

Before you pick up a needle, I want you to reconsider the frame. Think of it not as the final step, but as the first decision. The boundary of a frame gives your work intention, transforming a simple stitched motif into a deliberate piece of art. It asks you to think about composition, negative space, and focus from the very beginning.
This changes everything. Instead of stitching and then wondering how to display it, you design *for* the display. Your stitches become more confident, your color choices more considered. You’re no longer just decorating fabric; you are composing a scene, capturing a feeling, or exploring a texture within a defined space.
Here, you’ll find techniques that honor that intention. These ideas are about elevating your embroidery from a craft to an art form—one that deserves to hang on a gallery wall, starting with your own.
1. Geometric Harmony with Metallic Thread
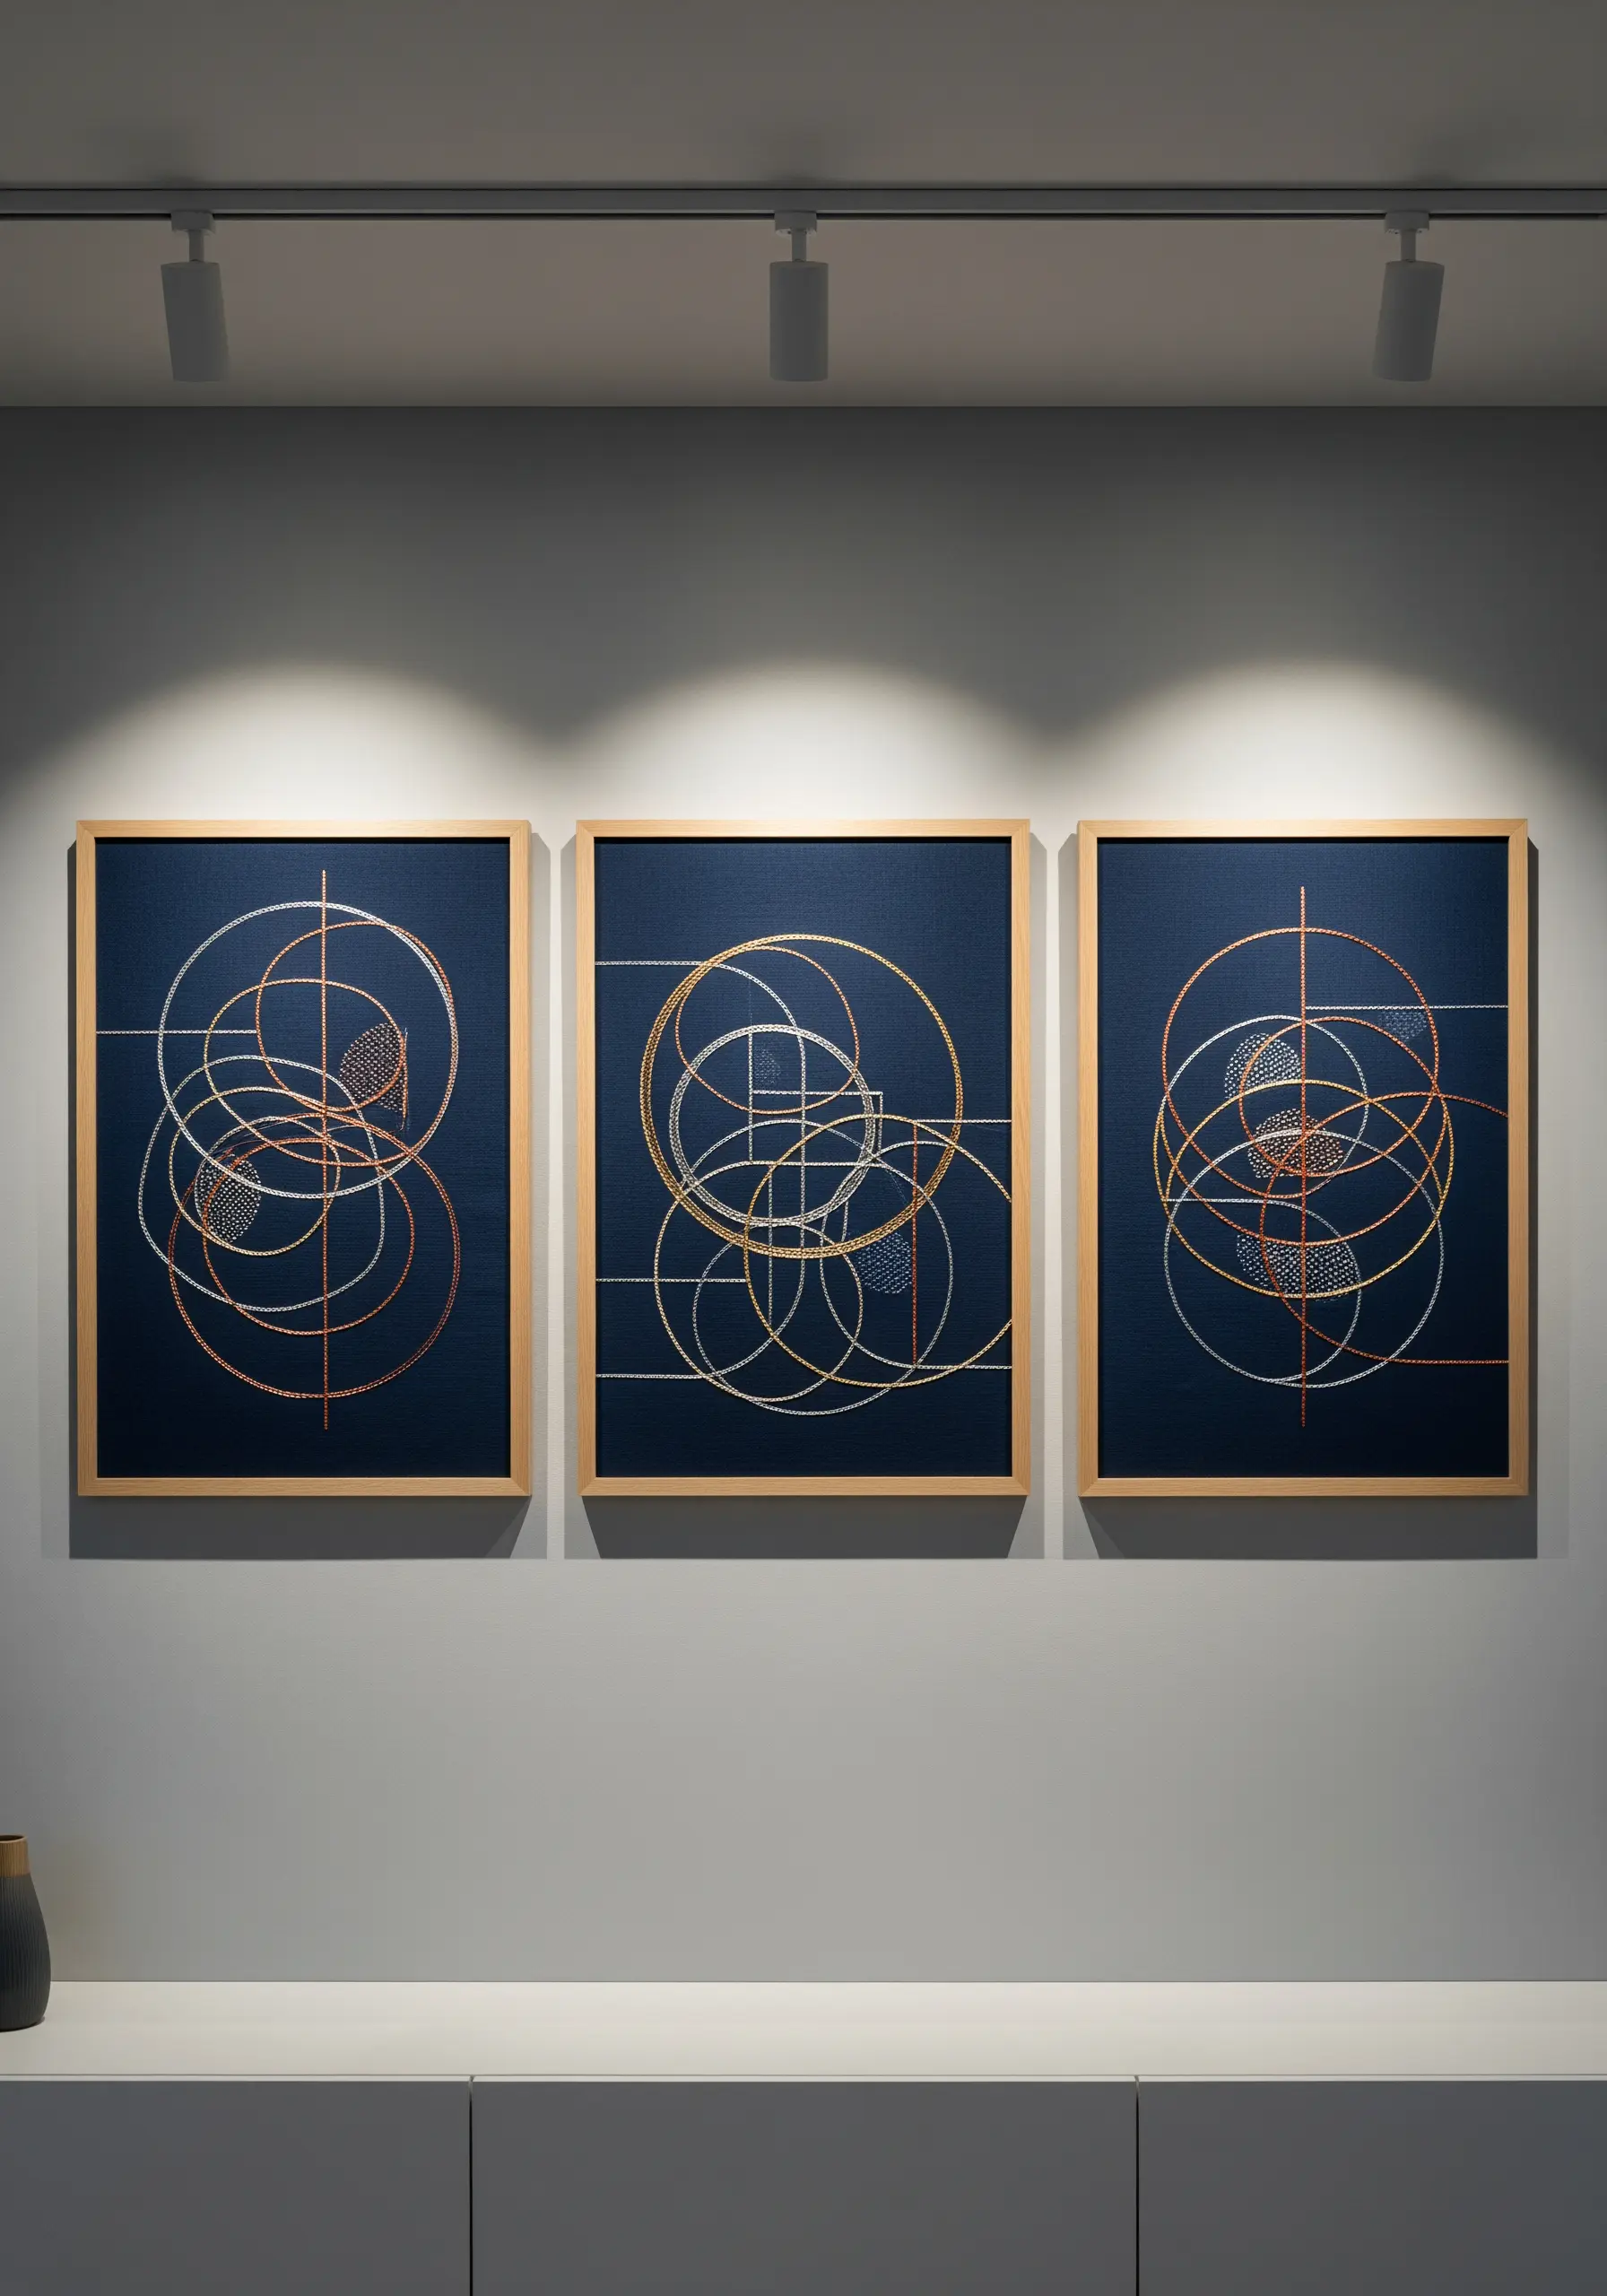
Create a triptych of abstract designs on a dark, tightly woven fabric like navy linen or cotton canvas.
Use a fine metallic thread for the delicate linework, applying a couching stitch for perfectly smooth curves that won’t snag or twist.
Contrast the sleek lines with small, dense areas of seed stitch using a matte cotton floss in a complementary color—this textural shift adds depth and sophistication.
The contrast between the metallic sheen and the matte texture is what elevates the composition from a simple drawing to a tactile piece of art.
2. Lifelike Botanicals with Directional Stitching
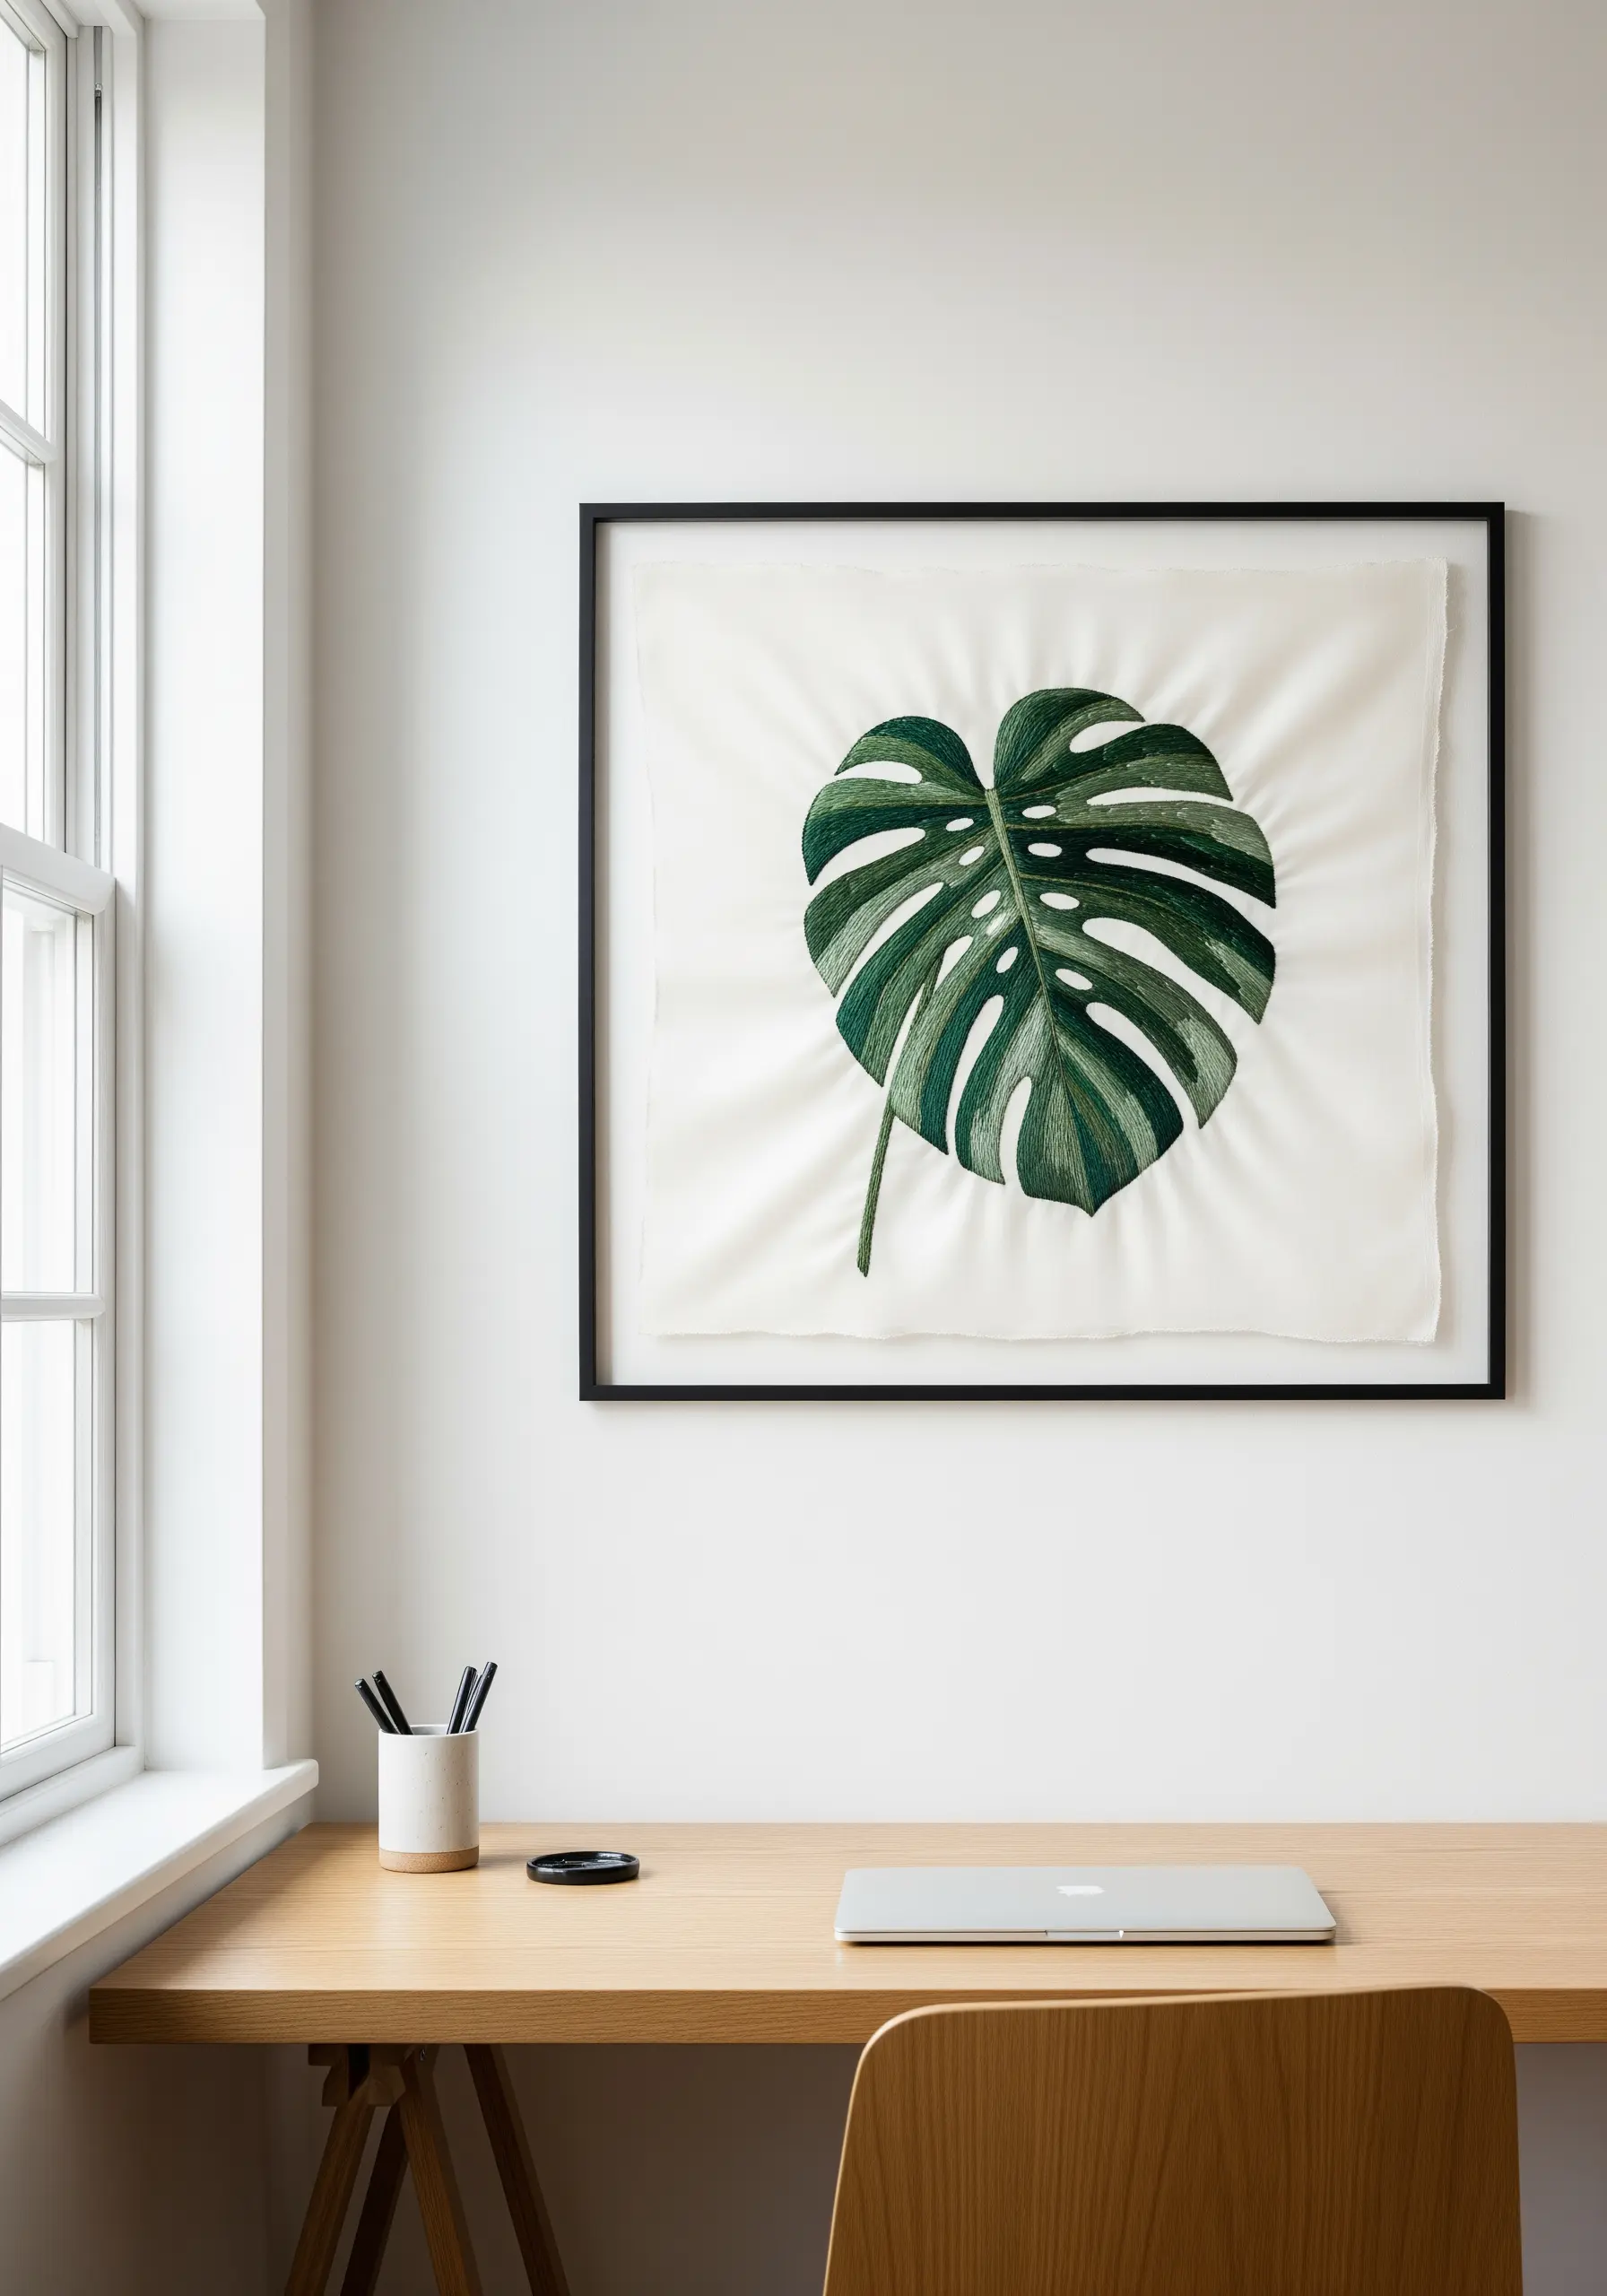
To achieve this level of realism, treat your needle like a paintbrush and your floss like paint.
Use the long-and-short stitch, but pay close attention to the direction of your stitches, ensuring they follow the natural growth and veins of the leaf.
Work with at least three to five shades of green, blending them subtly to create highlights and shadows that mimic how light hits the surface.
This technique, known as needle painting, is what gives the piece its incredible depth and vitality, making it feel alive.
Explore ways to embroider realistic shadows under leaves for depth that looks painted.
3. Sculptural Florals with Stumpwork Techniques
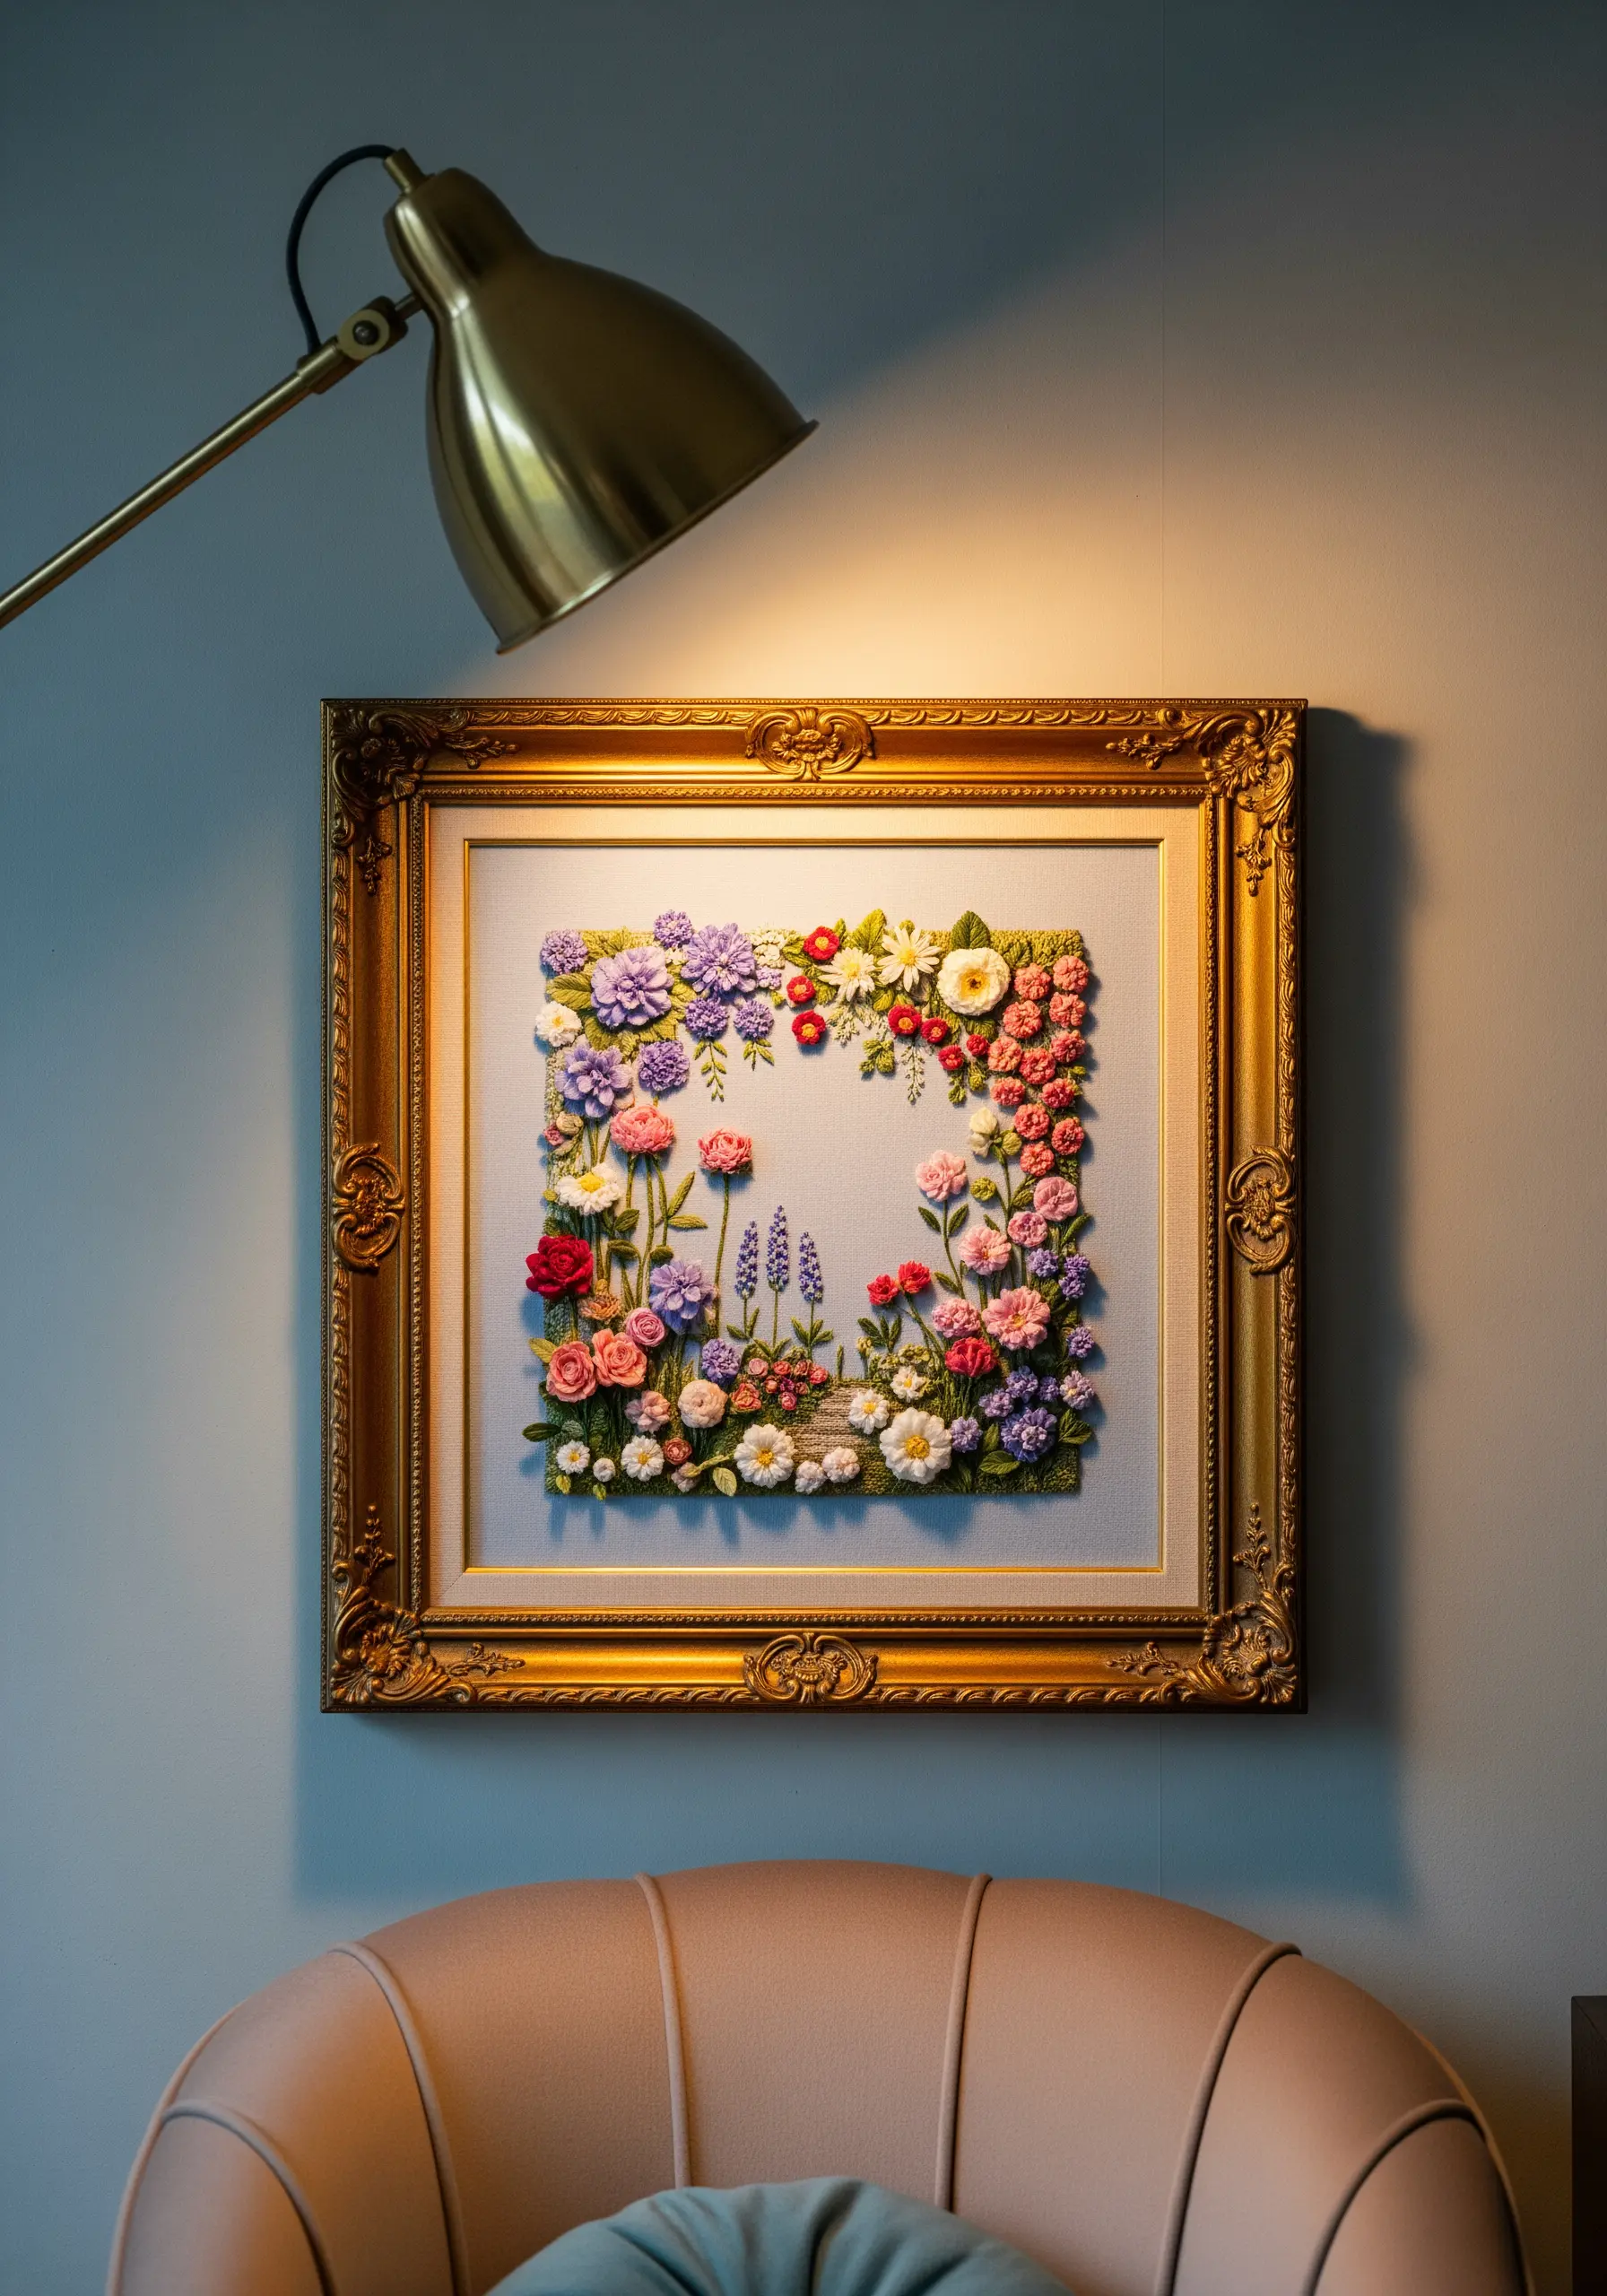
Move beyond flat embroidery by incorporating stumpwork, a technique that creates three-dimensional elements.
Craft individual petals on a separate piece of fabric with a wire outline, fill them with satin stitch, cut them out, and then apply them to your main design for raised, realistic flowers.
Combine these with high-texture stitches like woven wheel roses and French knot clusters to build a dense, garden-like composition that invites touch.
An ornate frame adds a touch of classic luxury, contrasting beautifully with the handmade, organic feel of the floral forms.
4. Celestial Charts in Goldwork Embroidery

For a design with immense detail, a monochrome palette on a dark background offers maximum impact without becoming visually cluttered.
Use a single strand of gold metallic thread on black fabric to create a striking celestial map.
Vary your stitches to define different elements: use a simple backstitch for constellations, tiny seed stitches for star clusters, and a smooth satin stitch for planets and moons.
This thoughtful variation in texture ensures the intricate design is readable and visually dynamic, drawing the viewer in to explore the details.
These minimal sky & moon designs also create a beautiful cosmic effect.
5. Architectural Precision in Thread
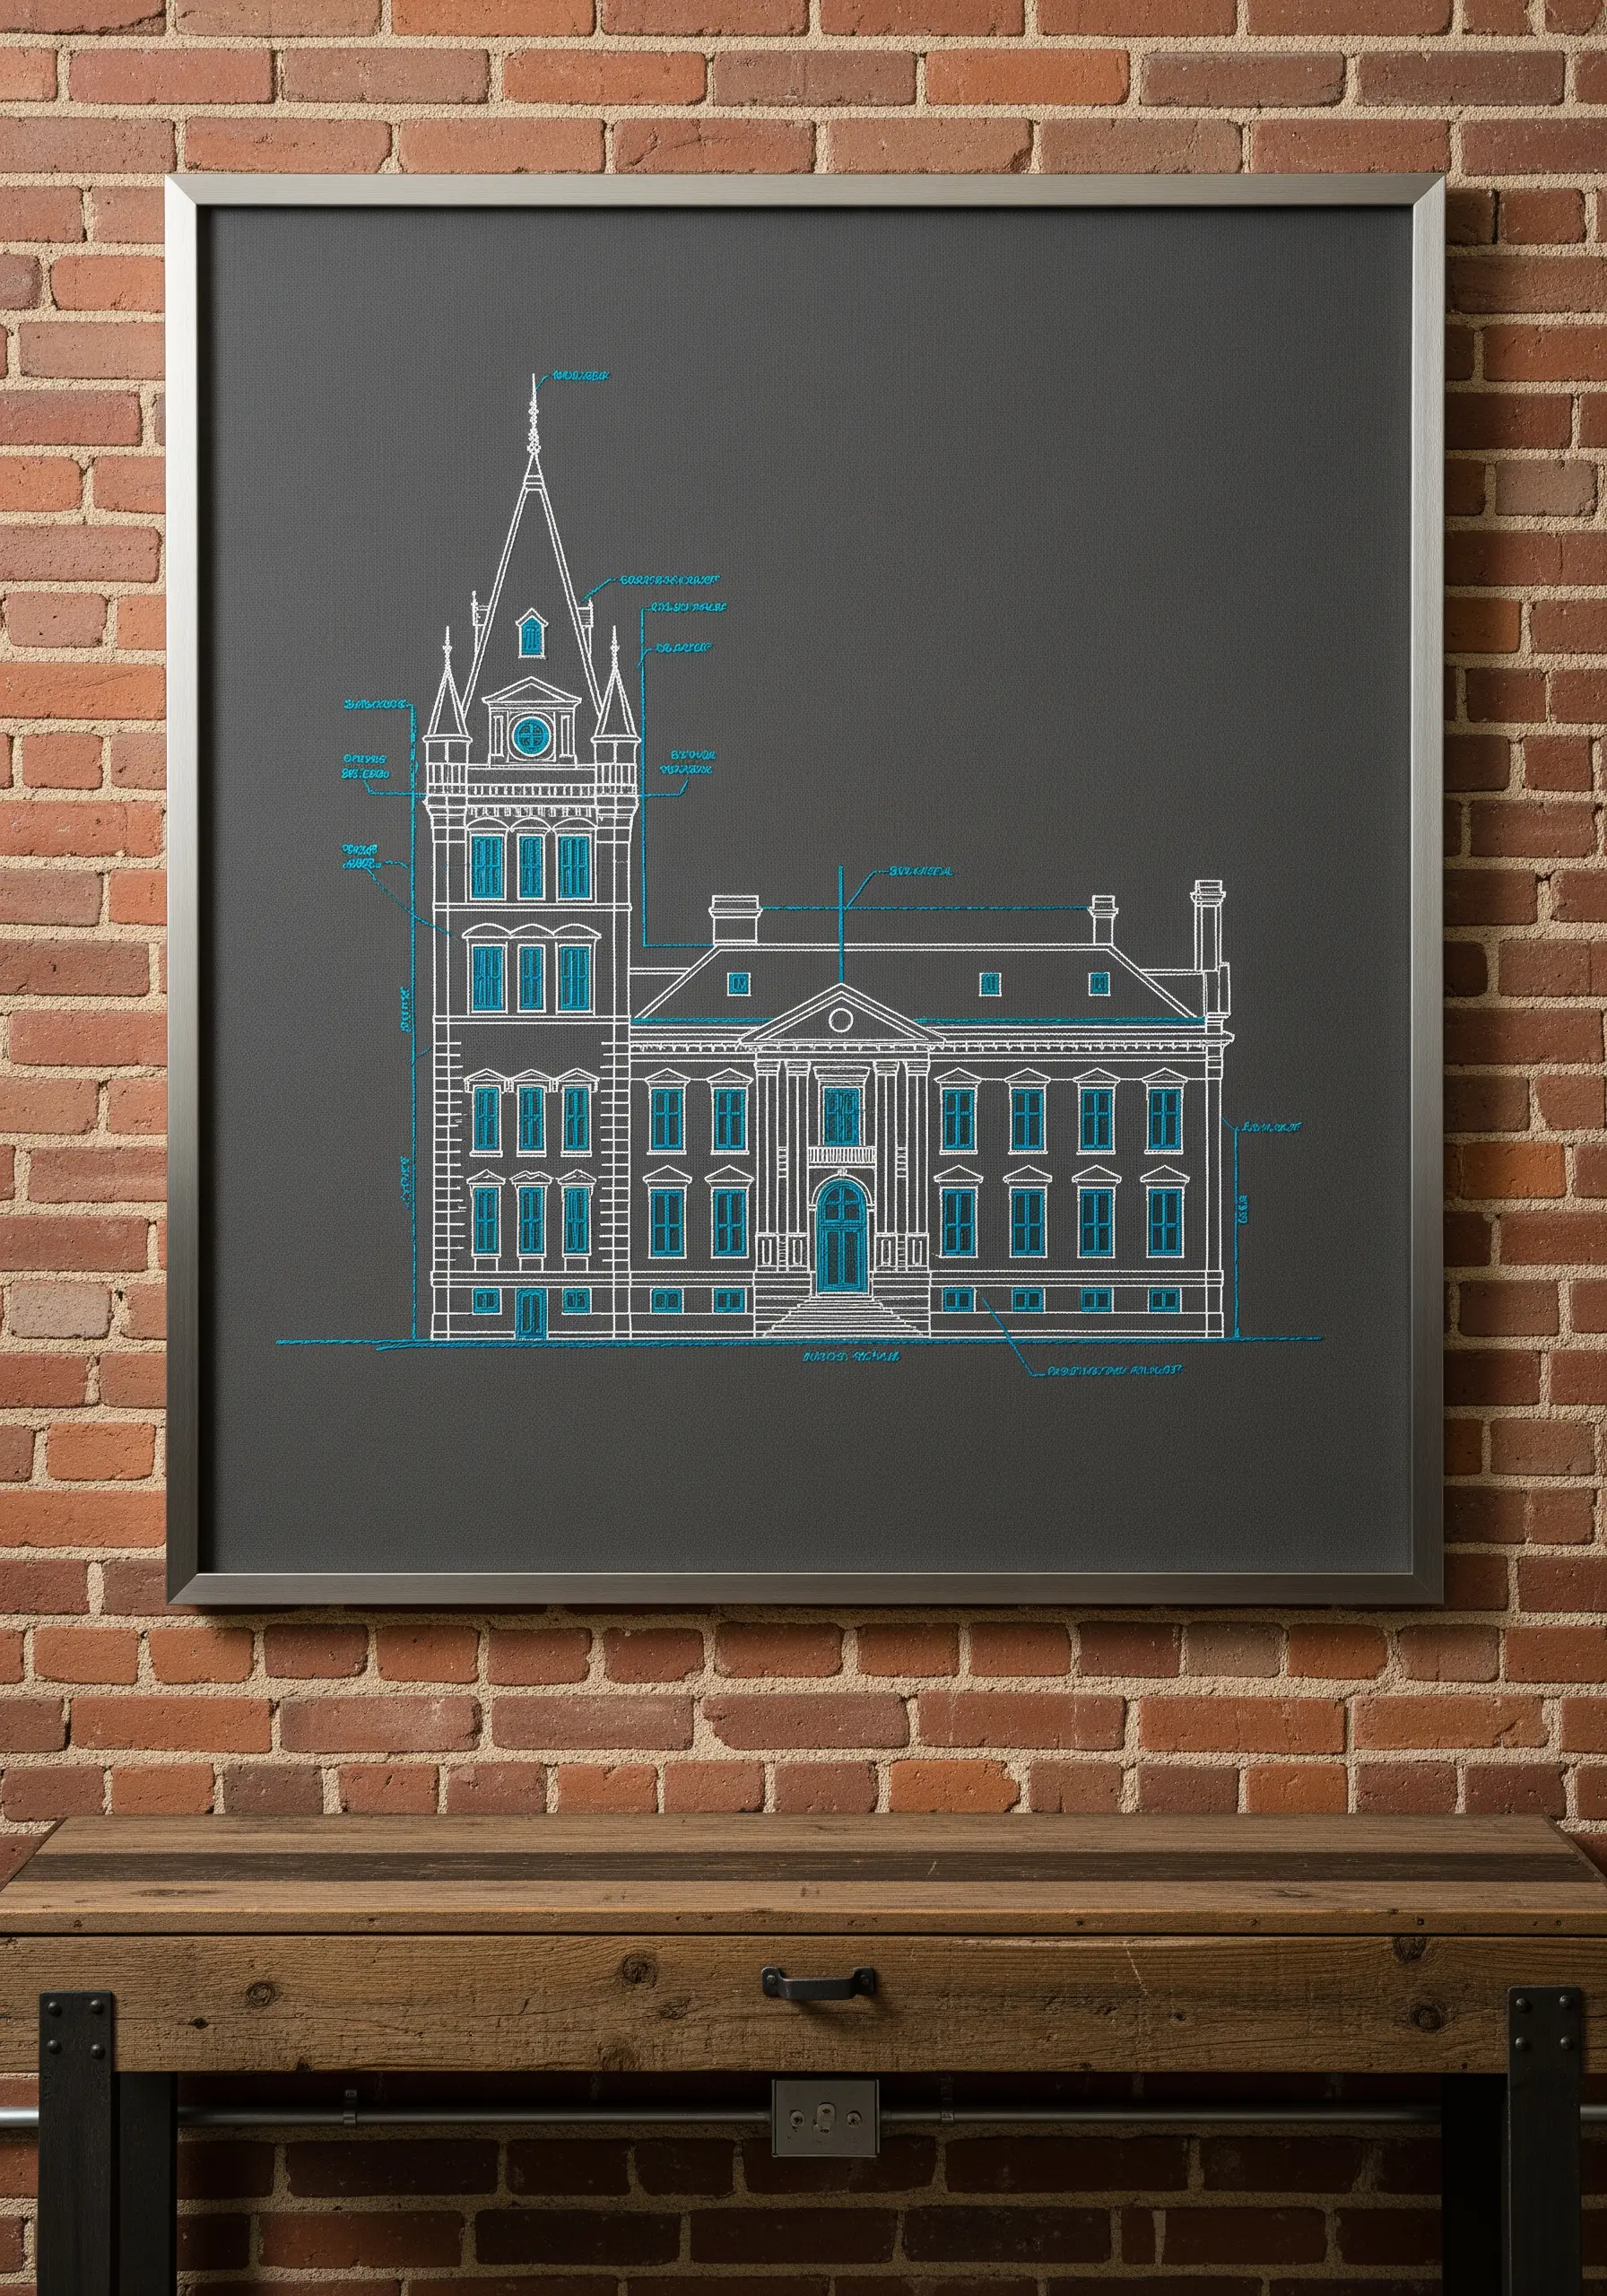
Recreate the crisp, clean feel of an architectural blueprint by using a single, fine-weight thread on a smooth, solid-colored fabric.
A perfectly executed split stitch or whipped backstitch will give you flawlessly straight lines that are essential for this style.
The key to success here is an accurate pattern transfer; use a water-soluble stabilizer to print your design, ensuring every line and detail is perfectly placed.
Framing it in a modern, metallic frame completes the industrial, technical aesthetic, turning a technical drawing into sophisticated wall art.
6. The Restraint of Sashiko-Inspired Motifs
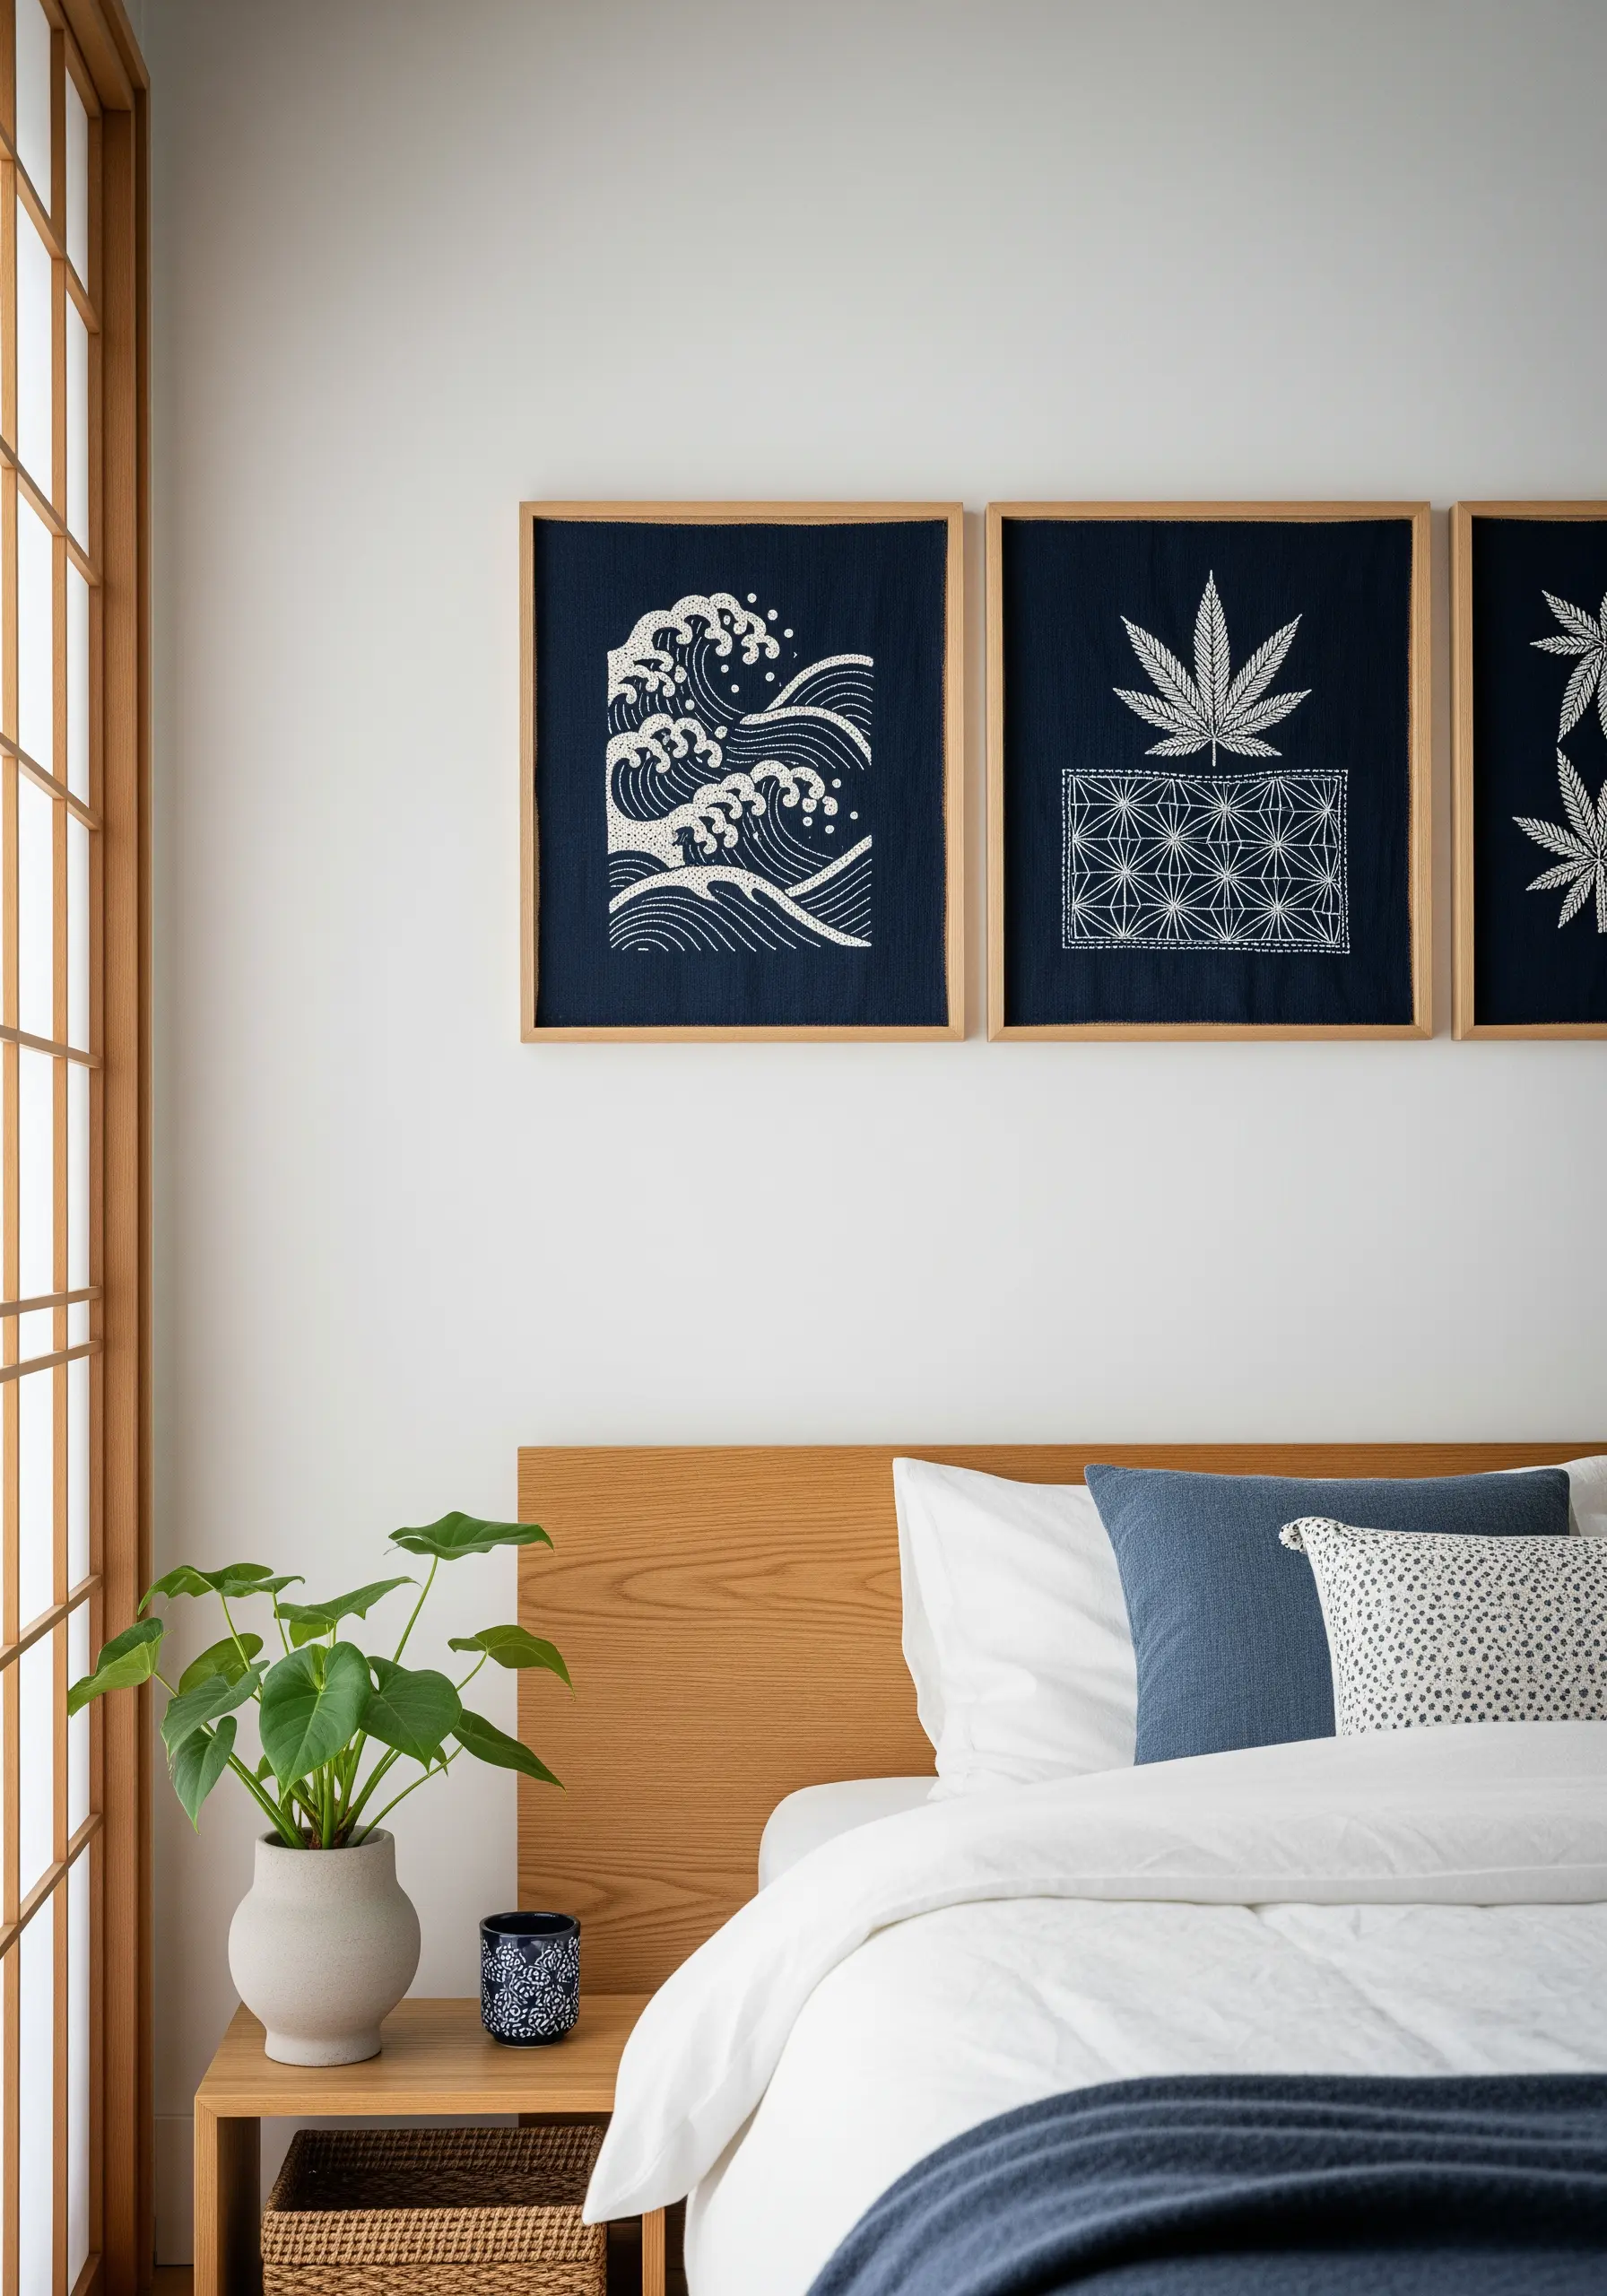
Explore the Japanese art of Sashiko by using a simple running stitch to create intricate patterns.
The beauty of this technique lies in its uniformity and rhythm—focus on keeping your stitches consistent in length and spacing.
Traditionally done with white thread on indigo fabric, this high-contrast combination emphasizes the graphic quality of the patterns and the importance of negative space.
Grouping several small, framed pieces together creates a serene and cohesive display that feels both modern and timeless.
These minimalist embroidery decor ideas can transform any compact space.
7. Curating a Cohesive Hoop Art Gallery Wall
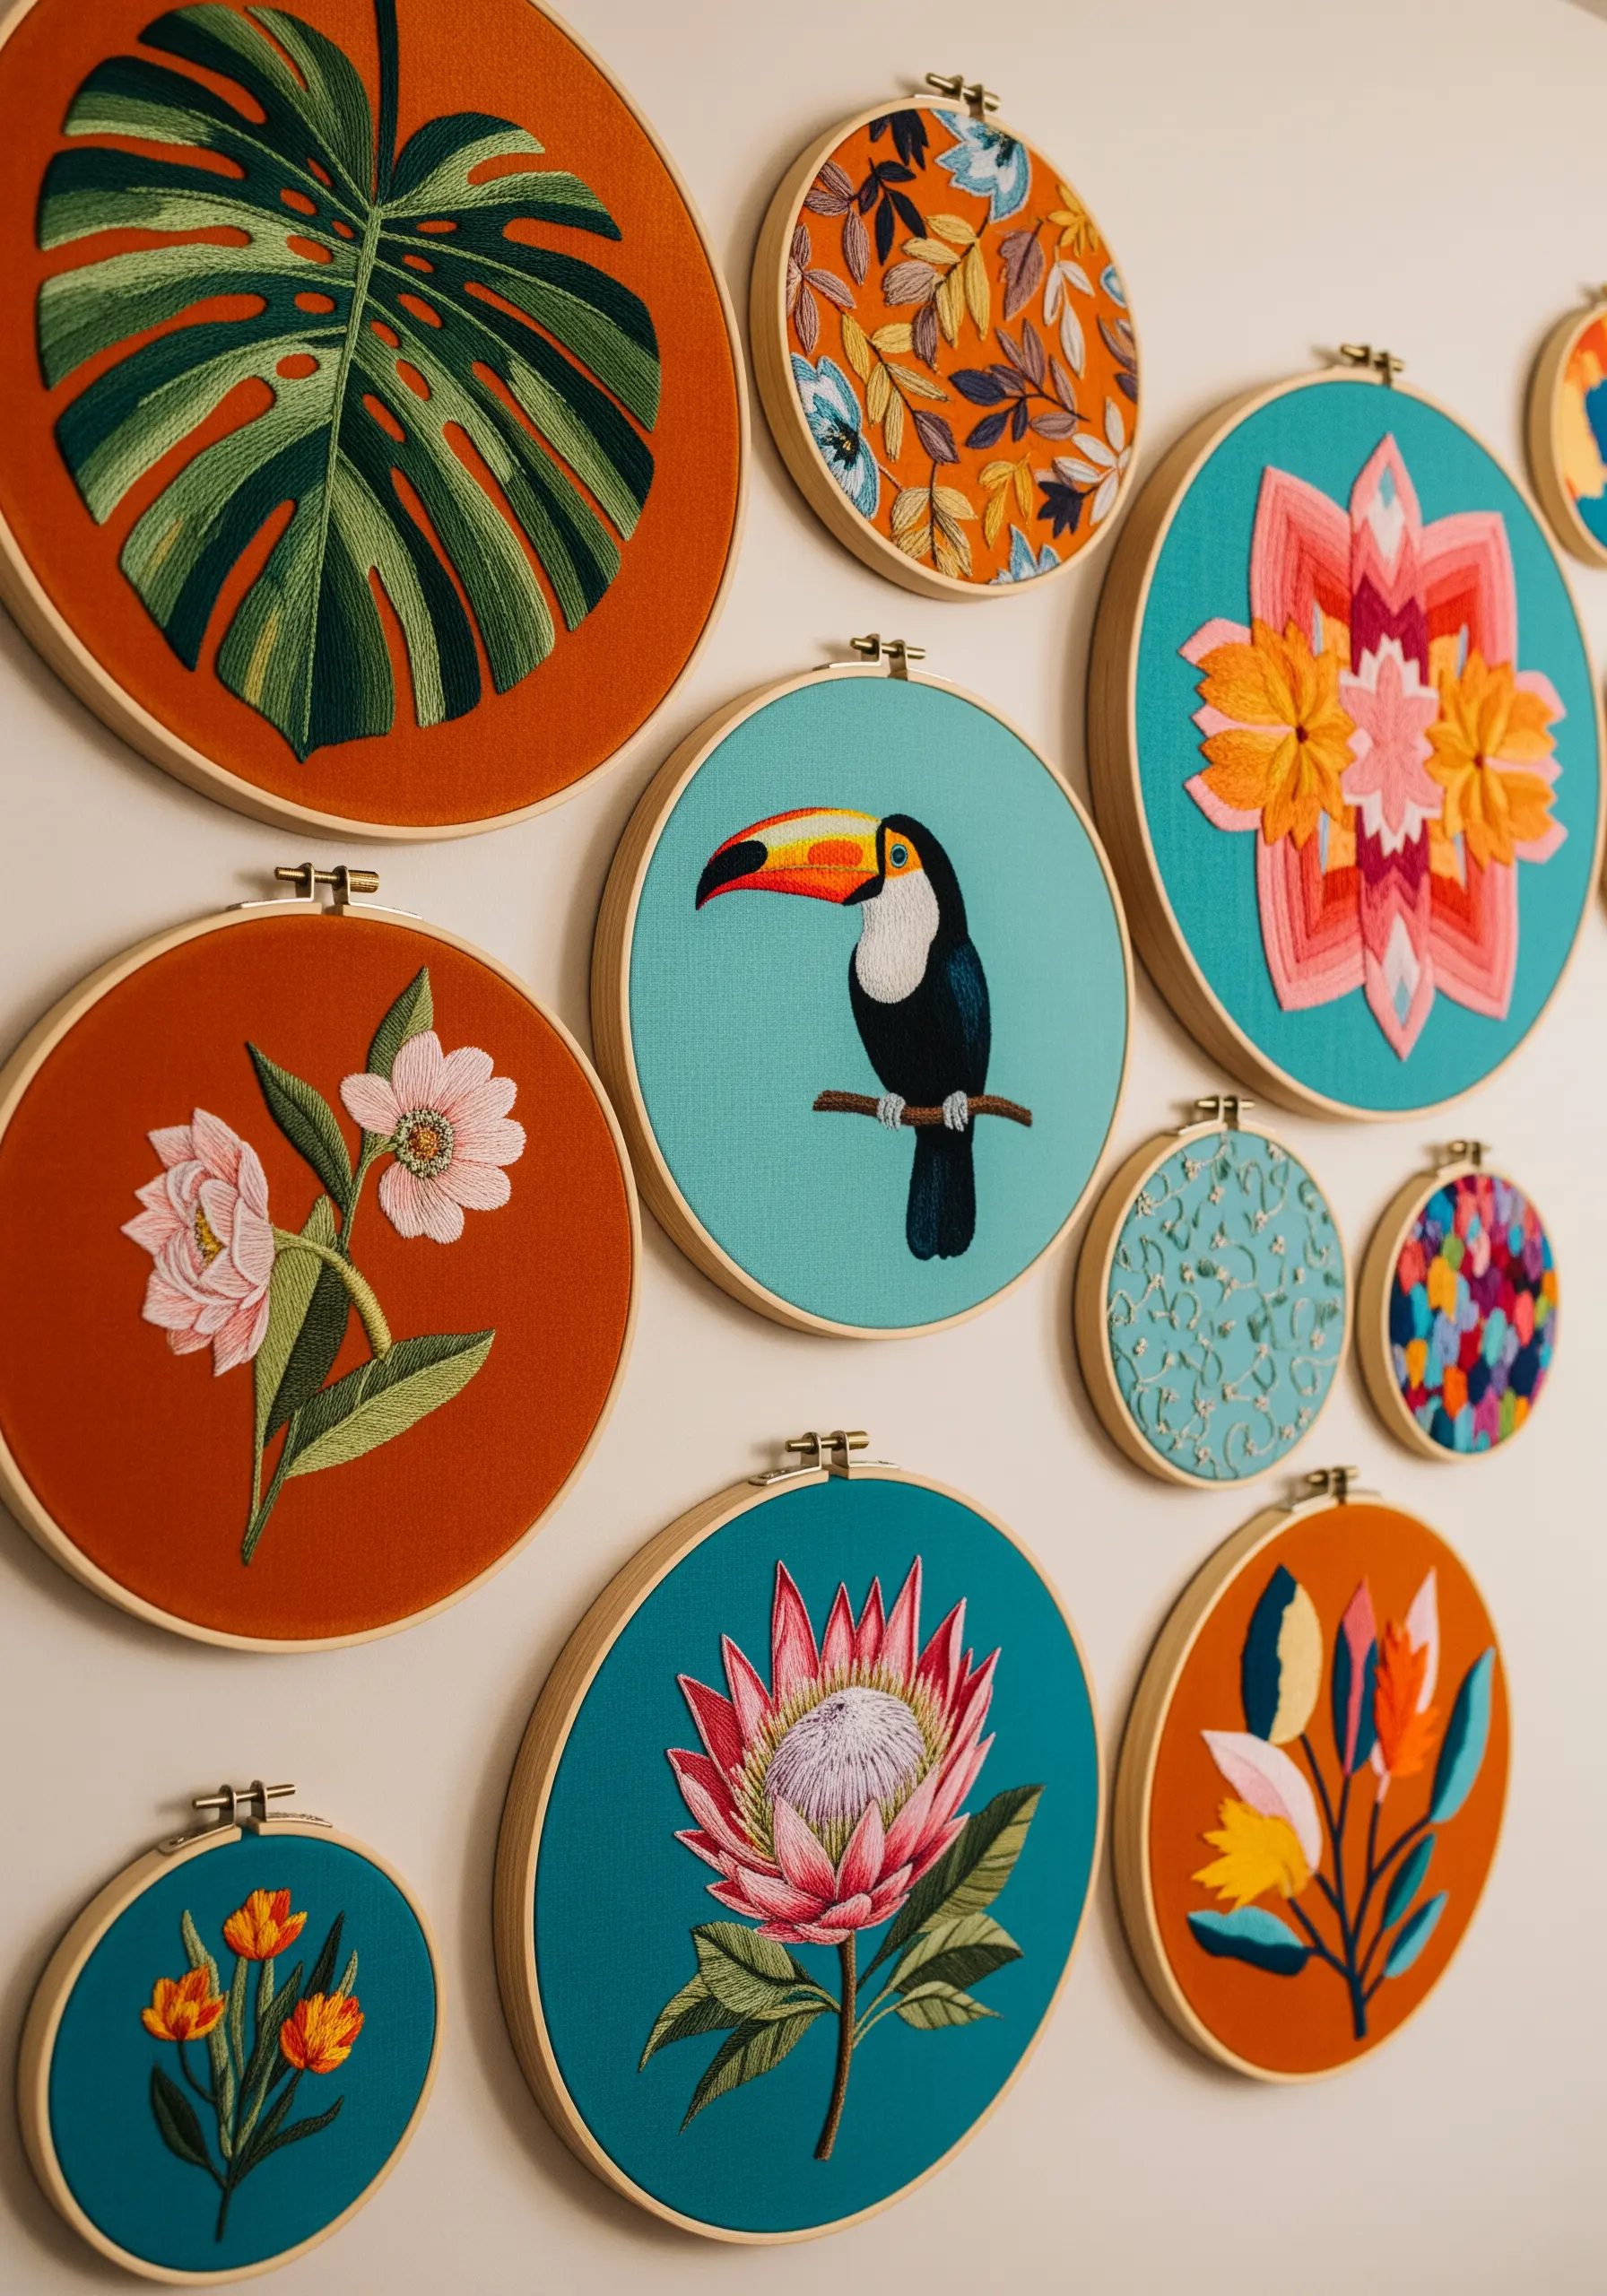
Transform a collection of individual hoops into a unified art installation by establishing a clear theme or color story.
Here, a tropical theme connects each piece, while a consistent color palette of turquoise, orange, and green ties everything together.
Vary the size of the hoops and the complexity of the designs—mix fully stitched pieces with simpler linework and even patterned fabric hoops for visual balance.
This approach allows you to build a dynamic and personal display over time that feels curated, not chaotic.
8. Art Deco Elegance with Graphic Stitches
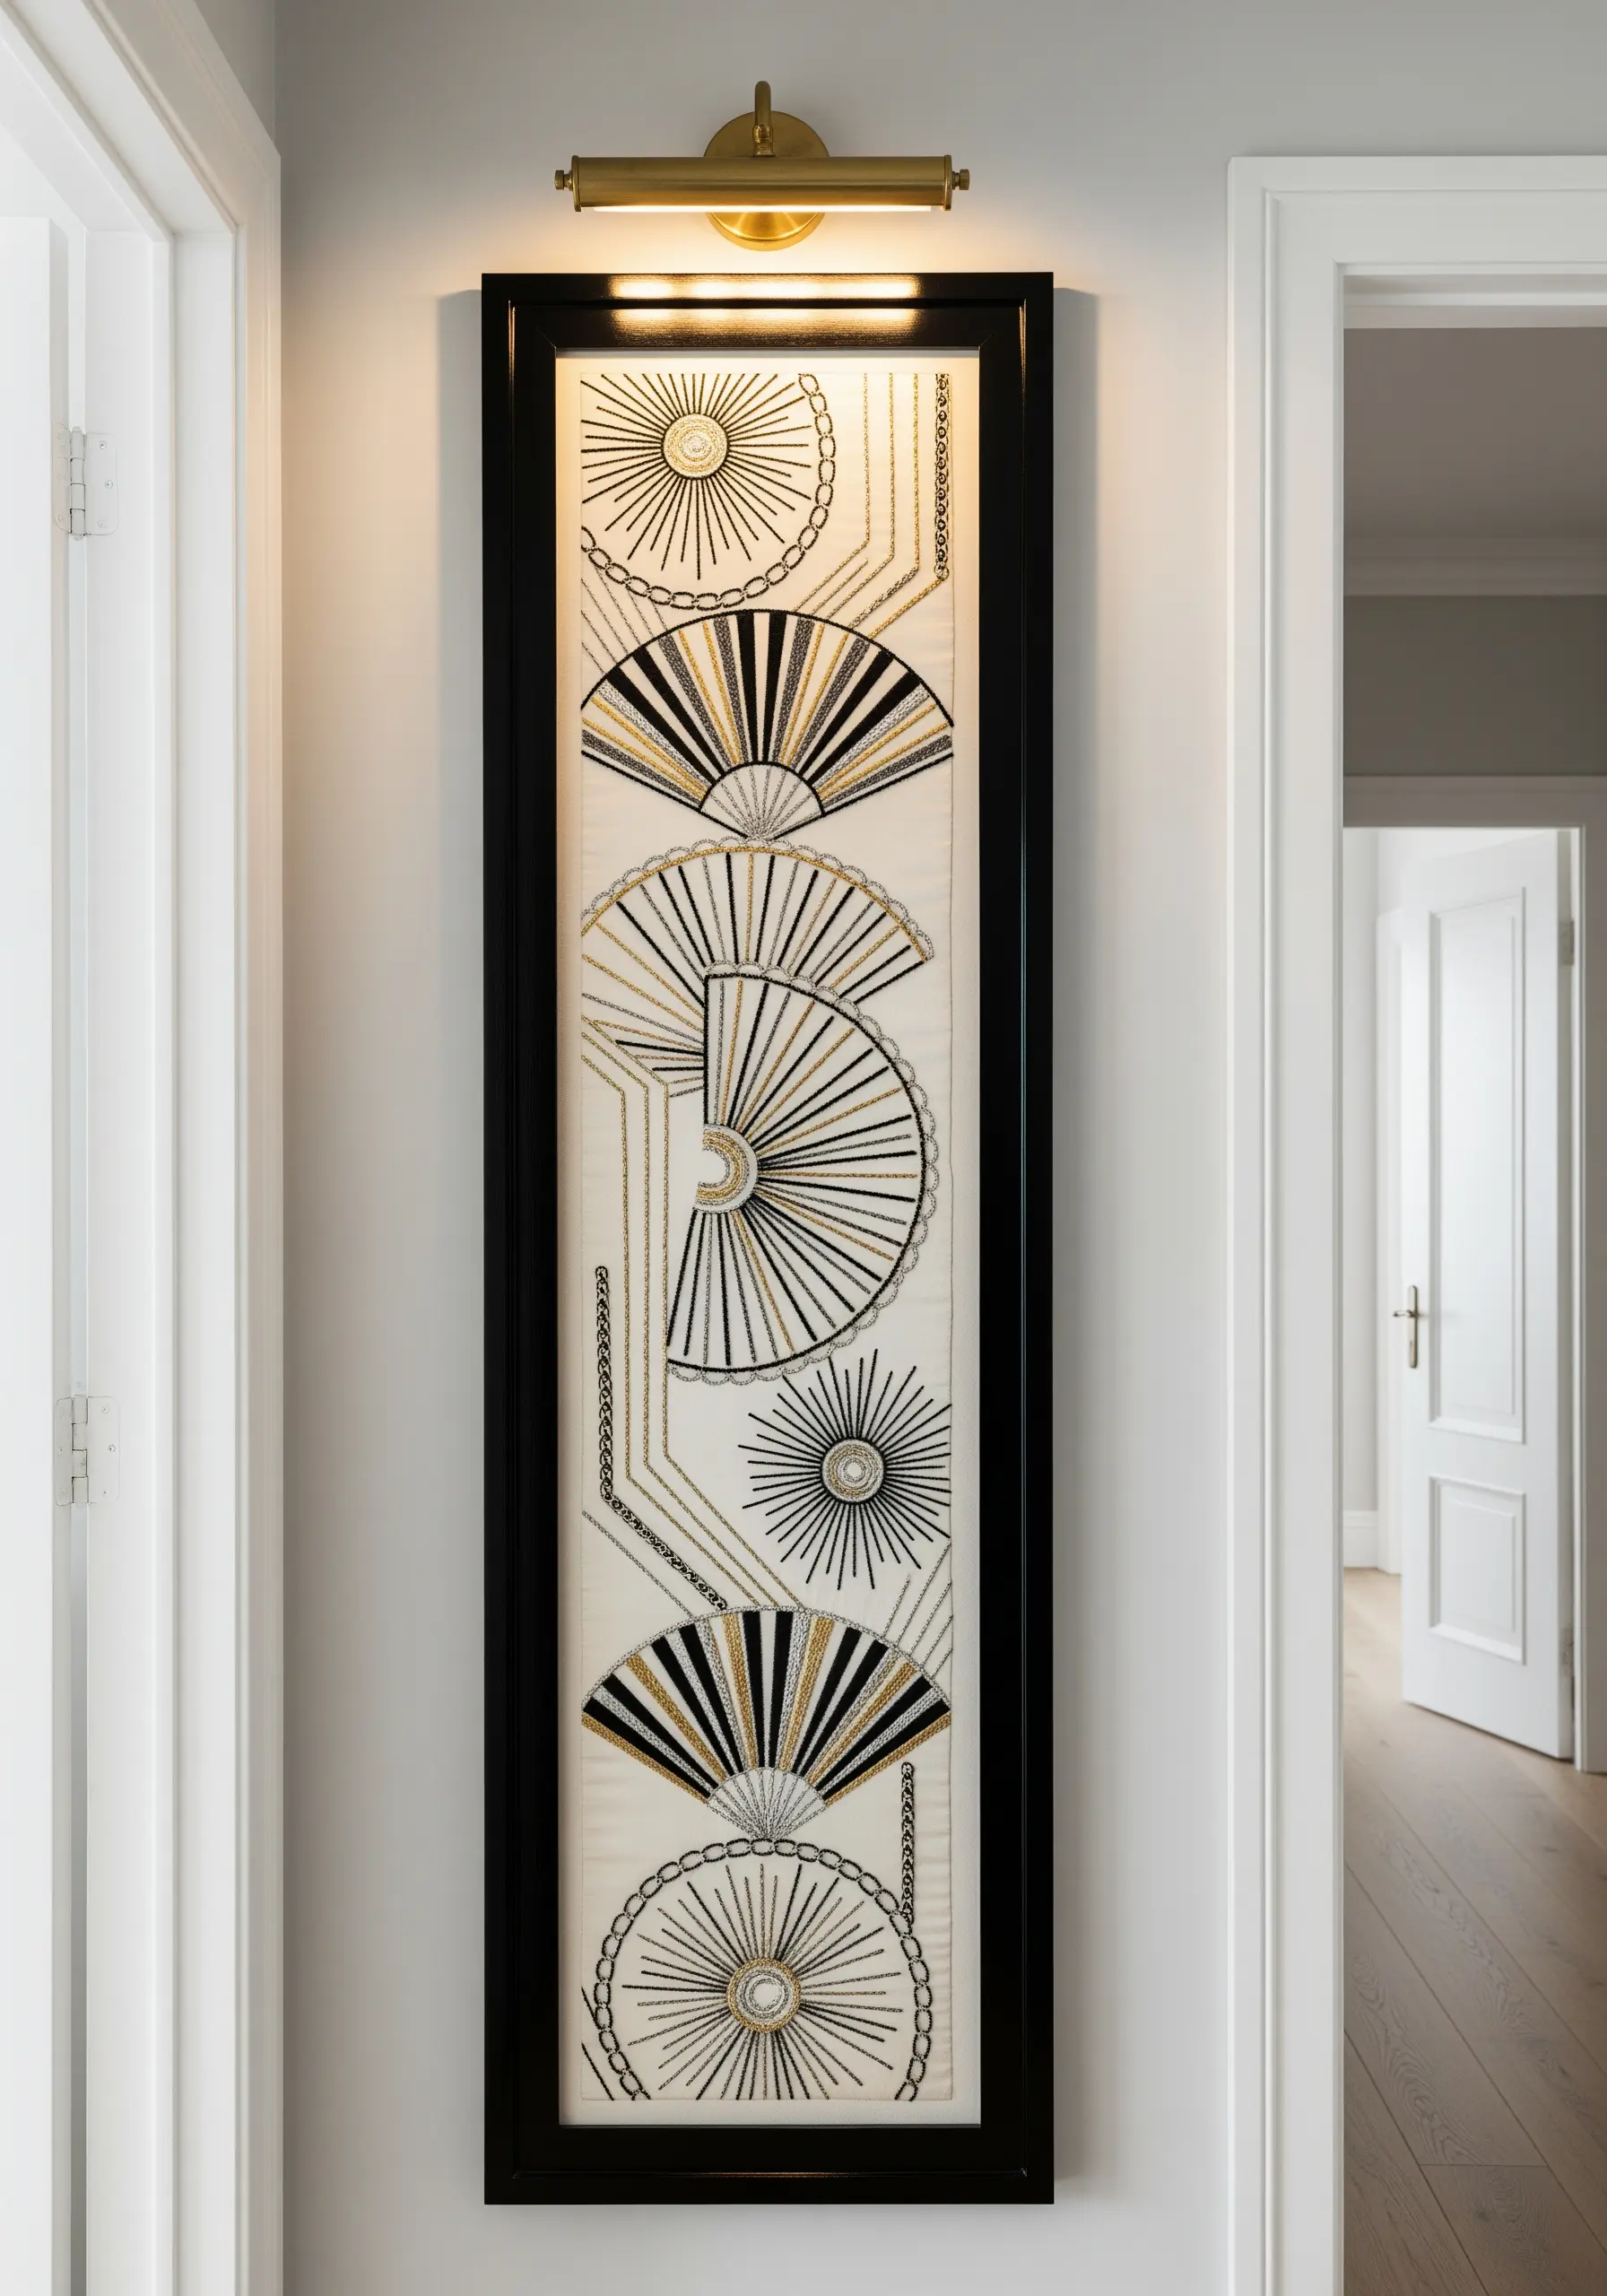
Capture the glamour of the Art Deco era by focusing on strong geometric shapes, symmetry, and a high-contrast palette of black, white, and gold.
Use a sharp, clean chain stitch or whipped backstitch to create bold outlines for your fan and sunburst motifs.
Incorporate long, straight satin stitches to fill shapes, ensuring they lie perfectly flat for a sleek, graphic finish.
The addition of metallic gold thread is essential, as it introduces the opulent feel characteristic of the period.
9. Soft Textures for Charming Nursery Art
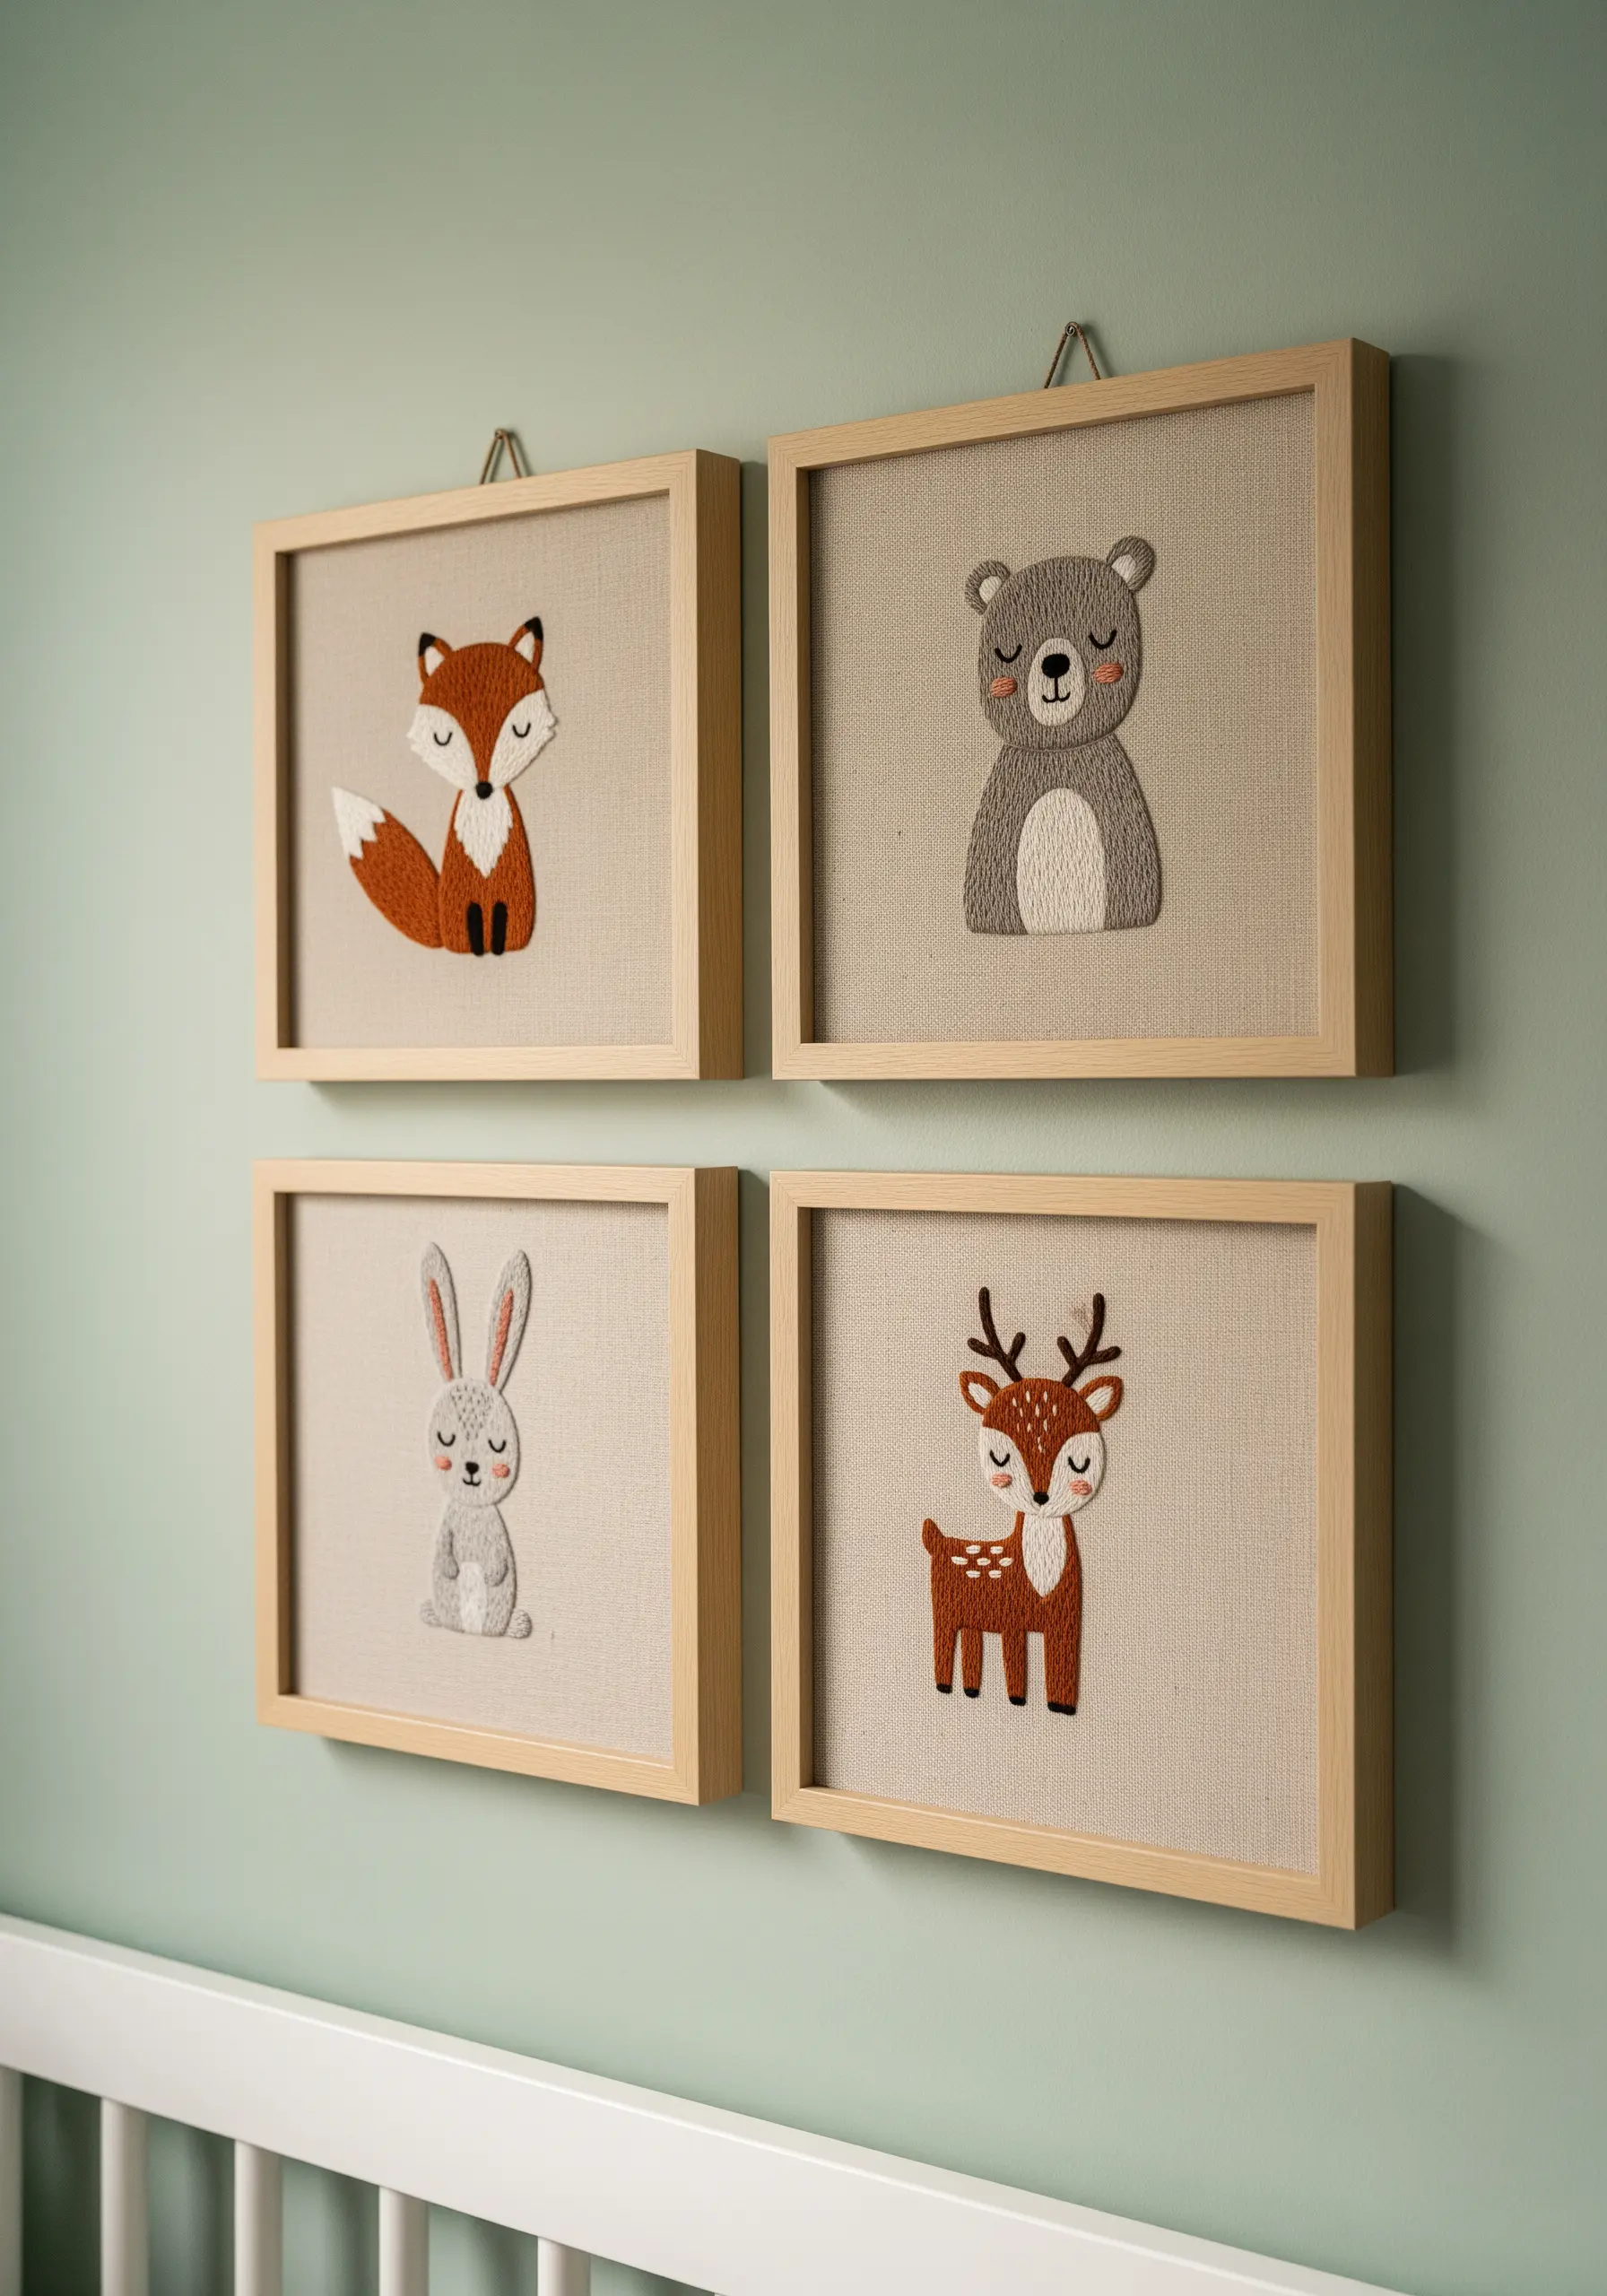
When creating art for a nursery, focus on soft textures and gentle expressions.
Use a dense, plush satin stitch to fill the bodies of the animals, making them look soft and huggable.
A few strategically placed French knots for eyes and noses add just enough detail without being overwhelming.
Stitching on a neutral, textured fabric like linen or oatmeal Aida adds warmth and complements the simple, light wood frames, creating a calming atmosphere perfect for a child’s room.
Try these animal-themed pillow stitching ideas for more cozy inspiration.
10. Expressive Portraits with Thread Painting
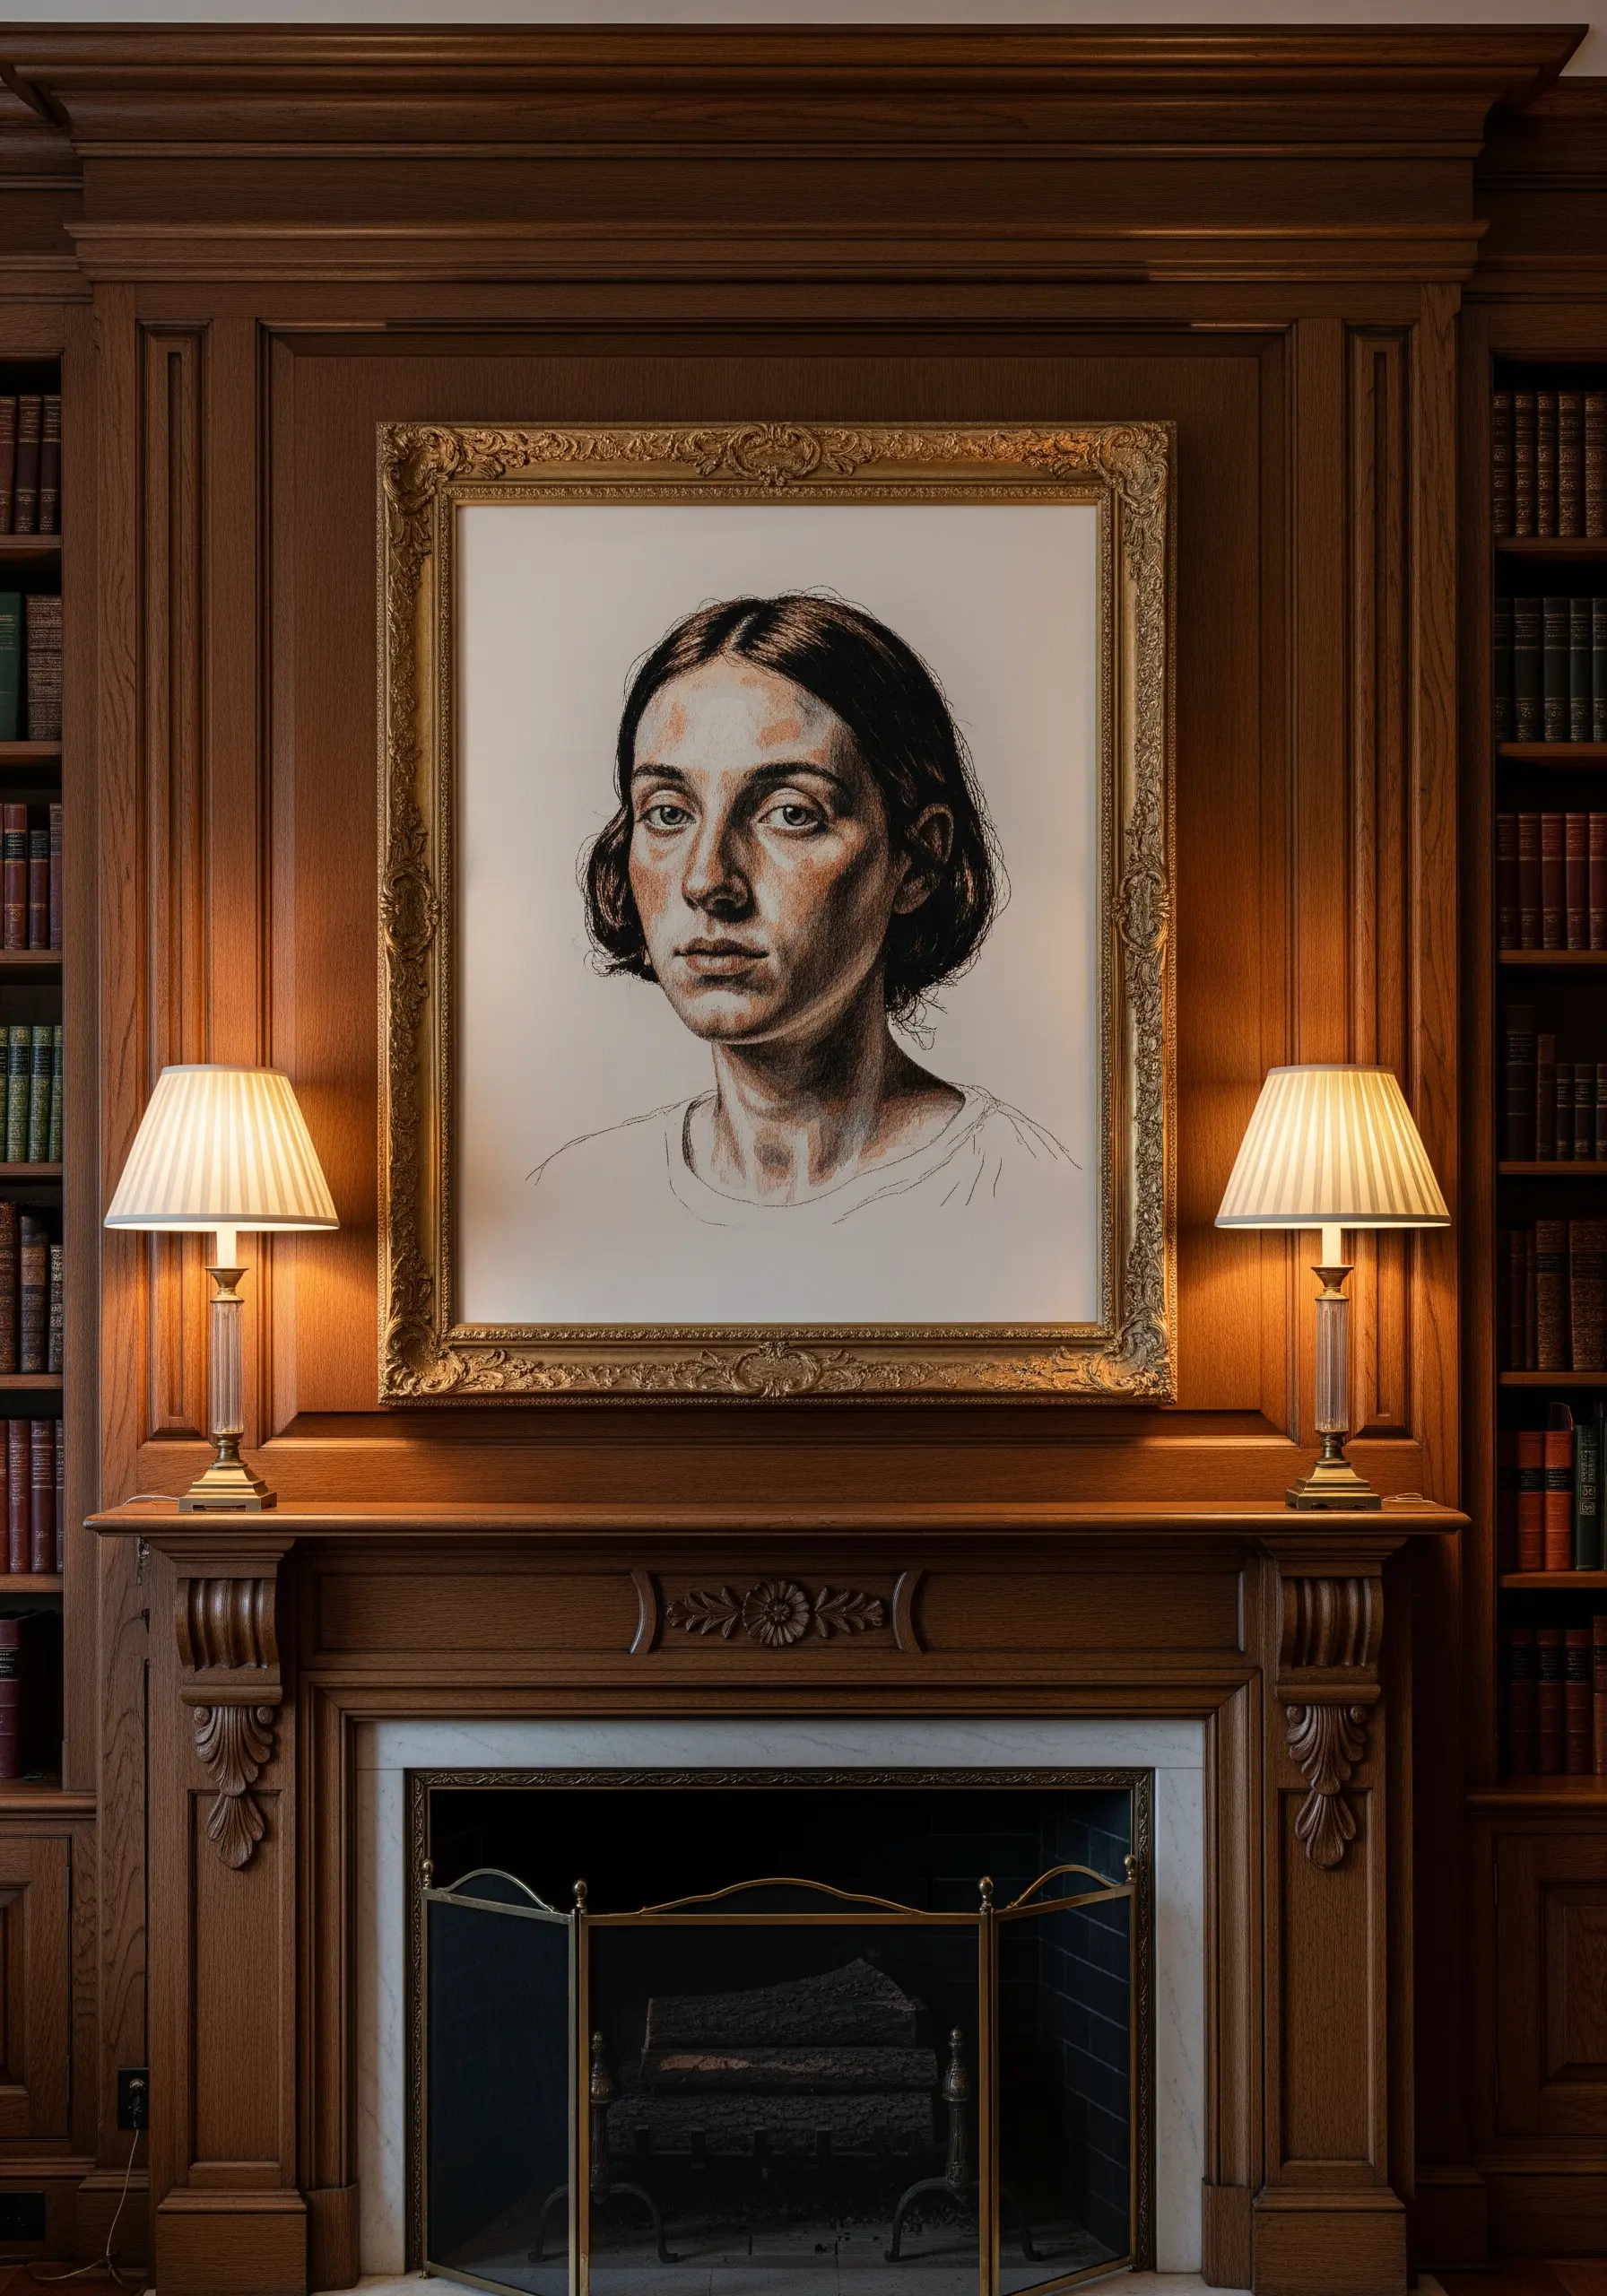
To create a portrait with emotional depth, you need to master the art of blending and shading with thread.
Work with a single strand of floss and use the long-and-short stitch to seamlessly blend dozens of subtle shades for the skin, hair, and shadows.
Think like a painter, layering colors to build up form and dimension. The direction of your stitches should follow the contours of the face to create a sense of realism.
This meticulous technique, also known as needle painting, transforms thread into a medium capable of capturing profound expression.
11. Depicting Food with Appetizing Texture
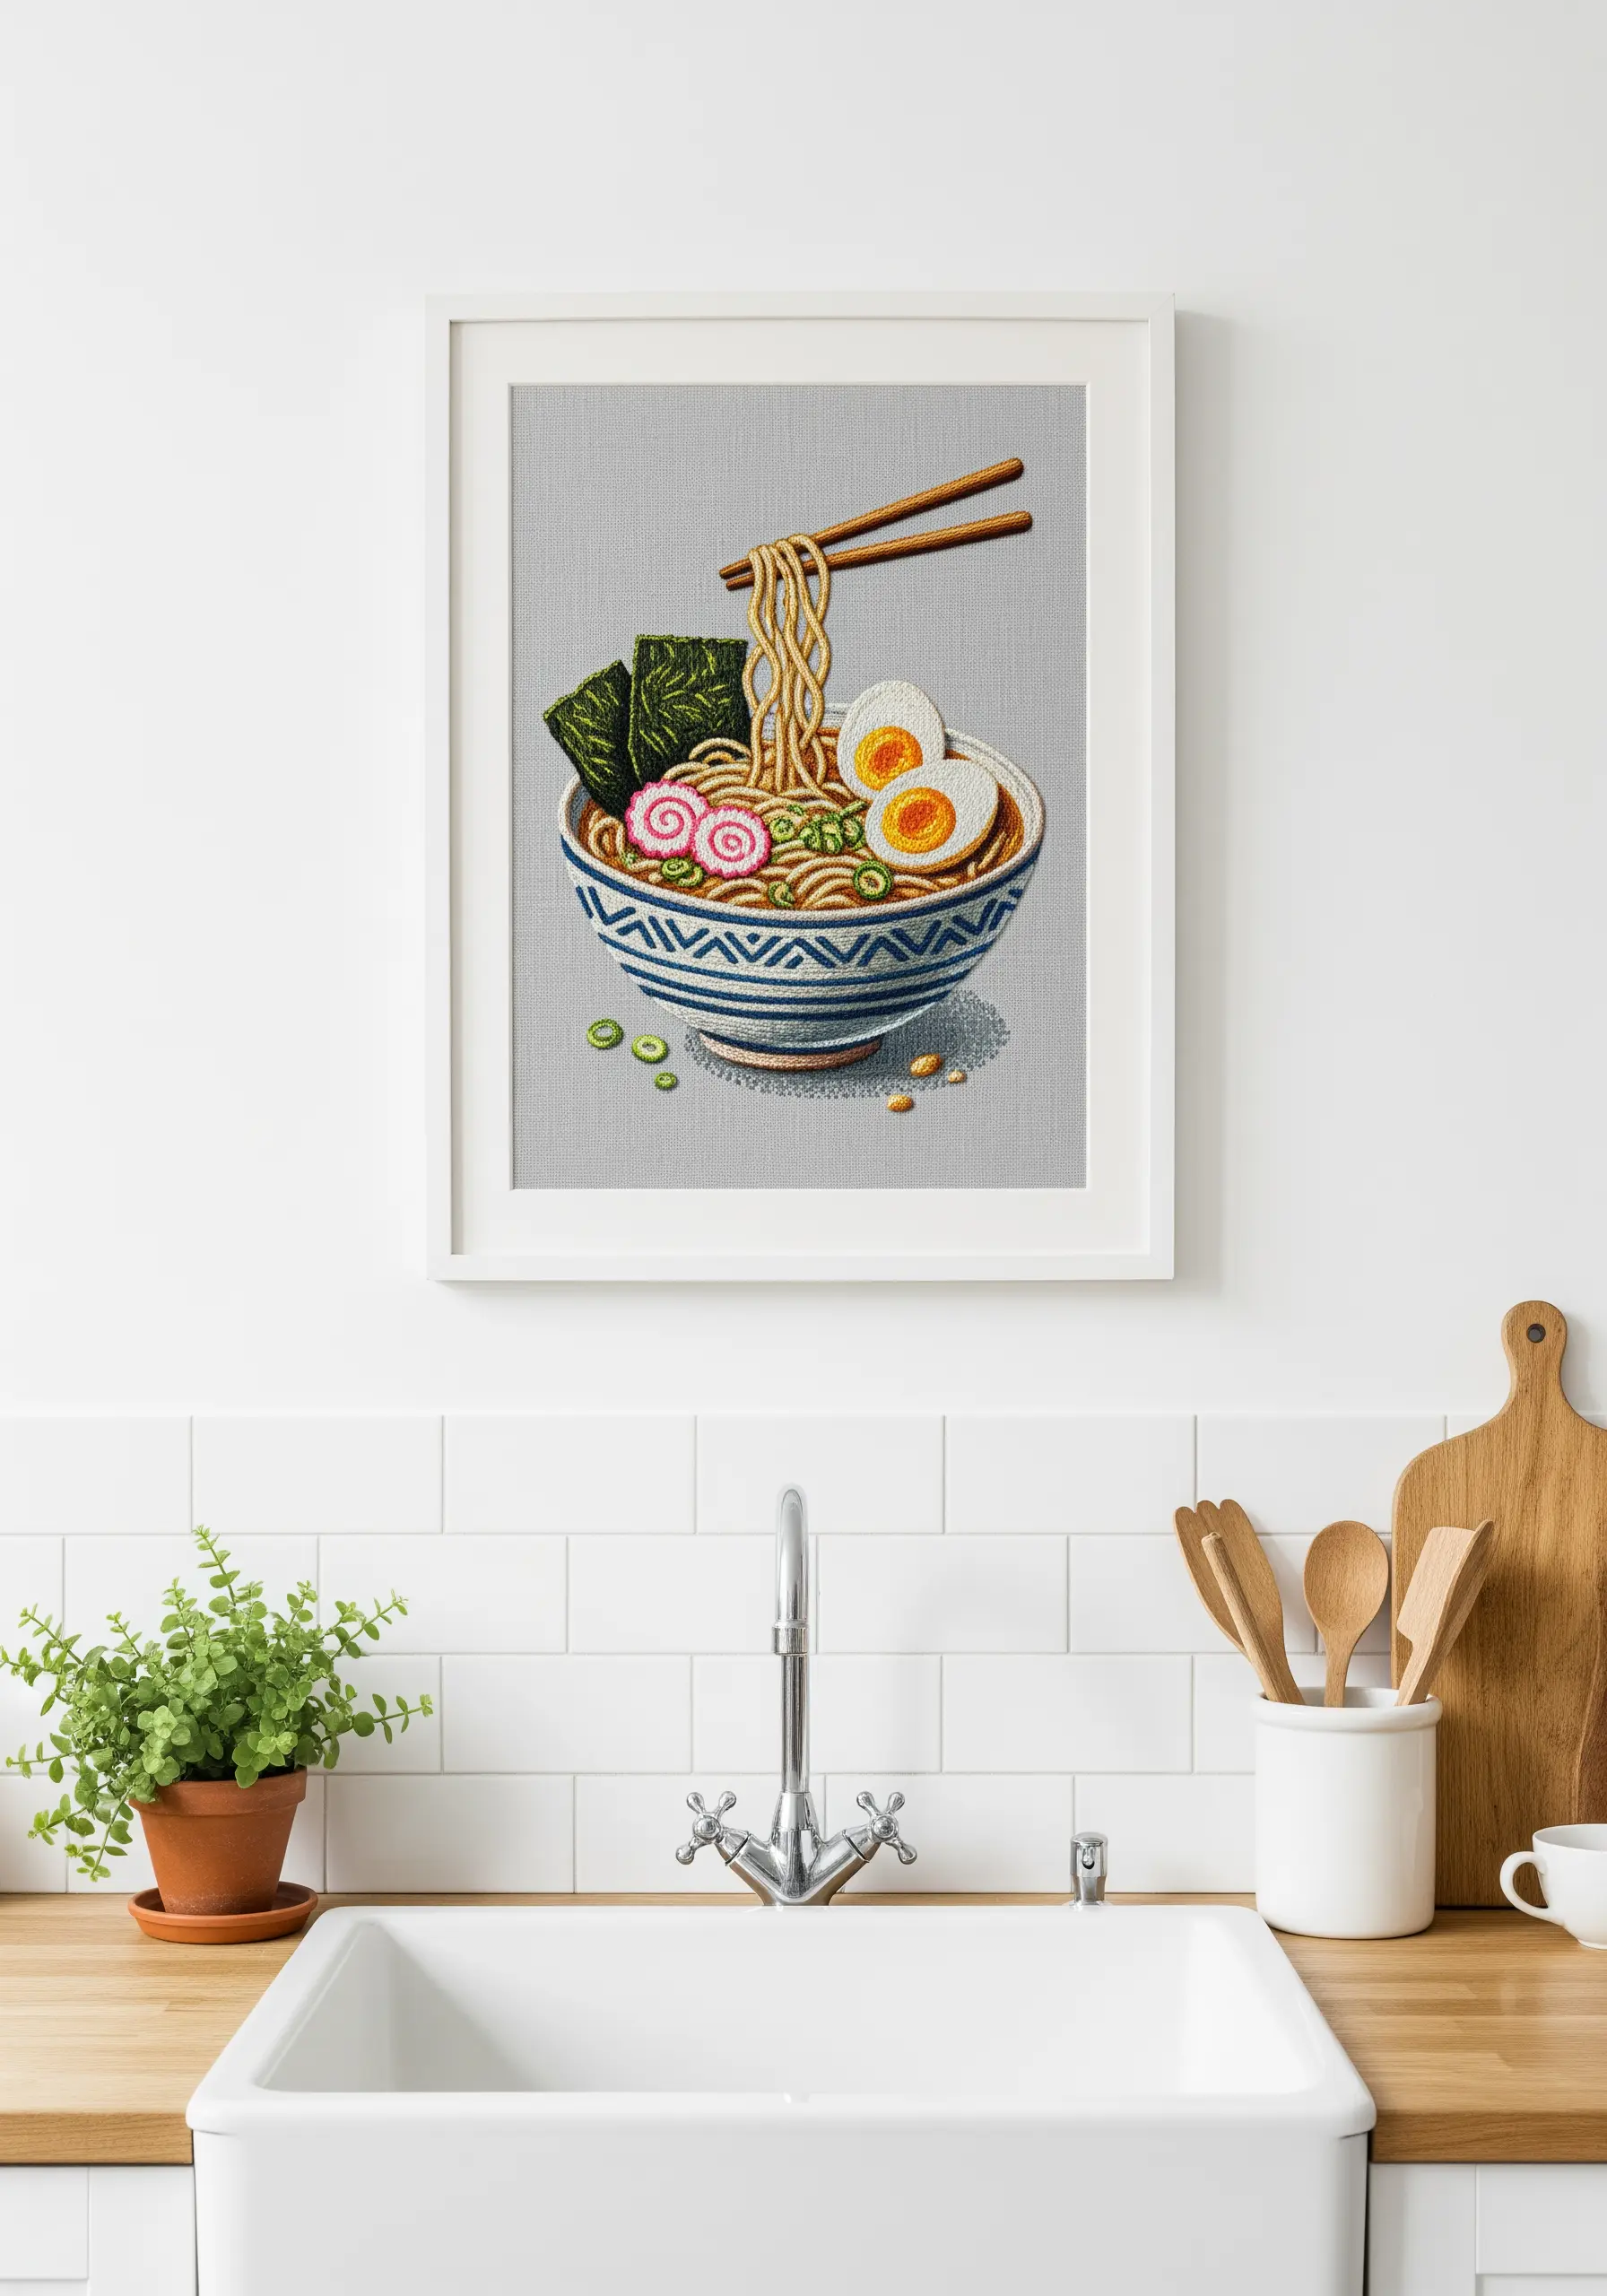
Make embroidered food look delicious by focusing on translating different textures into stitches.
Use thick, slightly twisted chain stitches or stem stitches for the noodles to give them a sense of volume and movement.
Employ French knots for the chopped scallions and a smooth, dense satin stitch for the shiny surface of the egg yolk.
This thoughtful choice of stitches for each ingredient is what makes the final piece look dimensional and appetizing, not flat.
12. Realistic Insects with Mixed-Media Layers
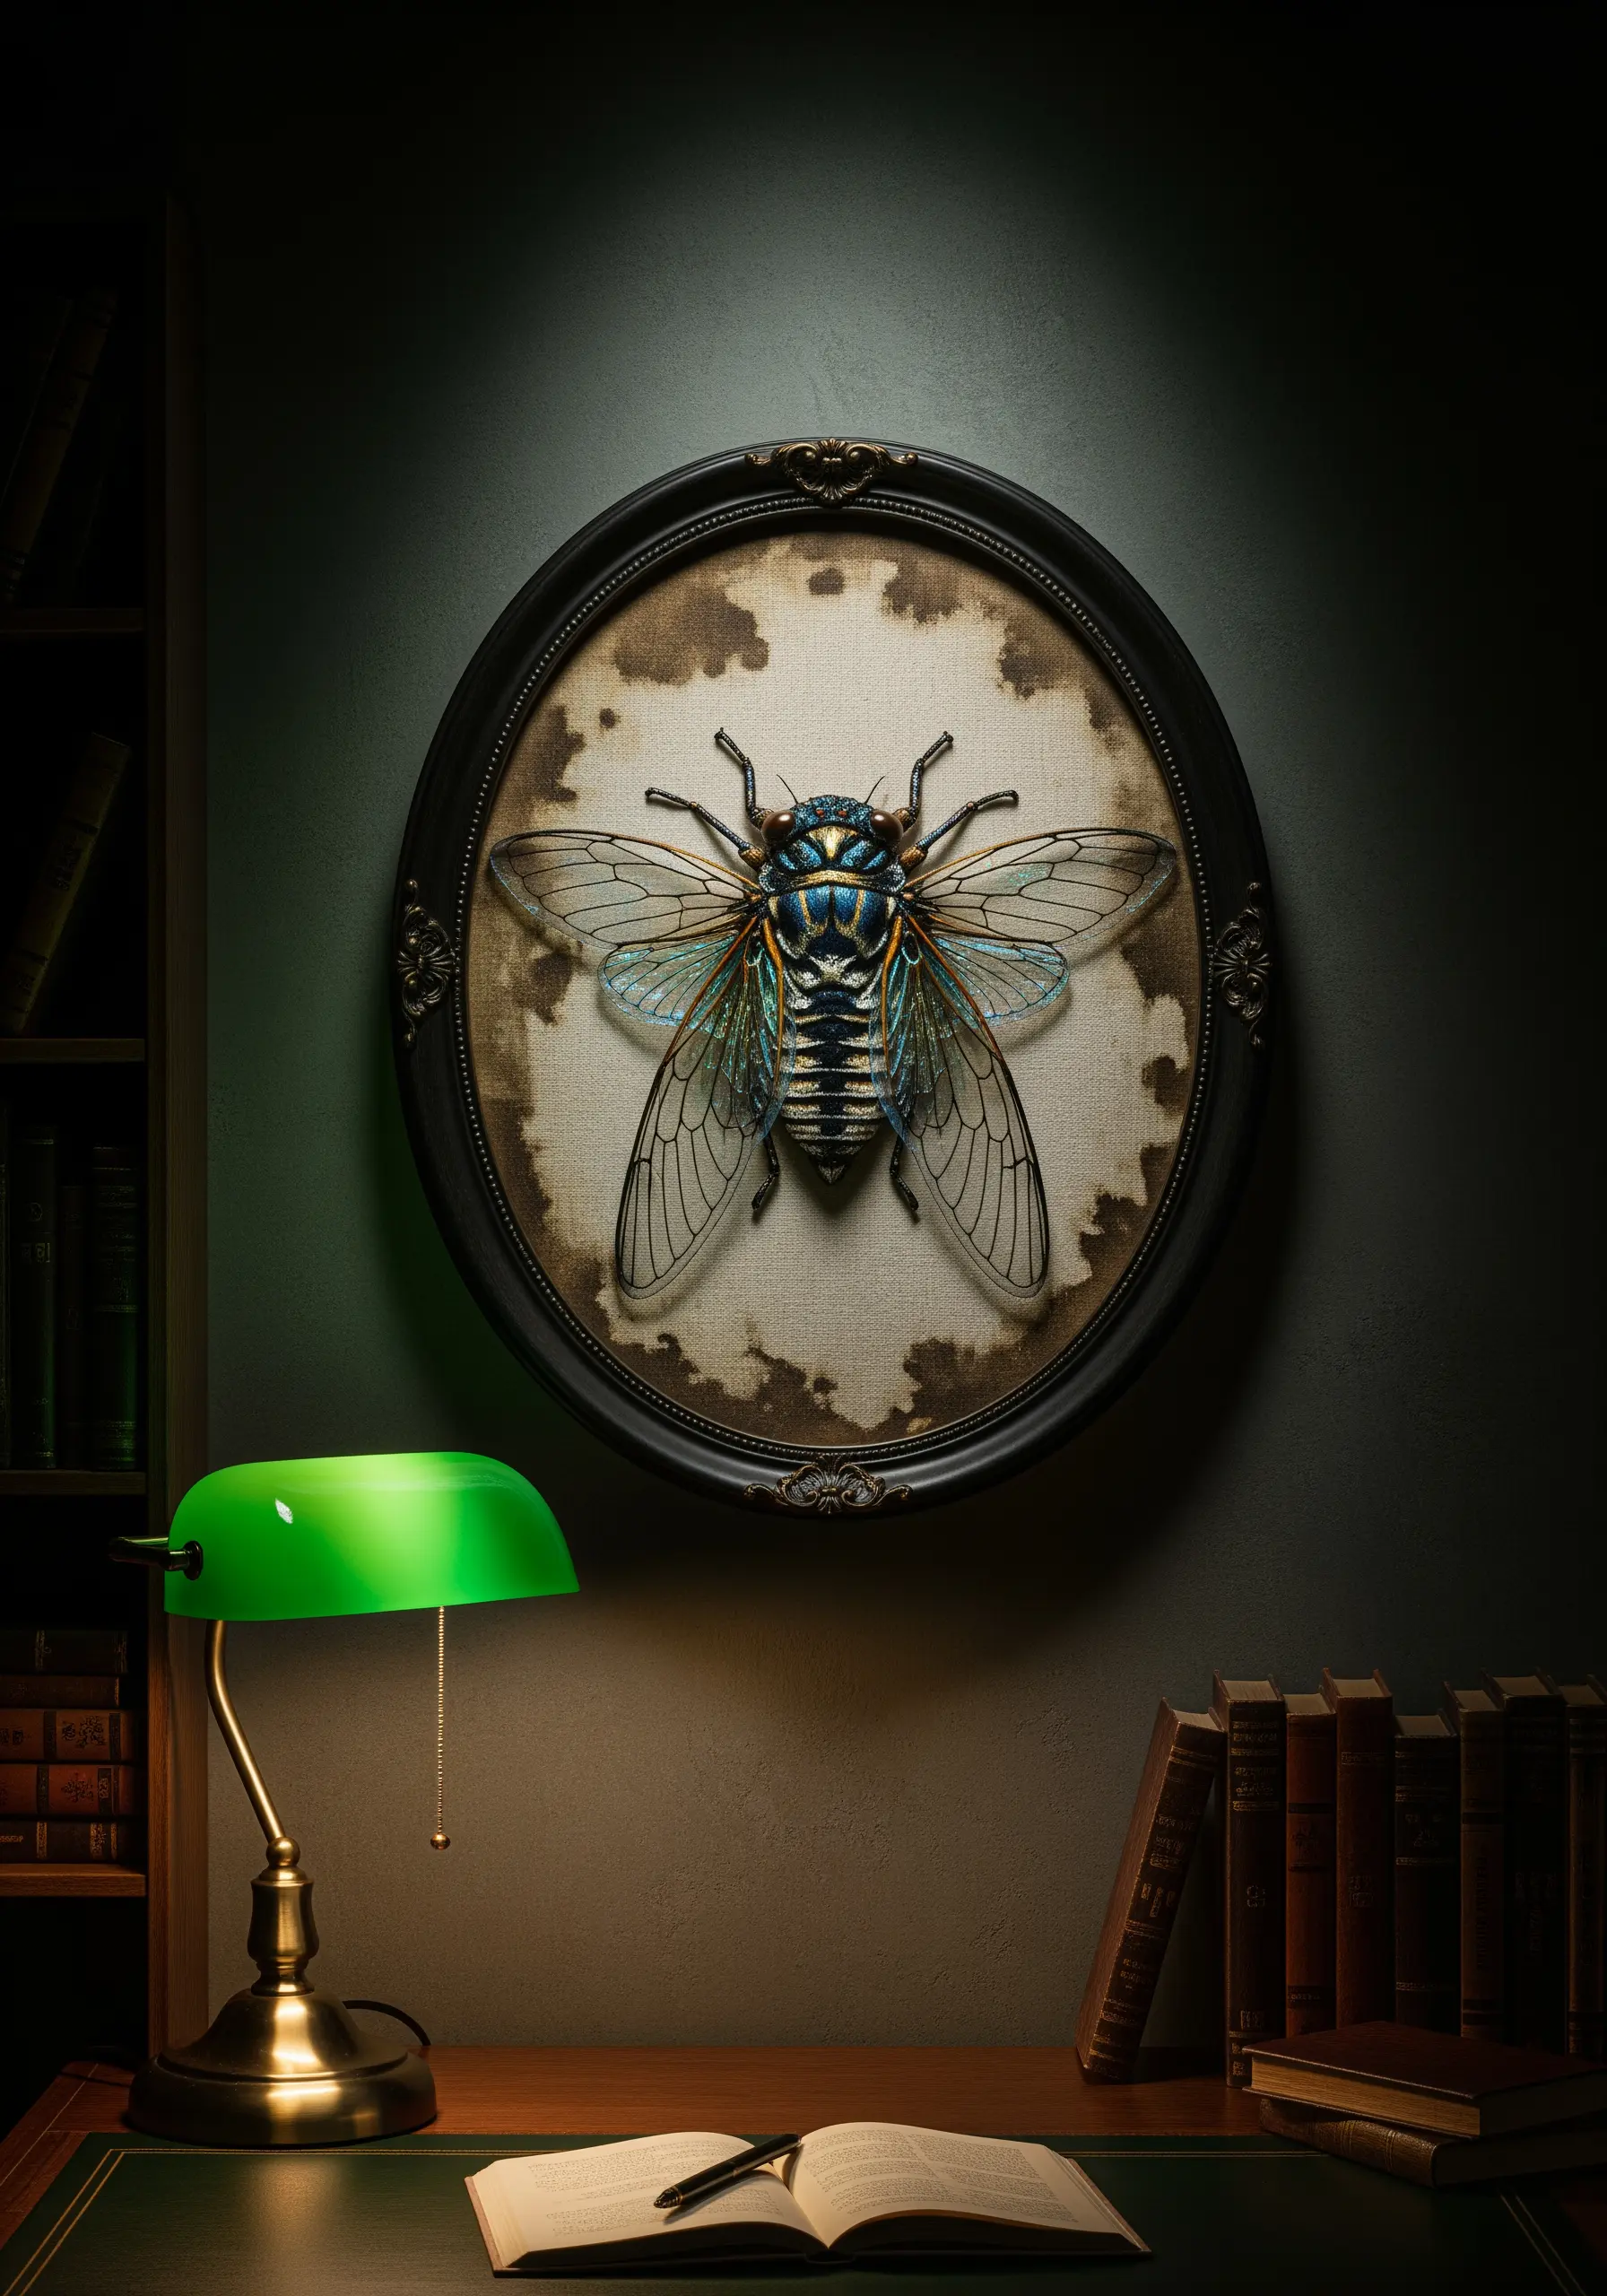
To create the transparent, delicate quality of insect wings, look beyond thread and incorporate sheer fabric.
Embroider the body of the insect directly onto your main fabric, using metallic and iridescent threads for a lifelike sheen.
For the wings, stitch the vein details onto a piece of fine organza or tulle stretched in a separate hoop. Carefully cut them out and stitch them onto the body.
This layering technique adds a level of realism and fragility that is impossible to achieve with stitches alone.
Discover more realistic animal & insect embroidery patterns for your next project.
13. Capturing Seascapes with Painterly Stitches
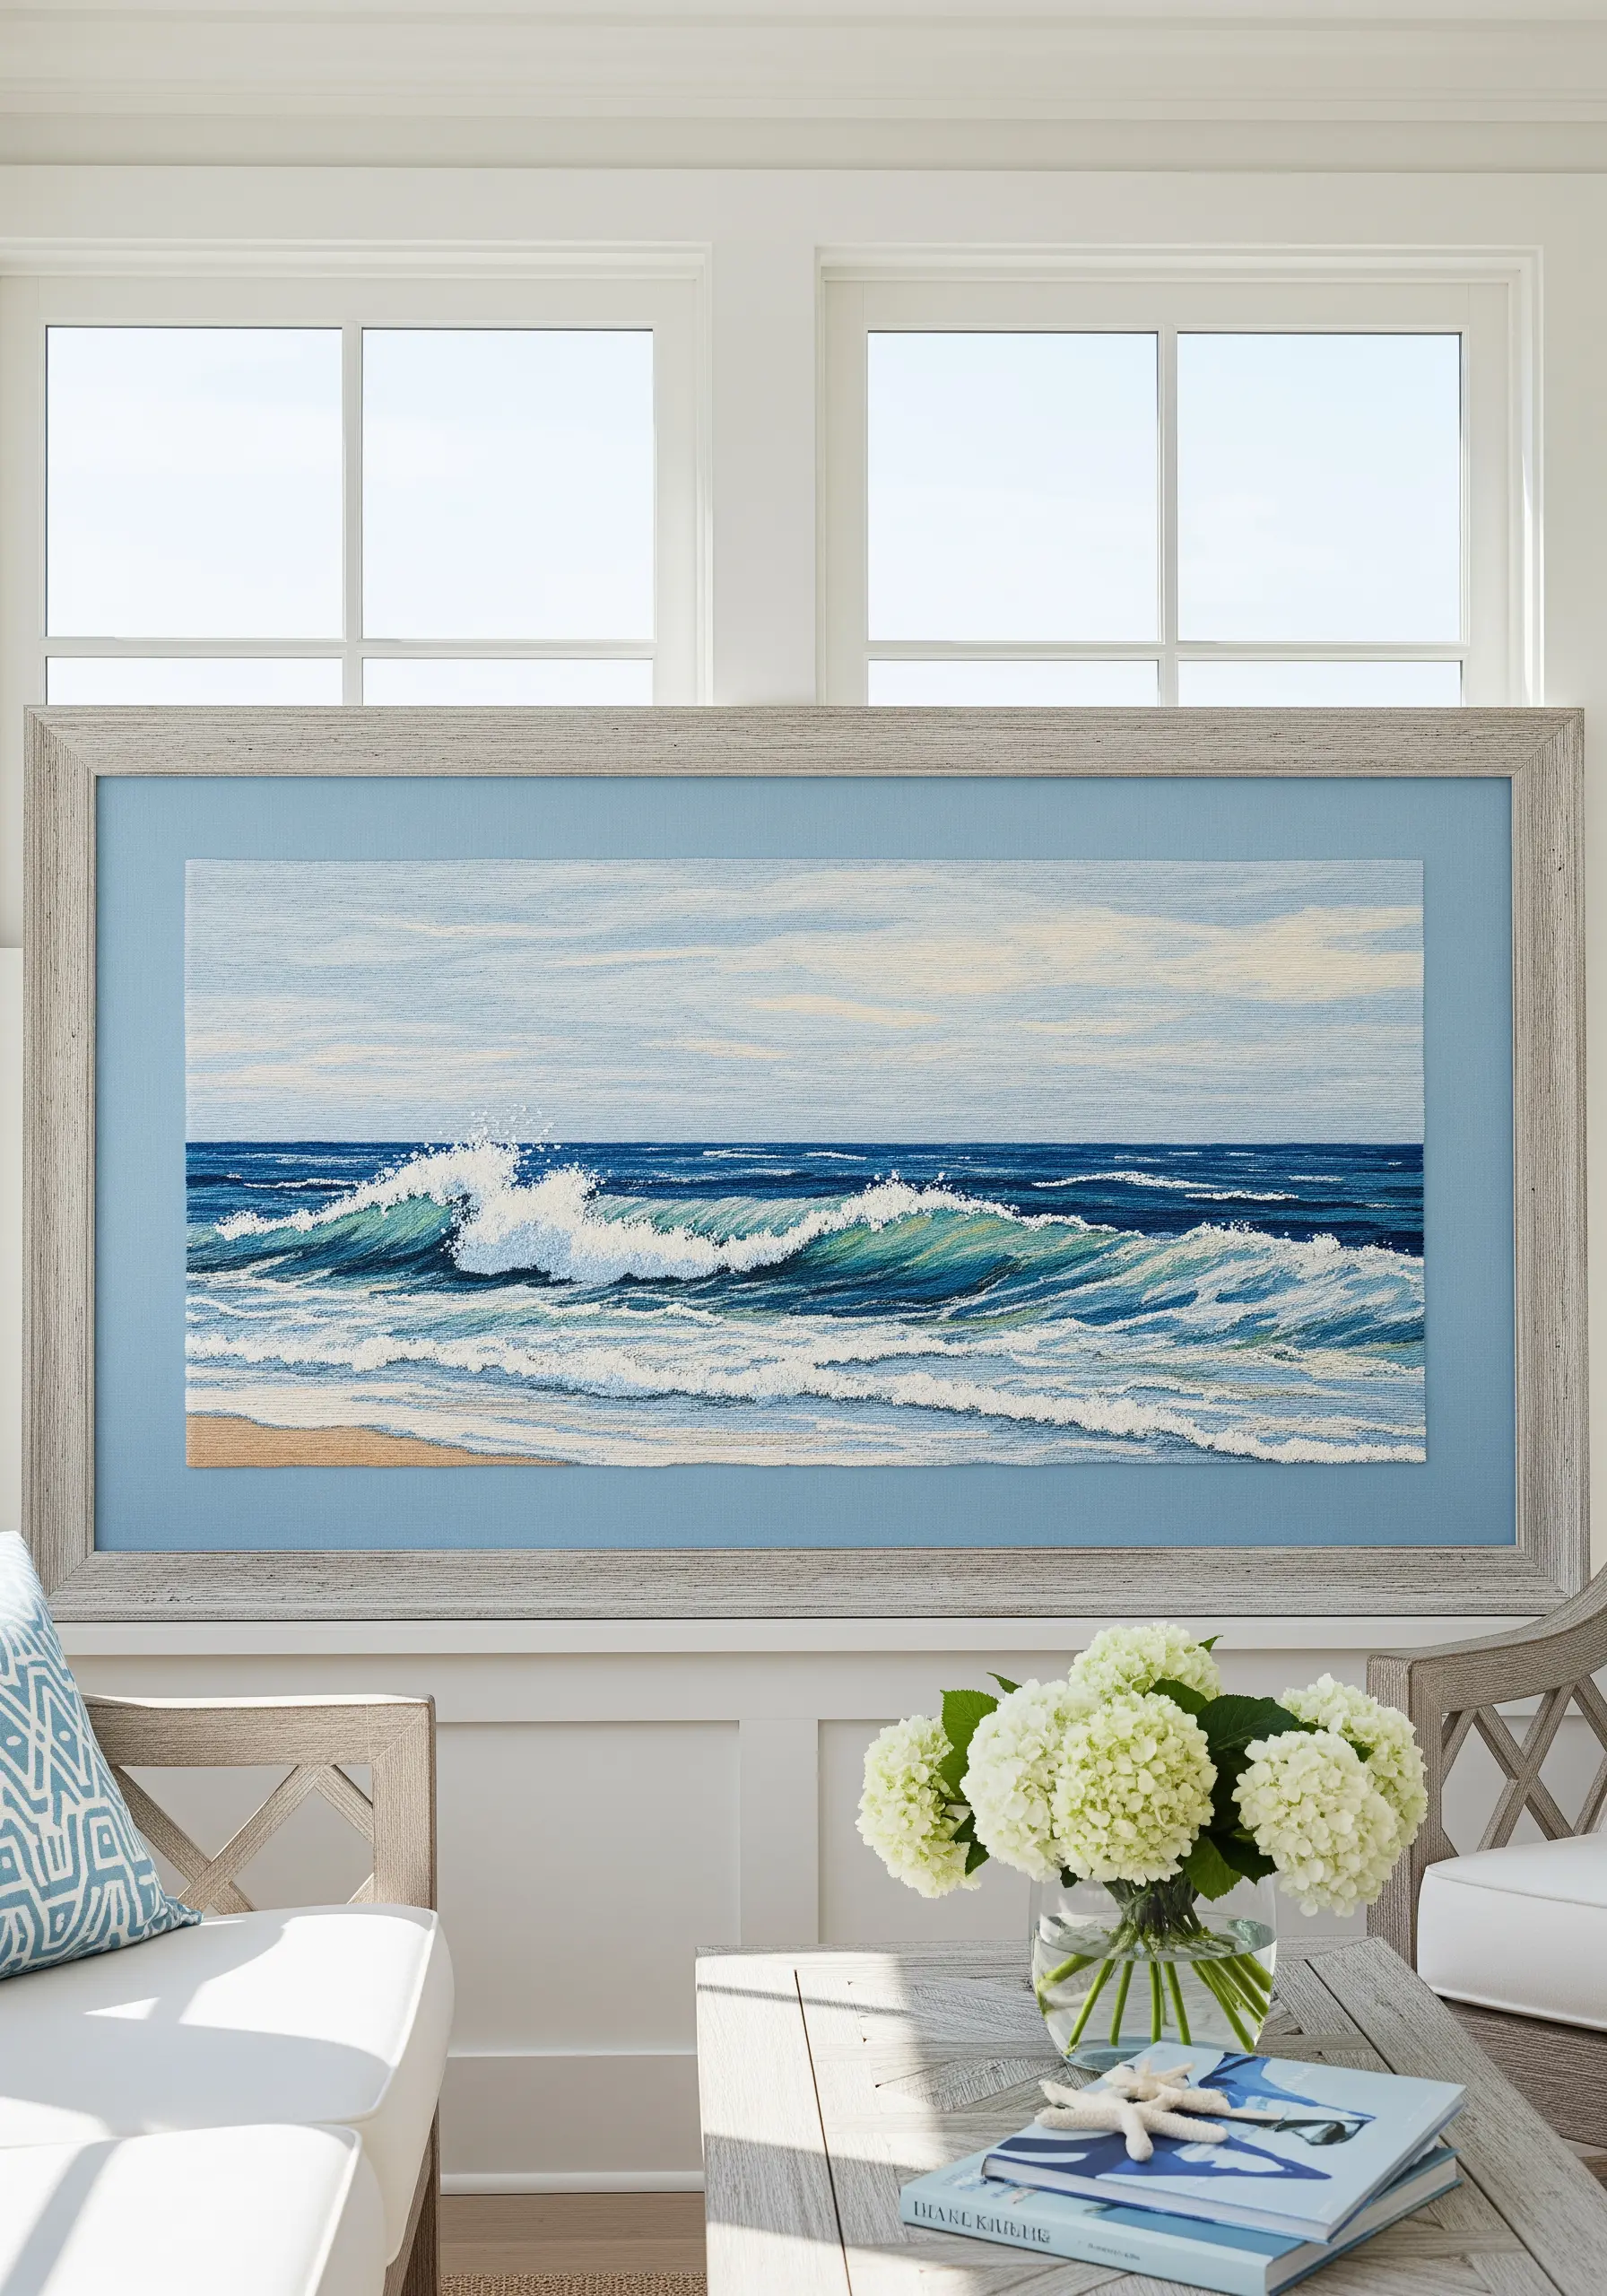
Stitch a seascape that feels dynamic and alive by using your needle to create movement and light.
Fill the ocean with a dense field of stitches, varying their direction to mimic the chaotic energy of the waves. A mix of long-and-short stitch and seed stitch works well.
Use a broad palette of blues, teals, and greens to depict the water’s depth, and add crisp white French knots and straight stitches for the sea foam and spray.
This is less about individual stitch perfection and more about the overall impressionistic effect, creating a piece that captures the feeling of the sea.
14. Abstract Color Fields with Dense Textural Stitches
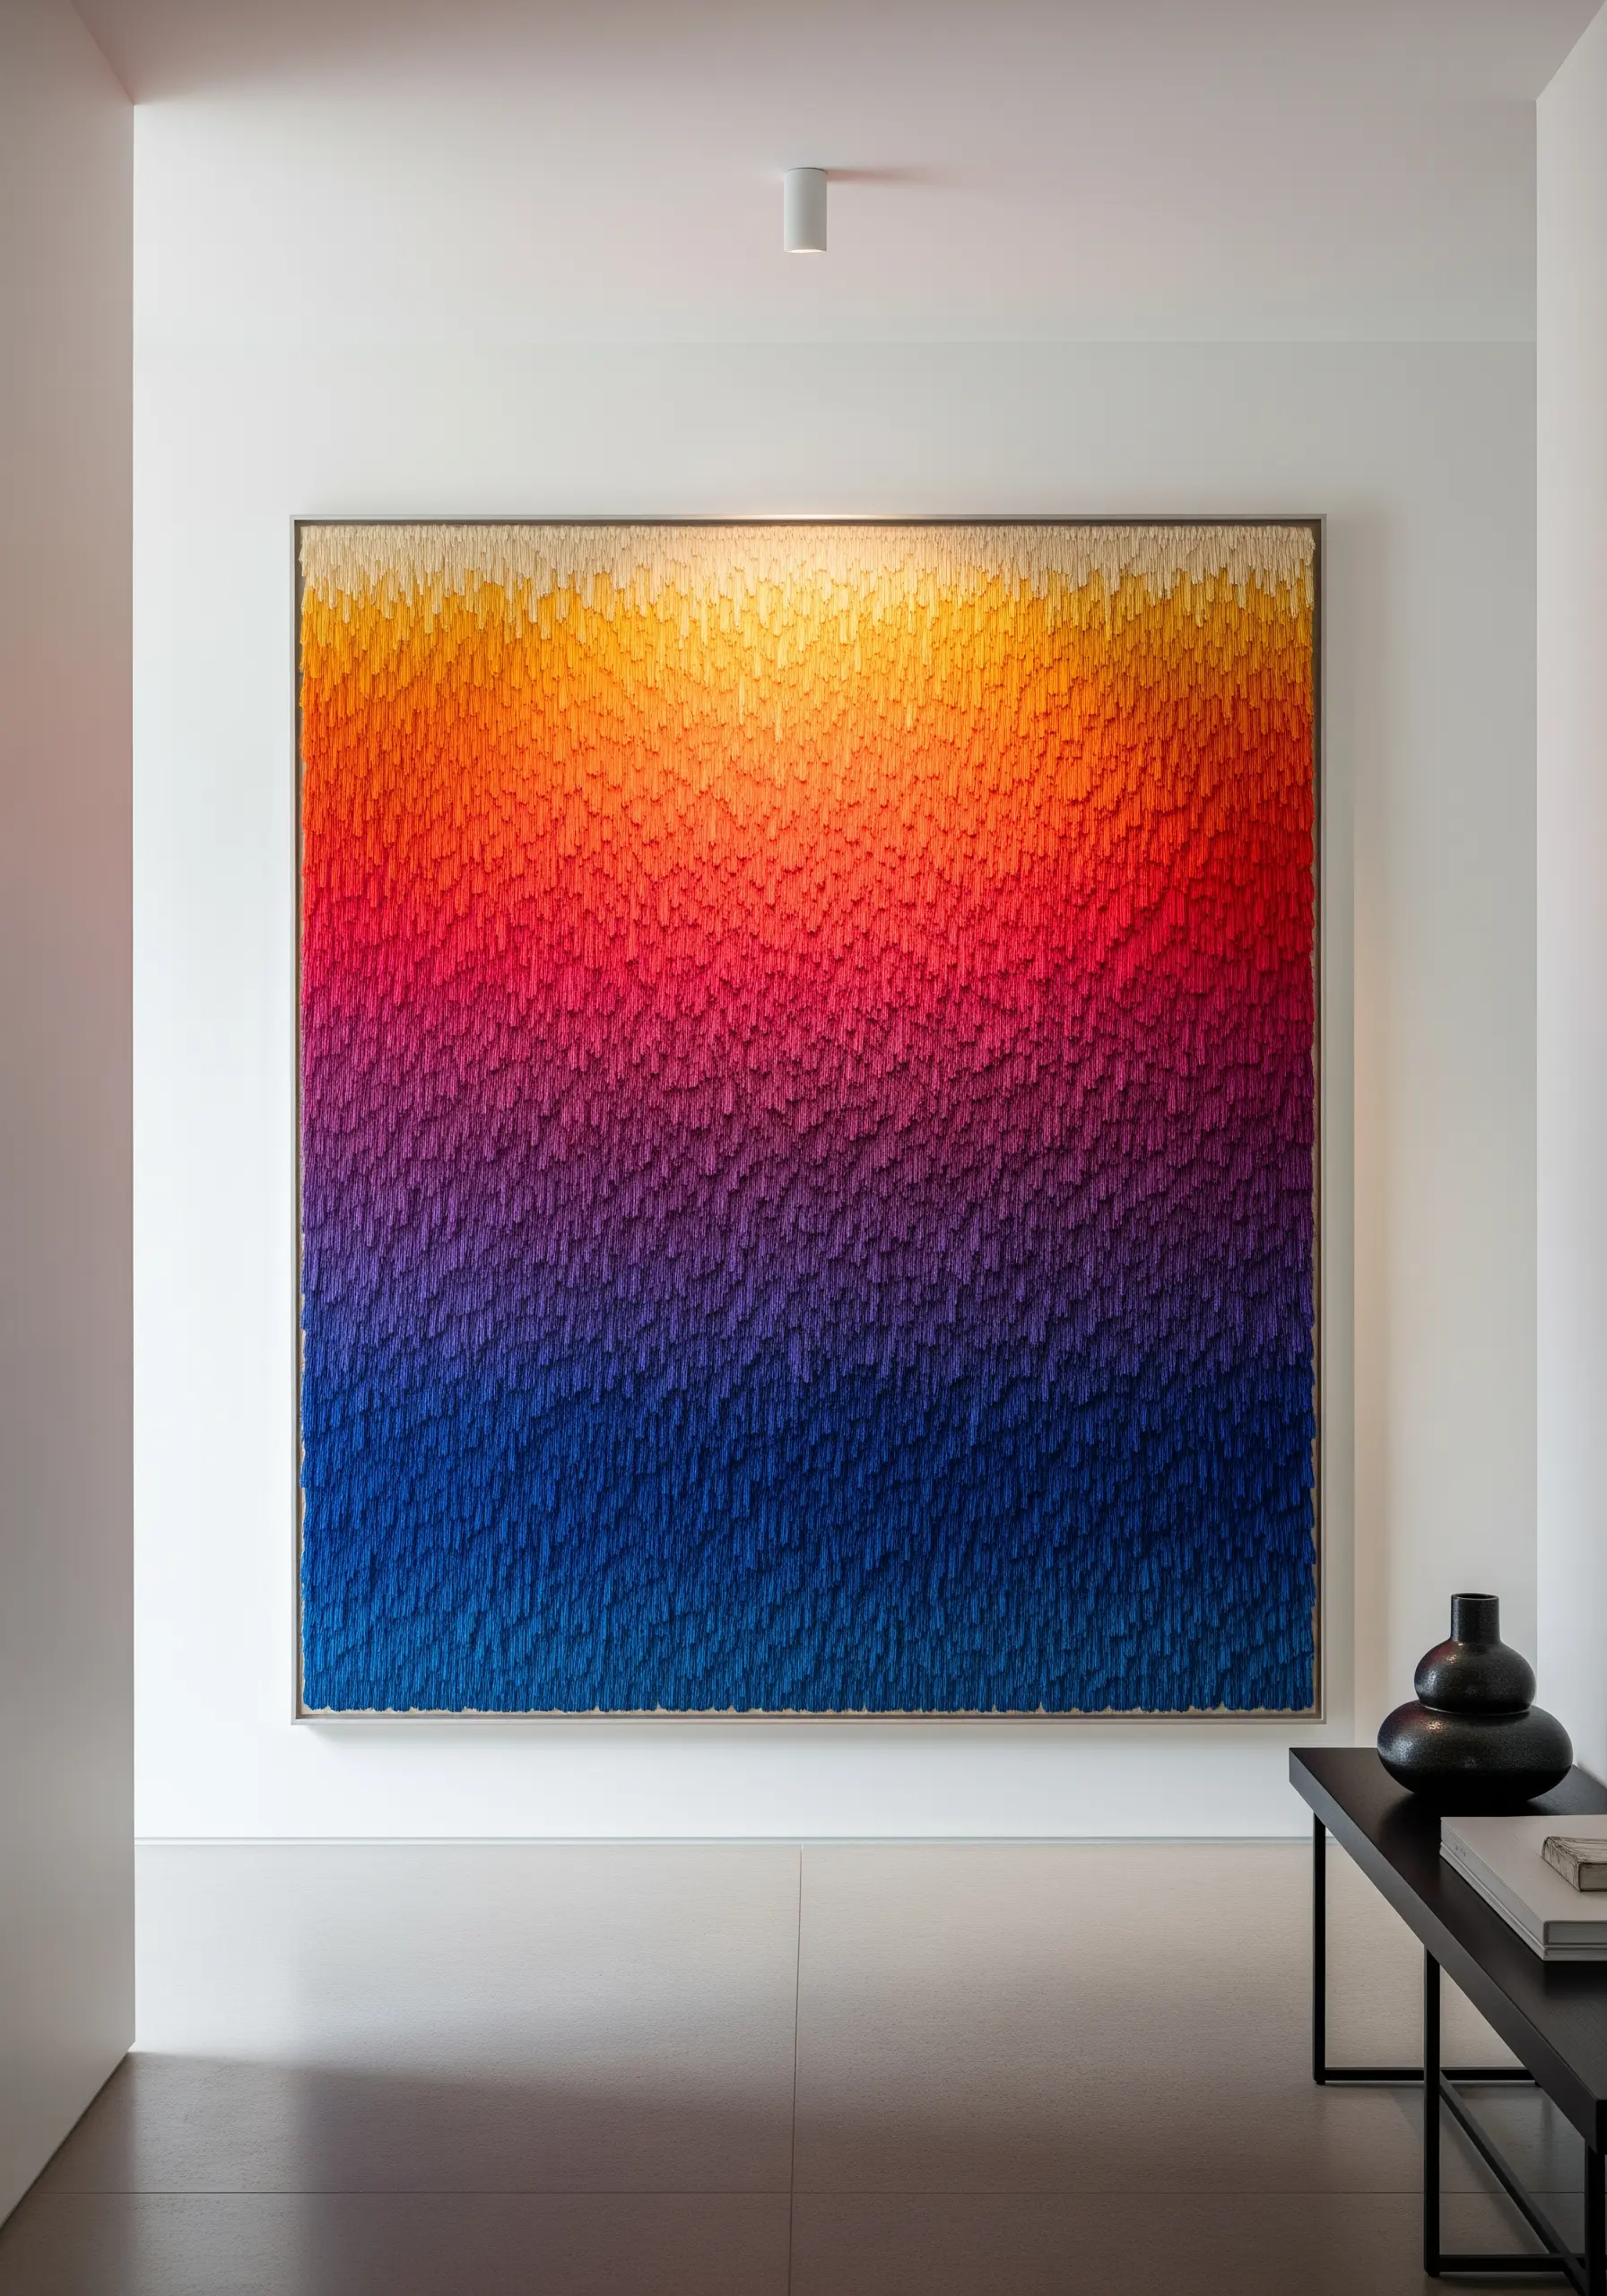
Create a powerful abstract piece by focusing entirely on color and texture, rather than form.
Fill your entire canvas with dense, vertical stitches, allowing the colors to blend and shift organically to create a smooth gradient.
You can achieve this effect with a latch hook, punch needle, or by using a turkey work stitch that you leave as loops or trim short.
The sheer density of the thread transforms the piece into a sculptural, tactile object that celebrates the beauty of the fiber itself.
These stunning fiber art installations show the power of pure texture.
15. Art Nouveau Grace with Flowing Line Work
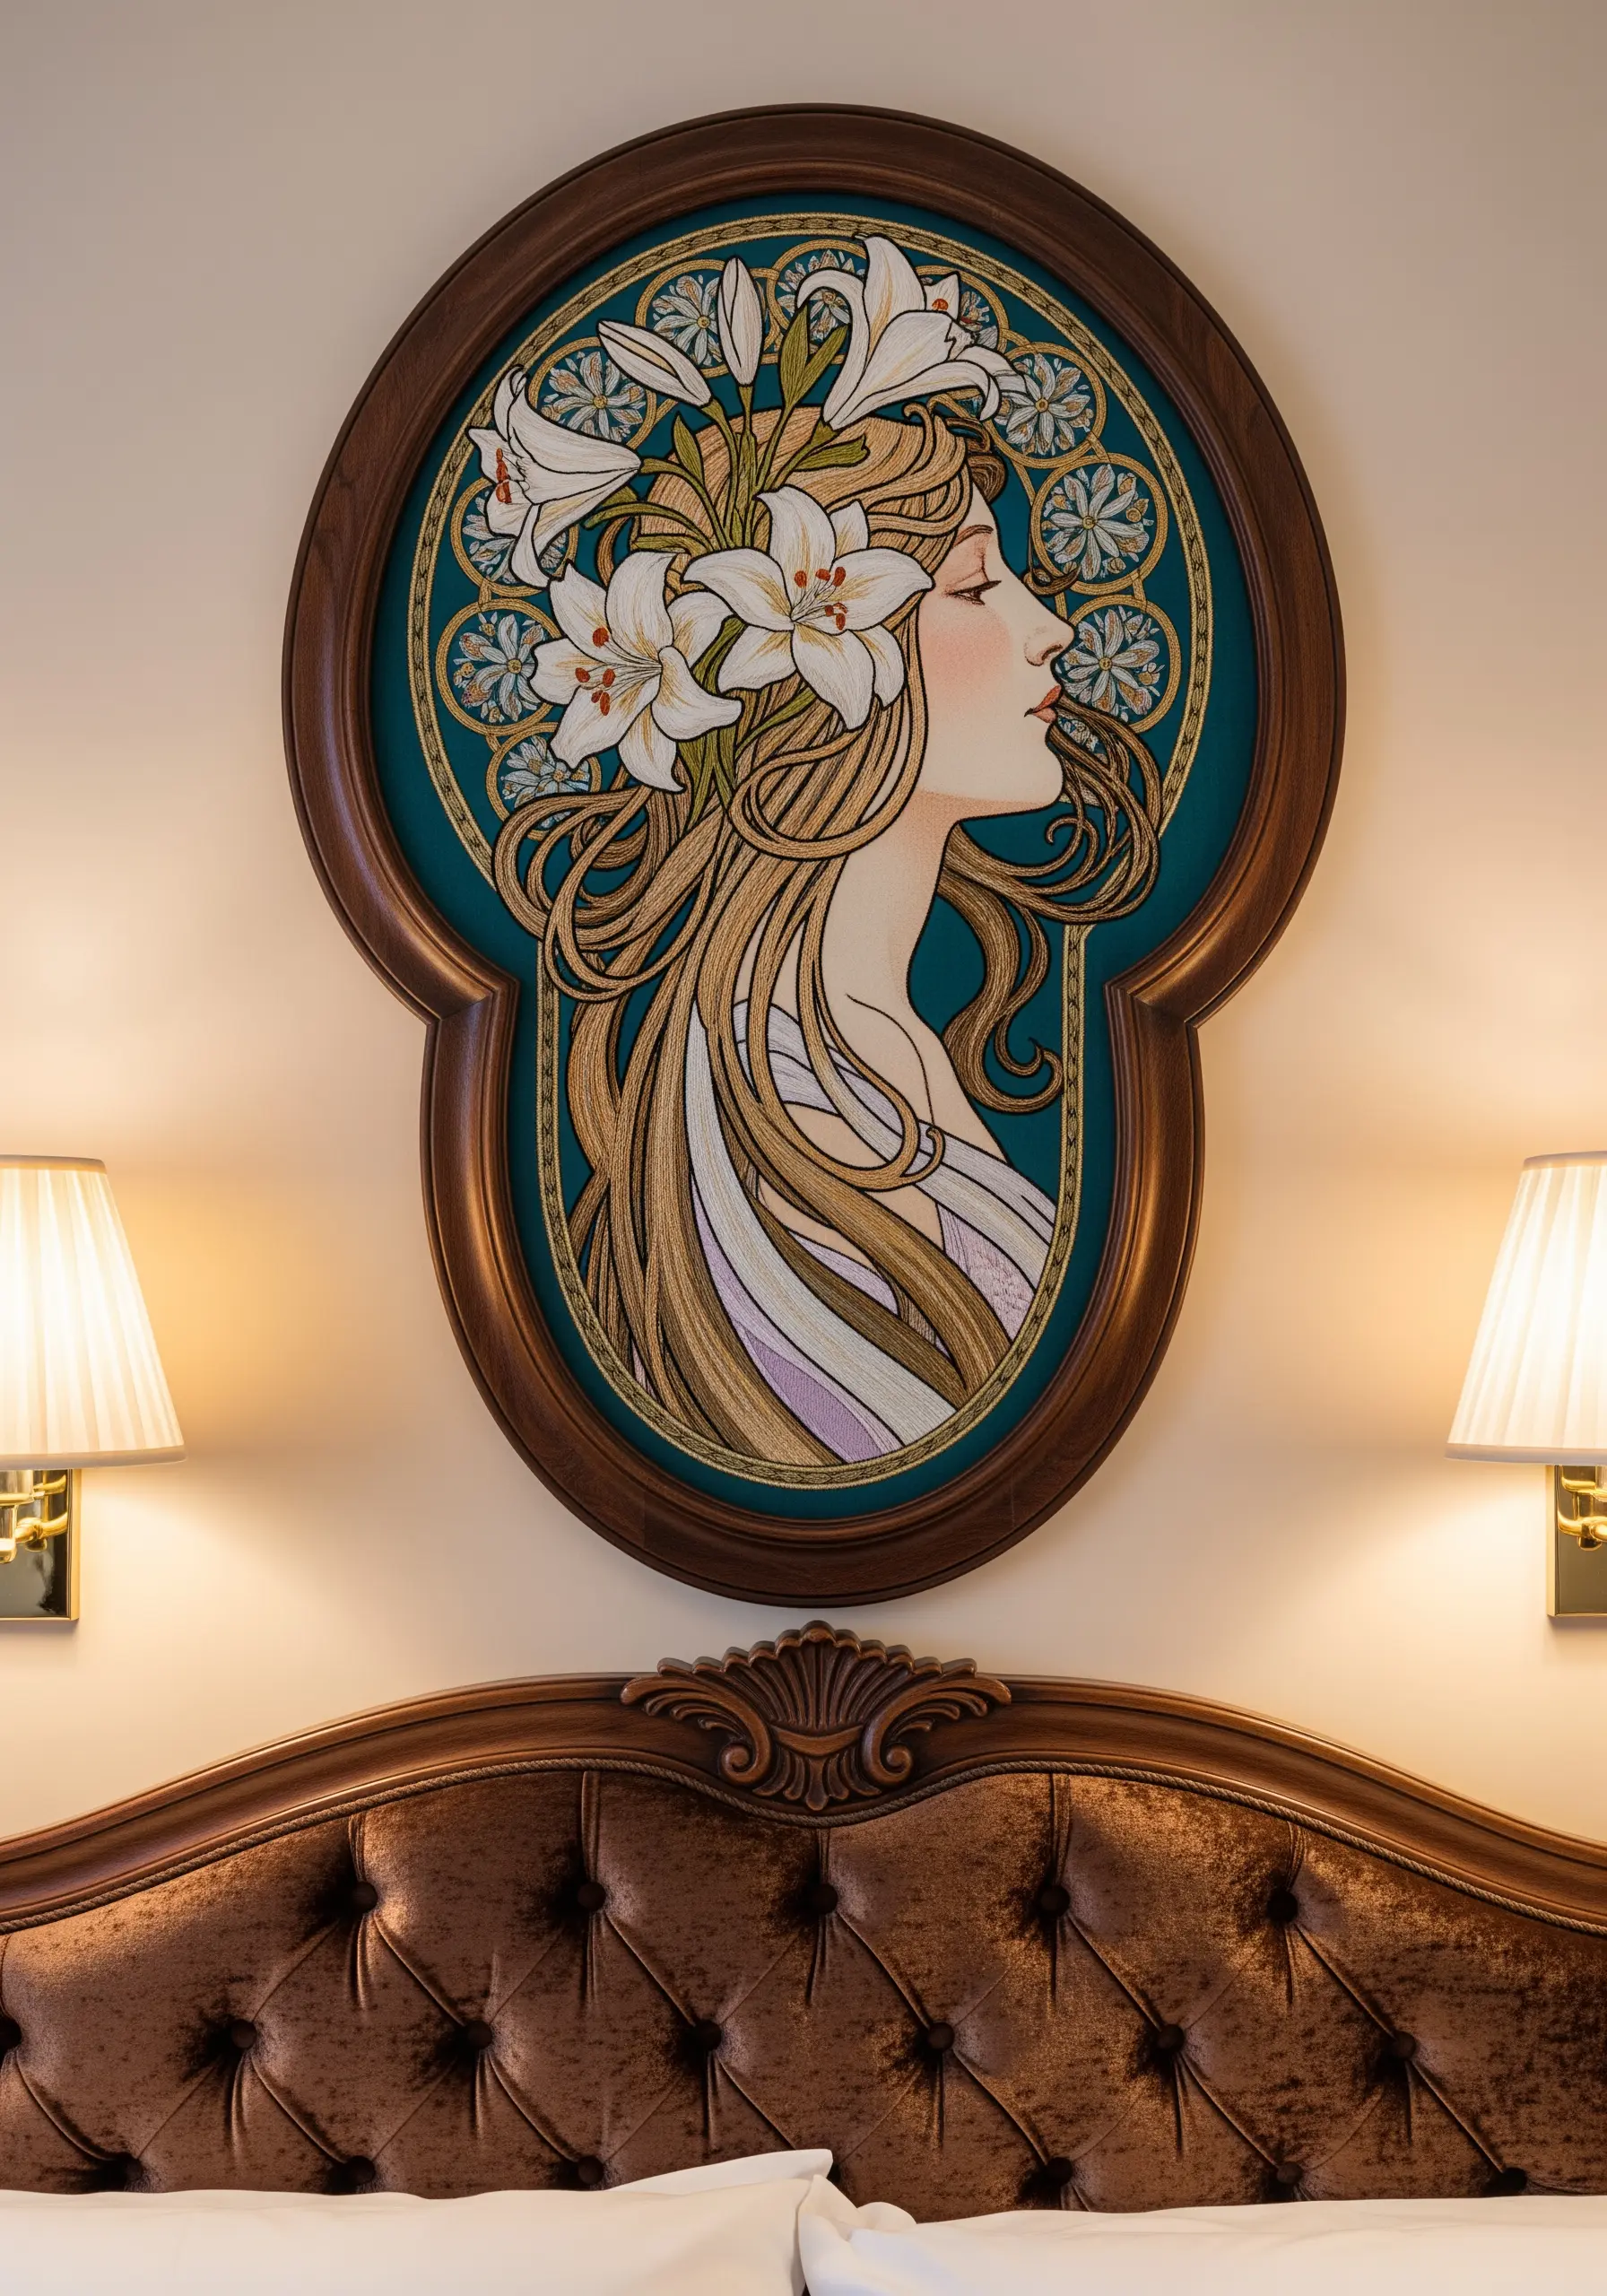
Emulate the elegant, organic lines of the Art Nouveau style by choosing your outline stitch carefully.
A whipped backstitch or a stem stitch will create the smooth, uninterrupted curves that are characteristic of this artistic movement.
Use a sophisticated color palette with muted jewel tones, golds, and creams to enhance the vintage, illustrative quality.
Fill in the colored sections with a smooth, directional satin stitch, almost like a classic cel-shading animation technique, to maintain the graphic feel.
16. Mastering the Embroidered Tapestry
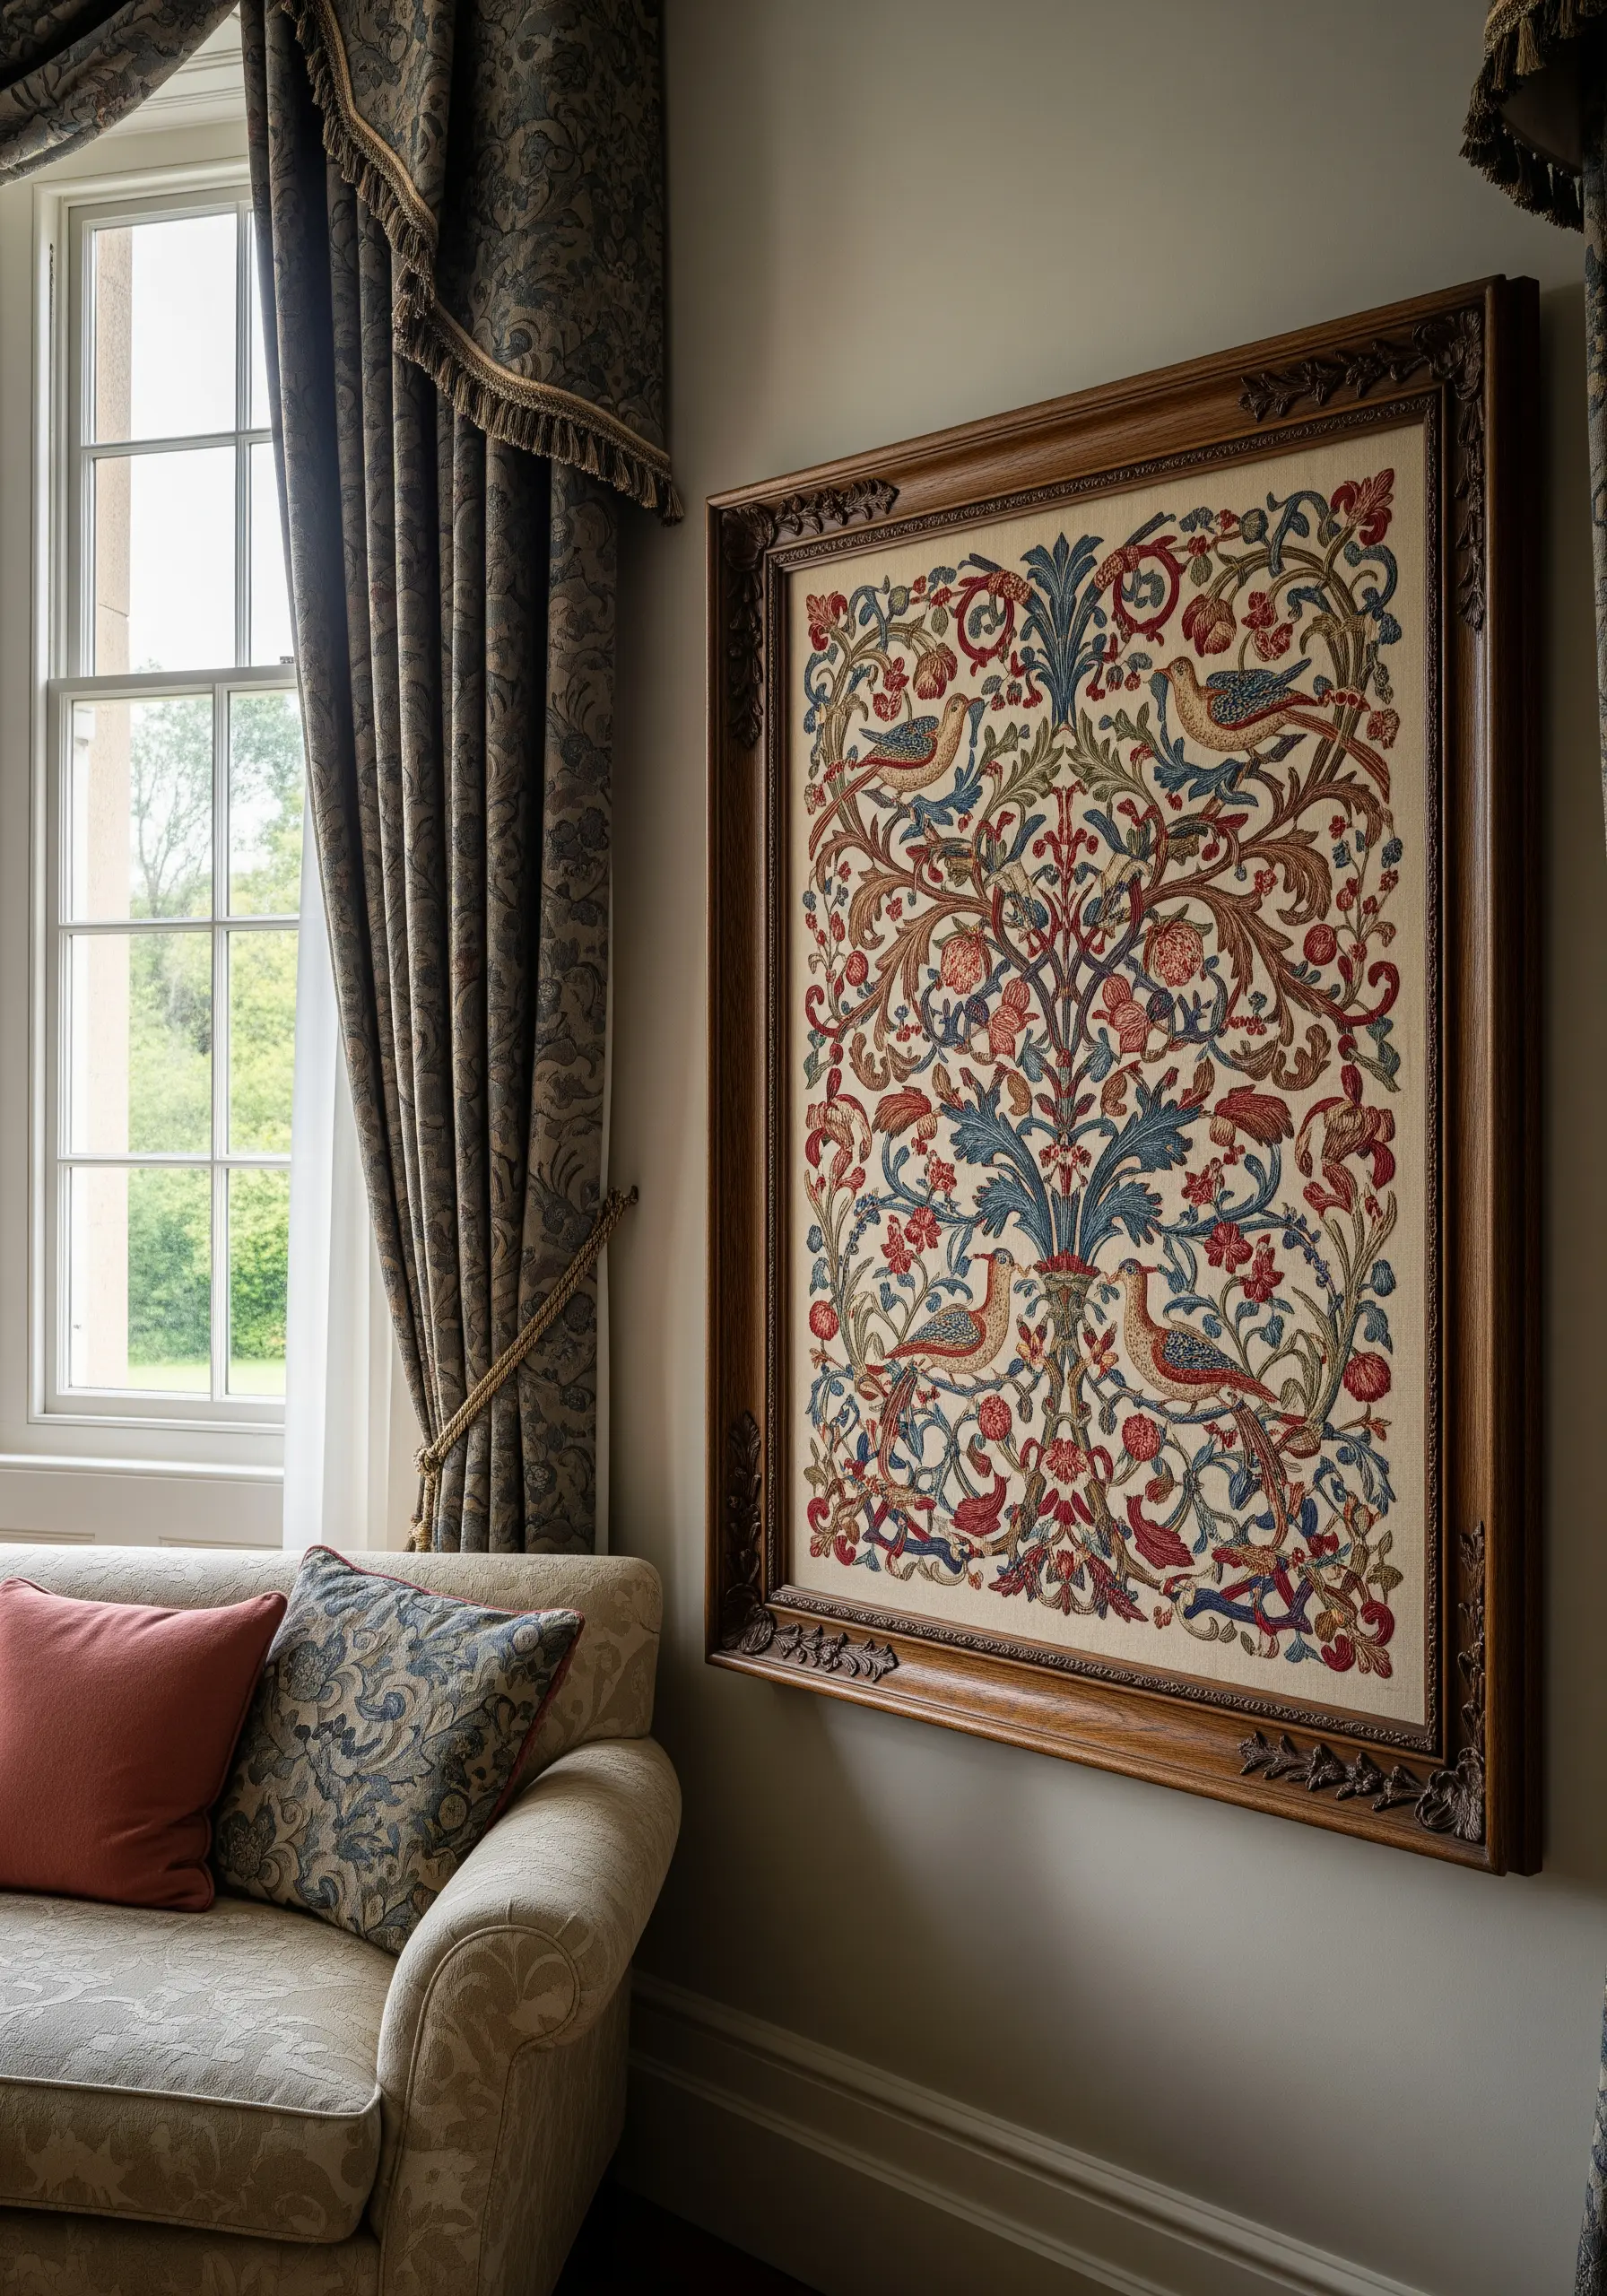
Tackle a large, complex piece by thinking of it as a tapestry rather than a small embroidery project.
Break the design into smaller, manageable sections, focusing on one color or motif at a time to avoid feeling overwhelmed.
Use a consistent set of basic stitches—like satin stitch for blocks of color, stem stitch for vines, and leaf stitch for foliage—to create a unified, harmonious texture across the entire piece.
This methodical approach is key to completing a large-scale work that feels cohesive and intentional.
Get inspired by these stunning framed embroidery pieces to start your own masterpiece.
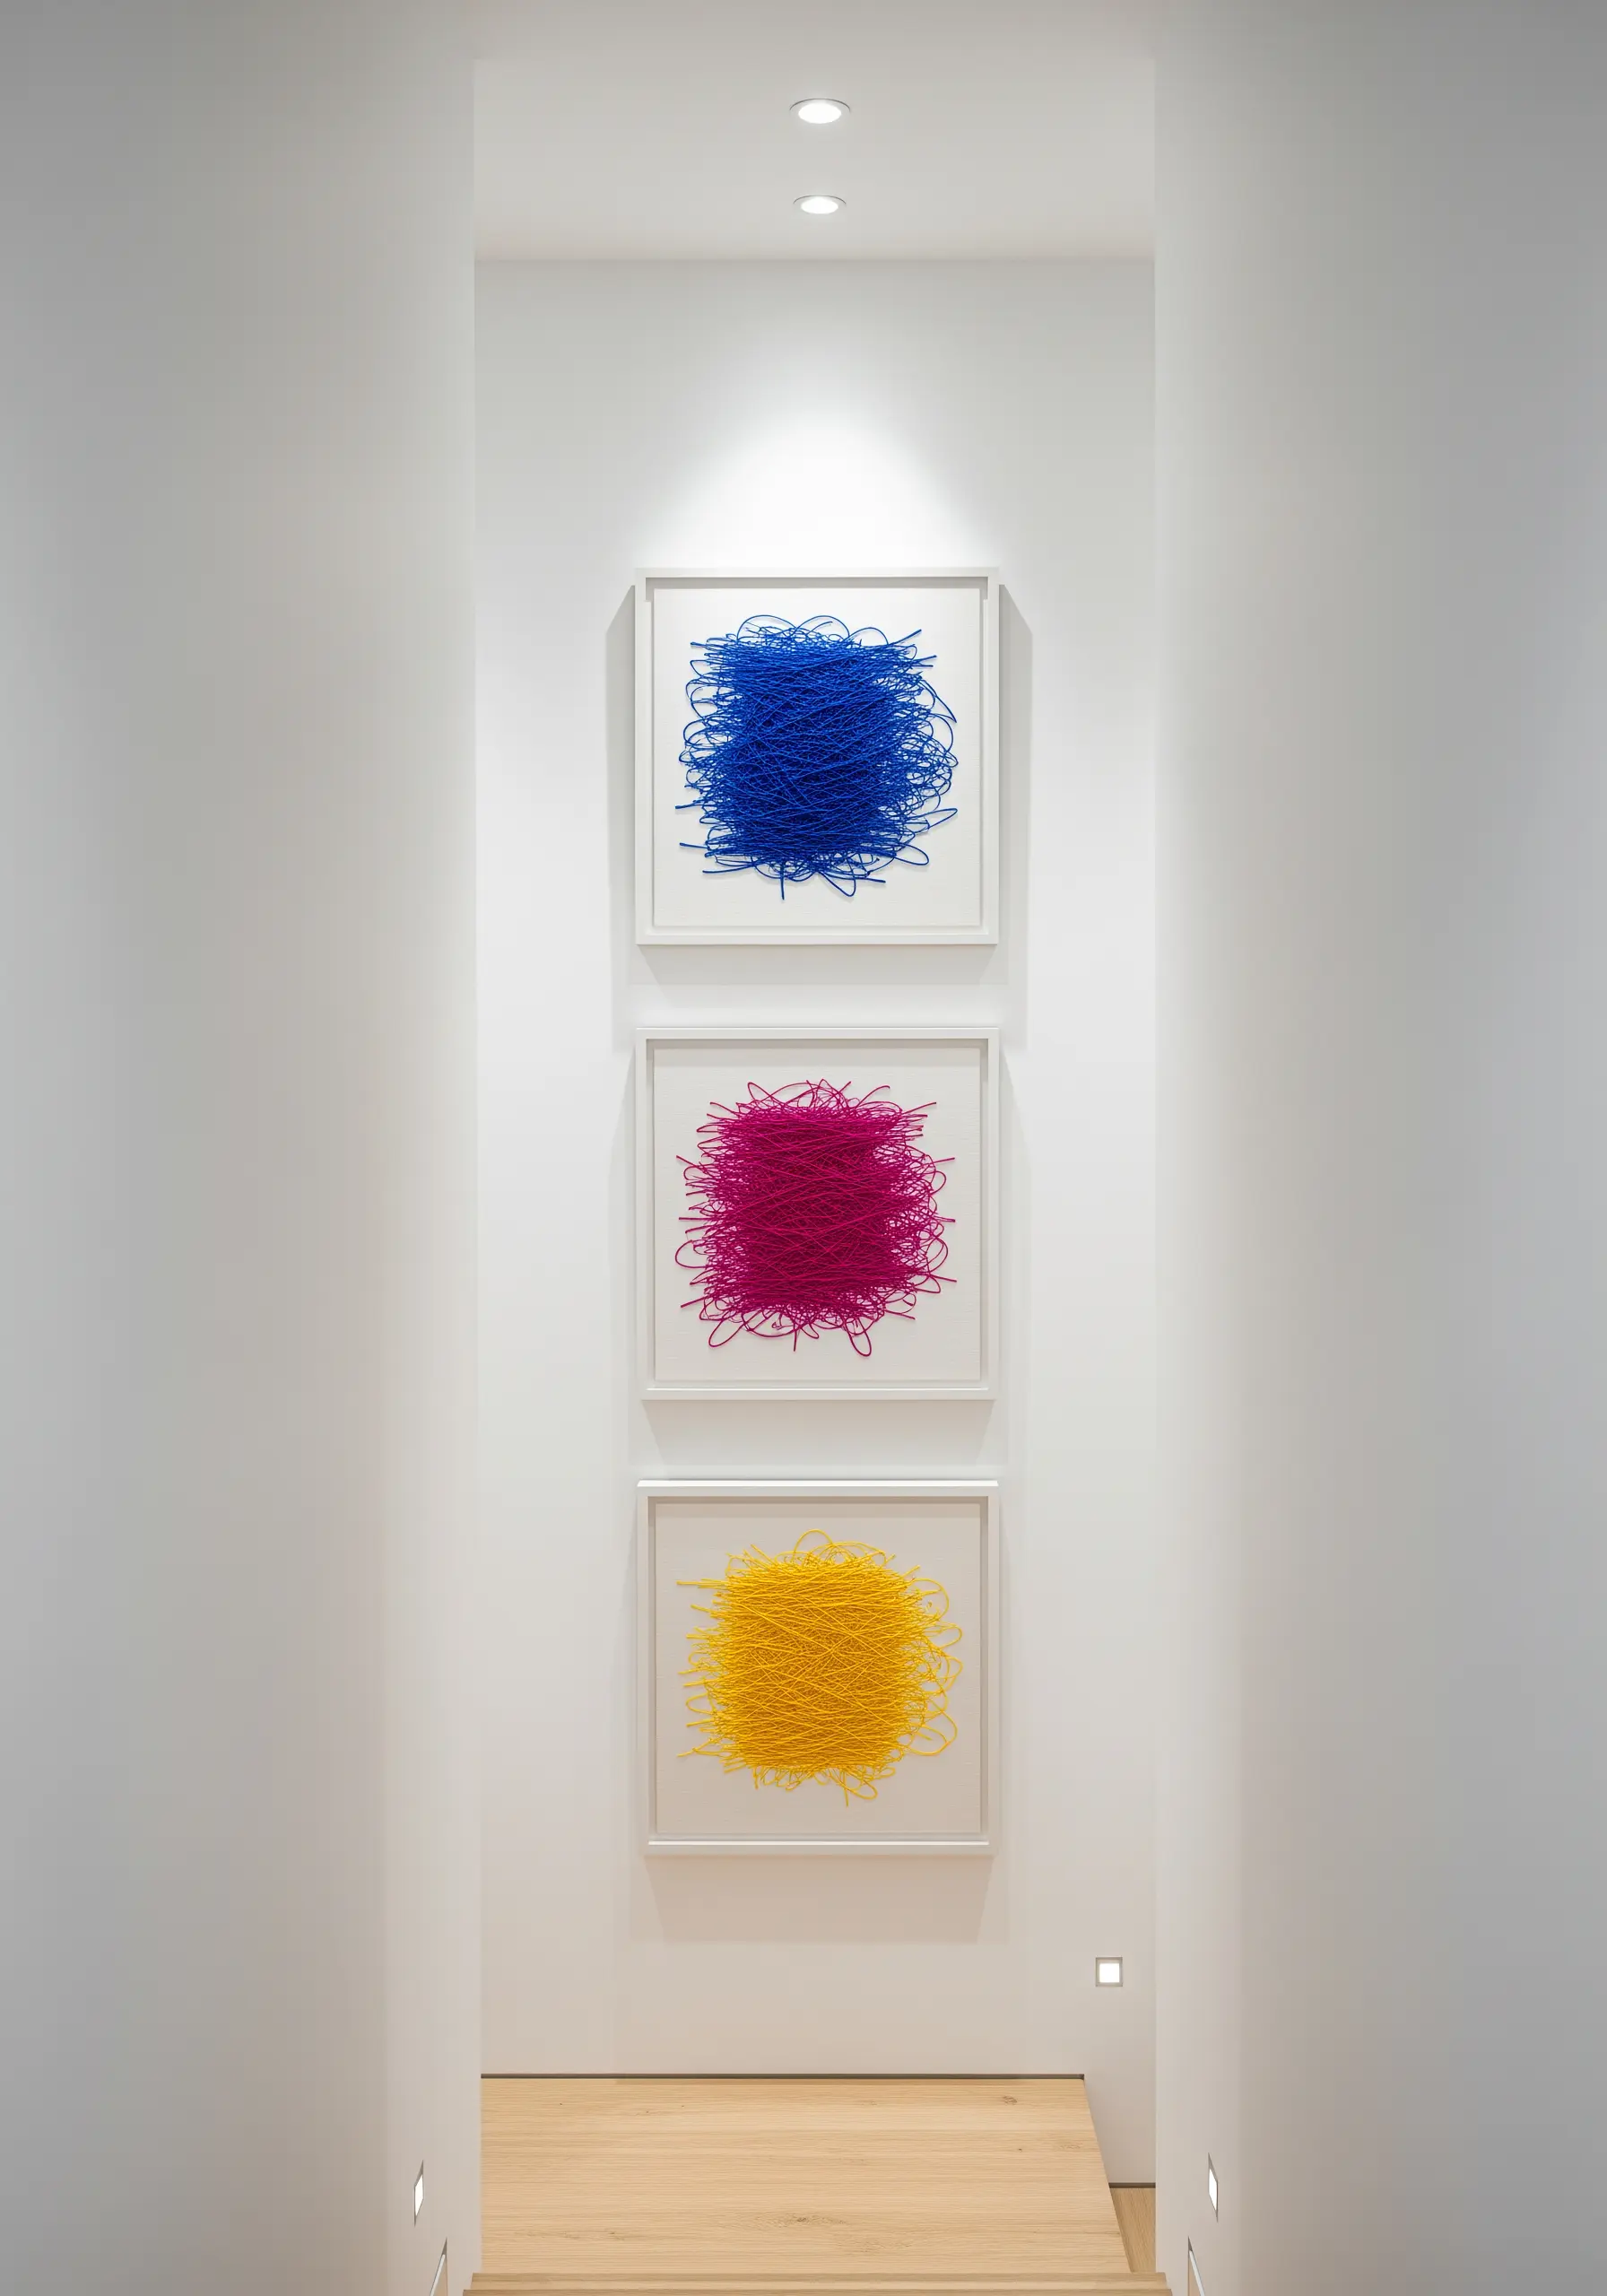
17. Abstract Triptychs with a Unifying Theme
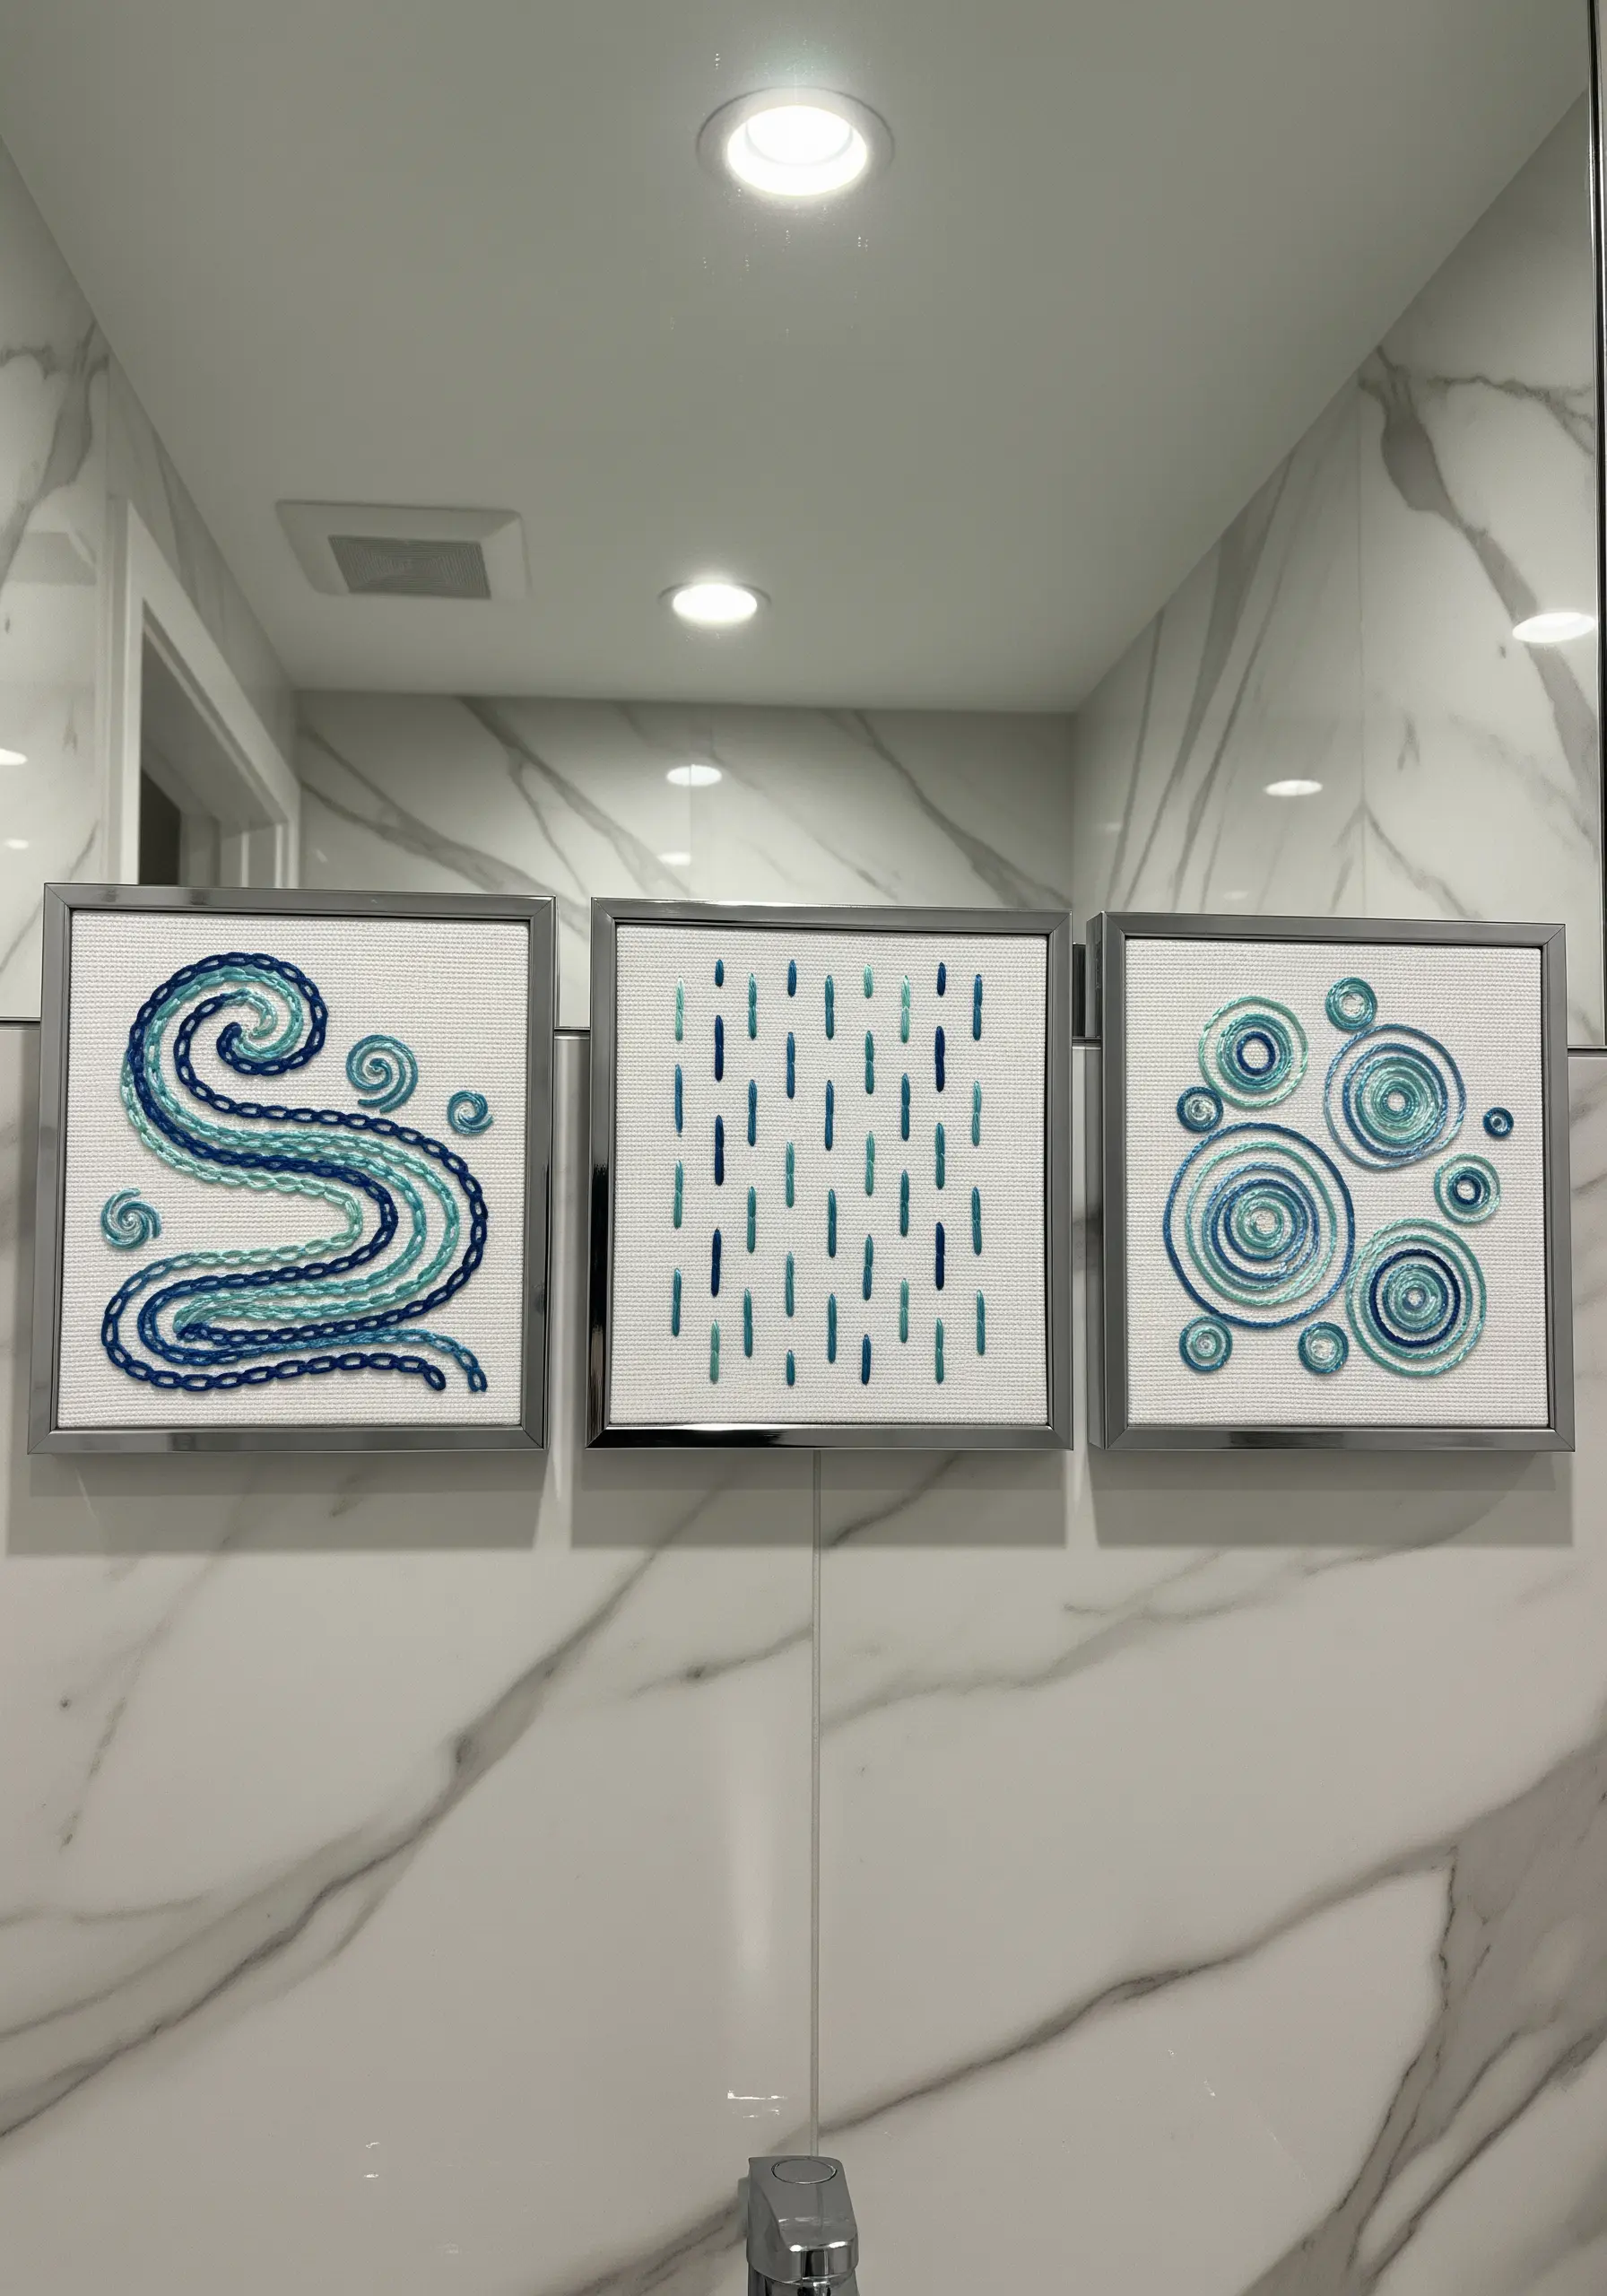
Tell a small story or explore a concept by creating a series of three related pieces.
Choose a unifying element—in this case, a shared color palette of blues and teals and a water theme—to tie the triptych together.
Within that theme, explore different interpretations: a swirling tentacle, falling rain, and concentric ripples. This creates variation while maintaining a strong visual connection.
Framing them identically and hanging them together transforms three small embroideries into a single, impactful art installation.
18. Pop Art Portraits with Graphic Stitches
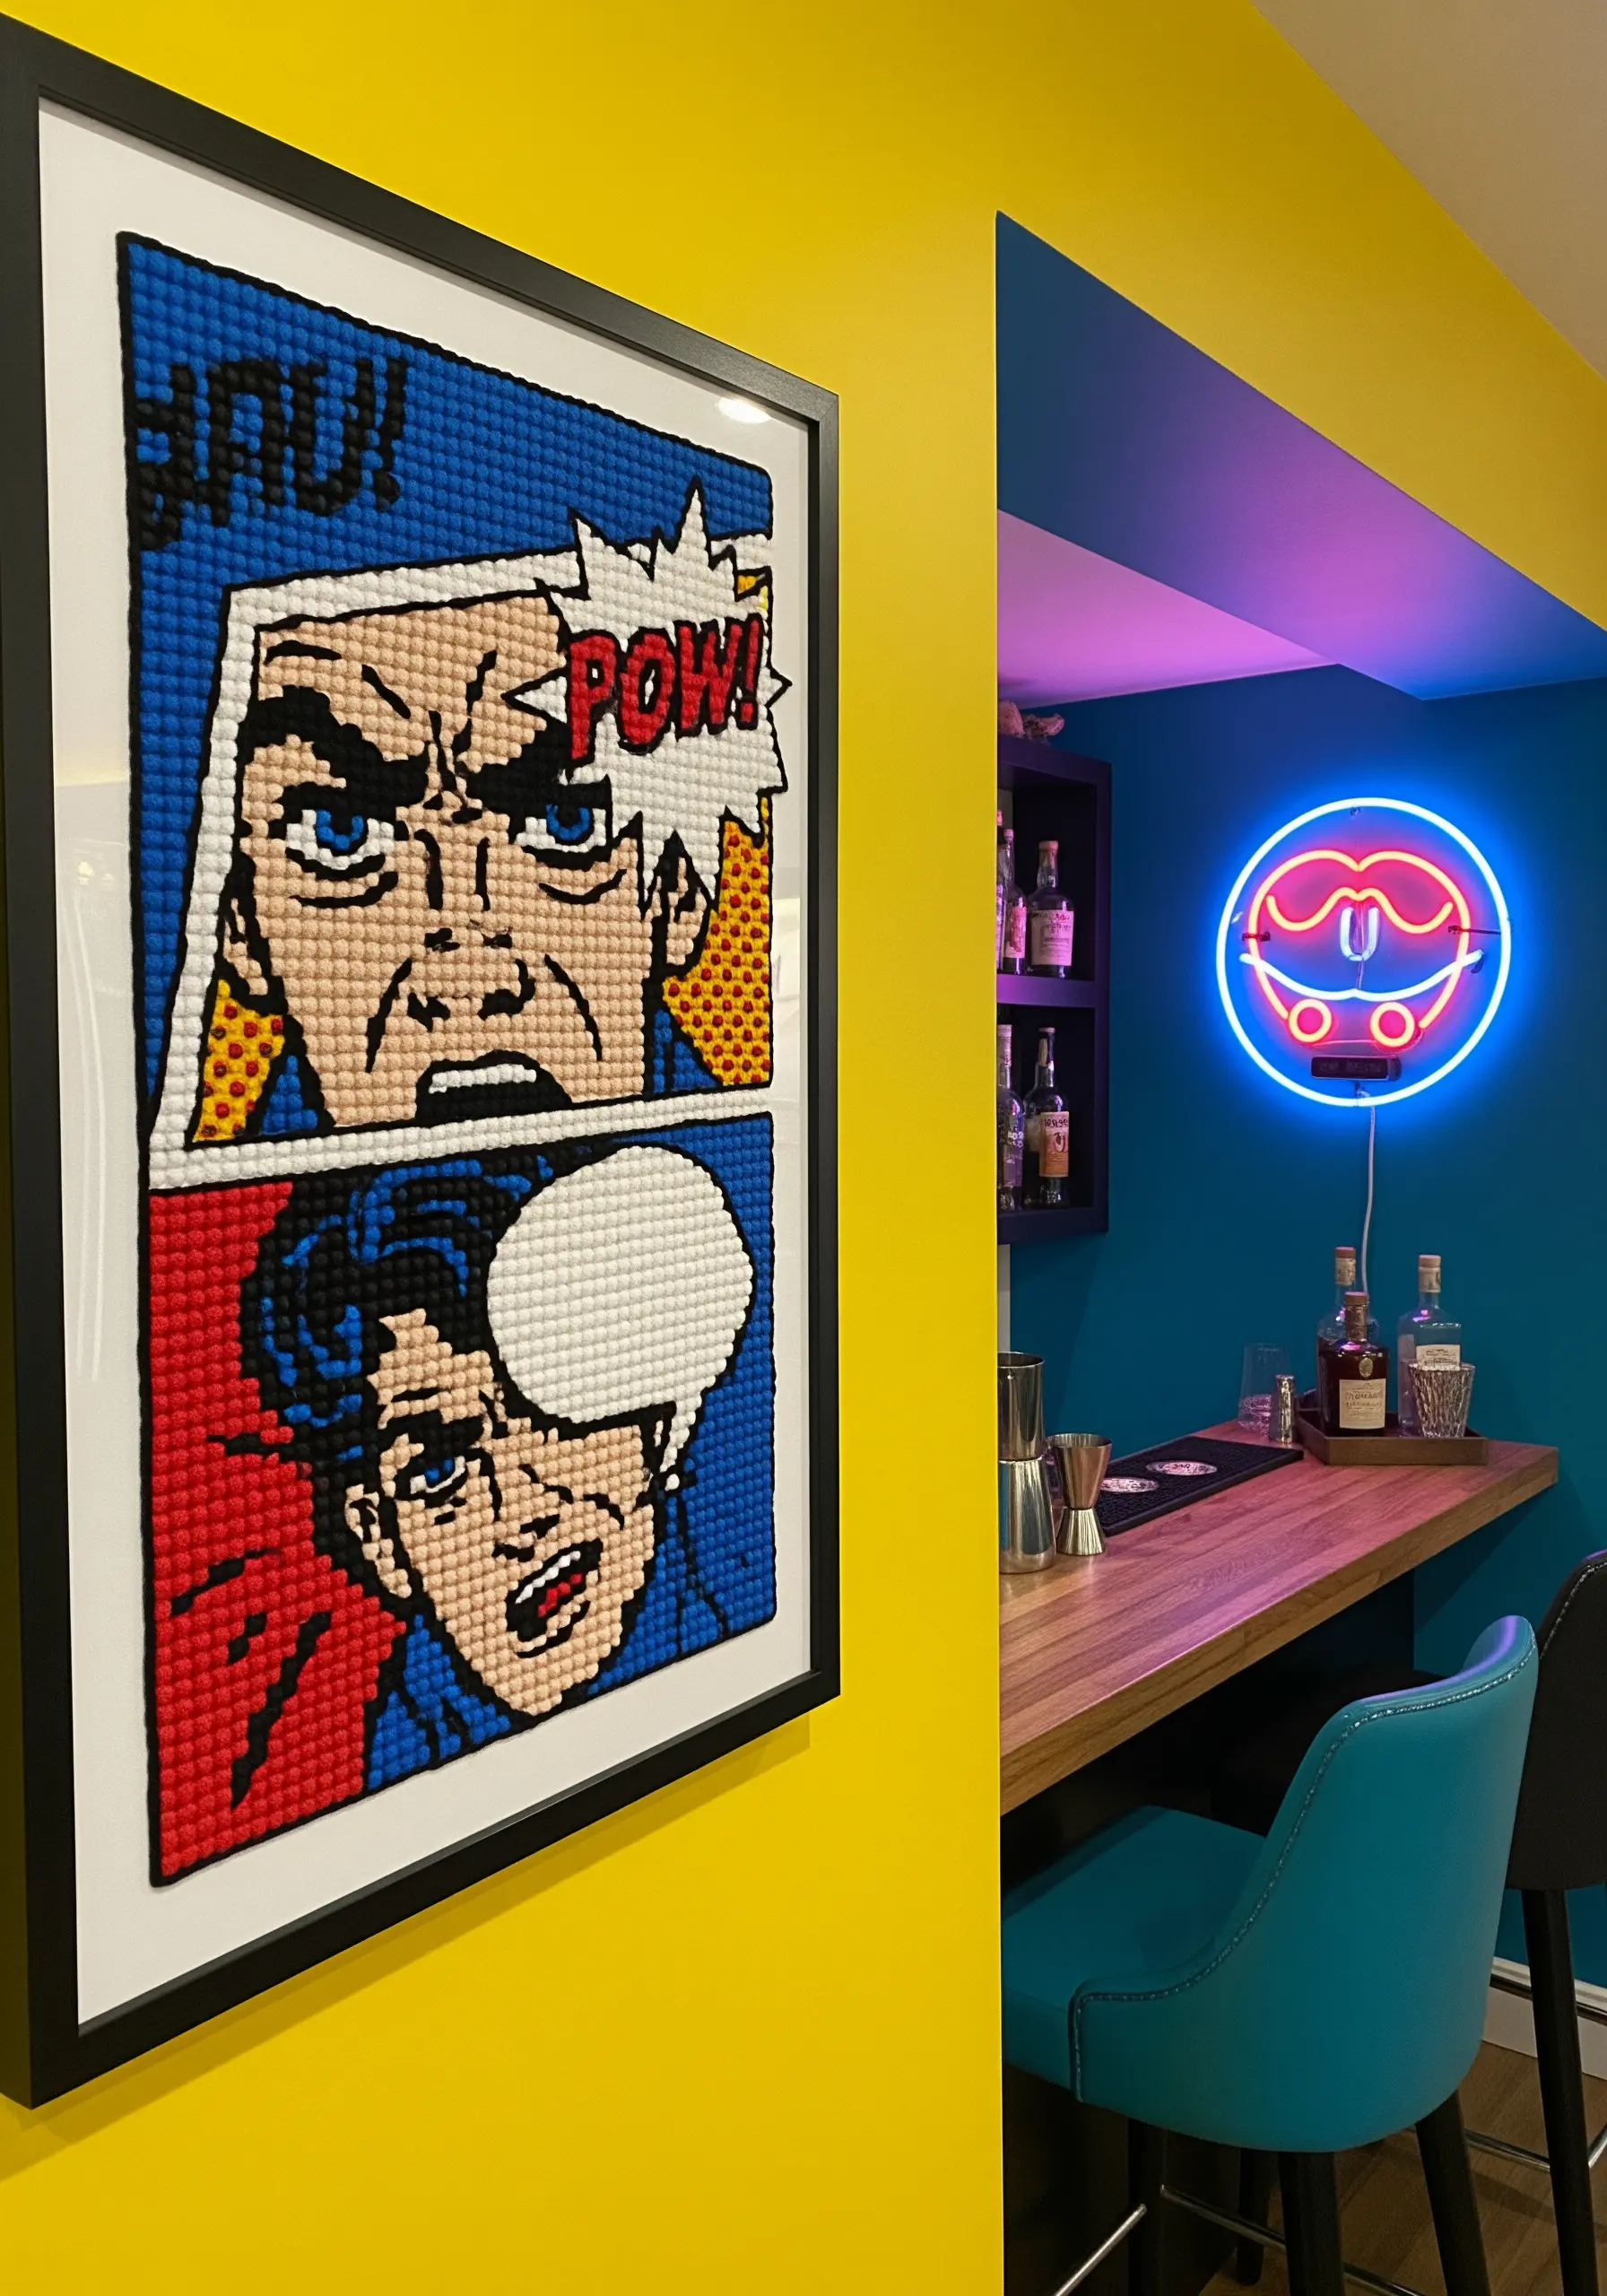
Recreate the bold, graphic style of comic book art by translating its key elements into thread.
Use a dense grid of French knots to mimic the Ben-Day dots used for shading in classic comics. This adds amazing texture and a playful, pixelated feel.
Outline every shape with a thick, bold line of black satin stitch or chain stitch to create that iconic, heavy ink-line look.
Stick to a primary color palette of reds, yellows, and blues to fully capture the vibrant, high-energy Pop Art aesthetic.
19. Rustic Landscapes with Punch Needle Texture
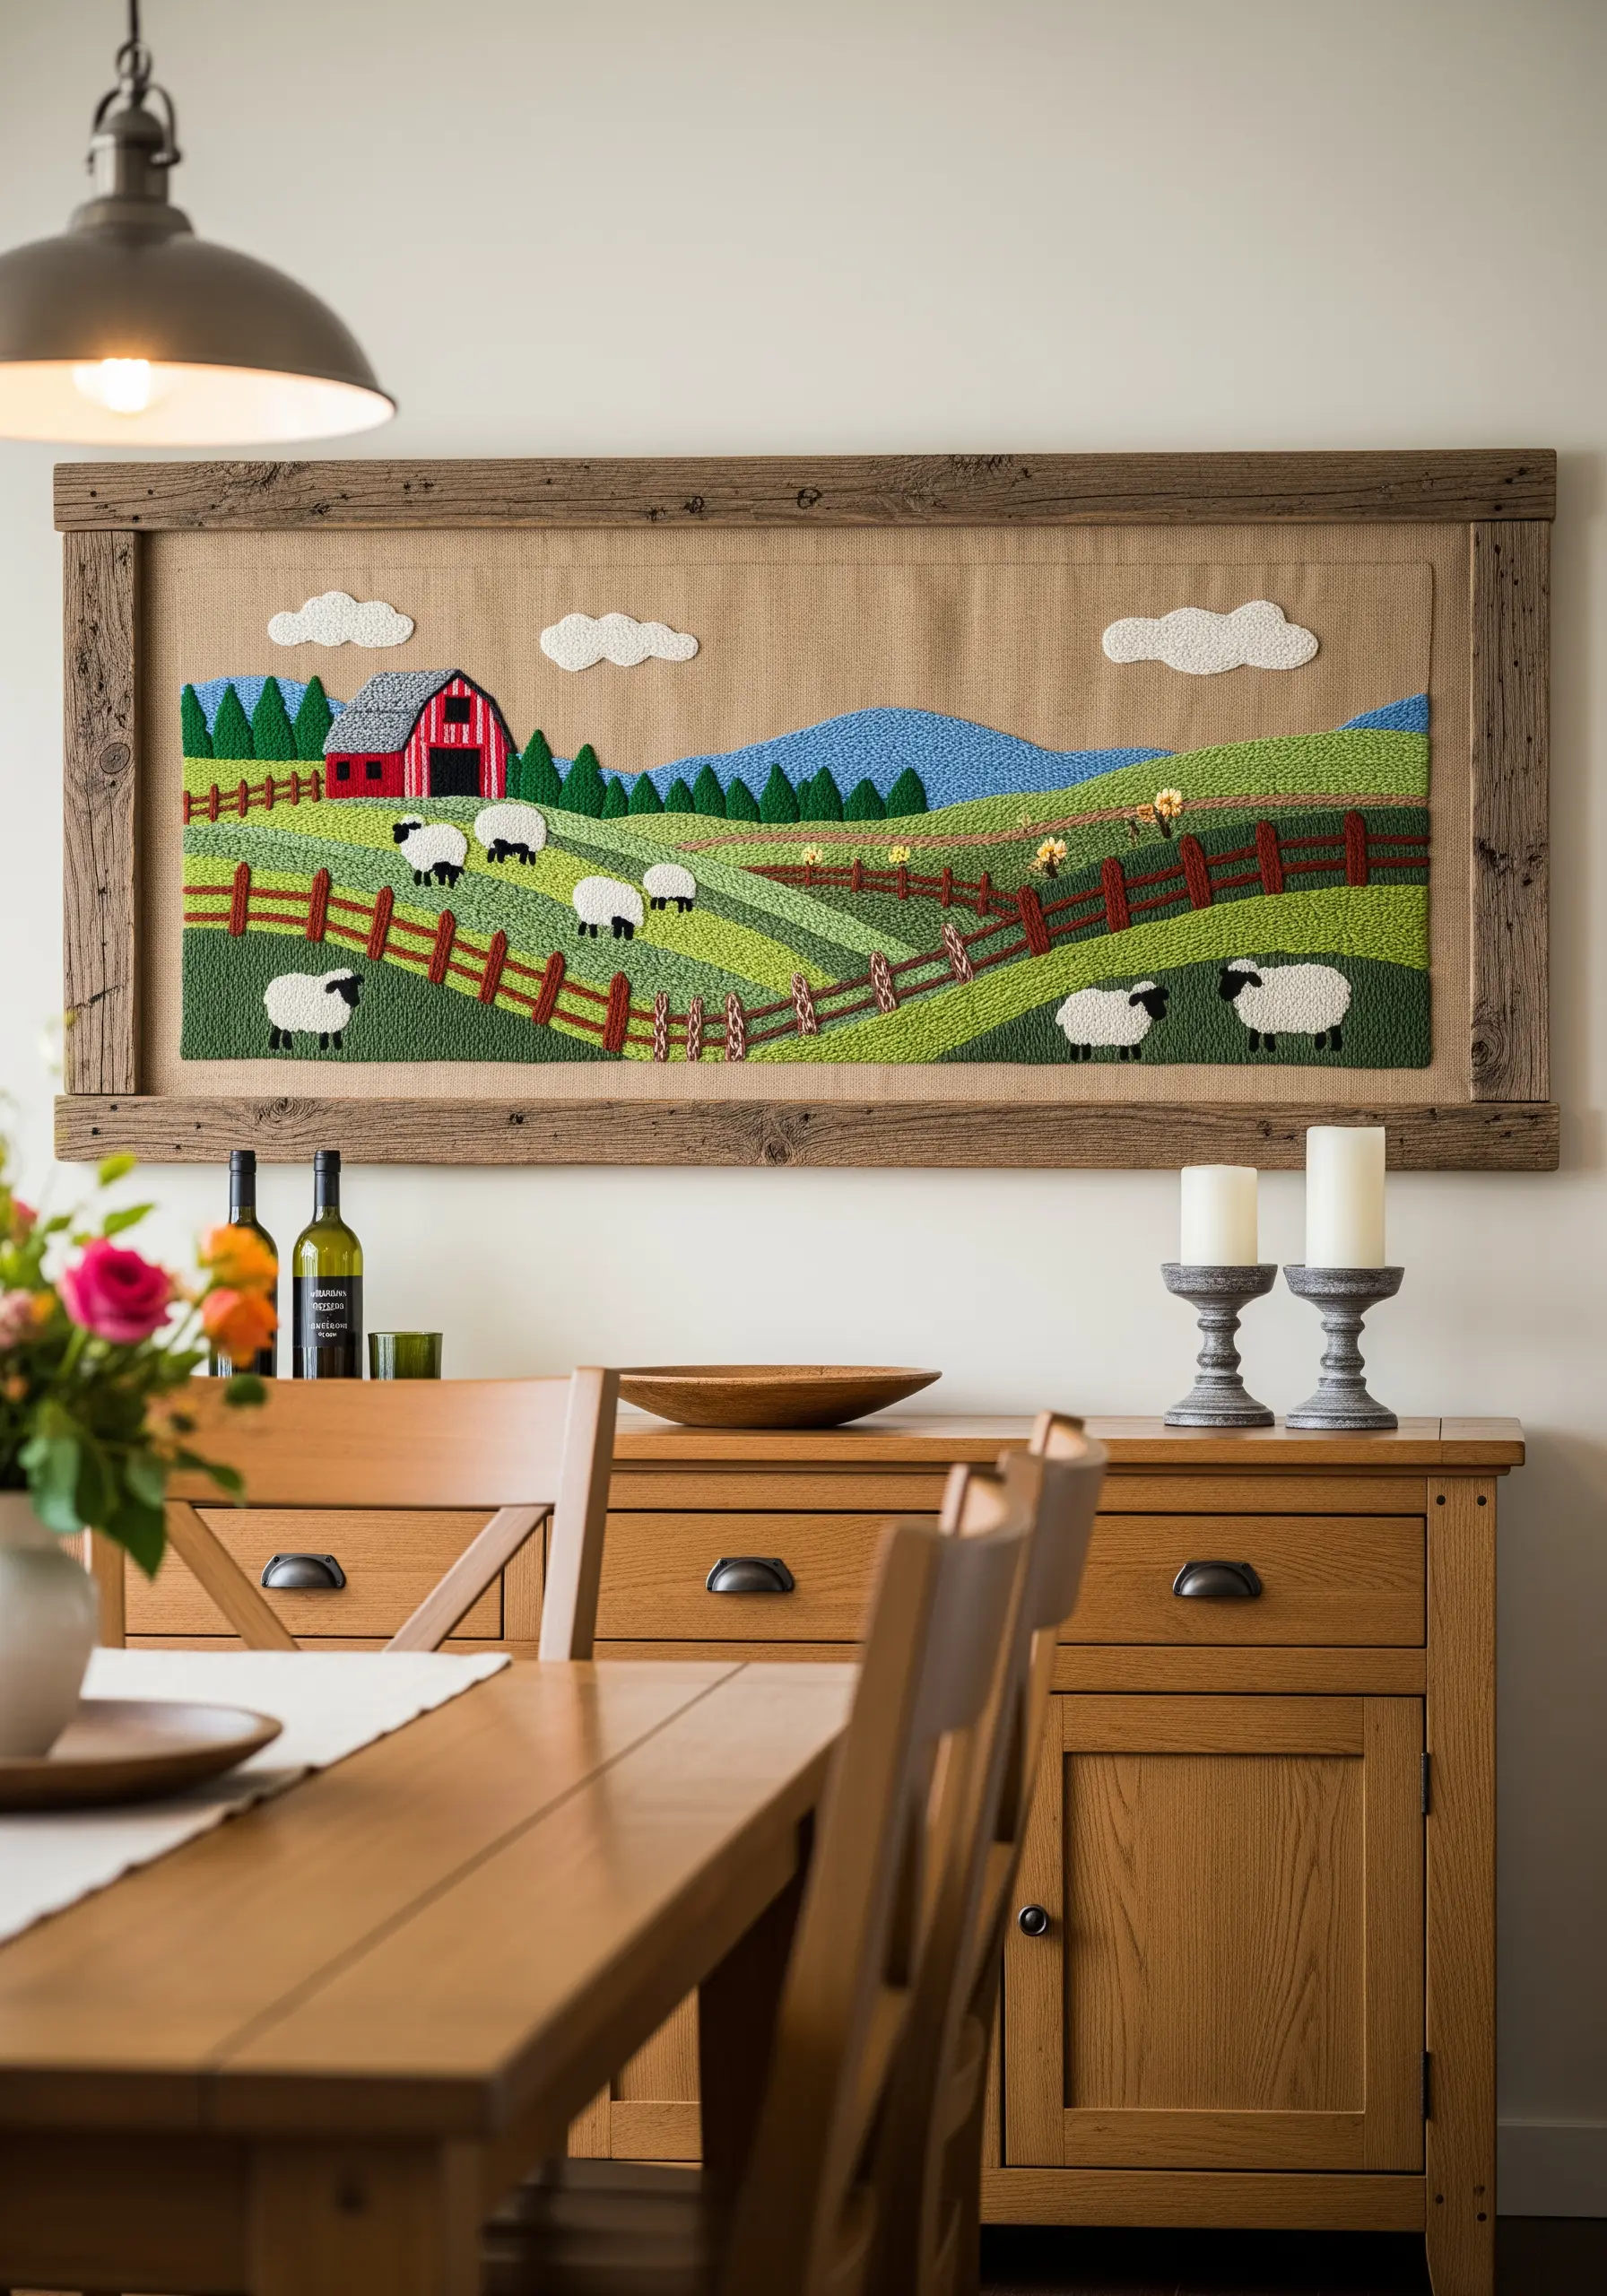
For a cozy, folk-art feel, switch from traditional embroidery to punch needle.
This technique allows you to fill large areas of color quickly, creating a looped texture that is soft and dimensional.
Use chunky yarn instead of floss to enhance the rustic, handmade quality of the piece. The varied loop heights create natural-looking hills and fluffy clouds.
Mounting the finished piece on a rustic wood frame completes the charming, pastoral aesthetic, making it perfect for a country-inspired interior.
These framed embroidery ideas that pair perfectly with rustic interiors offer more inspiration.
20. Intricate Lettering with Blackwork Filling
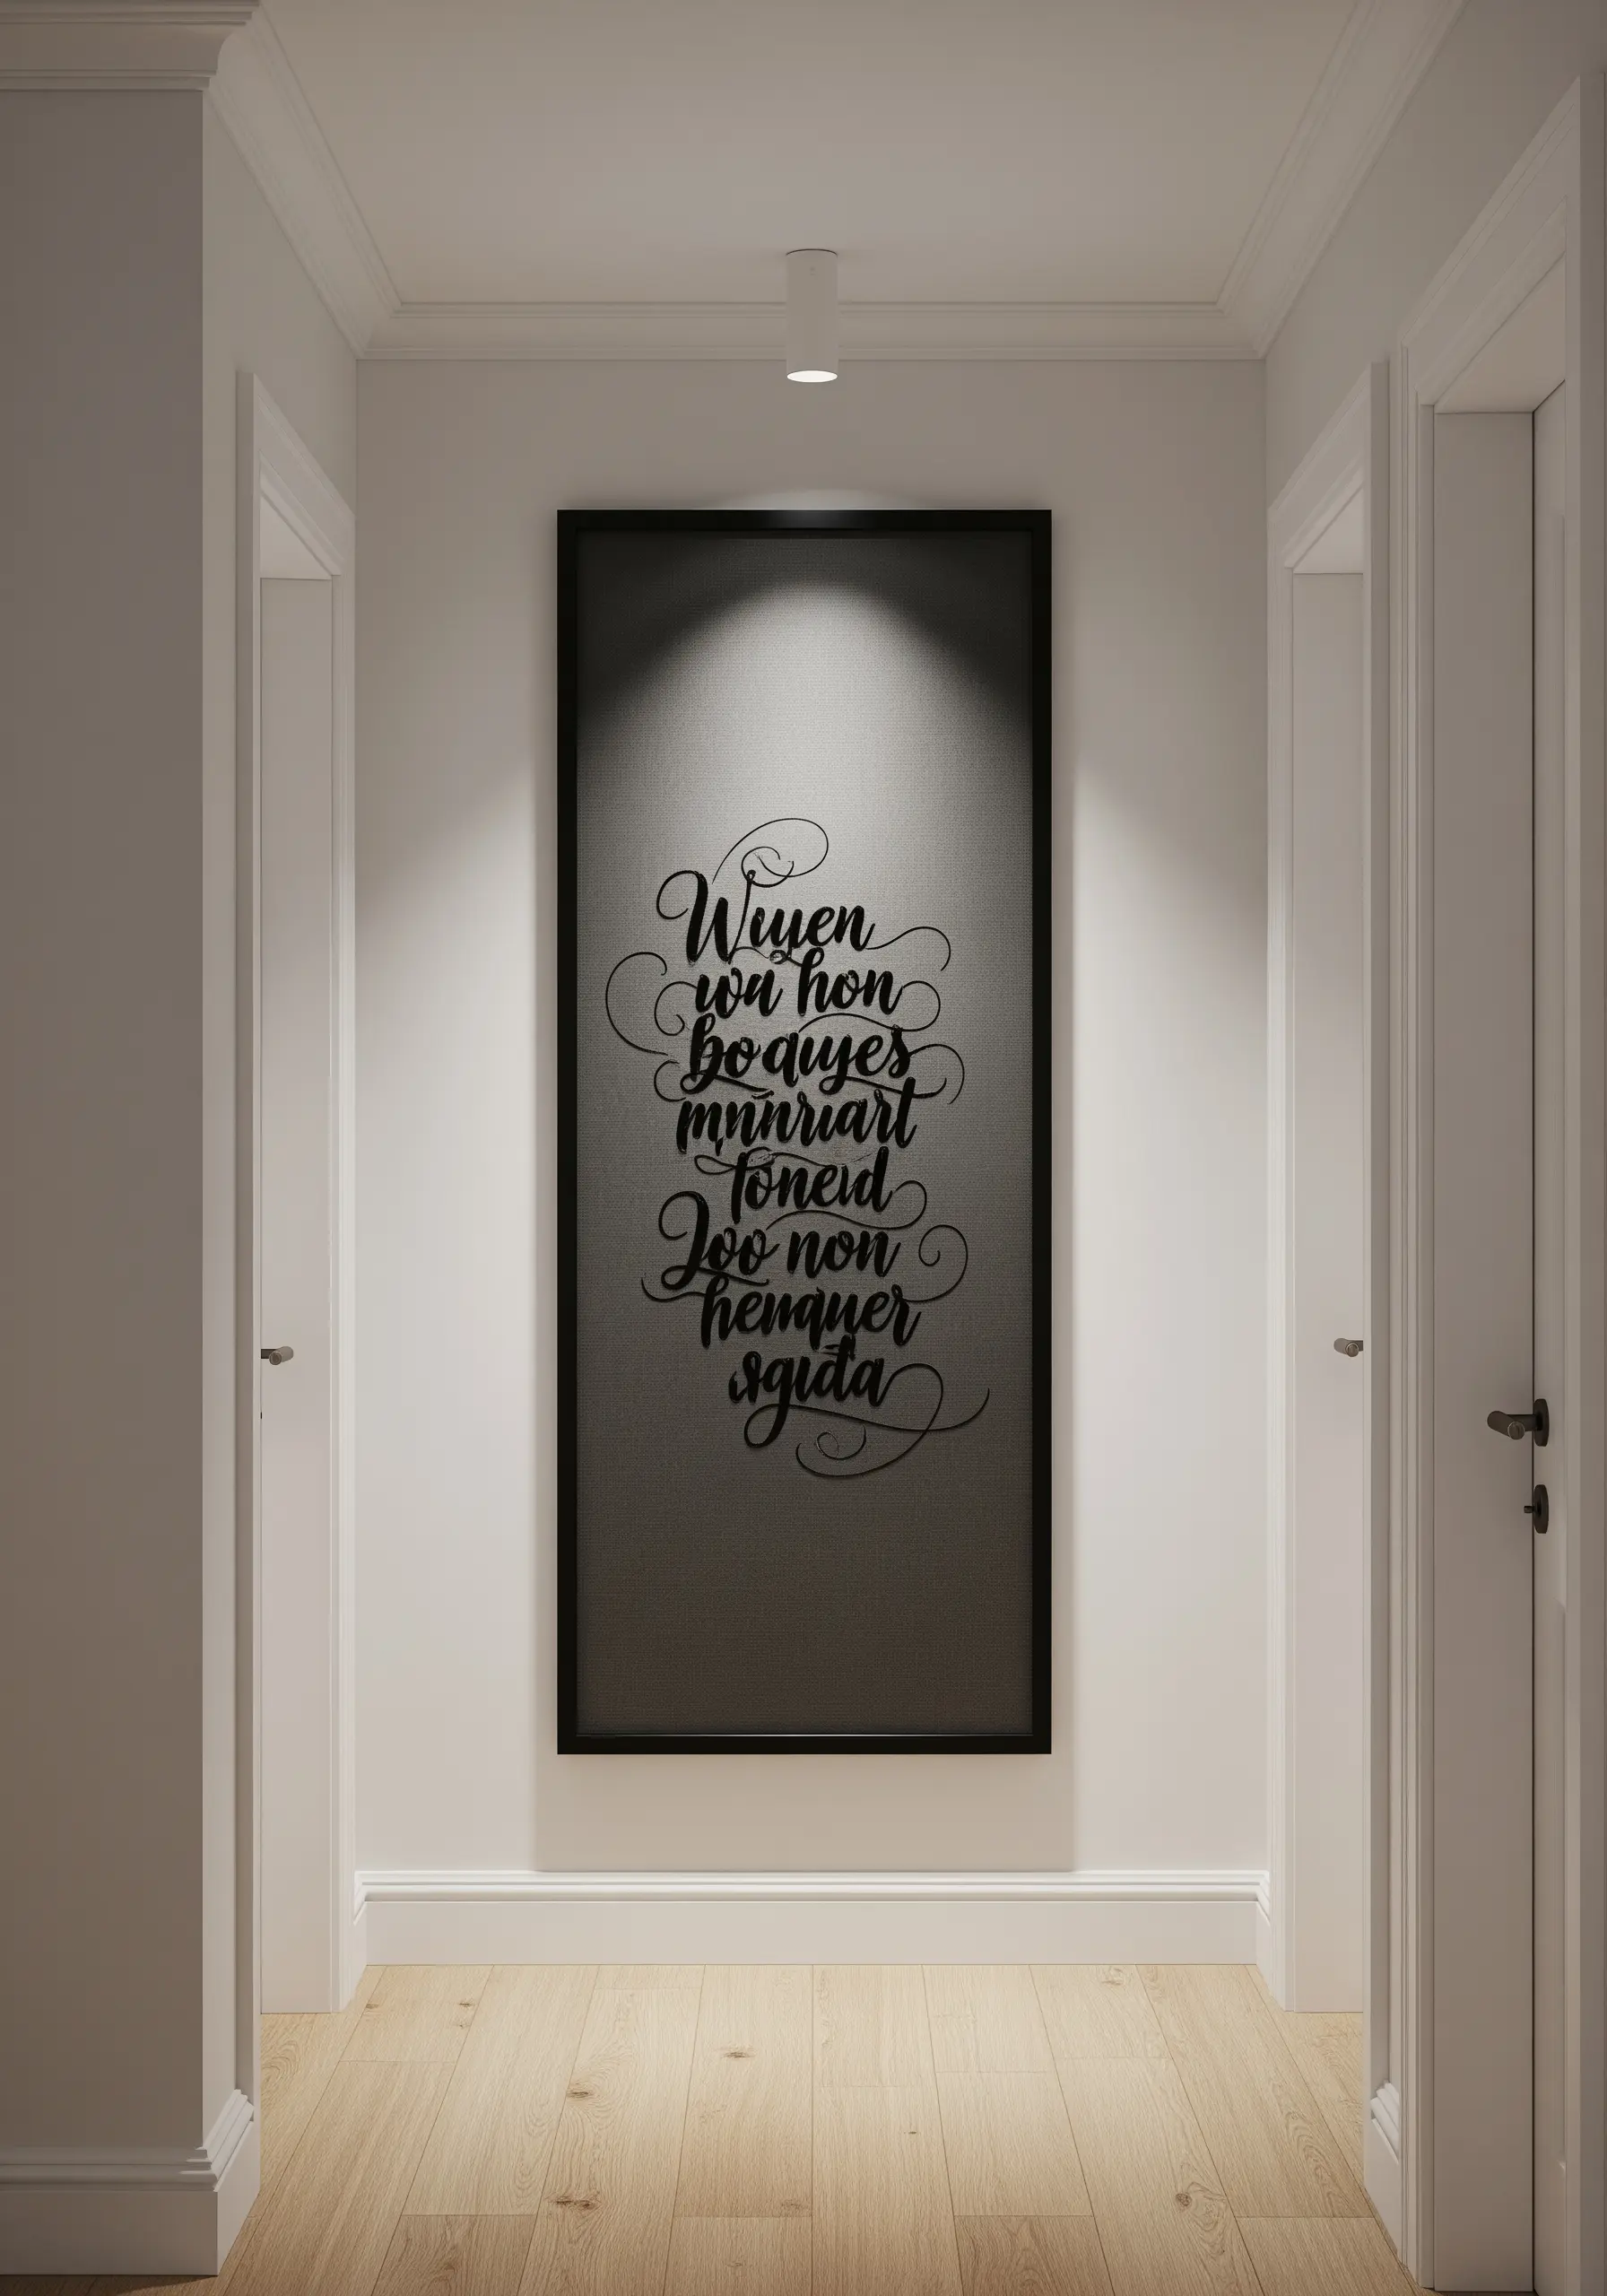
Elevate simple lettering by using blackwork, a form of counted-thread embroidery, to fill the shapes.
First, outline your letters with a simple backstitch. Then, instead of using satin stitch, fill the inside with repeating geometric patterns made of straight stitches.
This technique adds a layer of intricate, subtle detail that draws the viewer closer and transforms the text into a decorative art piece.
It works best on an even-weave fabric like linen, where you can easily count the threads for precise, consistent patterns.
21. Topographical Maps in Contour Stitching
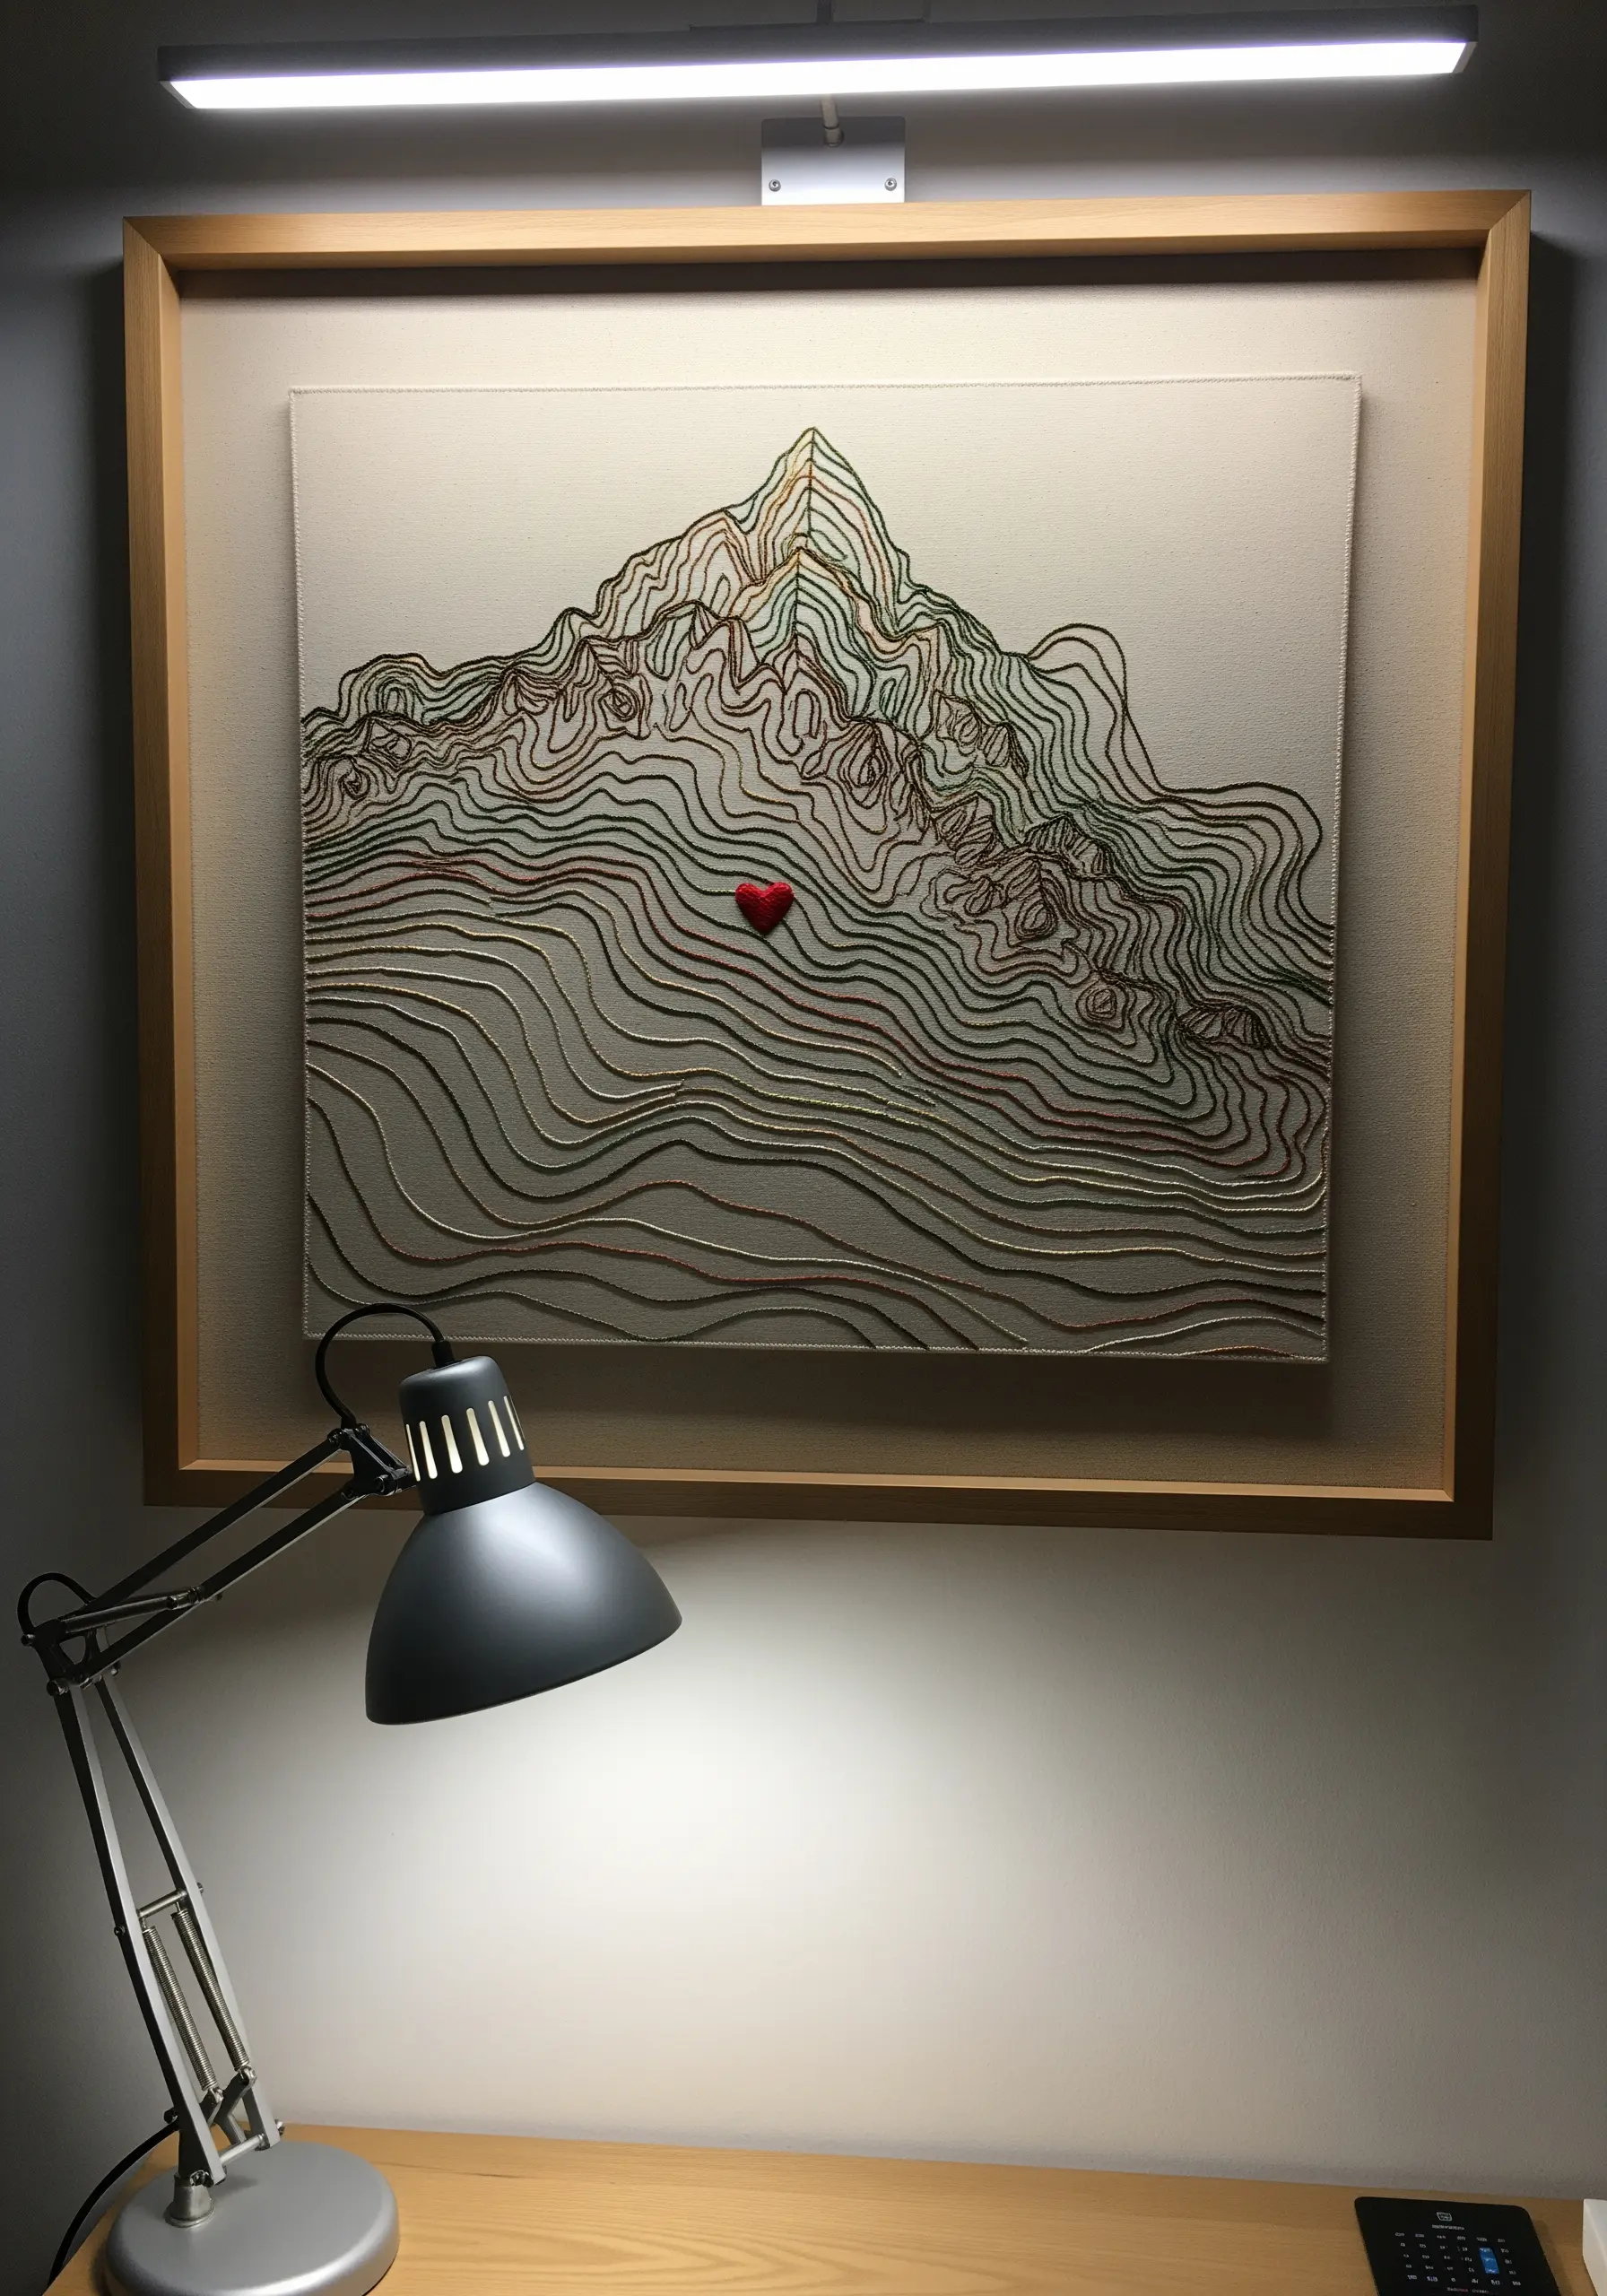
Create a minimalist yet meaningful piece by stitching the contour lines of a favorite landscape.
Use a simple backstitch or stem stitch, varying the color or thread weight to represent changes in elevation or different types of terrain.
The beauty of this style is in its simplicity and the personal story it can tell. Add a tiny, contrasting motif—like a small red heart—to mark a special location.
This technique turns a map into a personal, abstract piece of art that holds a secret meaning.
22. Symmetrical Details for Realistic Butterflies
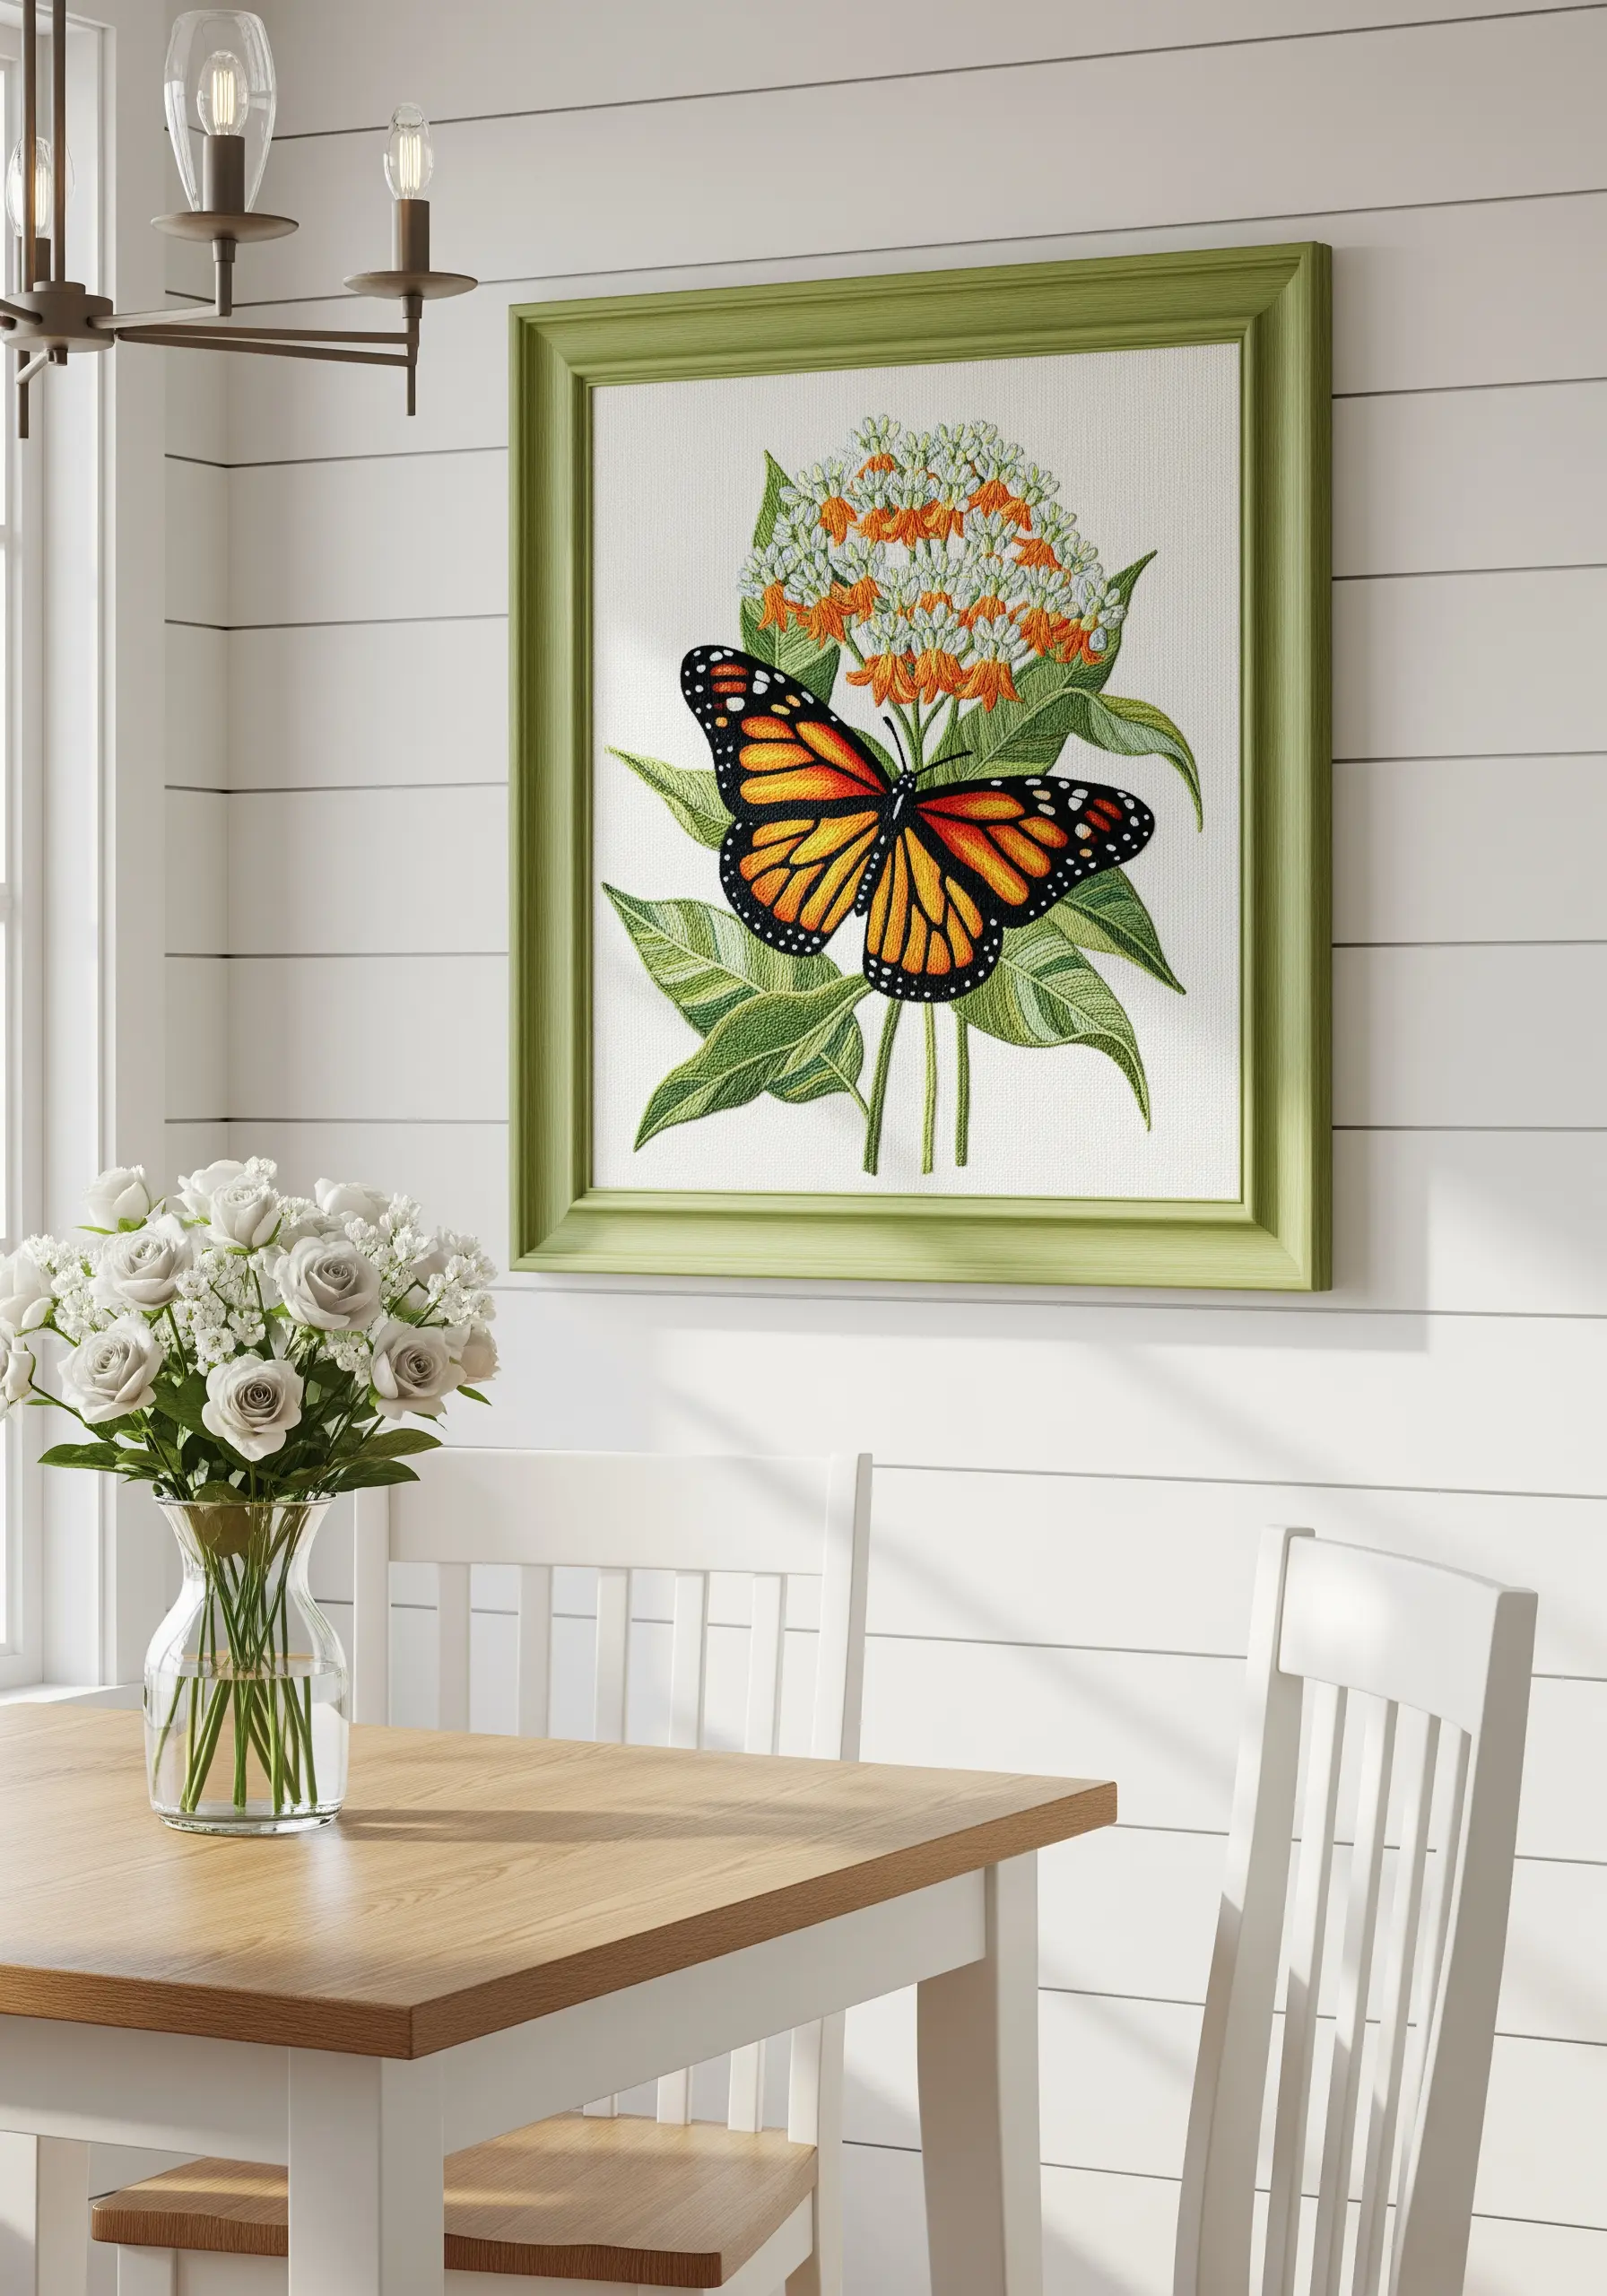
When stitching subjects like butterflies, precision and symmetry are paramount for a realistic result.
Lightly draw a central line down the body and mirror your stitches and color blocks on each side. Work on both wings simultaneously to ensure they match.
Use a fine split stitch for the delicate black outlines on the wings and a smooth, directional satin stitch for the vibrant color panels.
This careful, methodical approach is what makes the butterfly look balanced and lifelike rather than cartoonish.
23. Three-Dimensional Fashion with Appliqué and Beads
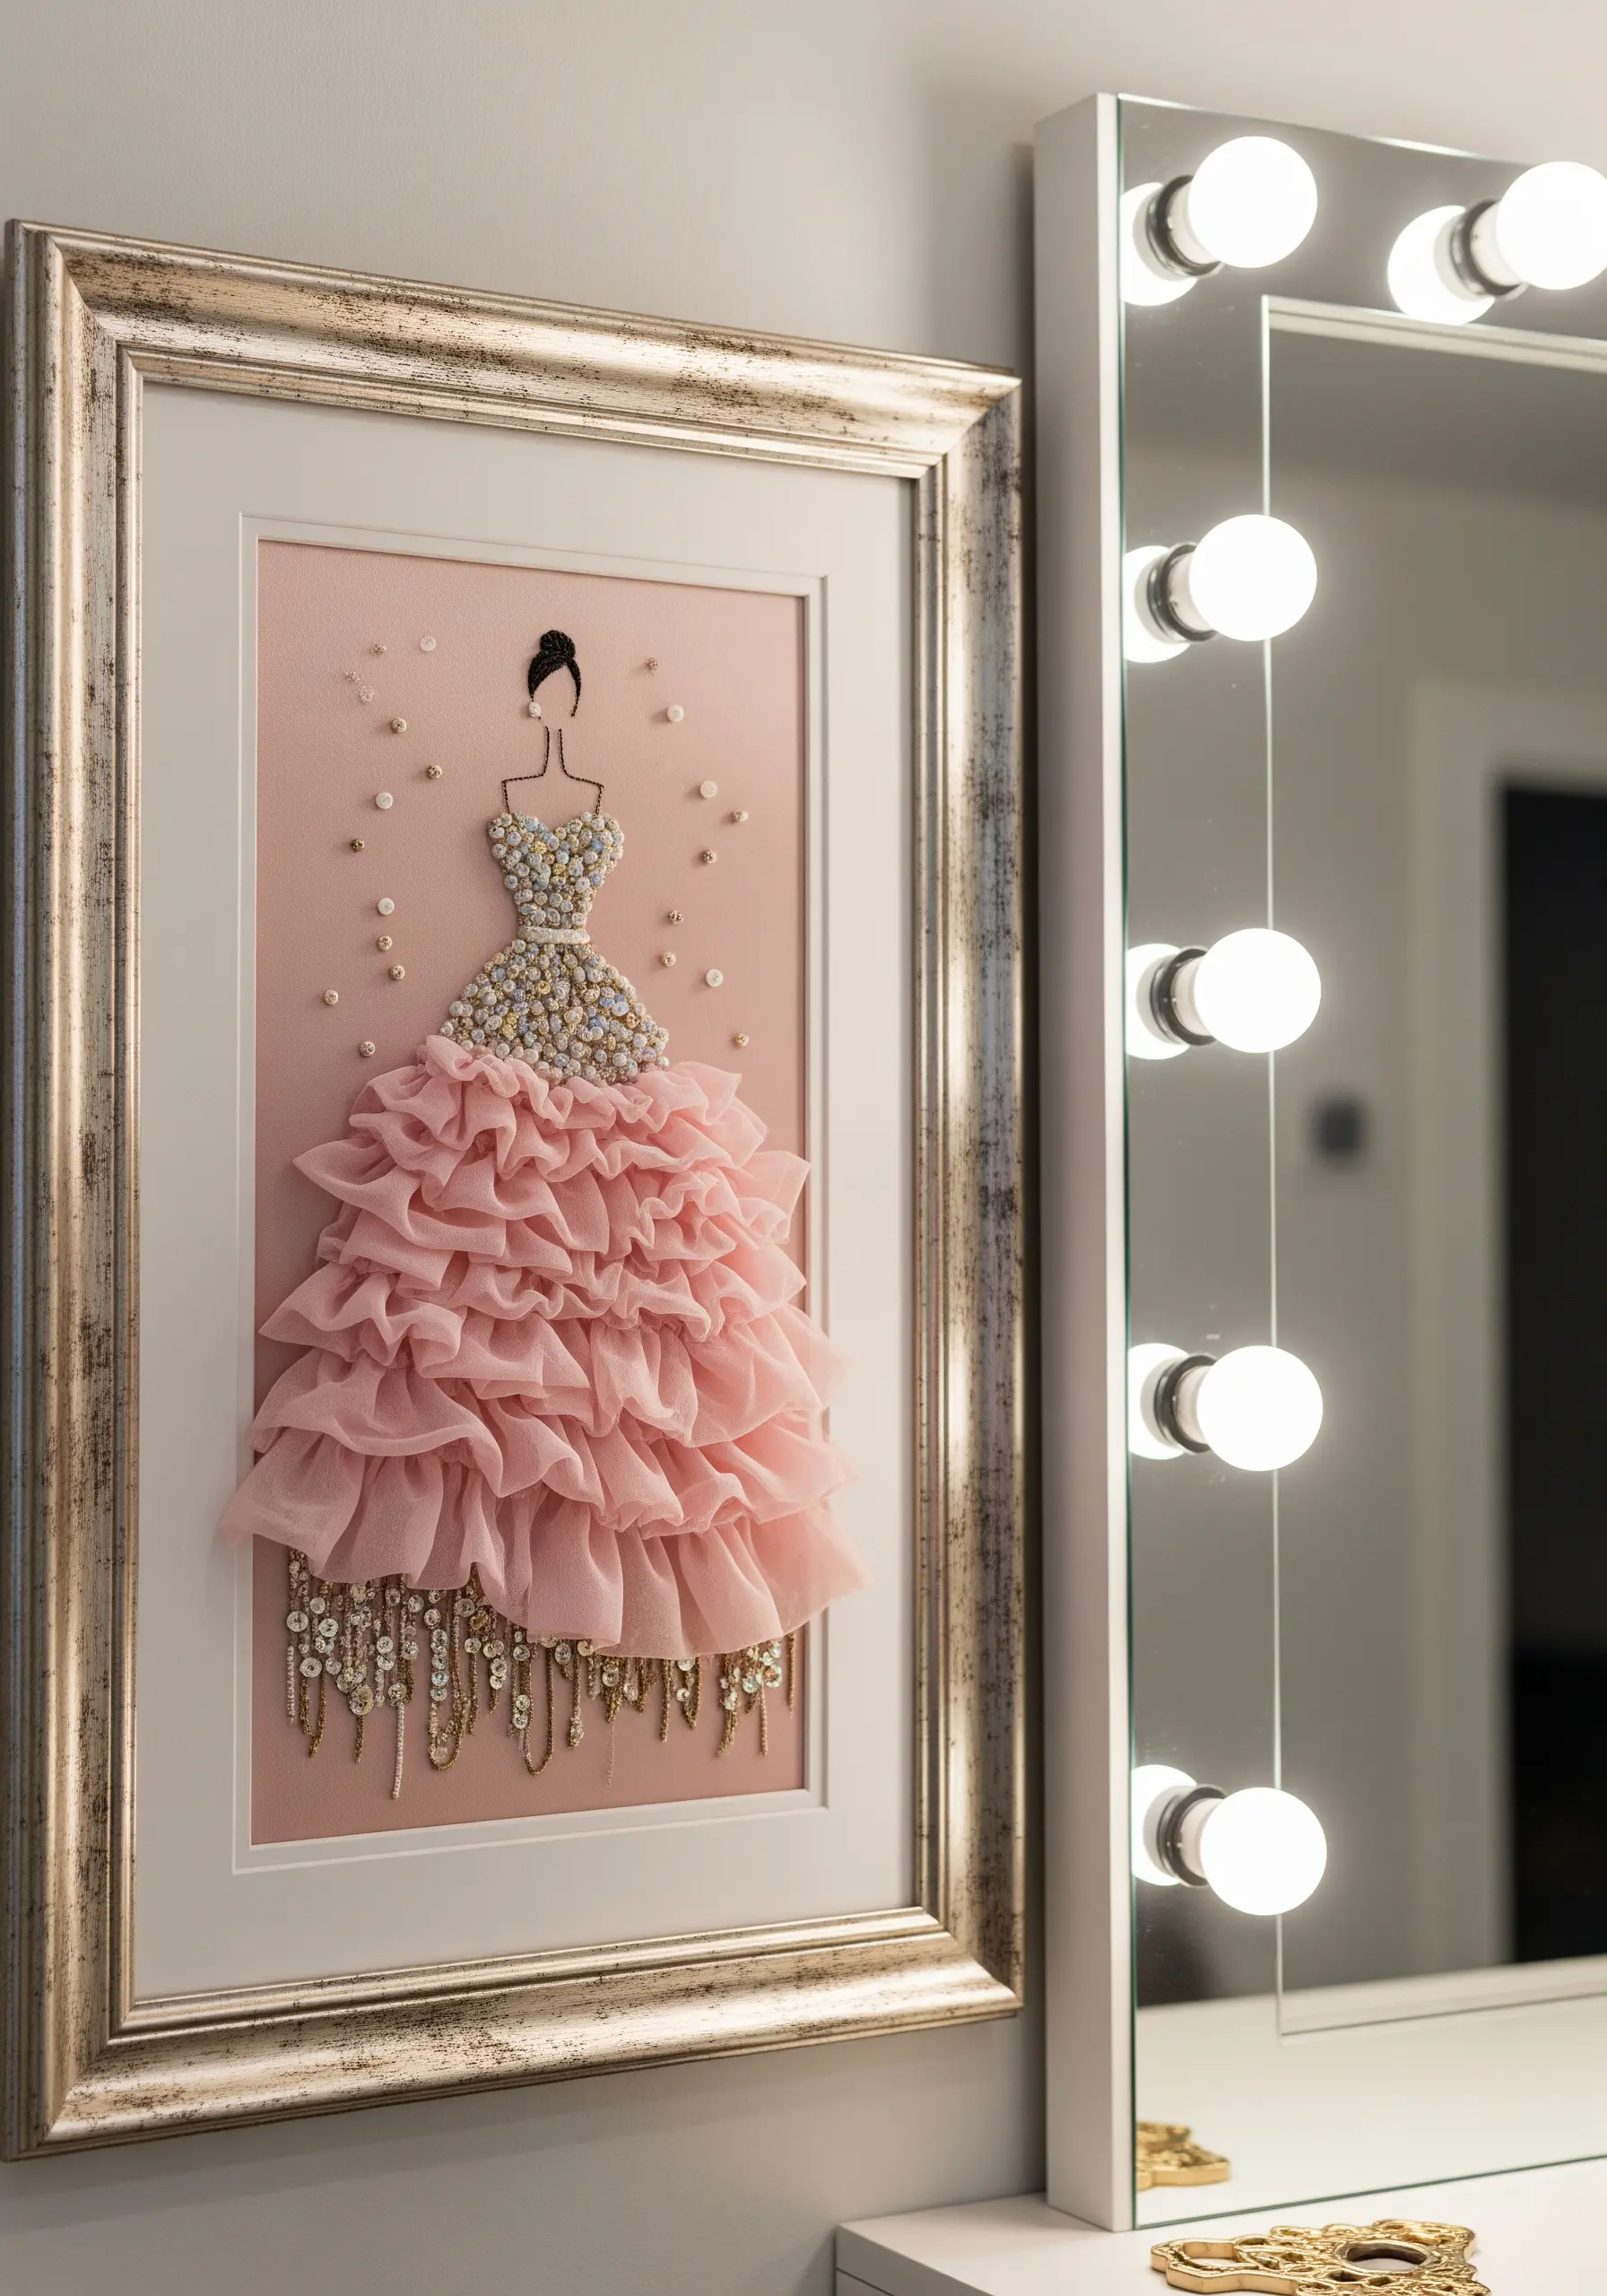
Combine embroidery with mixed-media elements to bring fashion illustrations to life.
For the ruffled skirt, gather and stitch down strips of soft chiffon or organza directly onto the background fabric. This creates volume and movement that thread alone cannot achieve.
Embellish the bodice and hemline with a dense application of beads, pearls, and sequins to mimic intricate beadwork and add a touch of glamour.
The embroidery itself—a simple outline for the figure—becomes the foundation for these more sculptural, tactile additions.
Try one of these DIY mixed-media embroidery projects for a quick, creative session.
24. Meditative Mandalas with Symmetrical Stitches
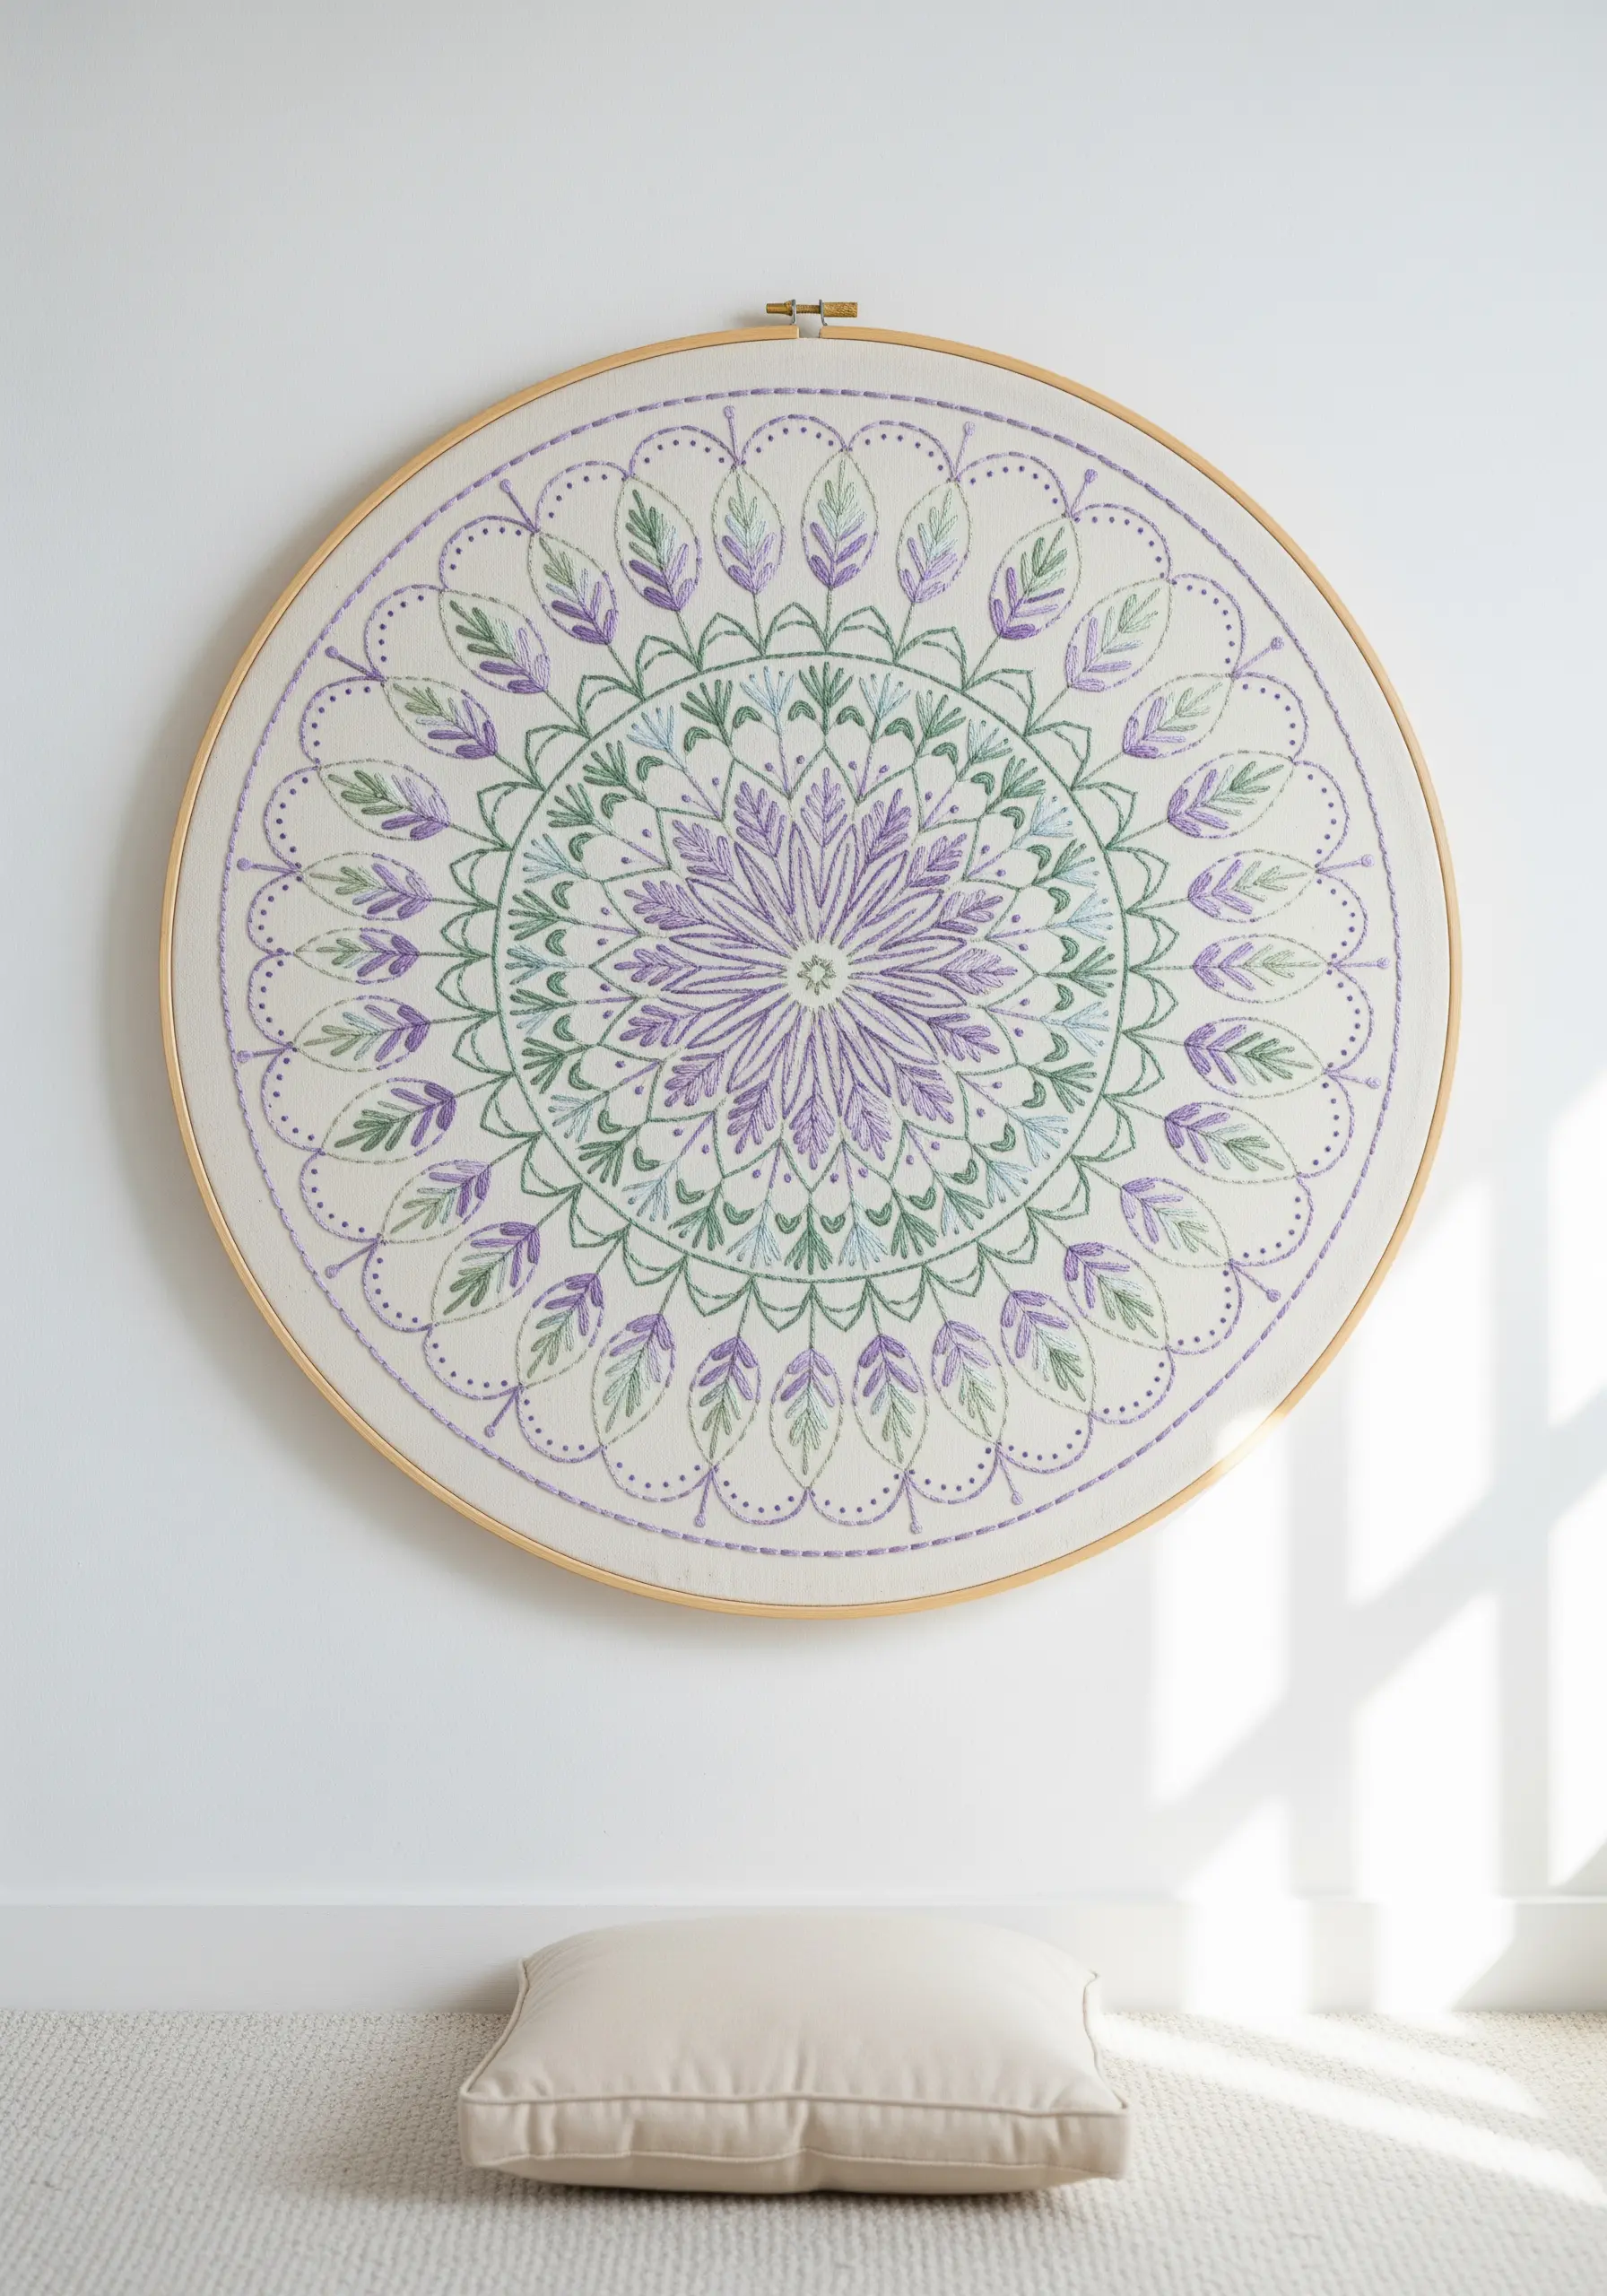
Find a calm, focused rhythm by stitching a mandala, where the beauty lies in symmetry and repetition.
Start from the center and work your way outwards, completing each ring of the pattern before moving to the next. This ensures your design remains balanced.
Use a limited, harmonious color palette to maintain a sense of peace and serenity. A simple vocabulary of stitches—like satin stitch, lazy daisy, and French knots—is all you need.
The process of creating the mandala is as important as the final result, offering a mindful and relaxing stitching experience.
25. Psychedelic Color with Variegated Threads
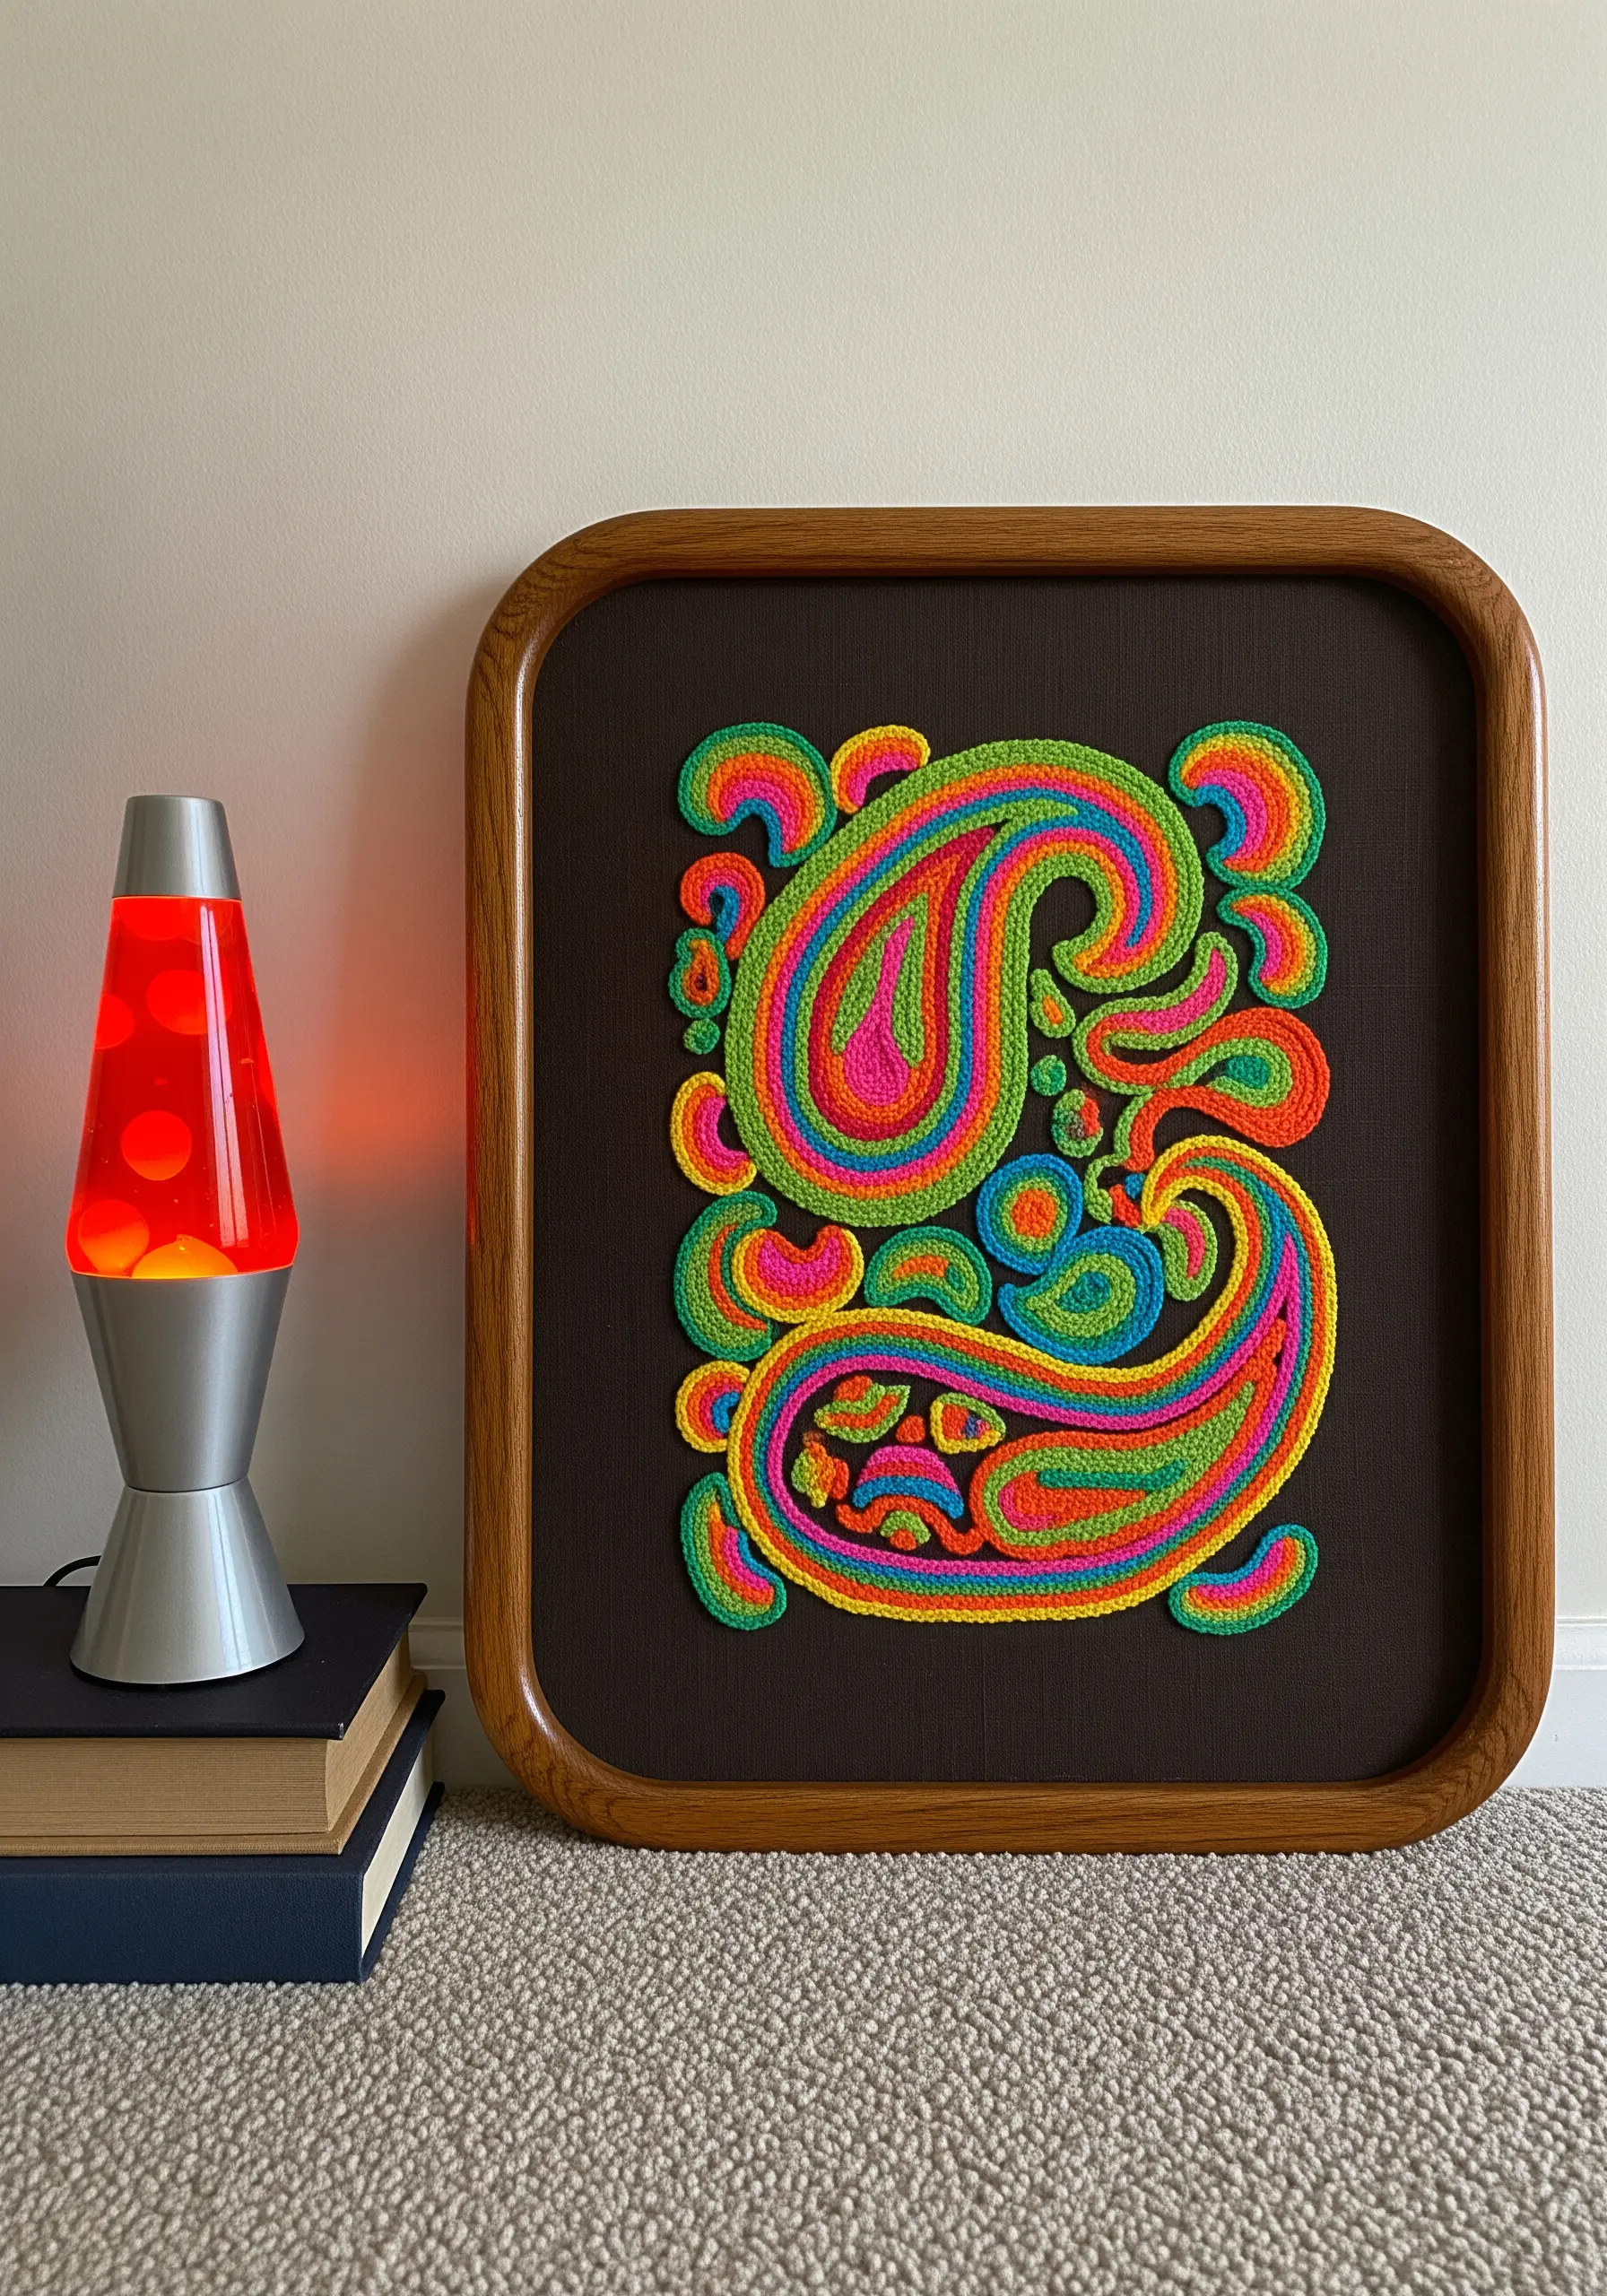
Create vibrant, flowing color transitions with minimal effort by using variegated or space-dyed embroidery floss.
As you stitch, the color will change on its own, producing beautiful gradients and surprising patterns within your shapes.
To make these shifting colors stand out, outline each section of your paisley design with a bold, solid color like black, using a thick chain stitch.
Stitching on a dark, solid background fabric will make the psychedelic colors pop even more, creating a dynamic, energetic piece.
26. Abstract Expressionism with Free-Form Thread
Explore pure abstraction by abandoning traditional stitches altogether.
Instead of creating controlled lines and shapes, allow your thread to tangle, loop, and build up in a free-form manner. Tack down the chaotic mass of thread with small, discreet couching stitches.
This technique is all about texture, color, and gesture. Create a series of these thread sculptures in bold, primary colors and frame them with plenty of white space to let each color breathe.
This turns thread into a sculptural medium, creating a piece that is expressive and entirely unique.
Find more inspiration in these abstract mixed-media embroidery ideas.
27. Visualizing Sound with Vertical Satin Stitch
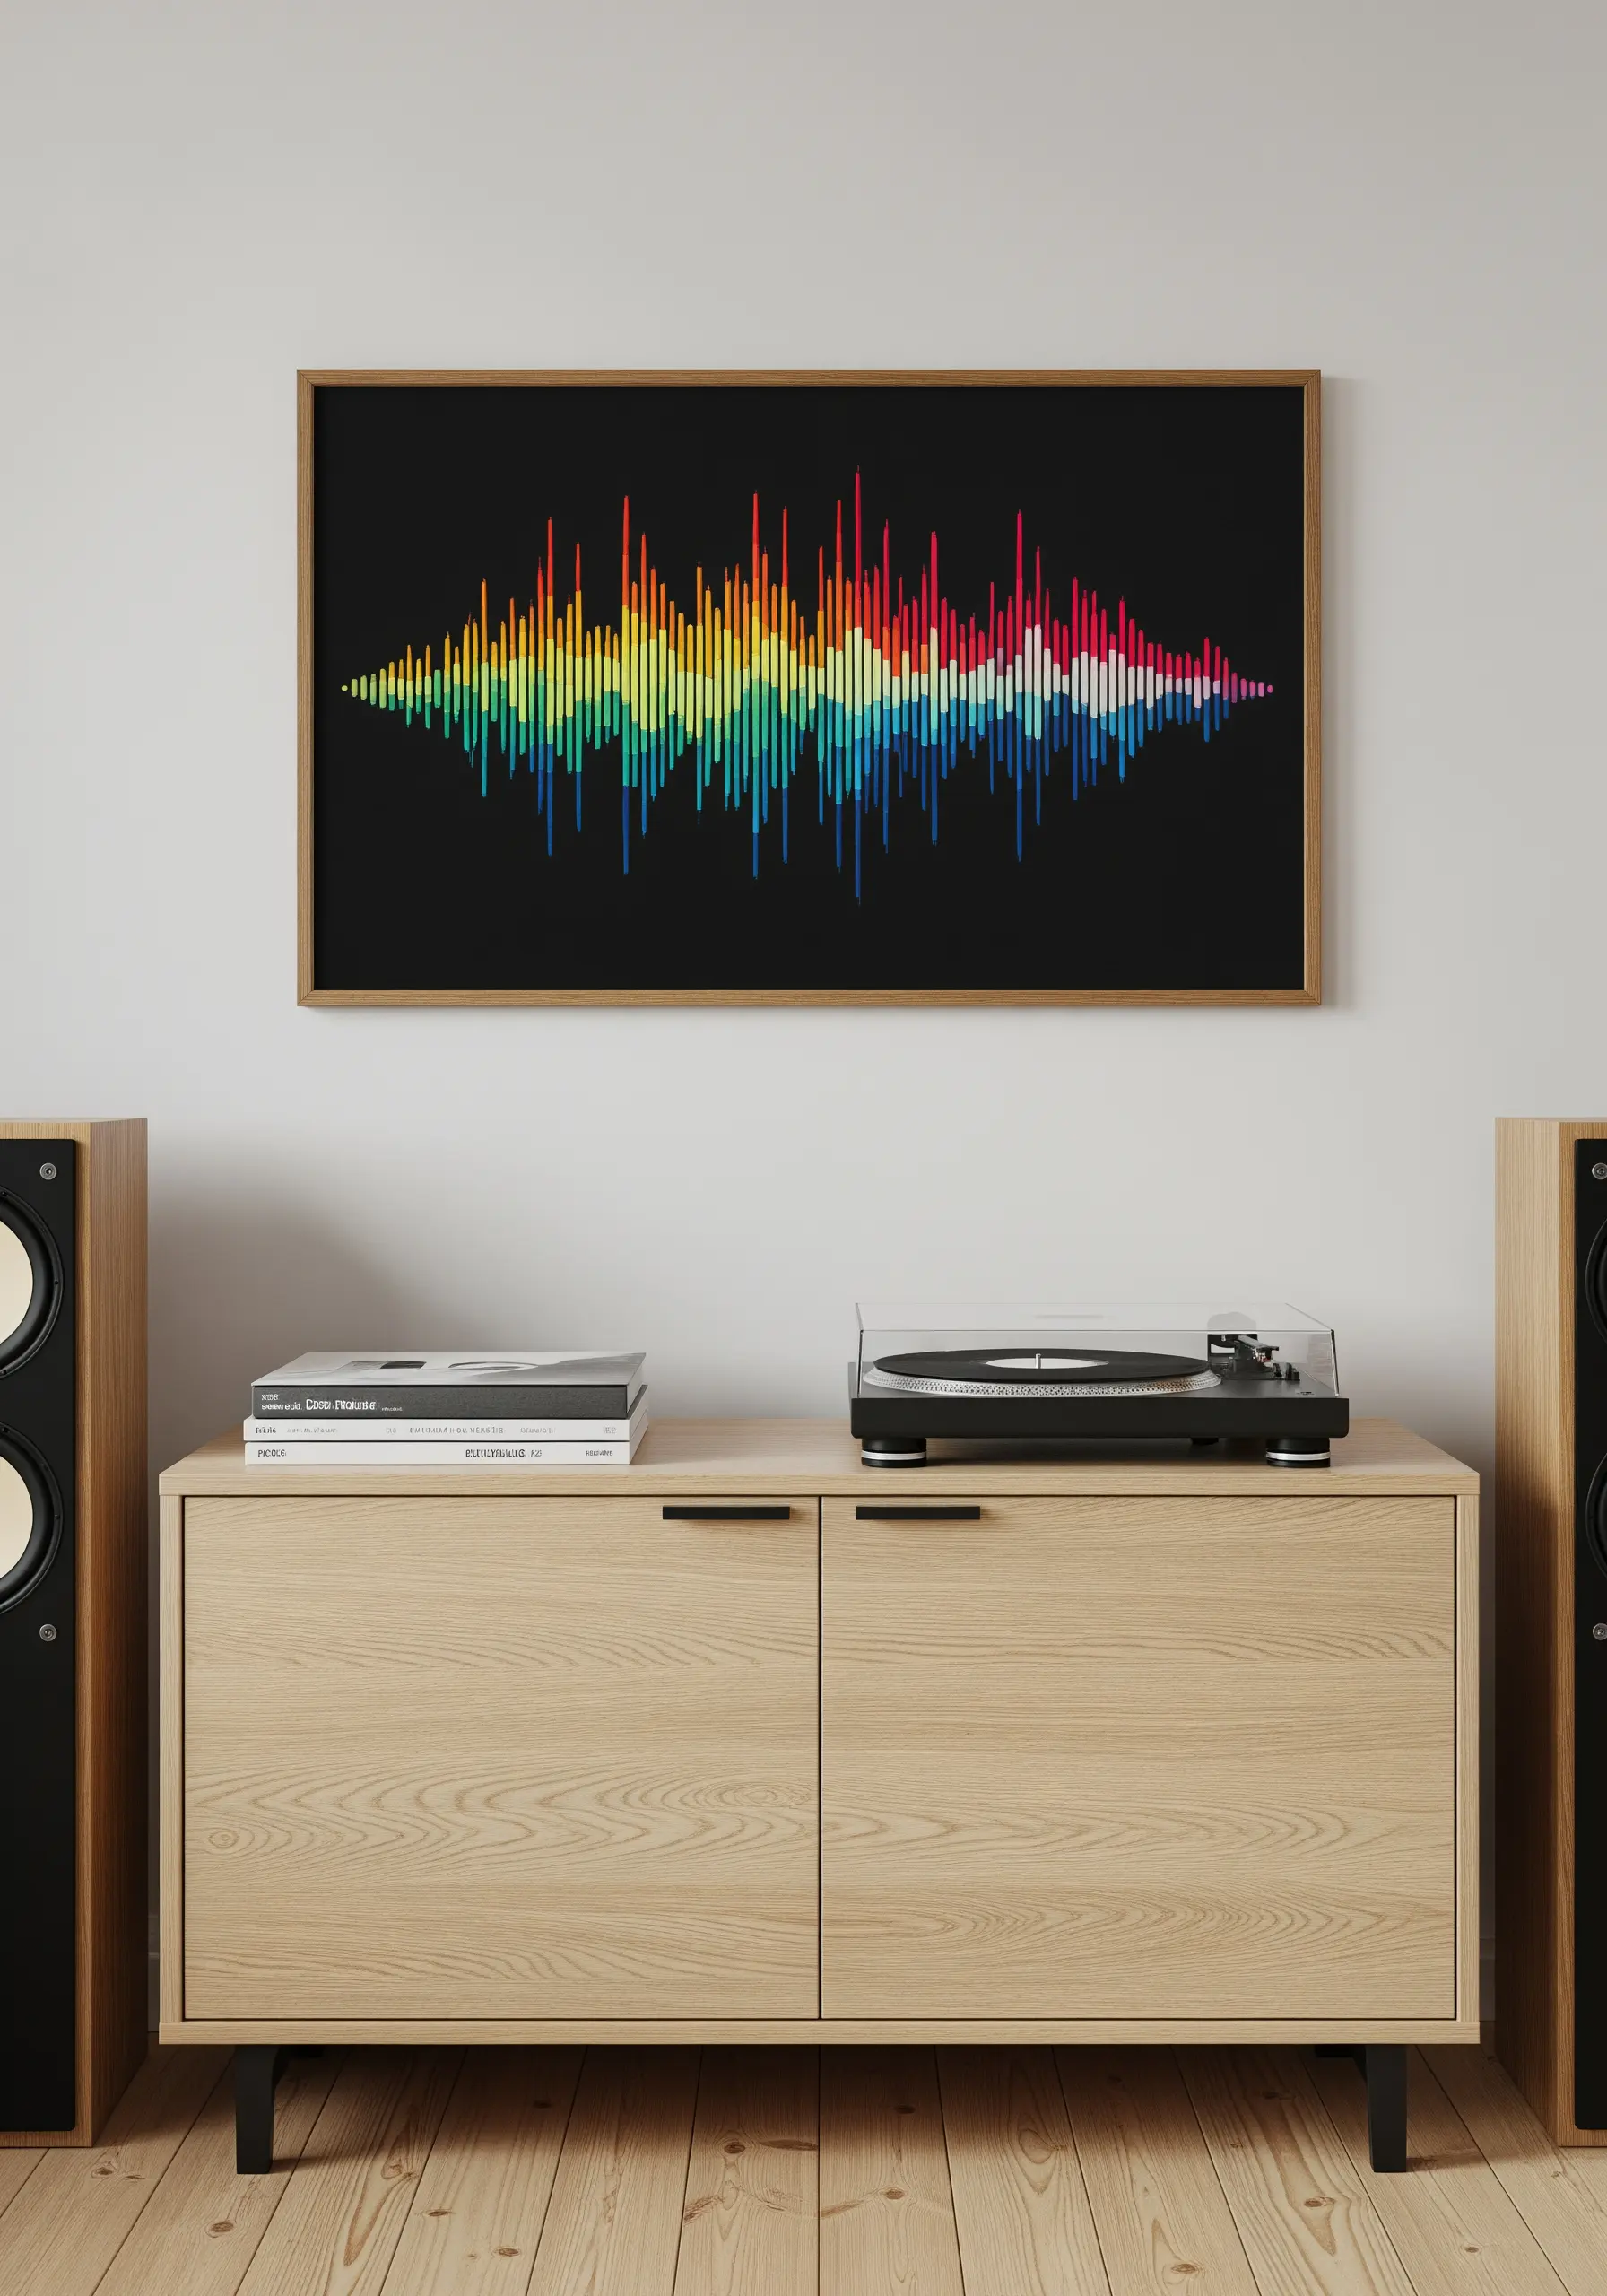
Turn a favorite song, a name, or a meaningful phrase into a unique piece of visual art by stitching its soundwave.
Use an online generator to create an image of the soundwave, then translate it into vertical satin stitches.
The height of each stitch corresponds to the amplitude of the wave. Using a rainbow of colors against a stark black background creates a vibrant, graphic effect.
This is a powerful way to create a deeply personal piece of art that is both abstract and full of hidden meaning.
28. Graphic Mazes with Voided Stitching
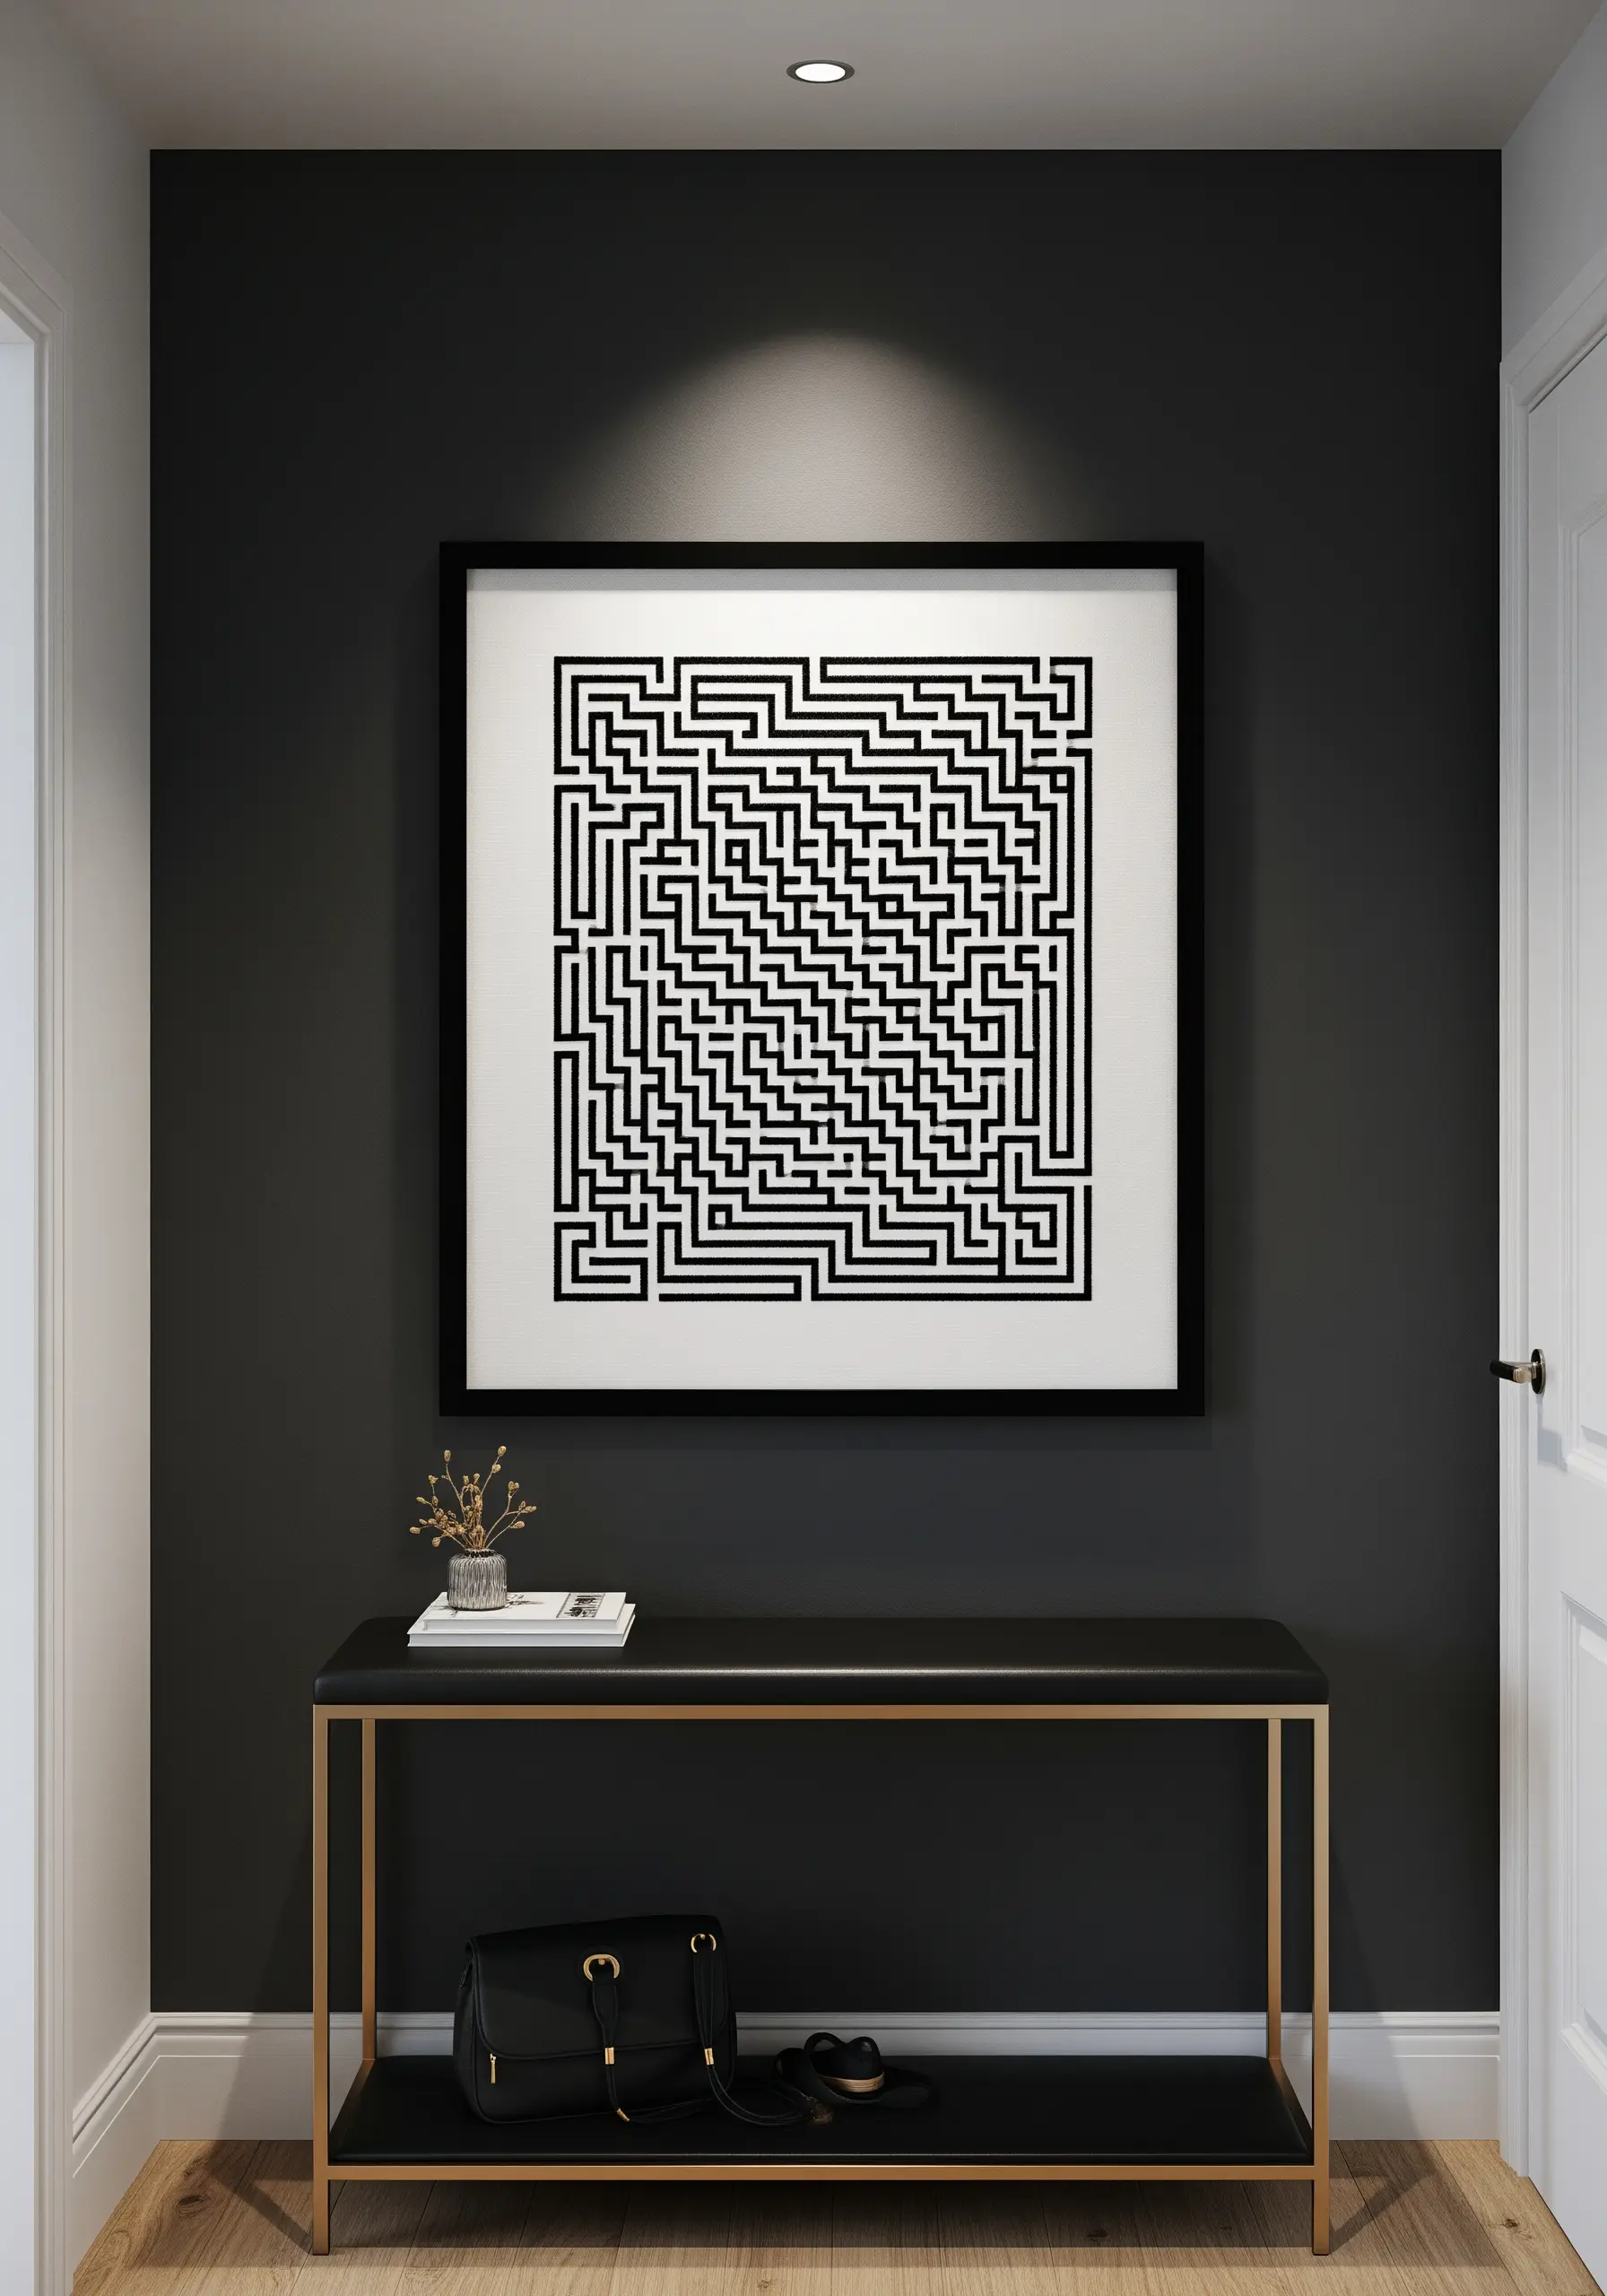
For a crisp, high-contrast geometric design like a maze, consider stitching the negative space instead of the lines themselves.
This technique, known as voided work, involves filling the entire background with a dense stitch (like black satin stitch), leaving the pattern—the walls of the maze—as un-stitched fabric.
This creates perfectly sharp lines and a bold, graphic impact that is difficult to achieve by stitching the lines directly.
It requires patience, but the result is a stunningly precise piece that plays with positive and negative space.
29. Sculpting Fur and Feathers with Turkey Work
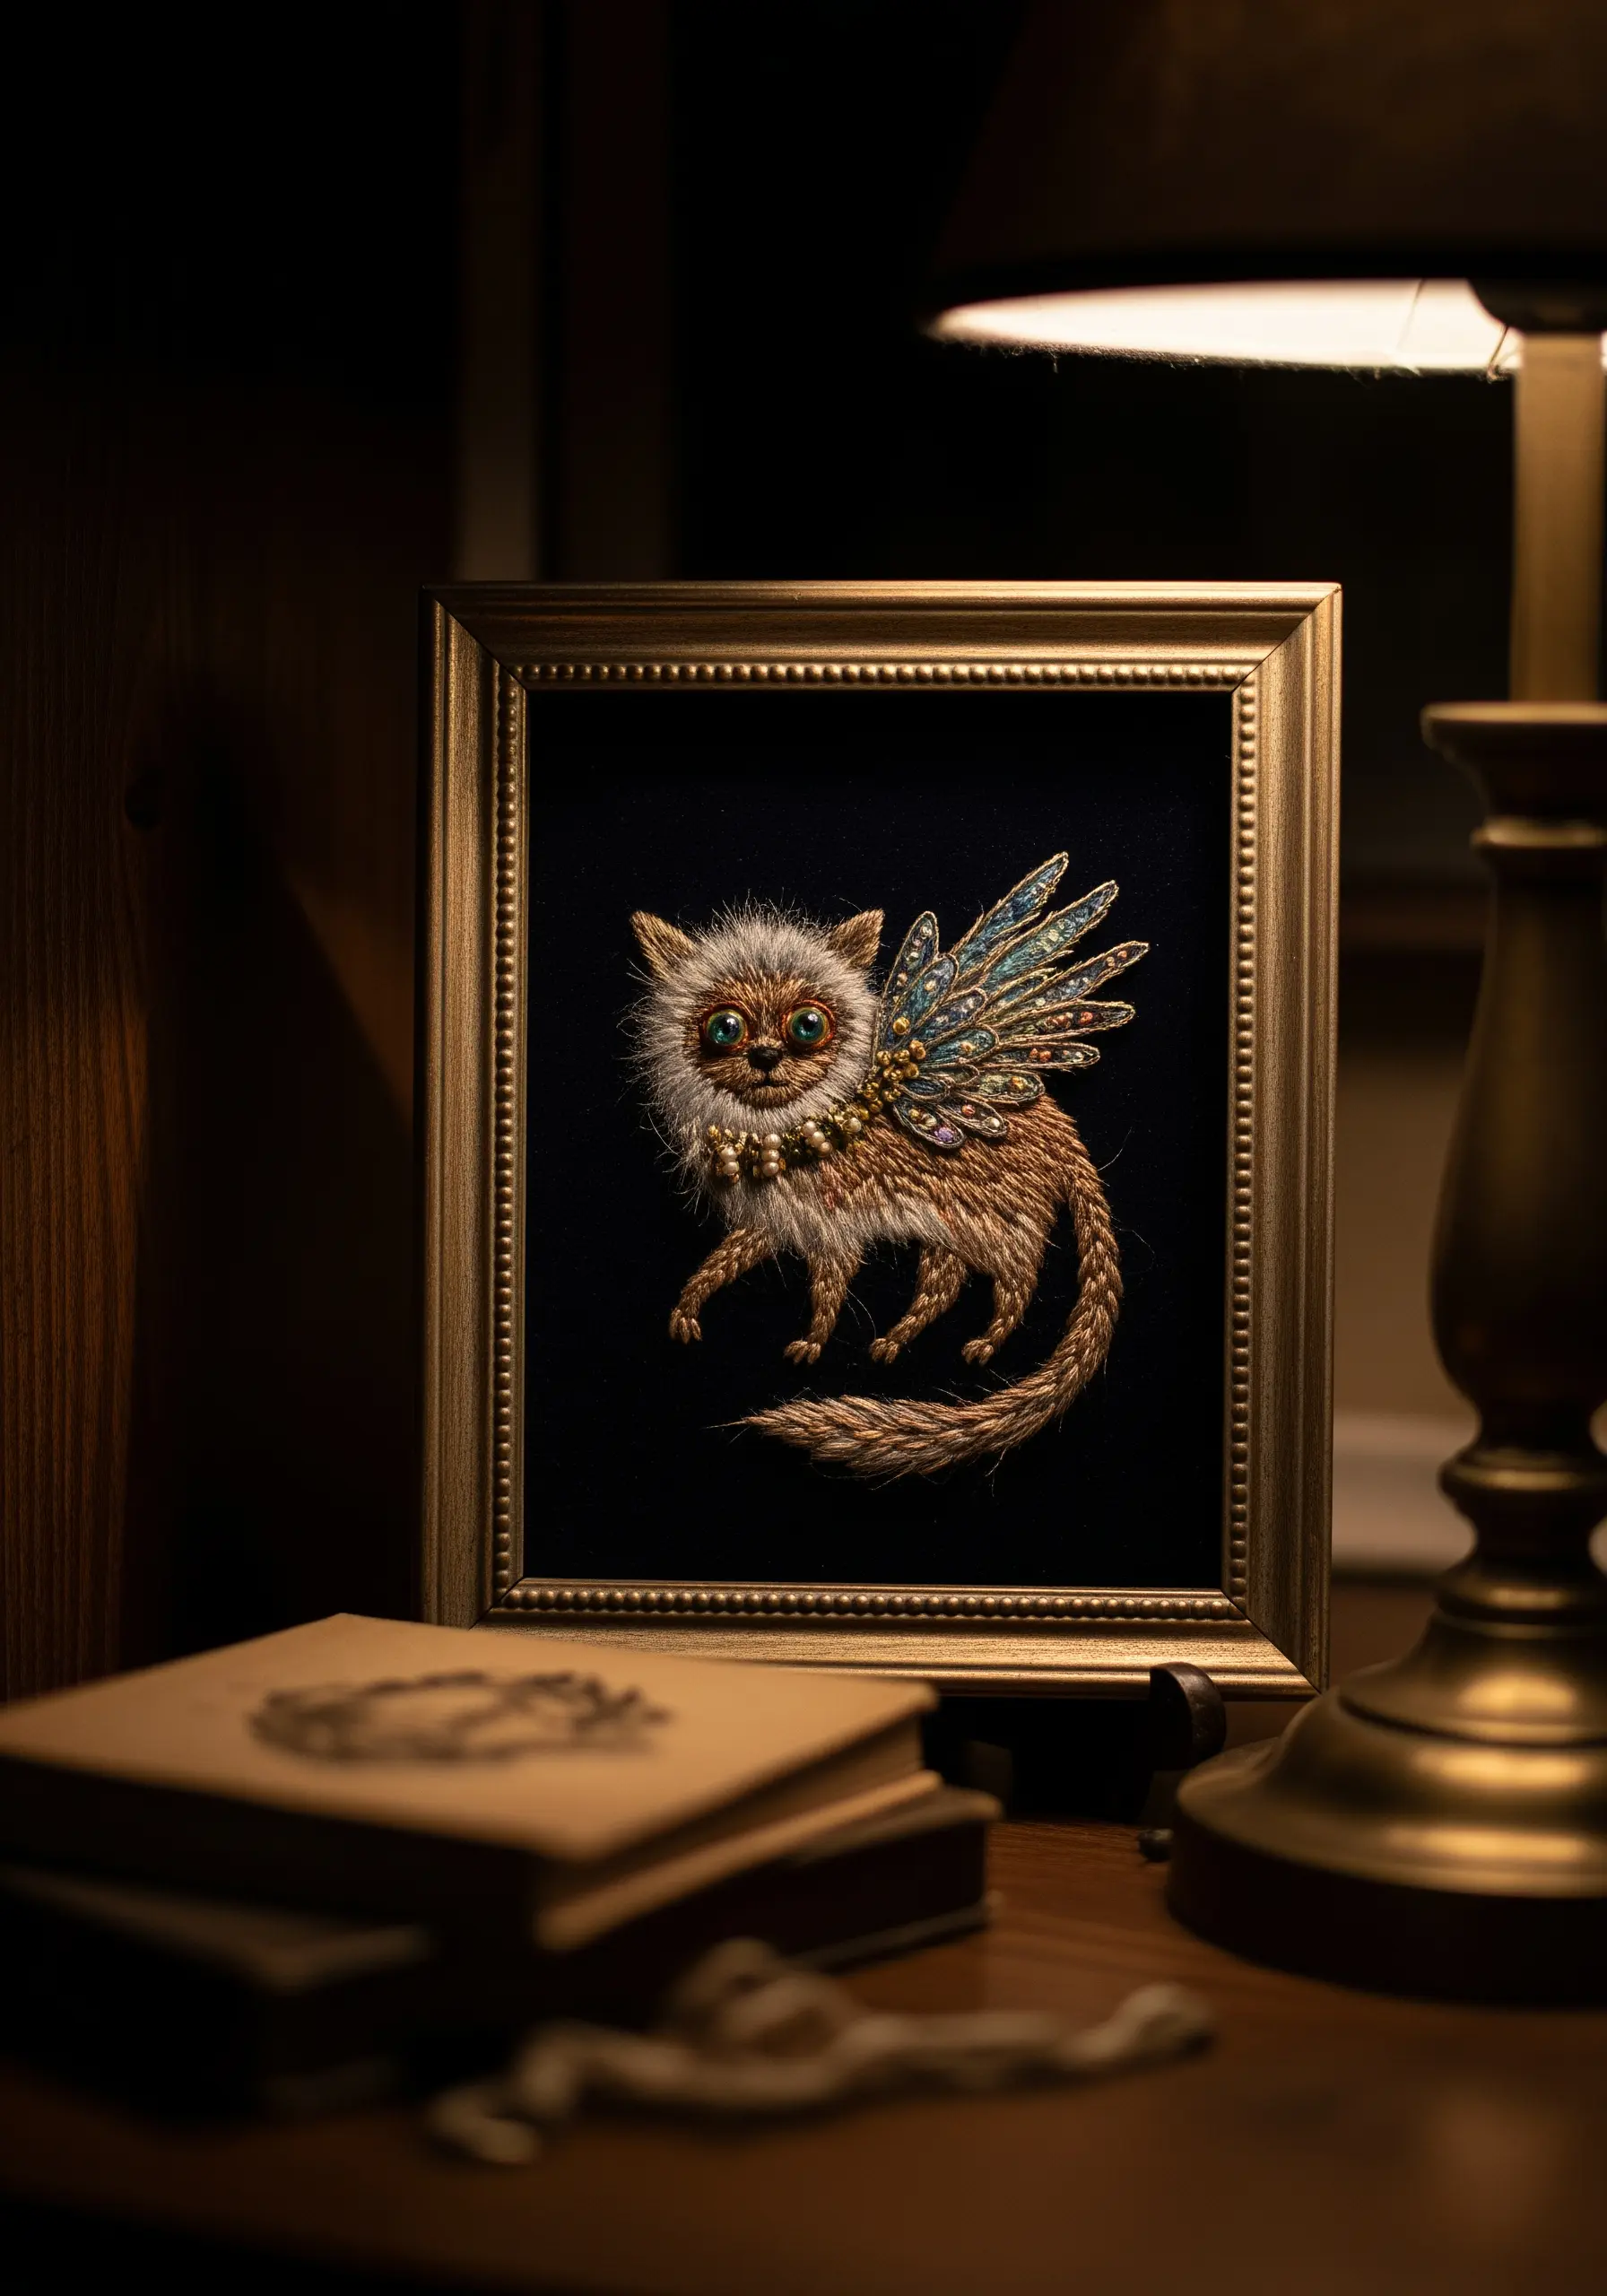
Create incredibly realistic and tactile fur by using the turkey work stitch.
This stitch creates loops that you can then trim and fluff to mimic the texture of fur or soft feathers. Layer different colors of thread within the same area to create depth and realistic shading.
Contrast this soft, fluffy texture with sleek, shiny elements like metallic thread and small beads for the wings or collar.
This combination of textures is what brings a fantastical creature to life, making it feel both magical and believable.
If you love tactile art, explore these high-texture fabric collage embroidery projects.
30. Grand-Scale Storytelling with Crewel Work
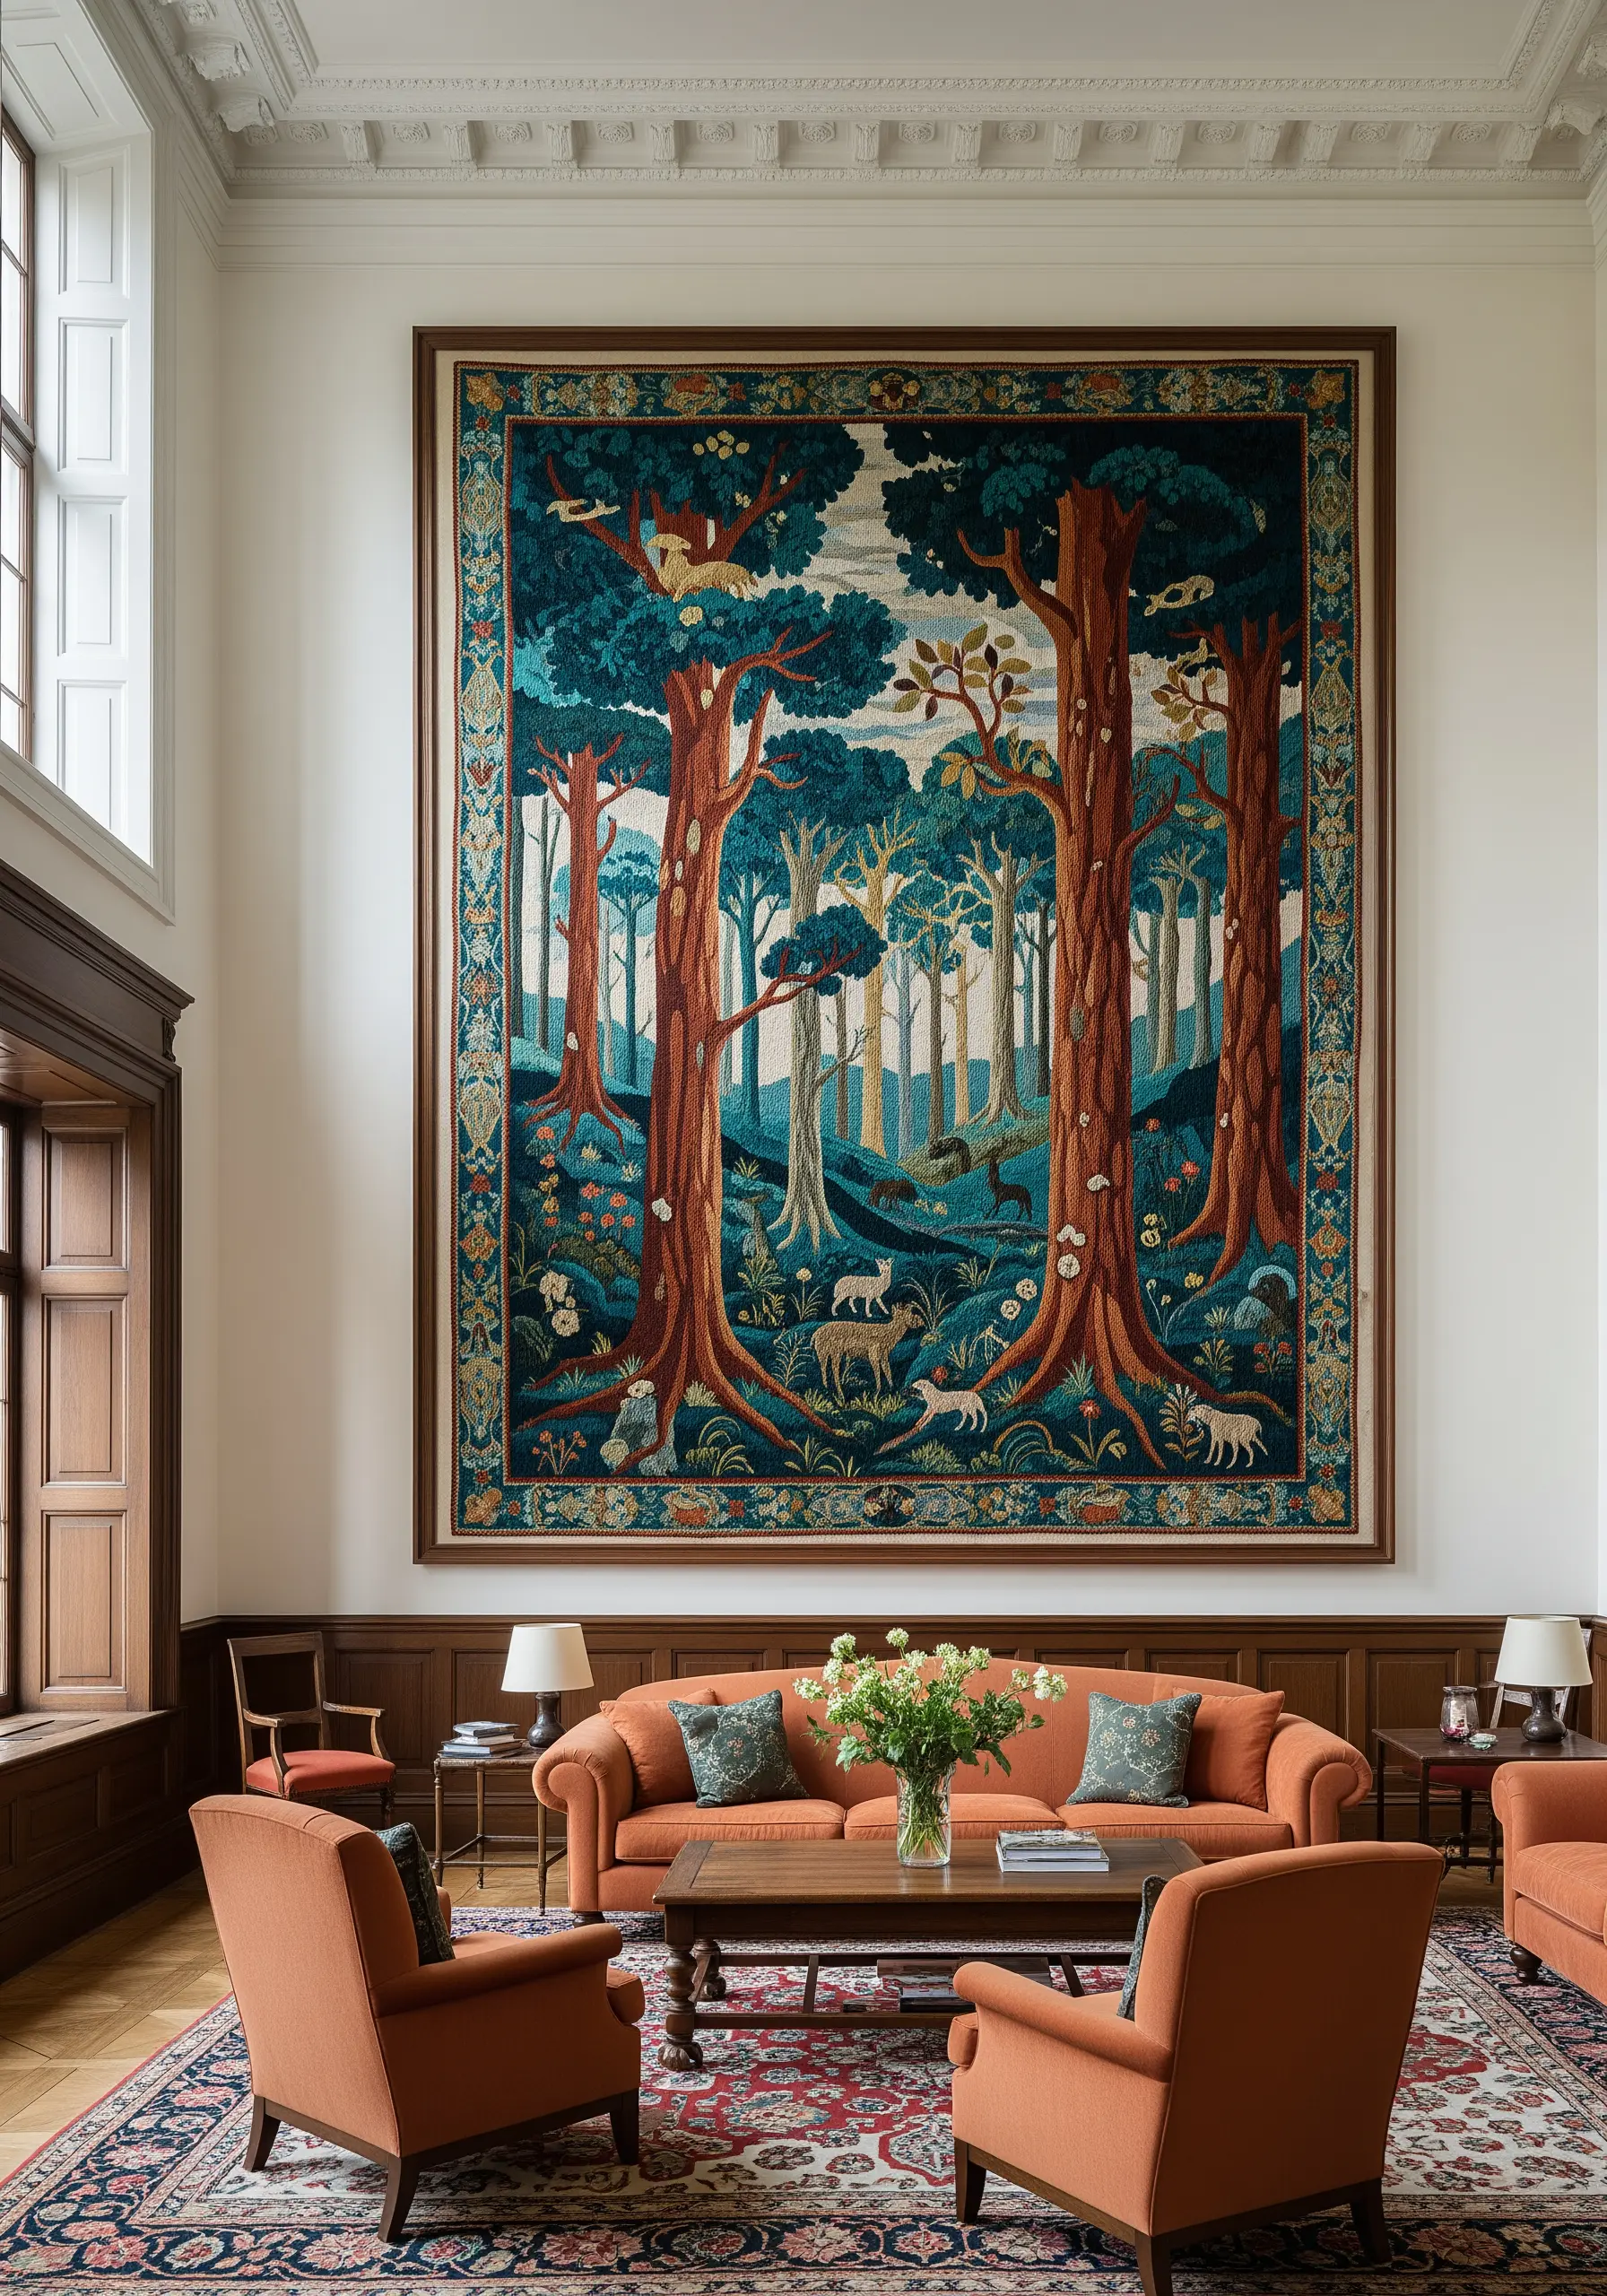
For a project of this scale, consider crewel embroidery, which traditionally uses wool thread on a sturdy linen twill fabric.
Wool thread is thicker than cotton floss, allowing you to fill large areas more efficiently. It also has a unique matte texture and a soft, warm finish that is perfect for tapestry-style pieces.
Use a vocabulary of stitches designed for crewel work, such as the trellis stitch for filling large areas and the long-and-short stitch for shading.
The result is a rich, textural piece with the heirloom quality of a historic tapestry.
31. Geometric Blocking with Flawless Satin Stitch
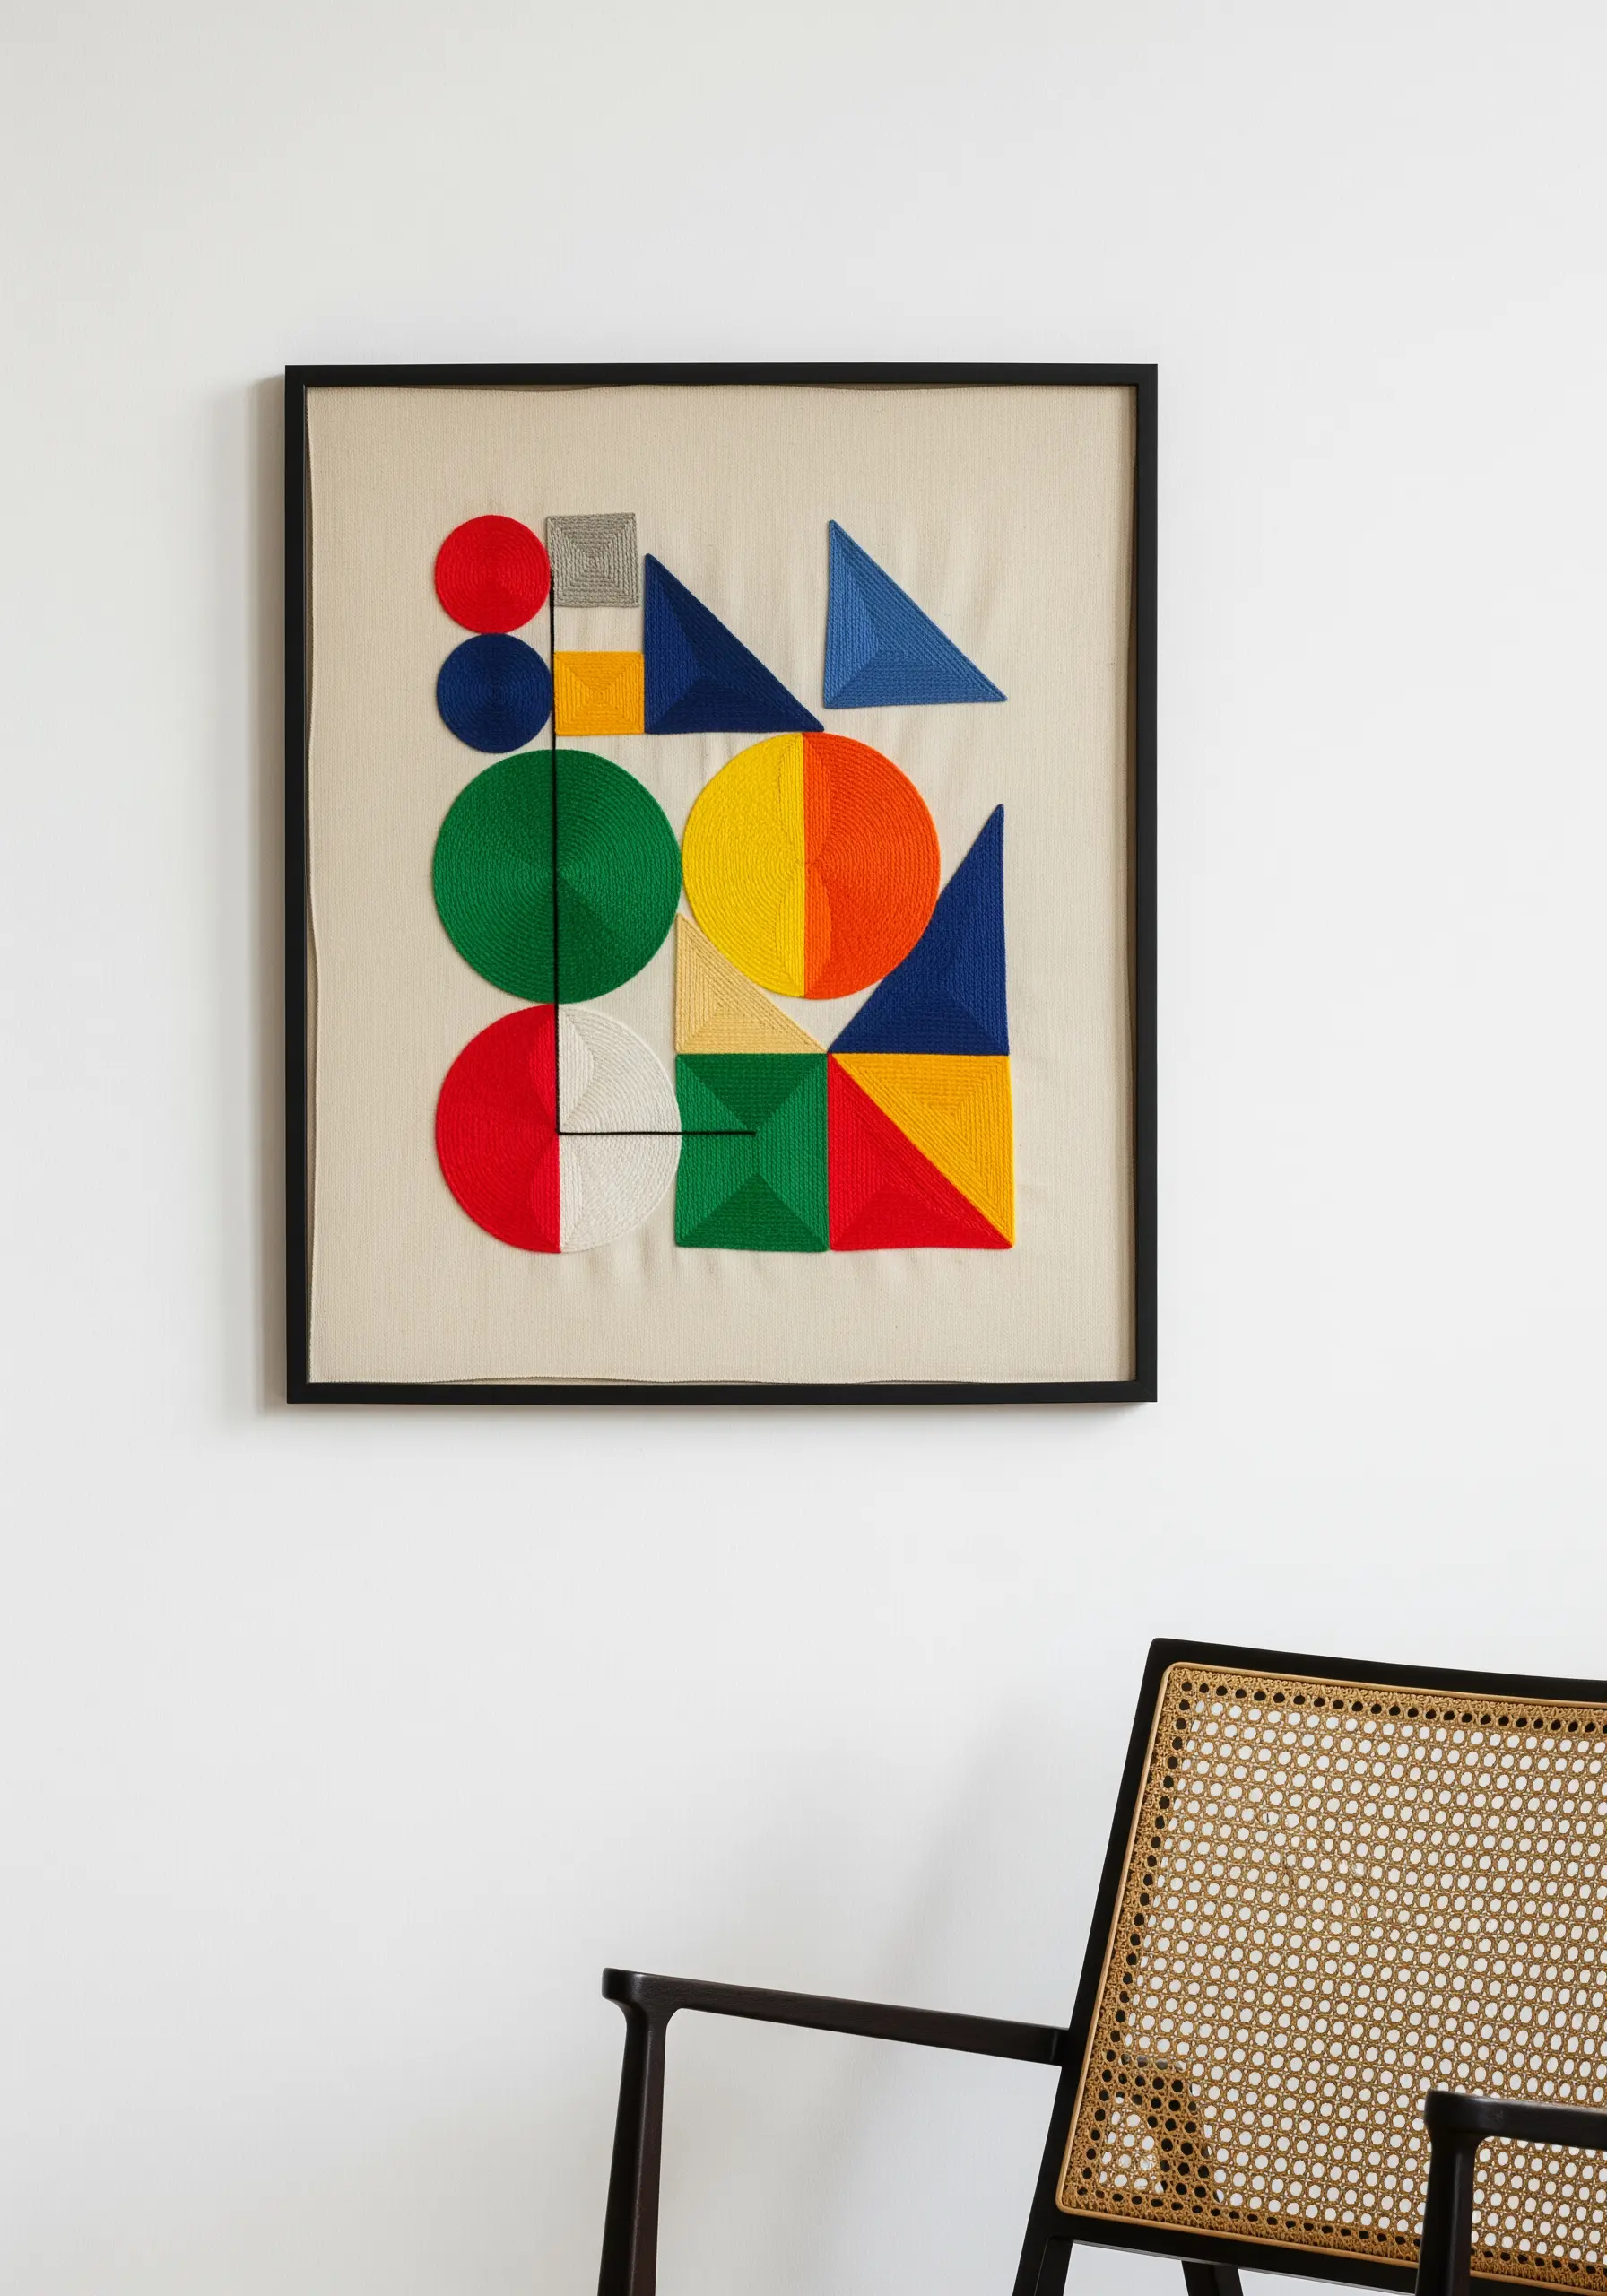
Achieve the clean, graphic look of modern art by mastering the satin stitch for solid blocks of color.
To get a perfectly smooth, glass-like finish, ensure your stitches are laid parallel to each other with even tension, and that they are all going in the same direction within a single shape.
Before you begin filling a shape, outline it with a split stitch. This creates a slightly raised edge that you can tuck your satin stitches under, resulting in a crisp, clean border.
This meticulous attention to detail is what separates a good satin stitch from a great one.


