

Have you ever finished a piece of botanical embroidery and felt it was missing something? You’ve chosen the perfect colors and your stitches are neat, yet the leaves and petals look a little flat—more like a symbol than a living thing.
That missing element is often the subtle play of light and shadow. Adding depth to your work isn’t about learning dozens of complicated new stitches. It’s about learning to see differently—to notice how a leaf turns away from the light, how it casts a shadow on the stem beneath it, or how its own shape creates shadows within its folds.
Here, you’ll discover how to use thread, color, and texture to create believable shadows that will make your embroidery feel like it’s lifting right off the fabric. These are not just techniques; they are ways of thinking about thread as if it were paint, giving you the power to create dimension and life in every piece you stitch.
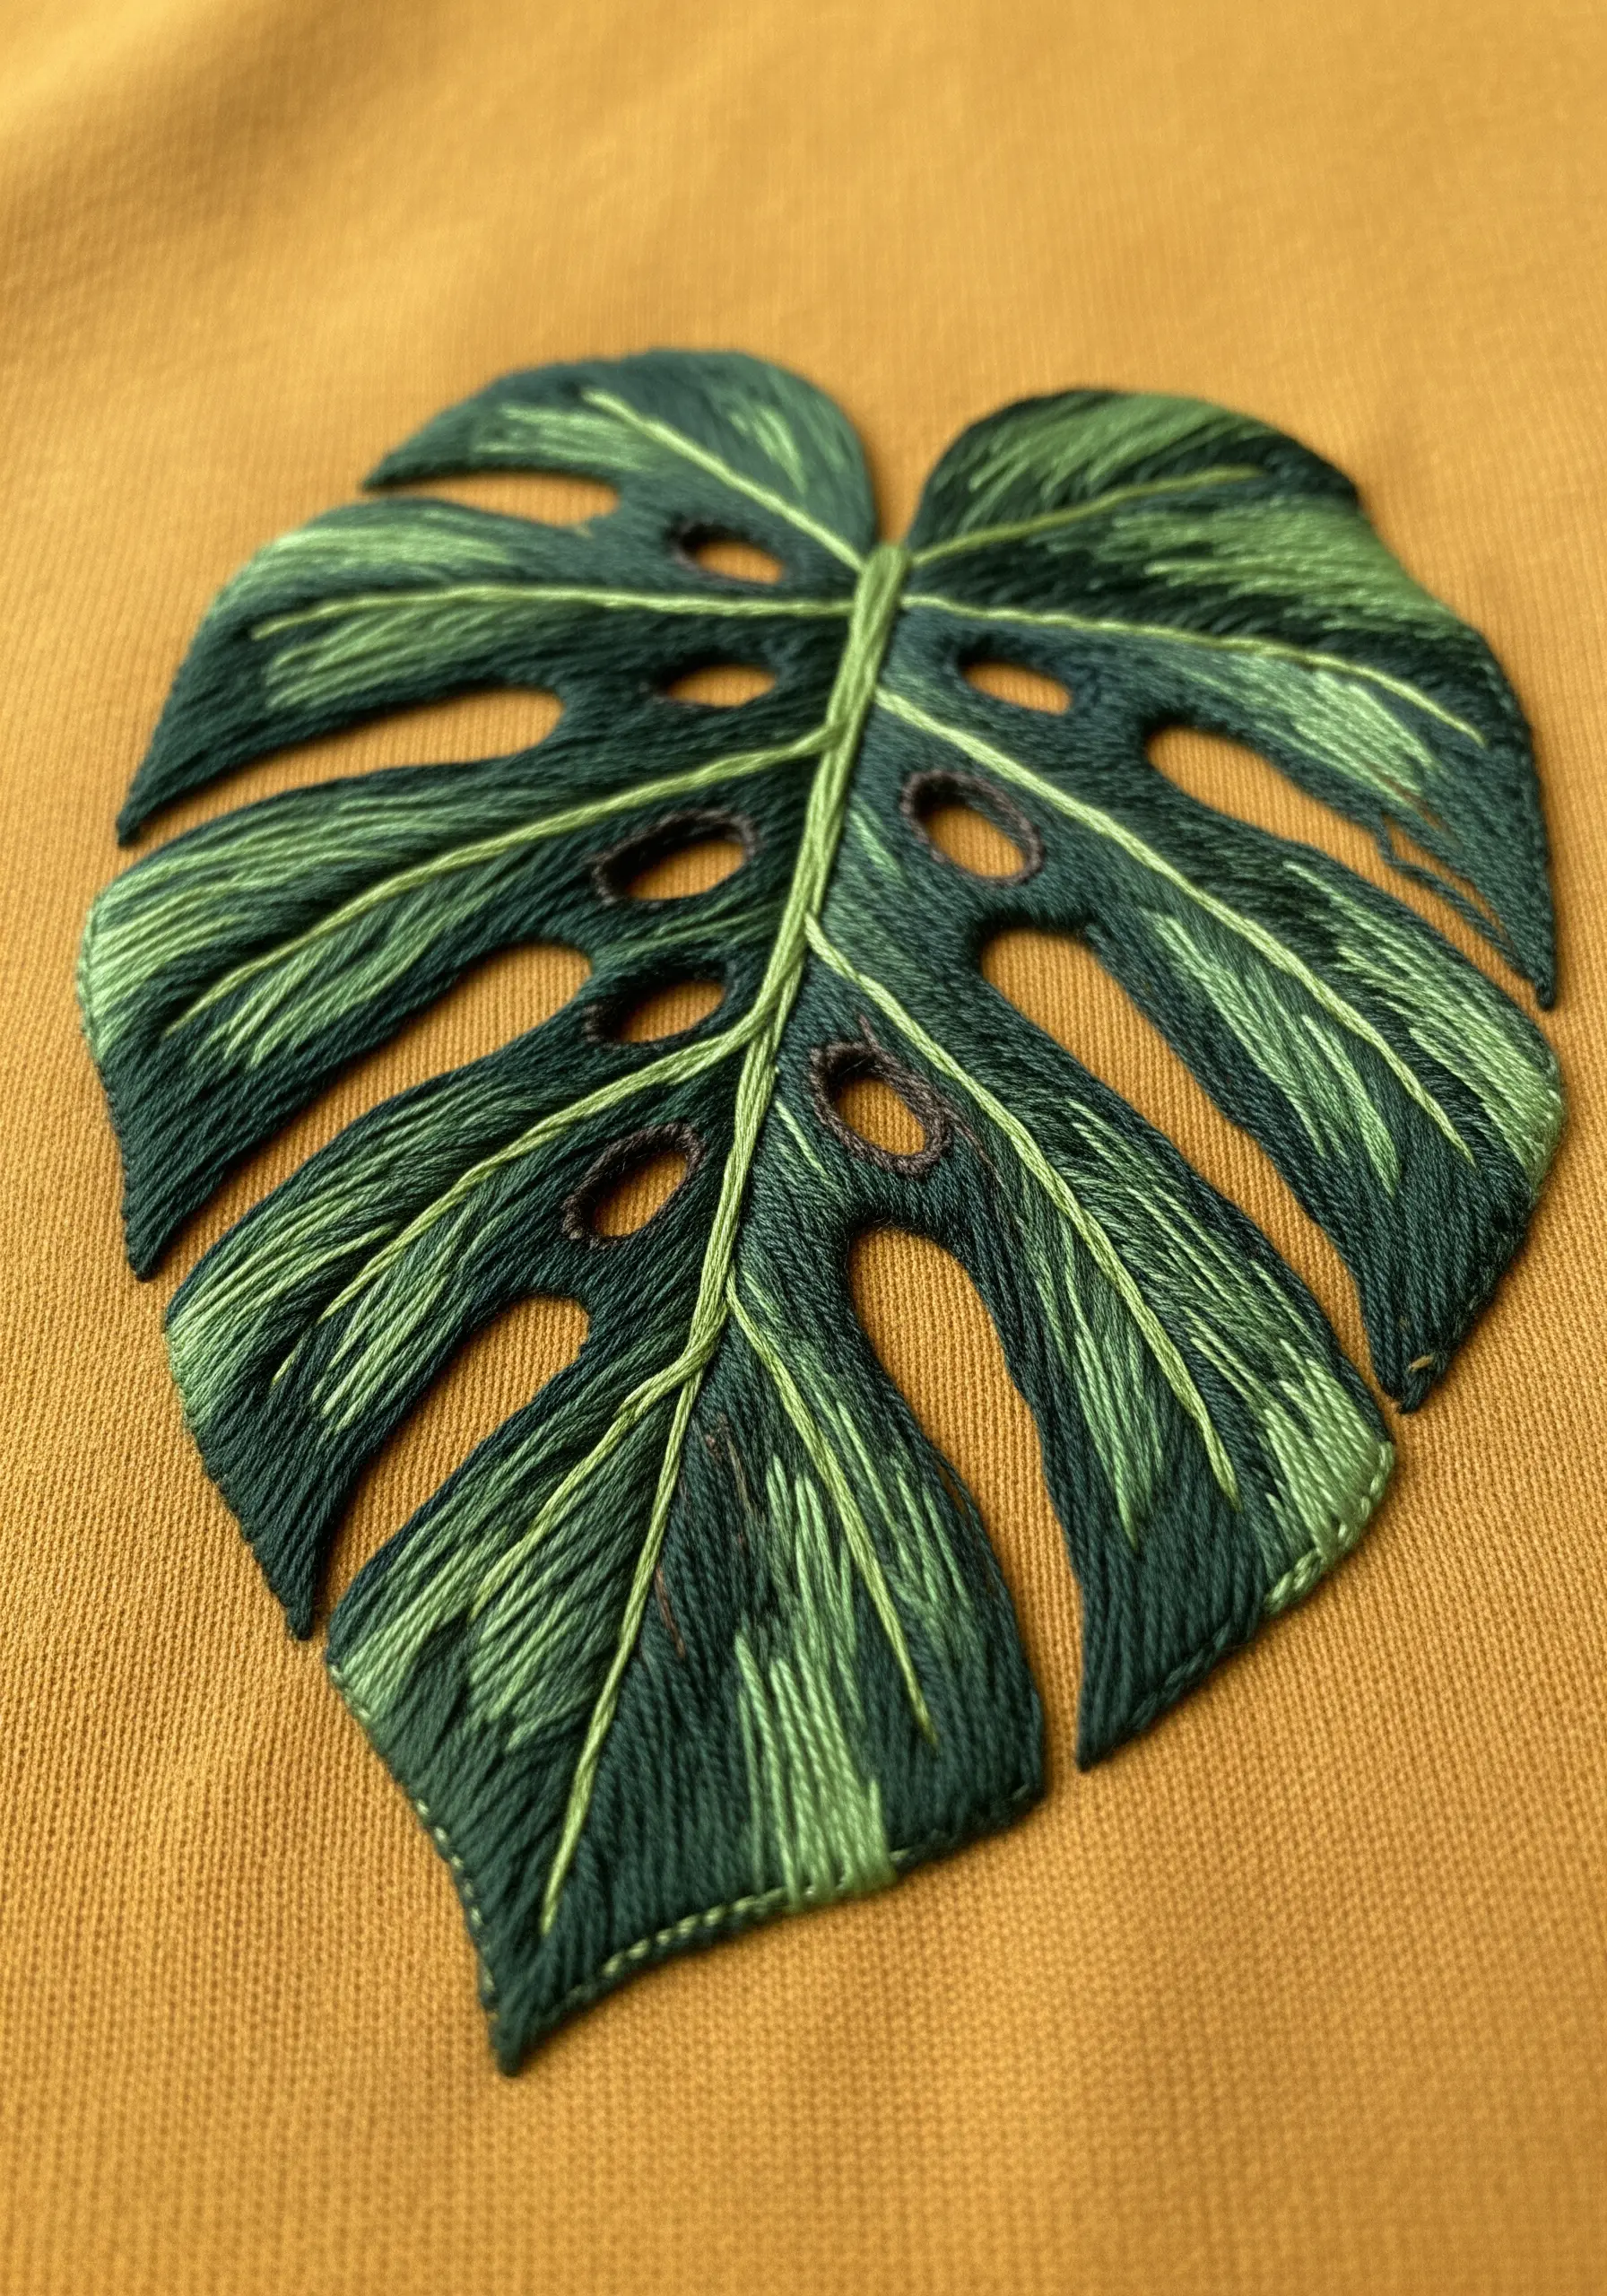
1. Blend Cool Tones Directly into the Leaf

Instead of stitching a separate gray or black shadow, integrate the shadow directly into the leaf’s form.
Use a single strand of a cool, dark color like indigo, deep teal, or slate gray and blend it into the lower sections of the leaf using long-and-short stitch.
This creates the illusion of a shadow being cast by the leaf’s own curves, giving it volume and a more painterly, naturalistic feel.
The key is to treat the shadow as part of the leaf’s color story, not as a separate entity on the fabric.
2. Imply a Shadow with Abstract Stitches
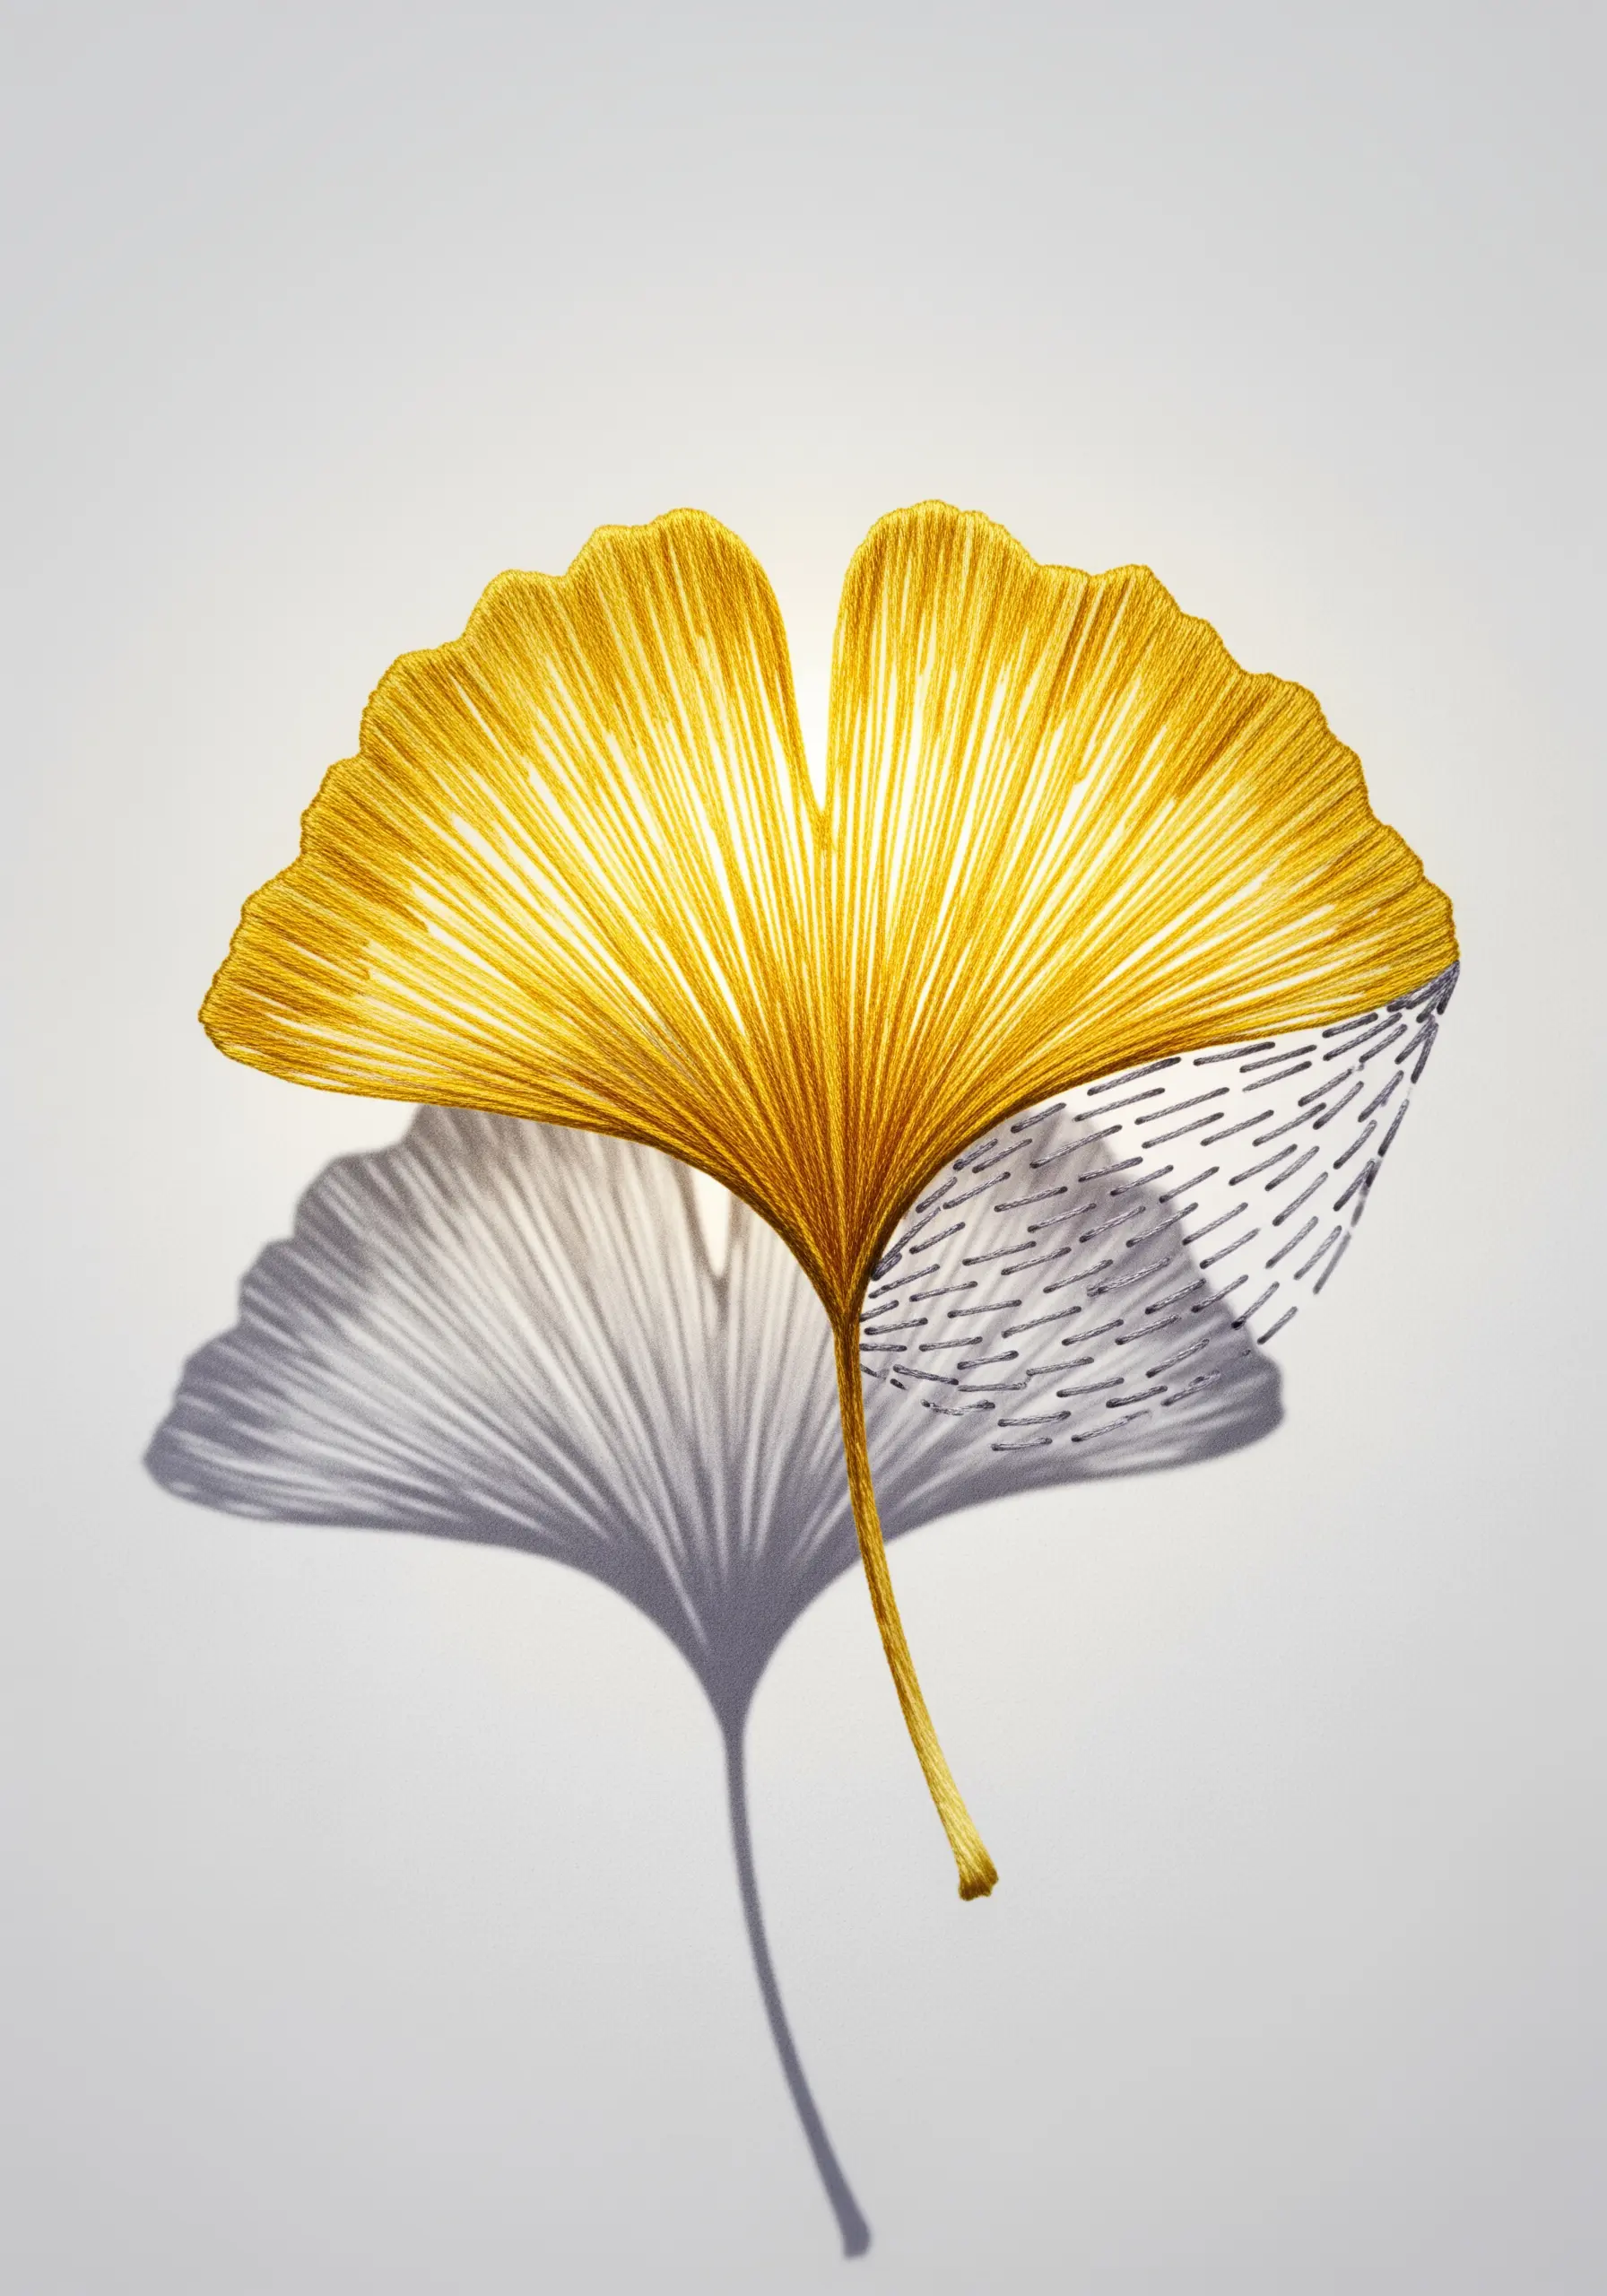
For a contemporary and graphic effect, render the shadow as a texture rather than a solid block of color.
Use a contrasting thread, like a metallic silver or a simple gray, to stitch an open pattern of running stitches or seed stitches in the shape of the shadow.
This technique separates the leaf from its shadow, turning the shadow into an independent design element.
It works beautifully for modern botanical pieces where realism is secondary to style and texture.
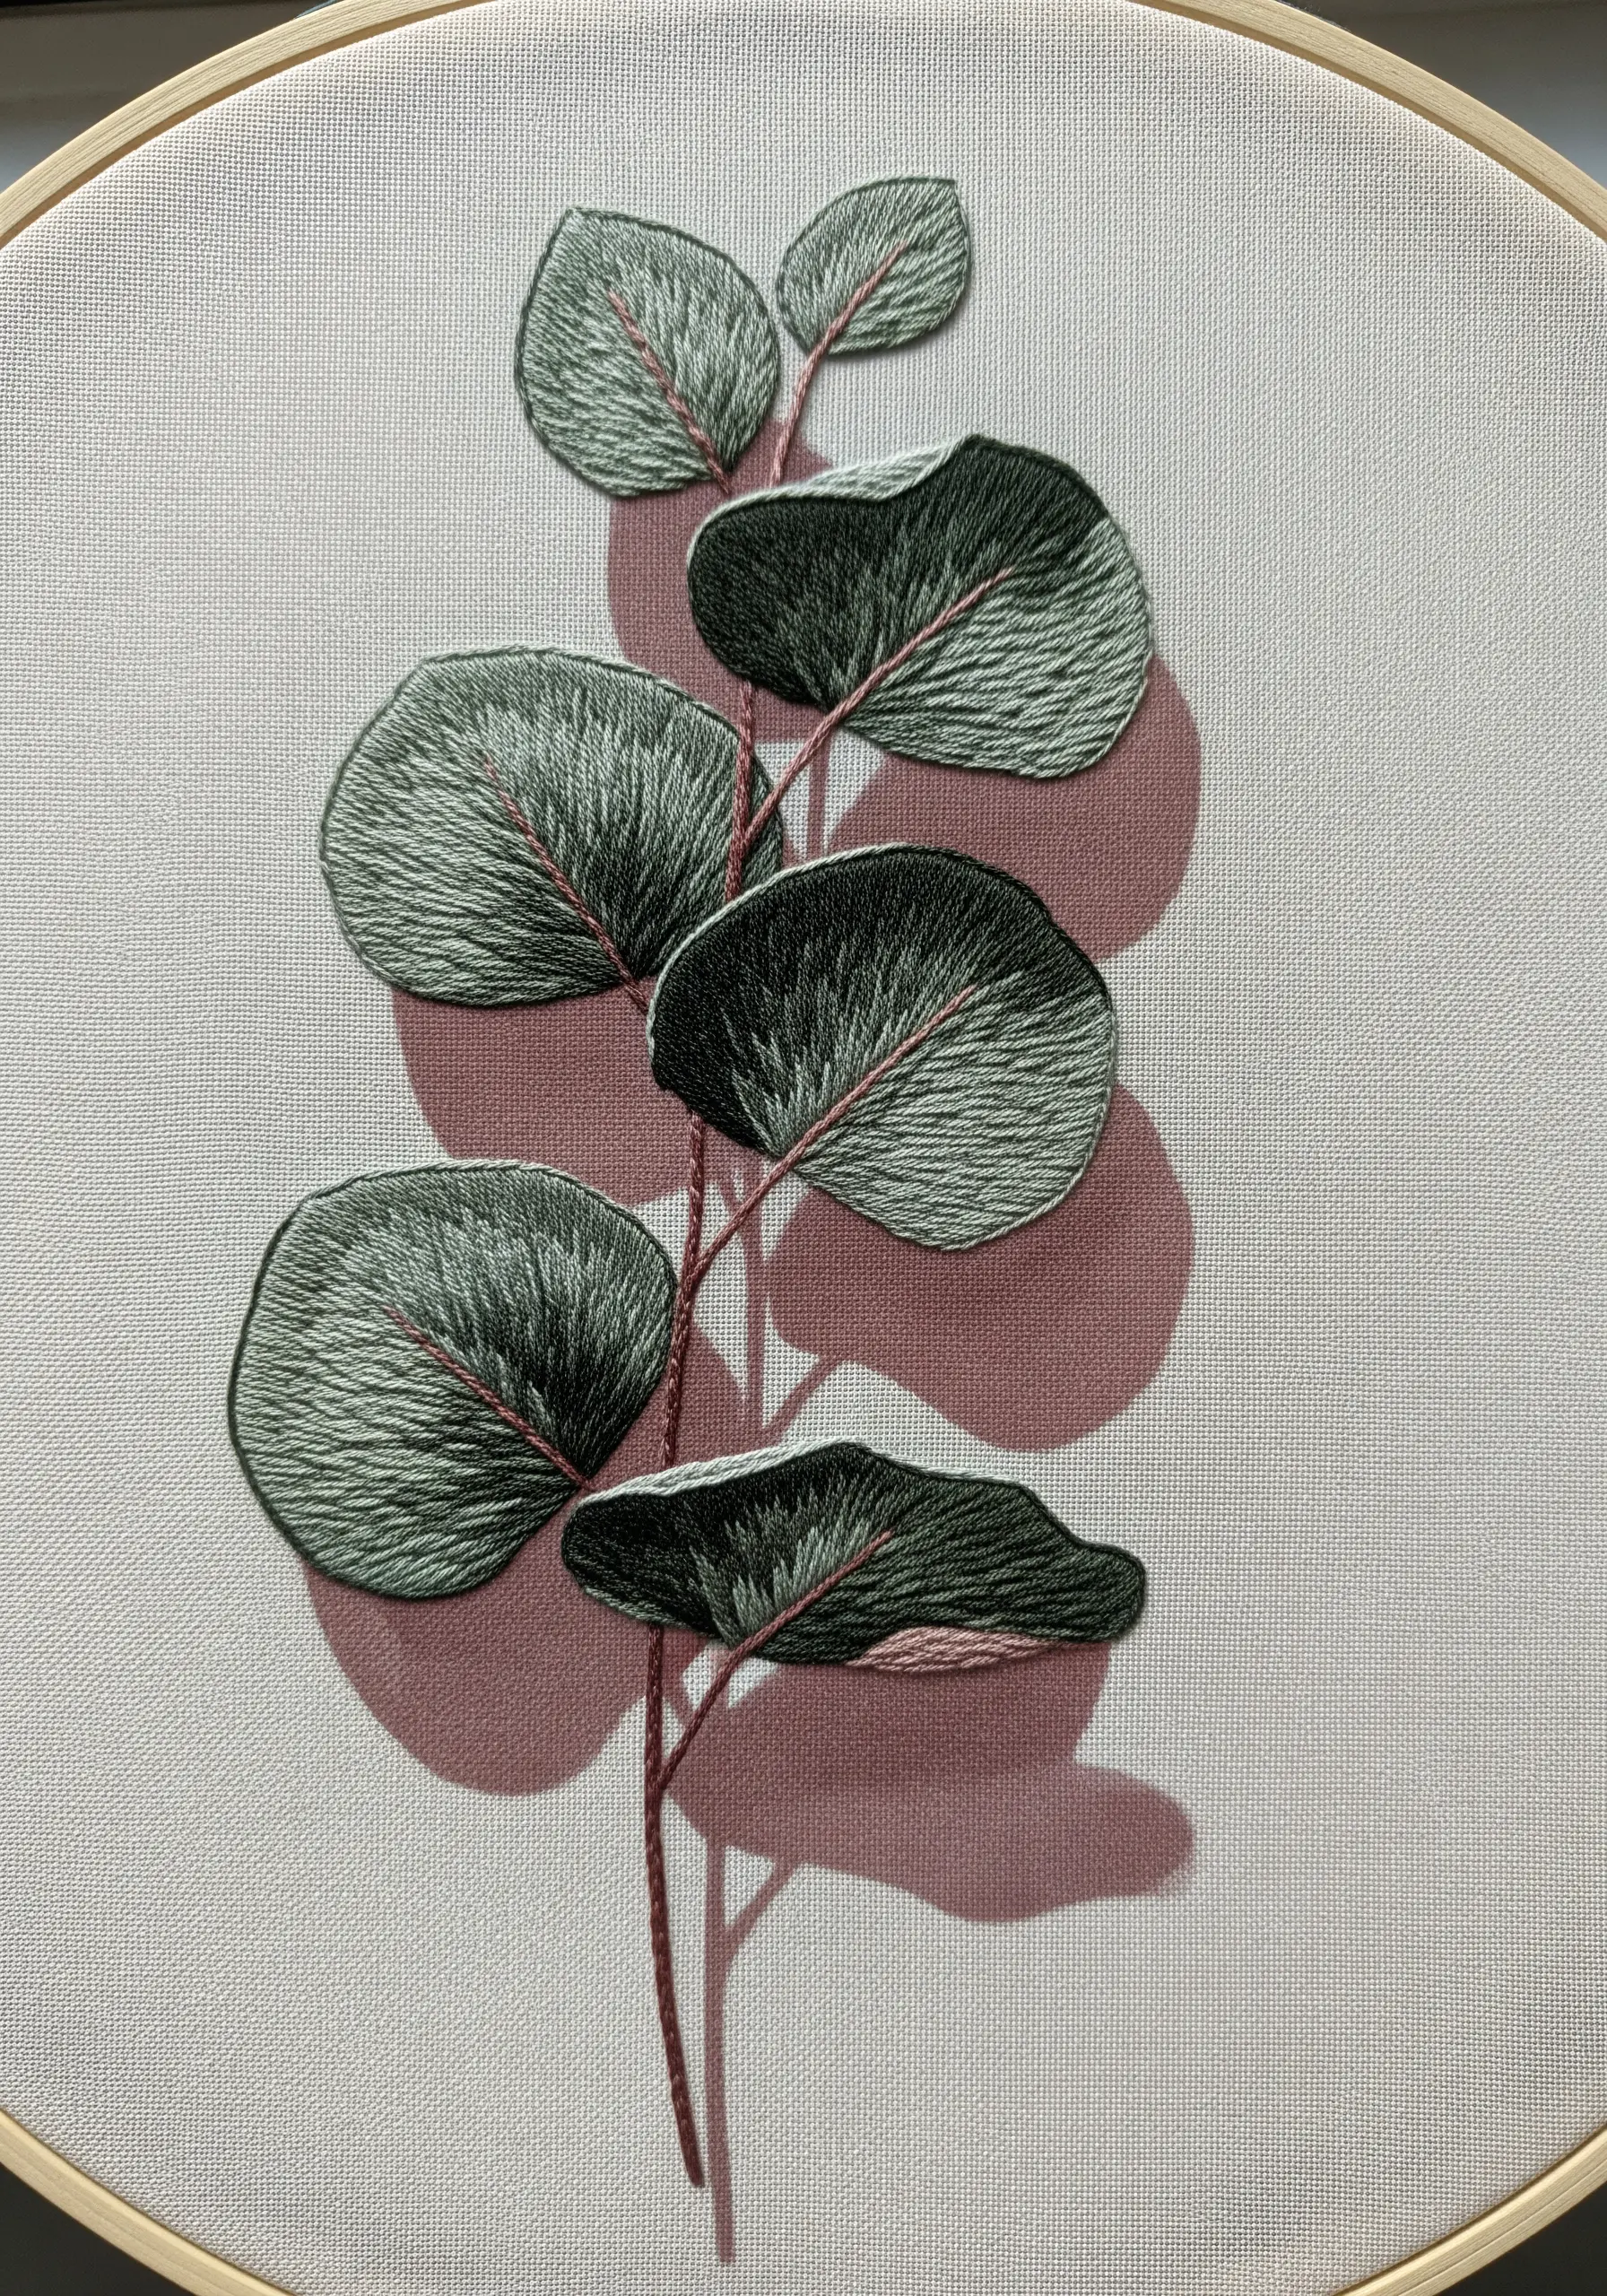
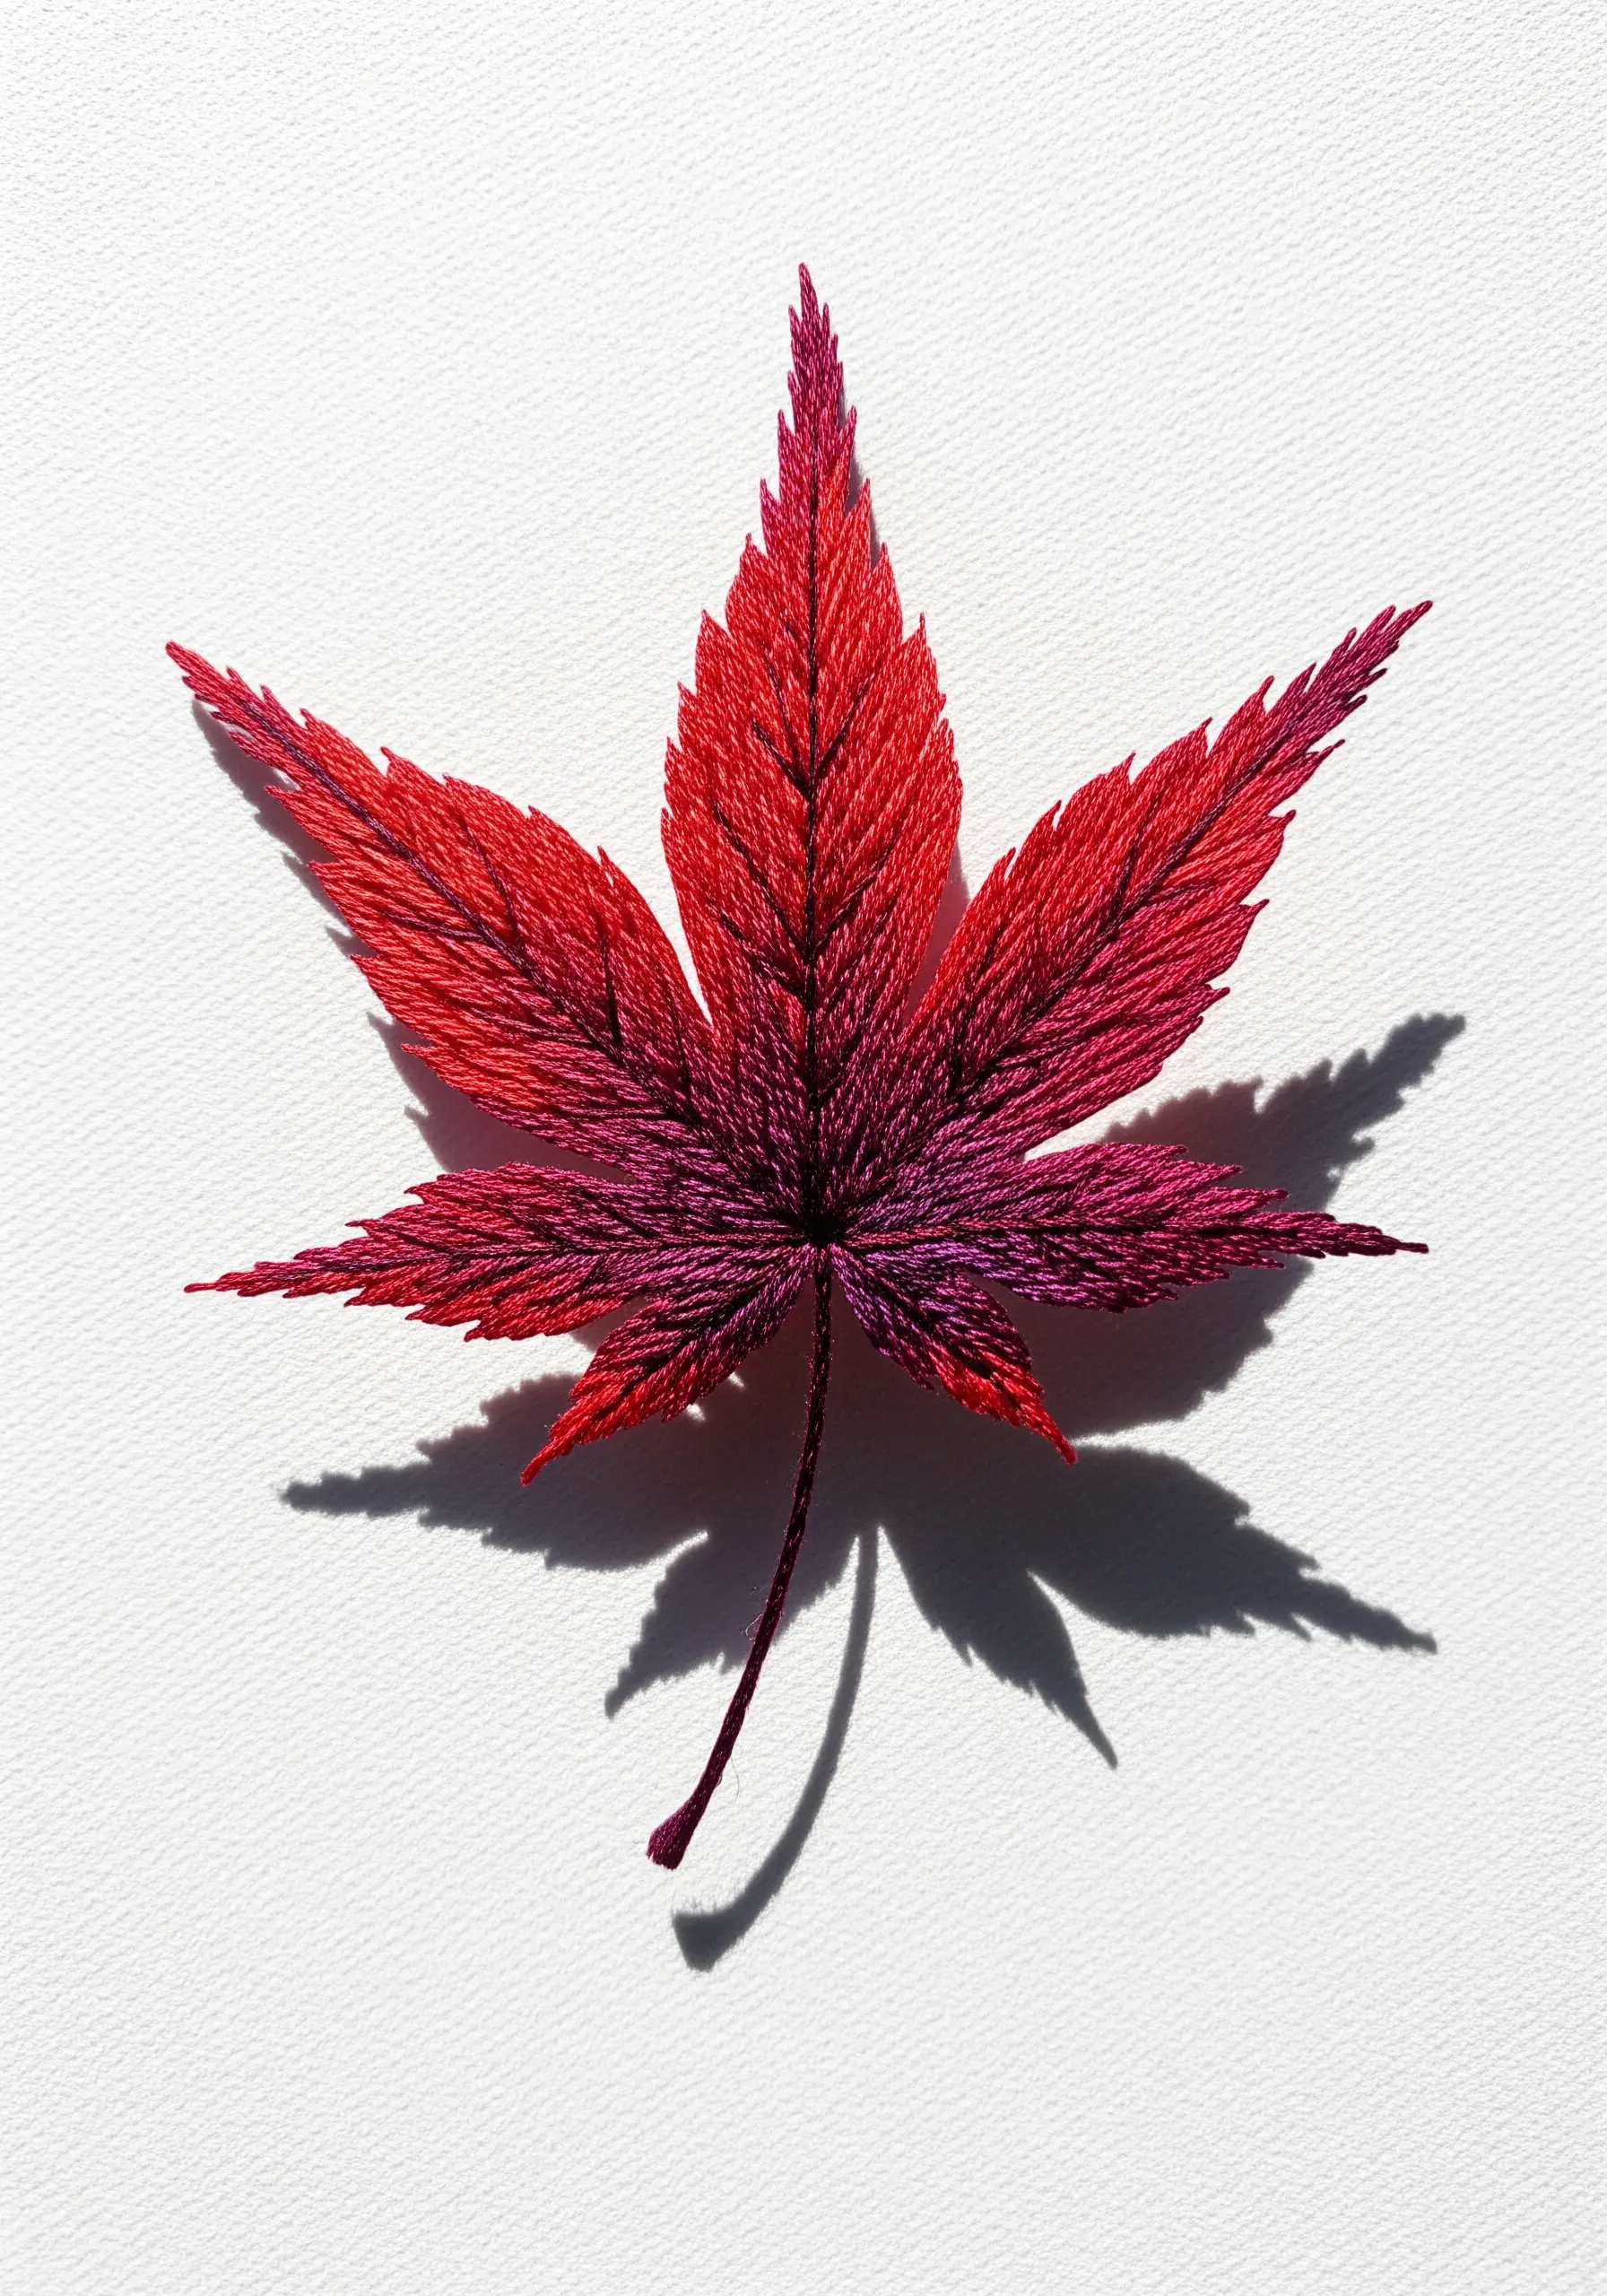
3. Create Depth by Layering Leaves
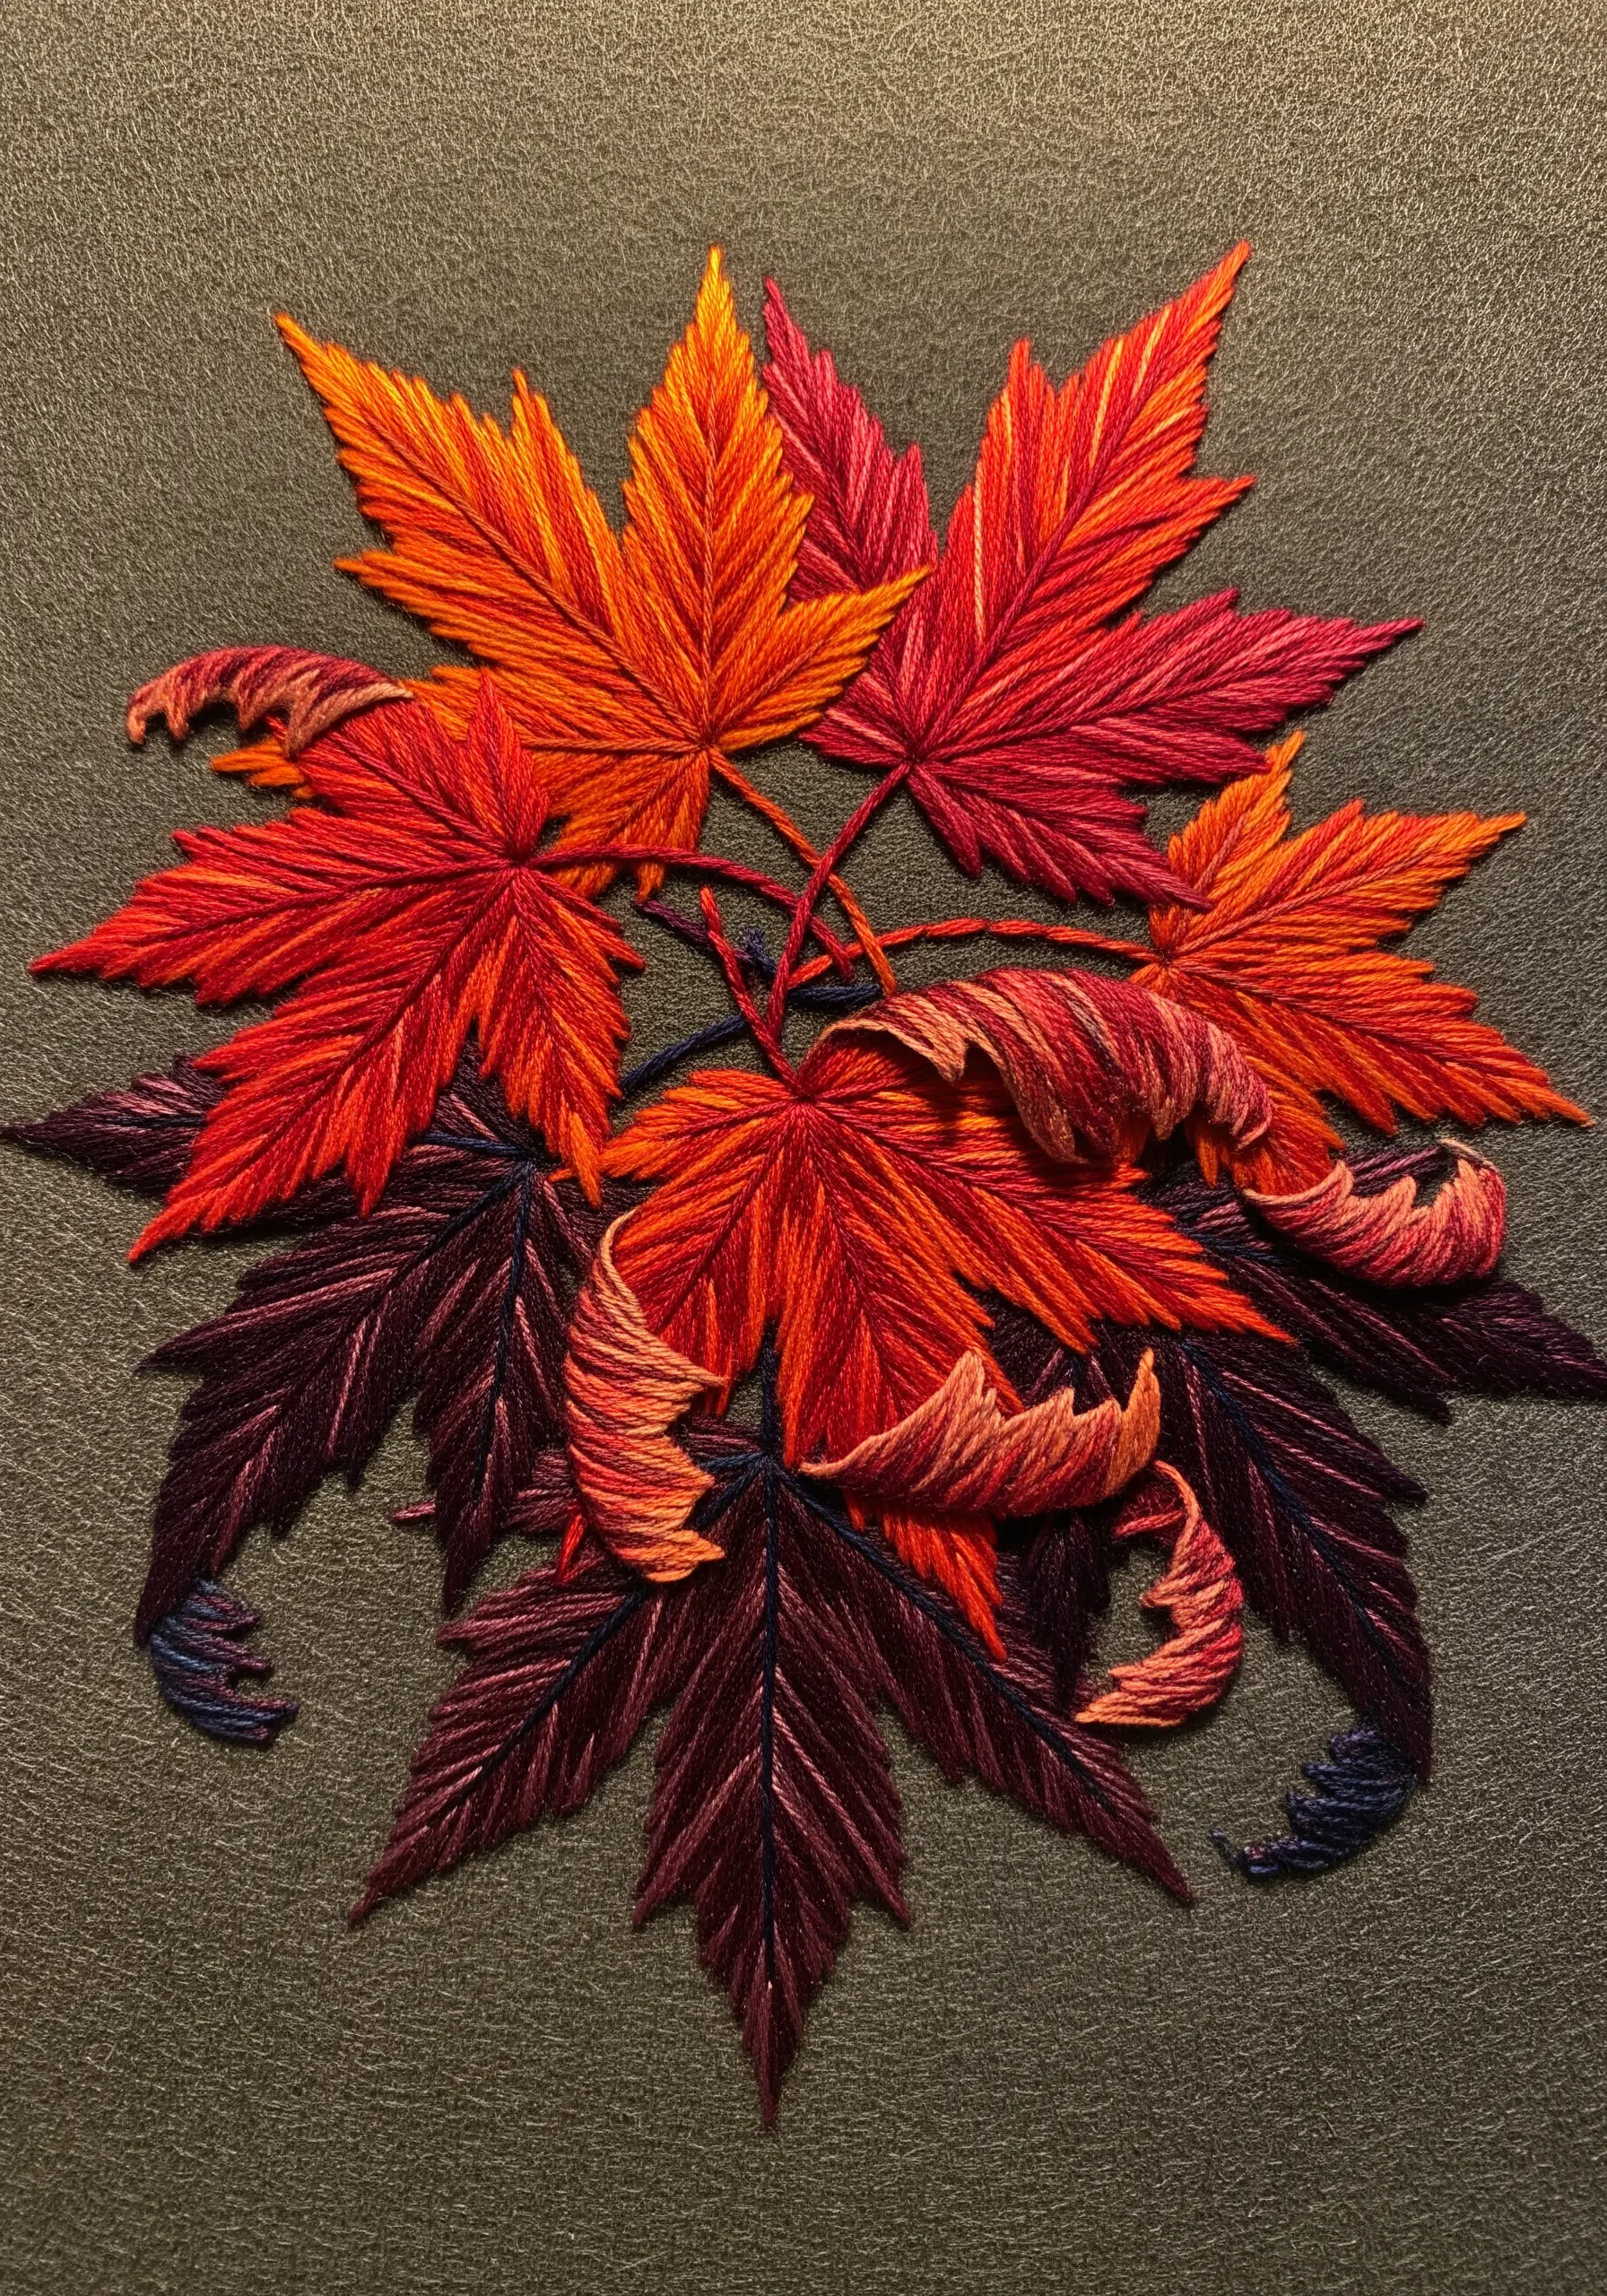
When composing a cluster of leaves, use color to establish which leaves are in front and which are receding into shadow.
Stitch the leaves at the bottom of the pile using darker, more muted tones like deep purples, burgundies, and dark navies.
As you build layers on top, transition to brighter, more saturated colors like reds and oranges.
This technique mimics how light hits a dense arrangement, naturally creating shadows and a convincing sense of three-dimensional space.
4. Stitch a Crisp, High-Contrast Cast Shadow
To create the effect of a bright, direct light source, stitch a distinct shadow shape directly onto your fabric.
Outline the shadow shape lightly with a pencil, mirroring the silhouette of your leaf but slightly offset.
Fill this shape completely with a dense satin stitch using a medium-gray or charcoal thread.
This method produces a clean, graphic result that makes the primary leaf motif pop, giving it a strong sense of being lifted off the surface.
5. Engineer a Real Shadow with 3D Stumpwork
For the most realistic shadow possible, create one with actual light by using stumpwork techniques.
Embroider your leaves on a separate piece of fabric with a thin wire stitched along the edges for structure.
Cut out the leaves and attach them to your main fabric along the stem or center, allowing the edges to lift away from the surface.
This allows the leaf to cast its own natural, ever-changing shadow depending on the light source in the room.
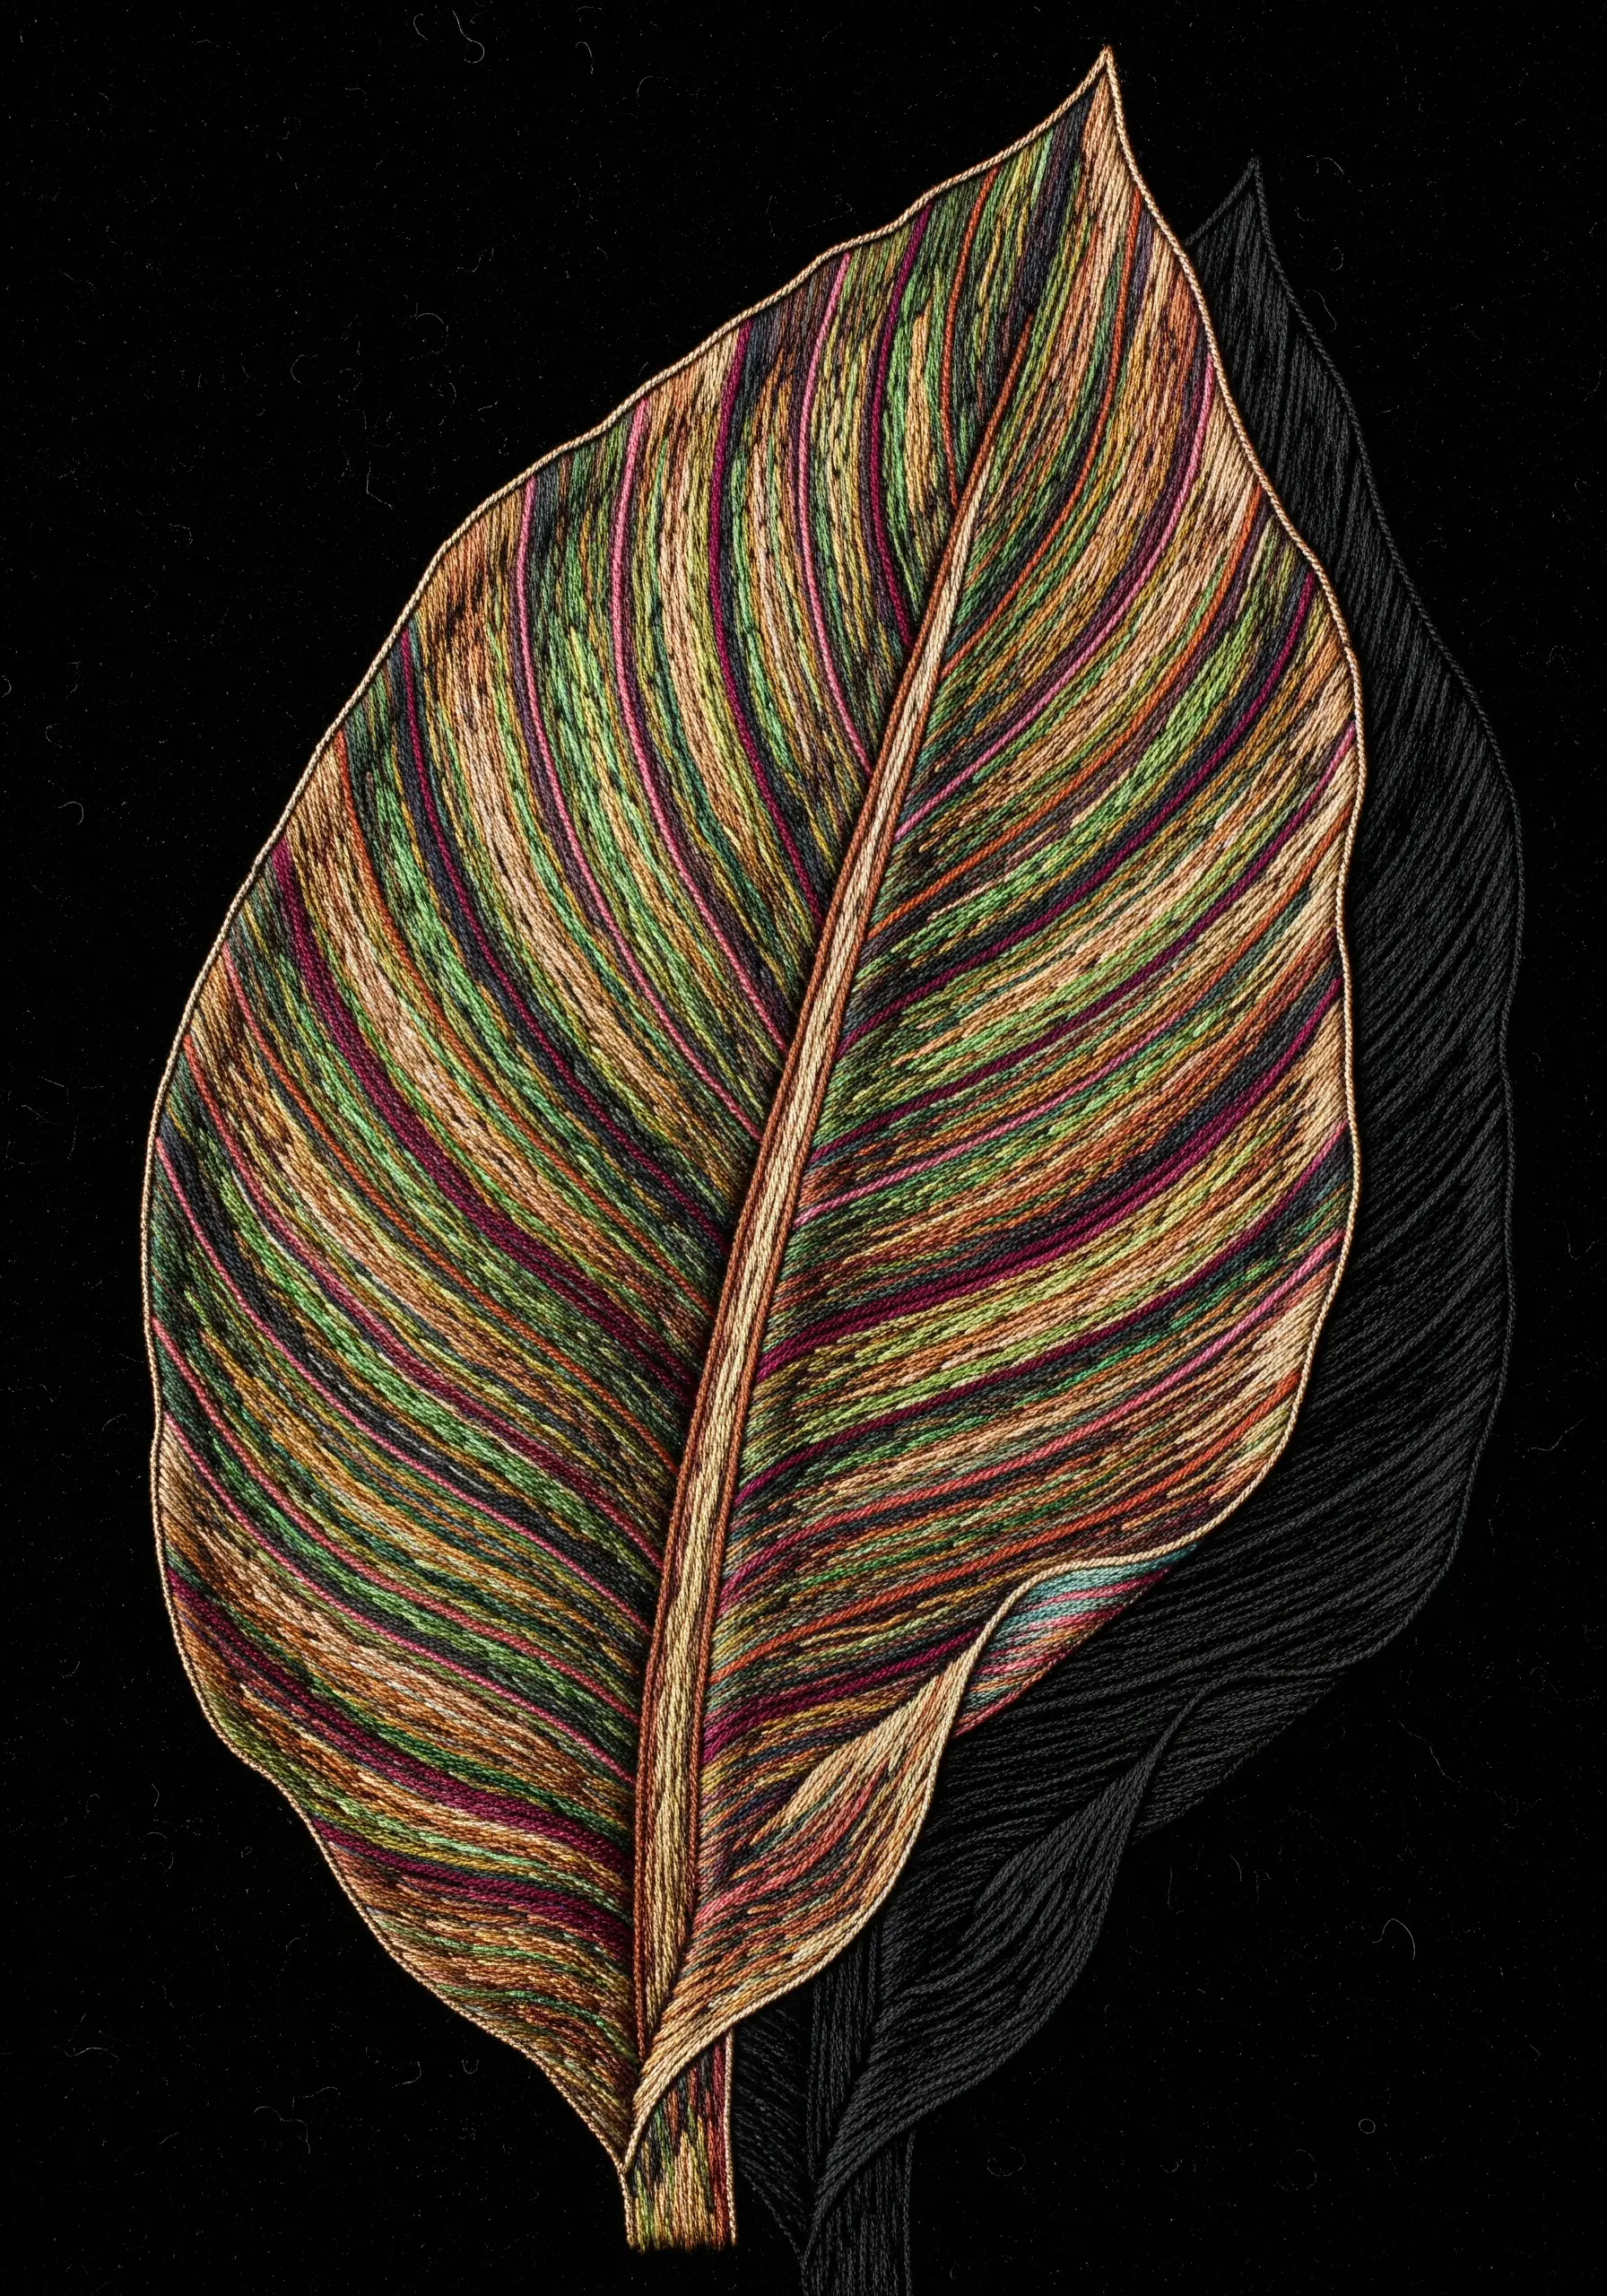
6. Let Dark Fabric Serve as the Deepest Shadow
When working on black or very dark fabric, you don’t need to stitch a shadow at all—the background does the work for you.
Focus on using vibrant, light-catching threads for the leaf itself to maximize the contrast.
To subtly define the area where a shadow would be, you can add a faint outline in a thread that is just one shade lighter than the fabric, like a charcoal gray on black.
This technique is elegant, efficient, and creates immediate visual drama.
7. Create a Diffused Shadow with a Stitch Wash
Not all shadows have hard edges; some are soft and hazy. Recreate this effect with a light wash of stitches.
Using a single strand of thread in a color slightly darker than your background fabric, scatter sparse, straight stitches within your shadow shape.
Keep the stitches light and airy, varying their length and direction to avoid creating a solid texture.
This gives the impression of a gentle, diffused light and prevents the shadow from overpowering the delicacy of your main subject.
8. Observe Real Leaves to Understand Light
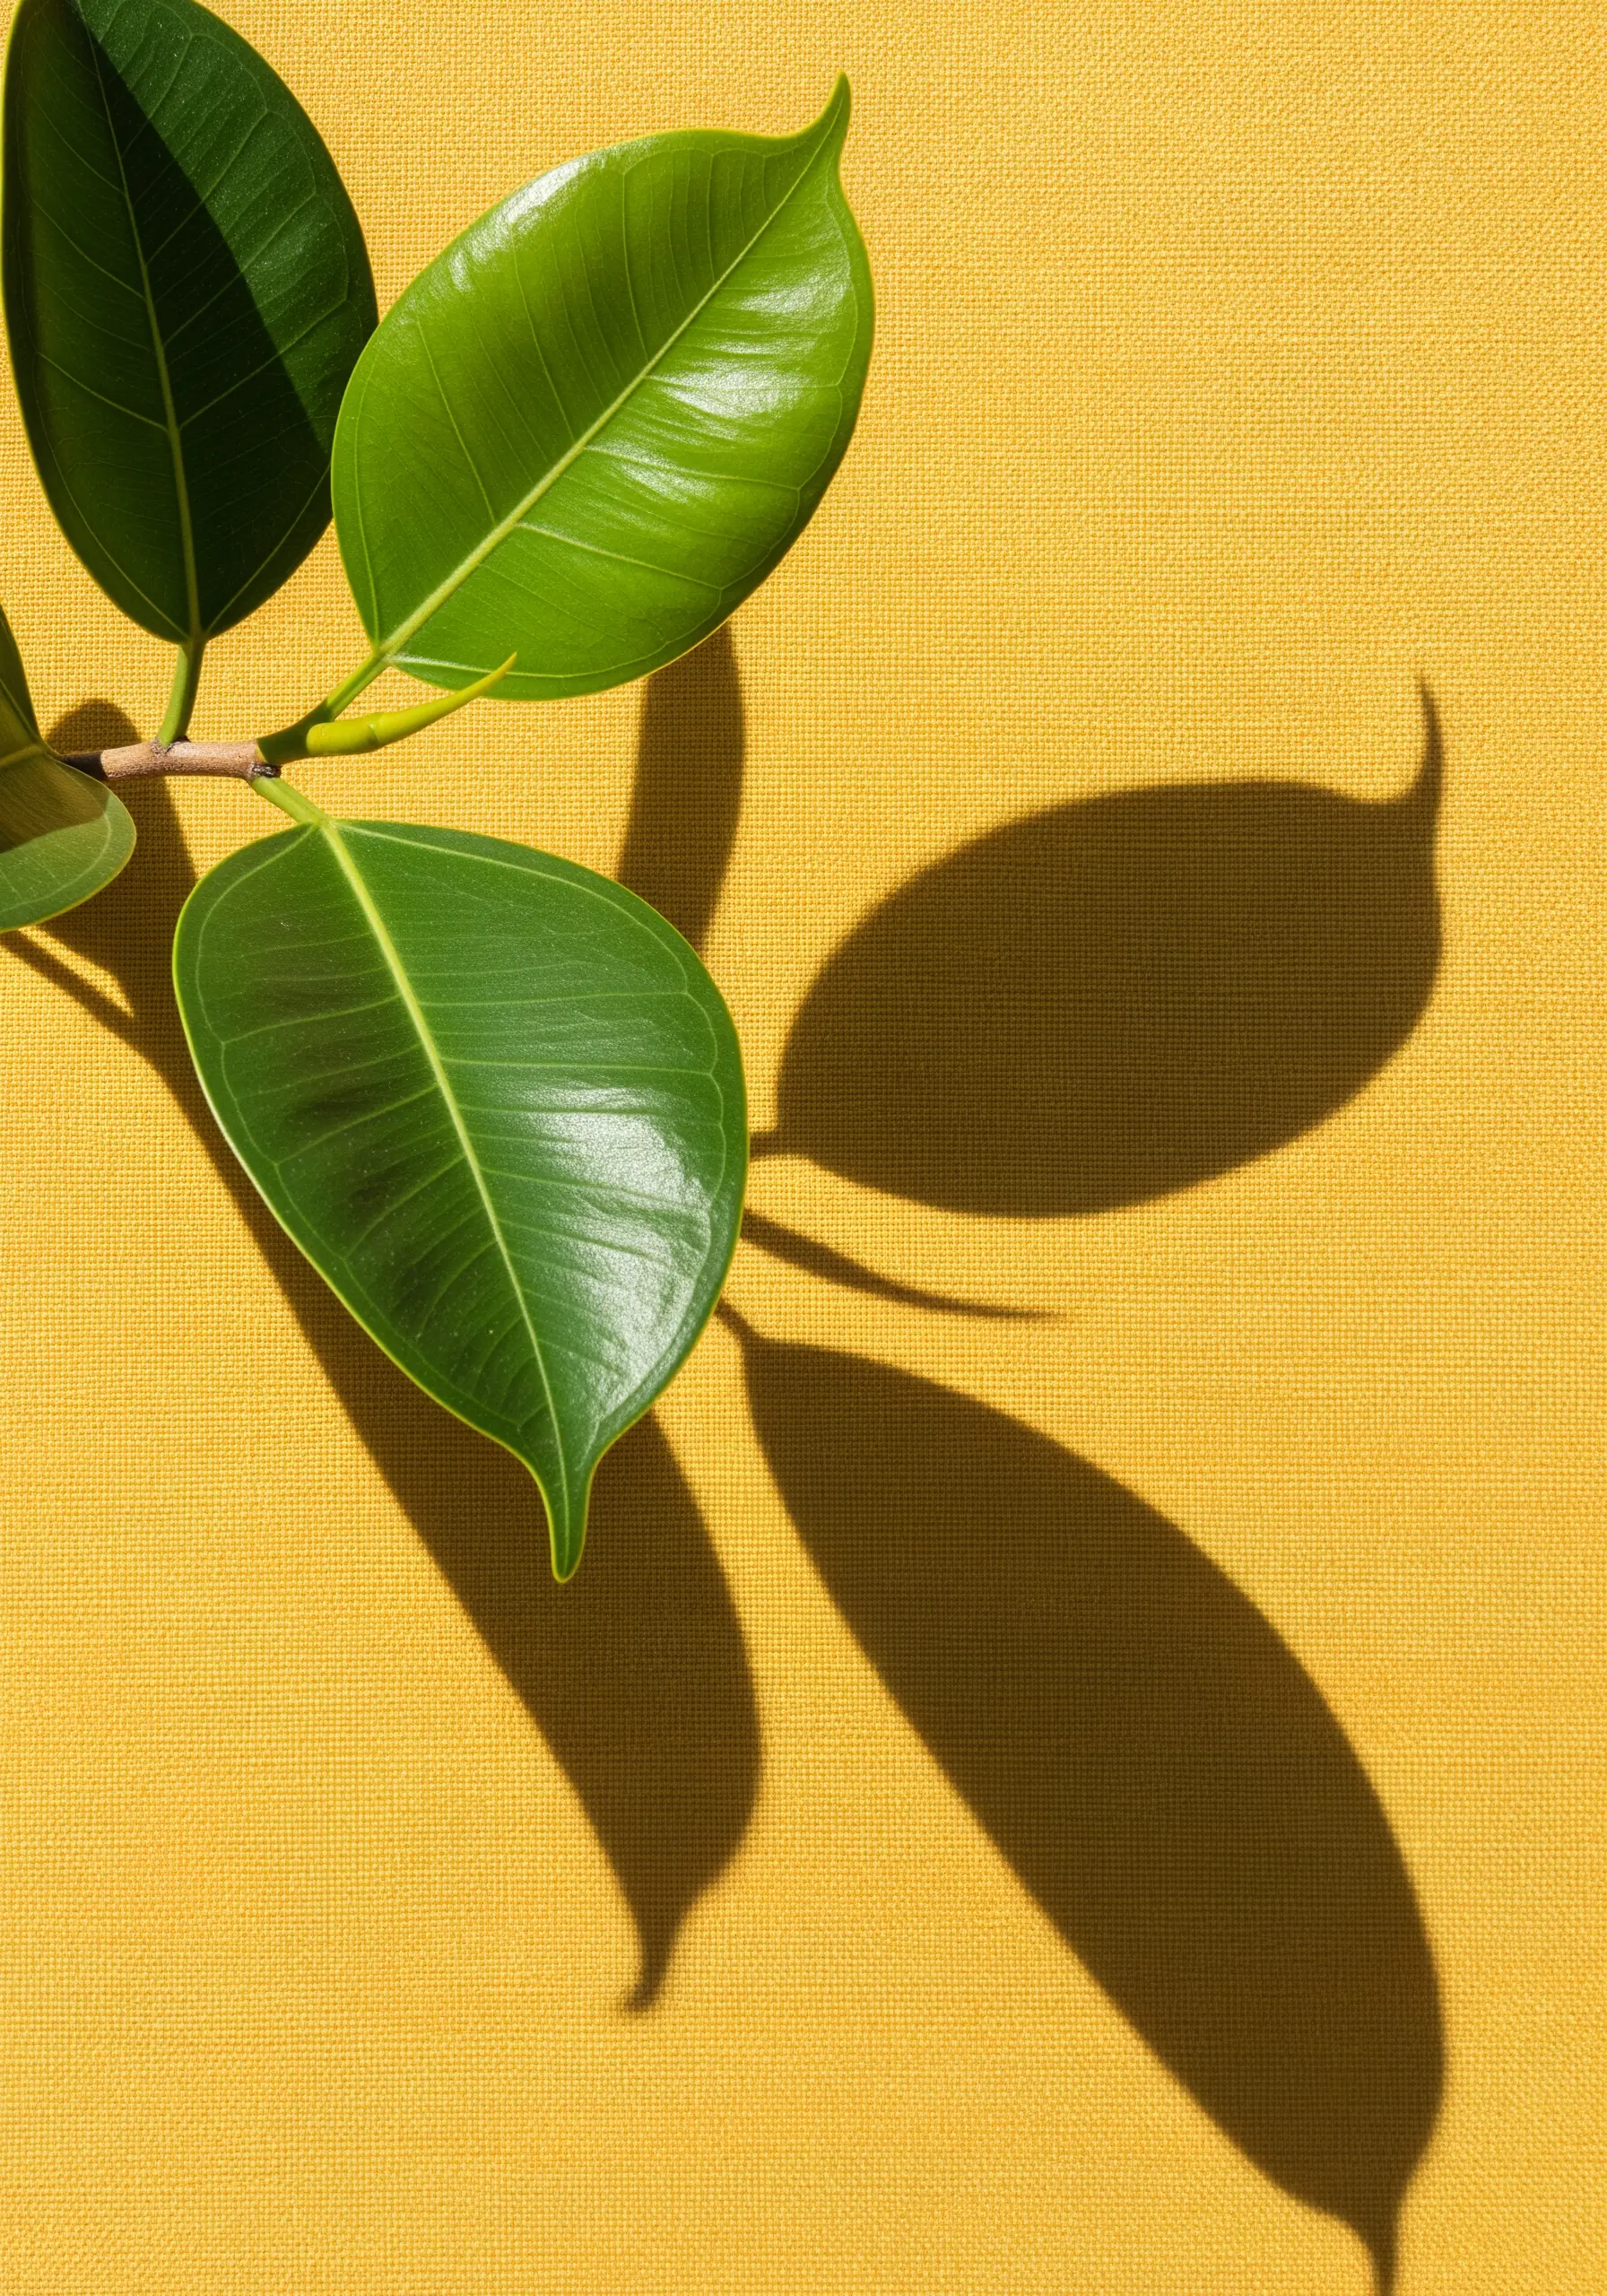
Your greatest tool for creating realistic shadows is observation. Before you pick up a needle, study your subject in real life.
Place a leaf near a window or under a lamp and notice where the light hits and where the shadows fall. Pay attention to the edges—are they sharp or blurry?
Observe the color of the shadow. It’s rarely pure gray; it often picks up cool blues from the sky or warm tones from its surroundings.
Translating these subtle details from life to thread will elevate your work from craft to art.
9. Use a Graphic Block of Black for High Impact
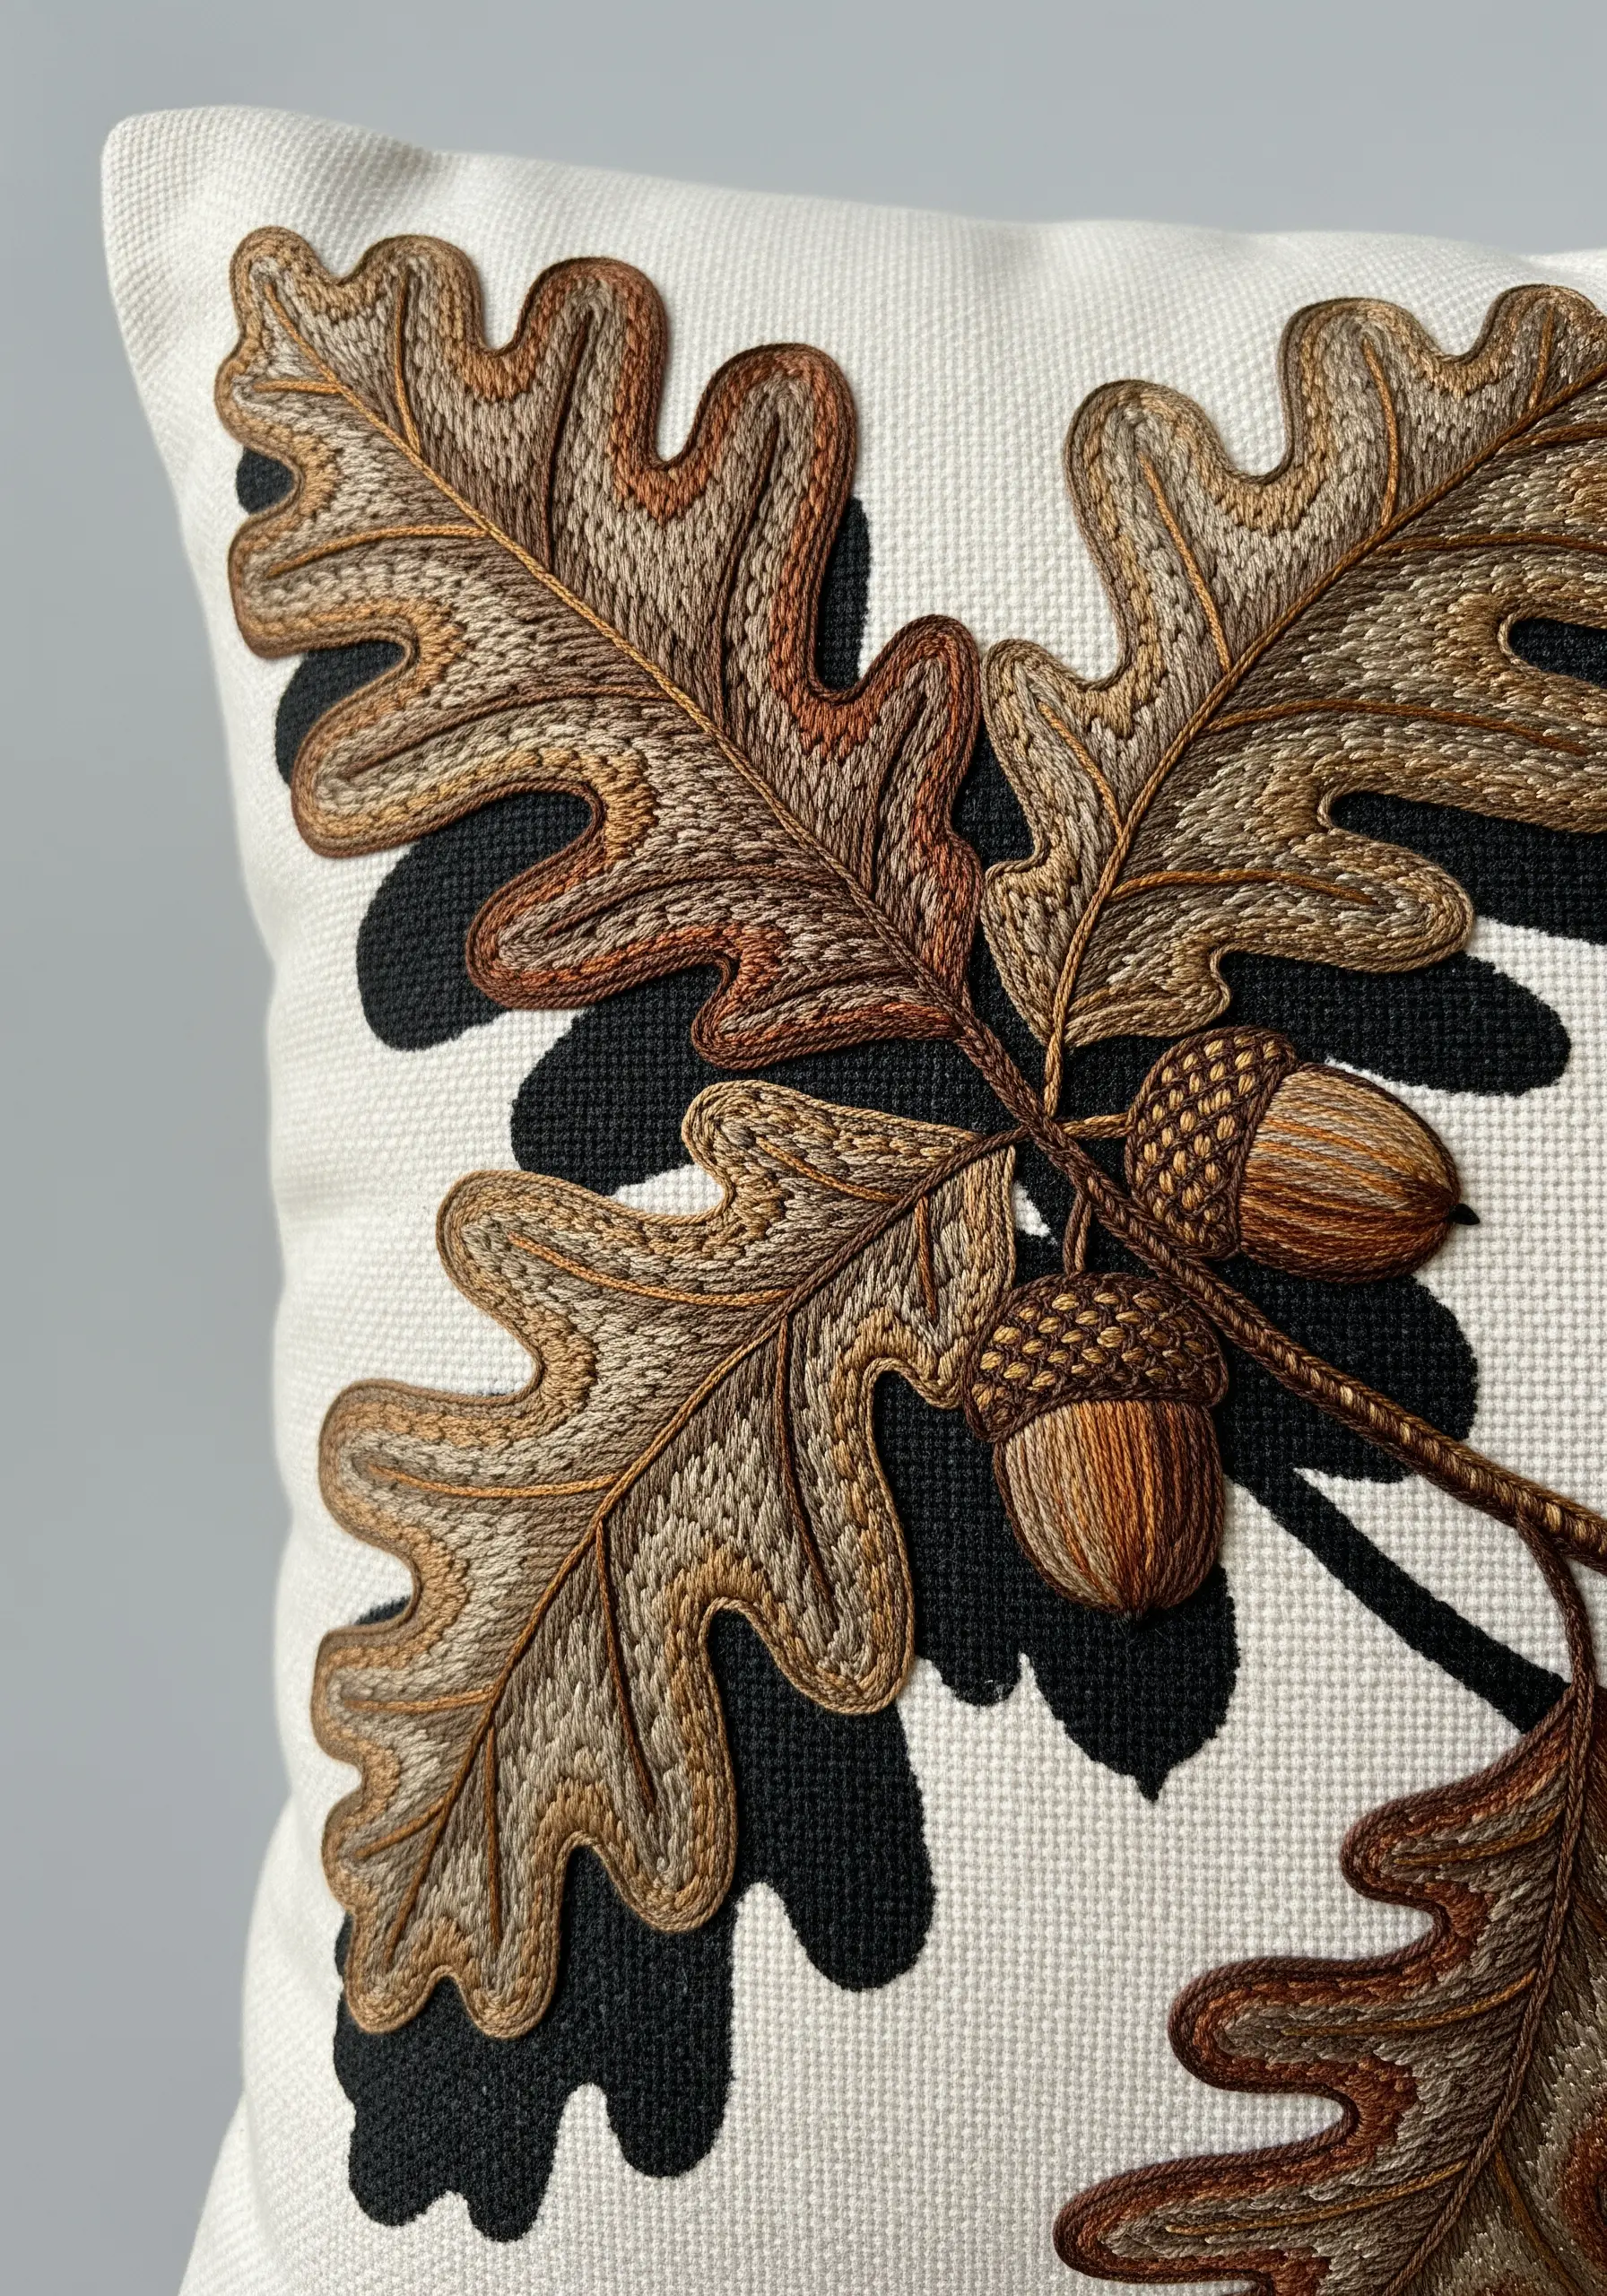
For a bold, illustrative style, create a solid black shadow that acts as a strong graphic element in your composition.
Fill the entire shadow area with dense, smooth satin stitch, ensuring your stitches are parallel and tightly packed for a uniform finish.
This technique creates a powerful contrast that pushes the intricately stitched leaf forward, making it the undeniable focal point.
This graphic approach is especially effective for home décor and other embroidery pillow ideas where you want the design to make a statement.
10. Blend the Shadow into the Leaf with Thread Painting
Use long-and-short stitch to seamlessly transition from the leaf’s main color into a shadow color on the leaf itself.
Imagine a light source and decide which parts of the leaf would be in shade, then gradually introduce darker threads in those areas.
Choose a shadow color that complements the leaf—a deep burgundy for a red leaf, or a dark purple for a magenta one.
This technique is similar to the principles behind contemporary rainbow blend stitches, where color transitions create all the form and dimension.
11. Suggest a Shadow with Textured Thread Scatter
Create an atmospheric shadow by building up texture on the background fabric.
Use a single strand of thread in a muted green or brown and make tiny, random seed stitches or french knots in the area where the shadow would fall.
For an even more tactile effect, you can trim the loops of turkey work to create a fine, moss-like pile.
This technique makes the smoothly stitched leaves appear to float above a textured, shadowy ground.
12. Manipulate Stitch Direction to Imply Shadow

You can create a subtle shadow effect without changing your thread color by simply changing your stitch direction.
Within the leaf, divide it into light and shadow sections. Keep the stitches in the light section uniform and angled to catch the light.
In the shadow section, switch the direction of your satin stitches—for example, from vertical to horizontal.
This shift will cause the threads to reflect light differently, creating a subtle but effective illusion of shadow and form.
13. Integrate Shadows into a Textured Background
When stitching on a textured surface like bark, felt, or coarse linen, make the shadow a part of that texture.
Instead of a flat satin stitch, use a darker thread to add more texture—like French knots or seed stitches—where the shadow falls.
This approach makes it feel like the shadow is falling over an uneven surface, connecting your embroidery to its background in a believable way.
The key is to mimic and deepen the existing texture rather than covering it up.
14. Create a Ghostly Shadow on Sheer Fabric

Stitching on transparent fabric like tulle or organza opens up unique possibilities for creating shadows.
As you stitch the leaf on the front, the back of your work becomes visible. This less-perfect ‘ghost’ image can act as a natural, ethereal shadow.
Alternatively, you can intentionally stitch a second, simpler version of the leaf directly behind the first, using a slightly darker or grayer thread to enhance the shadow effect.
Once complete, this technique results in stunning framed embroidery pieces that play with light and transparency.
15. Contrast Smooth Leaves with a Textured Shadow
Create a dynamic composition by giving your shadow a completely different texture from your main subject.
If your leaves are stitched with smooth satin stitch, fill the shadow area with a highly textured stitch like French knots or bullion knots.
This contrast in texture adds another layer of dimension and visual interest, turning the shadow from a simple shape into a fascinating tactile element.
Use a mix of related dark colors—like deep greens and browns—in your knots for even more complexity.
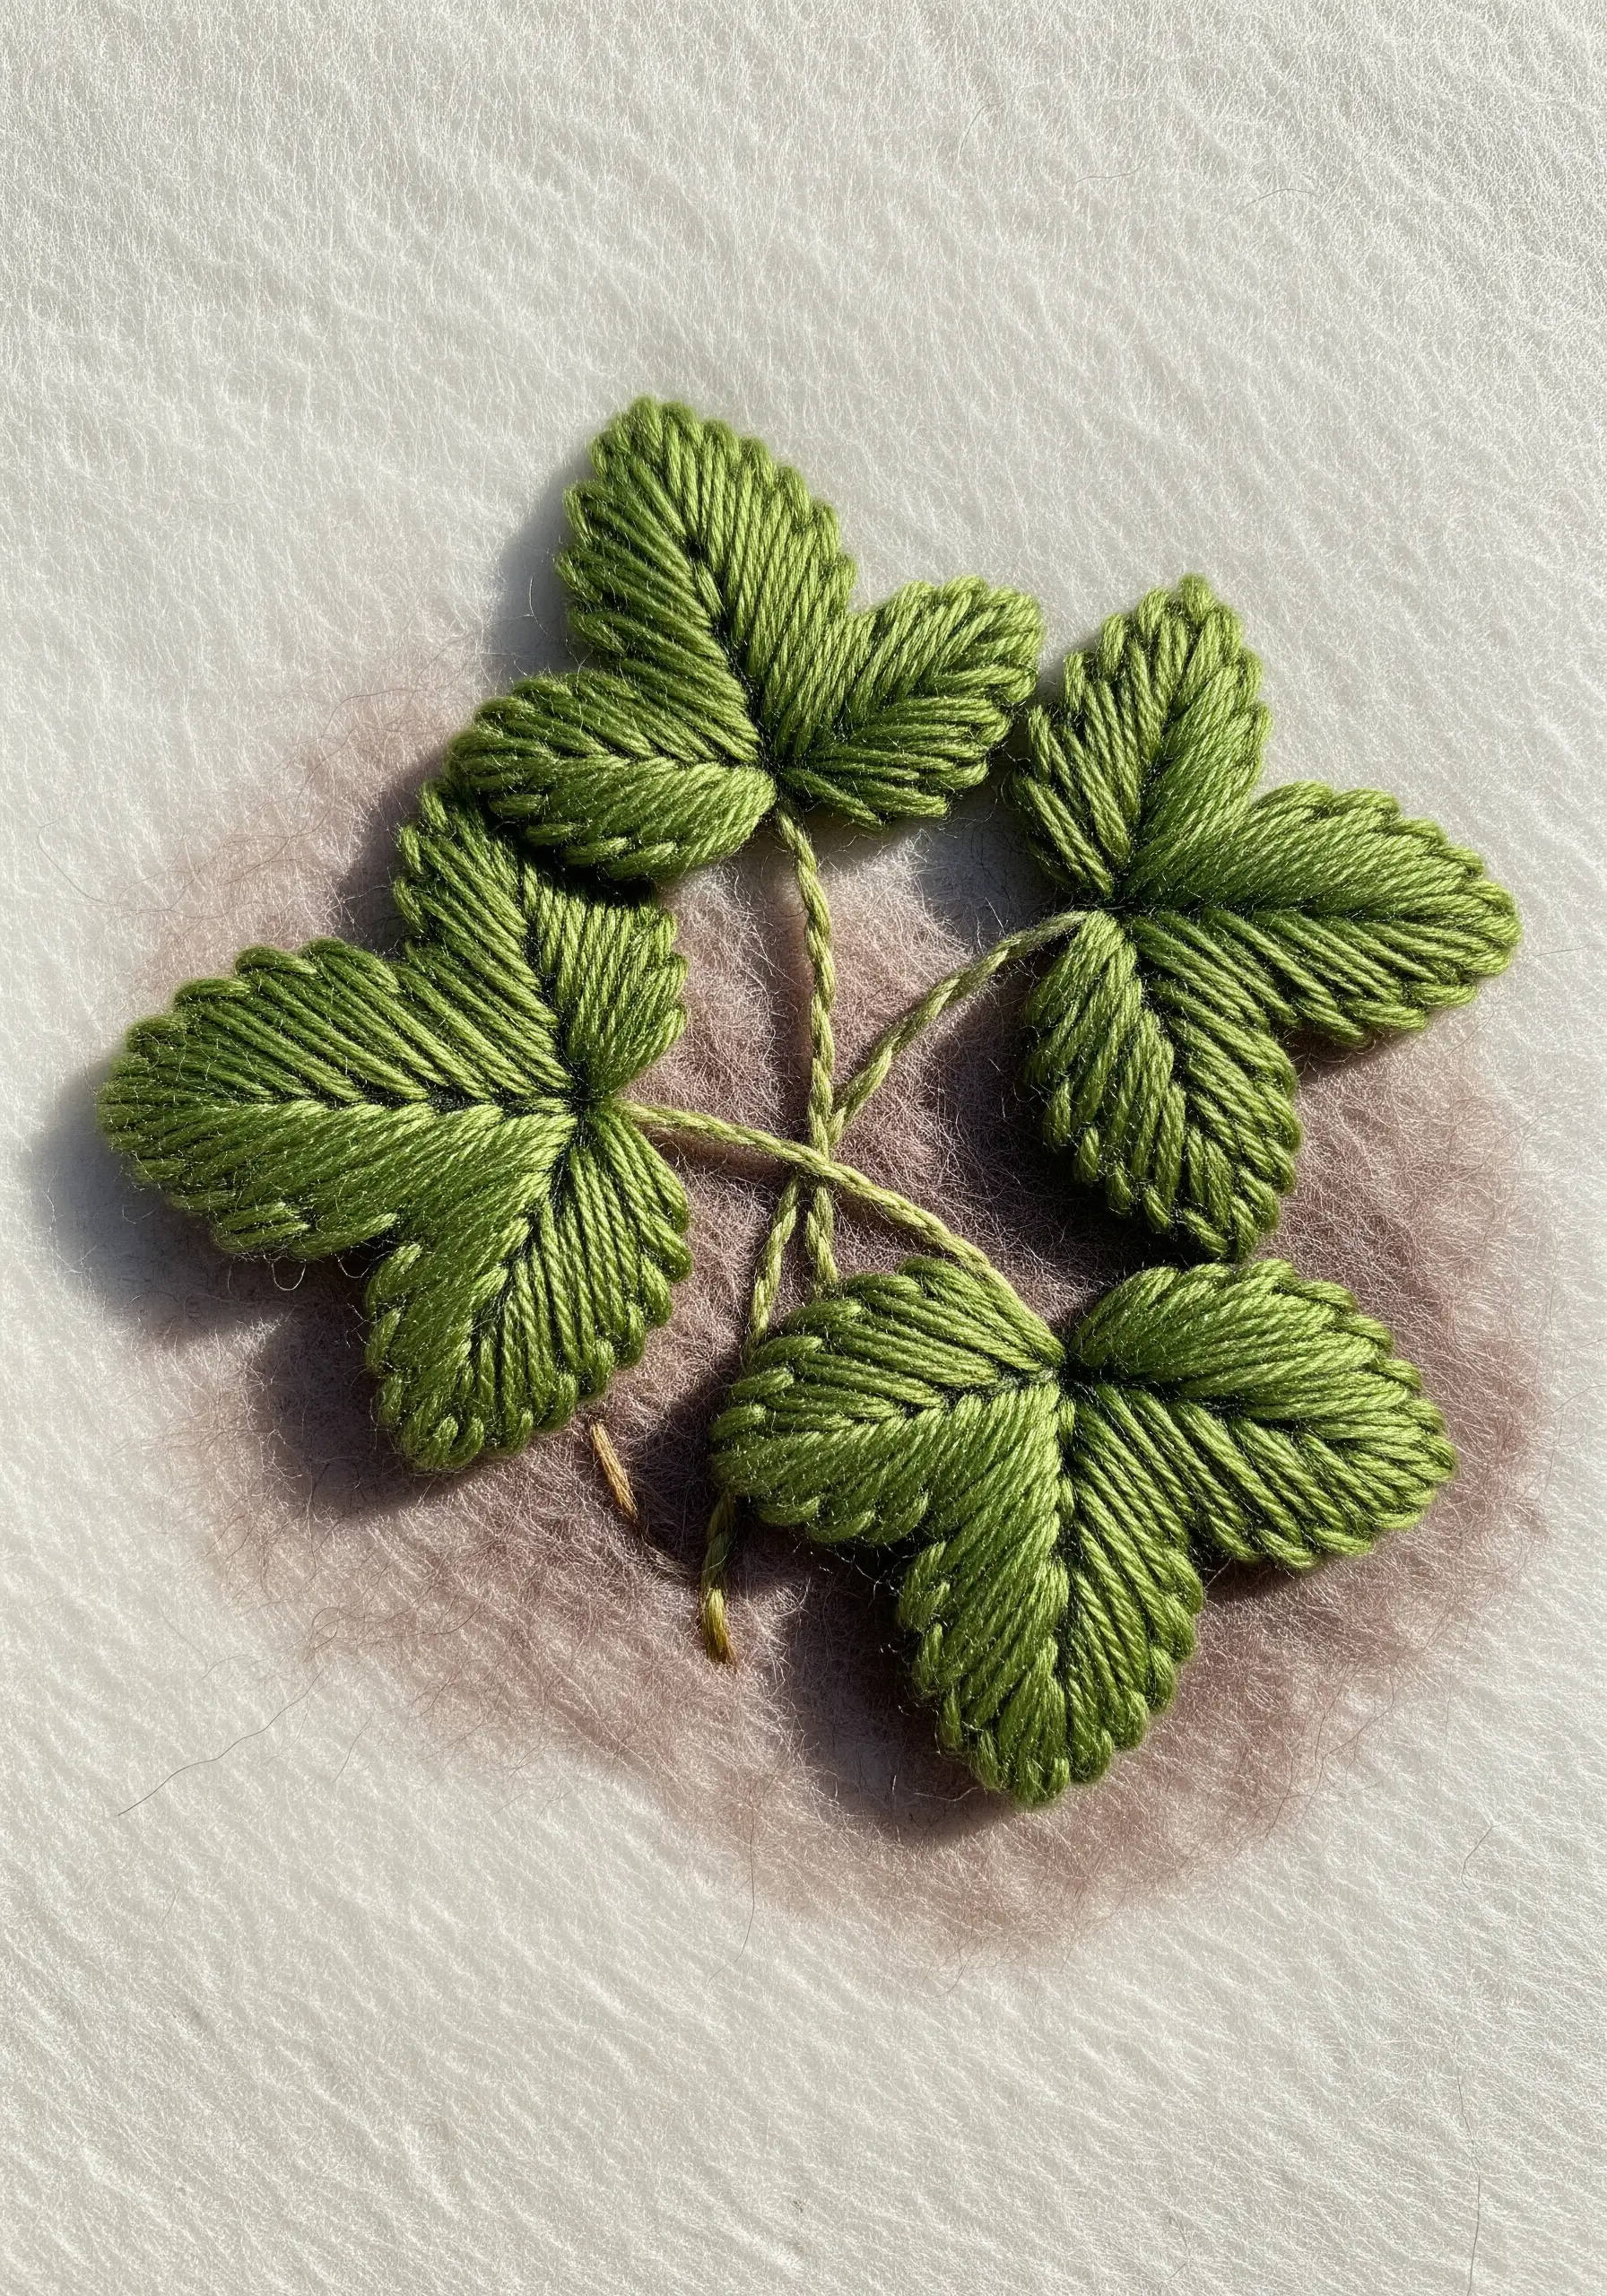
16. Imply Form with Subtle Color Shifts
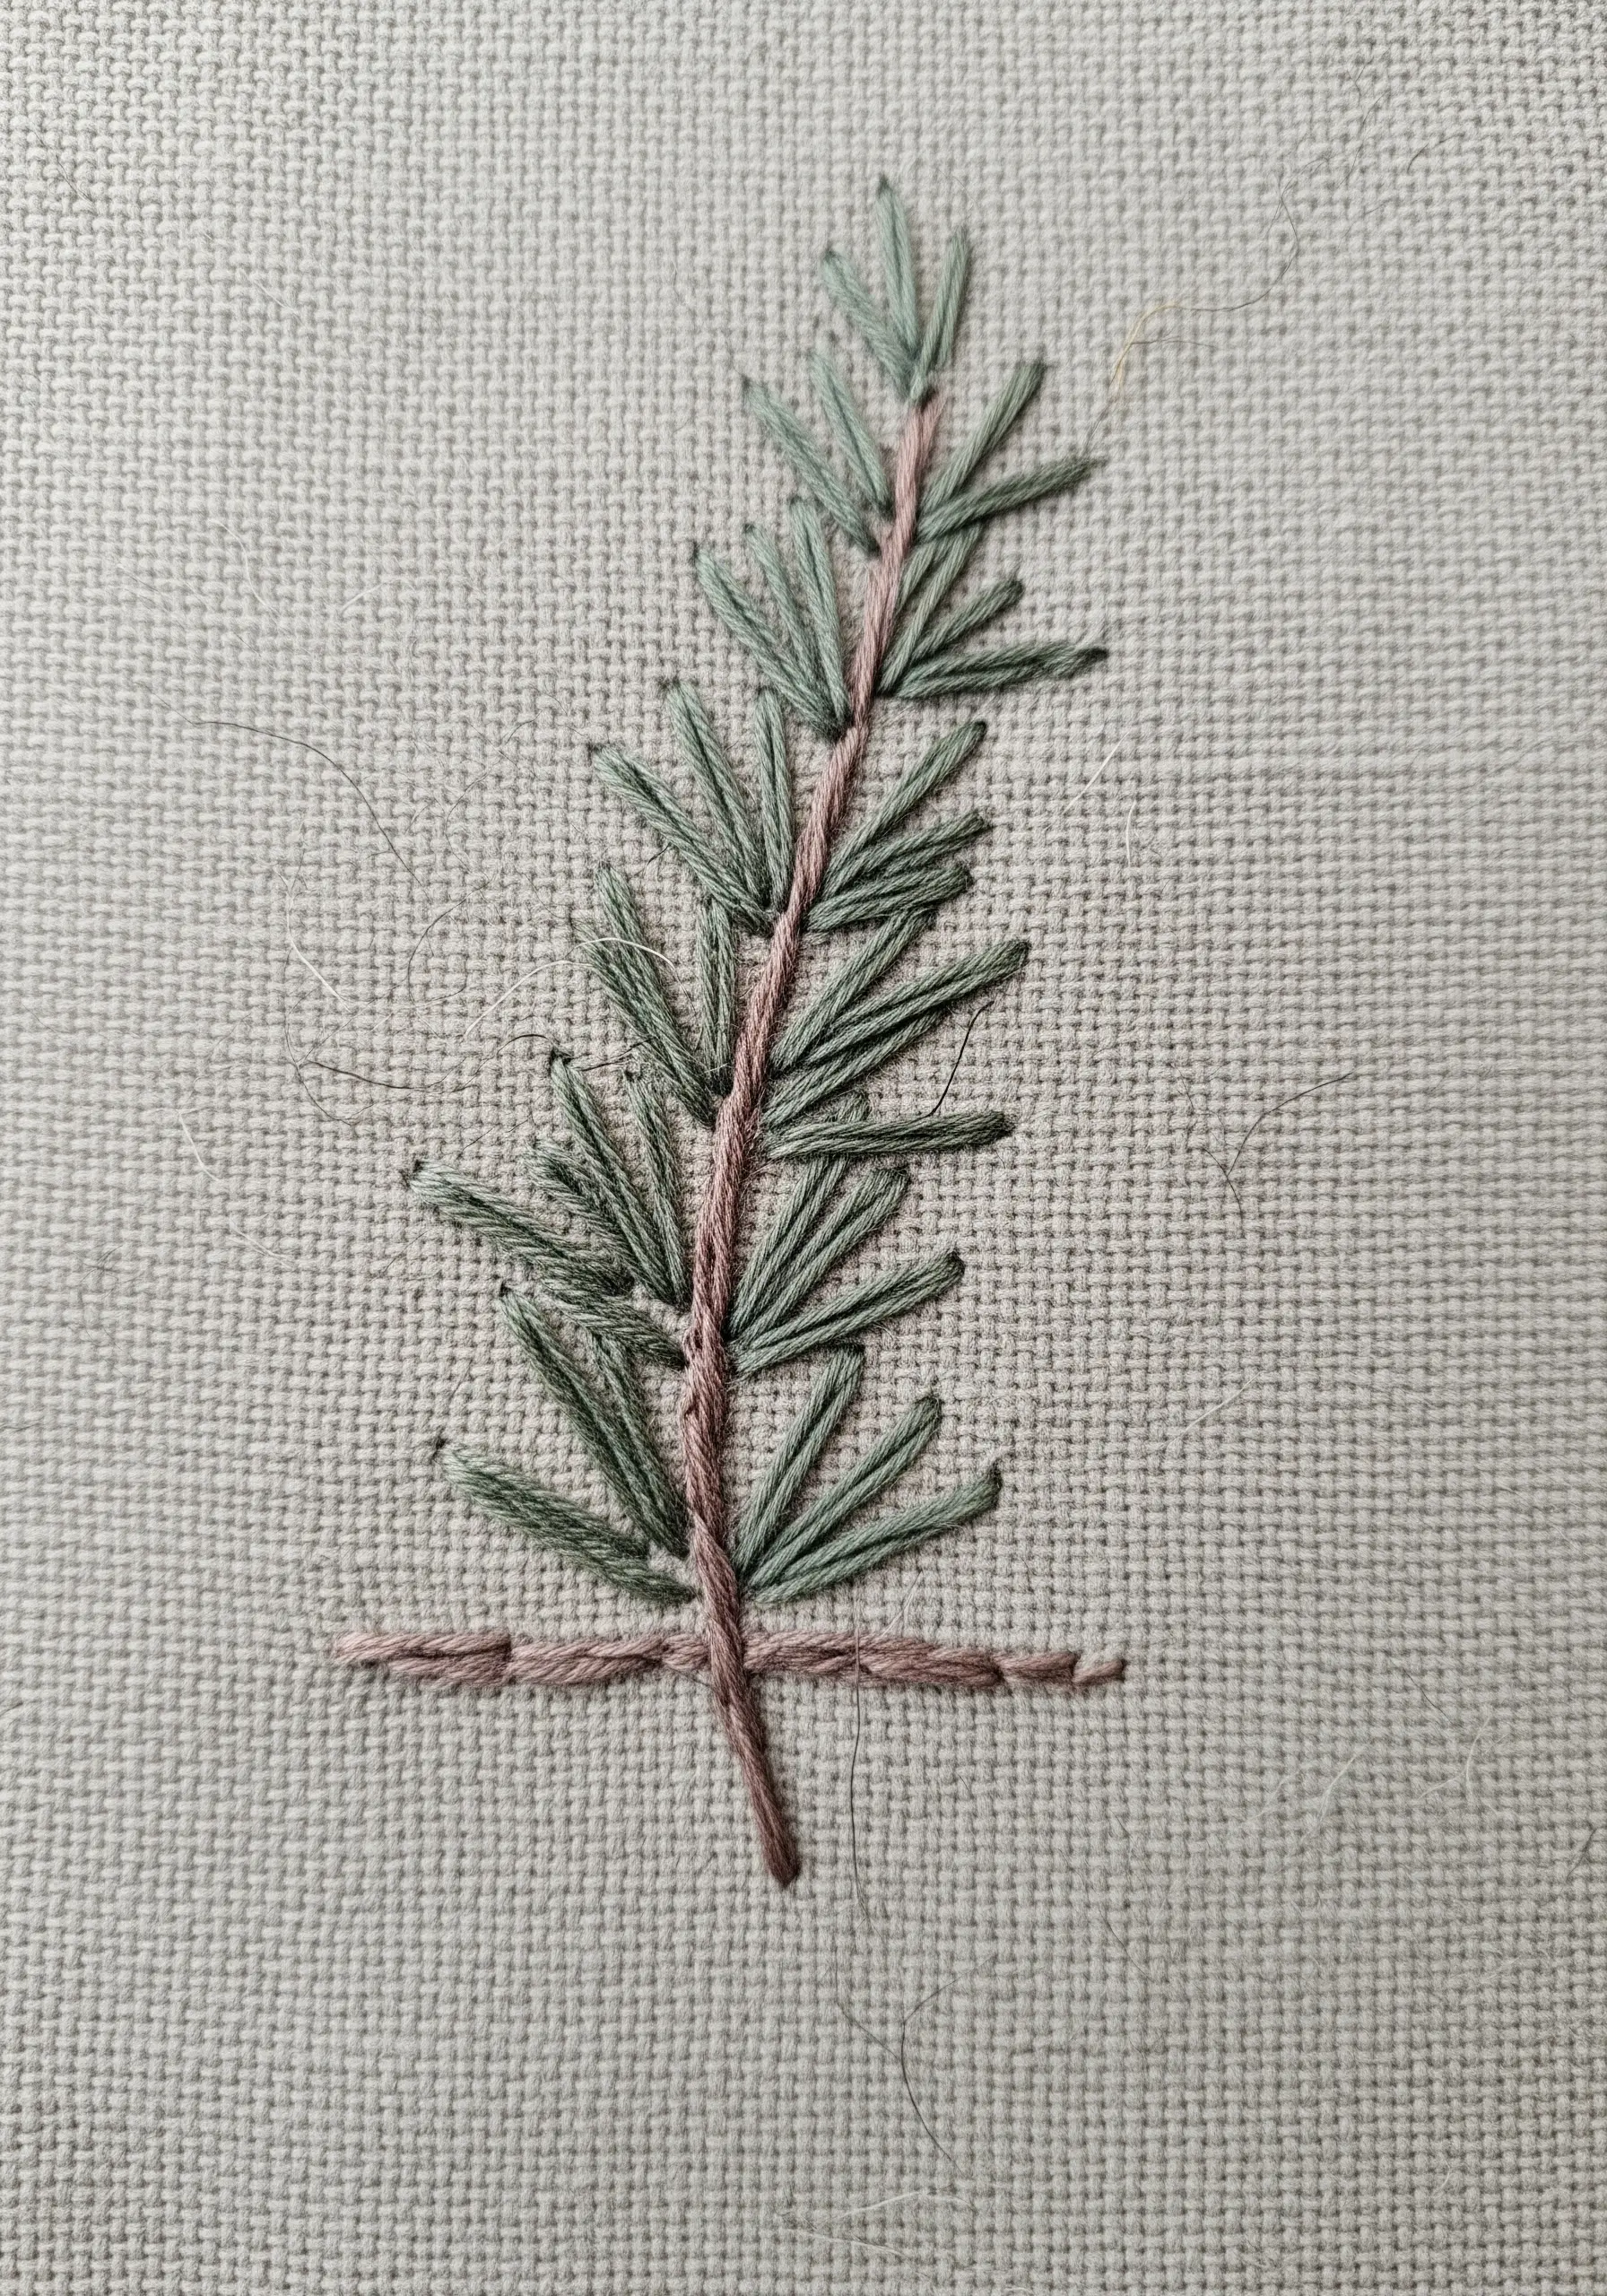
For minimalist designs, you can suggest depth and shadow without stitching a separate shape on the fabric.
Use two shades of the same color—one medium and one dark. Stitch the needles or leaves that would be in the light with the medium shade.
Then, tuck the darker shade behind them, stitching the parts of the plant that are on the underside or further away.
This simple color-blocking technique is all you need to create a sense of three-dimensional form.
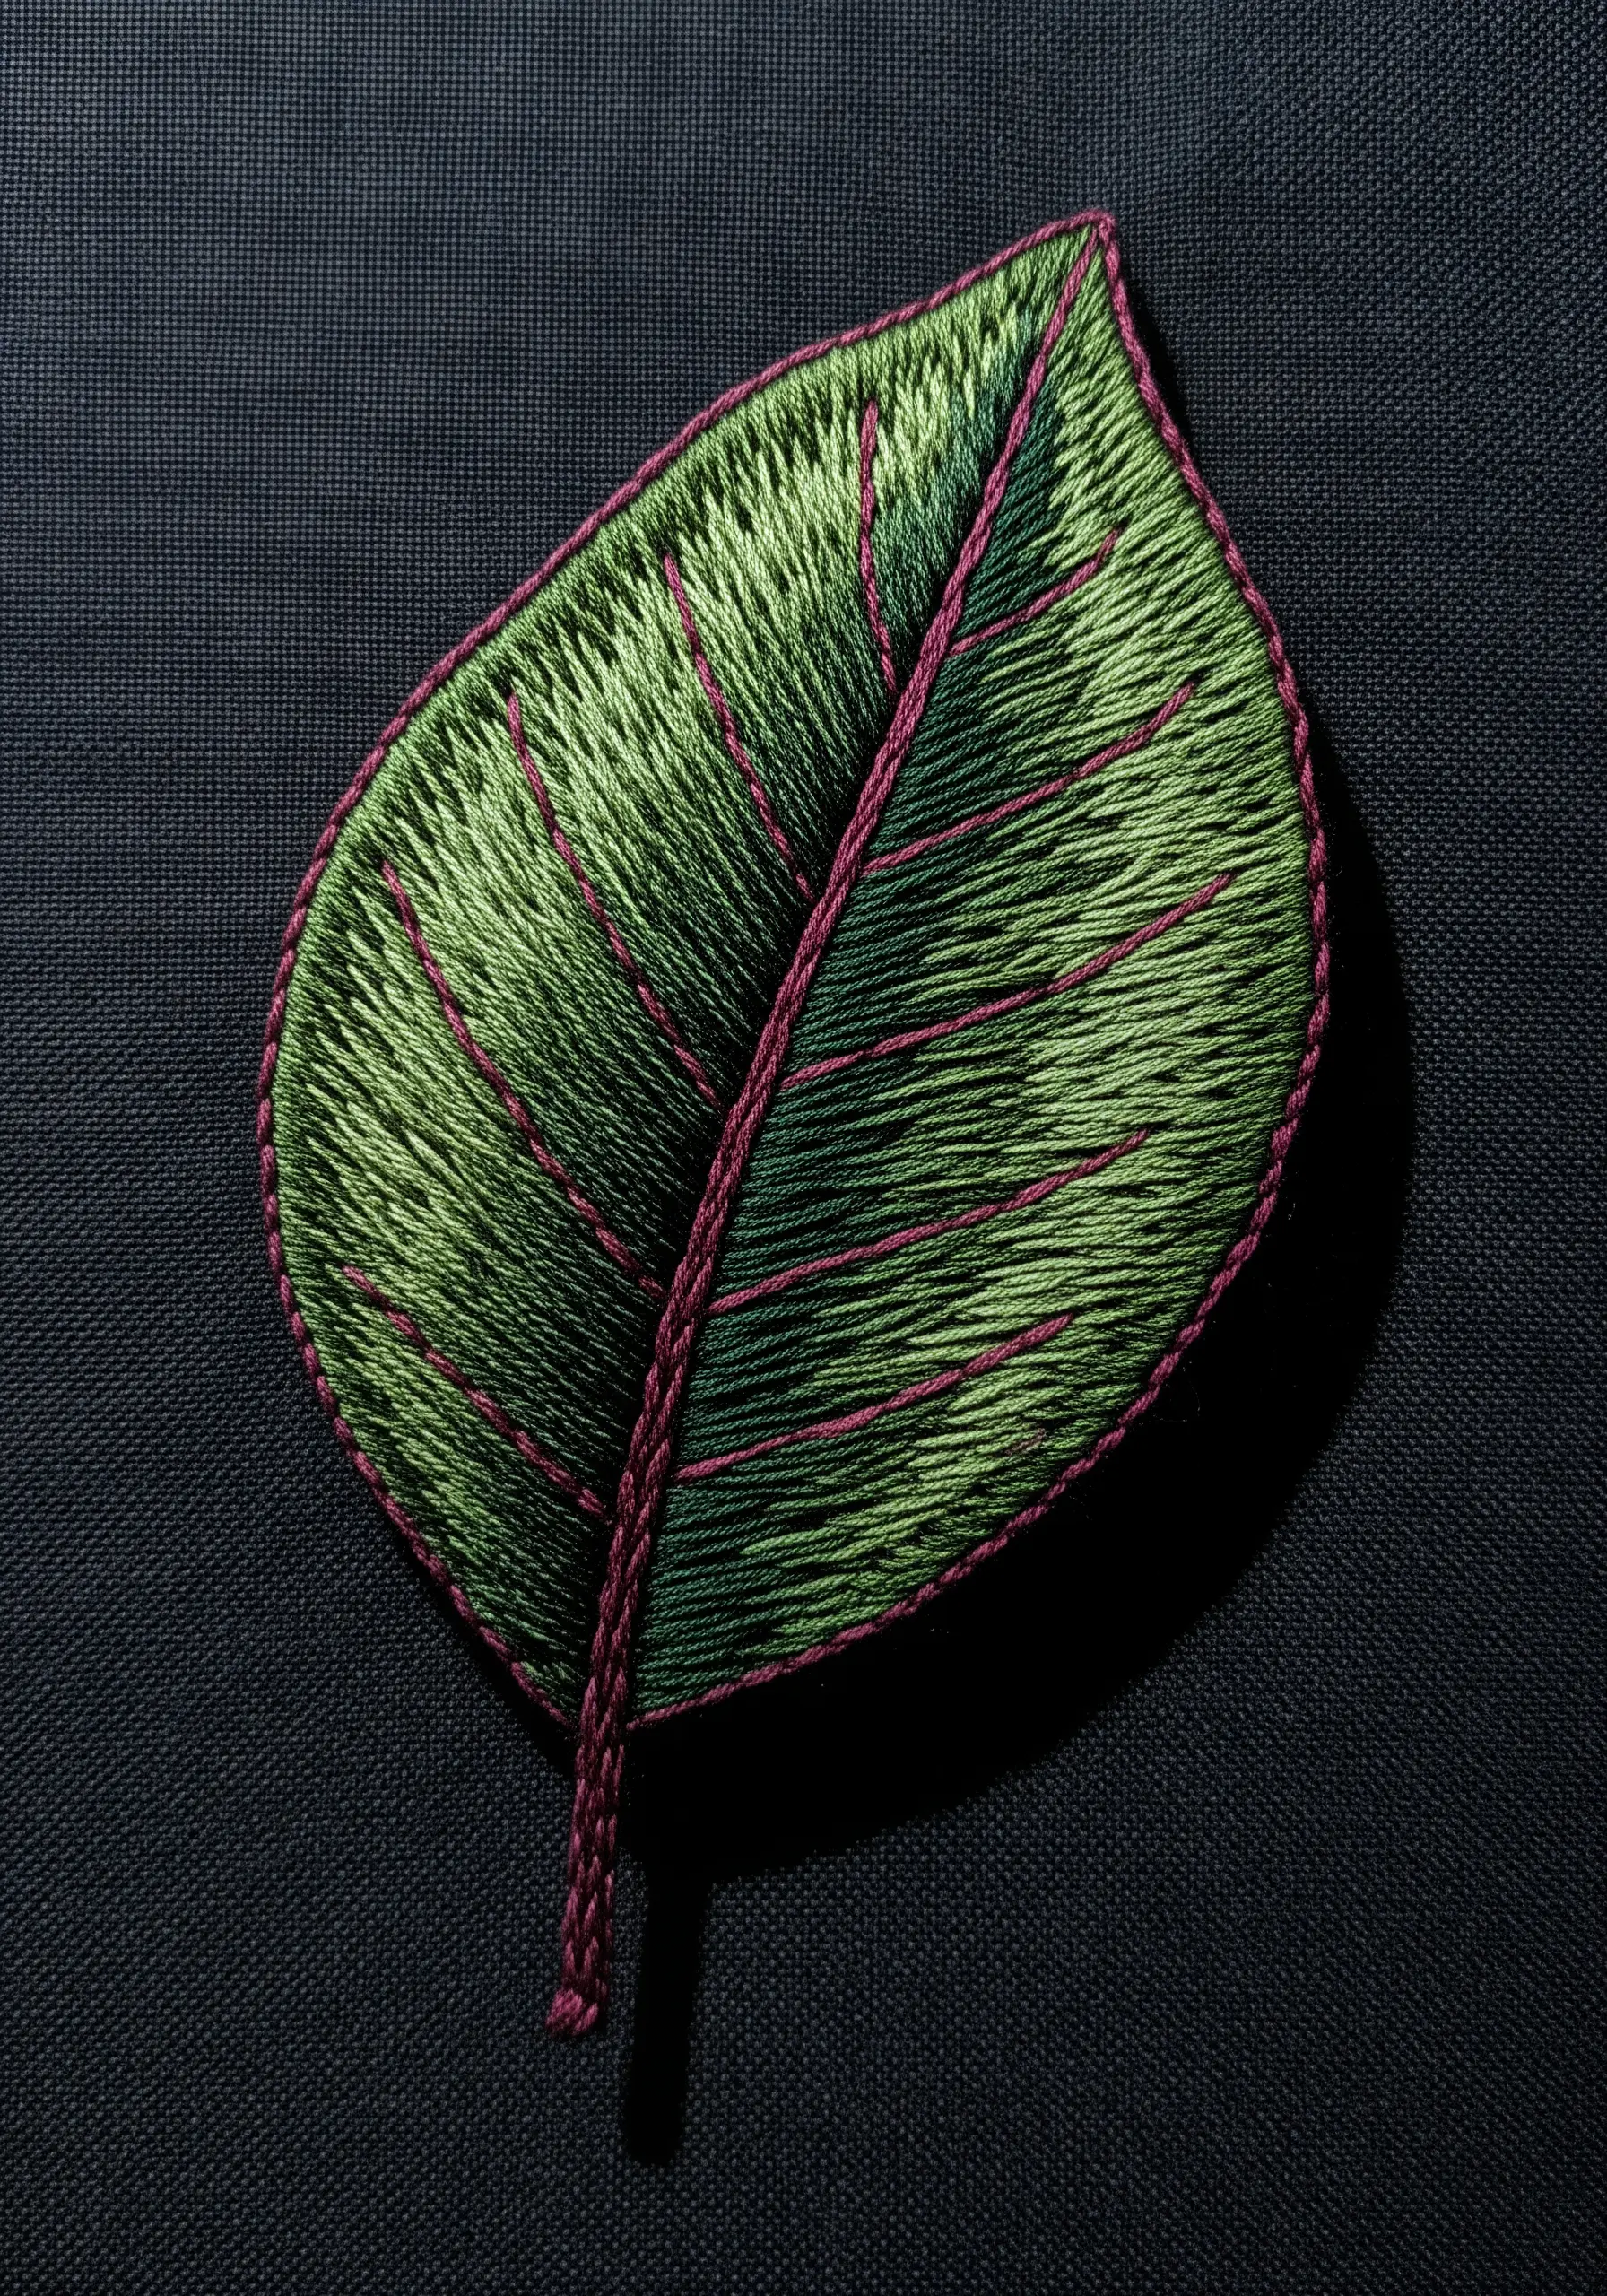
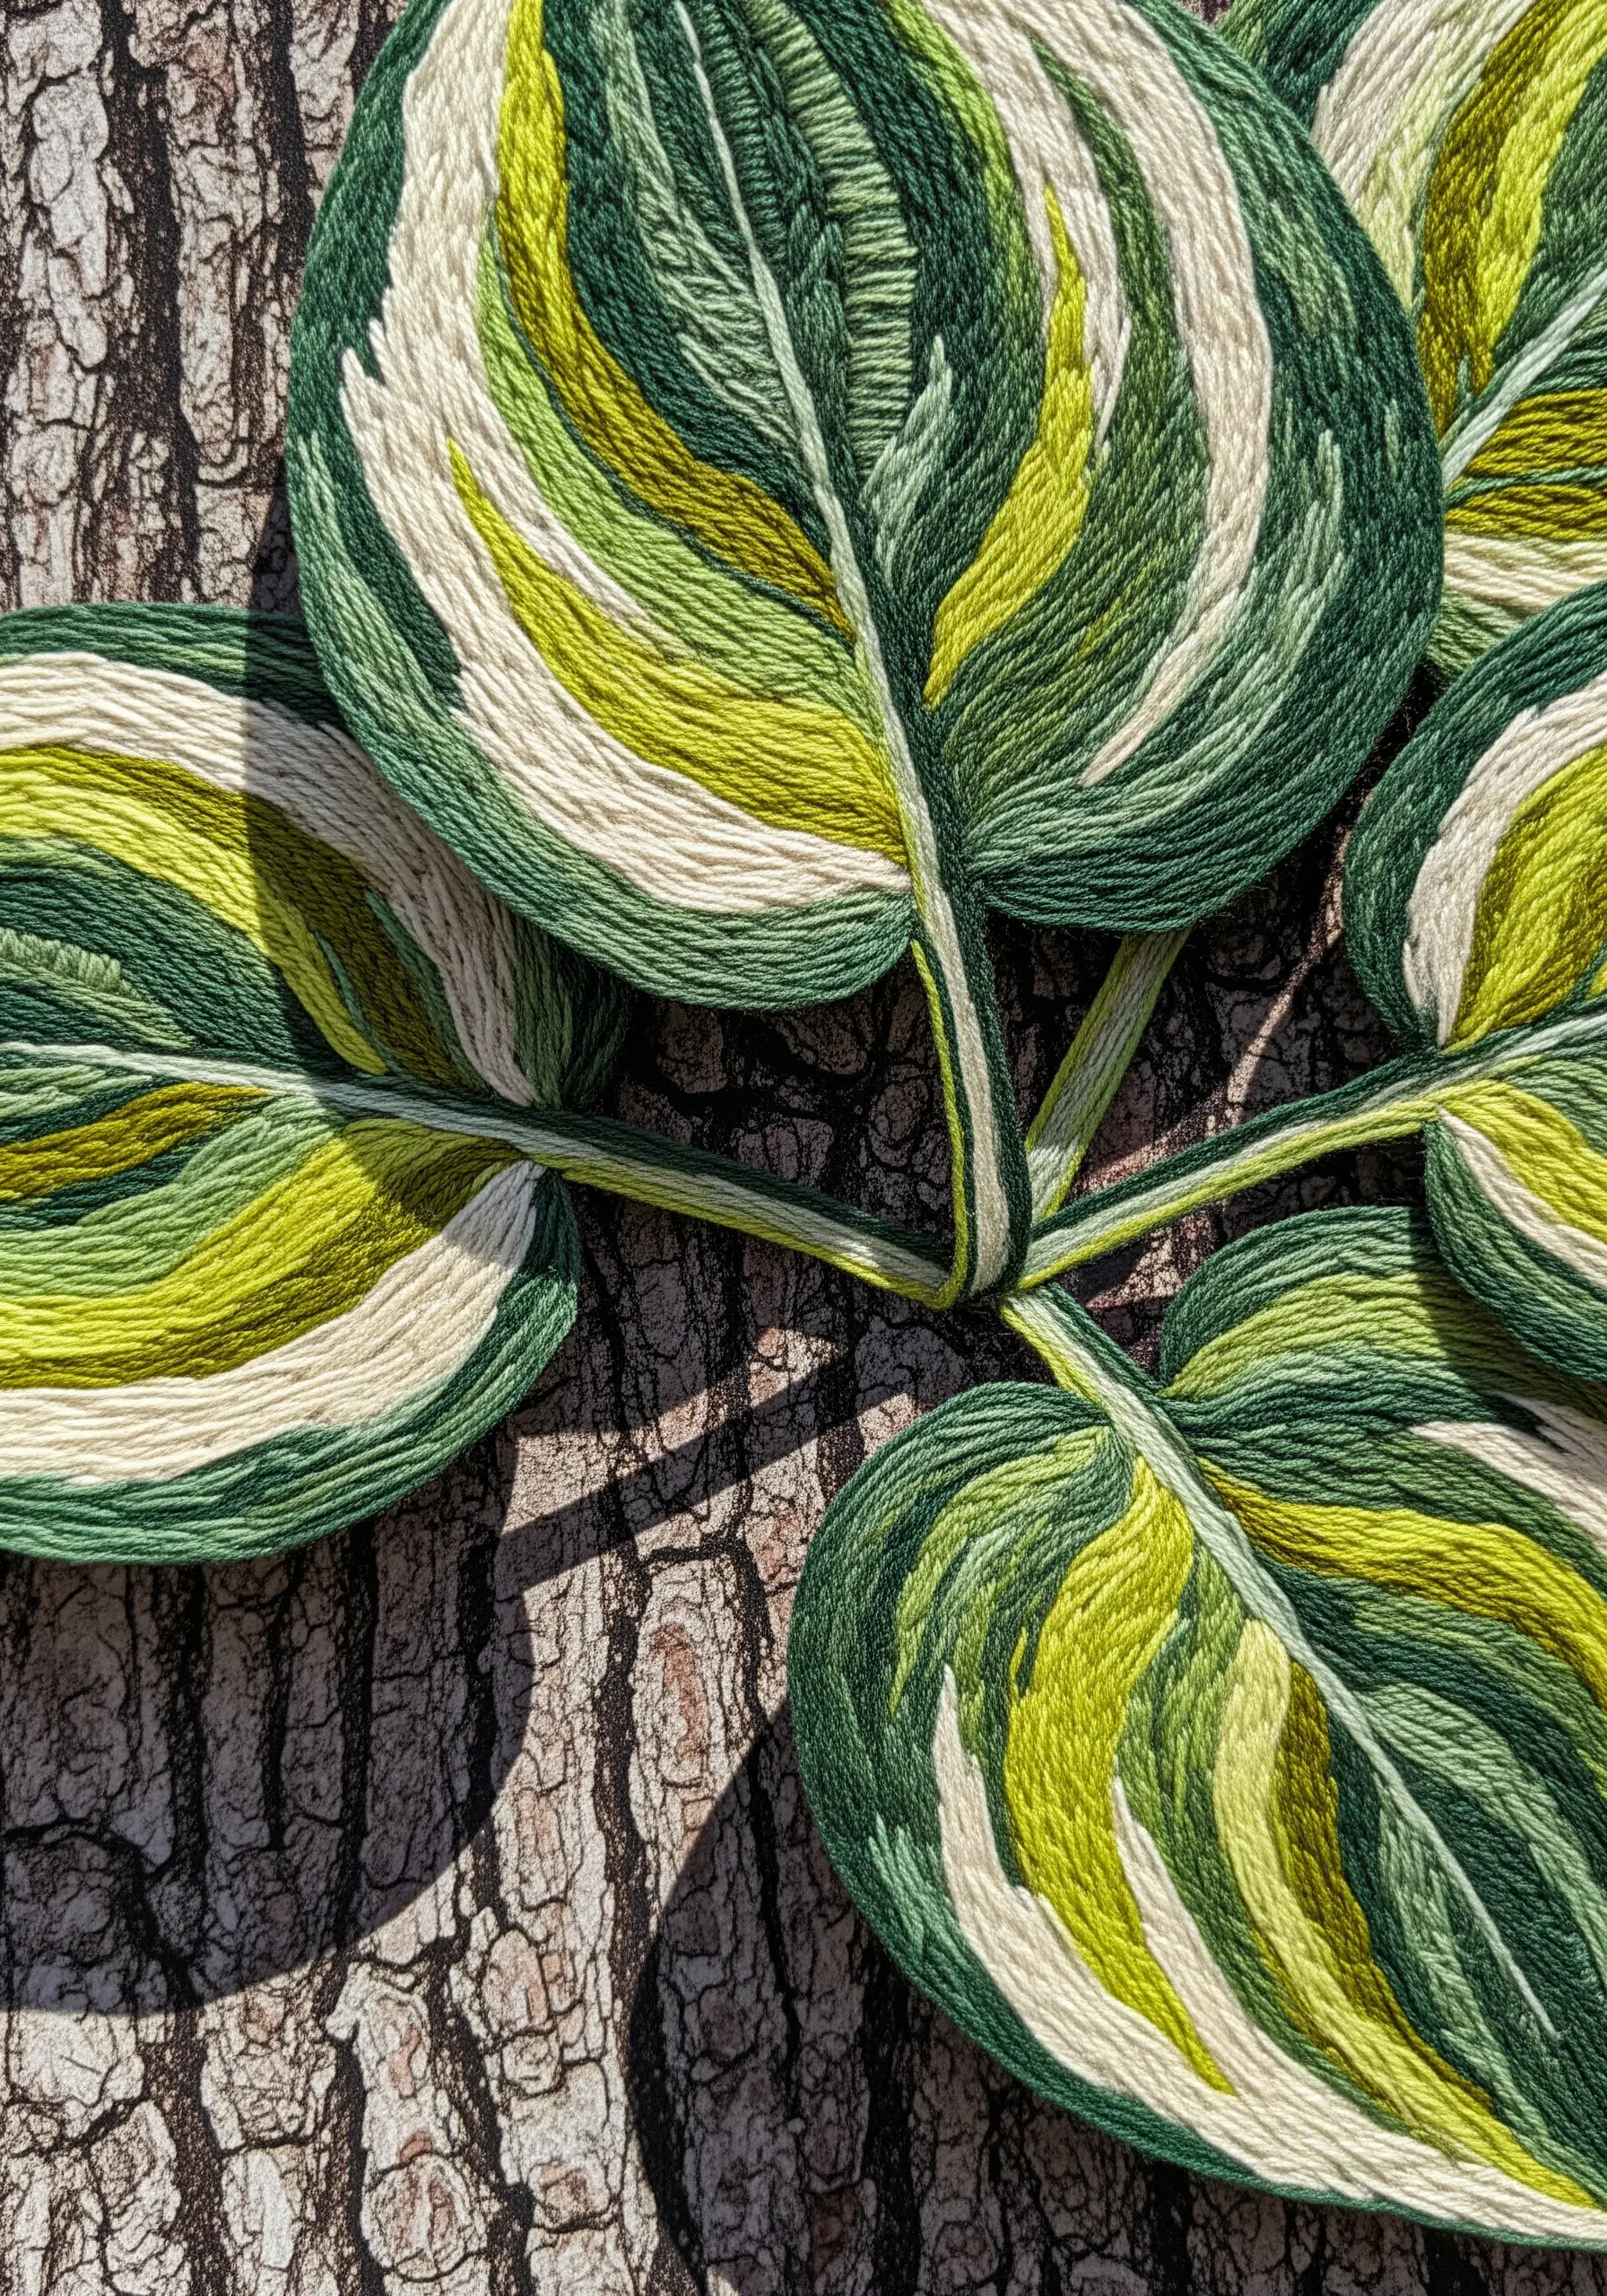
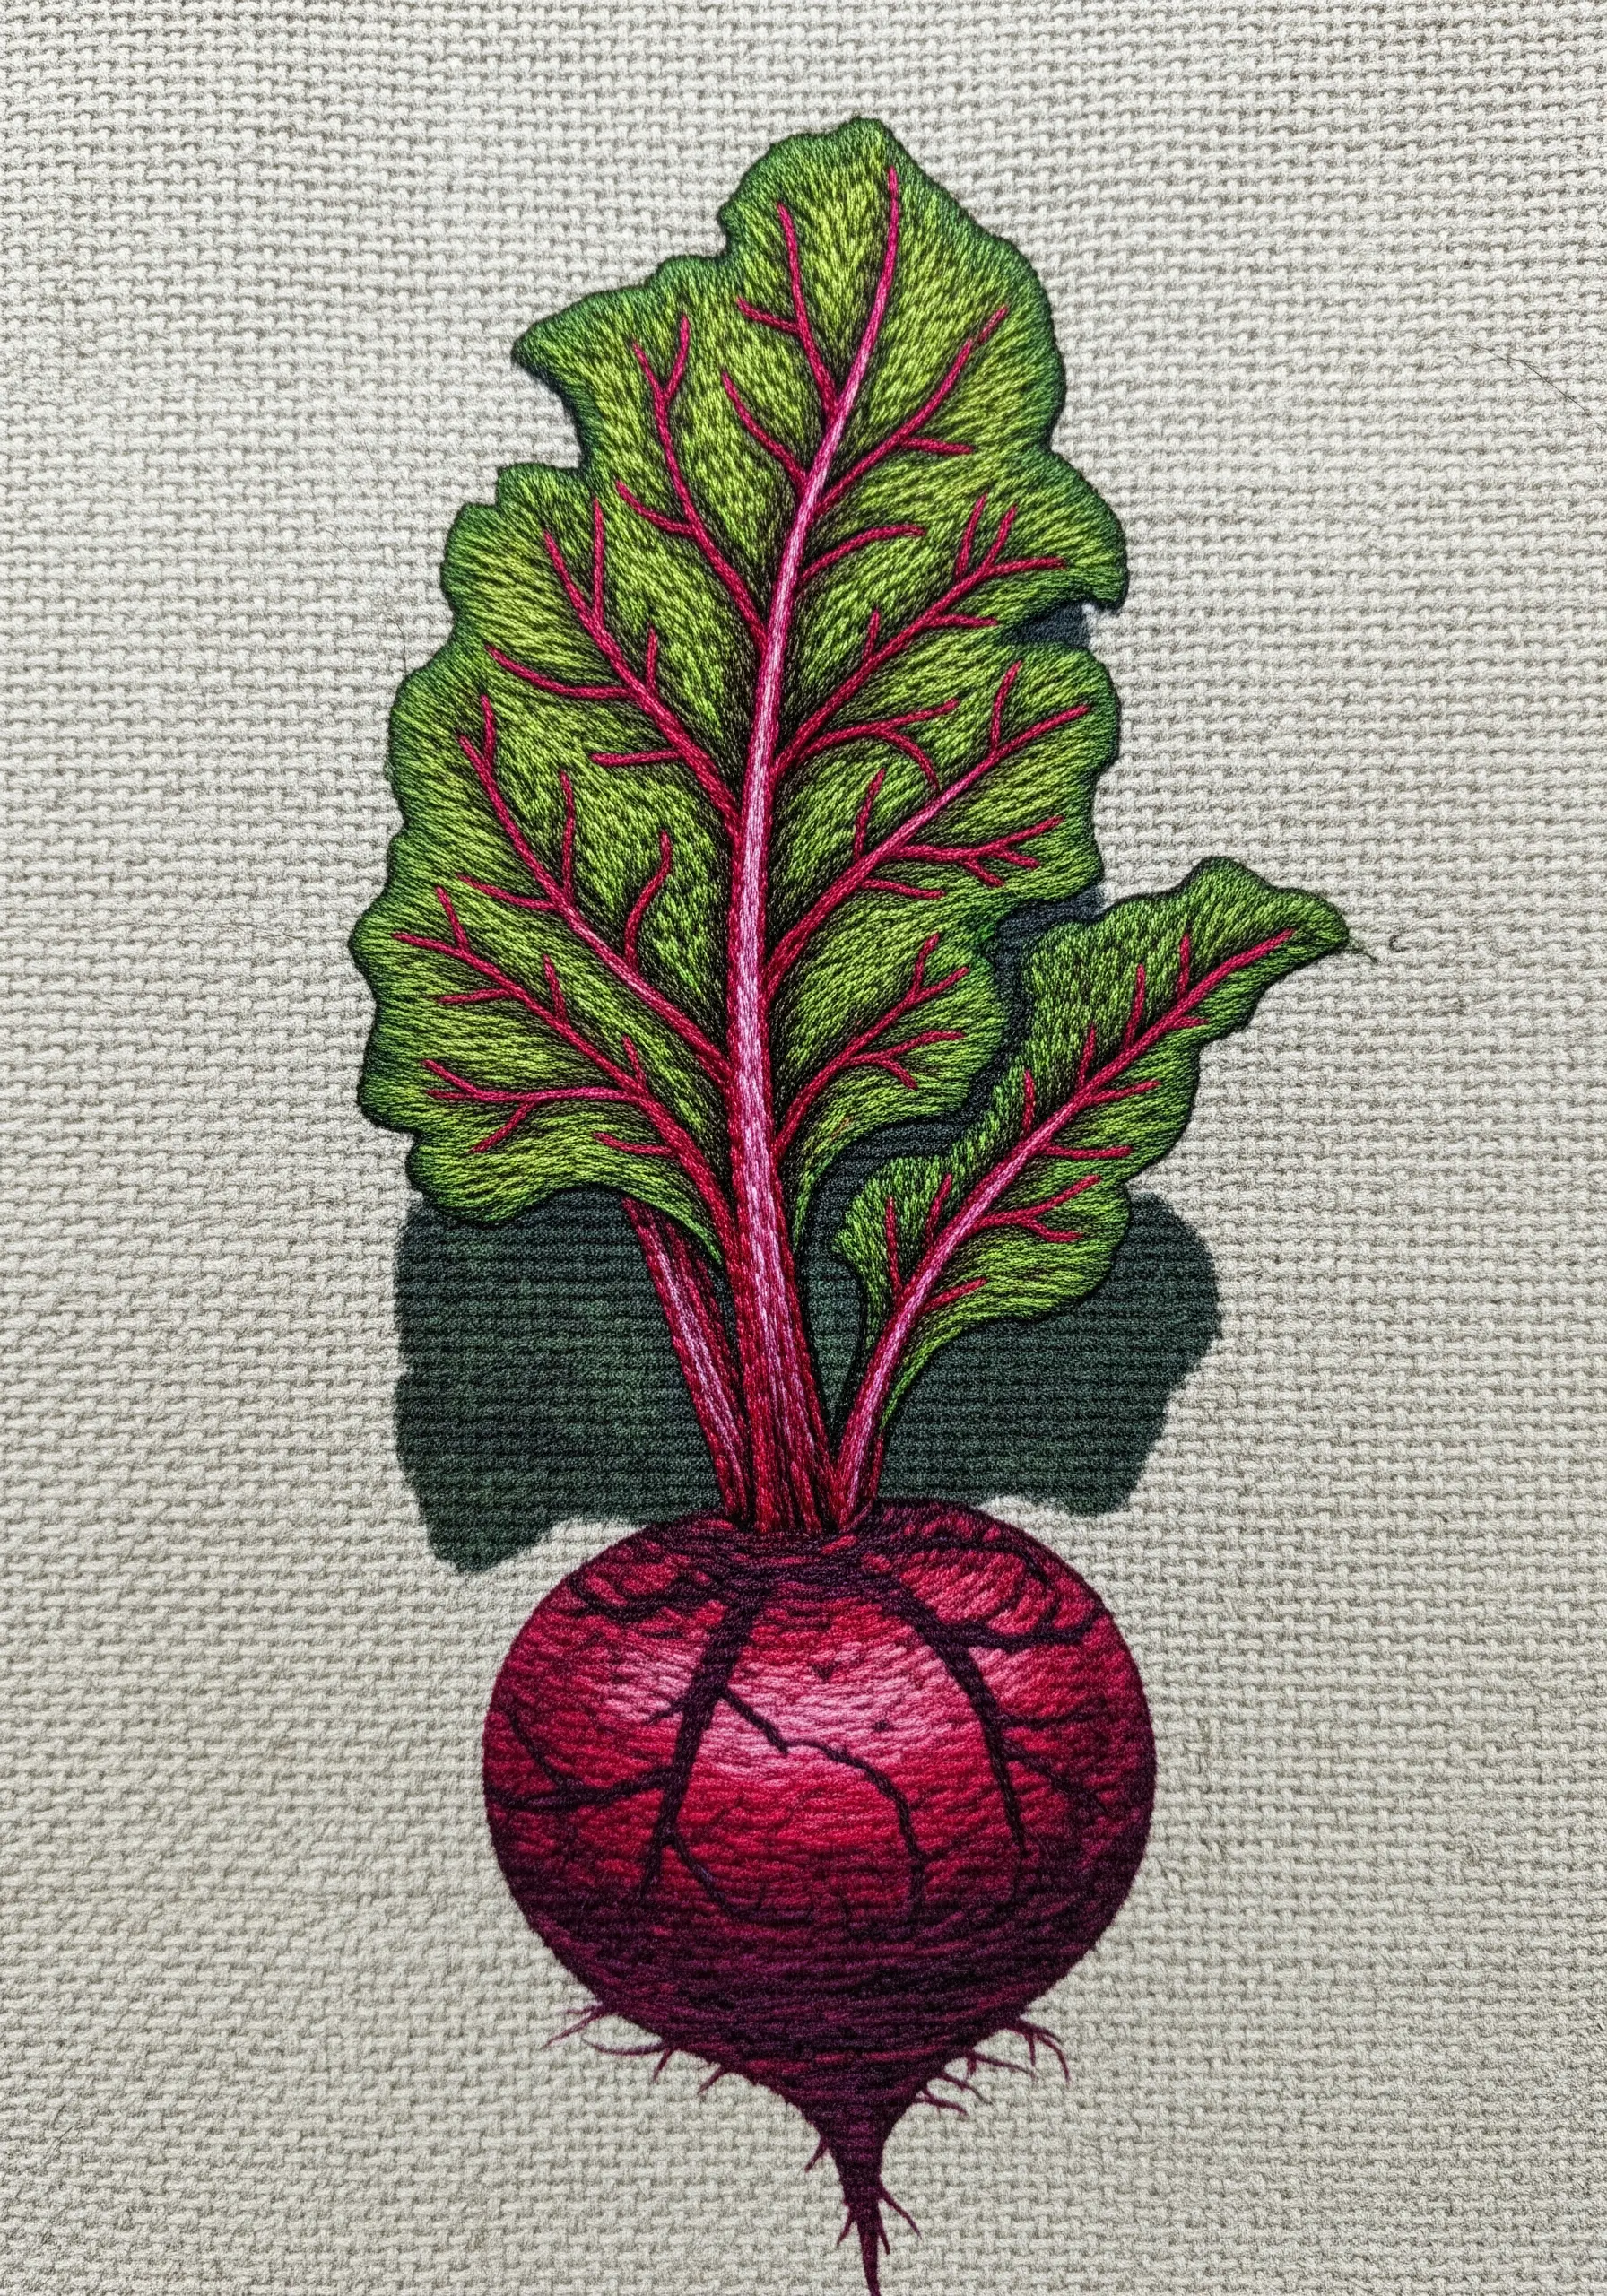
17. Stitch a ‘Color Echo’ Shadow
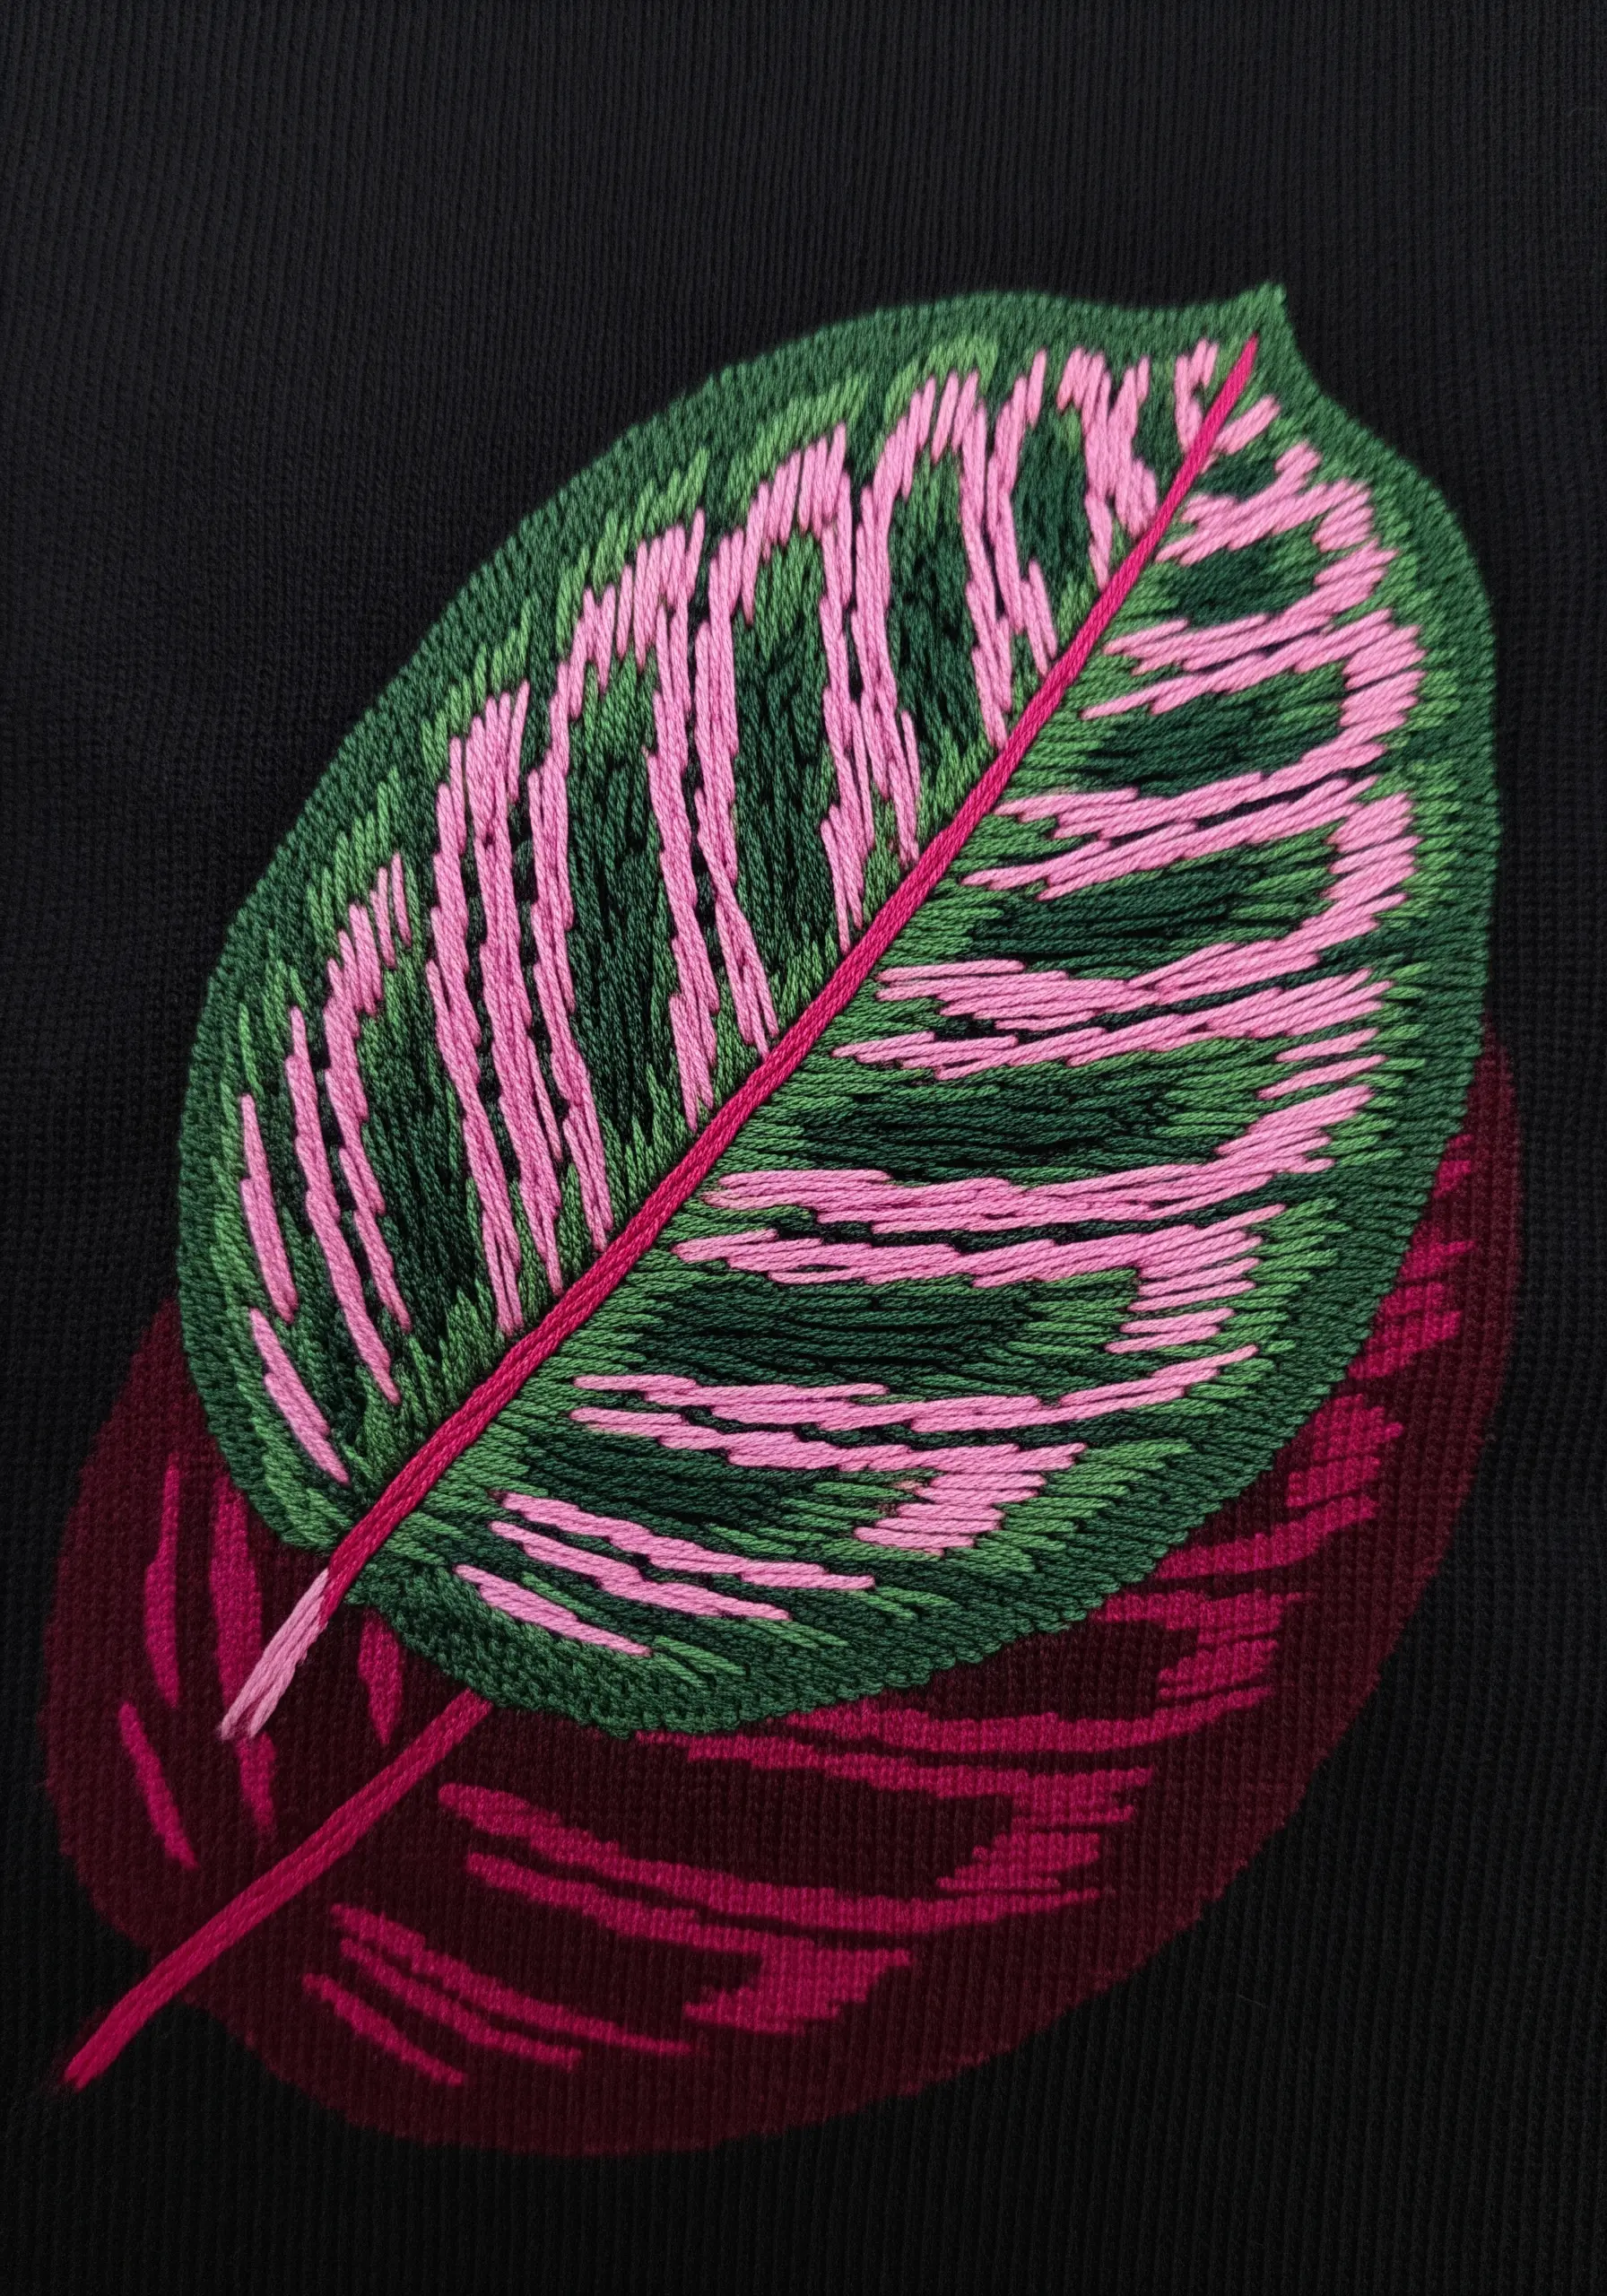
Instead of defaulting to gray or black, choose a shadow color that echoes a color already present in your leaf.
For this calathea leaf with pink veins, the shadow is stitched in a deep, muted maroon—a darker, desaturated version of the pink.
This creates a cohesive and sophisticated color palette where the shadow feels harmoniously connected to the object casting it.
It’s a powerful way to use color theory to enhance realism and artistic unity in your piece.
18. Carve Out Micro-Shadows with Dense Stitches
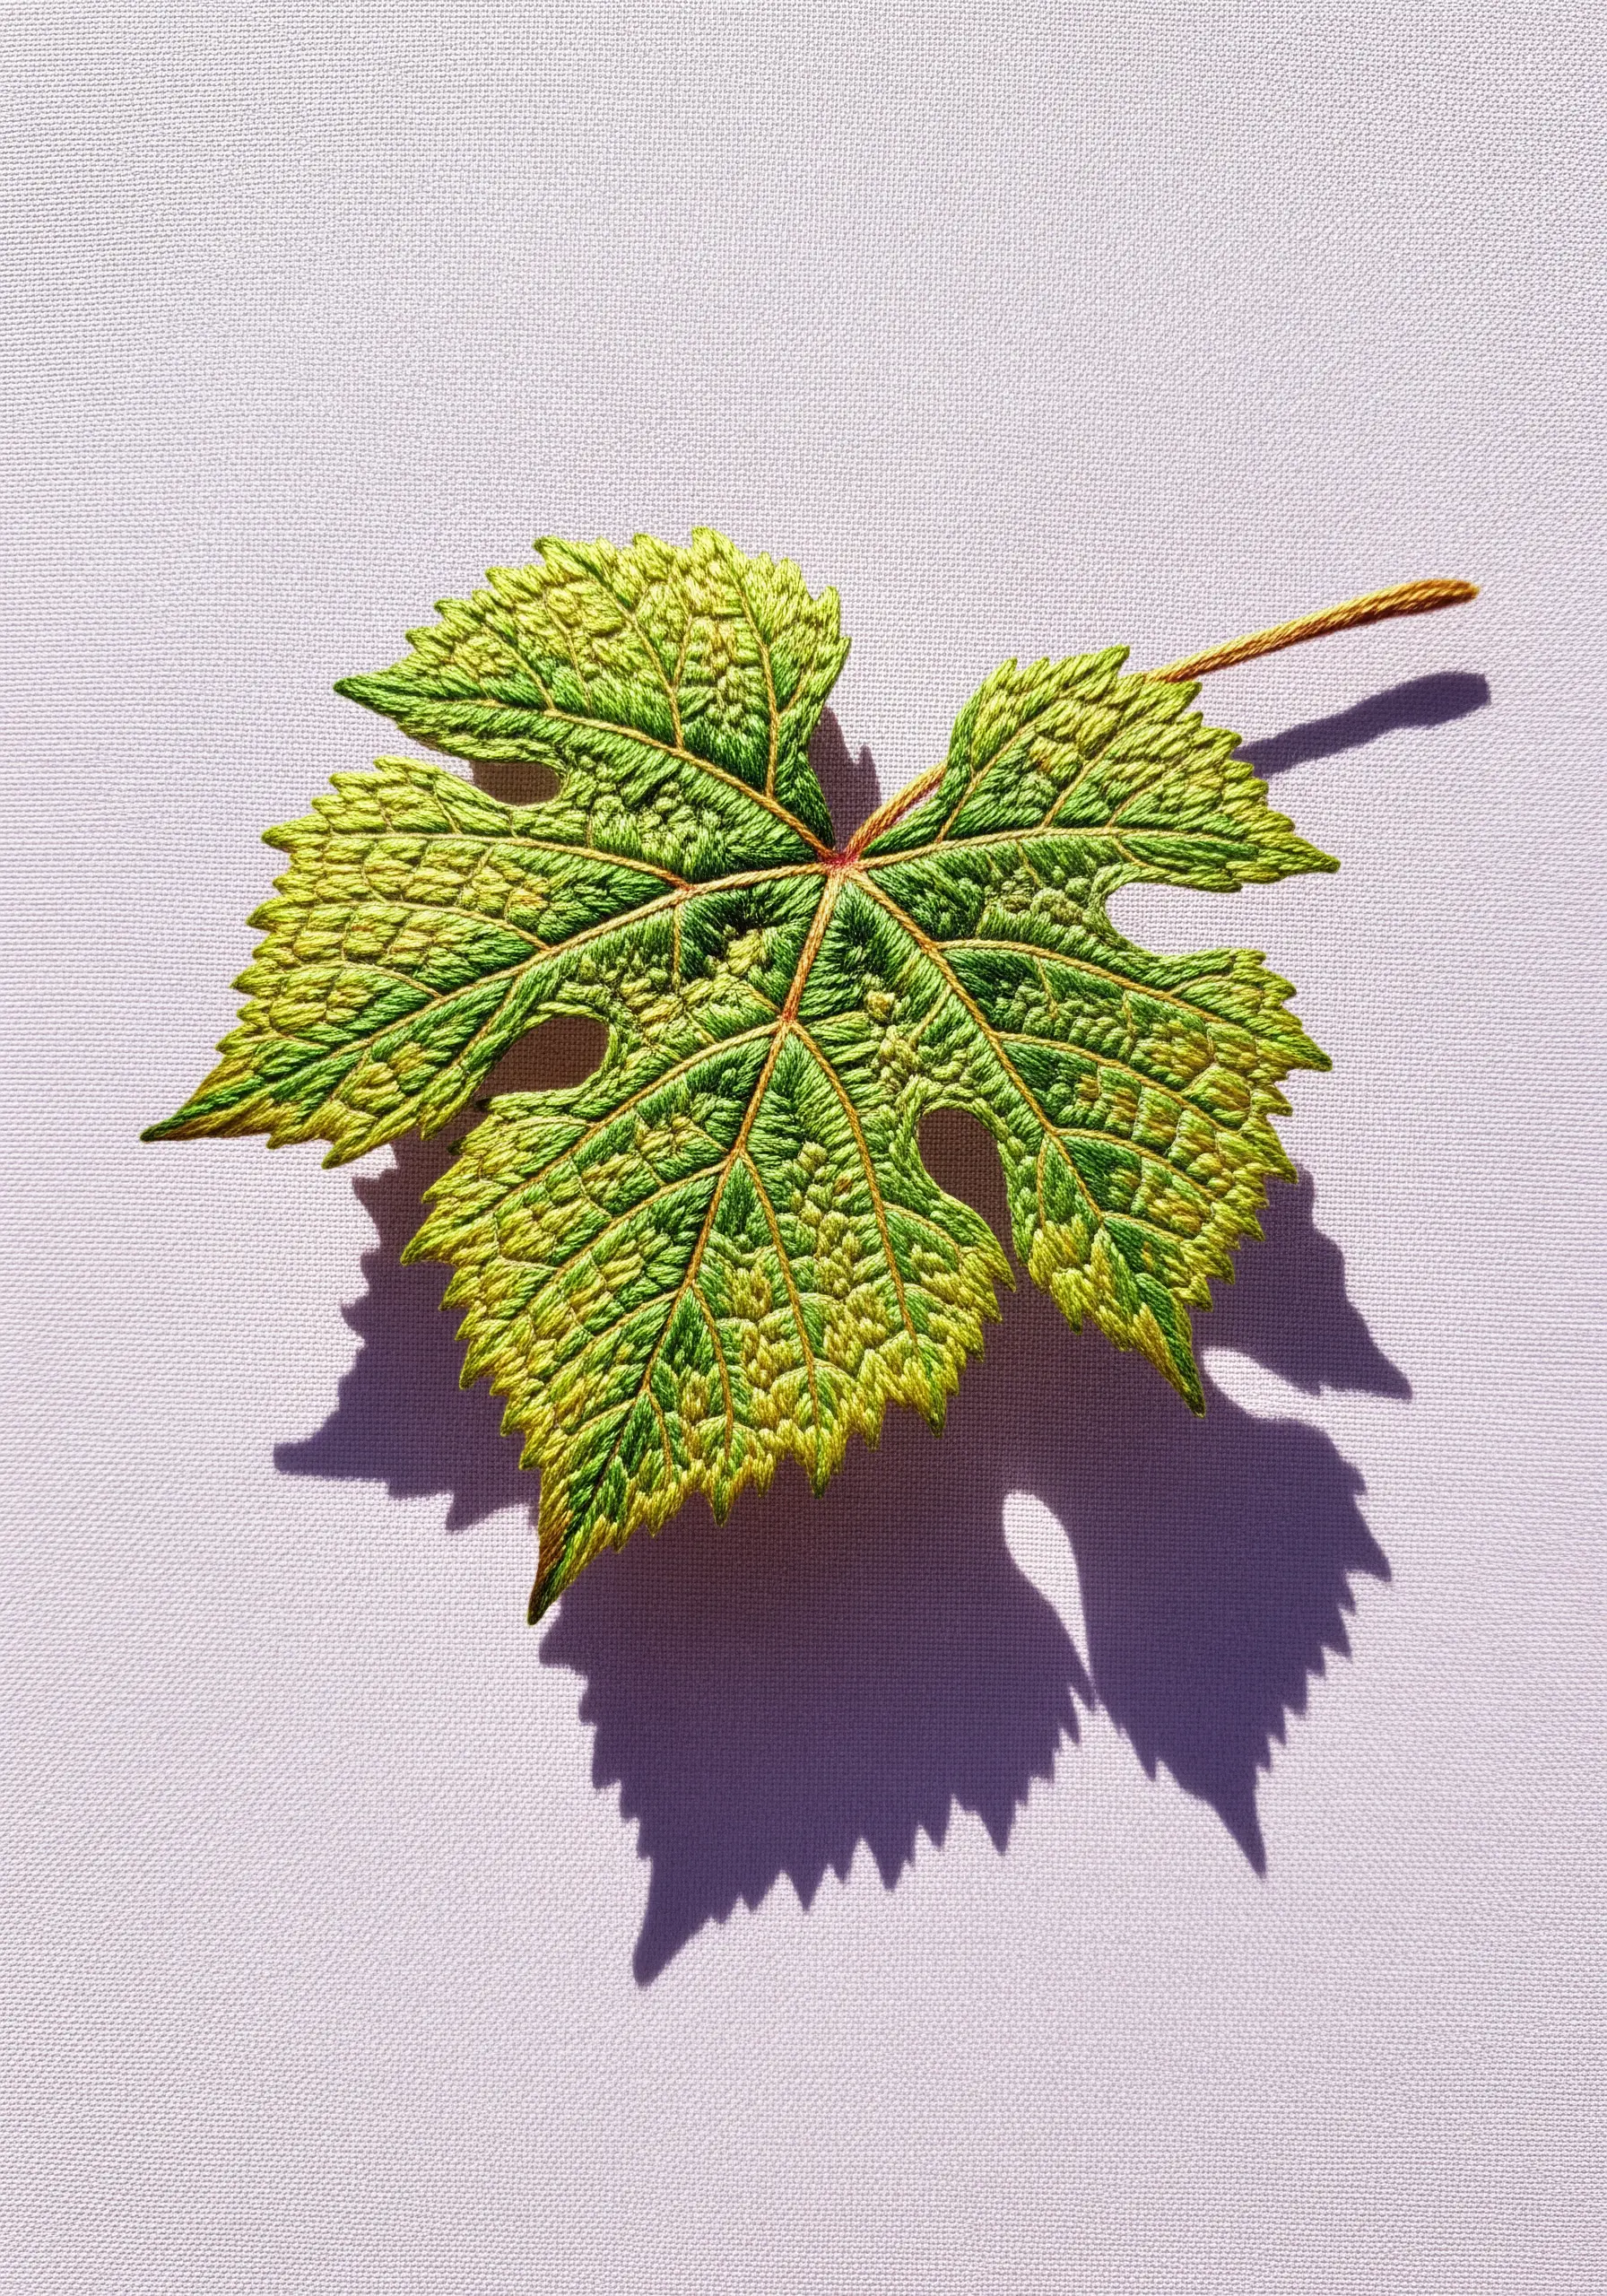
Give a leaf a realistic, textured surface by creating tiny shadows within its structure.
After filling the leaf with a base of long-and-short stitch, use a darker shade to add small, dense stitches like seed stitches or single-strand French knots into the natural dips and veins.
This technique, known as ‘needle painting,’ builds up layers of color and texture that mimic the way light plays across a real, imperfect leaf surface.
The jagged outline, created with tiny straight stitches, also helps cast micro-shadows along the edge.
19. Build Dimension with Padded Satin Stitch
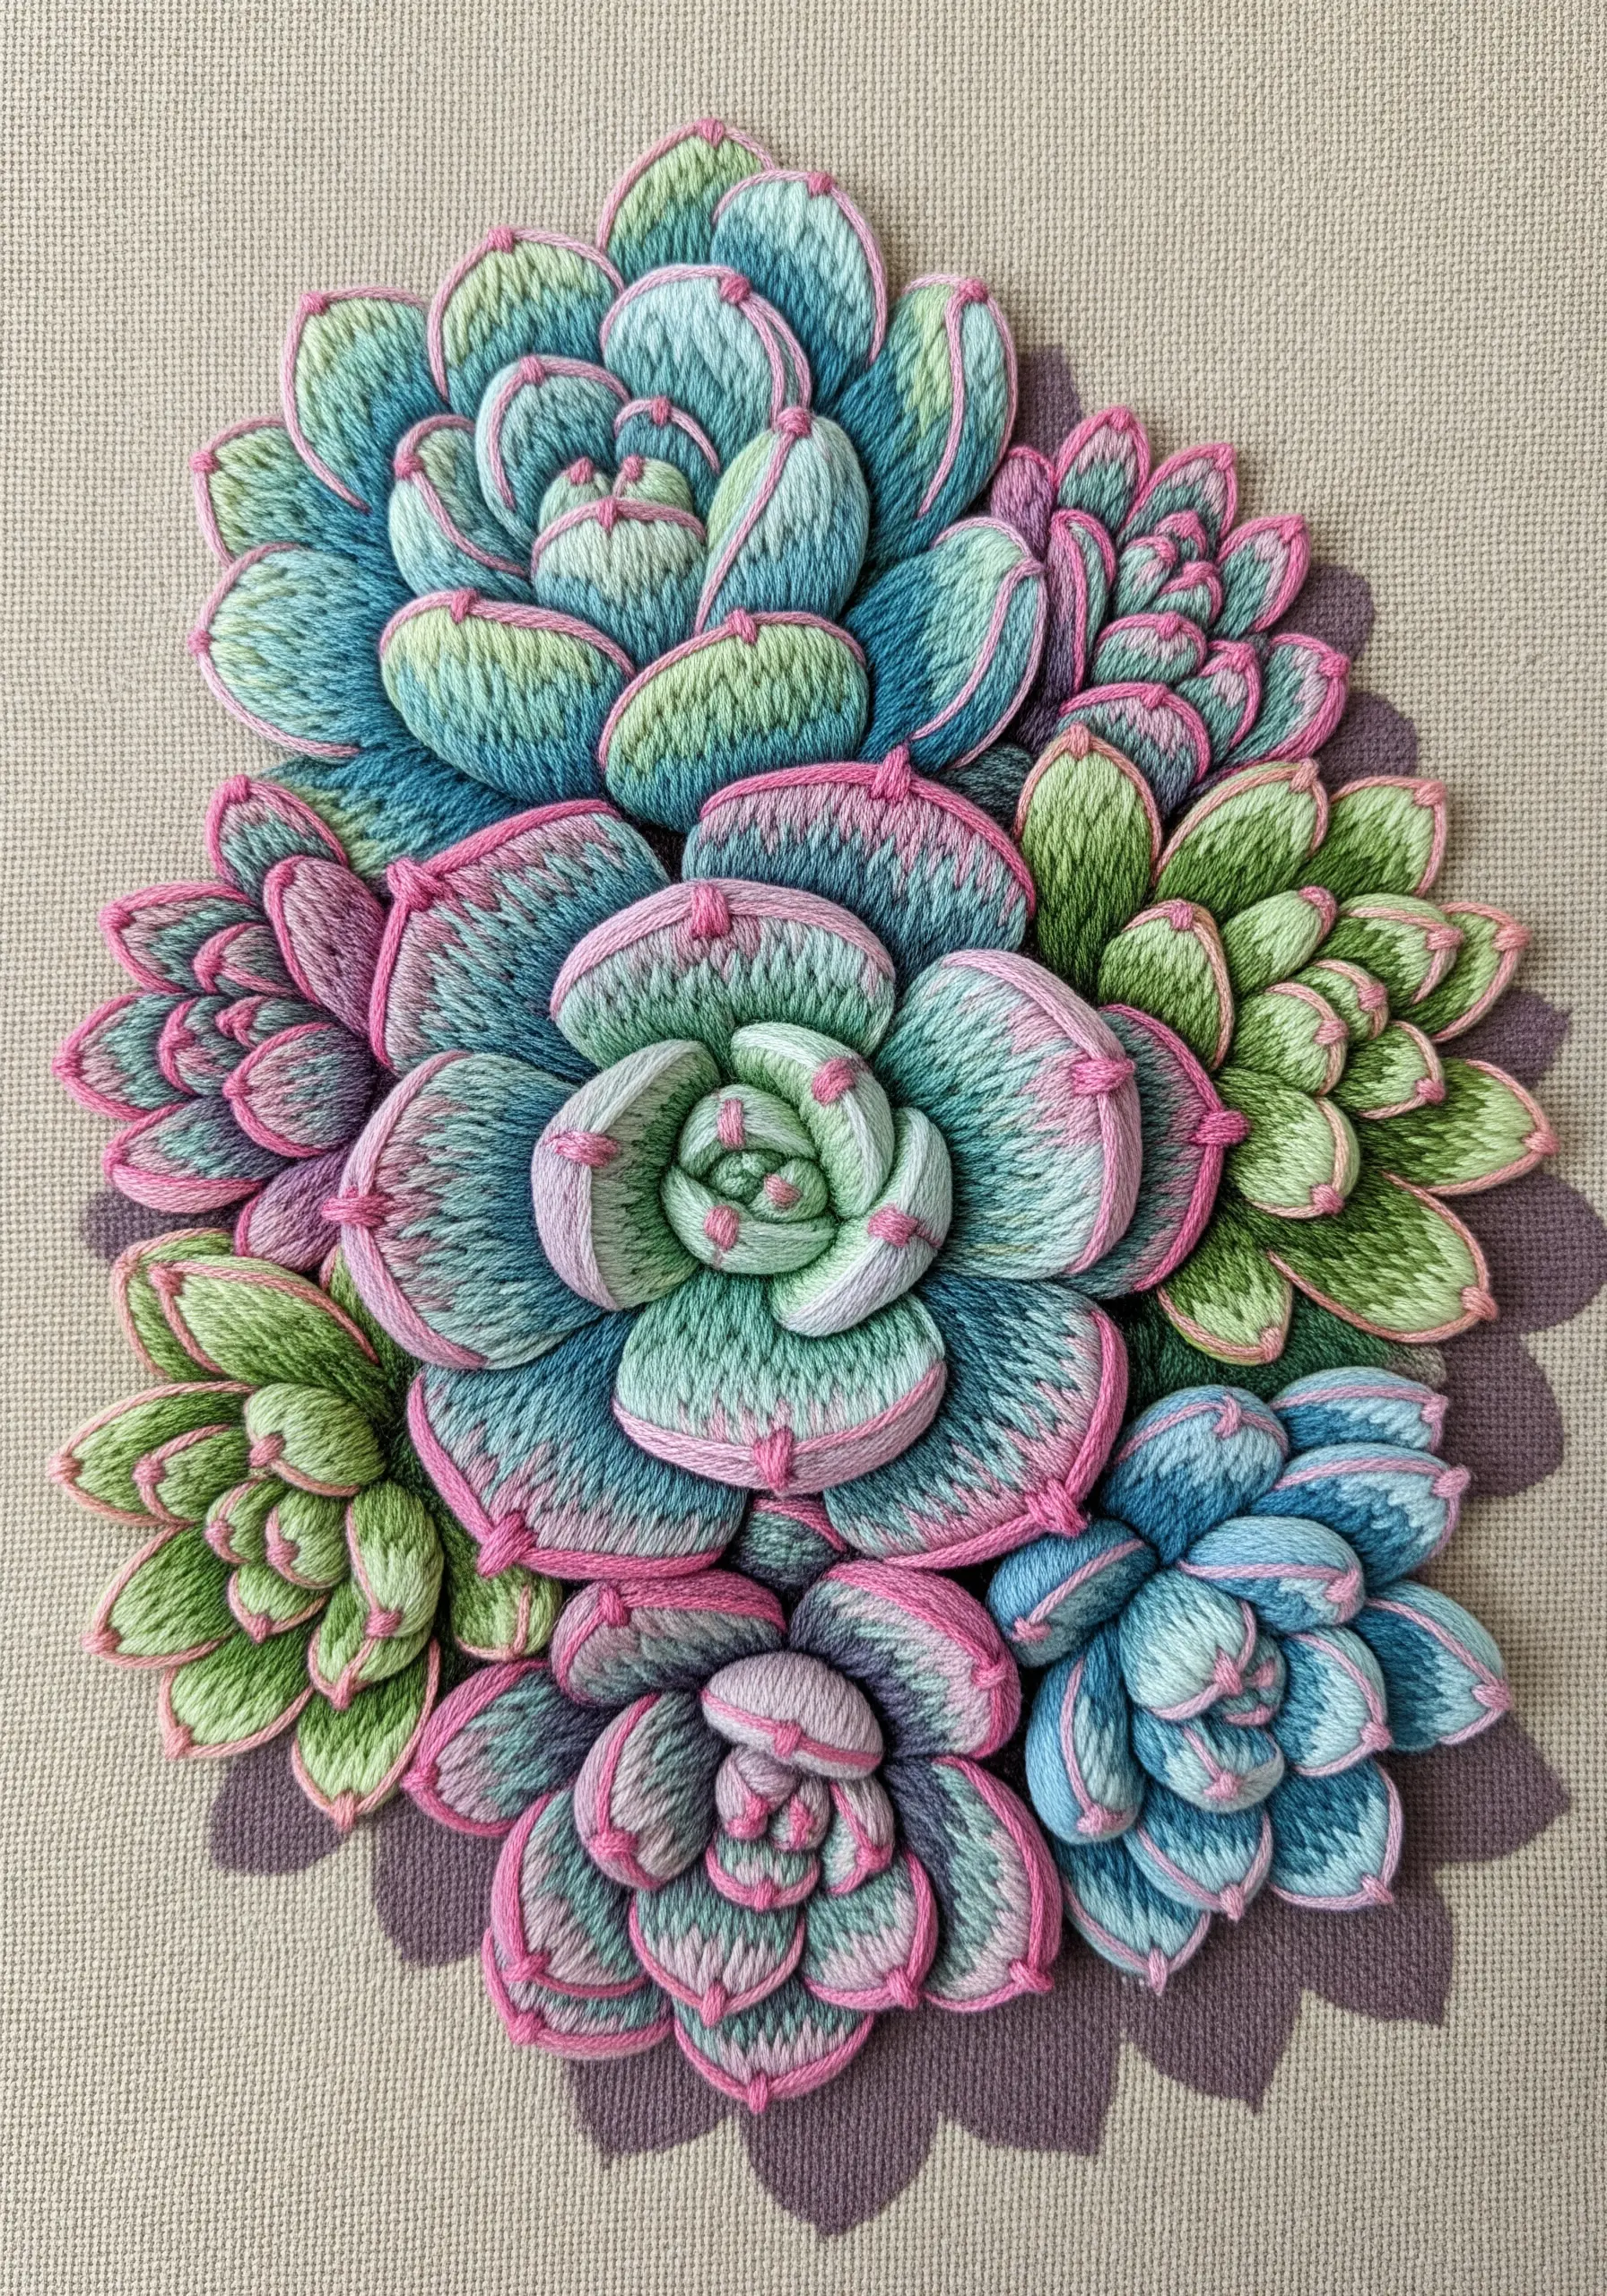
Make leaves physically stand out from the fabric to create their own subtle, natural shadows.
Before you stitch the top layer, create a padded base by filling the leaf shape with layers of preliminary stitches or a small piece of felt.
Then, cover this padding with smooth, tight satin stitches. The raised surface will catch the light and cast a slight shadow on the fabric beneath it.
This works especially well for fleshy plants like succulents, where each petal can be padded to create realistic layering.
20. Create a Frosty Shadow on Wool or Felt
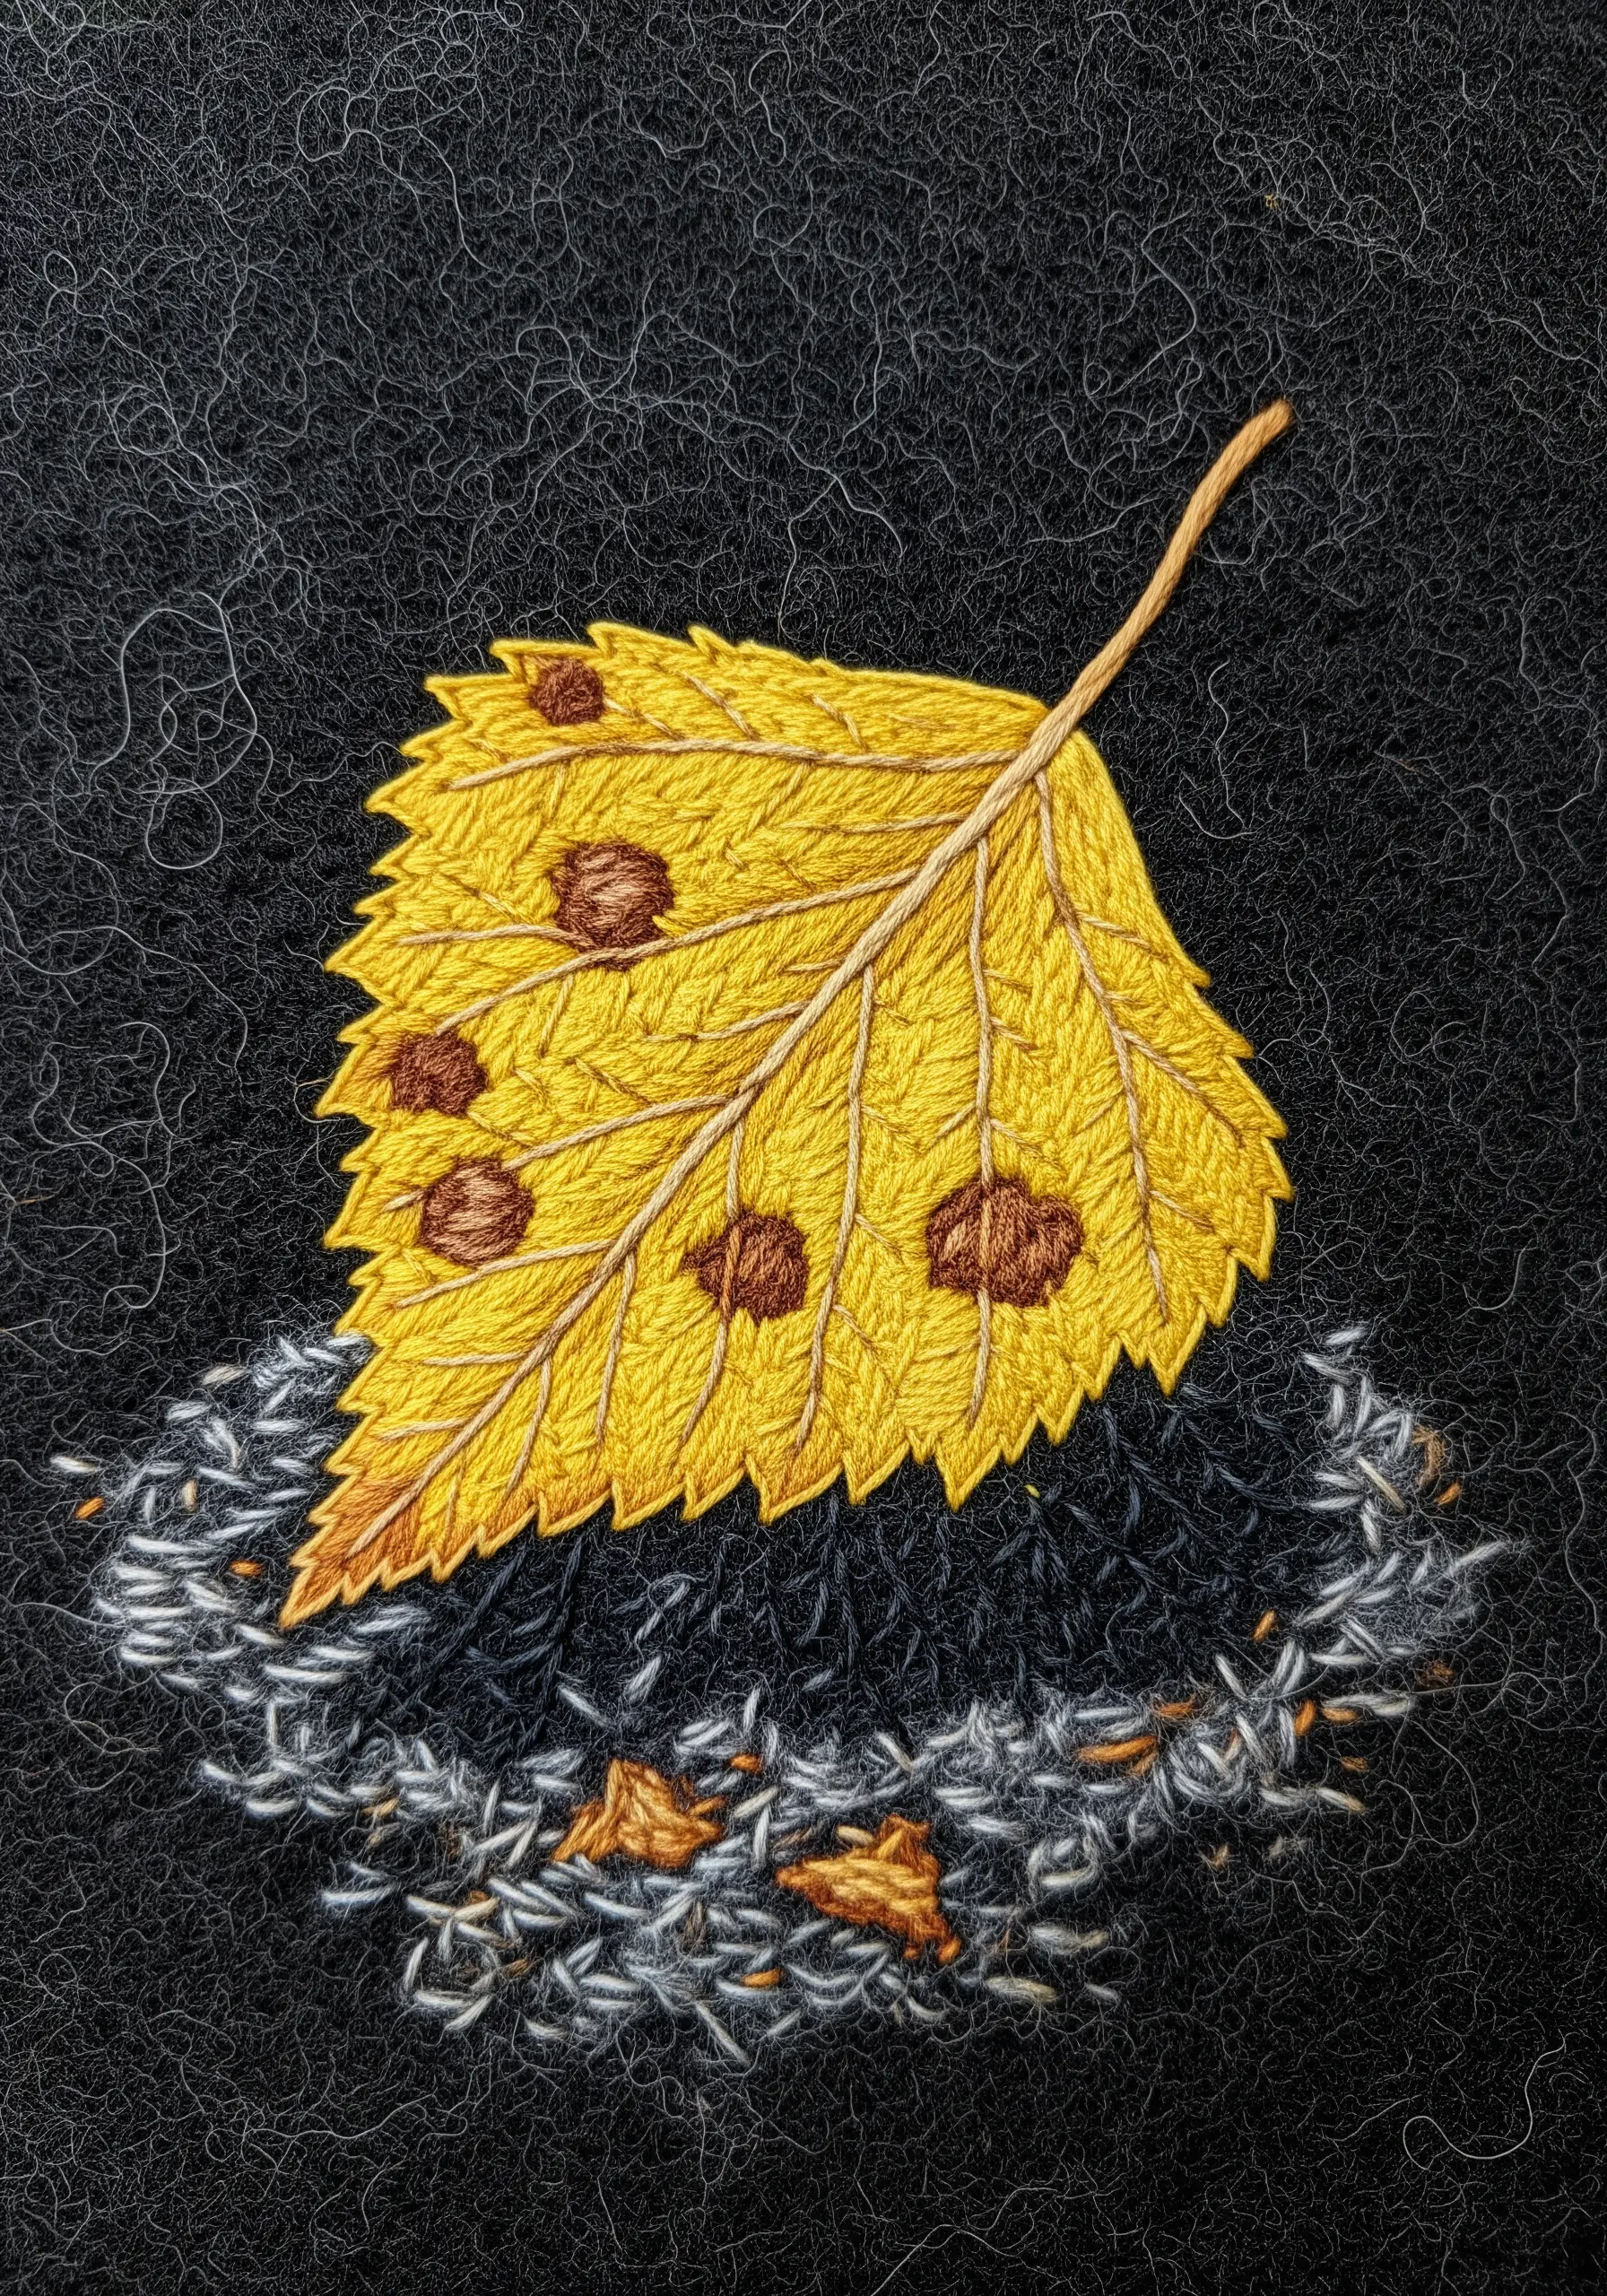
Adapt your shadow technique to complement the texture of your base fabric. On a fuzzy surface like felt or wool, a solid shadow can look out of place.
Instead, create a diffused, frosty-looking shadow using sparse, single-strand seed stitches in a mix of light gray and off-white threads.
This open stitching allows the texture of the wool to show through, integrating the shadow into the fabric and creating a soft, atmospheric effect.
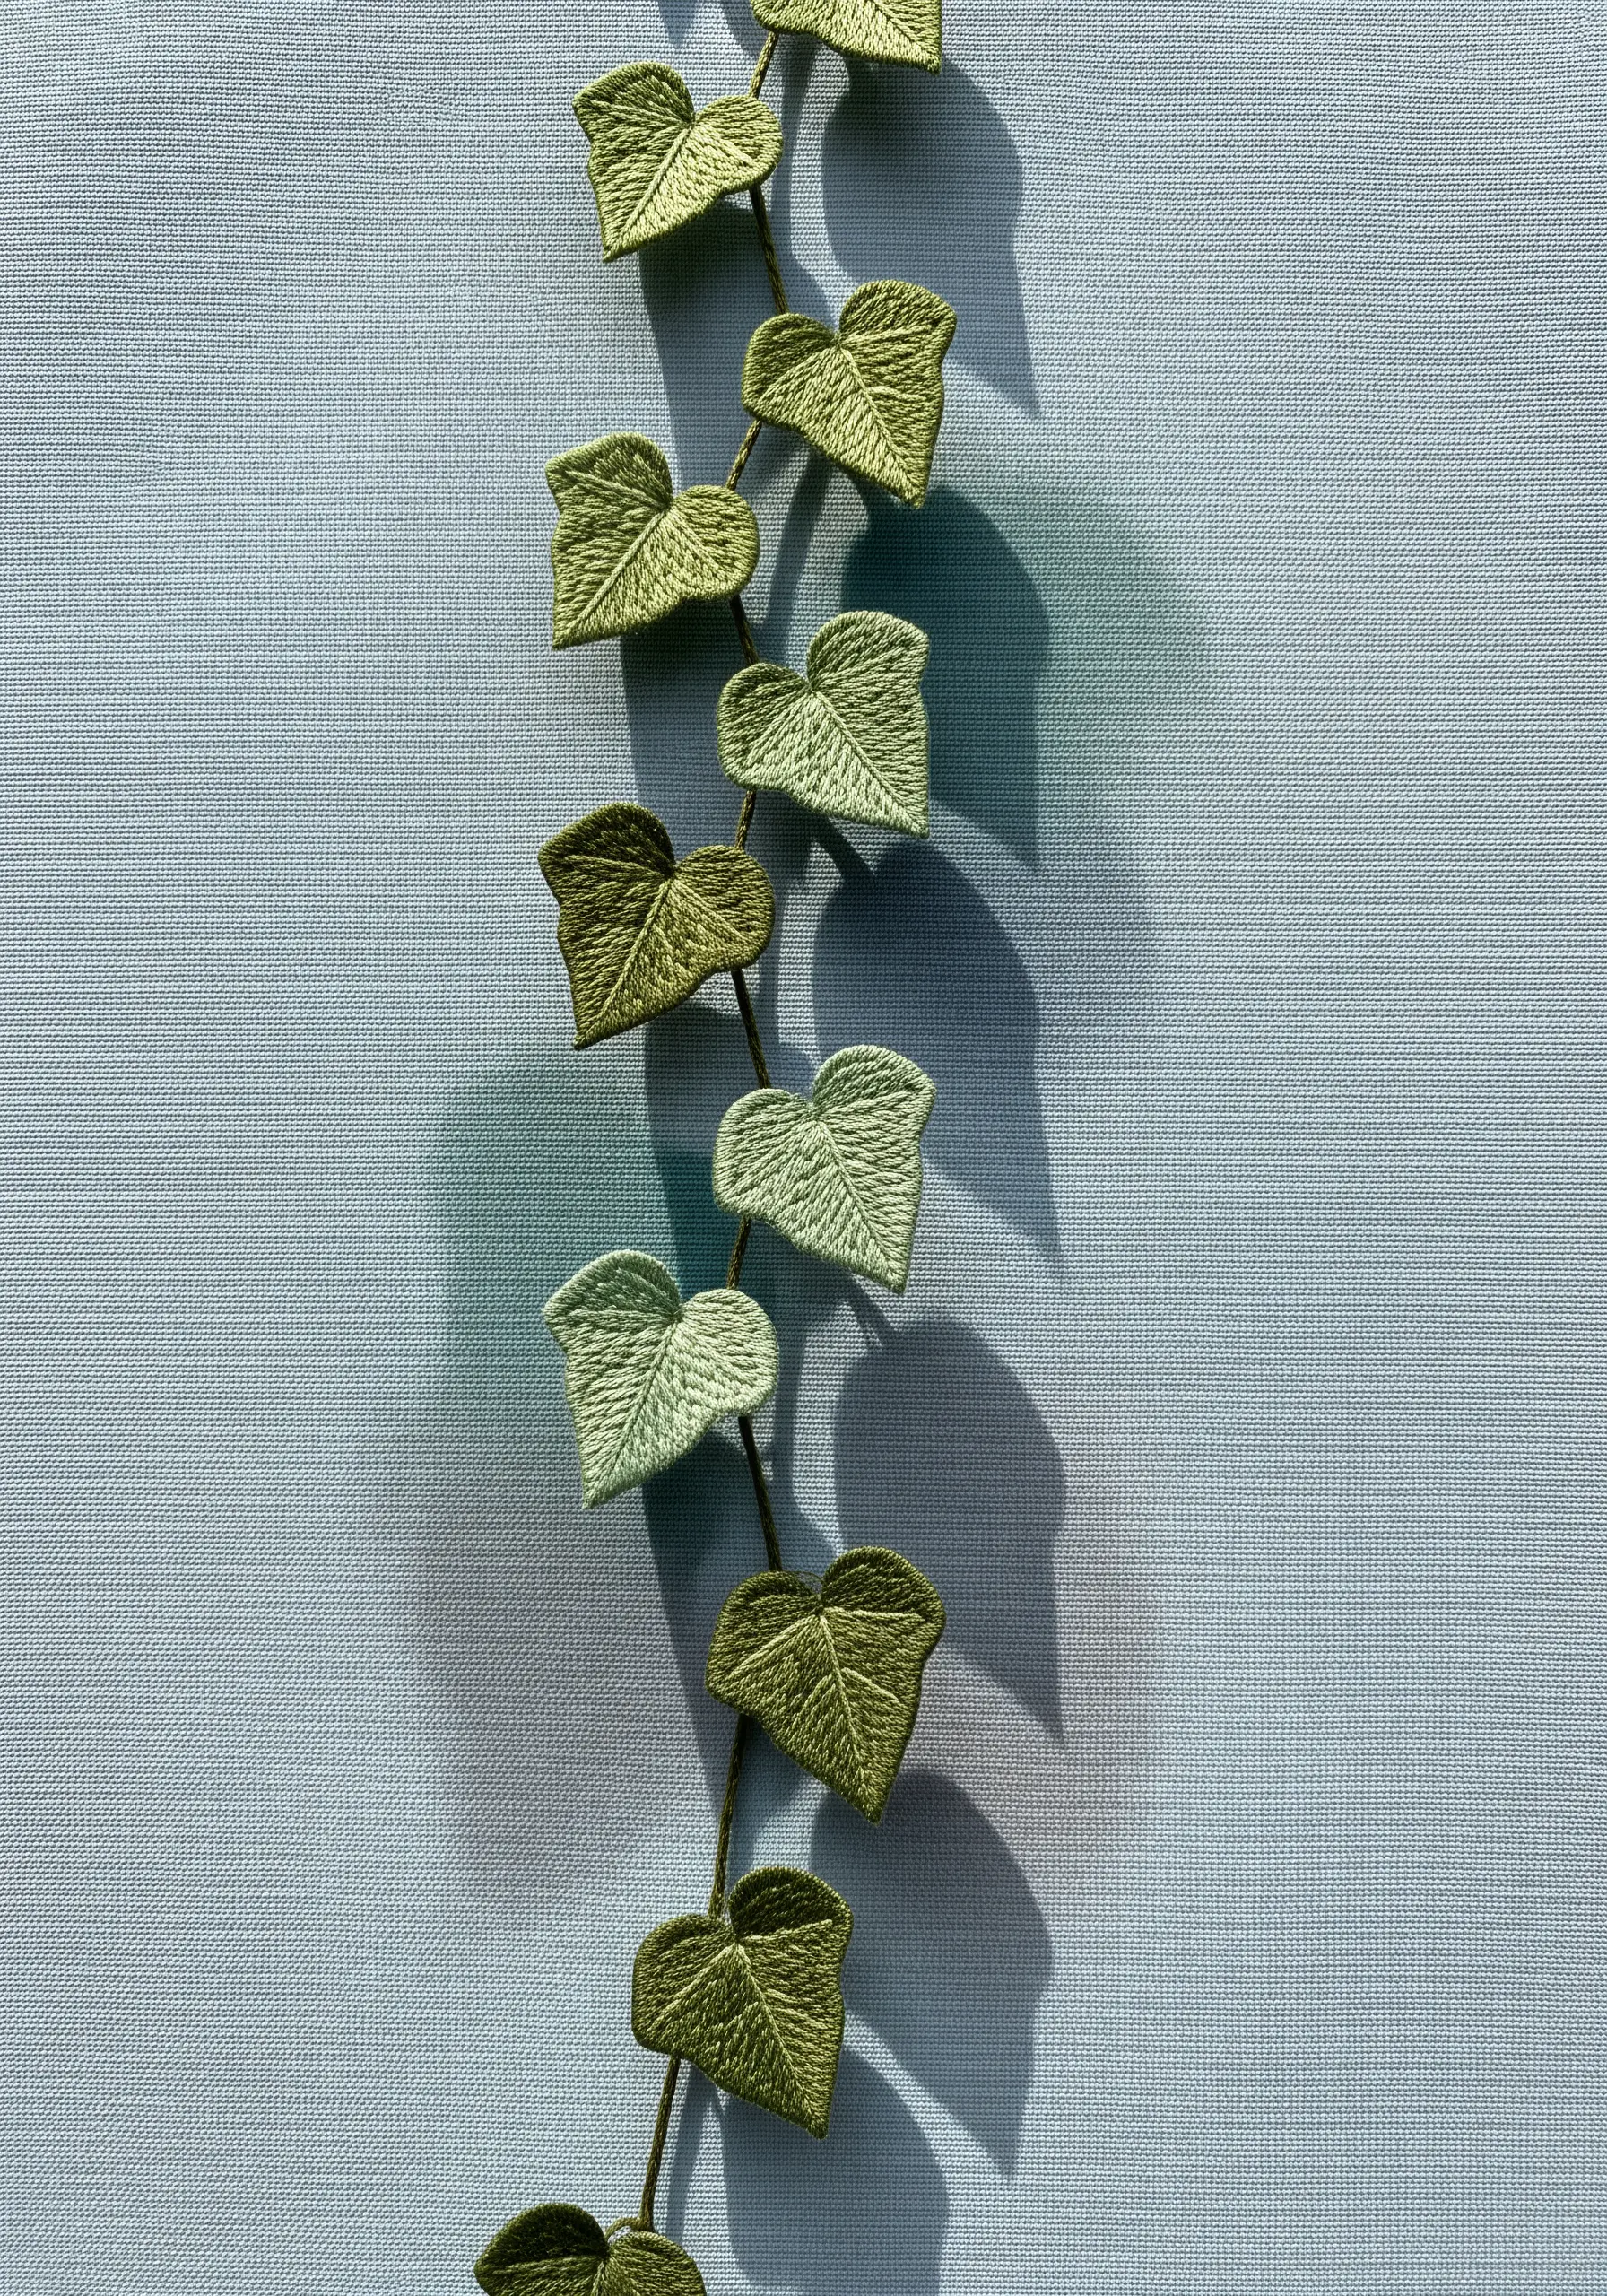
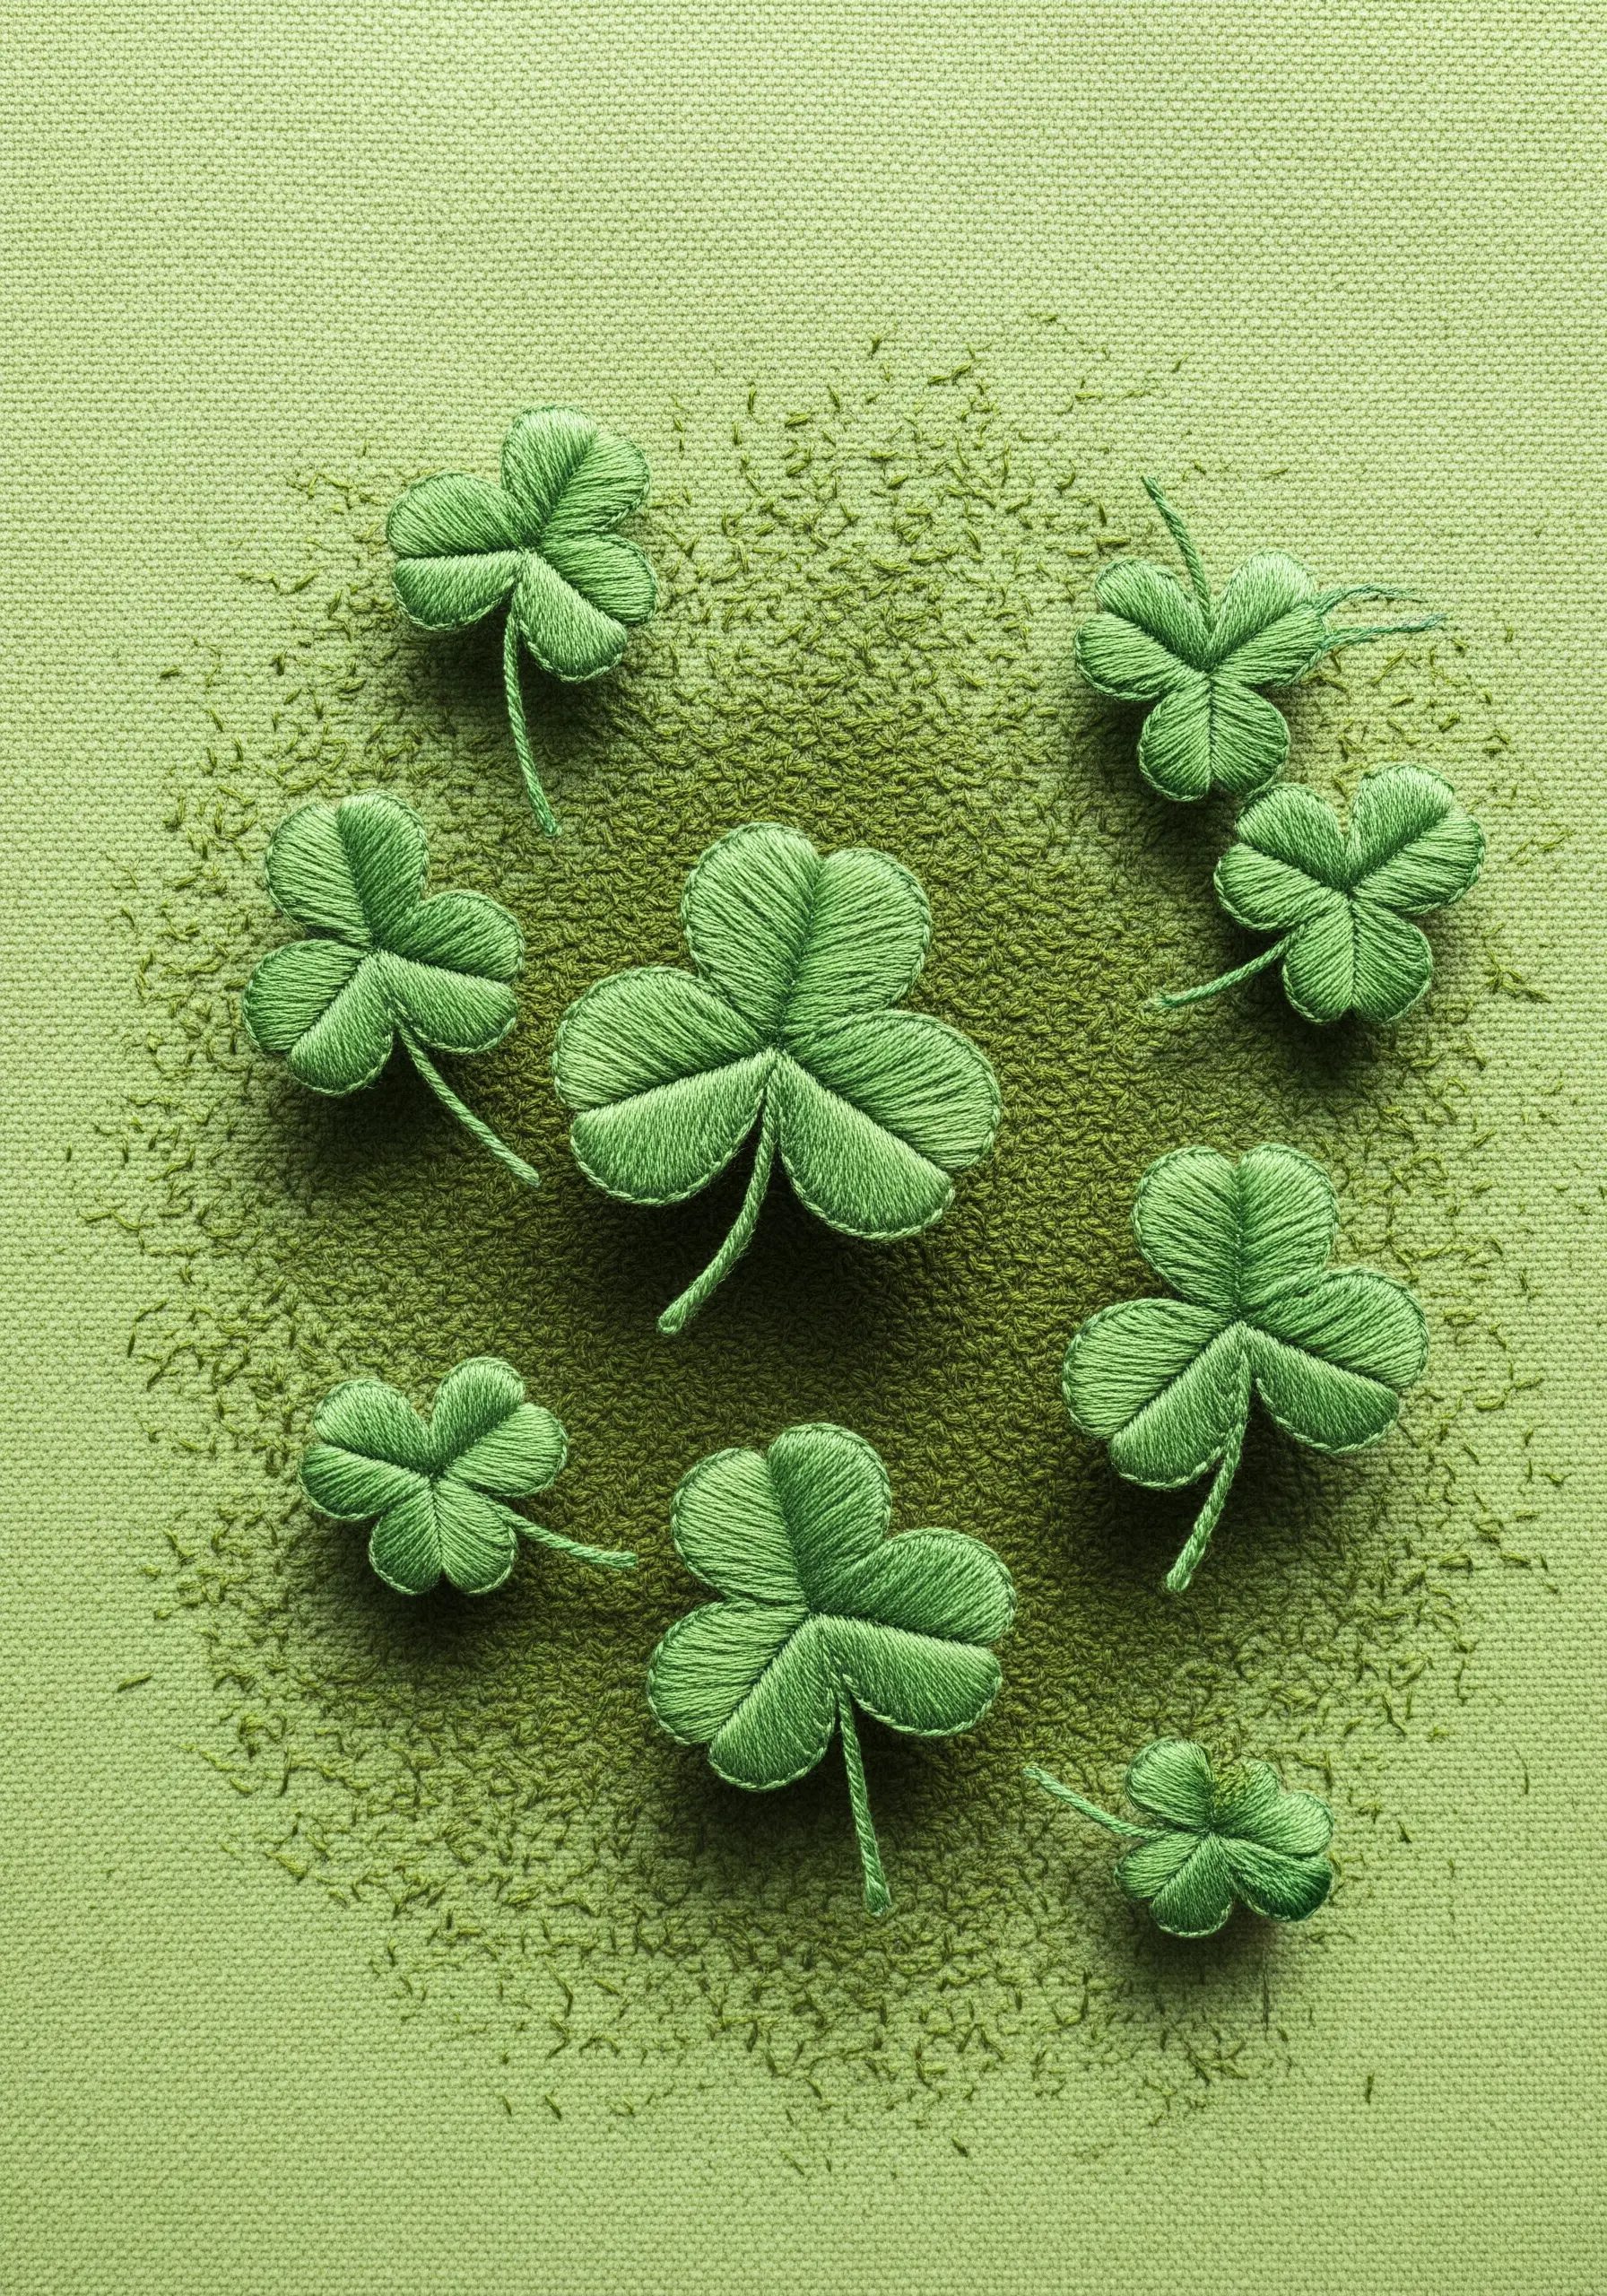
21. Choose a Shadow Color That Complements Your Fabric
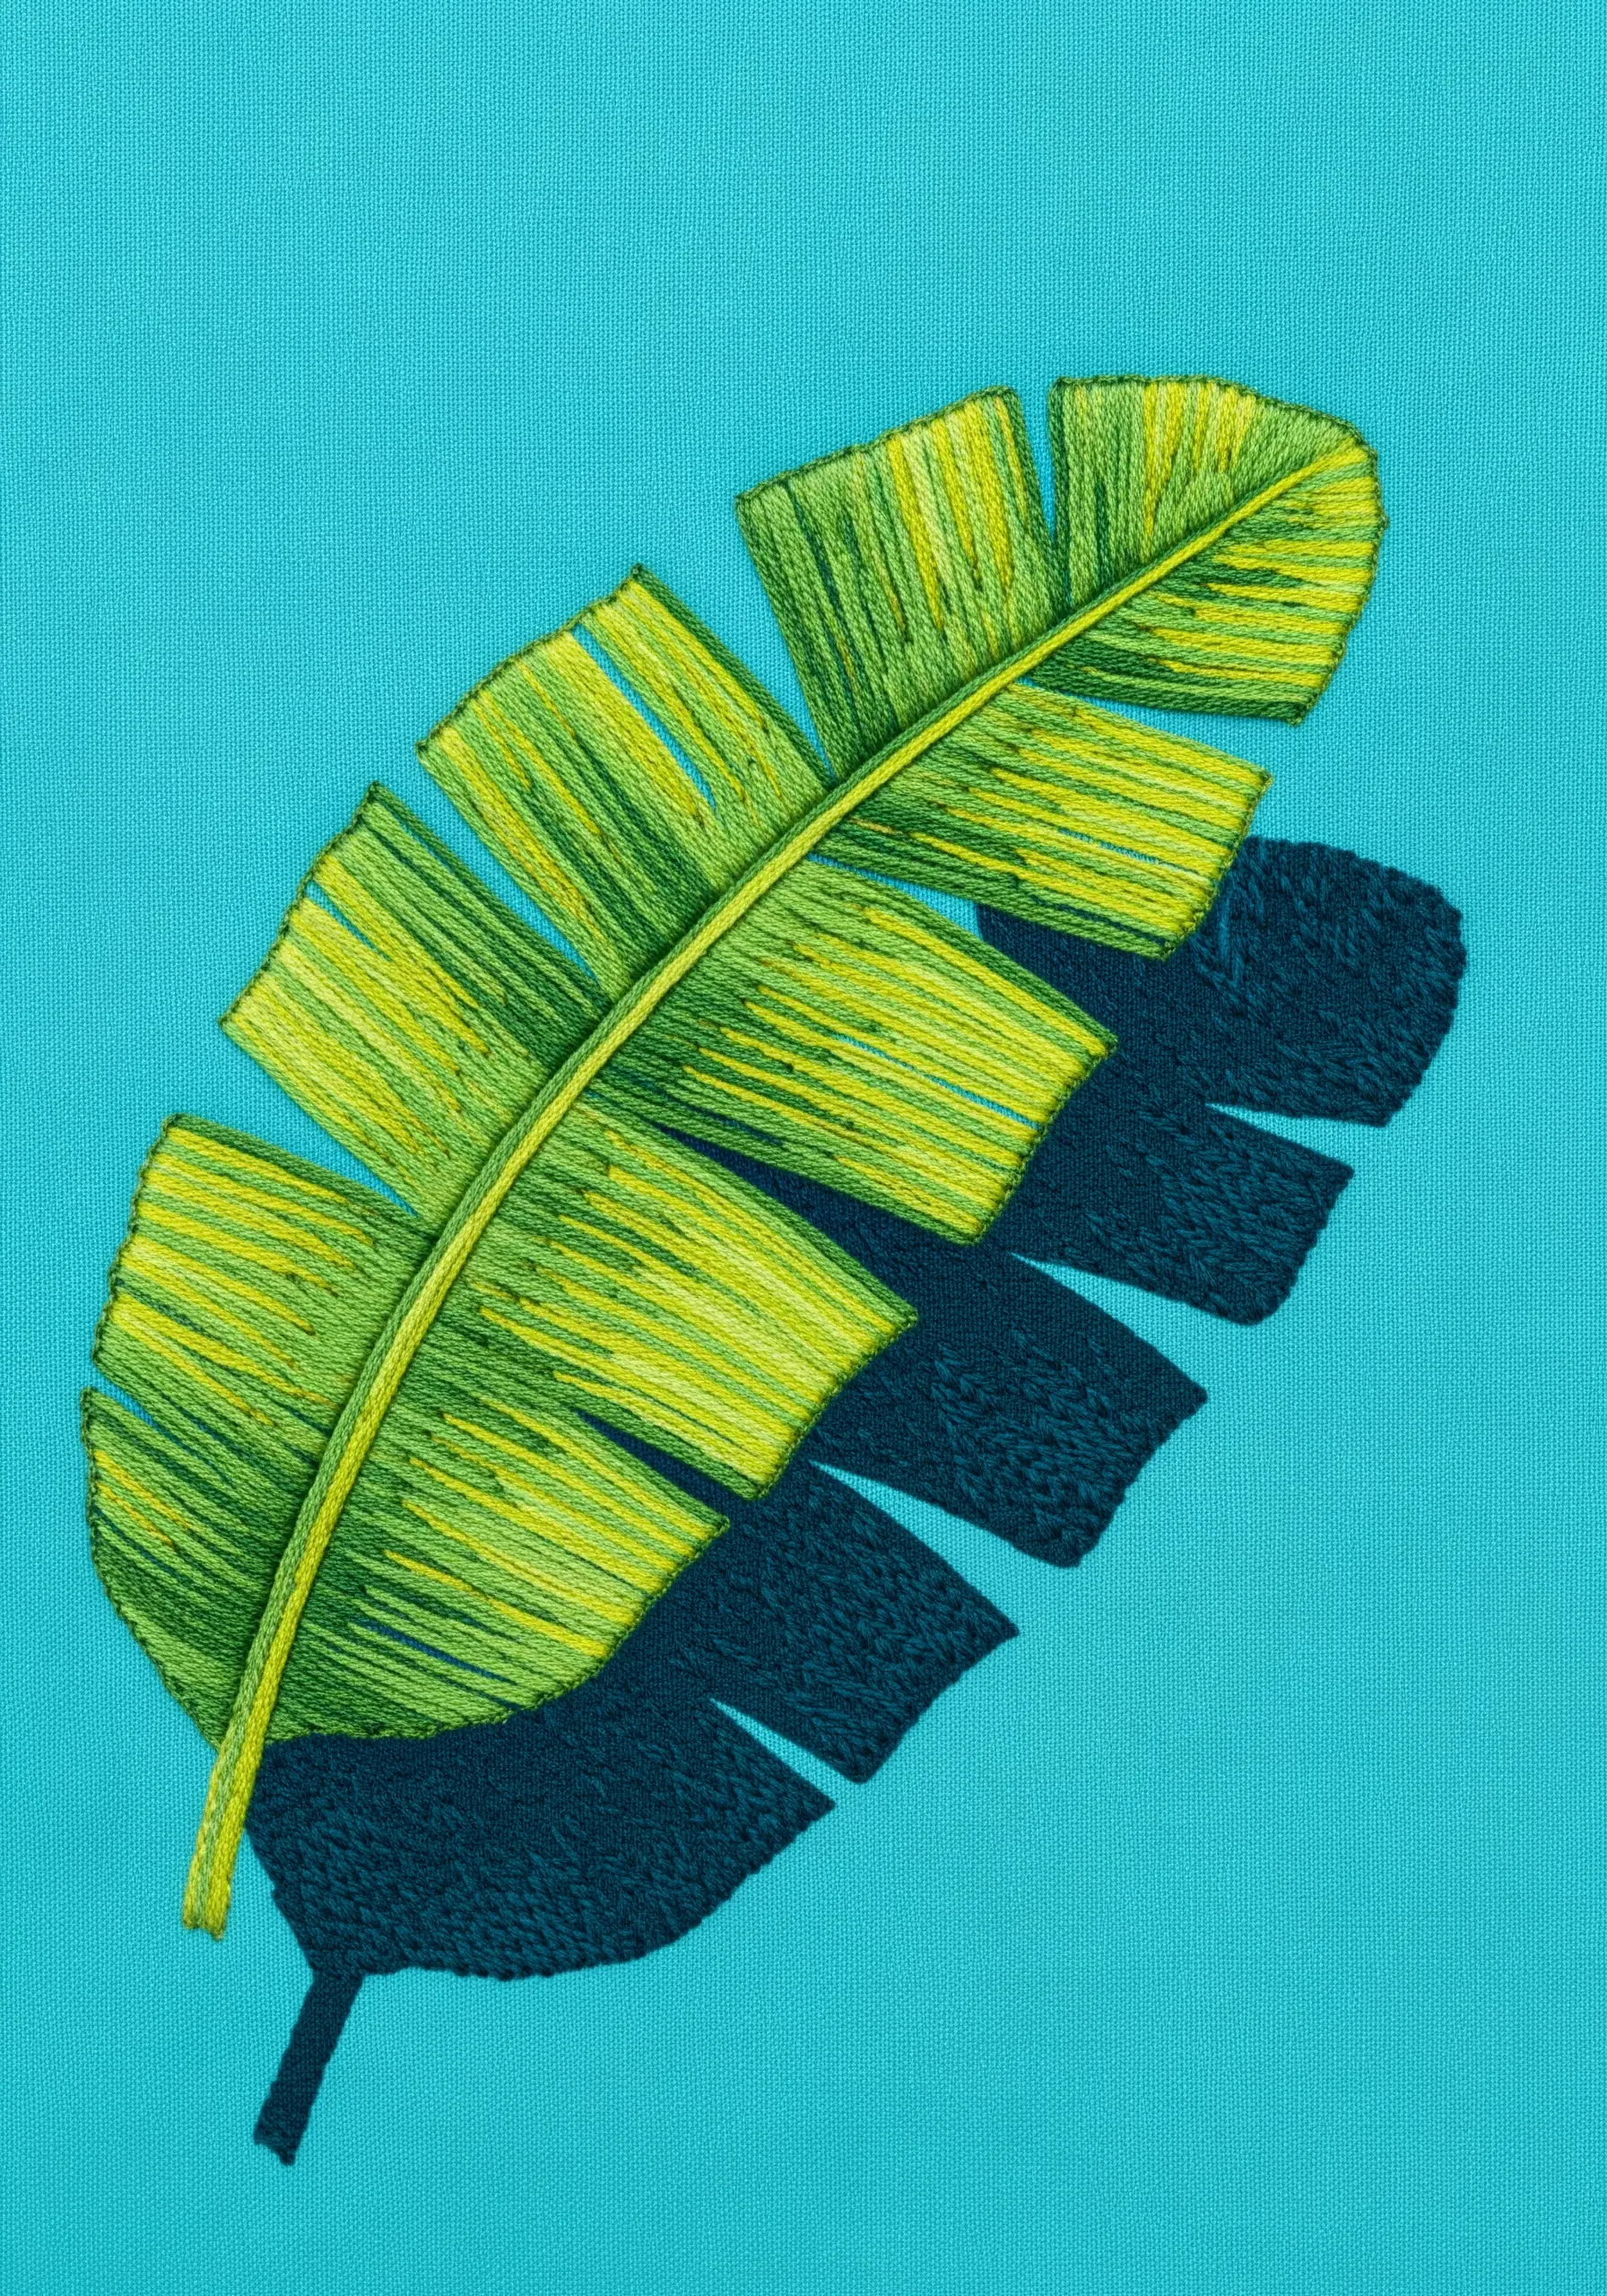
When working on a brightly colored background, avoid using a flat black or gray for your shadow.
Instead, choose a darker shade within the same color family as your fabric. On this turquoise background, the shadow is a deep, rich navy blue.
This creates a more harmonious and believable interaction between the object and its environment, making the entire piece feel more vibrant and intentional.
This vibrant, graphic style translates beautifully from complex thread painting to simpler botanical line art embroidery patterns on apparel.
22. Vary Your Thread Weight for Delicate Shadows
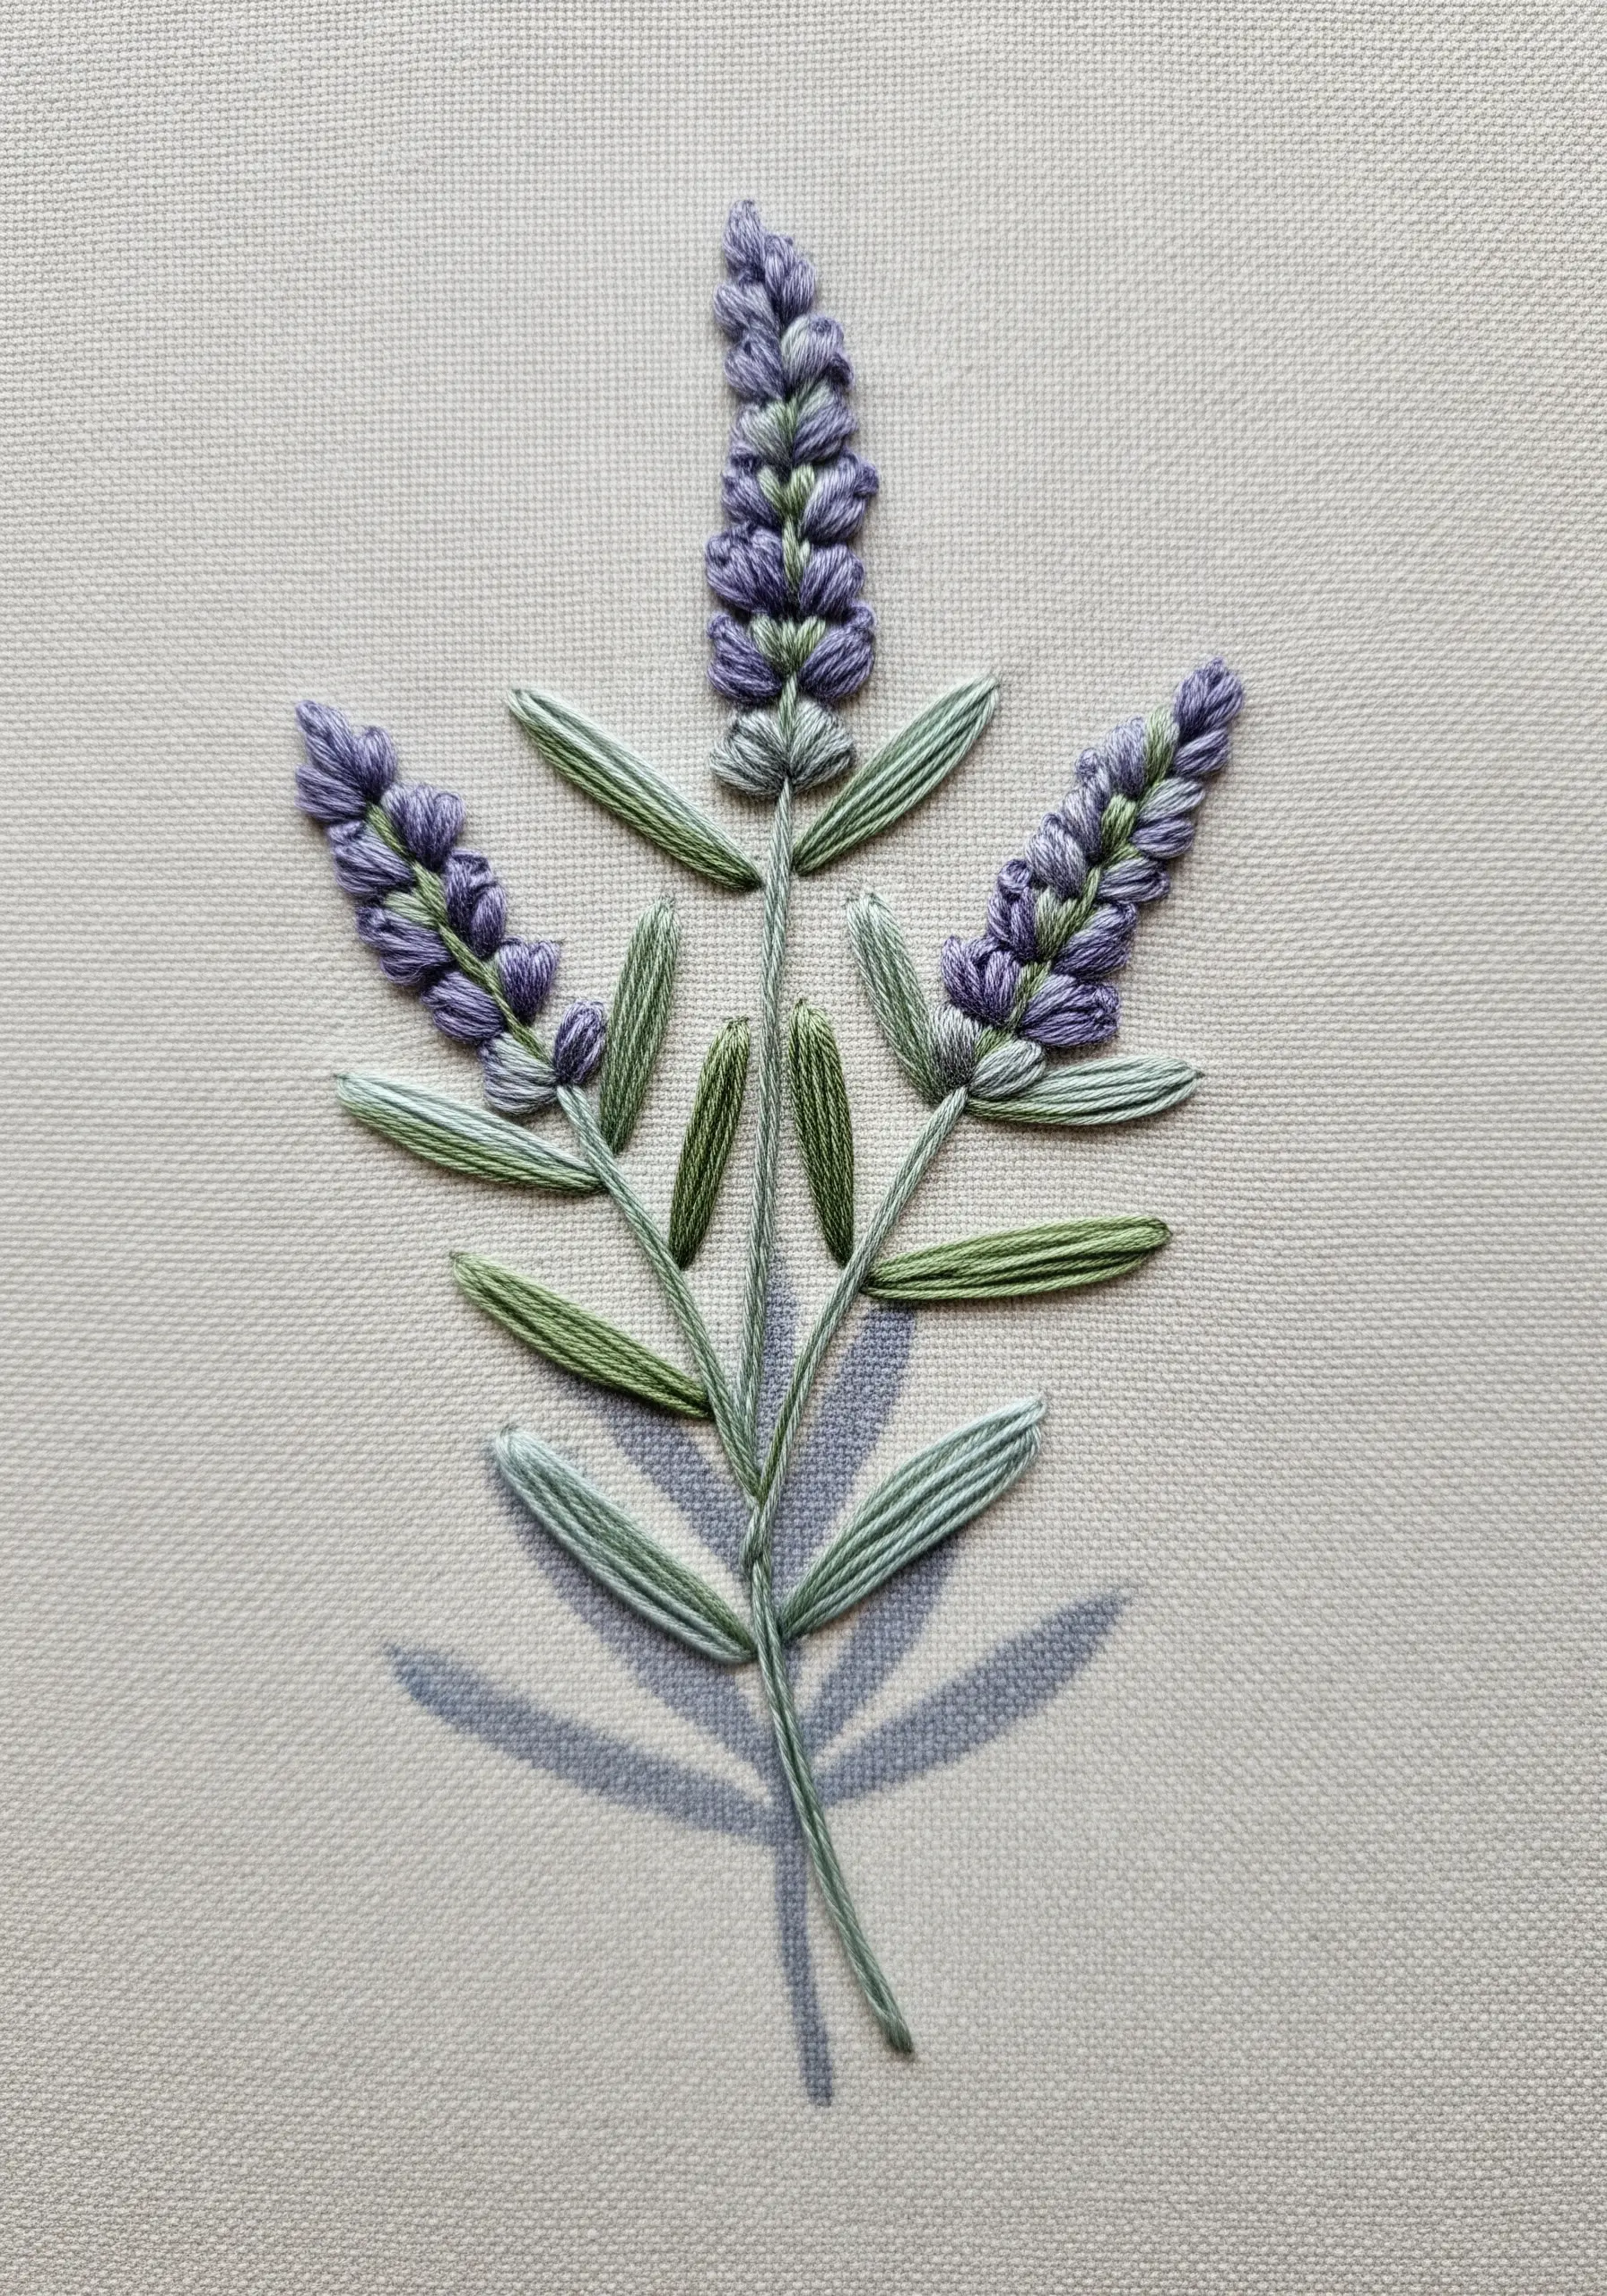
Create a sense of lightness and transparency by using fewer strands of floss for your shadow than for your main subject.
Stitch your leaves and flowers using two or three strands of embroidery floss to give them substance and presence.
For the shadow, switch to a single strand of a muted gray or taupe. The difference in thread thickness will make the shadow appear fainter and more delicate.
This technique is perfect for conveying the soft shadows cast by thin leaves or delicate petals.
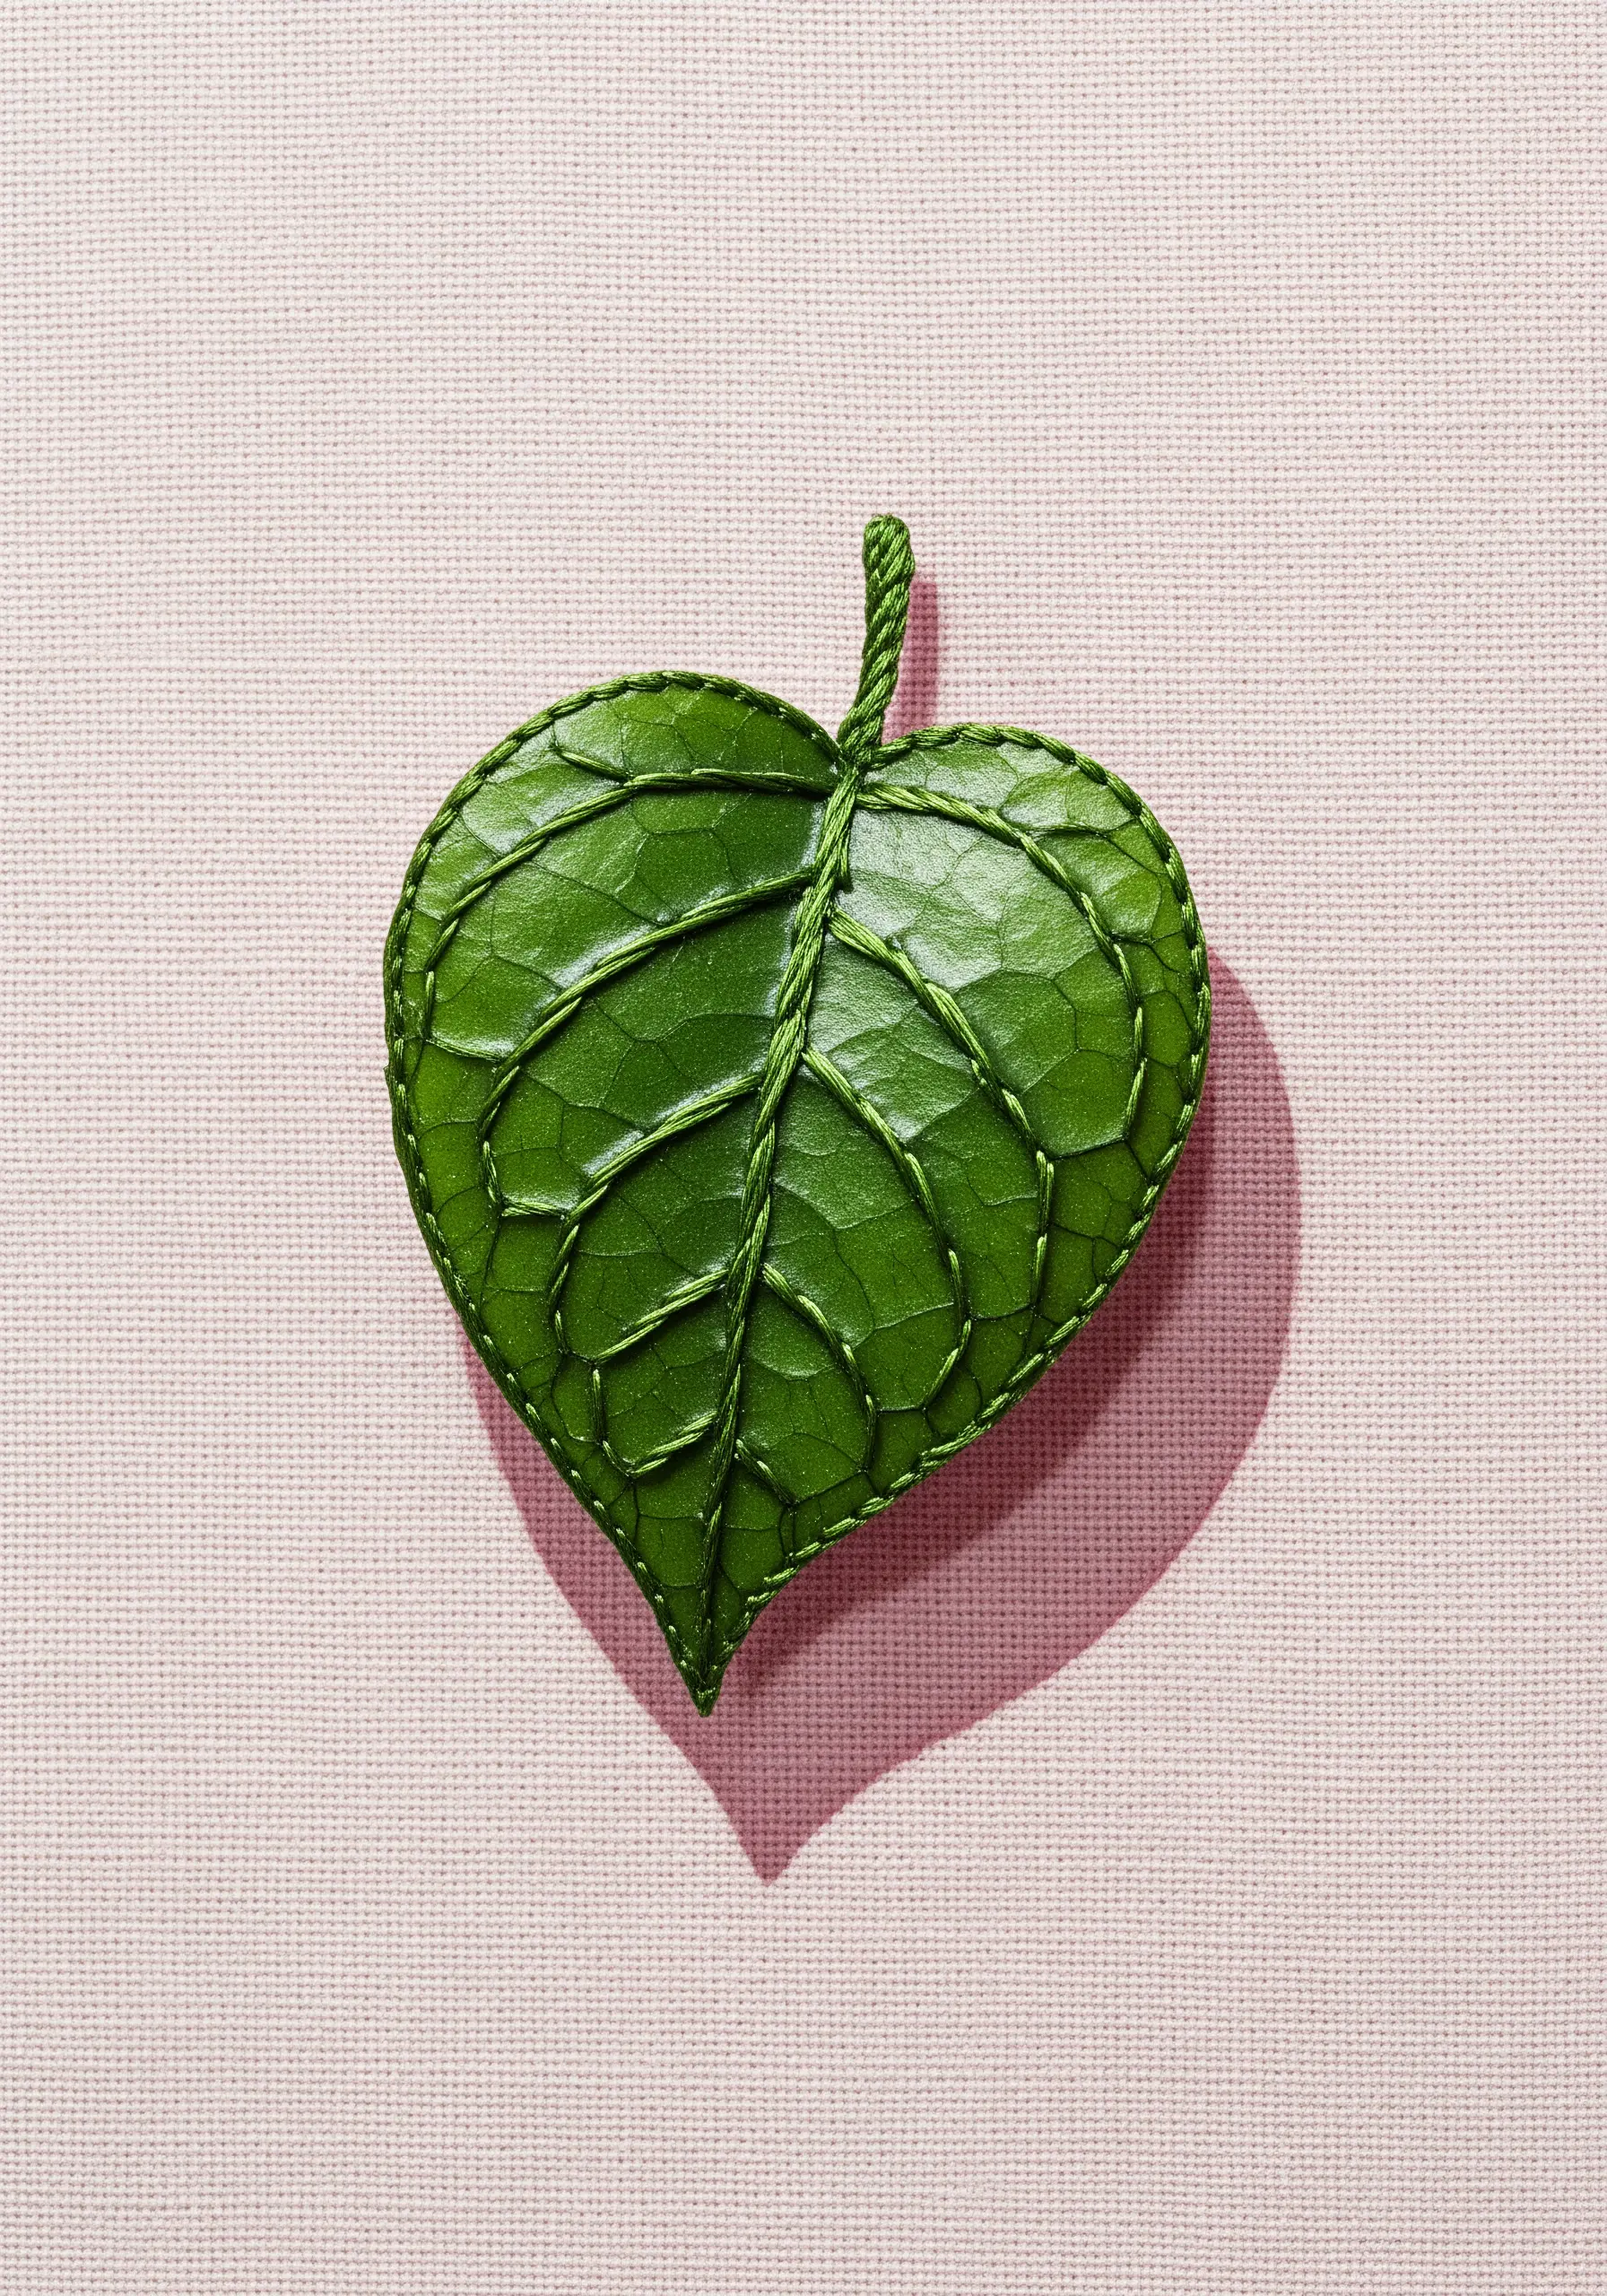
23. Define Form by Shading Along the Veins
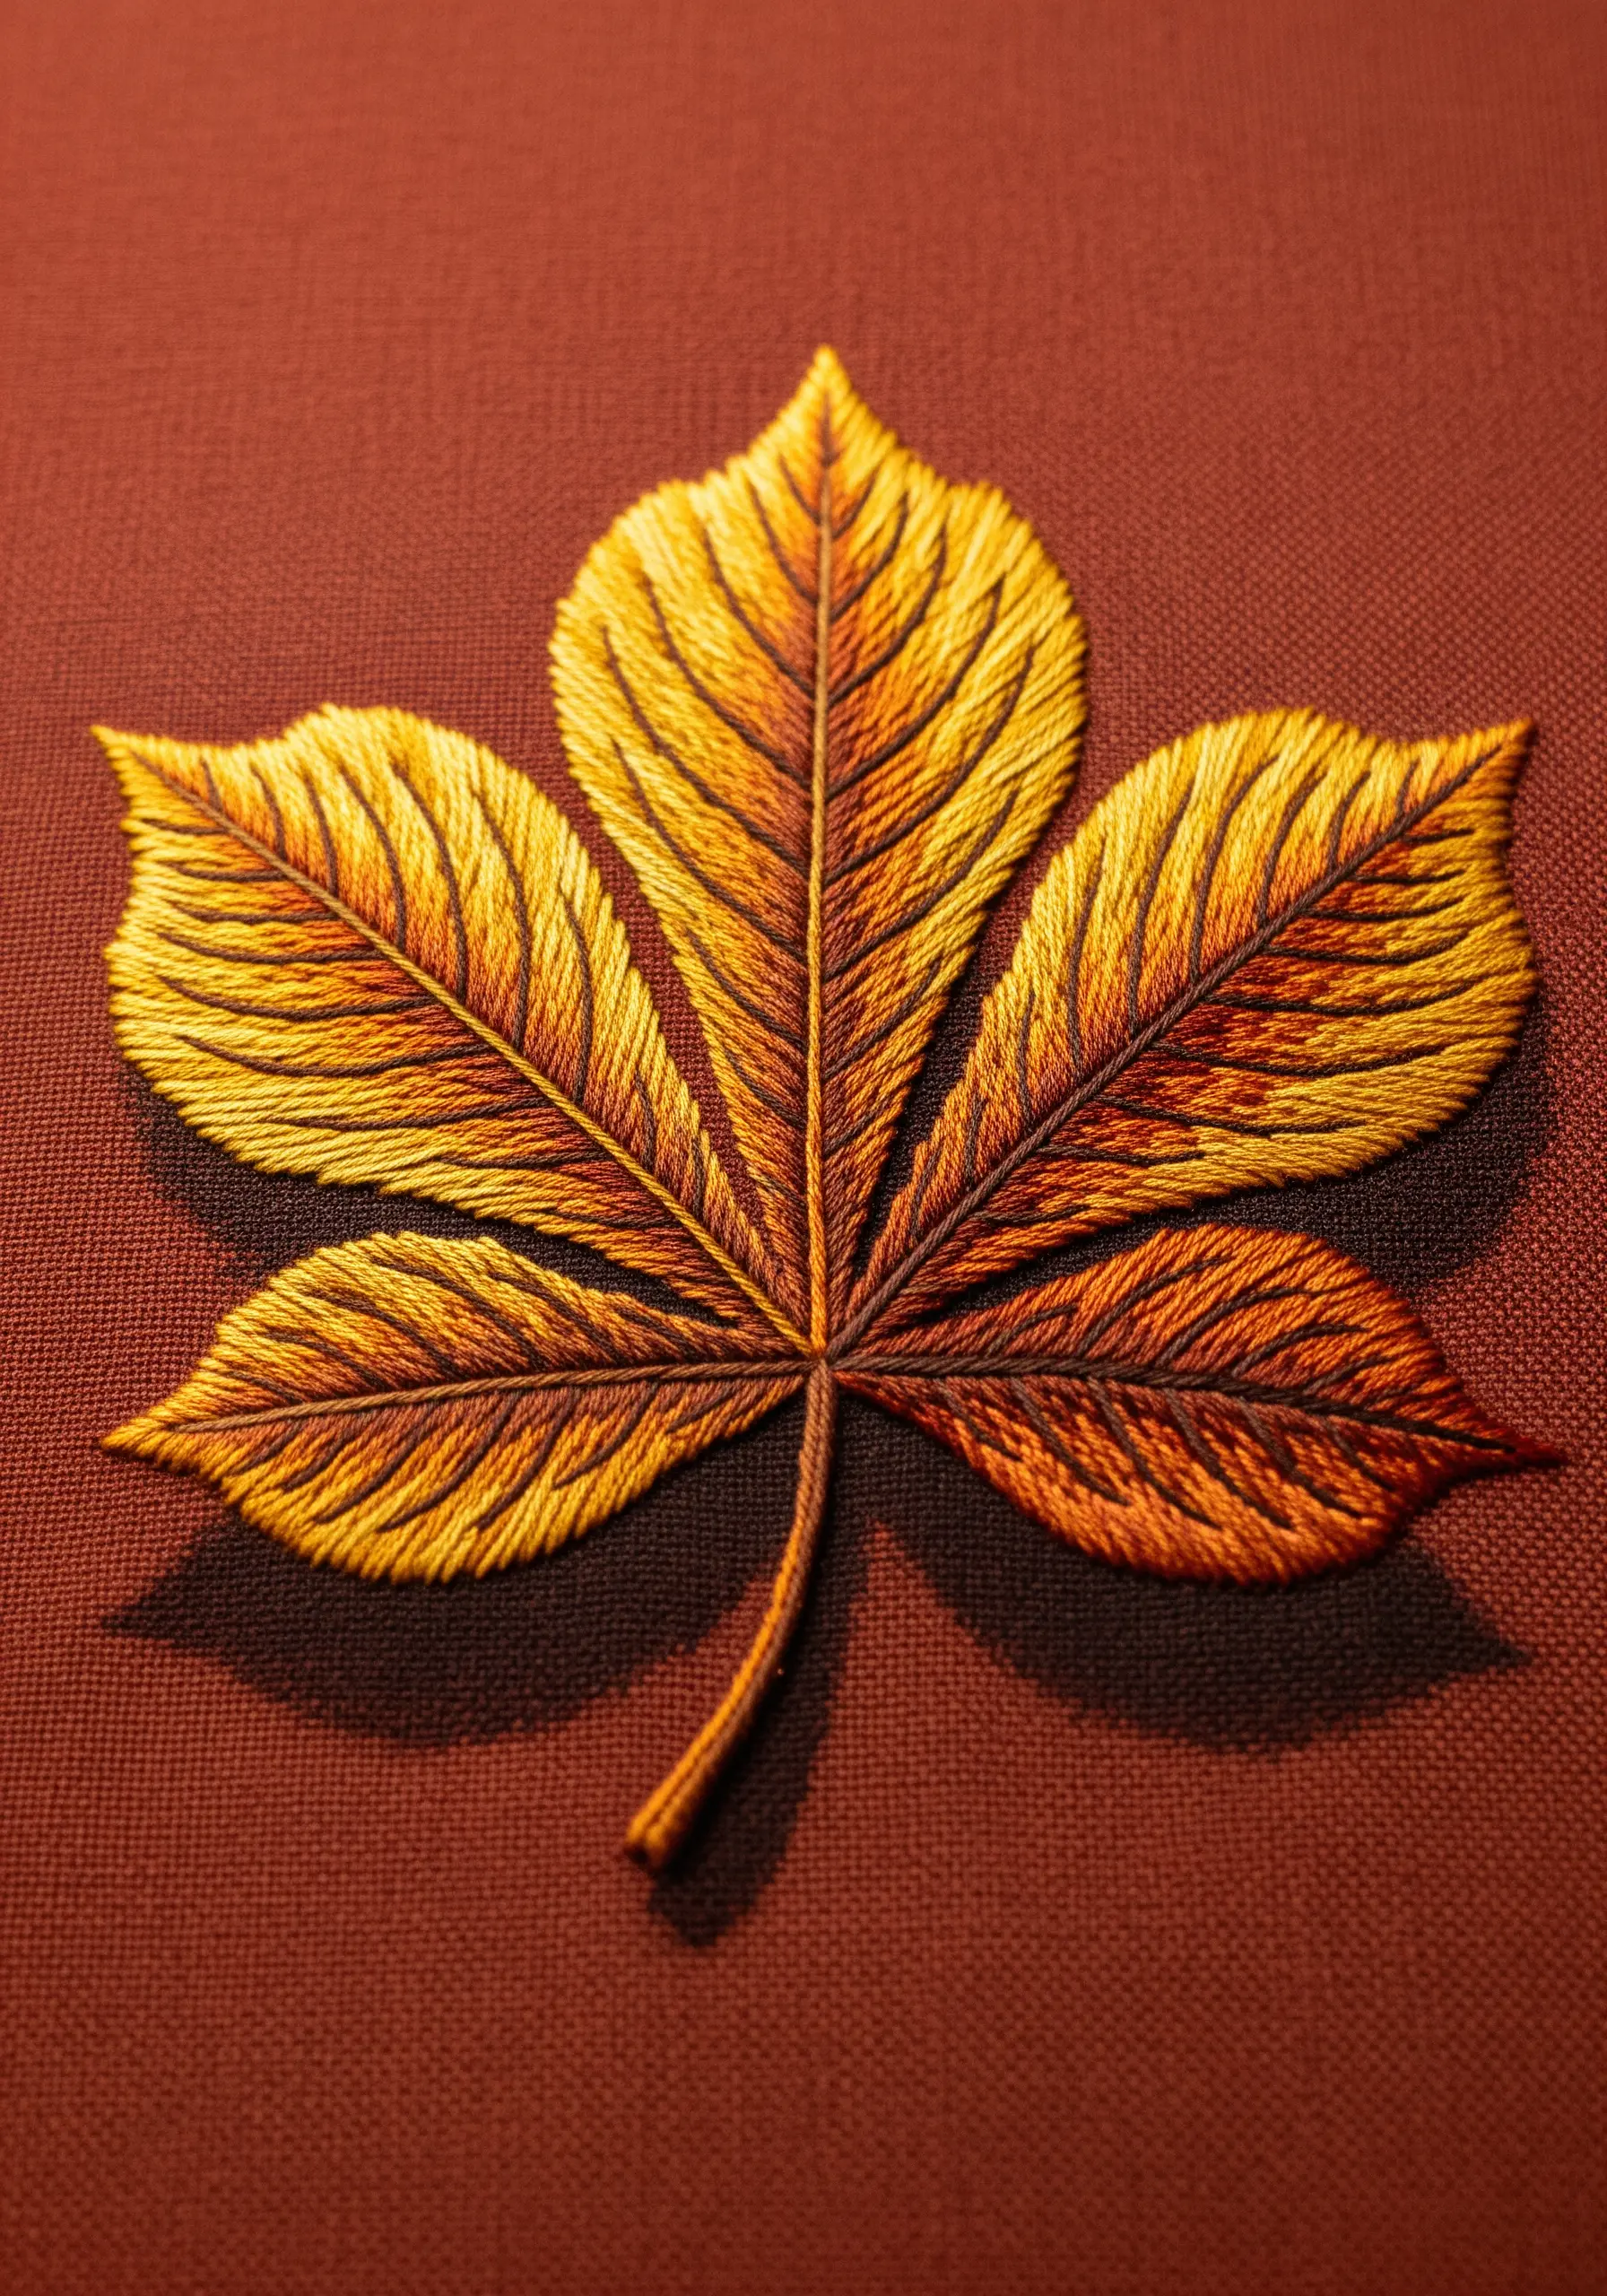
Use the veins of a leaf as your guide for placing shadows to create a contoured, realistic shape.
After filling the leaf sections with a base color, use a darker shade to add a line of long-and-short stitches right alongside one edge of each vein.
This small addition instantly creates the illusion that the sections of the leaf are curving and folding, giving the entire object a naturalistic sense of volume.
It’s a thread painting technique that relies on precision to build believable depth.
24. Use an Outline to Define a ‘Water’ Shadow
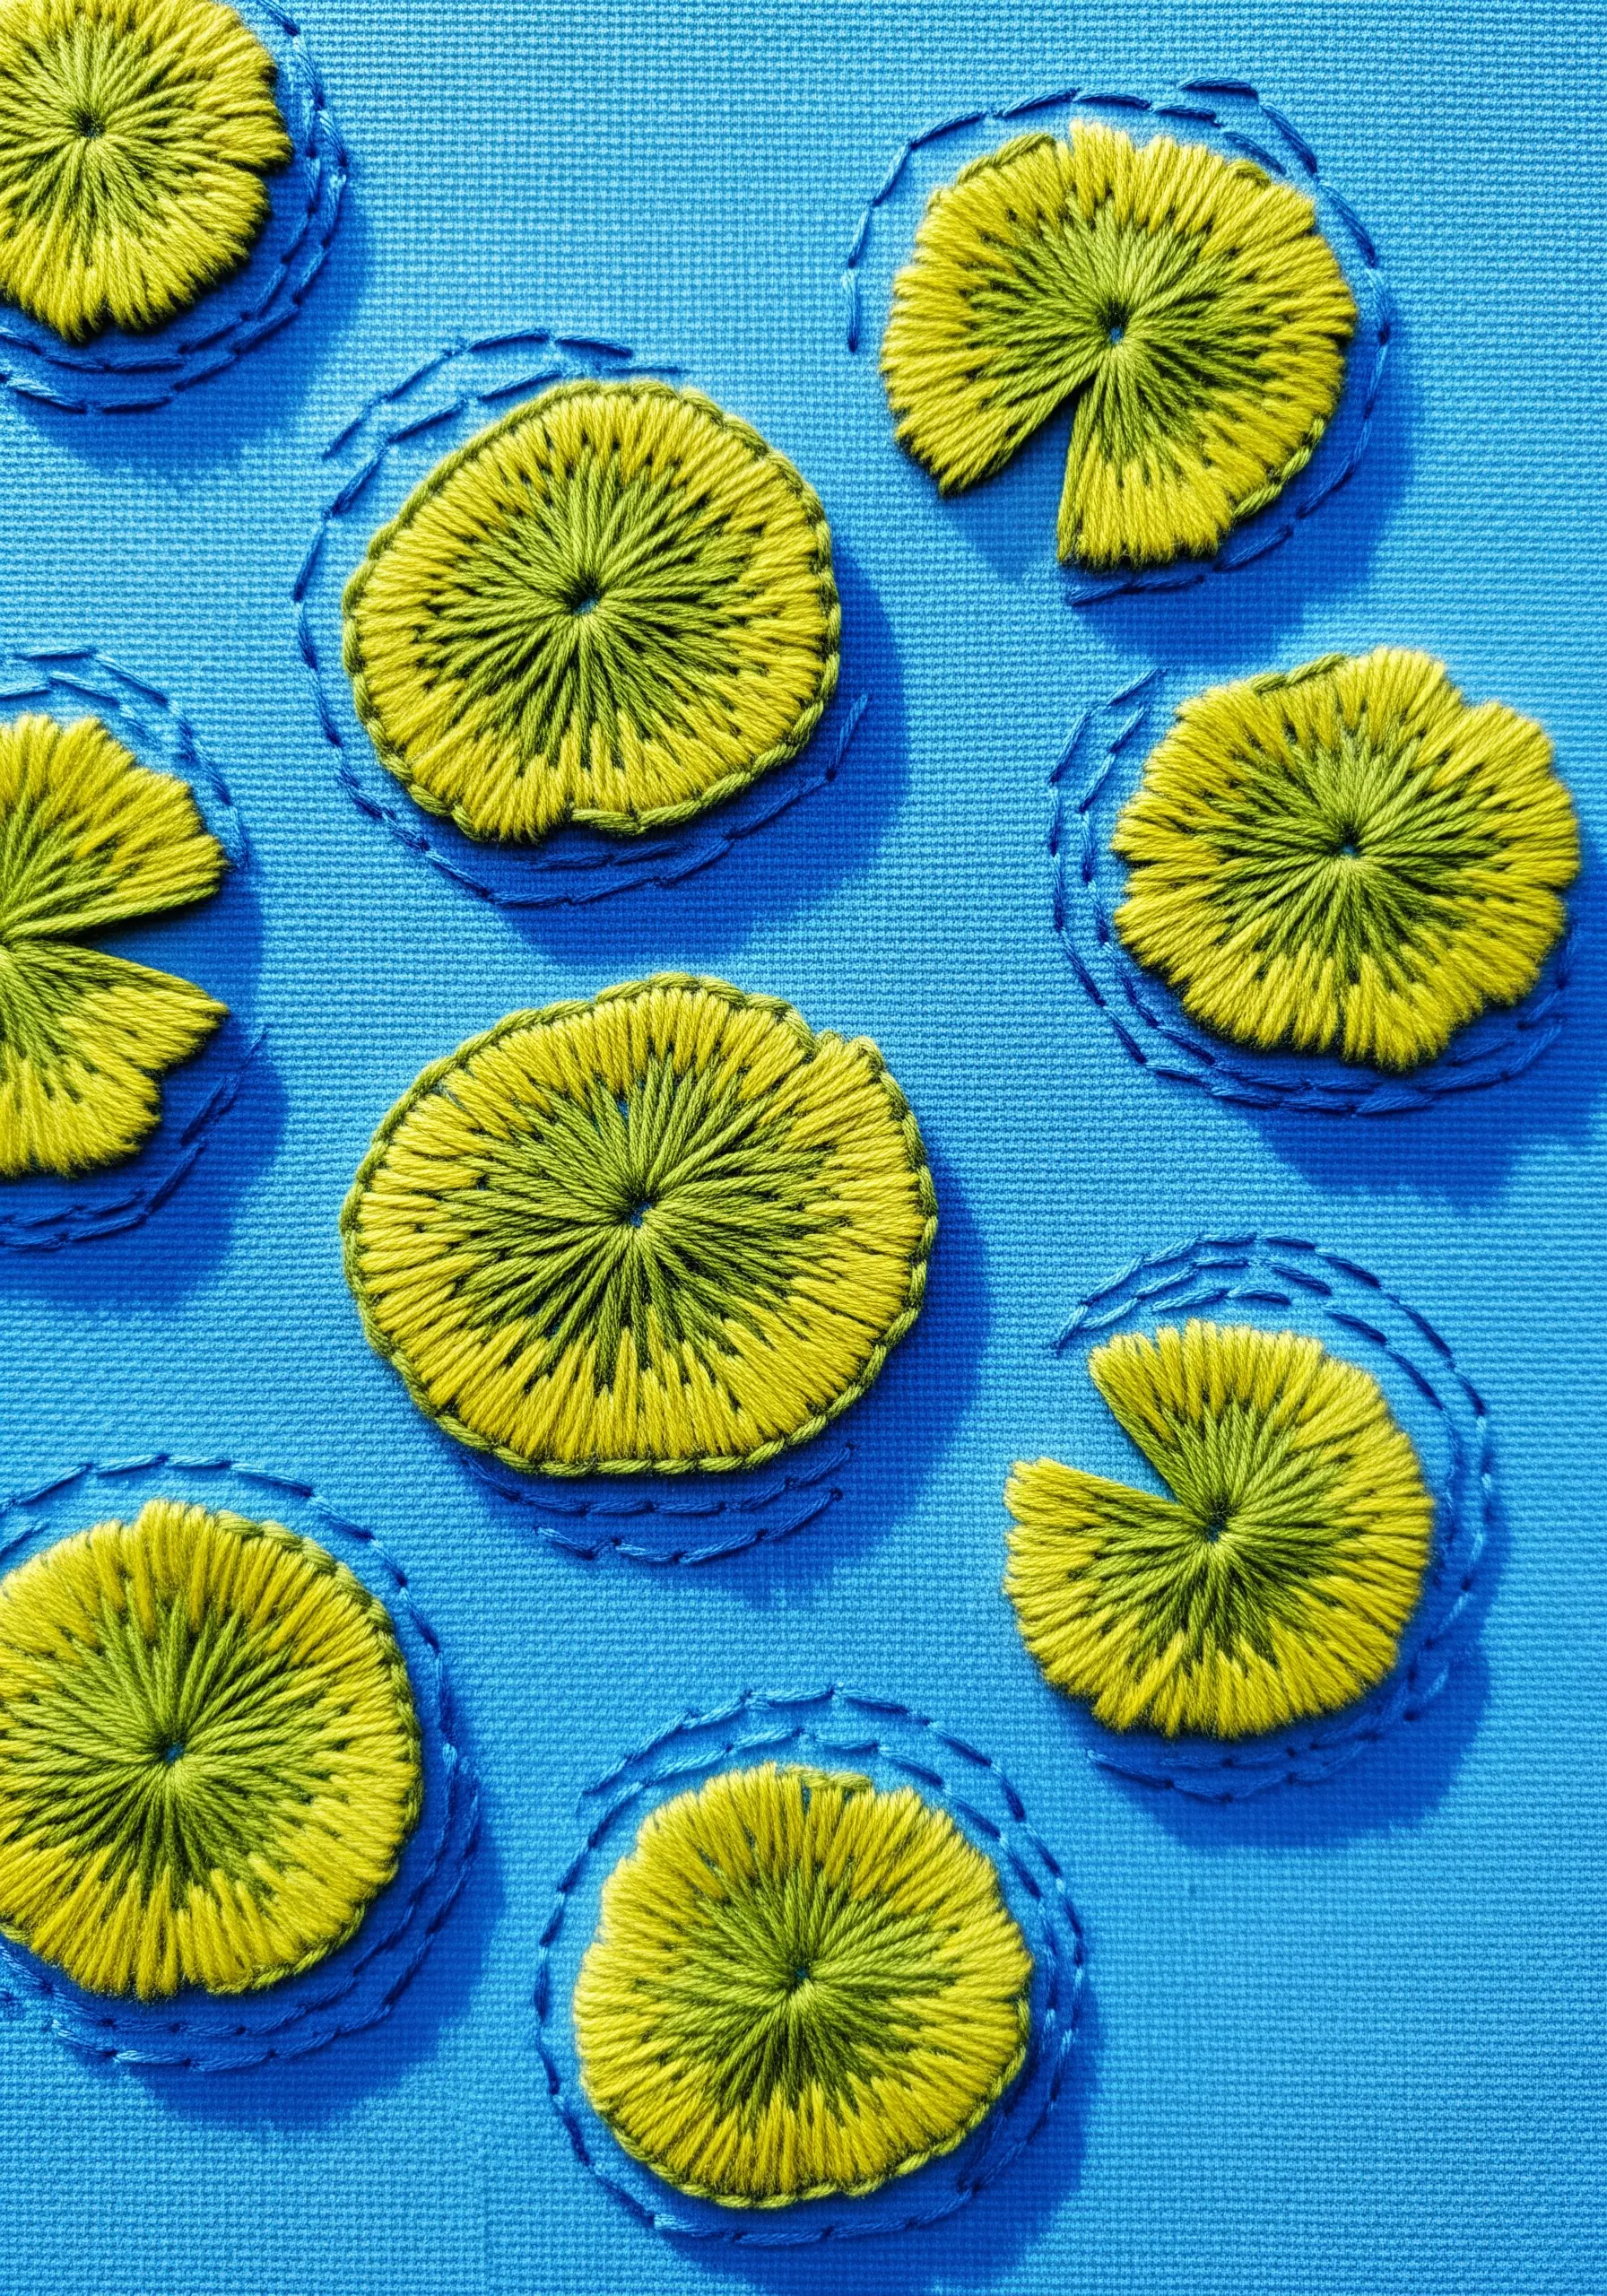
For aquatic plants like lily pads, the shadow is the water itself. You can define this relationship with a simple outline.
After stitching your lily pads, use a backstitch or split stitch in a contrasting color to trace a loose circle around each one.
This line acts as a ripple in the water and simultaneously serves as the edge of the shadow, clearly separating the pad from the surface it’s floating on.
It’s a clever, stylistic way to ground your subject in its environment.
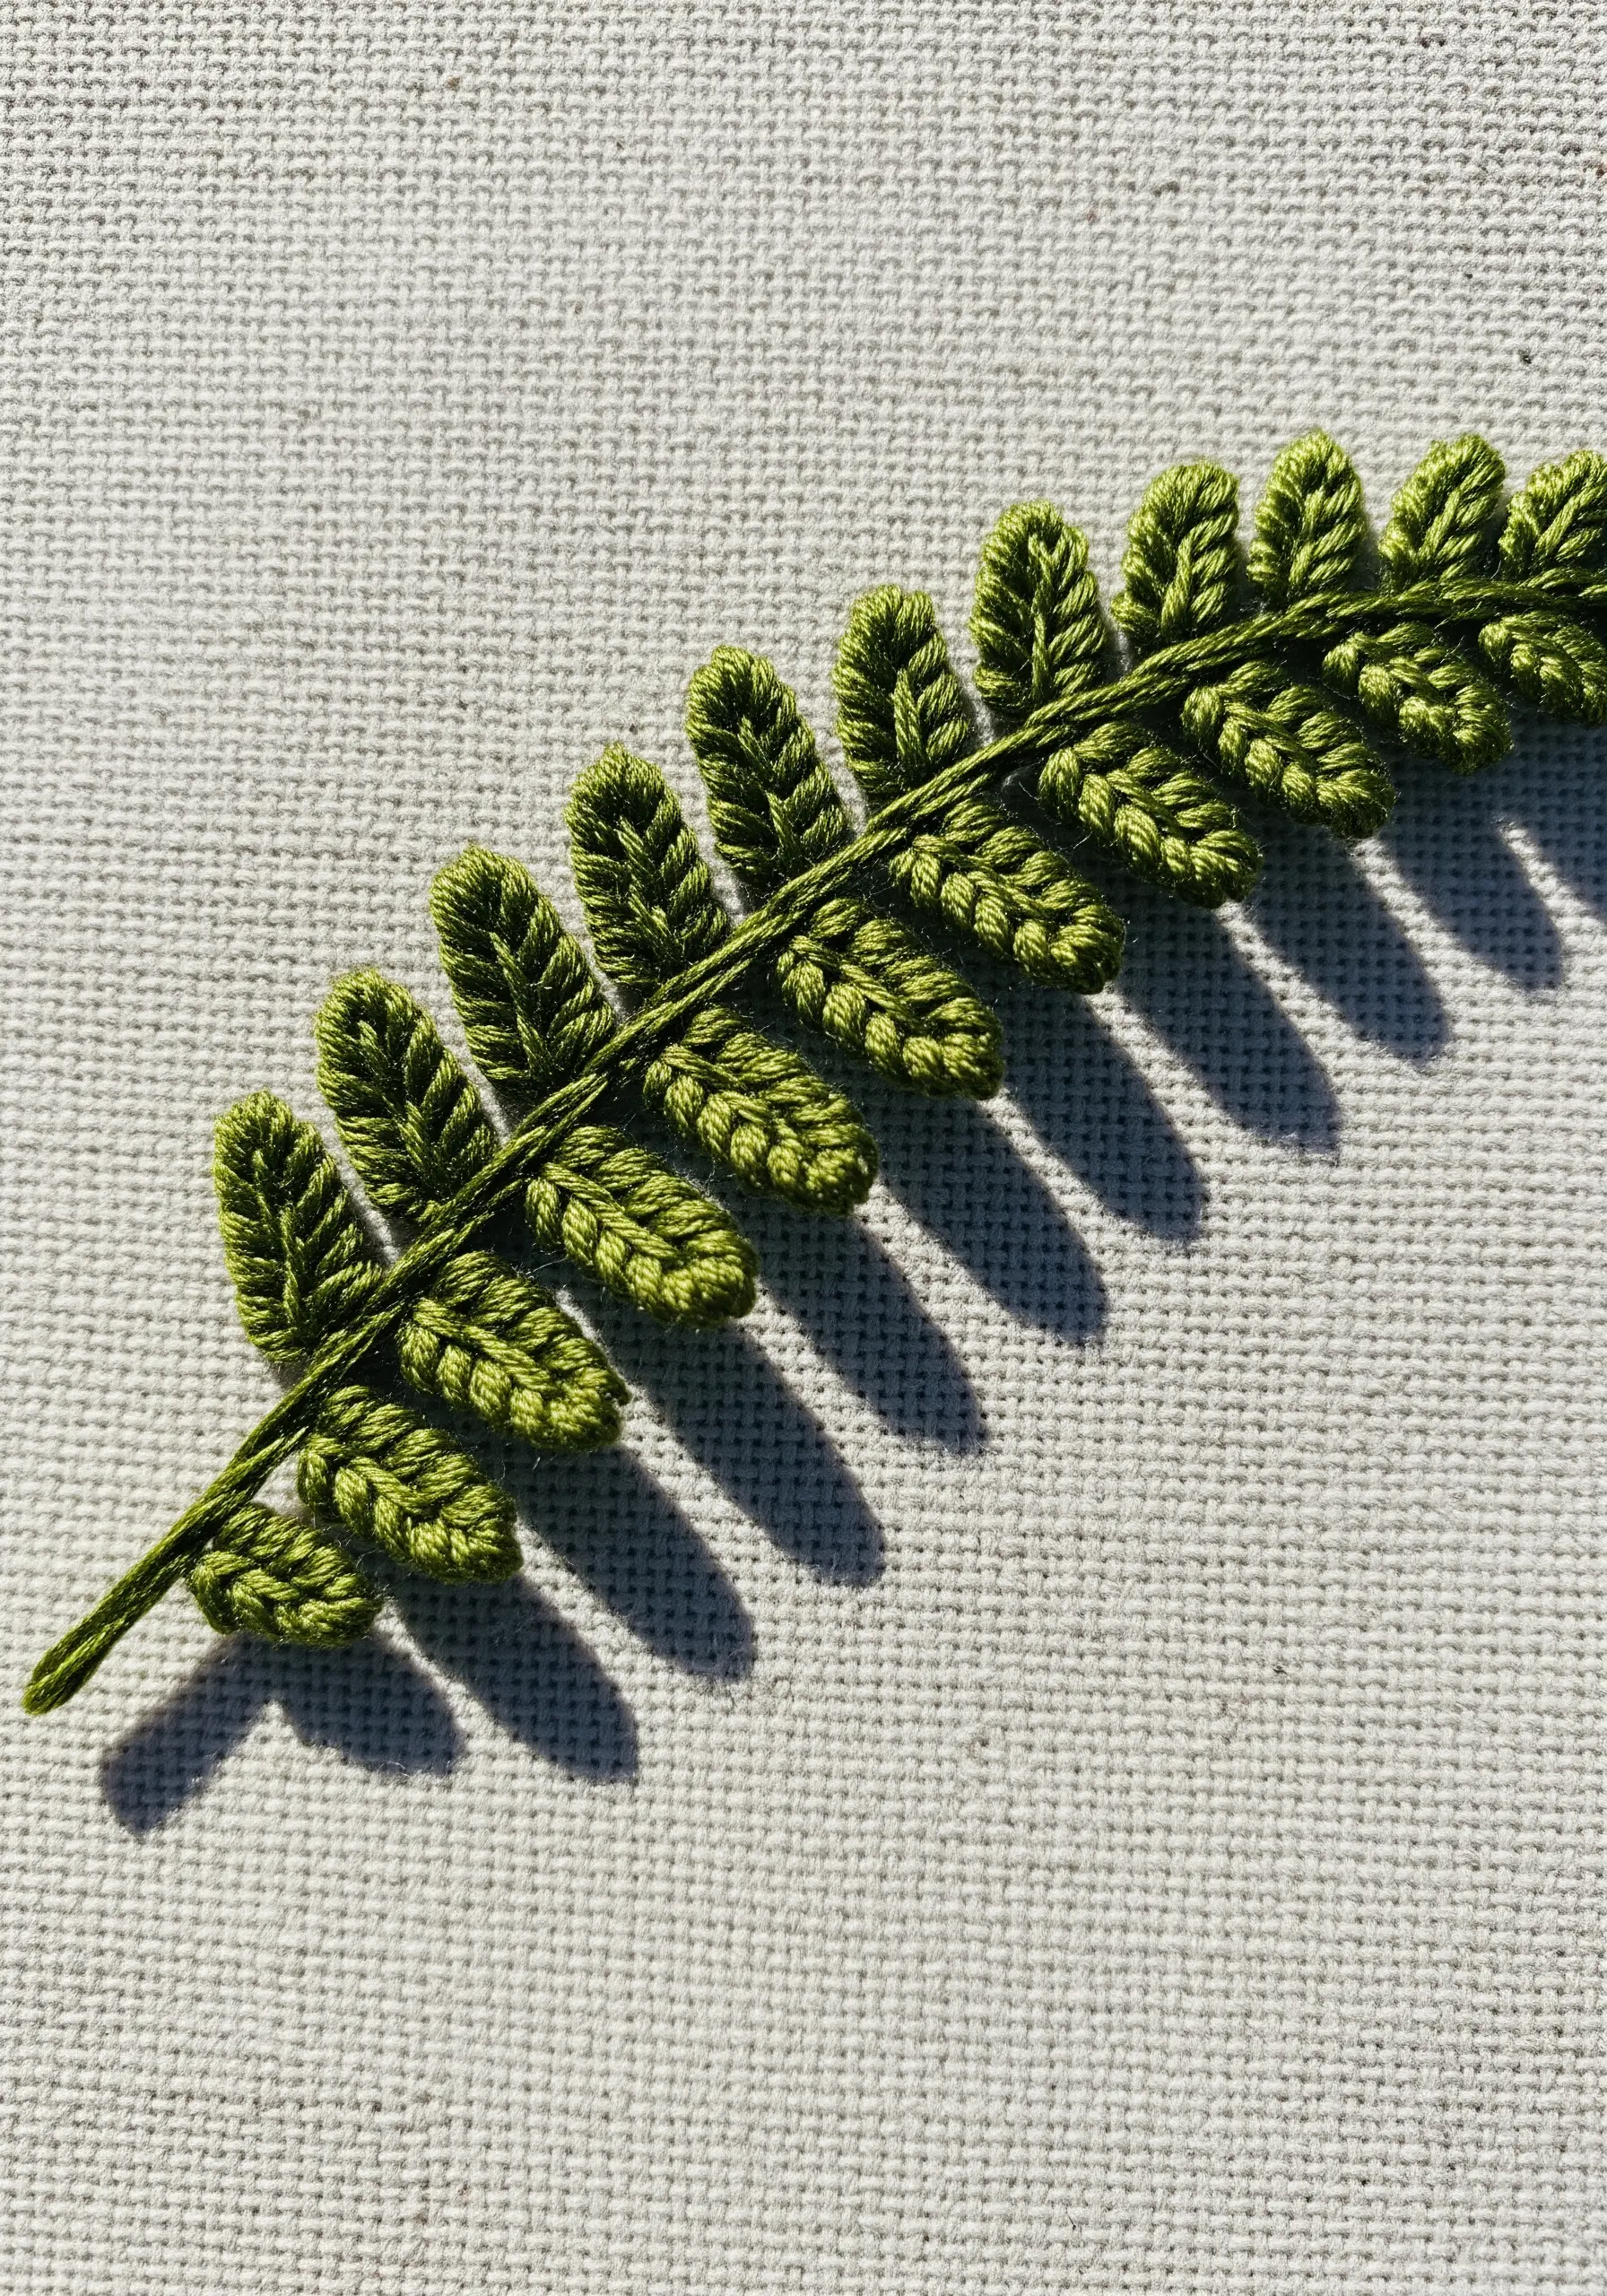
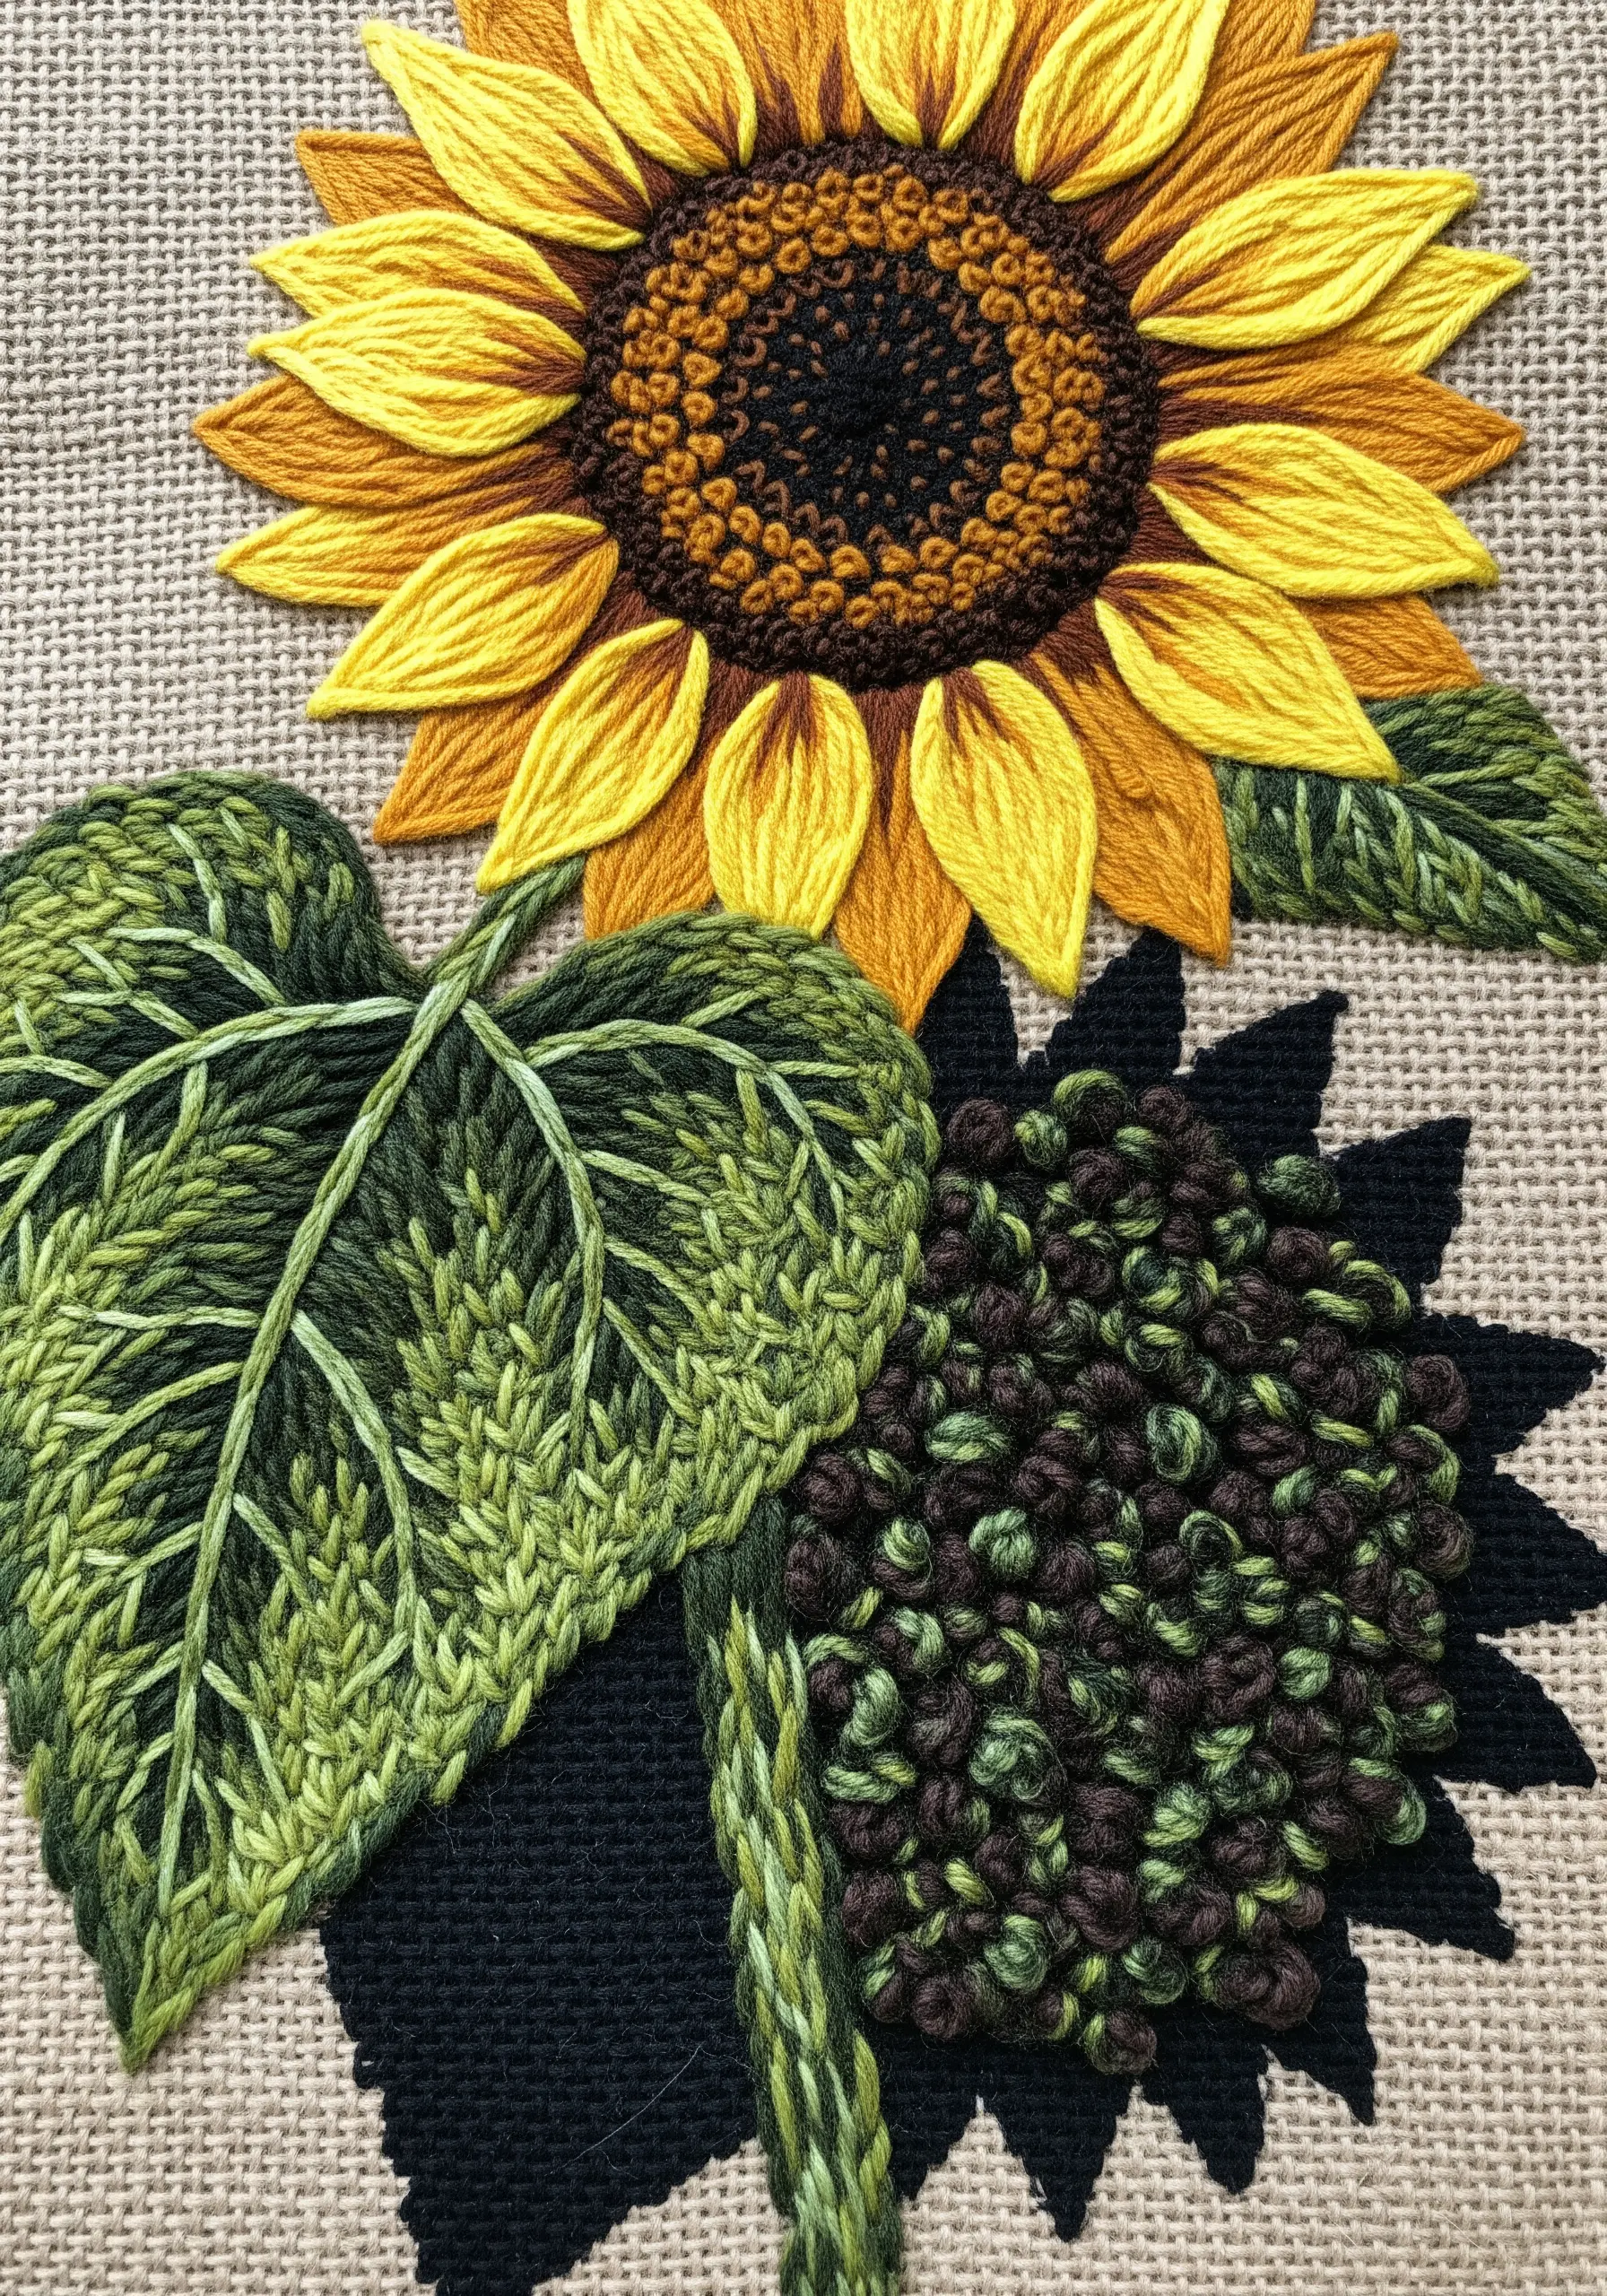
25. Stitch the Negative Space to Form a Shadow
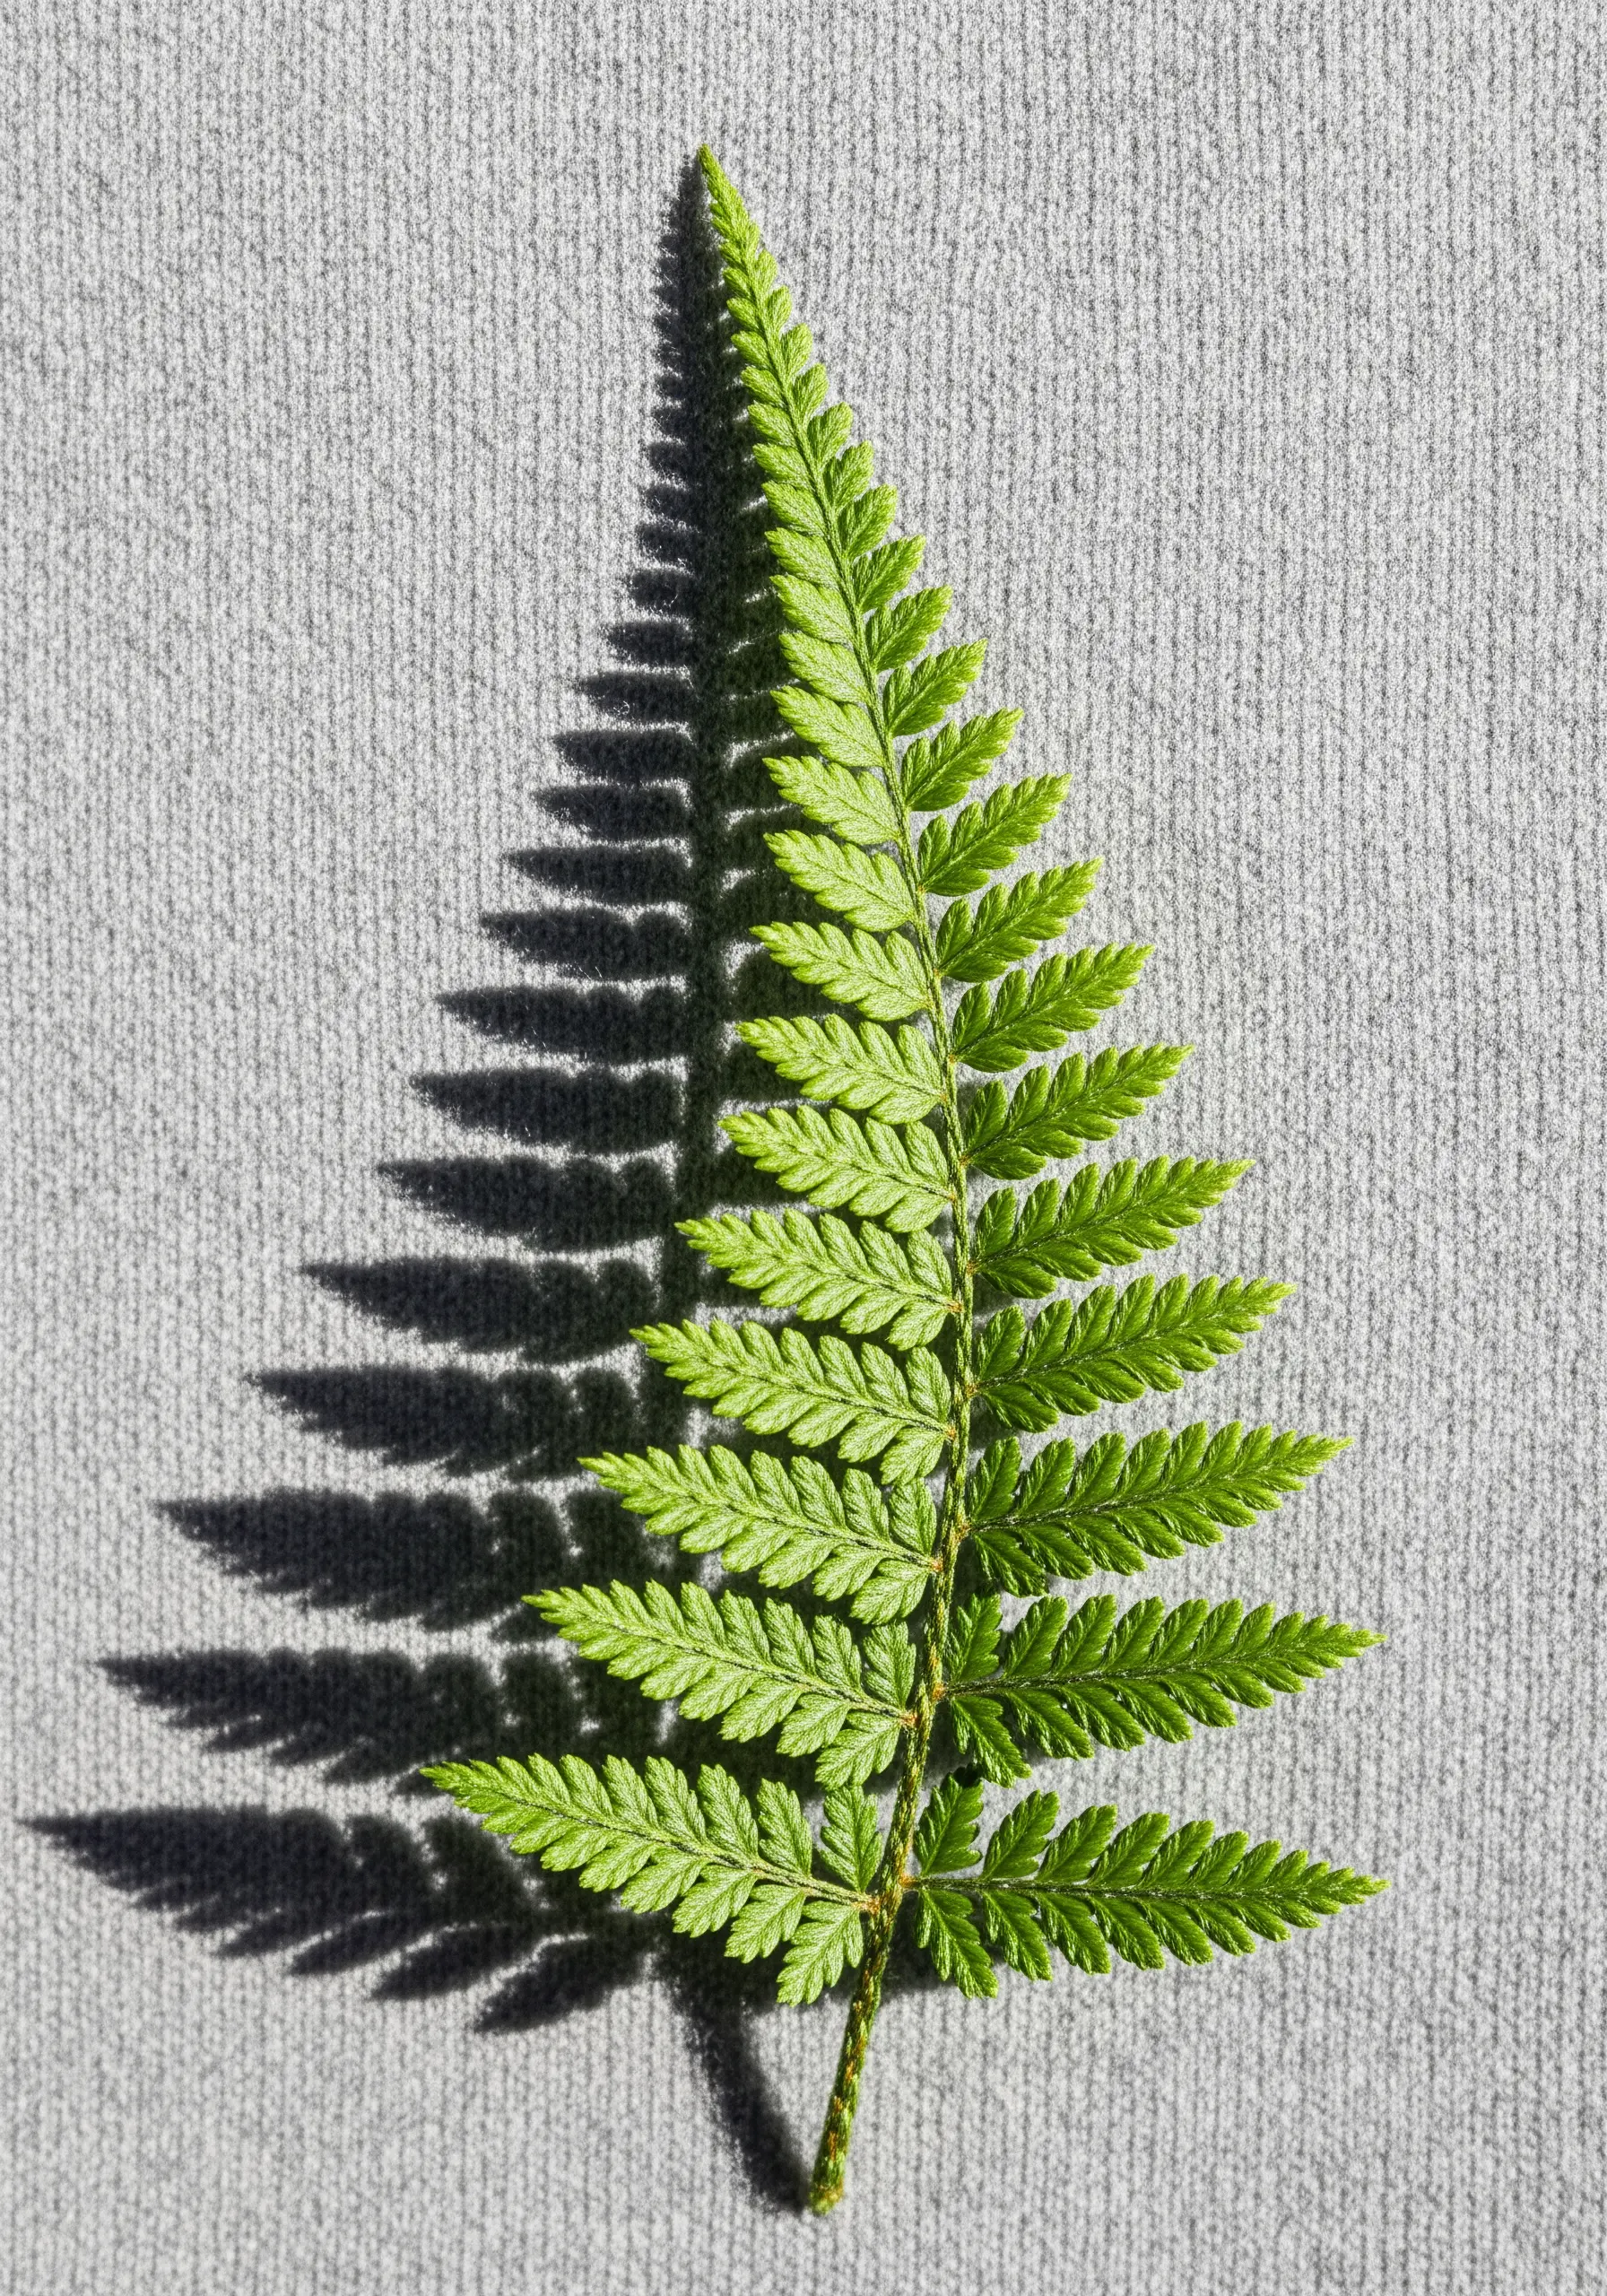
For complex shapes like ferns, trying to stitch a solid shadow can be overwhelming.
Instead, focus on the negative space. Lightly draw the detailed shadow shape, then fill the area *around* it with your background stitches.
Alternatively, stitch the shadow itself with the same level of intricate detail as the leaf, using open spaces to define its form.
This approach forces you to appreciate the shadow as a beautiful and complex shape in its own right.
26. Create a Grounding Shadow with Undefined Edges
A shadow doesn’t always need to be a perfect mirror of the object. Sometimes, a simple, soft mass is more effective.
To anchor an object to the ground, stitch a loose block of color beneath it using a dark, earthy tone like olive green or deep brown.
Use a loose satin stitch or even short fur stitches, and let the edges be slightly uneven and soft.
This creates a ‘grounding’ shadow that gives your subject weight and presence without distracting from the details.
27. Add Raised Details to Create Micro-Shadows
Enhance the three-dimensional quality of a leaf by adding raised textural elements that cast their own tiny shadows.
After filling the leaf with satin stitch, use a technique like couching to lay down thicker threads for the veins.
You can also use raised stem stitch or bullion knots for a more pronounced effect.
These raised lines will catch the light and create subtle, realistic shadows on the surface of the leaf itself, adding a layer of sophisticated detail.
28. Adapt Your Shadow Technique for Apparel
When embroidering on clothing, a large, solid-stitched shadow can make the fabric stiff and heavy.
Instead of stitching a separate shadow, weave darker threads directly into the bottom half of the leaf using thread painting techniques.
This integrates the shadow into the main design, creating a sense of depth without adding a dense, inflexible patch of stitches.
It’s a sophisticated way to integrate botanicals into tiny embroidery patterns that make your clothes look custom-made.
29. Stitch a ‘Contour’ Shadow with Parallel Lines
For a highly stylized and elegant look, create your shadow using long, parallel stitches that follow the curve of the leaf.
Instead of a solid fill, use single strands of a dark thread to stitch lines that echo the leaf’s outline. This is similar to the hatching technique in drawing.
The result is a shadow that feels light and airy, adding a sense of movement and graphic sophistication to your work.
This method works especially well on dark backgrounds, where the texture of the lines becomes the main feature.
30. Paint a Watercolor Shadow as Your Base
Combine mediums by painting a soft shadow onto your fabric before you even begin to stitch.
Use a small amount of diluted fabric paint or ink in a muted tone like gray or taupe to wash a soft shadow shape onto your fabric.
Let it dry completely. Then, stitch your crisp, detailed leaves directly on top.
The contrast between the soft, painted shadow and the sharp, textural embroidery creates a beautiful and unique sense of depth.
31. Use Cross-Hatching for a Graphic Shadow
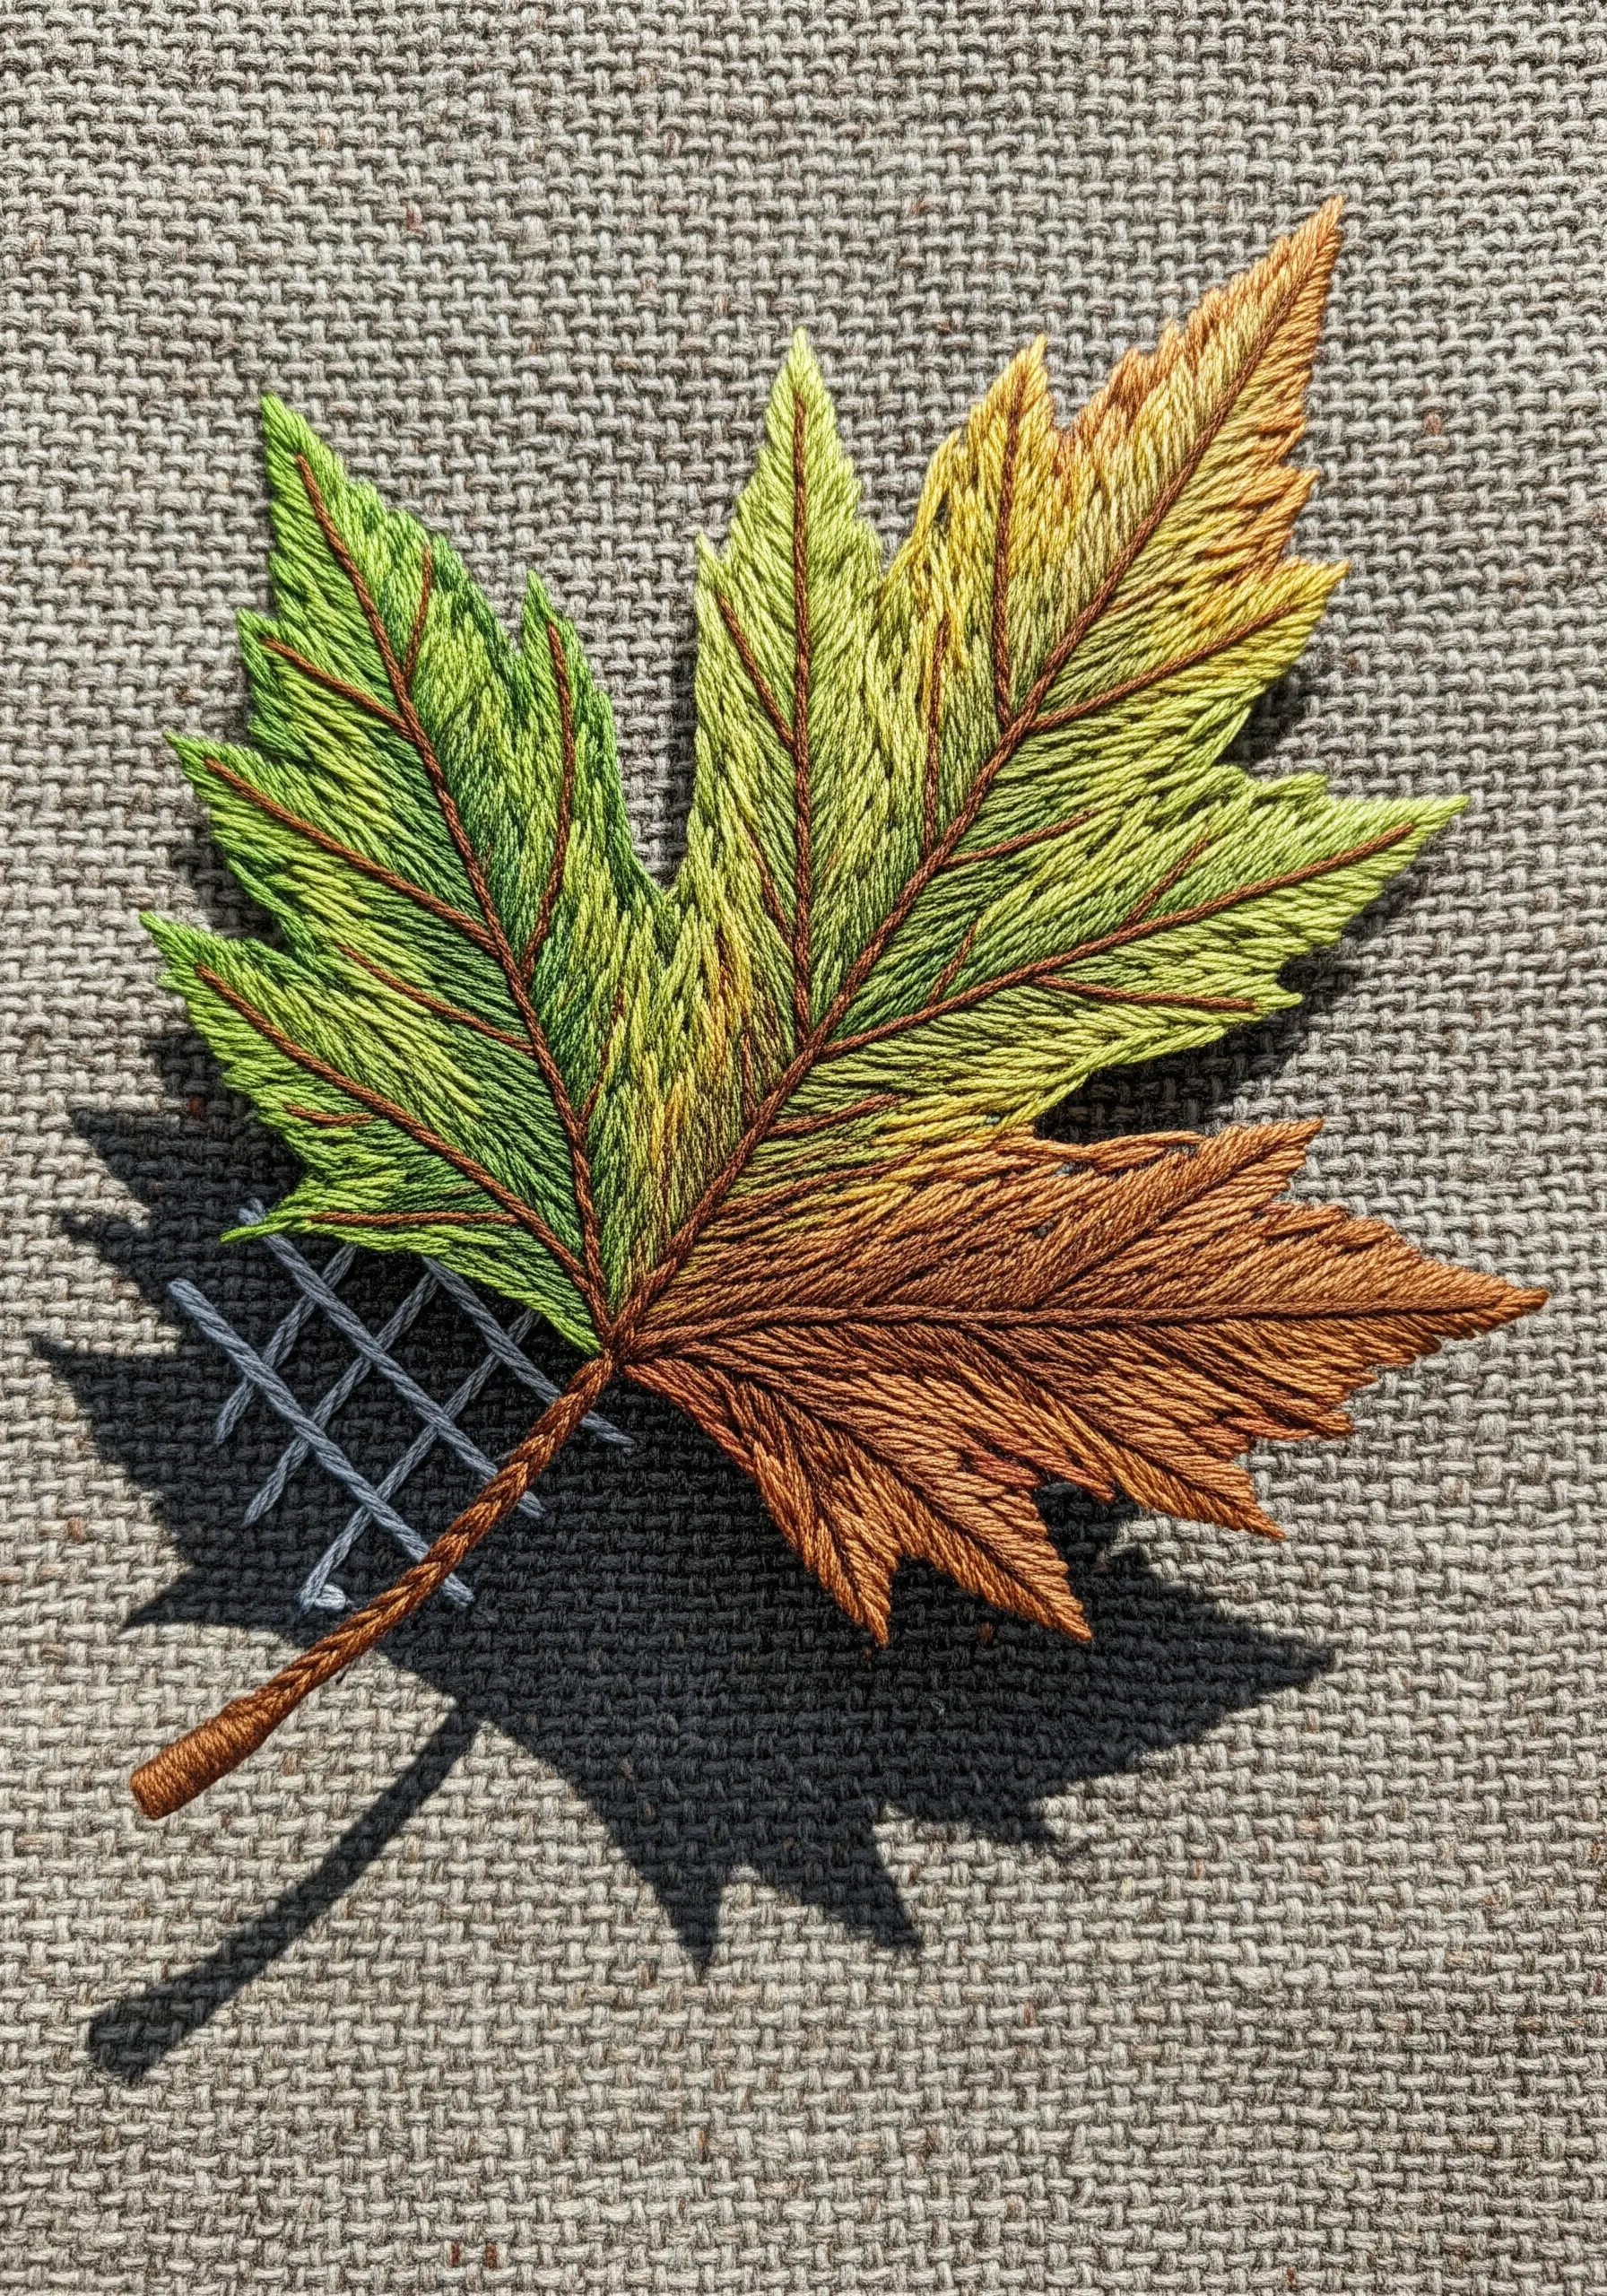
Borrow a technique from illustration and create your shadow using a graphic cross-hatch pattern.
Fill the shadow area with a grid of intersecting straight stitches. Use a neutral color like gray or a darker version of your background fabric.
You can vary the density of the grid to create lighter or darker areas within the shadow, just as you would with a pen.
This method provides a stylish, textured alternative to solid fills and works exceptionally well on rustic fabrics like linen or burlap.


