
There comes a moment in every creative practice when you feel you’ve hit a plateau. Your stitches are neat, your designs are lovely, but you’re looking for that next step—a way to make your work feel less like a craft and more like art. Combining paper, fabric, and thread in a collage is the perfect way to break through that barrier.
This isn’t about learning dozens of complex new stitches. Instead, it’s about seeing your thread as a line, a texture, a way to add dimension and story. It’s about how a few simple French knots can give life to a paper leaf, or how a single strand of metallic thread can chart a universe on a painted sky.
In these projects, you’ll discover how to use tiny hand stitches to connect, define, and transform your materials. Let this be an invitation to slow down, look closer, and see the immense artistic power held within a single, intentional stitch. You already have the skill; now it’s time to give it a new voice.
1. Use French Knots to Add Punctuation and Texture
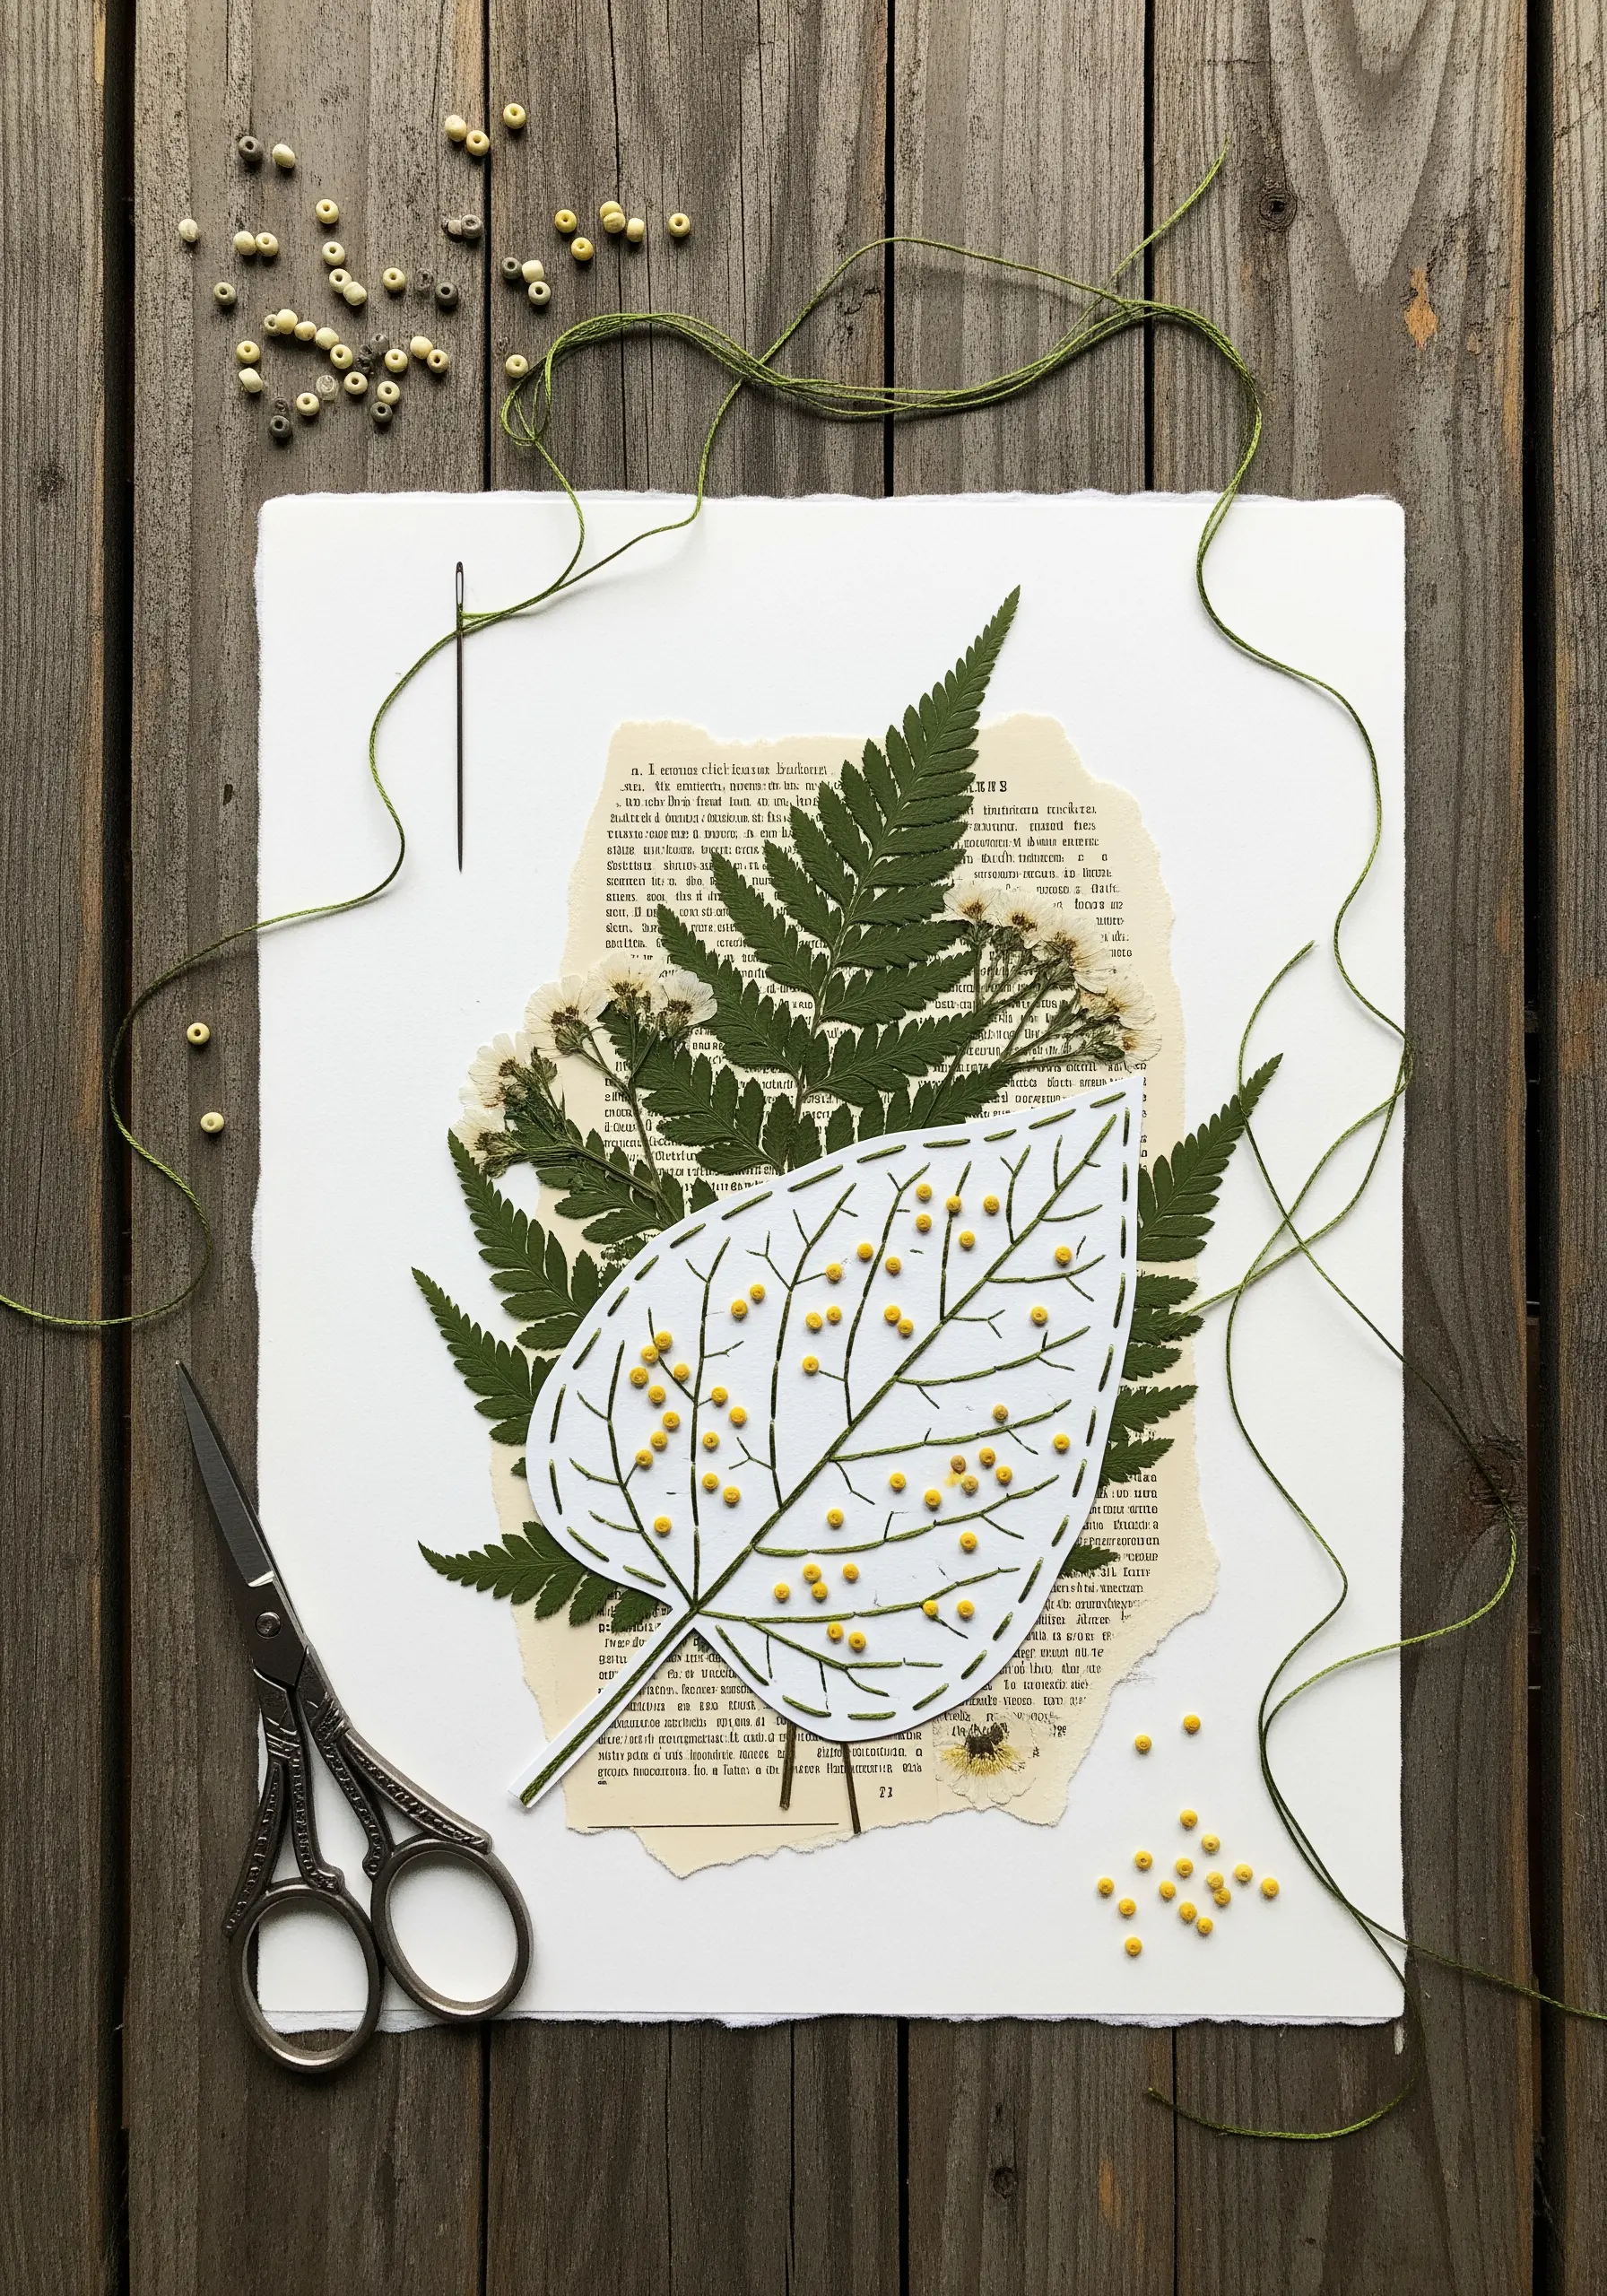
Instead of filling a space, think of French knots as deliberate, textural dots that draw the eye.
When stitching on paper, use a sharp, fine needle to pierce the material cleanly, preventing tears.
Arrange your knots in organic clusters or follow the lines of your collage elements, like the veins of a leaf, to create a sense of natural growth.
For a quicker, more uniform effect, you can substitute the knots with tiny seed beads, securing each one with a single, small stitch.
This technique turns a flat paper cutout into a tactile object, inviting a closer look.
2. Couch Metallic Thread for Clean, Celestial Lines
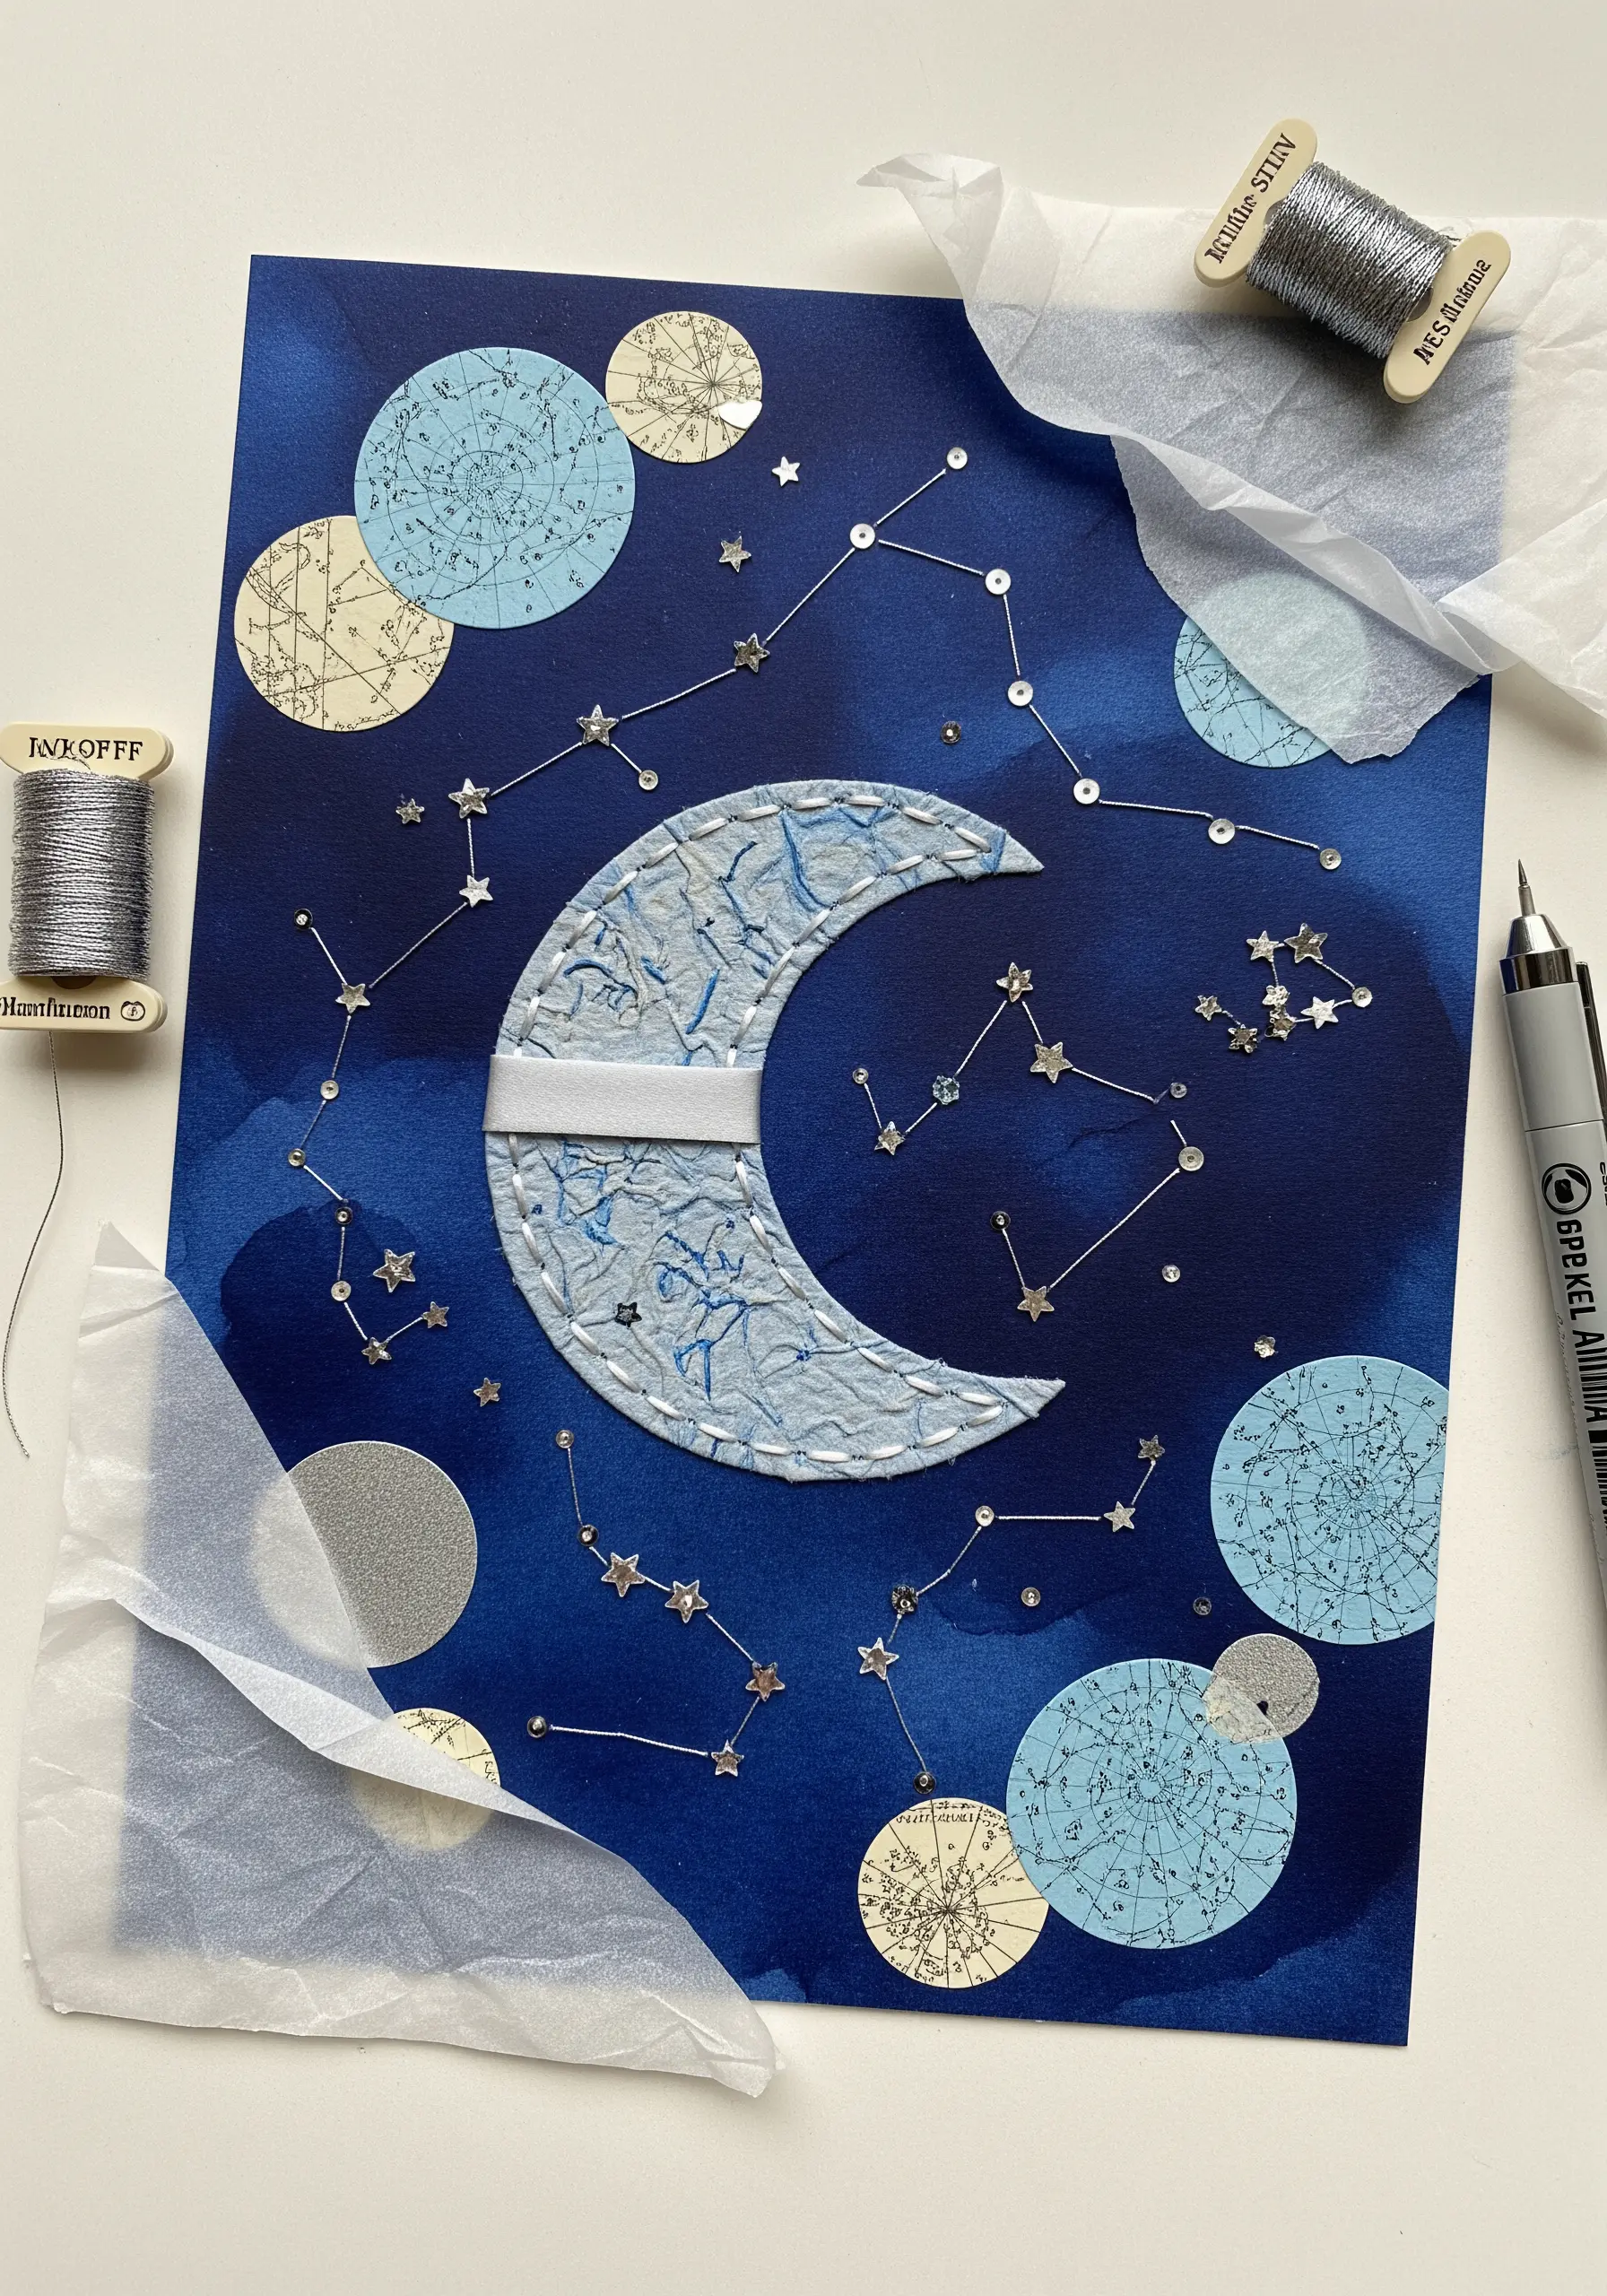
Create sharp, graphic constellations by couching metallic thread onto your paper collage.
This technique involves laying your metallic thread on the surface and securing it with tiny, perpendicular stitches of a finer, matching thread.
Couching prevents the stiff metallic thread from kinking or losing its luster, which can happen with conventional stitches.
It also allows you to create perfect curves and sharp angles with complete control, making it ideal for celestial maps and line art.
Finish by adding a few sequins or star-shaped beads to capture the sparkle of a night sky.
3. Define Portraits with Bold Chain Stitch Outlines

Transform a simple paper portrait by tracing its features with a bold, graphic chain stitch.
Use a contrasting color and a thicker thread, like a pearl cotton #5, to make the lines a central feature of the artwork.
The texture of the chain stitch adds a sculptural quality that lifts the image off the background, creating a powerful focal point.
For the hat, use a darning stitch on a fabric scrap before cutting it out and appliquéing it to the collage; this adds another layer of rich texture.
This approach combines illustration, collage, and embroidery into a cohesive, expressive mixed-media piece.
4. Frame Geometric Shapes with a Rustic Blanket Stitch

Juxtapose the clean, sharp edges of paper shapes with the rustic, handmade quality of a bold blanket stitch.
First, pierce the holes evenly along the edge of your paper elements using a needle or an awl before you begin stitching.
This preparation ensures your stitches are uniform and prevents the paper from tearing as you pull the thread through.
Use a thick, contrasting thread like black embroidery floss or fine yarn to make the stitches a prominent design element.
The result is a dynamic composition where the softness of the thread enhances the sharpness of the geometric forms.
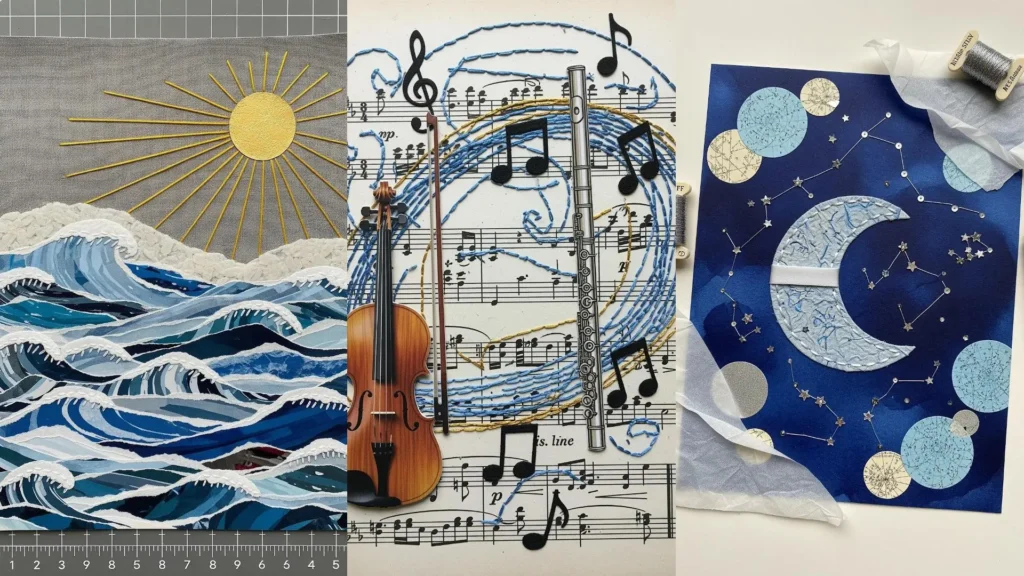
5. Imply Light and Motion with Radiating Straight Stitches

Use simple straight stitches to create the illusion of light and energy radiating from a central point, like the sun.
Varying the length of your stitches slightly will give the sun’s rays a more dynamic and less rigid feel.
To create the waves, use layers of torn paper instead of cut shapes; the rough, feathered edges naturally mimic the texture of sea foam.
Anchor the paper wave crests with a few discreet couching stitches or tiny French knots to add subtle texture and stability.
This combination of precise stitching for the sun and chaotic tearing for the water creates a balanced and evocative seascape.
6. Add Subtle Definition with Minimal Running Stitches

When your collage already features detailed illustrations, use embroidery to add a whisper of texture, not to overwhelm.
Employ a simple, spaced-out running stitch to attach paper elements to your background.
Use a single strand of floss in a color that tonally matches the paper to create a subtle, almost invisible, handmade touch.
These tiny stitches add a layer of authenticity and craftsmanship, suggesting a story or a well-loved travel journal.
The goal here is not decoration but quiet integration, making the collage feel like a single, cohesive artifact.
7. Create Soft Fur Texture with Scattered Seed Stitches

Bring paper-cut animals to life by adding a soft, fur-like texture with scattered seed stitches.
Use a single strand of thread in a slightly lighter or darker shade than the paper to create subtle depth.
Place small, straight stitches at random angles across the areas you want to appear soft, like the chest and tail.
For the ground, use clusters of French knots in various shades of green to build up a mossy, dimensional texture that the character can sit in.
These tiny embroidery details transform flat cutouts into charming, tactile figures.
8. Embellish Printed Patterns with Beading and Knots

Elevate a fashion illustration by treating a patterned paper cutout like real fabric.
Use tiny seed beads and French knots to accentuate elements within the floral print, adding sparkle and dimension.
A fine beading needle will allow you to stitch through the paper without creating large holes.
Secure each bead with a small backstitch for durability.
Add a delicate scalloped edge to the hemline using a blanket stitch with a picot variation for a couture-level finish.
9. Unify a Composition with Abstract Grid Stitches
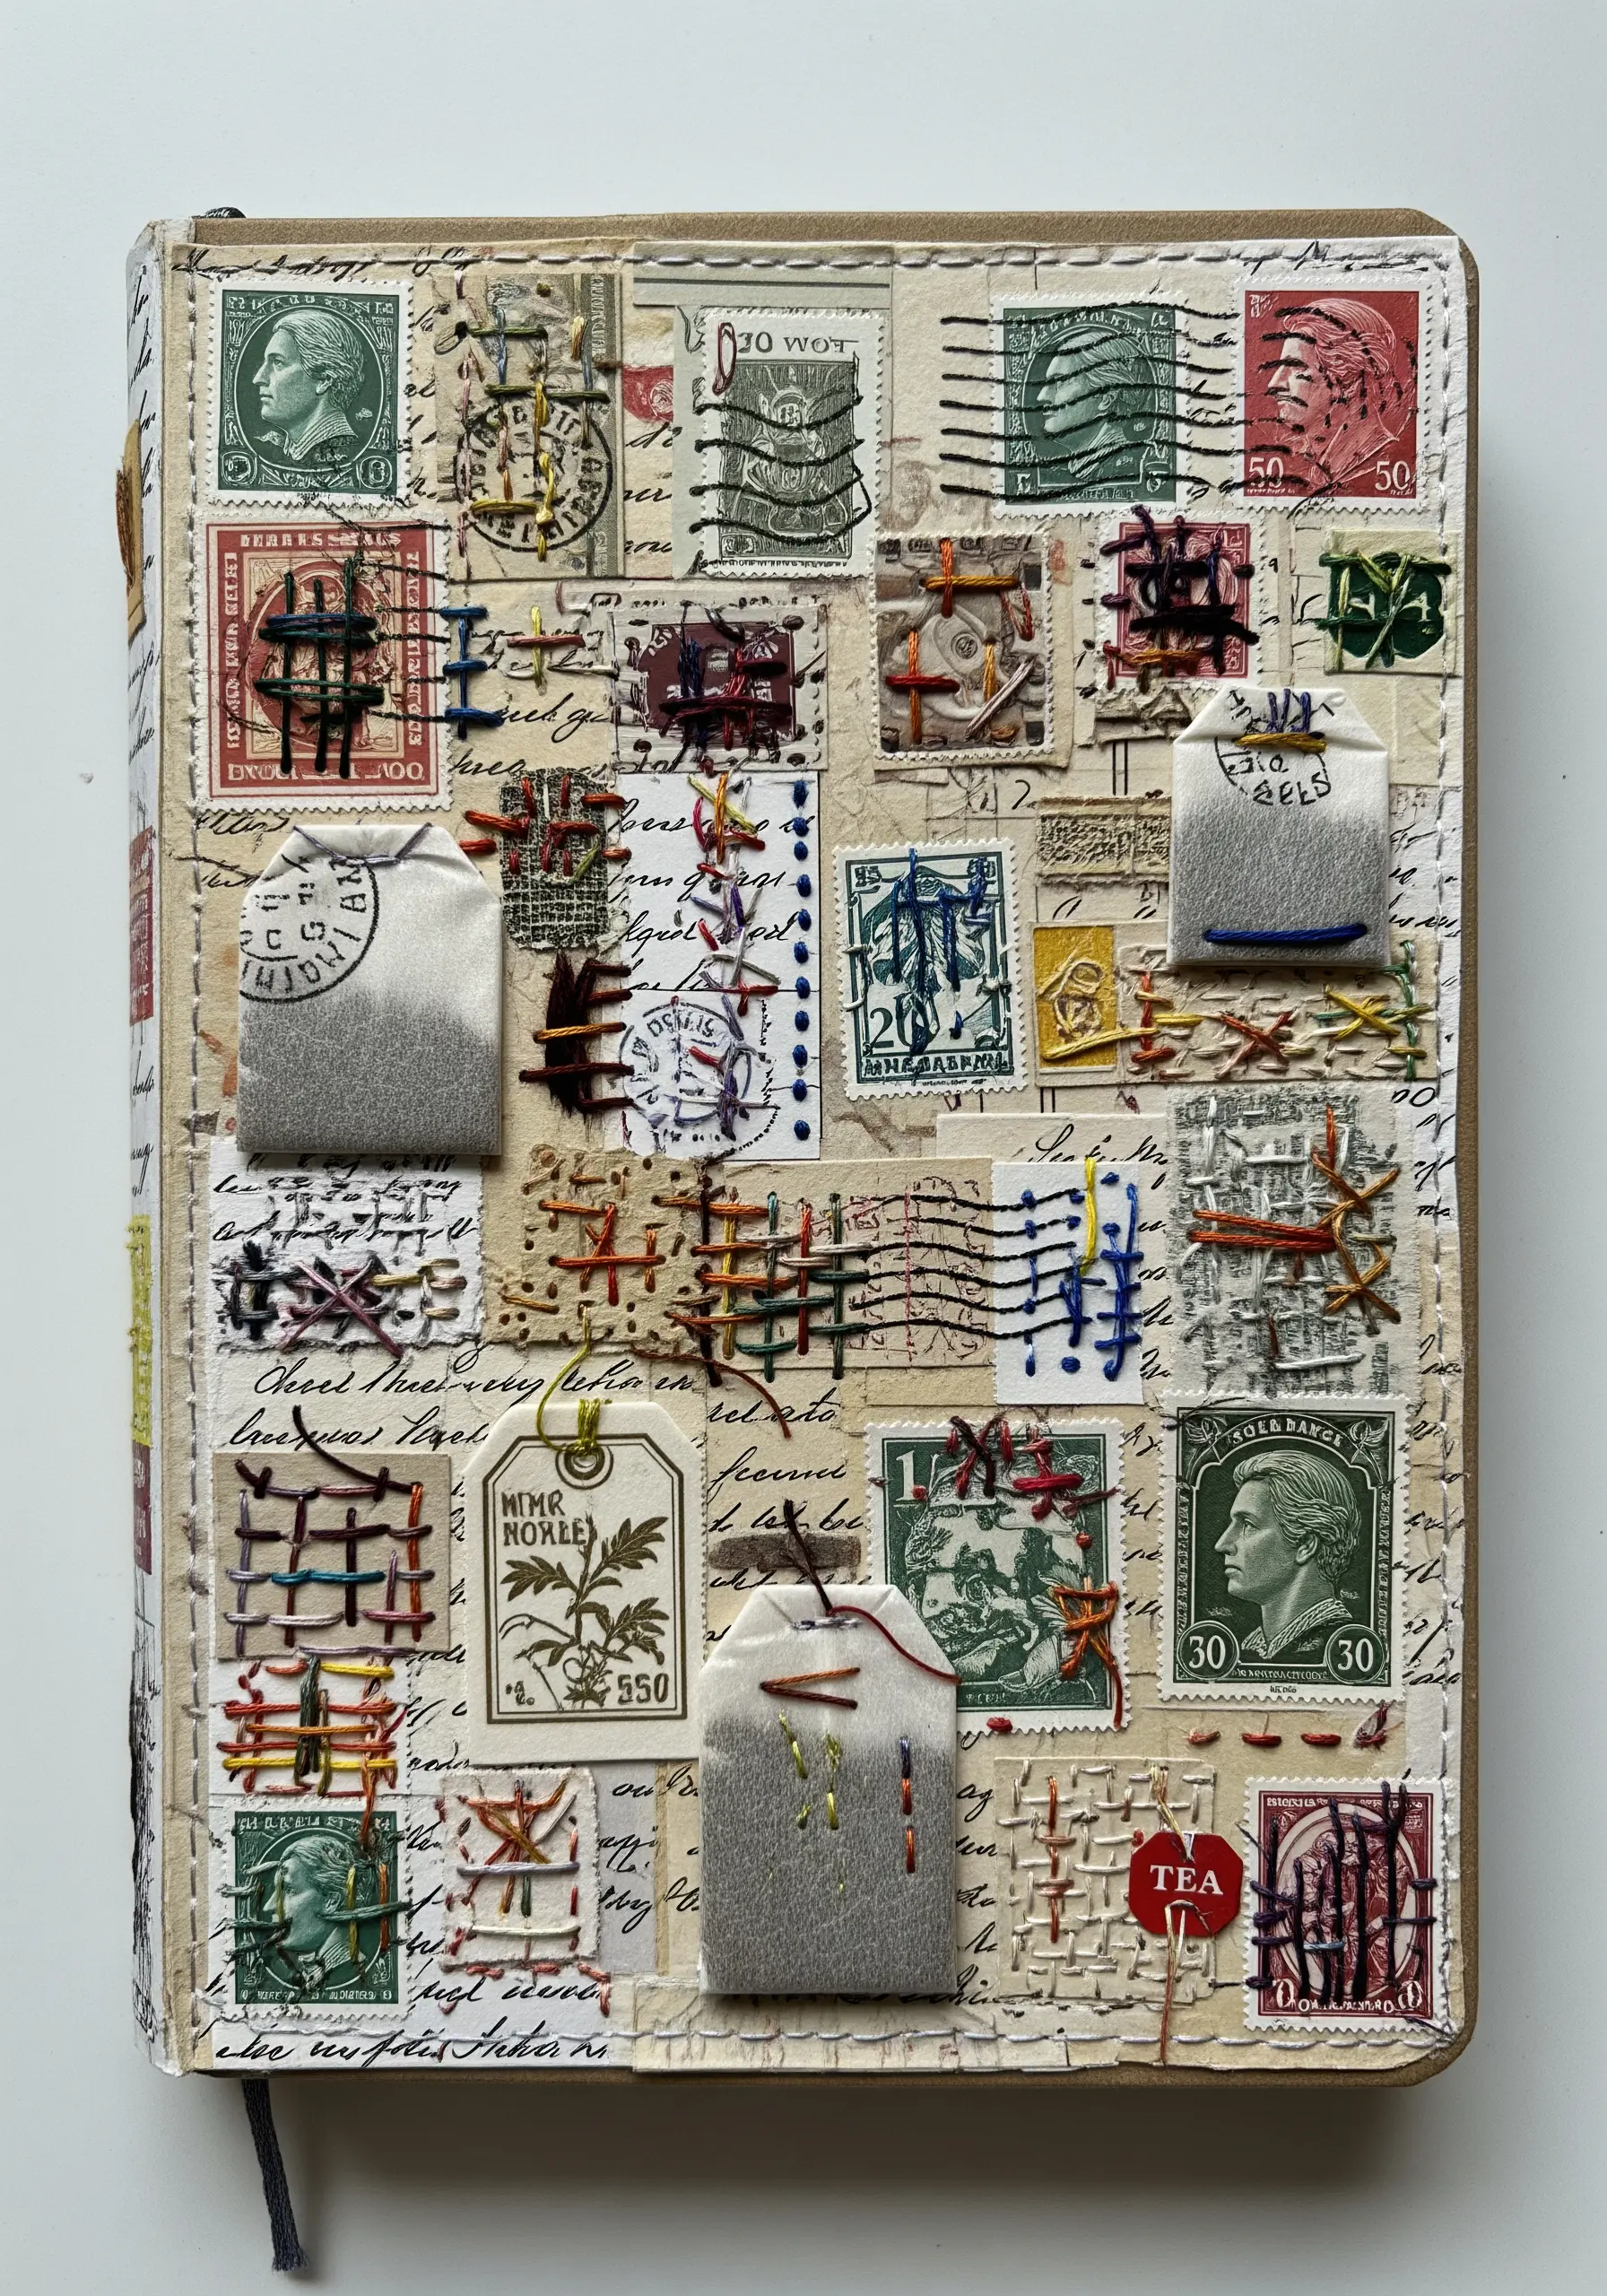
Create a cohesive surface from disparate elements, like postage stamps, by overlaying them with abstract grid-like stitches.
Use a darning stitch or create woven grids with long straight stitches to visually connect the different pieces.
Vary the color, thickness, and density of your stitched grids to add rhythm and focal points to the composition.
This technique is perfect for art journals and mixed-media pieces, turning a collection of scraps into a unified textile-like surface.
It’s a fantastic way to experiment with abstract thread patterns and color play.
10. Build Dense Texture with Tightly Packed French Knots

Create a stunningly dense and uniform texture by filling a defined shape with tightly packed French knots.
To achieve this effect, work from the outer edge of the shape inward, placing each knot directly beside the previous one.
Use a consistent number of wraps around your needle (one or two is best) to ensure all knots are the same size.
For the stem, create a clean, solid line by outlining with a split stitch and then filling it with satin stitches, or simply use a whipped backstitch.
This technique is perfect for creating impactful flower centers or other organic shapes.
11. Sculpt 3D Forms with Padded Satin Stitch
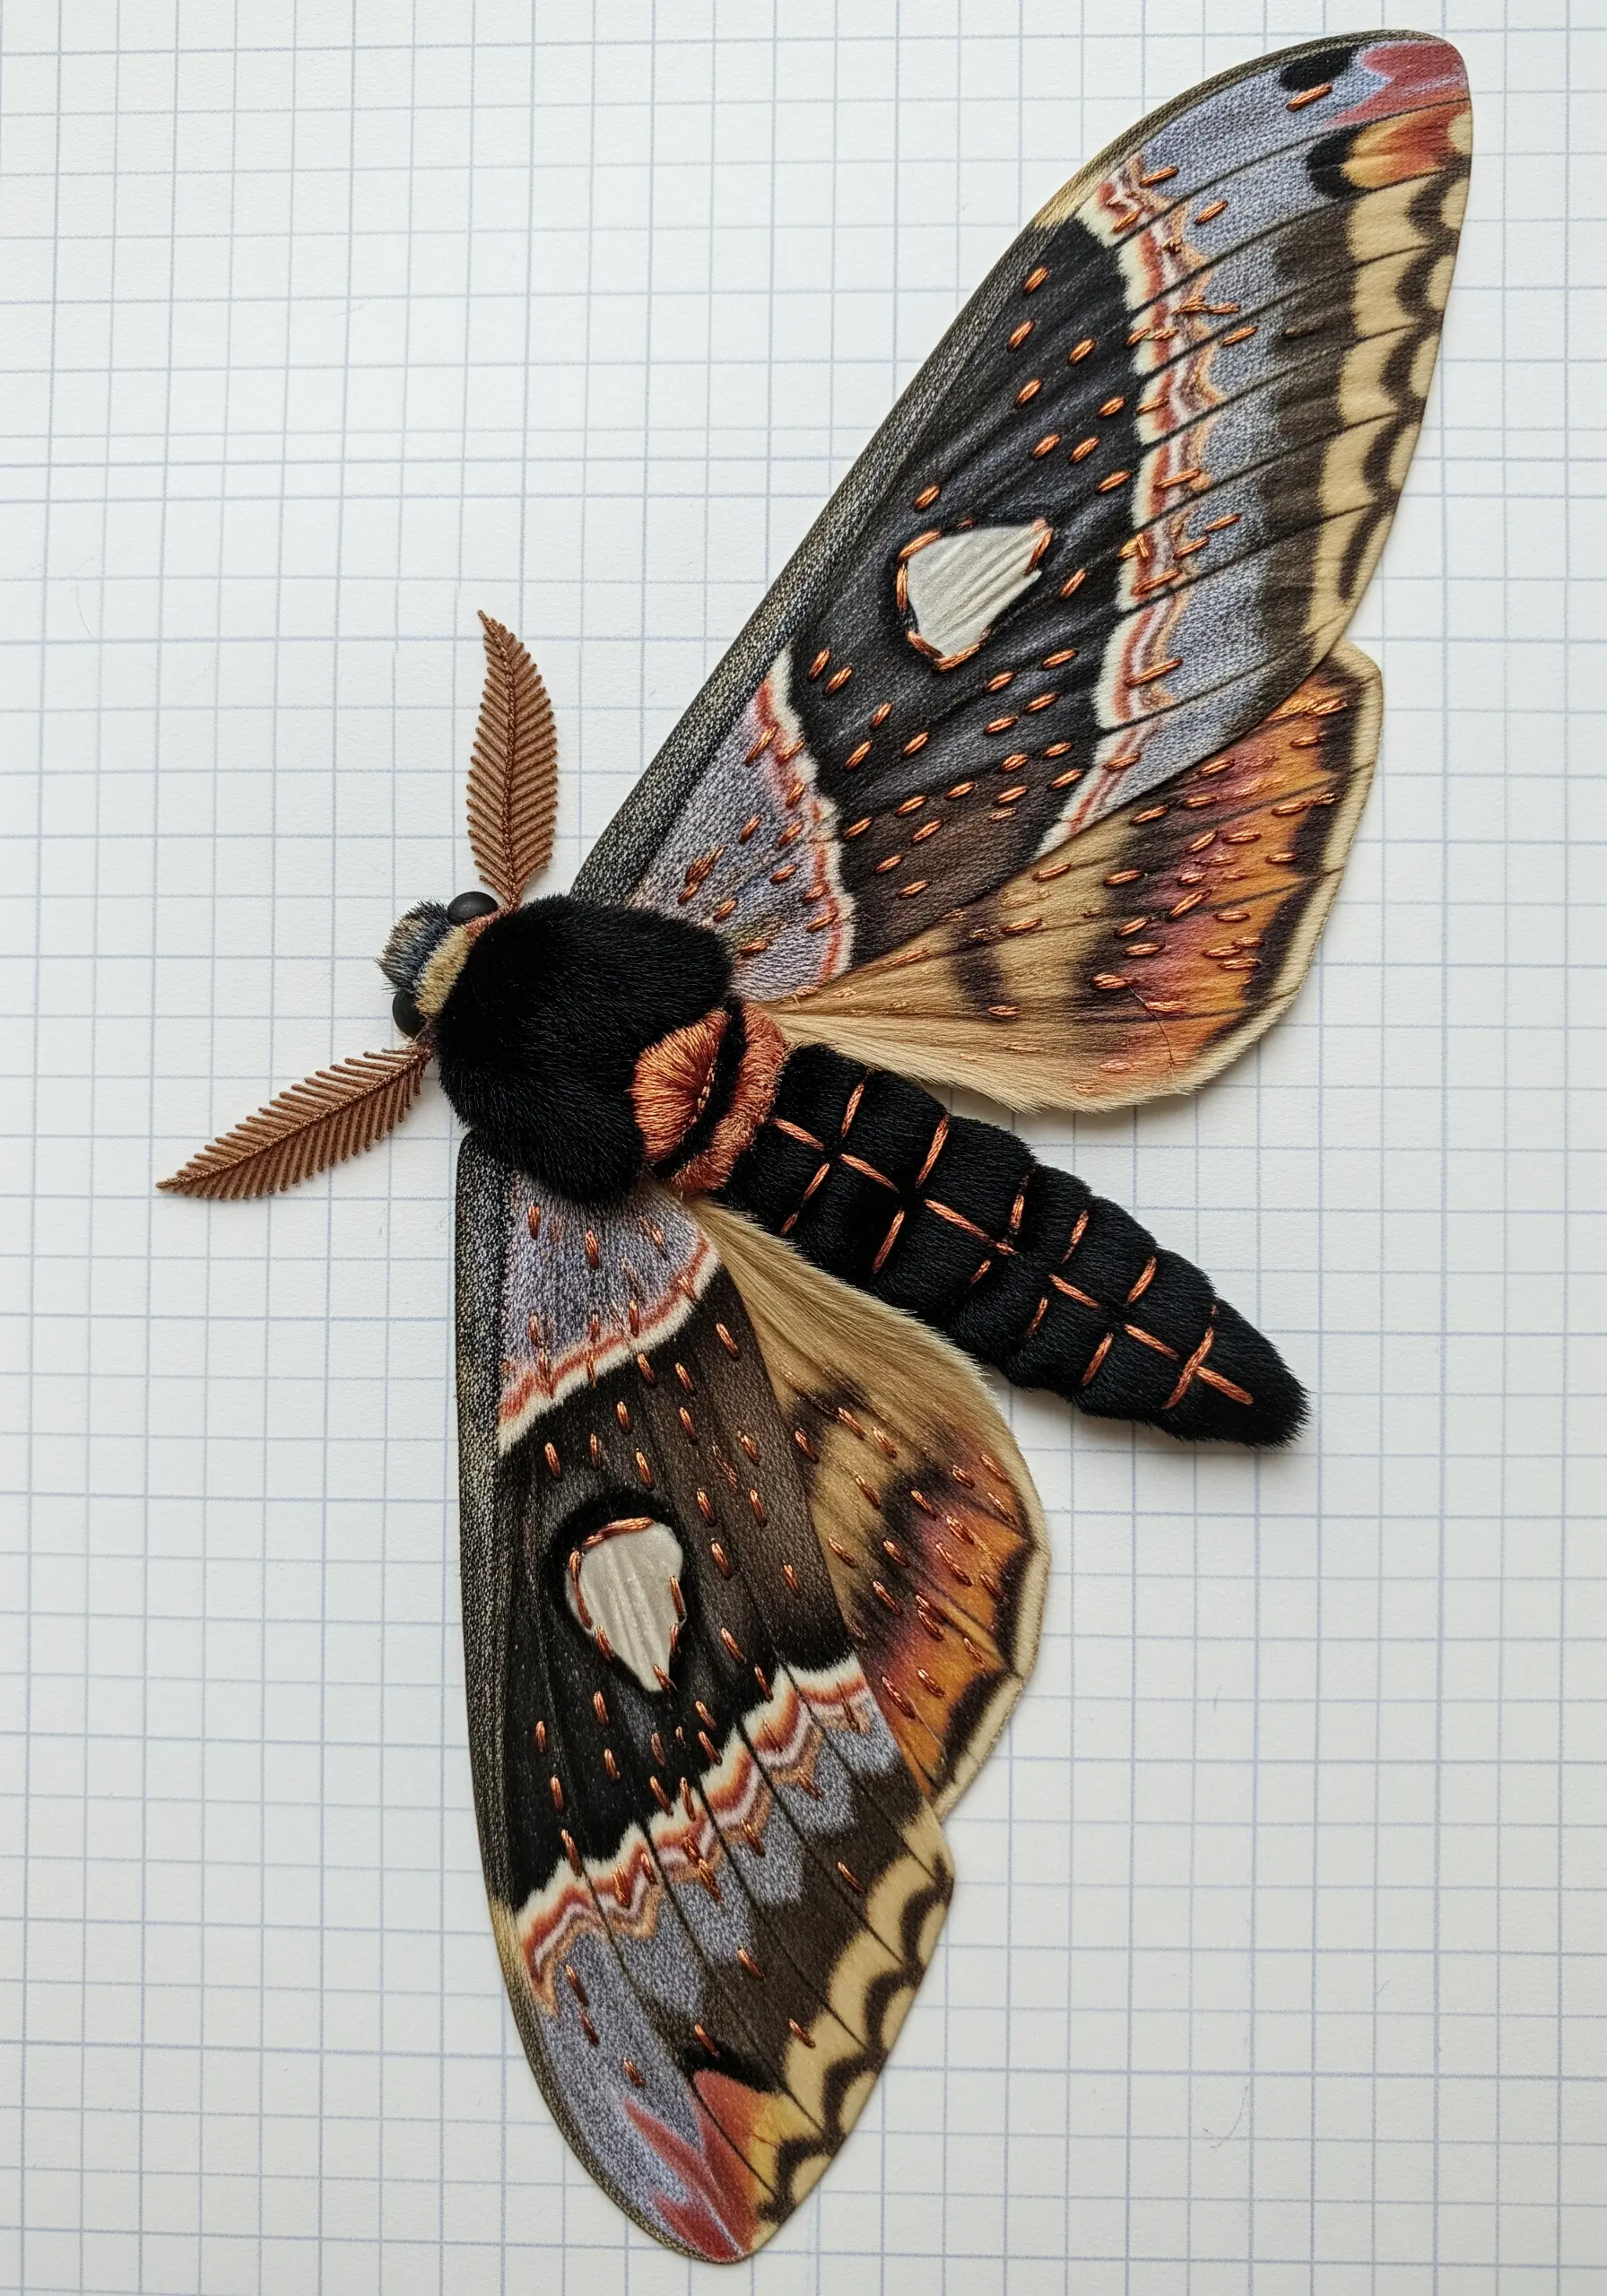
Give your collage elements a three-dimensional lift using padded satin stitch.
First, create a foundation of small, underlying straight stitches within the area you want to raise, like the body of this moth.
Then, cover this foundation with smooth, even satin stitches worked in the opposite direction.
The padding underneath pushes the top layer of stitches upward, creating a raised, sculptural effect that catches the light beautifully.
This method adds realistic volume and makes key elements of your composition physically stand out.
12. Illustrate Movement with a Playful Chain Stitch

Use a delicate chain stitch to represent intangible elements like steam or wind, adding a sense of life and movement.
Sketch a light, swirling guideline on your background with a water-soluble pen before you start stitching.
Use a soft, lightweight thread like a single strand of floss or sewing thread to keep the lines feeling airy and light.
The linked structure of the chain stitch provides a continuous, curved line that is perfect for capturing graceful motion.
This simple technique can bring a static, charming scene to life.
13. Add Graphic Depth with Fine Black Outlines

Enhance a painted or printed collage by tracing key architectural lines with a fine black thread.
Use a single strand of black floss and a simple backstitch to create the effect of an ink drawing overlaid on the image.
This technique adds sharp definition and a sense of depth, making the colors appear more vibrant and the details more pronounced.
Focus on edges where shadows would naturally fall to increase the illusion of three-dimensionality.
It’s a sophisticated way to merge painting and embroidery into a single, cohesive art form.
14. Create Solid Fills for Graphic Impact
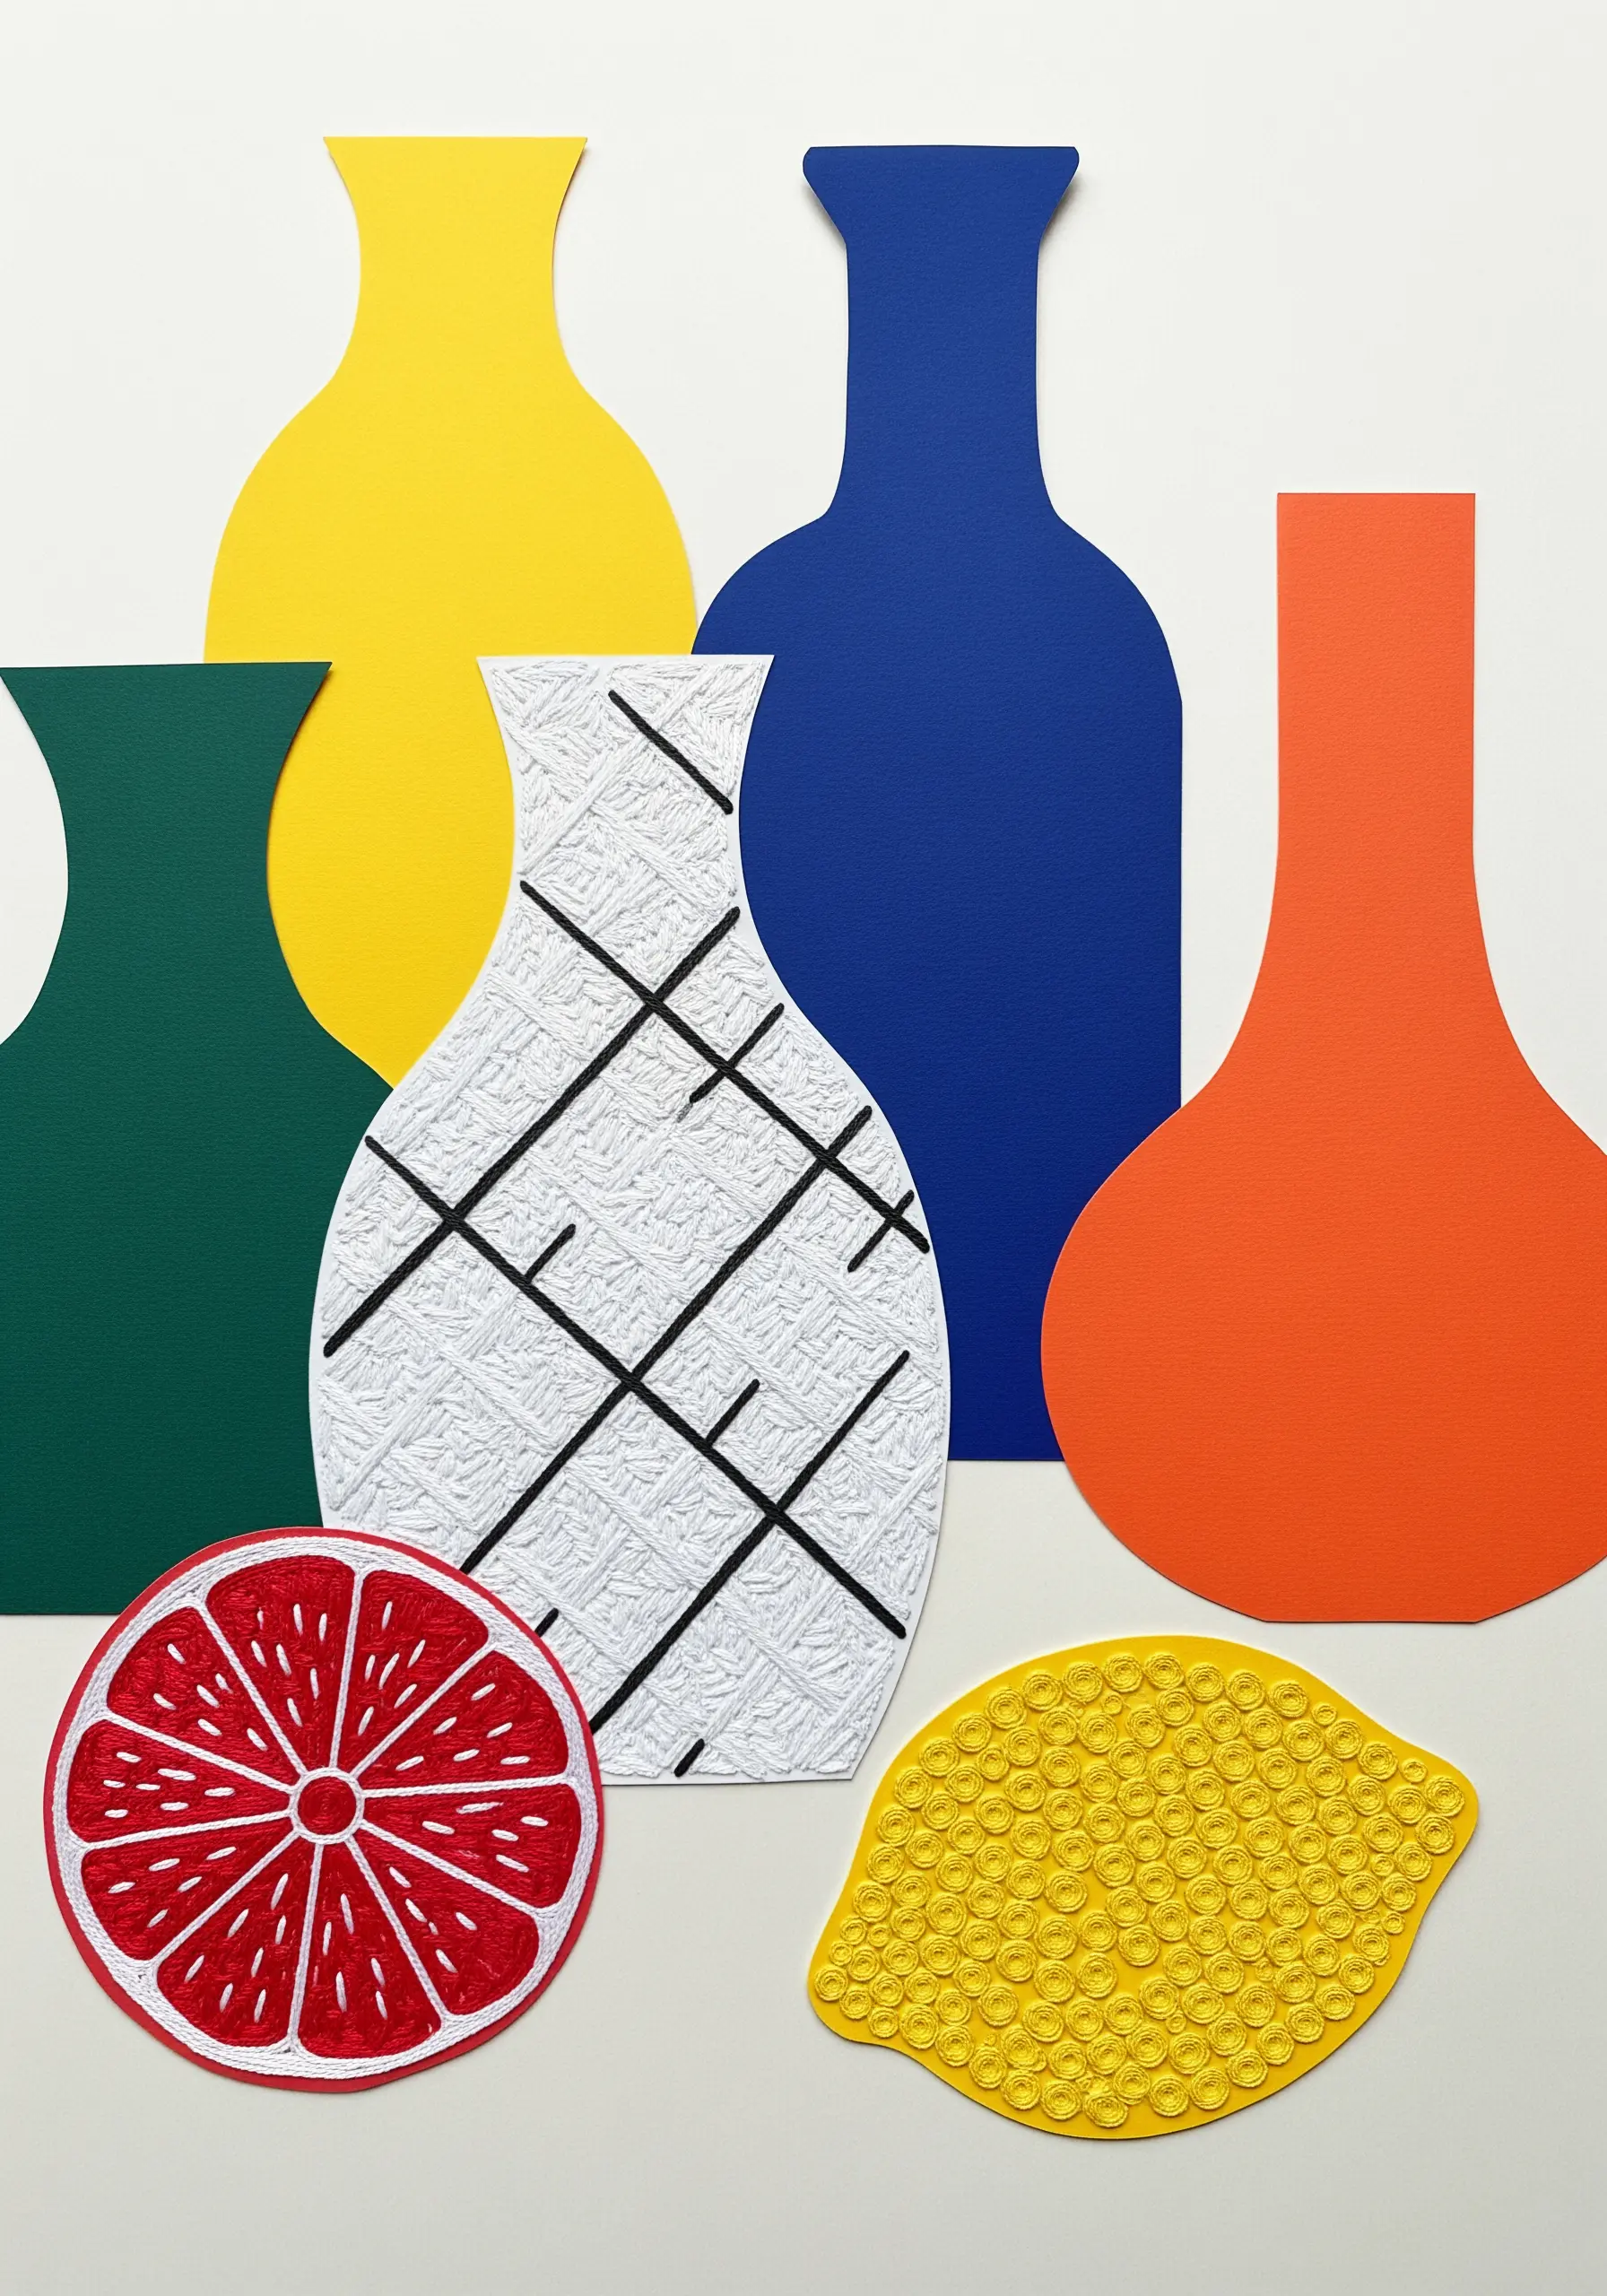
Turn simple paper cutouts into bold, textural statements by completely filling them with stitch.
Use a dense satin stitch or a long-and-short stitch to create a smooth, solid surface of color.
To keep your stitches even on paper, lightly draw parallel guidelines with a pencil before you begin.
The contrast between the flat, matte paper of some shapes and the lustrous, textured surface of the stitched elements creates a visually dynamic composition.
This technique is perfect for abstract and minimalist designs where shape and texture are key.
15. Combine Stitching and Fabric Manipulation for Depth

Create a richly layered night scene by combining embroidery with manipulated fabric elements.
Use long, radiating straight stitches in a fine, bright thread to represent moonlight or the glow from mushrooms.
For the tree leaves, cut small scraps of fabric, pinch and fold them, and then secure them to the background with a single stitch in the center.
This creates wonderfully textured, three-dimensional foliage that contrasts beautifully with the flat background and the sharp lines of the stitched light.
This mixed-media approach builds a scene with incredible tactile depth.
16. Create Fluid Lines on Delicate Surfaces with Couching

When working on a fragile surface like sheet music, couching is the perfect technique for adding bold lines without causing damage.
Lay down your main thread—or in this case, a bundle of threads—in the desired shape, and then tack it down with small, discreet stitches from a second, finer thread.
This method allows you to create sweeping, expressive curves and layers of color without repeatedly piercing the delicate paper.
Incorporate a metallic thread into your bundle to add a touch of light and sophistication to the design.
17. Define Edges with a Dense, Wrapped Border
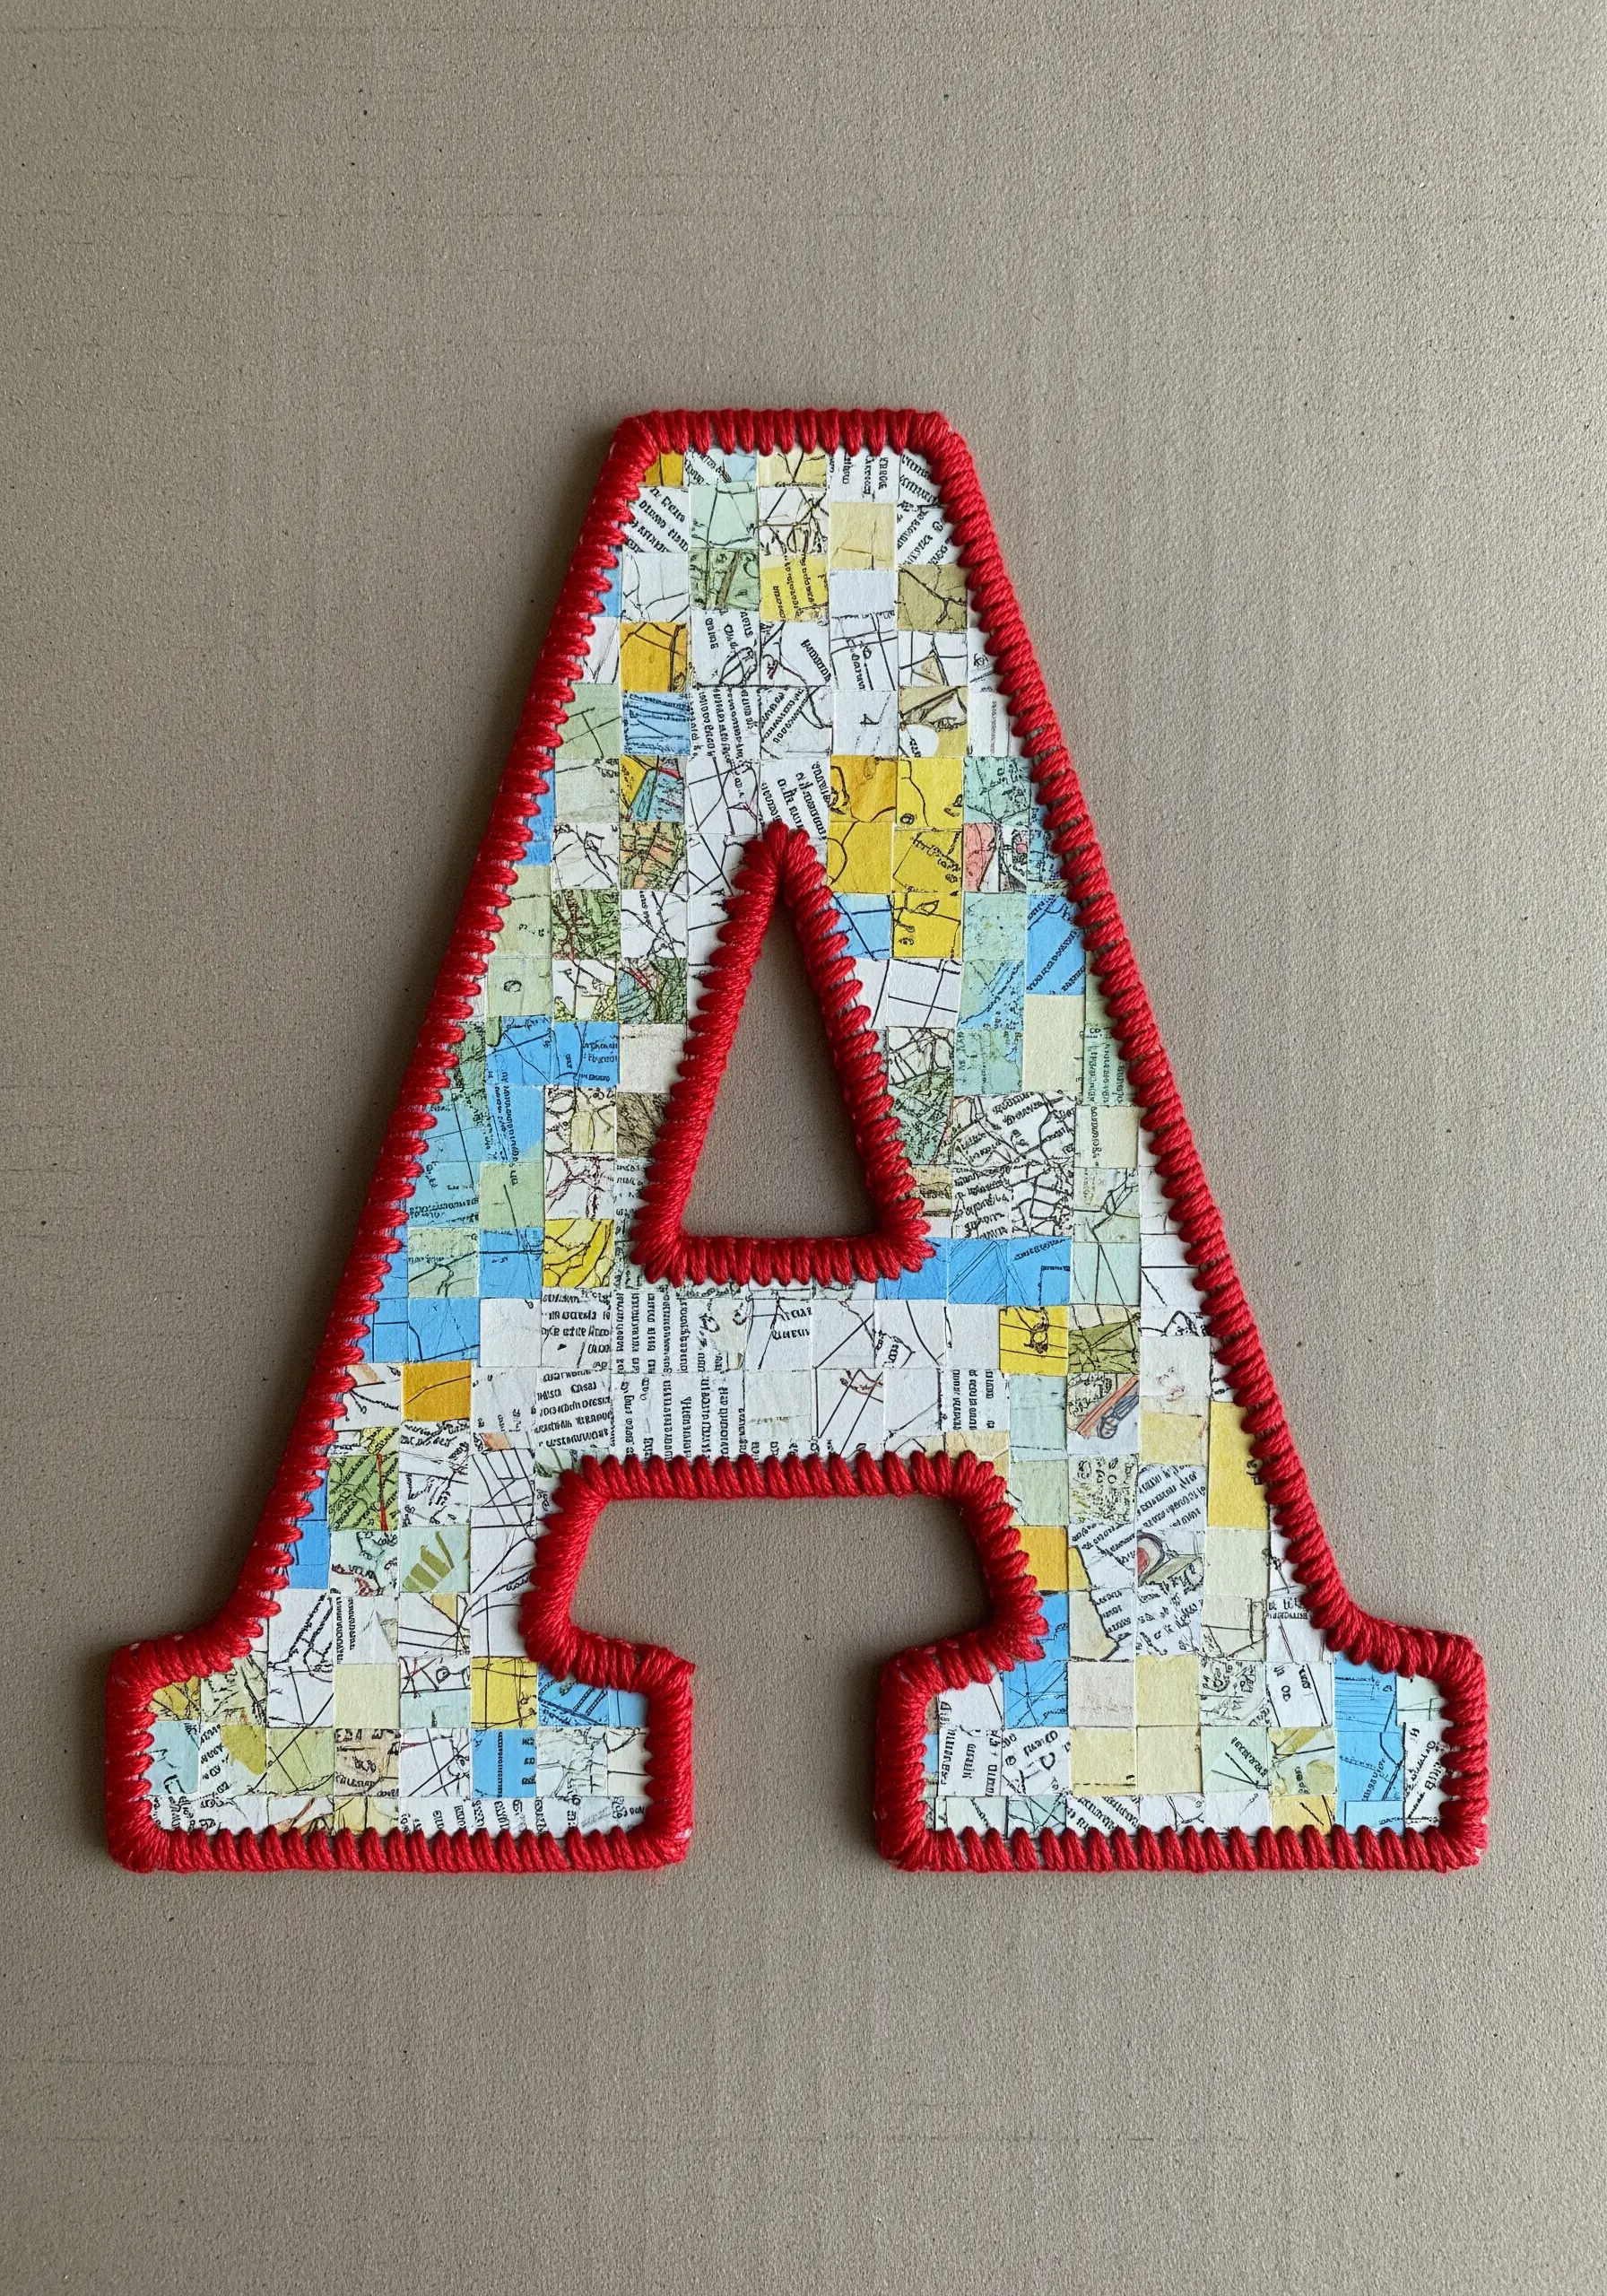
Give your collage monograms or shapes a clean, substantial, and perfectly finished edge using a dense wrapping stitch.
You can achieve this look with a tight blanket stitch worked over the edge or by covering the edge with a satin stitch border.
To ensure uniformity, lightly mark your stitch entry and exit points on the front and back of your cutout before you start.
Using a thicker thread like pearl cotton or multiple strands of floss will help you build a solid, satisfying border more quickly.
This technique makes your paper or fabric elements feel like polished, standalone patches.
18. Anchor Delicate Elements with Purposeful Stitches
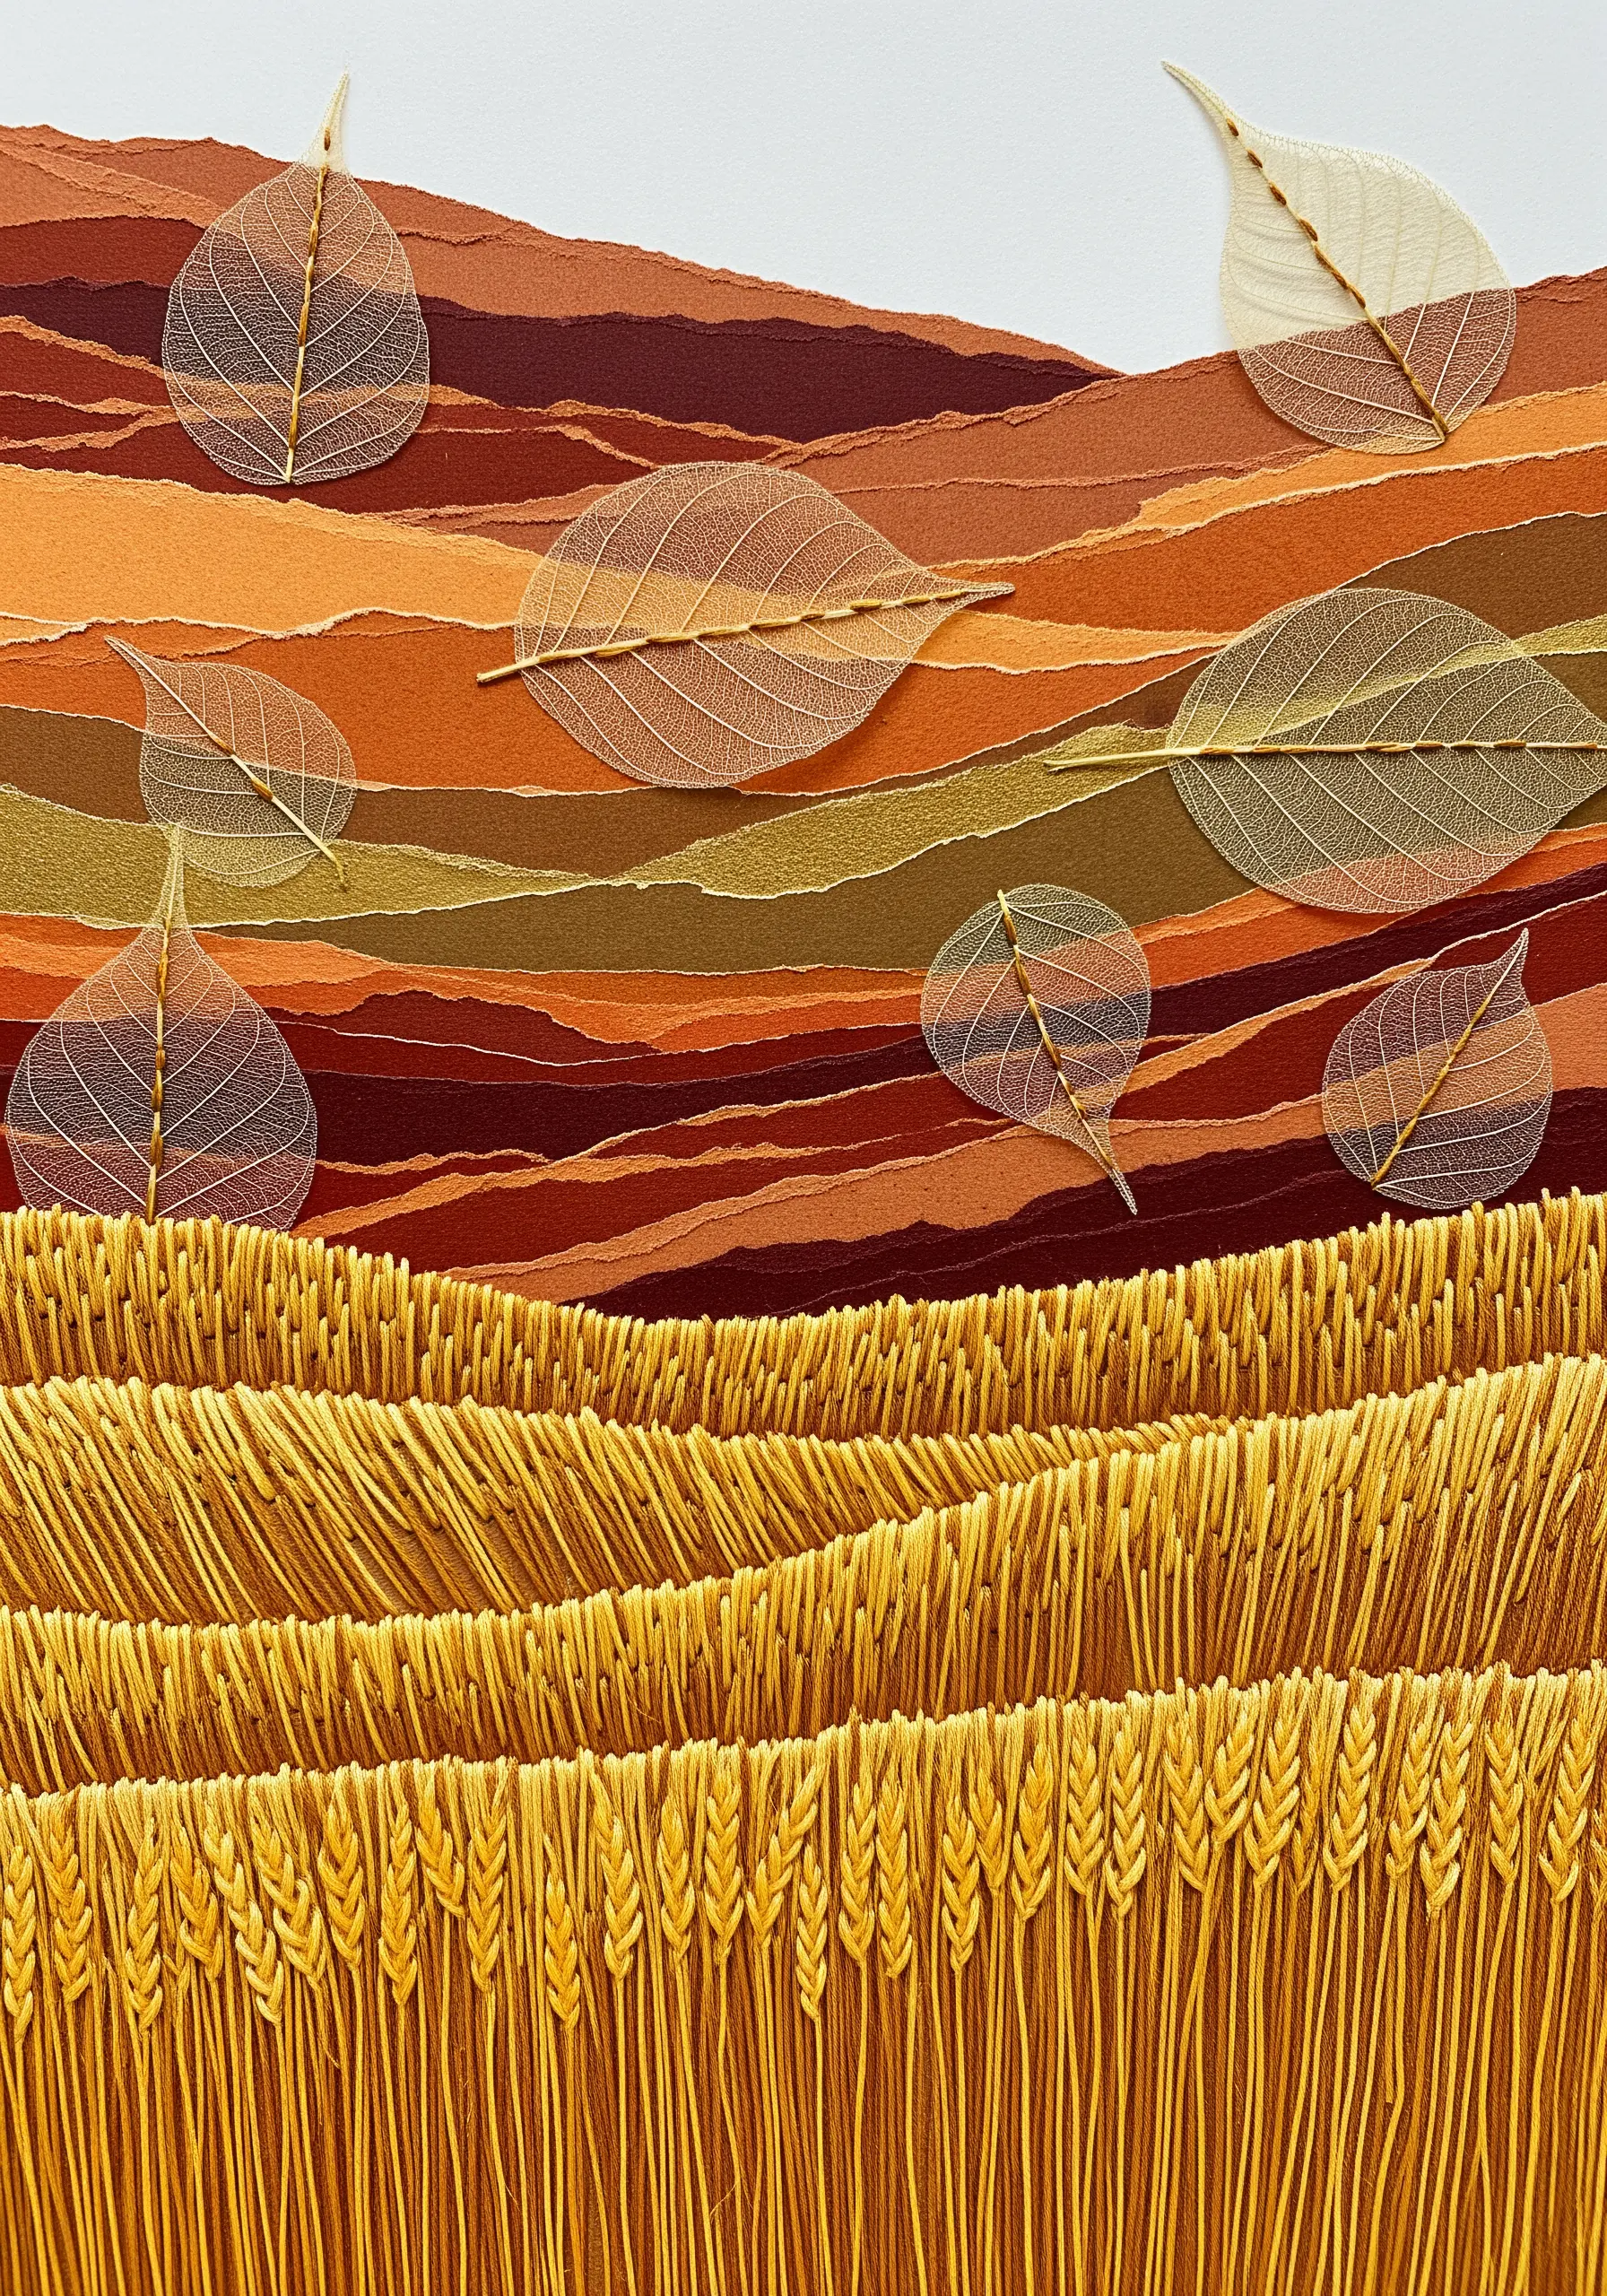
Incorporate fragile materials like skeleton leaves into your collage by using your stitches to anchor them in place.
Use a fine needle and a single strand of thread to stitch along the main veins, securing the leaf to the background while enhancing its natural structure.
Contrast the delicate transparency of the leaves with a field of dense, vertical straight stitches to represent wheat or grass.
By varying the height and density of these stitches, you can create the illusion of rolling hills and perspective.
This project beautifully demonstrates how stitching can integrate natural textures.
19. Create Atmosphere with Scattered, Minimal Stitches

Evoke a feeling or an atmosphere, like falling snow, with thoughtfully placed minimal stitches.
Use tiny, white straight stitches of varying lengths and angles scattered across the background to create a sense of gentle movement.
For the snow on the roof, lay down parallel rows of straight stitches, which provides texture while also suggesting shingles.
Incorporate a few tiny French knots or colonial knots to represent heavier snowflakes and add textural variety.
This minimalist approach proves that a few simple stitches can completely transform the mood of a piece.
20. Weave Texture with Directional Seed Stitching
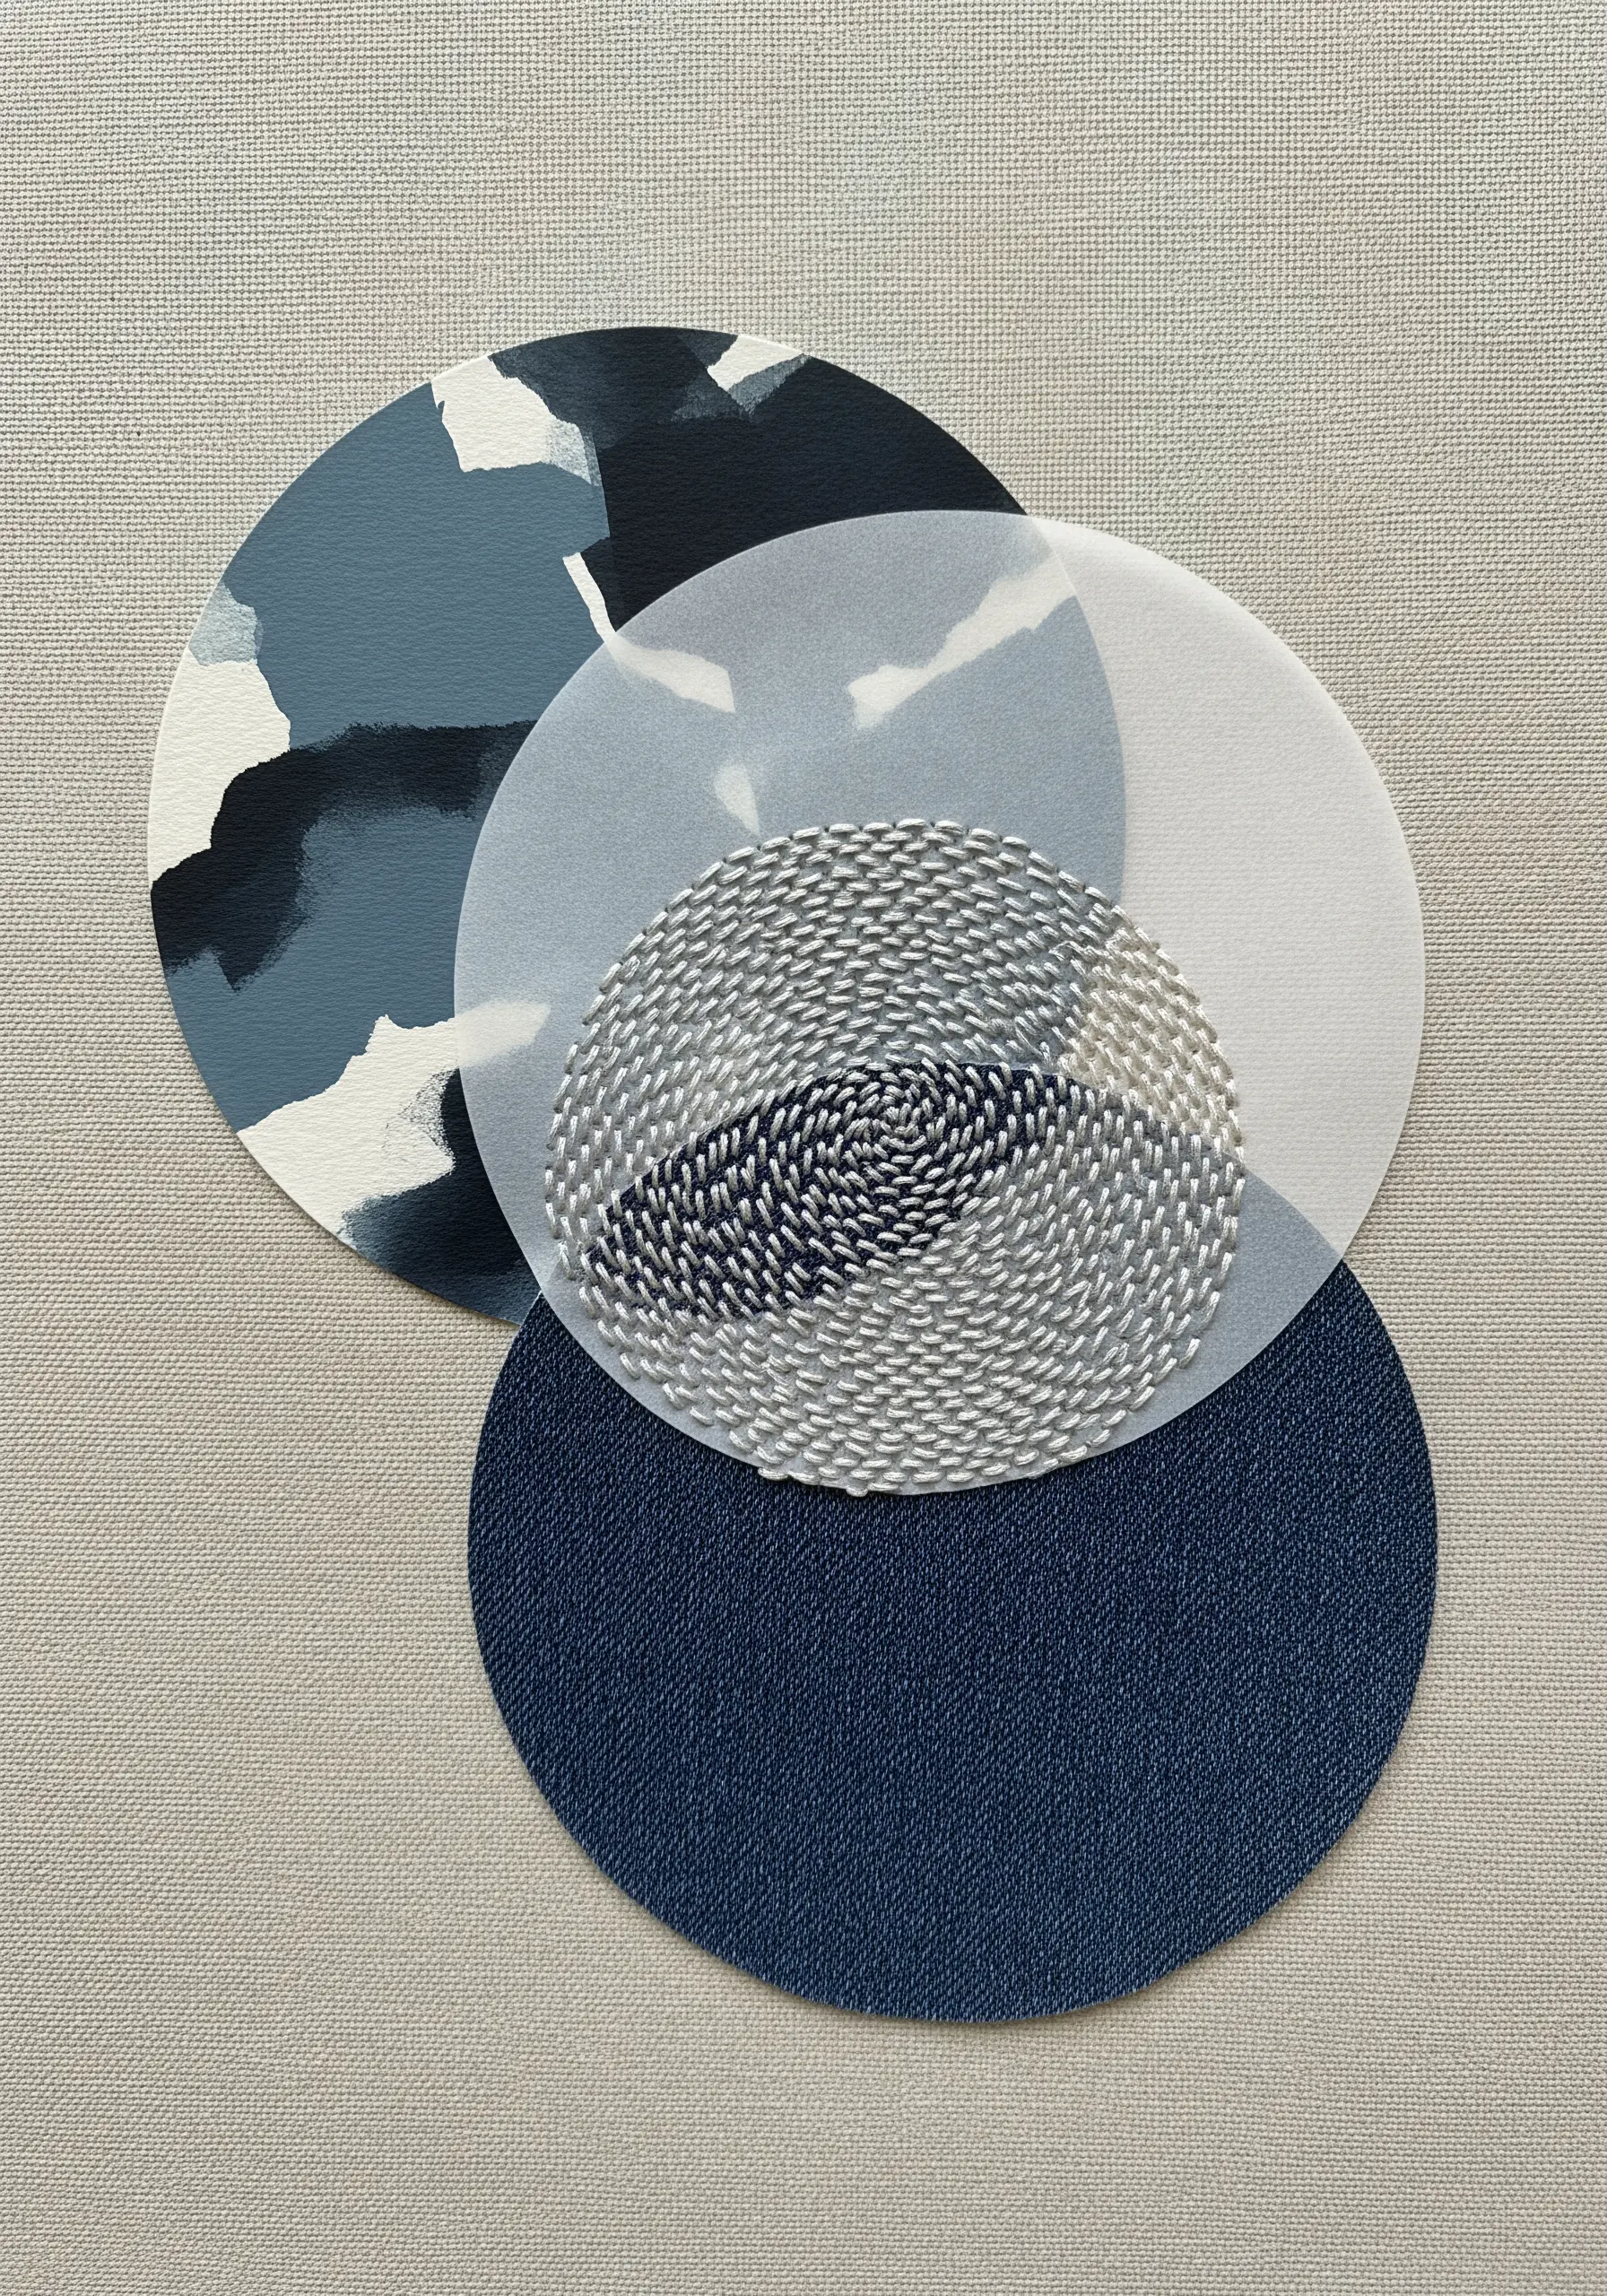
Create a dynamic, woven texture within a simple shape by changing the direction of your seed stitches.
Instead of scattering them randomly, arrange your small straight stitches in swirling, concentric, or radial patterns.
This controlled placement causes the thread to catch the light in different ways, creating a sense of movement and depth.
Use two closely related shades of thread, as seen in the center, to introduce subtle color variation and enhance the illusion of form.
This sophisticated filling technique turns a flat circle into a captivating, textured centerpiece.
21. Use Couching for Perfect, Delicate Bubbles
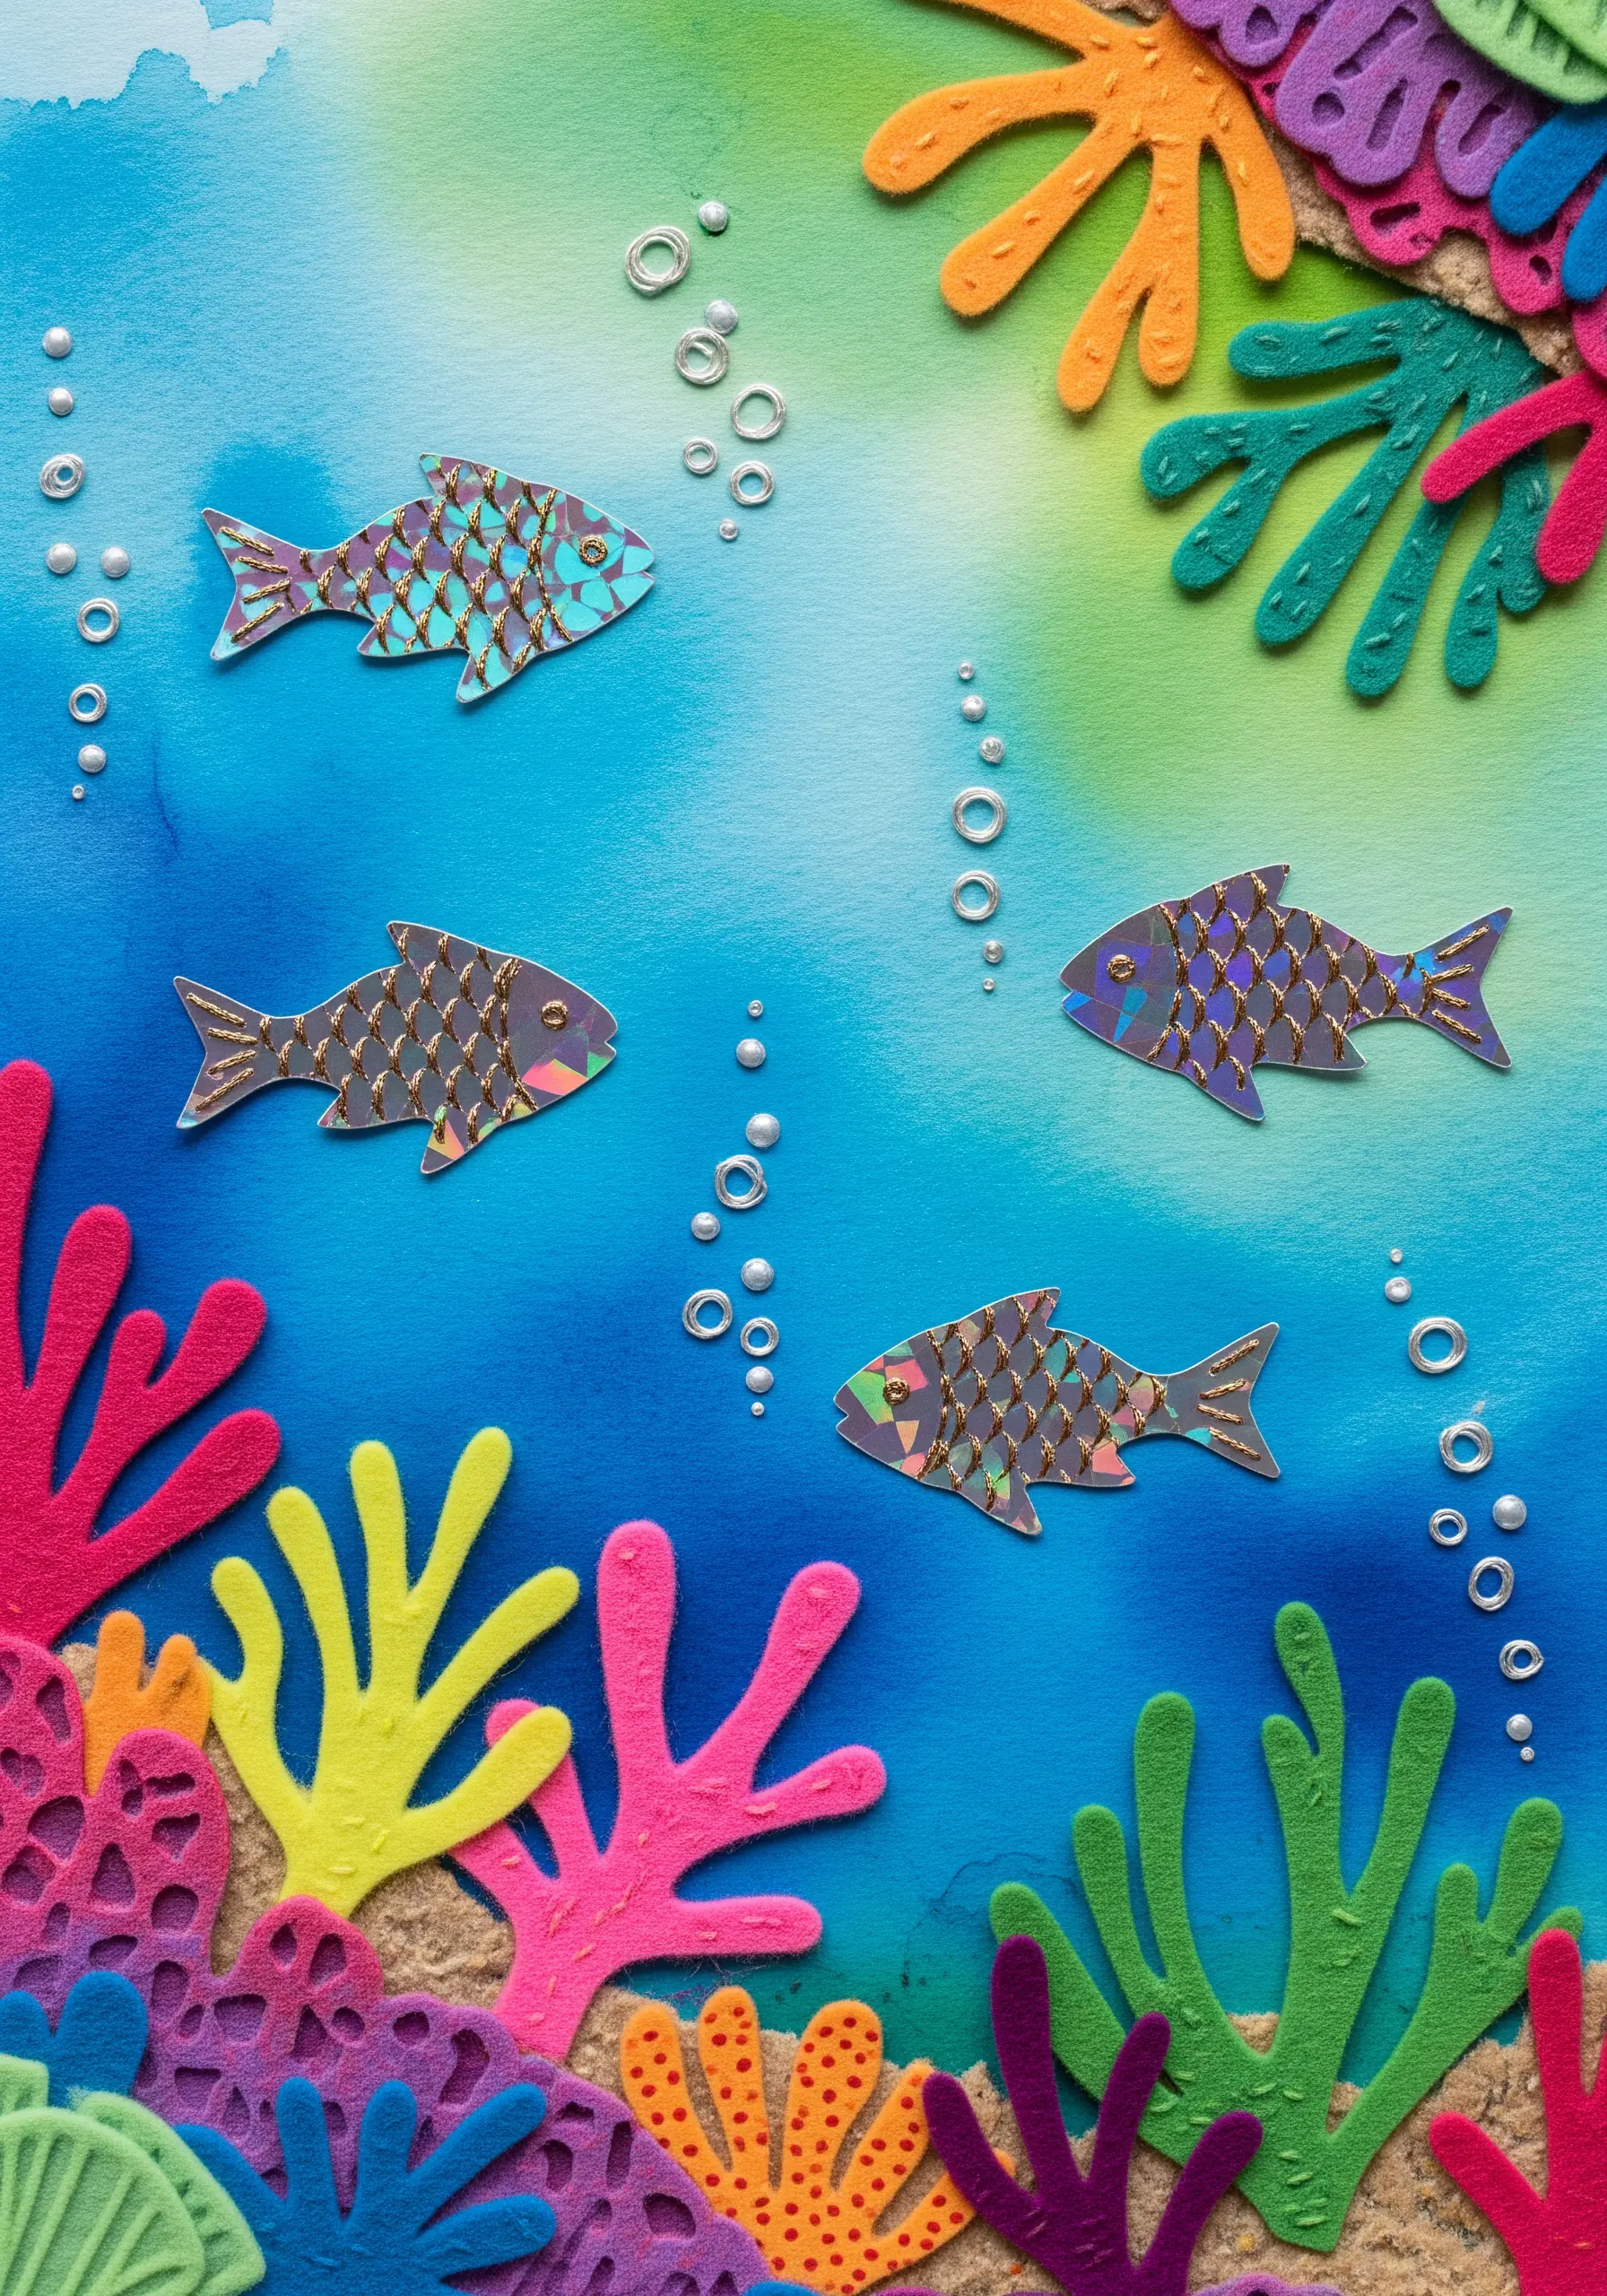
Create flawless, airy bubbles in an underwater scene by couching a fine, pearlescent or metallic thread.
Instead of trying to satin stitch a tiny, perfect circle, simply form a loop with your feature thread and tack it down with tiny stitches of a nearly invisible thread.
This method gives you a perfect circular outline that looks delicate and light, exactly like a bubble.
It’s much faster and cleaner than fill stitches for this particular effect and works beautifully on both paper and fabric backgrounds.
This technique is a perfect example of choosing the right stitch for the right effect.
22. Integrate Rustic Textures like Twine and Jute
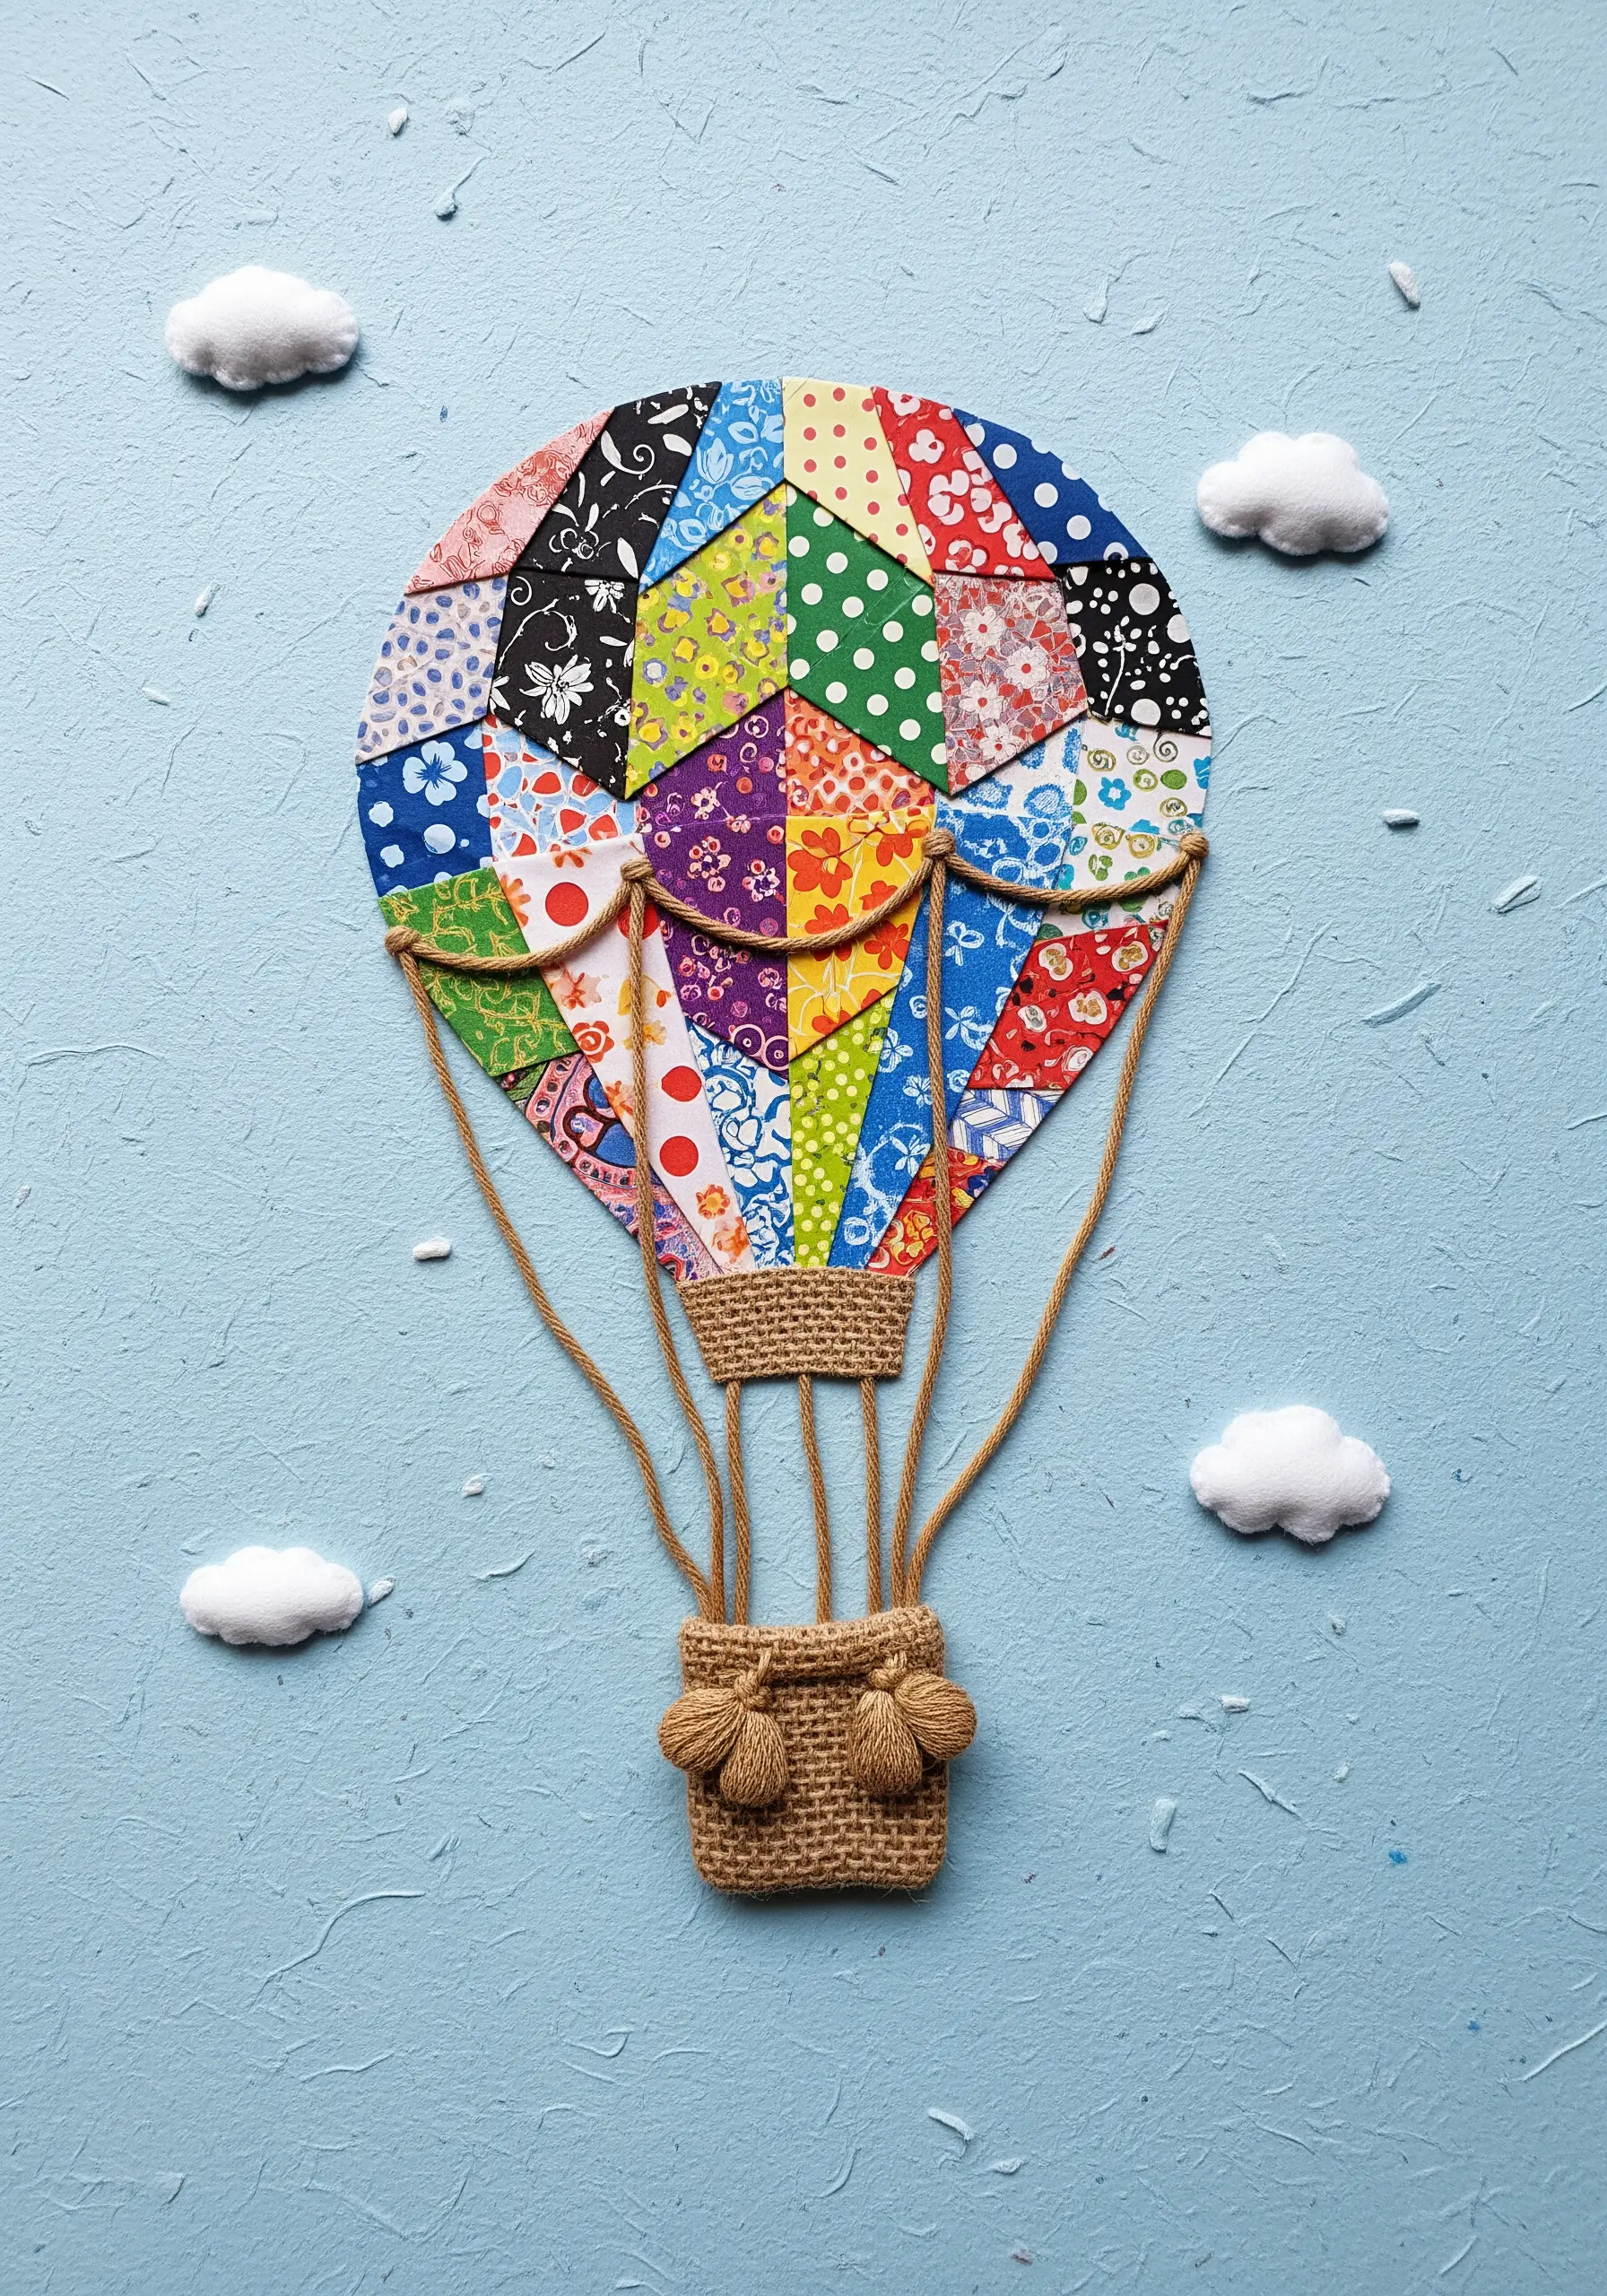
Add a rustic, three-dimensional element to your collage by stitching with or attaching thicker fibers like jute or twine.
You can use a large-eyed needle to stitch directly through sturdy cardstock, or use a couching technique to attach the twine to the surface.
For the basket of the balloon, create a woven texture by stitching a grid of twine and then weaving another piece through it.
This technique is perfect for adding robust, structural details that contrast with the flatness of paper or fabric patchwork.
23. Create Raised Outlines with Whipped Backstitch
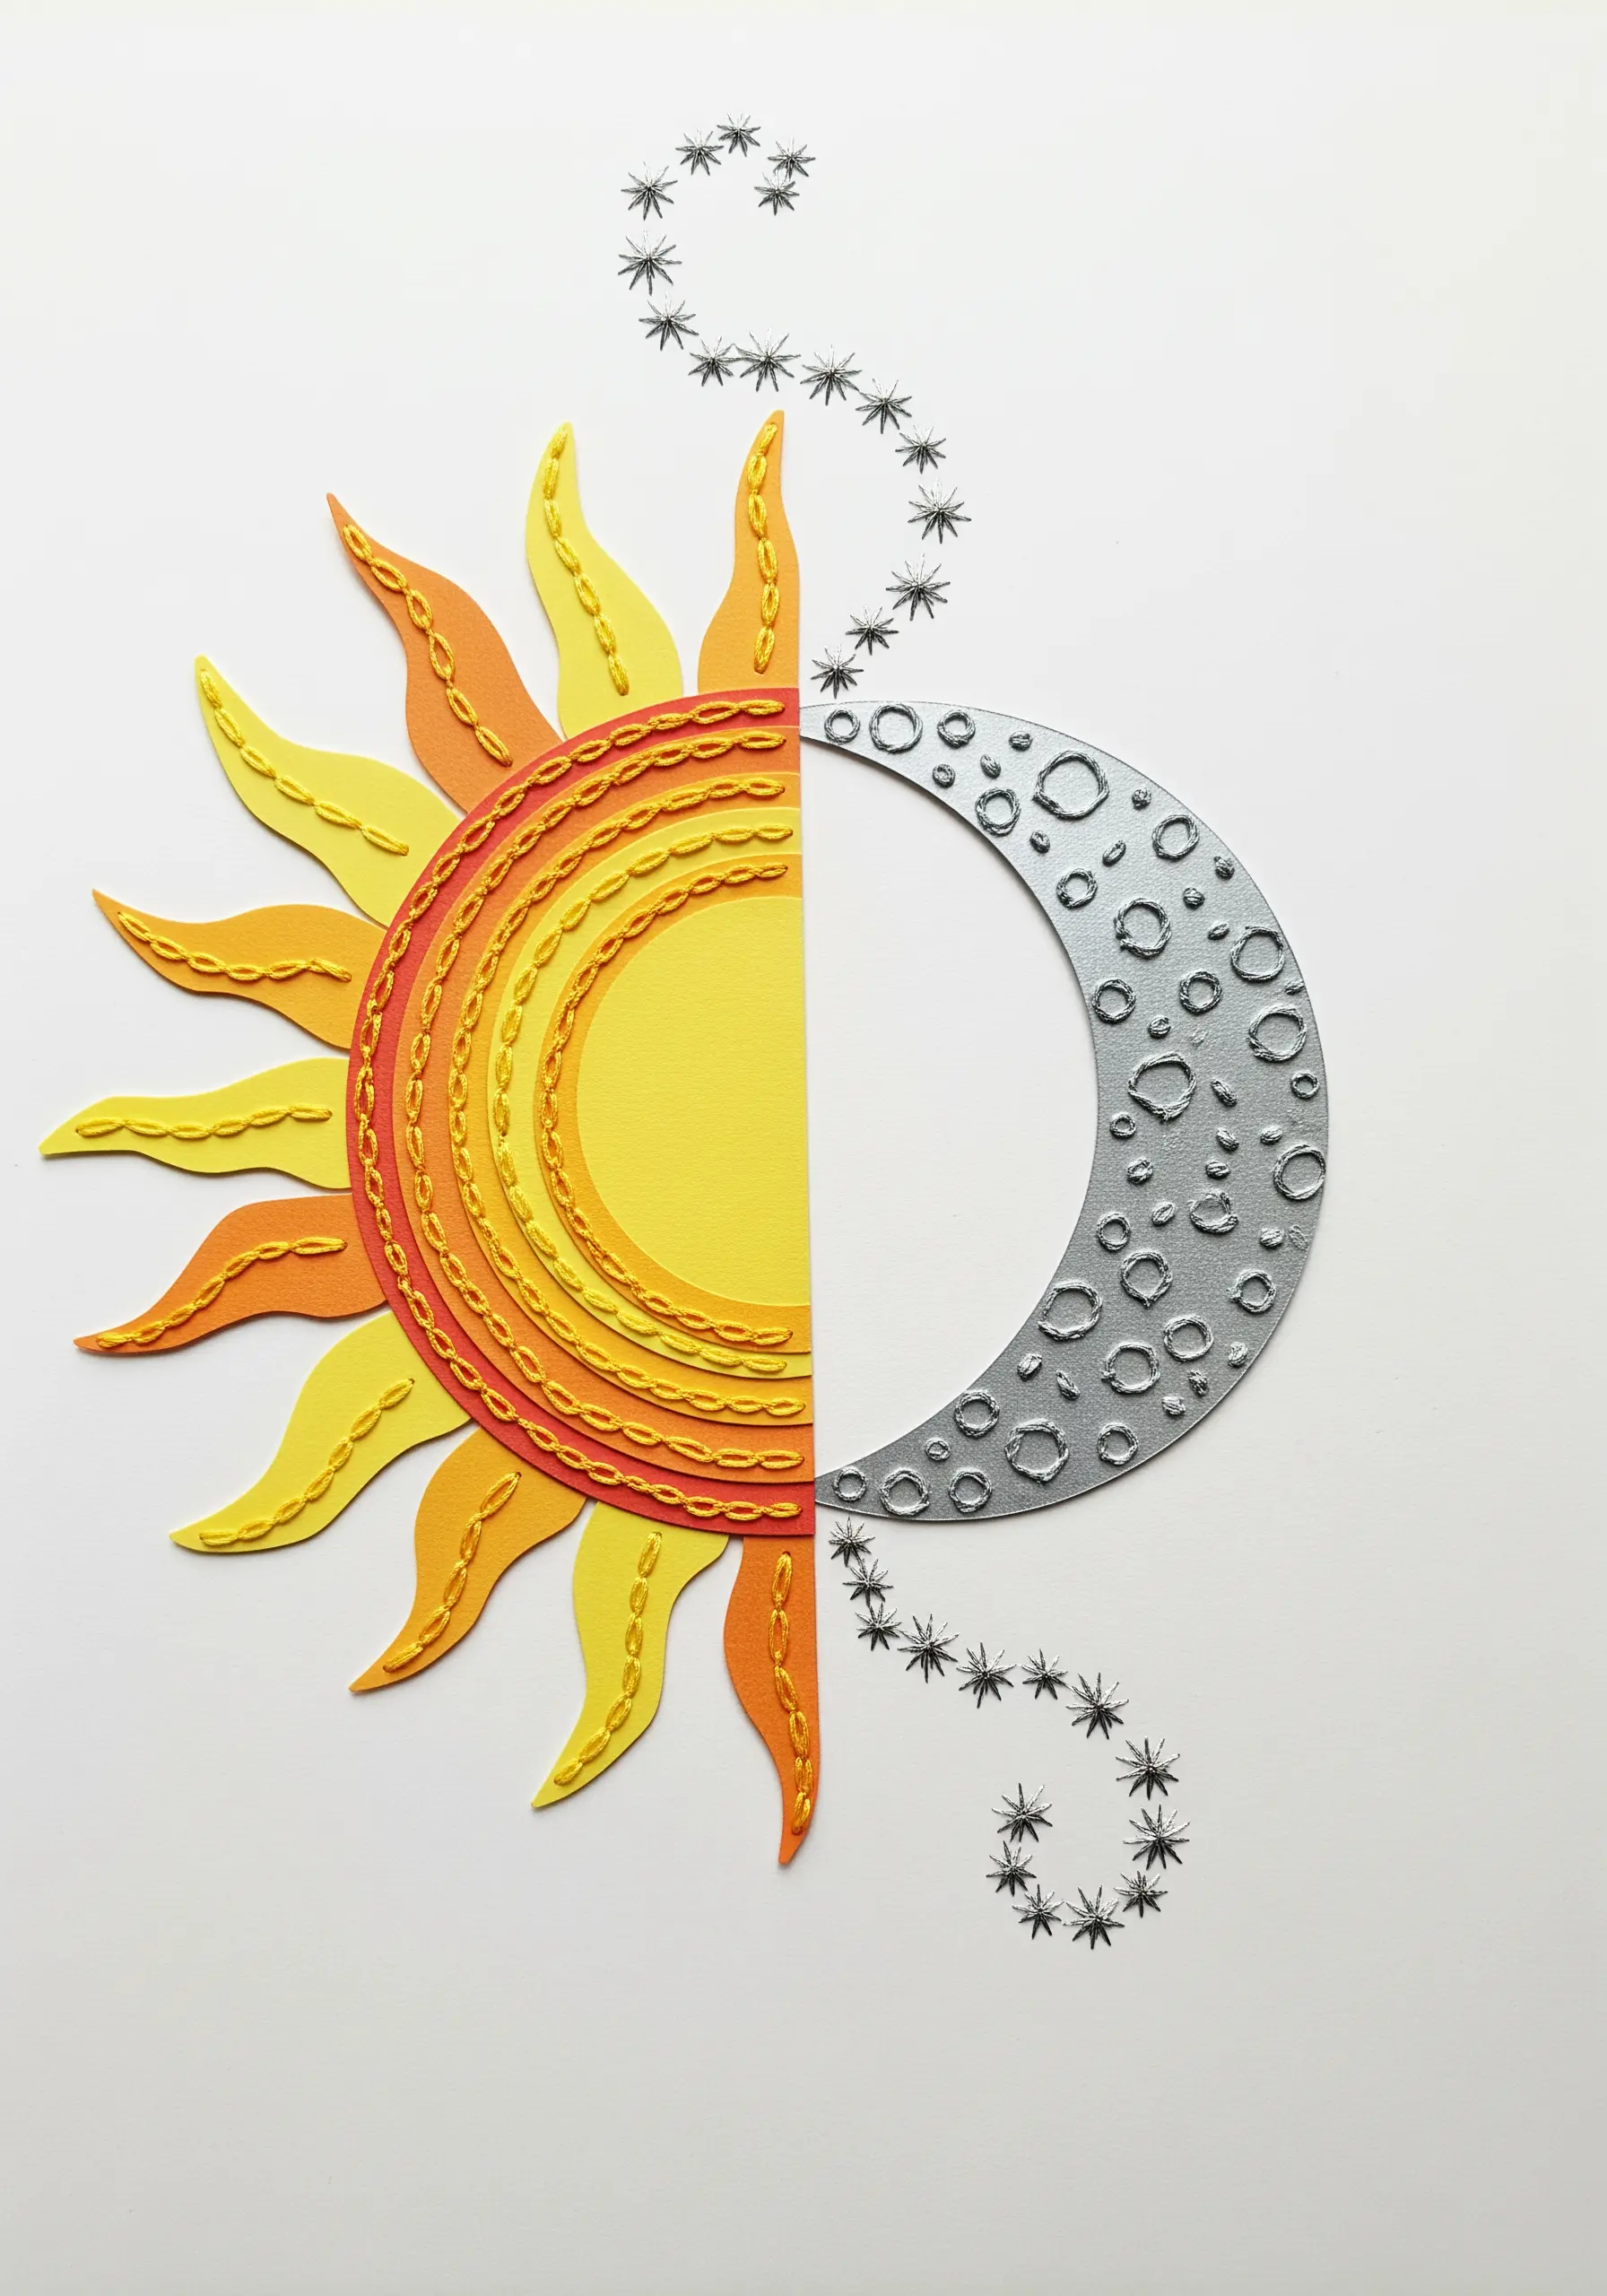
For clean, raised lines that define concentric shapes, use a whipped backstitch or a whipped running stitch.
First, create a foundation of simple backstitches along your design line.
Then, take a second thread (in the same or a contrasting color) and weave it under each backstitch without piercing the paper again.
This wrapping motion covers the foundational stitches, resulting in a smooth, cord-like line that stands out from the surface.
For the moon, use scattered French knots or colonial knots to create a cratered, textural surface.
24. Frame Your Work with a Decorative Running Stitch
Elevate a simple collage by adding a decorative border with a multi-color running stitch.
Instead of a single solid line, work two or more rows of running stitch in complementary colors, offsetting the stitches to create a woven or dashed pattern.
This adds a gentle, handmade frame that enhances the vintage or rustic feel of your artwork without overpowering it.
Lightly mark your stitch points with a pencil and ruler beforehand to ensure your lines are straight and your stitches are evenly spaced.
It’s one of the simplest ways to add a polished finish.
25. Tell a Story Through Stitch Progression

Use your choice of stitches to reflect the concept of your collage, like the blooming of a flower.
For the tight bud, use sharp, angular straight stitches and satin stitch to convey a closed, contained energy.
As the flower opens, switch to a simpler backstitch outline, suggesting a more delicate, unfolding form.
For the final, fully bloomed flower, use ribbon stitch to create lush, three-dimensional petals that literally pop off the surface.
This thoughtful progression turns three separate images into a single, cohesive narrative about growth and transformation.
26. Construct 3D Objects with a Blanket Stitch
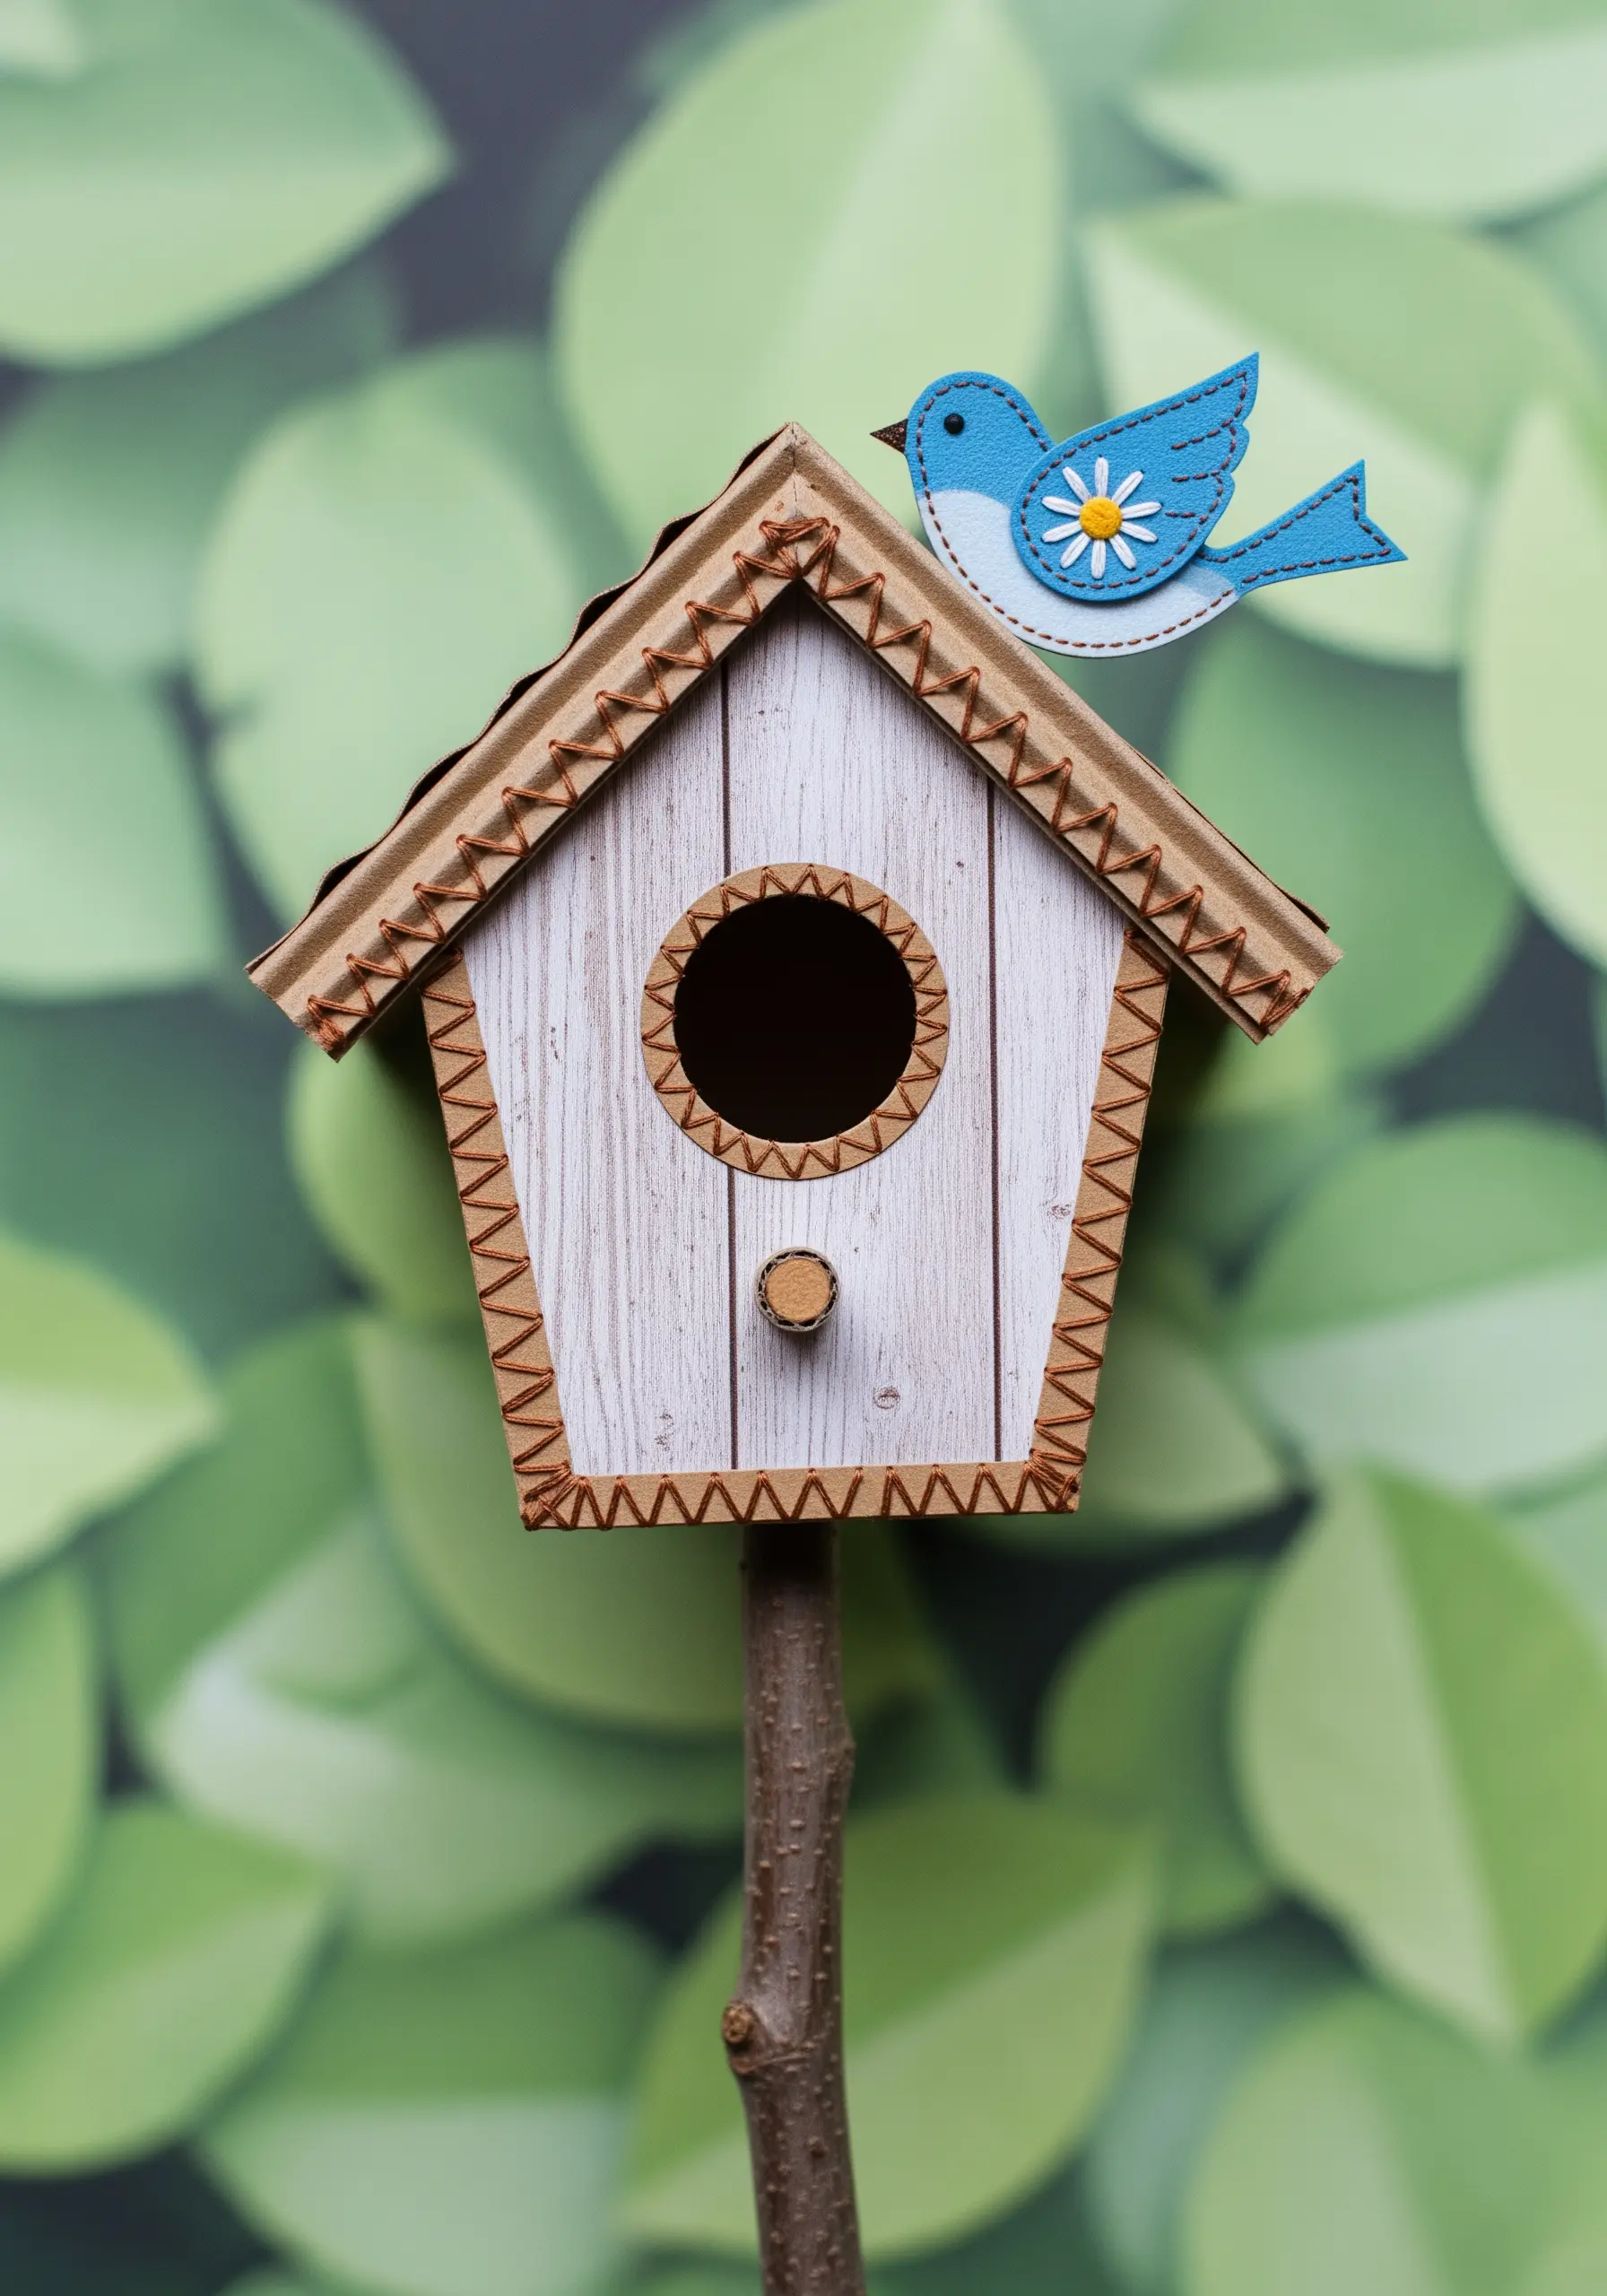
Move beyond surface embellishment and use stitches to actually construct your three-dimensional collage elements.
The blanket stitch is perfect for joining the edges of paper, cardboard, or felt, creating a decorative and structurally sound seam.
Here, it’s used to define the edges of the birdhouse and attach the roof, turning flat materials into a charming 3D object.
This approach fully integrates the stitching into the form of the artwork, making it an essential part of the design, not just an add-on.
27. Recreate Crystalline Textures with Beads and Stitches

Mimic the complex, sparkling texture of a geode using a combination of beads, sequins, and metallic thread.
Start from the center and work your way out, filling the space with a dense cluster of iridescent beads and sequins.
Use bugle beads and short straight stitches with metallic thread to create the radiating crystal structures.
The key is to pack these elements tightly to create a solid, light-reflecting mass that contrasts with the smooth paper layers around it.
The final piece becomes a highly tactile and luxurious object.
28. Bring Miniature Scenes to Life with Micro-Stitches
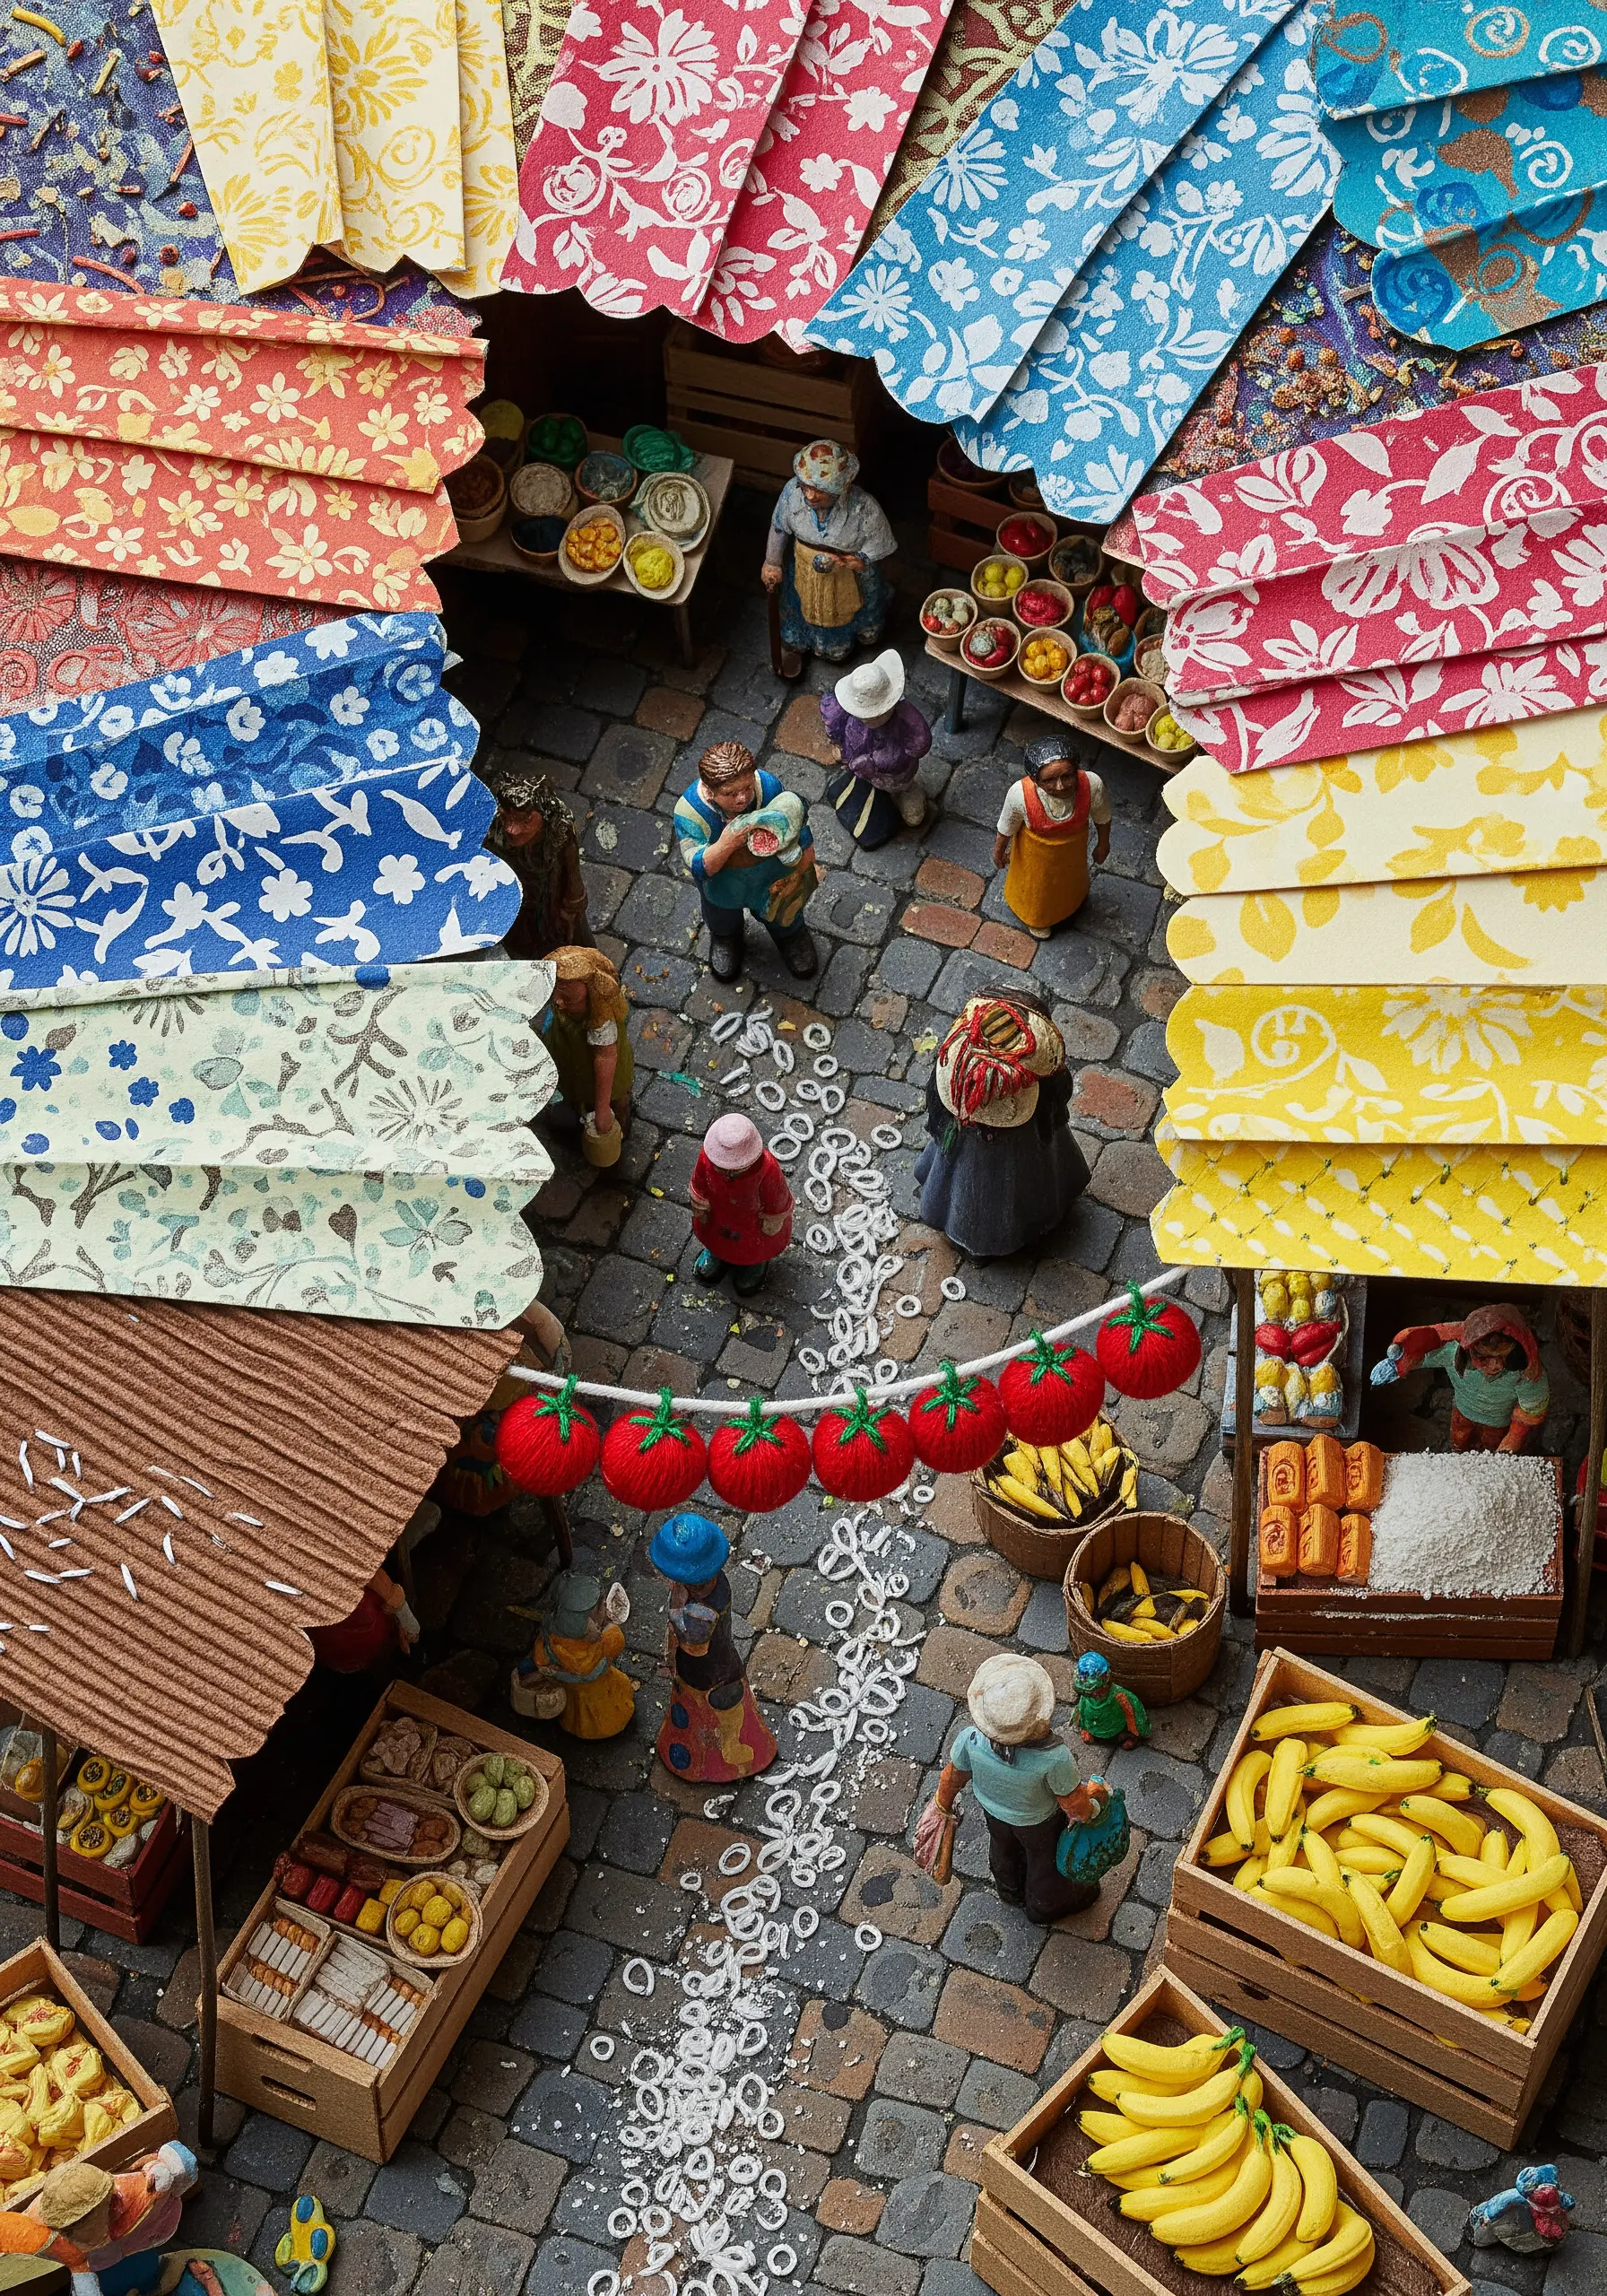
When working with miniature figures or scenes, even the smallest stitch can have a huge impact.
Use a single strand of floss to add tiny details that suggest texture and story.
Here, a simple looped stitch creates a garland of tomatoes, and tiny white circles stitched on the ground suggest scattered items in a busy market.
These micro-details draw the viewer in, rewarding them with discoveries upon closer inspection.
It’s a powerful reminder that in embroidery, scale and subtlety are just as important as bold gestures.
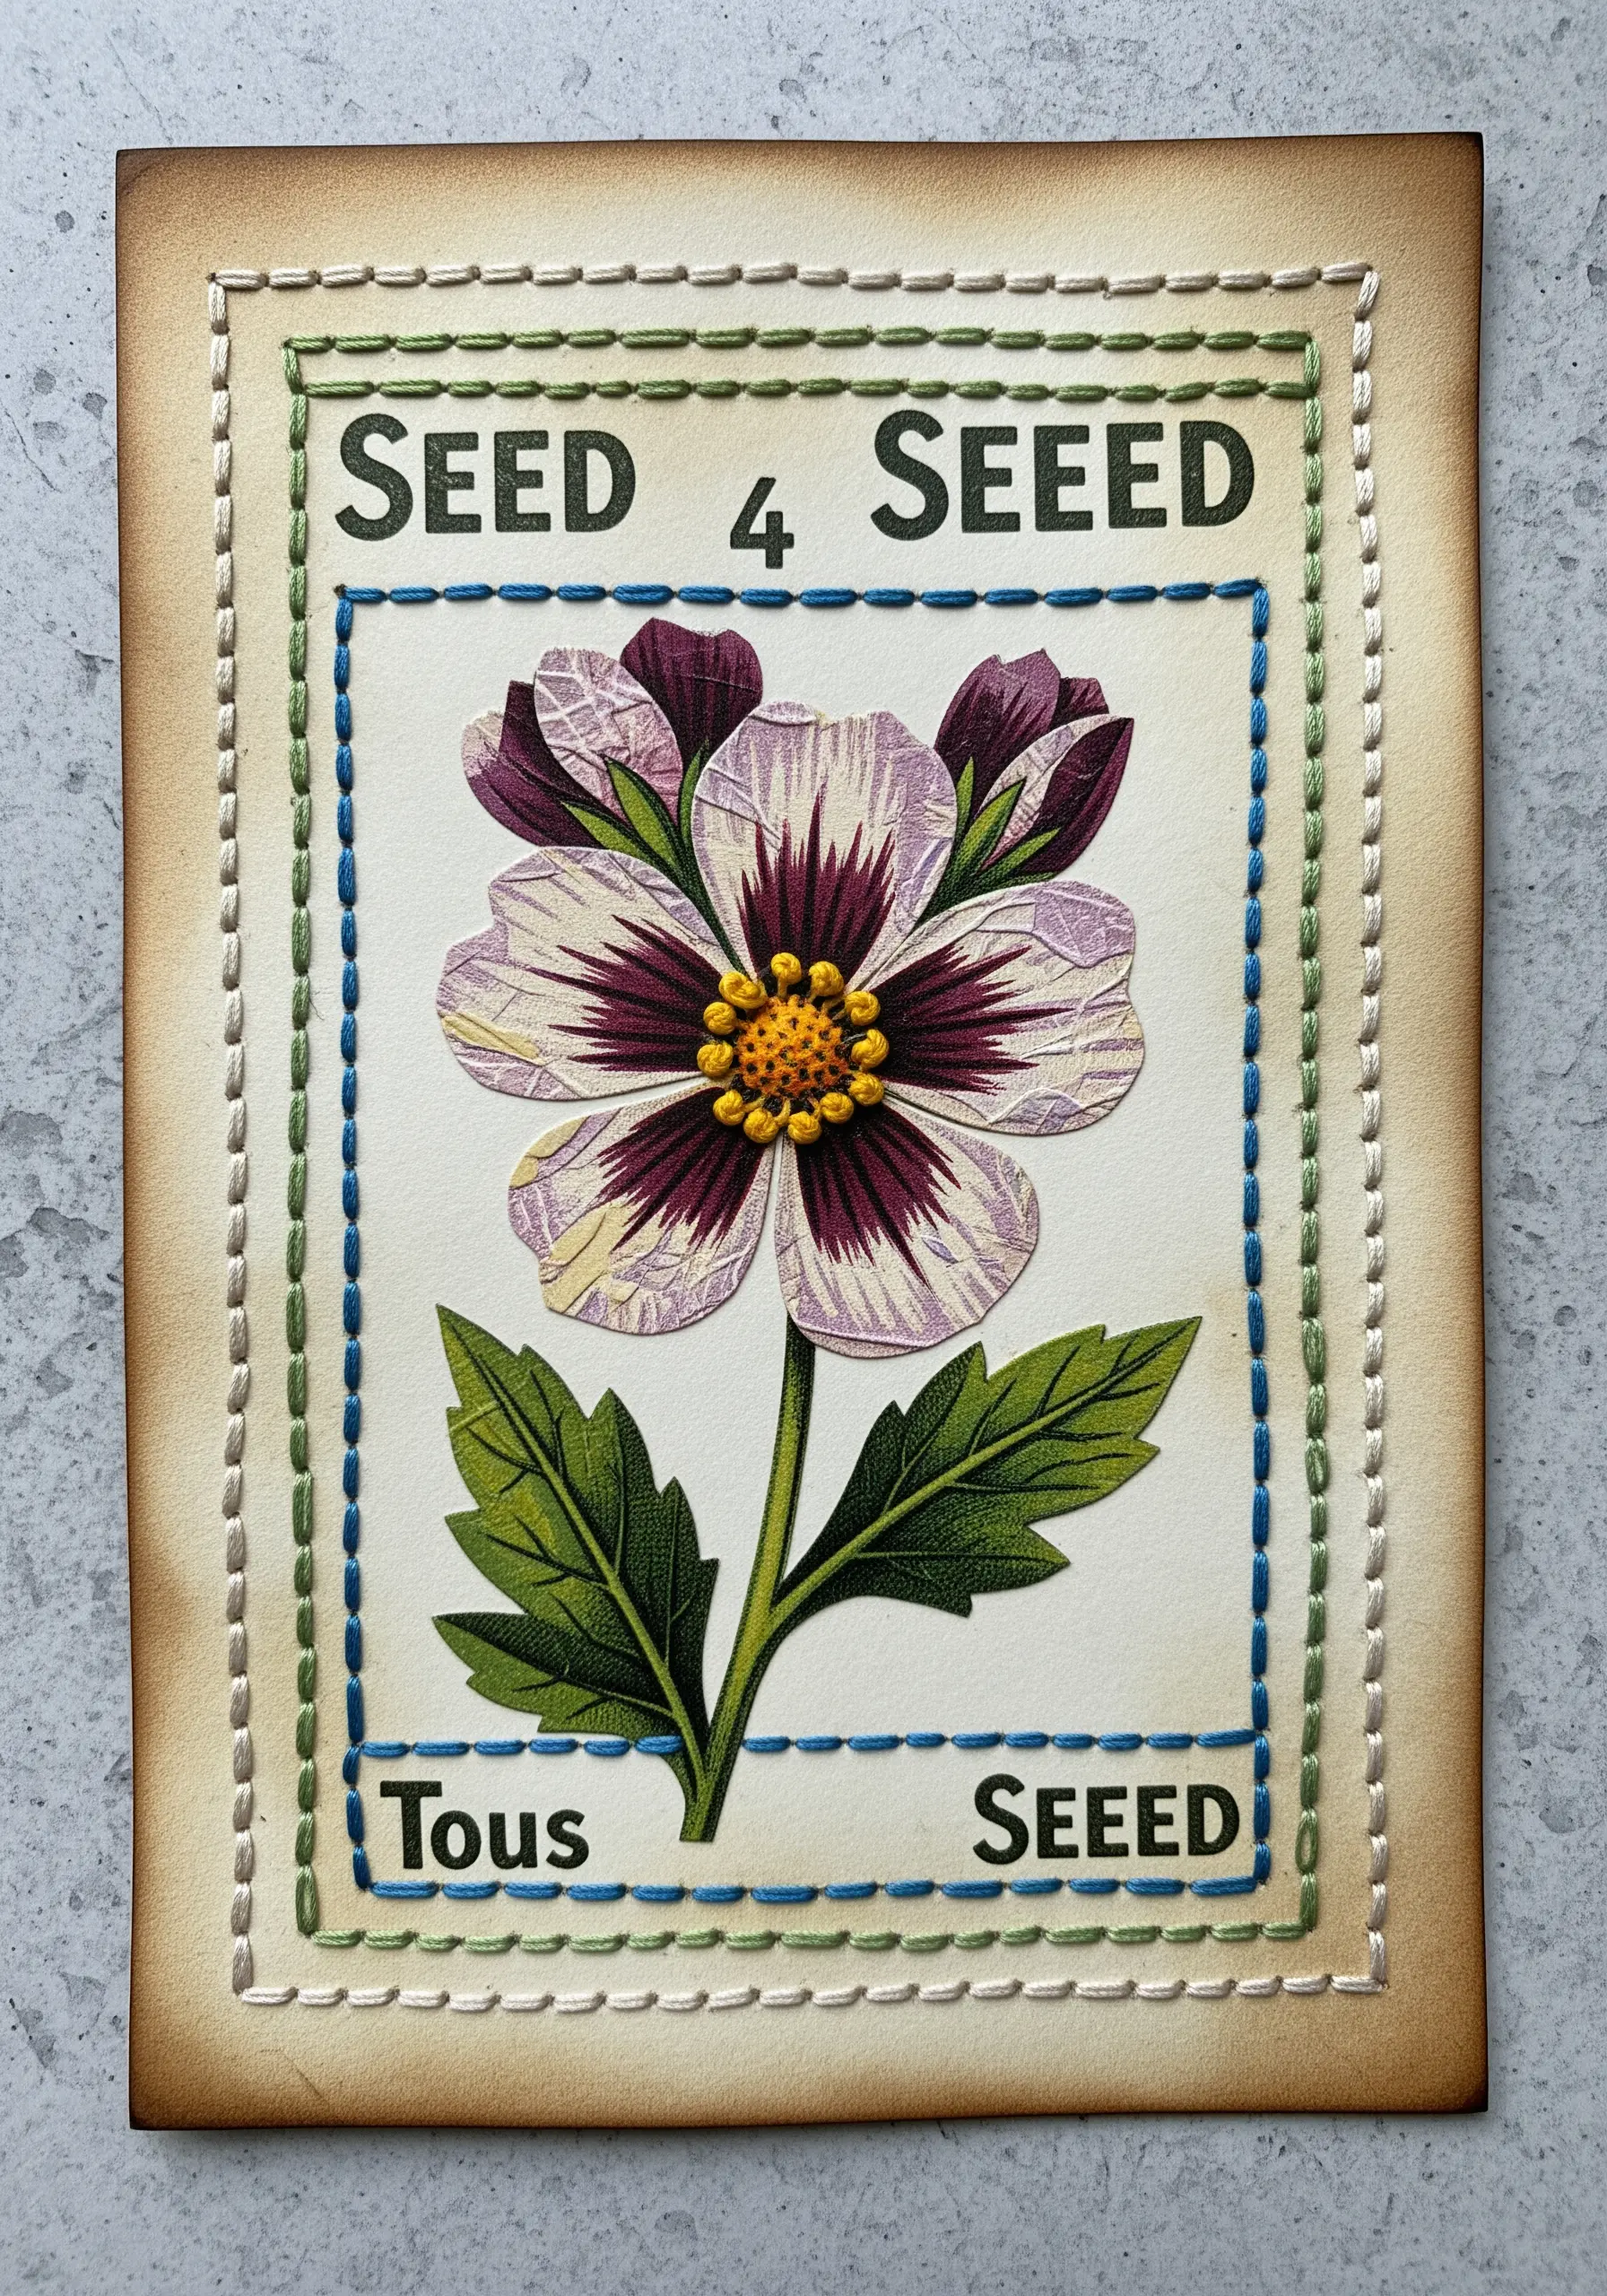
29. Create Intricate Centers with Knotted Stitches

Add a touch of elegance and intricacy to your paper flowers by creating their centers with a knotted stitch.
The yellow knots could be a Chinese Knot or a simple series of bullion knots arranged in a circle.
This creates a complex, woven-looking center that provides a beautiful focal point and contrasts with the smooth paper petals.
For the branch, a simple running stitch adds a rustic, dashed line that anchors the delicate blossoms.
This thoughtful combination of simple and complex stitches results in a balanced and refined design.
30. Suggest Detail with Graphic Star Stitches
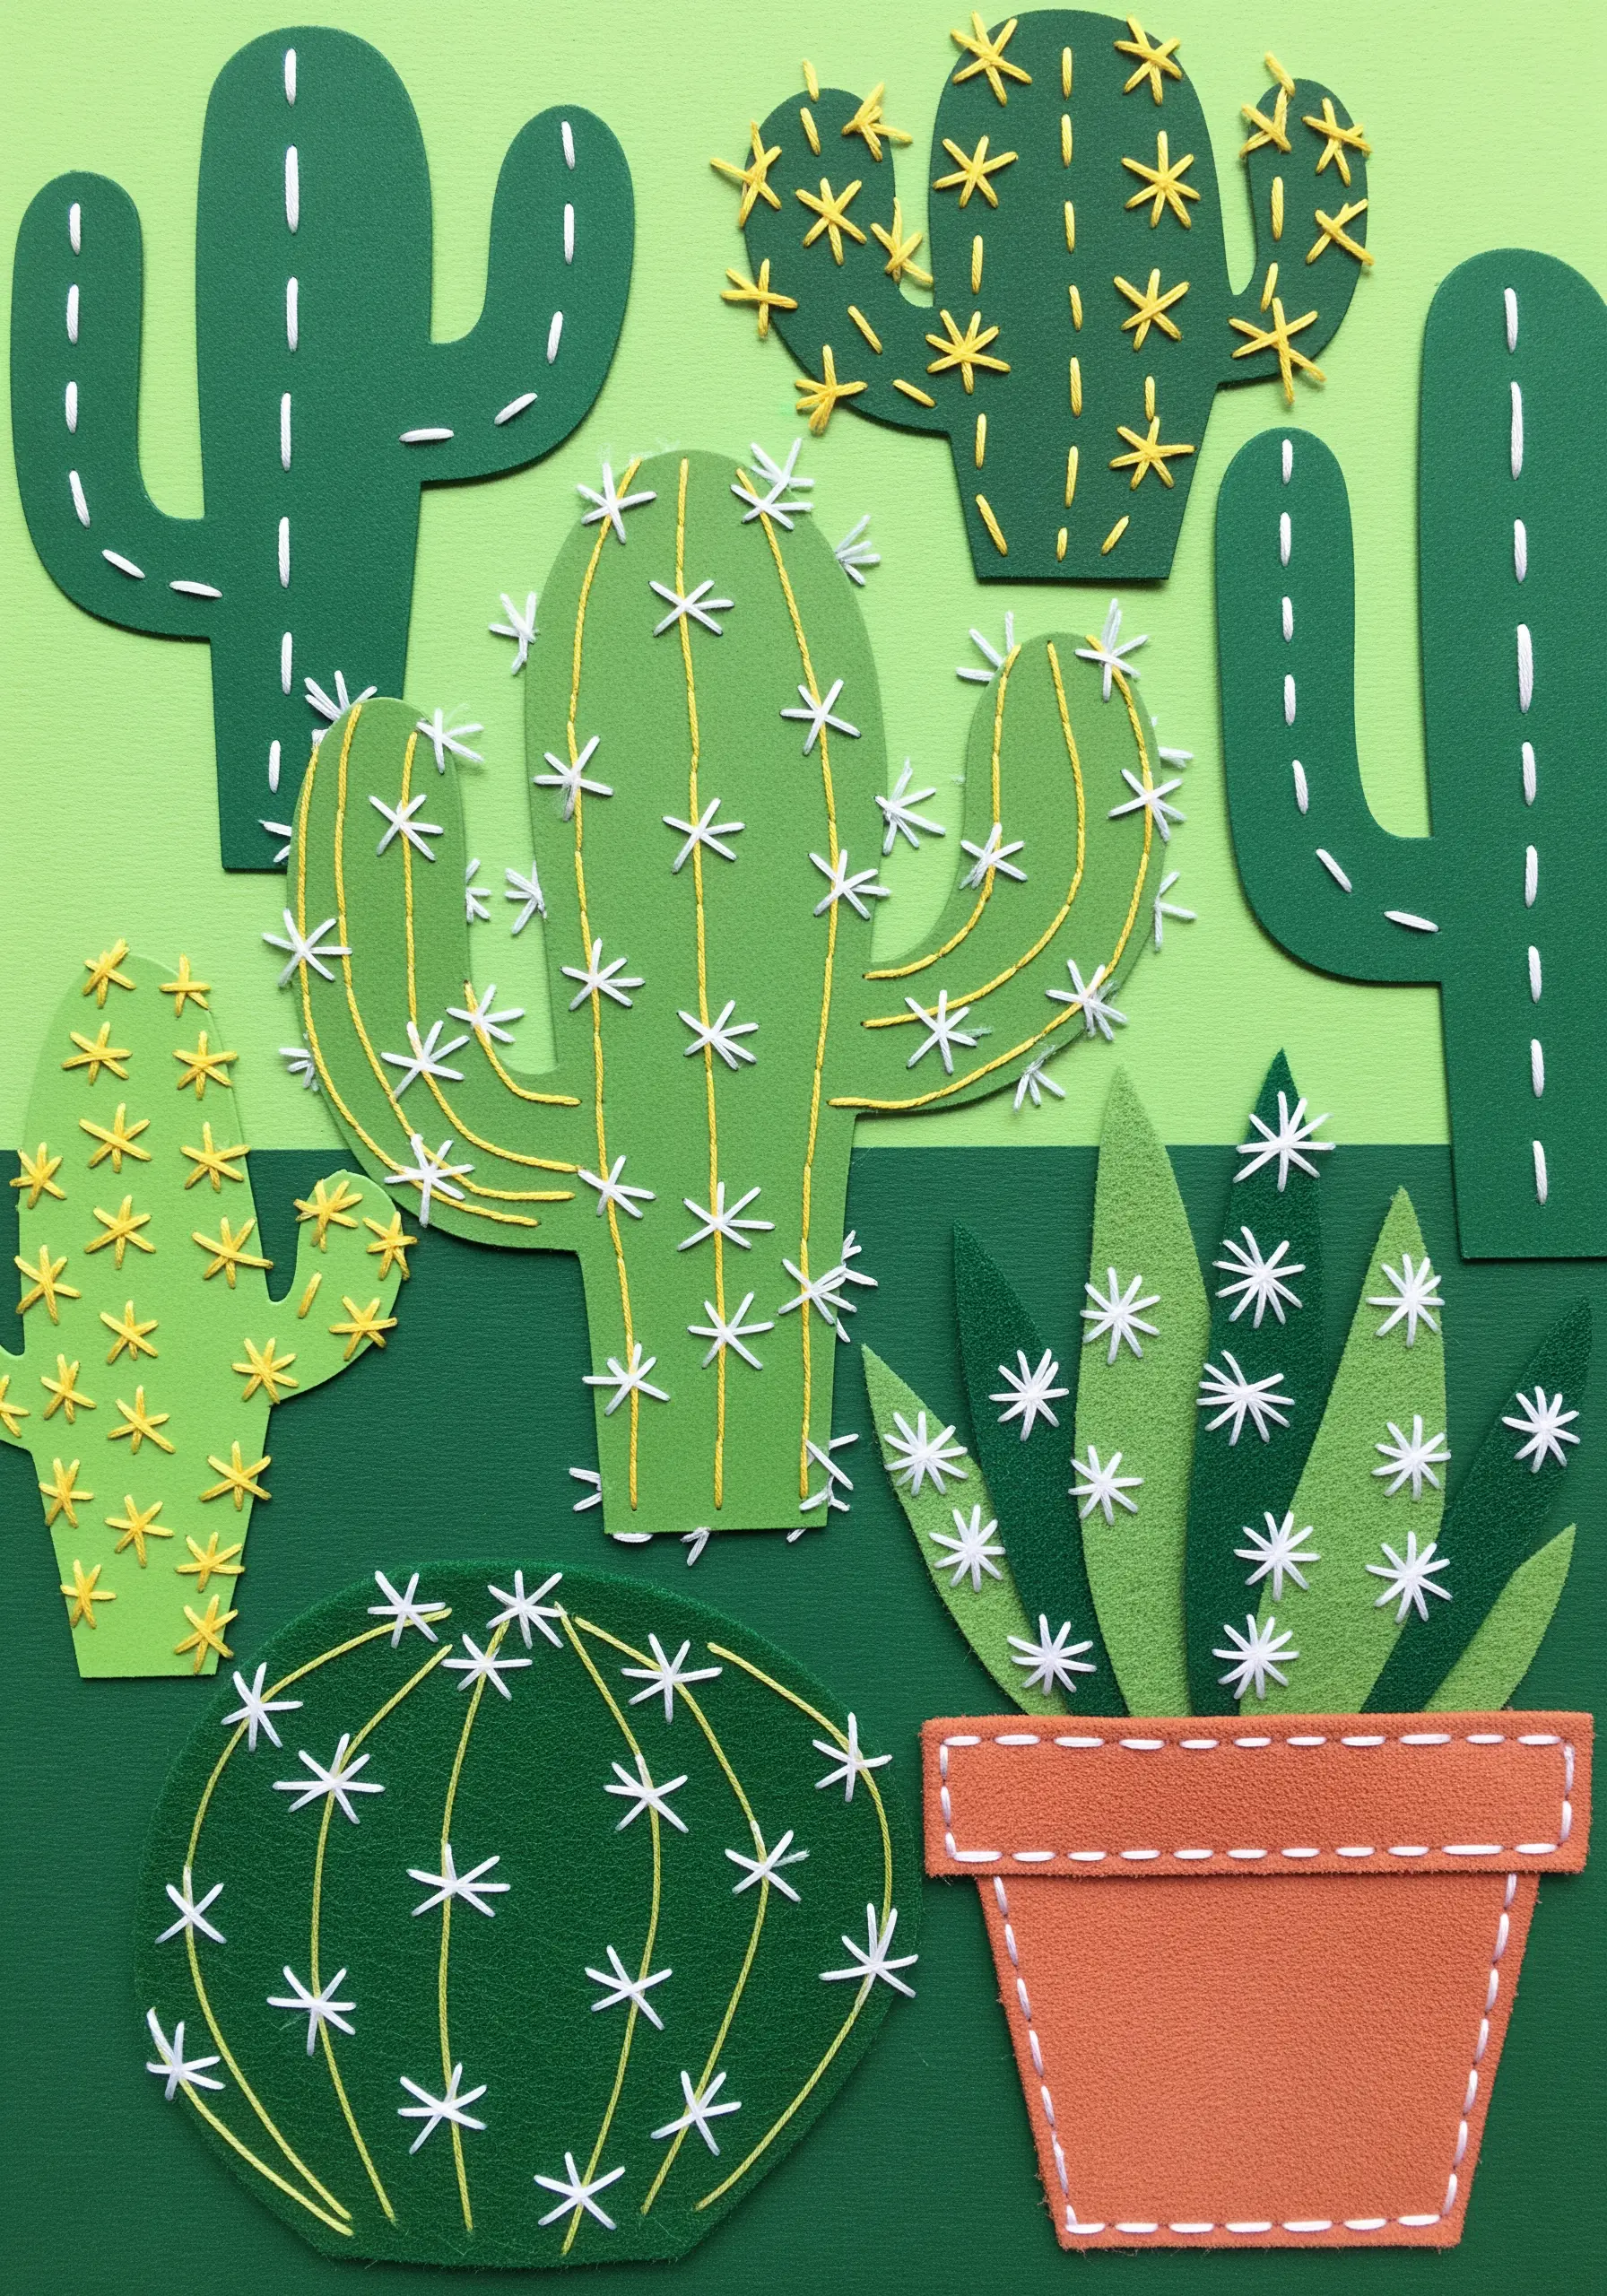
Instead of trying to stitch every single detail, use a graphic stitch to suggest a texture, like cactus spines.
The star stitch (or an isolated cross stitch with an intersecting straight stitch) is a quick and effective way to create this effect.
Vary the size and orientation of the stars to give your composition a more organic and lively feel.
Using a bright, contrasting thread like white or yellow on green makes the stitches pop and reinforces the clean, graphic style of the collage.
This is a perfect technique for adding playful detail without overworking the piece.
31. Add Narrative with a Simple Dashed Line
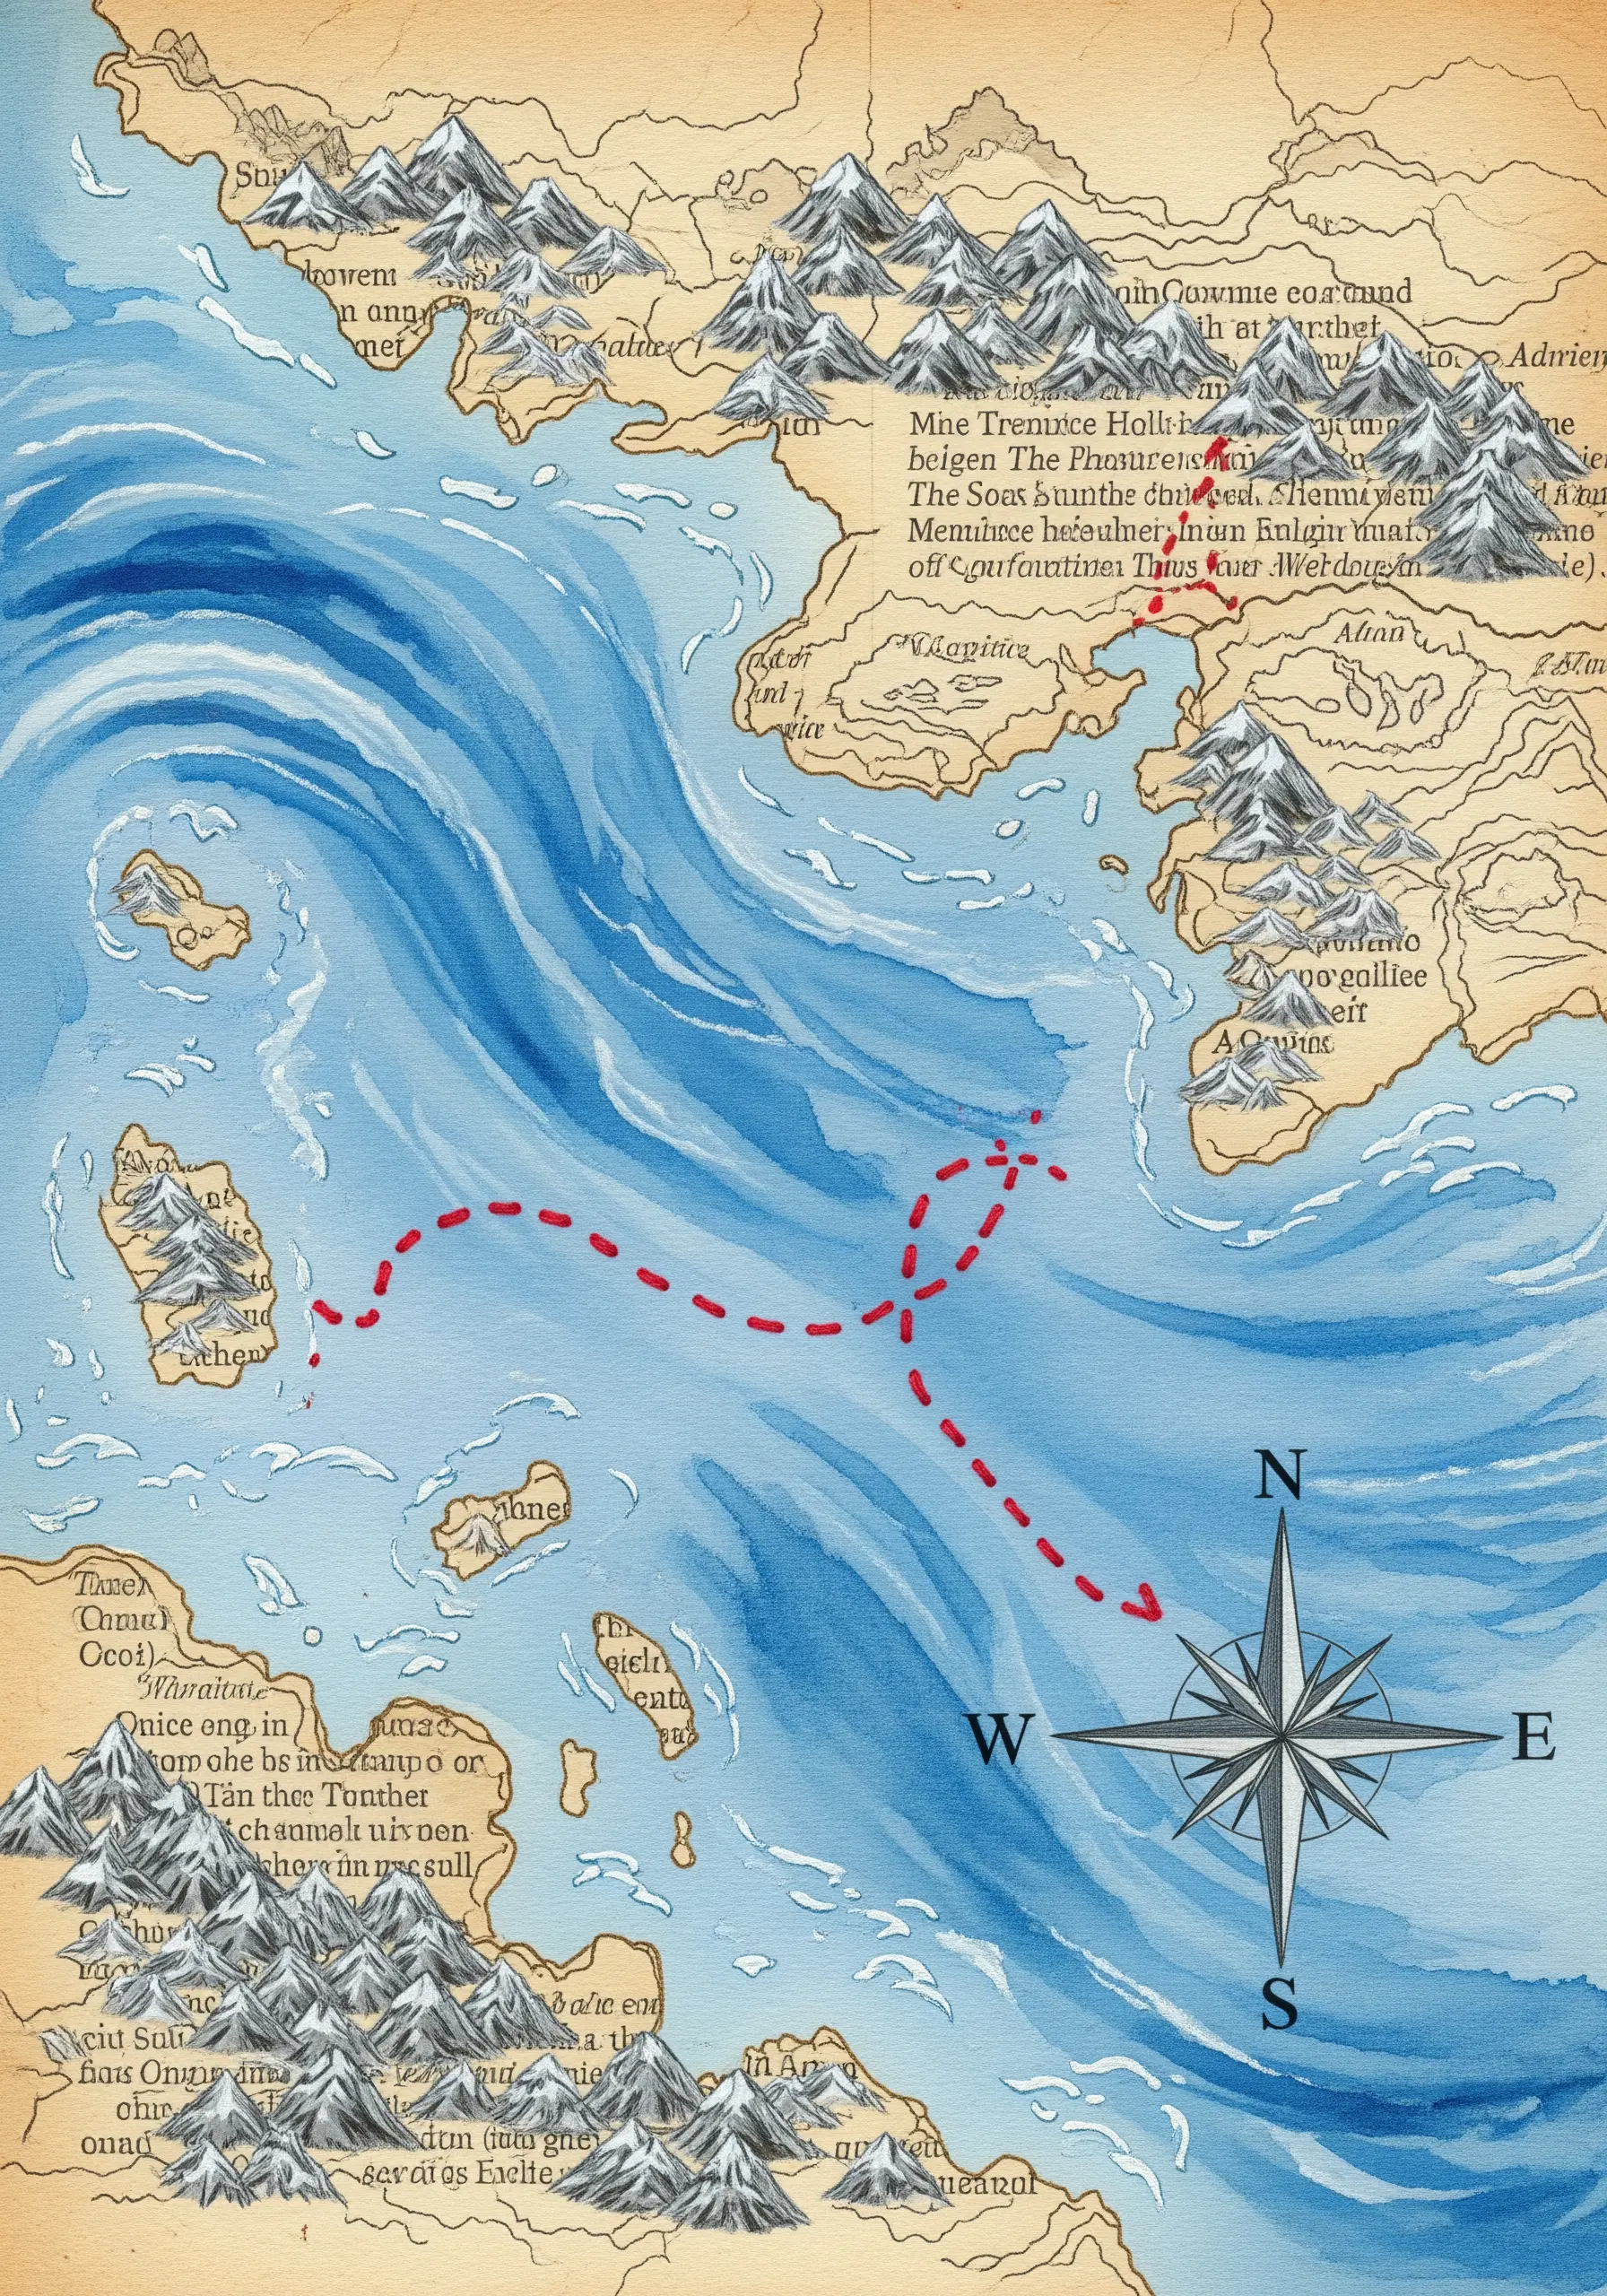
Guide the viewer’s eye and add a layer of storytelling to your collage with a simple stitched path.
A basic running stitch in a bold, contrasting color is all you need to represent a journey, a memory, or a fictional route on a map.
The handmade quality of the stitches adds a personal, tangible feel to the narrative element.
This technique instantly transforms a static image into a piece with a sense of history and movement.
It’s a testament to how even the simplest line can carry deep meaning.
32. Integrate Thread as a Pure Design Element
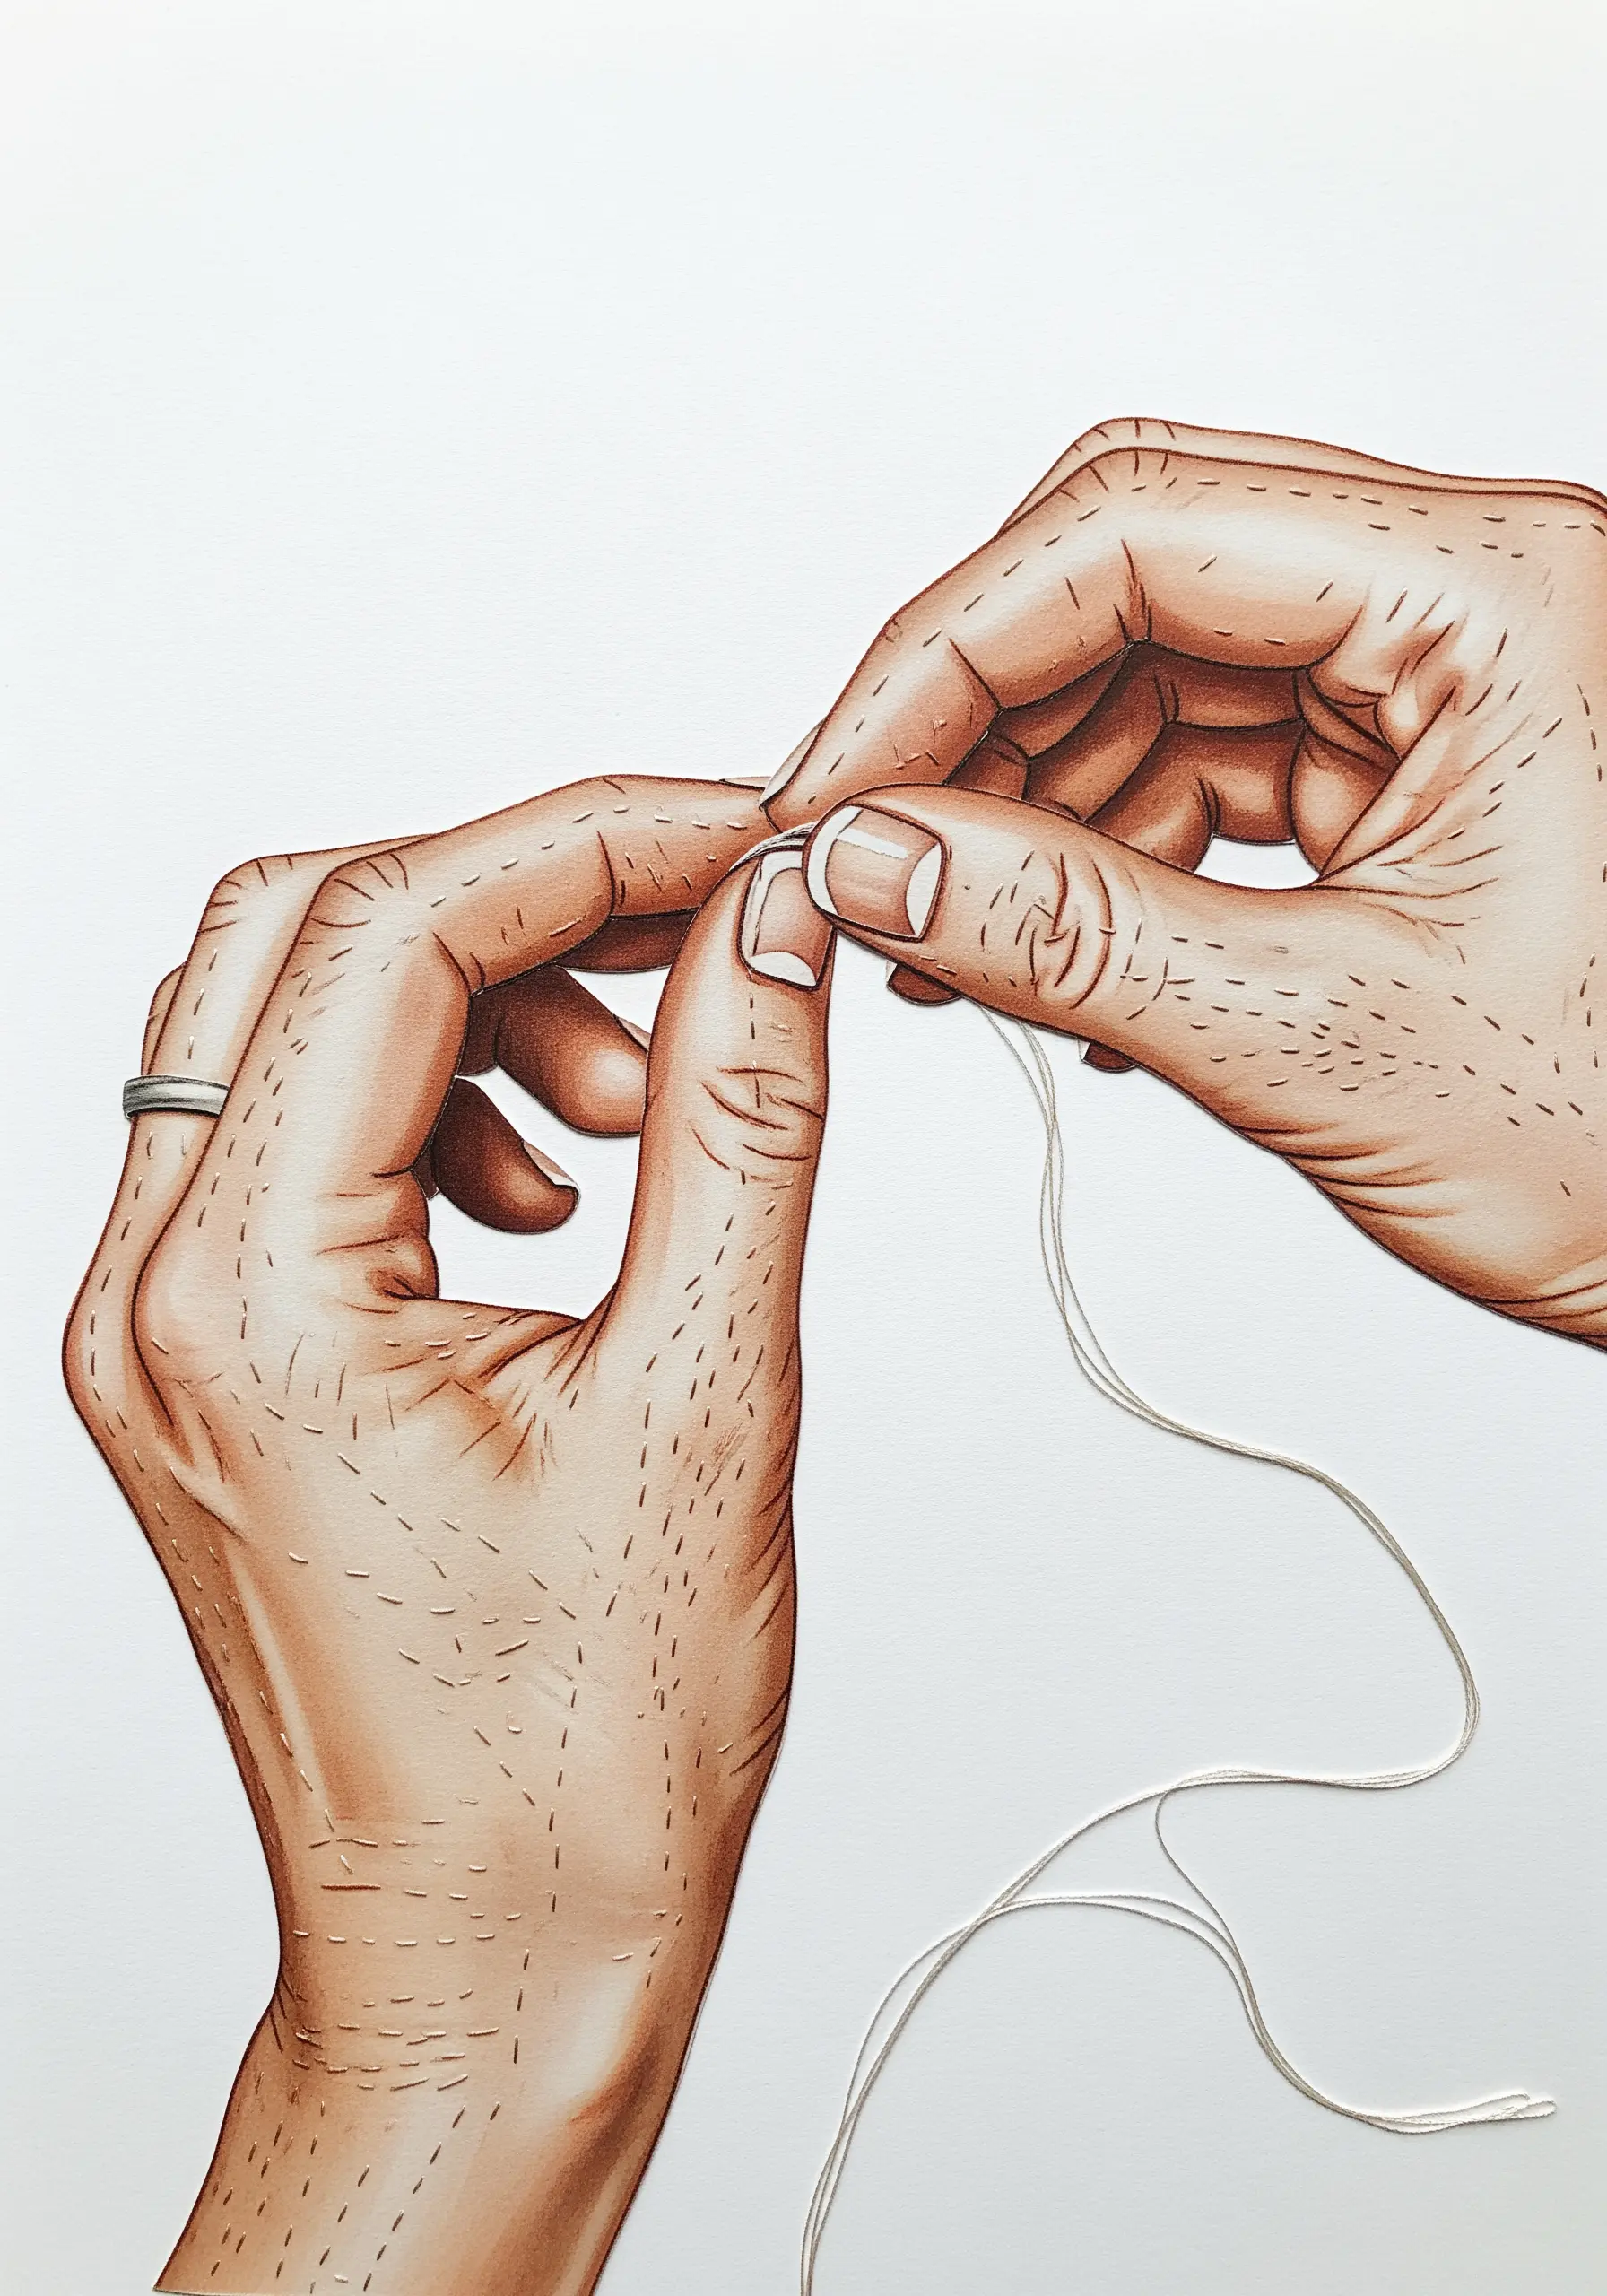
Challenge the idea that thread must always form a recognizable stitch.
In this piece, the thread is treated as a continuous line, an extension of the illustrated hands, blurring the boundary between drawing and fiber.
To achieve this, you can couch the thread onto the surface or carefully pierce the paper only at the beginning and end points, allowing the thread to float across the composition.
This conceptual approach uses the material itself—the physical strand of thread—as a central part of the artwork’s message.
33. Use Pre-Perforated Surfaces as a Stitching Guide
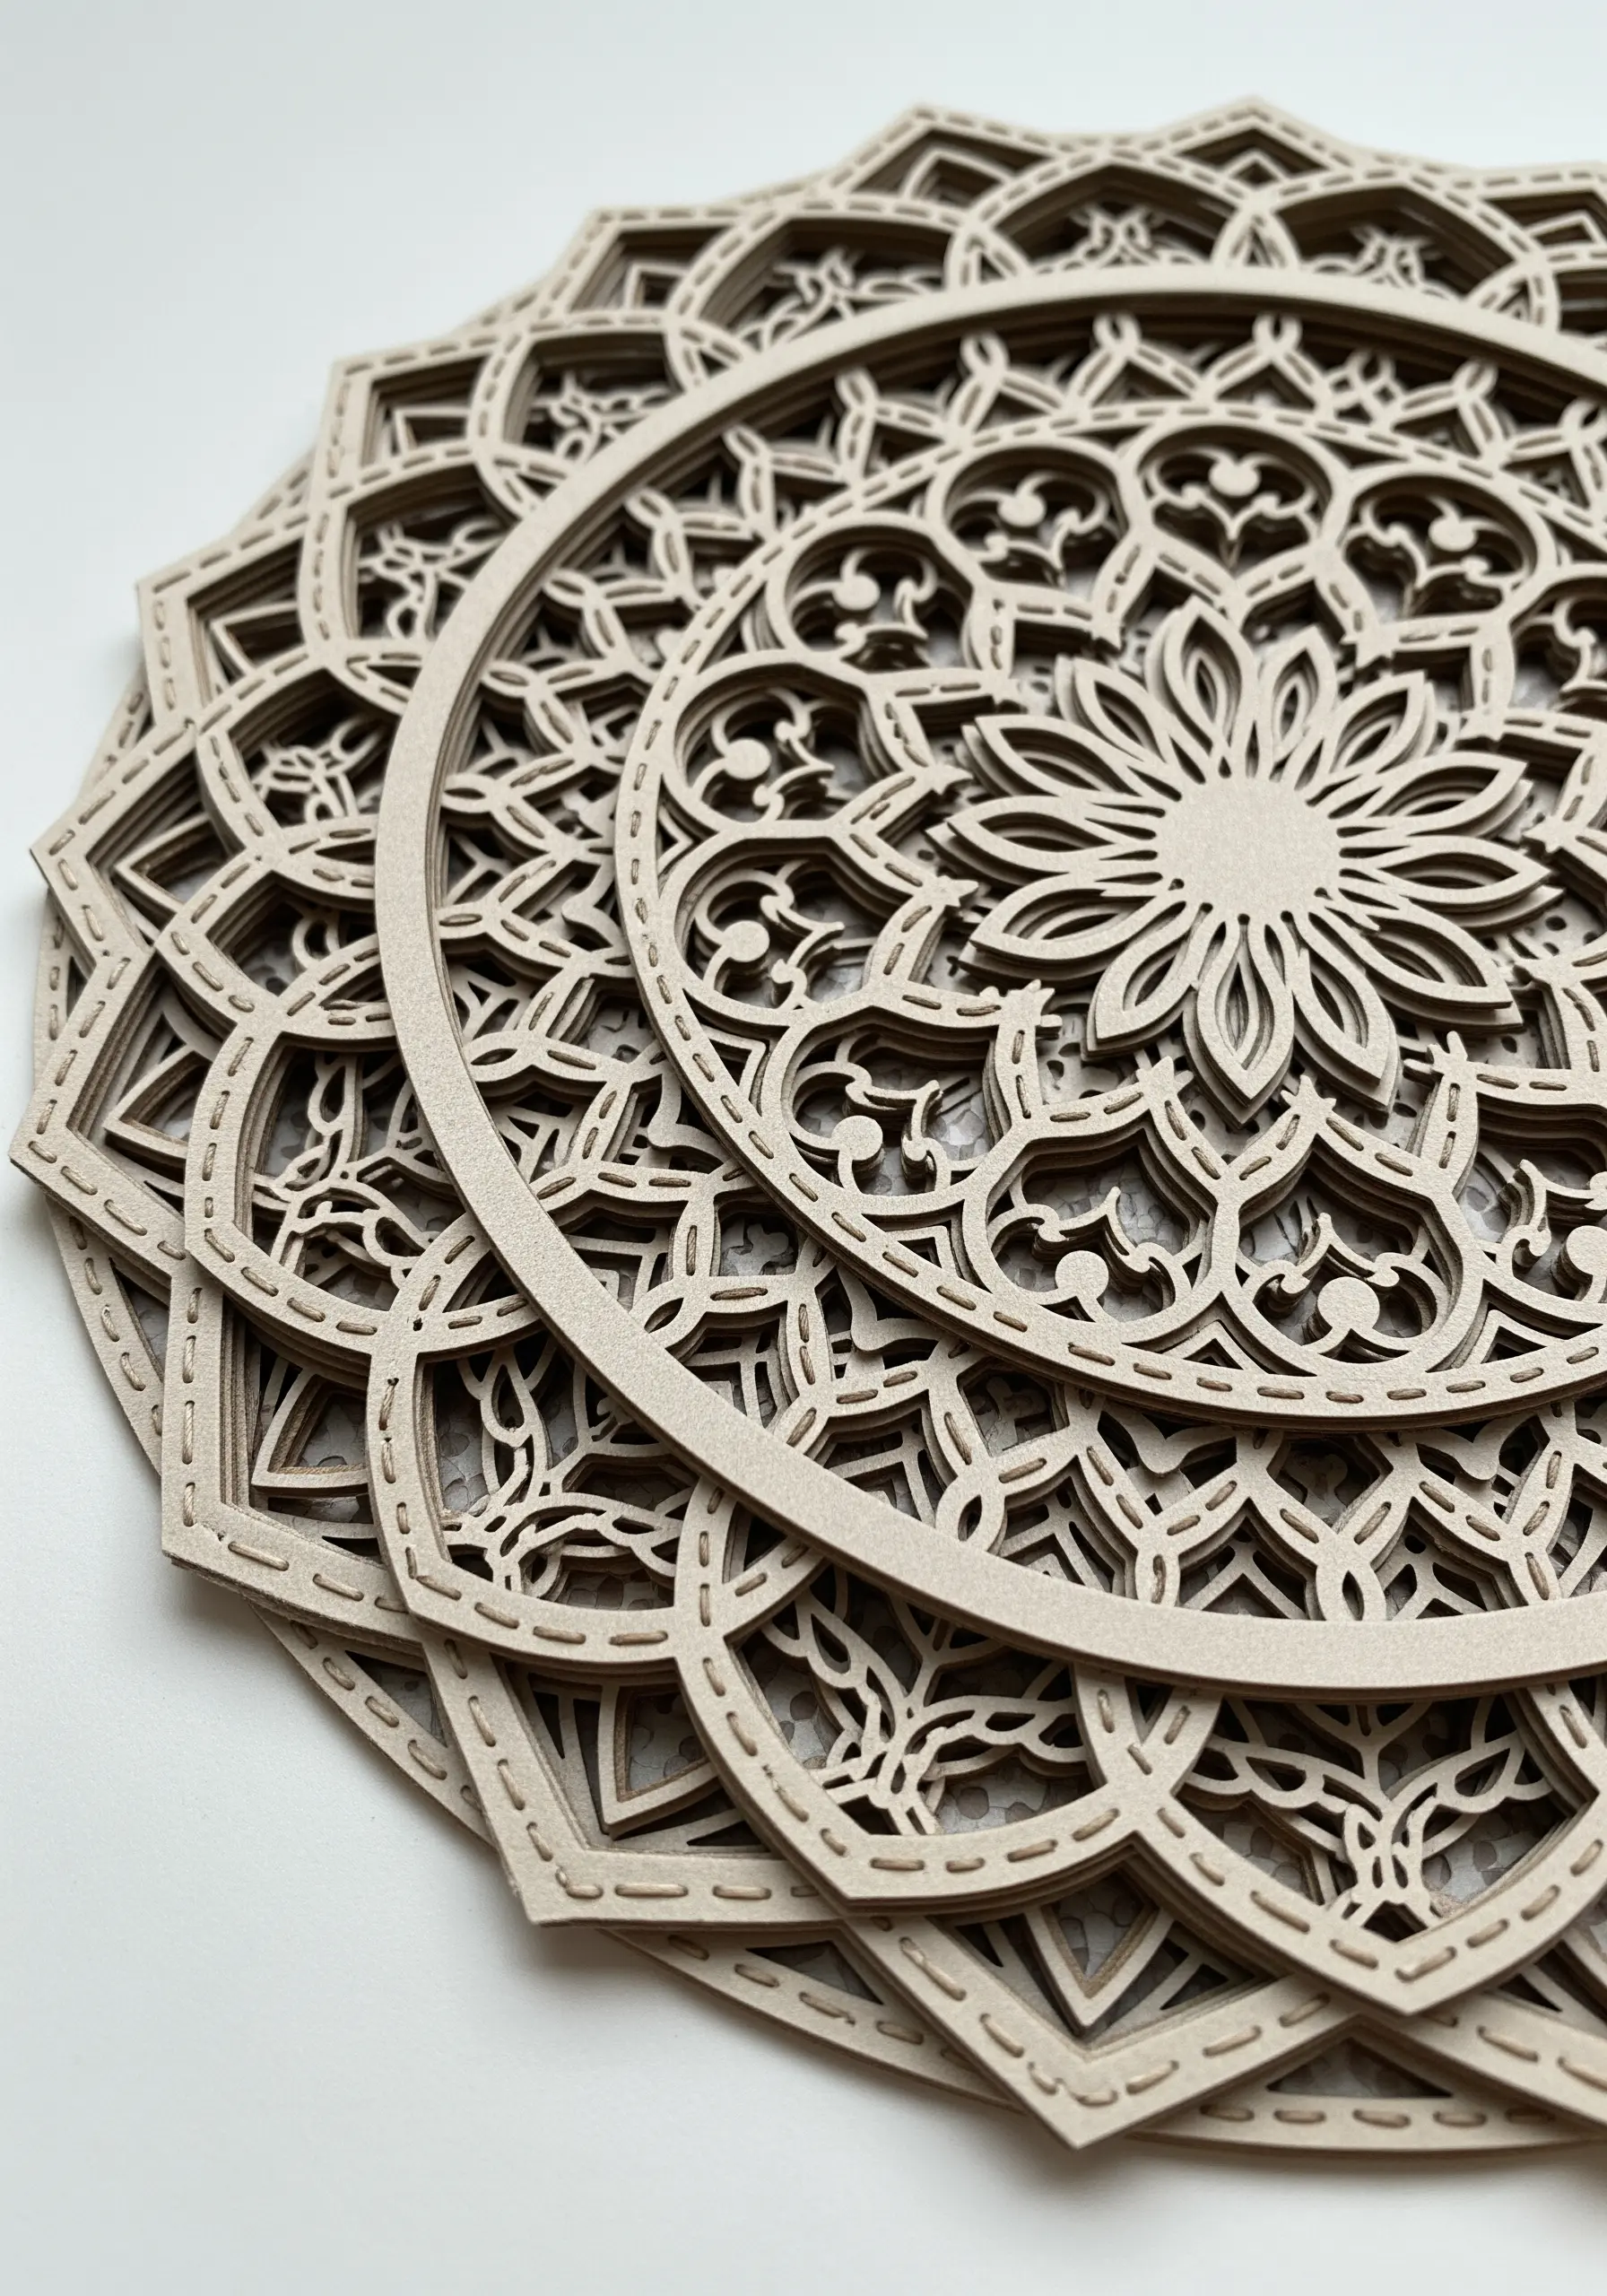
For perfectly uniform and intricate patterns, use a laser-cut or pre-punched surface as your stitching canvas.
Materials like thin wood, cardstock, or leather can be found with beautiful, complex designs already cut into them.
Simply use the existing holes as a guide for your running stitch, backstitch, or more complex woven patterns.
This method removes the challenge of spacing your stitches perfectly, allowing you to focus on color and texture.
It’s a wonderful way to combine modern technology with the timeless craft of hand stitching.
34. Create Embroidered “Specimens” for a Shadow Box
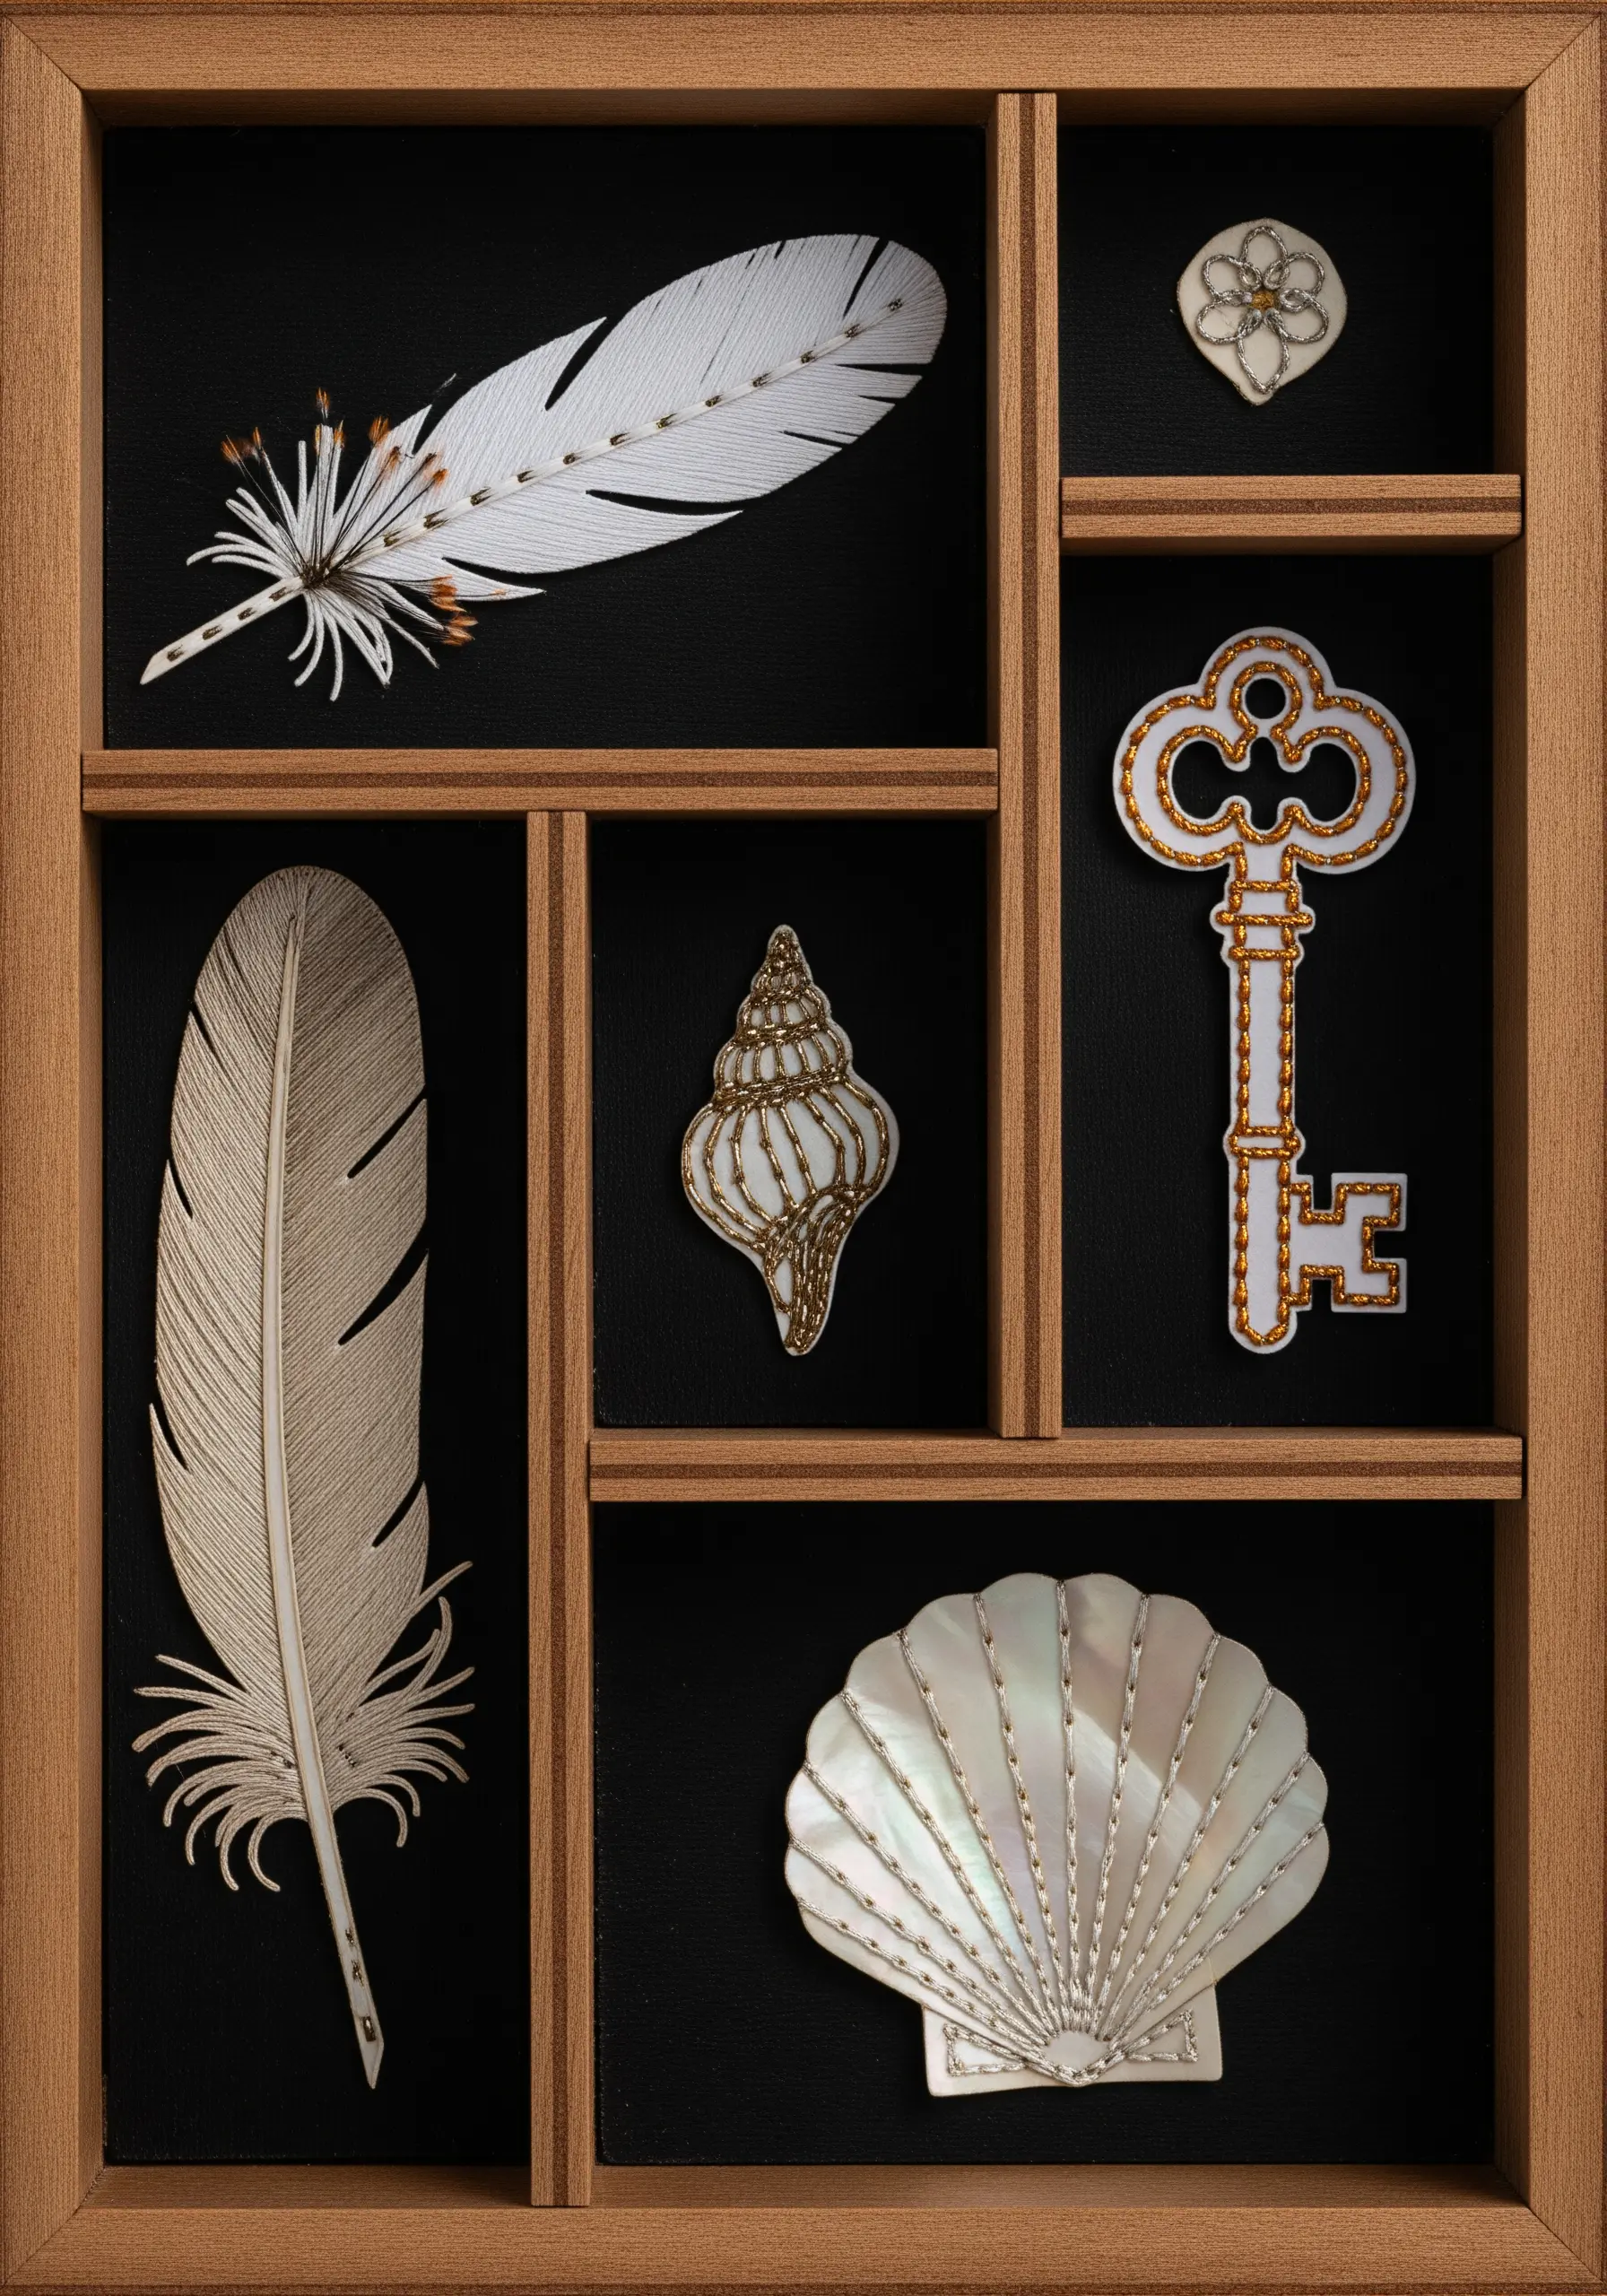
Elevate your embroidery by treating each small piece as a precious object to be collected and displayed.
Work your designs—like these feathers and shells—on a sturdy, non-fraying fabric like felt or ultra-suede.
Cut each piece out carefully, leaving a small border if desired.
Arrange your finished embroidered “specimens” in a shadow box or a partitioned tray for a display that feels like a personal museum.
This presentation transforms your stitches from simple decorations into treasured artifacts.


