
When you transform a piece of embroidery into something that can be worn or carried, you give your stitches a new life. It’s no longer just a piece to be hung on a wall; it becomes a personal statement, a tiny piece of art that moves through the world with you or someone you love.
Creating embroidered jewelry and accessories isn’t about mastering impossibly complex techniques. It’s about thinking differently about scale, texture, and finishing. It’s about choosing the right stitch to create a 3D petal, the right fabric to make a line crisp, or the right combination of thread and beads to catch the light.
Here, you’ll find ideas that focus on these small but impactful details. Think of them not just as projects, but as techniques you can adapt to create polished, durable, and truly special gifts that feel both handmade and high-end.
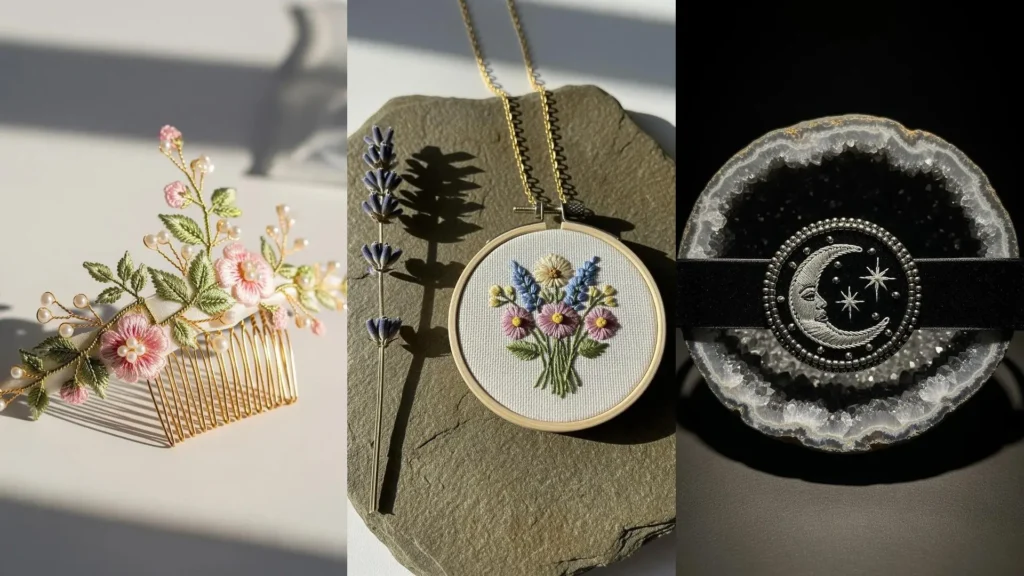
1. Miniature Bouquet Pendant
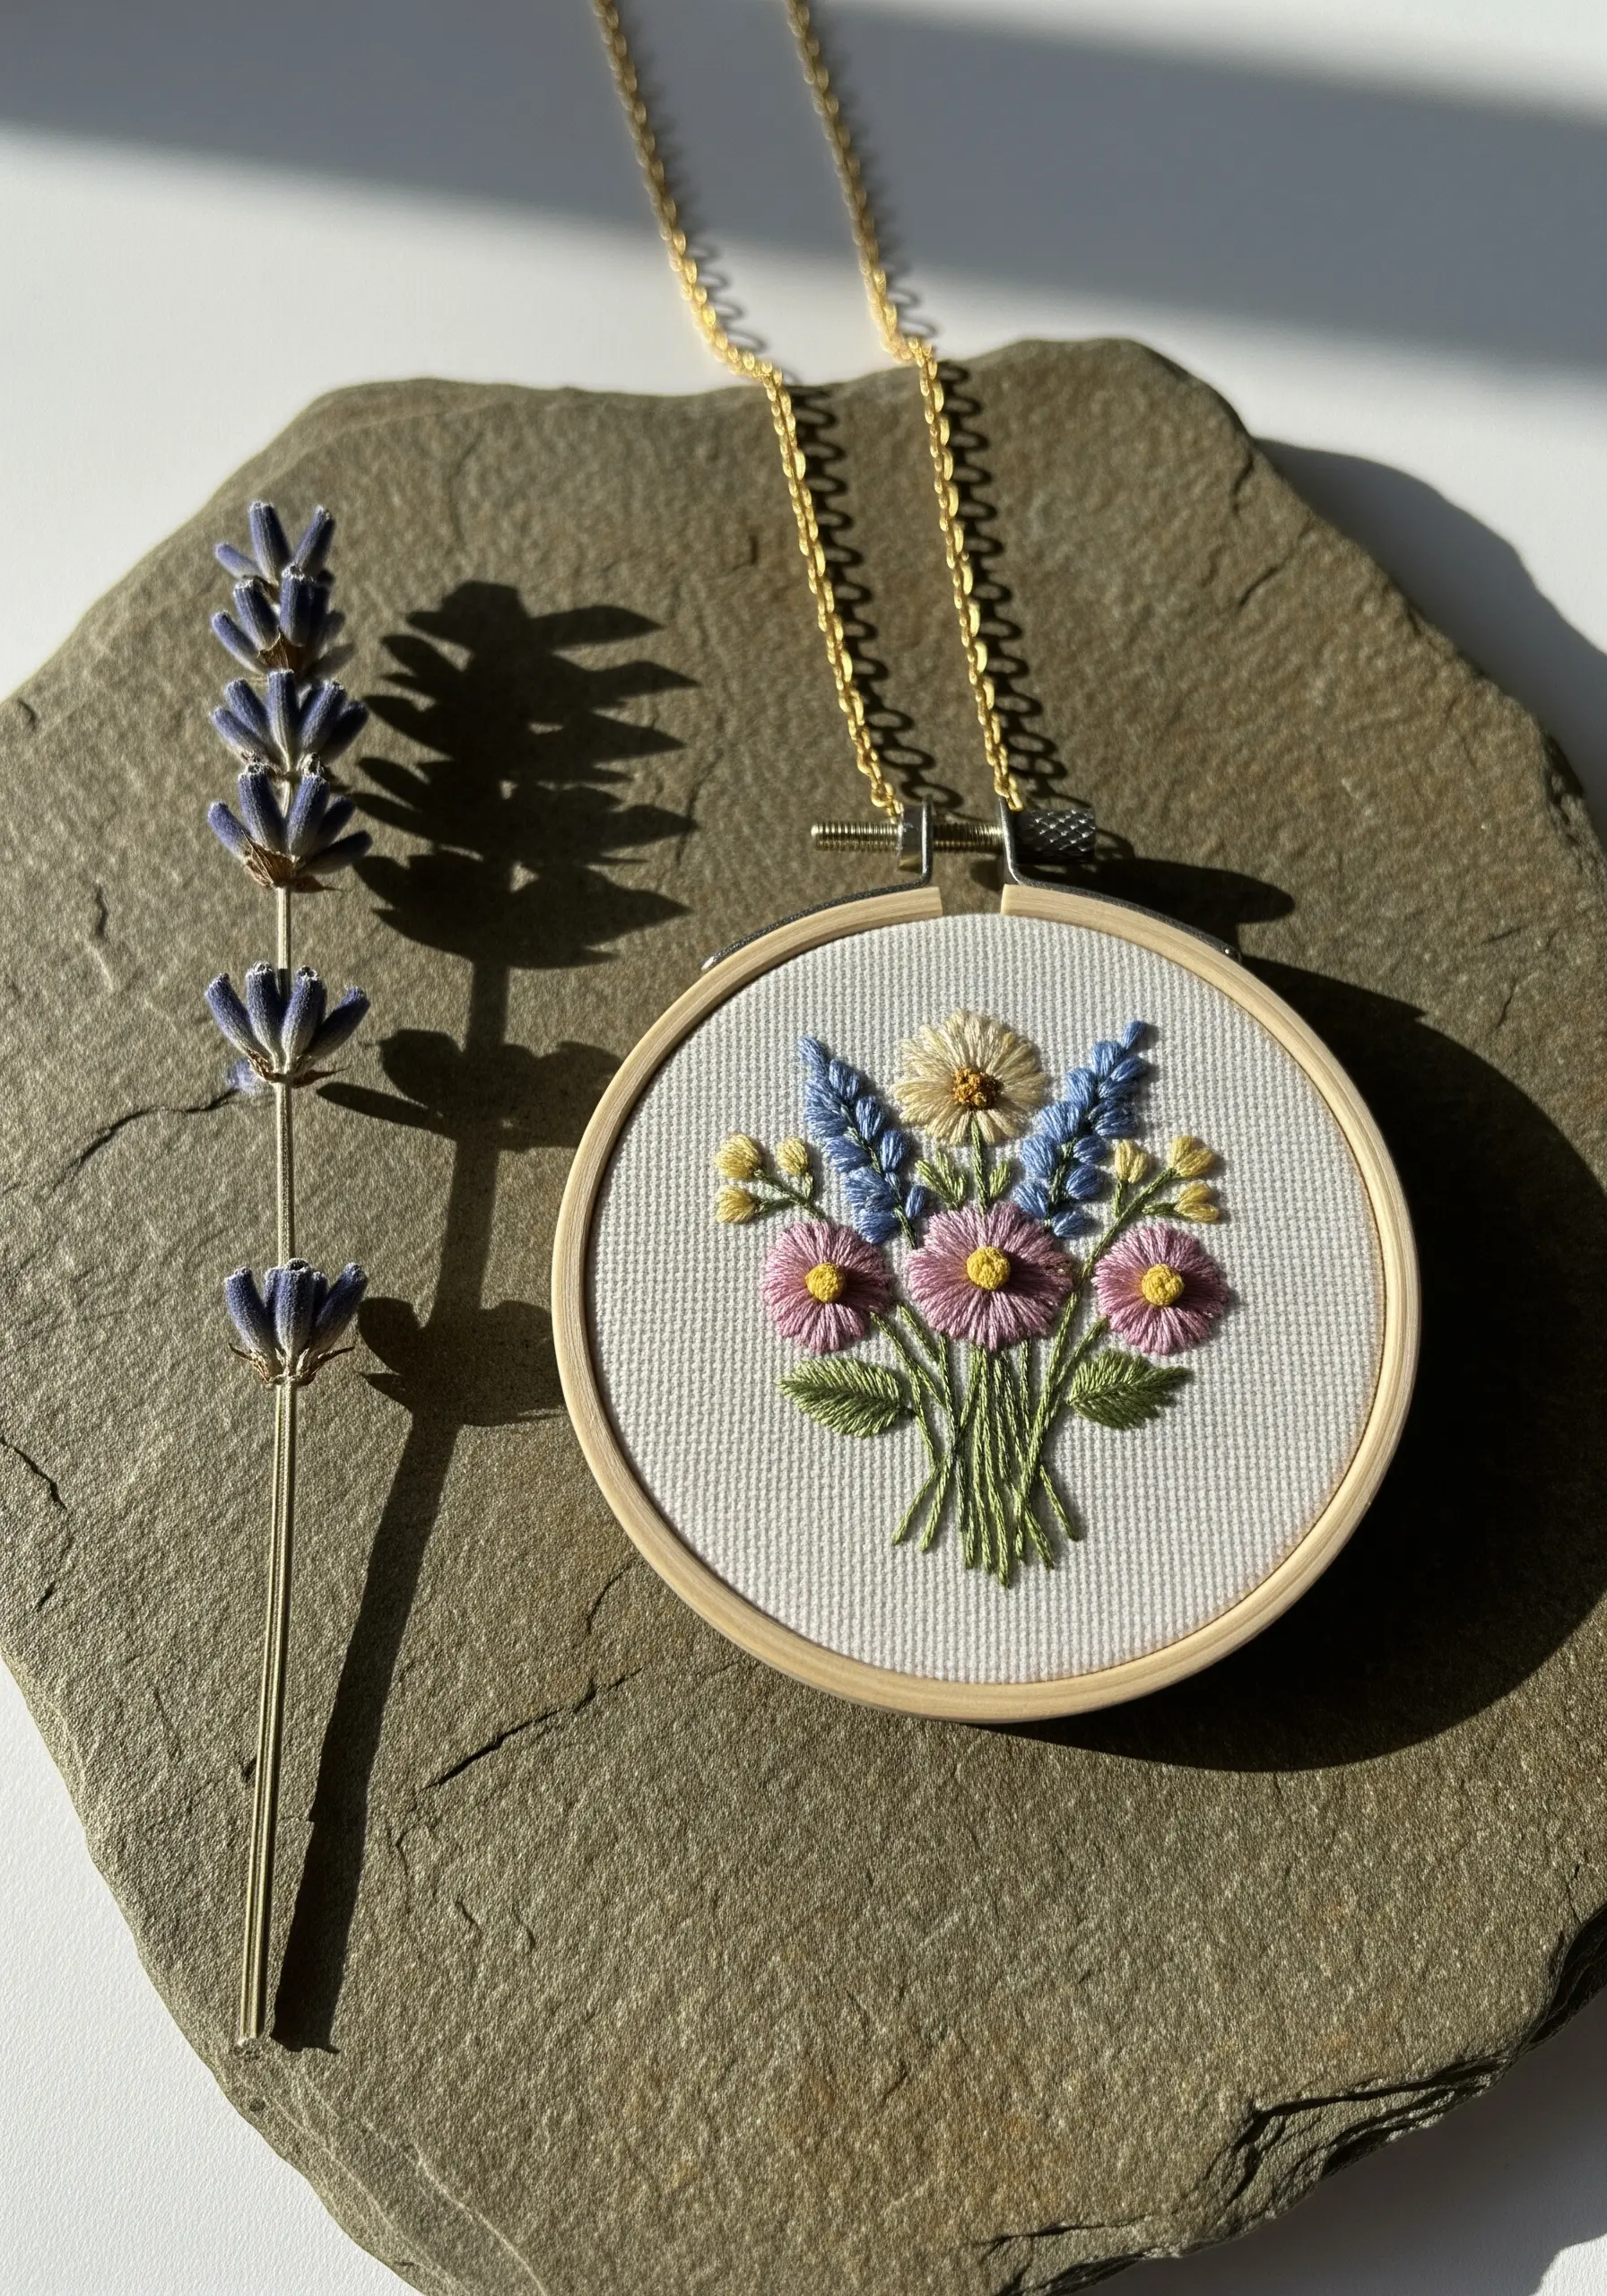
To create a dense yet delicate floral arrangement in a tiny hoop, focus on textural variety over complex stitches.
Use single-strand French knots for tiny buds, detached chain stitches for small petals, and two-strand stem stitch for foliage.
This combination creates visual depth without overcrowding the composition, making your miniature bouquet feel lush and intentional.
Choosing a high-count linen or cotton-linen blend provides a stable, smooth ground for these hand-embroidered flower stitches.
2. Art Deco Beaded Earrings
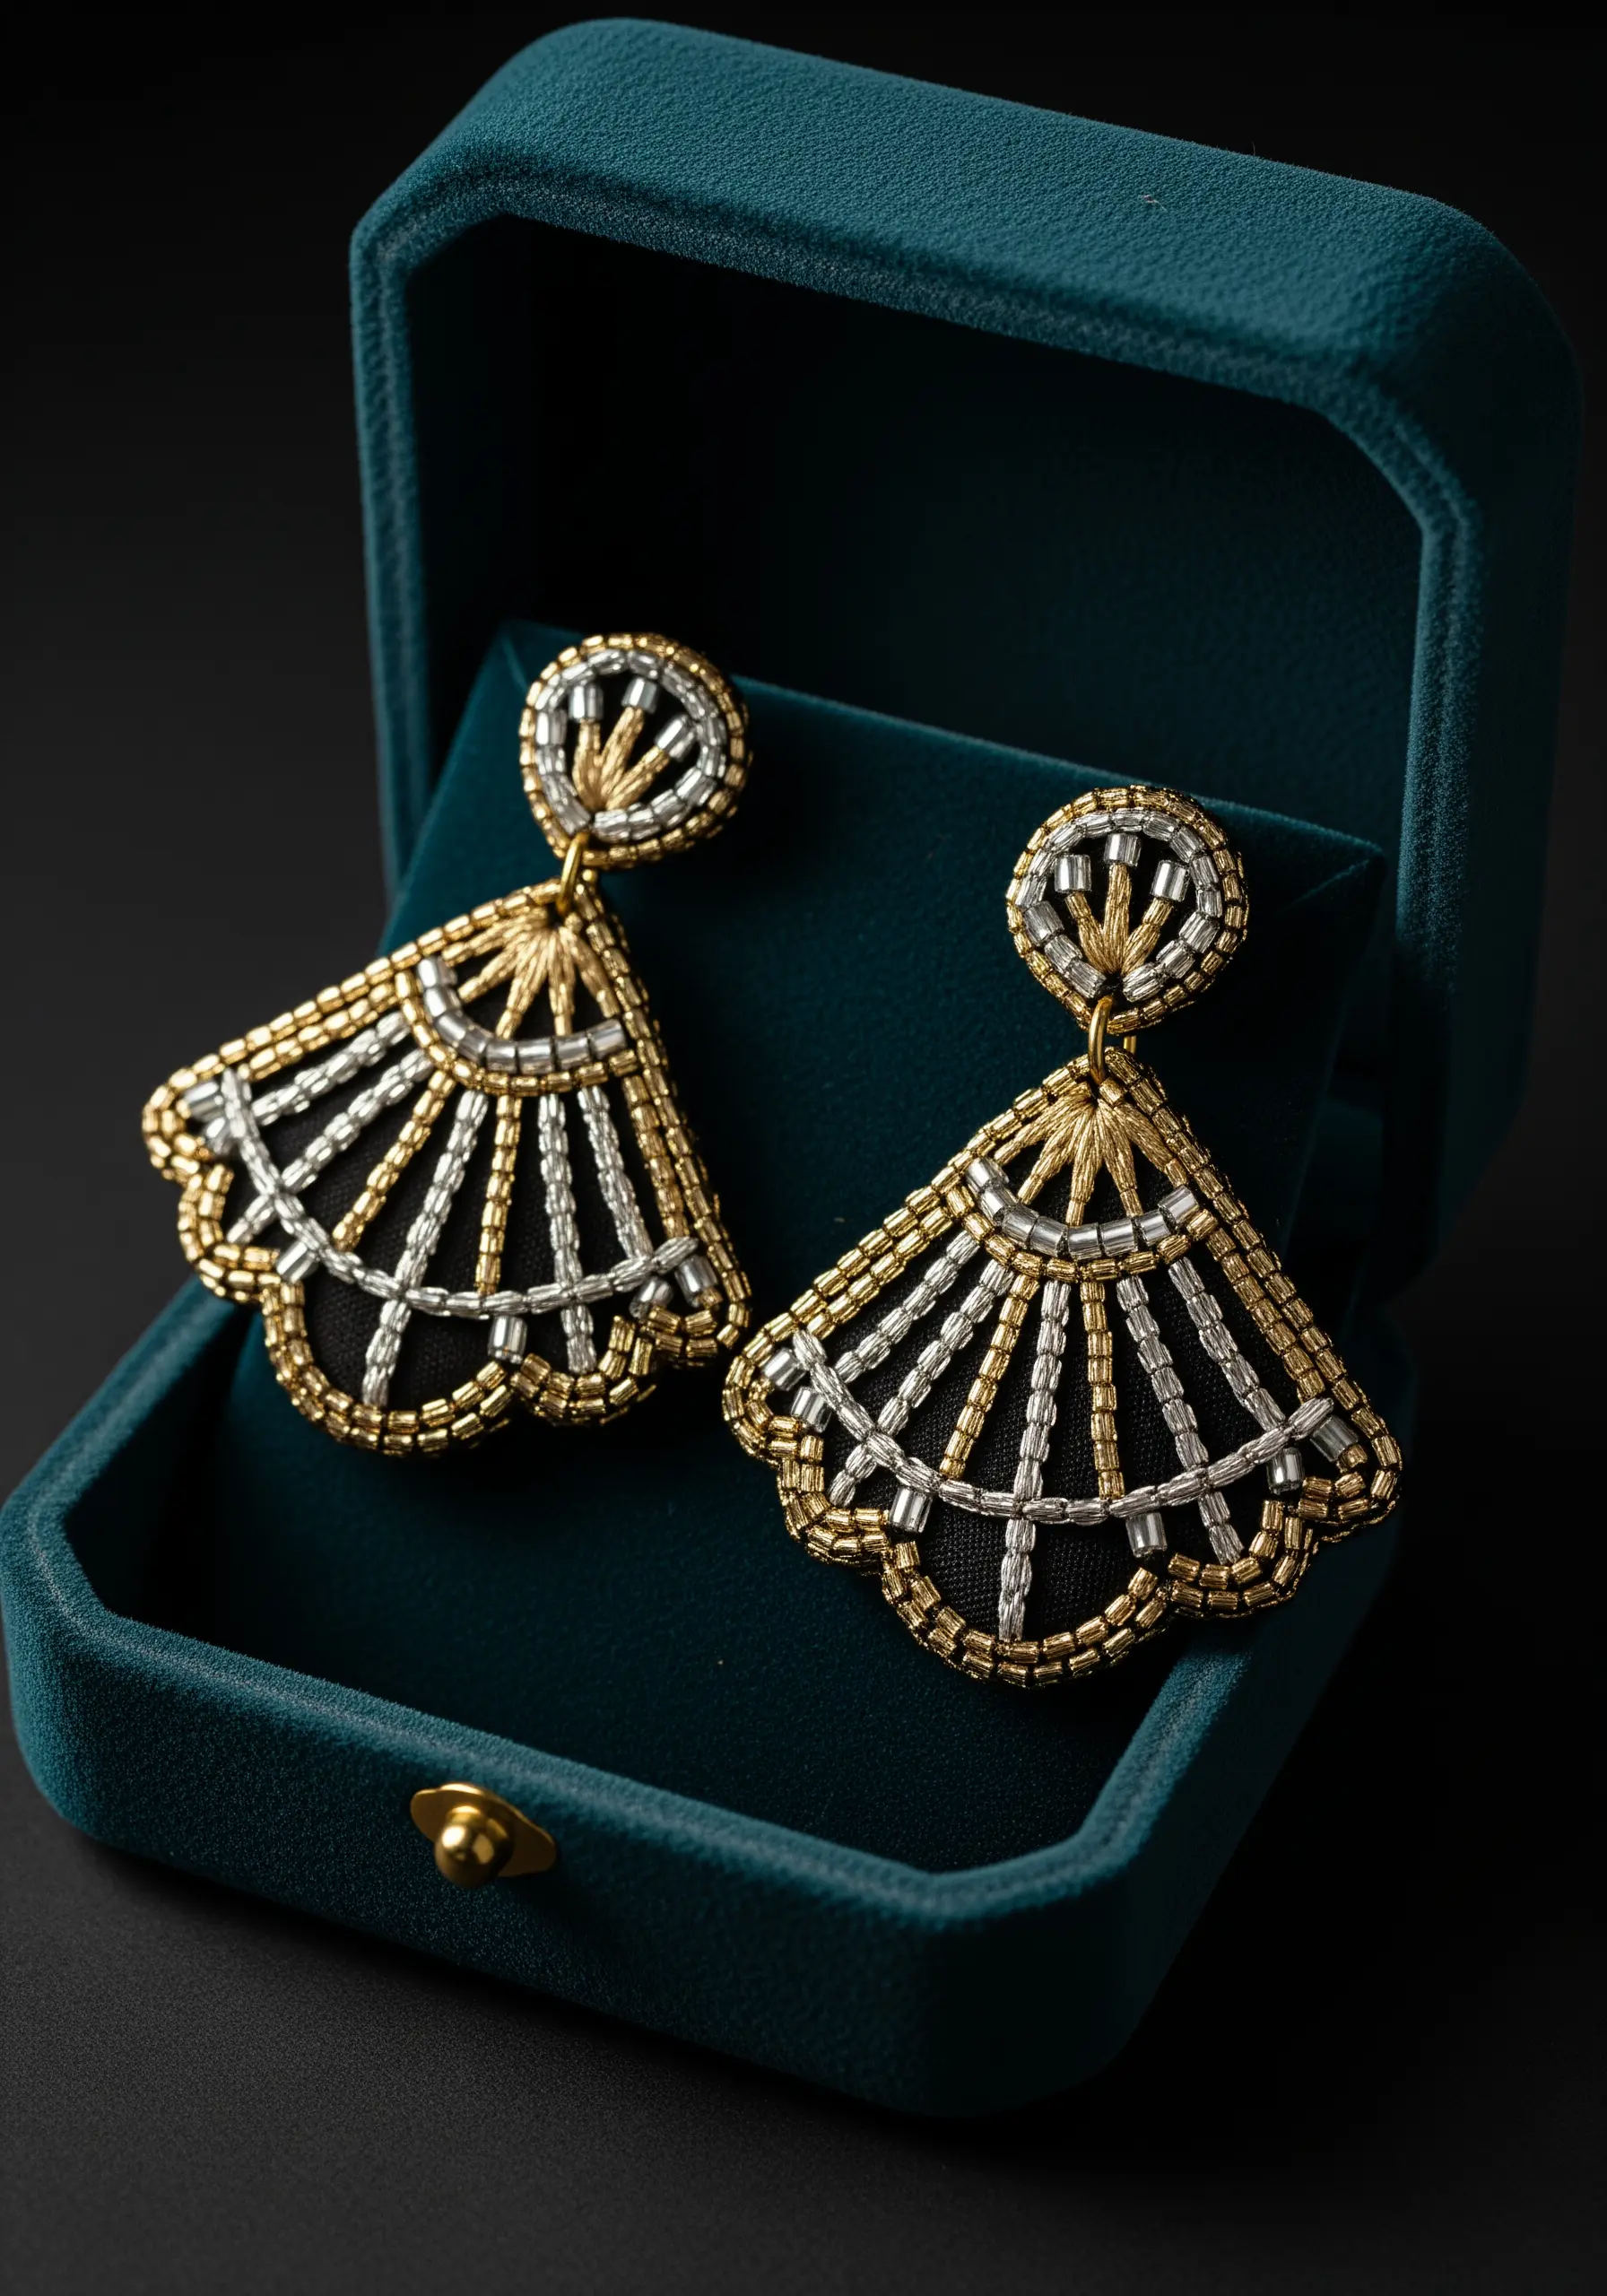
Achieve a polished Art Deco look by combining metallic thread with glass beads on a dark fabric base.
Instead of stitching with metallic thread, couch it down with a finer, matching cotton thread—this prevents fraying and creates perfectly smooth lines.
Use a single, strong beading thread to secure rows of seed beads, ensuring they lie flat and follow your design lines precisely.
The contrast between the matte black fabric and the reflective materials is what gives these earrings their signature glamour.
3. Botanical Beaded Cuff
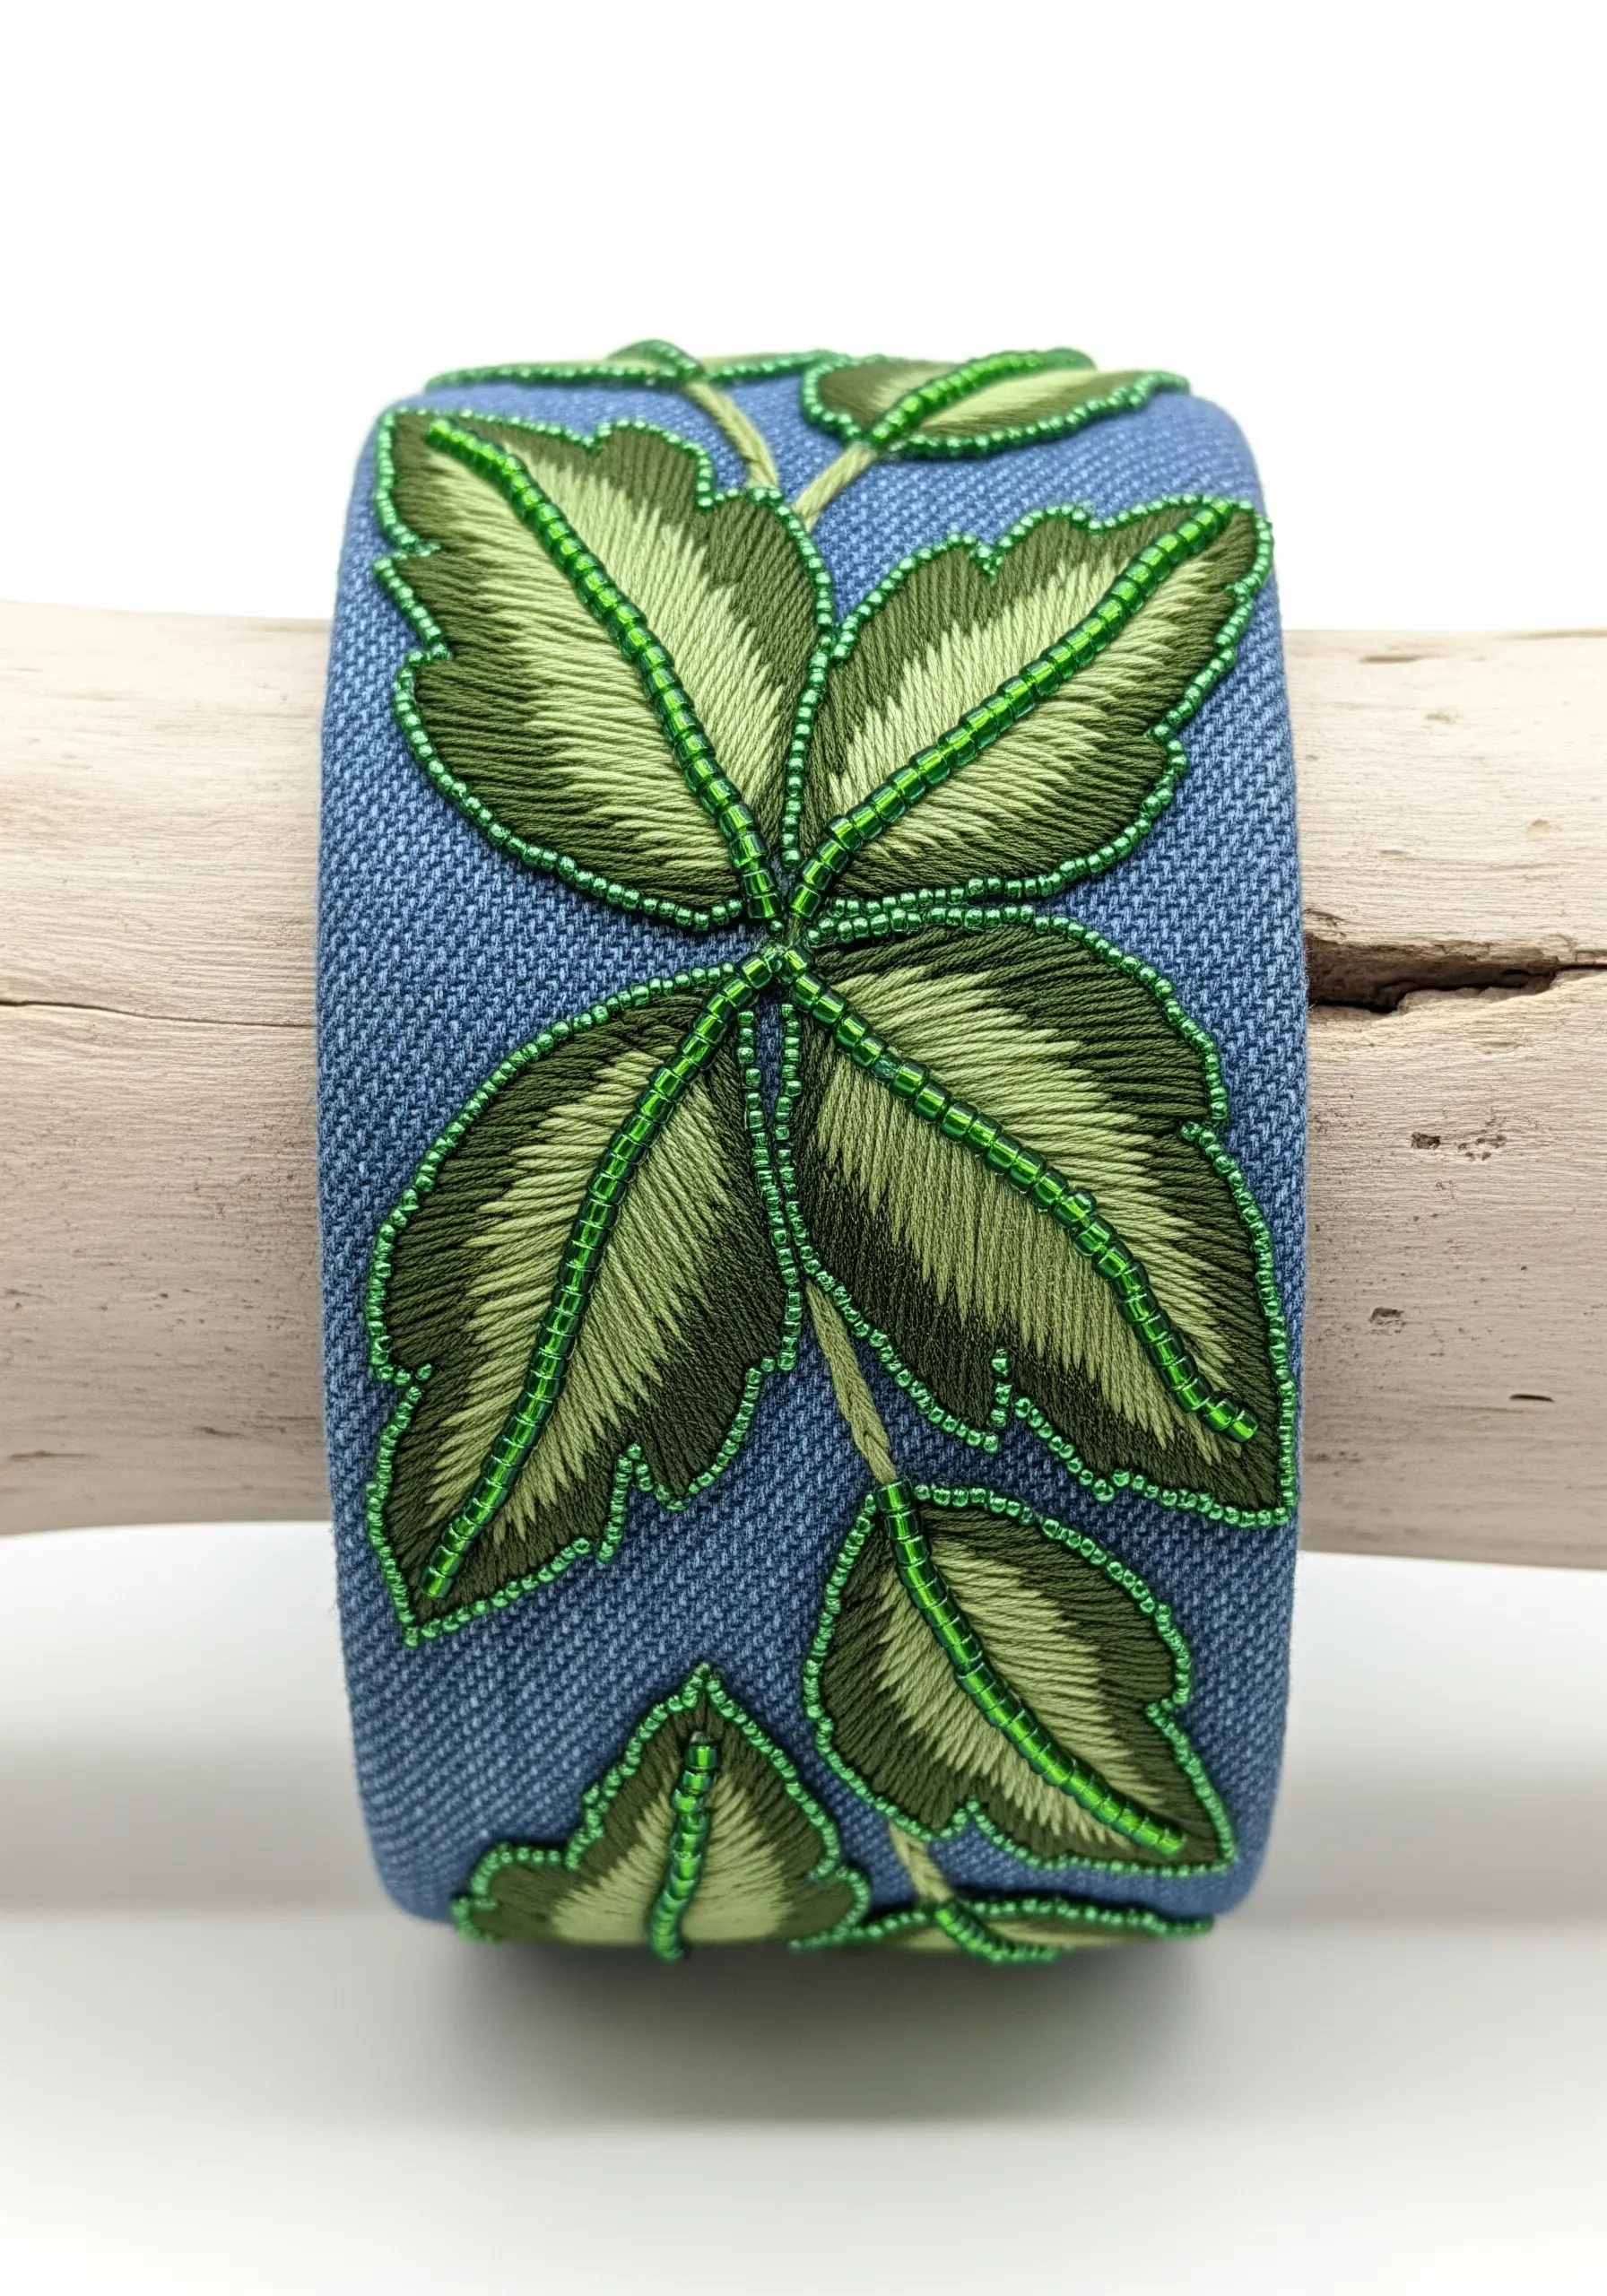
Elevate simple leaf motifs by outlining your thread painting with a precise row of seed beads.
First, complete the leaves using a long-and-short stitch to create a smooth color gradient from light to dark green.
Then, come back with a single beading thread and use a backstitch to secure each bead along the leaf’s edge.
This technique adds a clean, defined border and a subtle sparkle that makes the entire design pop against the fabric.
4. Thread-Painted Fox Brooch
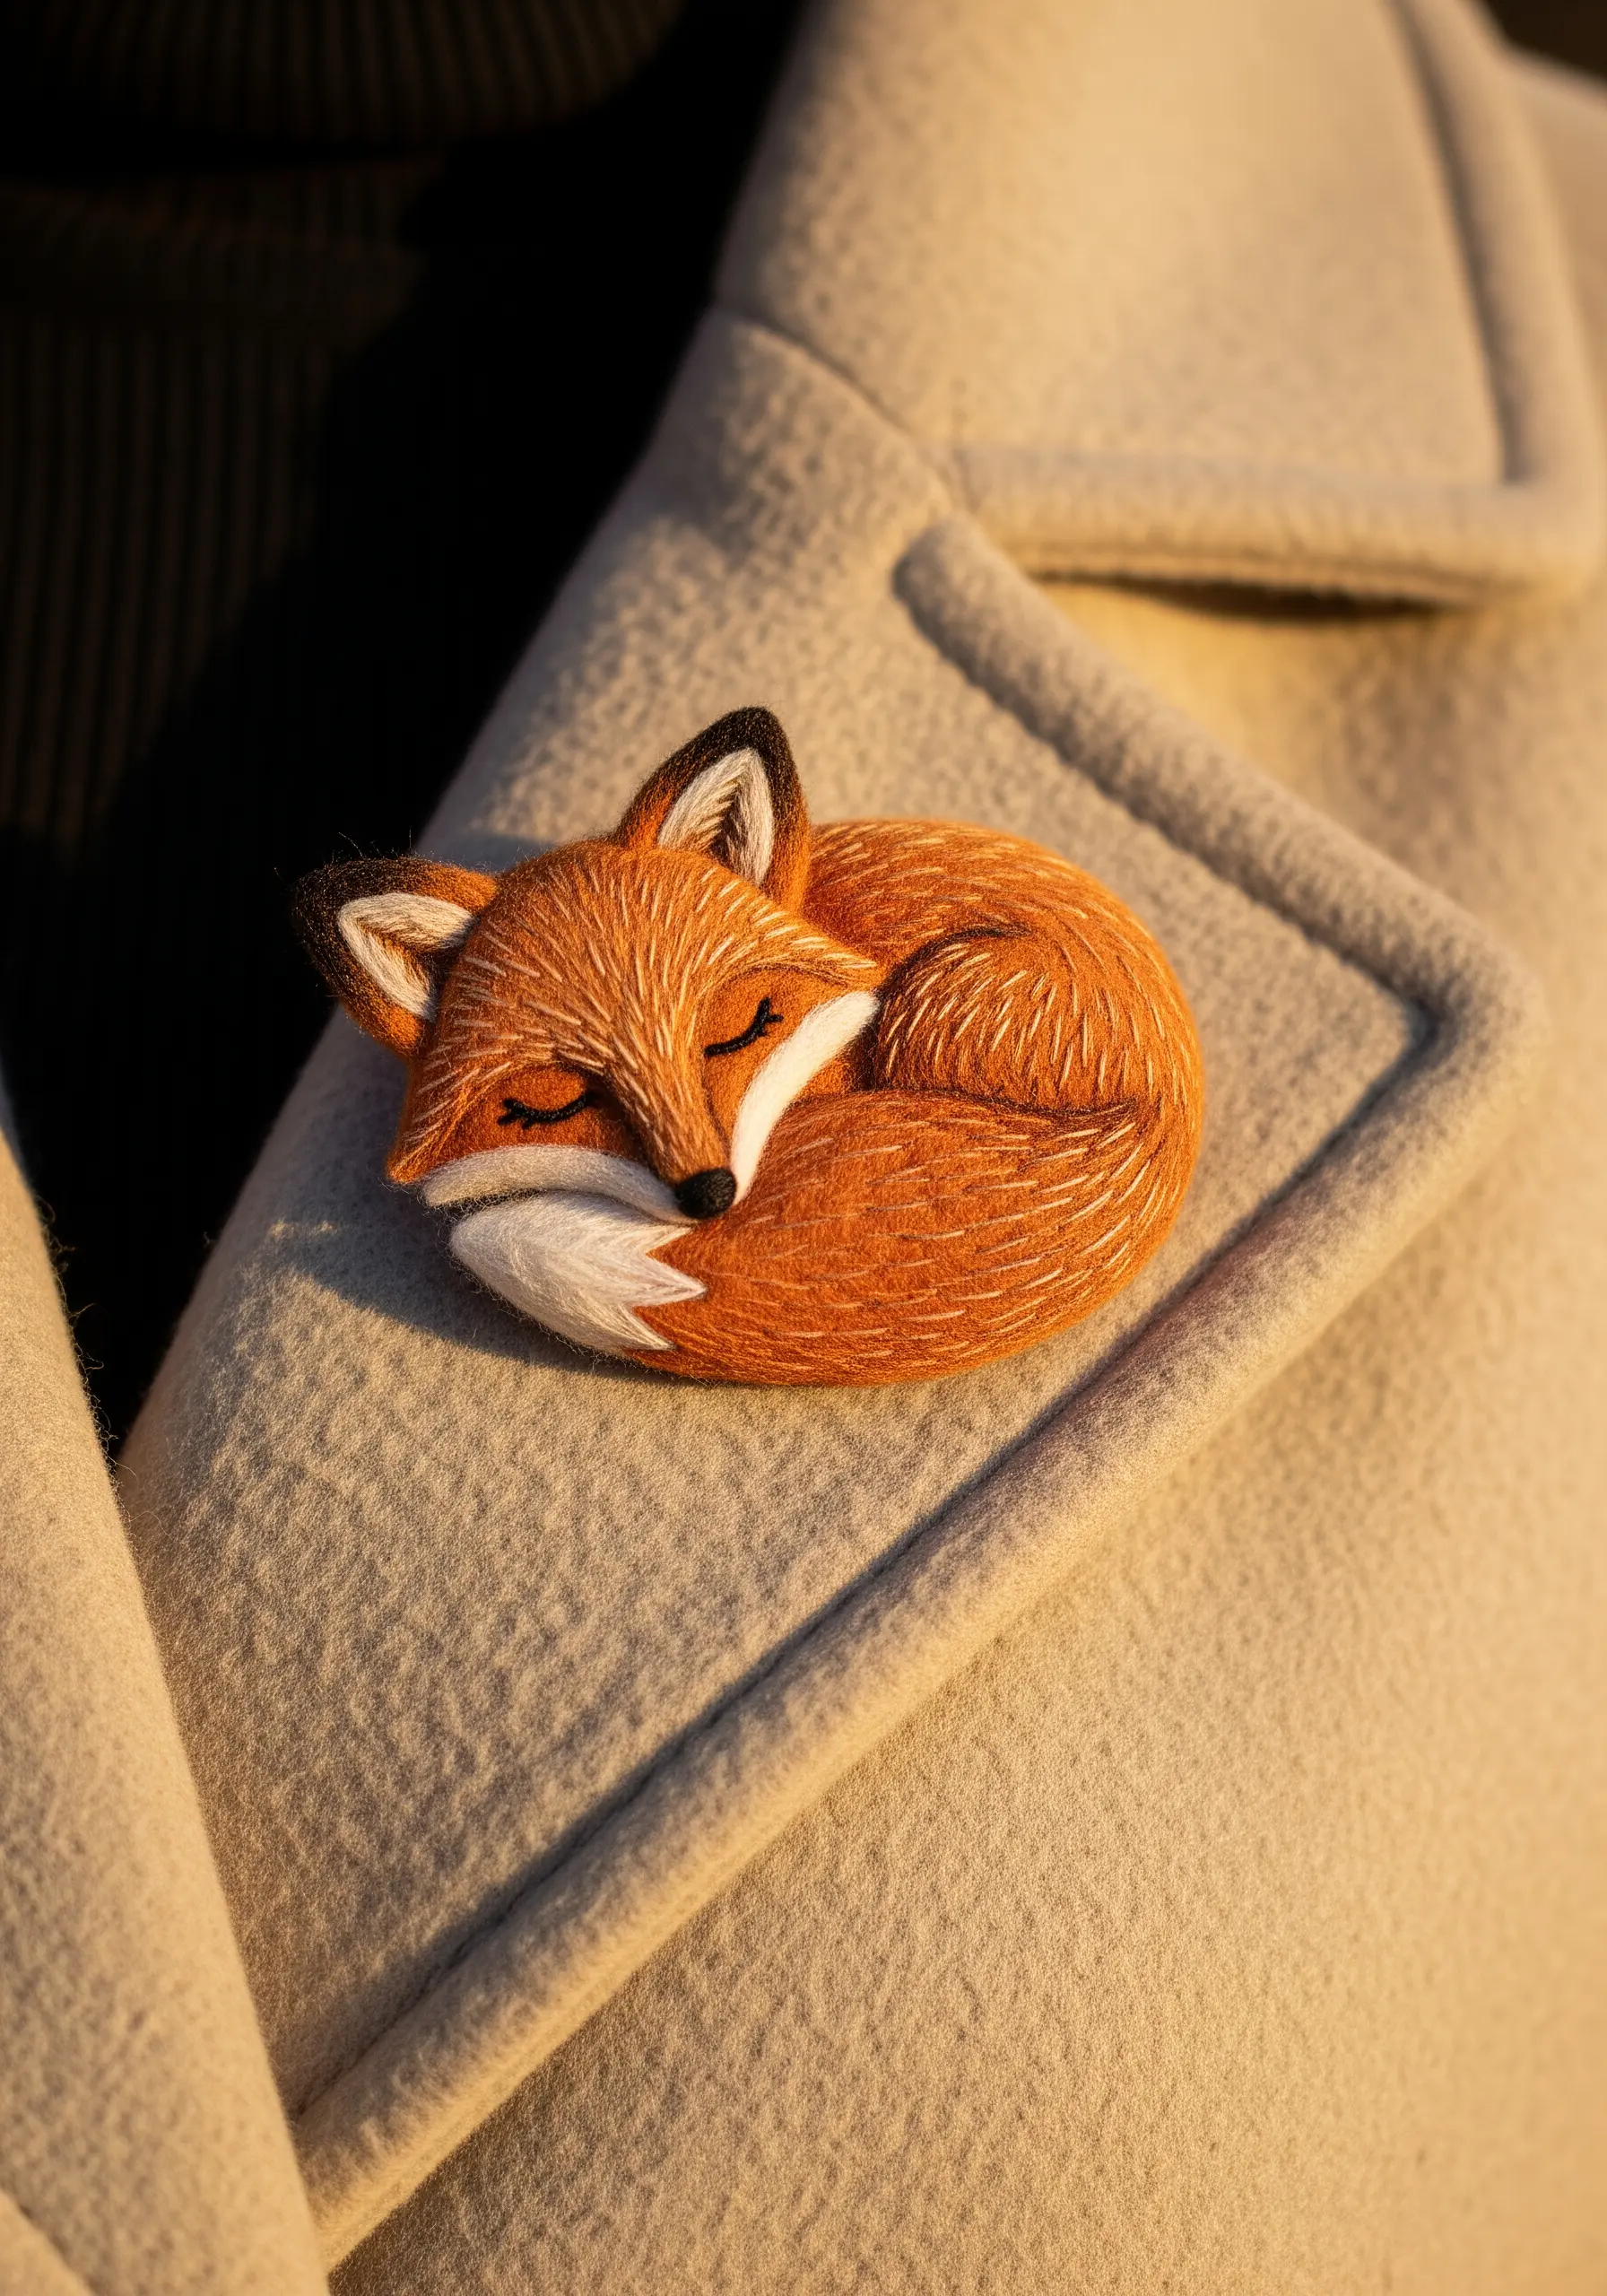
To create a realistic fur texture, work with single strands of embroidery floss and follow the natural direction of hair growth.
Use the long-and-short stitch, blending shades of orange, tan, and cream to build up soft, gradual color shifts.
Keep your stitches small and slightly overlapping to avoid gaps and create a plush, seamless effect.
A few carefully placed dark brown or black stitches for the nose and ear tips will add the final touch of realism.
5. Delicate Forget-Me-Not Hair Clips
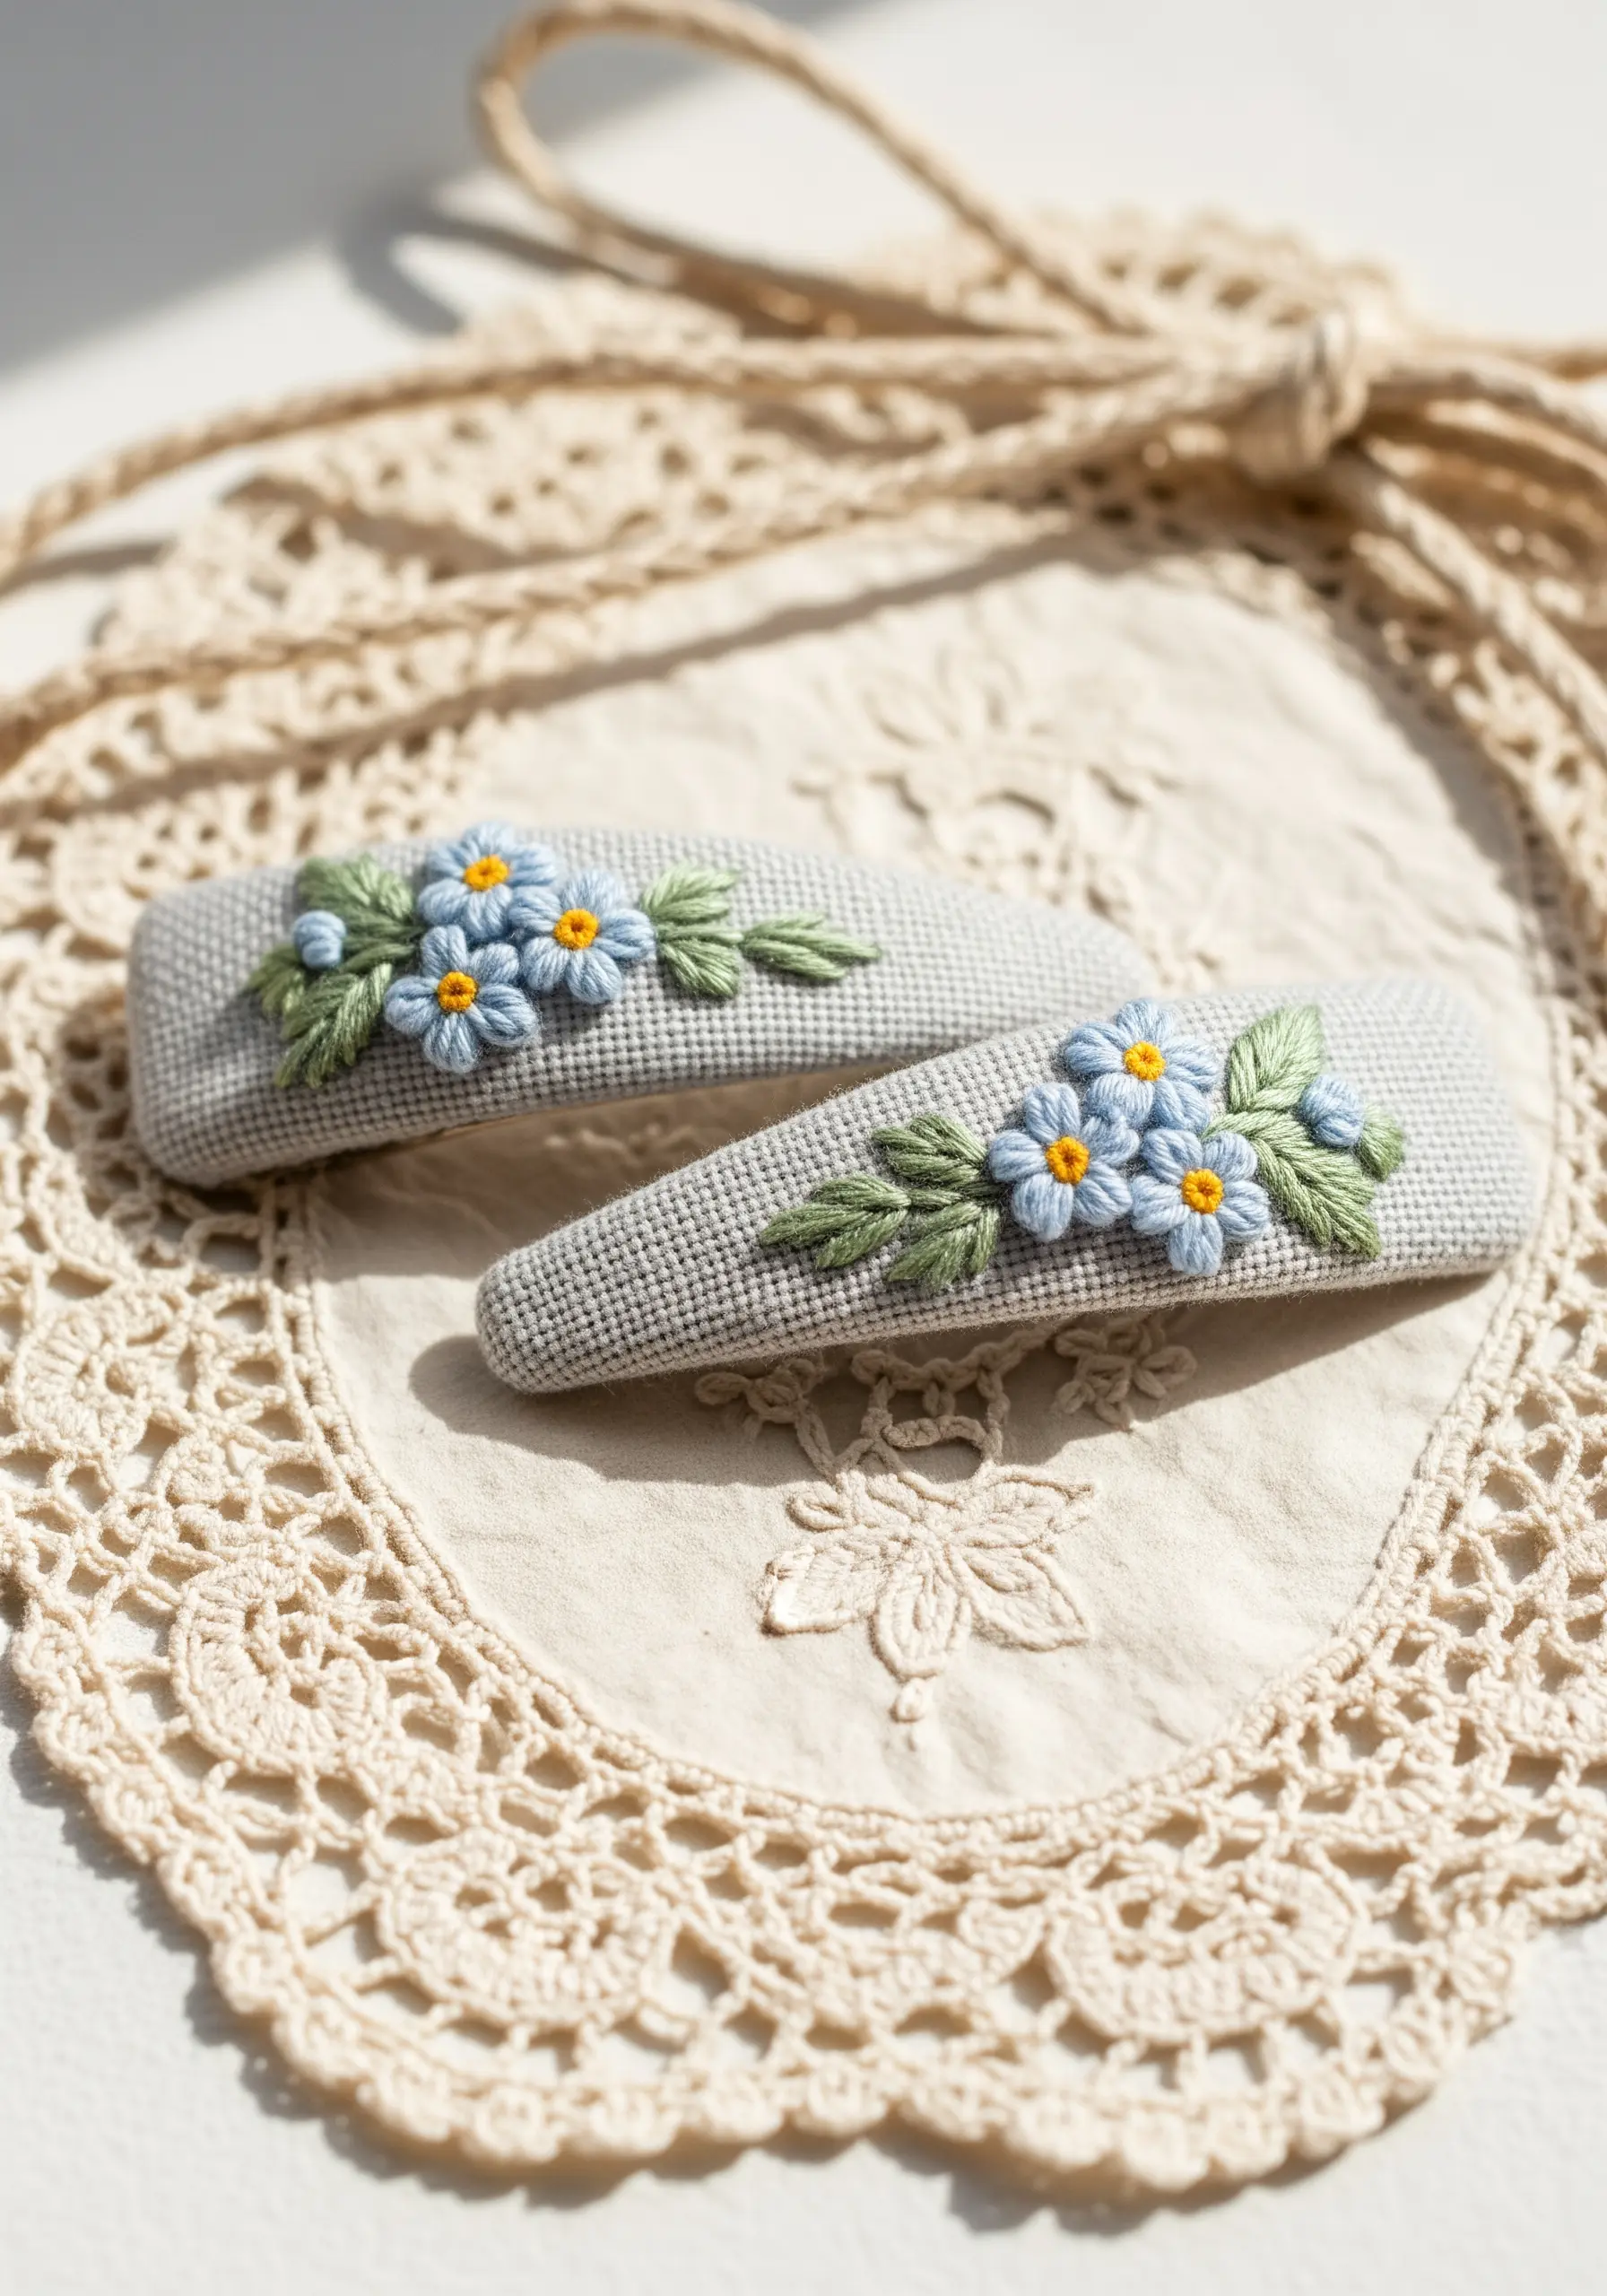
For tiny floral hair accessories, dimension is key. Use padded satin stitch to make your flowers stand out.
First, create a small underlayer of split stitches within your petal shapes. Then, cover this padding with satin stitches using two strands of floss.
This simple step lifts the petals slightly from the fabric, giving them a subtle 3D quality that catches the light beautifully.
A single yellow French knot in the center completes the classic forget-me-not look.
6. Classic Monogram Bookmark
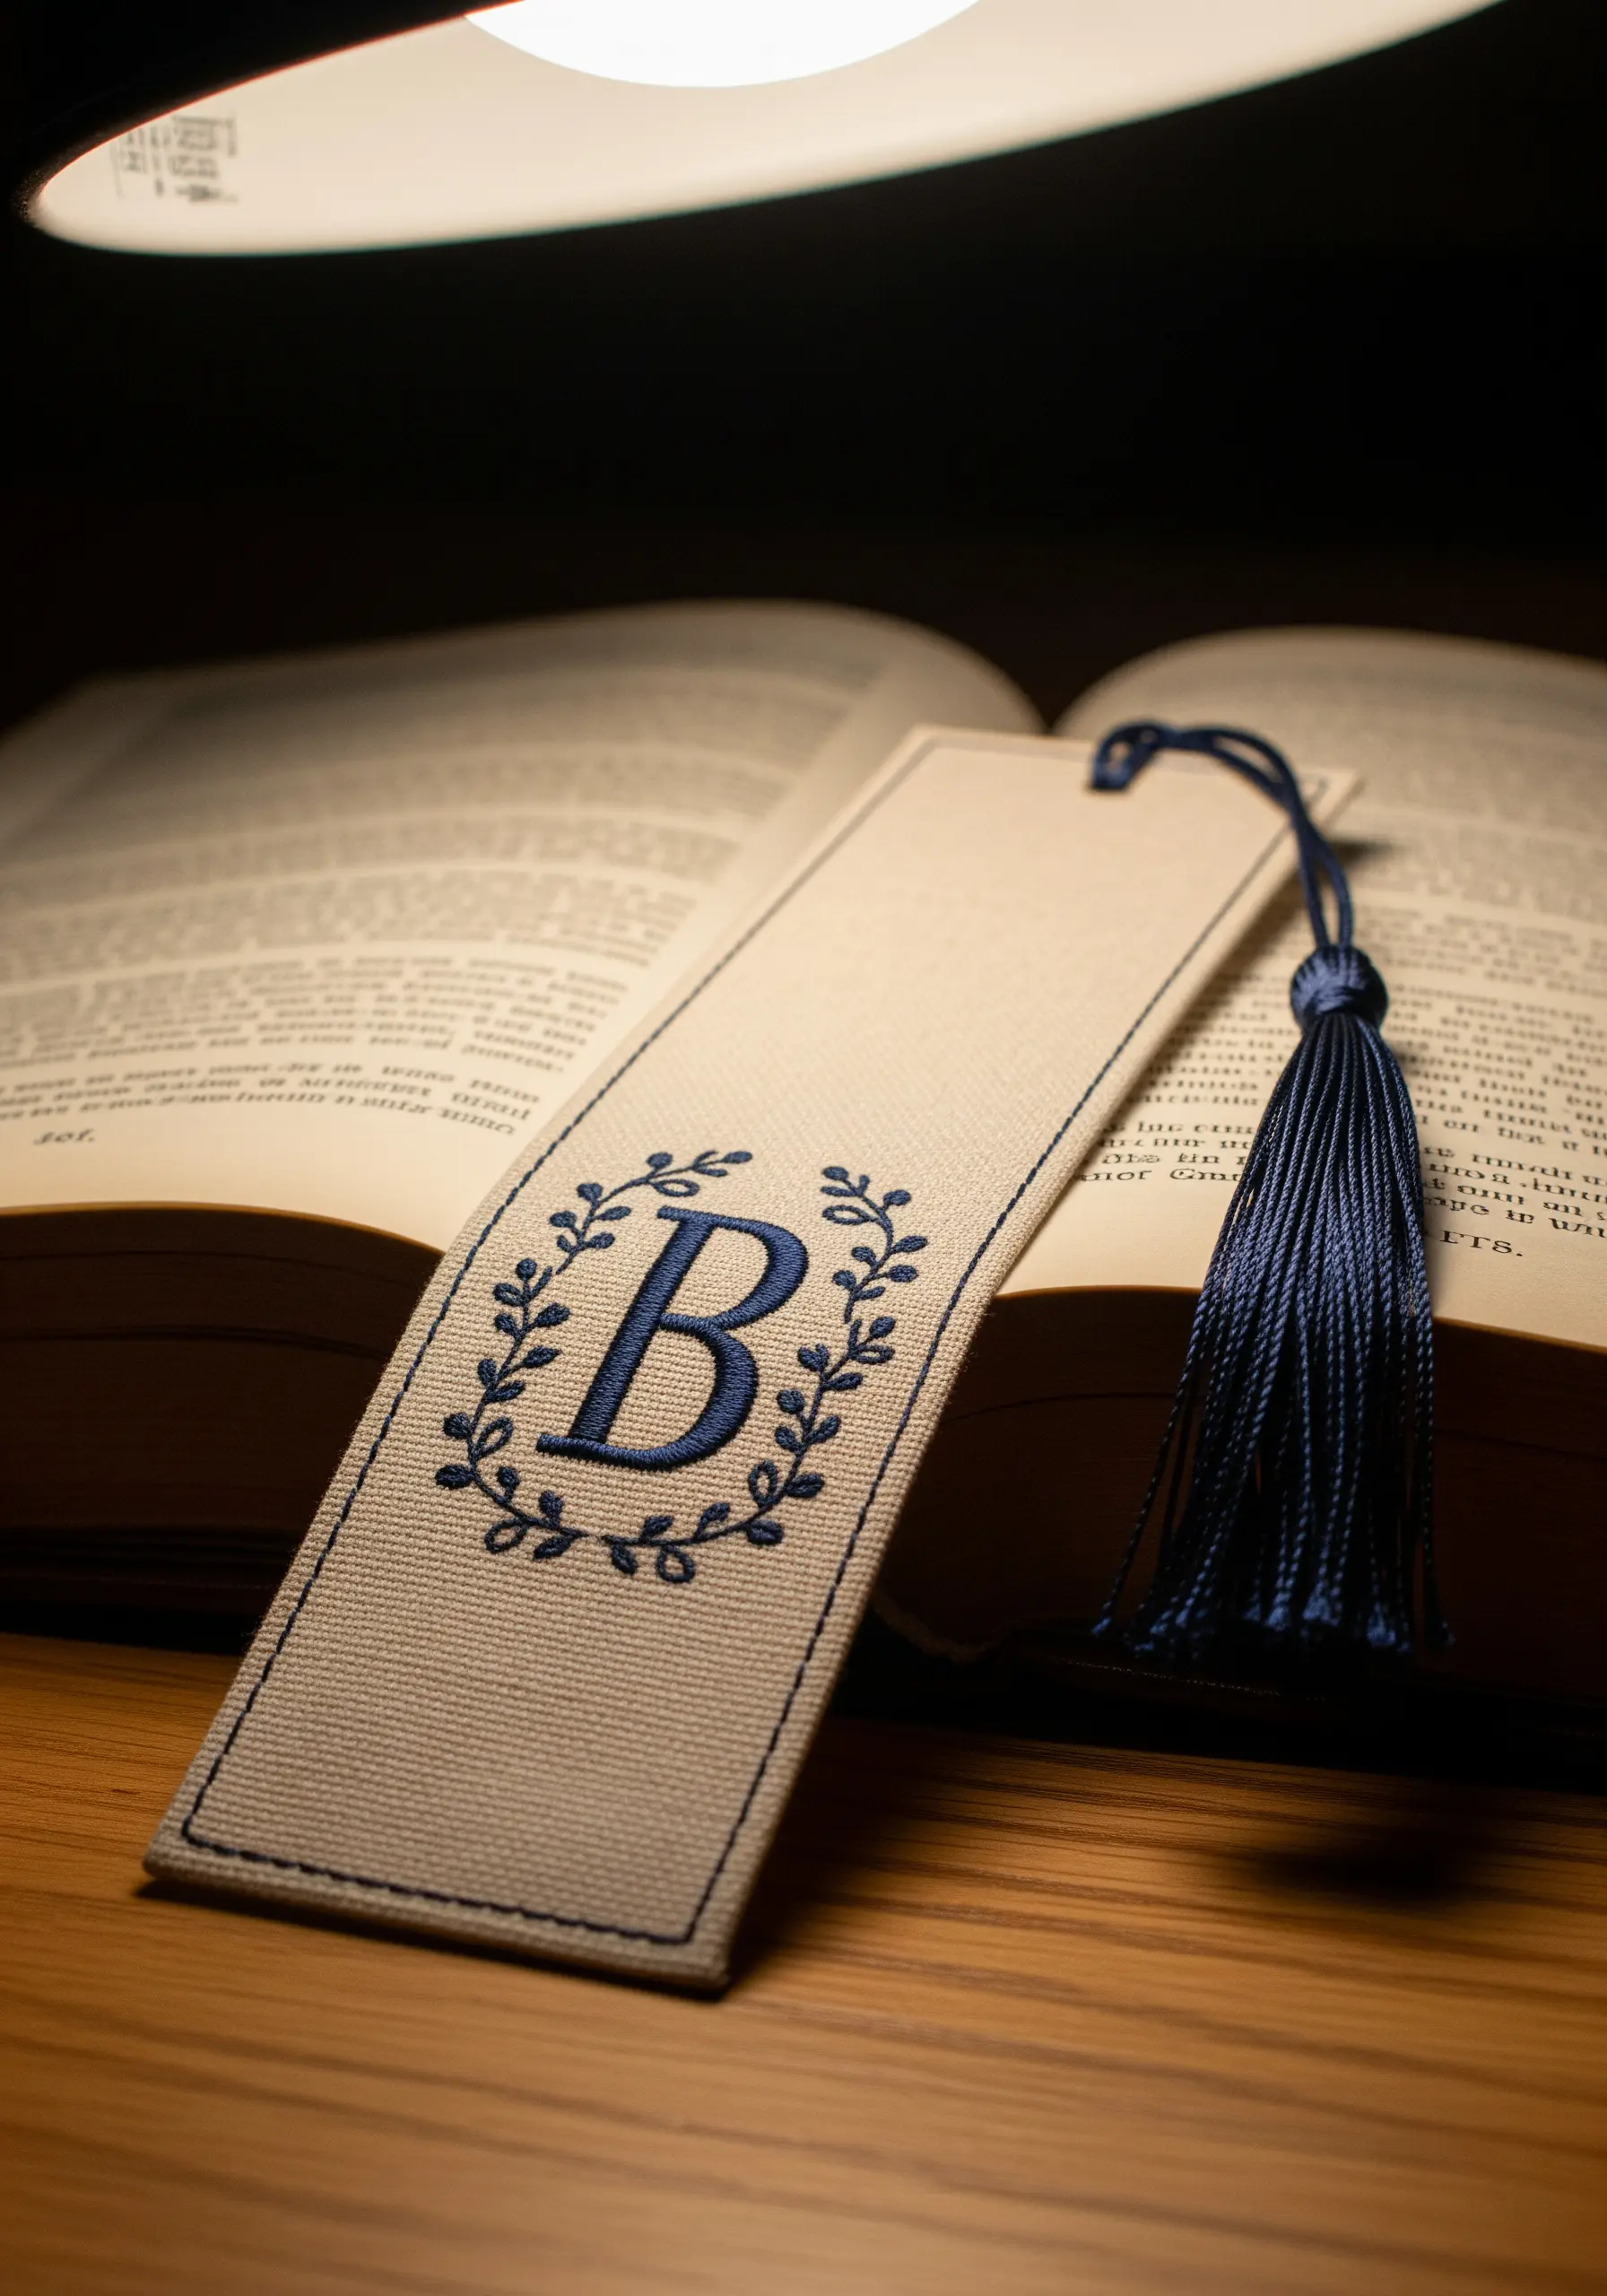
To achieve a crisp, professional-looking monogram, choose your stitch and fabric with care.
A whipped backstitch is an excellent choice for smooth, solid lines, as the wrapping motion covers the individual stitches of the foundation.
Alternatively, a tiny, neat chain stitch offers a beautiful rope-like texture.
Stitching on a tightly woven cotton canvas or linen ensures your lines remain sharp, creating an elegant monogram that feels truly timeless.
7. Monarch Butterfly Keychain
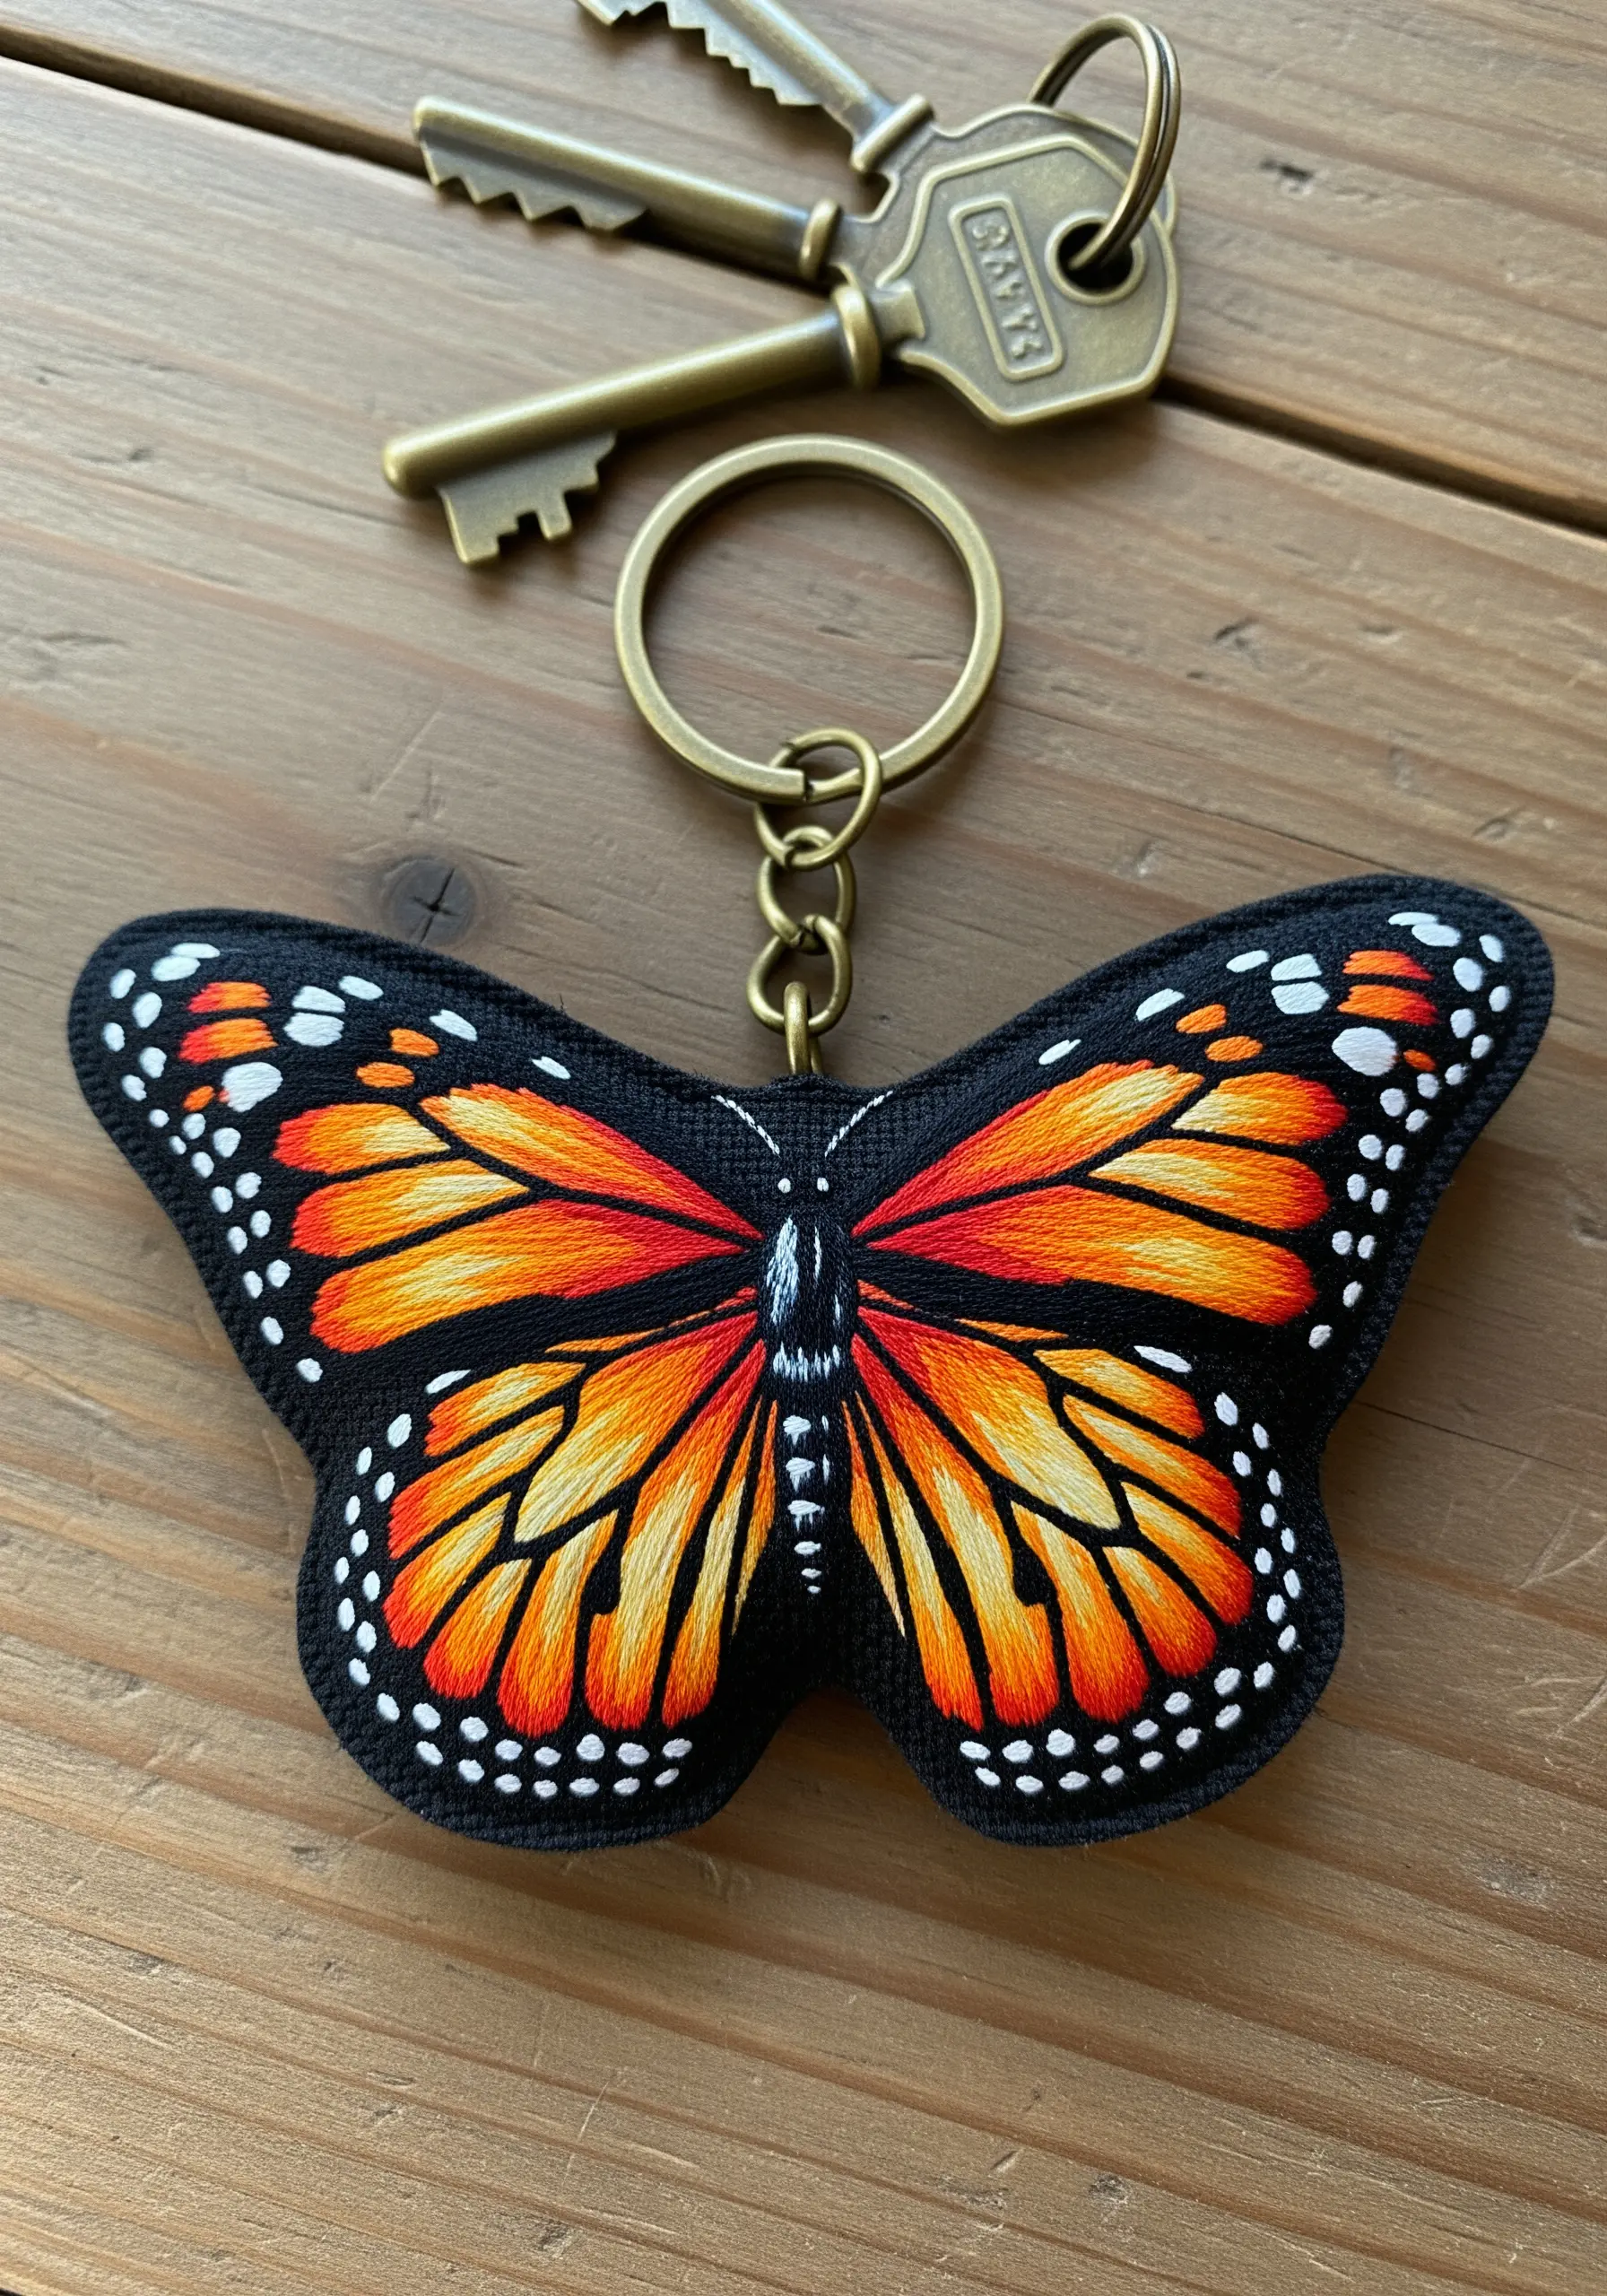
To bring your butterfly to life as a keychain, create it as a double-sided, freestanding piece.
Embroider your design on a piece of sturdy fabric like felt or cotton canvas, leaving a small seam allowance.
Cut out a matching backing piece from the same material. Place them wrong-sides together and finish the edge with a tight, neat blanket stitch, enclosing a small ribbon loop for the keyring at the top.
This method creates a durable, polished accessory that looks beautiful from every angle.
8. Woven Rose Statement Ring
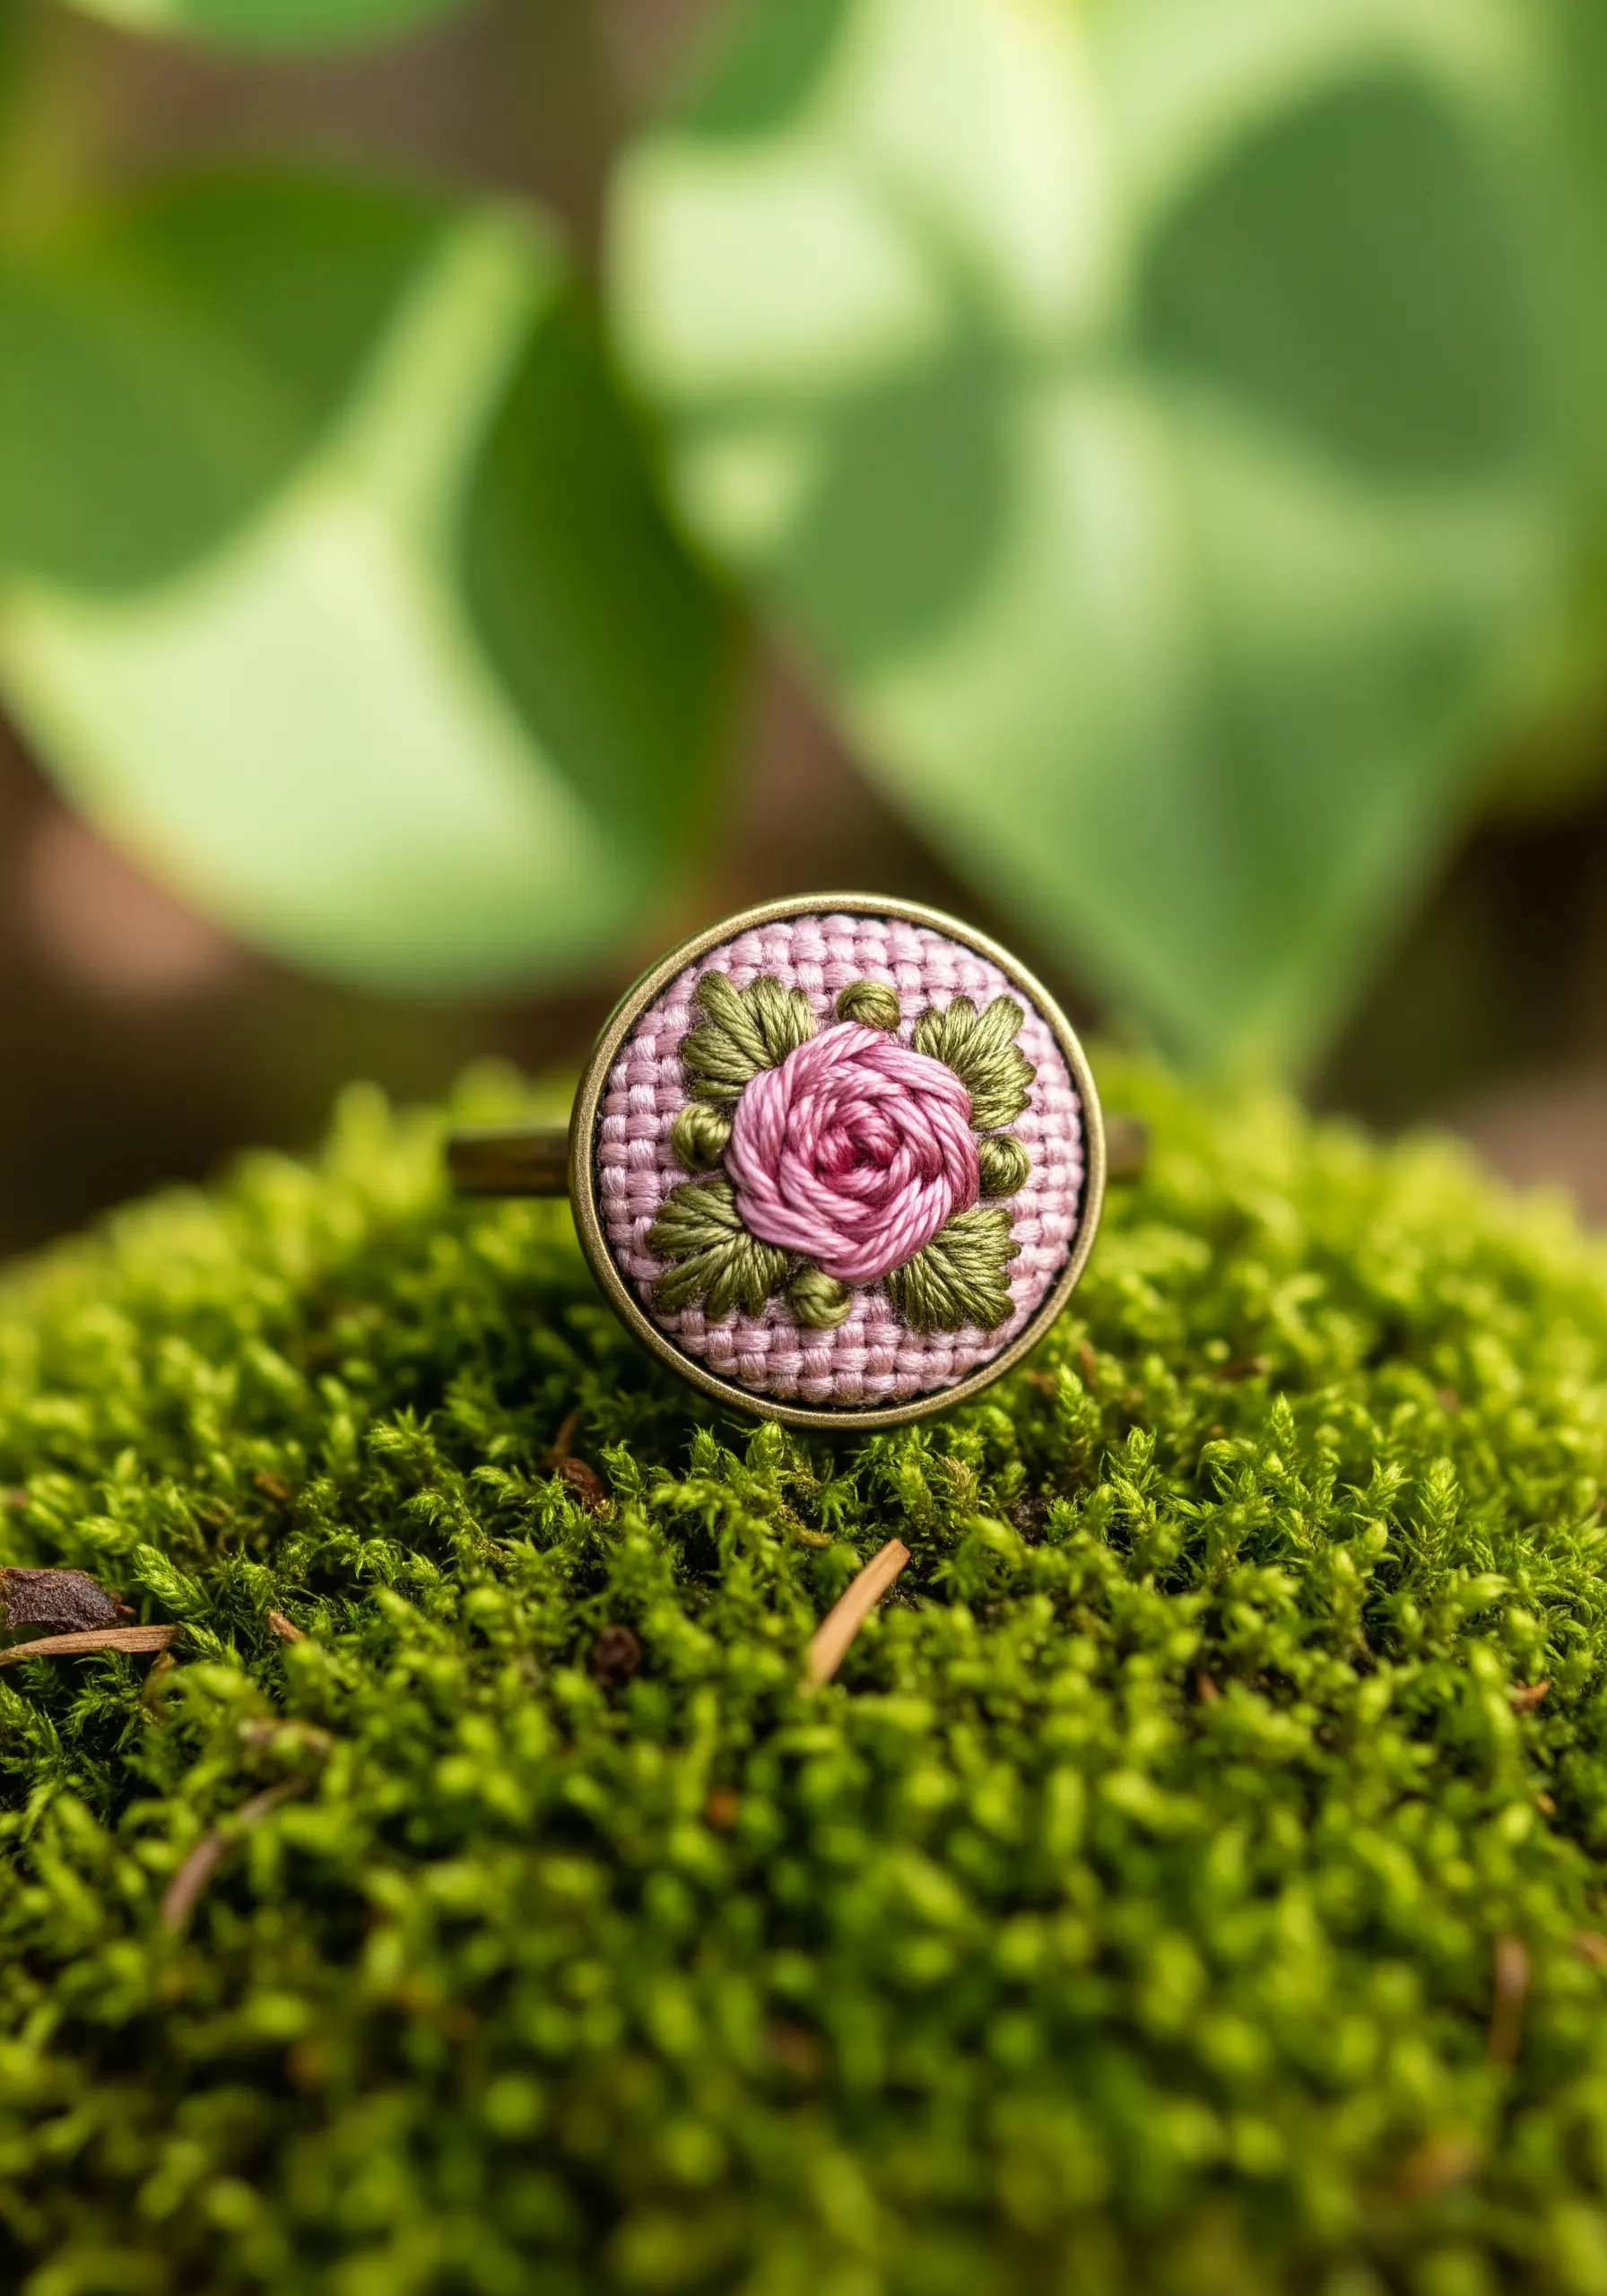
Create a stunning, three-dimensional rose using the woven wheel stitch, also known as the spider web rose.
Start by making a foundation of five straight stitches radiating from a central point, like spokes on a wheel.
Then, using a new thread, weave it over and under these spokes, working from the center outwards until the foundation is completely covered.
This technique builds a beautiful, layered rose that is perfect for statement jewelry.
9. Minimalist Mountain Tie Clip
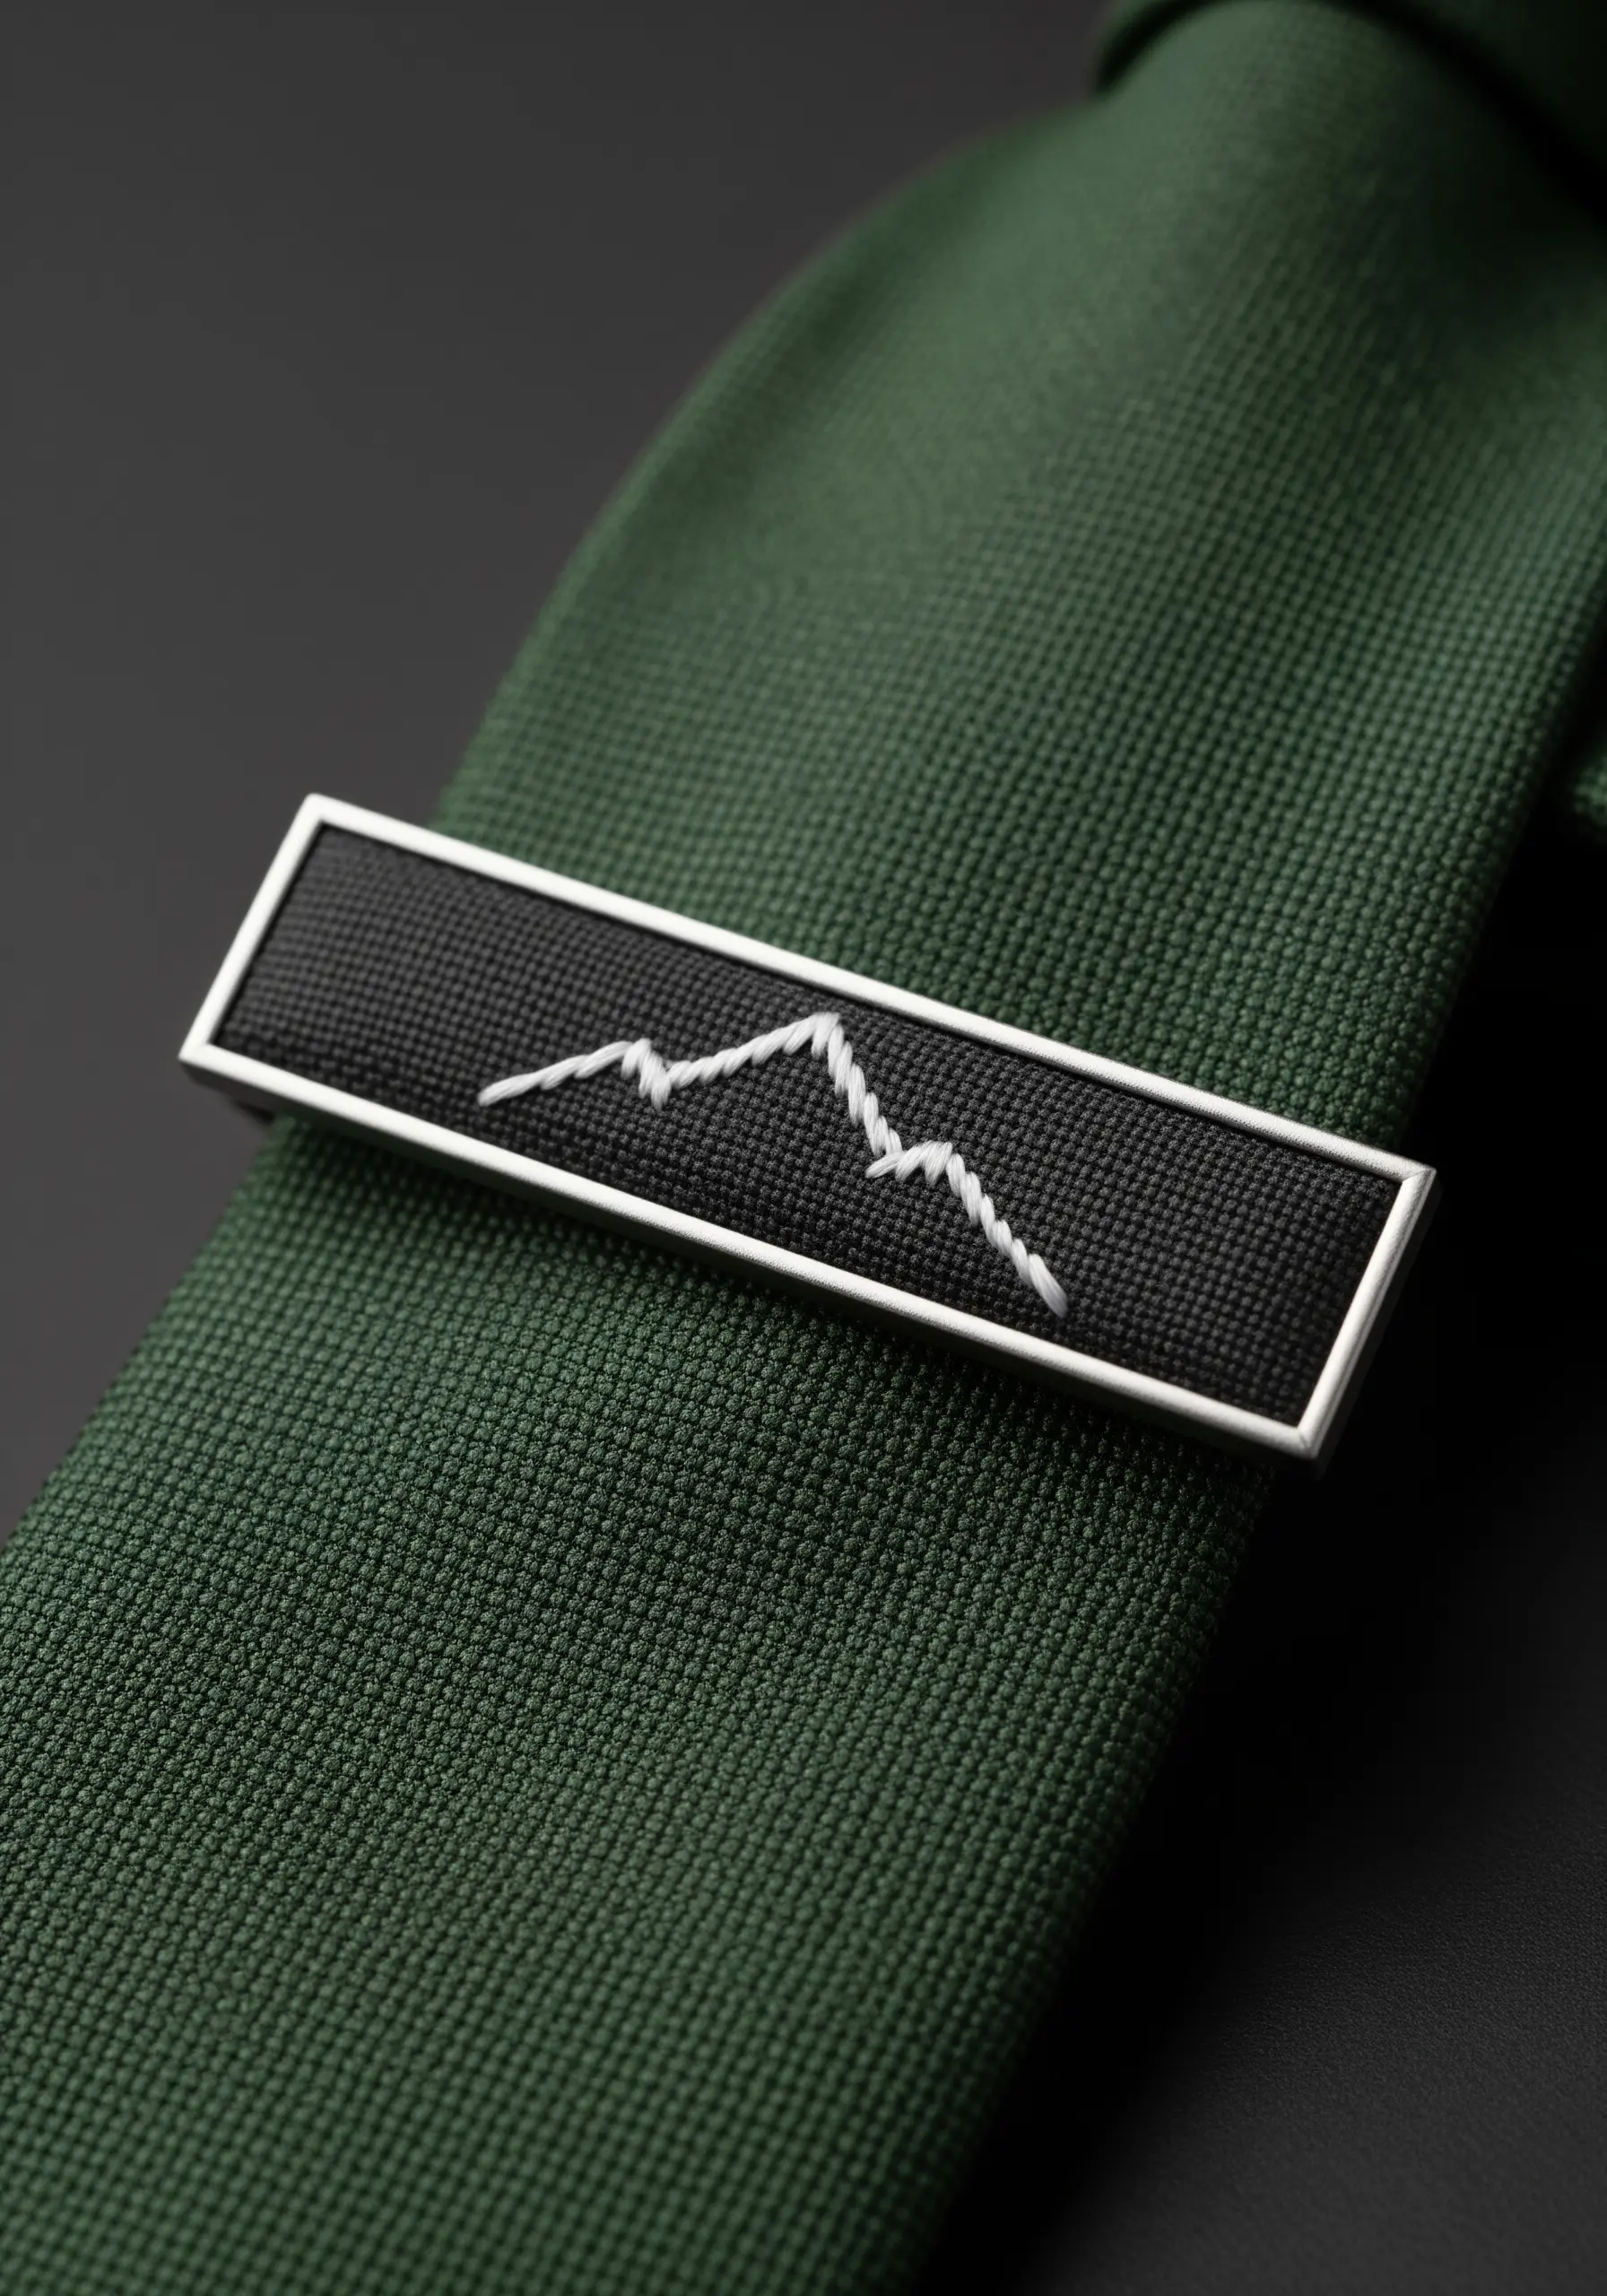
For a sophisticated piece of men’s jewelry, embrace the power of high-contrast minimalist line art.
Use just one or two strands of white floss on a tightly woven black fabric, like cotton twill, to ensure your line is sharp and clean.
A simple, neat backstitch is all you need to render the mountain range. The stark contrast between the white thread and black background creates a modern, graphic statement that is both subtle and striking.
10. Personalized Initial Cufflinks
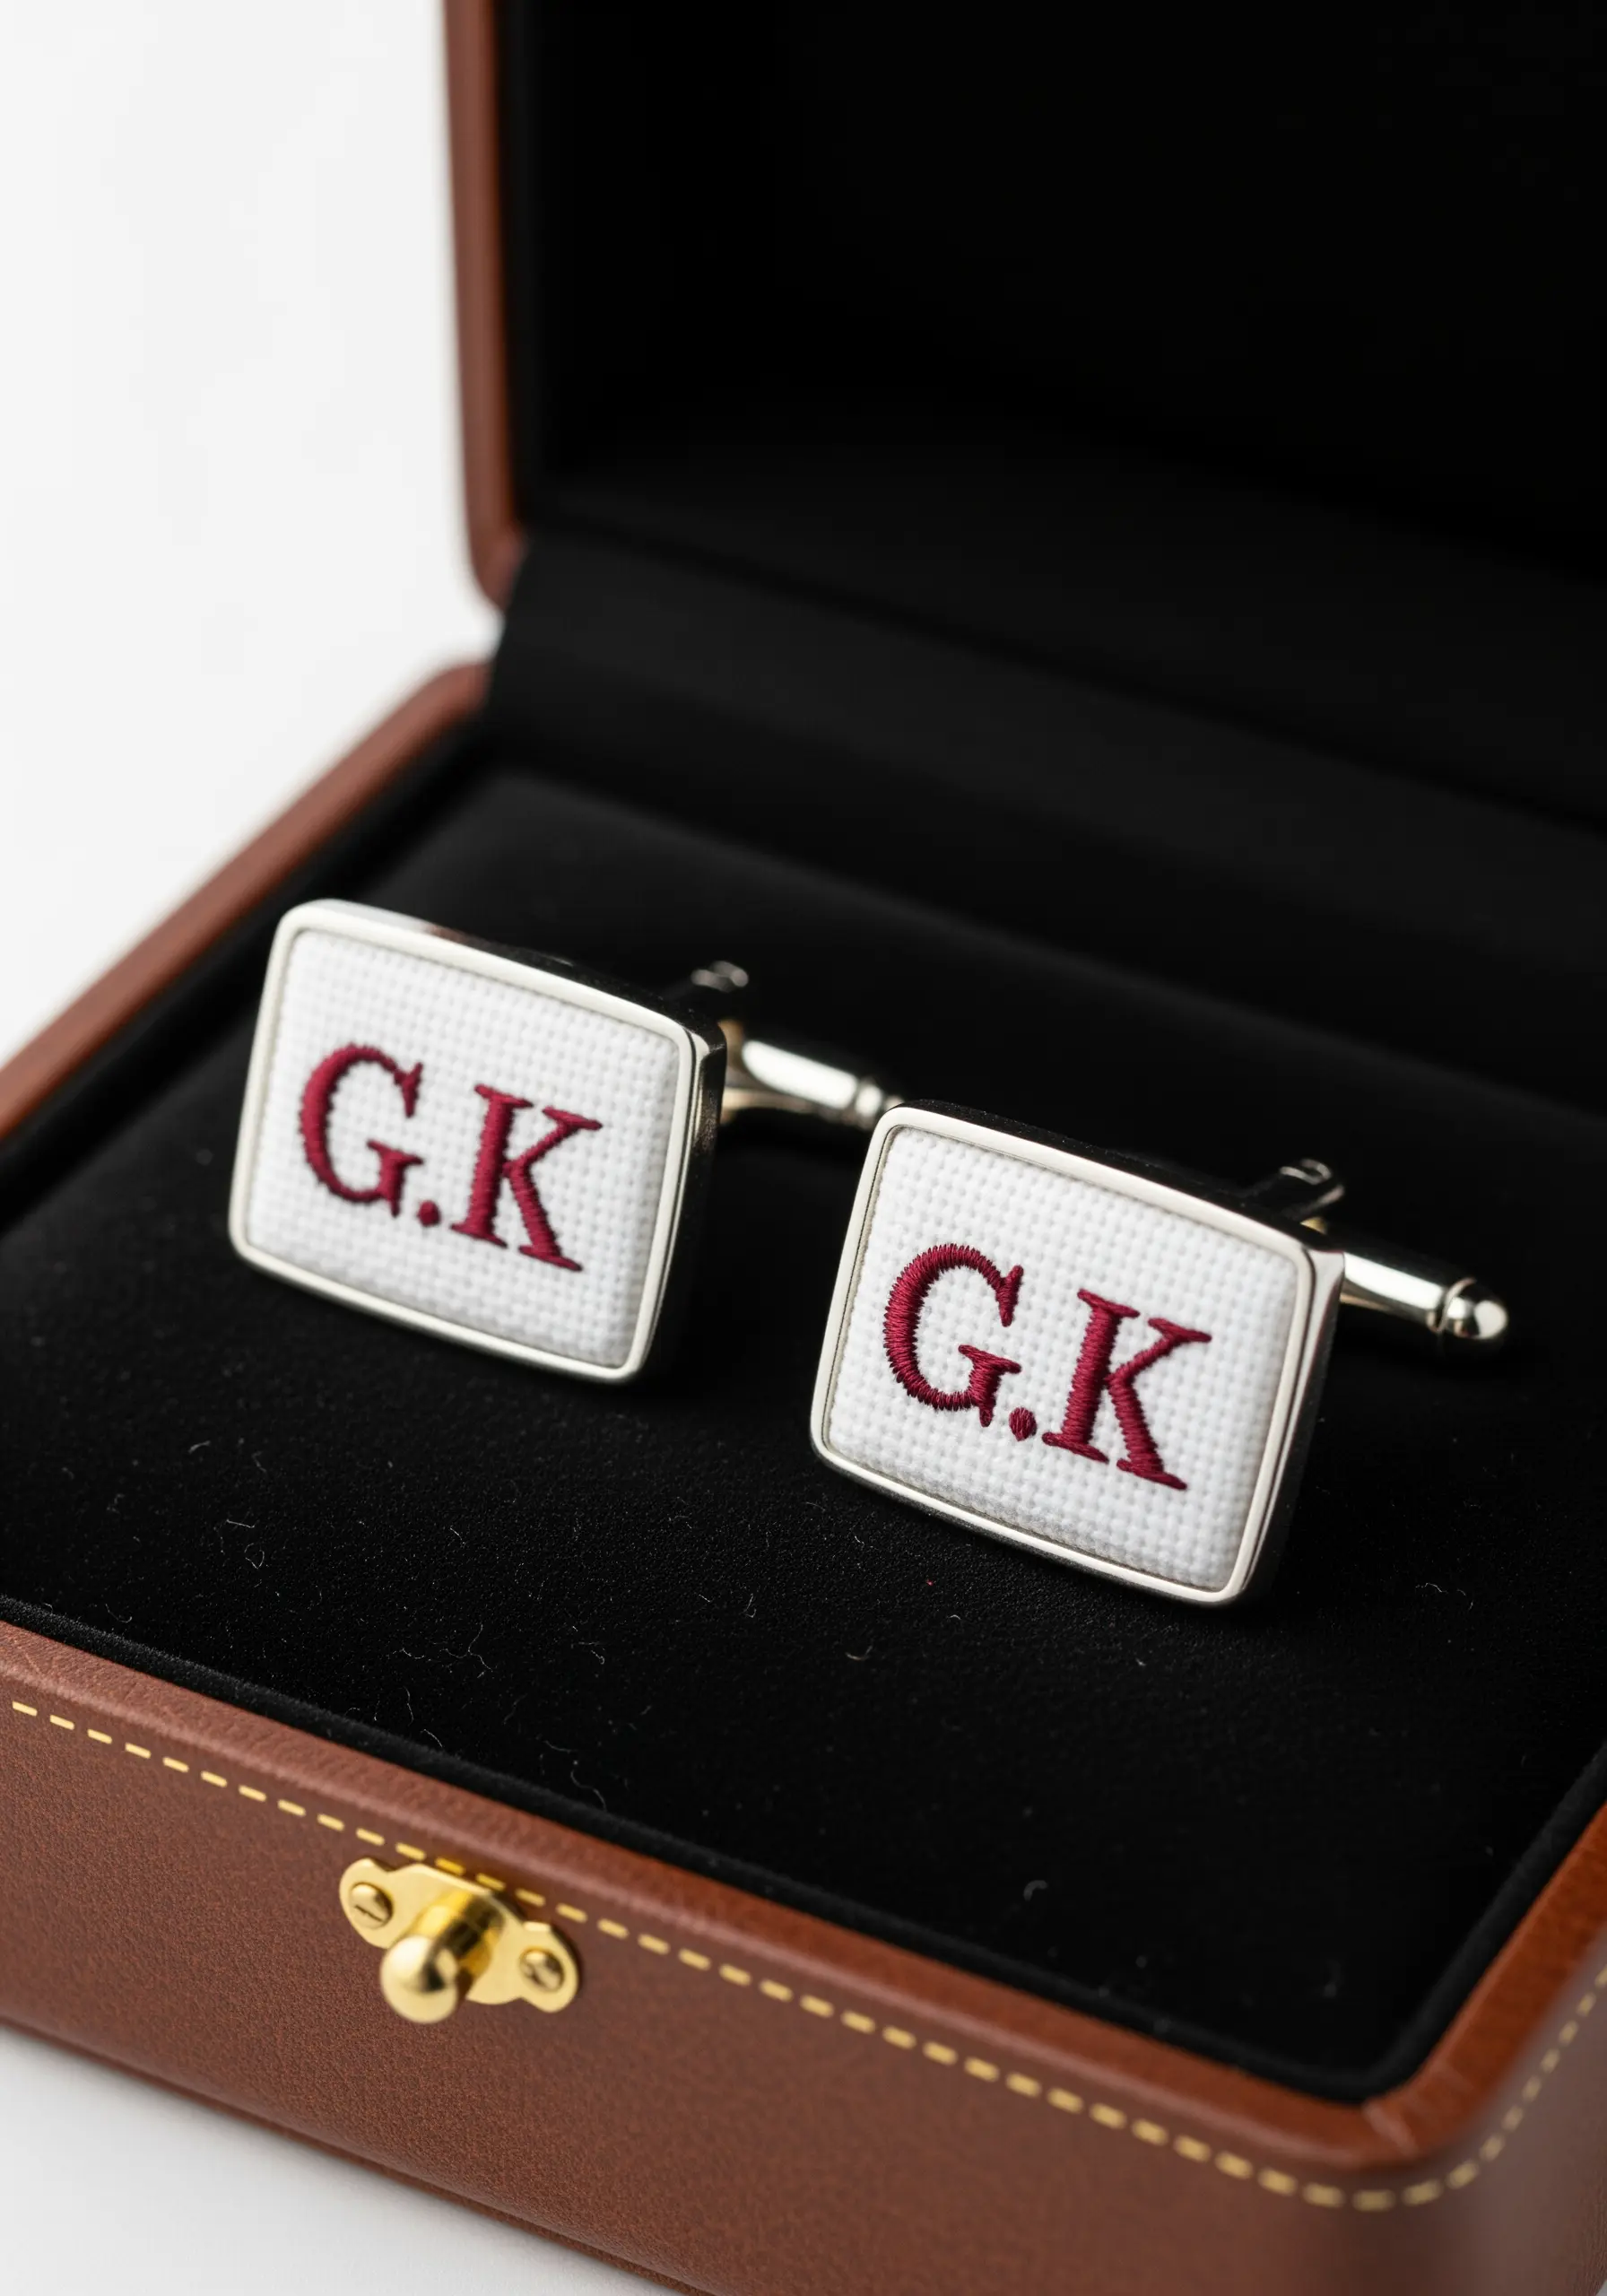
When embroidering initials on a small scale for cufflinks, precision is paramount.
Use a single strand of thread on a piece of 18-count Aida cloth or 32-count evenweave linen.
The fabric’s grid structure guides your needle, allowing you to create perfectly formed cross-stitched or backstitched letters.
This method ensures that both cufflinks are identical and that the final result is sharp, legible, and impeccably elegant.
11. Pansy Locket Keepsake
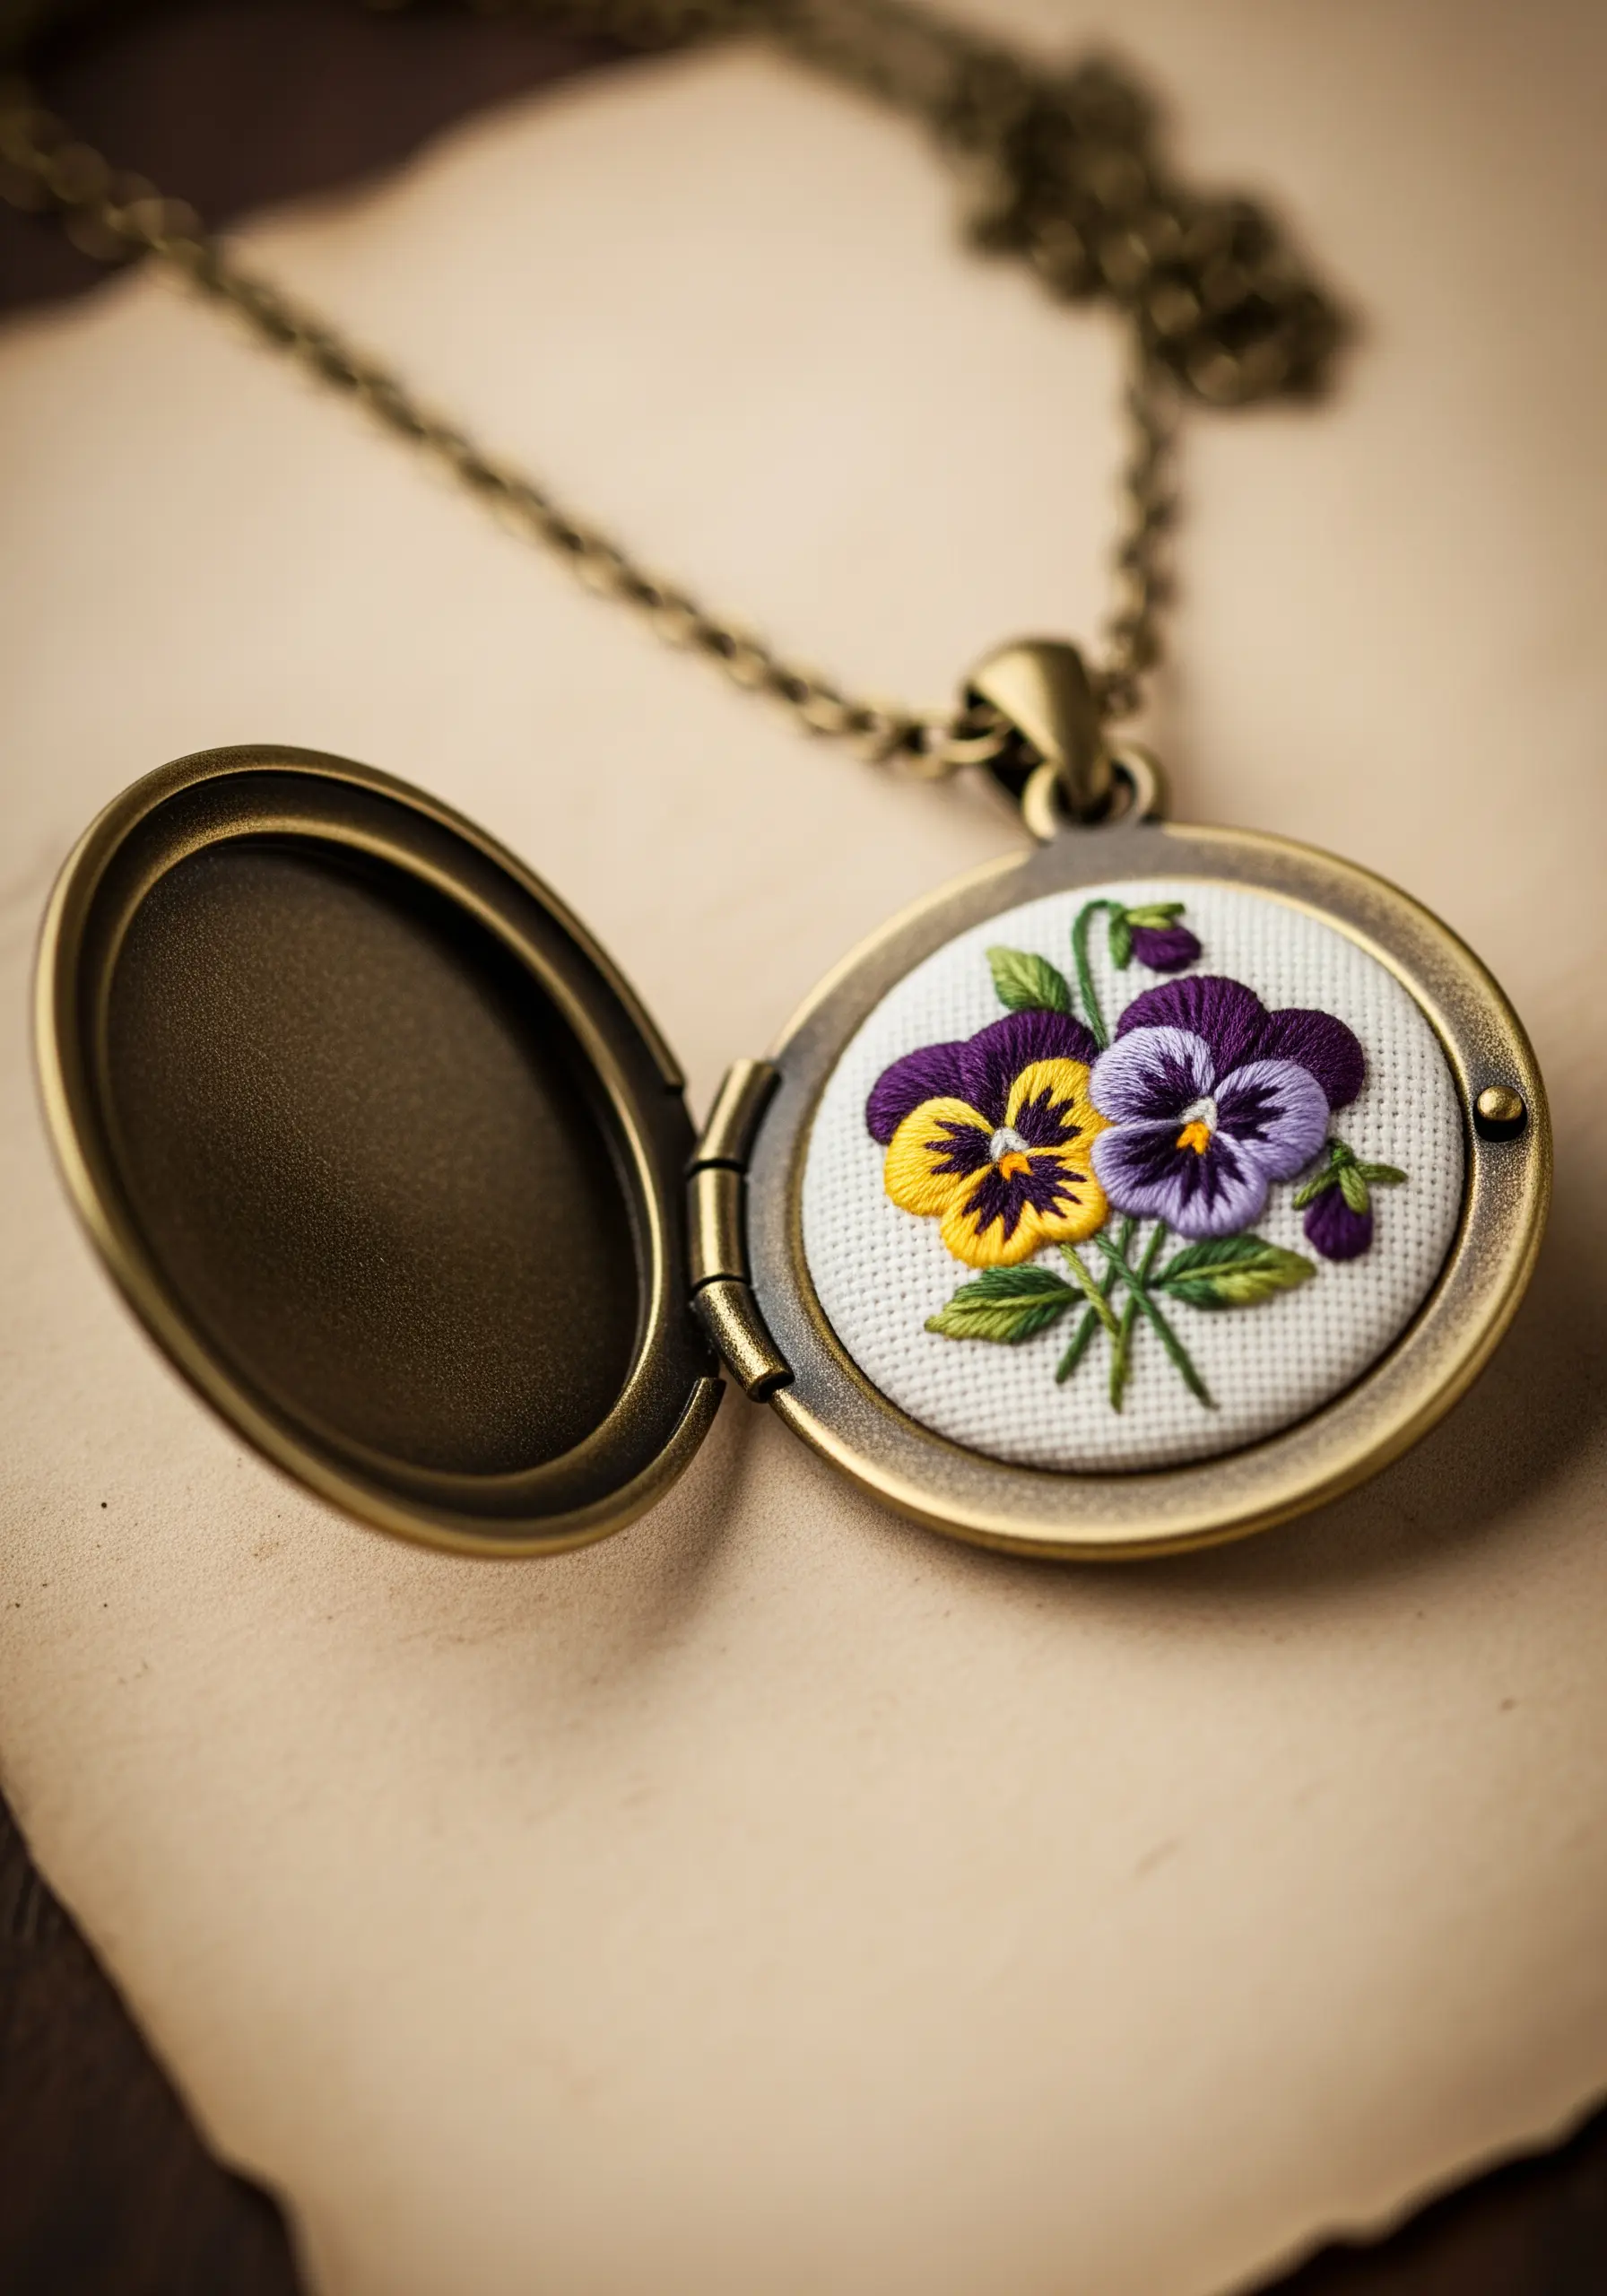
Capture the delicate beauty of a pansy by focusing on realistic color blending within each petal.
Using single strands of floss, work the long-and-short stitch to merge shades of purple, violet, and yellow seamlessly.
Instead of creating hard lines between colors, allow your stitches to overlap and interlock, mimicking the soft gradients found in nature.
This thread painting technique turns a simple locket insert into a treasured piece of miniature art.
12. Celestial Velvet Choker
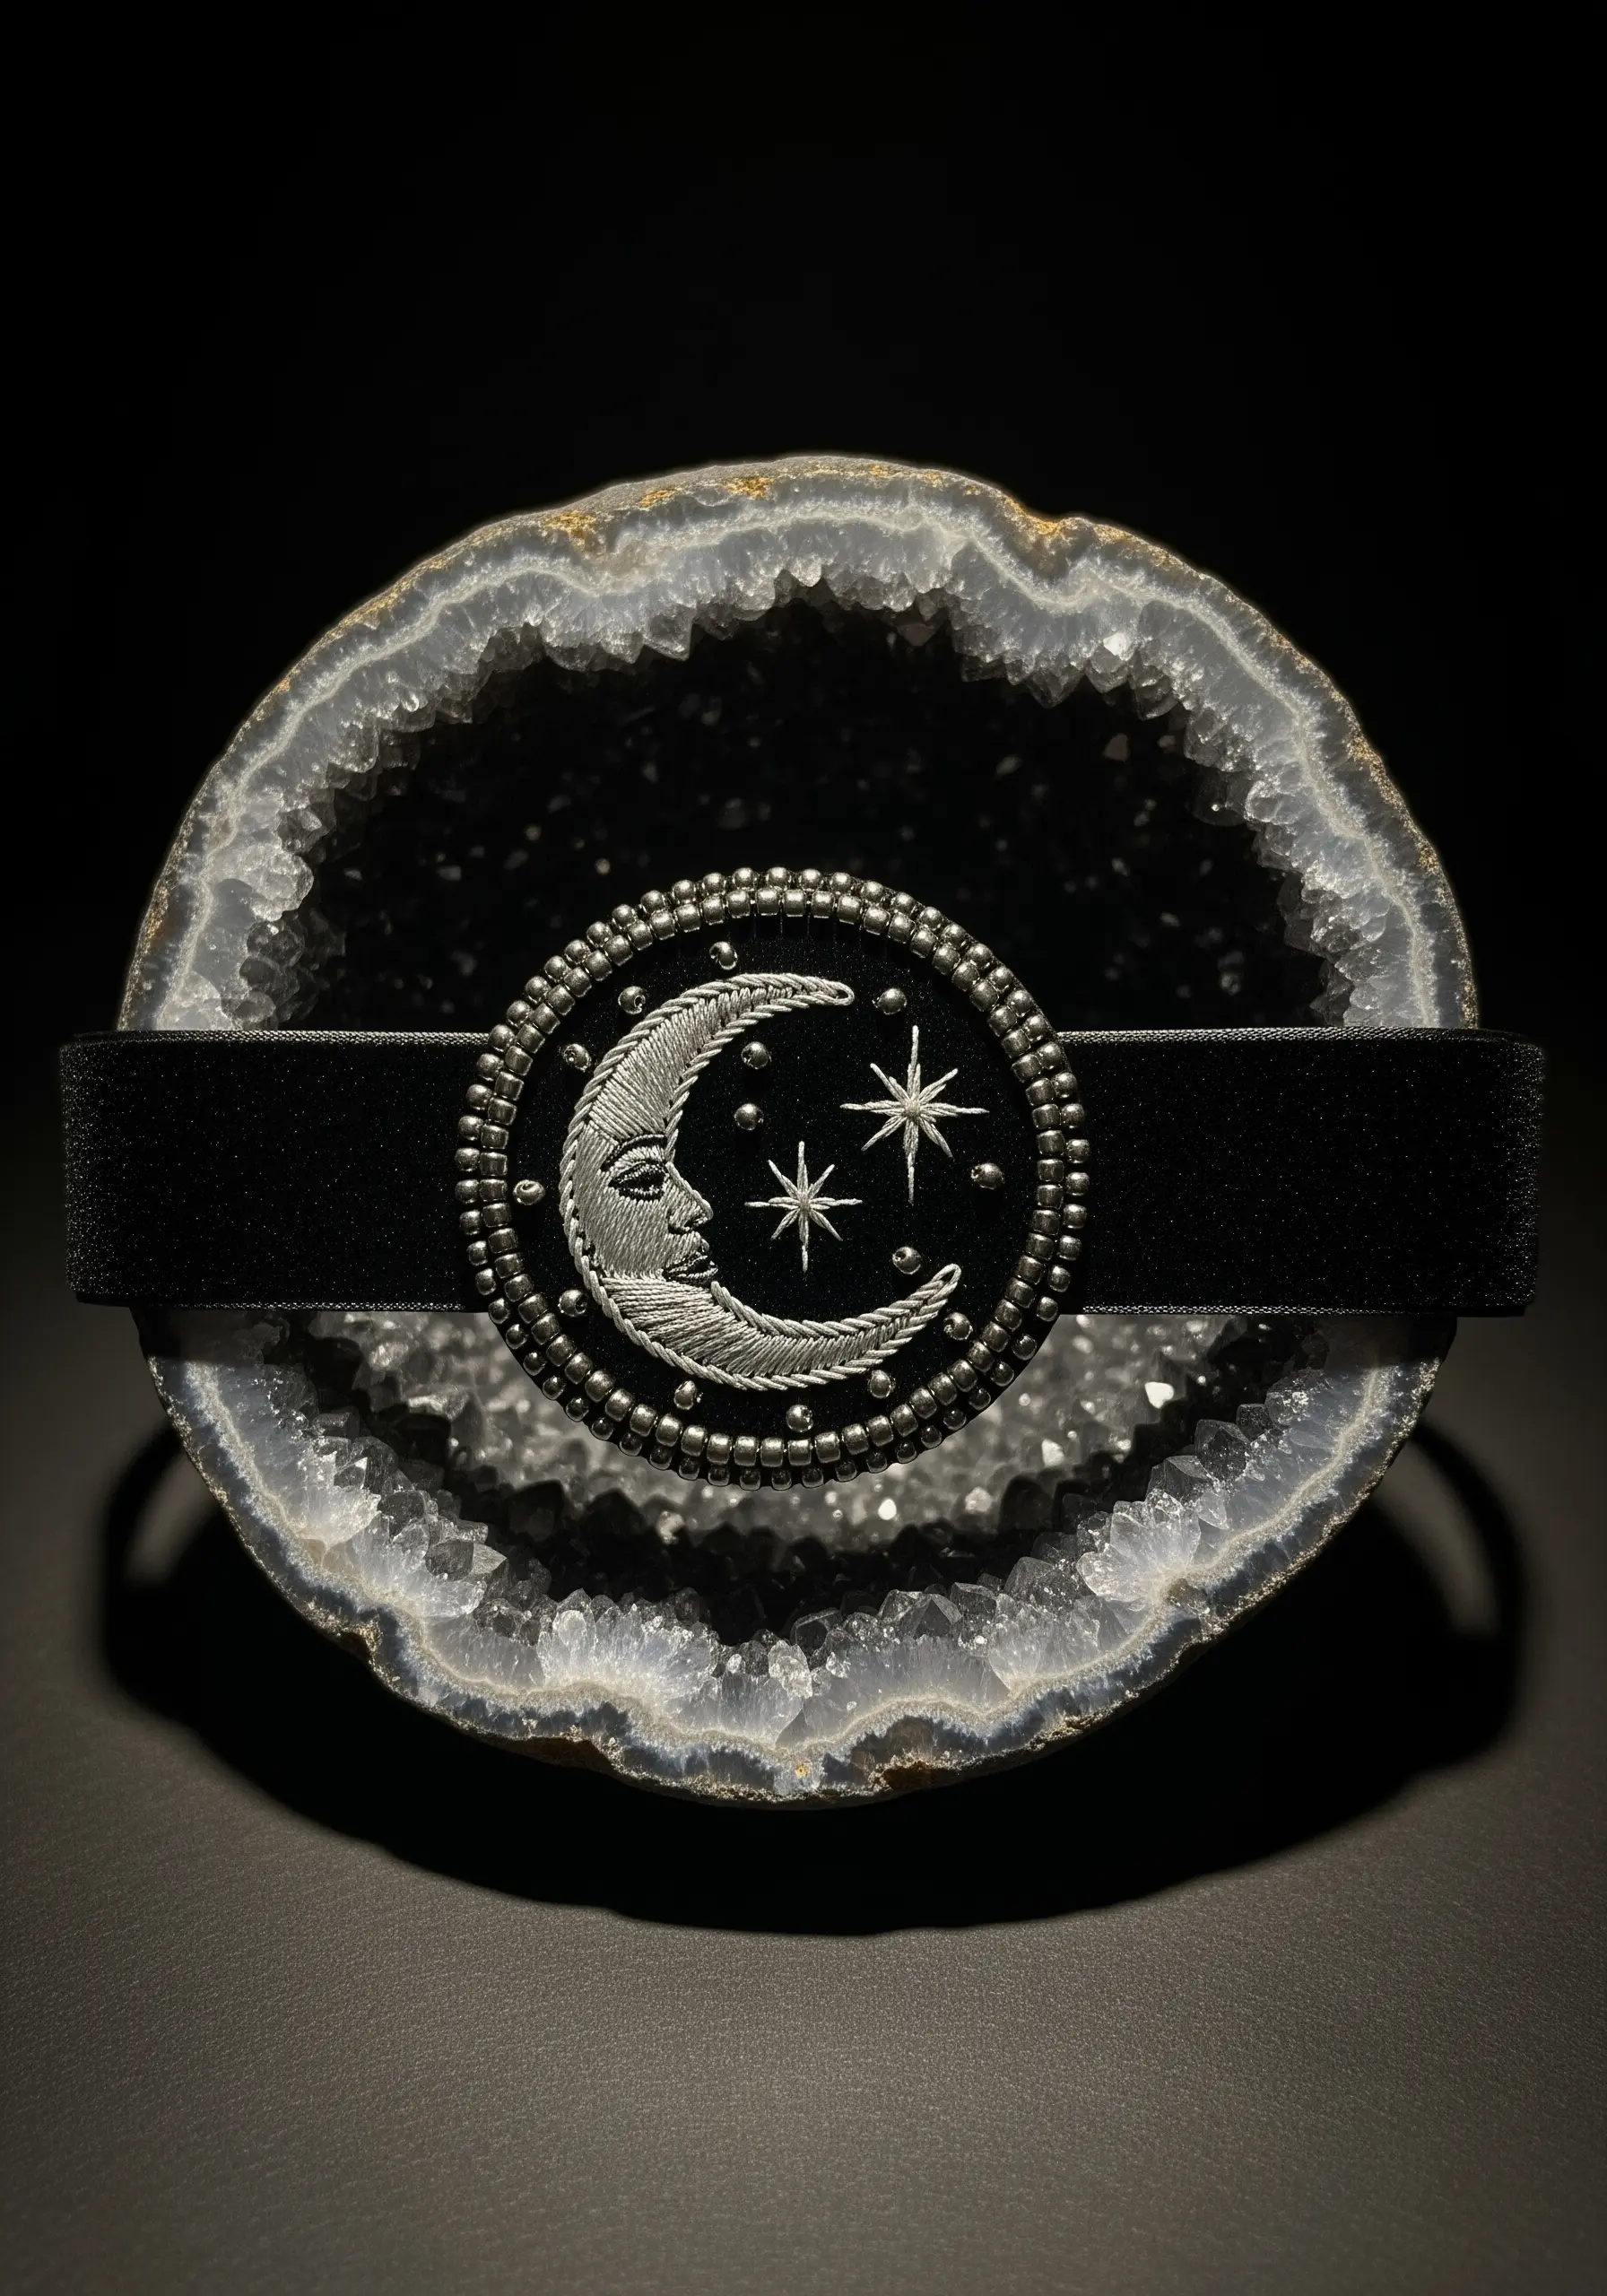
Combine metallic thread and beads to create a celestial motif that feels both classic and magical.
Stitch the crescent moon with a silver metallic thread using a tight satin stitch, which creates a smooth, light-catching surface.
Frame the medallion by couching a row of metallic seed beads around the edge. This adds a refined border and a different kind of sparkle, creating a rich textural contrast against the soft velvet ribbon.
13. Wrapped Thread Hoop Earrings
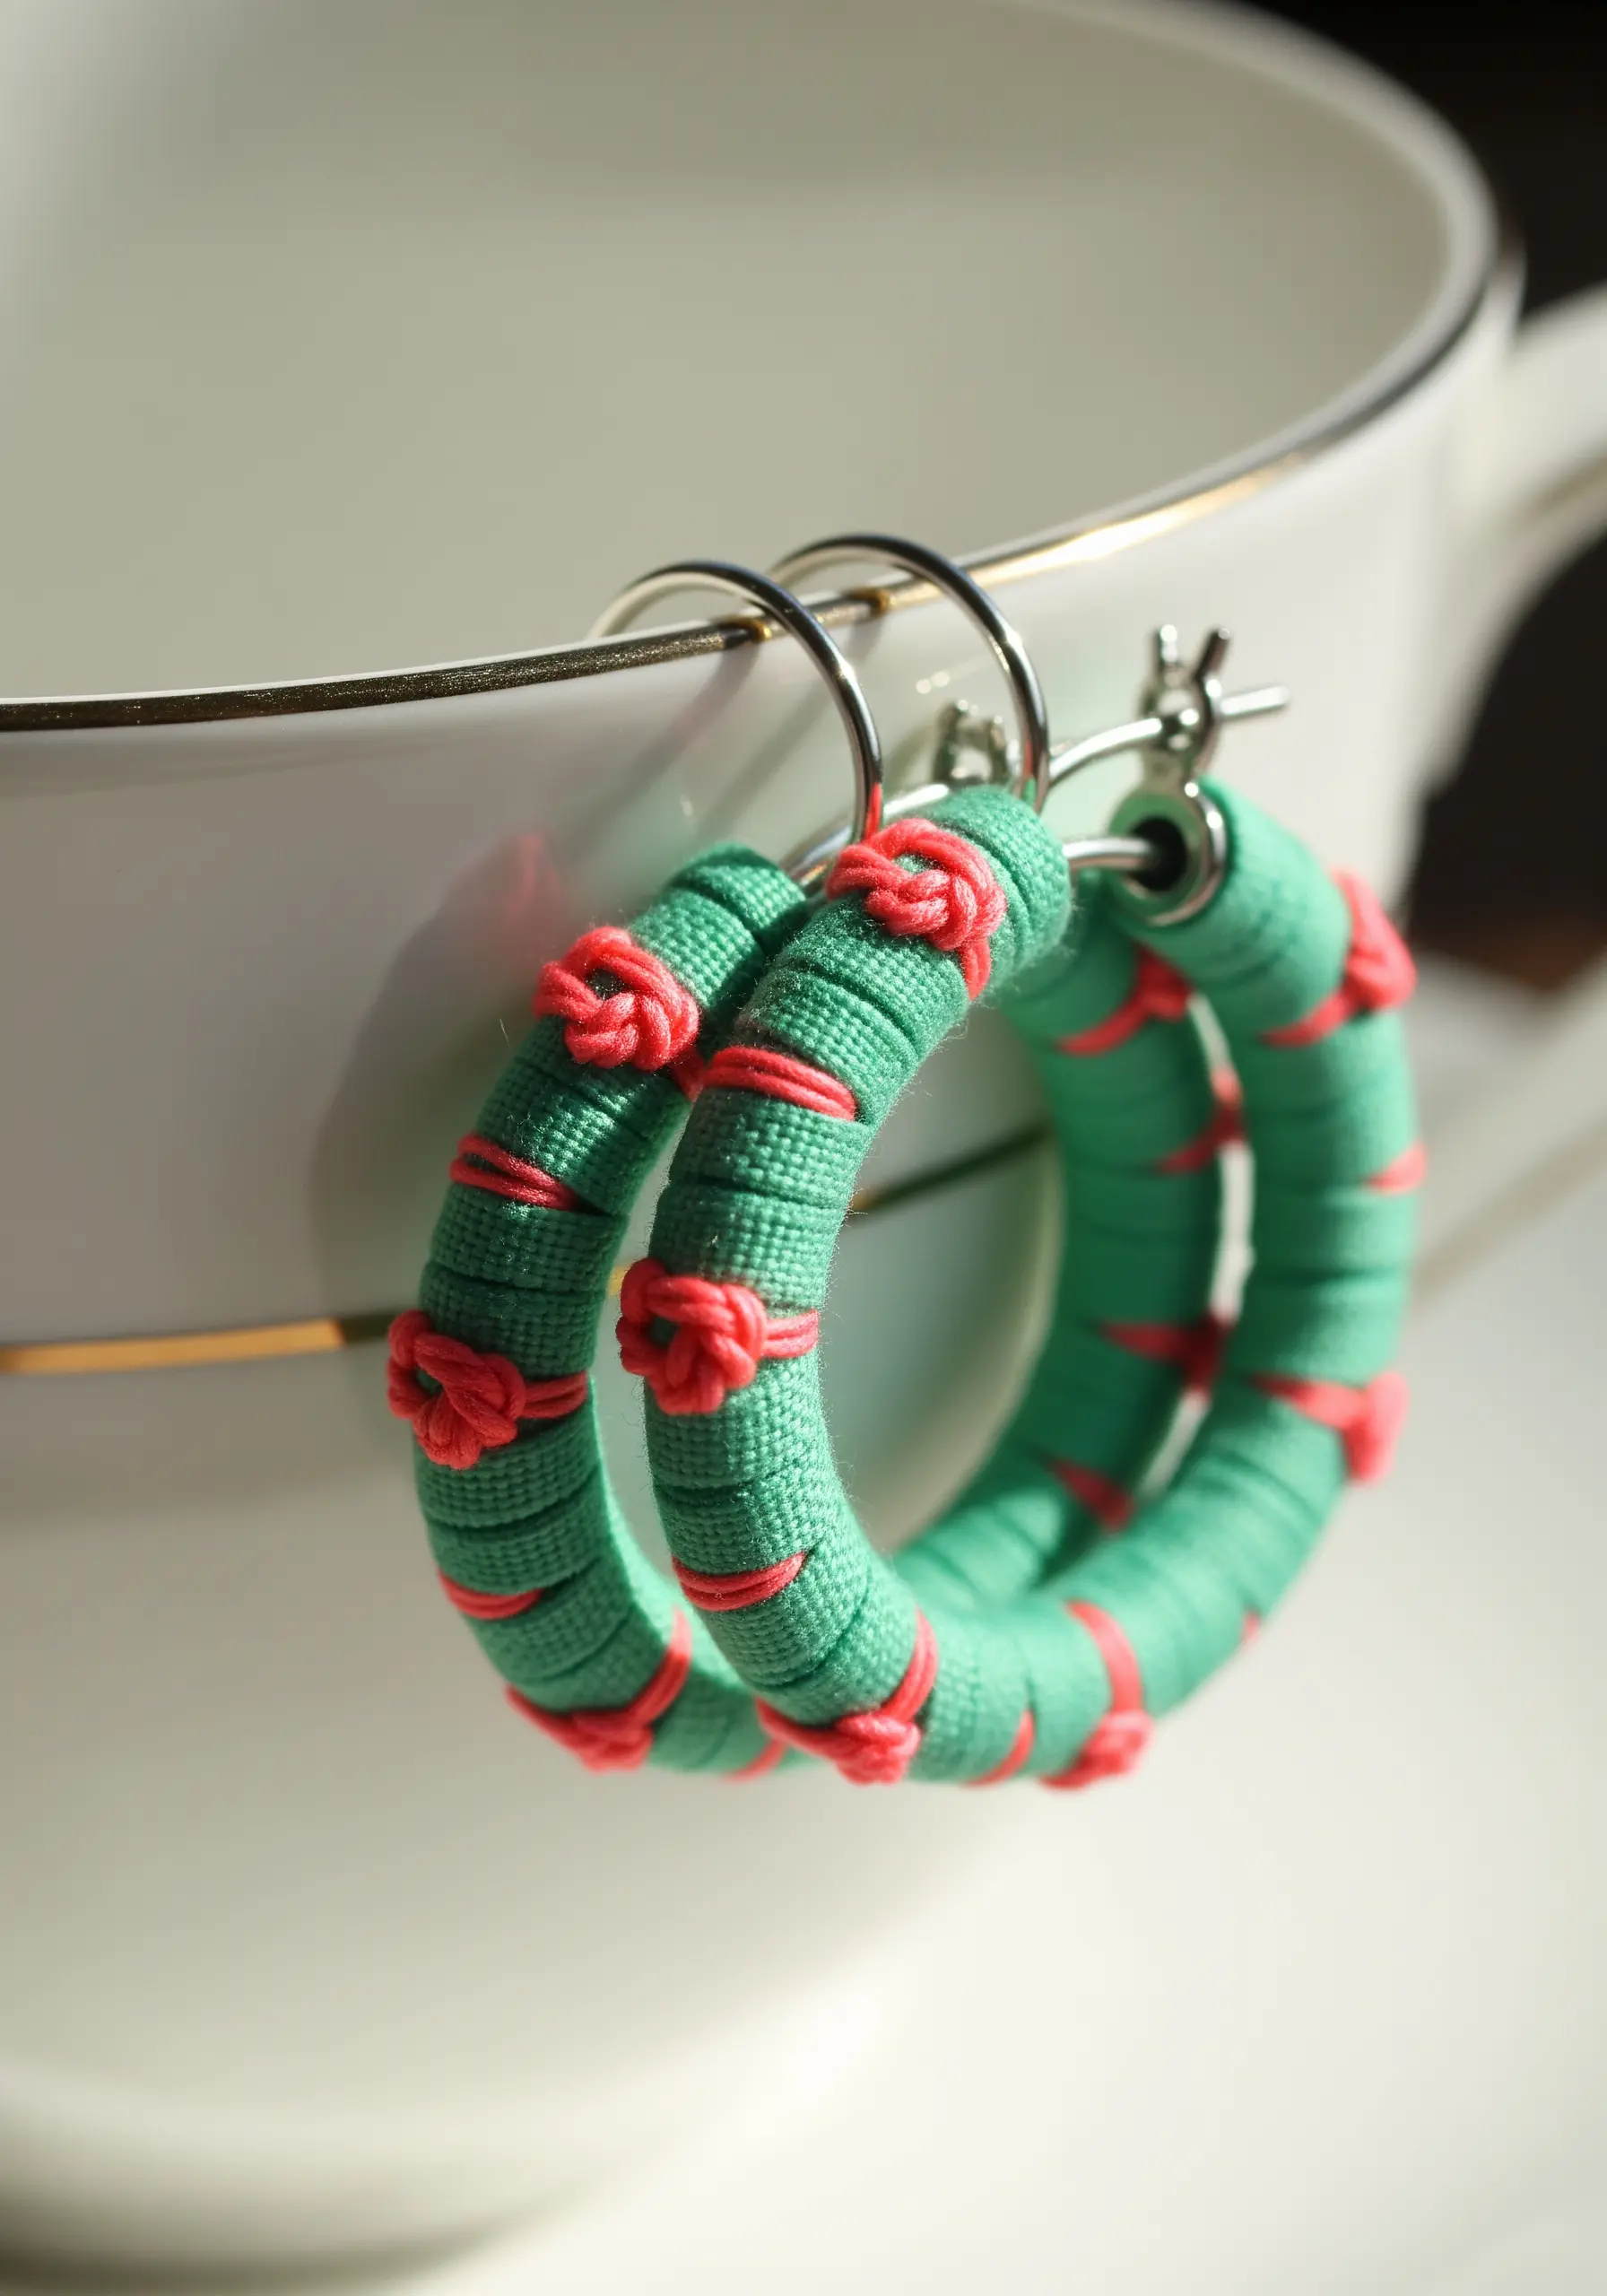
Transform basic hoop earrings into a unique accessory with a simple thread-wrapping technique.
Secure your first color of floss to the hoop with a knot, then wrap it tightly and evenly around the metal base, ensuring there are no gaps.
To add a decorative accent, use a contrasting color to tie small, evenly spaced knots or create tiny patterns over the top of the wrapped base.
This method requires no traditional stitching but produces a vibrant, handcrafted look.
14. Cosmic Galaxy Pendant
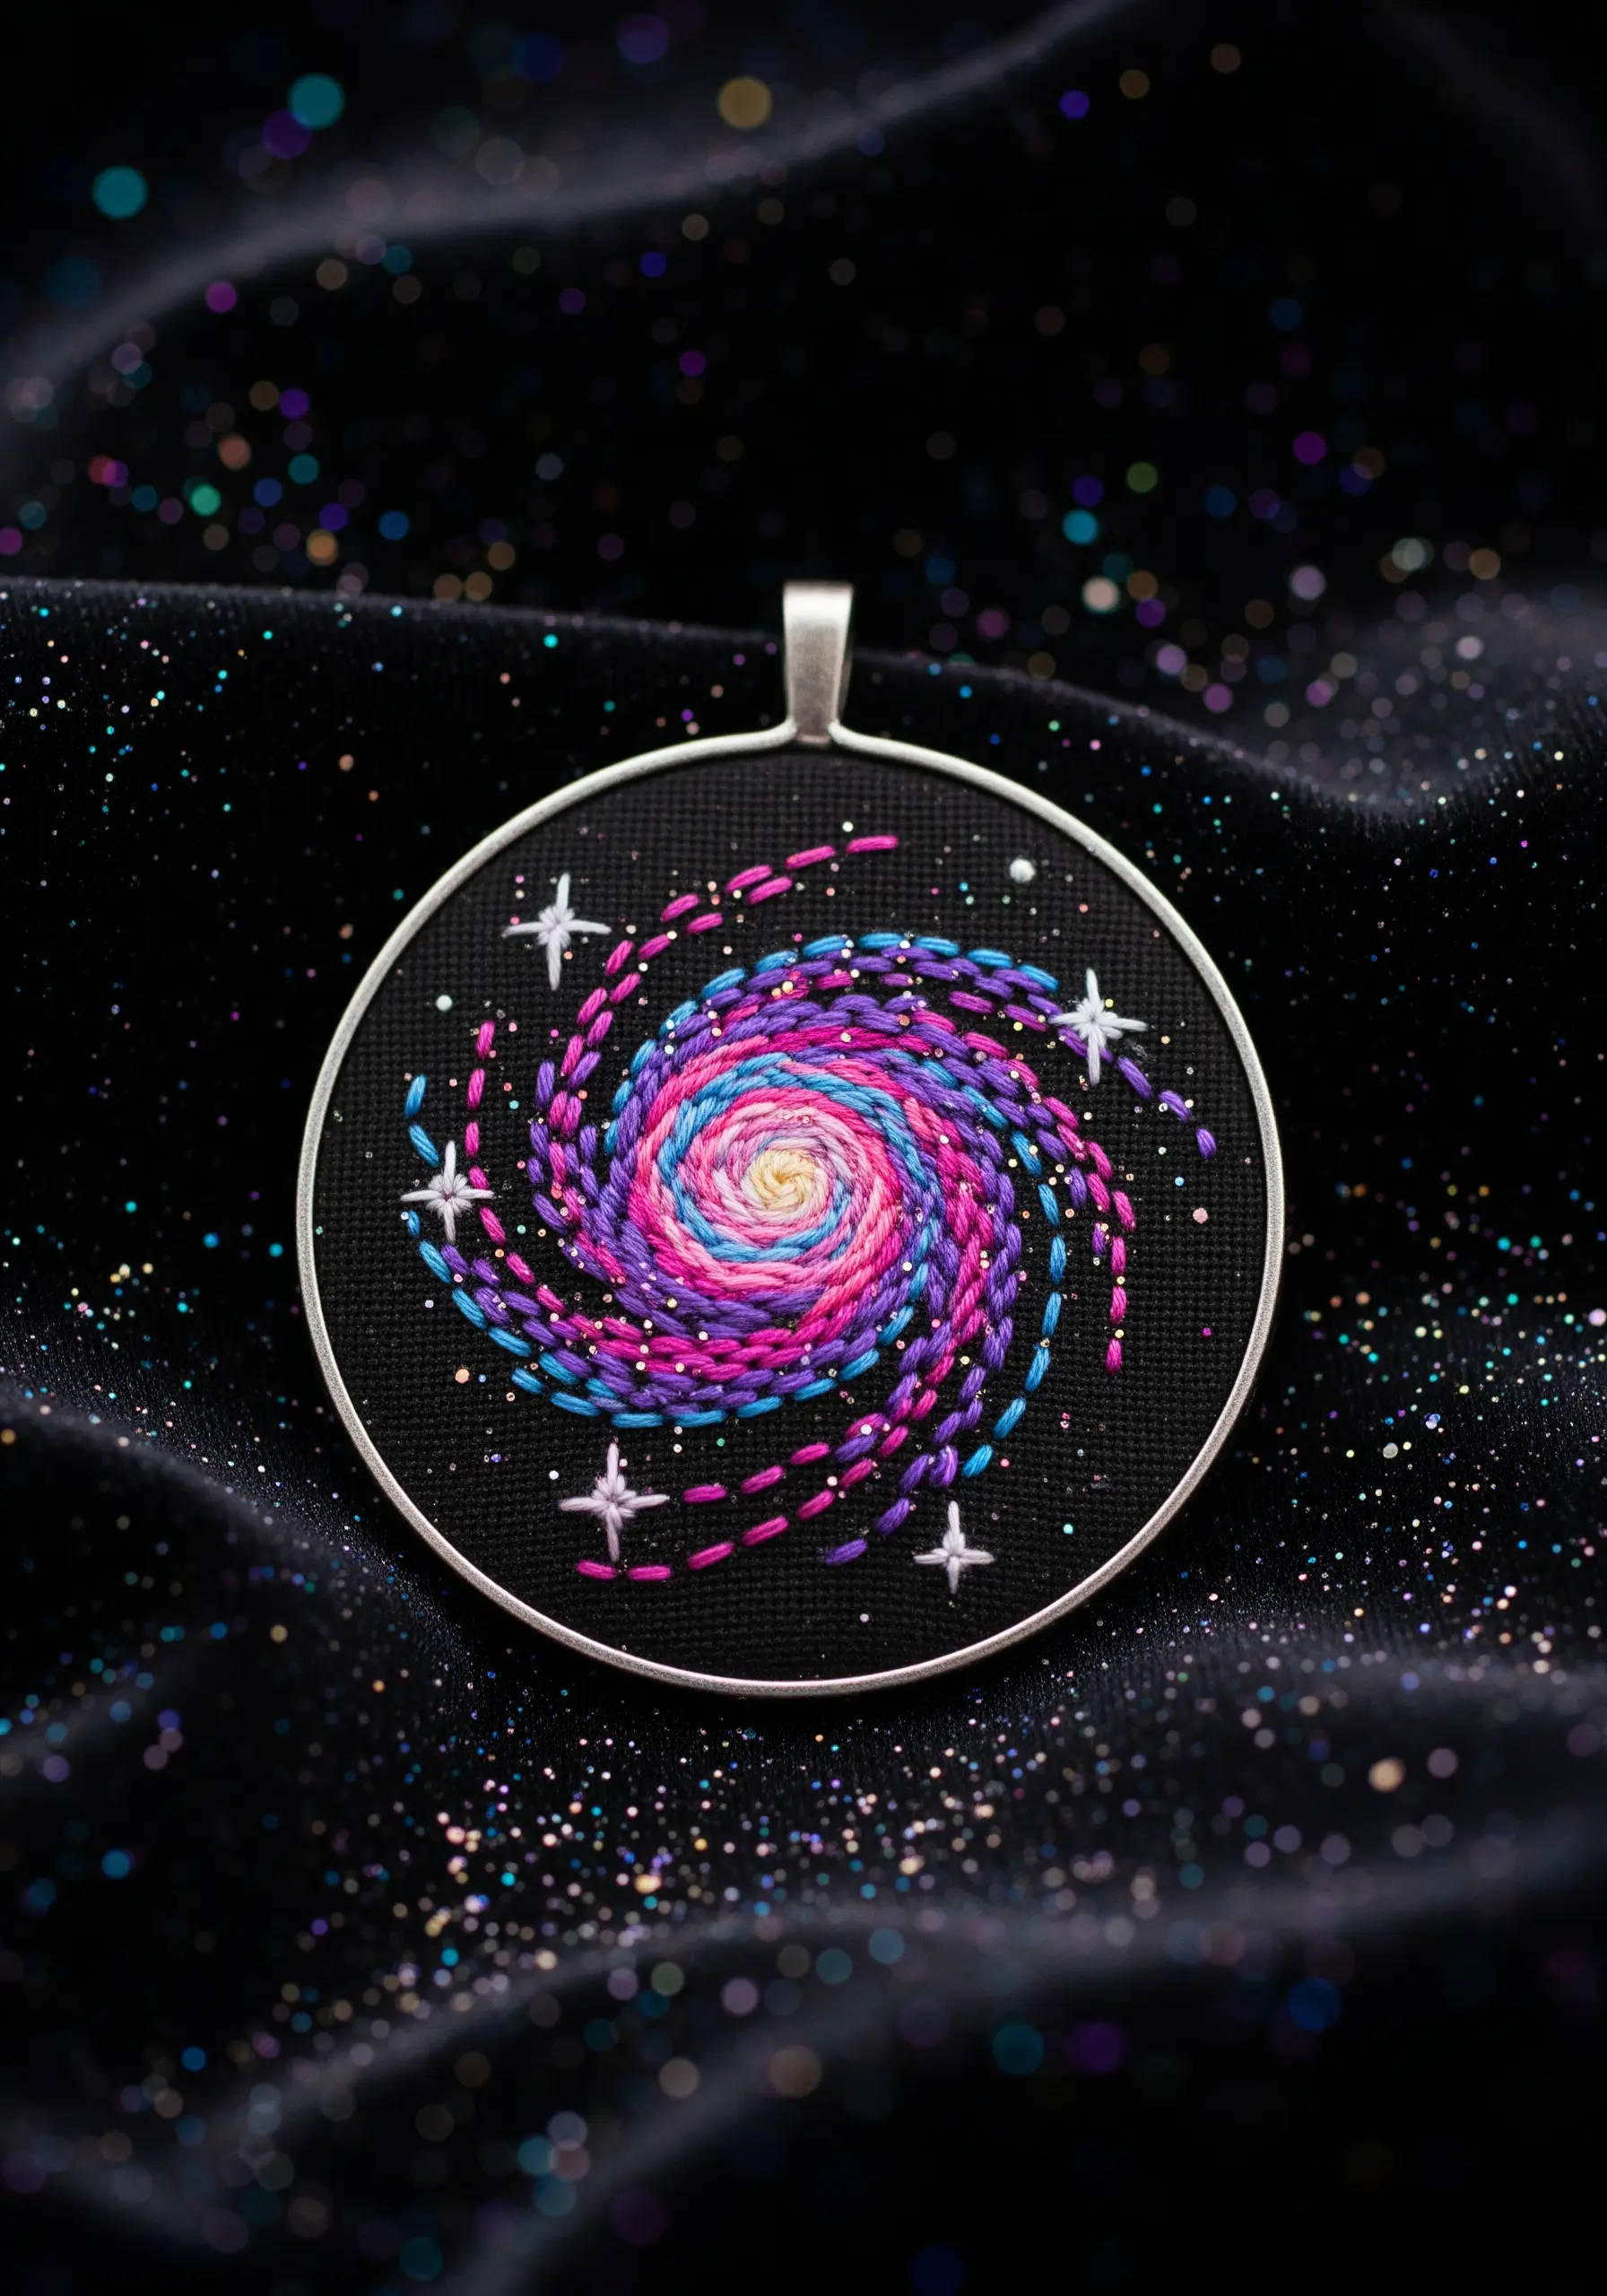
Create the illusion of a swirling galaxy by using a directional chain stitch or backstitch with variegated thread.
Start from the center and spiral outwards, allowing the color changes in the thread to create natural shifts in the design.
Alternatively, use three or four different colored strands of floss in your needle at once for a blended, multi-tonal effect.
A few scattered straight stitches in a bright white or silver metallic thread make perfect, sparkling stars against the dark fabric.
15. 3D Floral Hair Comb
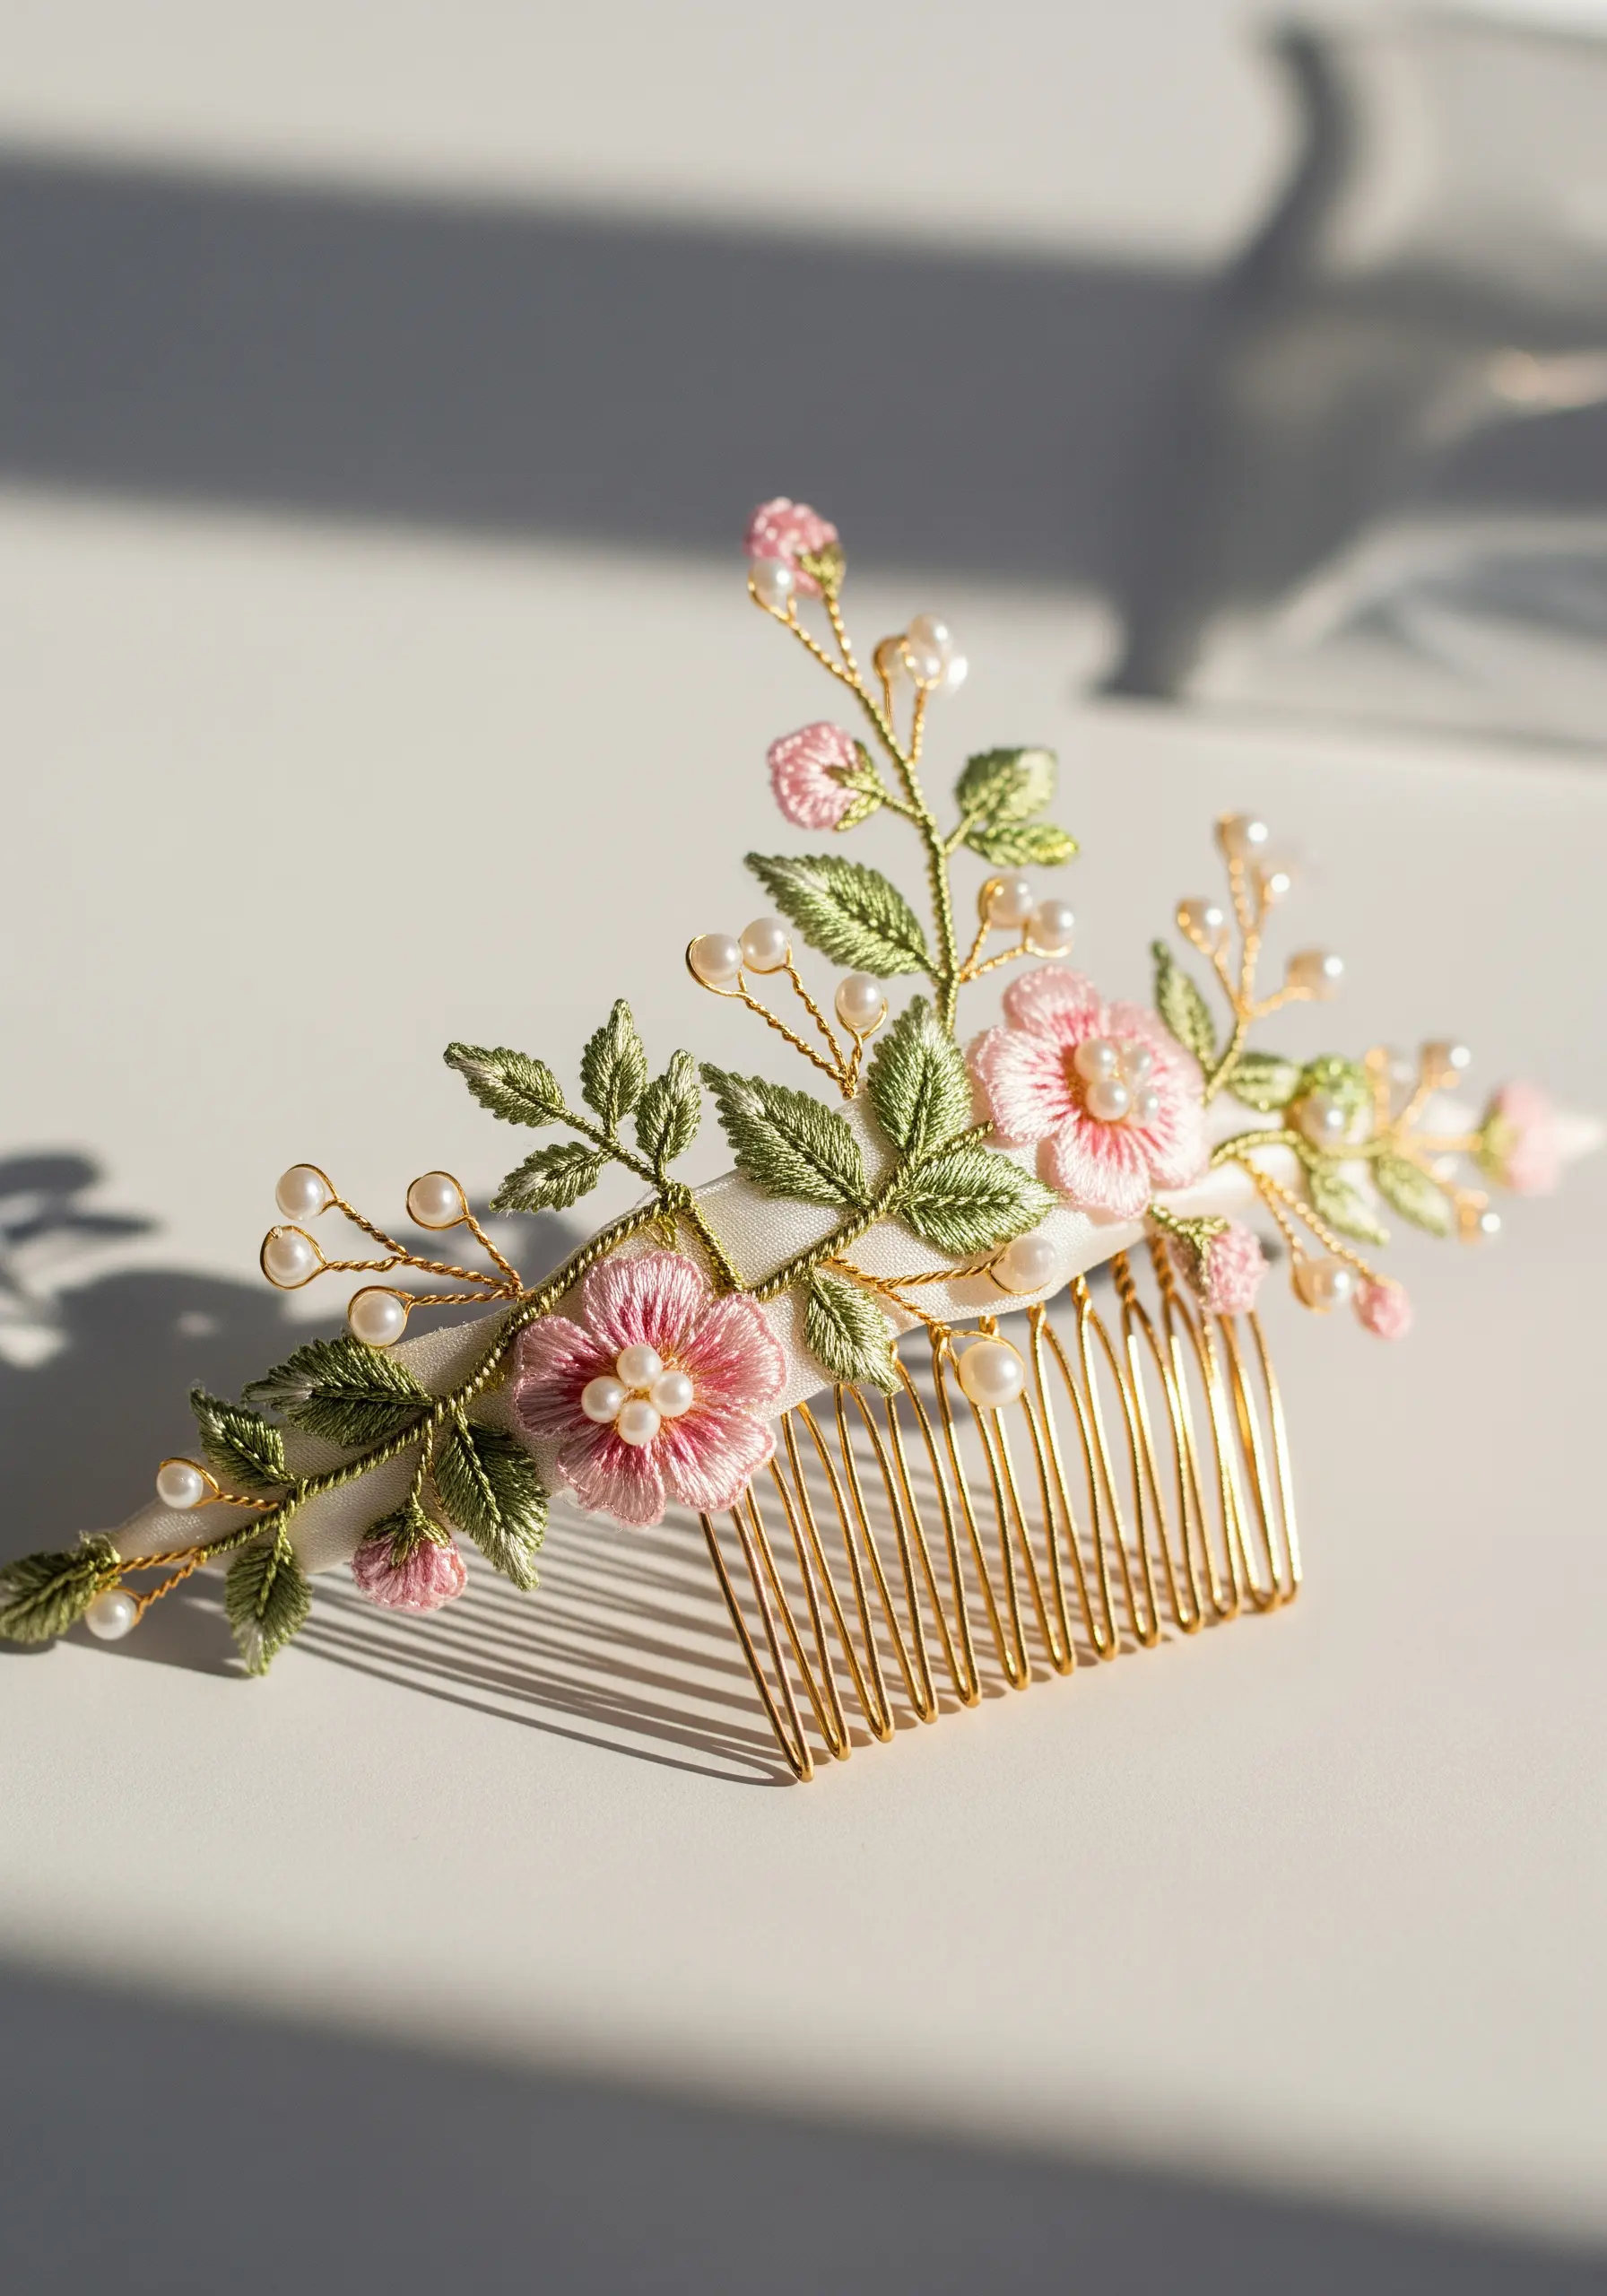
Create a delicate, lifelike hair accessory using stumpwork techniques for three-dimensional flowers and leaves.
Construct each petal and leaf individually by stitching over a fine wire frame with a buttonhole stitch. This allows you to cut them out from the fabric without fraying.
Once all elements are complete, gently shape the wired edges to give them natural curves, then arrange and stitch them securely onto the fabric-wrapped comb.
Adding a few pearl beads mimics morning dew and completes the romantic effect.
16. Scottish Thistle Scarf Pin
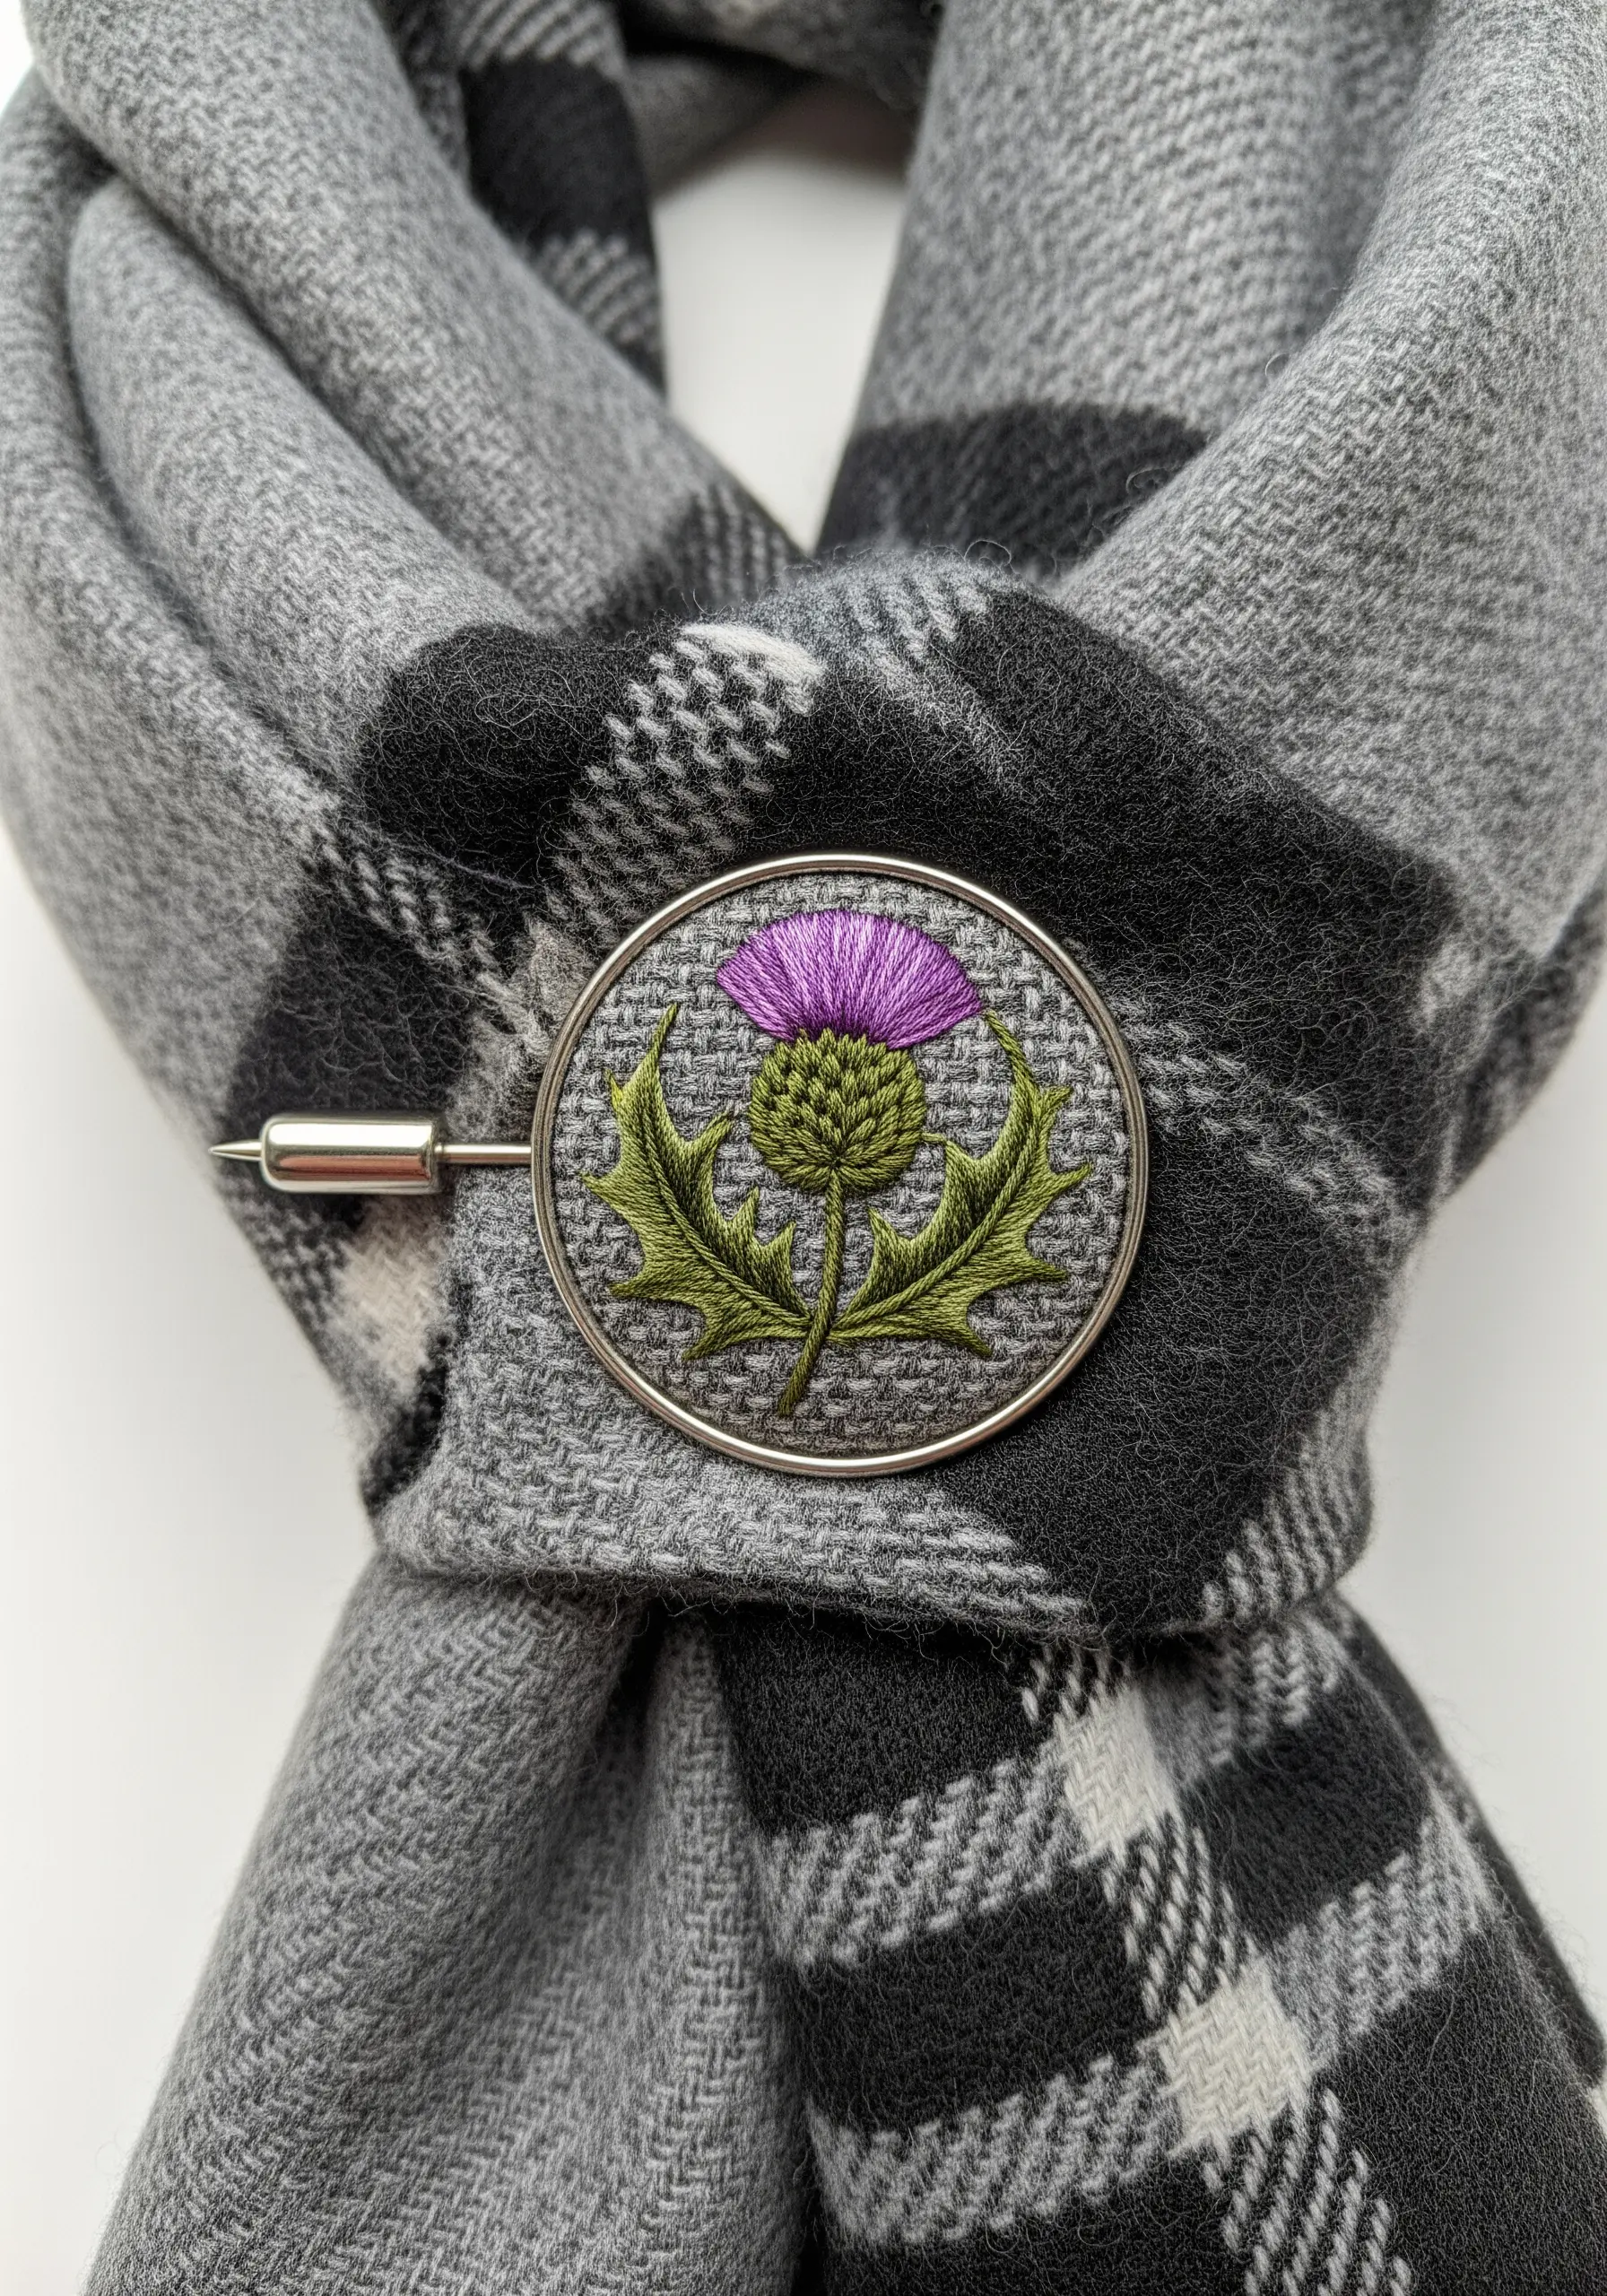
Capture the unique texture of a thistle by combining different stitches for its distinct parts.
For the spiky green base (bracts), use layered fly stitches or long, sharp straight stitches radiating outwards.
Create the fluffy purple bloom with turkey work—a technique involving looped stitches that are then cut to create a plush, brush-like pile.
This multi-stitch approach provides the textural realism needed to make the thistle recognizable and tactile.
17. ‘The Great Wave’ Coin Purse
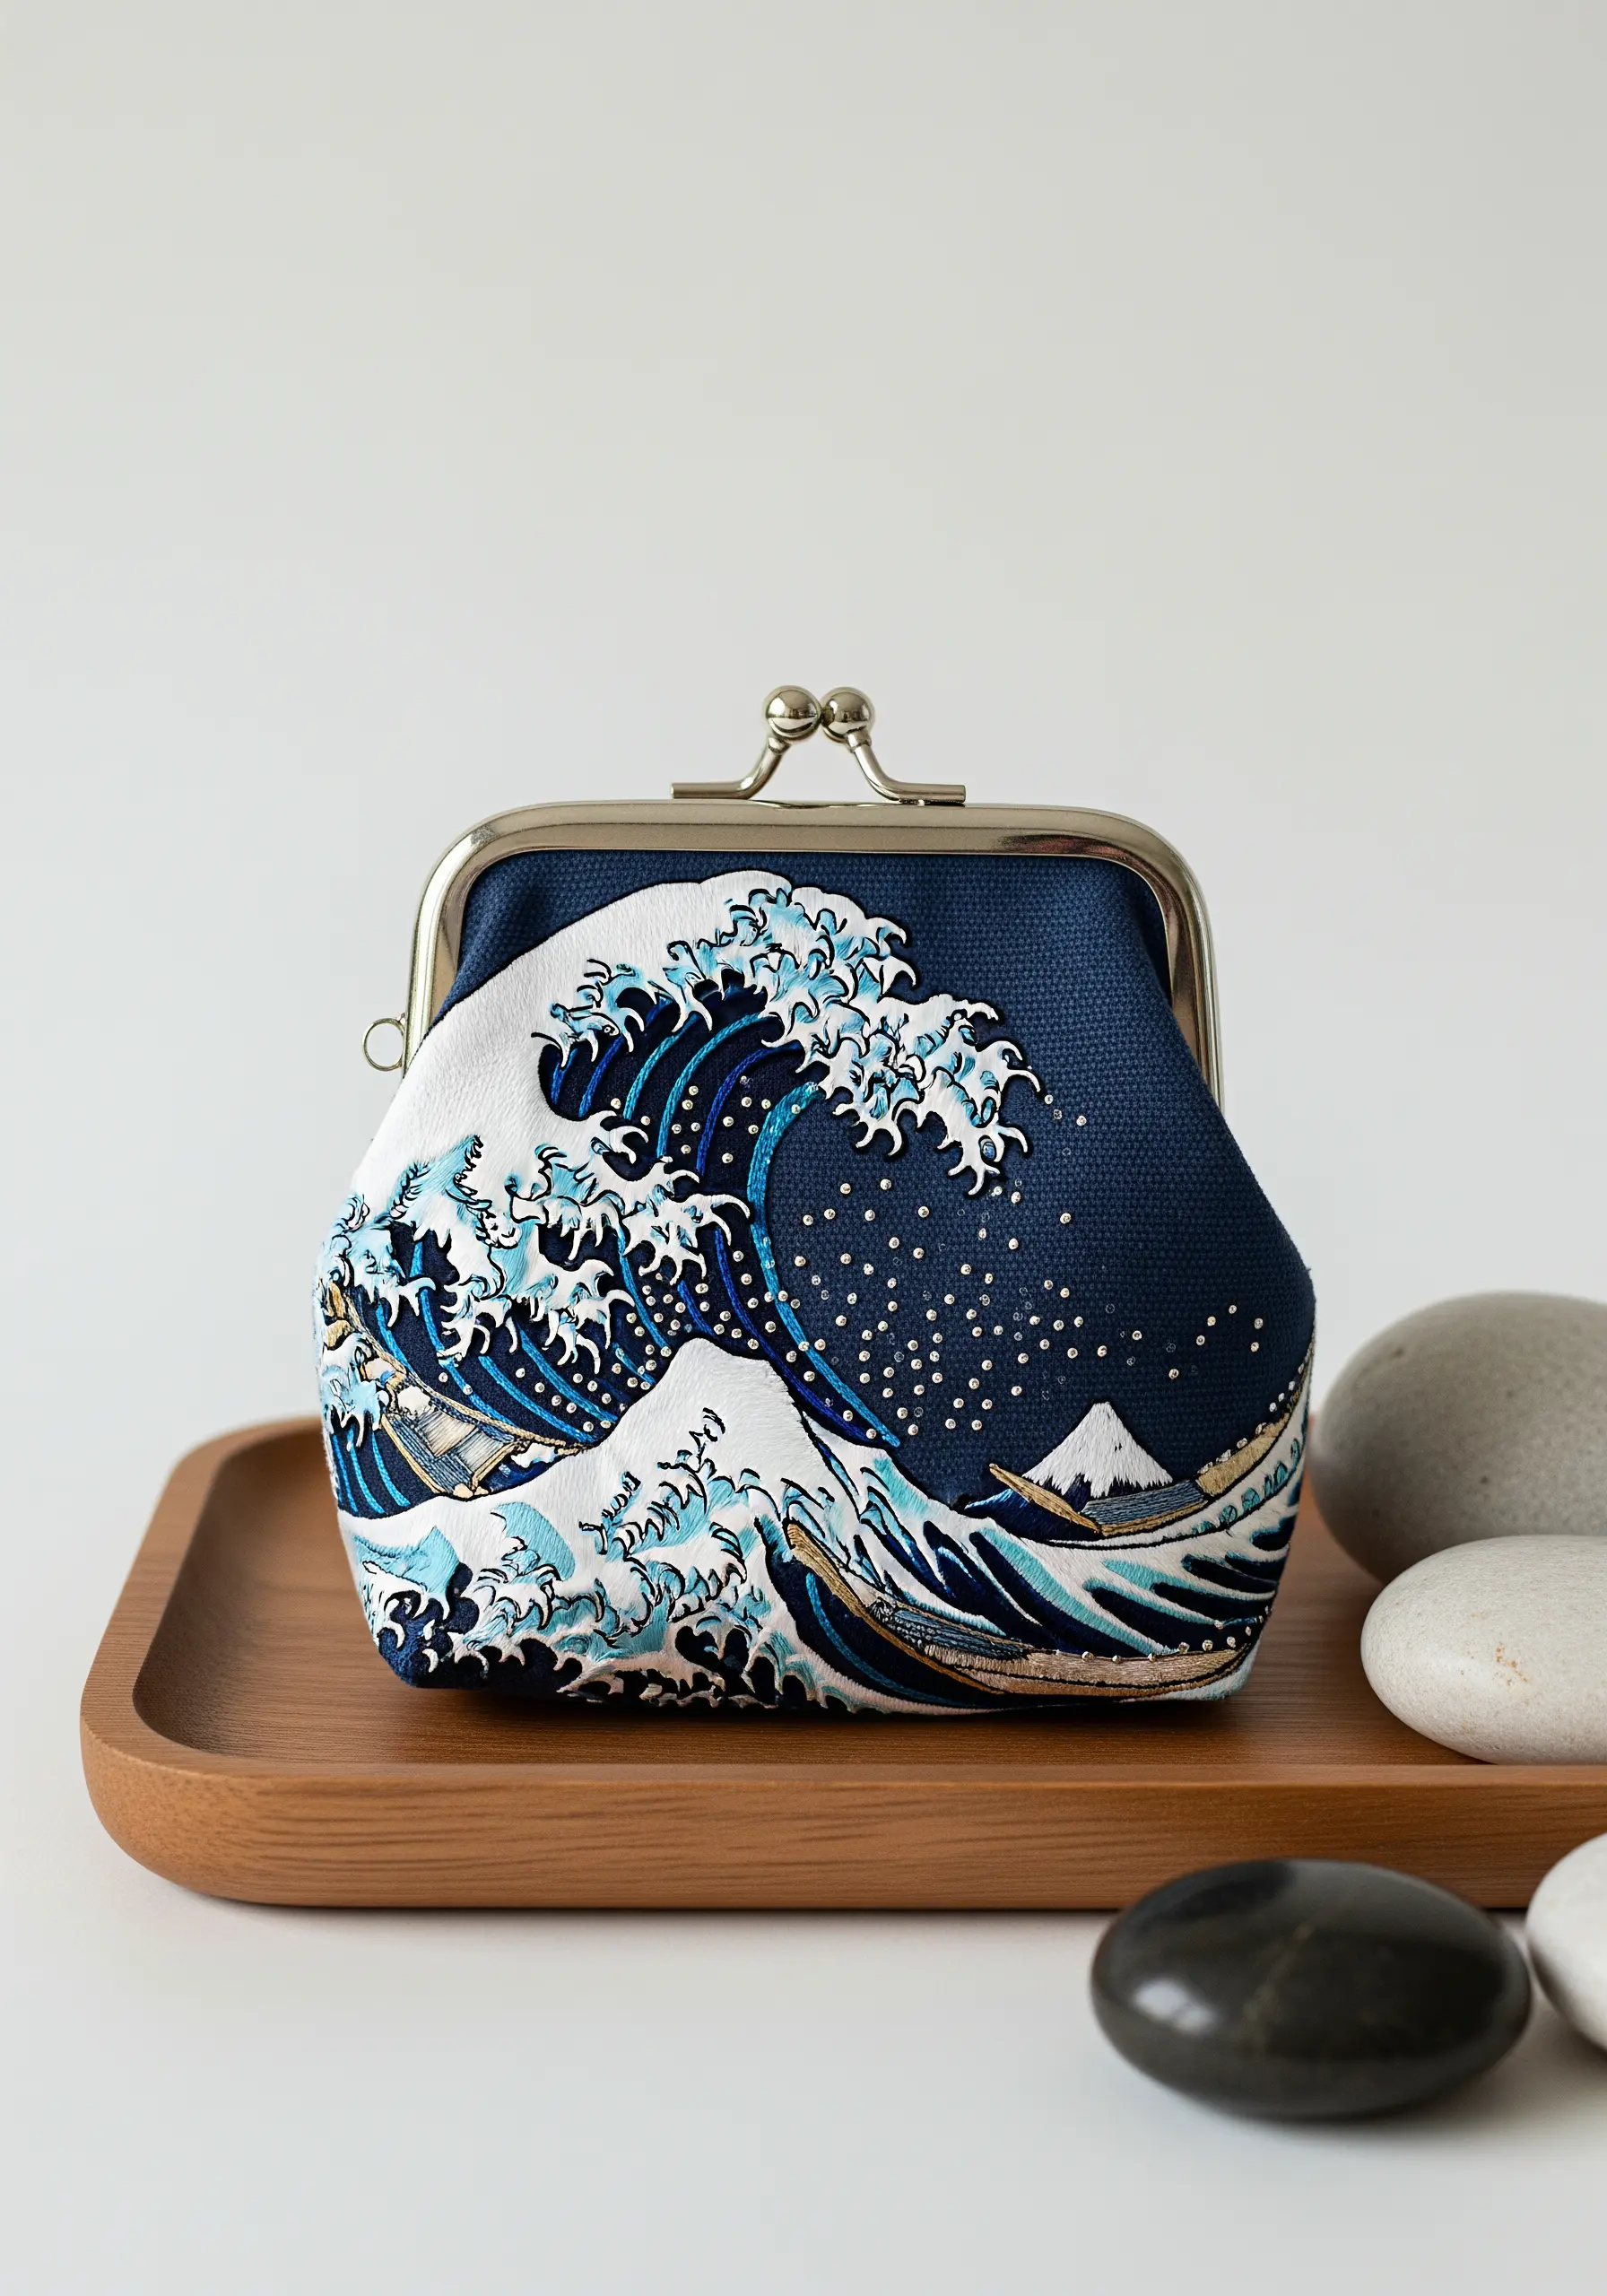
To translate an iconic painting onto fabric, focus on capturing movement and energy through directional stitching.
Use short, choppy backstitches and straight stitches to mimic the sea’s turbulent texture. Vary the shades of blue and white to create depth.
For the crests of the waves, use dense clusters of French knots in white and pale blue to replicate the sea foam.
This approach transforms a flat image into a dynamic, tactile piece of wearable art.
18. Temari-Inspired Eyeglass Chain
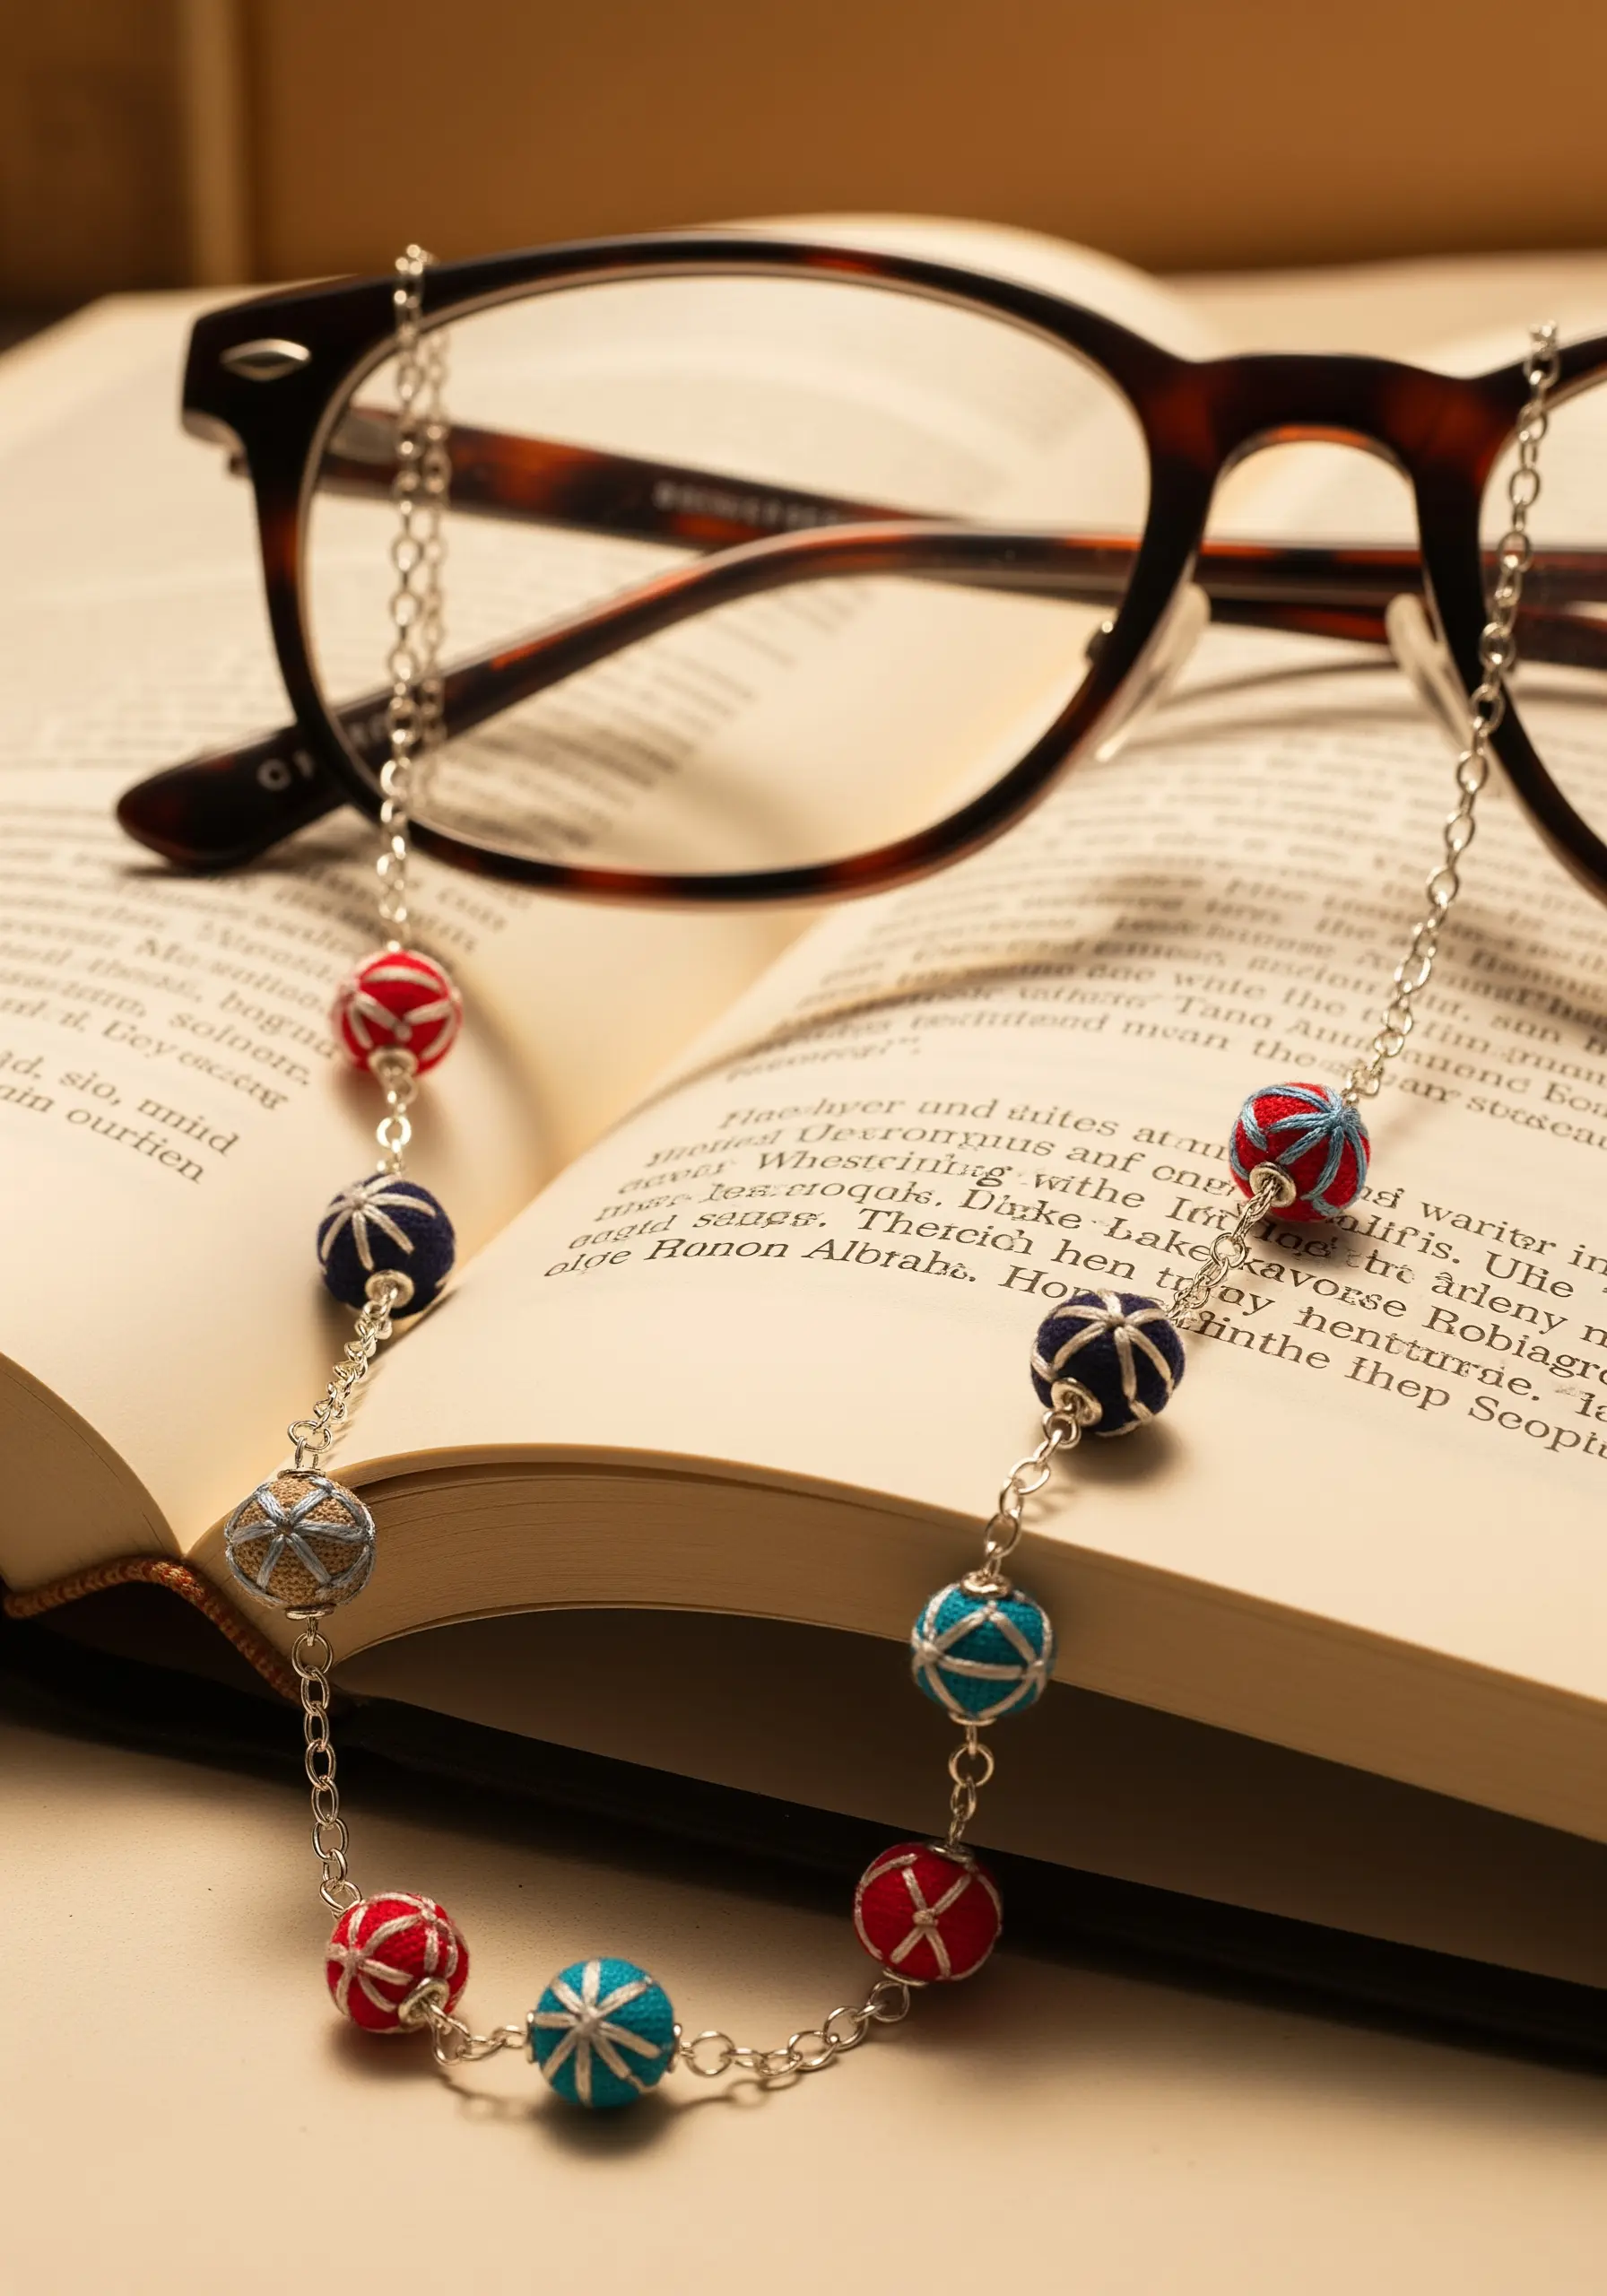
Create beautiful, intricate beads for an eyeglass chain using the principles of Japanese Temari.
Start with a small wooden or foam bead as your core. Wrap it completely and smoothly with a base layer of sewing thread.
Then, use colorful embroidery floss to stitch geometric patterns—like diamonds, stars, or intersecting lines—around the bead’s surface.
These lightweight, handmade beads turn a practical item into a unique piece of jewelry.
19. Mixed-Media Bee Brooch
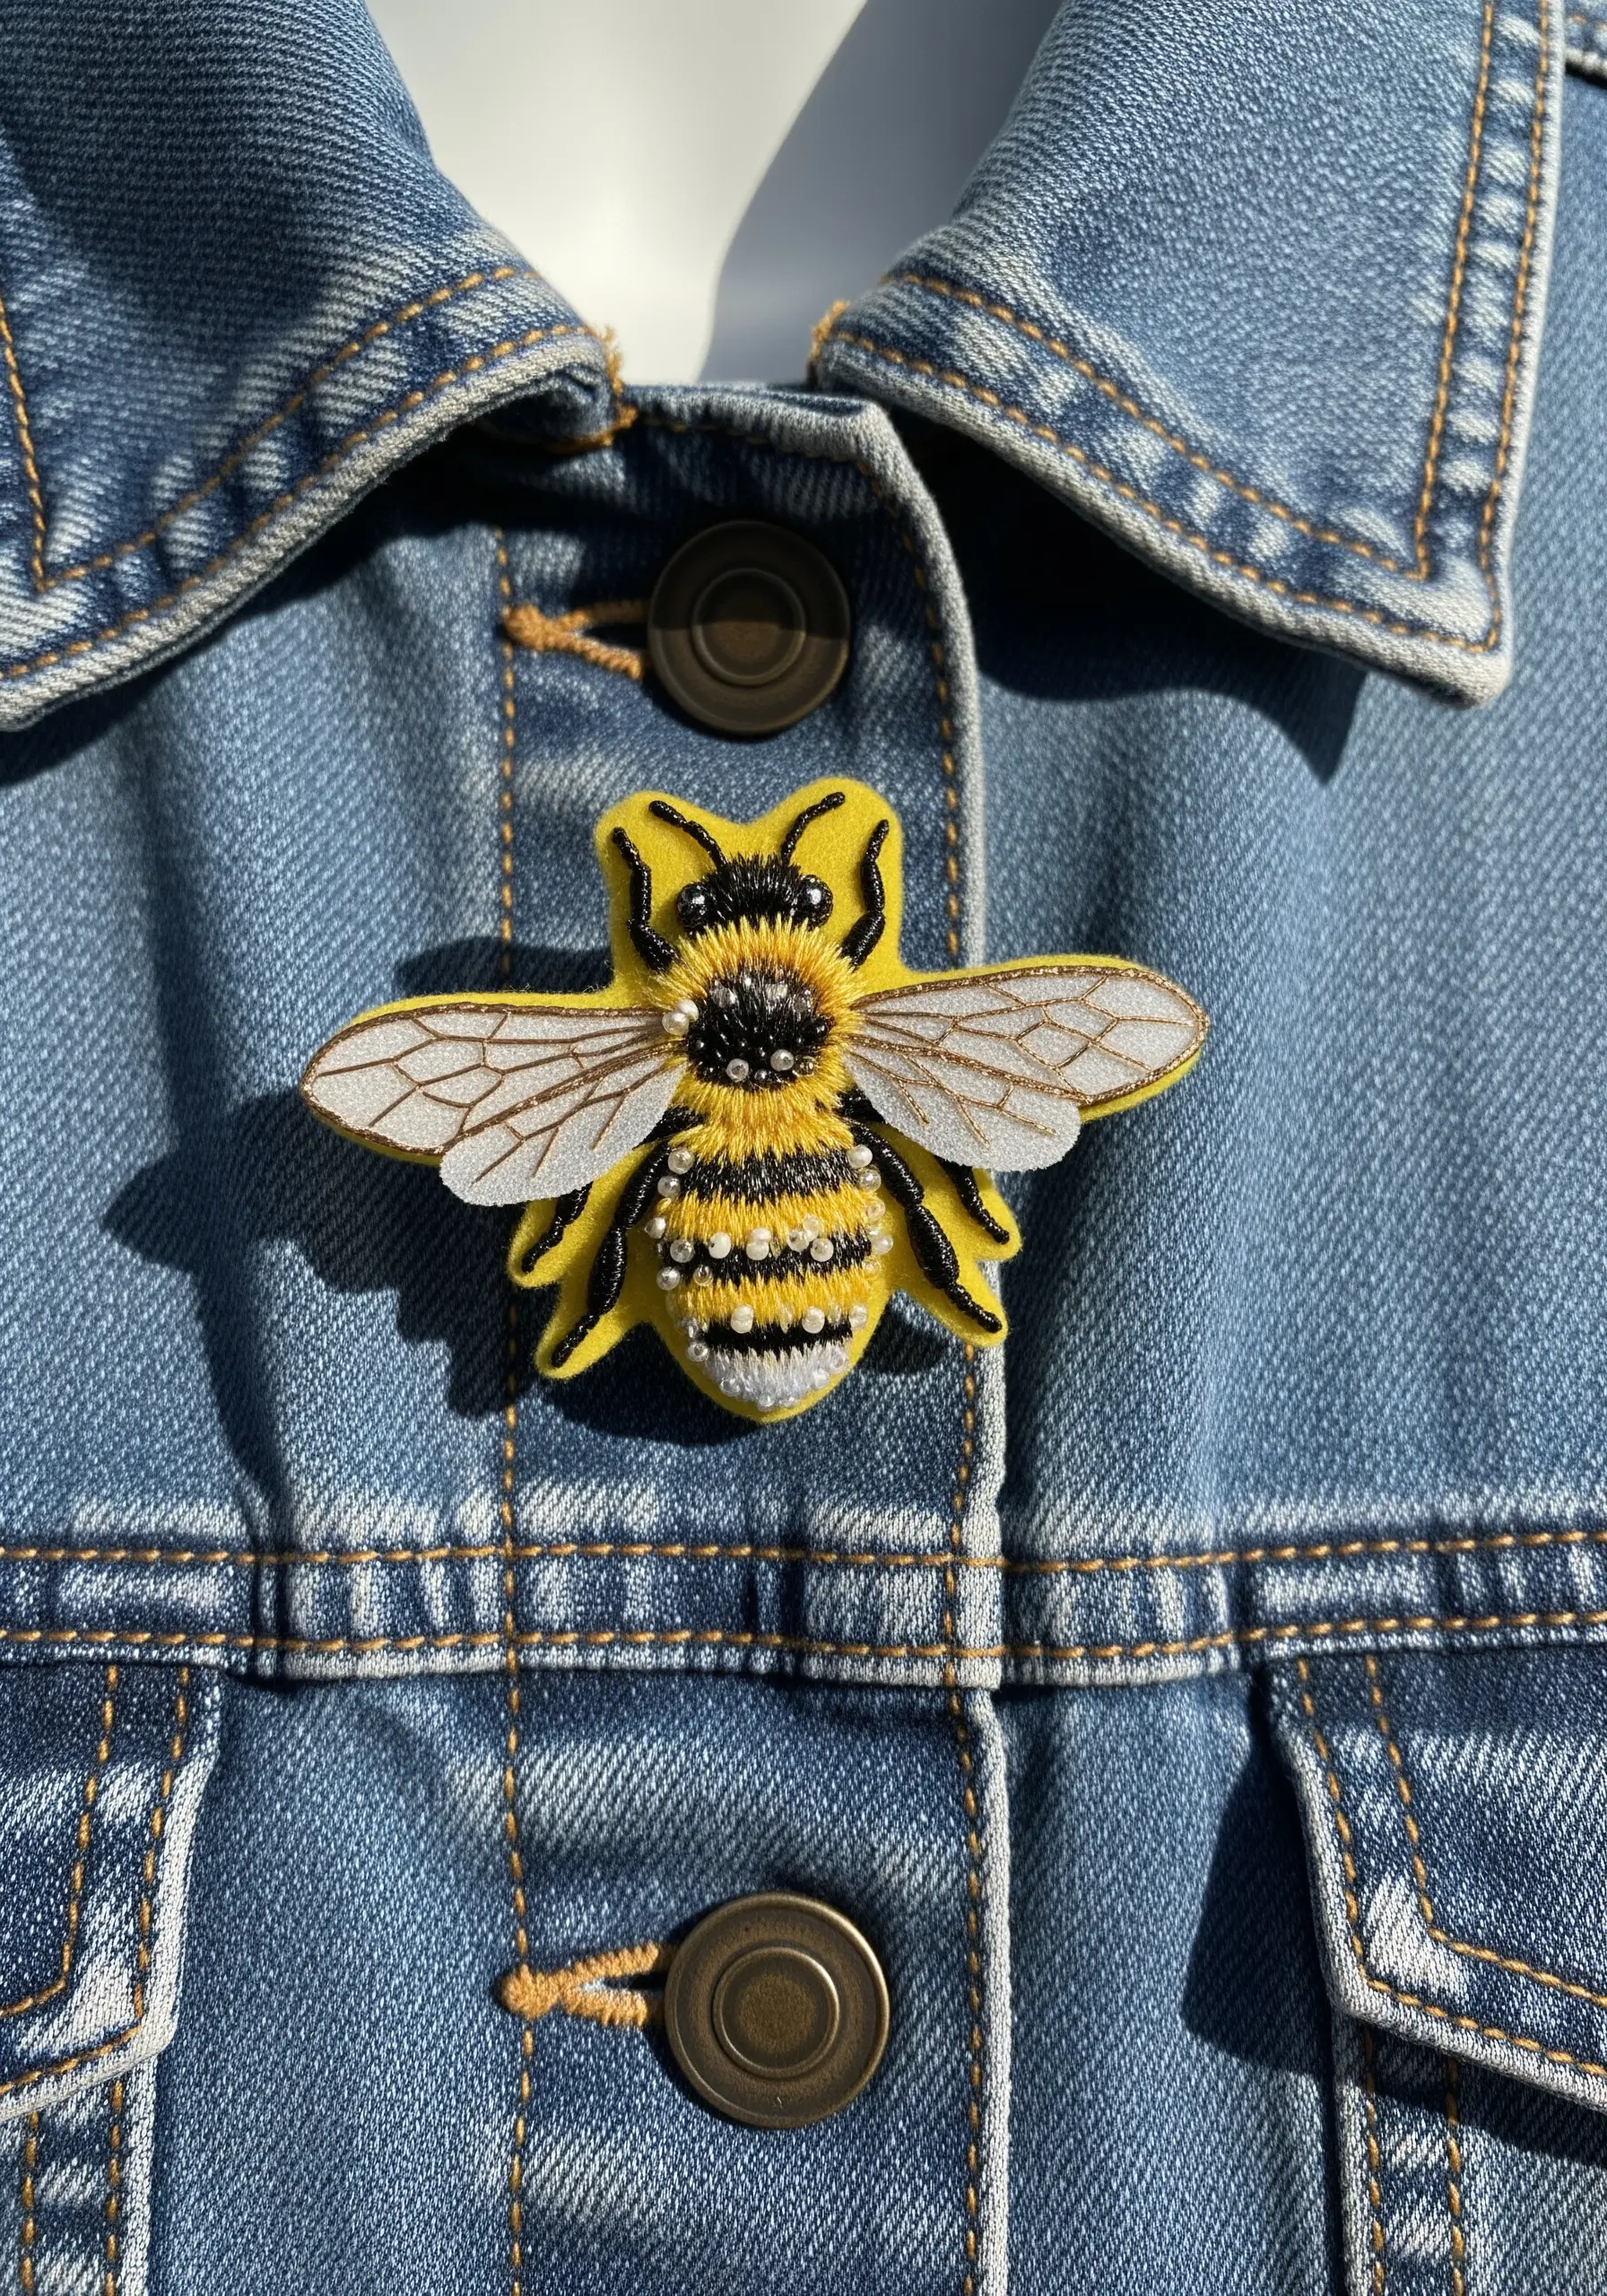
For a hyper-realistic insect brooch, combine embroidery with beading and layered fabrics.
Use padded satin stitch for the fuzzy body stripes and a sprinkle of black seed beads for the textured thorax.
To create translucent wings, stitch the vein details onto a layer of sheer organza stabilized with a water-soluble backing.
After rinsing the stabilizer, carefully trim the organza around the stitching. This mixed-media approach provides a level of detail that thread alone cannot achieve.
20. Sculptural Seashell Bracelet
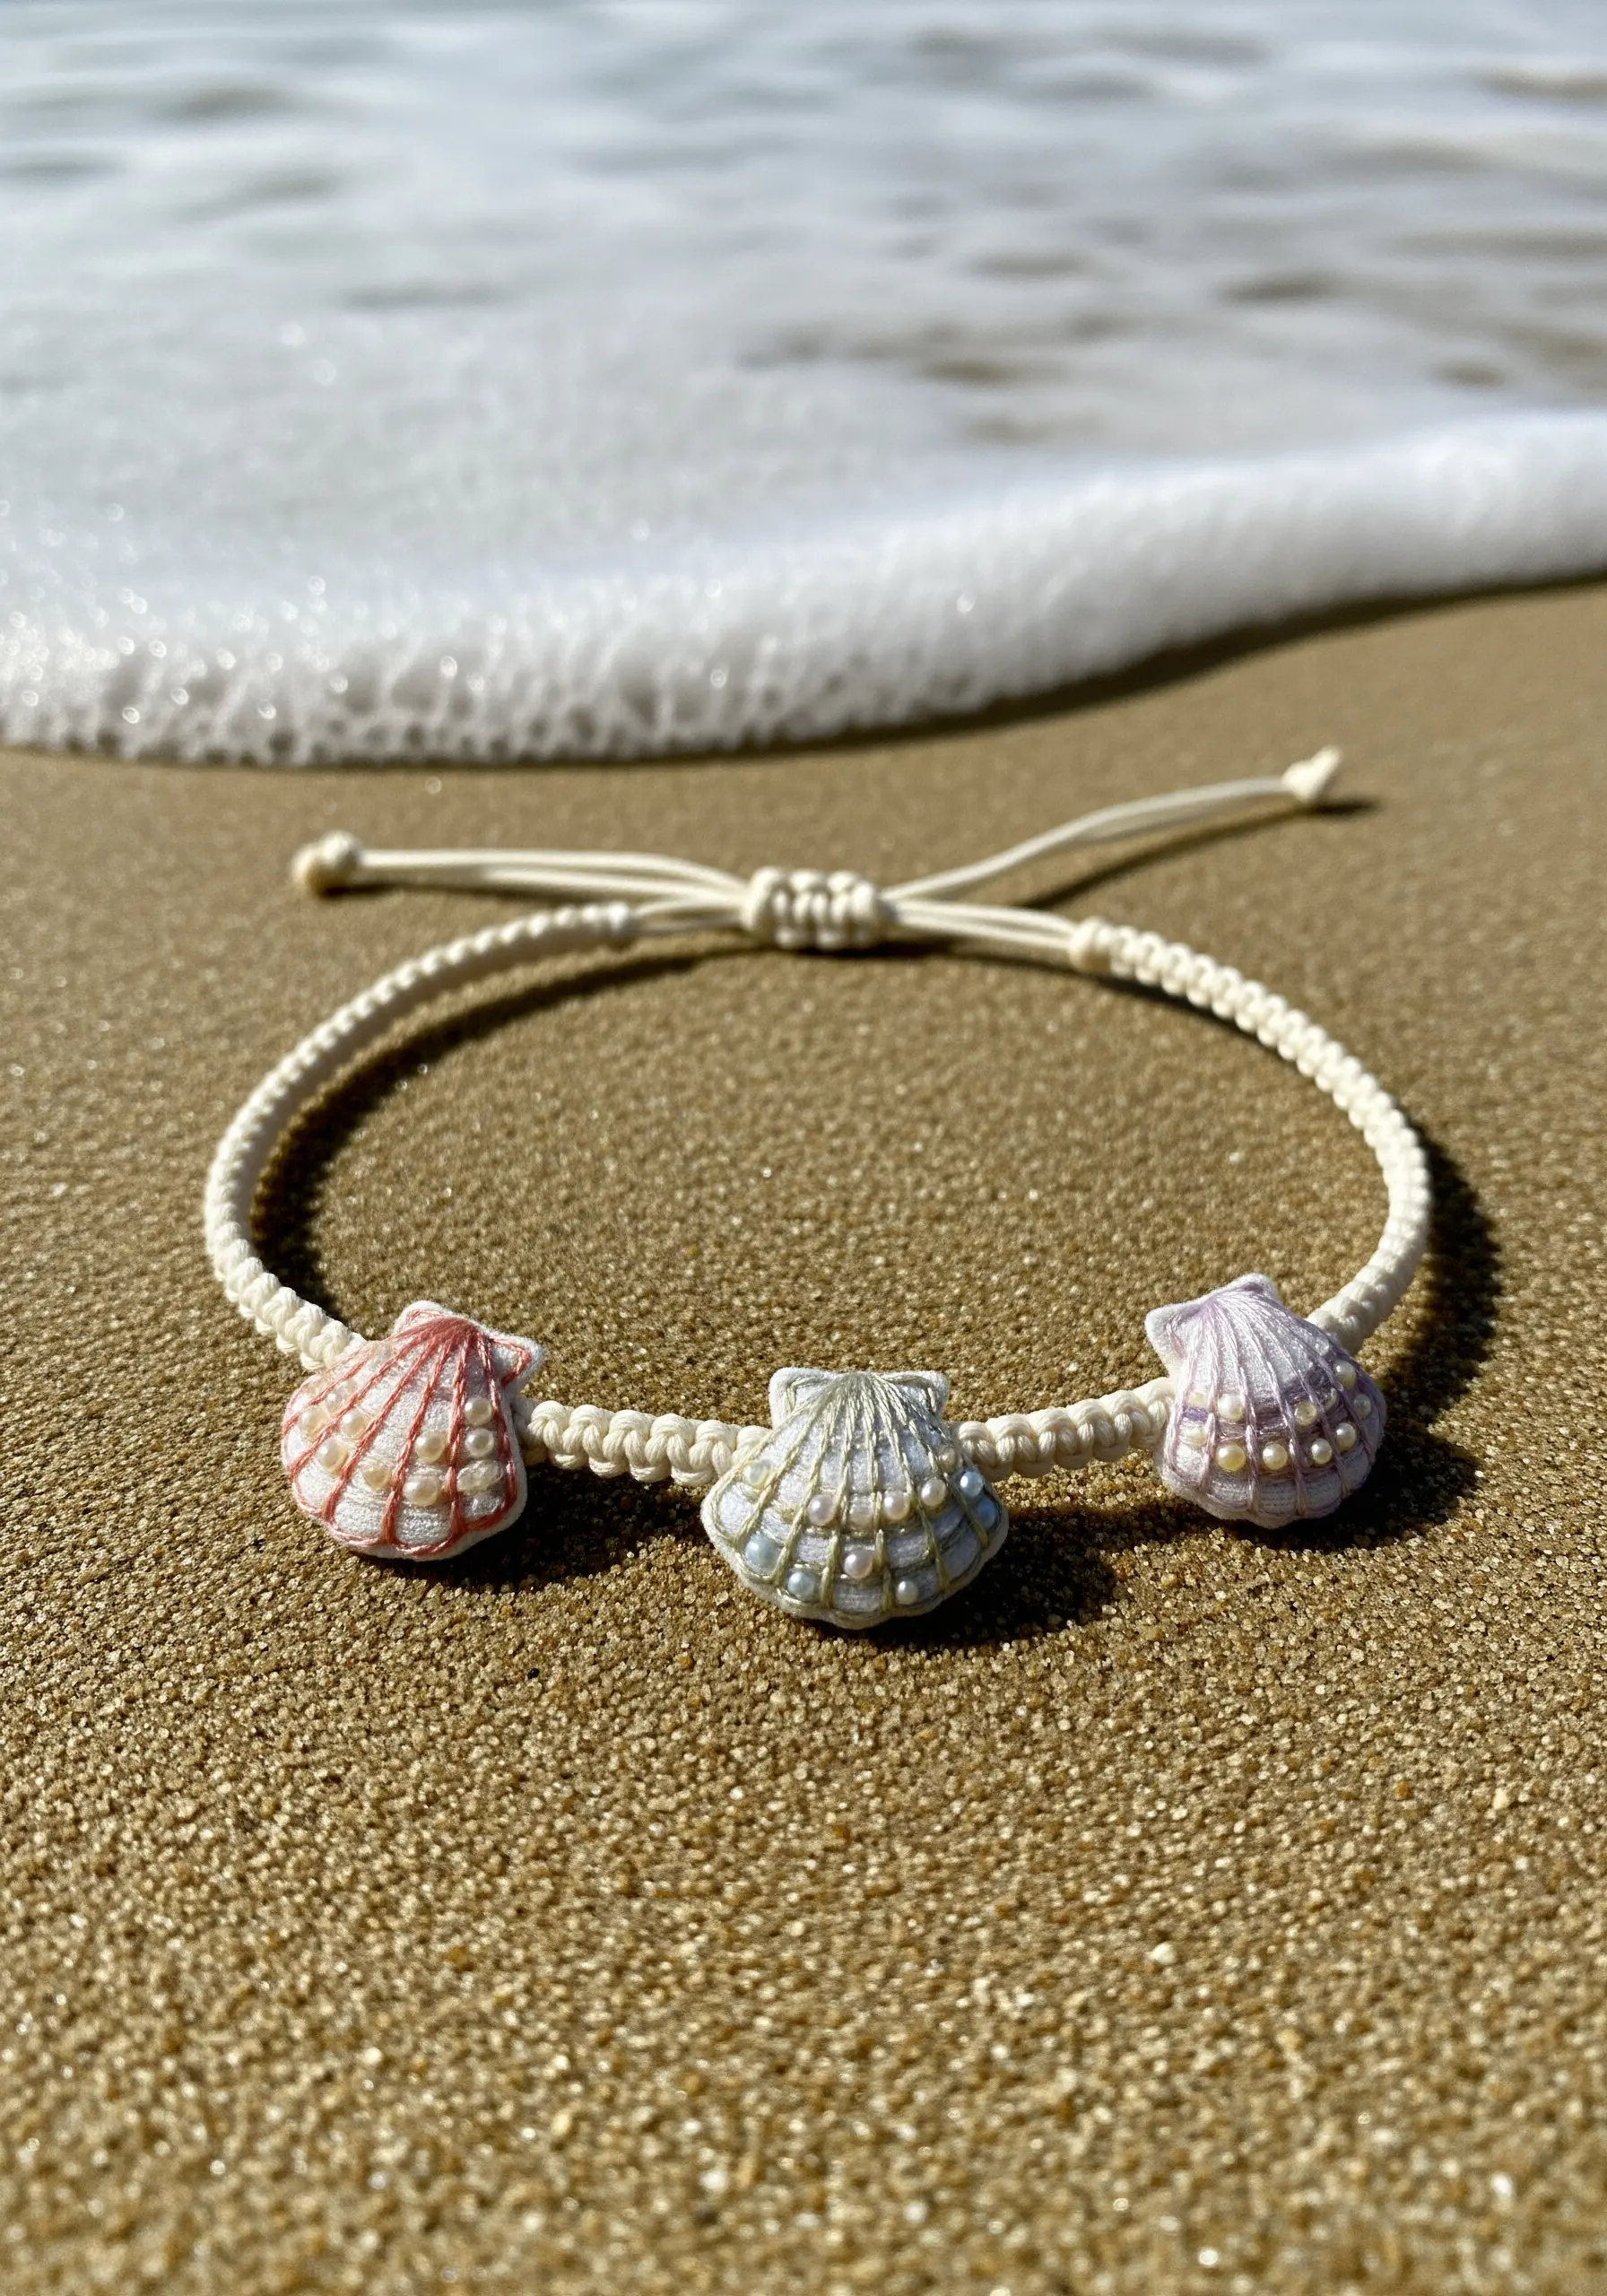
Give your embroidered seashells a realistic, curved shape with padding and careful shading.
Cut a small piece of felt in the shape of the shell and stitch it onto your fabric base. This creates a raised foundation.
Cover the padding with satin stitches, using two or three closely related shades of thread to create subtle highlights and shadows.
Stitch the lines of the shell with a single, darker thread to define its form, resulting in a beautiful, sculptural piece.


