

Sometimes, the desire to create something beautiful is at odds with the time we actually have. You don’t need an entire weekend to make progress, refine a technique, or feel that quiet satisfaction of a finished piece. A single evening is enough.
Think of these small projects not as mere diversions, but as focused studies. Each one is an opportunity to perfect a single skill: the tension of a French knot, the smoothness of a satin stitch, the balance of a simple composition. Mastering these details is what transforms your work from handmade to artful.
Here, you’ll find seventeen ideas designed to be completed in just a few hours. Let them be your gentle return to creativity at the end of a long day—a simple, elegant way to make something meaningful with your own two hands.
1. The Understated Eucalyptus Branch
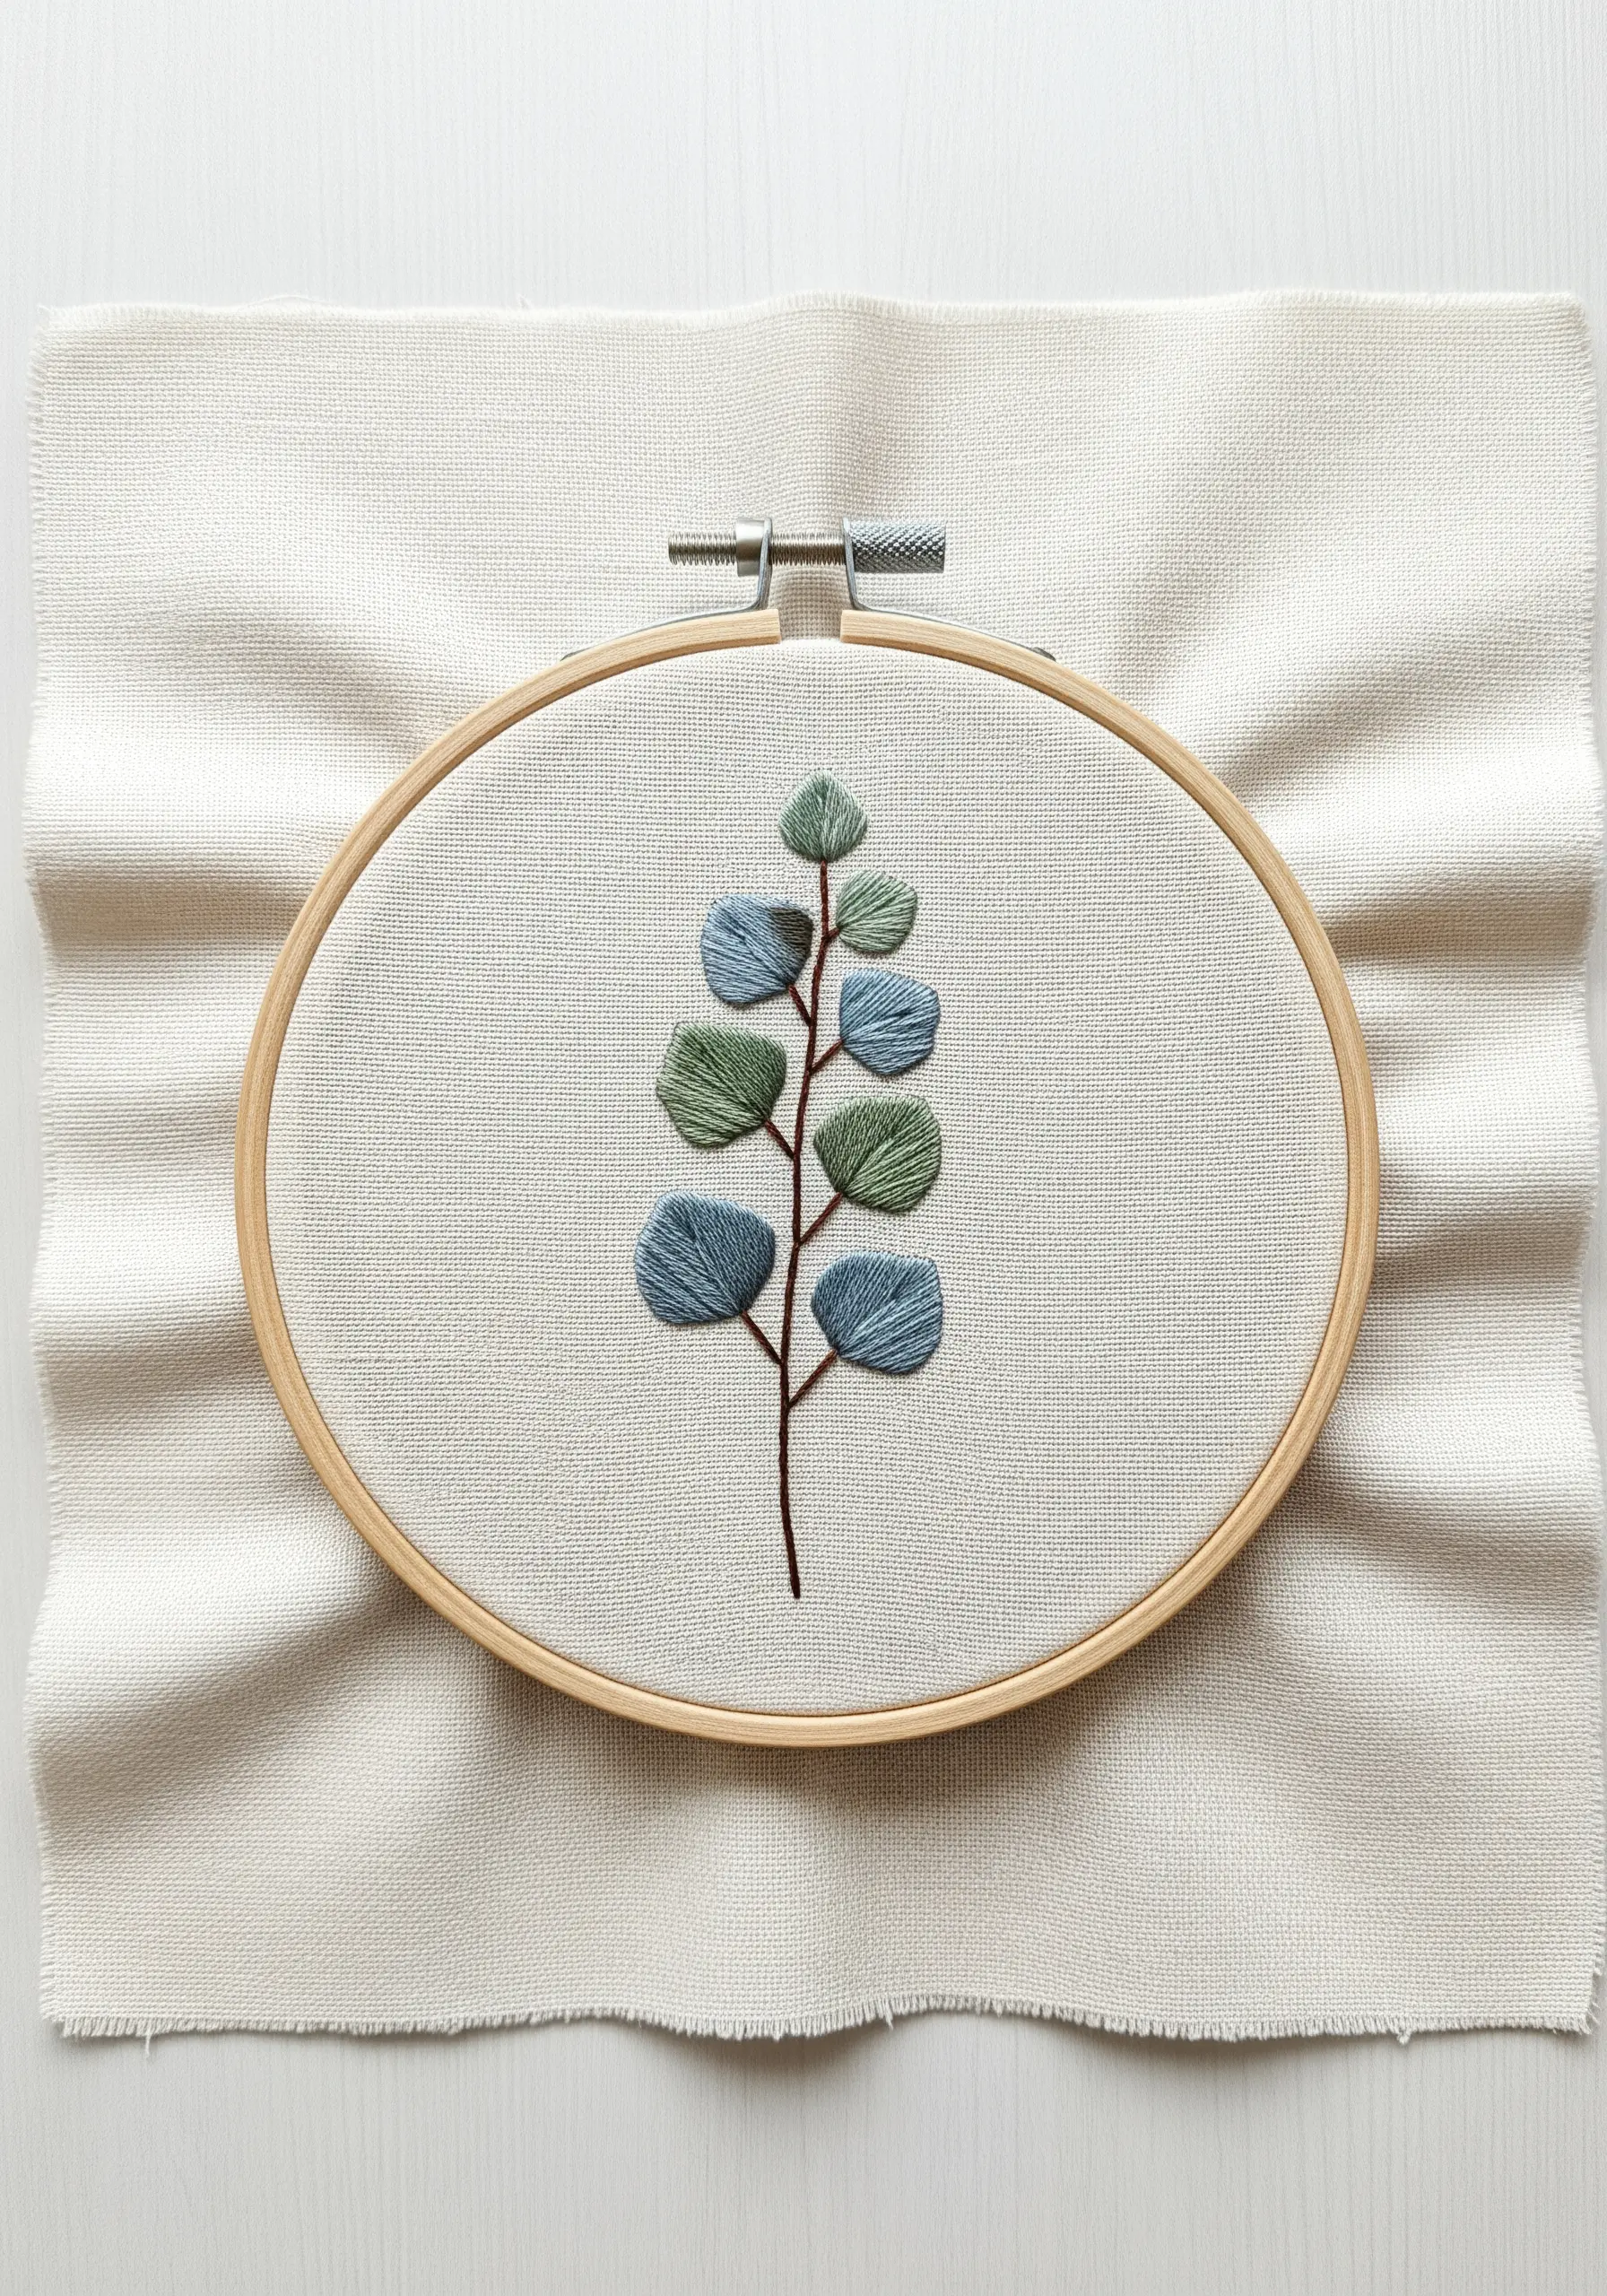
Create a sense of naturalism by varying the direction of your satin stitches.
Instead of stitching straight across, angle the stitches on each leaf toward the central stem, mimicking the way a real leaf grows.
Use three strands of floss for the leaves to keep them looking delicate, and switch to a darker, four-strand thread for the stem to give it structure.
This subtle shift in thread weight adds depth and makes the simple motif feel more intentional and refined.
2. A Study in Radiating Lines
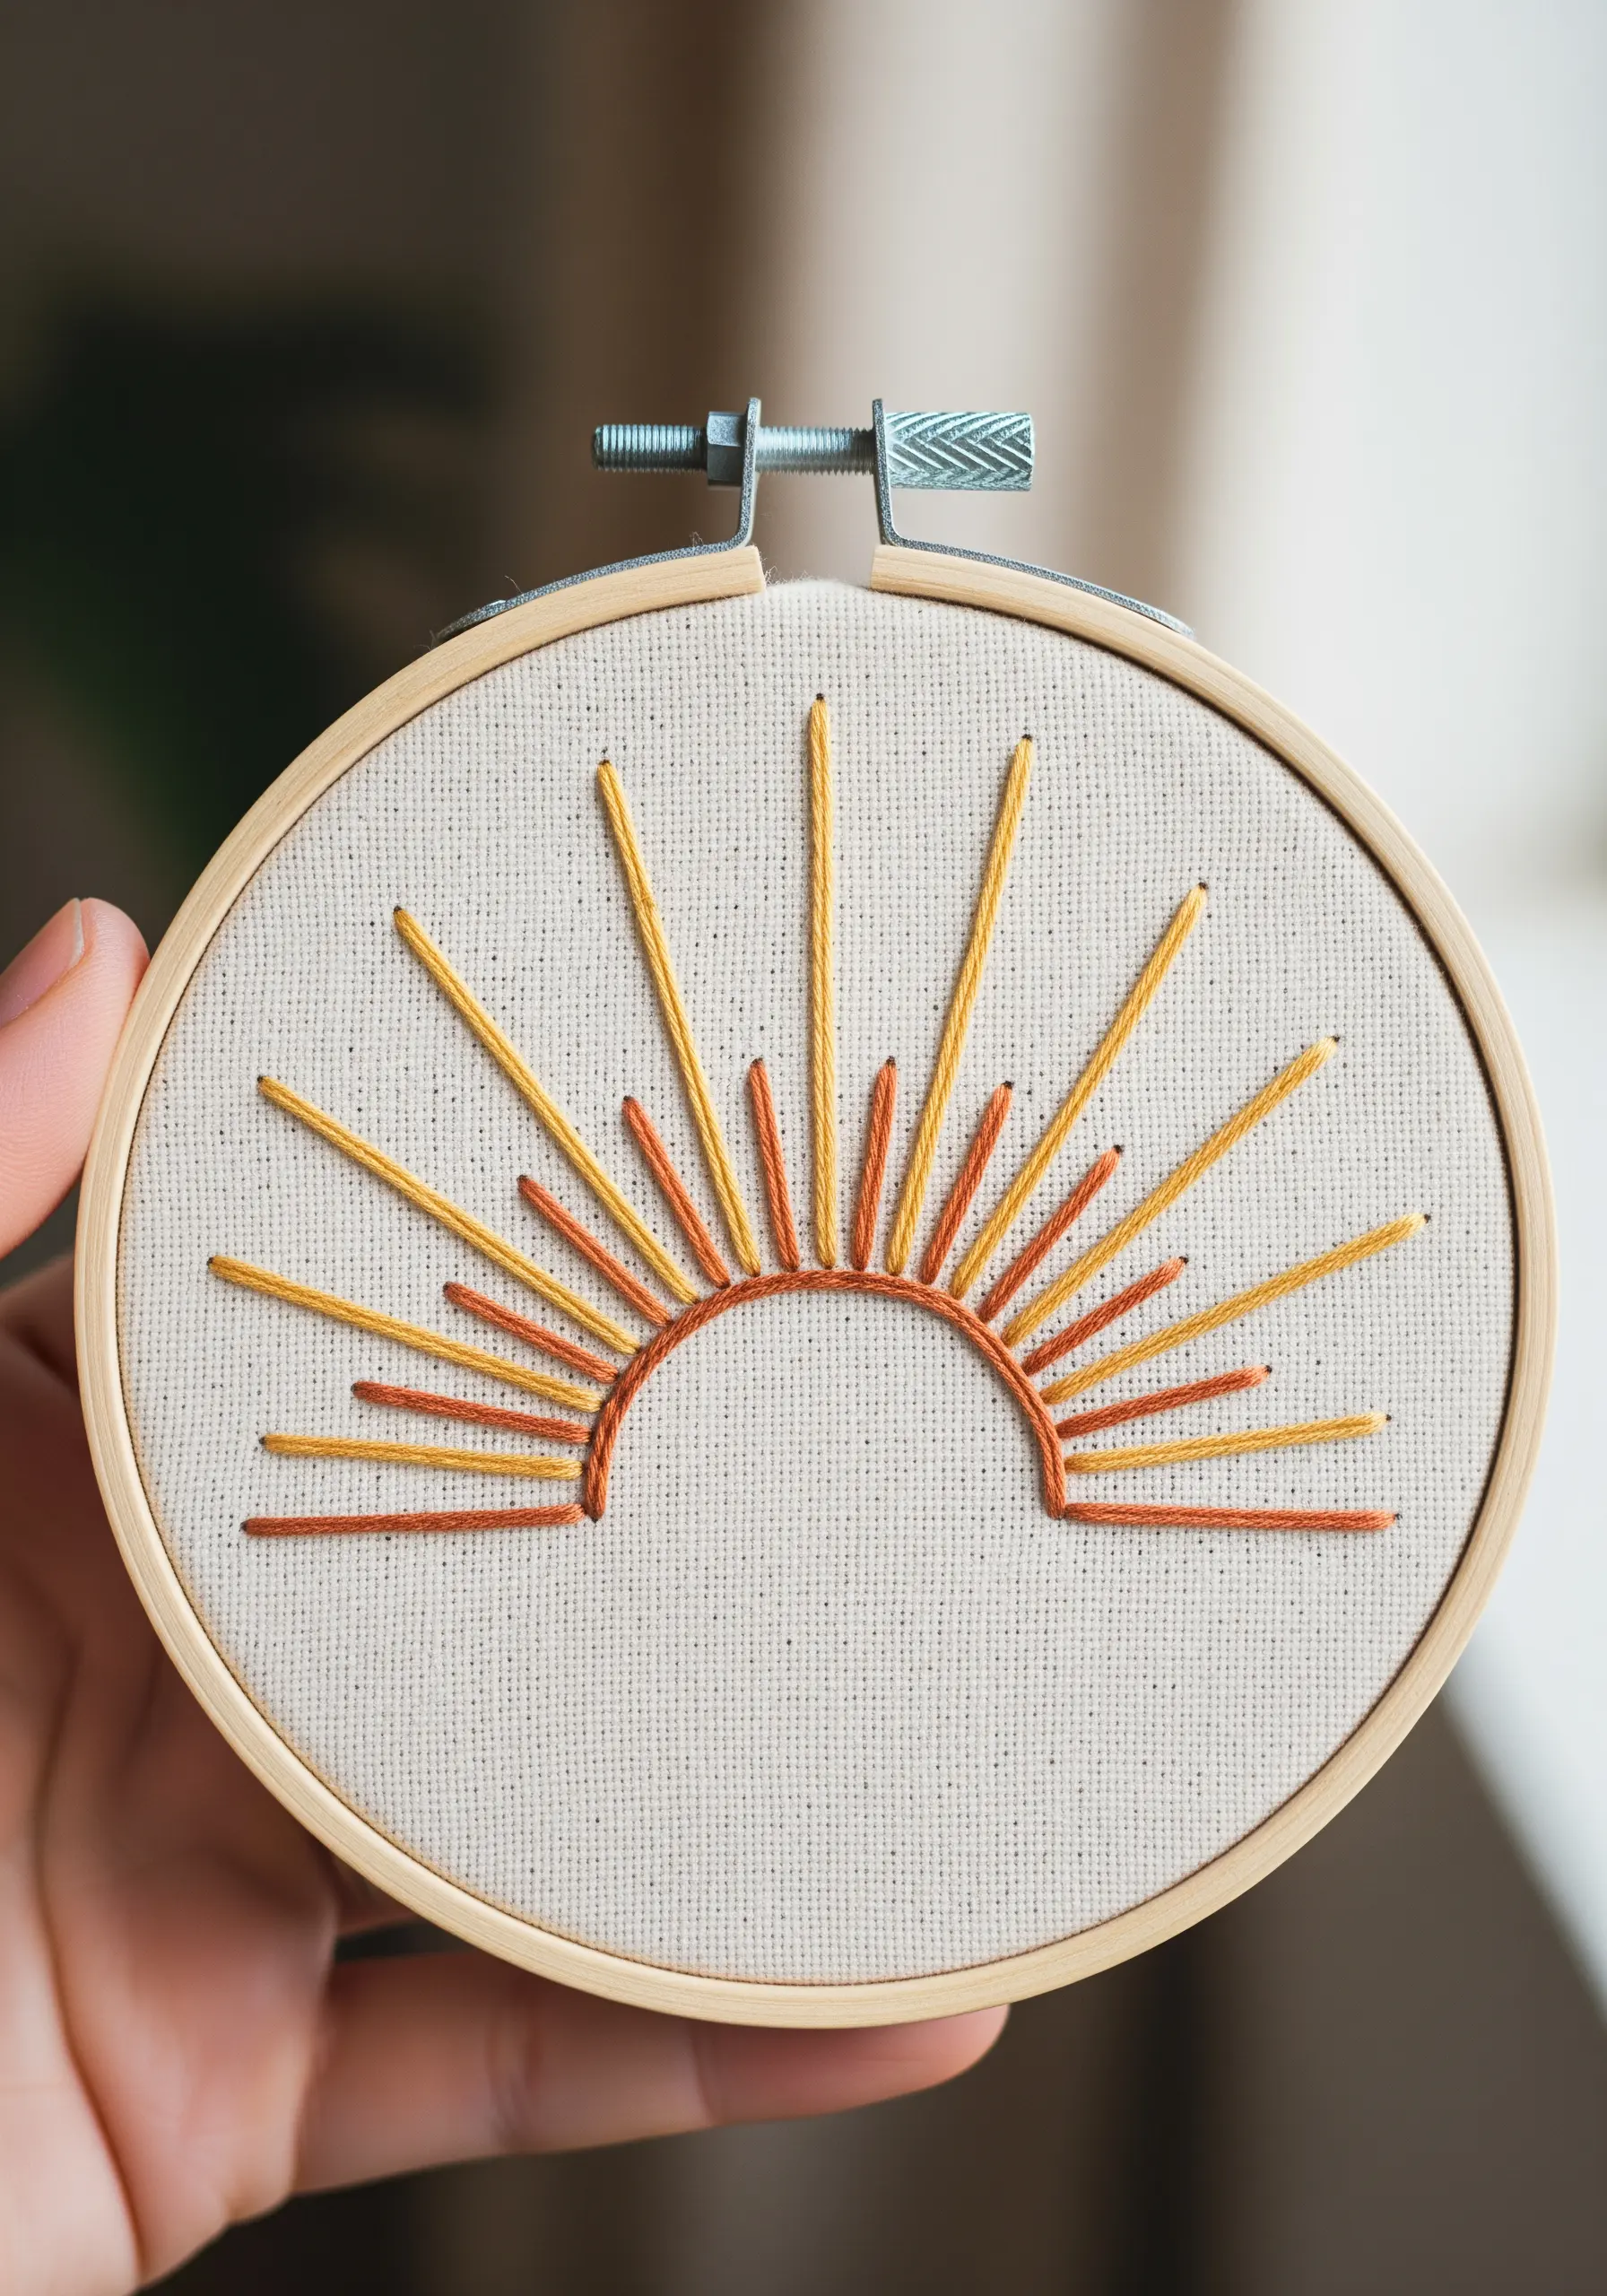
This design is a perfect exercise in achieving clean, precise straight stitches.
To ensure your sun rays are perfectly sharp, mark the start and end points of each line with a fabric pen before you begin.
Create visual rhythm by alternating between two harmonious colors, like ochre and marigold.
You can also add subtle depth by using a different number of strands for each color—for example, three for the yellow and two for the orange—which gives the composition a more dynamic feel.
3. Crafting a Tactile Felt Patch
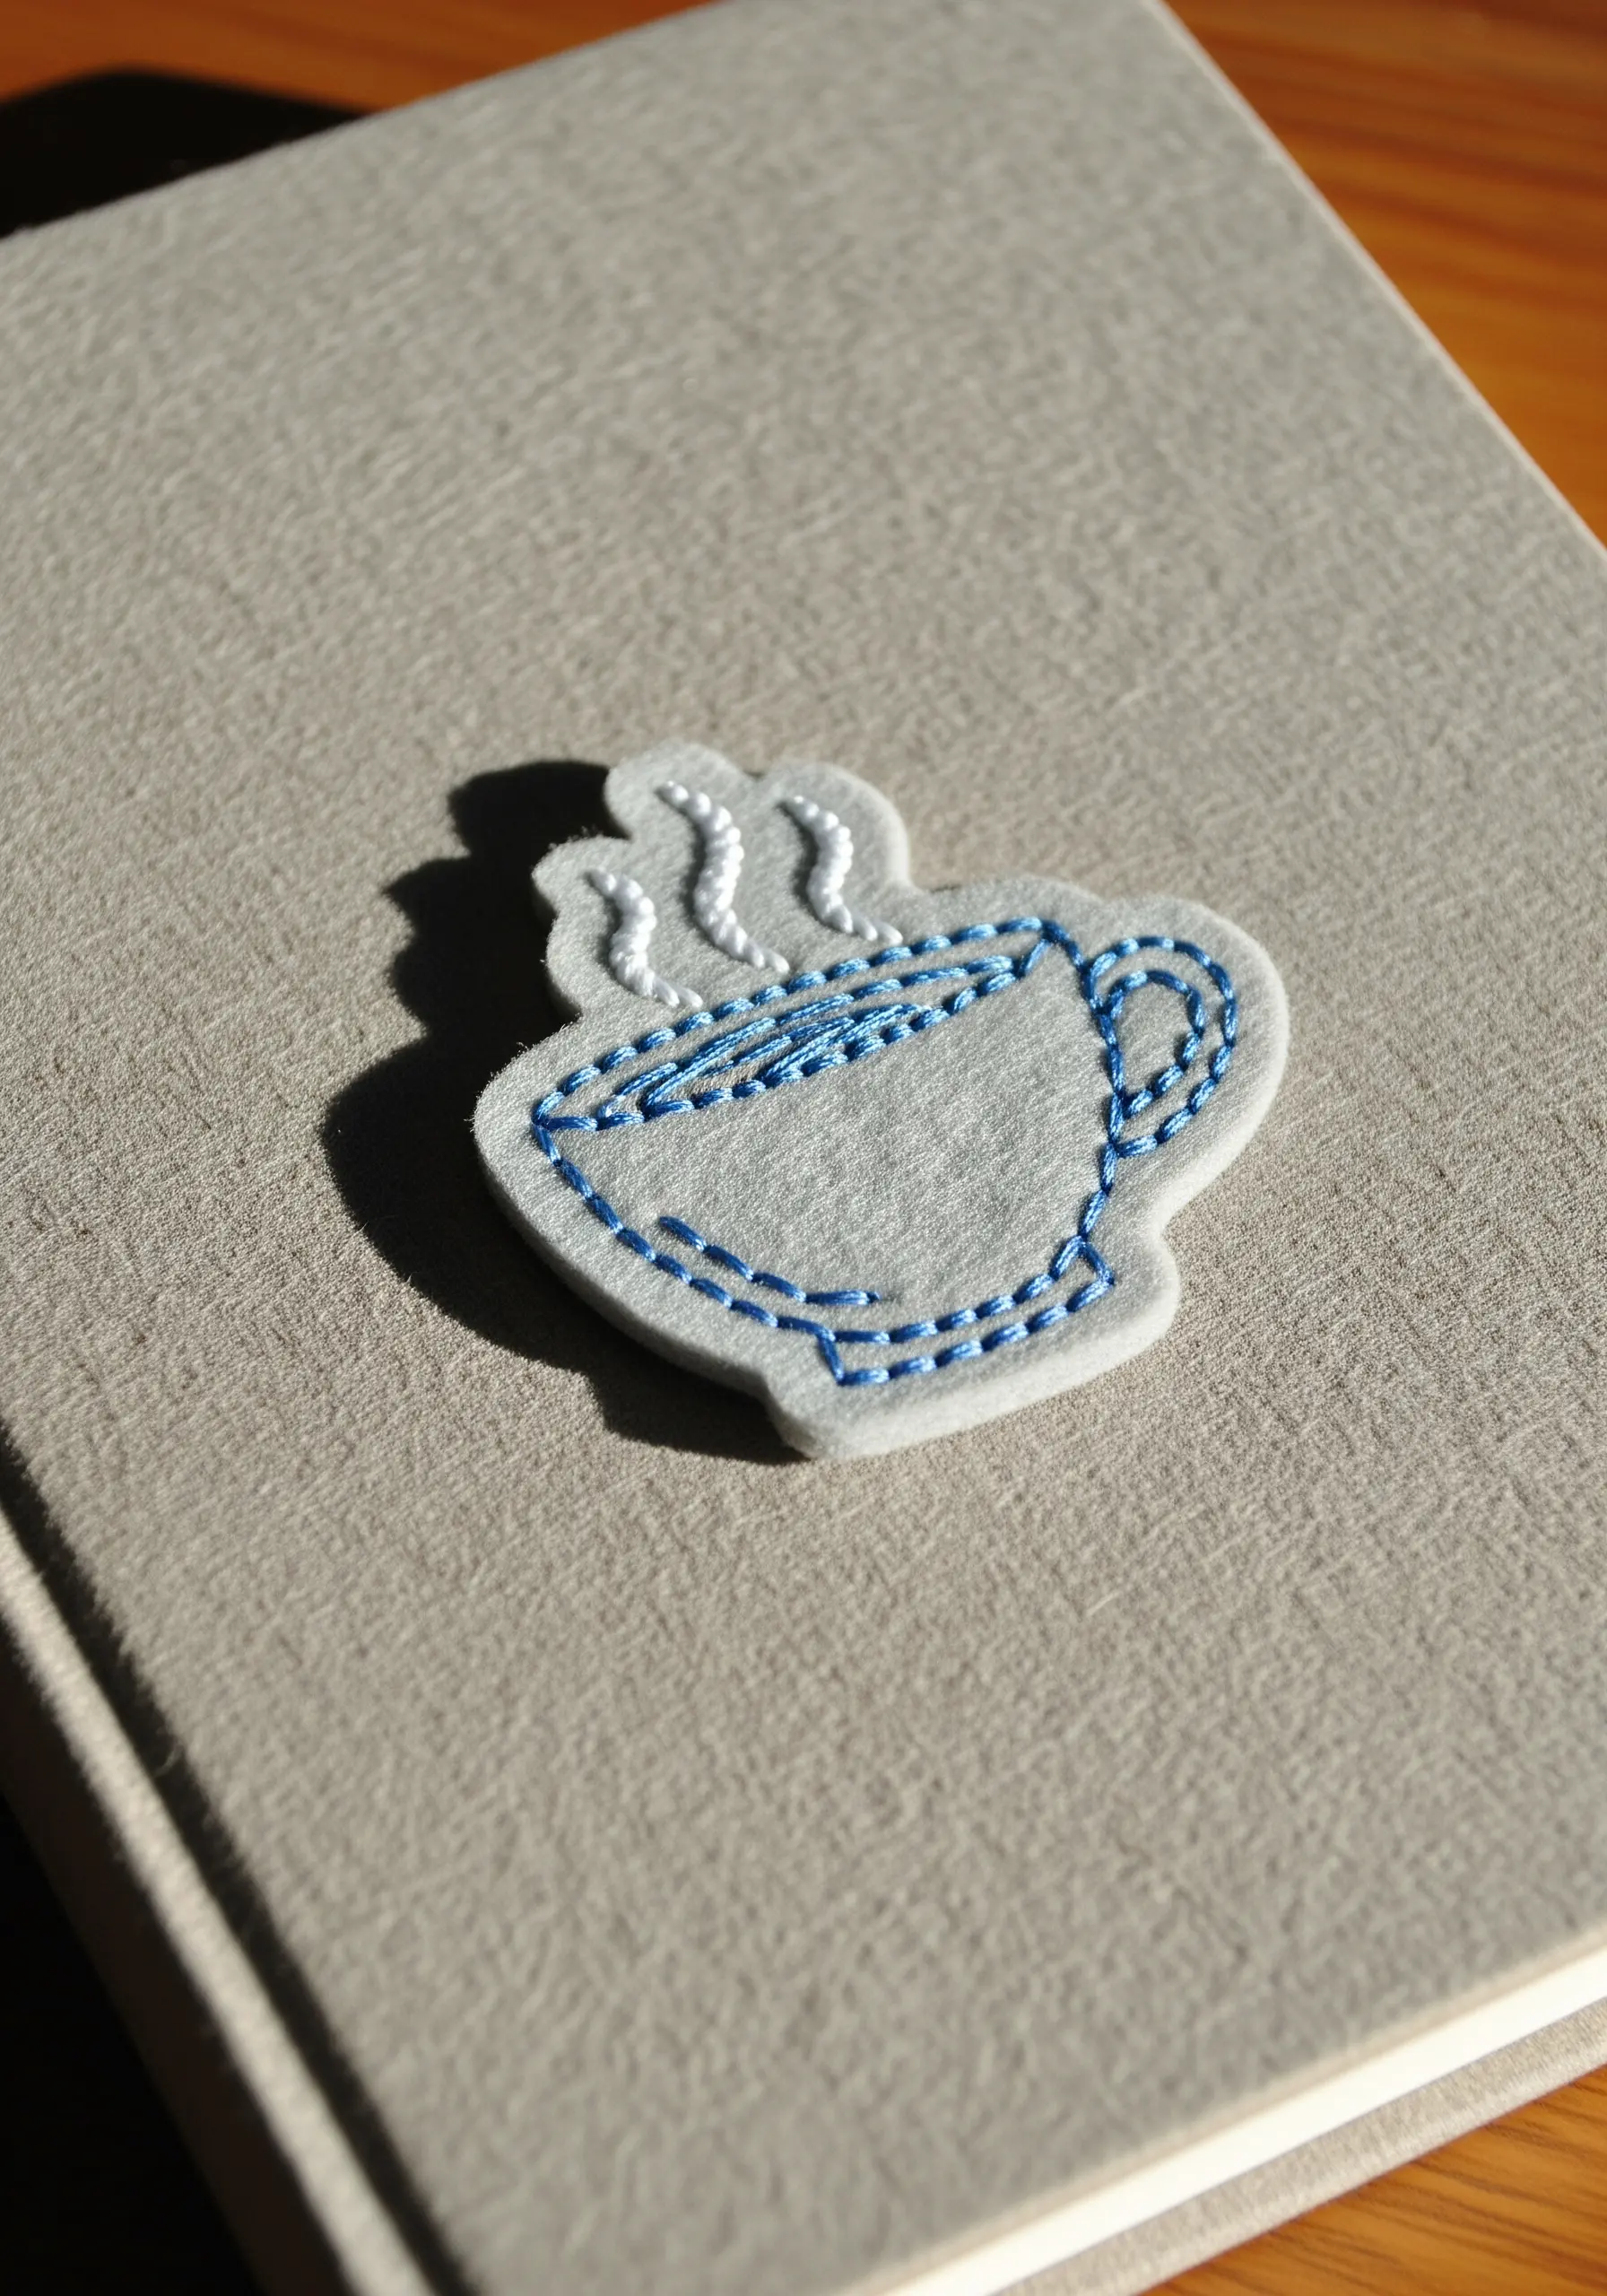
Take your embroidery off the hoop by creating a sturdy felt patch.
Use a simple running stitch for the details, focusing on maintaining consistent stitch length for a polished, hand-drawn look.
Choose a thread color that contrasts sharply with the felt—like this electric blue on soft grey—to make your design stand out.
To give your patch structure, use stiffened felt or iron a fusible backing onto regular craft felt before you begin stitching.
4. Stitching a Celestial Constellation

Make your stitches shine by working on high-contrast fabric.
A deep navy or black Aida cloth makes white or metallic thread appear luminous, creating a striking night-sky effect.
Instead of using French knots for stars, try the lazy daisy stitch; it creates a soft, star-like shape with more definition.
Connect the stars with a fine, two-strand backstitch to ensure the constellation lines remain delicate and don’t overpower the sparkling points of light.
5. Exploring Geometric Fill Stitches
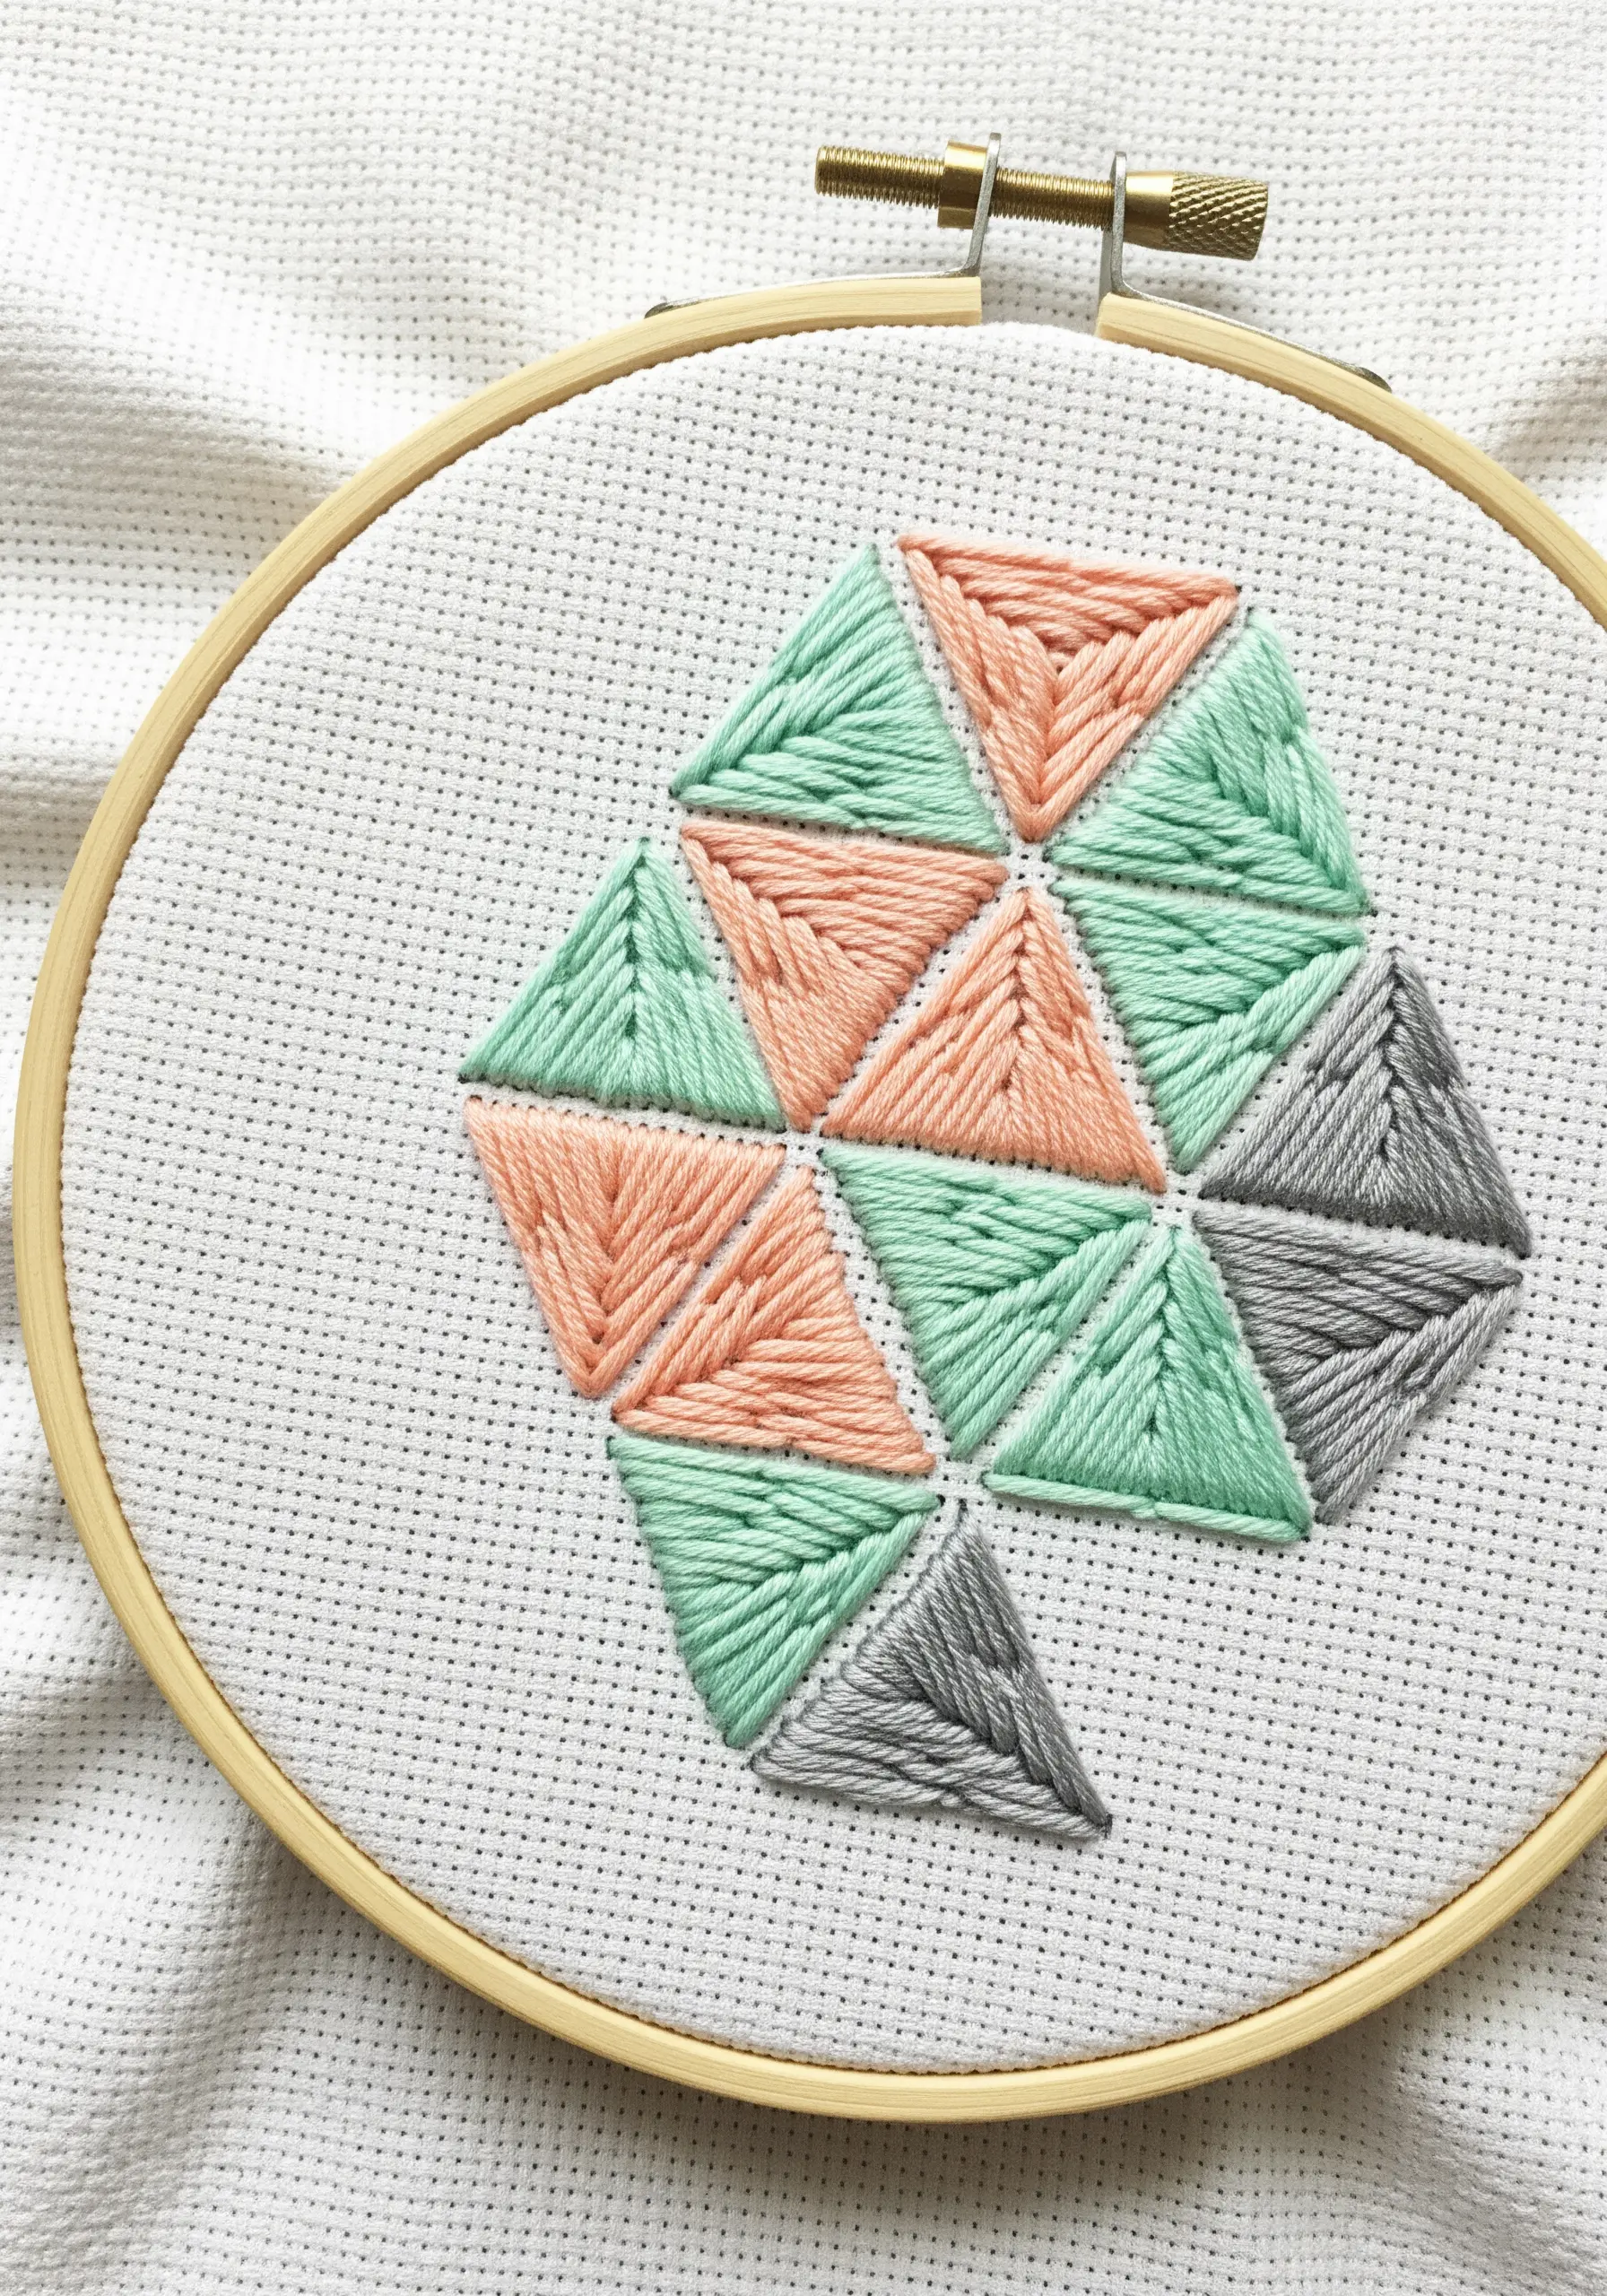
This project is a small masterclass in directional satin stitching.
Before filling each triangle, outline it with a split stitch to create a crisp, raised edge that will keep your fill stitches neat.
Vary the angle of your satin stitch in adjacent triangles—some horizontal, some vertical, some diagonal—to create a woven, light-catching texture.
A limited palette of three complementary colors, like mint, peach, and grey, results in a modern, balanced composition.
6. Capturing Texture in a Honeybee

Bring an insect motif to life by focusing on texture and material choice.
Use a glossy rayon or silk thread for the body segments to give them a natural sheen, stitched with a tight satin stitch that follows the curve of the body.
For the wings, switch to a single strand of grey or off-white cotton floss and use an open fill—like spaced-out straight stitches—to suggest transparency.
This contrast between the solid body and ethereal wings creates a remarkably realistic effect.
7. The Rhythmic Ocean Wave
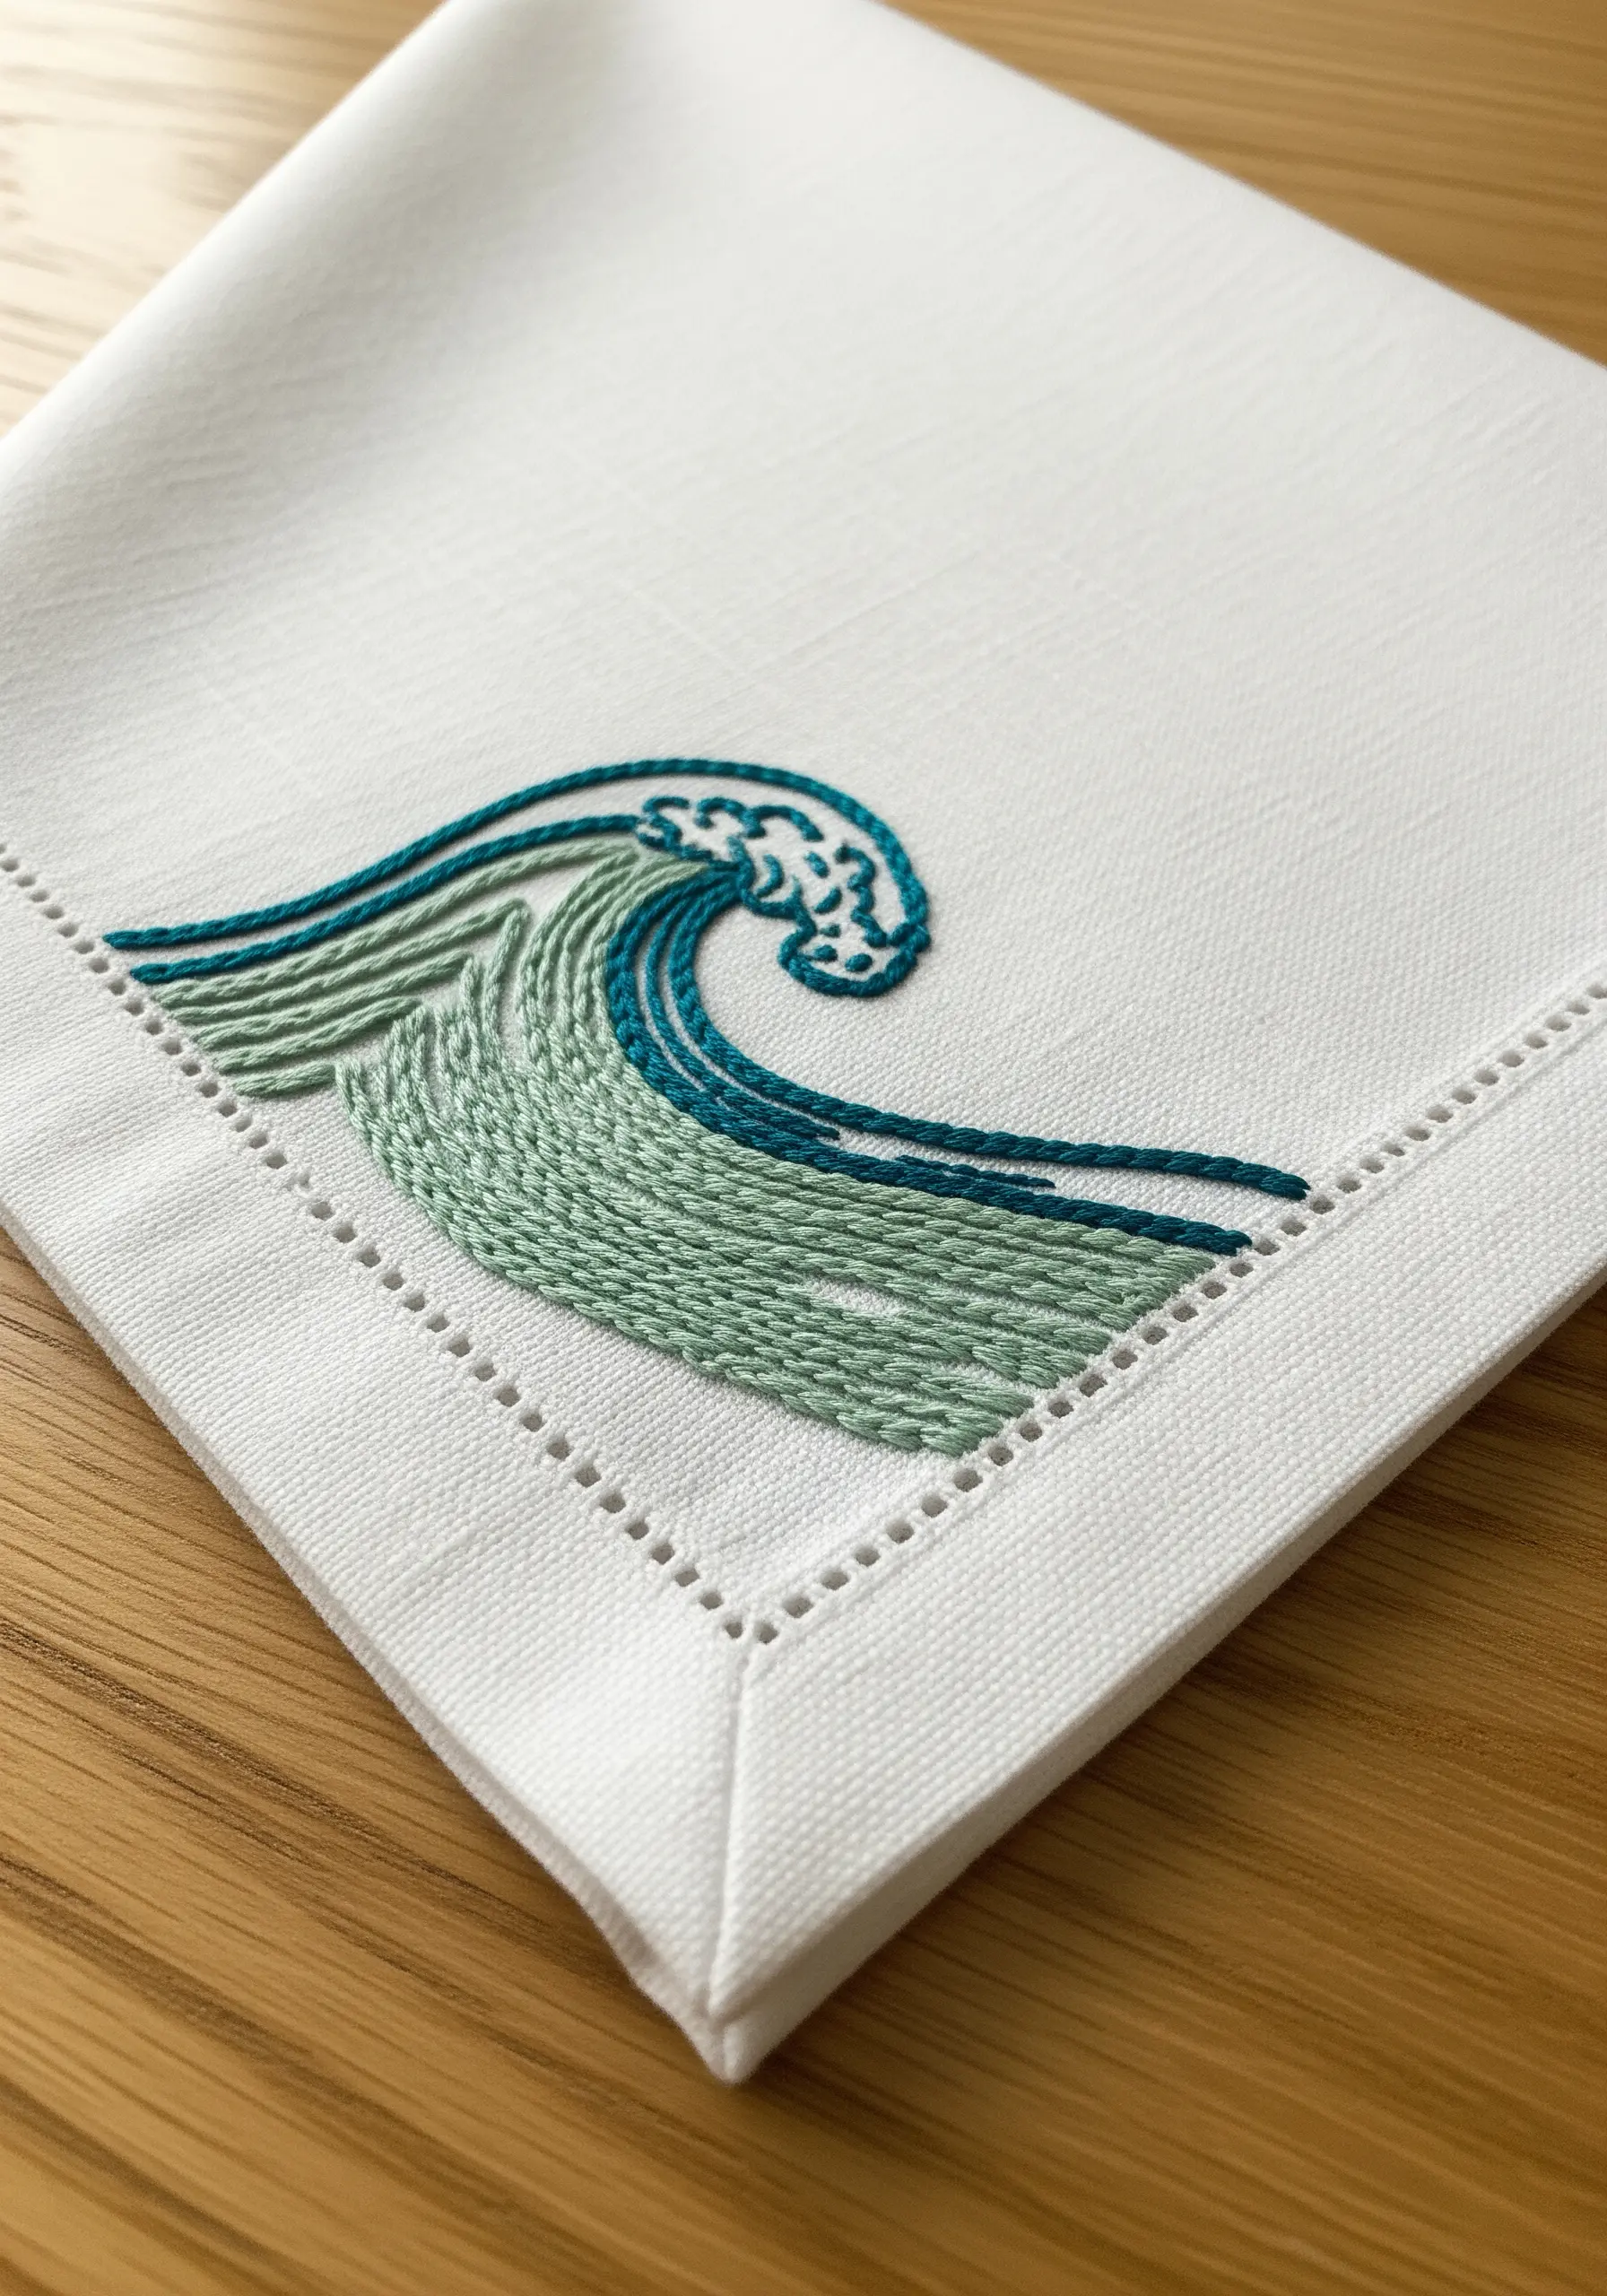 ocean wave on a linen napkin using greens and teals.” style=”max-width:100%; height:auto;”>
Capture the essence of movement by using stitch direction to your advantage.
Fill the body of the wave with long and short stitches, angling them to follow the water’s curve and blending two or three shades of thread for a natural gradient.
To create the texture of seafoam, use a line of tightly packed French knots or chain stitches along the crest of the wave.
When stitching on finished linens, always use a water-soluble stabilizer to prevent puckering and ensure your design lies flat.
8. An Exercise in Line and Texture
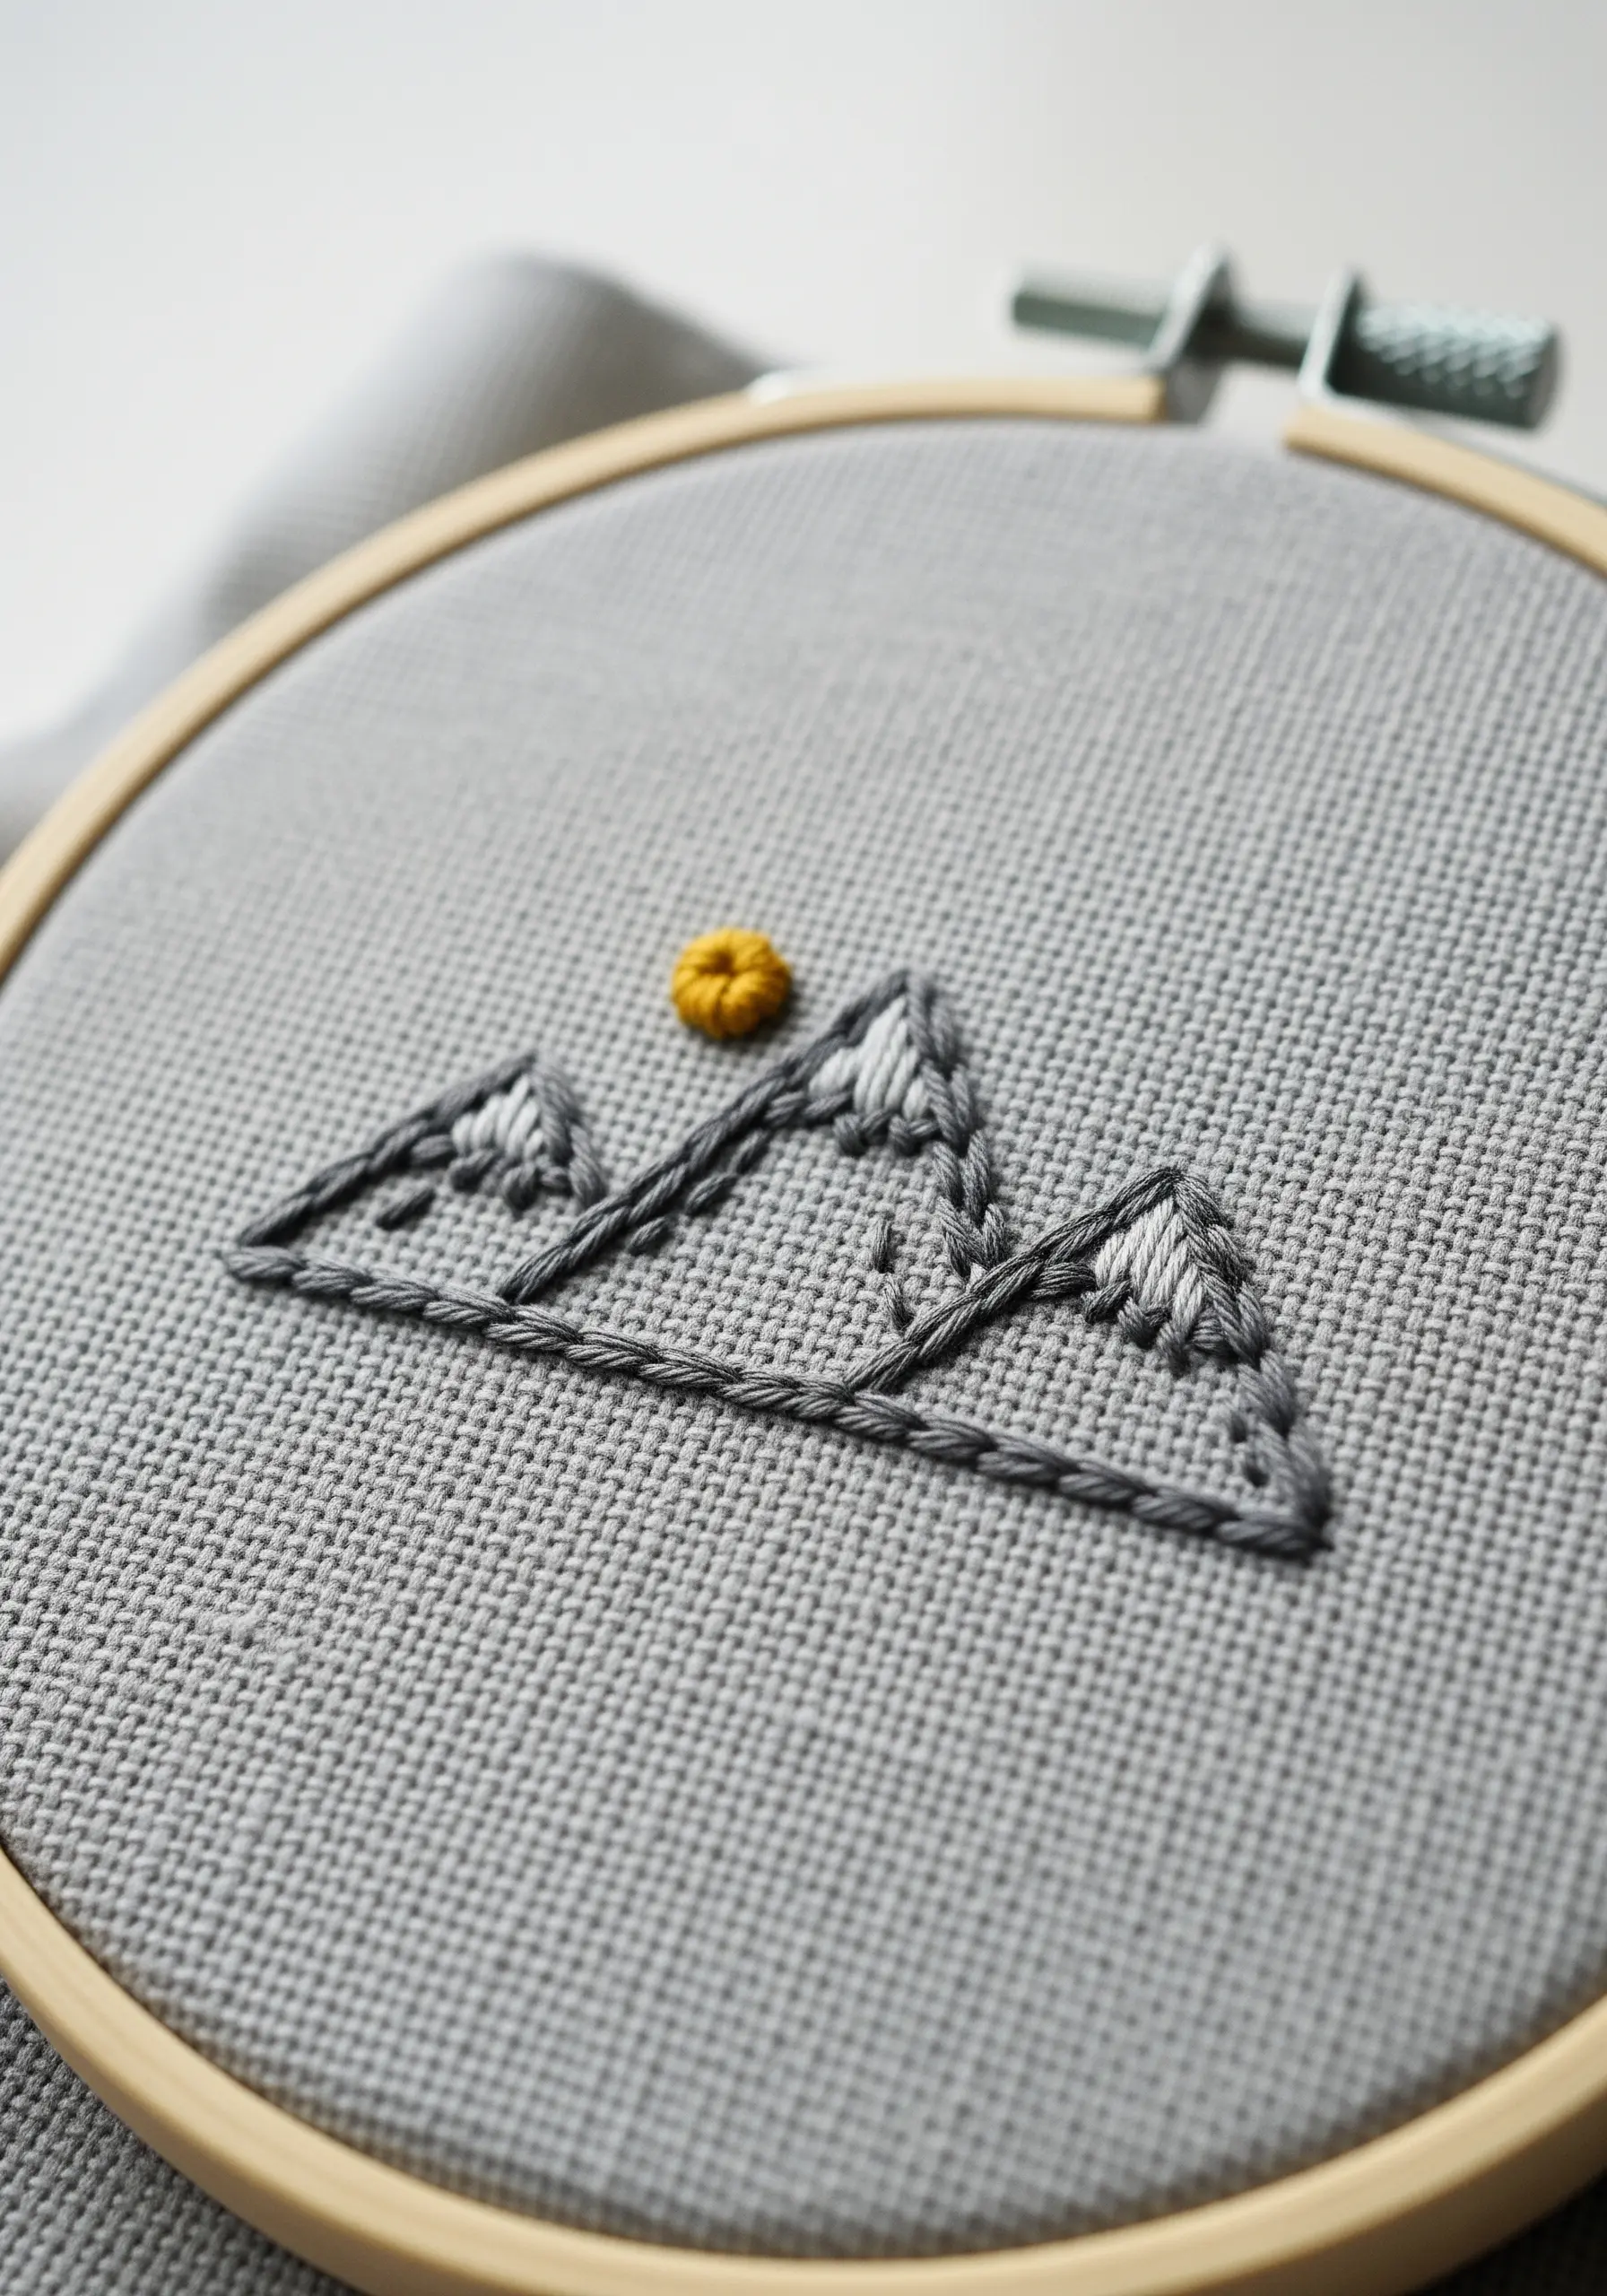
This design proves that minimalist art can have a powerful presence.
Elevate the simple outline by using a whipped backstitch, which creates a solid, cord-like line with more definition than a standard backstitch.
Fill the snowcaps with a few strategically placed satin stitches in a contrasting white or silver thread for a clean, graphic highlight.
The single woven wheel for the sun introduces a point of focused texture, perfectly balancing the smooth lines of the mountains.
9. The Art of the Padded Monogram

Give a simple initial a luxurious, three-dimensional quality with padding.
First, stitch a base layer of small, dense seed stitches or satin stitches within your letter’s outline.
Then, work your final satin stitch layer on top, making sure your stitches run perpendicular to the direction of the padding stitches.
This technique physically raises the thread off the fabric, creating beautiful highlights and shadows that make the monogram pop.
10. A Rustic Mushroom Bookmark
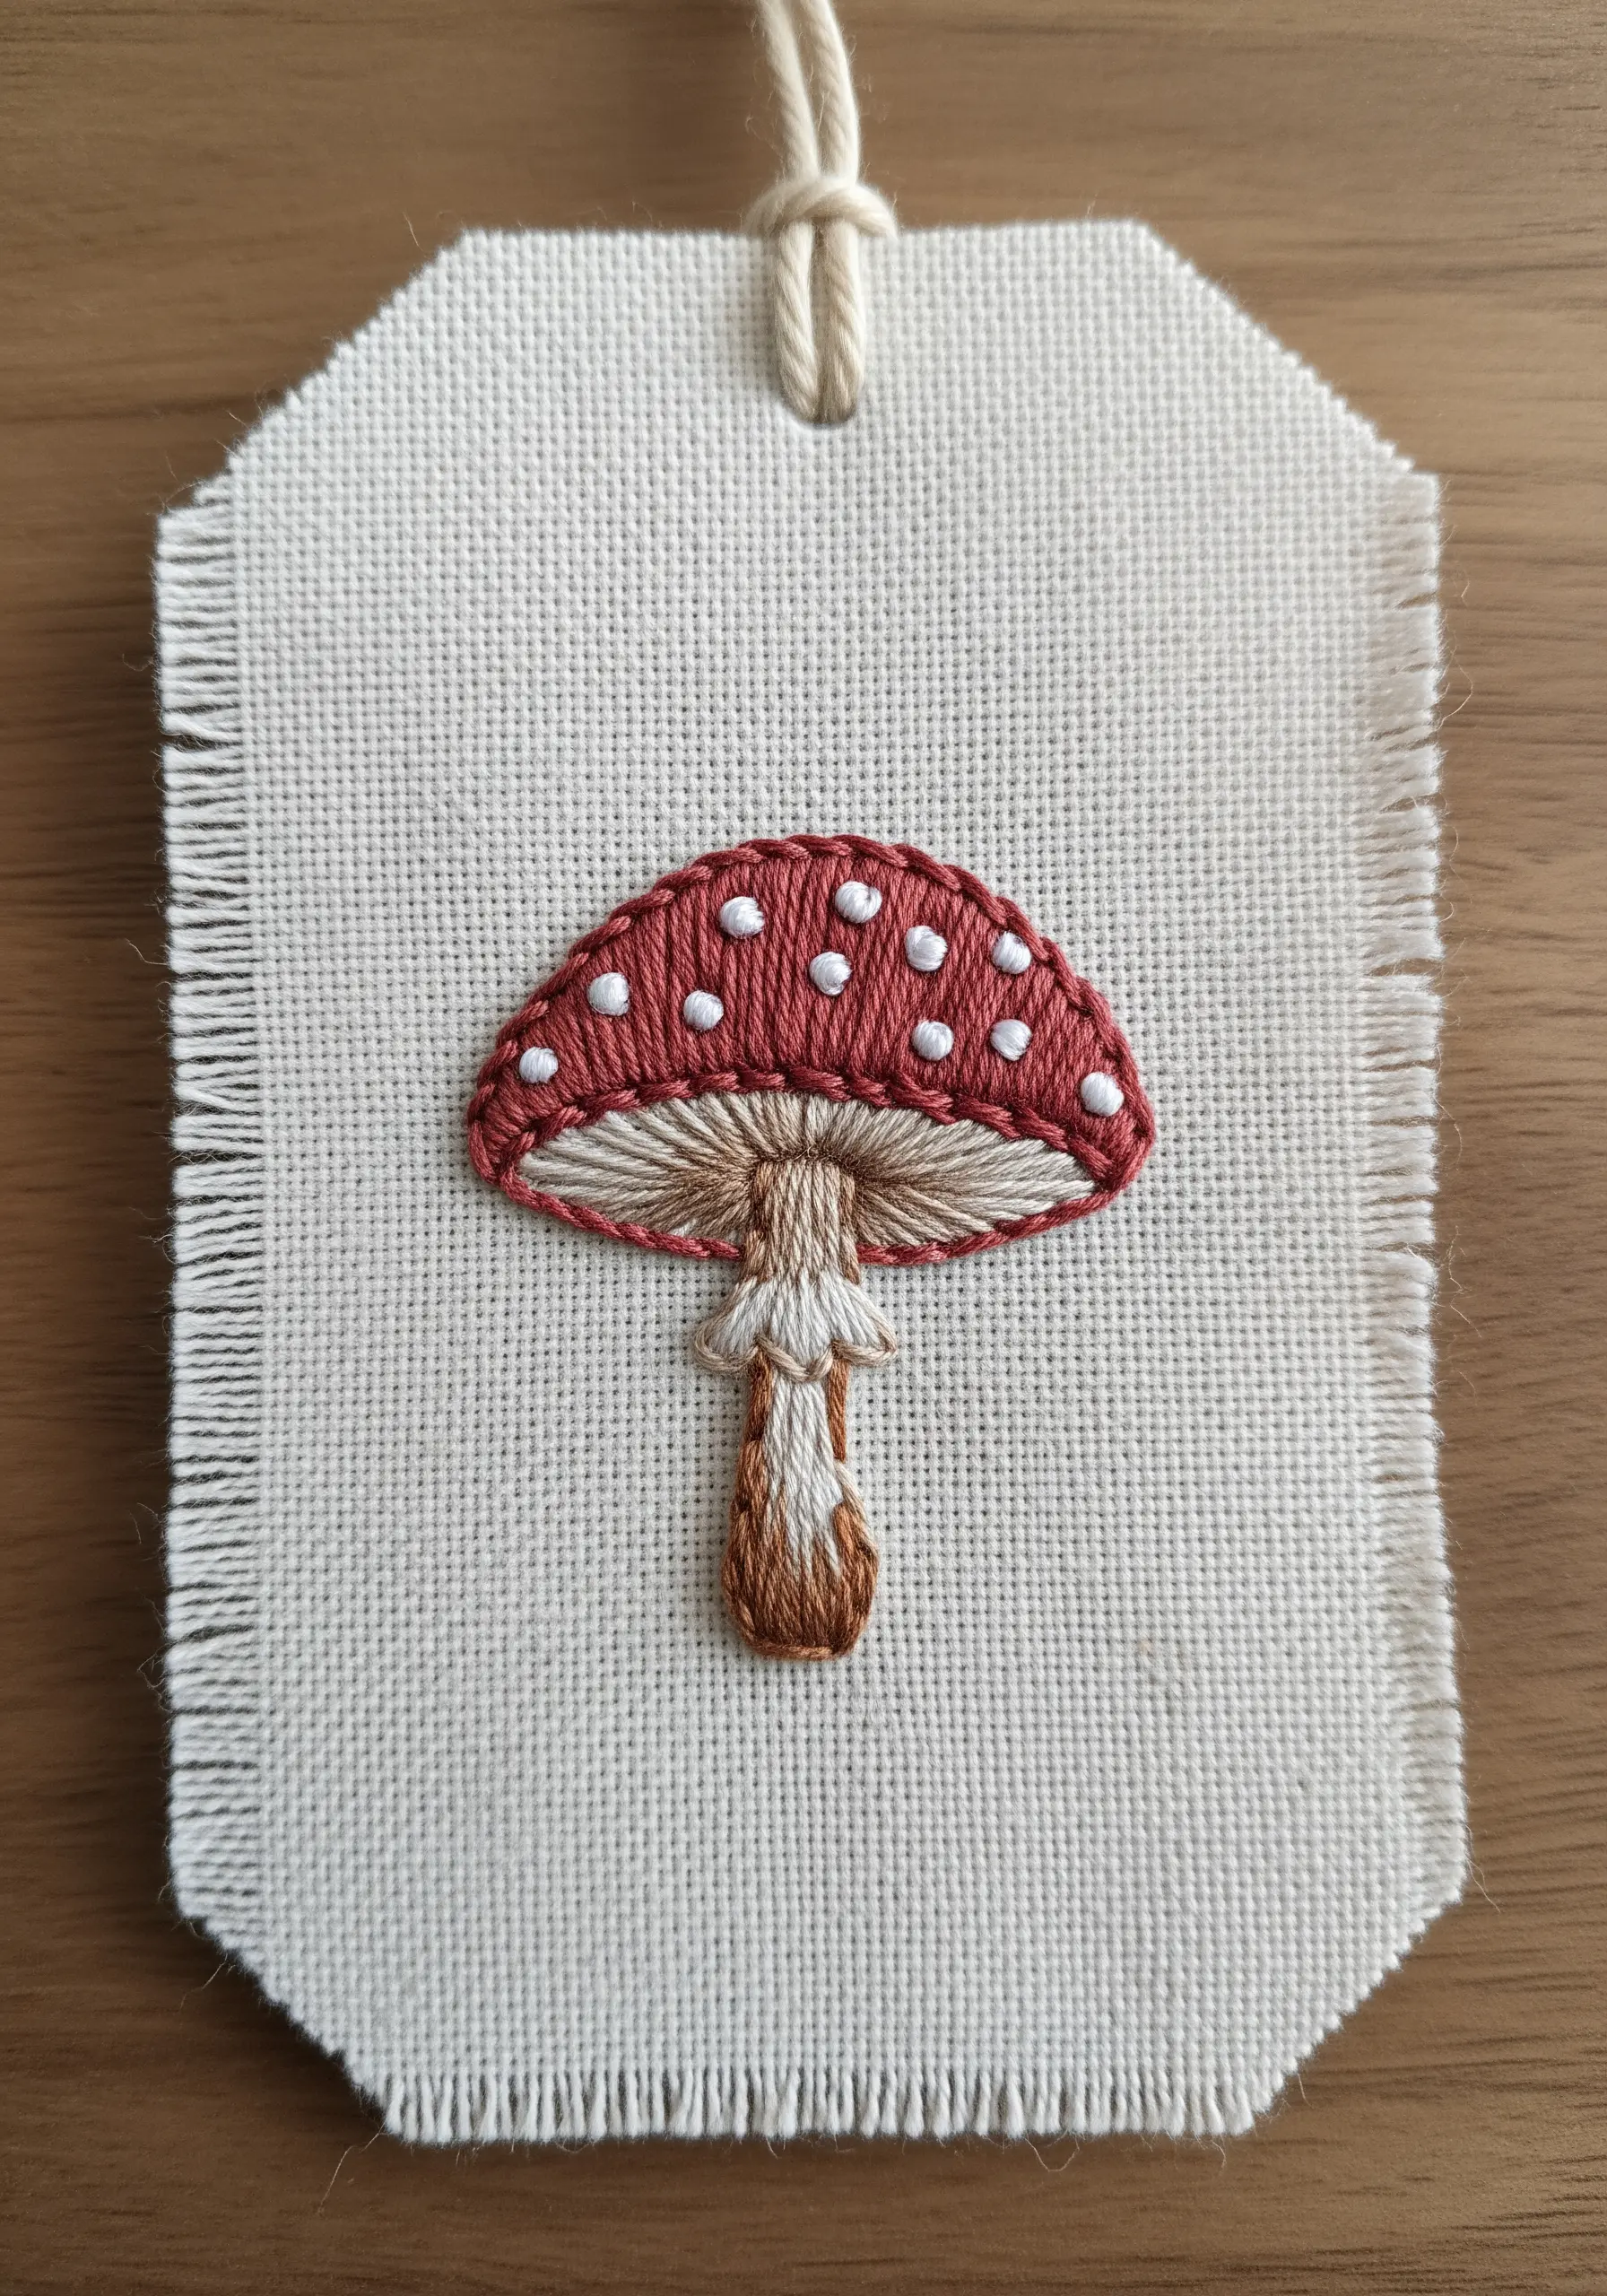
This project is perfect for combining smooth fills with textural details.
Work the cap and stem in a directional satin stitch, following the curves of your drawing.
Add dimension to the cap by scattering tiny, tight French knots in a contrasting color for the spots.
To create a bookmark, stitch on a heavy fabric like linen or canvas, back it with felt for a clean finish, and carefully fray the edges to enhance the rustic, handmade feel.
11. Building Texture on a Cactus
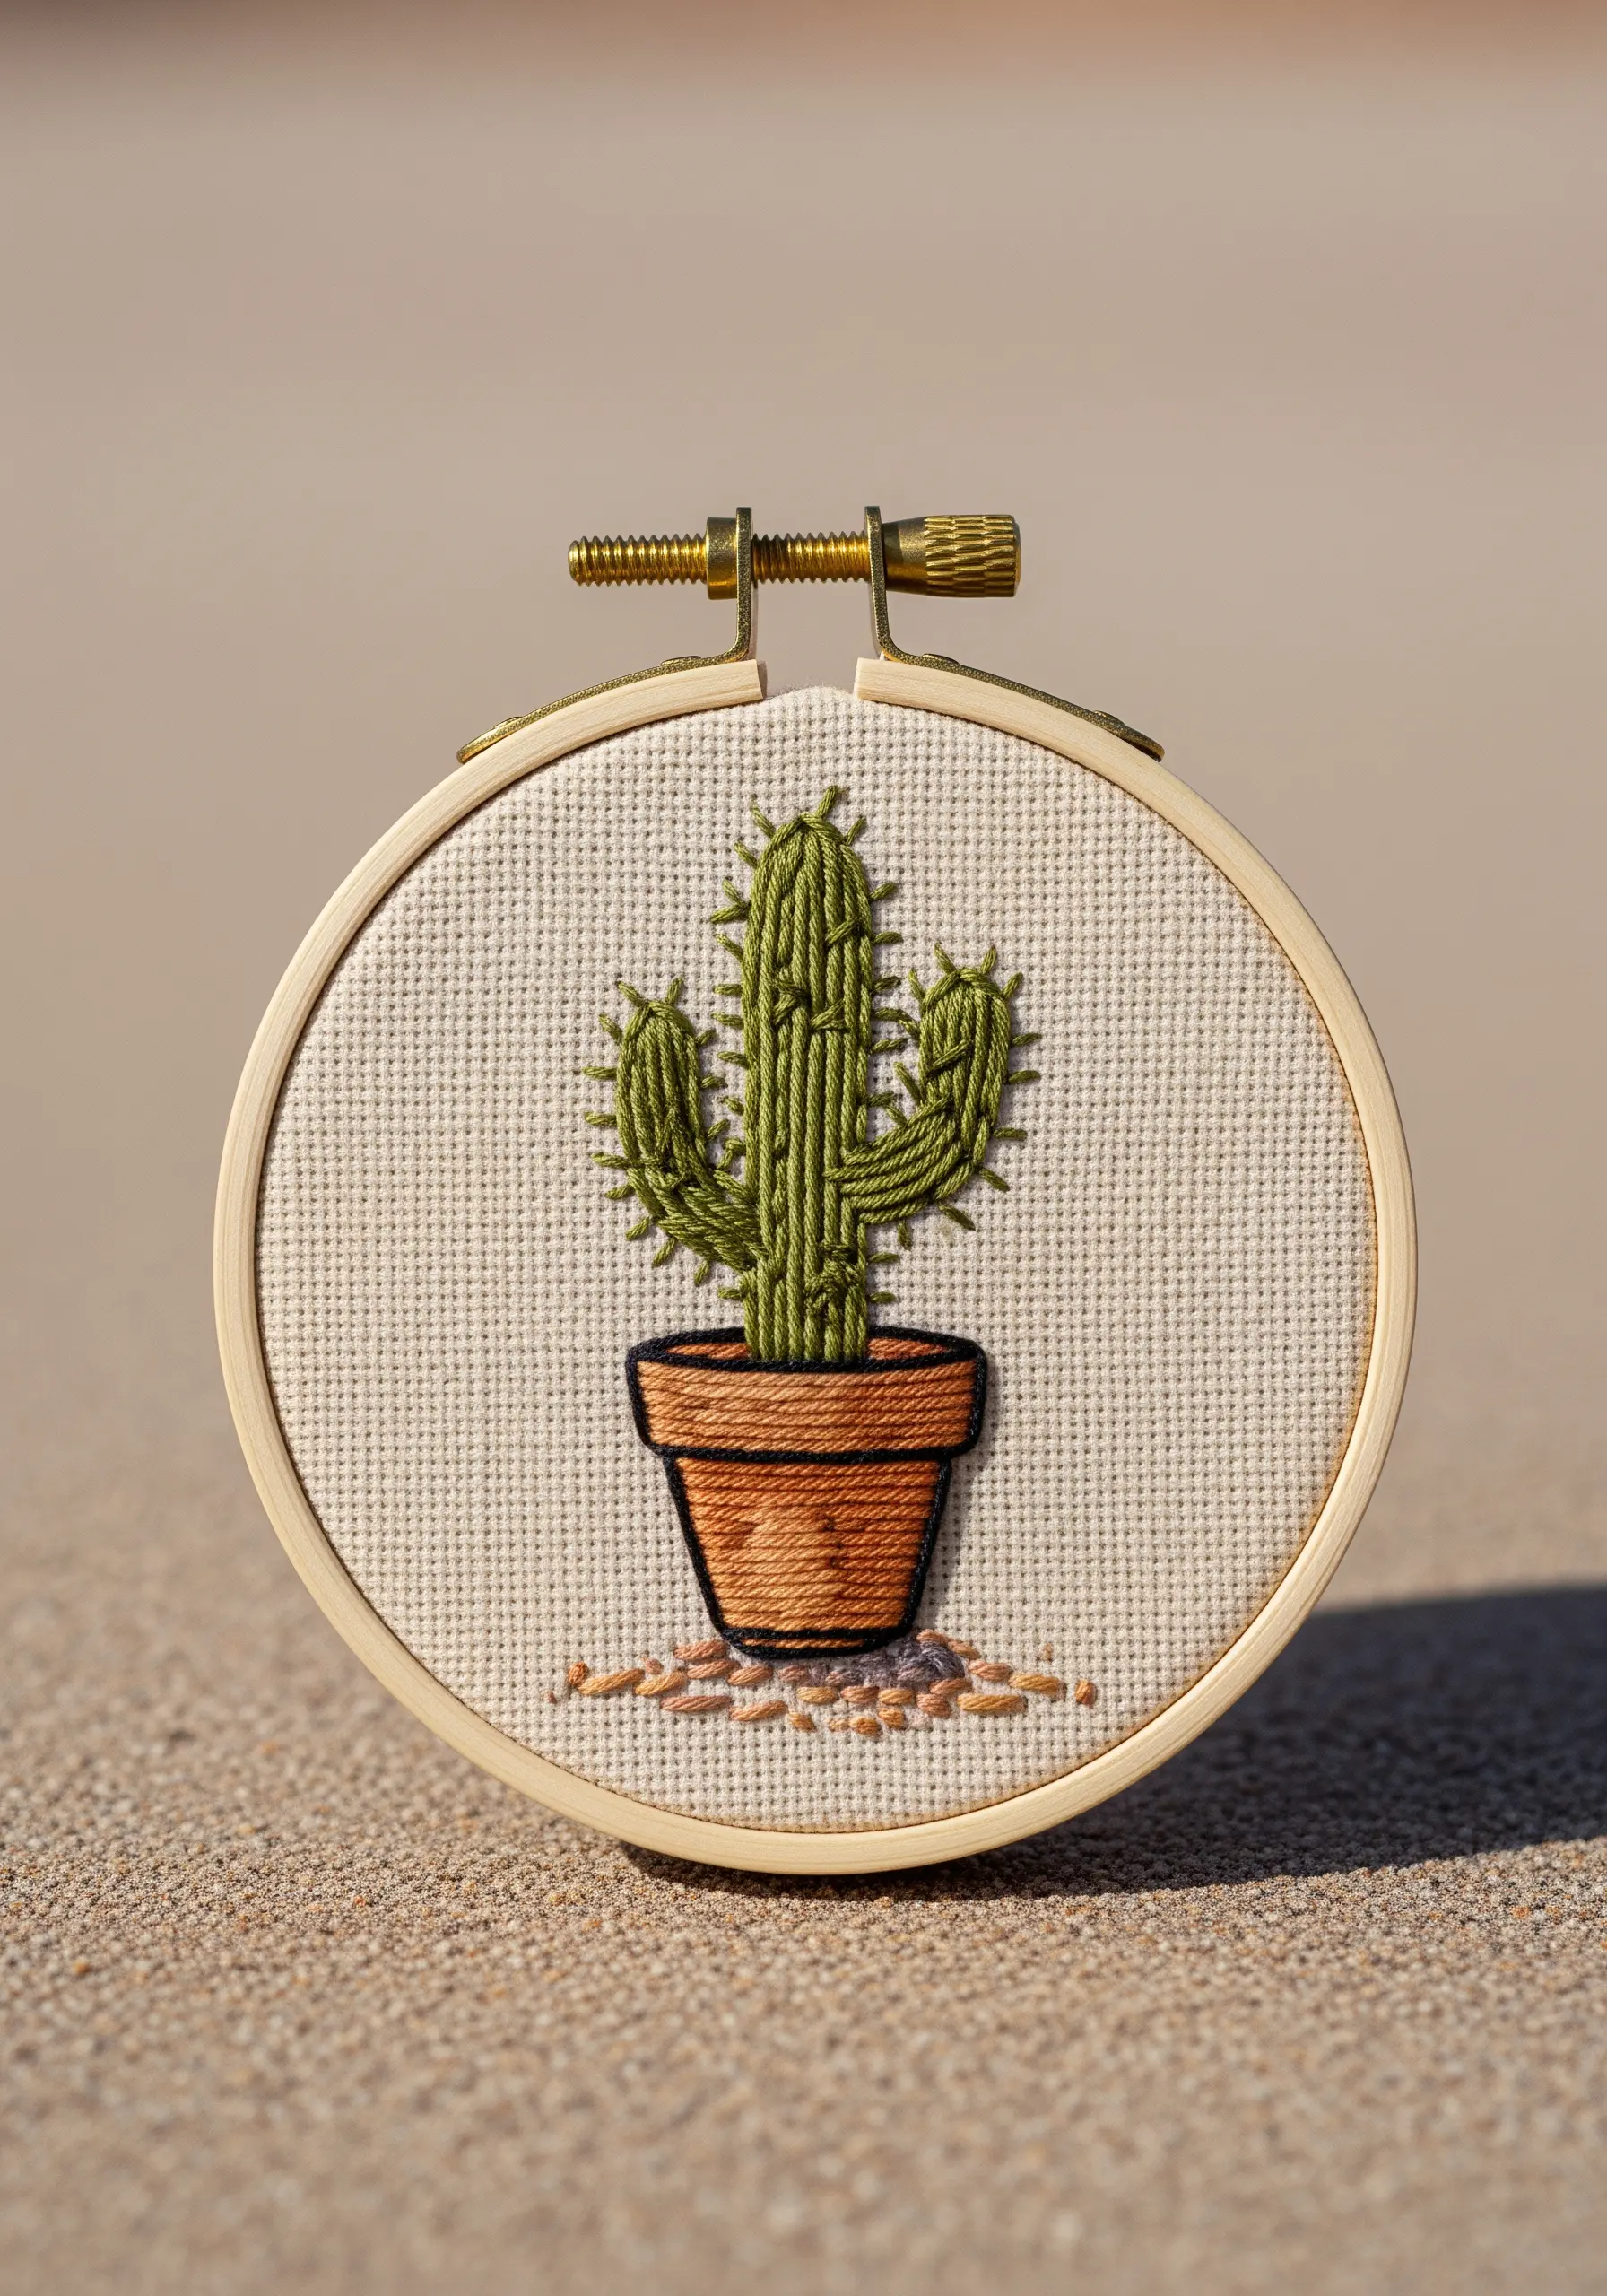
You can create a surprisingly realistic texture with the simplest of stitches.
First, fill the body of the cactus with long, vertical satin stitches.
Then, using a single strand of a slightly lighter or contrasting thread, scatter tiny straight stitches or seed stitches over the surface to act as spines.
This layering technique is incredibly effective for suggesting the prickly texture of a real cactus without overcomplicating the design.
12. Lunar Phases in Satin Stitch
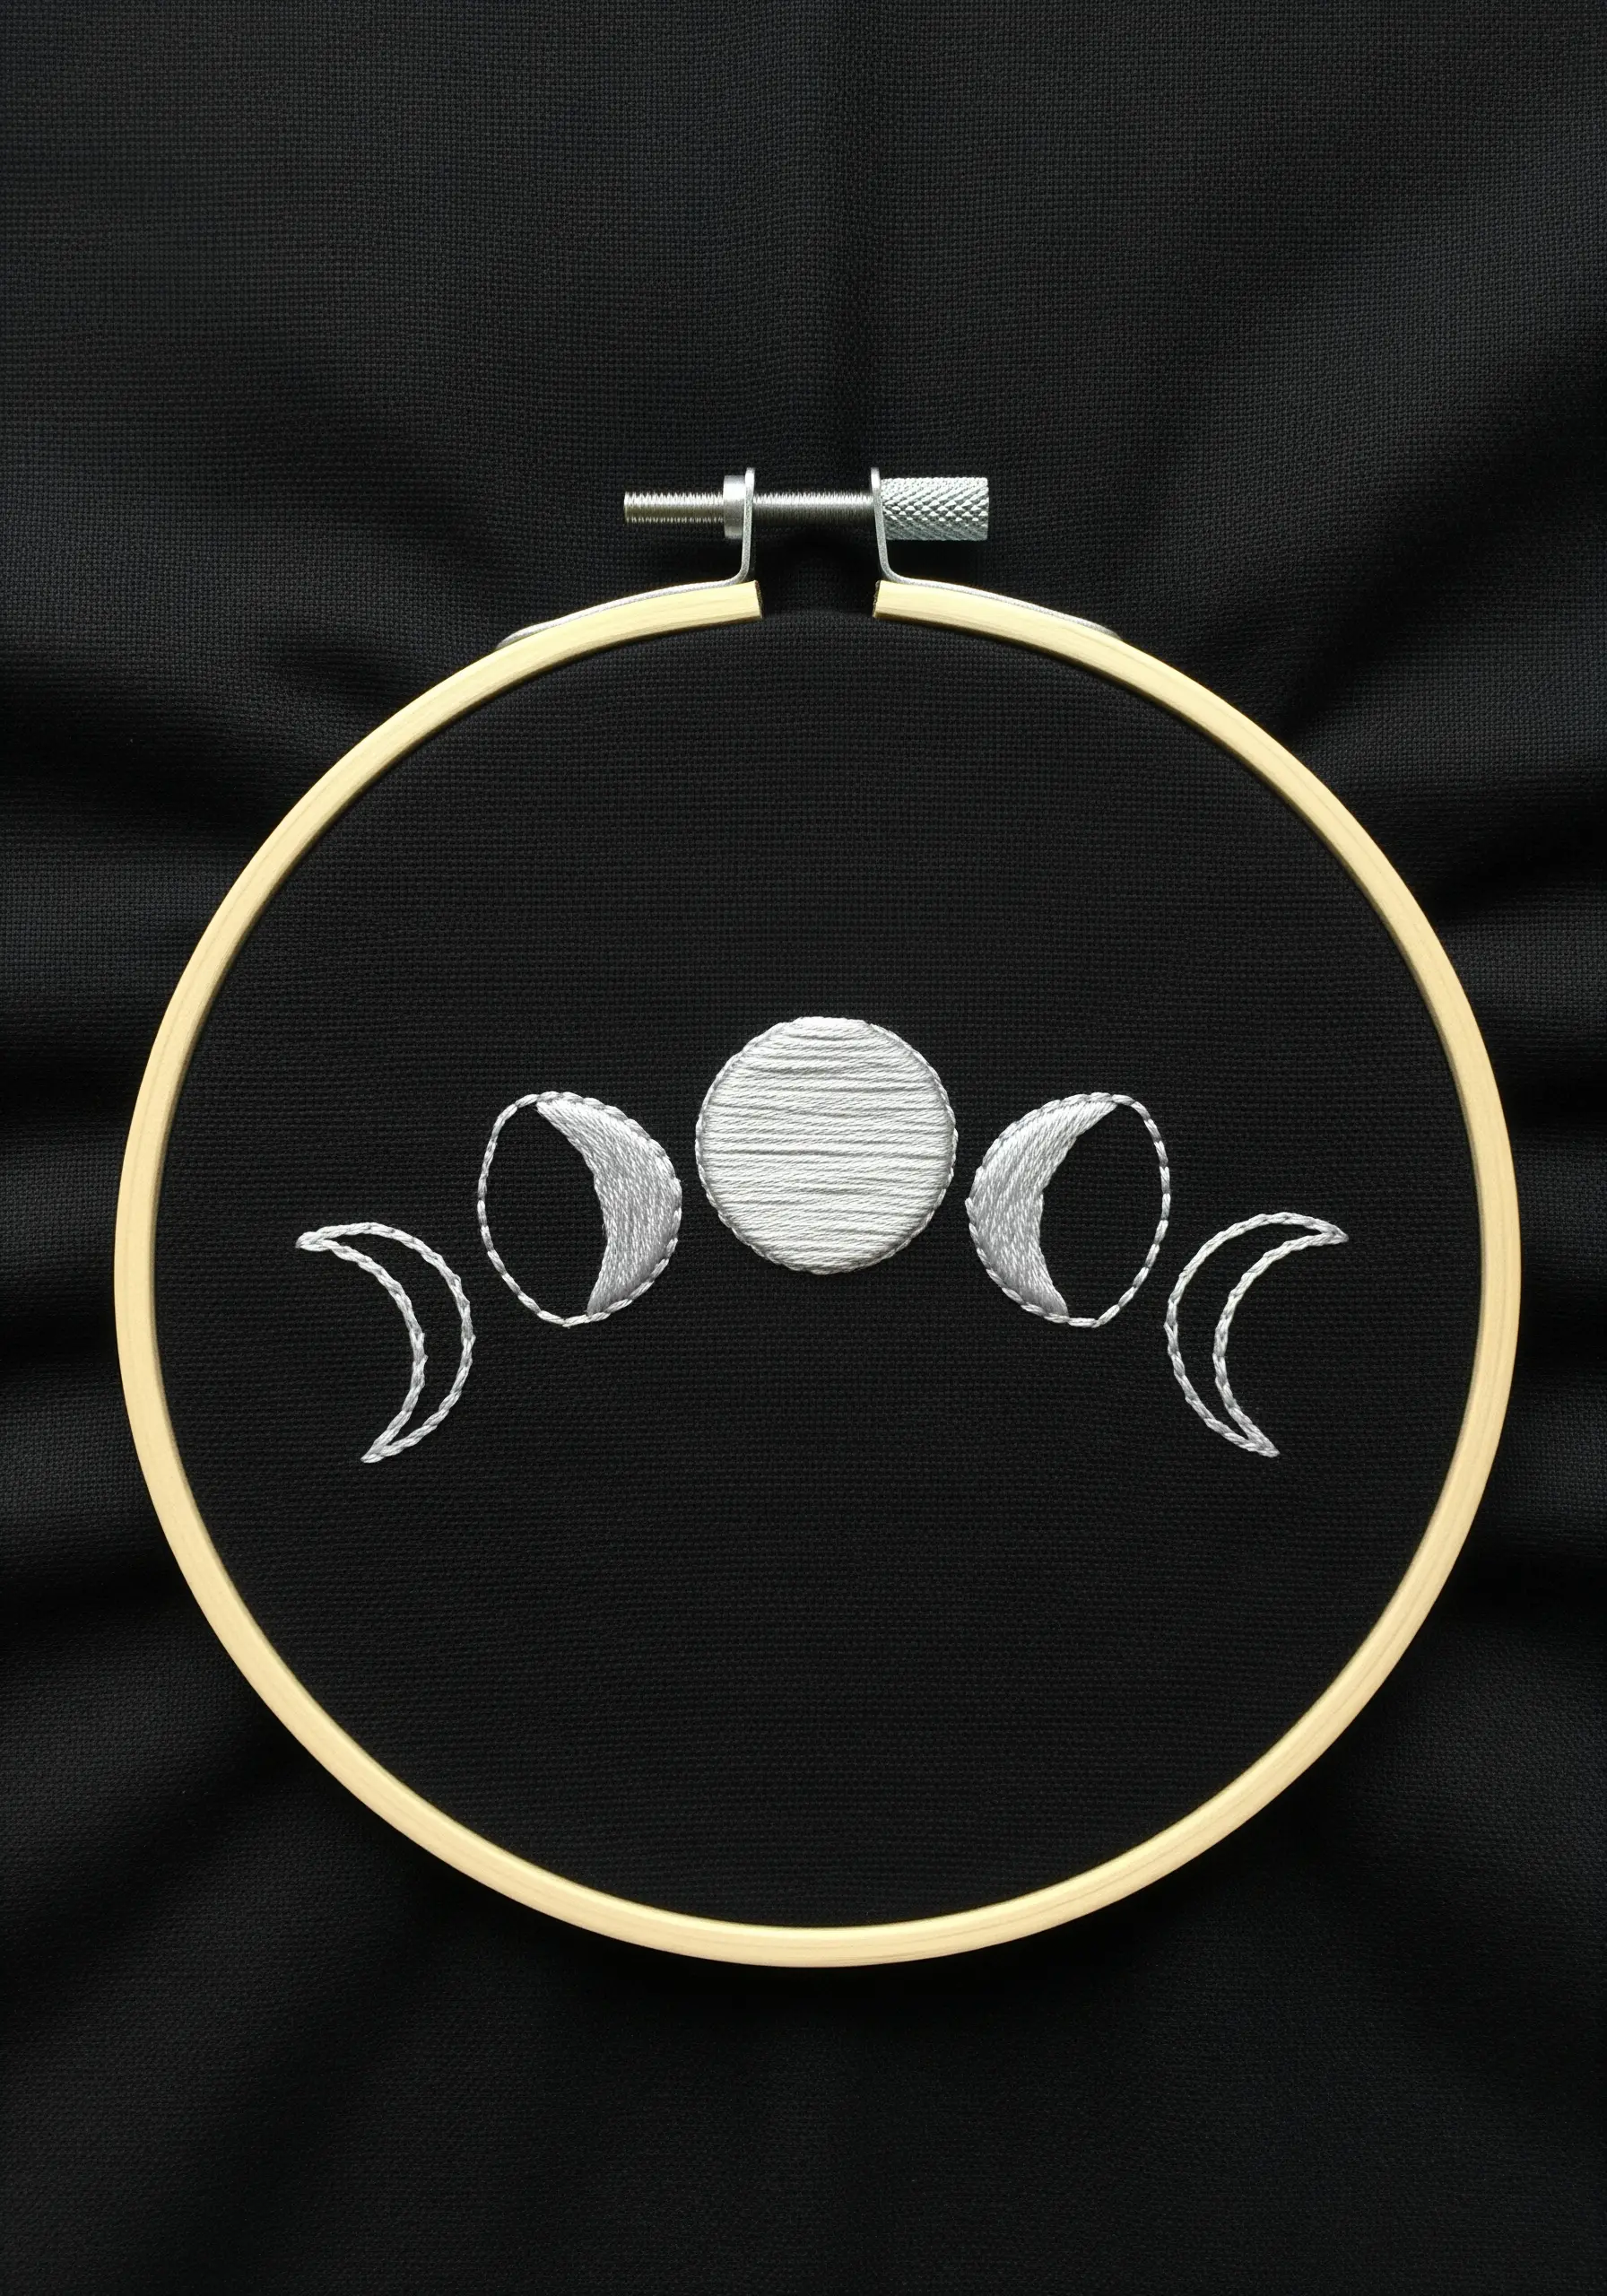
This design is an excellent opportunity to perfect your circular satin stitch.
To get a flawlessly smooth edge, first outline each shape with a delicate split stitch. This raised border acts as a guide and prevents your fill stitches from looking uneven.
Keep your satin stitches perfectly parallel as you fill the shapes, using a single strand of thread for the finest finish.
For an ethereal glow, choose a high-sheen cotton or a metallic silver thread against black fabric.
13. Creating a Vibrant Citrus Patch
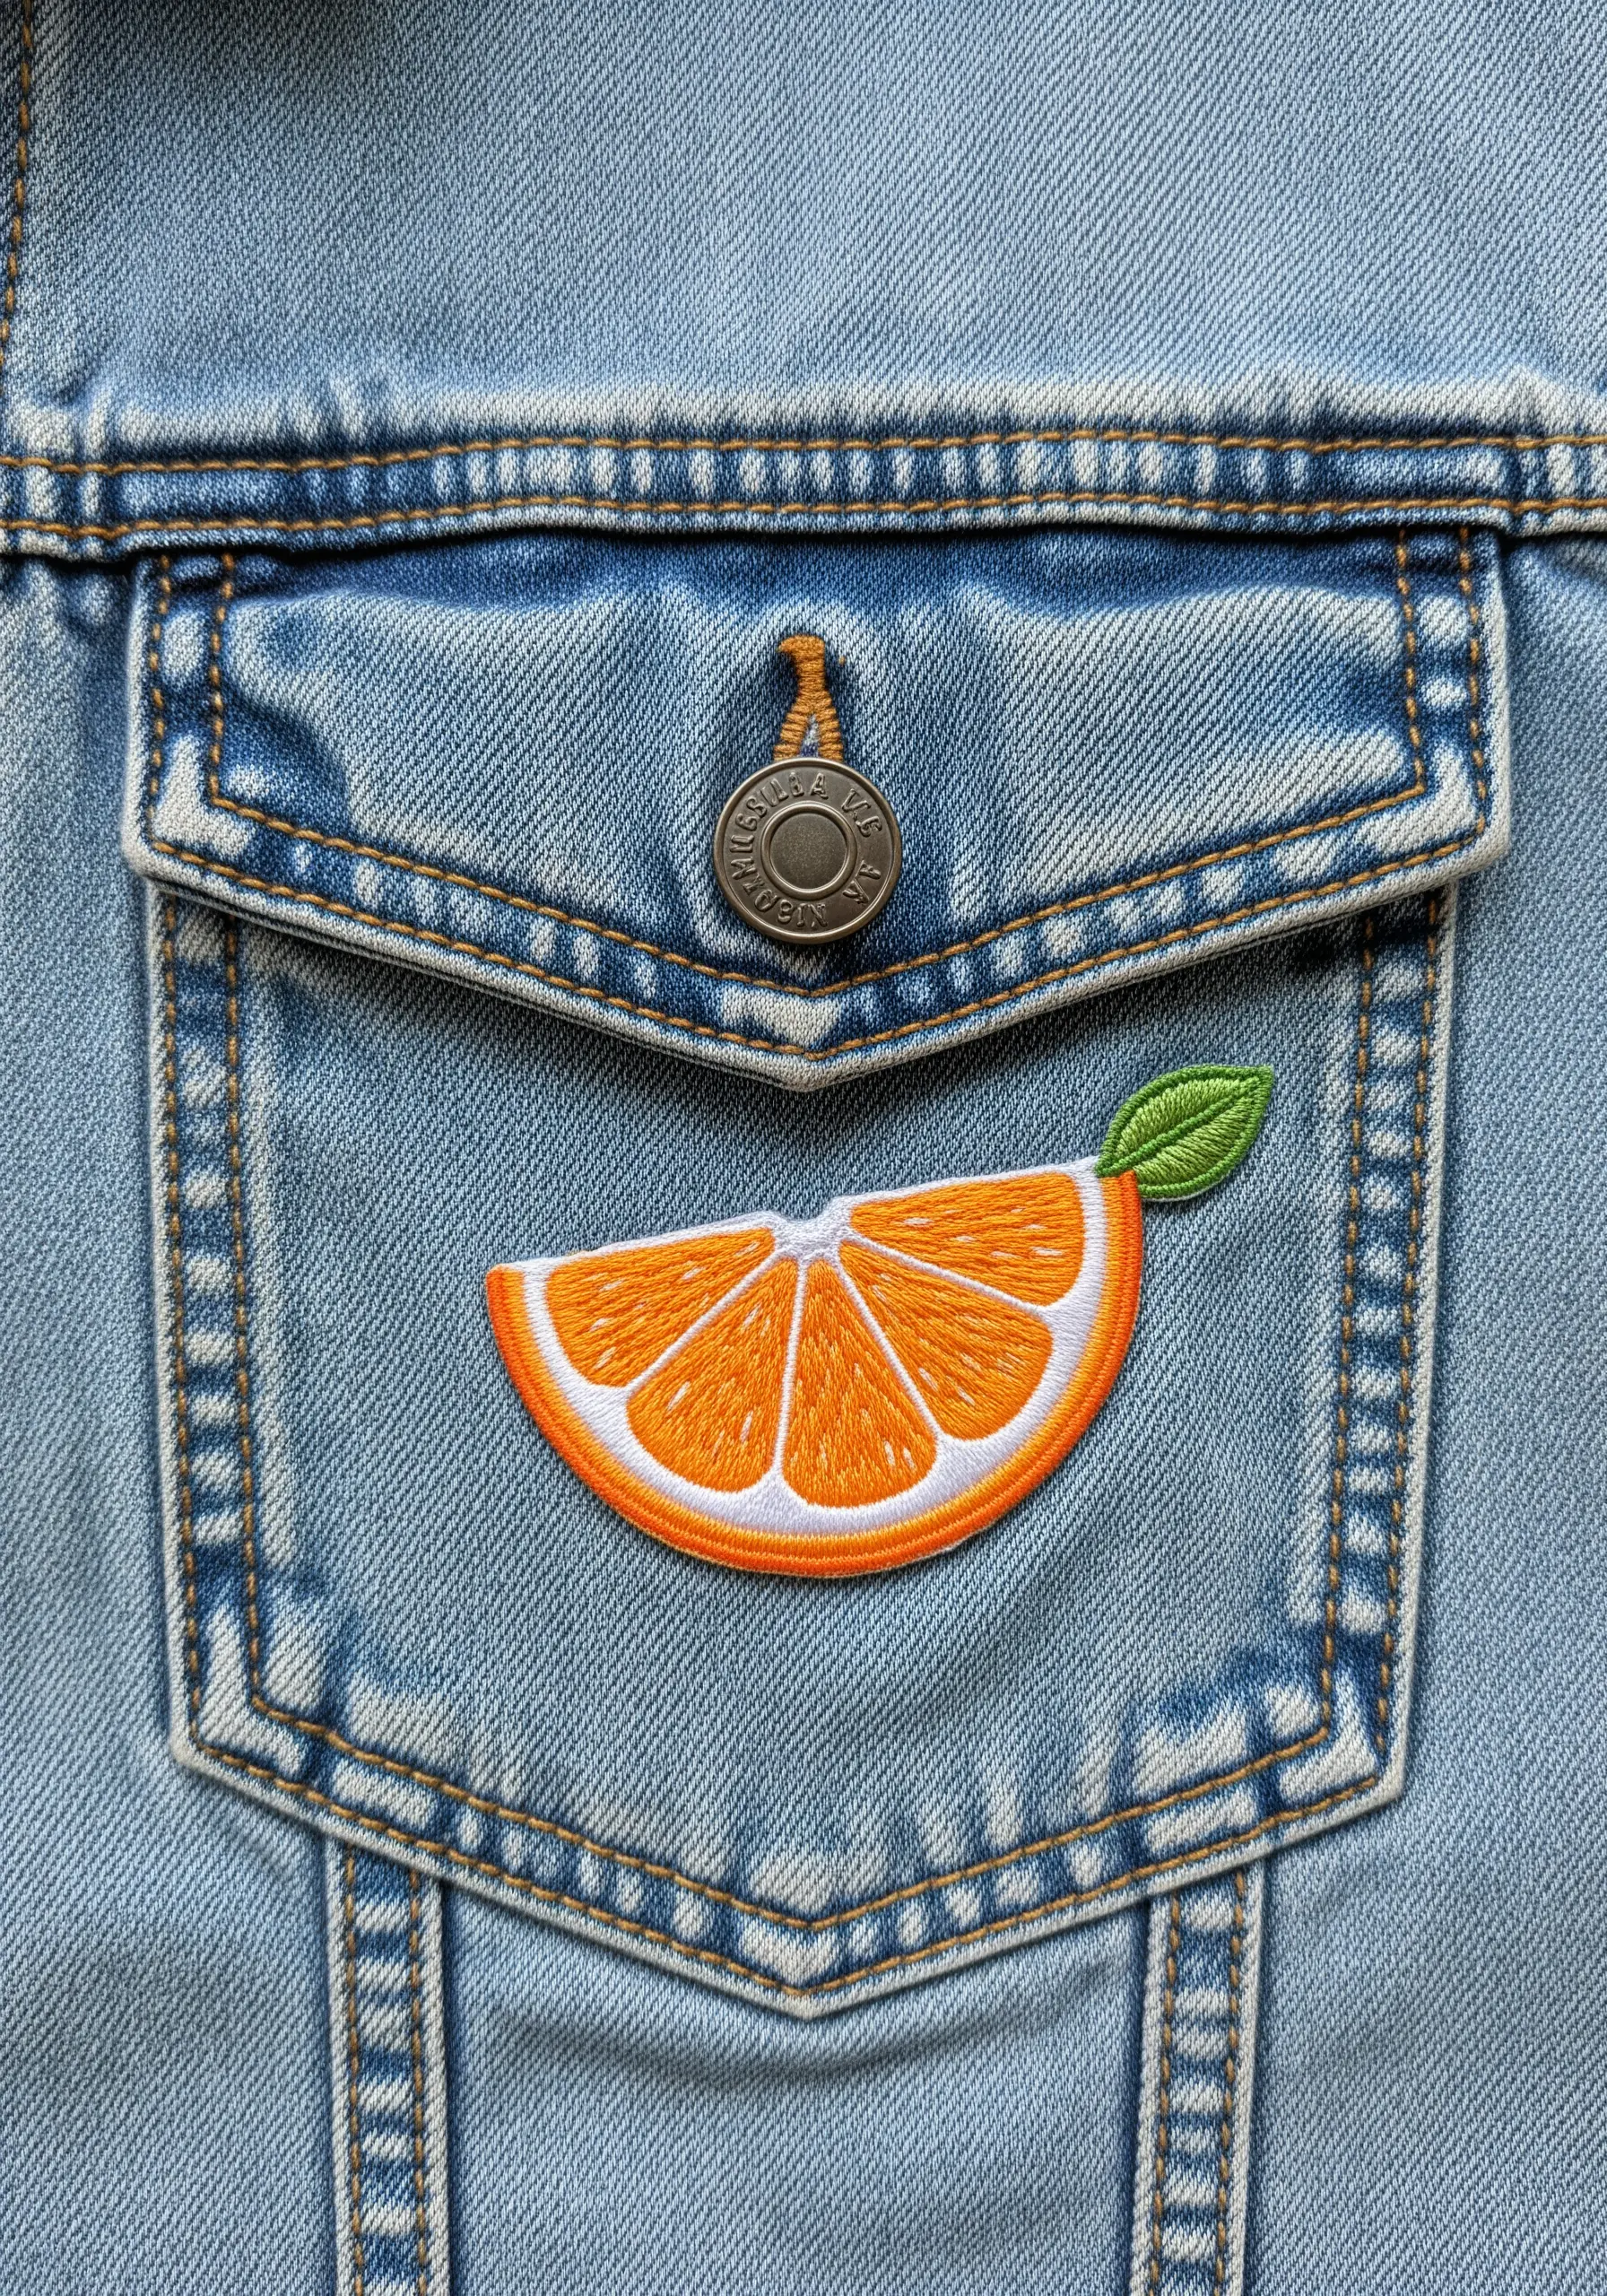 denim jacket pocket.” style=”max-width:100%; height:auto;”>
The key to a professional-looking patch is clean definition between colors.
After filling the orange segments with directional satin stitch, outline each one with a single strand of white backstitch. This simple step creates sharp, graphic lines that make the colors pop.
Finish with a thick, dense satin stitch border around the entire design. This not only gives it a clean edge but also stabilizes the fabric, making it easy to cut out and apply.
14. A Whimsical Mixed-Media Cloud

Elevate a simple motif by incorporating different materials for a tactile effect.
Instead of a flat fill, create the cloud’s texture with densely packed French knots or tufted yarn loops for a soft, fluffy feel.
Scatter a few tiny seed pearls or white seed beads throughout the knots to mimic the glisten of water droplets.
Finally, attaching beaded dangles for raindrops adds movement and a touch of sparkle, turning the embroidery into a small piece of mixed-media art.
15. The Detailed Book Lover’s Bookmark
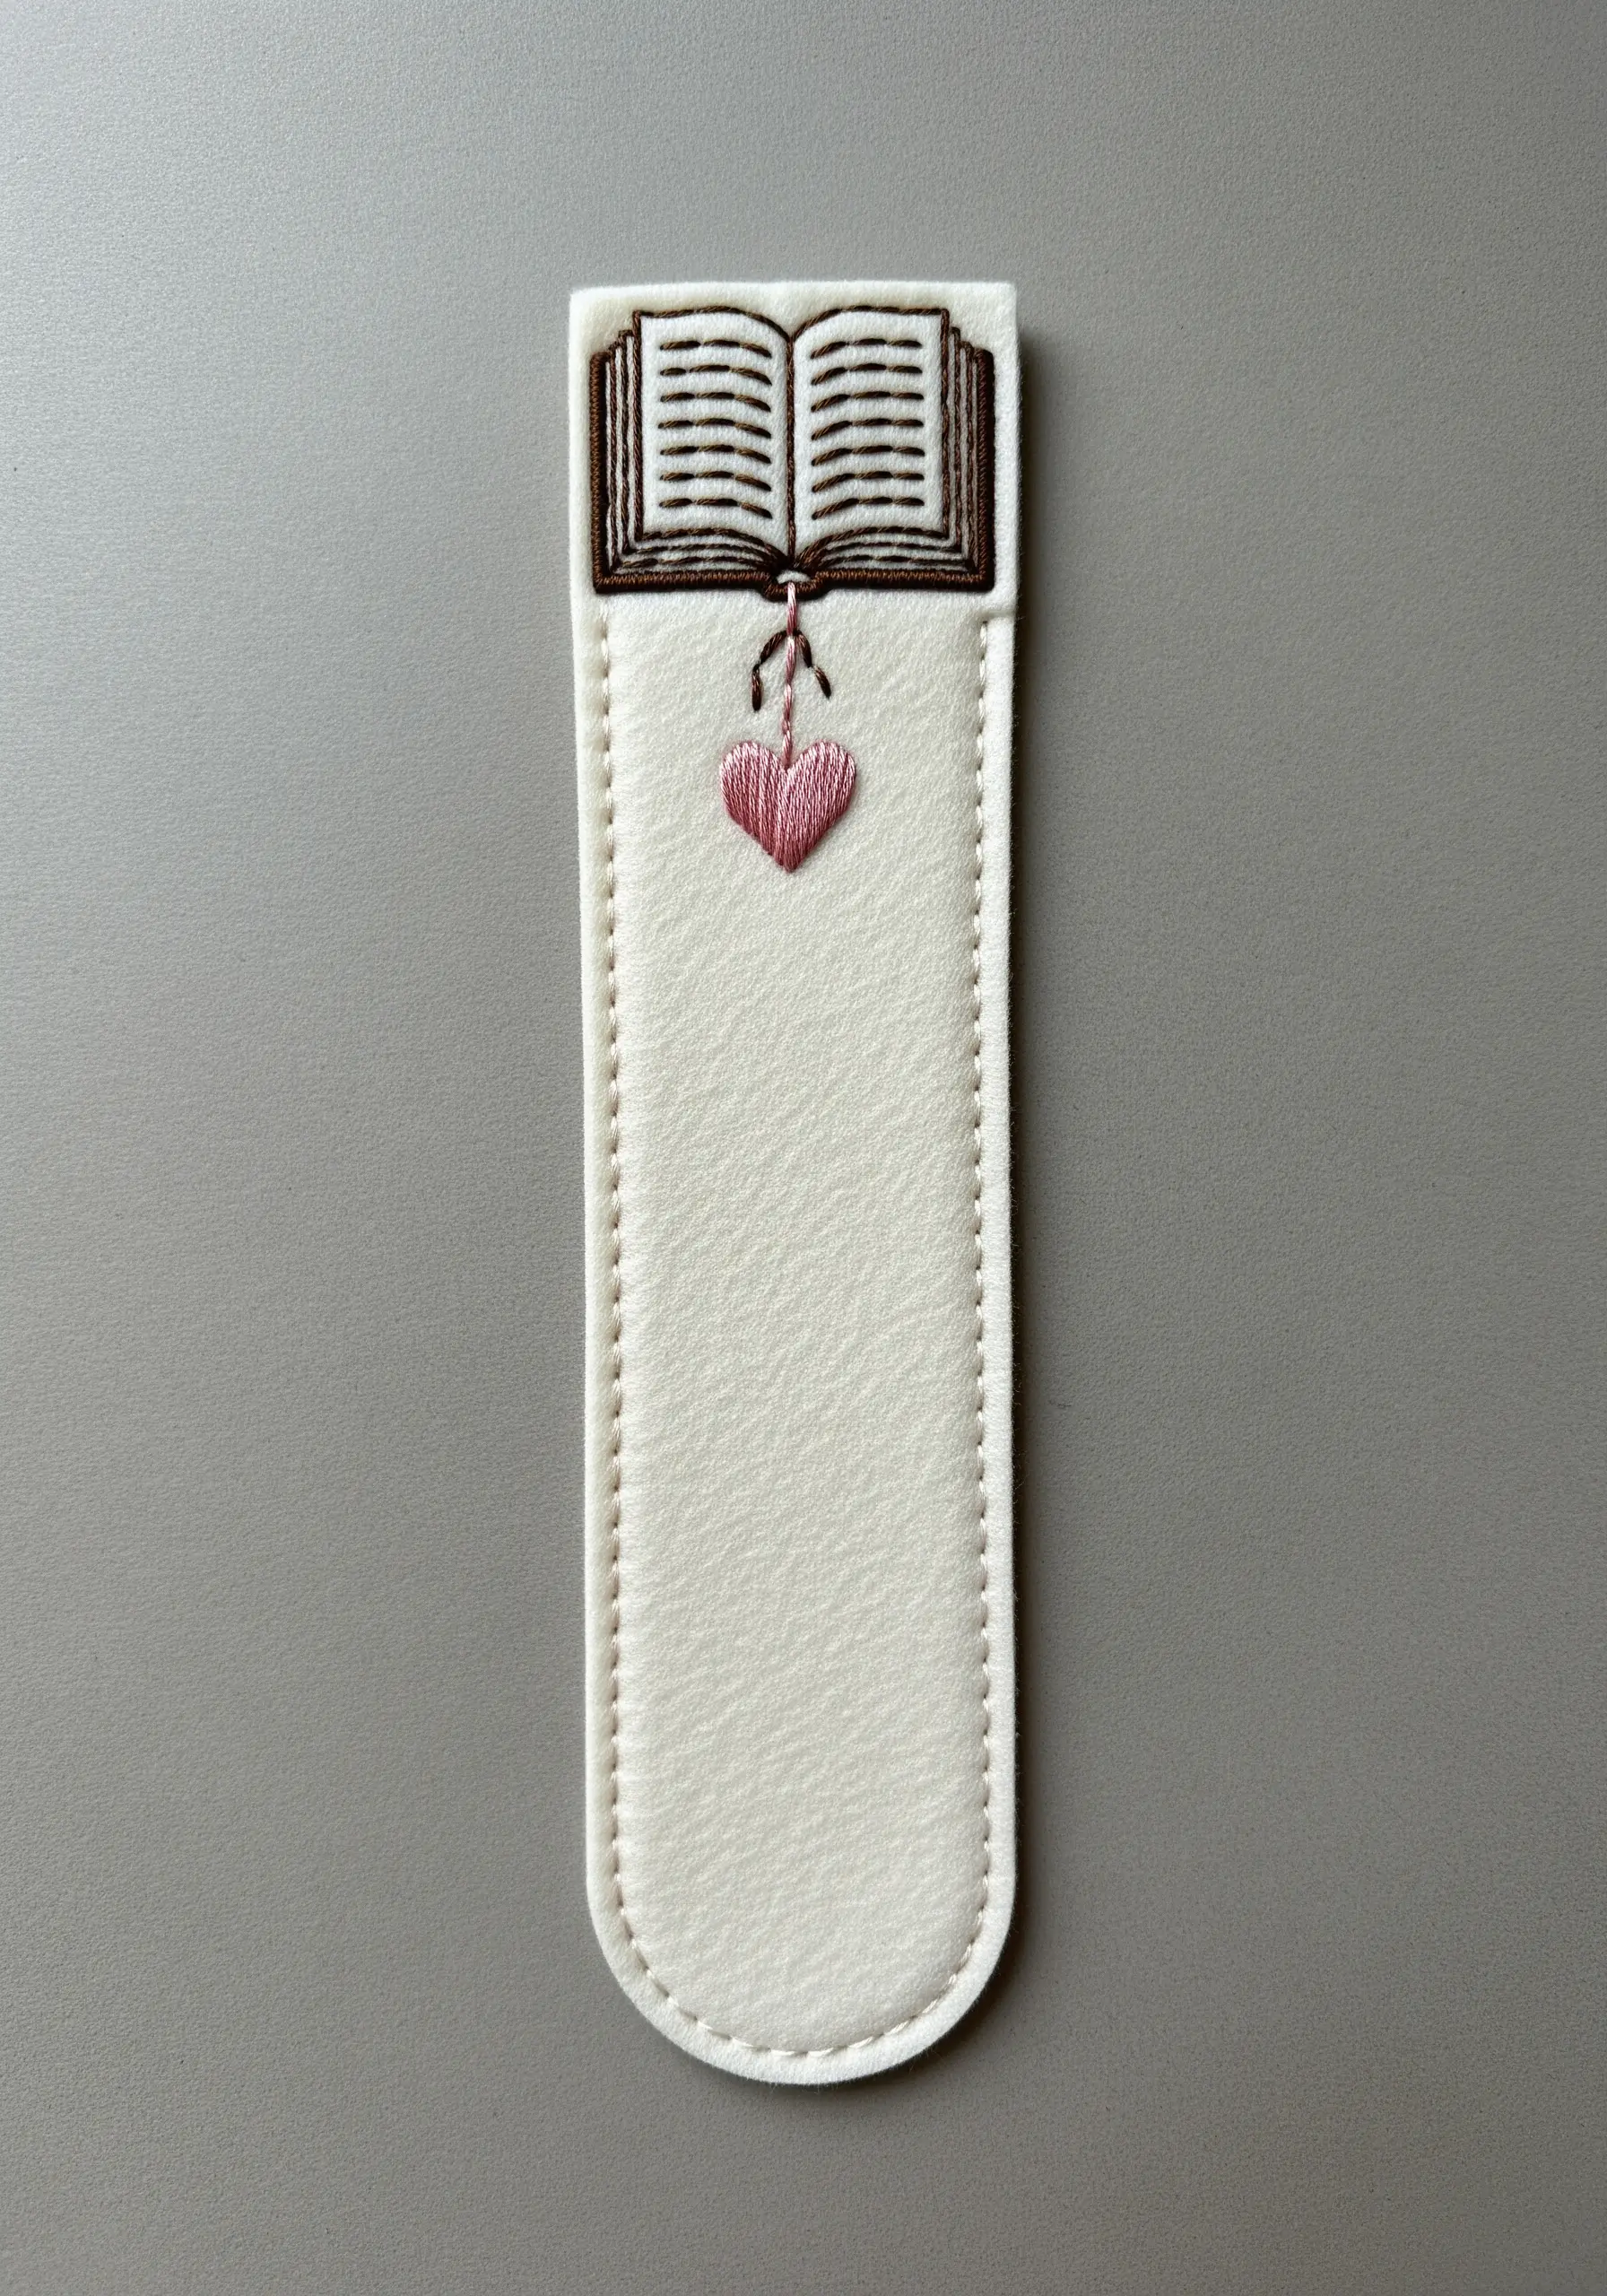
Executing fine details in a small space requires precision and the right materials.
For the delicate lines of the book’s pages and cover, use only a single strand of embroidery floss. This ensures your backstitches remain crisp and legible, not bulky.
To make the tiny heart stand out, use a small padded satin stitch to give it subtle dimension.
Stitching on a non-fraying material like felt or vegan leather provides a durable base that is ready to use as soon as you finish your last stitch.
16. Weaving an Abstract Soundwave
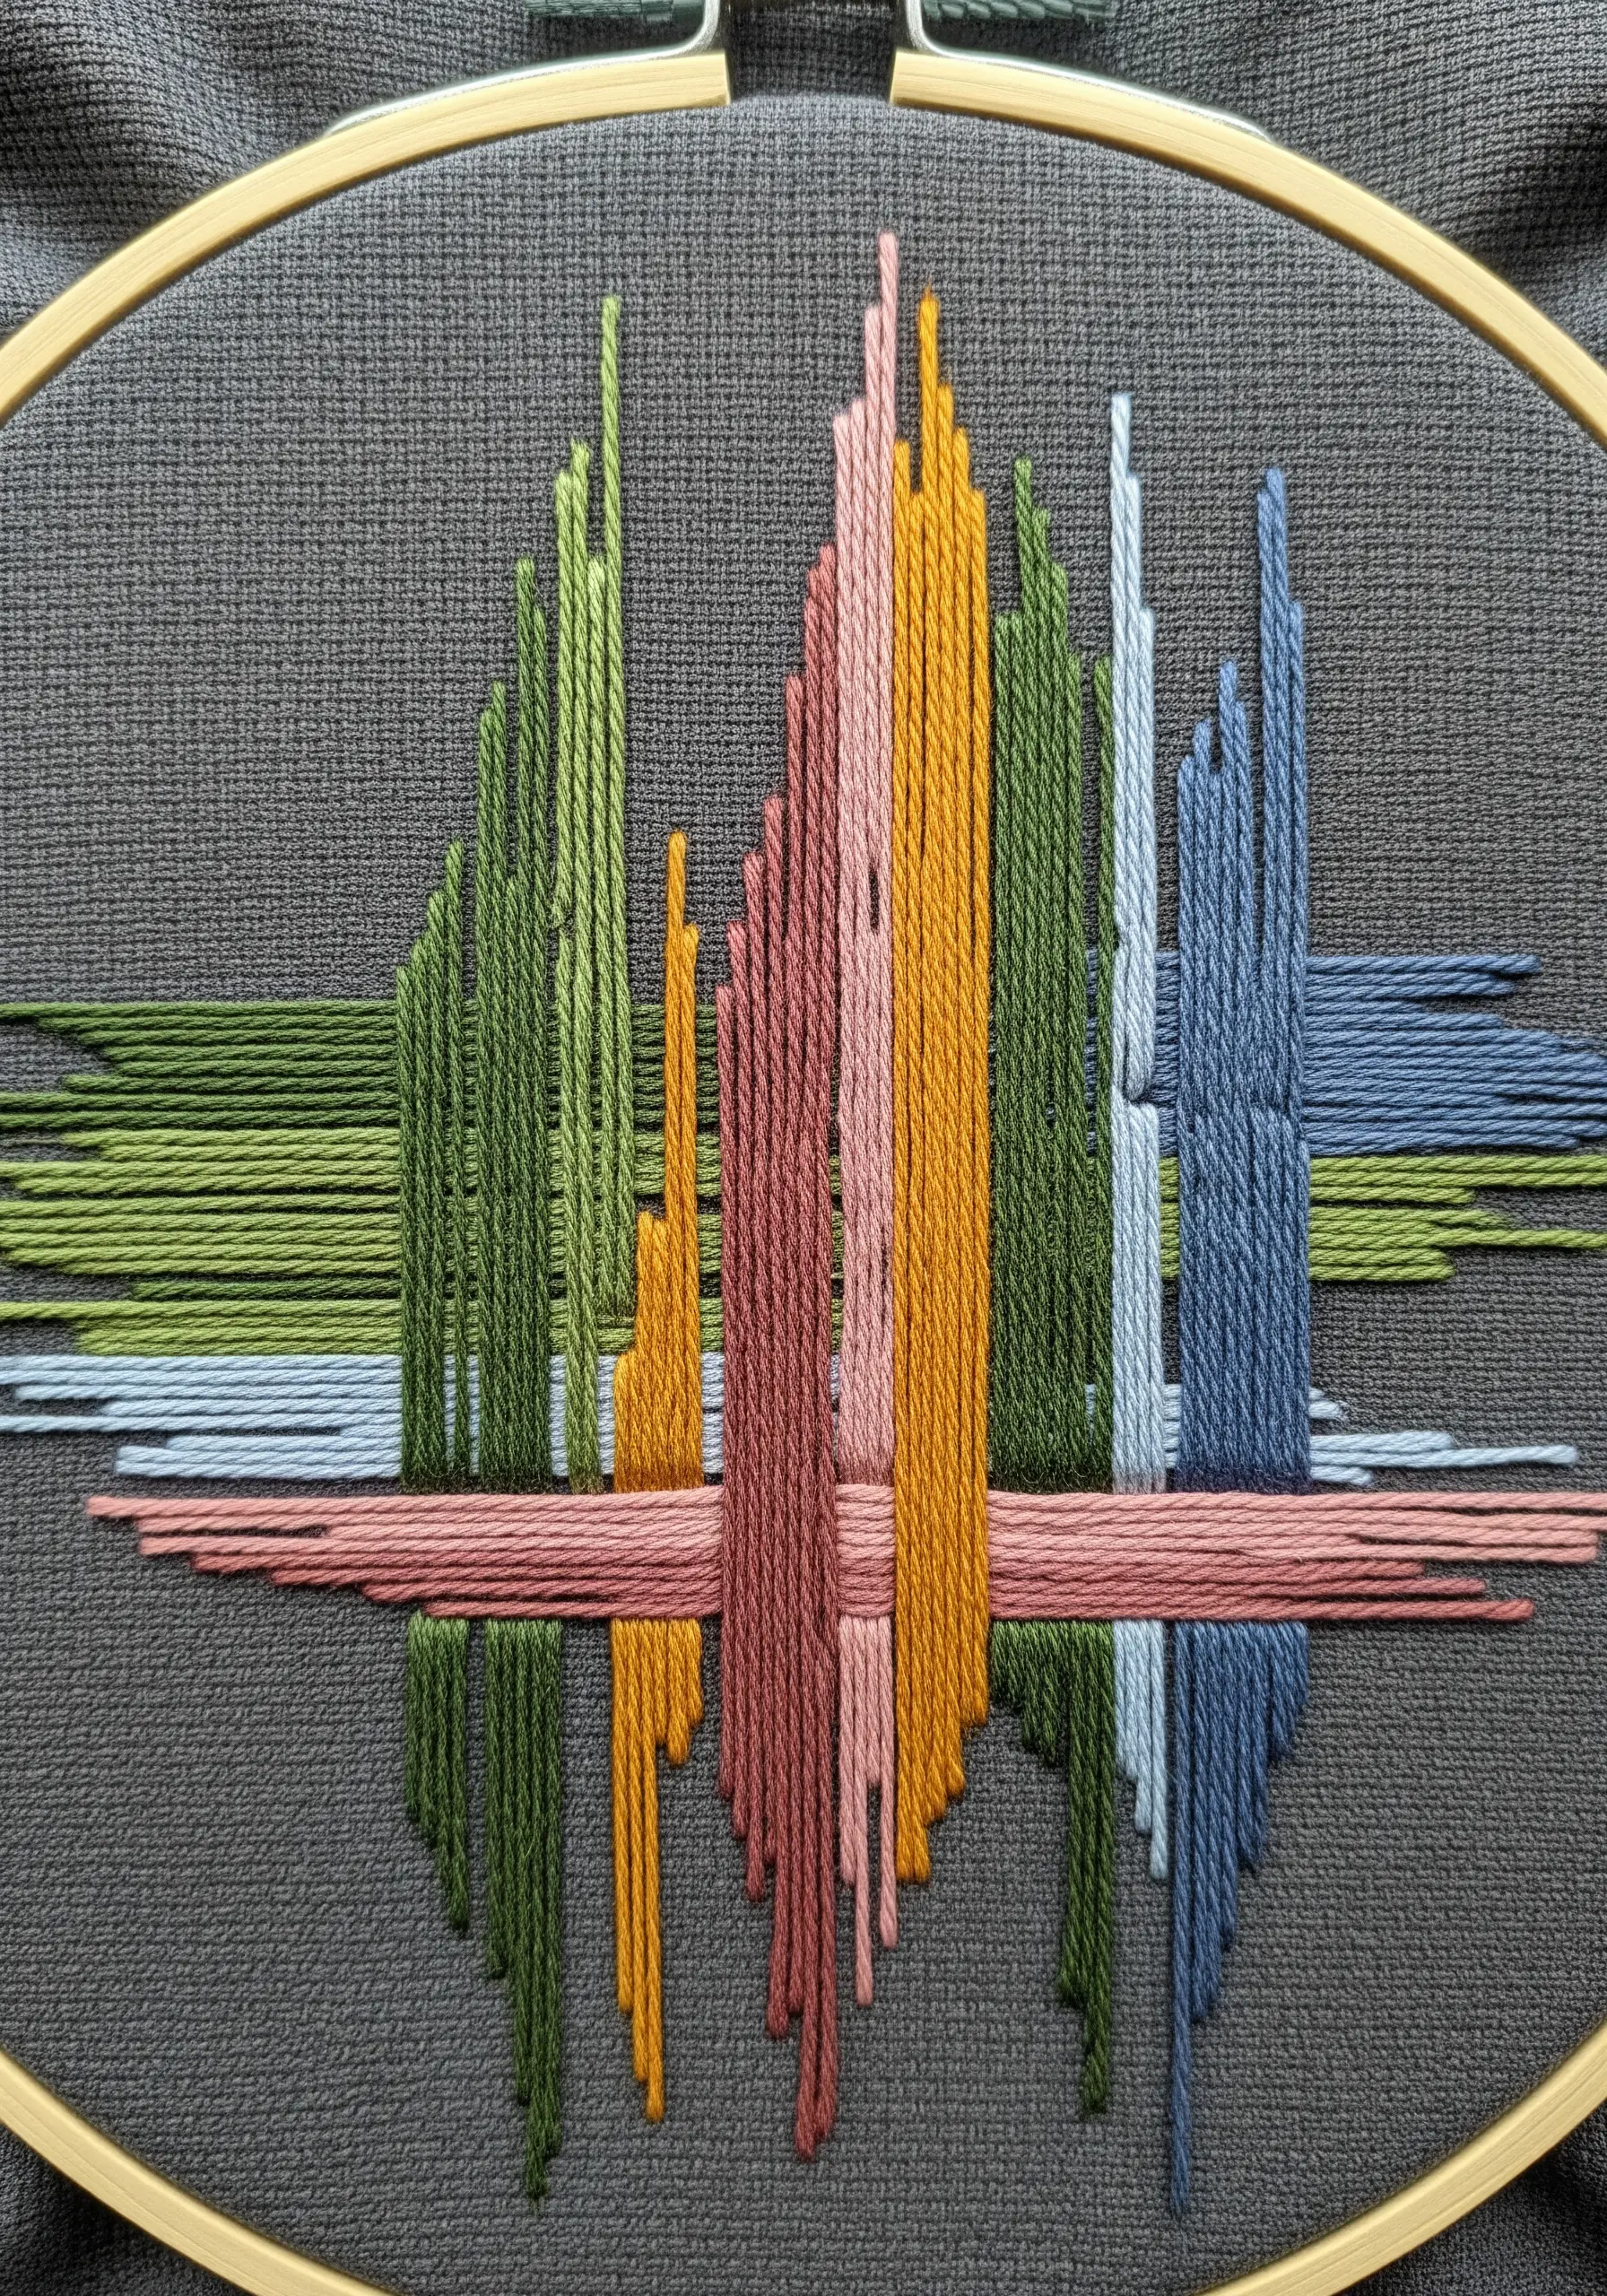
Translate an abstract concept like sound into a tactile design through color and texture.
This freeform piece is built with simple vertical straight stitches, but their power comes from varying their height and thickness (by using more or fewer strands of floss).
The horizontal woven bar not only adds a compelling textural contrast but also anchors the composition, tying the individual lines together.
This is a wonderfully meditative project, as there are no strict rules—only your own sense of rhythm and balance.
17. Delicate Lavender in French Knots
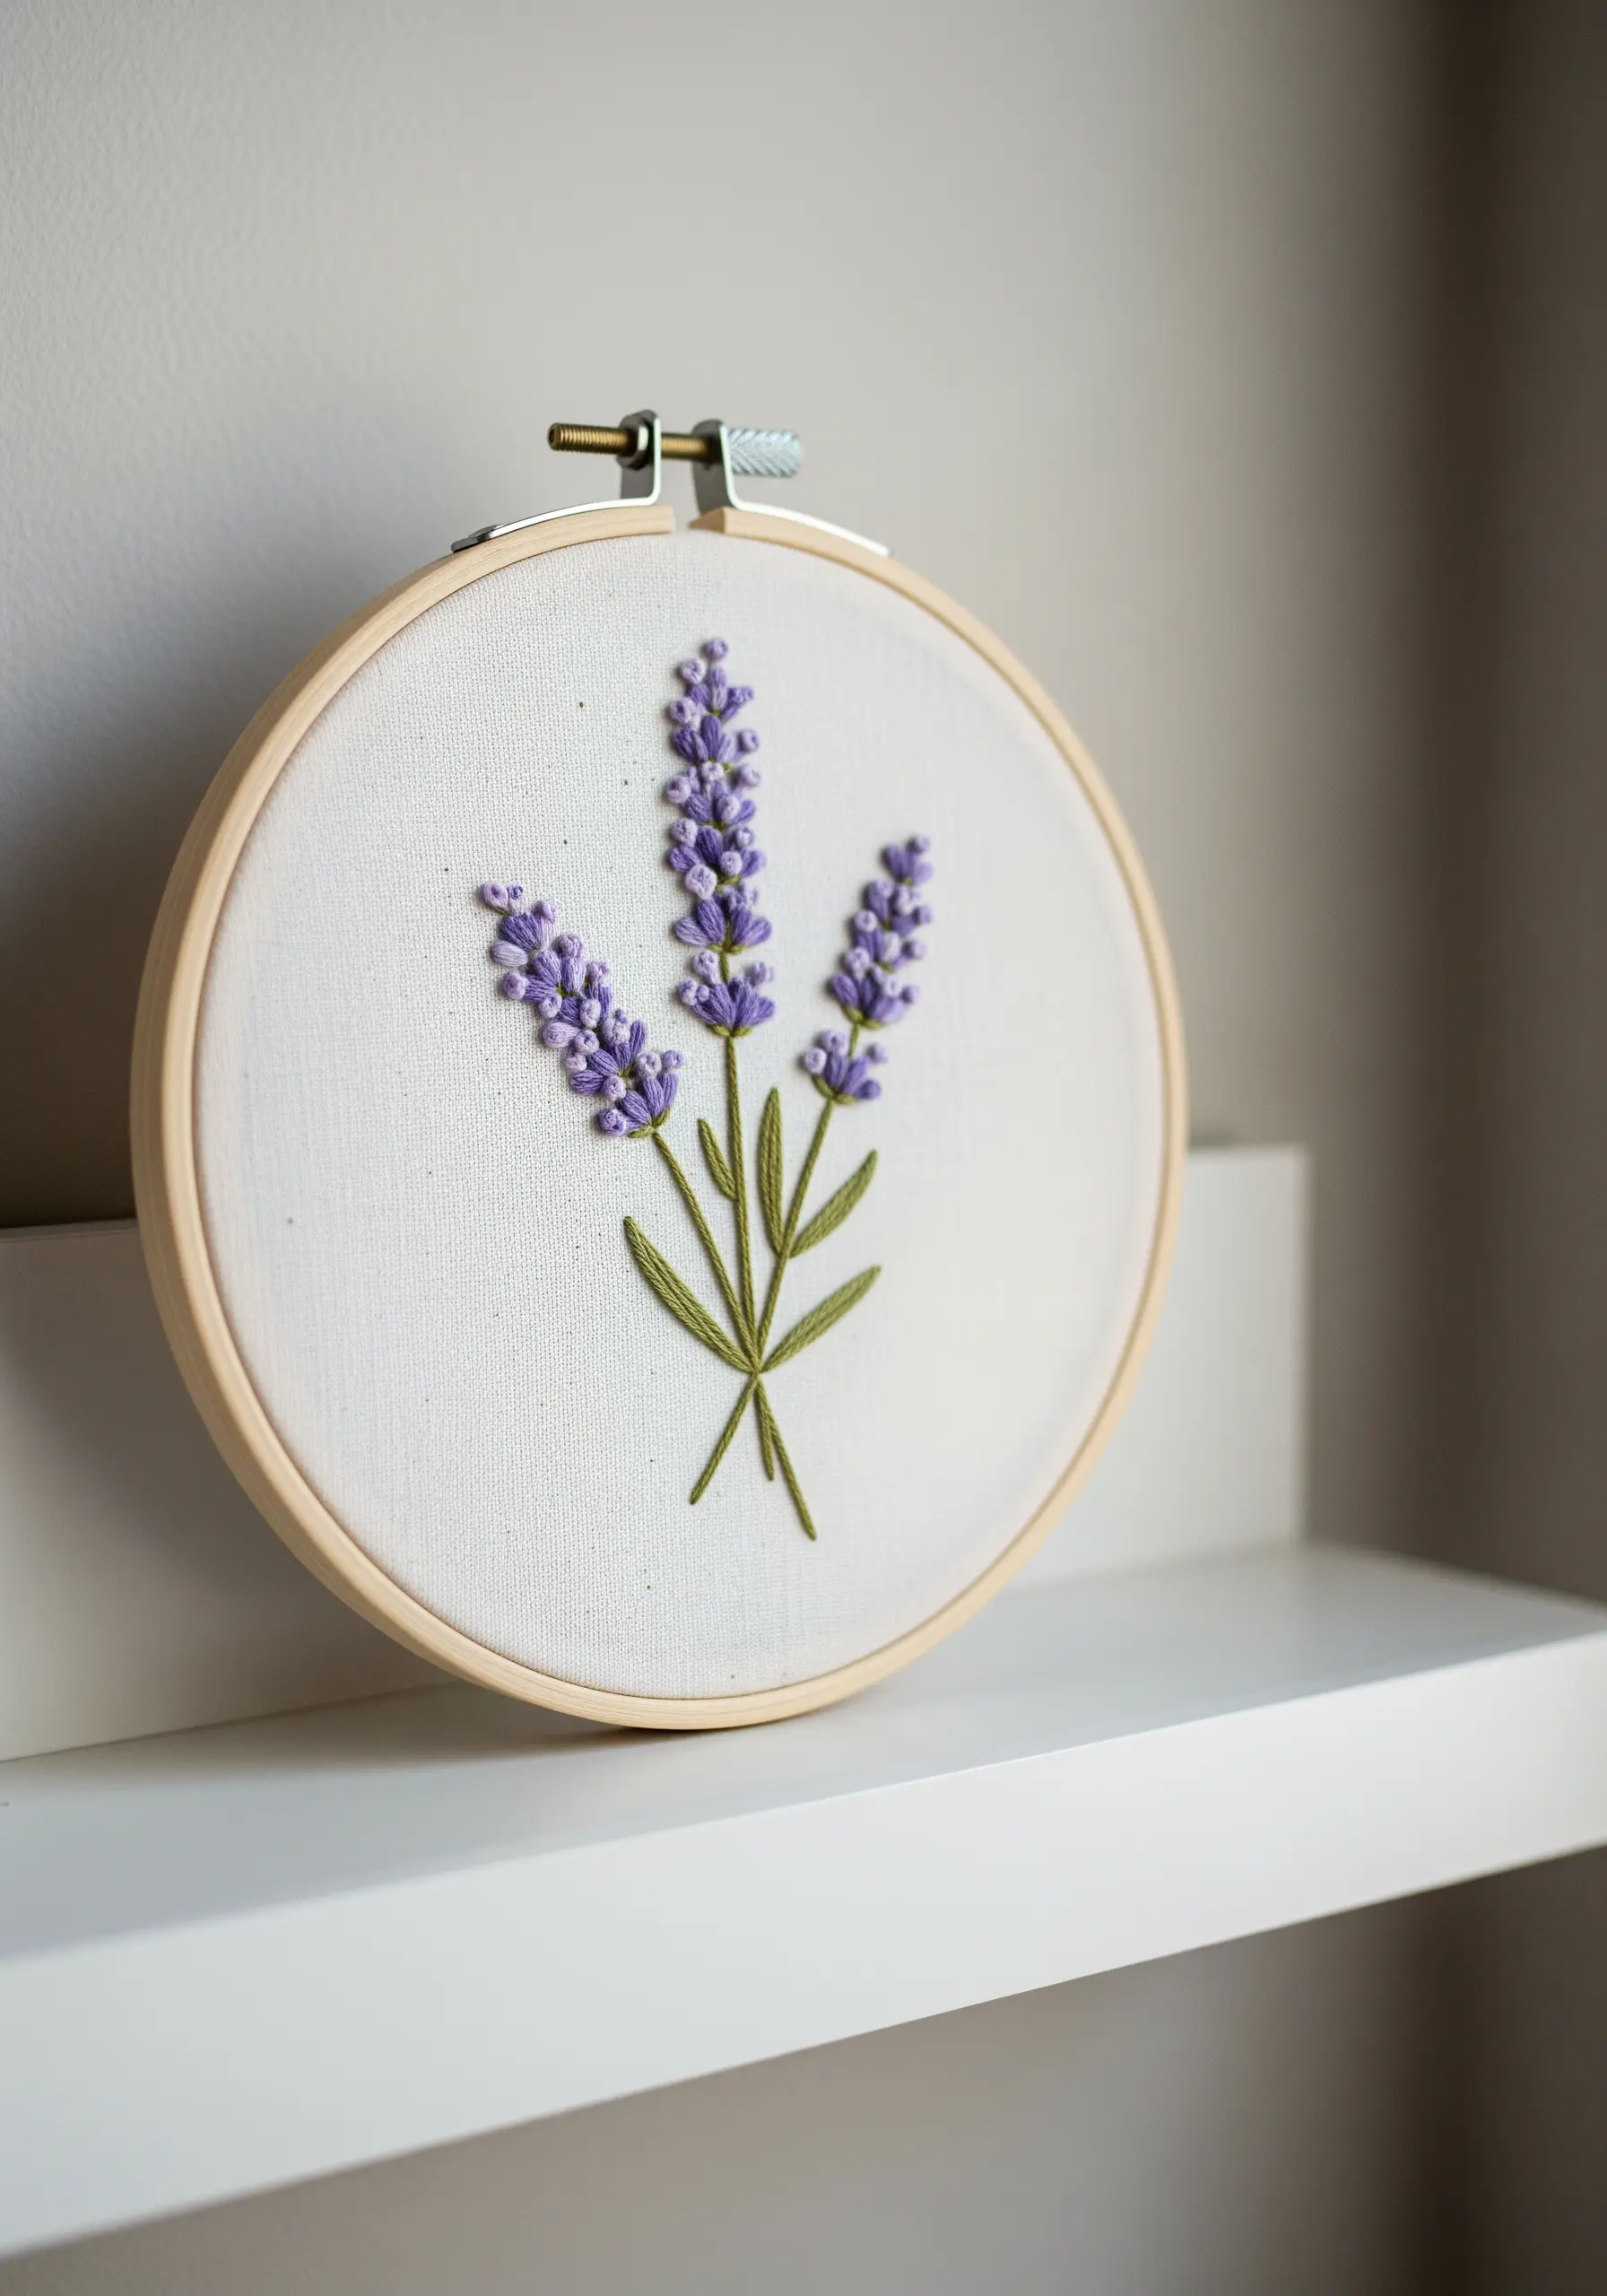
Mimic the dense texture of a lavender blossom by using clusters of French knots.
For a more realistic look, use two or three closely related shades of purple thread, and vary the number of wraps around your needle (one, two, or three) to create knots of different sizes.
This variation gives the blooms a natural, organic feel.
Pair the textured blossoms with simple, two-strand stem stitches for the stalks and leaves to let the floral texture remain the star of the show.


