

Have you ever looked at a beautifully crafted object and wished you could create something with that same sense of presence and intention? You can. The secret isn’t in buying more supplies, but in rethinking how you use the threads and fabrics you already own.
Let’s move beyond stitching flat images and start thinking like sculptors. A few carefully placed knots can become a mossy forest floor. A change in stitch direction can mimic the curve of a bird’s wing. This is where your embroidery gains a soul and transforms from a craft into a small, cherished piece of art for your home.
These ideas are not just projects to be copied. They are invitations to explore form, texture, and dimension. See them as starting points, and give yourself permission to turn a simple thread into something you can truly feel.
1. Sculptural Stumpwork Mushrooms
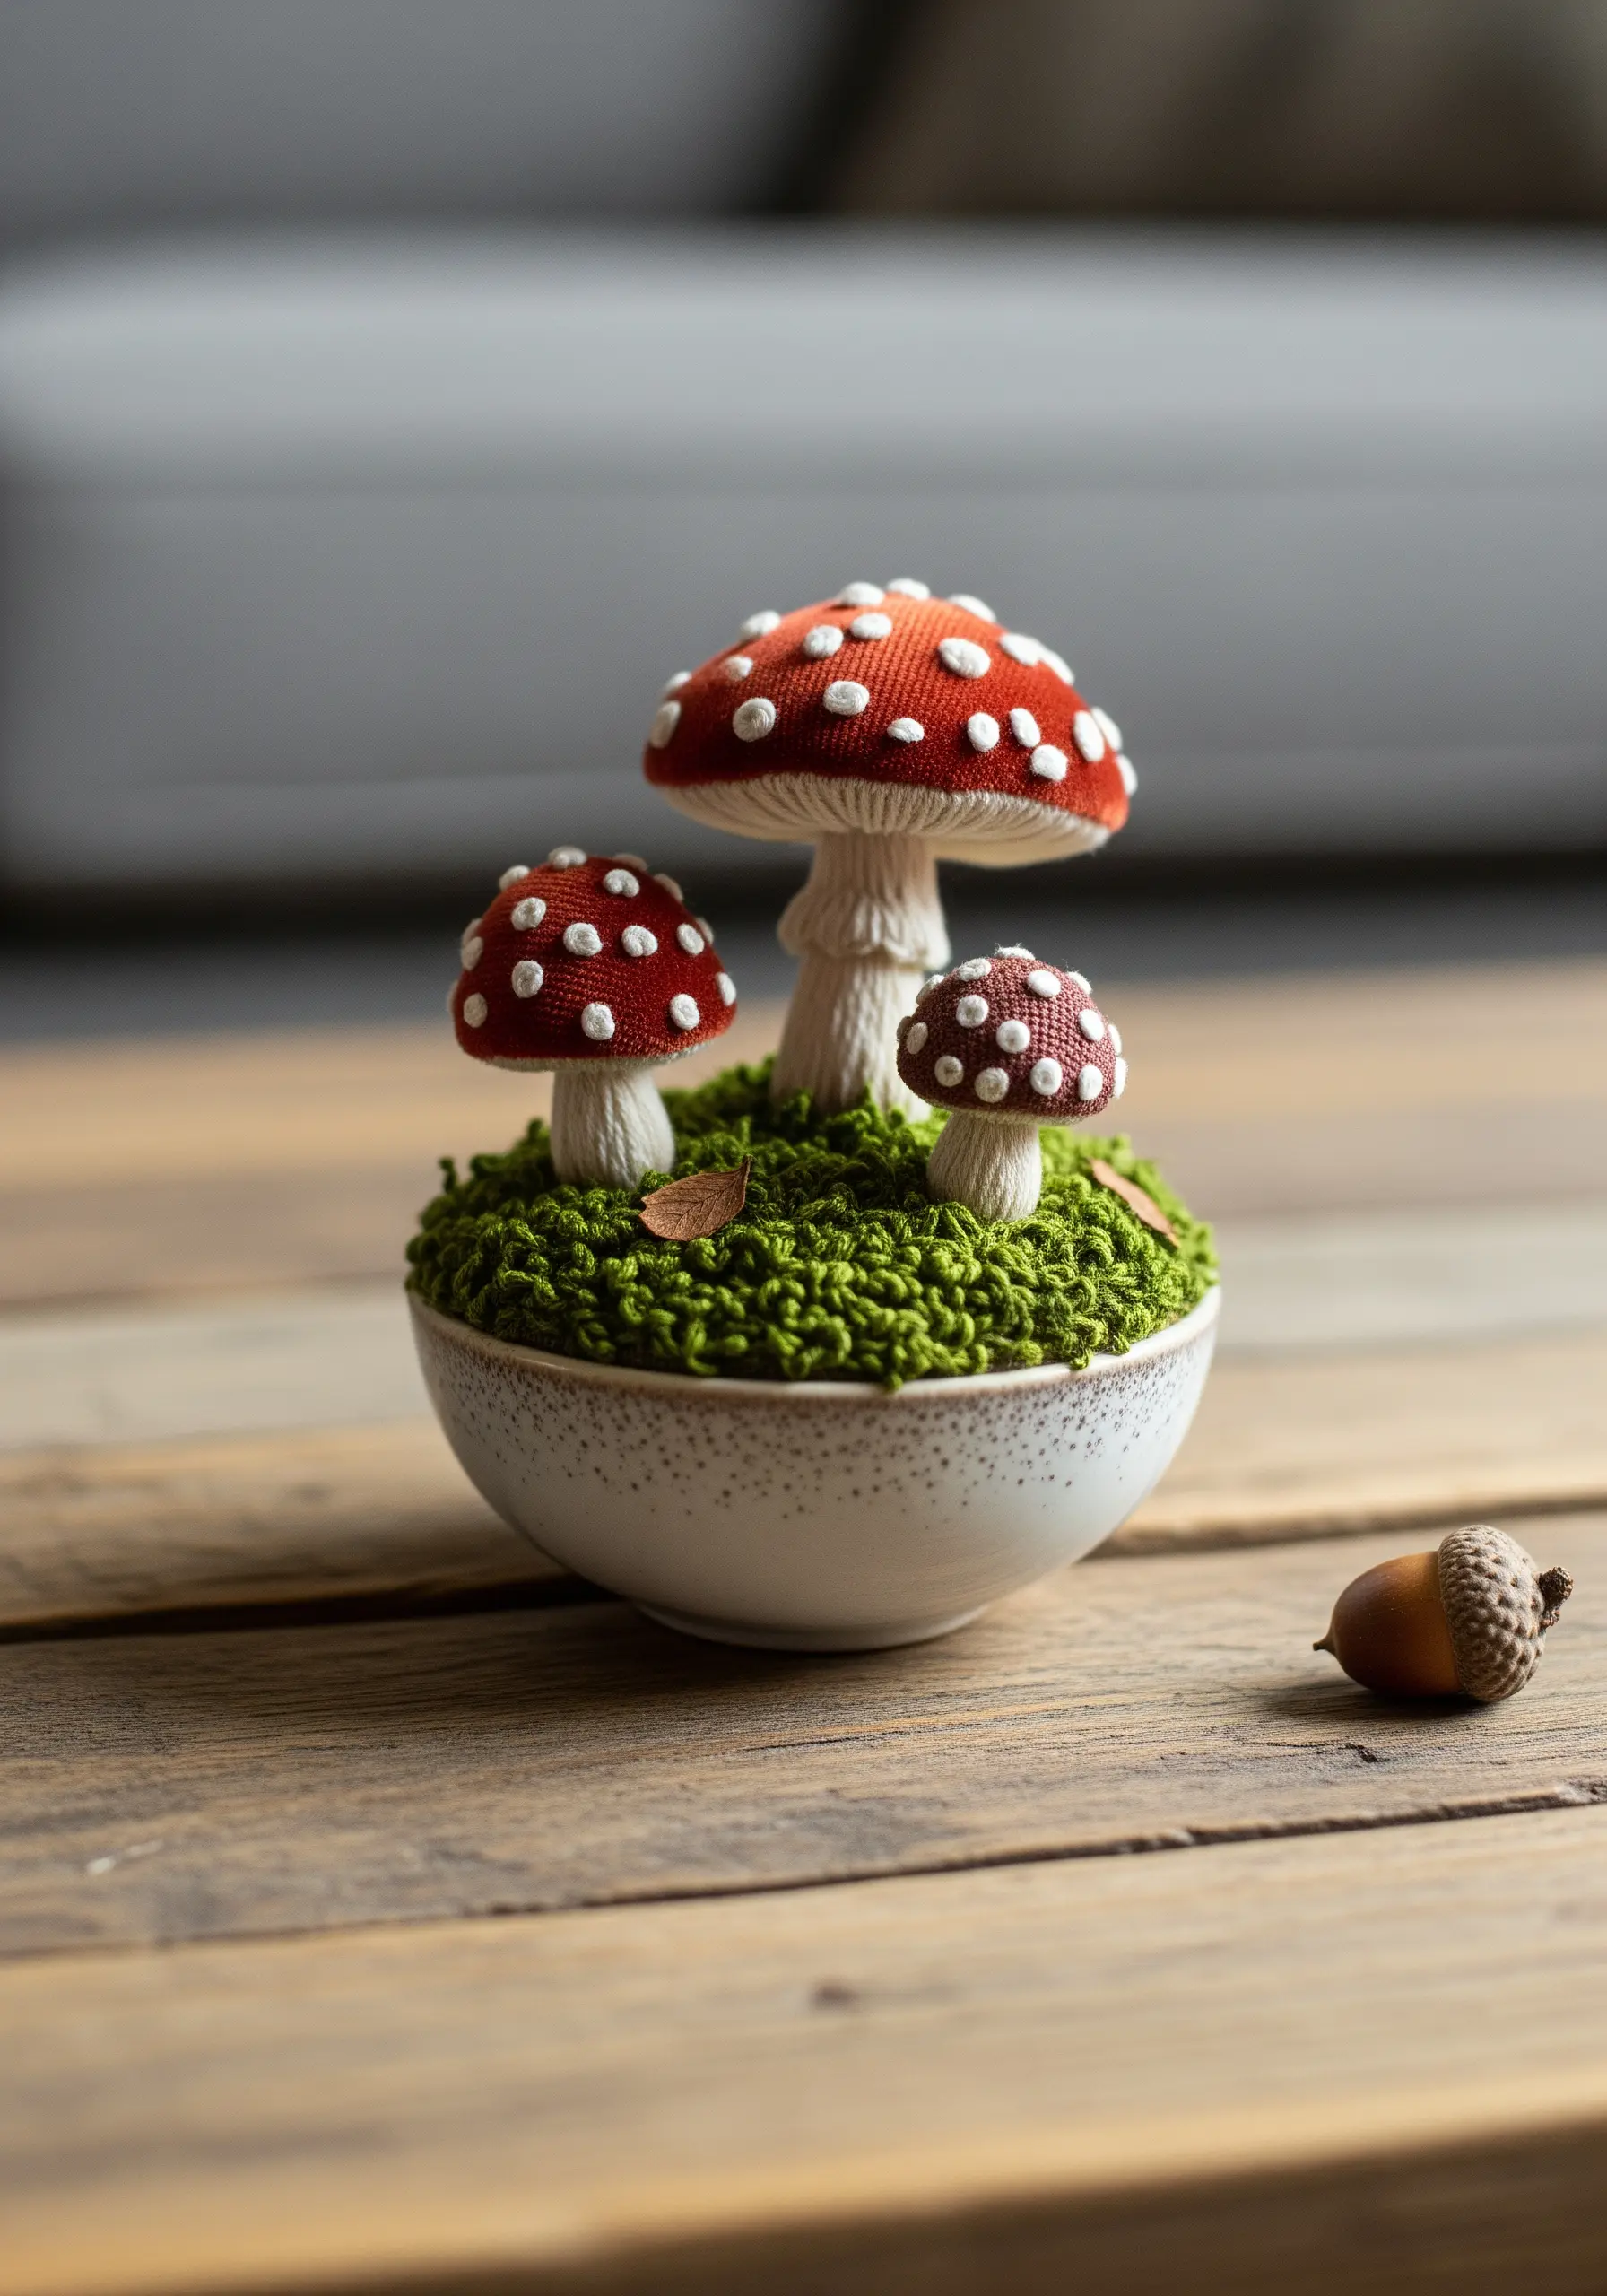
Create a three-dimensional mushroom cap by using padded satin stitch over a felt base; this gives it a natural, rounded volume that simple flat stitching cannot achieve.
For the iconic white spots, use tightly packed French knots with three wraps of thread to make them stand proud against the red background.
The mossy ground is best achieved with turkey work, trimming the loops at varying heights to mimic the uneven texture of real moss.
This technique transforms your embroidery from a flat image into a tangible, miniature sculpture.
2. Layered Felt & Thread Succulents
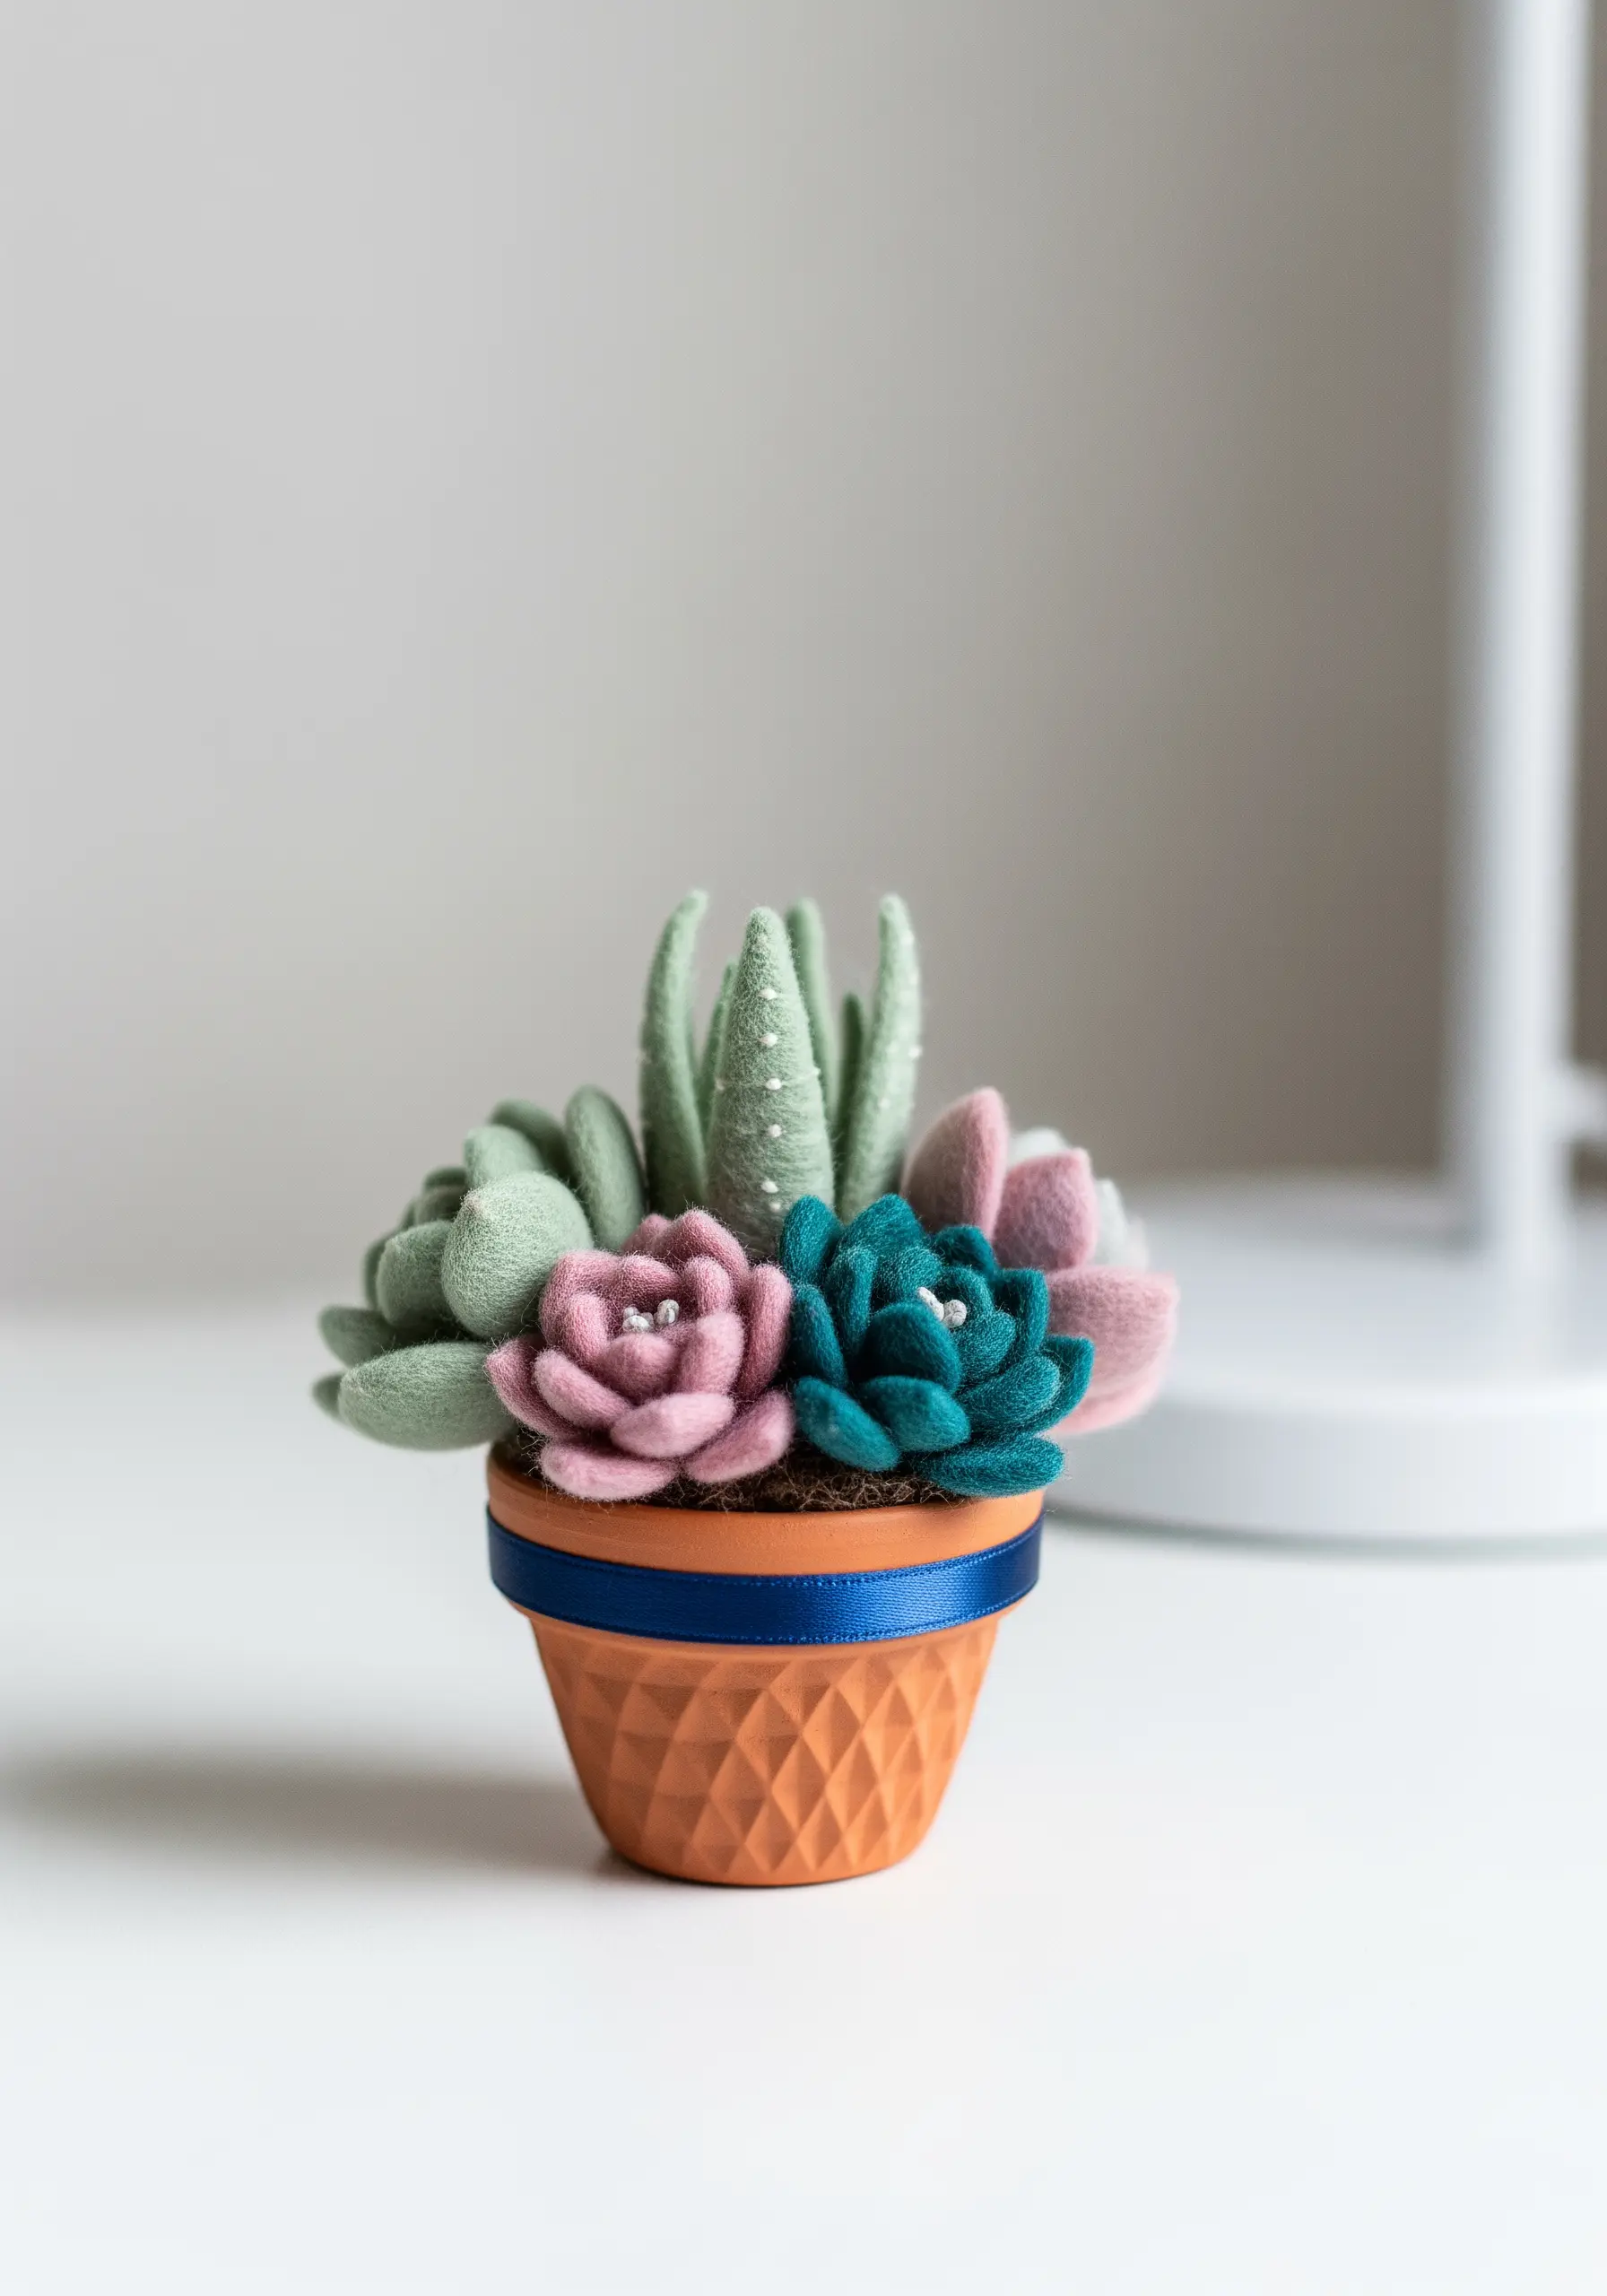
This is not just felt craft; it’s an exercise in subtle stitching that elevates the final piece.
After cutting your felt petals, use a single strand of matching thread to add a central vein line with a simple backstitch, giving each leaf structure and realism.
To assemble the succulent, use a discreet whipstitch on the interior edges, which will be hidden as you layer the petals.
For a touch of elegance, add a single seed bead or French knot in the center of the rosettes, drawing the eye and adding a delicate highlight.
3. Contoured Stitches for a Sculpted Bird
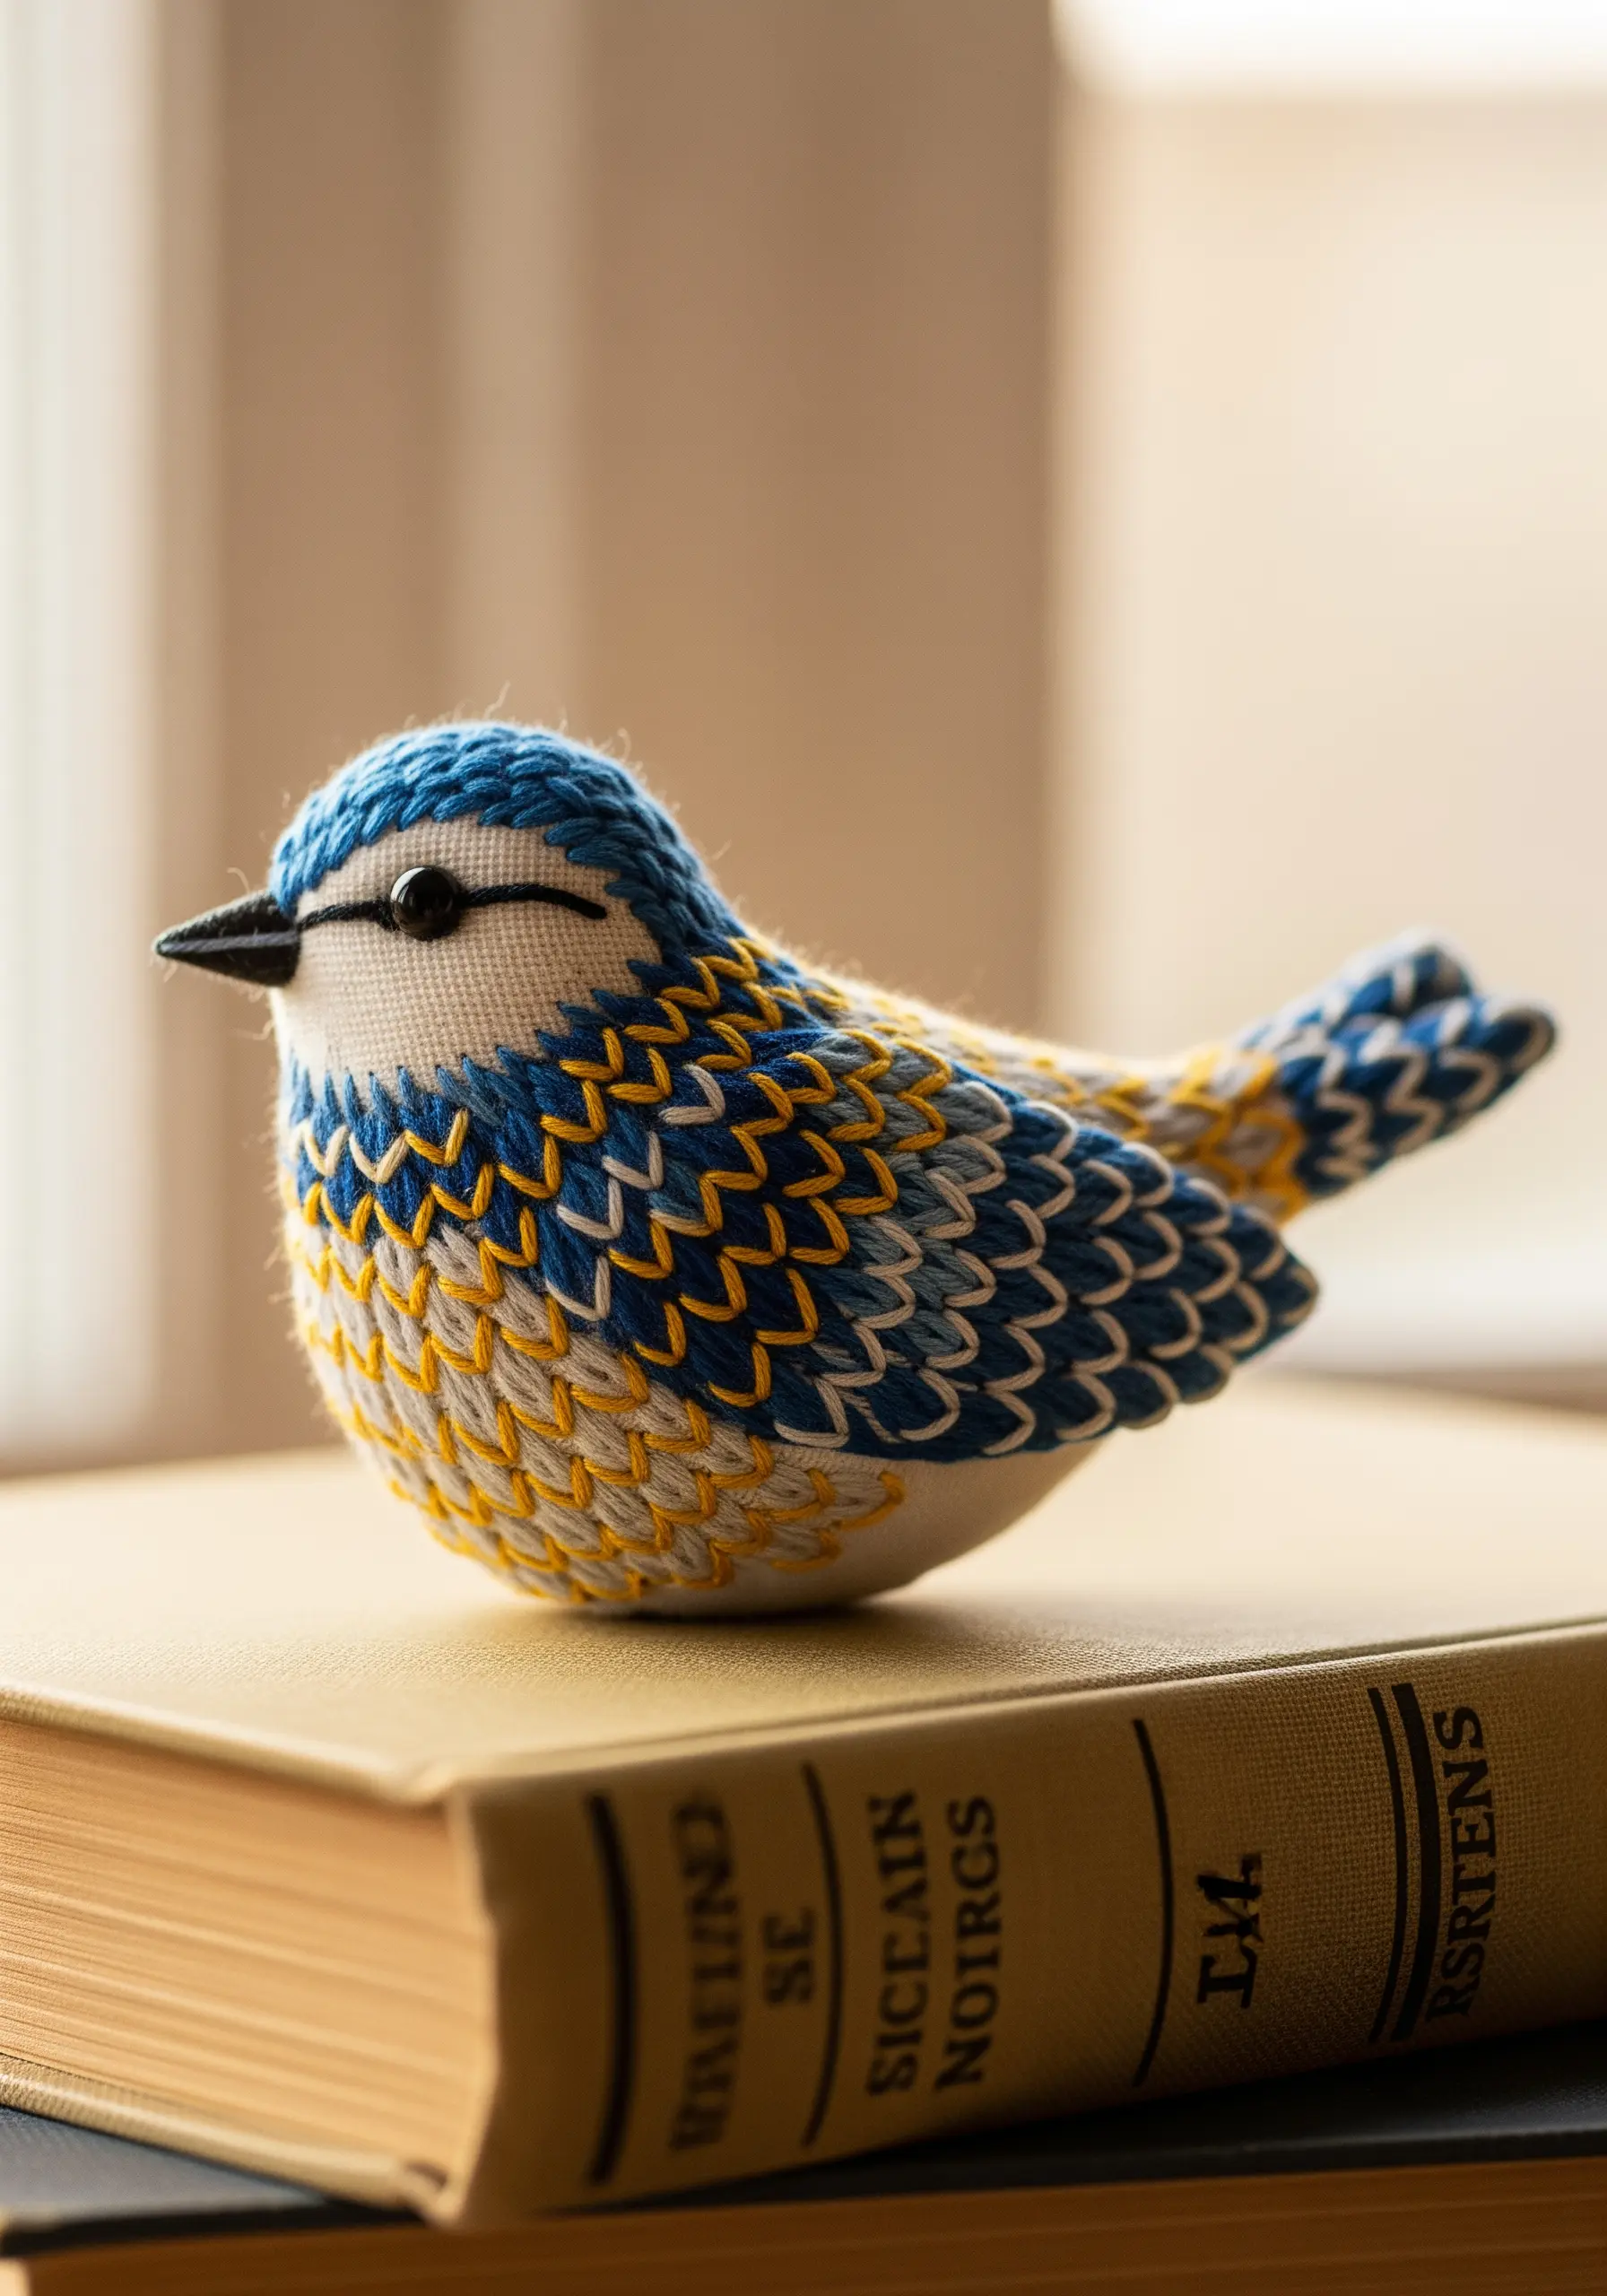
To give this bird its lifelike, rounded shape, embroider over a pre-sewn and stuffed fabric form—a technique known as stumpwork.
Use a long-and-short stitch, ensuring your stitches follow the contours of the bird’s body. This ‘thread painting’ approach makes the feathers look as if they are wrapping naturally around the form.
Create the distinct feather pattern by alternating colors in neat rows of brick stitch. This gives a clean, graphic quality that contrasts beautifully with the bird’s soft shape.
The key is consistent stitch direction; it acts like a brushstroke, defining form and dimension.
4. Miniature Woven Sunset Tapestry
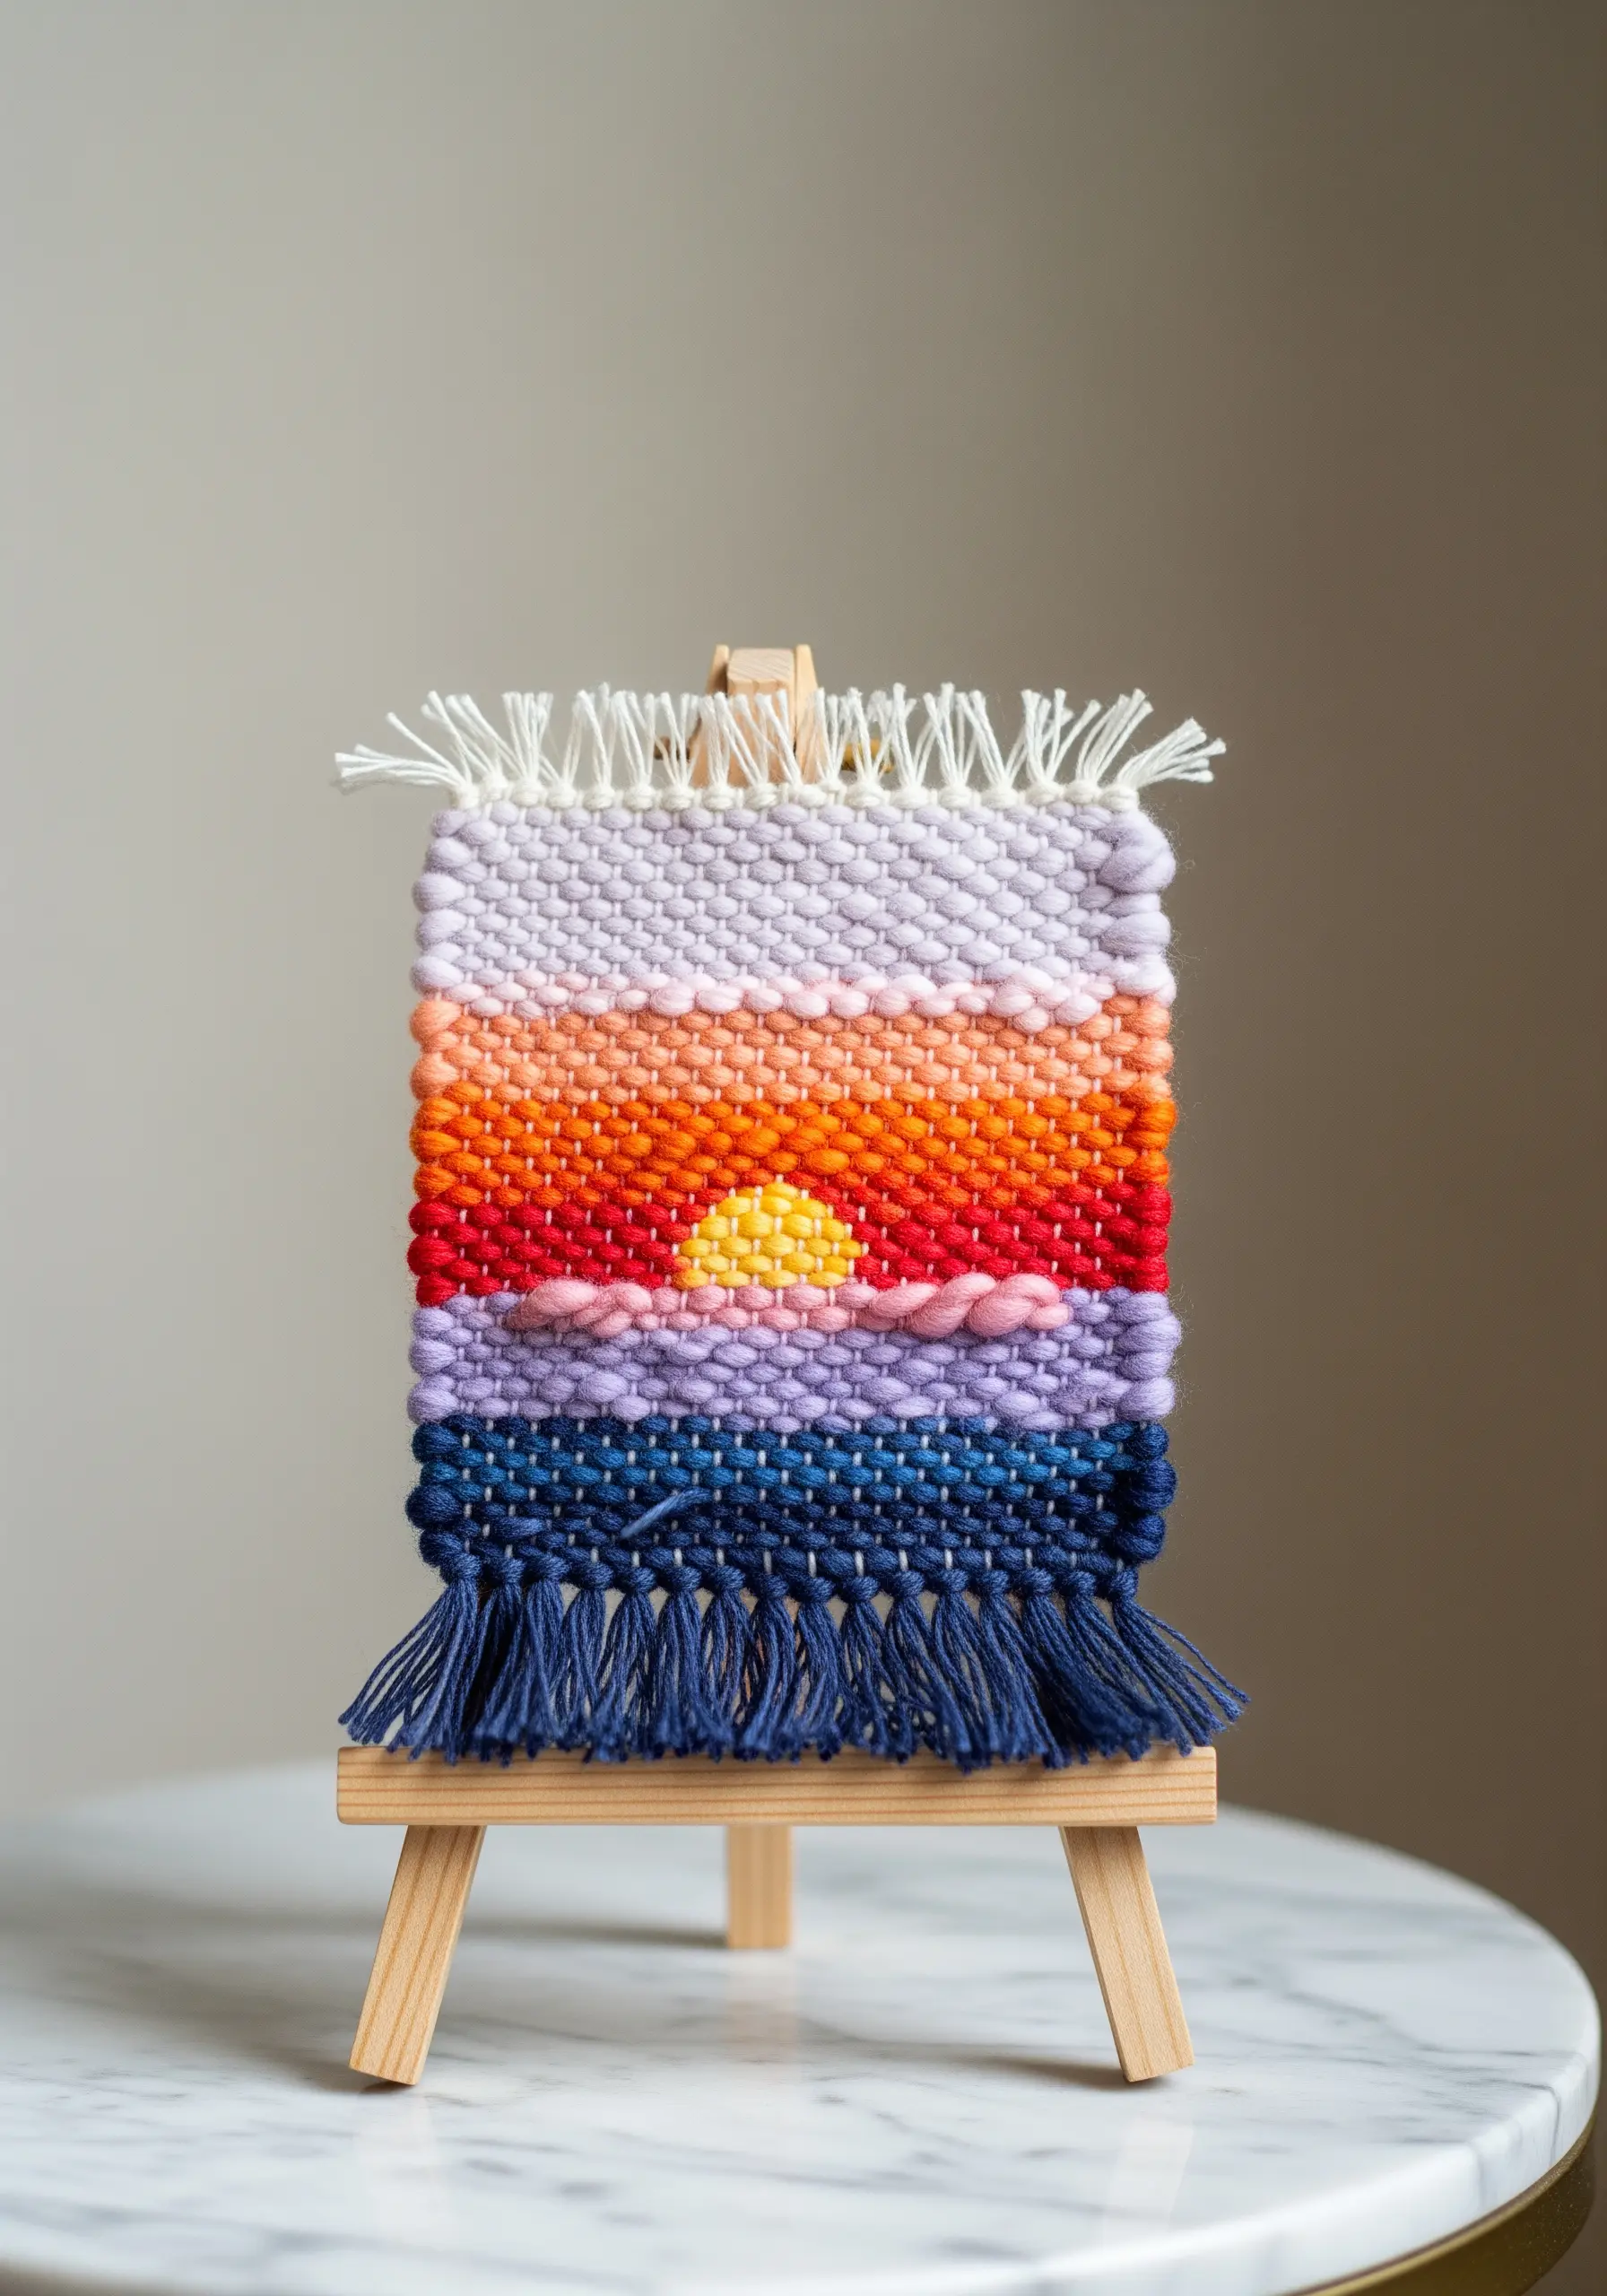
Translate embroidery skills into miniature weaving on a small frame loom to create textural art for your desk.
To achieve the soft gradient of a sunset, blend colors by weaving with two different colored yarns threaded on the needle at once for a few rows—this creates a gentle, heathered transition.
Vary the texture by alternating the standard ‘tabby’ weave with rows of soumak stitch (a raised, rope-like texture) to define the horizon or create puffy clouds.
Finishing is key: a neatly trimmed fringe at the top and bottom frames the piece and gives it a professional, tidy appearance.
5. Celestial Couching on a Journal Cover

Embroidering on a hard surface like a book cover requires a specific approach; couching is your best technique here.
Lay down thick metallic thread for the crescent moon’s outline and secure it with small, perpendicular stitches in a thinner, matching thread. This method controls the stiff metallic fiber and creates a perfectly smooth, raised line.
For the delicate constellations, use single strands of a silver thread with simple straight stitches and tiny seed stitches for the stars. The variation in scale makes the moon the focal point.
6. Felted Fox with Embroidered Details

This piece combines the soft sculpture of needle felting with the sharp detail of embroidery.
After felting the fox into its final shape, use a single strand of black floss to add delicate backstitched whiskers and closed eyes. This fine line work provides a crisp definition that felting alone cannot achieve.
The embroidered leaves on the base are created with a fishbone stitch. This stitch creates a central vein and angled sides in one motion, giving the leaves a natural, veined appearance.
This mixed-fiber creation demonstrates how two crafts can be combined for a richer result.
7. Coiled Rope Bowl with Rainbow Wraps
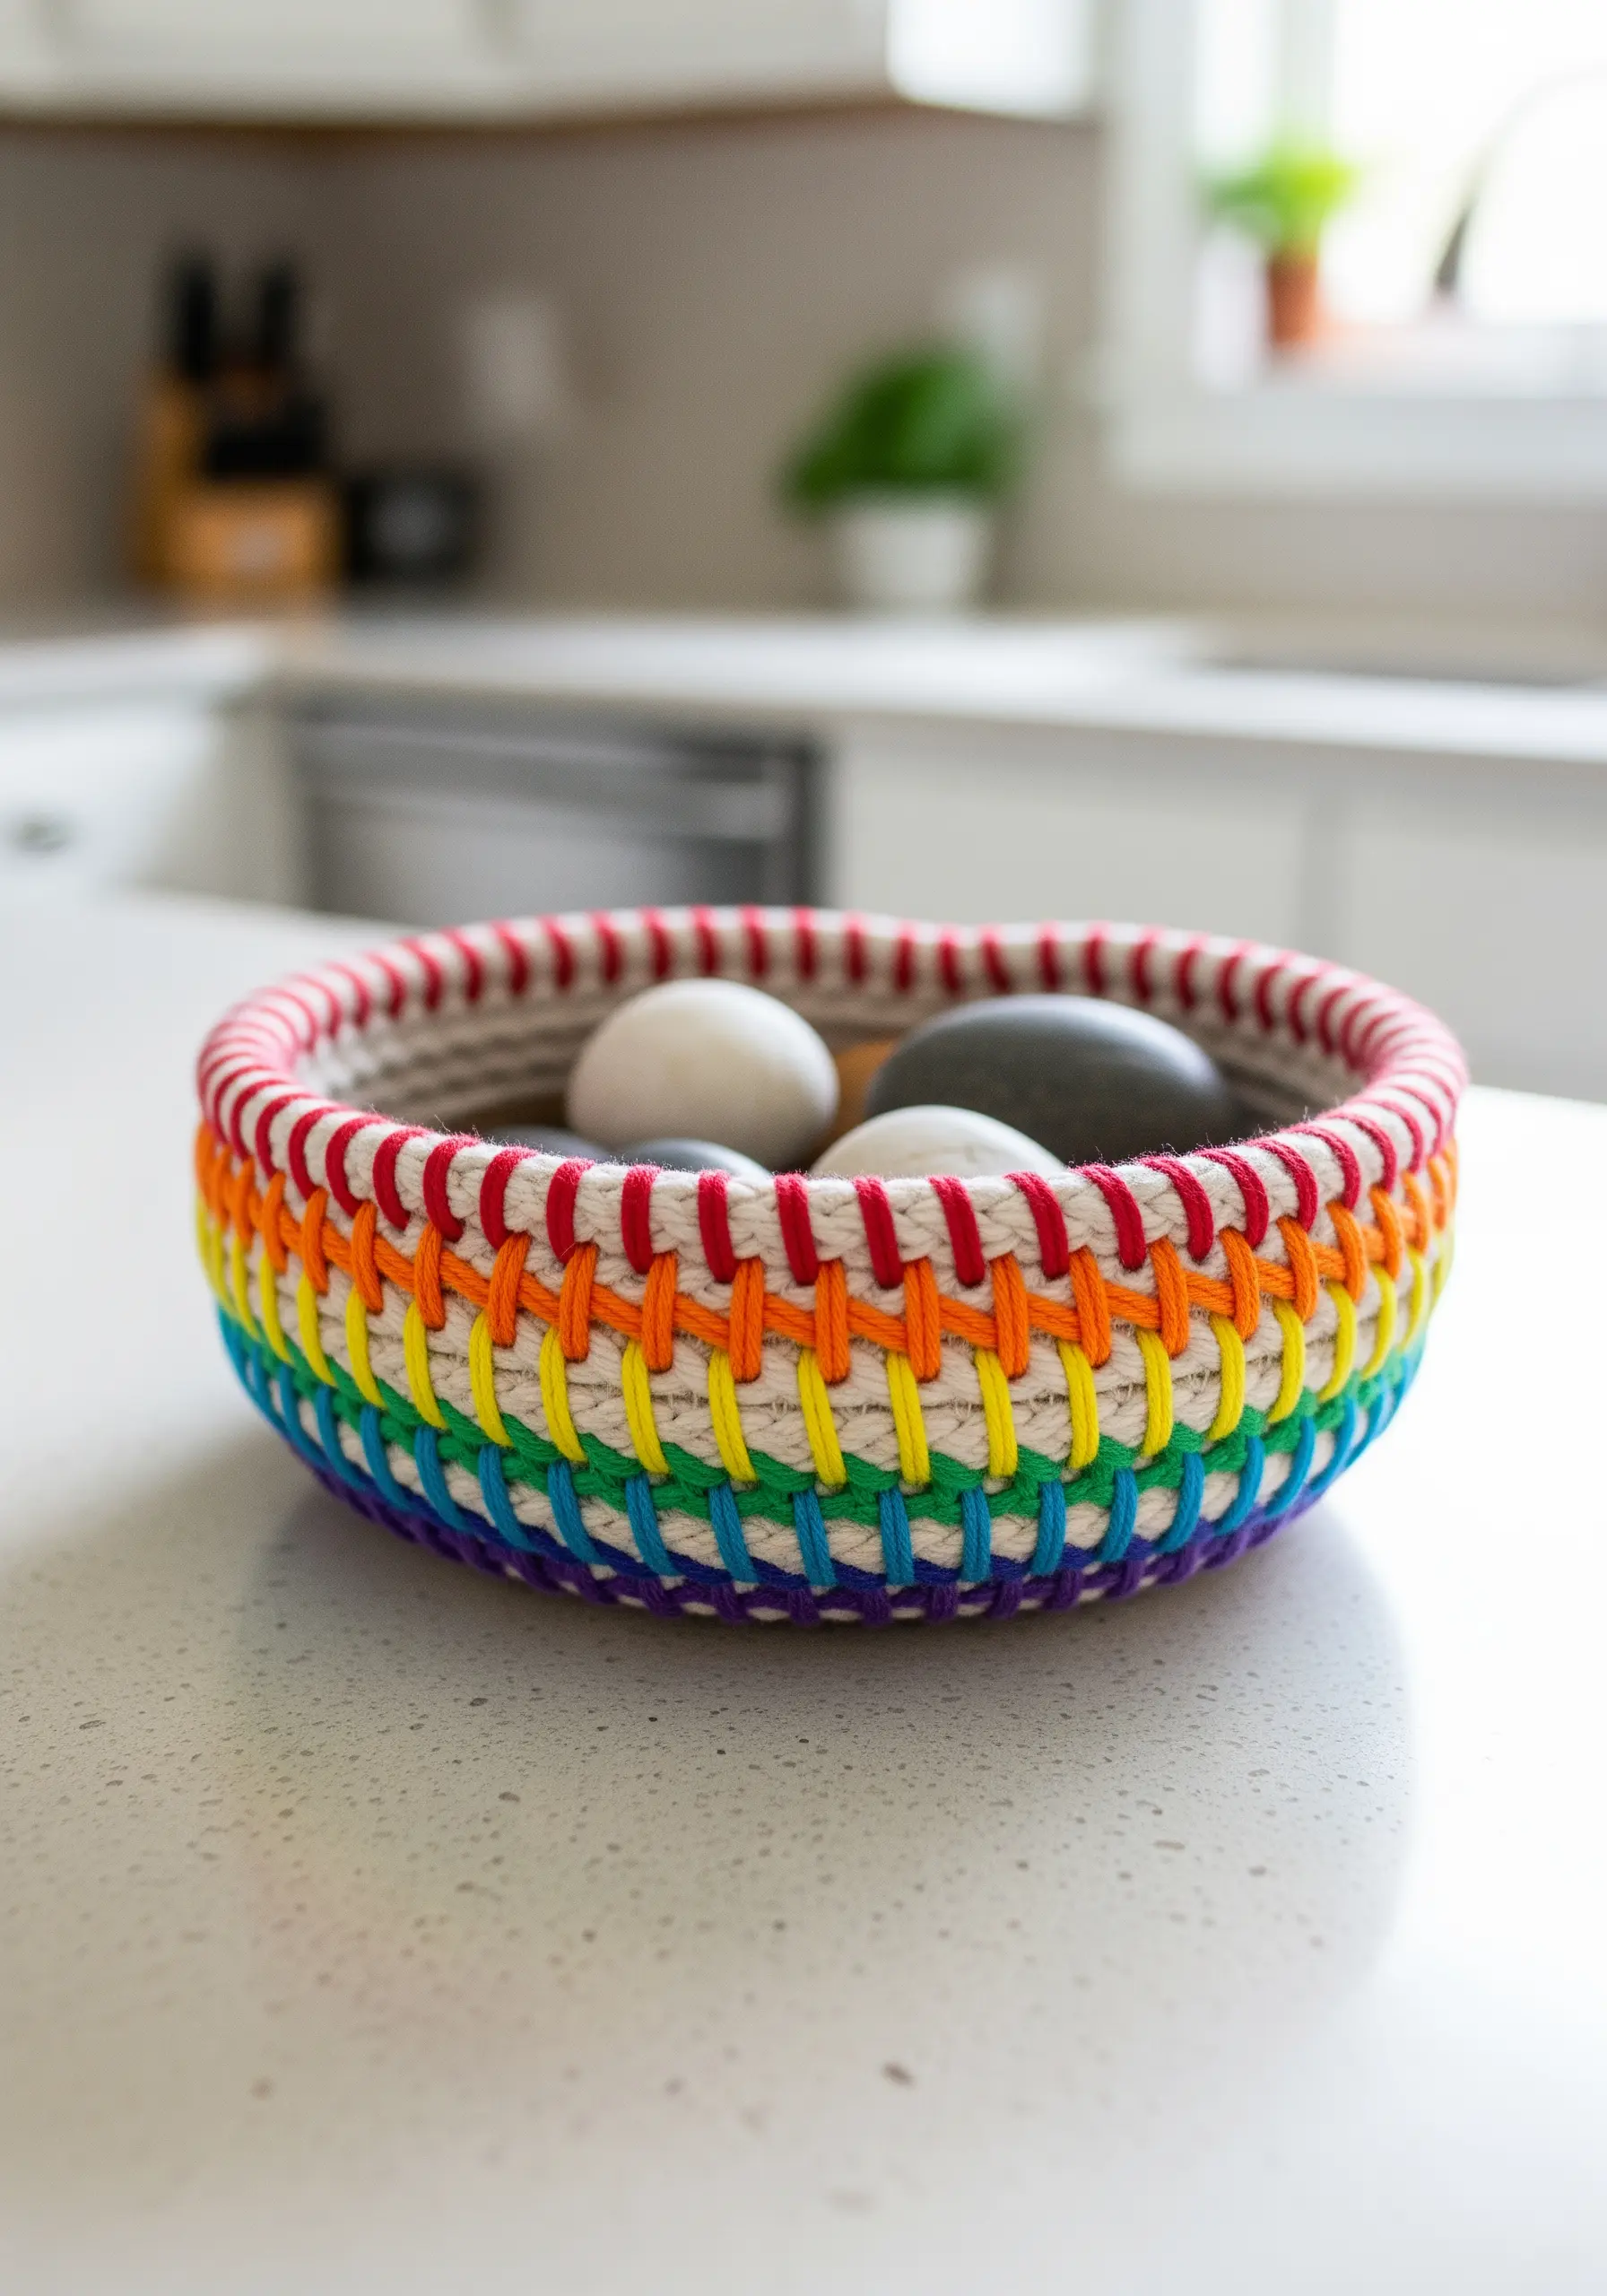
Create a sturdy, functional bowl by wrapping cotton rope with colorful embroidery floss.
The technique is simple but requires consistency: wrap the floss tightly around the rope, ensuring no gaps are visible. To join the coils, use a simple whipstitch that passes through the previous row, locking it in place.
Plan your color changes to create intentional stripes or blocks. To switch colors, simply tie off the old floss on the inside of the bowl and begin wrapping with the new color.
The even tension of your wrapping thread is what gives the final piece its polished, store-bought look. These contemporary rainbow blend stitches offer a vibrant, modern aesthetic.
8. Atmospheric Landscape Hoop Art

Achieve depth in a landscape by manipulating thread weight and stitch density.
Use single-strand floss and sparse straight stitches for the distant hills to create an atmospheric, hazy effect. As you move to the foreground, switch to three strands of floss for bolder texture and richer color.
The rolling hills are filled with directional seed stitch, where the angle of each small stitch follows the curve of the land, enhancing the sense of topography.
For the fluffy clouds, use a dense cluster of French knots, which provides a raised, billowy texture that contrasts with the flatter landscape below.
9. Miniature Macrame Plant Hanger
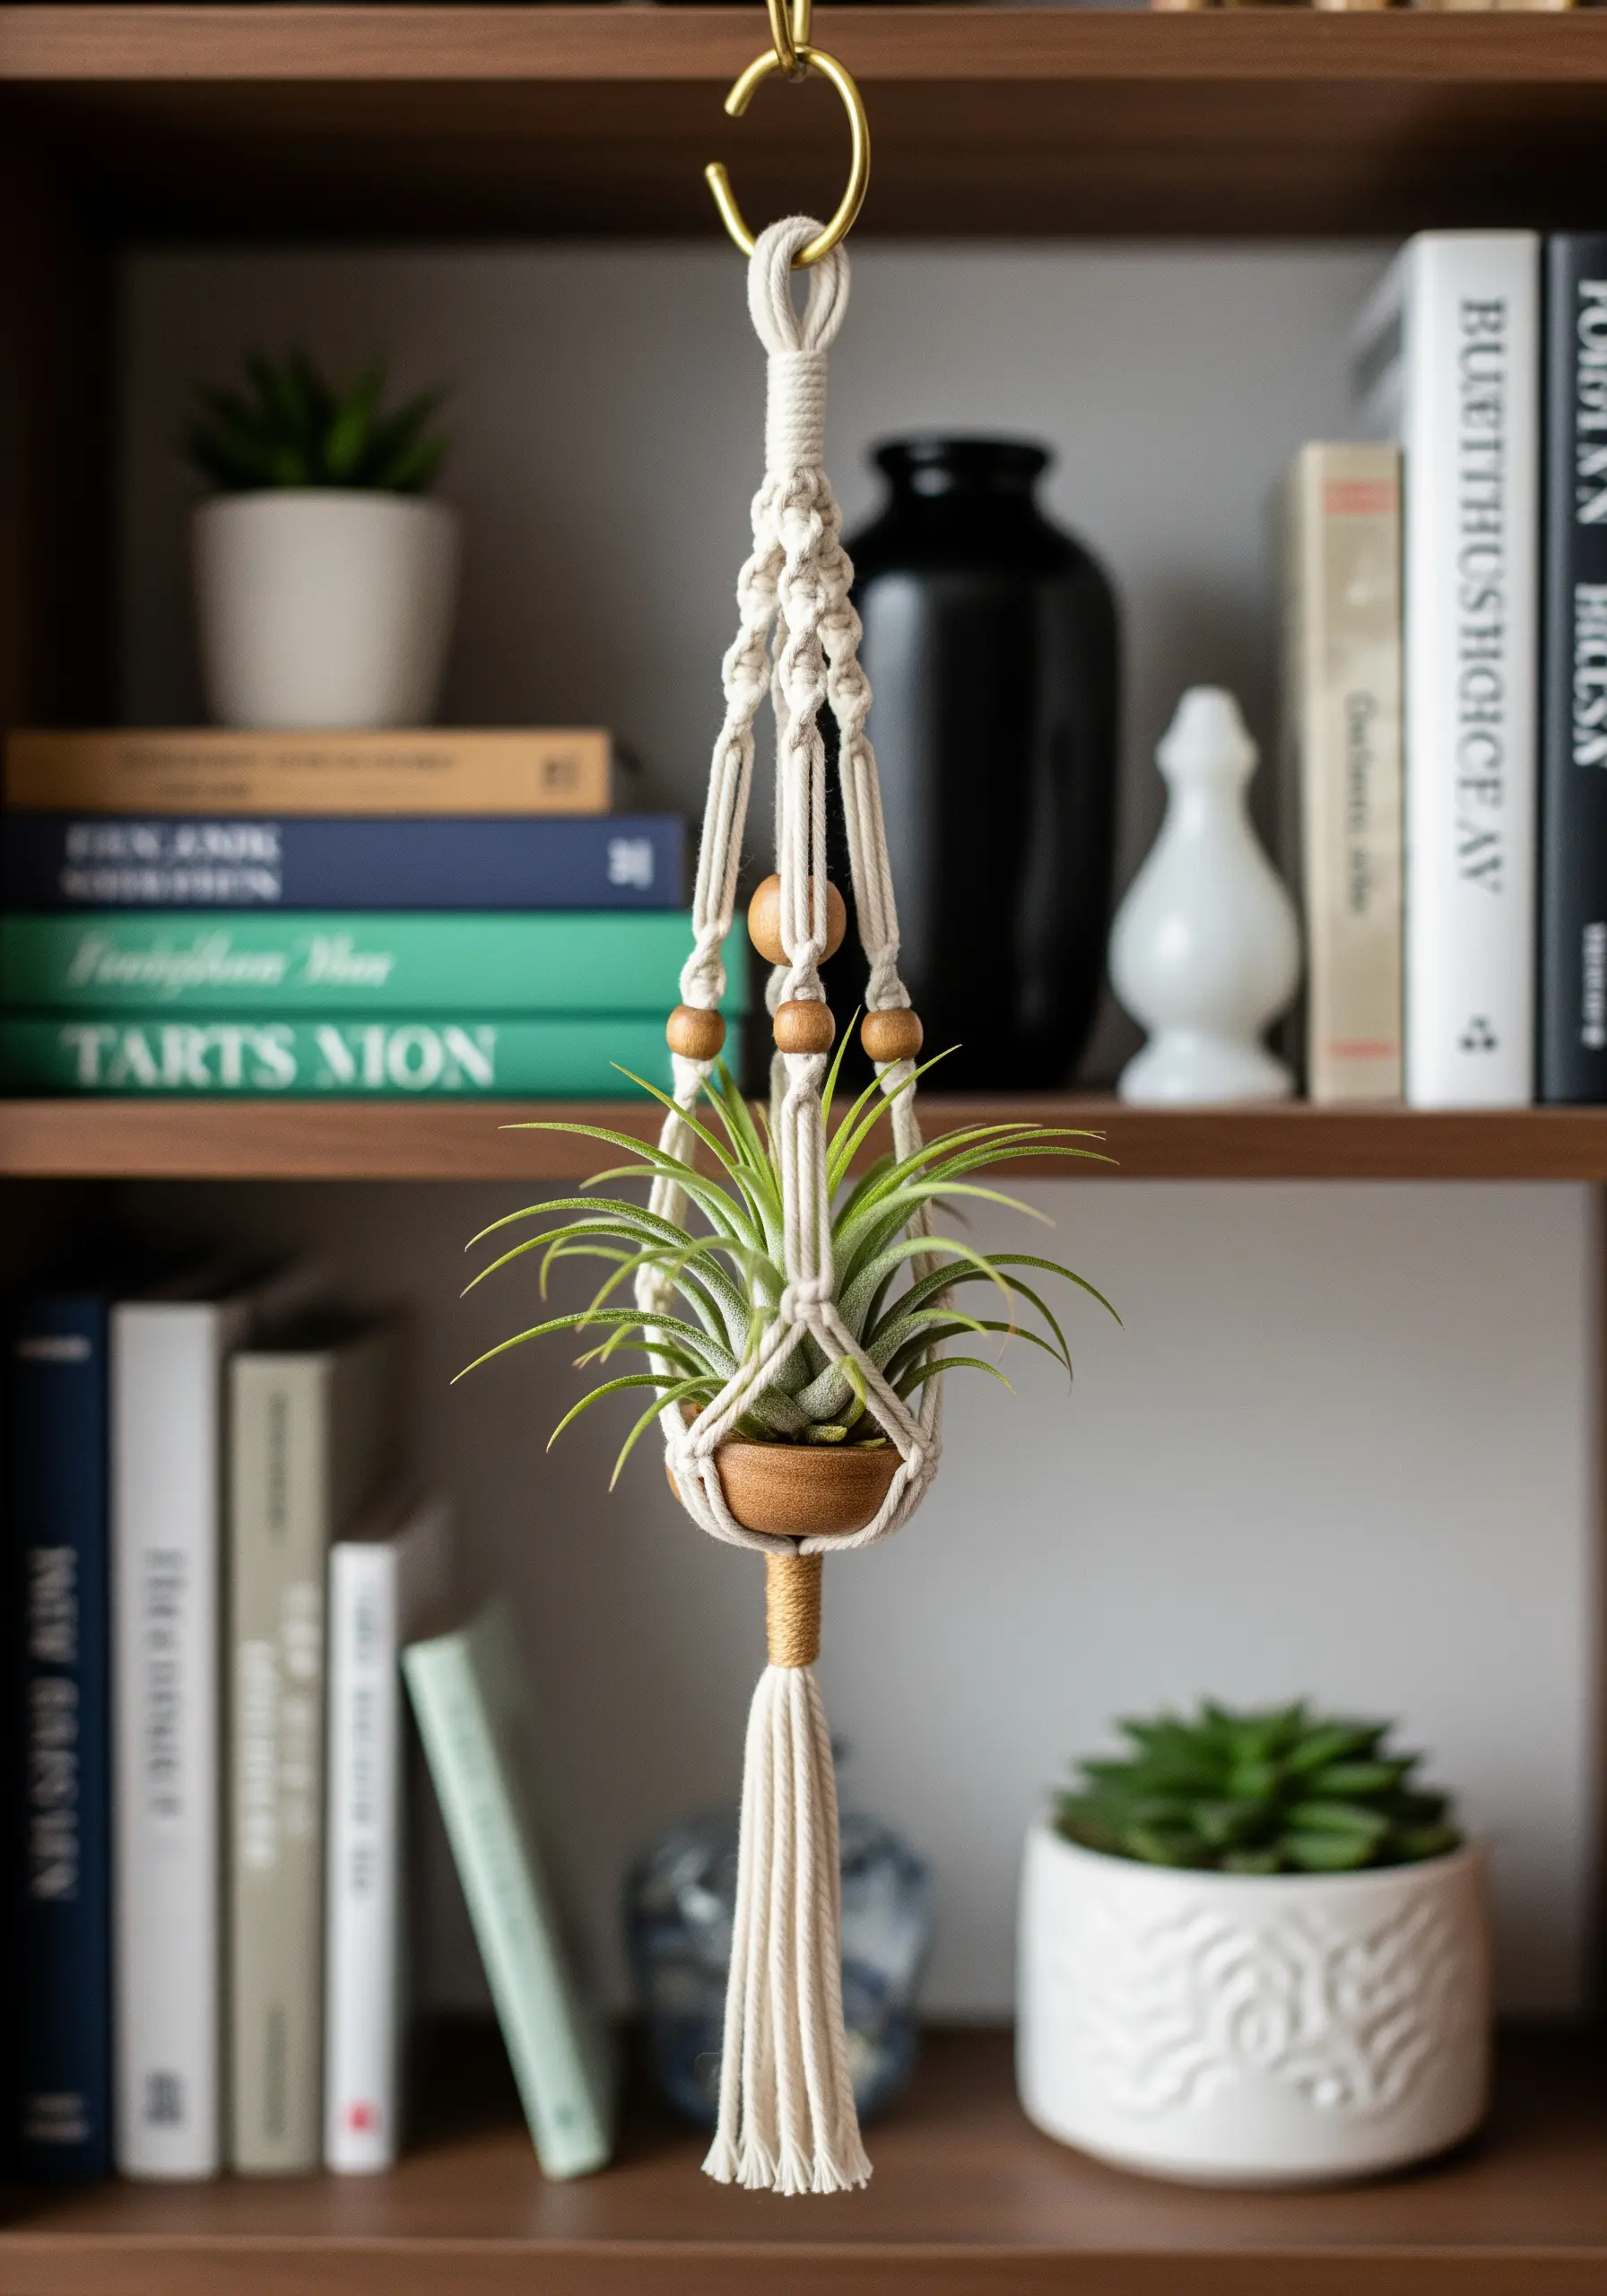
Macrame is knotting, a foundational skill for any fiber artist, and this miniature version is a perfect entry point.
The entire structure is built on two simple knots: the square knot and the half-hitch spiral. Mastering the tension of your square knots is essential for a symmetrical, even basket.
Incorporate wooden beads by simply sliding them onto the central cords before tying the knots beneath them. This adds a classic bohemian detail.
Finish with a gathering knot to create a neat, tidy tassel. The cleaner your finish, the more professional the piece will look.
10. Concentric Beaded Trinket Dish

This is bead embroidery, a meditative process where stitches are hidden and beads take center stage.
Work from the center out, stitching down small sections of threaded seed beads (3-4 beads at a time) with a backstitch. This secures the beads tightly and allows you to create perfect curves.
To create the pattern, simply switch the color of beads you are stringing. Mapping your design on the foundation fabric with a pencil beforehand will ensure symmetry.
Use a sturdy, stiff felt as your base; it provides the necessary support and is easy to stitch through without buckling.
11. Velvet Pumpkin with a Golden Leaf
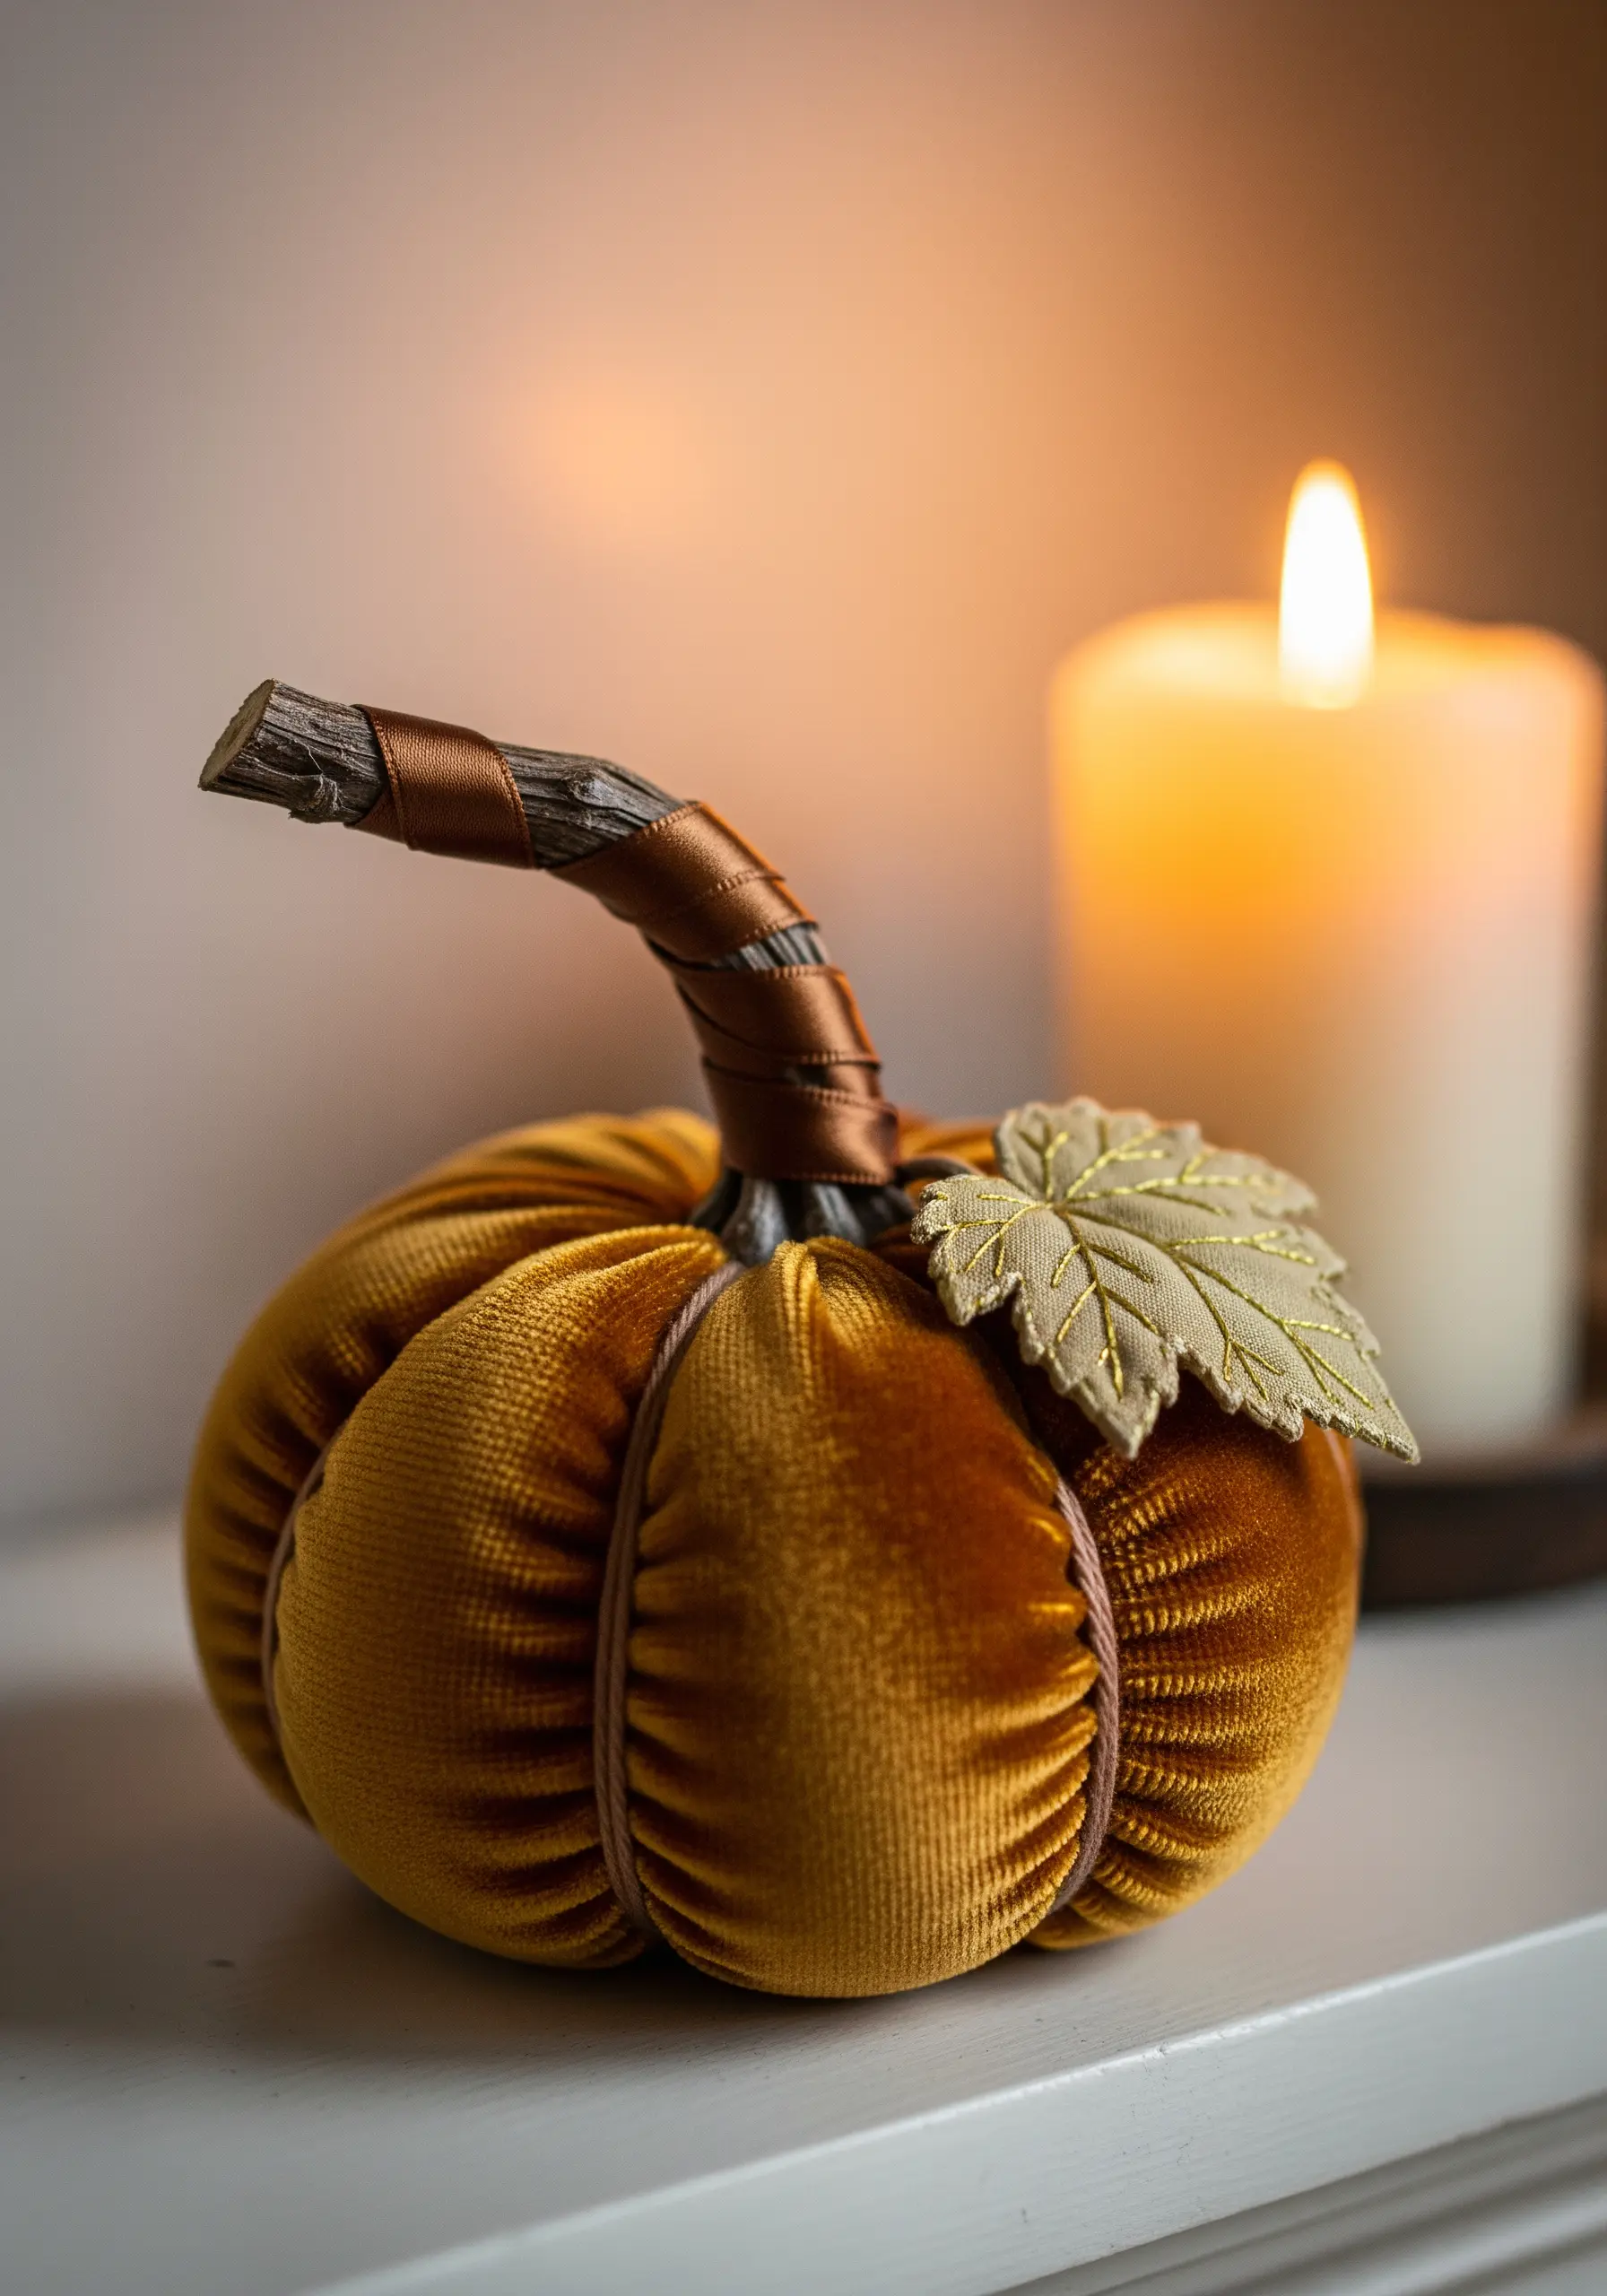
Transform simple fabric into a luxurious decorative object with clever stitching and a single, stunning detail.
The pumpkin’s shape is formed by hand-sewing a running stitch around a circle of velvet, stuffing it firmly, and pulling the thread tight to close. The segments are created by wrapping strong thread from top to bottom, pulling tightly to create the indentations.
The embroidered leaf is the focal point. Create it on a separate piece of fabric using a padded satin stitch with gold metallic thread. Cut it out, leaving a small border, and attach it to the pumpkin for a clean, appliqué finish.
12. Dimensional Stitched Cottage
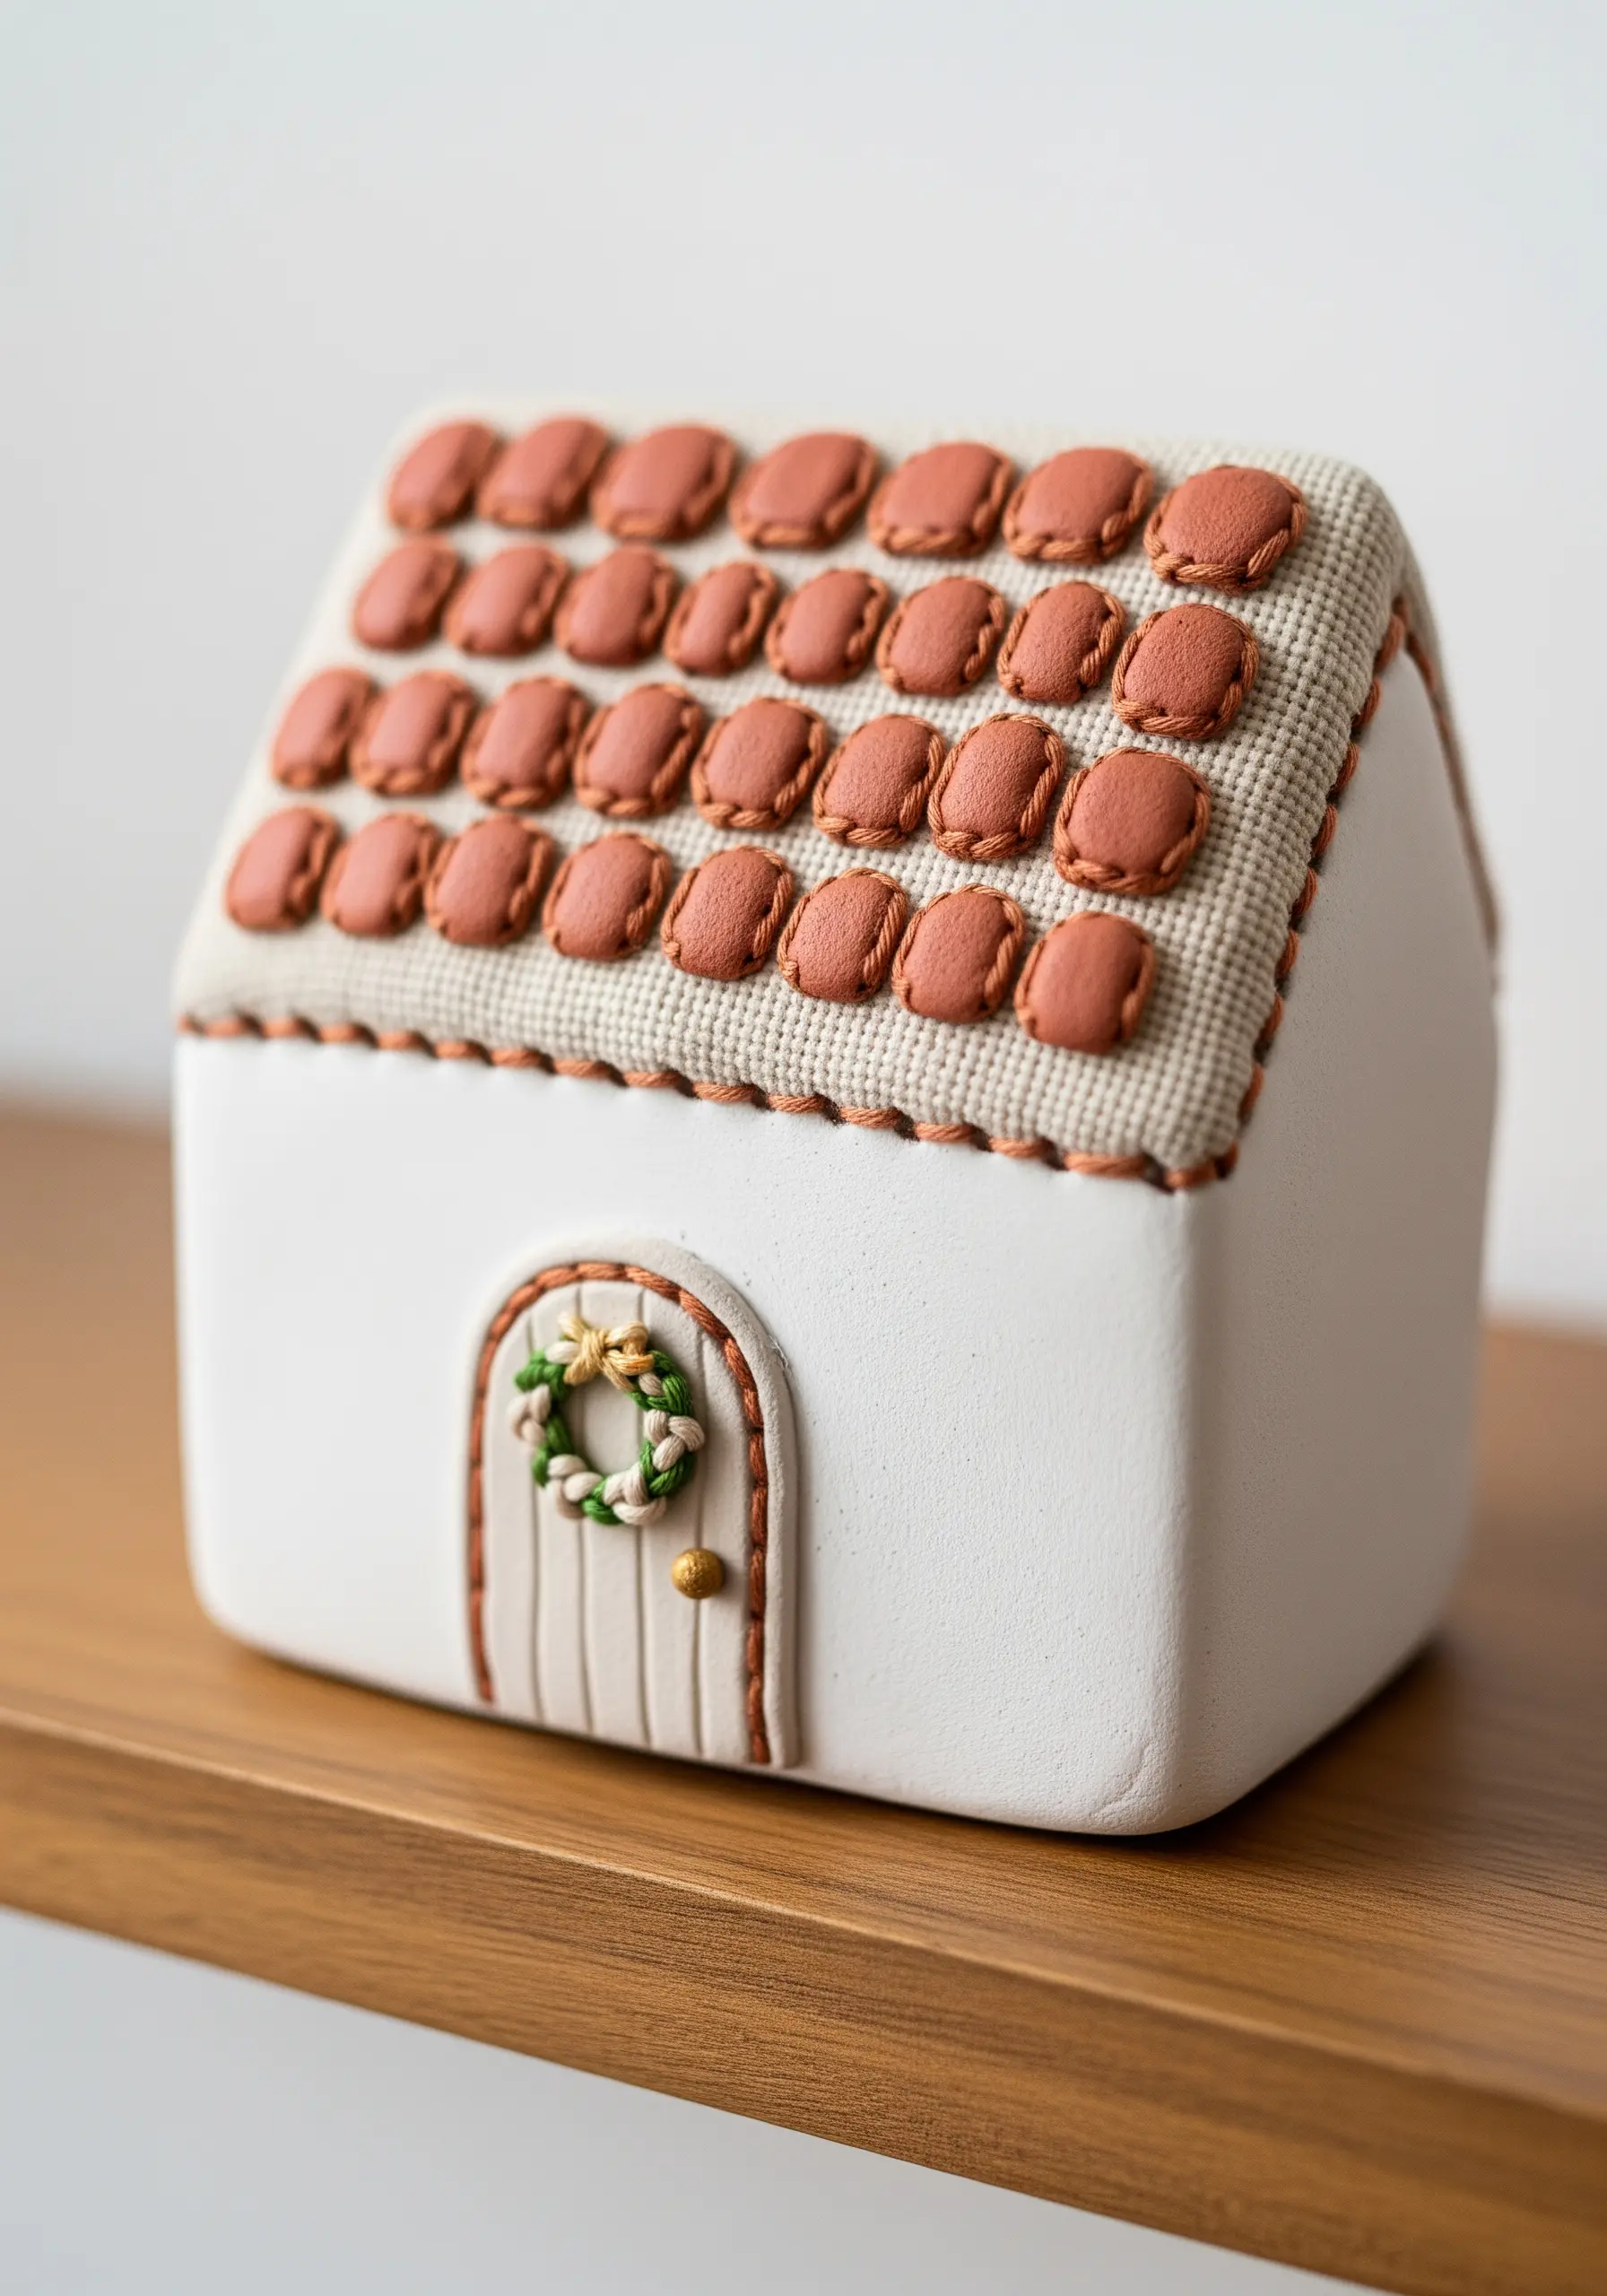
This piece masterfully combines surface embroidery with appliqué to create a storybook cottage with charming textures.
The roof tiles are not stitched directly; they are small, padded fabric shapes secured with a single couching stitch. This raises them from the surface, creating realistic dimension and shadow.
For the tiny wreath on the door, use bullion knots for the green foliage and French knots for the berries. These highly textural stitches provide intricate detail at a miniature scale.
The clean blanket stitch along the roofline gives the piece a neat, illustrative finish.
13. Geometric Stitched Stone Sculptures
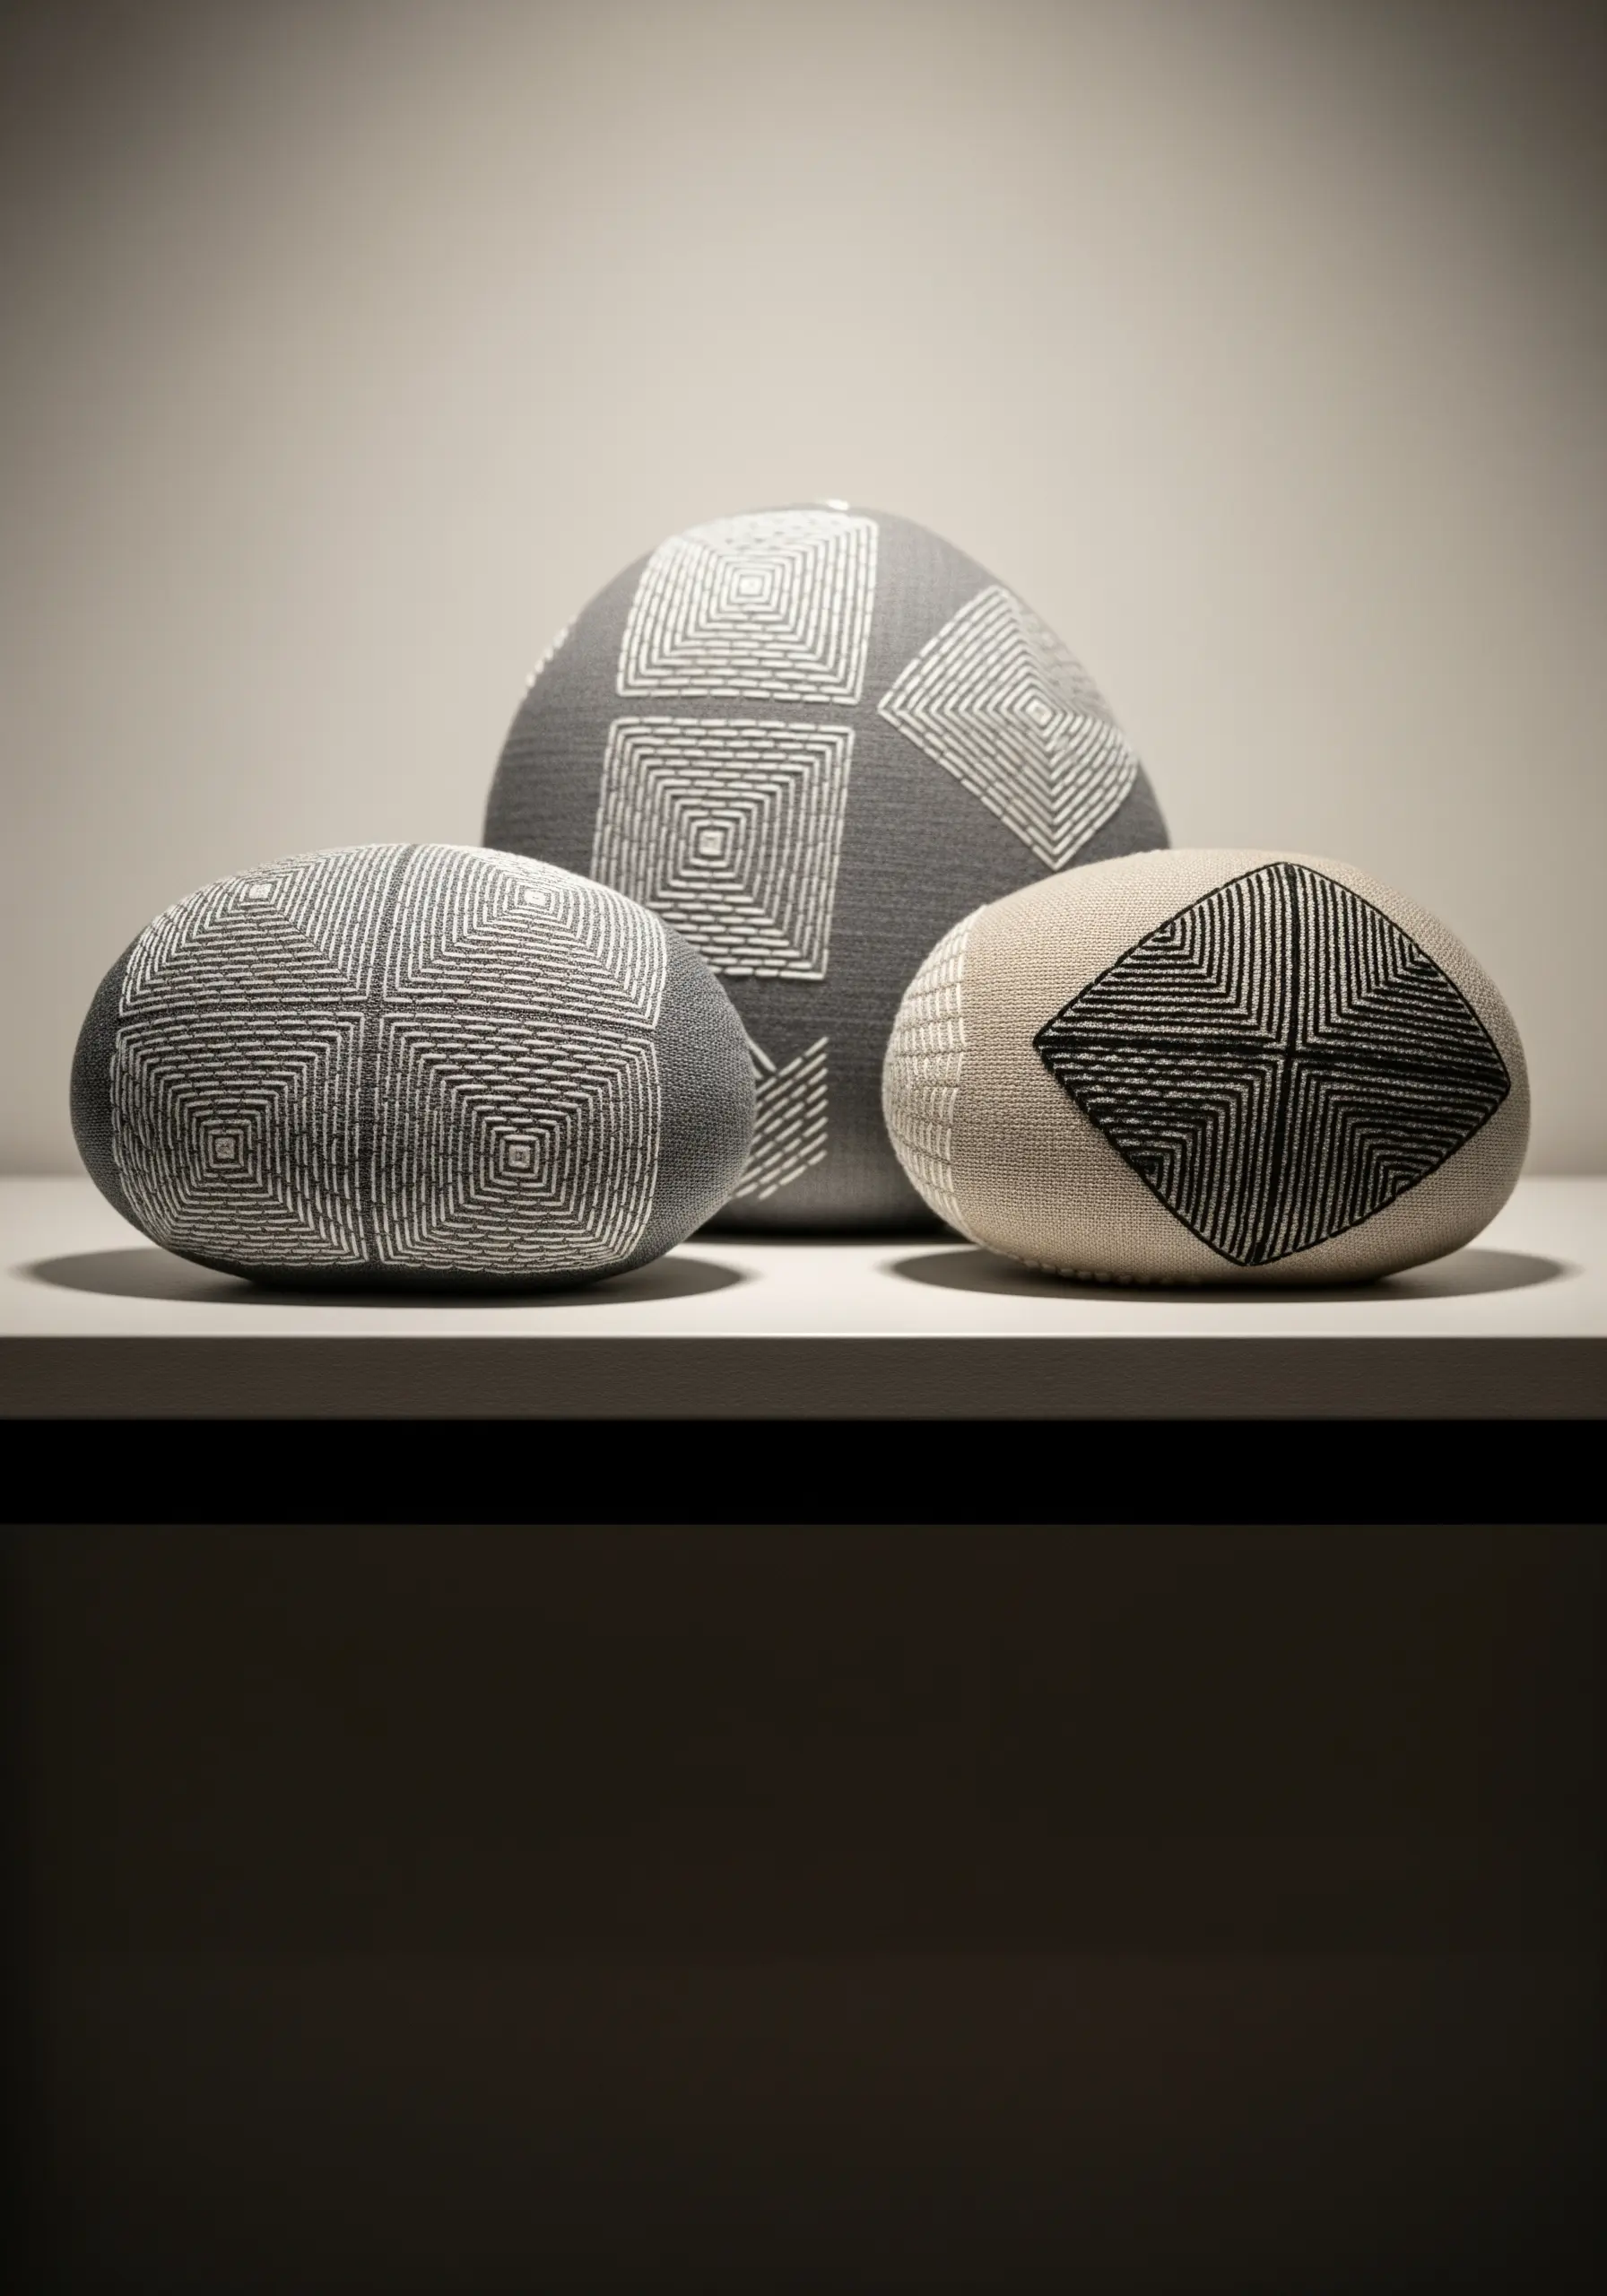
Create these soft, satisfying ‘stones’ by covering a pebble-shaped form with linen and then adding geometric embroidery.
The power of this design lies in the contrast between the organic, rounded shape of the stone and the rigid, repeating lines of the stitching.
Use a simple running stitch or backstitch to create the geometric patterns. The key is perfect stitch length and spacing, so consider marking your lines with a water-soluble pen before you begin.
Choose a high-contrast thread color to make the geometric patterns pop against the neutral fabric.
14. Floral Embroidered Candle Sleeve
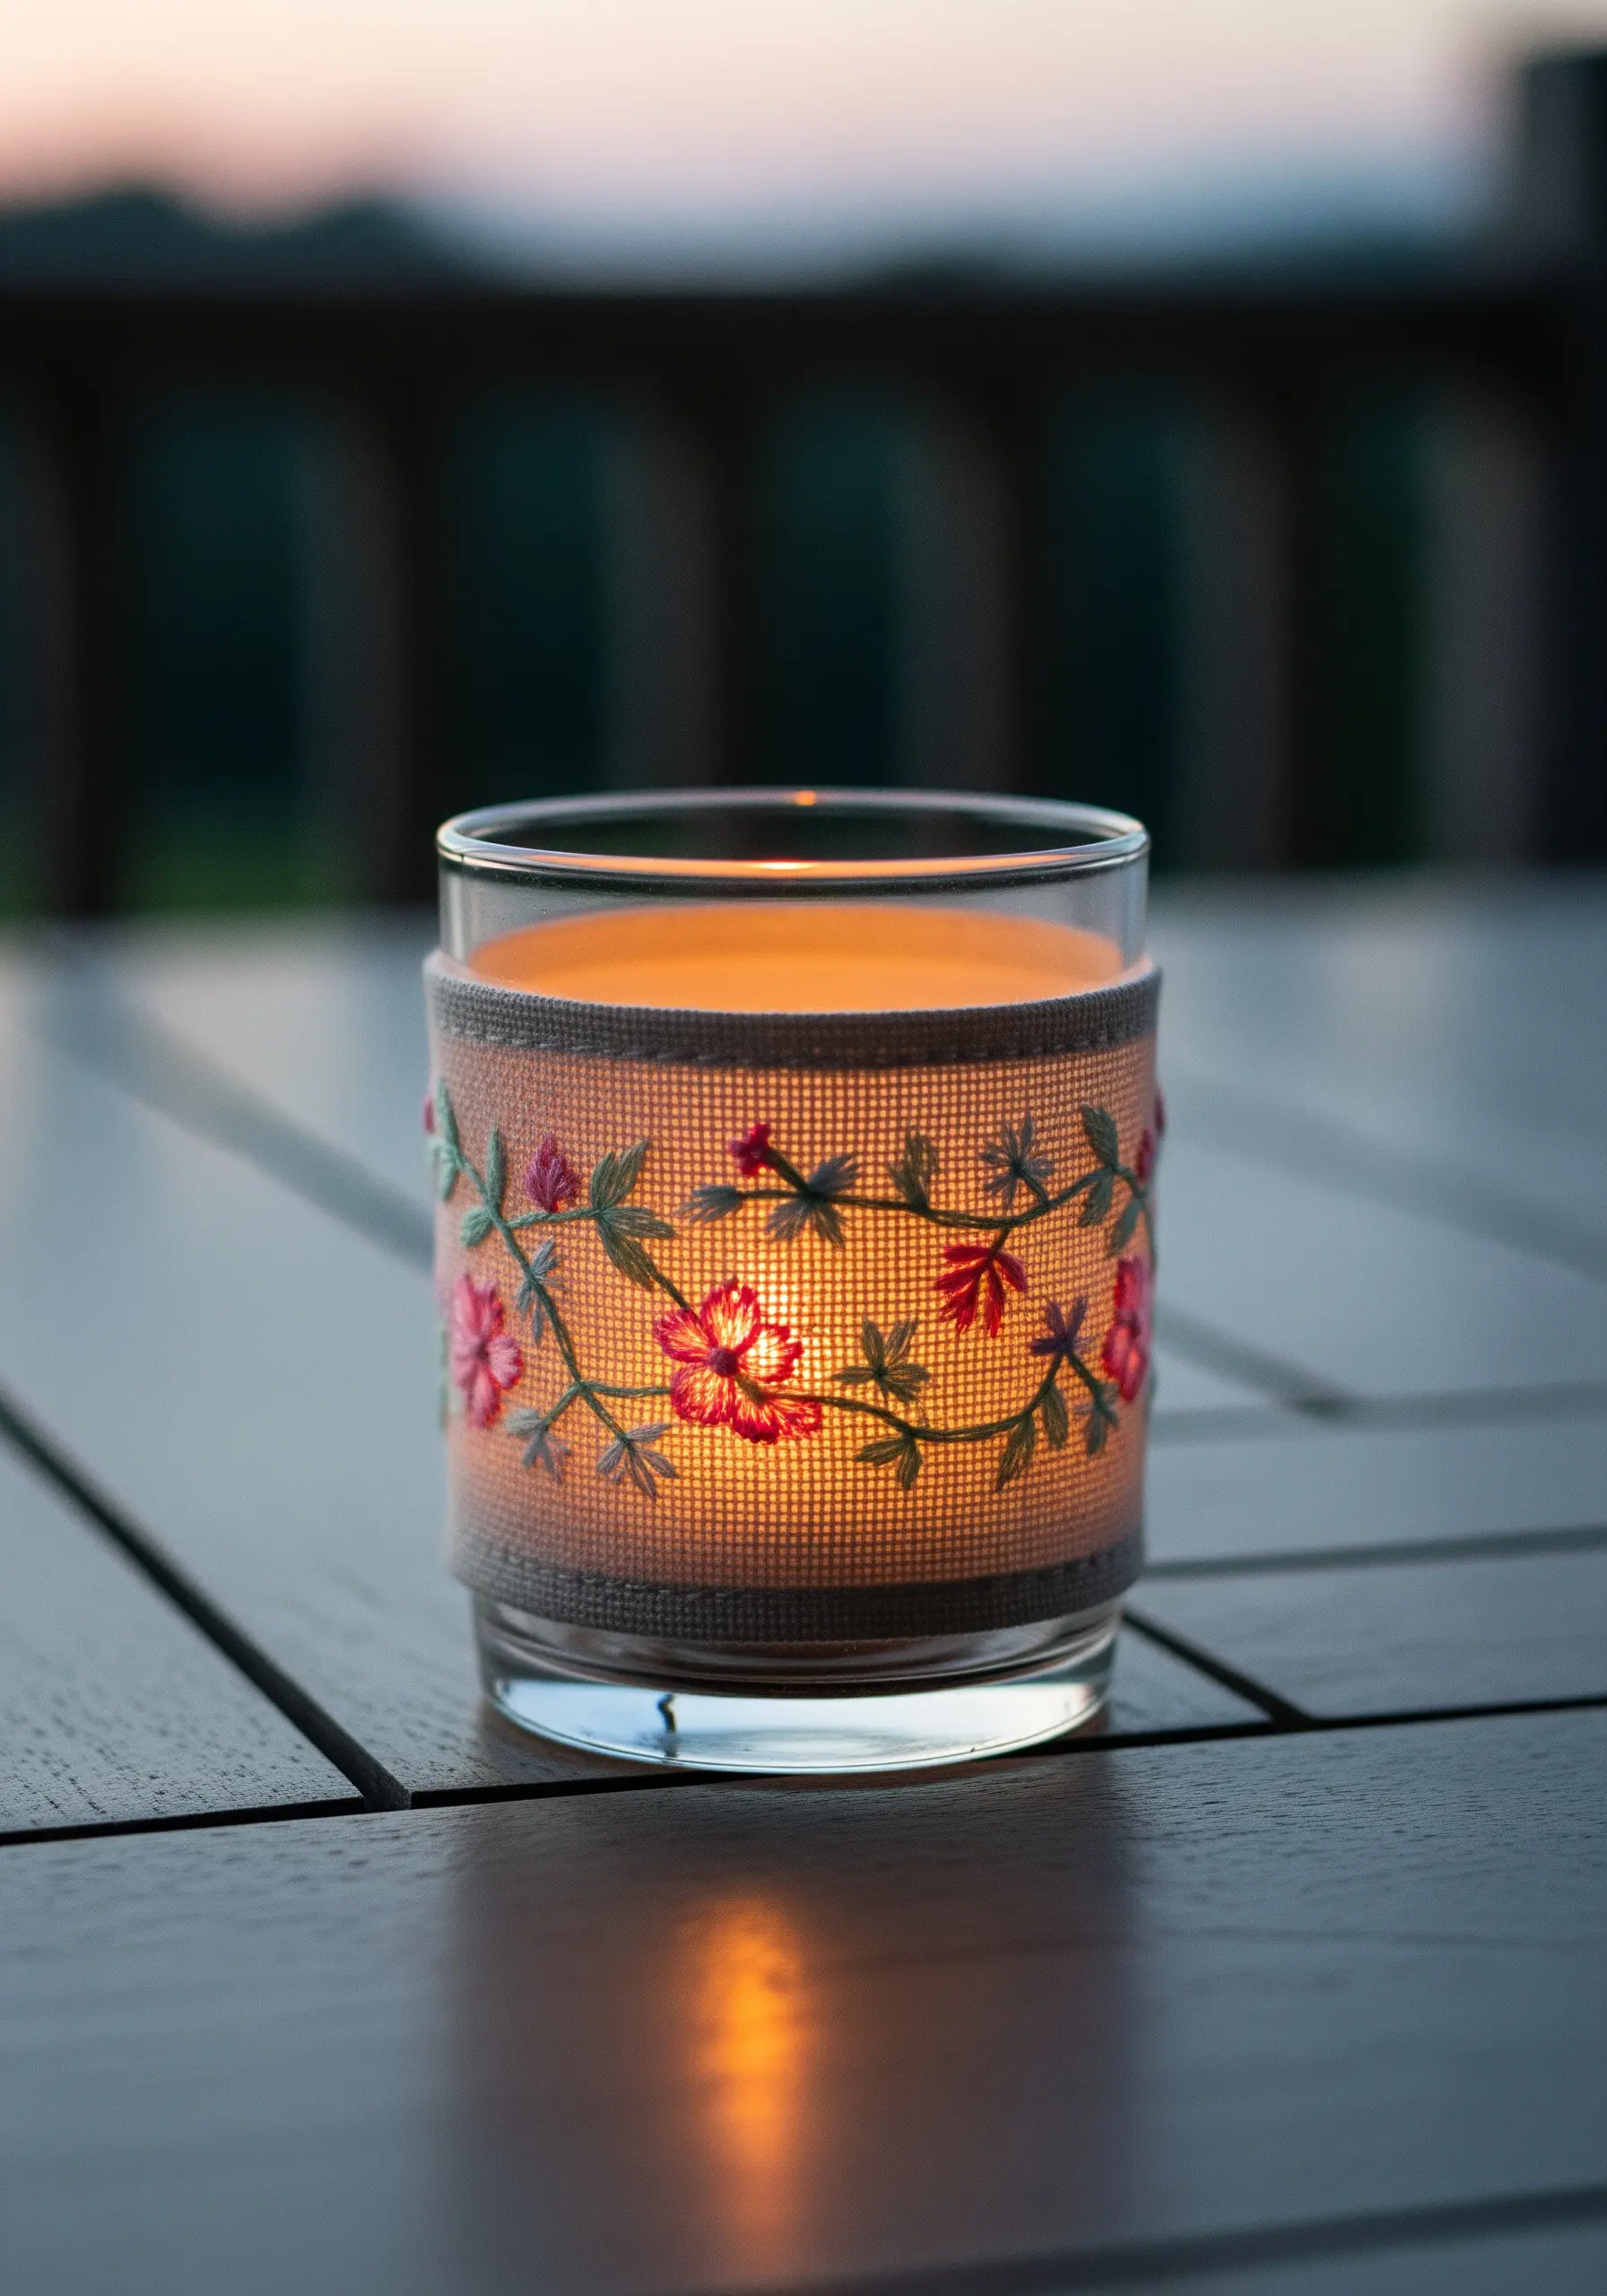
Embroidering on an open-weave fabric like burlap or linen allows you to create a beautiful candle wrap that glows from within.
Choose stitches that are beautiful from both the front and the back, like the lazy daisy stitch for petals and stem stitch for vines, as both sides may be visible.
Avoid dense fills like satin stitch, which would block the light. Instead, focus on elegant outlines and scattered ‘airier’ stitches that allow the candle’s glow to shine through.
These line art garden motifs are perfect for creating delicate designs that interact with light.
15. Thread-Painted Pet Portrait
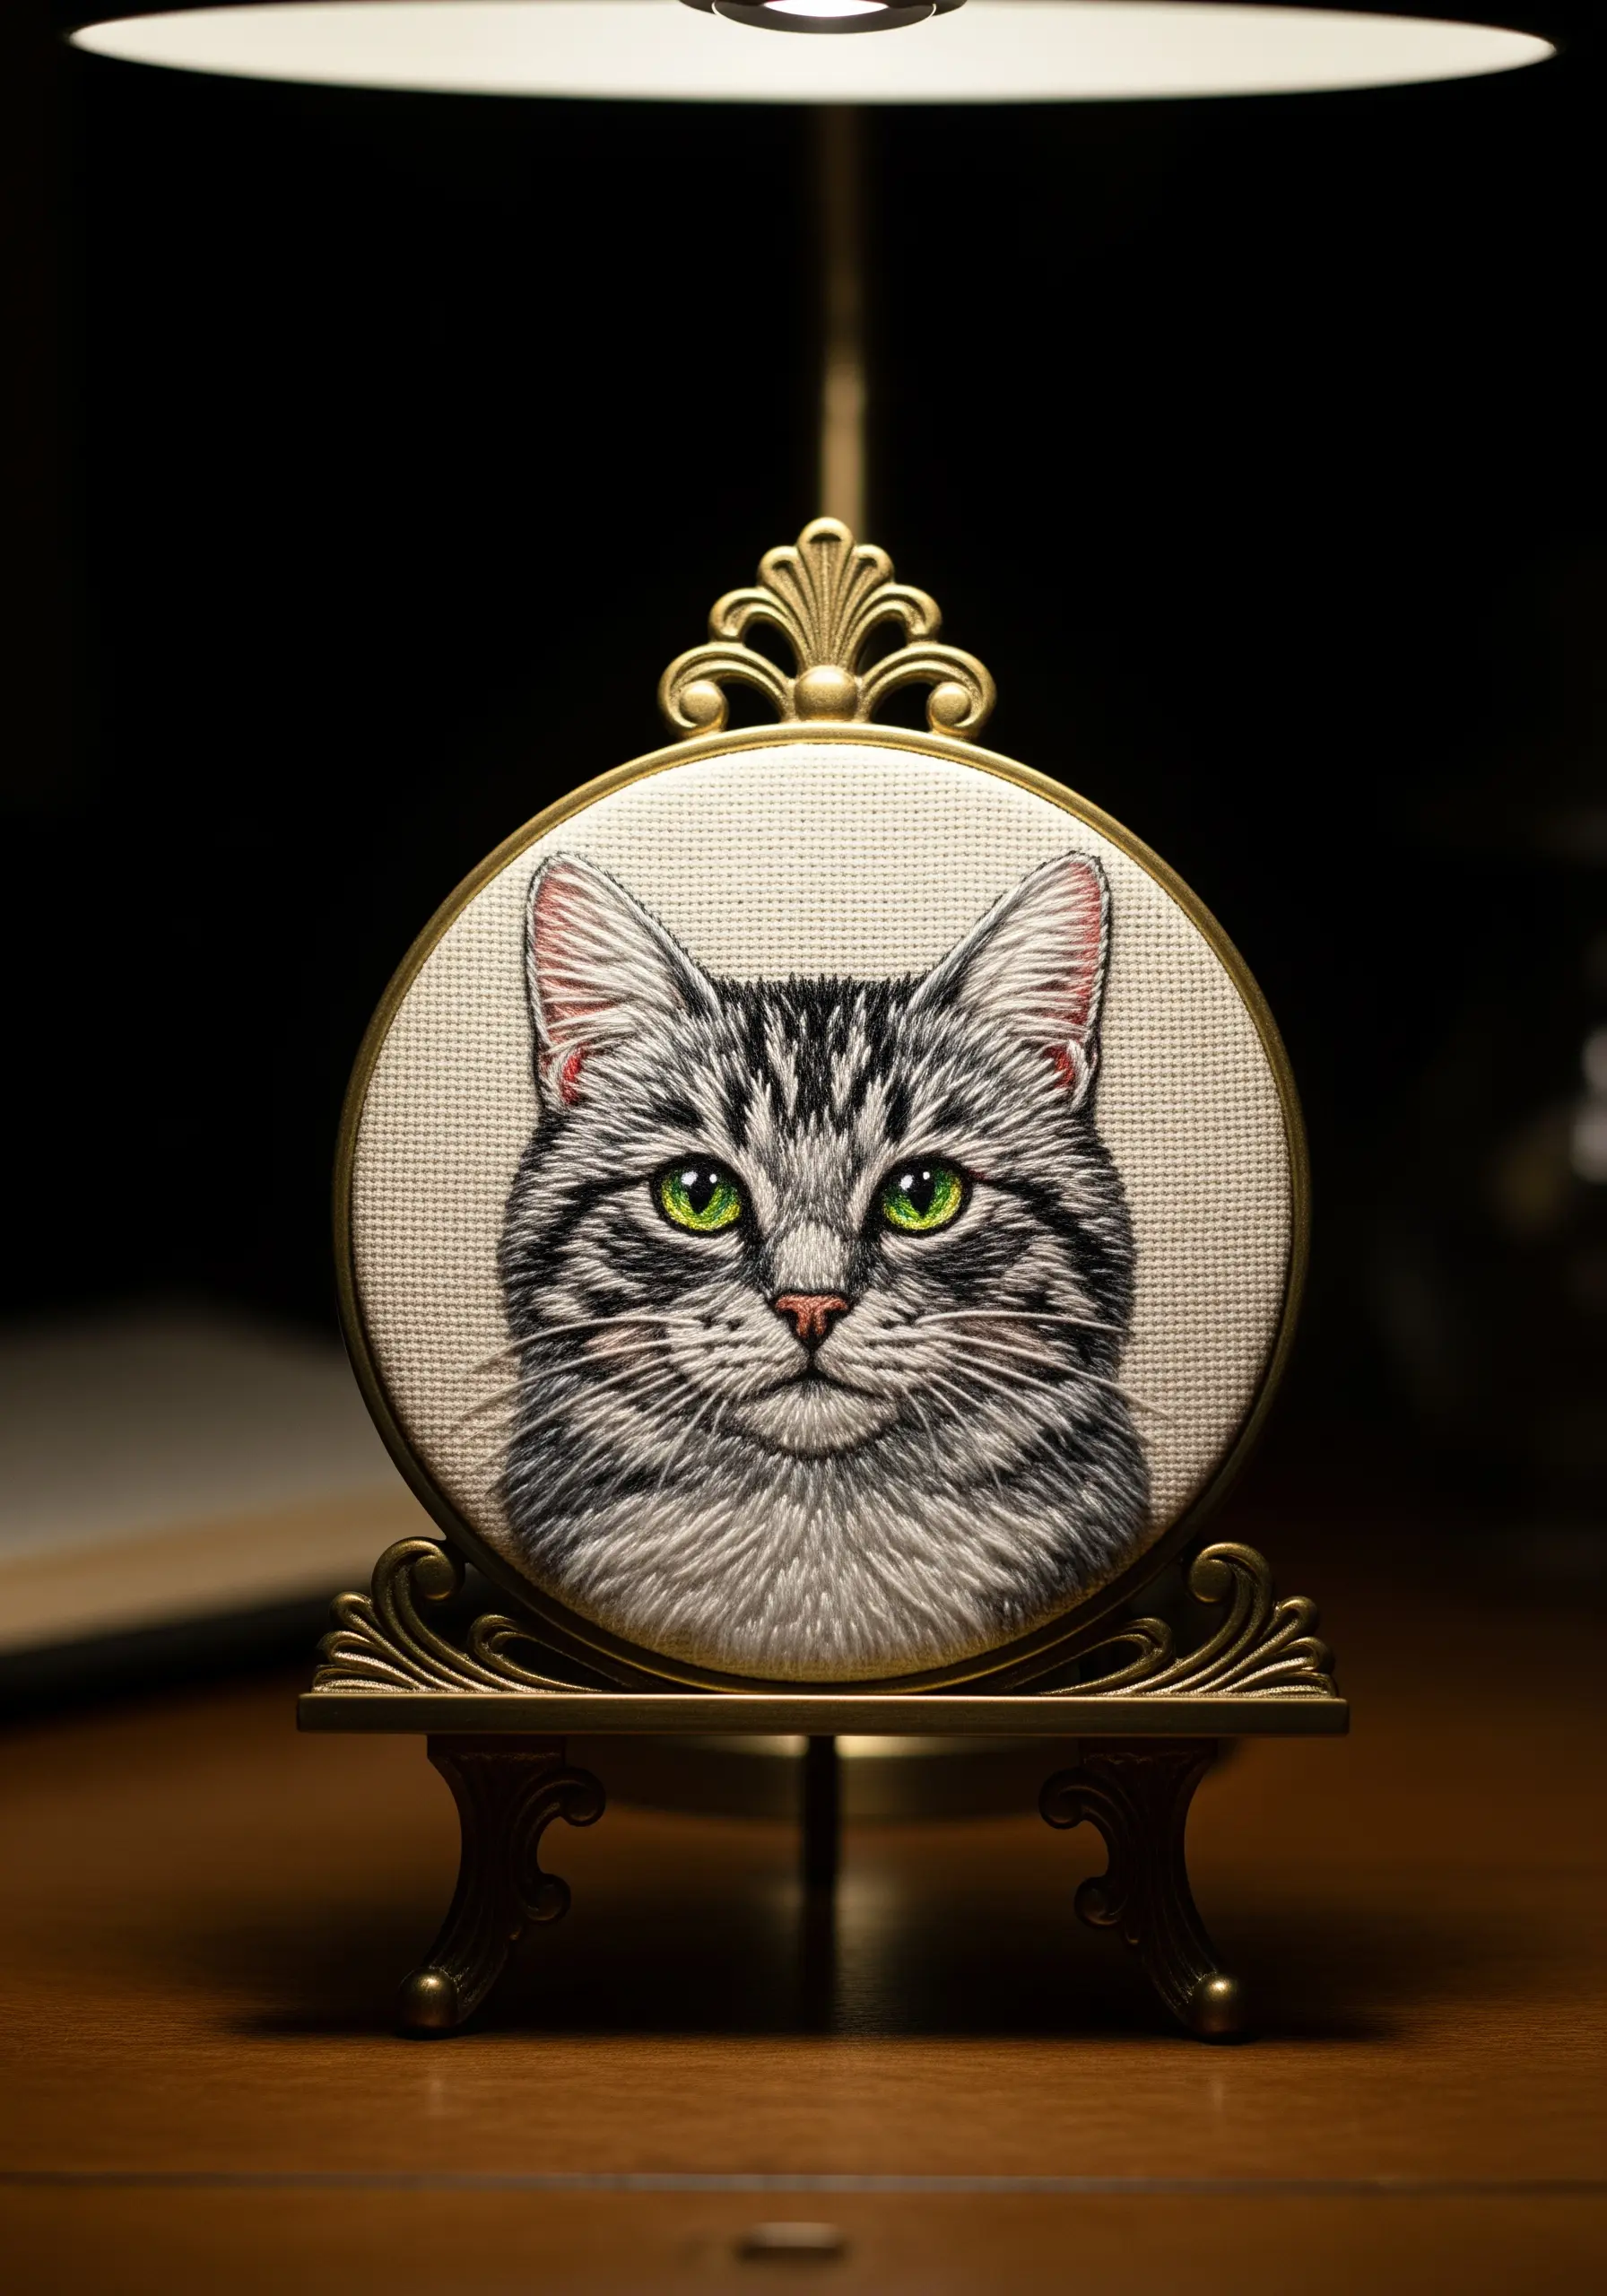
Capturing a realistic animal portrait is all about the artful blending of color and direction in thread painting.
Work with a single strand of embroidery floss to achieve the finest detail and smoothest color transitions. Use long-and-short stitch, layering shades of grey, black, and white to mimic the texture and depth of fur.
Always stitch in the direction of the fur growth. This simple rule is the most critical element for creating a lifelike portrait.
The eyes are the soul of the piece. Use a few tiny satin stitches for the color and a single, precisely placed French knot in white for the catchlight to bring your animal to life.
16. Minimalist Sailboat with Appliqué

This charming object demonstrates that a single, well-executed motif can define an entire piece.
The anchor is the focal point. To achieve such a clean shape, use an iron-on stabilizer on the back of the sail fabric before you stitch. This prevents the fabric from puckering and keeps your outline crisp.
A satin stitch works beautifully here, but for an even sharper edge, first outline the shape with a split stitch and then work your satin stitches over it. The split stitch outline acts as a raised ‘railing’ to guide your thread.
17. Stumpwork Butterfly with Painted Wings
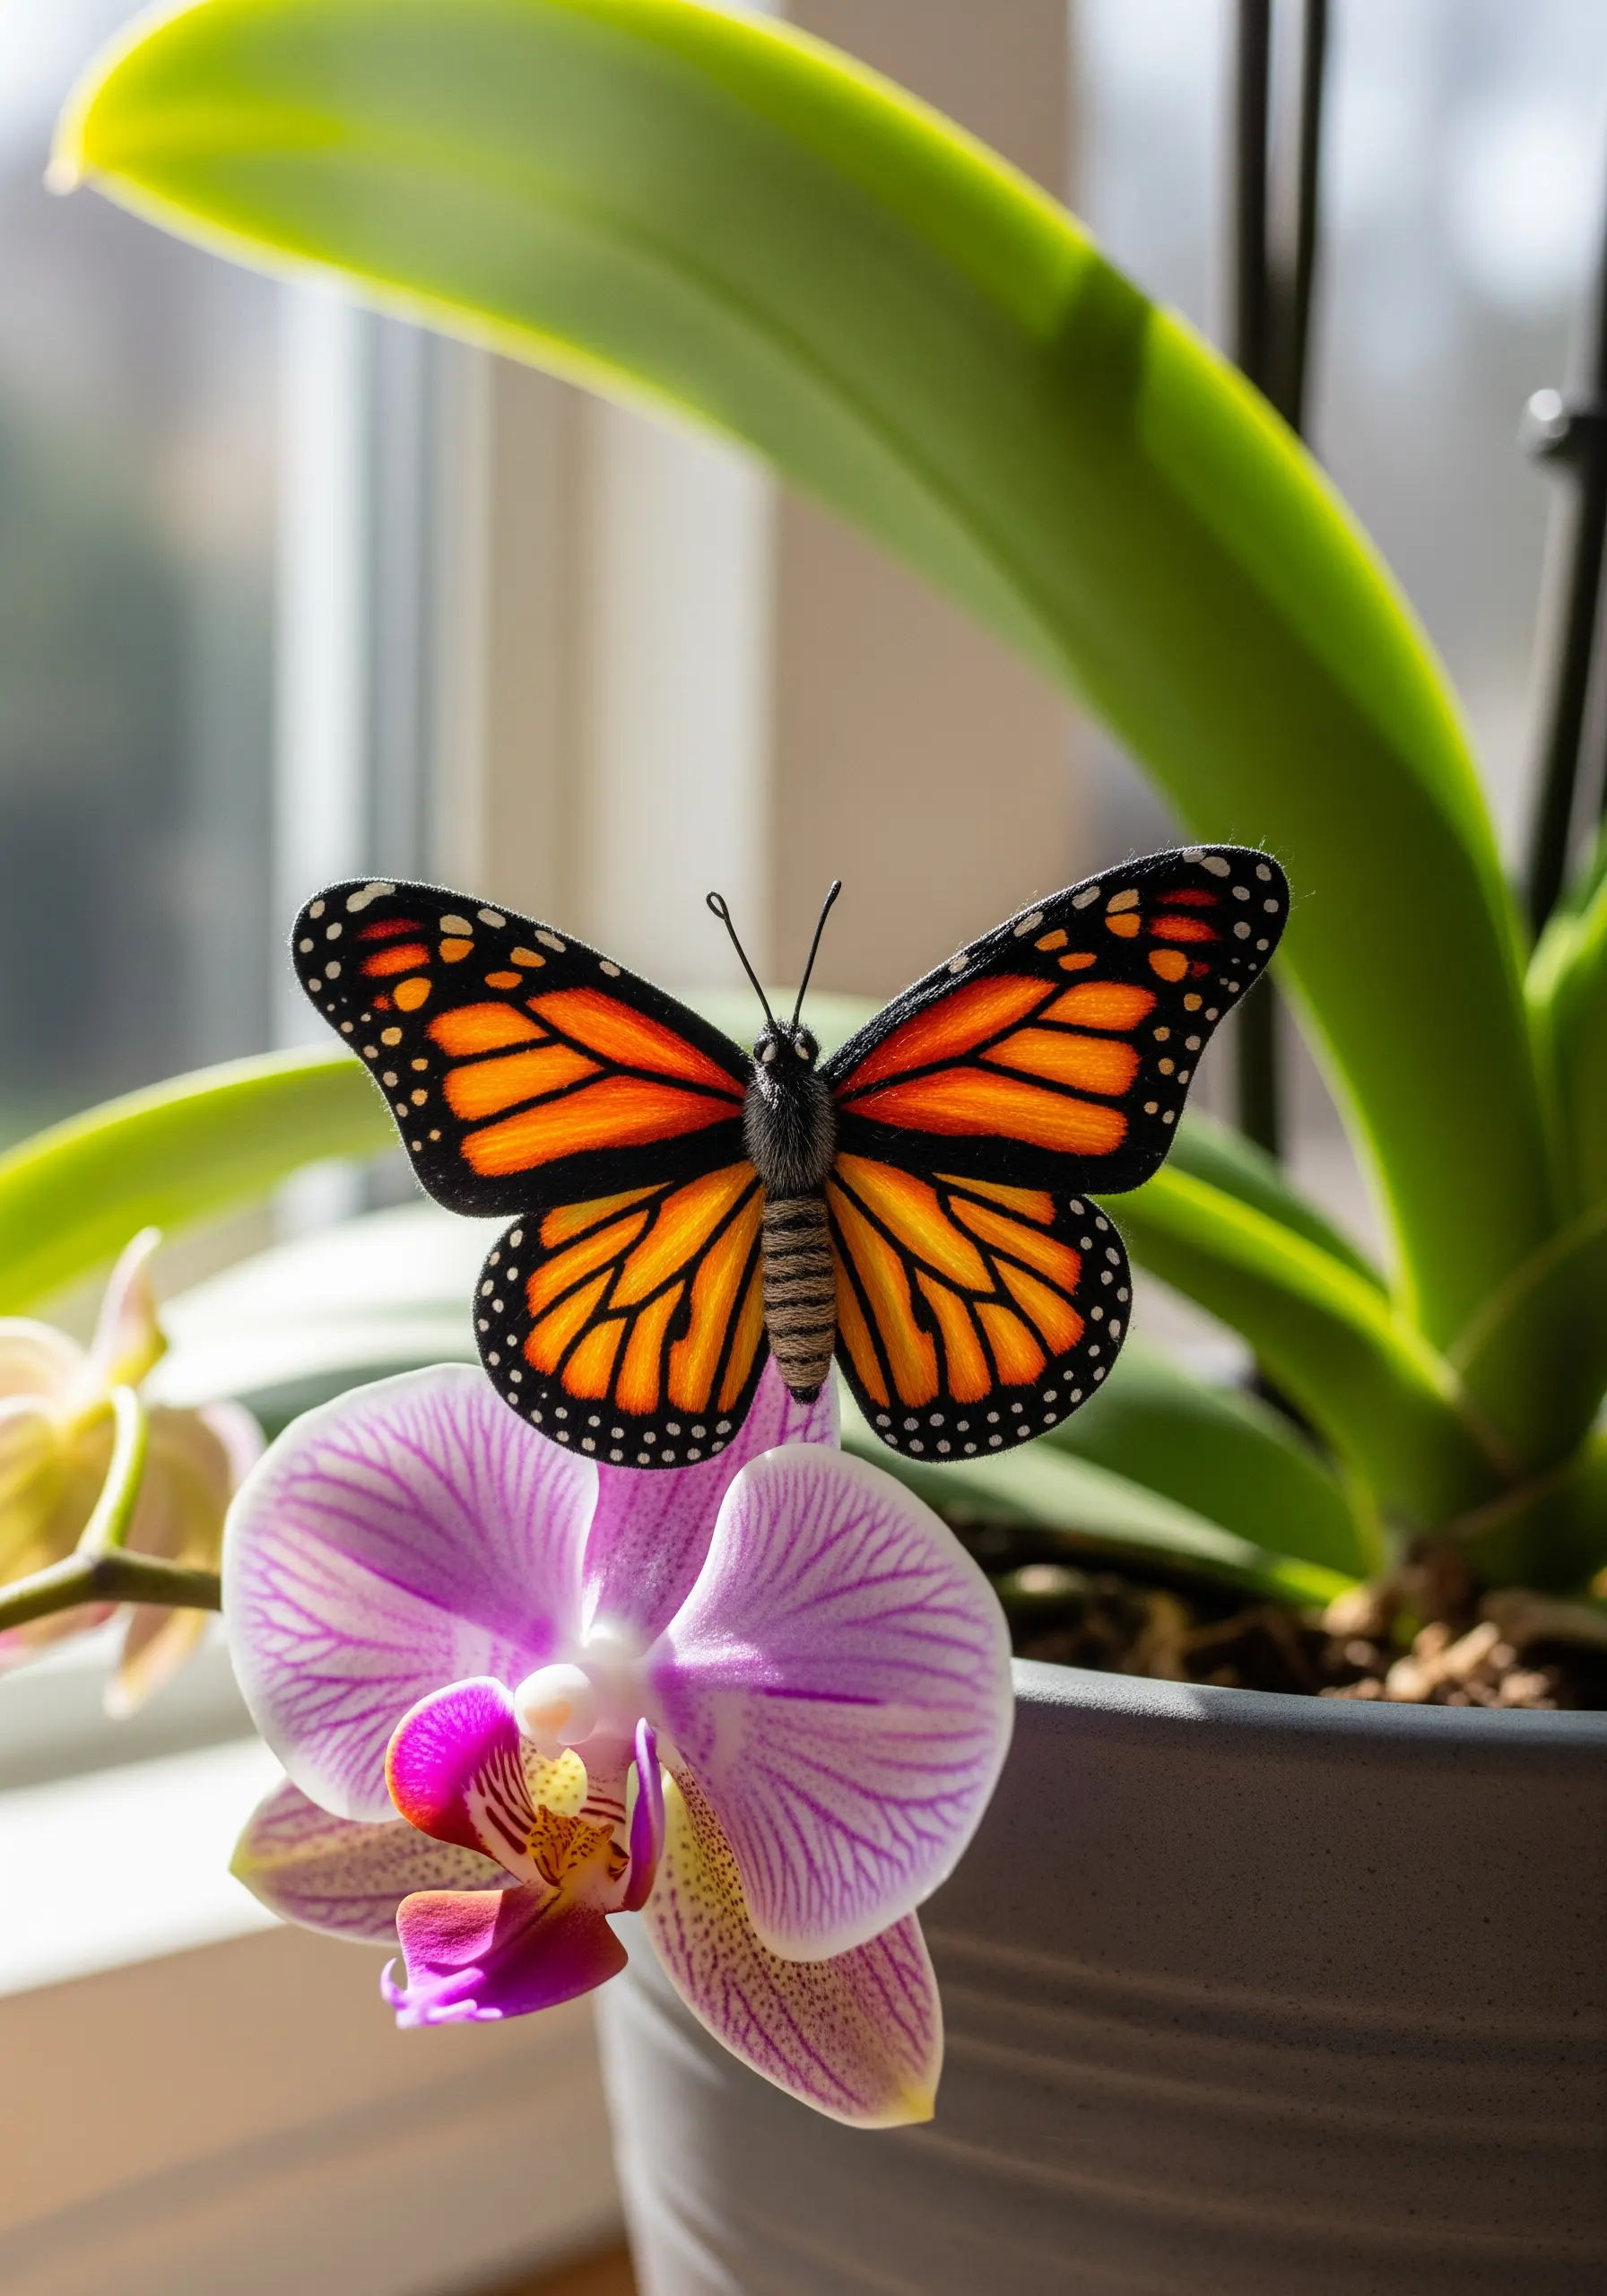
This realistic butterfly uses a detached stumpwork technique to lift it off the surface and into the third dimension.
Create the wings by embroidering onto a separate piece of fabric that has a fine wire stitched around the perimeter. Use long-and-short stitch to blend the orange, yellow, and black threads seamlessly.
Once embroidered, carefully cut the wings out, and the wire will allow you to bend them into a lifelike, fluttering position.
Attach the finished wings to a small, stitched body on your main project, and you have an insect that looks ready to take flight.
18. Temari-Inspired Embroidered Acorn
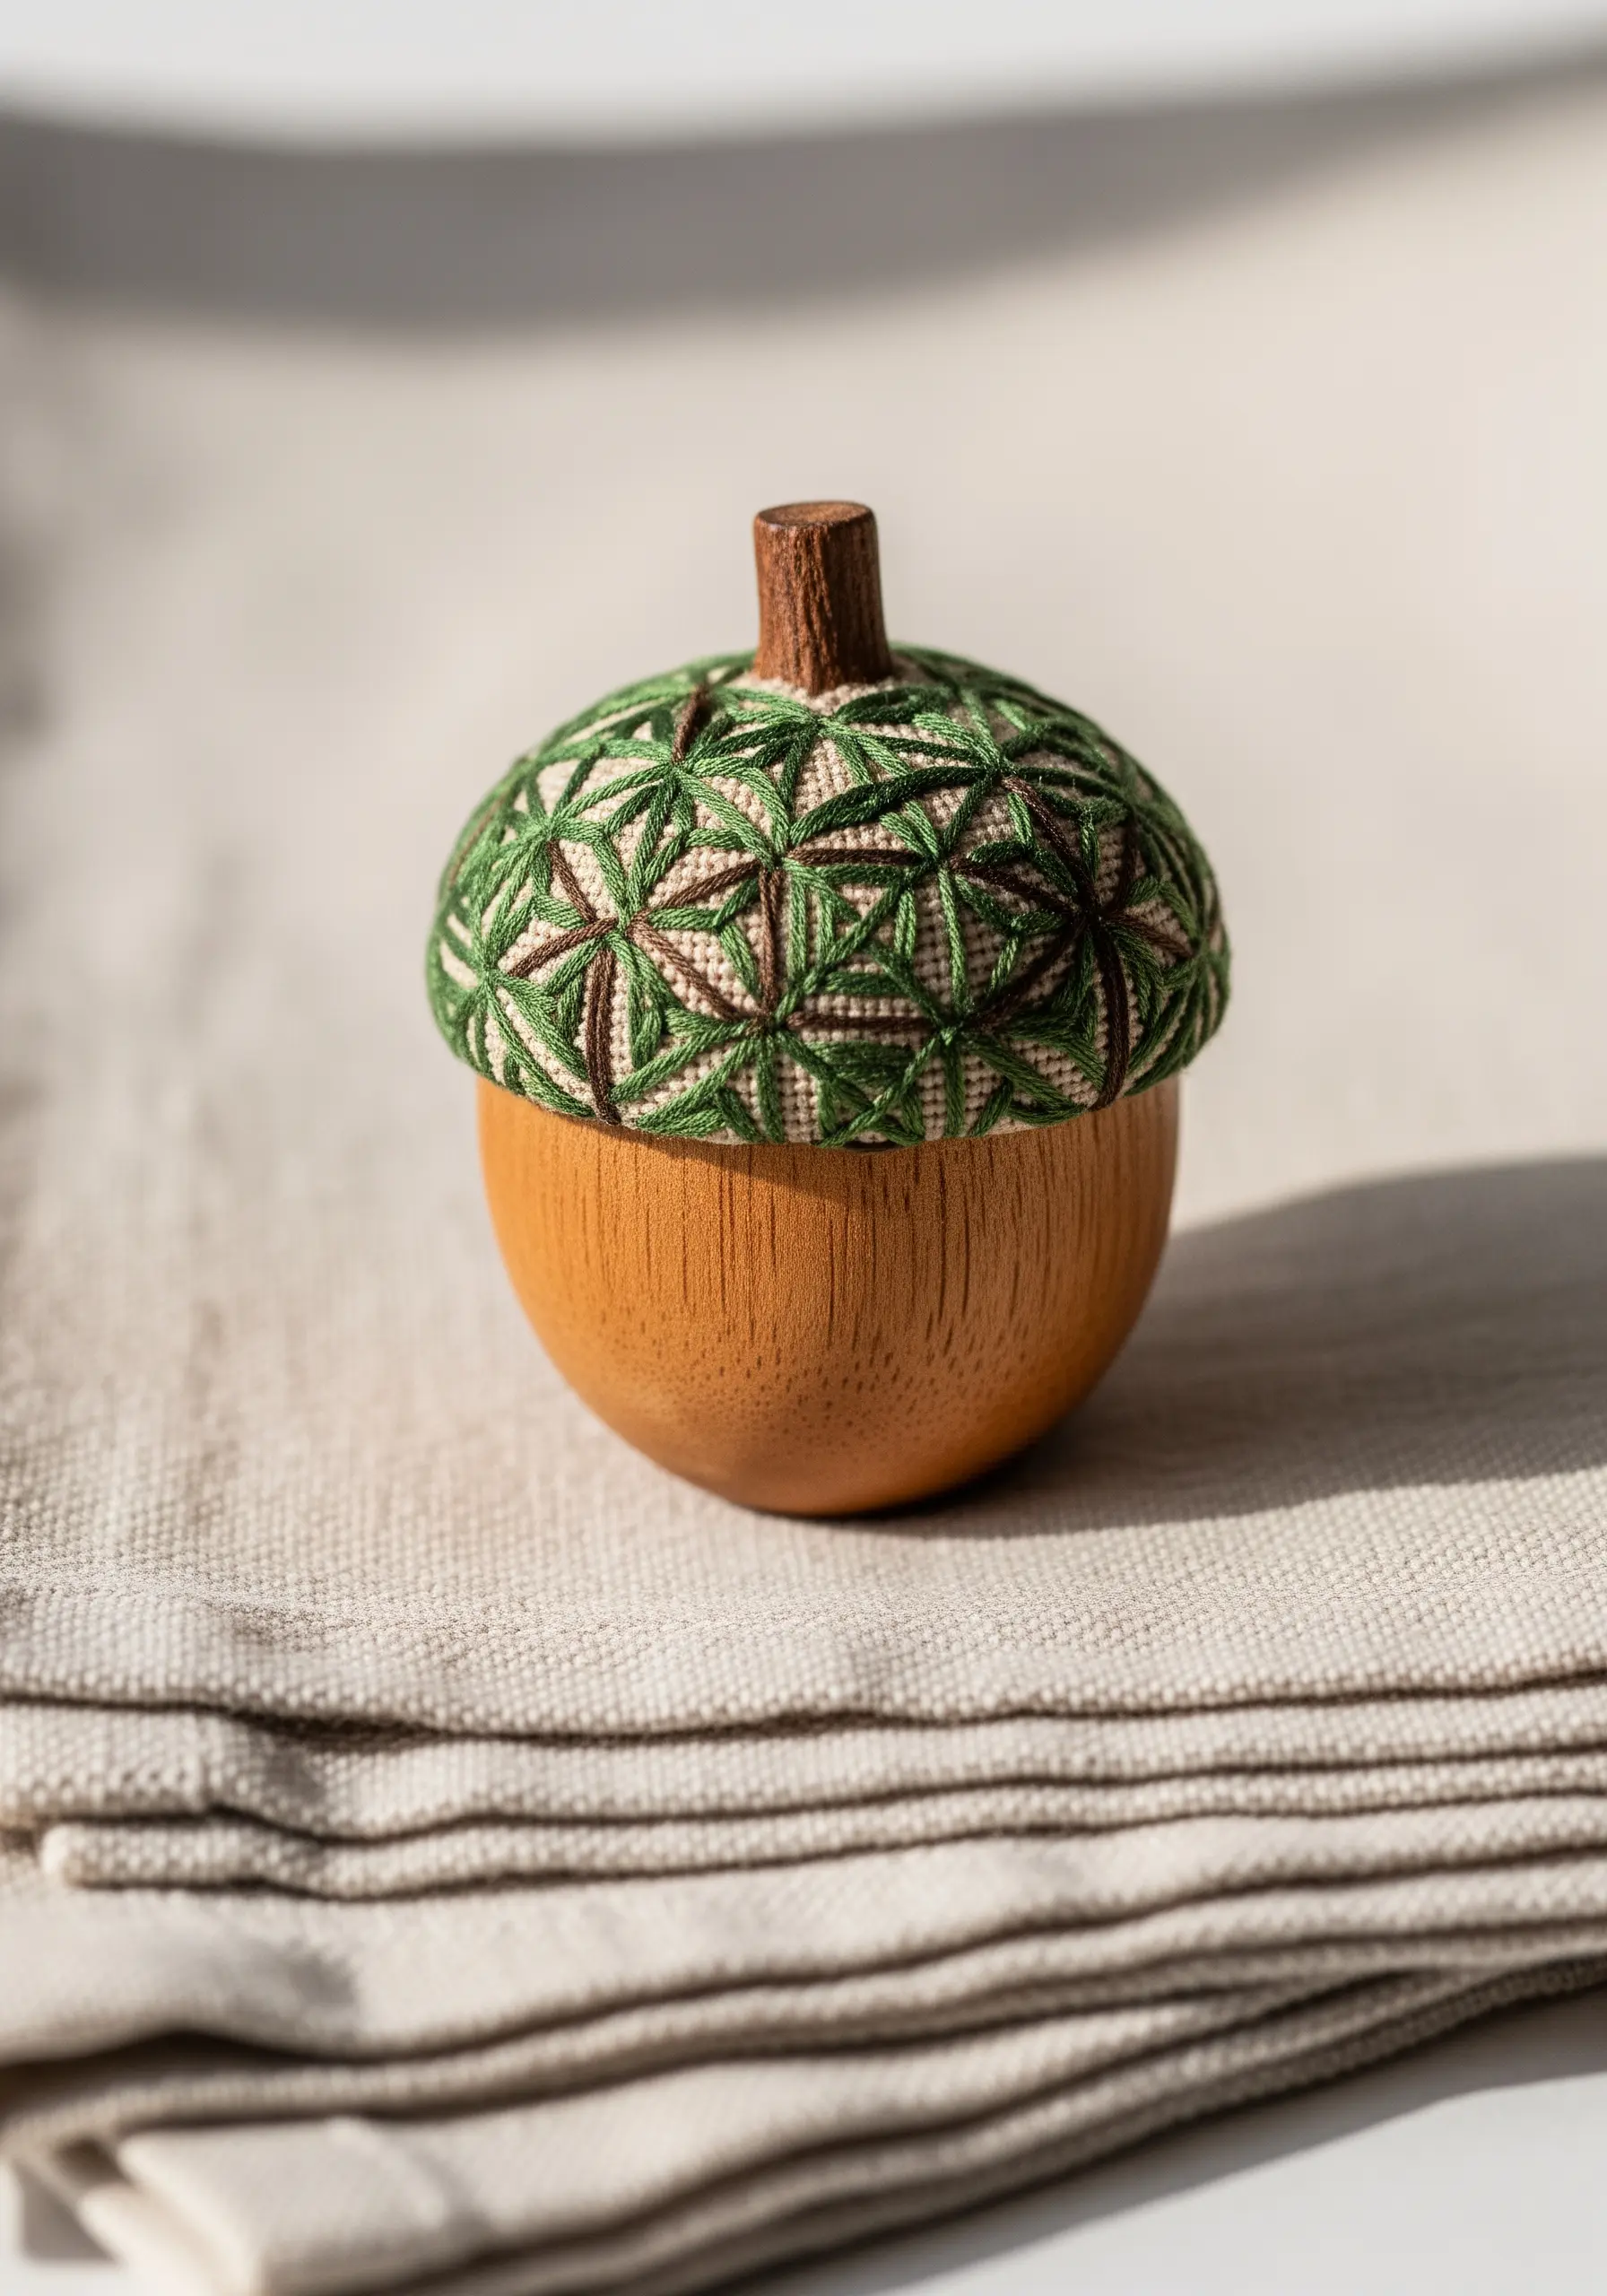
Apply the principles of Japanese Temari ball embroidery to a unique object like this wooden acorn cap.
The technique involves creating a foundation of precisely placed guide threads that divide the surface into equal segments. These threads become the framework for your decorative stitching.
The geometric star pattern is formed by weaving and wrapping embroidery floss around the guide threads. The beauty comes from the mathematical precision of the wrap.
Using a variegated thread can create an incredibly complex-looking pattern with very simple wrapping motions, as the color changes do the work for you.
19. Beaded Wire Bonsai Tree
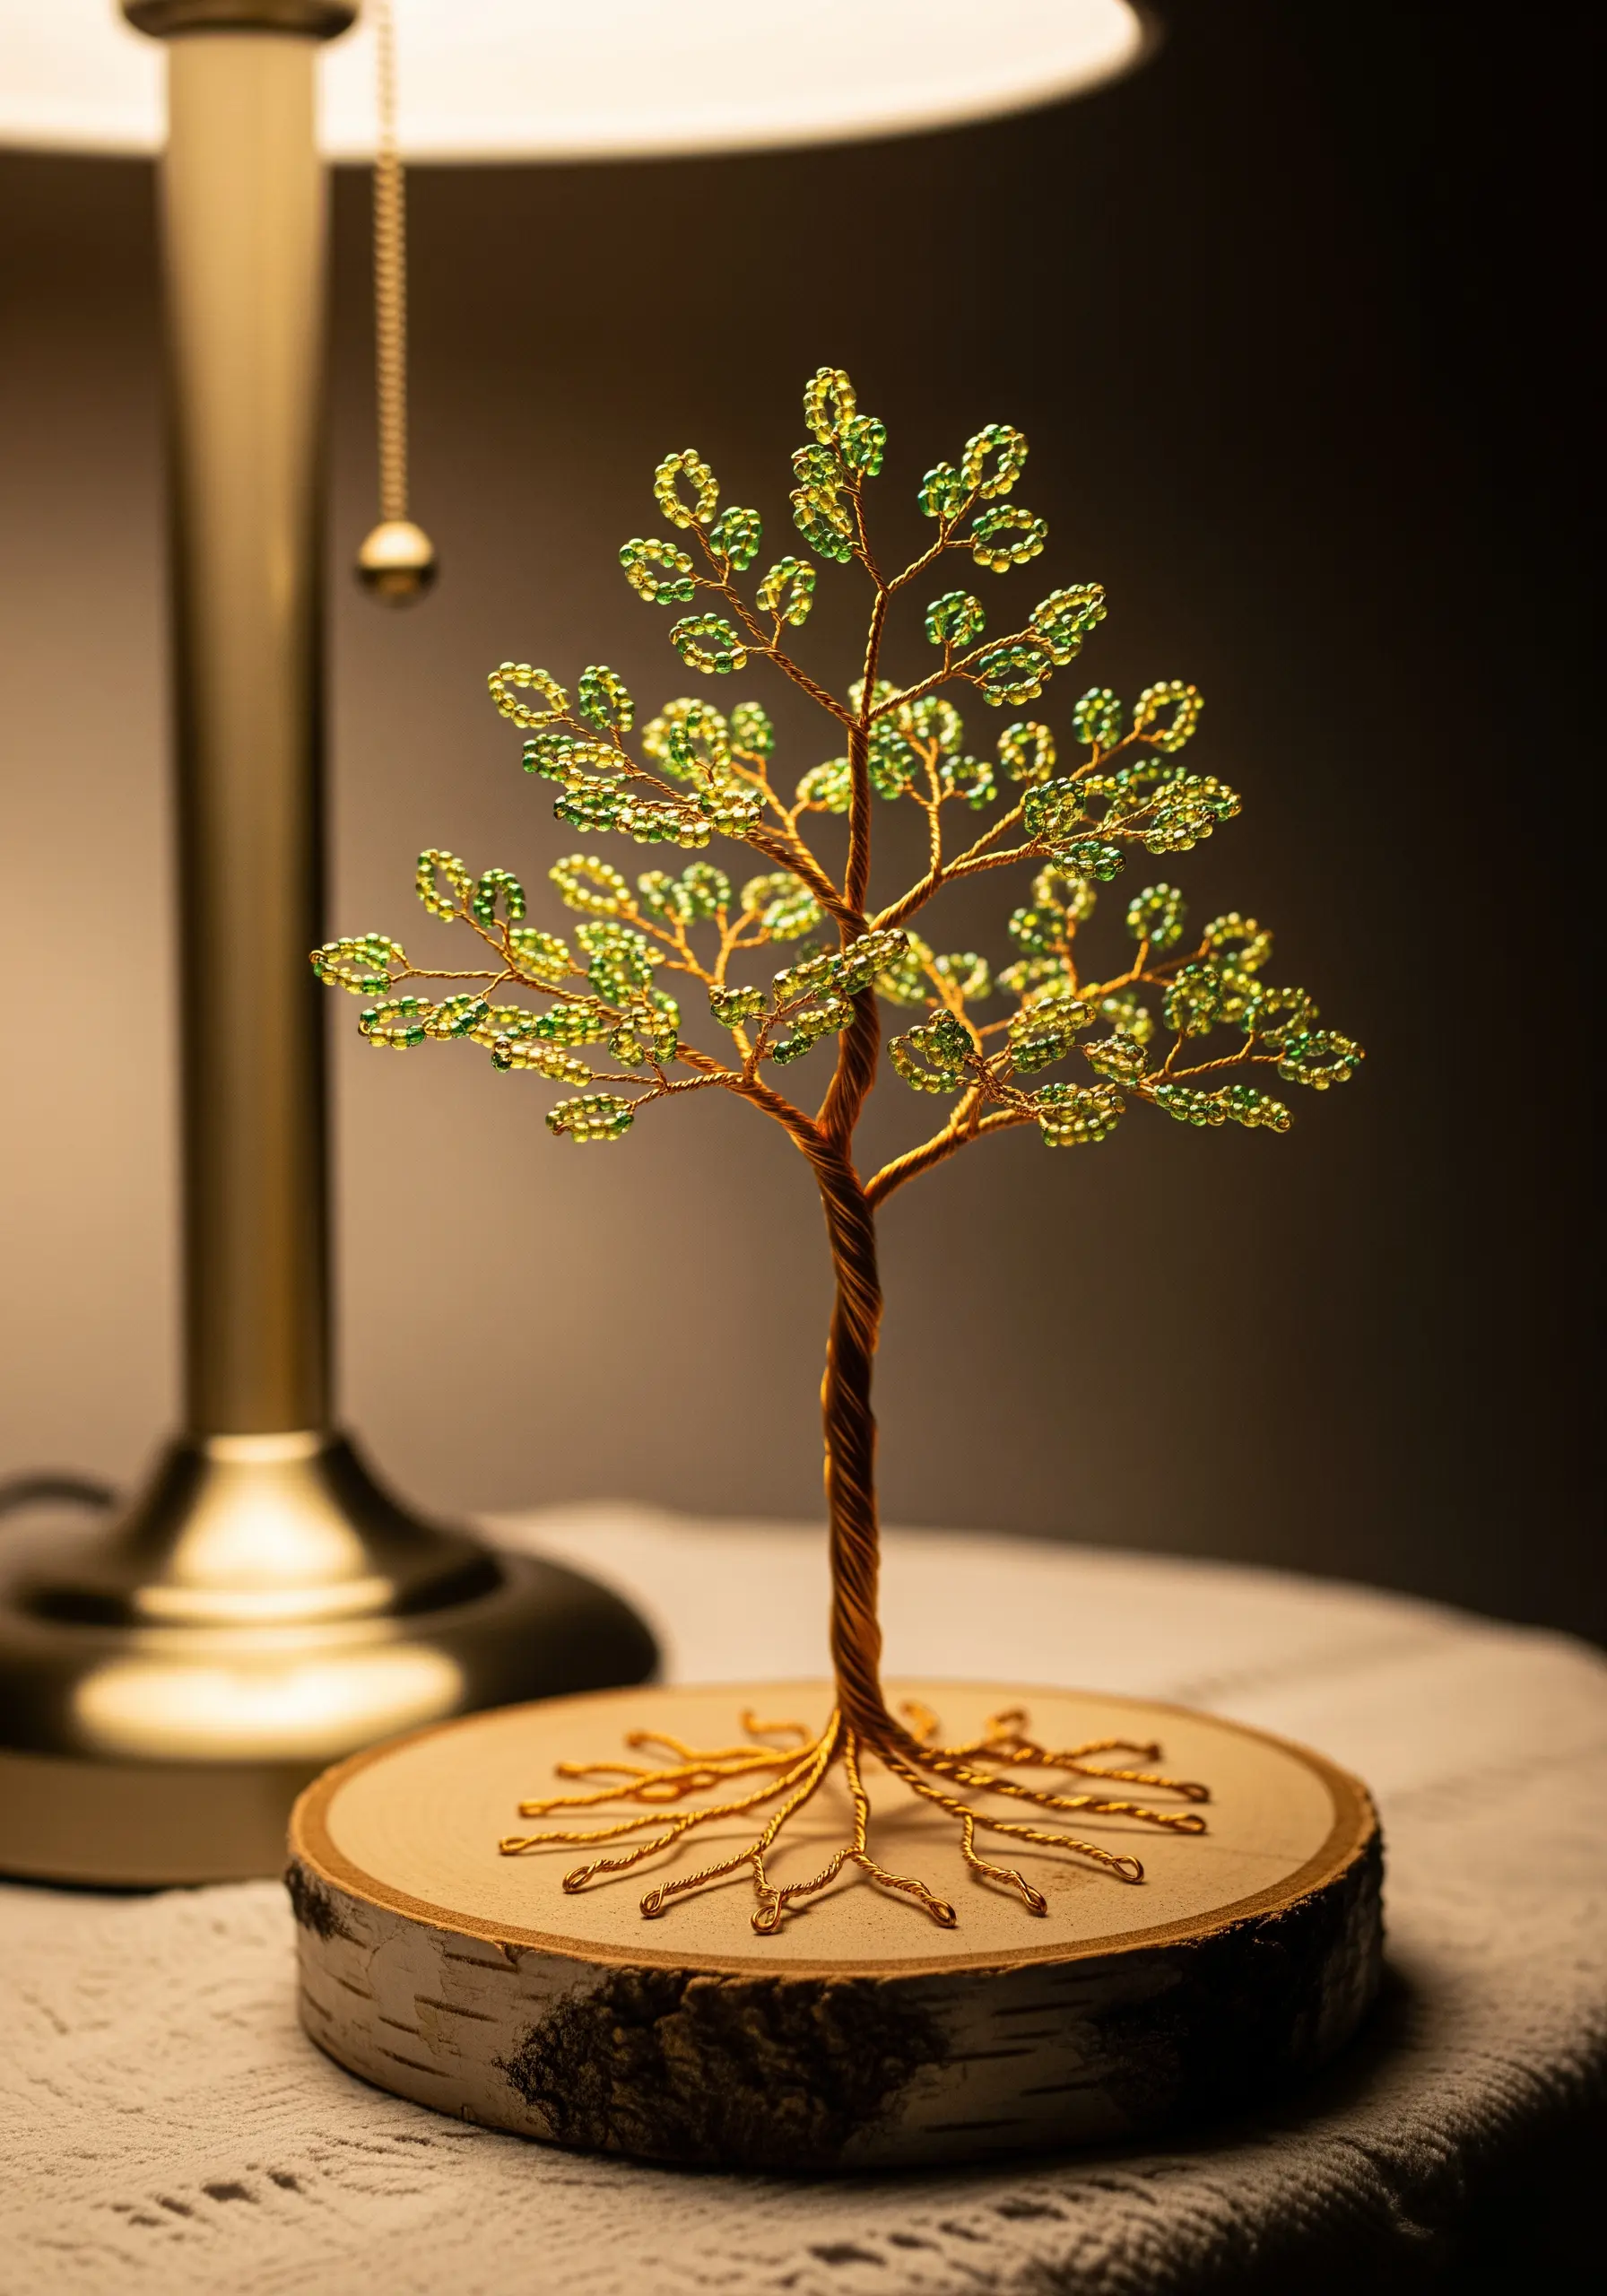
This is sculpture using jeweler’s wire and beads, but the principle of building form with small, repeated elements is shared with embroidery.
Twist thicker gauges of wire together to build the trunk and main branches, creating a sturdy base.
The leaves are made by threading seed beads onto a very fine, flexible wire. Twist the wire after a small group of beads to form a leaf cluster, then attach these clusters to the main branches.
The artistry is in shaping the branches and arranging the roots over the wooden base to create a sense of balance and natural movement.
20. Ornate Beaded and Braided Tassel
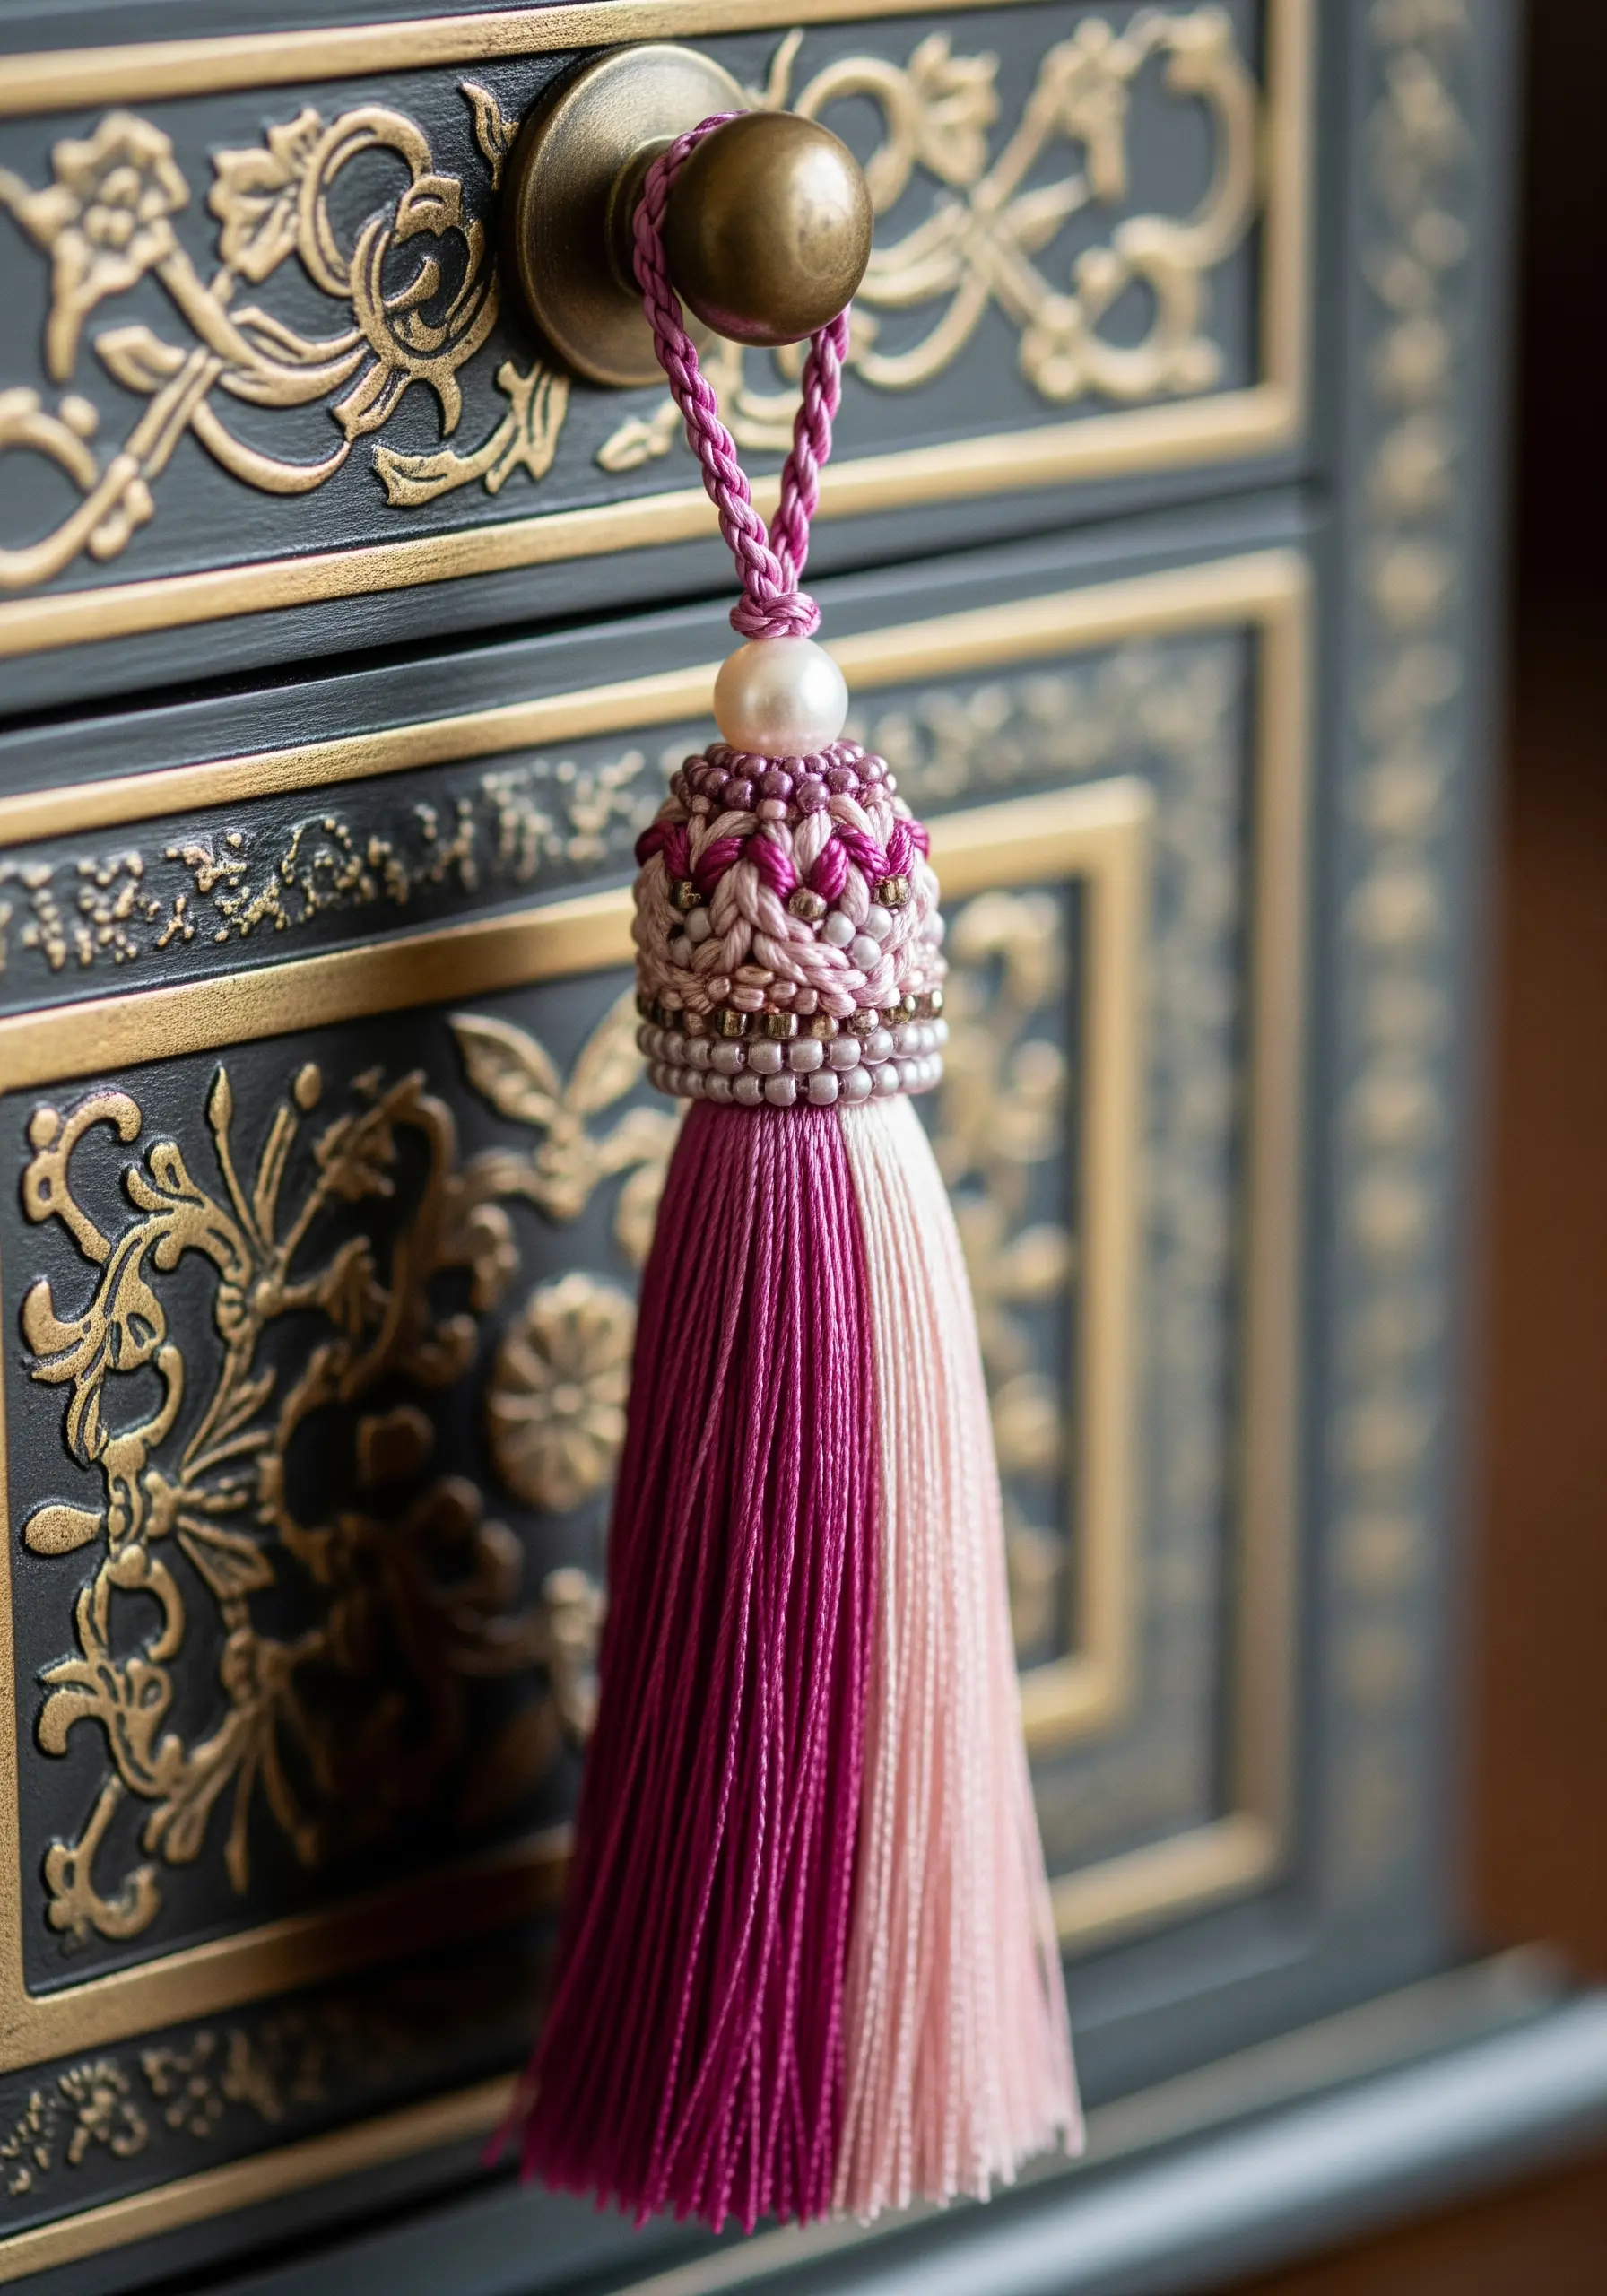
Elevate a simple tassel into a piece of art with a custom-beaded cap and a braided cord.
The cap is the most intricate part. Weave seed beads together using an off-loom stitch like peyote or brick stitch to create a small, flexible tube of beadwork that fits snugly over the top of the tassel.
For a lush, professional tassel, use a high-quality silk or rayon thread and wrap it around a piece of cardboard at least 100 times for density.
The hanging cord is a simple four-strand braid, which is stronger and more decorative than a simple twisted cord.
21. Appliqué Lemon Slice Coaster
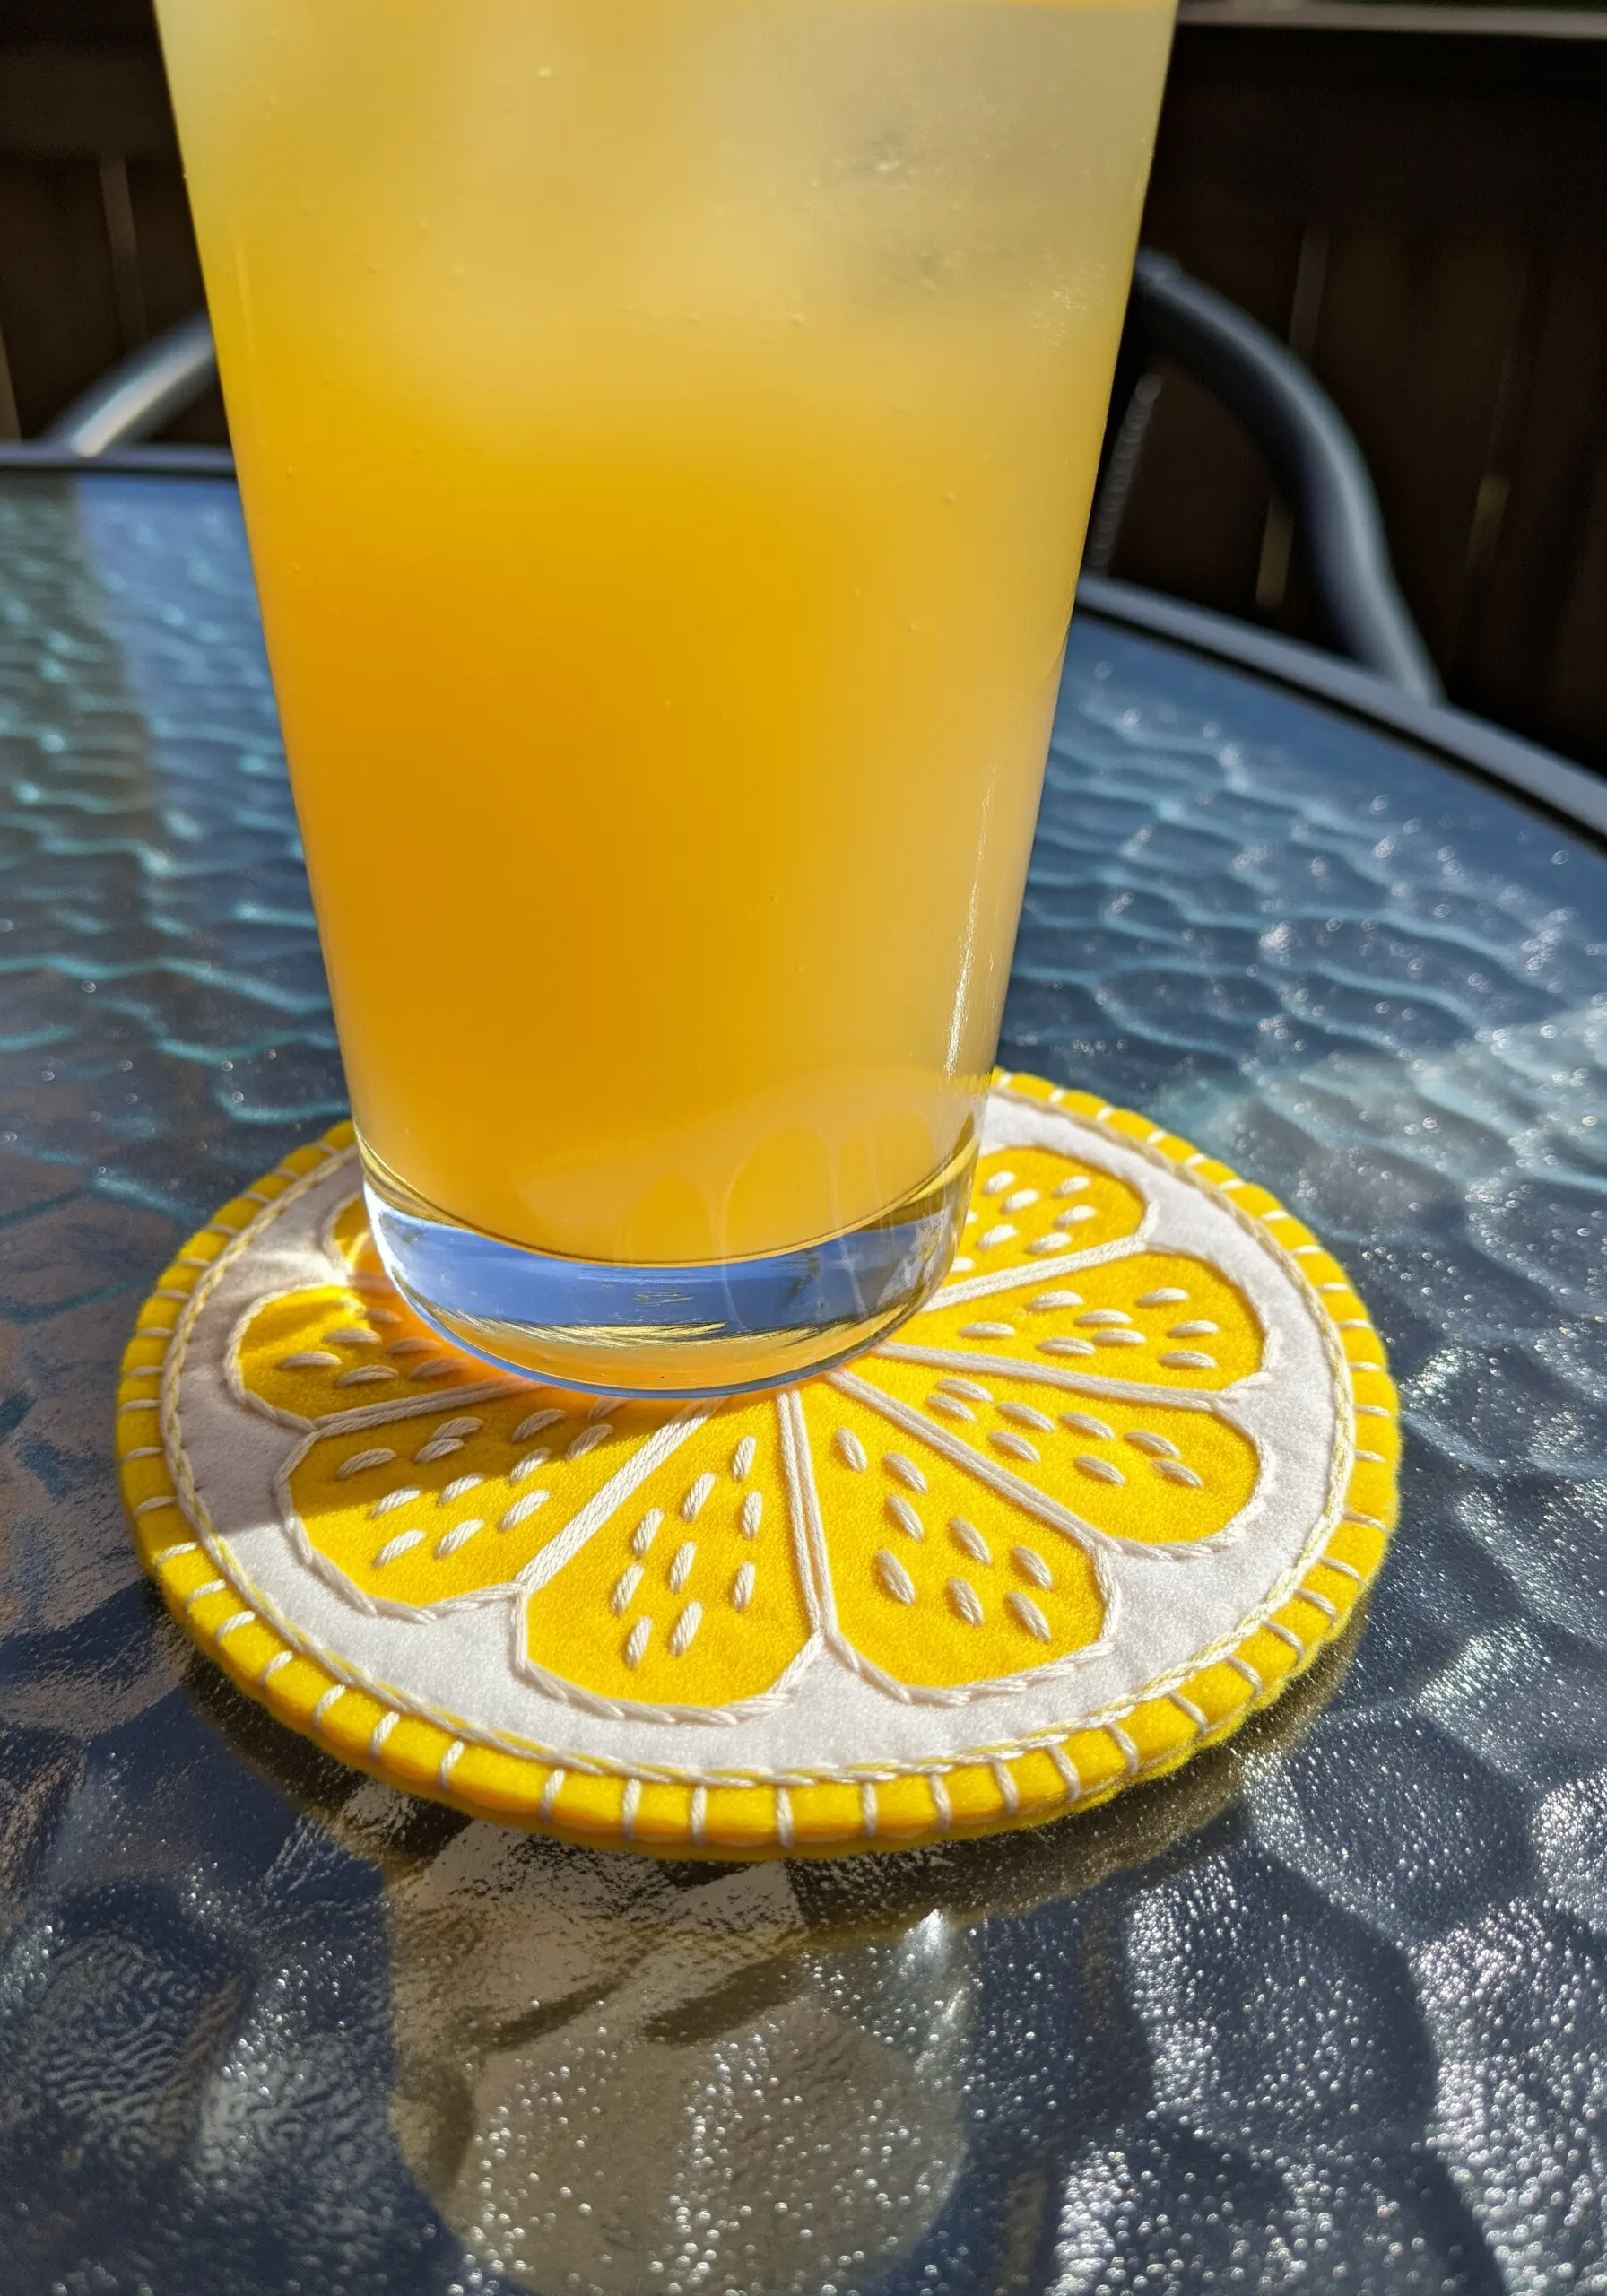
This coaster combines simple appliqué with decorative stitching for a bright, functional piece of art.
Cut your felt pieces precisely using a sharp blade or rotary cutter. The crispness of the shapes is fundamental to the design’s success.
Use a blanket stitch to attach the yellow segments to the white base. This not only secures the appliqué but also adds a charming, decorative border.
The white seed details are simple straight stitches. Stagger their length and angle slightly to give them a more organic, natural look. For a clean finish, use these easy small embroidery patterns.
22. High-Relief Bee and Daisy
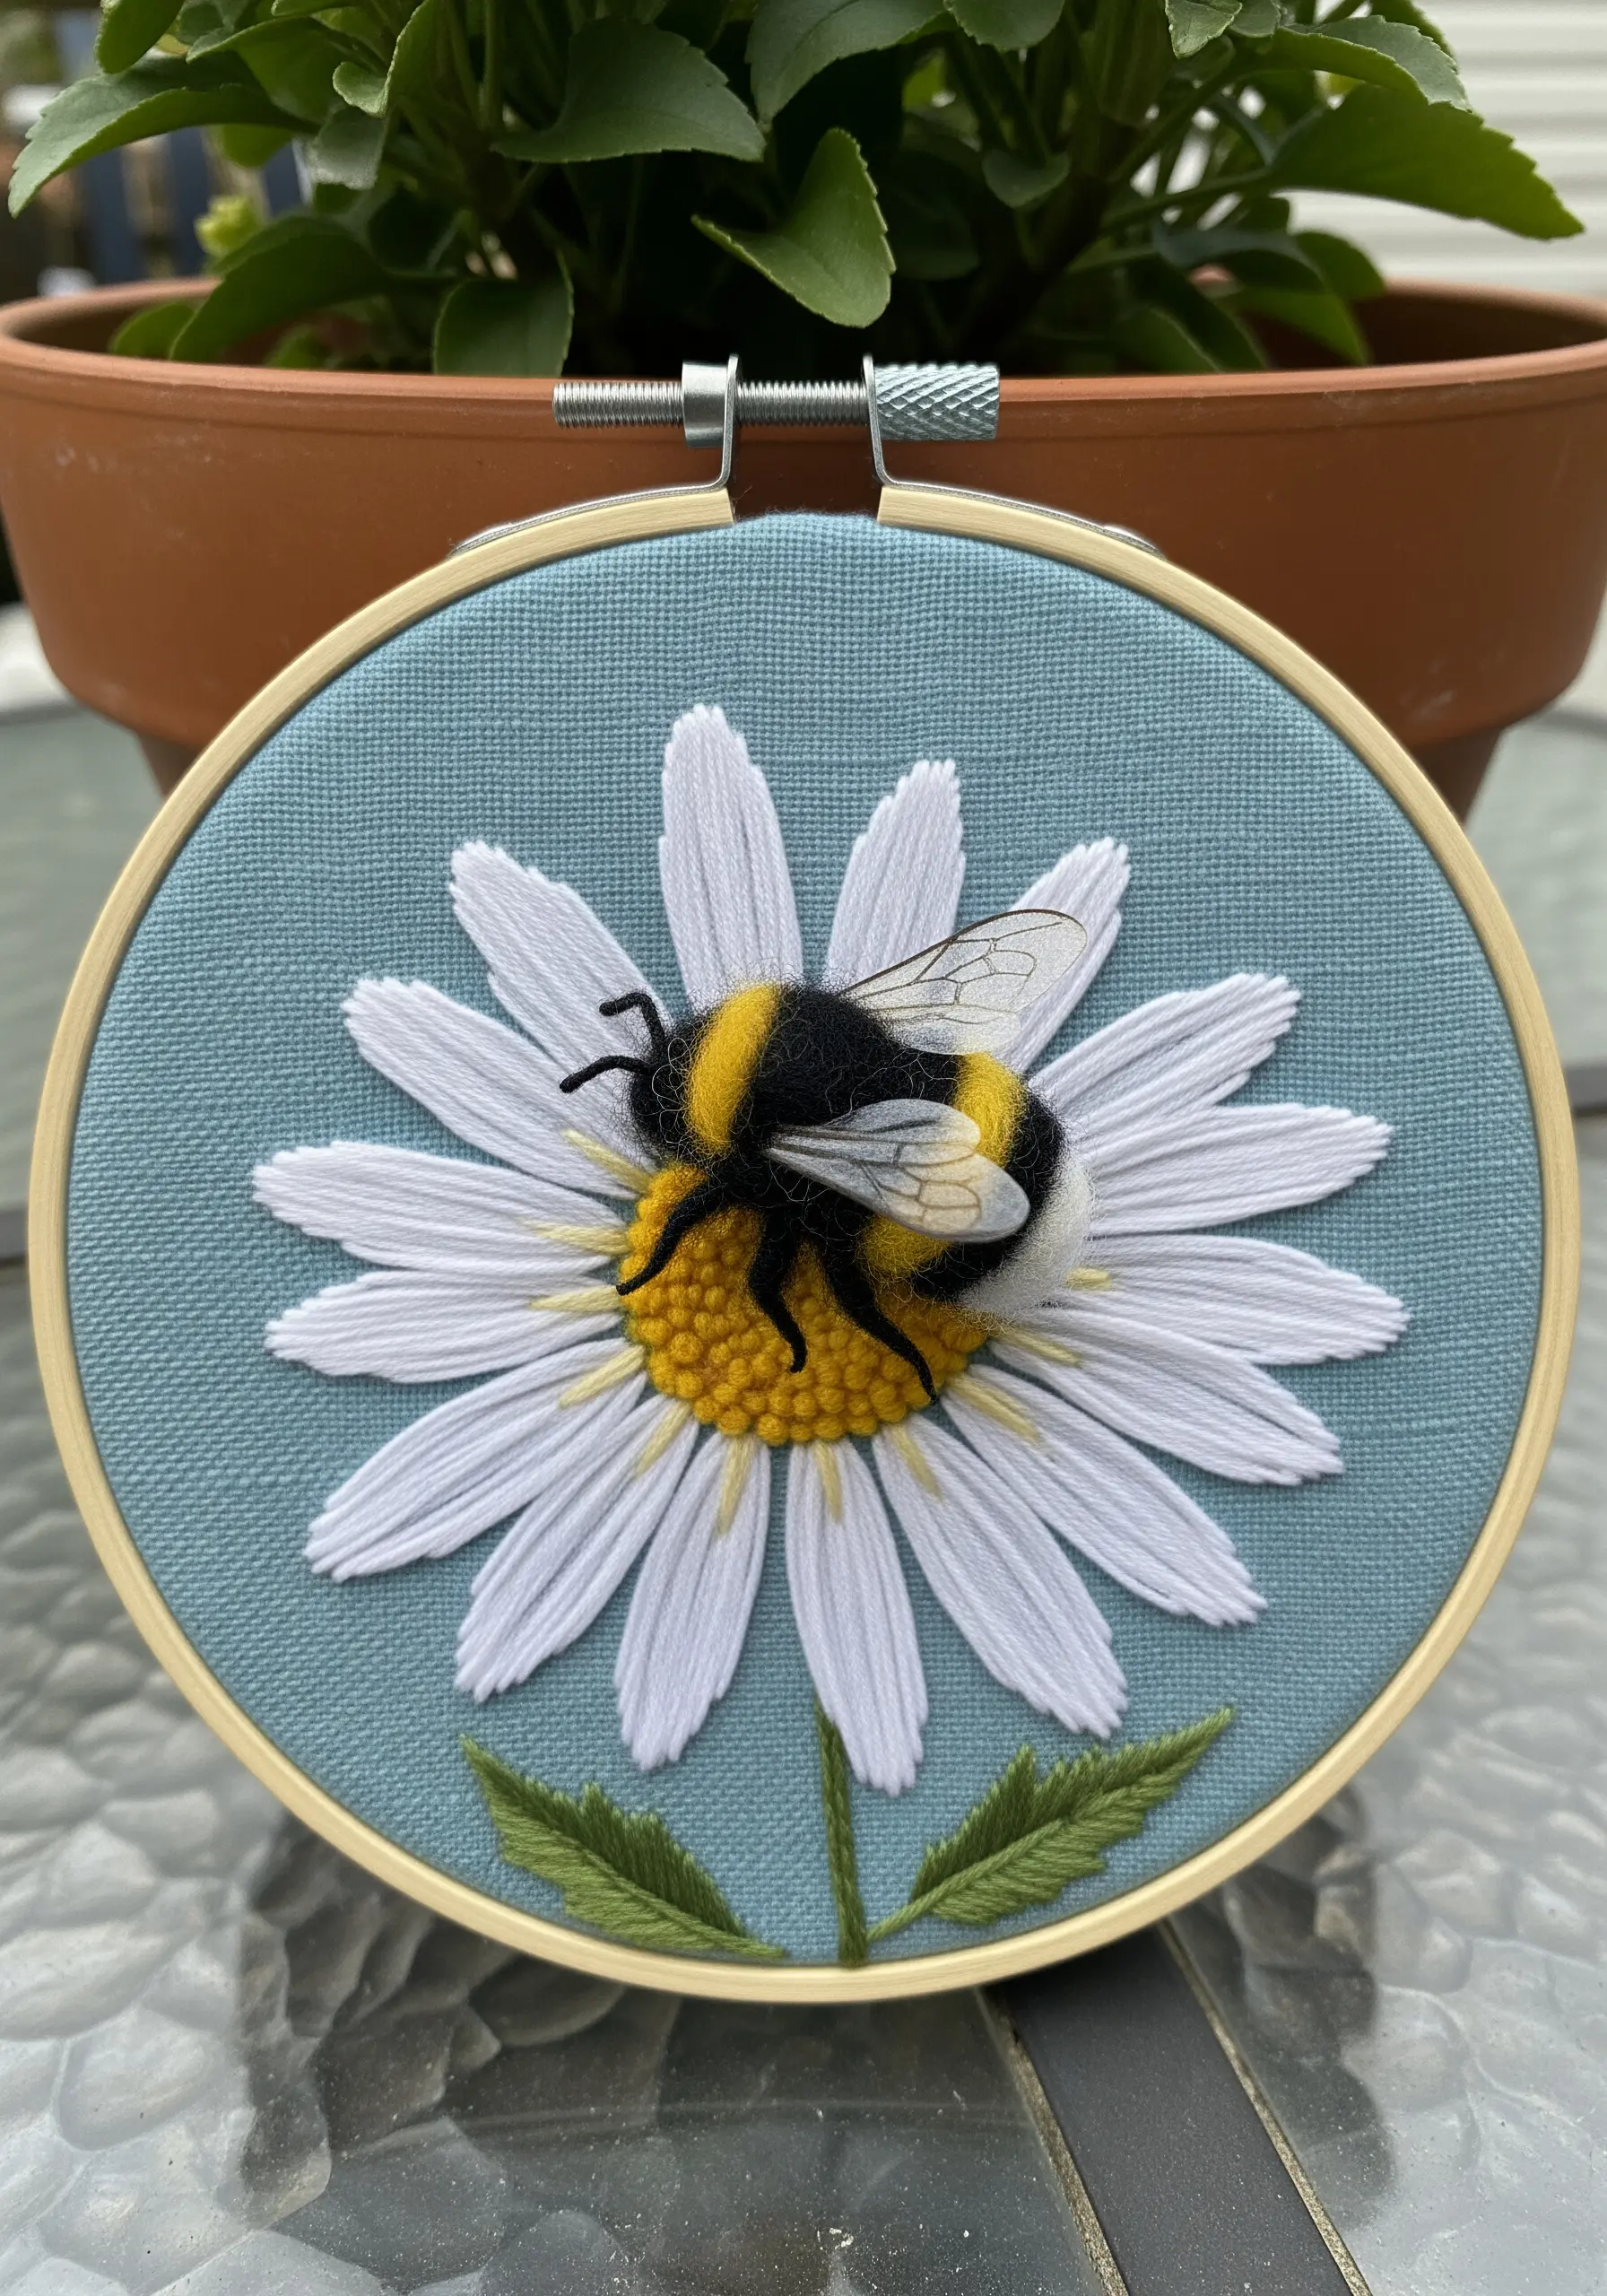
Create astonishing realism by combining traditional embroidery with needle felting for a true 3D effect.
The daisy petals are simple satin stitches, but their power comes from their uniformity and the dense bed of yellow French knots that form the center, giving it real dimension.
The bee’s fuzzy body is a small ball of wool roving, needle-felted directly onto the fabric. This technique achieves a texture that thread alone cannot replicate.
The wings are the final touch: stitch the outlines on a sheer fabric like organza, cut them out, and attach them to the bee’s body for a delicate, translucent effect.
23. Mixed-Media Bird with Sculpted Wing

This stunning piece merges a 2D surface with a 3D embroidered element for a dynamic effect.
The wing is created separately as a piece of stumpwork. Embroider the feathers onto a piece of canvas, using padded satin stitch over layers of felt to create the raised, overlapping effect.
Once complete, carefully cut out the wing and attach it to the painted or printed tile. This juxtaposition of a soft, textural element against a hard, smooth surface creates immense visual interest.
This is a perfect example of creative collage art ideas that use thread to bridge different materials.
24. Bejeweled Crescent Moon Pillow
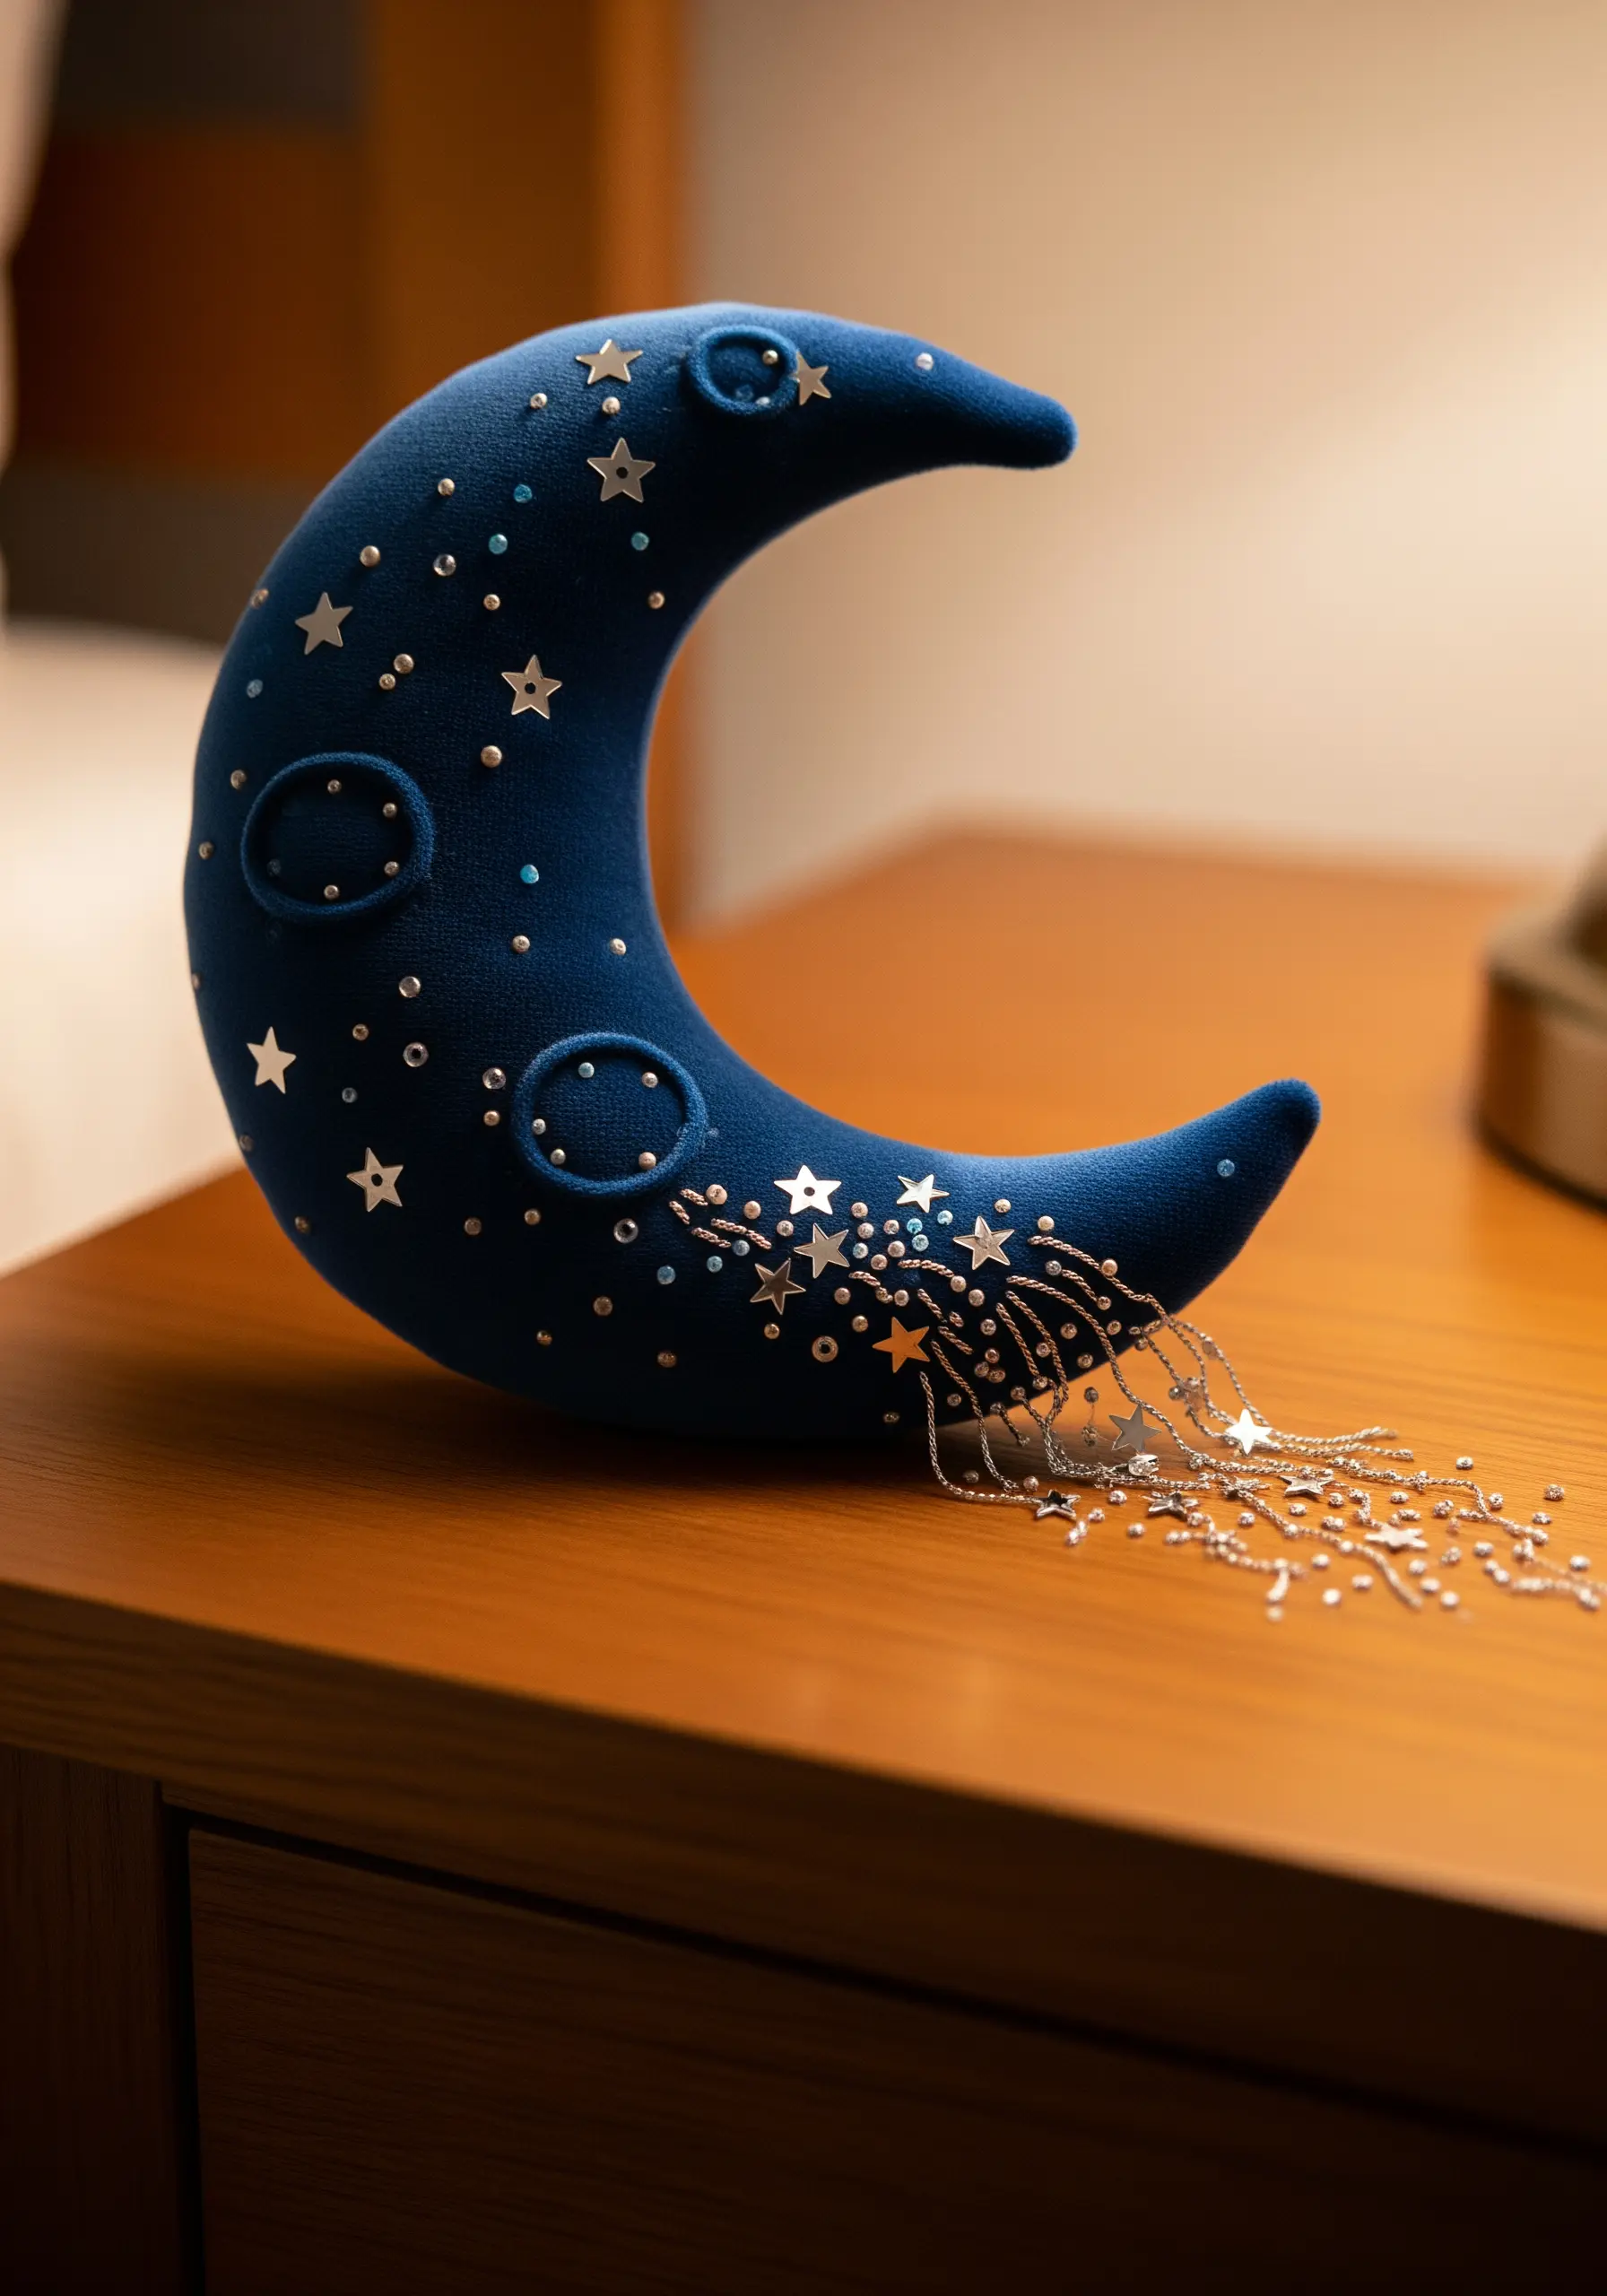
Transform a simple plush object into a celestial treasure with thoughtful bead and chain embellishment.
Rather than scattering beads randomly, create intentional clusters and swooping lines that suggest constellations and shooting stars. Use a strong beading thread and secure each bead with a separate locking stitch.
The cascading chains add movement and a touch of magic. Secure a delicate silver chain at one point, letting it drape naturally, and anchor it with a few star-shaped sequins or beads.
The combination of soft velvet with the cool, hard texture of beads and metal creates a rich sensory experience.
25. Monogrammed Punch Needle Coaster
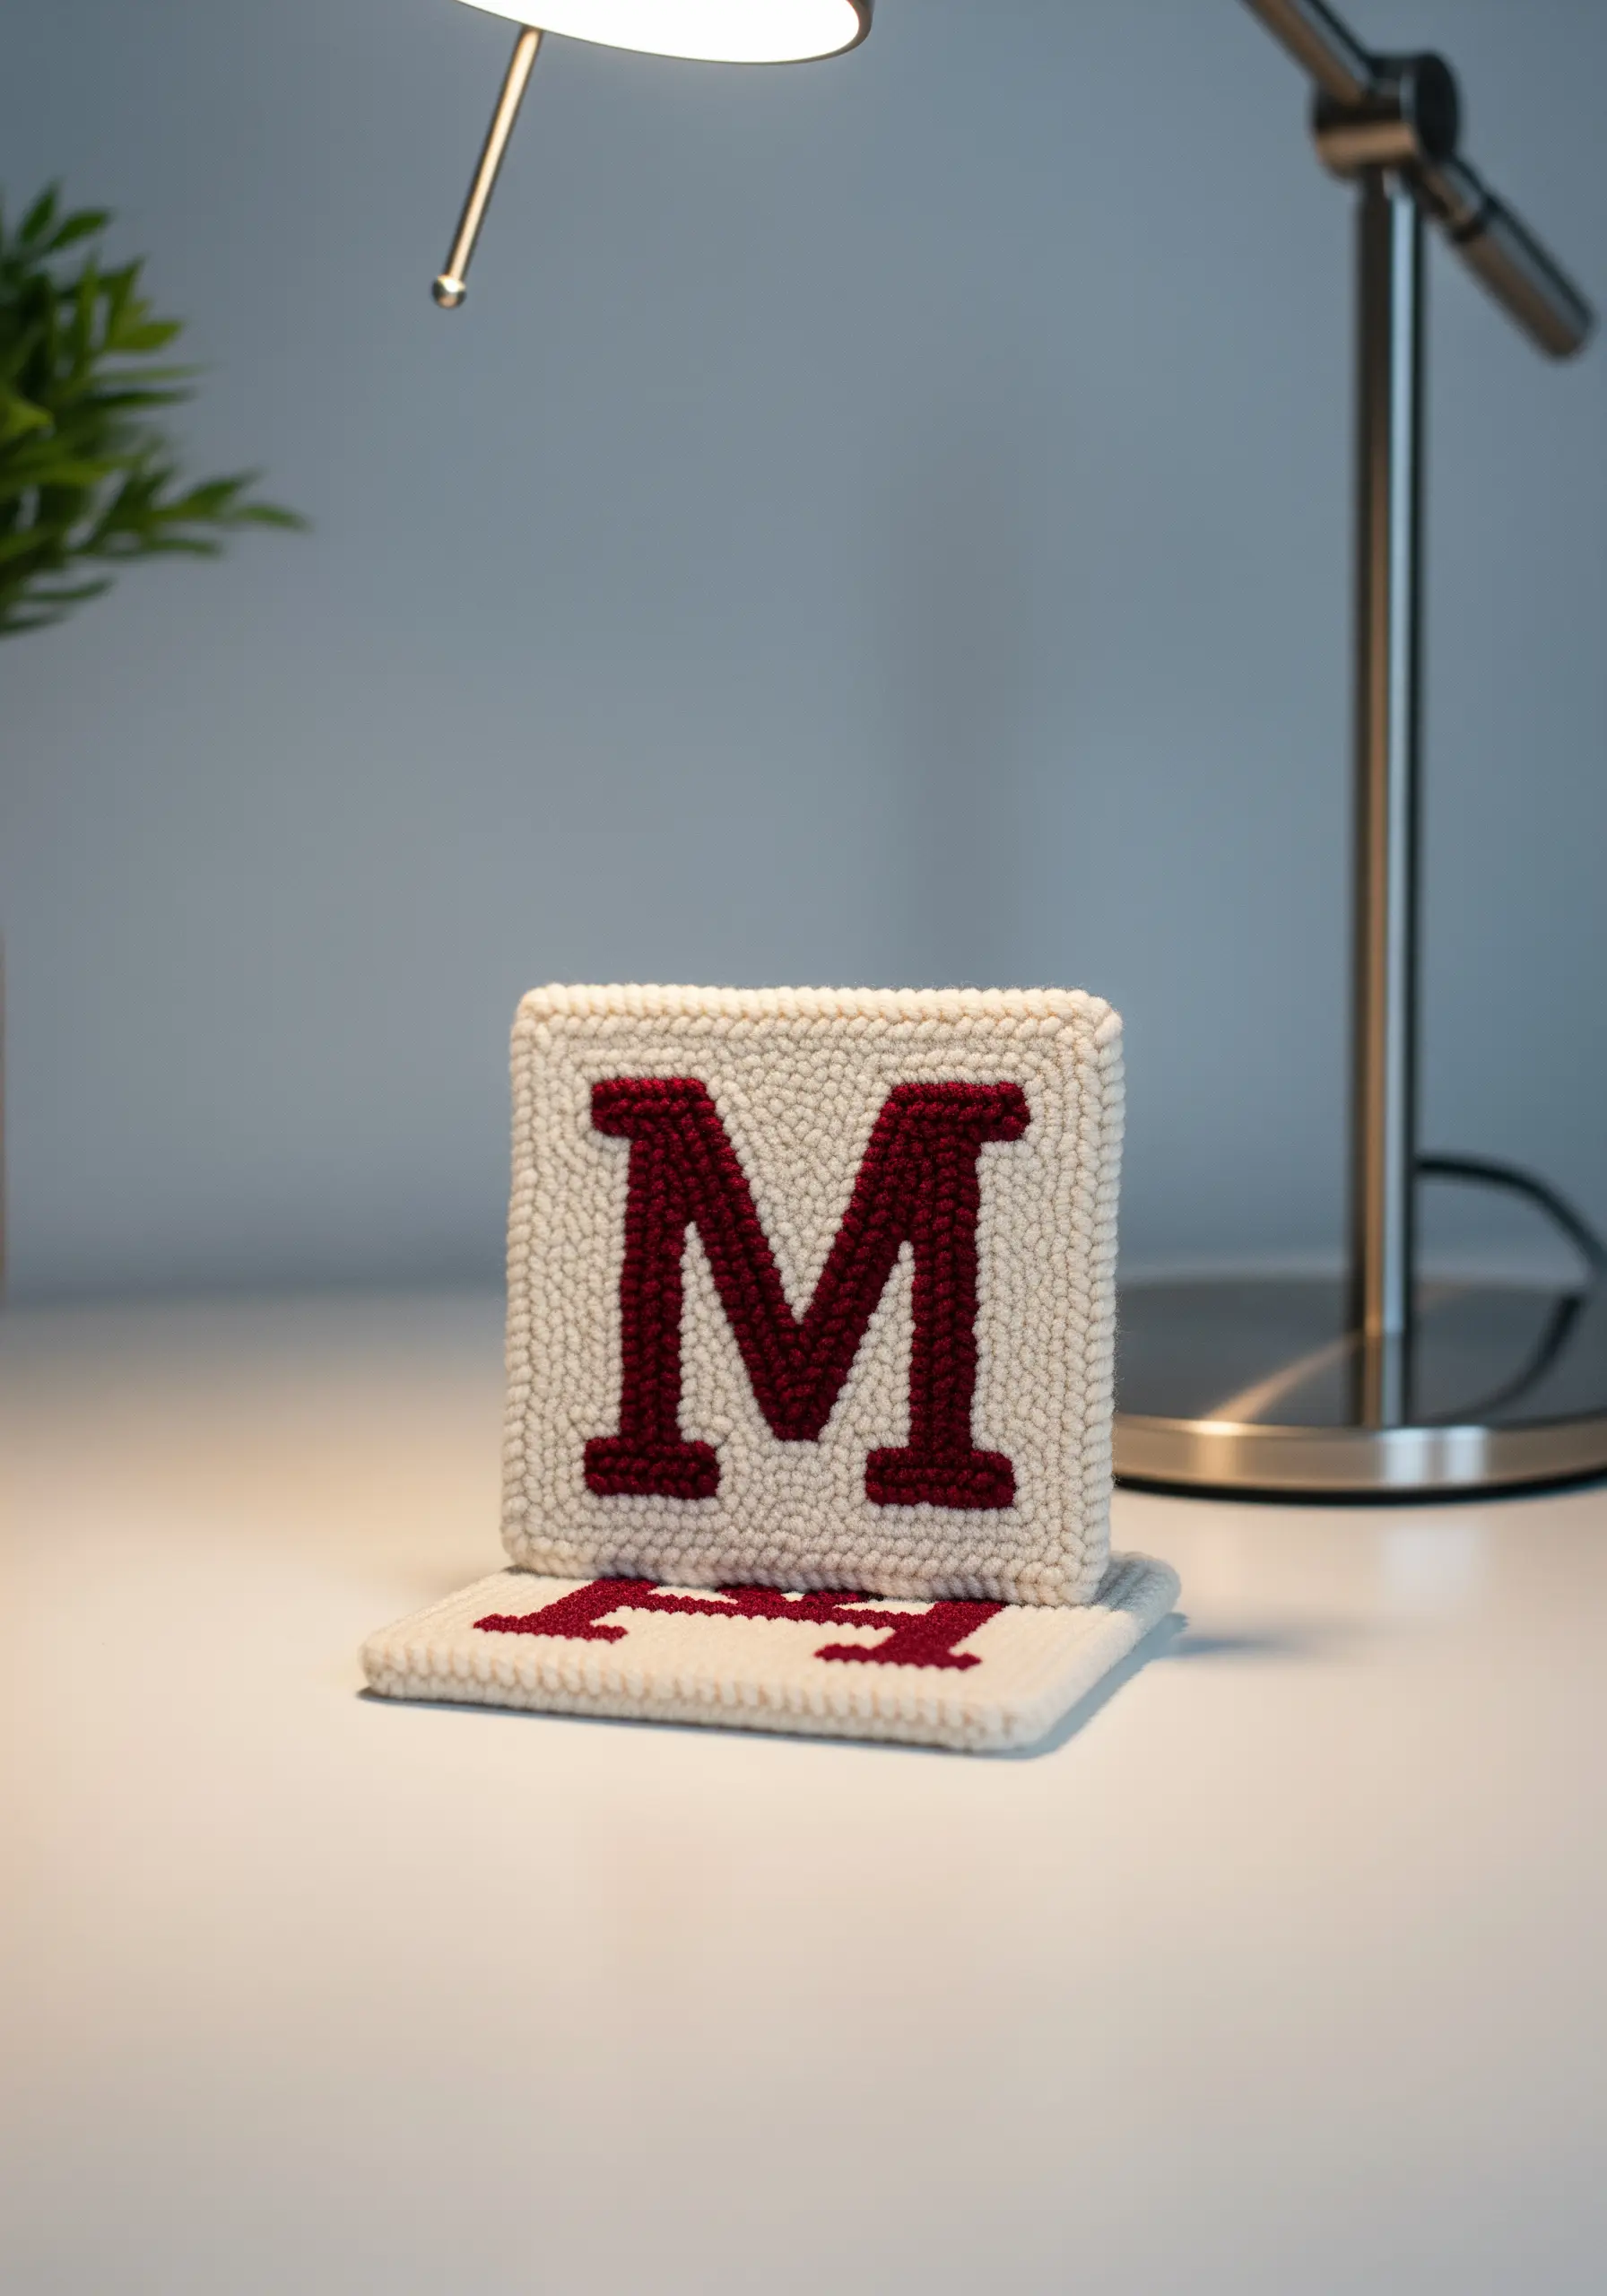
Punch needle embroidery allows you to create plush, looped textures that are both decorative and functional.
To get a crisp, clear letterform, work the outline of the monogram first. Then, fill in the space around it with your background color. This ensures the letter’s edges are sharp and defined.
Use a good quality weaver’s cloth as your foundation; its tight, even weave is essential for holding the punch needle loops securely.
Finish the coaster with a felt backing and a neat whipstitch around the edge. This not only hides the messy back of the work but also adds durability and a professional touch.


