
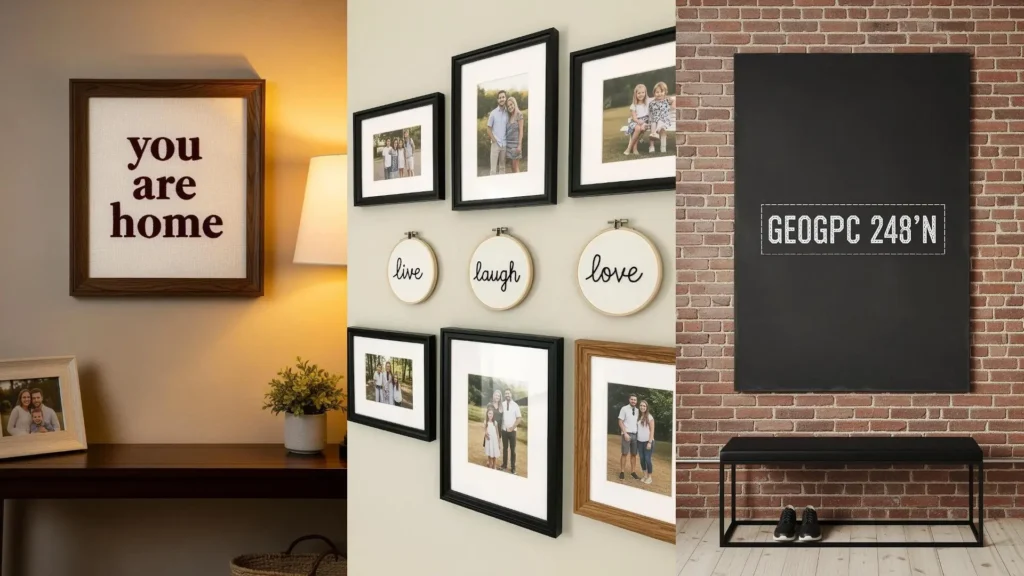
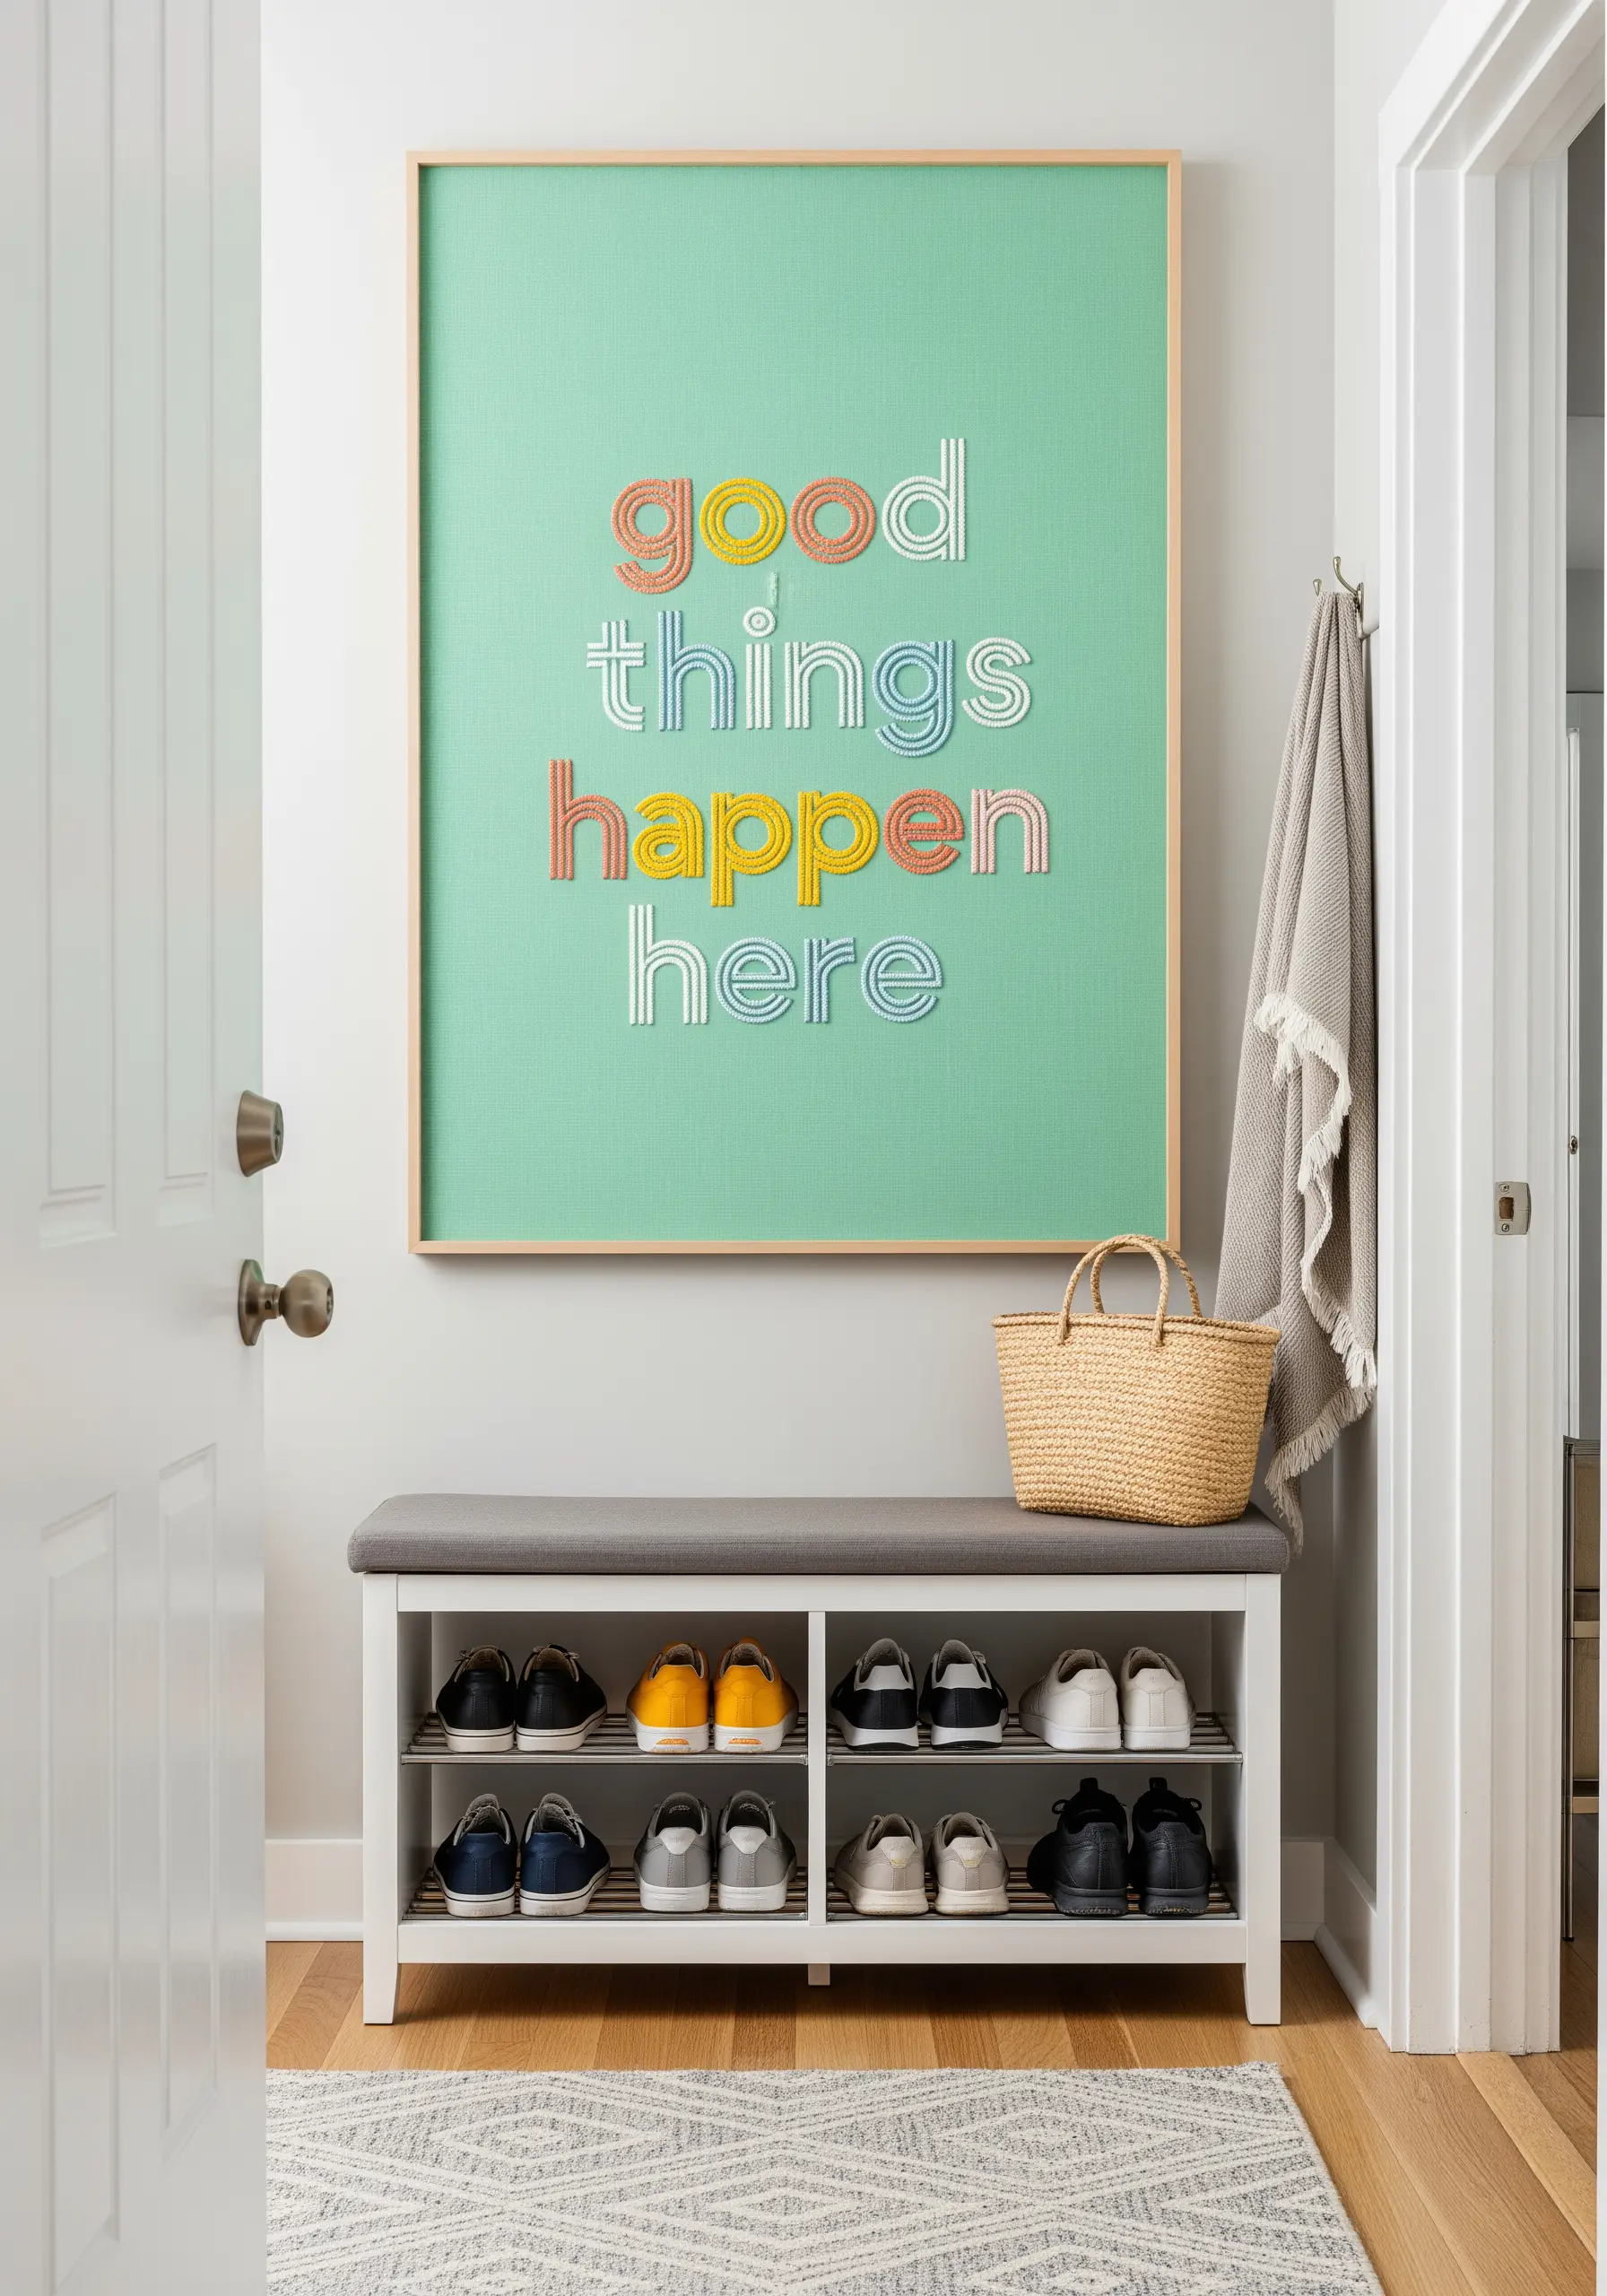
Your entryway is the first word your home speaks. Before the paint color, before the furniture, there is the feeling you want to create—a sense of welcome, of peace, of personality. Minimalist typography embroidery allows you to stitch that feeling directly into the fabric of your home.
Forget complex patterns and dozens of colors. The most impactful statements are often the most simple. A single word, a meaningful phrase, or a family name, rendered with intention, can transform a plain wall into a personal welcome. It’s about choosing the right stitch to give a letter weight, the right thread to catch the light, and the right fabric to serve as a quiet, confident canvas.
In these patterns, you’ll discover how to use texture, placement, and clean lines to create art that feels both modern and handmade. This is your opportunity to move beyond the expected and craft an entryway that is not just decorated, but truly expressive of who you are and the home you’ve created.
1. The High-Impact Satin Stitch Greeting
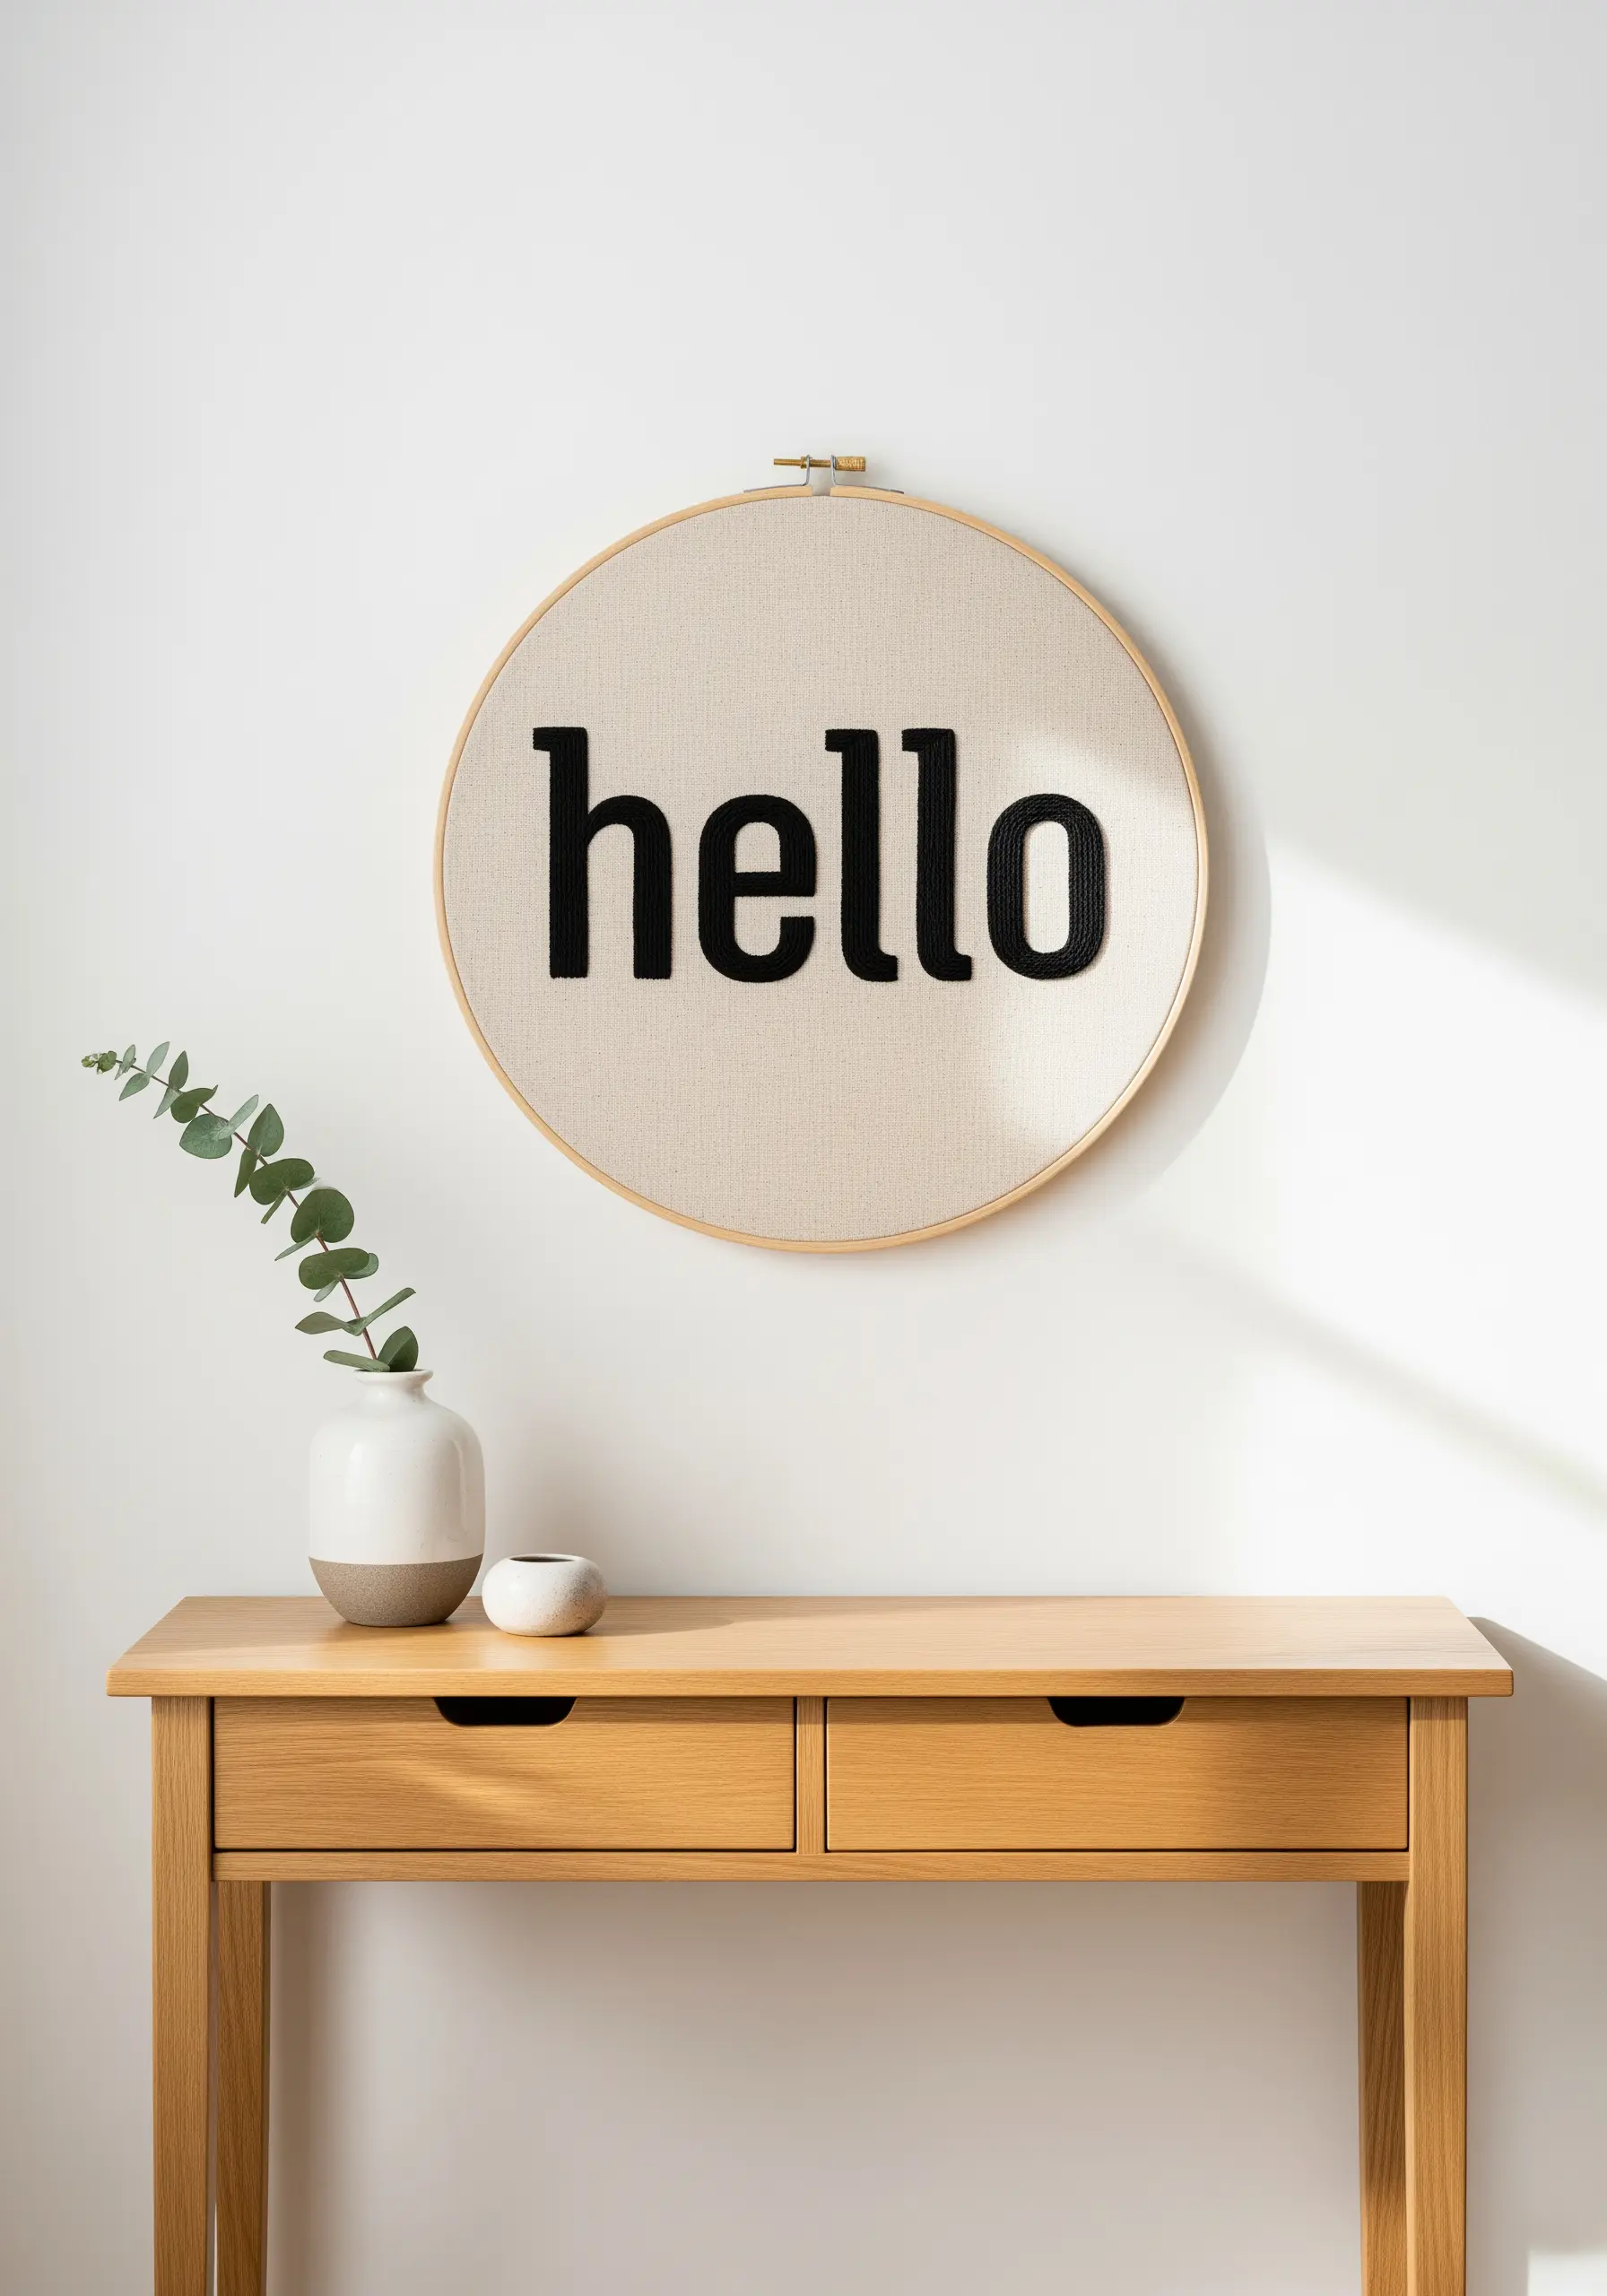
To achieve this bold, raised lettering, use a dense satin stitch with all six strands of embroidery floss.
First, create a split-stitch outline around each letter.
This simple preparation acts as a barrier, giving your satin stitches a clean, sharp edge to press against and creating that satisfyingly plump, 3D effect.
Working on a sturdy fabric like cotton canvas or linen ensures the fabric can support the heavy stitching without puckering.
2. Elegant Script on a Modern Banner
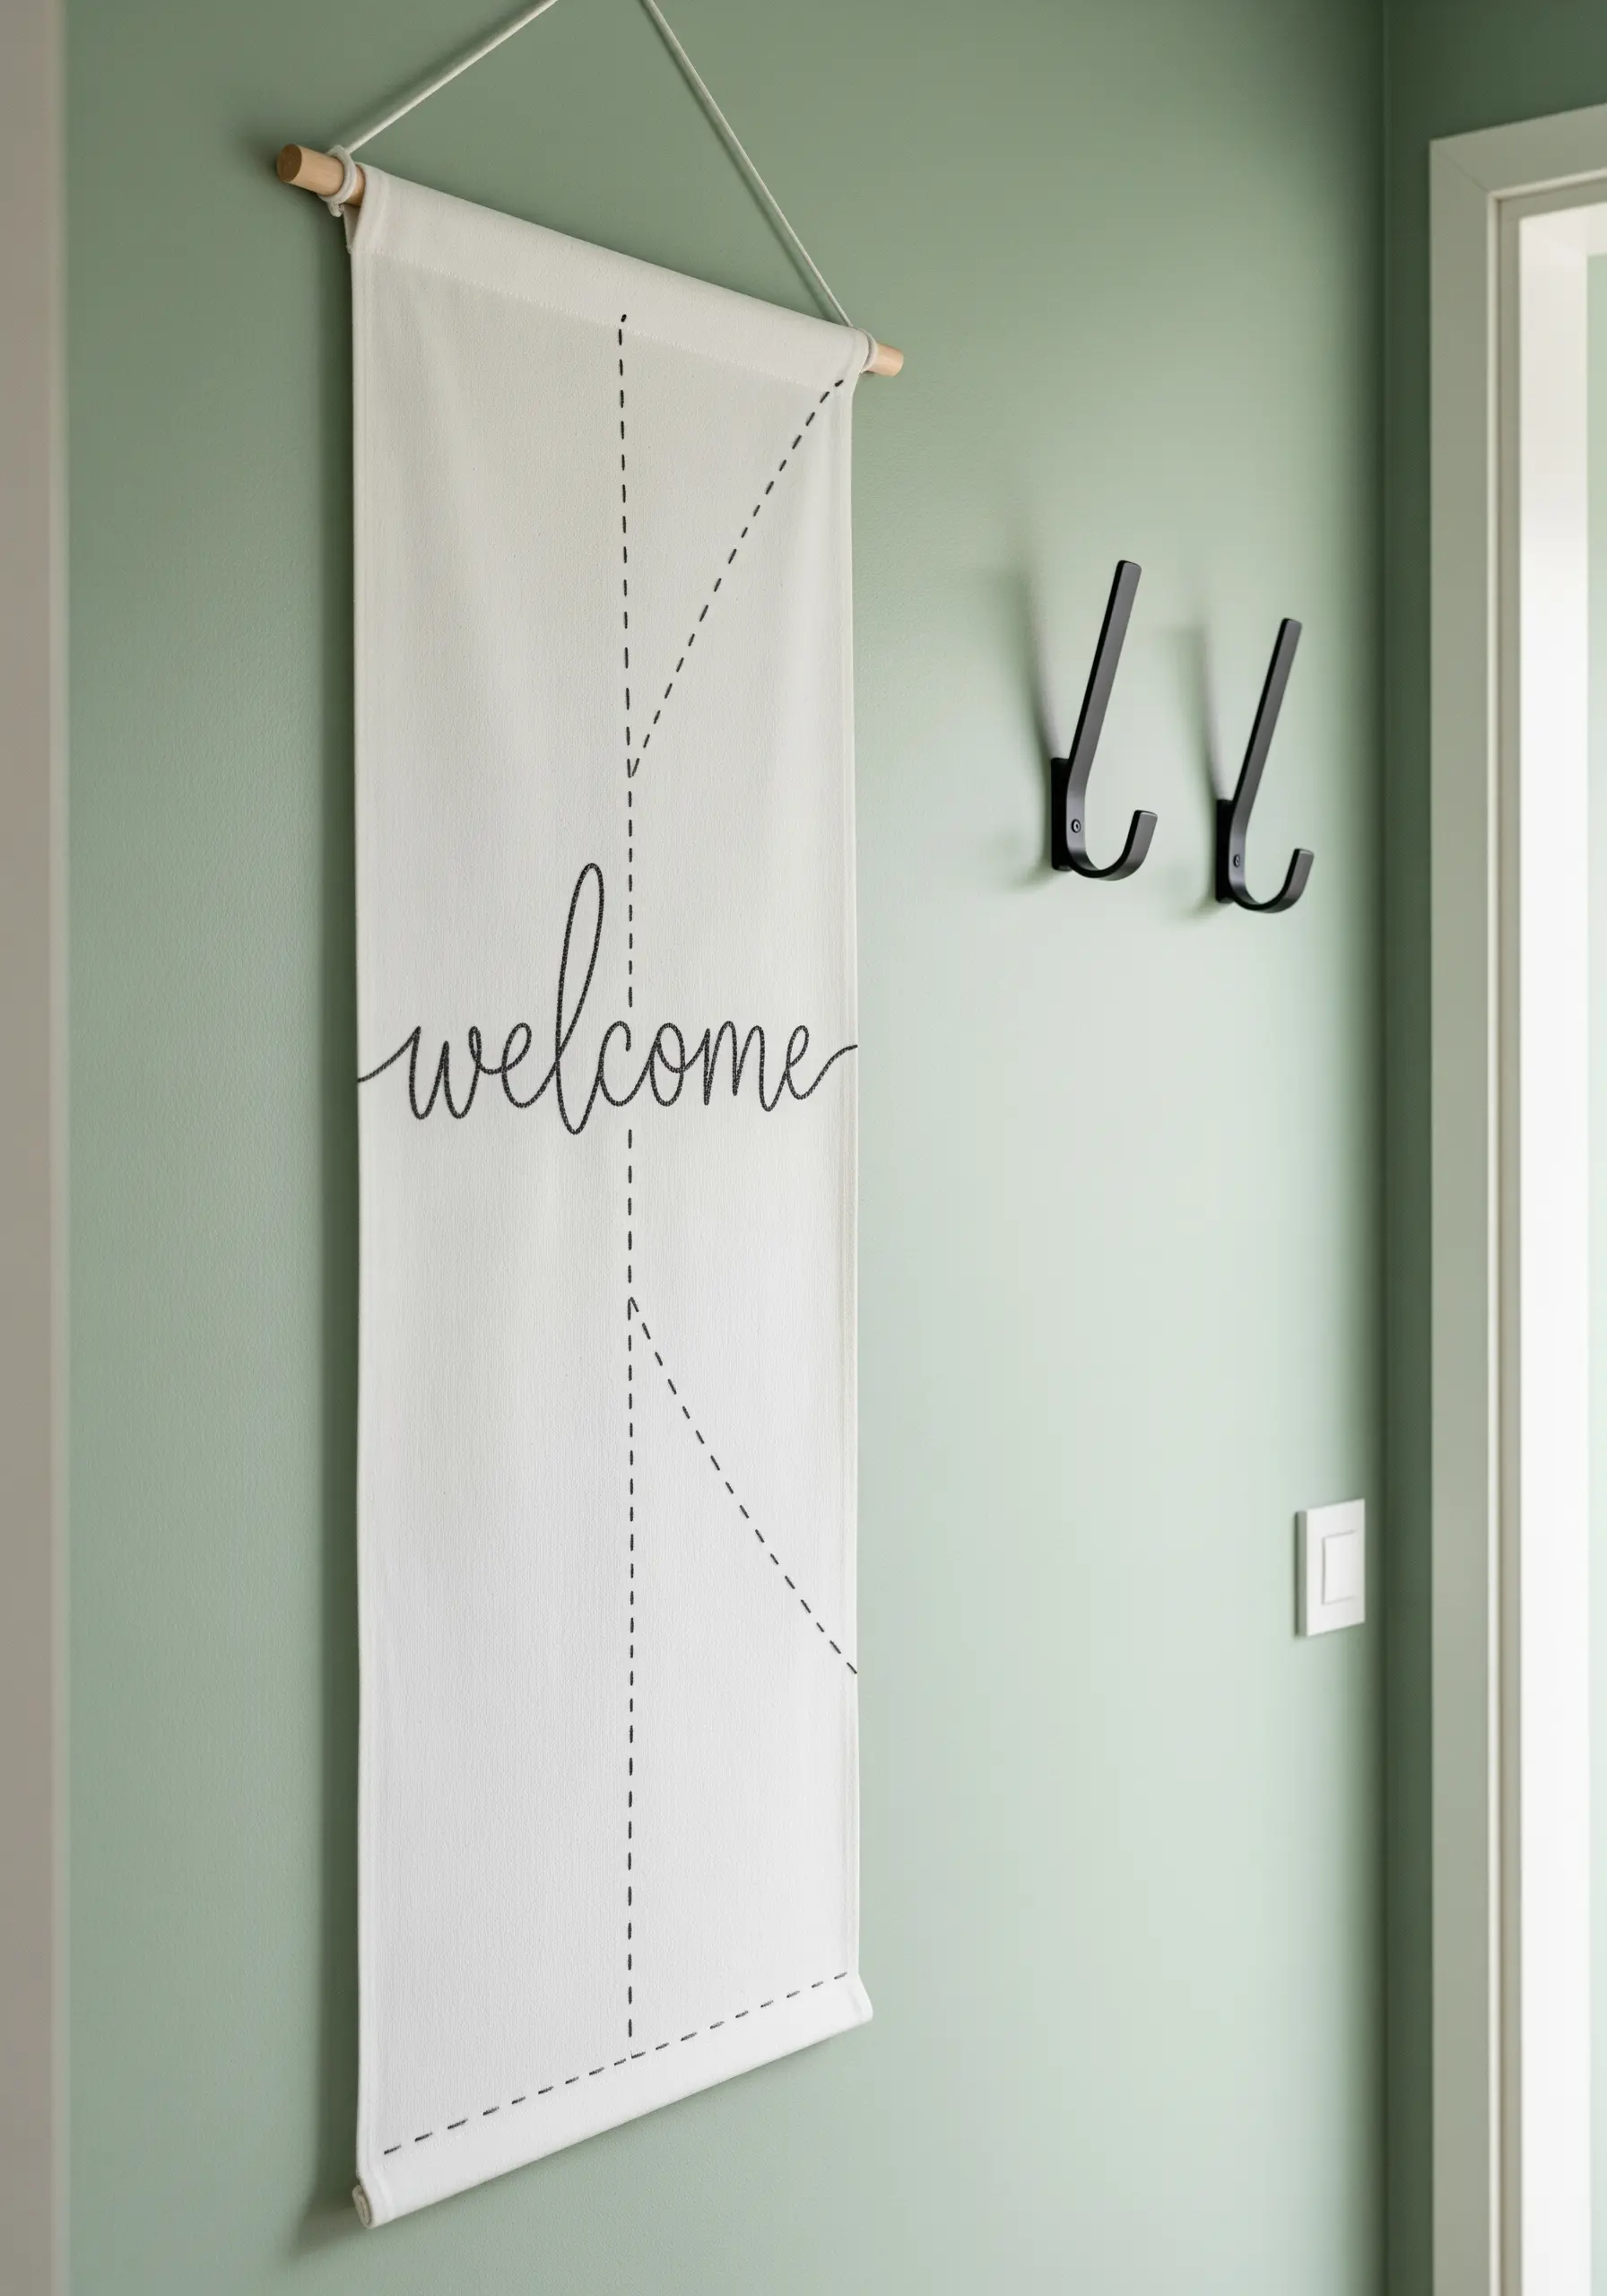
For a smooth, continuous script that flows like ink, use a whipped backstitch or a stem stitch with three strands of floss.
These stitches are designed to follow curves gracefully, eliminating the jagged edges you might get with a standard backstitch.
The banner format is a chic alternative to a hoop, perfect for narrow walls or adding a soft textile element next to a doorway.
Finish the piece with a simple running stitch for the dashed geometric lines, keeping them subtle so the script remains the focal point.
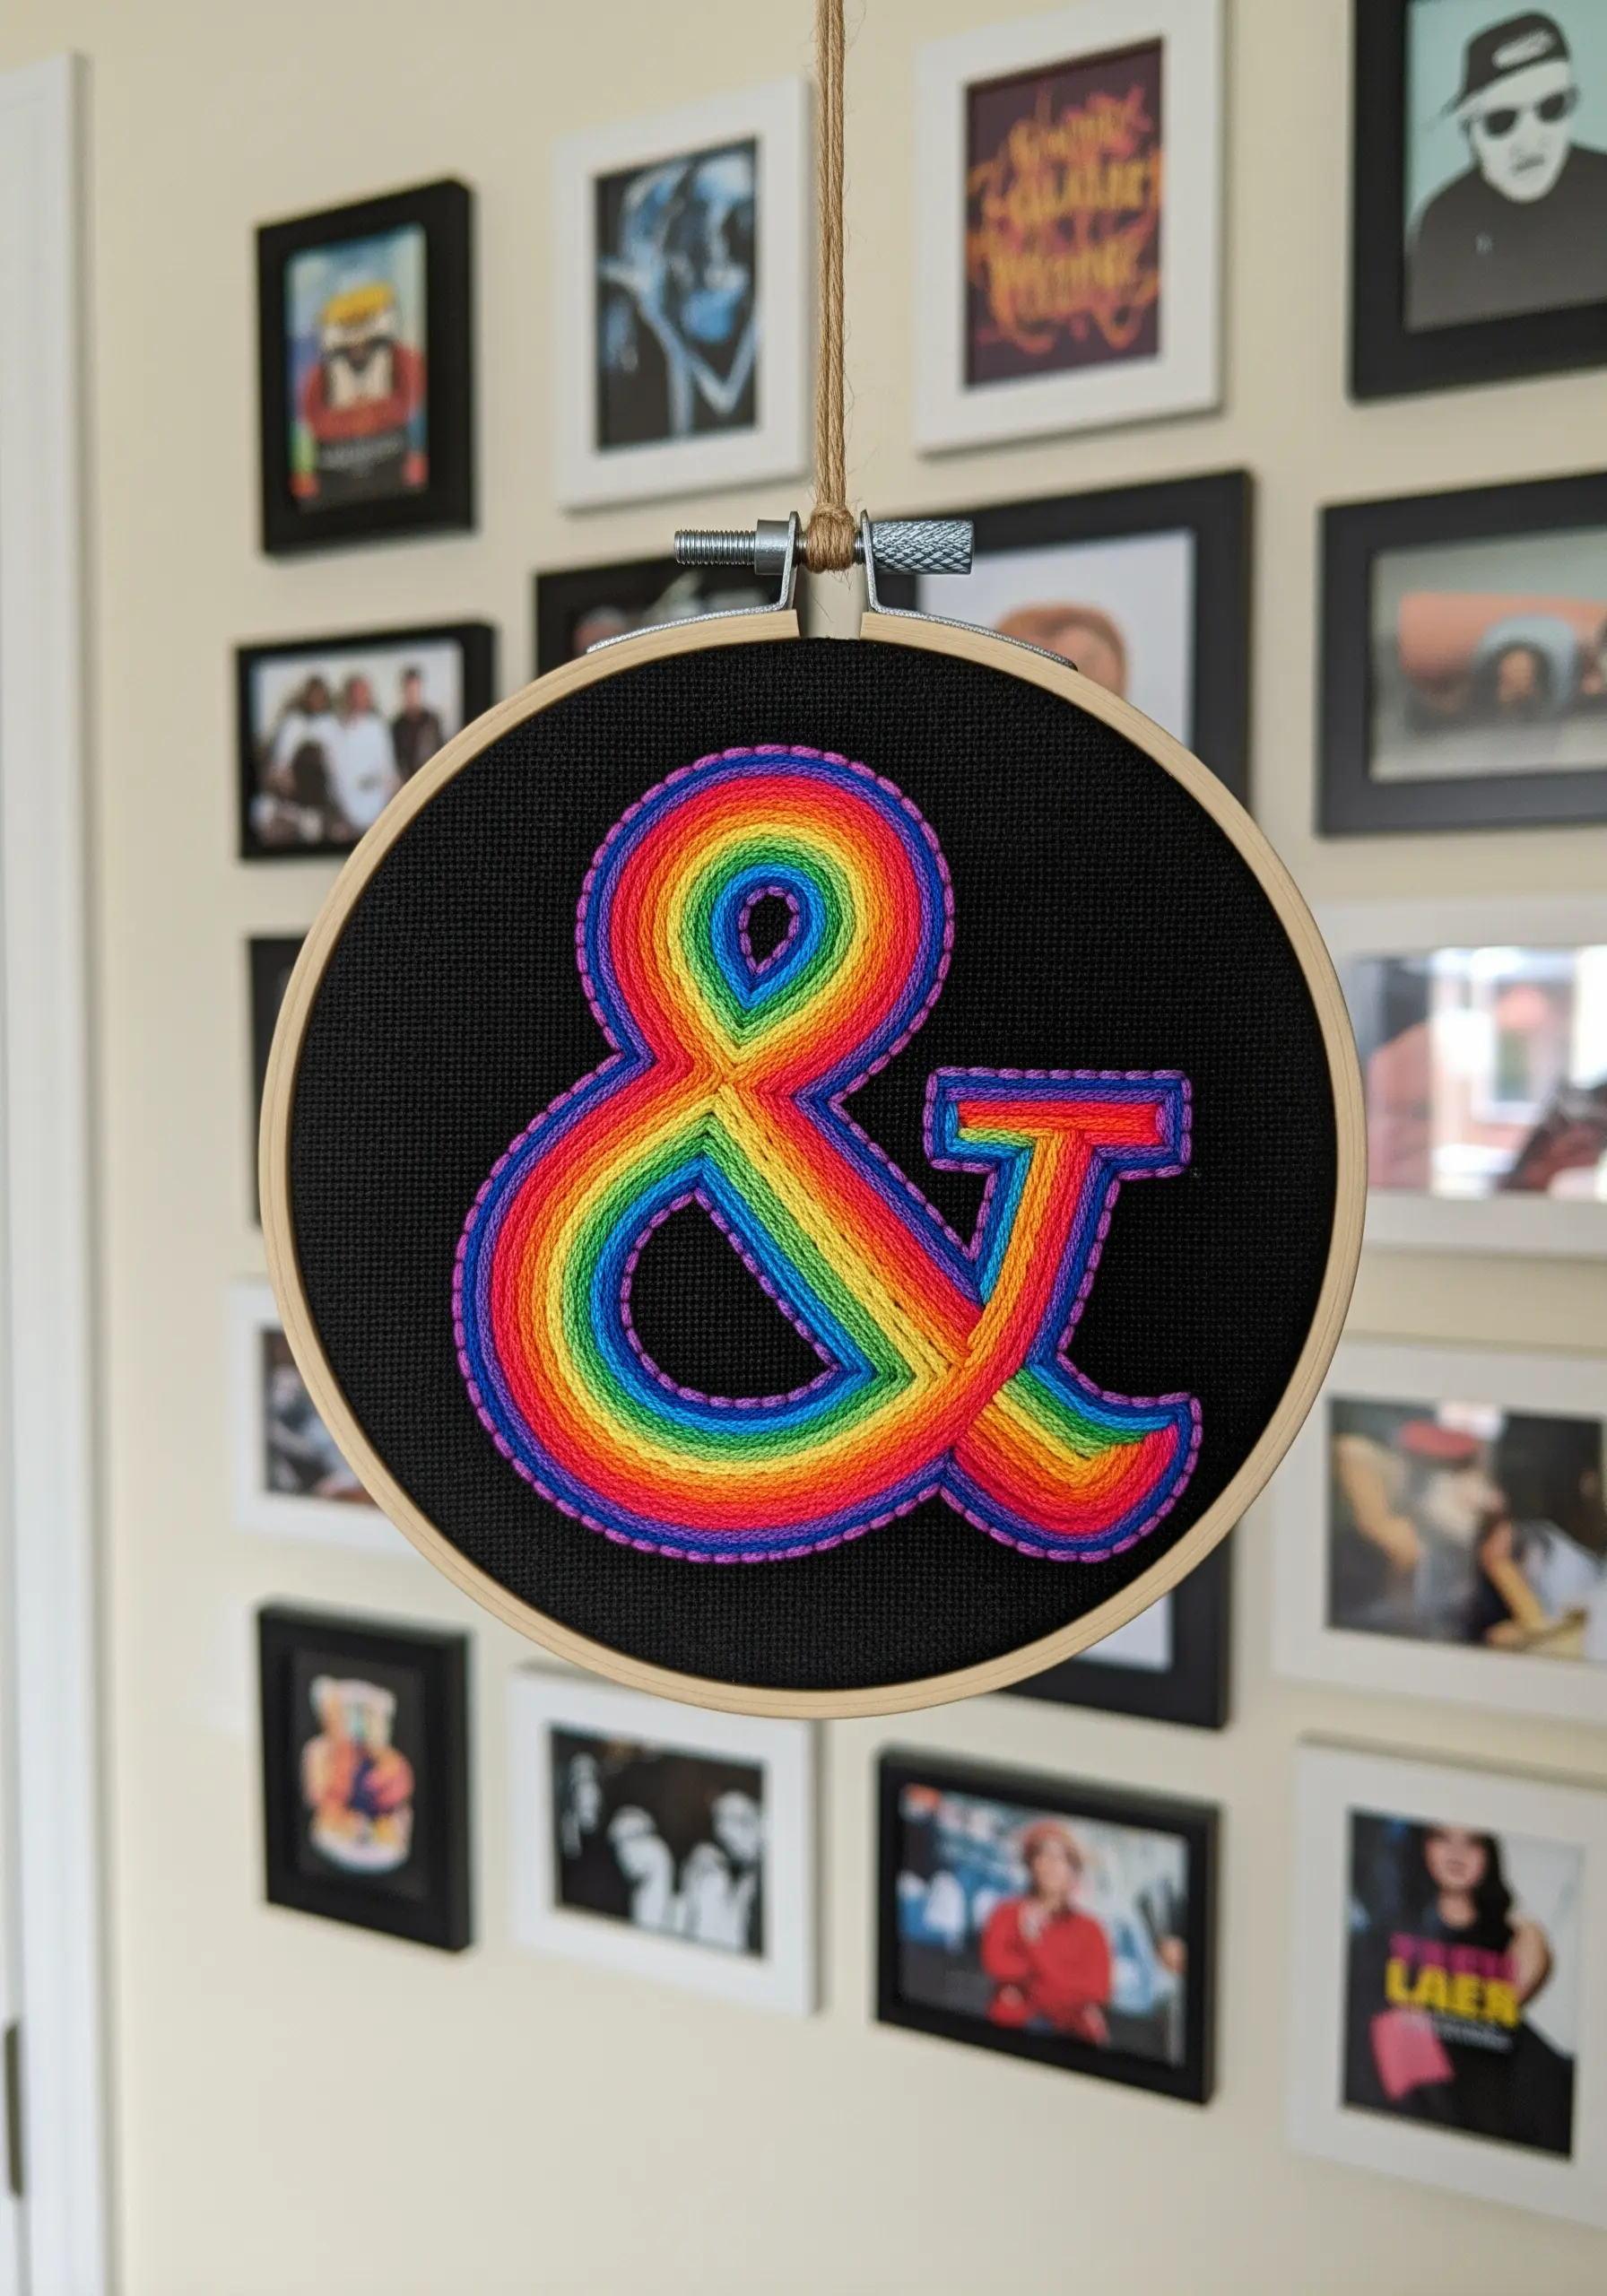
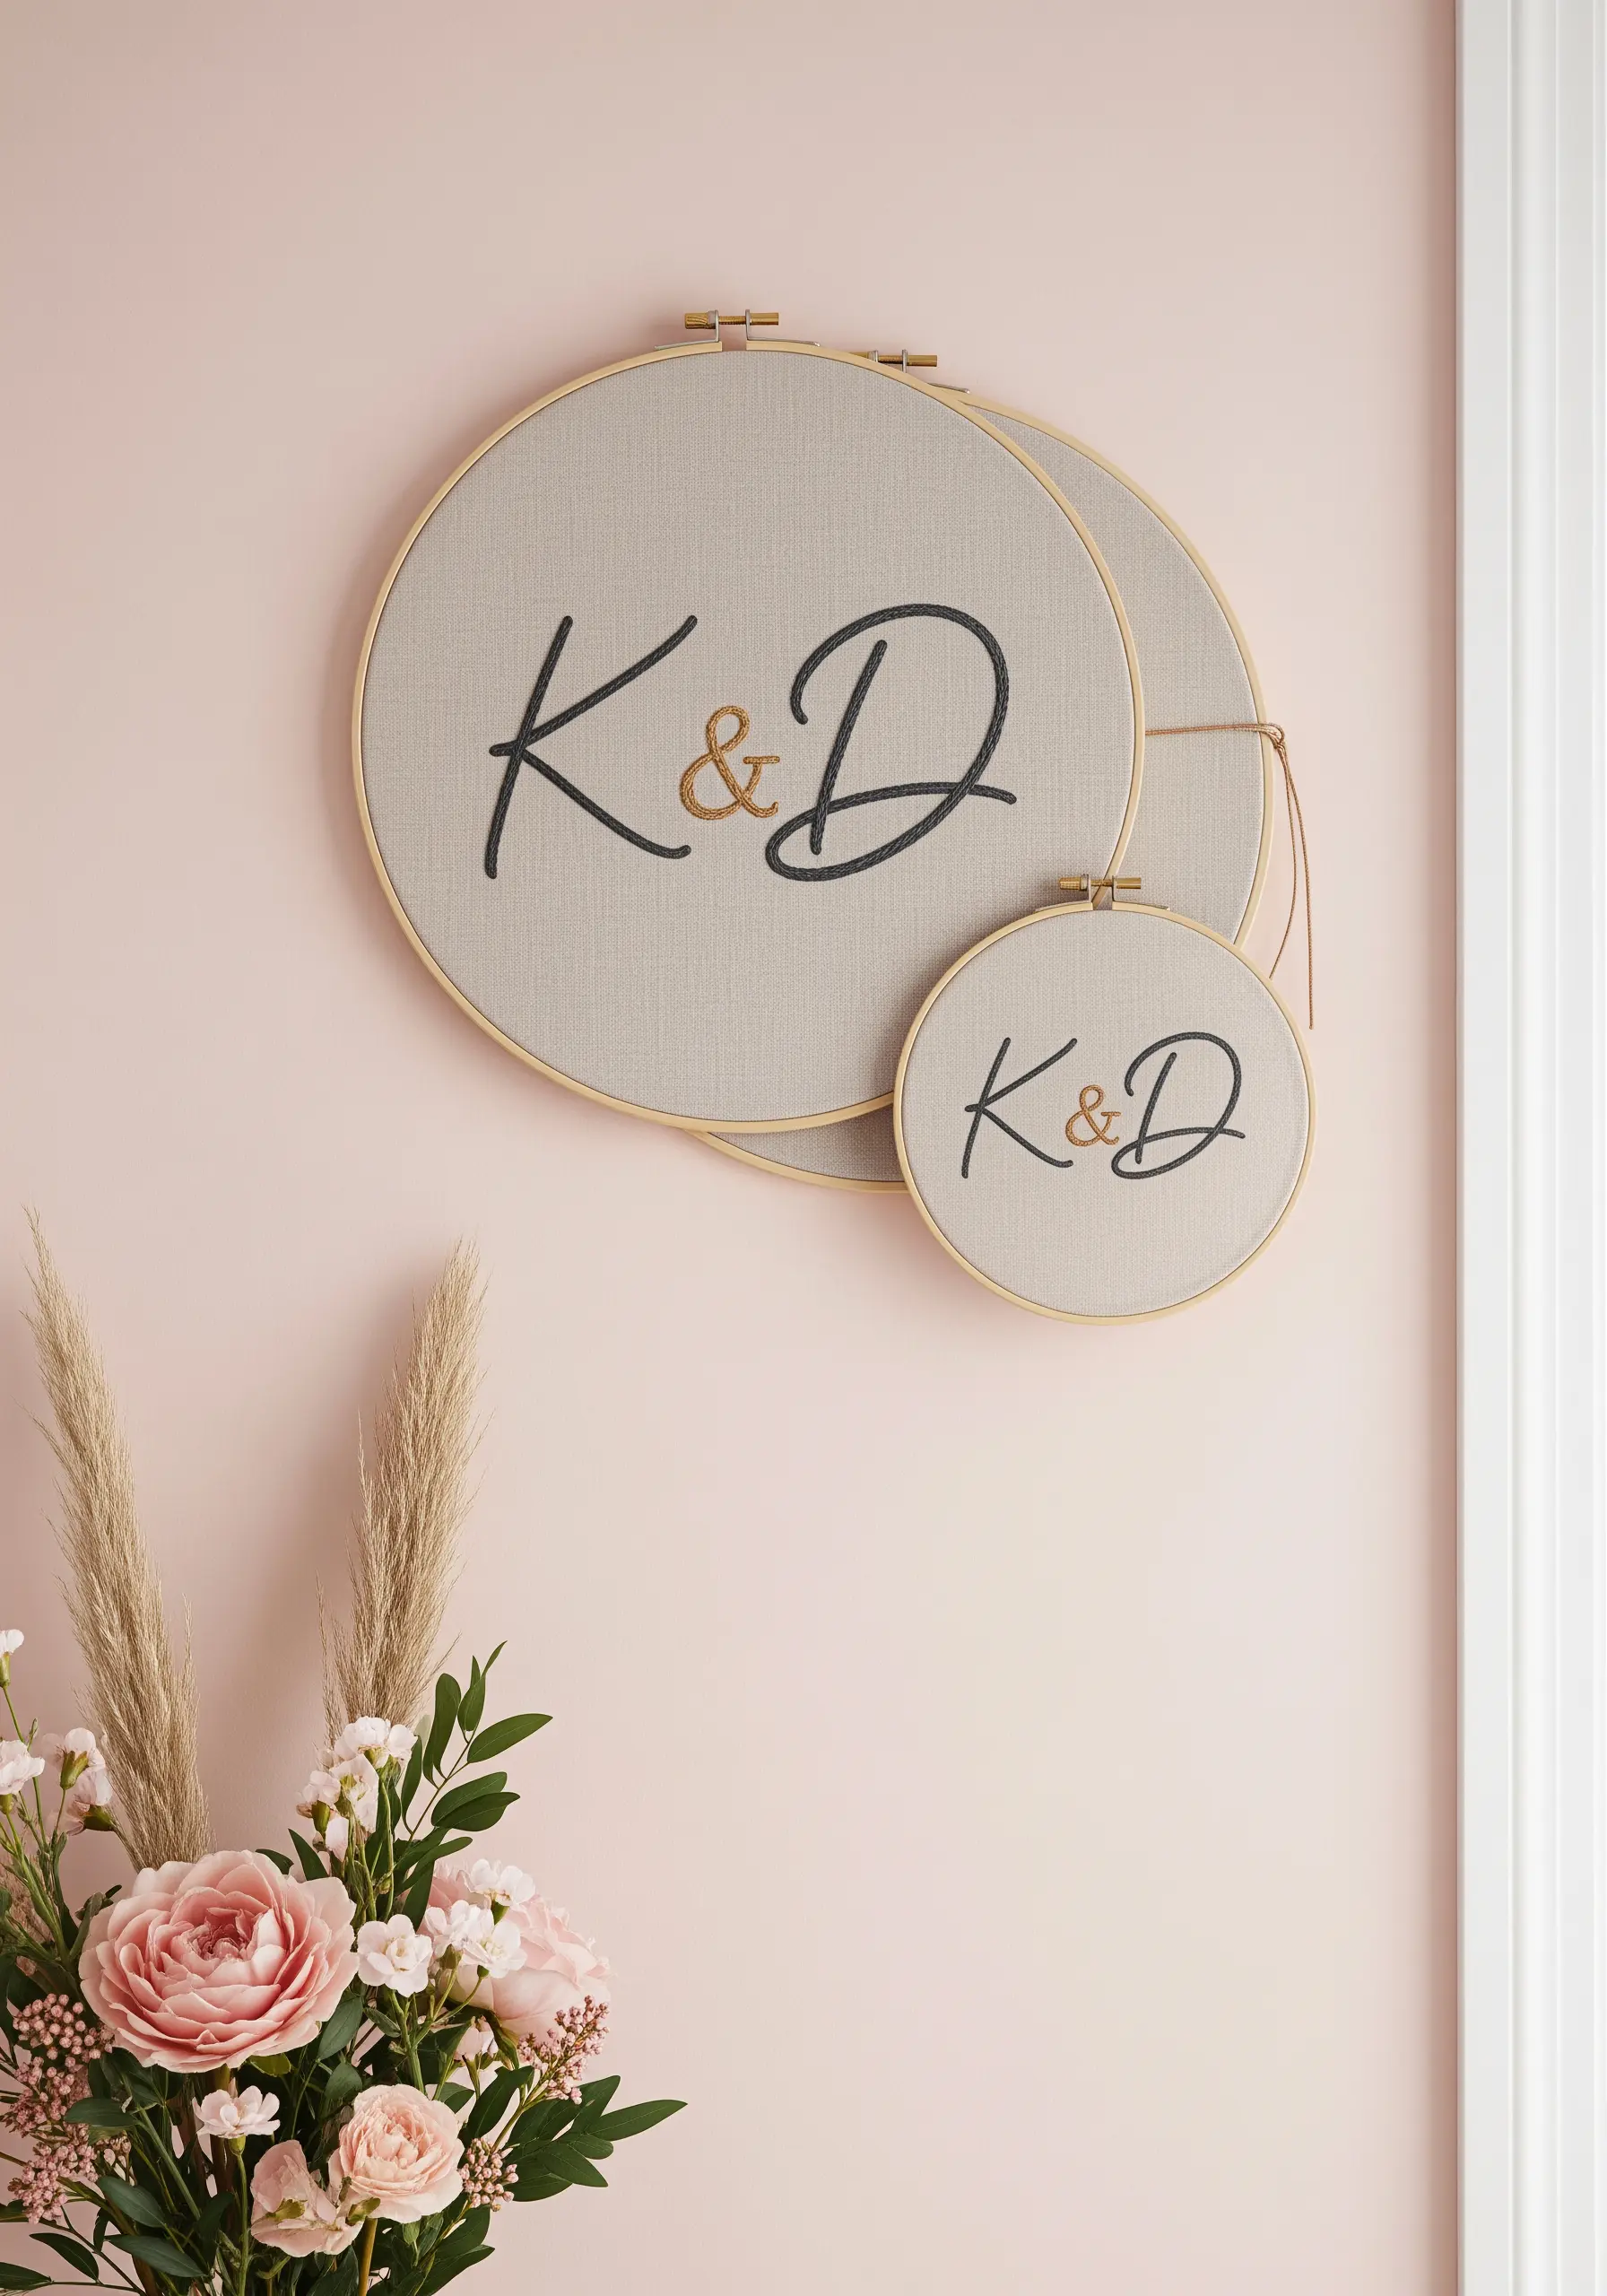
3. A Triptych of Minimalist Monograms
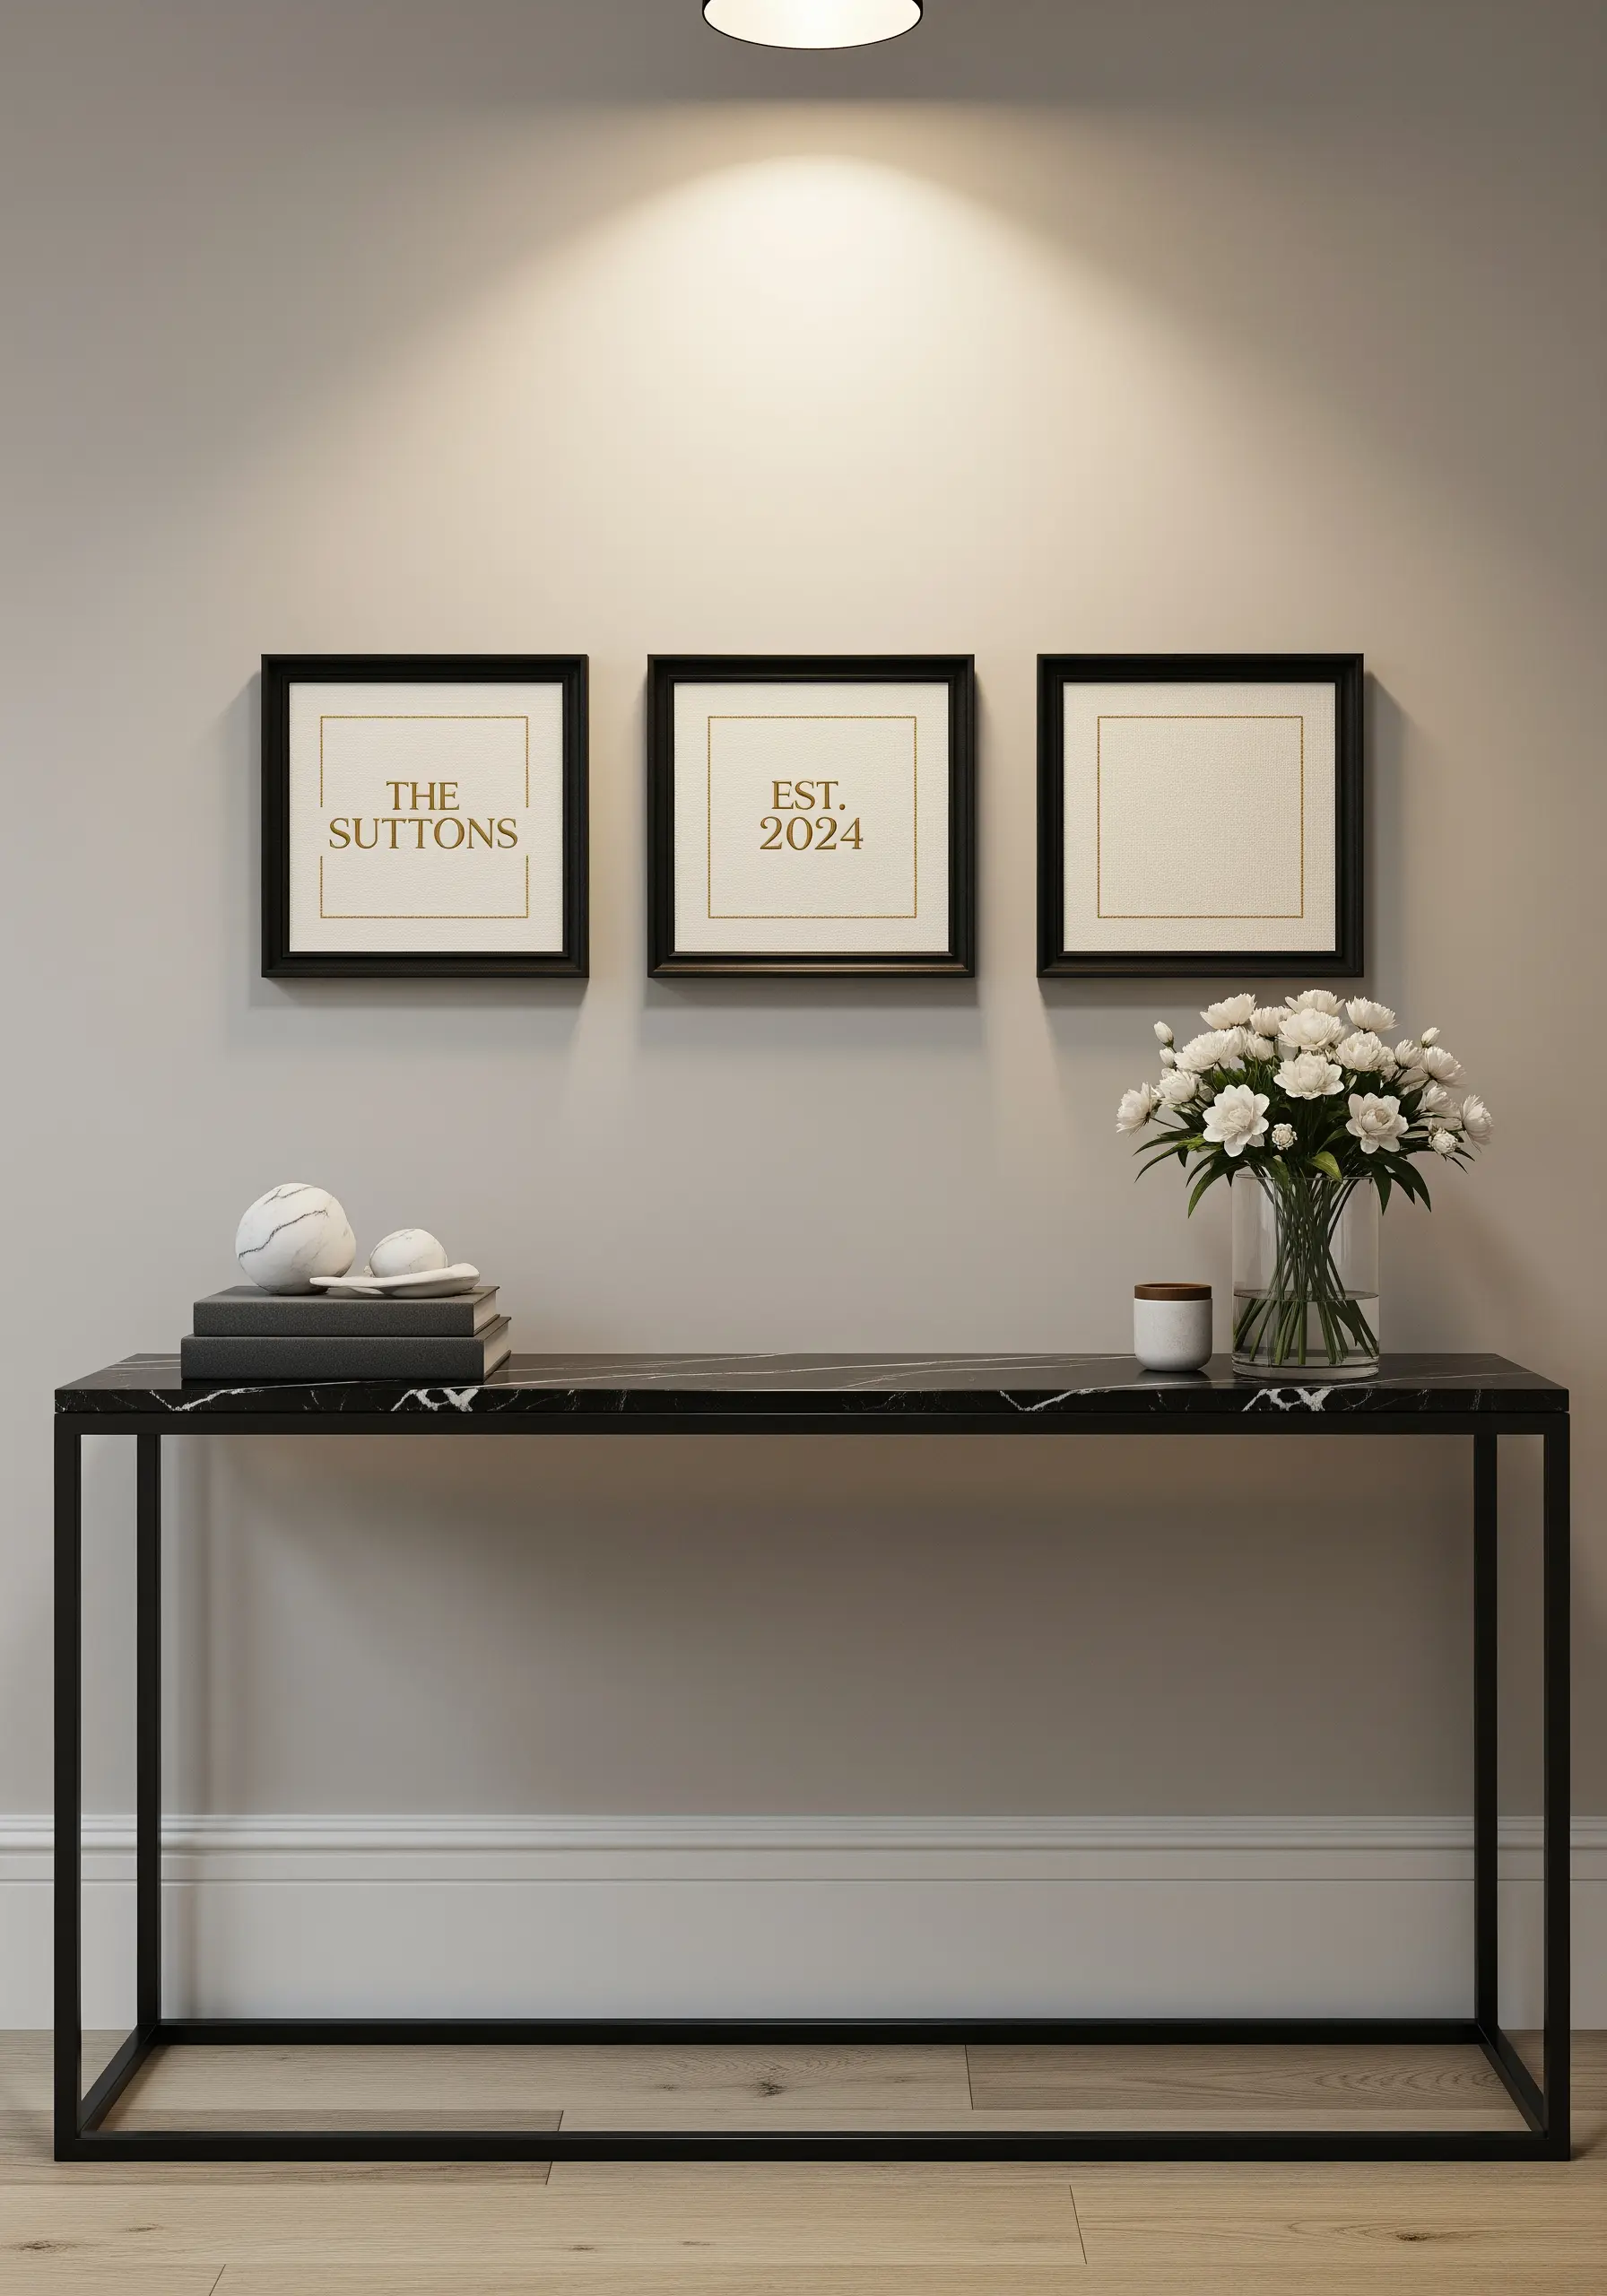
The elegance of this design comes from its absolute precision.
Use a single strand of floss and a tiny backstitch to render the delicate serif font with clarity.
Stretching your fabric drum-tight in the frame is non-negotiable for achieving perfectly straight lines.
Grouping framed embroidery art pieces as a triptych elevates them, creating a cohesive, gallery-style statement.
The third empty frame is a deliberate design choice, offering visual balance and celebrating the texture of the linen itself.
4. Architectural Lettering with Geometric Fills
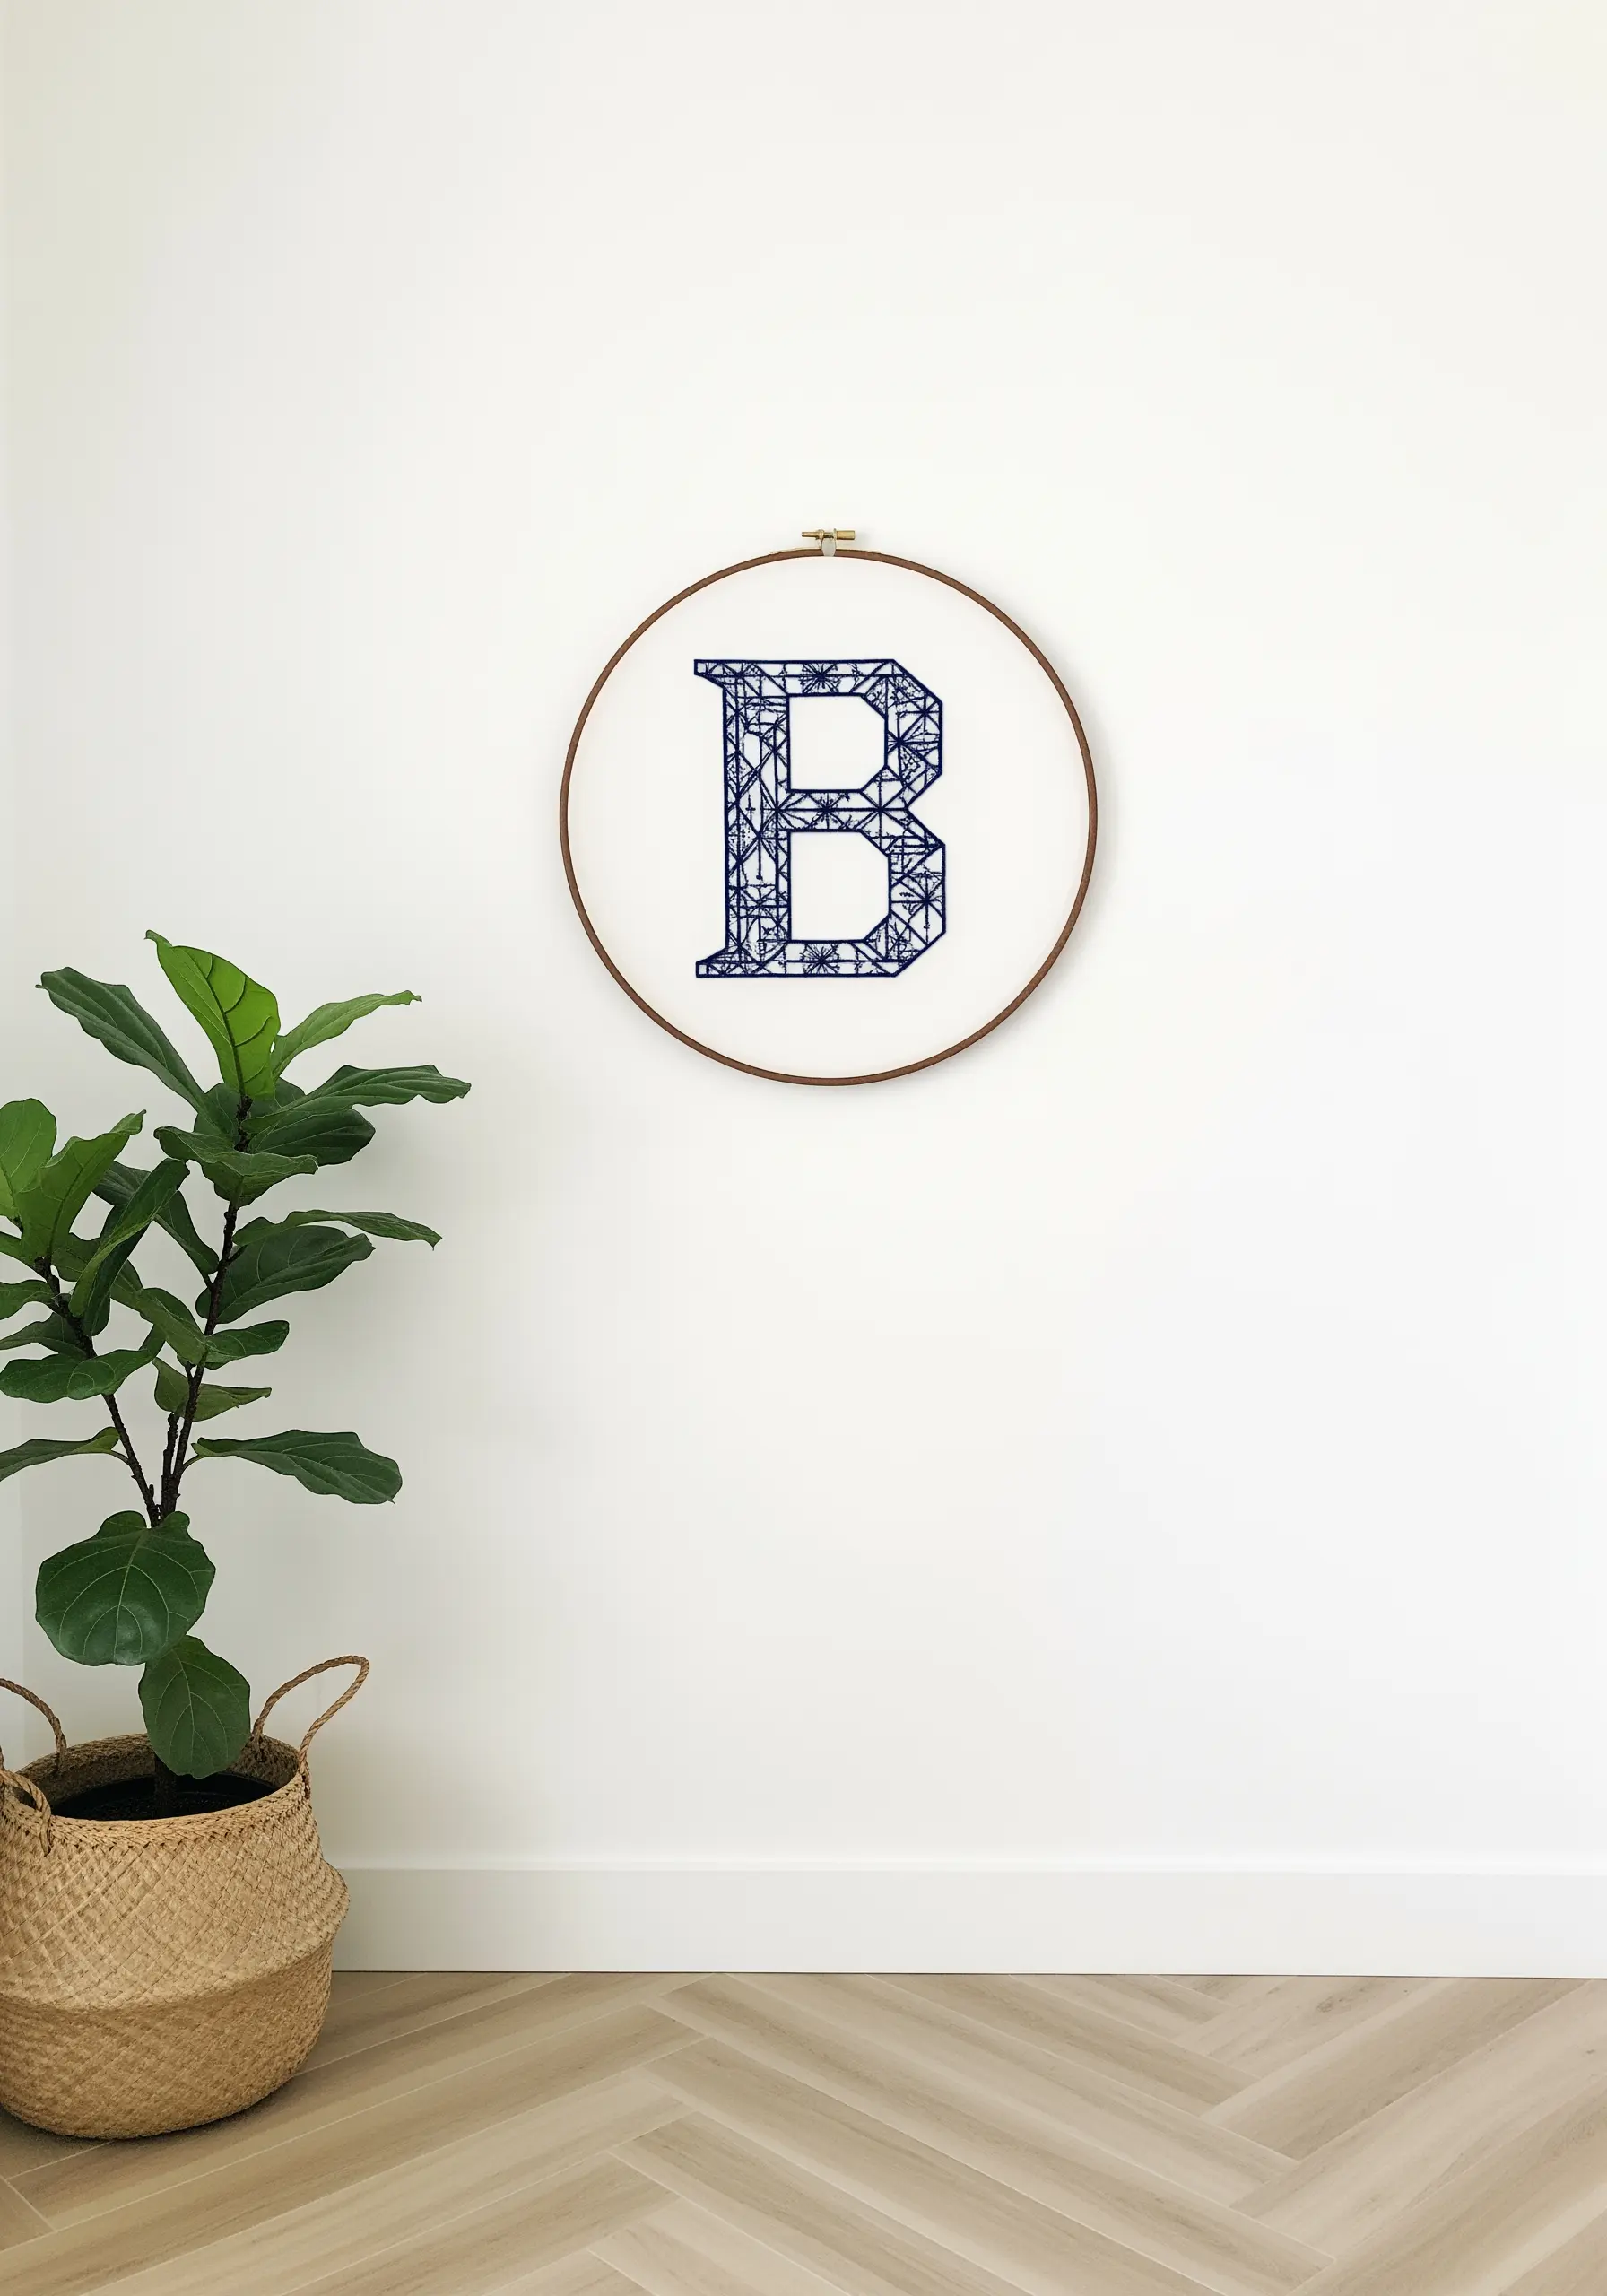
Instead of a solid satin stitch, fill your monogram with a striking geometric pattern using straight stitches.
This technique, similar to blackwork, creates incredible texture and visual interest while using less thread than a traditional fill.
For perfect precision, lightly draw a grid onto your fabric with a water-soluble pen before you begin stitching.
This method transforms a simple initial into a piece of architectural art.
5. Dimensional Couching for 3D Typography
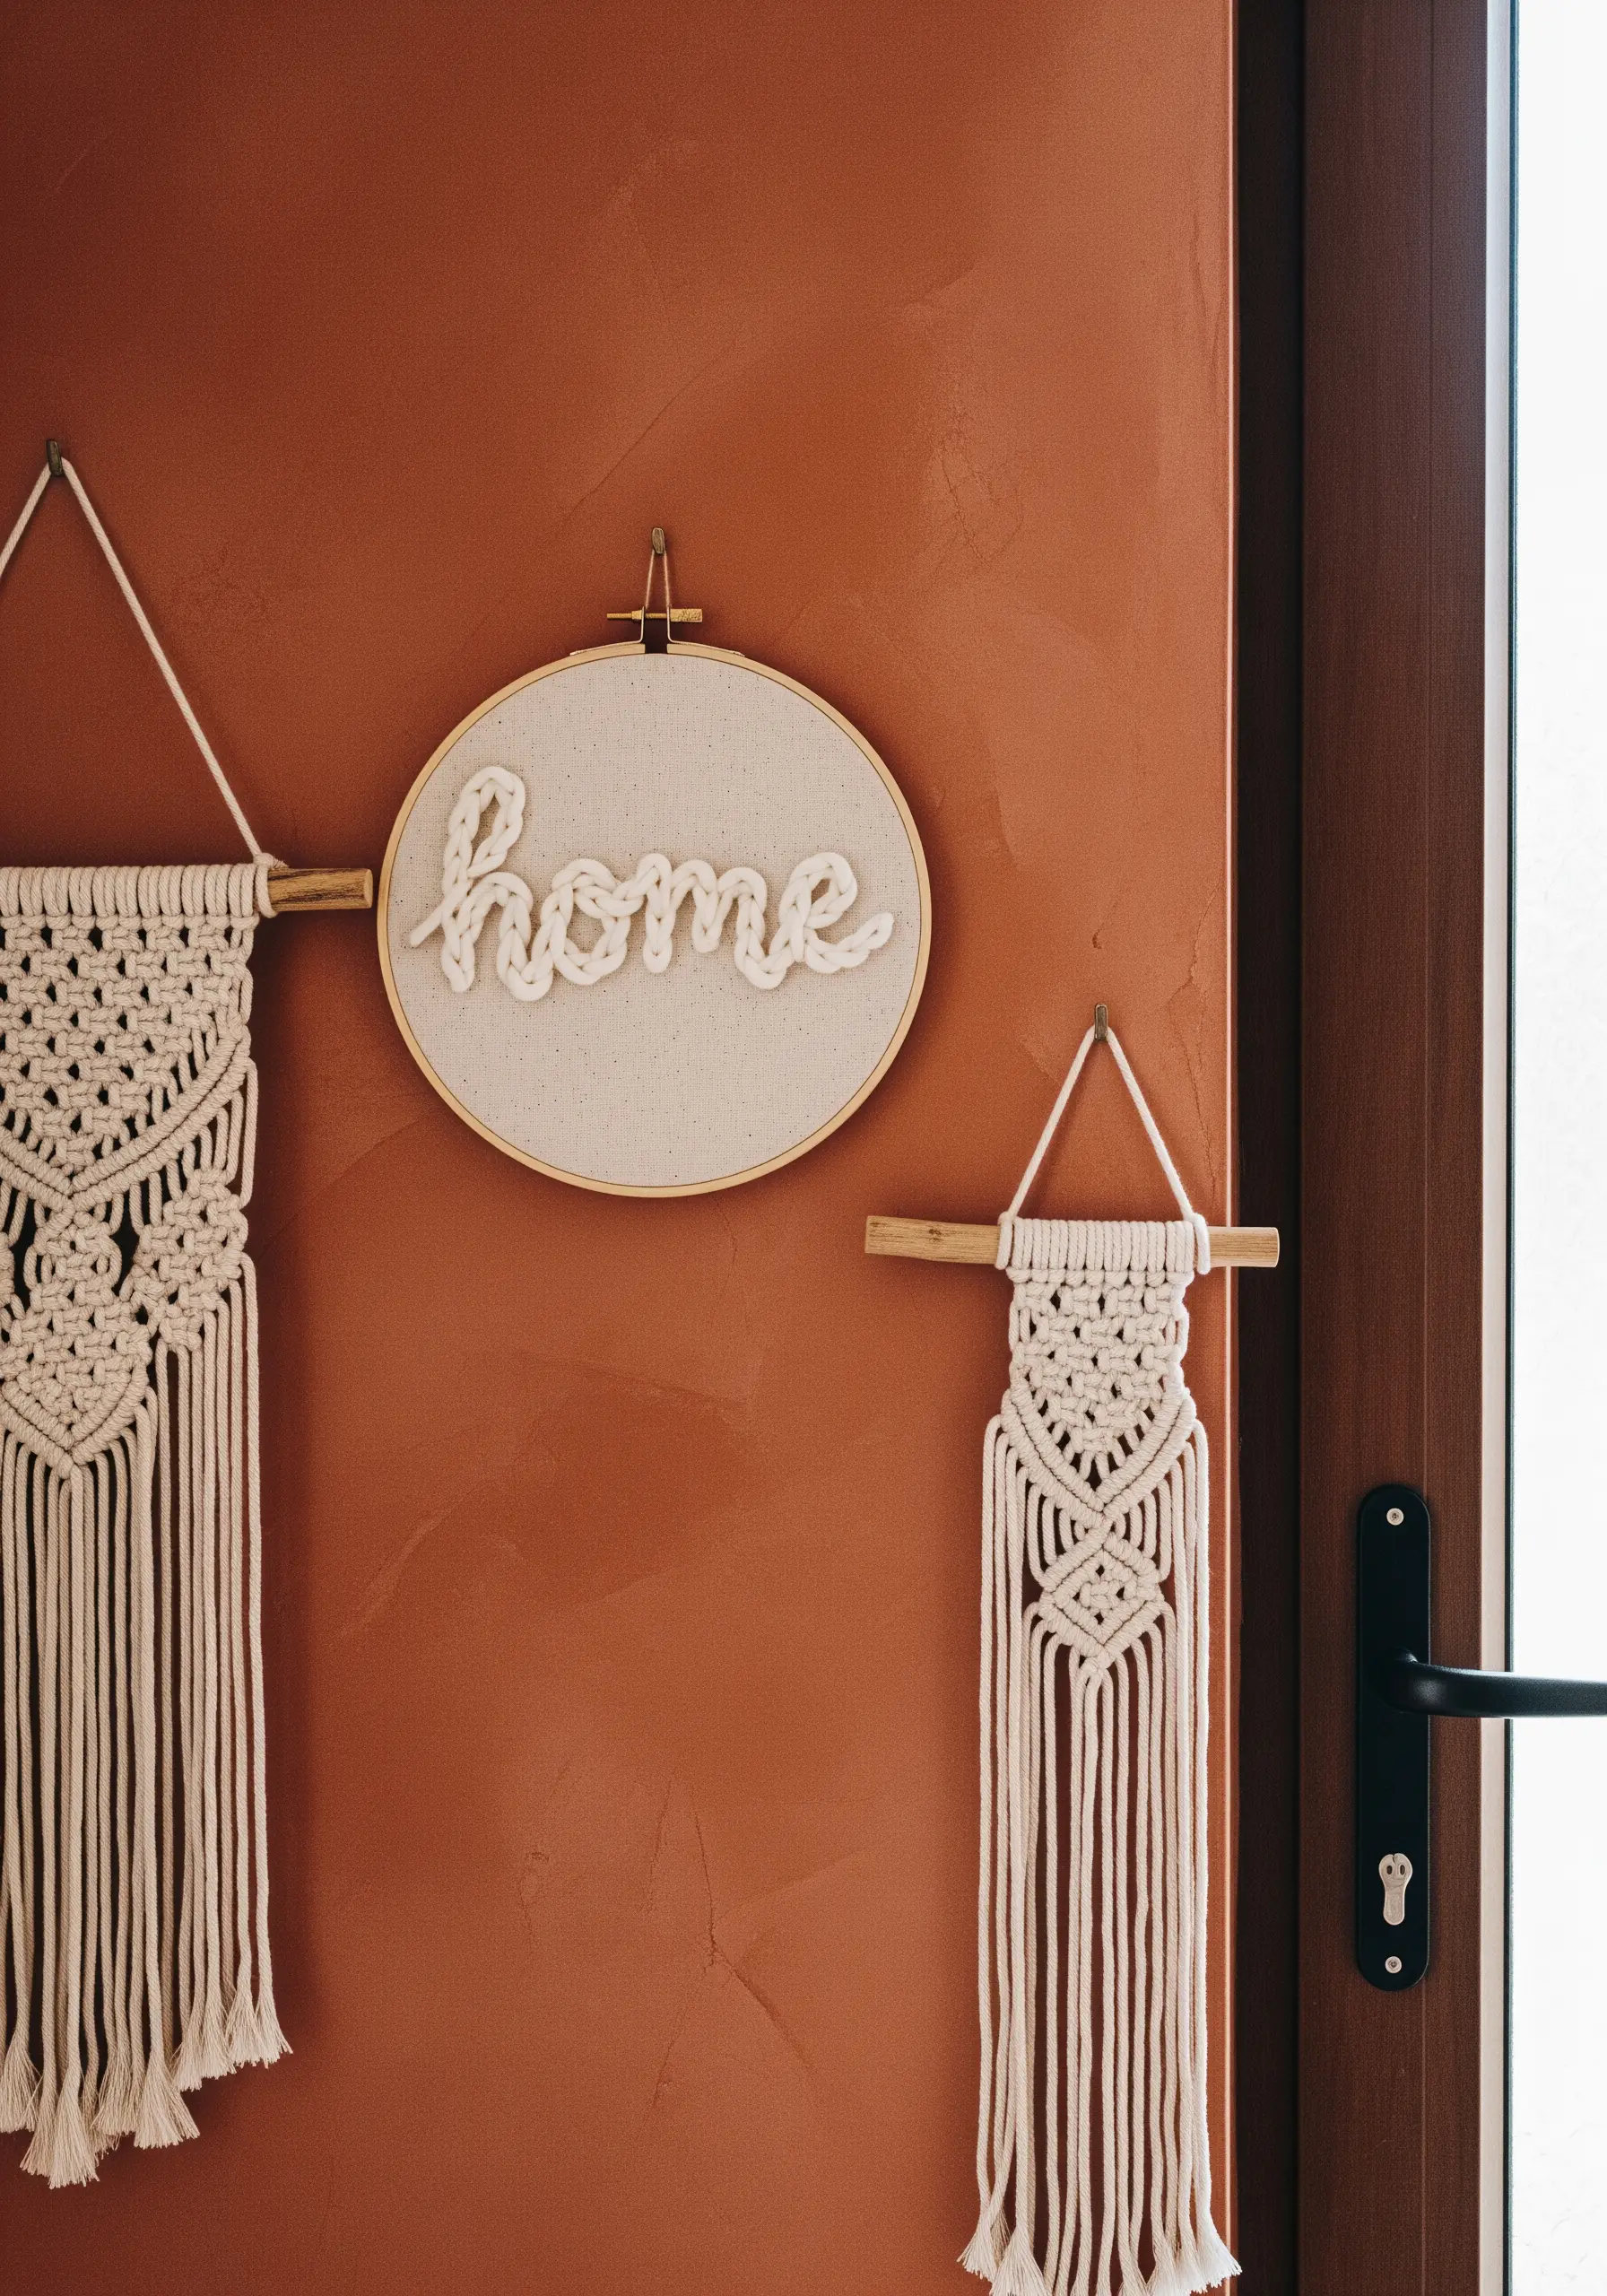
To create this chunky, three-dimensional script, use the couching technique.
First, lay down a piece of thick yarn or cord in the shape of your word.
Then, using a single strand of matching embroidery floss, tack the yarn to the fabric with small, evenly spaced stitches.
This method adds instant sculptural texture and is a wonderful way to connect your embroidery with other fiber arts like macrame for a cohesive, boho-inspired look.
6. Whispering Script and Botanical Accents
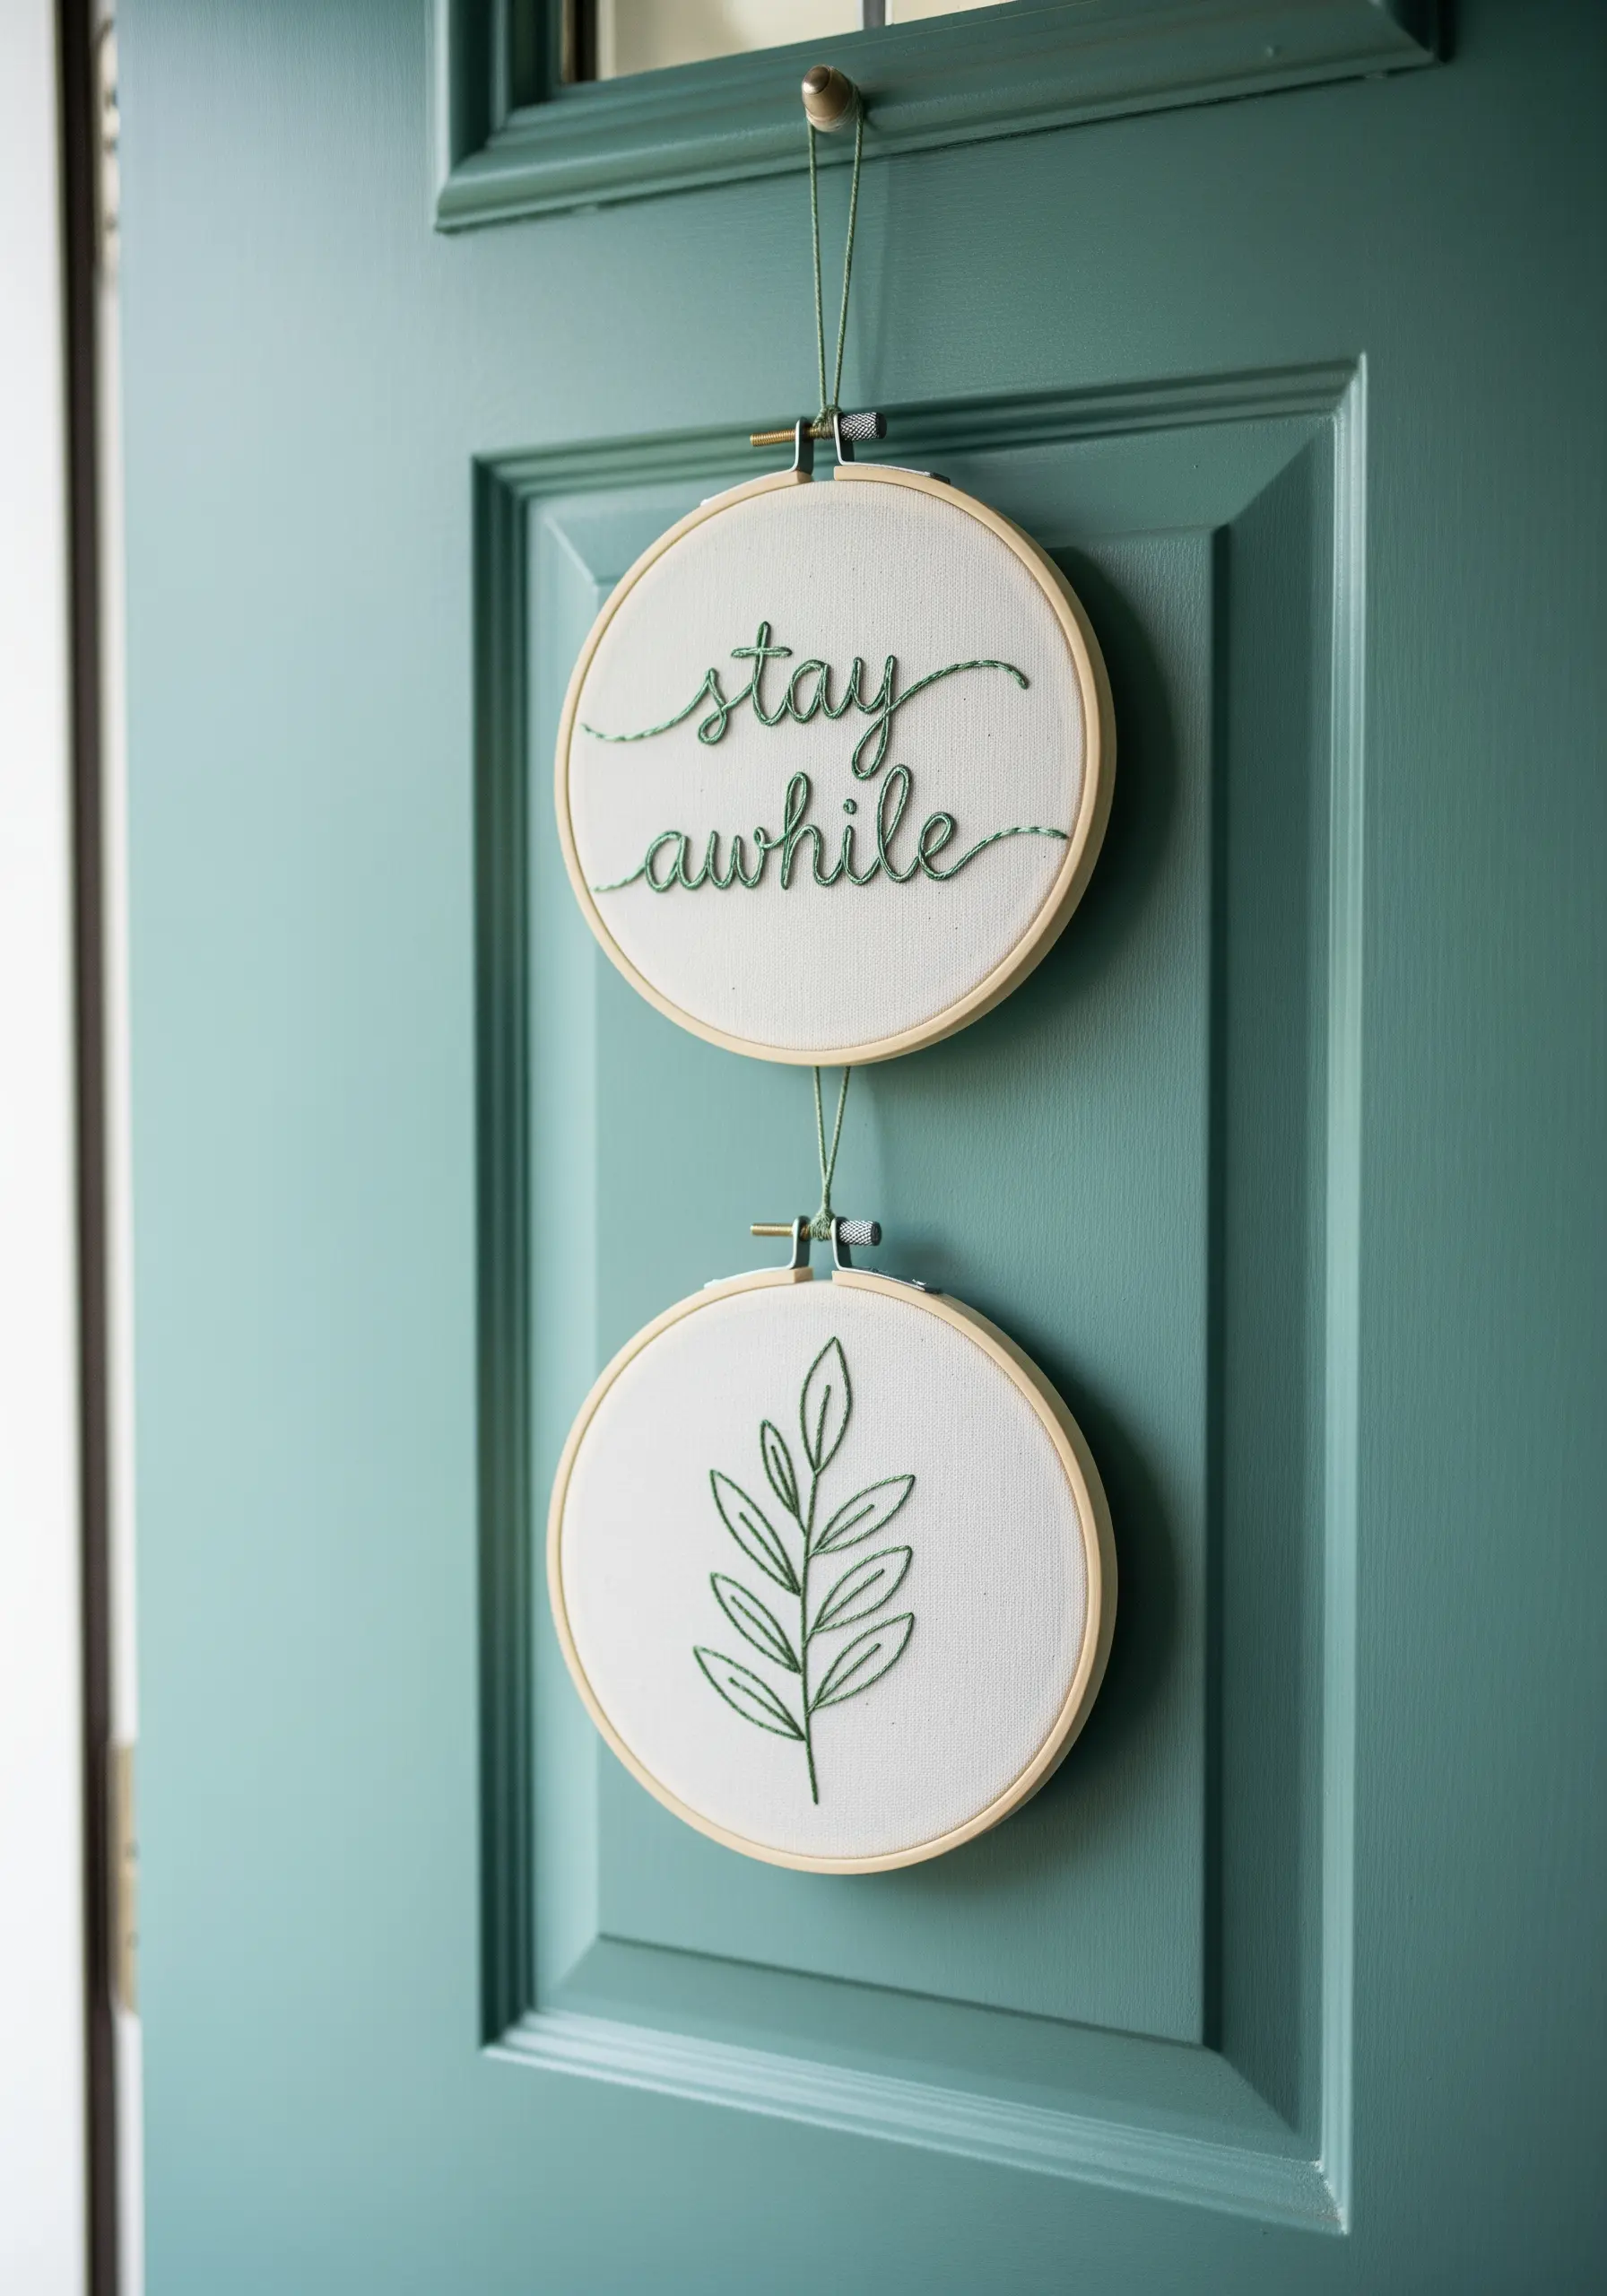
This design masterfully balances delicate text with a simple illustration.
Use a split stitch with just two strands of floss for the script to give it a soft, almost drawn-on quality.
For the leaves, a fishbone stitch is the perfect choice, as it creates the central vein and fills the leaf shape in one fluid motion.
The key to success here is harmony; let the two elements complement each other without competing for attention.
7. Industrial Chic with Stenciled Lettering
Achieve this bold, industrial look by outlining each letter first with a backstitch to establish clean edges.
Then, fill the shapes with rows of chain stitch using all six strands of floss.
Chain stitch creates a texture similar to knitting, offering a woven look that’s more interesting than a flat satin stitch.
The high contrast of bright white thread on black fabric is essential for making this graphic statement.
8. The Power of Understated Typography
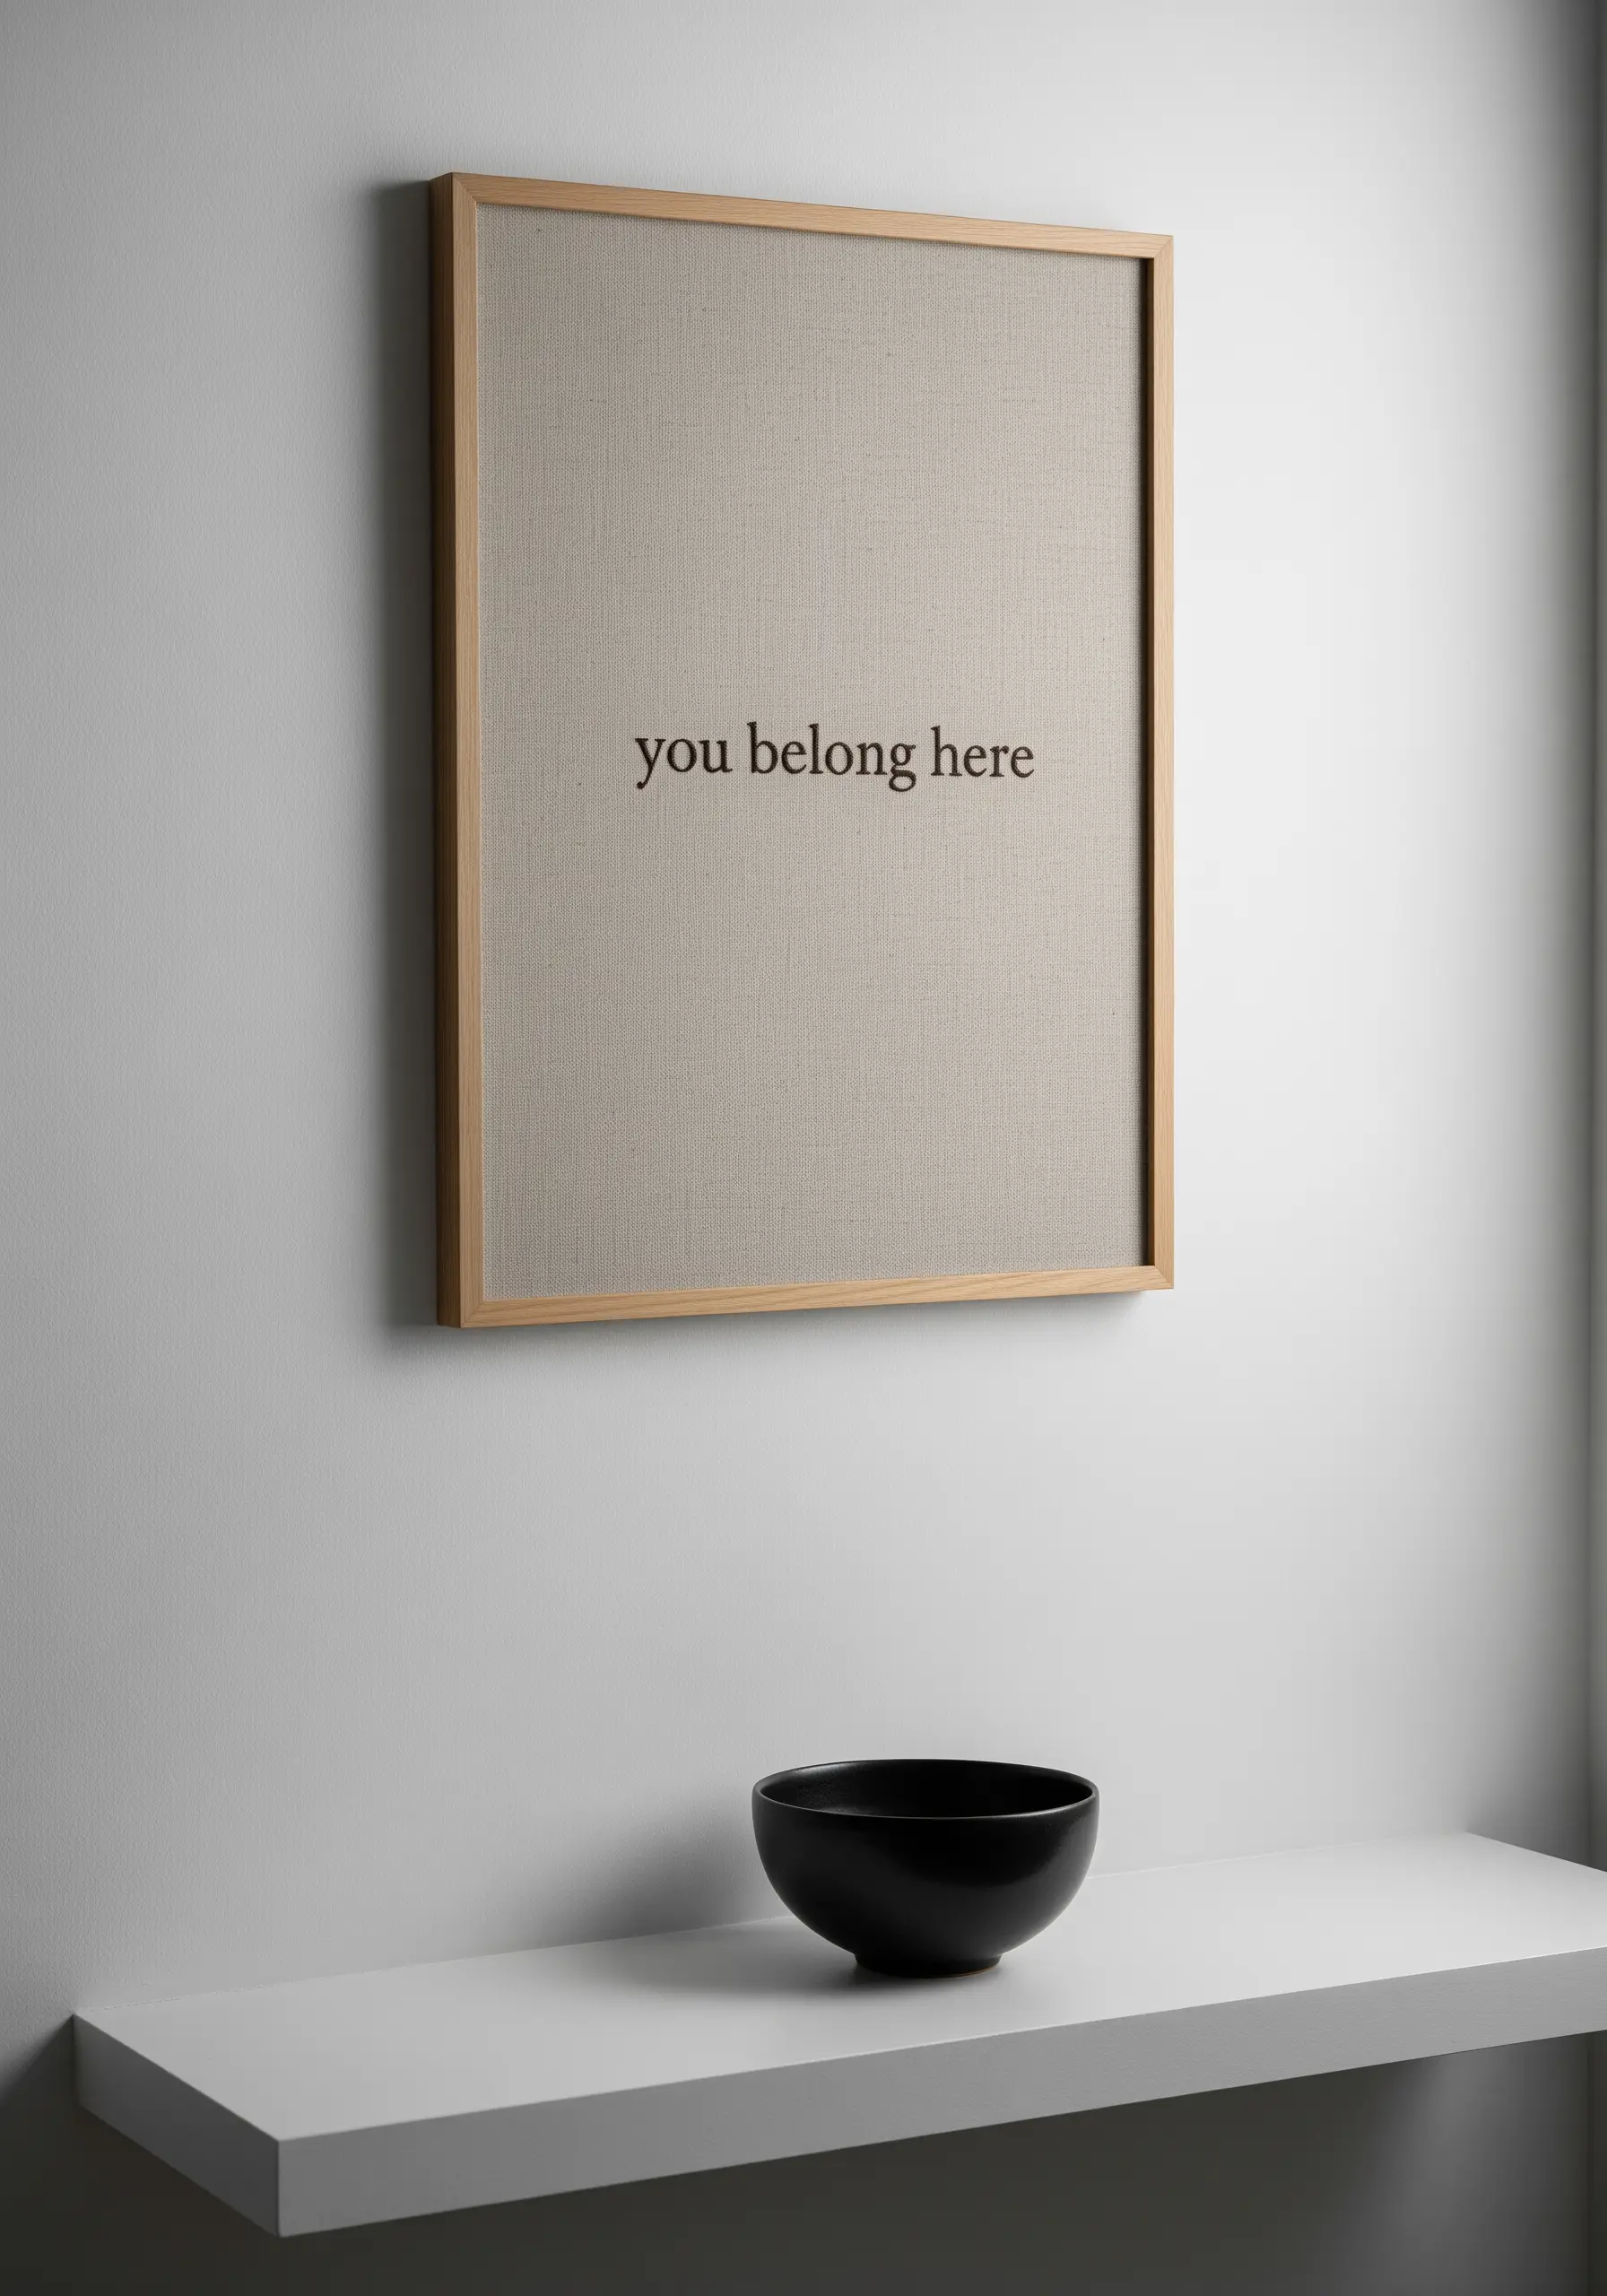
Here, the impact is created through restraint.
Choose a thread just a few shades darker than your linen for a subtle, tone-on-tone effect.
Use a single strand of floss and a precise, tiny backstitch to render the simple font.
The quietness of the stitching forces the viewer to slow down and read, making the message feel more intimate and sincere.
This is proof that embroidery doesn’t need to shout to be heard.
9. Layered Textures with Fabric Appliqué
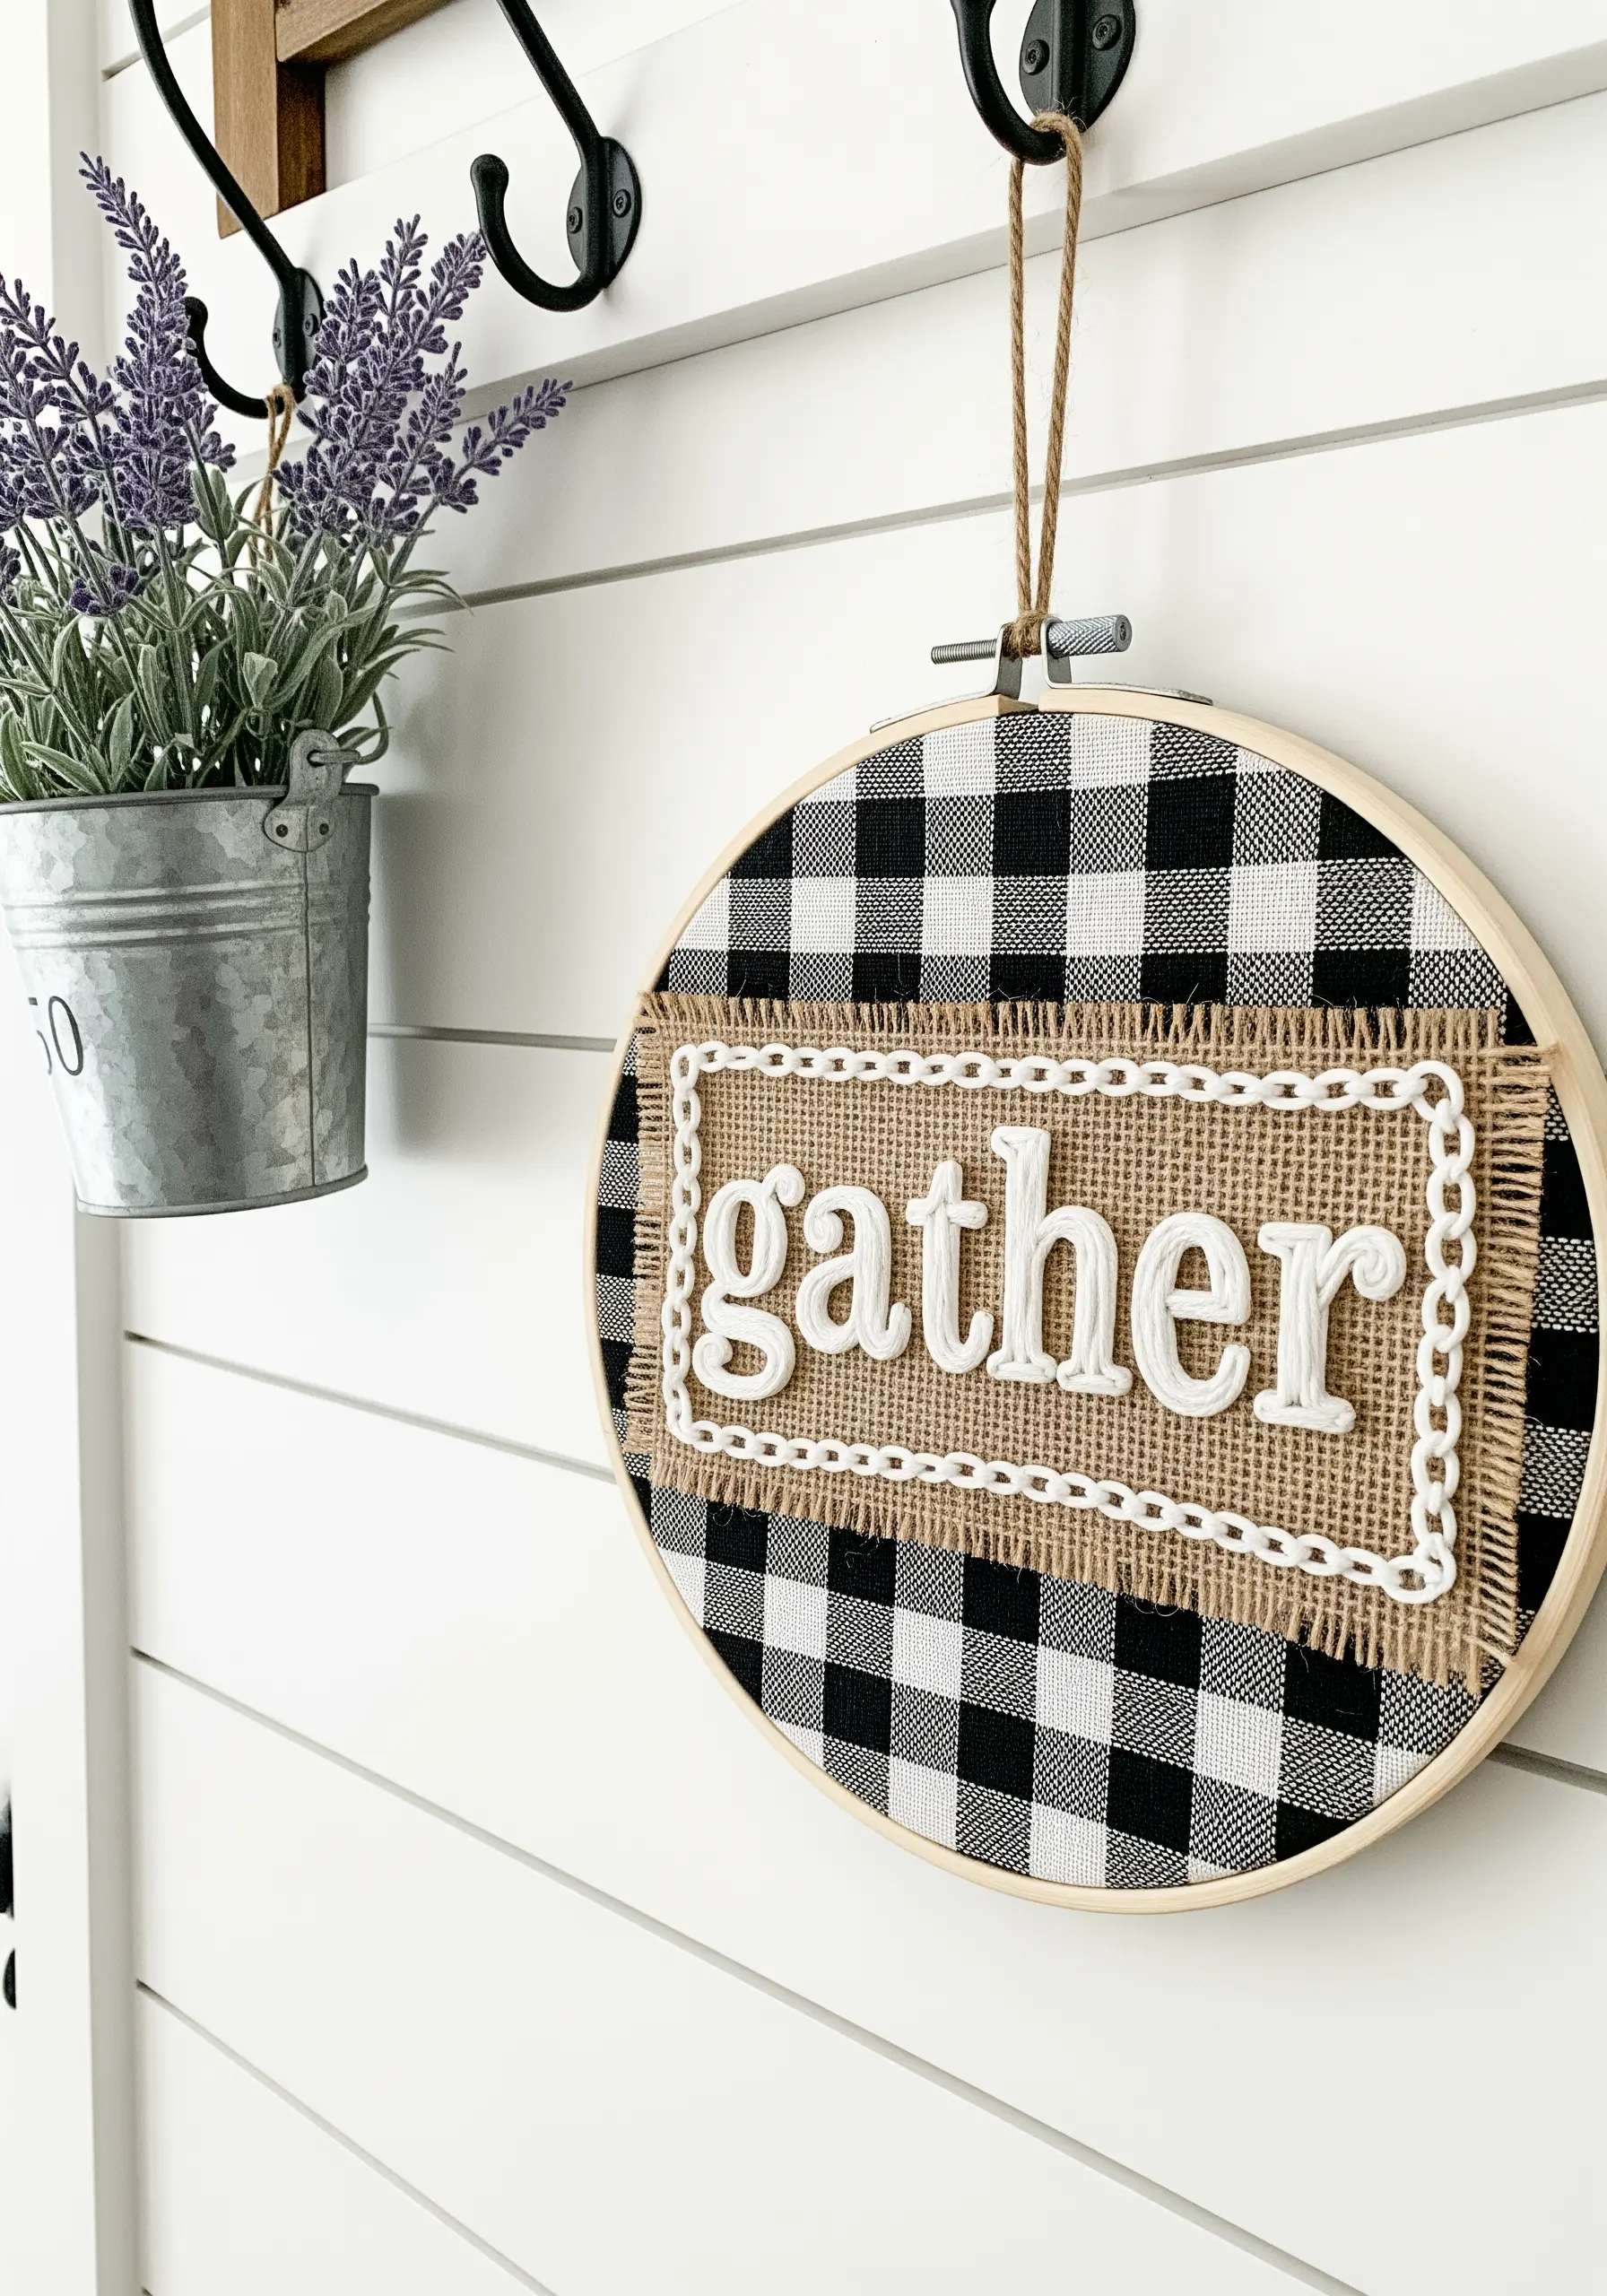
Build depth and rustic charm by layering different textiles.
Start with your base fabric in the hoop, then appliqué a smaller piece of burlap on top, securing it with a simple running stitch border.
The word itself is created by couching thick white yarn for a 3D effect, while the chain stitch border adds a final decorative frame.
This mixed-media approach turns a simple hoop into a rich, tactile piece.
10. Retro Color-Blocking with Satin Stitch
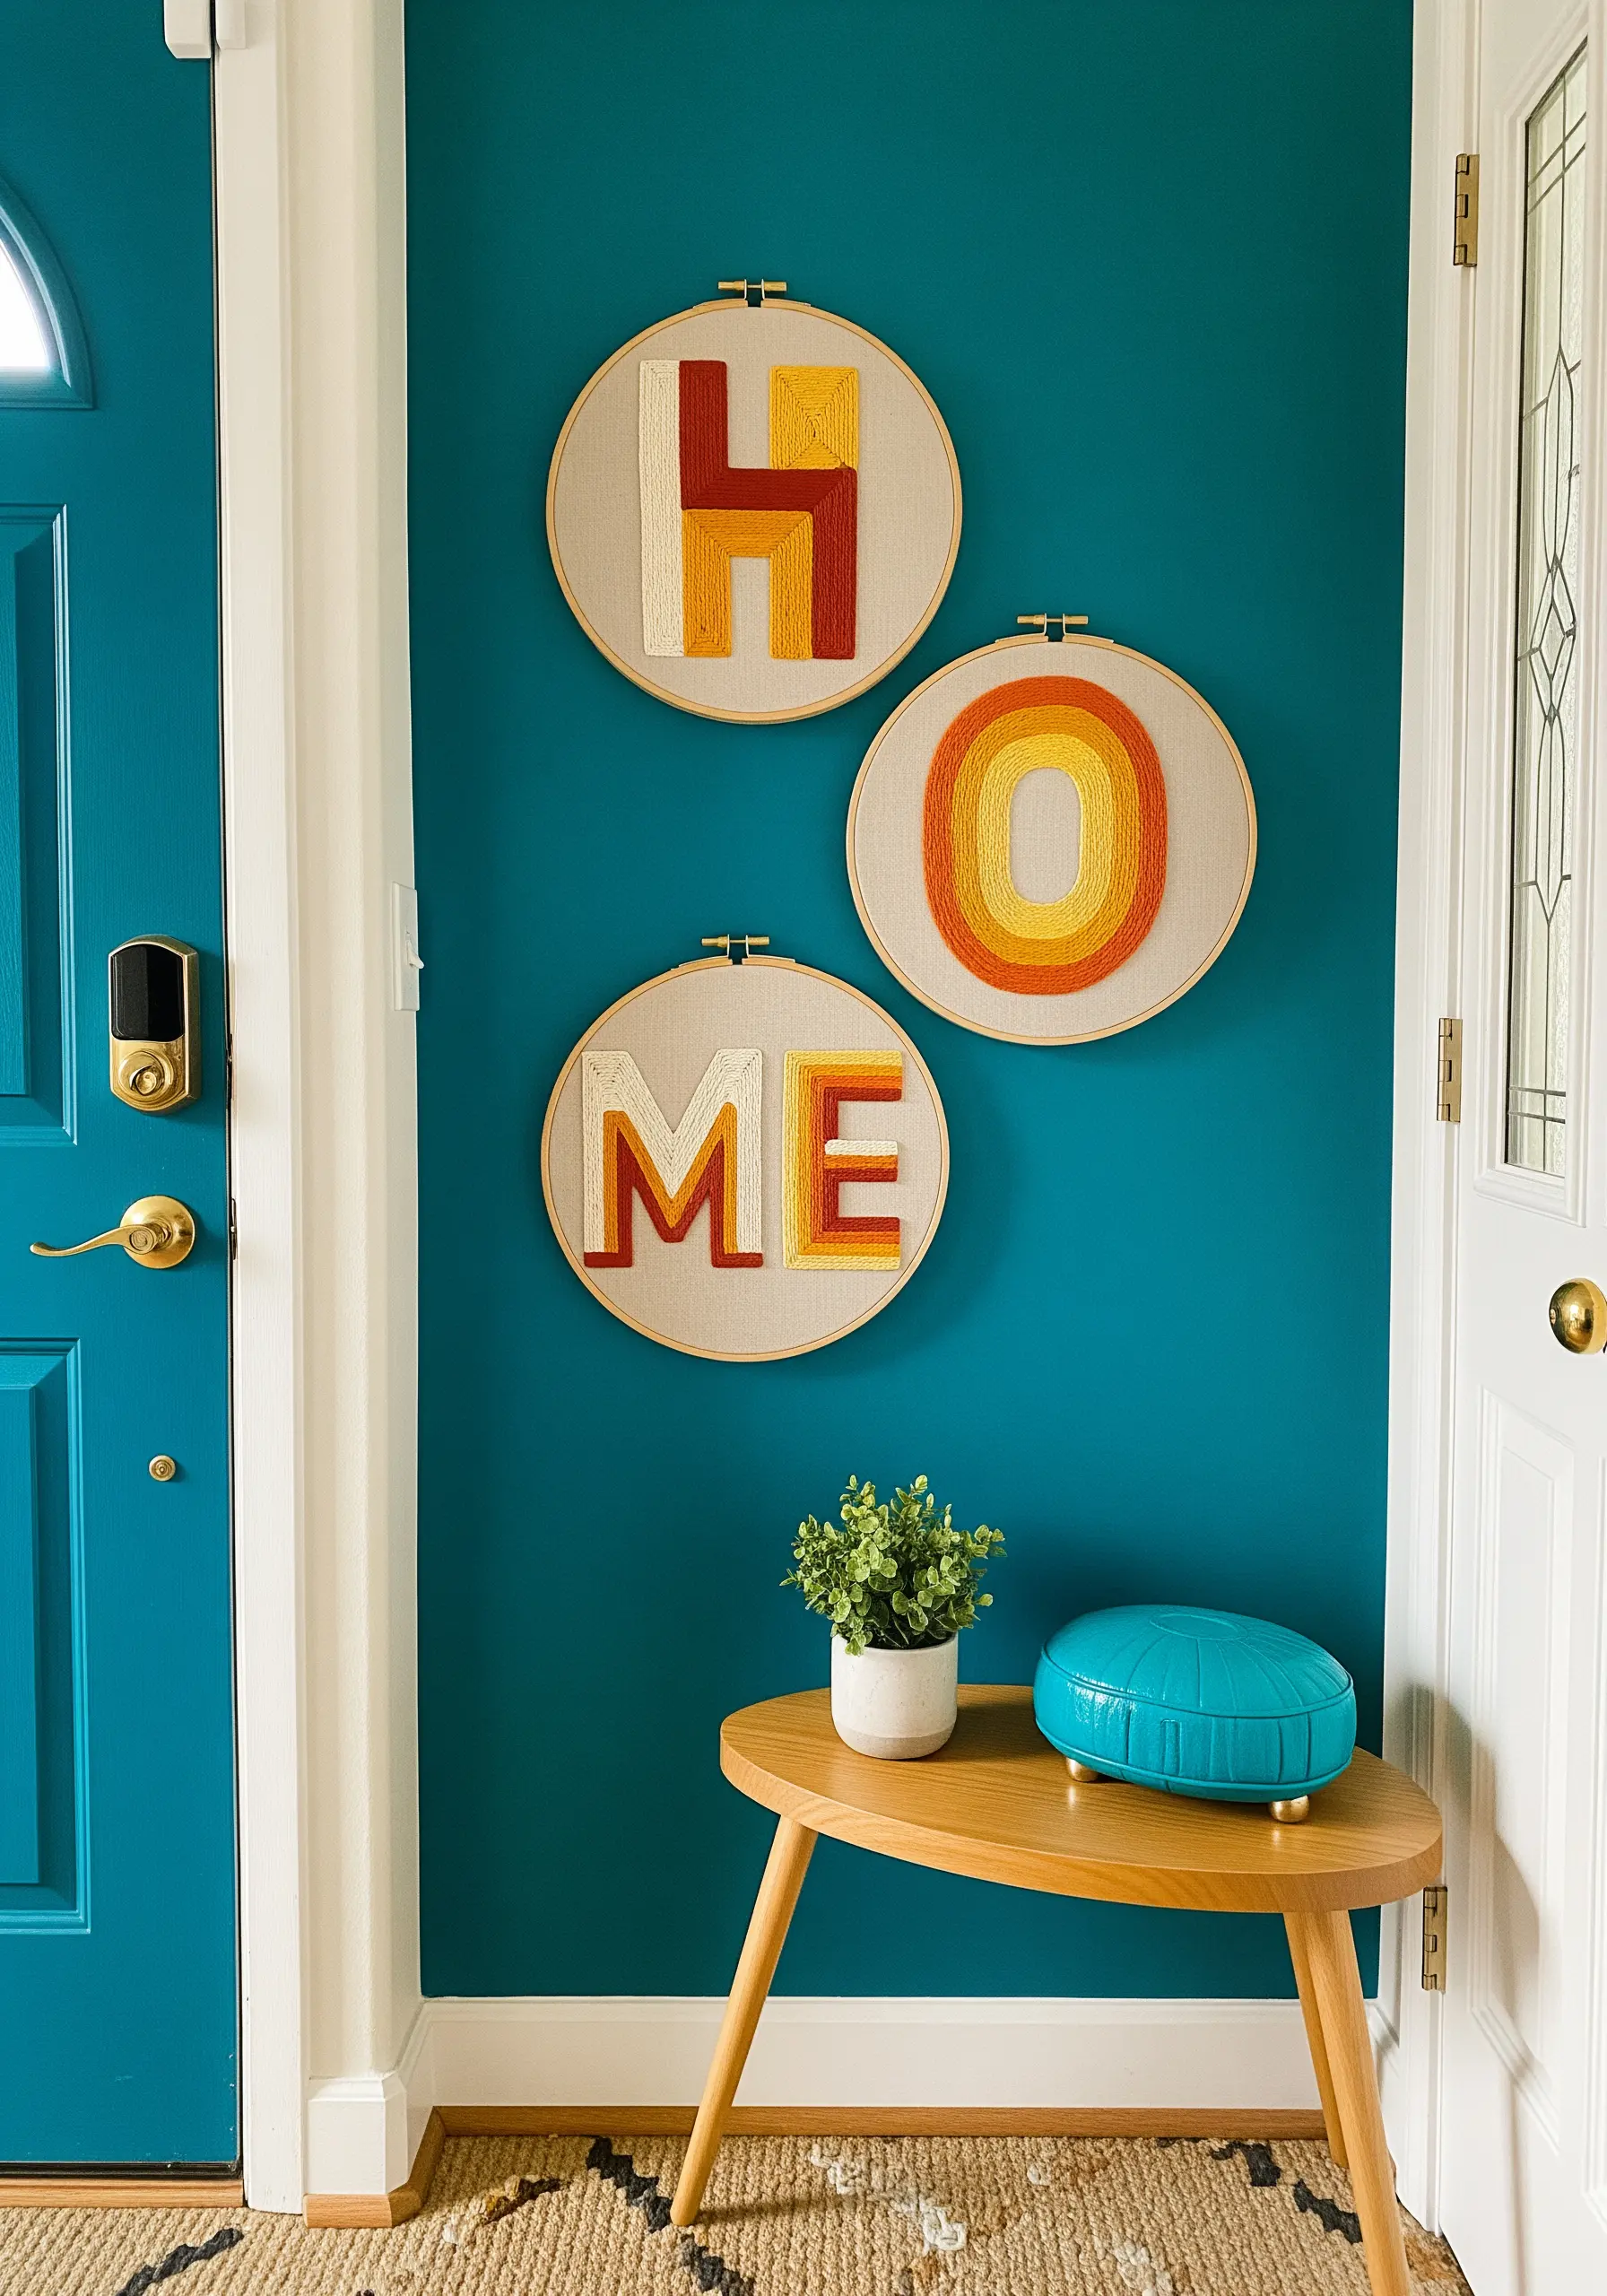
To keep these satin-stitched blocks clean and sharp, treat each color section as its own small shape.
Complete one colored block before moving to the next, ensuring your stitches lie flat and parallel.
A split-stitch outline for each shape will give you a crisp edge to stitch against.
Using a bold, retro color-blocking embroidery pattern across multiple hoops creates a dynamic and cohesive installation for a larger entryway wall.
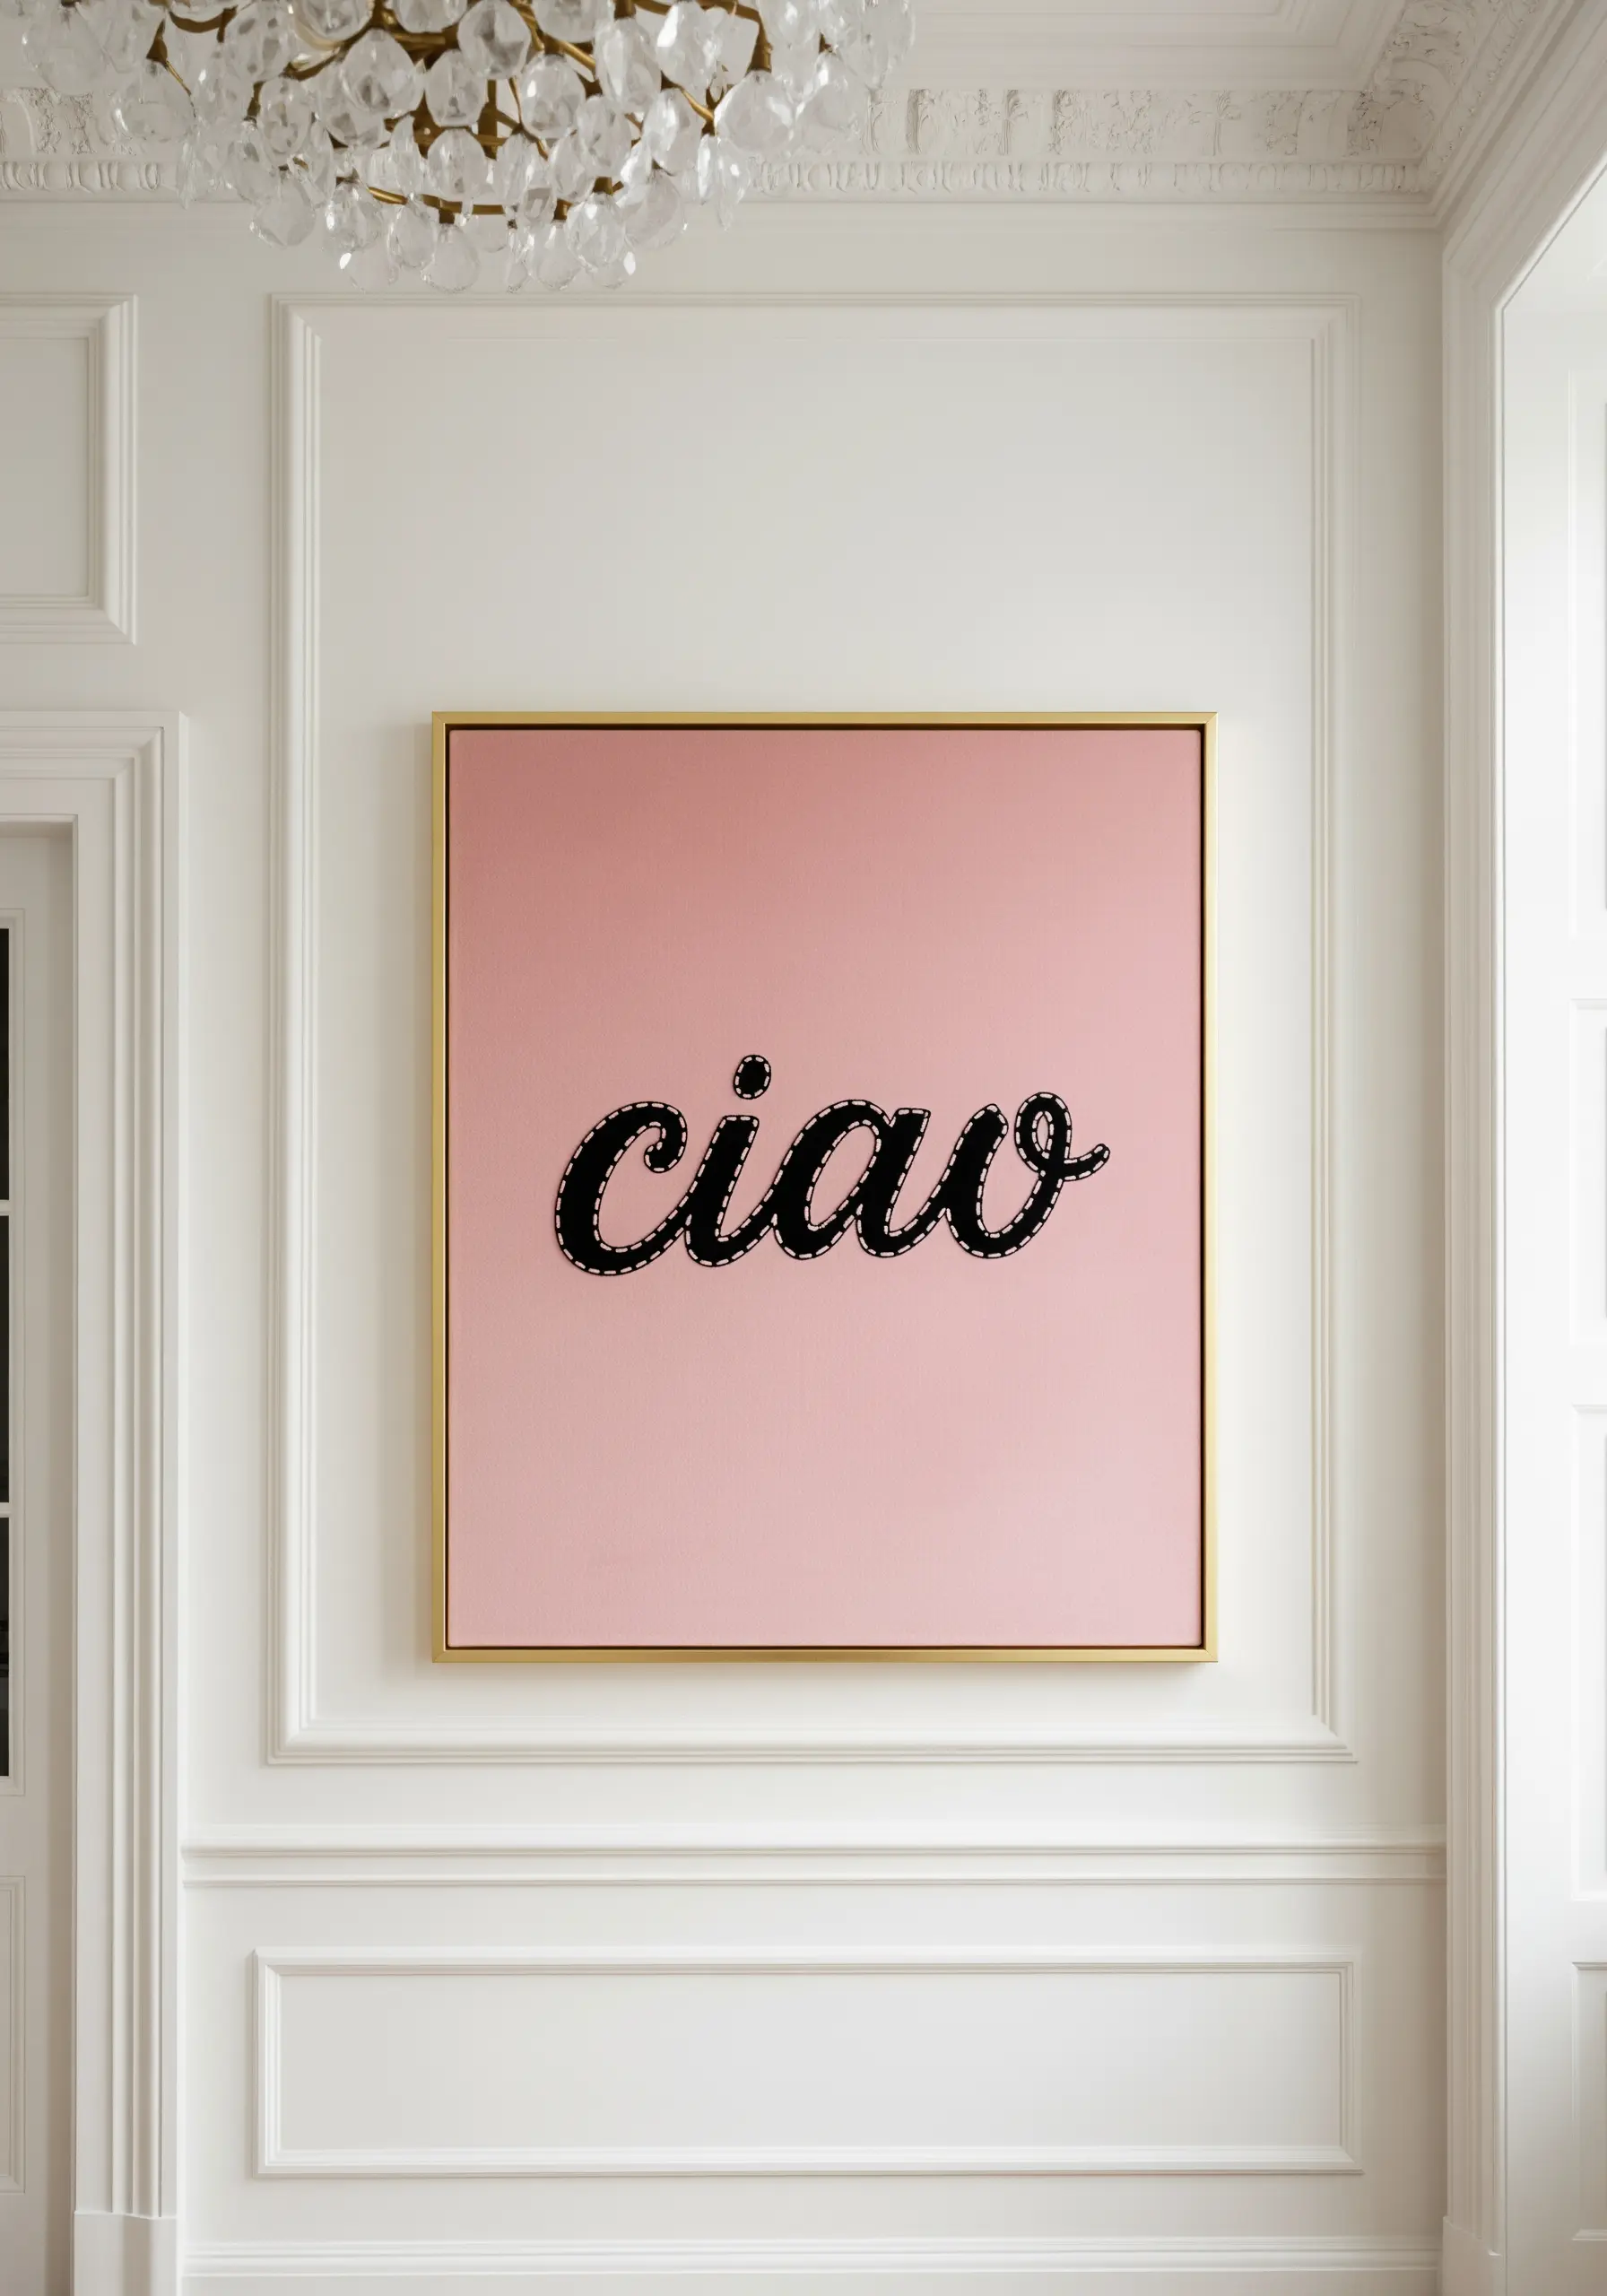
11. Monochromatic Elegance with Fine Script

A high-end, sophisticated look is achieved here through a subtle, monochromatic palette.
Select a thread color that is only a few shades lighter than your fabric.
Use a whipped backstitch with two strands of floss; this technique creates a smooth, raised line that looks like a single, elegant cord and catches the light beautifully.
Finishing the piece in a contrasting black hoop provides a modern, graphic frame that makes the subtle stitching pop.
12. Watercolor Script with Thread Blending
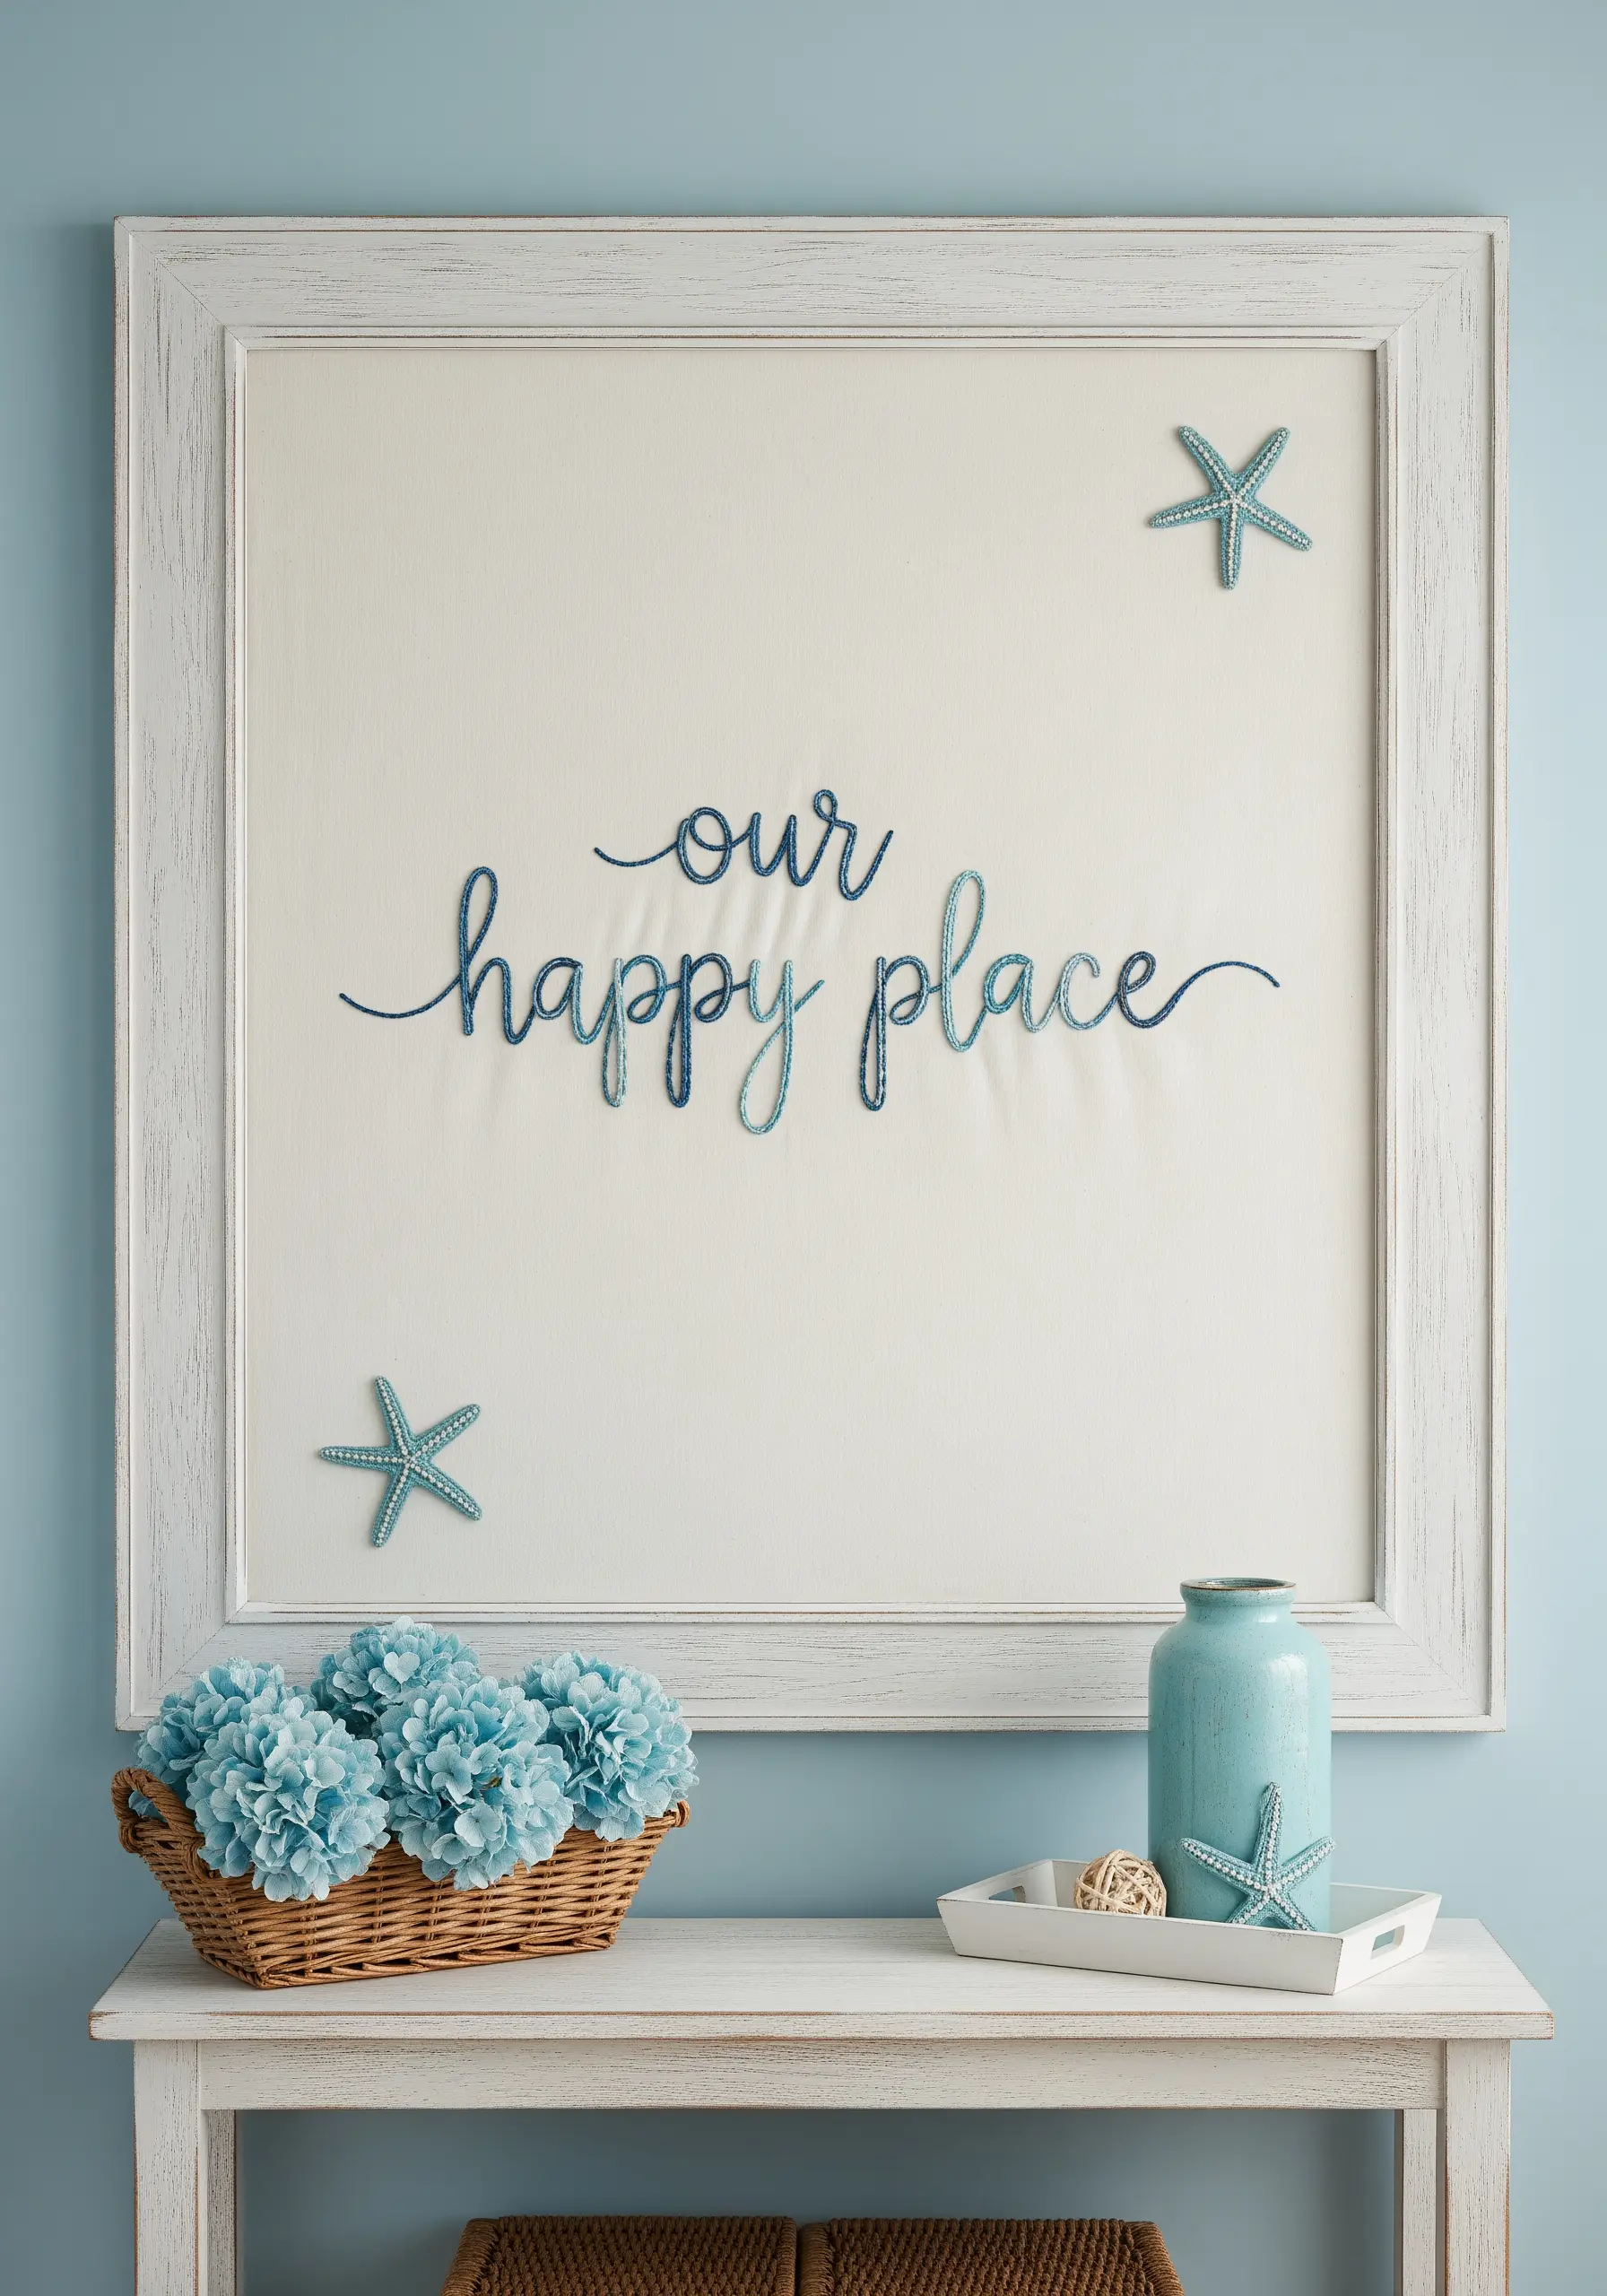
You can create a beautiful, soft ombré effect without needing dozens of thread colors.
Stitch the first word using two strands of the darkest blue.
For the middle word, thread your needle with one strand of the dark blue and one strand of the lighter blue.
Finish the final word with two strands of the lightest blue.
This simple blending technique creates a seamless, watercolor-like gradient that adds depth and artistry to your lettering.
13. Graphic Pop with Shadowed Outlines
This clever 3D effect is surprisingly easy to achieve.
First, stitch your main letters using a thick, padded satin stitch with white floss to give them dimension.
Then, using a single strand of black floss, add a simple backstitch outline along the bottom and right edges of each letter.
This “drop shadow” instantly makes the letters appear to lift off the fabric, creating a modern, graphic look.
14. Vibrant Gradients with Concentric Satin Stitch
For a smooth, vibrant gradient like this, work in concentric rows of satin stitch from the outside in.
Change your thread color every one or two rows to create a seamless transition.
The key to perfect curves is to use shorter satin stitches in the tightest parts of the shape; this allows you to control the angle precisely.
Stitching on black Aida cloth makes every color appear exceptionally vivid and bold.
15. Bold and Playful with a Whipped Chain Stitch
To achieve this satisfyingly chunky, rope-like script, start by creating a foundation of chain stitch along your design lines.
Once complete, go back and whip the chain stitch—passing your needle under each link without piercing the fabric.
Using a contrasting color for the whipping thread can create a candy-cane effect, but using a matching thread, as seen here, makes the line extra thick, smooth, and bold.
16. Rustic Adventure-Themed Lettering
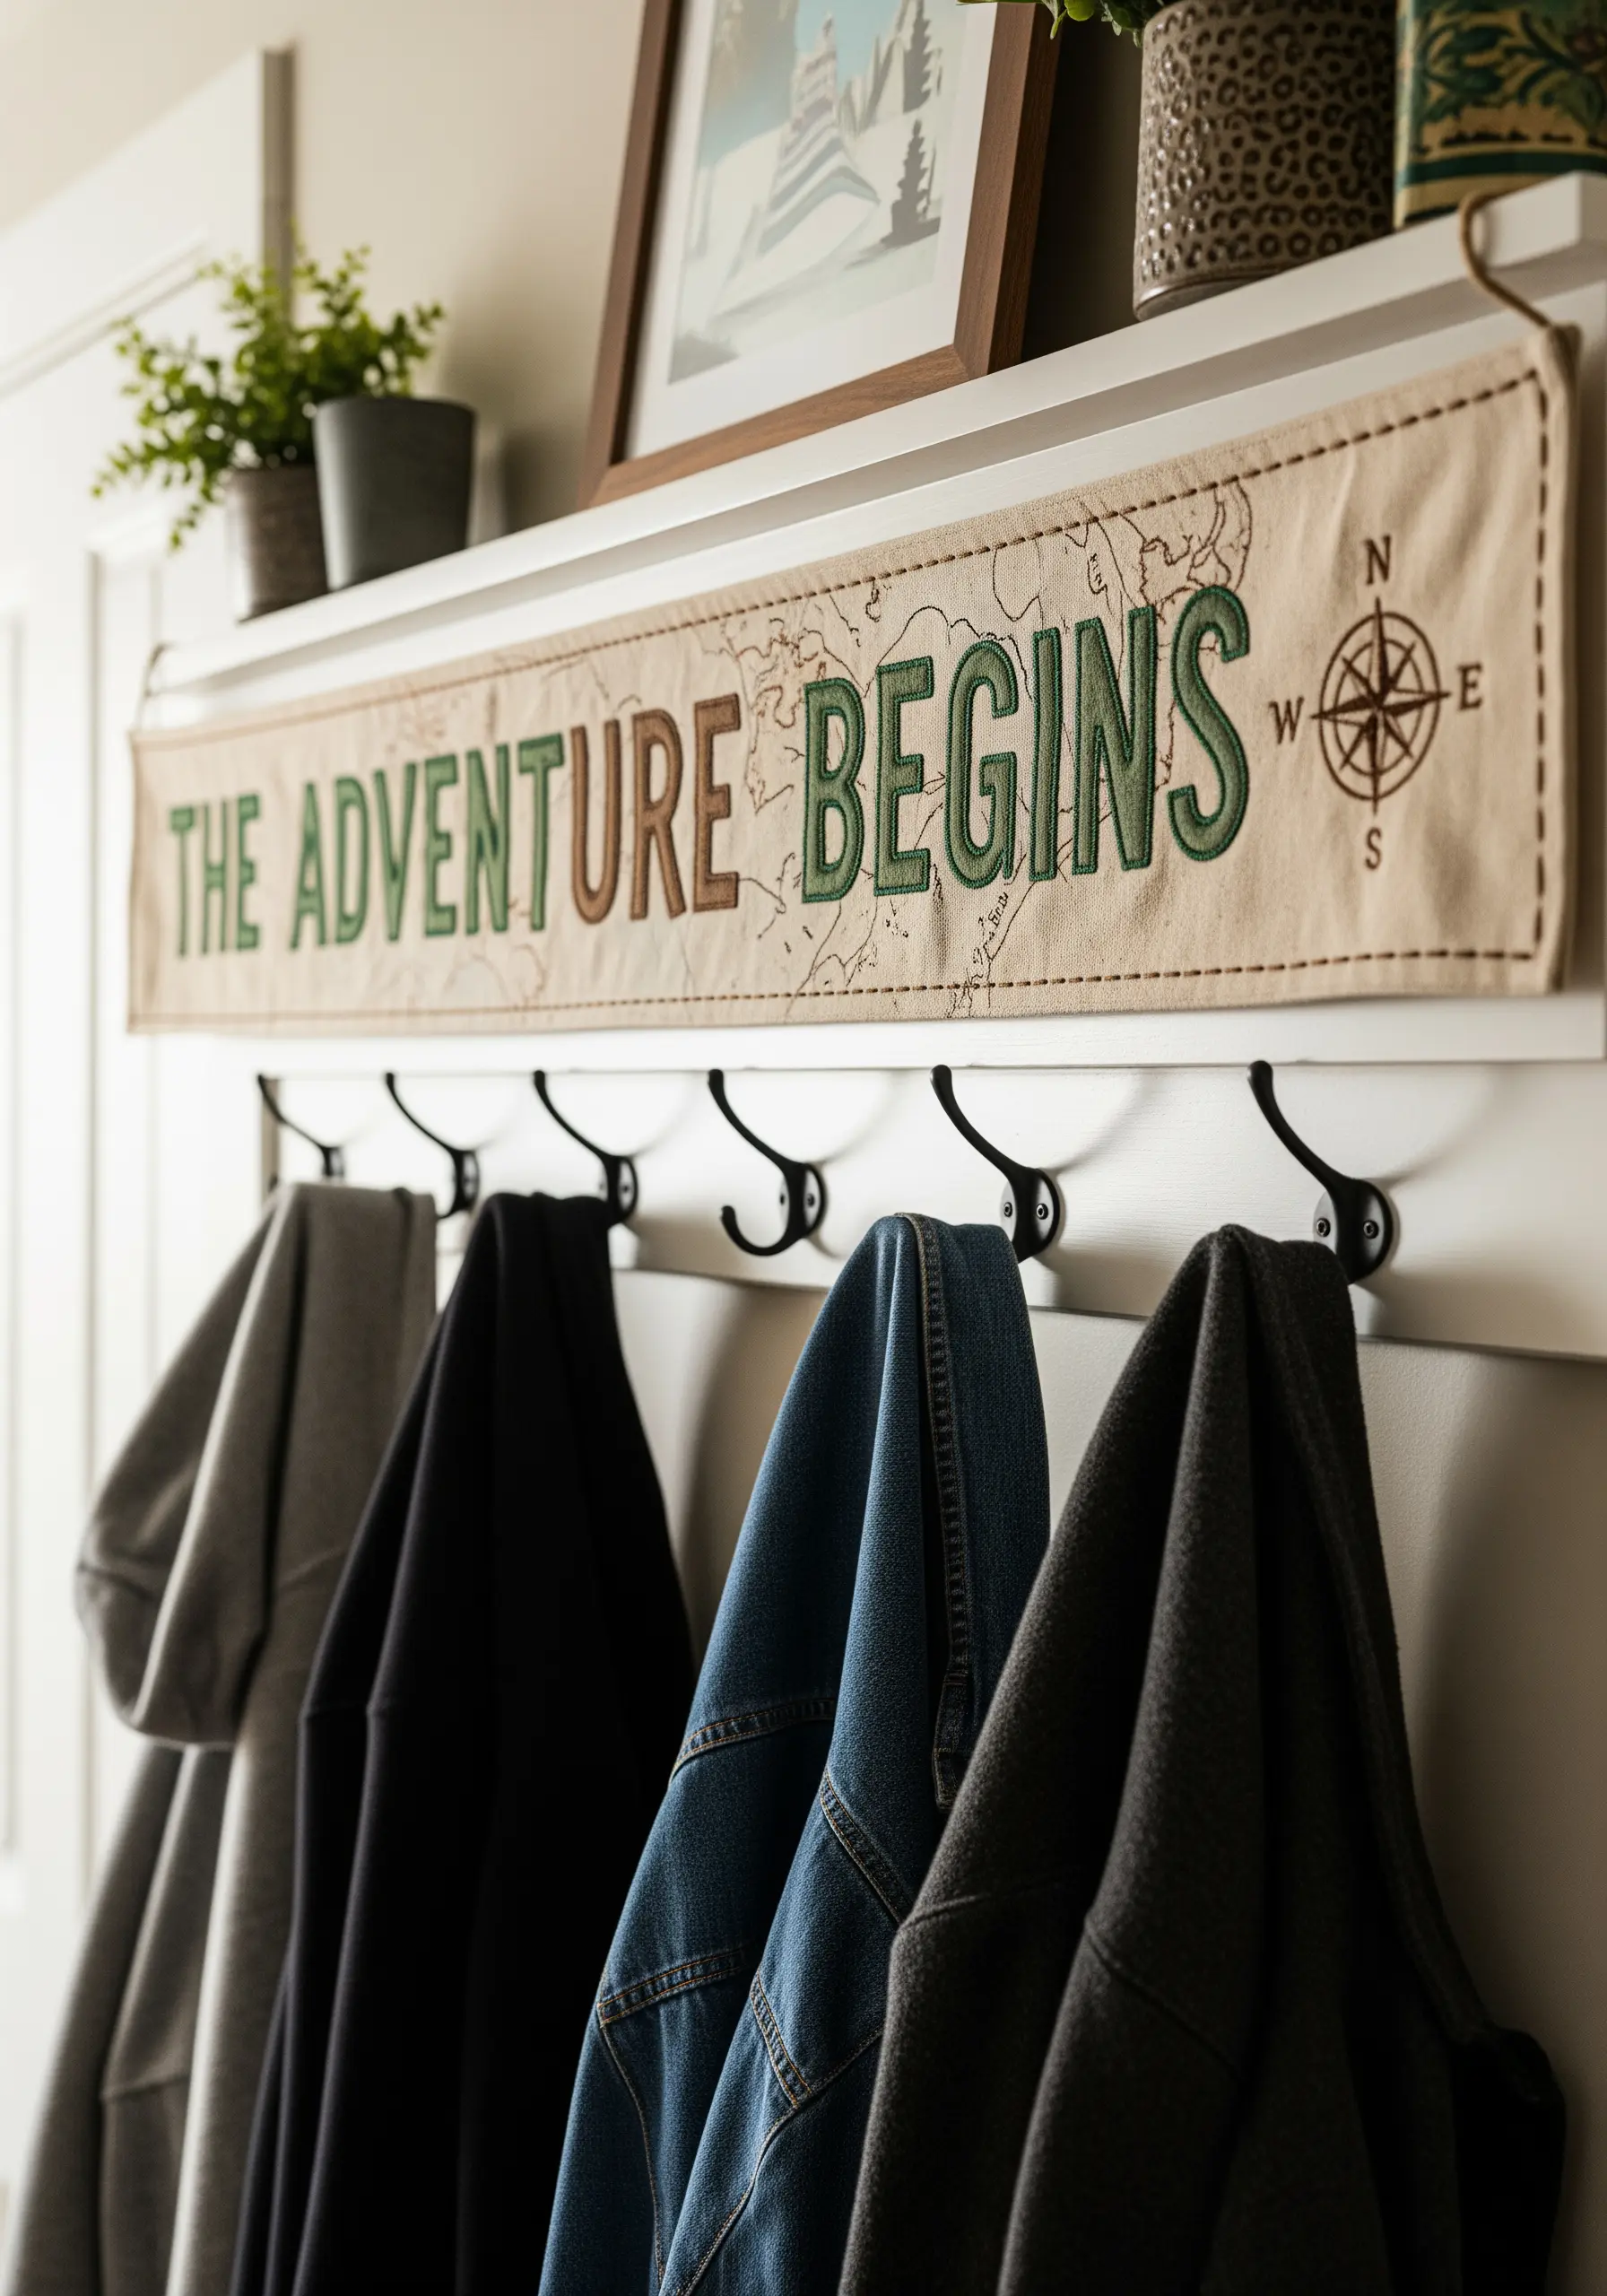
Create visual hierarchy by assigning different stitches to different words.
Make the main word, “BEGINS,” the hero by filling it with a solid satin stitch.
For the secondary text, use a simpler, cleaner backstitch that complements but doesn’t compete.
Using a palette of earth-tone embroidery threads enhances the rustic, adventurous feel, making it perfect for an entryway that leads to the outdoors.
17. Illustrative Typography with Line Art
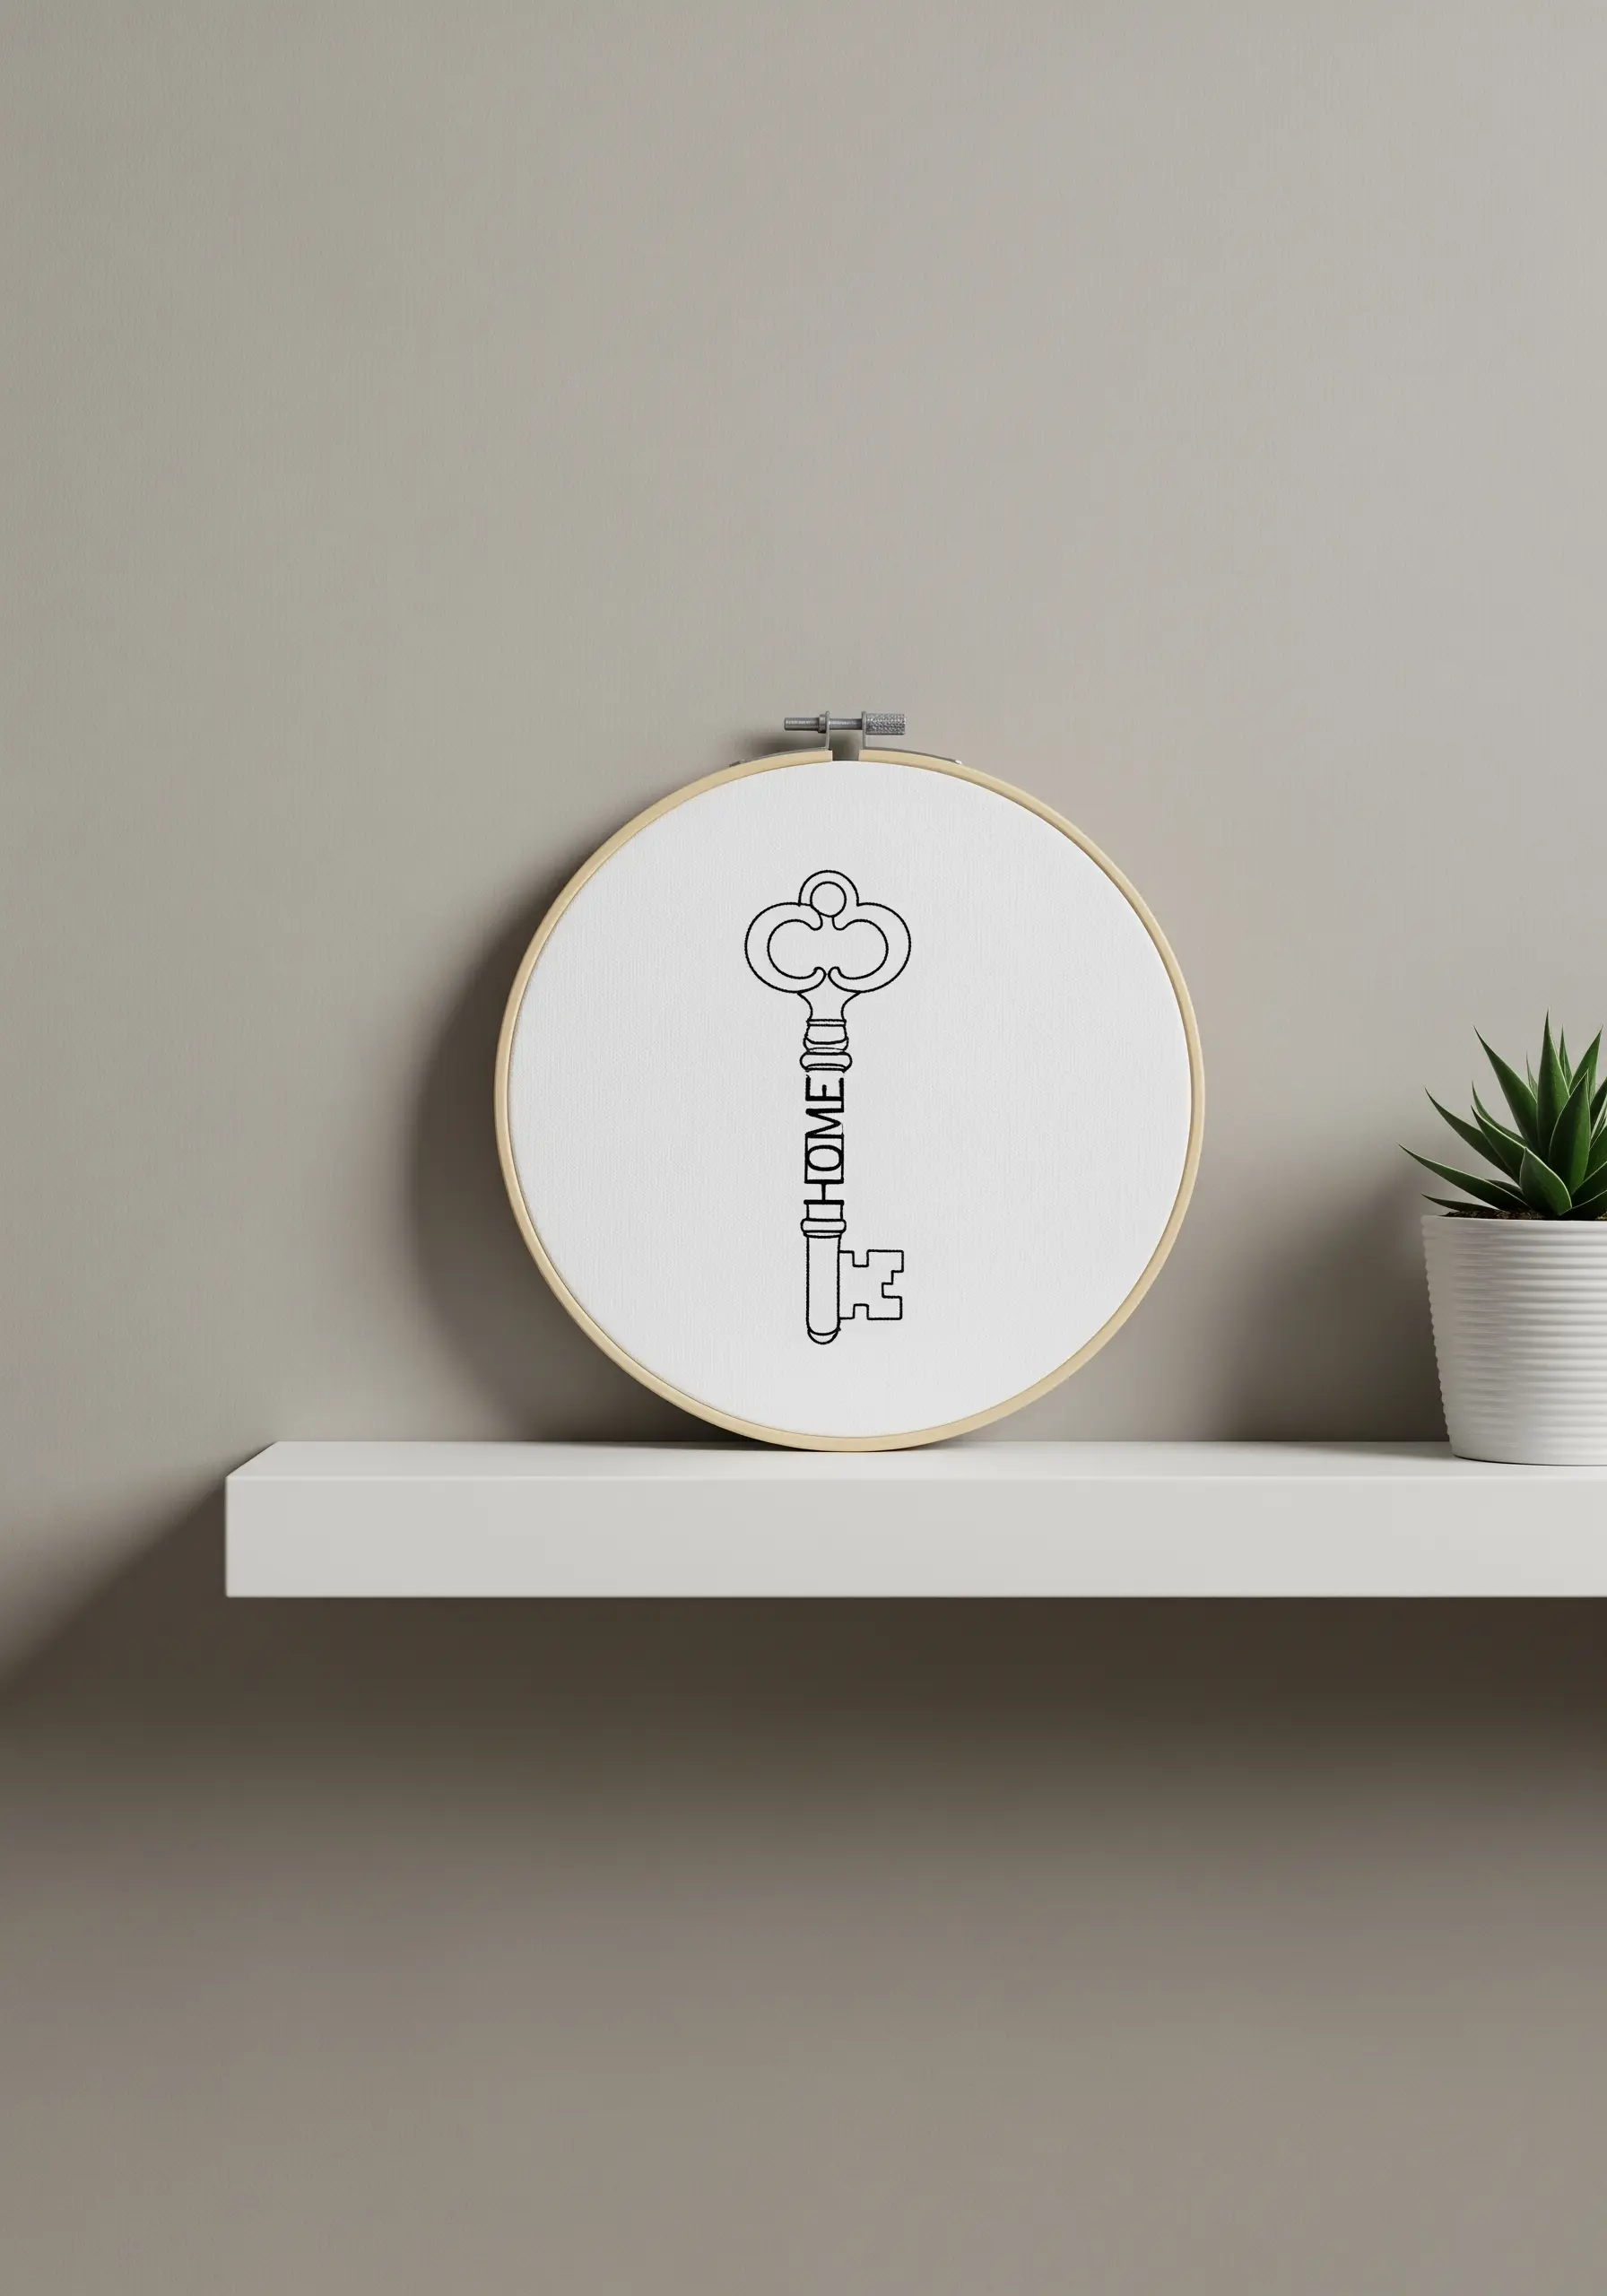
This clever design integrates the word “HOME” directly into the illustration of a key.
The trick to making this work is maintaining a consistent line weight throughout the entire piece.
Use a stem stitch or backstitch with the same number of floss strands (two is ideal) for both the illustration and the text.
This ensures the word feels like a thoughtful, intentional part of the drawing, not a separate element.
18. Playful Accents with Scattered French Knots
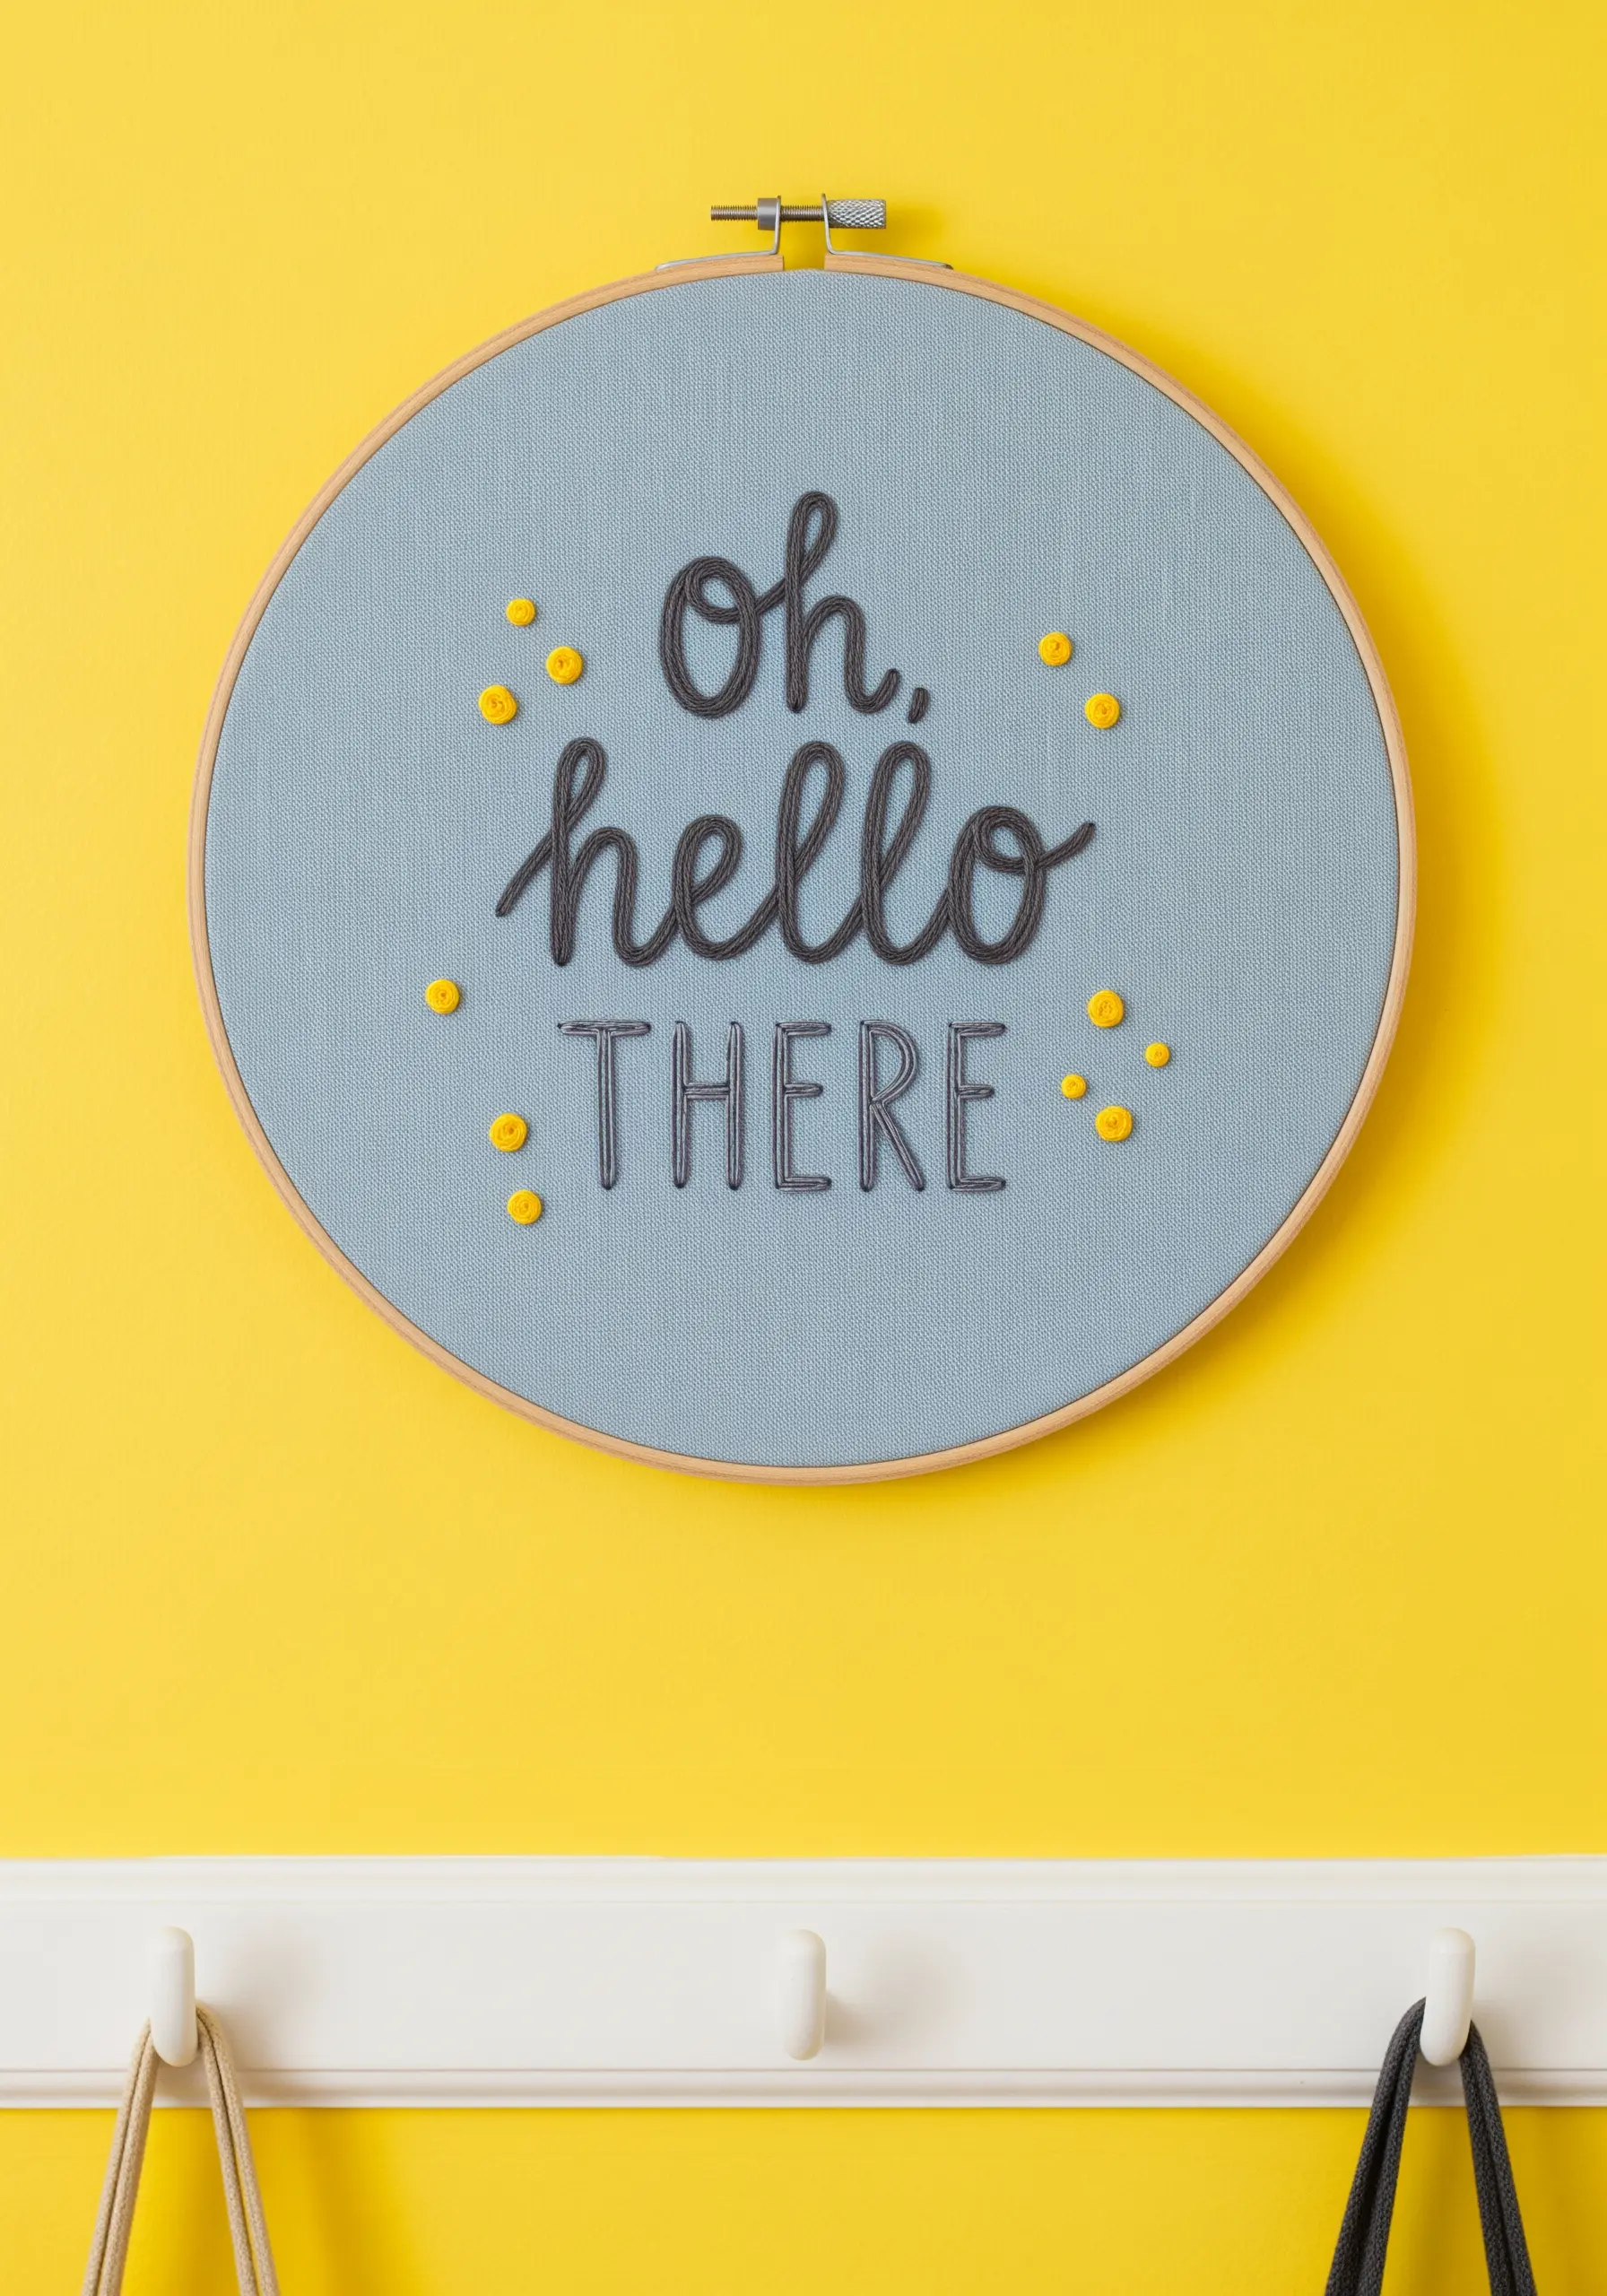
Breathe life and texture into simple lettering with a sprinkle of French knots.
First, stitch your text using a smooth whipped backstitch for a clean, rope-like line.
Then, add scattered French knots in a bright, contrasting color.
Create visual interest by varying the size of the knots—wrap the thread once for tiny dots, twice for medium, and three times for bold, poppy accents.
19. Cohesive Gallery Wall with Scripted Hoops
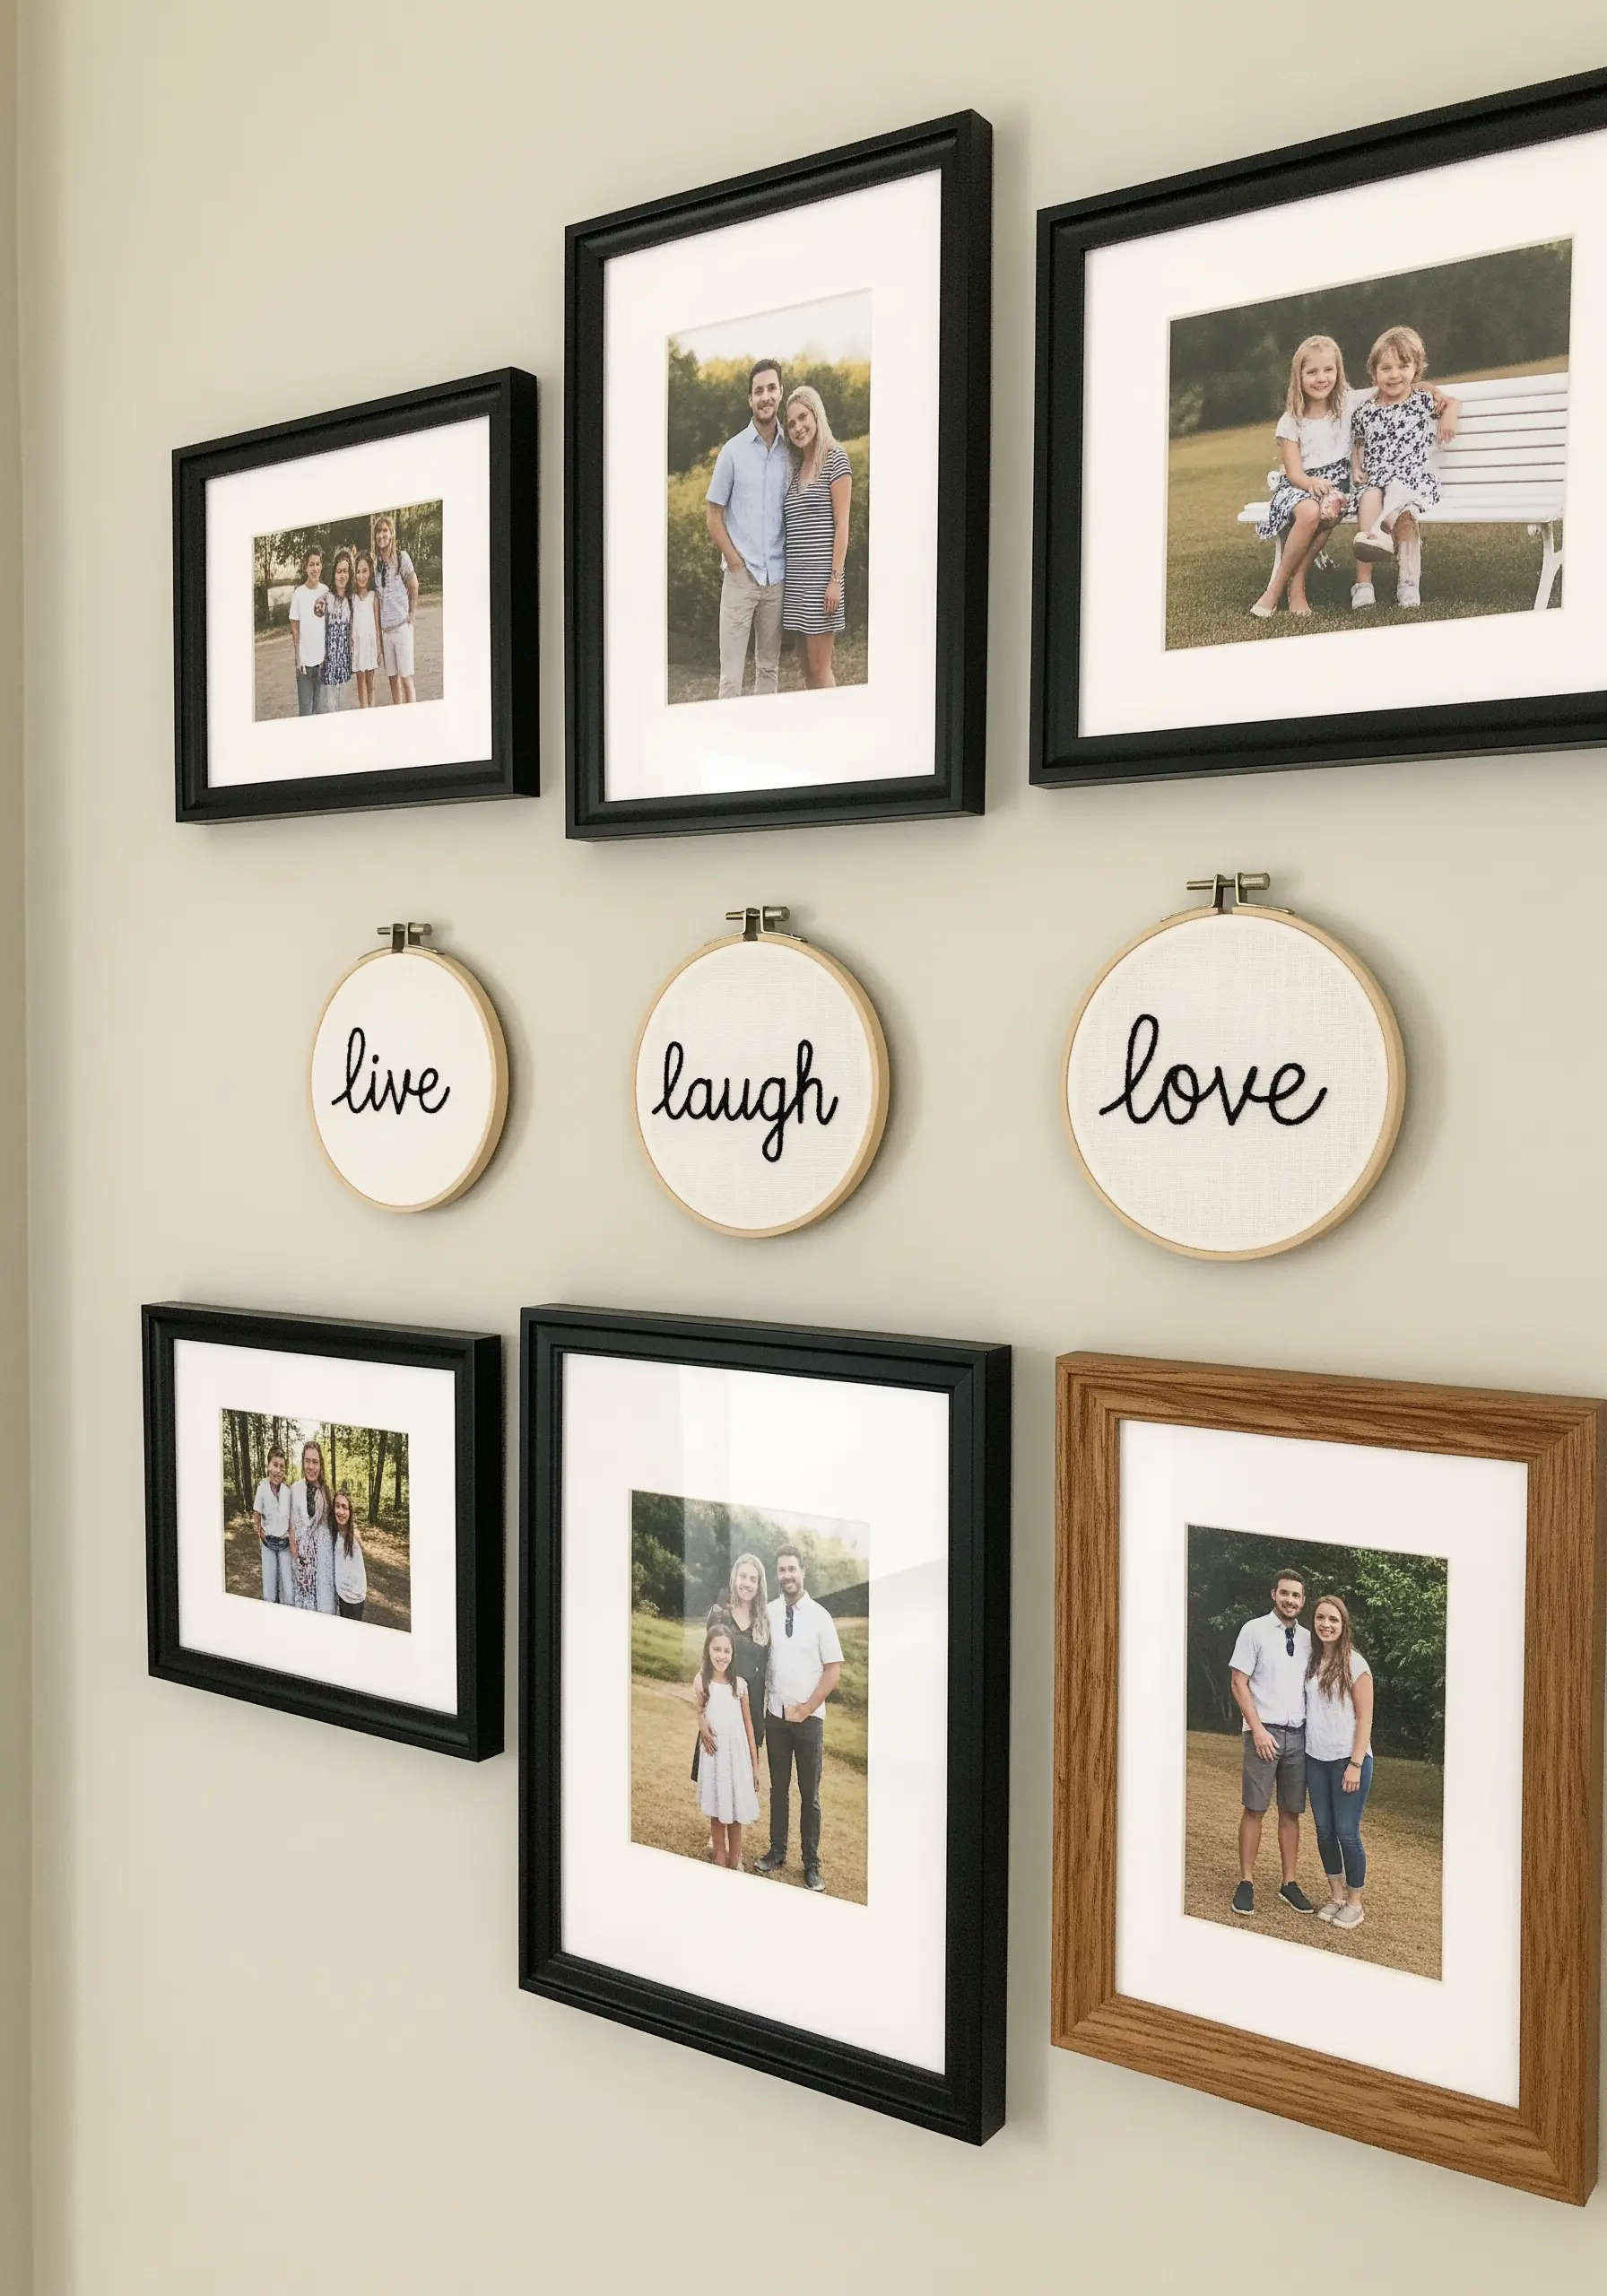
When creating a set of hoops to be displayed together, visual consistency is paramount.
Use the exact same font, thread color, floss count, and stitch for each word.
This repetition creates a strong, intentional theme, allowing your handmade pieces to integrate seamlessly into a larger gallery wall of photos and art.
They act as quiet, personal anchors within the collection.
20. Refined Serif on Raw-Edged Linen
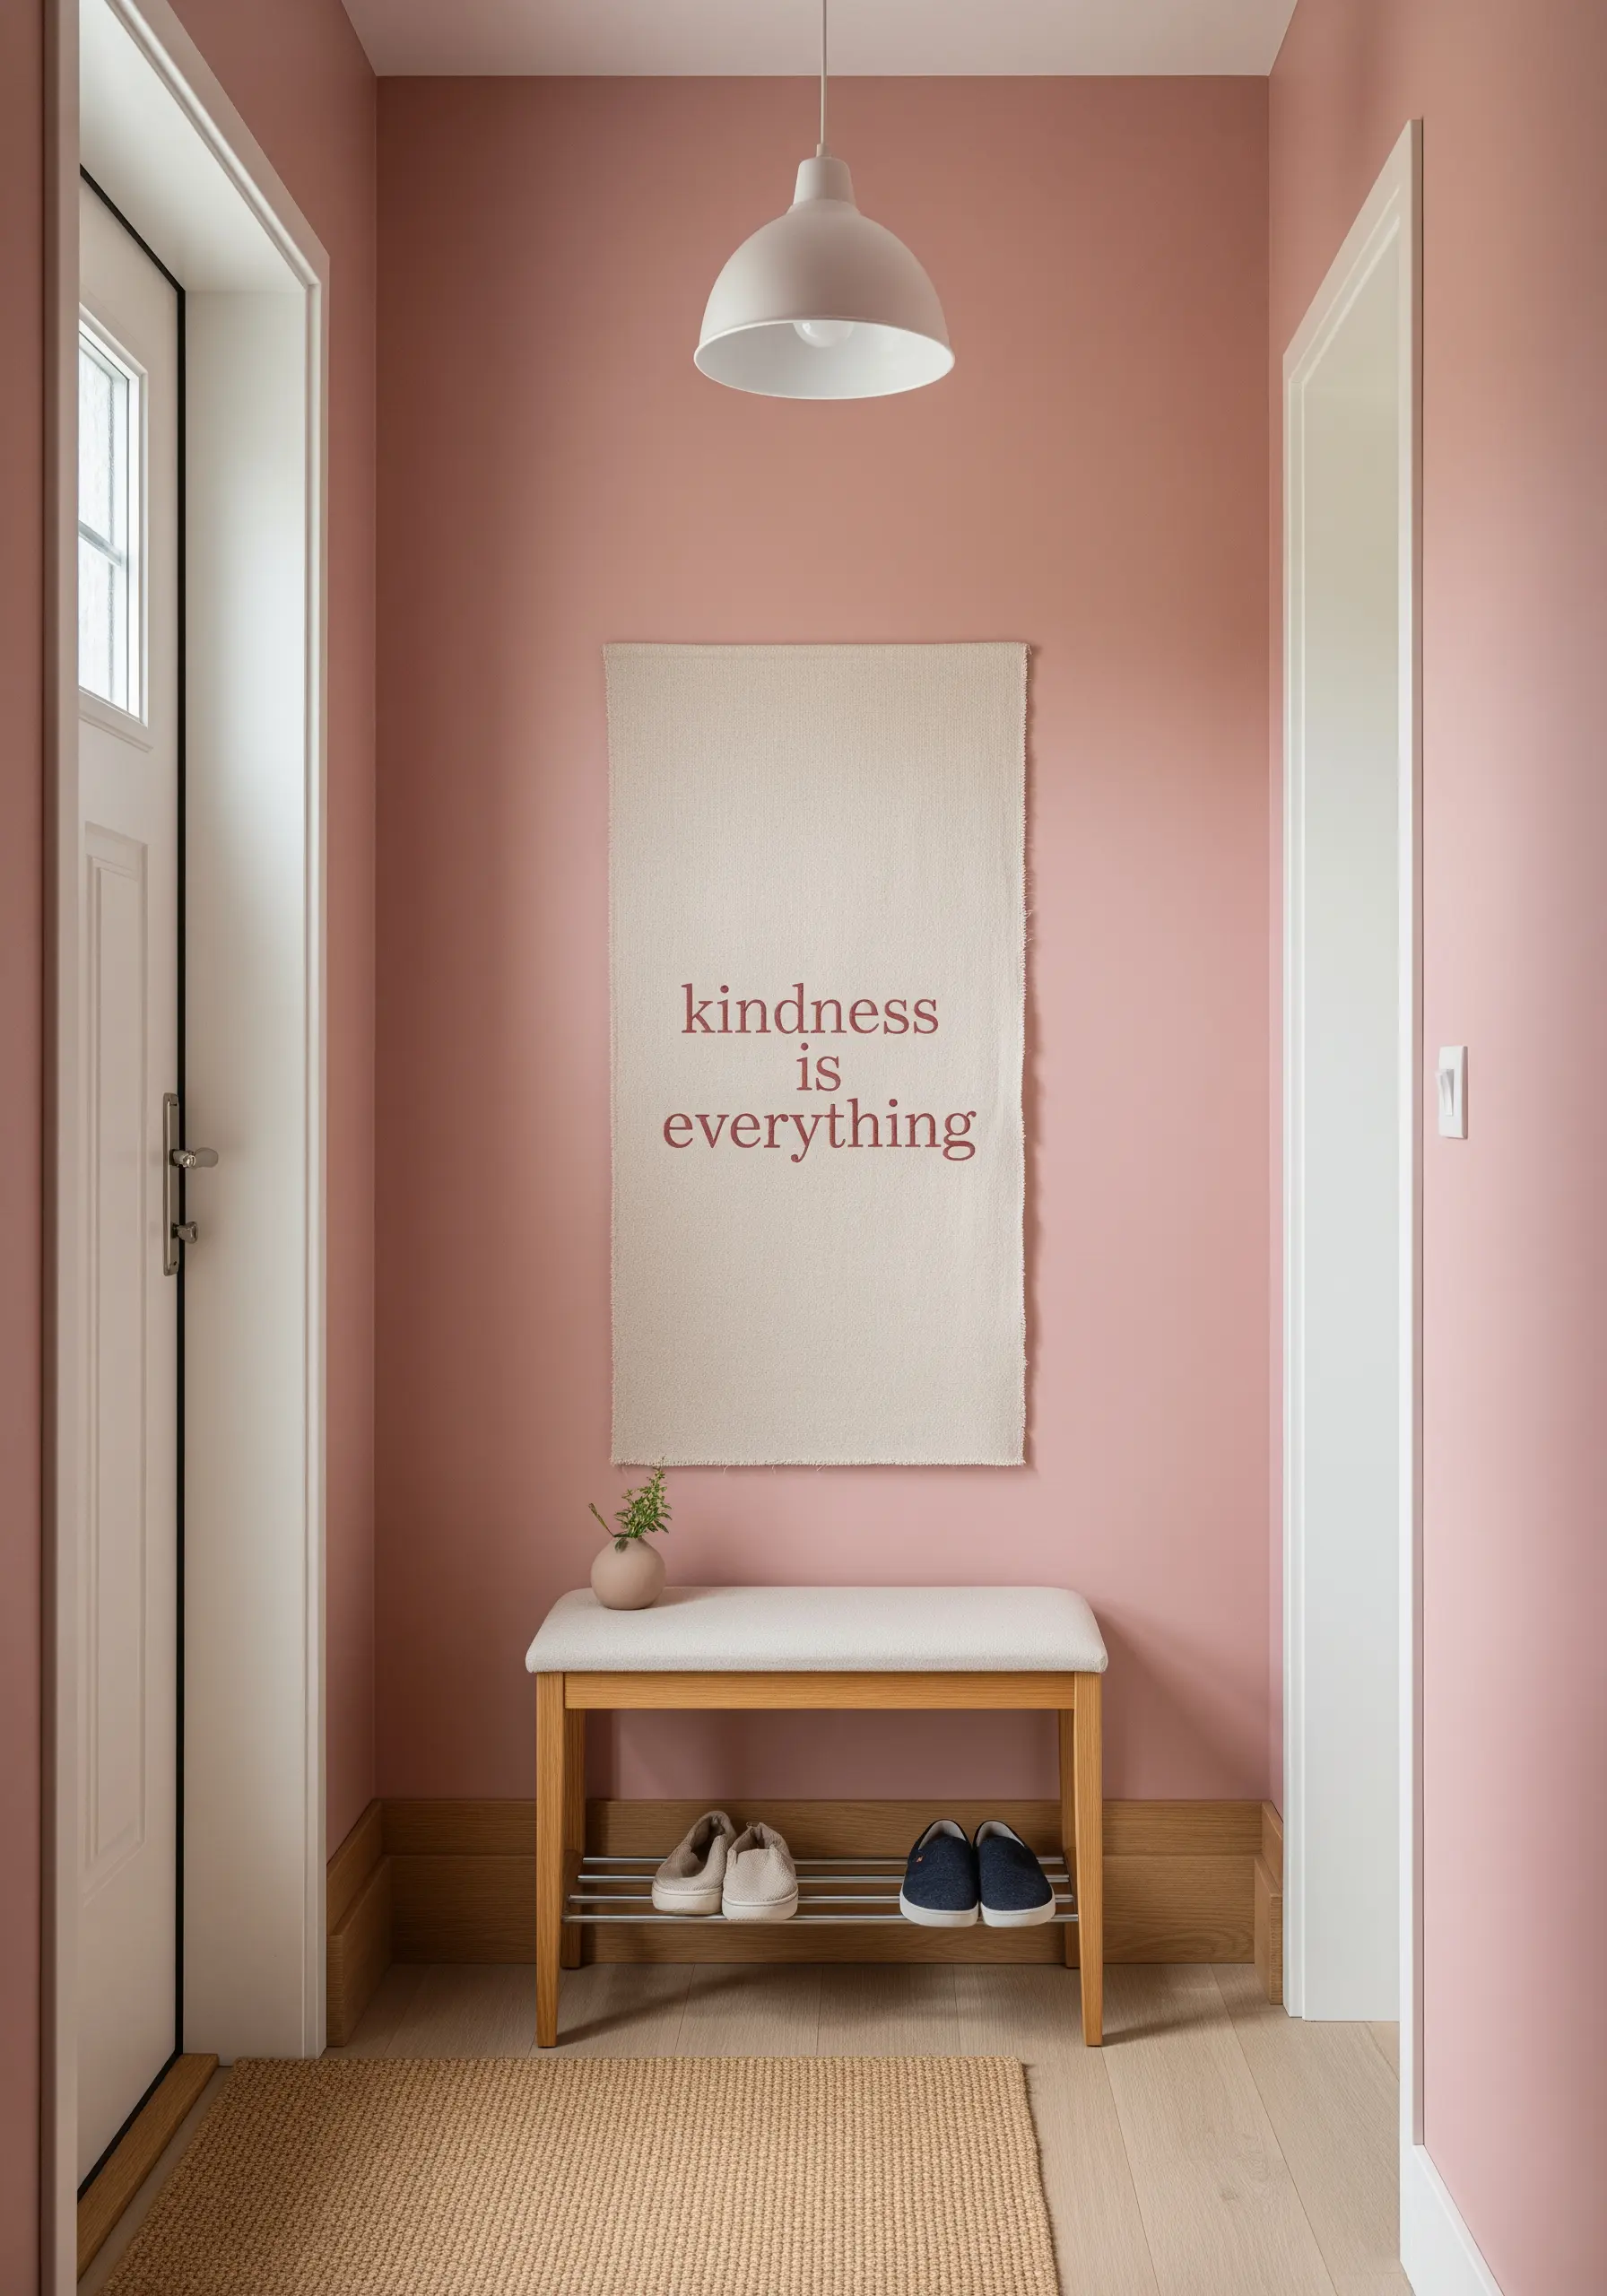
The beauty of this piece lies in the contrast between its refined details and rustic presentation.
To capture the delicate thin lines and serifs of the font, use a single strand of floss and a meticulous backstitch.
Displaying this precise needlework on a linen banner with raw, frayed edges creates a sophisticated juxtaposition.
It feels both timelessly elegant and organically modern.
21. Bold and Gentle with Sans-Serif
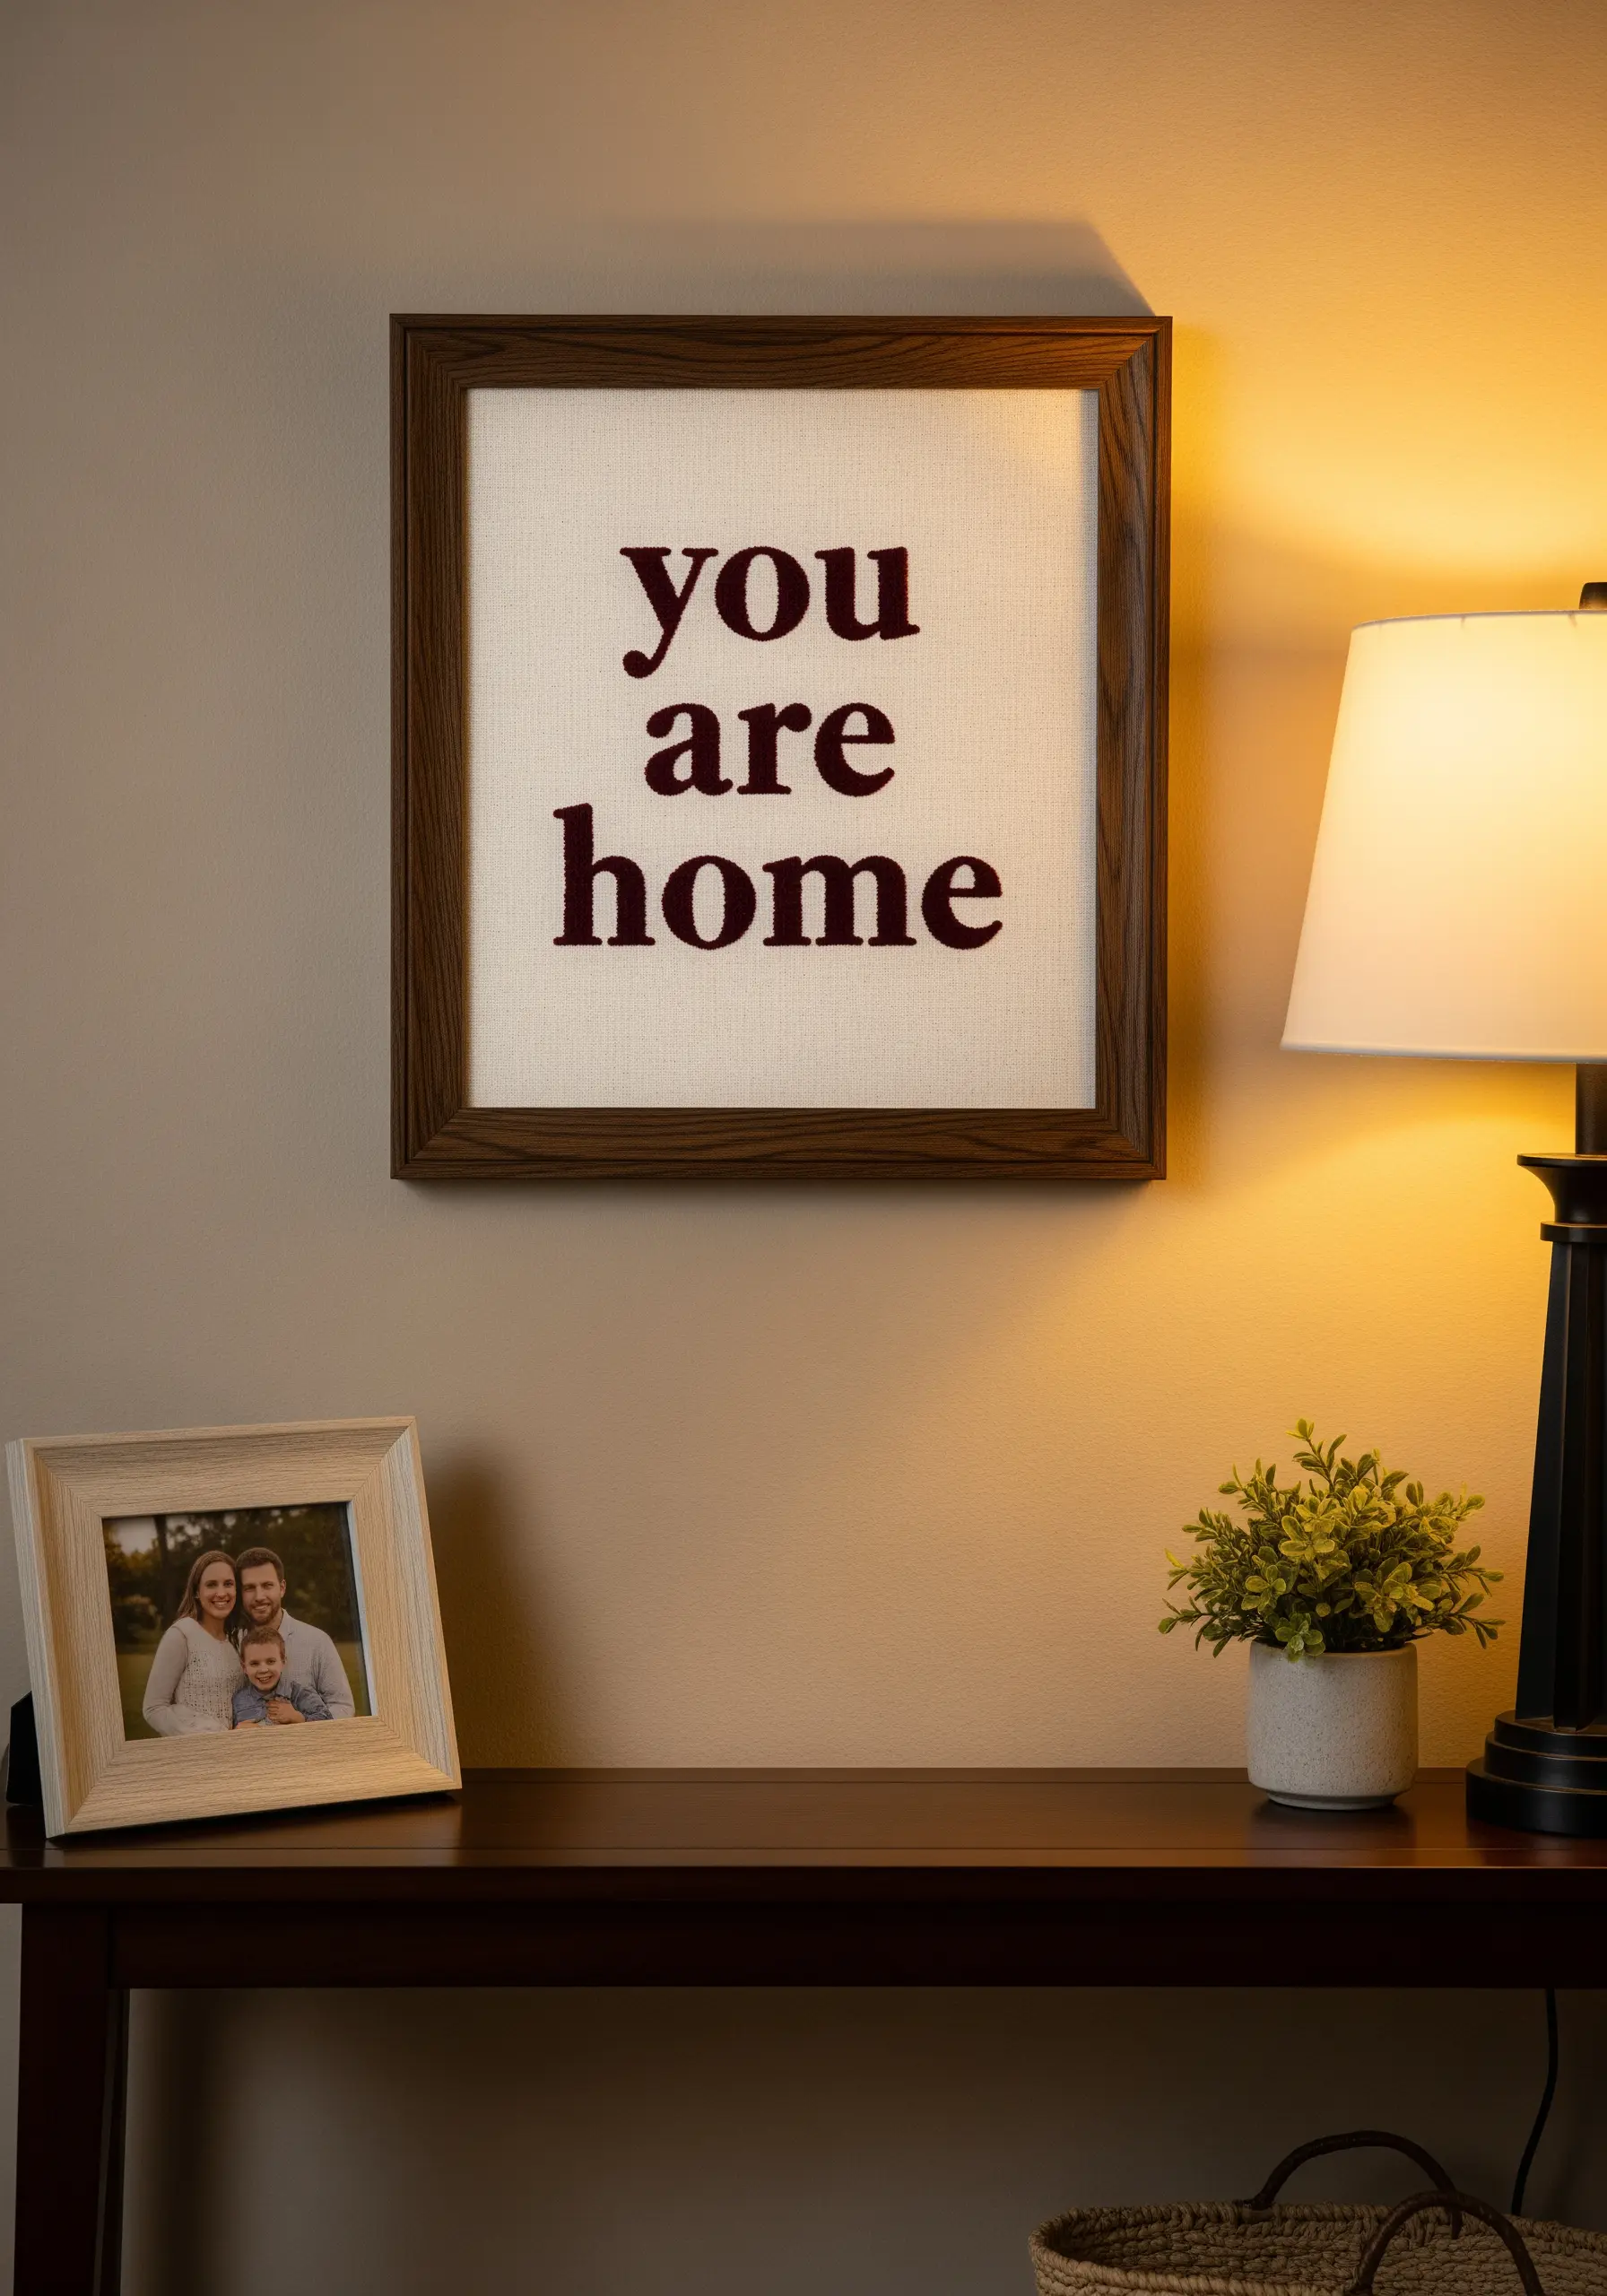
To achieve perfectly smooth results on large, satin-stitched letters, always use an iron-on stabilizer on the back of your fabric.
This prevents the fabric from puckering under the tension of the dense stitches.
For wider sections of a letter, break up your satin stitch into smaller, interlocking blocks rather than attempting one long stitch.
The rich, warm burgundy on a neutral background feels both confident and comforting.
22. Vibrant Texture with Punch Needle
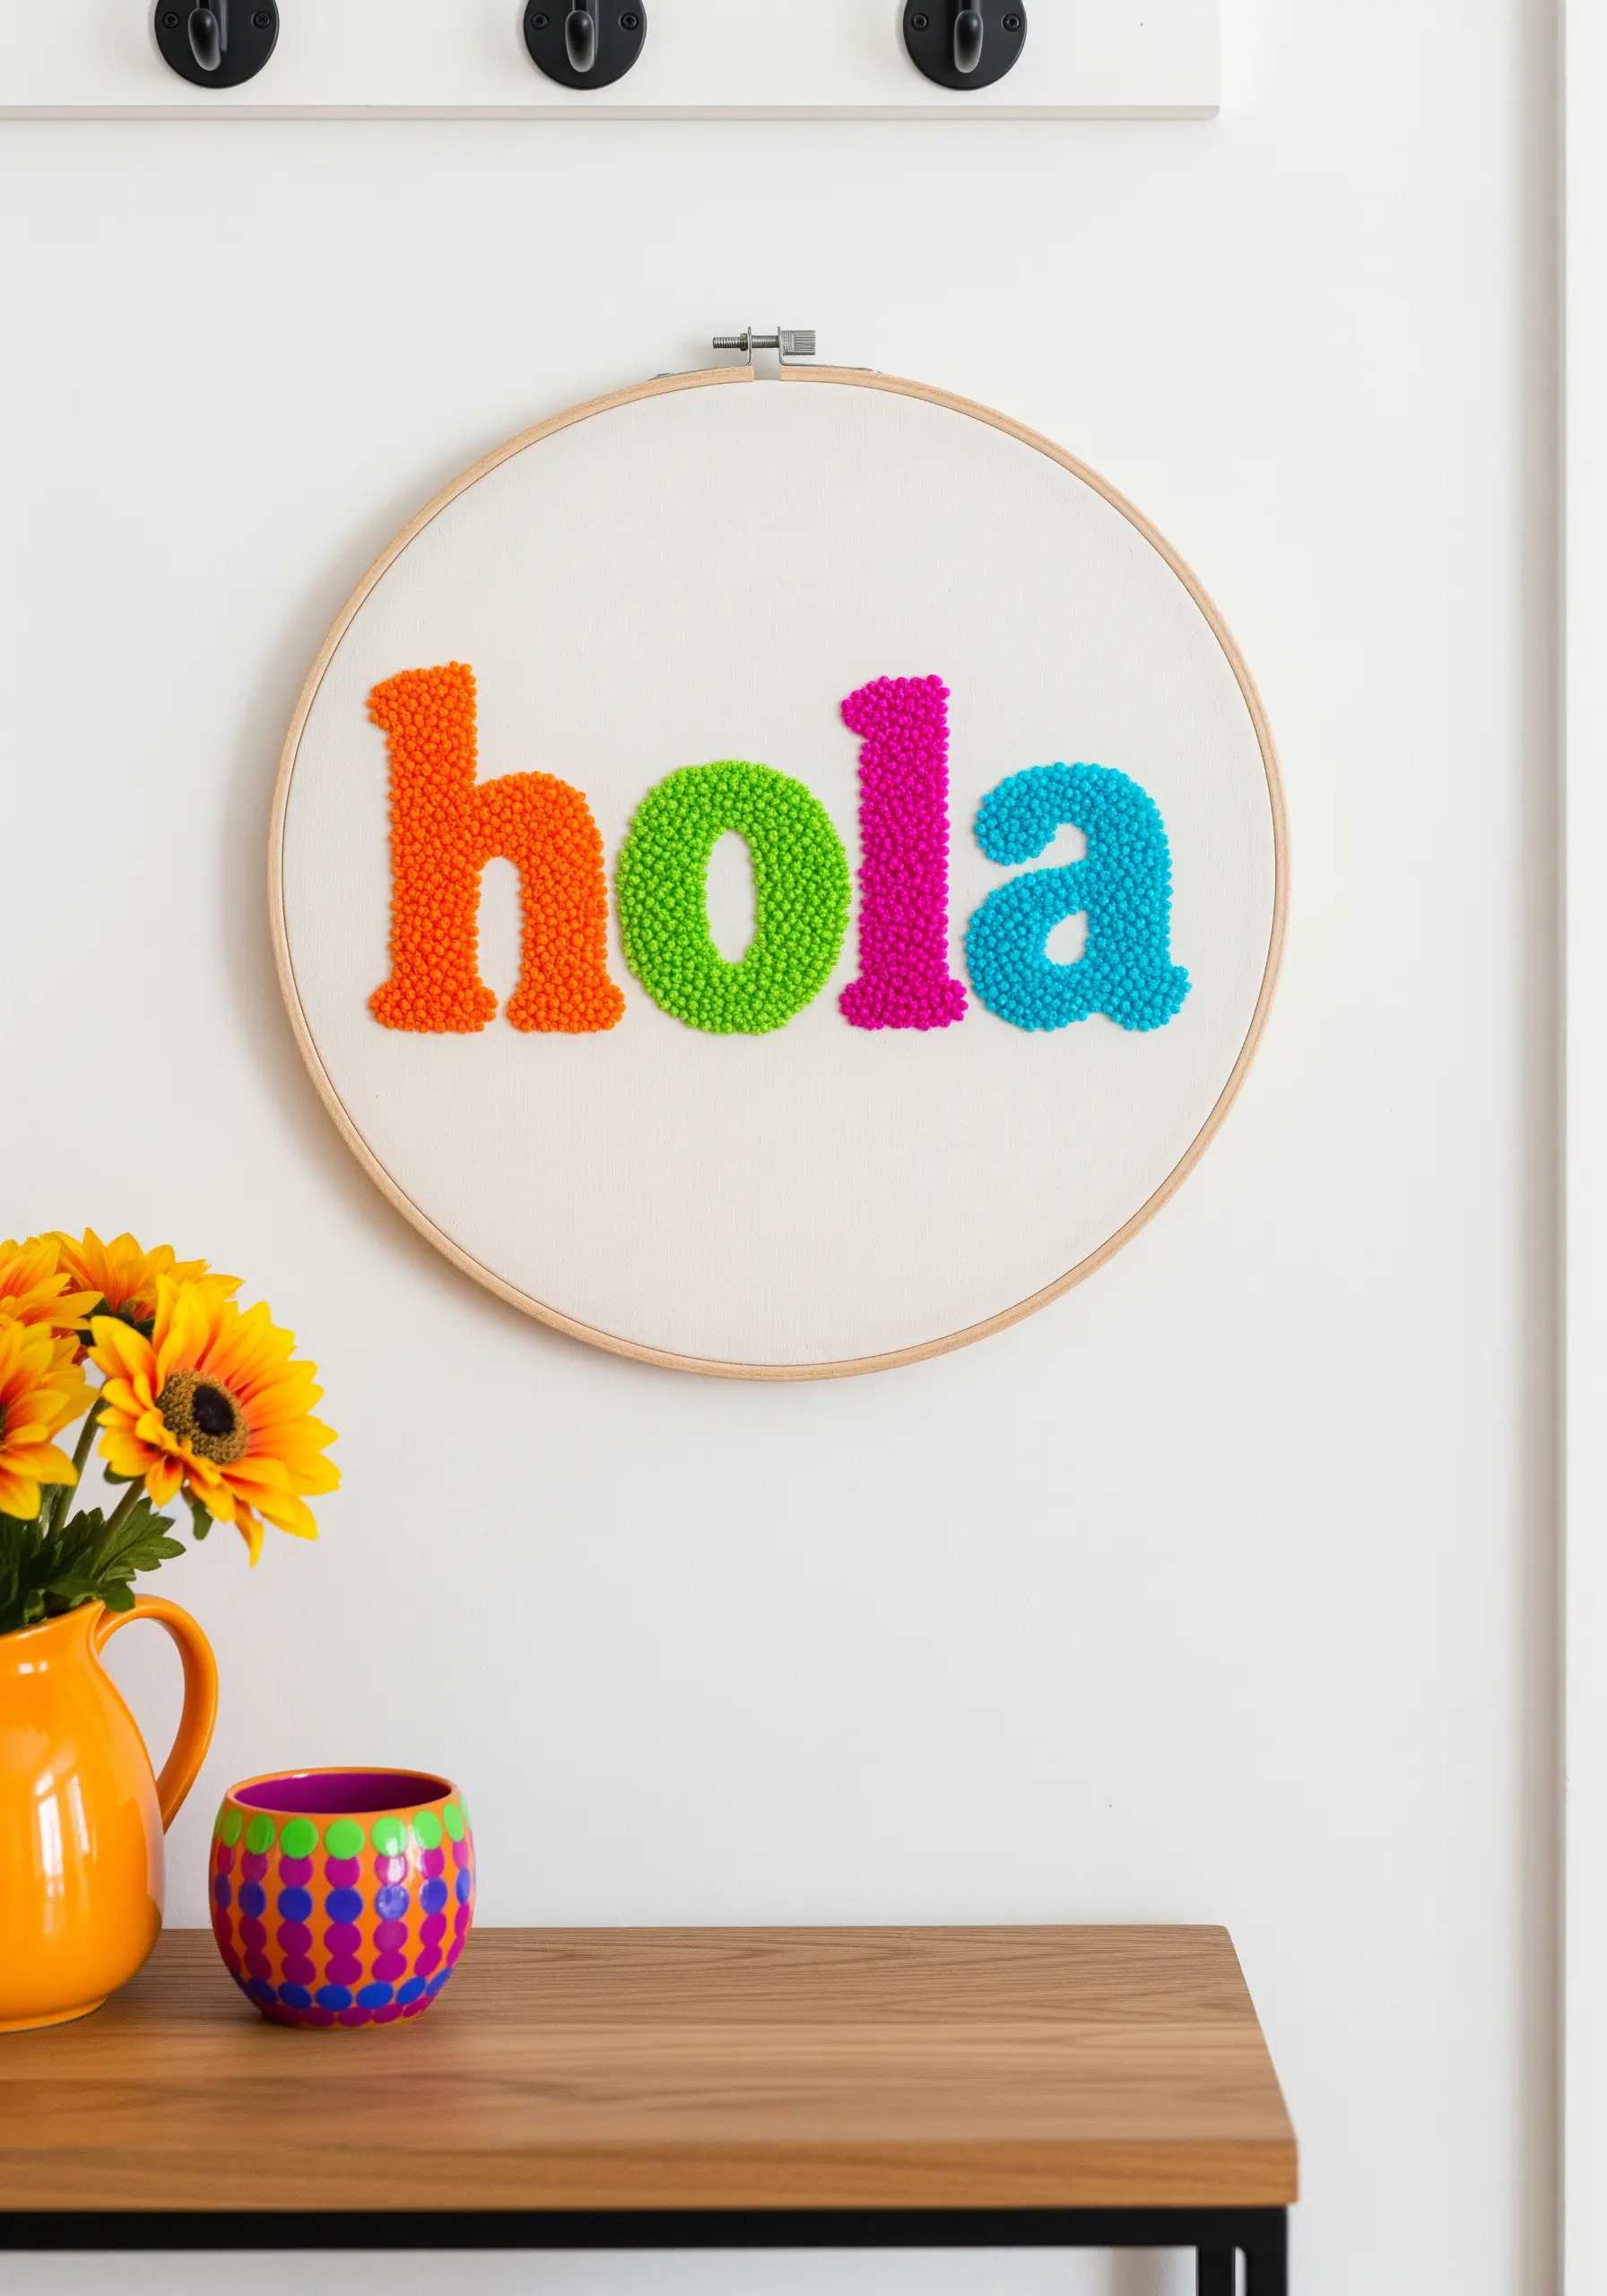
This incredibly tactile effect is created with punch needle, which forms loops of yarn on the surface of your fabric.
To achieve a dense, plush finish like this, you must pack your stitches very closely together as you work from the back.
Using a different, vibrant color of yarn for each letter gives the piece a joyful, celebratory energy that is perfect for a welcoming greeting.
23. Luxurious Script with Metallic Thread
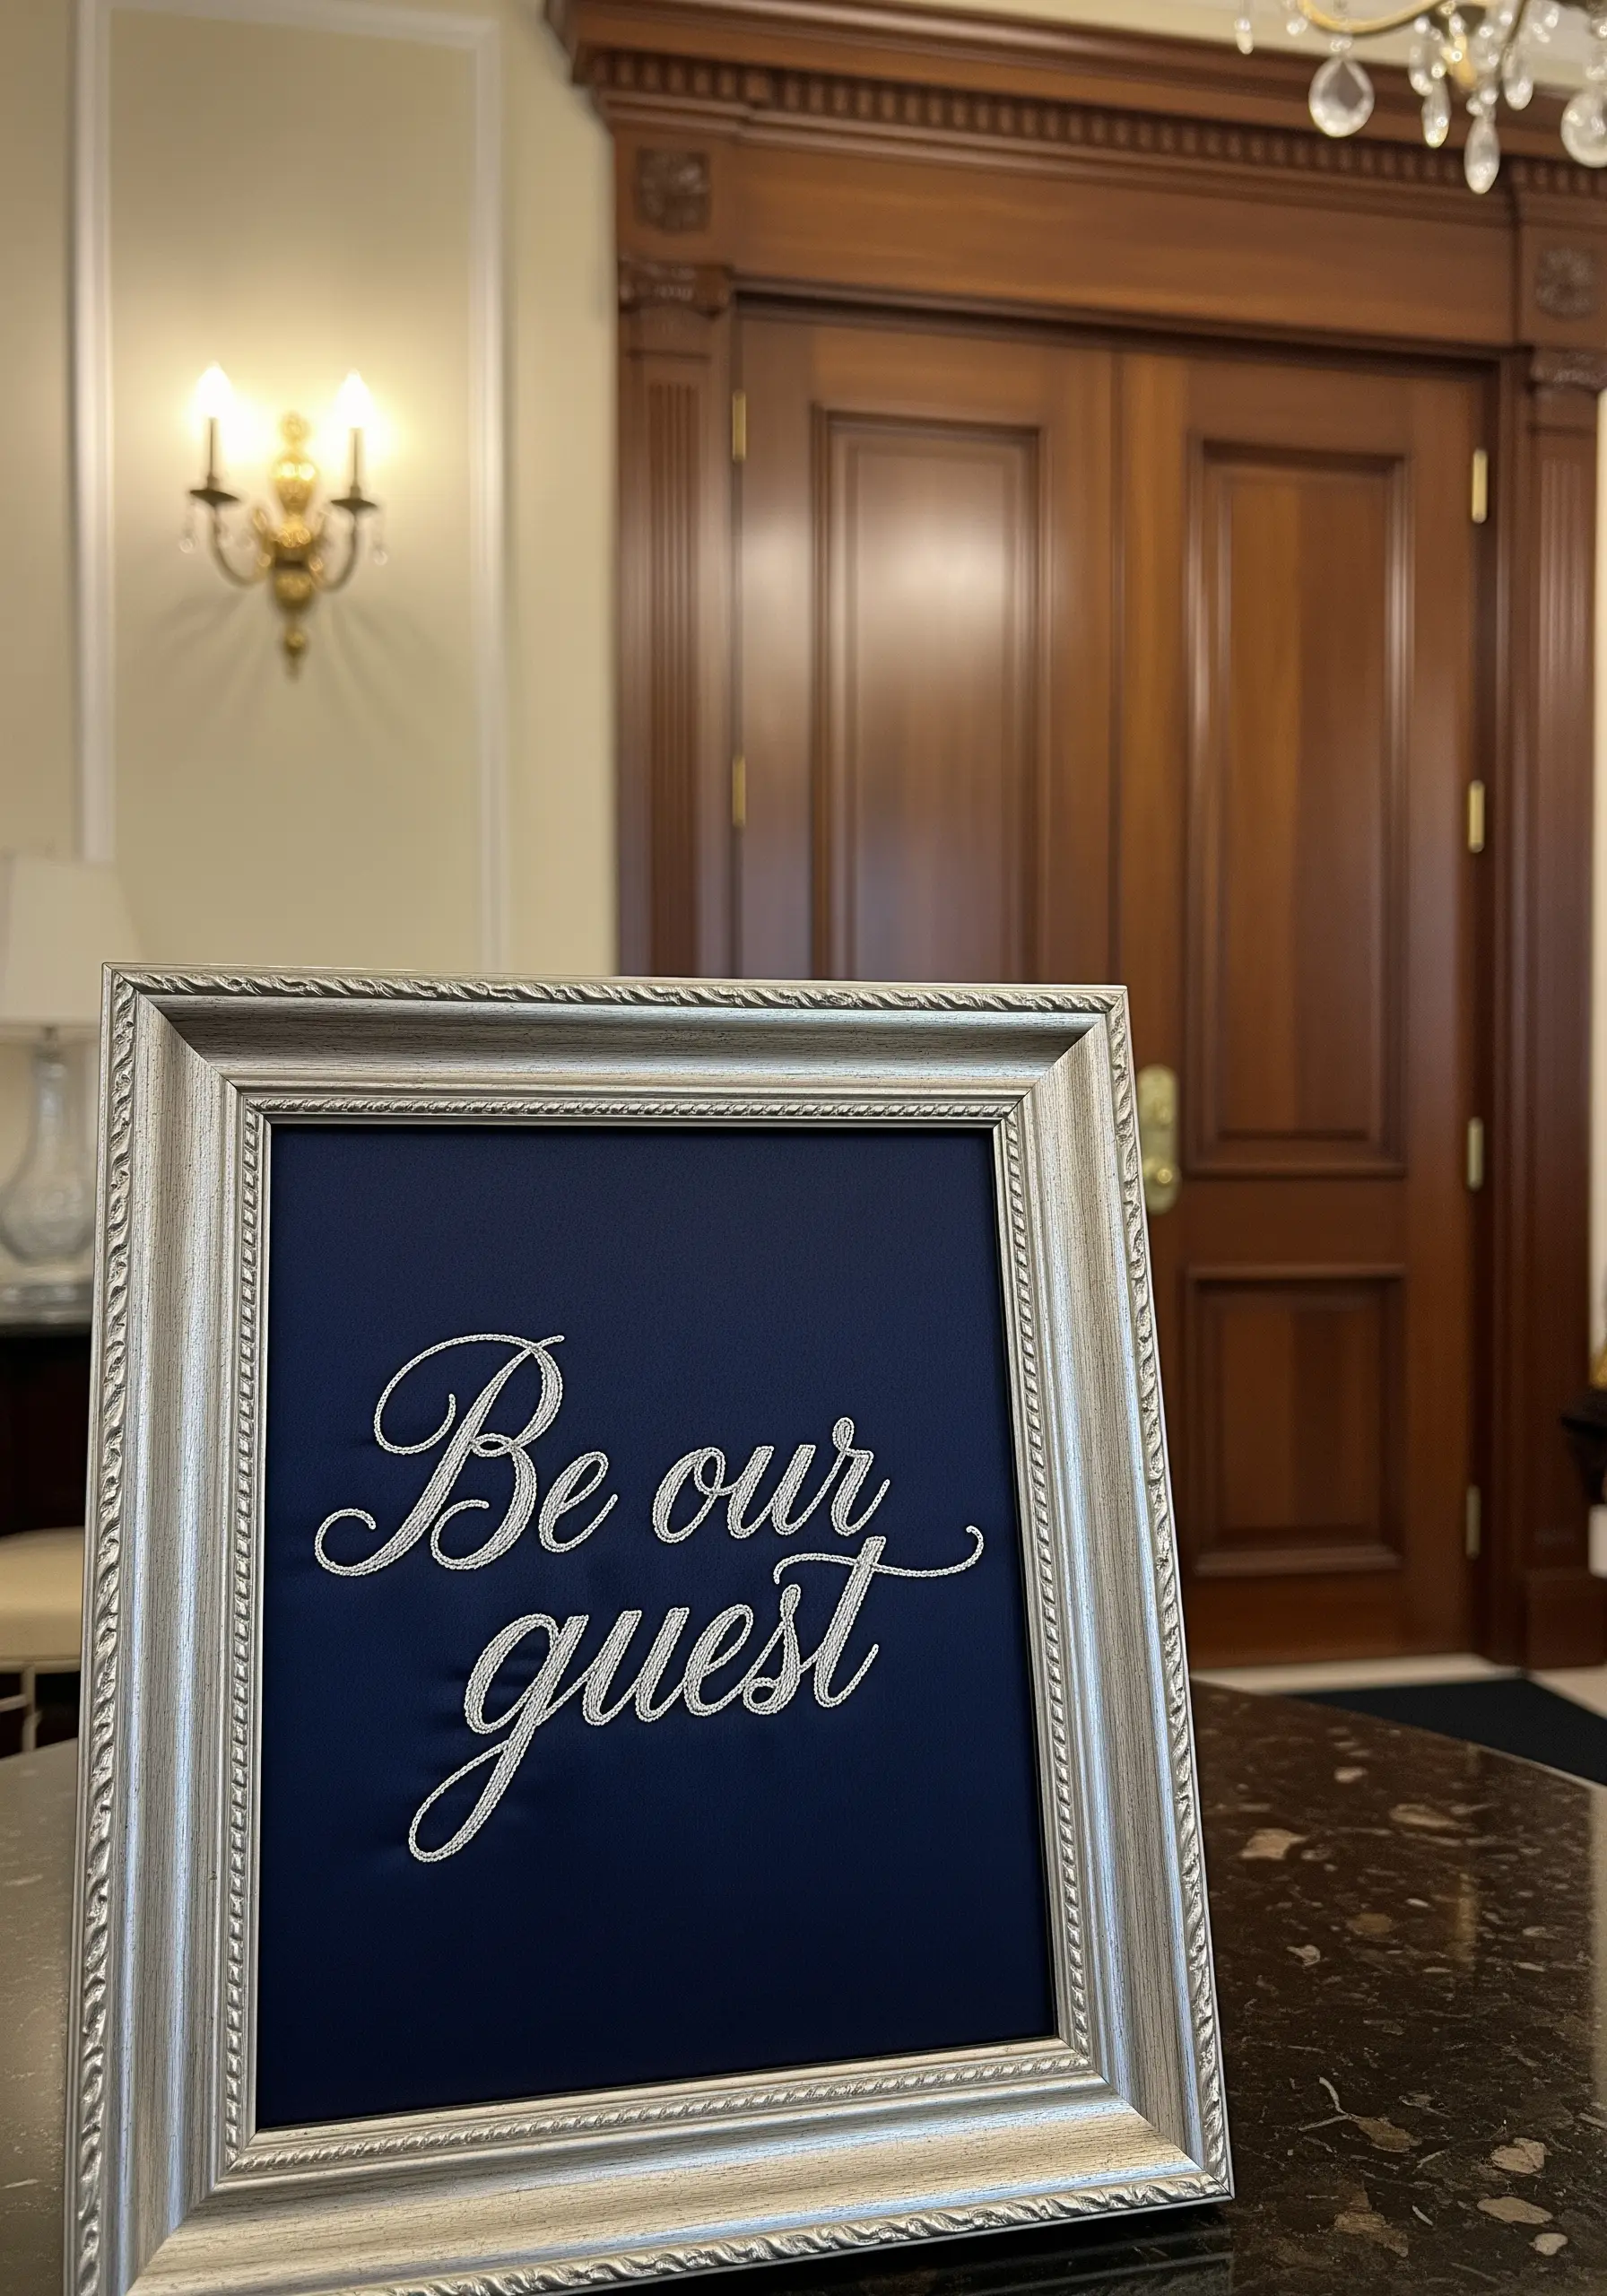
Stitching with metallic floss adds instant glamour, but it requires a bit of technique.
Work with shorter lengths of thread (about 12 inches) to minimize tangling and fraying.
A thread conditioner like beeswax can also make it easier to handle.
Stitching this elegant script on a deep navy fabric provides a dark, rich backdrop that makes the silver thread truly shimmer and stand out.
24. Playful Contrast on Patterned Fabric
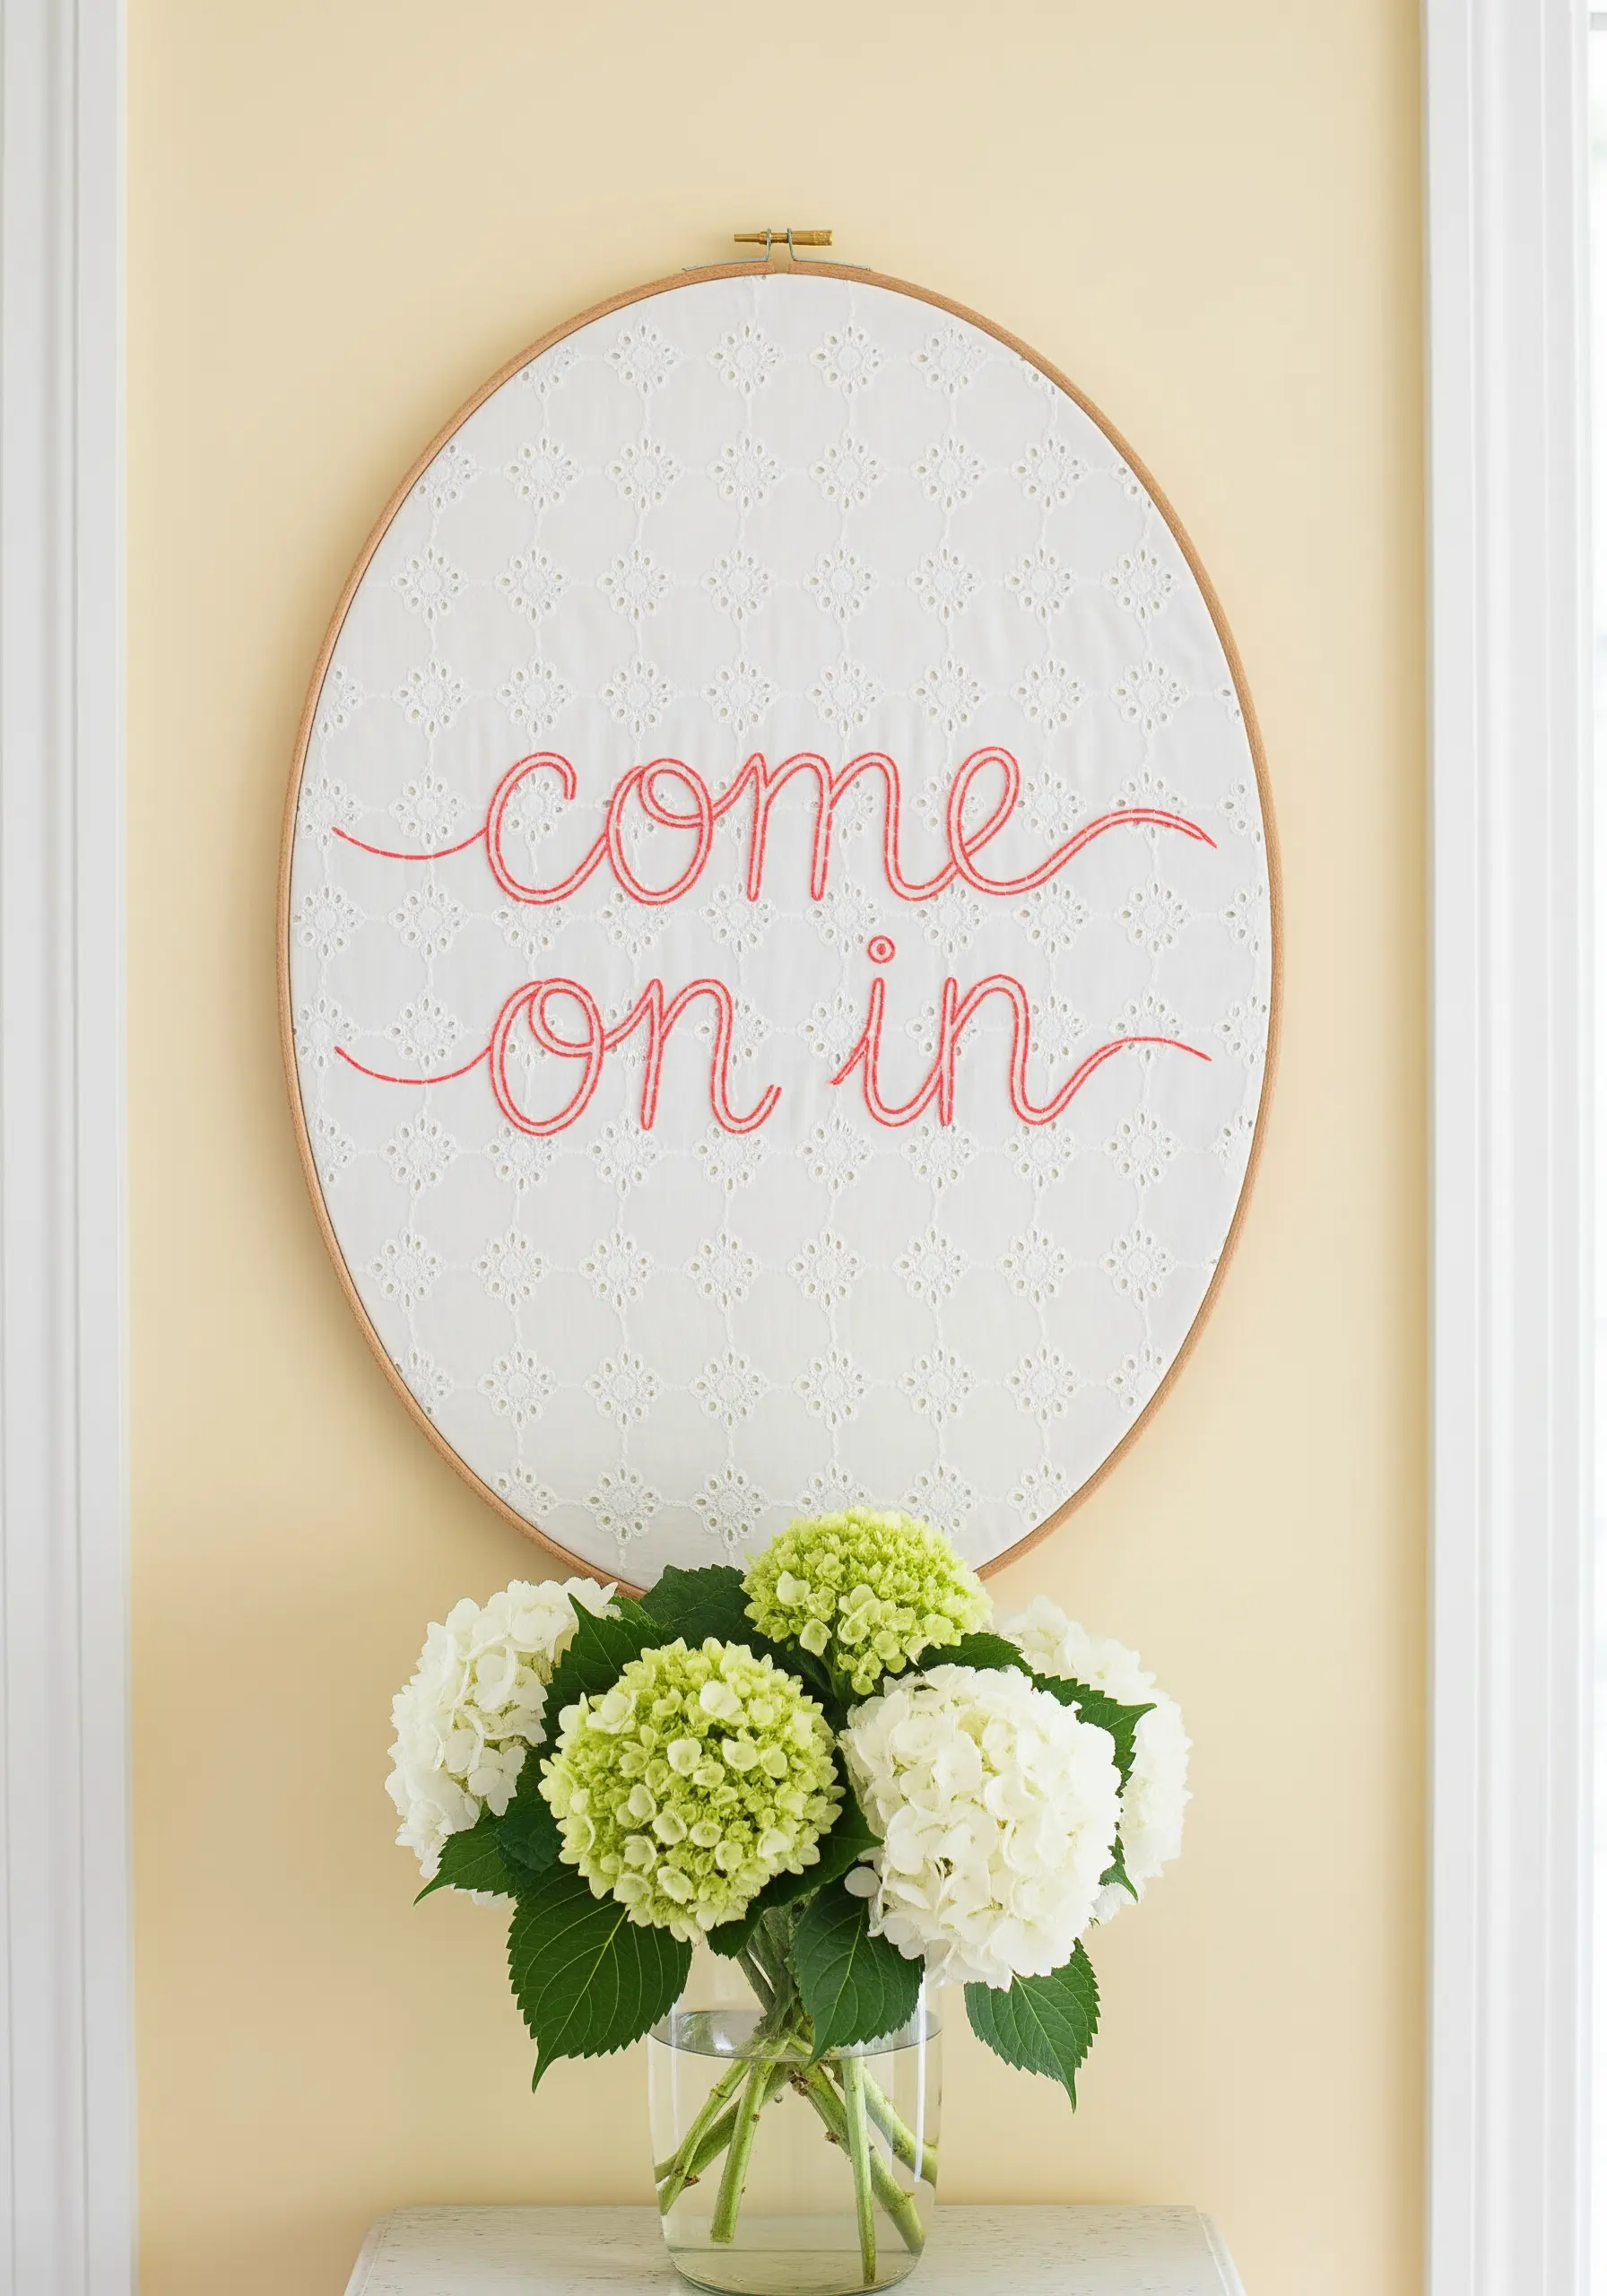
Don’t shy away from stitching on patterned fabrics like this eyelet lace.
The key is to create enough contrast for your lettering to be legible.
Choose a bright, bold thread color that stands out against the background, and use a thick, substantial stitch like a chain stitch or a stem stitch with all six strands of floss.
This ensures your message is the star of the show.
25. Overlapping Hoops for a Layered Display
Instead of arranging hoops side-by-side, create a more dynamic composition by layering them.
Stitch the same monogram or design in two different sizes, on two separate hoops.
When you hang them, simply let the smaller hoop partially overlap the larger one.
This simple trick adds instant depth and a modern, curated feel to a classic monogram display.
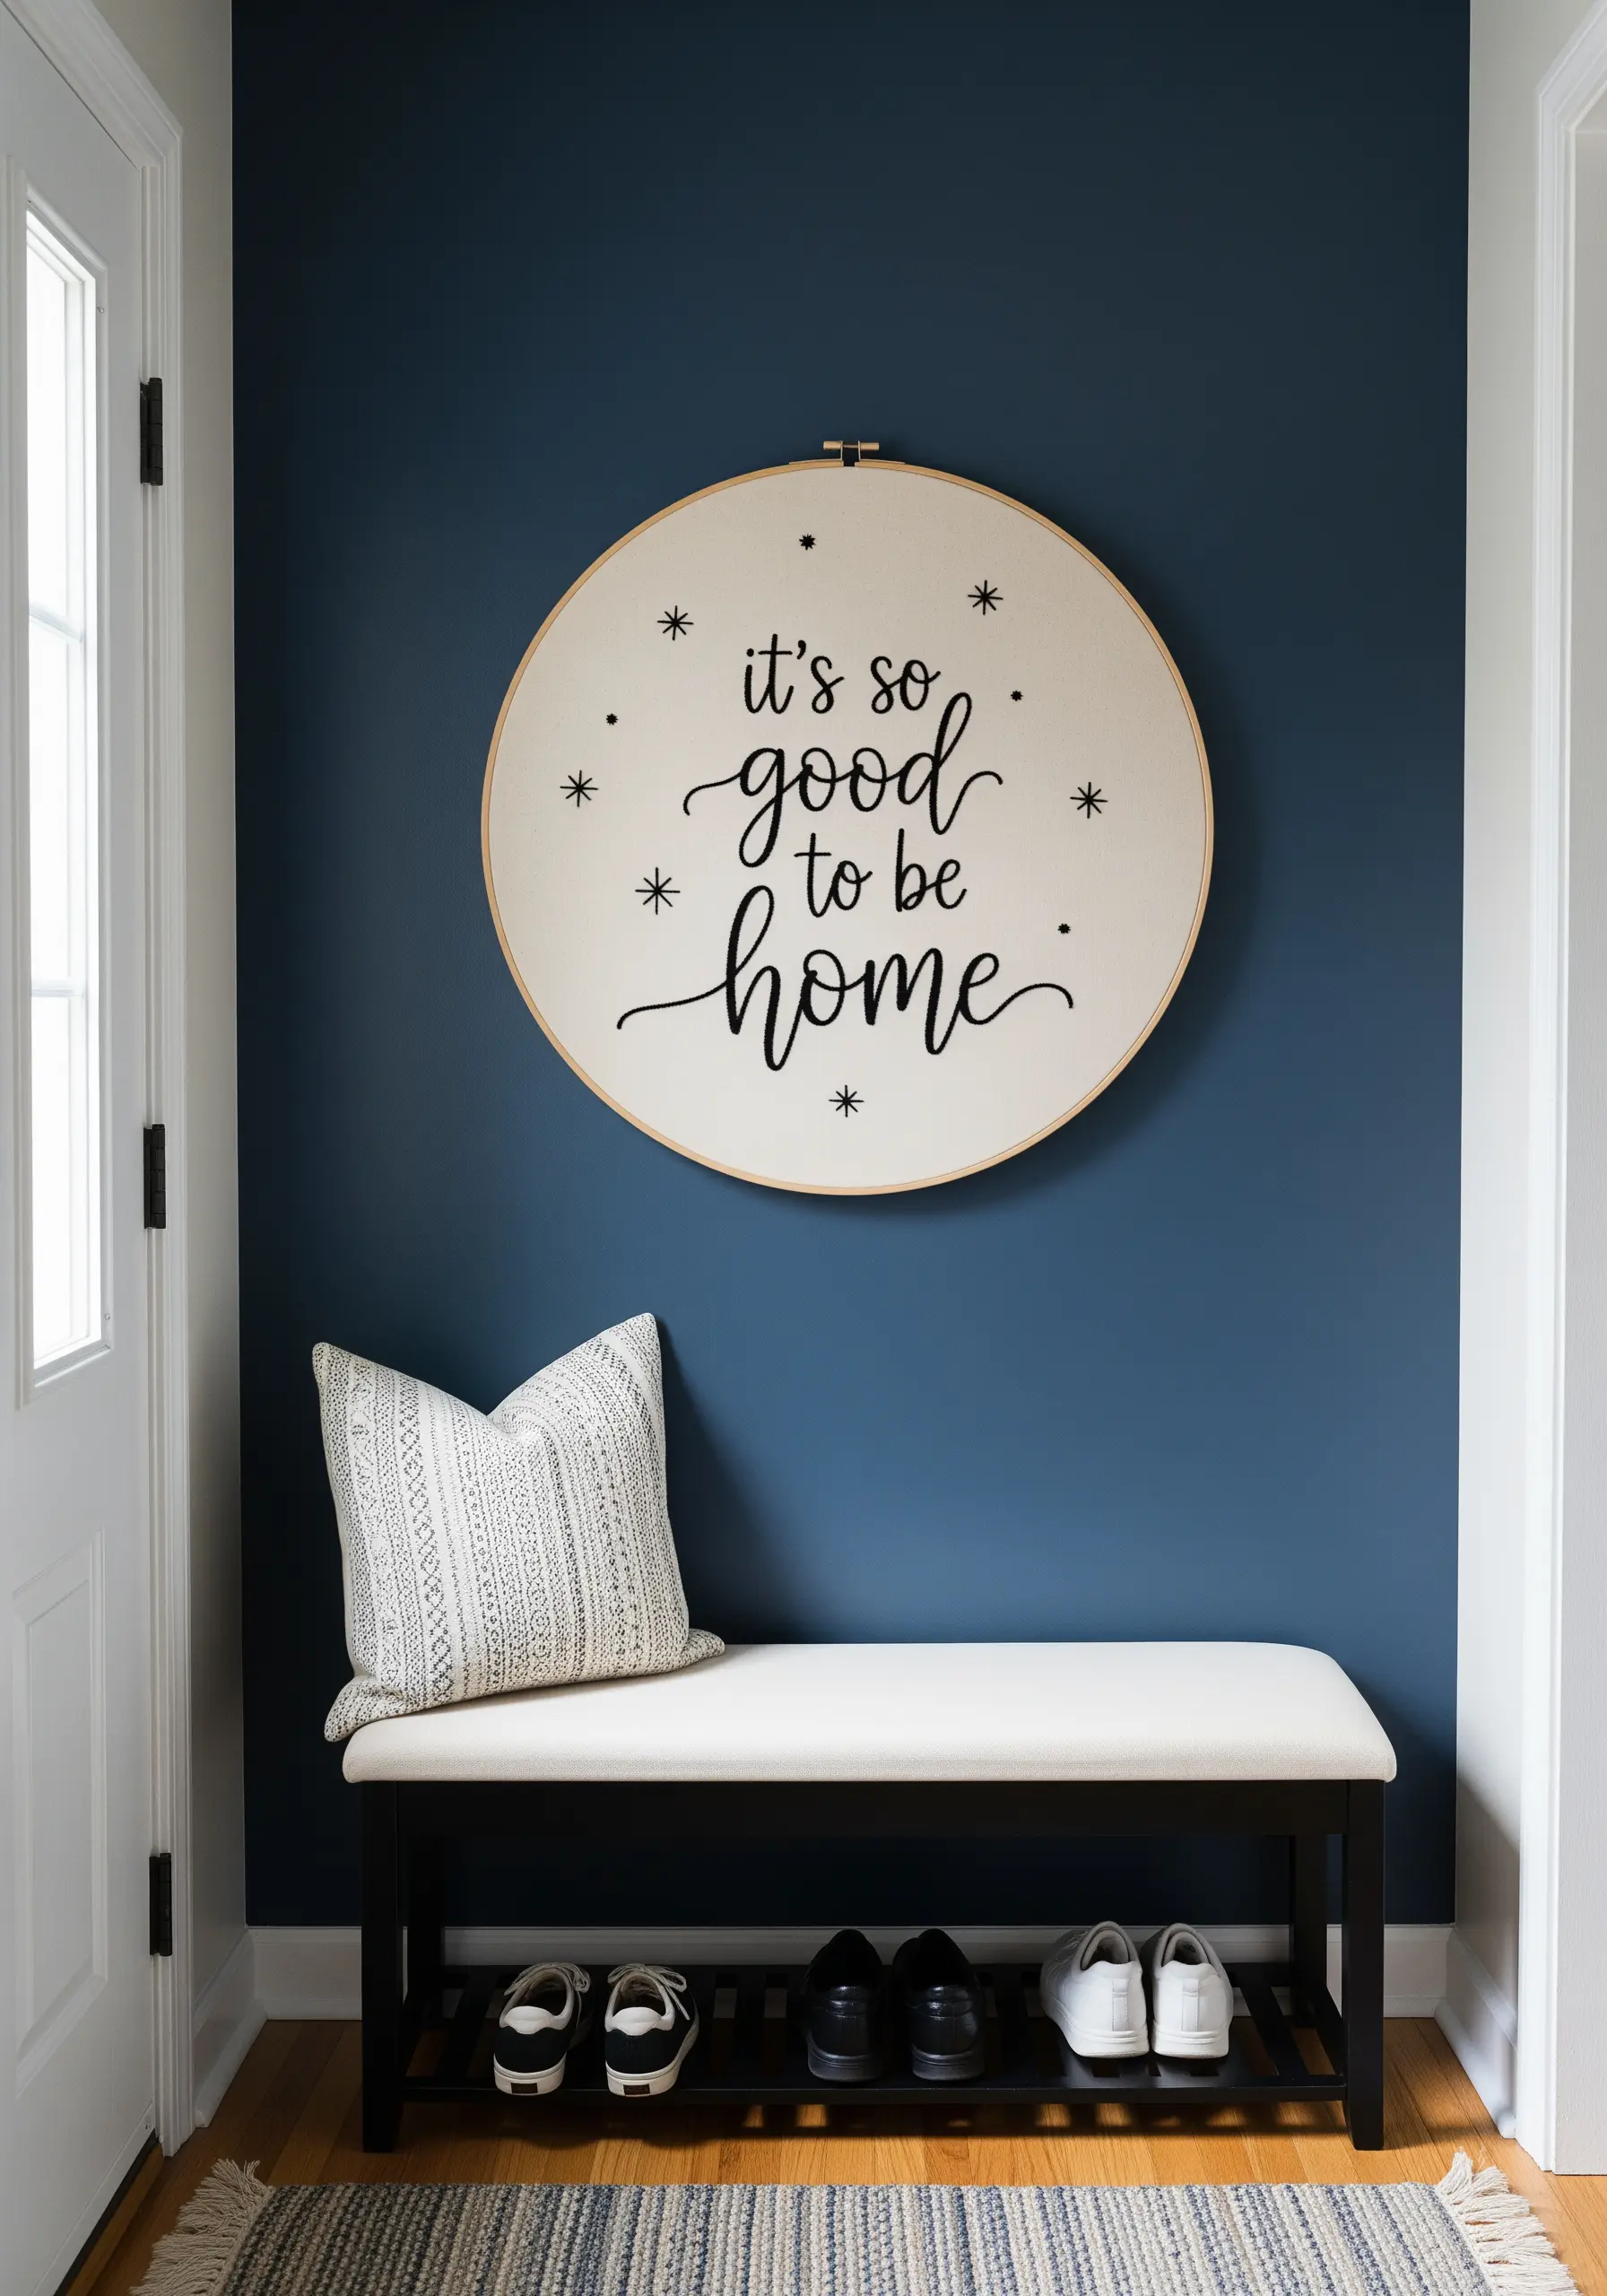
26. A Mindful Moment with Pixelated Text
Using cross-stitch on Aida cloth gives your lettering a delicate, pixelated quality.
For a word this small and minimal, precision is everything.
Use just two strands of floss to keep the stitches neat and refined, not bulky.
The simplicity of the technique and the single, calming word make this one of the most effective minimalist small hoop designs you can stitch in under one hour tonight.
27. Multi-Color Pop with Outlined Letters
This is a brilliant way to achieve a colorful, graphic look without the time commitment of full satin stitch.
First, outline each letter with a clean backstitch using two strands of floss.
Then, add just a few rows of satin stitch on the inside of the outline.
By using different colors for each line of text, you create a playful, retro-inspired piece that feels vibrant and full of energy.
28. Appliqué Lettering on a Felt Canvas
For large-scale, high-impact lettering, appliqué is an excellent alternative to embroidery.
Cut your letters from a thick, high-quality felt in a contrasting color.
Arrange them on your felt background and secure them using a small, neat whip stitch around the edges with a matching thread.
This technique creates a bold, graphic piece with a wonderfully soft and tactile finish.
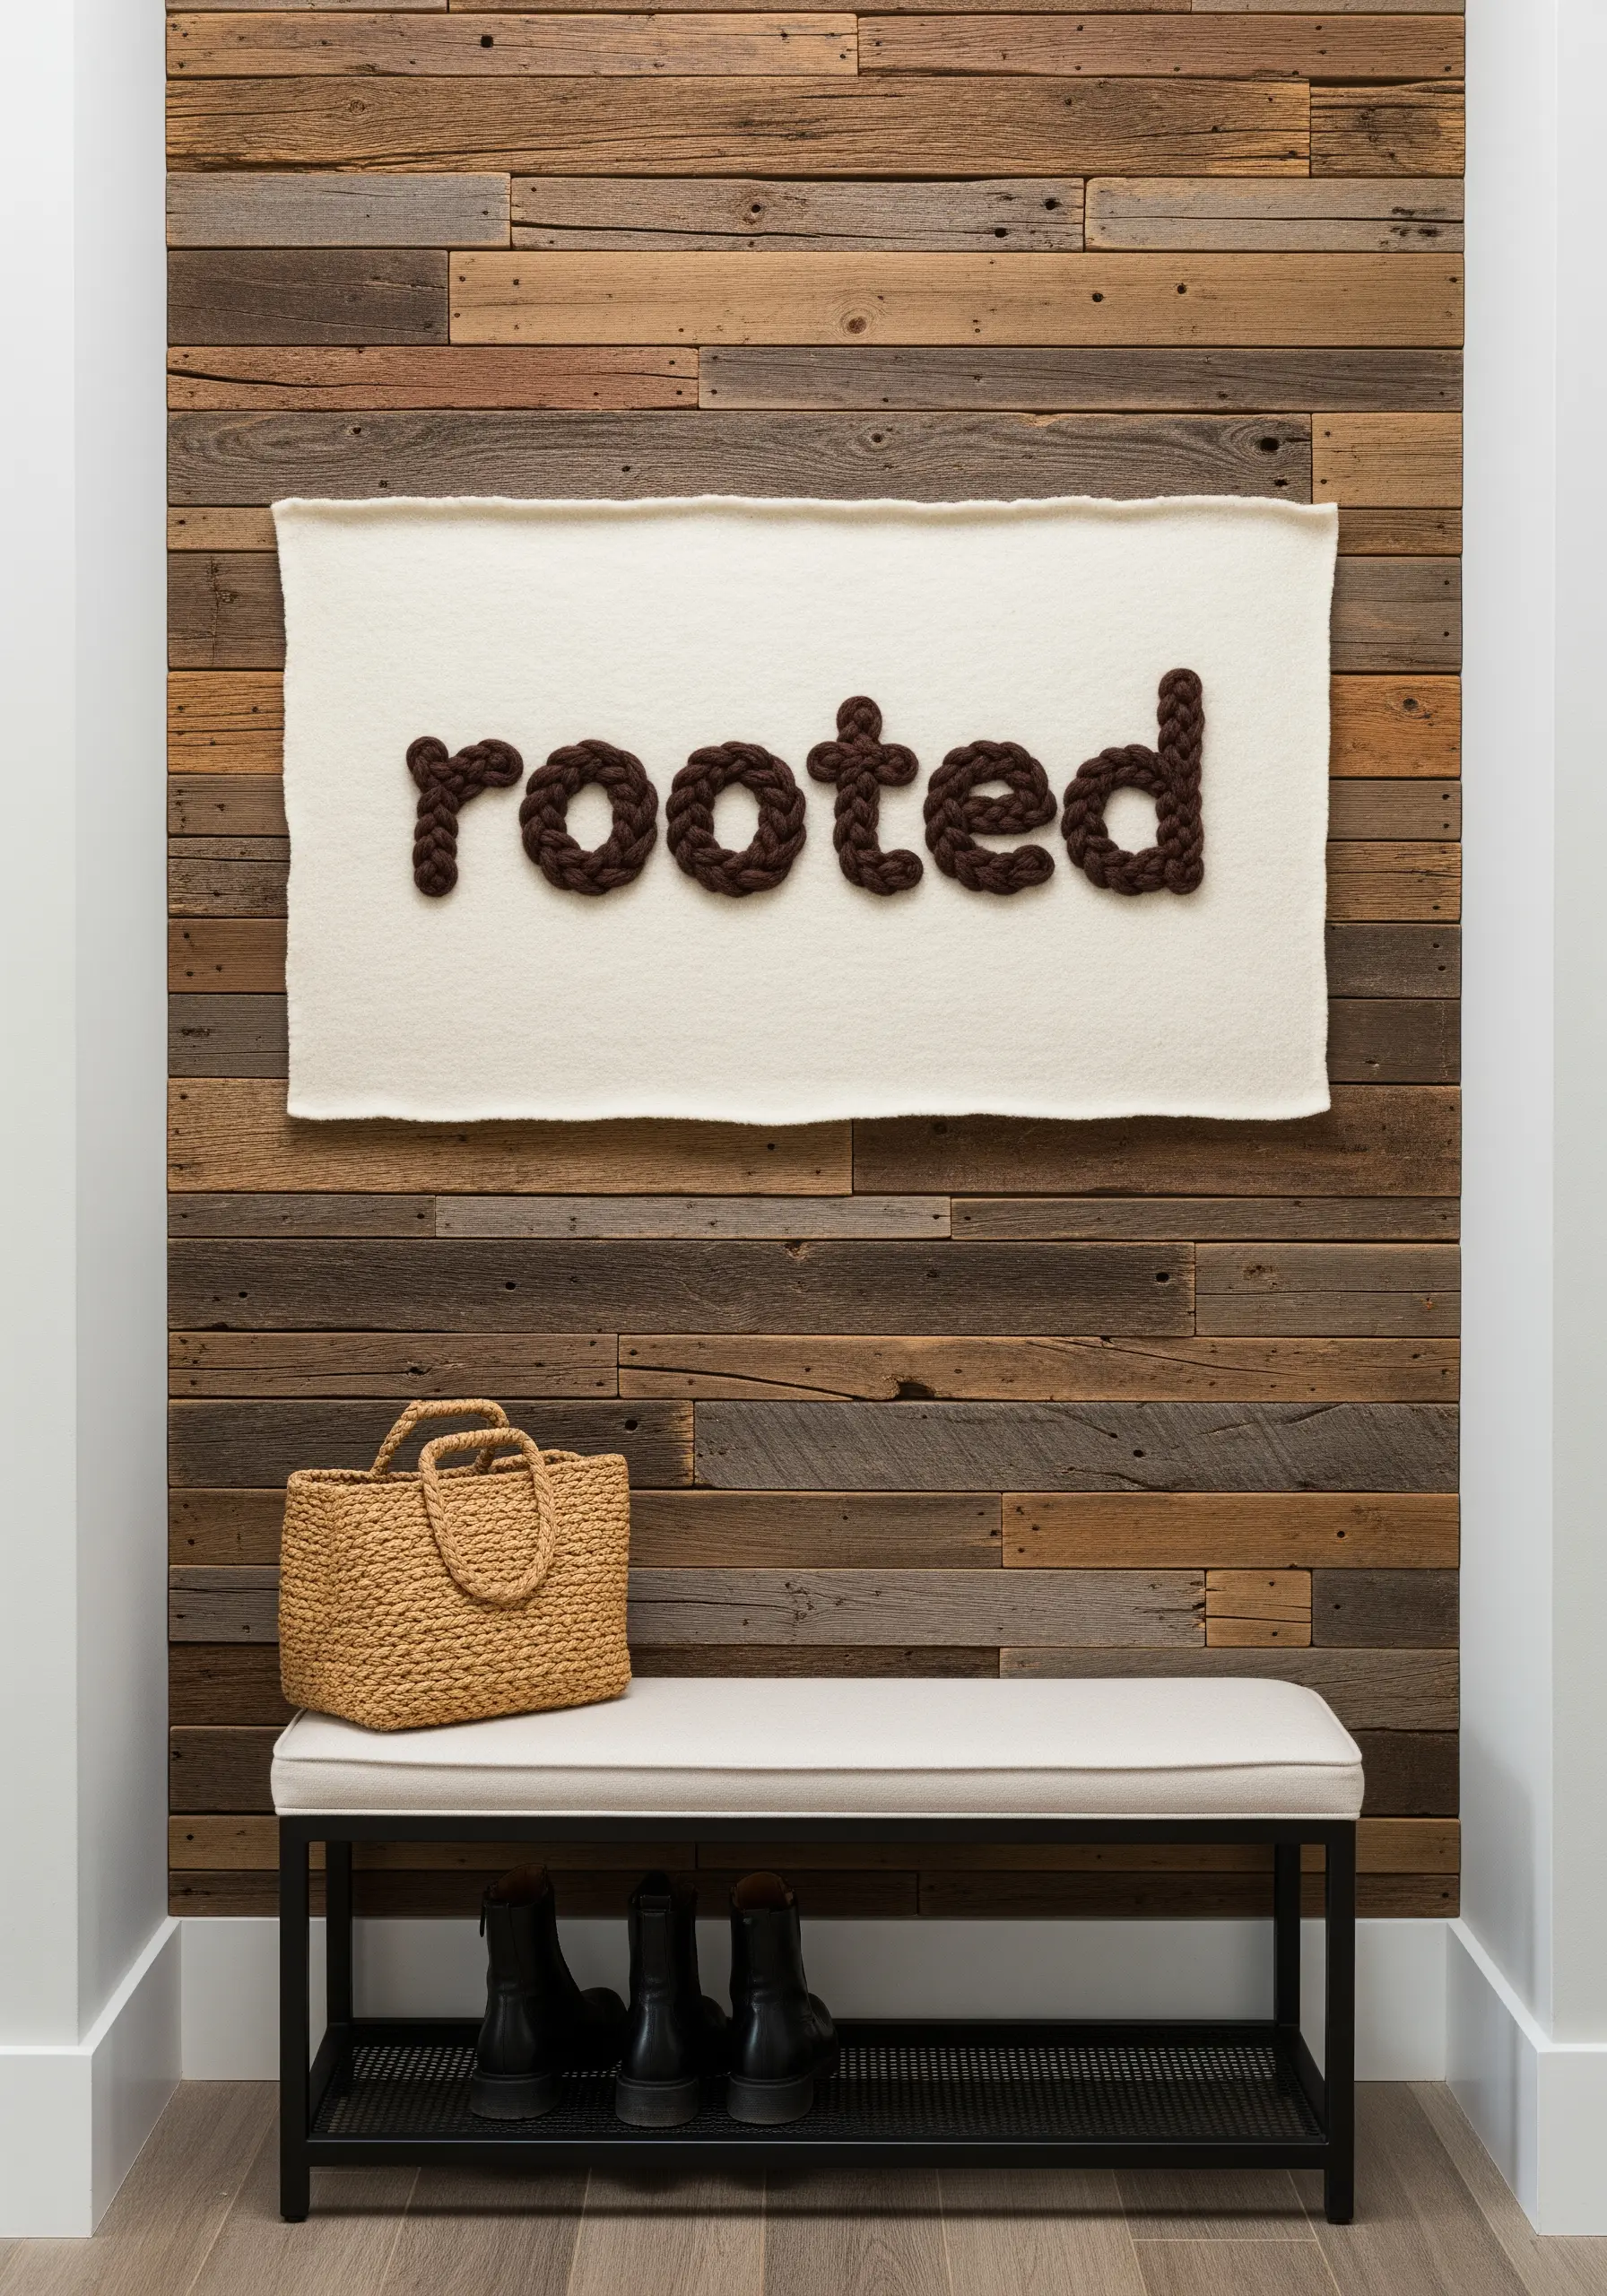
29. Cheerful Script with Couched Yarn
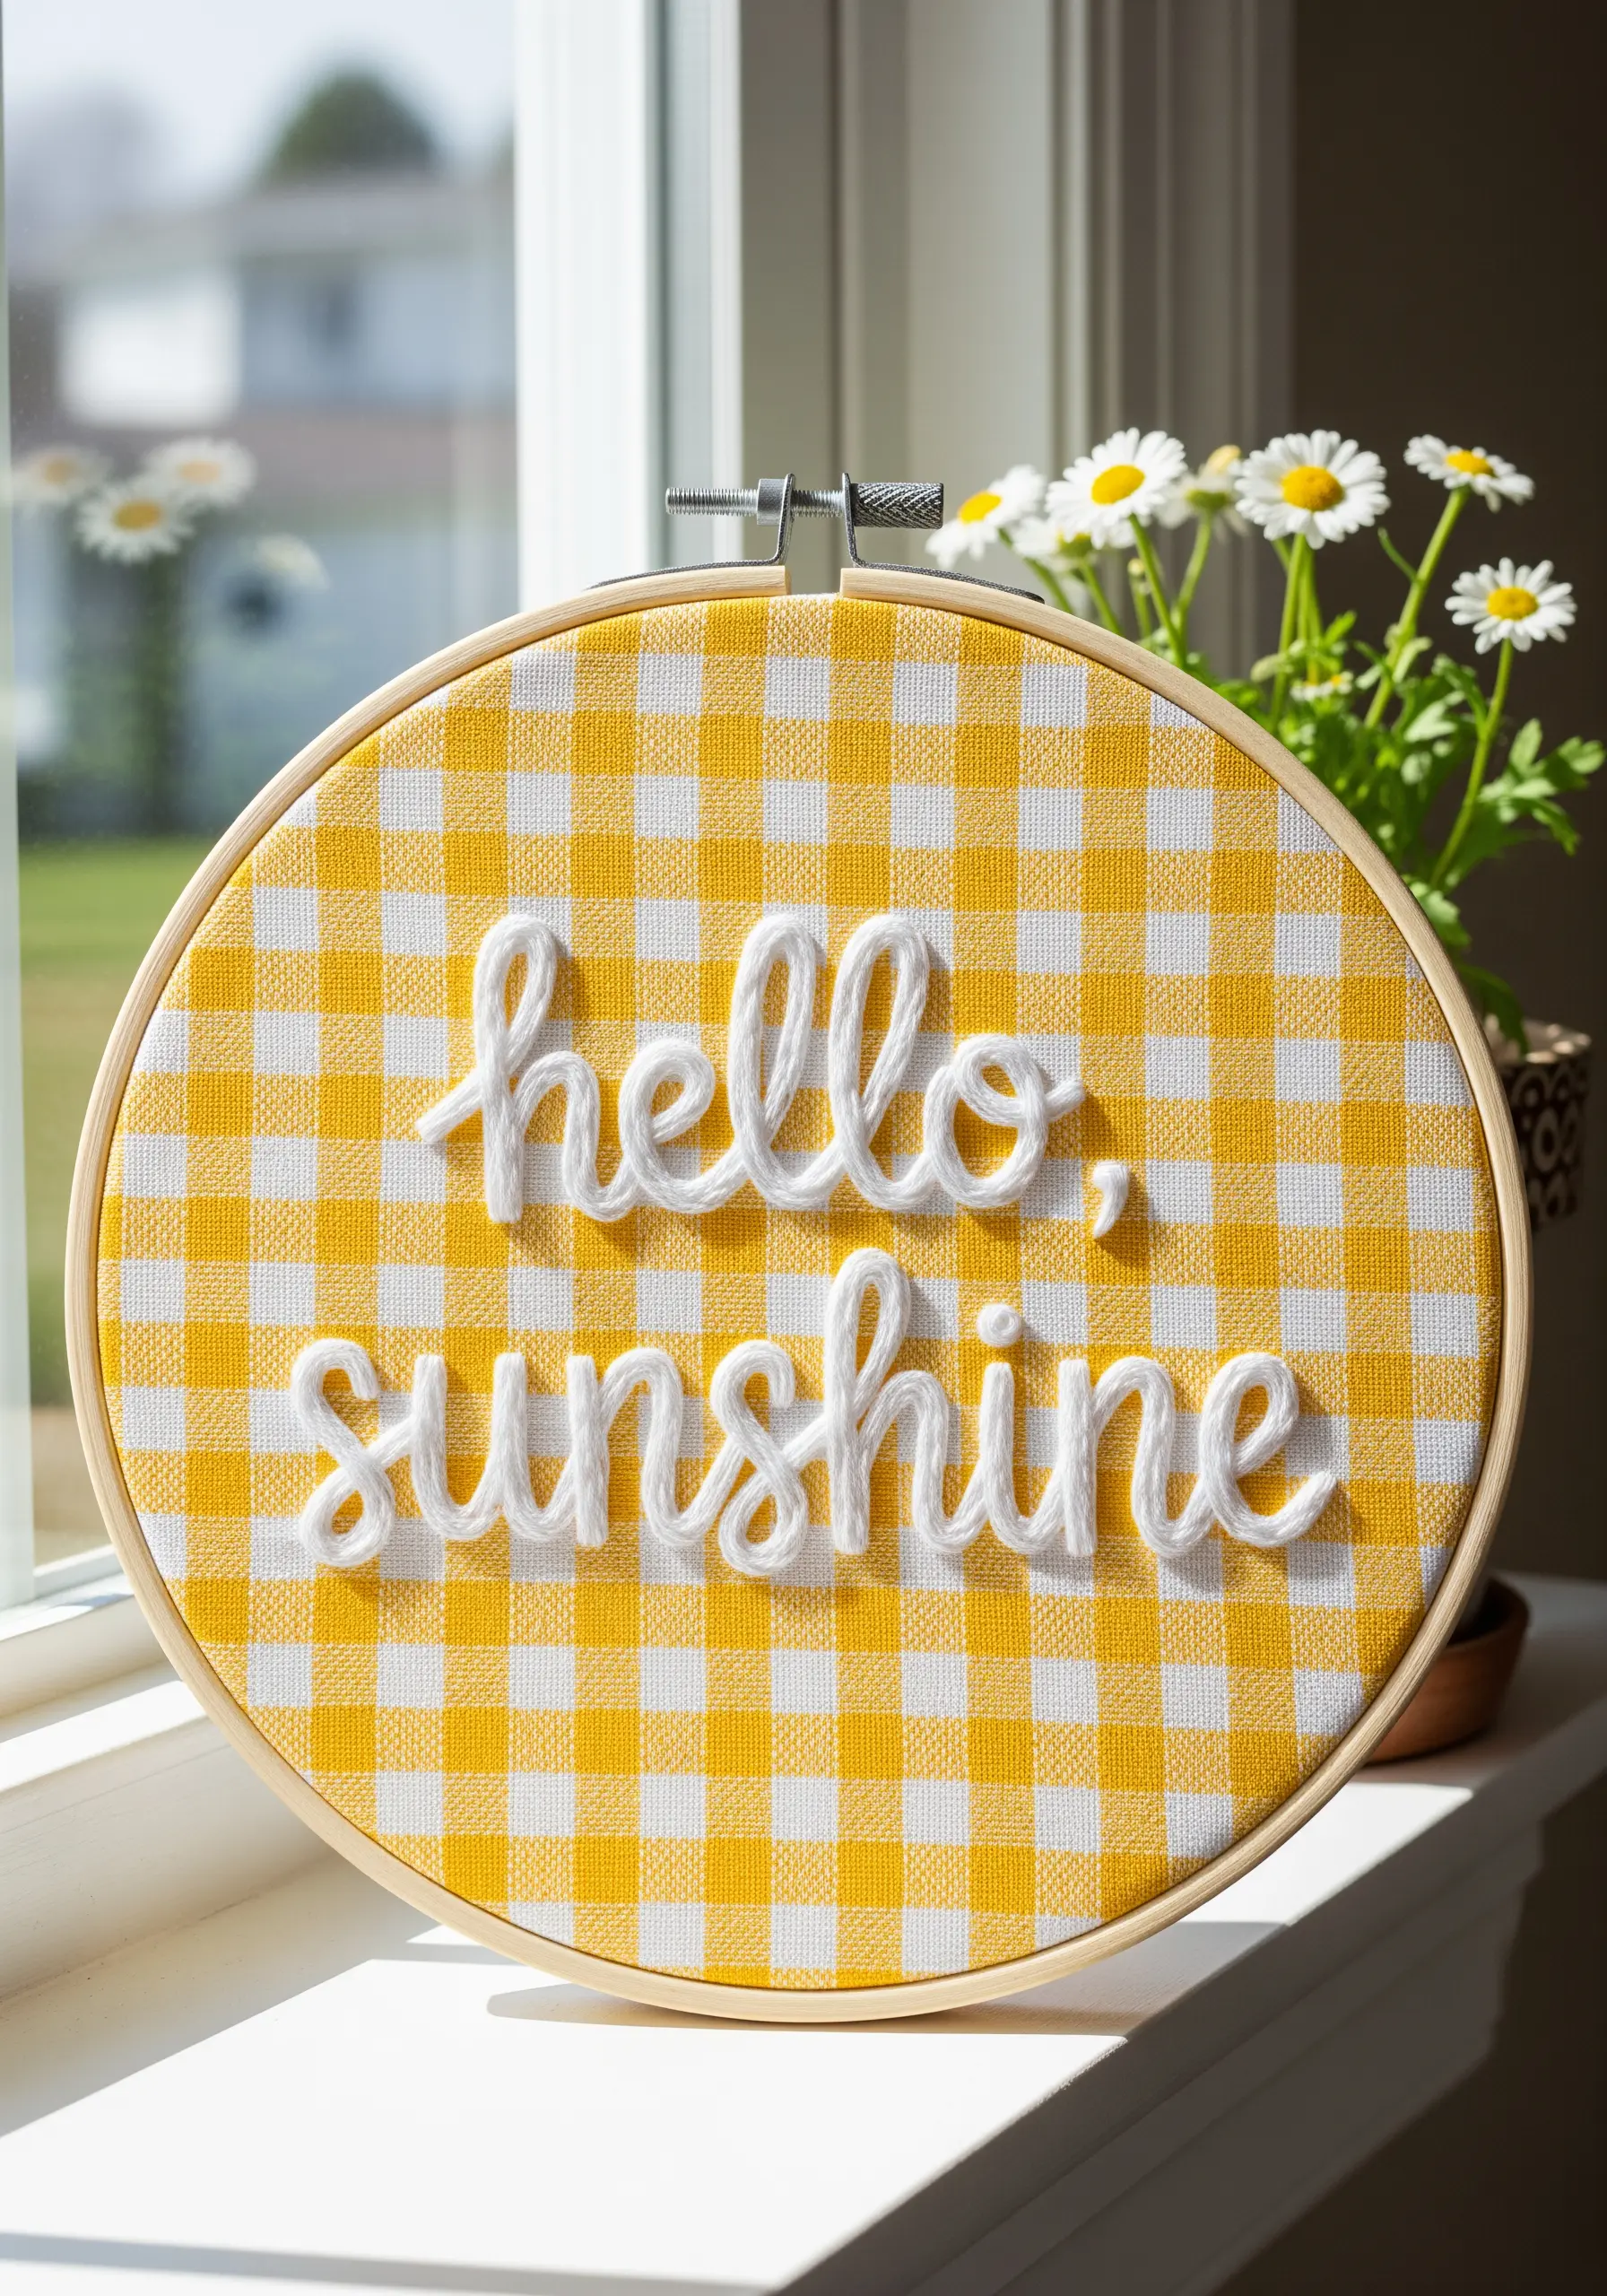
Couching is the perfect technique for creating this bold, 3D script that looks like it’s floating on the fabric.
Simply lay down a chunky yarn in your desired script, and then use a single strand of regular embroidery floss to tack it down with tiny, evenly spaced stitches.
The playful gingham background fabric enhances the cheerful, sunny disposition of this welcoming piece.
30. A Meditative Duo with Stenciled Text

This modern design plays with negative space to form the letters.
Instead of stitching the letters themselves, you stitch the area around them with rows of simple straight stitches or a seed stitch fill.
By leaving the letter shapes as un-stitched fabric, you create a cool, stenciled effect.
This thoughtful approach is perfect for meditative words like “inhale” and “exhale,” as the process of revealing the words is as mindful as the message itself.
31. Dynamic Flow with a Single-Line Script
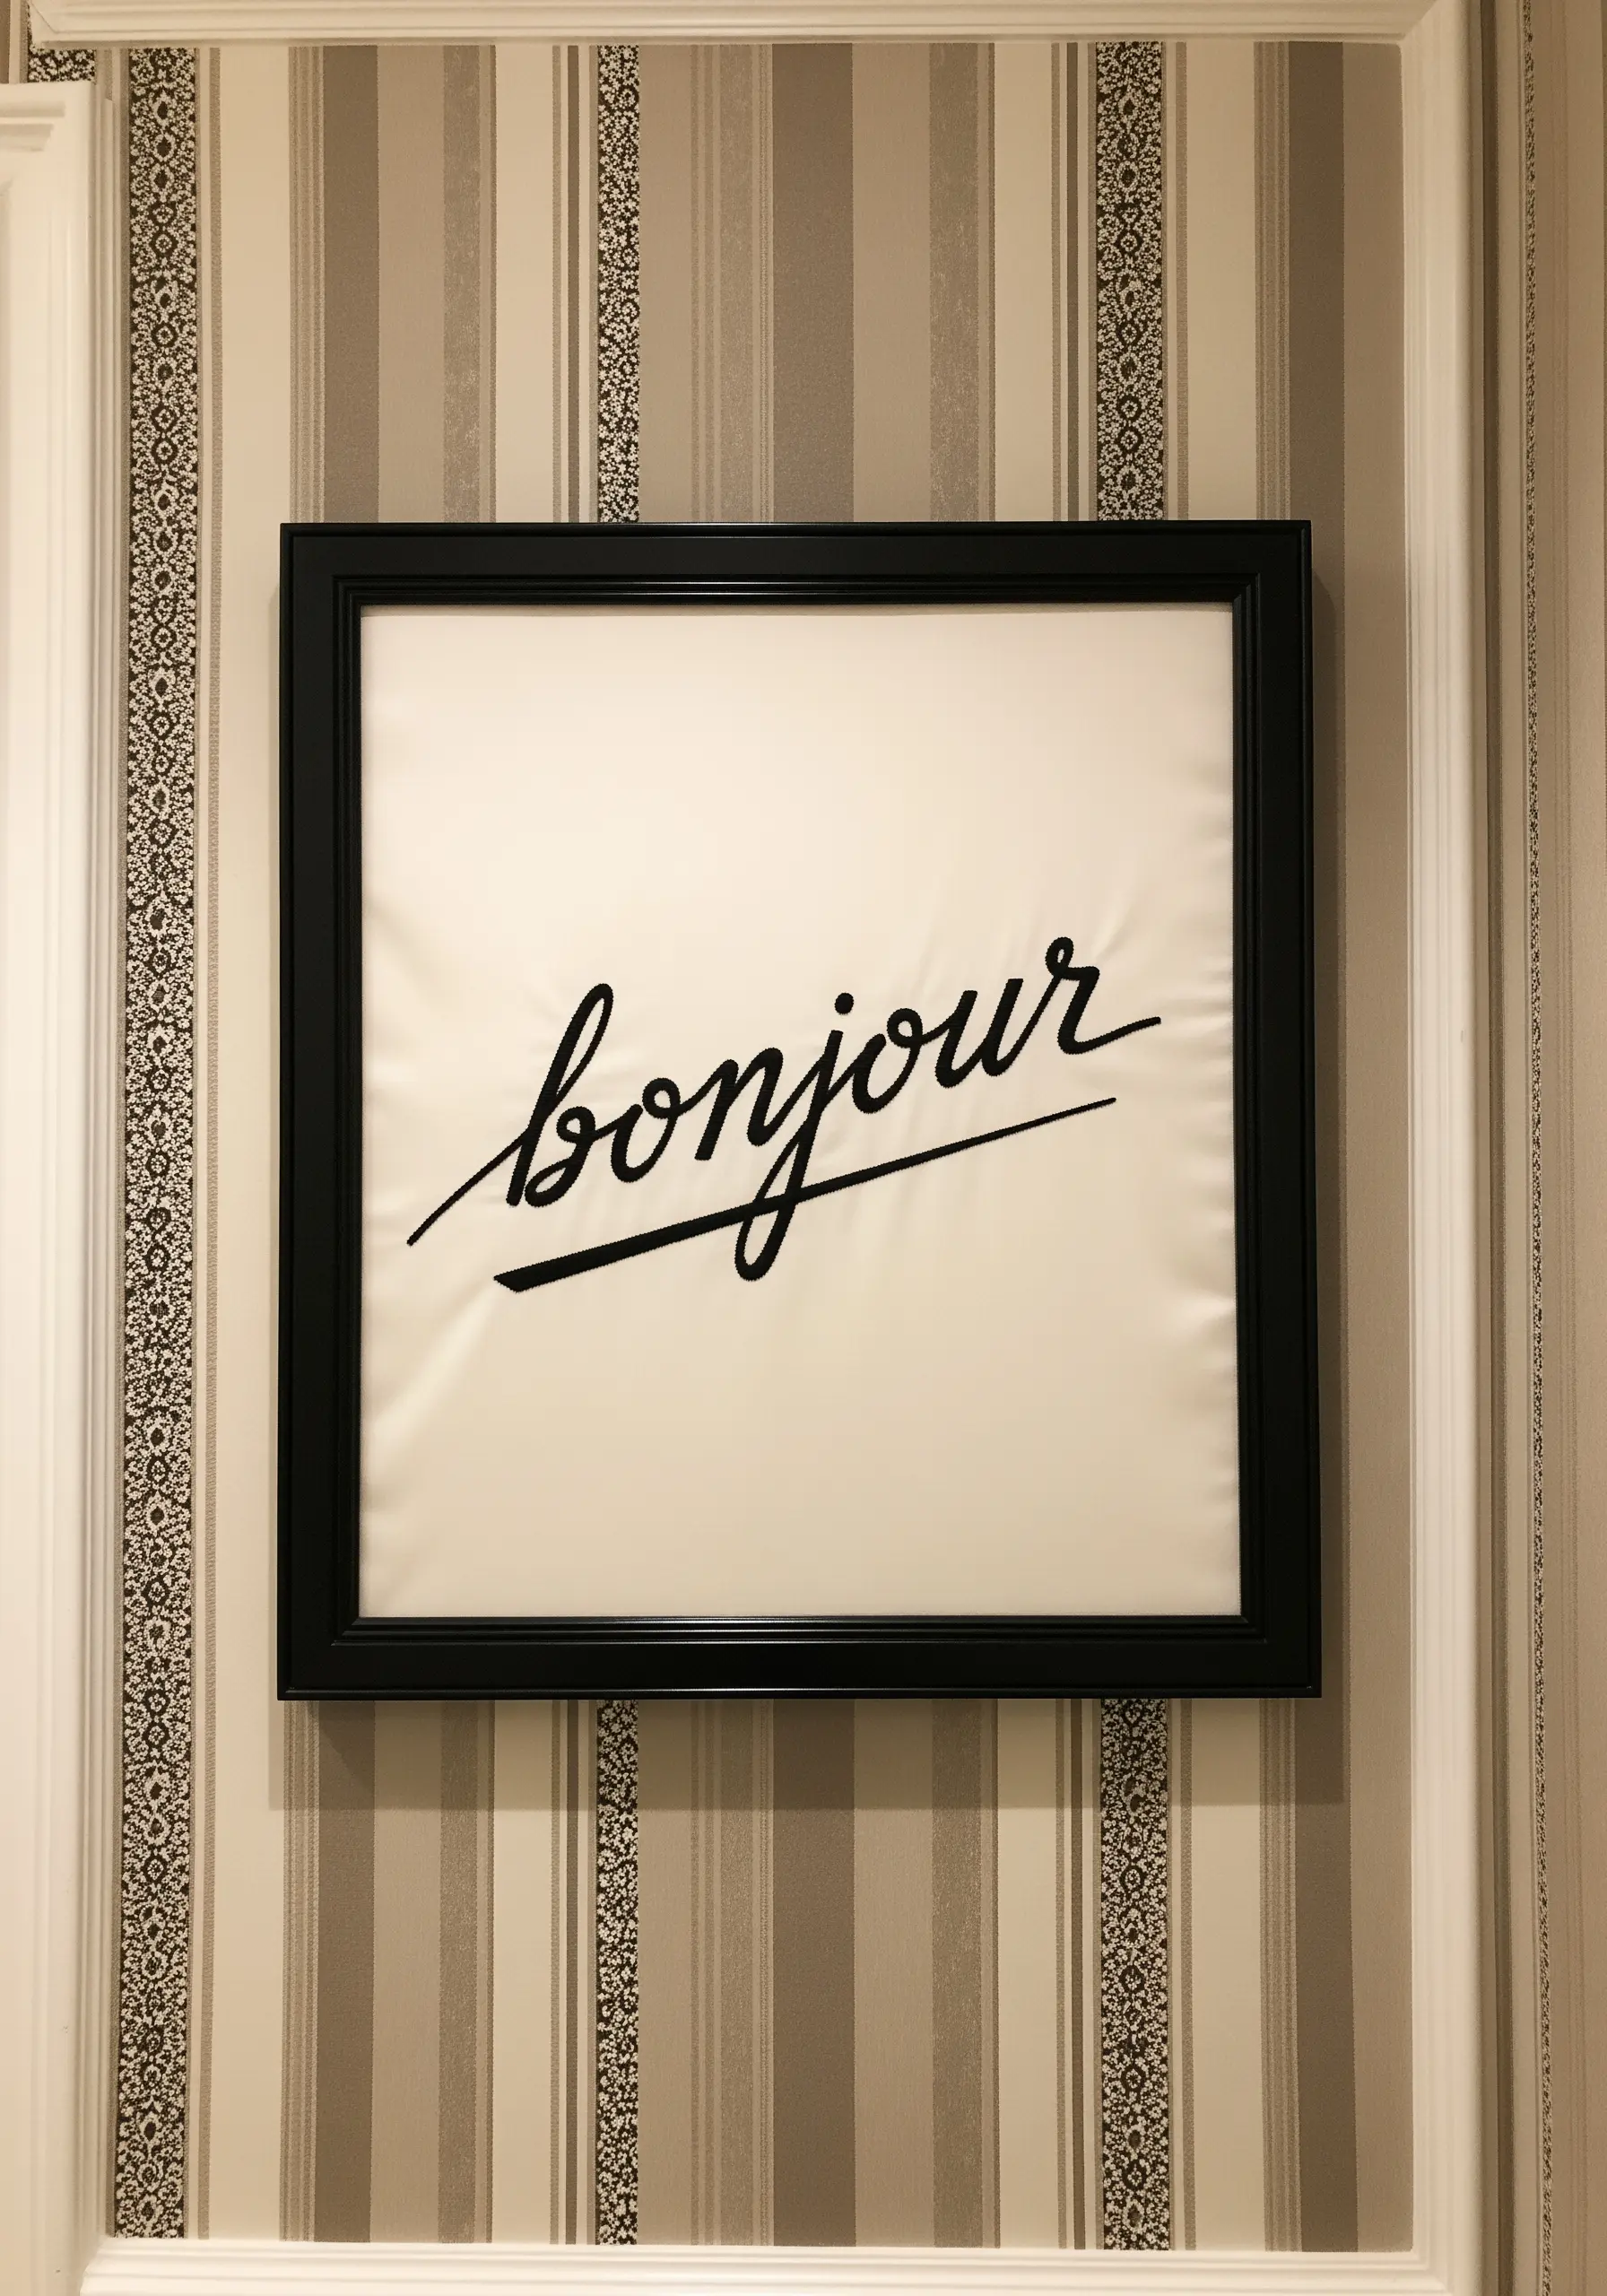
The elegance of this piece is in its fluid, unbroken line, reminiscent of a signature written in ink.
To achieve this seamless flow, use a stem stitch, which excels at navigating smooth curves.
The single, gestural underline adds a touch of personality and movement.
By keeping the palette to a classic black-on-white, you create a timeless and effortlessly chic statement.
32. Whimsical Charm with Mixed Fonts
Combine different lettering styles to add personality and visual interest to a phrase.
Use a smooth, flowing stitch like a whipped backstitch for the cursive words, and a simple, clean backstitch for the printed words.
This contrast creates a clear visual hierarchy.
The addition of tiny starbursts, made with clusters of simple straight stitches, fills the empty space and adds a final touch of playful charm.
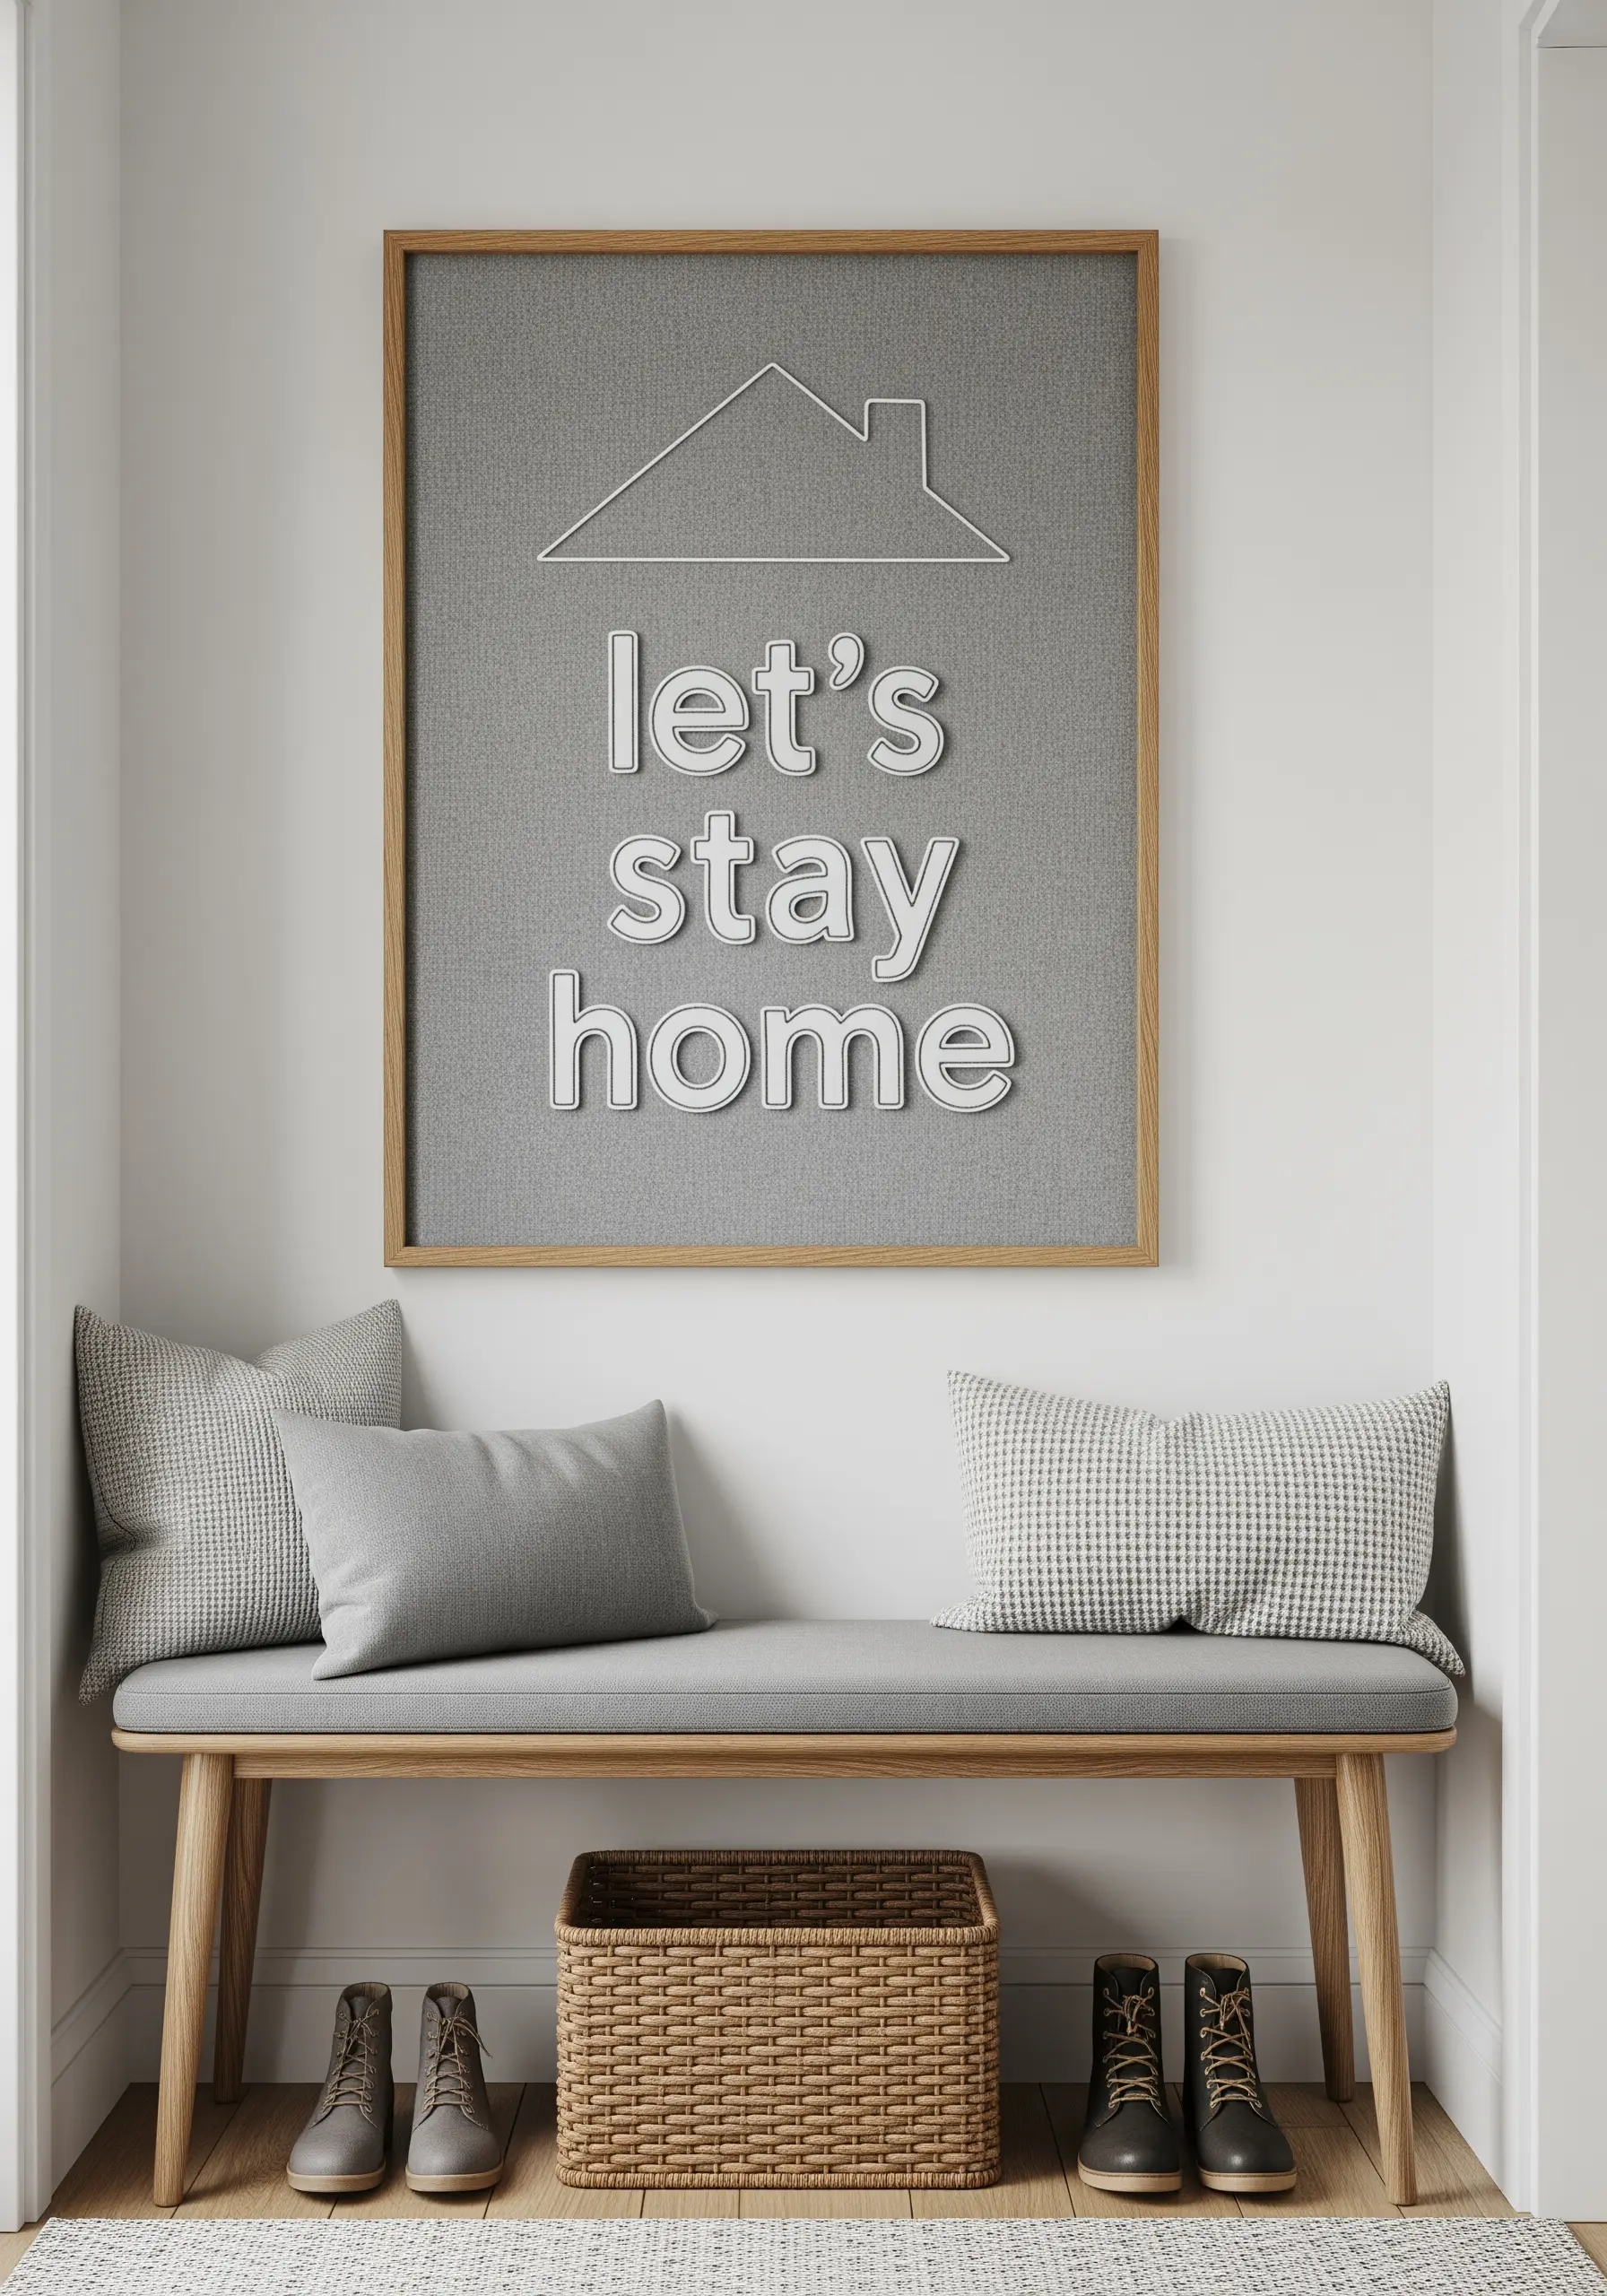
33. Minimalist Personalization with Line Art
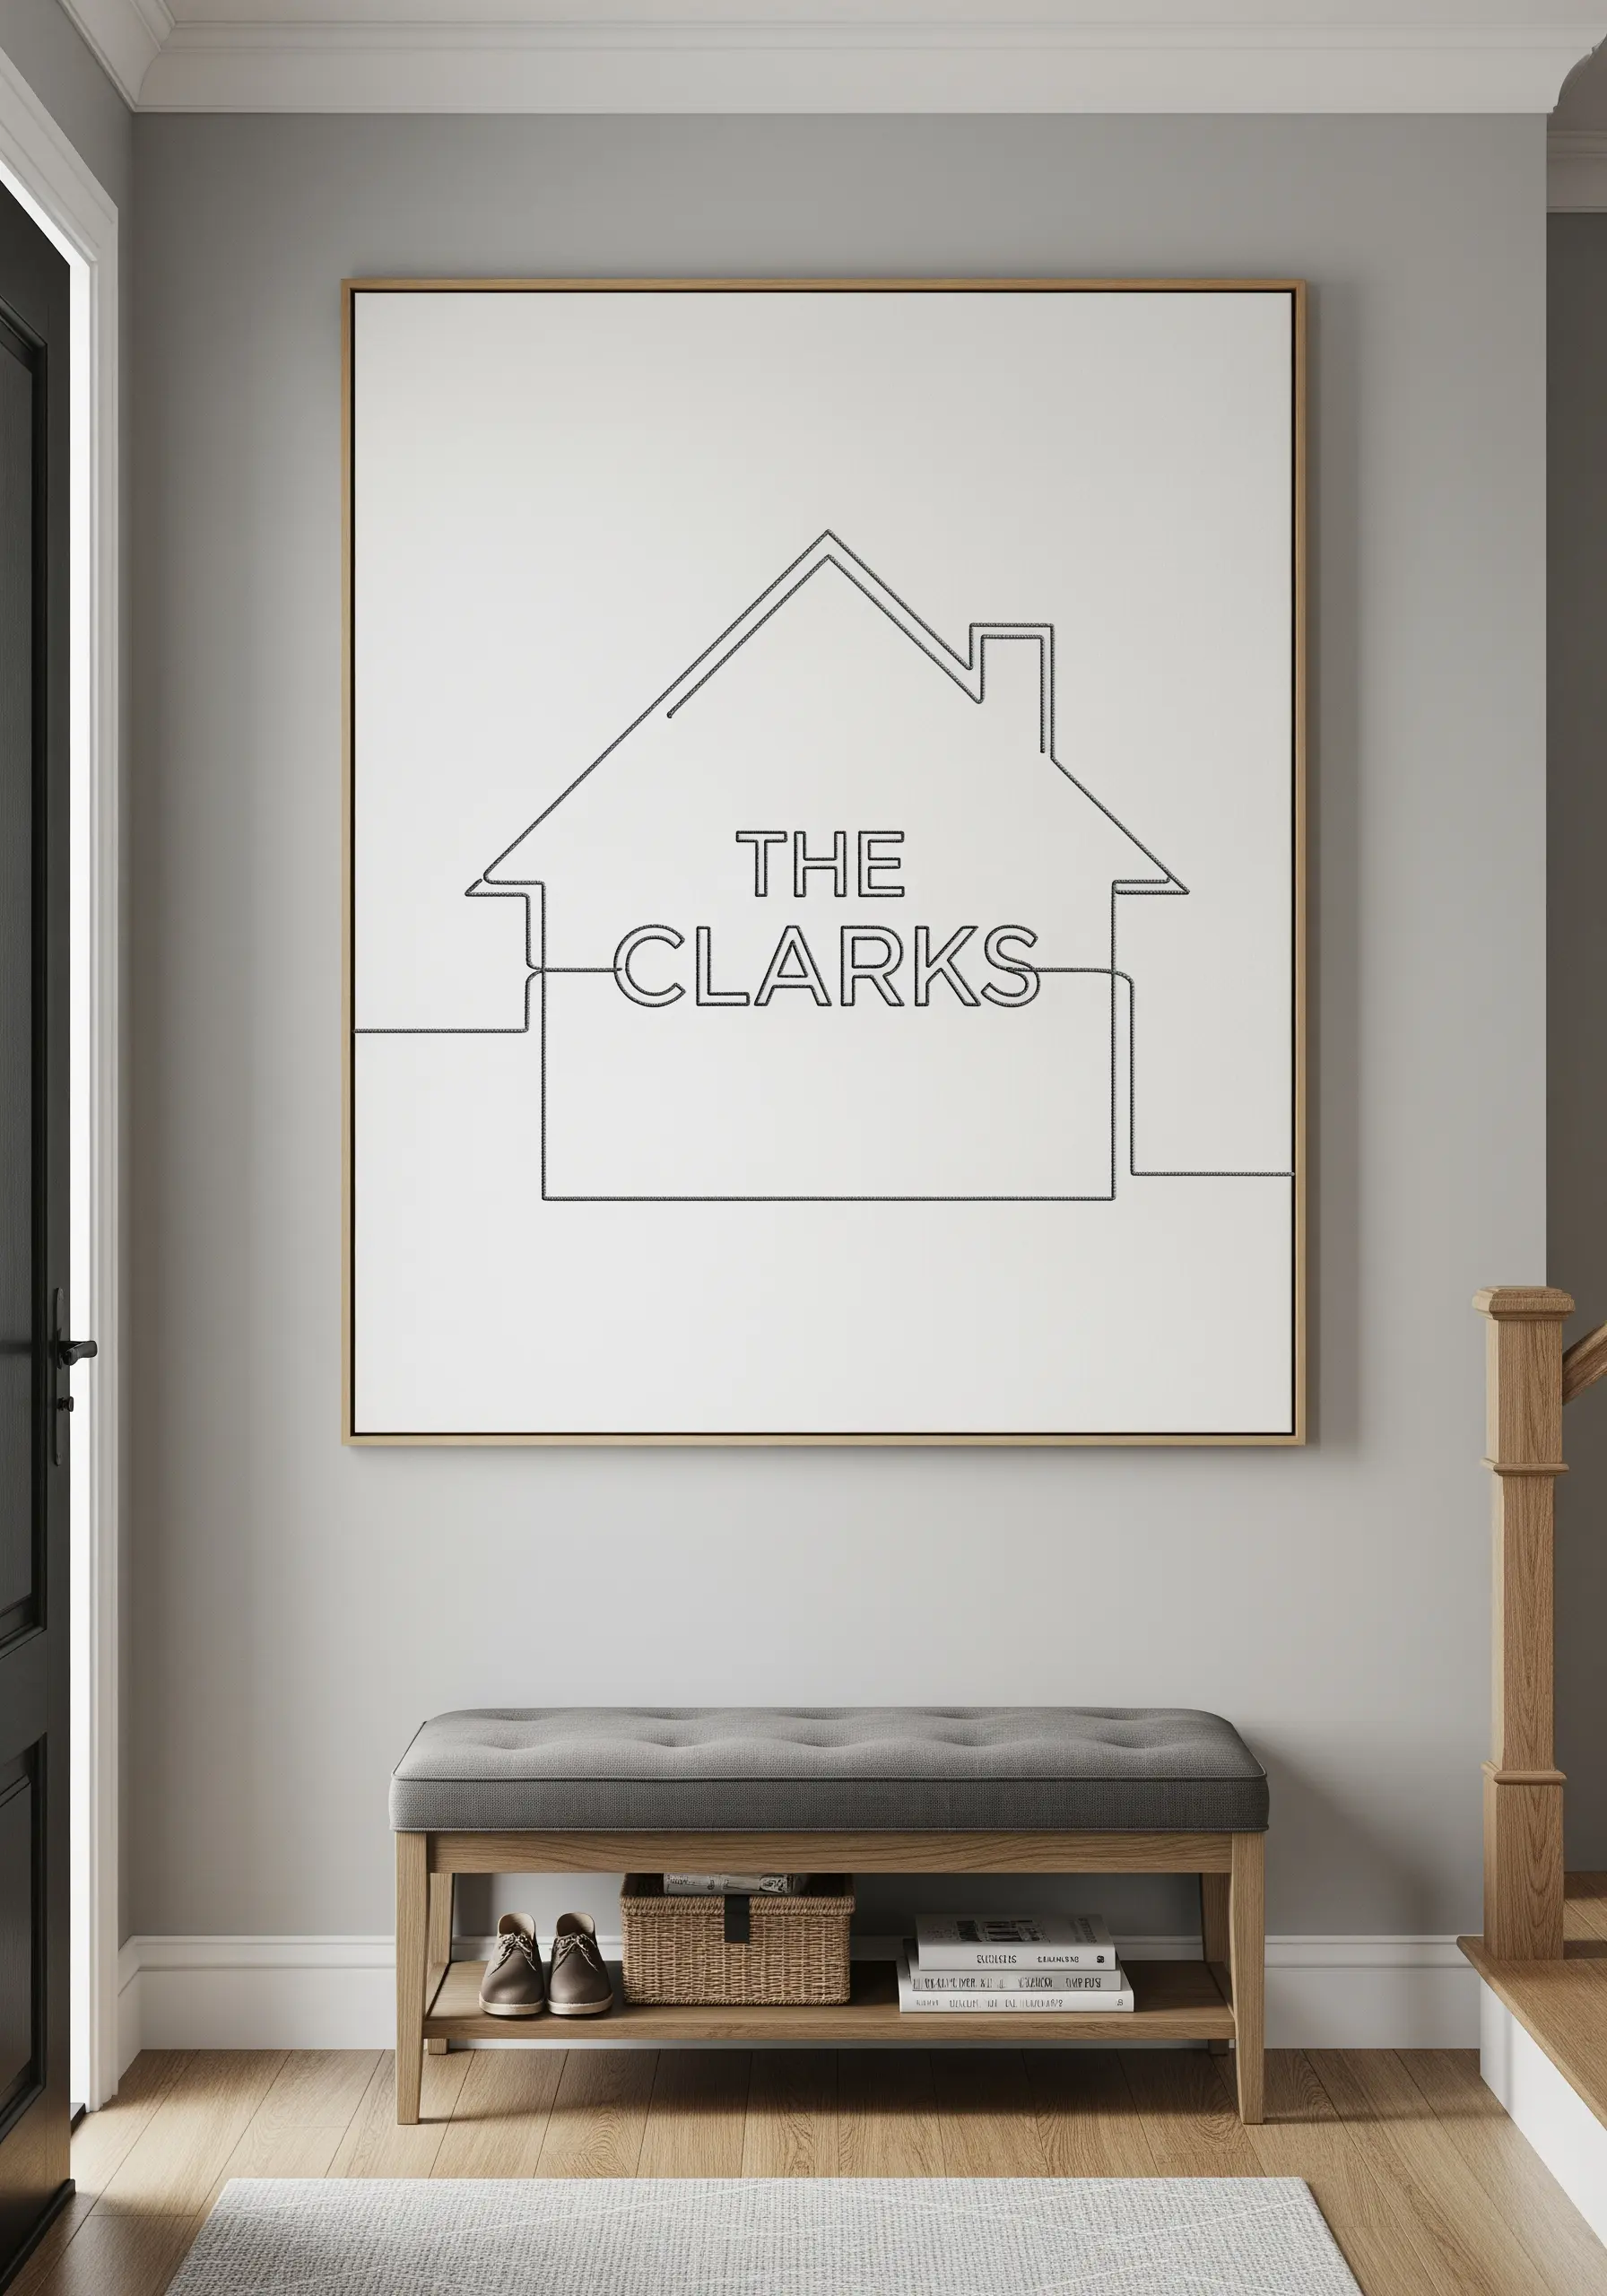
This is a perfect example of modern, minimalist embroidery that feels deeply personal.
Use a basic backstitch with two strands of floss to create the continuous line art of the house; the key is to pull each stitch taut for sharp corners and perfectly straight lines.
Pairing the simple illustration with a clean, sans-serif font for the family name maintains the clean, contemporary aesthetic.
34. Grounded Textures with Wrapped Yarn
To create this incredibly chunky, sculptural lettering, you need to build a structural base.
Form your letters using a sturdy material like wire or pipe cleaners.
Then, wrap the forms tightly and completely with a thick, textured yarn.
Finally, attach the finished letters to your canvas with strong, discreet stitches from behind.
This technique turns thread into a powerful, tactile sculpture that feels solid and grounded.


