
You have an hour tonight. Before the day ends, you can make something whole, something beautiful, something just for you. Embroidery doesn’t have to be a month-long commitment tied to an enormous pattern. It can be a quiet, focused moment where a single color of thread and a few well-placed stitches create a piece of art, complete from start to finish.
These small hoop designs are more than just quick projects; they are exercises in precision and intention. In minimalism, every stitch counts. This is your chance to perfect the curve of a satin stitch, the tension of a French knot, or the clean line of a single backstitch. It’s here, in these tiny frames, that you learn how one good stitch can be more powerful than a hundred rushed ones.
So pick a design that speaks to you. Choose a color that feels right for this exact moment. Let this be your permission to sit down and create, without pressure or expectation. In less than an hour, you’ll have more than just a finished hoop—you’ll have reclaimed a piece of your day for calm, creativity, and the simple, satisfying magic of needle and thread.
1. The Refined Botanical Outline
Create a clean, modern botanical look by focusing entirely on the quality of your line work.
Use a simple backstitch with three strands of floss—this provides a balanced weight that feels intentional, not flimsy.
For perfectly smooth curves, especially around the leaf notches, take shorter stitches.
This allows you to control the line with greater precision, preventing any sharp, awkward angles and ensuring the final piece feels fluid and organic.
2. Interlocking Metallic Forms

Working with metallic thread can be frustrating, as it tends to snag and unravel.
Instead of trying to force it through the fabric, use couching: lay the metallic thread on the surface and tack it down with a second, thinner thread in a matching color.
This technique gives you complete control over curves and placement, resulting in flawless, shimmering lines that catch the light beautifully.
The high contrast on black fabric makes the metallic thread appear even more luminous.
3. A Celestial Satin Stitch Study
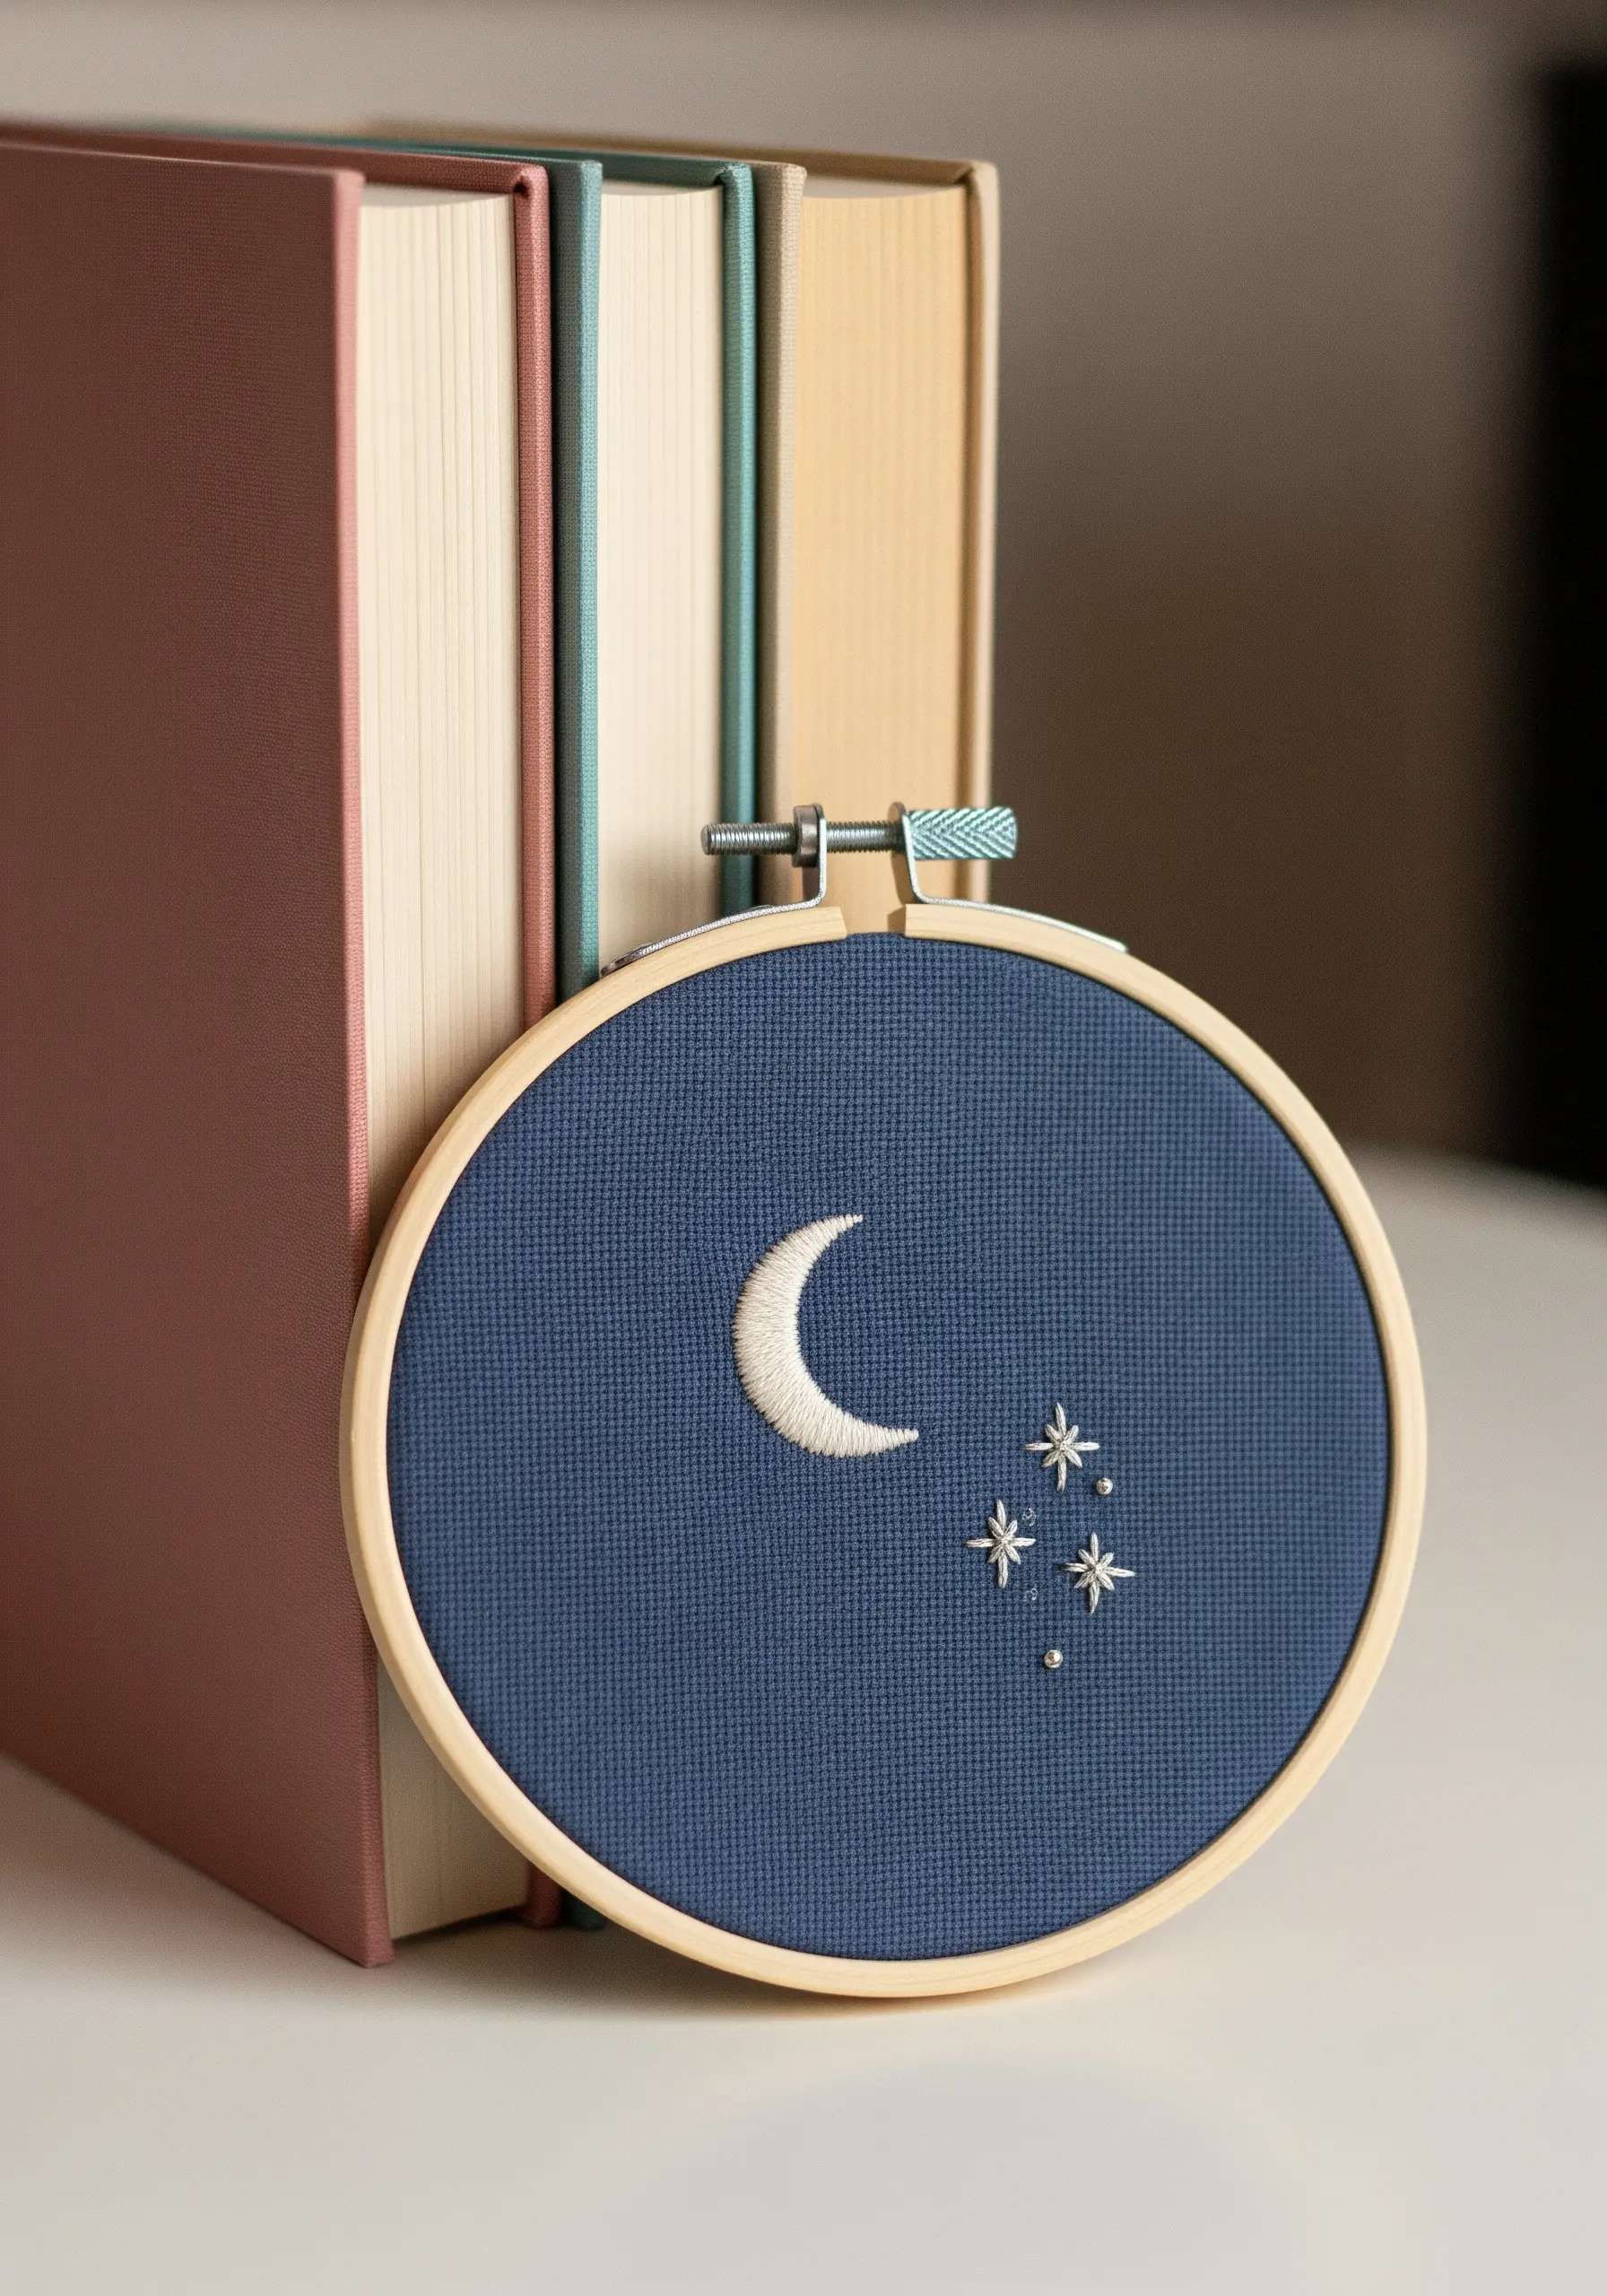
For a perfectly smooth, raised crescent moon, use padded satin stitch.
First, create an underlayer of small, horizontal stitches within the shape’s outline.
Then, cover this padding with your final satin stitches, working vertically from one tip of the crescent to the other.
This simple preparation lifts the stitches away from the fabric, giving your tiny night sky embroidery designs a subtle, professional 3D effect.
The stars are simply straight stitches and tiny seed beads for a hint of sparkle.
4. Sculptural Color-Blocked Waves
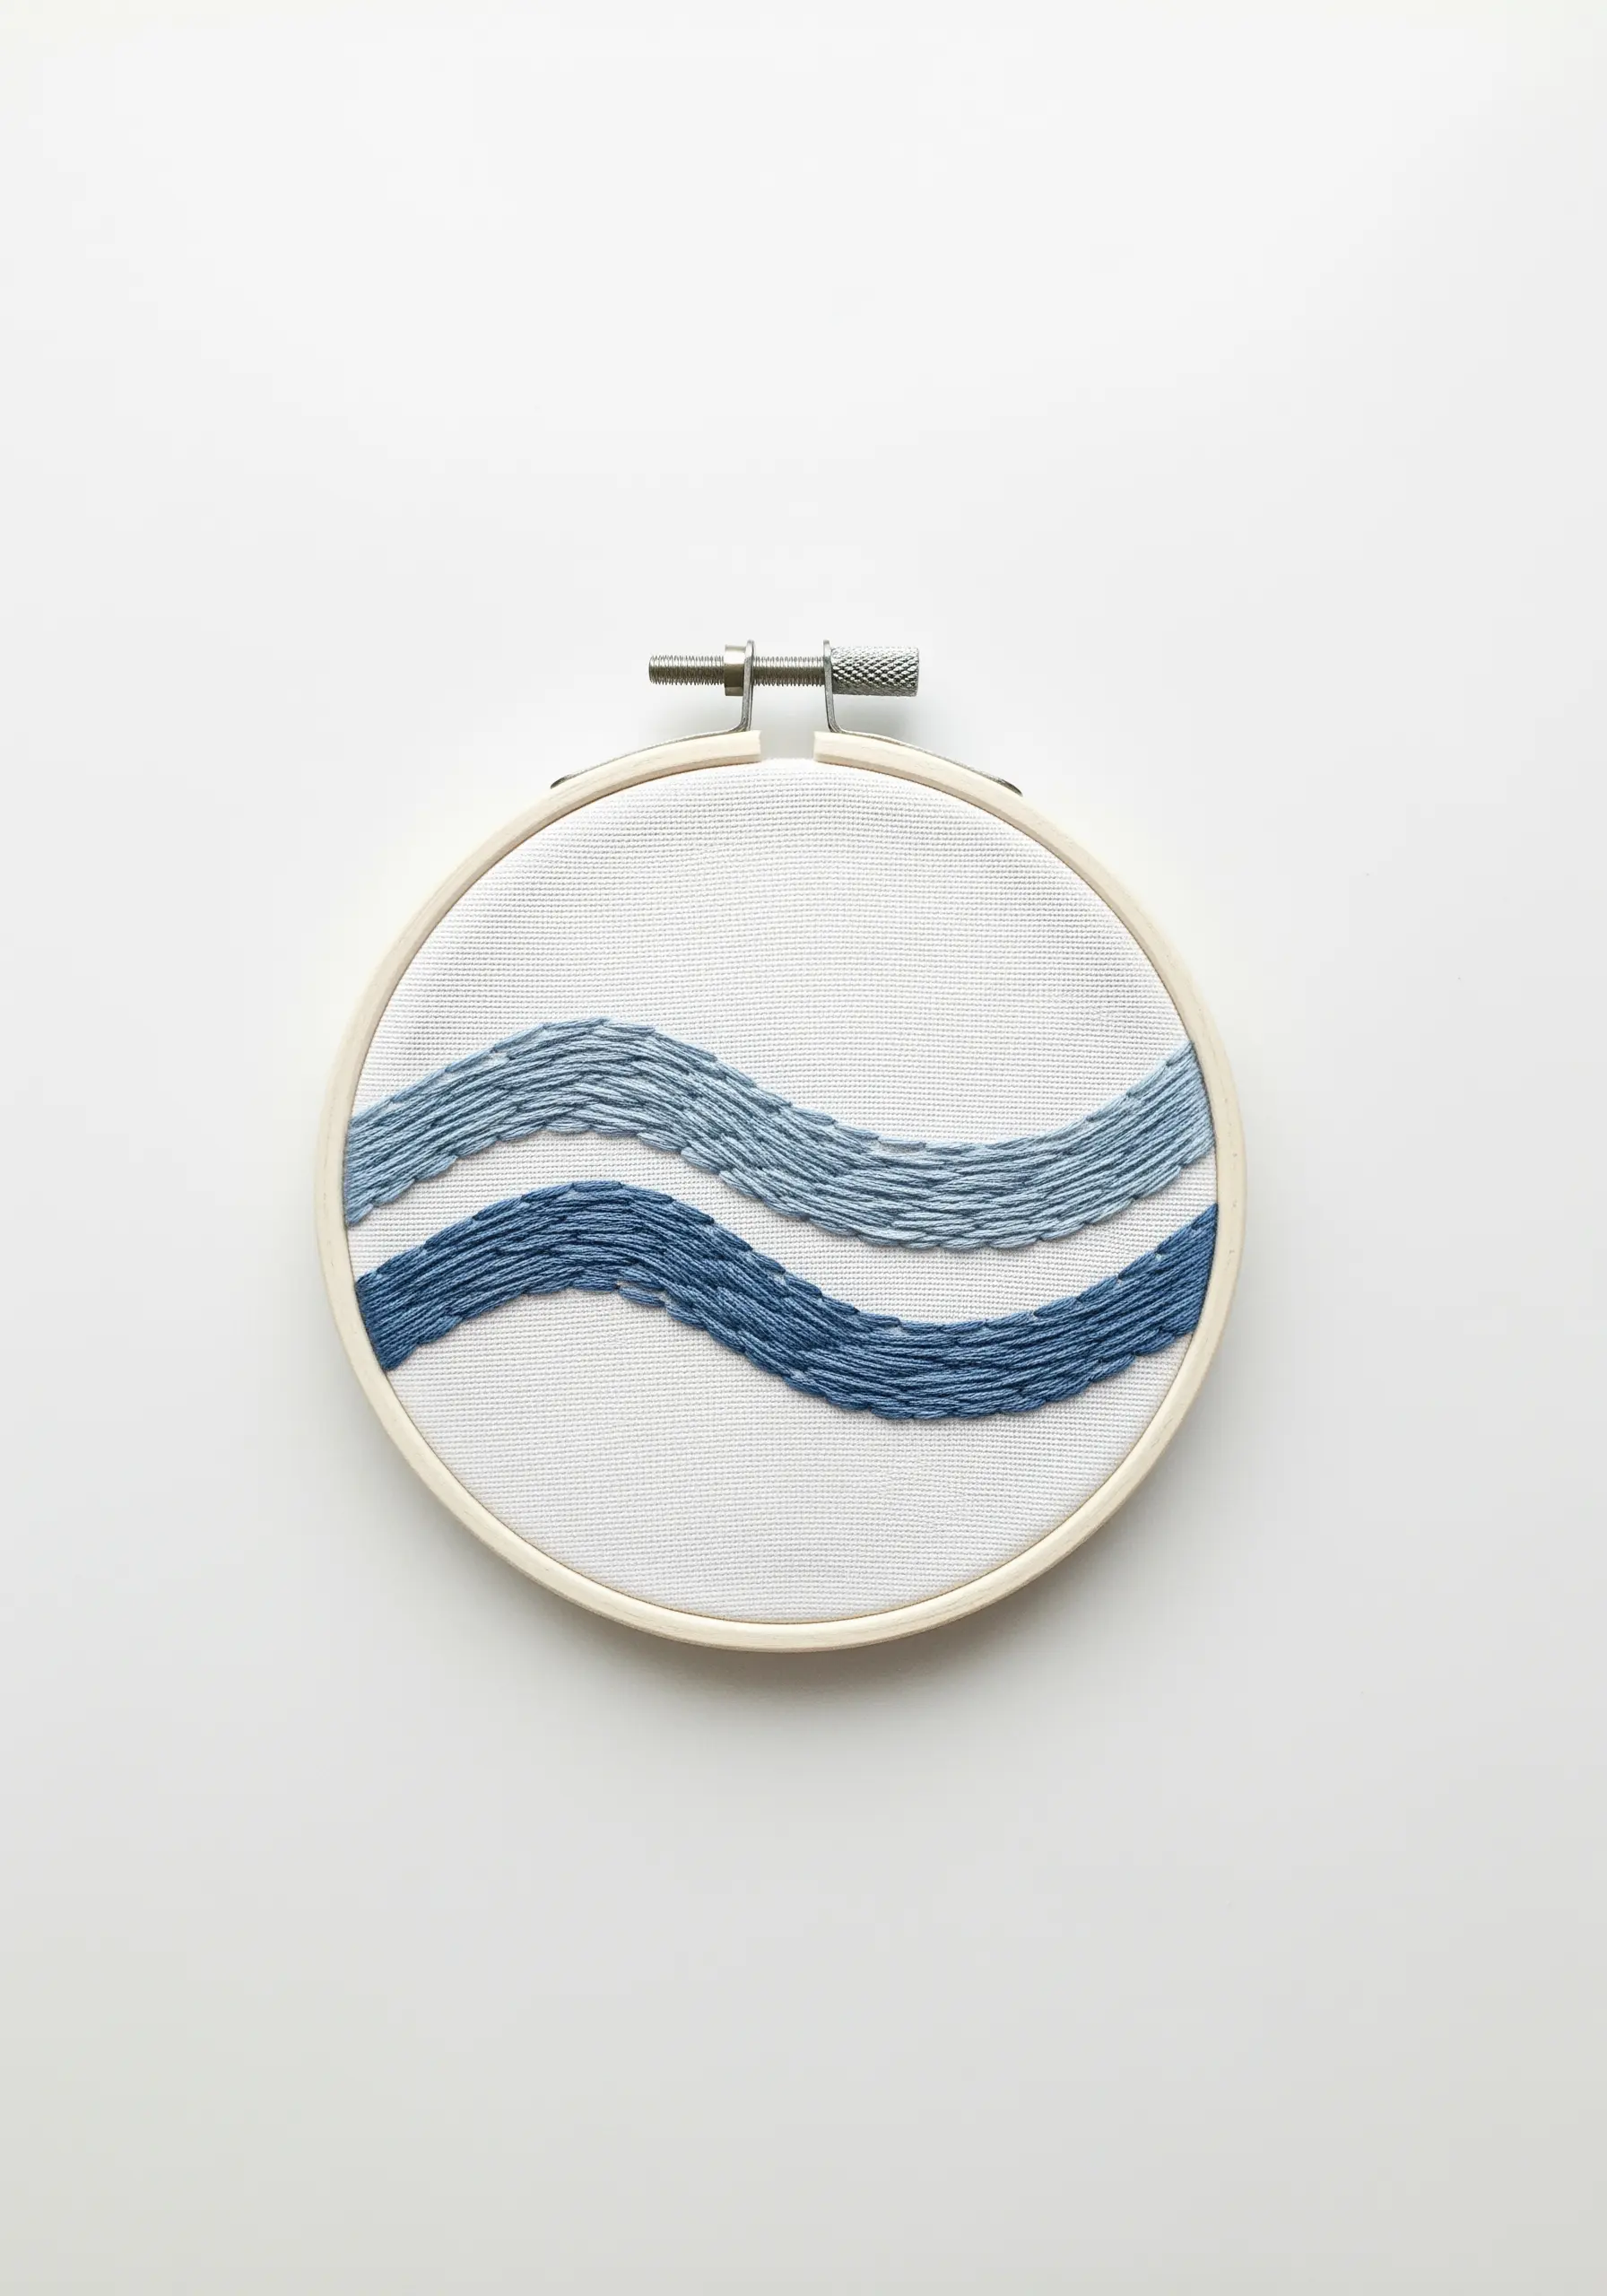
This design’s power lies in using stitch direction to imply movement.
Fill each wave with satin stitch, but ensure the angle of your stitches in the top wave is slightly different from the bottom one.
This subtle shift creates a dynamic tension between the two forms.
To keep your edges perfectly crisp, first outline each shape with a split stitch before filling—it acts as a containing wall for your satin stitches, preventing them from looking uneven.
5. Textural Lavender Sprigs
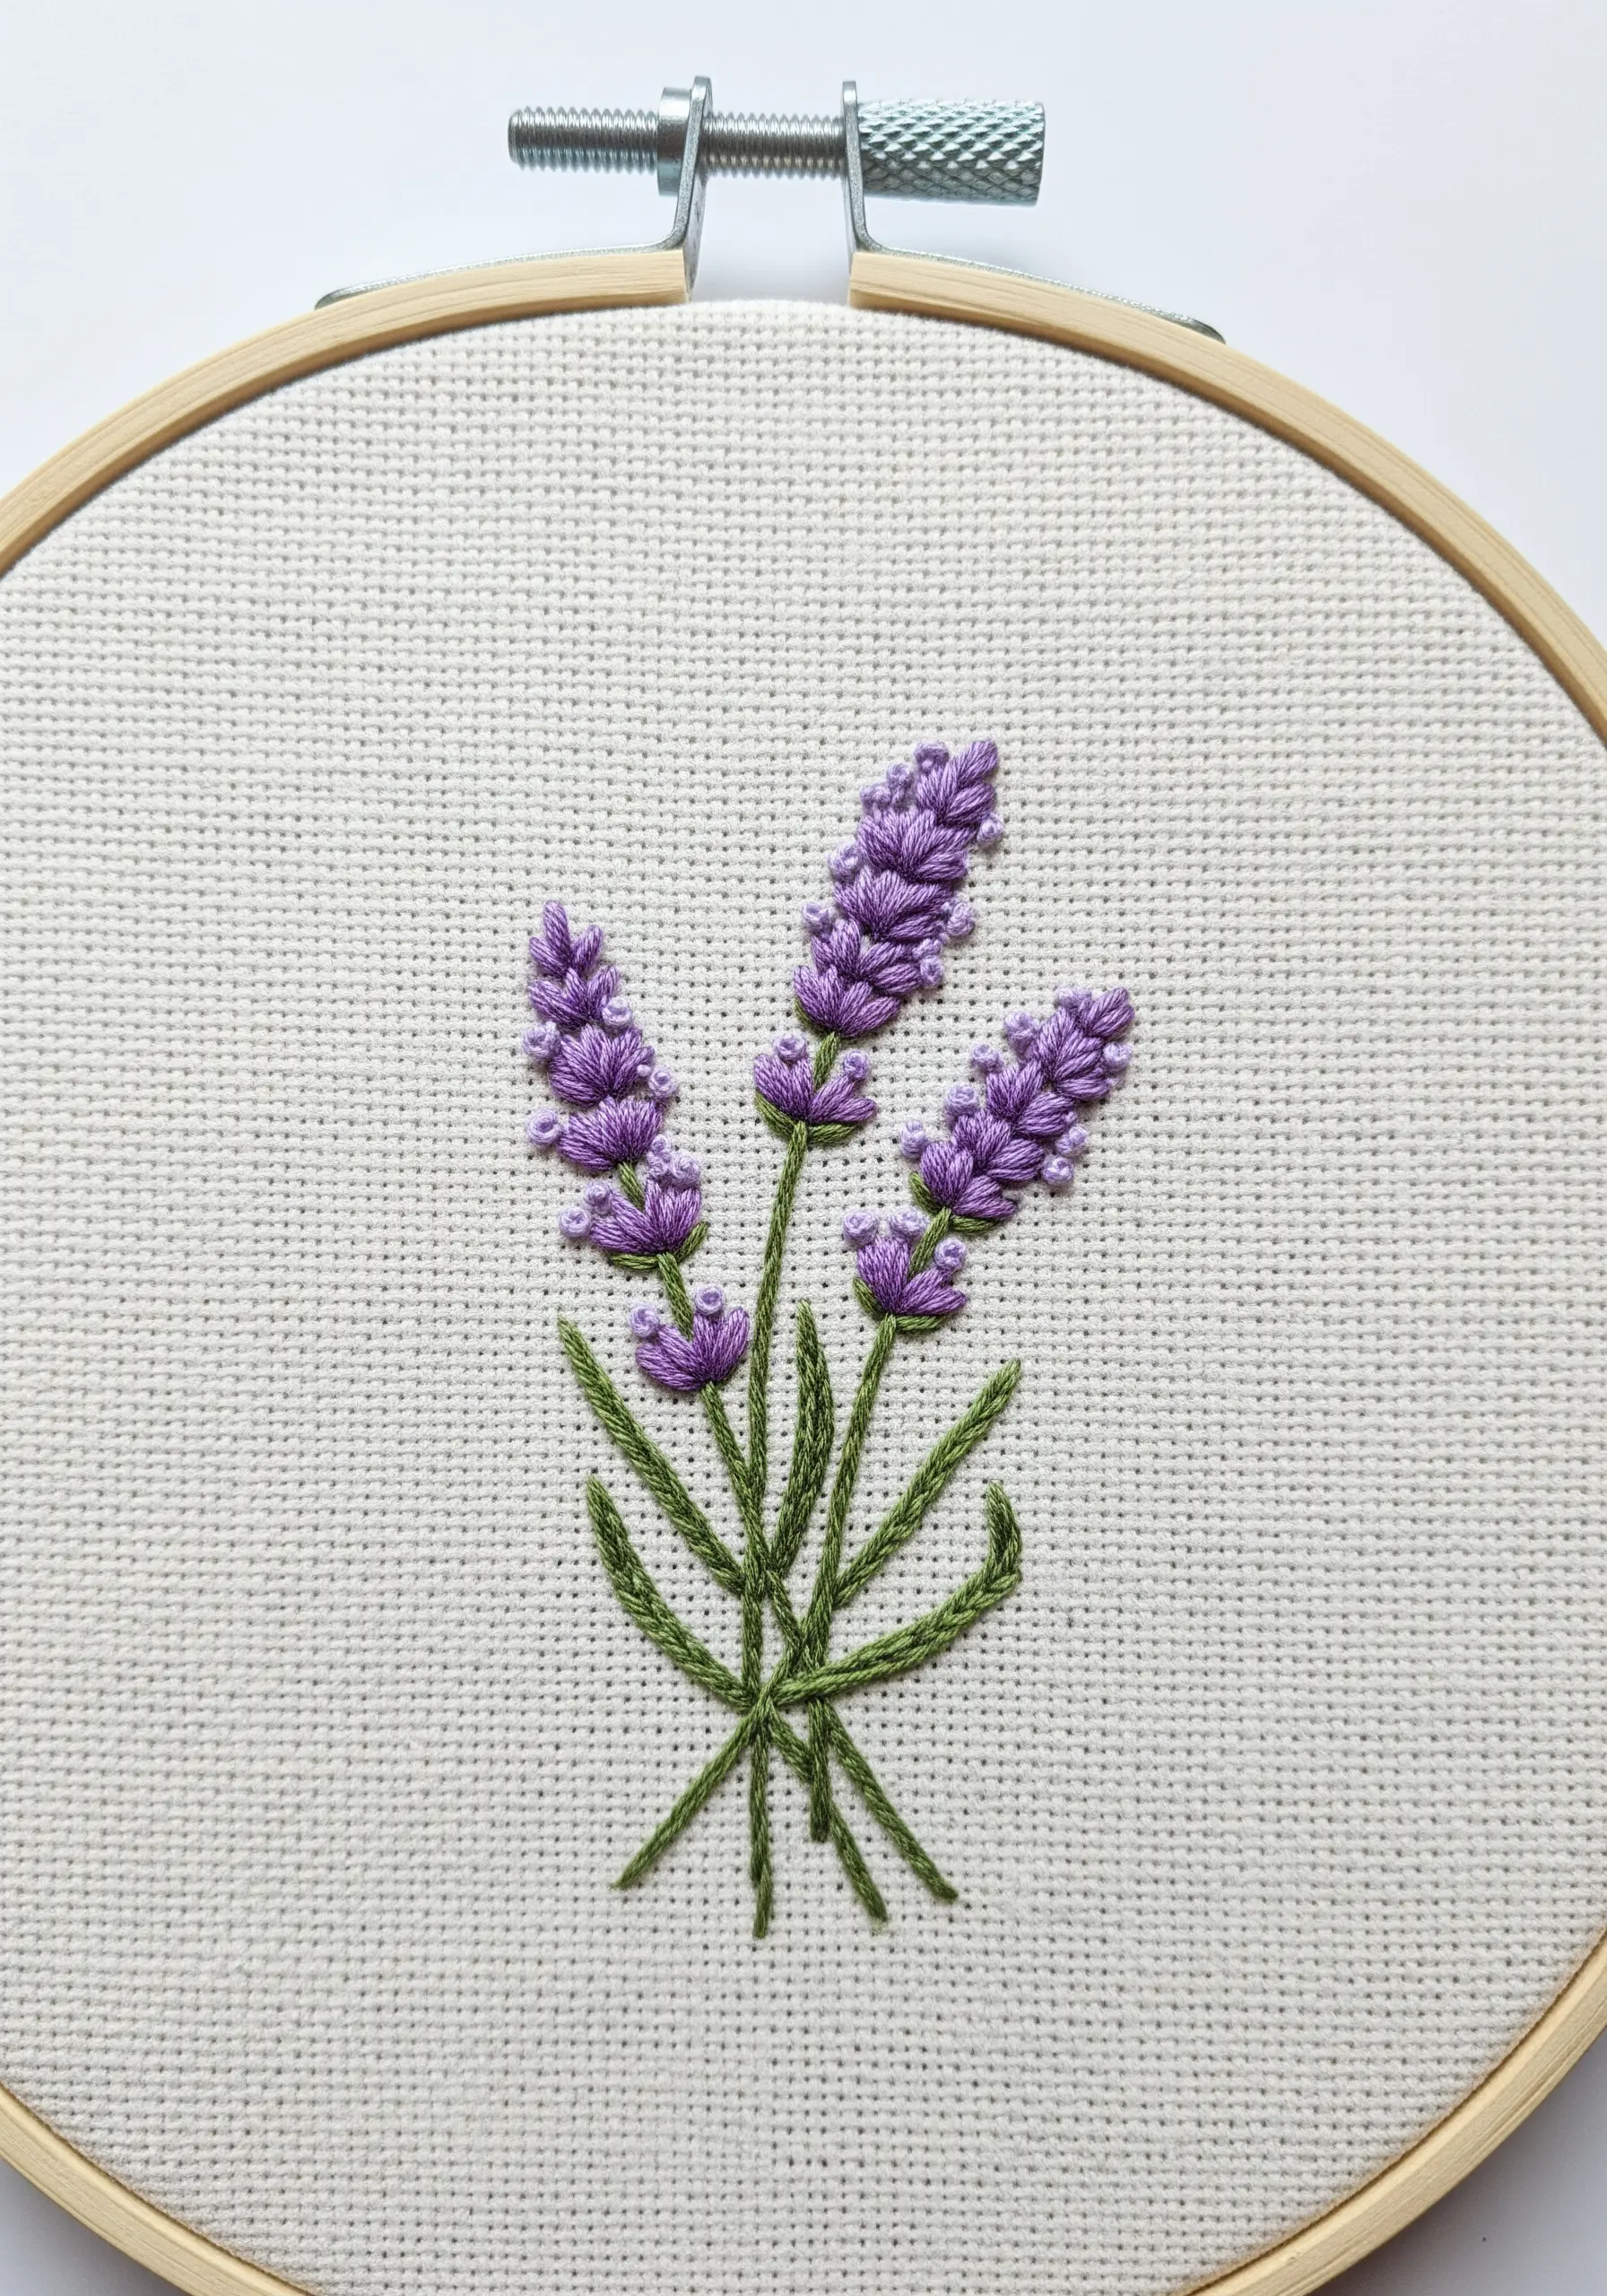
This classic motif is a perfect study in combining stitch textures.
Use three strands for the French knots to create plump, substantial lavender buds that stand out from the fabric.
For the stems and leaves, switch to a finer two-strand straight stitch.
This contrast in thread weight is what gives the delicate lavender stitch ideas their realistic depth and delicate appearance.
6. The Minimalist Line Drawing
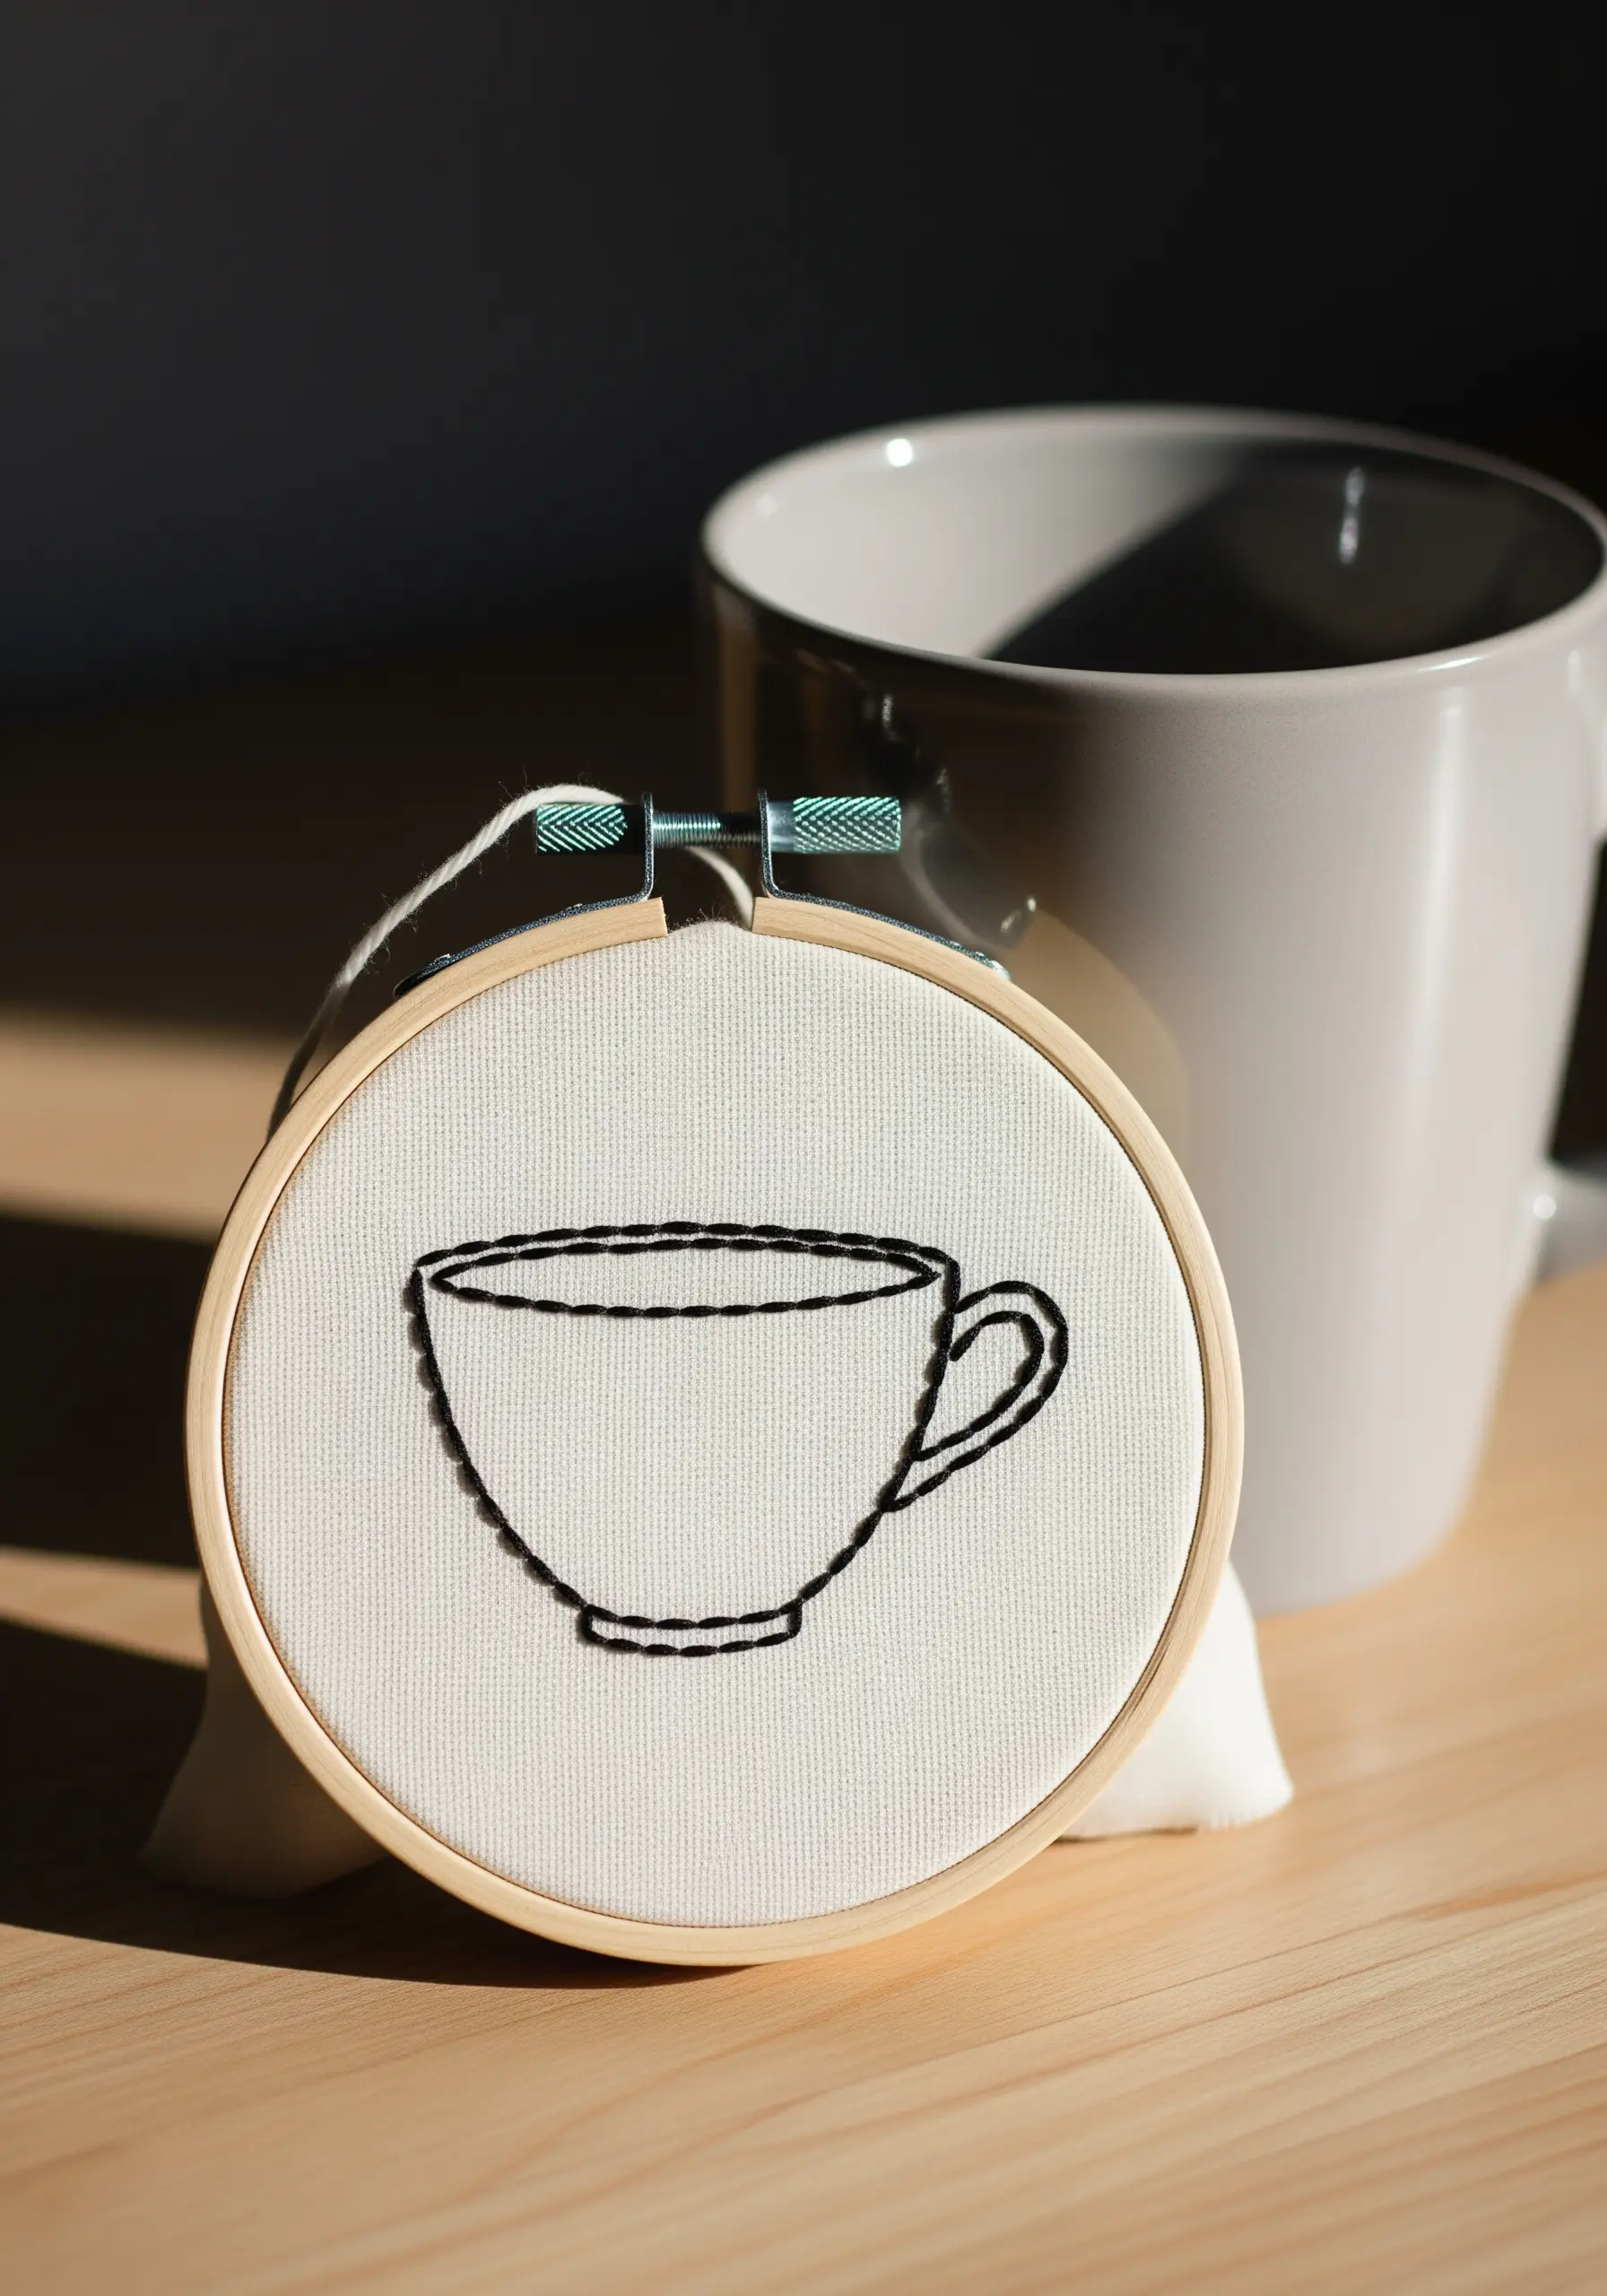
To achieve the clean look of a pen-and-ink drawing, a precise split stitch is your best tool.
Use only two strands of floss for a fine, delicate line.
The key to consistency is to bring your needle up precisely through the center of the previous stitch every single time.
Maintain even tension throughout to prevent the fabric from puckering, ensuring your final line is as smooth as if drawn by hand.
7. Geometric Texture with French Knots
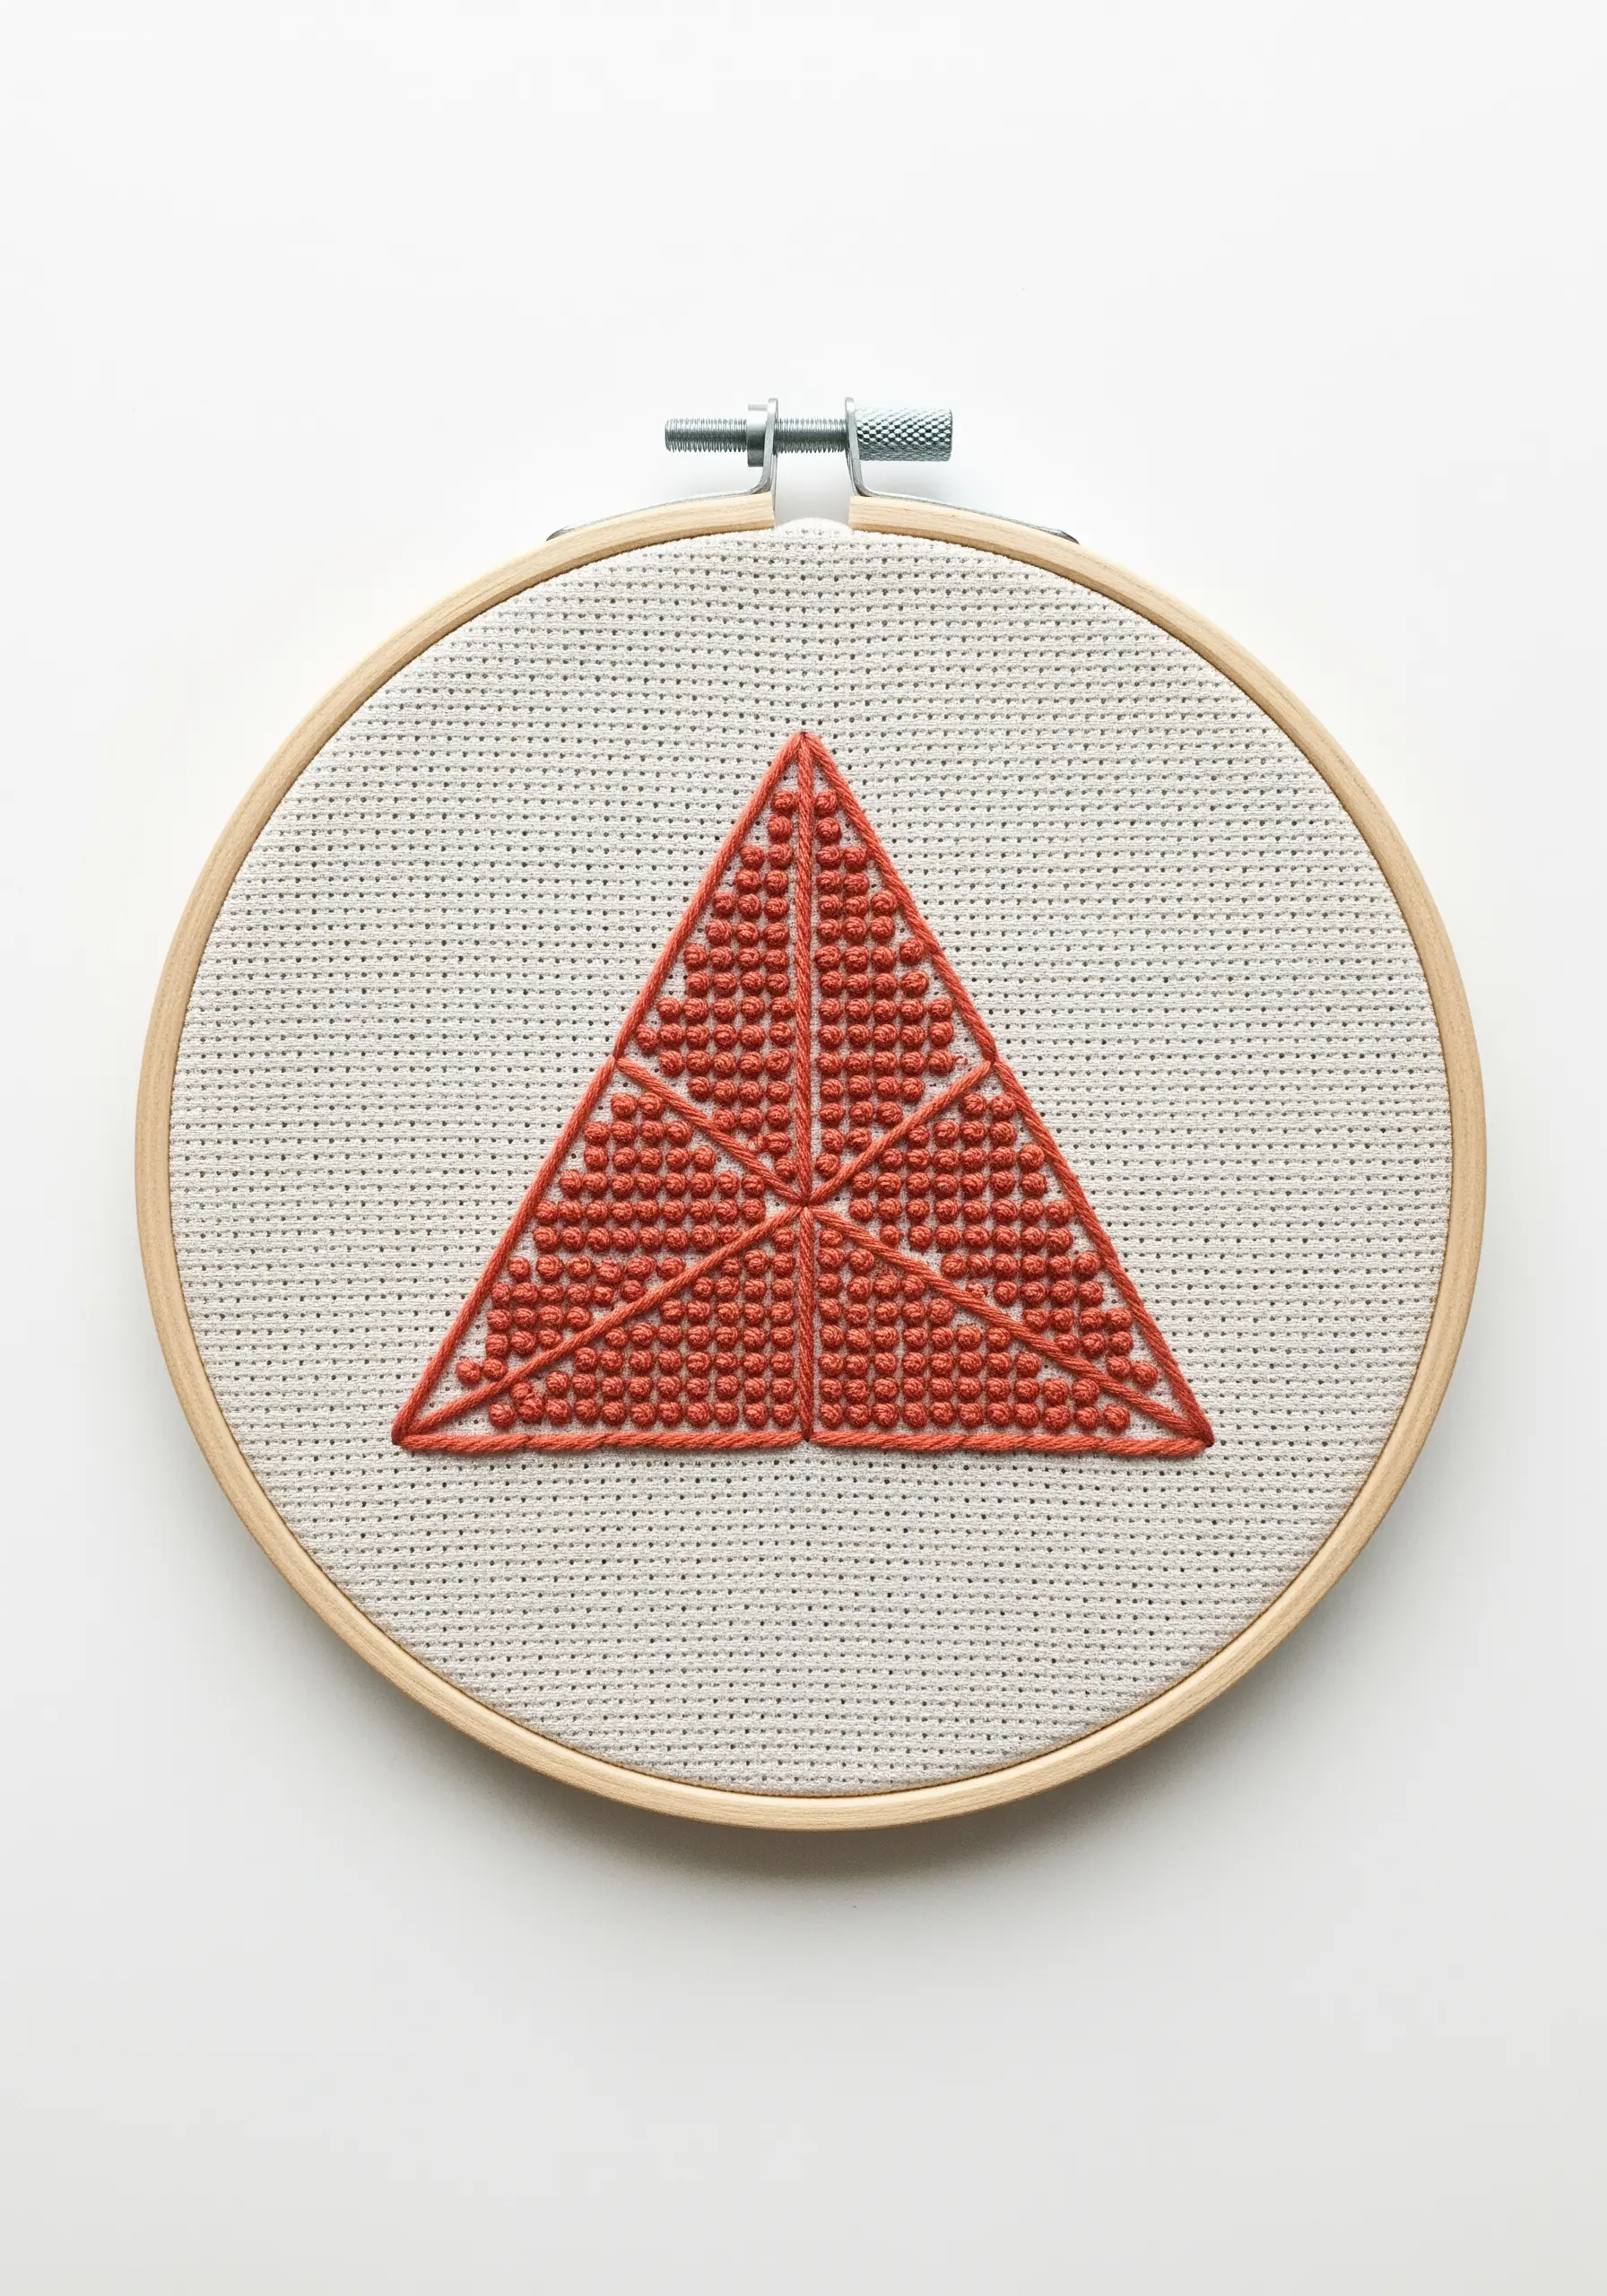
Instead of a flat satin stitch, fill a geometric shape with tightly packed French knots for a surprisingly lush, bobbled texture.
To ensure even coverage, work in neat rows from one edge to the other, placing each knot directly beside the last.
Using a single, bold color turns the focus entirely onto the dimensional quality of the stitch itself, transforming a simple triangle into a tactile statement piece.
8. The Delicate Star Constellation
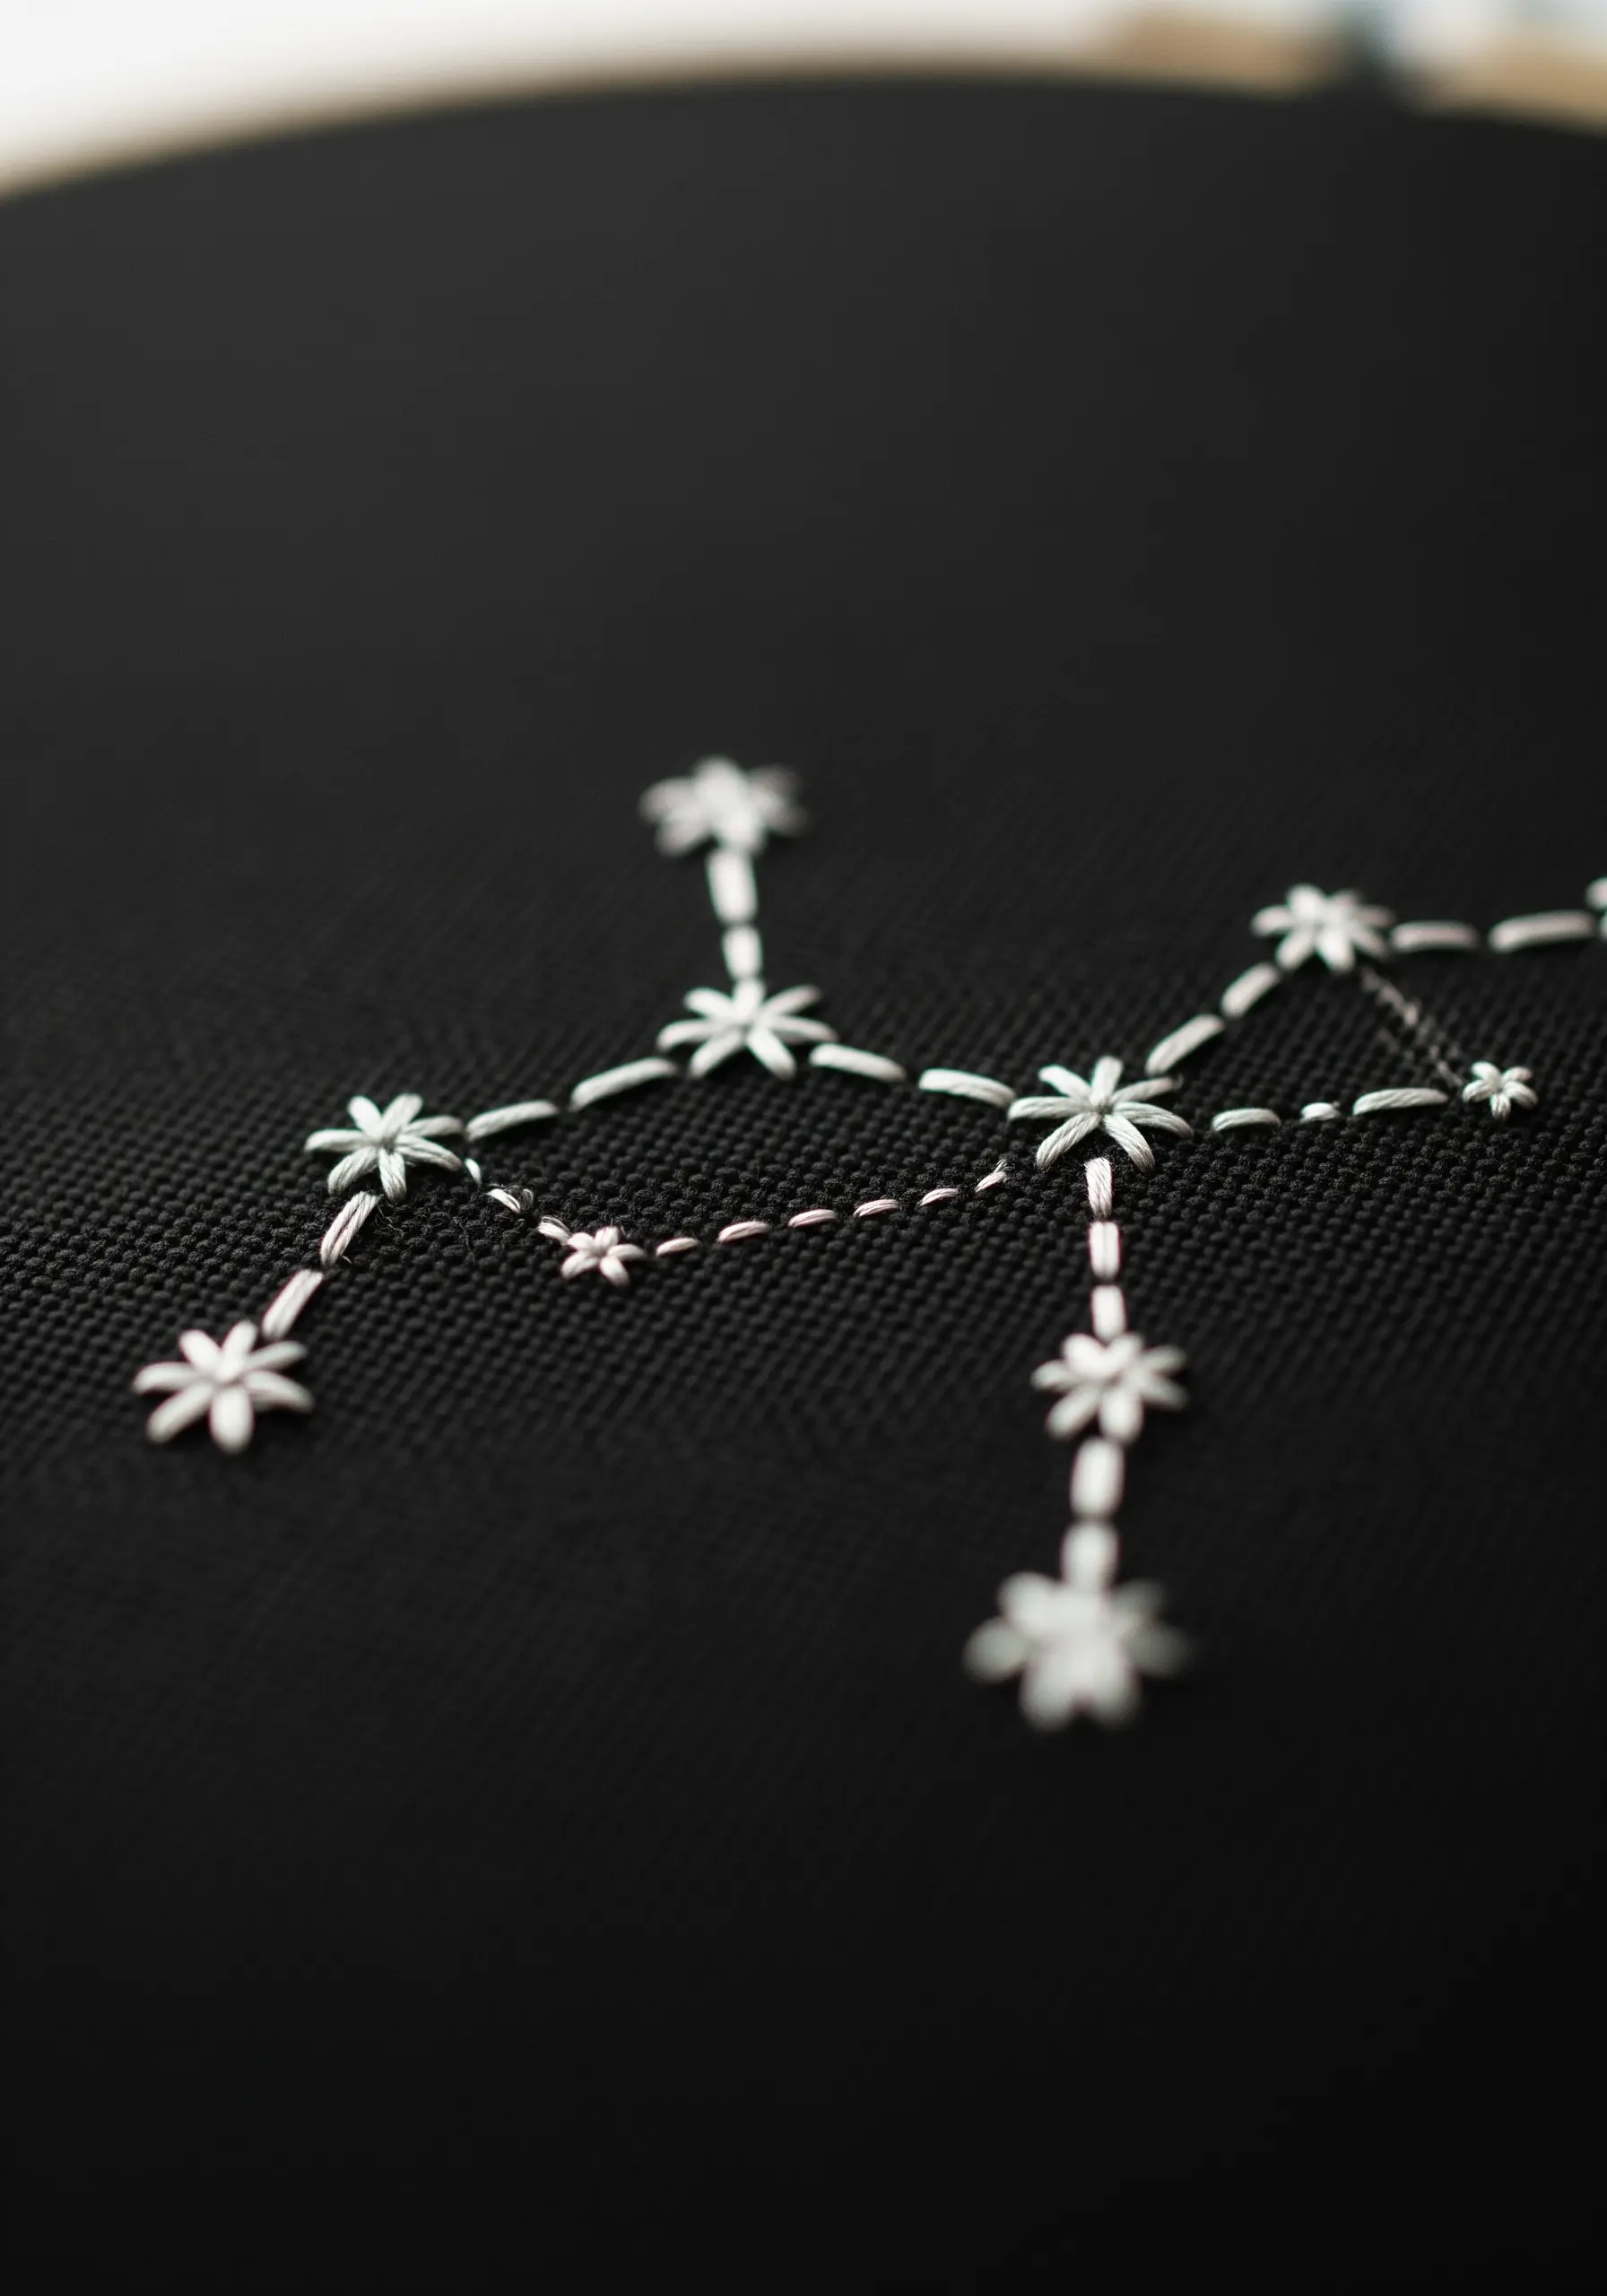
Create stylized stars by arranging detached chain stitches (lazy daisies) in a circular pattern.
Use a brighter, thicker thread for the stars to make them pop against the dark fabric.
Then, connect them with a faint line of single-strand backstitch.
This contrast in thread weight makes the connecting lines recede visually, allowing the star formations to take center stage, just as they do in the night sky.
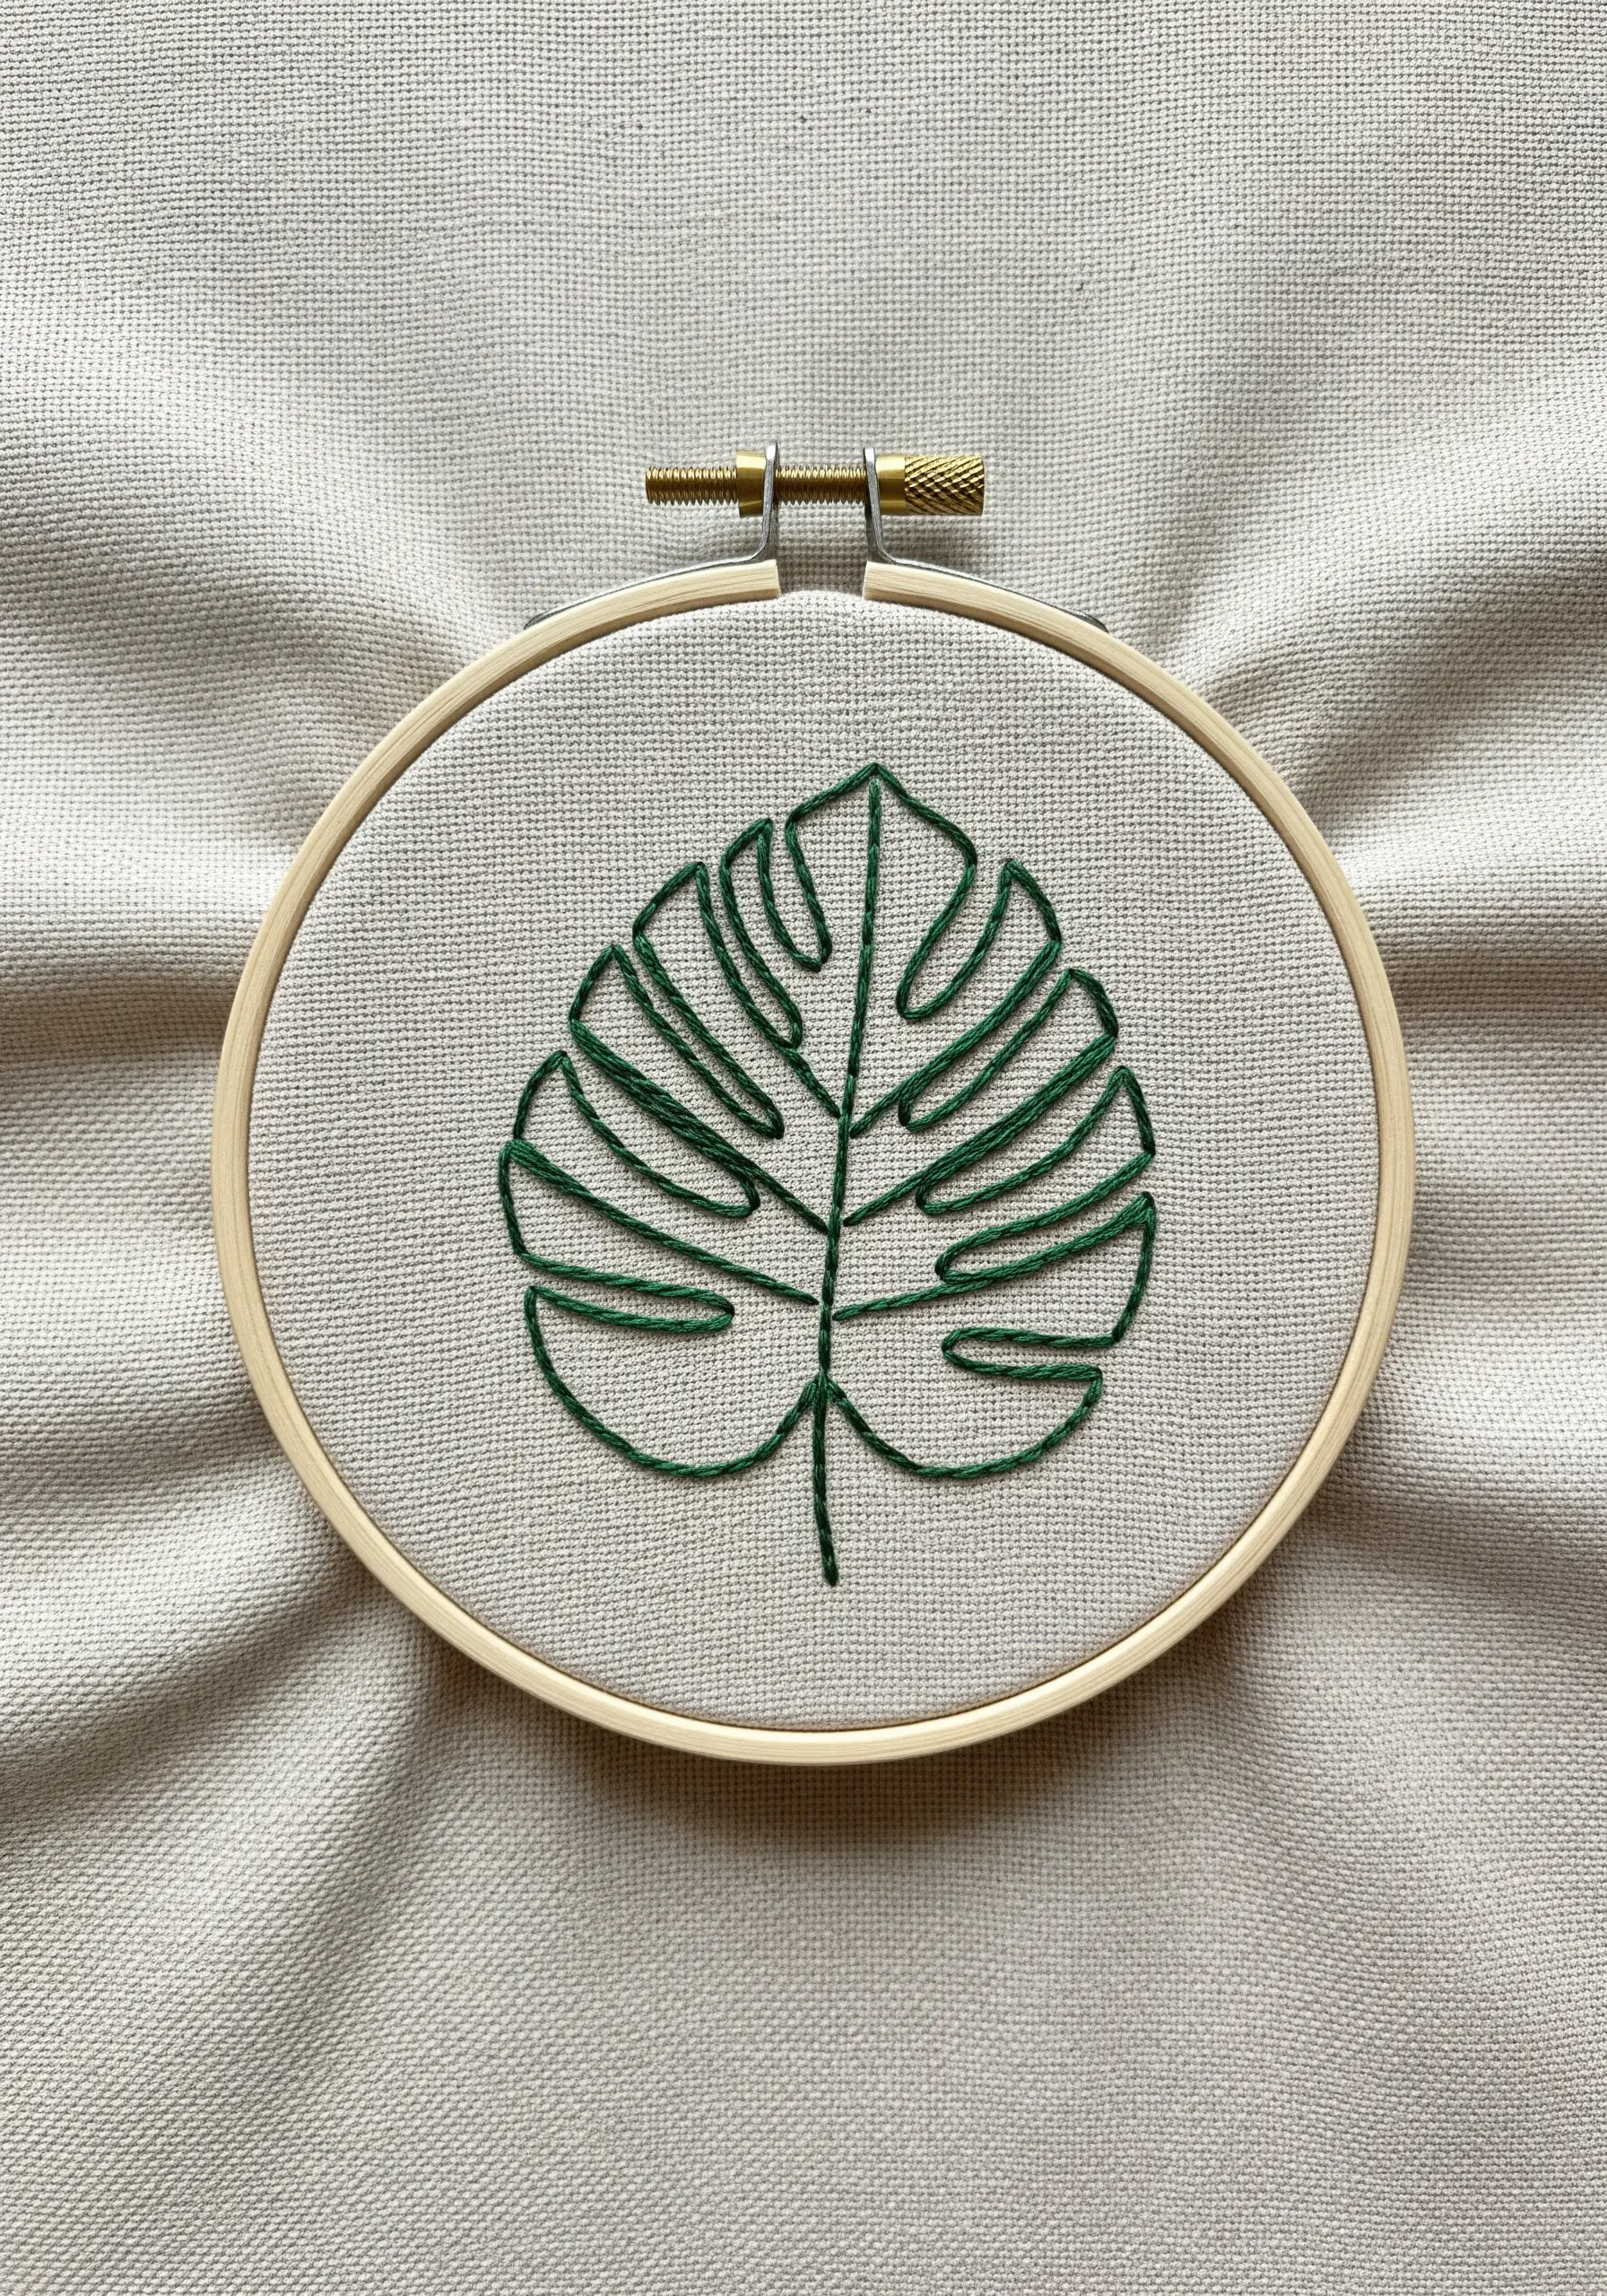
9. The Art of Directional Fill
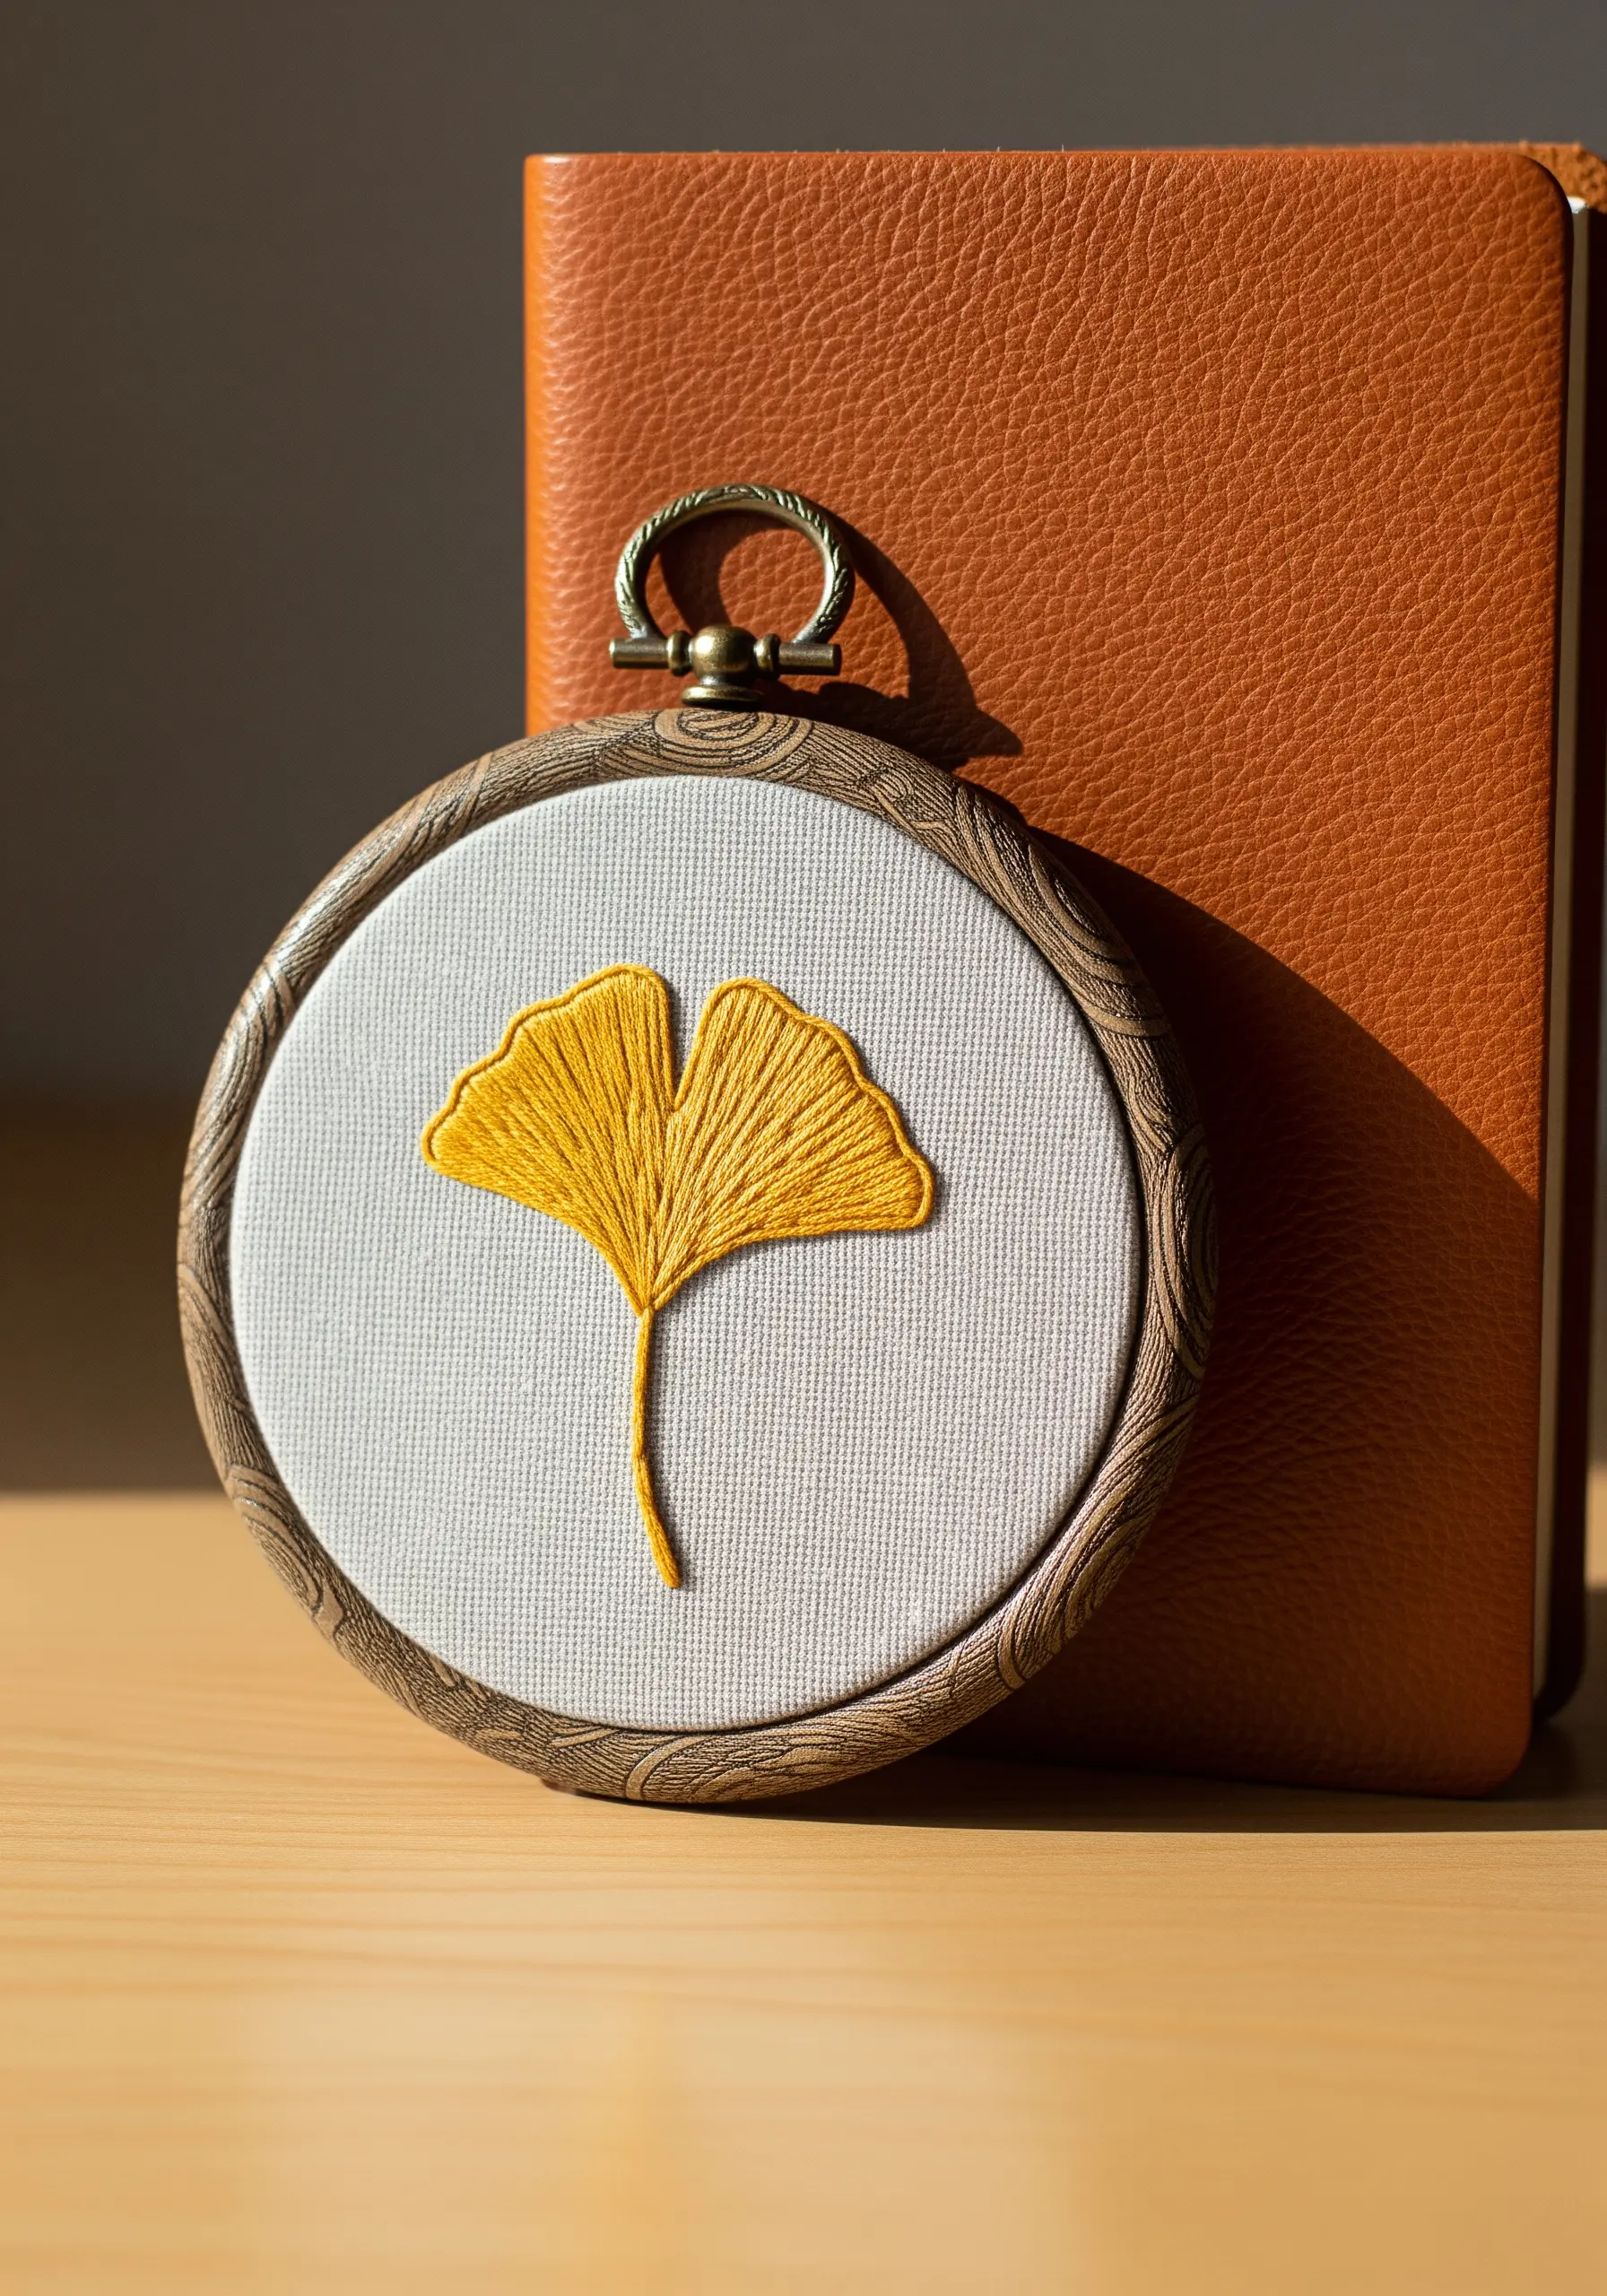
The realism of this ginkgo leaf comes from smart stitch direction that mimics its natural structure.
Lightly draw faint guide lines radiating from the stem to the outer edge of the leaf.
Use these guides to angle your long-and-short stitches, ensuring the entire shape flows organically from a single point.
This technique turns a simple fill stitch into a dynamic element that gives the leaf form and life.
10. An Abstract Study in Line Stitches
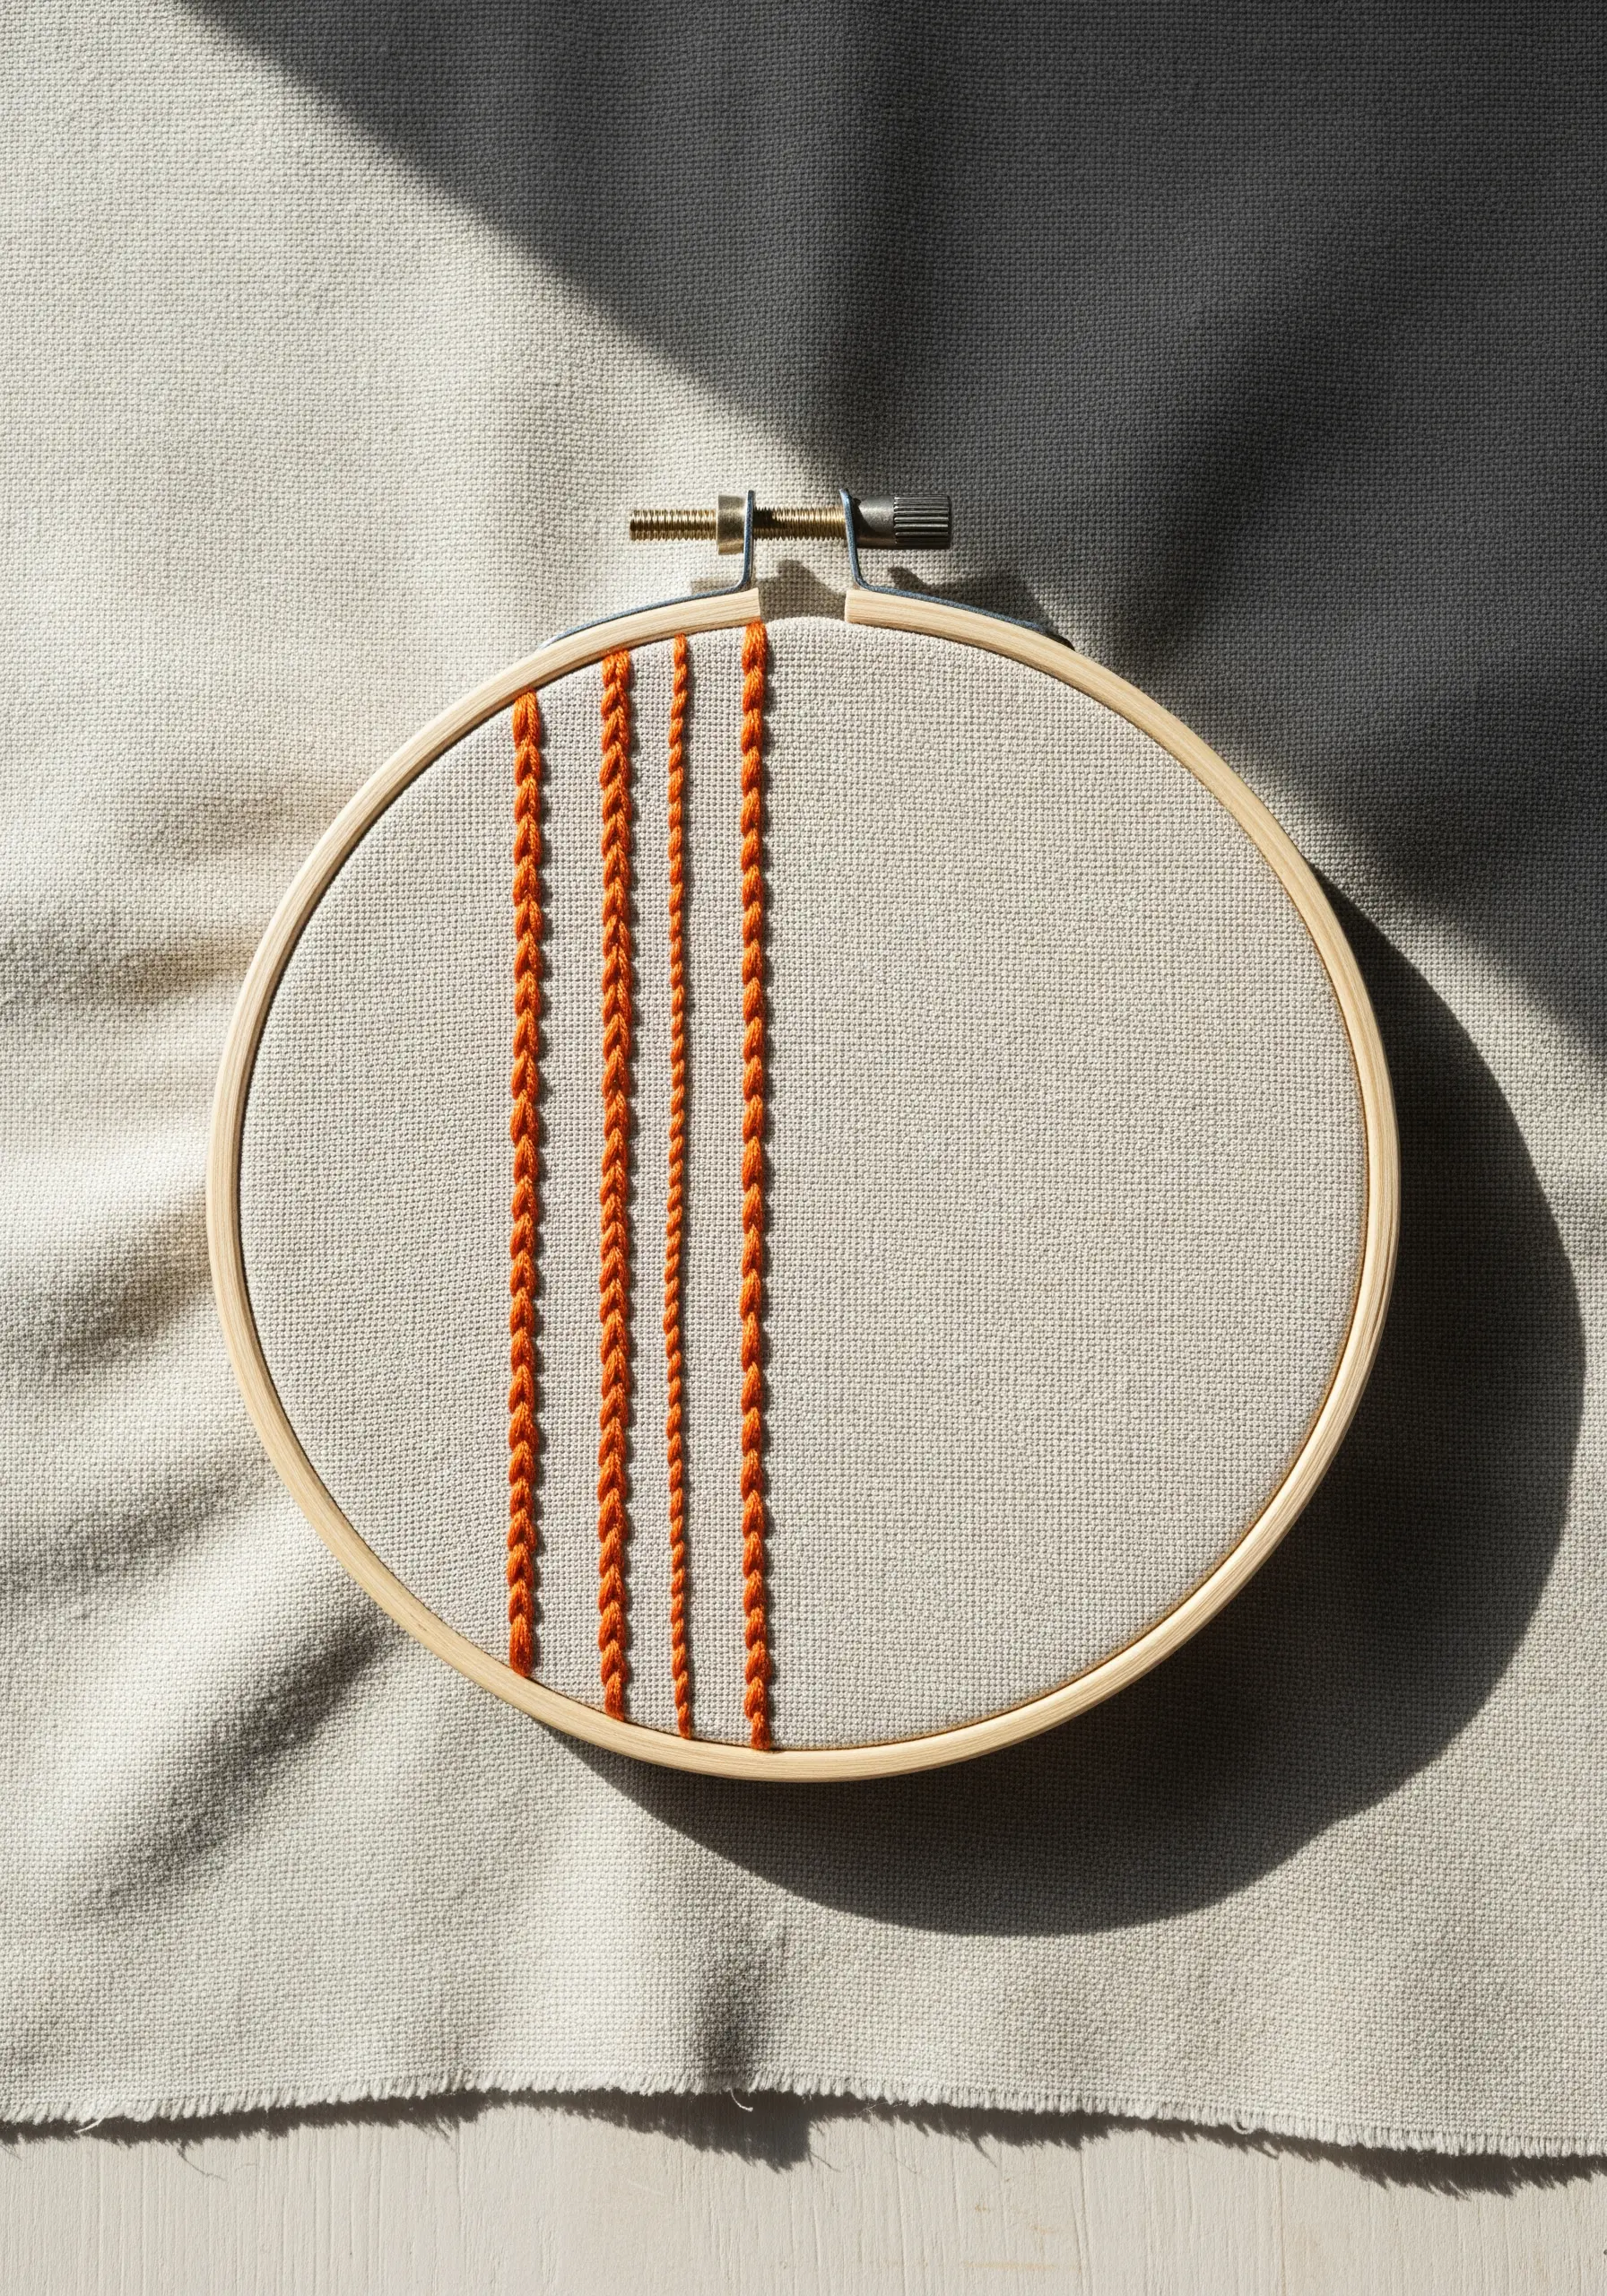
Elevate your stitch practice into a finished piece of minimalist art.
Instead of a random sampler, stitch perfect vertical lines of different foundational stitches—like the chain stitch, stem stitch, and whipped backstitch—side-by-side.
By arranging them in a deliberate composition and using a single, striking color, you highlight the inherent beauty and texture of each stitch, turning exercise into exhibition.
11. Architectural Lines with Backstitch
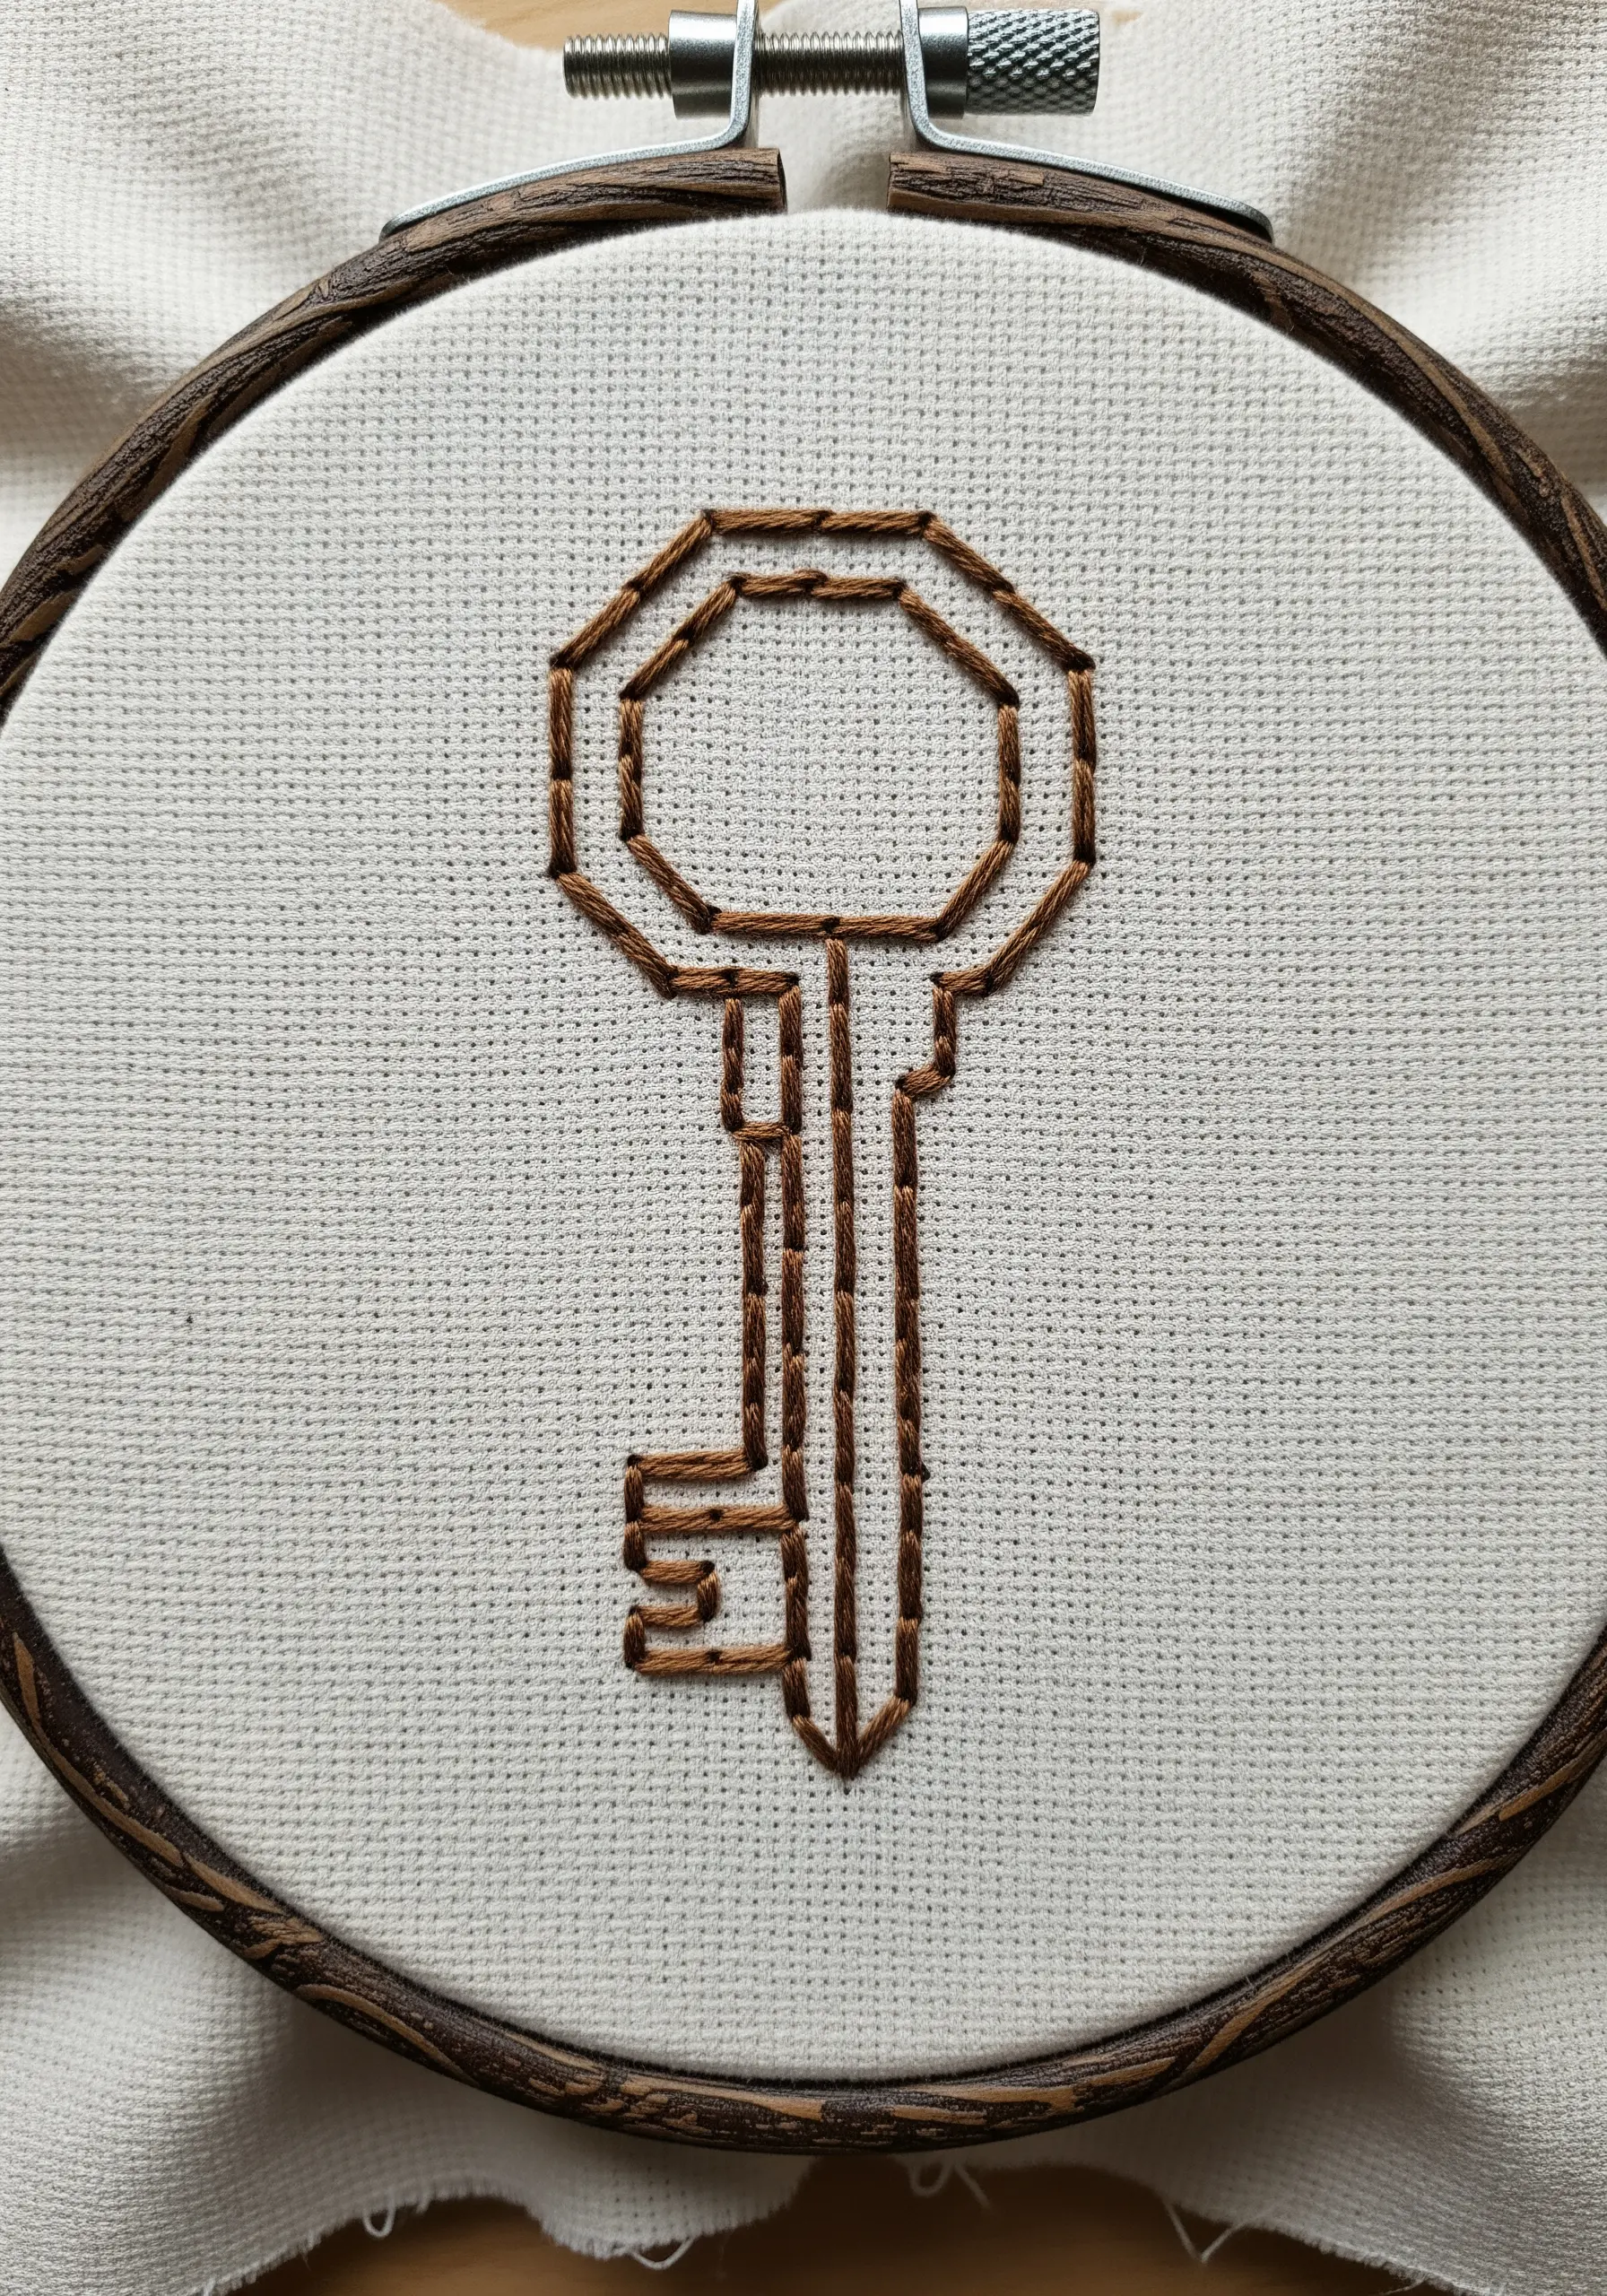
For clean, sharp corners in geometric designs, your technique matters more than your speed.
Use the stabbing method: bring the needle fully up through the fabric, then punch it straight down for the end of the stitch.
This is more precise than the sewing method (weaving the needle in and out) and ensures that every corner and intersection is perfectly crisp and defined.
12. Geometric Landscape with Textural Fills
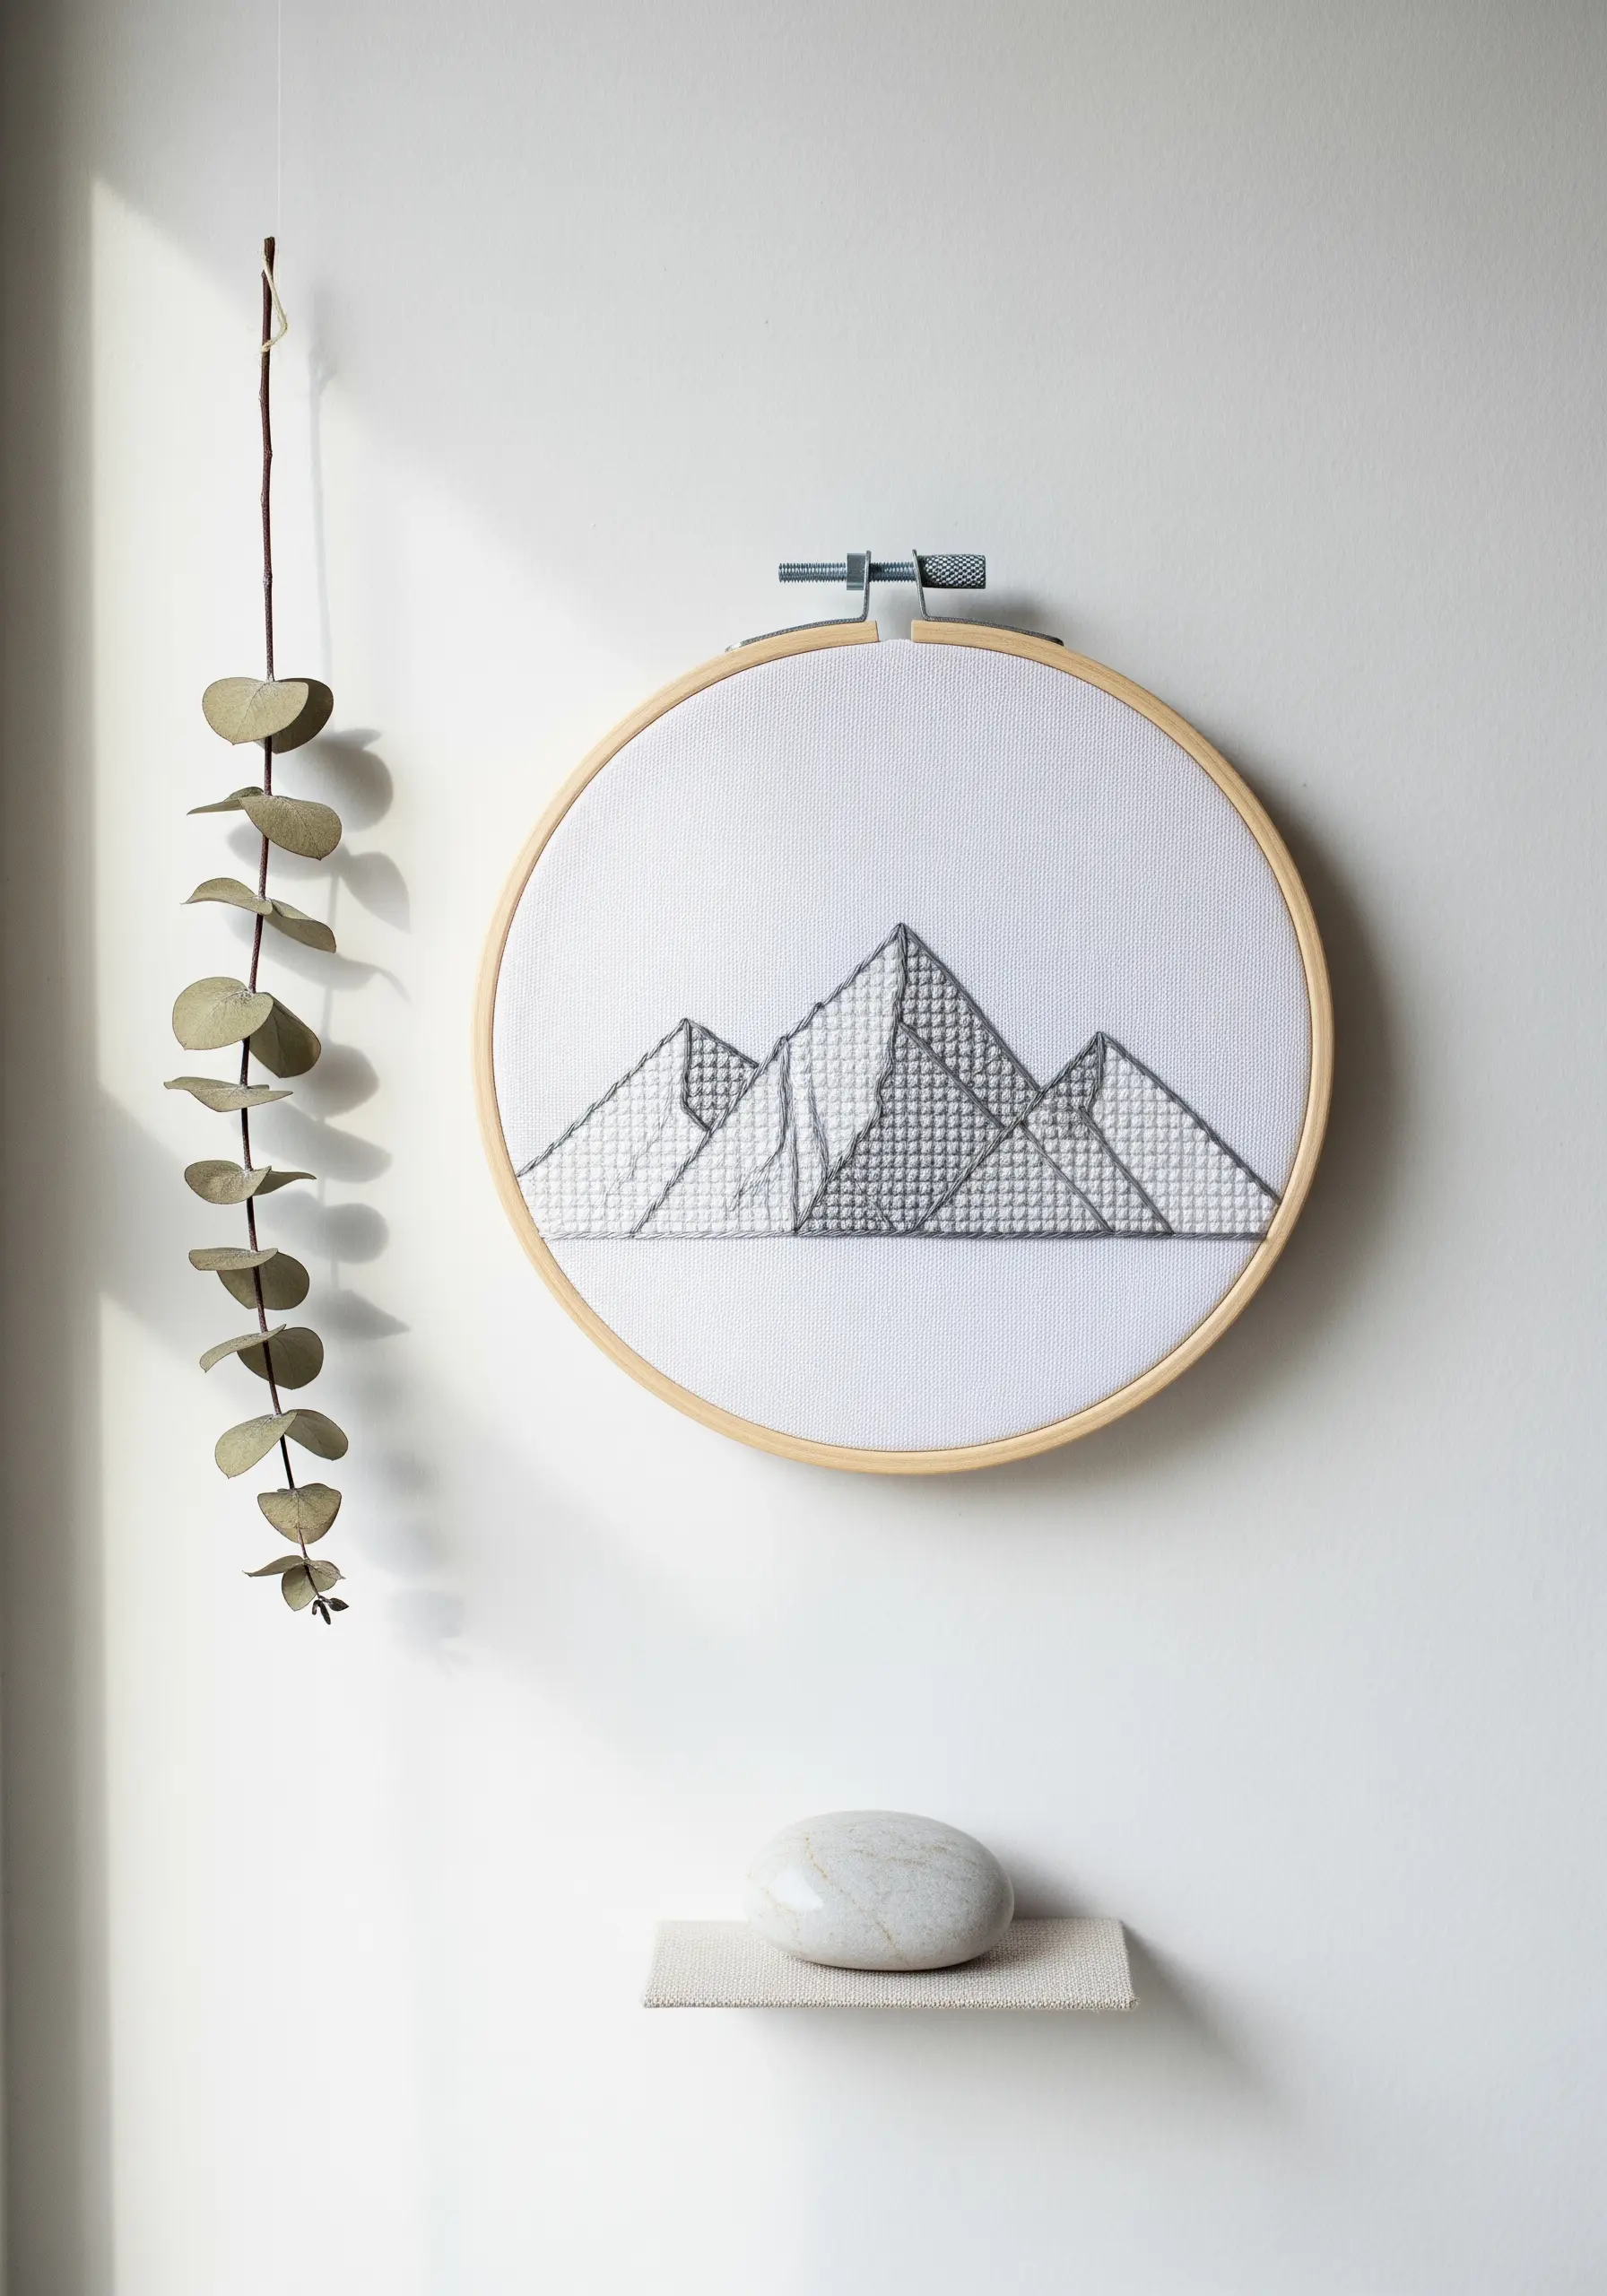
Create a sophisticated mountain landscape by focusing on texture over color.
Divide the peaks into geometric sections, and fill each with directional straight stitches or a simple seed stitch.
Vary the direction of the stitches in adjacent panels (e.g., vertical next to horizontal) to create contrast and dimension.
Using a monochrome palette allows the rich textural details to become the main focus.
13. Silk Ribbon Foliage for 3D Texture
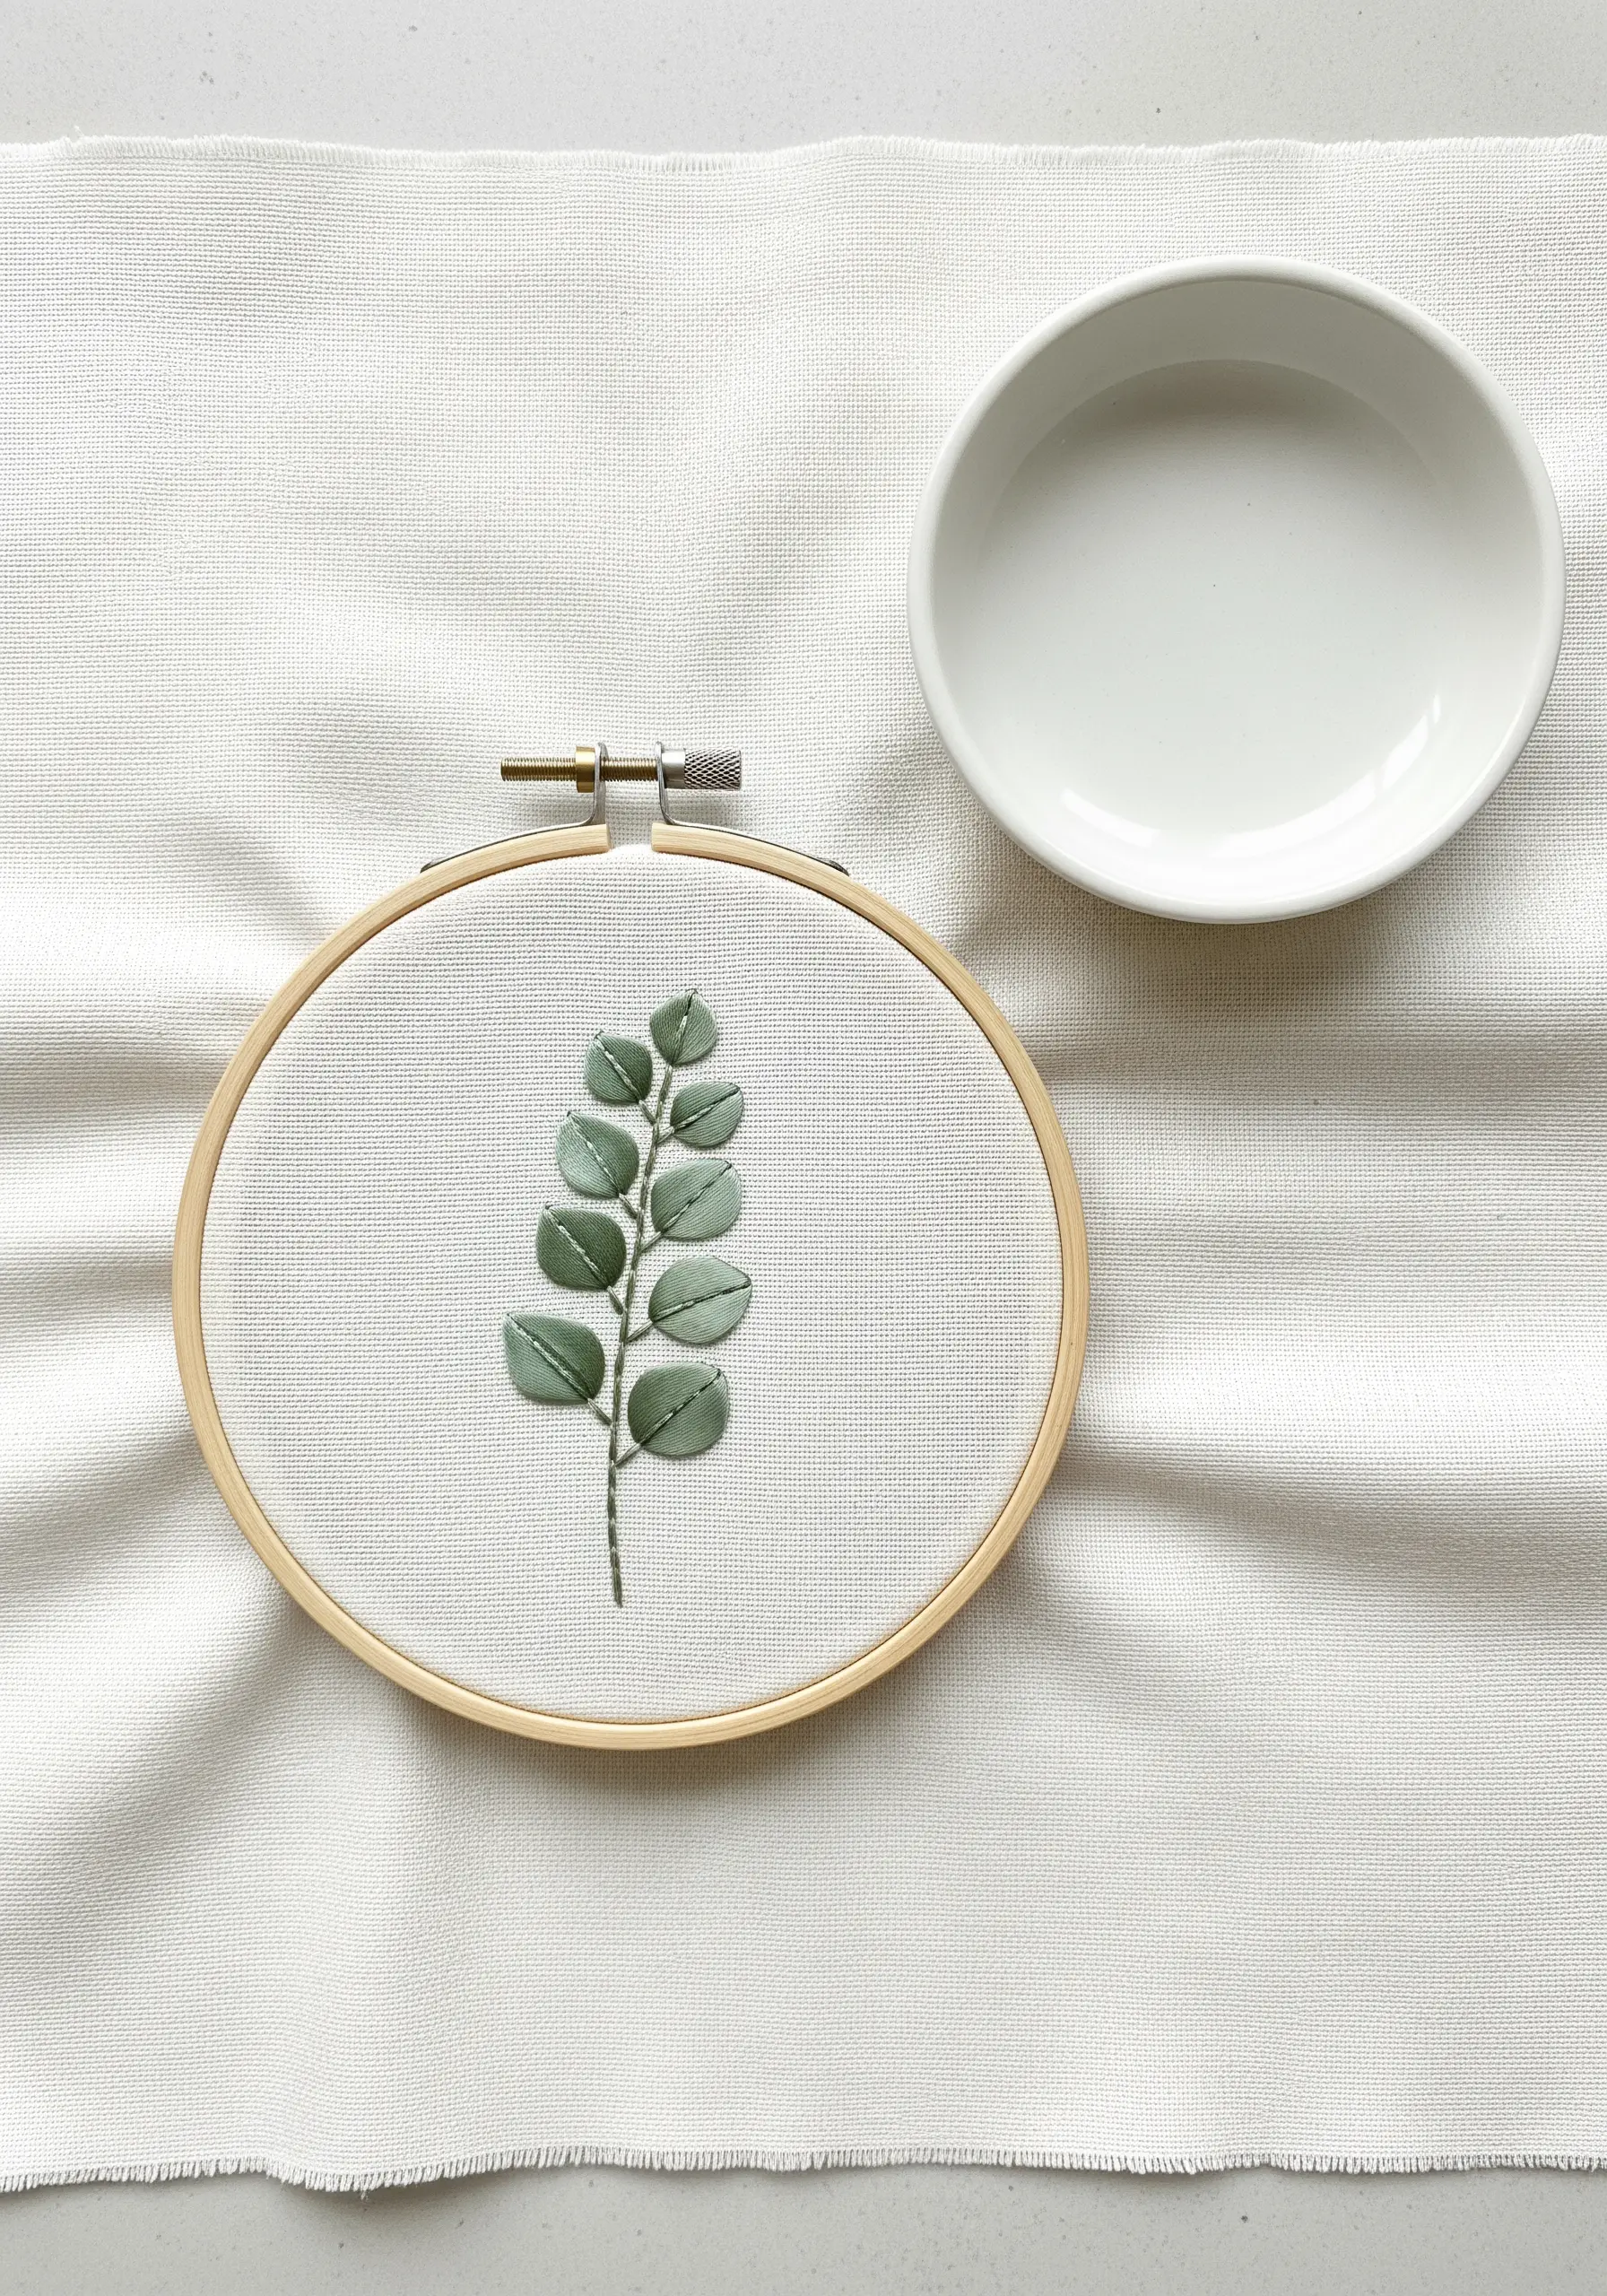
Introduce silk ribbon into your work for an instant touch of luxury and dimension.
Create these plump eucalyptus leaves using a simple straight stitch with 4mm or 7mm silk ribbon.
Before you pull the ribbon through to the back, give it a slight twist.
This creates the gentle, naturalistic curl you see in real leaves and adds a beautiful, light-catching texture to your embroidery project.
14. The Gradient French Knot Wreath
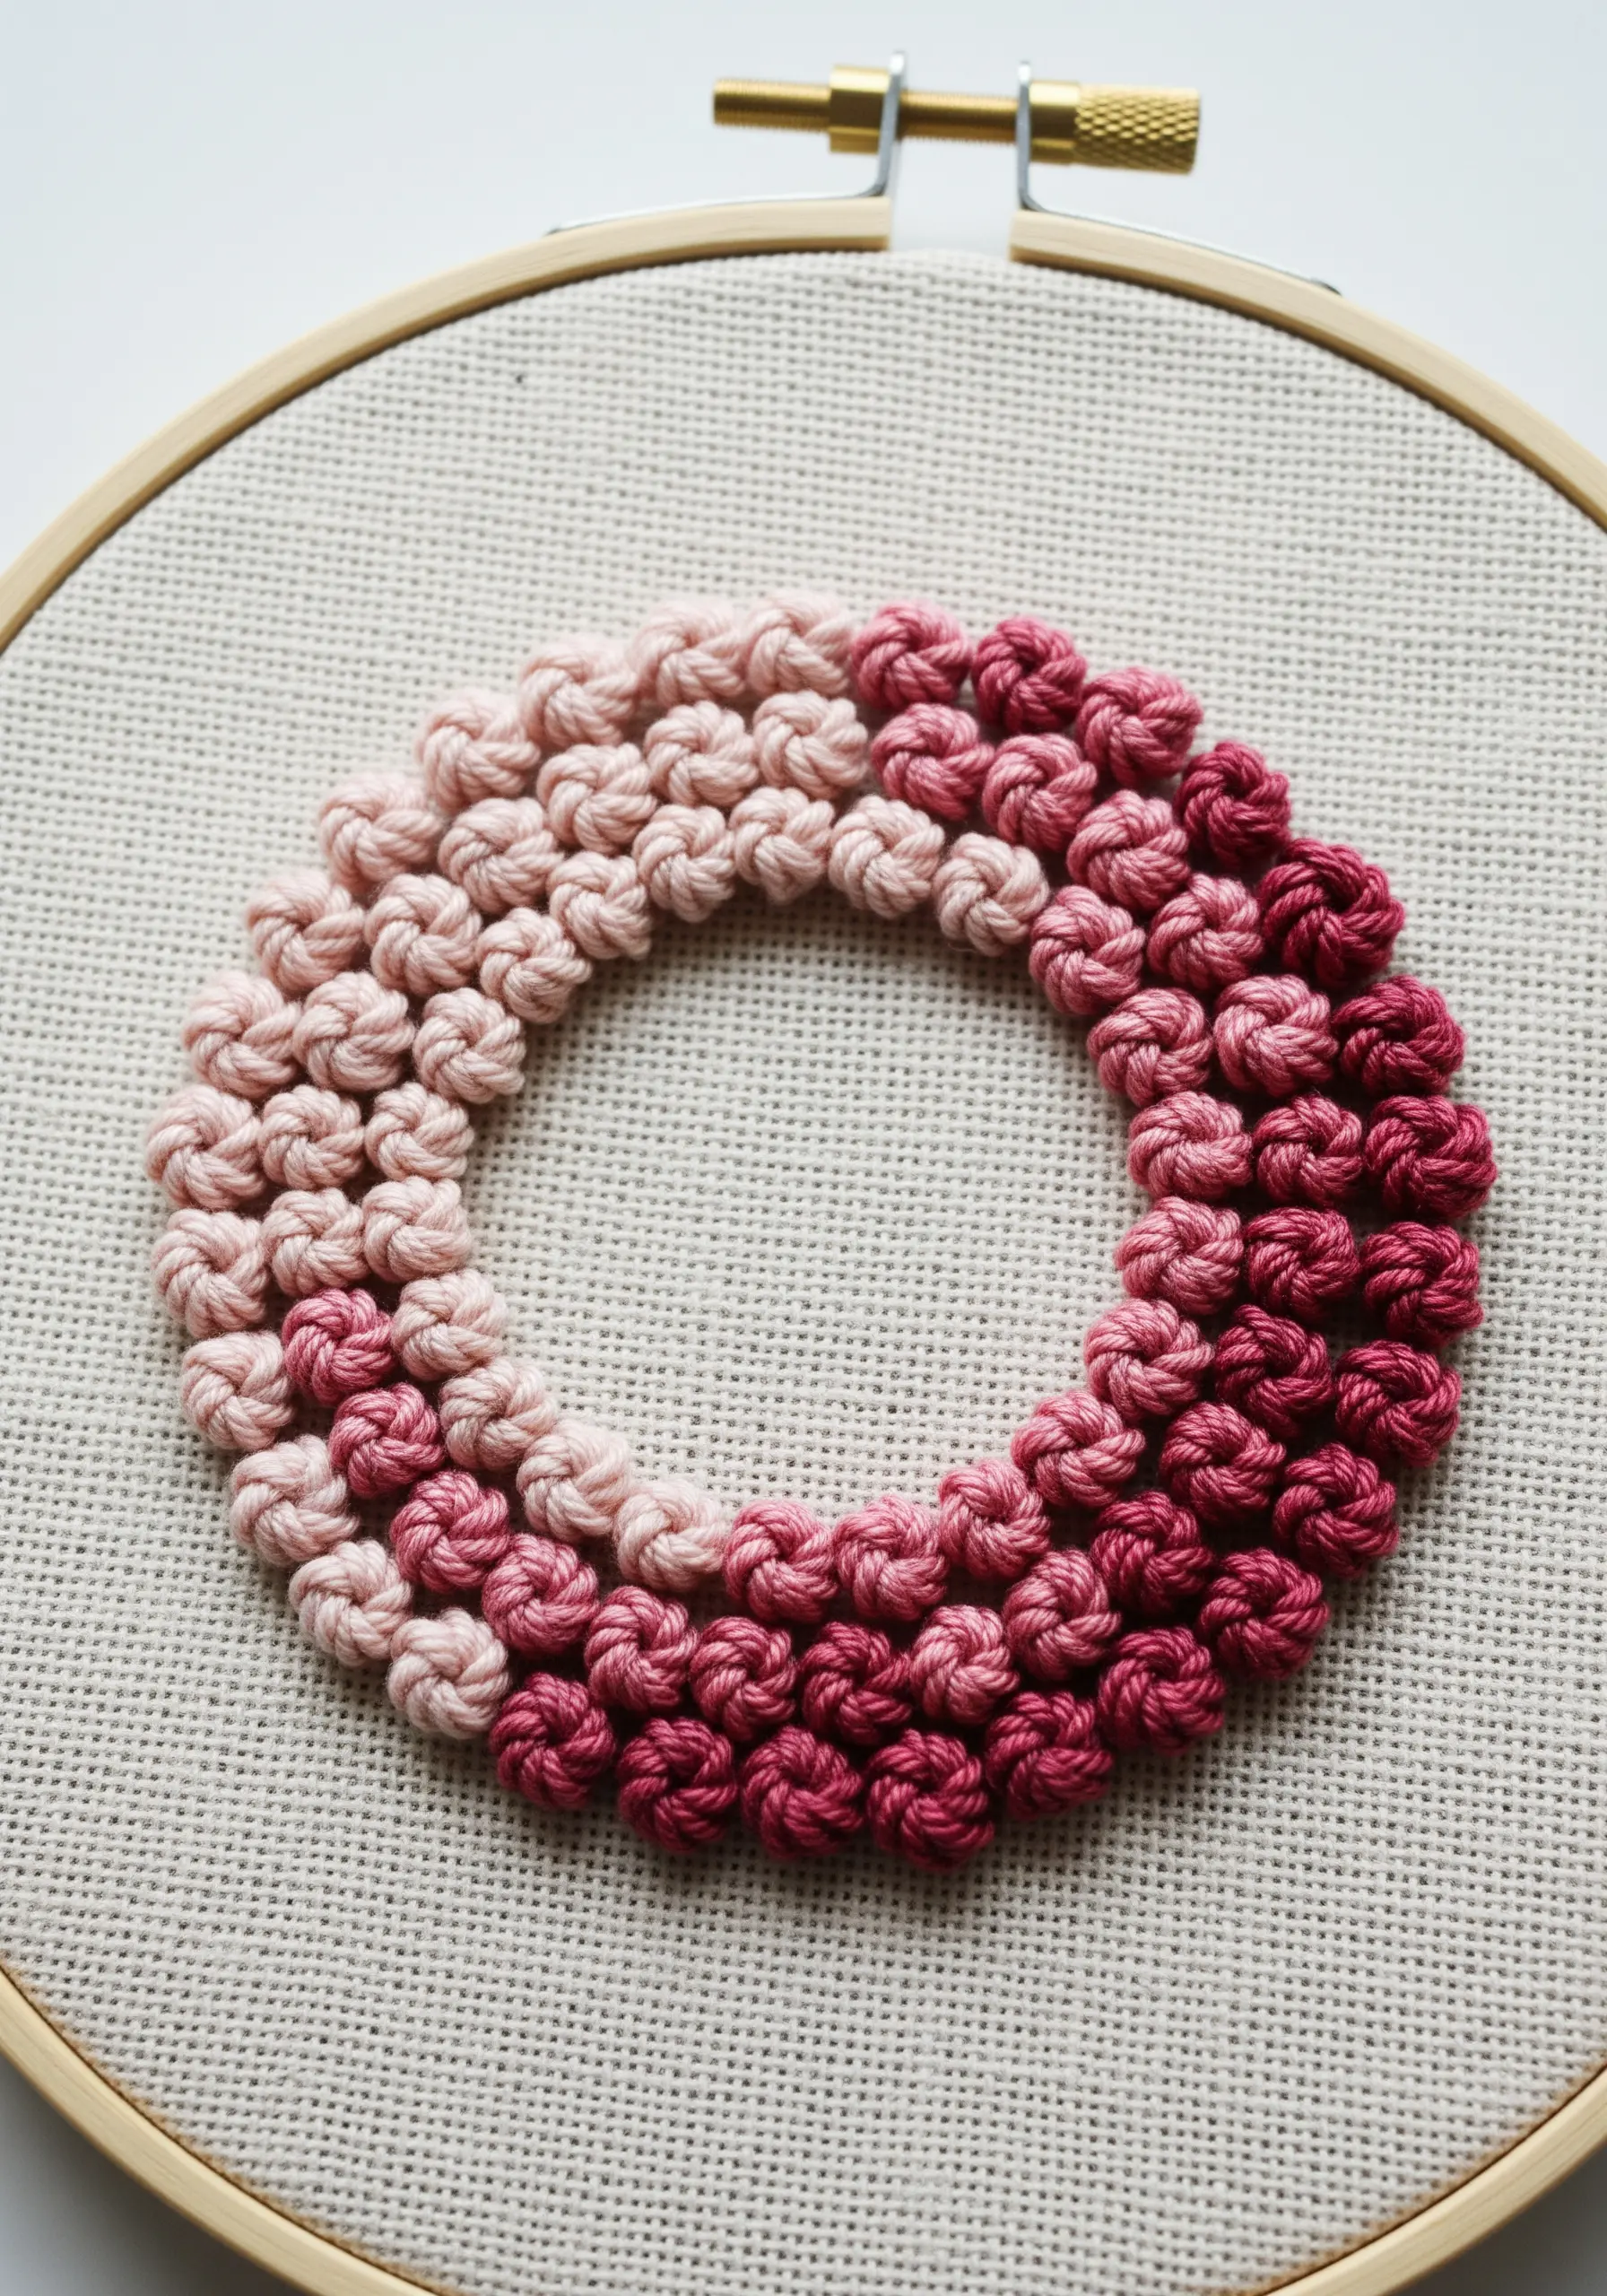
Create a seamless color gradient using only French knots and a thoughtful color selection.
Choose four shades of a single color family, from light to dark.
Stitch the knots in dense clusters, and to blend the sections, intersperse a few knots of the lighter color into the edge of the darker section, and vice-versa.
This simple mixing technique tricks the eye and makes the transition feel smooth and painterly.
15. Radiant Satin Stitch Sun
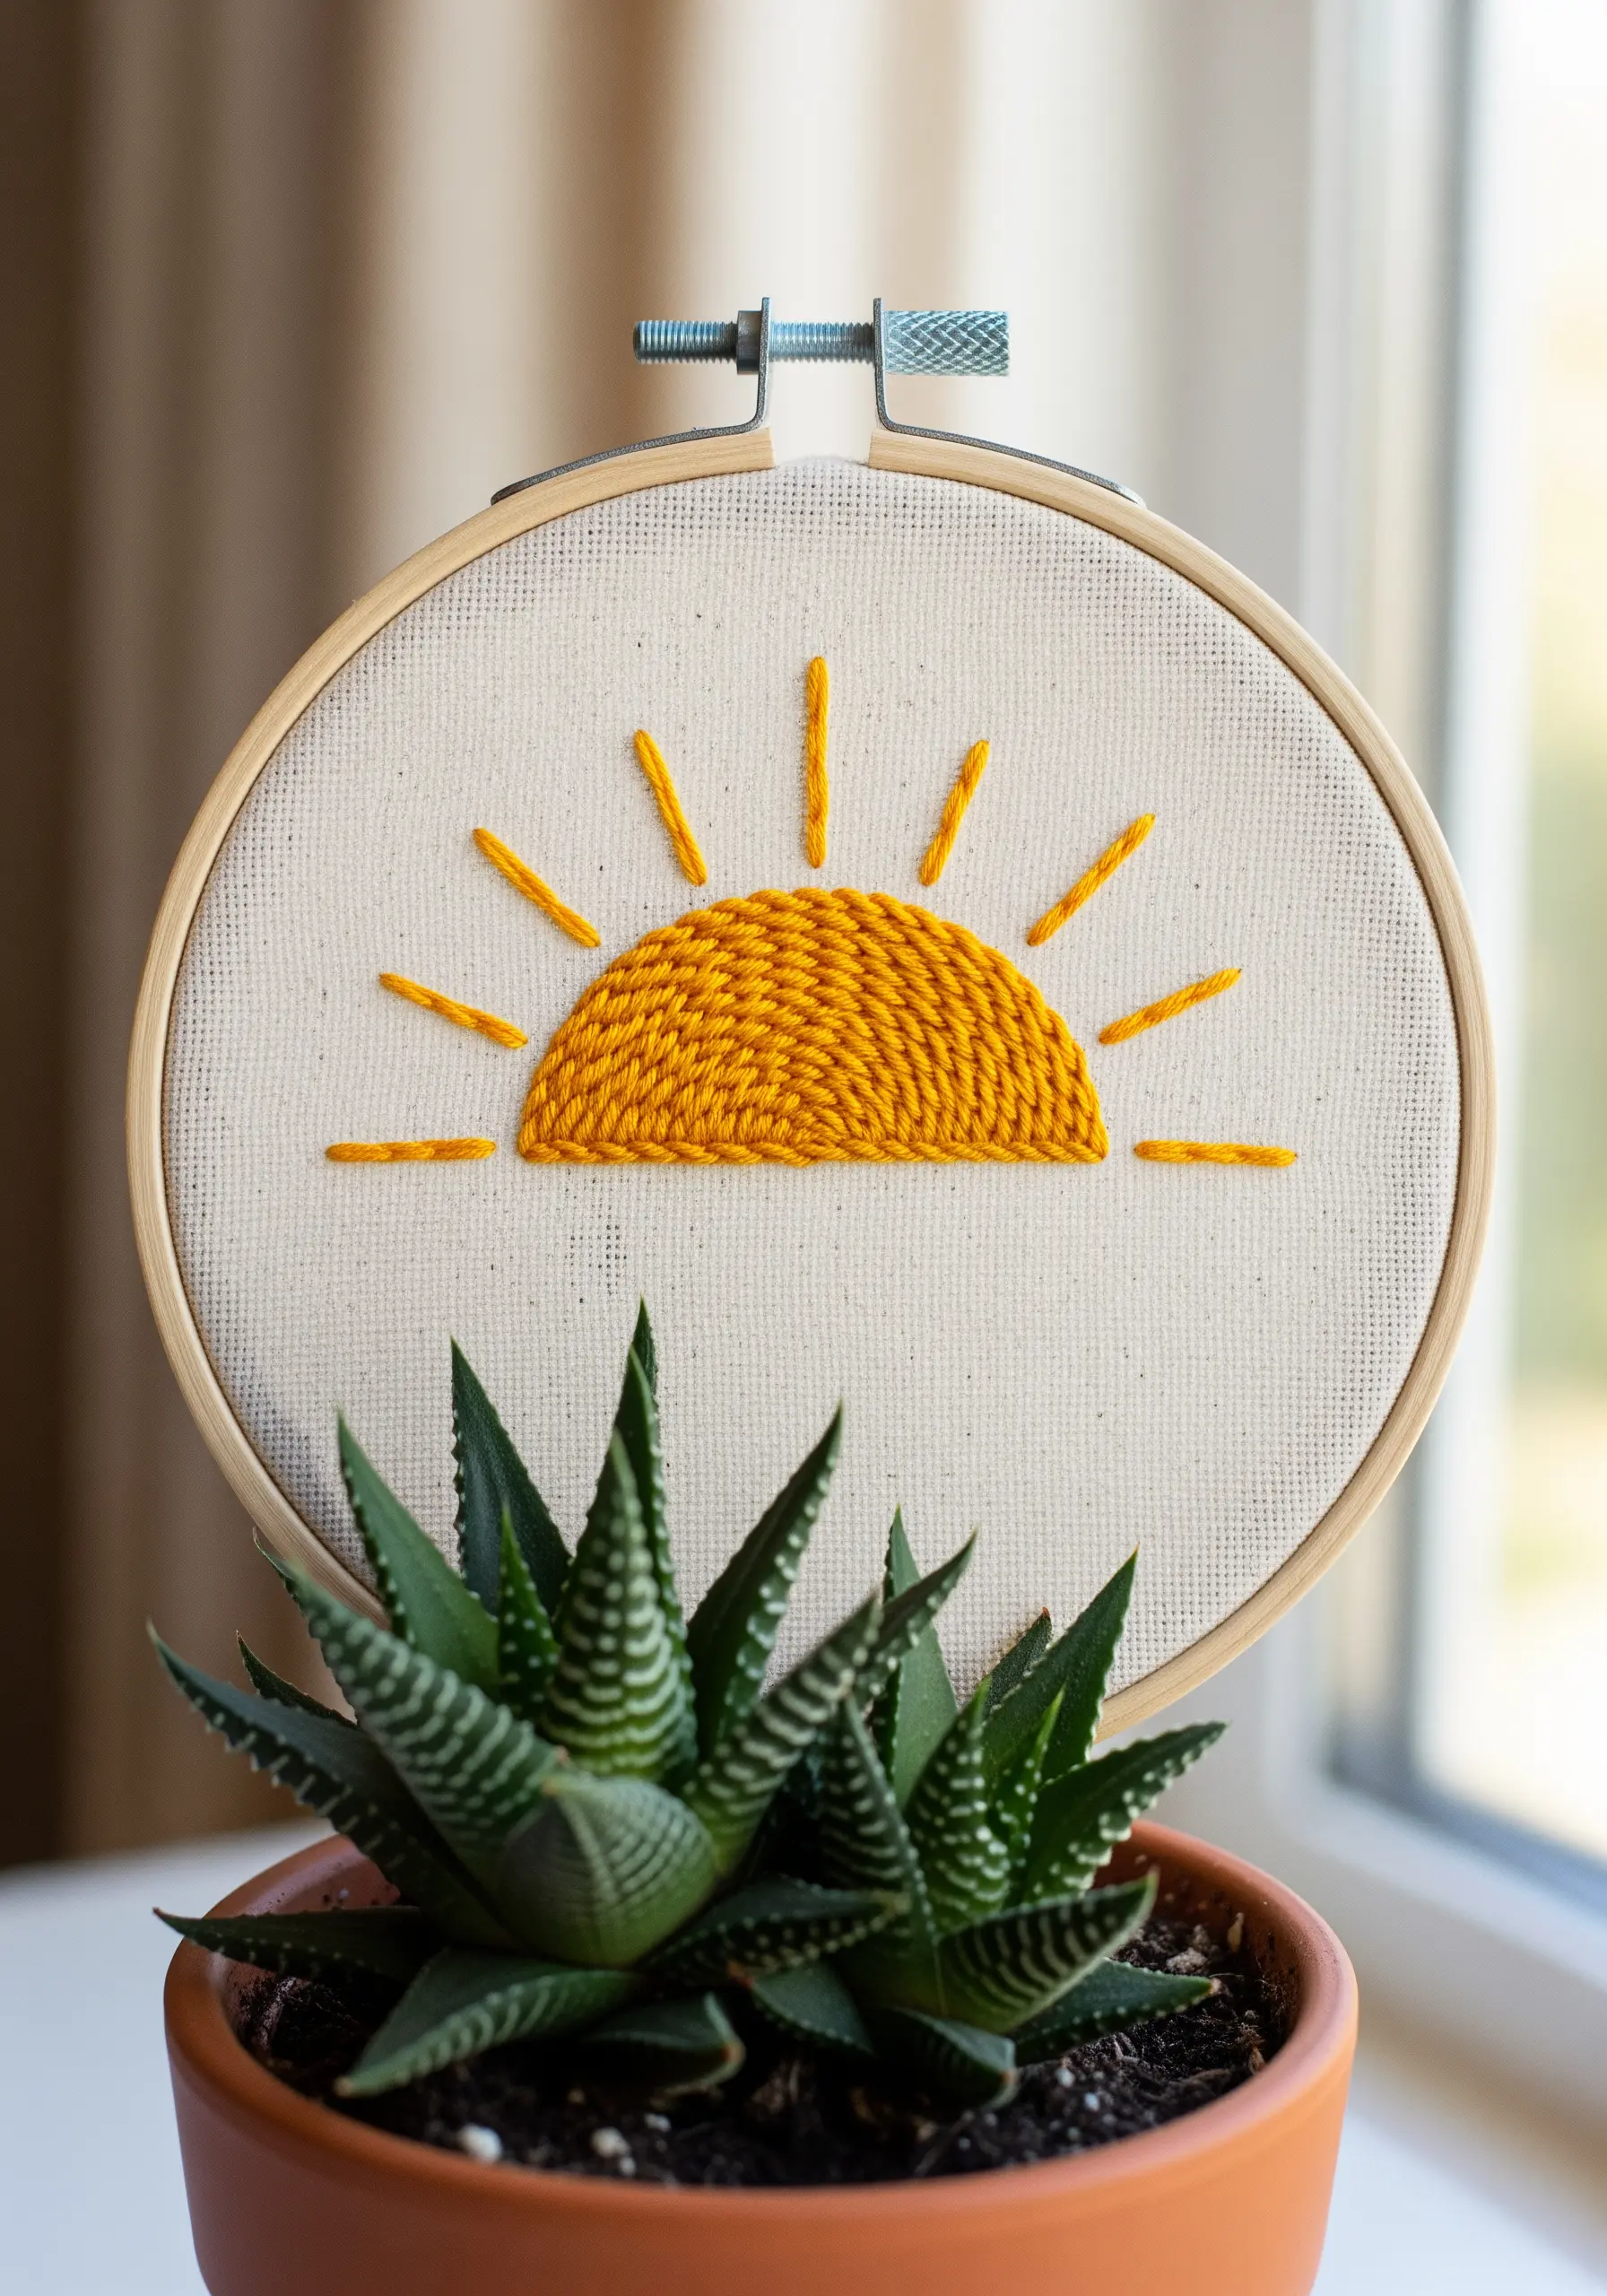
To give this sun its textured, radiating appearance, divide the semi-circle into small, triangular wedges before you begin.
Fill each wedge with satin stitches angled toward the center point at the base.
Because the stitch direction changes slightly with each wedge, the finished sun will catch the light from multiple angles, creating a beautiful shimmer and sense of movement.
The sunbeams are simple straight stitches for clean contrast.
16. The Graphic Storybook Outline

For a bold, uninterrupted line that feels like a solid illustration, use a whipped backstitch.
First, complete the entire outline using a standard backstitch.
Then, with a new length of the same thread, pass your needle under each backstitch on the surface of the fabric, without piercing it.
This action wraps the stitches, hiding the gaps and creating a smooth, rope-like line perfect for minimalist line art embroidery patterns.
17. Expressive Floral Line Art

Add depth and sophistication to a simple line-art floral by varying your thread weight.
Use two or three strands of floss for the main outline of the petals to give them presence.
Then, switch to a single strand for the delicate interior veins.
This subtle shift in line thickness creates an immediate sense of dimension and makes the flower feel more delicate and realistic.
18. Miniature Satin Stitch Planet
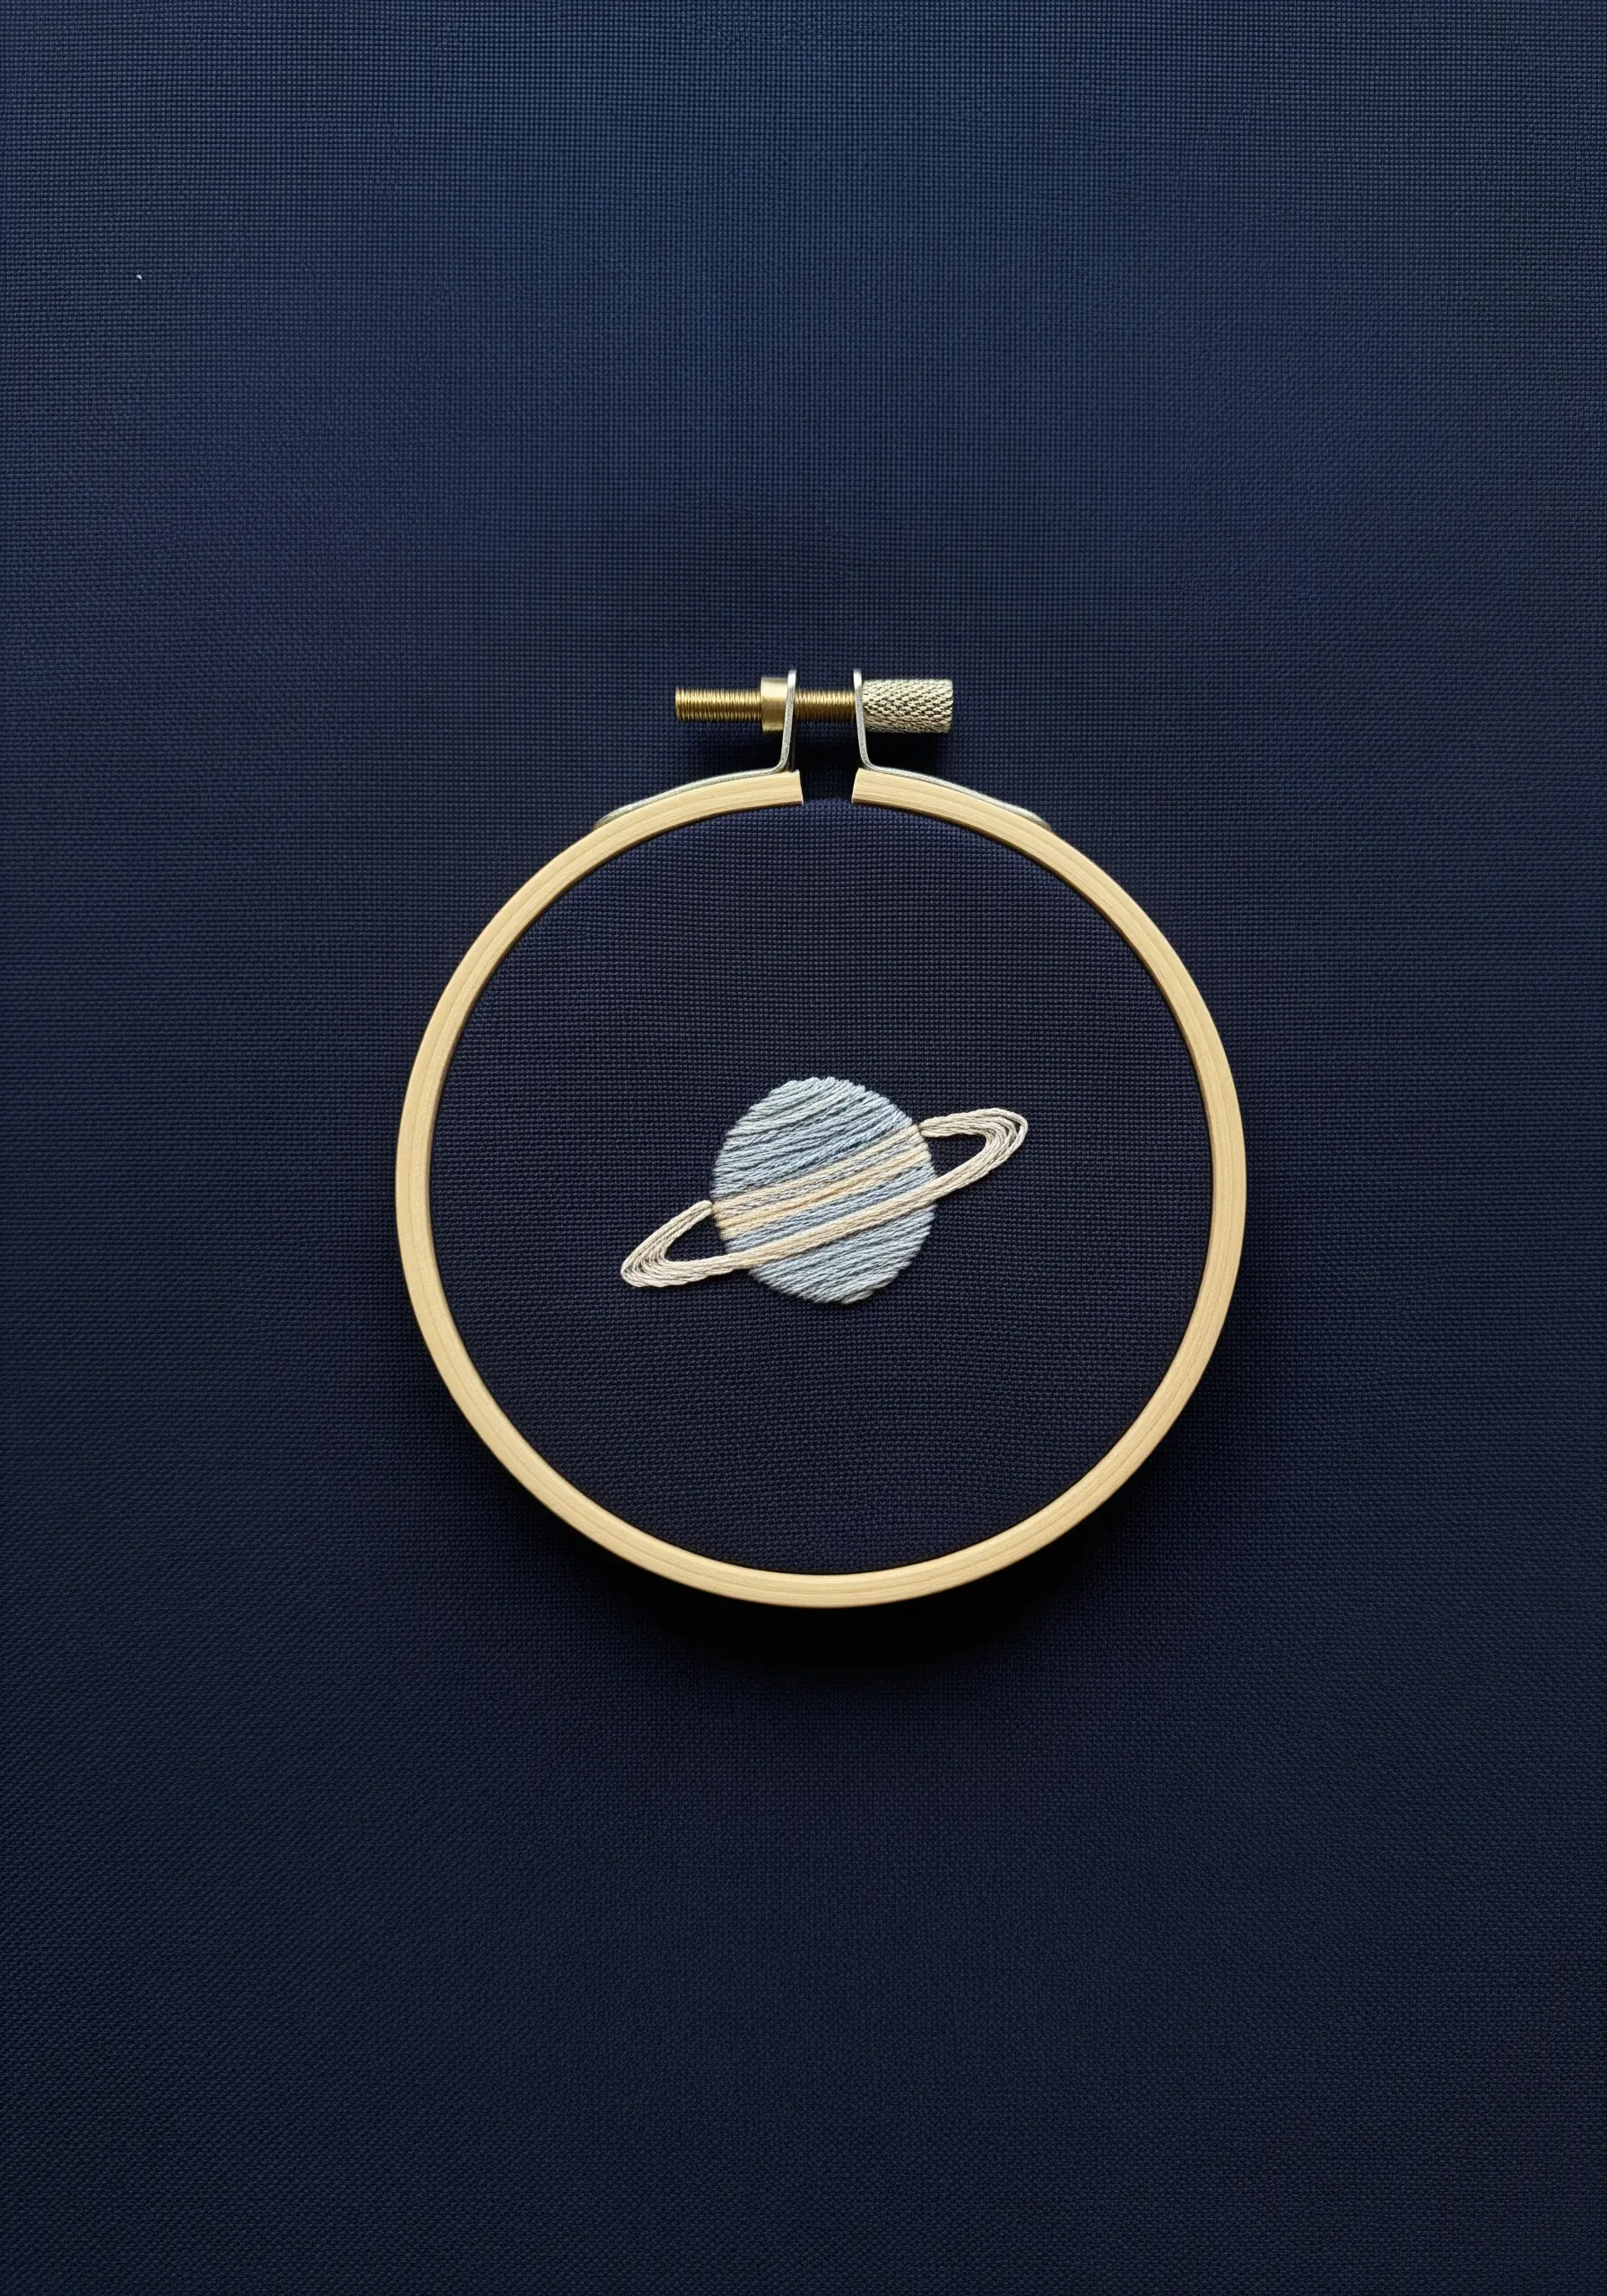
When filling a small circle, avoid perfectly straight satin stitches, which can make the shape look flat.
Instead, angle your stitches to follow the curve of the sphere, making them slightly shorter at the top and bottom edges.
This technique, known as curved satin stitch, creates a subtle illusion of roundness.
For the rings, alternate two similar colors to give them texture and the impression of cosmic dust.
19. Organic Movement with Thread Painting
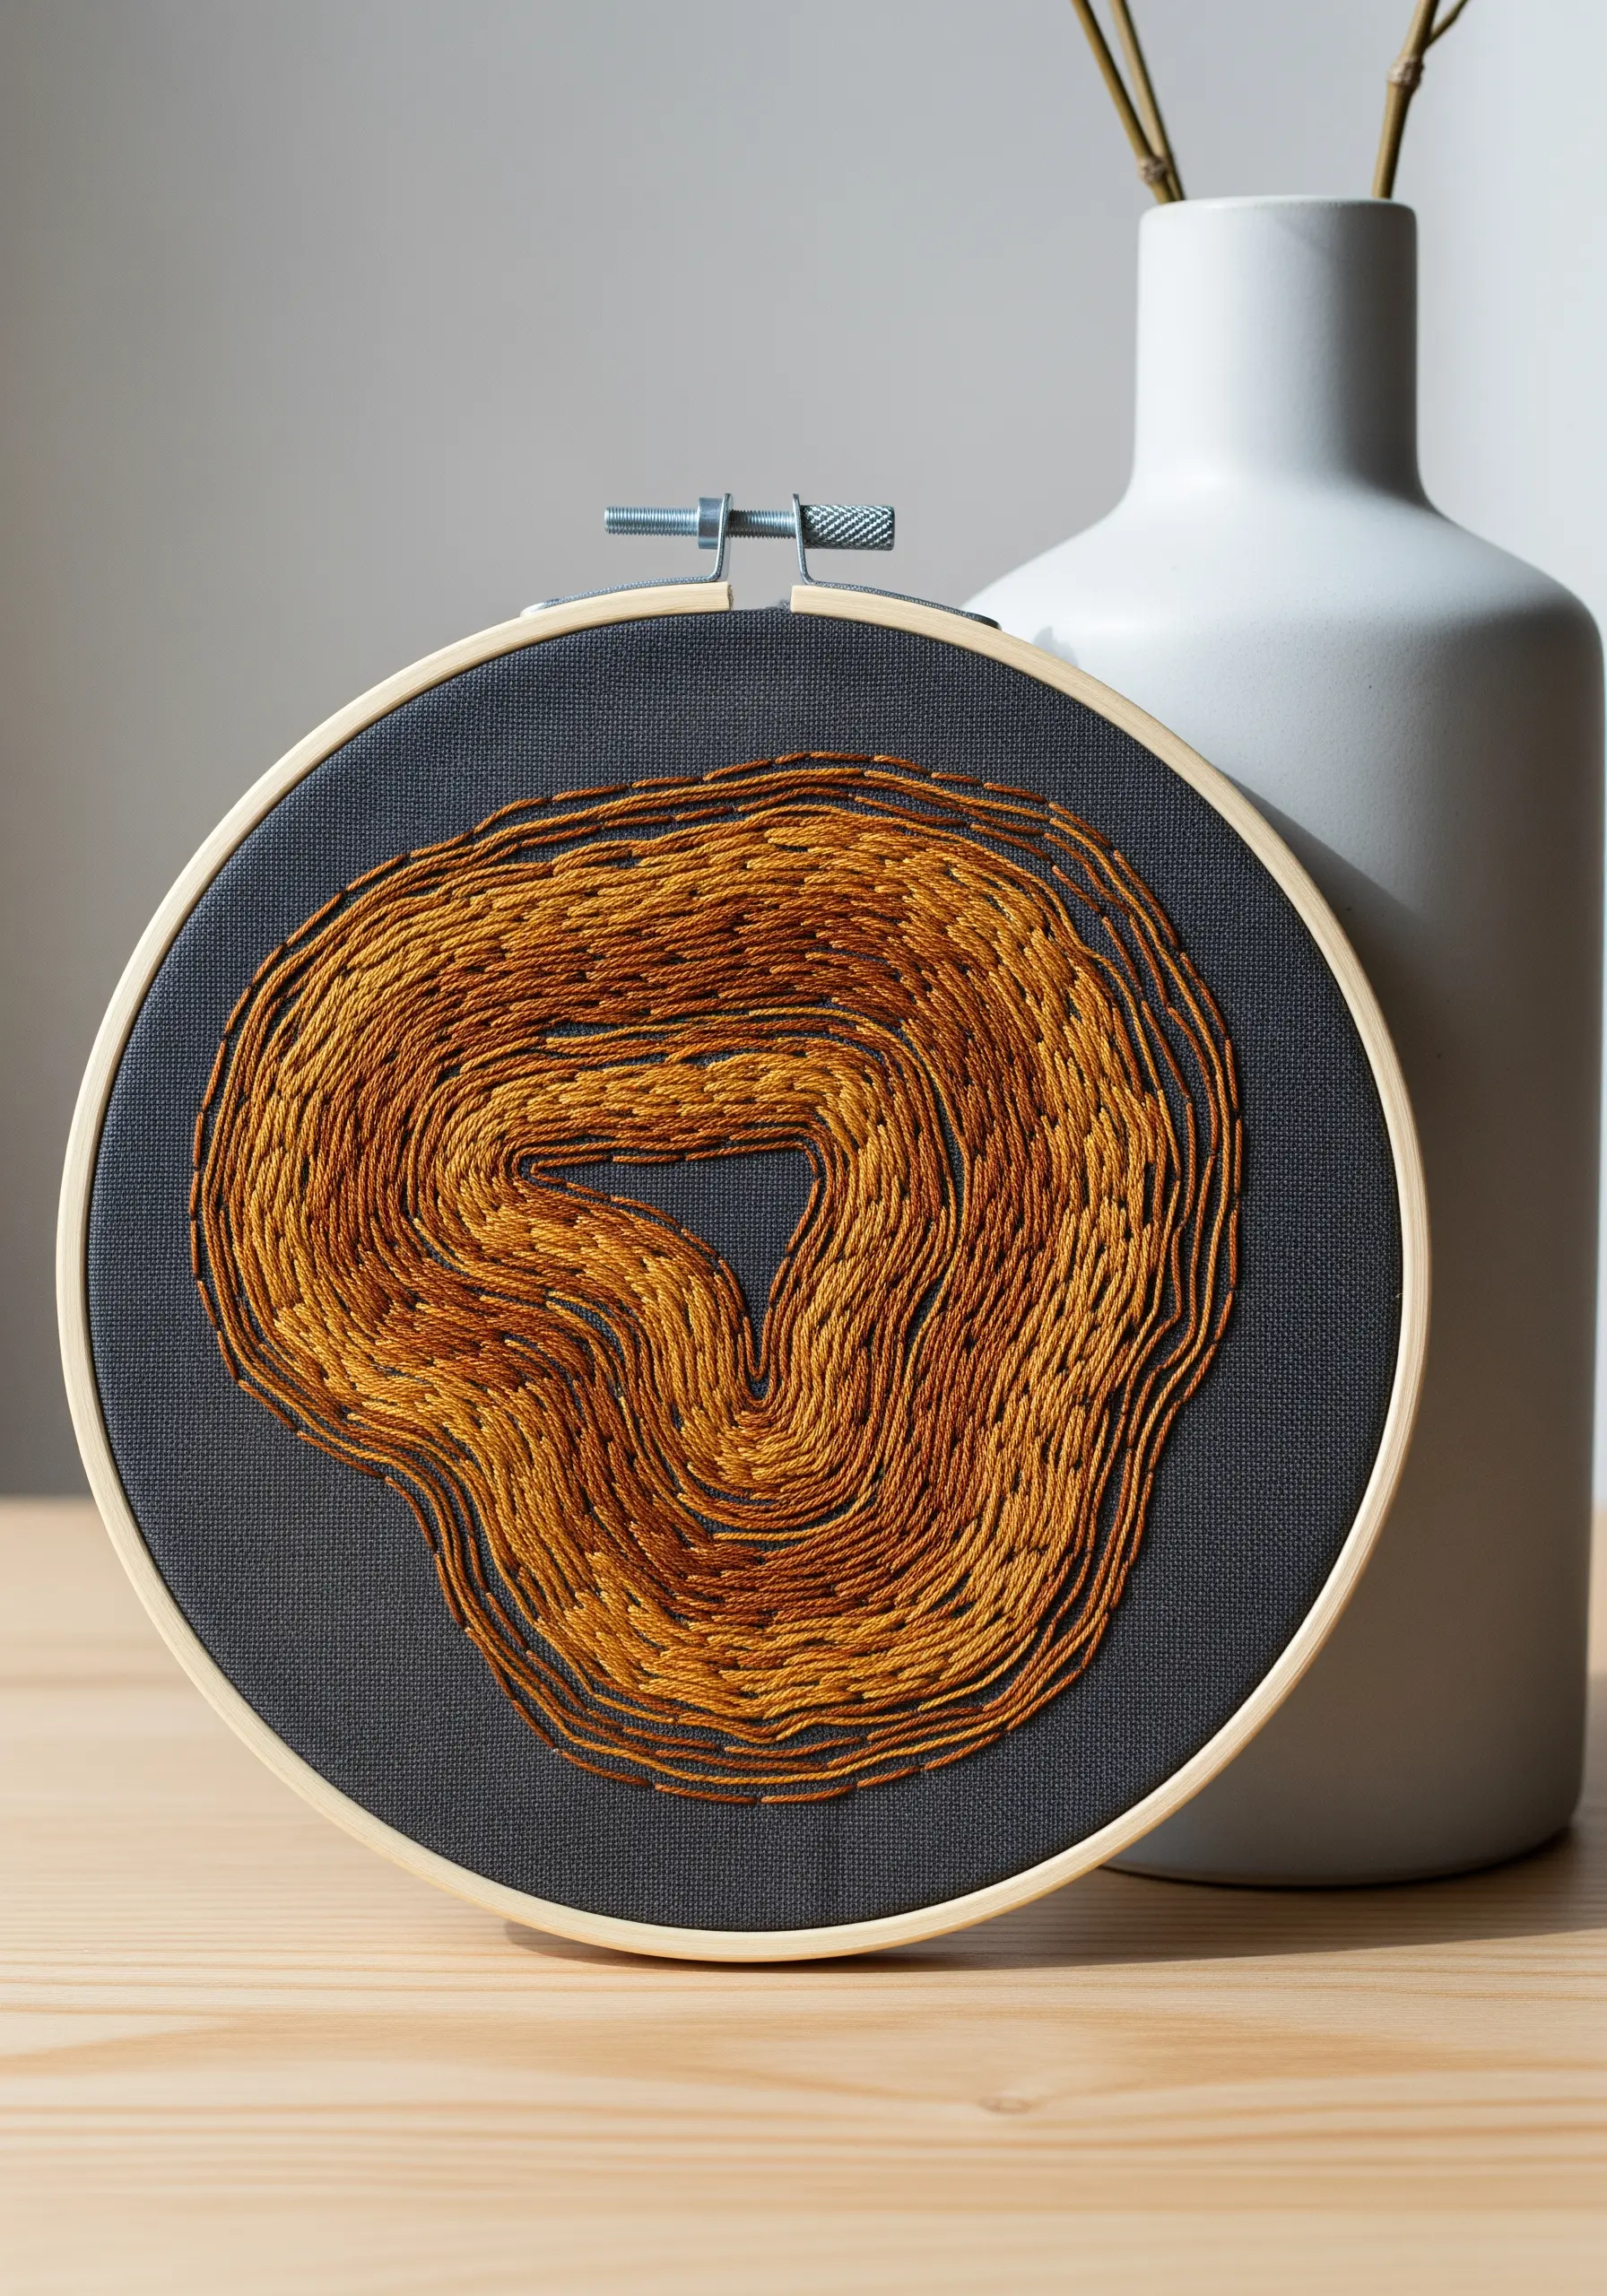
You can create the effect of wood grain with a simplified thread painting method.
Use three or four analogous colors and fill the shape with long, flowing split stitches.
Instead of trying to blend them perfectly, allow the colors to form distinct but swirling sections.
The key is to follow an organic, wavy path with your stitches, which creates the beautiful, natural movement that makes this piece so compelling.
20. Sculpted Raindrop Motifs

To achieve these plump, perfectly shaped raindrops, padding is essential.
First, outline the drop with a split stitch to define the edge.
Next, fill the interior with a light layer of seed stitches—this is your padding.
Finally, cover the entire shape with vertical satin stitches.
The hidden layer underneath pushes the satin stitch up, creating a raised, glossy finish that makes your simple stitches look professional.
21. The Minimalist Fruit Contour
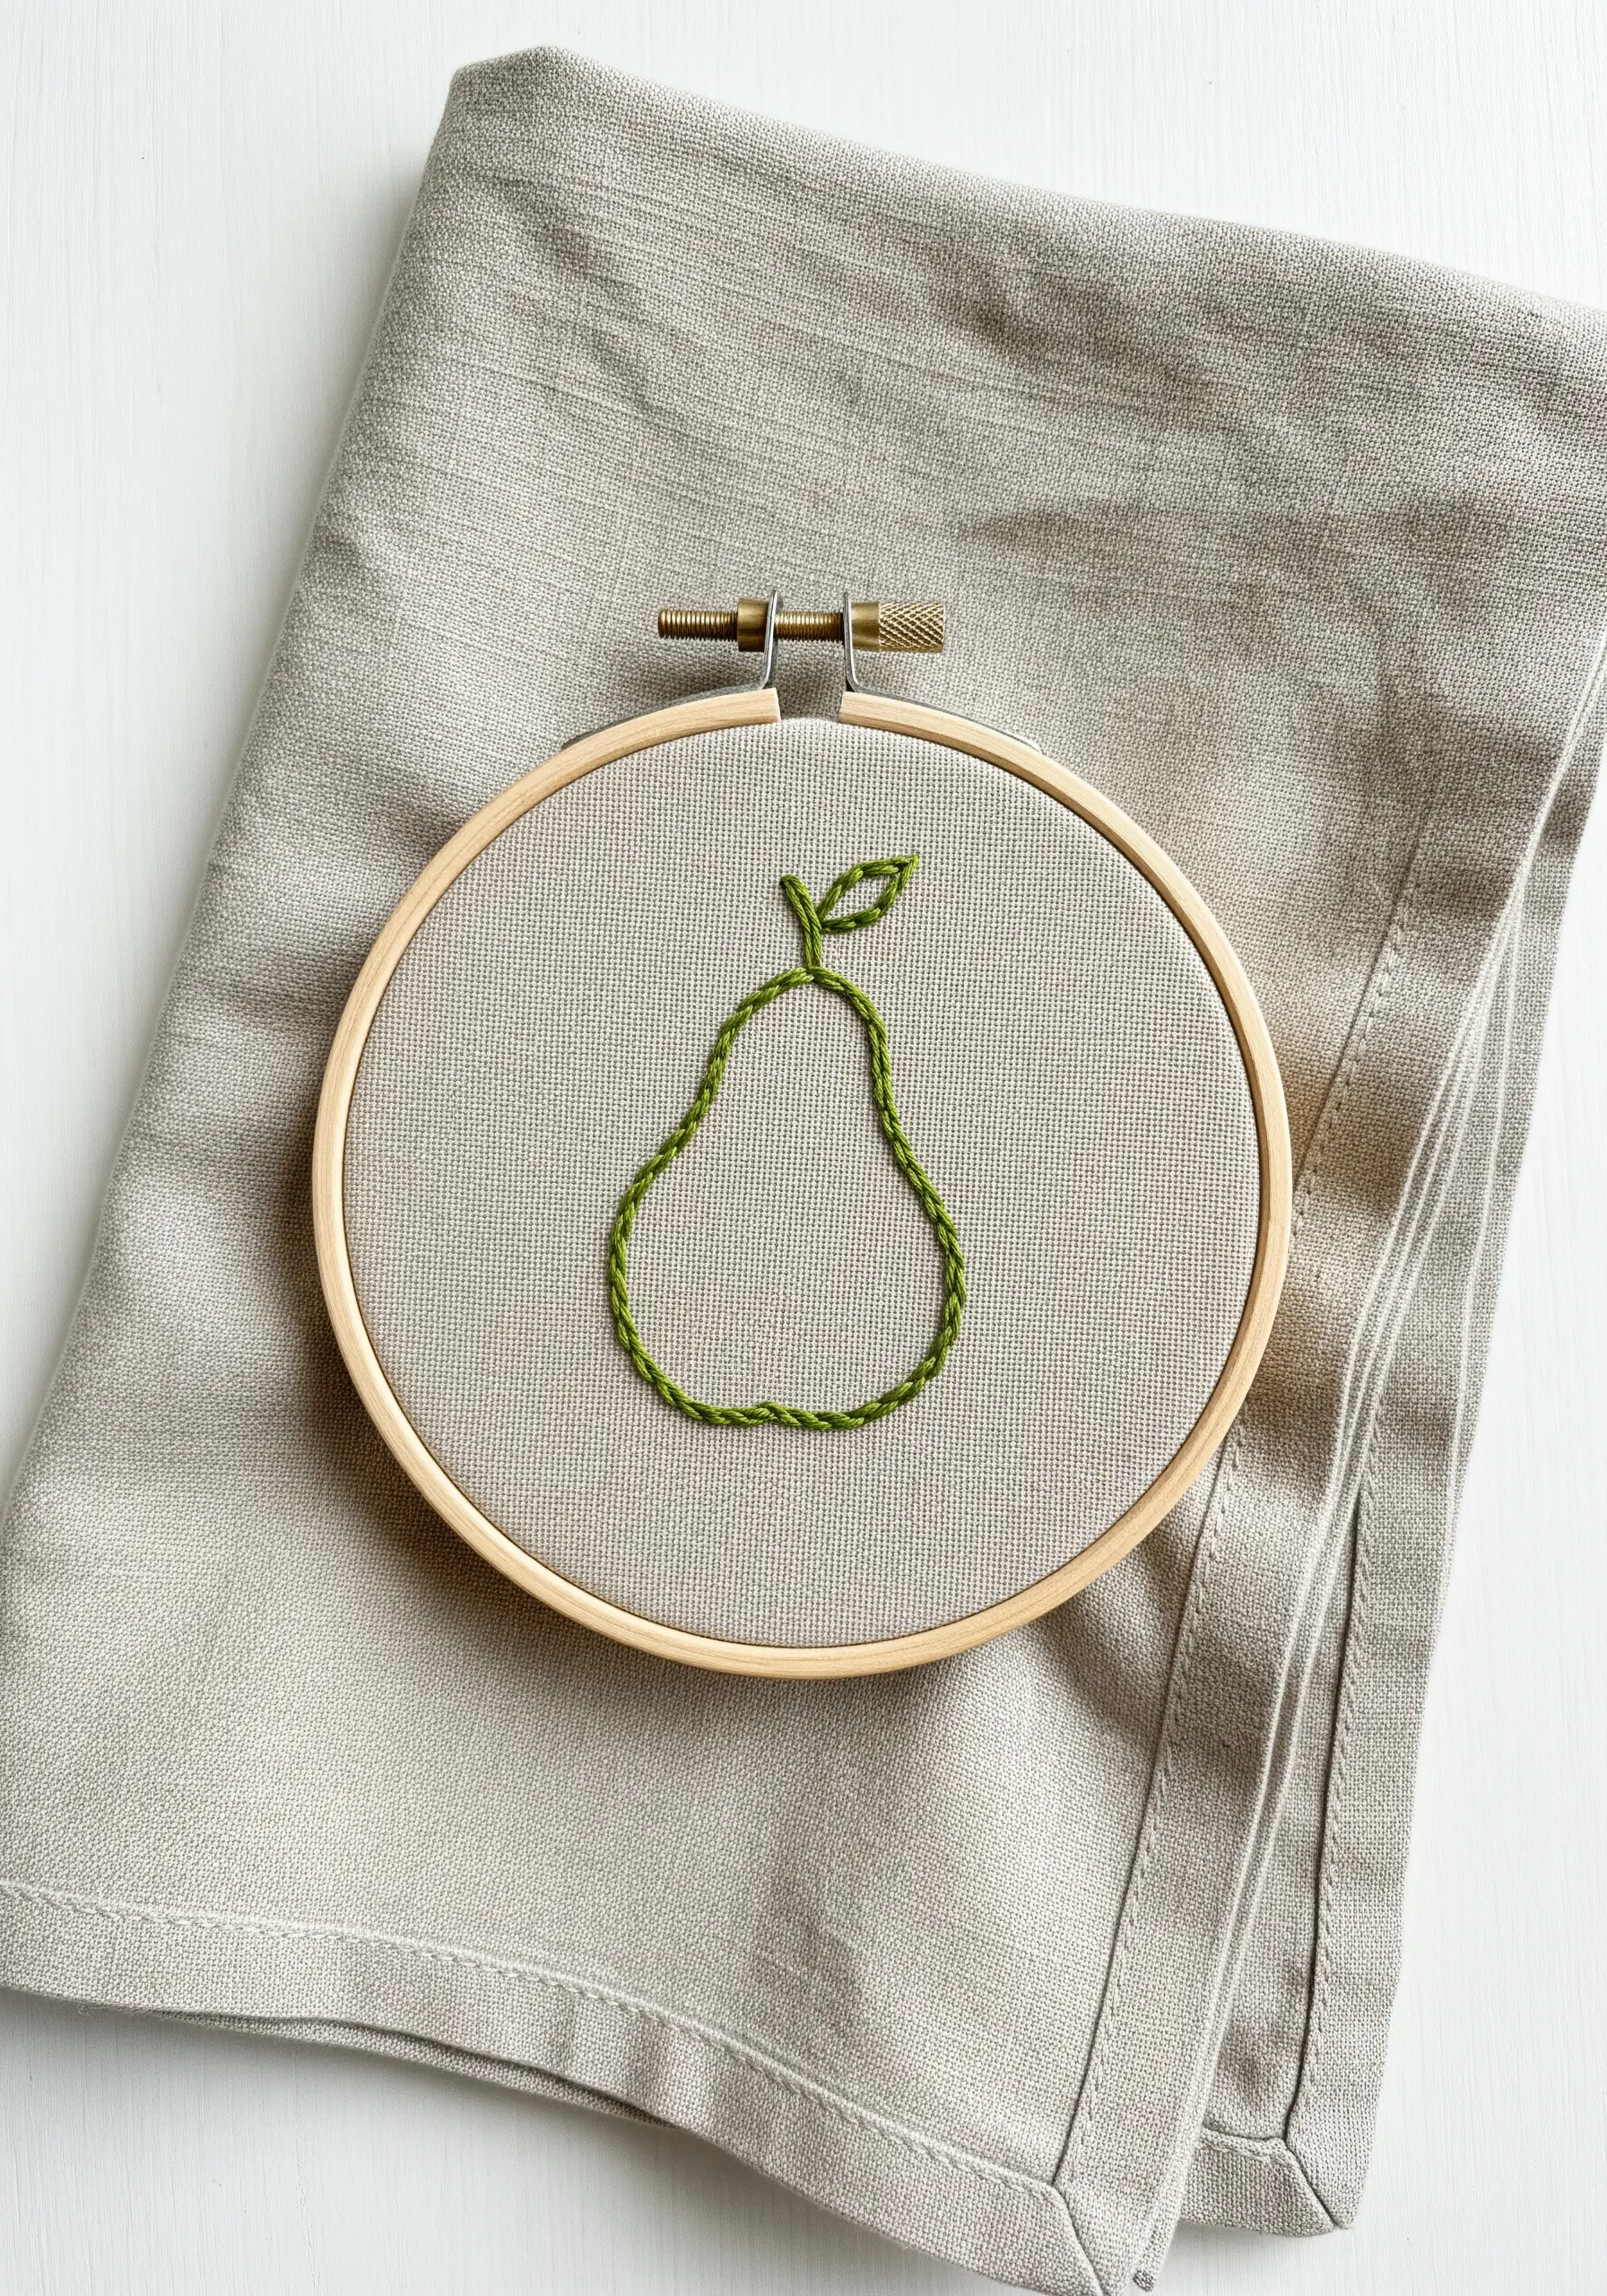
For a simple outline with more personality and texture than a backstitch, use the chain stitch.
Its linked structure creates a line that is inherently bolder and more decorative.
Use three strands of floss to give the stitch a pleasing weight that stands up well on its own.
It’s an excellent choice for minimal fruit and botanical patterns where the line itself is the star of the show.
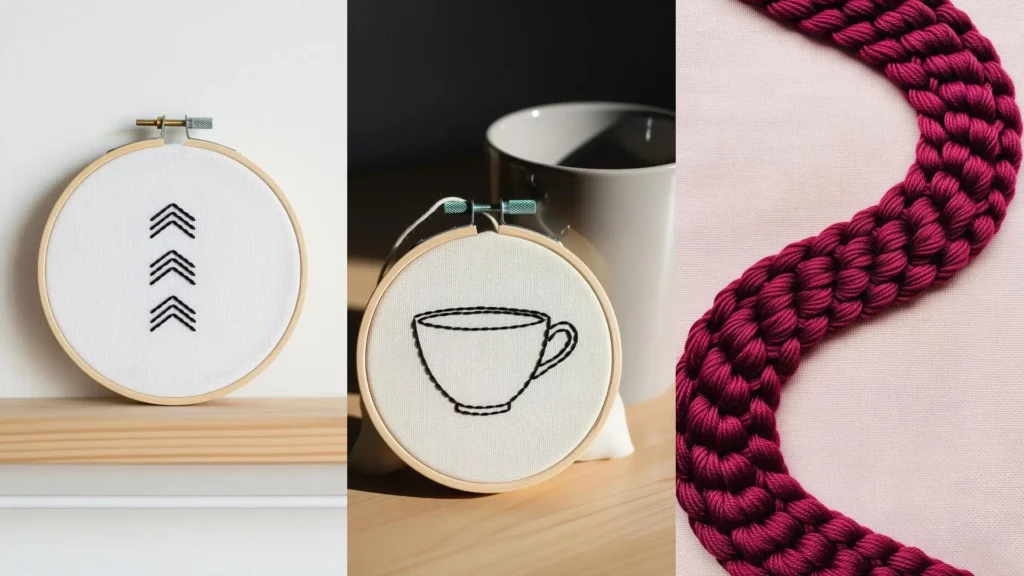
22. Sharp Geometric Repetition
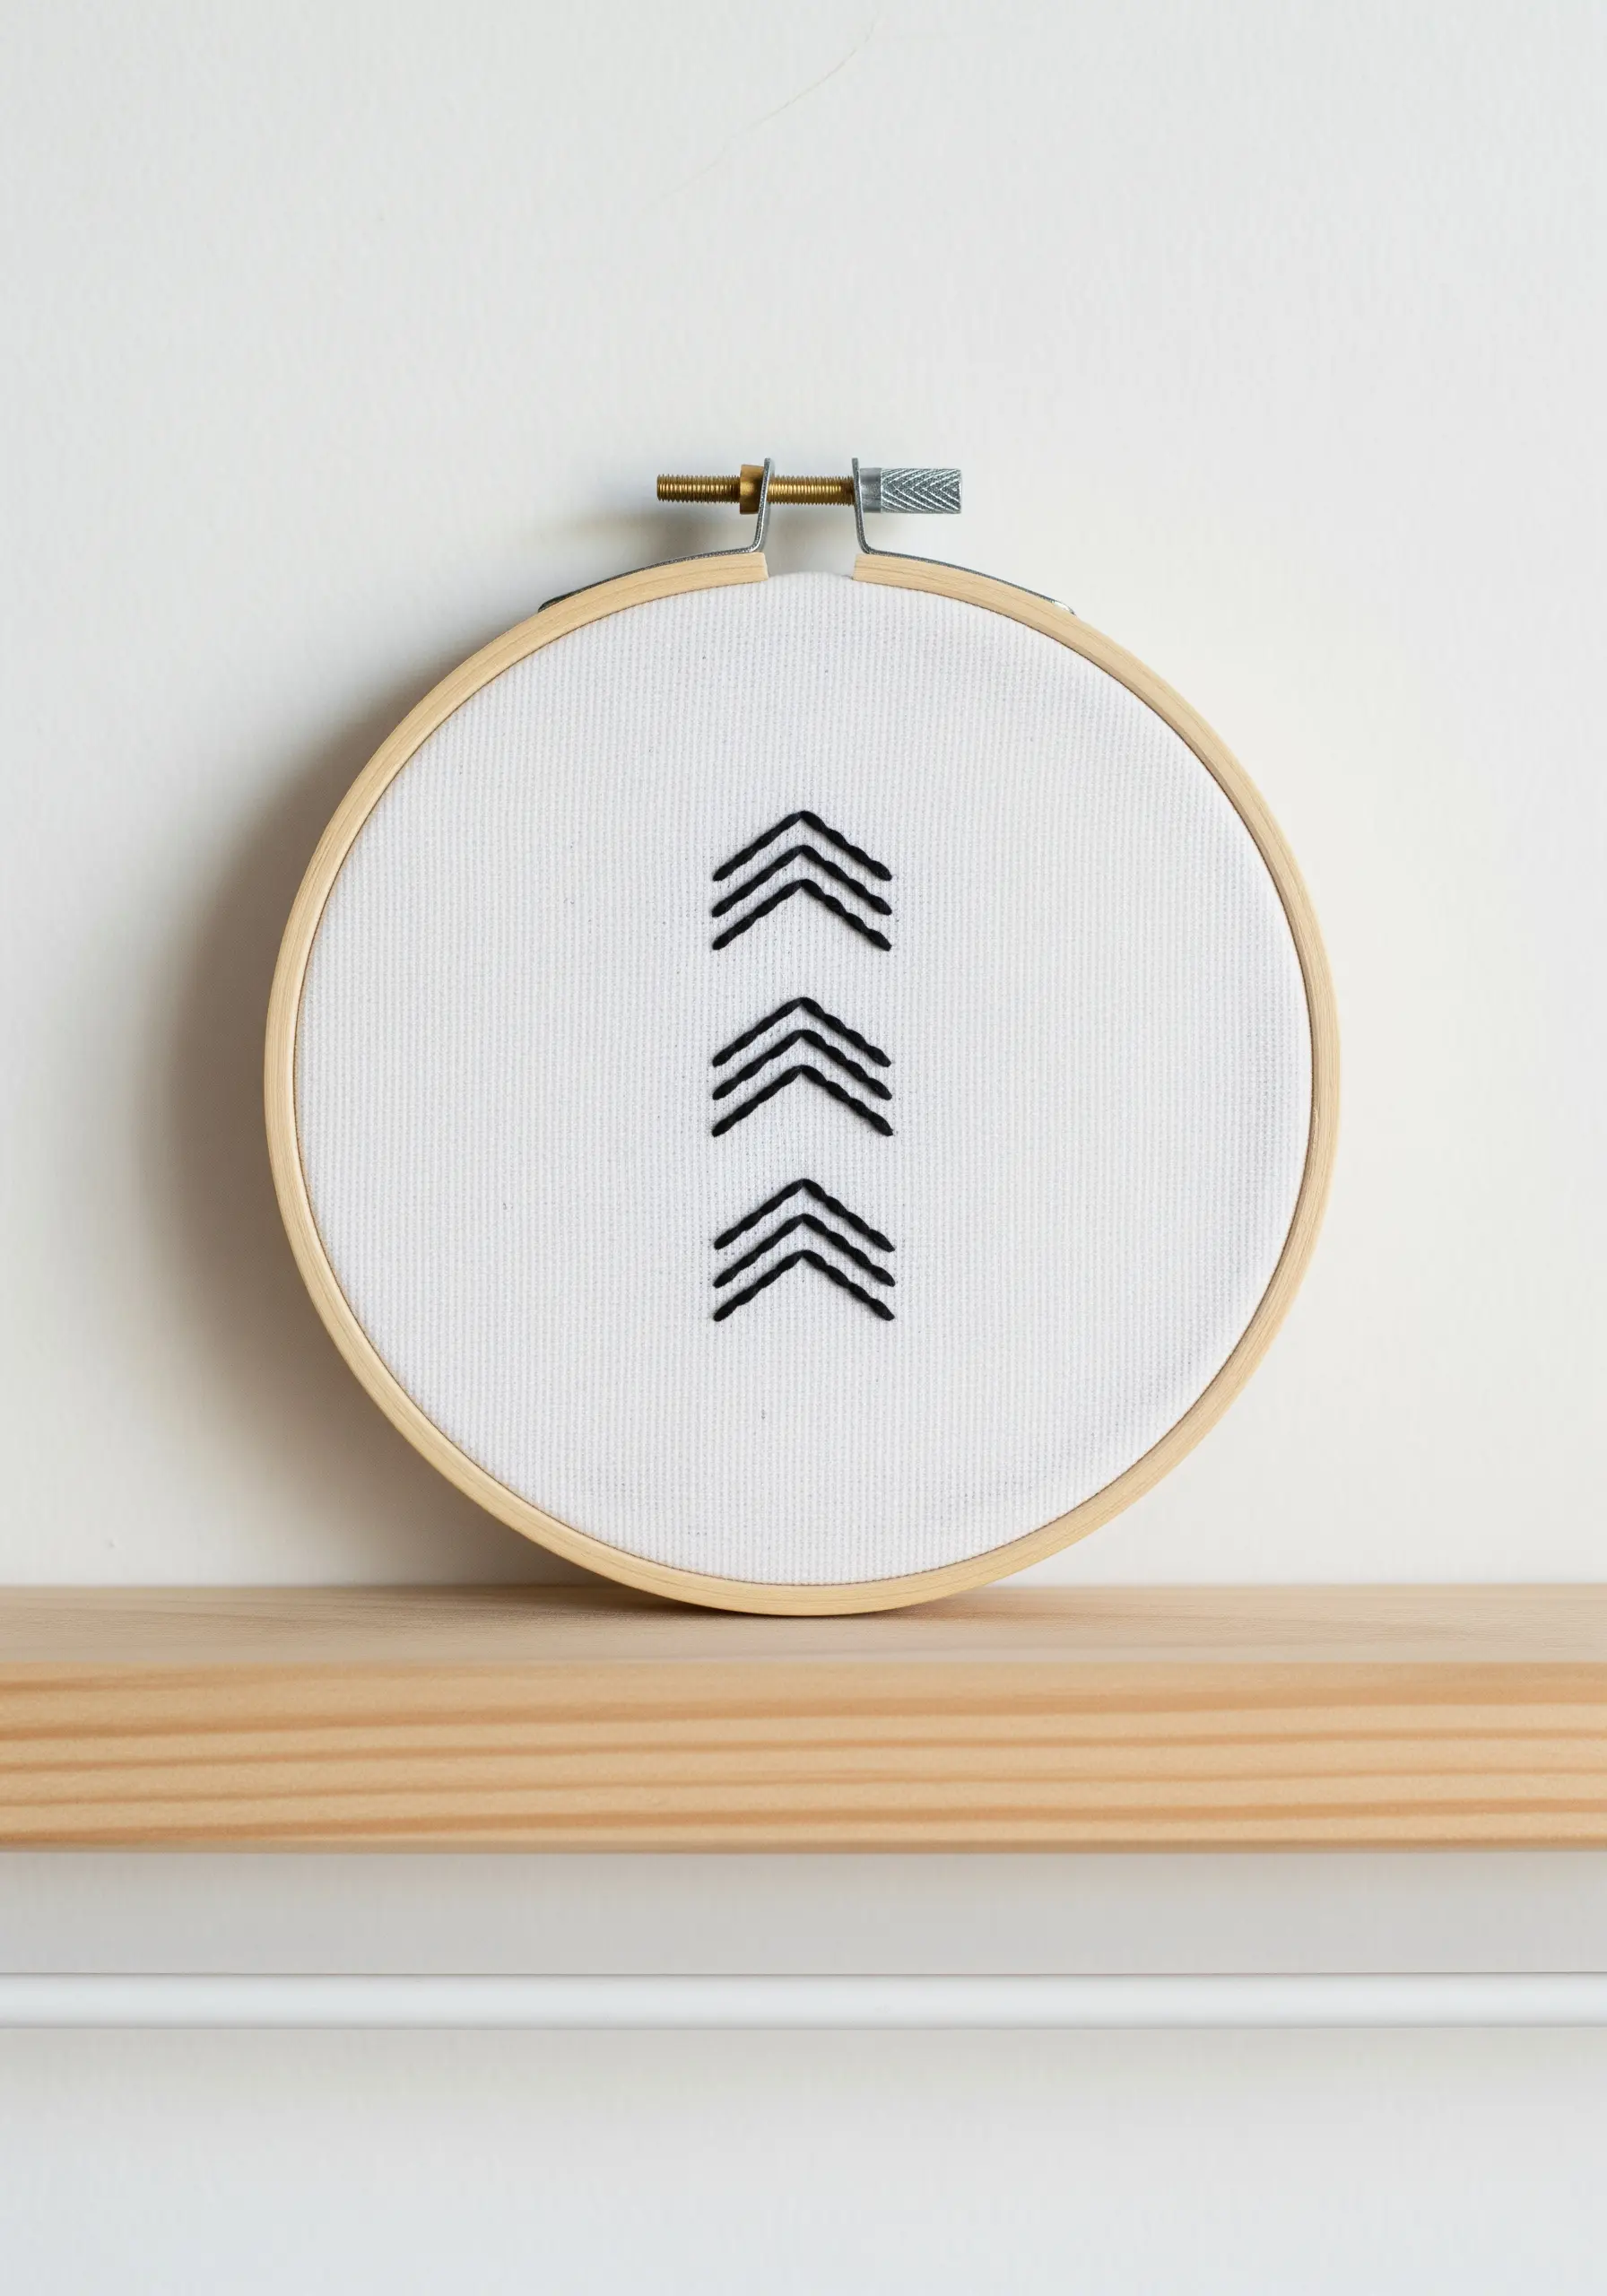
The success of this bold, graphic design depends entirely on precision.
To get perfectly sharp points on your chevrons, ensure the stitch that ends one line and the stitch that begins the next share the exact same fabric hole at the vertex.
Using an evenweave fabric like Aida or a linen with a visible weave can help guide your needle for absolute symmetry.
This small detail is what separates a clean design from a messy one.
23. Airy Dandelion with Straight Stitches
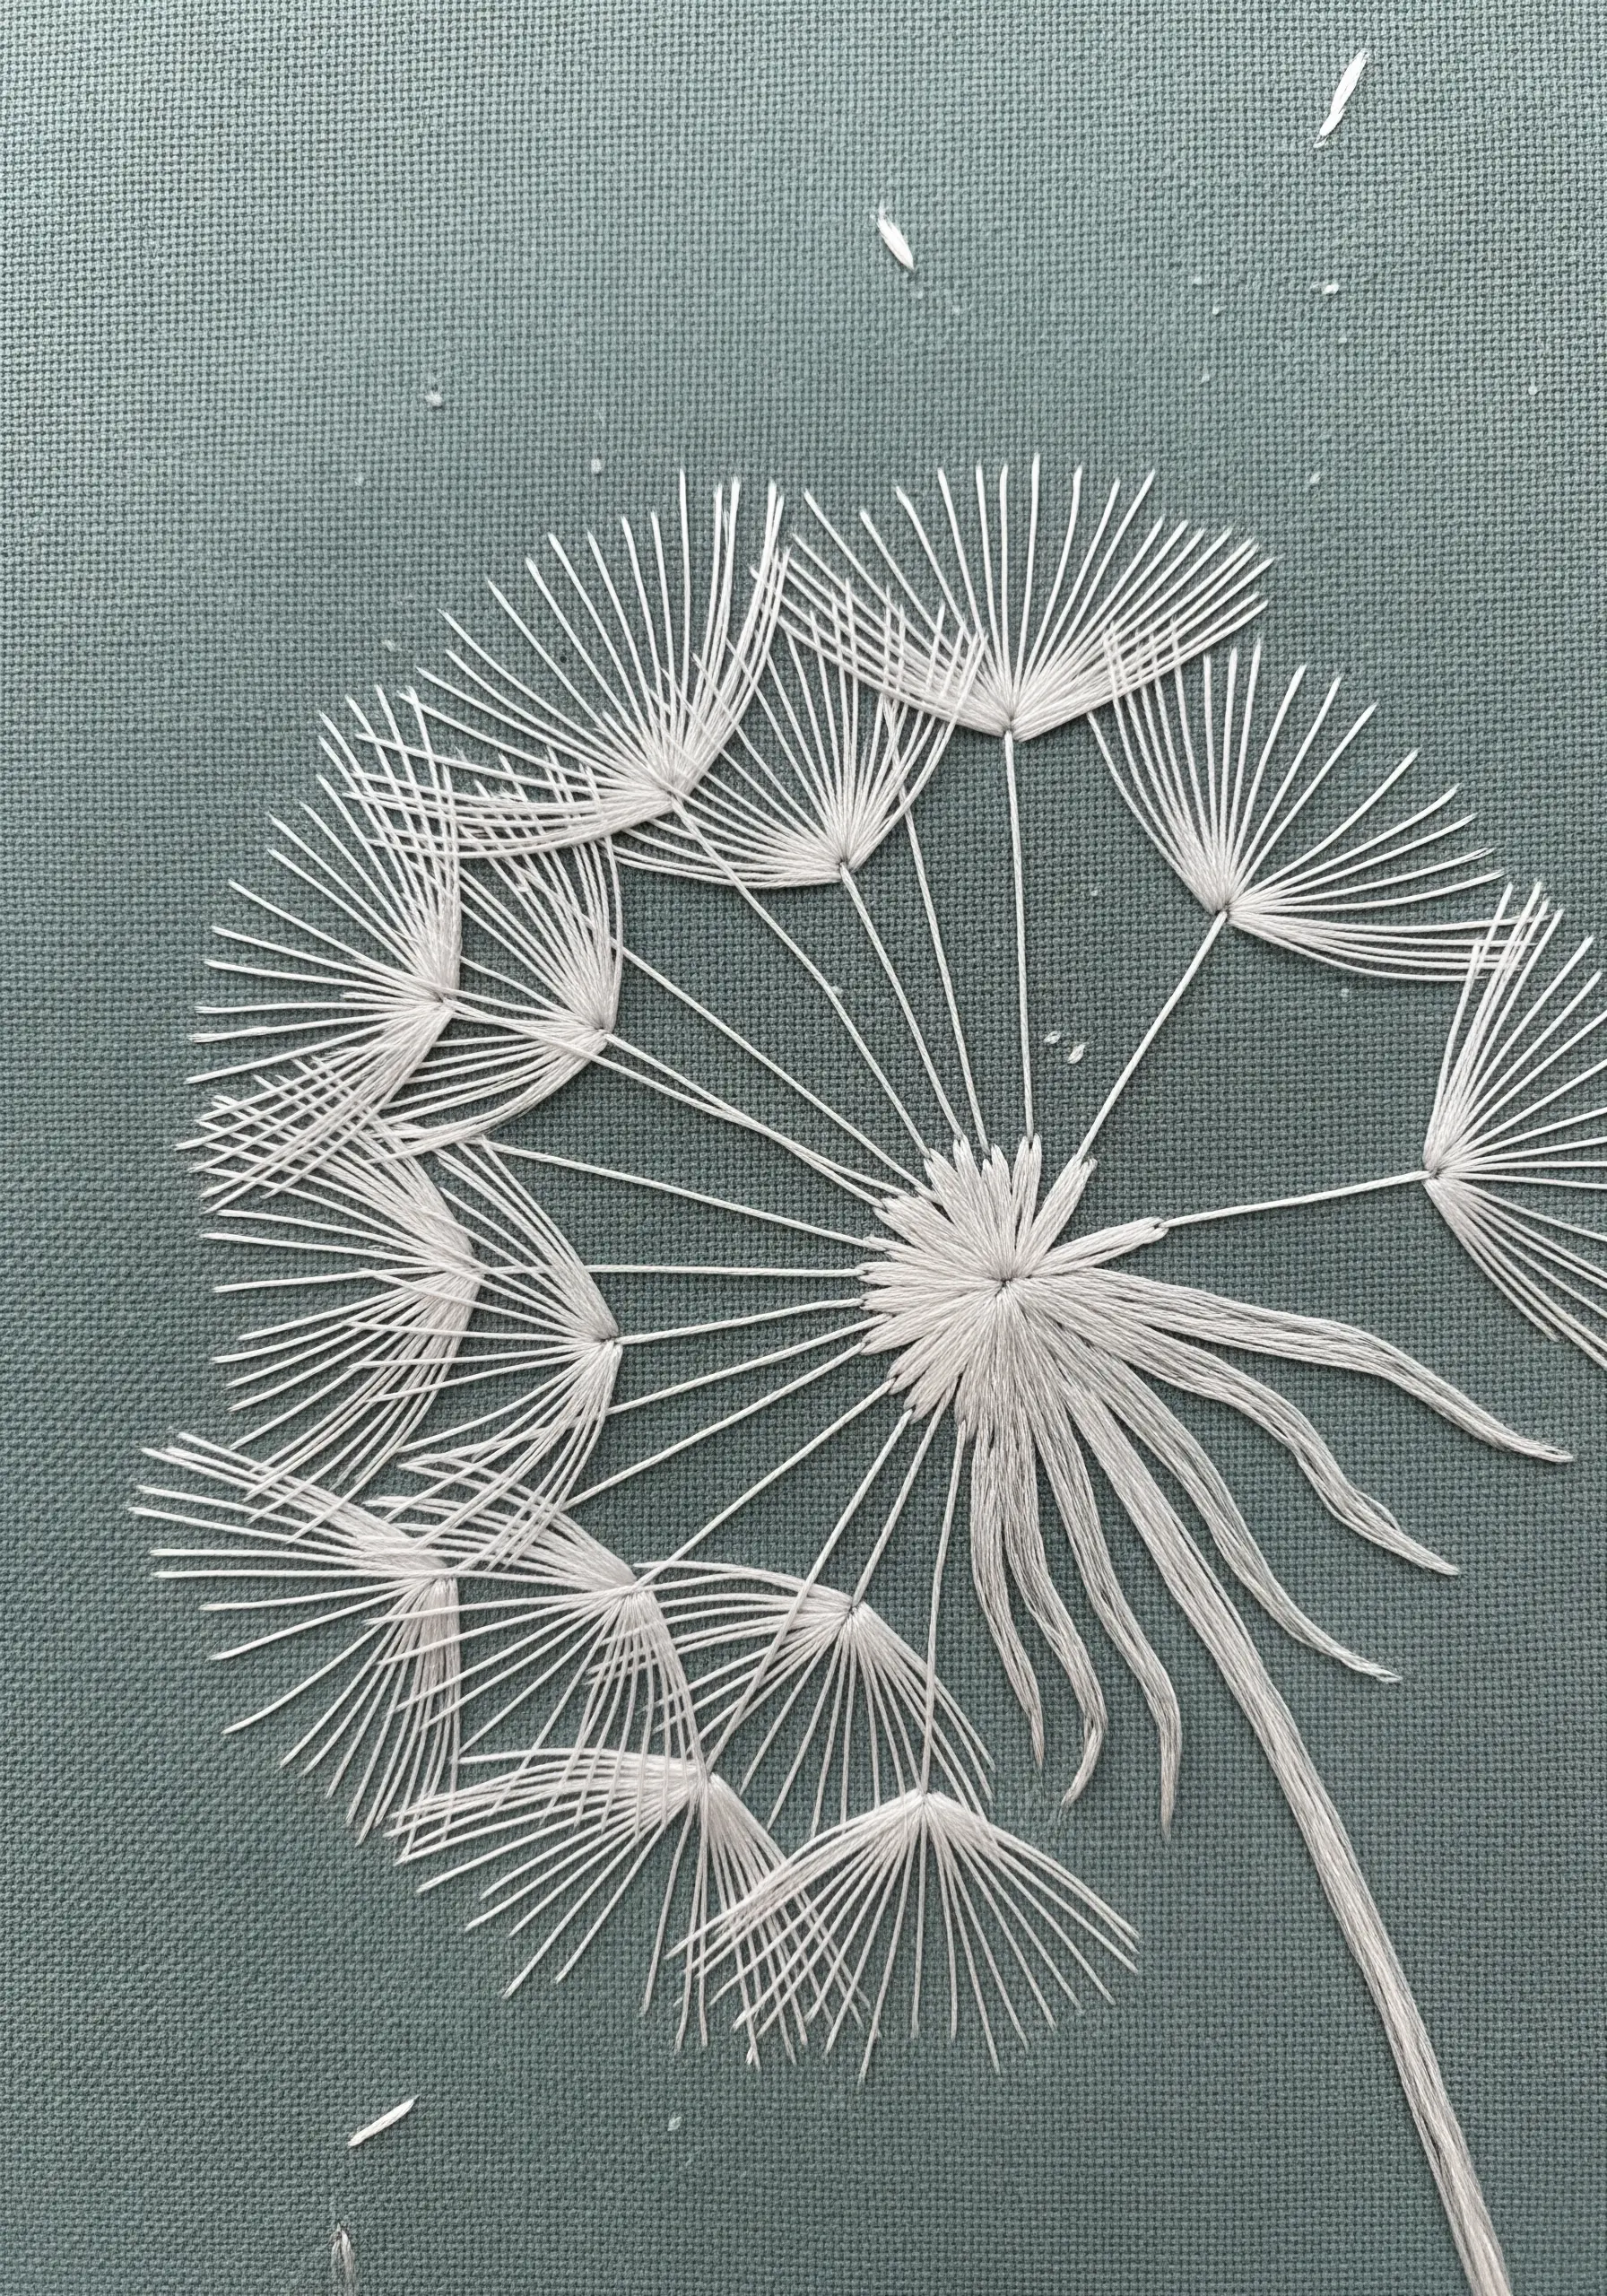
This entire design is a masterclass in the power of the humble straight stitch.
The key to its ethereal quality is using only a single strand of white floss against a colored background.
For the delicate seed parachutes, create small fans of tiny straight stitches.
Keep your tension consistent—not too tight, not too loose—to give the threads a light, floaty quality that feels full of movement.
24. A Feather in Two-Tone Fishbone Stitch
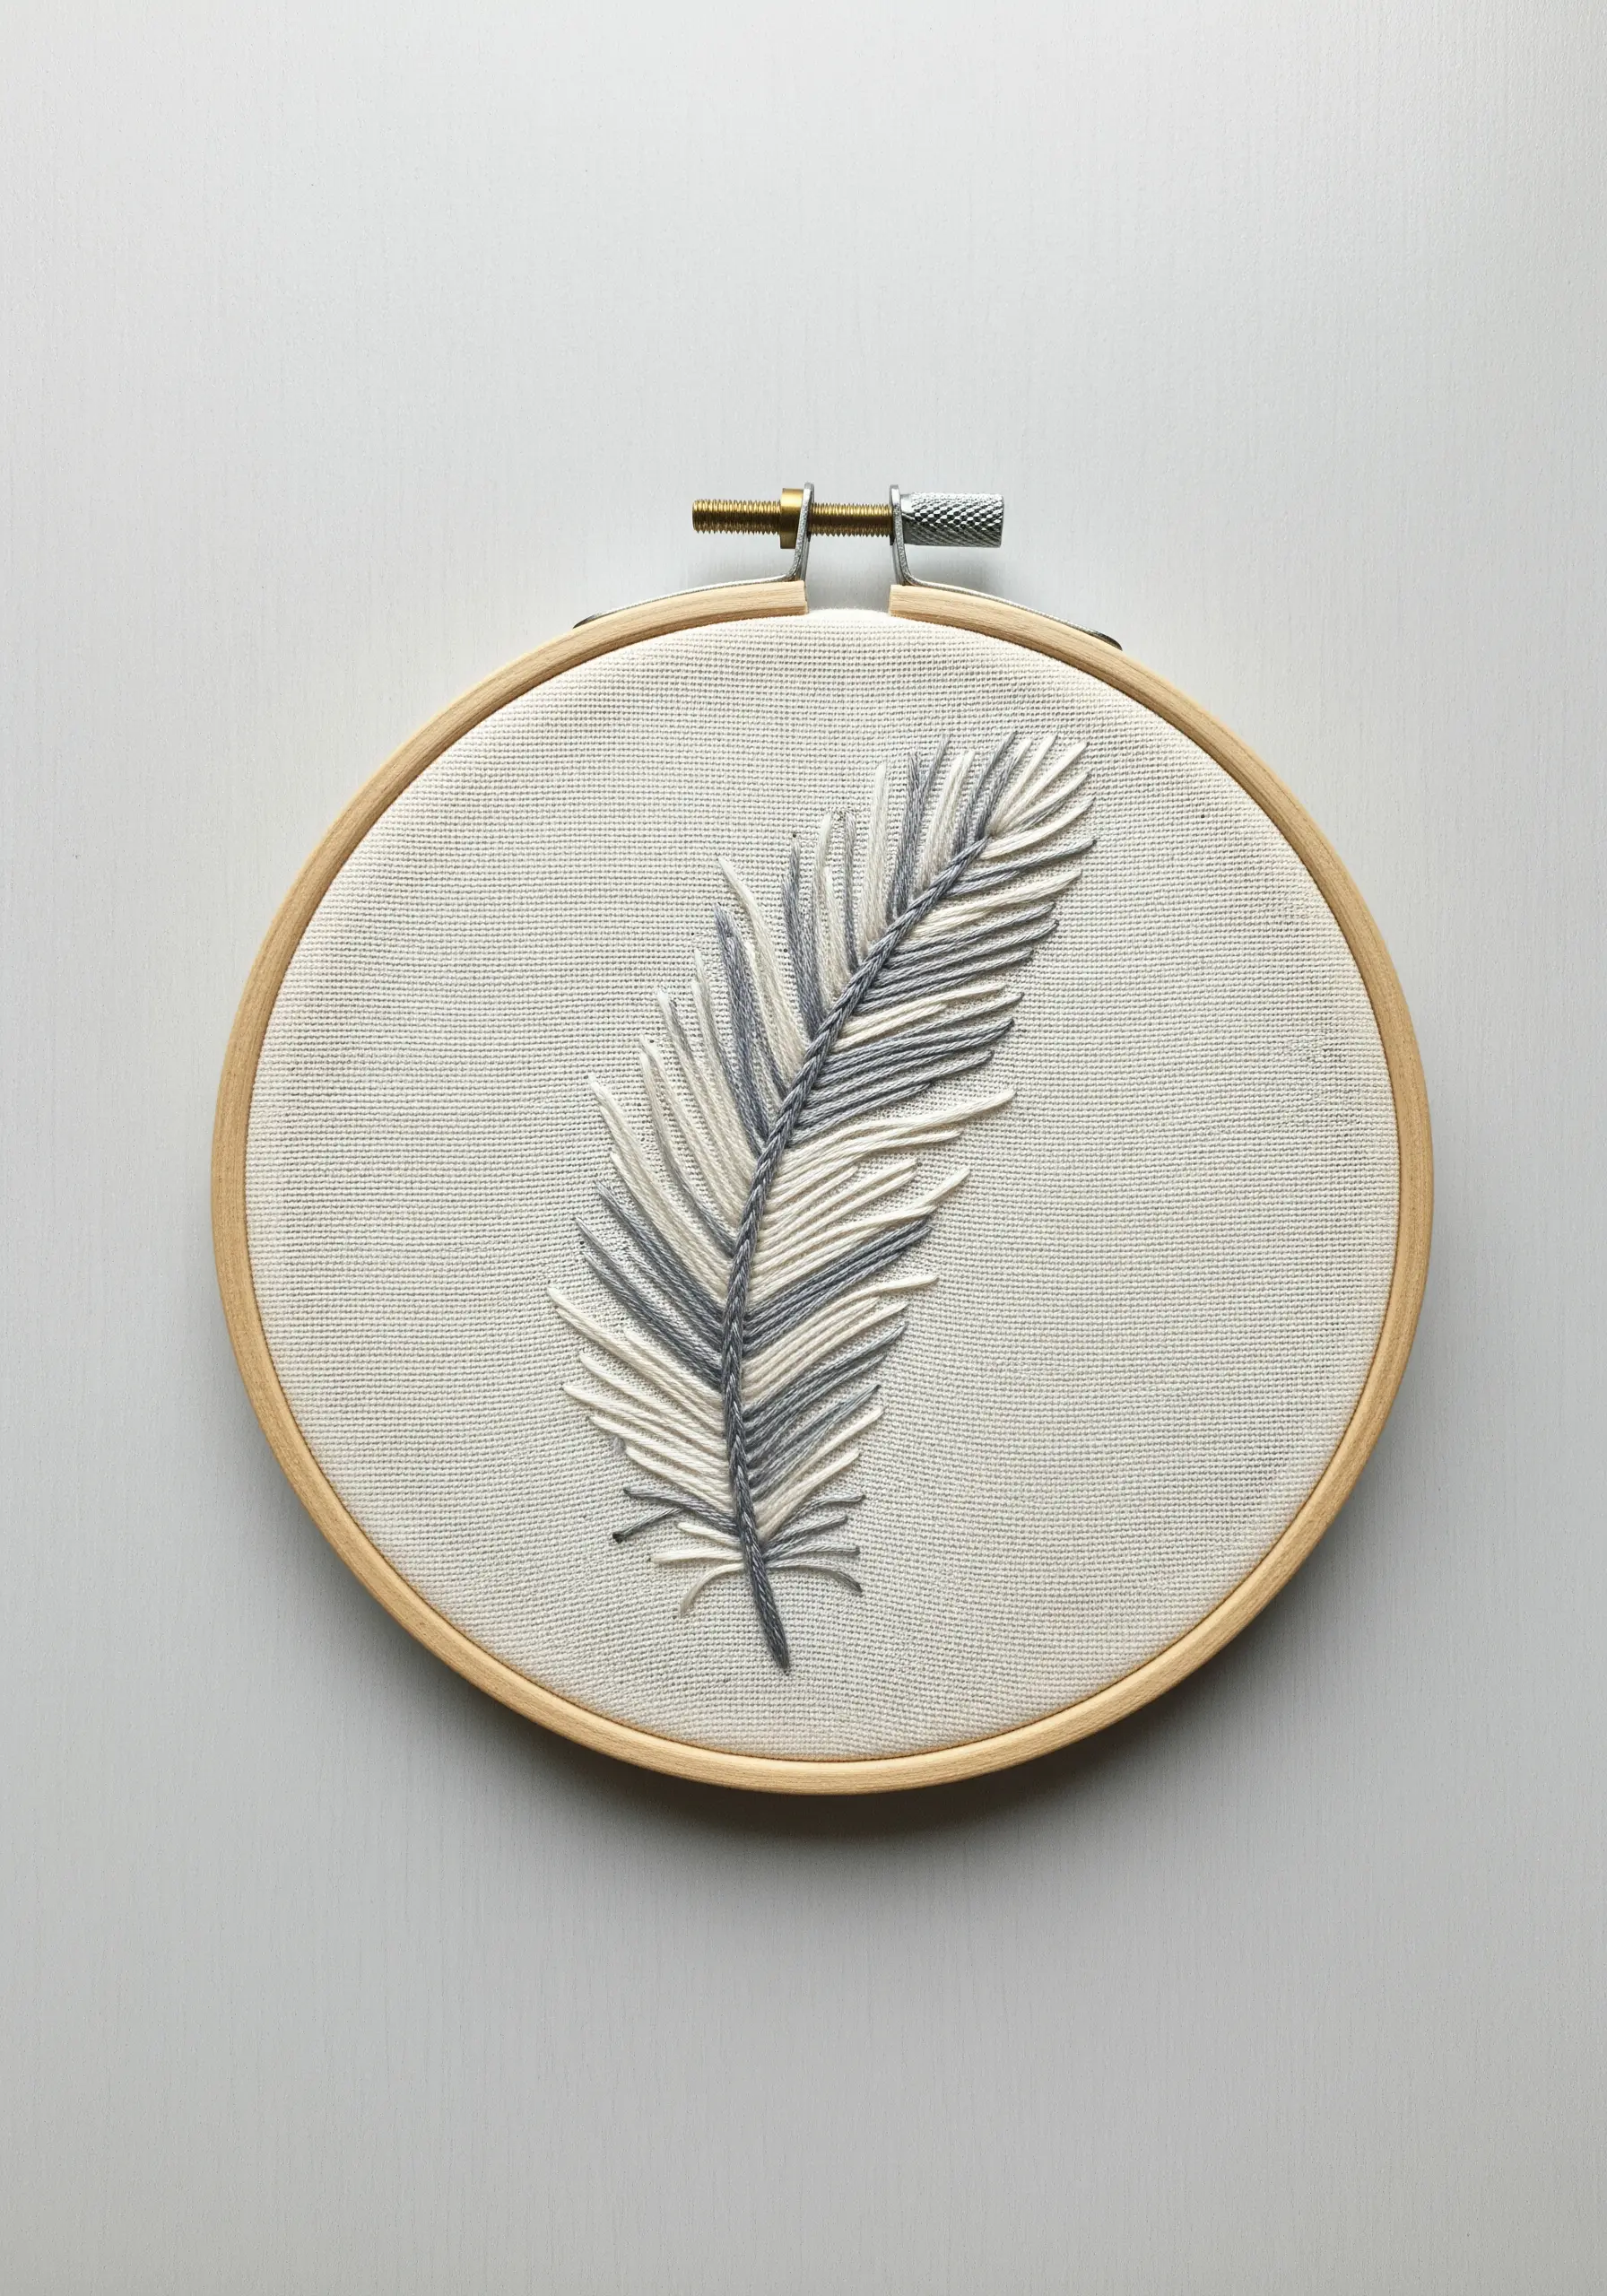
The fishbone stitch is ideal for creating the texture of feathers and leaves.
To achieve this integrated two-tone effect, thread your needle with one strand of each color simultaneously.
As you stitch, the colors will lay down side-by-side in a naturally variegated pattern.
This is a much faster and more organic-looking method than trying to stitch separate blocks of color to create realistic feather embroidery.
25. The Sculptural Braid Stitch
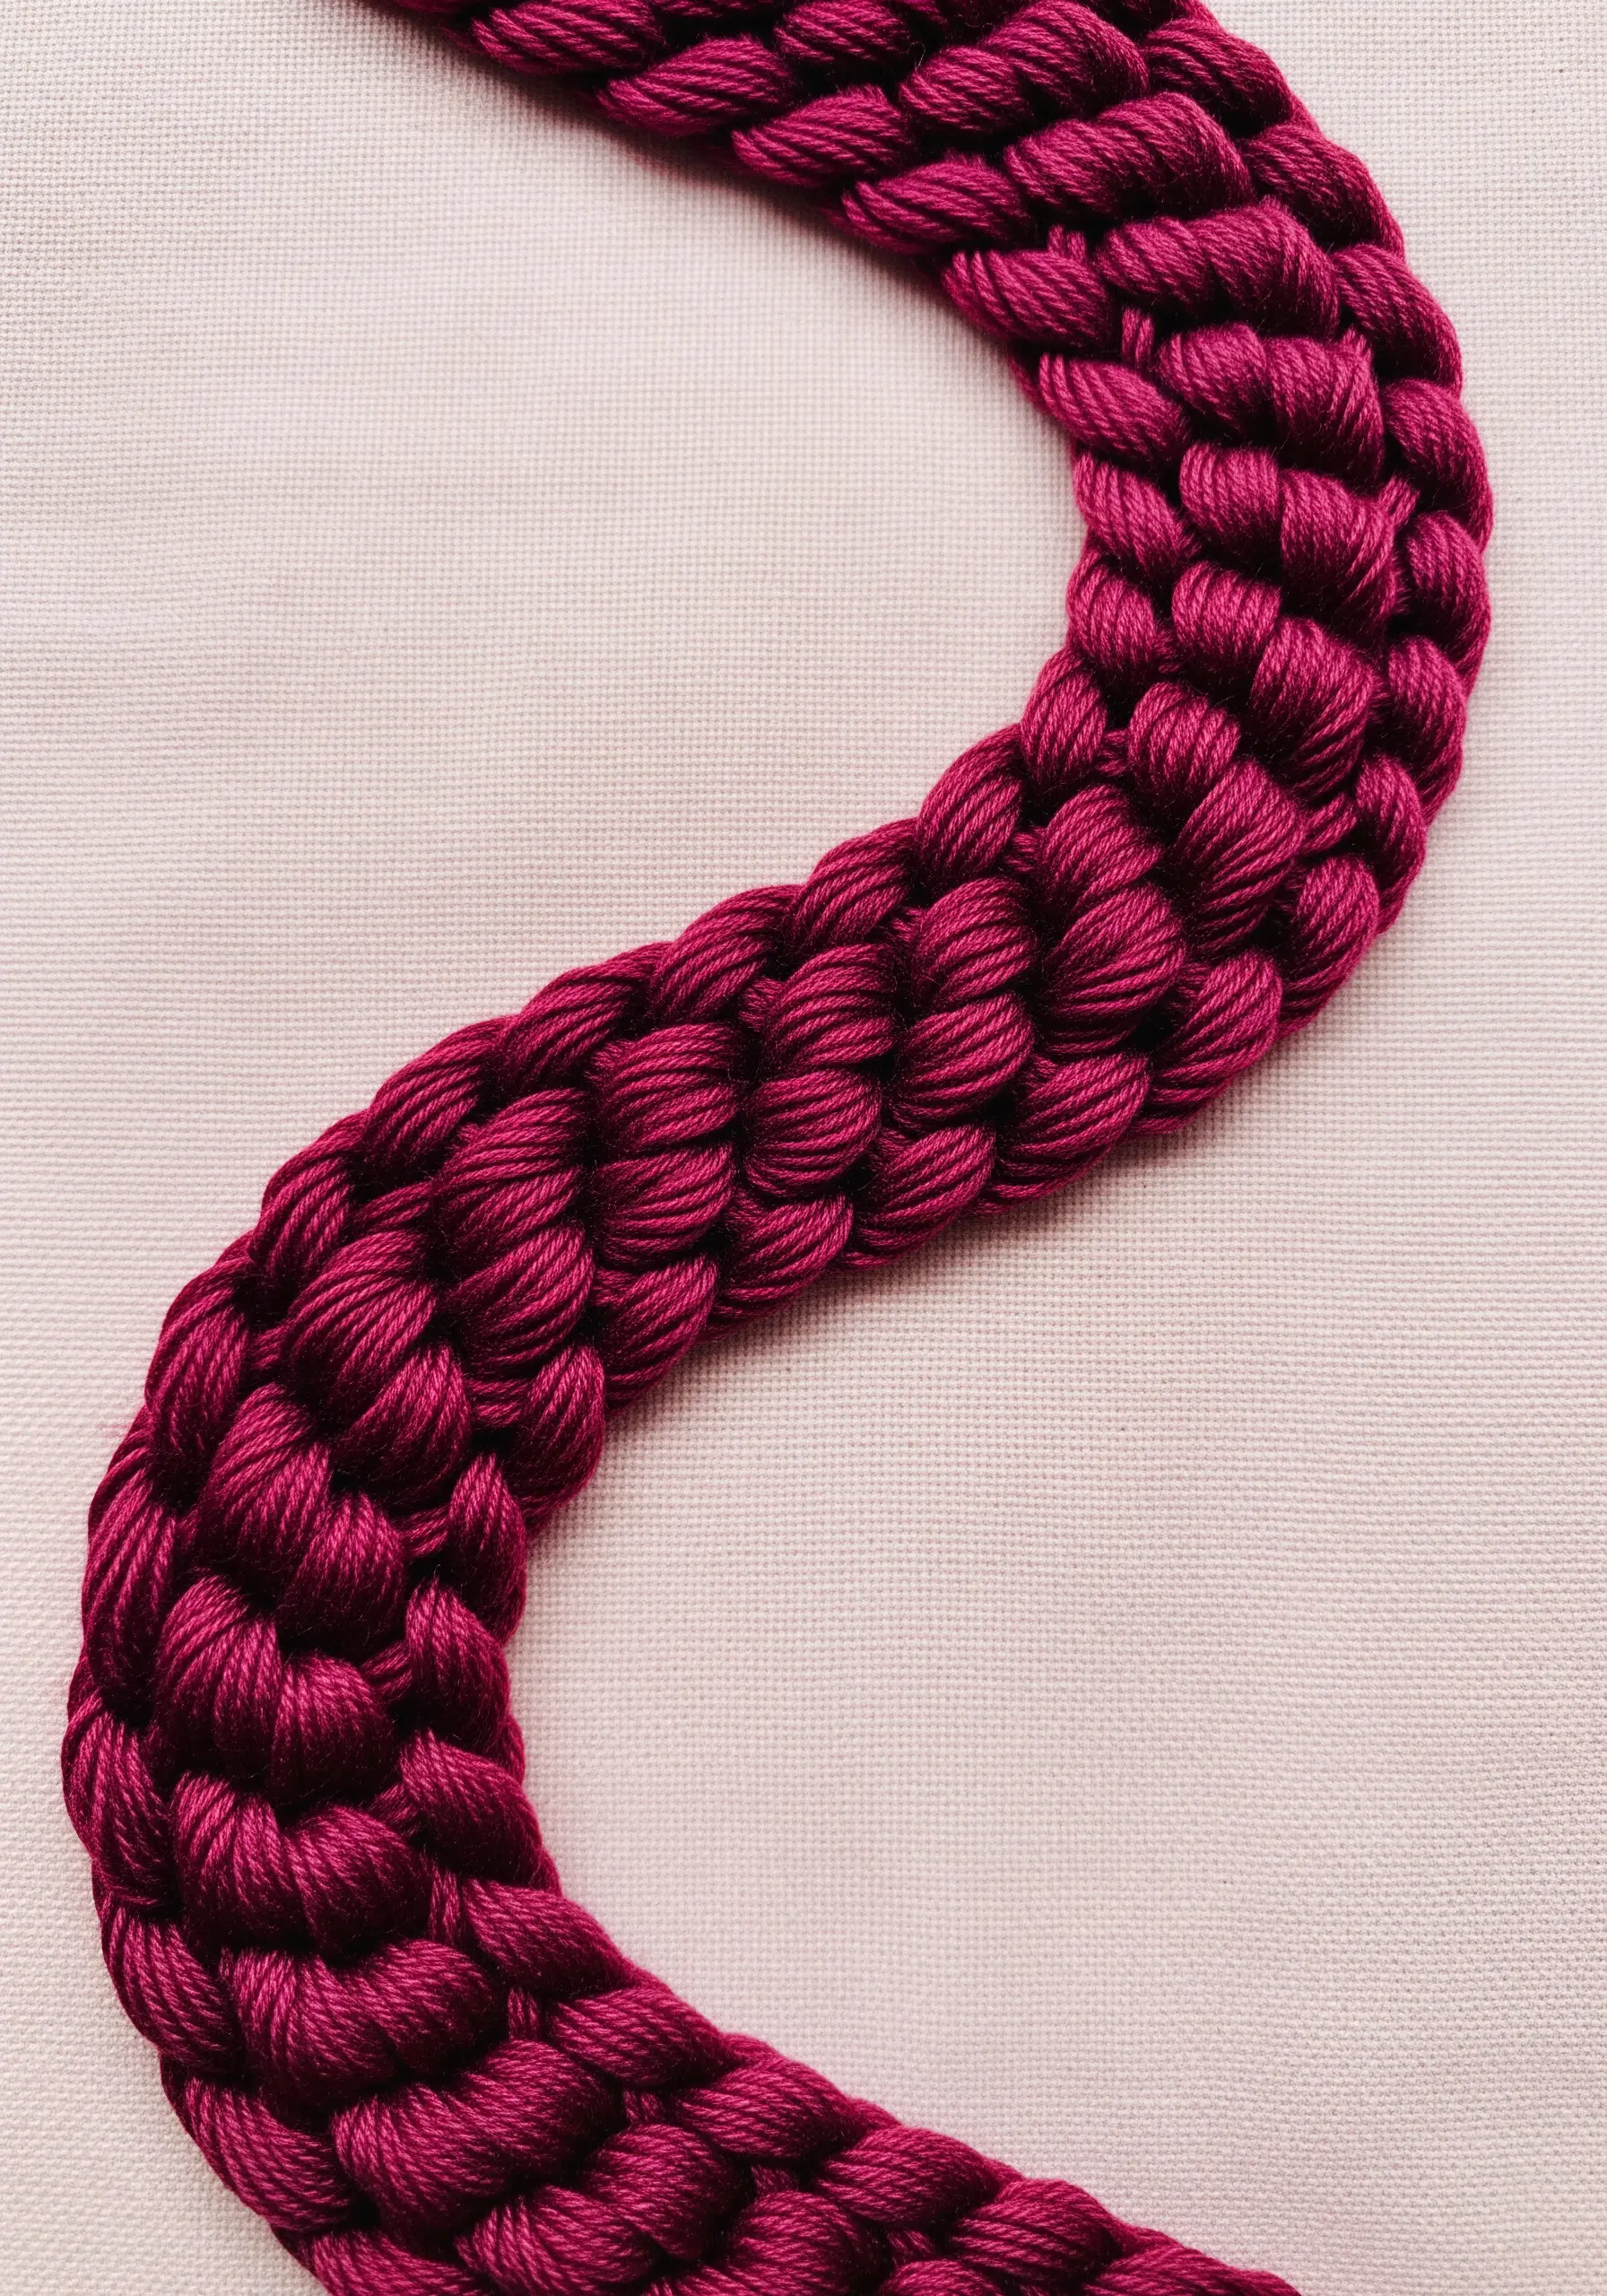
When you want a line with serious textural impact, choose the raised chain stitch, often called a heavy braid stitch.
This stitch creates a thick, three-dimensional rope that sits high on the surface of the fabric.
Use all six strands of your embroidery floss to maximize its volume.
It’s a perfect choice for bold outlines or for creating purely abstract, textural art where the form of the stitch is the focus.
26. Earthy Woodland Mushrooms
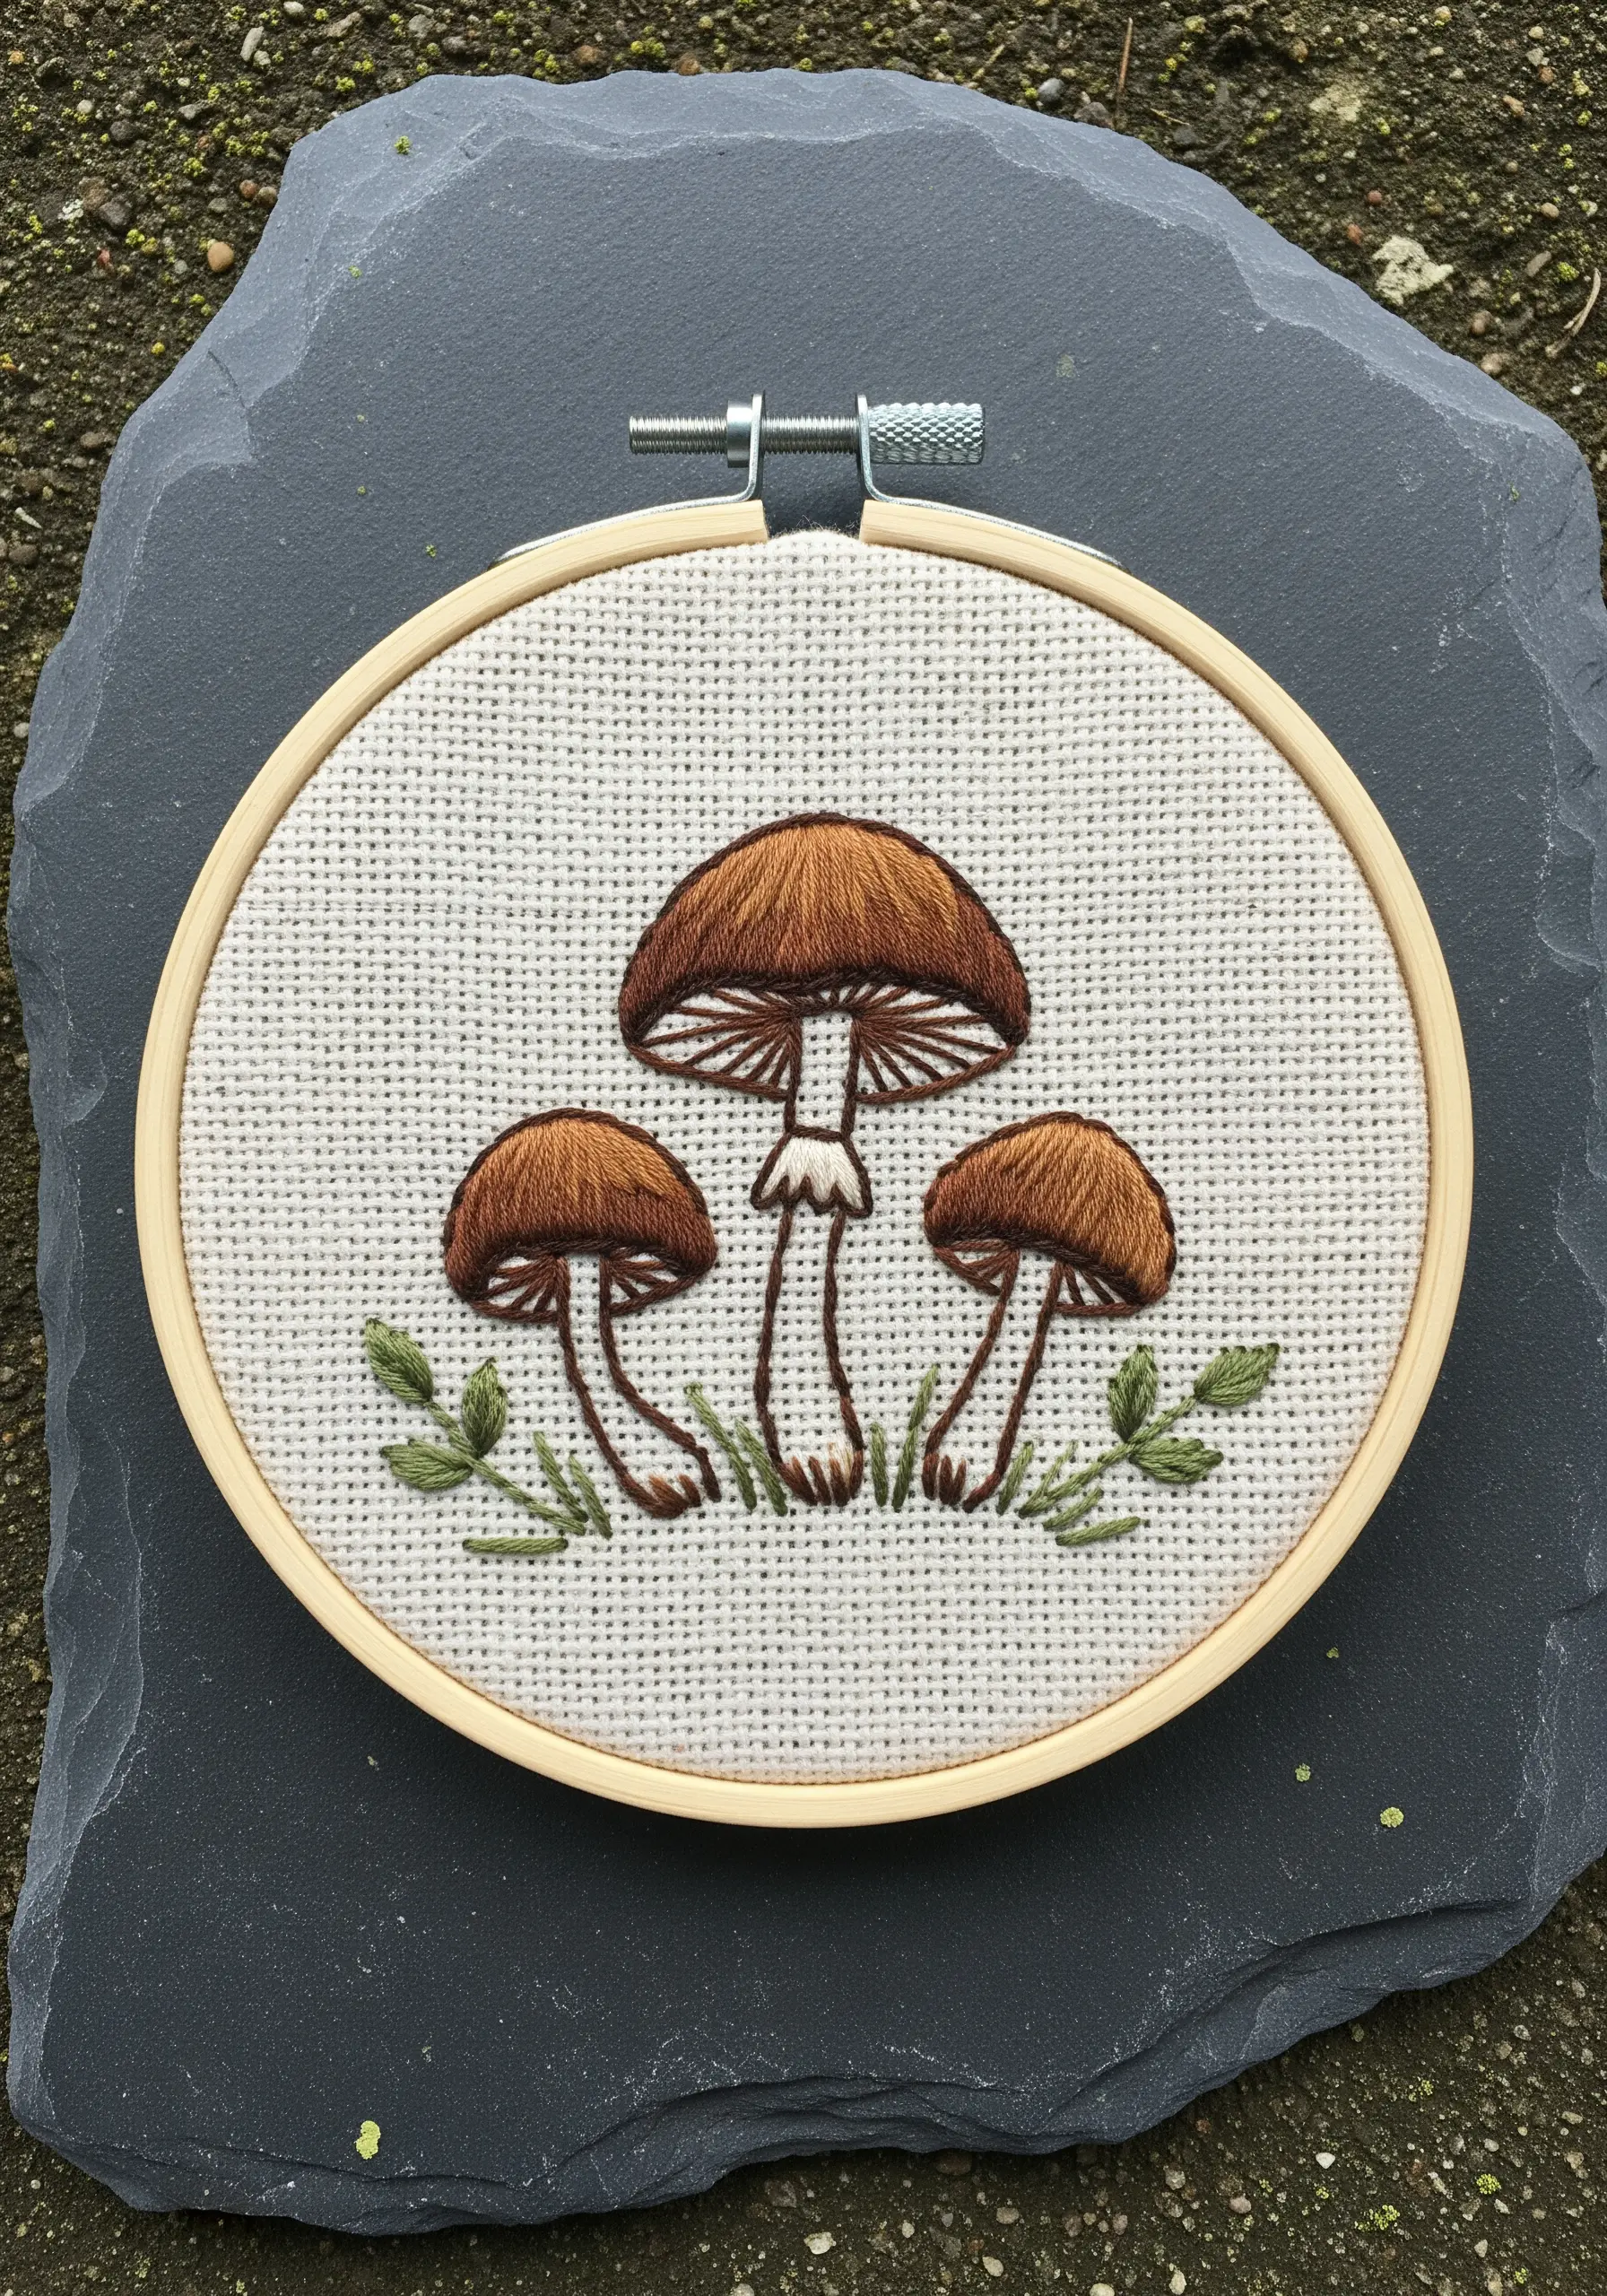
Bring these mushrooms to life by using stitch direction to enhance their form.
Fill the caps with satin stitches that curve gently over the top, mimicking their rounded shape.
For the gills beneath, switch to tight, vertical straight stitches in a contrasting color.
This juxtaposition of stitch direction and color immediately creates a sense of depth and realism, turning simple shapes into a charming rustic woodland scene.
27. The Woven Needlepoint Square
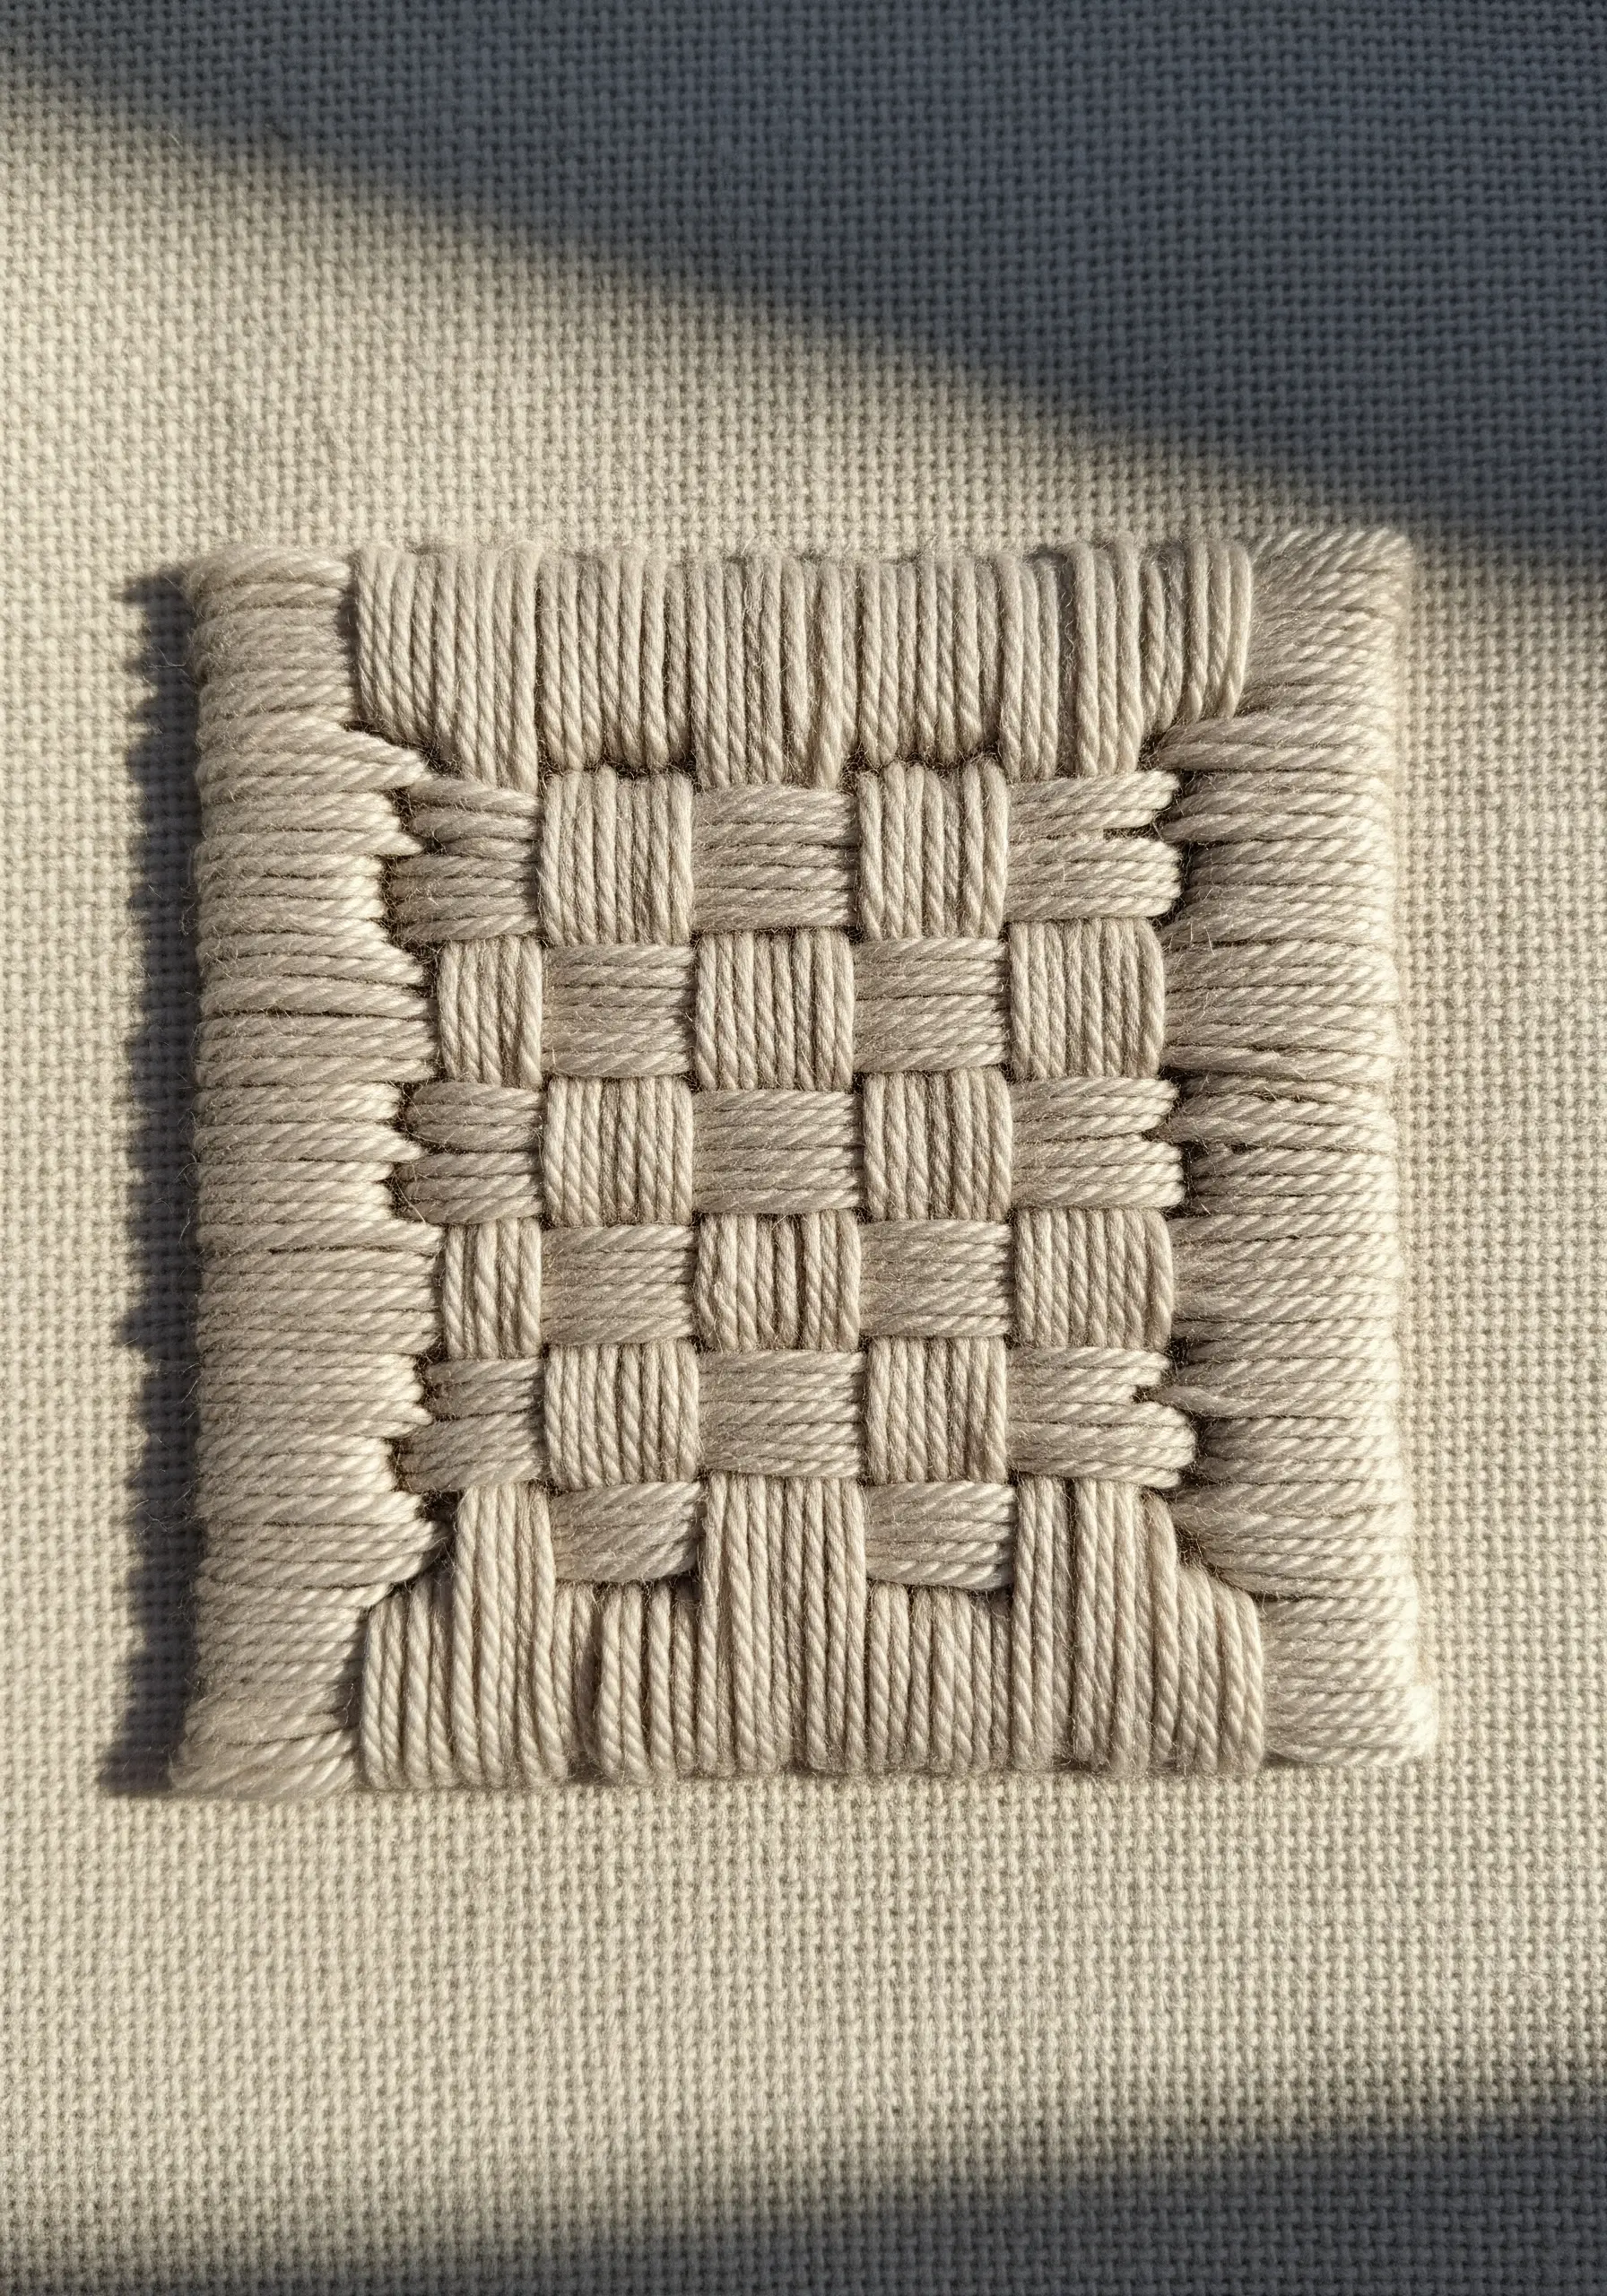
Create a solid, woven patch directly on your fabric using a technique called needle weaving.
First, lay down a foundation of parallel vertical stitches (the warp).
Then, use your needle to weave a second thread horizontally (the weft) over and under the warp threads, from one side to the other.
This method creates beautiful, abstract texture-play designs and is a wonderful way to fill in shapes with a tactile, fabric-like finish.


