
Before you begin your next project, I want you to reconsider monochrome. It’s not about limitation; it’s about intention. In a world saturated with color, choosing to work with a single hue invites you to focus on what truly gives embroidery its soul: texture, line, and form.
Japandi design thrives on this principle. It finds beauty not in loudness, but in the quiet interplay between light and shadow, the texture of natural linen, and the elegance of a single, well-placed line. Your needle and thread are the perfect tools to explore this philosophy.
In these concepts, you won’t just find patterns. You’ll find techniques—ways to make a single black thread feel sculptural, a simple white stitch look luminous, and a neutral background become an active part of your composition. This is where your embroidery evolves from a craft into a contemplative art form.
1. Large-Scale Topography with Varied Thread Weights
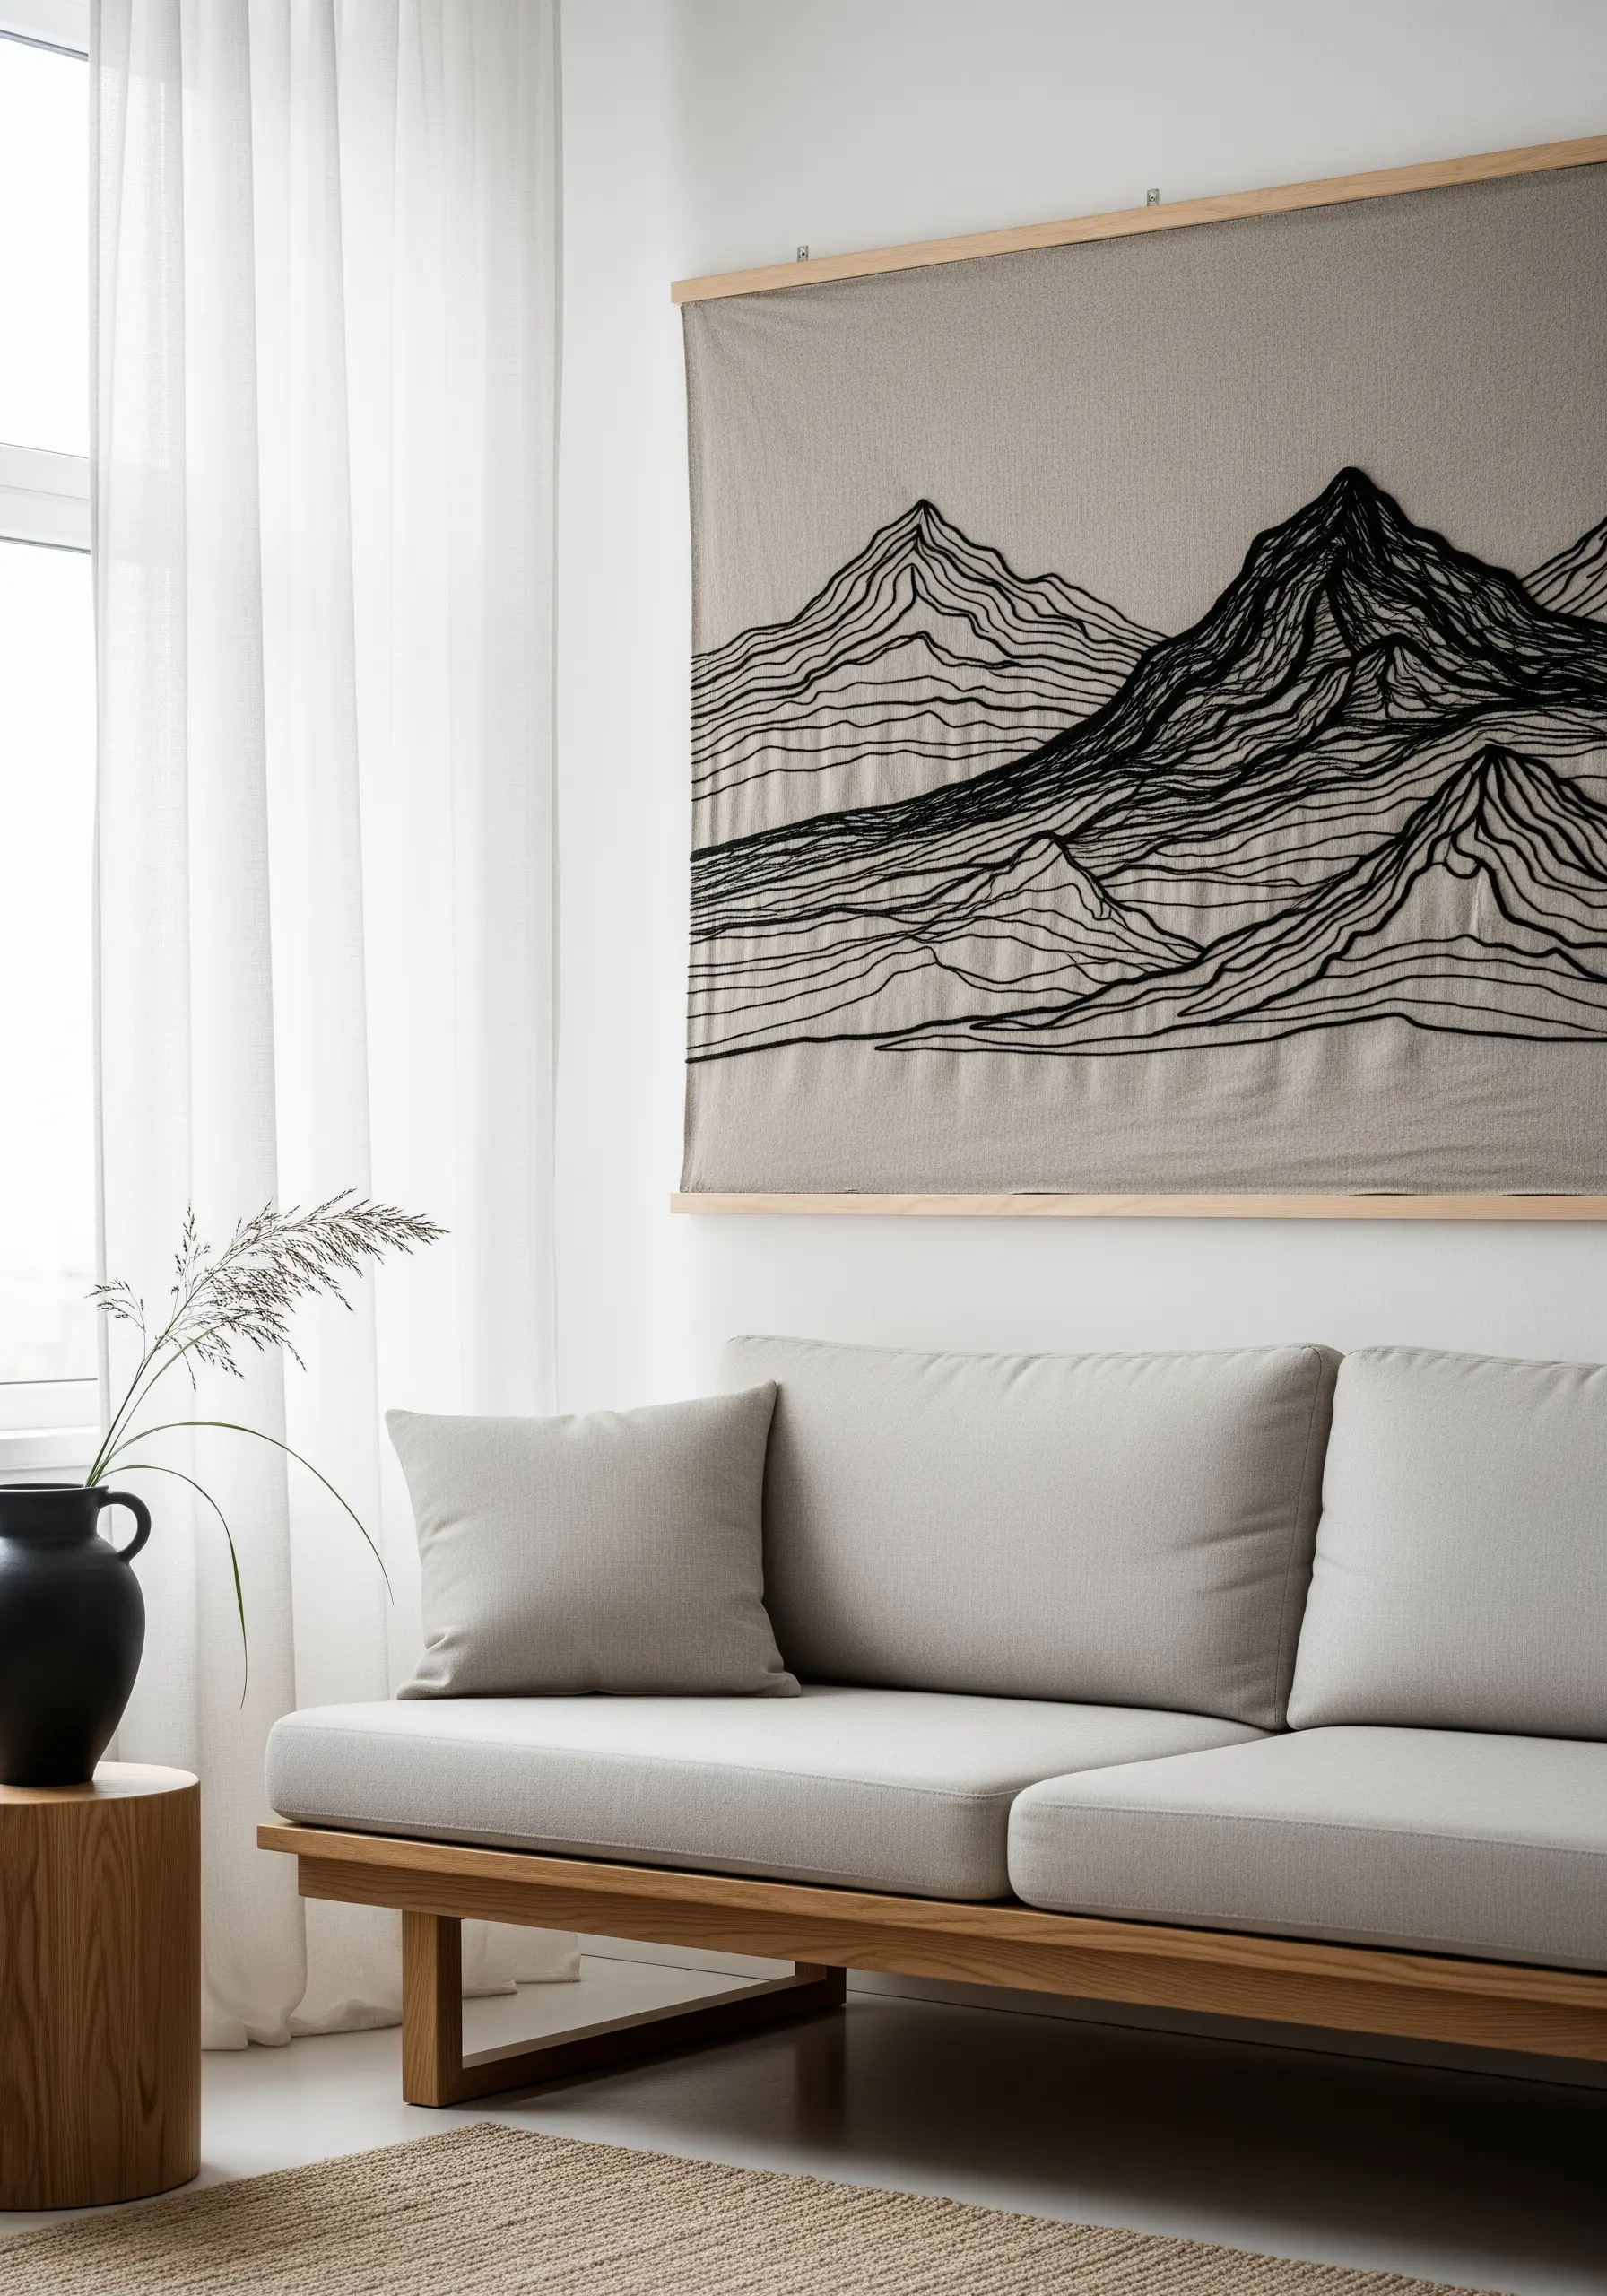
To create depth in a large landscape piece, move beyond a single thread weight.
Use a thick crewel wool or multiple strands of floss for the foreground mountain peaks, making them physically stand out with a raised satin stitch or couching.
For the distant lines, switch to a single strand of cotton floss and use a simple backstitch or running stitch.
This subtle shift in thread weight tricks the eye into seeing distance and dimension, adding sophistication to a minimal design.
It transforms a simple line drawing into one of the large-scale embroidery tapestries that become the focal point of any home.
2. The Cohesive Triptych on a Fabric Scroll
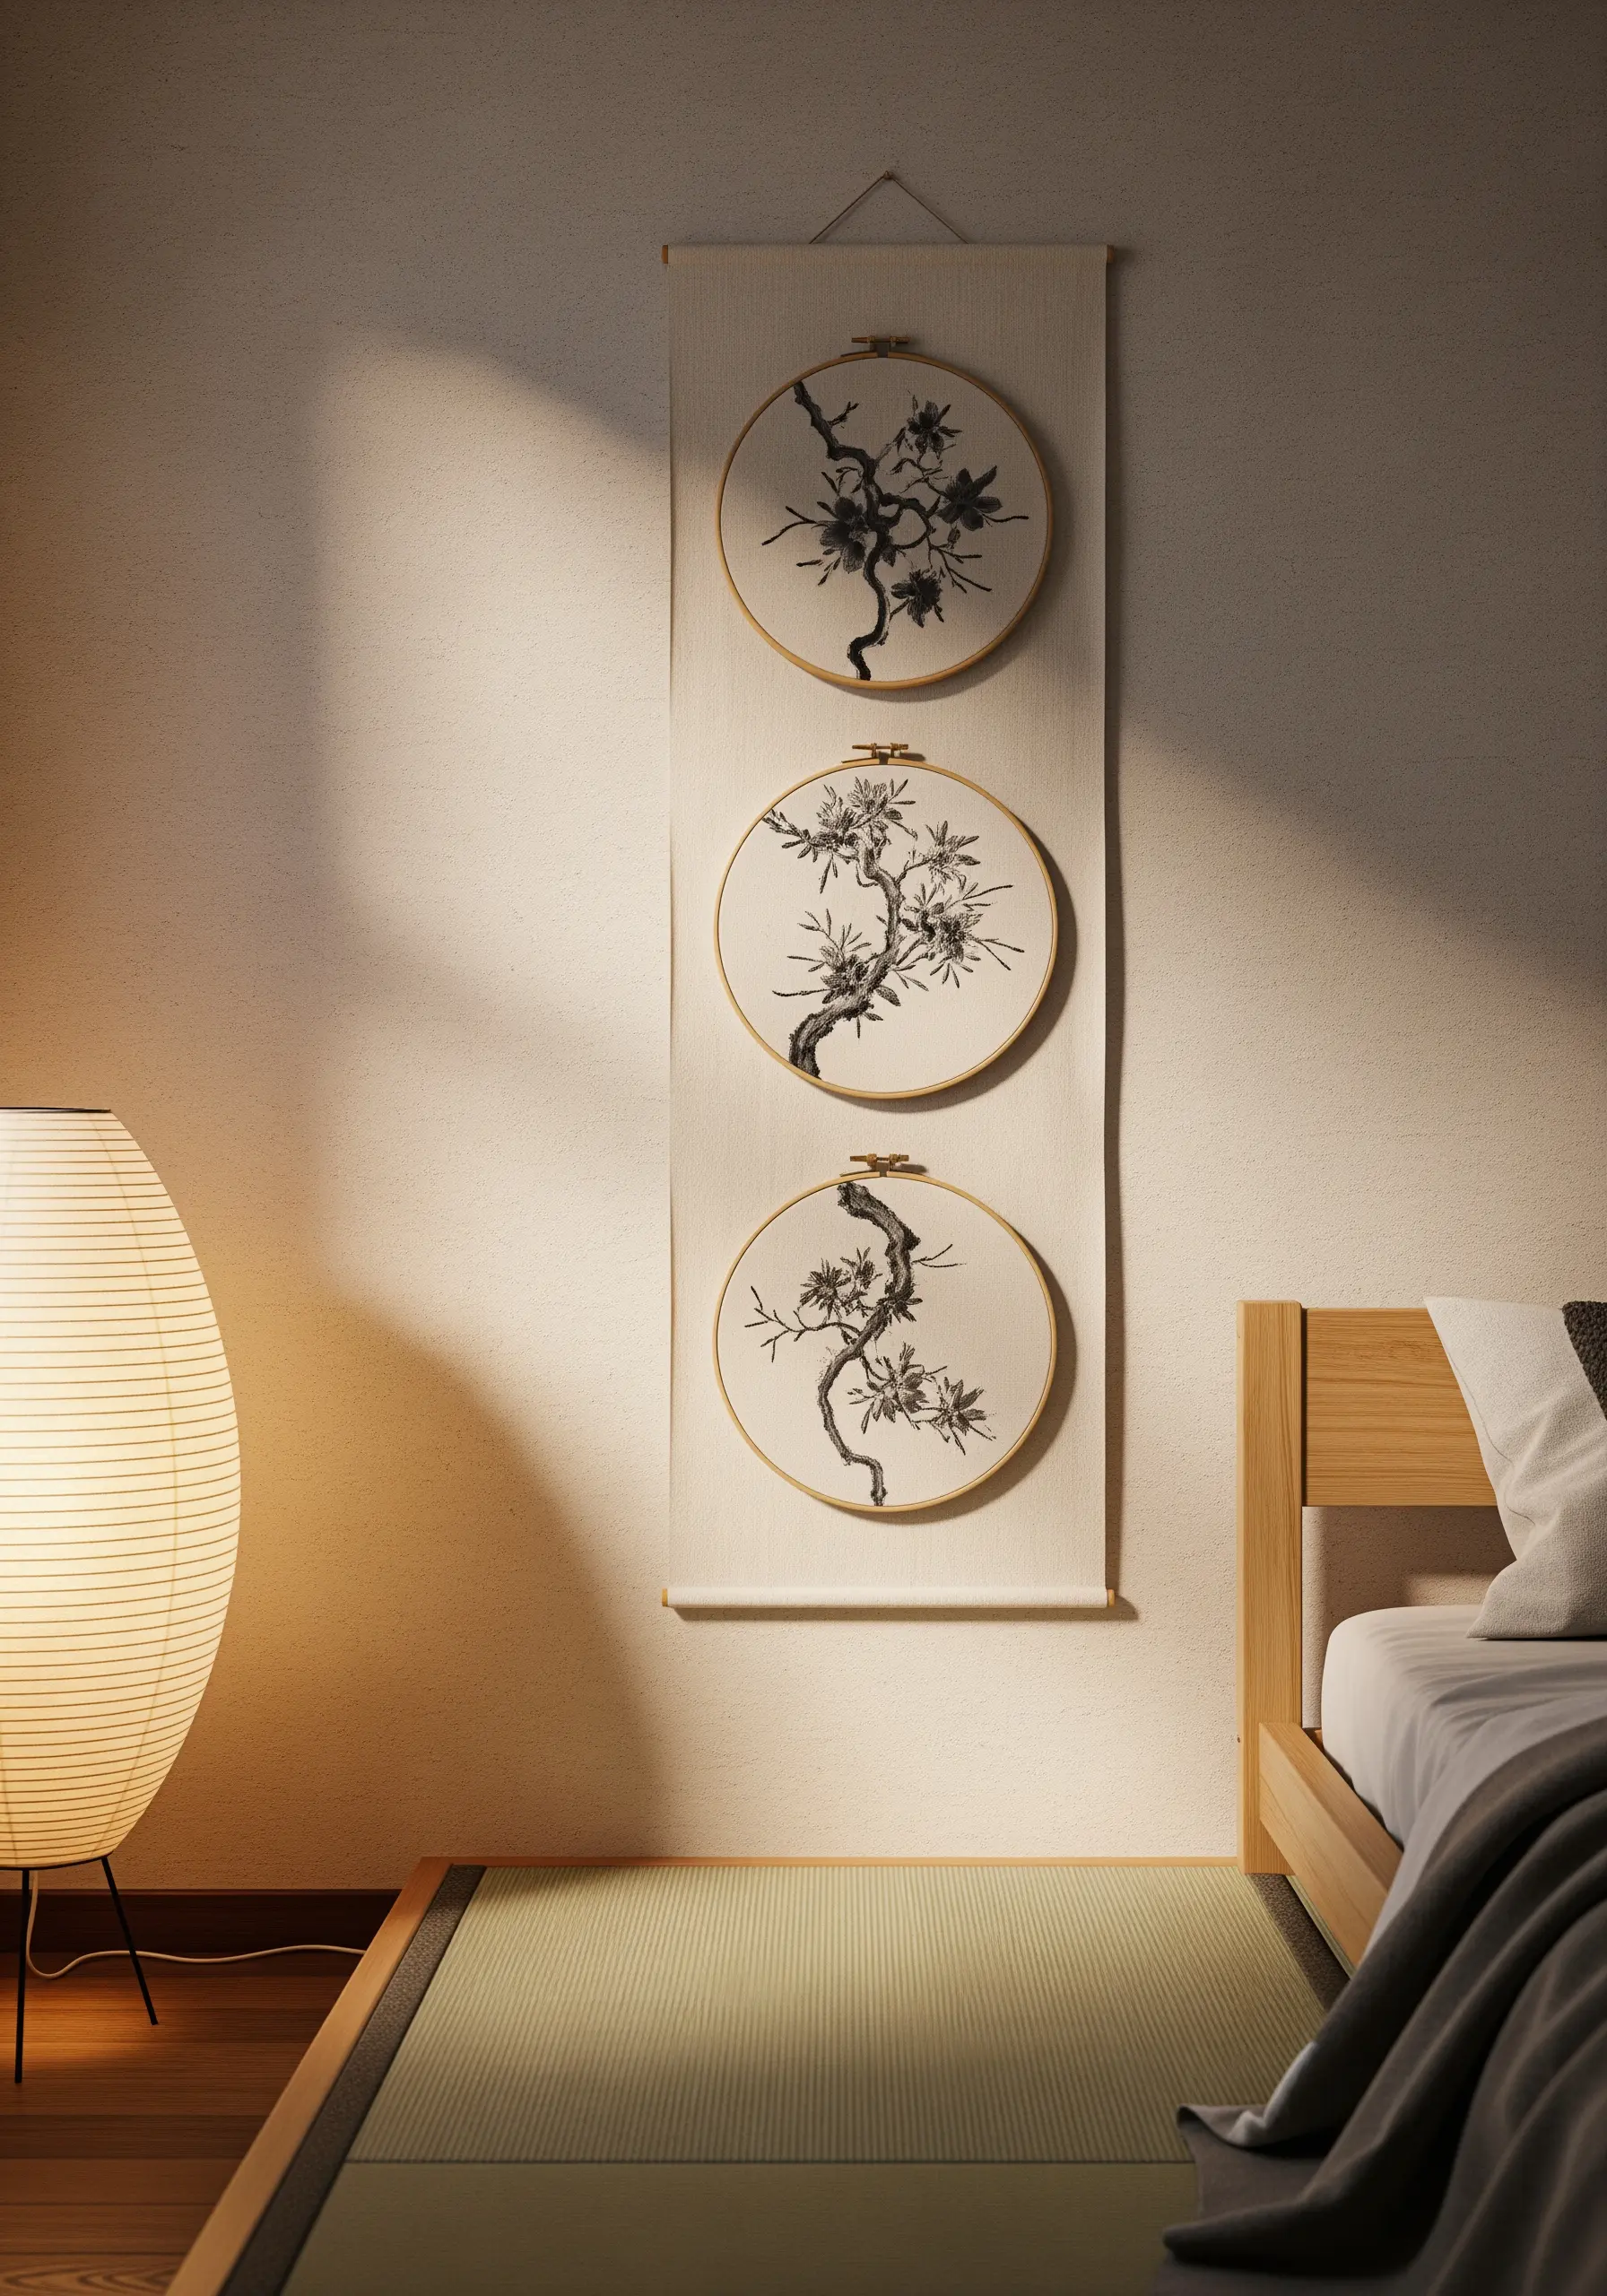
Instead of hanging three separate hoops, unite them on a single fabric runner to create a cohesive triptych.
This approach turns individual pieces into a single, intentional art installation with narrative flow.
Ensure the fabric scroll is wide enough to frame the hoops but narrow enough to maintain a vertical emphasis.
For the motifs, use a consistent style, like the delicate ink-wash effect achieved with long-and-short stitch using shades of grey and black floss.
This method elevates simple floral embroidery hoops to add natural charm to every room into a singular, gallery-style statement.
3. High-Contrast Geometry with Couching Techniques
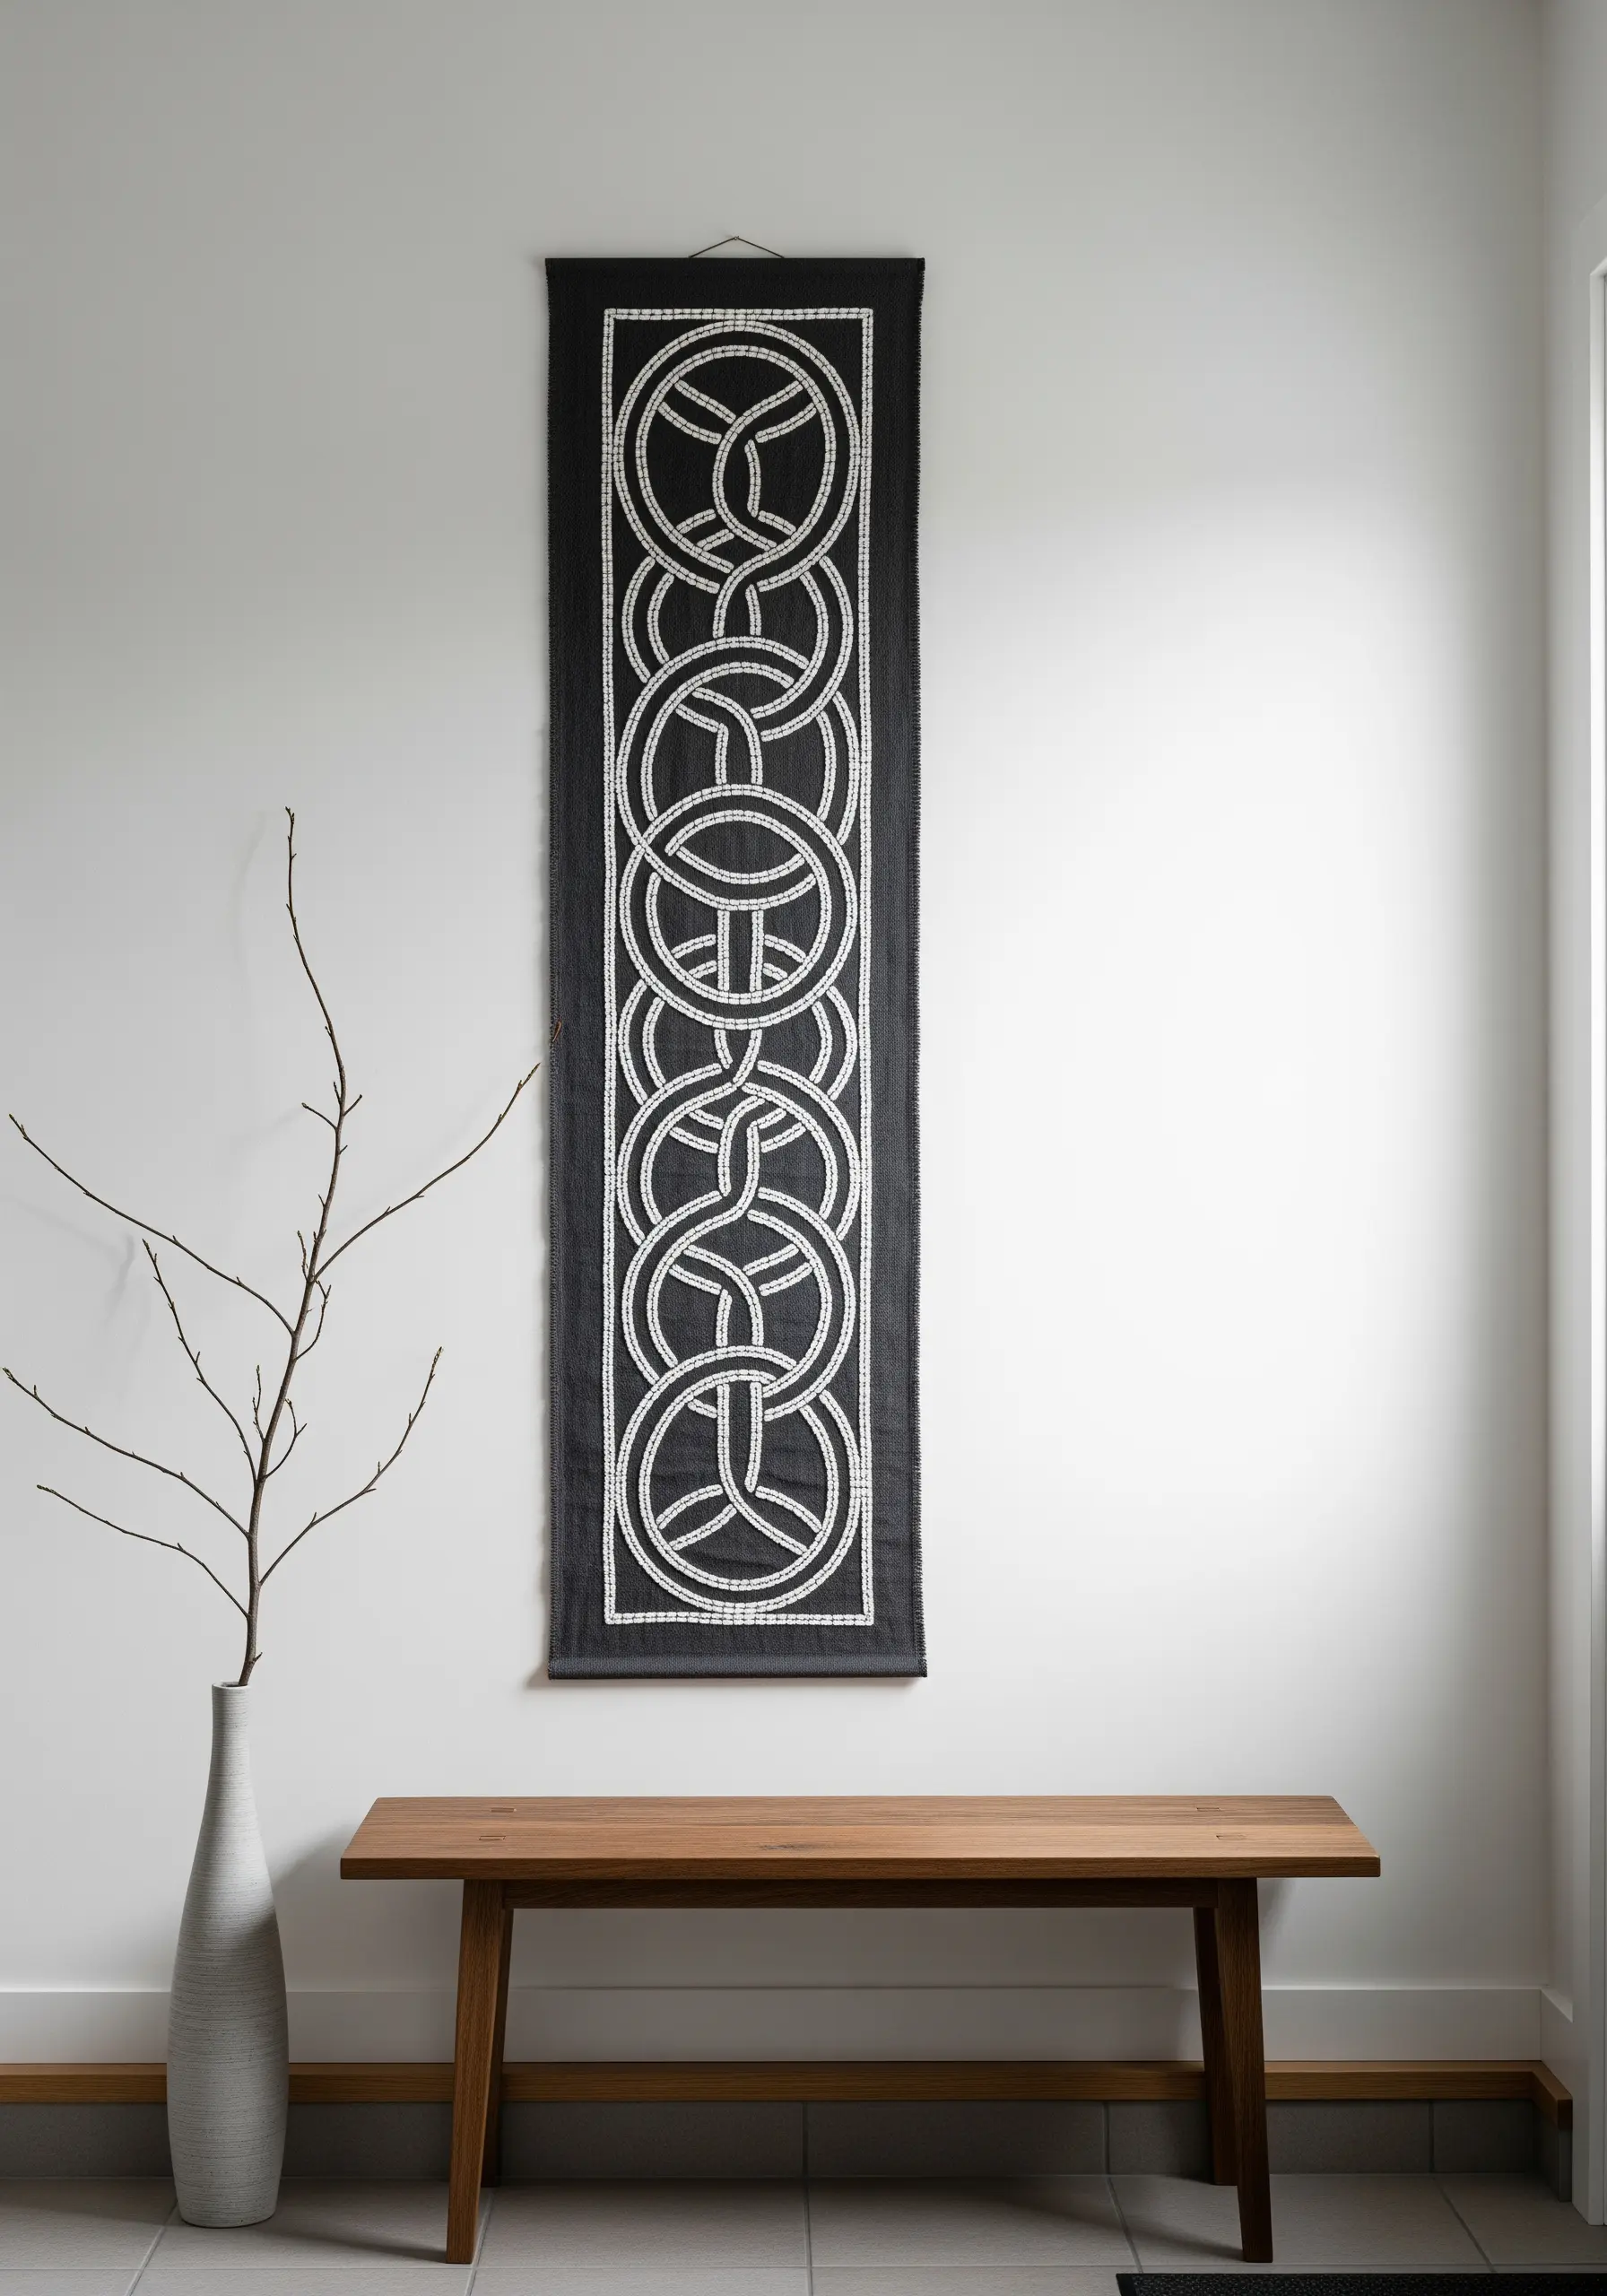
For bold, graphic lines that pop against a dark background, couching is your best technique.
Lay down a thick, smooth cord or multiple strands of white perle cotton for the main circular patterns.
Then, use a single, fine strand of matching or contrasting thread to tack it down with tiny, almost invisible stitches.
Fill the interior spaces with a textured stitch like seed stitch or a diagonal satin stitch to create a subtle woven effect that contrasts with the smooth, couched outlines.
4. Abstract Texture with Yarn and Roving

Move beyond floss to incorporate thick fibers like wool roving or chunky yarn for dramatic texture.
Create a spiral base on your fabric using a simple running stitch as a guide.
Then, couch the thick yarn along the spiral, allowing it to twist and pile up naturally for an organic, sculptural effect.
Add delicate radiating lines with a single strand of floss to contrast the soft, bulky center, creating a beautiful tension between textures.
These mixed-fiber wall hangings that will totally transform your room add warmth and dimension.
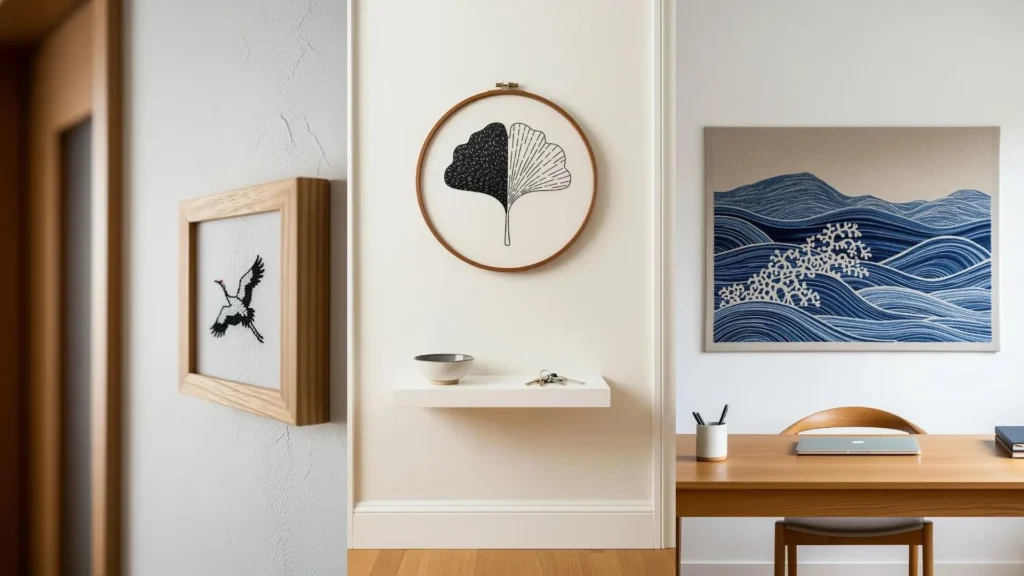
5. Botanical Illustrations with Refined Line Work

To achieve the clean, precise look of a botanical ink drawing, focus on stitch consistency.
Use a two-ply strand of black floss and a sharp needle on a tightly woven linen or cotton fabric.
A whipped backstitch will give you a remarkably smooth, solid line that mimics a pen stroke far better than a standard backstitch.
Frame each piece individually with plenty of negative space to let the delicate forms breathe, reinforcing the minimalist aesthetic of minimalist line art nature embroidery for modern home walls.
6. Monochrome Thread Painting for Dynamic Waves

Monochrome doesn’t mean just one color; it means one color family.
Create movement and depth by selecting three to five shades of a single color, from dark to light.
Use long-and-short stitch to blend the shades seamlessly, creating the rolling motion of waves.
Reserve the lightest shade for the crests and the darkest for the troughs to enhance the illusion of light and shadow.
A few French knots in the lightest color can suggest sea foam without cluttering the design.
7. Sculptural Dimension with Padded Satin Stitch

Elevate simple branches from flat lines to sculptural forms using padded satin stitch.
First, create a raised foundation by stitching layers of straight stitches or felt padding within your branch shapes.
Then, cover this padding with smooth, tight satin stitches, ensuring your stitches lie perpendicular to the underlying foundation.
This technique gives the branches a tangible, three-dimensional quality that casts subtle shadows, adding incredible depth and turning your work into one of those ways to capture nature’s textures in your next embroidery project.
8. Sequential Design for Narrative Wall Art
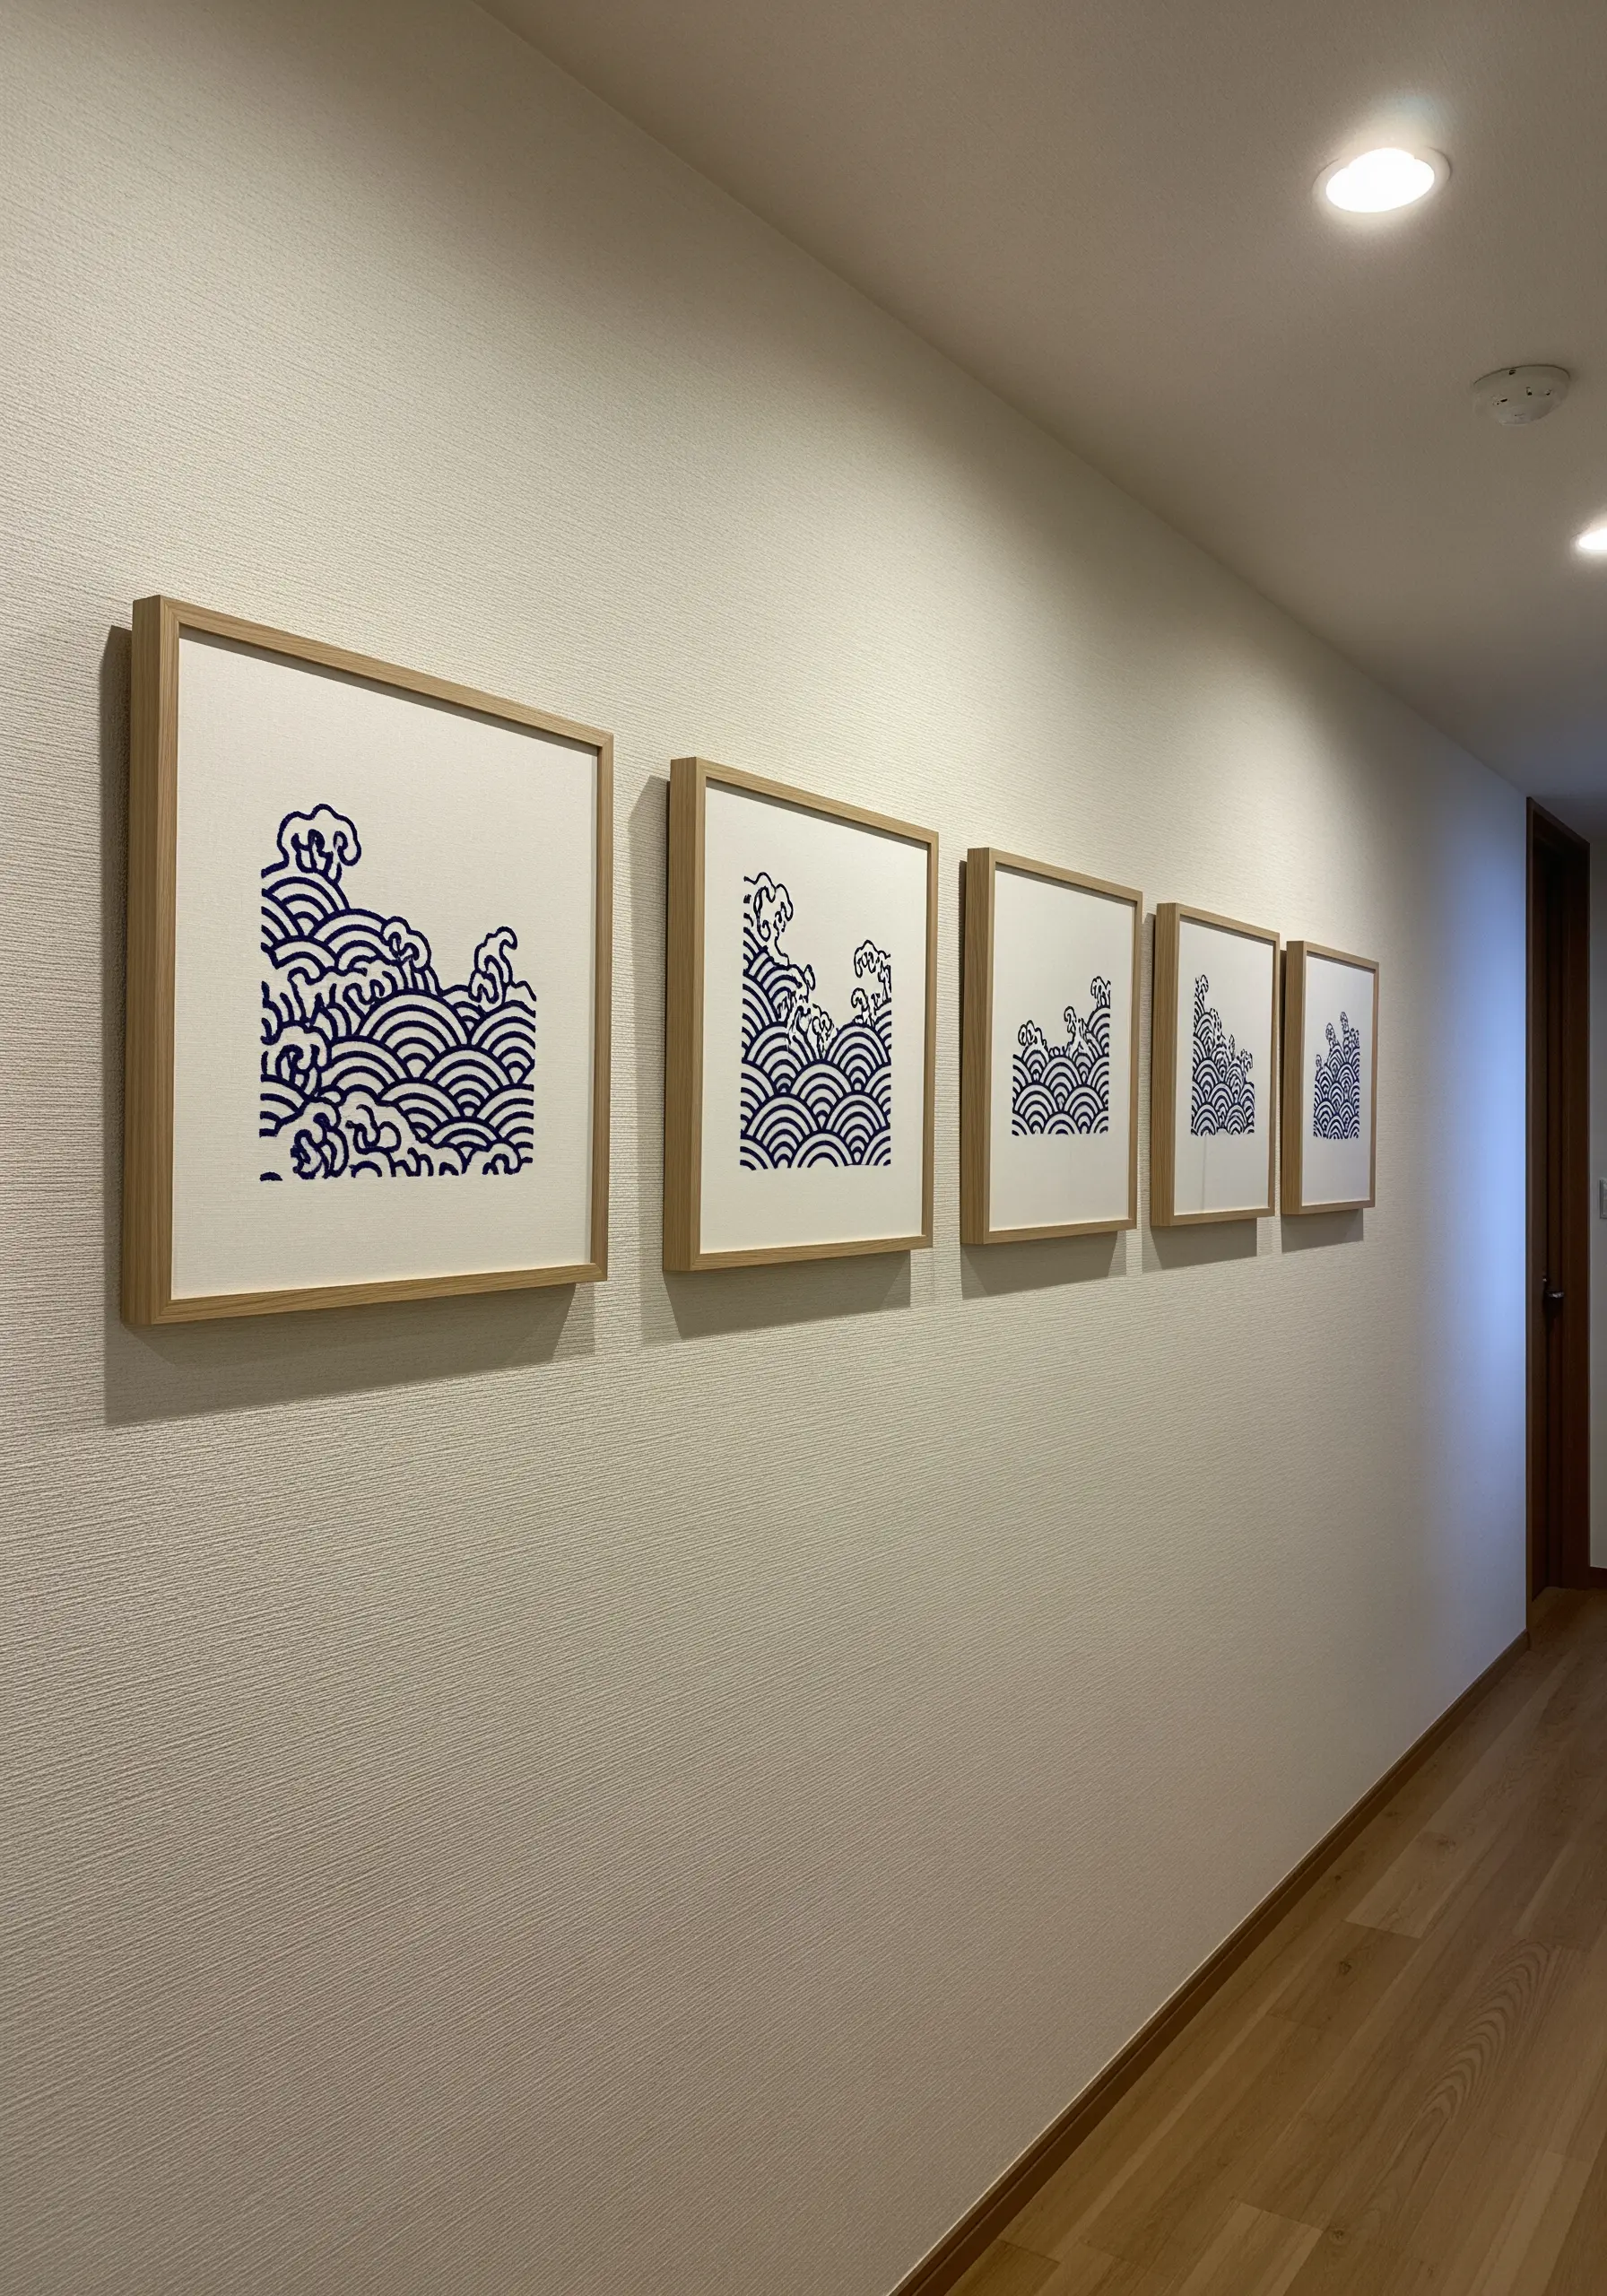
Tell a story across multiple frames by stitching a progressive or sequential pattern.
In this wave motif, the design is cropped and scaled down in each subsequent frame, creating a sense of rhythm and recession.
To execute this successfully, maintain perfect stitch consistency and use identical framing for all pieces.
This technique is perfect for creating a custom minimal DIY embroidery pieces perfect for a gallery wall that feels both unified and dynamic.
9. Mastering Negative Space with Fill Stitches
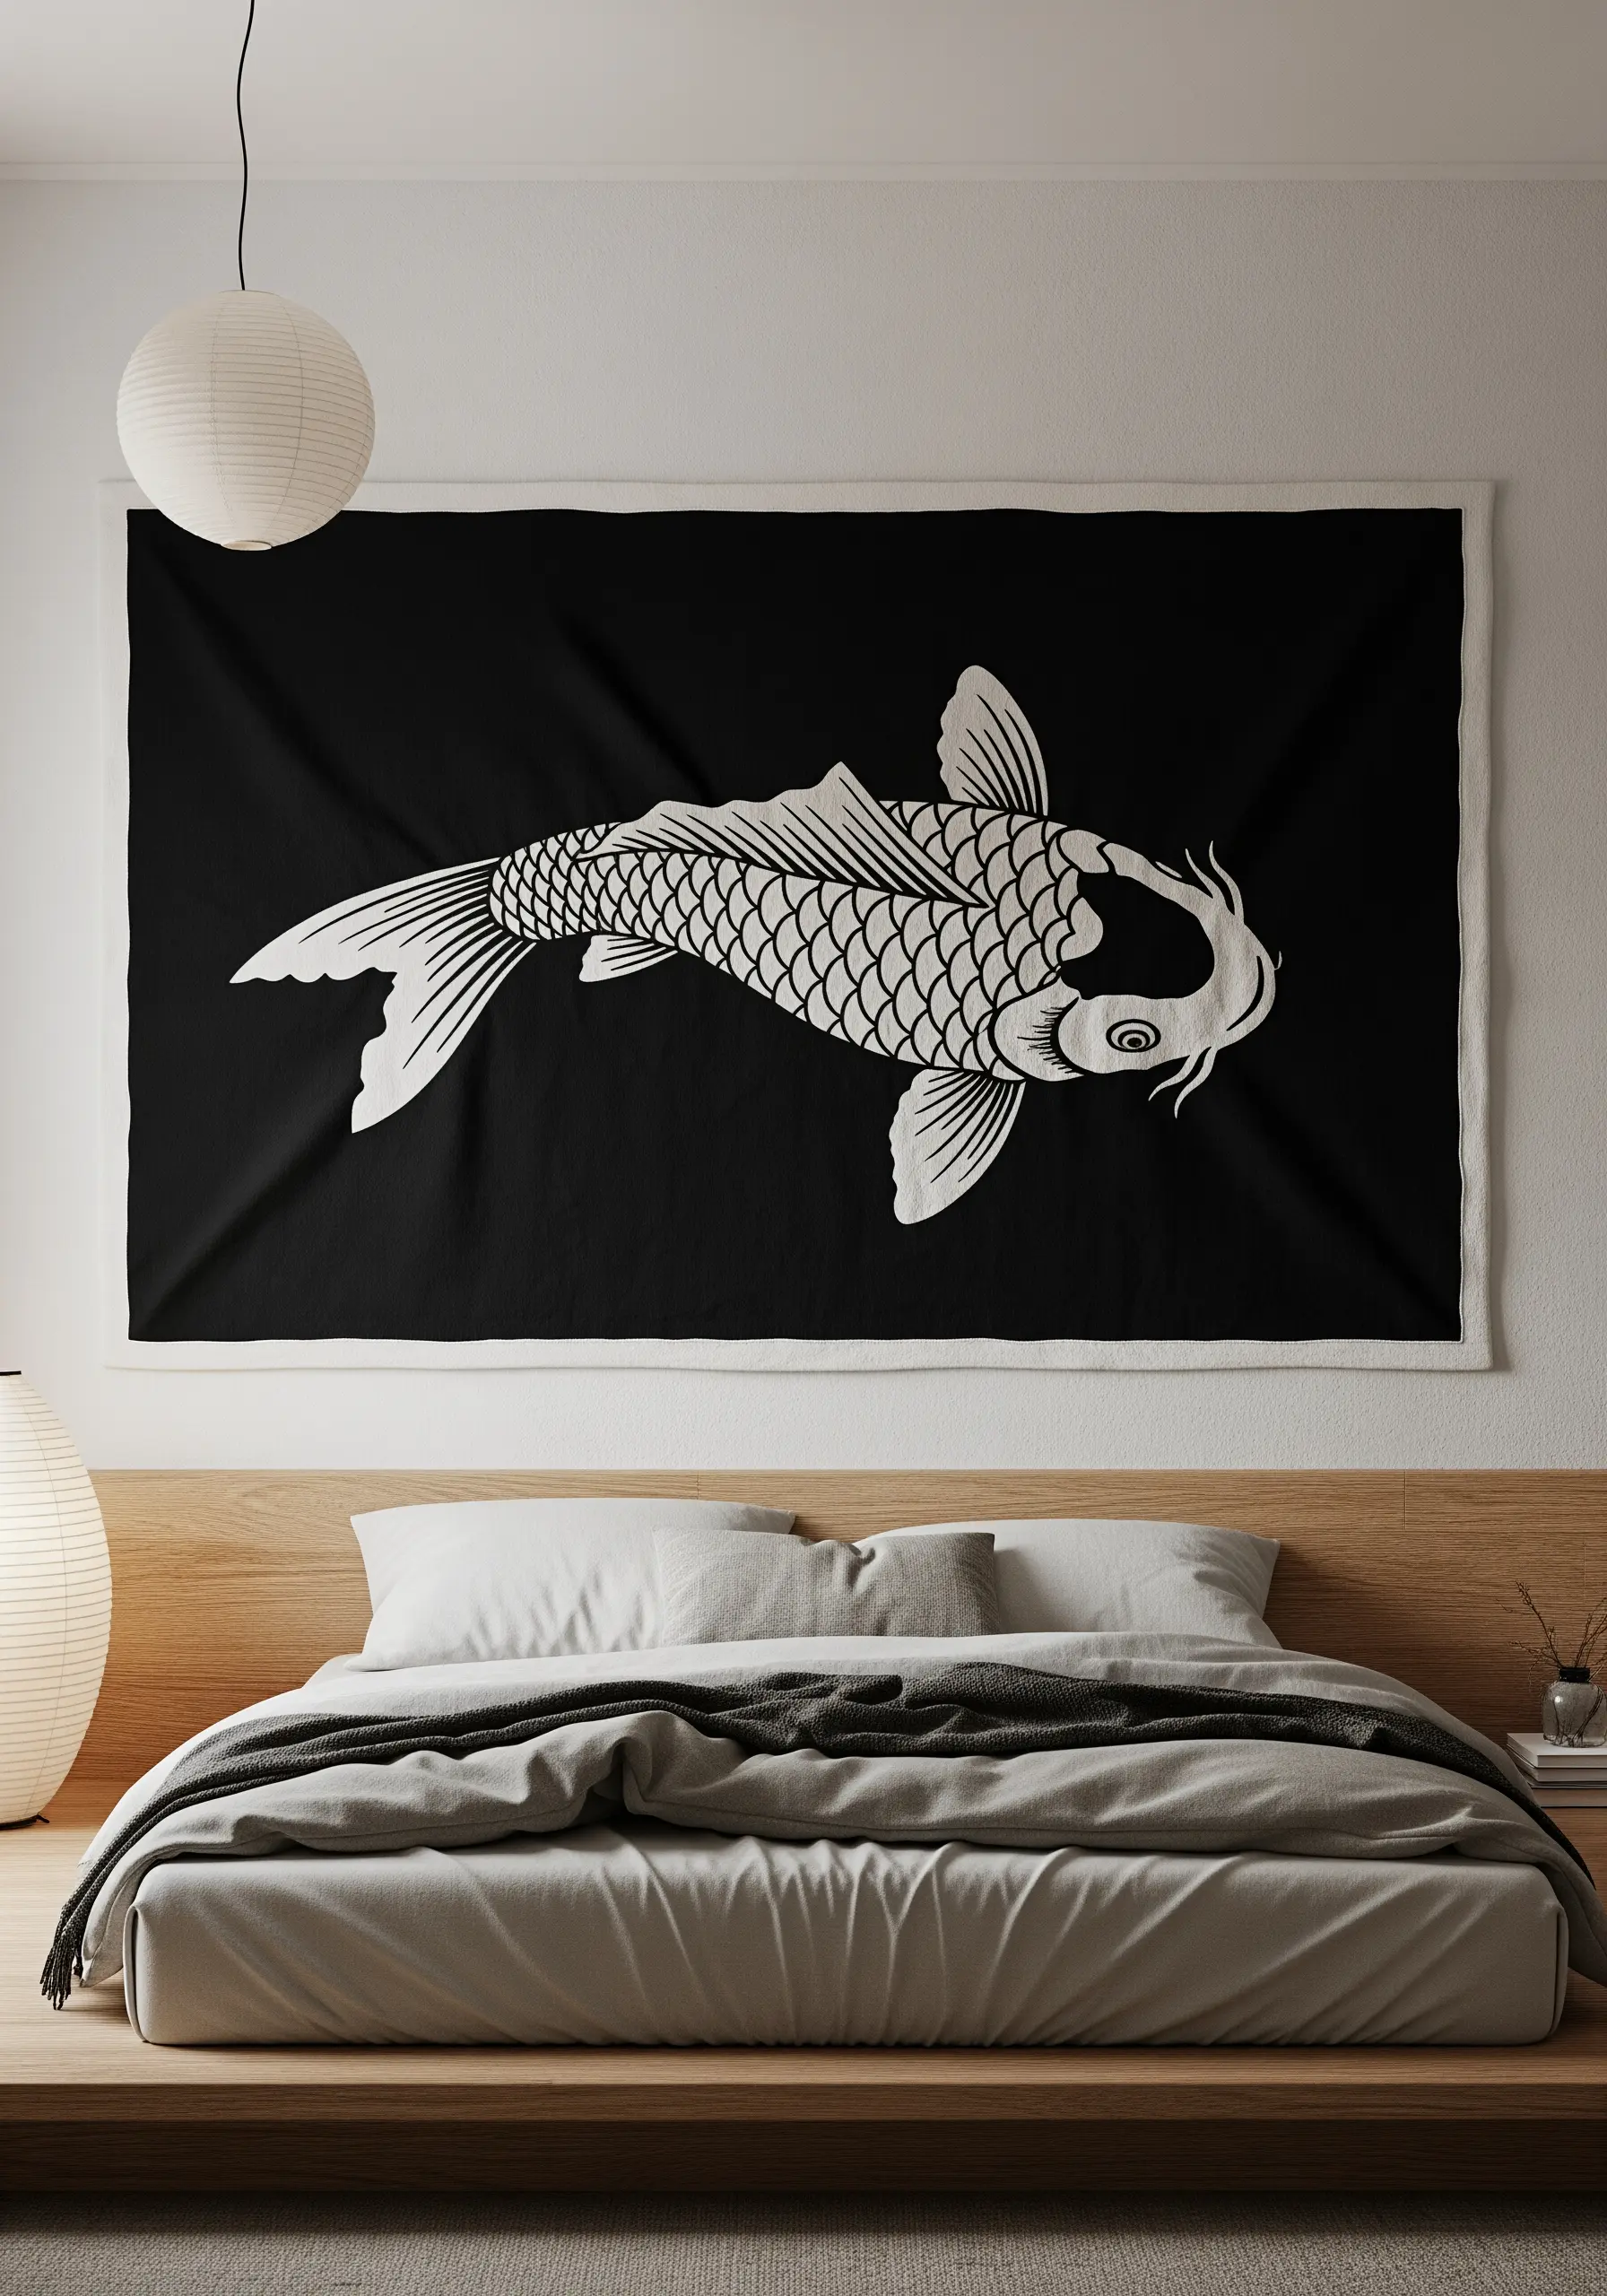
Instead of embroidering the subject itself, stitch the background to let the un-stitched fabric become the focal point.
Trace your central motif (like this koi fish) onto dark fabric, then carefully fill the entire surrounding area with a uniform stitch, such as darning stitch or satin stitch, using a light-colored thread.
This high-contrast, negative-space technique is incredibly impactful for statement-size wall art ideas, creating a bold, graphic silhouette.
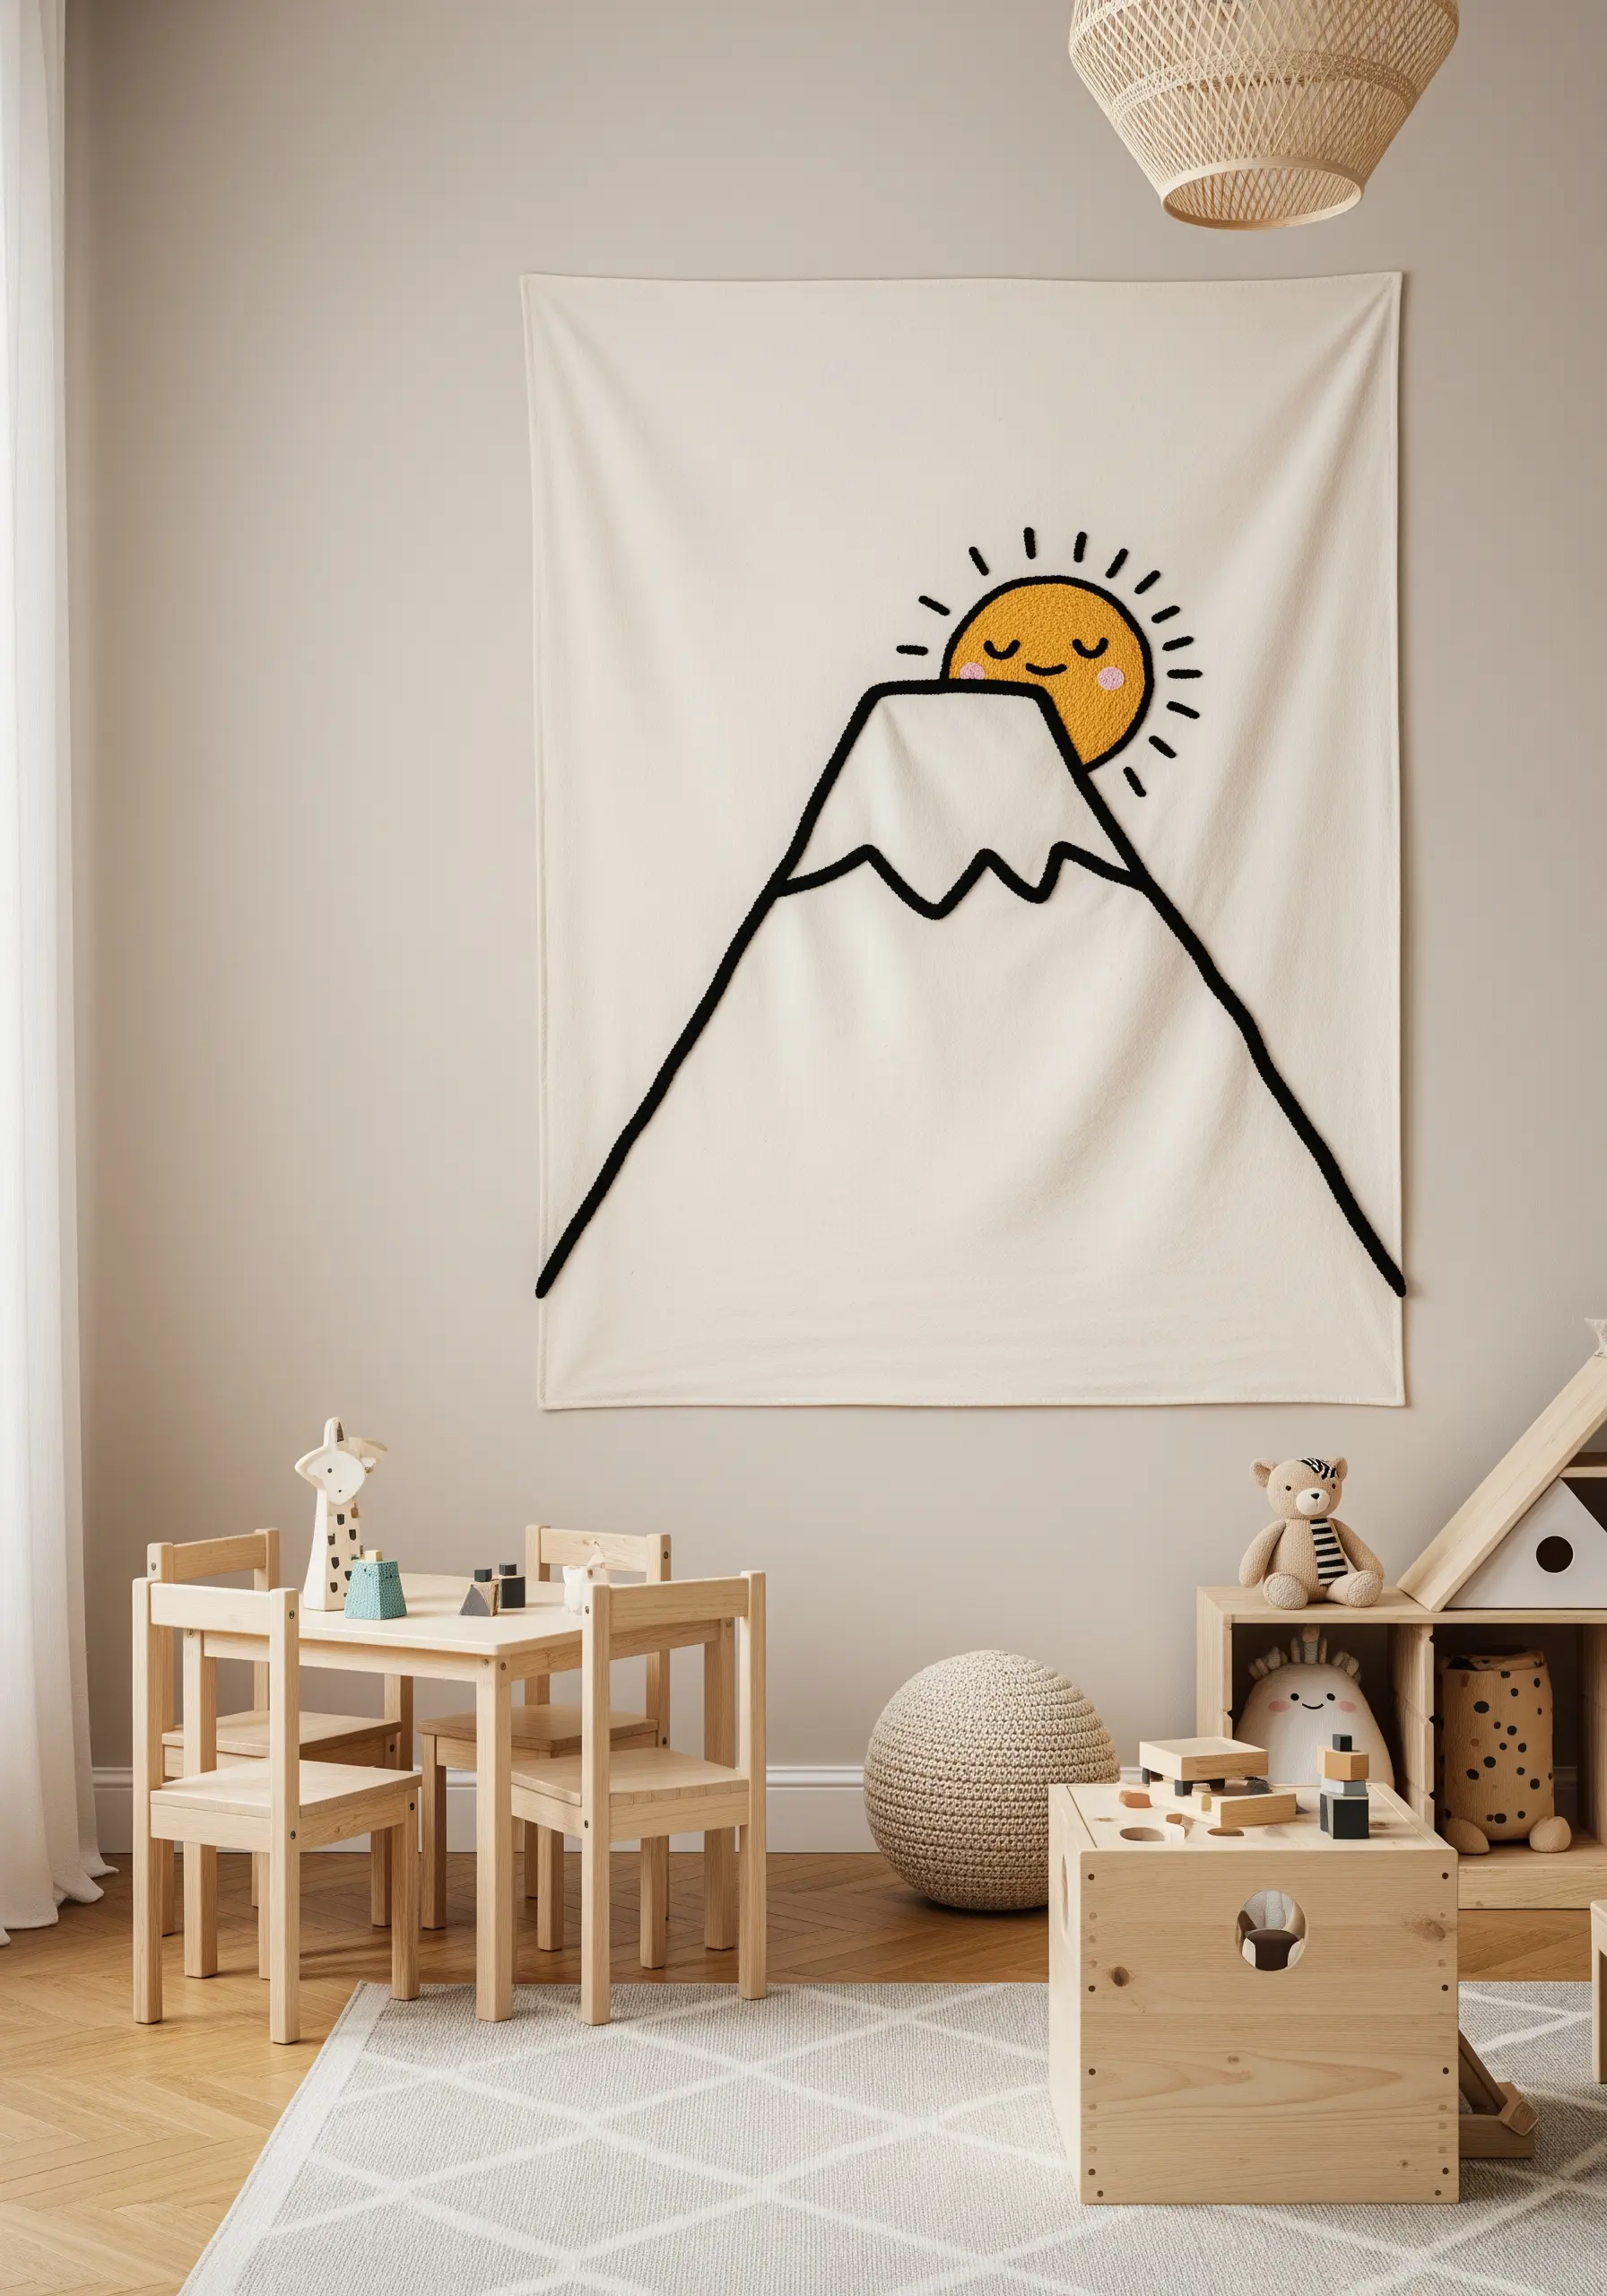
10. The Single-Line Contour for Effortless Charm
Capture the essence of an object with a single, continuous line, as if you never lifted your pen from the page.
Plan your stitch path carefully before you begin, aiming for one unbroken thread.
A split stitch or stem stitch works beautifully, as they create a solid, consistent line that can navigate tight curves smoothly.
The beauty of this style lies in its simplicity and the quiet confidence of the unbroken contour.
11. Zen Garden Spirals with Dimensional Stitches
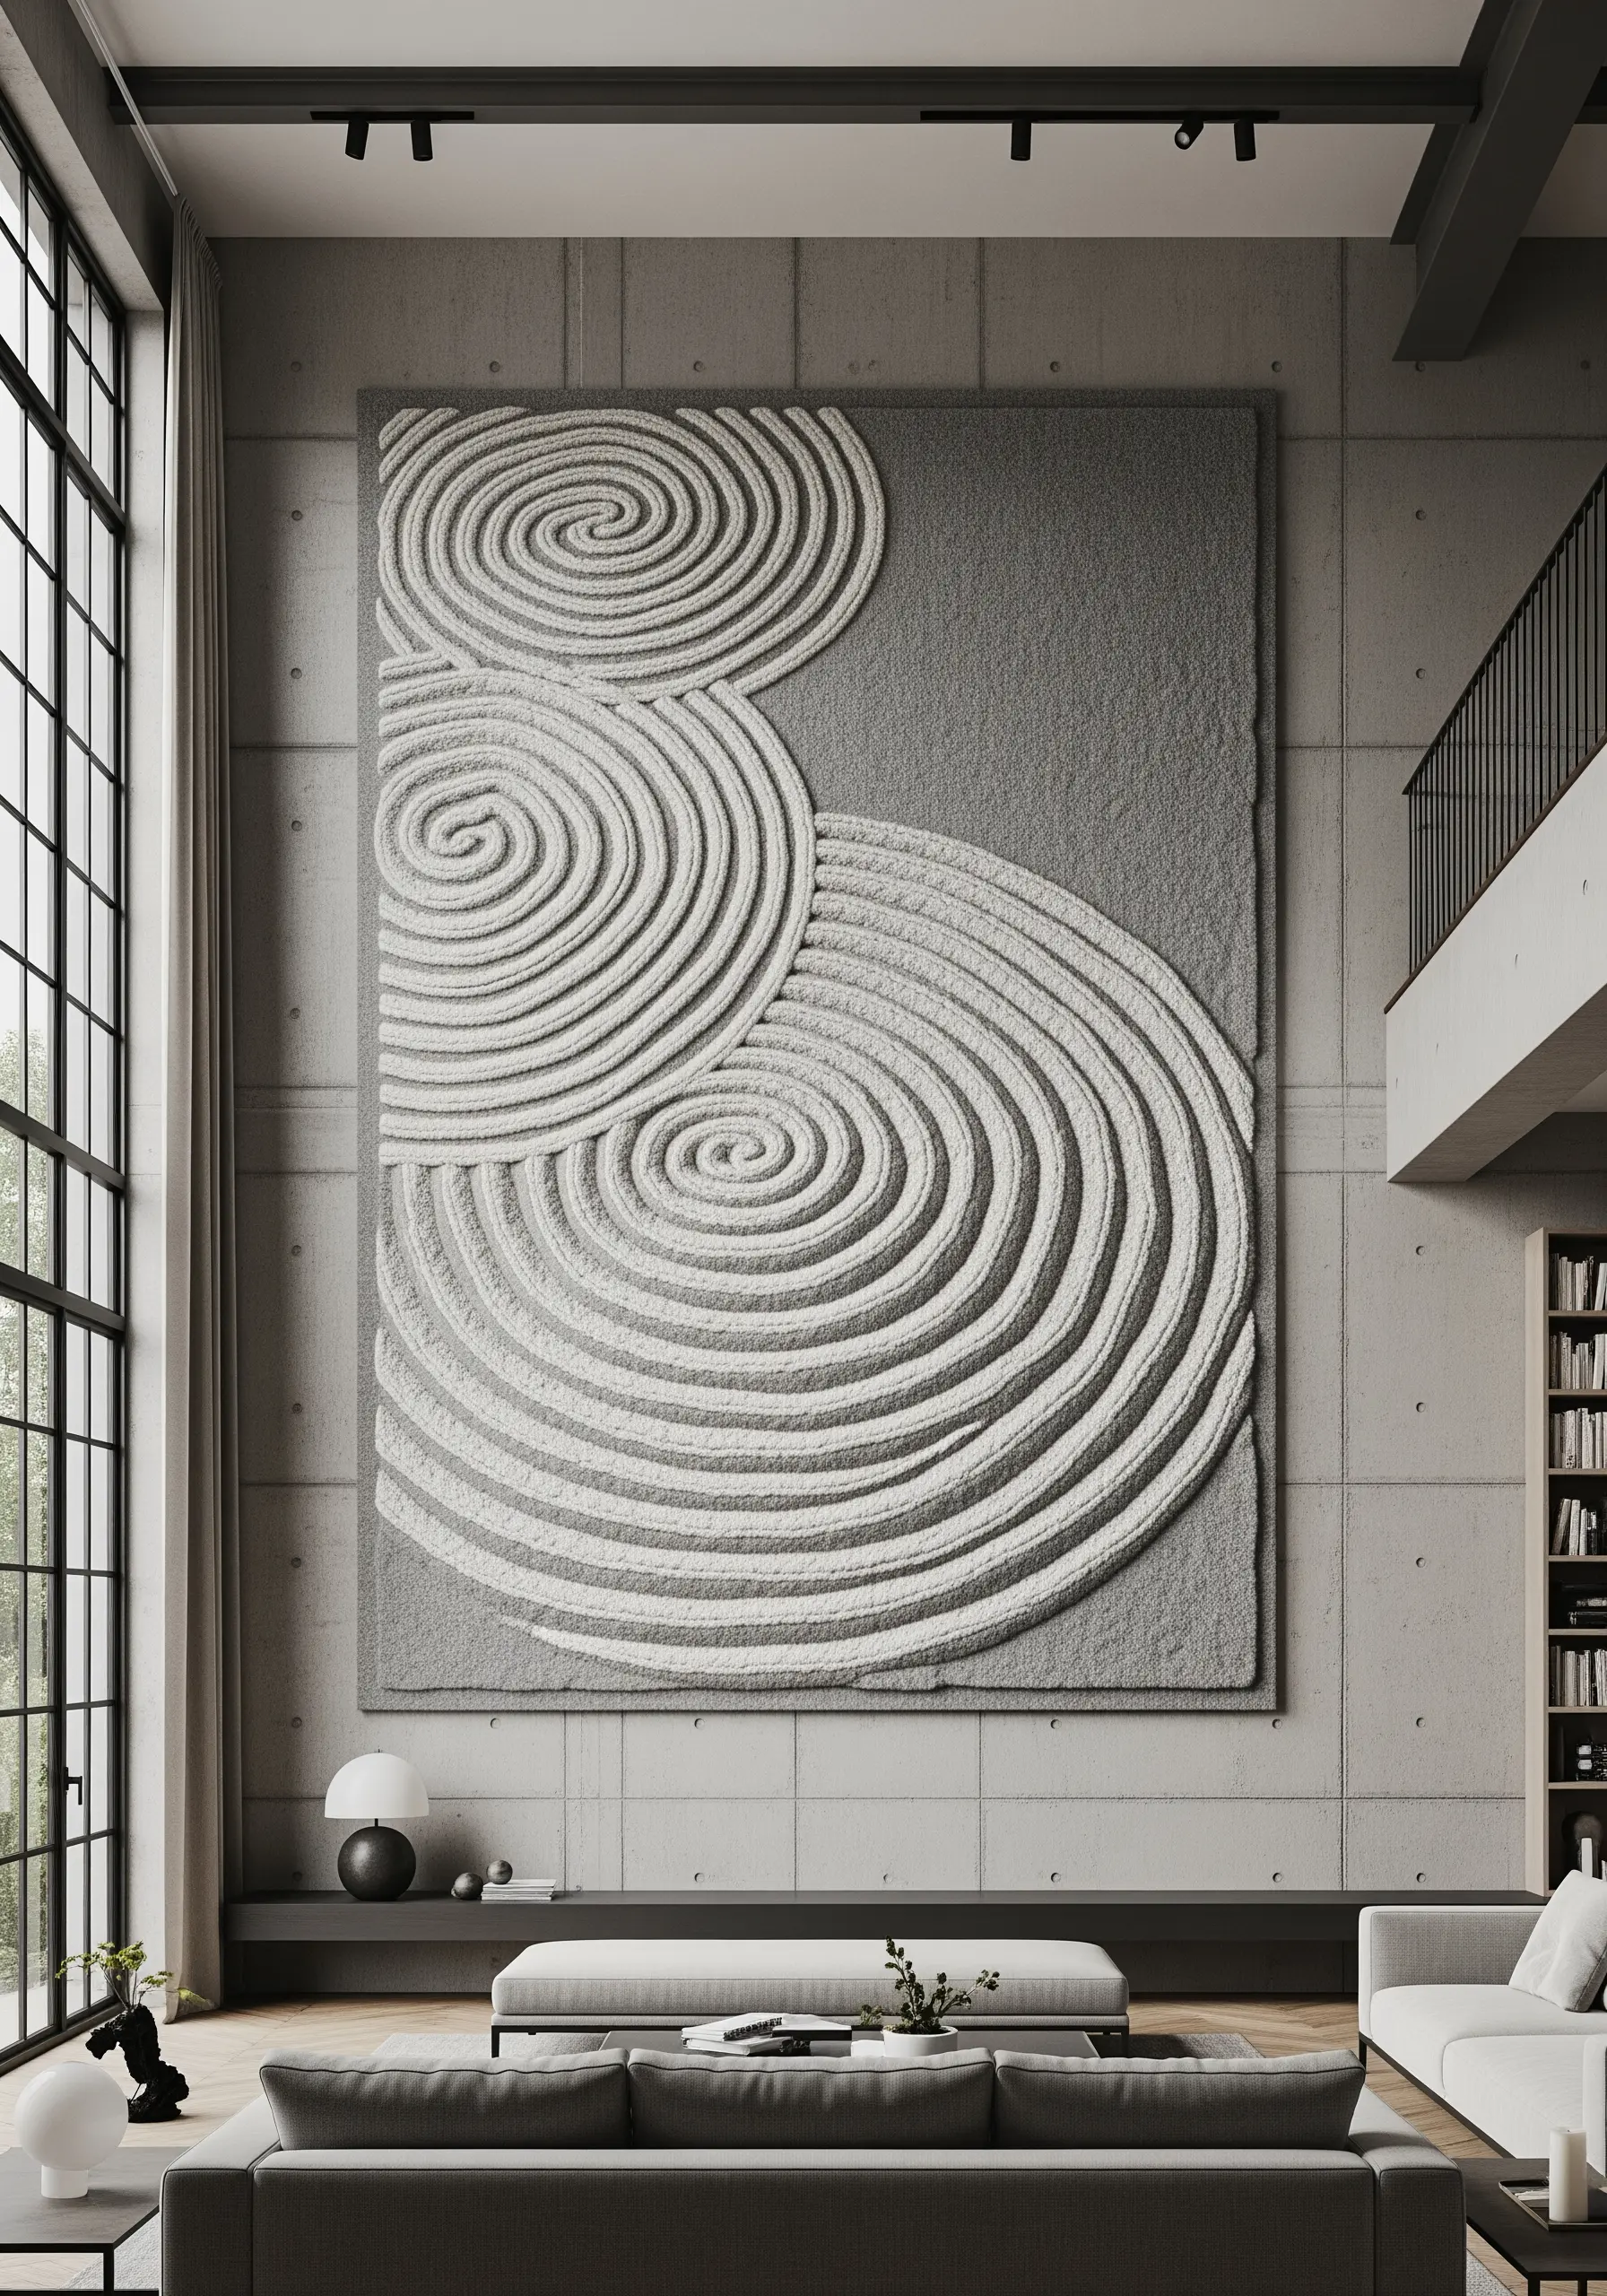
Recreate the raked lines of a Zen garden using stitches that provide height and structure.
Use a raised stem stitch band or couch down a thick, soft cord to form the prominent spiral ridges.
The key is consistency in stitch height and spacing to create a hypnotic, rhythmic pattern.
For the background, use tiny, scattered seed stitches to mimic the texture of sand. This contrast between order and randomness makes the piece feel balanced and serene.
12. Shaded Botanicals on Grid Fabric

When working on Aida or even-weave fabric, you can create subtle shading even with simple stitches.
Instead of a solid fill, use just three tones of grey floss: dark for the central vein, medium for one half of the leaf, and light for the other.
By mapping out the design on a grid, you can ensure the shapes are clean and the color blocking is precise.
This technique adds depth and a modern, graphic quality to simple fern foliage stitch variations.
13. Calligraphy with Textural French Knots
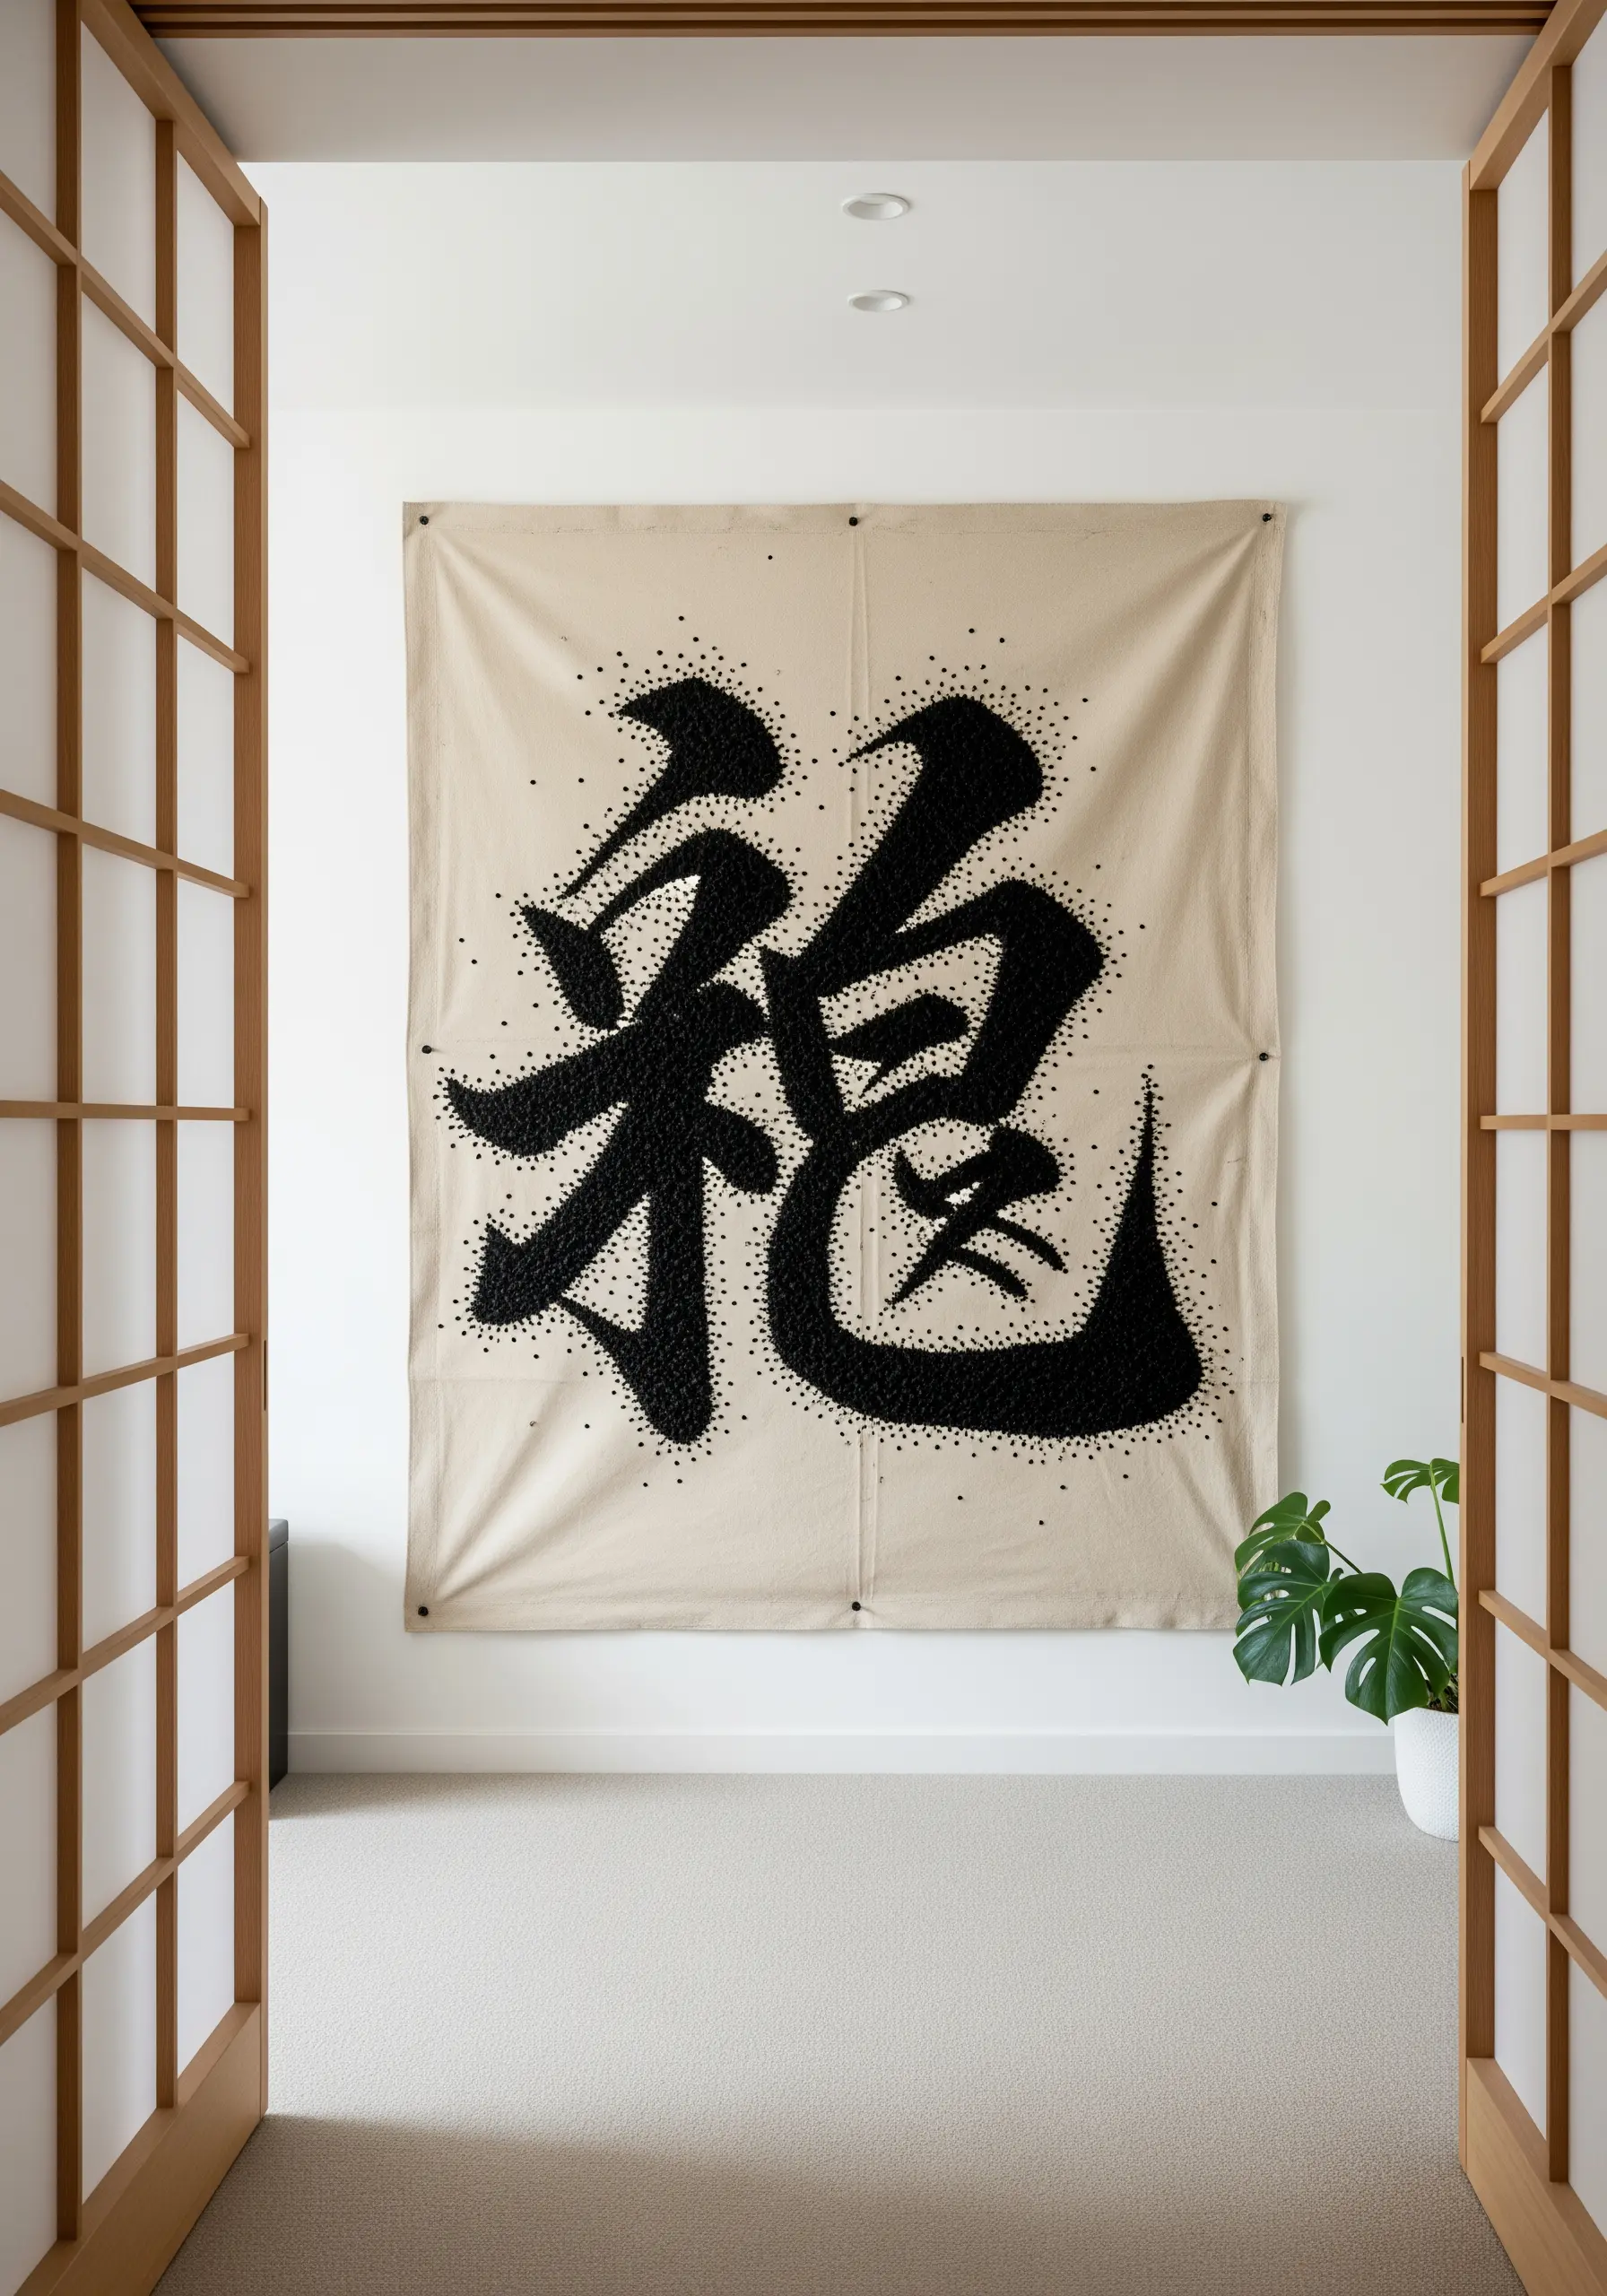
Translate the bold strokes of calligraphy into a tactile experience by using dense clusters of French knots.
Instead of filling the character with a flat satin stitch, outline the shape and then fill it completely with tightly packed knots.
This technique gives the character a rich, pebbled texture that captures the viscous quality of ink and creates beautiful shadows.
For a final touch, add scattered seed stitches around the main form to suggest ink splatters, turning it into one of those DIY hand-stitched projects that feel luxurious and artistic.
14. Celestial Mobiles with Stitch Variation

Create a celestial mobile by dedicating each hoop to a different lunar texture.
Use a smooth, clean satin stitch for a sharp crescent moon.
For a full or gibbous moon, fill the shape with a dense scattering of French knots in varying sizes to mimic a cratered surface.
Stitching on dark navy or black linen enhances the contrast and makes the white floss glow. These tiny night-sky embroidery designs are perfect for serene spaces.
15. The Diptych for Balanced Composition
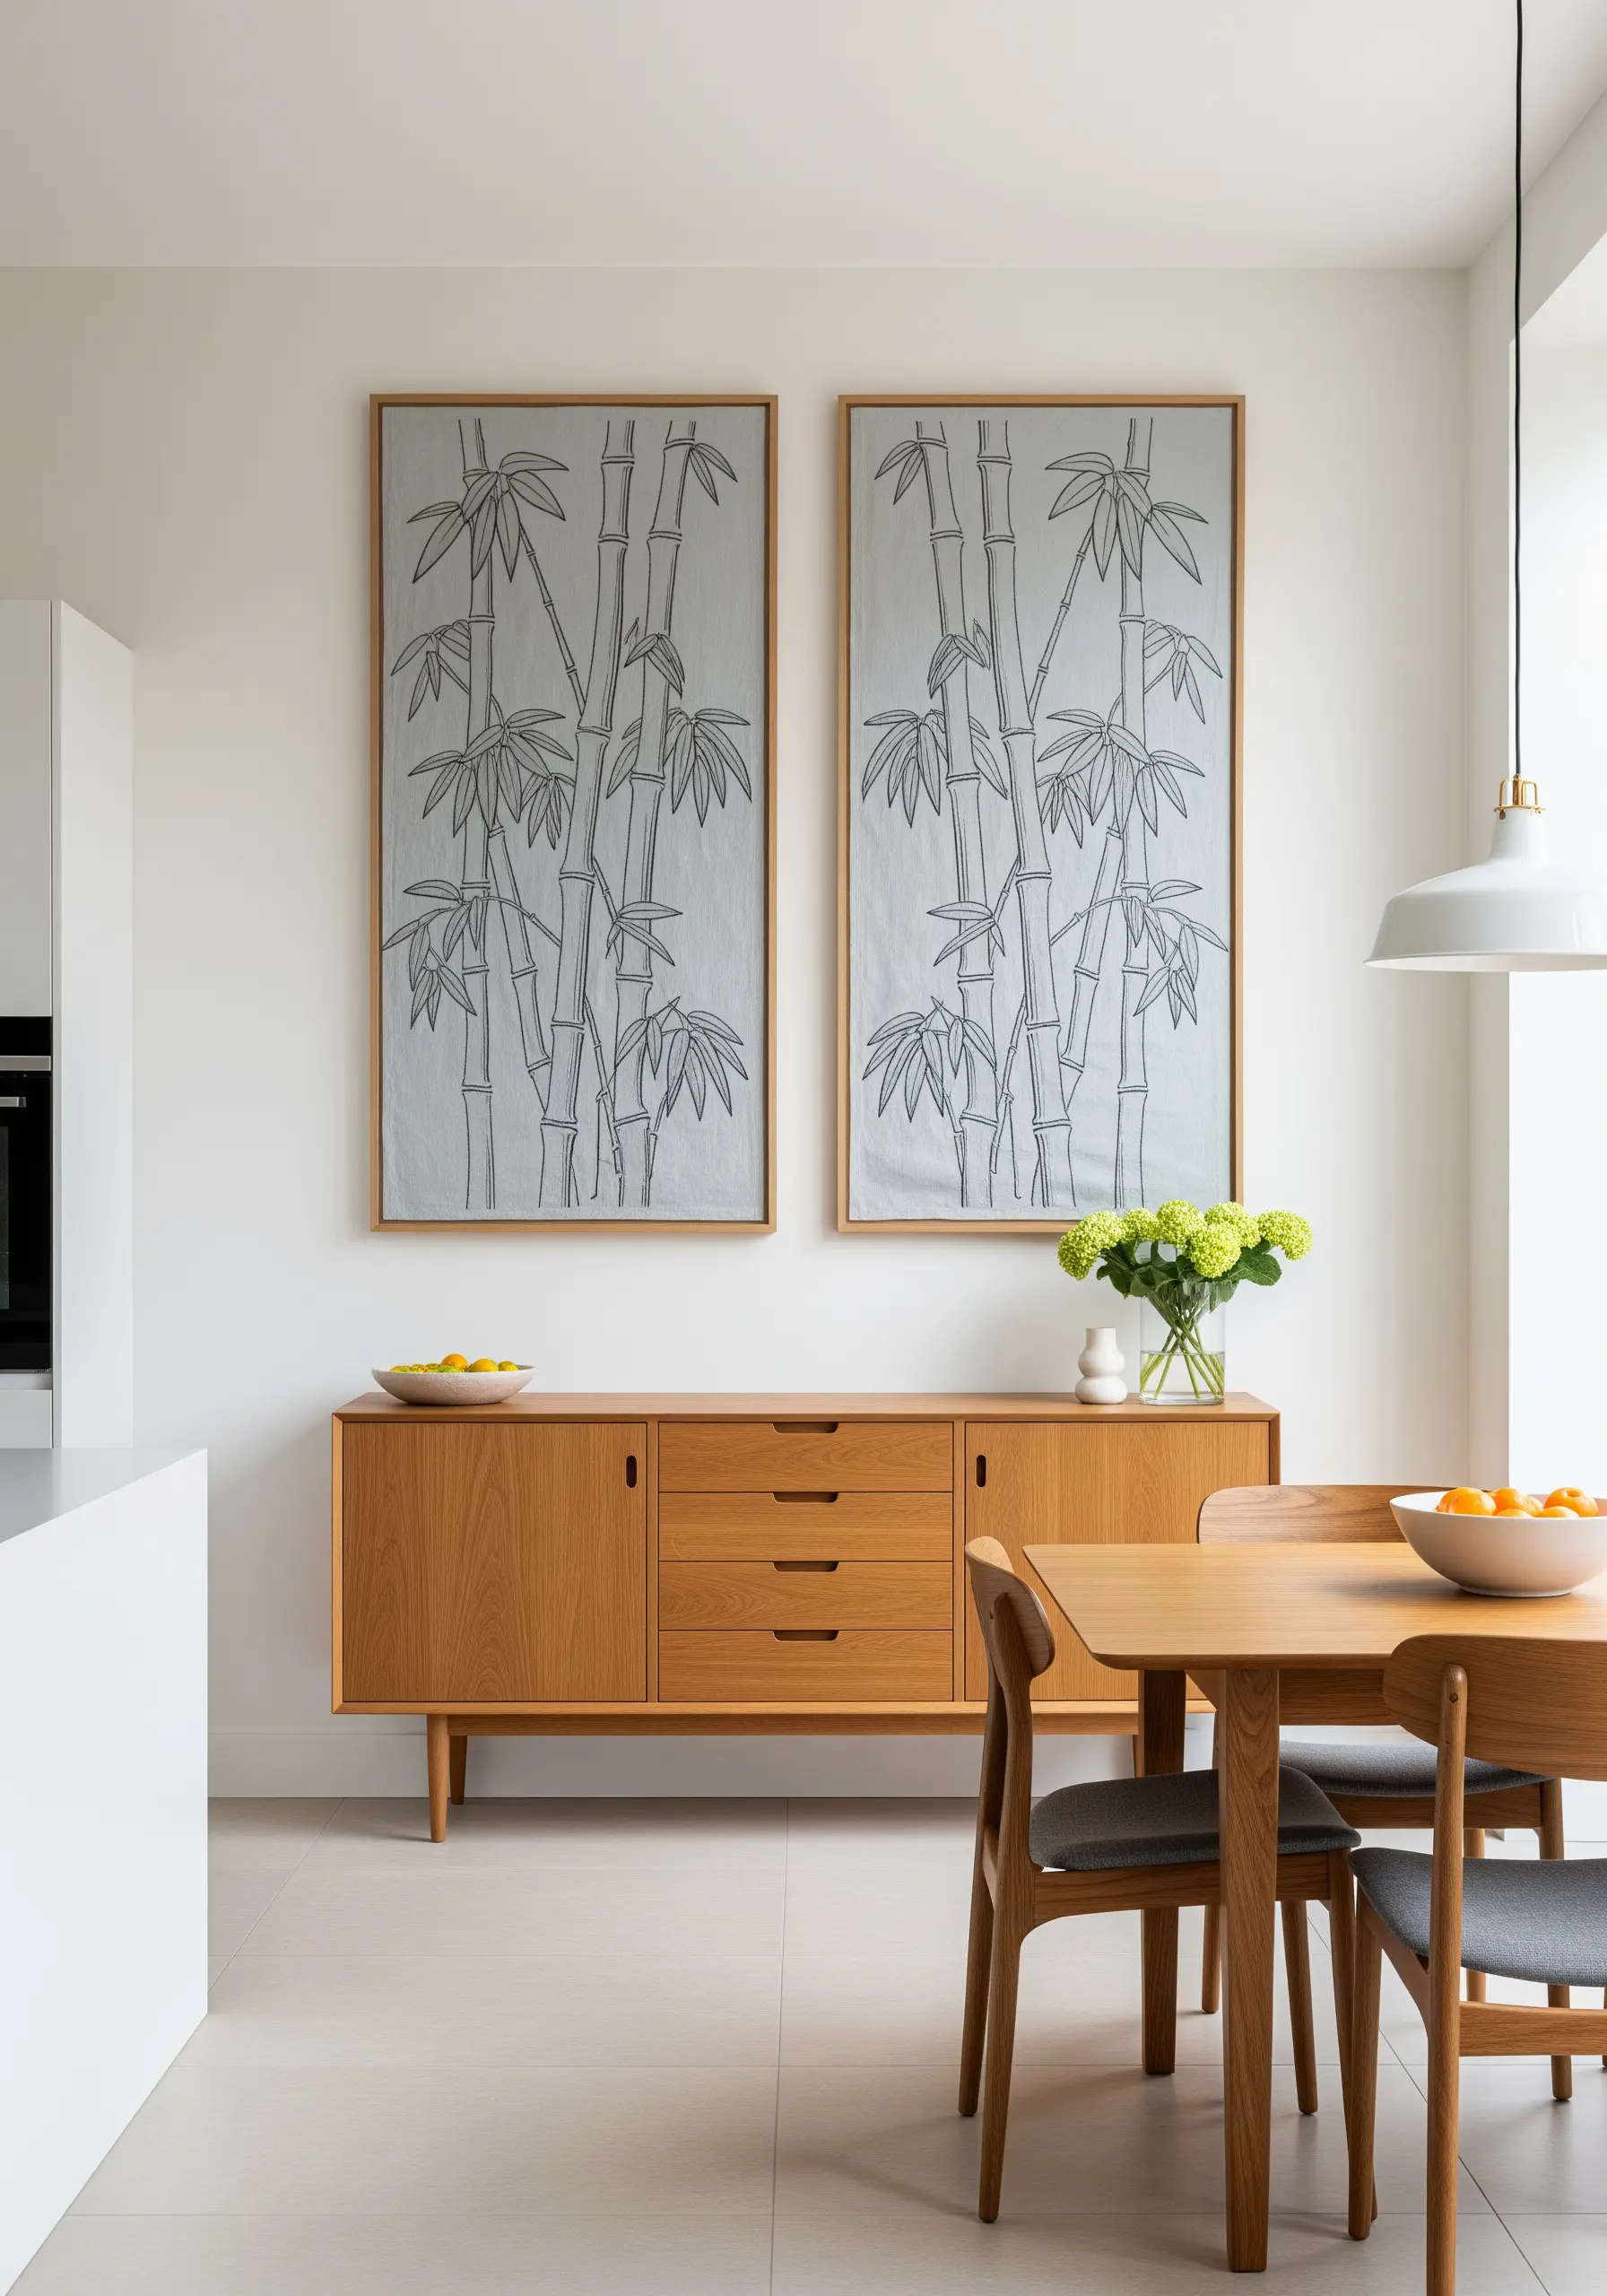
Create a sense of harmony and expansive scale by splitting a single image across two vertical panels.
This diptych approach works beautifully for tall, elegant subjects like bamboo, creating a more sophisticated and intentional composition than a single, wide piece.
Ensure the design flows seamlessly from one panel to the next by carefully aligning your pattern transfer.
Use a simple backstitch to keep the focus on the clean lines and the overall balance of the two pieces.
16. Micro-Embroidery for Delicate Details
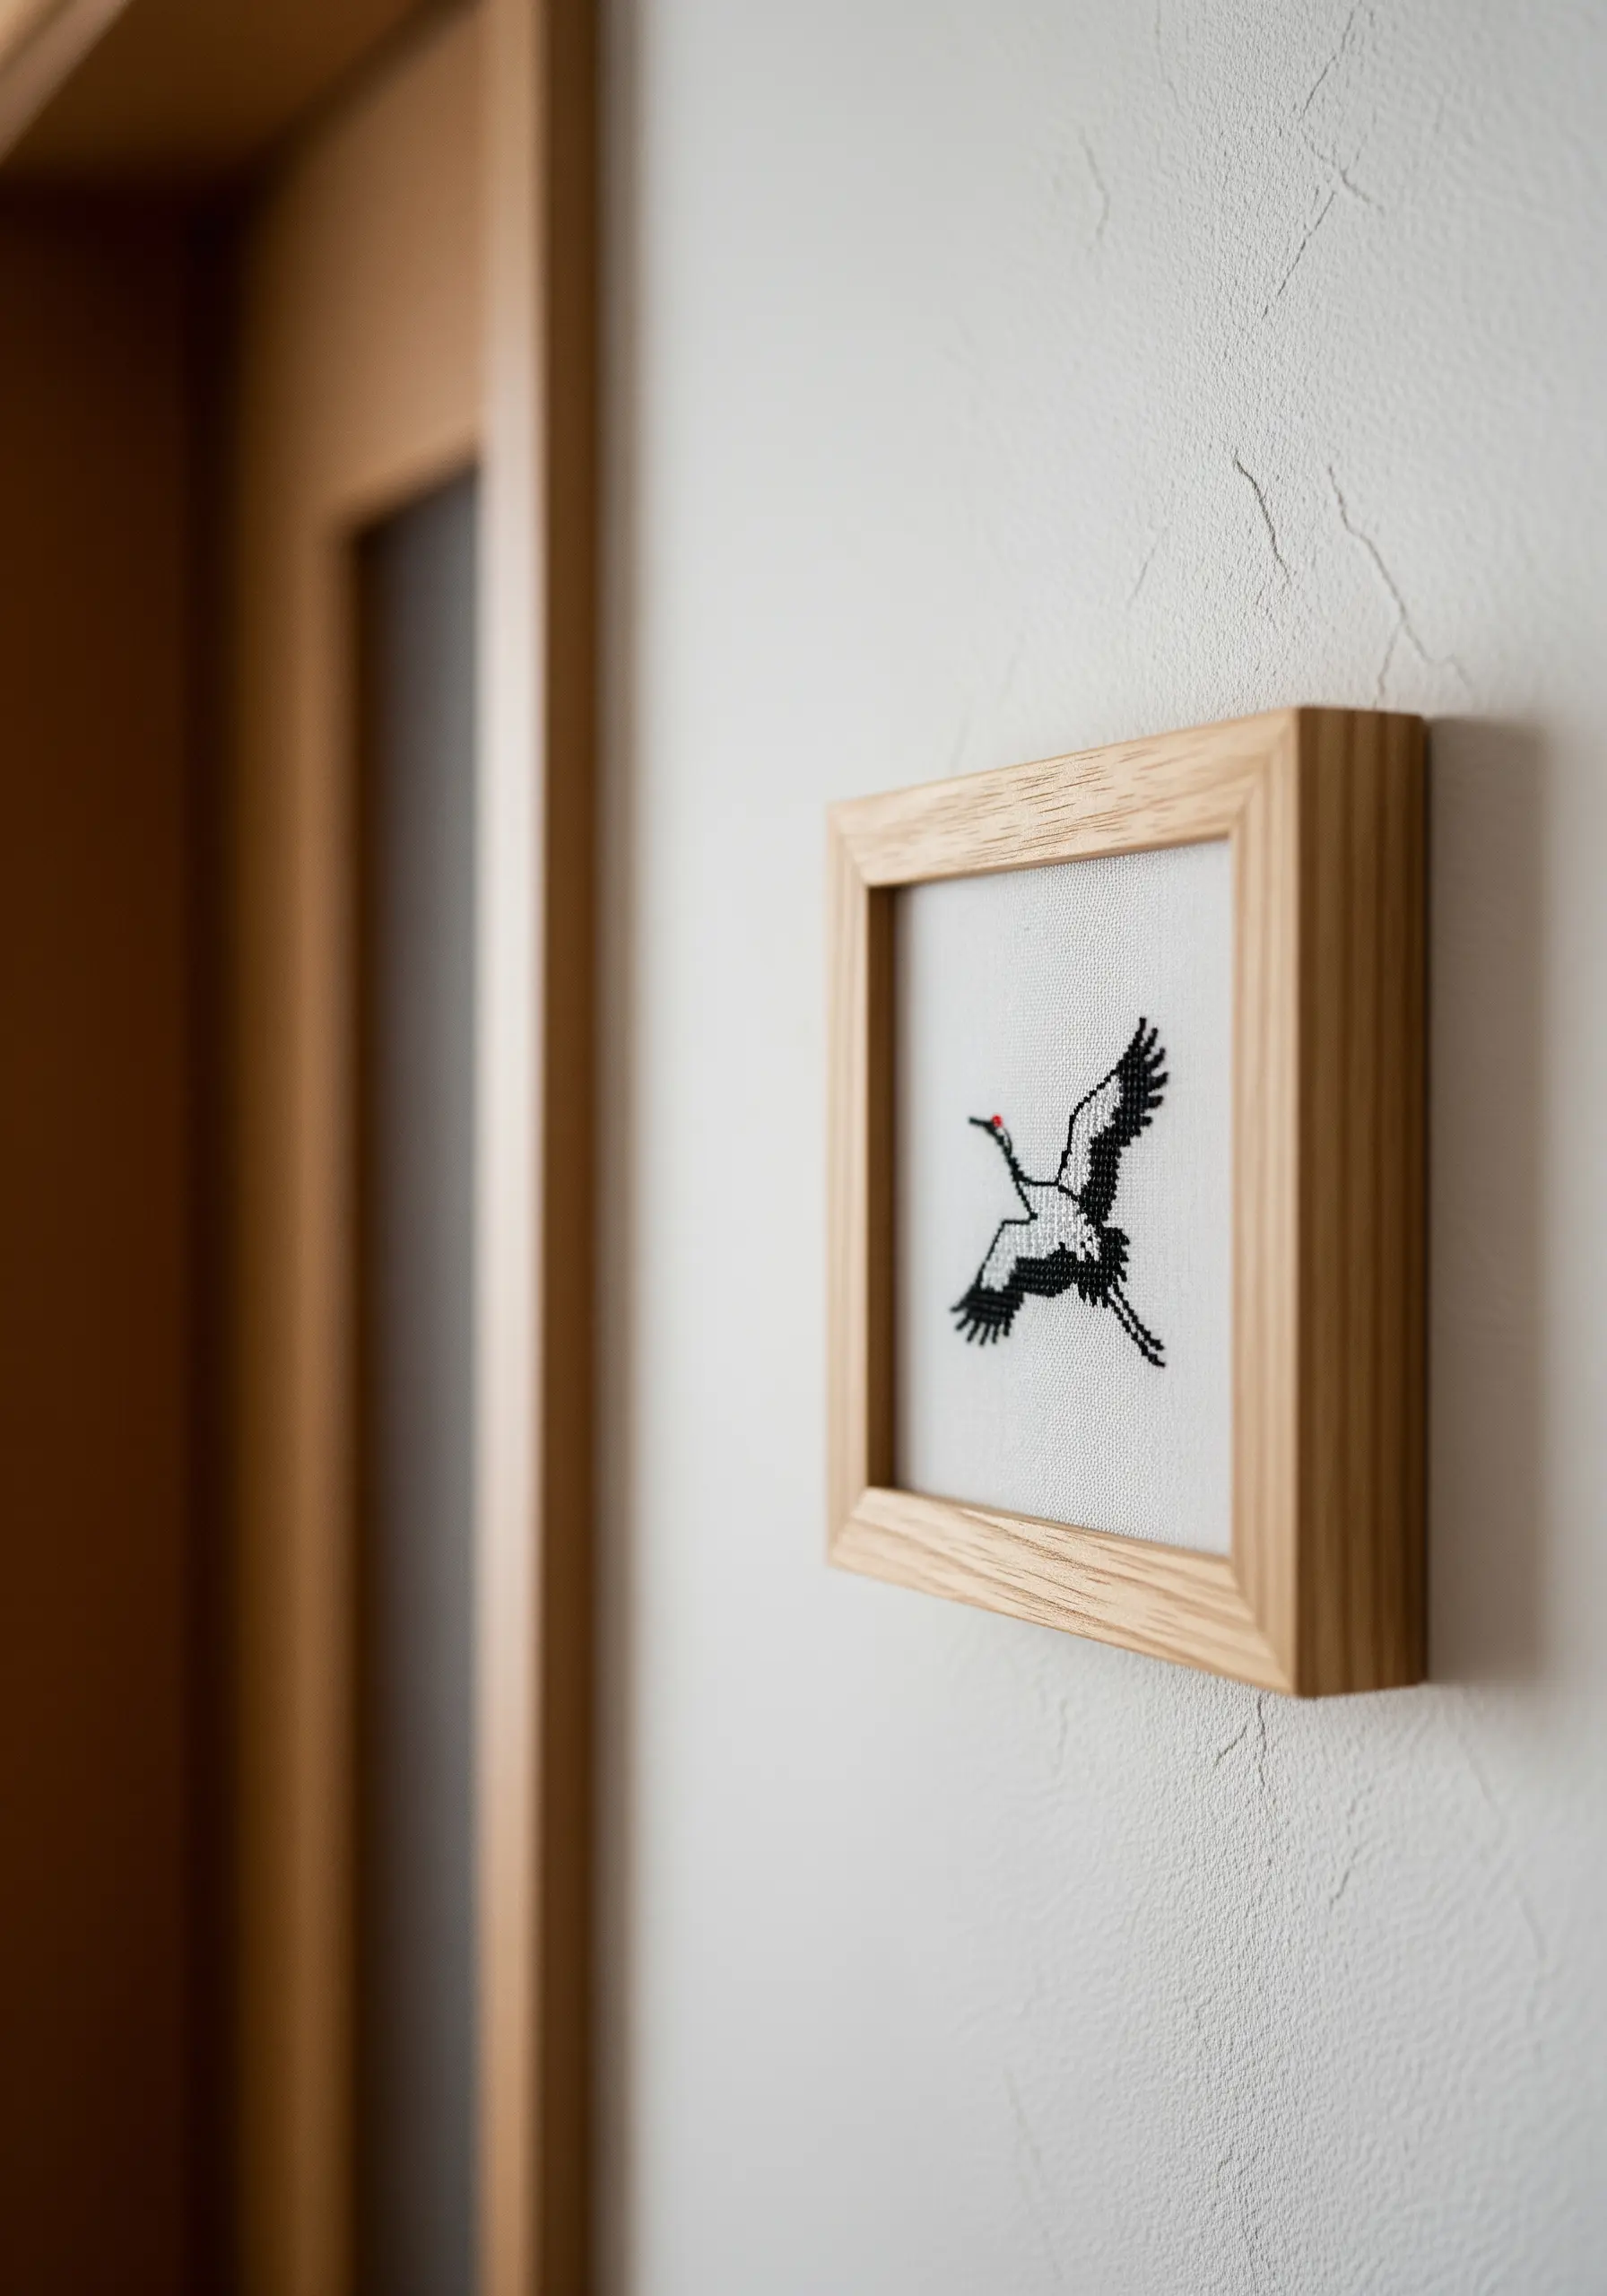
For incredibly small, detailed work, your material choices are paramount.
Switch to a high-count fabric (like 28-count evenweave or higher) and use only a single strand of embroidery floss.
This allows you to create sharp, precise details, like the delicate feathers of a bird, without the stitches becoming bulky or losing definition.
These handmade mini decor pieces prove that powerful statements can come in small packages.
17. Organic Grids with Imperfect Running Stitches
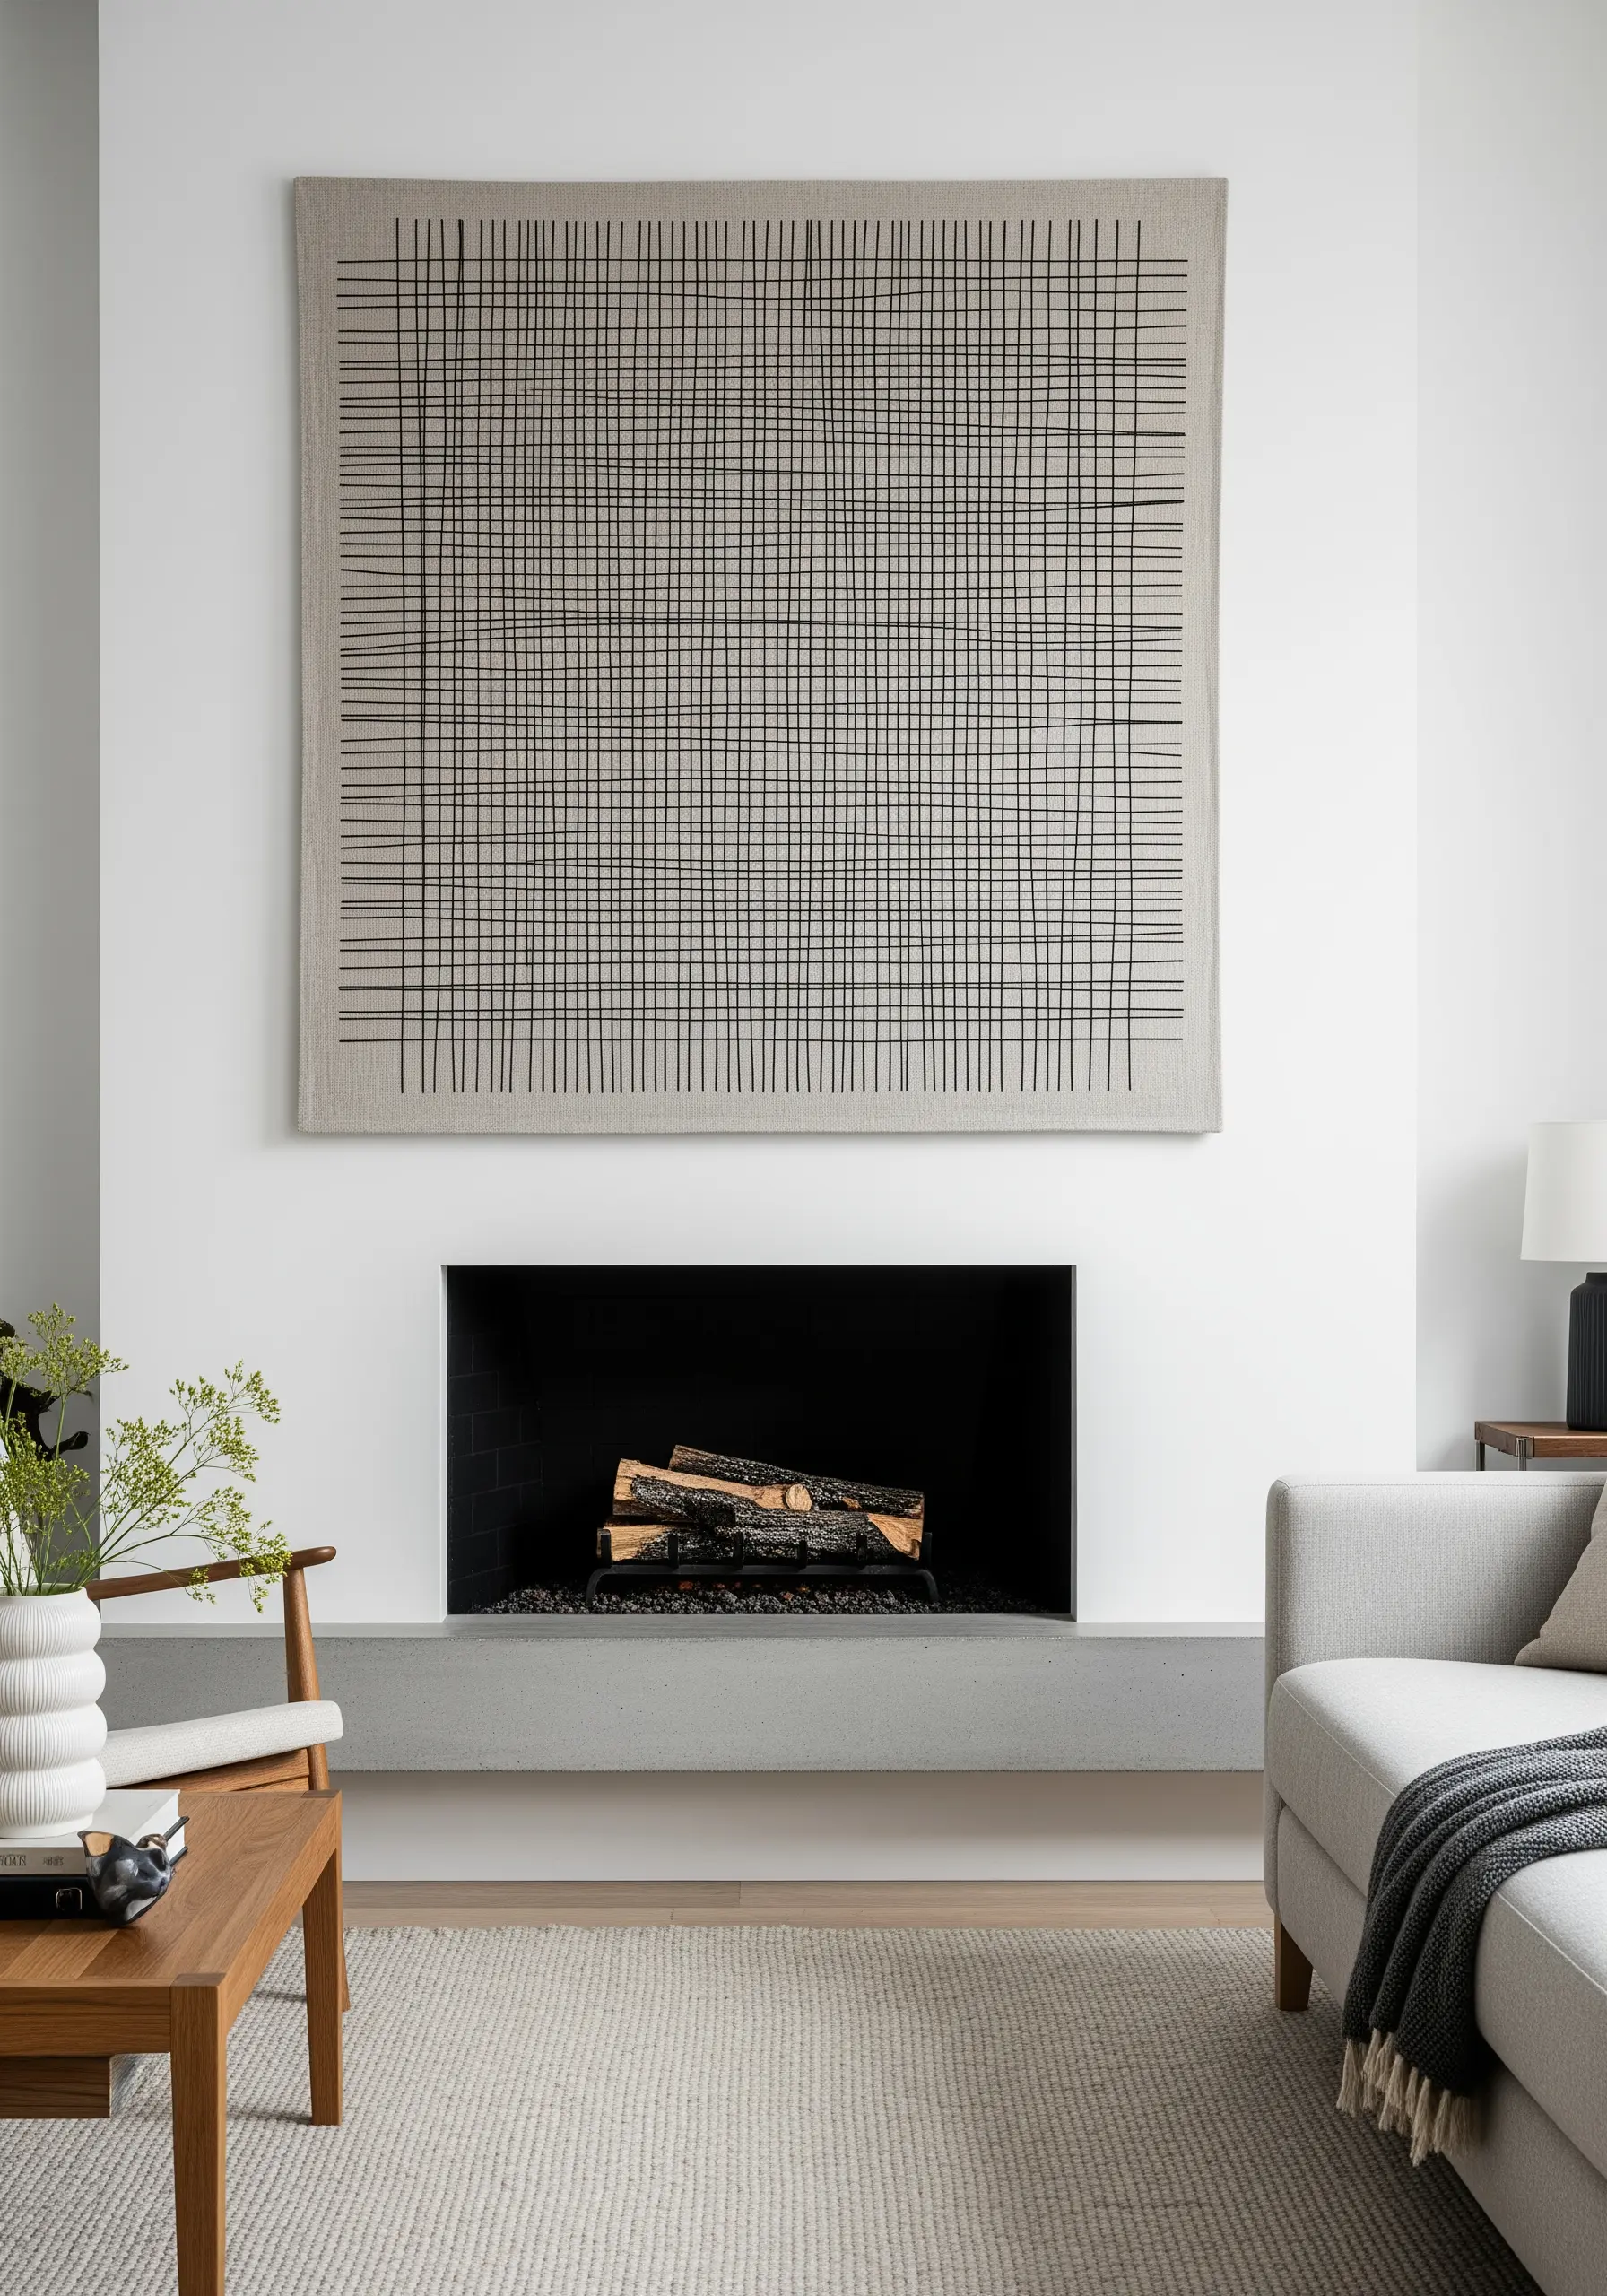
Embrace the wabi-sabi philosophy by creating a grid that celebrates imperfection.
Use a simple running stitch with a consistent thread weight, but allow for natural, subtle variations in your lines.
Don’t use a ruler; stitch by eye to give the grid an organic, hand-drawn quality.
The result is not a rigid geometric exercise, but one of those beautifully simple embroidery patterns that make statement wall art, feeling both structured and wonderfully human.
18. Celestial Maps with Knots and Lines
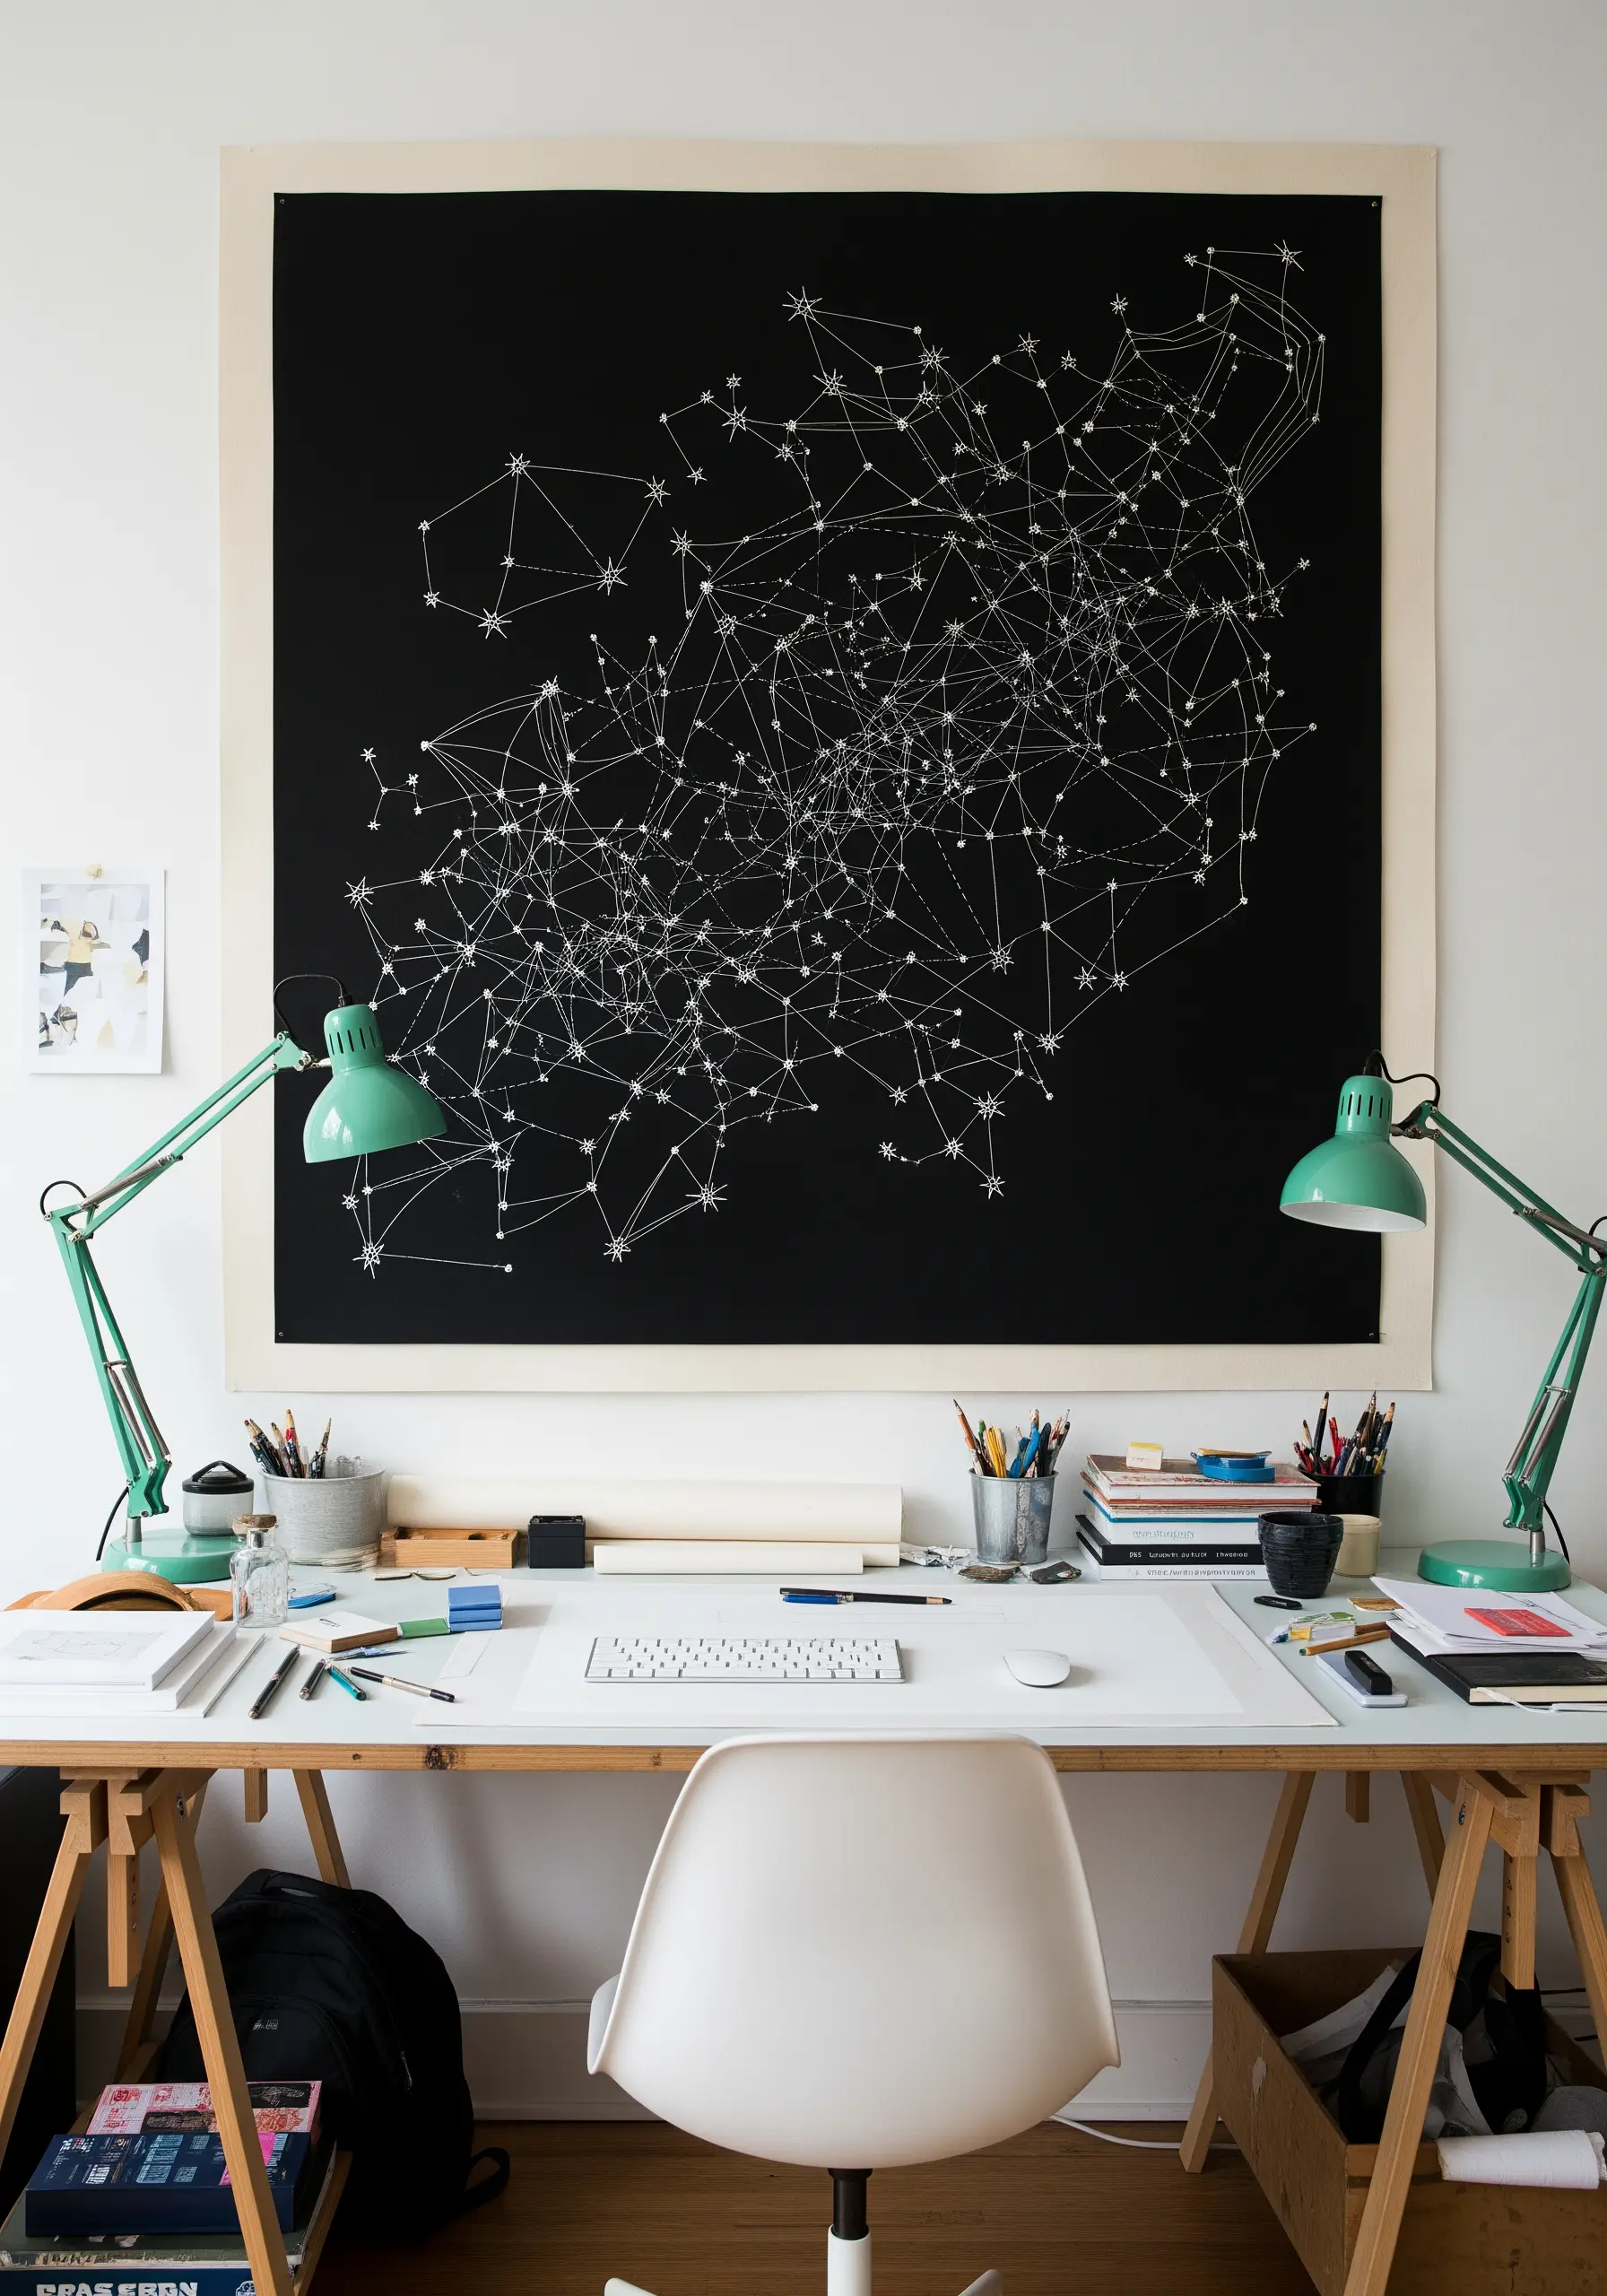
Turn a dark piece of fabric into a starry night sky with two simple stitches.
Use French knots or colonial knots for the stars, varying their size by wrapping the thread once for small stars and two or three times for larger ones.
Connect them with clean, taut straight stitches to form the constellations.
The contrast between the points of light (knots) and the connecting paths (lines) transforms simple stitches into mesmerizing abstract thread embroidery ideas.
19. Atmospheric Depth Through Stitch Density
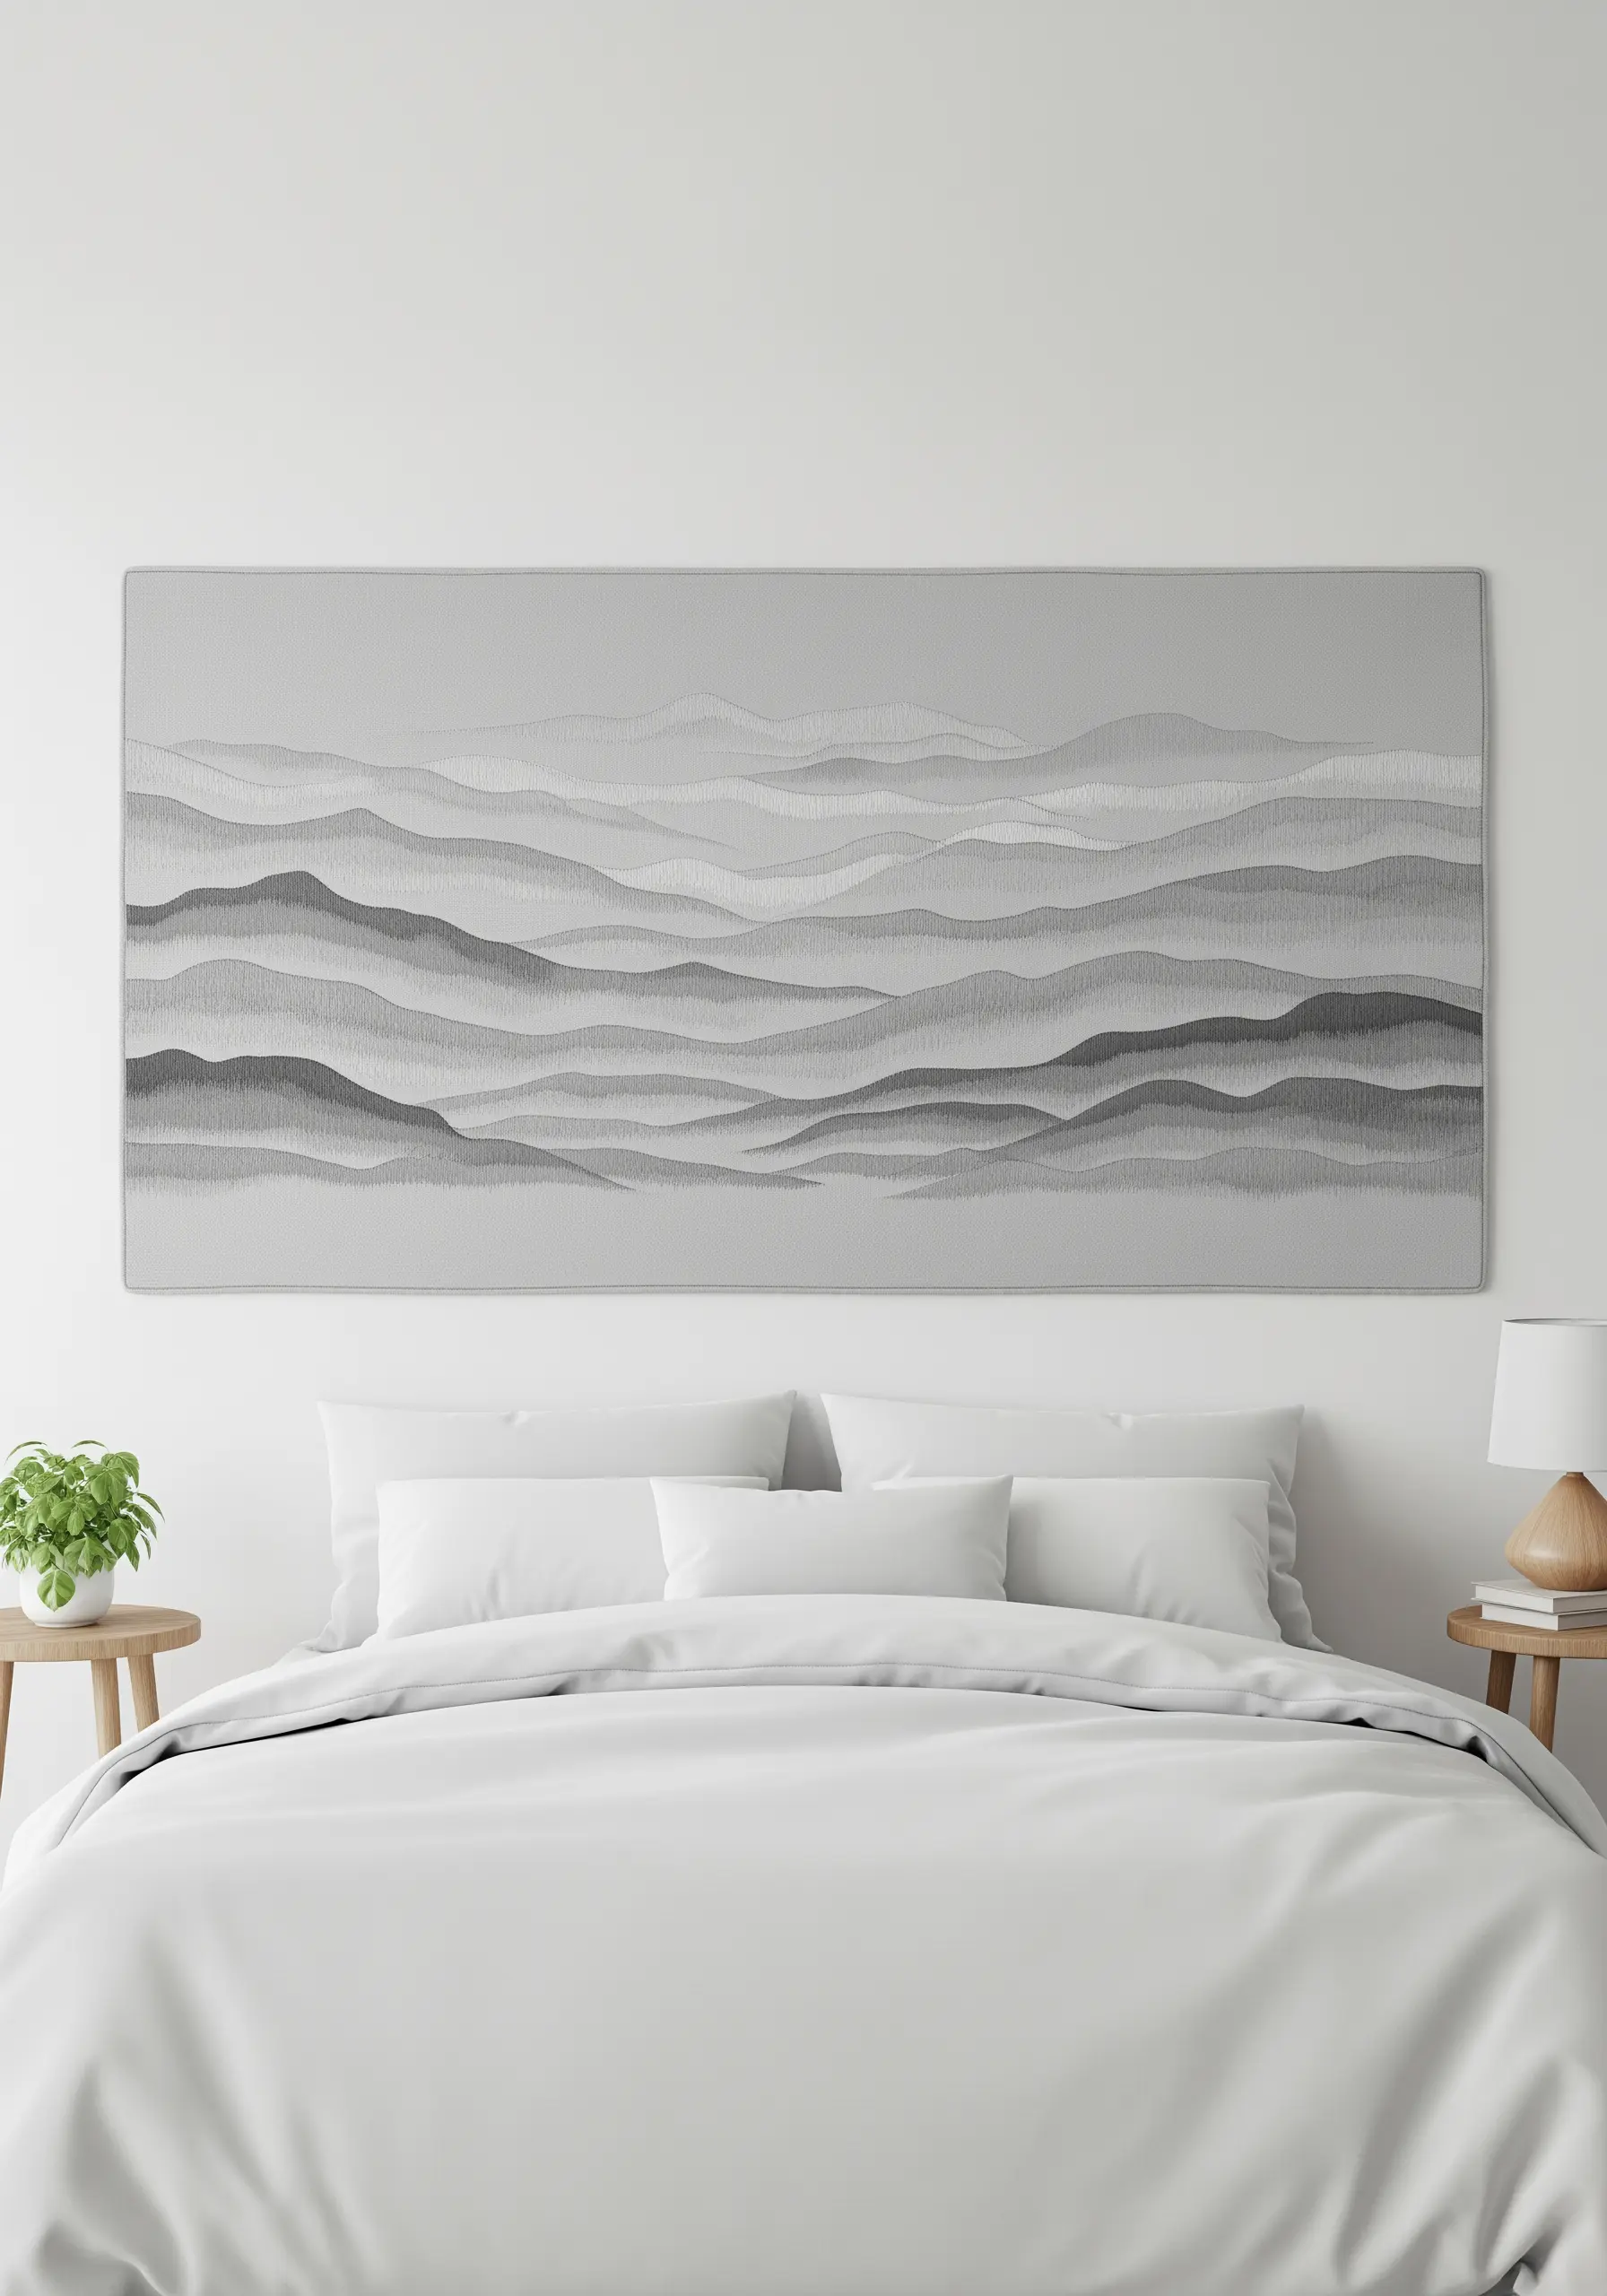
Create the illusion of fog-laden hills using variations in stitch density and thread weight.
For the foreground hills, use a darker grey thread and fill them with dense, vertical satin stitches.
As the hills recede, switch to a lighter grey and use a sparser fill, like seed stitch or even spaced-out running stitches.
This gradient in texture and tone creates a powerful sense of atmospheric perspective, making your landscape feel vast and deep.
20. High-Contrast Halves for Graphic Impact
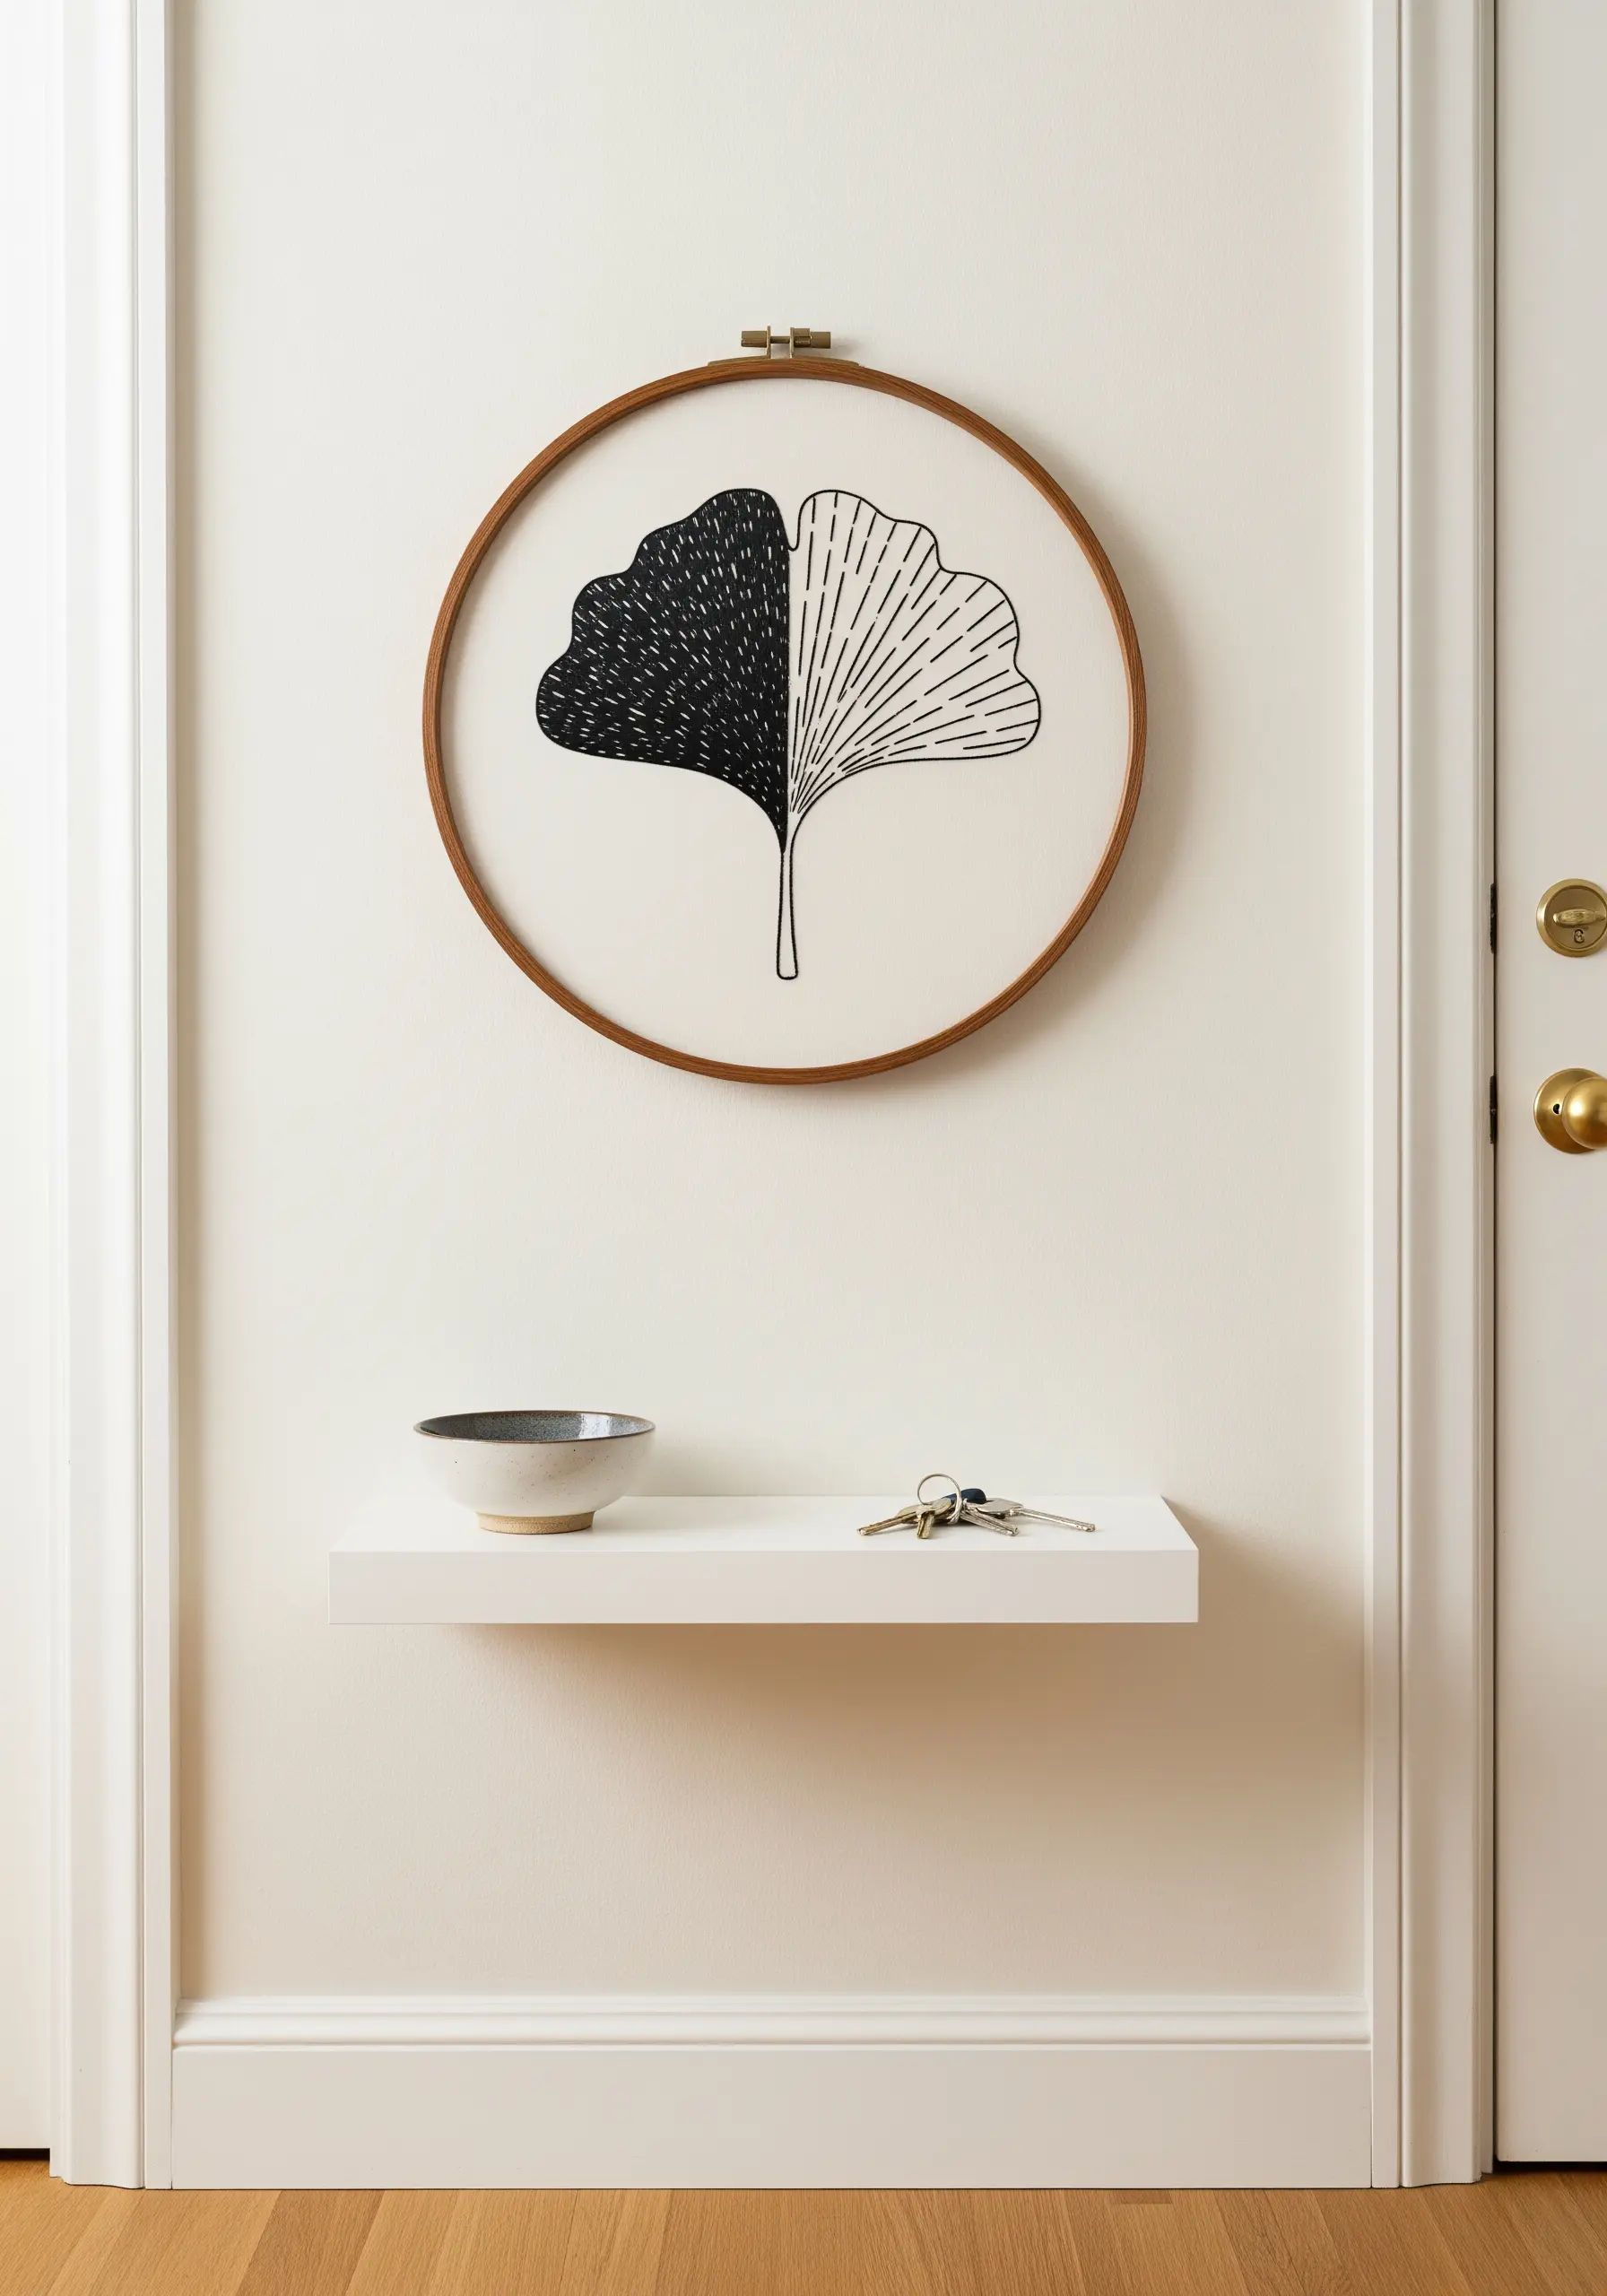
Create a striking visual statement by dividing a symmetrical motif, like a ginkgo leaf, into two contrasting textures.
Fill one half with dense, solid seed stitch for a dark, textured effect.
On the other half, use simple, radiating backstitches or running stitches to create a light, linear pattern.
This play between solid and line, dark and light, turns a simple botanical into a bold piece of graphic art, adding character without clutter.
21. A Sampler Grid of Monochrome Textures
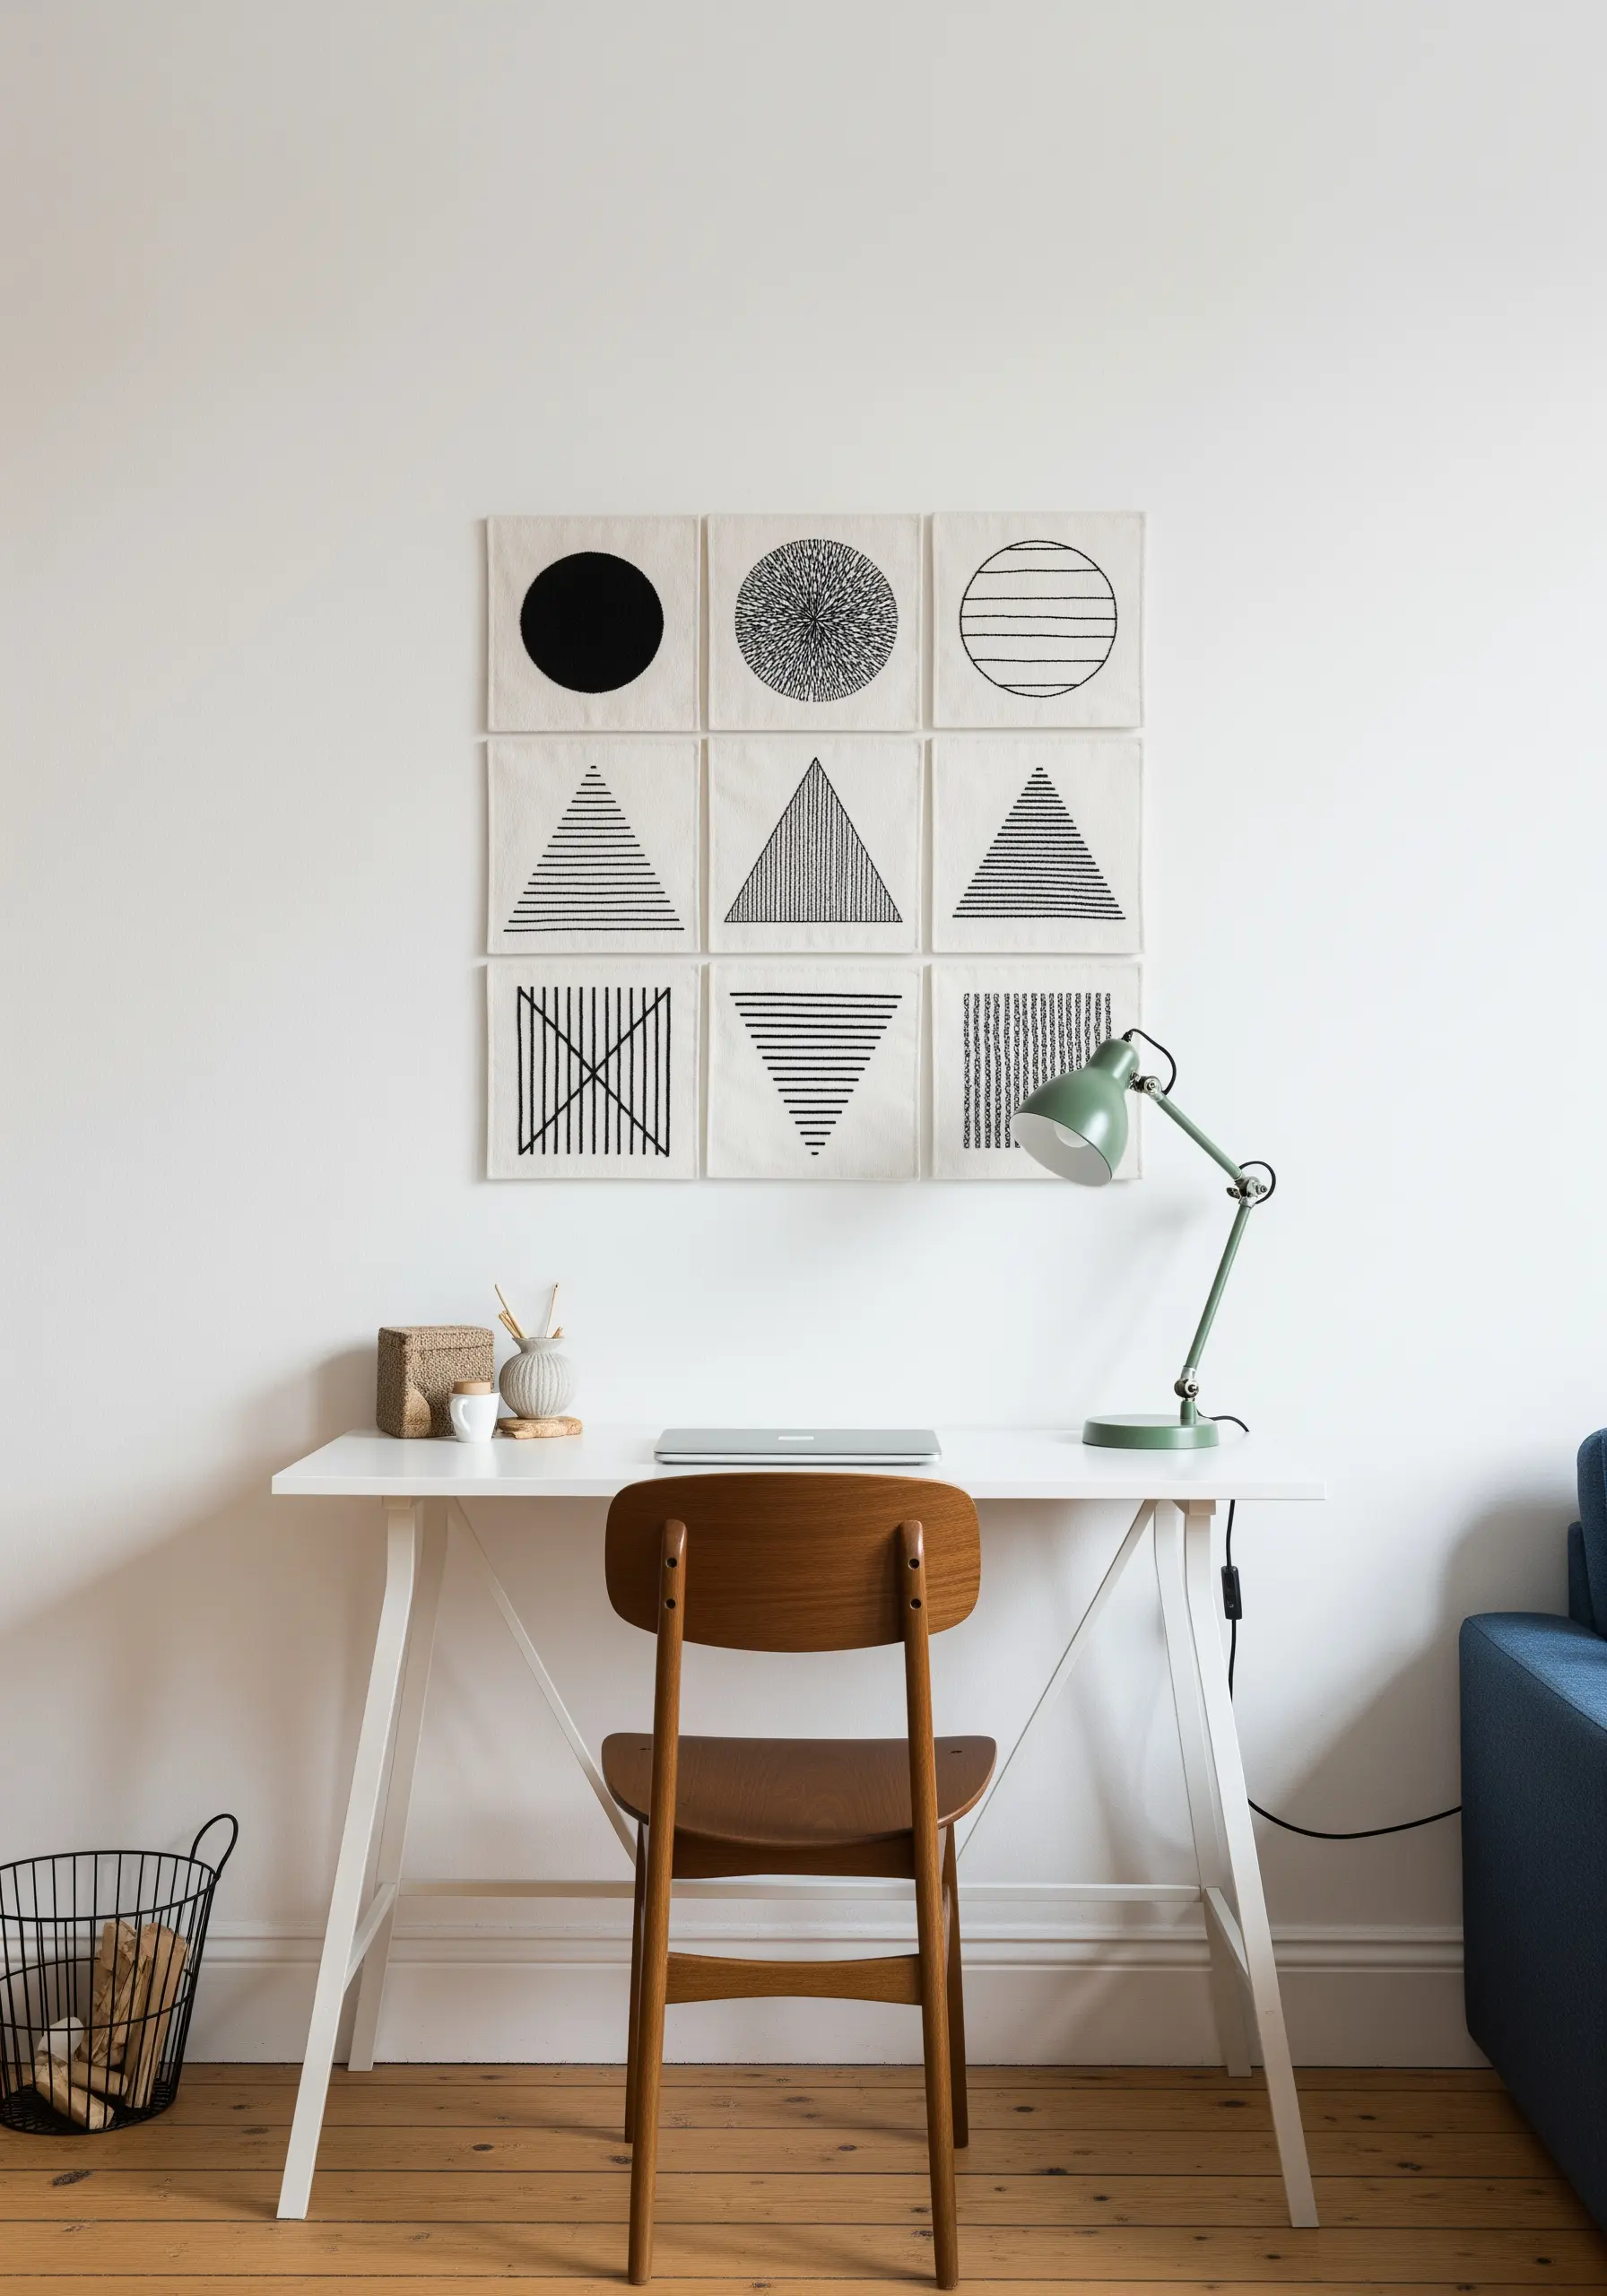
Instead of a single image, create a grid of small squares, each exploring a different monochrome stitch or pattern.
Dedicate one square to solid satin stitch, another to parallel lines, a third to woven bars, and so on.
This project becomes a beautiful reference of textures and a sophisticated piece of art in its own right.
Arrange them in a 3×3 grid for a balanced, modern display perfect for office walls.
22. Cascading Petals to Convey Movement
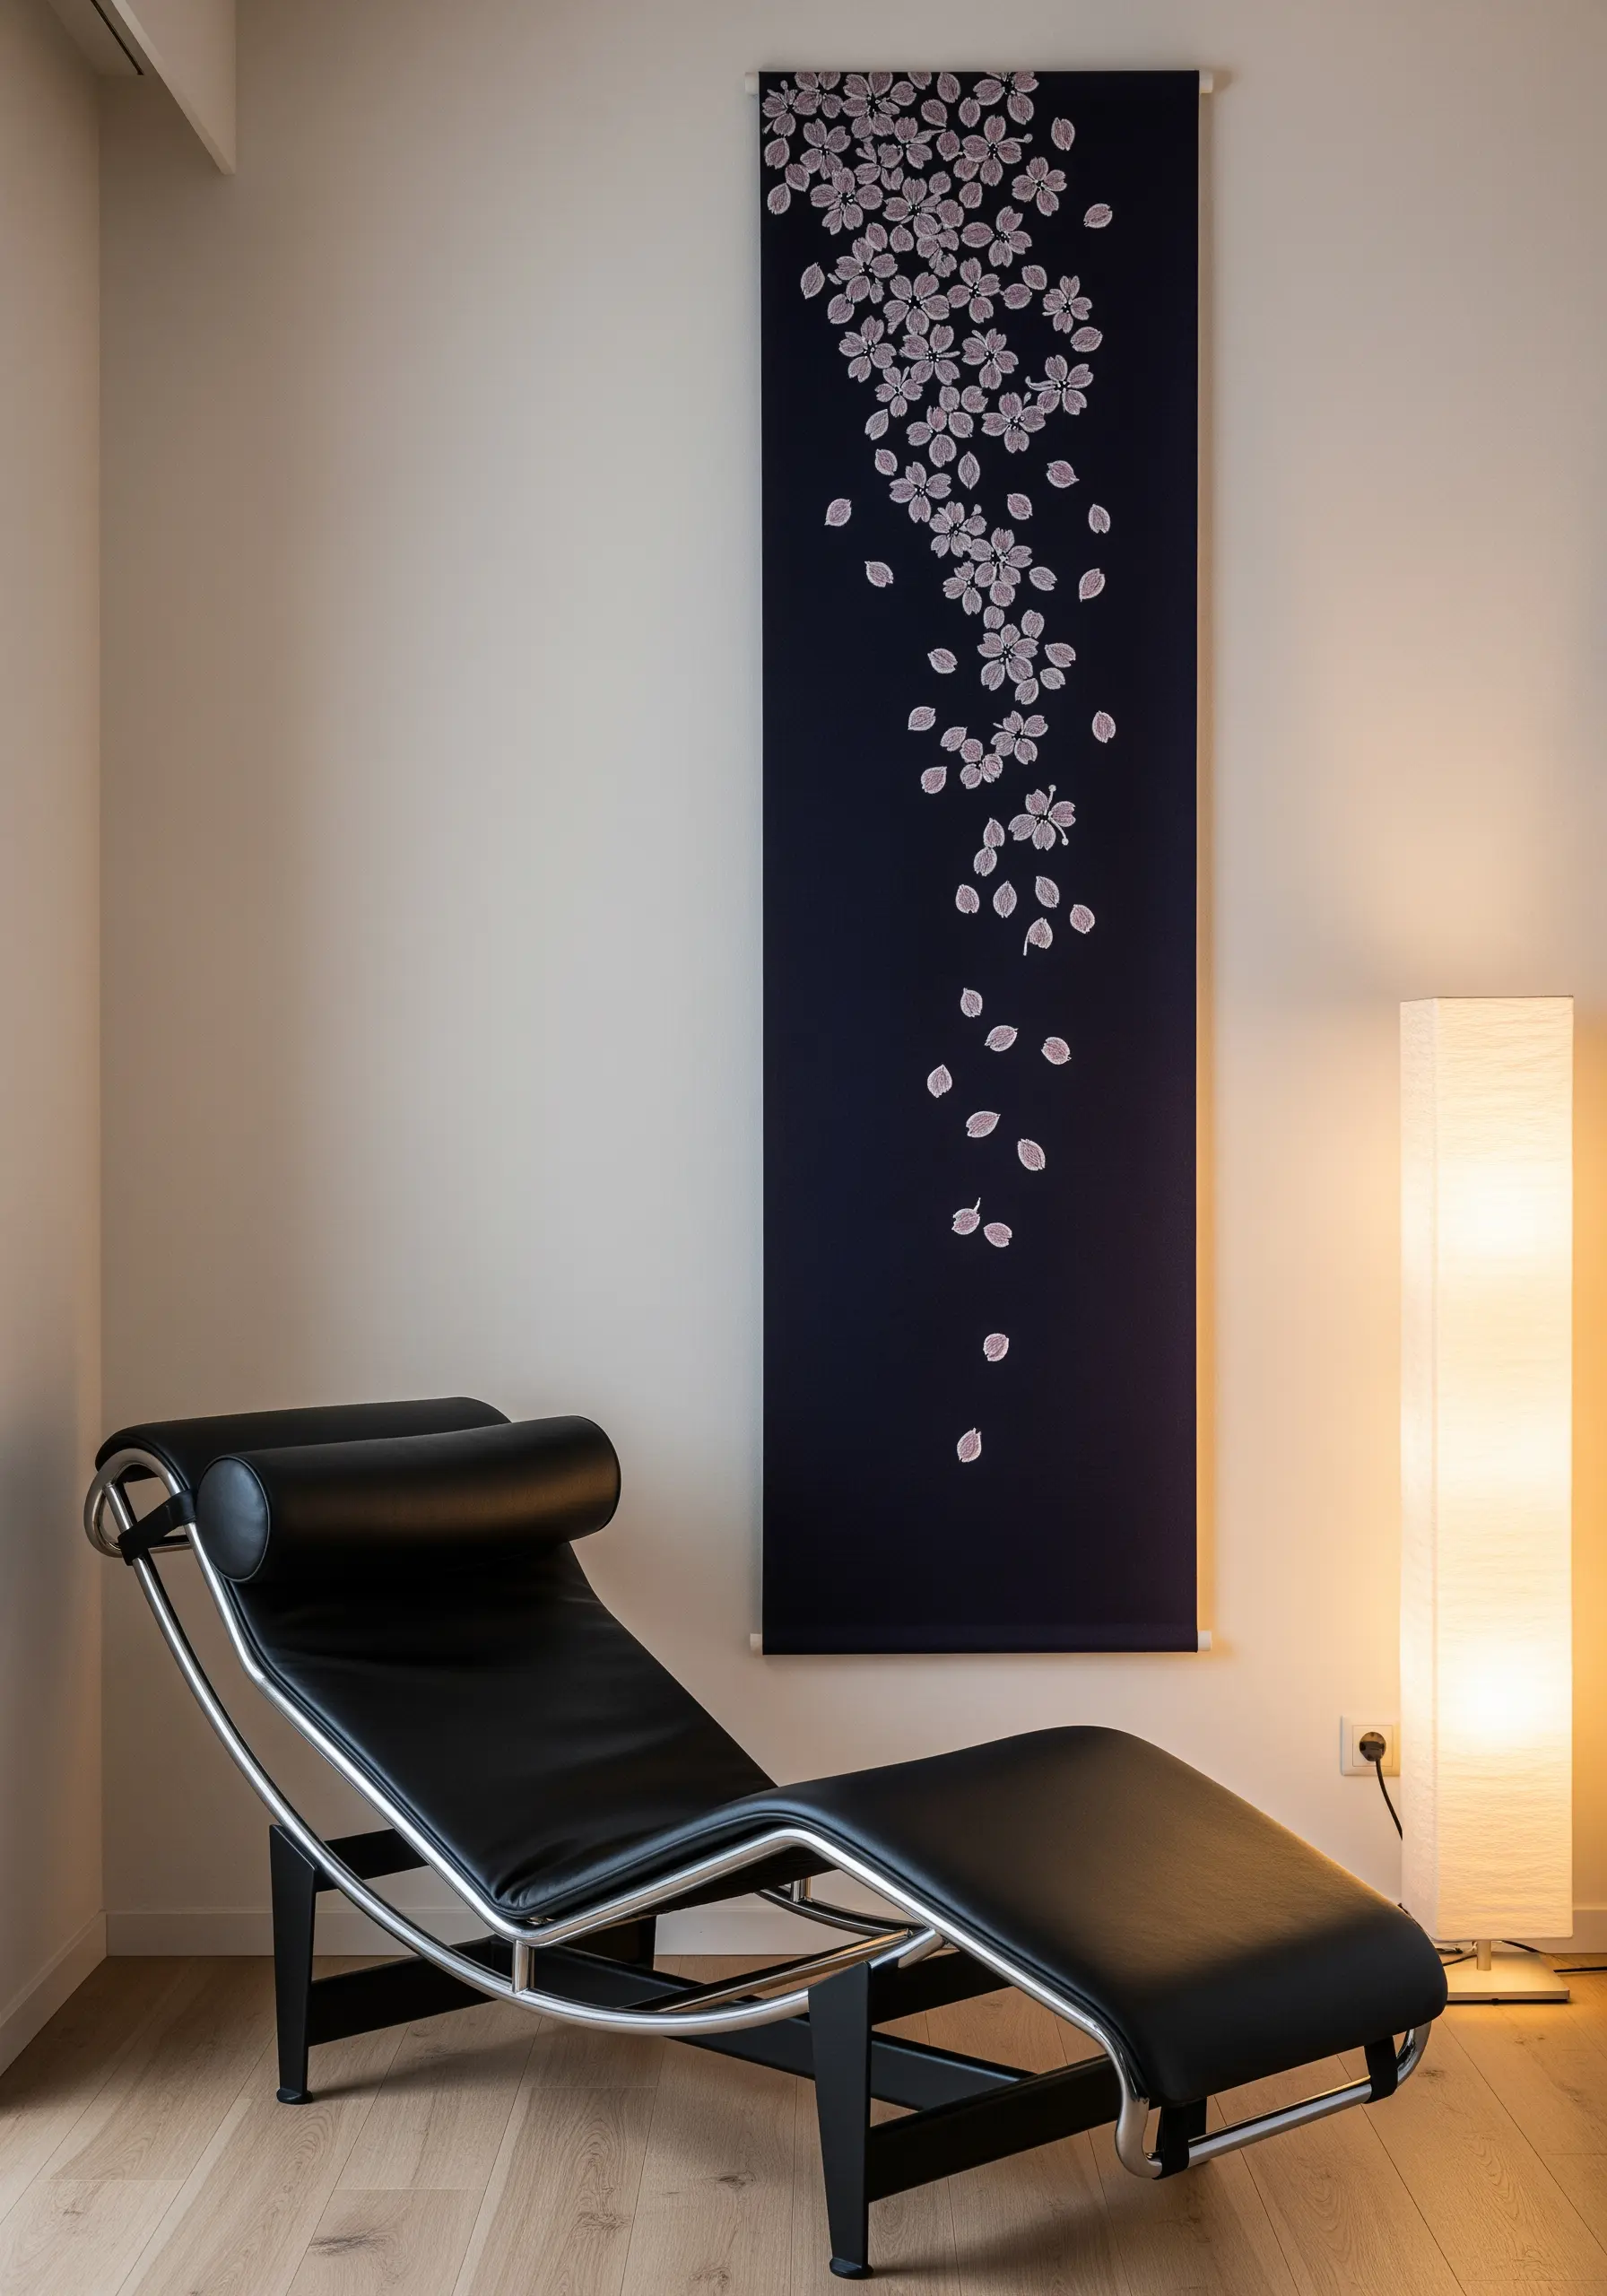
To capture the gentle movement of falling cherry blossoms, think about placement and stitch choice.
Use detached chain stitches for the individual petals, which gives them a delicate, floating quality.
Create a dense cluster of blossoms at the top of your design, then gradually space them out as they descend the fabric.
This tapering effect creates a beautiful illusion of gravity and motion, making your monochrome floral embroidery ideas feel alive.
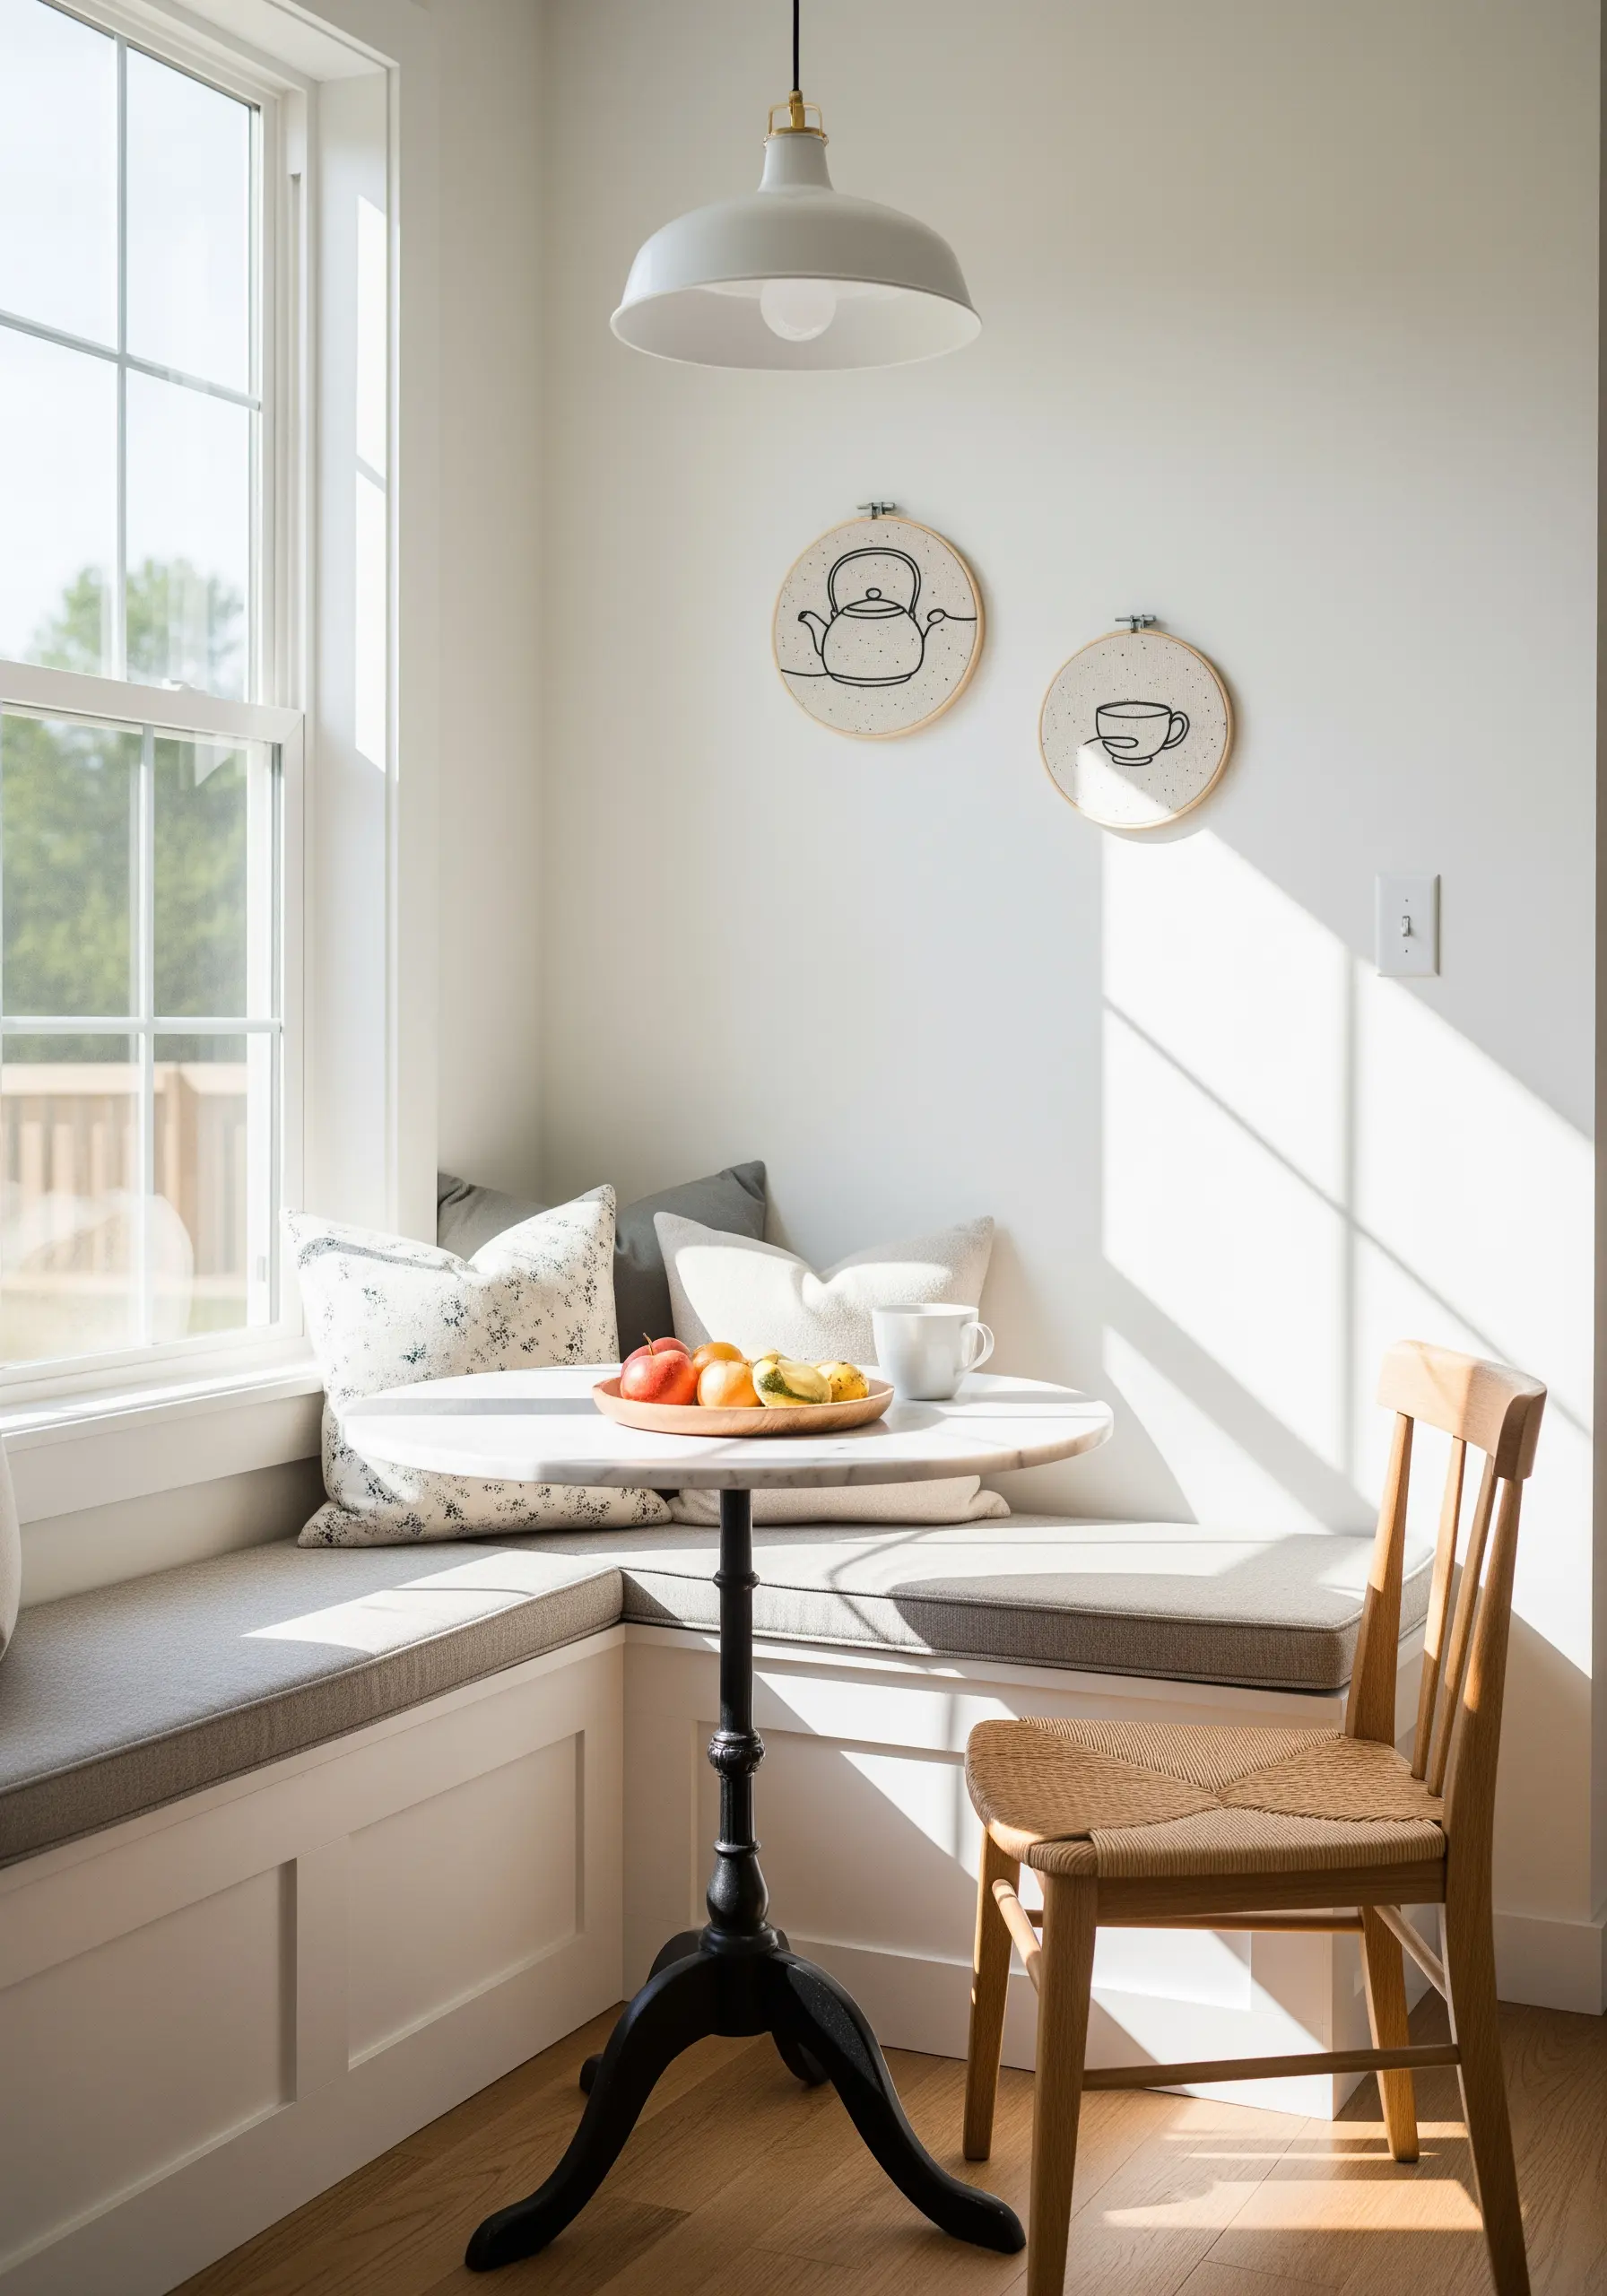
23. Kitchen Motifs with Minimalist Linework
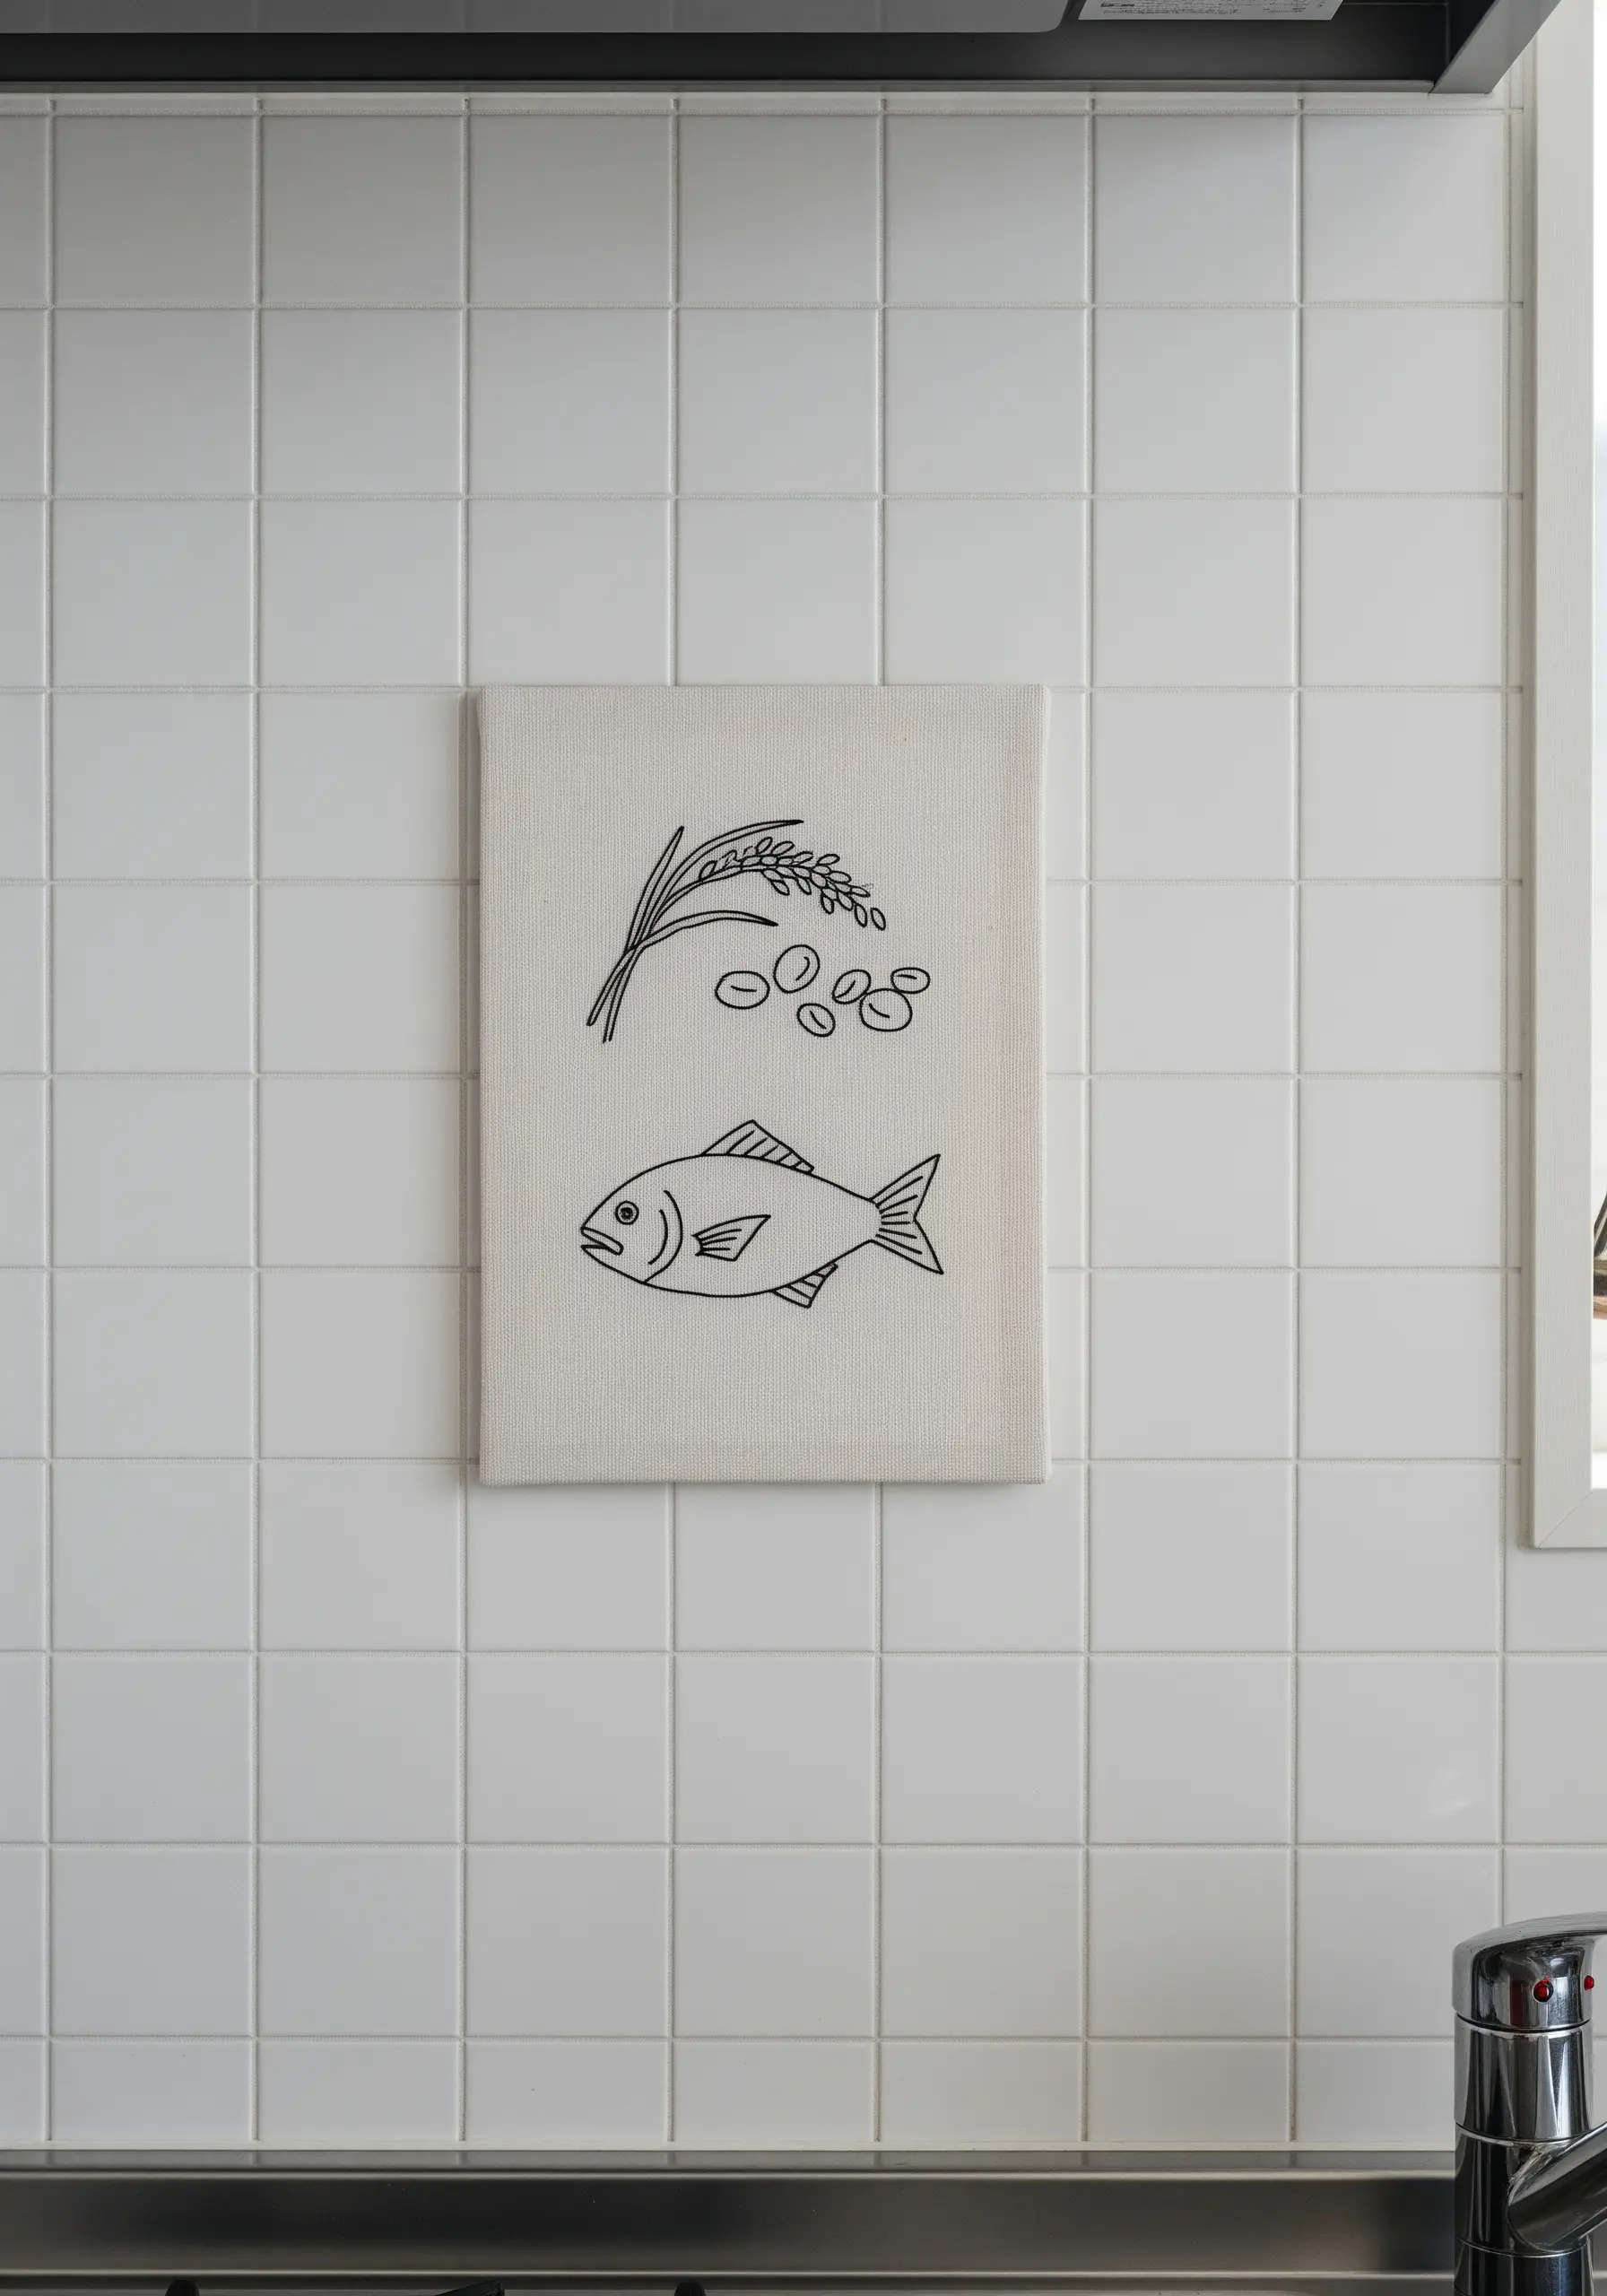
For kitchen or dining room art, choose simple, universal symbols and render them with clean linework.
A simple backstitch using two strands of floss is perfect for creating clear, readable icons like rice stalks, beans, or fish.
The elegance comes from the restraint—resisting the urge to add color or complex fills keeps the focus on the pure, graphic forms.
These minimal fruit & plant motifs are perfect for adding a touch of handmade charm to utilitarian spaces.
24. Organic Flow with Couched Textured Yarn
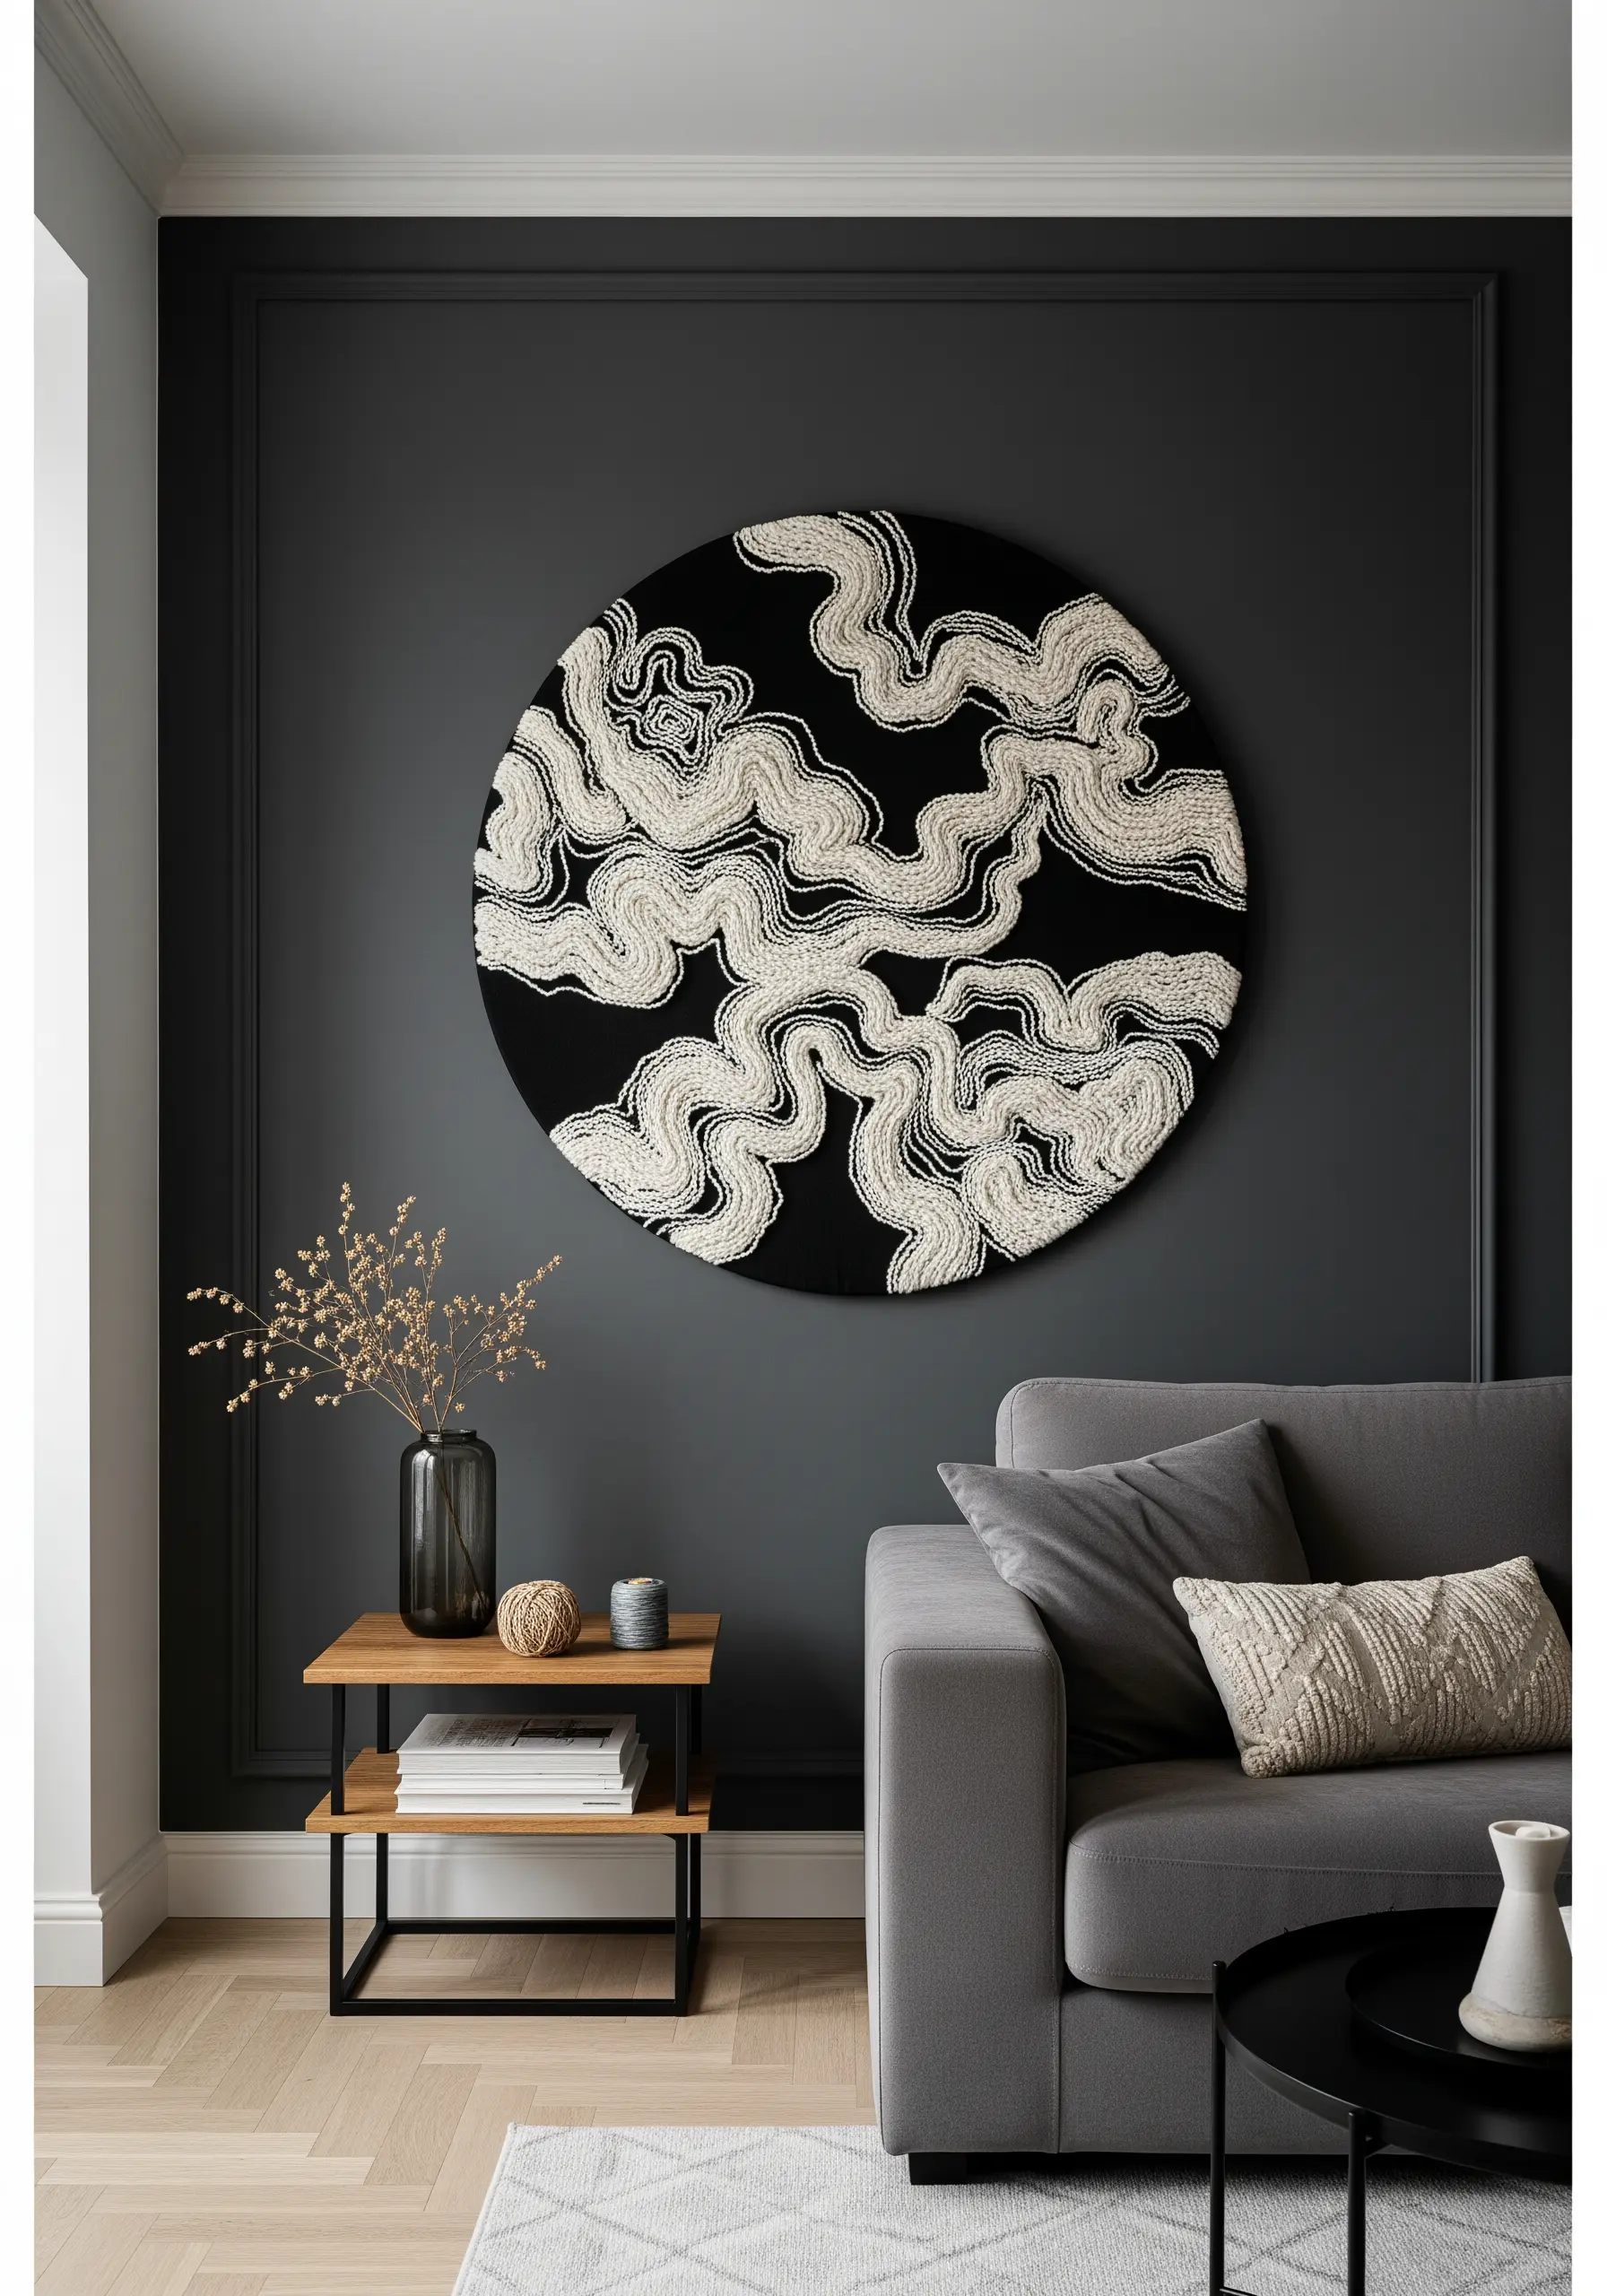
Capture the feeling of flowing water or smoke by couching a highly textured yarn onto a dark background.
Choose a slub or bouclé yarn that has natural variations in thickness, and lay it down in meandering, organic curves.
Use a fine, contrasting thread to tack it down, allowing the yarn’s texture to be the main feature.
This method allows you to create bold, dimensional abstract thread waves & swirls much faster than with traditional stitches.
25. The Continuous Line Diptych
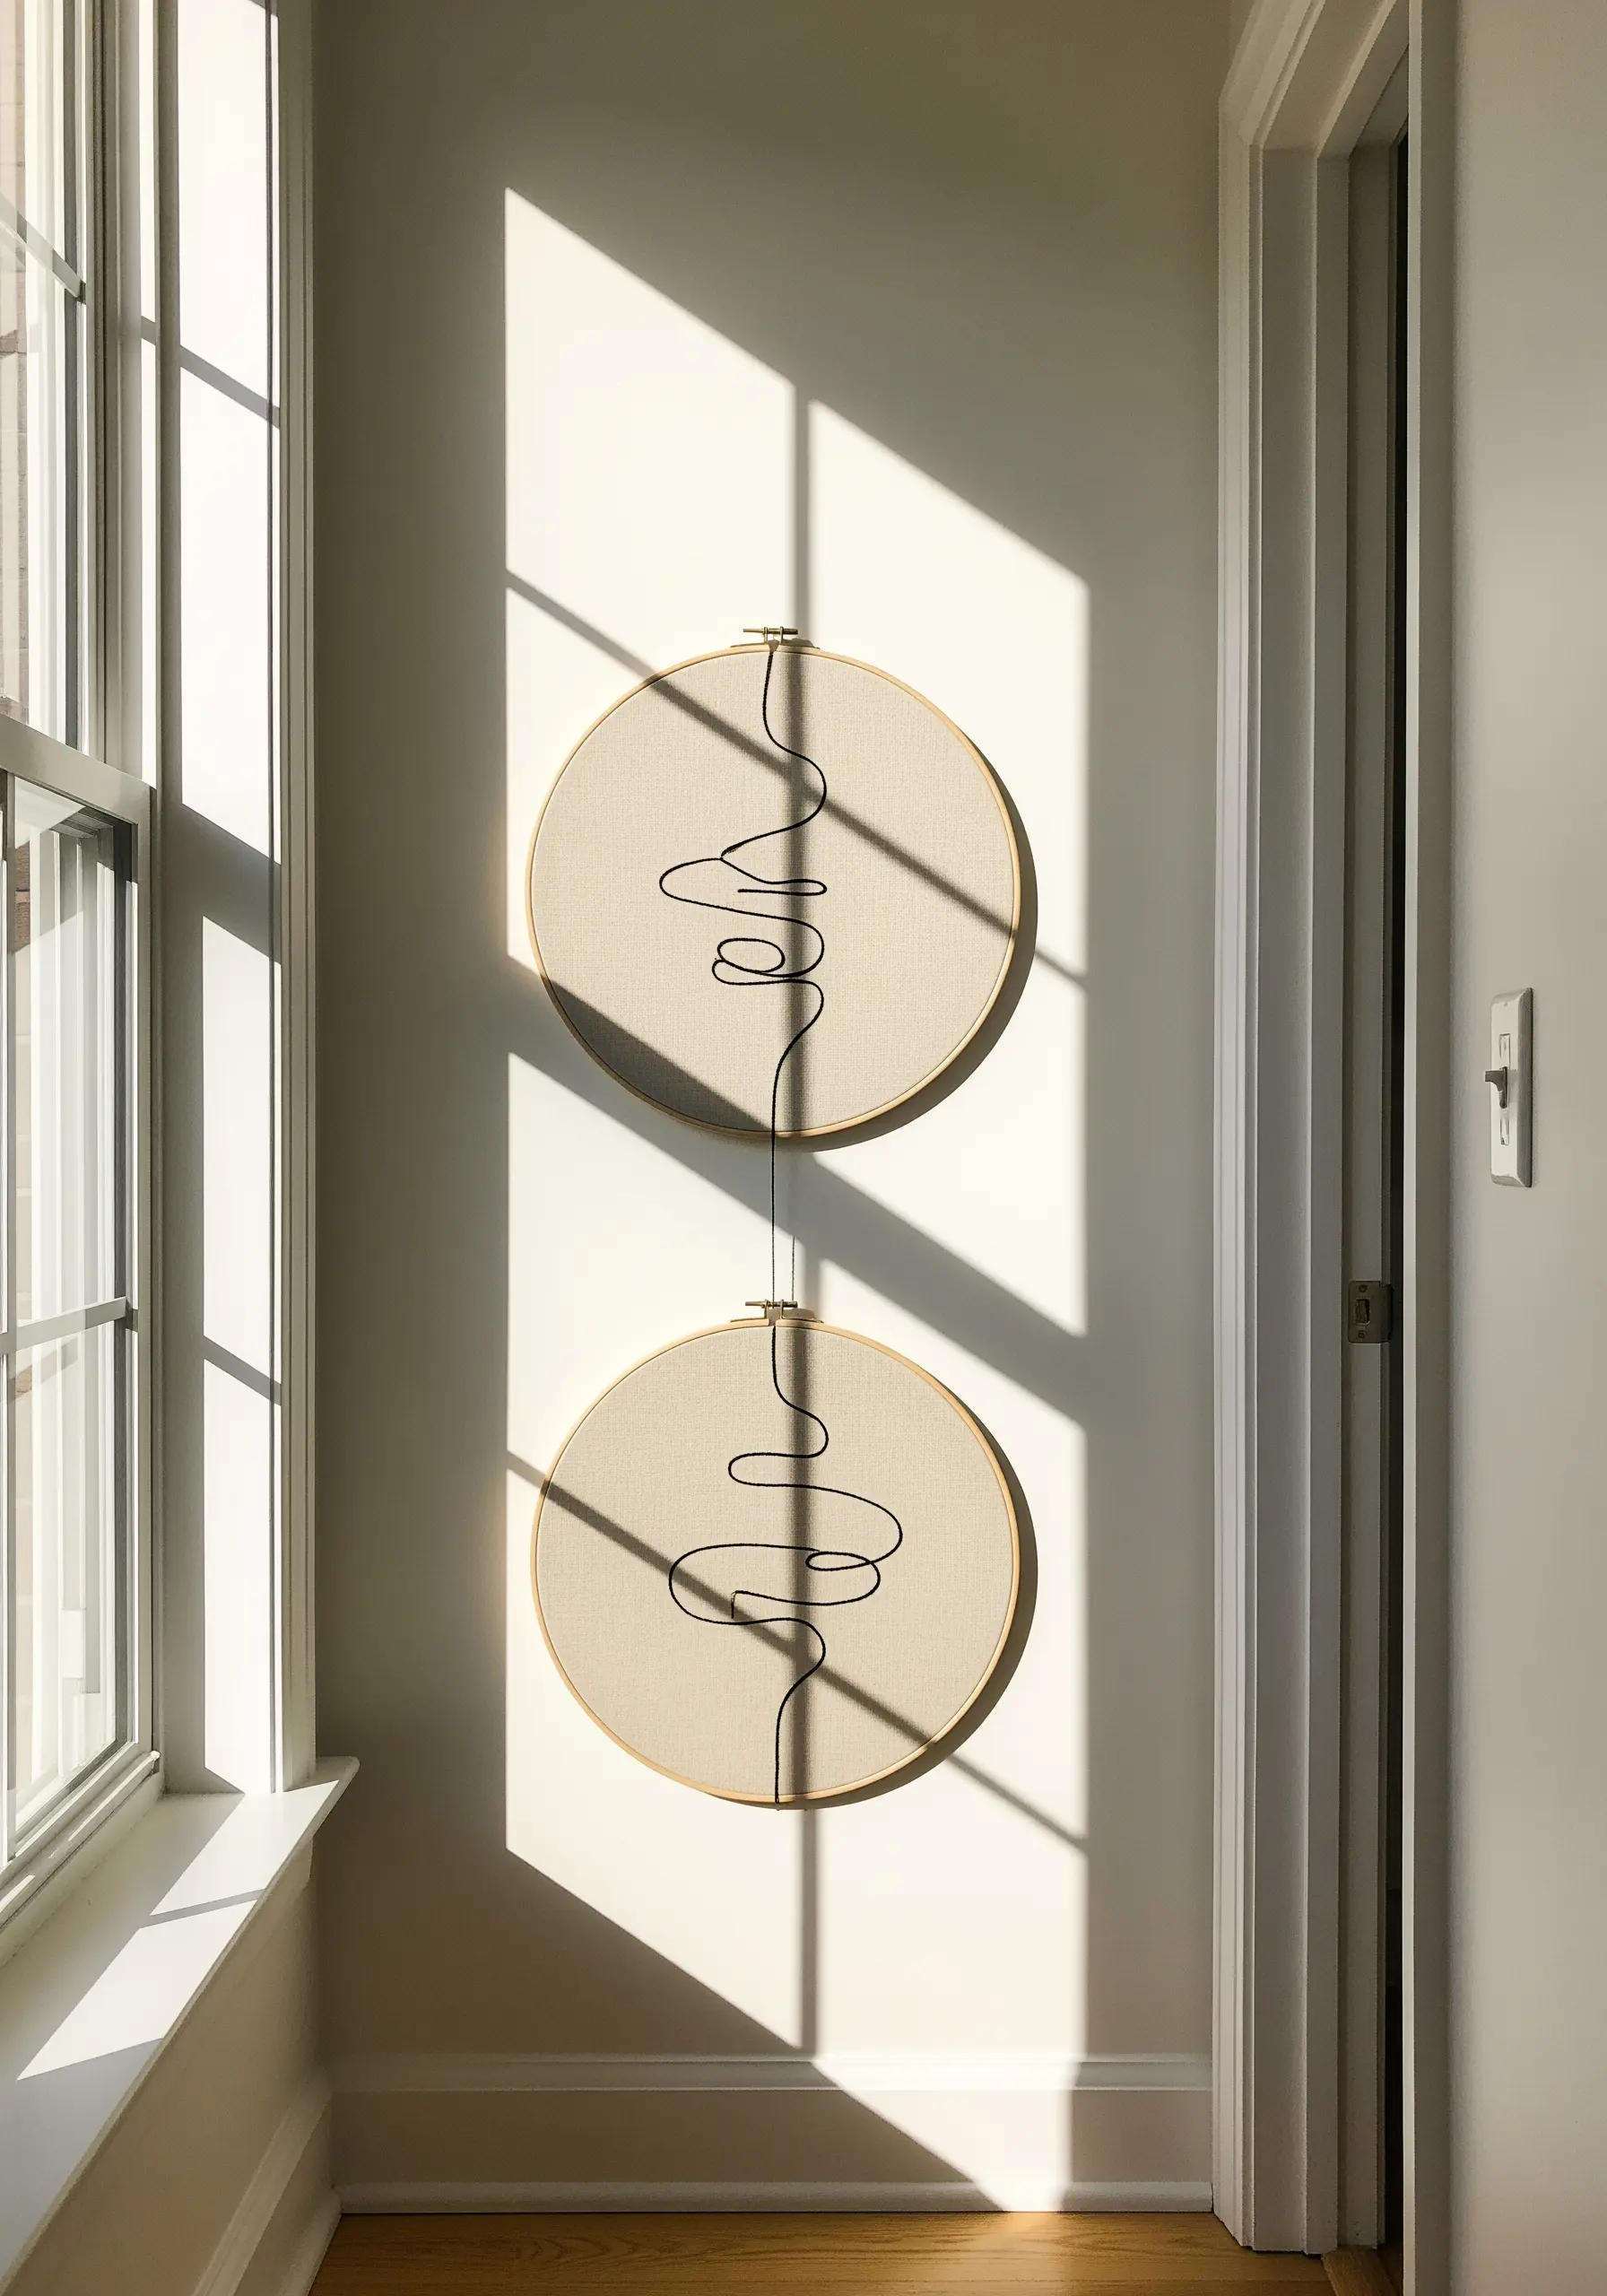
Challenge yourself by creating a design that flows seamlessly across two separate hoops, connected by a single thread.
Lightly draw your continuous abstract line across both pieces of fabric before you begin stitching.
Use a whipped backstitch or stem stitch for a smooth, uninterrupted line that gives the illusion of a single, fluid gesture.
This concept transforms two simple pieces into a unified, thoughtful installation, perfect for capturing emotion in a single stroke.
26. Delicate Stitches on Sheer Fabric

Embroidering on sheer or semi-transparent fabric like organza creates a beautiful, ethereal effect, as if the motif is floating.
To prevent puckering, use a lightweight water-soluble stabilizer on the back while you stitch, then gently wash it away.
Stick to delicate stitches like a single-strand split stitch for outlines and tiny seed stitches for fills.
This technique is perfect for window hangings, where the light can filter through the fabric and highlight your delicate work.
27. Dynamic Texture to Illustrate Natural Forces
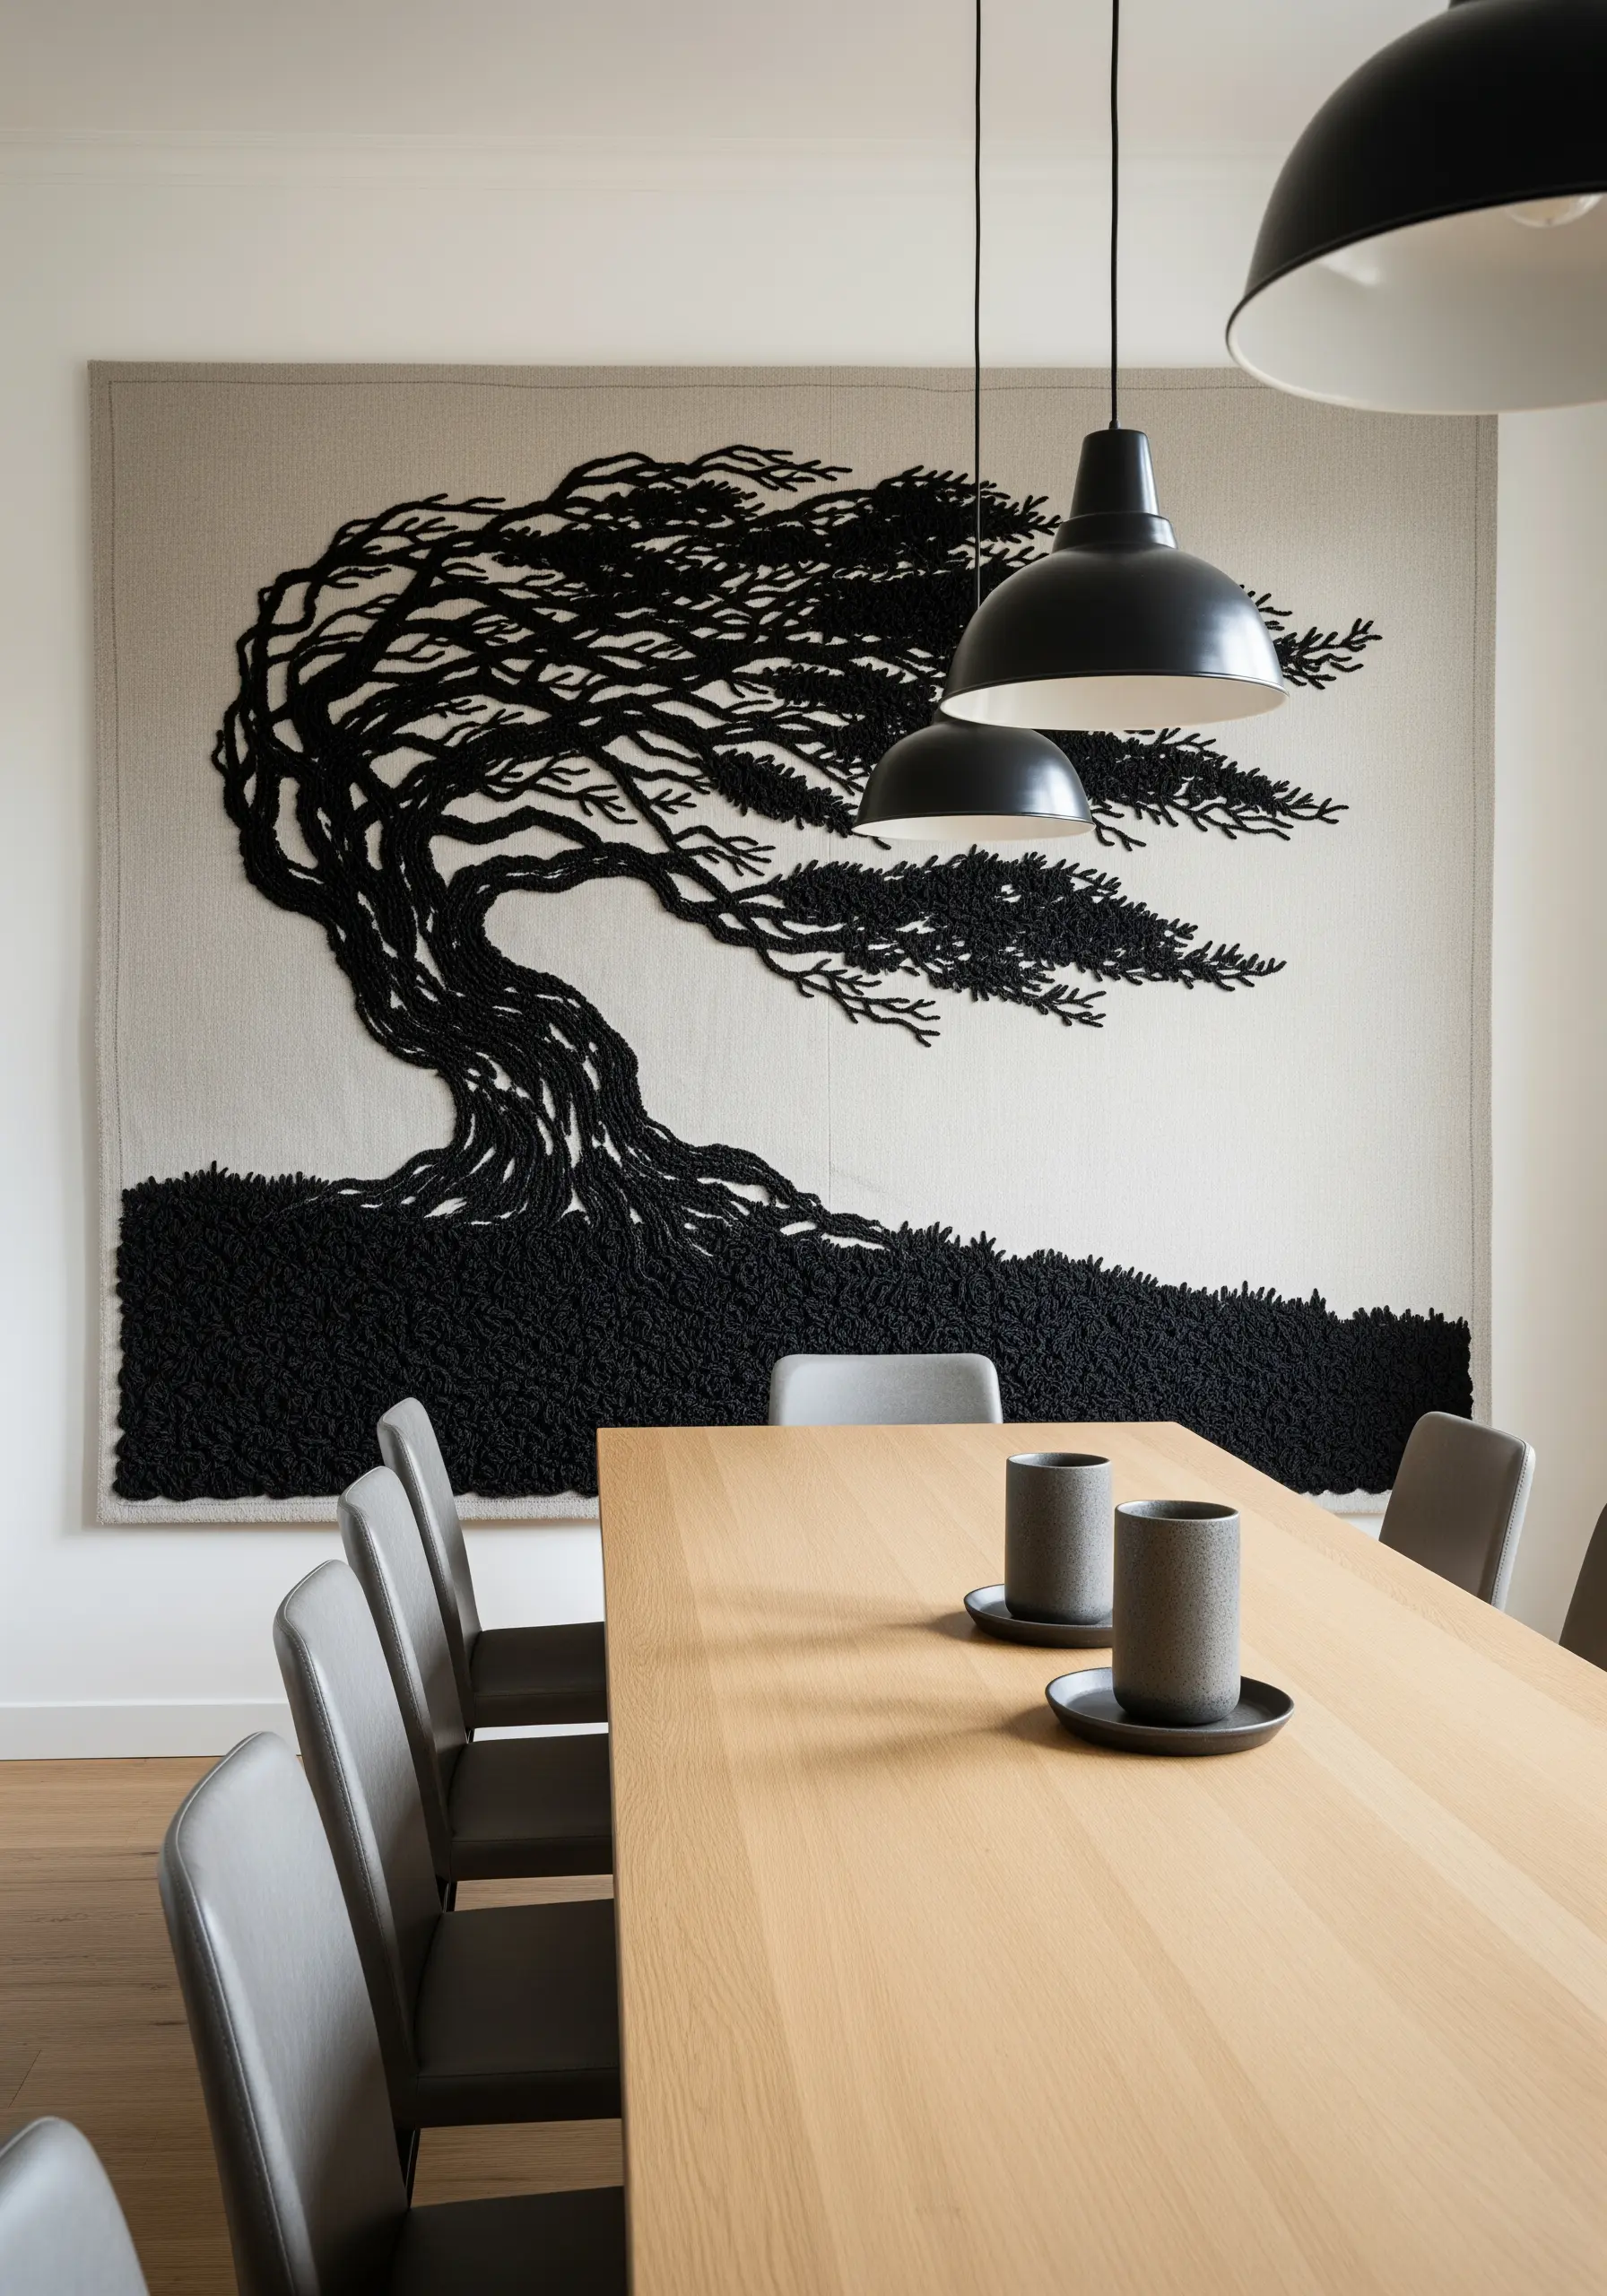
Convey the force of wind by using directional and highly textural stitches.
For the ground, use Turkey work (or Ghiordes knot) and trim the loops to create a dense, rugged texture that anchors the composition.
For the tree’s foliage, use long, chaotic straight stitches, all angled away from the trunk to create a powerful sense of movement.
This combination of texture and direction makes the viewer feel the wind, turning your art into a sensory experience.
28. Personal Data as Minimalist Art

Transform a personal soundwave—like a favorite song clip or a loved one’s voice—into a sleek piece of modern art.
Use vertical satin stitches for the bars, ensuring they are perfectly parallel and evenly spaced for a clean, graphic look.
Mount the finished piece on a canvas or in a long, panoramic frame.
This is the ultimate way to create minimalist embroidery DIYs to add personality to your space, embedding deep personal meaning into a clean, abstract design.
29. Thread Painting for Photorealistic Stone
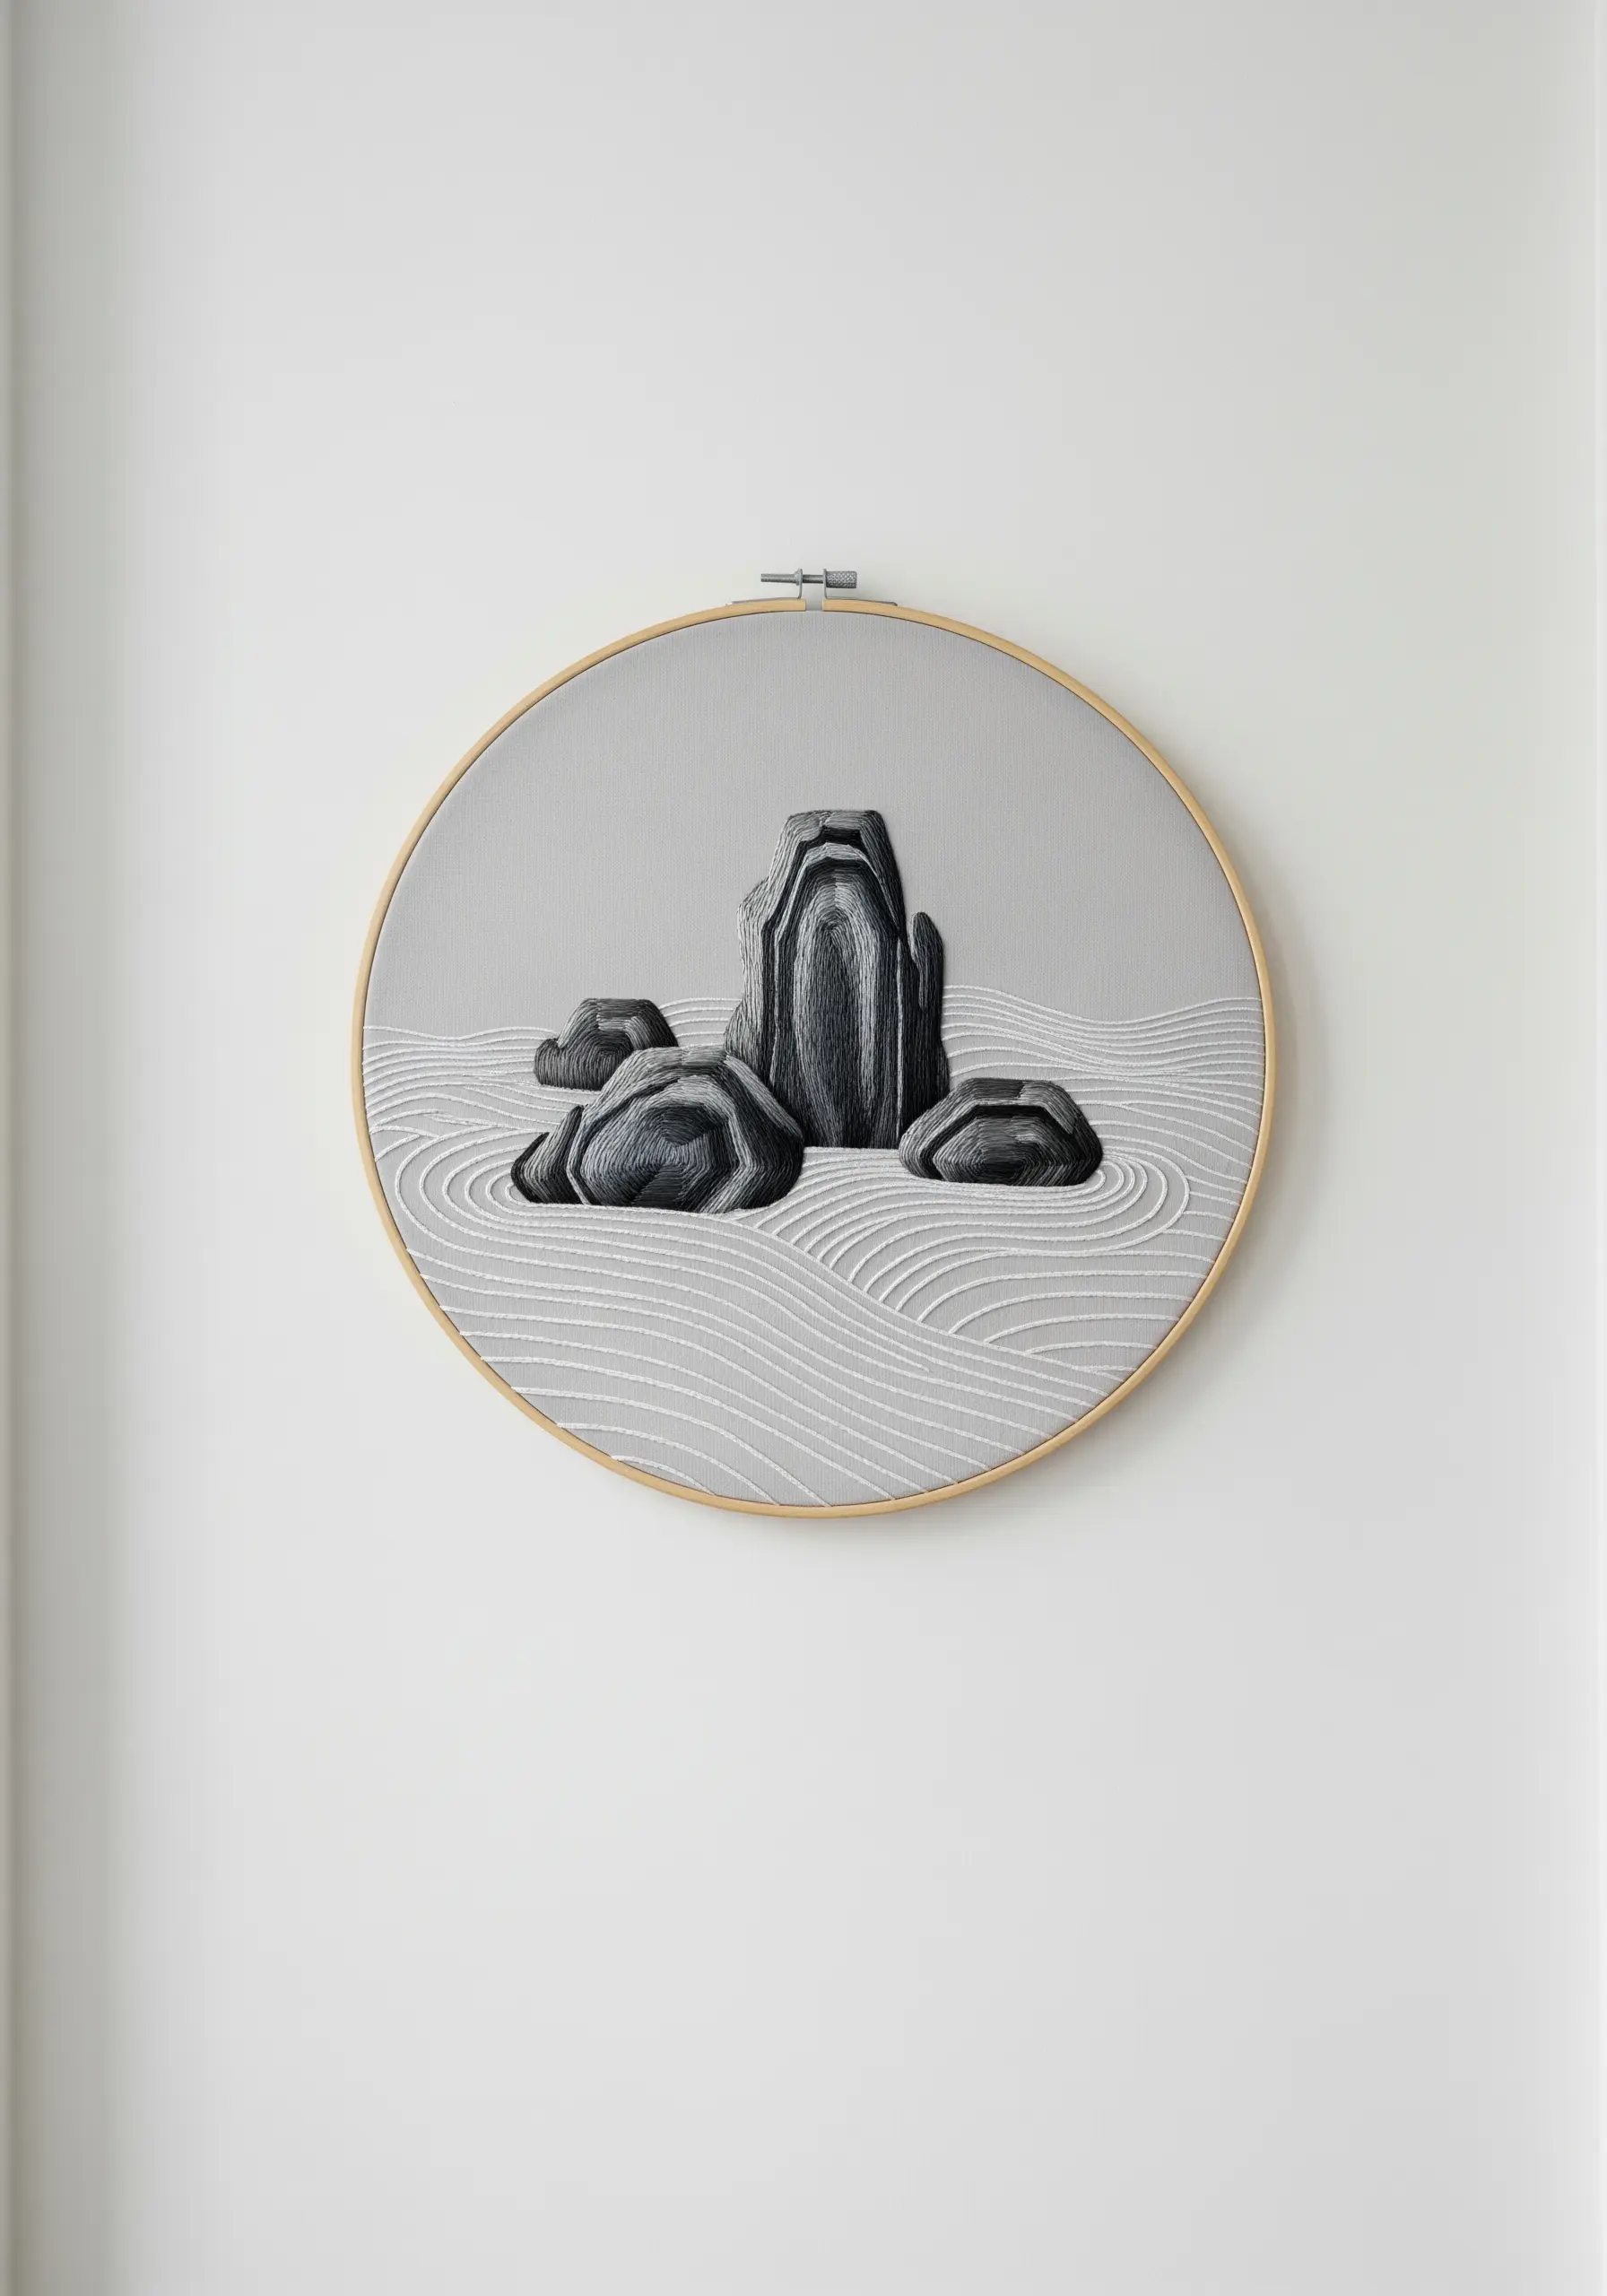
Capture the smooth, weathered texture of Zen garden stones through meticulous thread painting.
Use several shades of grey and a touch of black, working with a single strand of floss.
Blend the colors with long-and-short stitch, following the contours of the rocks to create highlights and shadows.
Contrast the smooth rocks with the simple, graphic lines of the raked sand, created with precise, parallel rows of white backstitch.
30. The Meditative Power of Seed Stitch Fill

For a large, solid shape, resist the urge to use satin stitch. Instead, fill it with thousands of tiny seed stitches.
Work with a single strand of floss and make small, straight stitches in random directions, slowly building up a dense, uniform texture.
The process is incredibly meditative, and the result is a surface with a subtle, velvety texture that absorbs light beautifully, unlike the high sheen of satin stitch.
It’s a perfect technique for creating neutral mandala embroidery patterns that invite calm reflection.
31. A Curated Collection of Abstract Marks
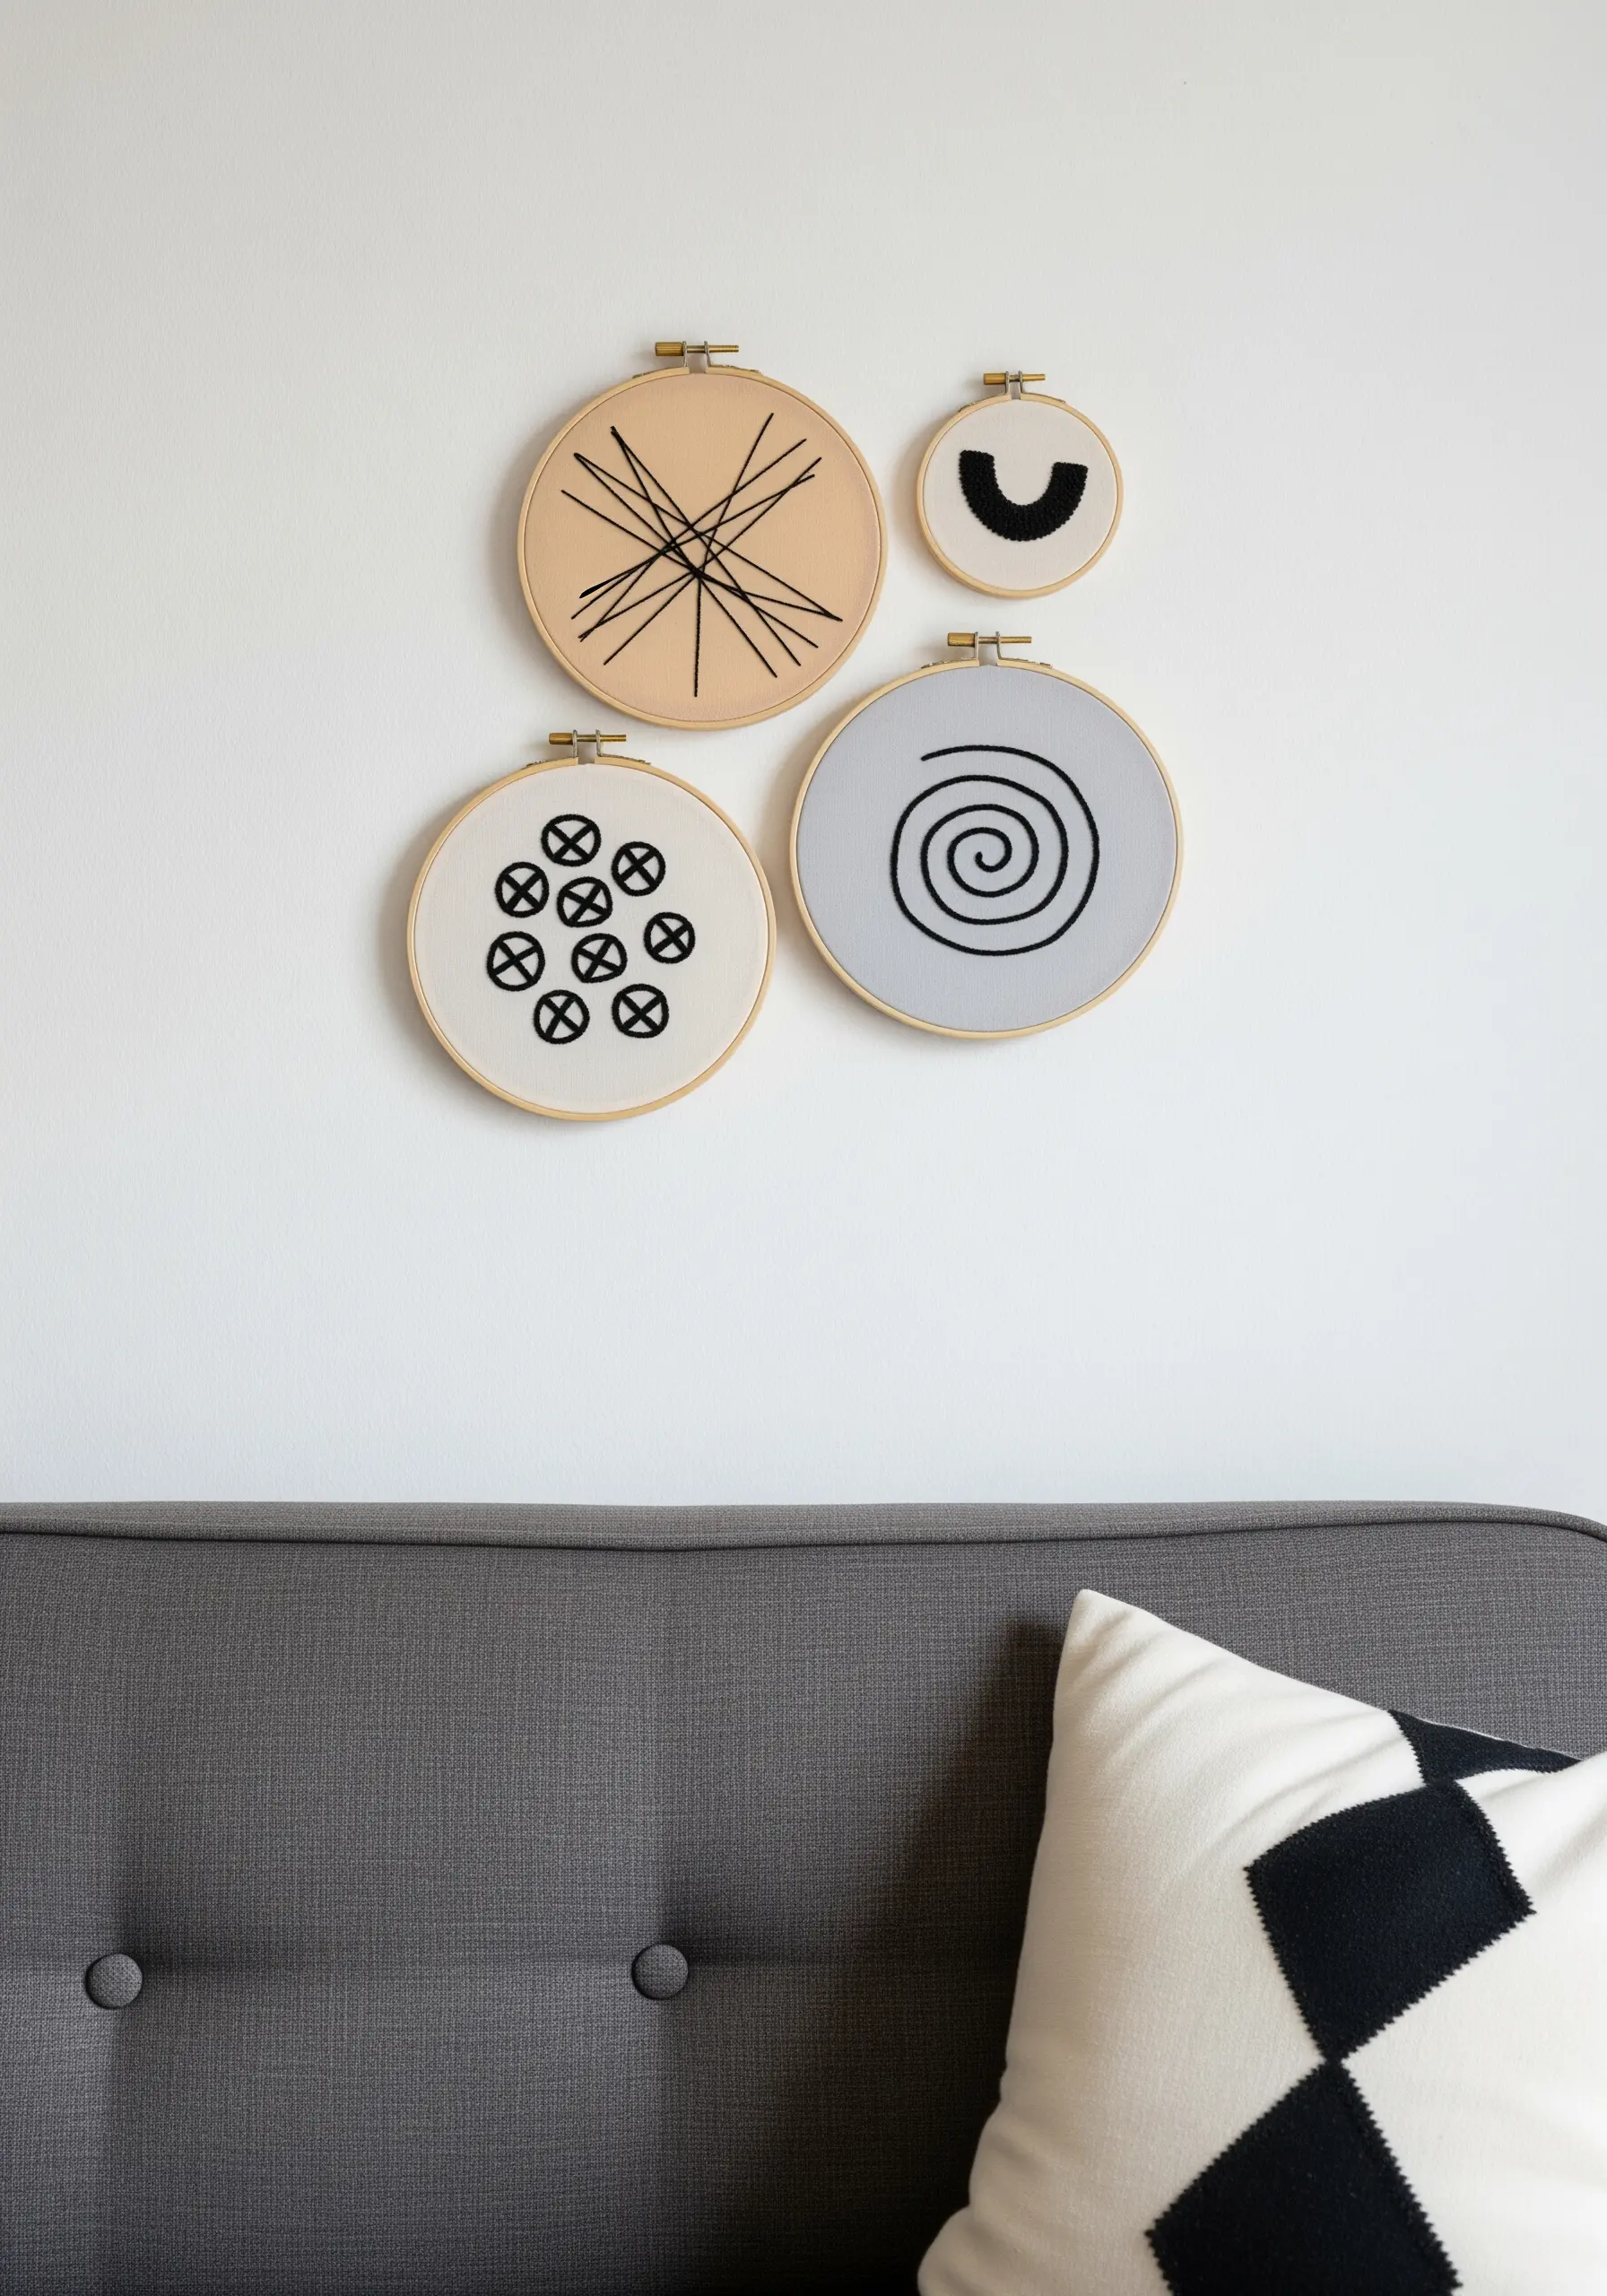
Create a sophisticated gallery wall by stitching a series of small, abstract symbols or marks, each in its own hoop.
The key is variation within a set of constraints: use the same black thread and neutral fabrics, but explore different compositions—a spiral, intersecting lines, a cluster of marks.
Arranging these abstract hoop art concepts together creates a dialogue between the pieces, making the whole greater than the sum of its parts.
32. Light-Catching Ripples with Metallic Thread
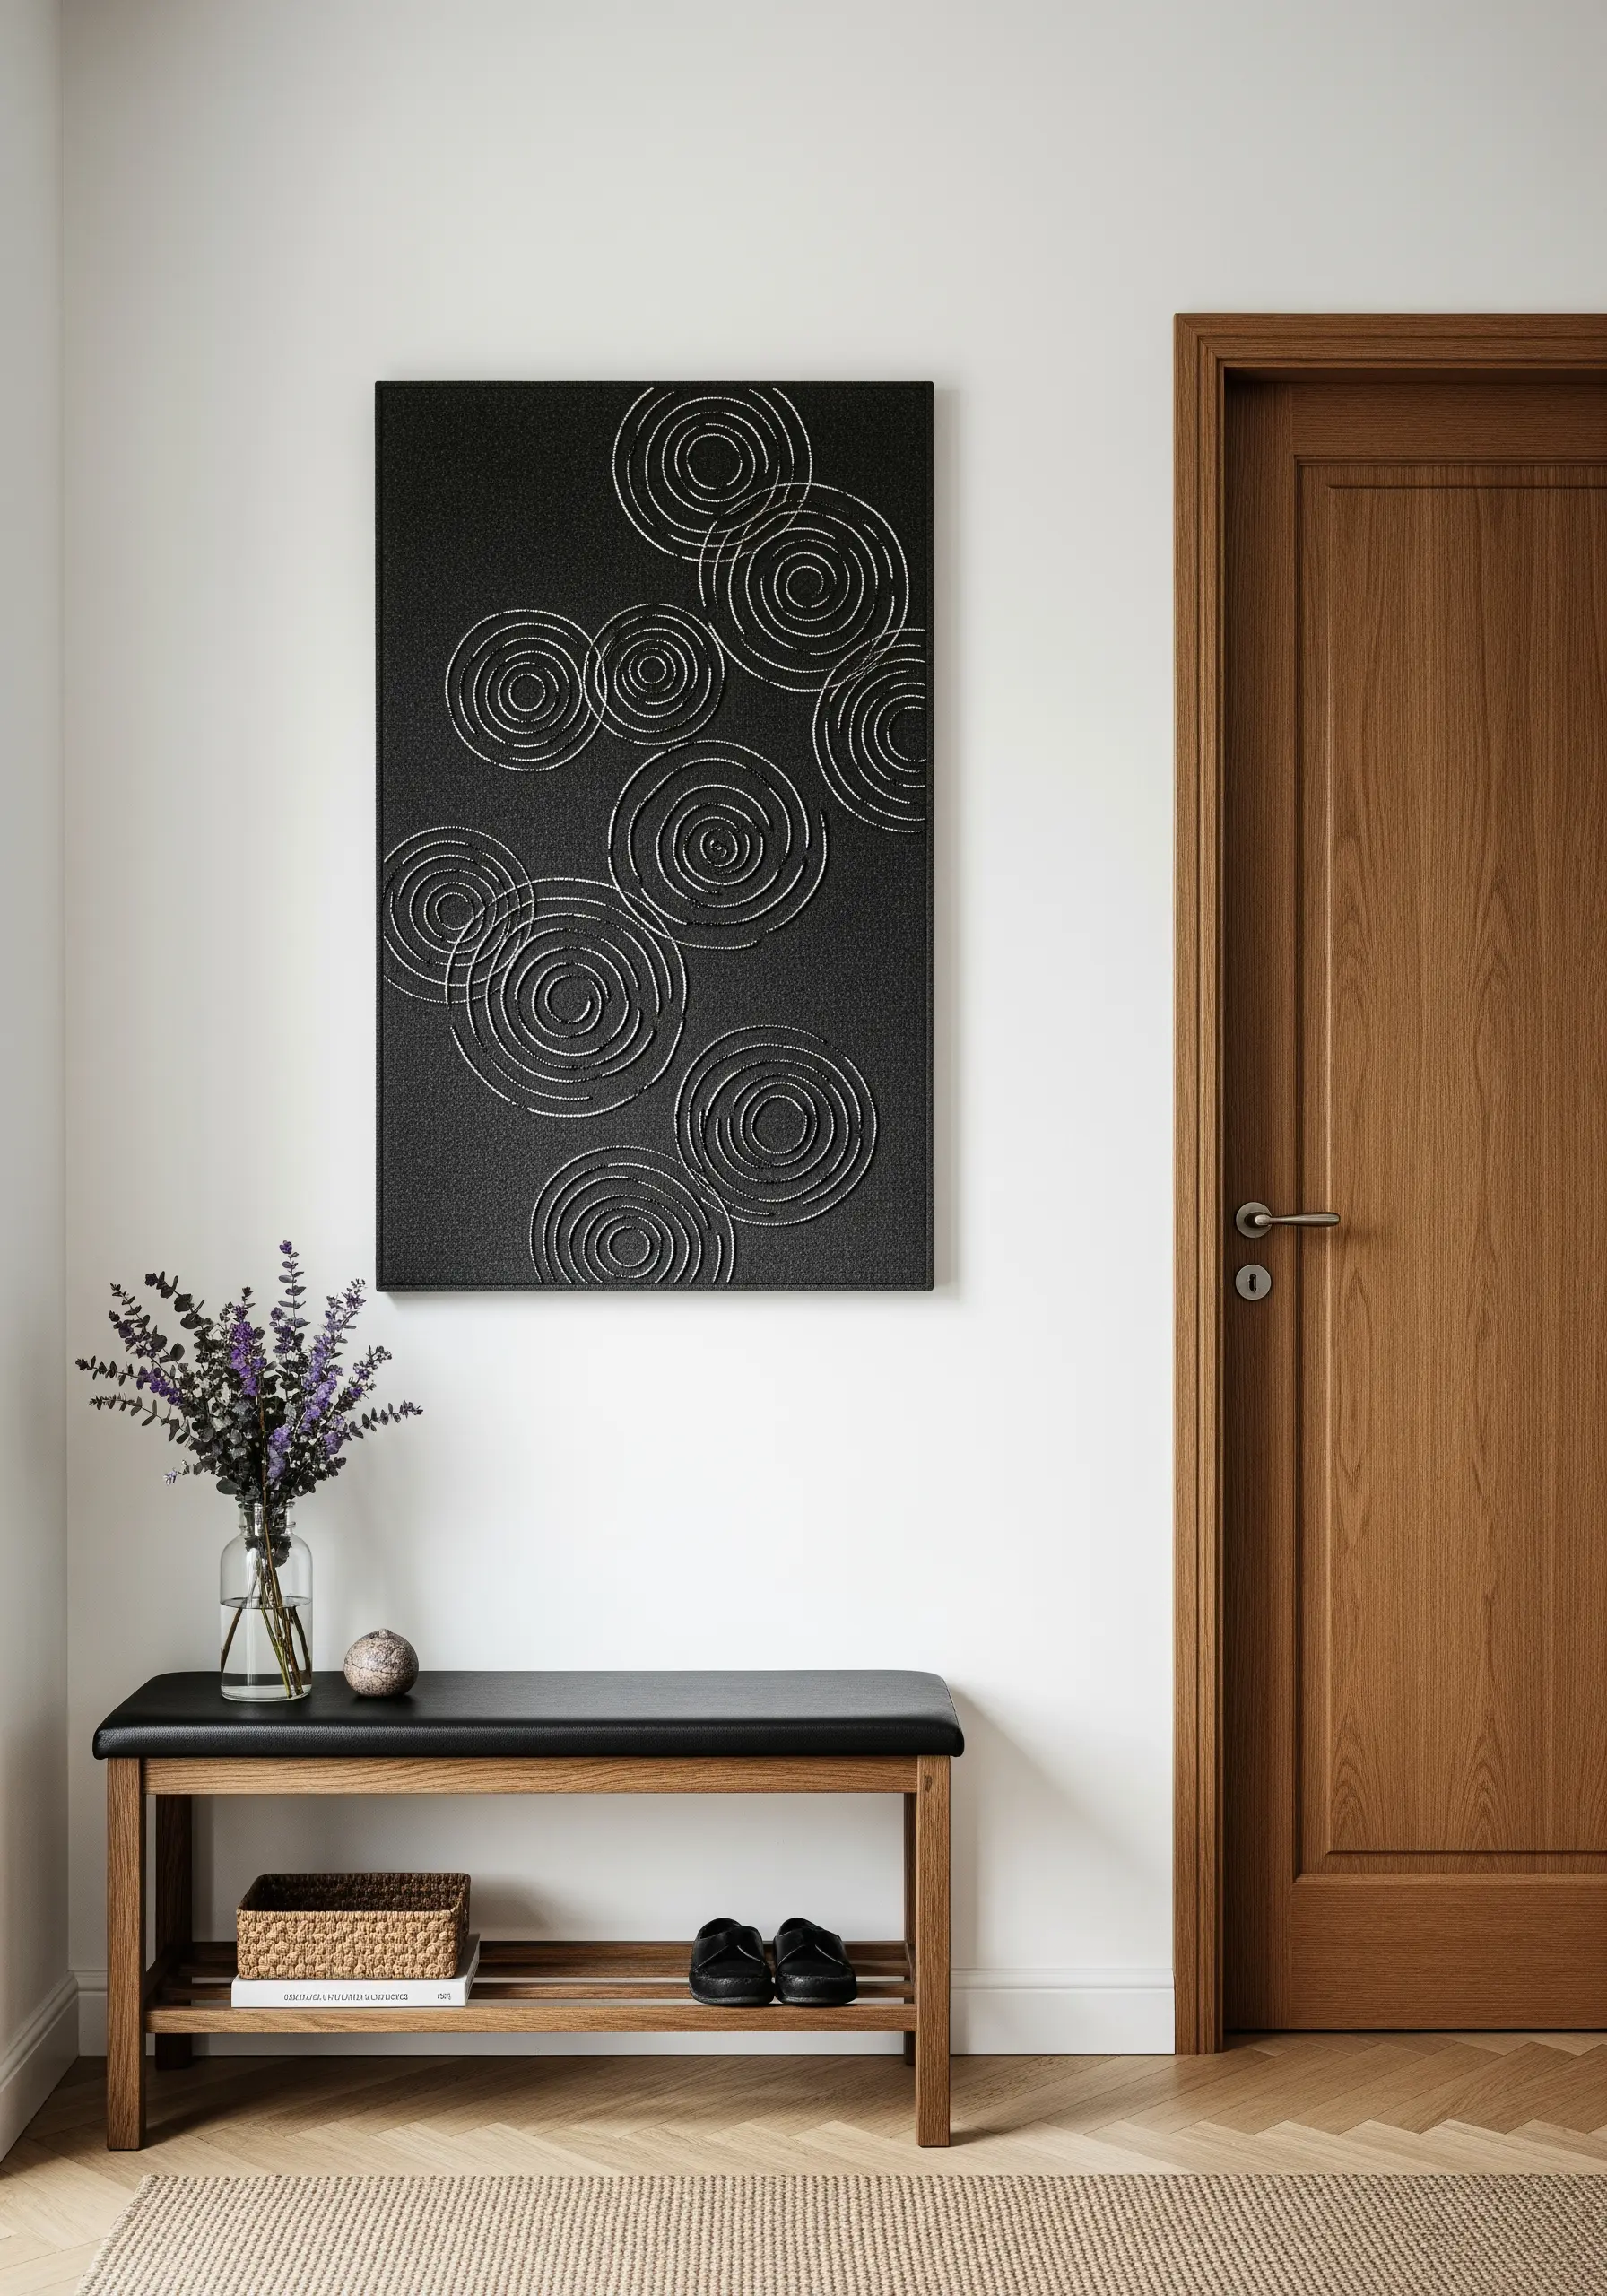
Mimic the shimmer of light on water by using a fine metallic thread on a dark, matte fabric.
Stitch concentric, slightly irregular circles using a simple backstitch or running stitch.
The magic happens when light hits the piece; the metallic thread will catch it, creating a subtle, dynamic glimmer that changes as the viewer moves.
These abstract metallic thread projects add a touch of understated glamour to a minimal aesthetic.
33. Minimalist Seascapes with Horizontal Stitches
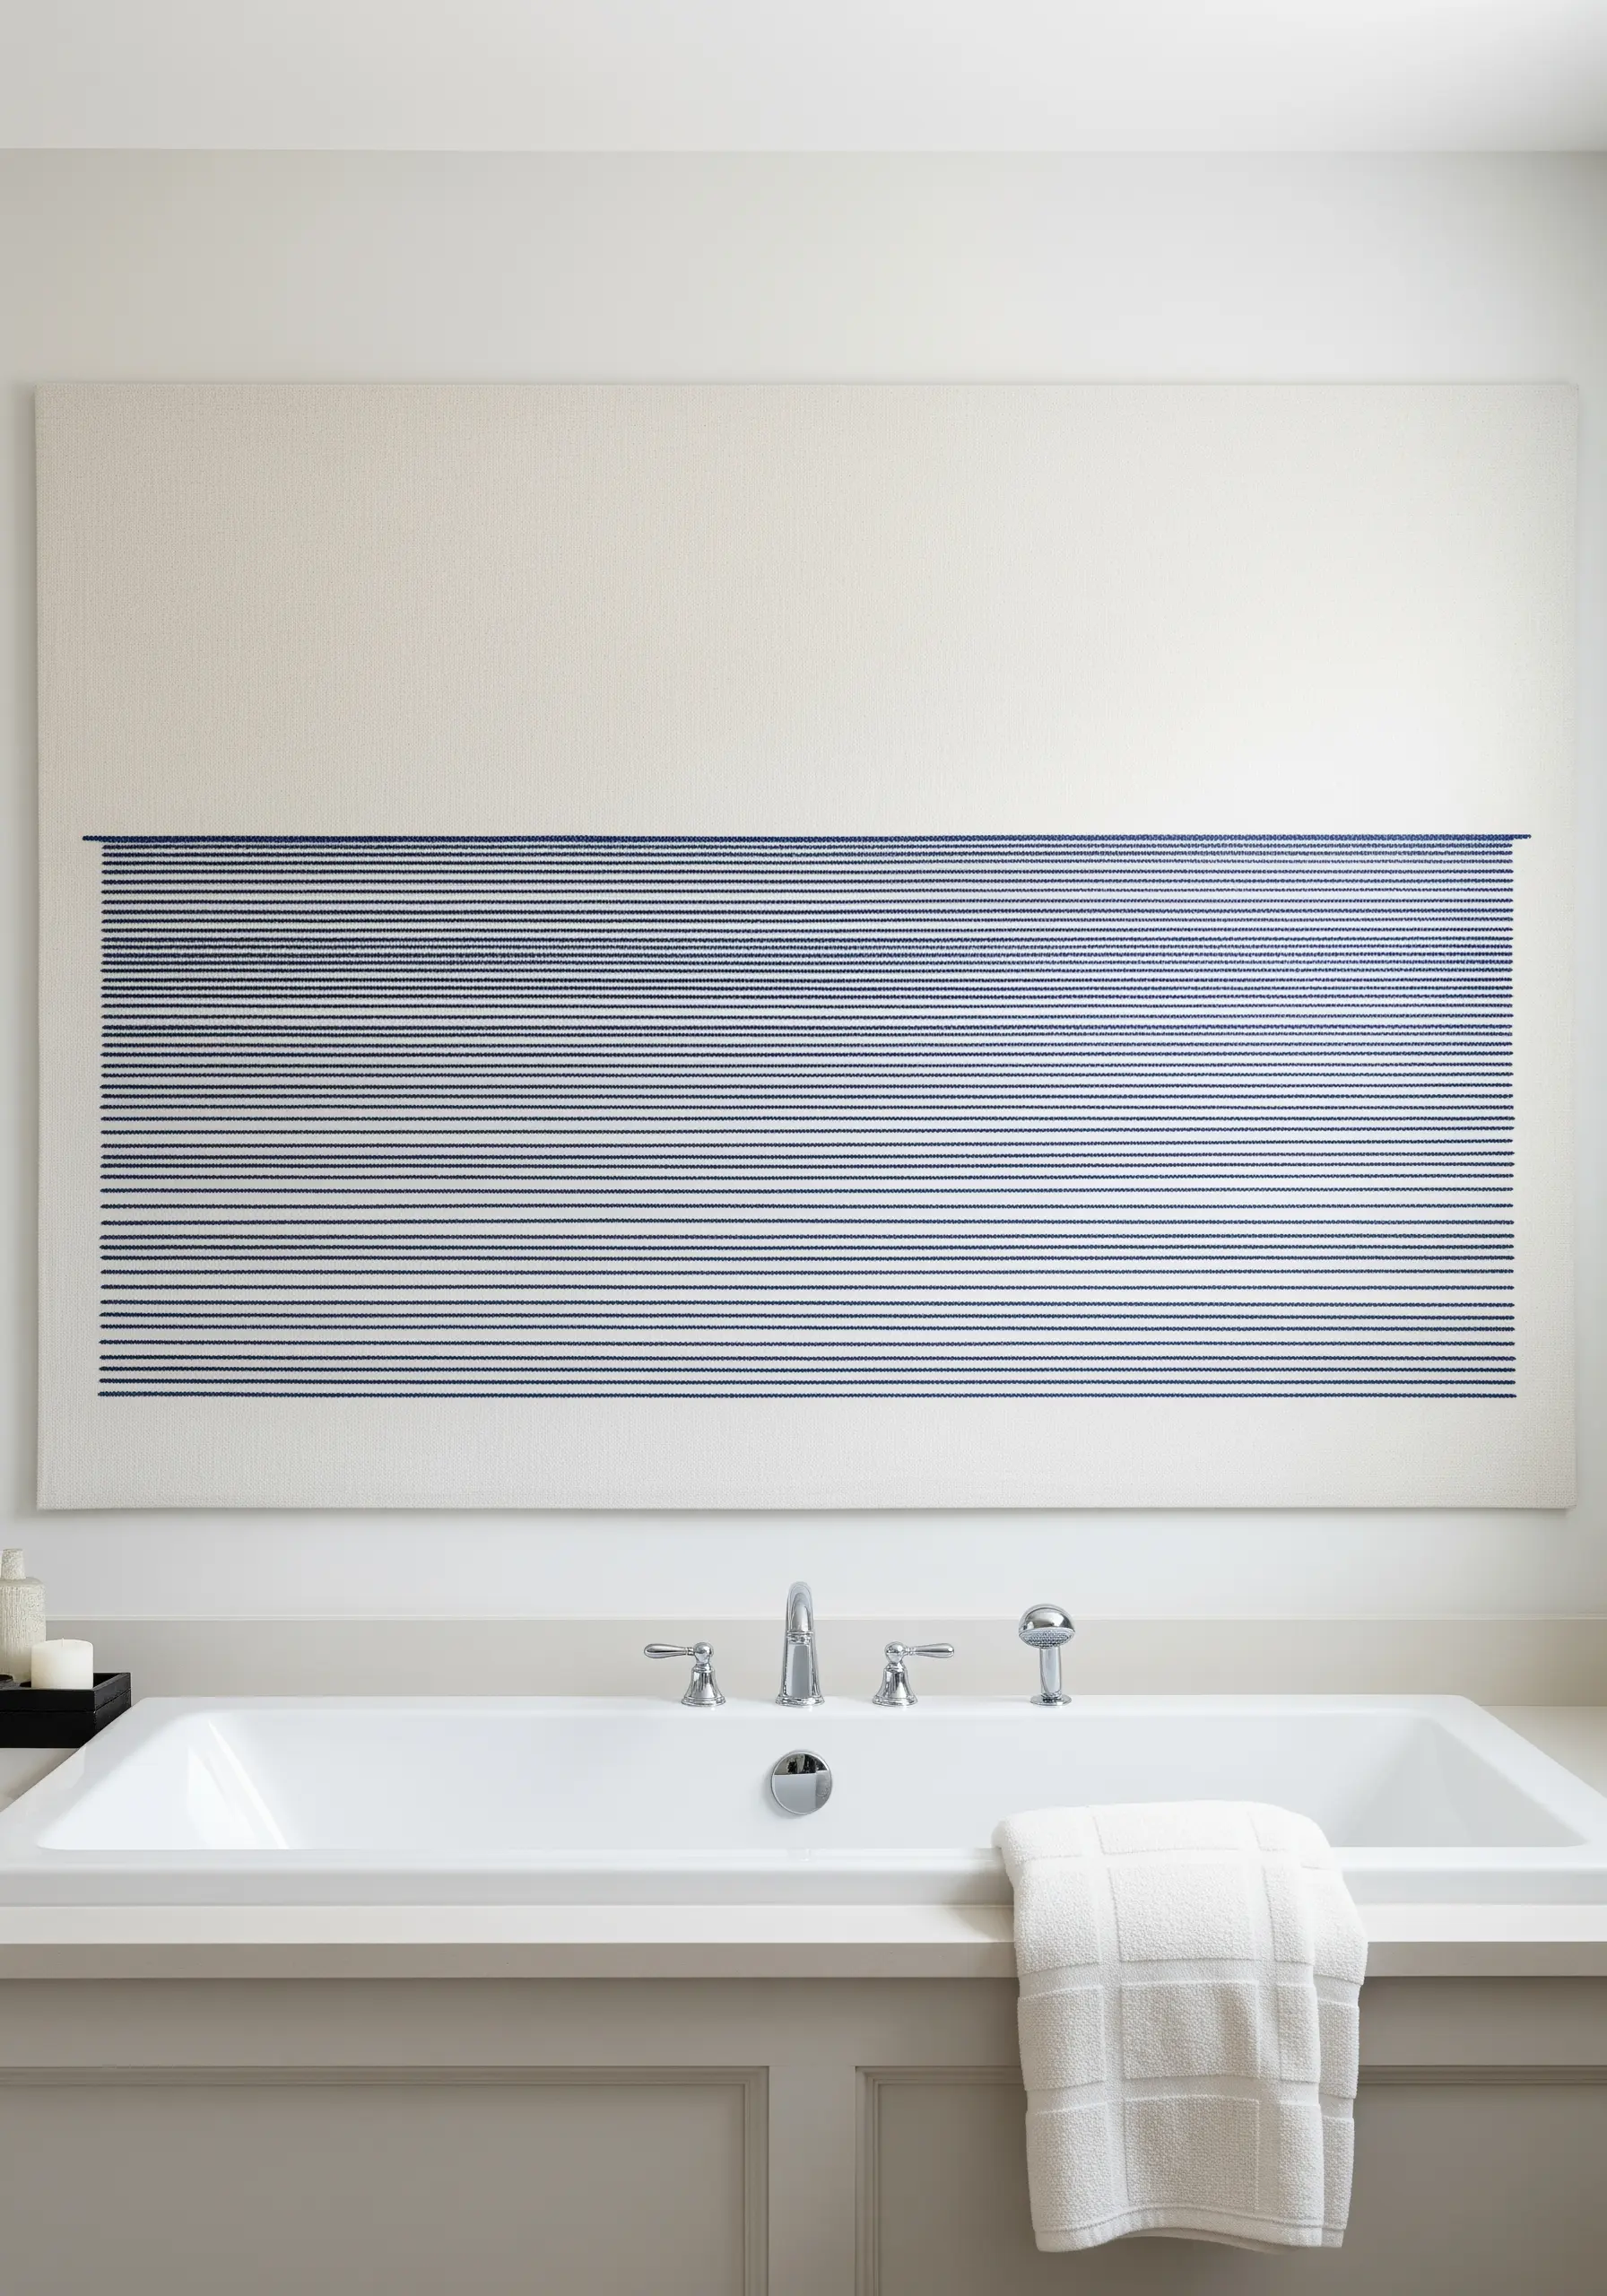
Suggest a serene horizon or seascape using nothing but parallel horizontal stitches.
Use a single color thread and focus on varying the density and length of your running stitches or straight stitches.
A dense band of stitches can represent water, while sparser, longer stitches above can suggest the sky.
This exercise in restraint results in a deeply calming and sophisticated piece of art, perfect for a tranquil space.
34. Playful Graphics with Couched Yarn Outlines
For a bold, graphic style with a playful feel, outline your shapes with thick yarn.
Lay down a chunky black yarn along your design lines and use a single strand of matching embroidery floss to couch it in place with small, discreet stitches.
This technique creates a clean, strong outline that has a soft, friendly quality, making it ideal for children’s spaces or adding a touch of whimsy to a modern room.
35. A Monochrome Medley of Patterned Fills
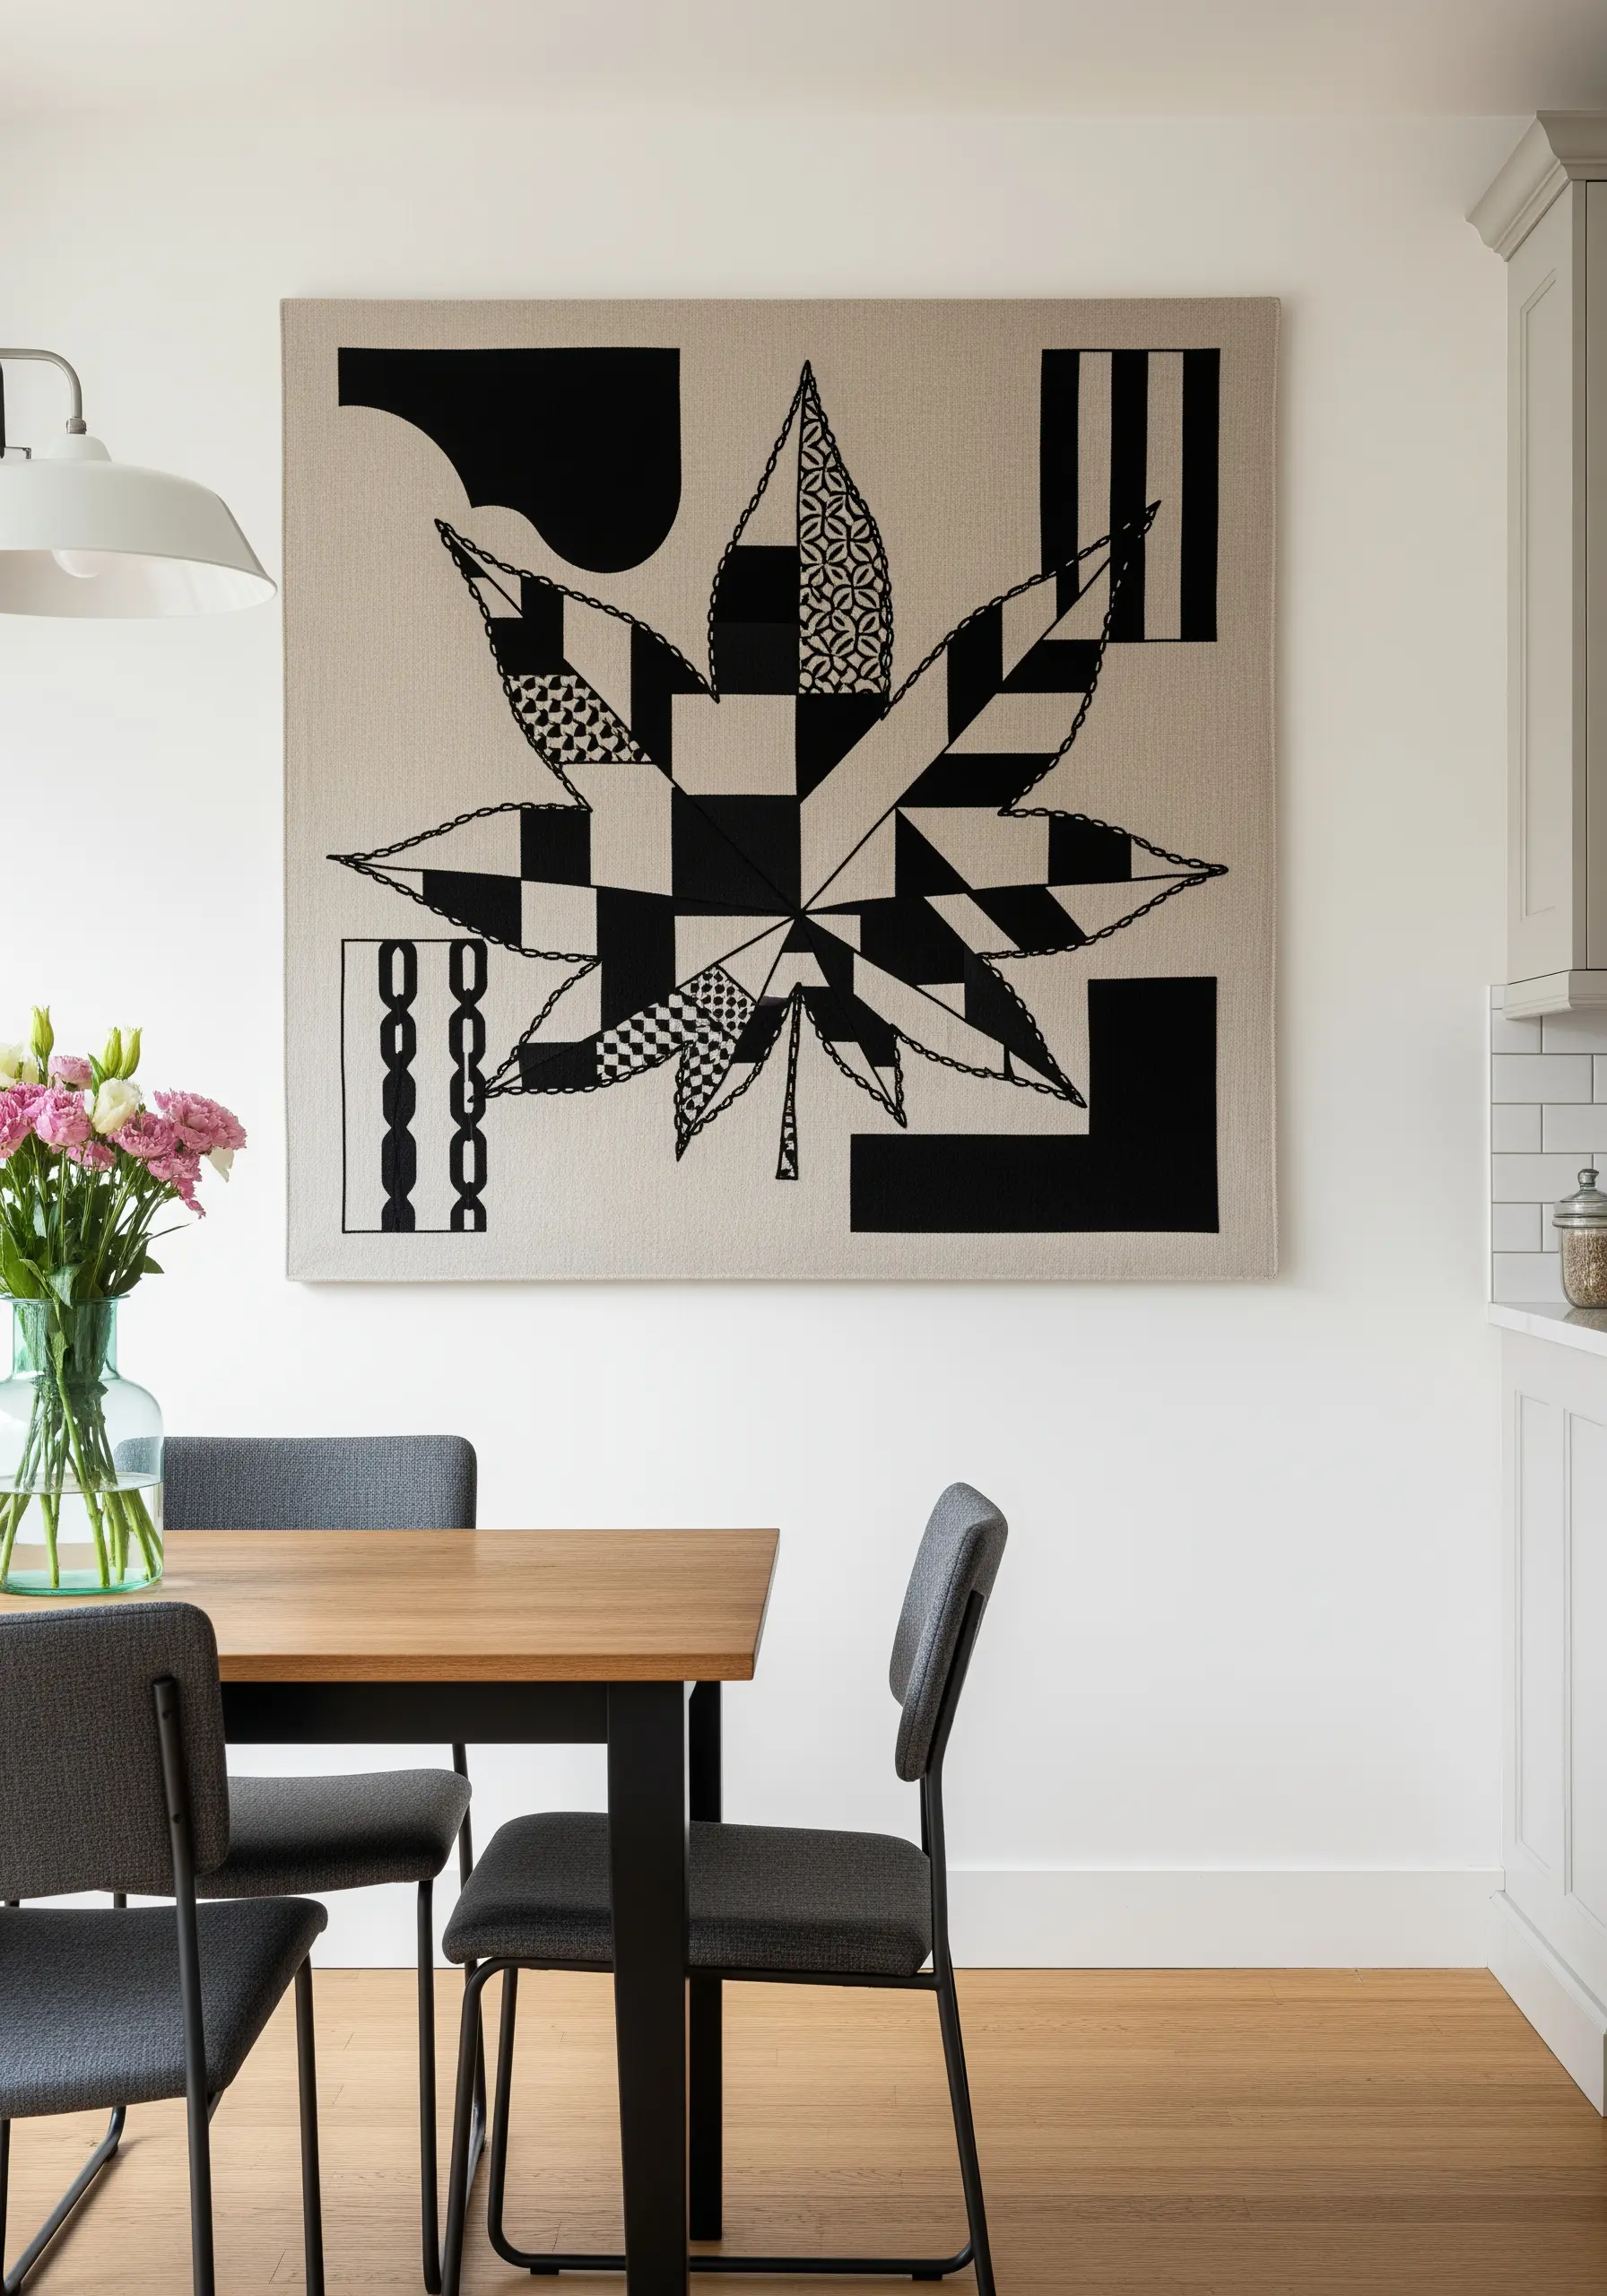
Turn a single, large motif into a showcase of pattern and texture.
Divide the shape—like this maple leaf—into a grid or geometric sections.
Fill each section with a different classic black-and-white pattern: checkerboards using satin stitch, stripes using running stitch, dots using French knots, and woven effects using darning stitch.
This approach transforms a simple outline into a rich visual tapestry, perfect for lovers of detailed abstract thread pattern mashups.


