

Have you ever held your embroidery hoop, thread poised, and felt a gap between the beautiful image in your mind and what you think you can create? You have the patience and the love for the craft, but you want your finished pieces to feel less like a hobby and more like art—intentional, polished, and deeply calming to both make and behold.
Let’s shift our focus from just choosing a pattern to choosing a technique. The secret to elevating your work isn’t about mastering hundreds of complex stitches; it’s about understanding how to use a few simple ones with intention. It’s knowing that angling your satin stitch can create the illusion of a rolling hill, that reducing your thread count can build atmospheric fog, or that a single line of backstitch can carry more elegance than a riot of color.
These projects are designed to bridge that gap. They are an invitation to explore how texture, color harmony, and composition can turn a simple needle and thread into a tool for creating tranquility. Here, you will find not just inspiration, but the clear, practical steps to help you stitch a space that feels as serene and beautiful as the nature that inspires it.
1. Render Serene Landscapes with Directional Stitching
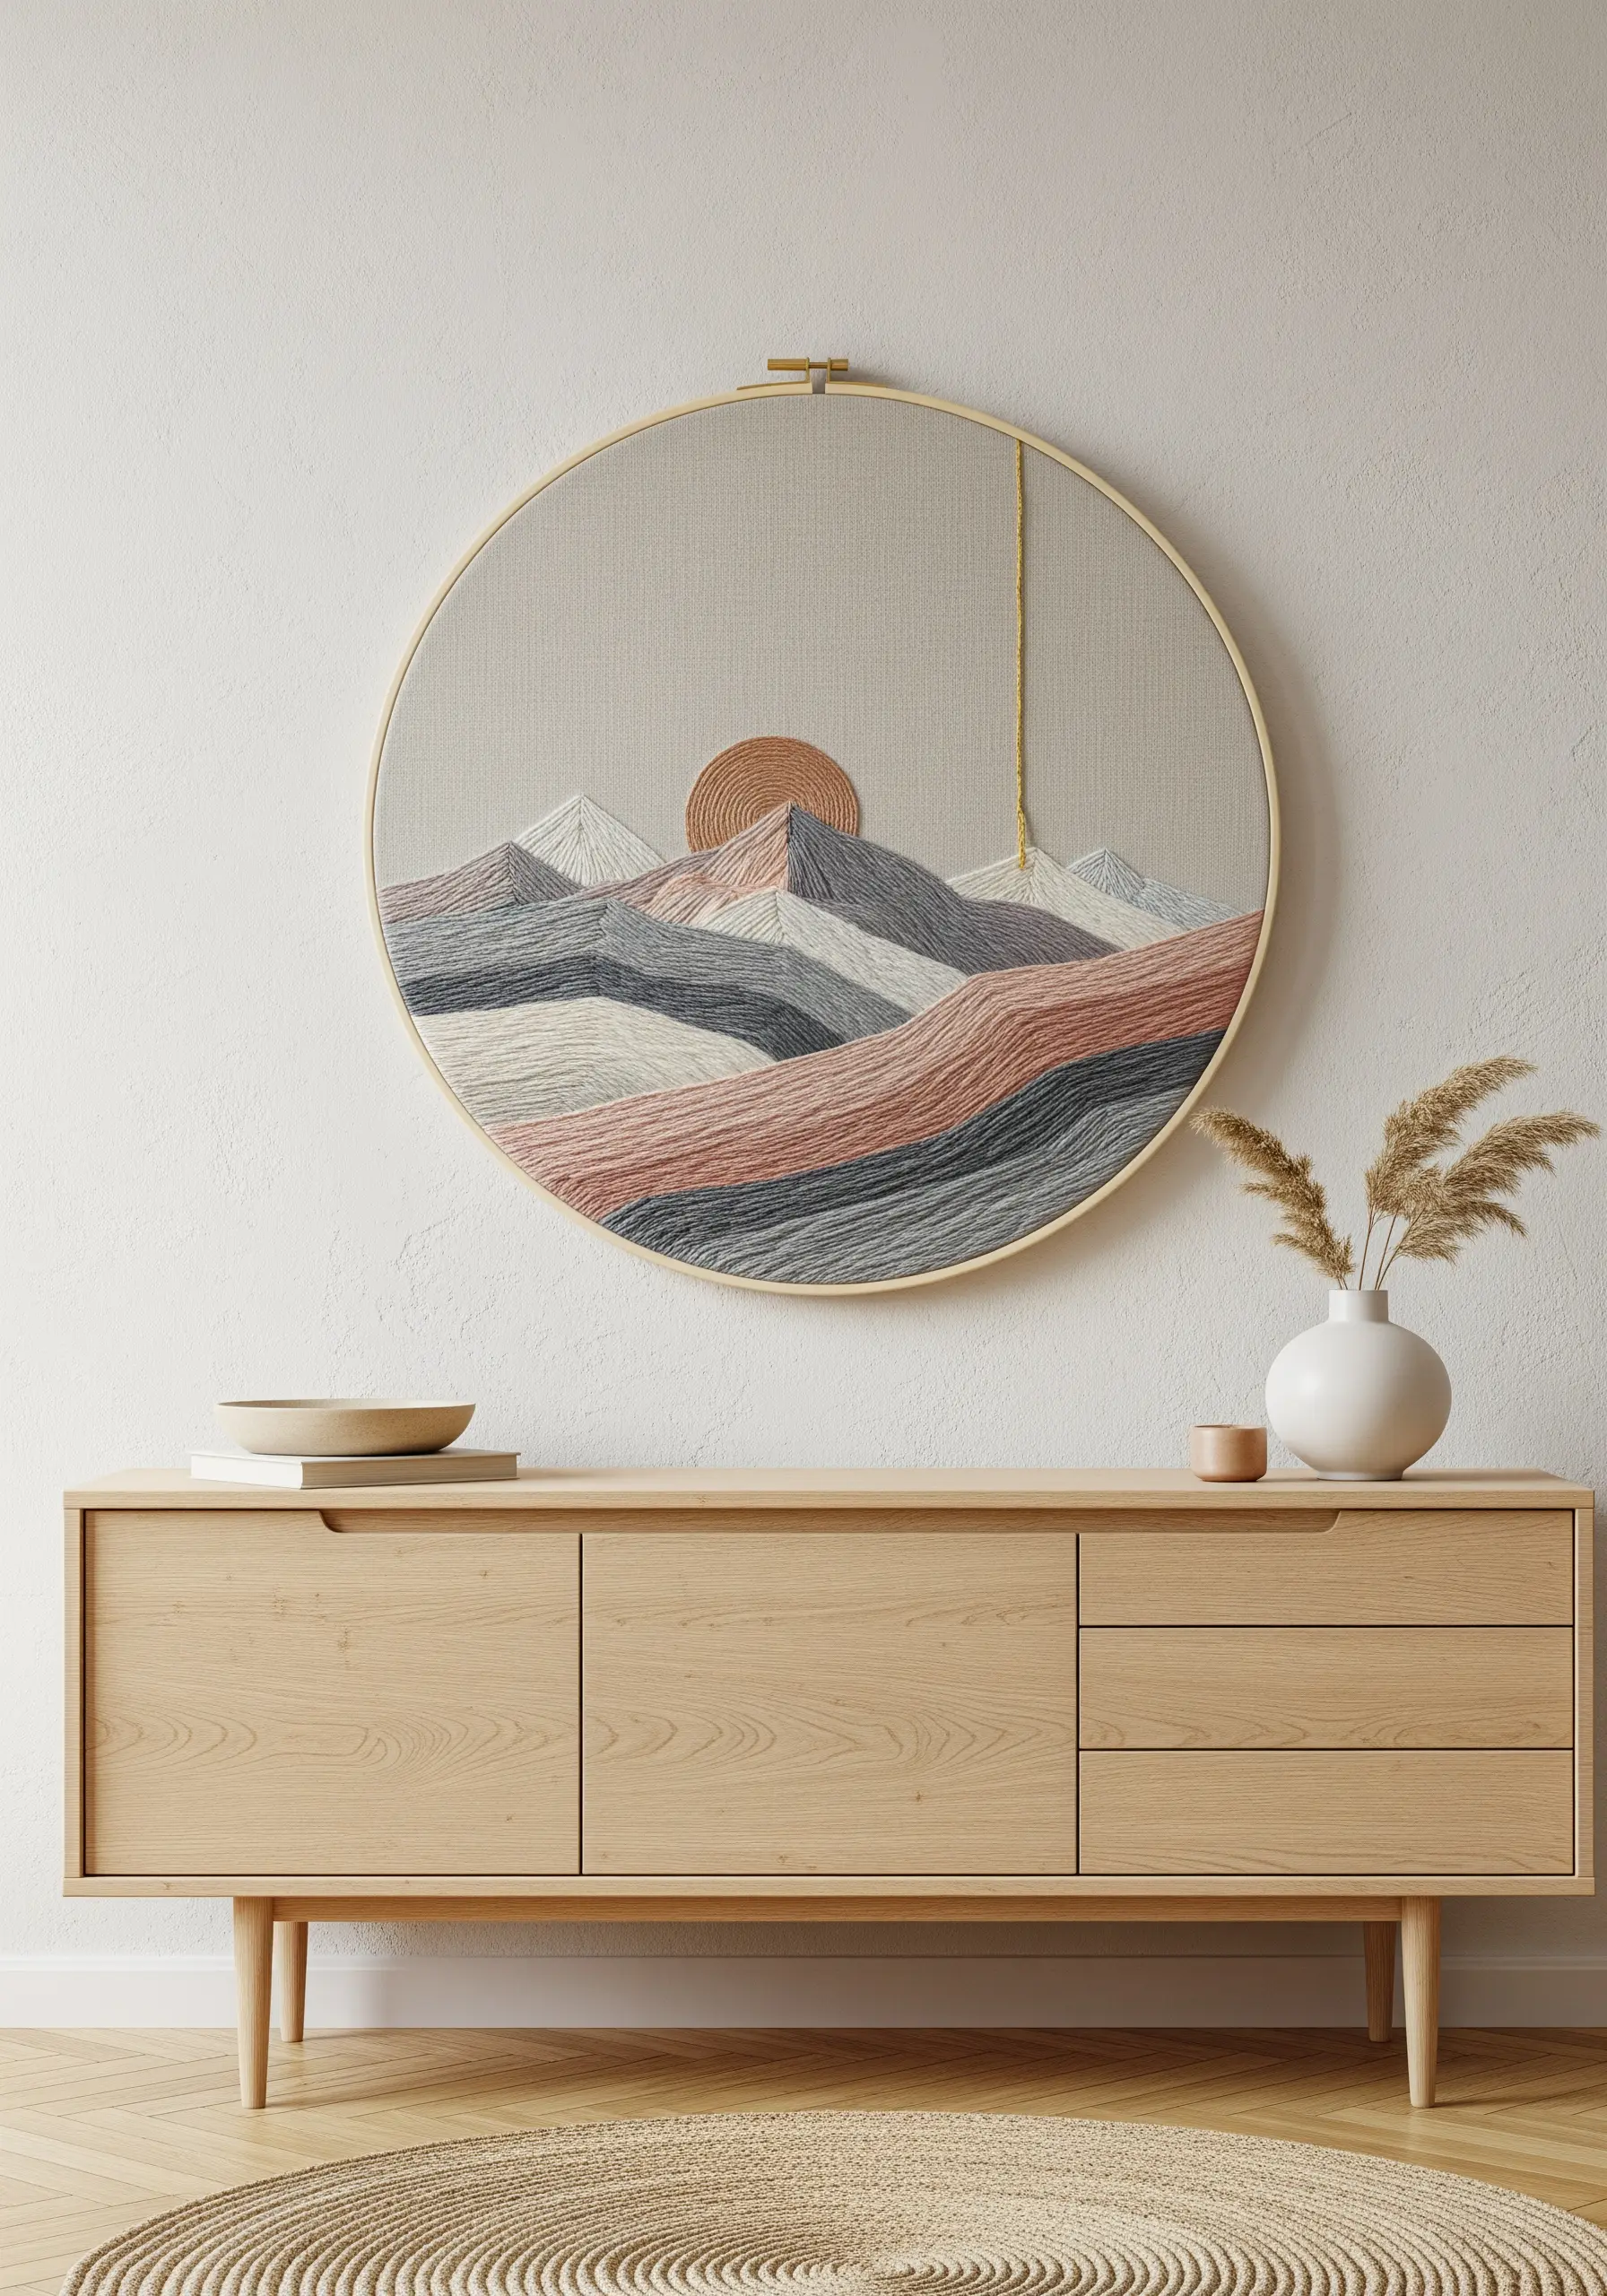
Create a sense of calm and depth in your mountain scenes by using a single, foundational stitch: the satin stitch.
Instead of filling each shape uniformly, angle your stitches to follow the natural contours of the hills and peaks.
This simple adjustment creates visual movement and mimics the way light falls across a landscape, adding realism without complexity.
For the sun, use a tightly packed spiral of split stitch with a single strand of metallic thread to create a focal point that gently catches the light.
The key is a tightly edited color palette—stick to dusty rose, slate blue, and soft grays to maintain a tranquil, cohesive aesthetic for your calm, zen-inspired interiors.
2. Elevate Line Art with Botanical Simplicity

To achieve this clean, illustrative style, focus on the purity of a single line.
Use a two-strand stem stitch or backstitch for your botanical motifs; this provides a slightly raised, rope-like texture that feels more substantial than a simple running stitch.
The elegance of this design lies in its restraint. Resist the urge to add color fills, and instead, let the negative space become an active part of the composition.
When creating a triptych, ensure visual harmony by using the same thread color and weight for each piece, and maintain consistent spacing when you arrange them on the wall.
This approach turns simple sketches into minimal embroidery wall pieces that feel both modern and timeless.
3. Capture Fluid Motion with Thread Painting
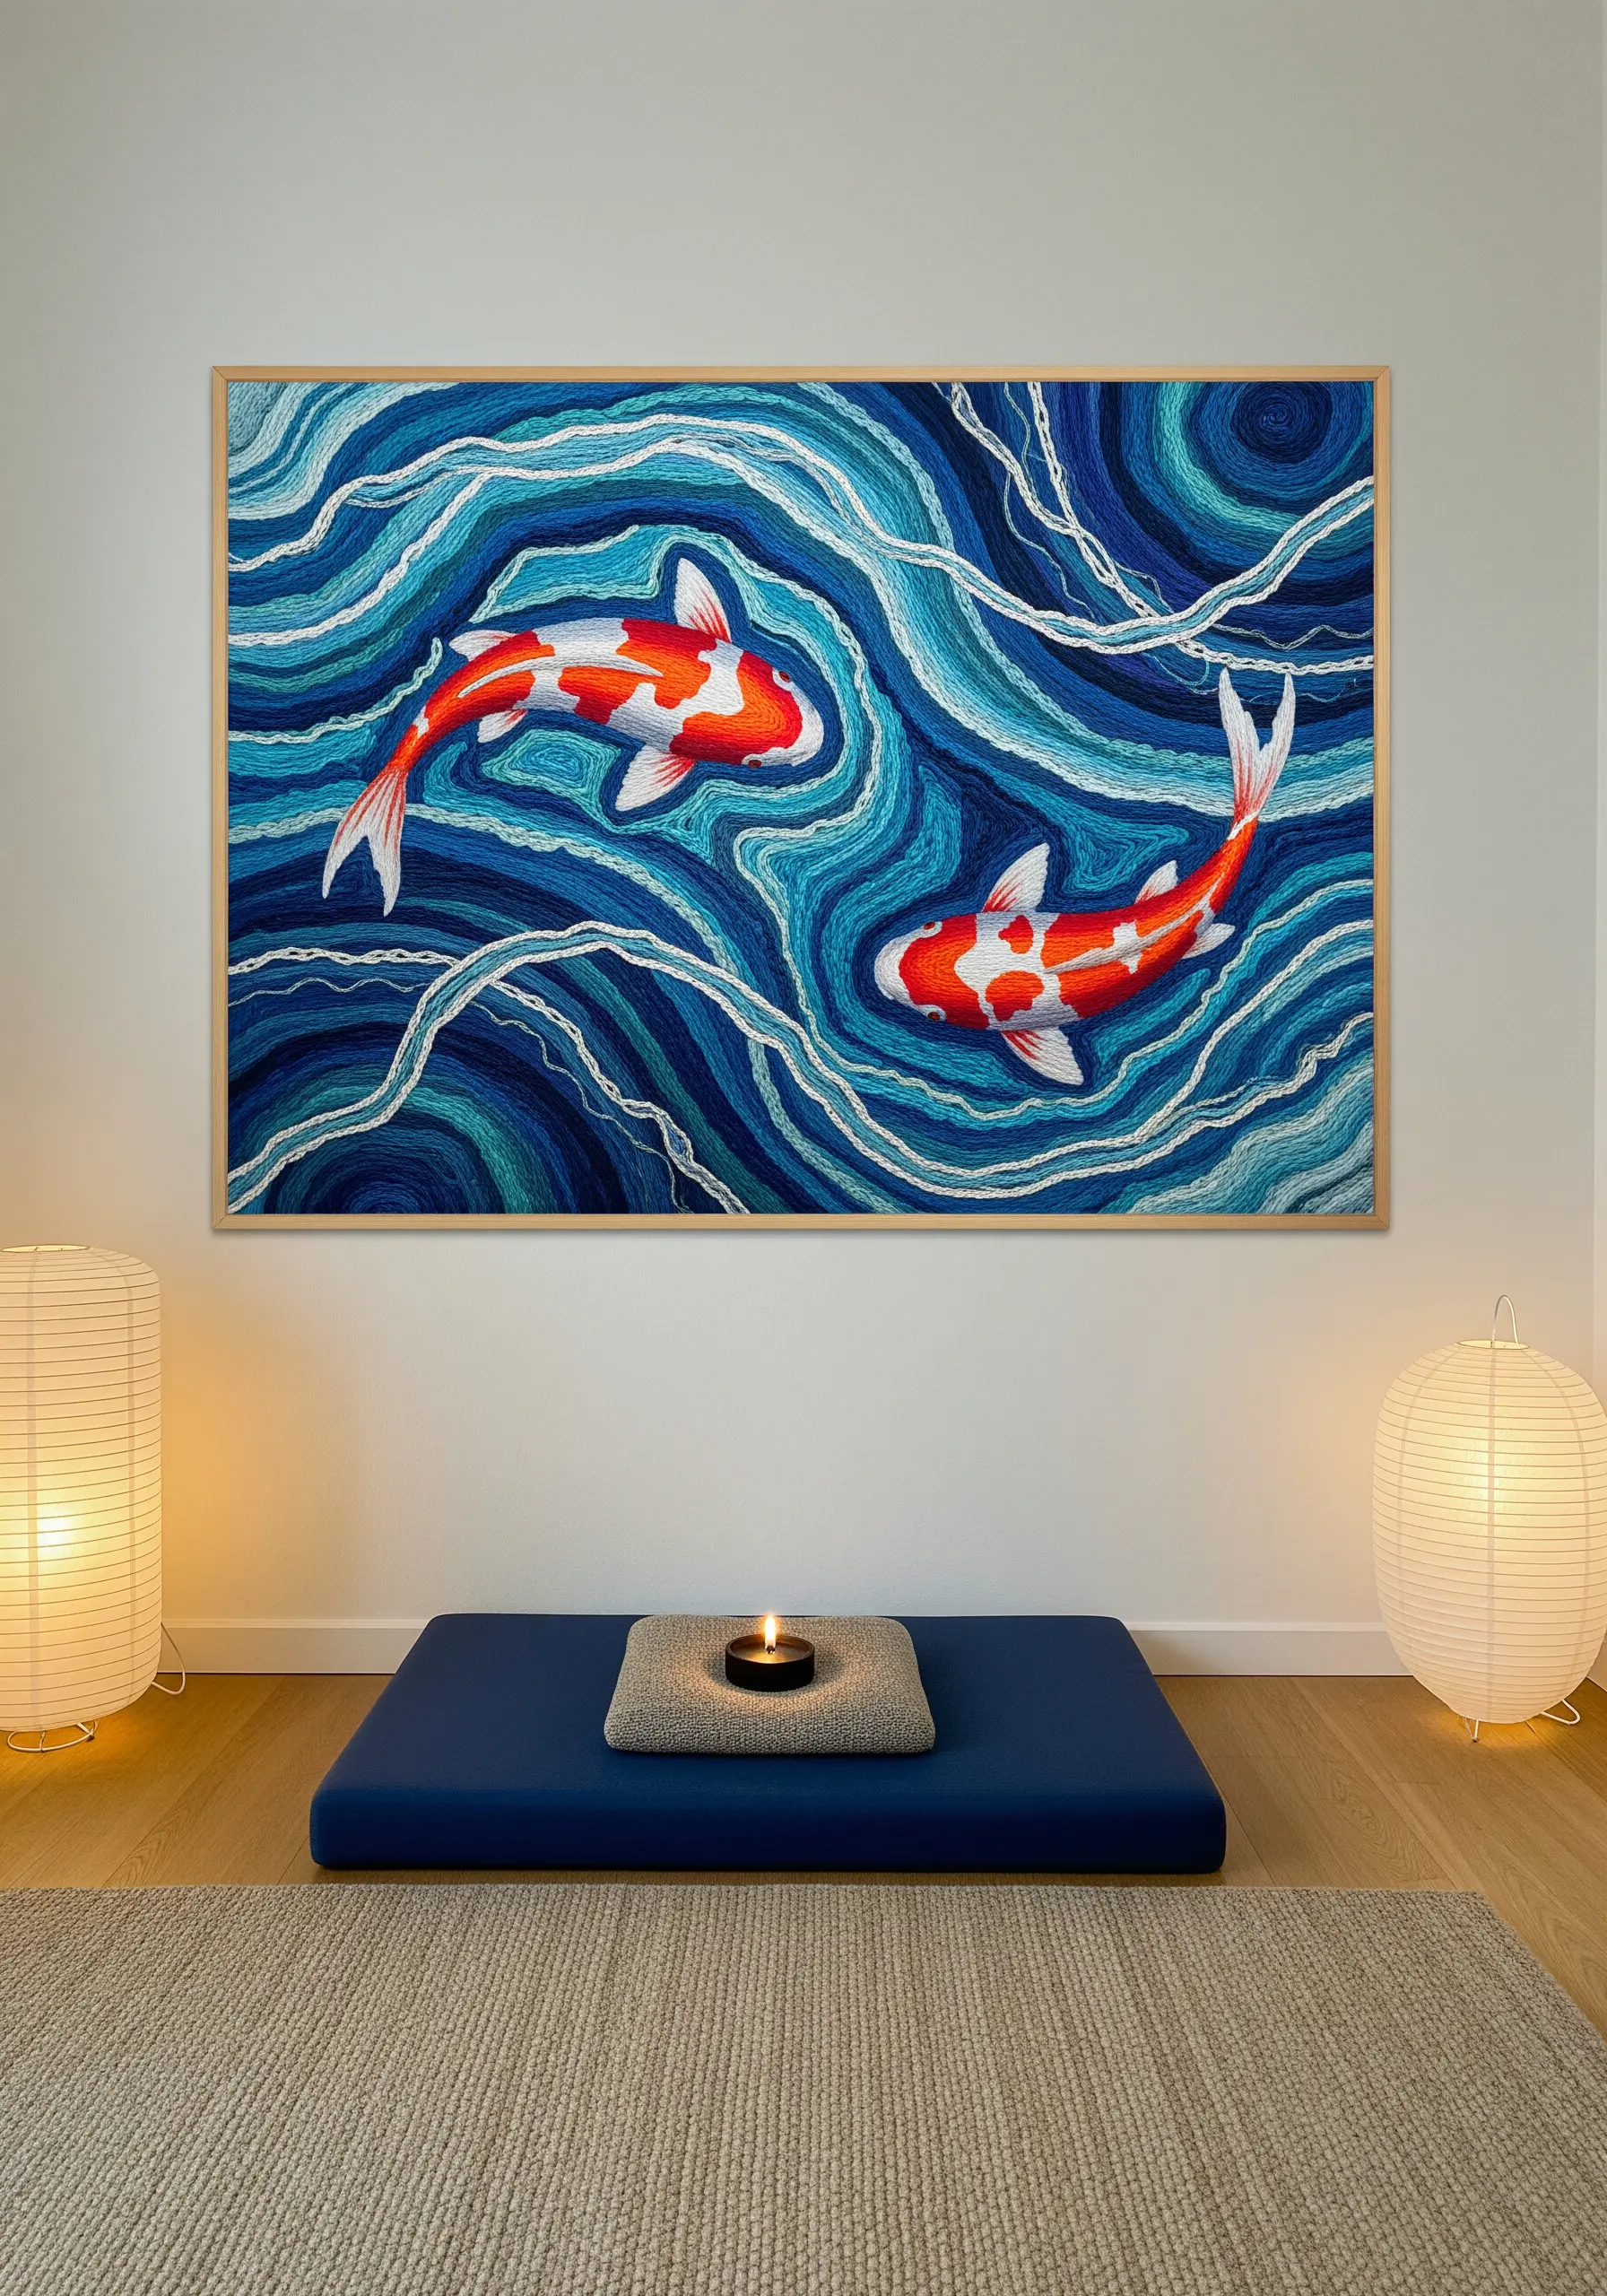
Bring water to life by embracing the principles of thread painting to create dynamic, swirling textures.
Use a palette of five to seven shades of blue, from deep navy to pale sky blue, to build layers of color.
Fill the space with long, curved split stitches, allowing the different shades to interlock and blend organically. This technique avoids harsh lines and creates a more painterly effect.
For the koi, use a short satin stitch, angling your stitches to define the scales and curve of the body. A single strand of bright white thread adds the perfect sharp highlight to the fins and whiskers, making the fish pop against the deep blues.
4. Create Atmospheric Depth in Forest Panoramas
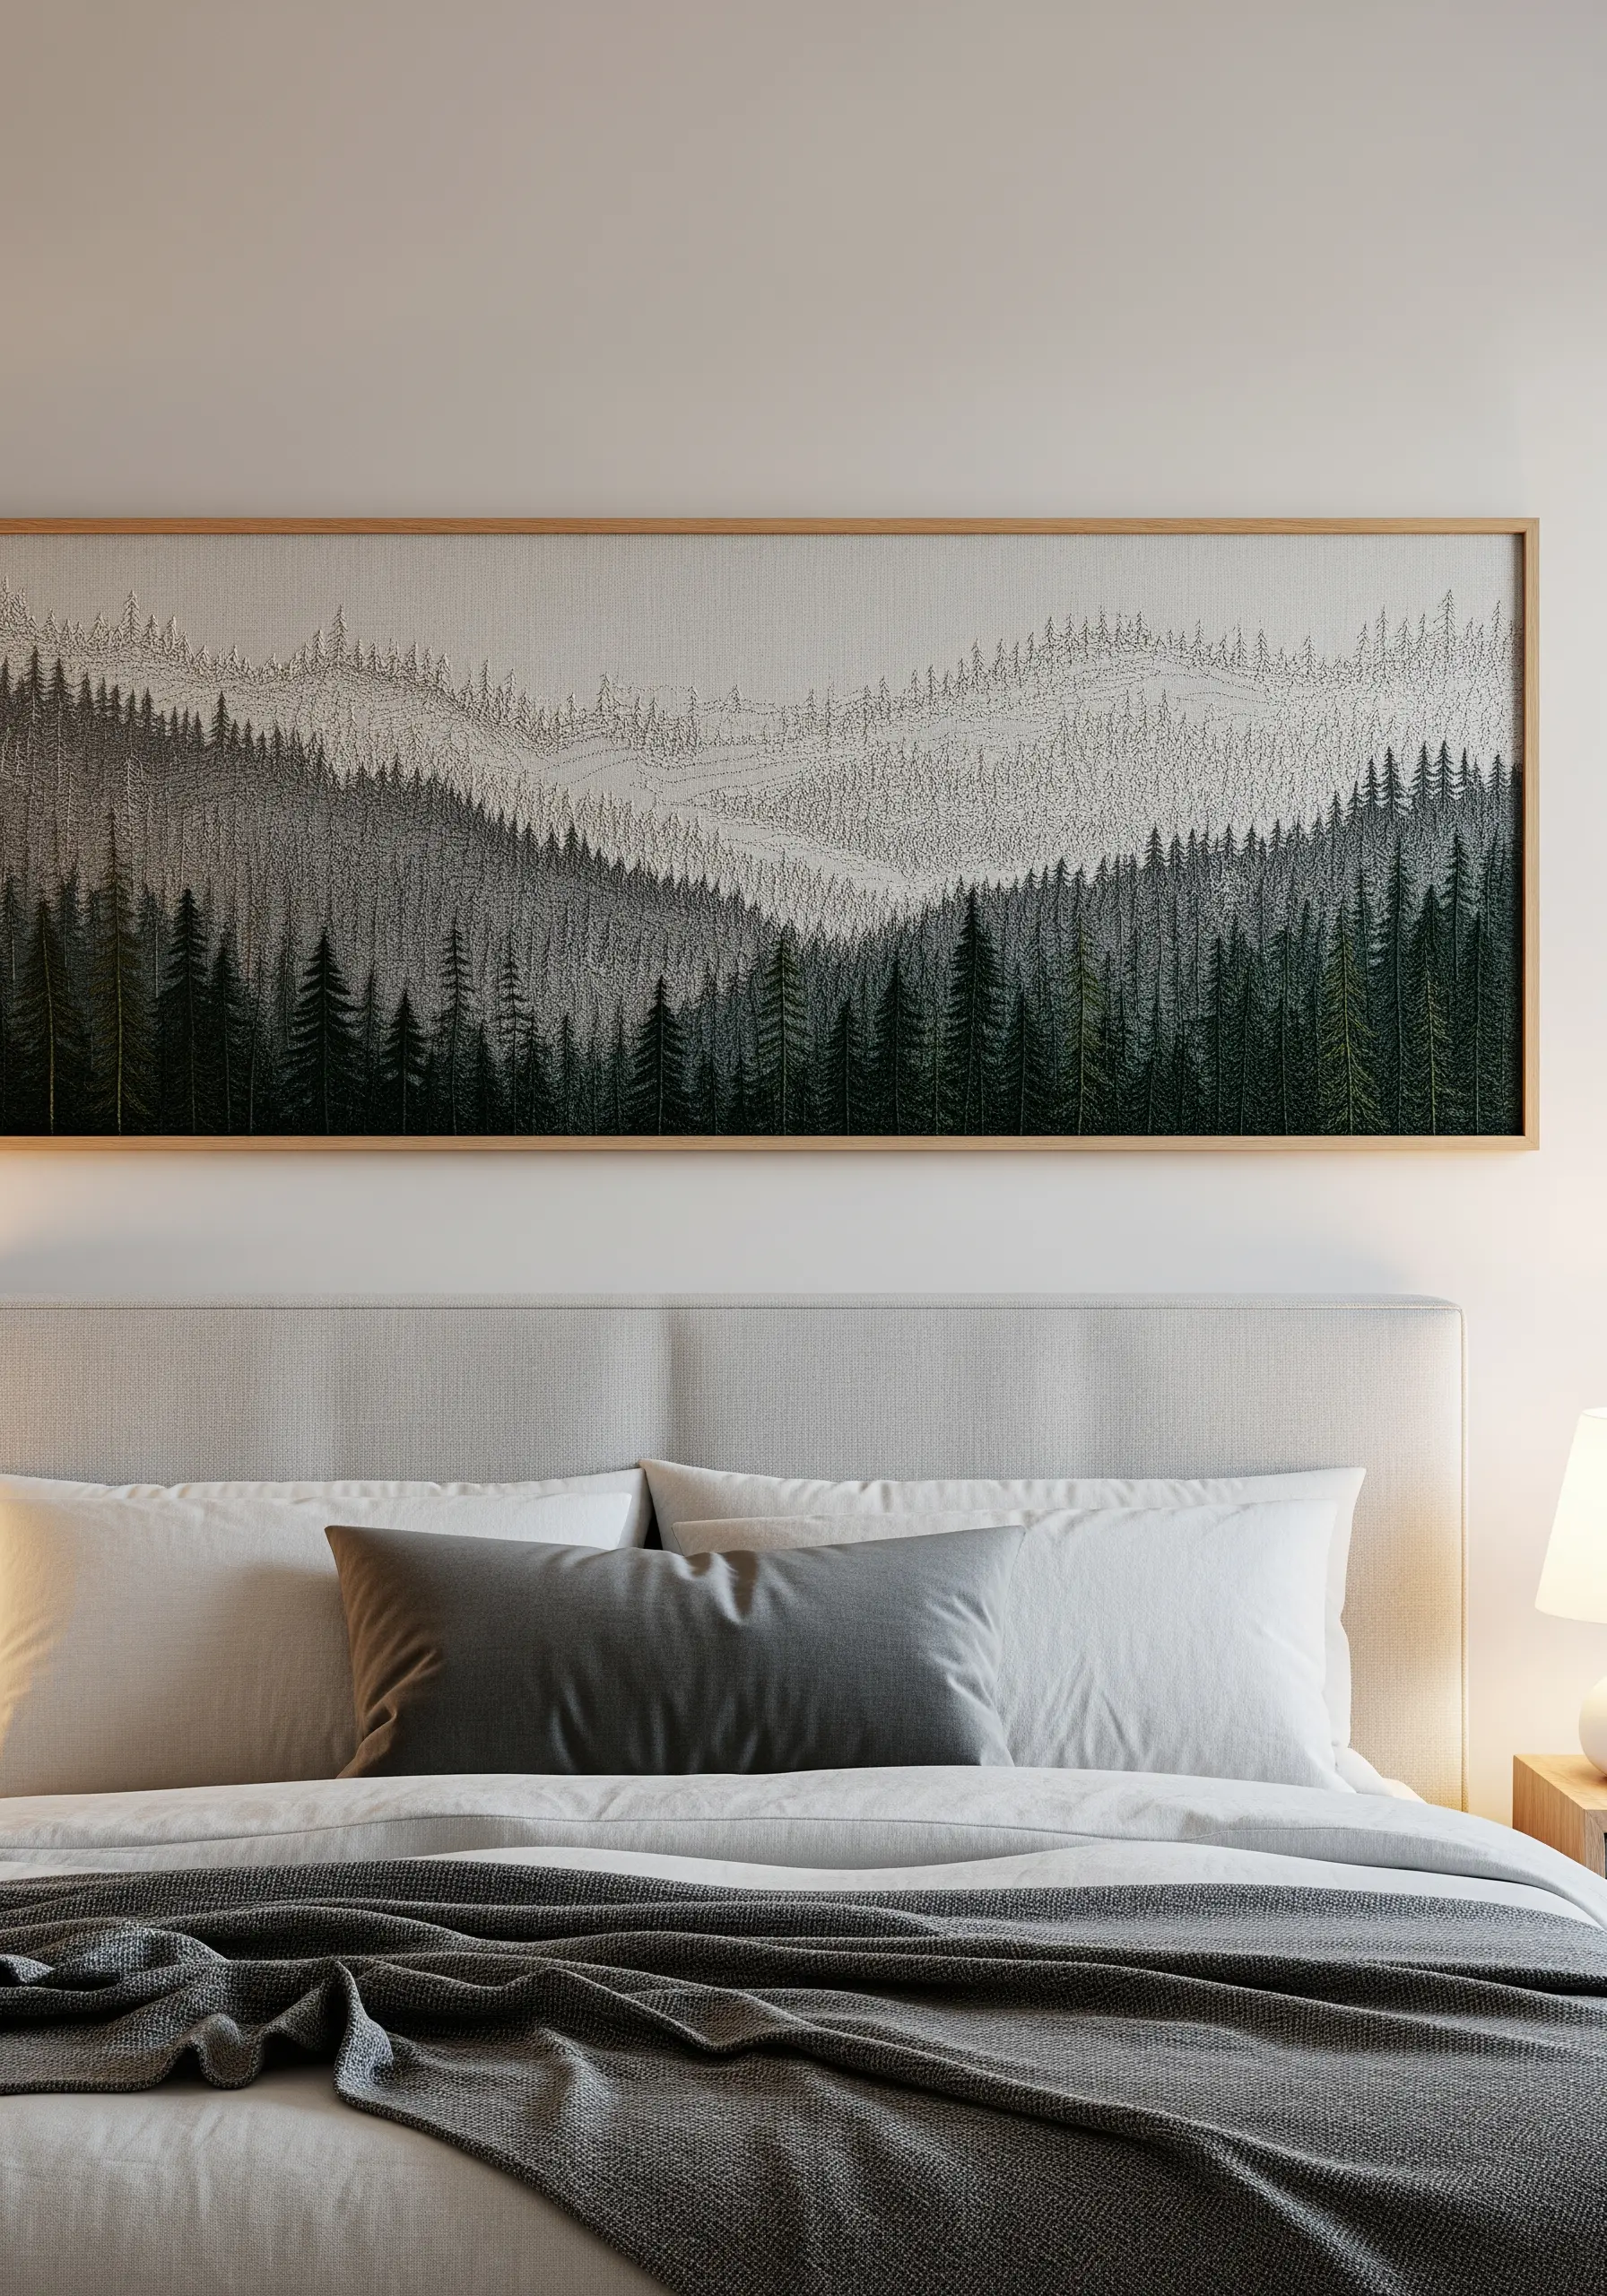
To give your embroidered forests a realistic sense of distance, manipulate both thread weight and stitch density.
For the trees in the foreground, use all six strands of floss in a dark green, stitching them close together with vertical straight stitches to create a dense, solid appearance.
As you move into the mid-ground and background, reduce the number of strands to three, then two, and finally one.
Simultaneously, switch to lighter shades of grey and green and increase the space between your stitches. This technique, known as atmospheric perspective, tricks the eye into seeing depth and misty valleys, transforming a flat surface into a sprawling landscape.
5. Curate a Cohesive Wildflower Gallery Wall
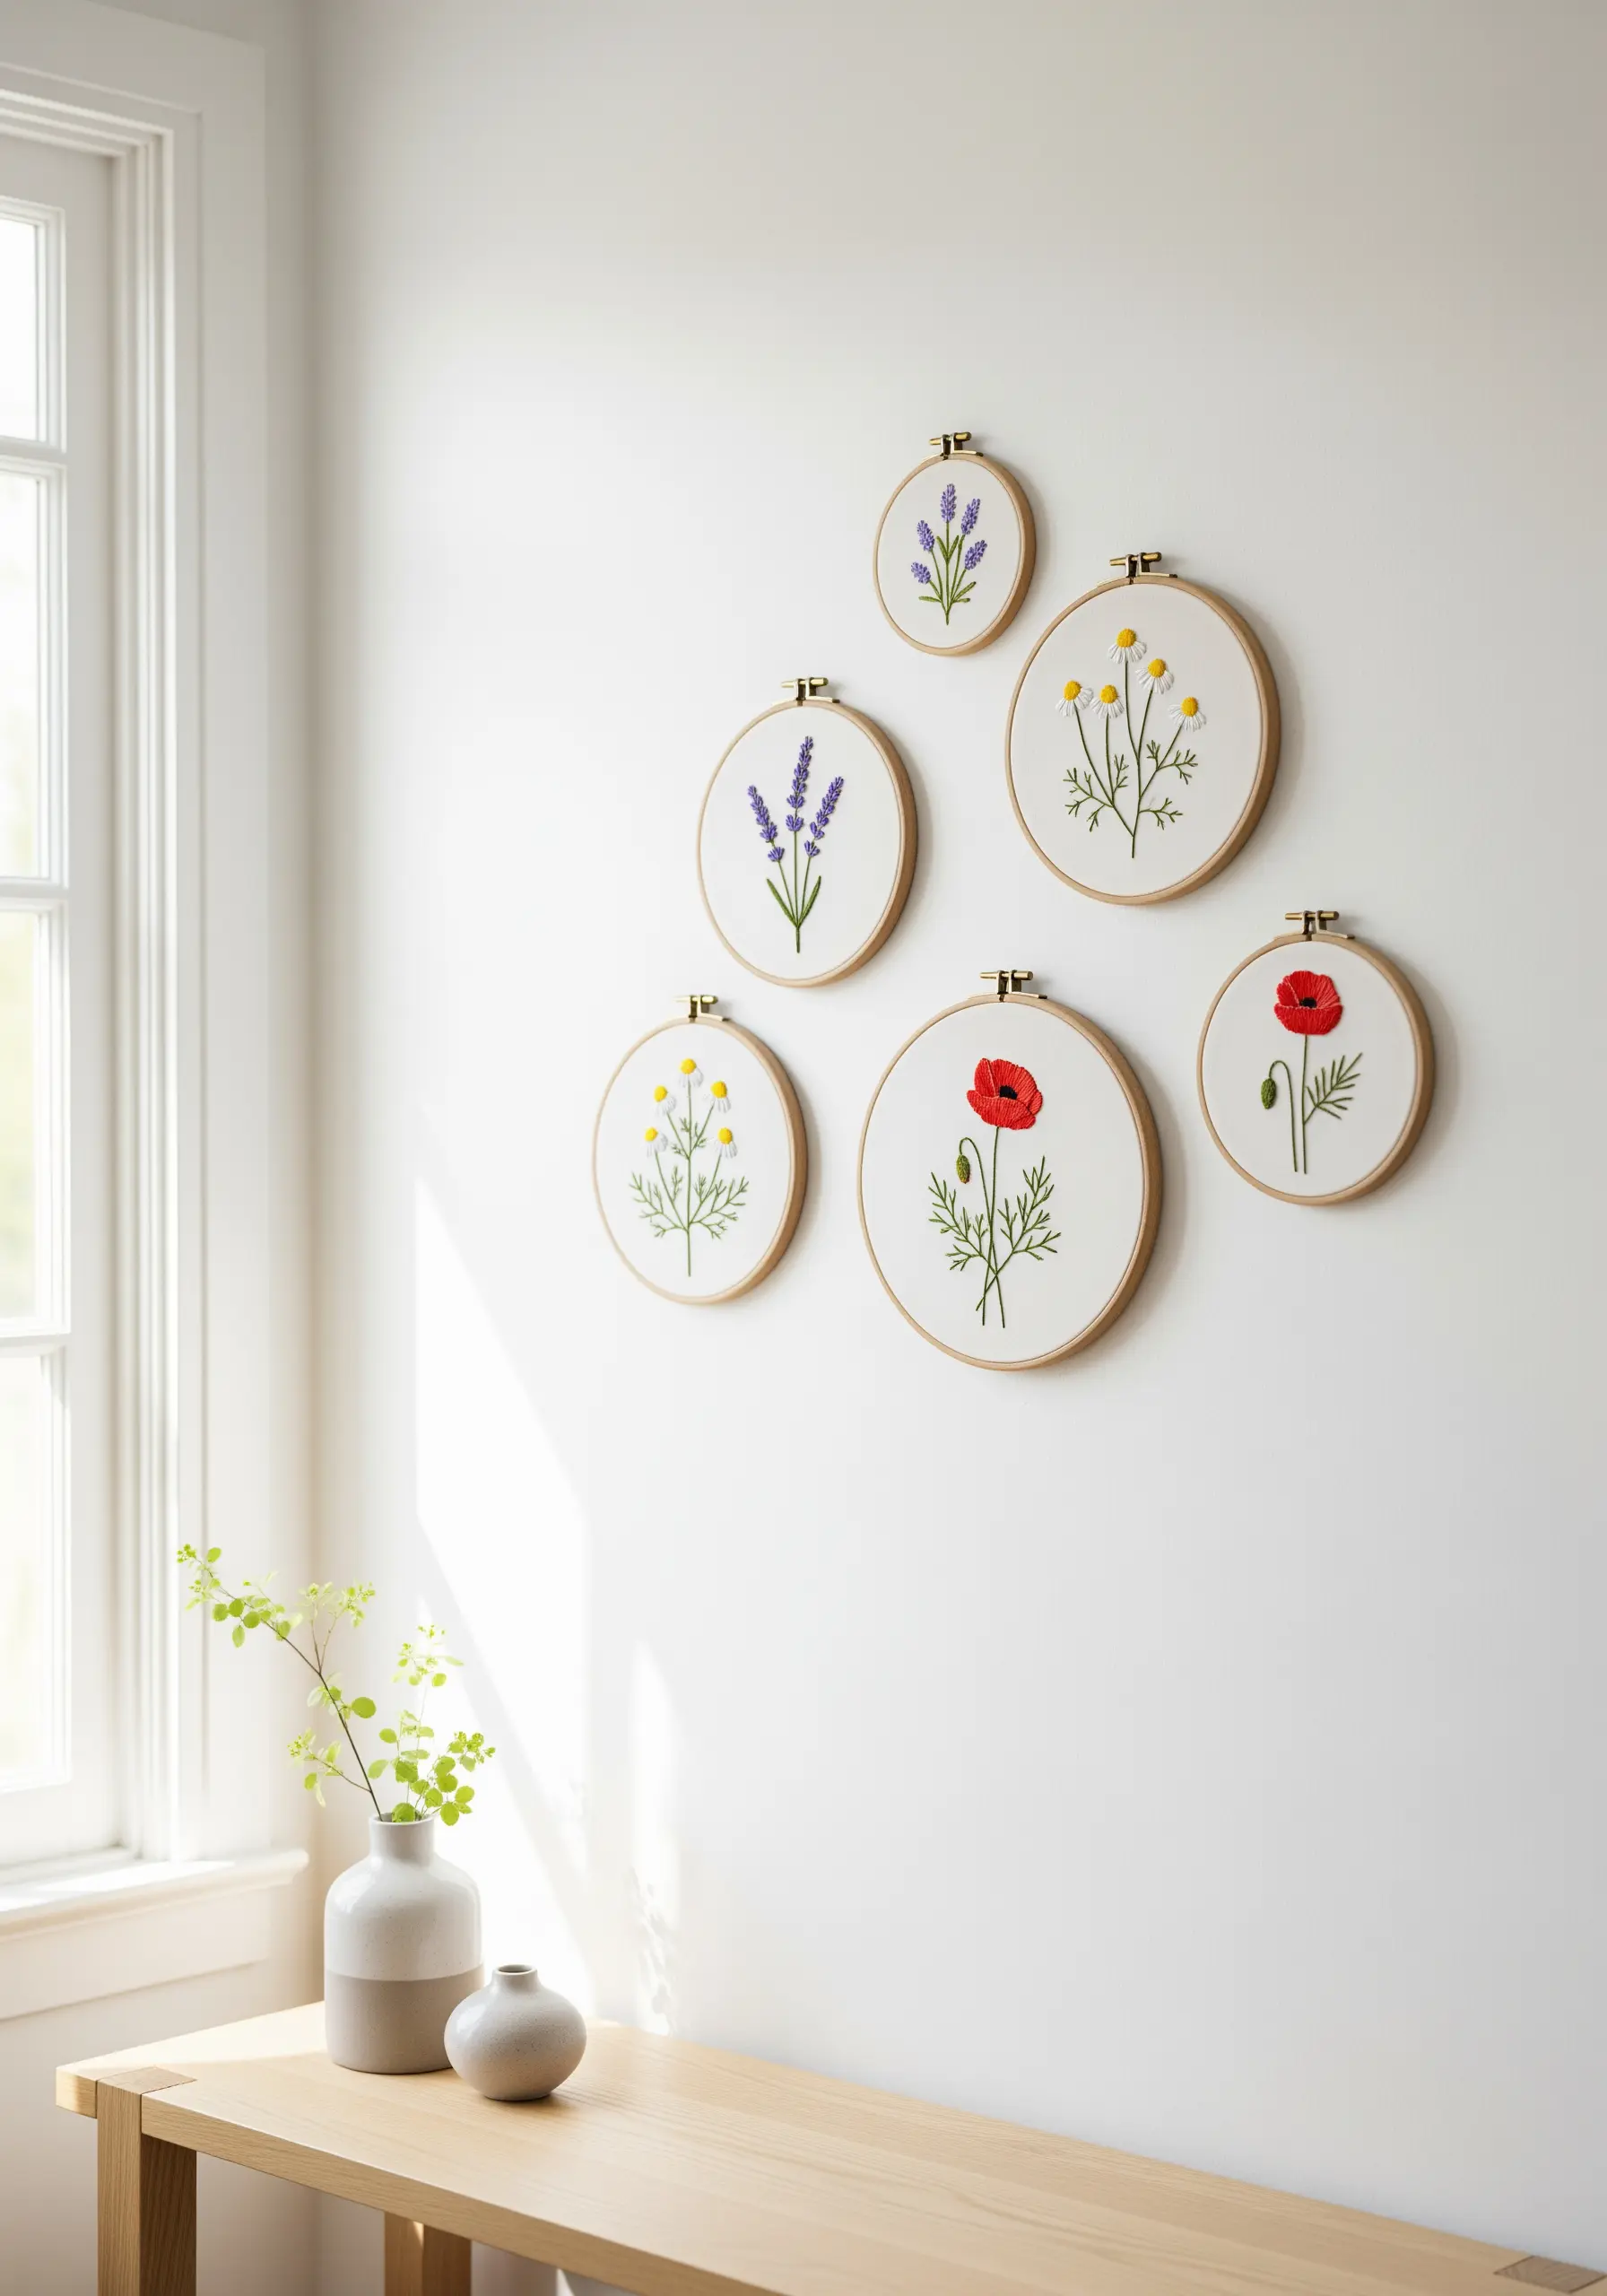
The success of a multi-hoop display lies in its visual unity, not complexity.
Select three or four simple wildflower motifs, like poppies and lavender, and stitch them using a consistent set of techniques.
Use stem stitch for the stalks, lazy daisy stitch for lavender buds, and a padded satin stitch for the poppy petals to give them a subtle, raised dimension.
Tie the collection together with a strict color palette—here, red, yellow, and violet are balanced by a universal green for all foliage.
Arrange the floral embroidery hoops in an organic, asymmetrical cluster to create a sense of natural, effortless charm.
6. Sculpt a Bonsai with Dimensional Fiber Art

Move beyond thread to create a statement piece with dramatic, sculptural texture.
For the twisted trunk and roots, couch thick wool yarn or roving onto a burlap or heavy linen background. This technique involves laying the yarn on the surface and securing it with small, spaced-out stitches in a matching thread color.
Build the dense foliage pads using a sea of tightly packed French knots in several shades of green to create realistic dimension and shadow.
Working on a coarse fabric like burlap adds to the rustic, organic feel of these handmade organic pieces, making the textures the true focus of the artwork.
7. Illuminate the Night with High-Contrast Stitching
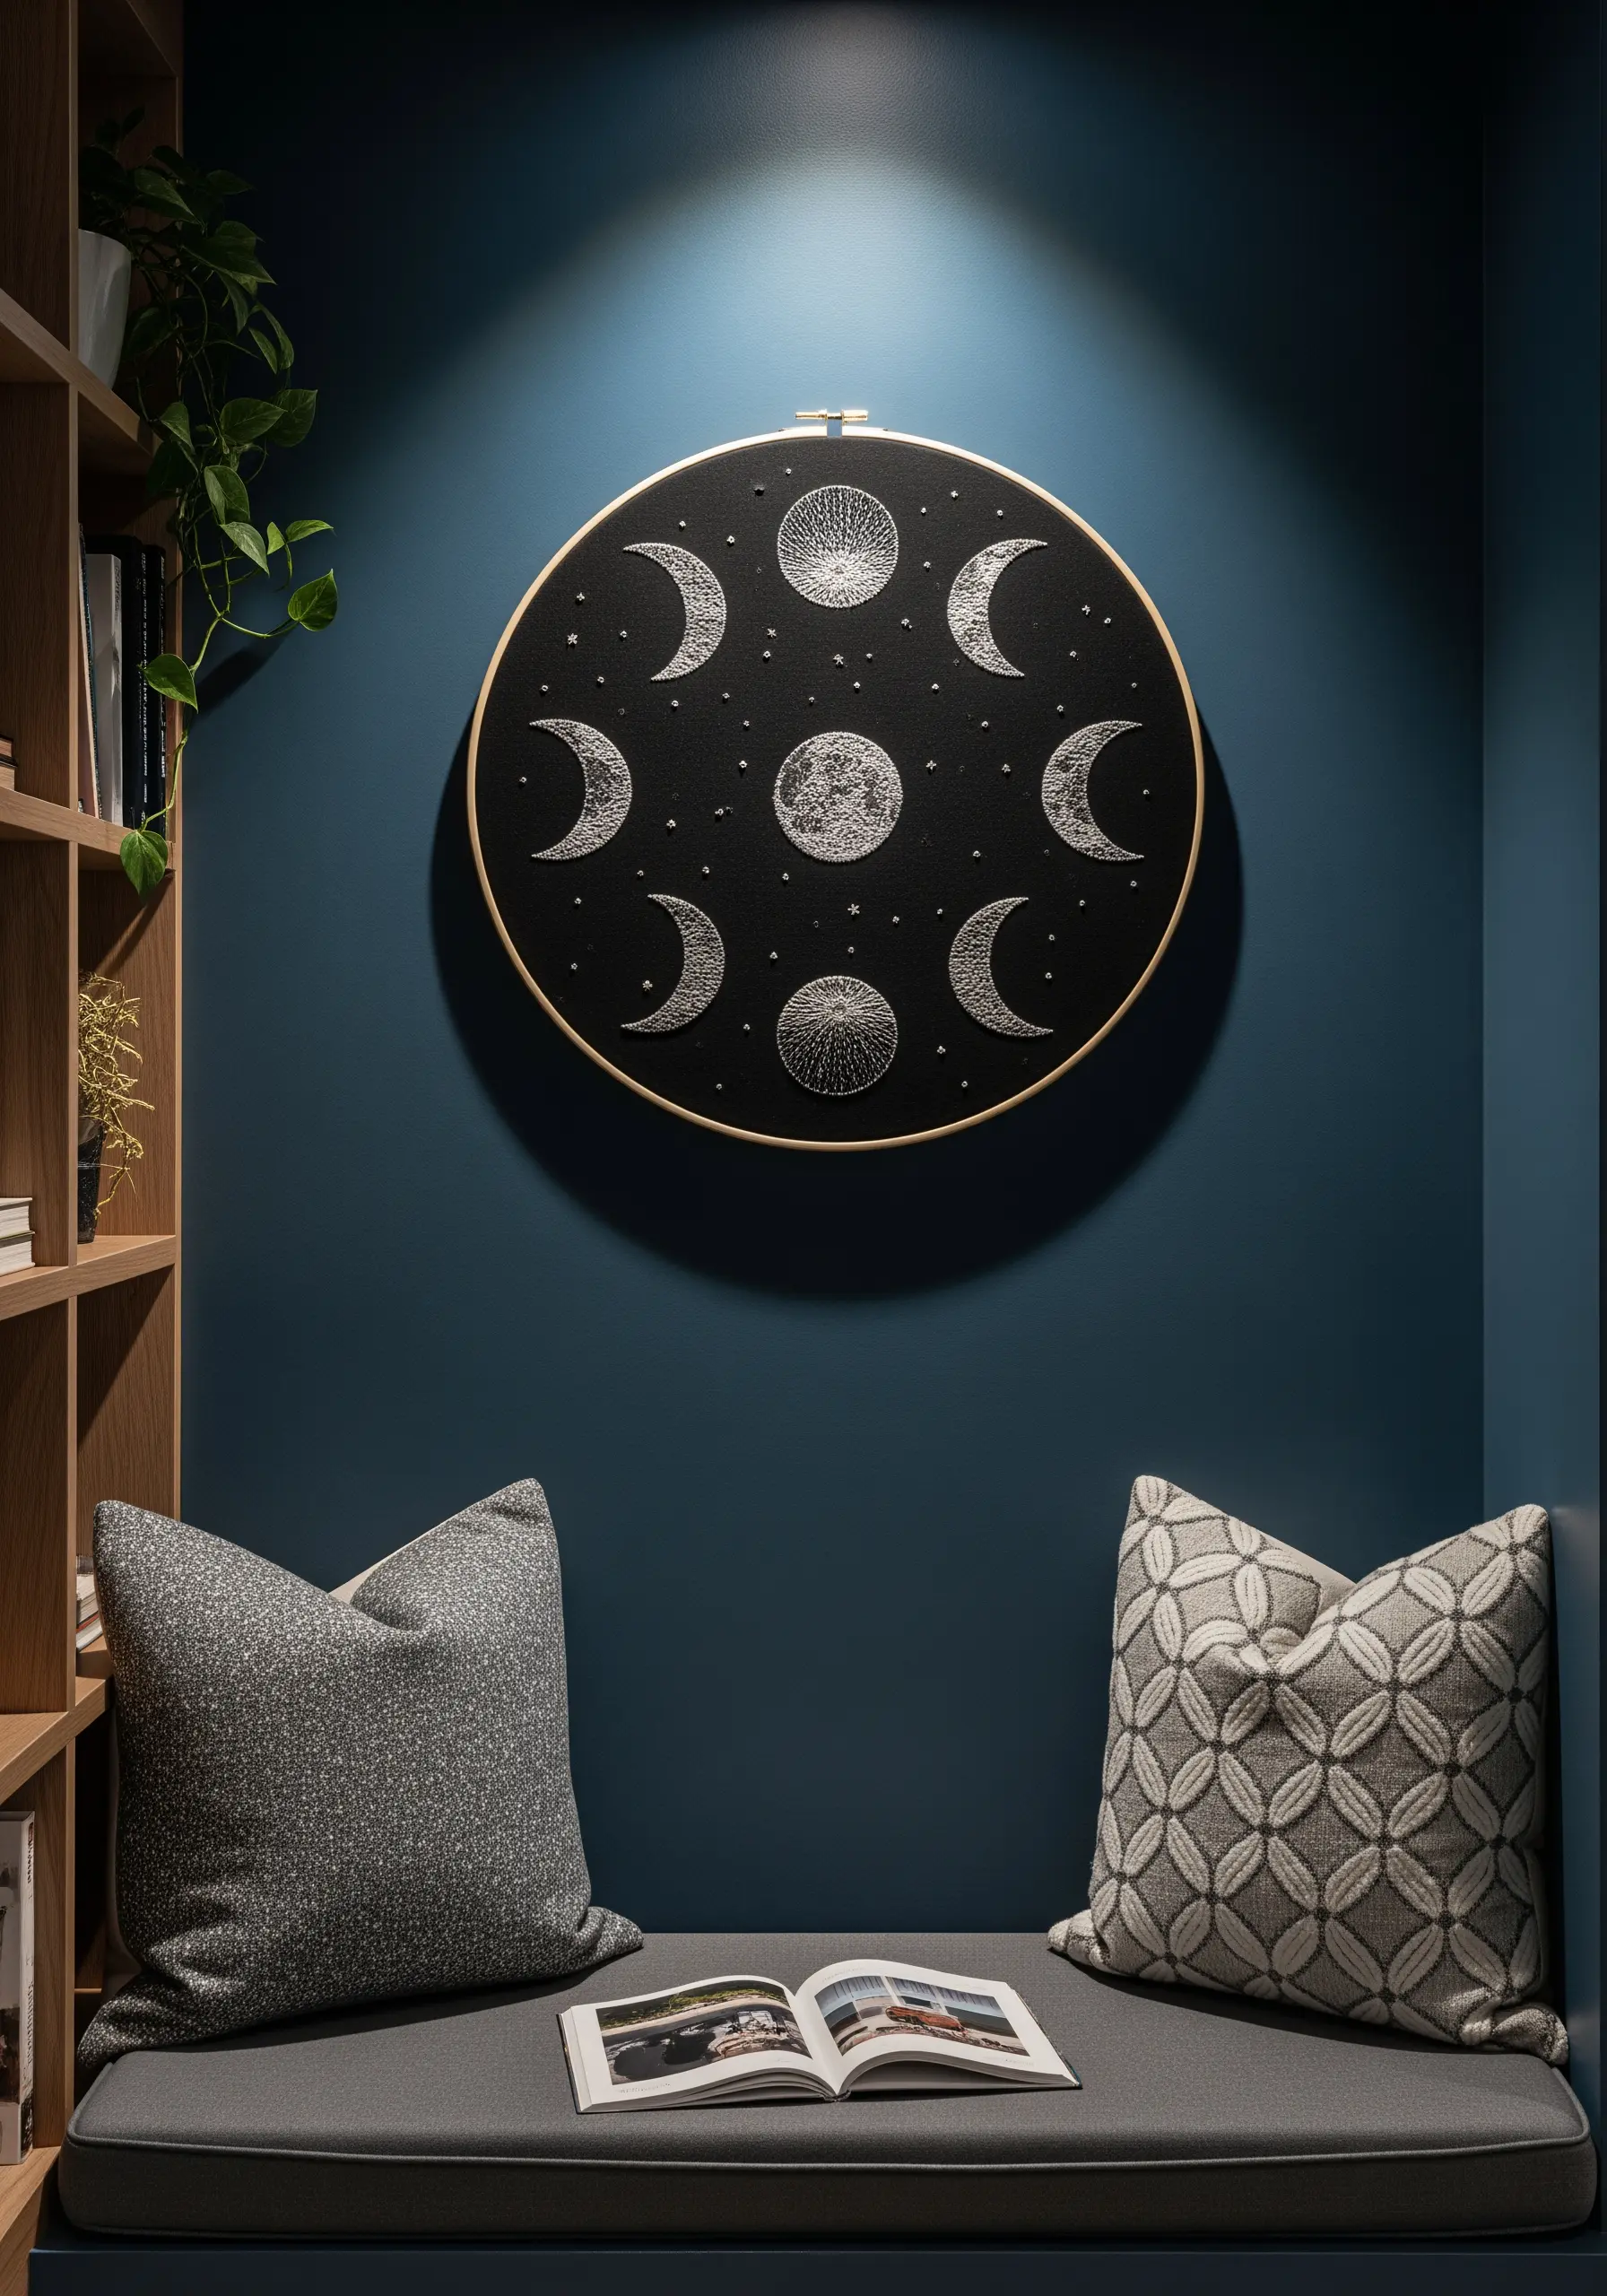
Create a celestial masterpiece by maximizing the contrast between thread and fabric.
Choose a deep black or navy linen as your canvas and use a high-sheen white or silver thread to make your stitches pop.
For the moon’s cratered texture, don’t just fill it with satin stitch. Instead, use a dense field of French knots or seed stitches, varying the stitch direction and density to create highlights and shadows.
The delicate star-like speckles in the background can be achieved with tiny, scattered single seed stitches. This technique elevates a simple design into a dramatic piece with dramatic contrast.
8. Master Realistic Foliage with Thread Painting
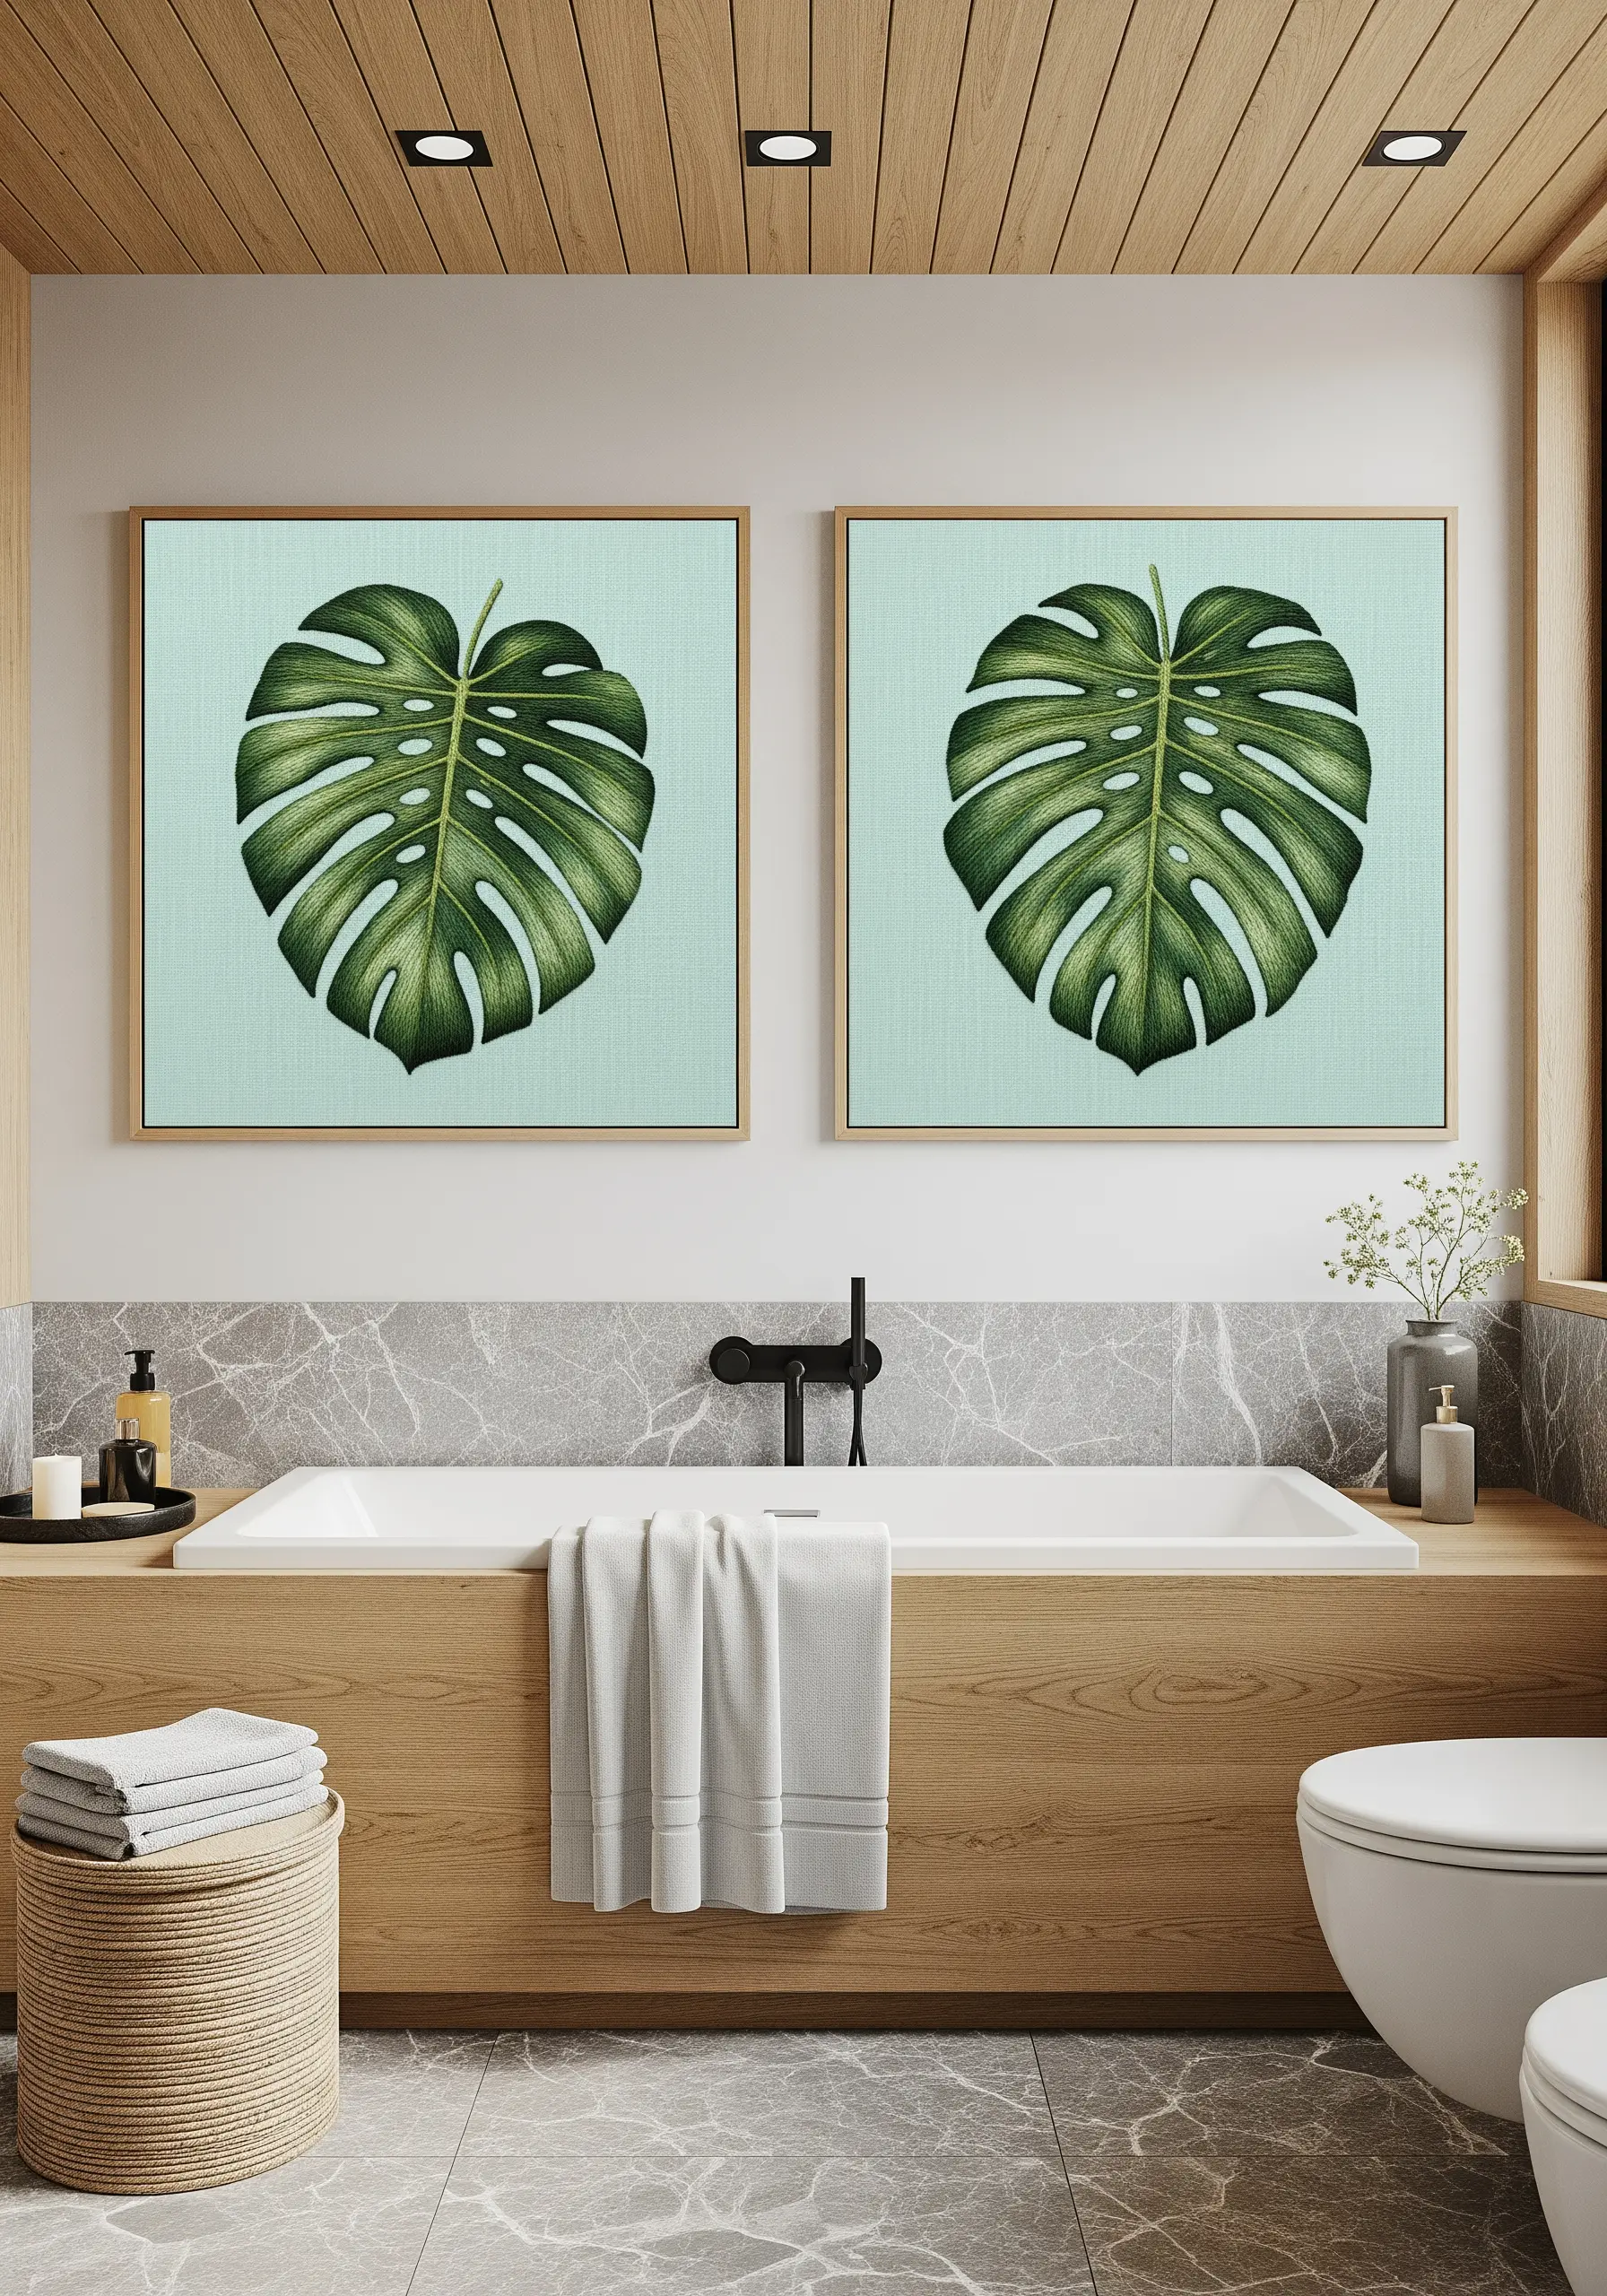
To achieve the lifelike gradients of a monstera leaf, the long-and-short stitch is your most powerful tool.
Start by outlining each section of the leaf with a split stitch. Then, work inwards with a series of interlocking long and short stitches, blending three or four shades of green to create a smooth transition from light to dark.
Keep your stitches angled towards the central vein of the leaf to mimic its natural growth pattern.
This meticulous blending technique transforms simple stitches into stunningly realistic tropical leaf designs, giving the final piece a painterly quality that feels vibrant and alive.
9. Capture Shimmering Light on Water
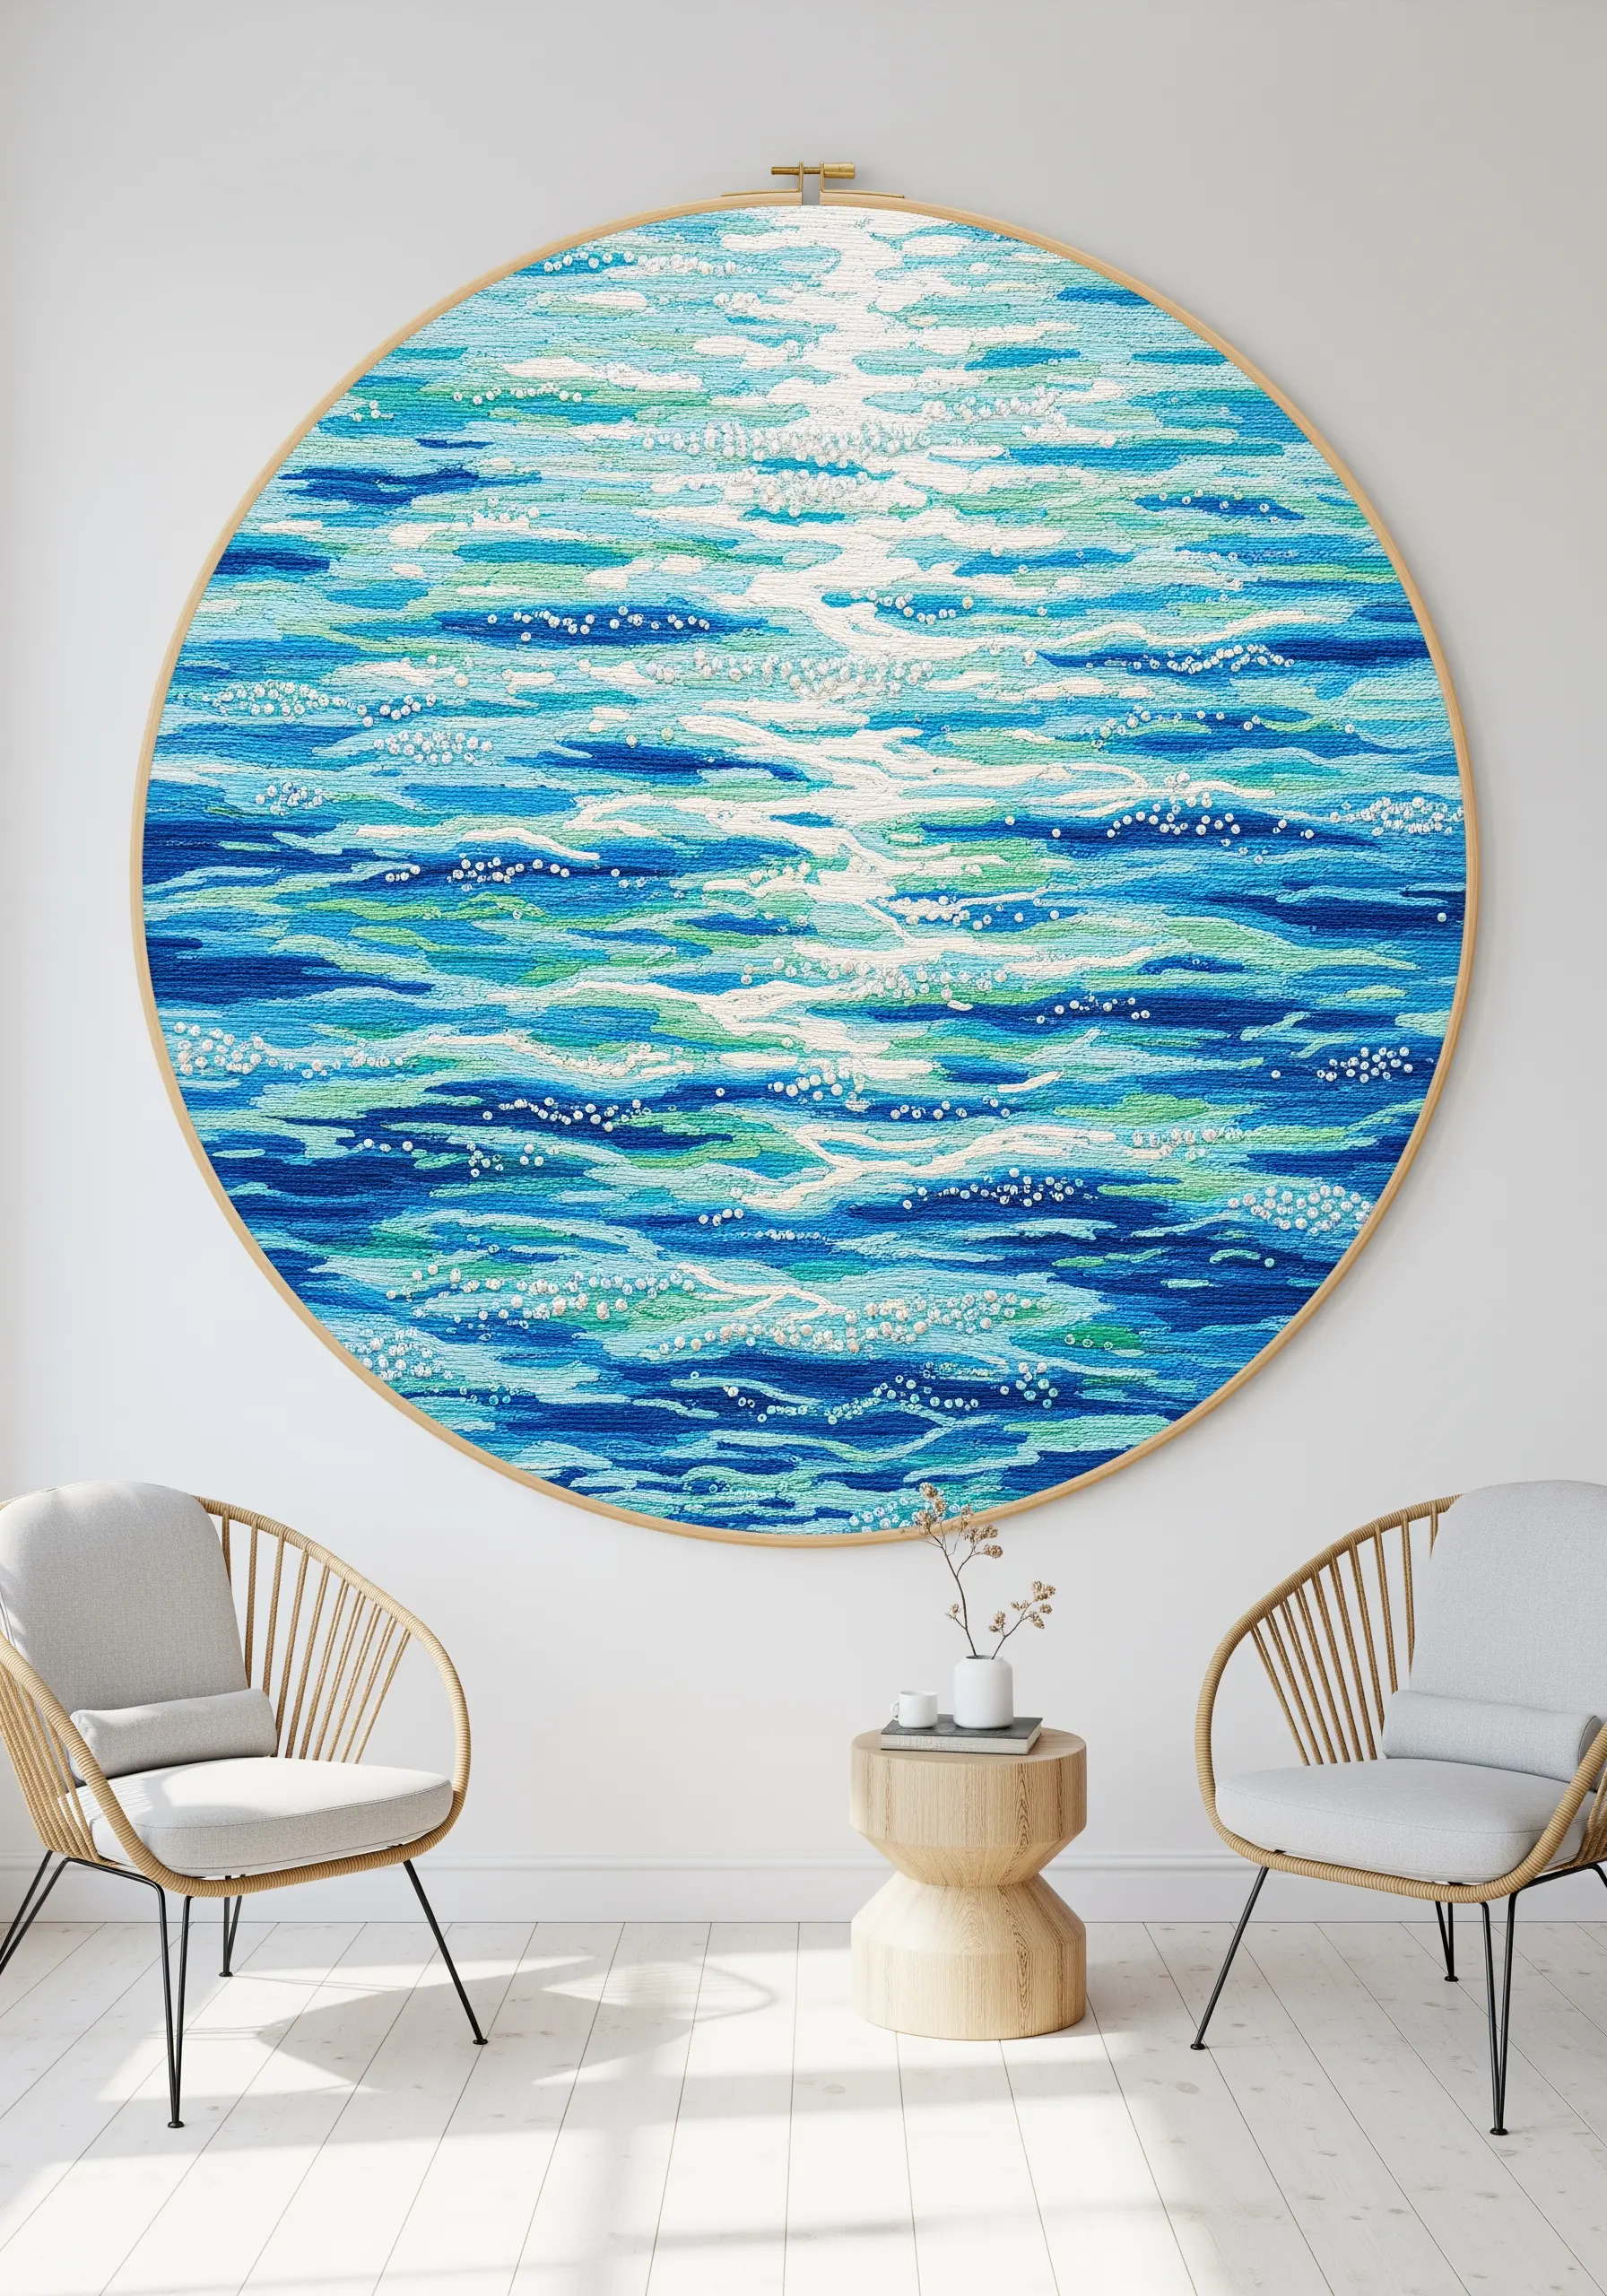
Evoke the sparkle of sun on water by combining textural stitches with variegated thread.
Lay down a base of flowing, horizontal satin stitches using a blue-green variegated floss. This automatically creates subtle color shifts without needing to switch threads constantly.
Next, scatter clusters of white or iridescent French knots across the surface, concentrating them where the light would be brightest. This mimics seafoam and glinting sunlight.
The combination of smooth satin stitch and bumpy knots creates a tactile and visual contrast that makes the entire piece feel dynamic and alive, capturing the essence of ocean-inspired hoop embroidery.
10. Convey Grace with Minimalist Line and Texture

In a design this clean, precision is paramount. Use a single strand of black floss for the outlines of the cranes to achieve sharp, delicate lines.
A precise split stitch will give you more control and a smoother curve than a backstitch for the birds’ elegant necks and wings.
For the background, create a subtle ombre effect by filling the lower portion with a dense field of seed stitches in a pale blue, gradually spacing them out as you move up the canvas.
This adds texture and a sense of sky without distracting from the graceful movement of the cranes, resulting in beautifully framed embroidery artworks.
11. Stitch a Fragrant Field of Lavender
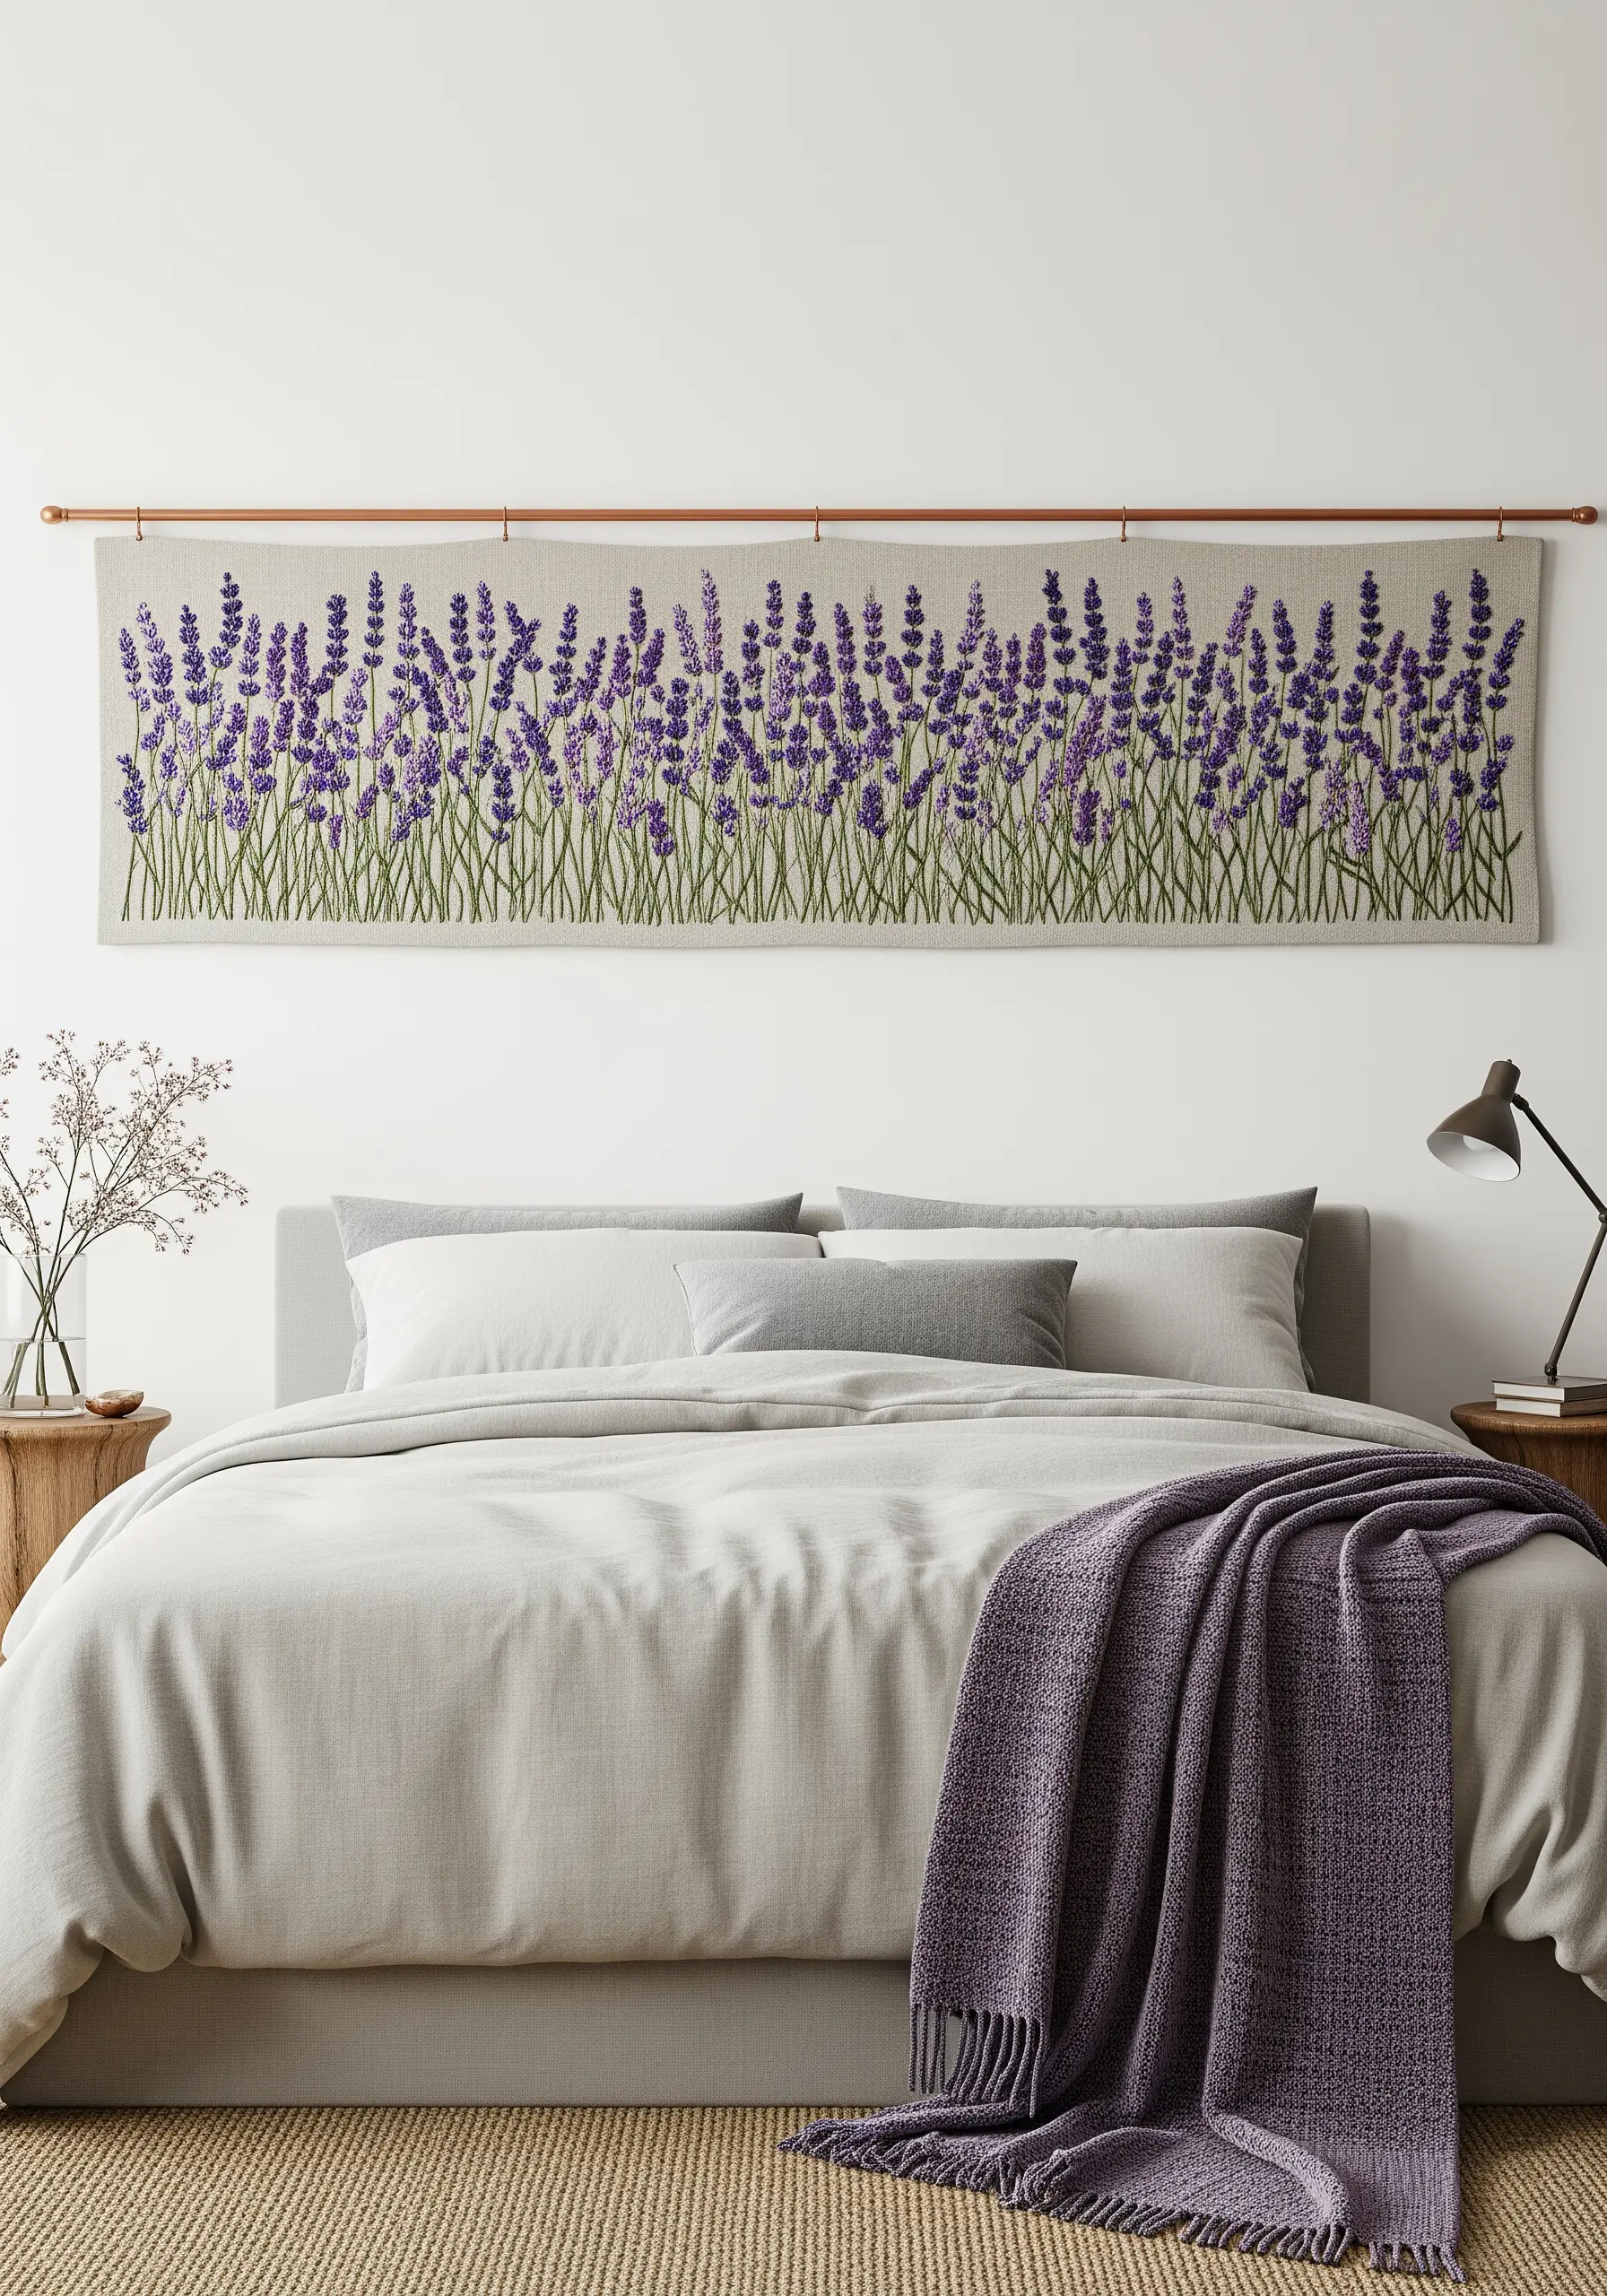
To create a lush, textured field of lavender, choose stitches that provide natural dimension.
Bullion knots or stacked lazy daisy stitches are perfect for the purple flower buds, giving them a plump, 3D quality that stands out from the fabric.
Work with three to four shades of purple and violet, scattering them randomly to create a more natural, less uniform appearance.
Keep the stems simple with long, straight vertical stitches in a soft green. Arranged as a panoramic embroidered textile wall hanging over a bed, this repetitive, rhythmic stitching becomes a meditative practice and a calming focal point.
12. Recreate Geode Textures with Contour Stitching
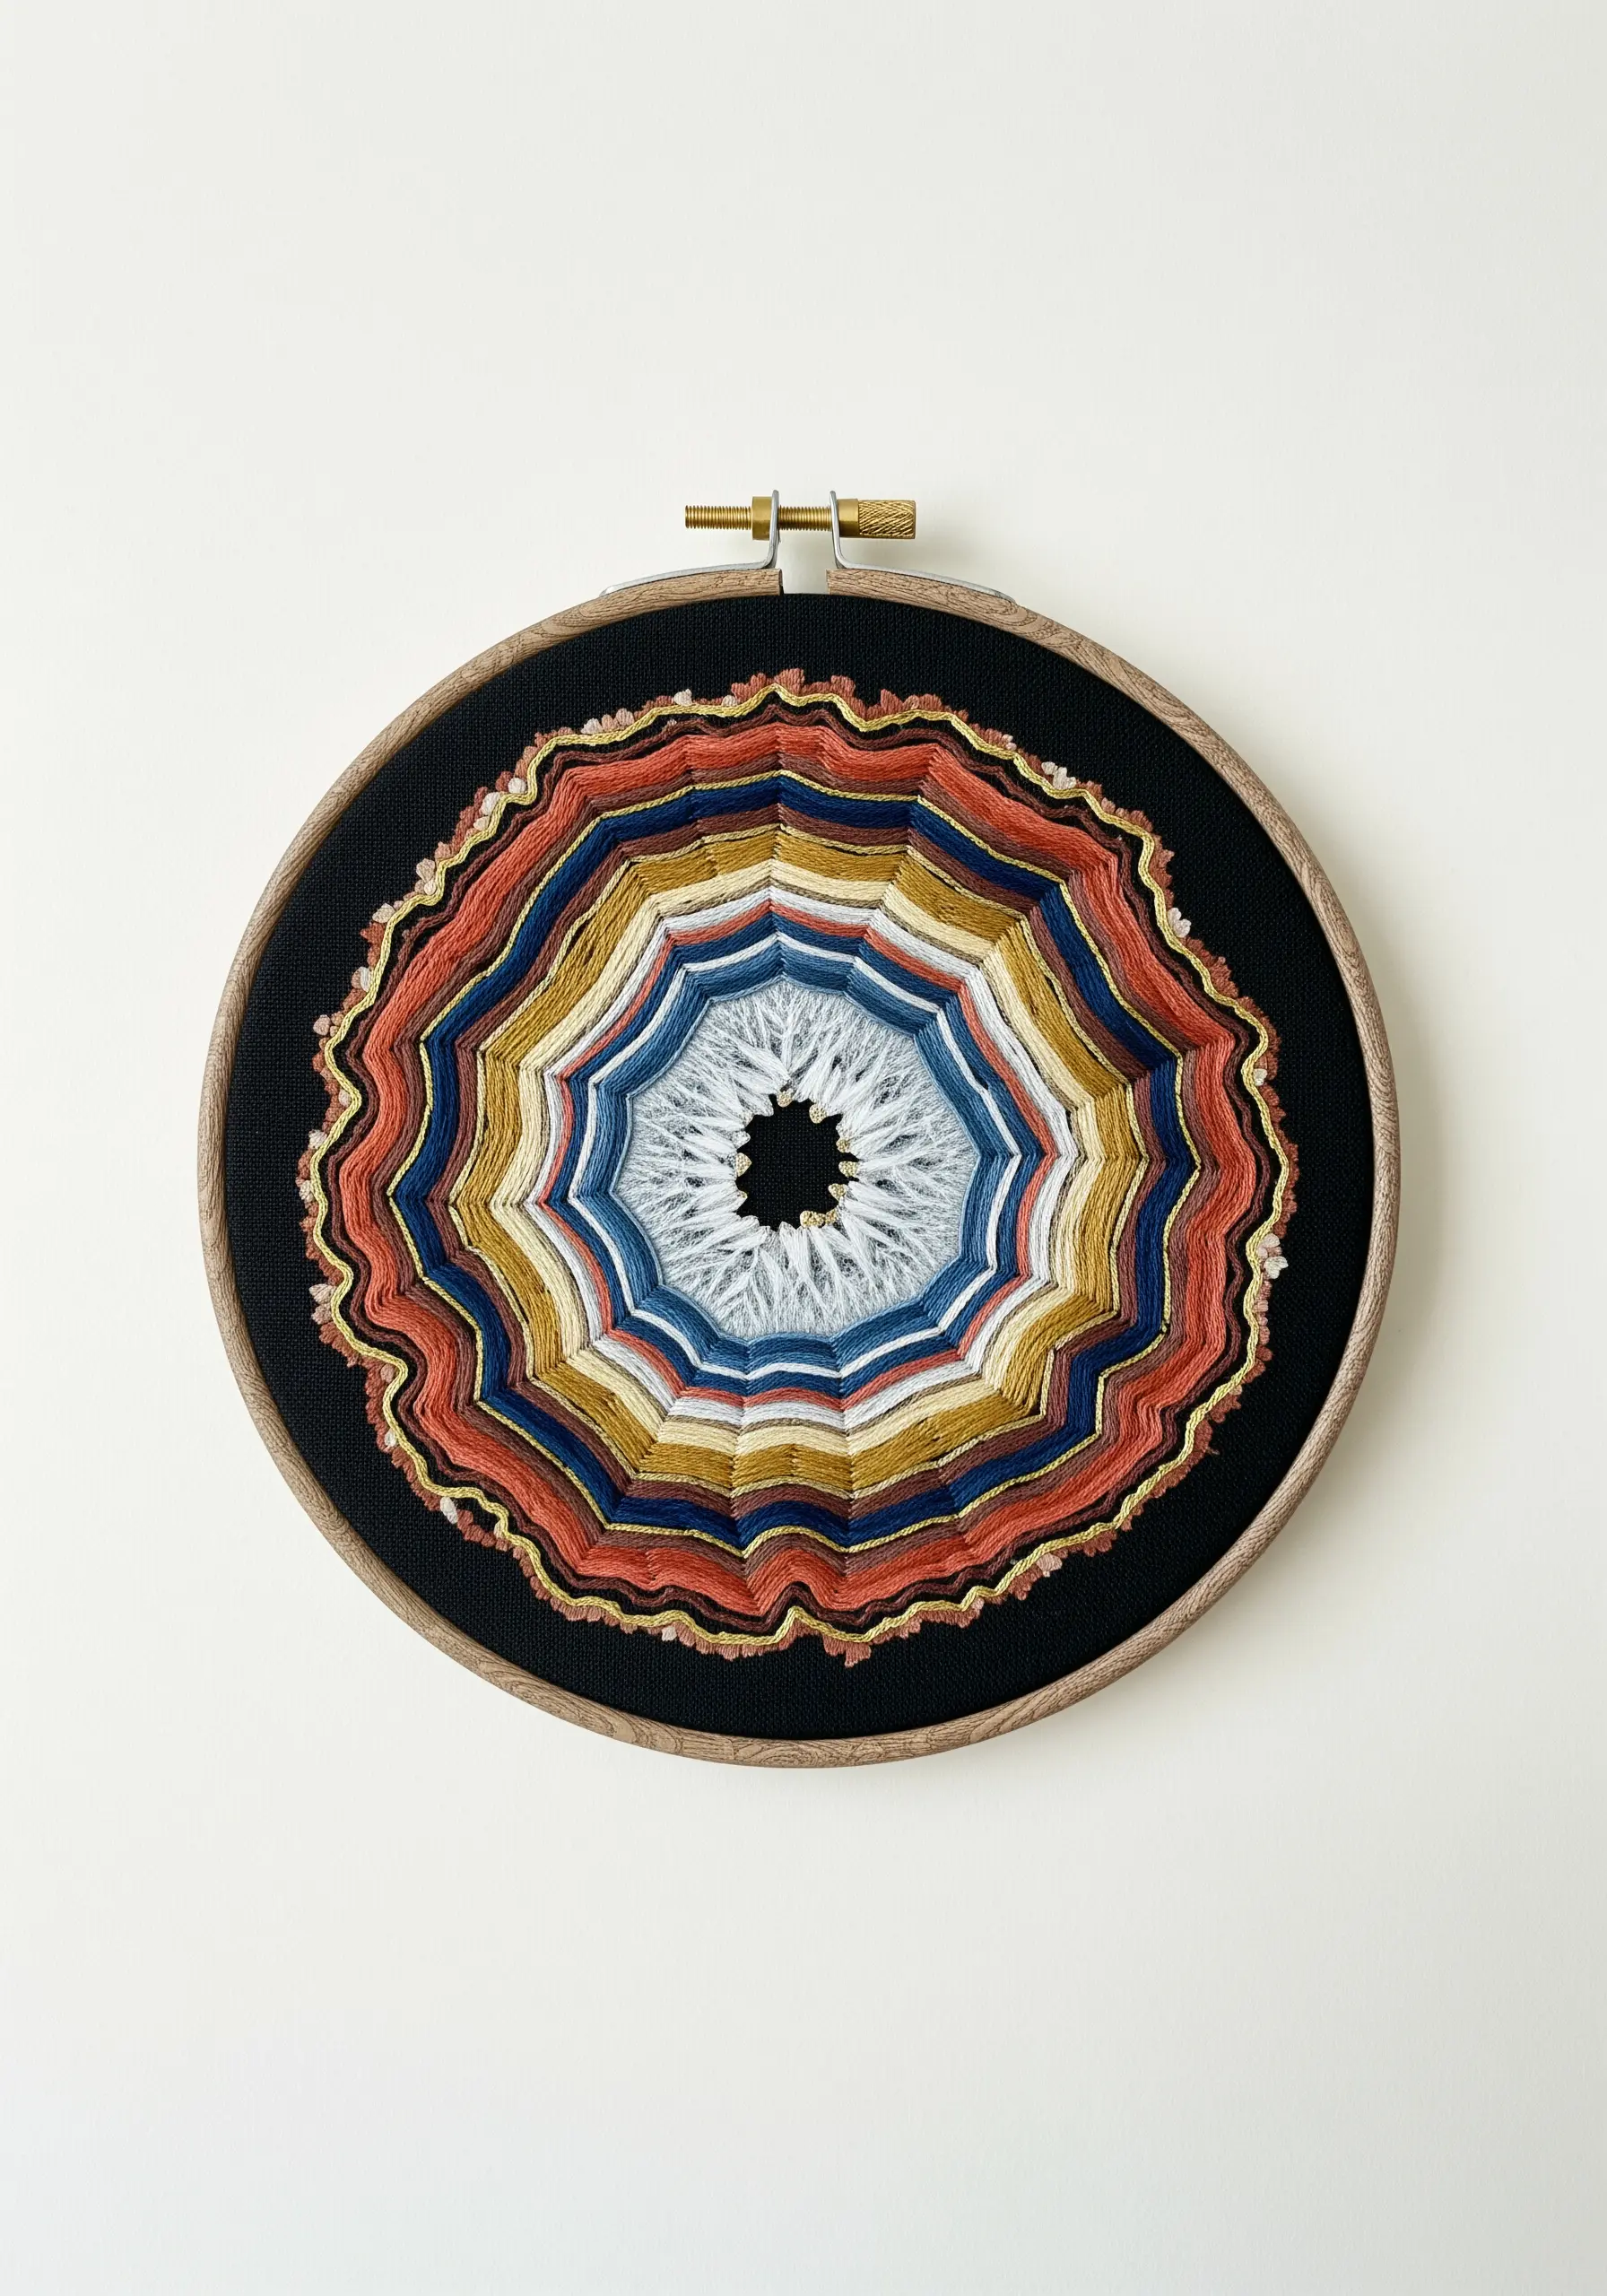
Capture the organic, layered beauty of an agate slice by building concentric rings of color and texture.
Instead of a perfect circle, draw free-flowing, irregular shapes as your guide. Outline each layer with a whipped backstitch or a heavy chain stitch to create a raised, defined edge.
Vary the thickness of each band and use a rich, earthy color palette. Introduce a metallic gold or silver thread for one or two of the rings to mimic the crystalline structures found in real geodes.
The contrast of matte and metallic threads against a dark fabric creates a stunning, hypnotic effect perfect for earth-inspired embroidery designs.
13. Cultivate a Zen Garden with Minimalist Textures
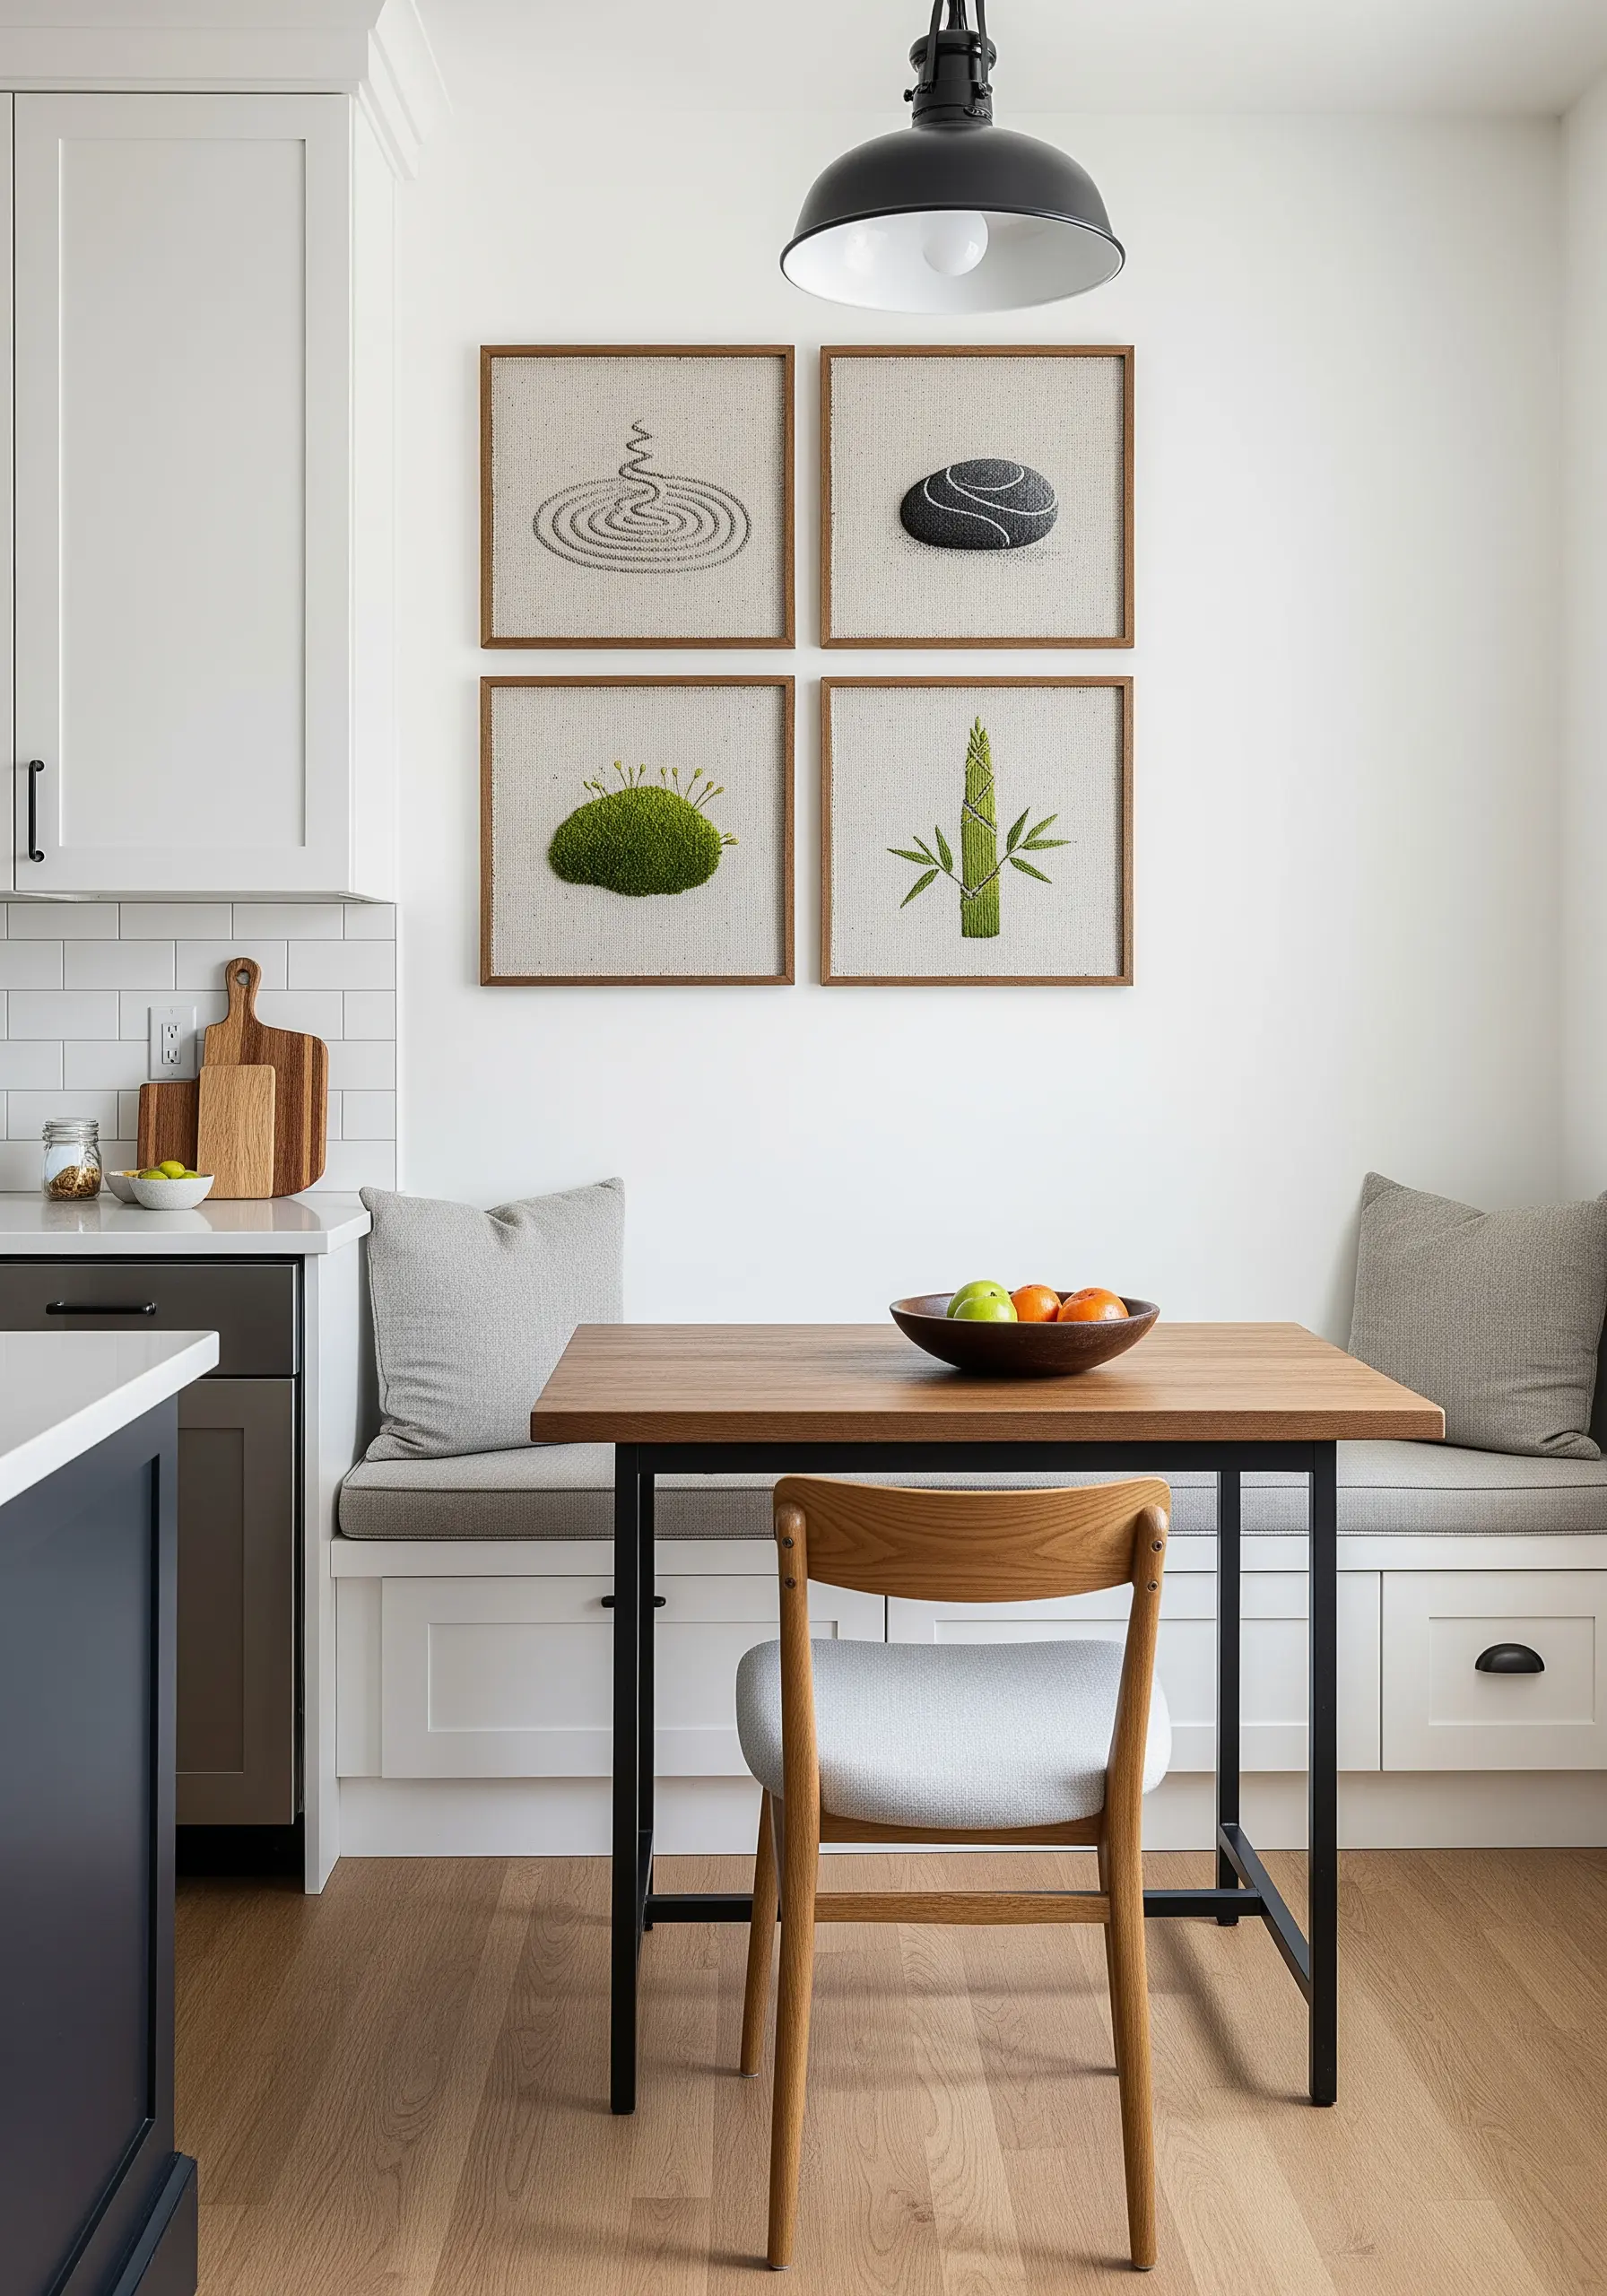
This quartet proves that you can evoke complex ideas with the simplest of stitches.
To create the moss, fill the shape with a dense carpet of French knots in variegated green thread. For the raked sand, use single strands of grey thread to stitch gentle, curving lines of running stitch.
The stacked stones gain their smooth, rounded appearance from a padded satin stitch—lay down a base of straight stitches before covering it with your final layer.
For bamboo, simple vertical satin stitches suffice. This exercise in minimalism demonstrates how texture can be used to create stunning embroidery art through thoughtful, restrained application.
14. Build Delicate Blossoms with 3D Stitches

Give your cherry blossoms a lifelike, delicate quality by building them with dimensional stitches.
Create each petal using the detached chain stitch (lazy daisy), but instead of pulling it tight, leave a little slack to let it arch away from the fabric.
For a fuller look, try a woven wheel stitch (or spider web rose), which creates a beautiful, layered rosette. Use a pale pink for the petals and add a cluster of tiny French knots in yellow or cream at the center.
Scattered white seed beads can mimic unopened buds or dewdrops, adding another layer of subtle, refined detail to your floral embroidery.
15. Add Soft Dimension with Embroidery and Appliqué

Combine the softness of felt appliqué with the sharp detail of embroidery for a charming, modern nursery piece.
Cut the shapes for the deer and tree trunks from felt and secure them to your base fabric with a neat, even blanket stitch around the edges. This adds instant dimension and a wonderful tactile quality.
Then, use embroidery to add the finer details: straight stitches for the deer’s spots, satin stitch for the forest floor, and lazy daisy stitches for the tiny leaves on the branches.
This mixed-media approach is faster than filling large areas with thread and results in a playful, storybook effect perfect for decorating cozy corners.
16. Create Abstract Energy with Dynamic Straight Stitches
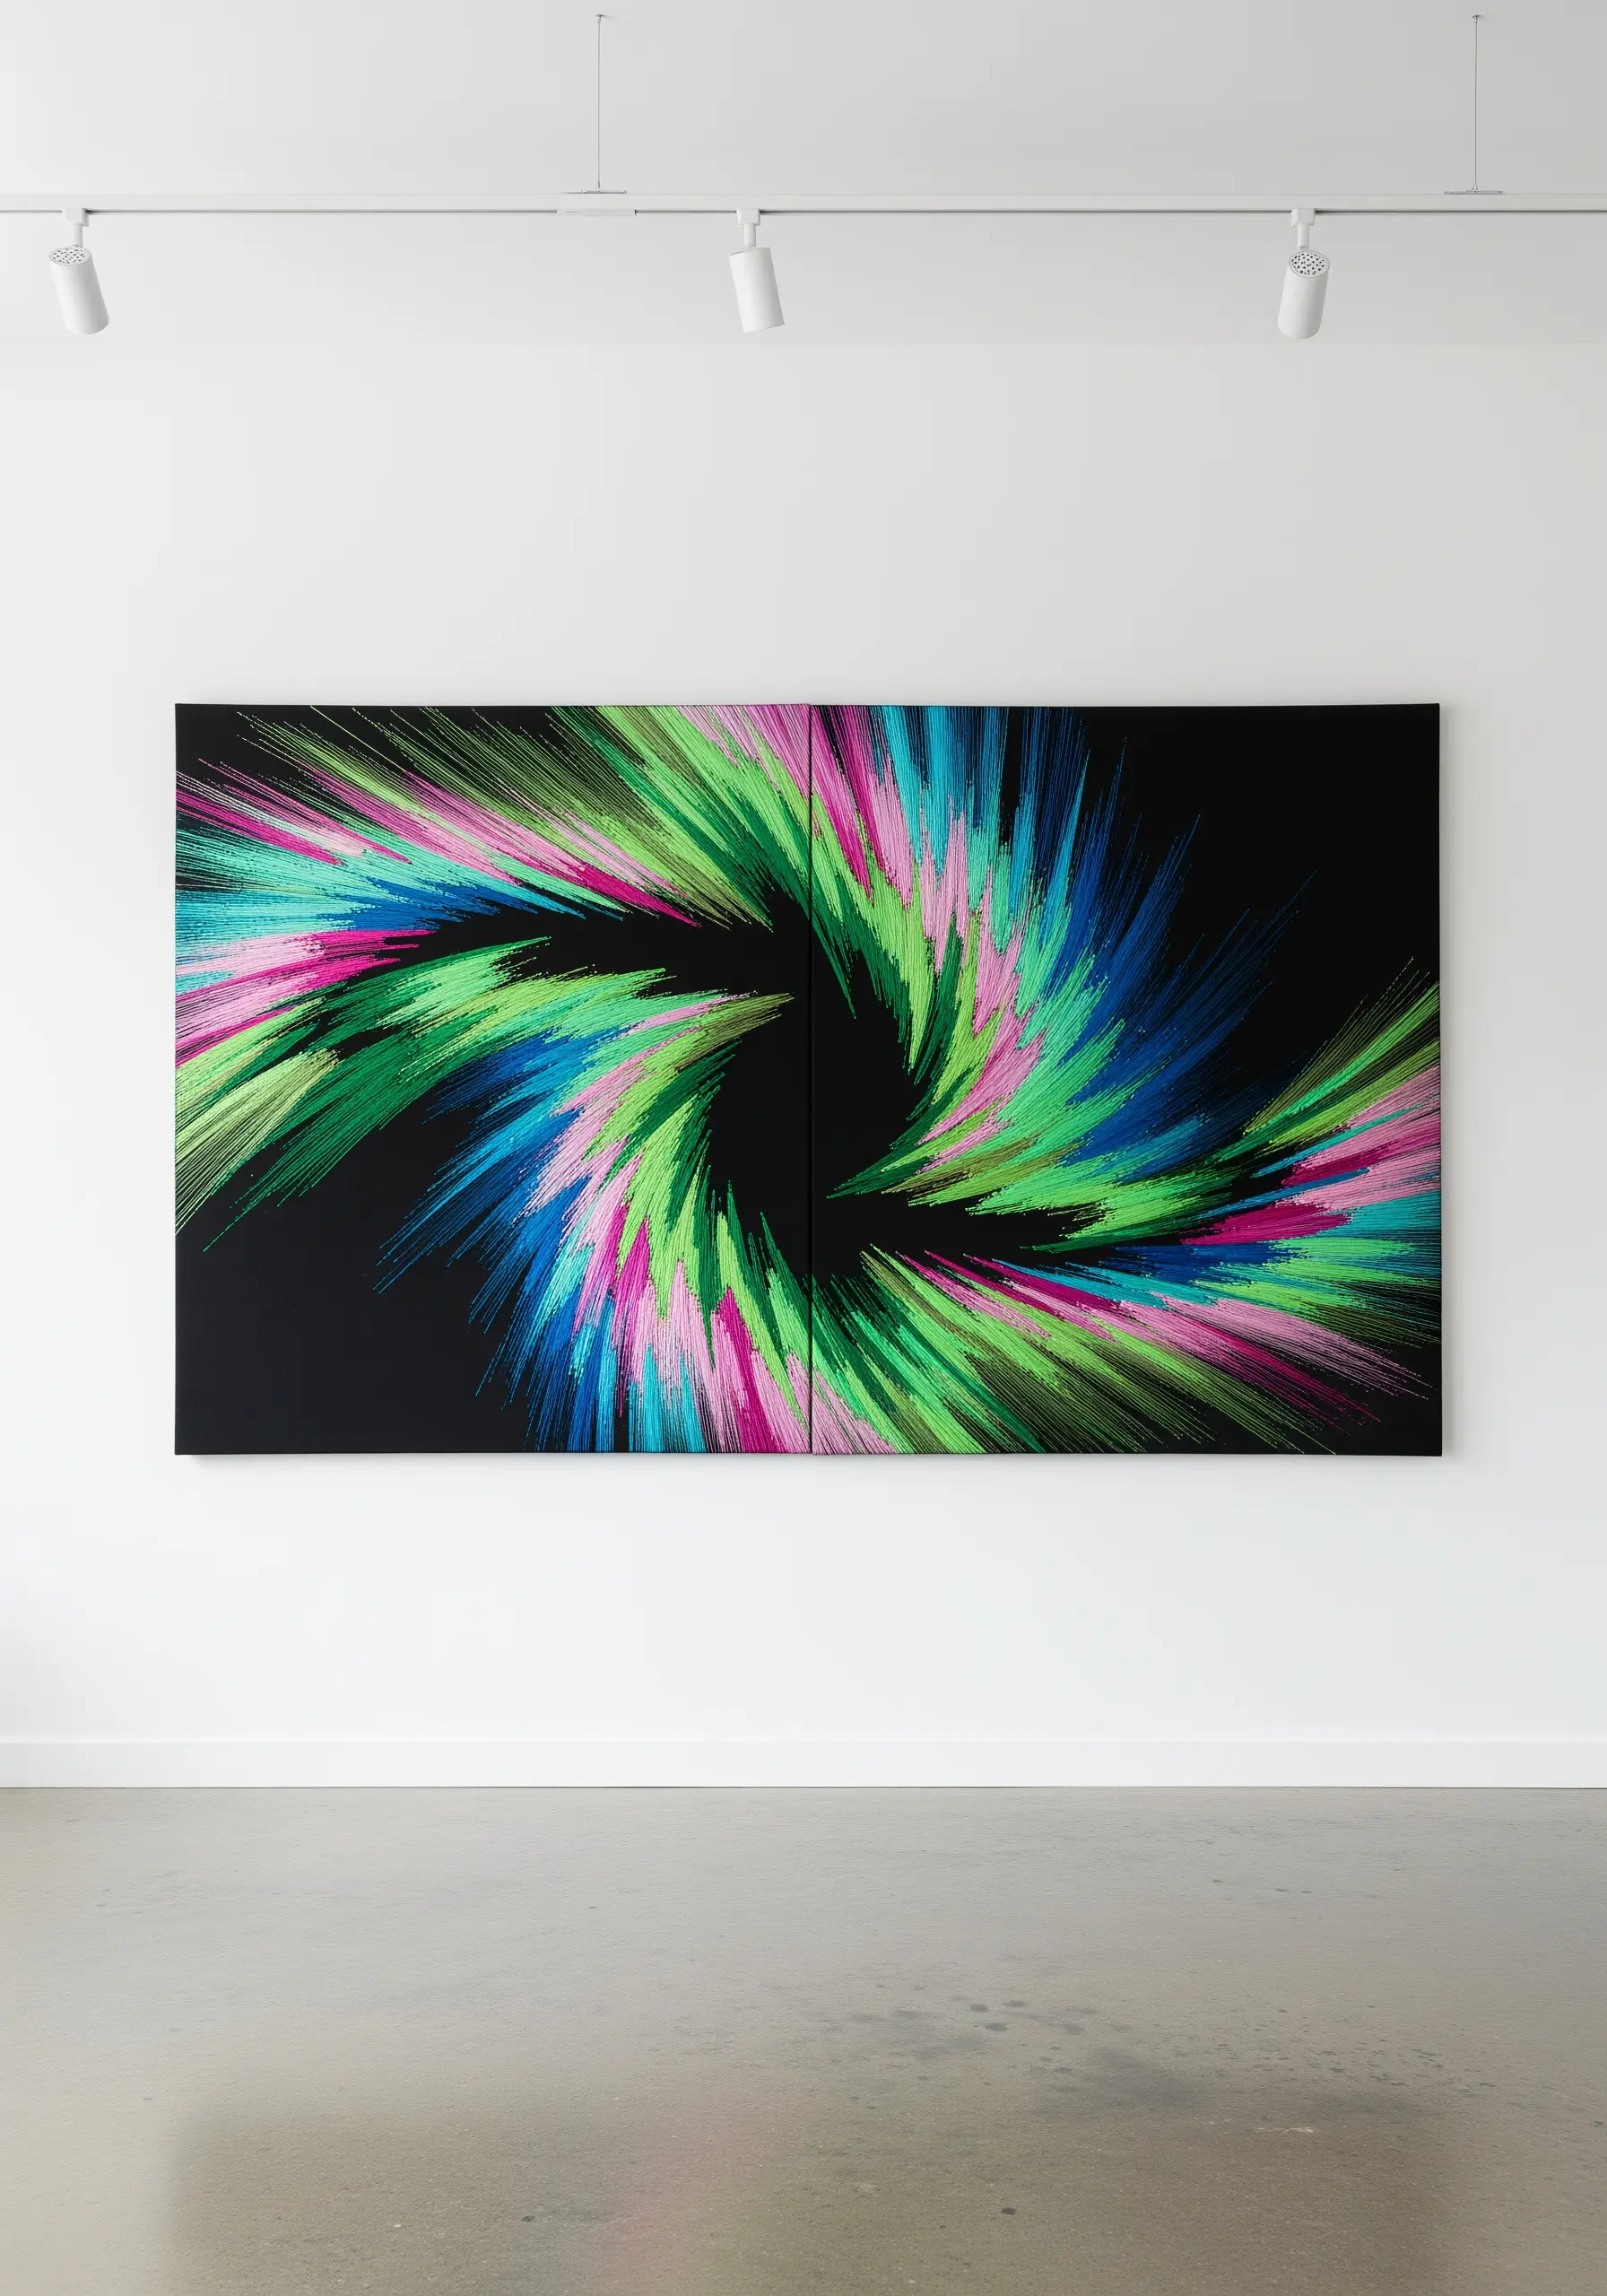
Unleash bold, expressive energy by using nothing more than the humble straight stitch.
This abstract vortex effect is created by layering thousands of straight stitches of varying lengths and colors. Work from the center out, angling your stitches to create a swirling motion.
Don’t be afraid to let colors overlap and intersect. The magic comes from the controlled chaos of the layers.
A dark background is essential, as it makes the vibrant pinks, greens, and blues appear to burst out from the canvas. This is a perfect project for using up leftover thread, transforming scraps into gallery-worthy abstract art.
17. Sculpt Realistic Mushrooms with Padded Satin Stitch

To give your embroidered mushrooms a plump, three-dimensional form, use a technique called padded satin stitch.
First, fill the area of the mushroom cap with a base layer of small, horizontal straight stitches. Then, cover this padding with your final layer of vertical satin stitches in bright red.
This underlayer physically raises the satin stitch, giving it a rounded, convex shape that perfectly mimics a mushroom cap.
Add tiny white seed stitches for the spots, and create a bed of moss below using a mix of French knots and straight stitches in various greens. It’s these textural details that create depth in your embroidery.
18. Trace Nature’s Intricacy with Fine Line Work

Capture the delicate, skeletal structure of a leaf by focusing entirely on precise line work.
This technique requires patience and a steady hand. Use a single strand of white or off-white floss on a contrasting background, like this grey linen.
A simple, neat backstitch is the perfect choice, as it creates a continuous, unbroken line that mimics the fine veins.
To ensure accuracy, you can trace your design onto the fabric with a water-soluble pen before you begin. The final result is a large-scale piece of minimalist line art for modern walls that celebrates nature’s quiet complexity.
19. Tell a Story with Sequential Hoop Art

Use a series of hoops to capture a moment of natural transformation, like a dandelion going to seed.
In the first hoop, use long-and-short stitch for the yellow petals. In the second, create the fluffy seed head with hundreds of straight stitches radiating from a central point, topped with tiny French knots.
For the final hoop, show the seeds dispersing across the fabric. Create this effect with individual lazy daisy stitches or French knots connected by a single straight stitch, giving them the appearance of floating on the wind.
This narrative approach turns a simple subject into a compelling piece of wall hoop art.
20. Paint Desert Dunes with Color-Blocked Gradients
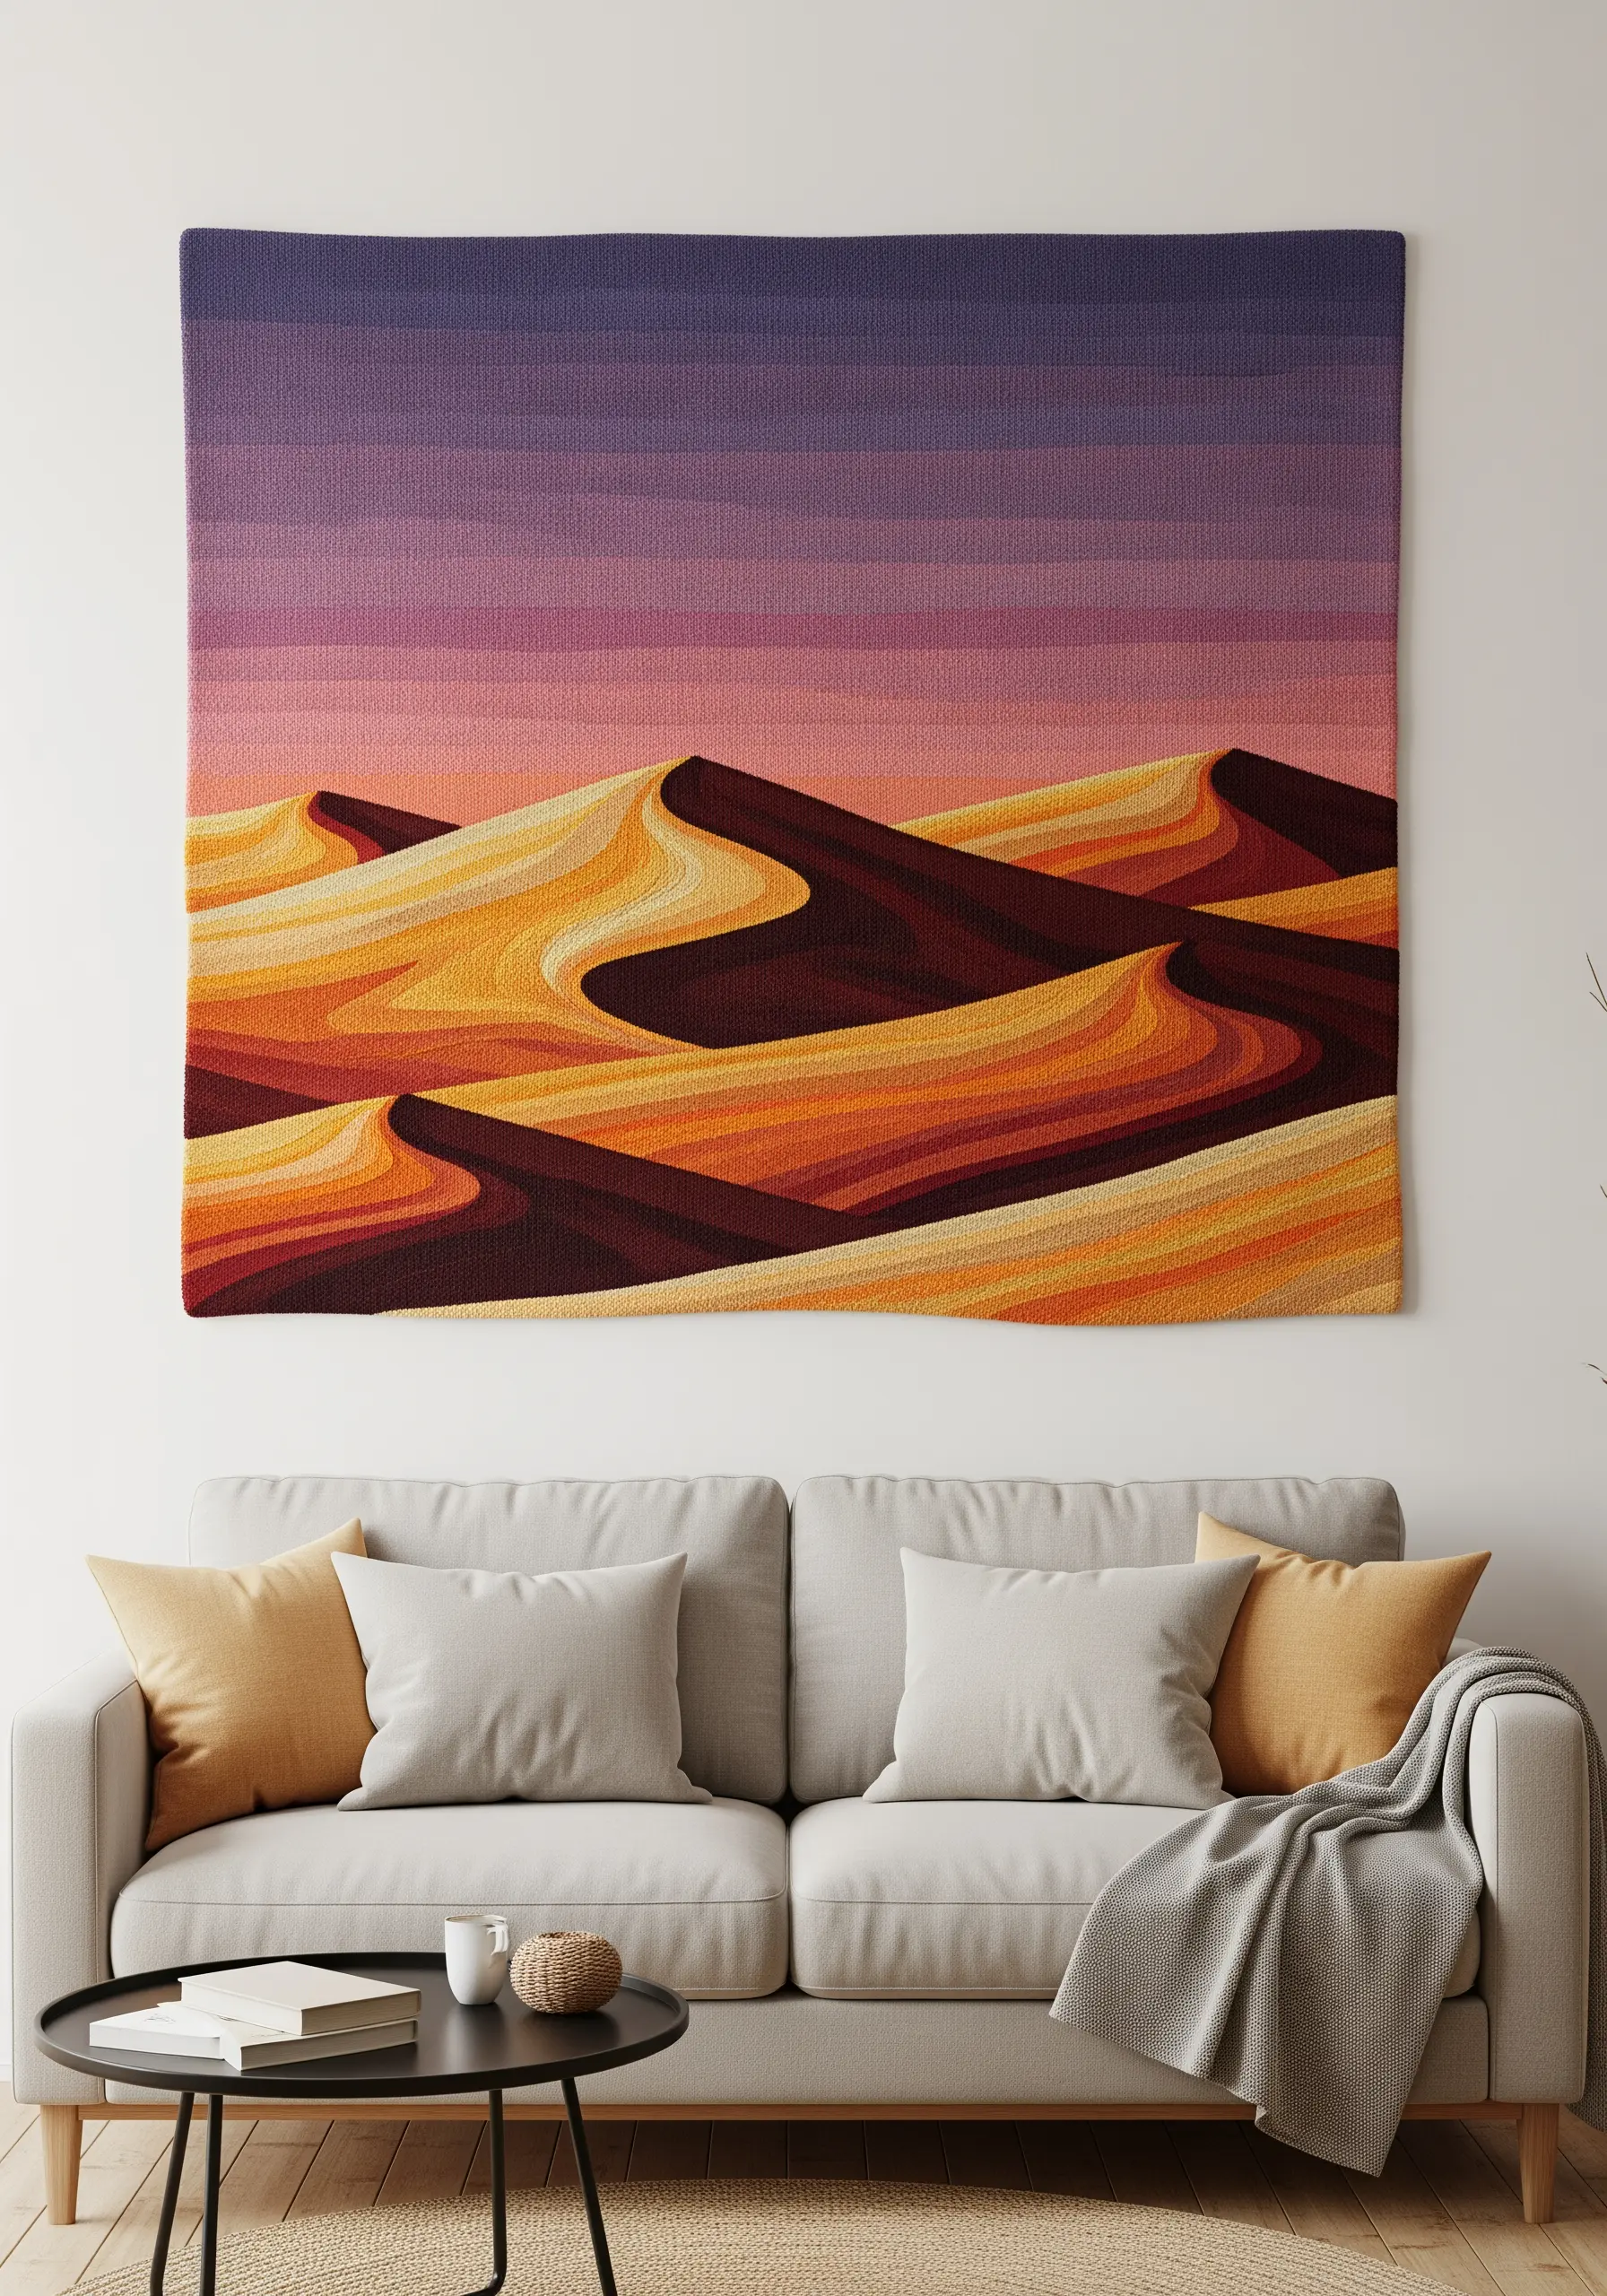
Evoke the sweeping curves of desert dunes by using blocks of solid color and clean, graphic lines.
This style is achieved with meticulous satin stitch, where each section of color is stitched in a single, consistent direction to create a smooth, fabric-like finish.
The key is selecting a sophisticated palette of ochre, burnt orange, and deep purple to represent sand and shadow.
Map out your color blocks precisely before you begin stitching. This technique, though simple in its execution, creates a powerful, large-scale graphic tapestry that feels both modern and serene, perfect for abstract thread landscapes.
21. Capture Iridescence with Silk and Metallic Threads
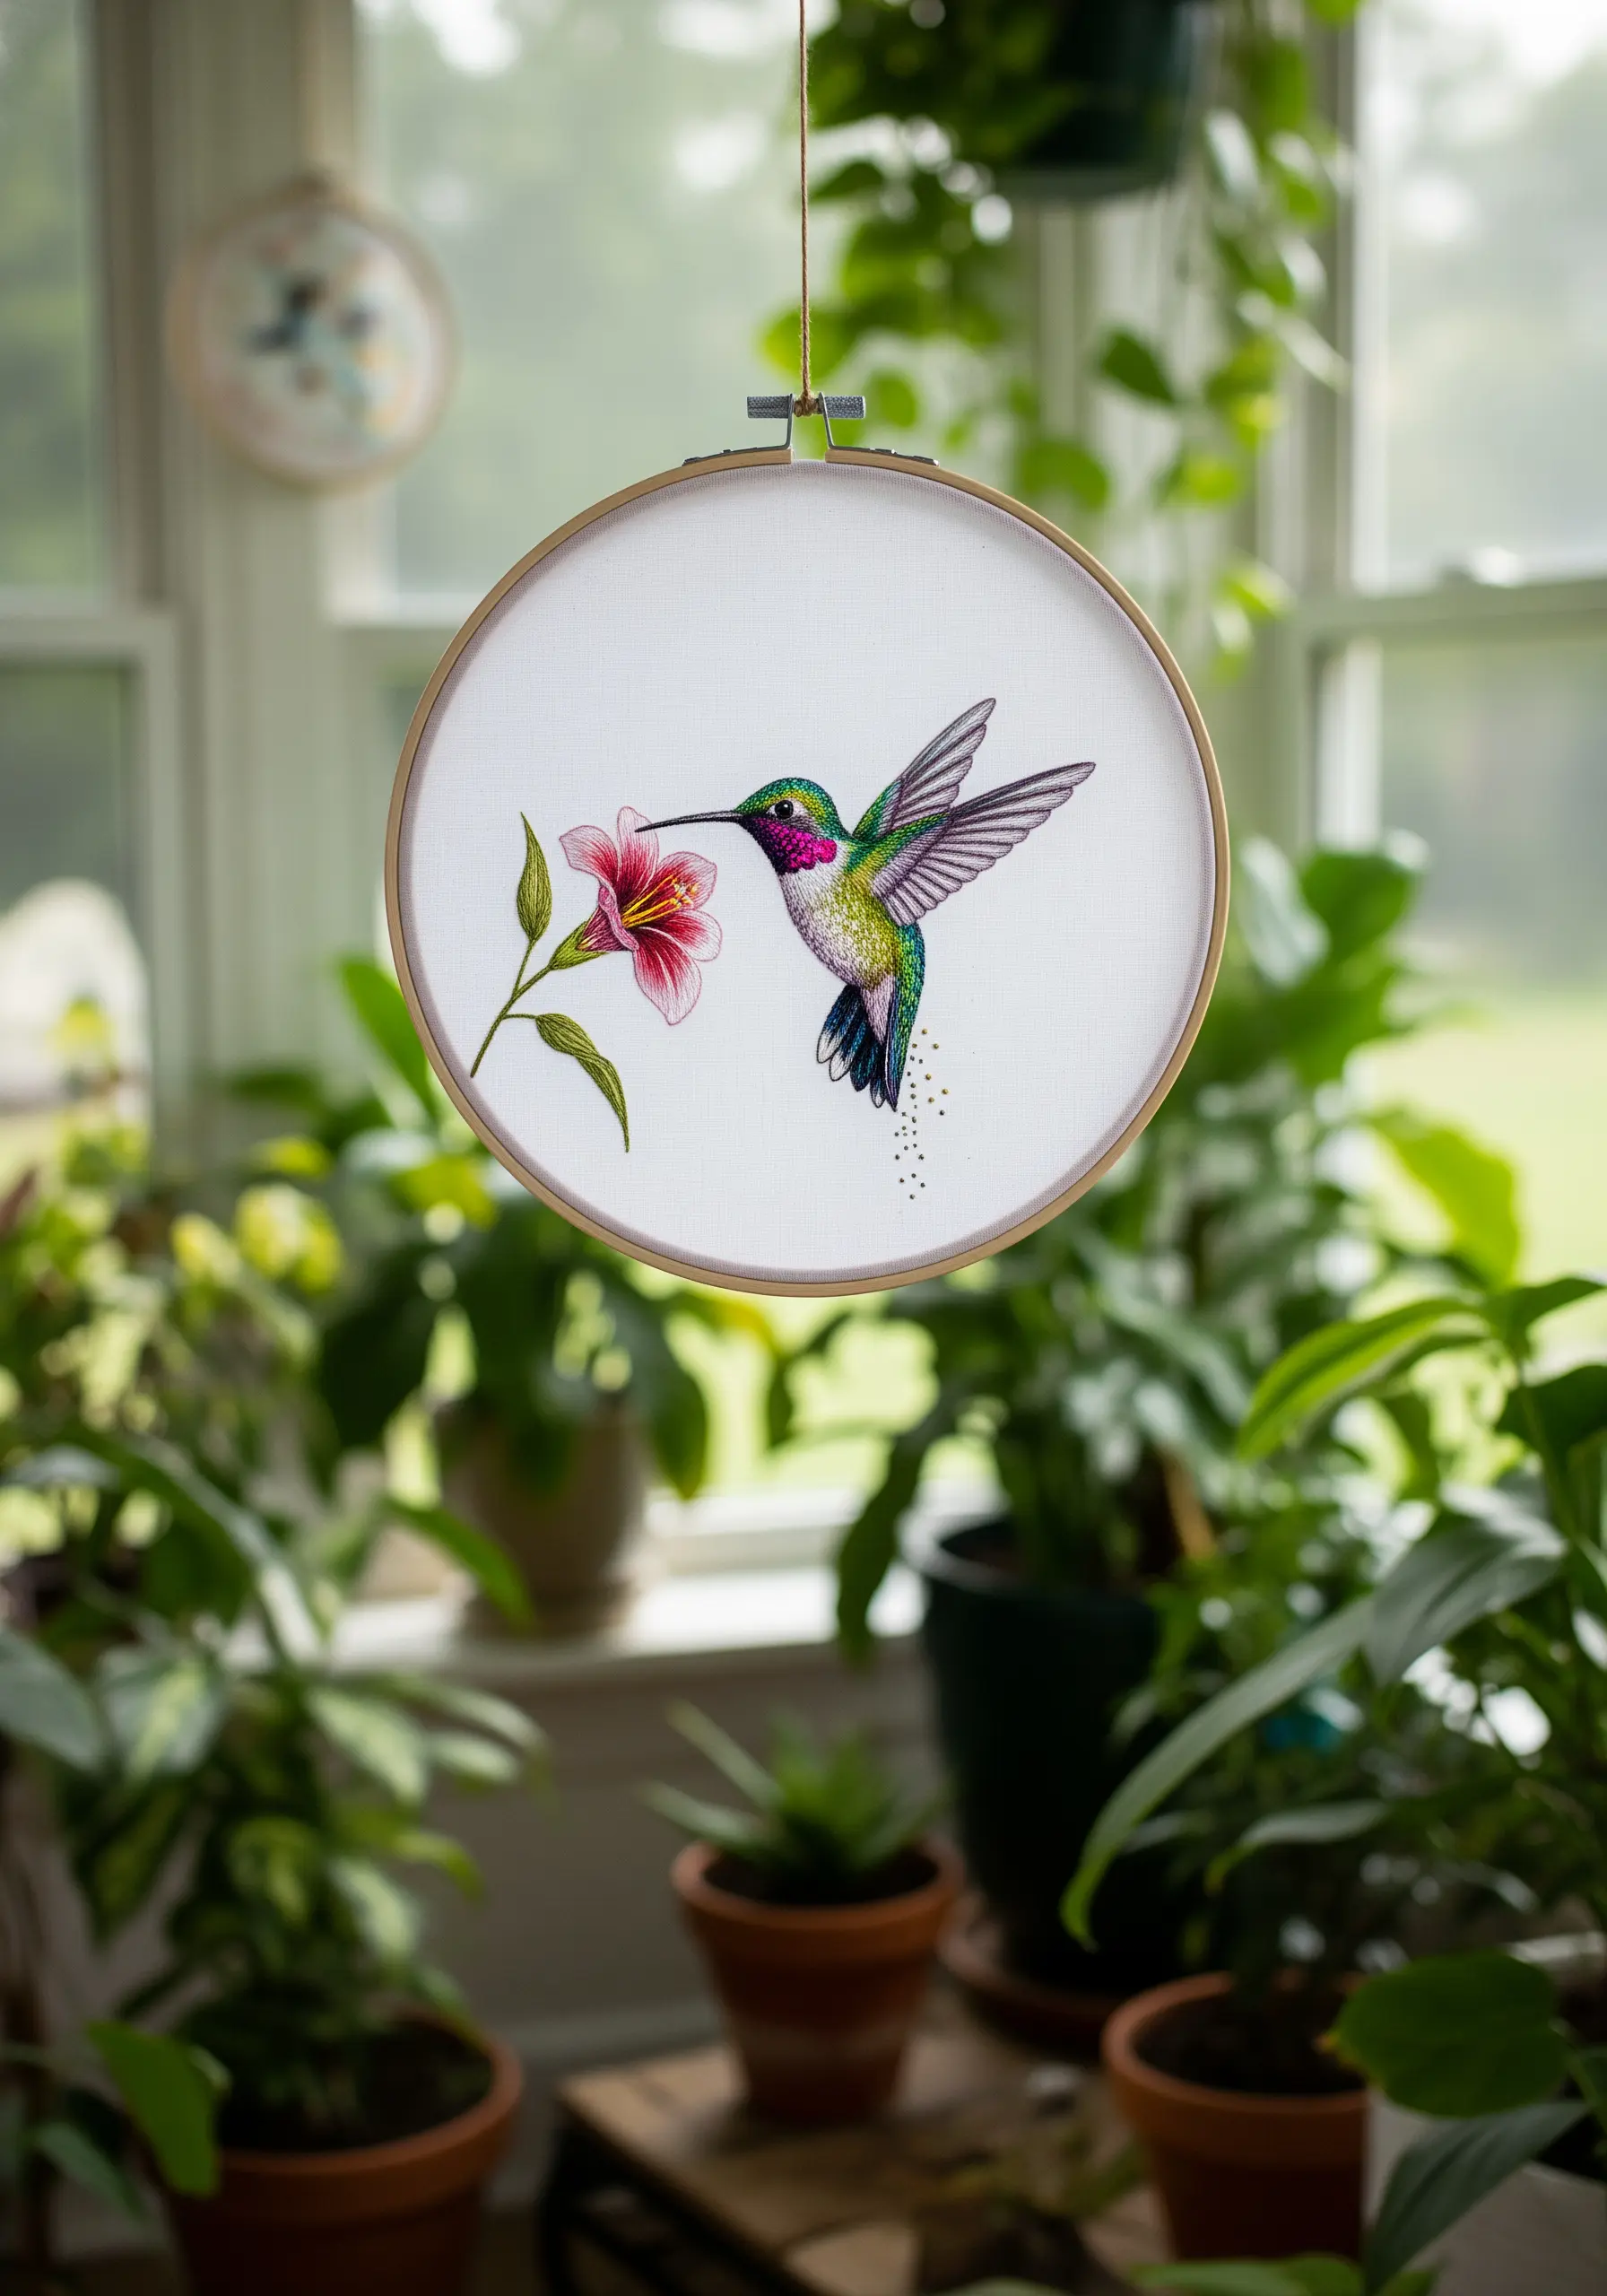
To mimic the shimmering throat of a hummingbird, thread choice is everything.
Incorporate silk threads or fine metallic floss in jewel tones like magenta, emerald, and sapphire. Use tiny, directional seed stitches or short satin stitches, allowing the different colors to blend and overlap slightly.
This creates a patchwork of color that shifts in the light, just like a real hummingbird’s feathers.
For the wings, suggest motion by using a sparse fill of grey straight stitches, leaving space between them to imply transparency and rapid movement. This selective use of special threads creates a stunning, realistic effect.
22. Explore Texture with Monochrome Spirals
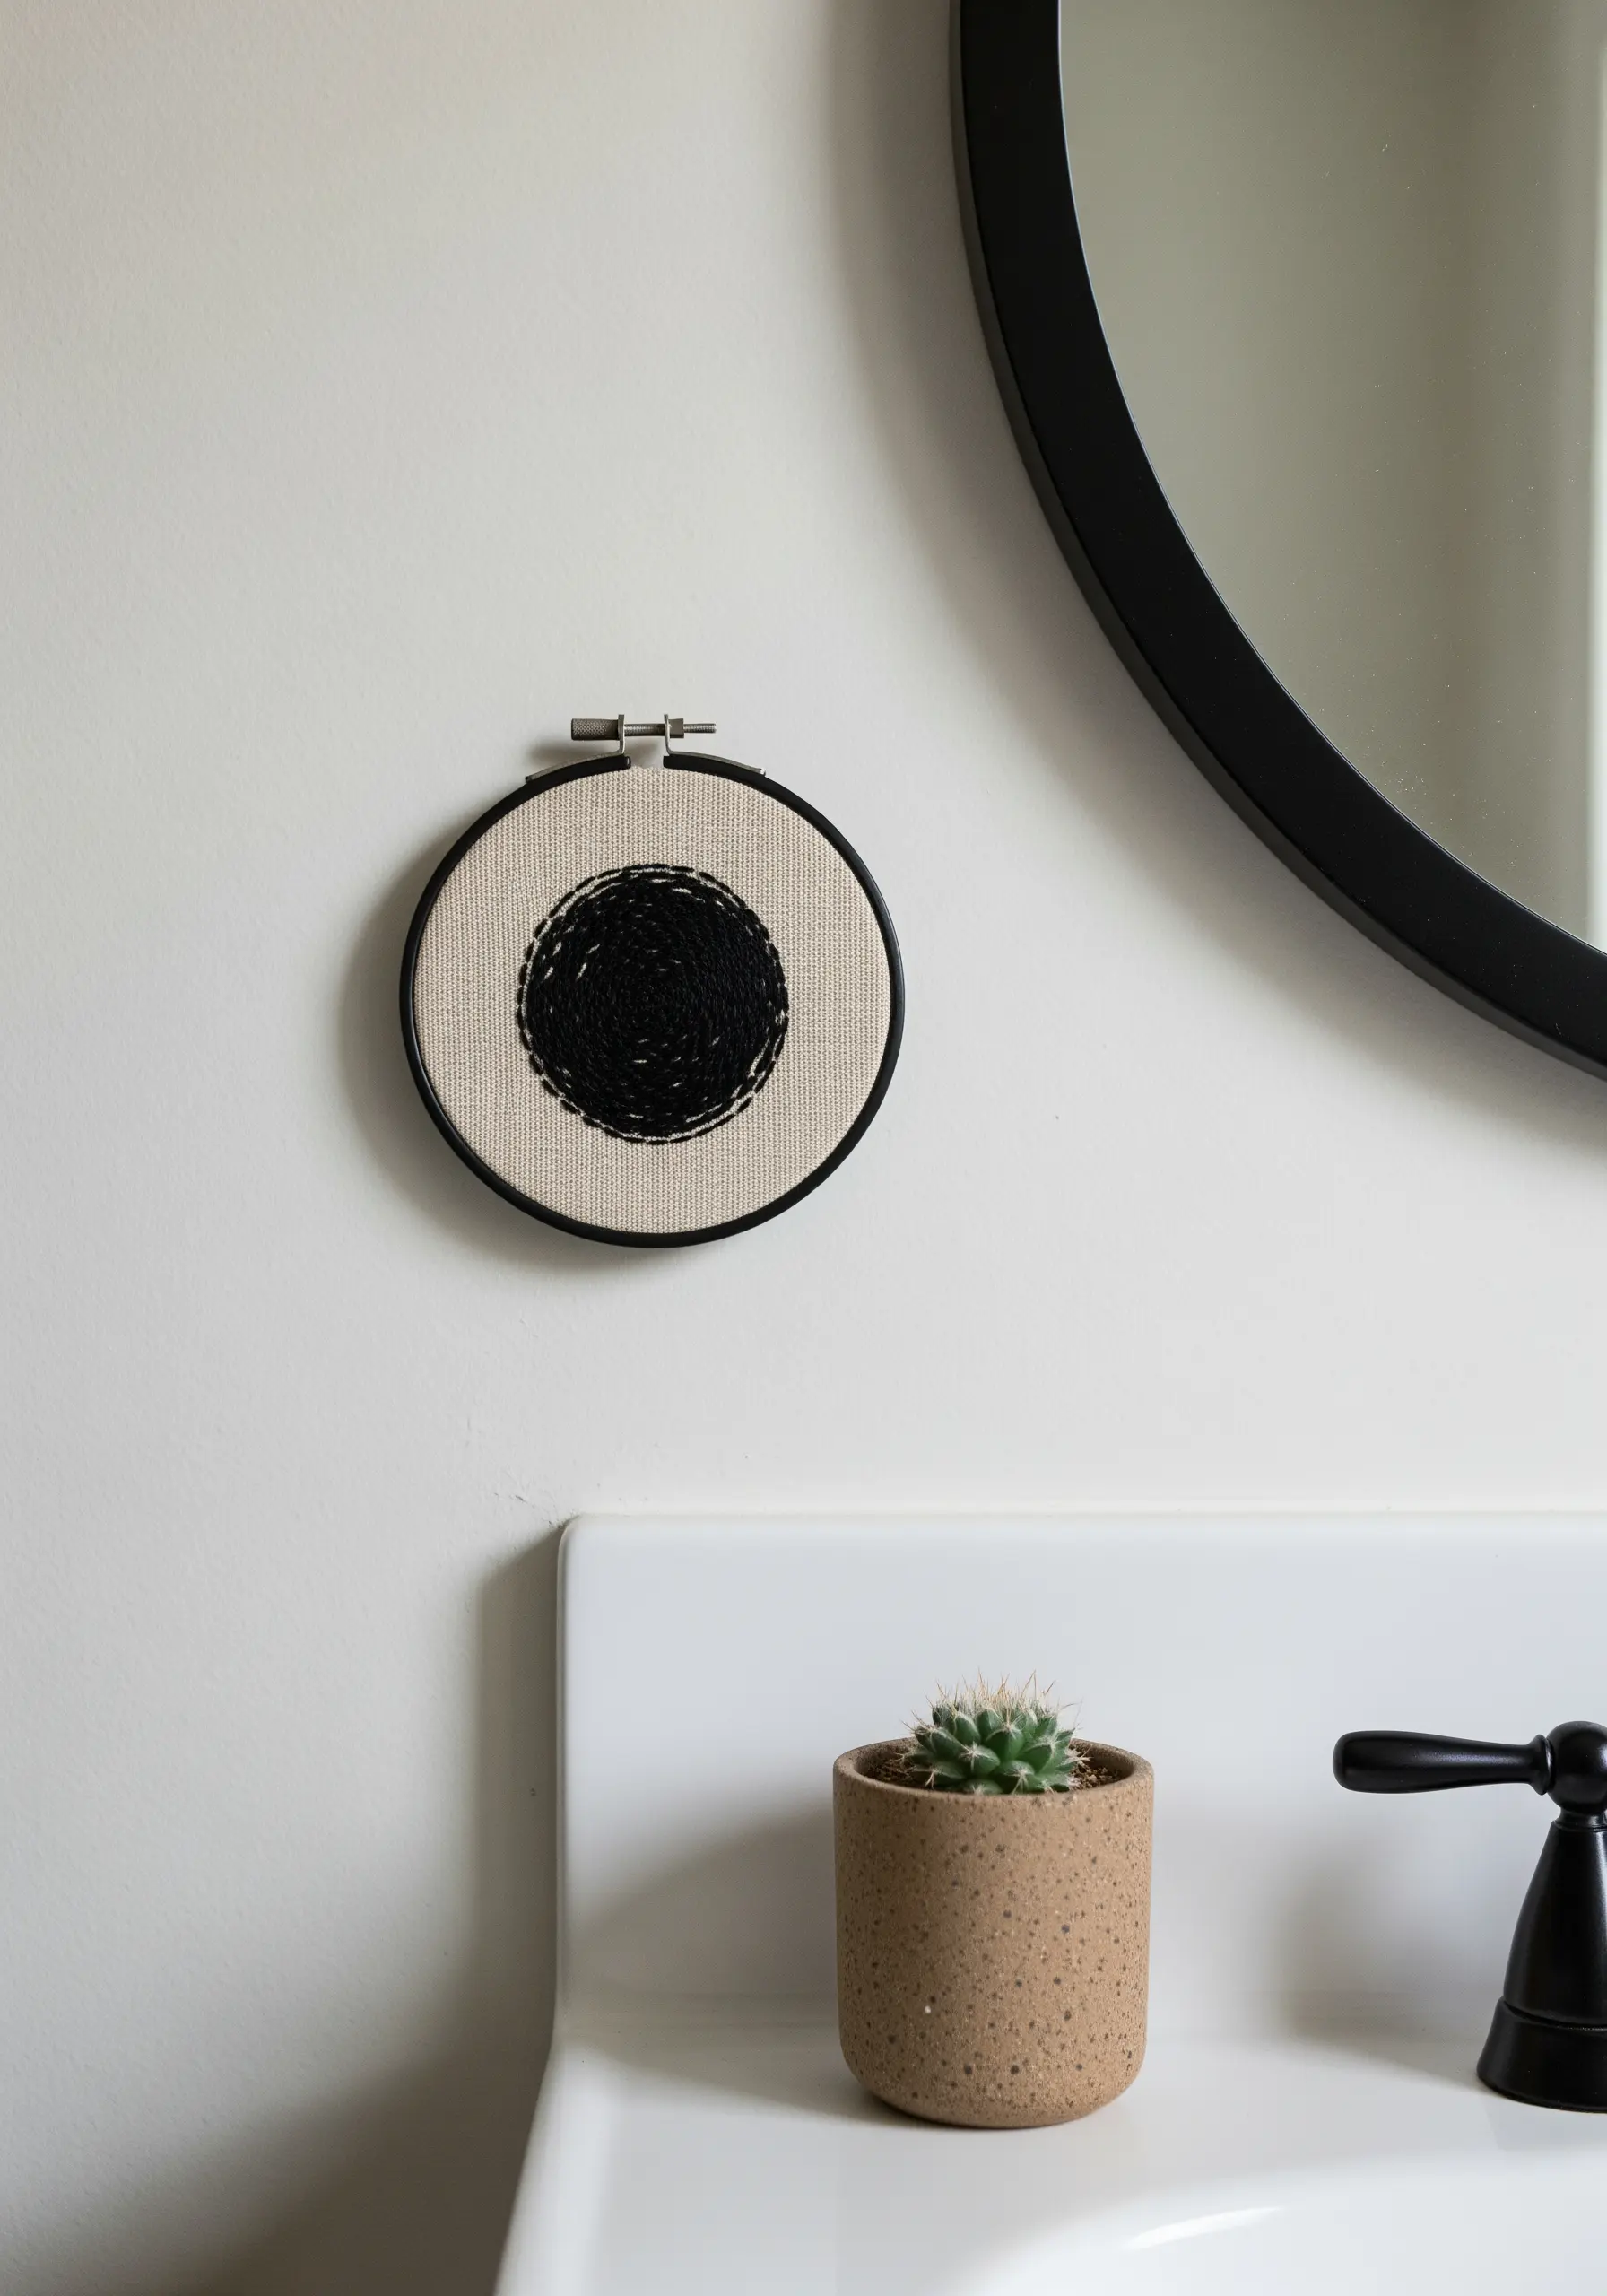
Even with a single color, you can create a piece with immense depth and visual interest.
This abstract design is built with a dense, spiraling backstitch or chain stitch using all six strands of black floss. By working from the center outwards, you create a hypnotic, textured medallion.
The slightly uneven, organic quality of the spiral adds character and catches the light in interesting ways, highlighting the thread’s texture against the neutral fabric.
This is a wonderfully meditative project that proves that monochrome embroidery can be incredibly powerful and expressive.
23. Weave a Sculptural Ocean Wave Headboard
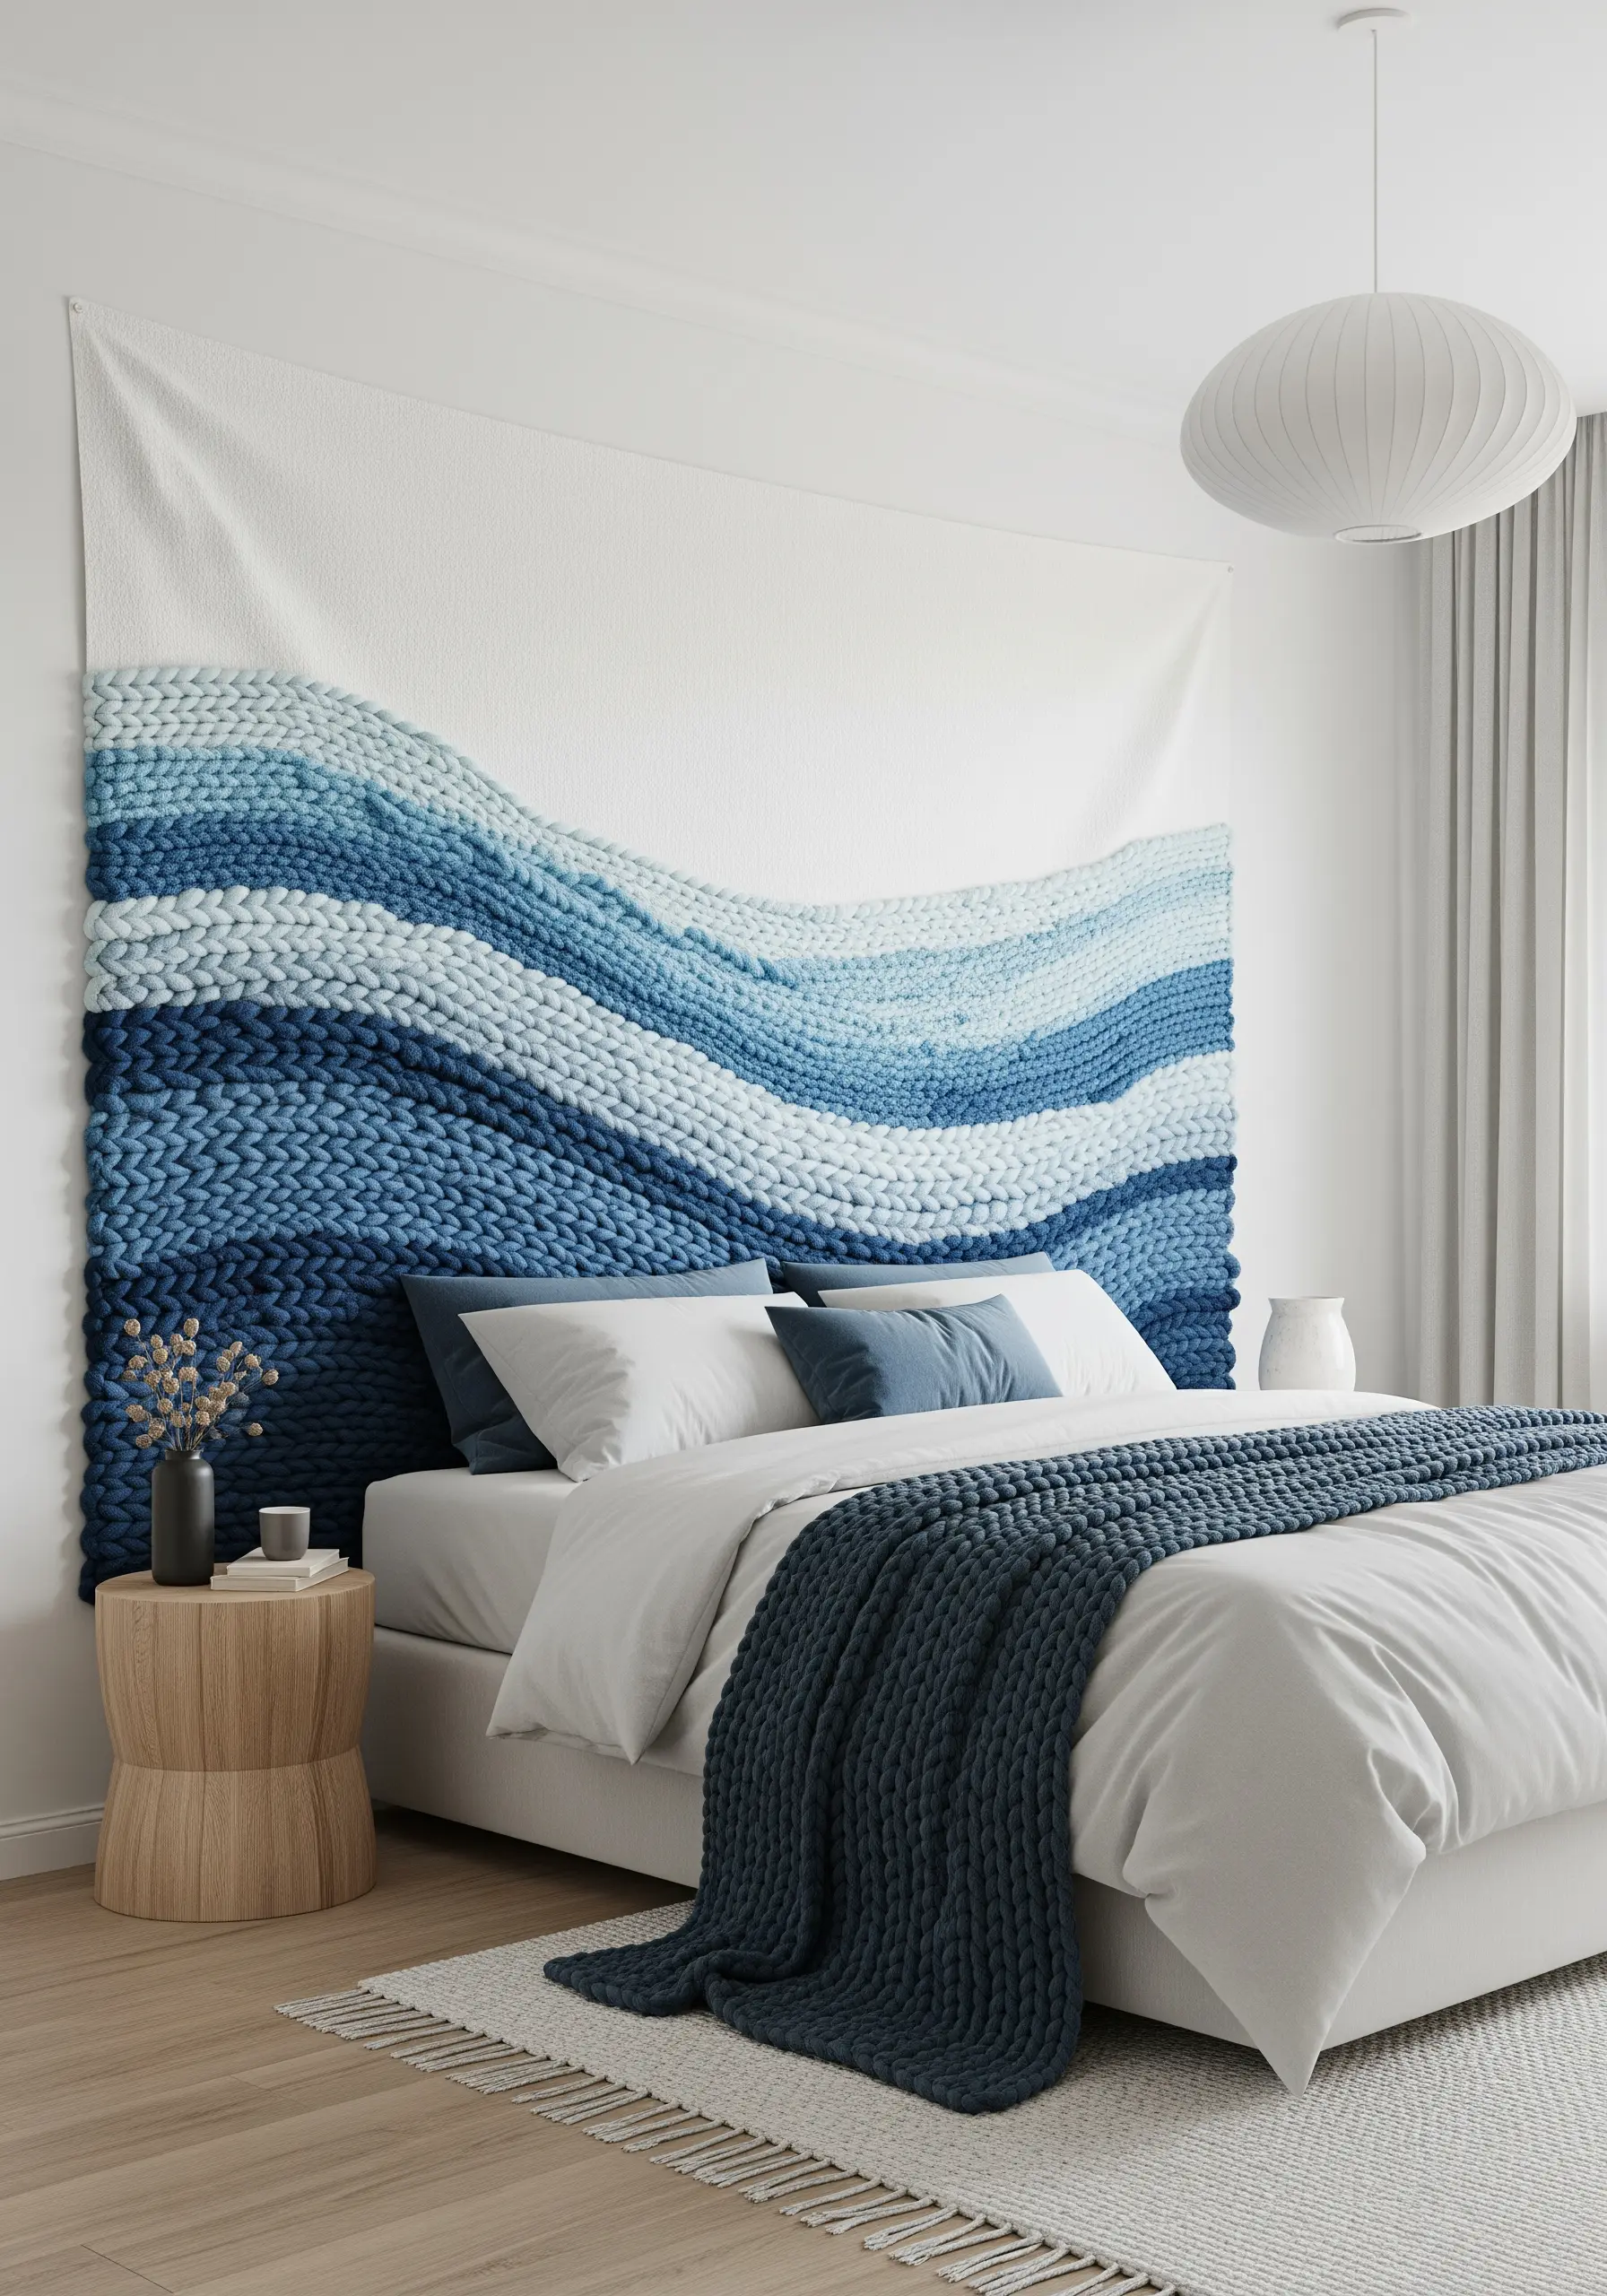
Transform your bedroom into a sanctuary with a large-scale, textural art piece that doubles as a headboard.
This stunning effect is achieved by using super chunky wool yarn, either couched or woven directly onto a large canvas.
To create the flowing waves, lay down thick bands of yarn in an ombre sequence of blues and whites, securing them with a strong, matching thread.
The sheer scale and plushness of the yarn create a soft, sculptural quality that is both visually striking and acoustically dampening, making it one of the most unique fiber art installations for a serene space.
24. Compose a Marsh Scene with Multi-Panel Art
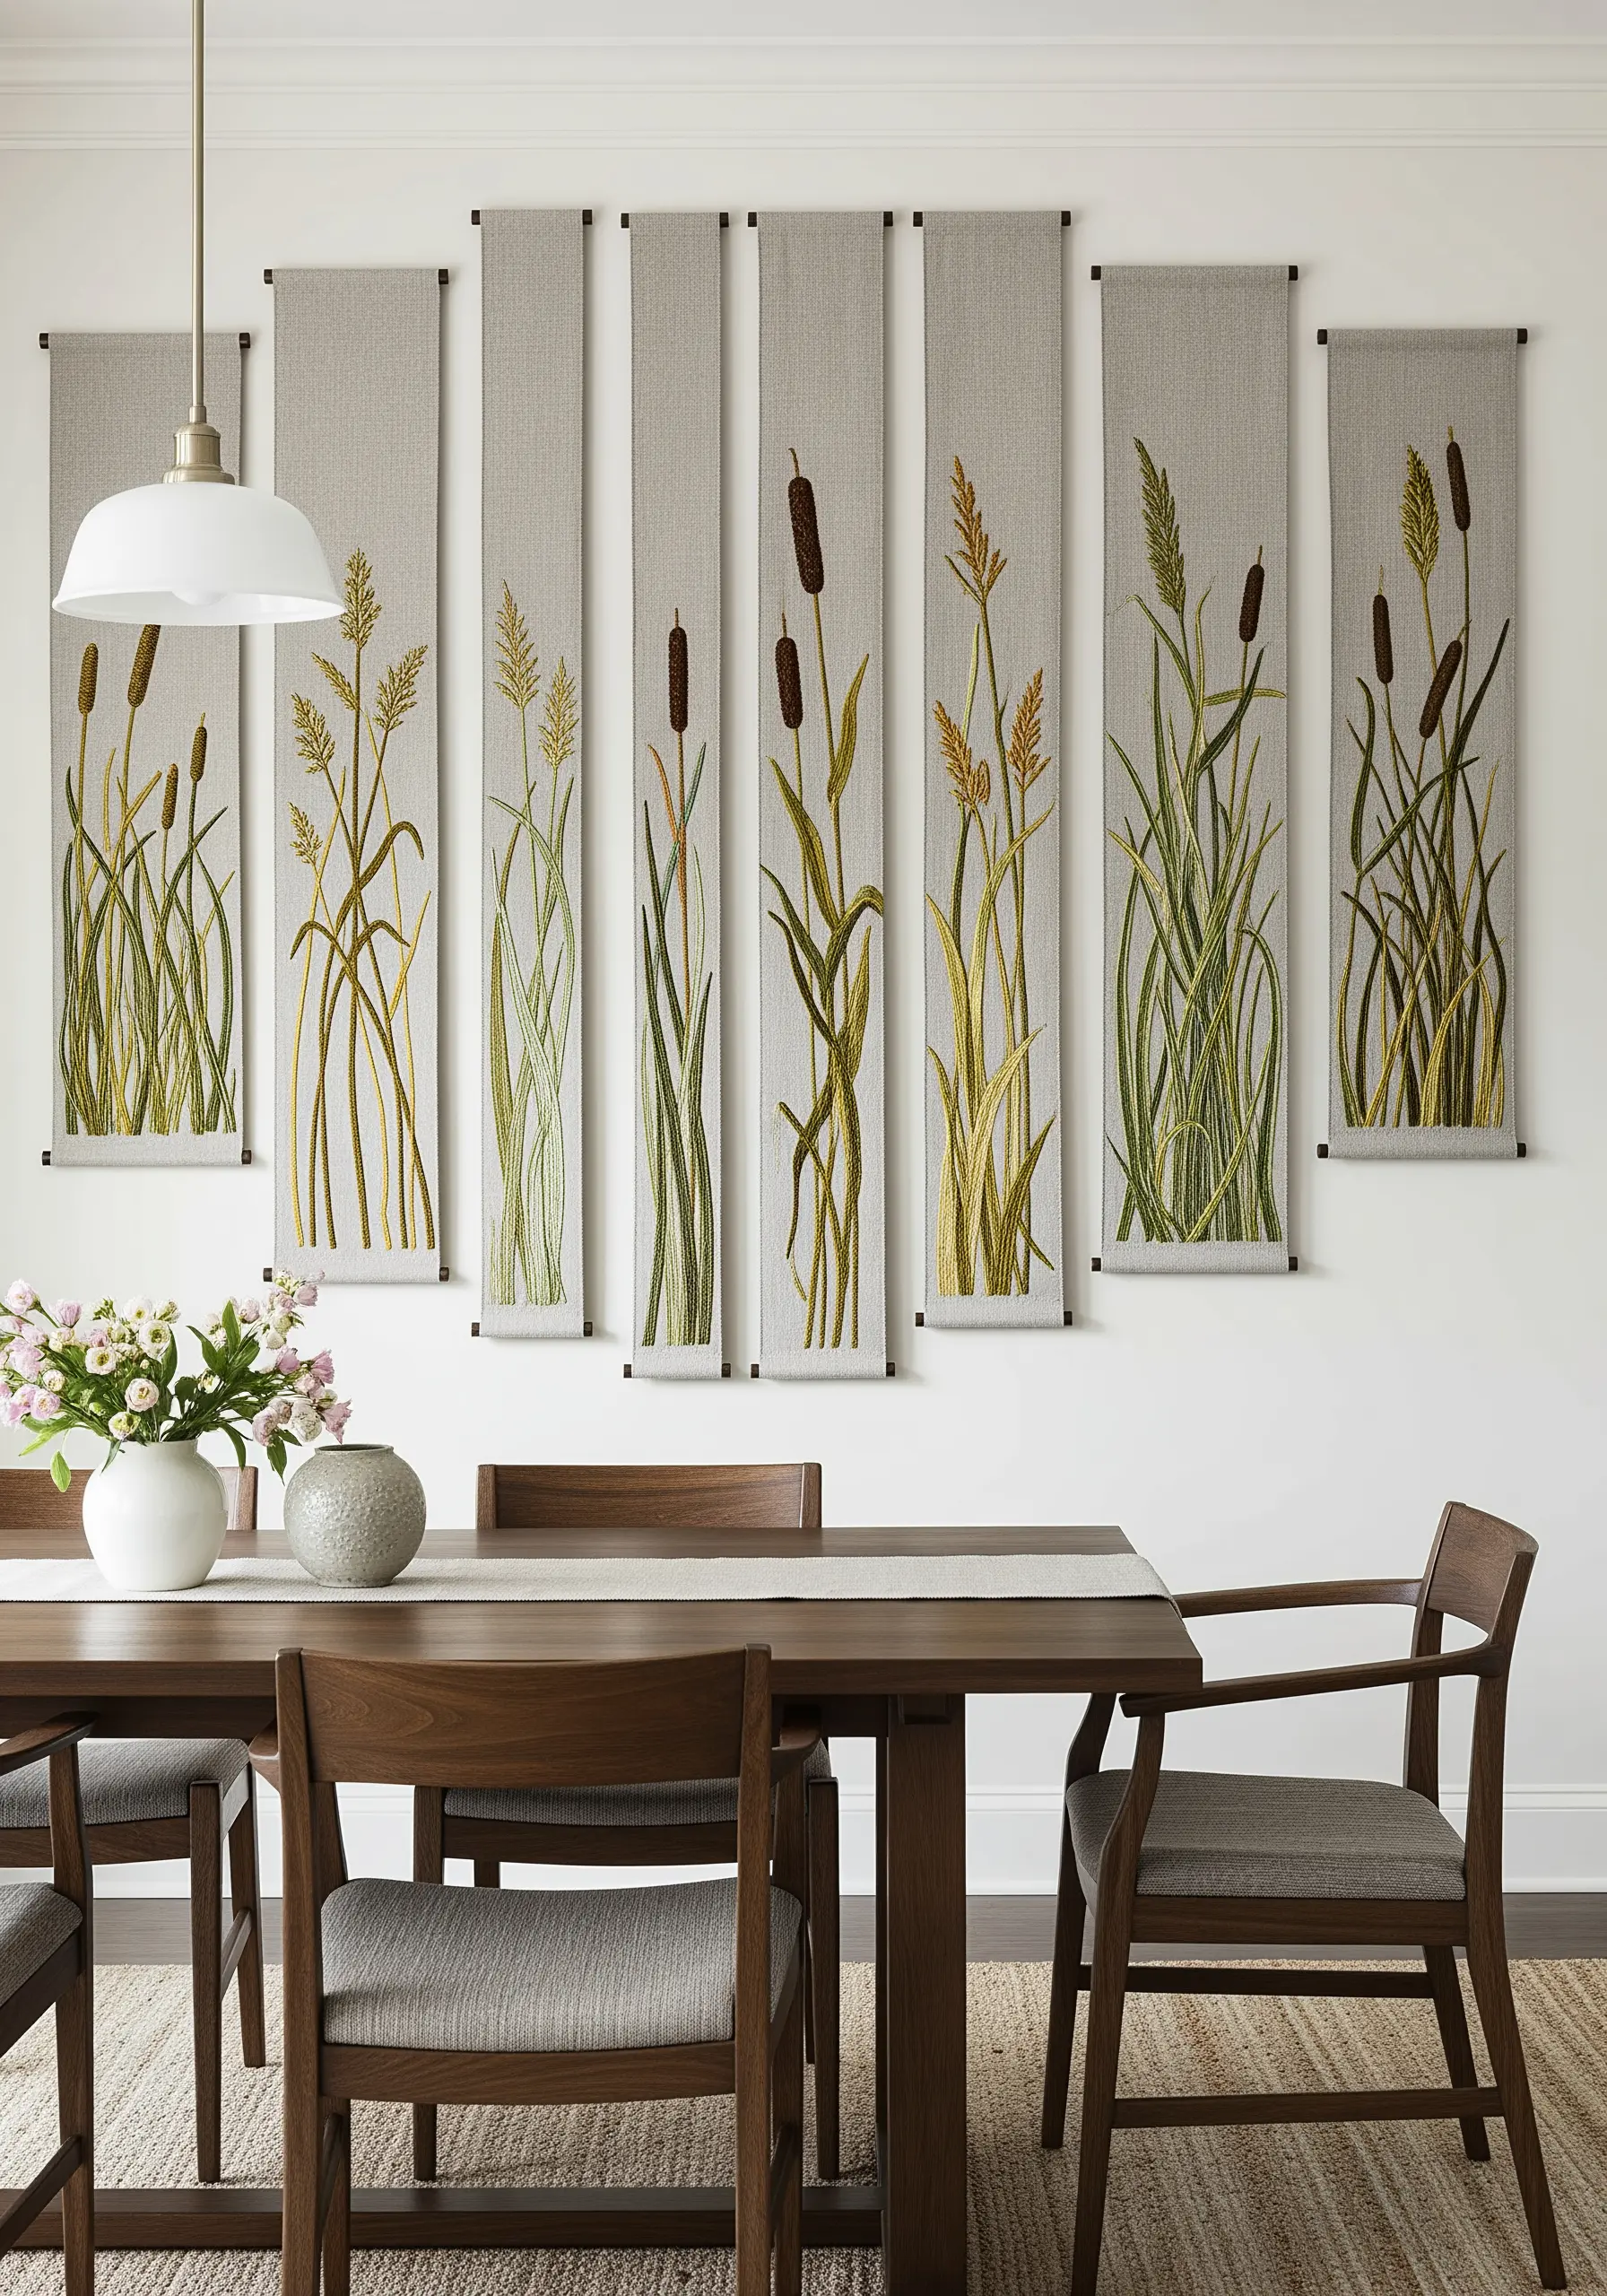
Create a sophisticated, expansive art piece by breaking a single scene into multiple vertical panels.
This approach allows you to build a sense of rhythm and height. Vary the placement and density of the reeds across the panels to avoid a static, repetitive look.
Use a fishbone stitch for the grassy leaves to give them a central spine and natural taper. For the fuzzy cattails, a plush turkey work stitch (ghiordes knot) in a rich brown provides the perfect three-dimensional texture.
Hanging them with a slight space in between enhances the architectural, gallery-like feel of this embroidered wall tapestry.
25. Chart the Stars with Thread and Light

Combine classic embroidery with modern technology to create a celestial map that truly glows.
Stitch the constellation lines and chart markings on dark blue fabric using a fine, bright white or silver metallic thread. A simple backstitch will provide the necessary precision for the geometric lines.
For the main stars, instead of French knots, carefully pierce the fabric from behind and poke through tiny battery-powered LED fairy lights.
Secure the wires on the back with tape or glue. This mixed-media technique turns a classic star chart into a magical, illuminated piece of art combining embroidery and mixed-media.
26. Meditate on Growth with Concentric Tree Rings
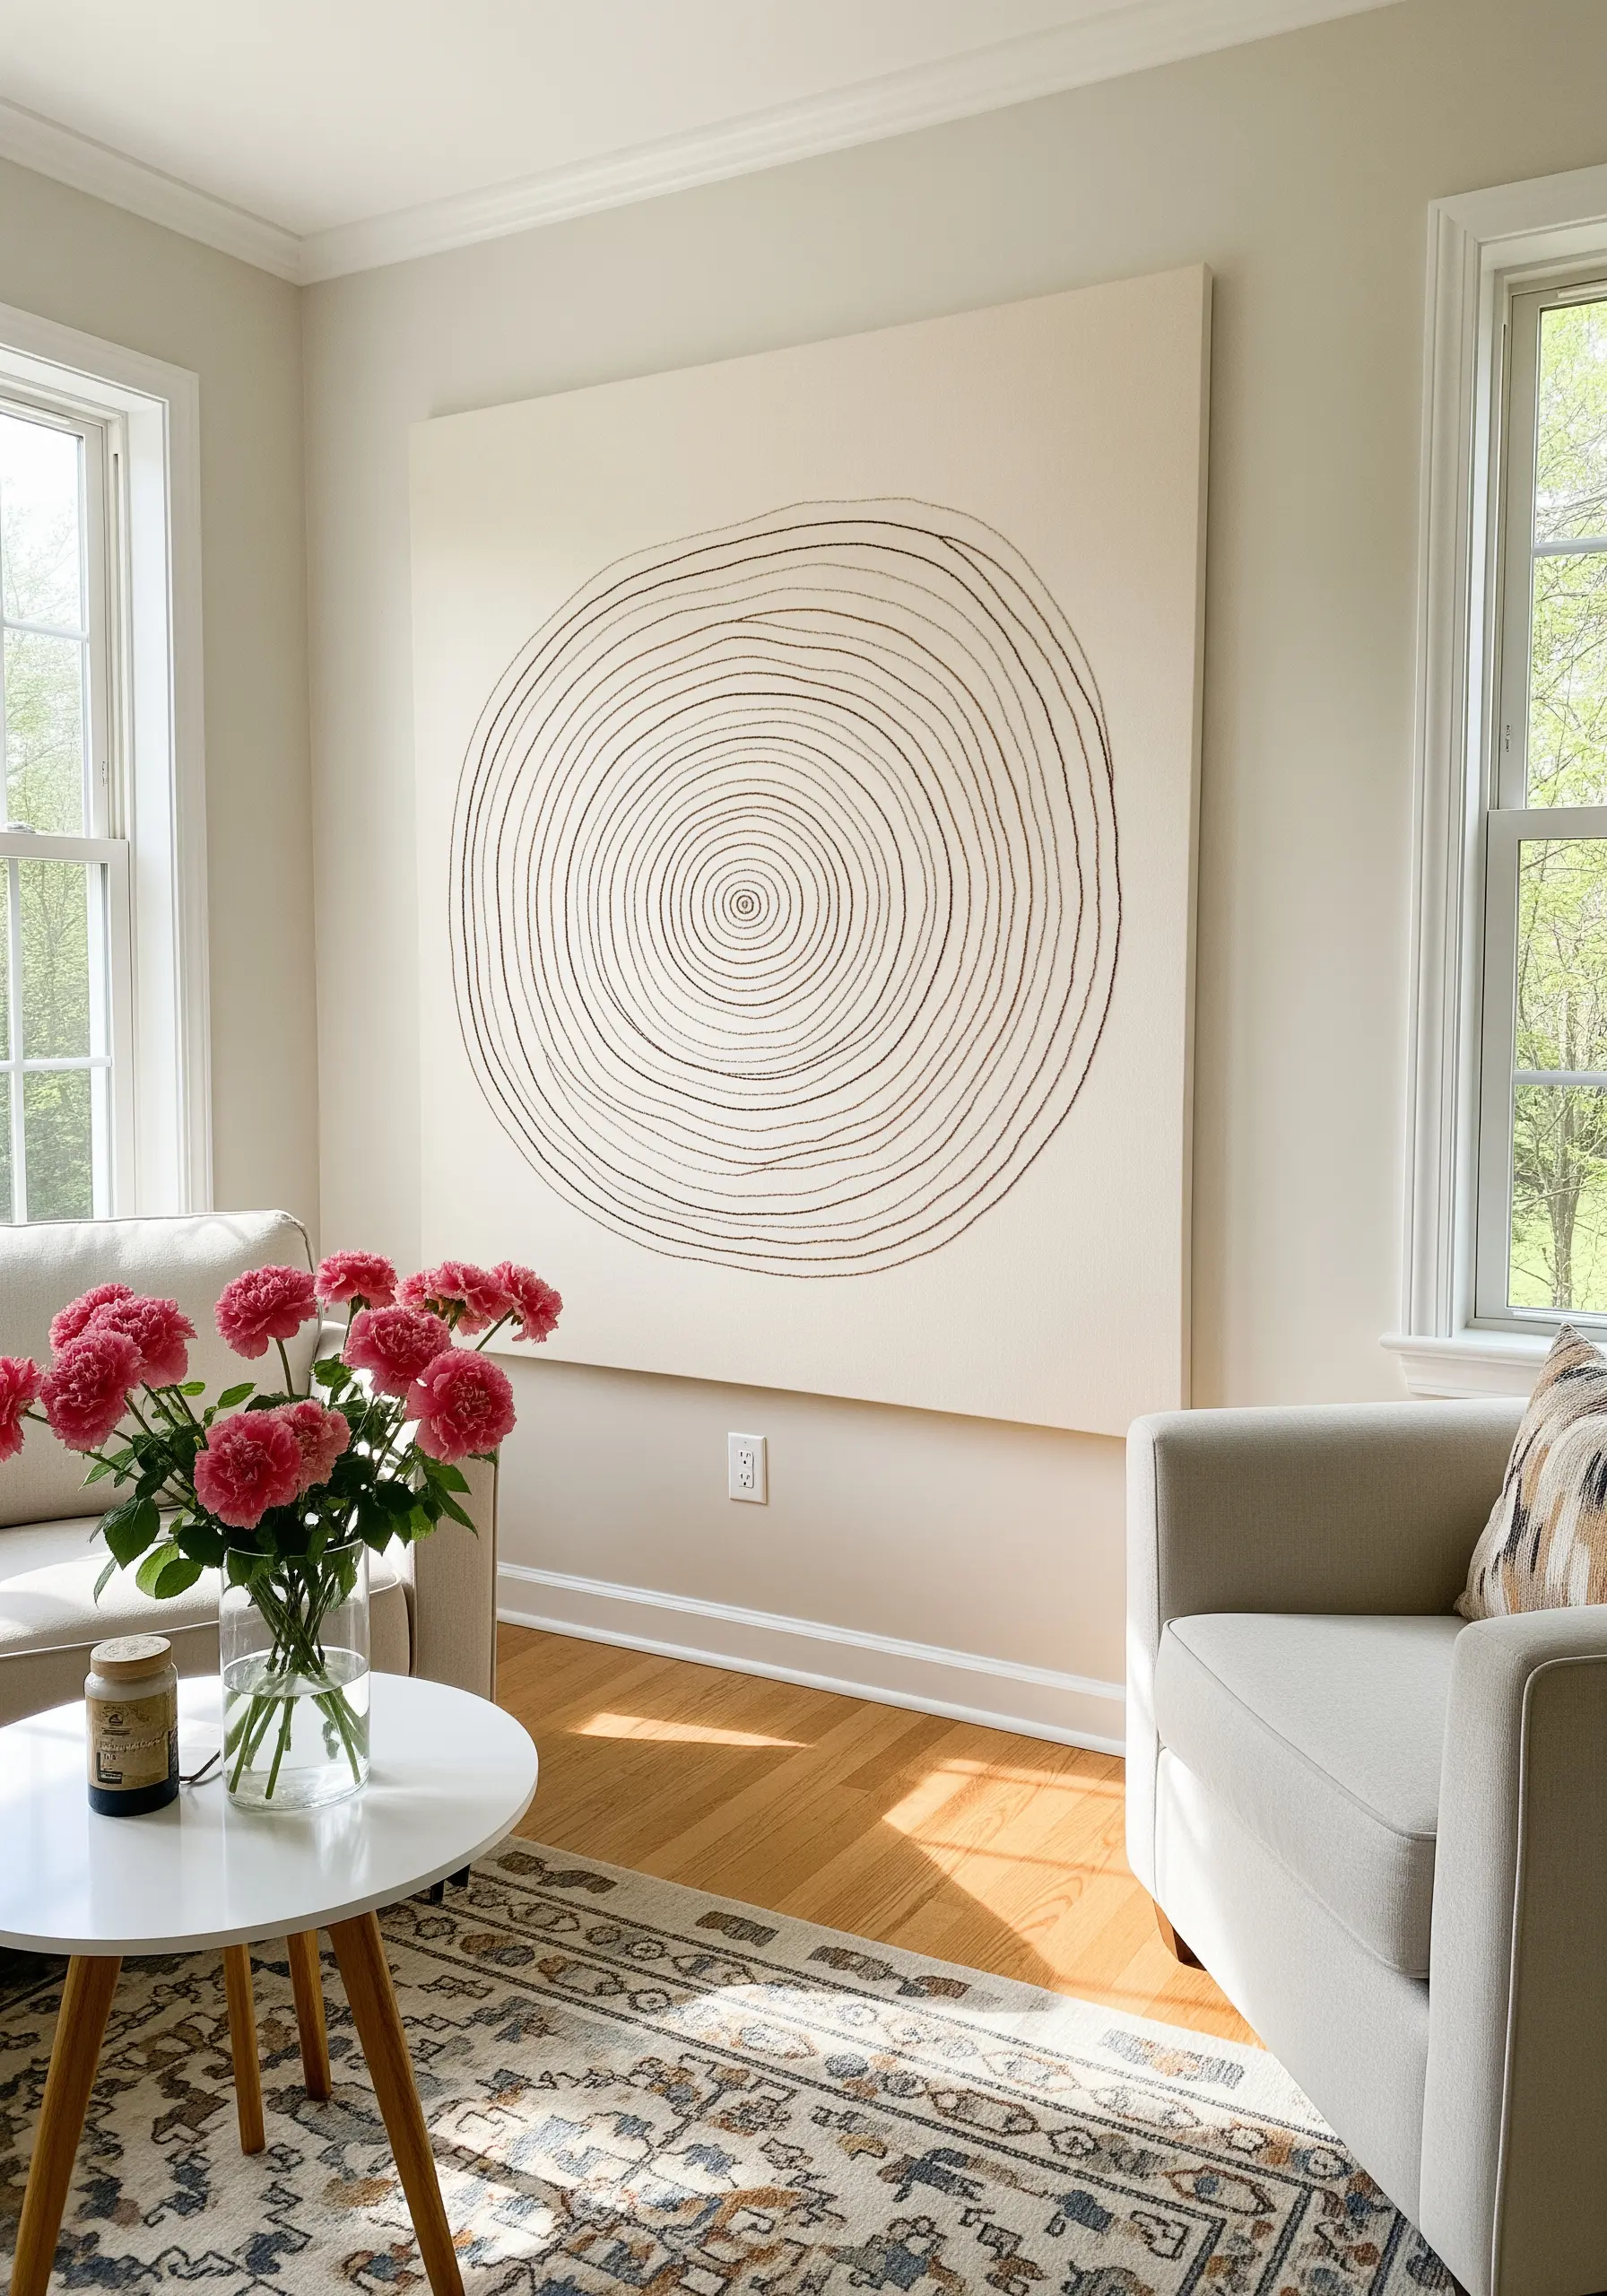
Capture the quiet passage of time by stitching the concentric rings of a tree trunk.
This large-scale, minimalist piece relies on the meditative repetition of a simple stitch, like a backstitch or split stitch.
To add subtle, natural variation, use a variegated brown or taupe thread. This will create slight shifts in color throughout the rings, mimicking the organic imperfections of real wood grain.
The power of this design lies in its scale and simplicity. It transforms a humble stitch into a profound statement about growth and nature, making it one of those minimal embroidery patterns that carries deep meaning.
27. Craft Feathery Pampas Grass with Turkey Work

To achieve the signature fluffy texture of pampas grass, the turkey work stitch is your best friend.
Create a series of looped stitches (Ghiordes knots) up the stalk of the grass. Once you have a dense section of loops, carefully snip them open with sharp embroidery scissors.
Fluff the cut threads with your fingers or a stiff brush to create a soft, feathery plume. Using an off-white or beige thread with a slight sheen will enhance the airy, light-catching quality.
This technique creates an incredible 3D effect, making your pampas grass look like it could sway in the breeze. It’s a key method for creating embroidery that captures nature’s textures.
28. Juxtapose Celestial Bodies with Radiant and Padded Stitches

Create a stunning sun and moon diptych by assigning a unique stitch treatment to each celestial body.
For the sun, stitch long, radiating straight stitches in a golden metallic thread, emerging from a dense, satin-stitched center. This creates a powerful sense of light and energy.
For the moon, use a padded satin stitch with silver metallic thread. The underlying padding will give the crescent a gentle, curved dimension, while the smooth surface reflects light softly.
This pairing of techniques—one explosive and linear, the other calm and dimensional—makes for a beautifully balanced set of metallic thread wall art.
29. Create Ethereal Botanicals on Sheer Fabric
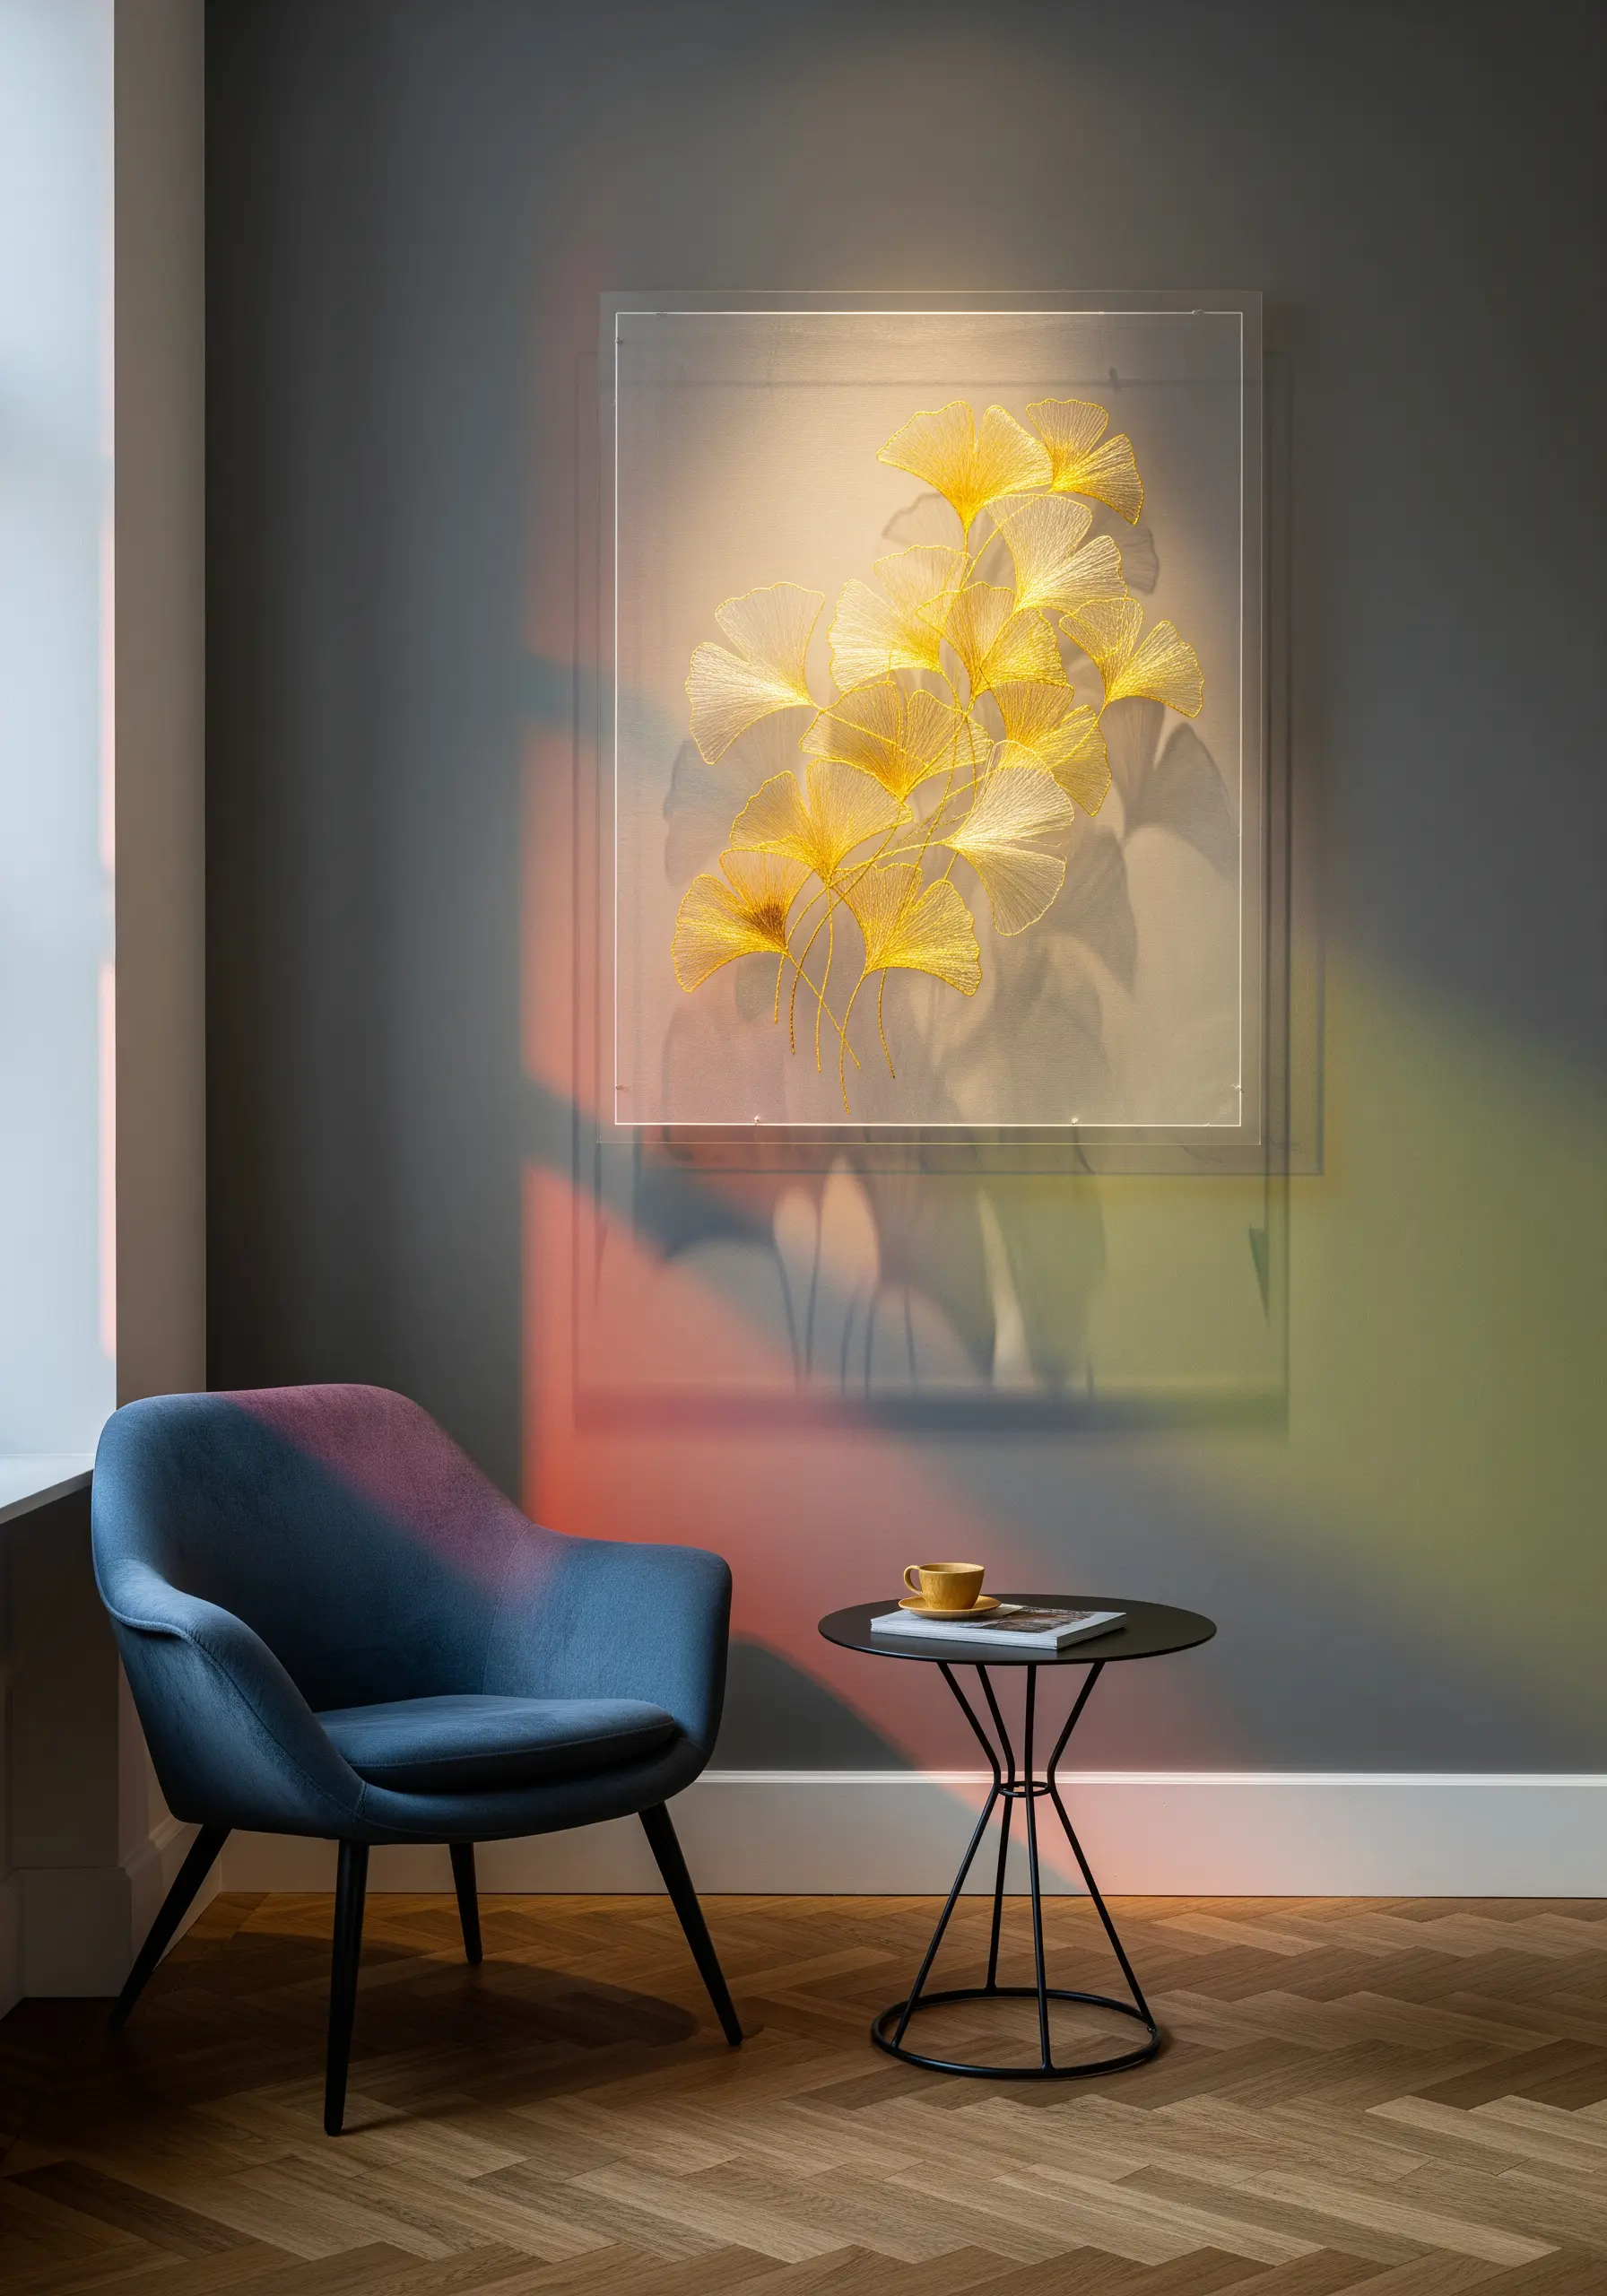
Stitching on organza or tulle allows you to play with light and shadow in a way that opaque fabric cannot.
To create these delicate, almost transparent ginkgo leaves, use a fine thread and a simple outline stitch like the backstitch. The magic happens when you display the piece in a clear acrylic or glass frame, allowing light to pass through.
This backlighting illuminates the structure of your stitches, making them appear to float in mid-air.
Remember to be tidy with your thread tails on the back, as they will be visible. This technique transforms your embroidery into a luminous, gallery-worthy installation.
30. Sculpt Succulents with Strategic Color Blending

To capture the fleshy, dimensional quality of a succulent, your color choices and stitch direction are critical.
Use a long-and-short stitch to blend at least three shades of green, with a touch of pink or purple at the tips of the leaves. This gradient creates a realistic, healthy glow.
Angle your stitches to radiate outwards from the center of the rosette, following the natural growth pattern of the plant.
Finally, define the edge of each leaf with a single line of split stitch in a slightly darker shade. This simple outline adds crispness and separates the layers, giving the succulent its distinct, sculptural form.
31. Convey Height and Strength with Vertical Satin Stitch

To create a tall, commanding bamboo forest, the direction of your stitches is everything.
Fill each segment of the bamboo stalks with long, vertical satin stitches. This not only reinforces the sense of height but also gives the stalks a smooth, reed-like sheen.
Use two or three closely related shades of green and alternate them between stalks to create subtle variation and depth.
For the leaves, a simple fishbone stitch provides the central vein and tapered shape with minimal effort. Hung as a long scroll, this piece becomes a powerful and serene focal point in any room.
32. Embellish with Beads for a Touch of Opulence

Elevate a simple line-art design by incorporating beadwork for texture and shine.
The dragonfly’s delicate wings are stitched with a fine, single-strand backstitch to keep them light and airy. You can add a few sparse seed stitches to suggest the veining without adding weight.
The body is where the magic happens. Instead of thread, sew on a series of graduating seed beads or small bugle beads in iridescent blues and greens. This creates a stunning, jewel-like effect that catches the light and provides a beautiful textural contrast to the fine threadwork of the wings.
33. Recreate Birch Bark with Abstract Stitching

Capture the unique texture of birch bark by thinking of your thread as paint.
Fill the canvas with long, horizontal straight stitches and satin stitches using off-white, cream, and pale grey threads. Allow the stitches to be slightly irregular in length and overlap to create a rough, papery texture.
Then, come back with black and dark brown thread to add the characteristic dark knots and peels. Use dense clusters of seed stitches or short, ragged satin stitches for these marks.
This abstract approach focuses on recreating a specific texture rather than a literal tree, resulting in a sophisticated and compelling piece of nature-inspired textile art.
34. Arrange a Botanical Study with Framed Herbs
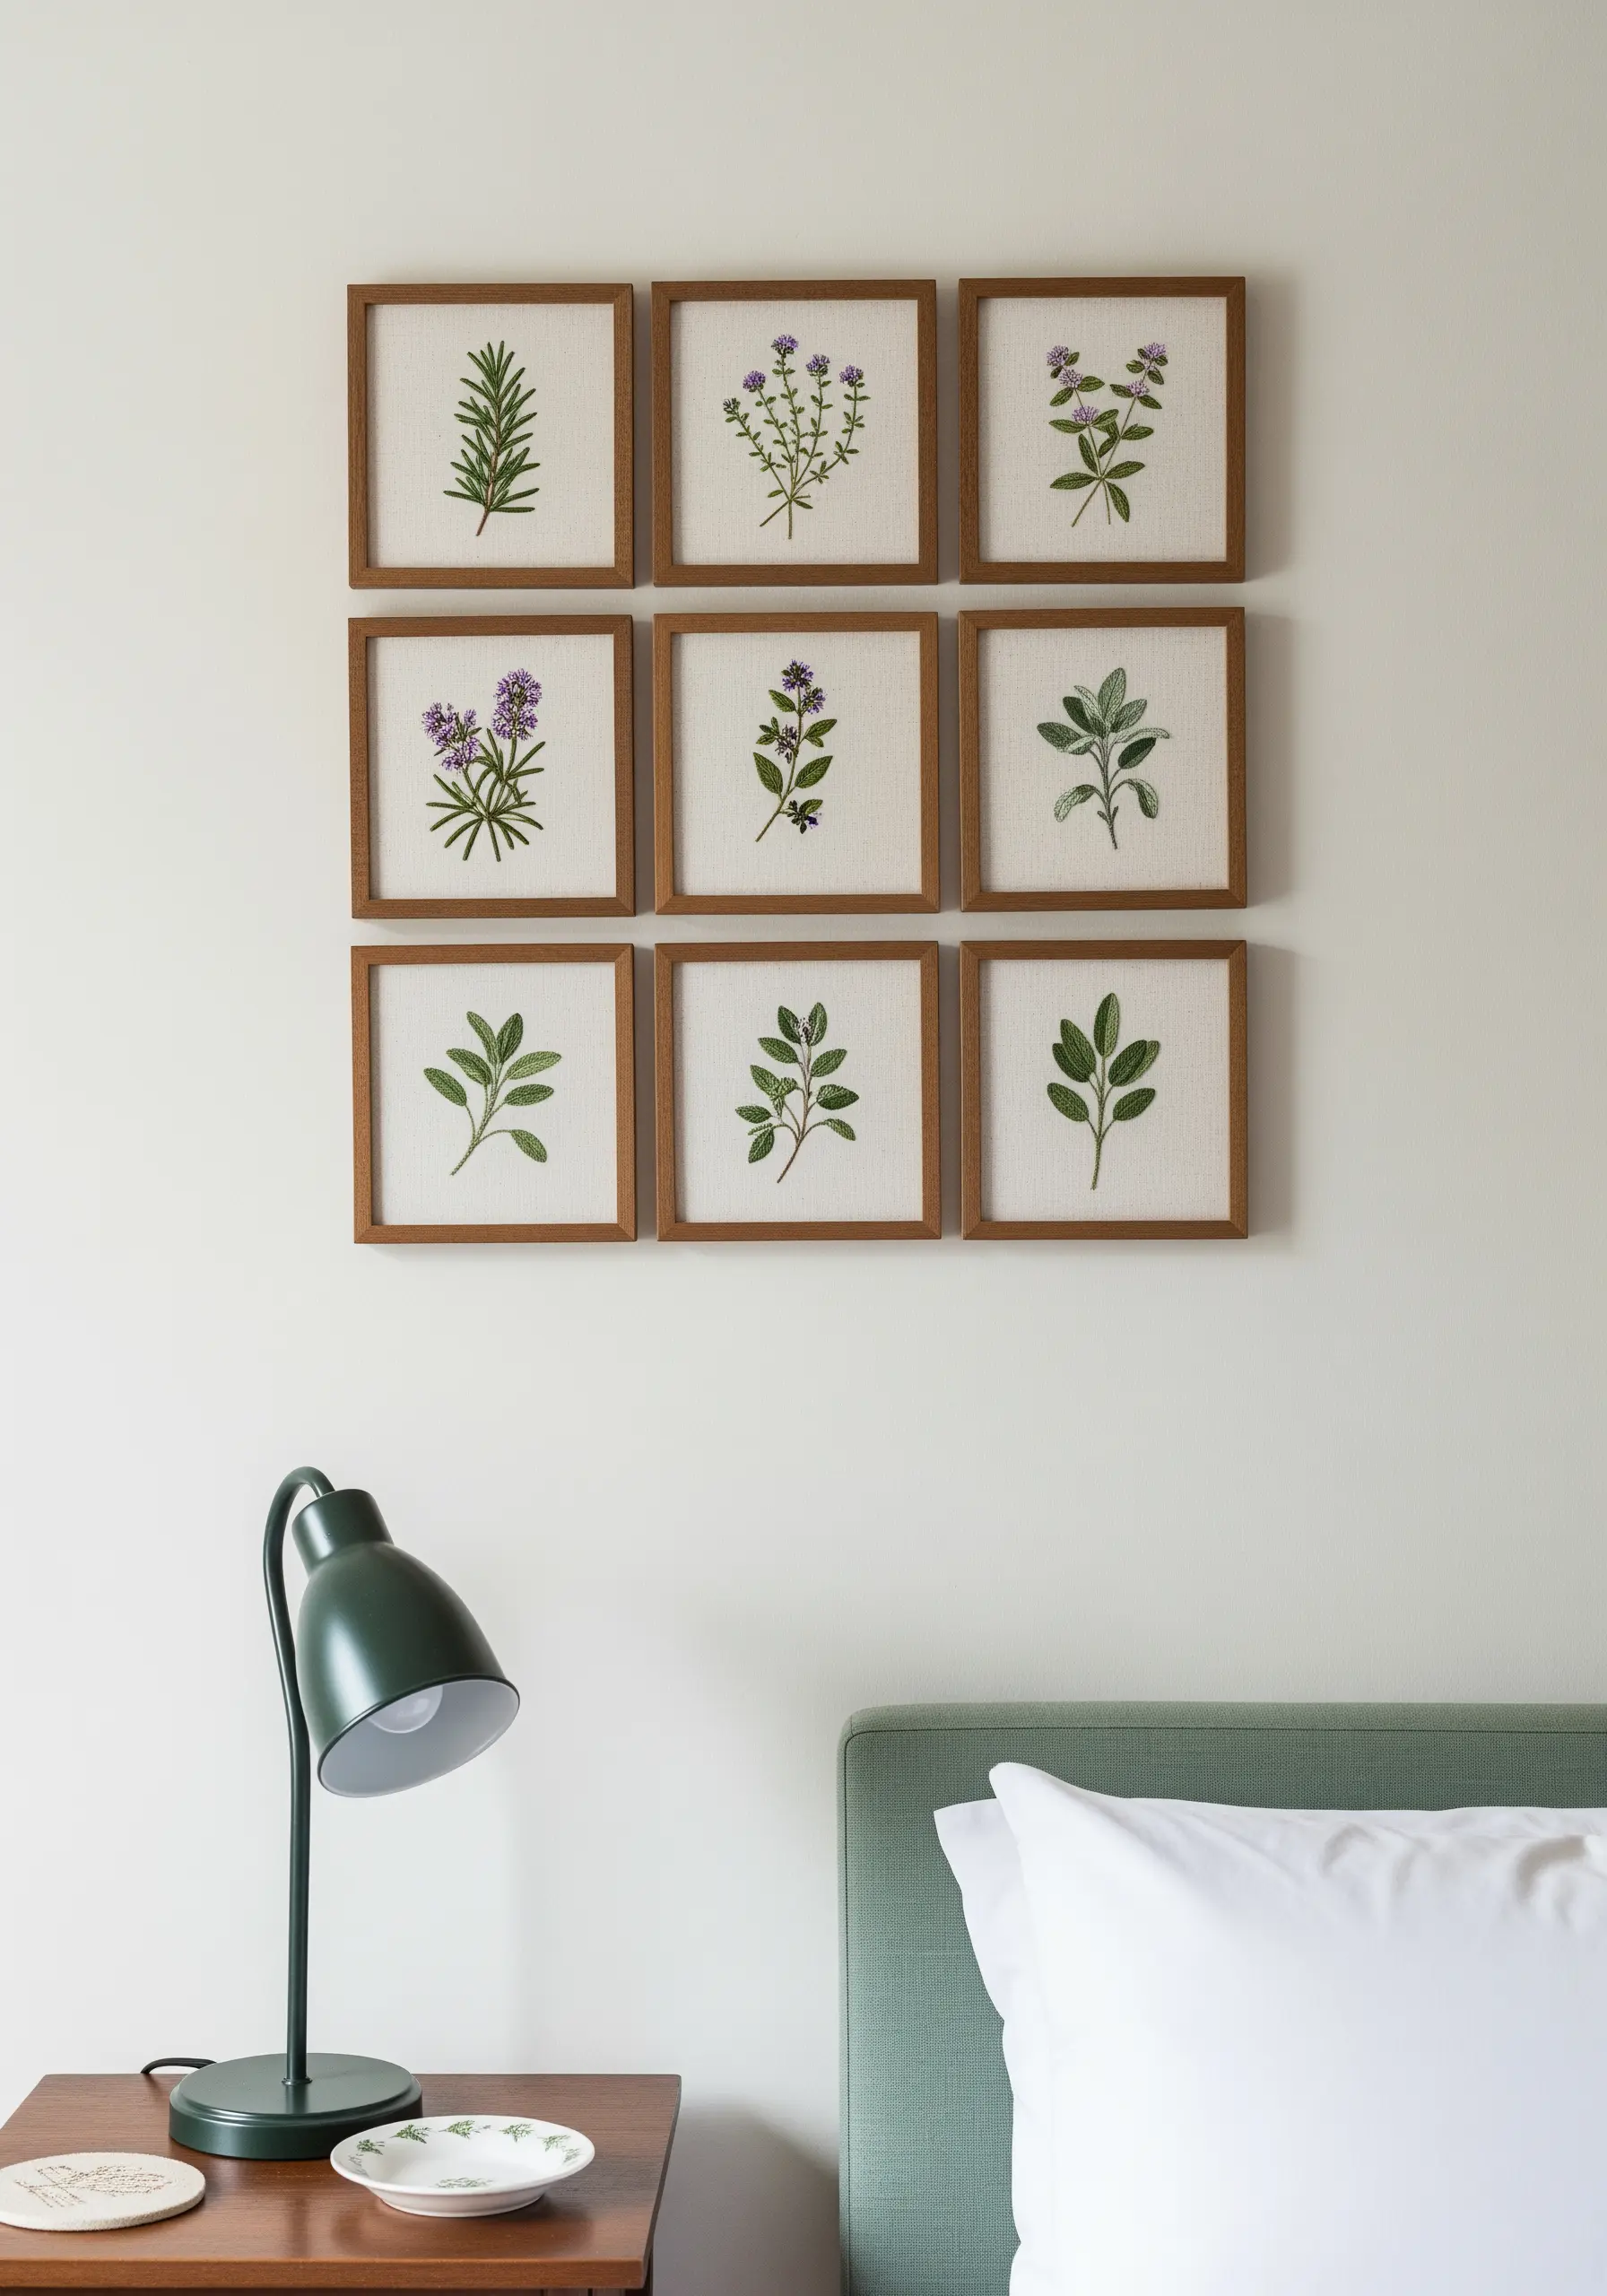
Create a classic and calming wall display by stitching a collection of culinary or medicinal herbs.
For a clean, scientific illustration style, keep your stitches simple and consistent across all pieces. A stem stitch for the stalks and a fishbone or lazy daisy stitch for the leaves is all you need.
The key to a cohesive collection is uniformity in your materials. Use the same type of fabric, the same size frames, and a consistent level of detail for each plant.
Arranging them in a simple grid transforms individual embroidered herbs into a sophisticated, unified piece of wall art.


