
Your embroidery hoop can be more than just a tool for creating decorative objects—it can be a frame for intention. Think of these small hoops not as projects to be finished, but as tiny canvases for capturing a feeling, a reminder, or a quiet thought that can gently shape the mood of your space.
The difference between a simple craft and a piece of art often lies in the small details. It’s in the way a stitch is chosen to enhance the meaning of a word, how a texture invites a second glance, or how a simple color palette can evoke a sense of calm or joy. You already have the skills; now it’s time to apply them with purpose.
In these ideas, you’ll discover how to use fundamental stitches in more expressive ways. You’ll see how adjusting thread weight, stitch direction, or texture can transform a simple quote or icon into something that feels personal, polished, and truly resonant. Let’s begin.
1. Render Cursive with a Dimensional Chain Stitch
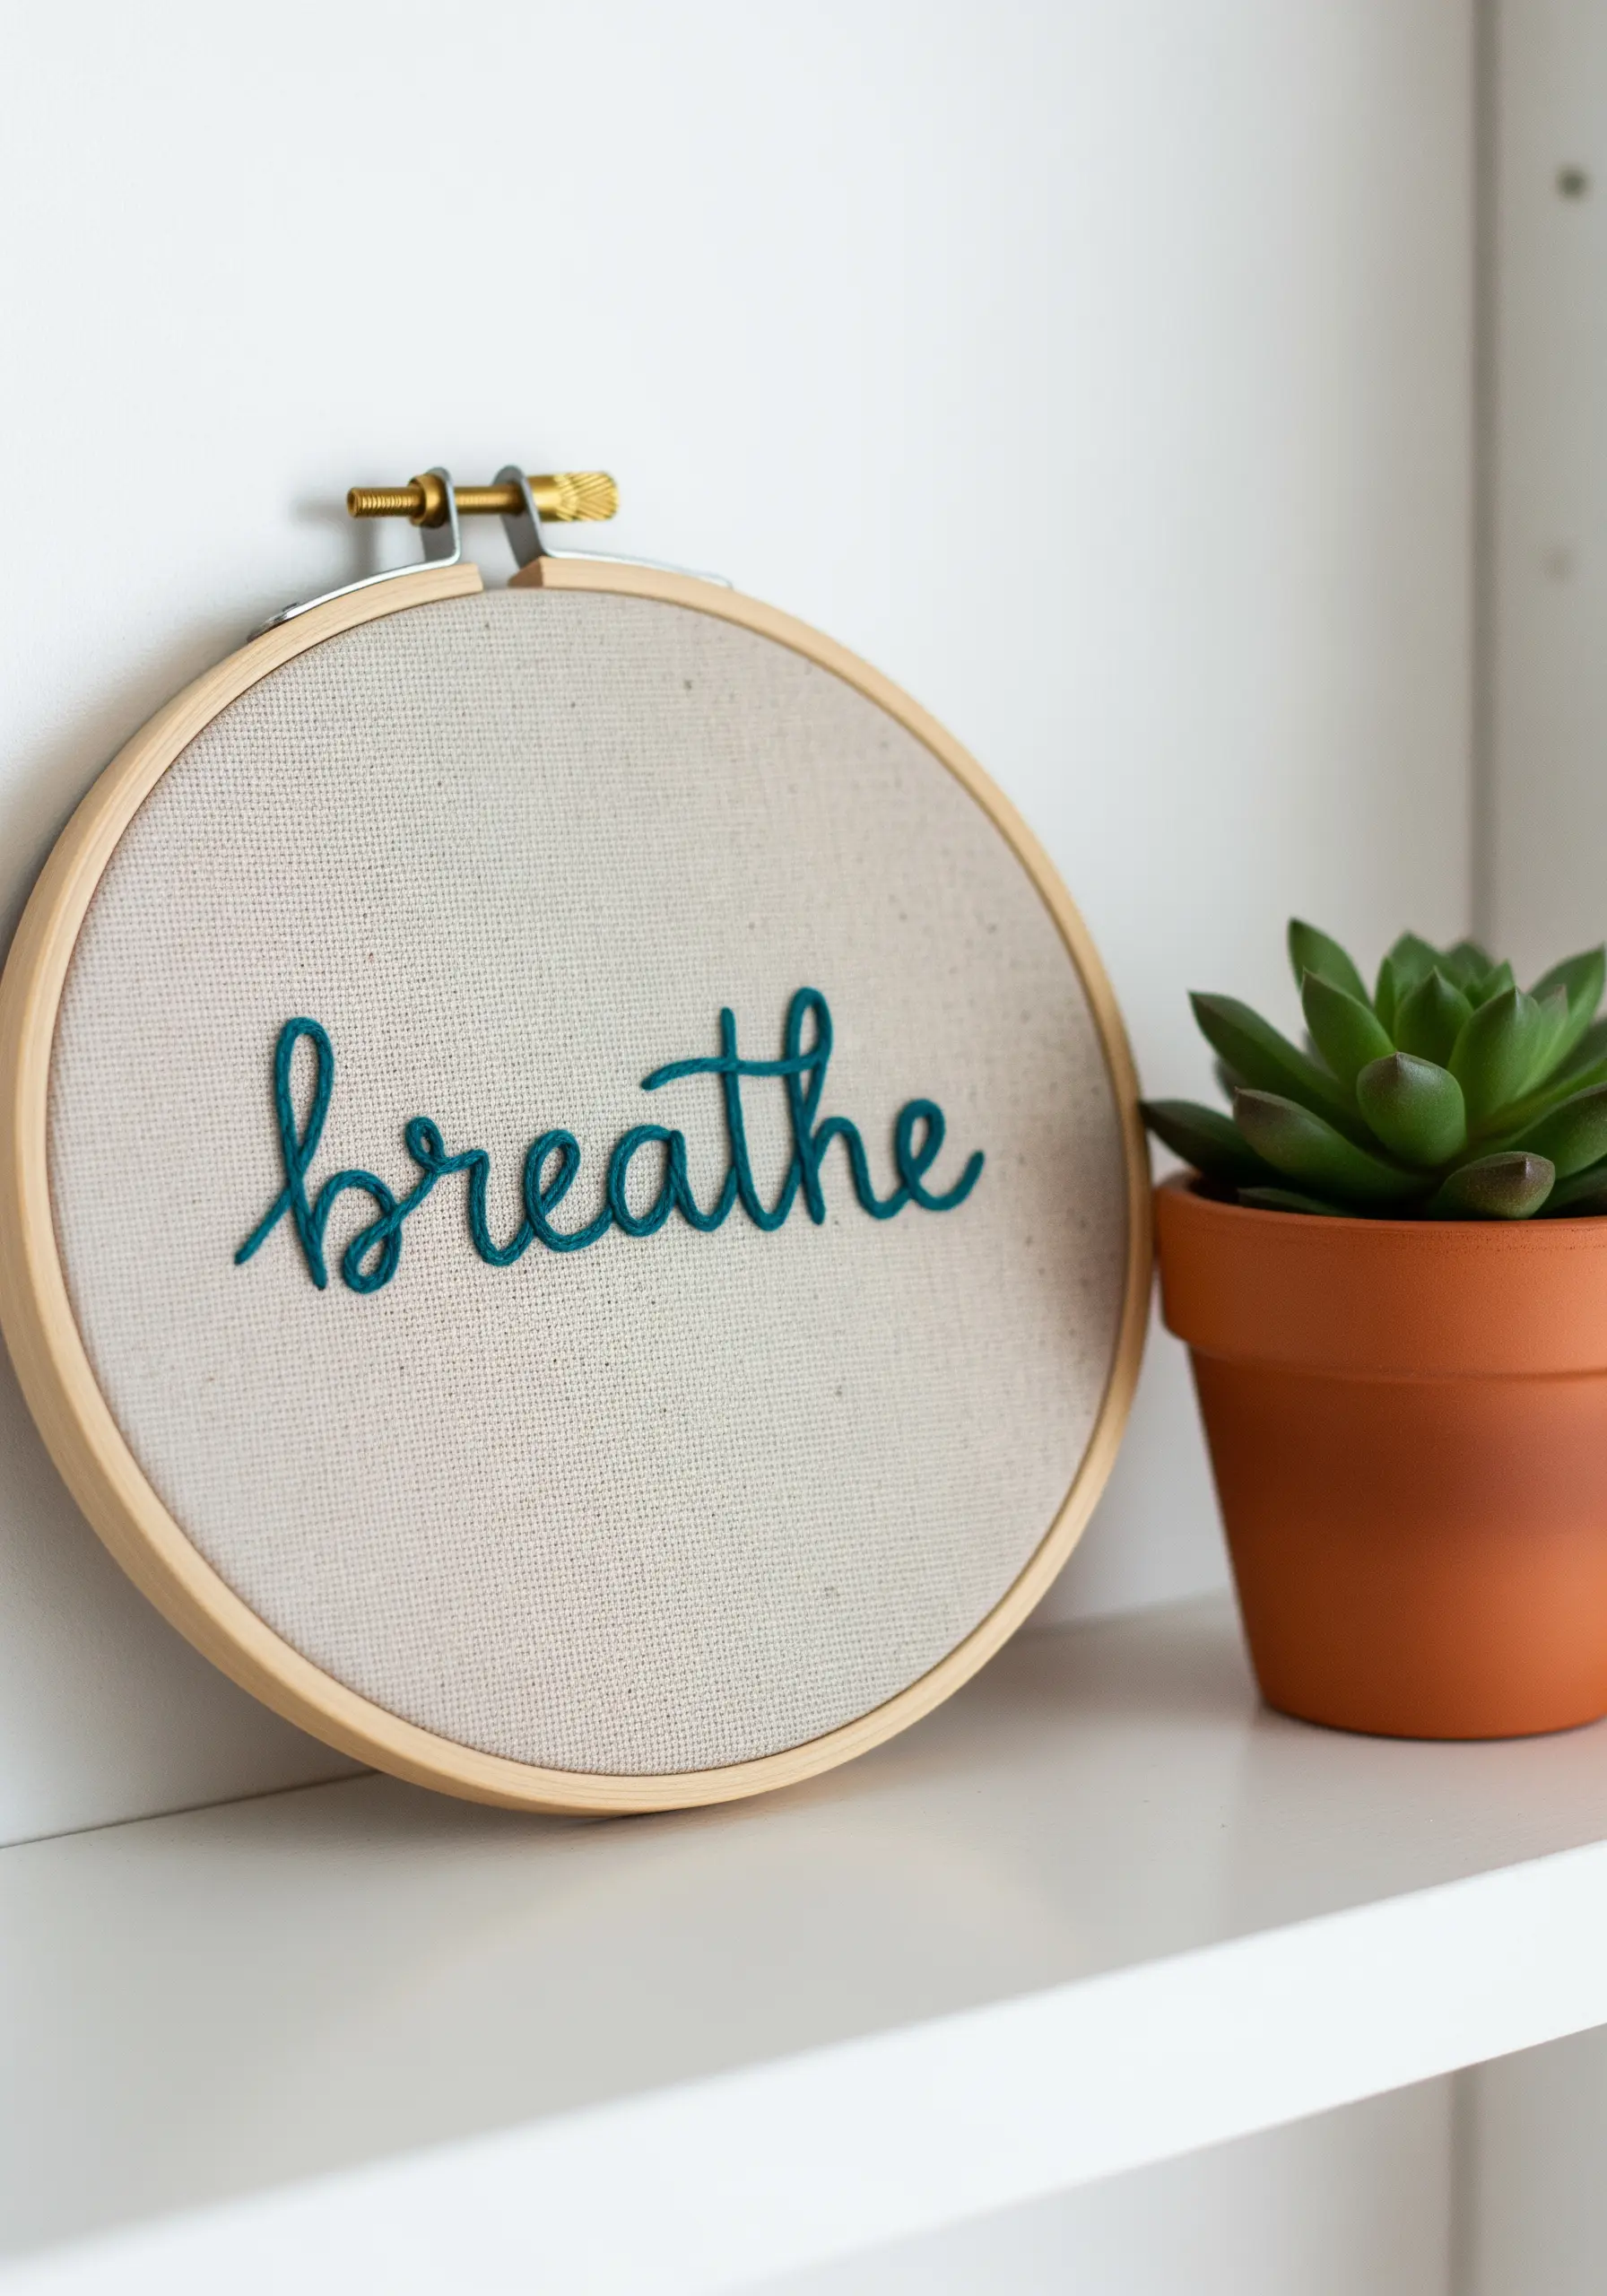
To give a single word like ‘breathe’ a soft, three-dimensional presence, use a chain stitch instead of a simple backstitch.
Use all six strands of your embroidery floss to create a fuller, rope-like texture that stands out against the fabric.
This technique turns simple text into a tactile object, reinforcing the calming, physical nature of the word itself.
The key is to keep your loops consistent in size for a smooth, uninterrupted flow, which is especially important for cursive lettering.
2. Layer French Knots for Realistic Lavender Texture
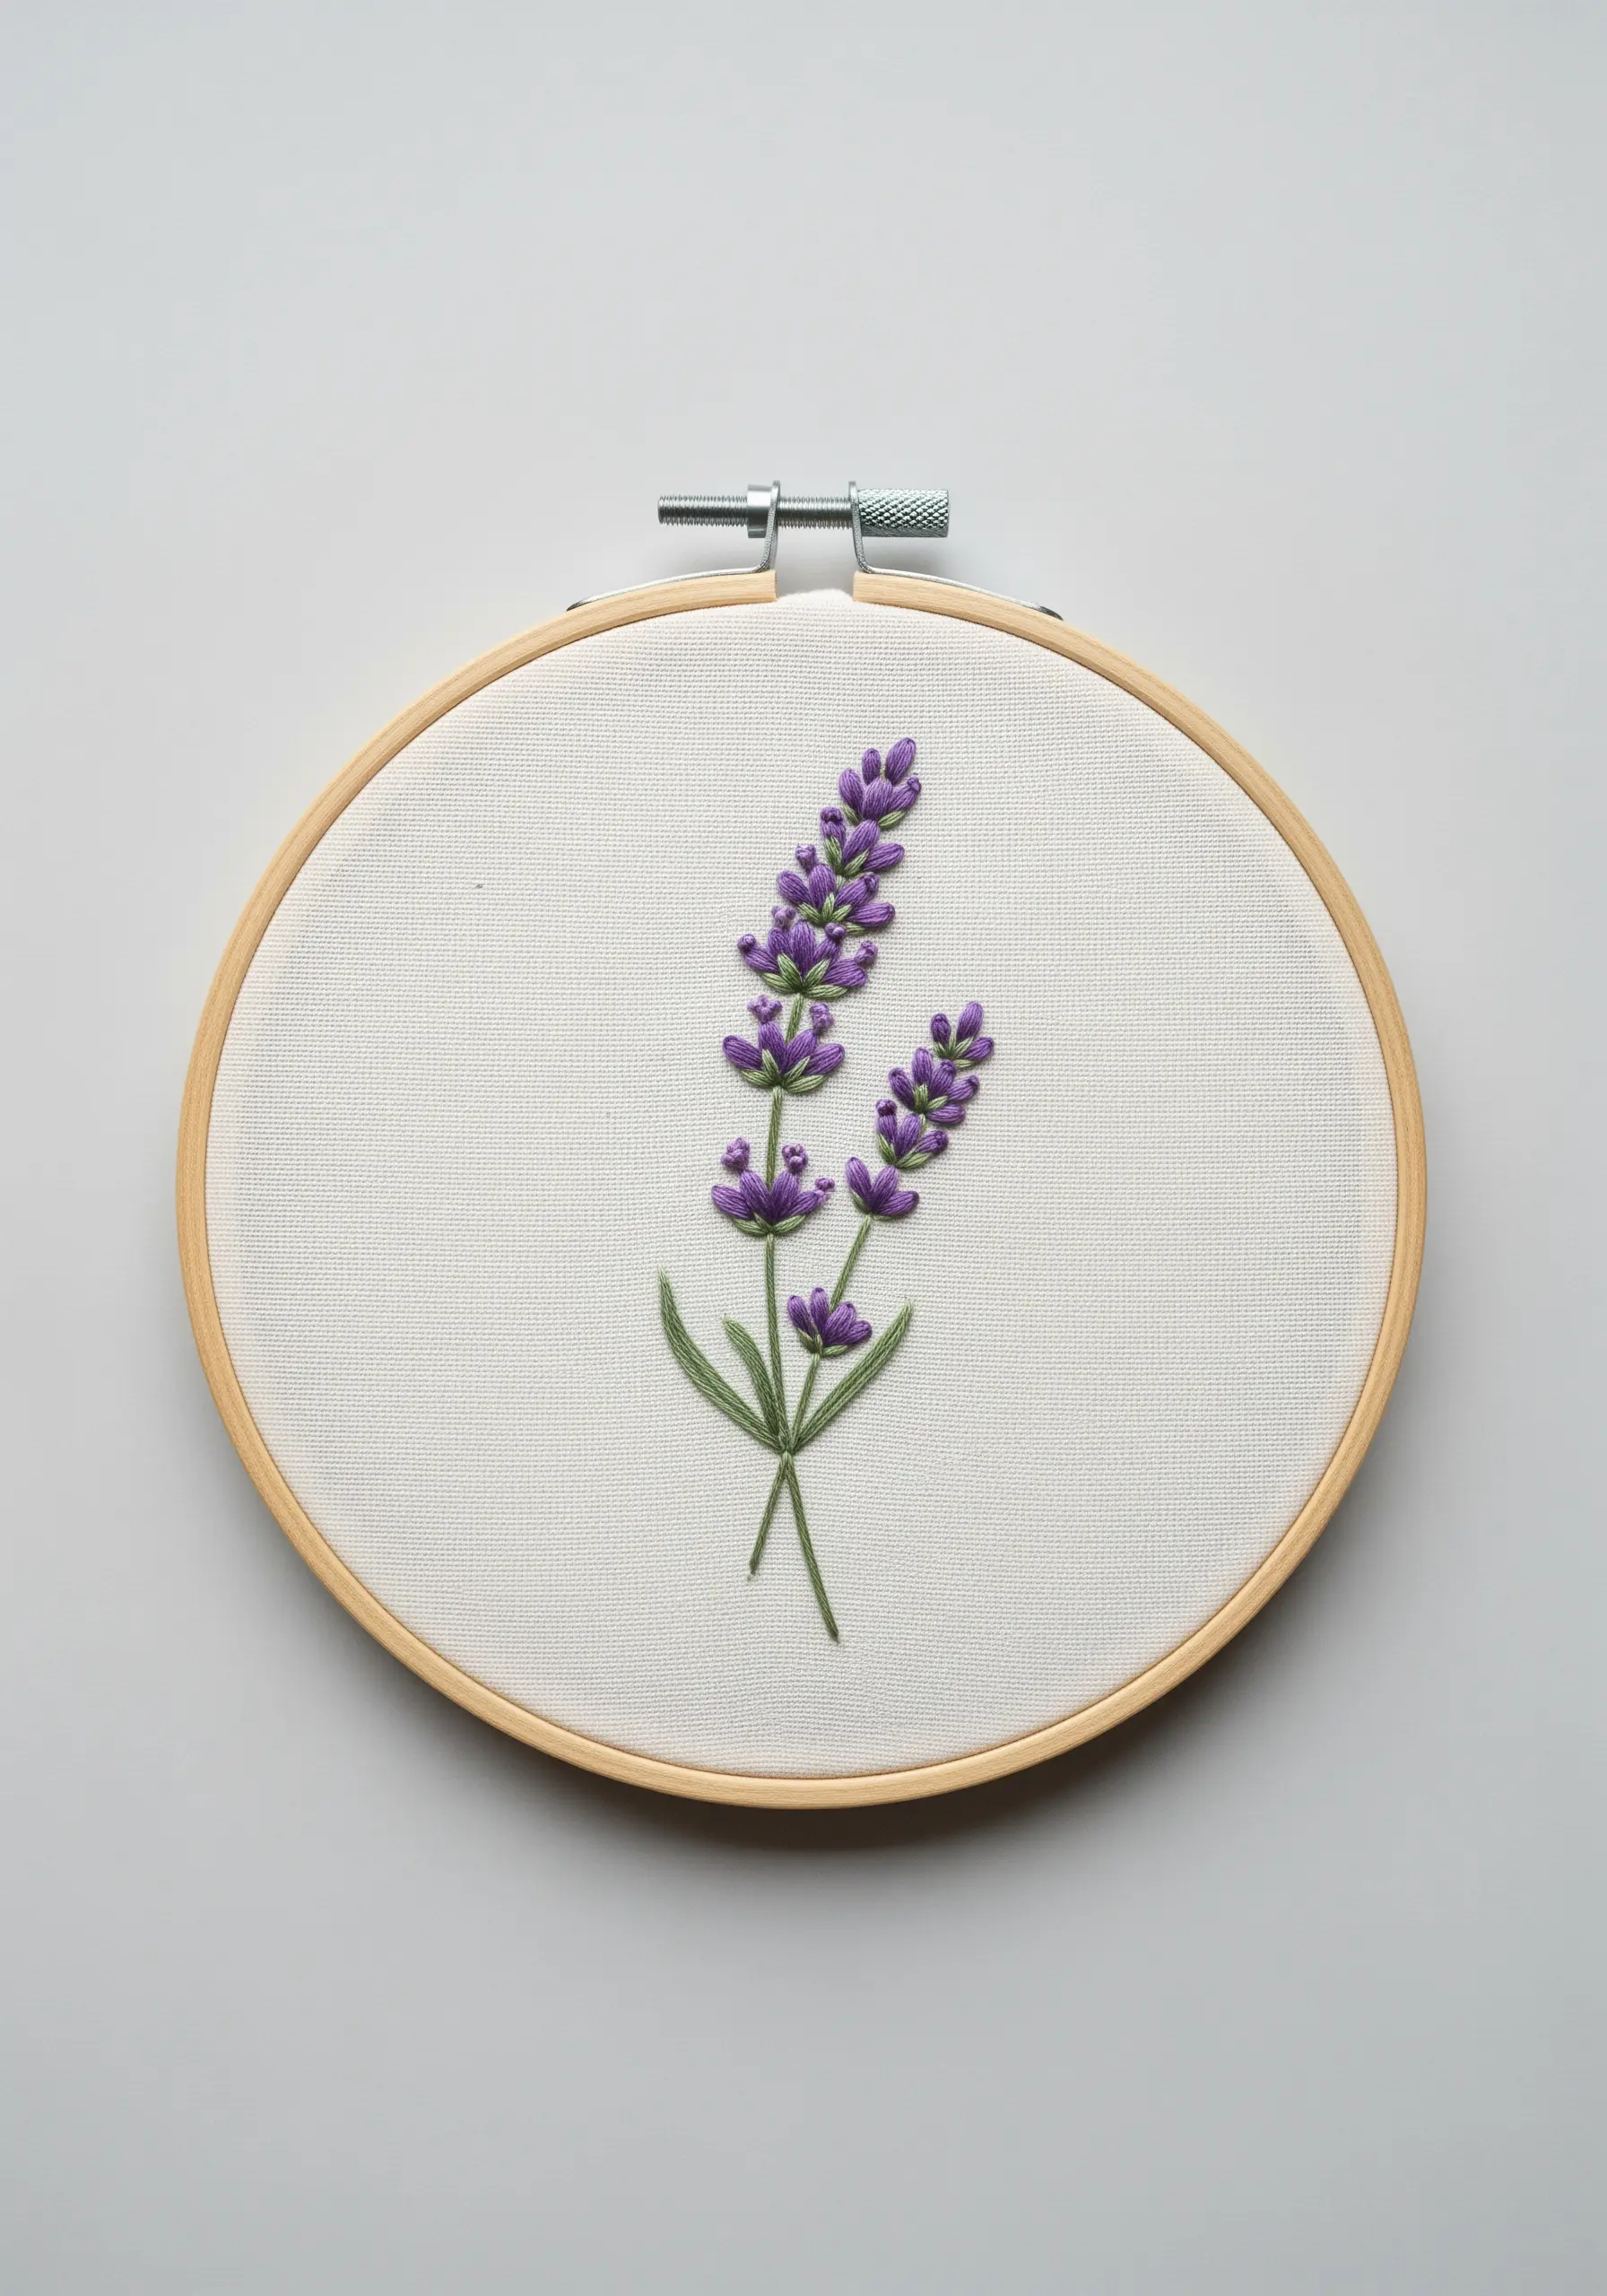
Create the signature texture of lavender blossoms by clustering French knots tightly together.
Use two or three shades of purple, varying them randomly to mimic the natural color variations in a real flower.
For the stems, a delicate stem stitch using just two strands of green floss provides a clean line that doesn’t overpower the textured buds.
This combination of textures—plump knots and sleek stems—is what makes botanical pieces feel lifelike and dynamic.
Explore more delicate lavender stitch ideas to create art that soothes the senses.
3. Achieve Clean Block Lettering with Backstitch

For crisp, sans-serif lettering, a disciplined backstitch is your most reliable tool.
First, draw your letters onto the fabric with a water-soluble marker, ensuring your guidelines are precise.
Use three strands of floss for visible but not bulky letters, and focus on making each stitch the exact same length.
This uniformity is what creates a clean, almost print-like effect that feels intentional and modern.
An earth-toned thread on a neutral linen background adds warmth to the minimalist aesthetic.
4. Create High-Contrast Celestial Motifs

Make simple icons pop by stitching with light thread on dark fabric.
Use a whipped backstitch for the crescent moon; this involves creating a standard backstitch outline and then weaving another thread through it to create a solid, raised line without any gaps.
For the stars, a simple satin stitch works beautifully, but ensure your stitches are parallel to create a clean shape and a subtle sheen.
The negative space here is just as important as the stitches, creating a balanced composition that feels calm and expansive.
Consider adding more shine with dark fabric metallic threads for a magical finish.
5. Build Padded Satin Stitch for 3D Typography
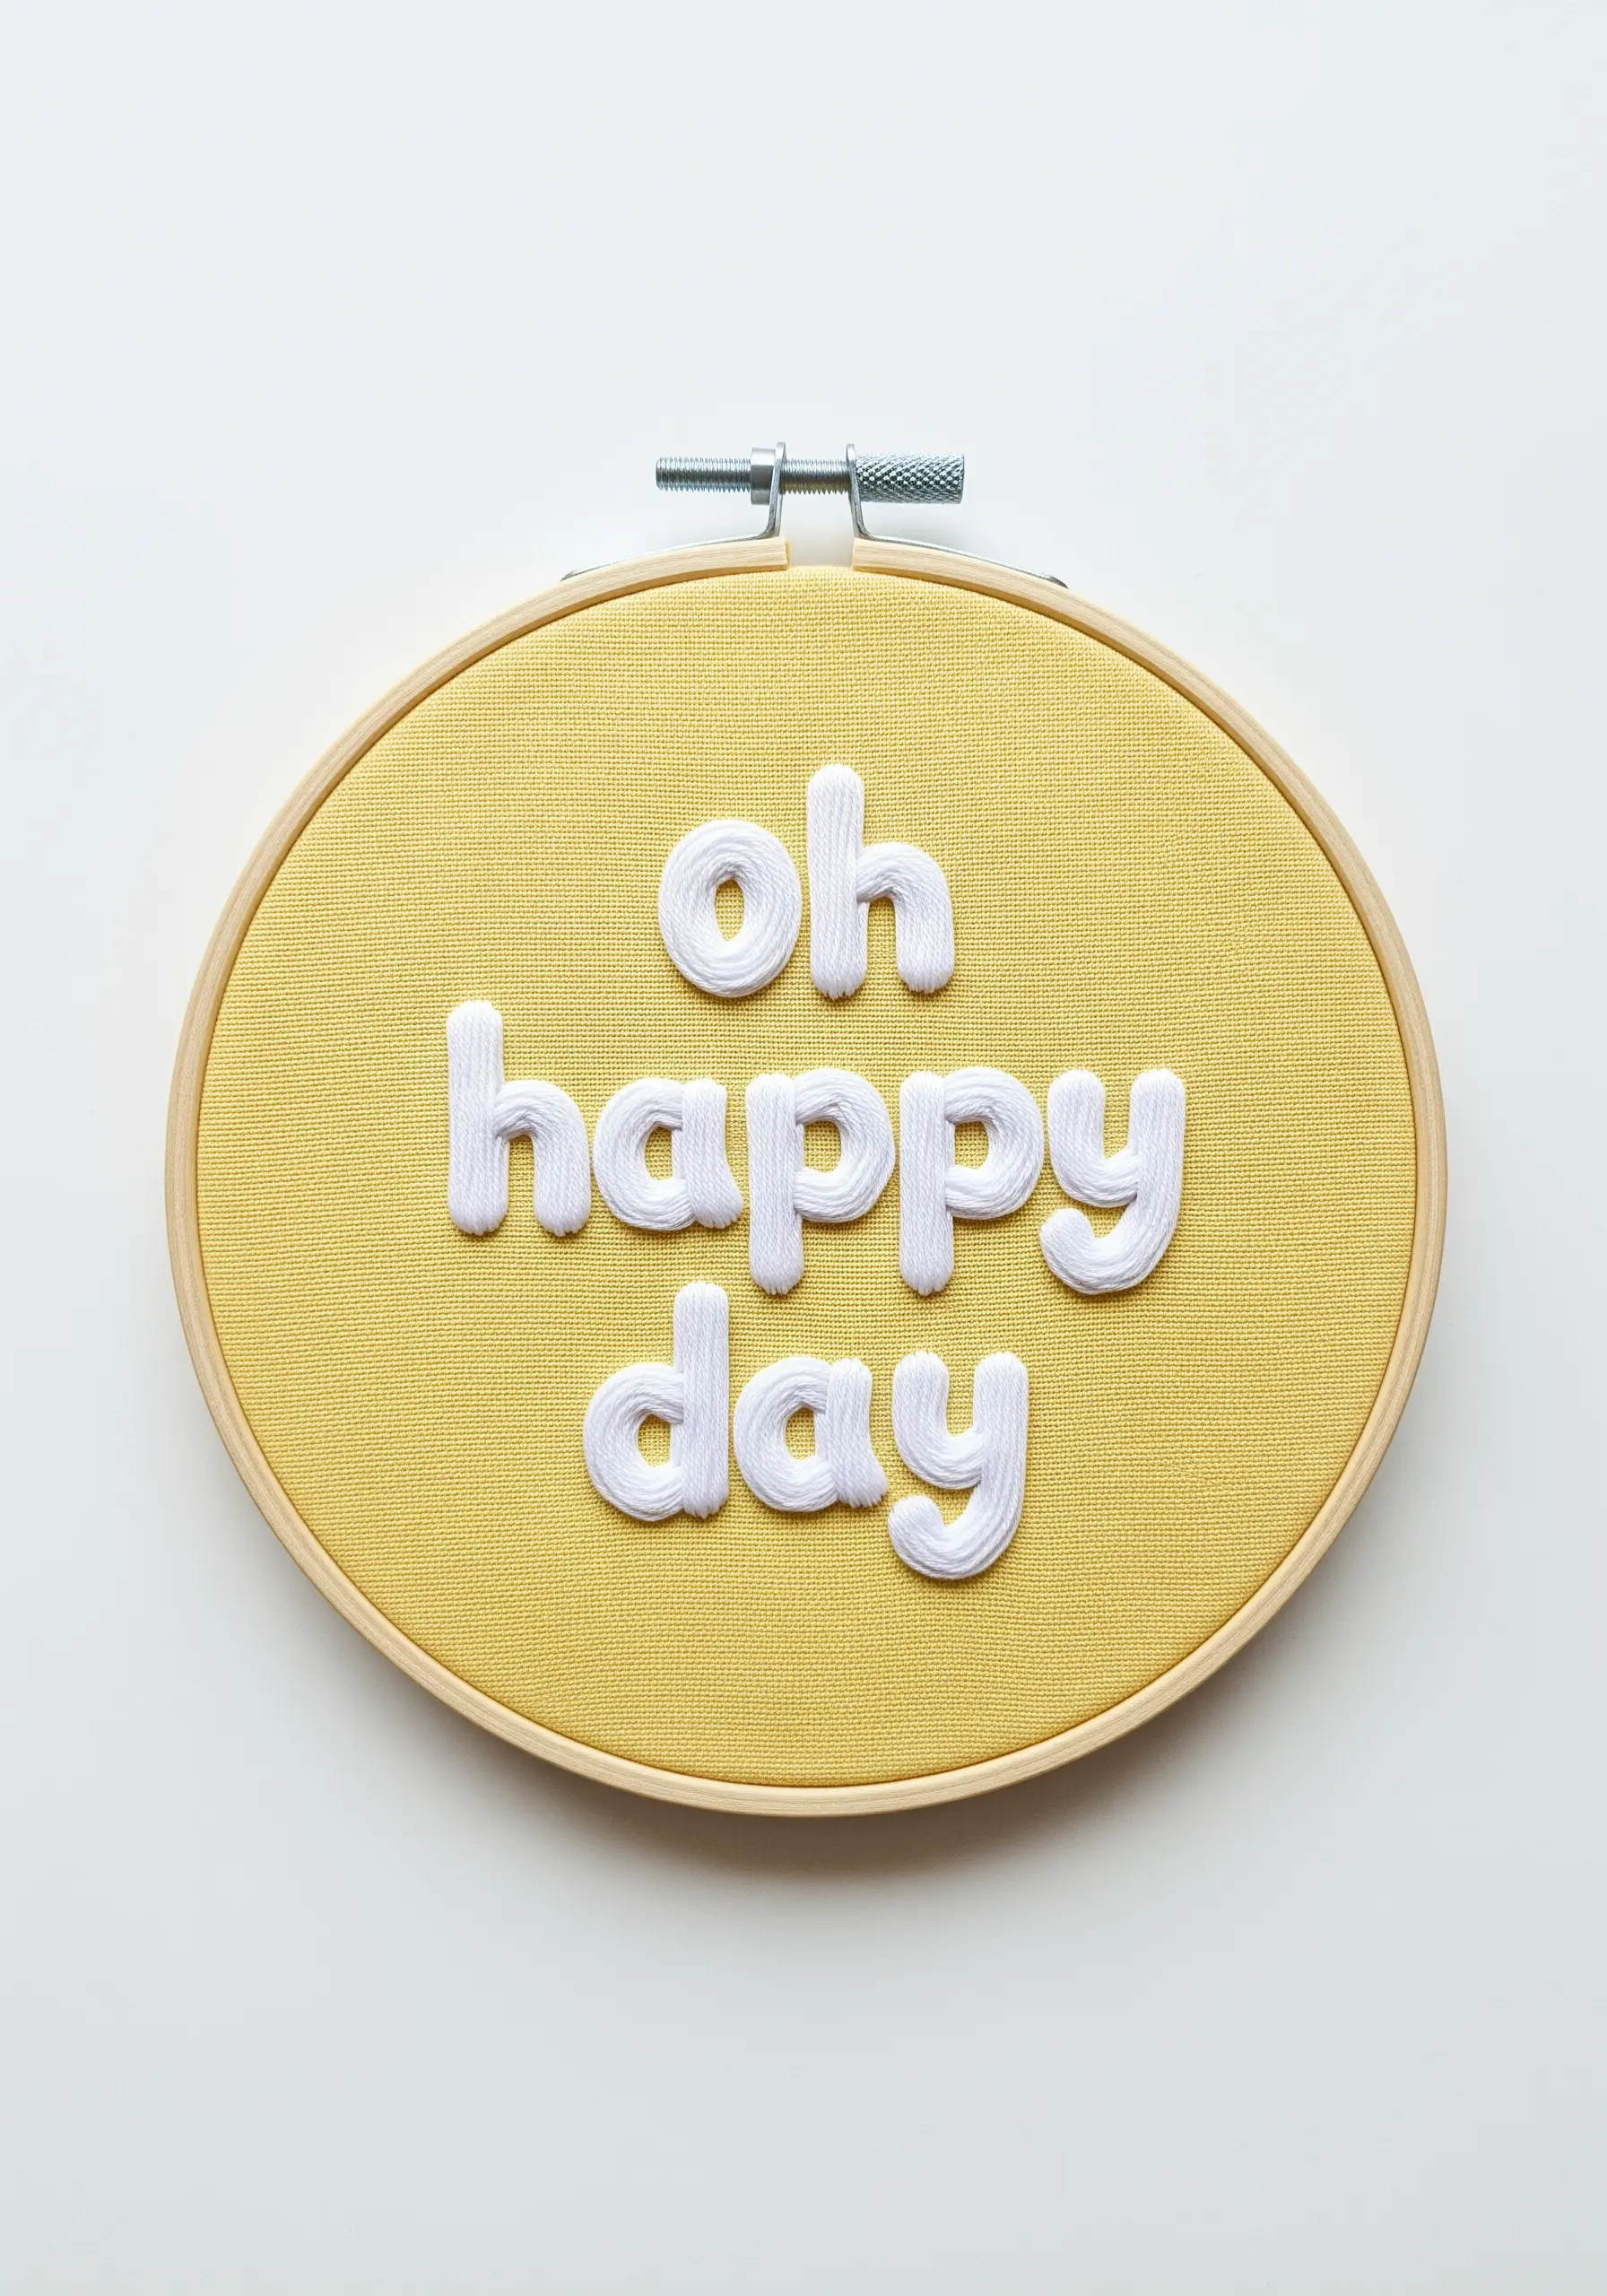
Elevate simple words by giving them a raised, cushioned effect with padded satin stitch.
First, fill the shape of each letter with a base of small, underlying stitches (like seed stitches or a simple back-and-forth fill).
Then, cover this padding with a smooth layer of satin stitch, ensuring your top stitches are perpendicular to the foundation stitches.
This technique physically lifts the thread from the fabric, creating soft shadows and a delightful tactile quality that makes the letters feel cheerful and buoyant.
6. Use Directional Satin Stitch to Mimic Leaf Veins
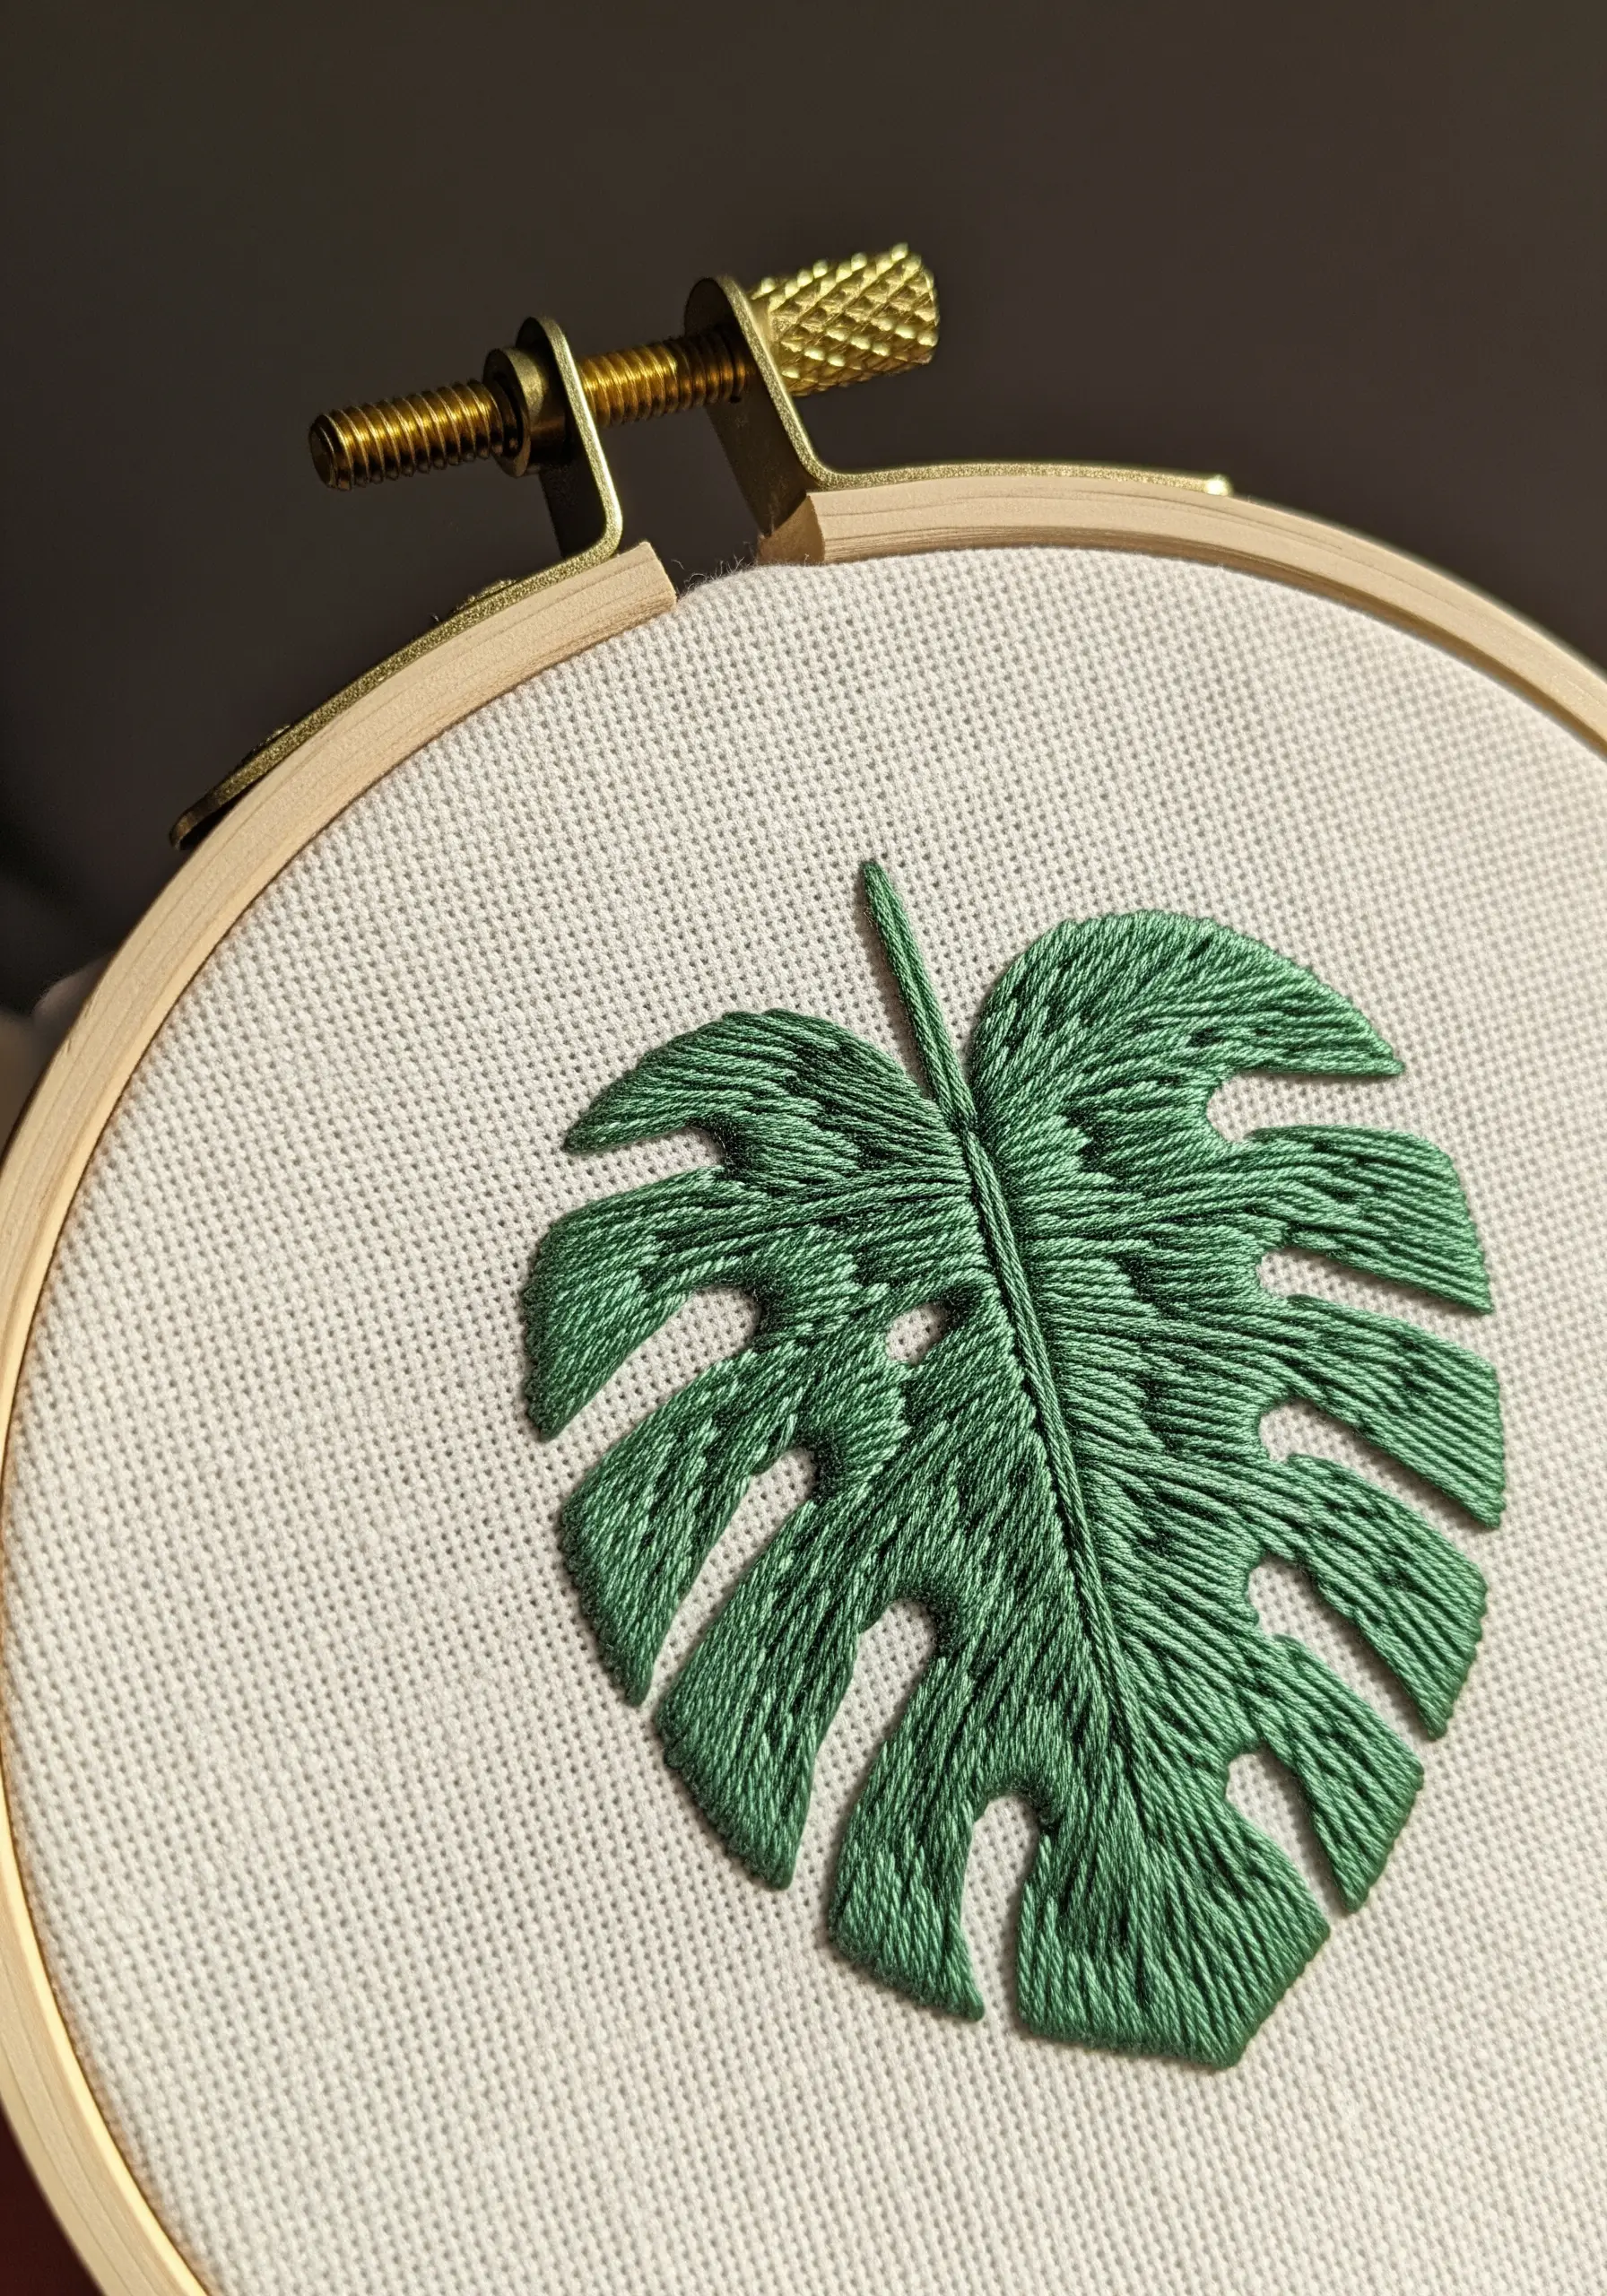
Instead of filling a leaf shape with uniform vertical stitches, angle them to follow the natural direction of its veins.
Start by stitching a central vein down the middle with a split stitch.
Then, work your satin stitches outwards from the center line at a slight diagonal, creating a herringbone-like effect that adds realism and movement.
This small adjustment in stitch direction is a powerful way to transform a flat shape into a dynamic botanical element.
Practice with more hand embroidery leaf patterns to perfect your technique.
7. Combine Lettering and Botanicals with Harmonious Stitches
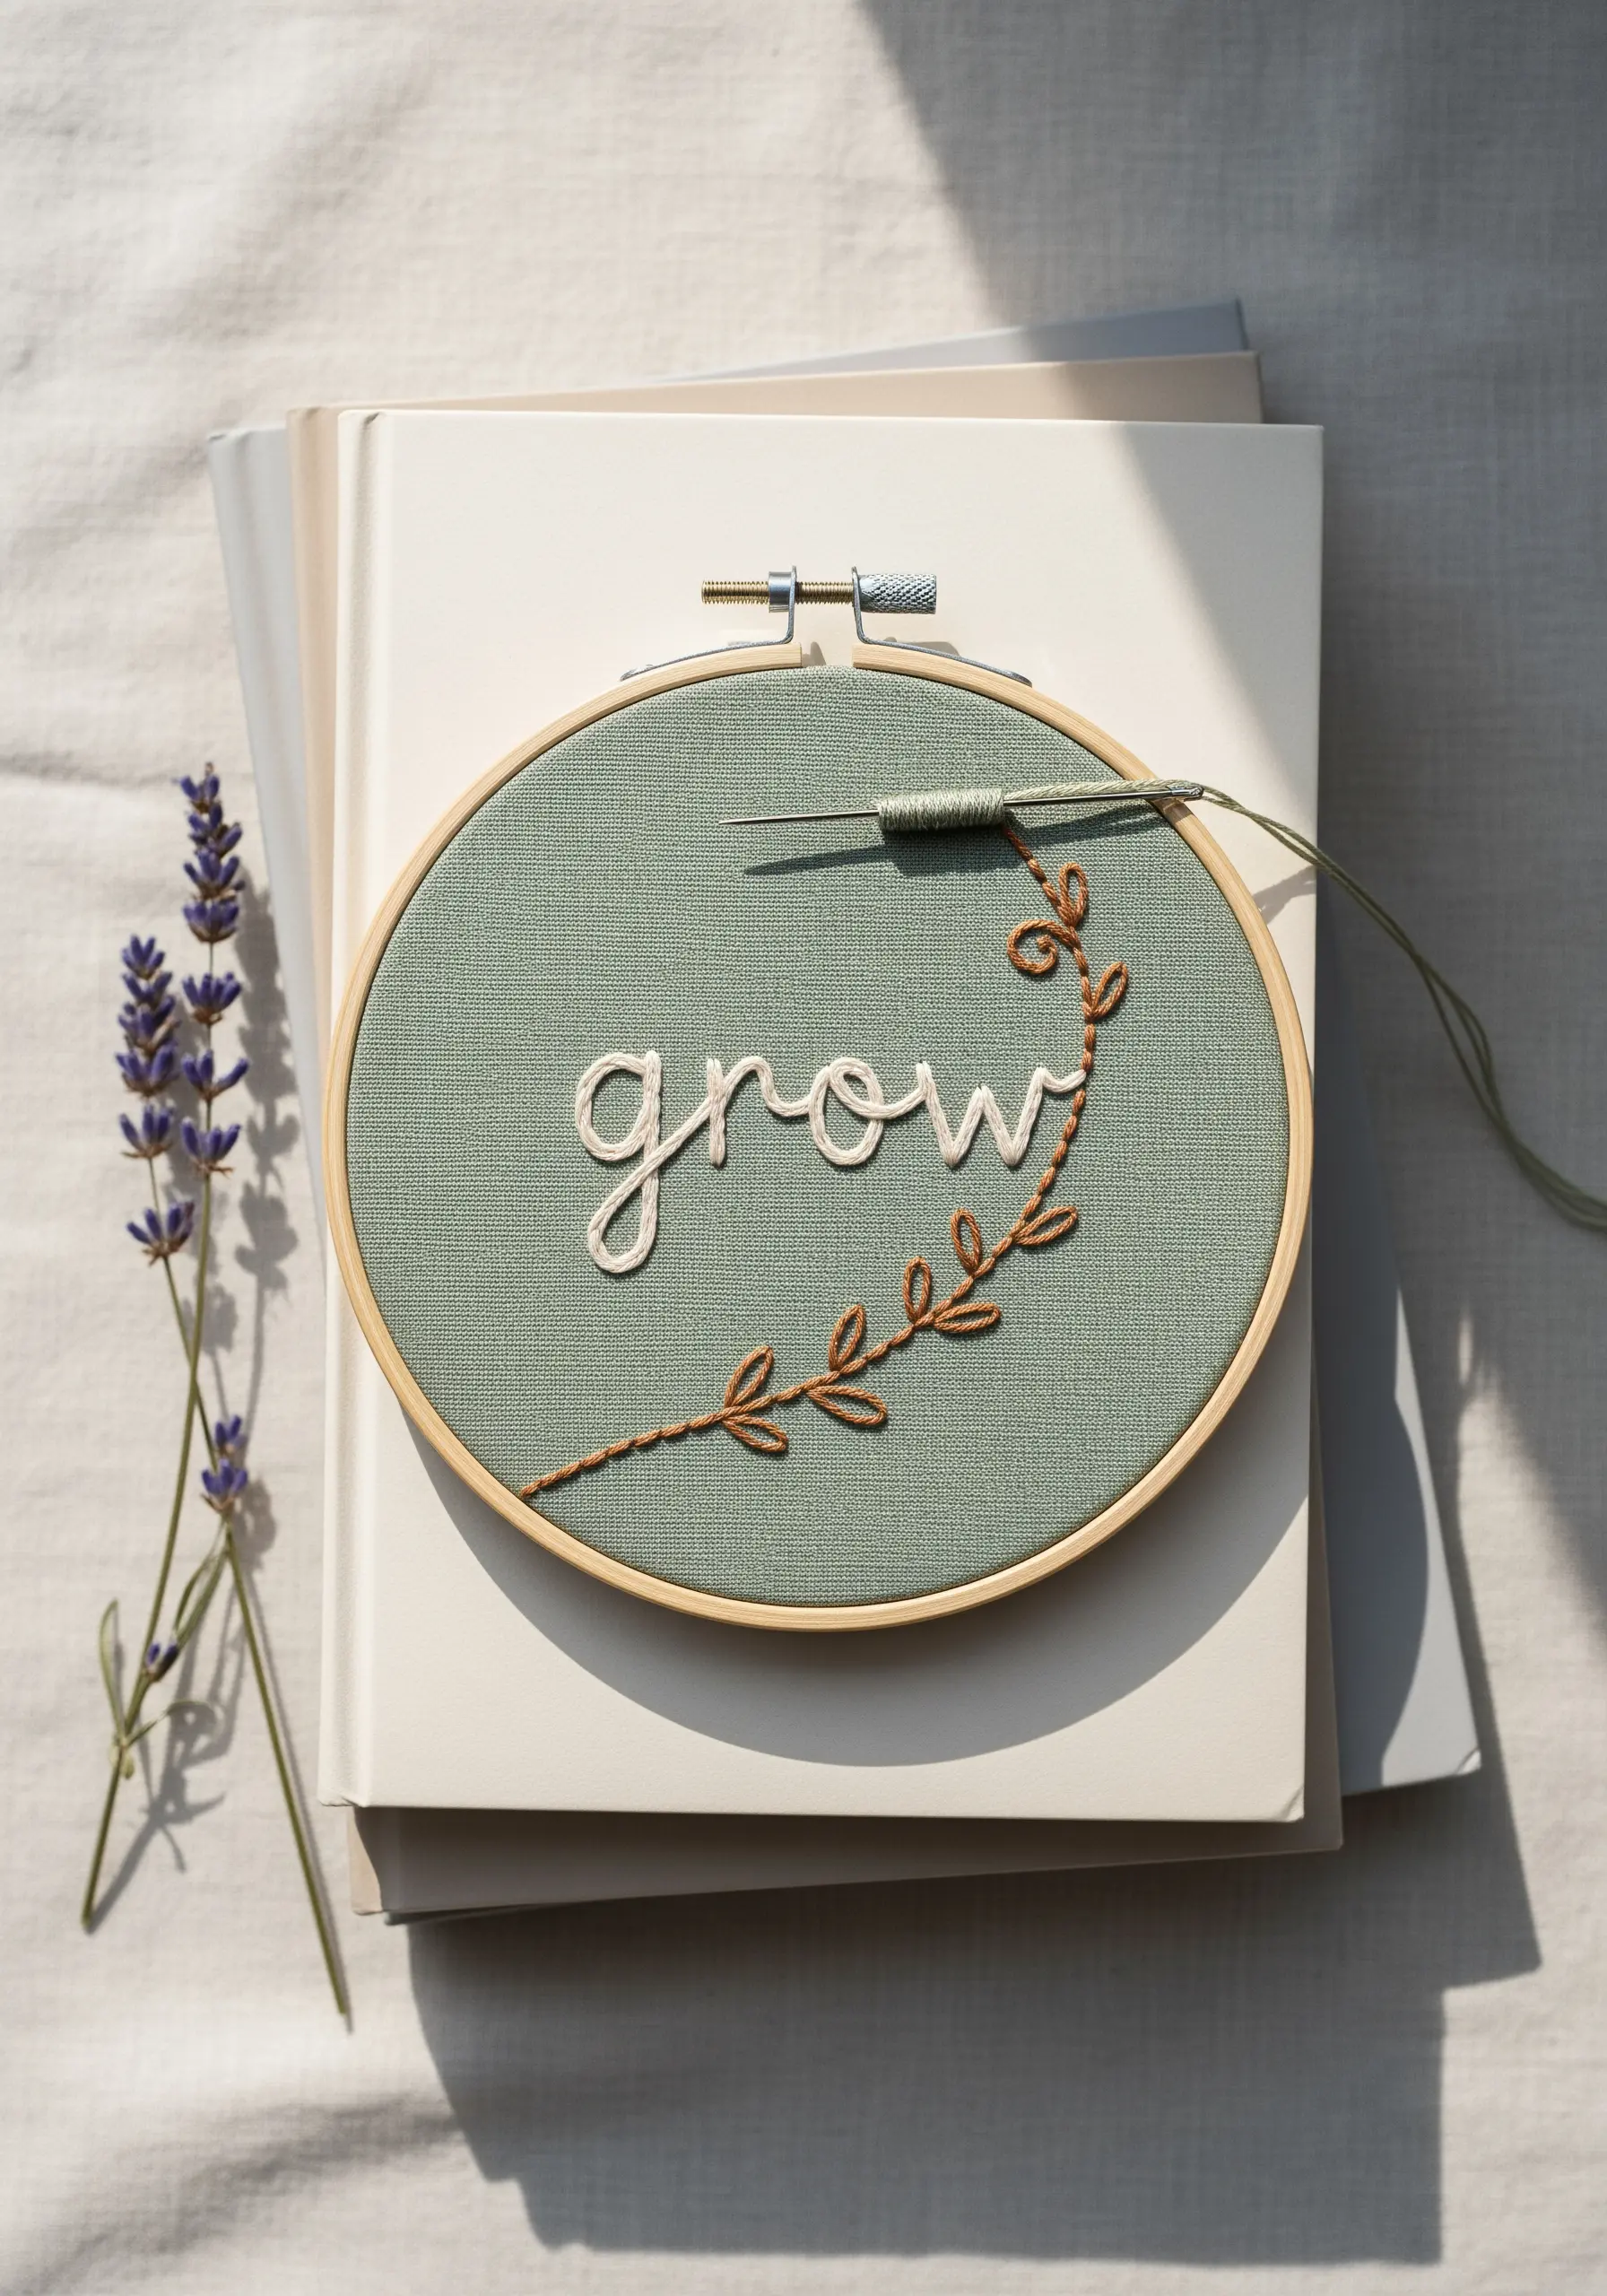
Create a balanced design by pairing different stitch textures for words and motifs.
Use a thick, smooth whipped backstitch for the word ‘grow’ to make it stand out with clean, rounded lines.
For the delicate vine, switch to a simple outline stitch using fewer strands of thread, which keeps it from competing with the lettering.
Choosing analogous colors—like cream, tan, and sage green—ensures the composition feels cohesive and serene.
8. Master Graphic Line Art with a Consistent Backstitch

Capture the essence of a scene with minimal lines for a modern, illustrative effect.
A simple backstitch is perfect for this style, but the key to a professional finish is stitch consistency.
Aim for each stitch to be the same length, especially around curves, to maintain a fluid, unbroken line.
Use contrasting colors like orange and blue to define separate elements, creating a design that is both simple and visually striking.
9. Create Bold Outlines with a Whipped Rope Stitch

For a design that feels both graphic and cozy, use a thick thread or multiple strands to create a prominent outline.
A whipped backstitch, using all six strands of floss or even perle cotton, creates a solid, rope-like line with no gaps.
This technique is perfect for simple shapes and words, giving them a comforting, handmade weight.
Paired with a felt or flannel fabric, the textural contrast makes the design feel exceptionally warm and inviting.
10. Add Subtle Depth with Variegated Thread
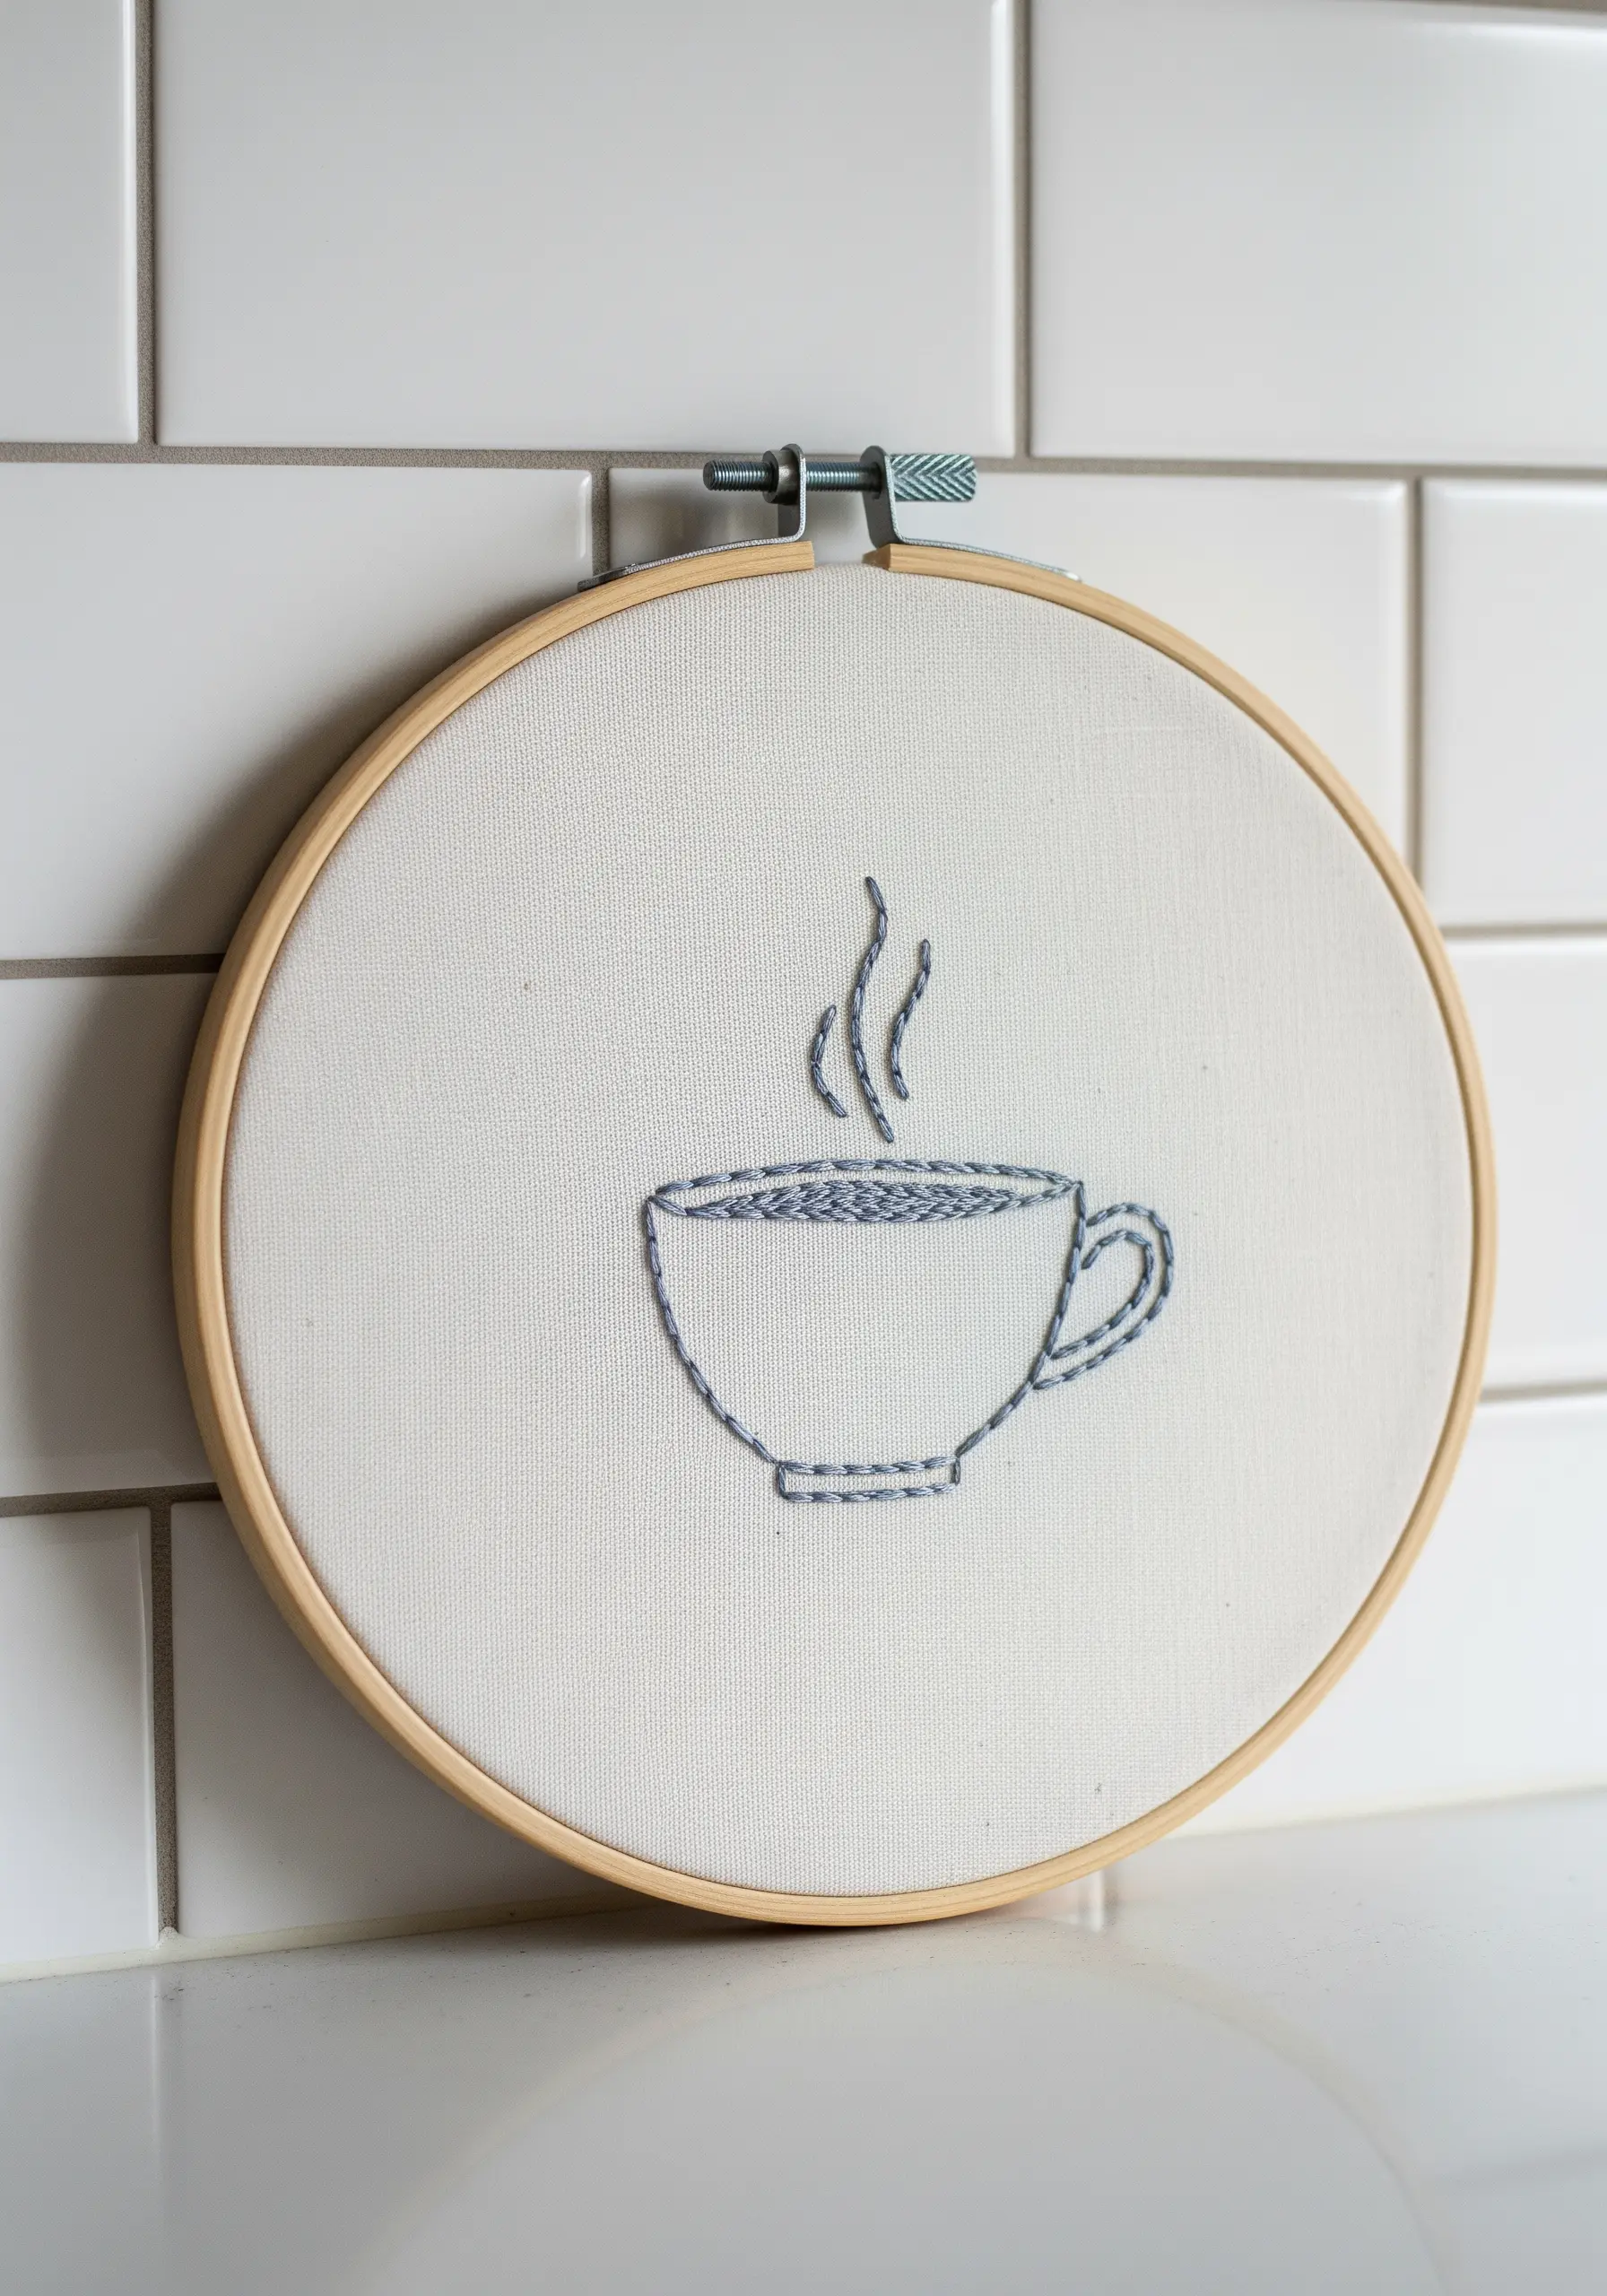
To give a simple line drawing texture and shading without changing floss, use a variegated thread.
As you stitch, the thread’s color will shift subtly, creating a gentle gradient effect that mimics light and shadow.
This is particularly effective for filling small areas, like the coffee in this cup, where it adds a sense of depth and movement.
Explore more texture-rich thread art ideas using variegated thread to see how one strand can create magic.
11. Convey Emotion with a Flowing Stem Stitch Script
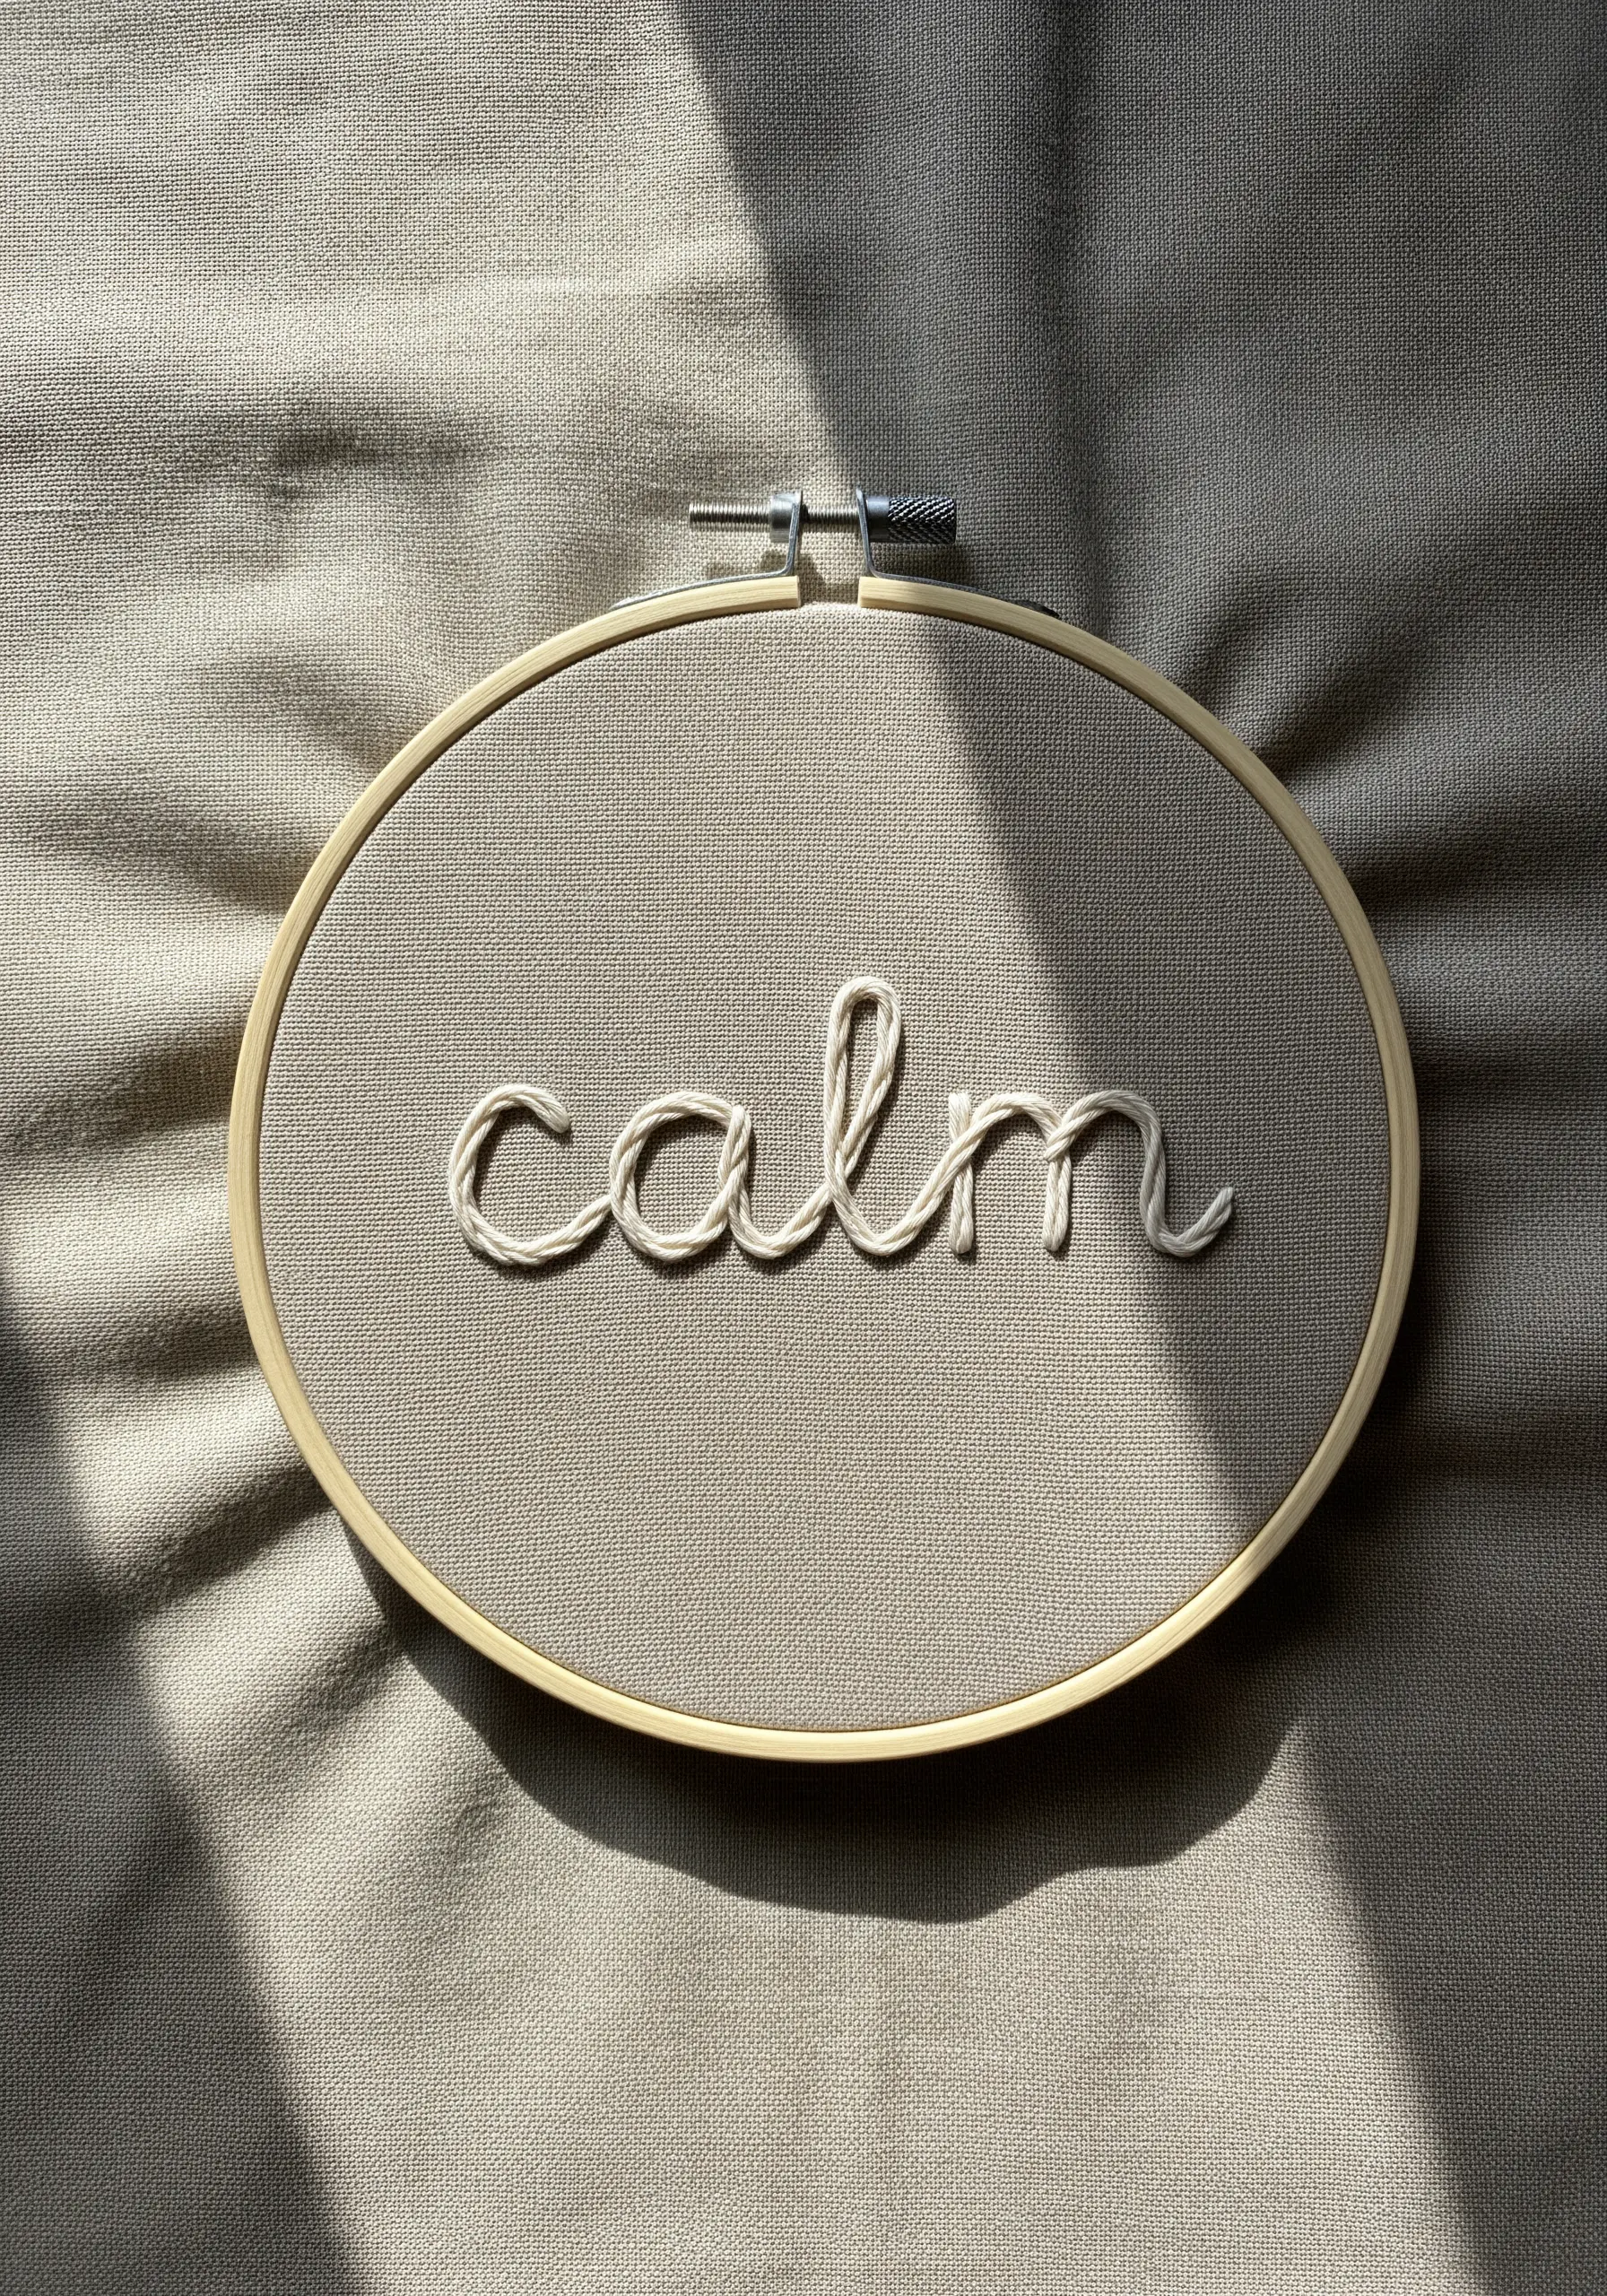
The stem stitch is ideal for cursive lettering because its twisted, rope-like appearance naturally follows curves.
To achieve a fluid line for a word like ‘calm,’ avoid pulling your stitches too tight, which can pucker the fabric and disrupt the smooth flow of the letters.
Using a neutral, single-color palette—like cream thread on taupe fabric—amplifies the serene message of the word, creating a piece of art that genuinely feels tranquil.
These calming DIY embroidery projects are perfect for mindful stitching.
12. Create Clean Edges on Abstract Shapes
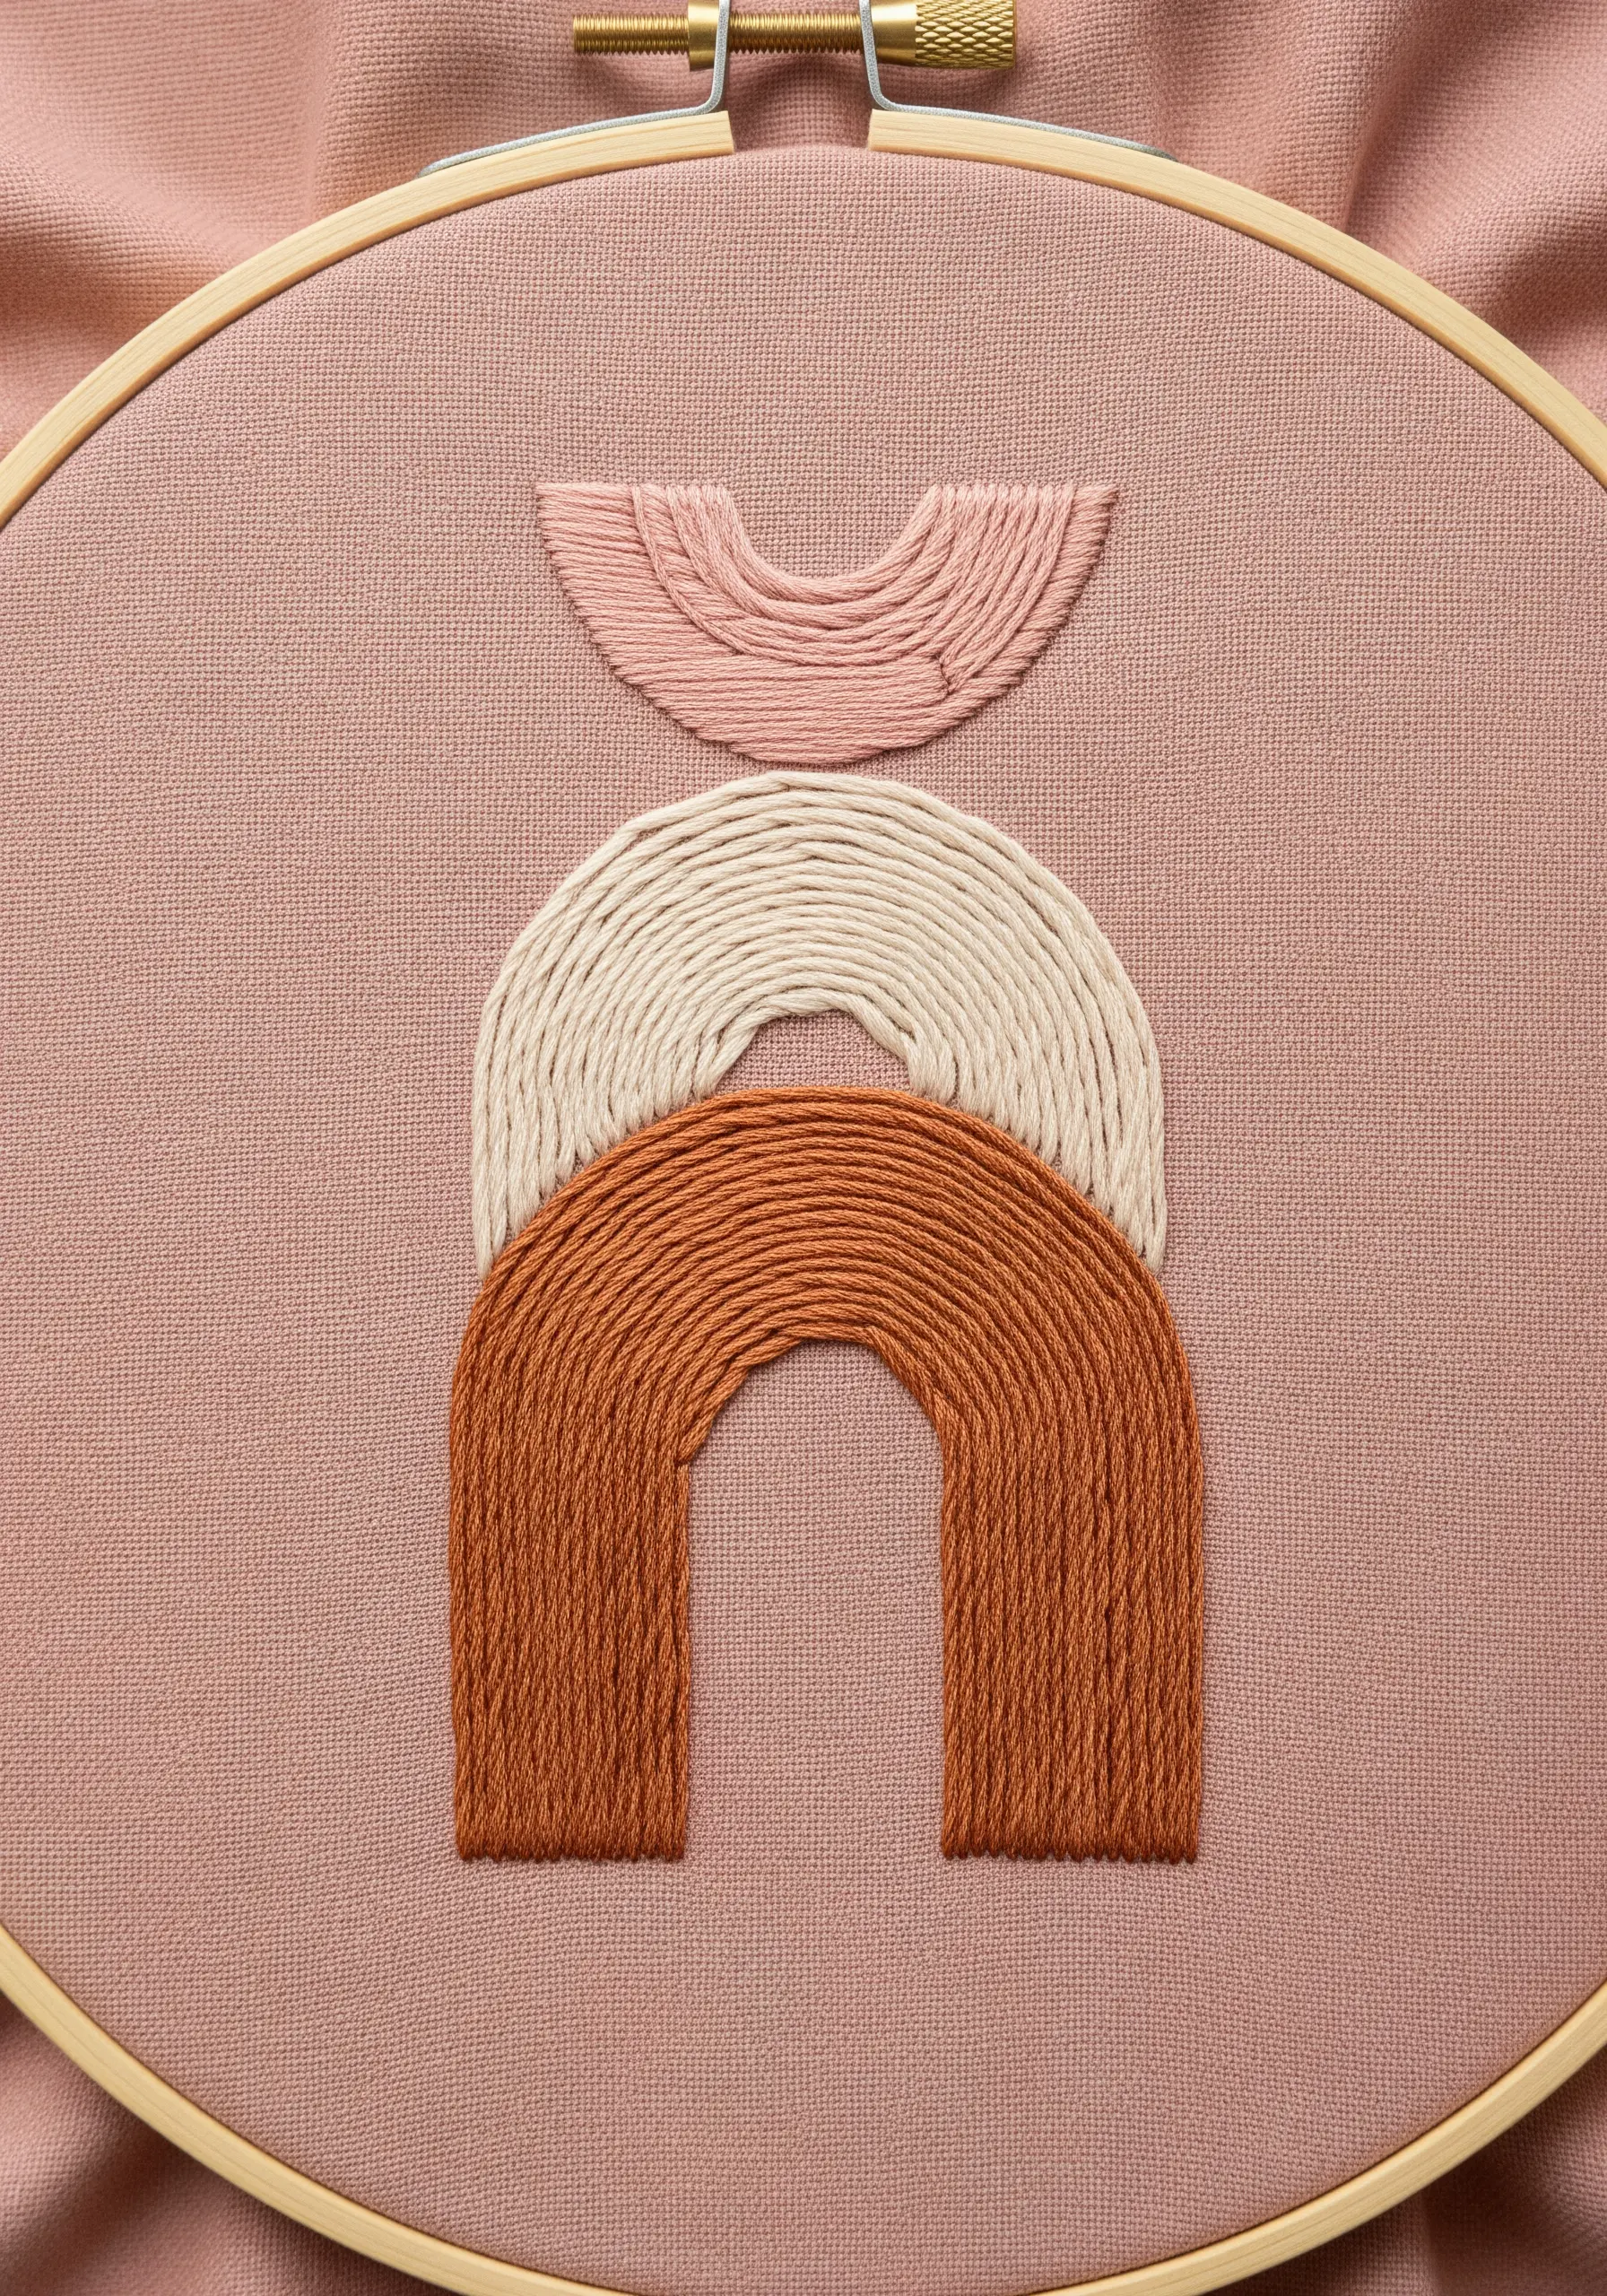
When filling geometric or abstract shapes with satin stitch, achieving a sharp edge is crucial for a polished look.
Before you begin filling, outline the entire shape with a split stitch using a single strand of matching floss.
Then, bring your satin stitch needle up just outside the split stitch line and down on the other side, covering the outline completely.
This technique creates a slightly raised, perfectly defined border for your abstract art.
13. Combine Appliqué and Embroidery for Graphic Impact
For exceptionally sharp and bold lettering, try stitching felt appliqué onto your fabric.
Carefully cut your letters from stiff felt, using a craft knife for precision on interior curves.
Position them on your hooped fabric and secure them with a few tiny, hidden whip stitches around the edges using a matching thread.
This mixed-media approach provides a level of crispness and opacity that thread alone cannot achieve, perfect for high-impact, minimalist statements.
14. Build Voluminous Texture with Knotted Stitches

Create a dense, sculptural cloud by filling the shape with colonial knots or French knots.
Use a thicker thread, like perle cotton or even fine yarn, to give the knots more volume and a softer appearance.
Vary the tightness of each knot slightly to create an organic, puffy texture rather than a uniform one.
For the raindrops, you can use simple straight stitches with a metallic thread or even add tiny silver bugle beads for a hint of sparkle.
15. Define Shapes with a Bold Couching Technique

For highly textured, graphic lettering that pops off the fabric, use the couching stitch with a thick fiber like yarn or cotton cord.
Lay your thick yarn along your design line, then use a standard six-strand floss in a matching color to tack it down with small, perpendicular stitches.
This method allows you to incorporate unconventional materials into your embroidery, creating a bold, textural look that is incredibly fast to execute.
16. Isolate Colors with a Backstitch Outline

To achieve a clean, stained-glass effect in your color-blocked designs, outline each segment with a backstitch first.
After outlining the entire motif, fill each section with a directional satin stitch, tucking the ends of your stitches just under the backstitch outline.
This technique prevents colors from bleeding into one another and creates a crisp, graphic separation that makes the entire design look sharp and intentional.
It’s the secret to professional-looking fills in illustrative embroidery.
17. Maintain Precision in Minimalist Lettering

When embroidering a short, impactful phrase, precision is everything.
For these clean, sans-serif letters, use a padded satin stitch on a smaller scale.
The key is to keep the underlying padding minimal and the top stitches perfectly parallel and uniform in tension.
Using a dark thread on a light, textured fabric like linen creates a sophisticated contrast that allows the simple words to carry significant visual weight.
18. Stitch a Delicate and Personal Constellation

Create a meaningful piece of decor by stitching your favorite constellation or zodiac sign.
Use a simple star stitch or small, tight satin stitches for the stars themselves, using a bright white or metallic thread to ensure they sparkle against a dark background.
Connect them with a fine, delicate backstitch using only one or two strands of floss to represent the faint lines of the constellation.
This is one of the most elegant ways to add celestial micro-embroidery ideas to your home with personal significance.


