

Have you ever admired an intricate mandala or a complex geometric design and thought, “I could never do that”? The secret is that you absolutely can. The most stunning, precise-looking embroidery often isn’t about mastering dozens of complex stitches—it’s about understanding the power of a single, well-placed straight stitch.
This collection is inspired by the clean, graphic beauty of string art, a technique that relies on lines, grids, and tension to build breathtaking patterns. By translating this concept to needle and thread, you can create designs that look impossibly detailed but are rooted in simple, meditative repetition. All you need is a pattern, a needle, and the patience to watch a masterpiece unfold one straight line at a time.
Let these ideas give you the confidence to tackle what seems complex. Focus on your color choices, the texture of your thread, and the rhythm of your stitching. You are about to discover how the simplest of techniques can yield the most extraordinary results, turning your fabric into a canvas for modern, geometric art.
1. Master Color Blocking with Layered Octagons

Create powerful depth by dedicating each geometric layer to a single, bold color.
For a tactile, graphic finish, use a thicker thread like pearl cotton or even fine tapestry wool, which fills the space beautifully and adds a soft texture.
Plan your layers from the outside in, allowing the underlying colors to frame the subsequent shapes, which enhances the dimensional effect.
This technique relies on consistent tension—keep your straight stitches taut enough to be straight, but not so tight that they pucker the fabric.
2. Craft a Celestial Spiral with Metallic Threads

Choose a dark, high-contrast fabric like navy or black linen to ensure your metallic threads have maximum impact.
To create this dynamic swirling effect, plot offset anchor points for your inner and outer circles, creating a graceful curve rather than a direct line.
Alternate a high-sheen metallic thread with a matte cotton floss in a similar shade to create subtle light play and visual texture.
Finally, scatter tiny seed beads or single French knots randomly across the background to mimic a starry sky, adding a final layer of delicate detail.
3. Define Geometric Points with Bead Accents
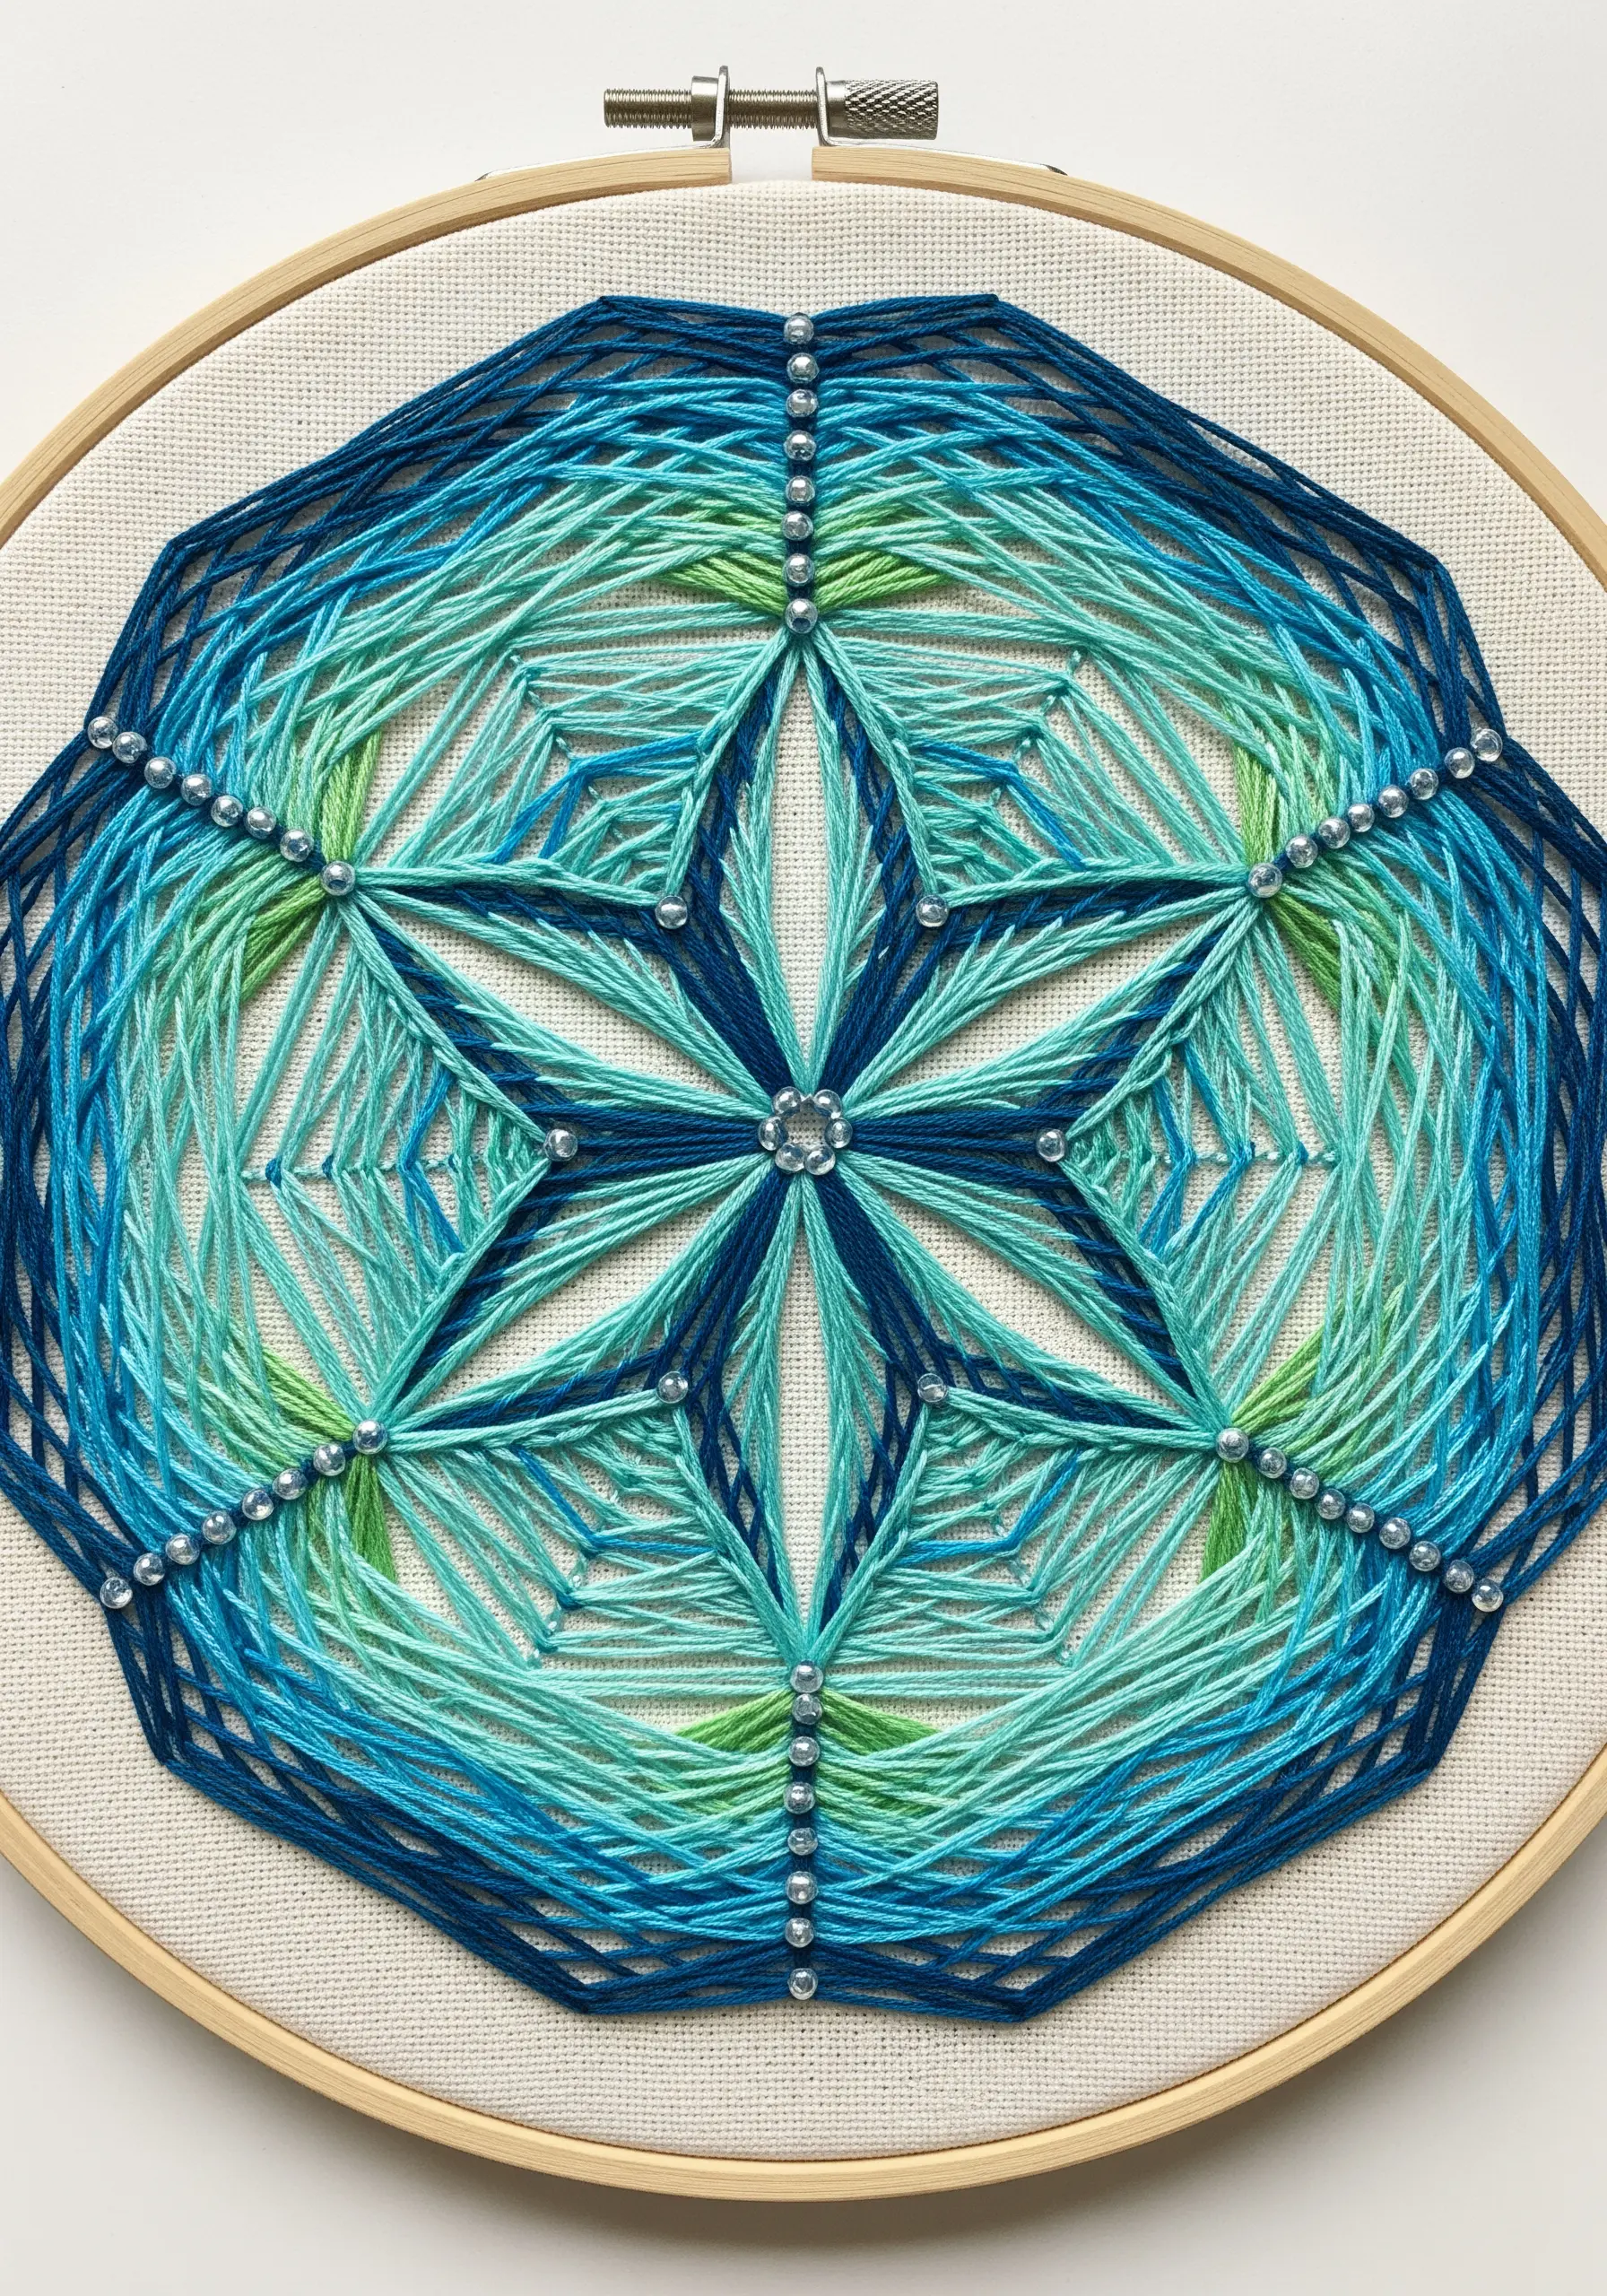
Instantly elevate the crisp intersections of your string art by adding a single seed bead at each anchor point.
This not only introduces a touch of sparkle but also helps to visually organize the complex layers of thread, making the pattern easier for the eye to follow.
Using a variegated thread in shades of blue and green allows you to achieve effortless color transitions without the fuss of changing floss.
The beads act as a guide, making the geometric pattern feel more polished and intentional—a simple trick for a professional finish.
4. Achieve 3D Petal Effects with Overlapping Stitches

Create the illusion of layered petals by stitching each shape individually and allowing them to overlap strategically.
Begin with the back layer and work your way toward the center, which gives the final design a natural, dimensional quality.
Use a thicker thread, like a #5 pearl cotton, to give each “petal” more volume and definition, enhancing the 3D effect.
Stitching on a sturdy base like felt prevents puckering and provides a soft, matte backdrop that makes your thread colors appear even richer.
5. Explore Grayscale Gradients for Modern Drama
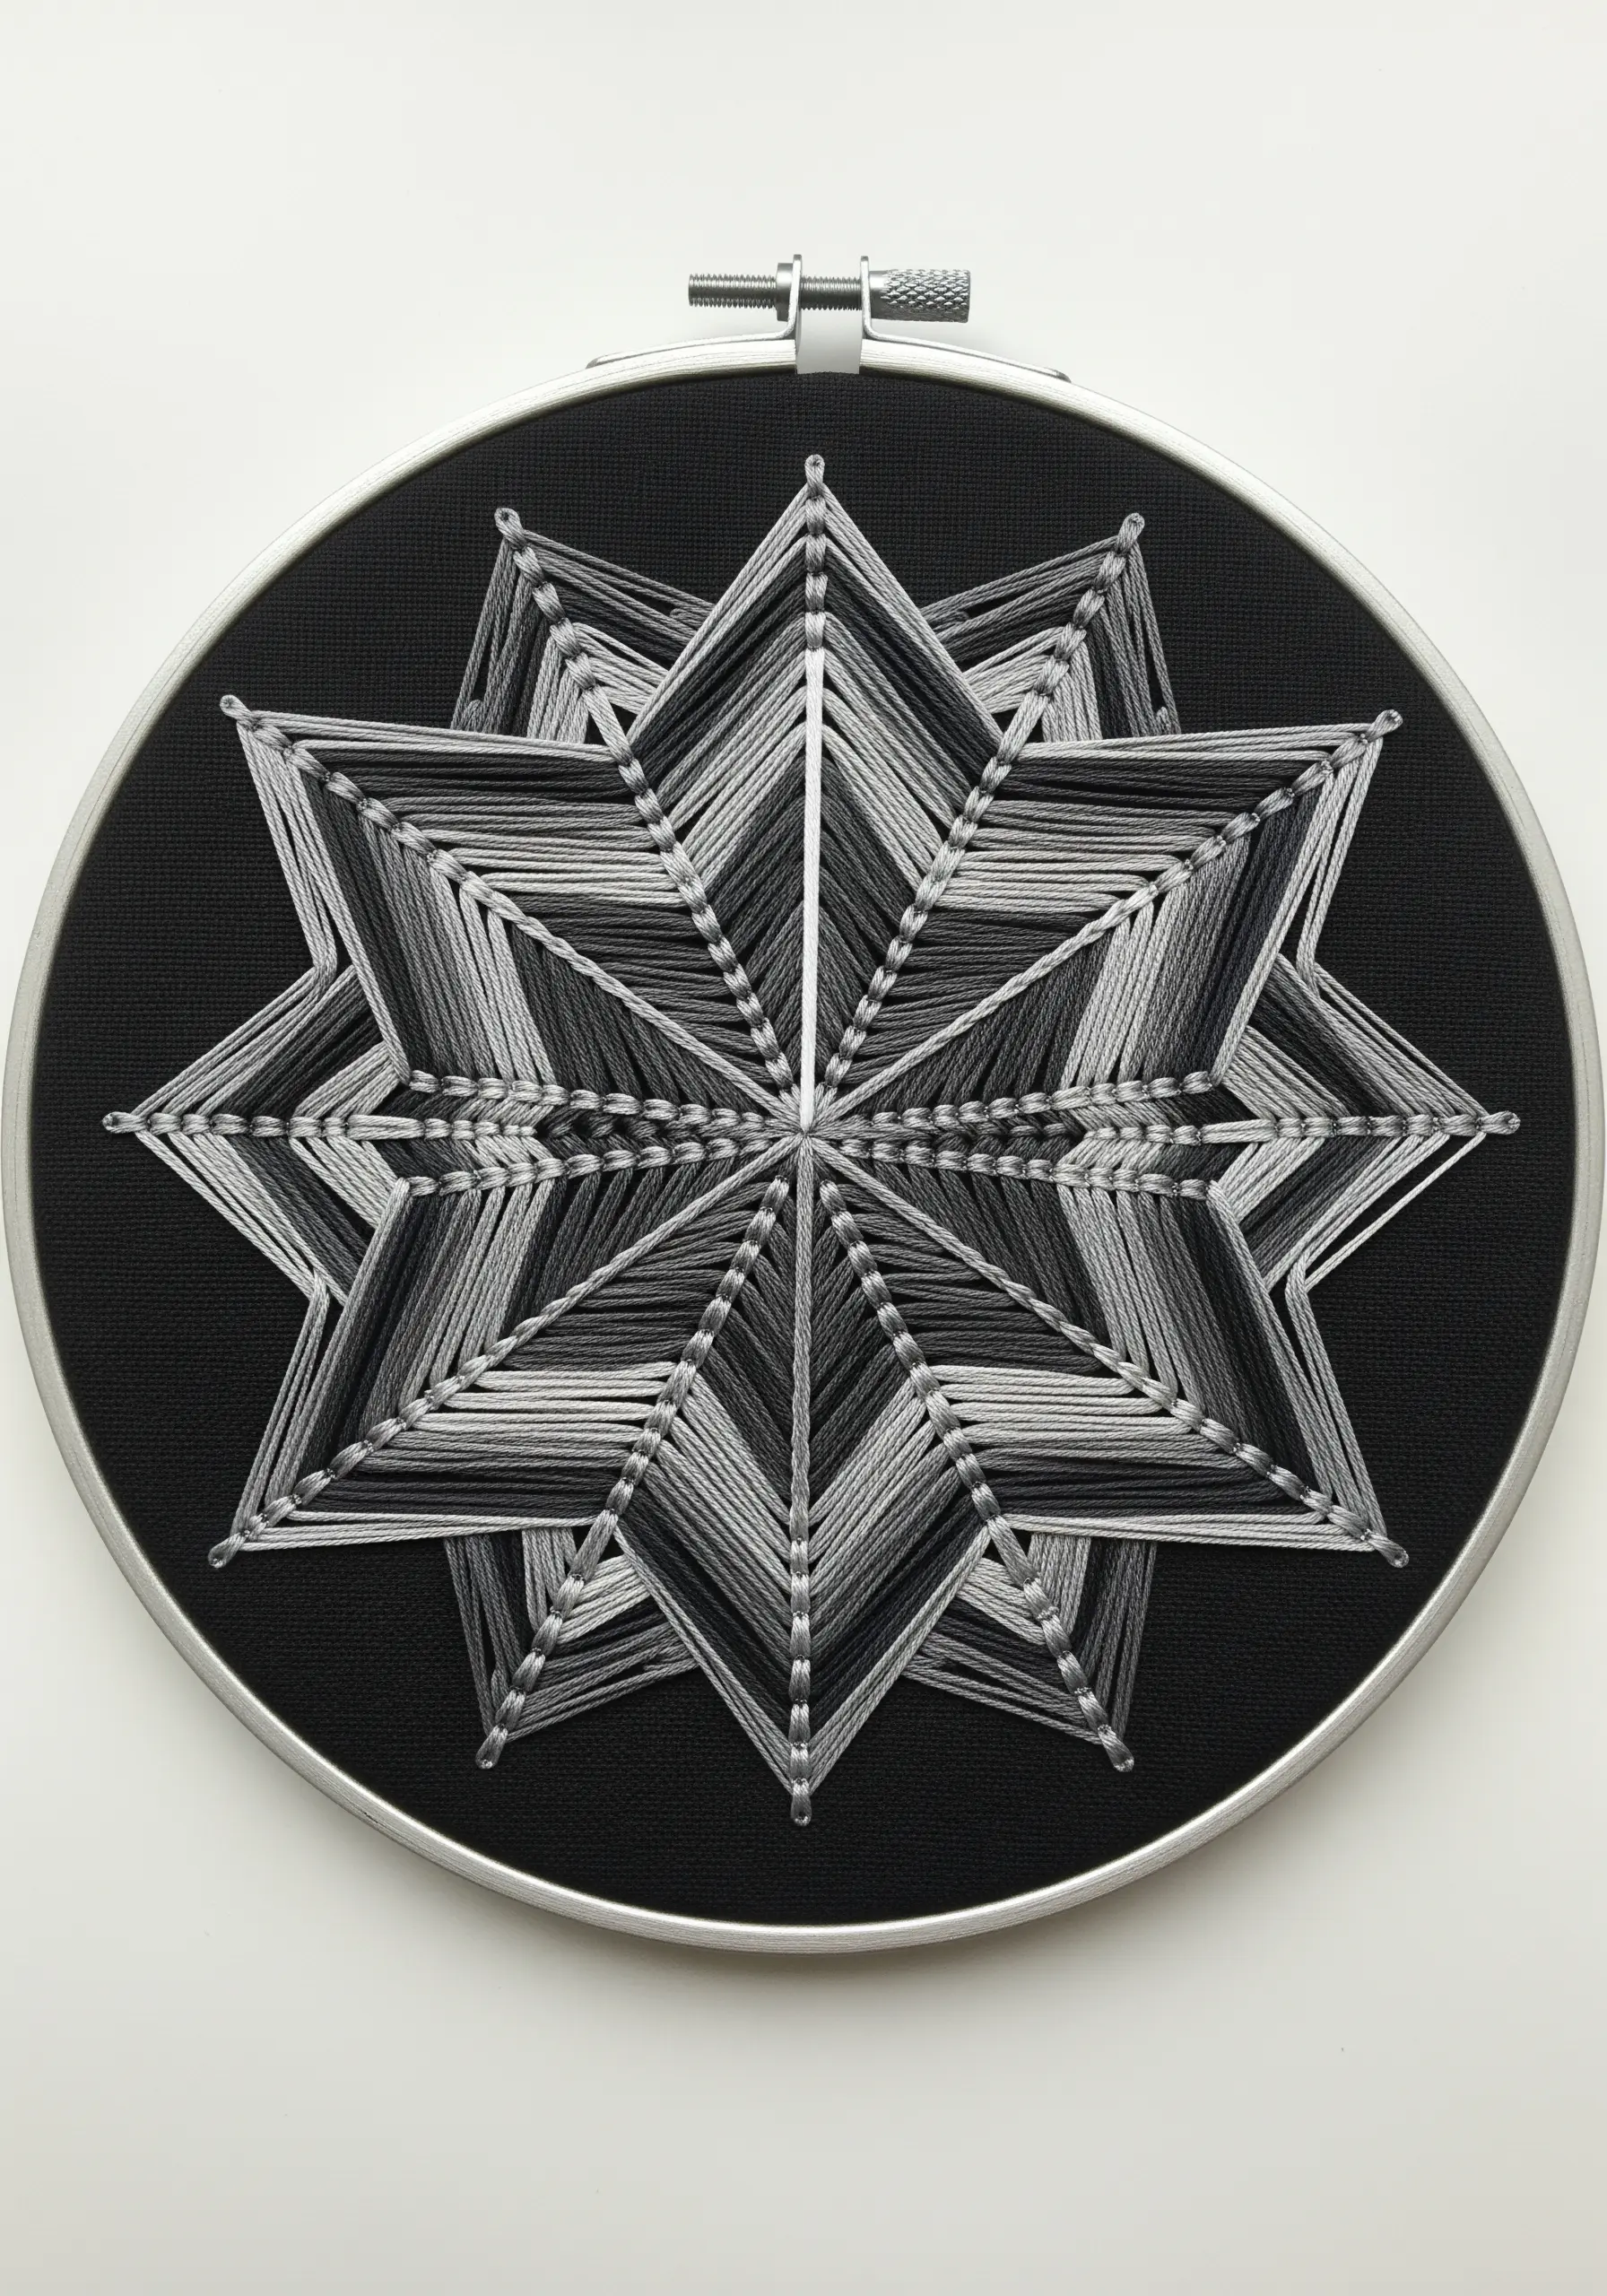
Achieve a striking, sophisticated look by limiting your palette to a grayscale gradient, from crisp white to deep black.
For a seamless transition, select at least five to seven distinct shades of gray floss to place between your black and white anchors.
The high contrast against the black fabric emphasizes the geometric precision of the design and makes the lines appear exceptionally sharp.
This monochromatic approach proves that you don’t need a rainbow of colors to create a visually powerful piece of framed embroidery.
6. Stitch a Seamless Rainbow Gradient

The key to a smooth and vibrant rainbow transition is careful color planning before you even thread your needle.
Arrange your floss in spectral order (ROYGBIV) to ensure a logical and visually pleasing flow.
For each major color segment, use two or three closely related shades to create a subtle blend where the colors meet, avoiding harsh lines.
This design is a meditative exercise in repetition, letting the simple rhythm of straight stitches and the color progression do all the aesthetic work.
7. Add Bohemian Flair with Matching Tassels
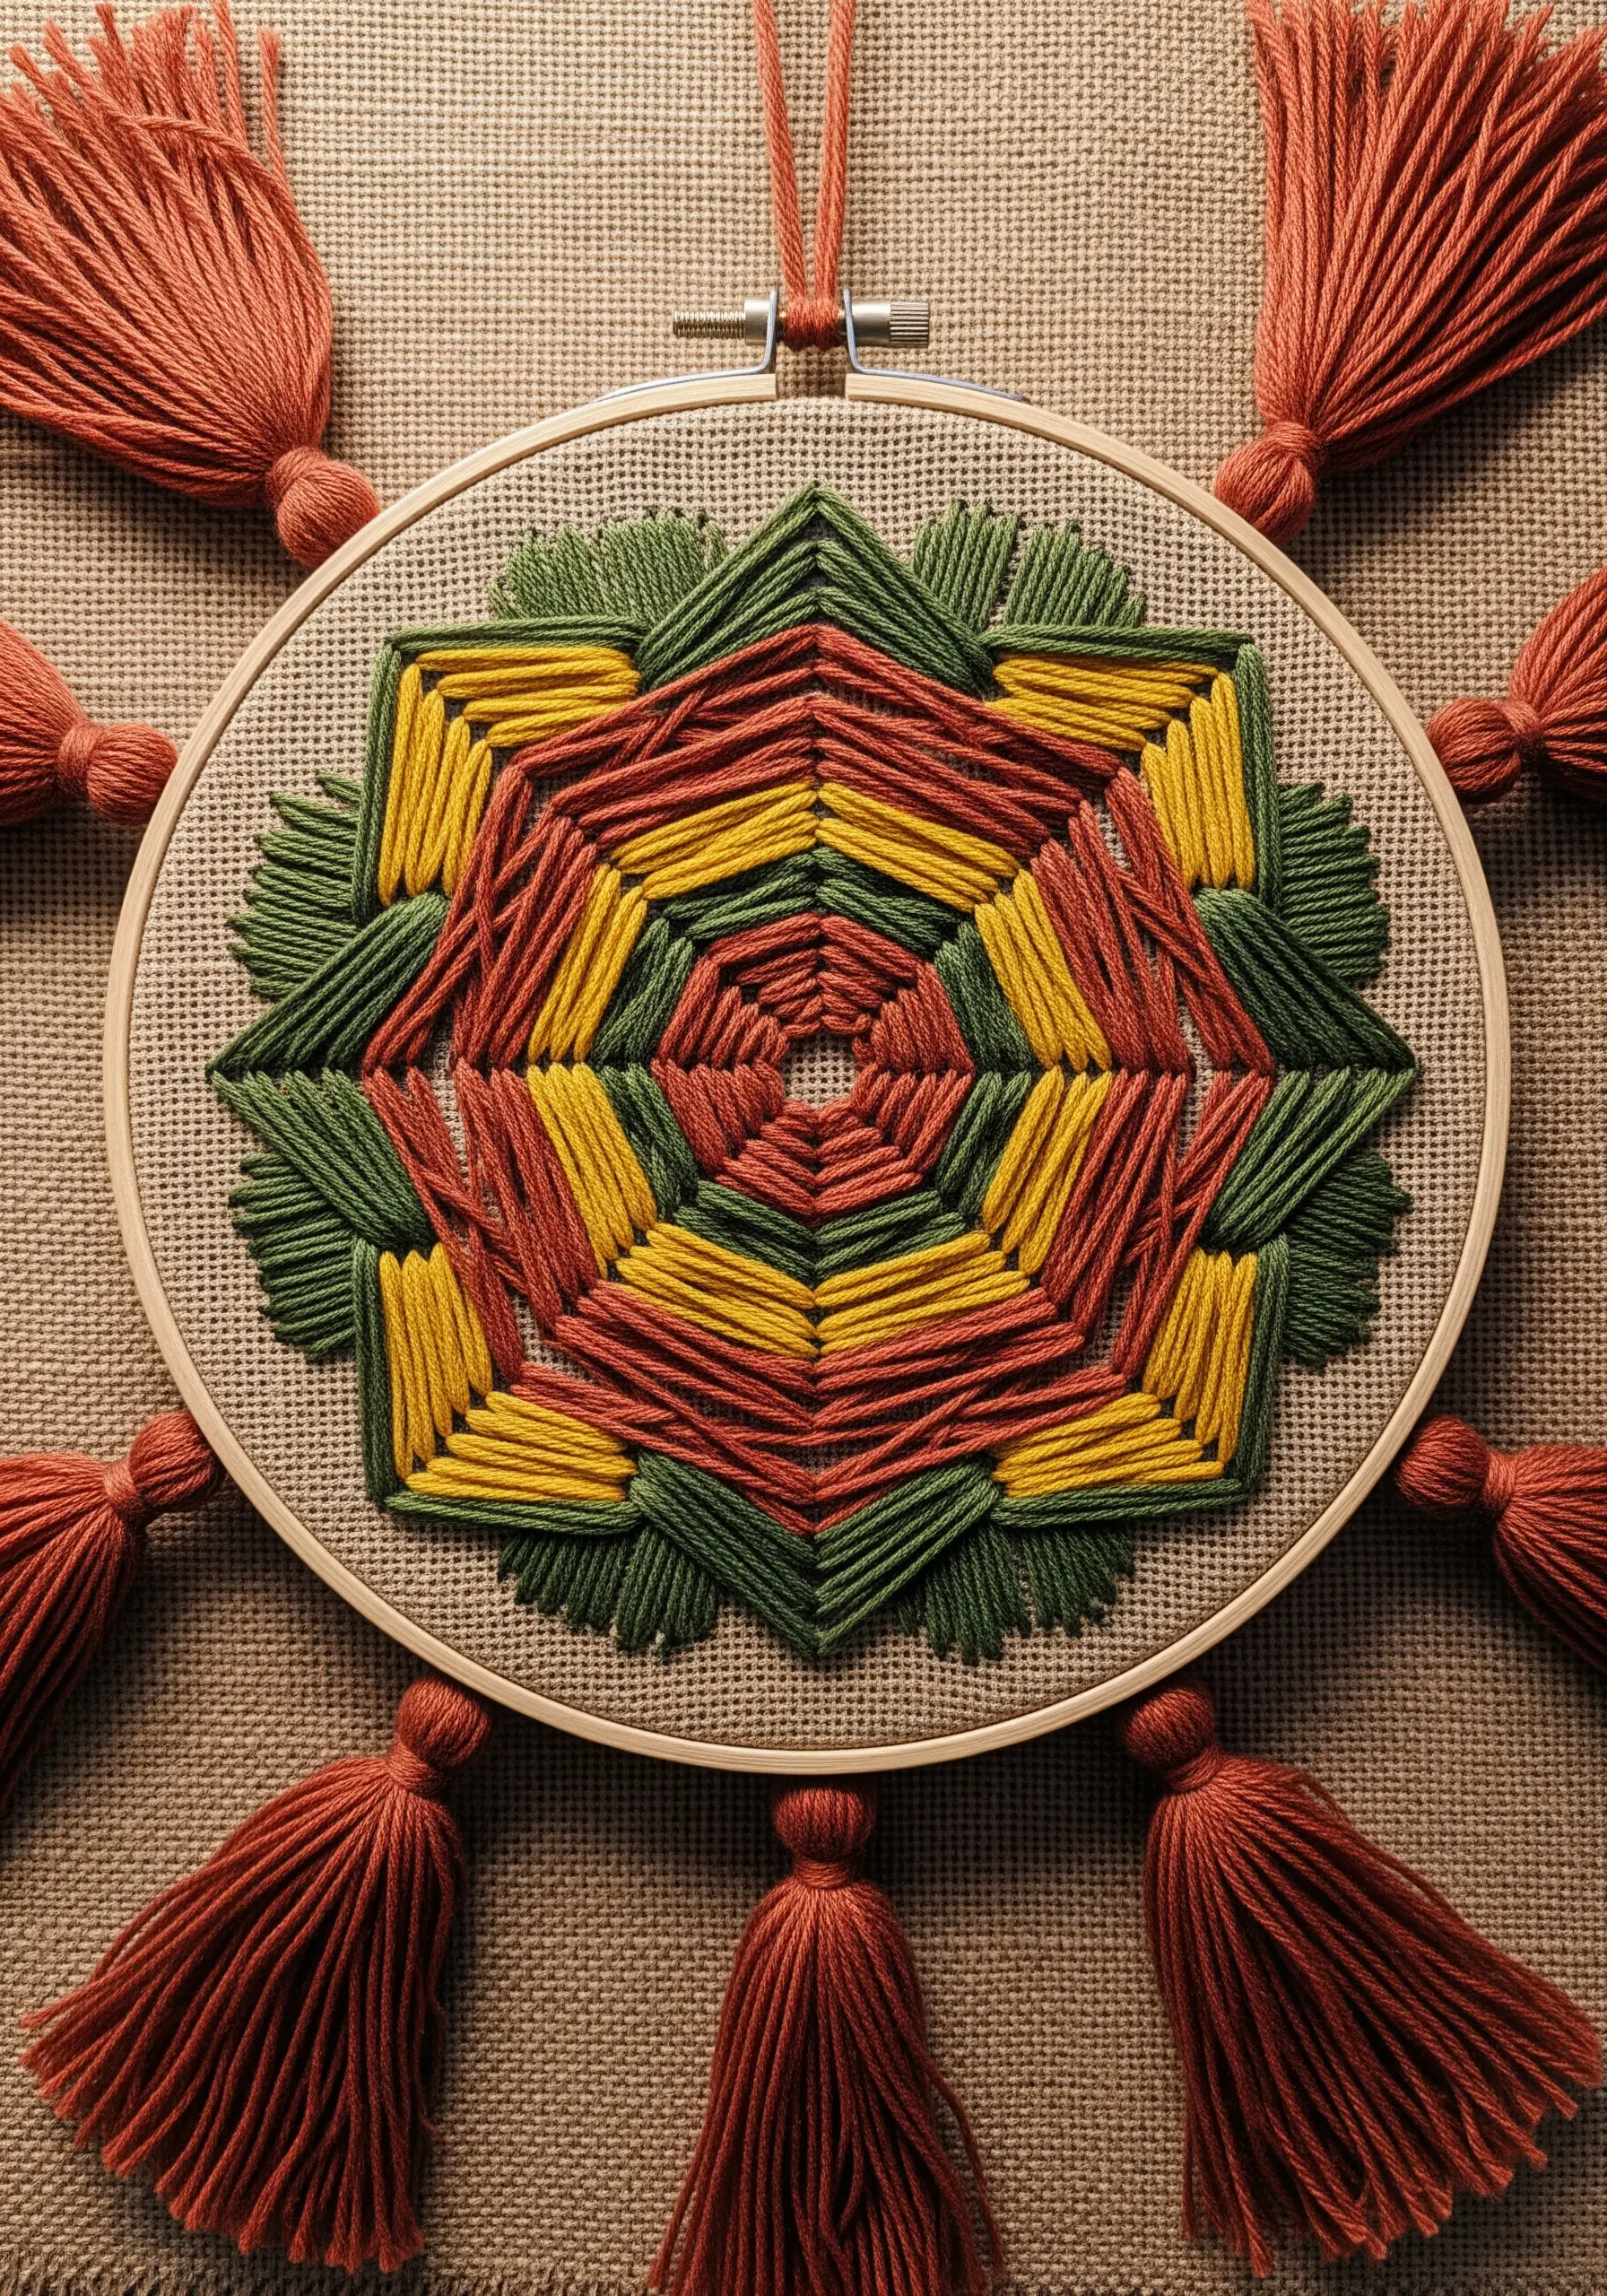
Elevate your hoop art from a simple project to a complete wall hanging by adding tassels made from the same thread.
This simple addition creates a cohesive, finished piece that feels professionally styled.
To make the tassels, wrap embroidery floss around a small piece of cardboard, tie it off securely at the top, cut the bottom loops, and trim the ends evenly.
Attach them to the hoop’s tightening screw or stitch them directly to the fabric edge for a touch of rustic, earthy charm.
8. Frame Your Design with a Metallic Thread Border

Make your central mandala pop by outlining its final shape with a layer of metallic gold thread.
This technique creates a brilliant ‘frame within a frame’ and adds an immediate touch of luxury and intention.
Stitch the inner layers with standard six-strand cotton floss in bold, primary colors for a classic look.
The contrast between the matte cotton and the high-sheen metallic thread will give your piece incredible visual depth and a refined edge.
9. Embrace Minimalist Impact with a Single Thread

Create a complex, spirograph-like pattern using only a single color of black thread on a crisp white or cream background.
The beauty of this design lies in its clean architectural lines and the captivating negative space it forms.
Use a finer thread (two or three strands of a six-strand floss) to keep the lines looking delicate and sharp, preventing them from becoming bulky where they intersect.
This is a perfect example of minimalist embroidery that feels both intricate and serene.
10. Create a Focal Point with a Beaded Center
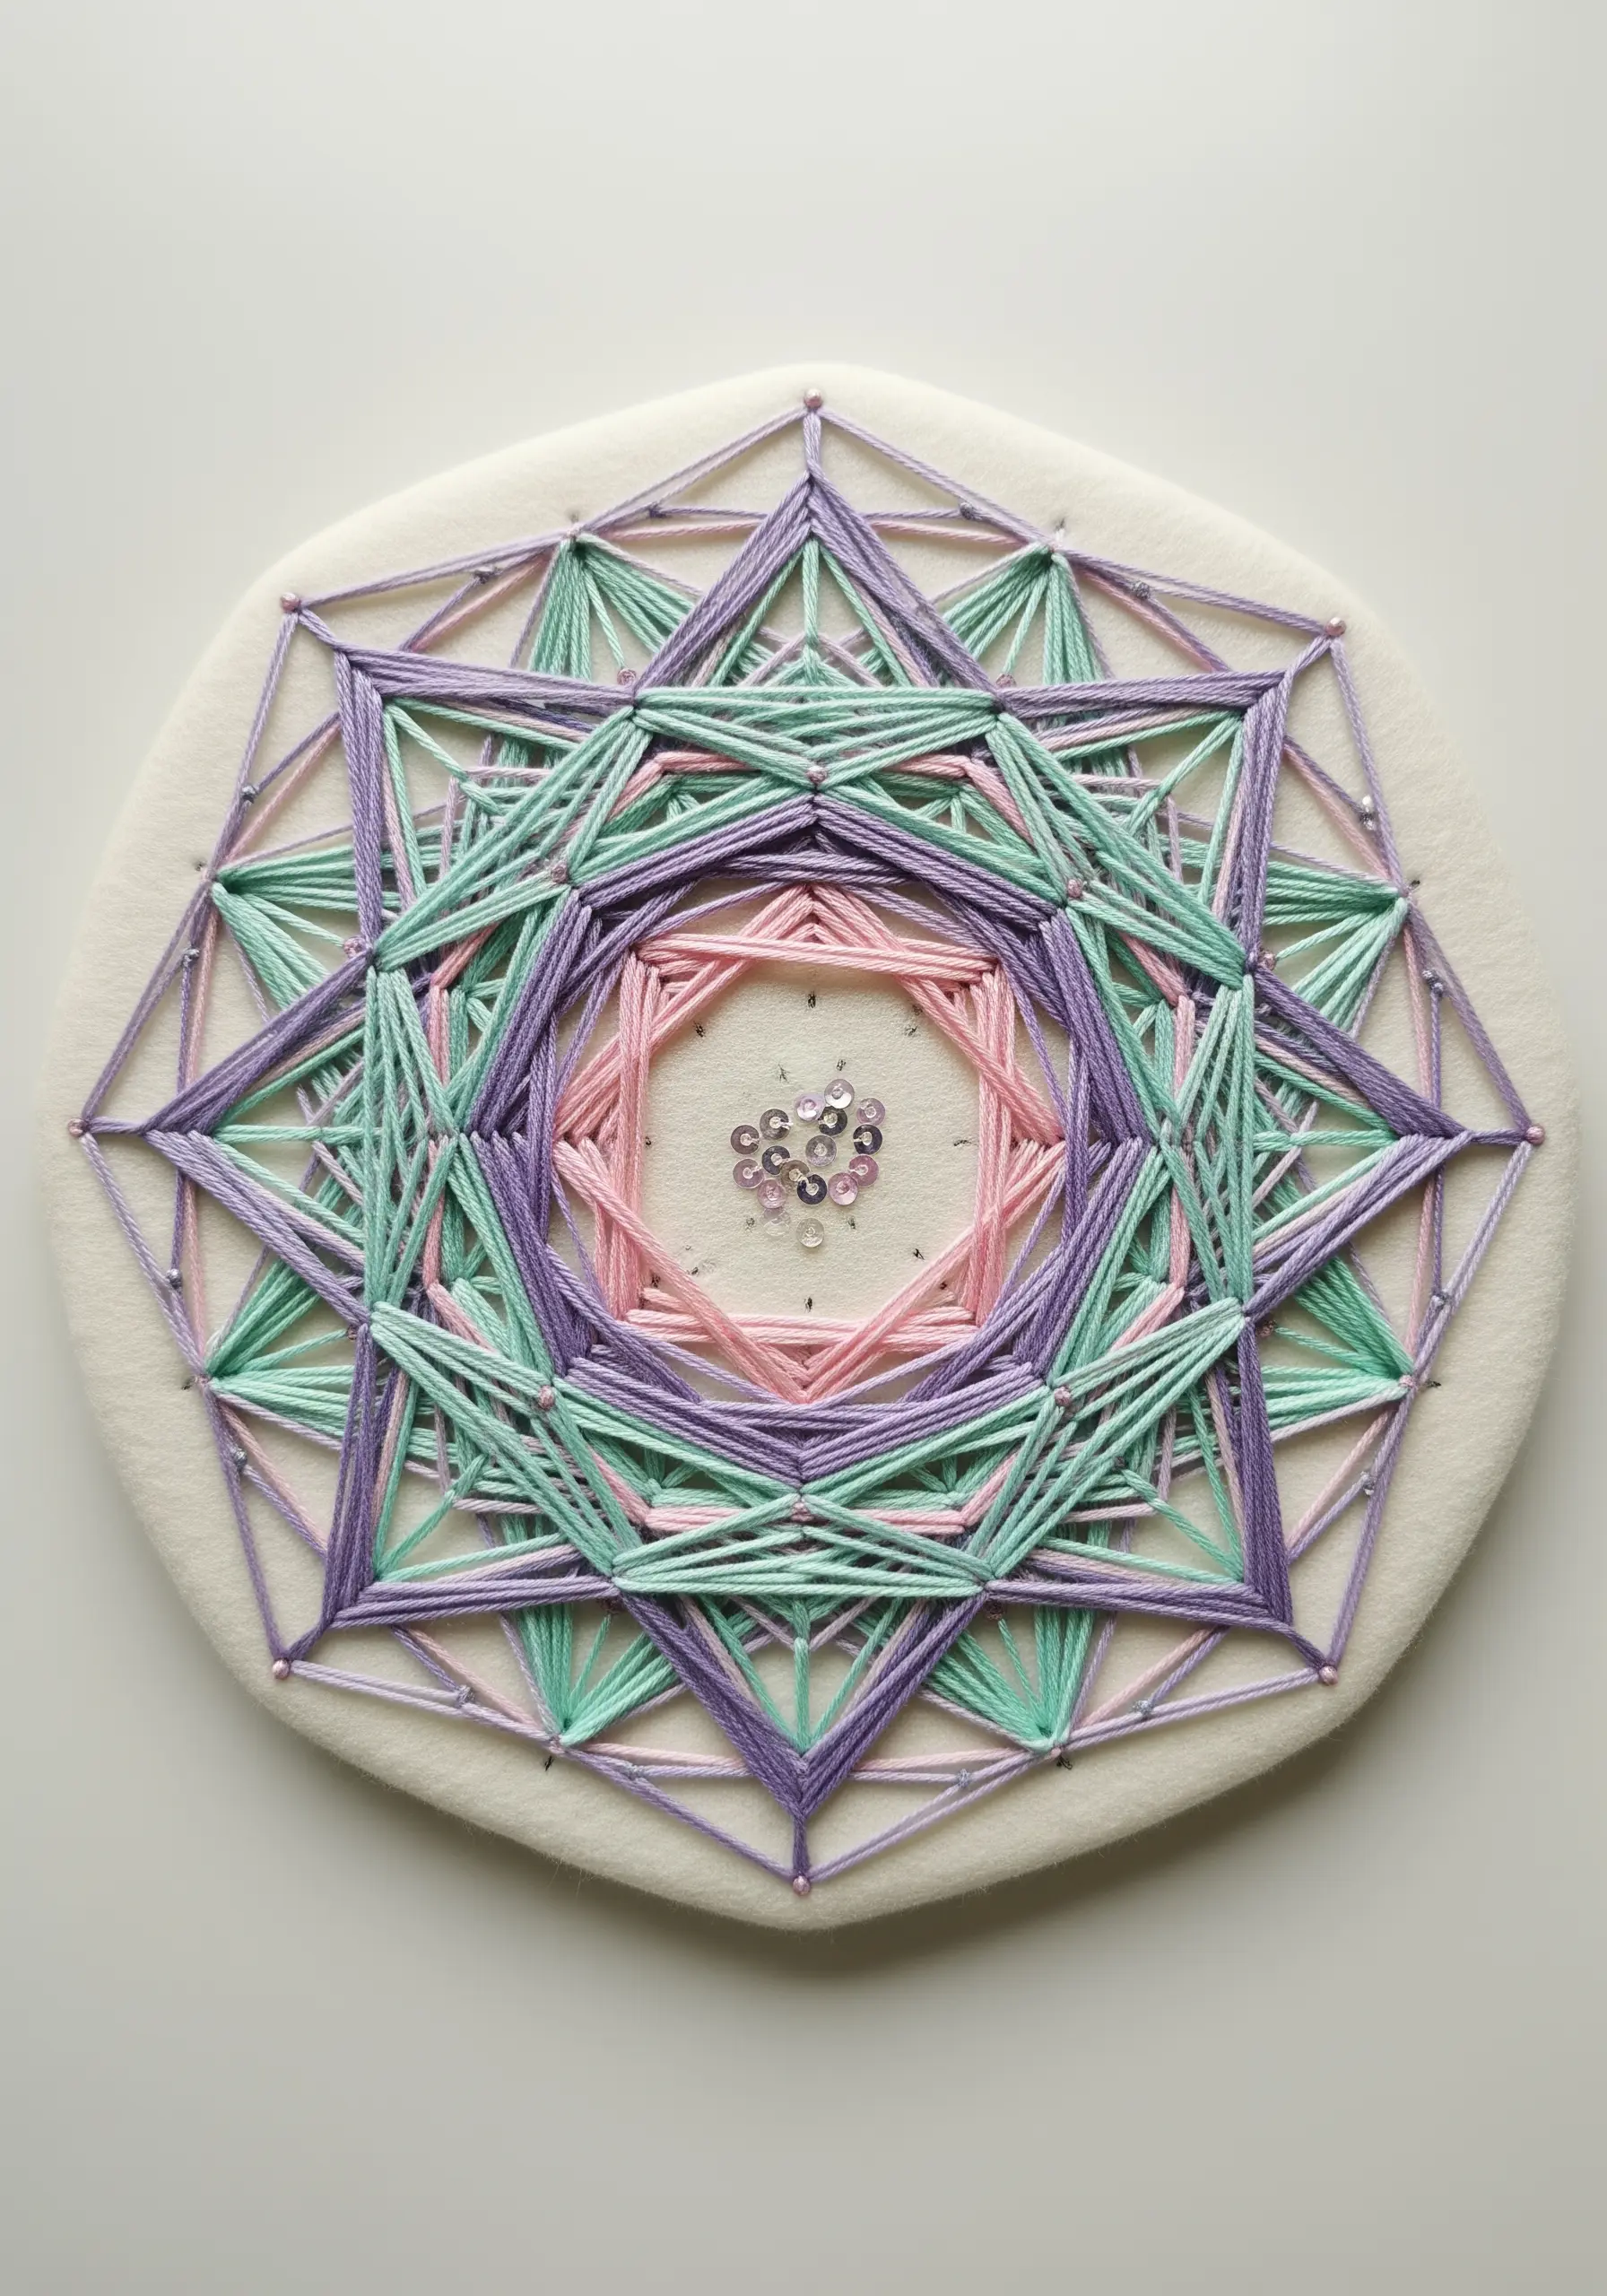
Draw the eye directly to the heart of your mandala by filling the center with a sparkling cluster of sequins and beads.
This adds a delightful textural contrast to the smooth, radiating lines of thread and gives the piece a precious, jewel-like quality.
Choose soft pastel threads for the main design to maintain a light, airy feel that complements the delicate embellishments.
Stitching on wool-blend felt provides a stable, non-fraying base that easily holds the weight of the beads without warping or puckering.
11. Create Dynamic Contrast with a Split-Color Design
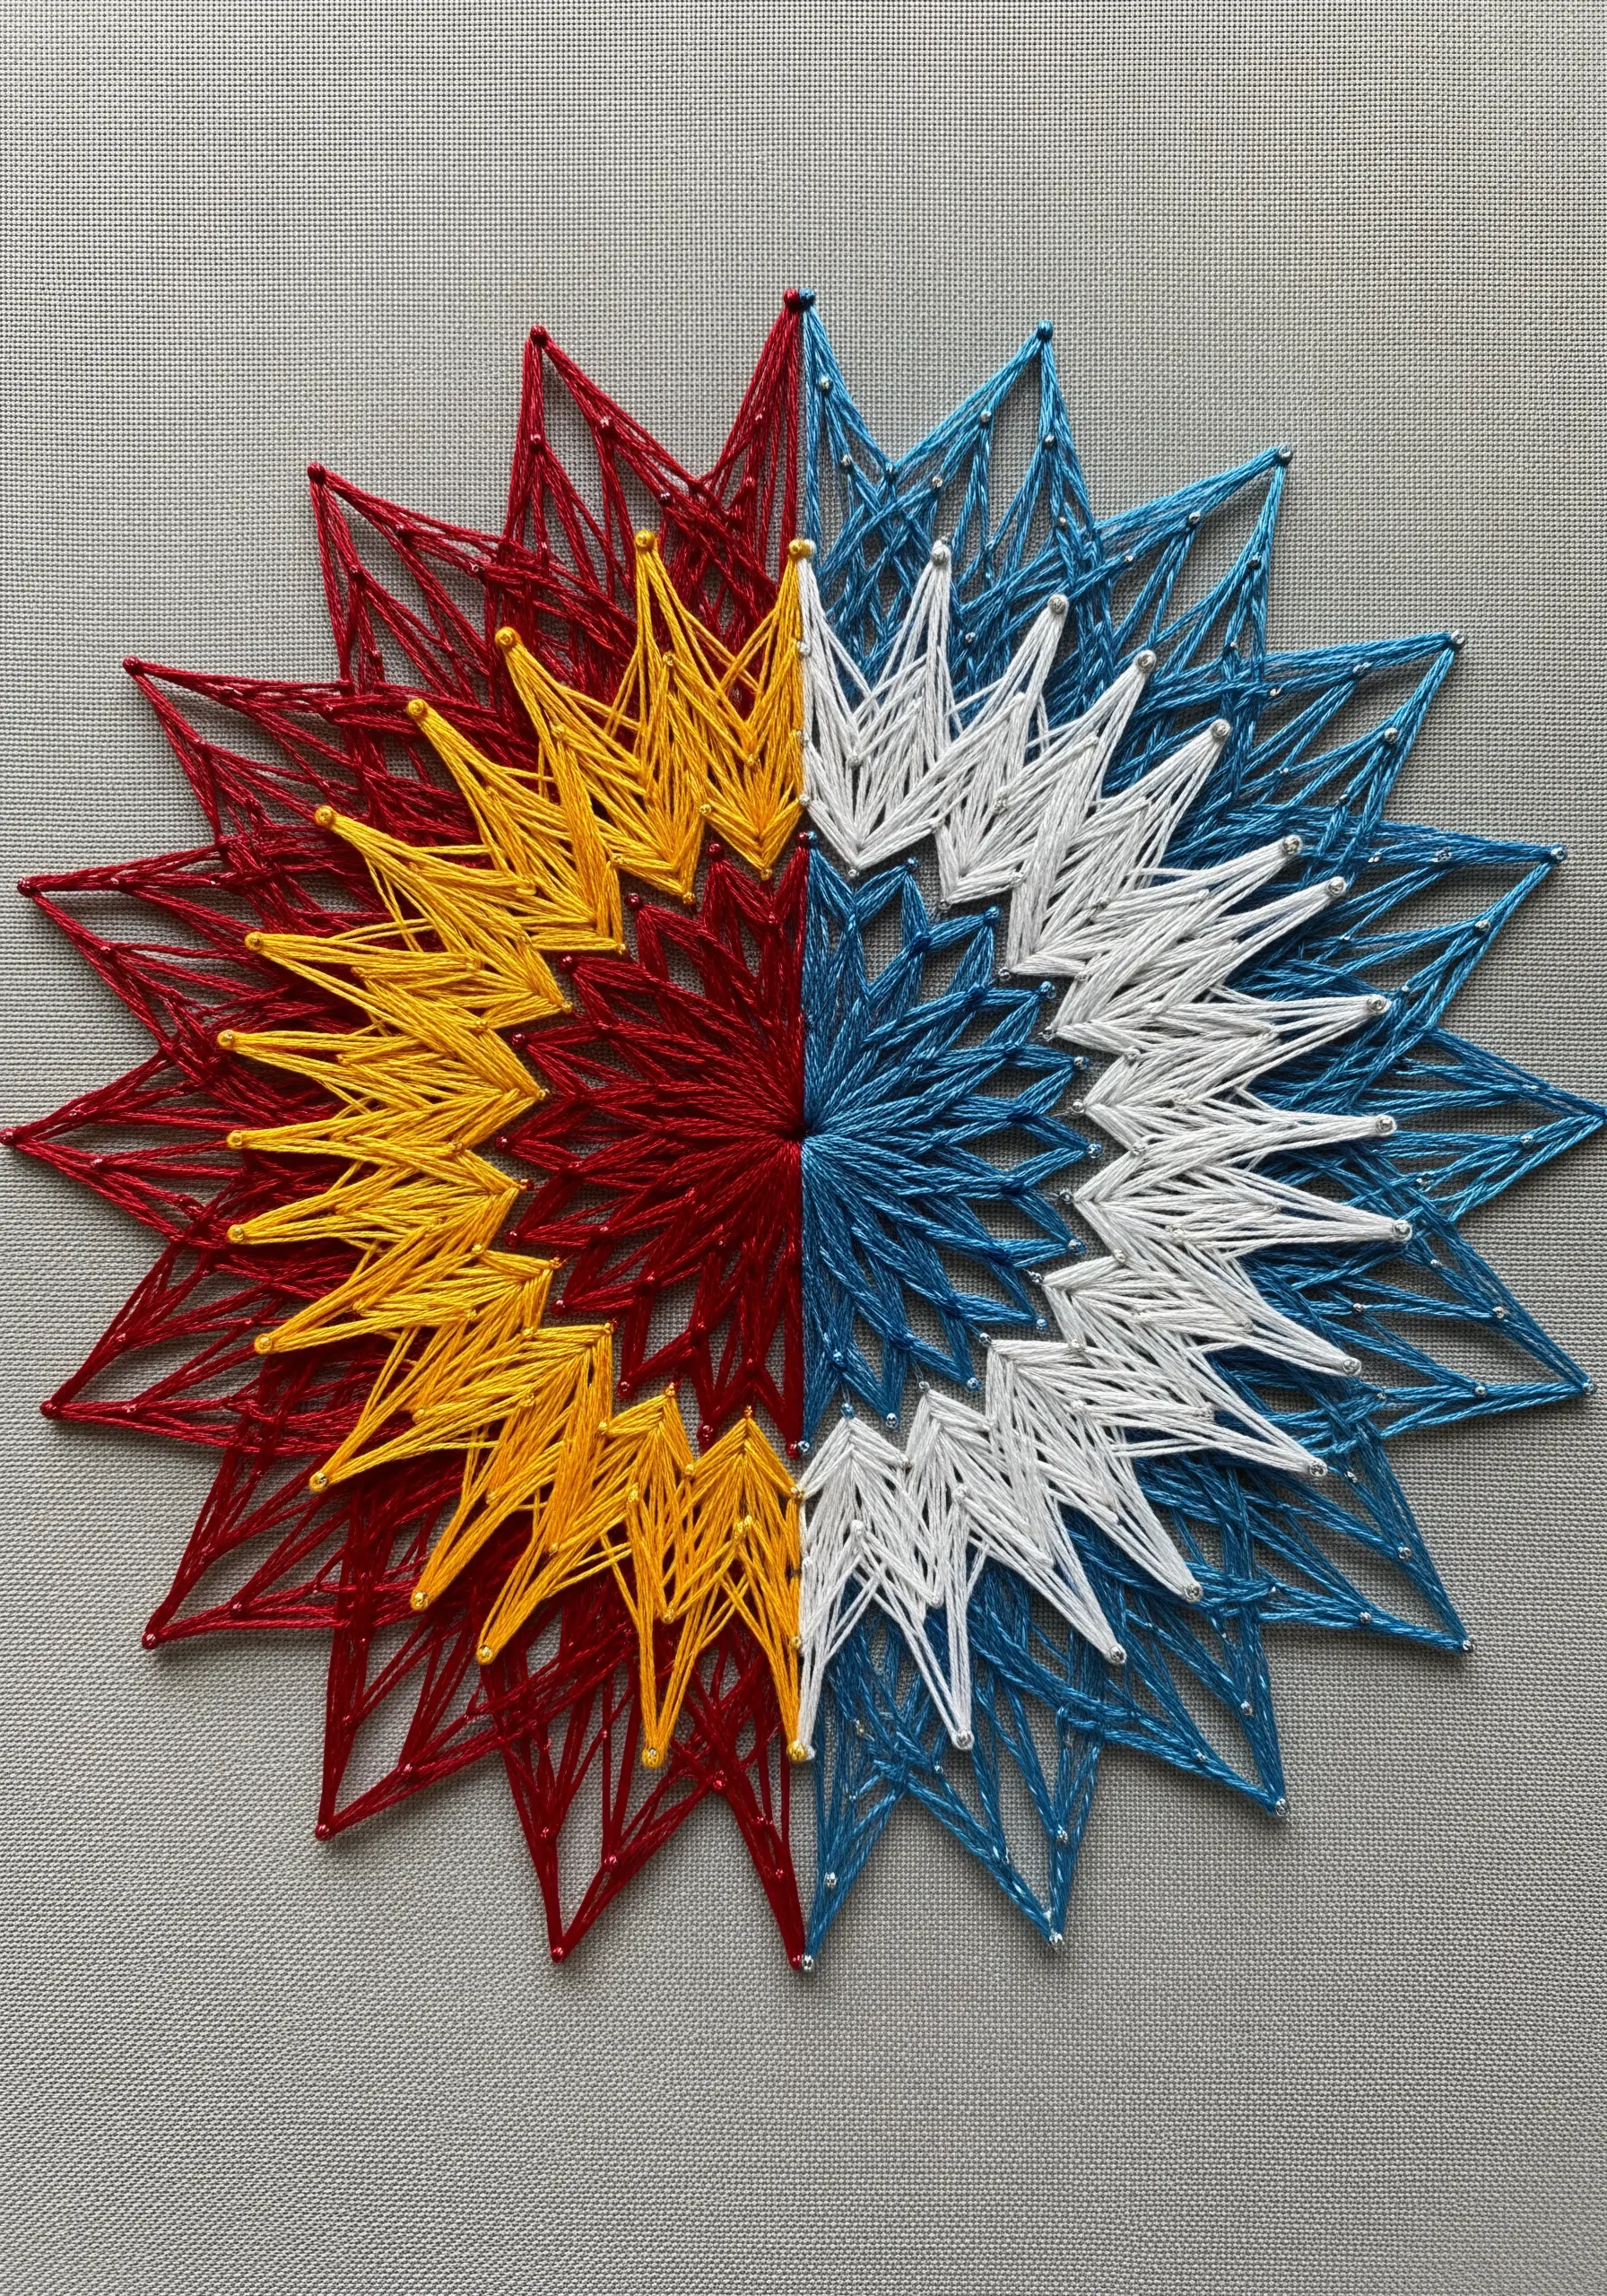
Divide your design into quadrants and assign contrasting color families—like warm reds and yellows versus cool blues and whites—to create a powerful visual split.
This technique instantly injects energy and a modern, graphic quality into an otherwise traditional star shape.
To keep your lines clean and colors pure, completely stitch one color family before moving to the next.
The sharp central lines where the colors meet become a crucial design element, highlighting the piece’s symmetry and duality.
12. Recreate Intricate Patterns with a Soluble Stabilizer
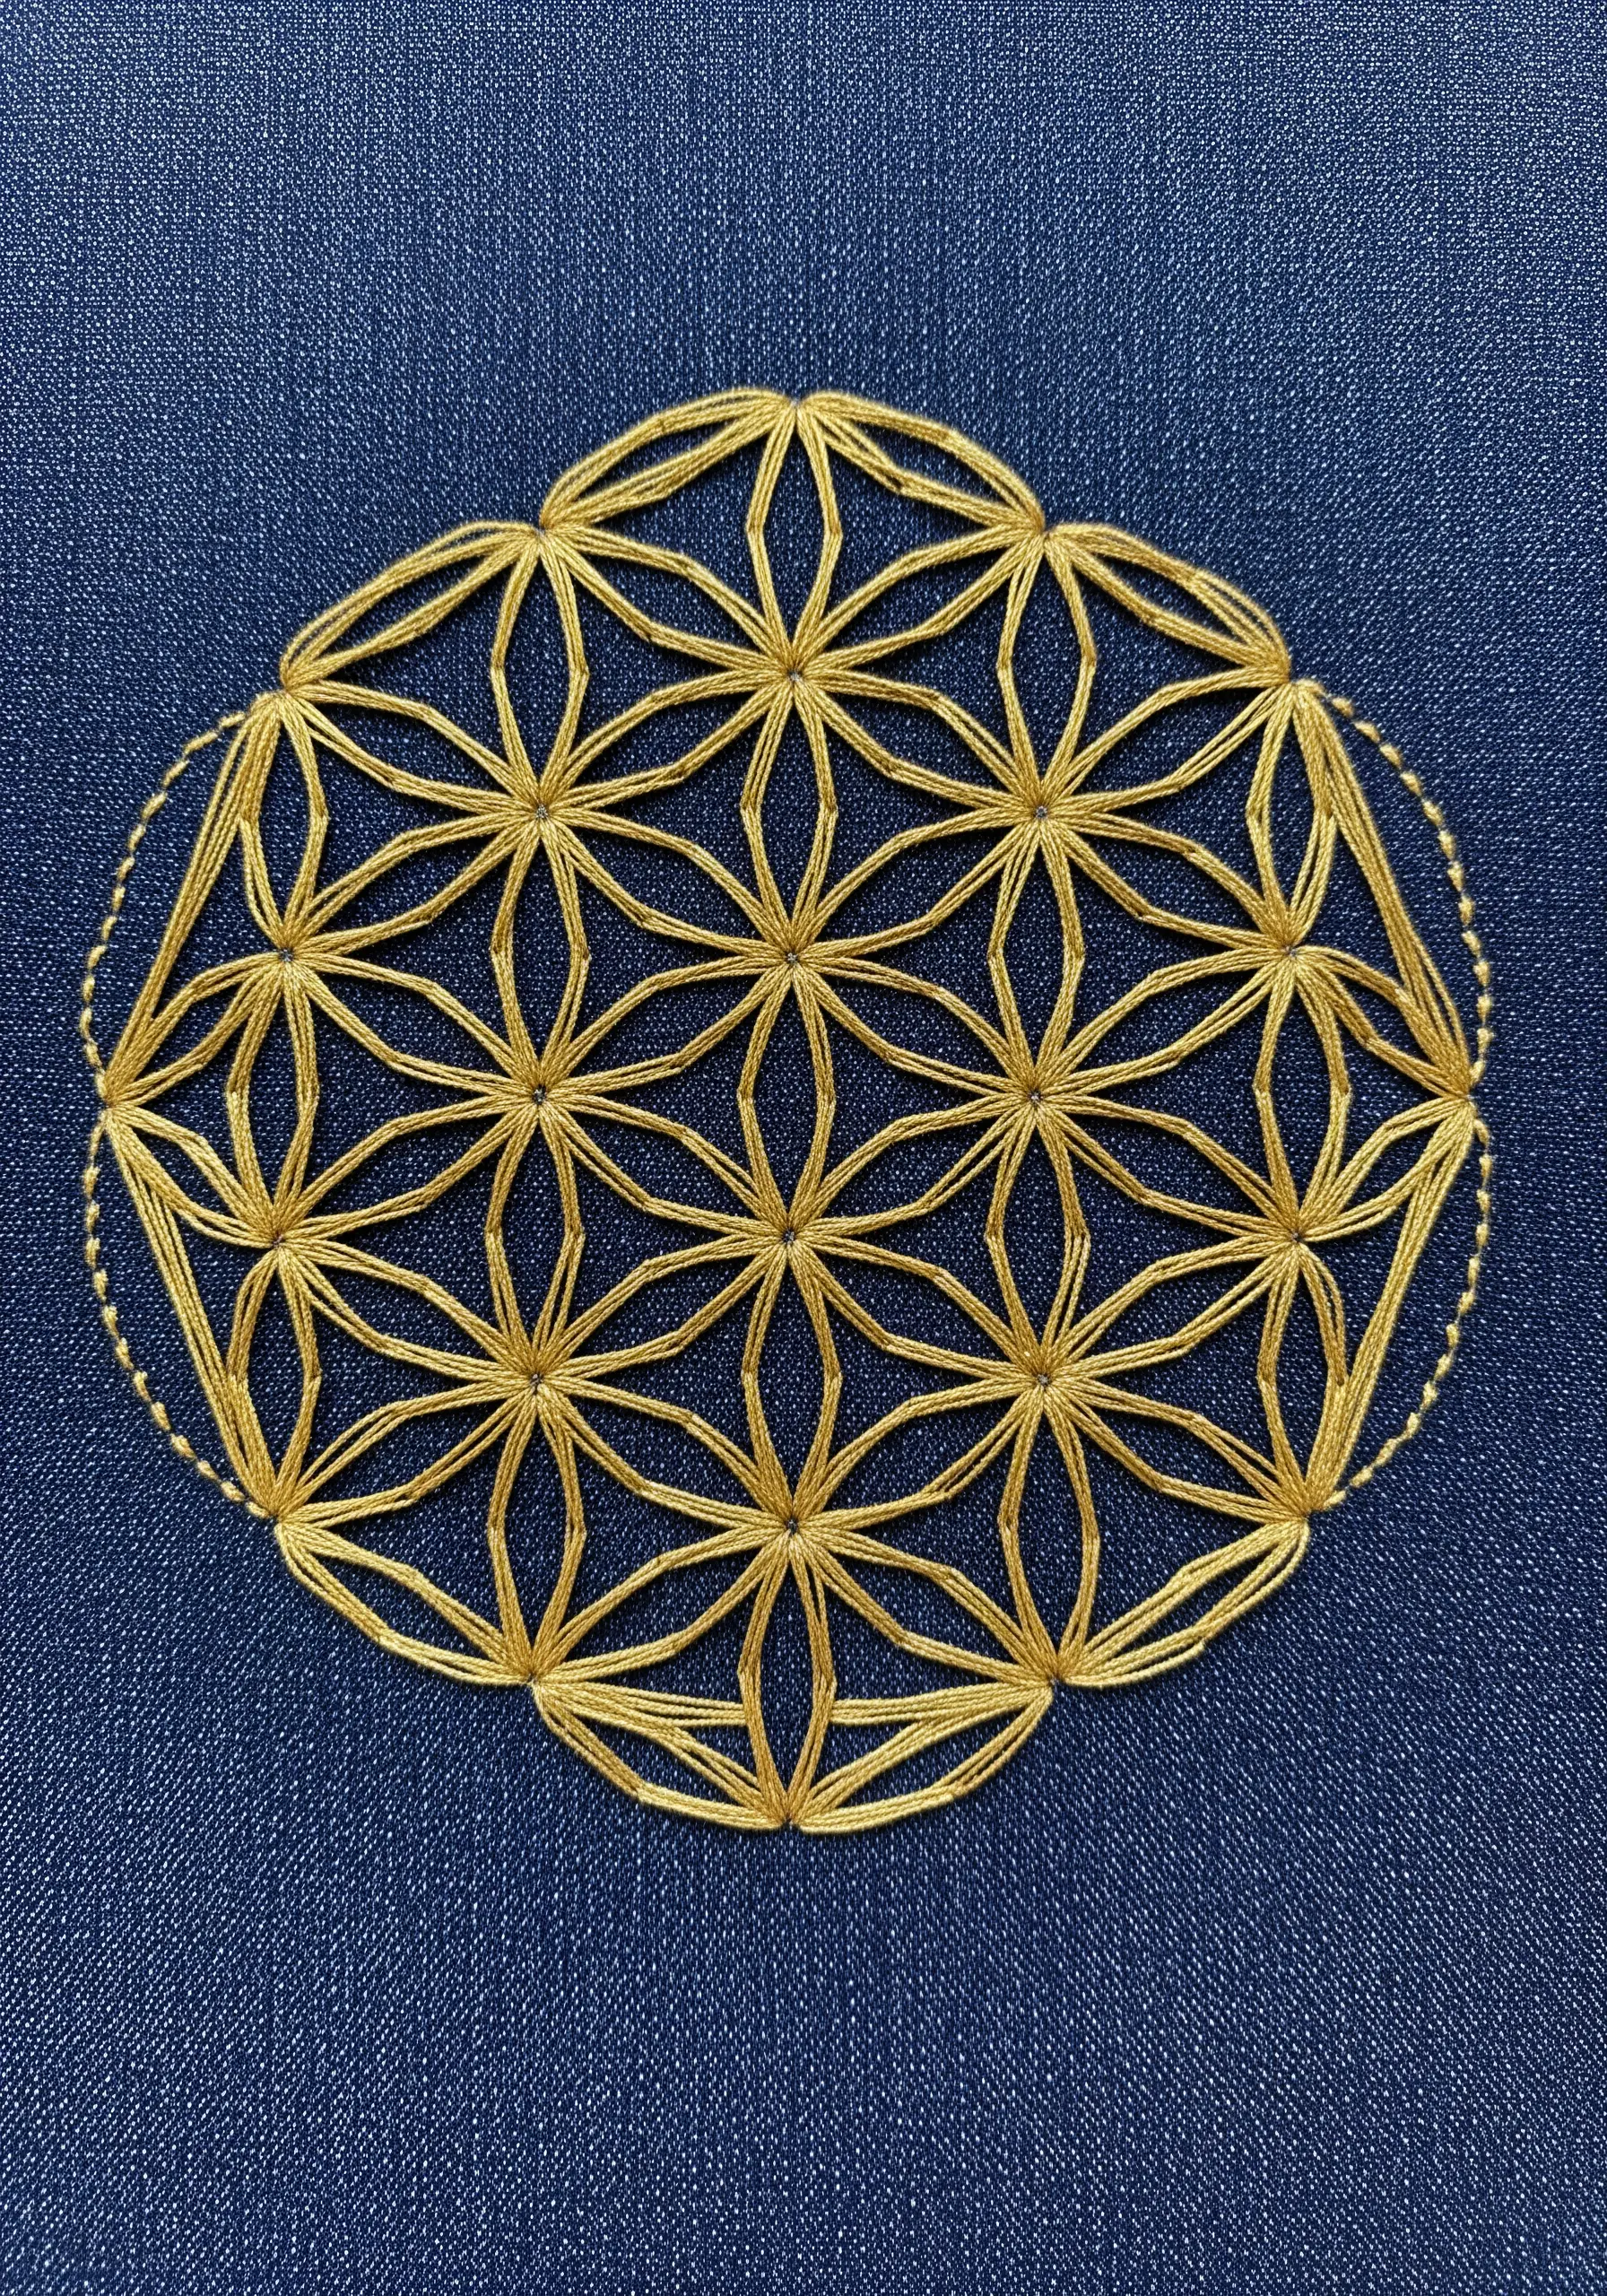
For hyper-complex geometric patterns like the Flower of Life, print your design onto a sheet of wash-away soluble stabilizer.
Hoop the stabilizer on top of your fabric and stitch directly through the paper pattern, following the lines perfectly.
Once you’re finished, simply rinse the piece in lukewarm water, and the stabilizer will completely dissolve, leaving only your precise, flawless stitching behind.
This professional method removes all the stress and inaccuracy of transferring intricate lines by hand.
13. Achieve a Stained Glass Effect with Padded Satin Stitch
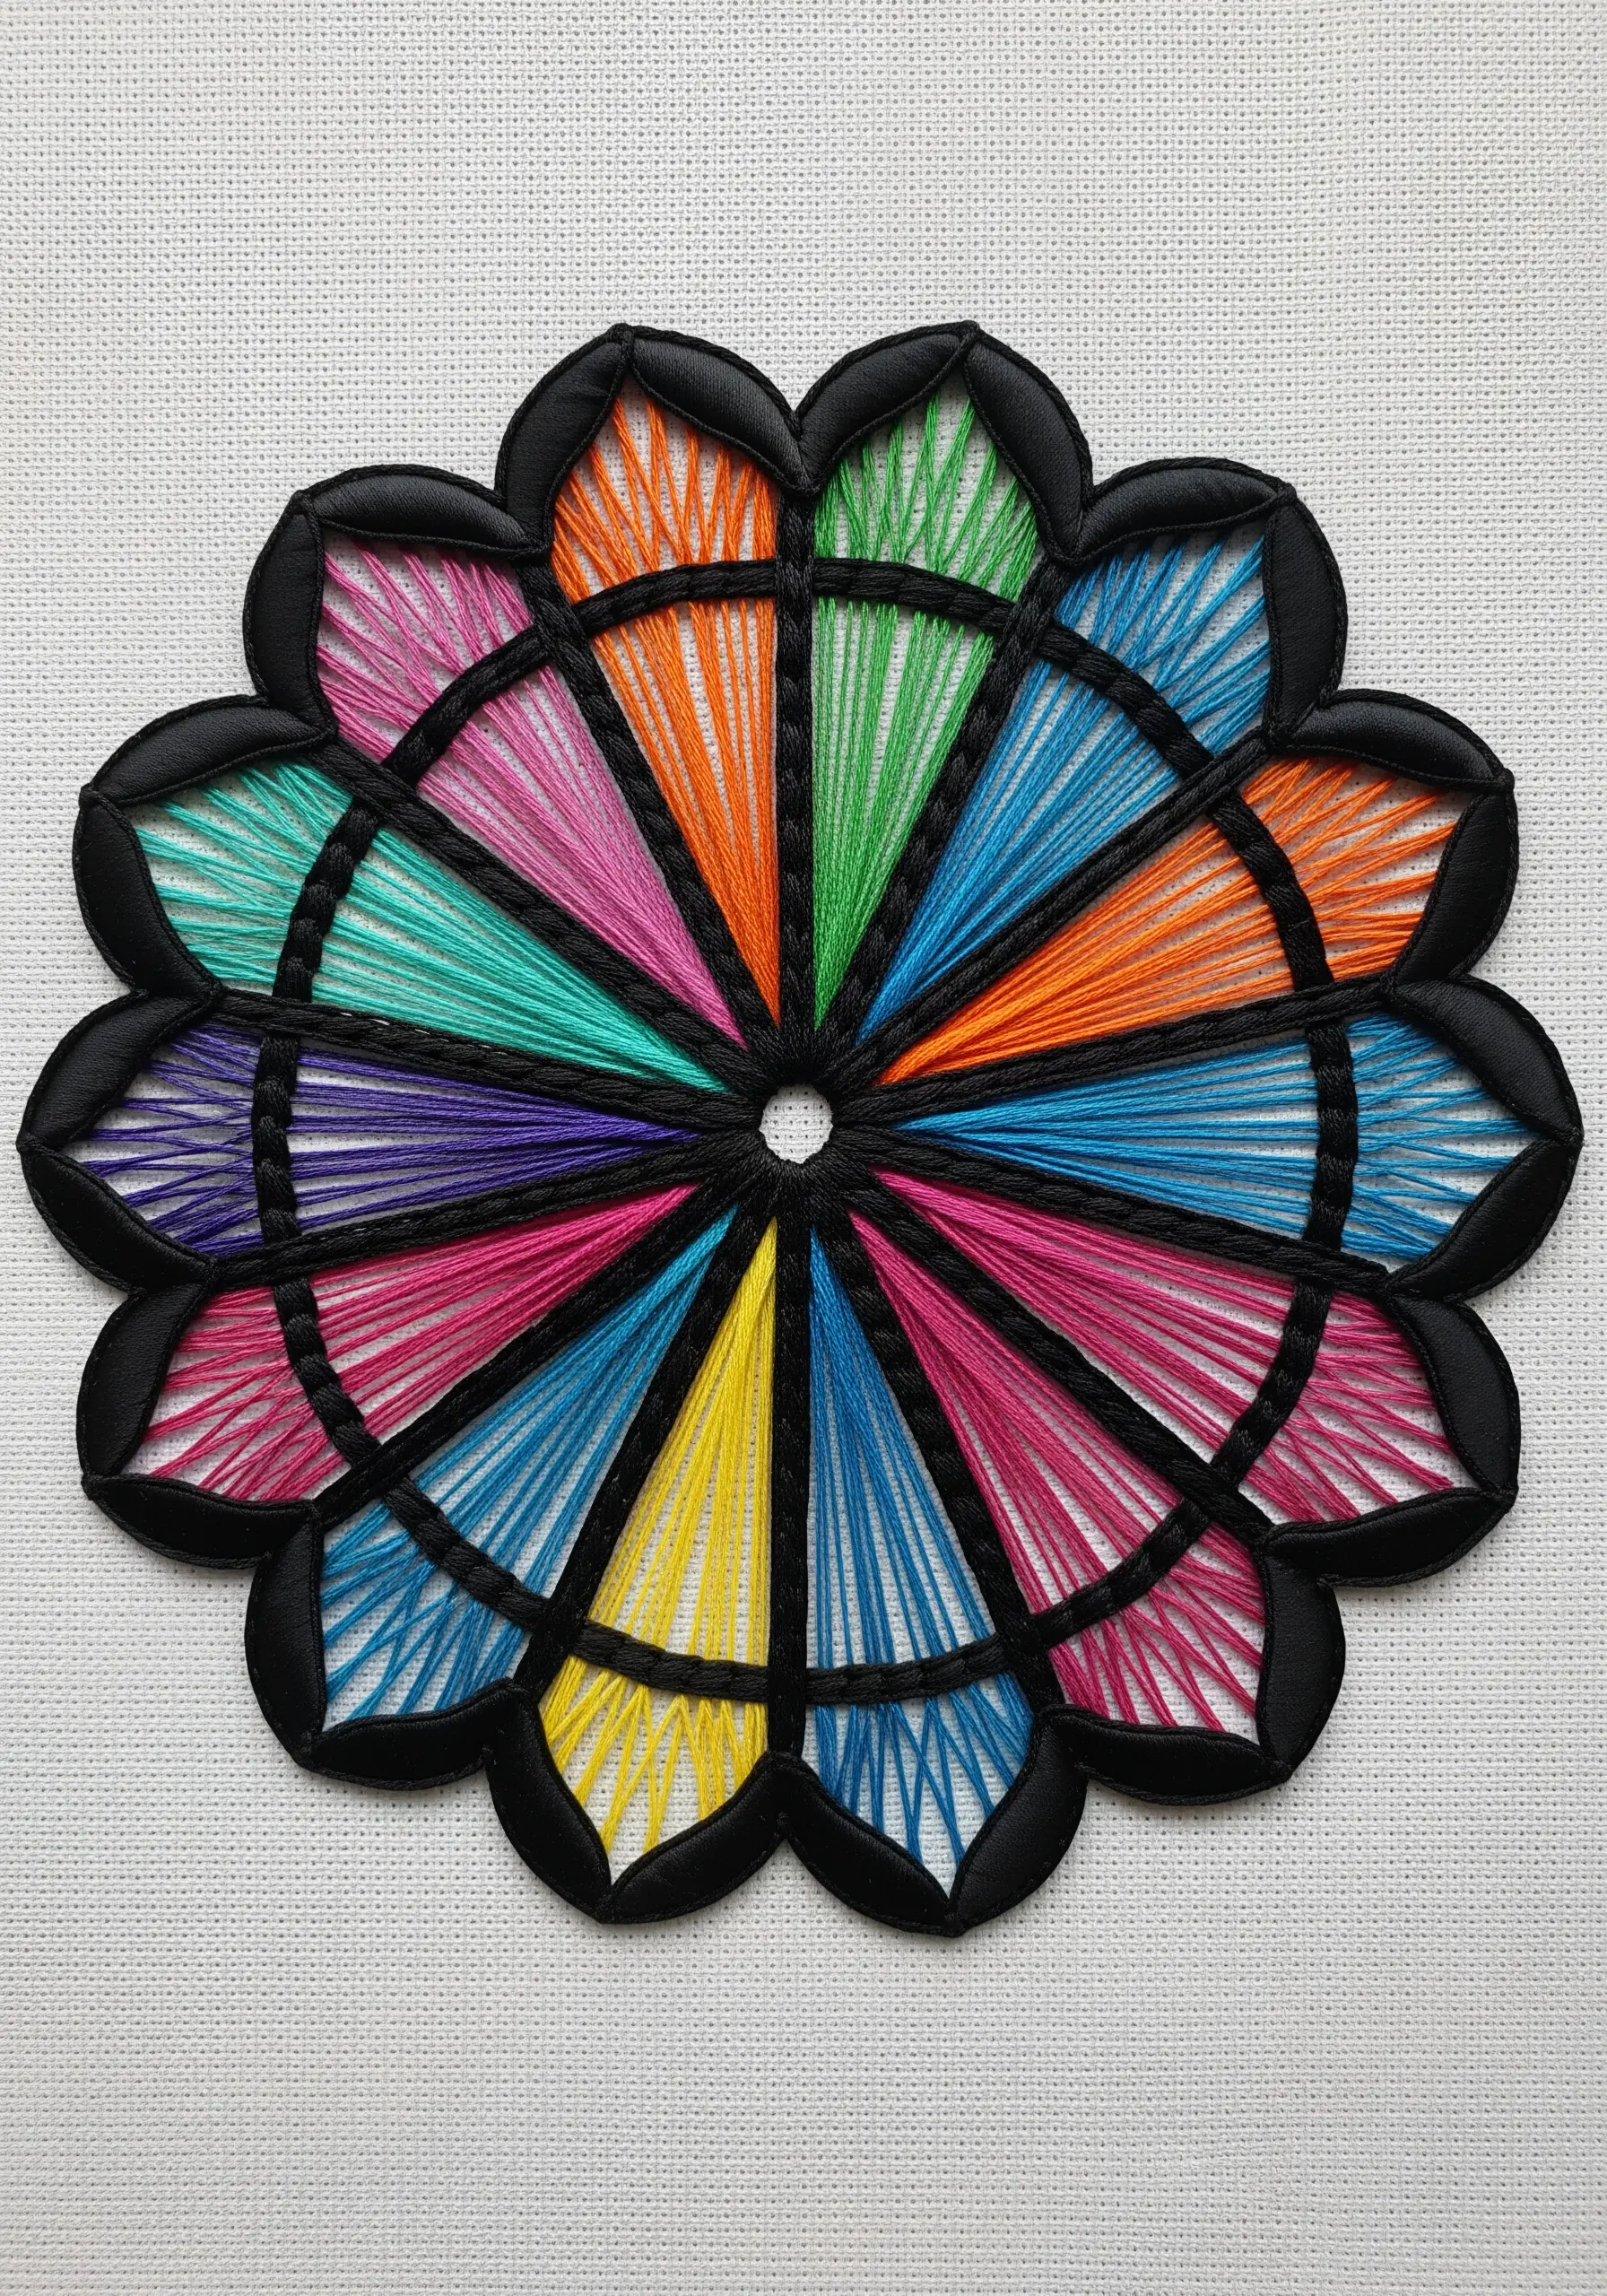
To create the bold, black “leading” of a stained glass window, outline each segment with a padded satin stitch.
First, lay down a foundation of several straight stitches within the shape’s outline, then cover them completely with a dense satin stitch.
This raises the outline from the fabric surface, creating a defined, dimensional border that makes the colorful string art infill appear brighter and more contained.
14. Capture Art Deco Style with Metallic Fan Motifs
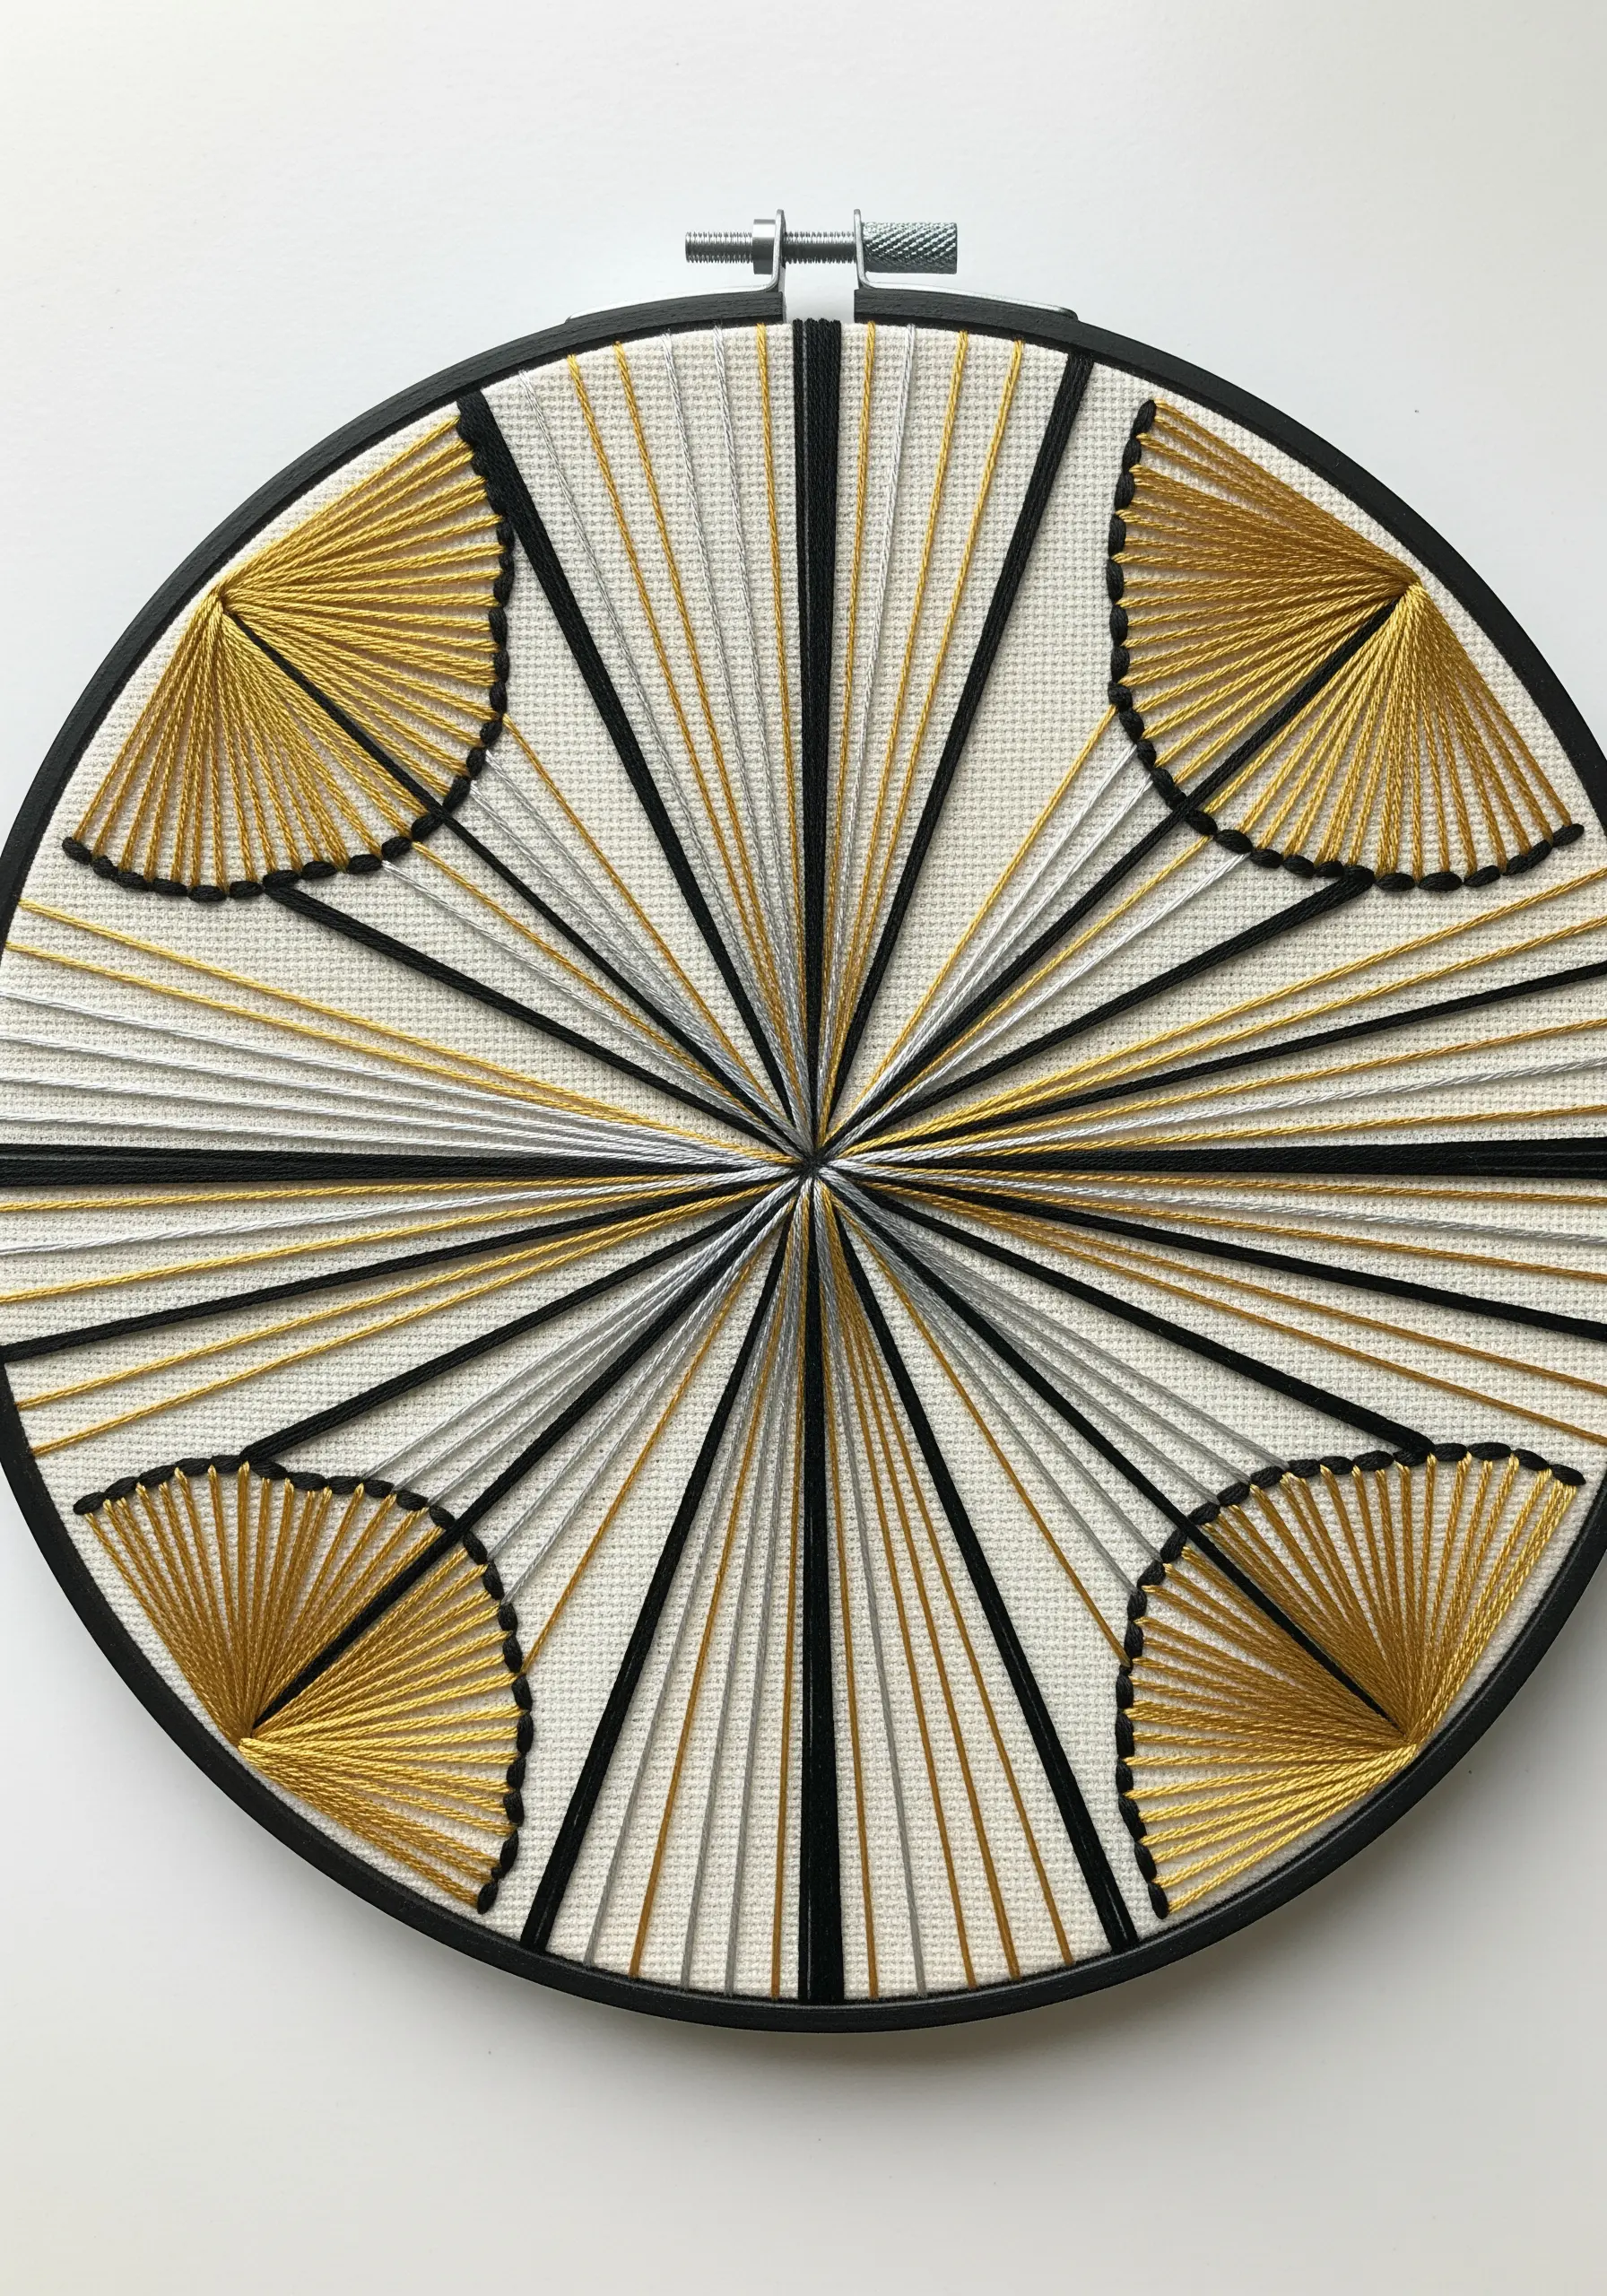
Evoke the glamour of the Art Deco era by combining metallic threads with strong, symmetrical geometric shapes.
Create radiating “fan” motifs in the corners of your design, a classic element of the style.
Alternate between gold, silver, and black thread to build a luxurious and timeless palette.
The interplay of long, radial lines with contained, cornered fans is a hallmark of this elegant aesthetic, transforming simple stitches into sophisticated art.
15. “Paint” a Stylized Landscape with Thread

Move beyond mandalas and use long straight stitches to fill in shapes and create a serene, stylized landscape.
Layer bands of color to represent rolling hills and dunes, changing the angle of your stitches for each section to add subtle texture and direction.
For the cacti, switch to a dense satin stitch to make them stand out as solid forms against the linear background.
This is a beautiful and accessible way to create string art landscape scenes with a modern, minimalist feel.
16. Evoke Peacock Feathers with Layered Teardrop Shapes

To capture the iconic essence of a peacock feather, build your mandala from layered, pointed teardrop shapes rather than simple triangles.
Use a vibrant palette of jewel-toned blues and greens, placing a pop of gold thread in the center of the design to draw the eye.
Outline the inner “eye” of each feather motif with a contrasting color to define the shape and mimic the stunning iridescence of the real thing.
17. Create an Autumnal Leaf with a Warm Palette

Stitch a stylized, star-like leaf using a color palette that transitions smoothly from deep burgundy and red to warm orange and bright yellow.
This gradient mimics the natural color changes of an autumn leaf and creates a sense of warmth and movement.
To add a touch of morning dew, stitch tiny pearl beads along the central vein or outer edges of each leaf section.
This small detail elevates the design, adding a delicate textural contrast to the smooth, flat threads.
18. Add a Textured Border with a Braided Chain Stitch
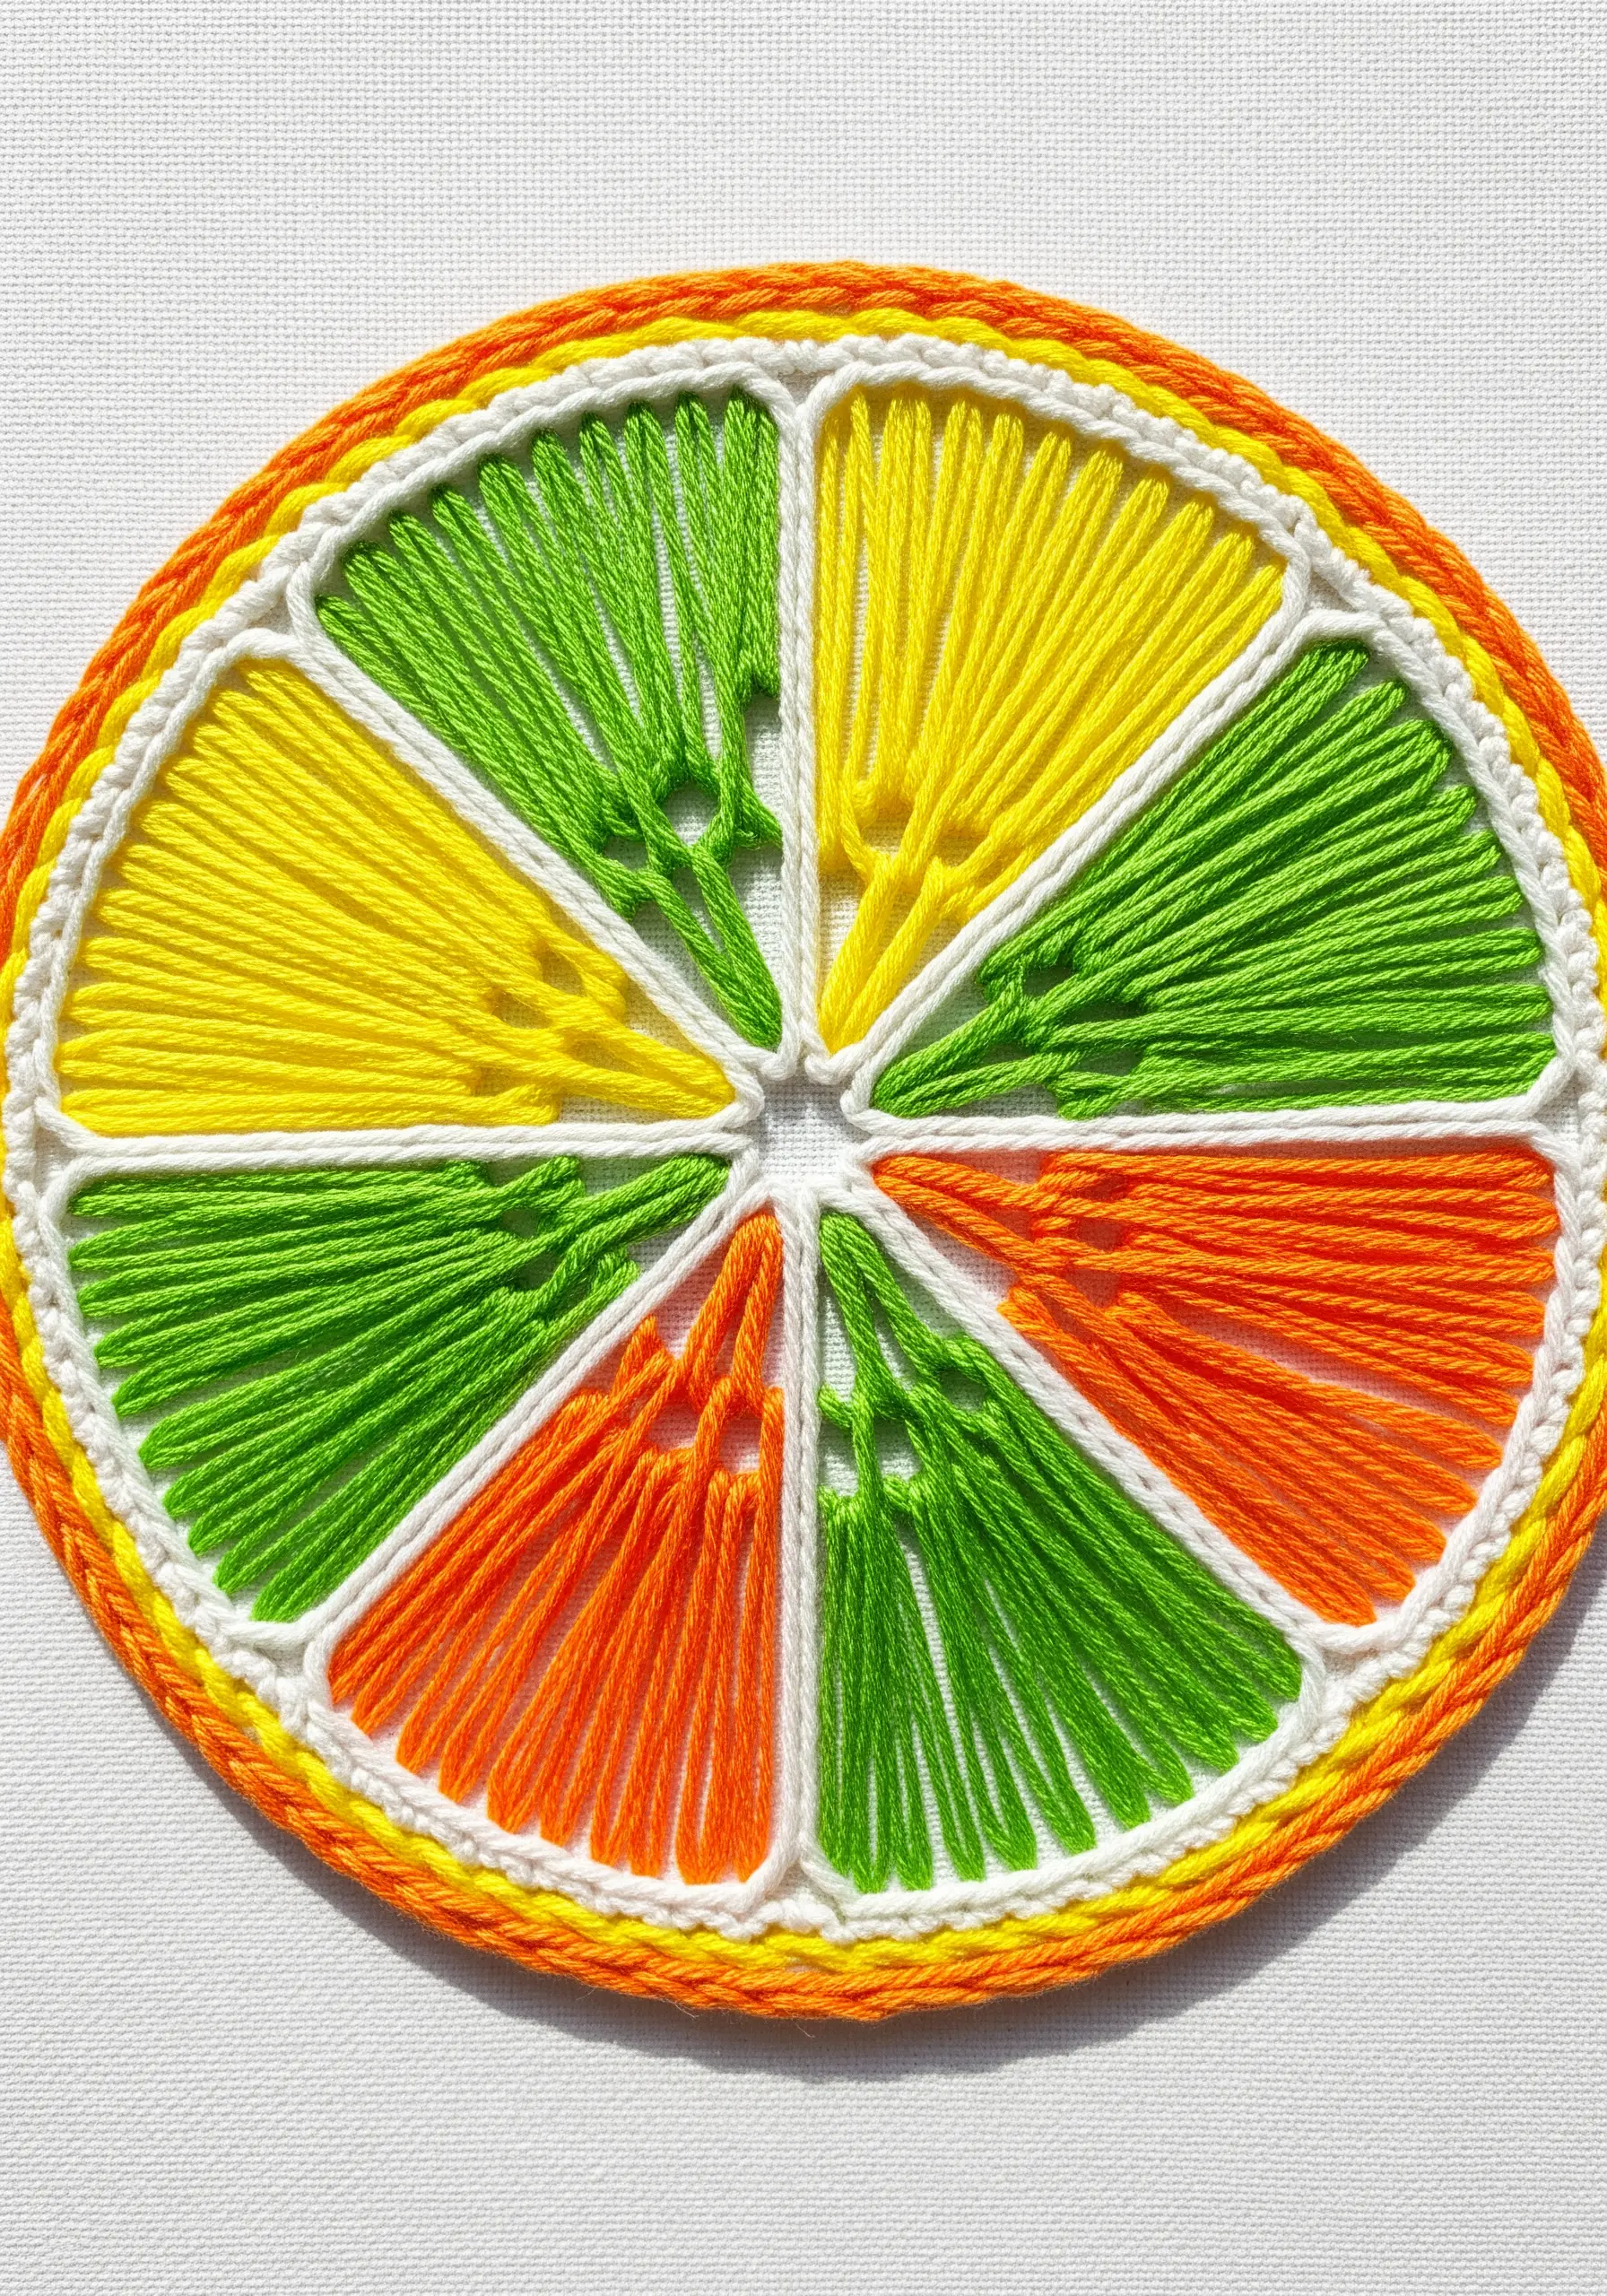
Frame your string art design with a tactile border to give it a clean, finished appearance.
A braided chain stitch (also known as a heavy chain stitch), worked with a thicker thread like #5 pearl cotton, creates a beautiful, rope-like edge.
This defines the circular shape and adds a satisfying textural element that contrasts perfectly with the fine, taut lines of the citrus segments inside.
19. Capture Fluid Motion with Abstract, Curved Lines

Create a sense of organic movement by mapping out graceful, curved paths for your anchor points instead of using a static, geometric grid.
Use a variegated thread or switch between analogous cool colors like blue, green, and purple to enhance the visual flow.
Sprinkling tiny, clear seed beads across the dark background adds a sense of effervescence, like bubbles in a deep-sea current.
This technique beautifully transforms geometric precision into abstract thread waves.
20. Mimic Delicate Lace with Fine Monochrome Thread

Achieve an incredibly intricate, lace-like effect by using a very fine thread—just one or two strands of cotton floss—and plotting many anchor points close together.
When stitched in a single neutral color on a closely matching fabric, the focus shifts entirely to the complex interplay of lines and the delicate negative space.
This patient technique requires precision but results in a stunning, heirloom-quality piece that looks far more complex than the simple stitches it’s made of.
21. Integrate Embroidery with a 3D-Printed Frame

Combine traditional textile art with modern technology by using a 3D-printed frame as your stitching base and design guide.
The rigid structure of a piece like this gothic window frame provides perfect, evenly spaced anchor points for your threads.
This creates a striking material contrast between the hard, architectural frame and the soft, colorful floss.
This mixed-media approach opens up a world of possibilities for creating unique framed embroidery patterns.
22. Build a Lotus Flower with Graduated Petal Layers
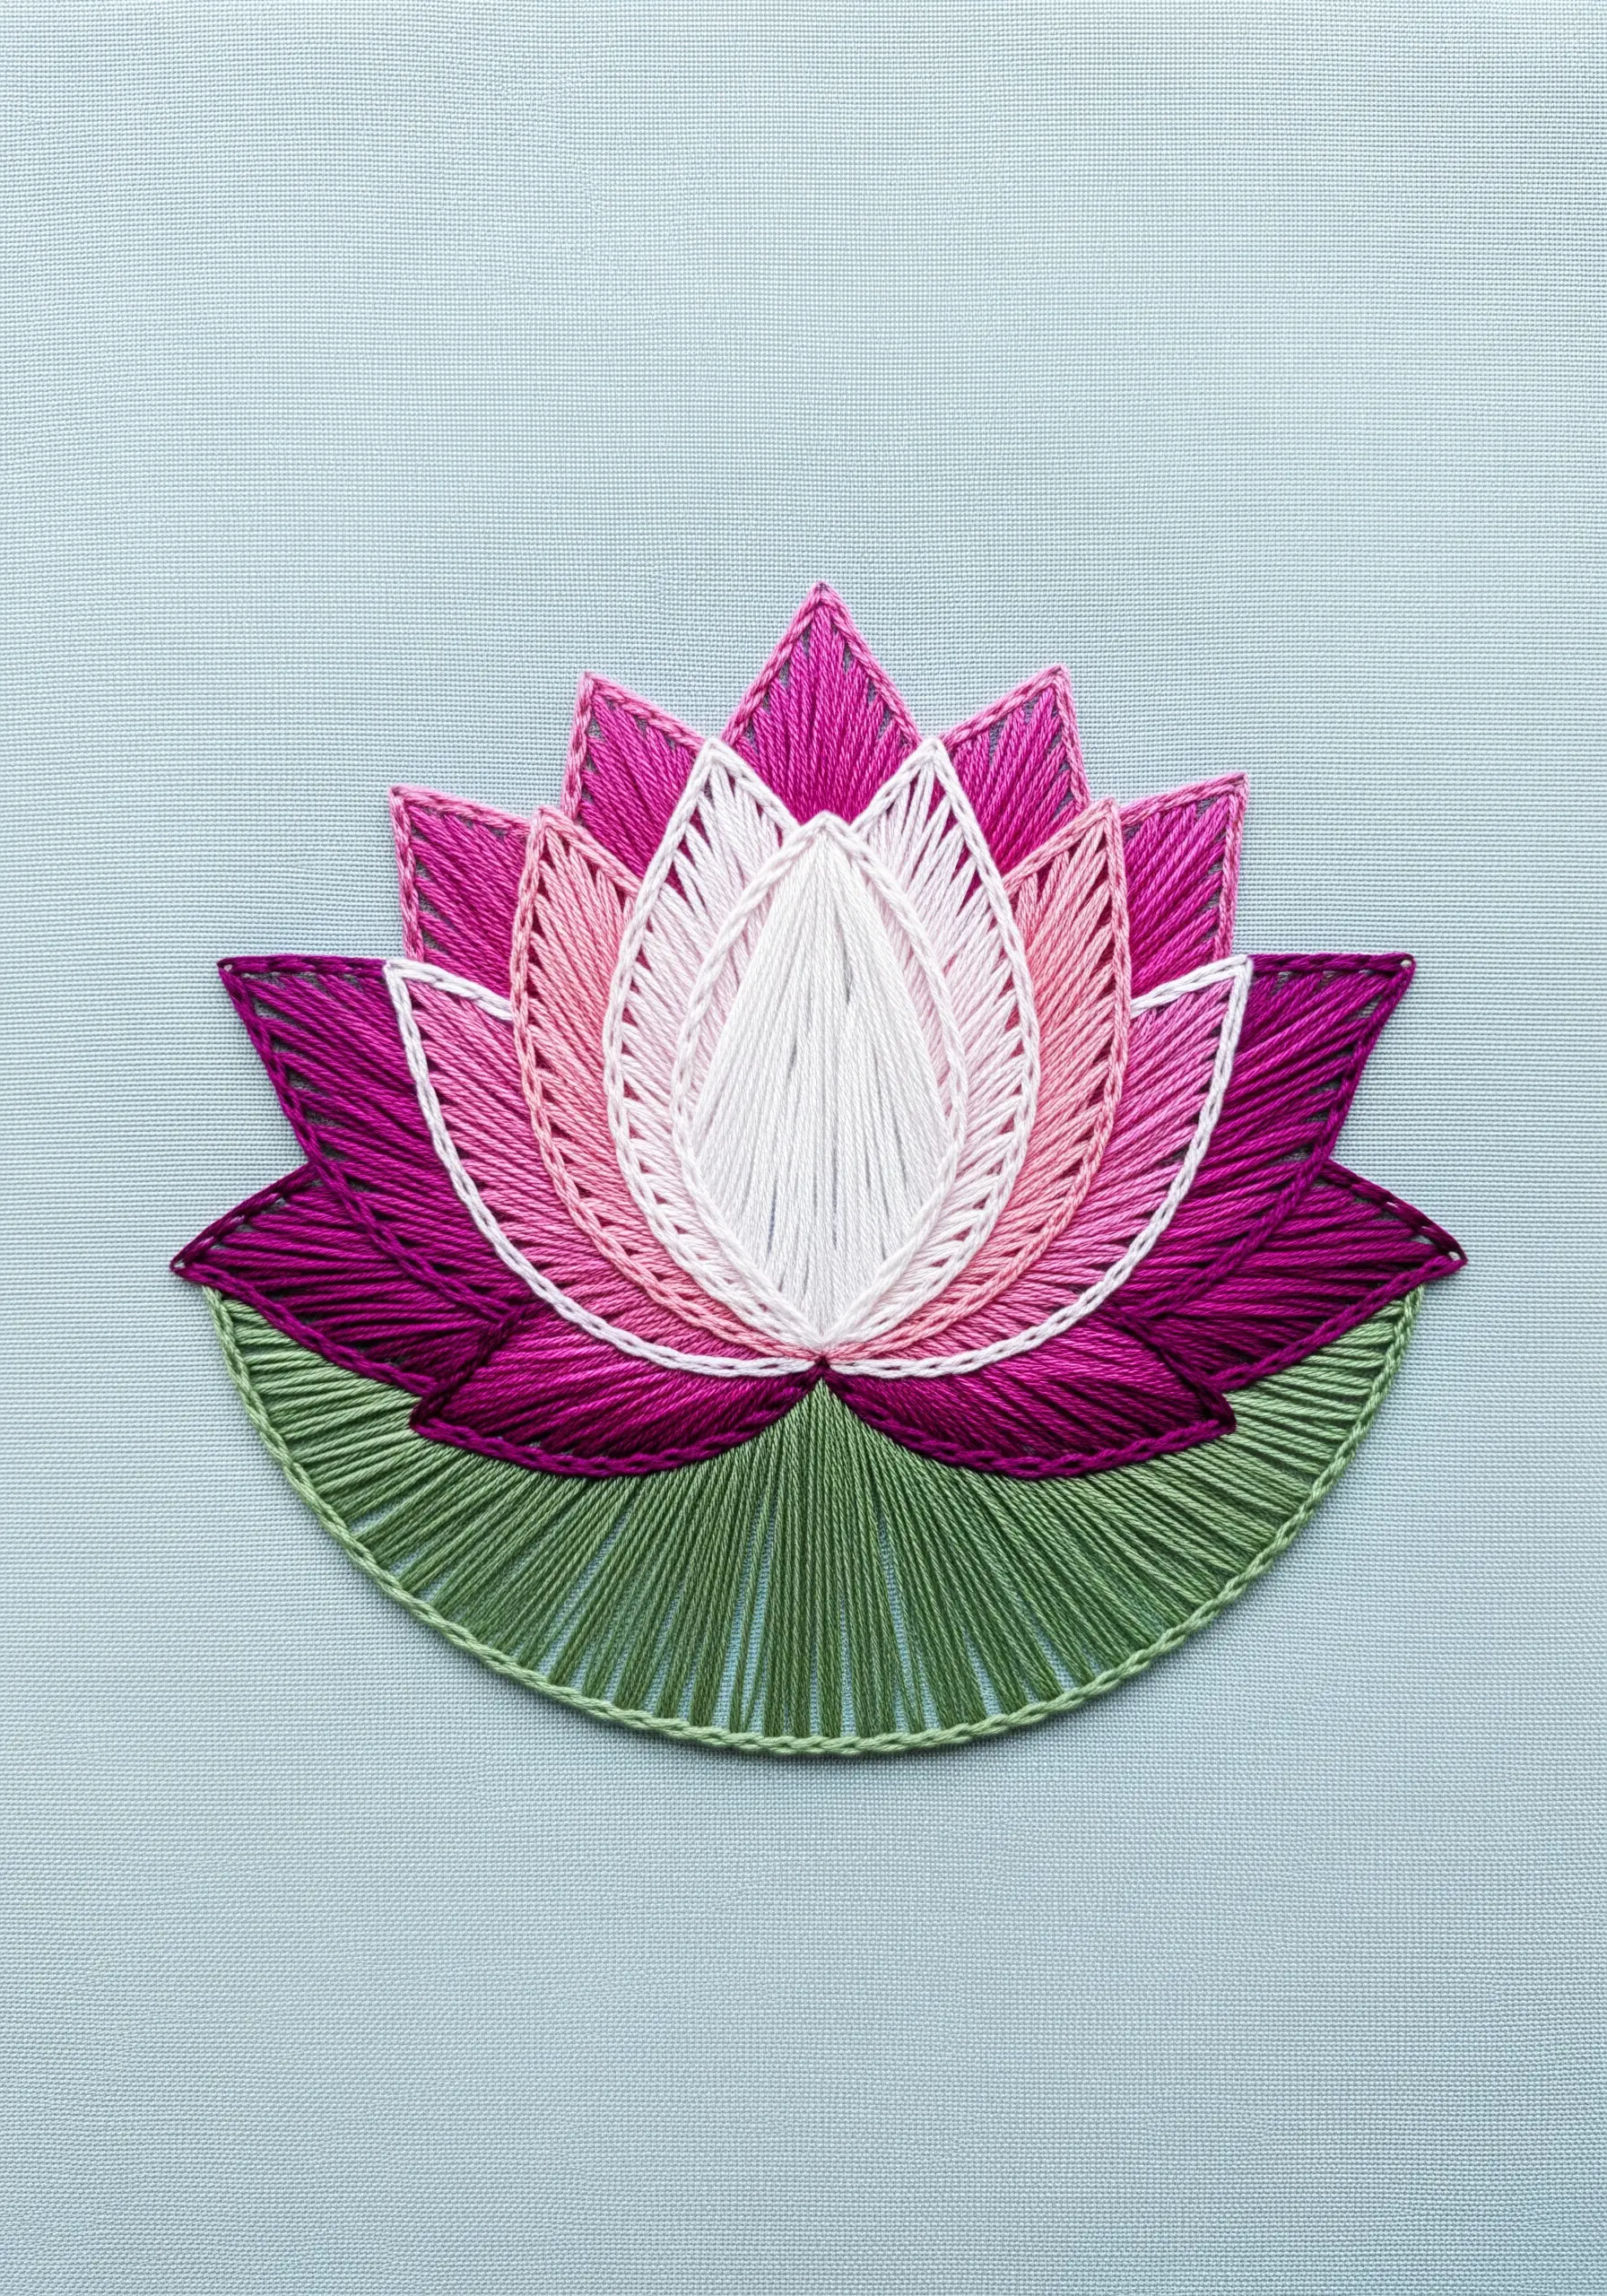
Create a serene and symbolic lotus blossom by stitching each layer of petals in a progressively lighter shade.
Move from a rich magenta at the base to a pale pink and finally a pure white at the center, mimicking a flower in bloom.
To ensure sharp definition between the color blocks, outline each individual petal with a single, delicate backstitch in a matching color.
This orderly gradient gives the geometric flower a sense of gentle, unfolding depth and tranquility.
23. Create a Woven Effect with Intersecting Spirals
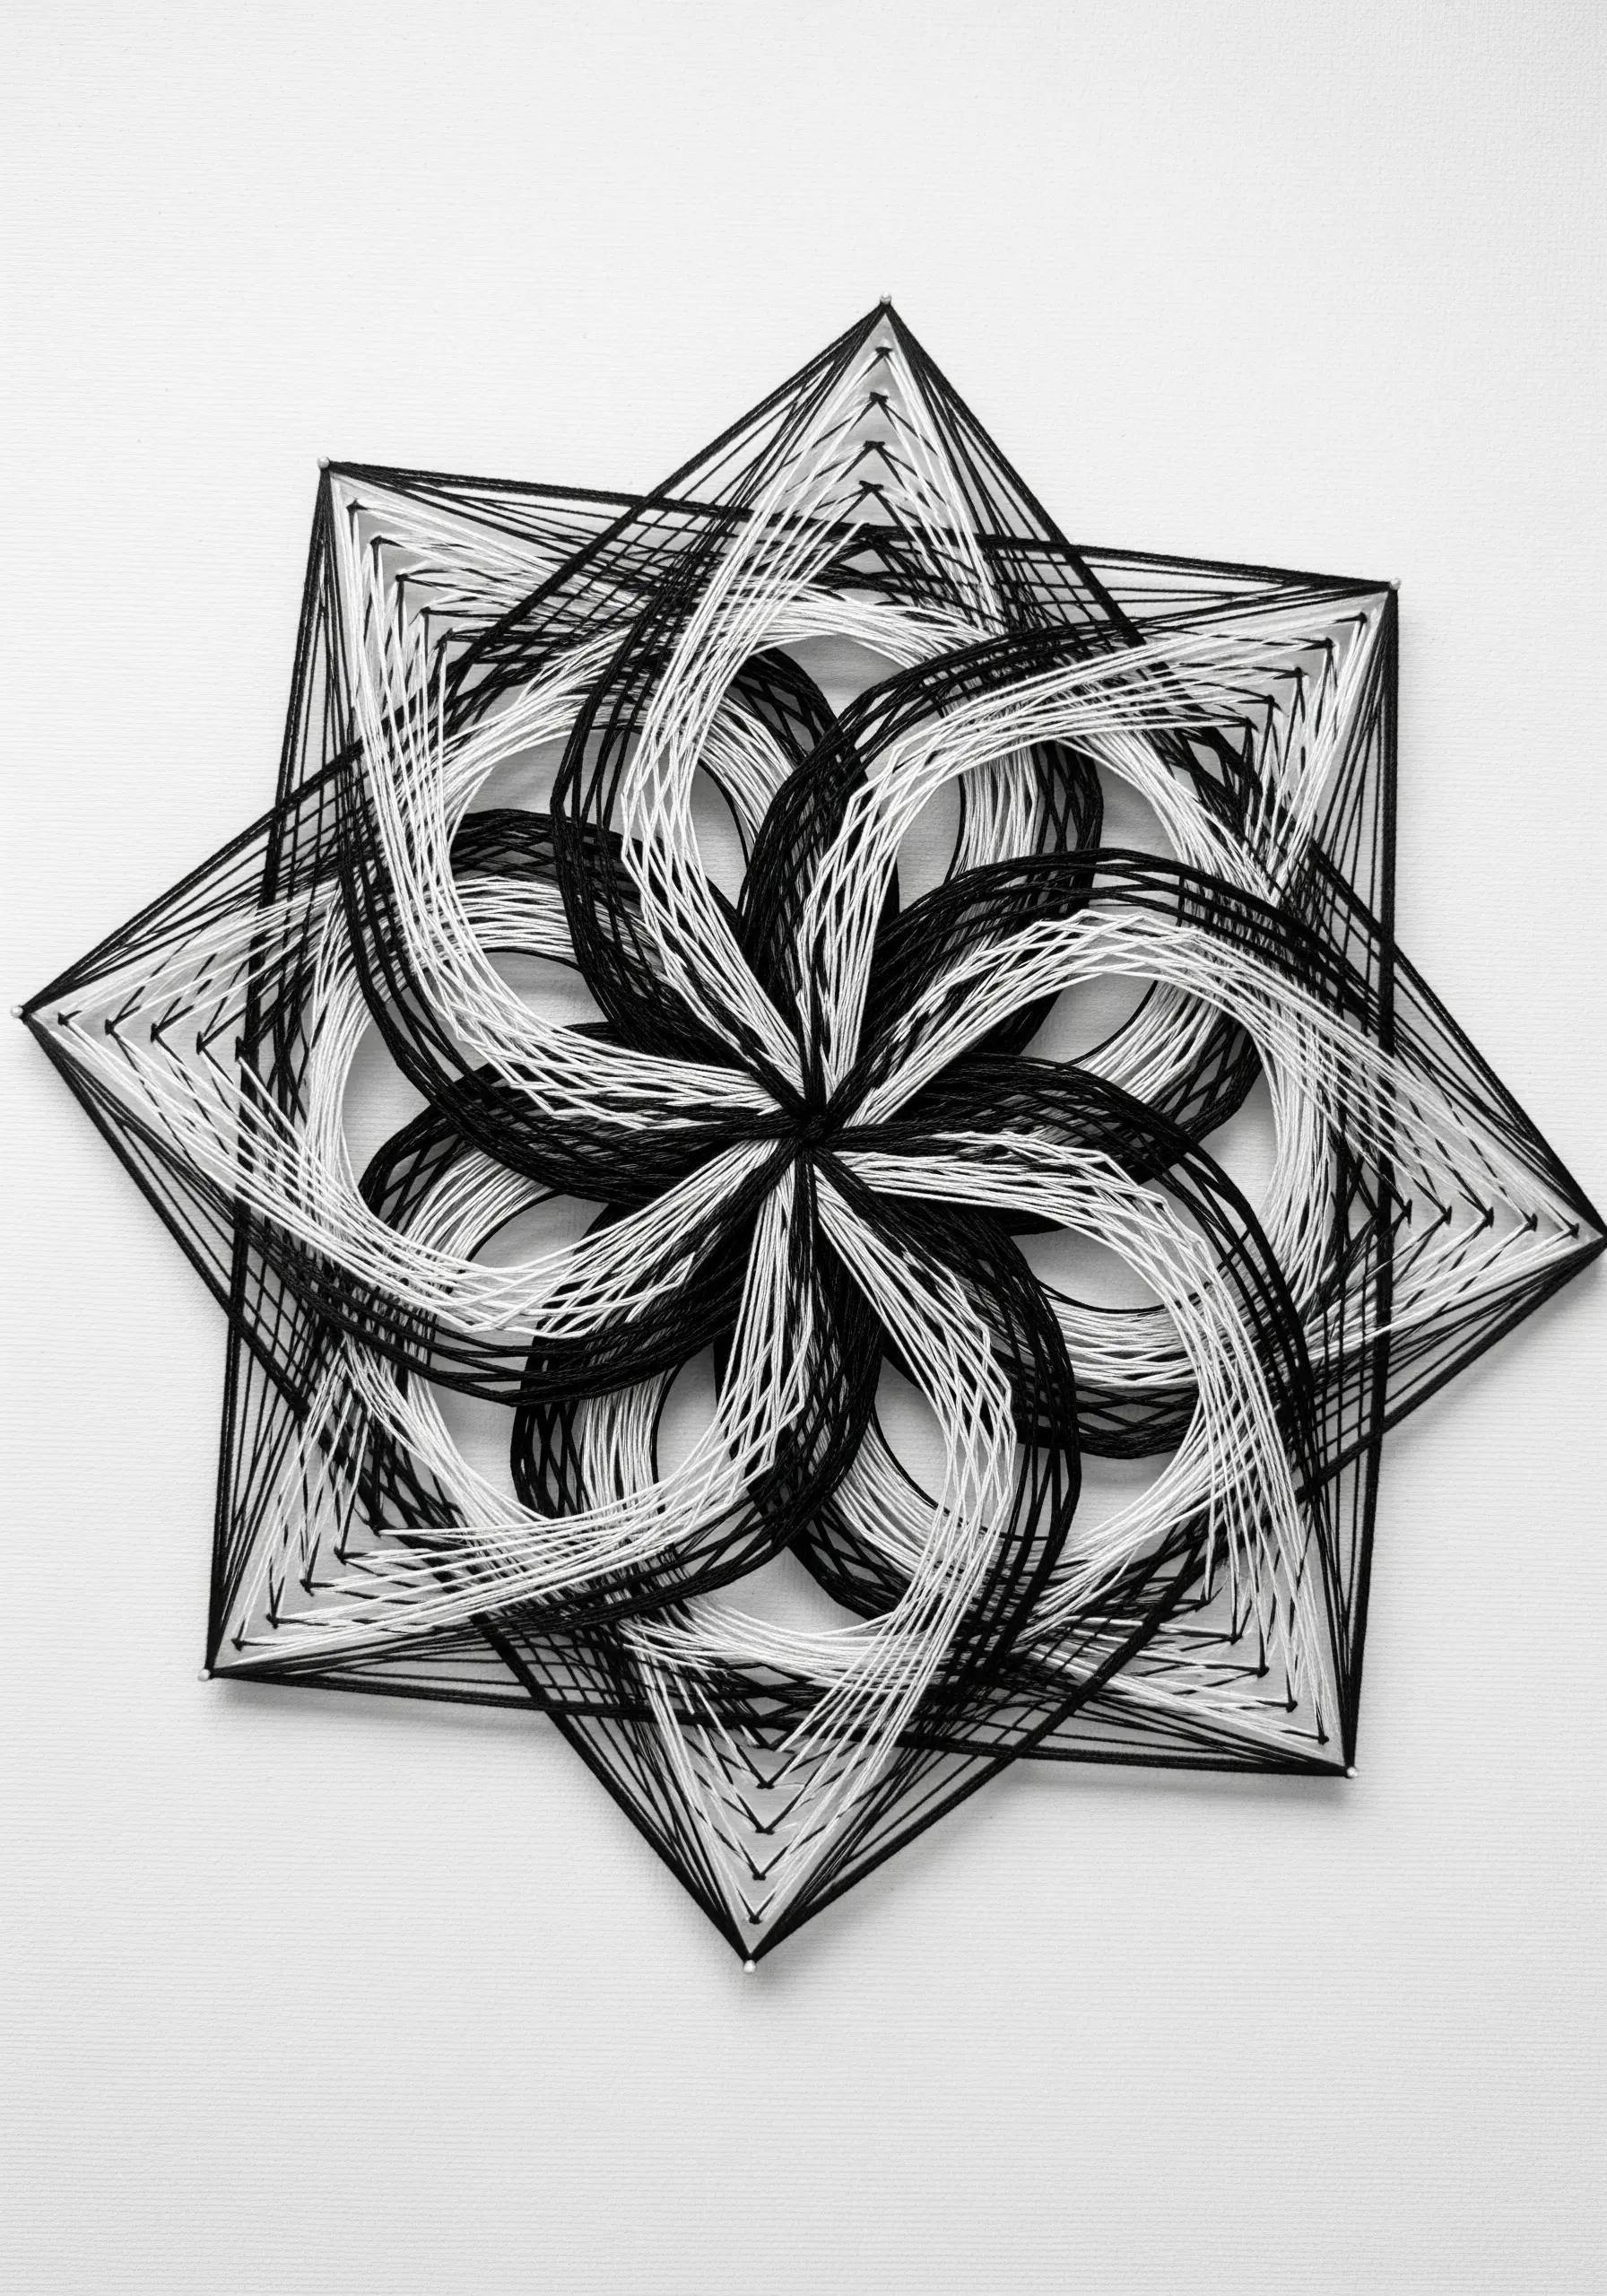
Instead of stitching simple lines that radiate from a single point, create the illusion of weaving by stitching two opposing spirals that intersect and overlap.
Use high-contrast threads, like black and white, to emphasize how the lines appear to pass over and under one another.
This dynamic technique adds a fascinating optical quality and a sense of constant motion to an otherwise static geometric shape.
24. Combine String Art with Classic Embroidery Stitches
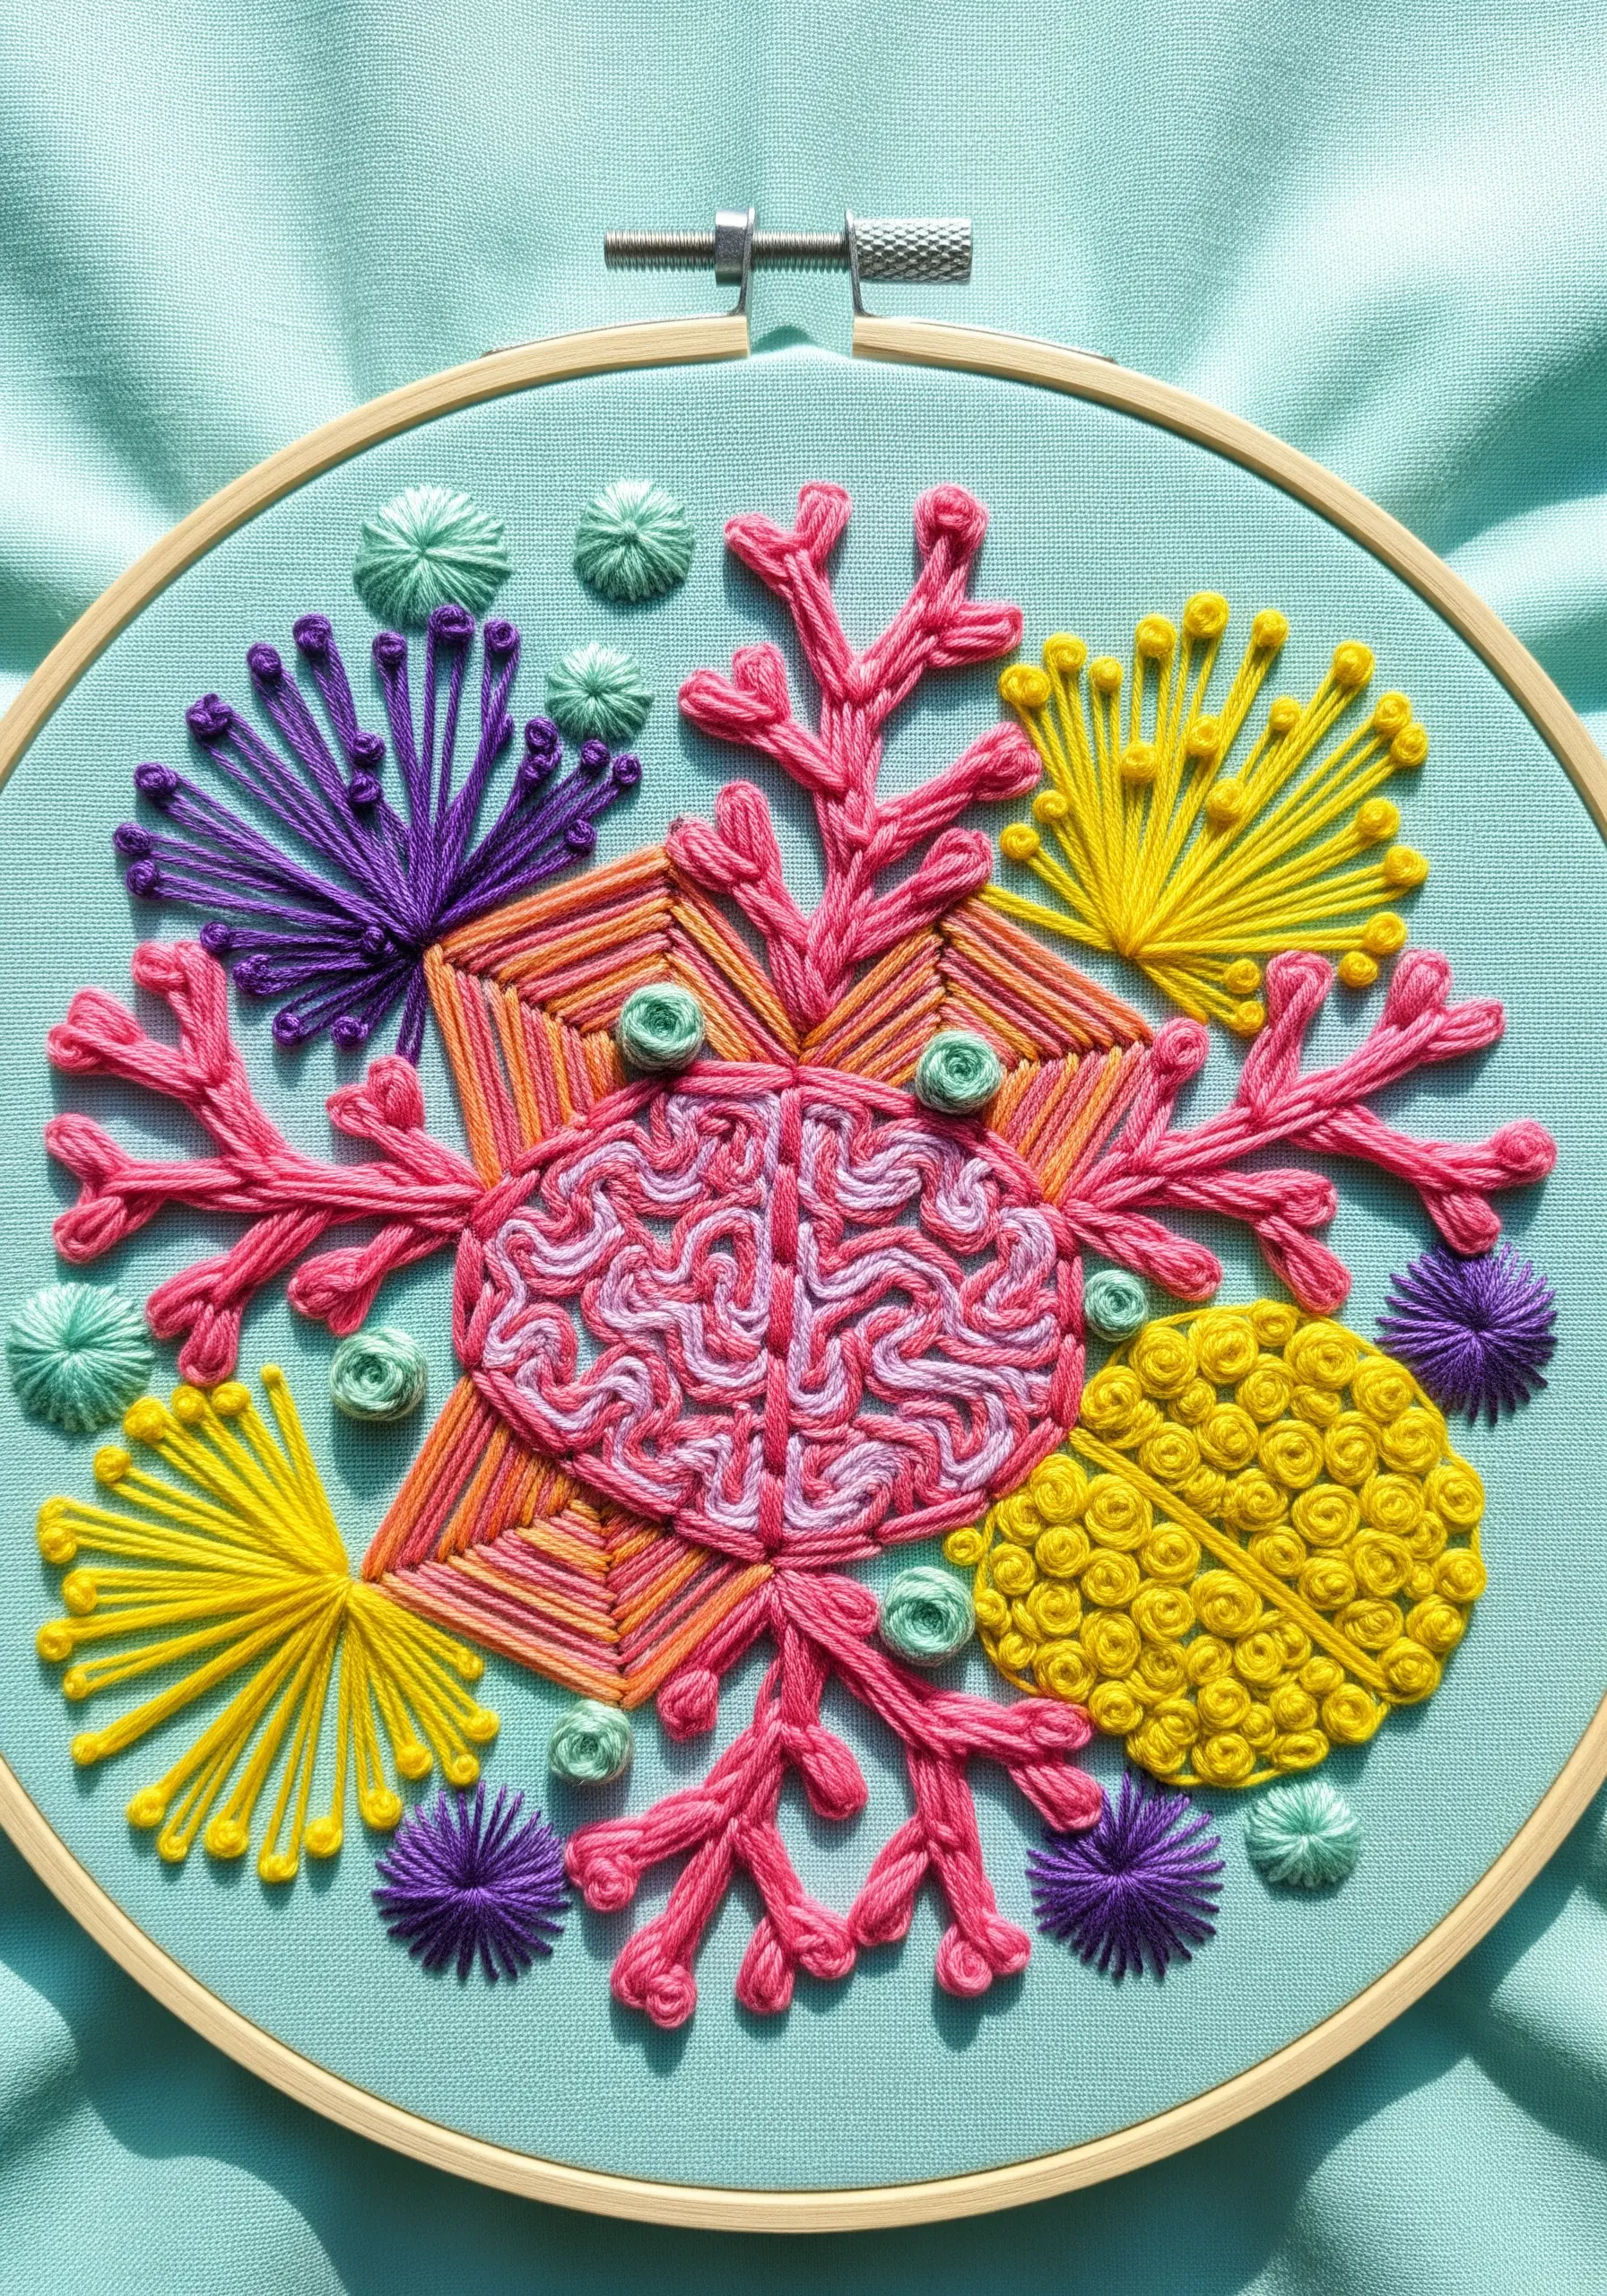
Use a geometric string art pattern as the foundational structure for a more complex and textural piece.
After creating your linear base, embellish it with a variety of traditional stitches to add narrative and detail.
Use French knots for coral polyps, detached chain stitches for leaves or bubbles, and woven wheel stitches for sea anemones.
This playful, mixed-technique approach adds a tactile dimension that makes your work truly unique and engaging.
25. Craft an Intricate Snowflake with Metallic Accents

Capture the delicate, crystalline structure of a snowflake by layering several geometric star shapes of varying sizes.
Use a crisp white thread for the main body of the snowflake to establish its form.
Then, go back and add a subtle overlay of shimmering silver metallic thread along the main spines or edges.
This simple addition mimics the way ice catches and reflects light, giving the design a magical sparkle. Stitching on cool blue felt enhances the frosty feel.
26. Design a Dynamic Starburst with Layered Anchor Points
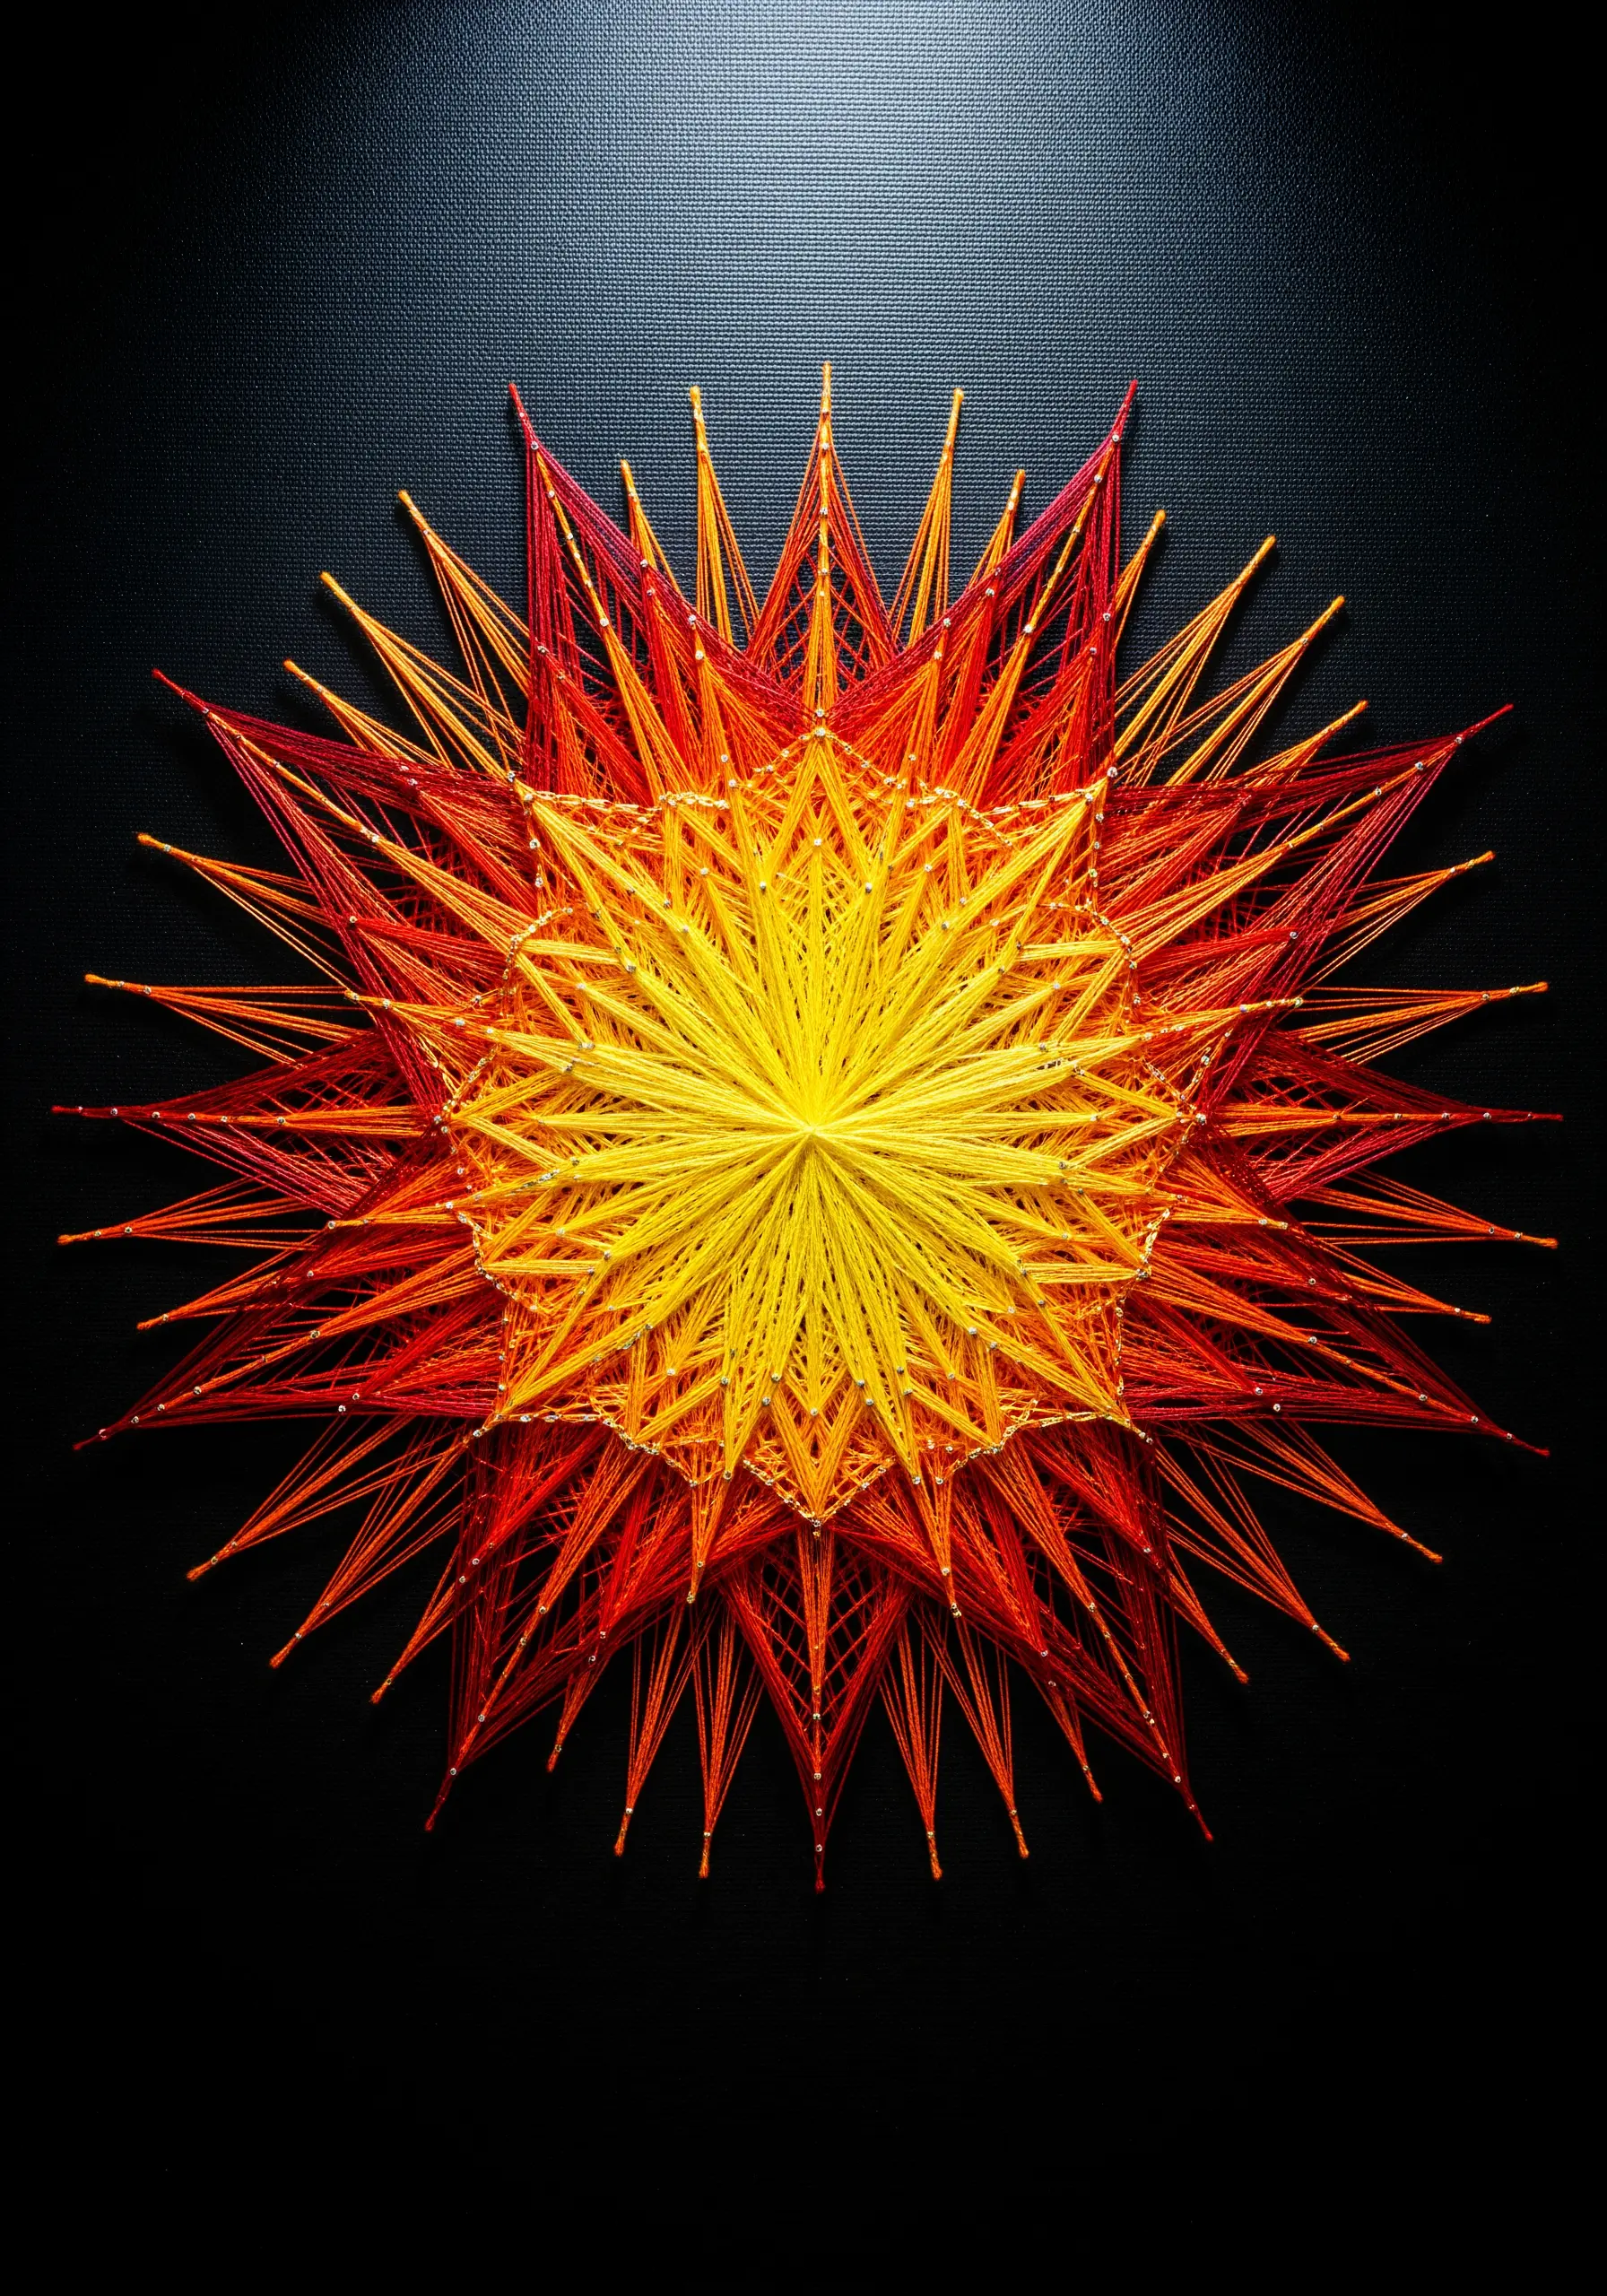
To create this explosive, high-energy effect, use multiple layers of anchor points that radiate from the center.
The outermost points should be the longest and most dramatic, with each subsequent layer of points getting shorter as you work inward.
A fiery color palette that moves from bright, intense yellow at the core to a deep red at the tips enhances the sense of power and motion.
Stitching on black fabric makes the colors feel even more vibrant and luminous.
27. Create a Pattern Sampler Within a Single Design

Divide your hoop or frame into distinct segments and fill each one with a completely different string art pattern.
This is a fantastic way to experiment with new textural combinations and line work in one cohesive, intricate piece.
Using a 3D-printed frame, or outlining each segment with a bold backstitch, helps to keep the overall look clean, organized, and intentional, even with so many different patterns at play.
28. Stitch a Festive Poinsettia with Golden Details

Evoke a classic holiday feel by stitching a poinsettia-inspired star design in a traditional palette of rich red and deep forest green.
Add small, shimmering accents with gold metallic thread to the inner corners of each red “petal” to catch the light.
In the center, a tight cluster of golden French knots perfectly mimics the flower’s central buds, providing a perfect finishing touch for beautiful holiday-theme embroidery.
29. Depict a Luminous Galaxy with Varied Stitch Density

To create the illusion of a glowing galactic core, pack your stitches very tightly in the center using white or pale-colored floss.
As you move outward from the center, gradually increase the space between your stitches and transition into darker purples and blues.
This change in density creates a natural light effect.
Intersperse a mix of tiny straight stitches and French knots throughout the outer rings to represent distant stars and cosmic dust, giving the piece a sense of infinite depth.
30. Explore Rustic Texture by Weaving with Twine

Swap your embroidery floss for a natural fiber like jute twine or linen cord to create a rustic, highly textural piece.
Instead of only stitching radiating lines, actively weave the twine over and under the foundational stitches to build dimension.
This technique adds a sturdy, almost basket-like quality to the finished work.
The beauty comes from the contrast between the simple, humble material and the intricate, geometric pattern it forms.
31. Create Optical Effects with Concentric Rainbows
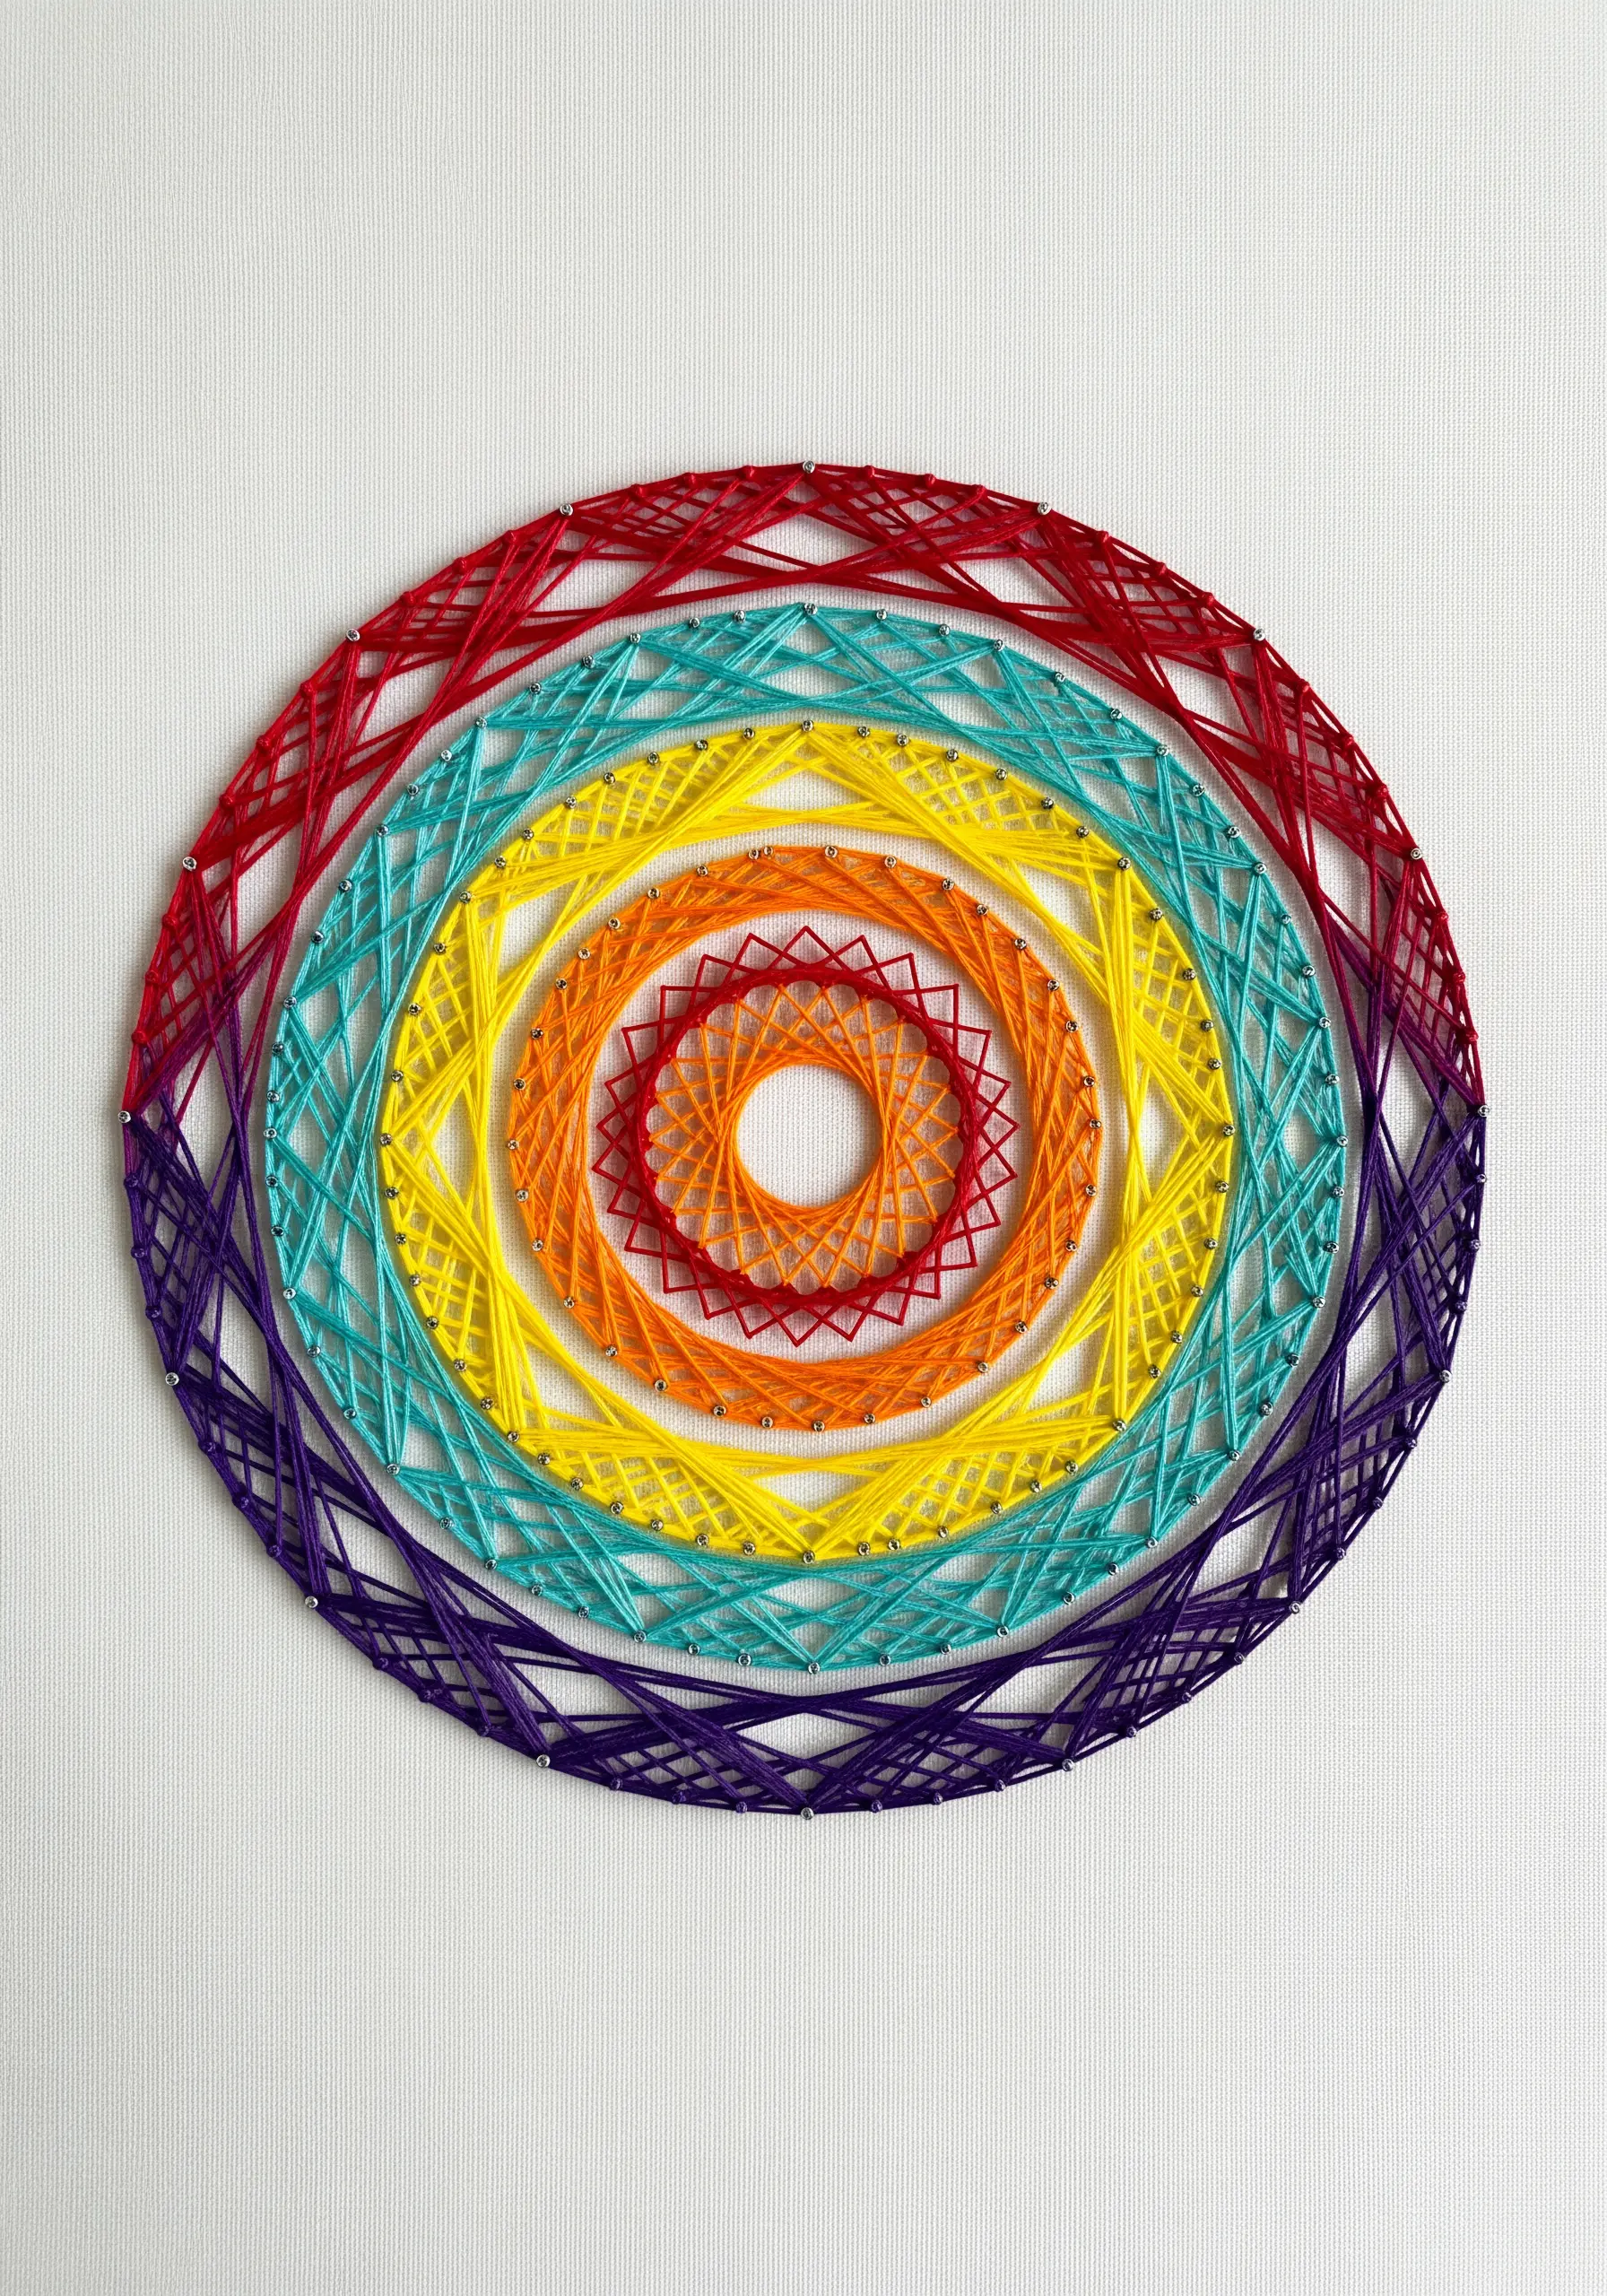
Play with visual perception by layering concentric ellipses or ovals instead of perfect circles.
Use a vibrant, rainbow-ordered color palette to enhance the playful, hypnotic effect of the shapes.
The slight offset of each elliptical layer creates a mesmerizing, tunnel-like illusion that draws the eye directly into the center of the design.
The key to success is precise anchor point placement for each consecutive ring, so mark your fabric carefully before you begin.


