
You have the threads, the fabric, and the desire to create something beautiful for your walls. But perhaps you feel stuck, wondering how to move beyond simply following a pattern and start creating art that truly feels like *you*—calm, intentional, and refined.
The secret isn’t in learning dozens of complicated stitches or buying more supplies. It’s in subtraction. It’s about understanding how a single, well-placed line can have more impact than a thousand dense stitches, and how the empty space around your motif is just as important as the motif itself.
These ideas are designed to sharpen your artistic eye. You’ll learn how to use composition, texture, and subtle details to transform a simple floral design into a piece of modern art that adds a soft, personal touch to your home without ever feeling cluttered.
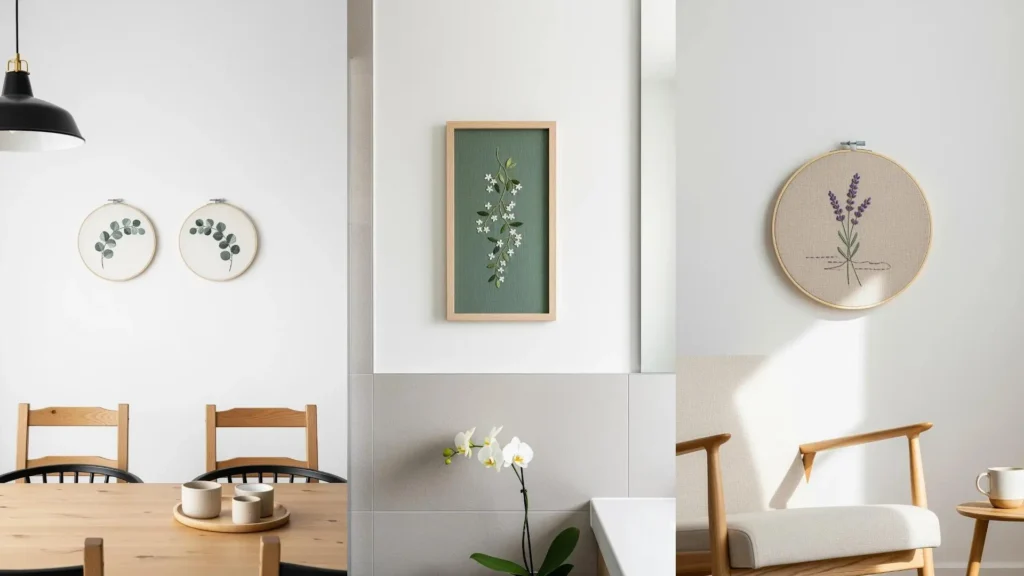
1. Ground Your Motifs with Abstract Anchors
To prevent a central motif from feeling like it’s floating aimlessly, add a simple graphic element to anchor it within the hoop.
Use a few horizontal running stitches below your floral stems, varying their length to create a subtle, sketch-like foundation.
This simple addition transforms the composition from a mere botanical study into a deliberate piece of art, balancing the organic shapes with a clean, modern line.
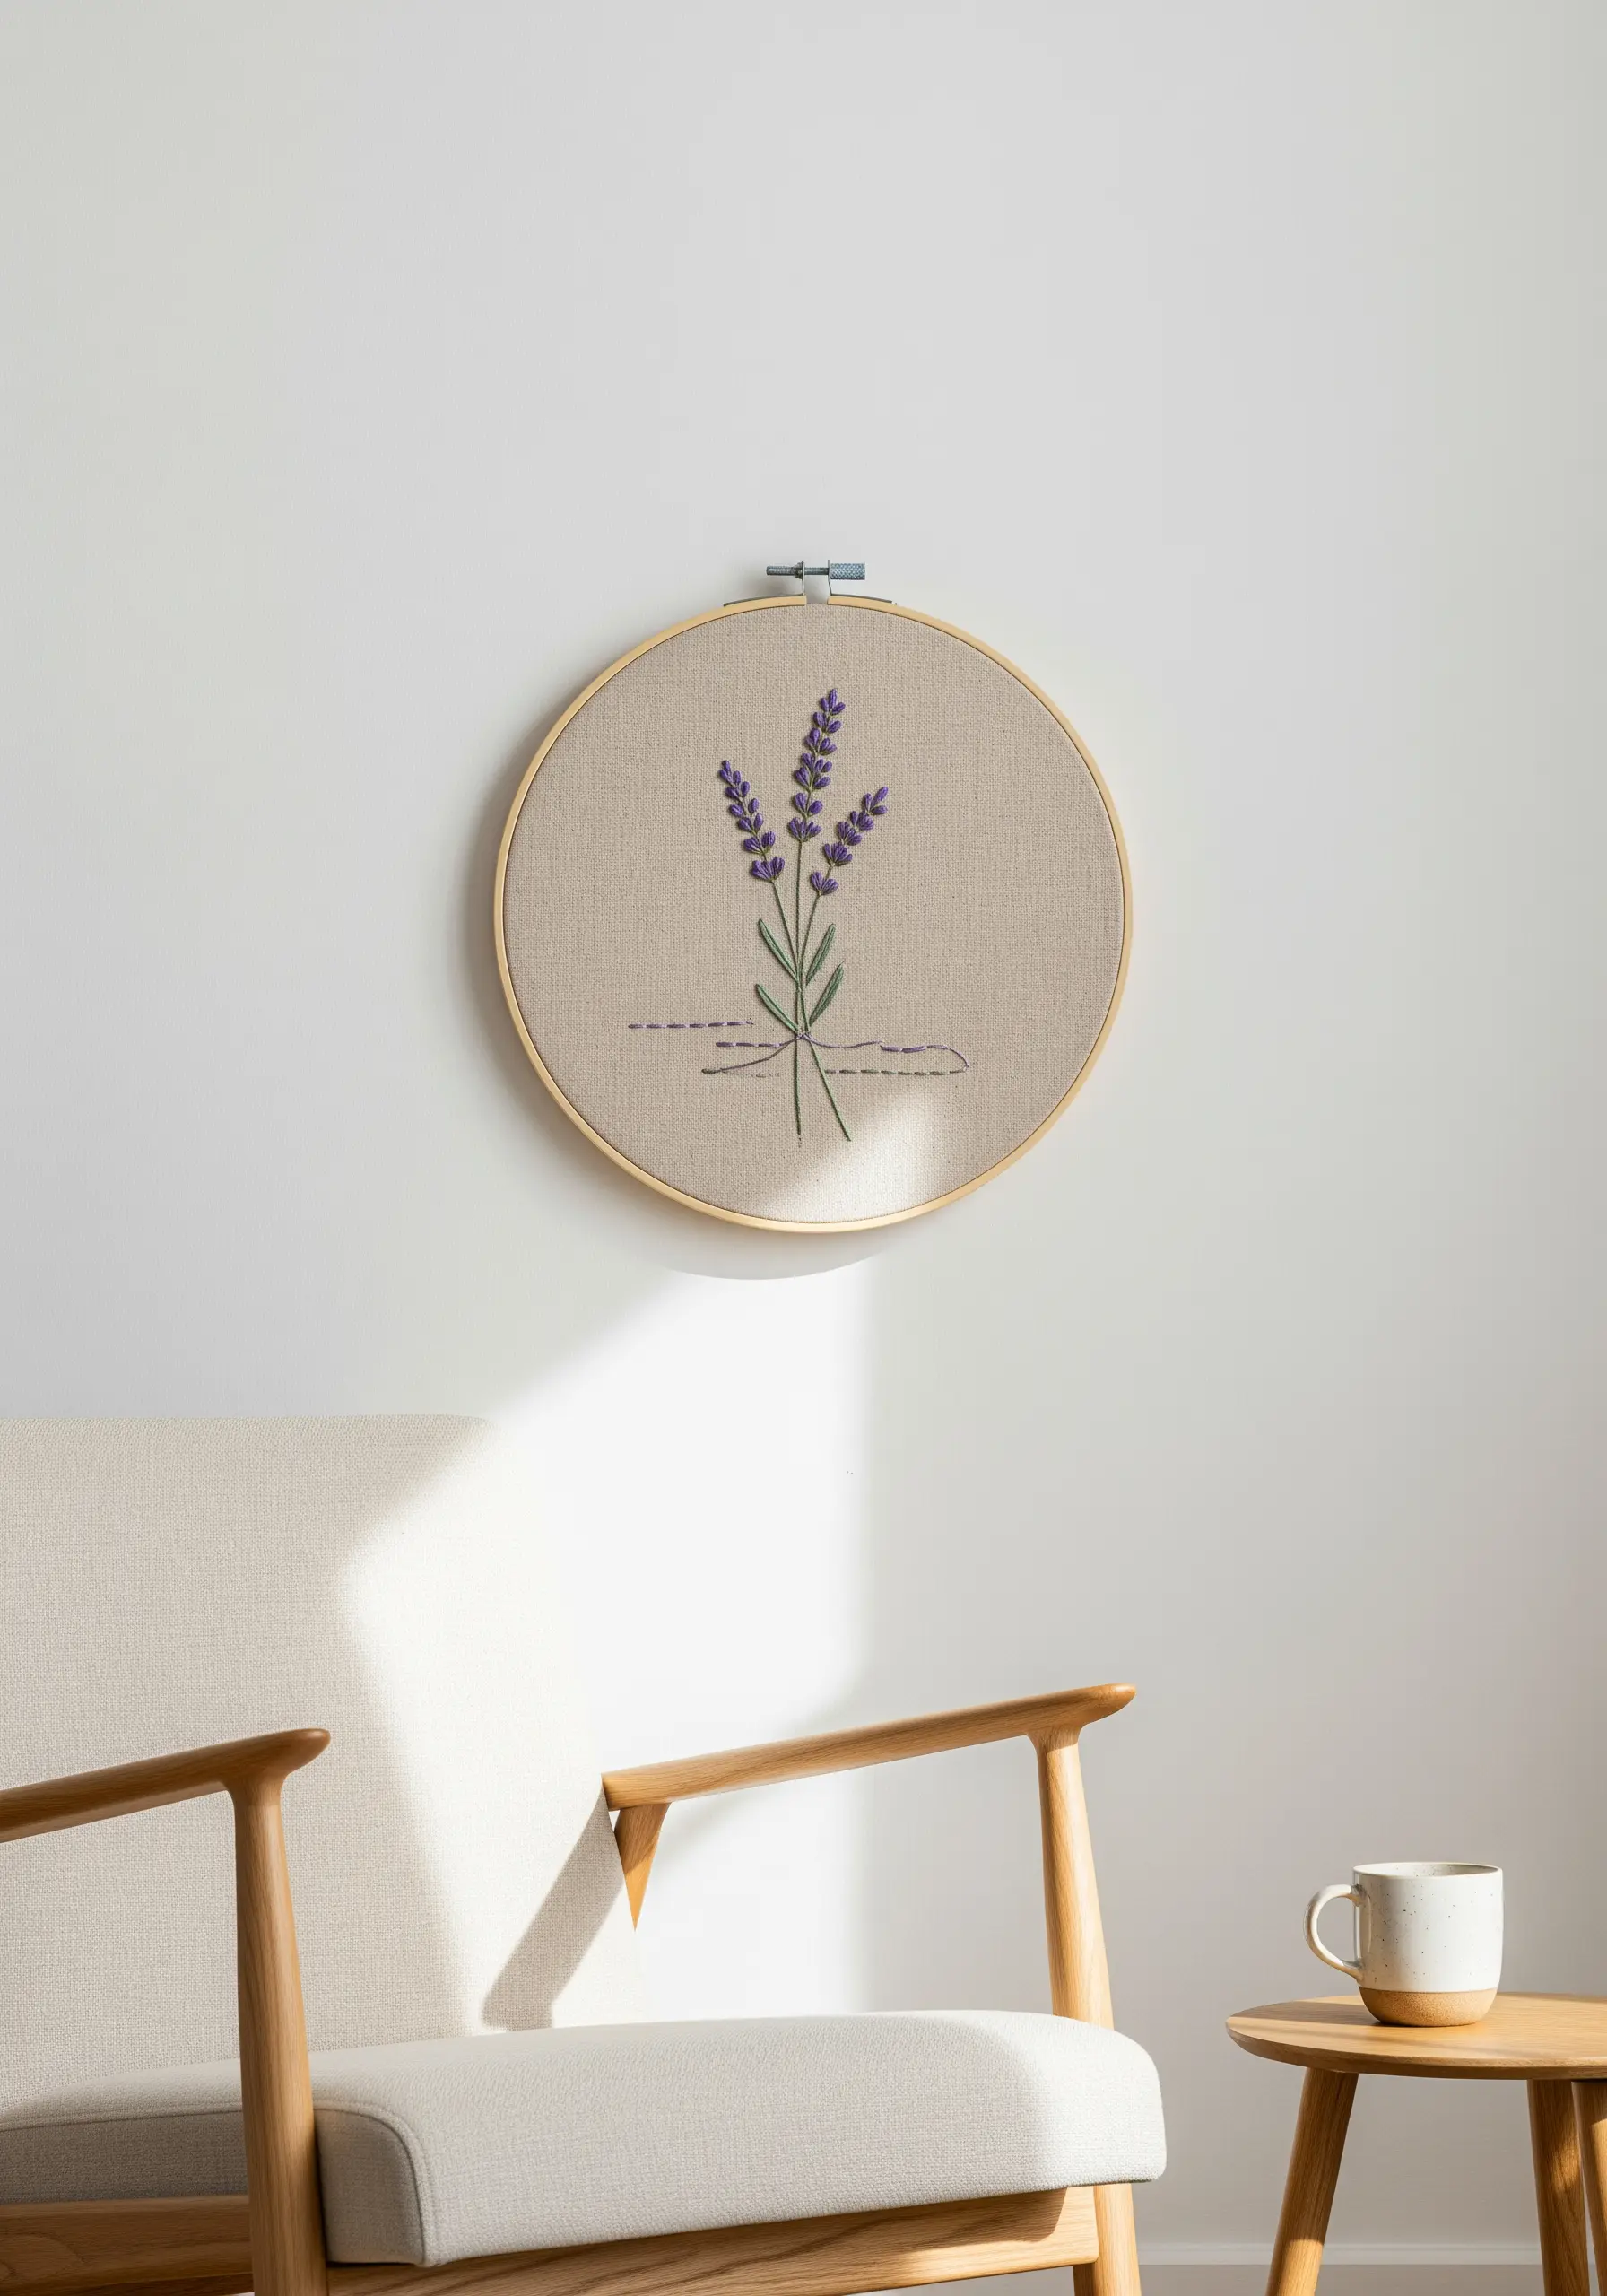
For the lavender blossoms, use French knots clustered tightly together, and a simple stem stitch for the stalk to maintain the design’s delicate feel.
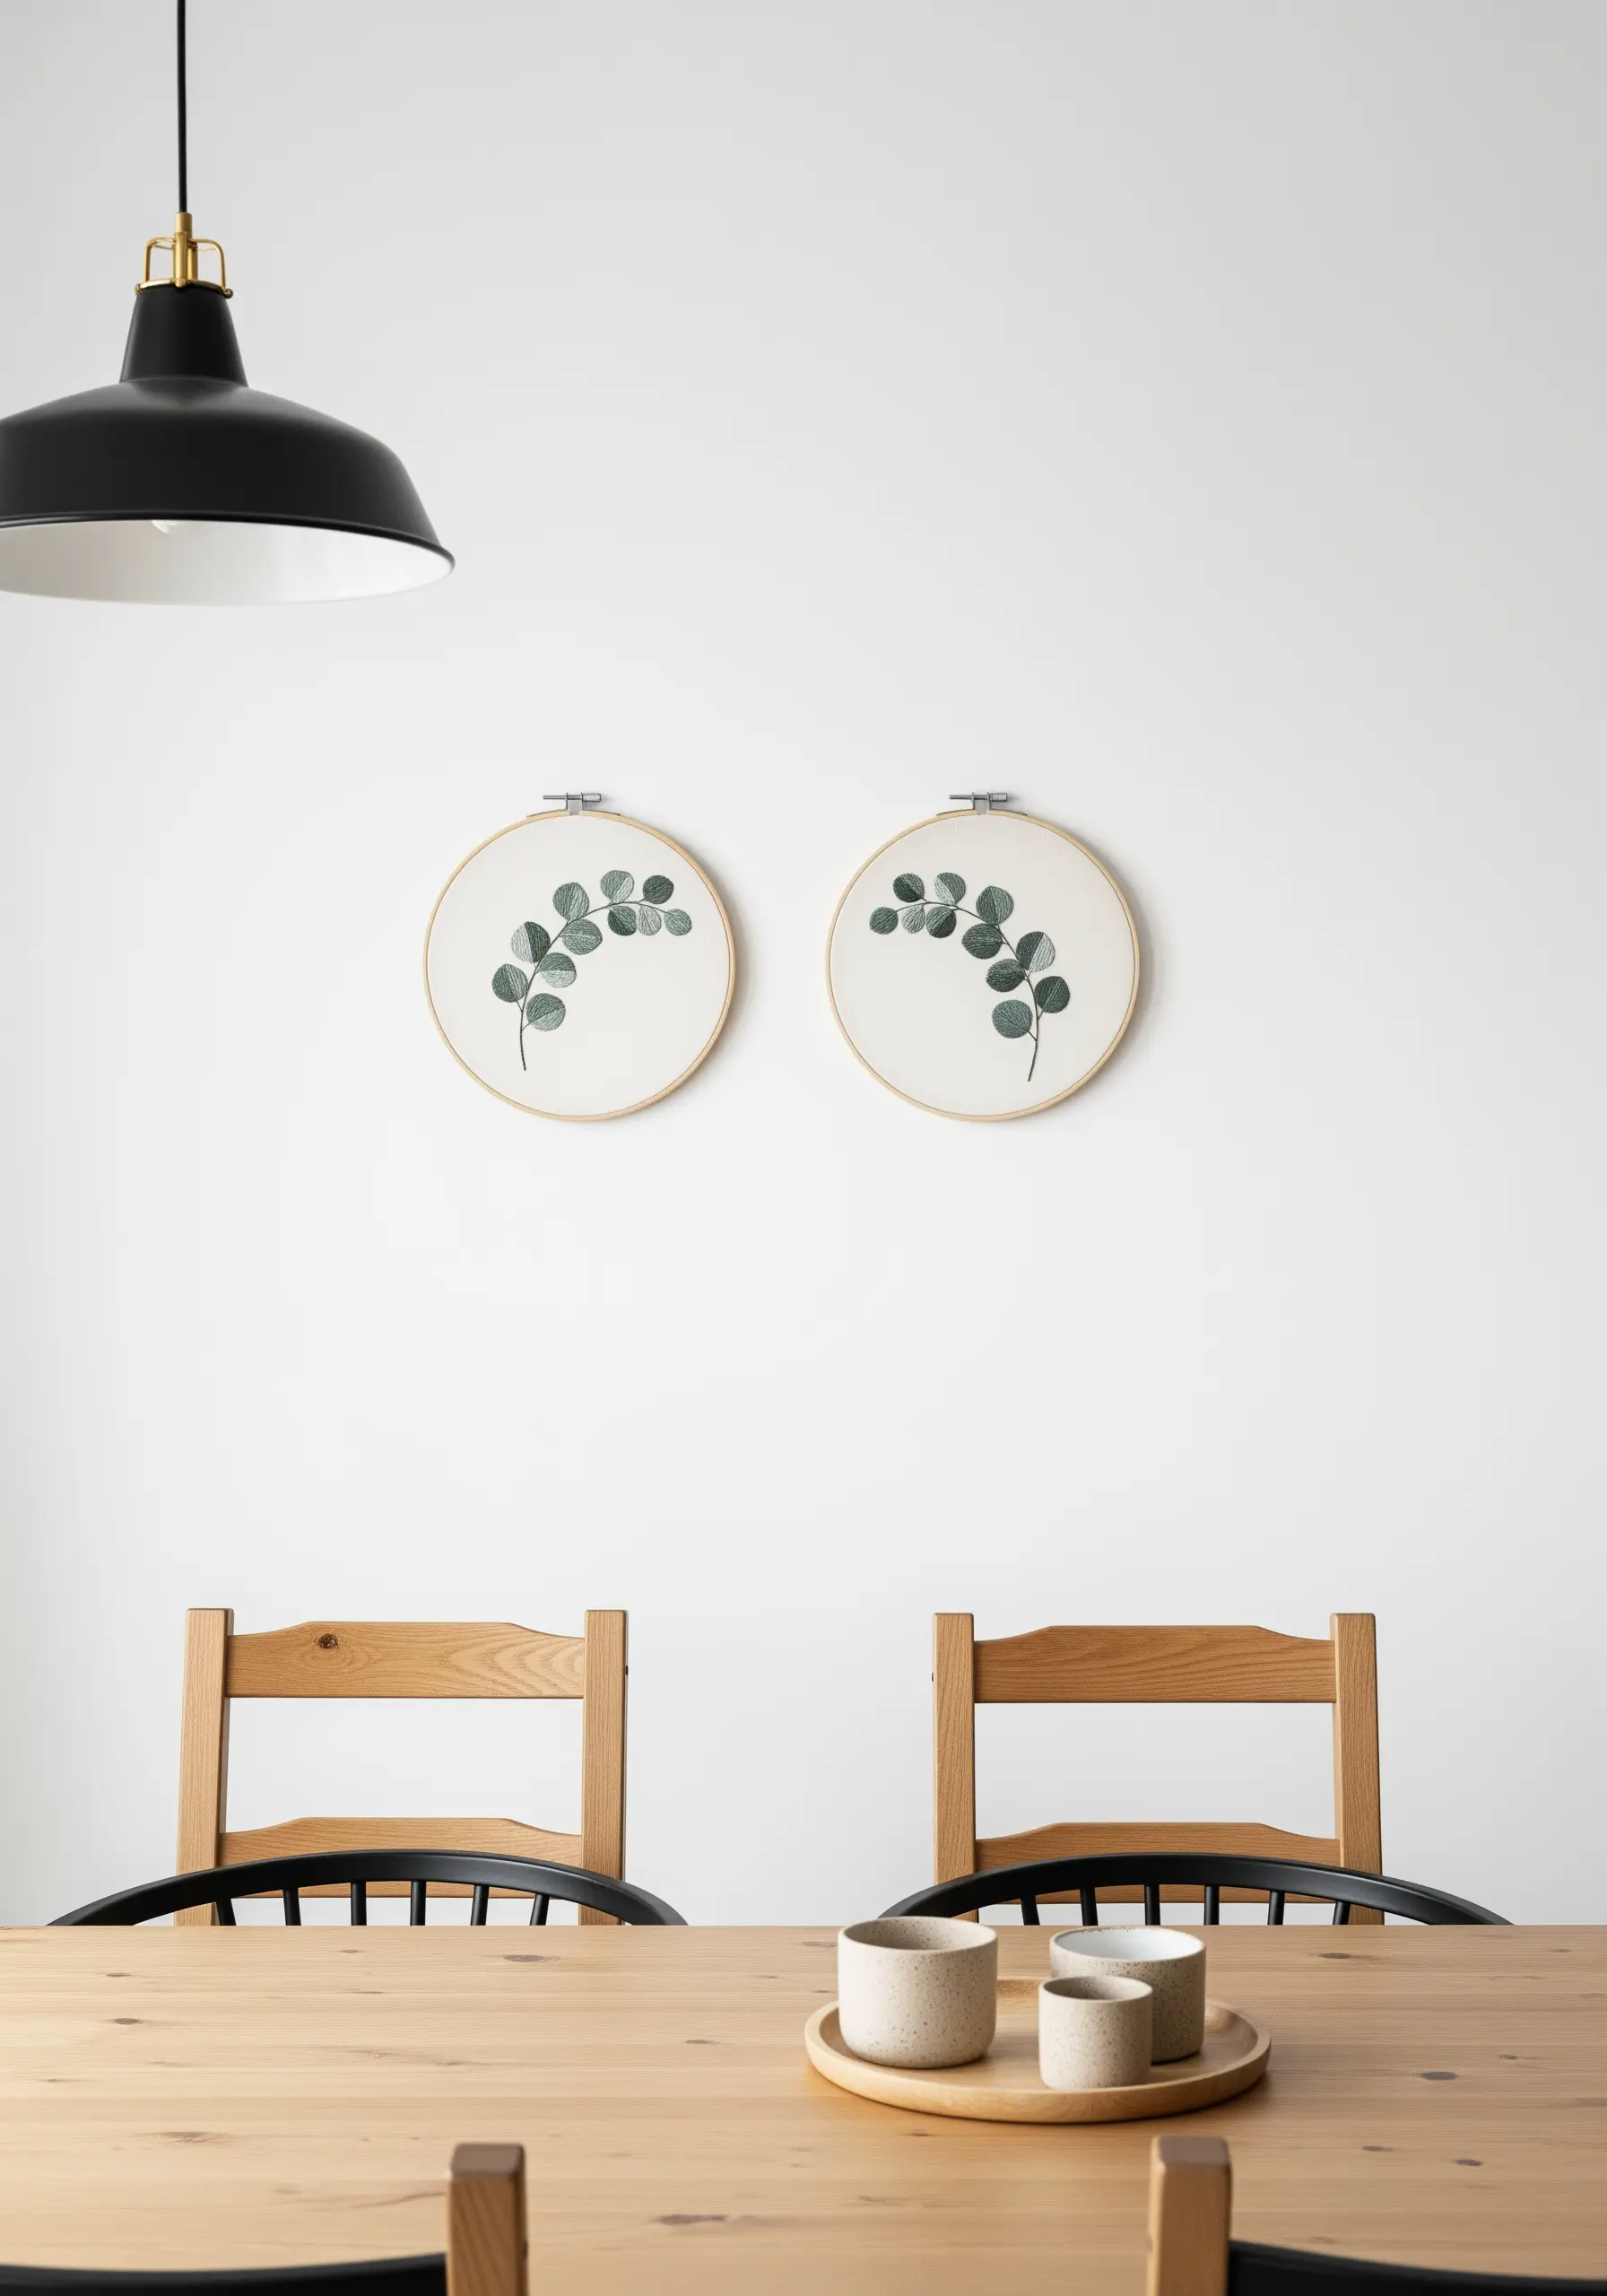
2. Create a Narrative with Sequential Hoops
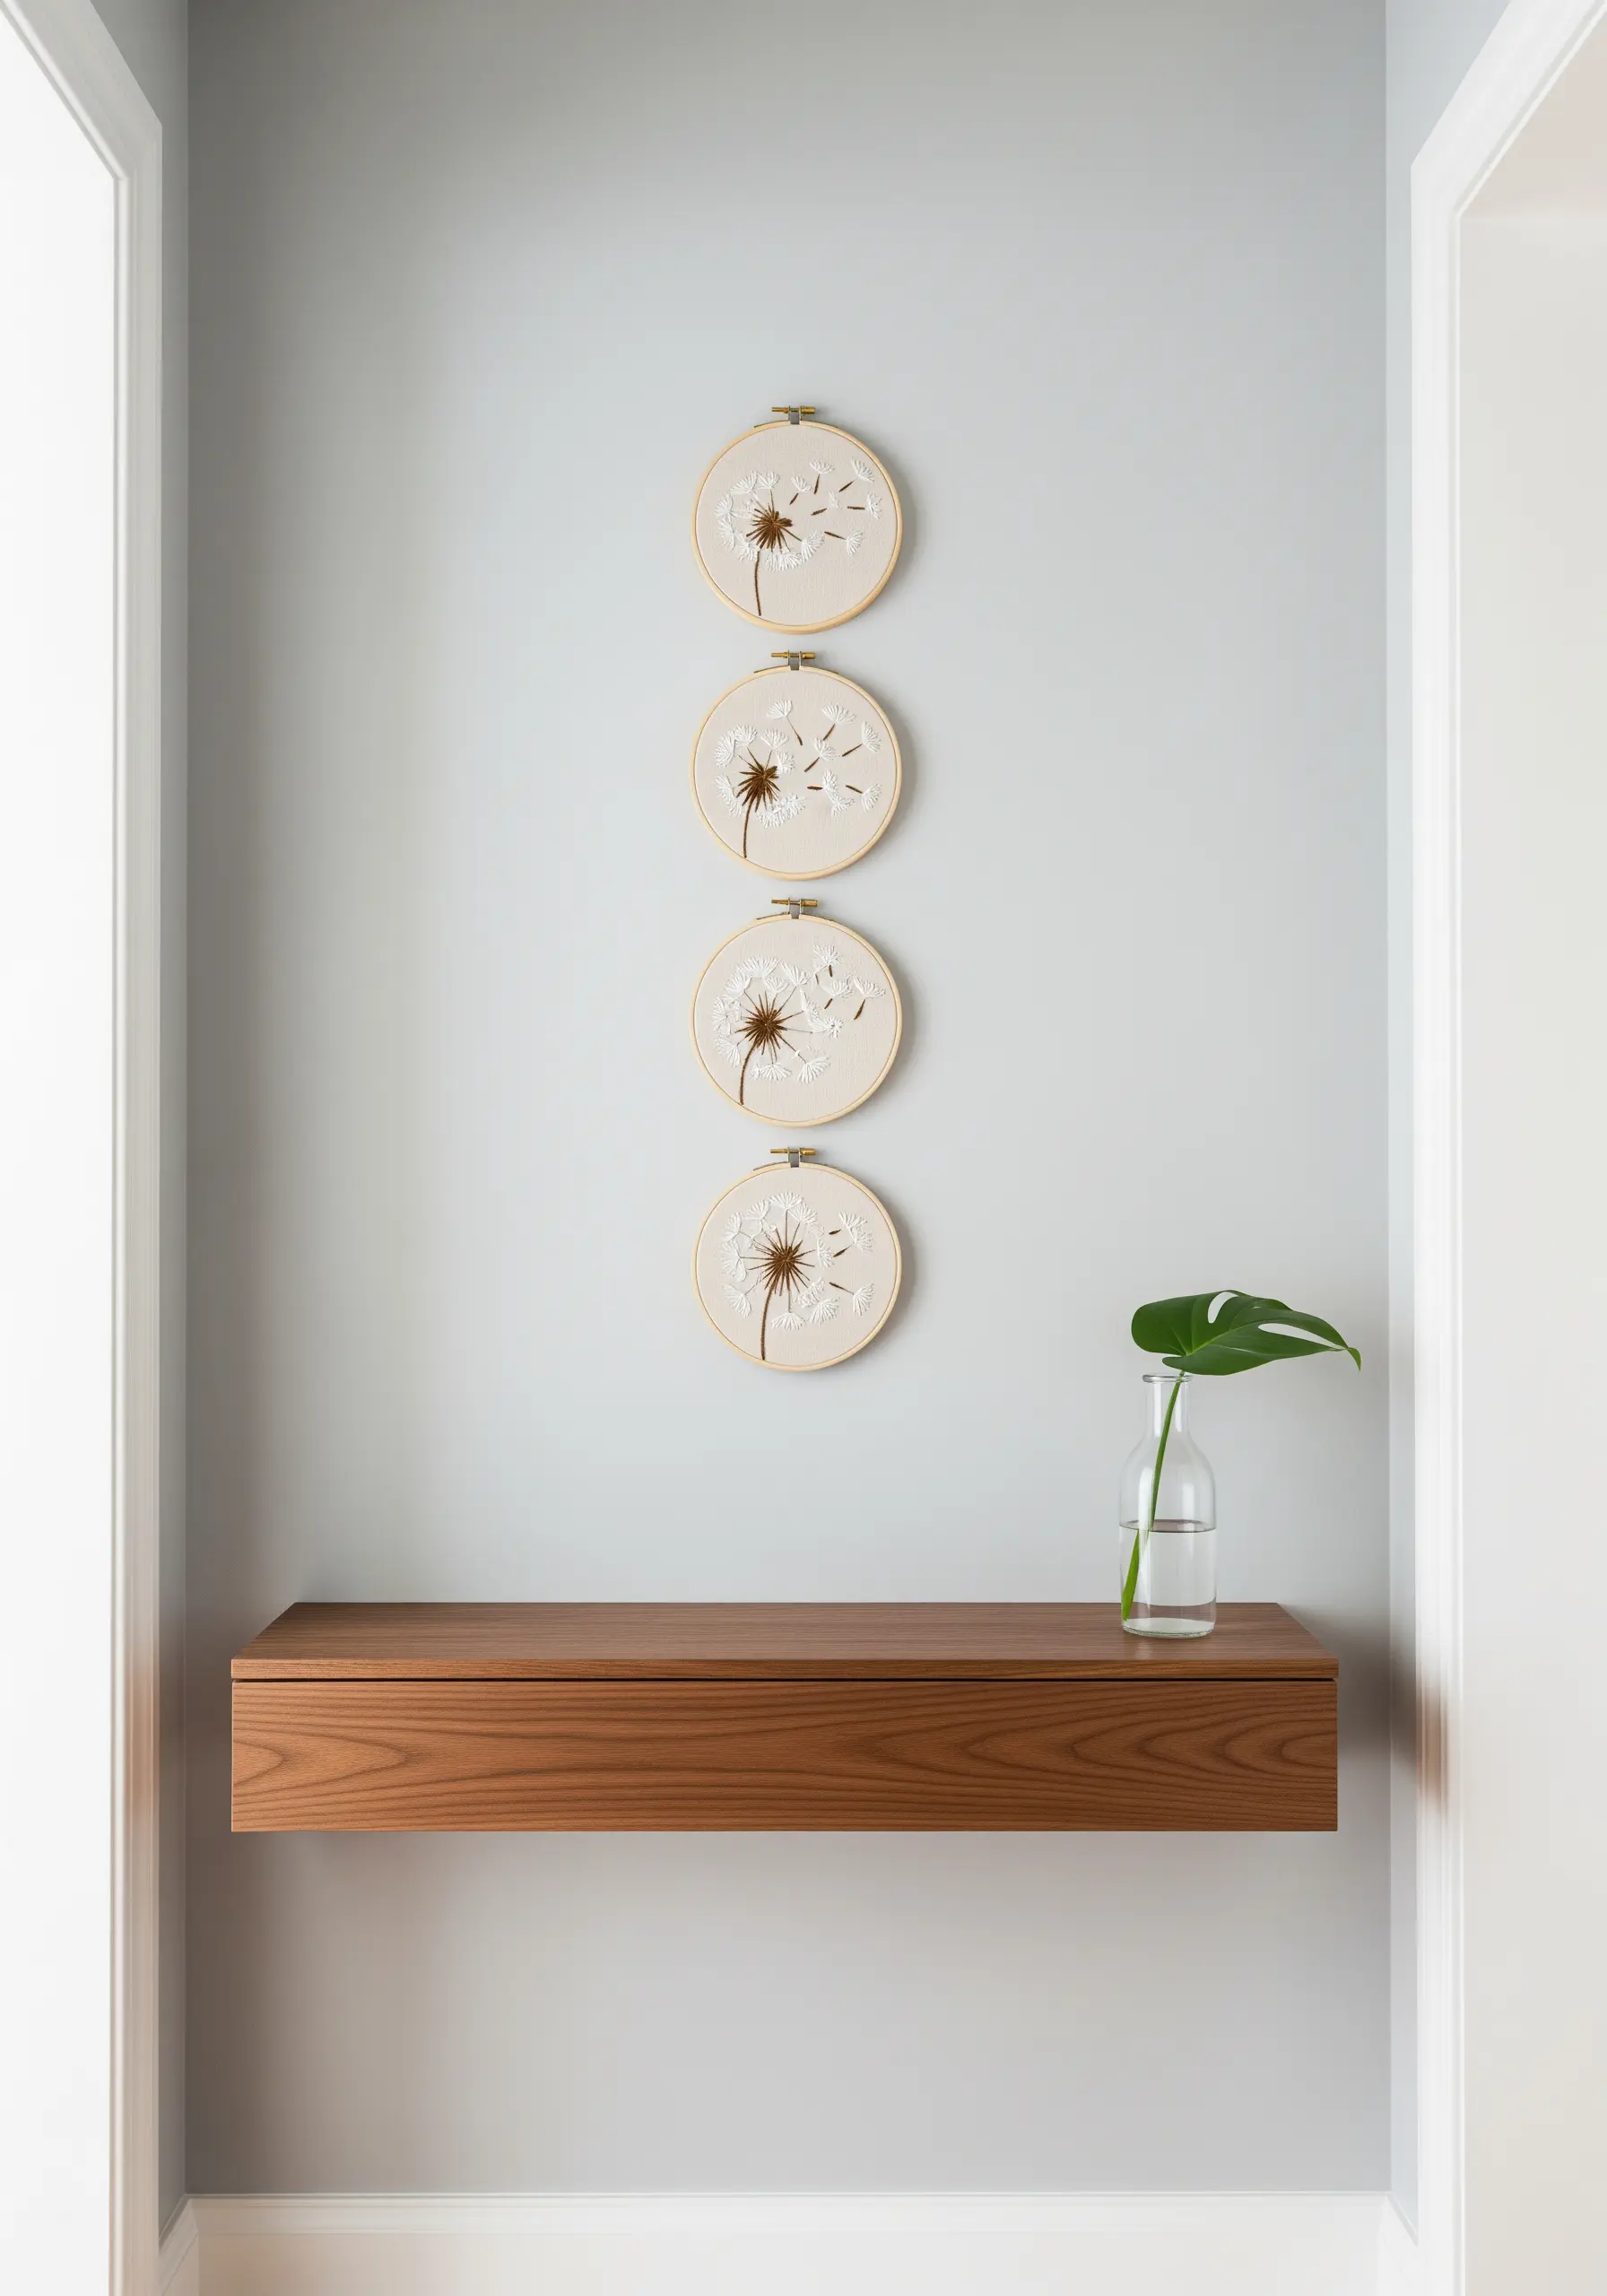
Tell a short, visual story by stitching the same motif across a series of hoops, showing its progression over time.
For a dandelion, start with a full seed head, then show it gradually dispersing across two or three subsequent hoops.
This technique turns a simple subject into a dynamic piece of wall art that guides the viewer’s eye along a path.
Use a mix of straight stitches and detached chain stitches for the floating seeds to create a sense of delicate movement.
Ensure you use the same fabric and hoop size for all pieces to create a visually cohesive collection.
3. Embrace Asymmetry on Large-Scale Canvases
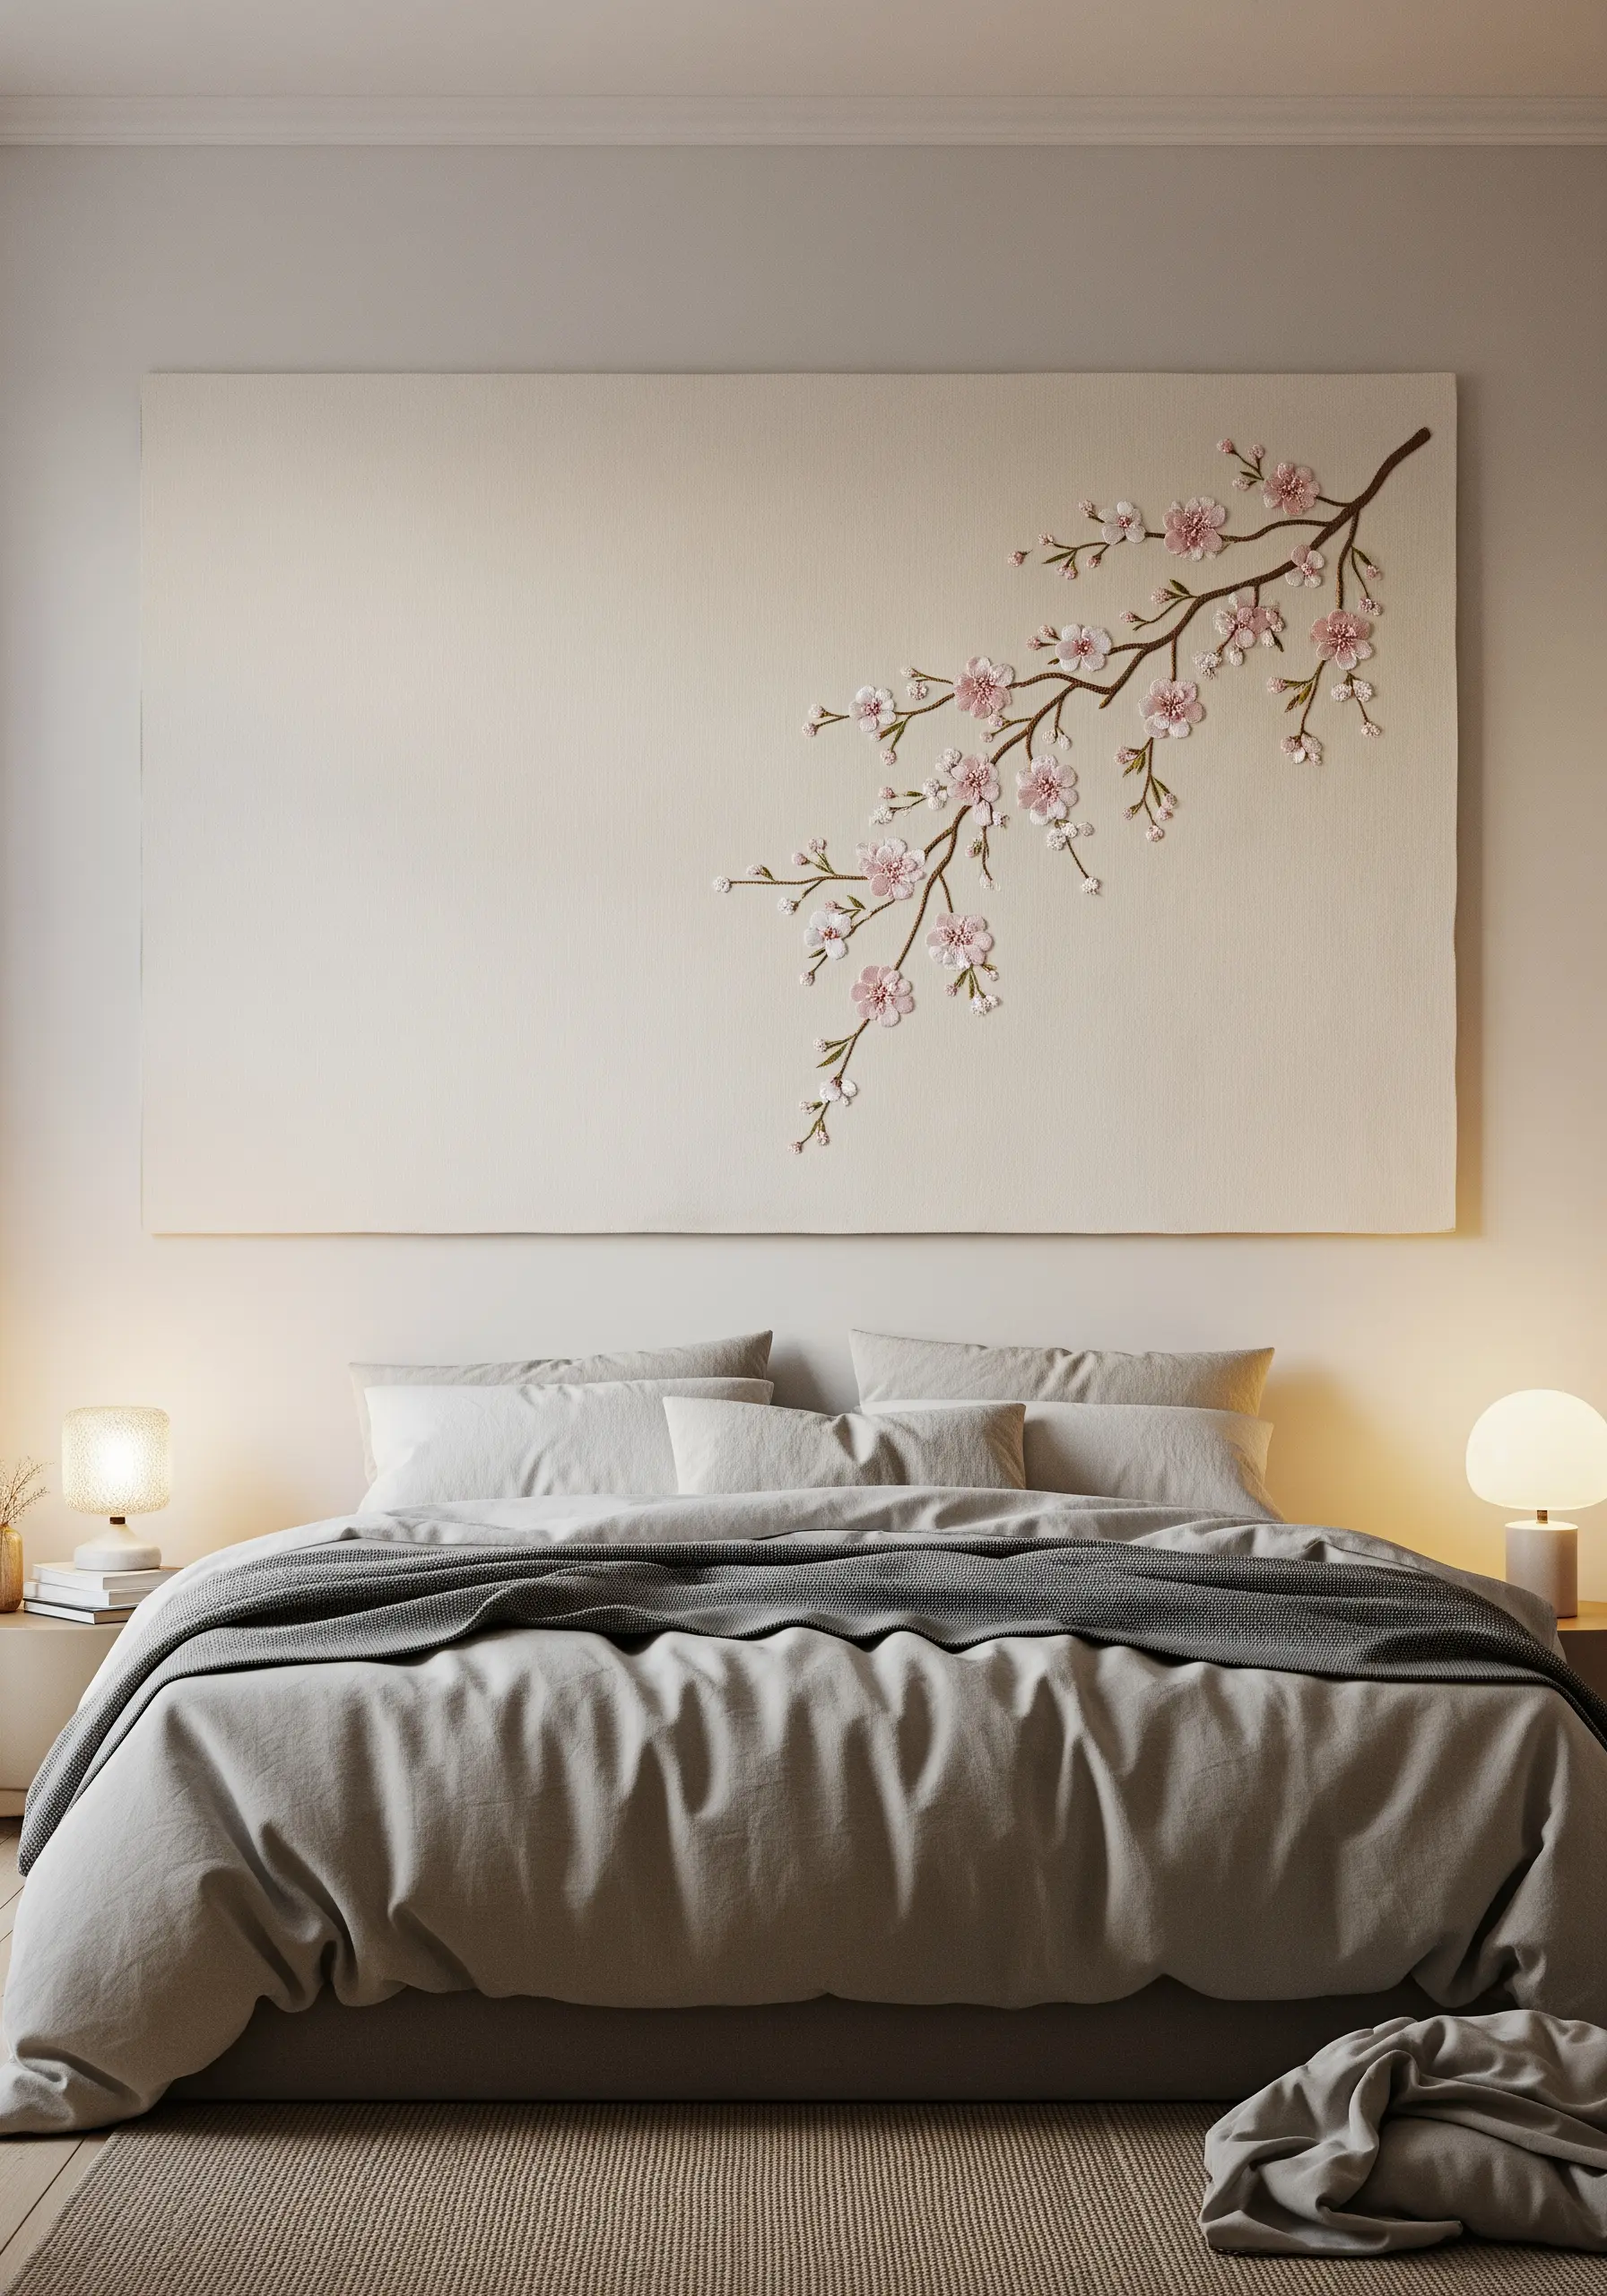
When working on large-scale canvases, resist the urge to center your design. Instead, place a delicate branch creeping in from one corner.
This asymmetrical composition activates the negative space, making the emptiness a powerful, intentional part of the artwork.
The eye is drawn to the detailed stitching, allowing the rest of the canvas to provide a sense of calm and breathability.
Use a padded satin stitch for the cherry blossoms to give them a subtle, raised dimension that catches the light.
4. Scatter Simple Motifs for Playful Rhythm

Instead of a rigid grid, create a floating, whimsical feel by scattering small hoops with a repeating motif across a wall.
Vary the spacing and height of each hoop to create a sense of gentle movement, as if daisies are floating in a breeze.
This is an excellent way to fill a larger space, like a nursery wall, without a single, overwhelming piece of art.
Stick to a very simple design—like a daisy made with lazy daisy stitches—so the overall effect remains light and uncluttered.
5. Isolate Form with Minimal Line Art
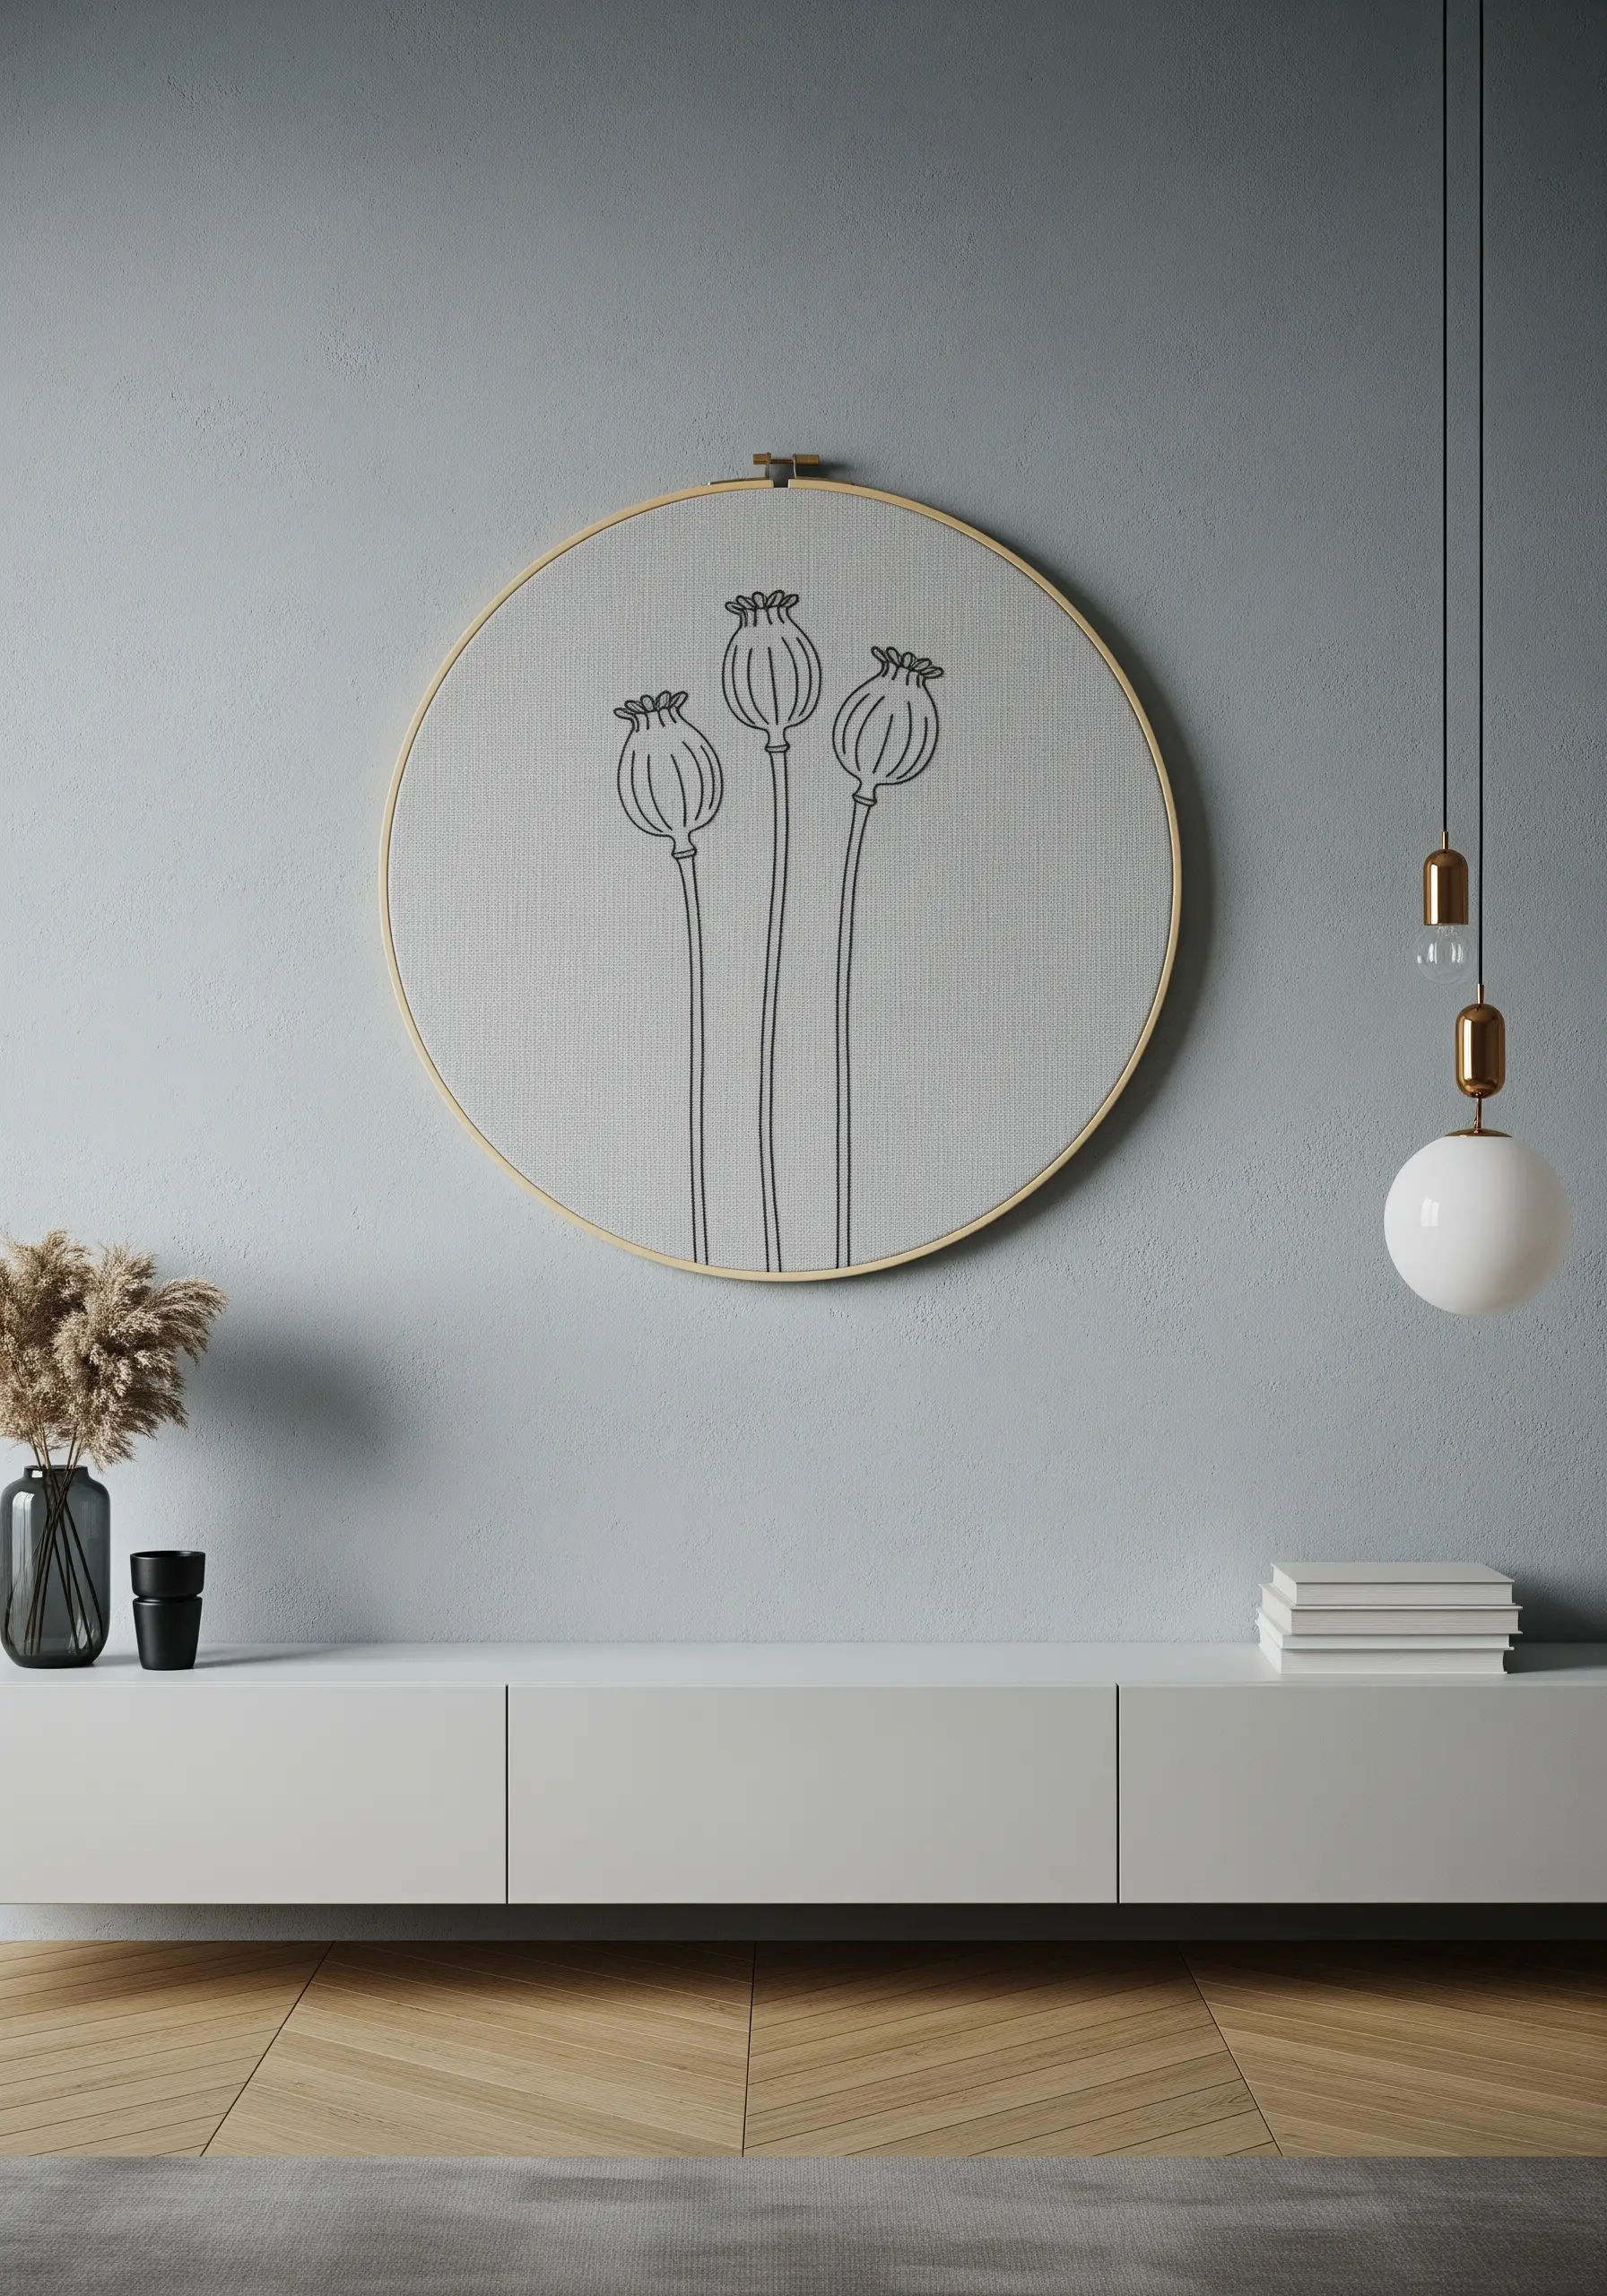
Focus entirely on the beauty of a plant’s silhouette by reducing it to pure line work.
Using a single, dark-colored thread on a light, textured fabric like linen creates a sophisticated, graphic statement.
Choose a stitch that gives you a clean, consistent line, such as a backstitch or a stem stitch, using three strands of floss for a visible but not overly heavy weight.
This technique celebrates simplicity and proves that you don’t need complex color fills to create impactful minimal line art.
6. Frame Your Work for a Finished, Gallery Feel
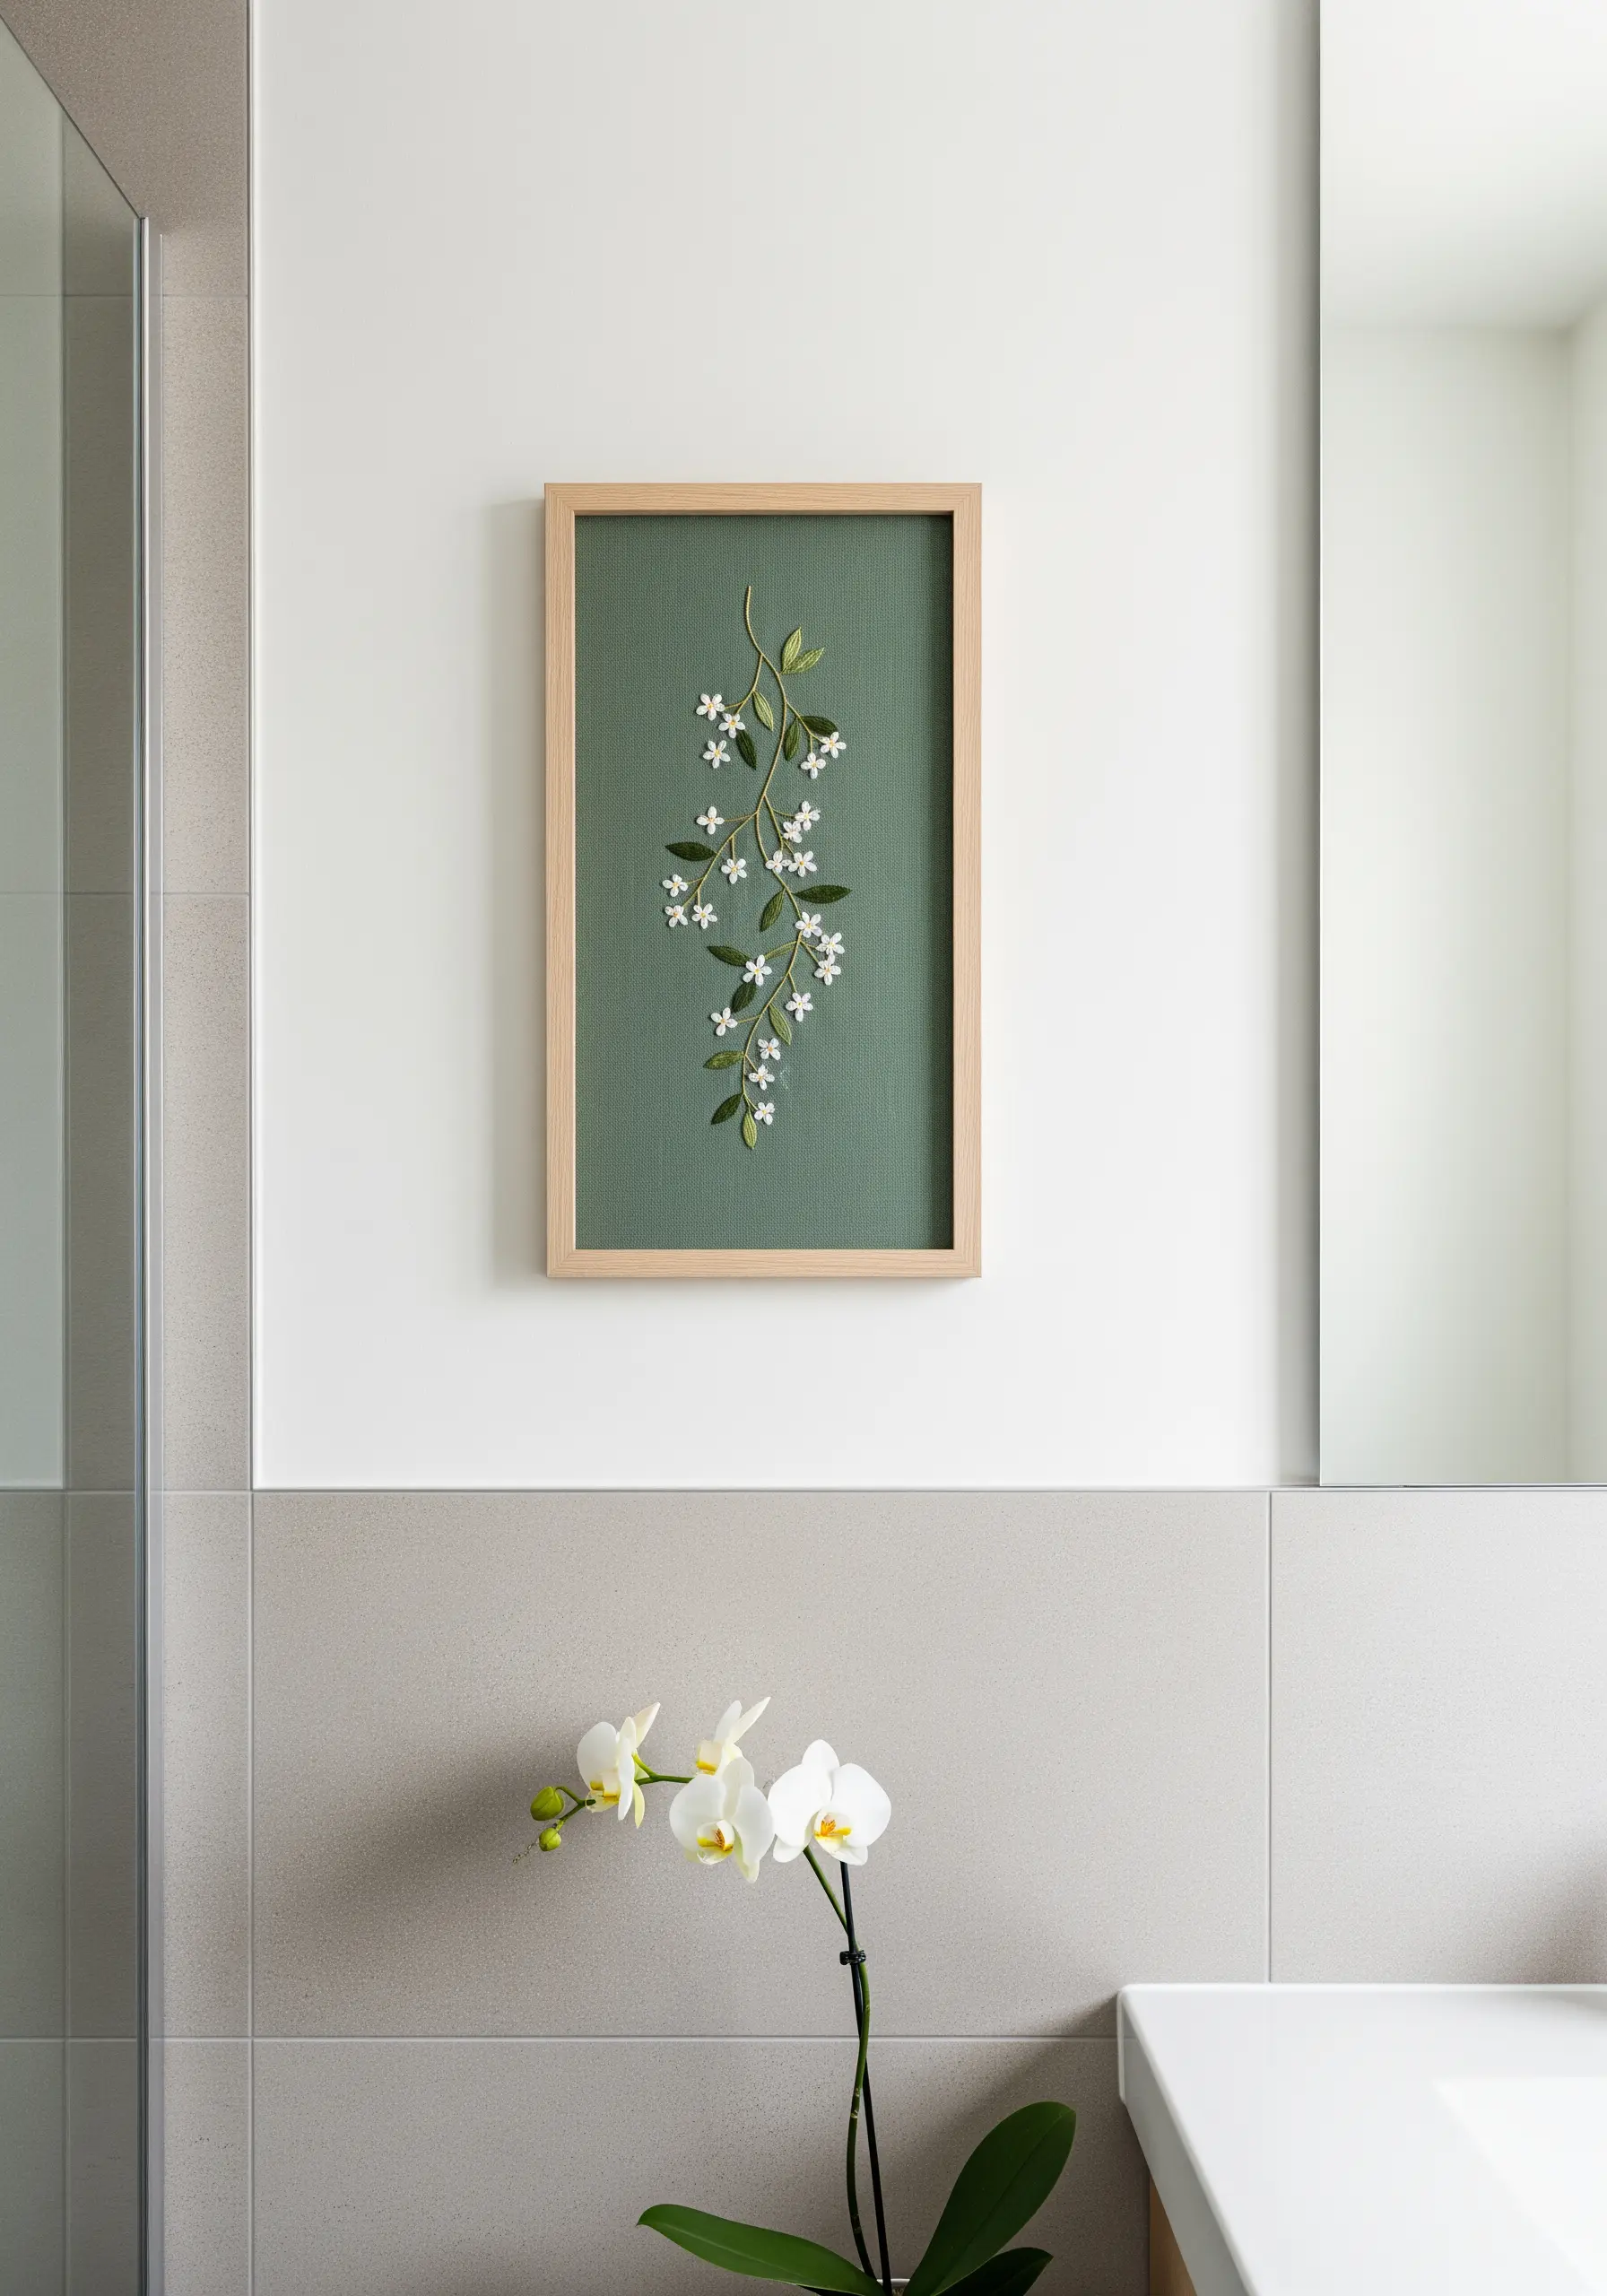
Transition your embroidery from a craft project to a piece of fine art by taking it out of the hoop and into a proper frame.
A simple, light wood frame provides a clean border that elevates the textile, making it feel more intentional and permanent.
For this high-contrast piece, use raised stitches like bullion knots for the flower petals to create texture that stands out against the deep green fabric.
This finishing touch instantly makes your work look more polished and ready for a prominent place in your home.
7. Create a Modern Floral Pattern with Repetition

Design your own custom ‘fabric’ by stitching a repeating floral motif in a loose, scattered grid.
This technique fills a frame with color and texture while maintaining a clean, modern aesthetic that feels more personal than pre-printed fabric.
Keep the individual flower simple—a few straight stitches for petals and a French knot for the center—to ensure the overall pattern feels airy, not busy.
Maintain consistent spacing between each flower to achieve a balanced, rhythmic composition.
8. Go Horizontal with an Embroidered Wall Hanging
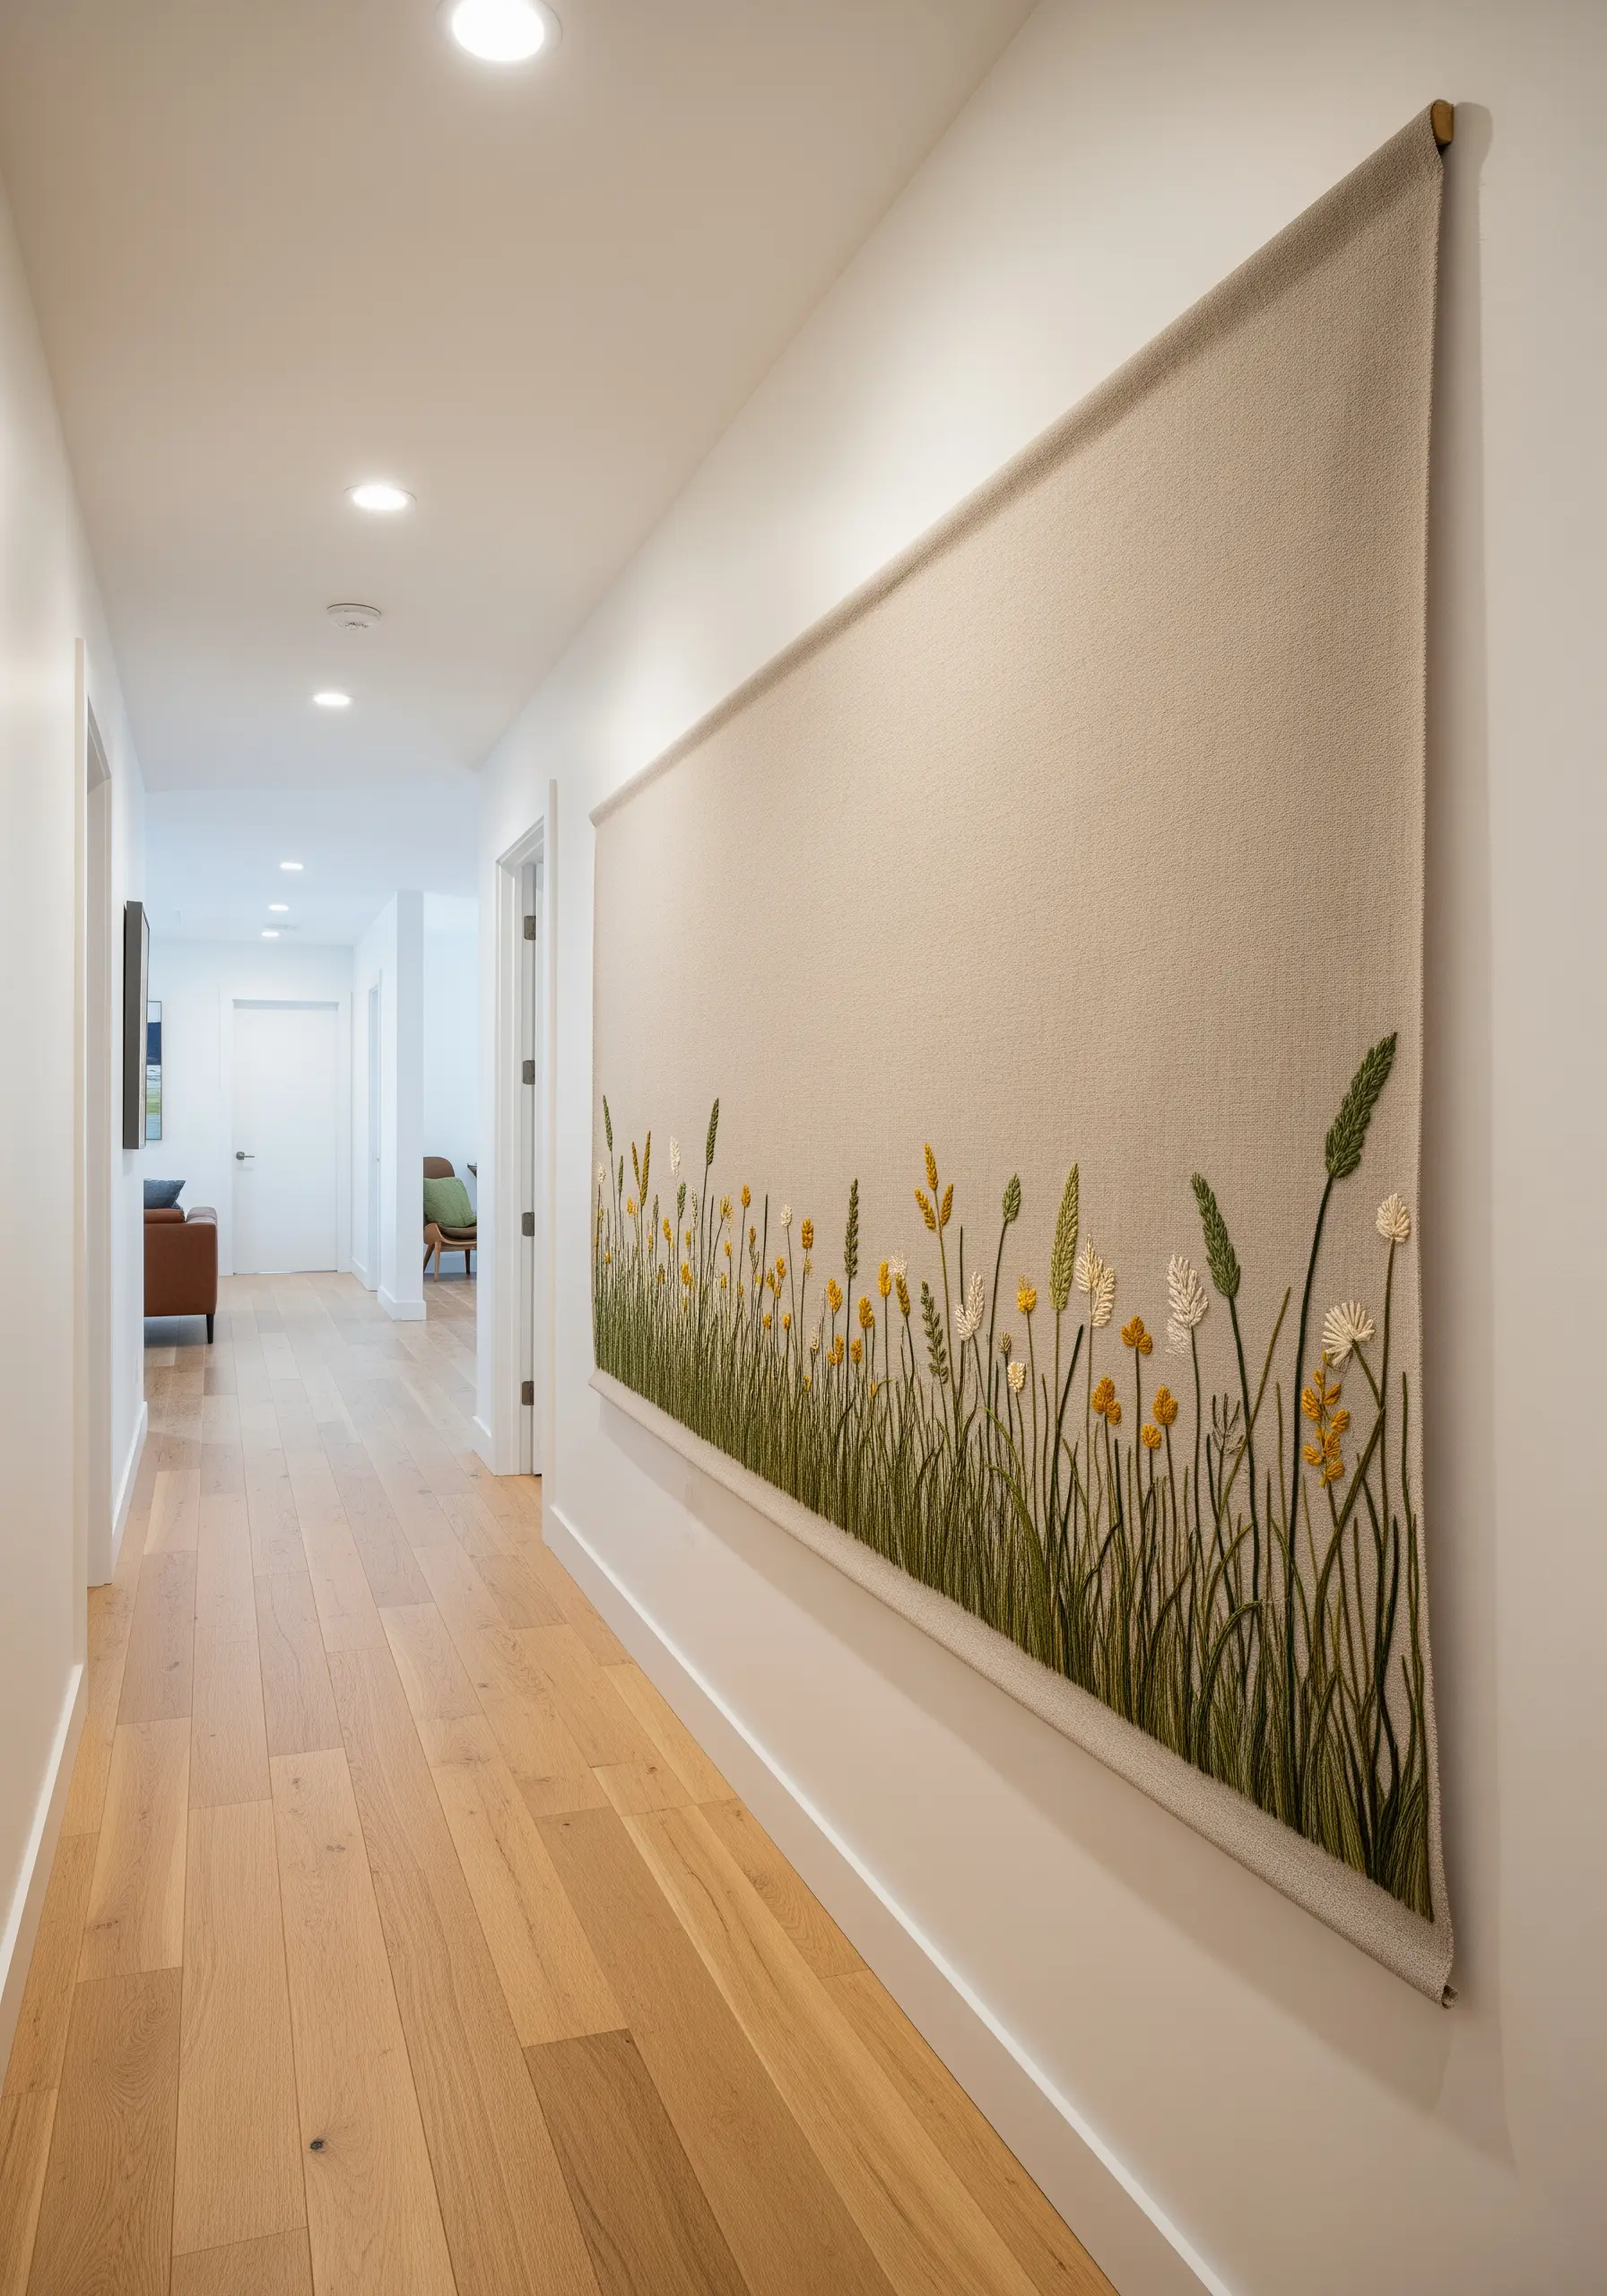
For a long, narrow space like a hallway, move beyond the hoop and create a textile wall hanging or tapestry.
Concentrate your embroidery along the bottom edge, creating a ‘meadow’ that grounds the entire piece and leaves ample negative space above.
Vary the height and density of your stitches to mimic the natural chaos of a field of wildflowers.
Mix stitch types—long straight stitches for grass, lazy daisy stitches for petals, and French knots for seed heads—to build rich, organic texture.
9. Define a Singular Motif with Bold Outlines
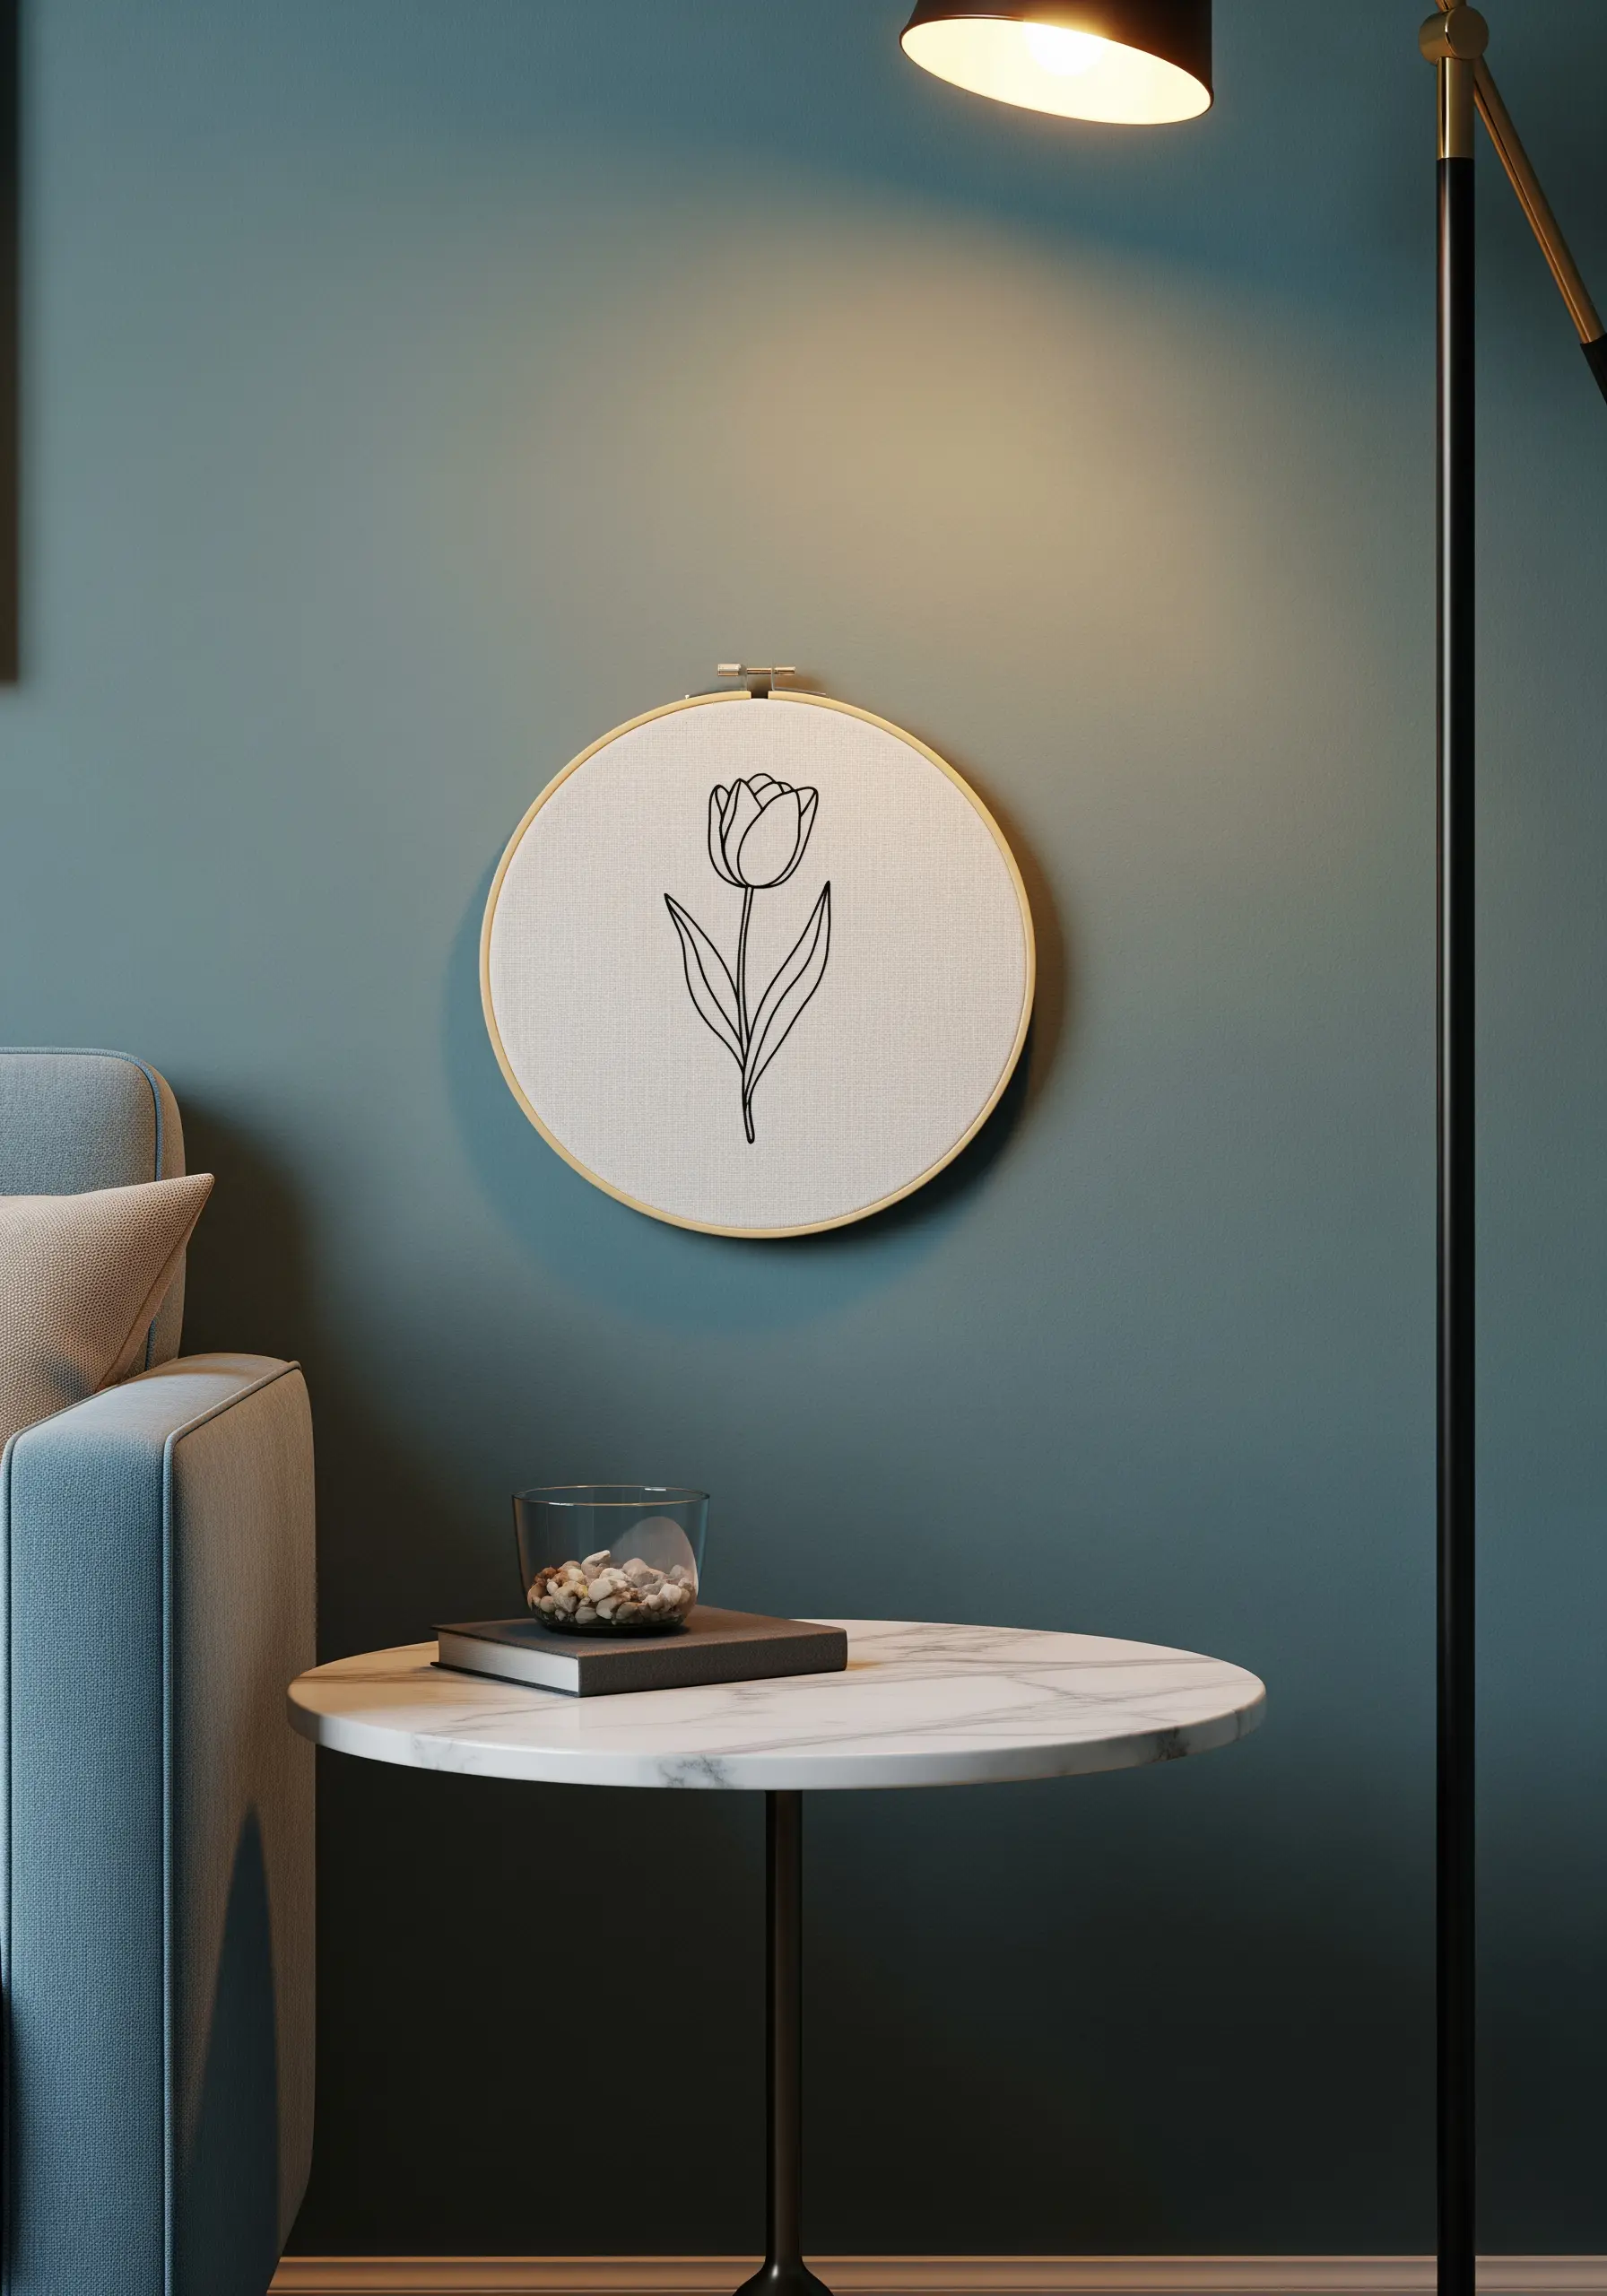
Make a strong graphic statement by isolating a single flower and rendering it with a bold, clean outline.
Use four to six strands of black or dark-colored floss to ensure the line has weight and presence against the neutral fabric.
A whipped backstitch is ideal for this, as it creates a perfectly smooth, uninterrupted line that elevates the simple drawing.
This approach transforms a familiar floral shape into a modern icon where the silhouette is the star, not the color or texture.
10. Achieve Softness with Watercolor-Style Stitches
Create a painterly, soft-focus effect by filling in leaves with sparse, directional stitches rather than solid satin stitch.
Use single strands of floss in three to four closely related shades—like sage, mint, and grey-green—and place them as loose seed stitches following the natural direction of the leaf’s growth.
This method allows the background fabric to show through, mimicking the transparent quality of watercolor paint.
The result is a delicate, airy botanical that feels less like a stitched object and more like a painting made of thread.
11. Play with Transparency on Sheer Fabric
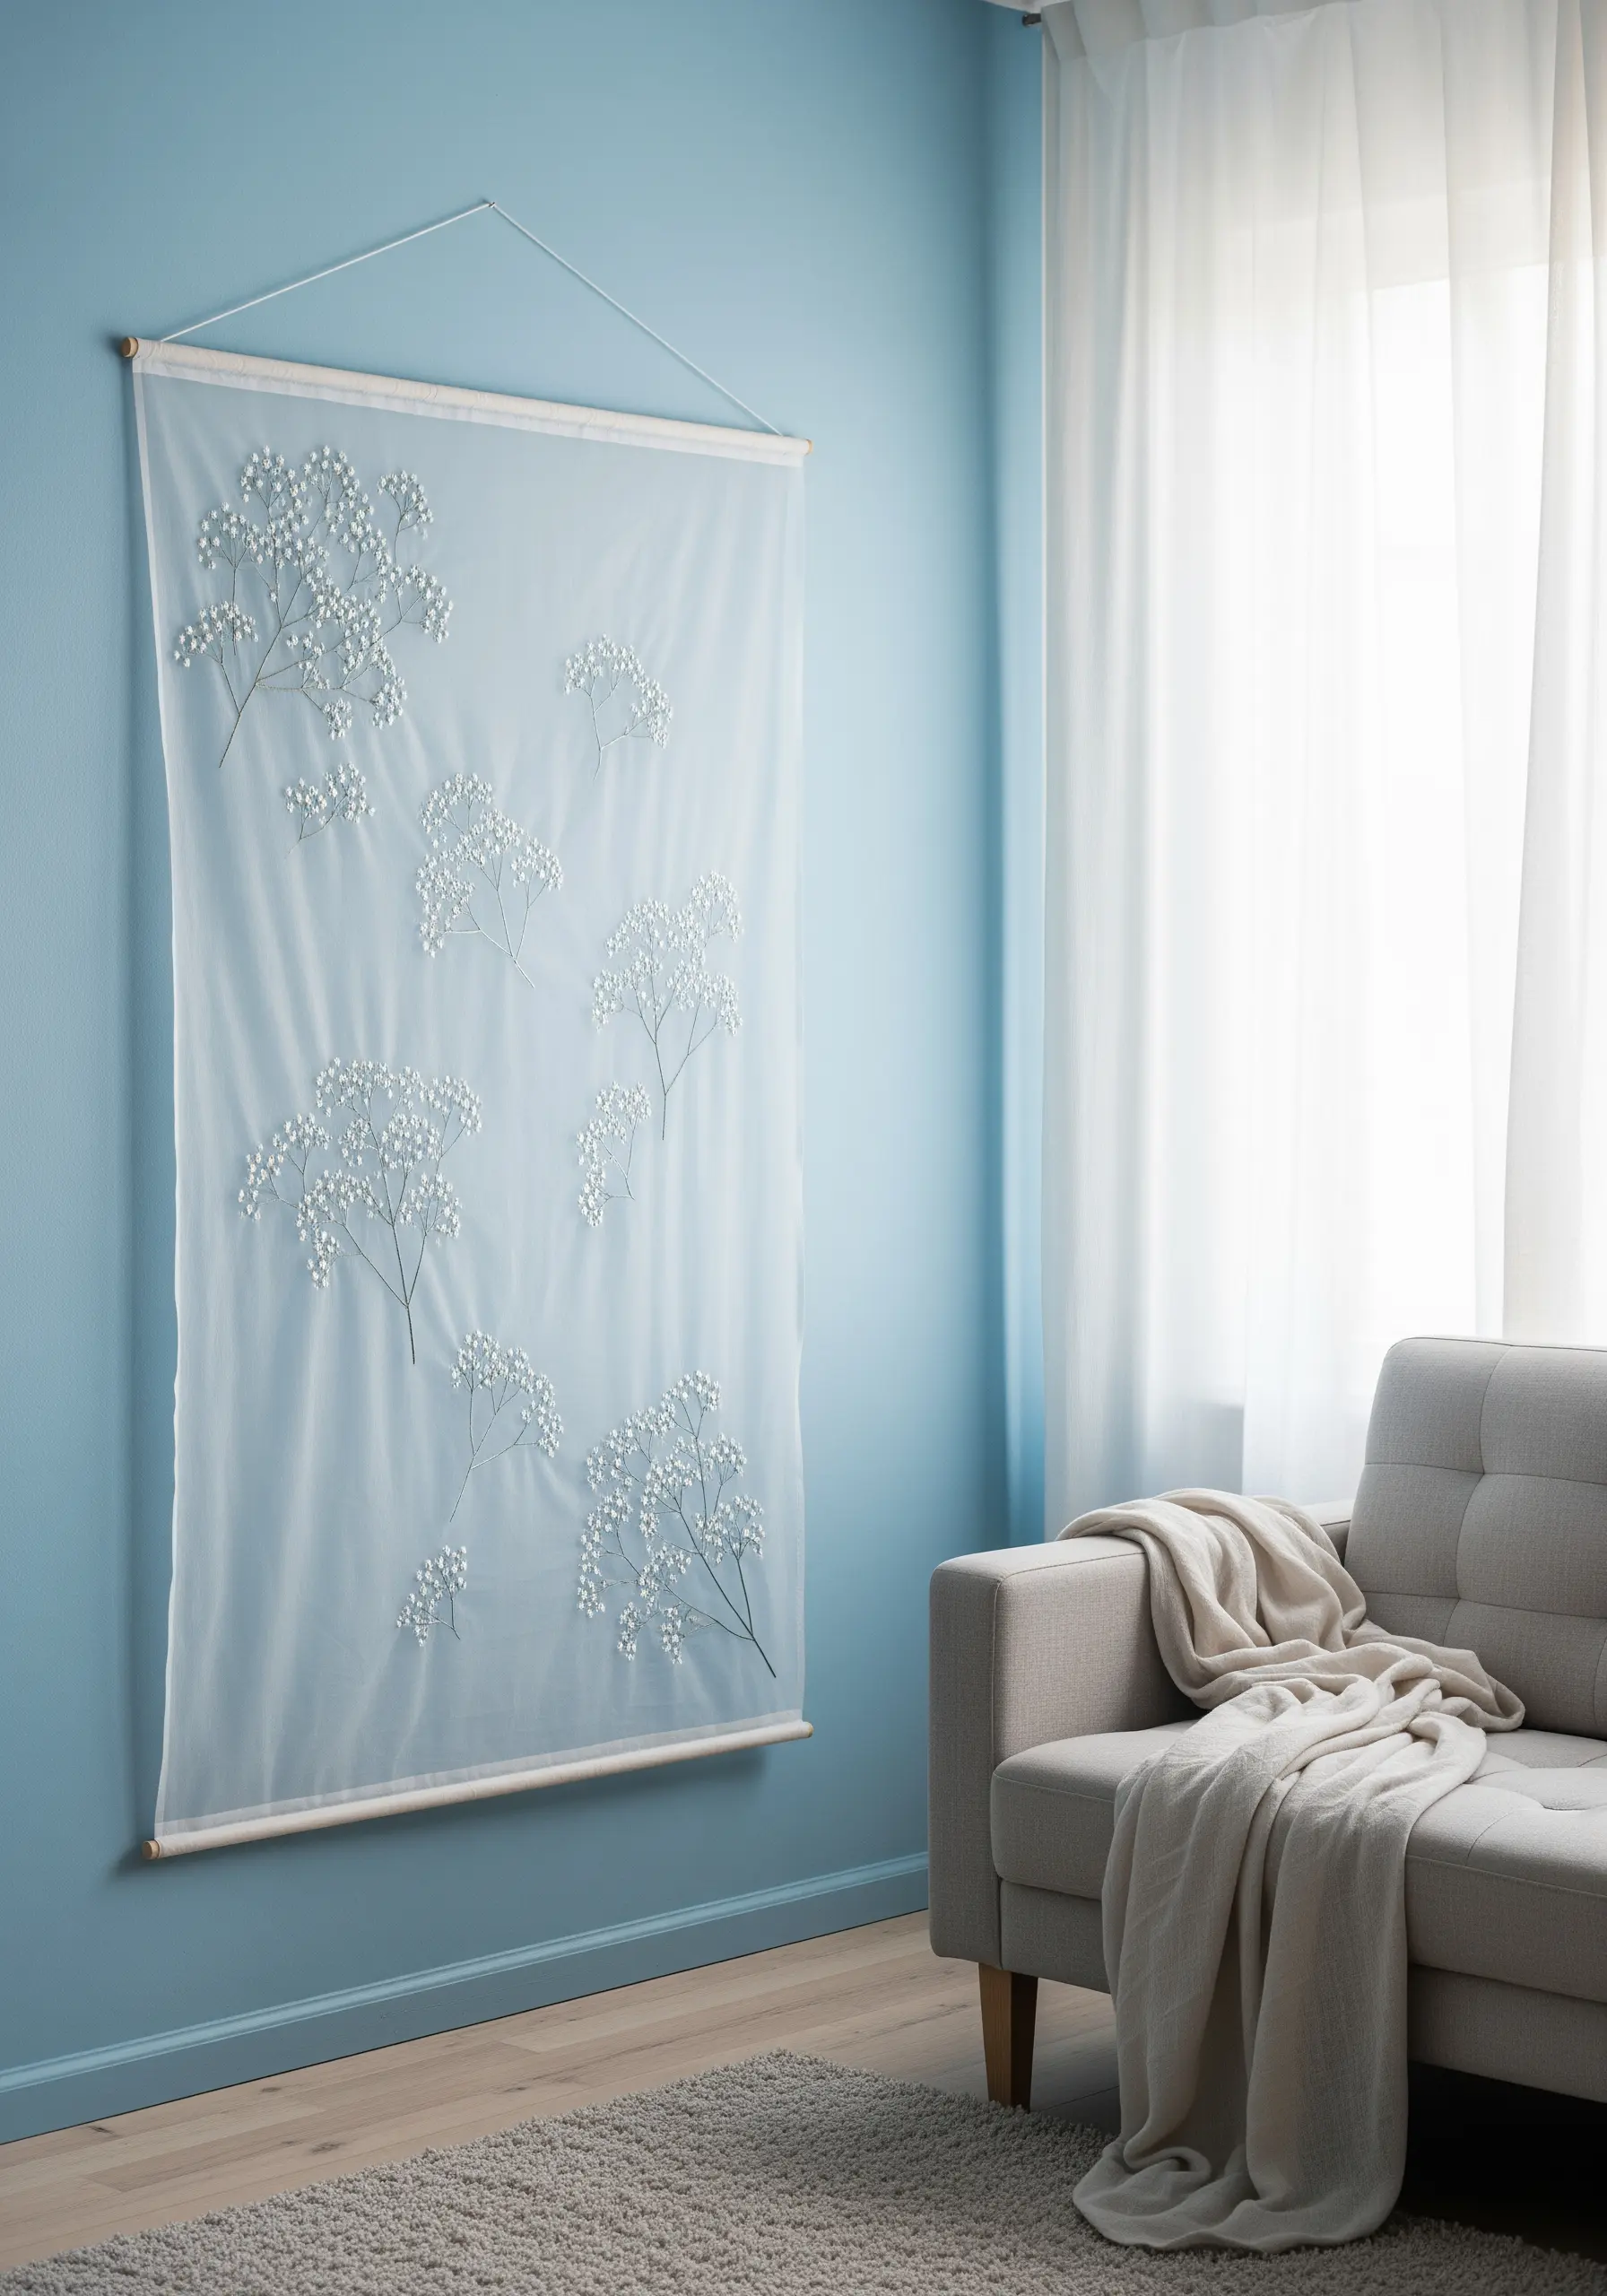
Embroidering on a sheer fabric like organza or tulle makes your stitches appear to float in mid-air, creating an exceptionally delicate and ethereal effect.
For a baby’s breath motif, use dense clusters of white French knots; their texture will pop against the transparent background.
Remember that the back of your work will be visible, so keep your connecting threads tidy or learn to weave them in securely without knots.
This technique is perfect for creating light, airy wall hangings that interact beautifully with natural light.
12. Use Radiating Lines for Graphic Energy
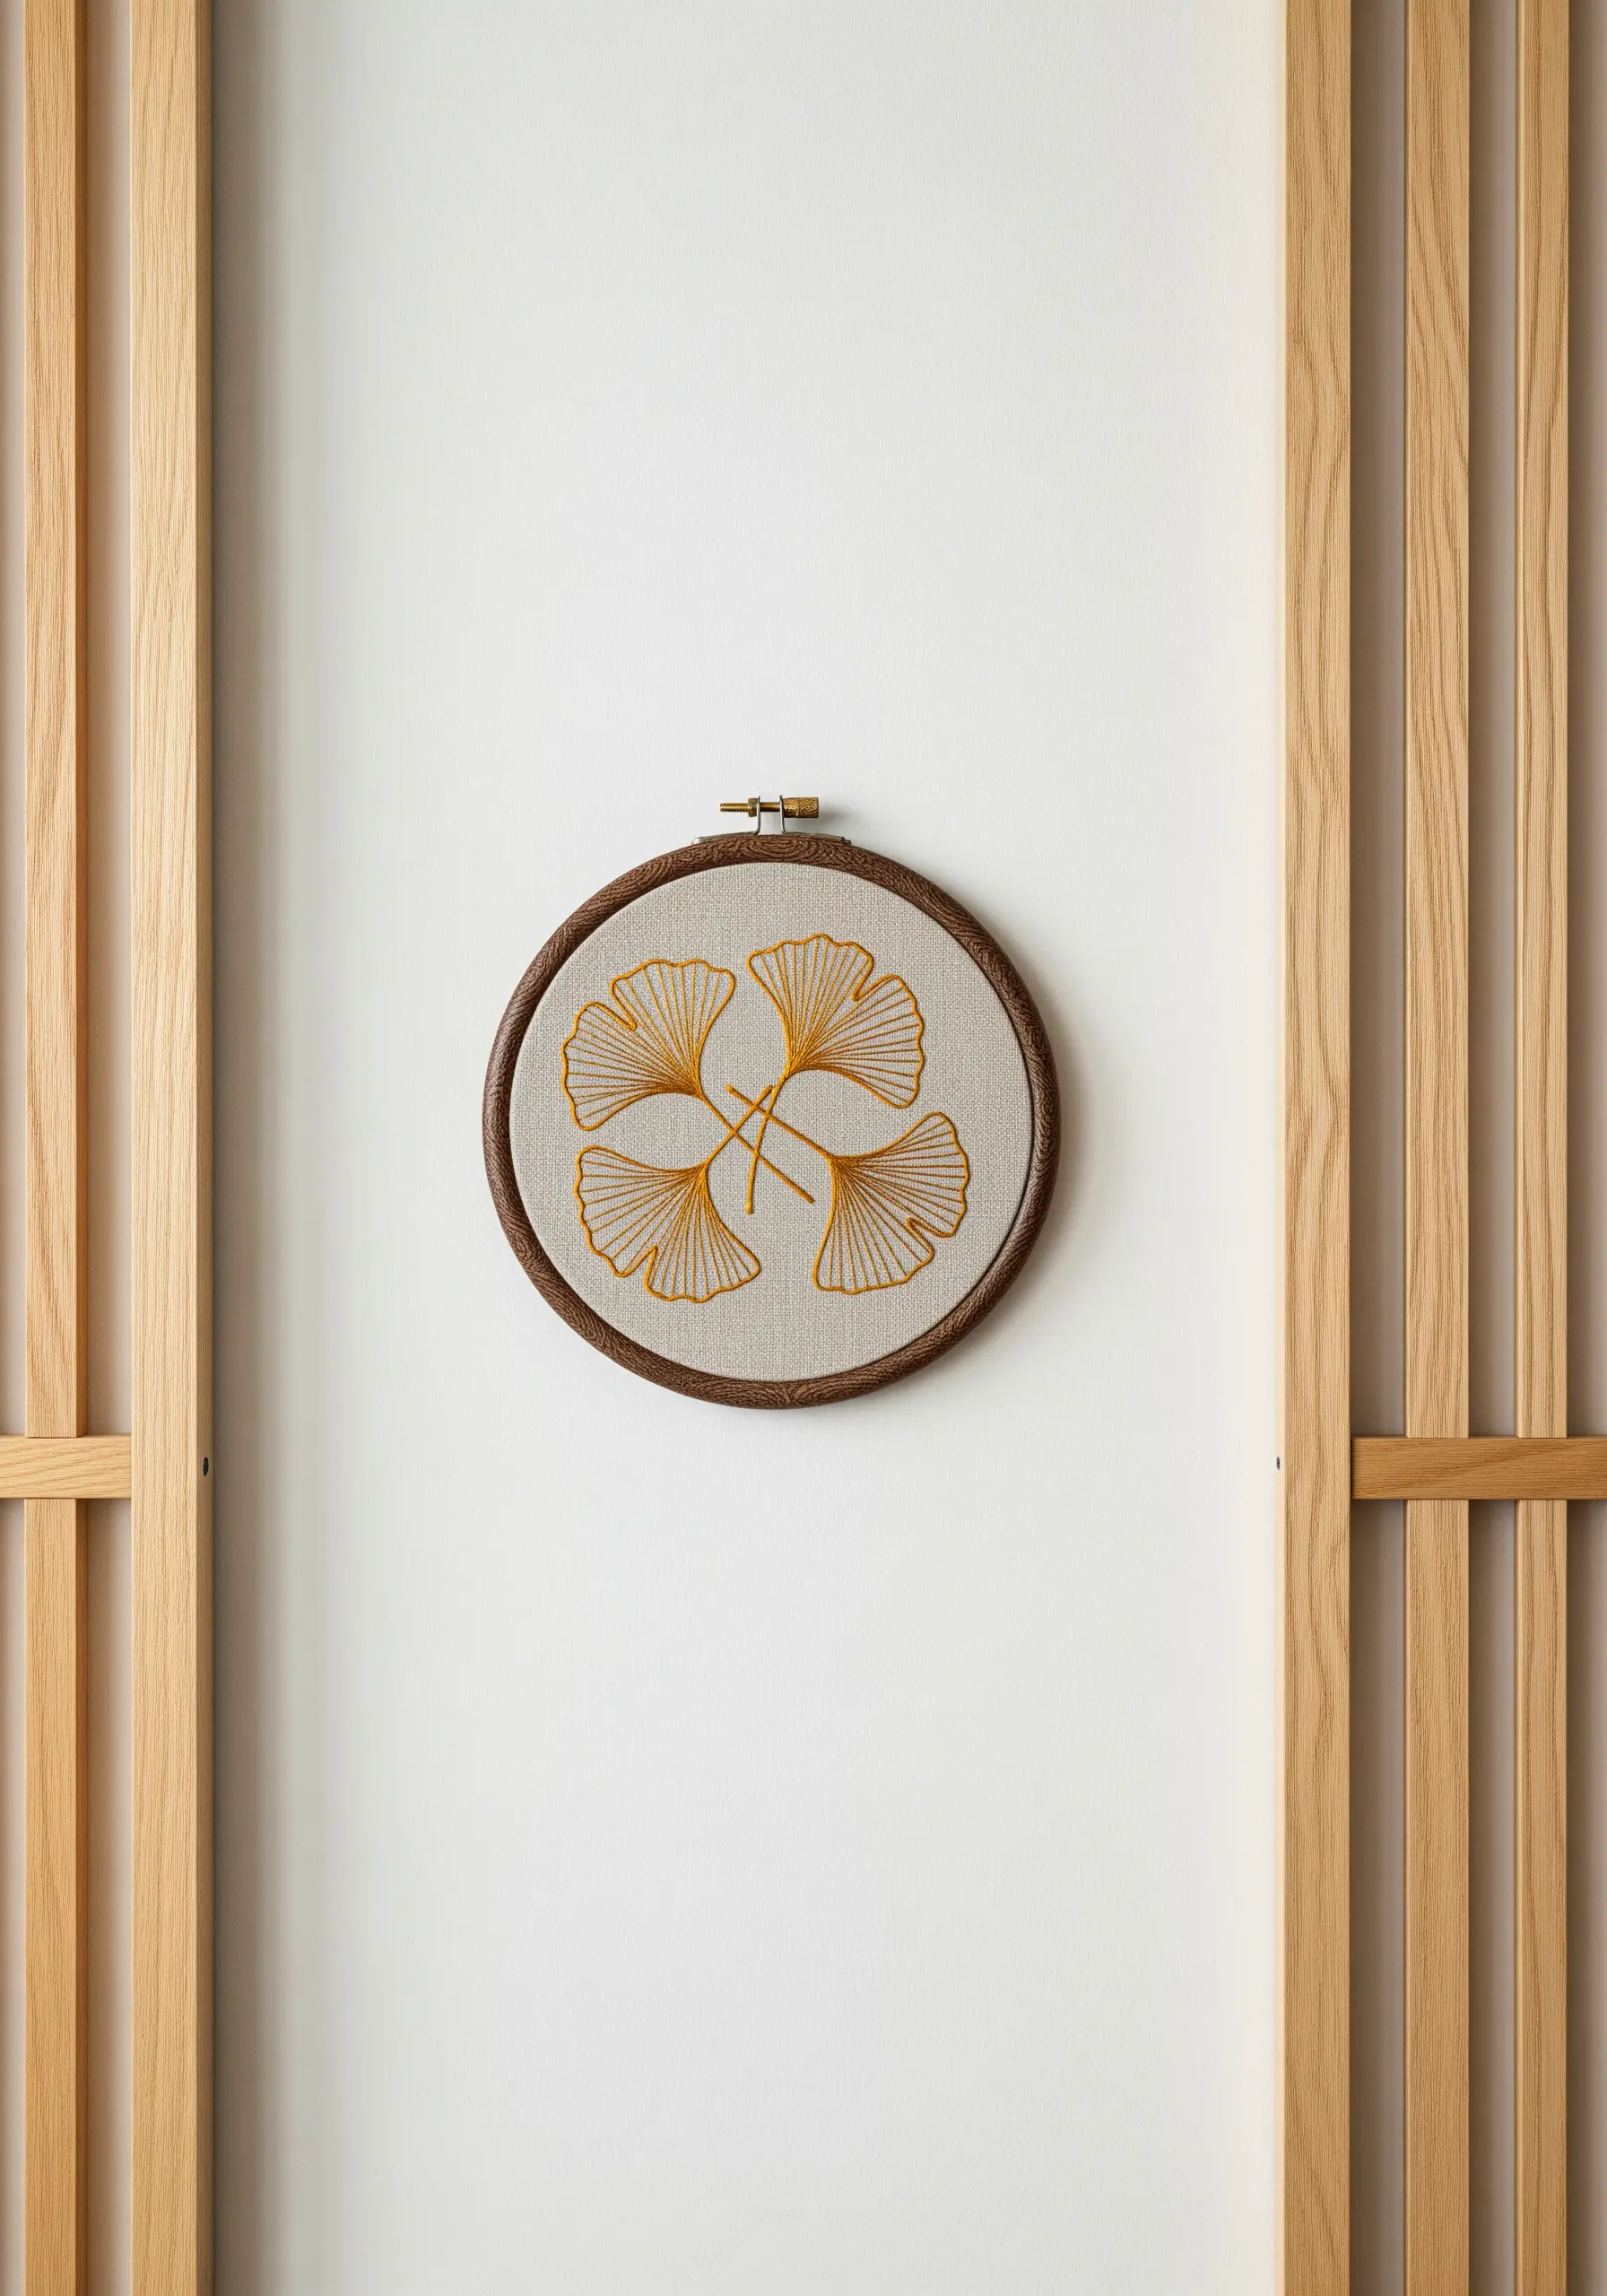
Translate the natural structure of a leaf into a graphic element by using radiating straight stitches.
For a ginkgo leaf, work all your stitches from a single anchor point at the base, fanning them out to fill the shape.
This technique not only mirrors the leaf’s veins but also creates a powerful sense of movement and energy within the design.
Stitching in a single, high-contrast color—like gold on neutral linen—amplifies the graphic impact and draws attention to the clean lines.
13. Deconstruct the Hoop for Sculptural Wall Art
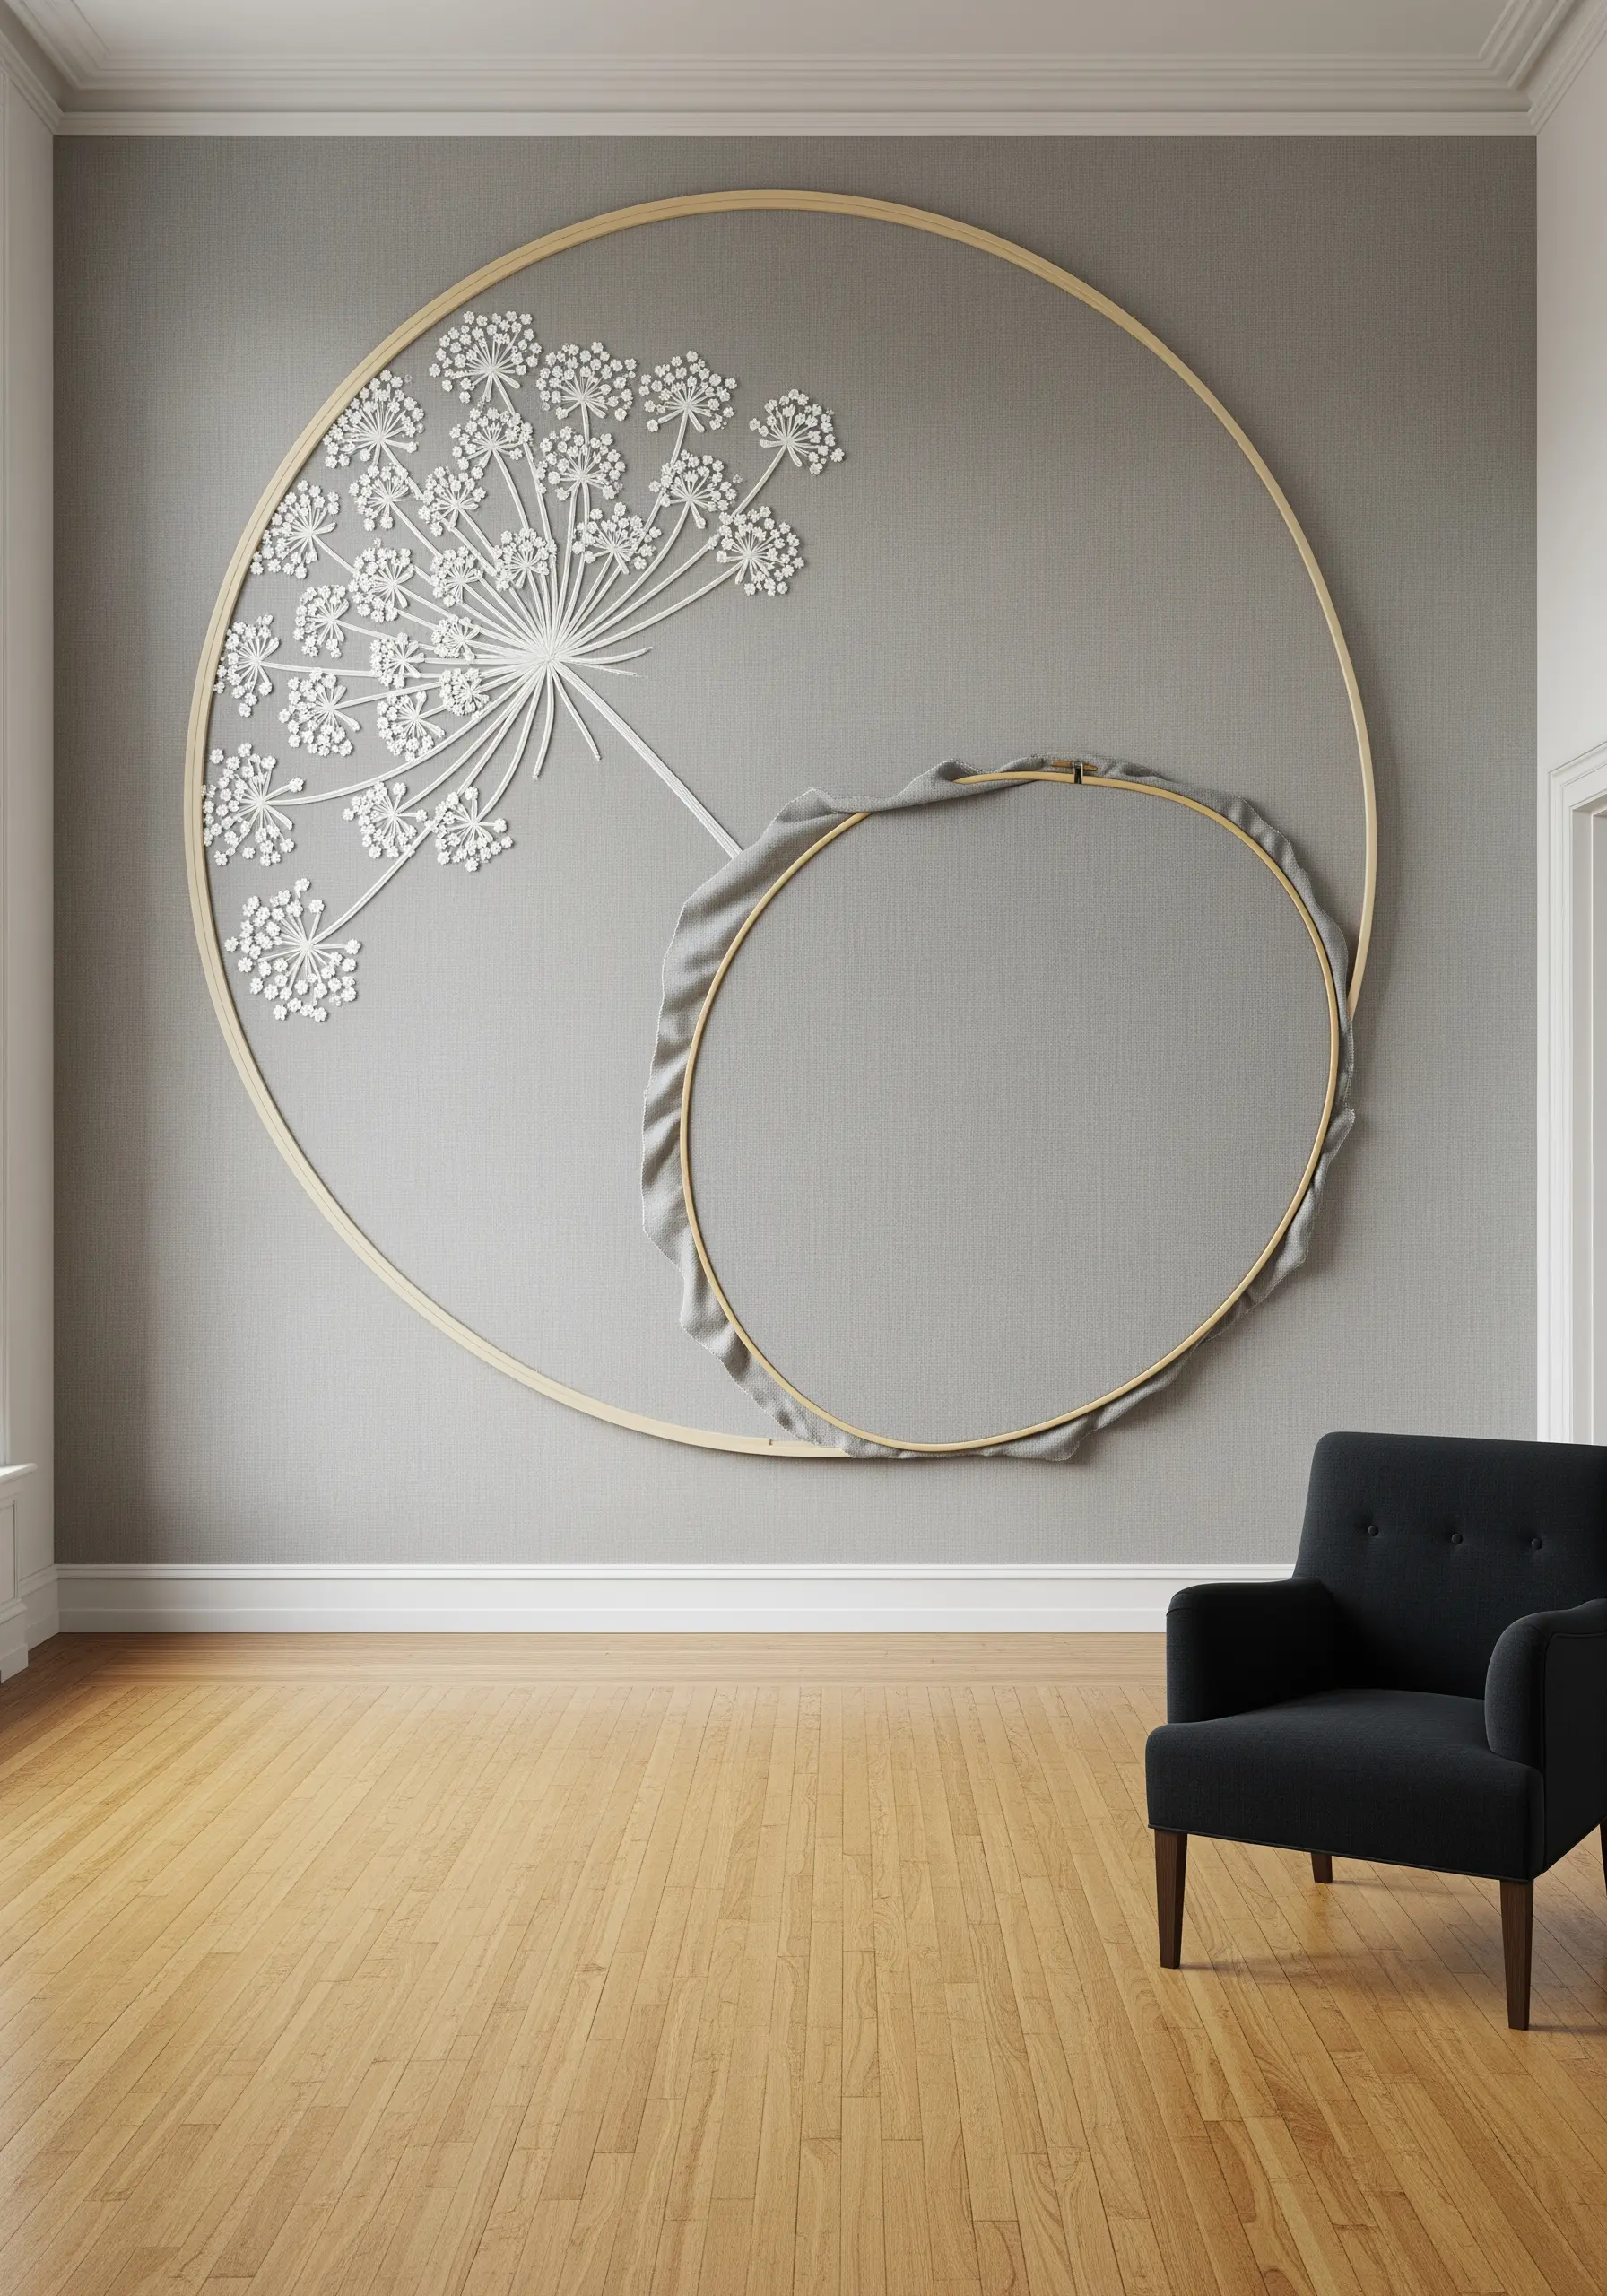
Challenge the conventional boundaries of embroidery by using the hoop as a compositional element rather than just a tool.
By stitching an oversized motif that extends beyond the inner hoop and allowing the fabric to drape loosely in a second, larger hoop, you create a piece of sculptural wall art.
This deconstructed approach adds drama and modernity, turning your textile work into a gallery-worthy installation.
The contrast between the intricately stitched flower and the raw, flowing fabric creates a compelling visual tension.
14. Capture Fleeting Light with Off-Center Placement
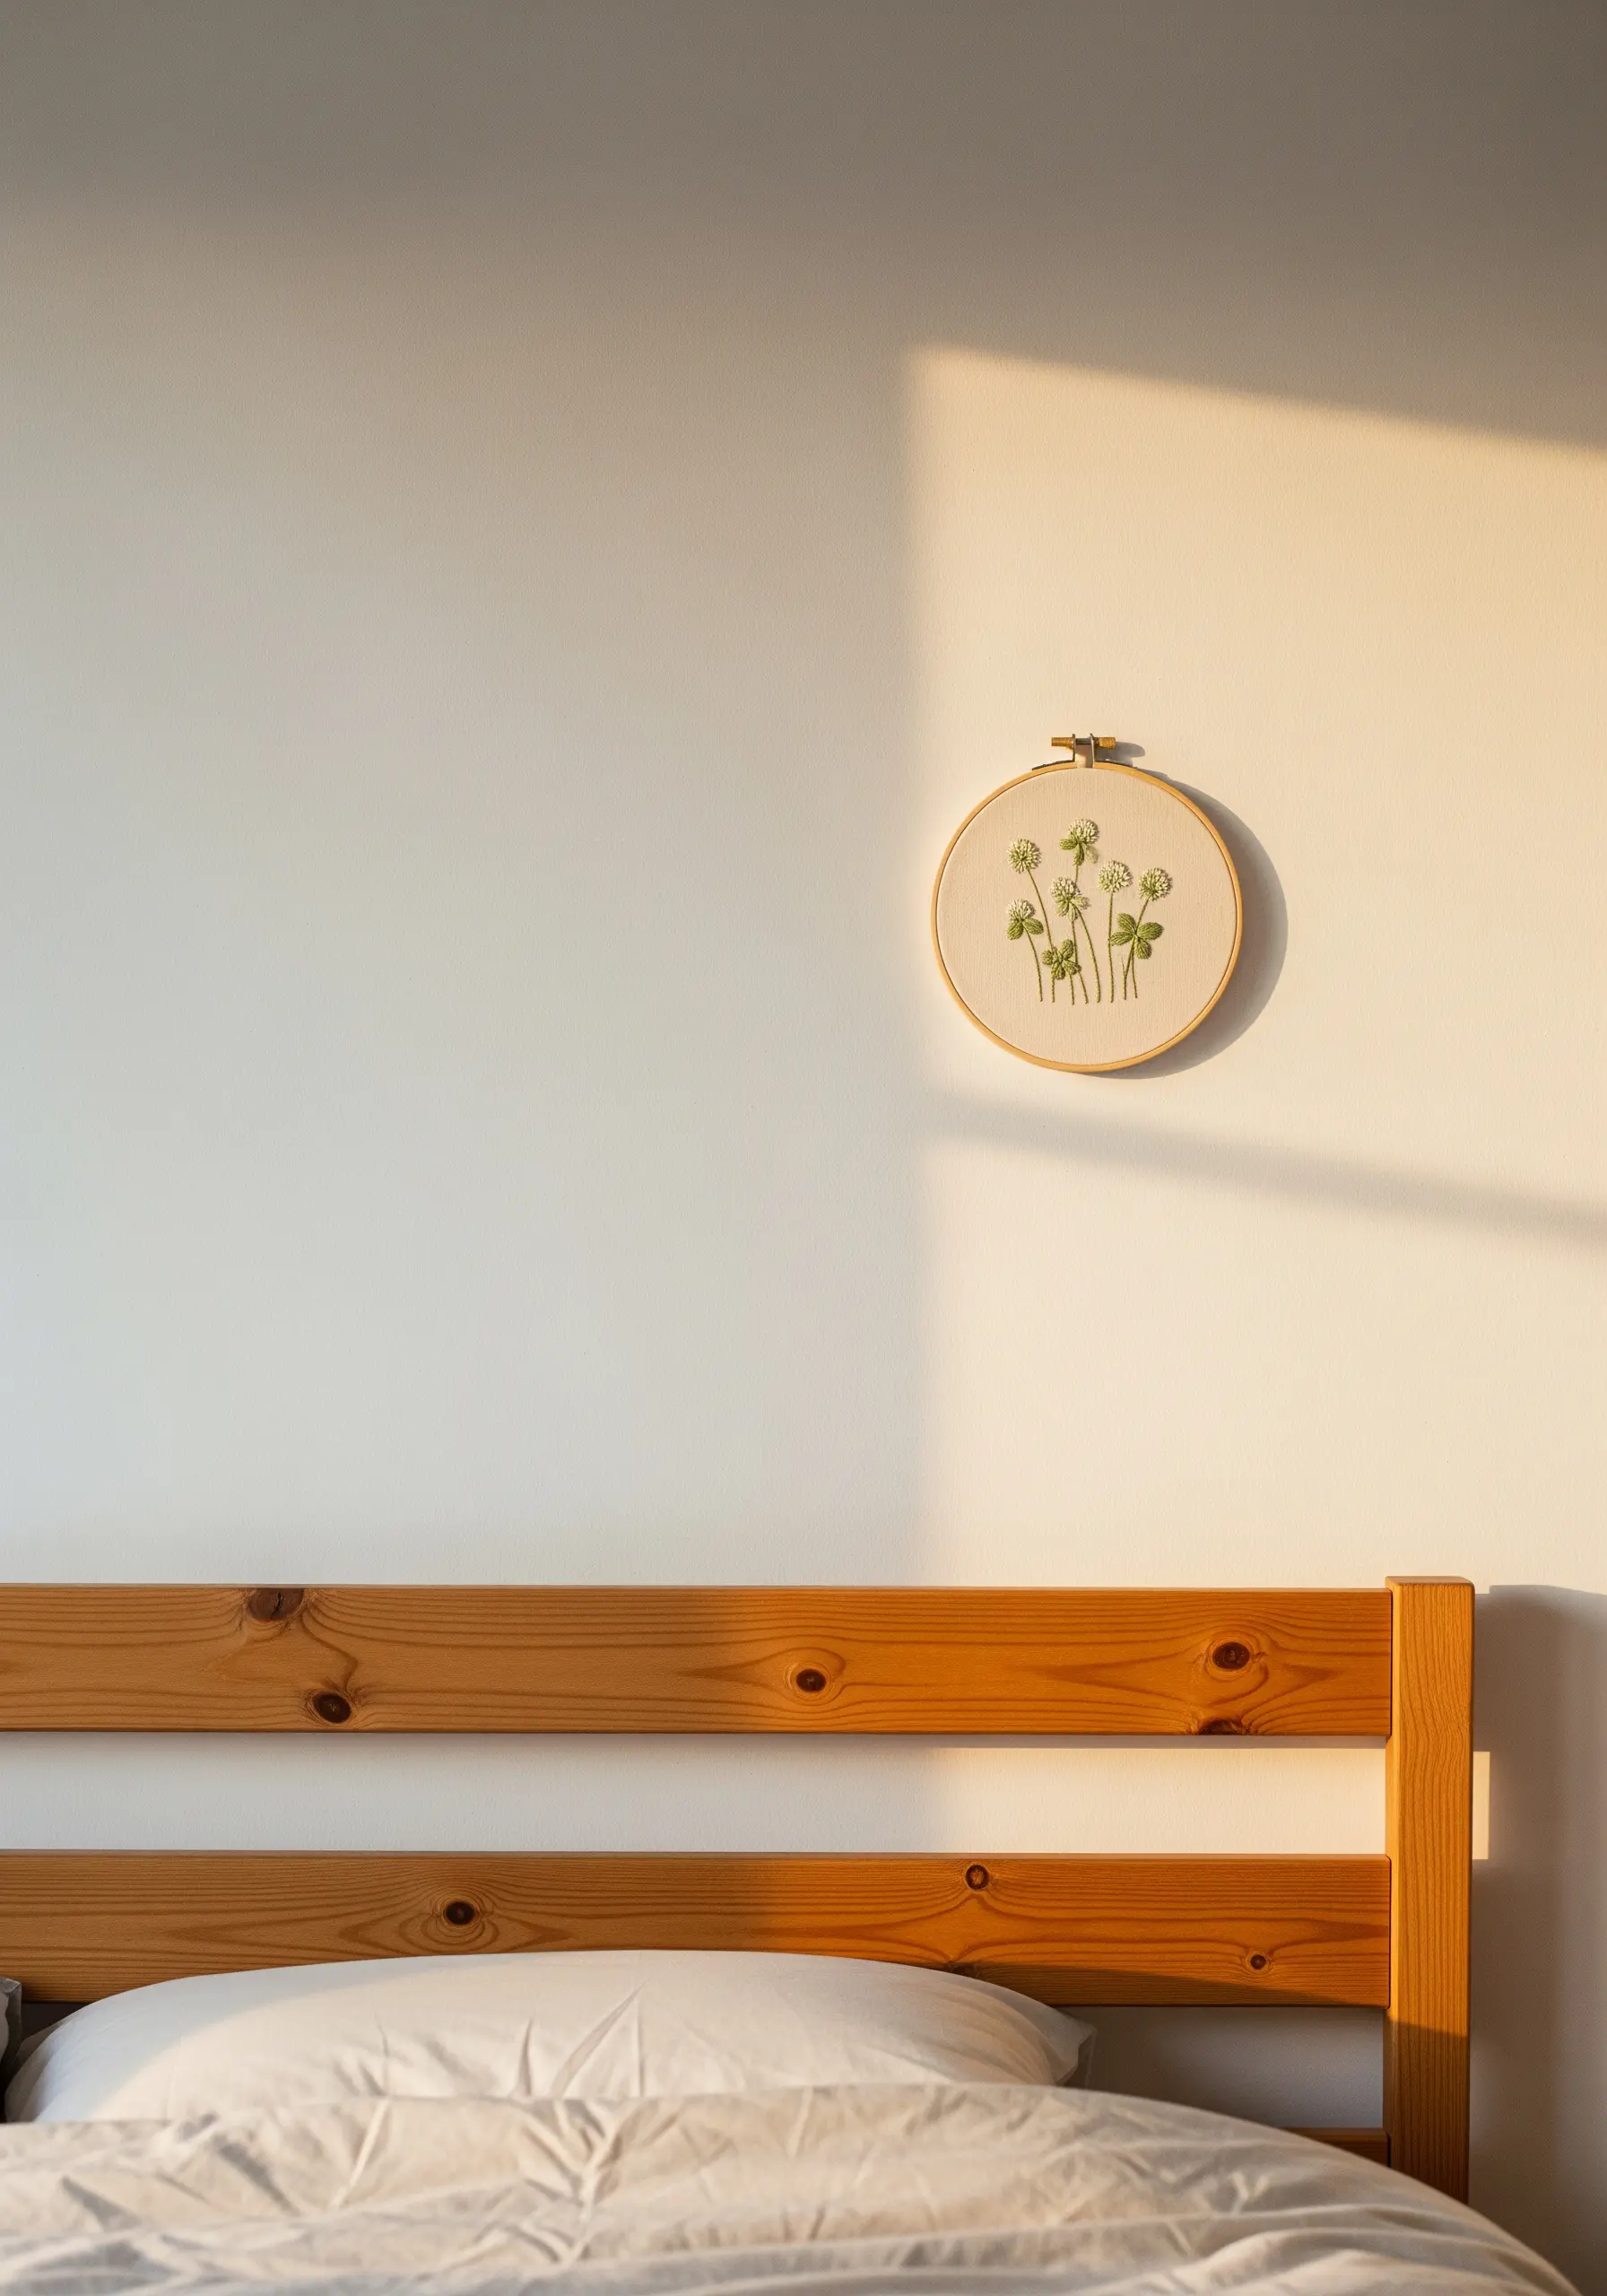
Create a more natural, candid feel by placing your small botanical motif off-center in the hoop.
This compositional choice creates a dynamic balance with the surrounding negative space, making the small cluster of stitches feel more precious and discovered, rather than formally presented.
A simple clover design, tucked into the upper quadrant of the hoop, draws the eye and invites closer inspection.
This is a powerful way to use a delicate motif to command a space far larger than itself.
15. Create Dramatic Contrast with Light-on-Dark Detail
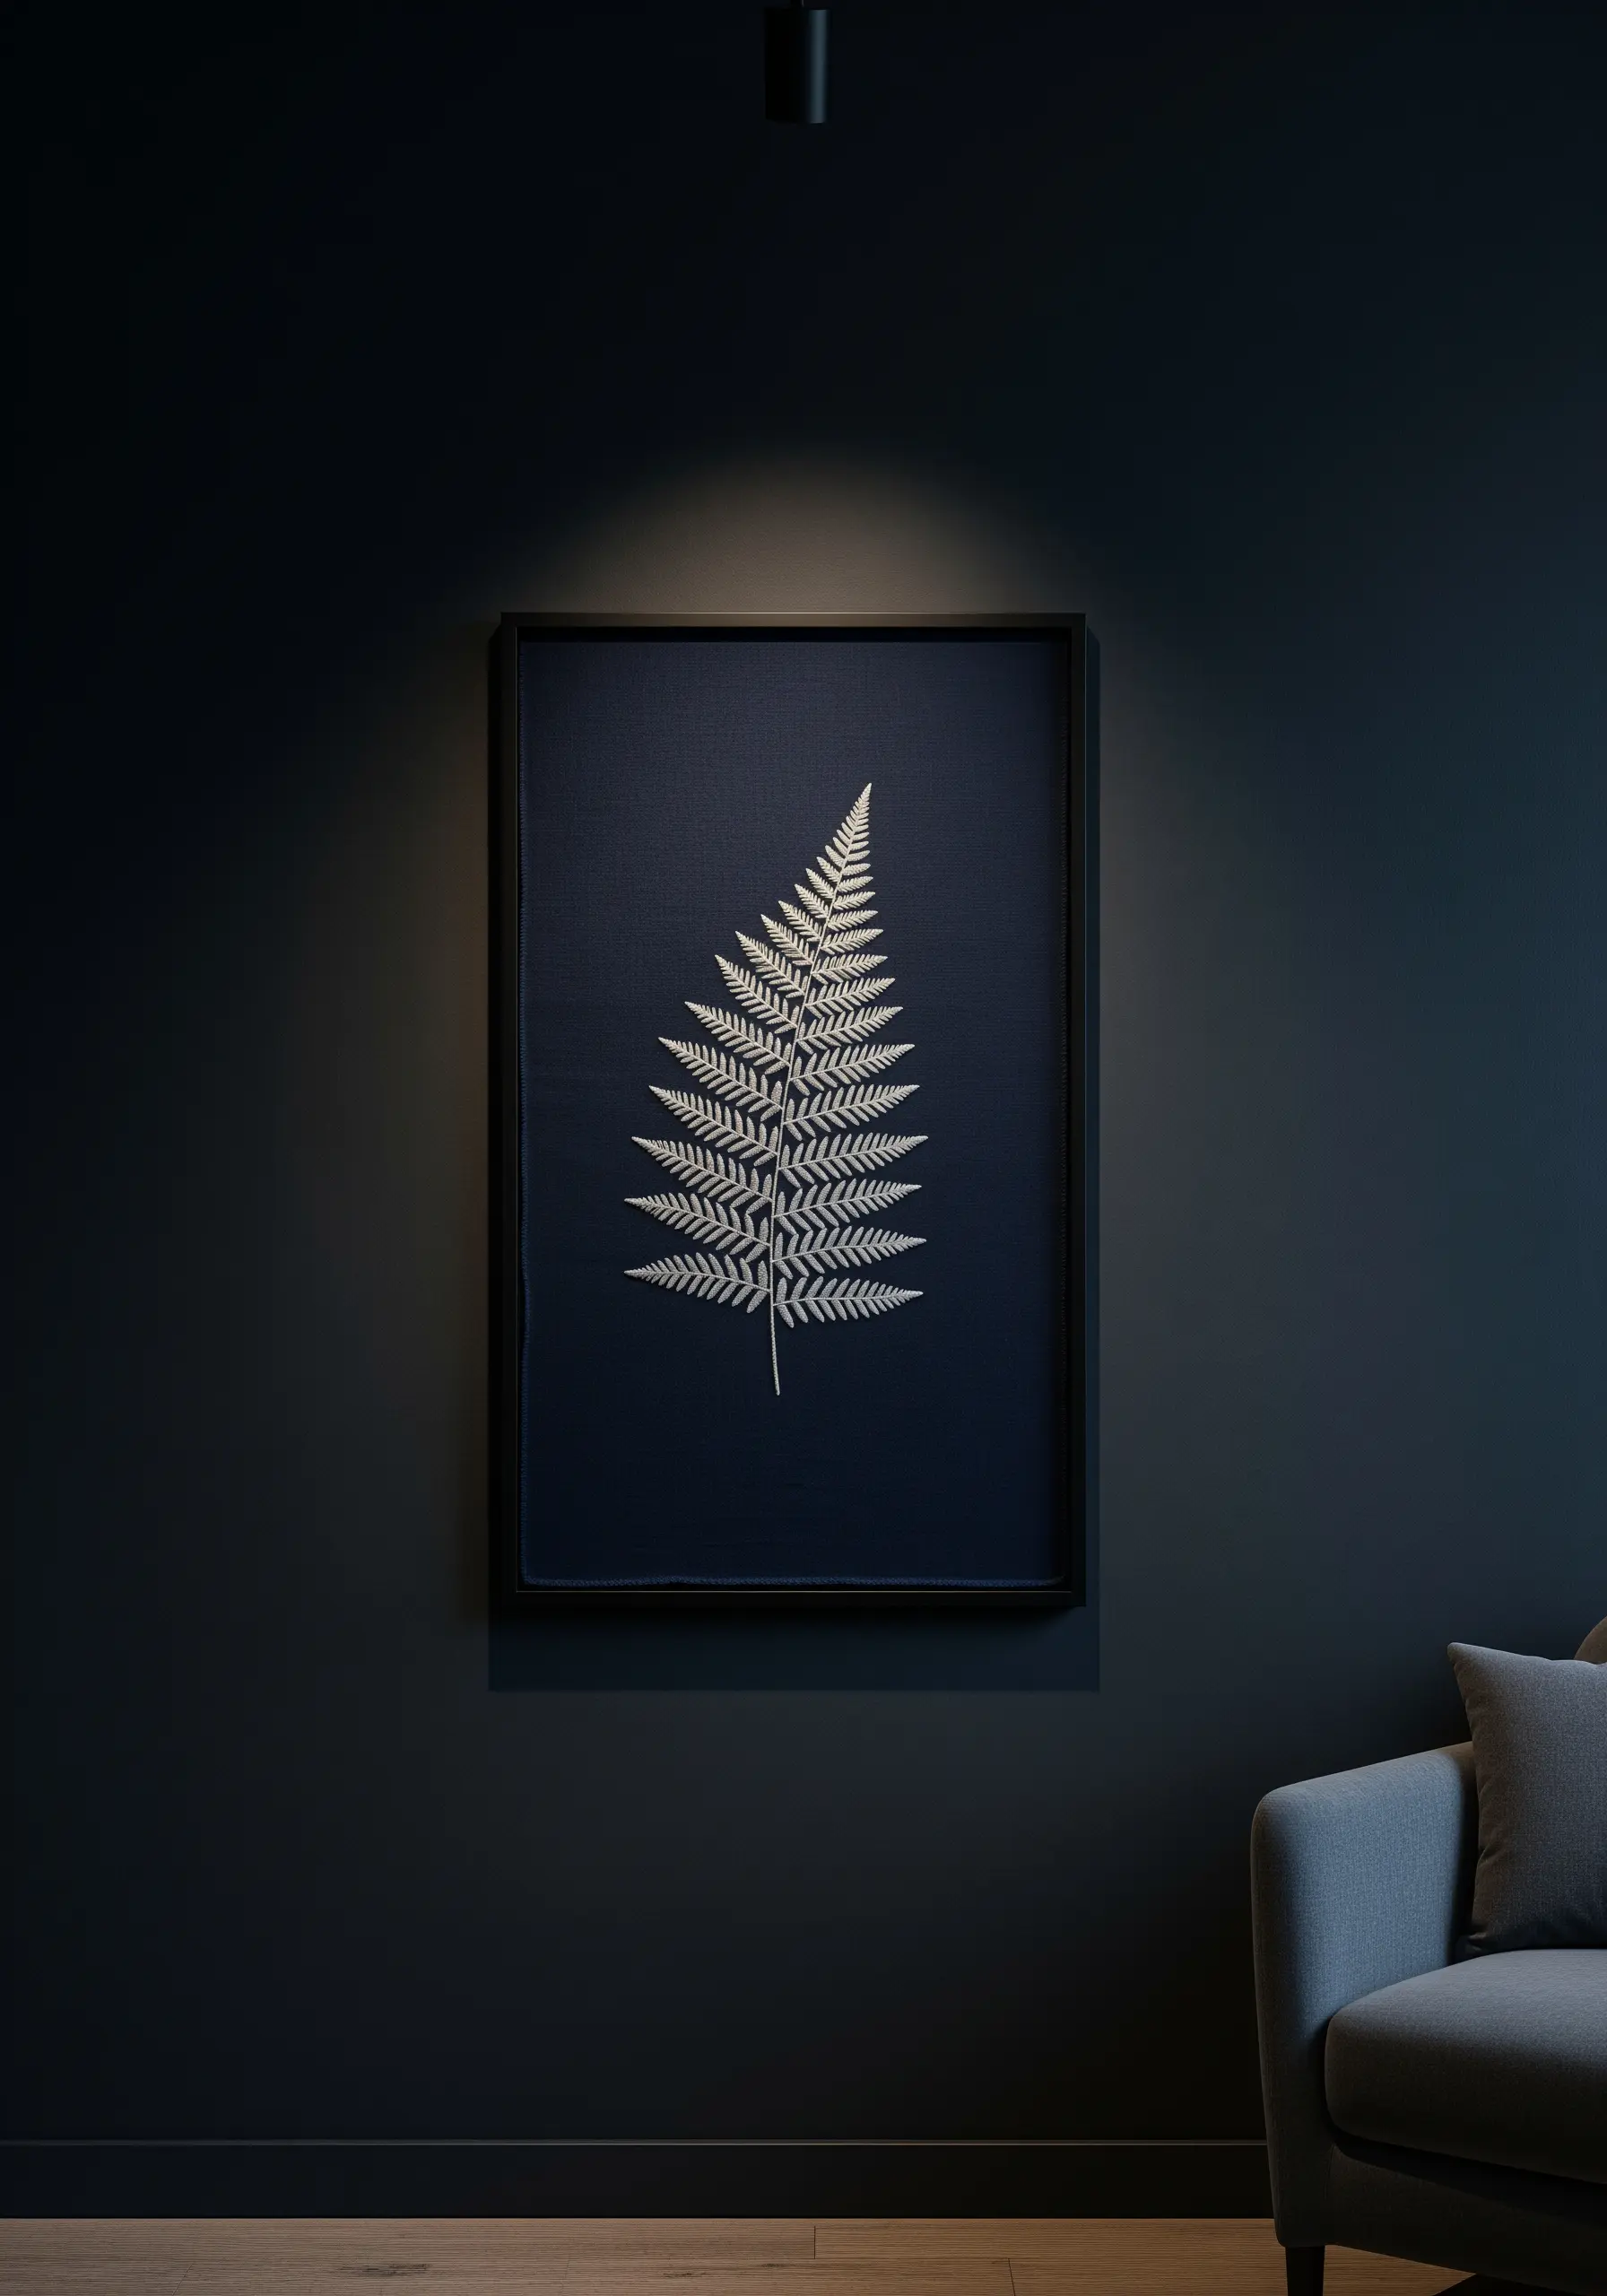
Amplify the impact of your stitching by working with a high-contrast color palette, such as bright white thread on a deep navy or black fabric.
This technique makes every single stitch stand out, highlighting the intricate detail and texture of your work.
For delicate, multi-part fern leaves, use the fishbone stitch to create a beautiful, layered effect that appears almost luminous against the dark background.
Framing the finished piece adds to the formal, dramatic presentation.
16. Modernize a Classic Motif with Simplified Lines

Reinterpret a traditional subject, like a rose, for a modern interior by stripping it down to its essential form.
Instead of dense, realistic shading, use a single color and a clean, graphic outline to capture the flower’s iconic shape.
This minimalist approach celebrates the silhouette and allows the motif to integrate seamlessly into contemporary decor styles like modern farmhouse or Scandinavian.
A whipped backstitch works perfectly here to create a raised, perfectly smooth line that defines the classic motif with confidence.
17. Build a Collection with Thematic Variations

Elevate your wall decor by creating a series of hoops that explore a single theme with subtle variations.
Instead of stitching four identical designs, vary the composition and scale within each hoop—a single stem, a cluster, a full plant.
Using hoops of different sizes adds another layer of visual interest to the vertical arrangement.
This method results in a cohesive collection that feels thoughtfully curated and more impactful than a single piece alone.
18. Introduce Sculptural Texture with Tone-on-Tone Effects
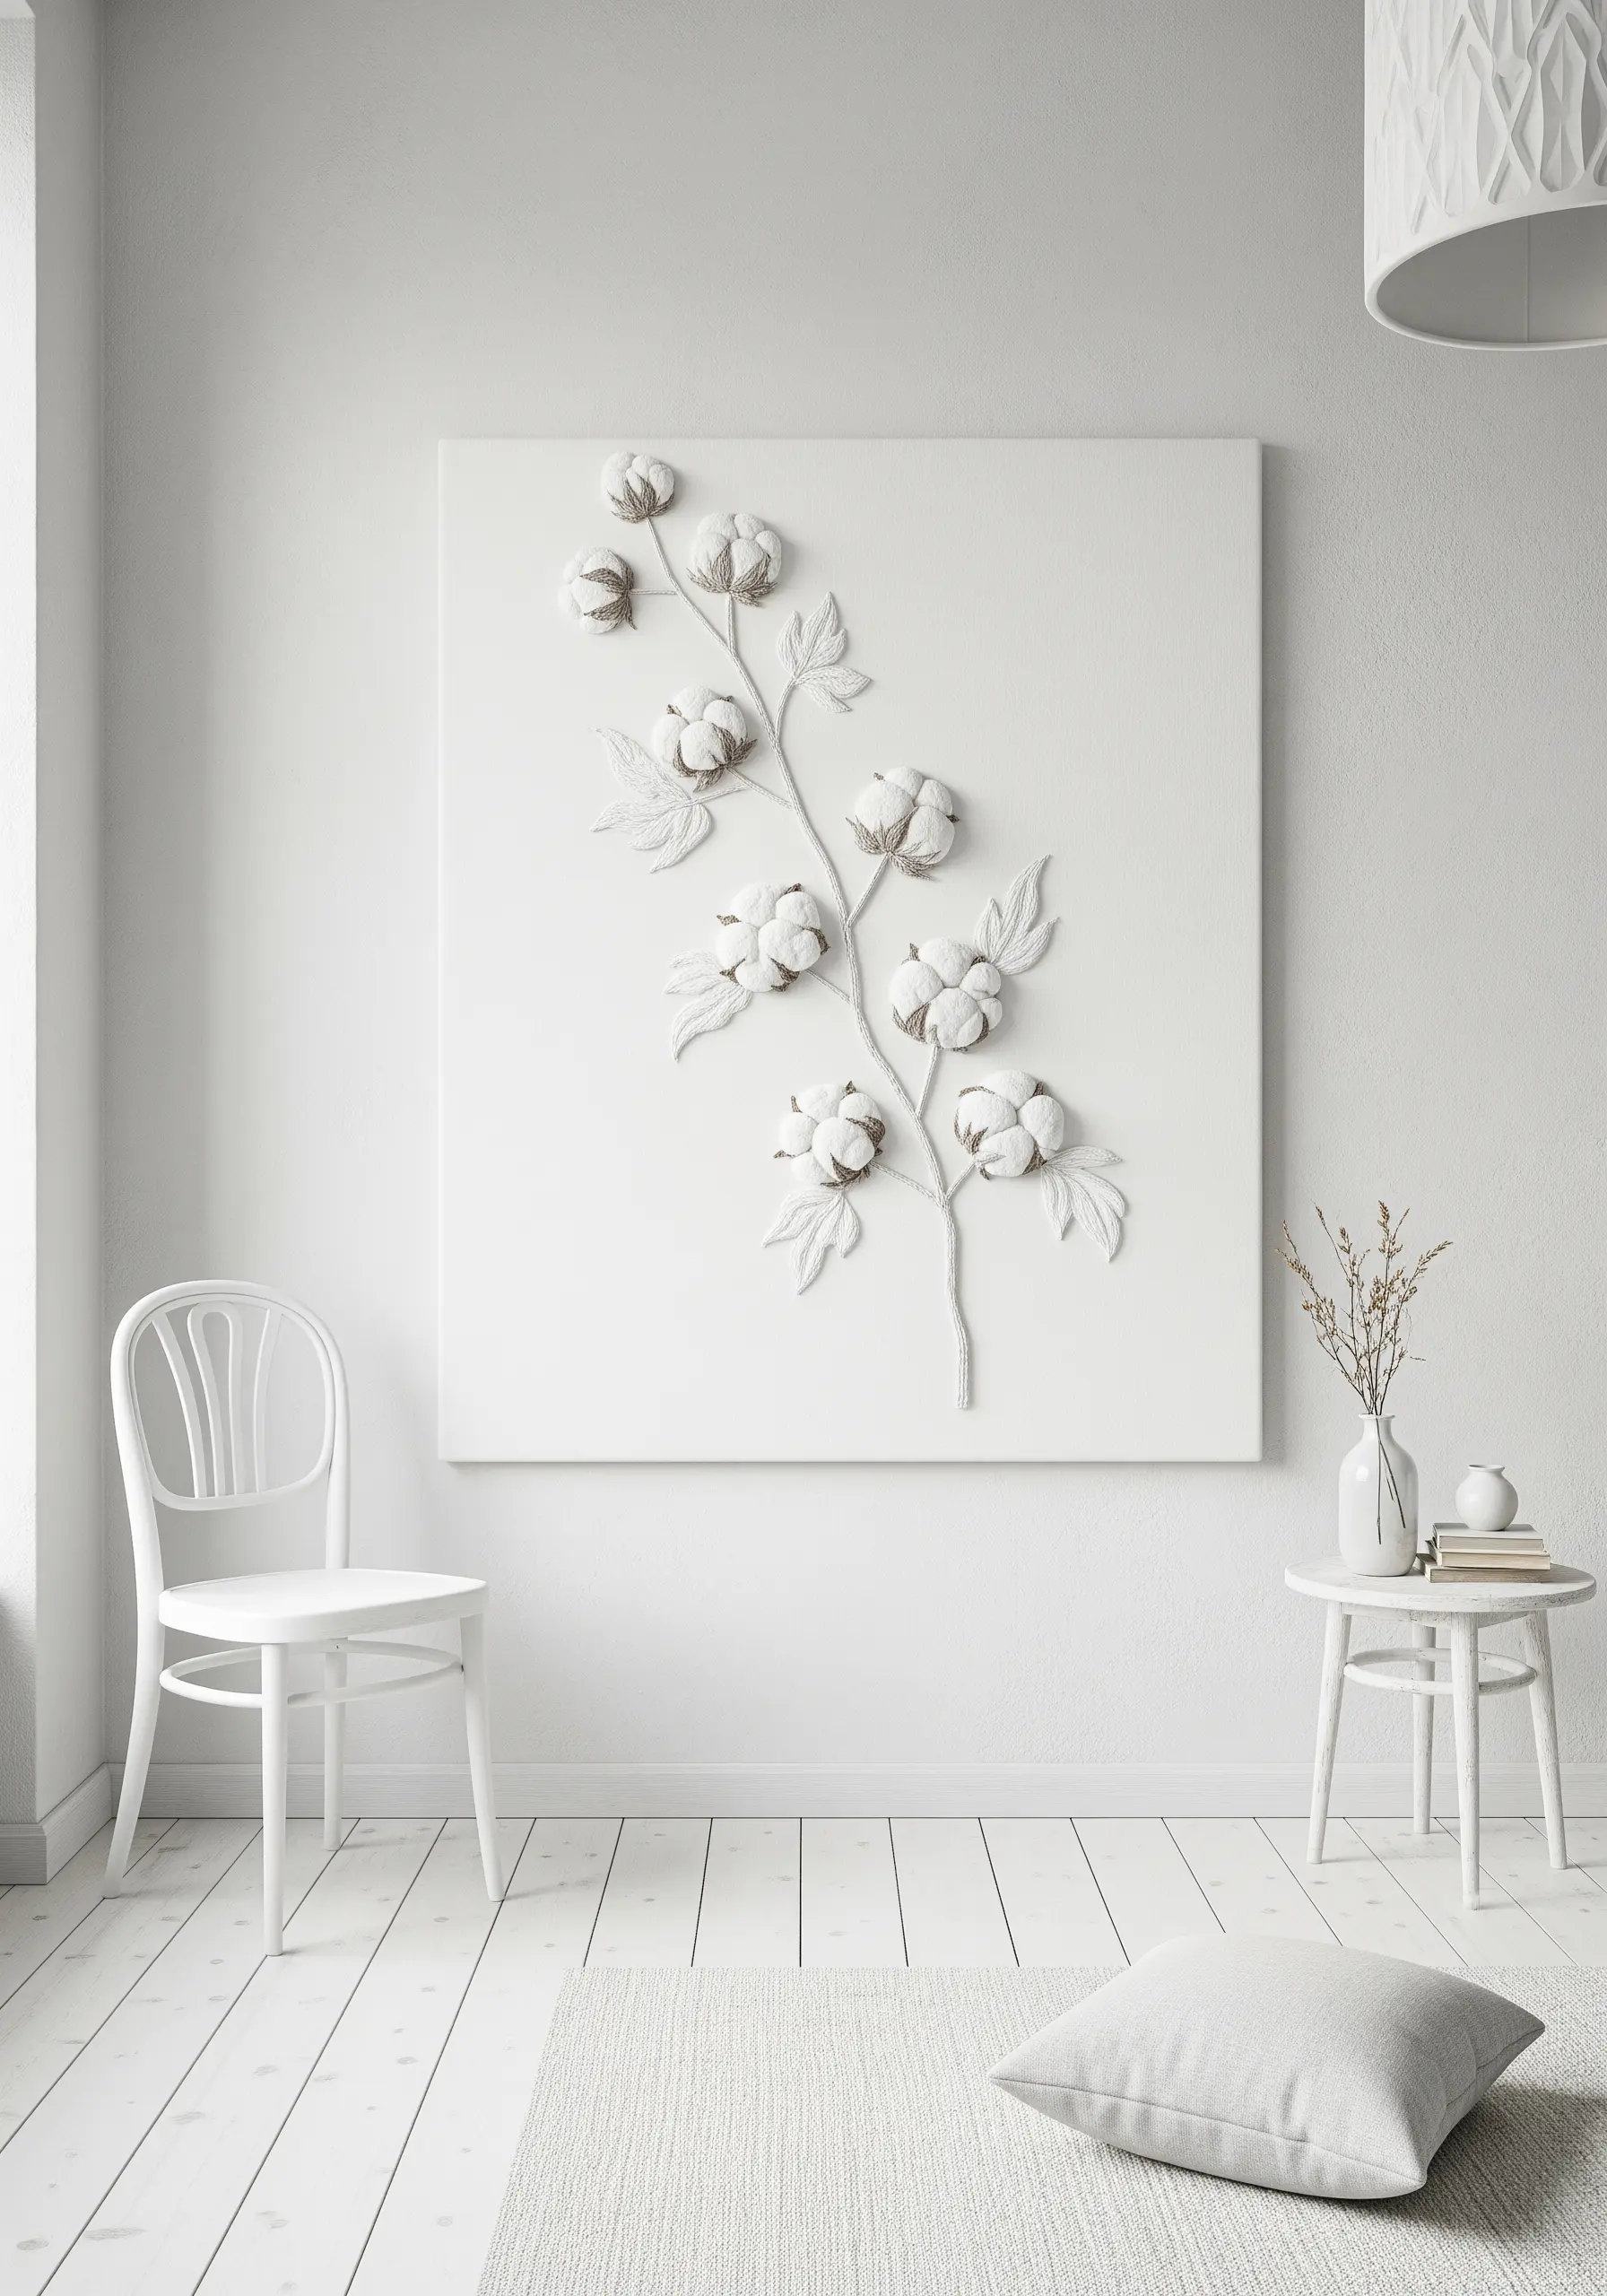
Create a sophisticated, high-end piece by focusing entirely on texture rather than color.
By using white or ivory thread on a matching white canvas, you achieve subtle tone-on-tone effects where the play of light and shadow becomes the main feature.
Use highly dimensional stitches for the cotton bolls, such as a padded satin stitch or tufted turkey work, to make them physically pop from the surface.
This technique results in a sculptural, tactile artwork that is both minimal and incredibly rich.


