

It’s easy to feel stuck in a creative rut, repeating the same stitches and patterns. You may be wondering how to make your work feel less like a hobby and more like art. The answer isn’t in complex techniques or expensive supplies, but in small, intentional shifts in how you approach your craft.
Think about texture, dimension, and context. A simple switch from satin stitch to a bullion knot can transform a flat flower into a sculptural element. Embroidering on an unexpected surface, like felt or leather, instantly adds a layer of sophistication. It’s about seeing the potential in every stitch and every material.
This collection is designed to be your guide. Each idea is a starting point—a specific technique or material choice explained, so you can see not just what to do, but why it works. It’s time to move beyond the pattern and begin creating pieces that feel thoughtful, polished, and uniquely yours.
1. Create a Meadow Scene with Stitch Layering
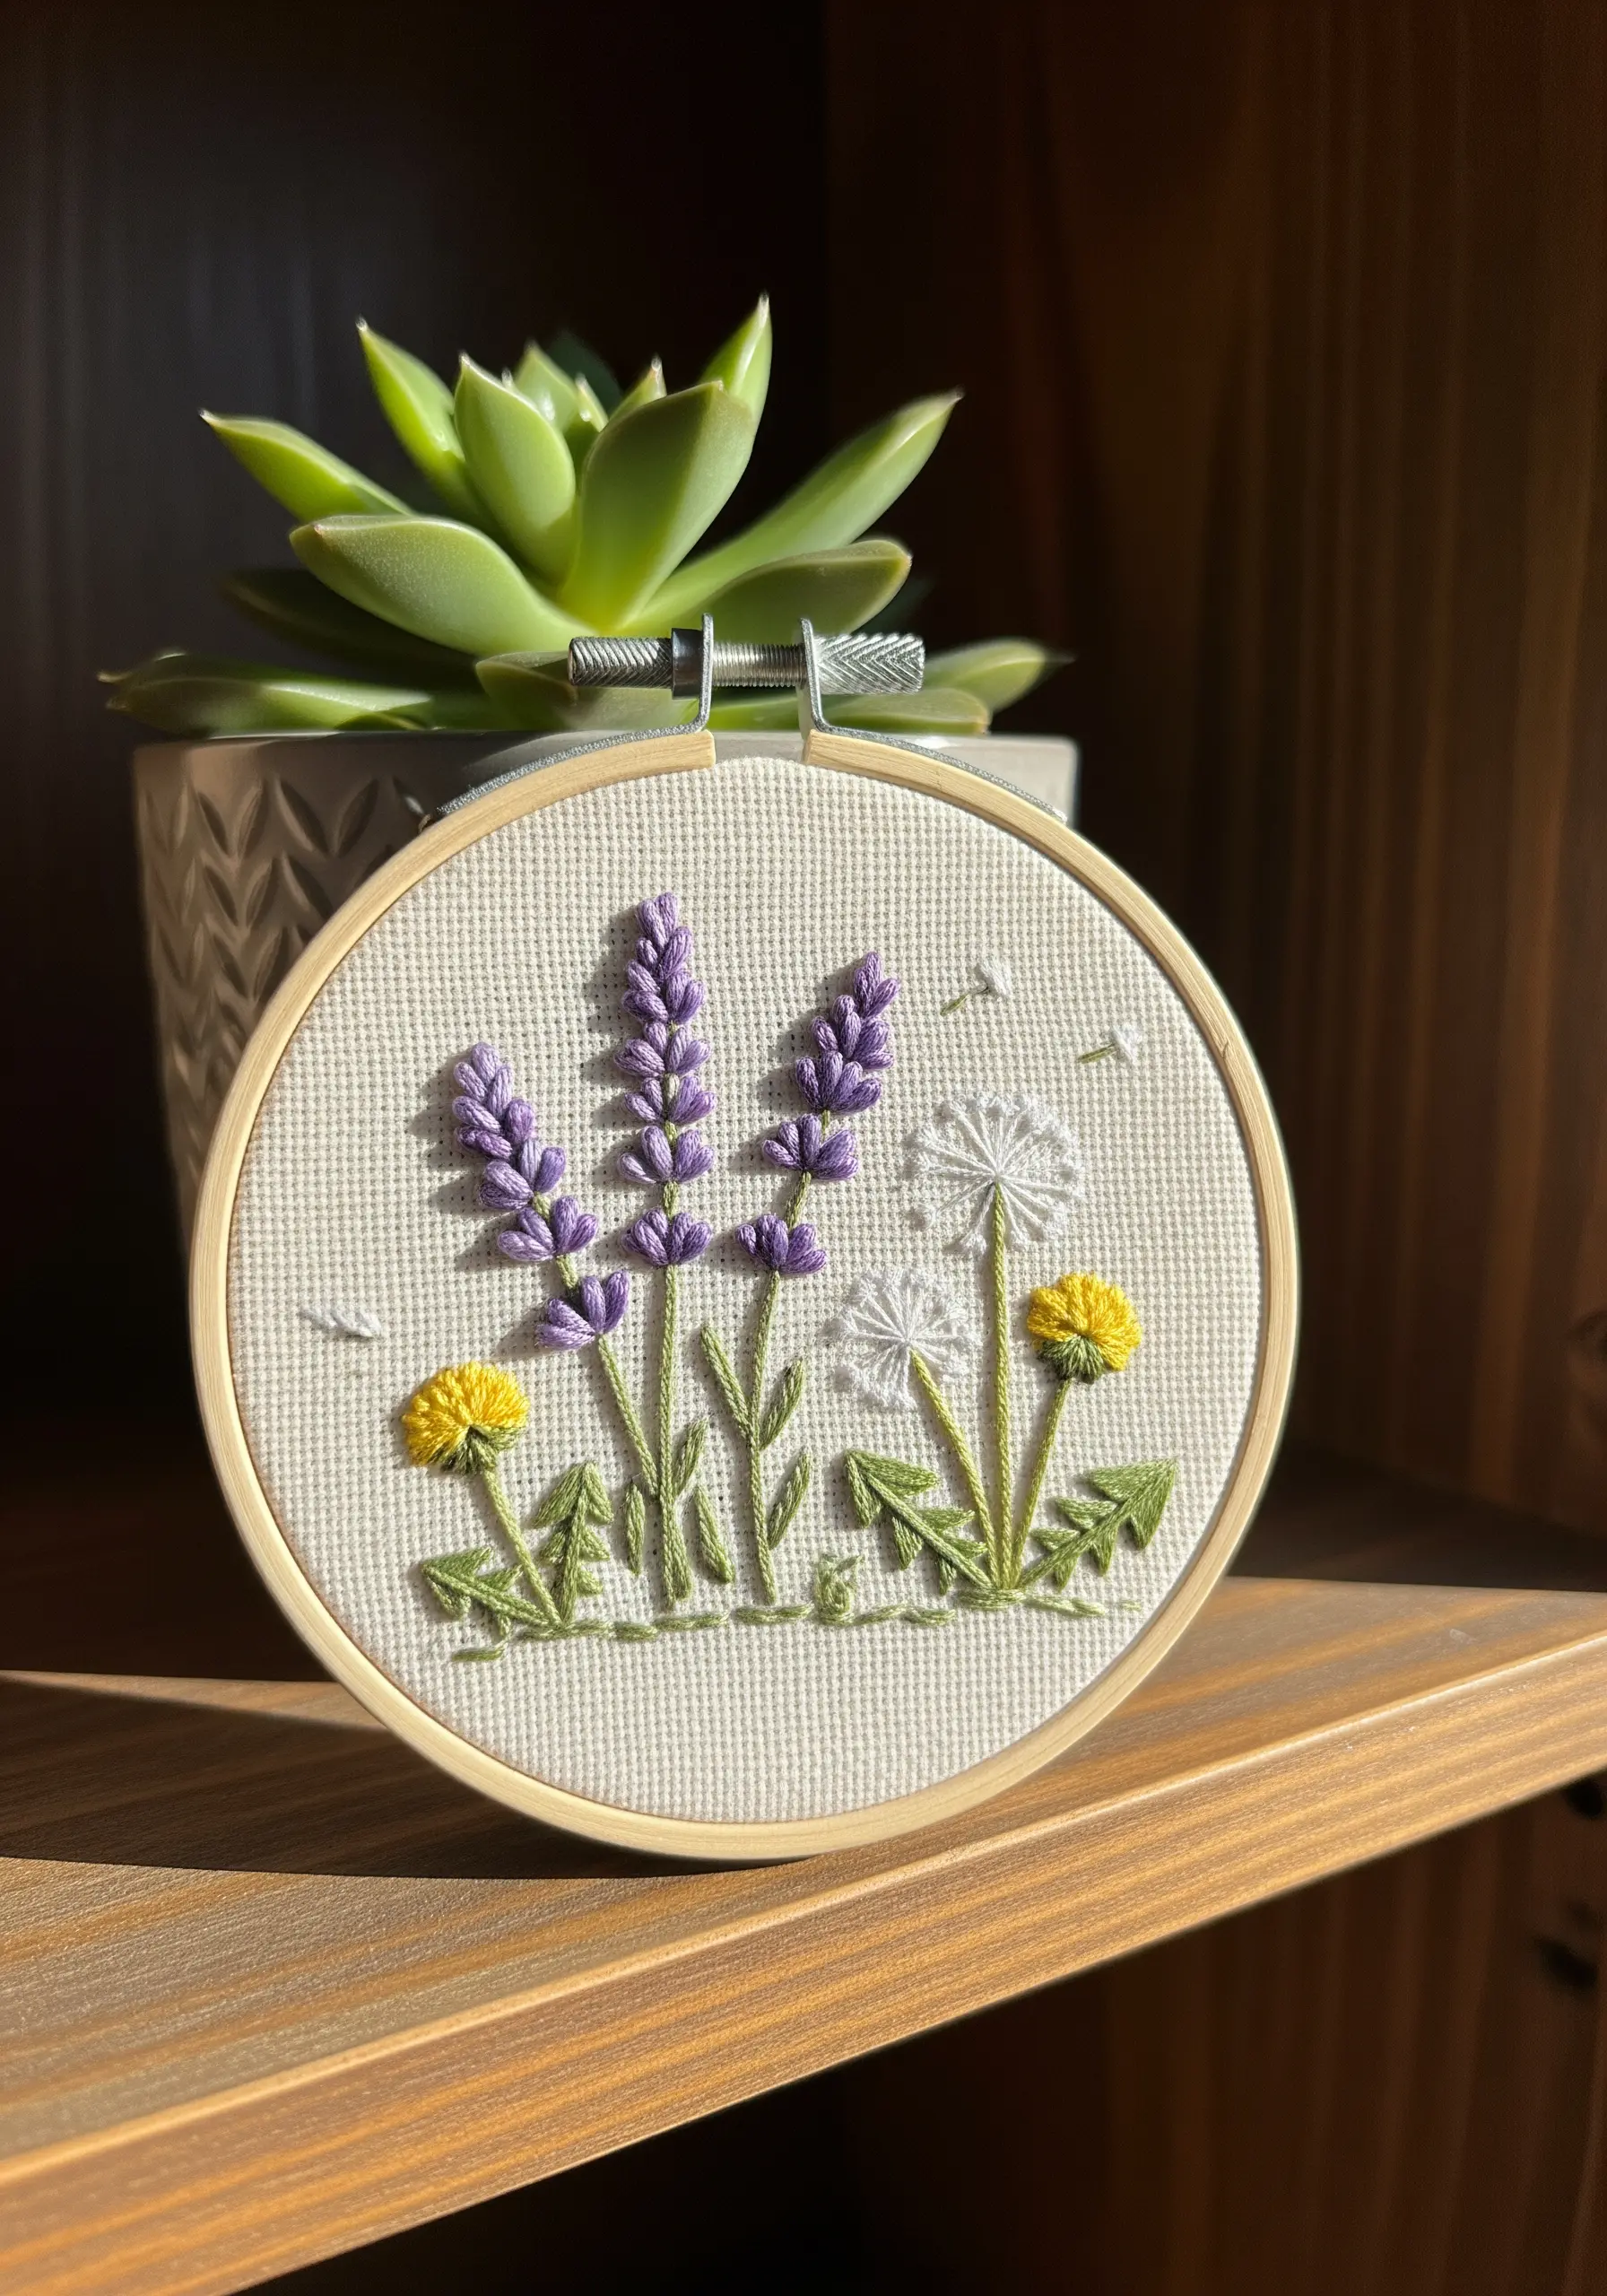
Give your lavender dimension by using bullion knots or raised stem stitches instead of flat satin stitches; this makes the blossoms appear fuller and more realistic.
For the dandelions, use single, detached chain stitches for the white seed heads to create a light, airy texture that contrasts with the denser lavender.
Choose an evenweave fabric like Aida or linen. Its grid-like structure helps you maintain consistent stitch spacing for cleaner stems and leaves, creating a more professional finish for your organic embroidery designs.
2. Stitch Geometric Patterns on Felt Coasters

Use felt for functional pieces like coasters—it doesn’t fray, so you can leave the edges raw for a clean, modern look.
To achieve sharp geometric lines, lightly draw your pattern with a water-soluble fabric marker before you begin stitching.
A simple running stitch creates this effect beautifully. Focus on keeping your stitch length and the space between each stitch perfectly even. This consistency is what transforms a simple stitch into a striking design.
These make for excellent small handmade projects that double as thoughtful gifts.
3. Weave a Sunset Wall Hanging with Mixed Fibers
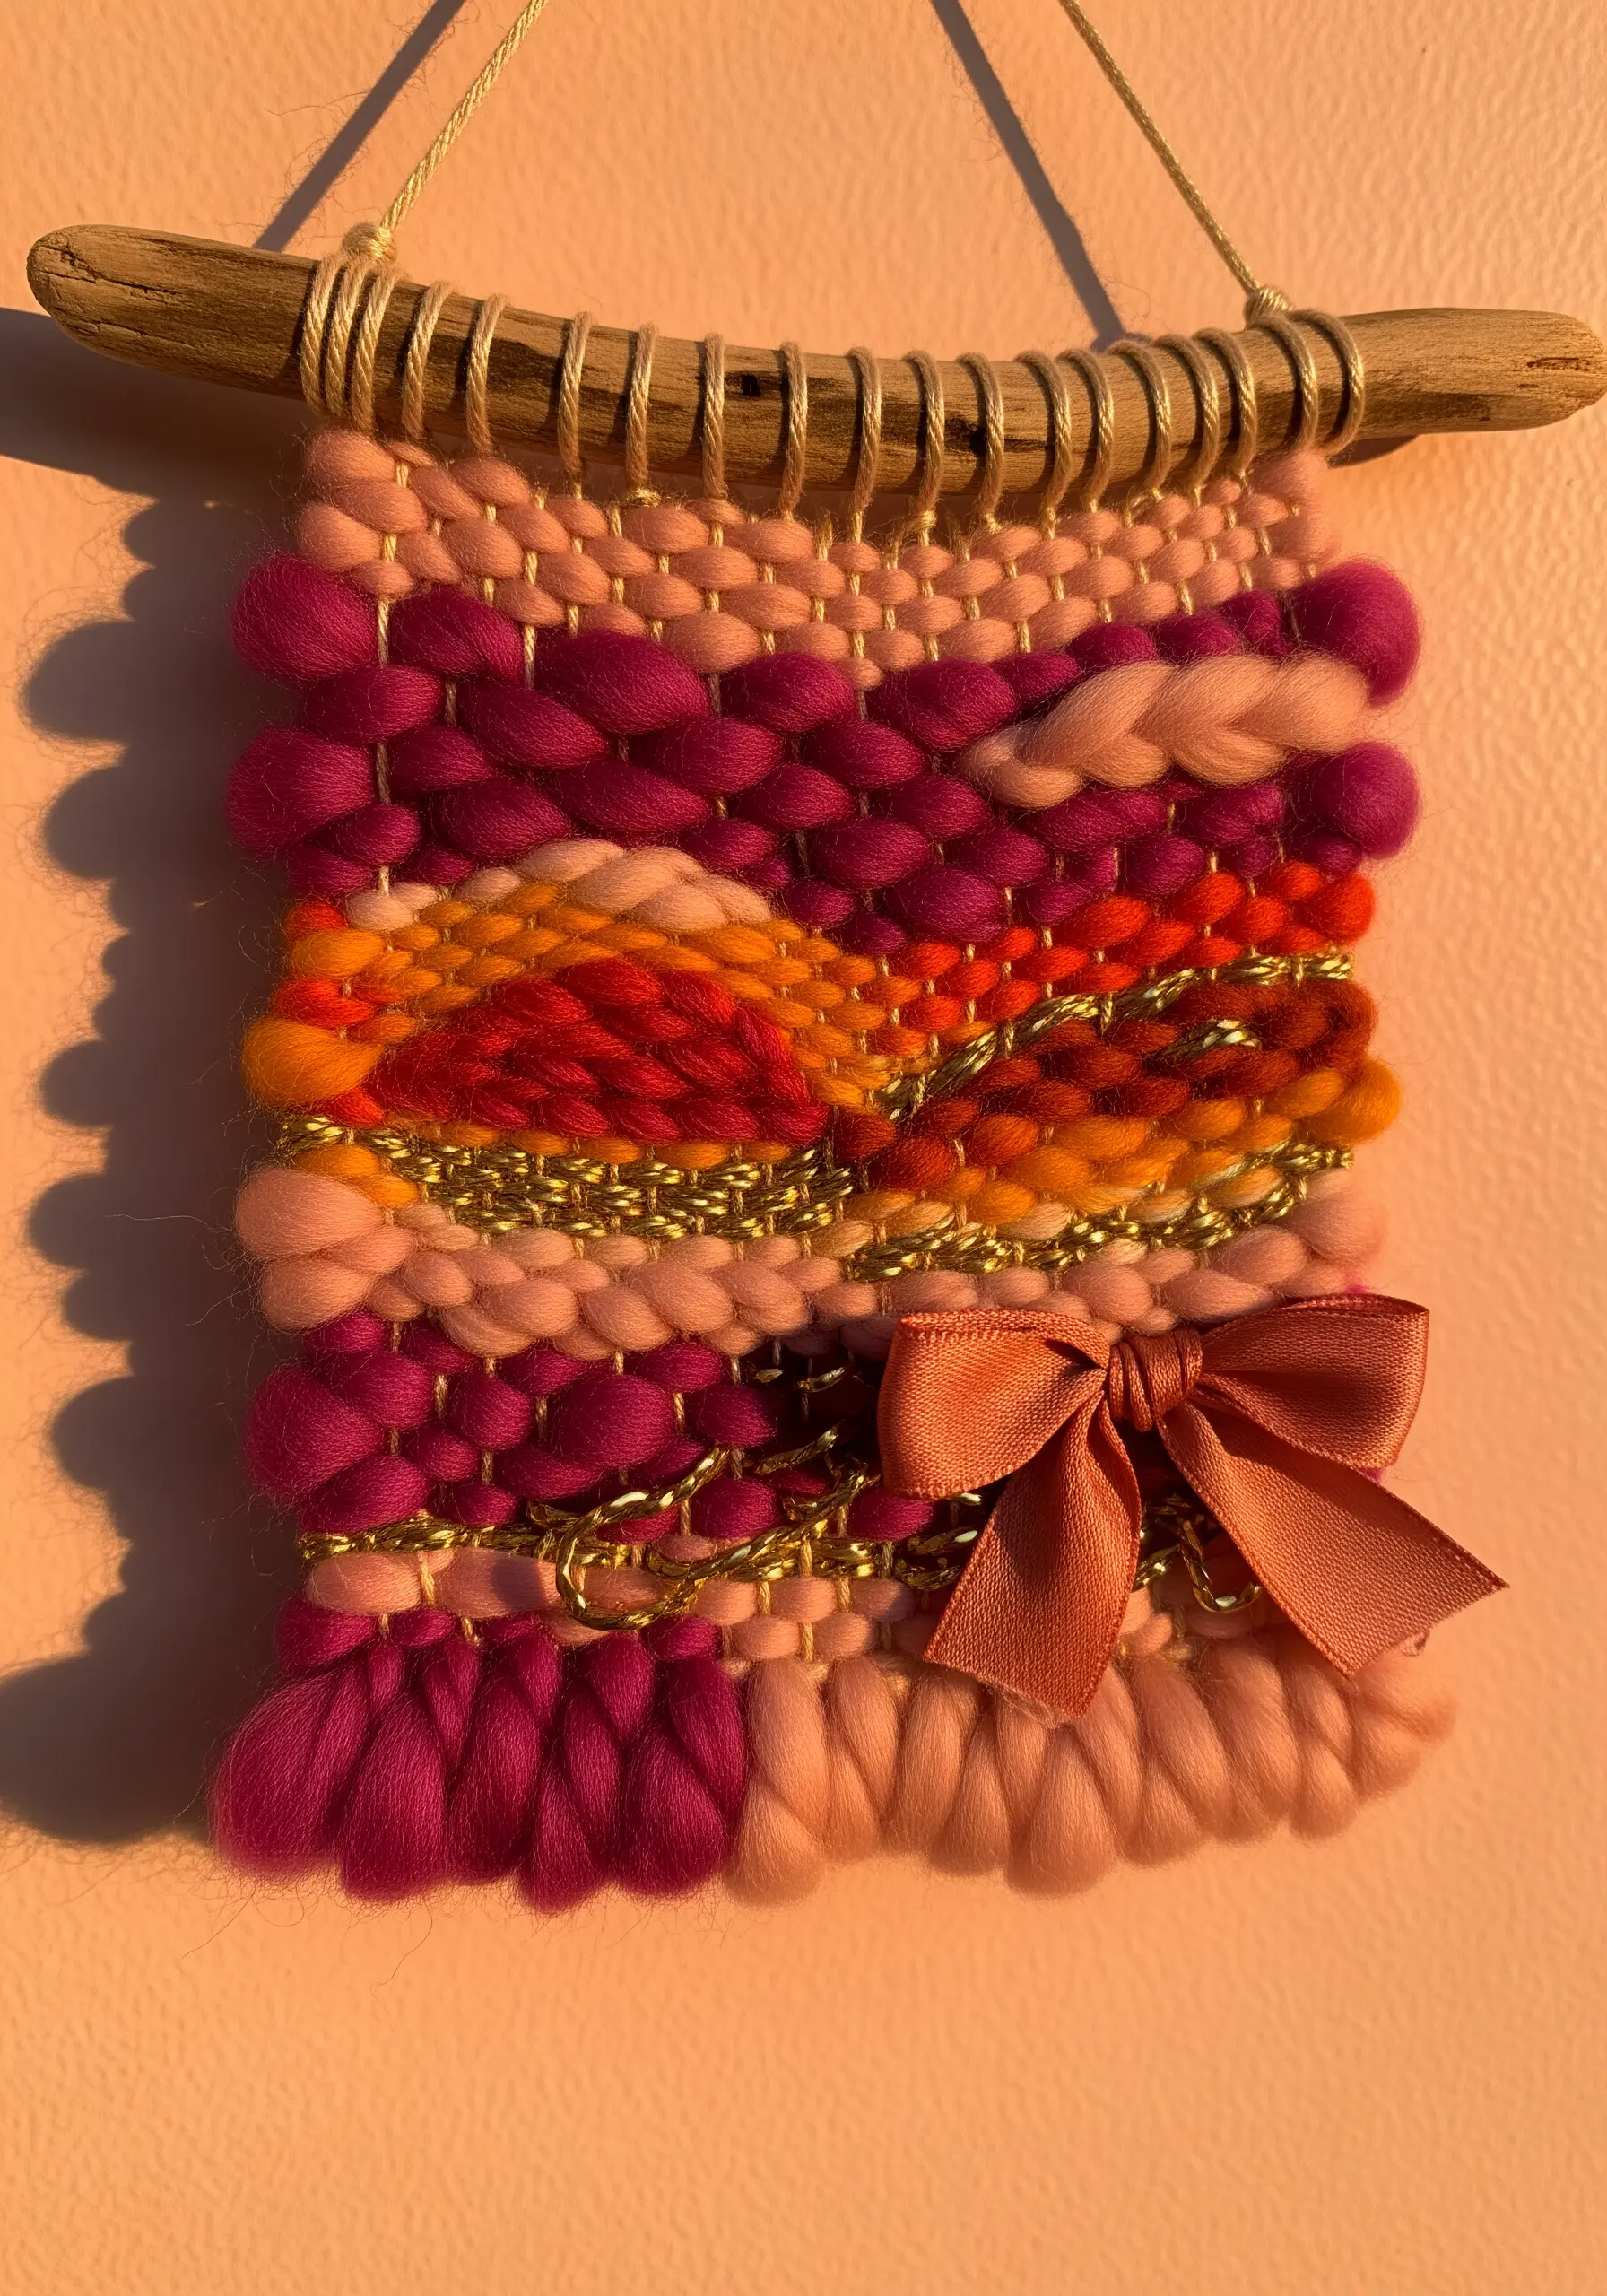
Move beyond thread and explore weaving with chunky wool roving, fine yarn, and even metallic accents like a delicate gold chain.
Varying the texture is key to creating depth. Alternate thick, bumpy sections made with roving against smooth, tightly woven areas to mimic the look of clouds and light.
Instead of a standard dowel, hang your weaving from a piece of driftwood. This adds an organic, rustic element that complements the soft fibers and makes the piece feel grounded.
These stunning fiber art installations add warmth and texture to any wall.
4. Craft a 3D Cactus with Stumpwork Techniques

Create a charming desk accessory by applying embroidery to a three-dimensional object. This pincushion uses plush velvet fabric, which adds a soft, luxurious feel and catches the light beautifully.
Use simple straight stitches for the cactus spines, but vary their length and angle slightly for a more natural, less uniform appearance.
For the flower, build layers of detached chain stitches (lazy daisies) in a circle. This simple technique creates a surprisingly dimensional blossom with minimal effort.
5. Embroider a Constellation on Sheer Fabric
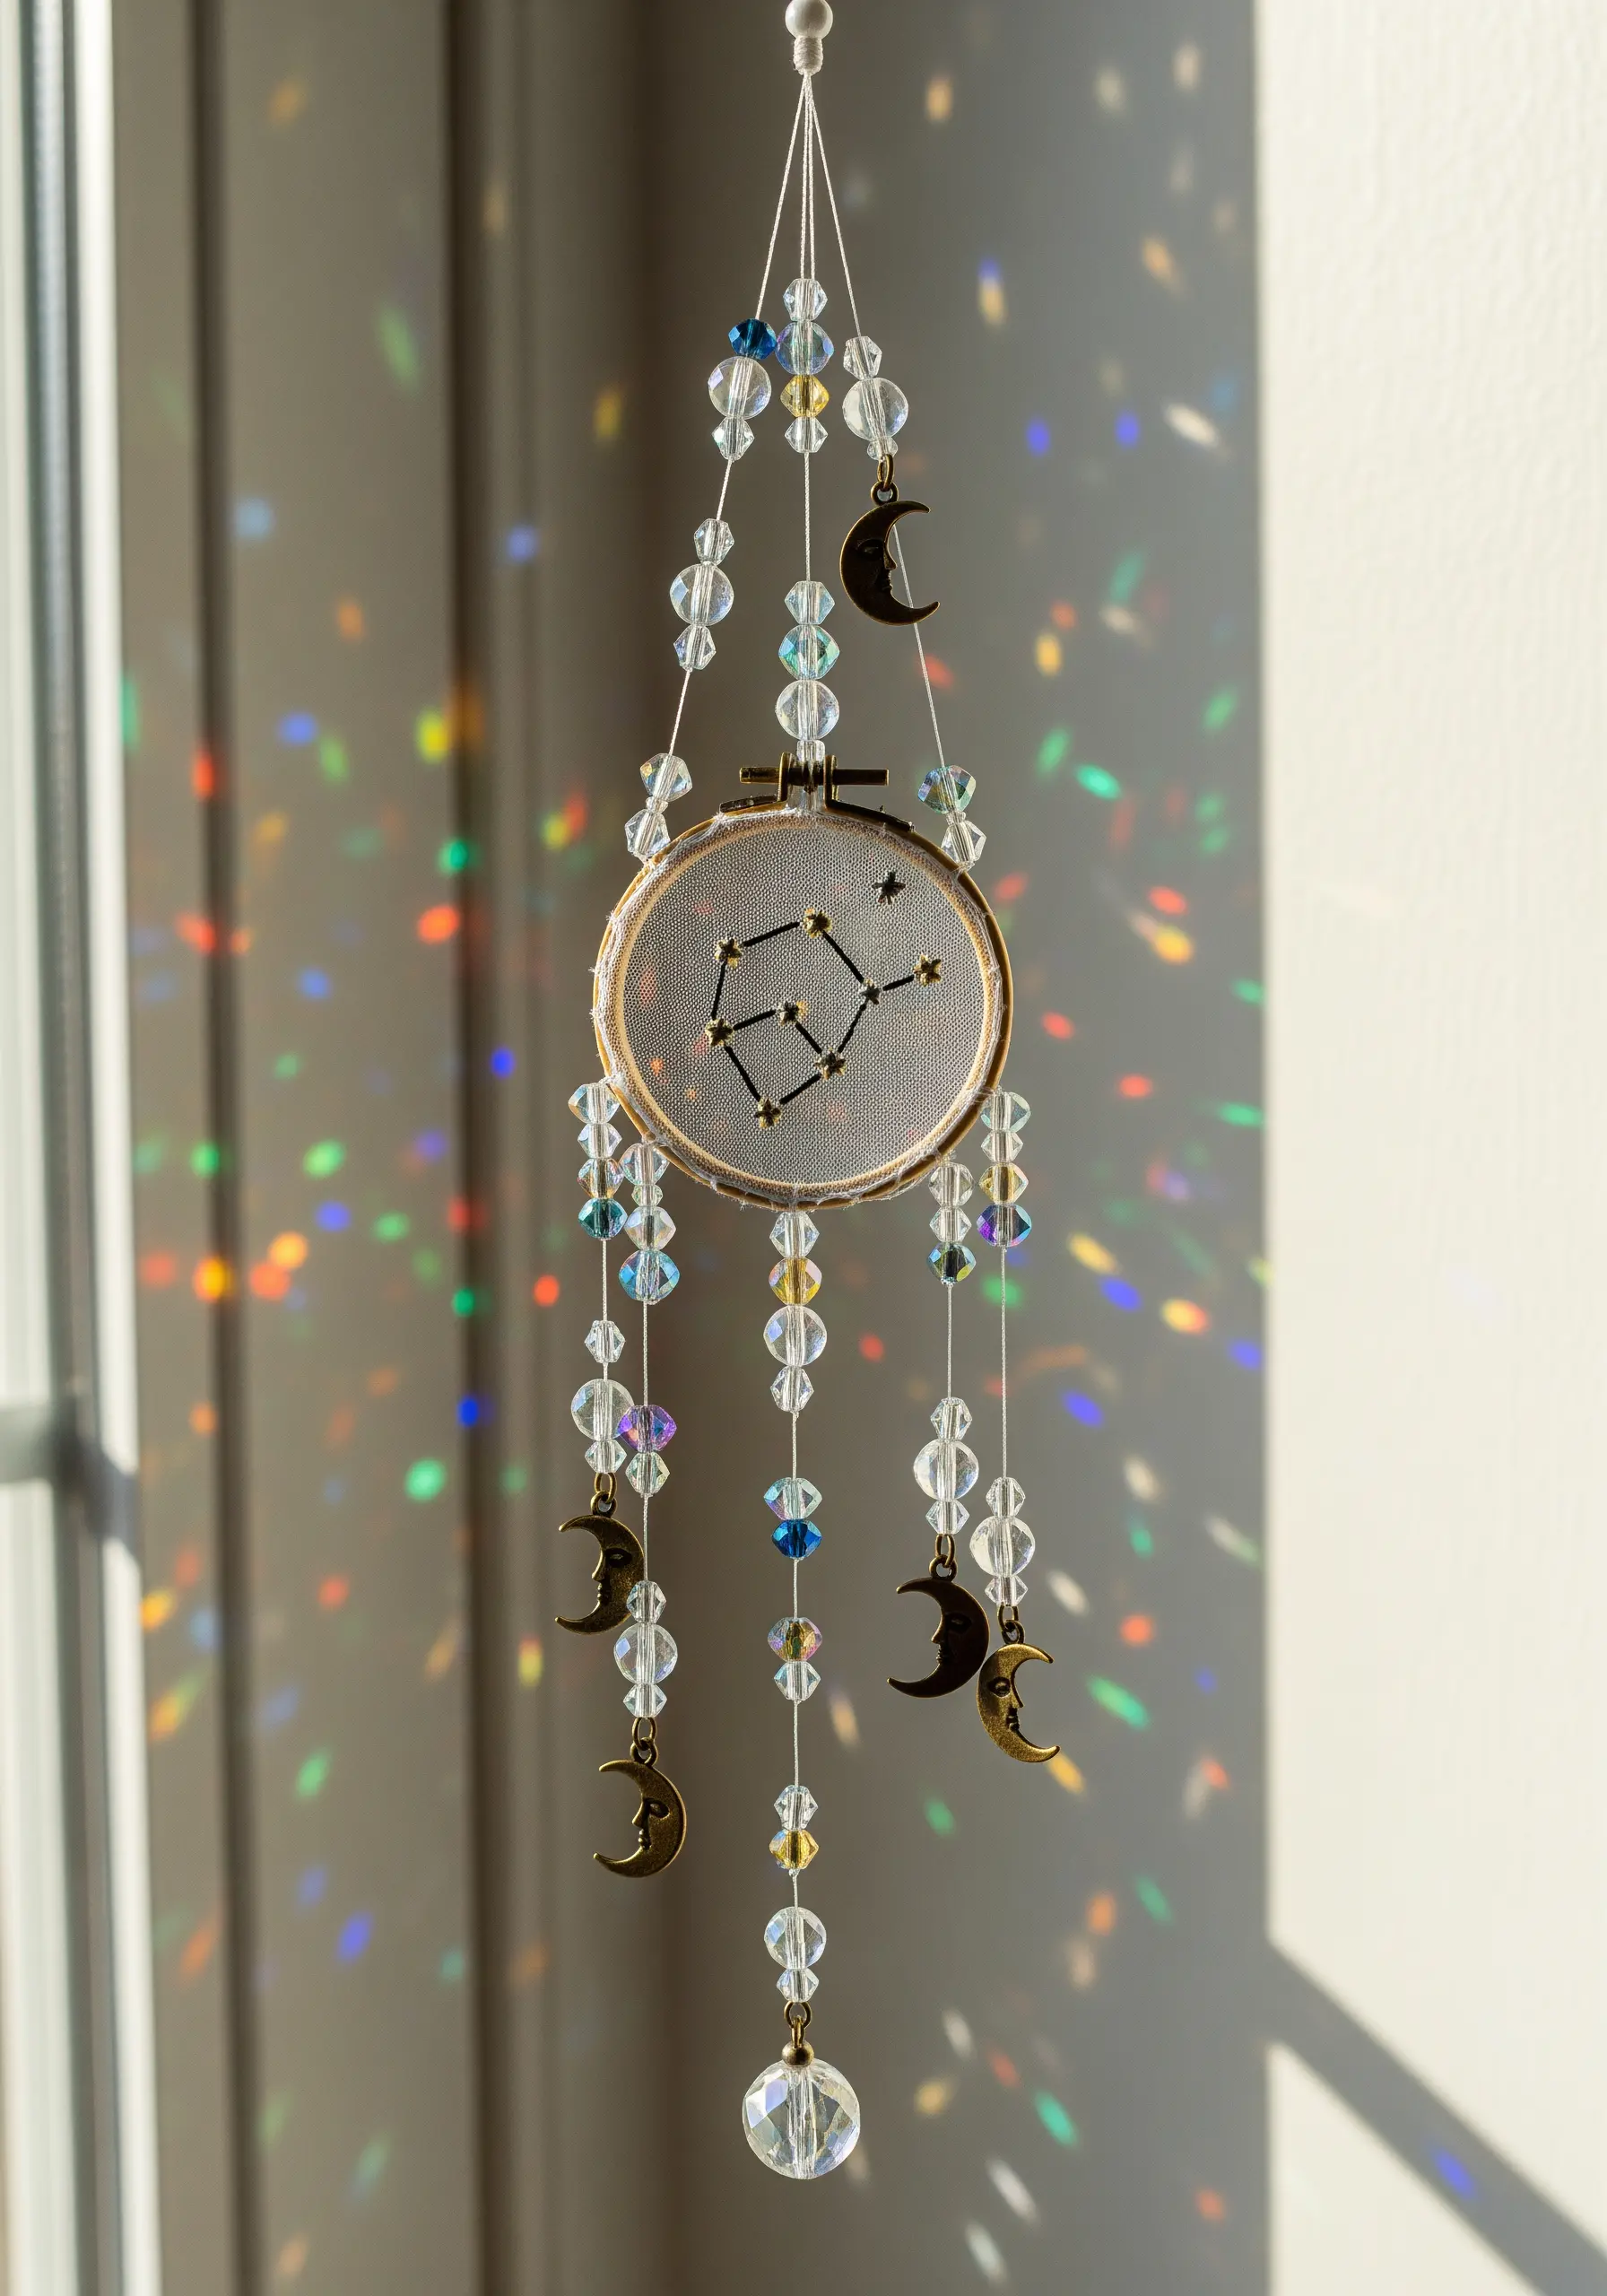
Create an ethereal suncatcher by stitching on a delicate fabric like tulle or organza stretched in a hoop.
To prevent puckering on sheer fabric, use a wash-away stabilizer. Hoop the fabric and stabilizer together, stitch your design, and then dissolve the stabilizer in water to reveal clean, stable stitches.
Combine your threadwork with beads and charms. String them from the hoop to catch the light, turning a simple embroidered piece into a dynamic, sparkling mobile. This is one of the best personalized embroidery ideas for a touch of magic.
6. Add Minimalist Motifs to Leather Goods
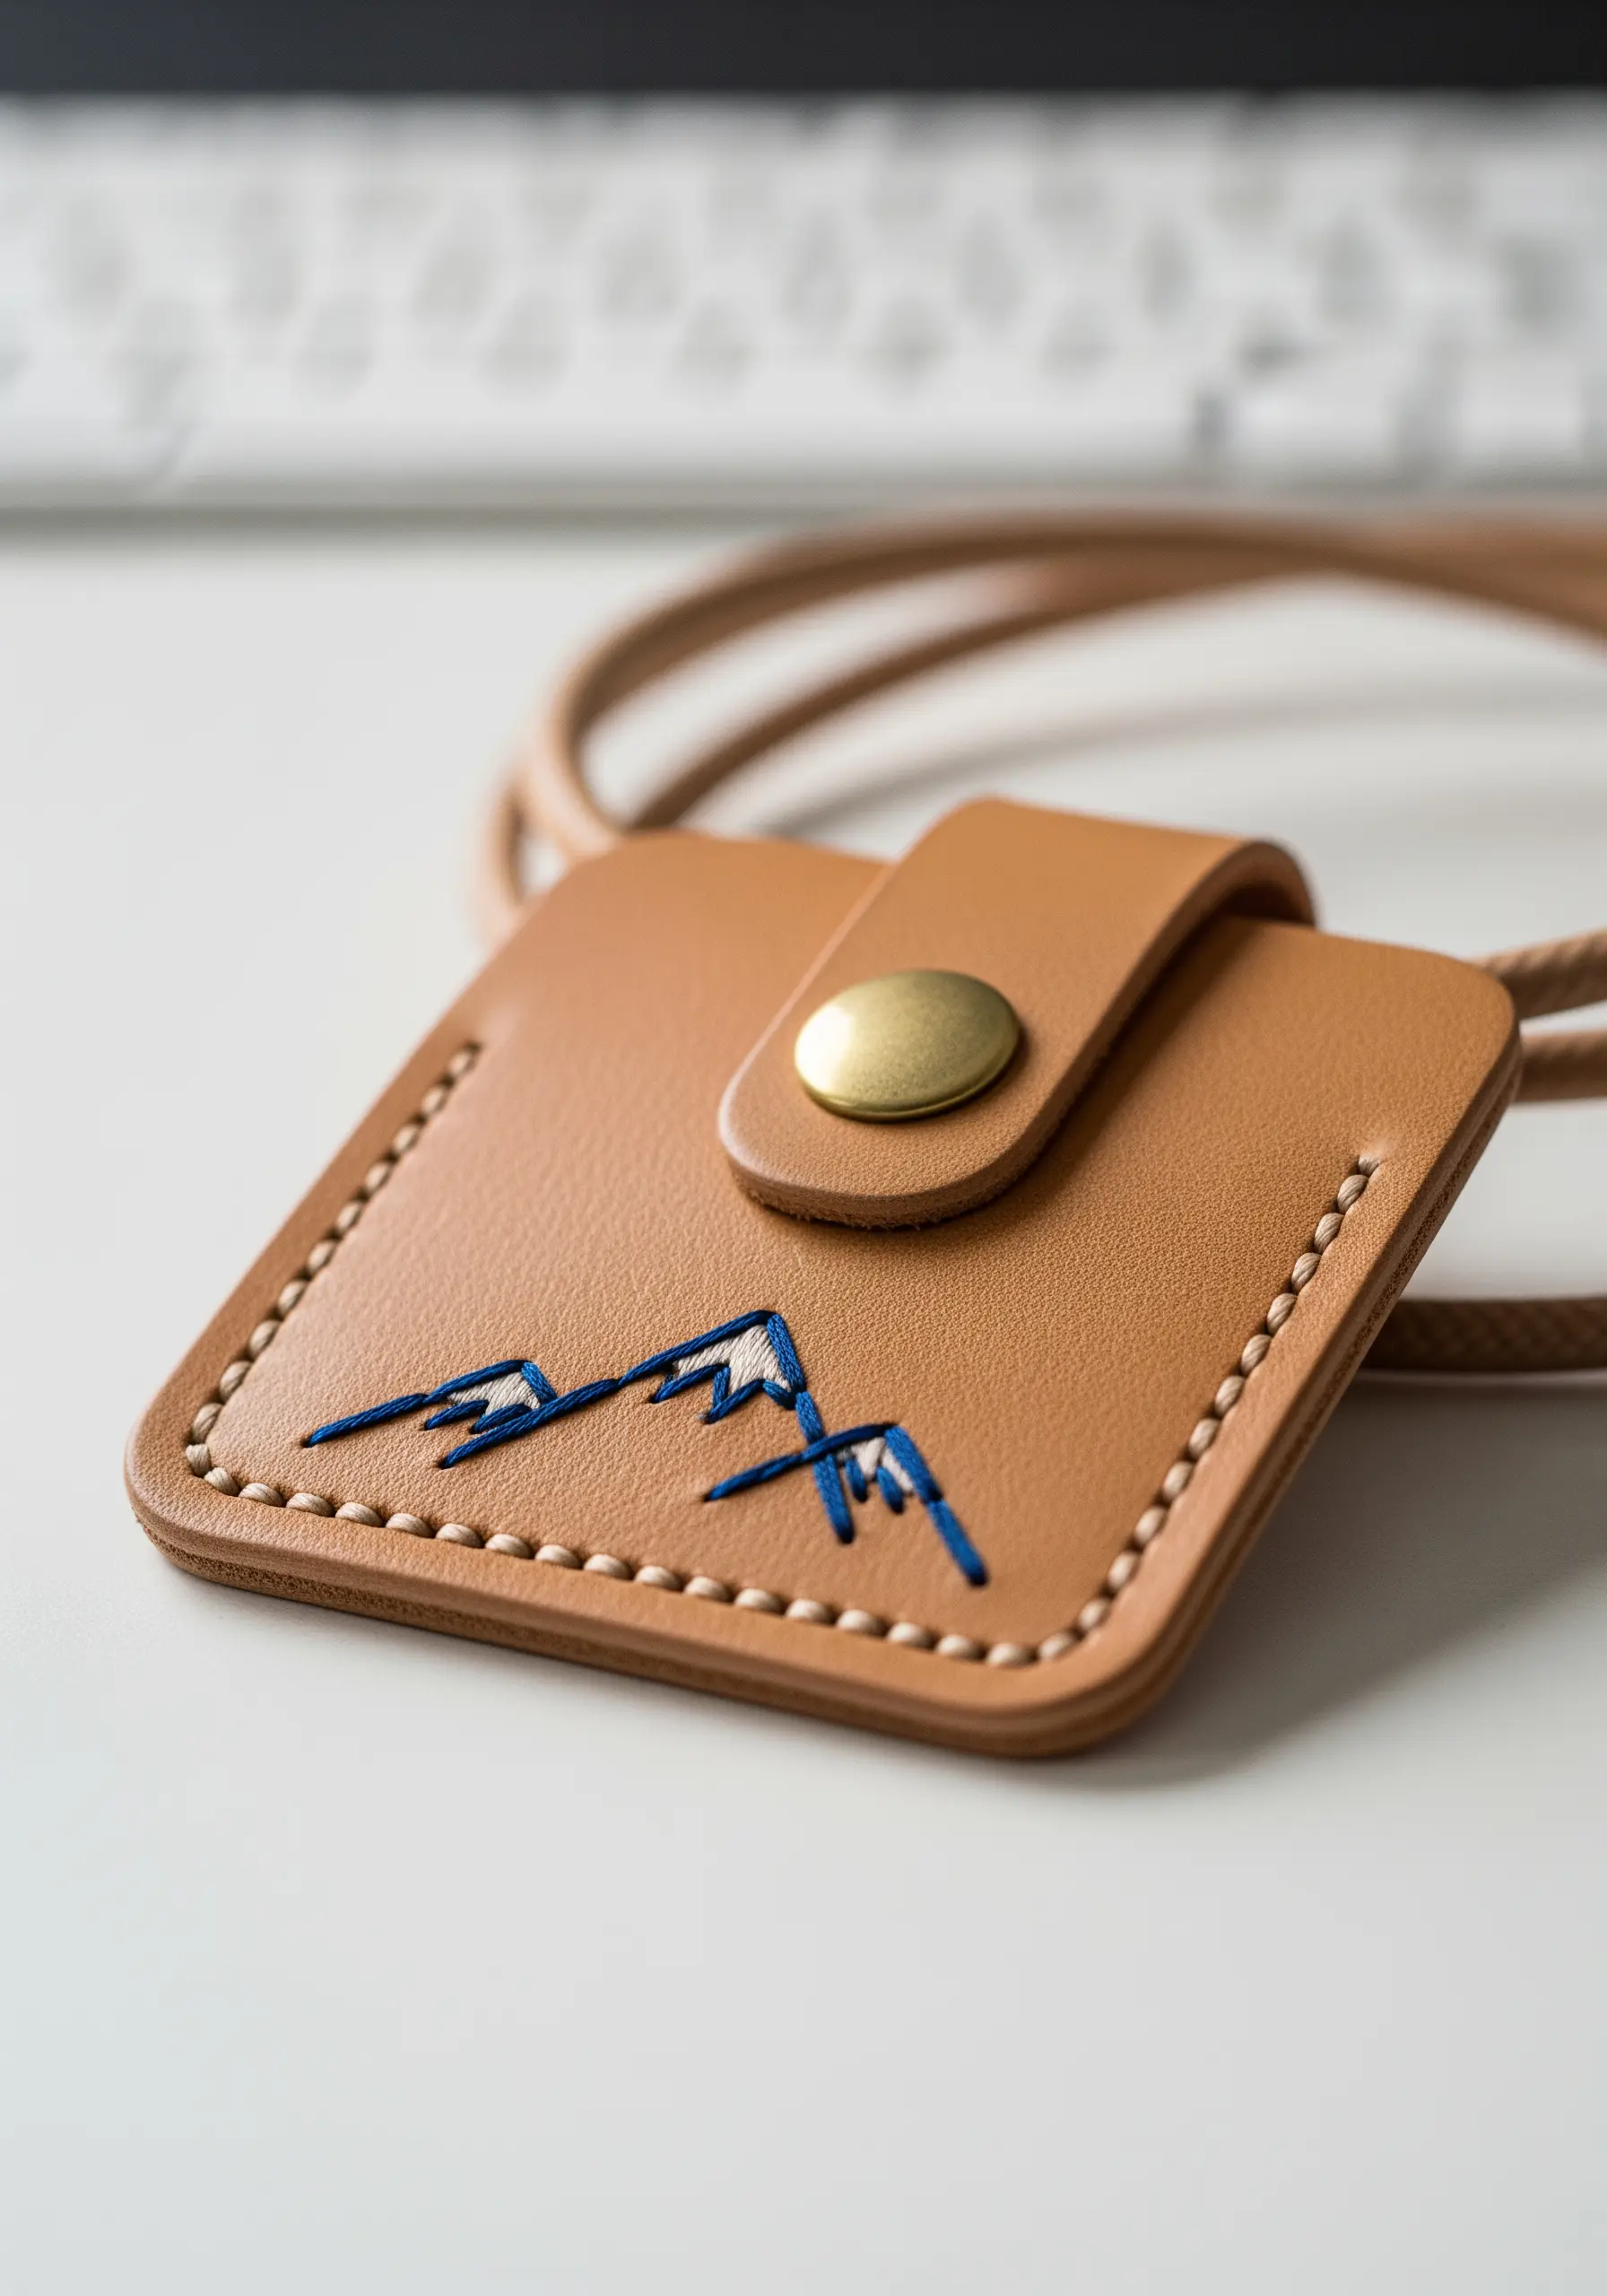
Embroidering on leather requires a specific approach. Use a sharp leather needle and pre-punch your stitching holes with a fine awl for clean, effortless stitching that won’t damage the material.
Keep your designs minimal and graphic. A simple line-art motif, like these mountains, has a powerful impact against the smooth leather surface.
Use a high-contrast thread to make your design stand out. A slightly thicker thread, like a Perle cotton, also adds texture and durability, making it perfect for easy small embroidery patterns for your everyday essentials.
7. Give Bee Motifs Dimension with Padding

To make the bee’s body look rounded and three-dimensional, use a padded satin stitch. First, create a base of small, underlying stitches within your shape, then cover them with satin stitches. The padding lifts the final stitches, creating instant volume.
For the translucent wings, use a single strand of light grey or silver thread. Fill the shape with a sparse pattern of straight stitches or seed stitches rather than a dense fill, which gives the impression of delicate, transparent wings.
These are charming handmade embroidery projects to give as thoughtful birthday gifts.
8. Embellish a Box with Sashiko-Inspired Waves

Transform a simple jewelry box or container with the elegance of Japanese Sashiko stitching. The key is the rhythmic running stitch, so focus on consistent stitch length and spacing.
Use a high-contrast thread color—like classic white on indigo—to make the intricate wave pattern the star of the show. A thicker Sashiko thread or Perle cotton works best.
Before you stitch, transfer the pattern onto your fabric with a fine, light-colored fabric marker to ensure the curving lines are fluid and precise.
9. Construct a Beaded Tassel for a Luxe Accent
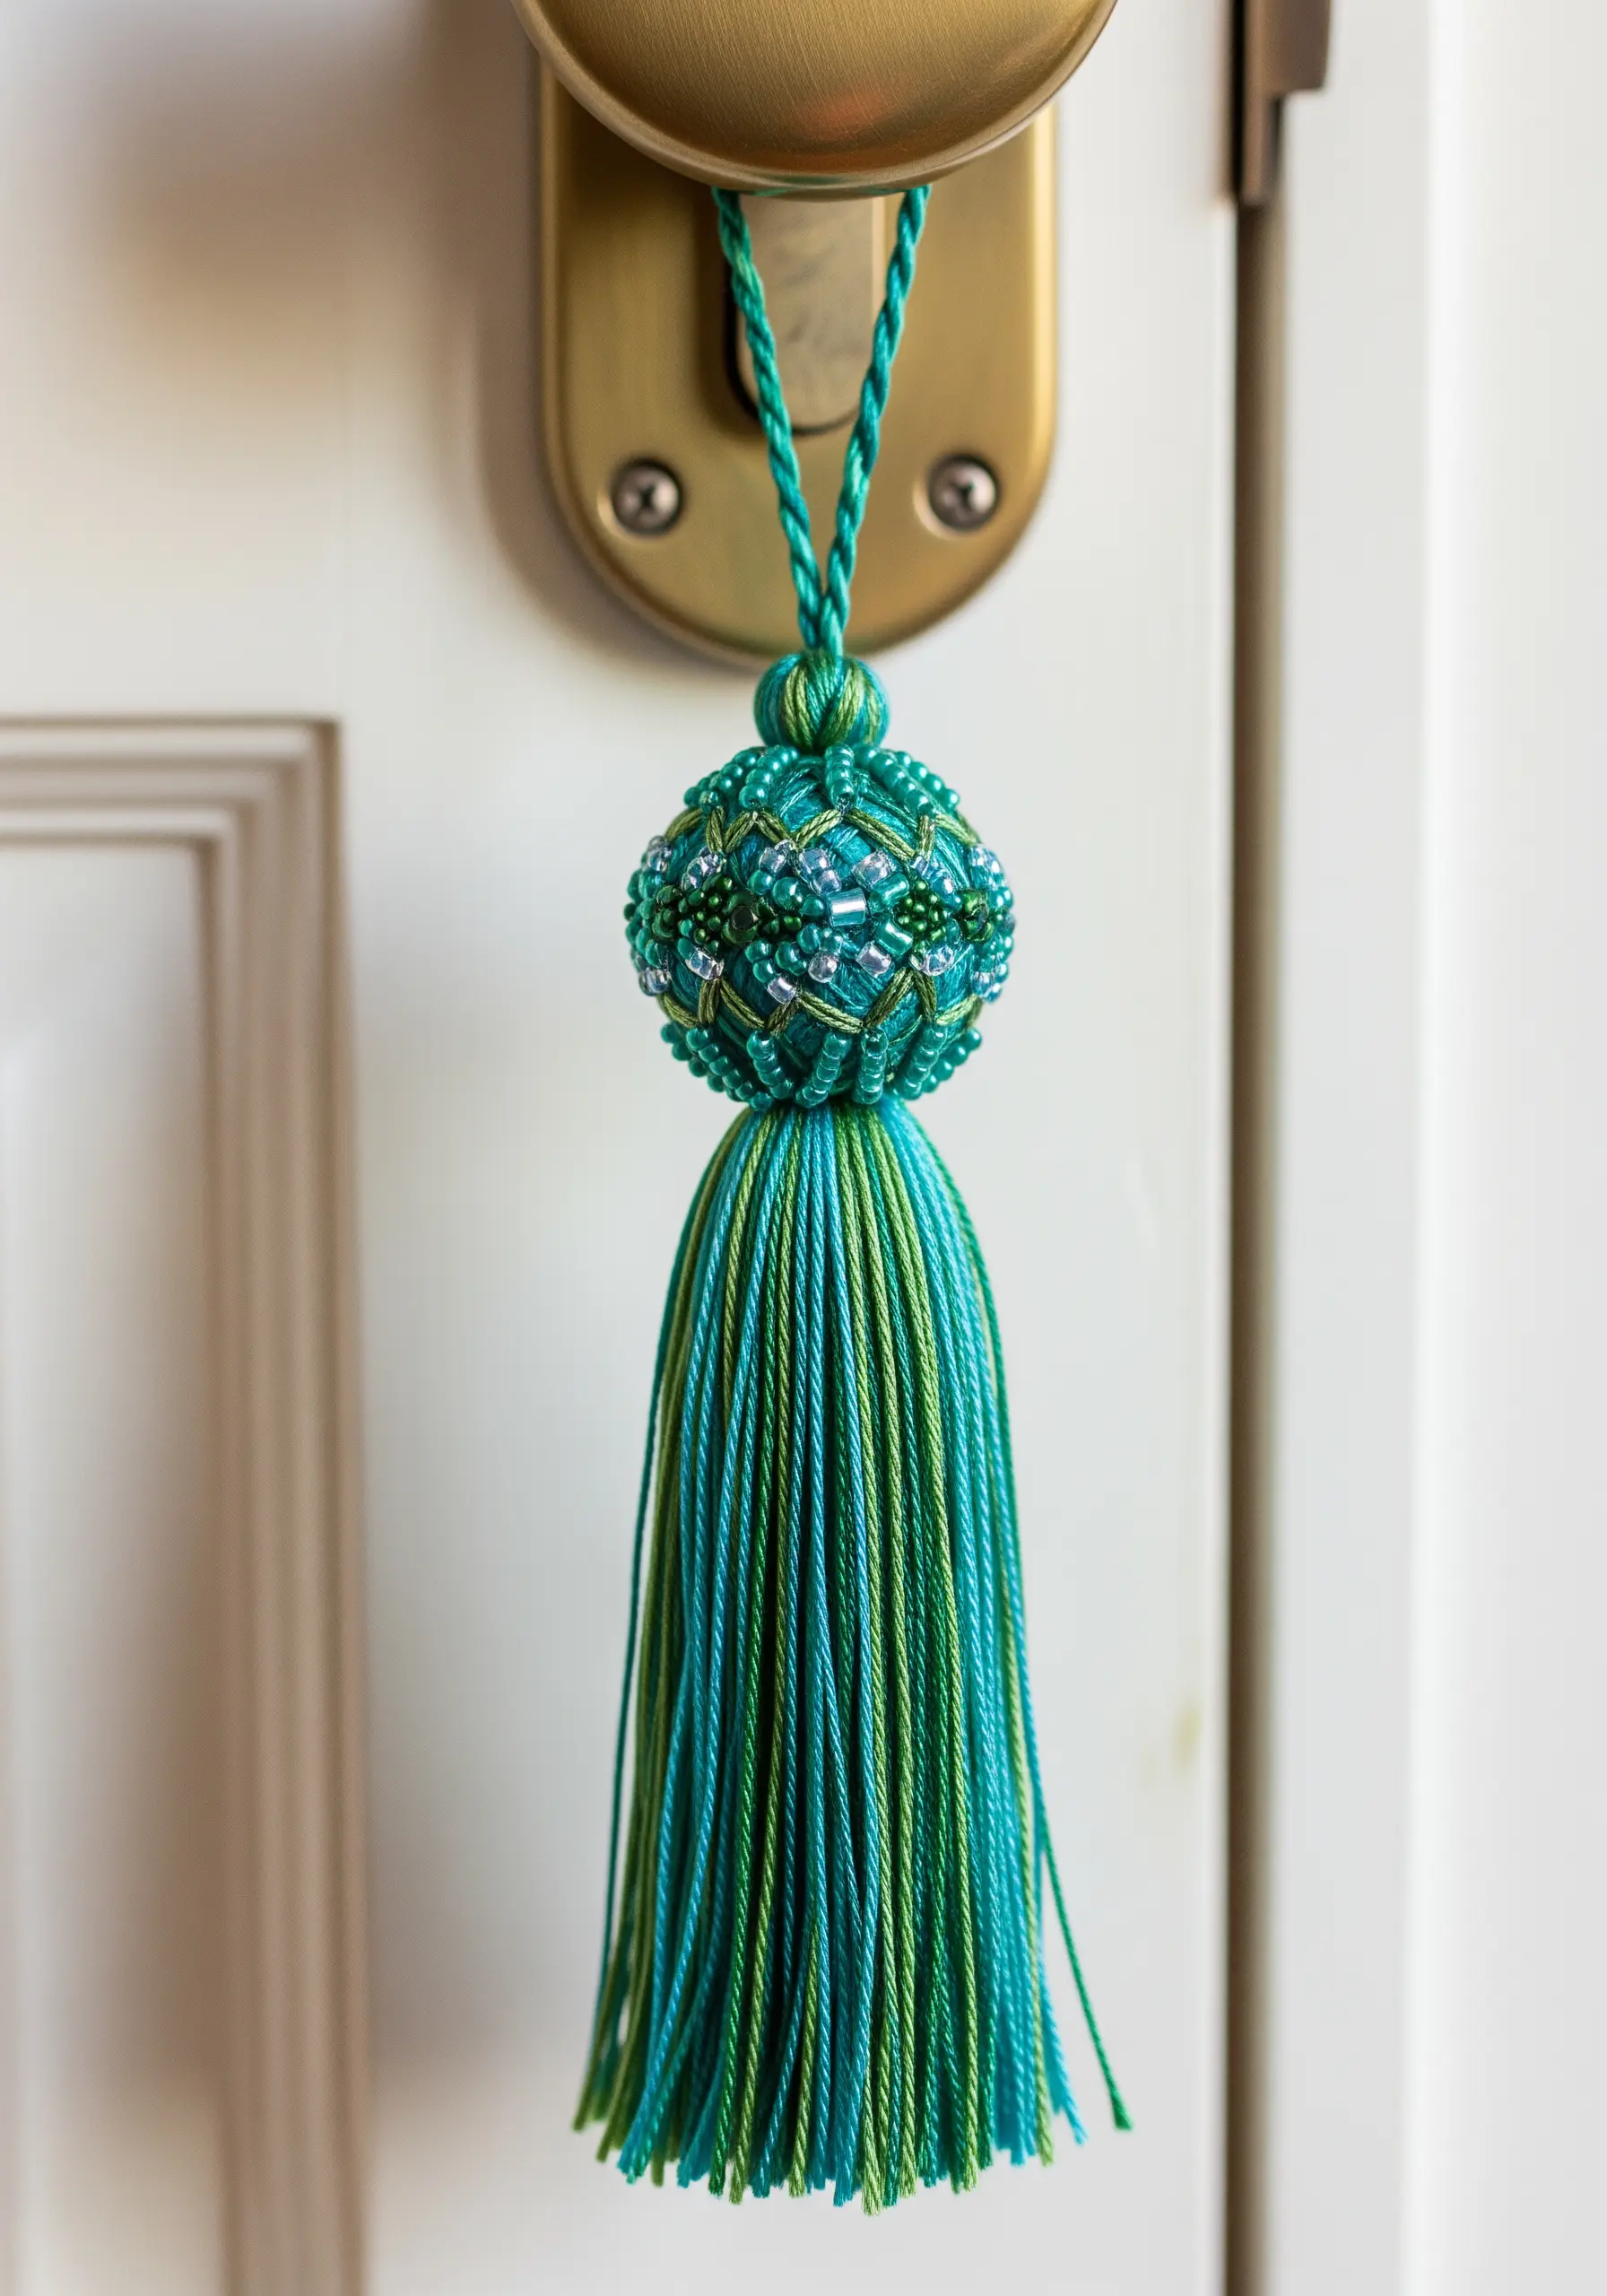
Elevate a simple door knob or drawer pull with a custom-made tassel. The top sphere is a wooden bead covered in a netting of tiny seed beads.
To create the lush tassel, wrap embroidery floss around a piece of cardboard, tie it securely at the top, and then cut the bottom loops. Use at least two complementary colors for a richer, more dynamic look.
The twisted cord for hanging is also handmade. Take several long strands of floss, anchor one end, and twist the other until it starts to kink, then fold it in half and let it twist back on itself.
10. Frame a Celestial Scene with Metallic Threads
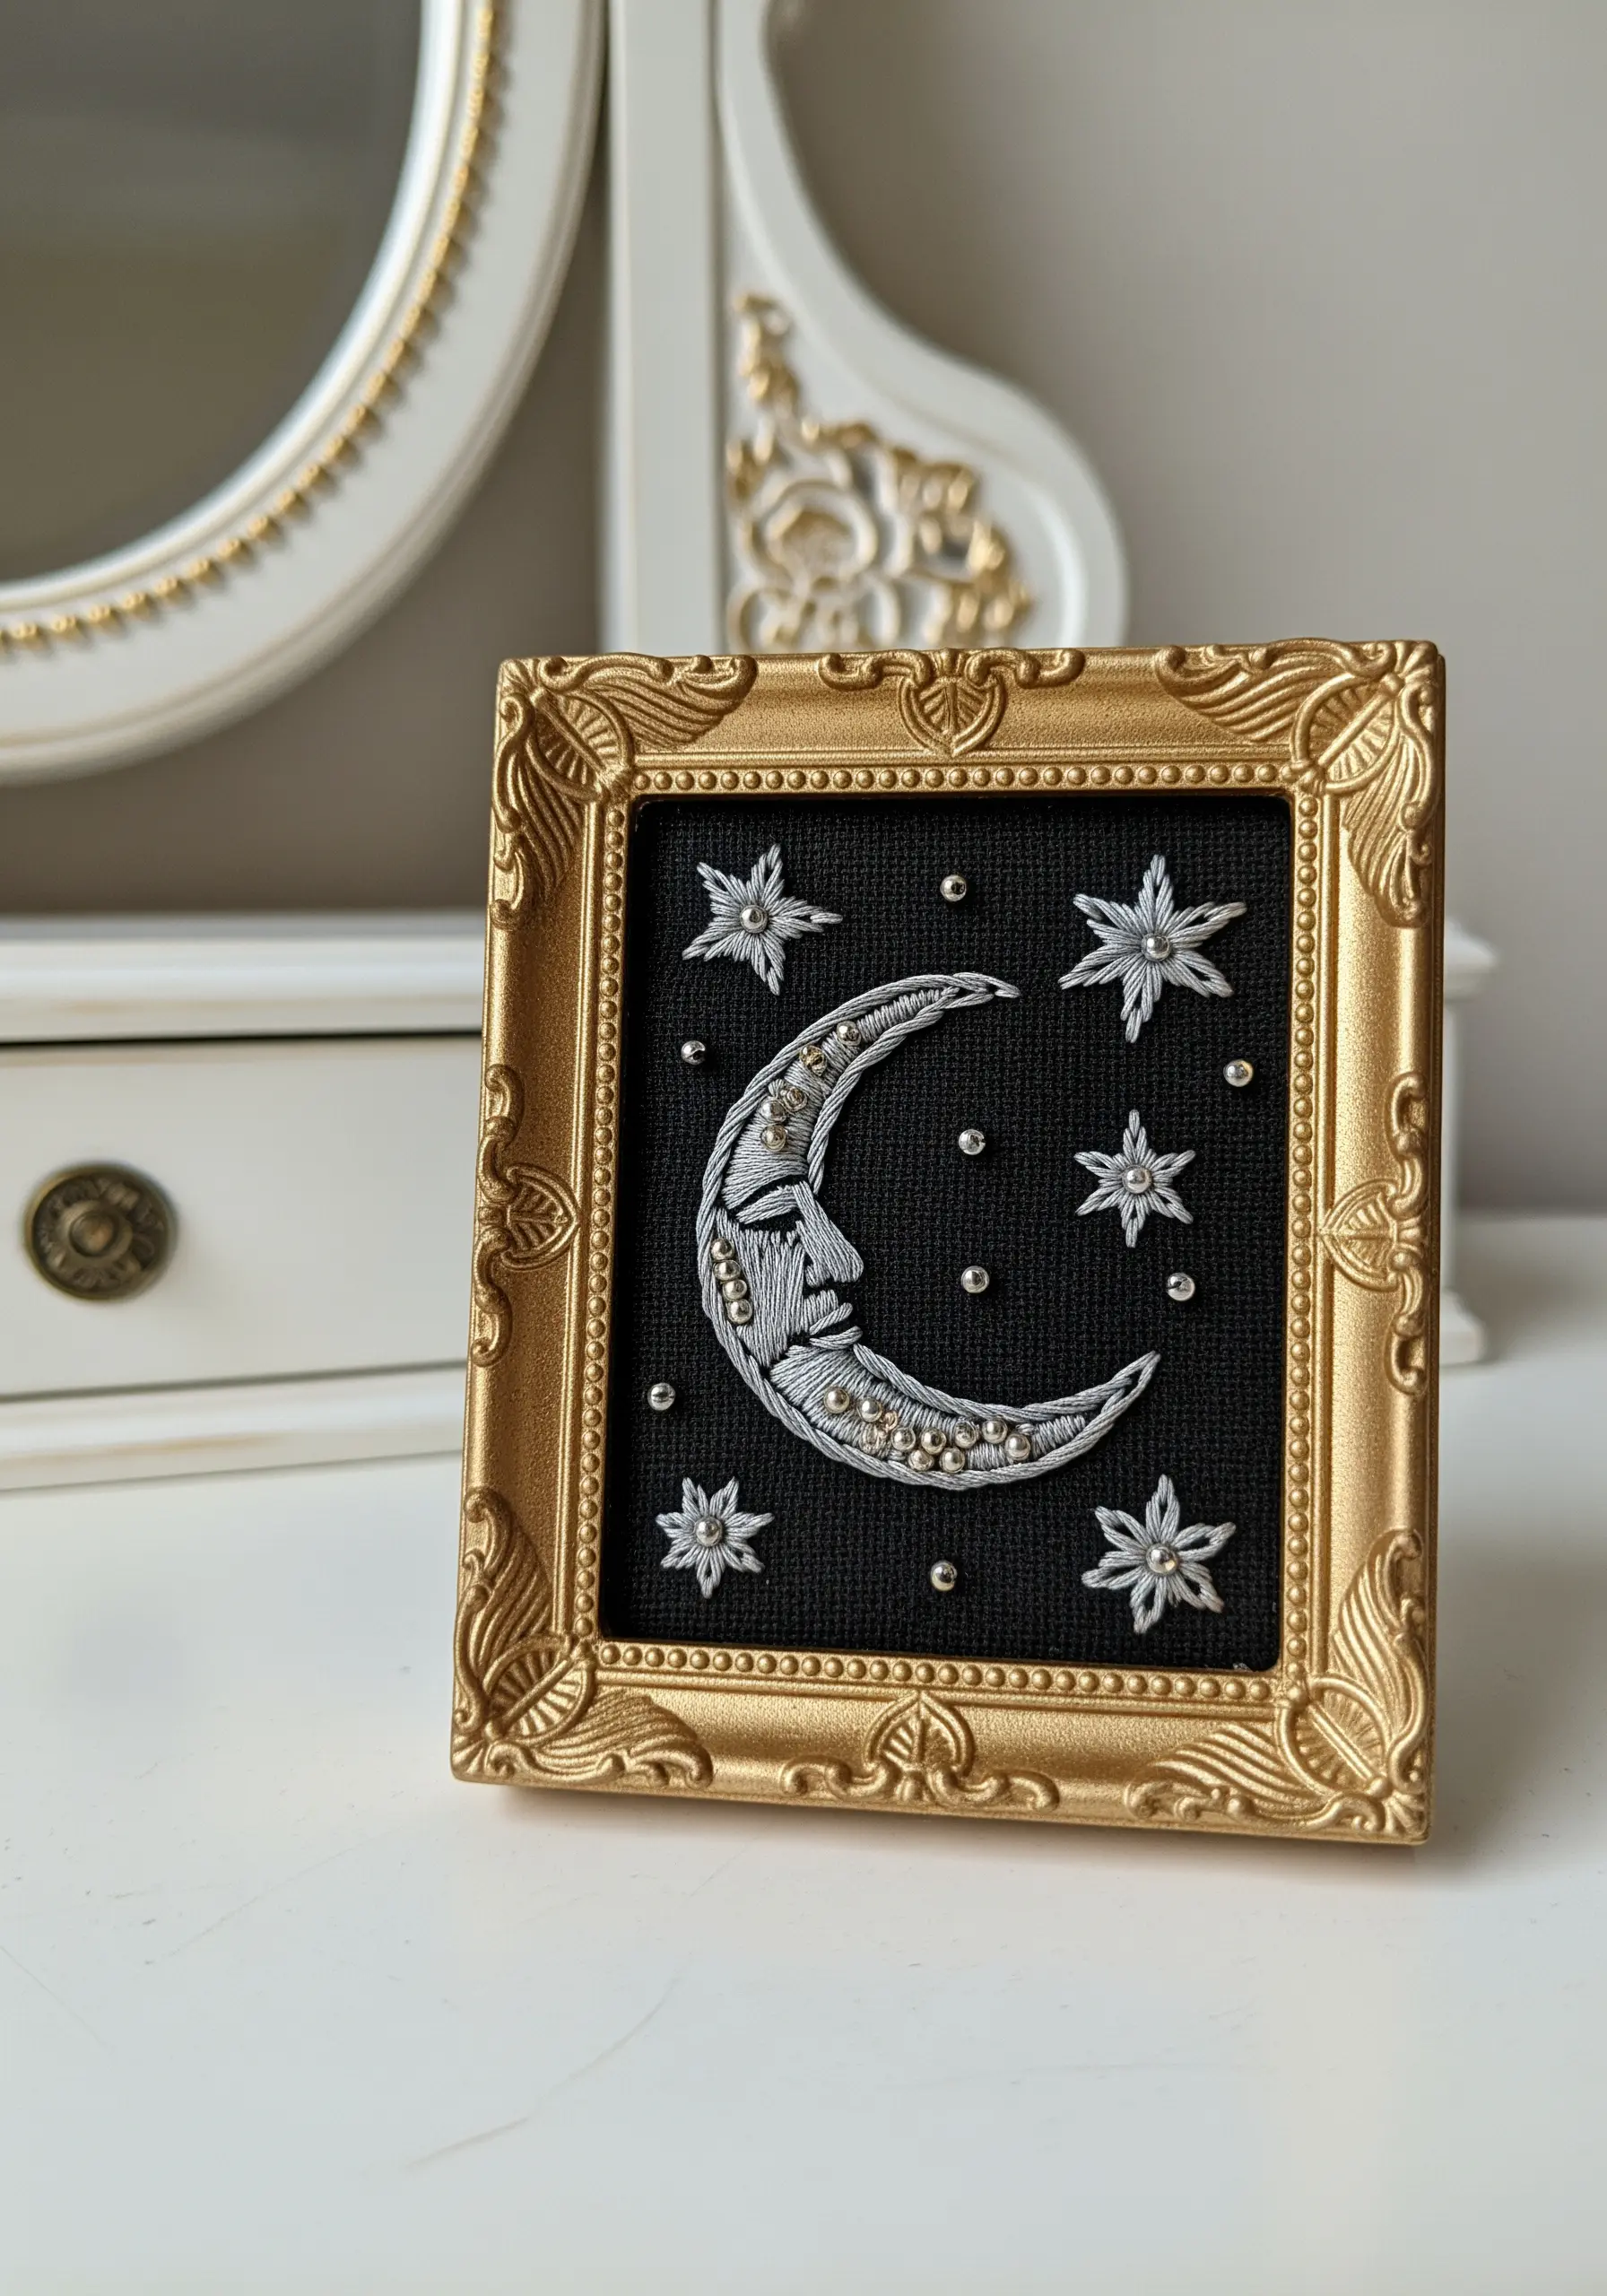
Create a piece of fine art by stitching on dark fabric and mounting it in an ornate frame. The contrast makes metallic threads and beads truly shine.
For the moon’s texture, use a long and short stitch with silver metallic thread, blending in shades of grey to suggest craters and shadows. Add a few strategically placed silver beads for a subtle sparkle.
Make the stars crisp and graphic by using a star stitch or a woven wheel stitch. This makes them pop against the dark background and provides a textural contrast to the smooth moon.
These are the kinds of stitched details that make plain walls pop elegantly.
11. Craft a Minimalist Macrame Plant Hanger
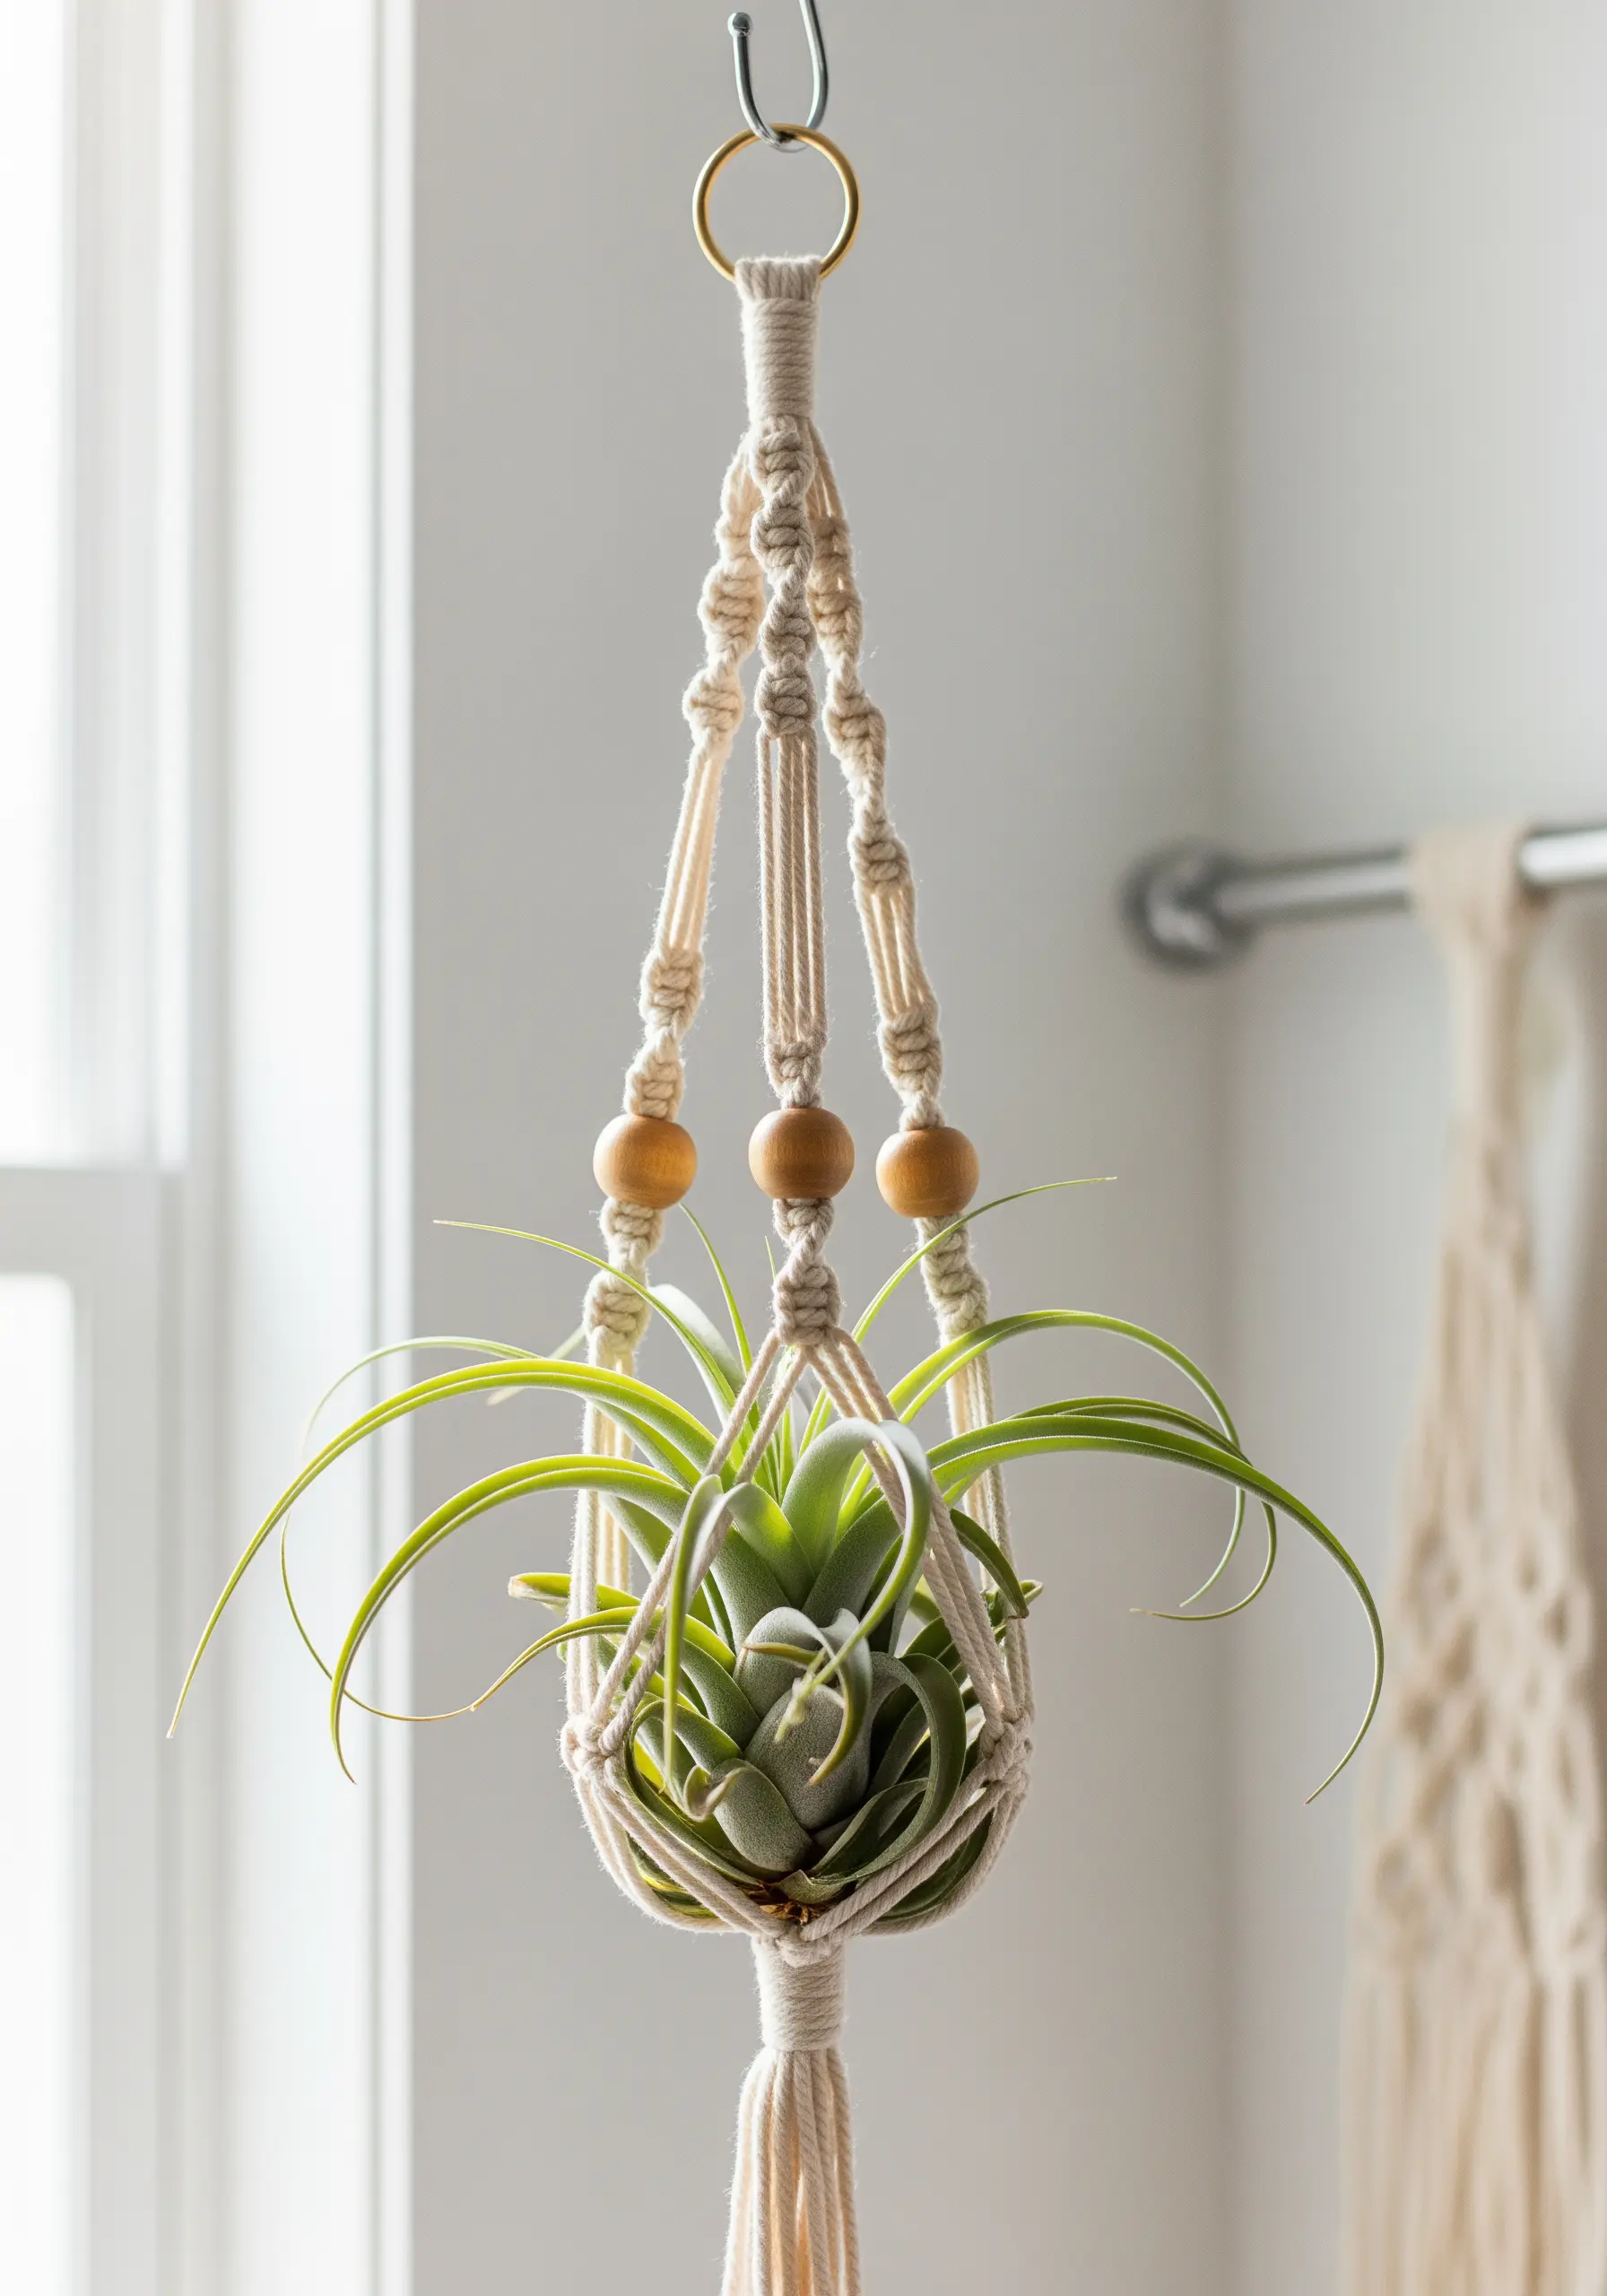
Even if you don’t embroider, you can create beautiful decor with fiber. Macrame is built on a few simple knots—master the square knot and the half-hitch spiral to create this entire piece.
The design’s elegance comes from the strategic use of negative space. Let the plain cords breathe between sections of knots to create a light, airy structure.
Incorporate wooden beads to add a warm, natural element. They also serve a practical purpose, helping to gather the cords and structure the hanger’s shape.
12. Design Embroidered Magnets from Fabric Scraps
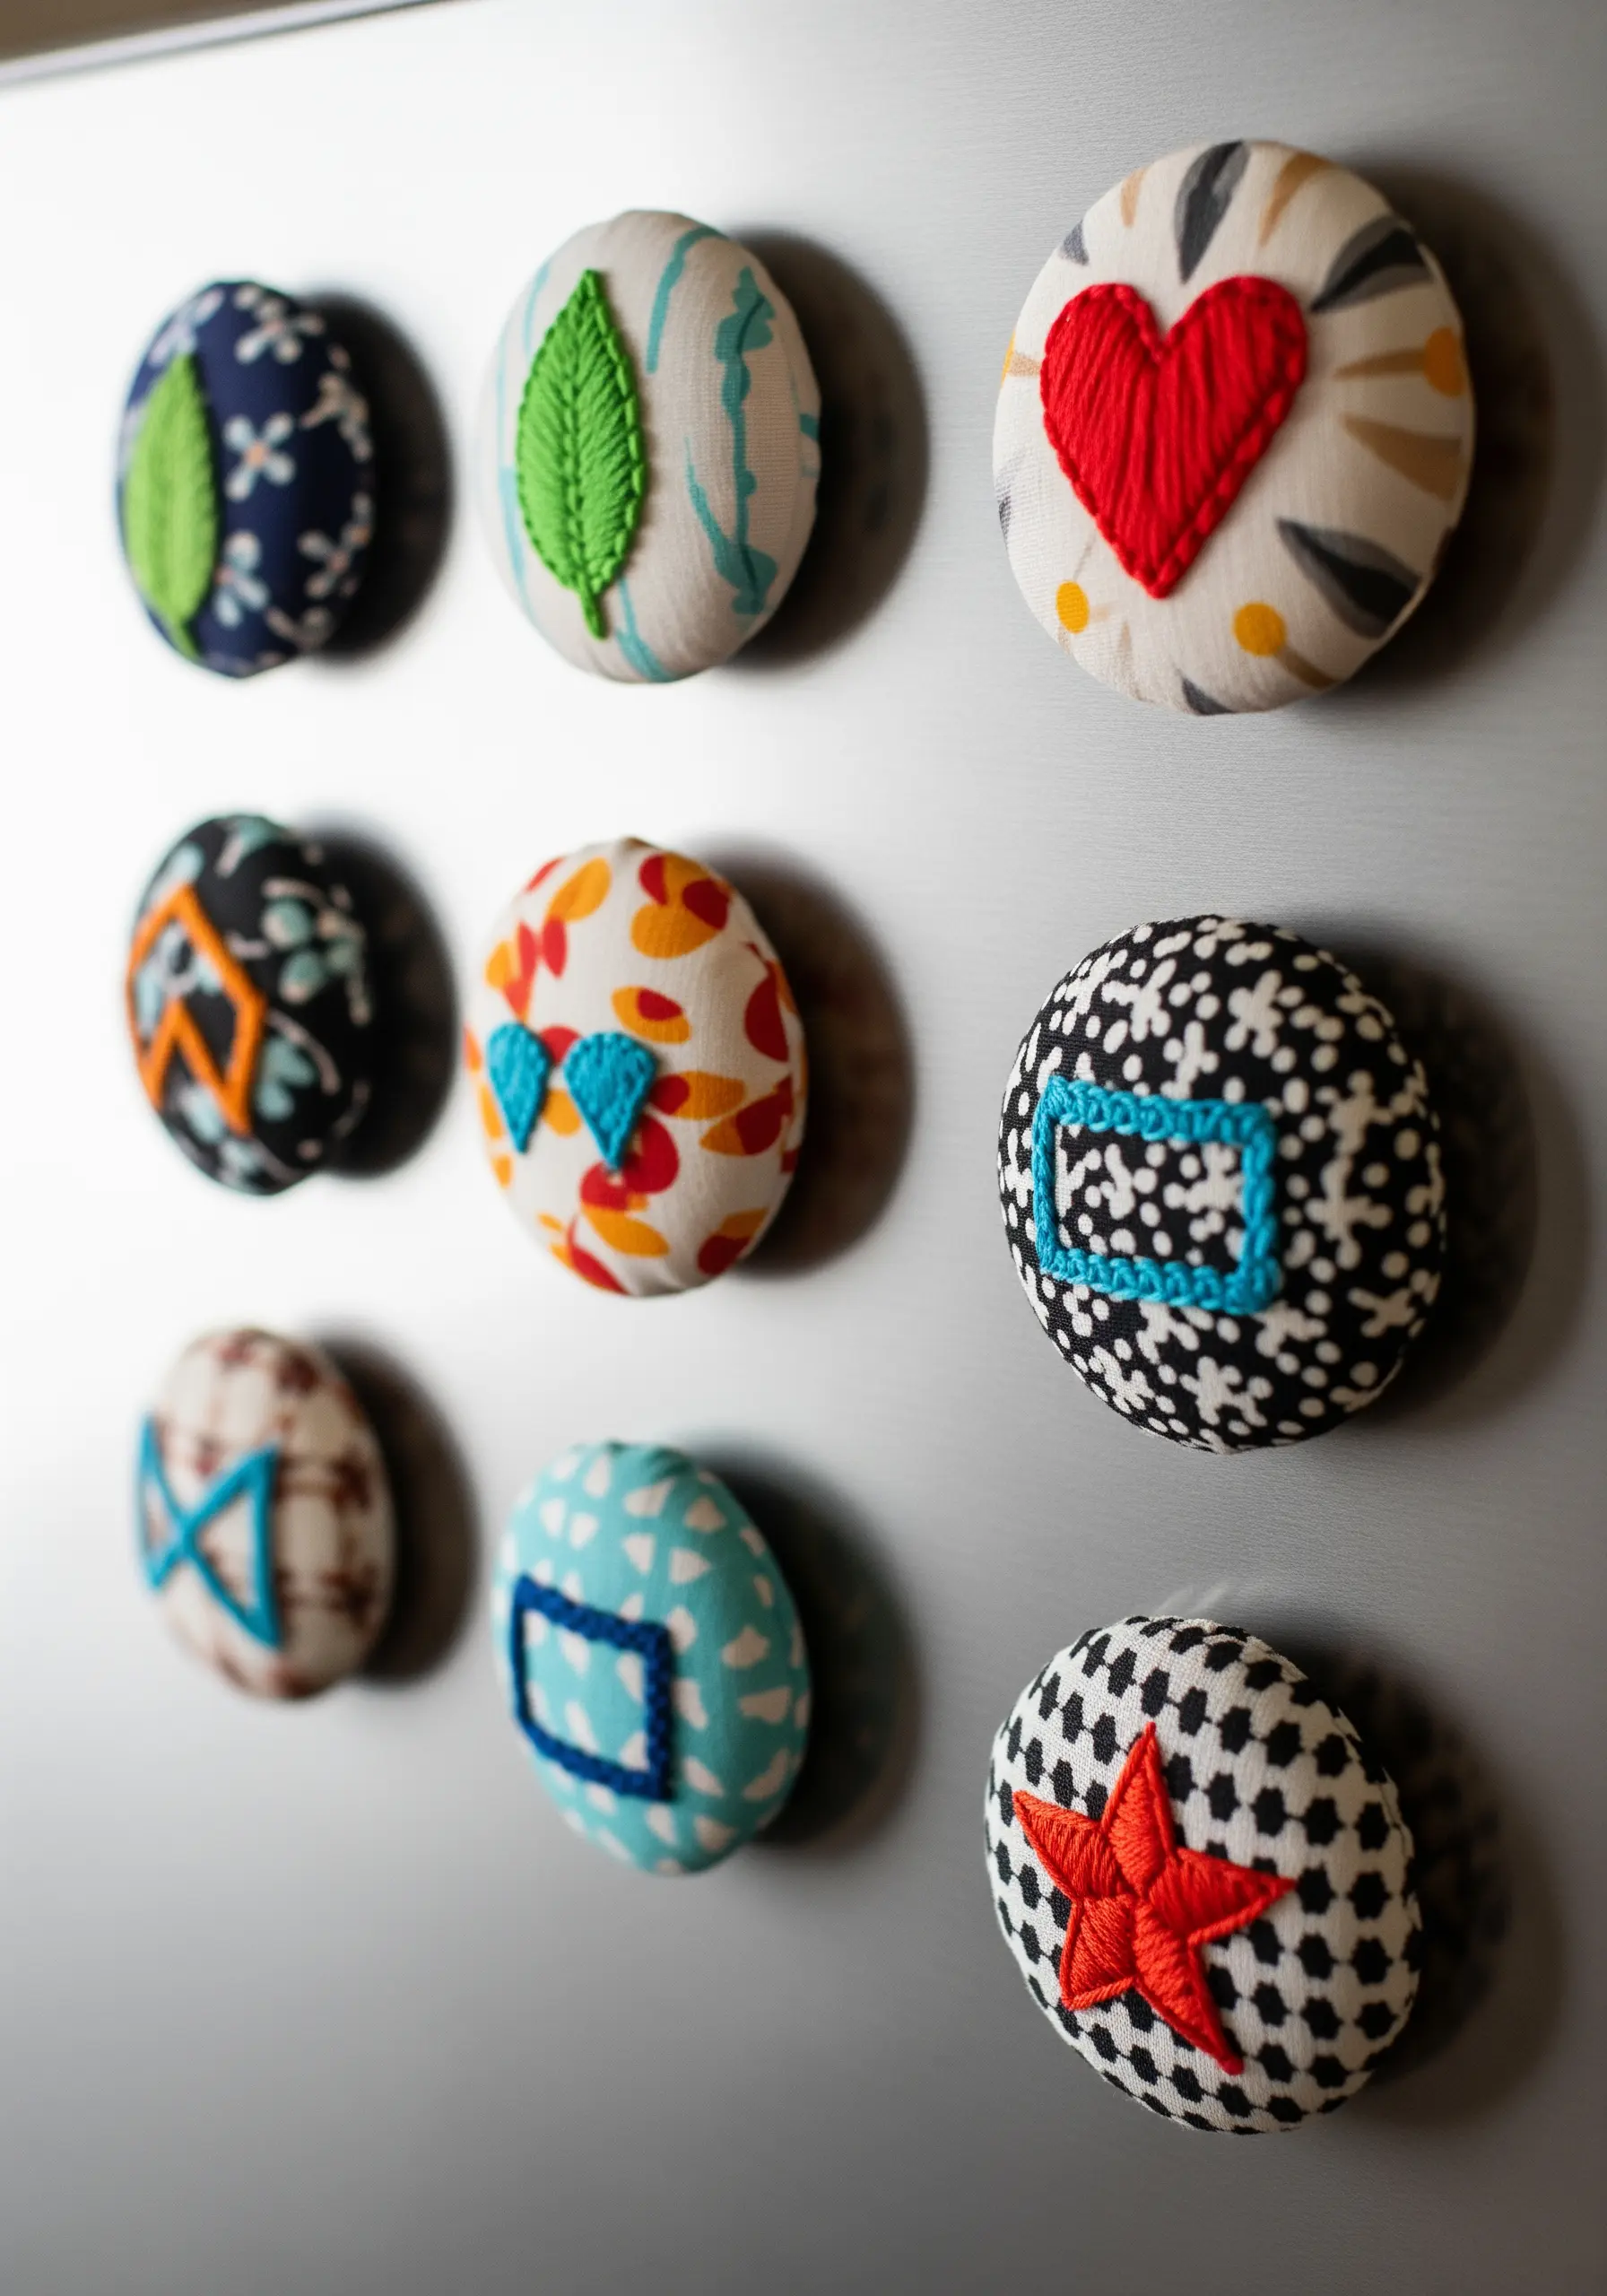
Turn leftover fabric scraps and buttons into custom magnets. Use a fabric-covered button kit as your base for a perfectly round and taut surface.
Choose simple, bold motifs that are easily readable on a small scale. A solid satin-stitched heart, a single leaf in fishbone stitch, or a basic geometric outline works beautifully.
When stitching on patterned fabric, use a thick, high-contrast thread (like a full six strands of floss) so your embroidery stands out instead of getting lost in the print.
13. Achieve Realism with Thread Painting
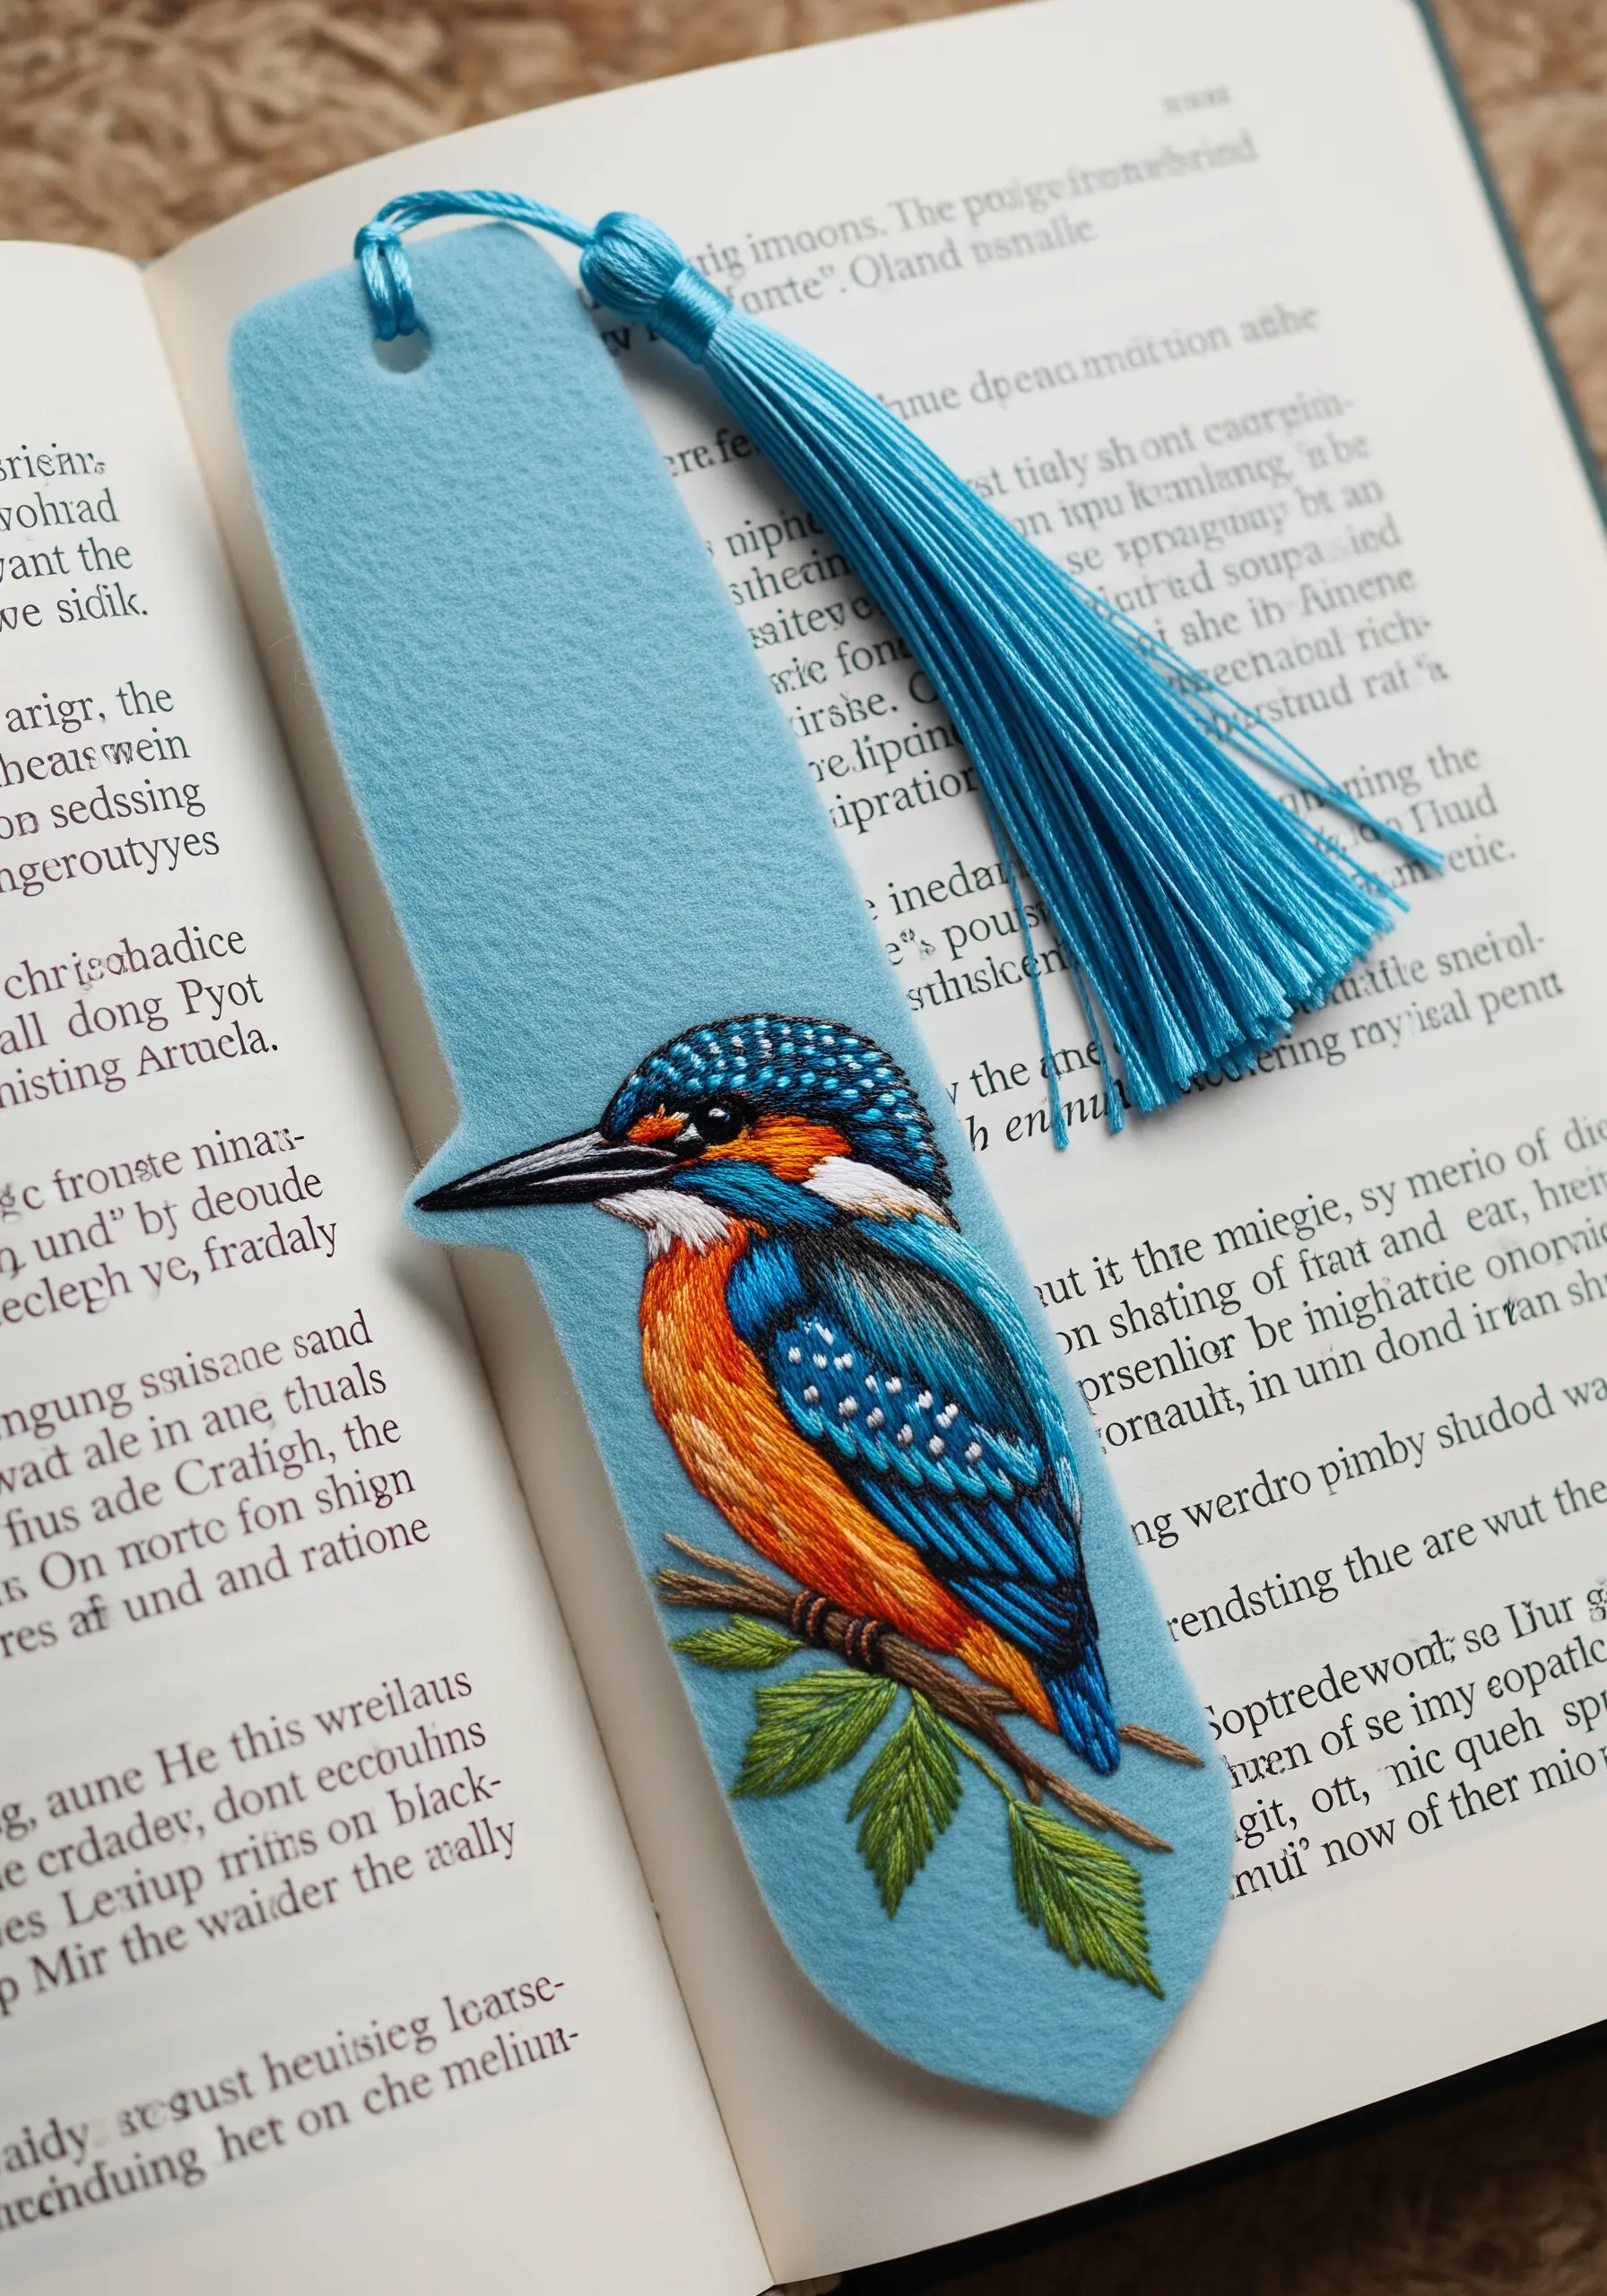
Create painterly effects with a needle and thread using the long and short stitch technique. To achieve smooth color blending, always work with a single strand of embroidery floss.
Before you start, map out your color zones. For the kingfisher, this means defining where the darkest blues, teals, and bright orange will go. This roadmap ensures your blending is intentional and realistic.
Stitching on stiff felt provides a stable, non-stretchy foundation that is ideal for dense thread painting. Plus, you can cut it to shape without worrying about fraying. You can even learn ways to embroider realistic shadows under leaves for depth.
14. Assemble a Sweet Felt Bird Garland
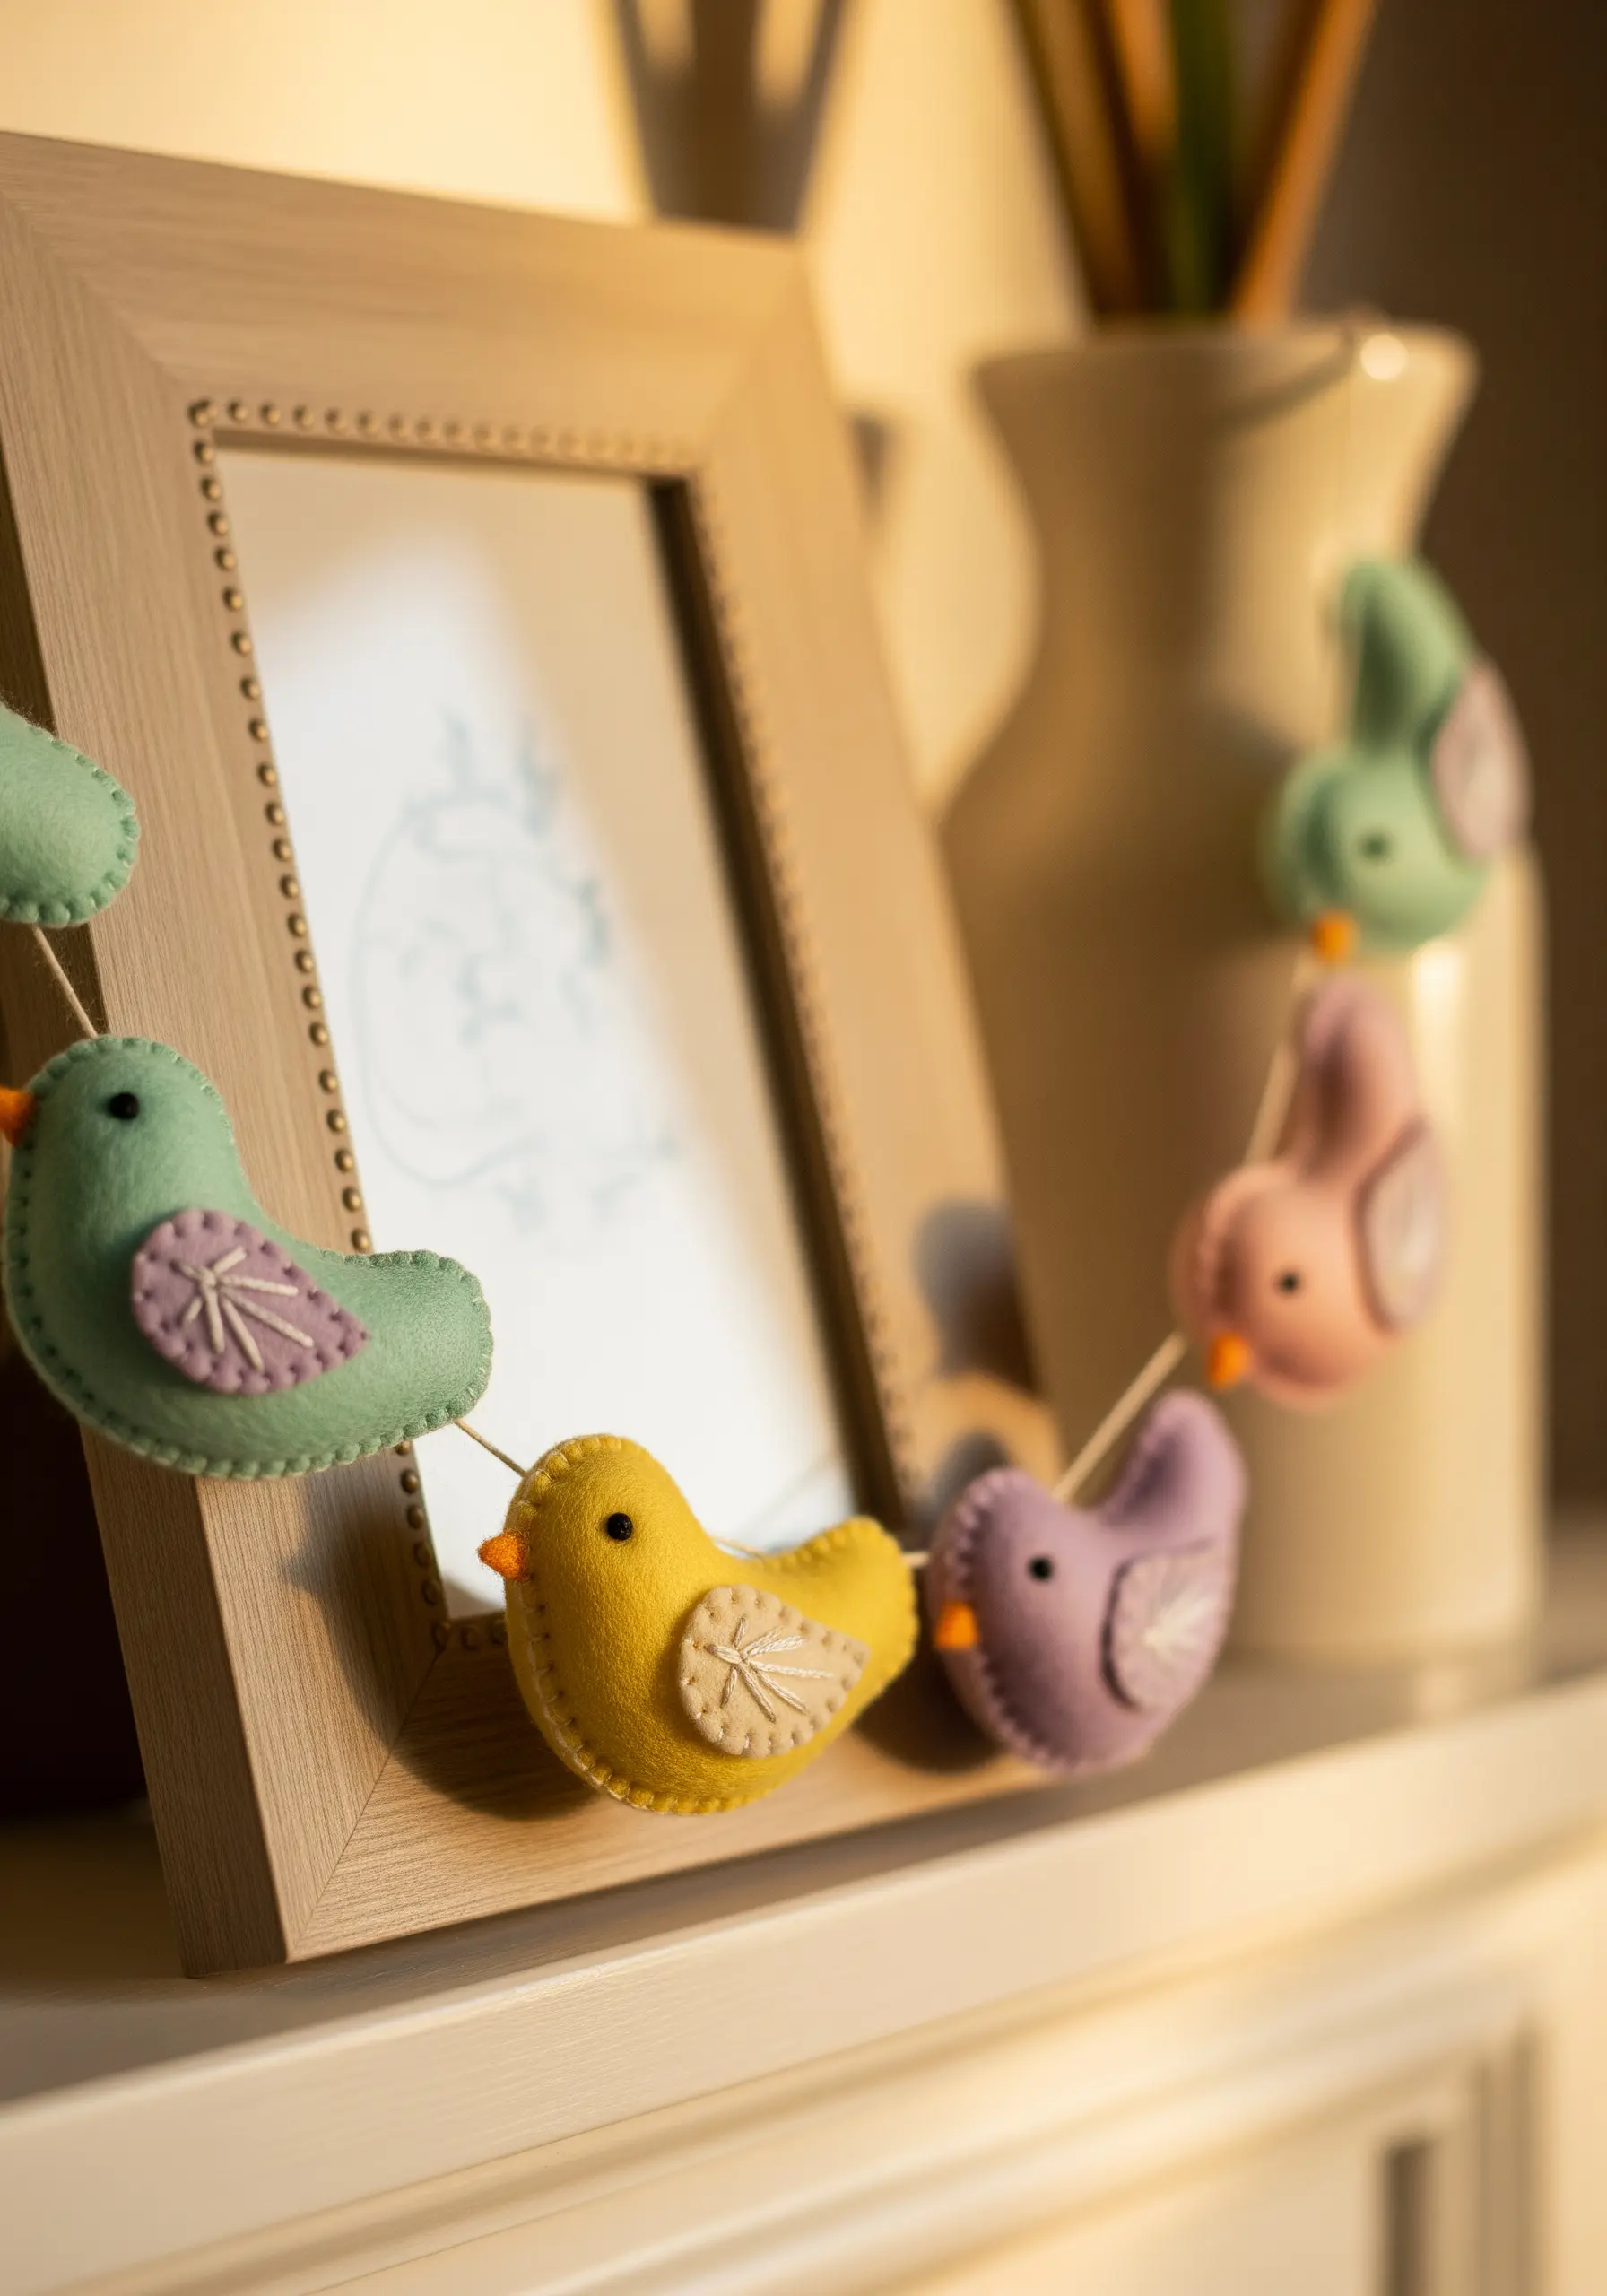
Create a charming garland with simple felt shapes. The key to a polished look is the finishing stitch: use a neat blanket stitch around the edge of each bird to close the seams and add a decorative border.
Keep the embroidered details minimal to maintain the soft, sweet aesthetic. A simple fan of straight stitches for the wing and a French knot for the eye is all you need.
Use a muted, harmonious color palette. The soft pastels work together to create a calm, cohesive look that feels gentle and intentional.
15. Turn a Switch Plate into a Botanical Accent
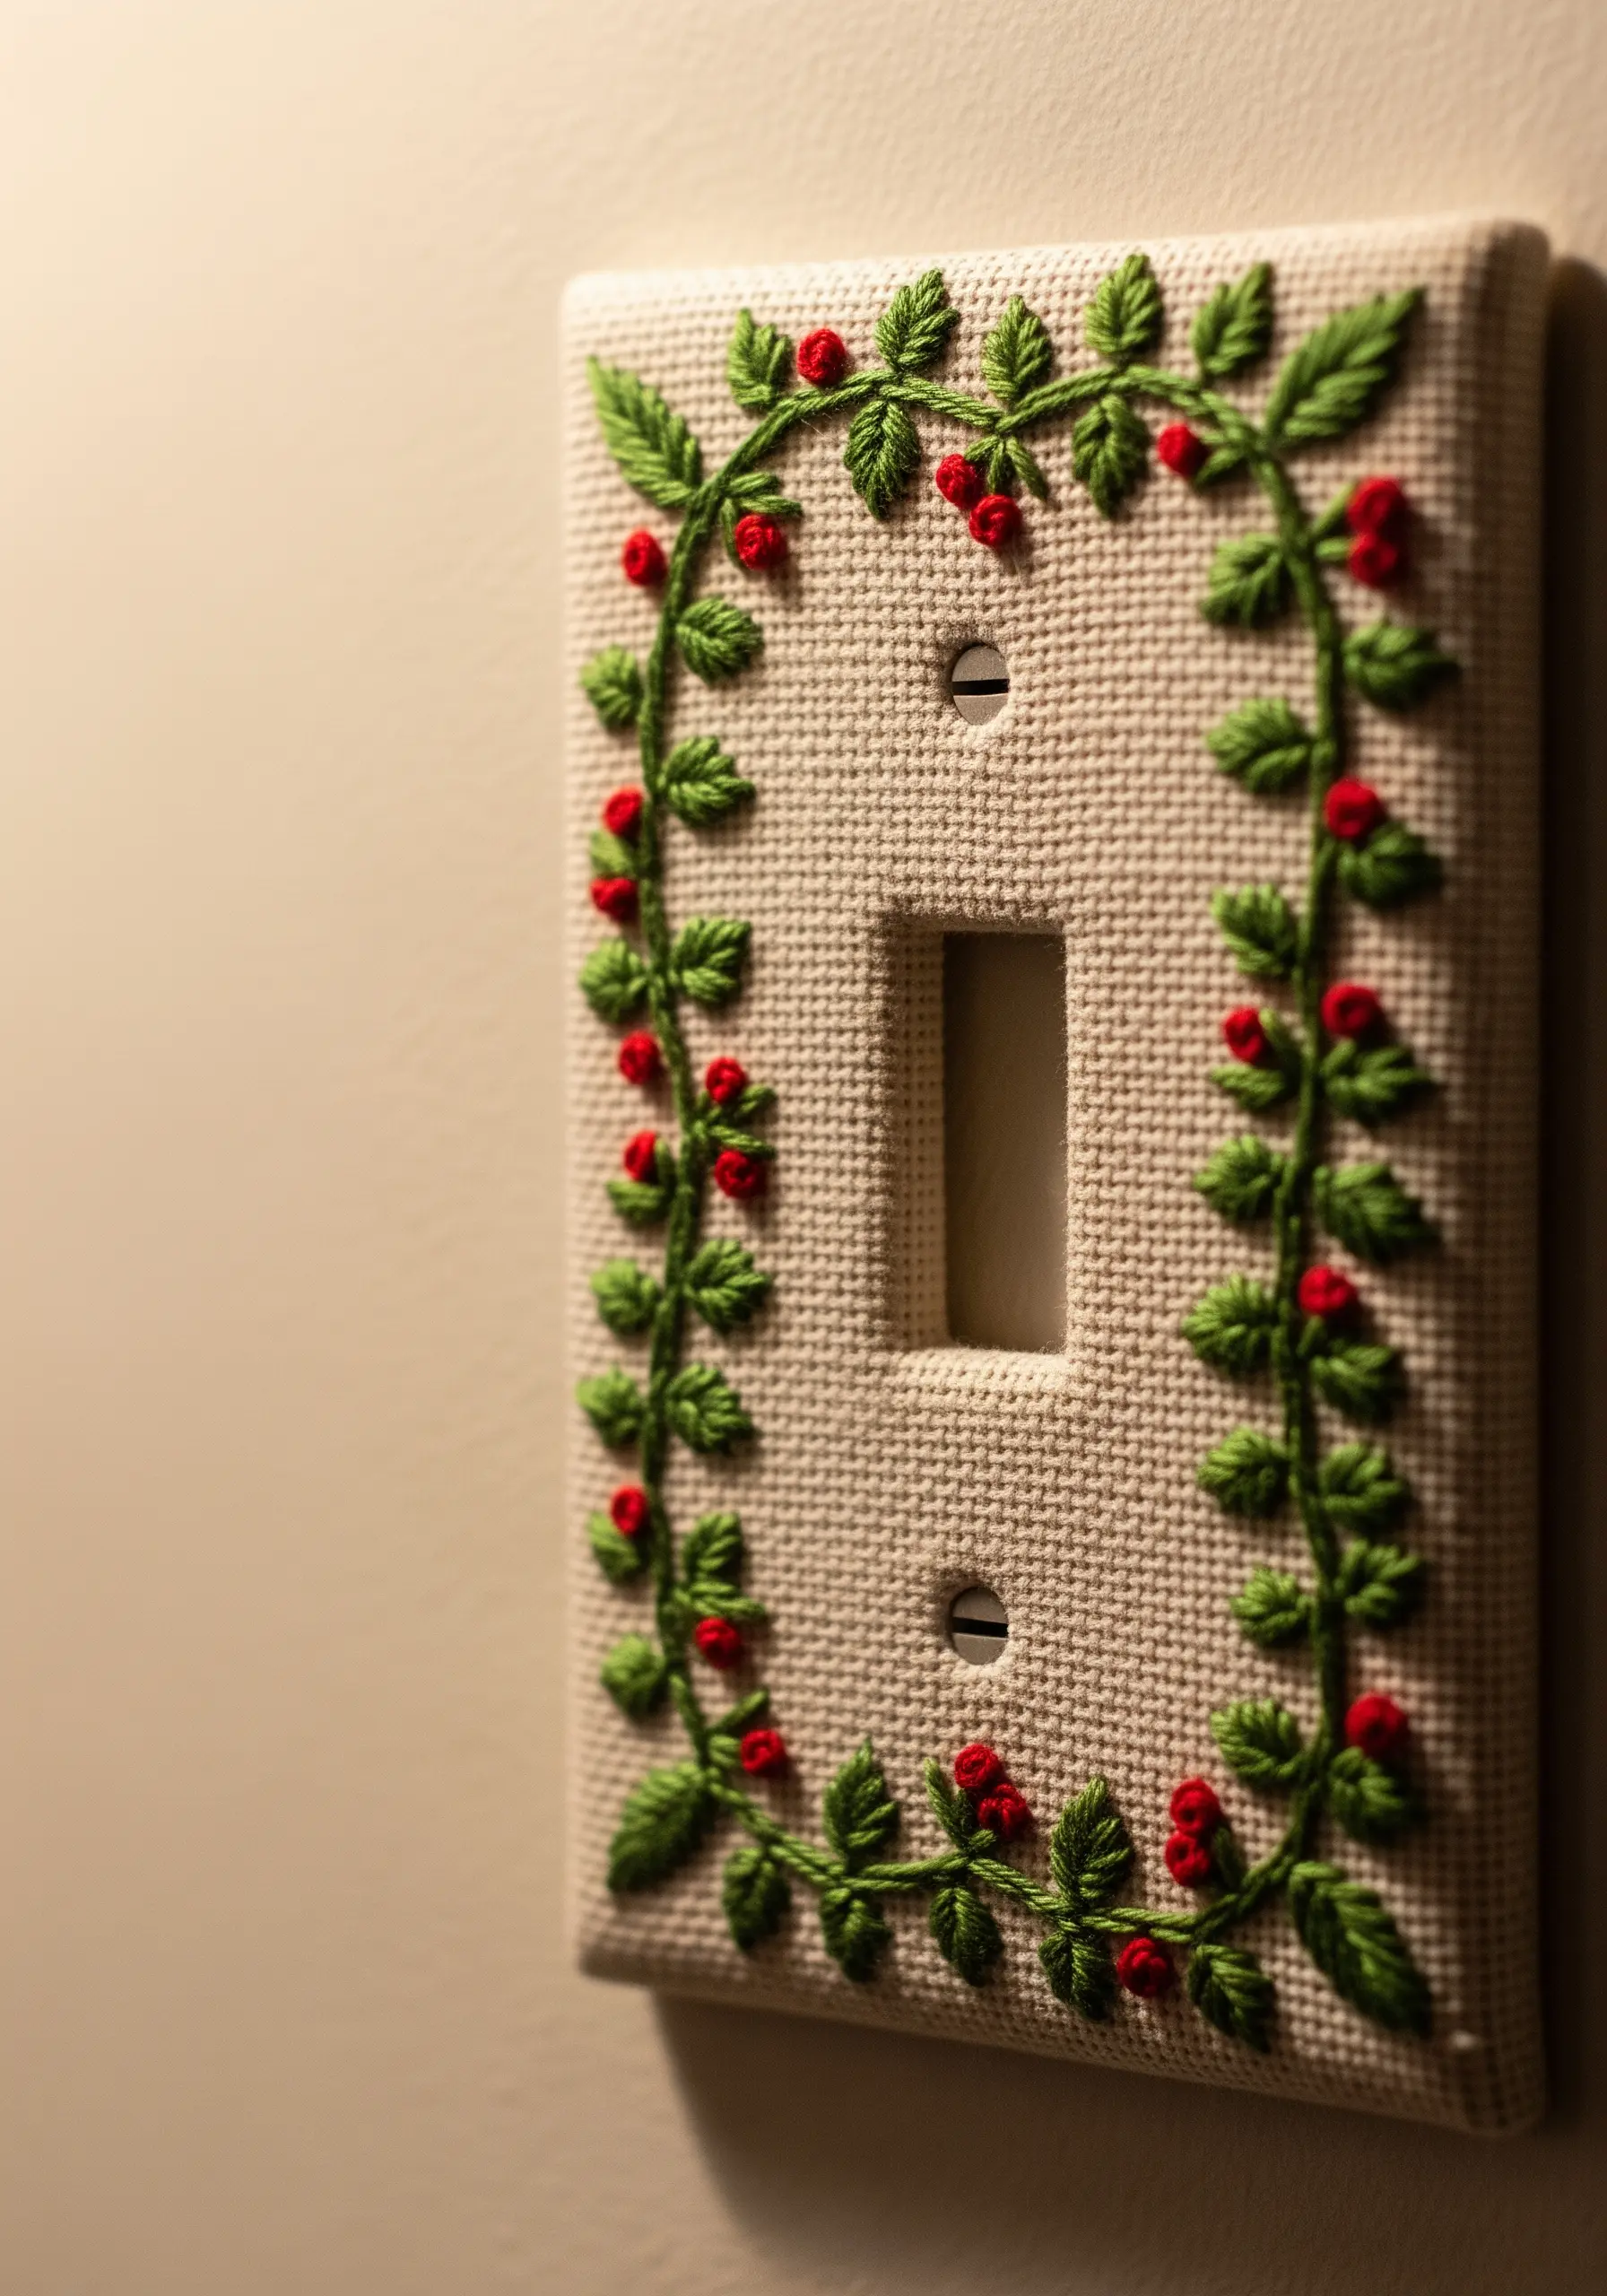
Elevate an ordinary household item by covering a standard plastic switch plate with embroidered fabric.
Use Aida cloth for this project. Its sturdy weave is easy to wrap tightly, and the grid helps you perfectly center your design. Stitch your botanical wreath first, leaving ample margin around the edges.
To assemble, use a strong spray adhesive on the plate, wrap the fabric tautly, and fold the edges to the back. Use a sharp craft knife to carefully cut out the openings for the switch and screws.
These hand-embroidery leaf patterns can be adapted for any small space.
16. Quilt a Modern Mug Rug for Your Countertop

Explore textile art through miniature quilting. A mug rug is a perfect small-scale project to practice piecing and quilting techniques without the commitment of a large blanket.
The visual interest comes from the contrast between fabric patterns and colors. Choose a mix of bold and subtle prints within a coordinated color scheme for a balanced, dynamic look.
The quilting stitches themselves are part of the design. You can stitch in the ditch (along the seam lines) for a clean look, or add decorative hand-quilting stitches with a contrasting Perle cotton for a more visible, handmade touch.
17. Craft Elegant Felt Napkin Rings
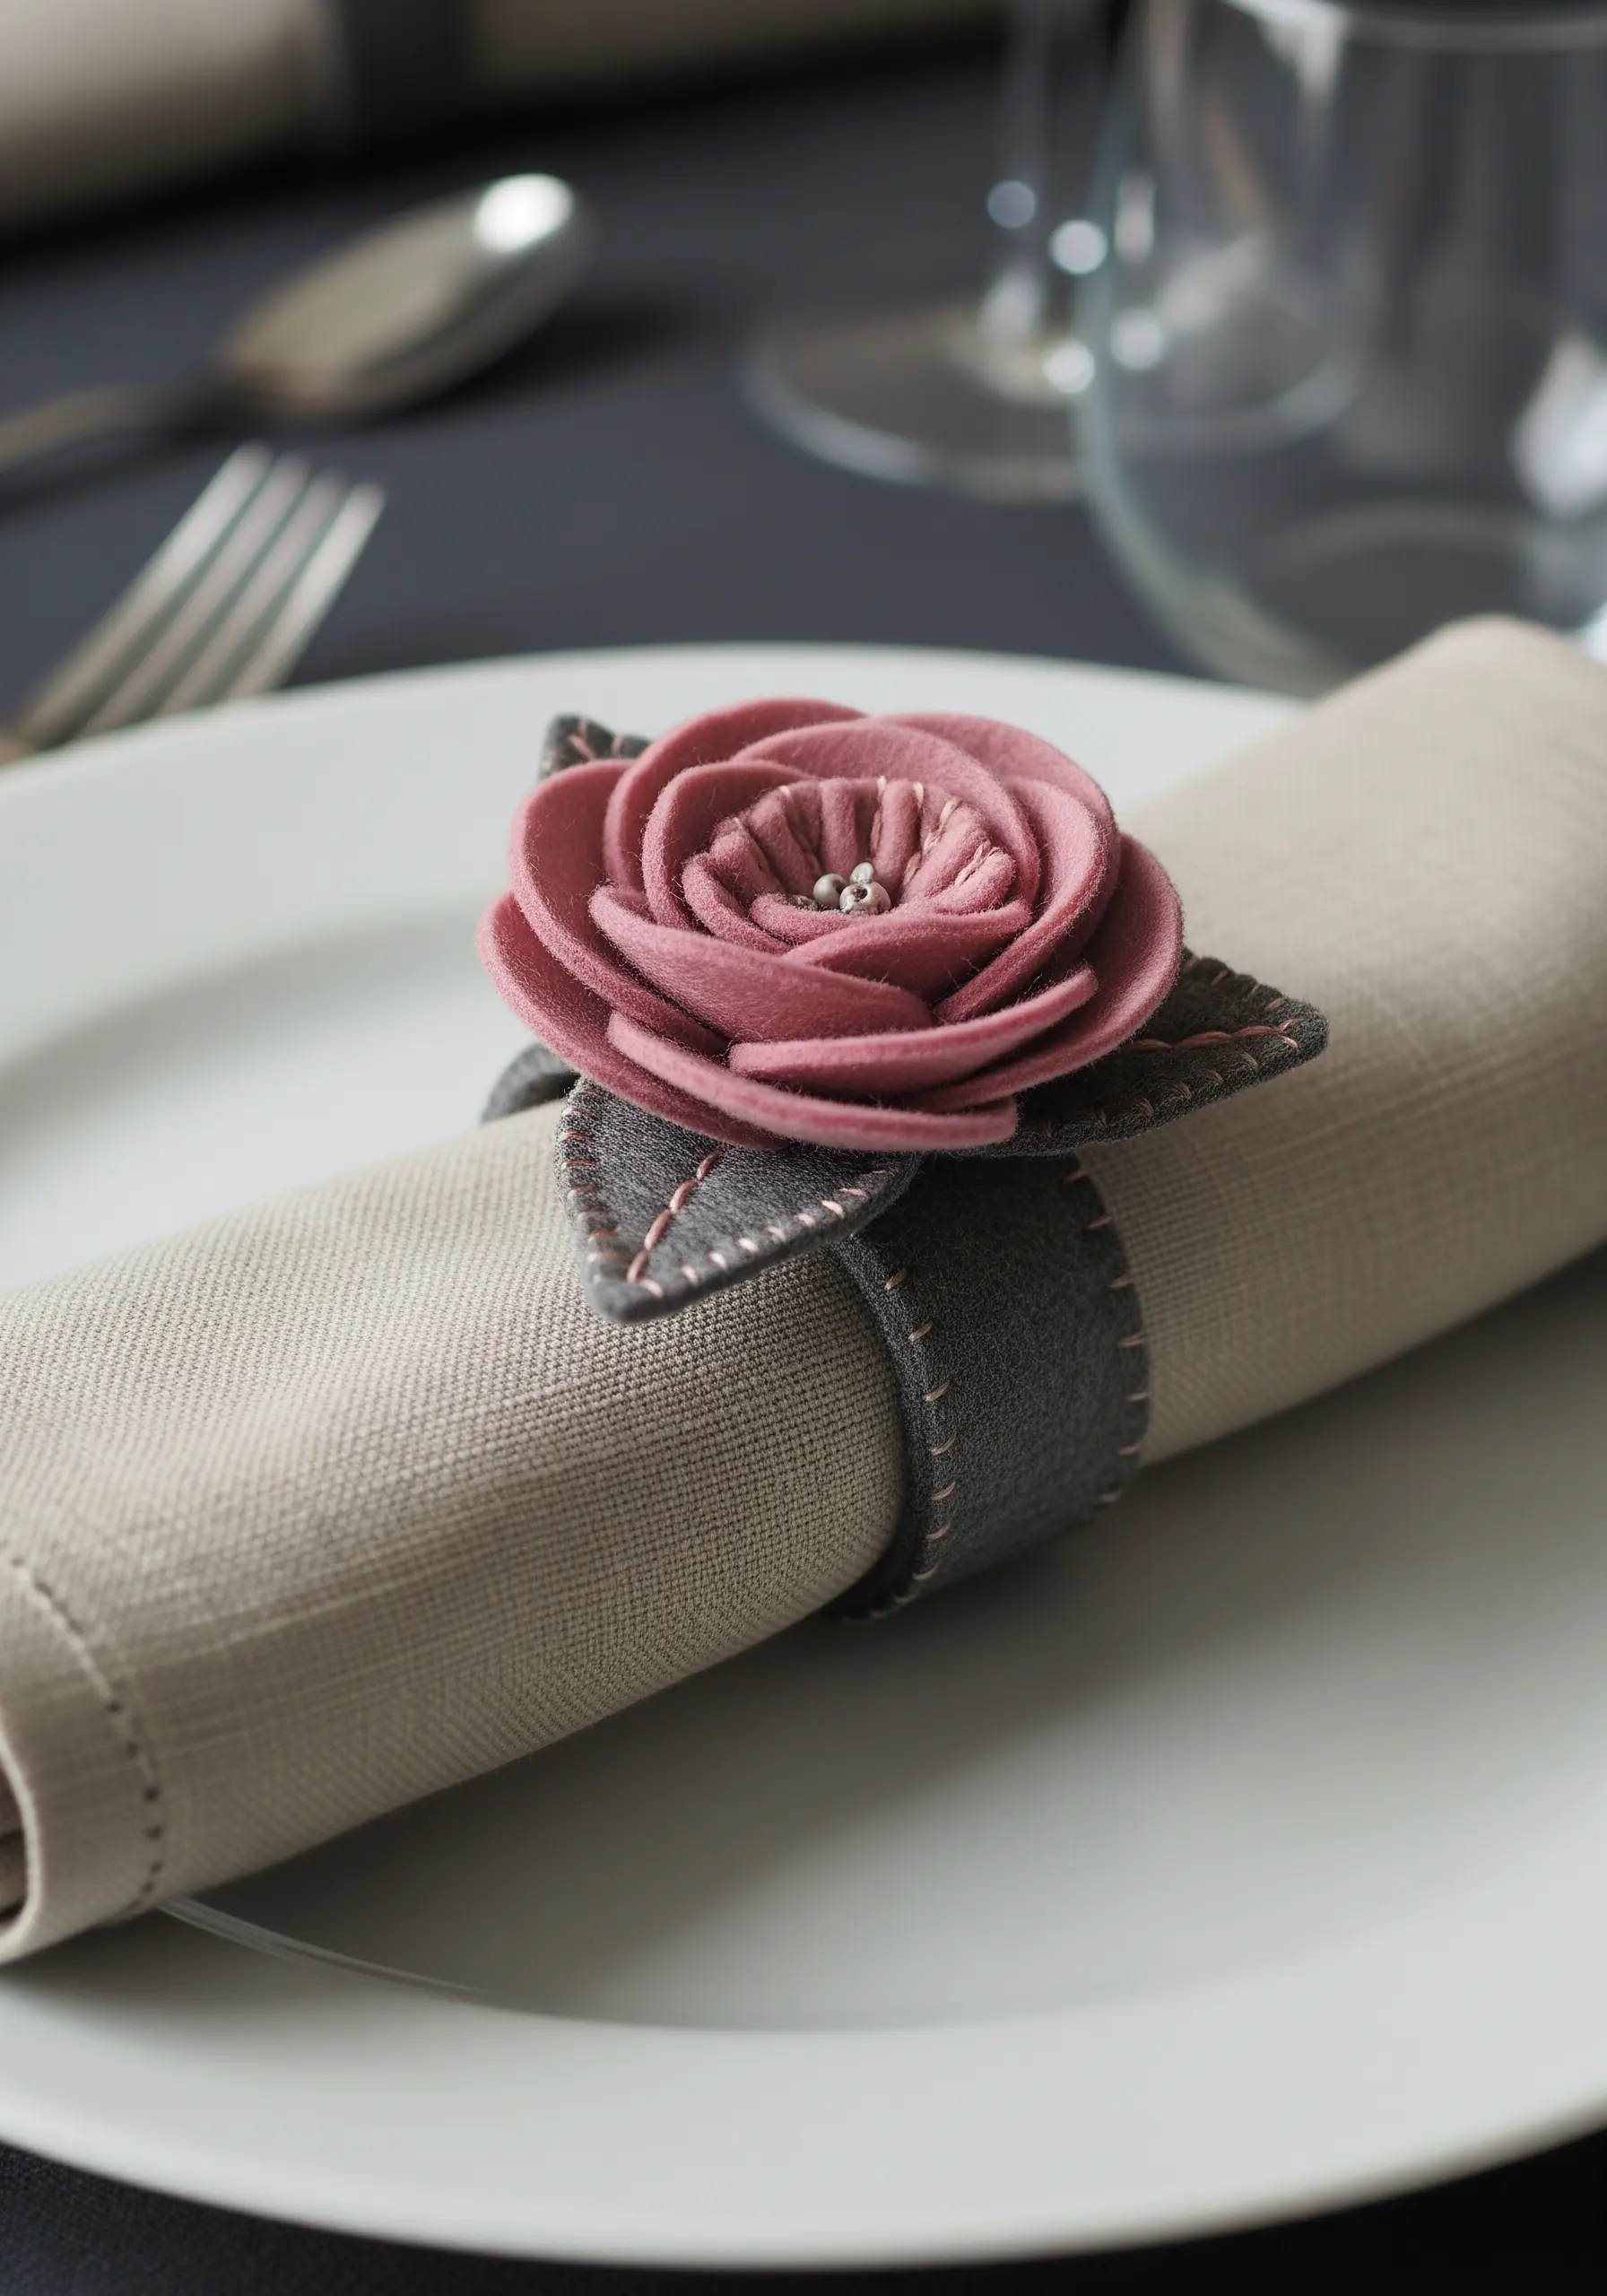
Construct beautiful, three-dimensional flowers from felt. Create the rose by cutting a spiral shape from a felt circle and rolling it up, securing the base with a few stitches.
Add subtle, handcrafted details with contrasting thread. A simple running stitch along the edge of the leaves and the band elevates the piece from a simple cutout to a polished accessory.
A cluster of tiny beads or French knots at the center of the flower adds a touch of elegance and draws the eye, providing a delicate focal point.
18. Coil a Rope Bowl with Fabric Scraps
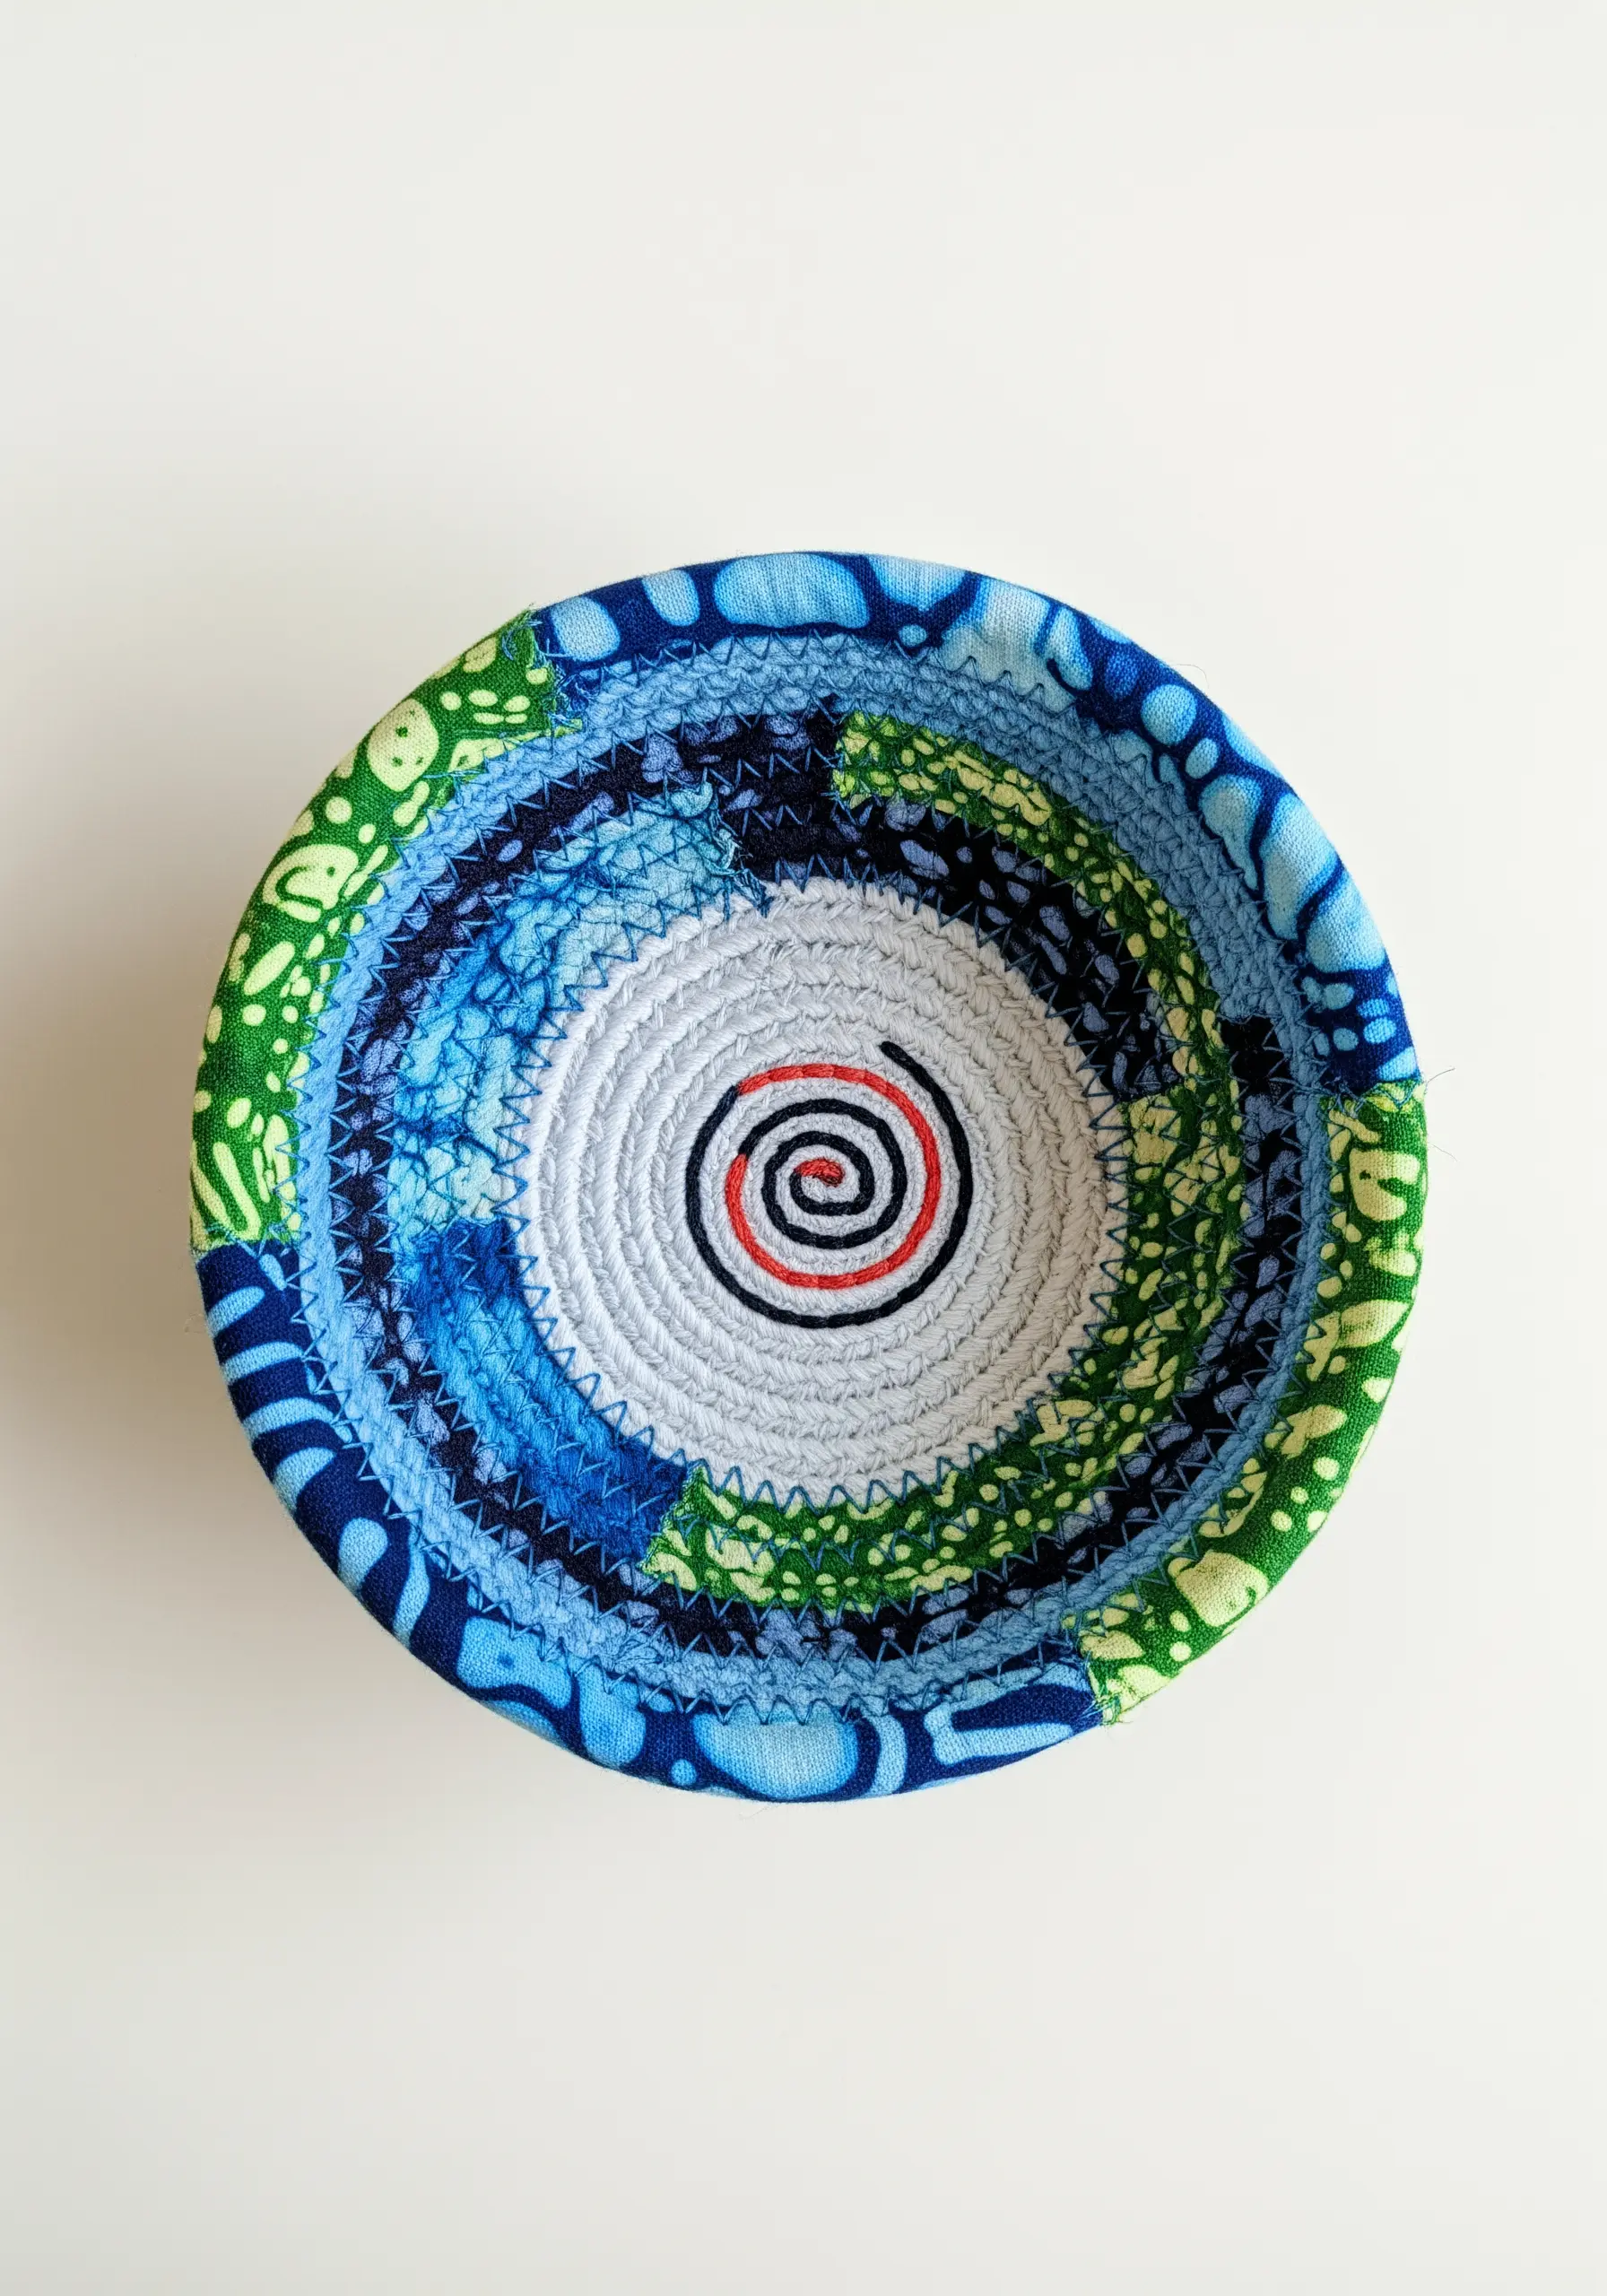
Create a vibrant decorative bowl by wrapping cotton rope with colorful fabric strips and coiling it into shape.
The technique is simple: as you coil the fabric-wrapped rope, use a sewing machine with a wide zig-zag stitch to join the coils together. This creates a sturdy, structured bowl.
The artistry comes from your choice of fabrics. Create a color-blocked effect by switching fabric patterns every few rows, or use a single variegated batik for a more organic, blended look. The hand-stitched spiral adds a final personal mark.
19. Cross-Stitch a Word with Gradient Thread
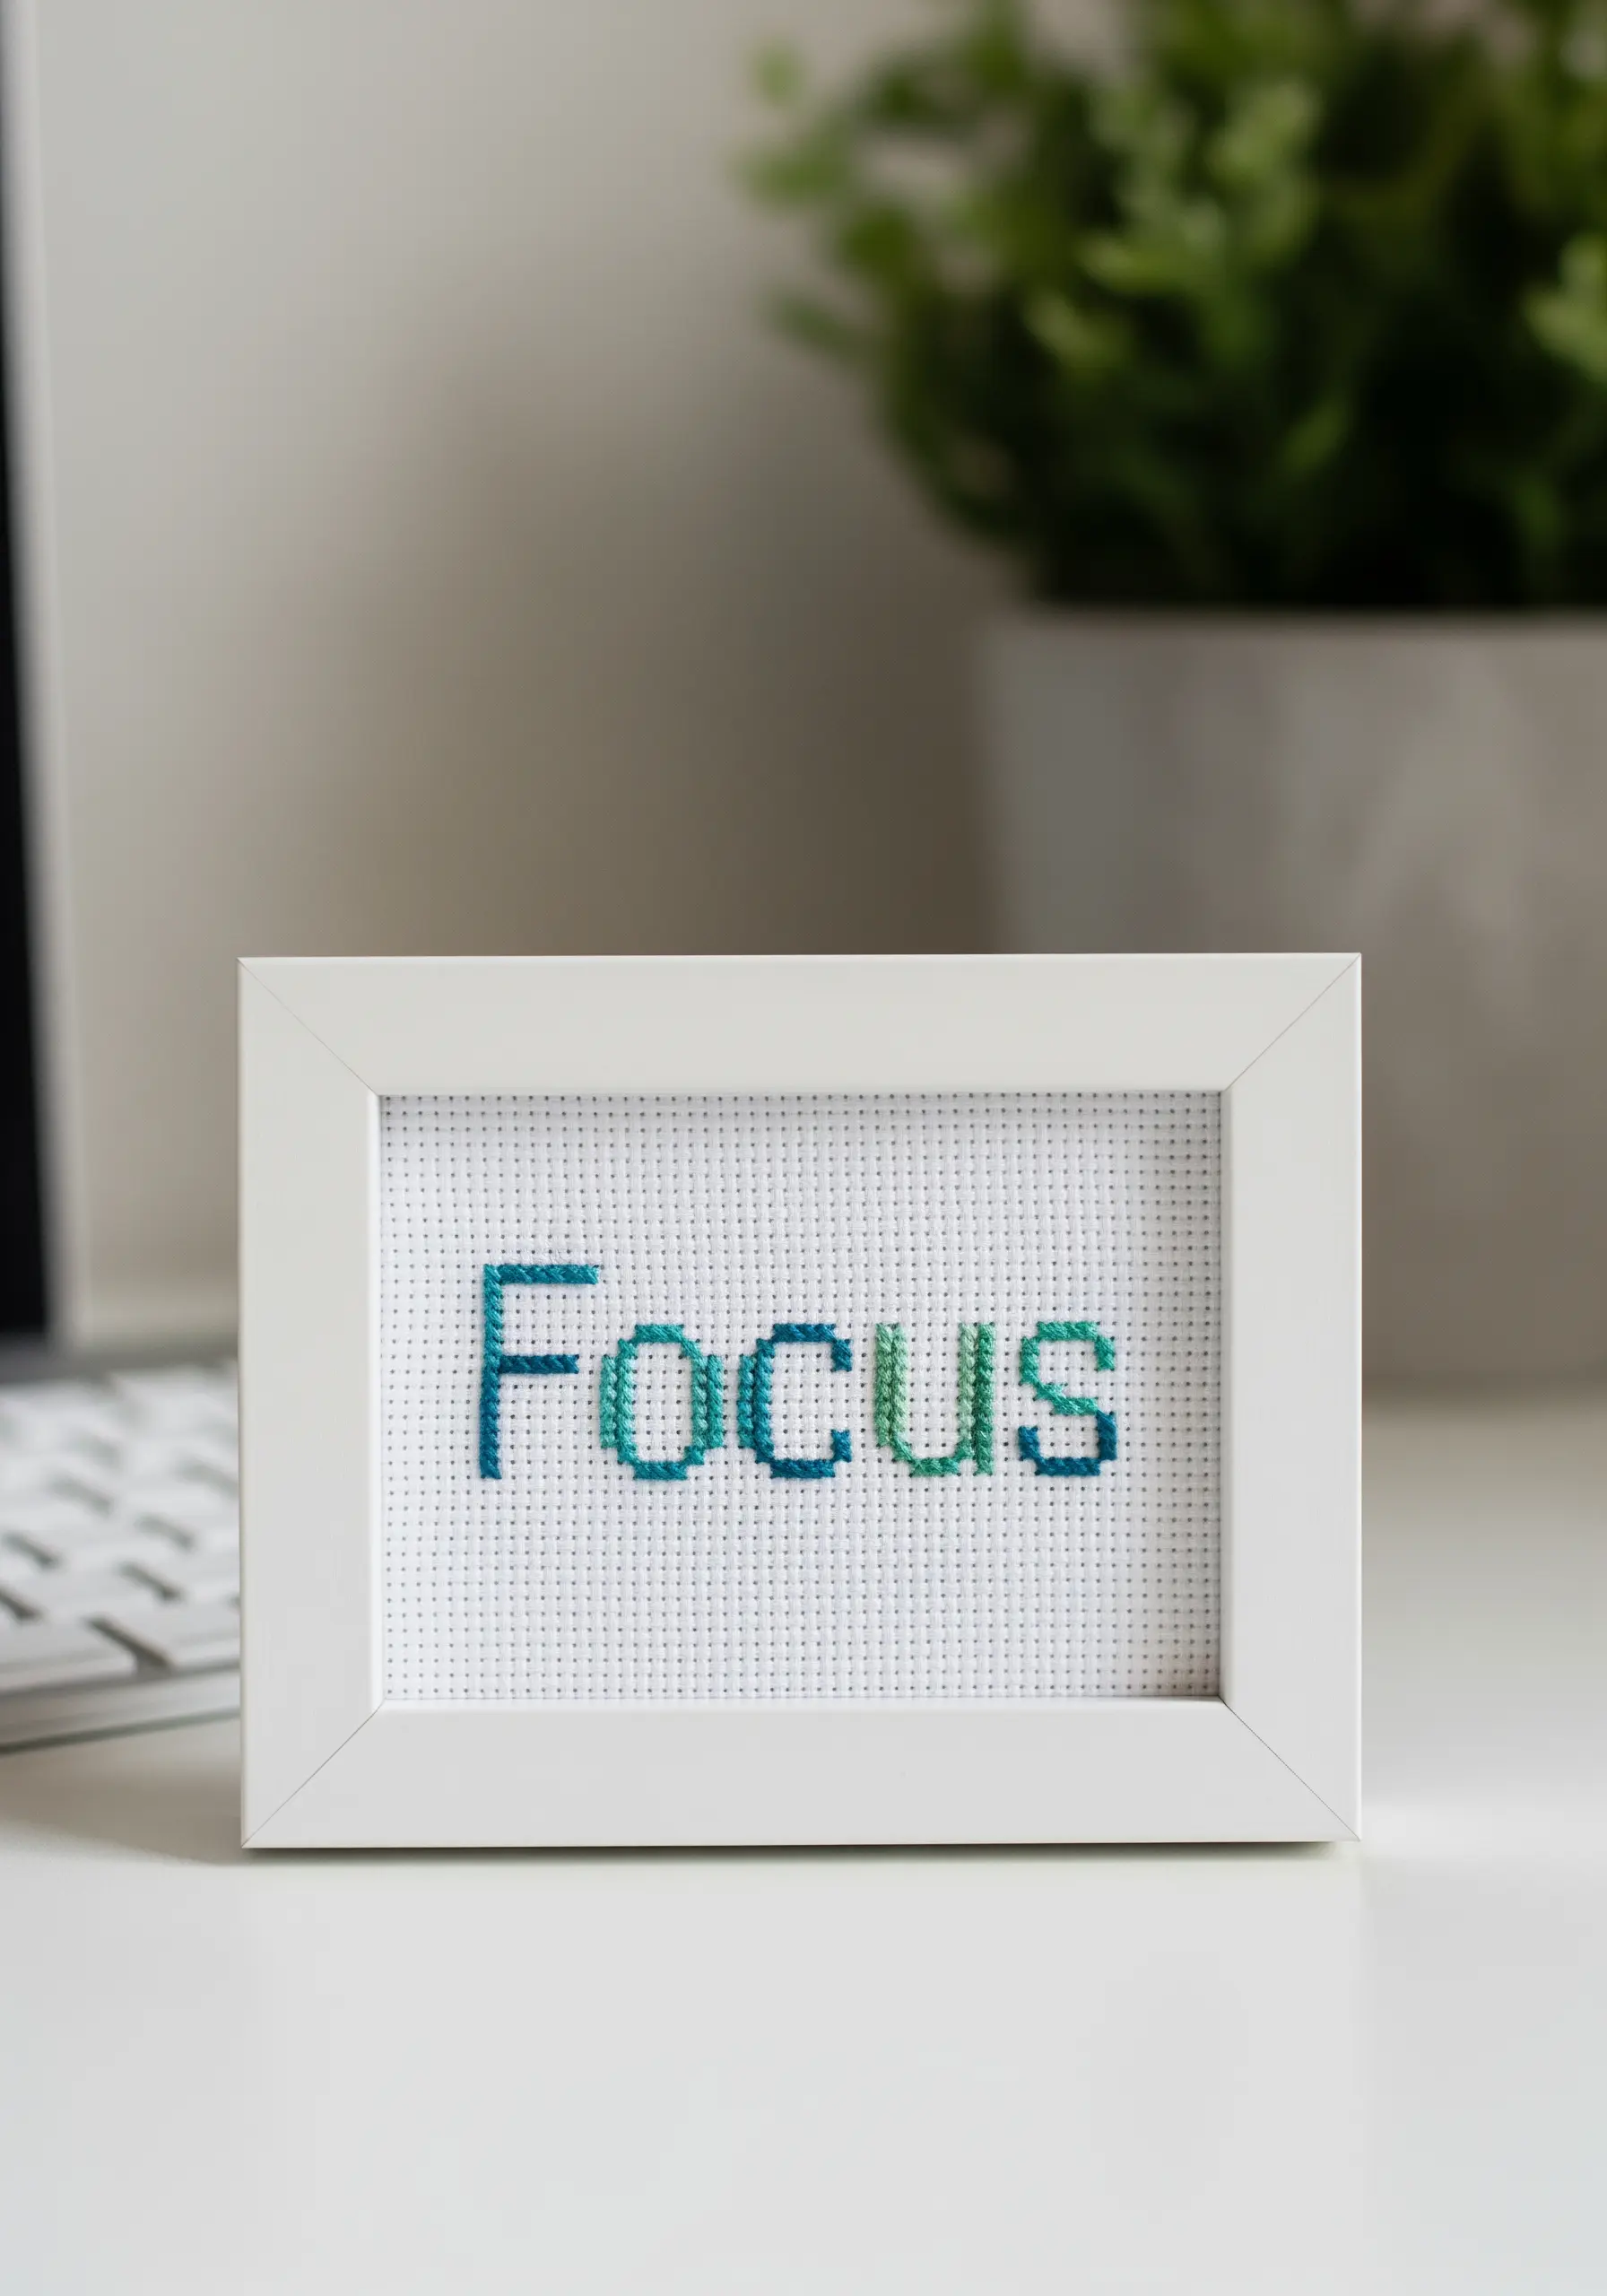
Give modern cross-stitch a painterly feel by using variegated embroidery floss. This special thread has multiple colors on a single strand, creating a beautiful gradient effect automatically as you stitch.
To ensure a smooth color transition with variegated thread, complete each full ‘X’ stitch before moving to the next one. This prevents the choppy, blocky color changes that can happen if you work in rows of half-stitches.
Keep the design and framing minimal. A clean, sans-serif font and a simple white frame allow the subtle beauty of the gradient to take center stage.
20. Sculpt a Whimsical Mushroom Ornament
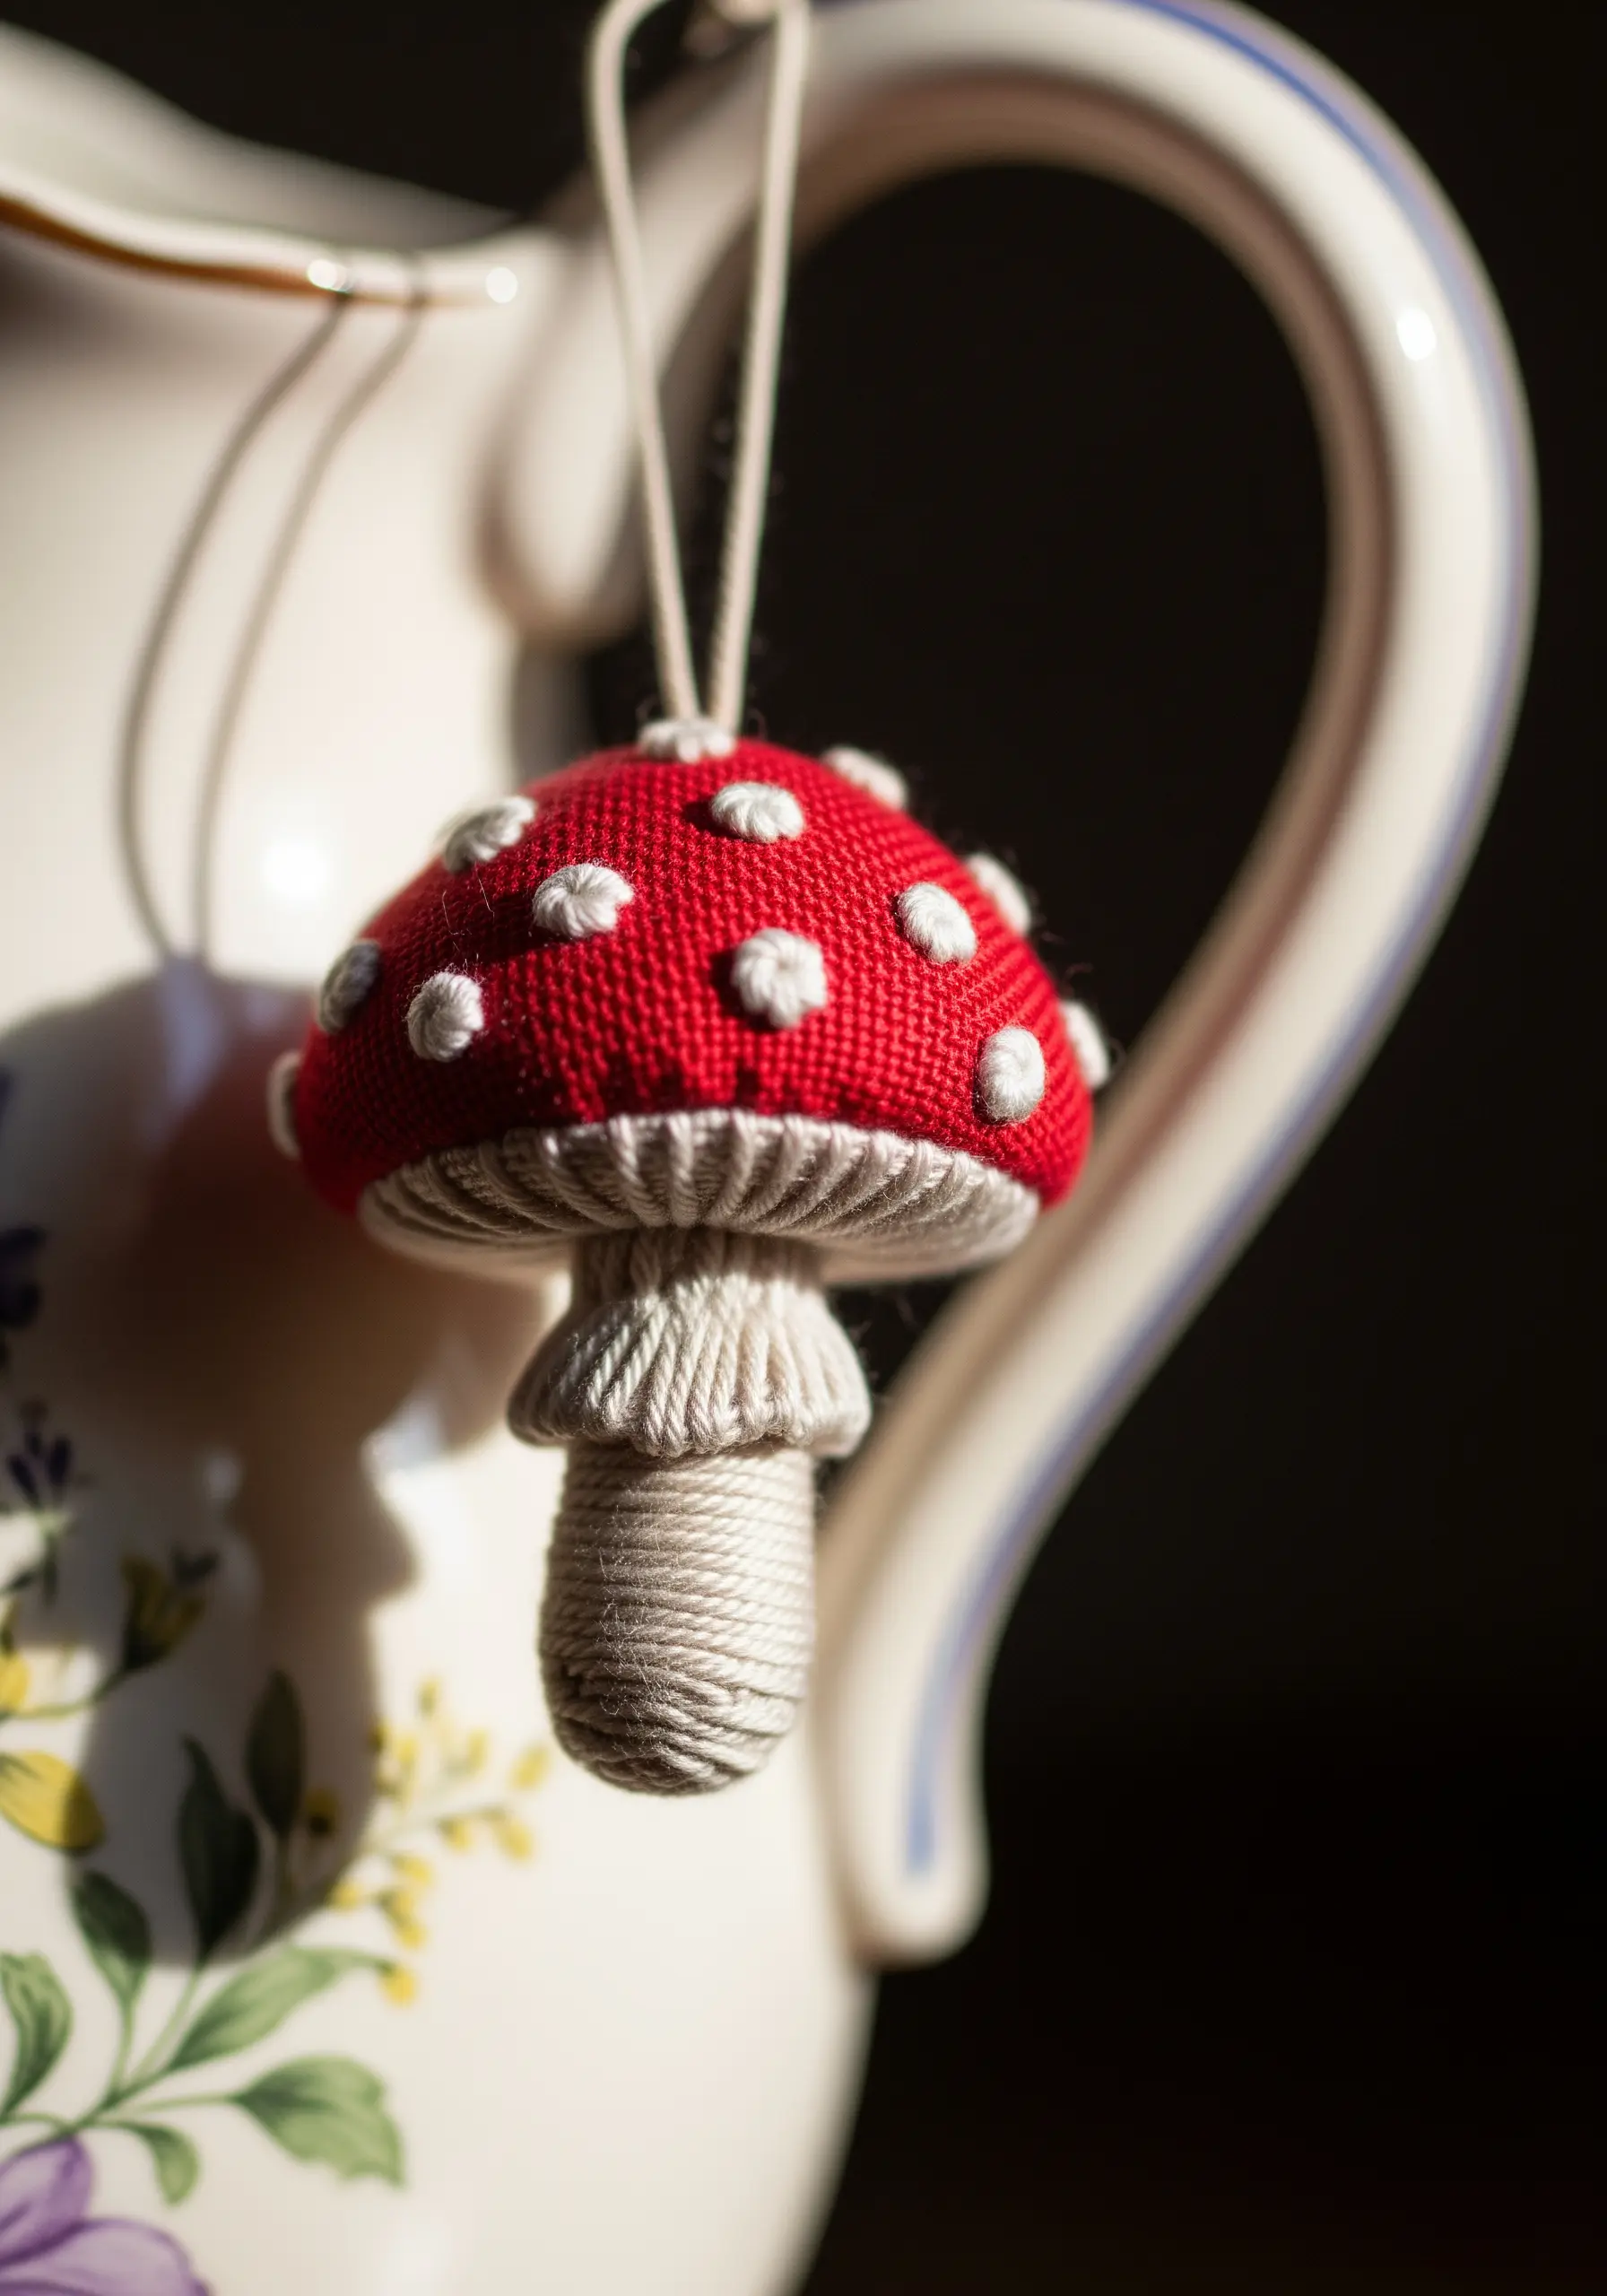
Explore stumpwork to create charming 3D ornaments. The mushroom cap is a padded shape covered in red fabric and embellished with white French knots for the iconic spots.
To create the realistic gills underneath the cap, wrap a neutral-colored thread tightly and neatly around the stem piece before attaching the cap.
This is a perfect piece of holiday-themed string art, adding a touch of woodland magic to a tree or a simple hook.
21. Design Elegant, Reusable Fabric Labels
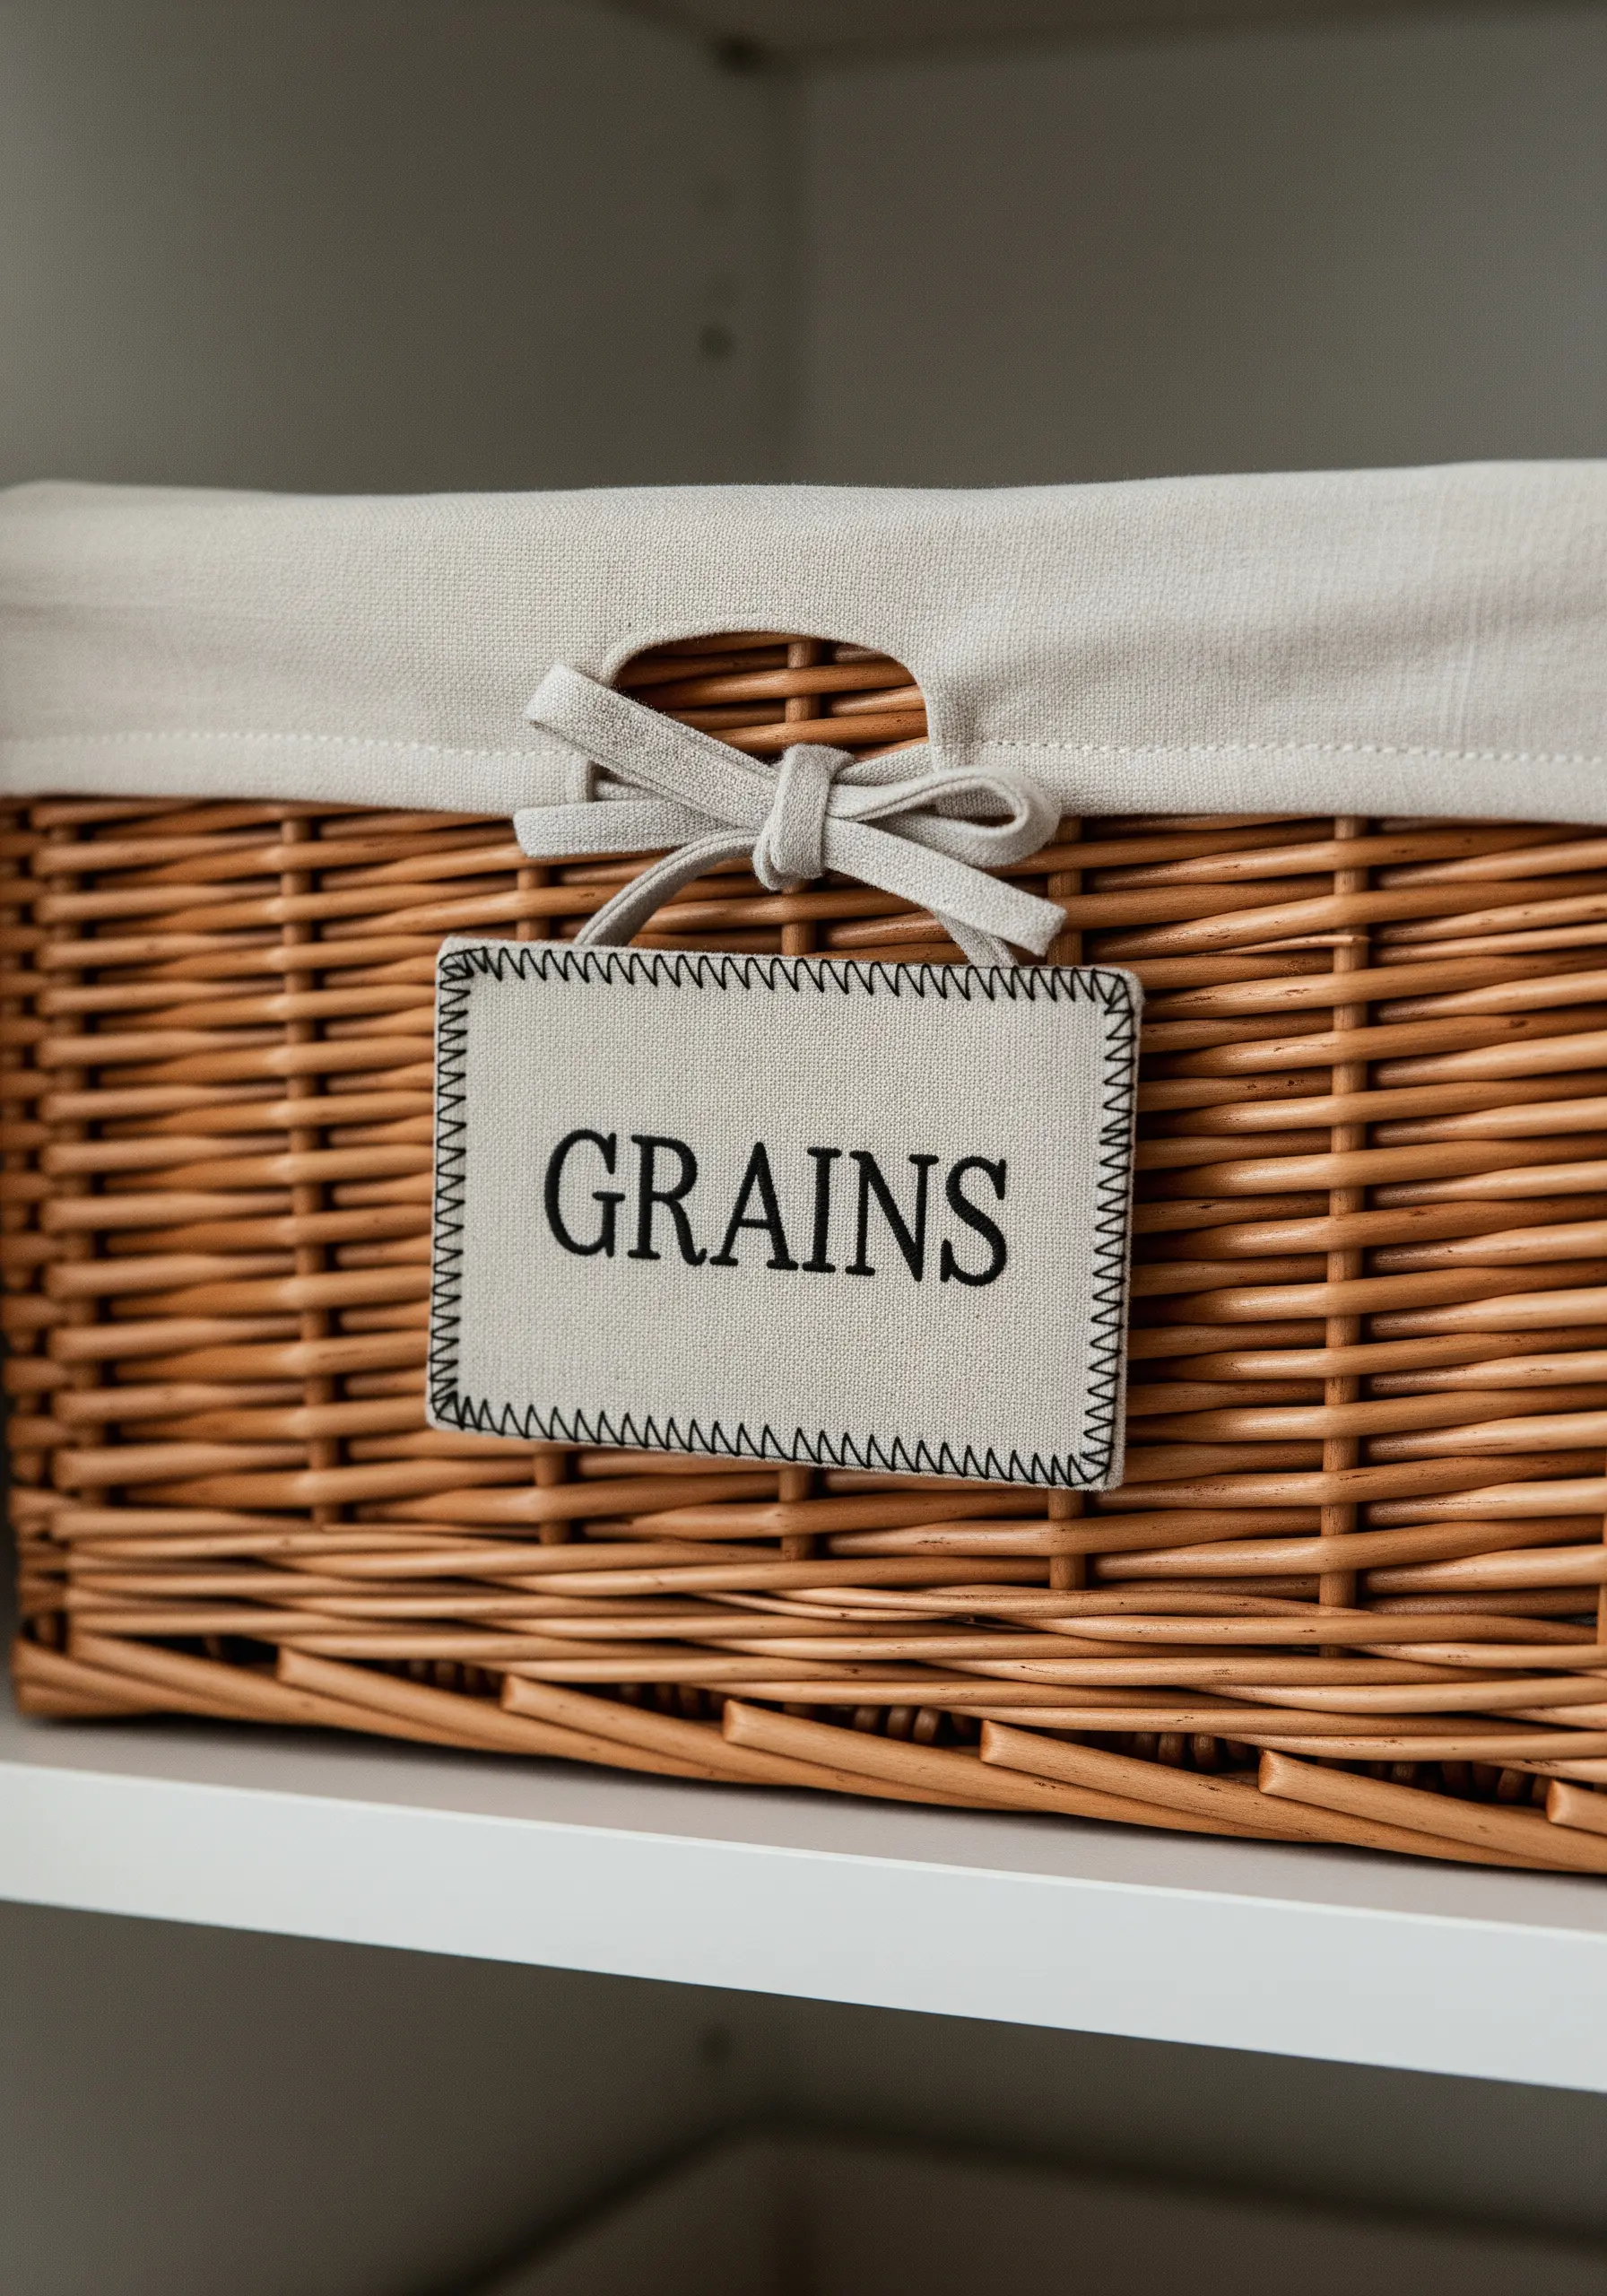
Create sophisticated, eco-friendly labels for baskets and bins. Use a sturdy fabric like linen or canvas that will hold its shape well.
A clean, simple backstitch is perfect for lettering. To ensure your text is perfectly aligned, write it on a wash-away stabilizer, stick it to your fabric, and stitch directly over the lines.
Frame the label with a decorative border. A neat blanket stitch around the edge not only prevents fraying but also gives the label a crisp, professionally finished look.
These are the tiny embroidered accents that make your home look designer-crafted.
22. Customize Push Pins with Tiny Motifs
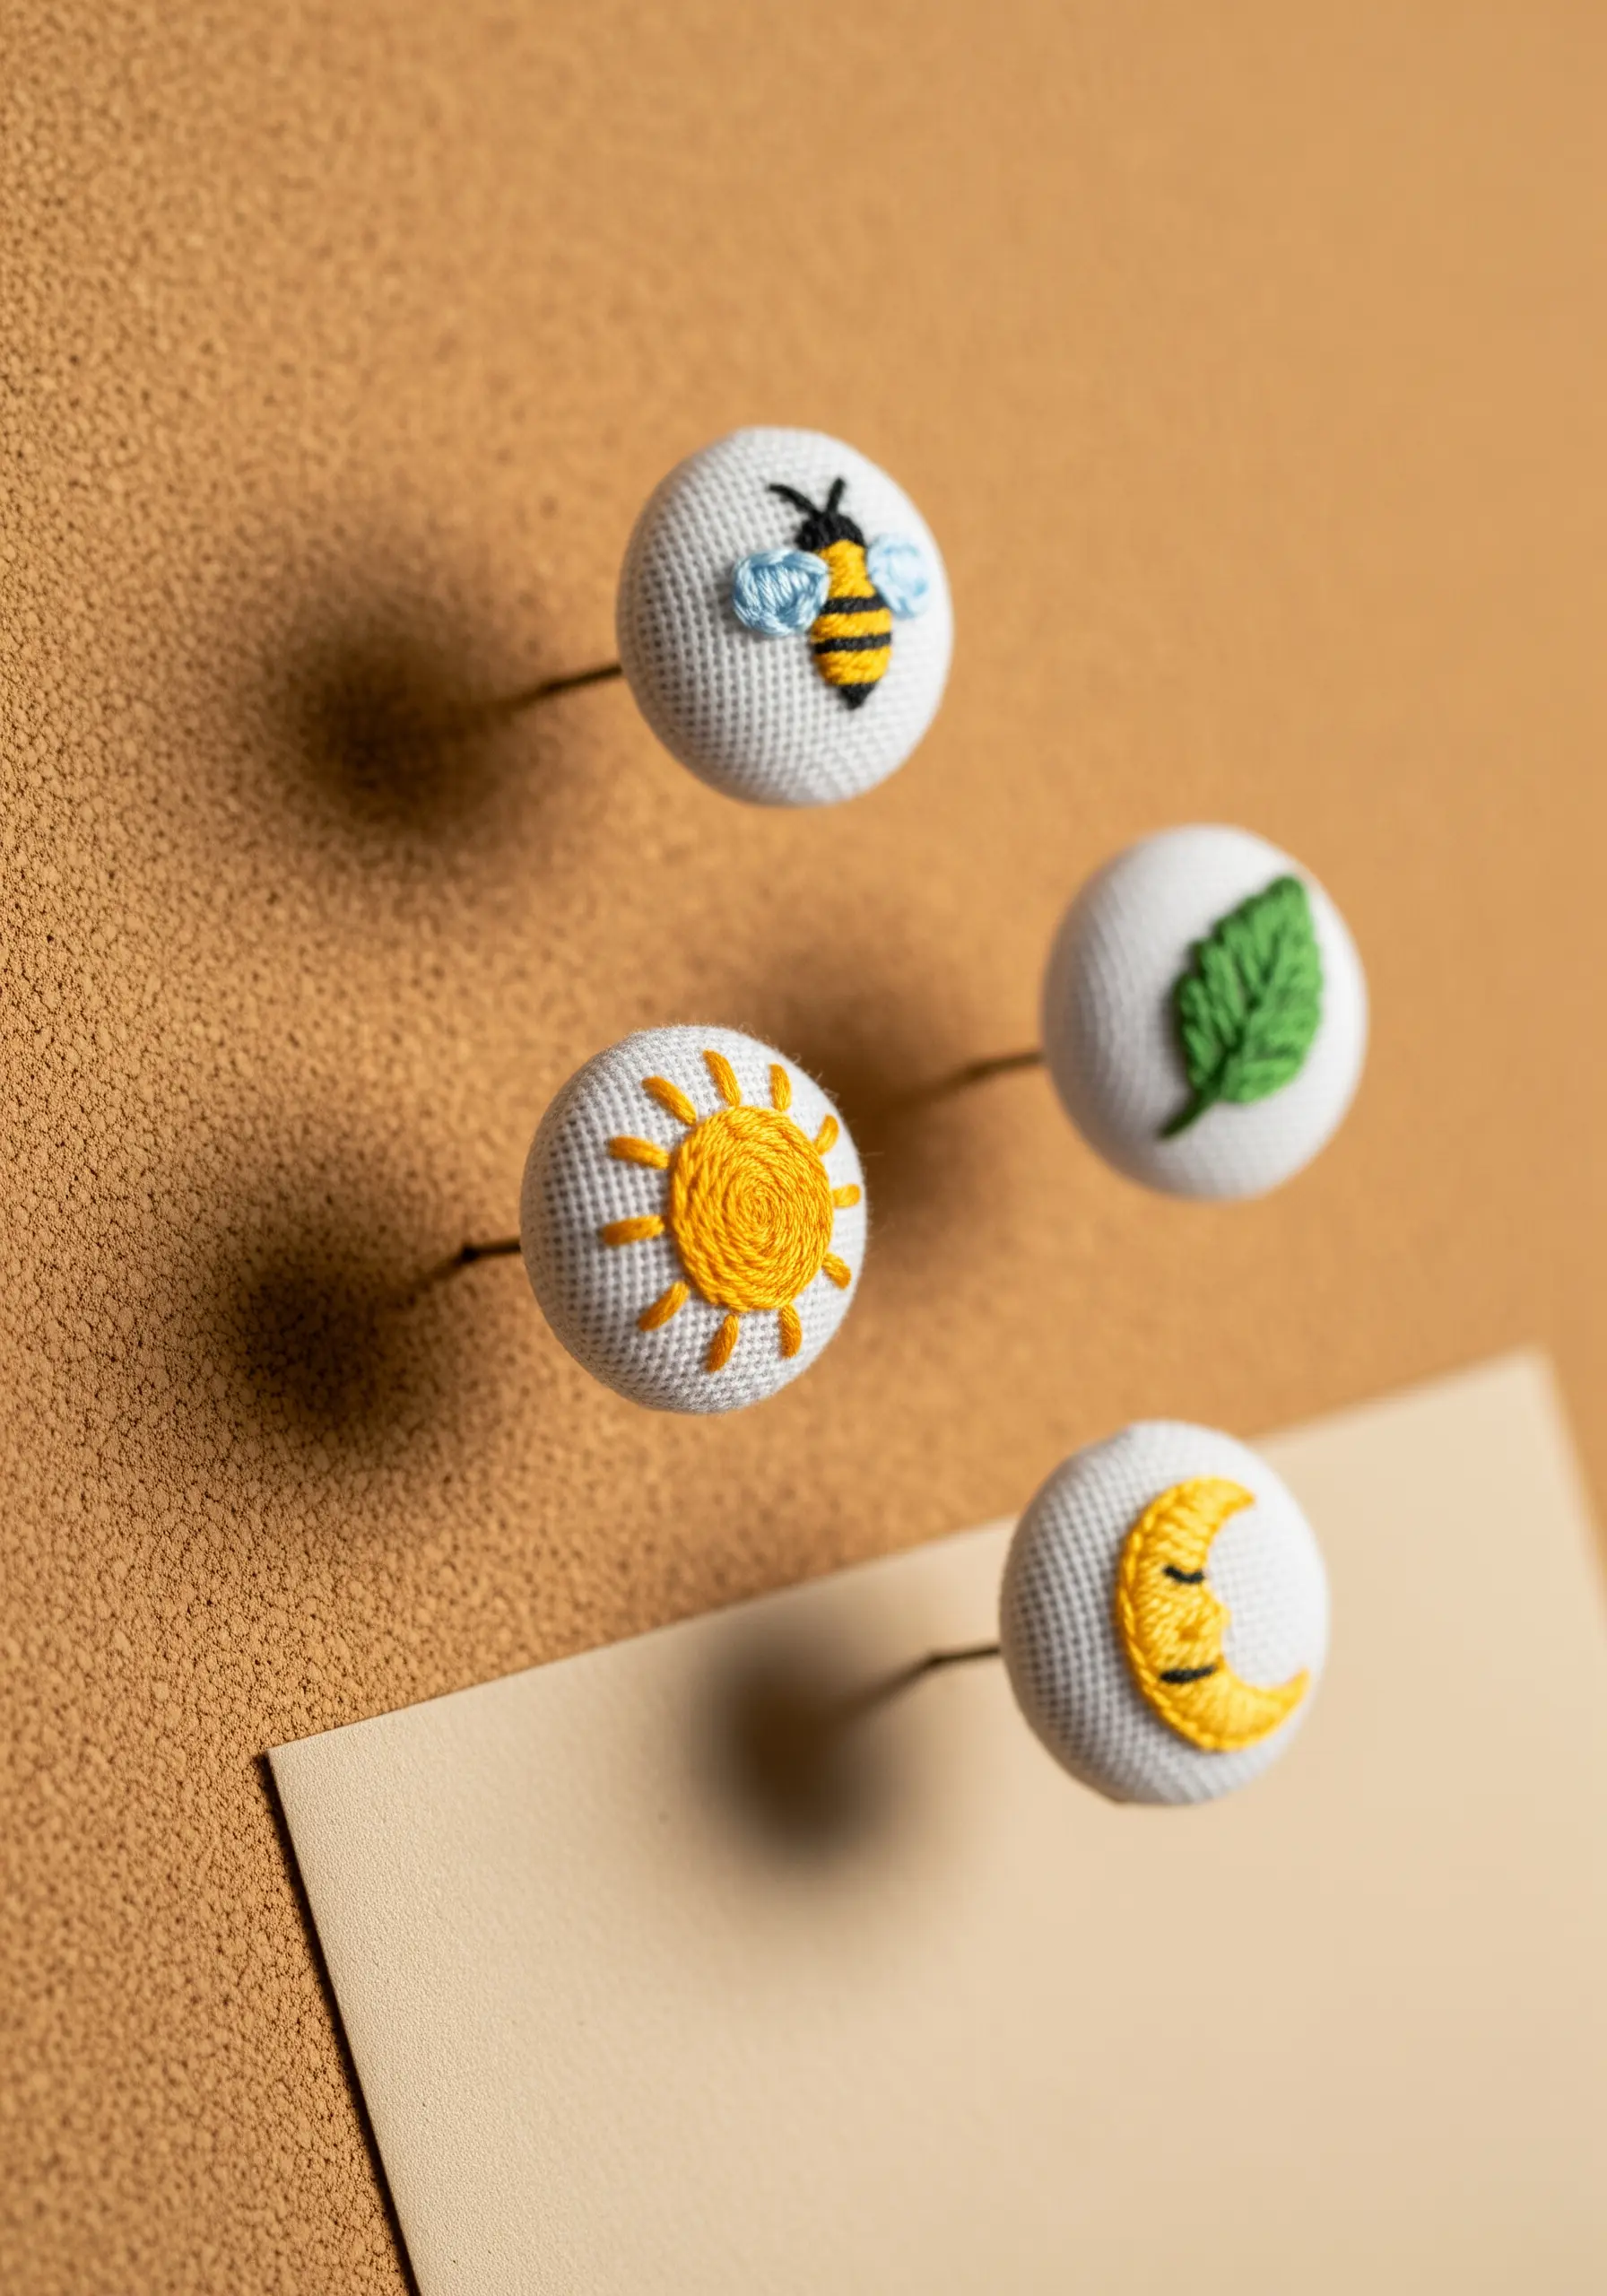
Transform ordinary office supplies into tiny works of art. This project uses fabric-covered button kits, with the shanks removed, glued onto flat-topped thumbtacks.
Your motifs must be tiny but impactful. Think simple and iconic: a whipped backstitch for a spiral sun, a fishbone stitch for a leaf, or a few satin stitches for a bee.
Use a single, bold color for each design to ensure it’s clearly visible. The contrast between the bright thread and the neutral fabric is what makes these miniature designs pop.
With tiny embroidery patterns, you can customize almost anything.


