
Have you ever finished an embroidery piece and felt it was missing something? A certain polish, a quiet confidence? The secret to elevating your work isn’t about mastering impossibly complex stitches or buying expensive threads.
It’s about intention. It’s found in the tiny, deliberate choices that transform a simple stitched line into a statement. A padded satin stitch that catches the light just so. A single, perfectly placed botanical that brings a plain linen napkin to life. A metallic thread that turns a book spine into a treasure.
Think of your shelves not just as storage, but as a personal gallery waiting to be curated. Each piece you’ll discover here is more than a project; it’s a technique designed to add a touch of quiet luxury to your home, one thoughtful stitch at a time. Let’s begin.
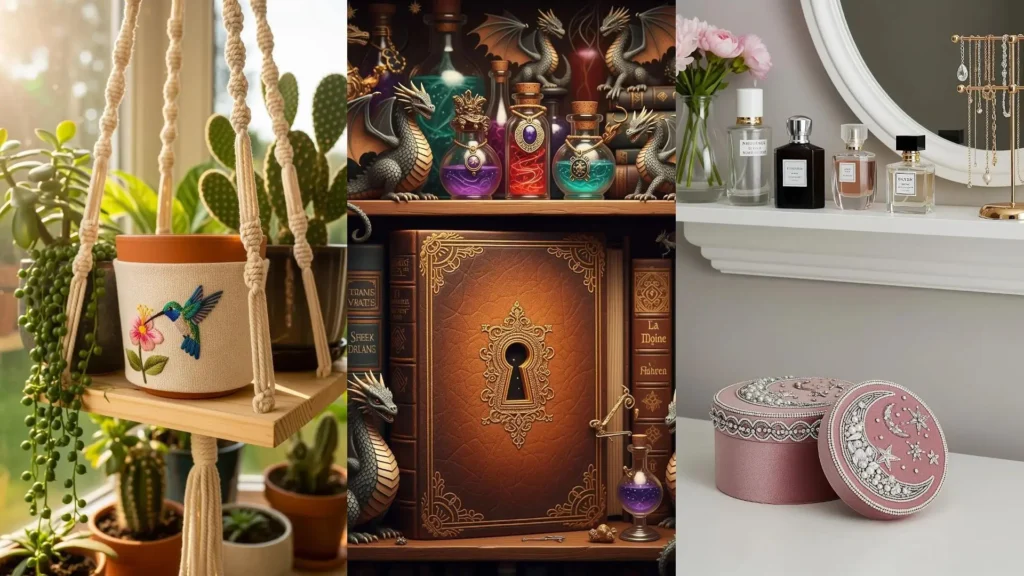
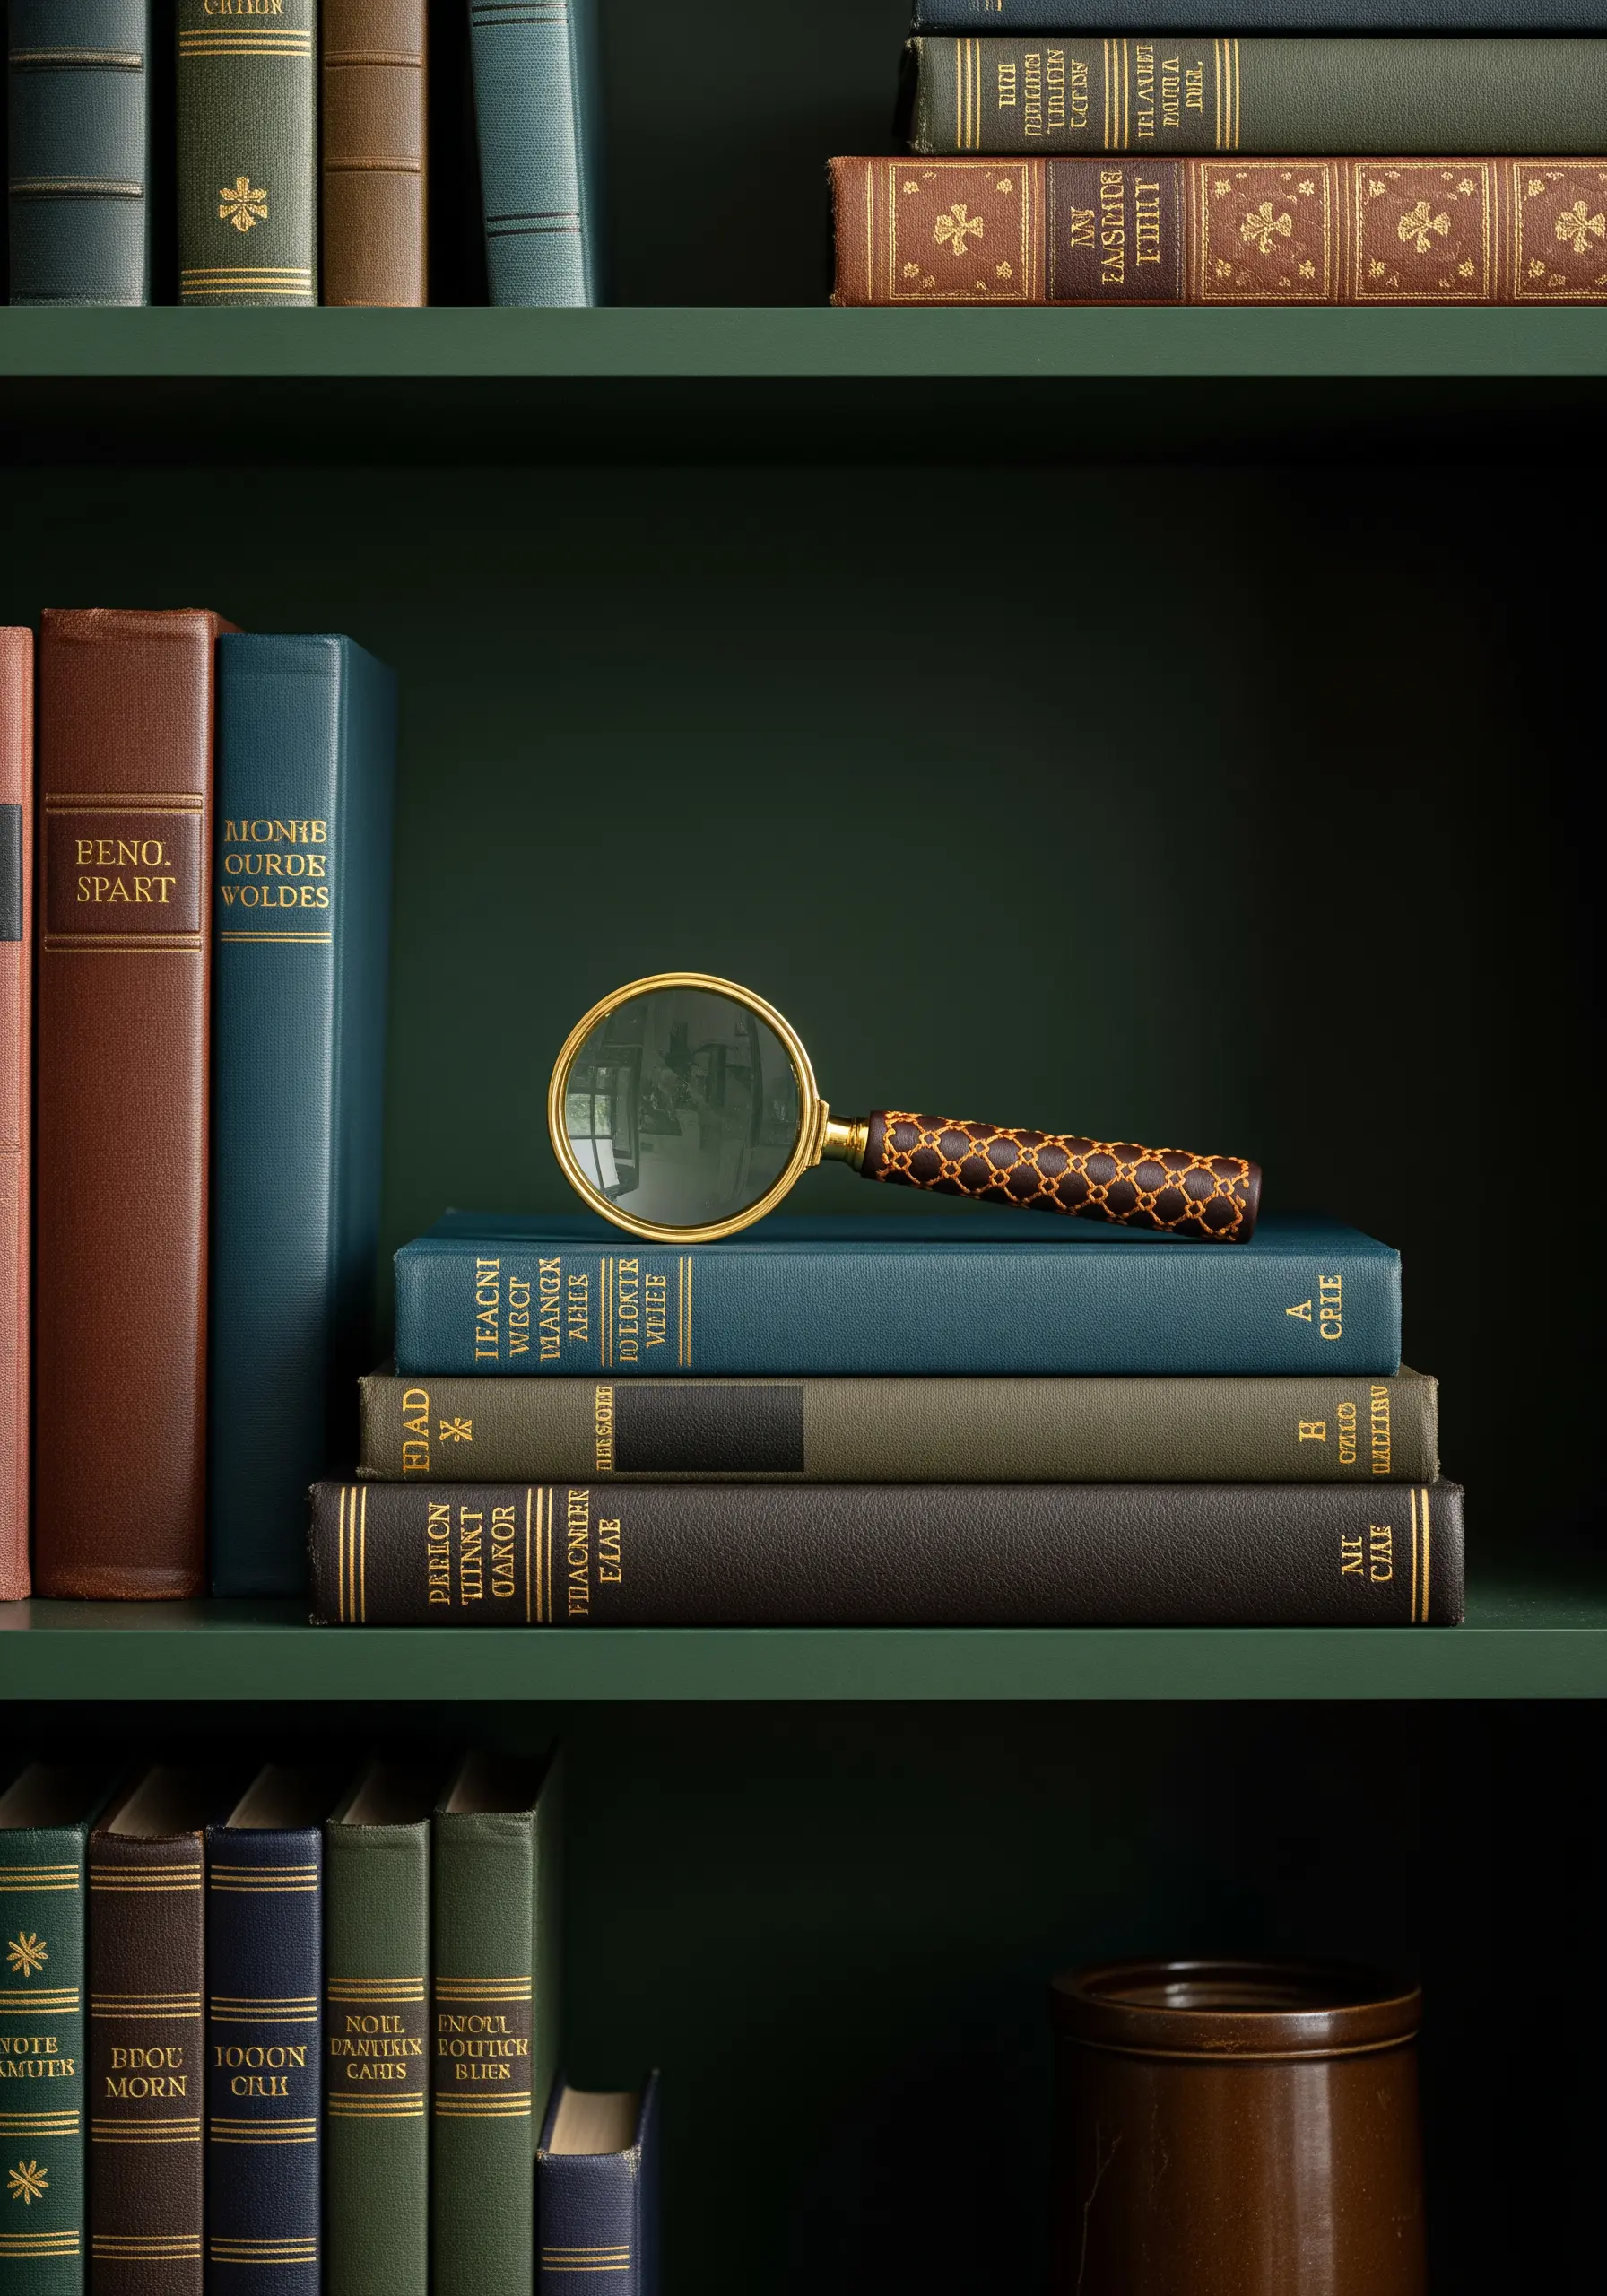
1. Add Gilded Accents to Book Spines

Transform a simple bookshelf into a personal library by adding stitched details to cloth-bound books or custom covers.
Use a single strand of metallic thread for delicate constellation or symbol motifs, securing it with a sharp needle and a simple backstitch.
For smoother, unbroken lines that mimic gold leaf, try the couching technique: lay down your metallic thread on the surface and tack it in place with tiny, invisible stitches of a matching, thinner thread.
This method prevents the often-brittle metallic thread from twisting or breaking while creating a perfectly fluid line.
2. Stitch a Single Botanical Sprig on Linens
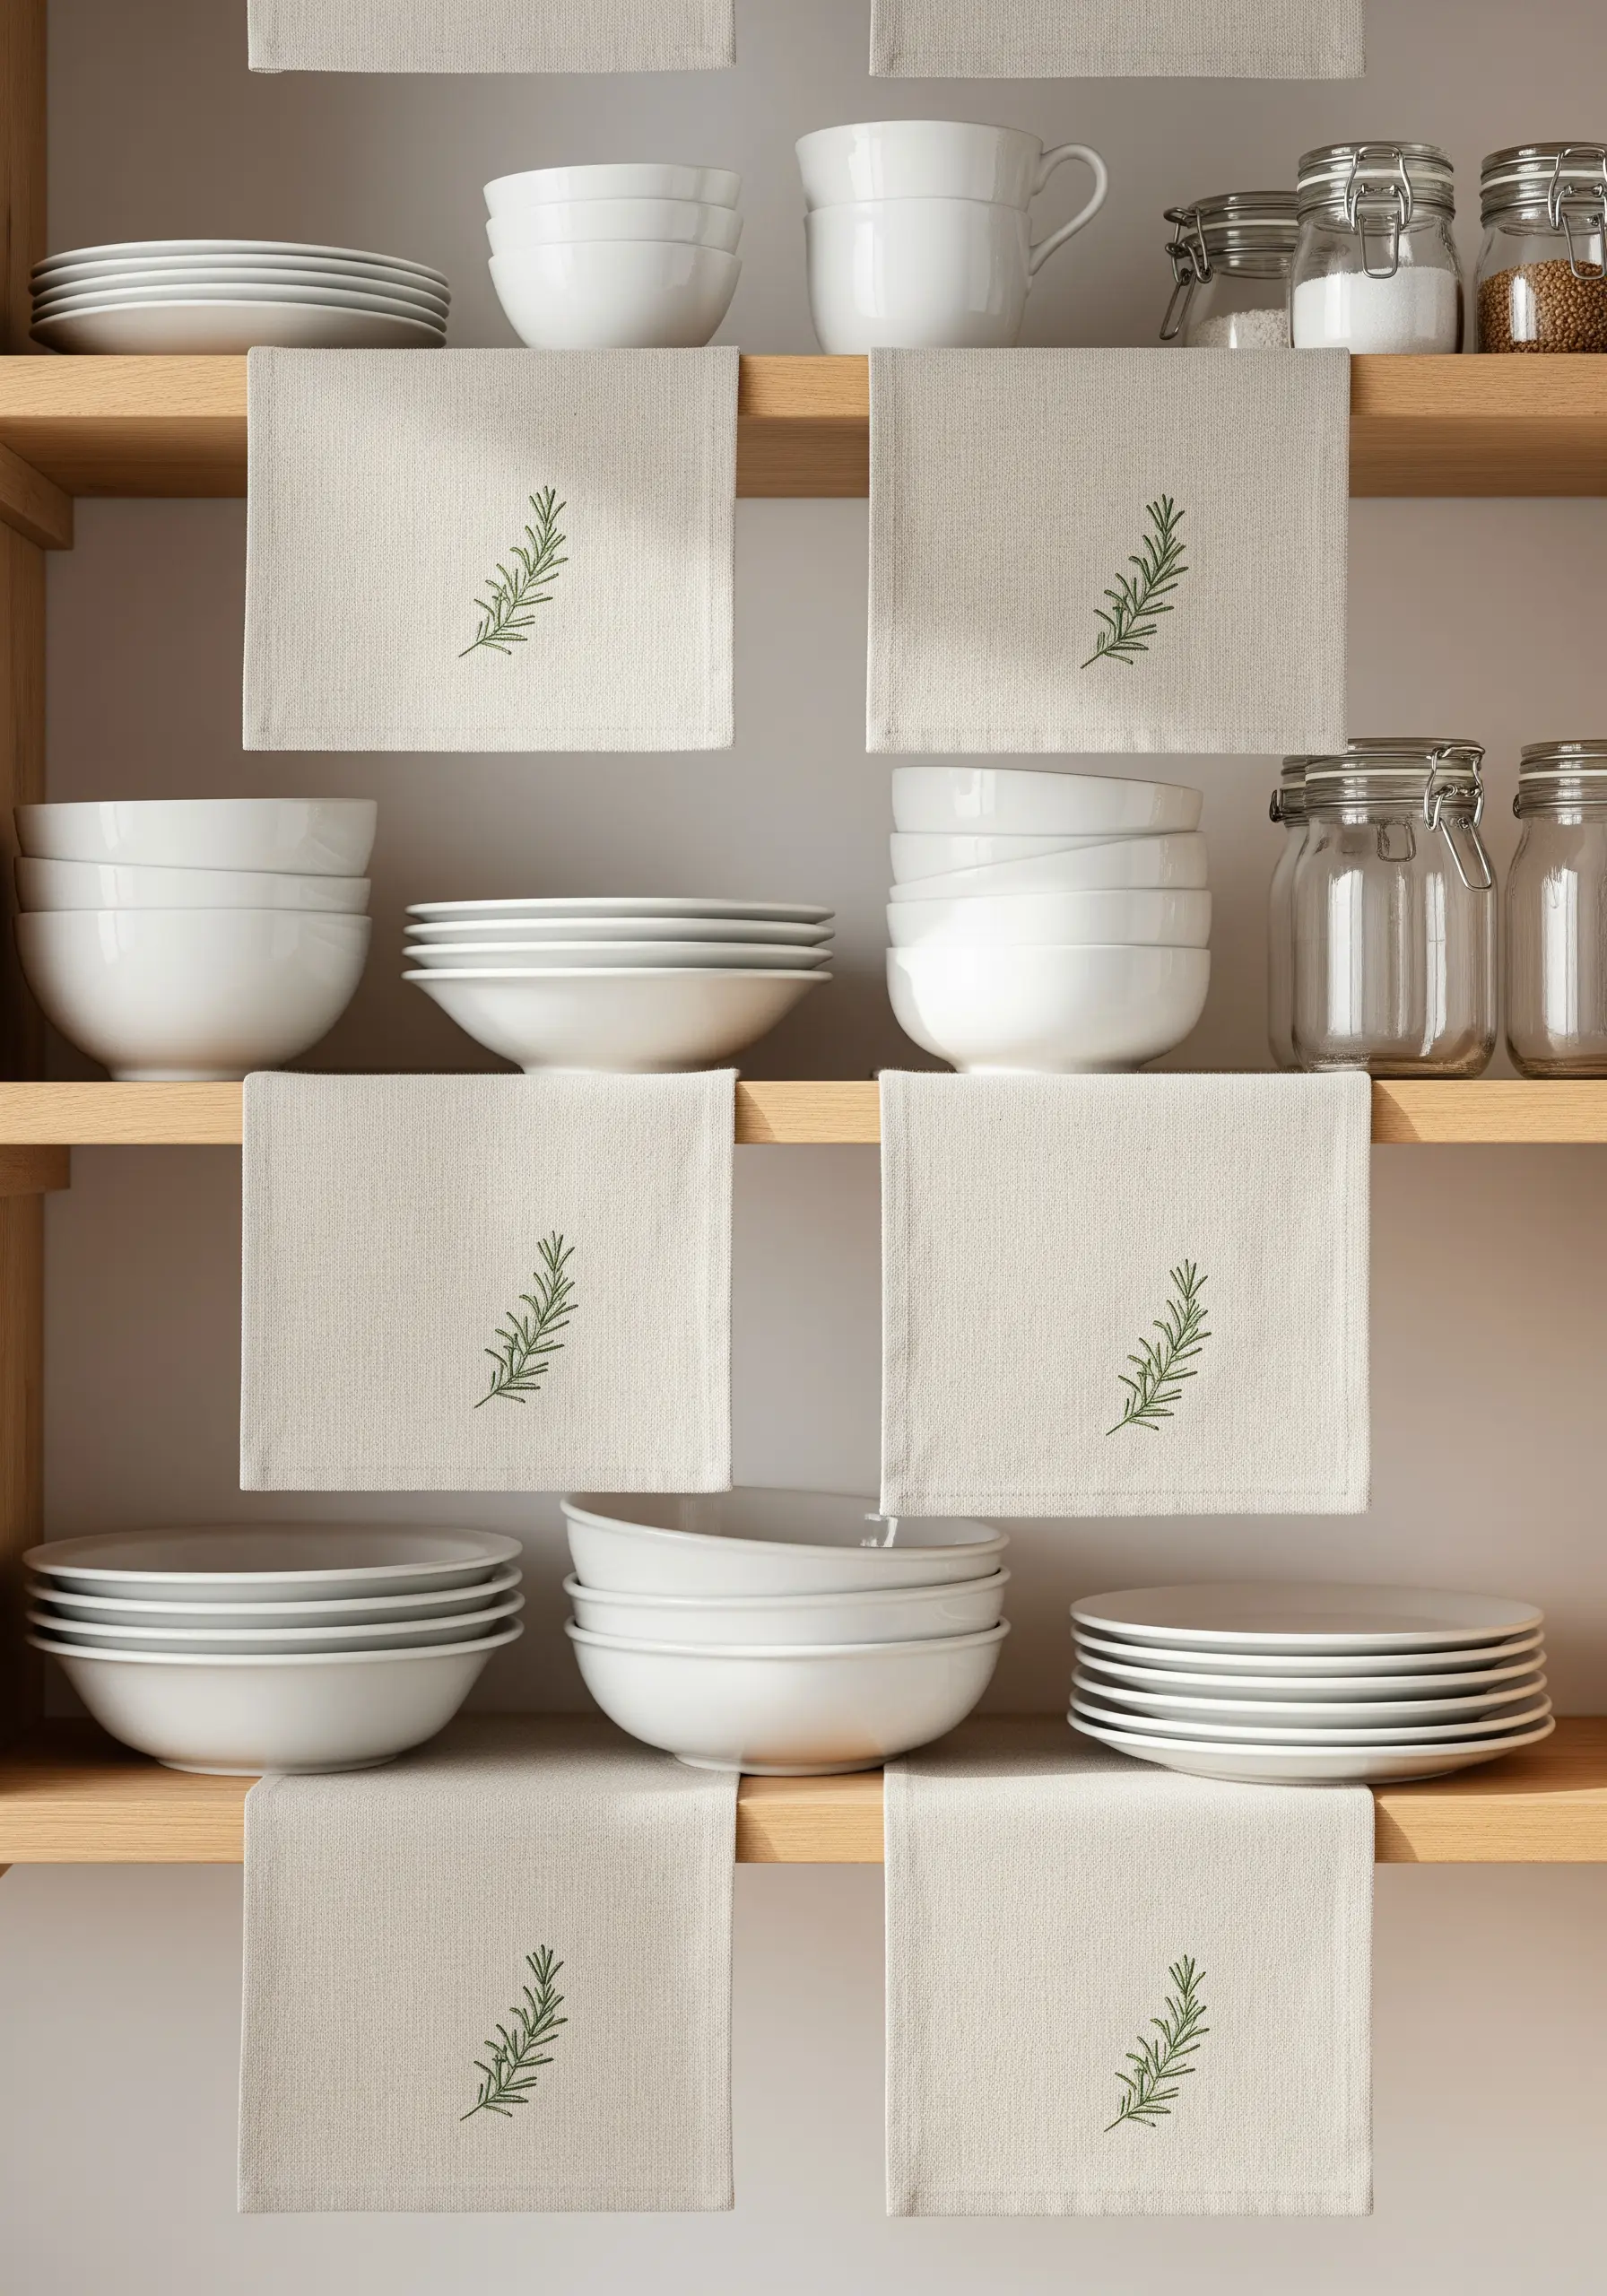
Bring a touch of organic elegance to your kitchen shelves with a single, well-placed botanical motif on linen napkins or placemats.
Instead of a basic outline, use a fishbone stitch for leaves to create a raised, central vein that adds both texture and realism.
Choose a variegated green floss. This allows you to achieve subtle color gradients within a single sprig without changing threads, giving the design effortless depth.
This restrained approach feels more luxurious than a busy pattern, proving that thoughtful placement is more powerful than density.
3. Master Realistic Texture with Thread Painting
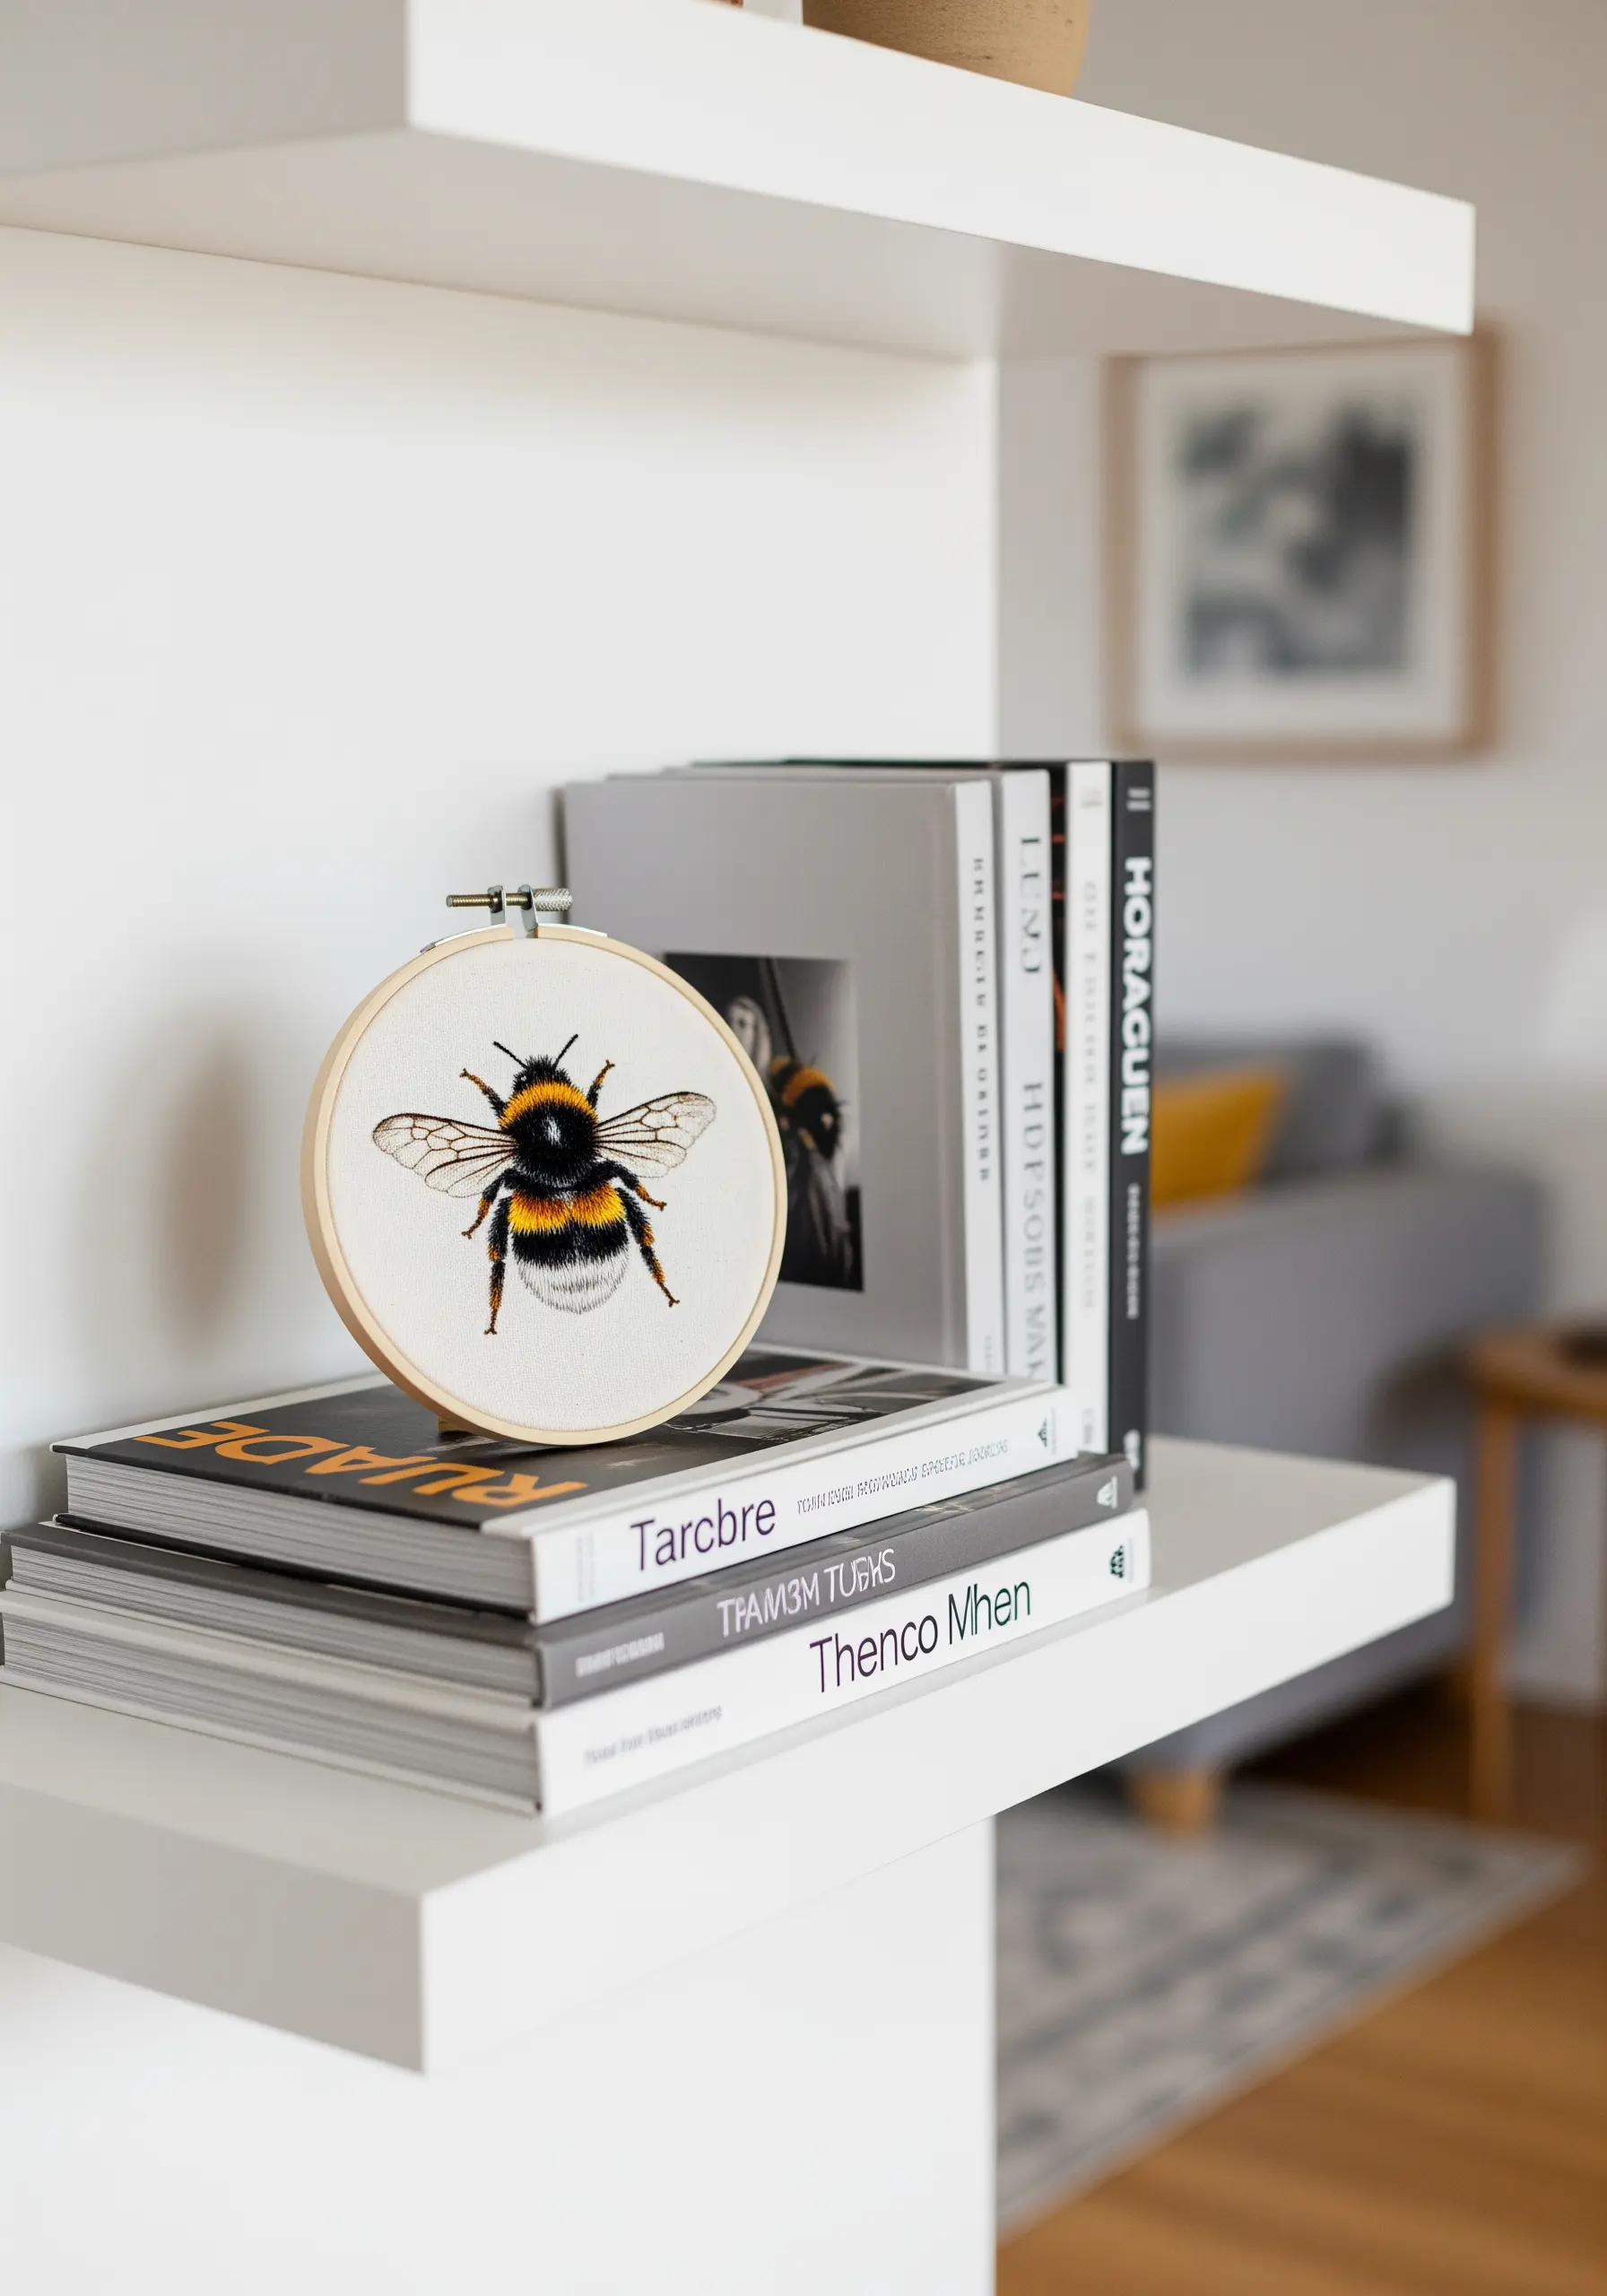
Capture the lifelike detail of insects or animals by using the long-and-short stitch, the foundation of thread painting.
To create the bee’s fuzzy texture, blend shades of yellow, ochre, and black floss, using single strands to make your stitches directional, following the form of the body.
For the delicate, transparent wings, use a single strand of light grey or off-white thread in an open split stitch. This creates the illusion of veining without adding bulk.
This technique turns a simple subject into a miniature work of textile art, making fabric come alive on your shelf.
4. Create Elegant, Reusable Fabric Labels
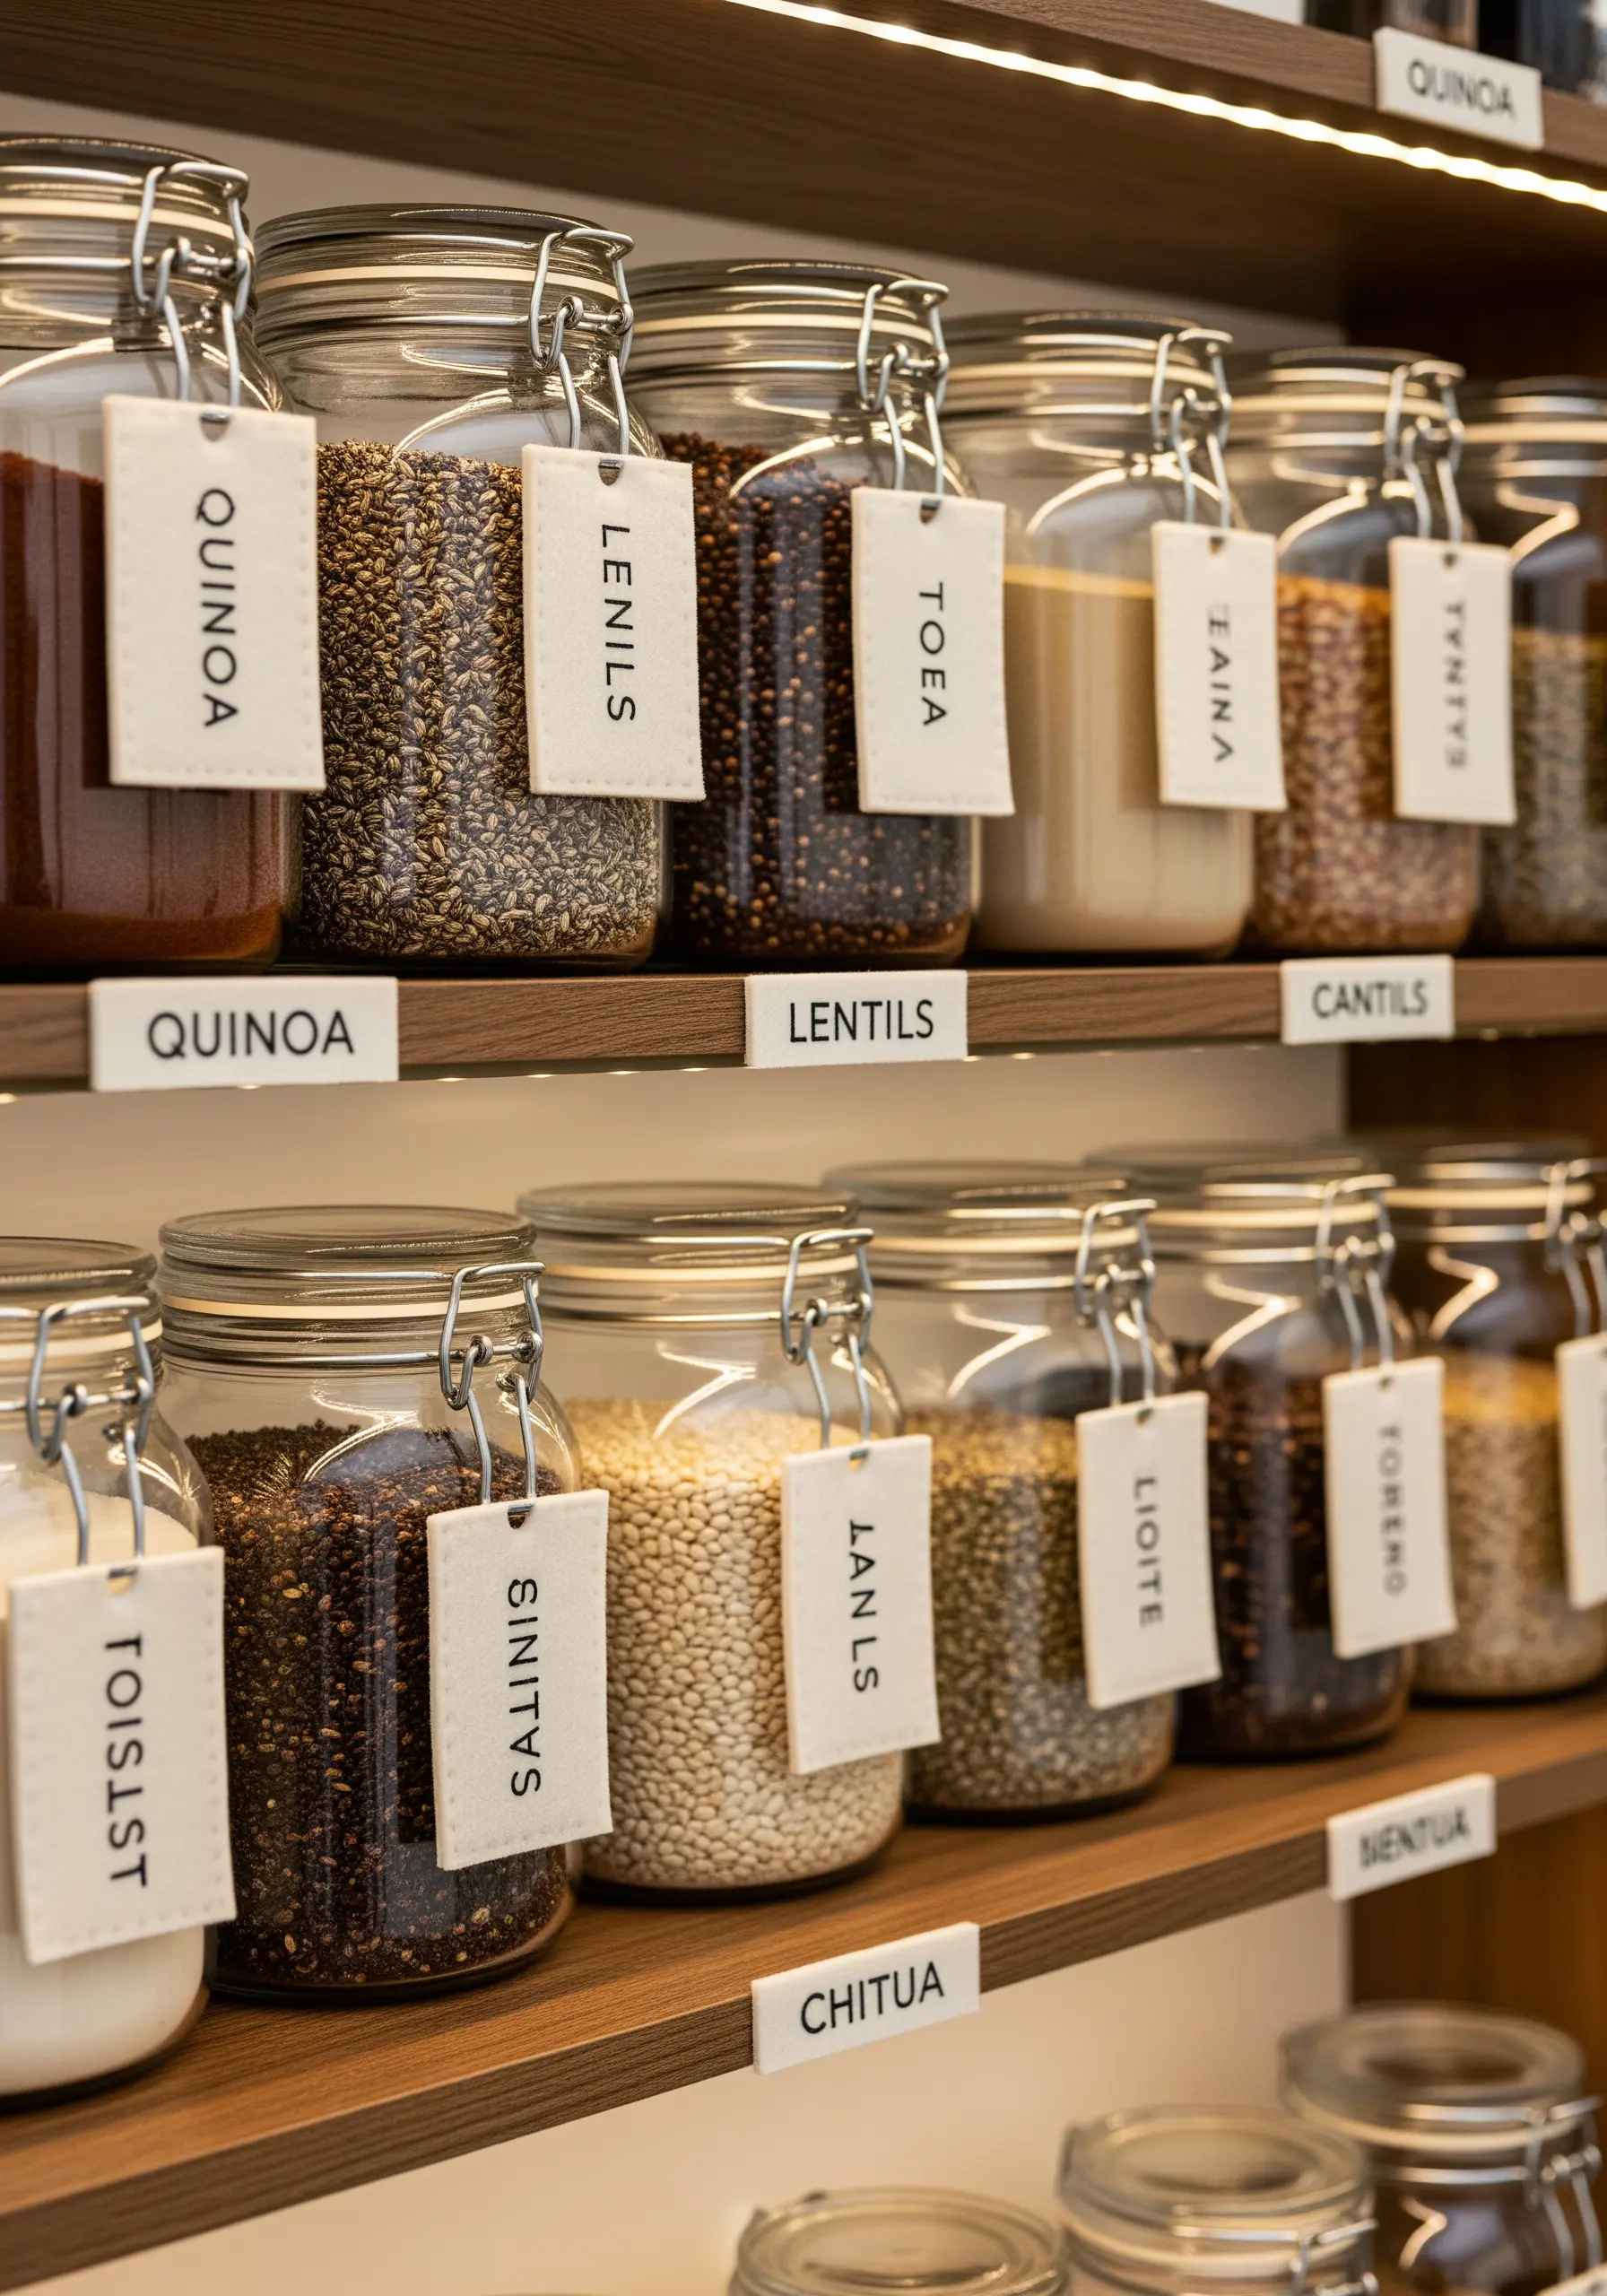
Upgrade your pantry organization with hand-stitched fabric labels that feel both rustic and refined.
Choose a tightly woven canvas or linen scrap and use a simple, clean backstitch for the lettering. To ensure your letters are perfectly crisp, use a water-soluble stabilizer on top of the fabric as a guide.
A single, dark color thread provides high contrast and legibility, turning a functional item into a cohesive design element.
These small stitched tags introduce softness and a handmade touch to glass and wood shelving.
5. Work with Silk and Satin for a Lustrous Finish
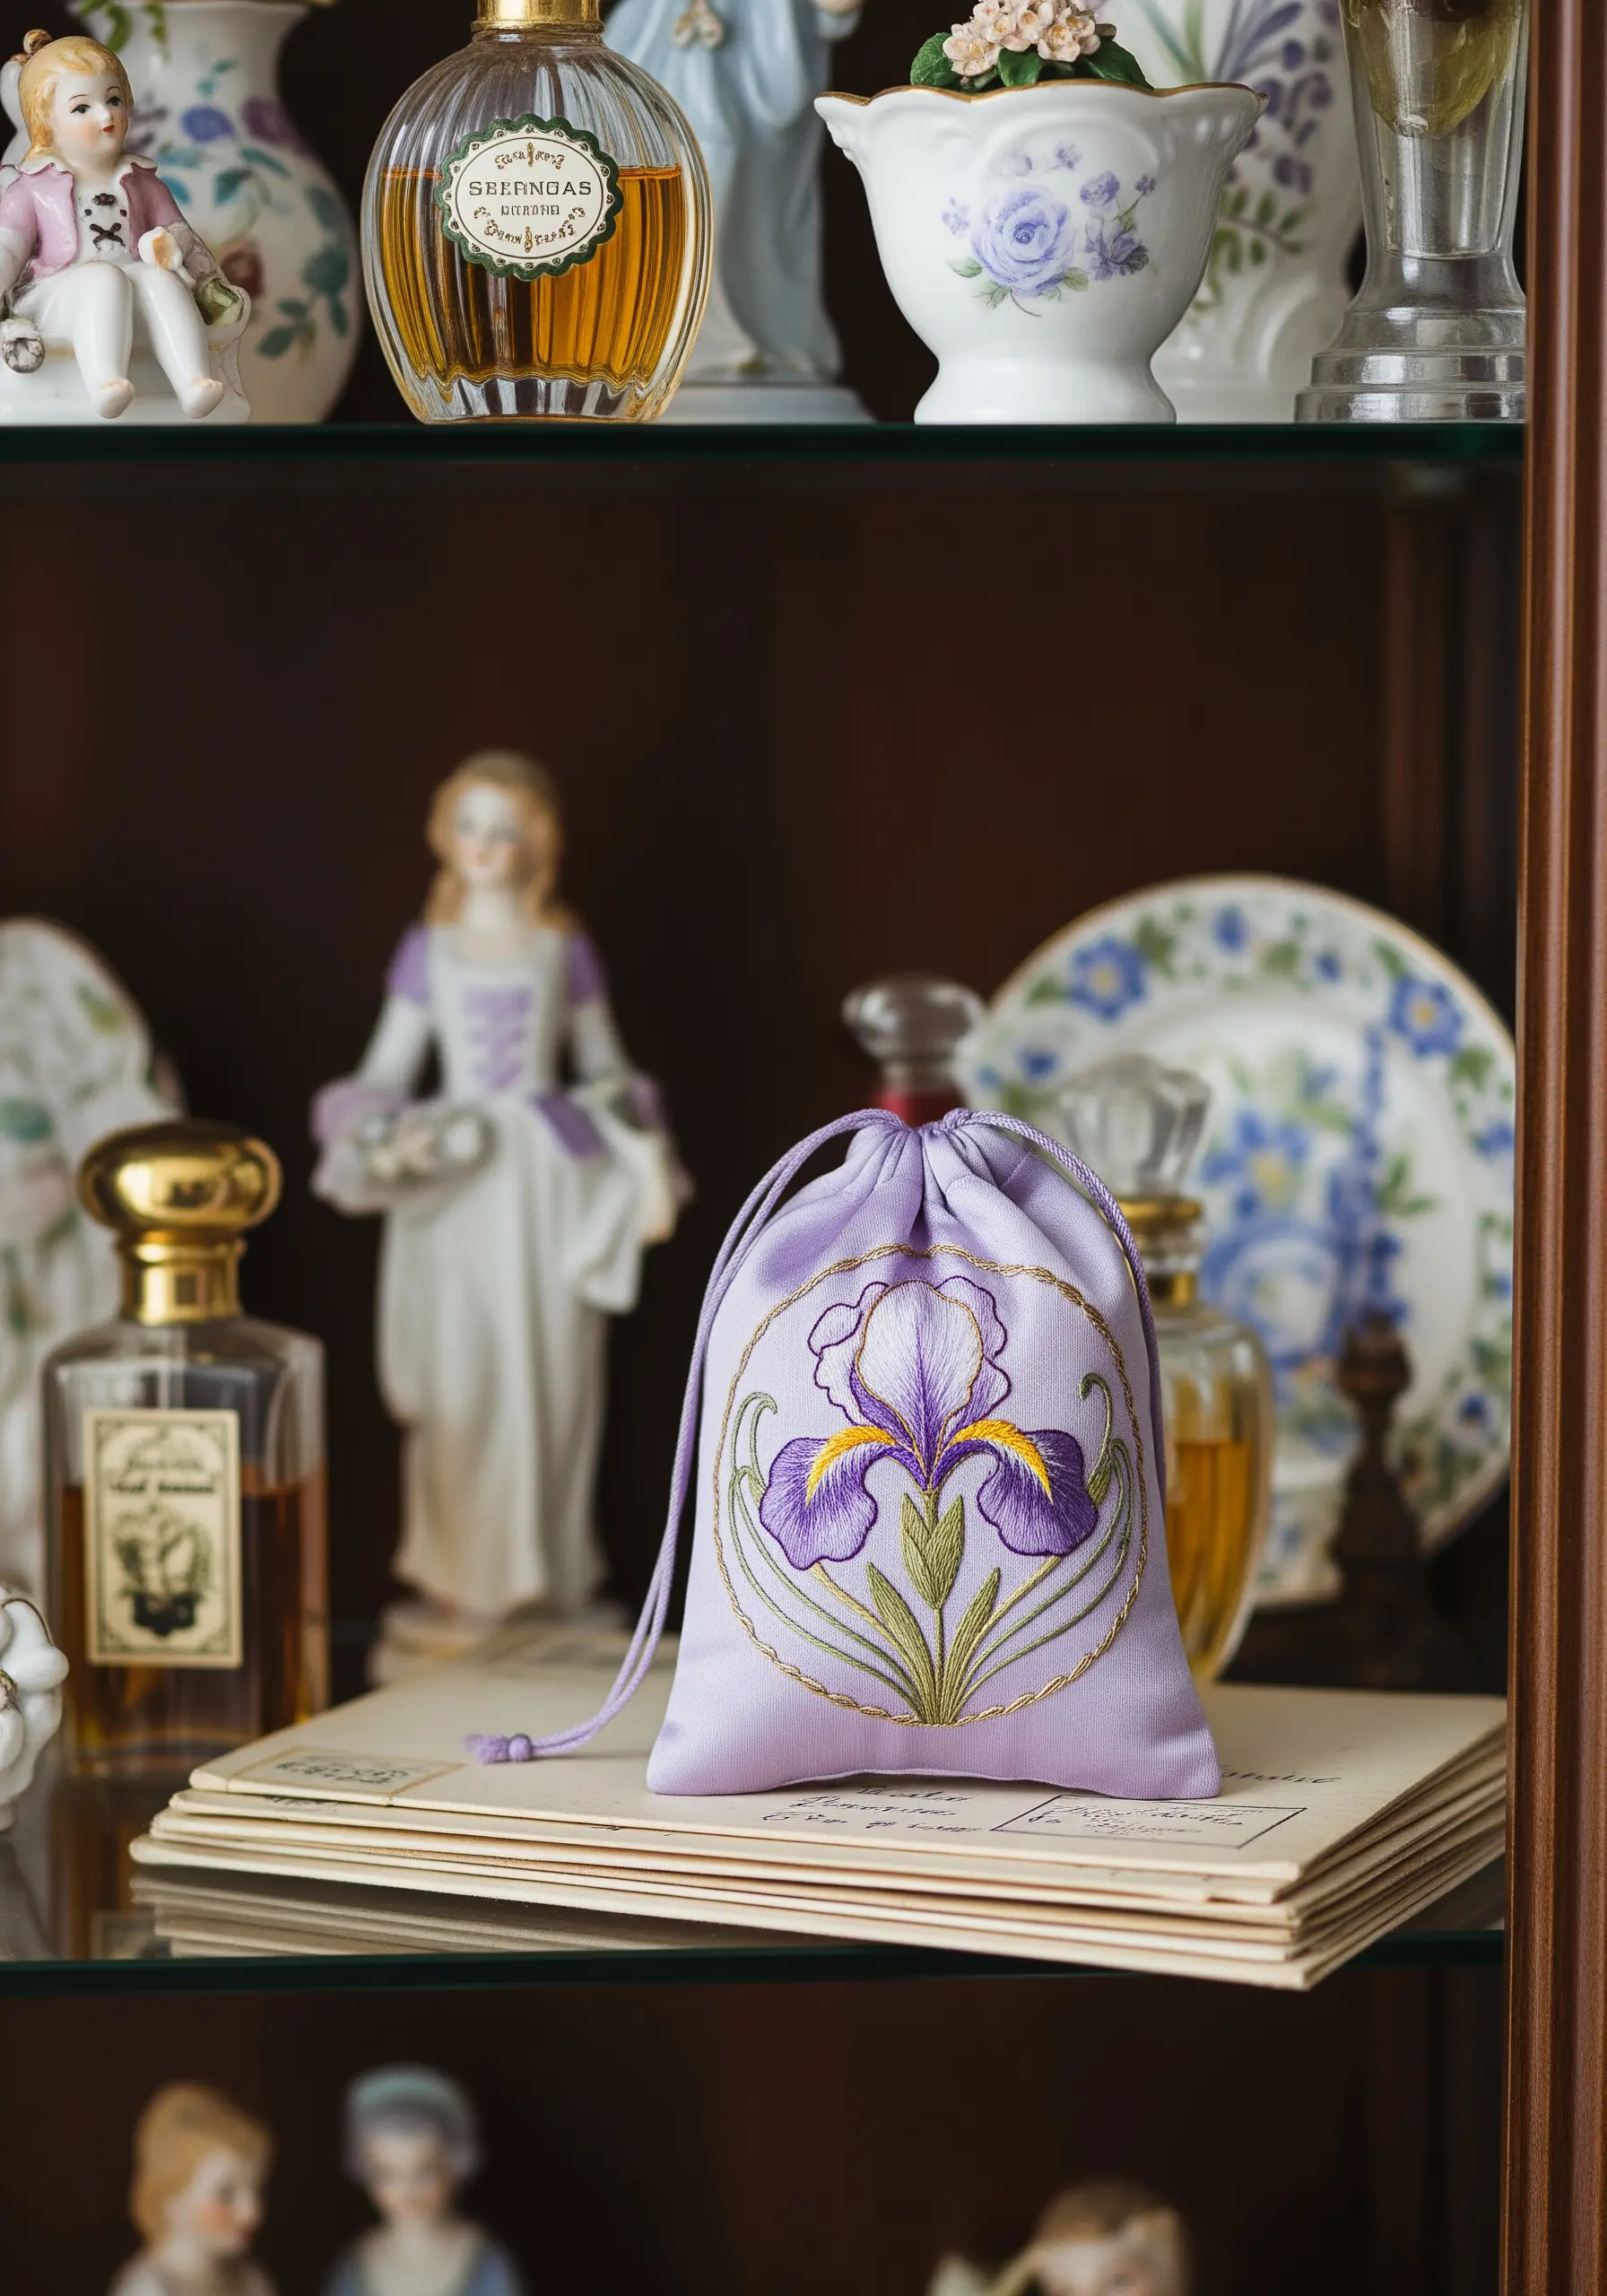
Embroidering on silk or satin elevates any project, creating a beautiful interplay between the lustrous fabric and the sheen of the thread.
To prevent puckering on this delicate surface, always use a lightweight iron-on stabilizer on the back of the fabric before hooping it.
Use a long-and-short stitch for the iris petals to achieve a painterly blend of purples and yellows. For the outlines, opt for a fine split stitch in a metallic gold to define the shape without overpowering it.
The result is a piece that looks like a treasured heirloom, perfect for a keepsake pouch or sachet.
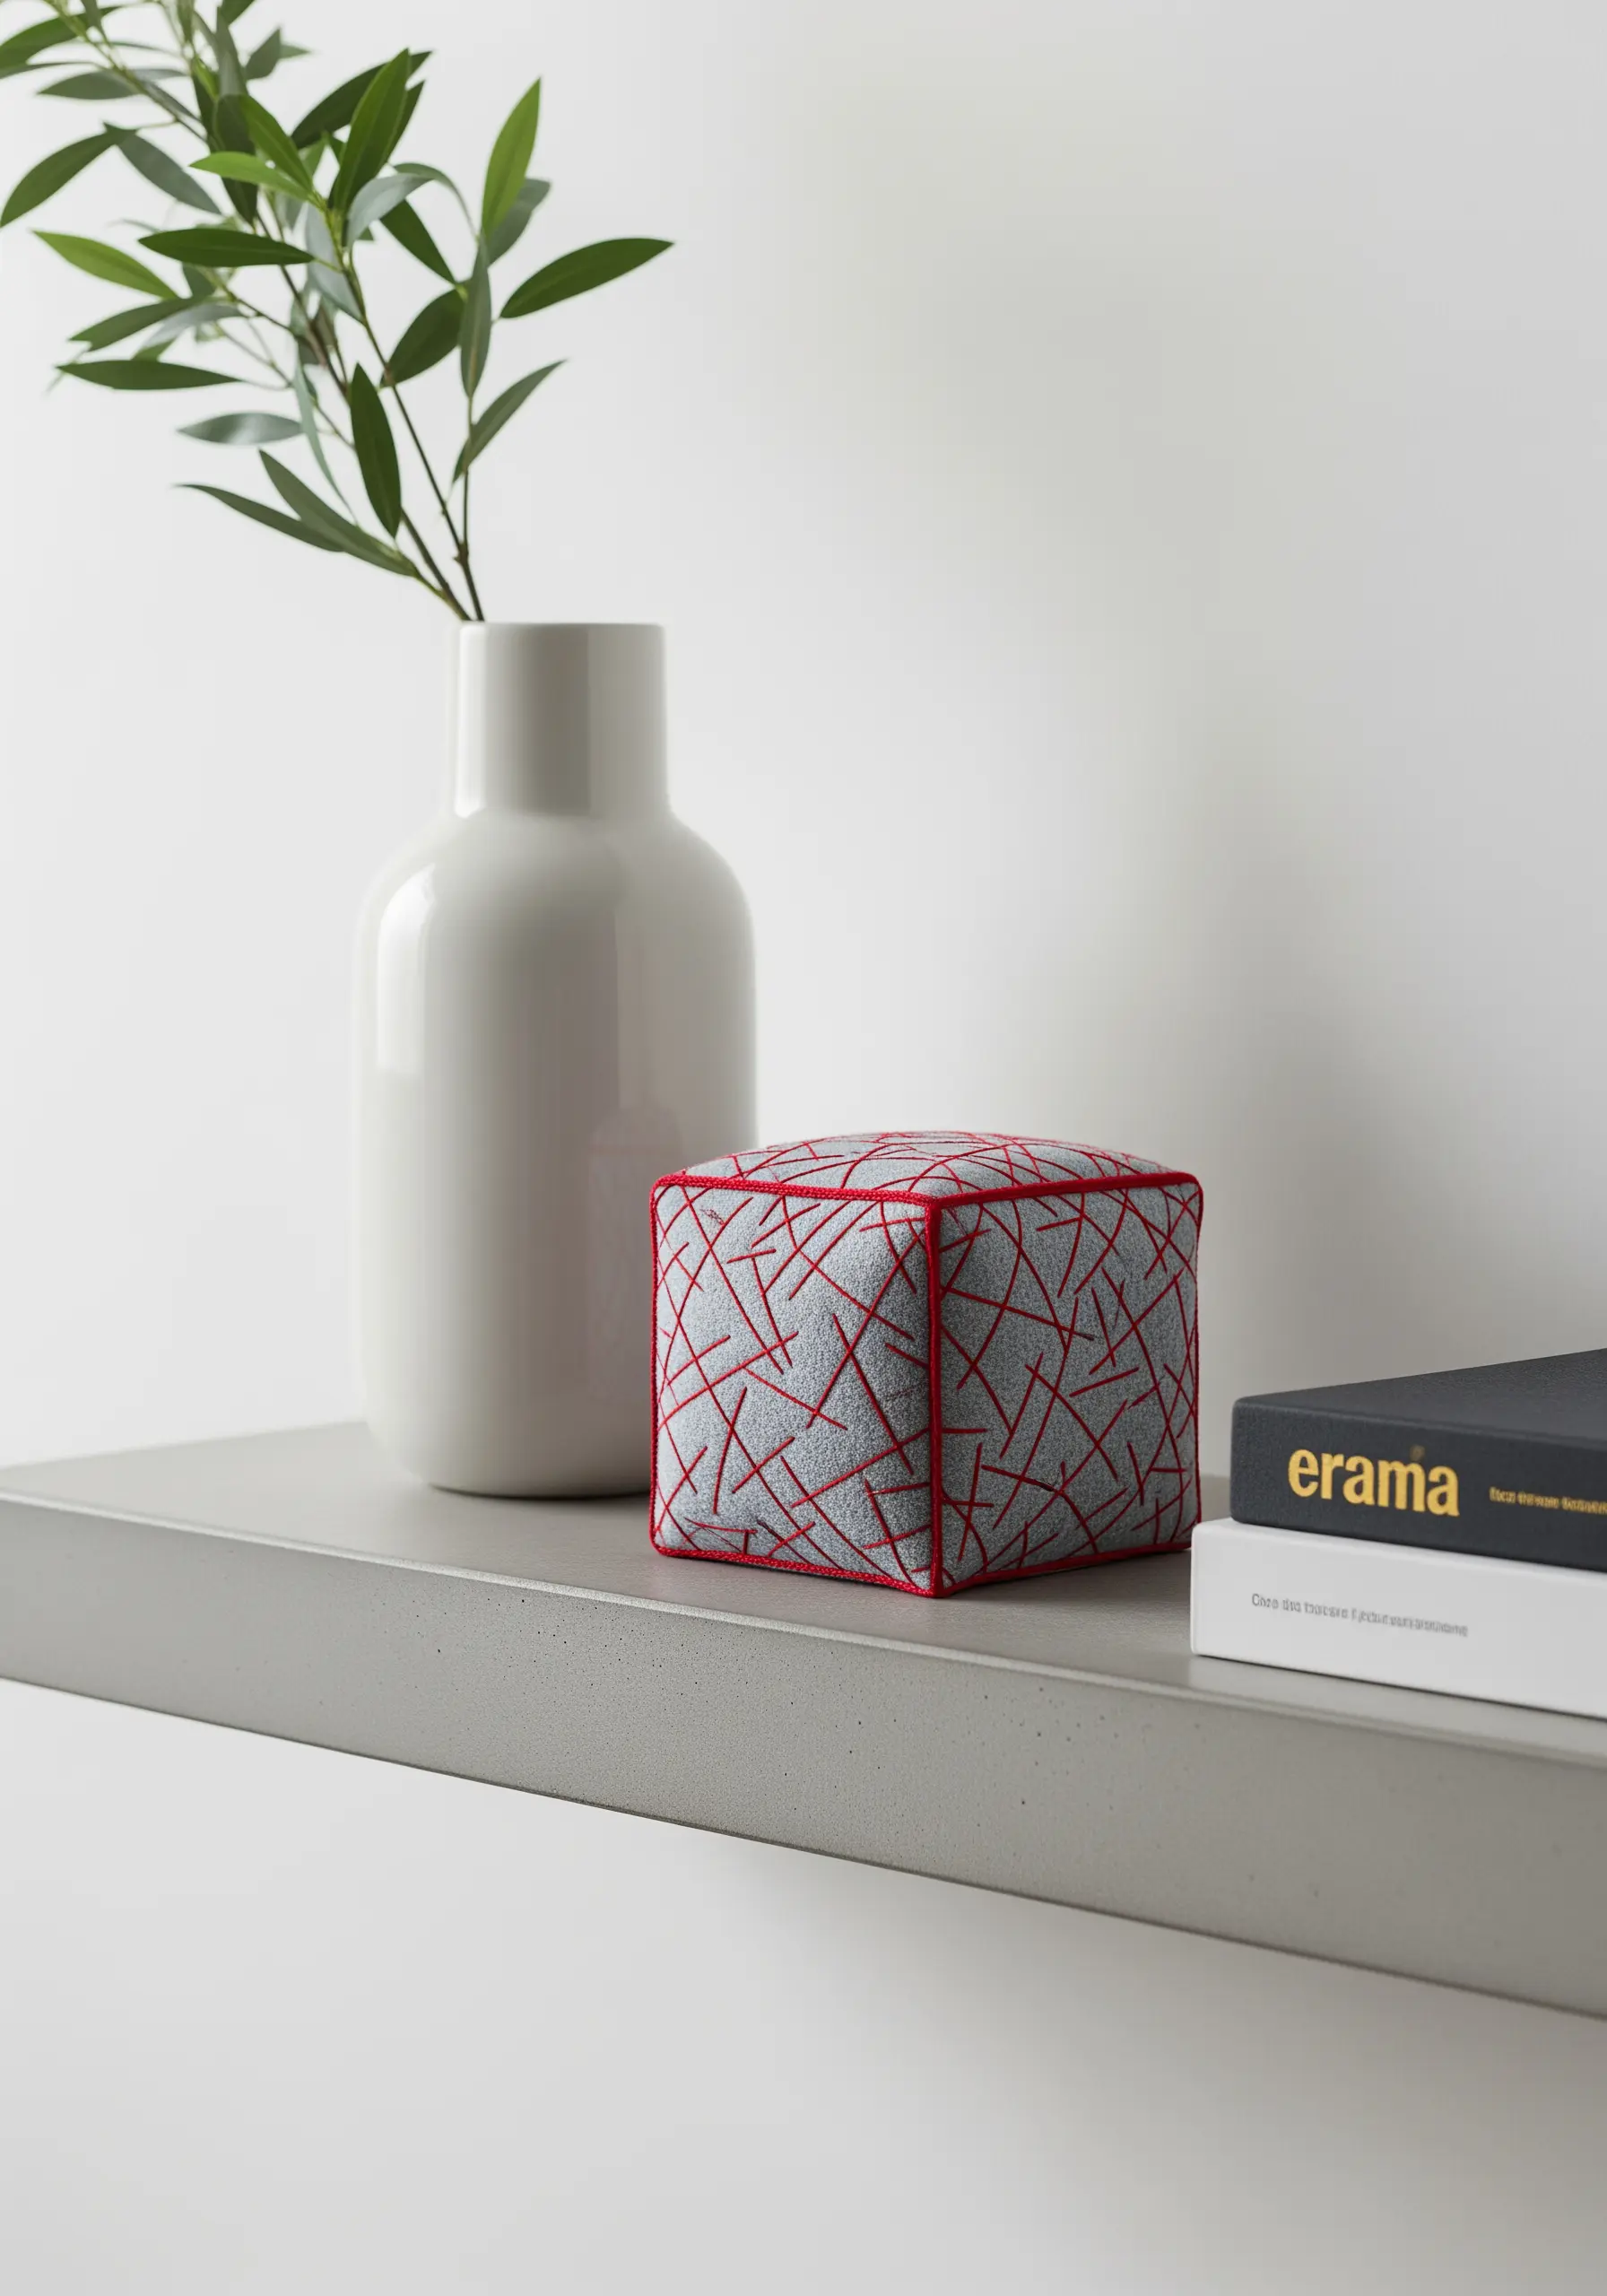
6. Design a Modern, Padded Monogram
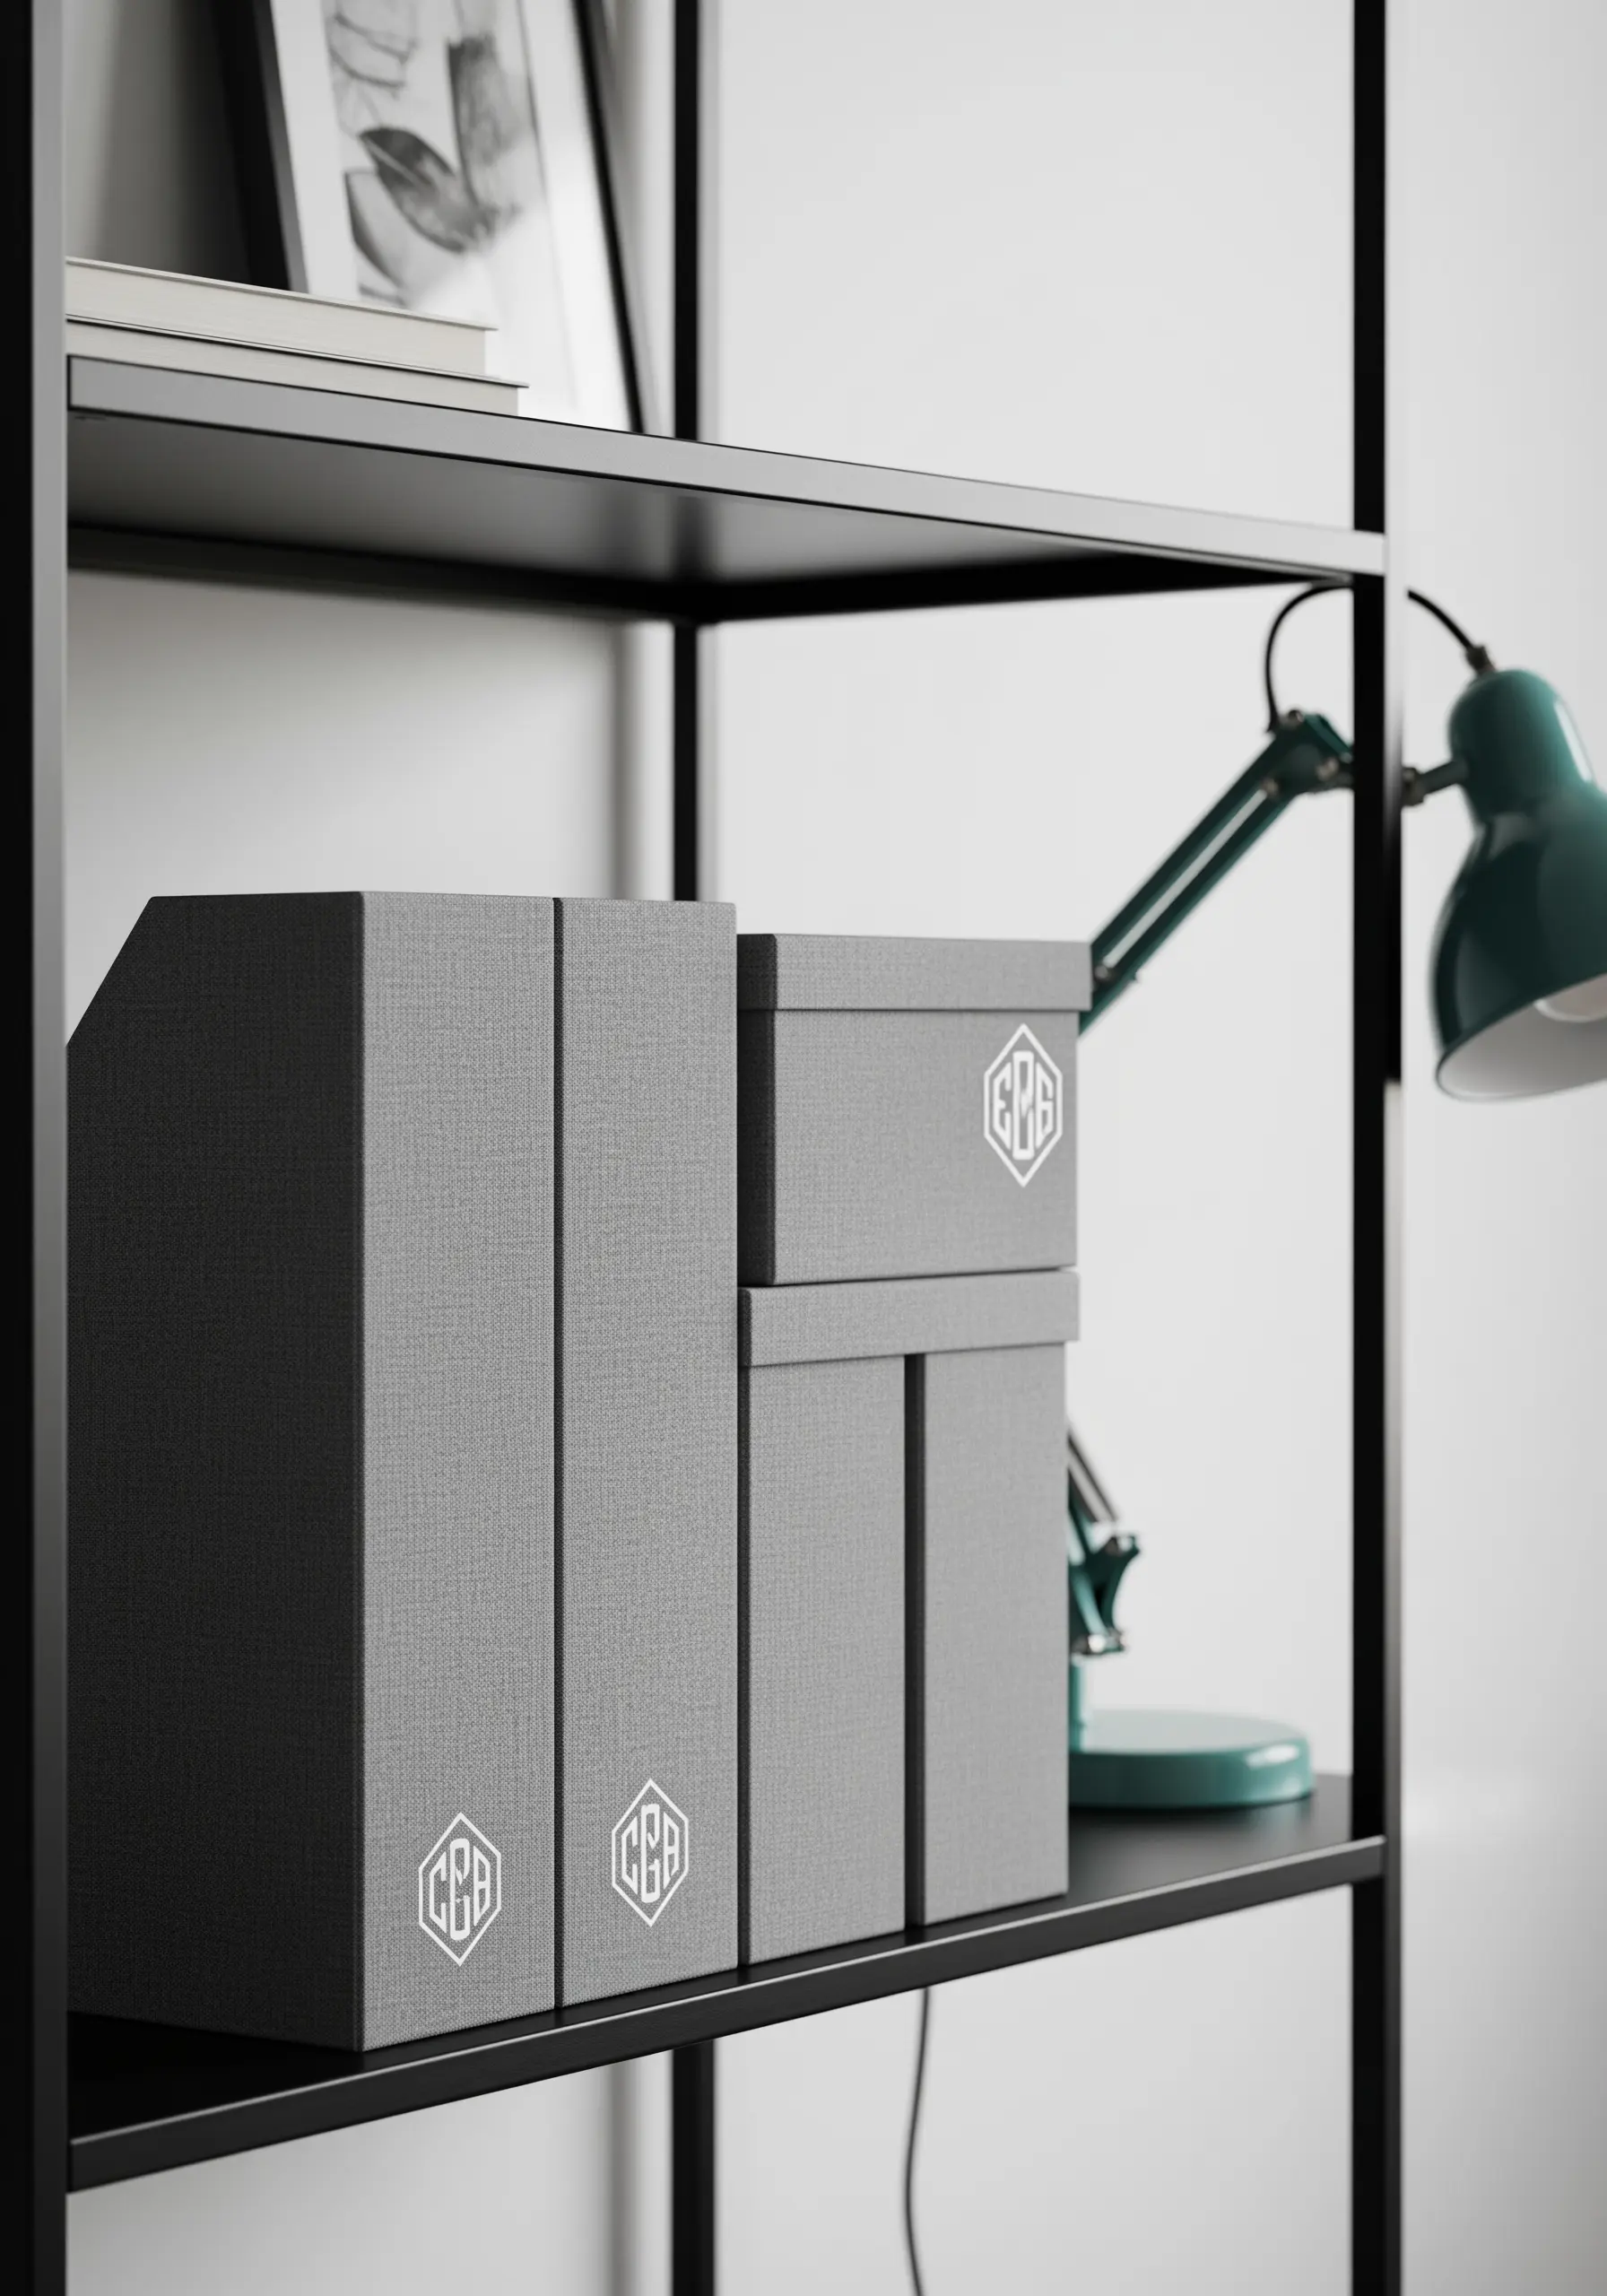
Give a classic monogram a contemporary update with a three-dimensional effect that adds subtle sophistication to storage boxes or journal covers.
To achieve the raised profile, first fill the shape of your letters with a base of seed stitches or satin stitches. Then, work your final satin stitch layer over this padding at a perpendicular angle.
This technique, known as padded satin stitch, lifts the monogram from the surface, creating shadows that accentuate its form.
Using a minimal monogram style in a tone-on-tone color scheme keeps the look clean and modern.
7. Embellish Velvet for Dramatic Contrast
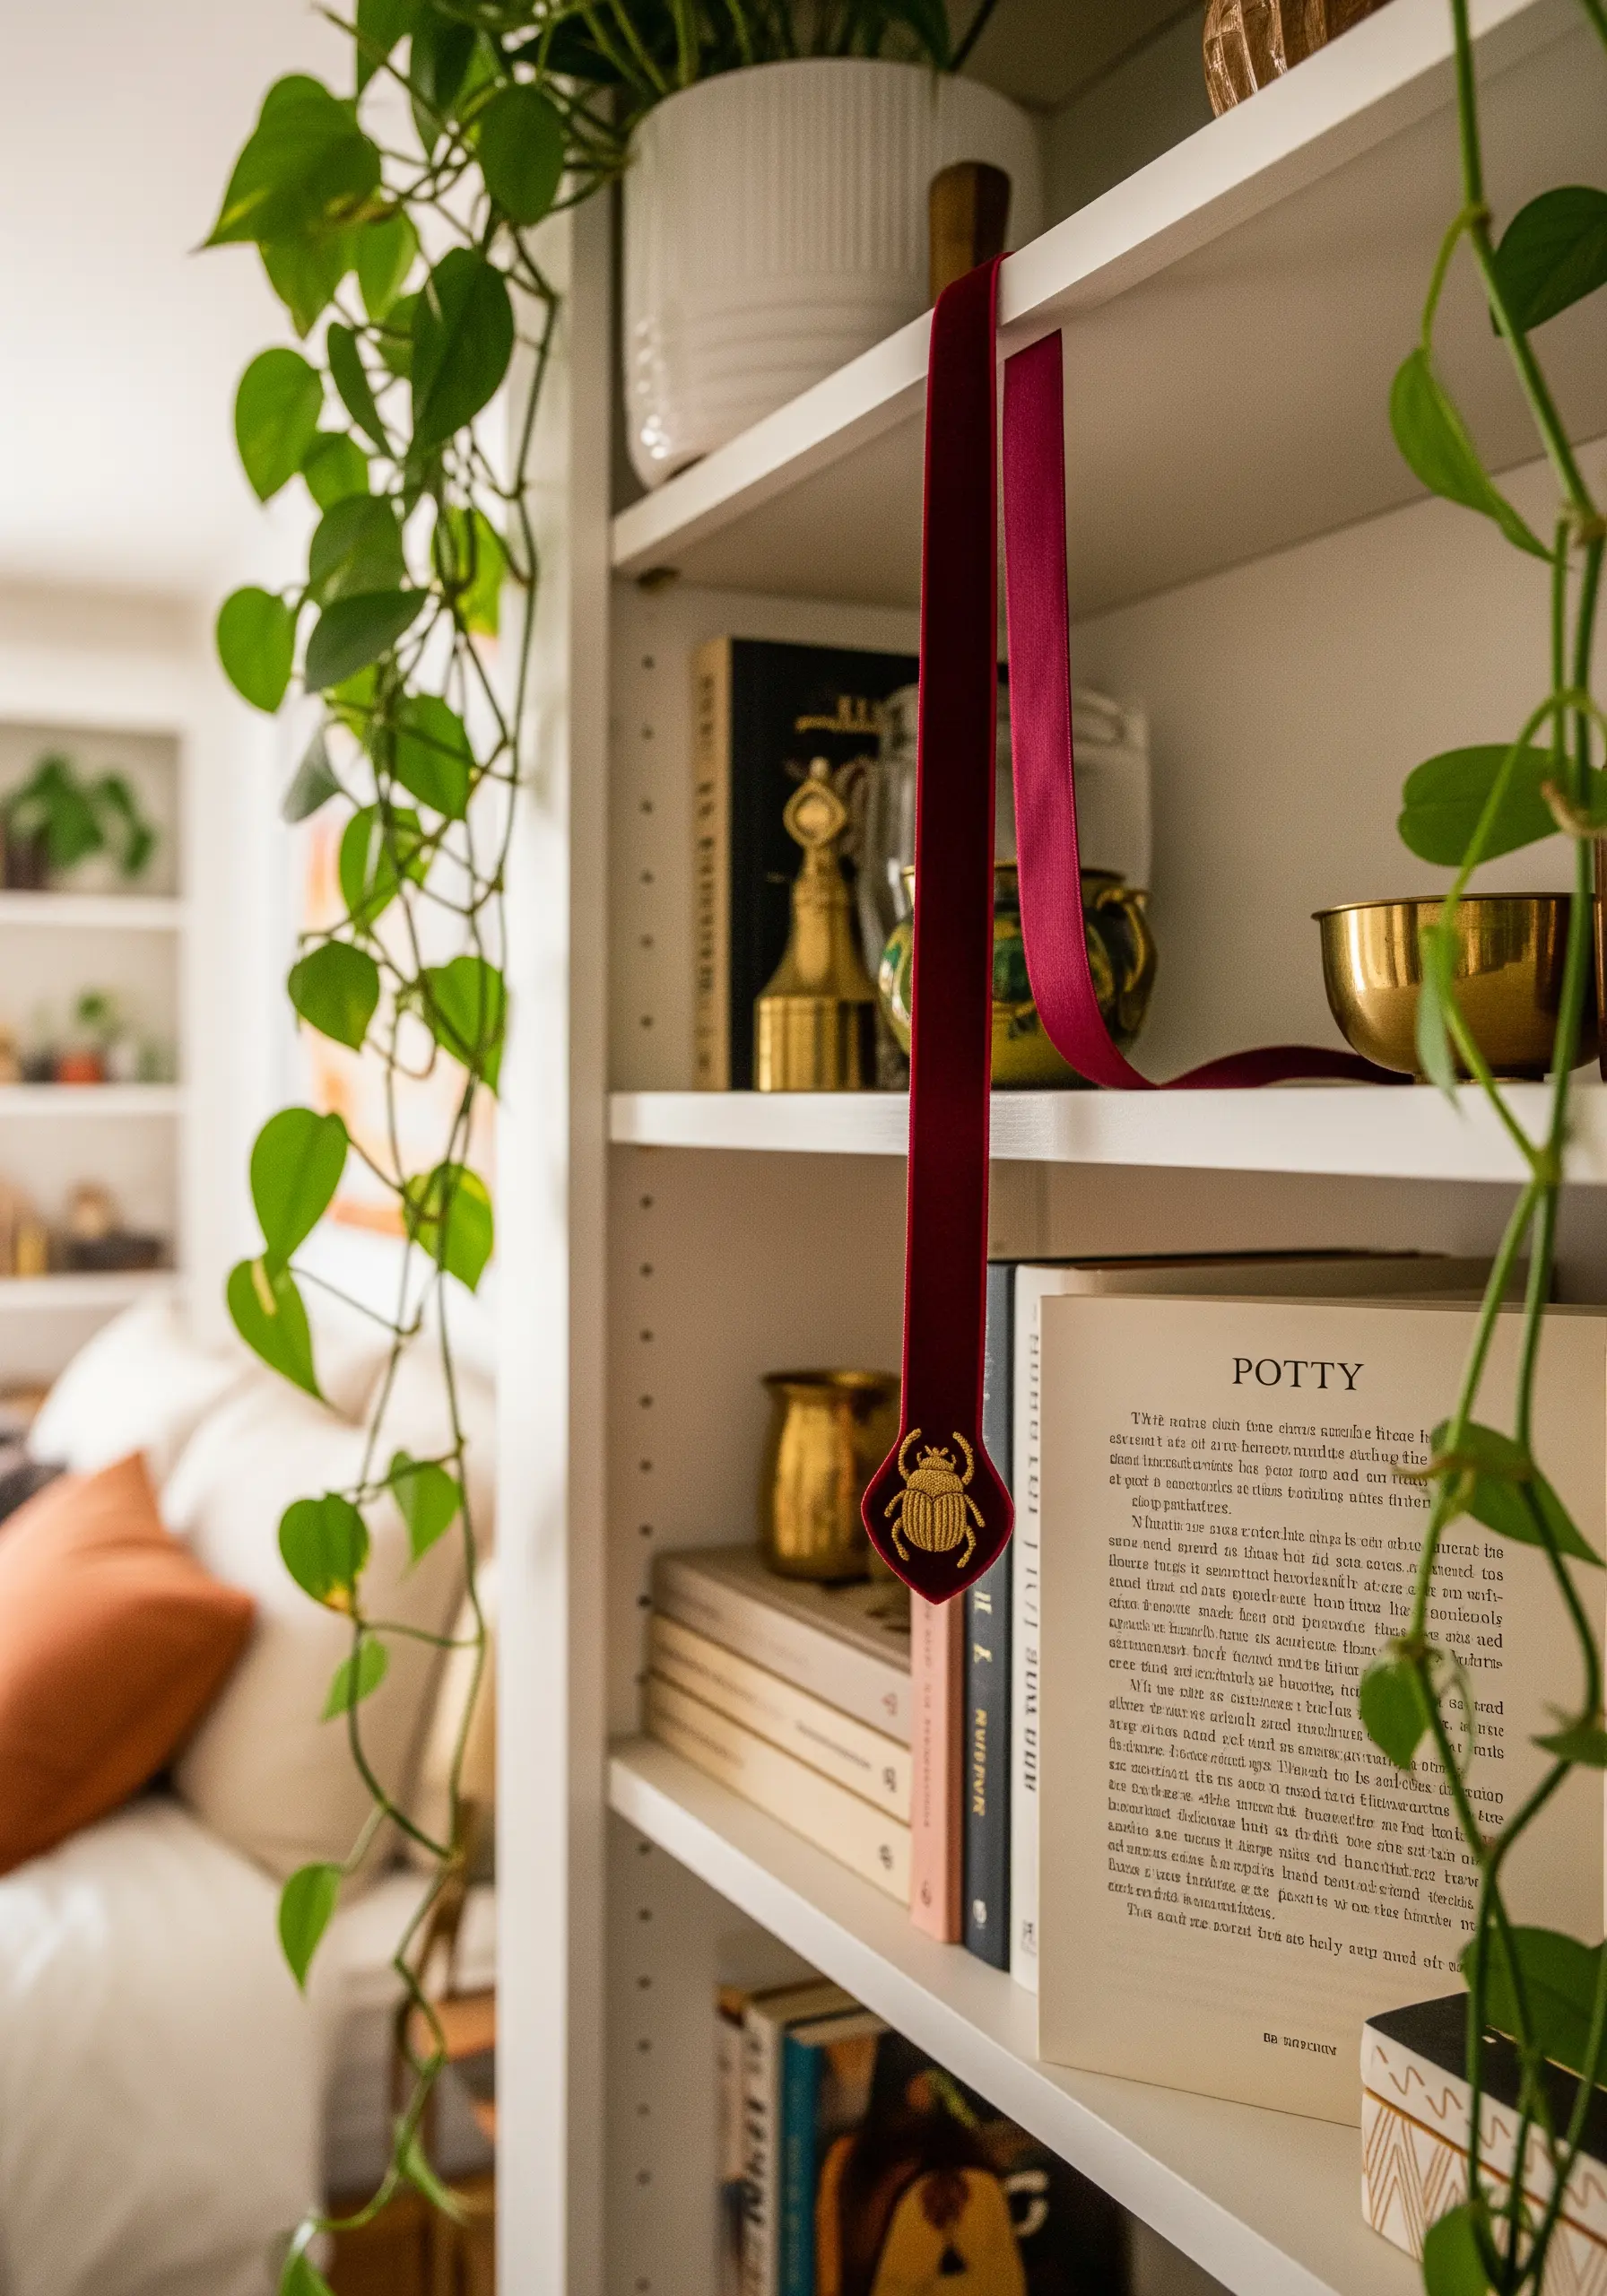
Stitching on a rich fabric like velvet instantly creates a sense of luxury, especially for items like bookmarks or jewelry pouches.
Because of velvet’s deep pile, choose bold, simple motifs that won’t get lost. A single scarab beetle, worked in a high-sheen gold rayon or metallic thread, provides stunning contrast.
Use a satin stitch for solid areas and a backstitch for fine details. A water-soluble topper stabilizer will keep your stitches from sinking into the pile, ensuring they remain crisp and visible.
This project is perfect for creating cozy embroidery bookmarks that feel exceptionally special.
8. Craft Soft Sculptural Objects from Felt
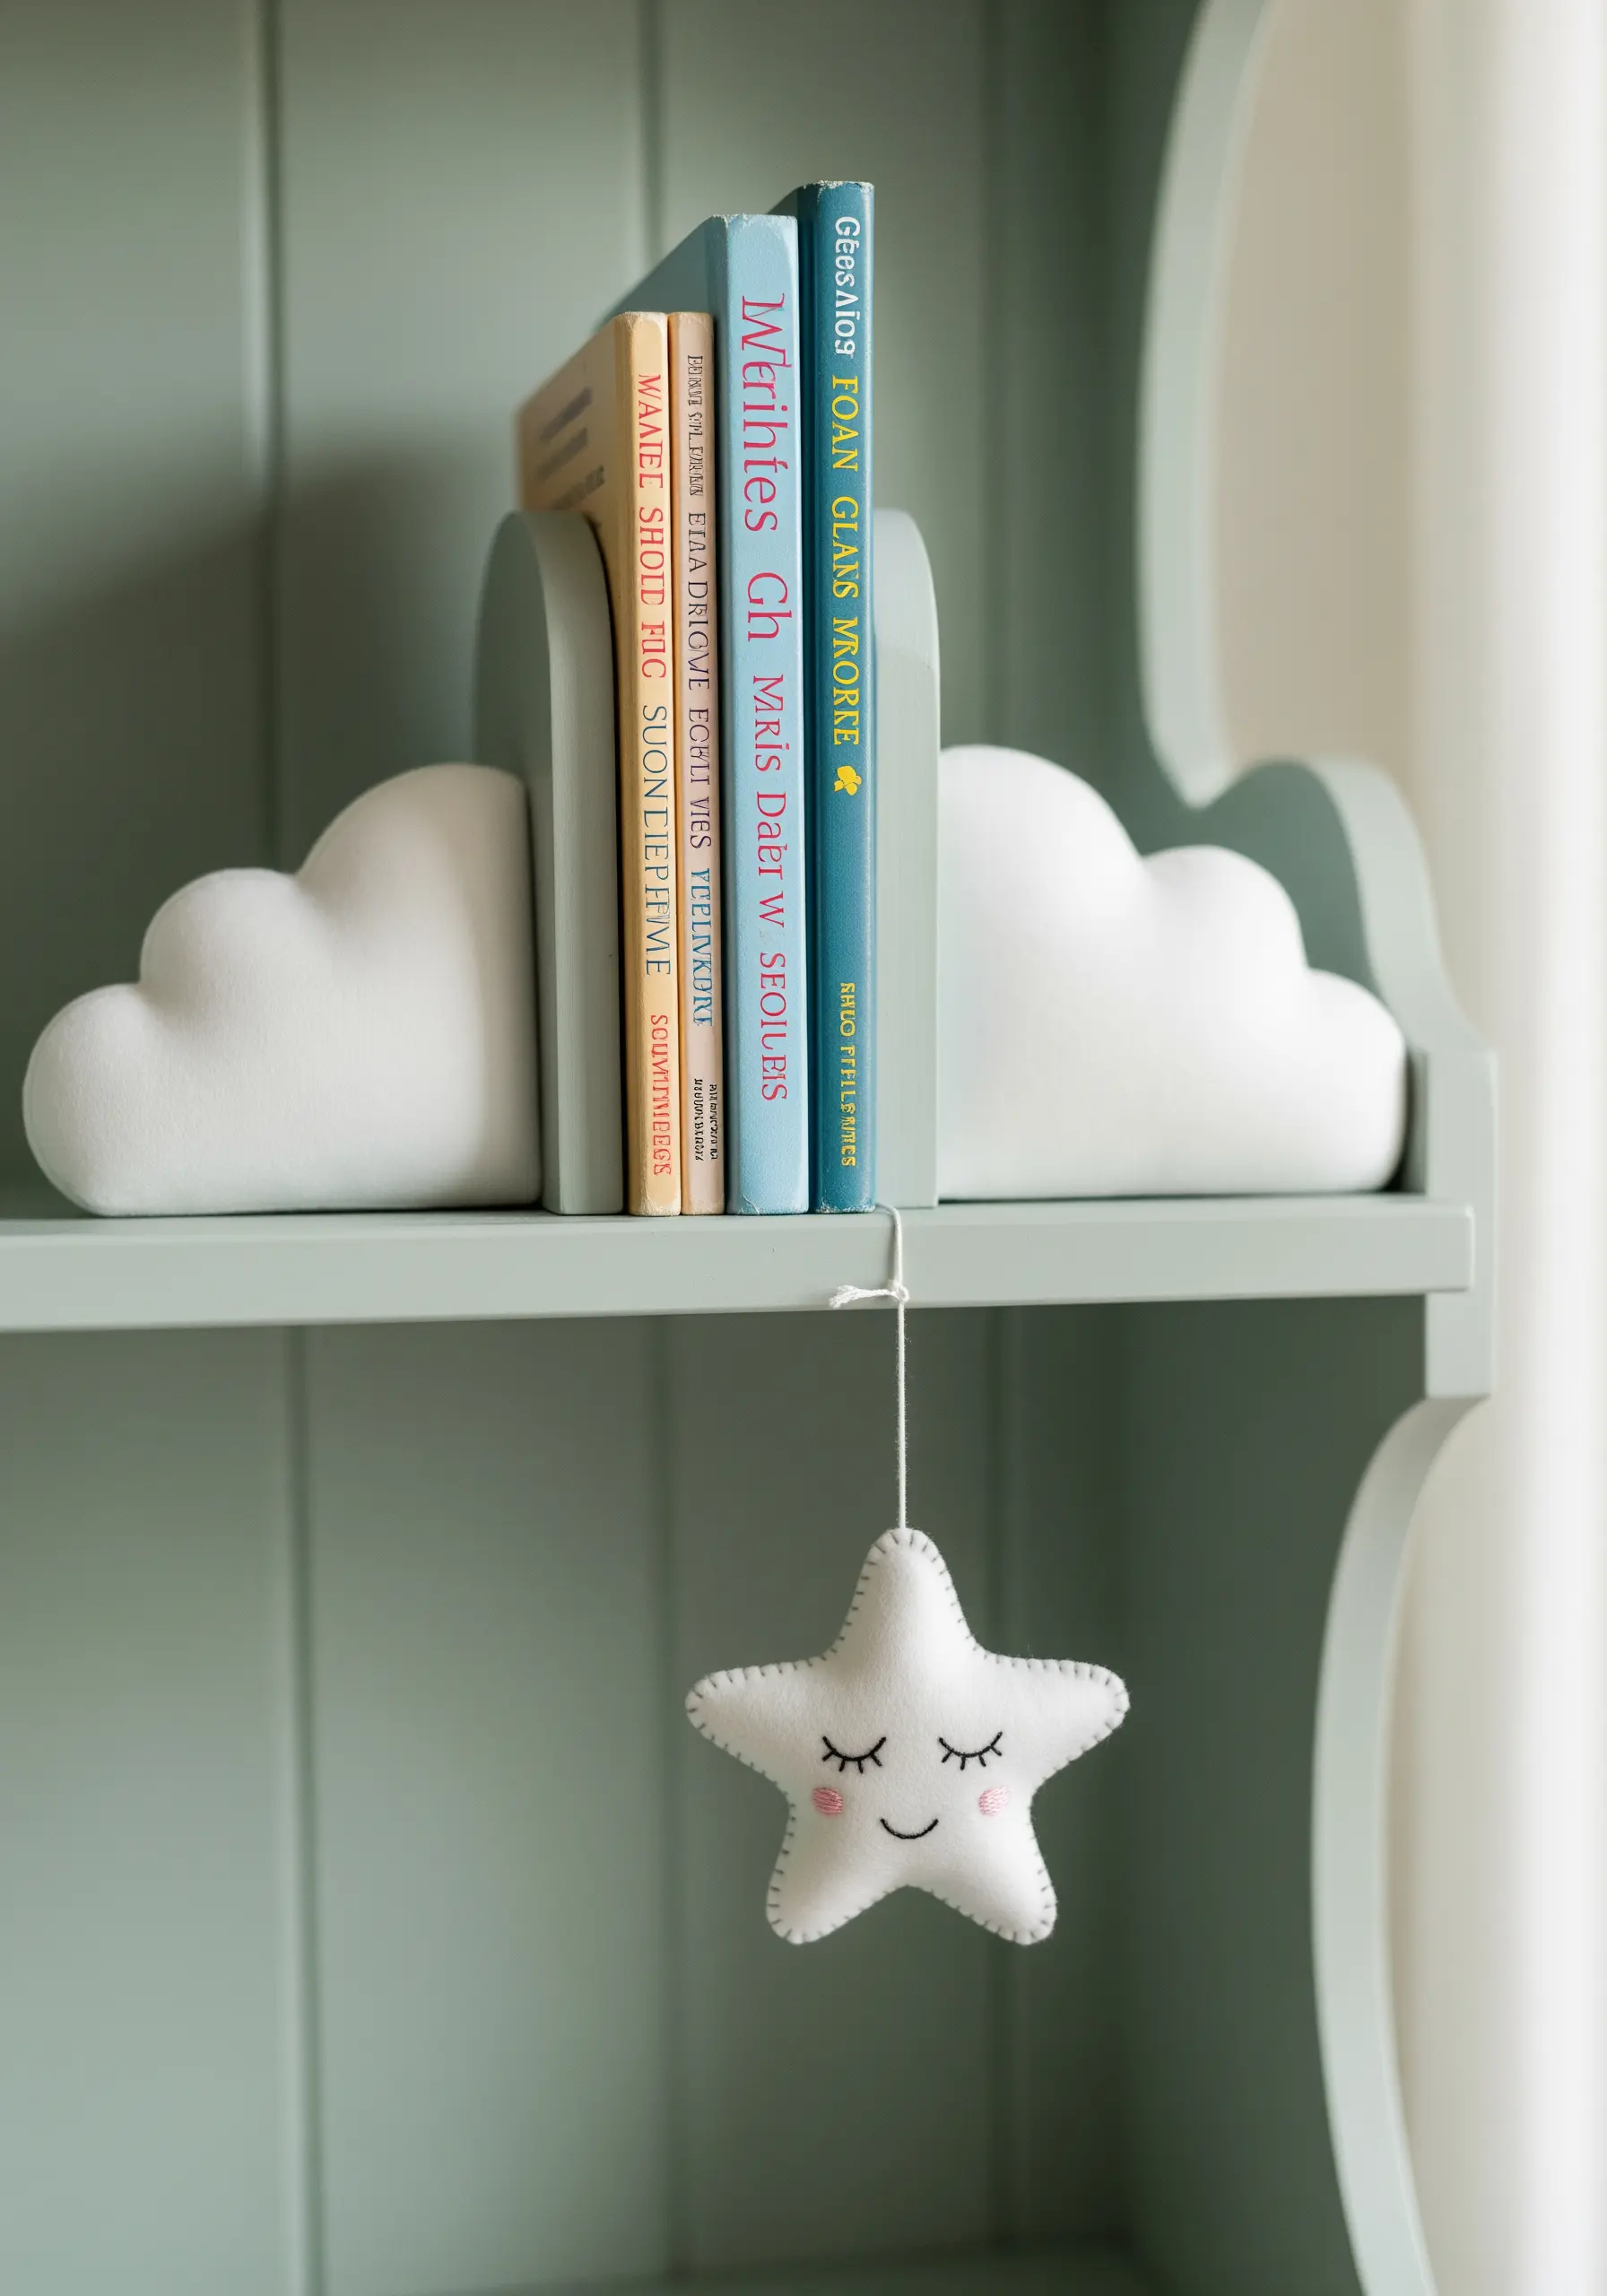
Move your embroidery off the hoop and into three dimensions by creating small, stitched felt objects to adorn a shelf.
Cut two identical shapes from soft felt, stitch on simple facial features with a few strands of black floss, and then join the pieces with a neat blanket stitch around the edges.
Before you completely close the shape, fill it with a bit of polyester stuffing to give it a soft, plump form.
These plush ornaments add a gentle, playful touch to nursery shelves or cozy reading nooks.
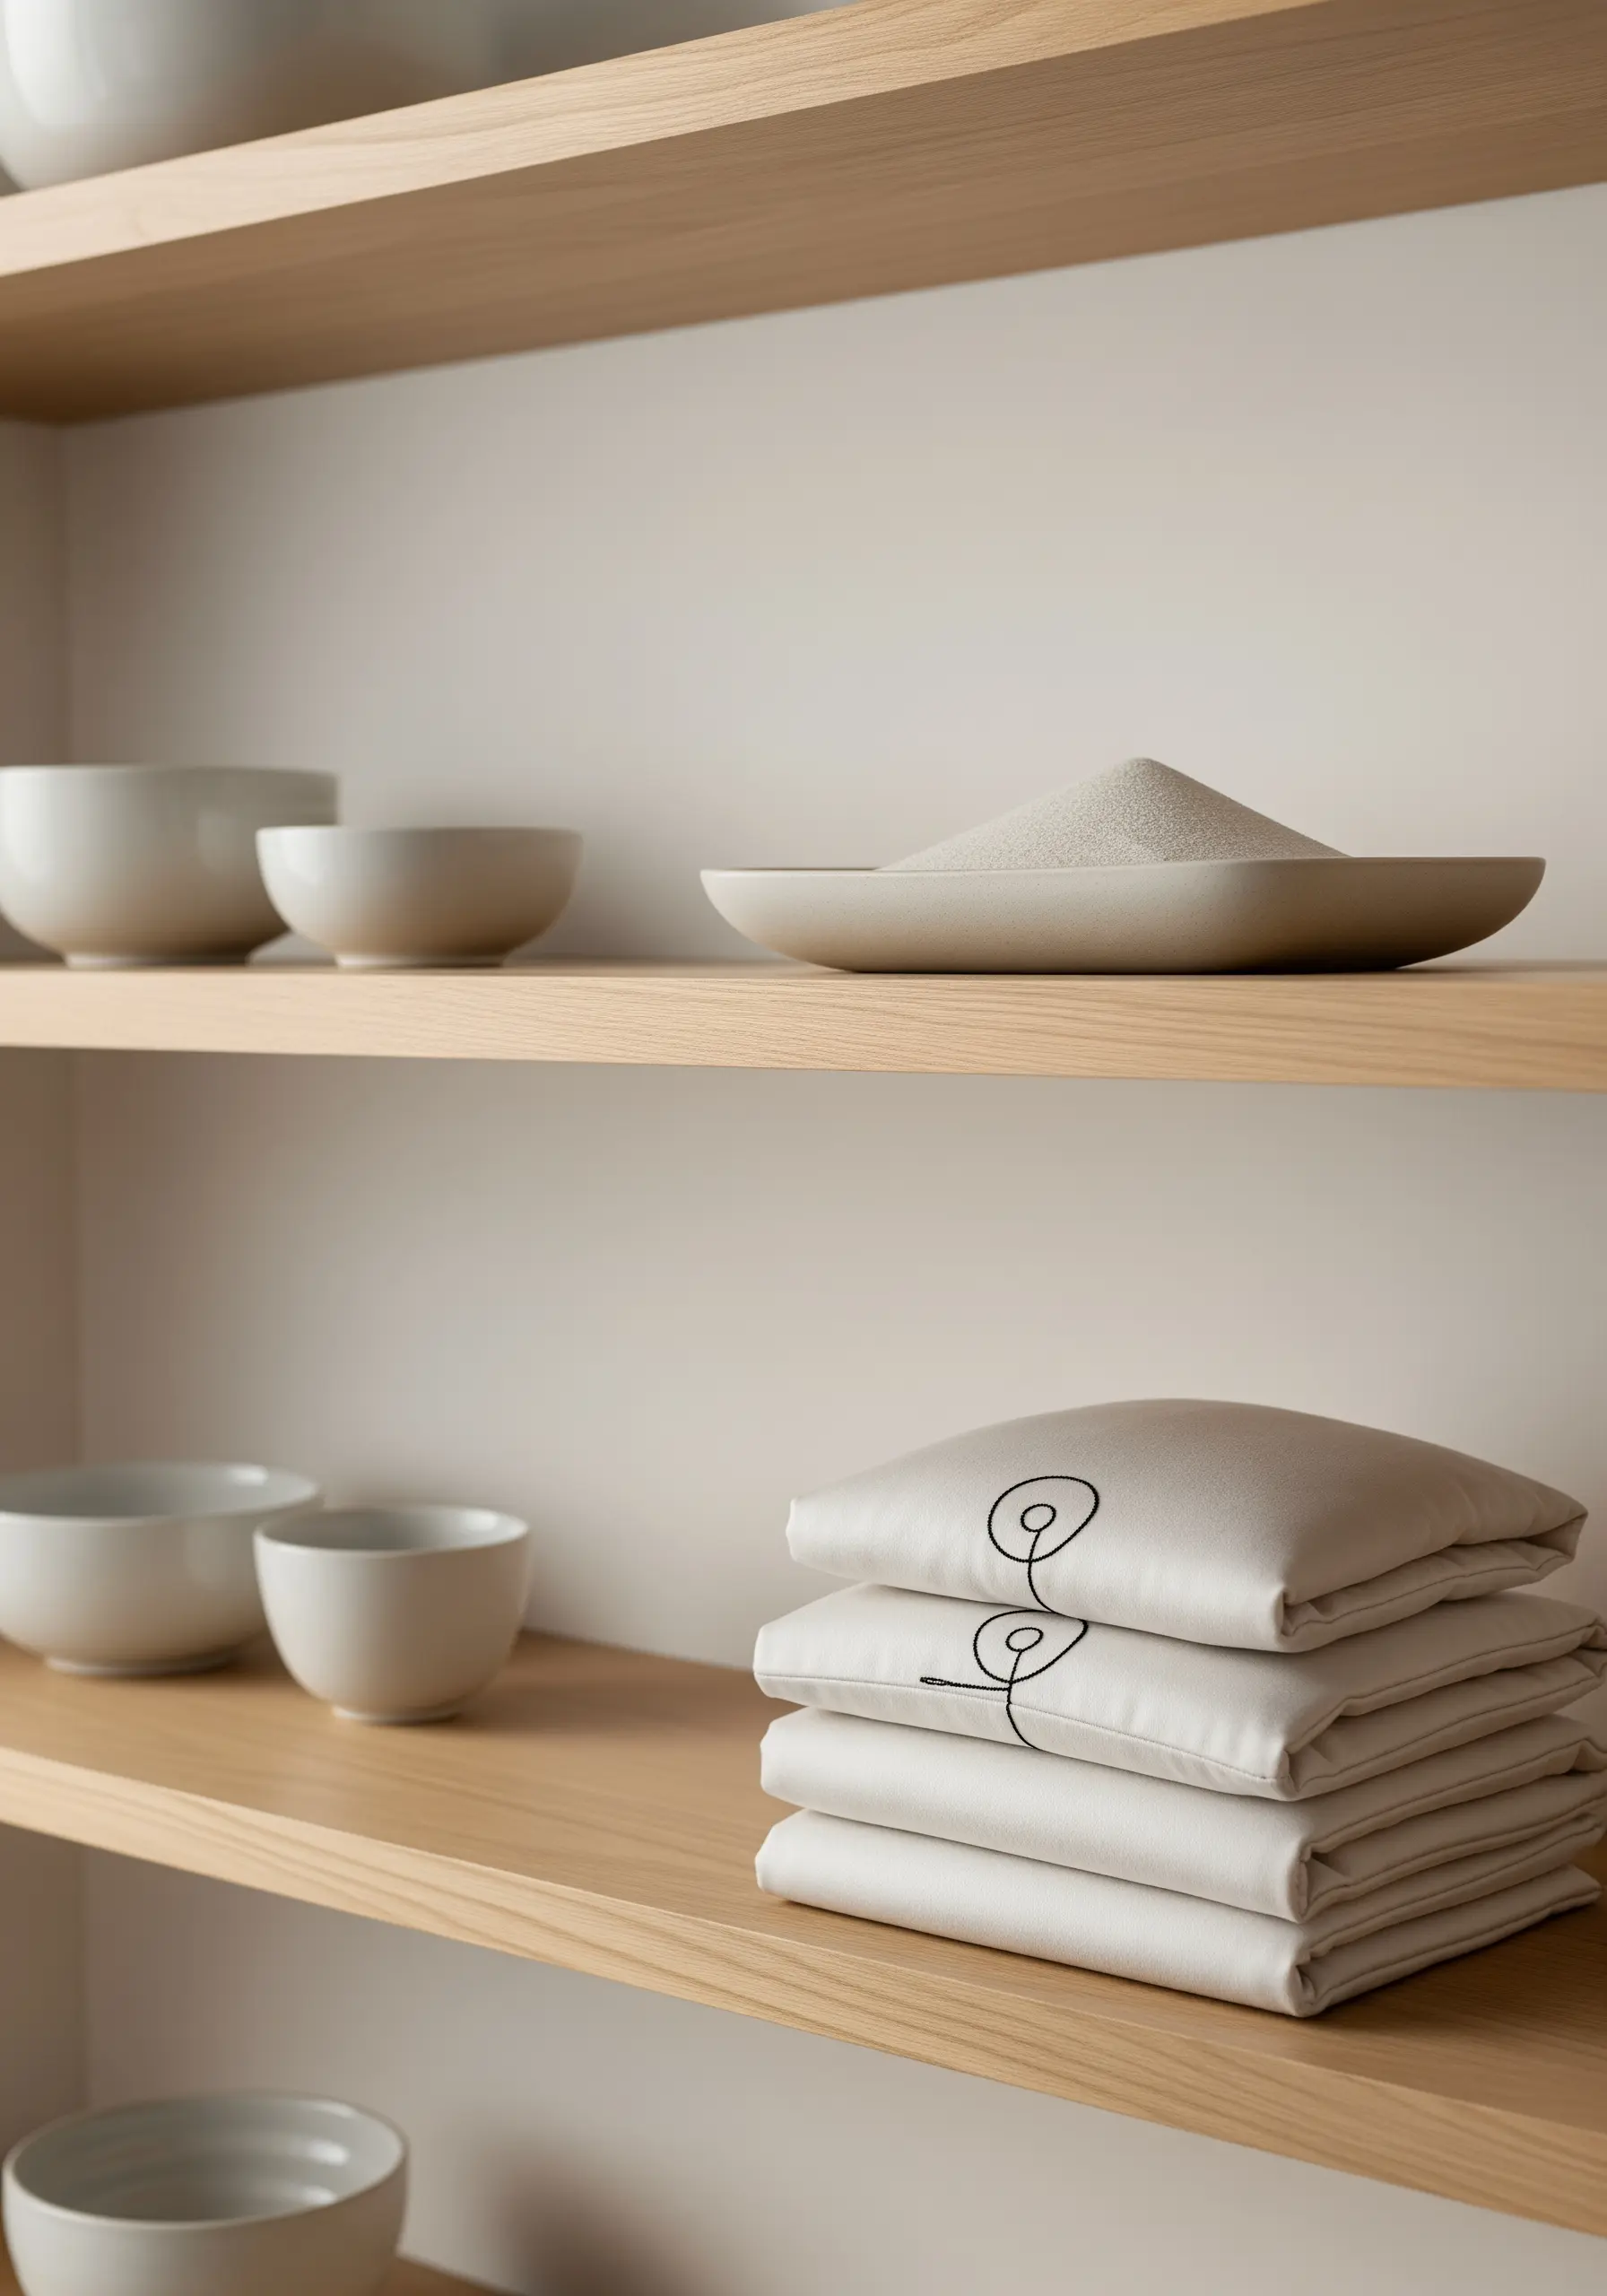
9. Use a Whipped Stitch for Refined Lettering
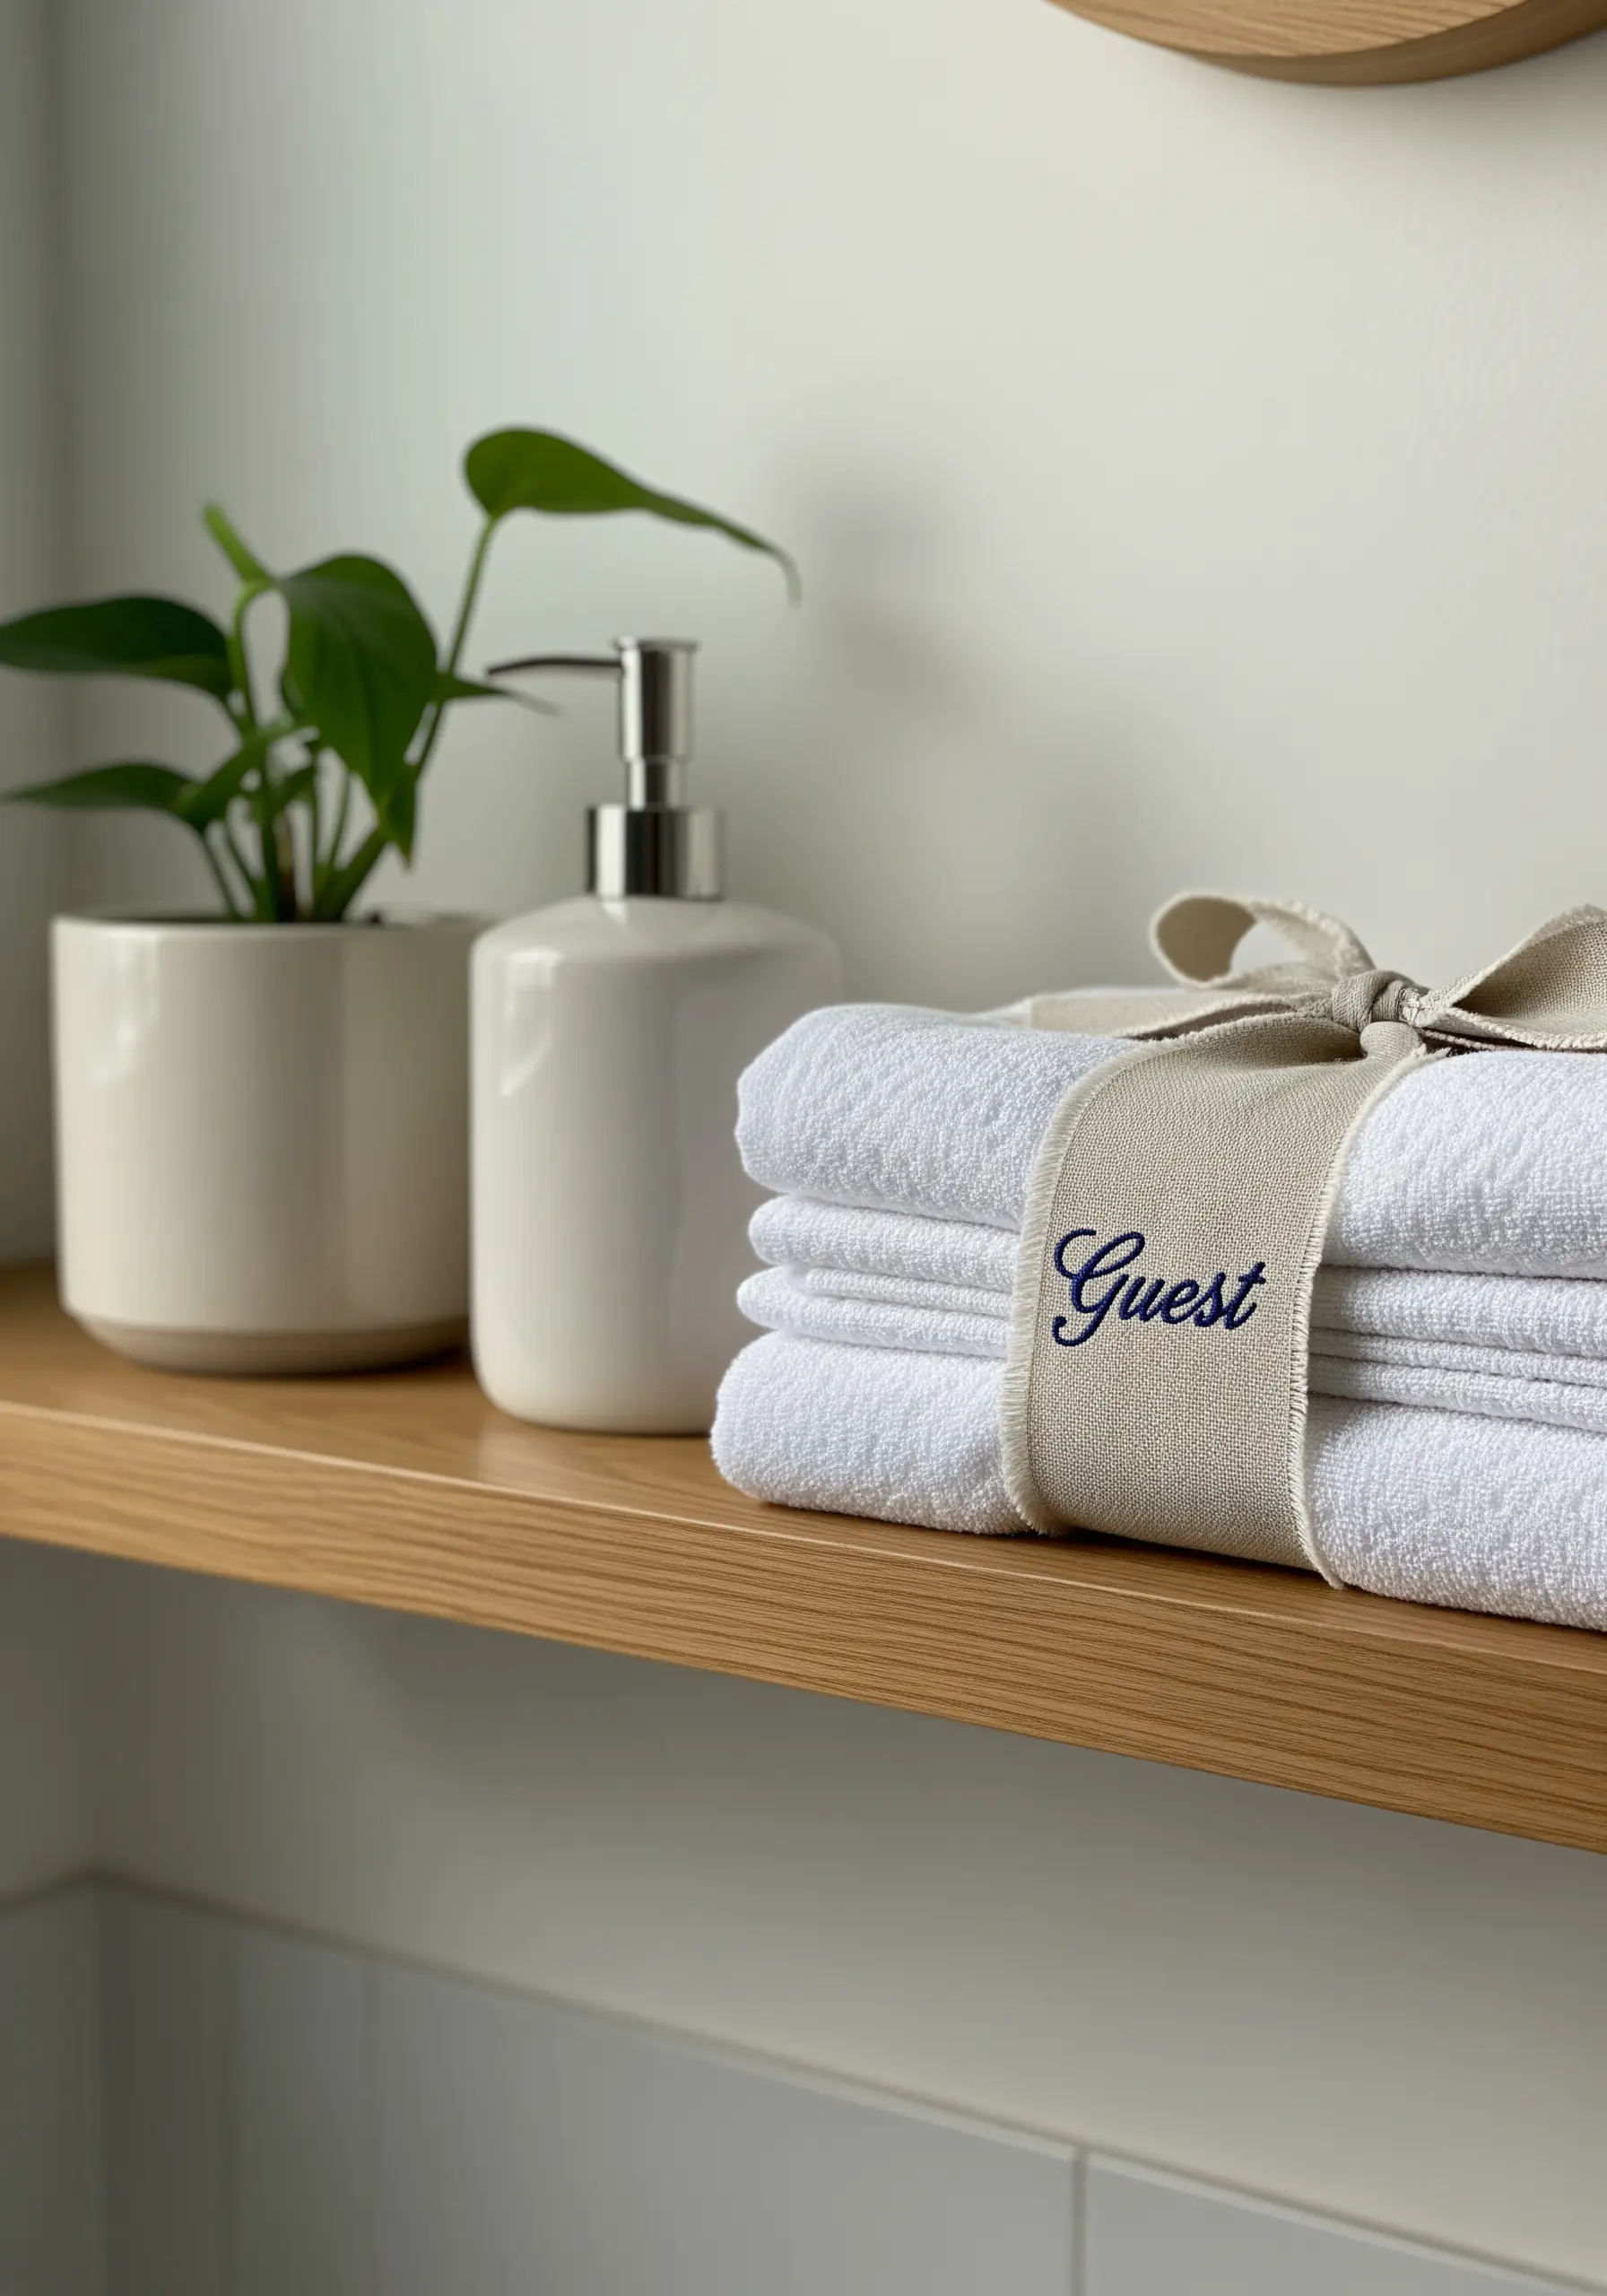
Elevate simple embroidered text on items like towel bands or gift tags with a stitch that creates a smooth, cord-like appearance.
First, stitch your word or phrase using a standard backstitch. Then, without piercing the fabric, slide your needle under each backstitch, wrapping the original line with a second thread.
This technique, called a whipped backstitch, smooths out the segmented look of a backstitch, resulting in a fluid, continuous line perfect for elegant script.
It’s a simple adjustment that gives your lettering a distinctly professional and polished finish.
10. Turn Cross-Stitch into a Tiny Scented Charm
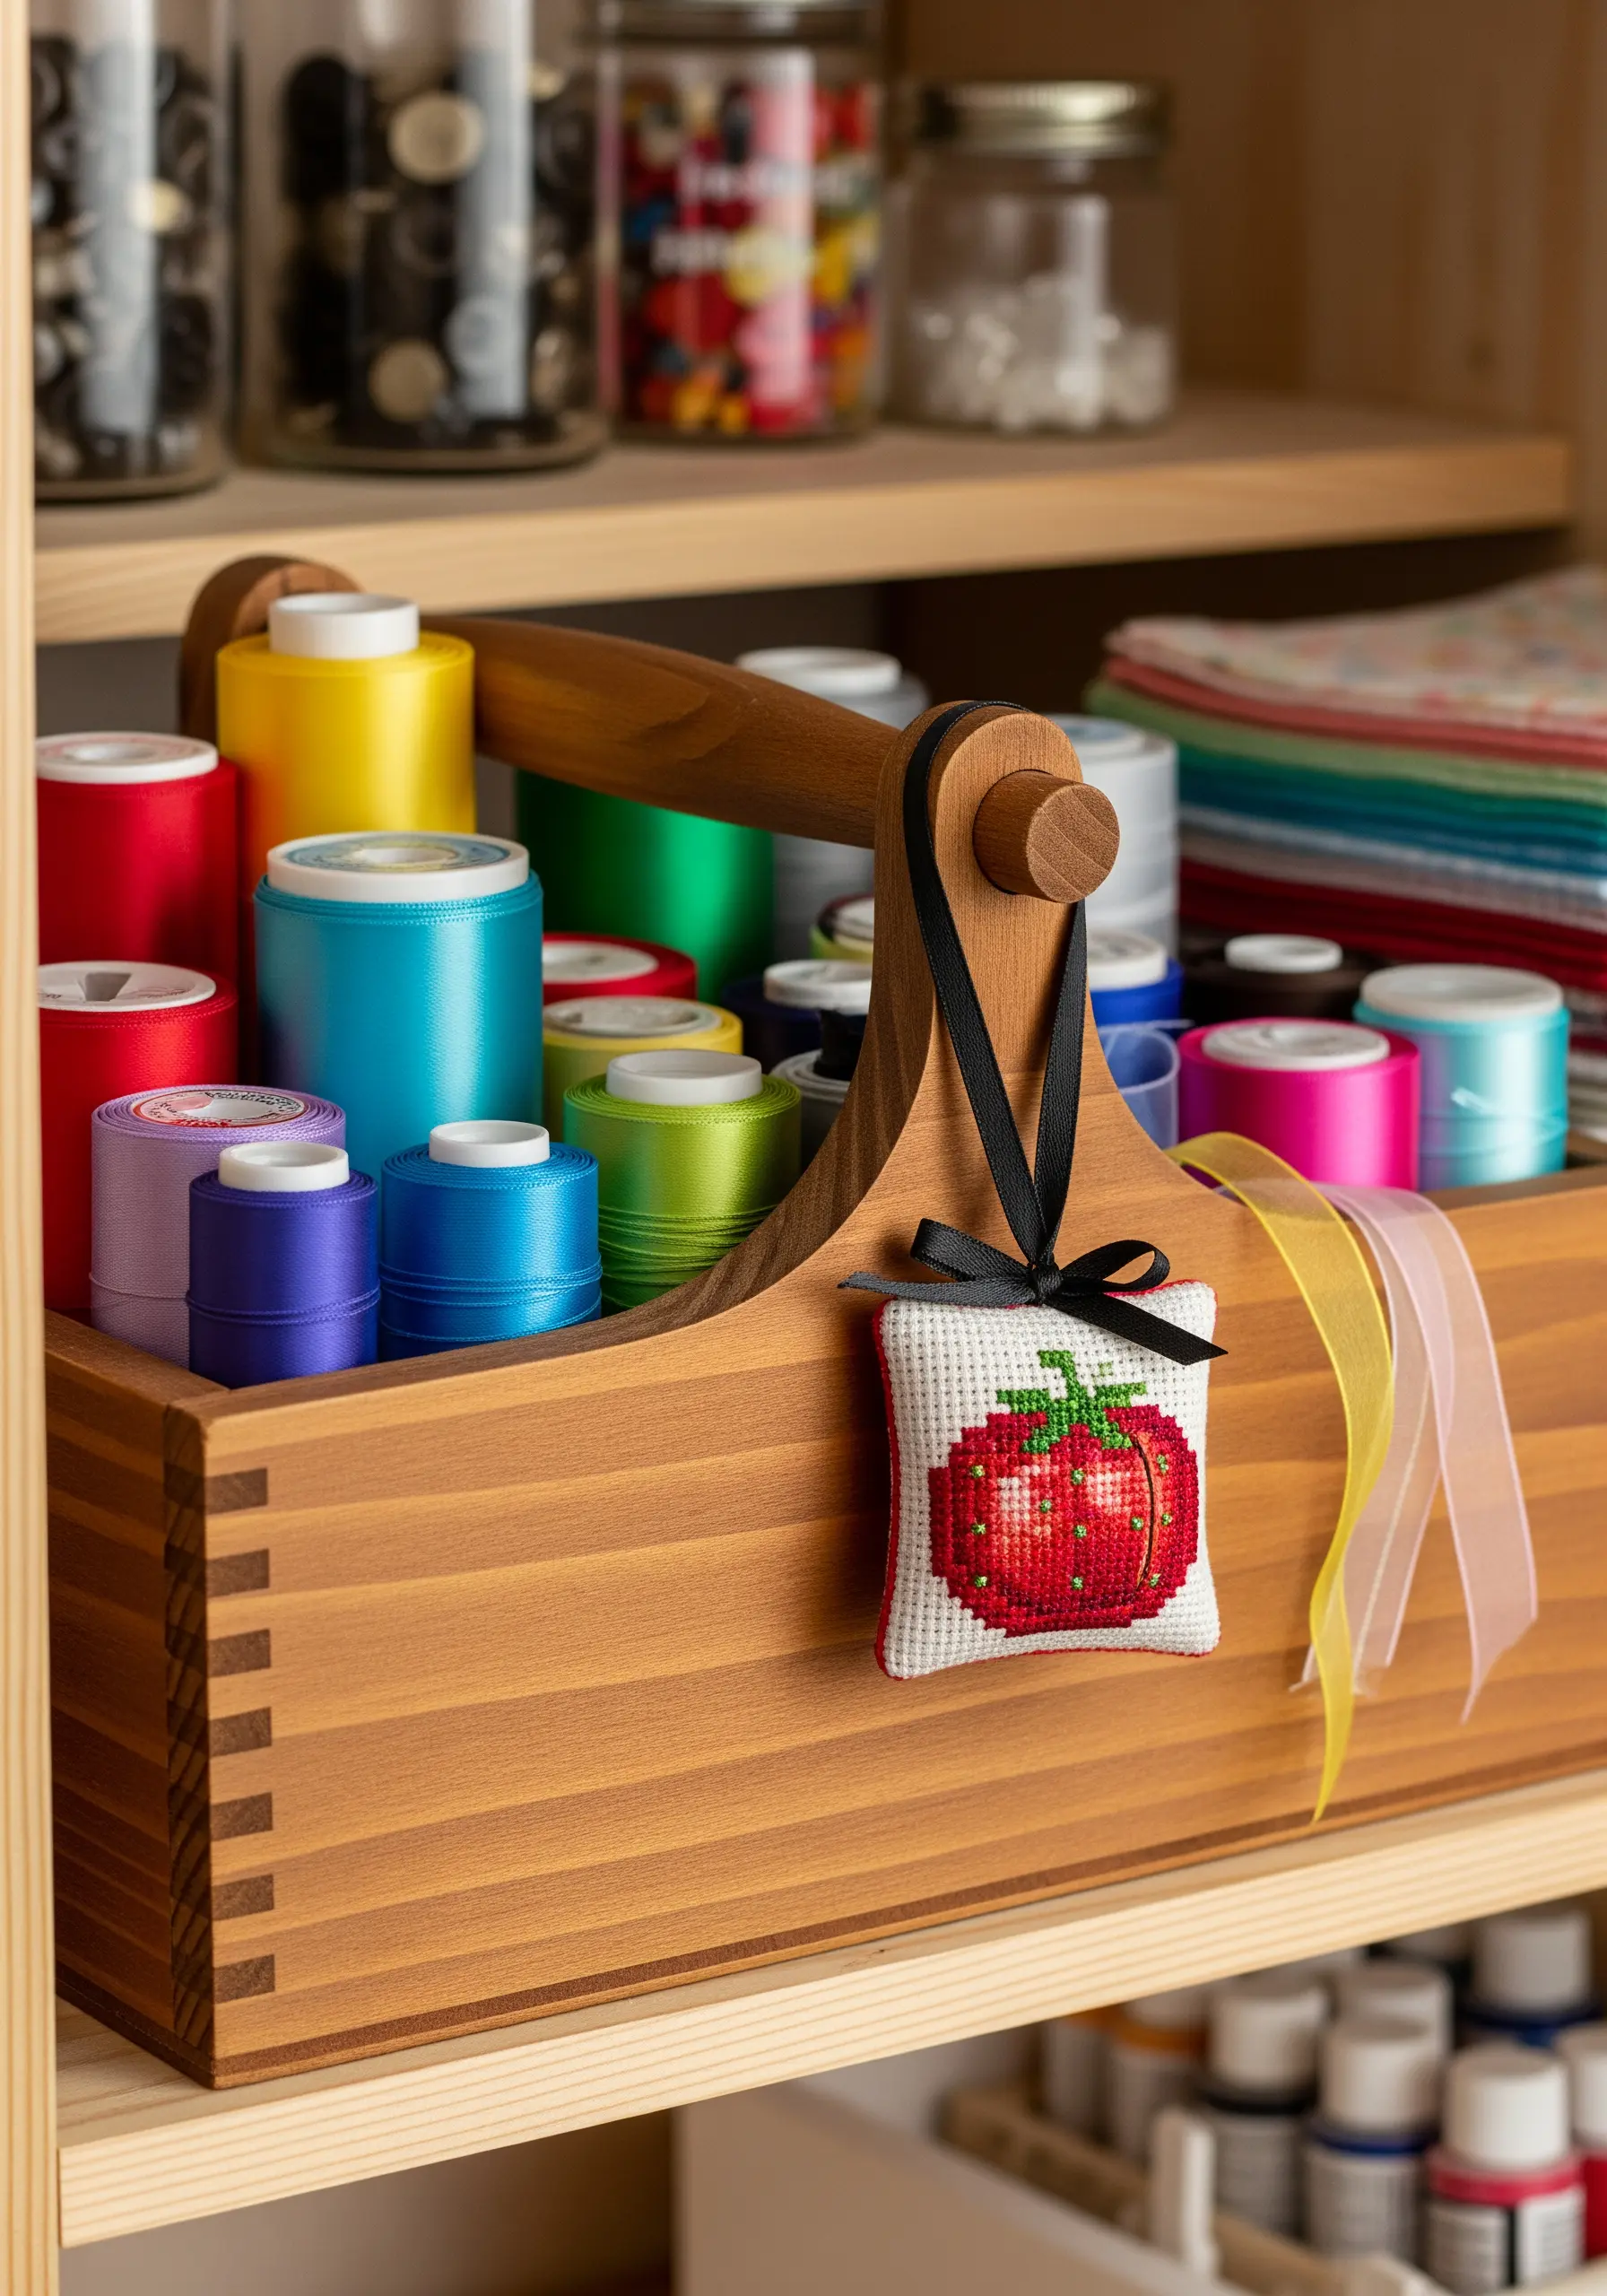
Take a small cross-stitch motif off the wall and transform it into a functional, decorative object like a pin cushion or a scented sachet.
After completing your design on Aida cloth, trim the fabric, leaving a small seam allowance. Stitch it to a backing fabric of your choice, leaving a small gap for stuffing.
Fill with polyester fiberfill mixed with dried lavender or cedar shavings for a lovely aroma every time it’s handled.
This turns a simple stitch exercise into one of those adorable mini embroidery ideas that can hang from a basket or knob.
11. Embrace Art Deco with Metallic Geometrics

Create a sophisticated accent piece like a coaster or mug rug by stitching a bold, Art Deco-inspired geometric pattern.
Choose a dark, solid fabric like black cotton or velvet to make metallic threads pop. Use a bright gold or silver thread for sharp, radiant lines.
Combine satin stitches for filled-in shapes and backstitches for clean, graphic outlines. The high contrast between the dark background and the shimmering thread creates a glamorous, high-end look.
This is a perfect way to add a touch of luxe, vintage-inspired style to a modern glass or metal shelf.
12. Experiment with 3D Stumpwork for Playful Realism
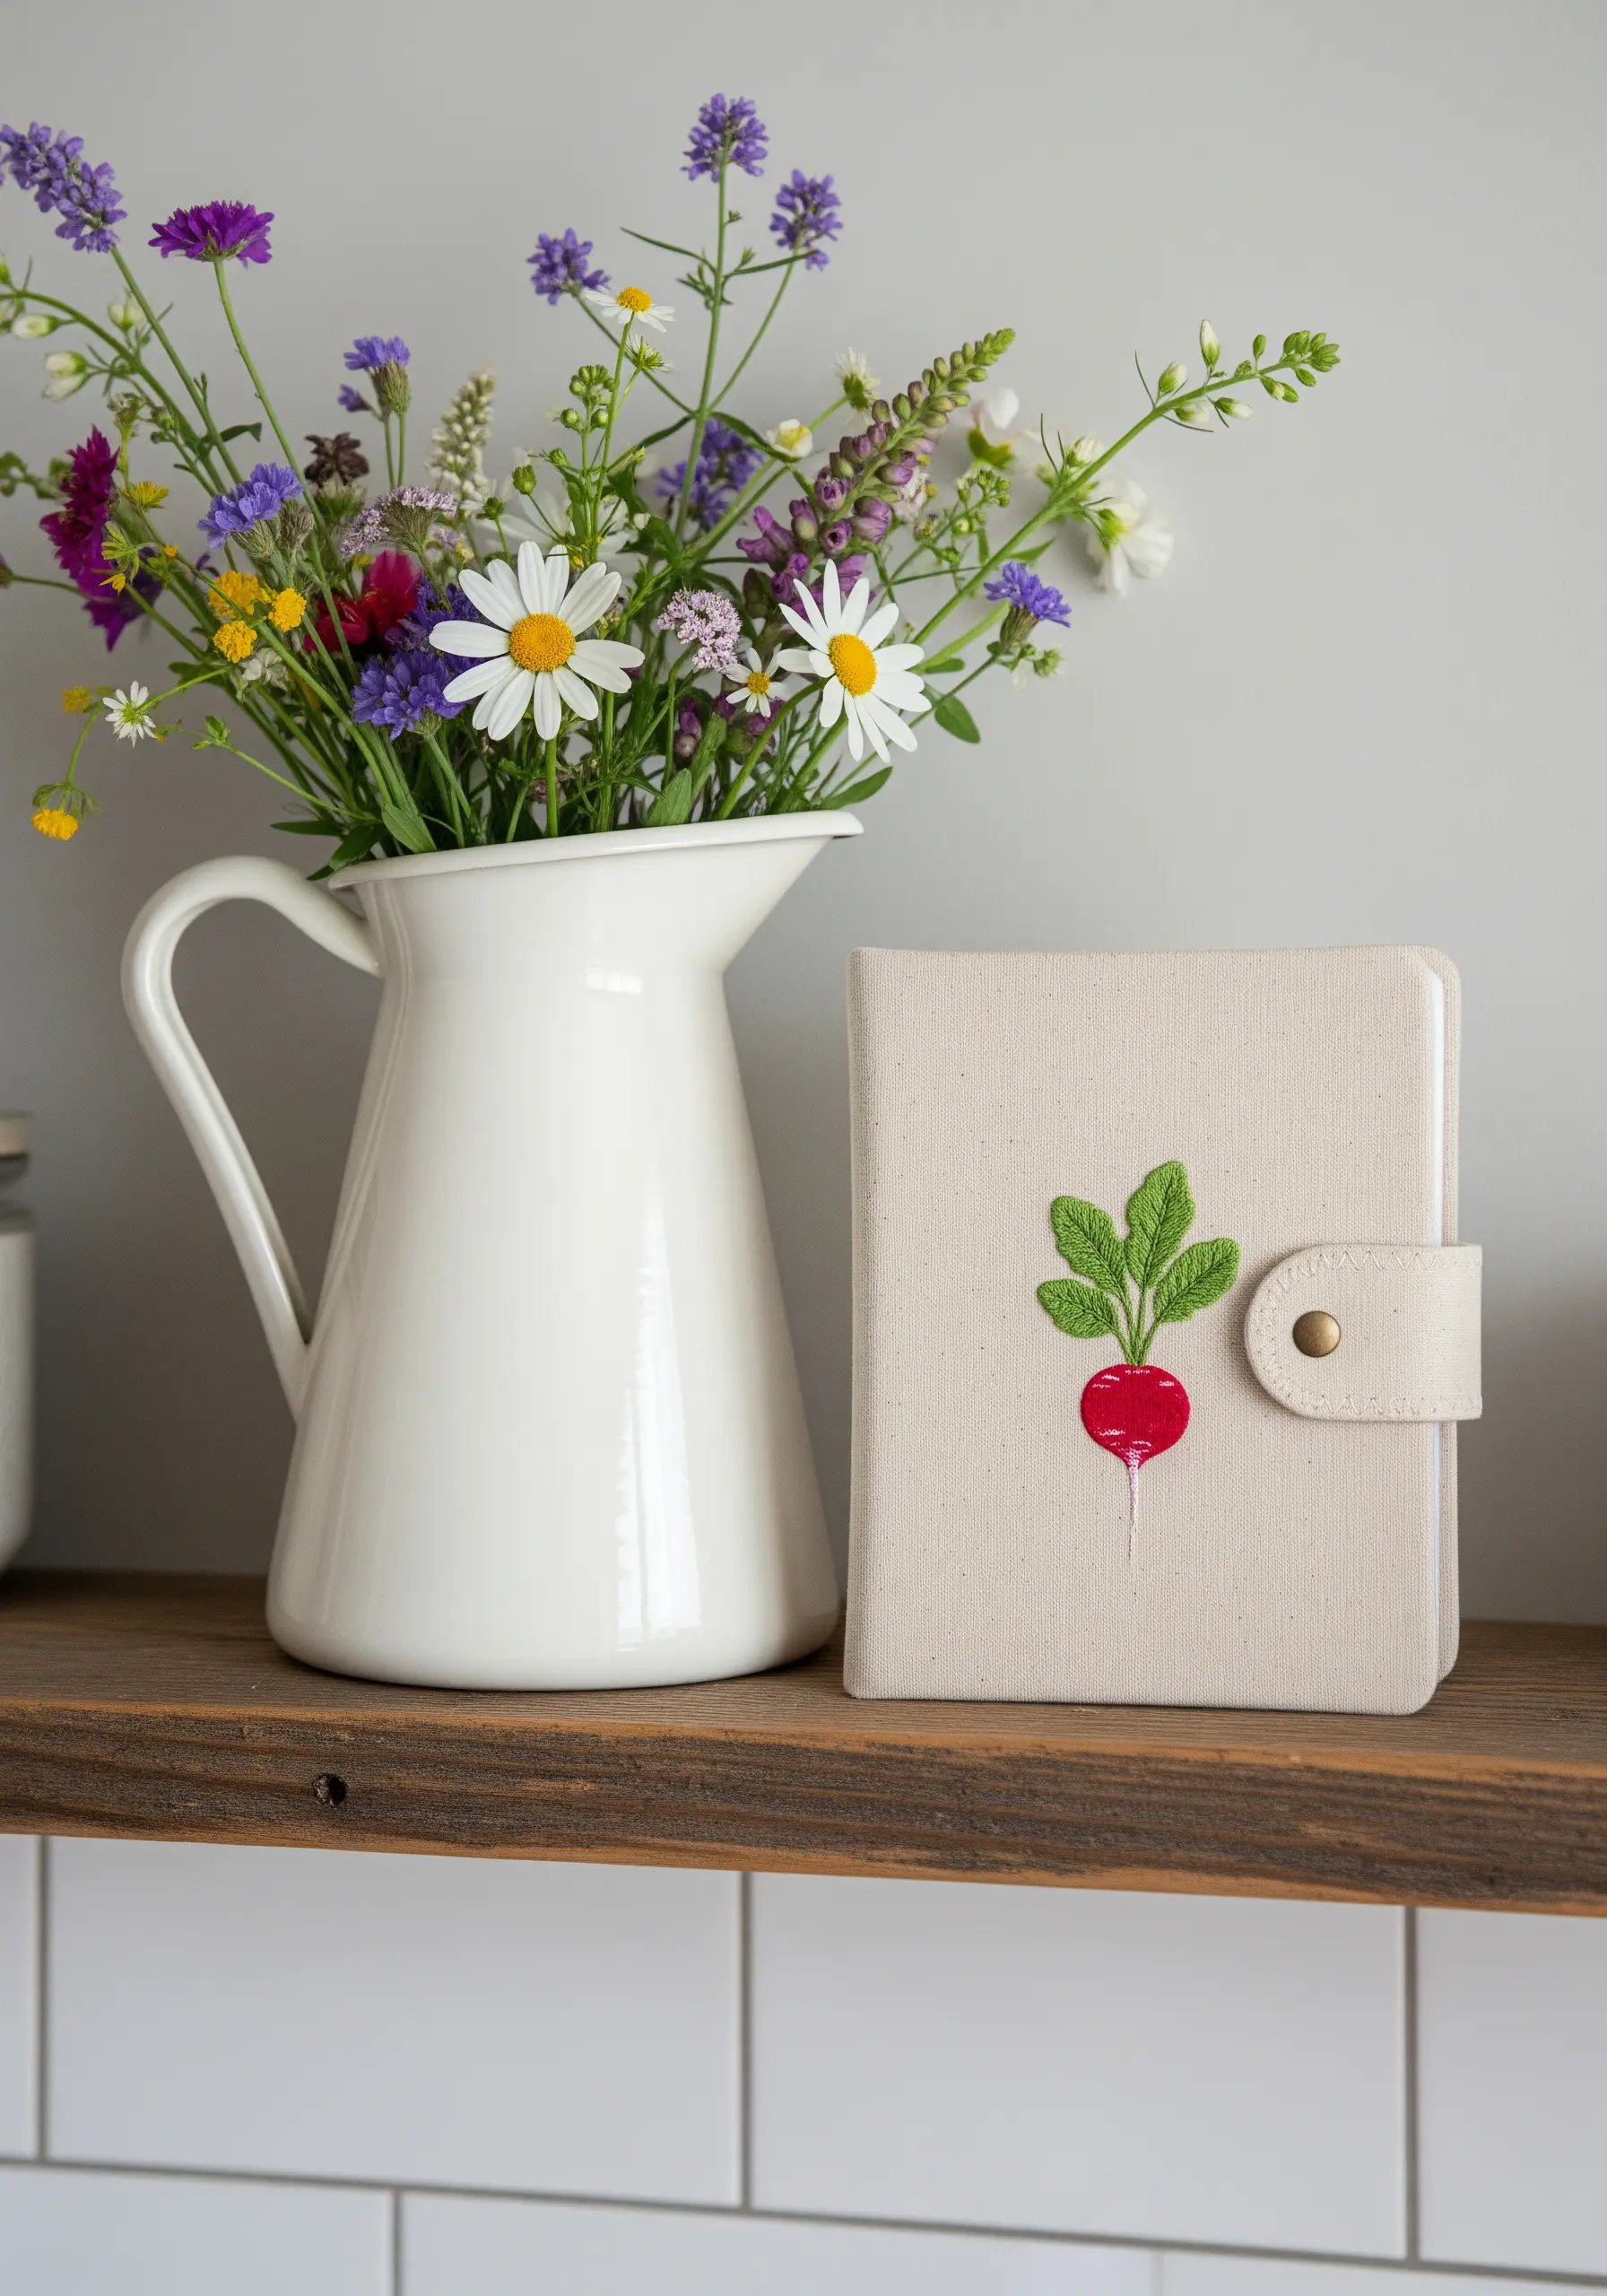
Add surprising dimension to a simple motif by incorporating stumpwork, a raised embroidery technique from the 17th century.
For the radish leaves, create individual petals by wrapping fine wire with buttonhole stitches, then stitch them onto the main fabric so they stand free from the surface.
The radish bulb itself can be given a plump, rounded shape using padded satin stitch. This combination of flat and raised elements creates an engaging, tactile piece.
This is one of the best modern texture-layering embroidery techniques to make your work literally pop.
13. Stitch Bold Statements on Stretched Canvas

Display your favorite words or phrases as art by stitching directly onto a small, stretched artist’s canvas.
Use a thick, textured stitch like a chain stitch or a chunky satin stitch to give the letters weight and presence. A six-strand floss or even fine yarn will create the bold look you need.
Before you begin, lightly pencil your letters onto the canvas. Use an awl or a large needle to pre-pierce the canvas along your lines to make stitching easier.
These embroidered quote wall hangings make a powerful, personal statement on any shelf.
14. Perfect the Art of Subtle Whitework
Create an effect of unparalleled elegance by using whitework, where white thread is stitched onto white fabric.
The beauty of this technique lies in texture, not color. Use a padded satin stitch for a raised monogram and tiny French knots or seed stitches for delicate surrounding details.
The play of light and shadow across the different stitch textures is what makes the design visible and captivating.
Tone-on-tone embroidery on fine linen is the epitome of quiet luxury, perfect for a formal dining room display.
15. Create a Coastal Orb with dimensional Stitches
Evoke a serene coastal feeling by creating a decorative fabric sphere adorned with stitched seashell motifs.
Cover a styrofoam ball with a light blue linen or cotton fabric. Then, use an off-white or cream thread to stitch various seashell shapes directly onto the surface.
Use a satin stitch for fan-shaped shells and straight stitches radiating from a central point for sand dollars. For a raised effect, try the detached buttonhole stitch to build small, three-dimensional shell forms.
This tactile piece adds a touch of the ocean to your decor without being overly literal.
16. Stitch on Unconventional Materials Like Paper or Leather

Add a unique touch to your organization by stitching directly onto materials like stiff paper, cardstock, or vegan leather for tags and labels.
The key is to pre-punch your stitching holes with a fine awl or a sharp, sturdy needle. This prevents tearing and ensures your stitches are even.
Use a simple backstitch or running stitch, as complex stitches can weaken the material. A thicker thread, like a #5 pearl cotton, works beautifully for this technique.
These paper embroidery projects add an unexpected and tactile detail to otherwise mundane items.
17. Capture Iridescence with Silk Threads
To replicate the shimmering, color-shifting quality of a peacock feather, your thread choice is paramount.
Opt for silk or rayon floss, as their high sheen catches the light beautifully. Use the split stitch to create fine, flowing lines for the feather’s barbs.
Blend multiple shades of blue, green, and turquoise within each section, laying your stitches close together to create a seamless gradient.
Framing this piece against a black velvet background enhances the vibrancy of the threads, making it a jewel-like focal point on any shelf.
18. Combine Beadwork and Embroidery for Opulence
Introduce another layer of texture and light by incorporating beads, pearls, and small crystals into your embroidery.
Stitch down individual beads with a single, secure backstitch. For lines of beads or pearls, use the couching method by laying the strand on your fabric and tacking it down between each bead.
Outline your beaded sections with metallic thread to define the shapes and add extra sparkle. This technique is perfect for embellishing the lids of decorative boxes or jewelry cases.
These mixed-media contemporary embroidery designs transform simple objects into treasures.
19. Embellish a Woven Basket with Yarn
Add a pop of color and handmade charm to a plain woven basket using thick yarn or cord.
Using a large, blunt tapestry needle, weave or whipstitch colorful yarn around the top rim of the basket. This is a simple way to introduce a band of color and texture.
You can also create simple patterns like cross stitches or couched lines directly onto the basket’s surface.
This is one of the easiest mixed-fiber ideas to personalize storage and add a soft, textile element to a hard surface.
20. Add Stitched Details to Everyday Objects
Look beyond fabric and hoops and consider how you can add a touch of embroidery to unexpected objects on your shelves.
Create a tiny embroidered band to wrap around the handle of a magnifying glass, a letter opener, or a vintage tool. Use a fine evenweave linen for detailed work.
Secure the embroidered piece with a few discreet stitches on the back. This tiny detail transforms a functional object into a piece of personal art.
Seeing embroidery in this context turns your shelves into a cabinet of curiosities, where even the smallest items tell a story.
21. Practice Minimalism with Single-Line Art
Convey powerful imagery with the utmost simplicity by using a single, continuous line of thread.
Choose a high-contrast combination, like black thread on natural linen or cream-colored fabric. Use a single strand of floss to keep the line exceptionally fine and delicate.
A stem stitch or a whipped backstitch will give you the smoothest, most fluid line for abstract faces, botanicals, or silhouettes.
This approach to minimalist line art nature embroidery is perfect for a modern, uncluttered aesthetic, adding a touch of artistry without overwhelming the space.
22. Create Pixel-Perfect Cross-Stitch Ornaments
Celebrate the charming, pixelated aesthetic of cross-stitch by turning a tiny motif into a decorative hanging ornament.
Stitch a simple fruit or botanical design on a small piece of 14-count Aida cloth, which provides the perfect grid for even stitches.
To finish, cut out the design leaving a one-square border, glue it to a piece of stiff felt, and trim the felt to match. Add a ribbon loop for hanging.
These tiny stitched charms are delightful handmade embroidery ideas that can decorate a baker’s rack, a knob, or a hook.
23. Explore Abstract Texture with Random Stitches
Create a dynamic, modern art piece by covering a three-dimensional object with a dense network of random straight stitches.
Start with a fabric-covered cube or sphere. Using a contrasting color of thread, stitch straight lines in every direction, overlapping them to build up a chaotic yet cohesive texture.
This technique is liberating as there’s no pattern to follow. The goal is to create a visual energy that draws the eye.
Frame the object with piped edges in the same color as the thread to give the piece a clean, finished look, similar to abstract thread-splatter projects.
24. Recreate the Look of Tooled Leather with Goldwork
Take inspiration from ornate, antique bookbinding to create a fantastically detailed embroidery piece.
To mimic the look of embossed leather, use goldwork techniques on a dark, rich fabric. Outline your keyhole or scrollwork design with a fine gold cord, couching it down with matching thread.
Fill in areas with padded satin stitch using a high-sheen gold thread to create a raised, metallic effect. This adds incredible depth and a sense of magical history to your work.
This approach turns embroidery into one of the most artistic embroidery projects you can display.
25. Craft a Stitched Plant Pot Cover

Personalize your indoor garden by creating a removable, embroidered fabric wrap for a simple terracotta or plastic pot.
Measure the circumference and height of your pot to create a fabric sleeve. Choose a durable fabric like canvas or linen that will hold its shape.
Embroider a vibrant hummingbird or a favorite botanical using thread painting techniques to blend colors for a realistic finish.
This is a wonderful way to harmonize your decor, connecting your love of houseplant embroidery motifs with your actual living plants.
26. Design a Subtle, All-Over Pattern
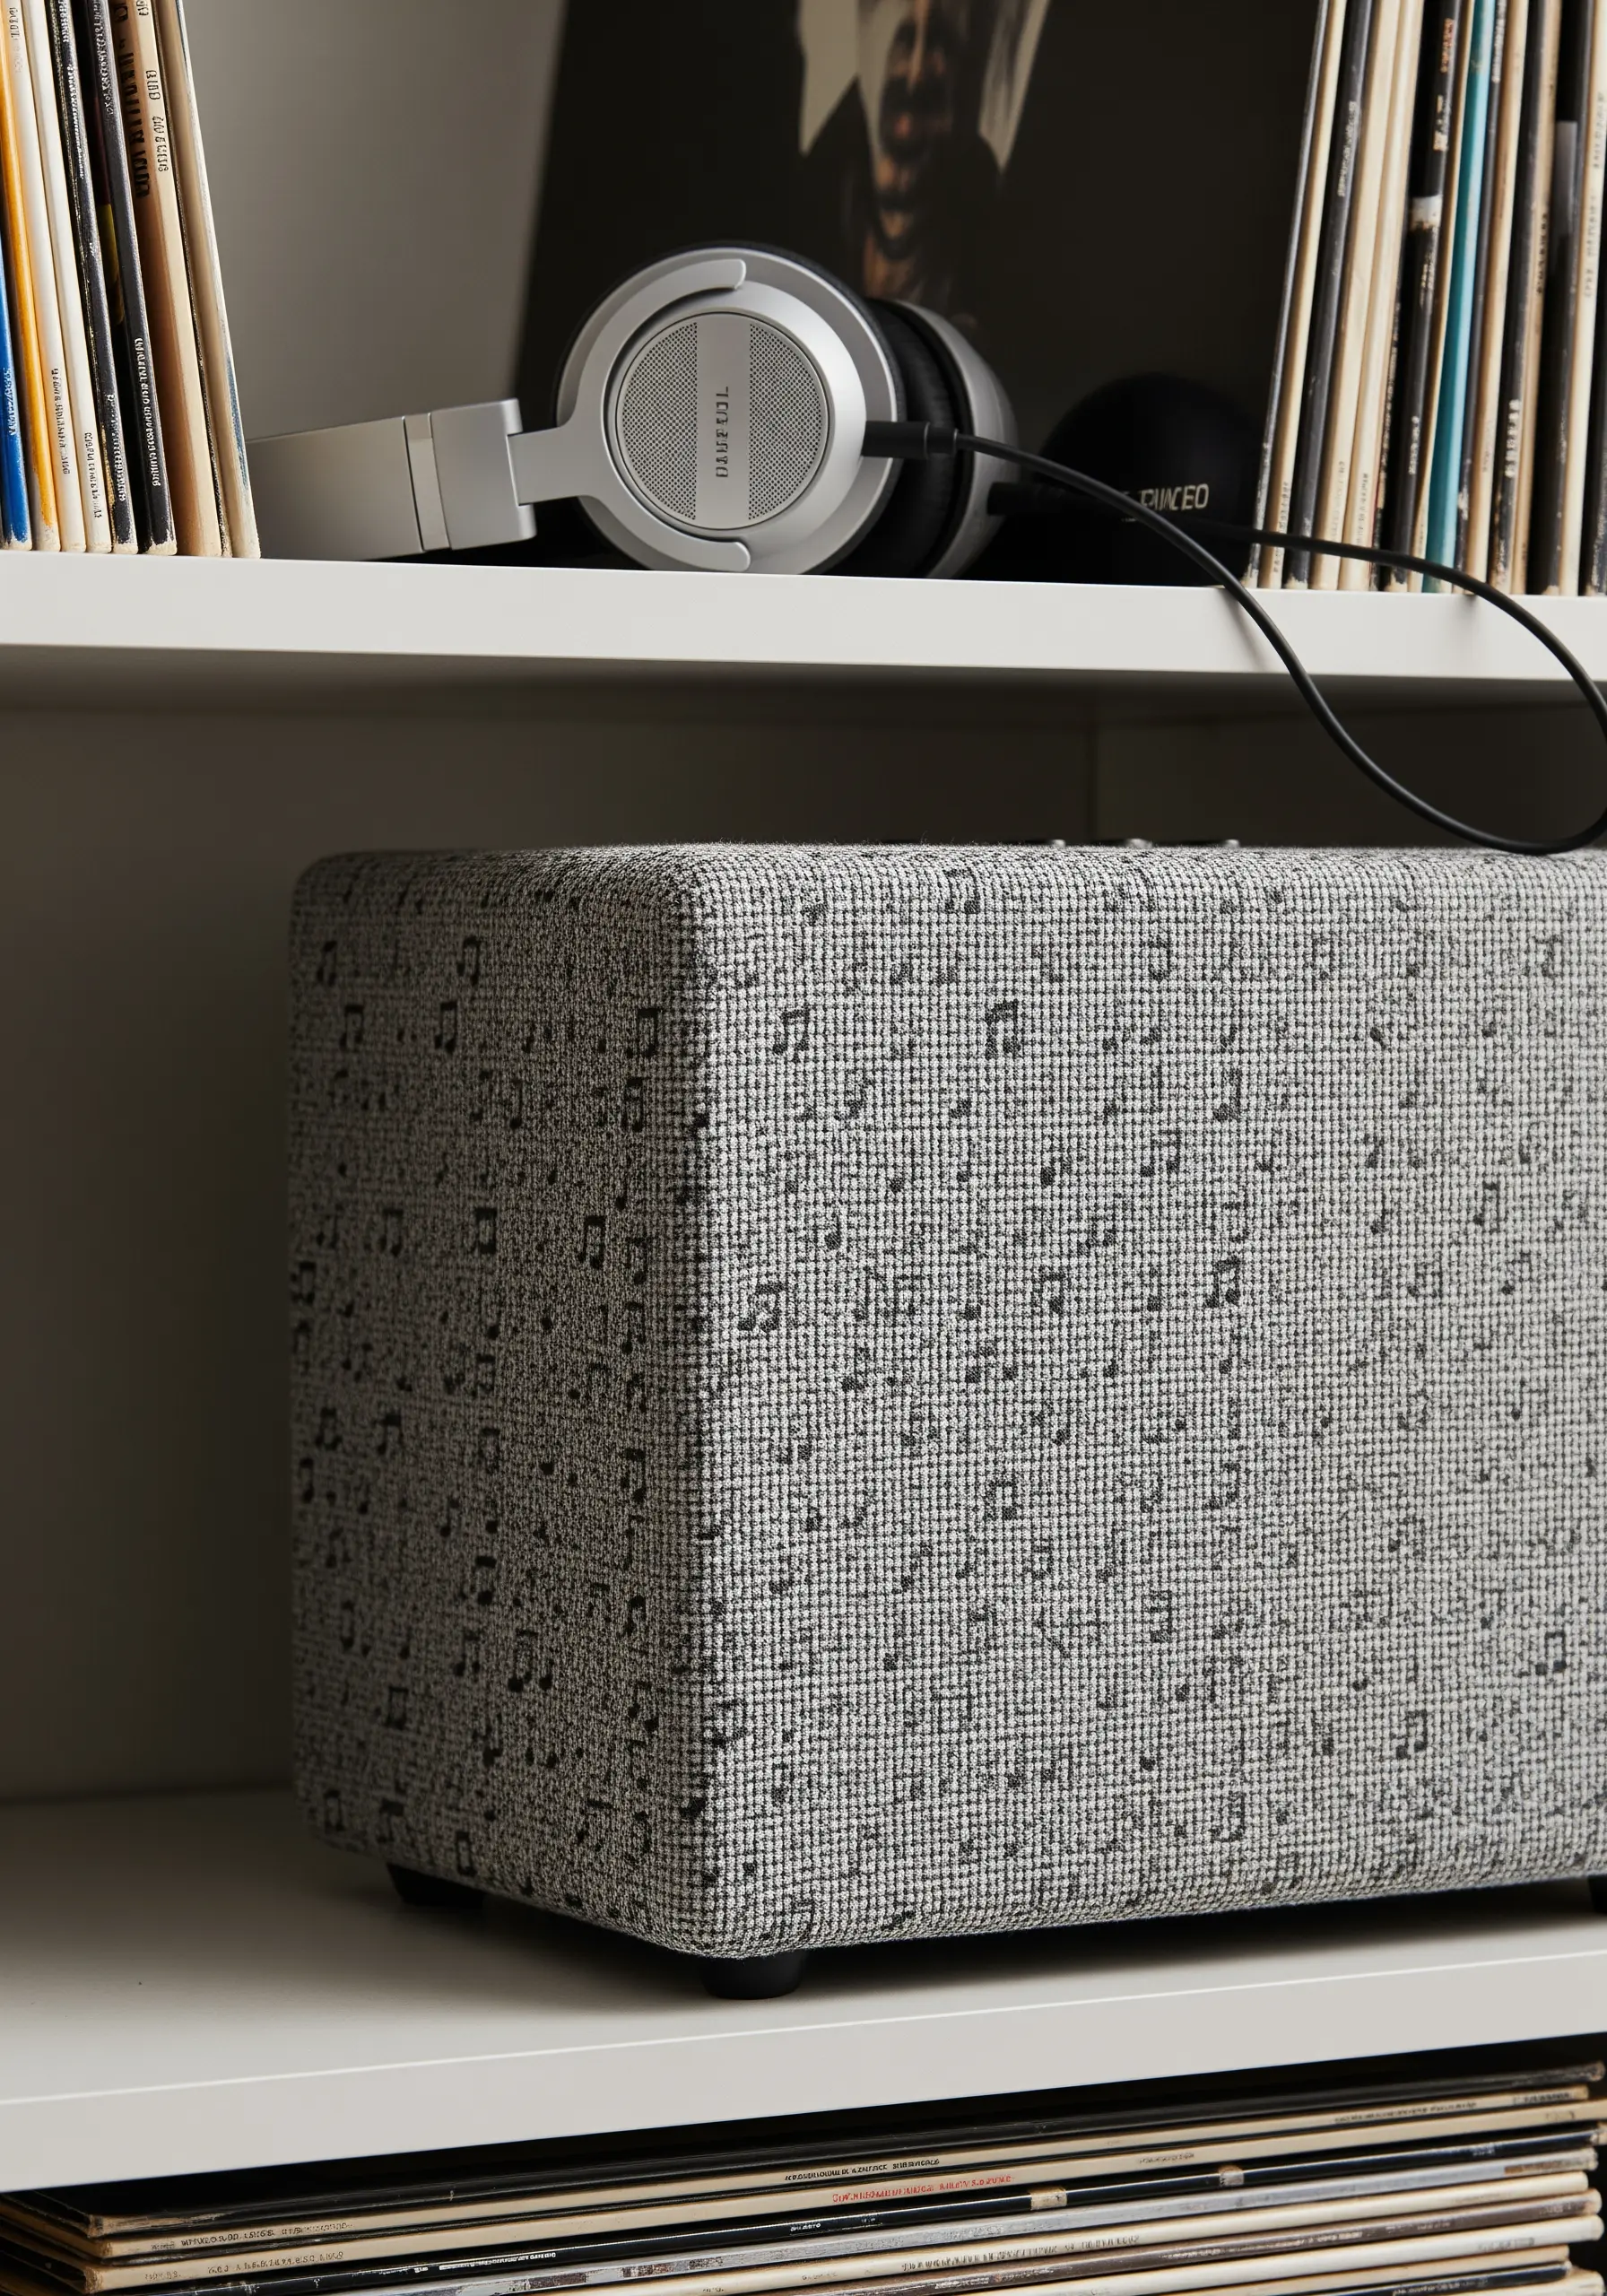
Instead of a single focal point, create a sophisticated texture by embroidering a repeating, all-over pattern on fabric.
This can be used to cover a storage box, a speaker, or to create a unique piece of framed art. Choose a simple, small-scale motif like a musical note, a dot, or a tiny geometric shape.
Use a single color of thread on a neutral fabric for a subtle, tone-on-tone effect that reads as a high-end woven textile from a distance.
This method allows you to create your own custom “printed” fabric, perfect for a cohesive and polished look.


