

That piece of clothing you love—the perfectly worn-in denim jacket, the crisp white shirt, the cozy grey sweater—is more than just fabric. It’s a canvas waiting for a story. And sometimes, the most powerful stories are told in the smallest of stitches.
Forget the pressure of large, complex projects. The true art of embellishment lies in thoughtful details: a tiny pop of color on a cuff, a single motif tucked beside a pocket, a line of texture tracing a collar. It’s about adding a whisper of personality that feels uniquely yours.
Here, you’ll find ideas designed to spark that connection. Think of them not as strict patterns, but as invitations to look at your wardrobe with new eyes. Let’s explore how a few simple, intentional stitches can transform the familiar into something truly special.
1. Animate Your Denim with Playful Placement
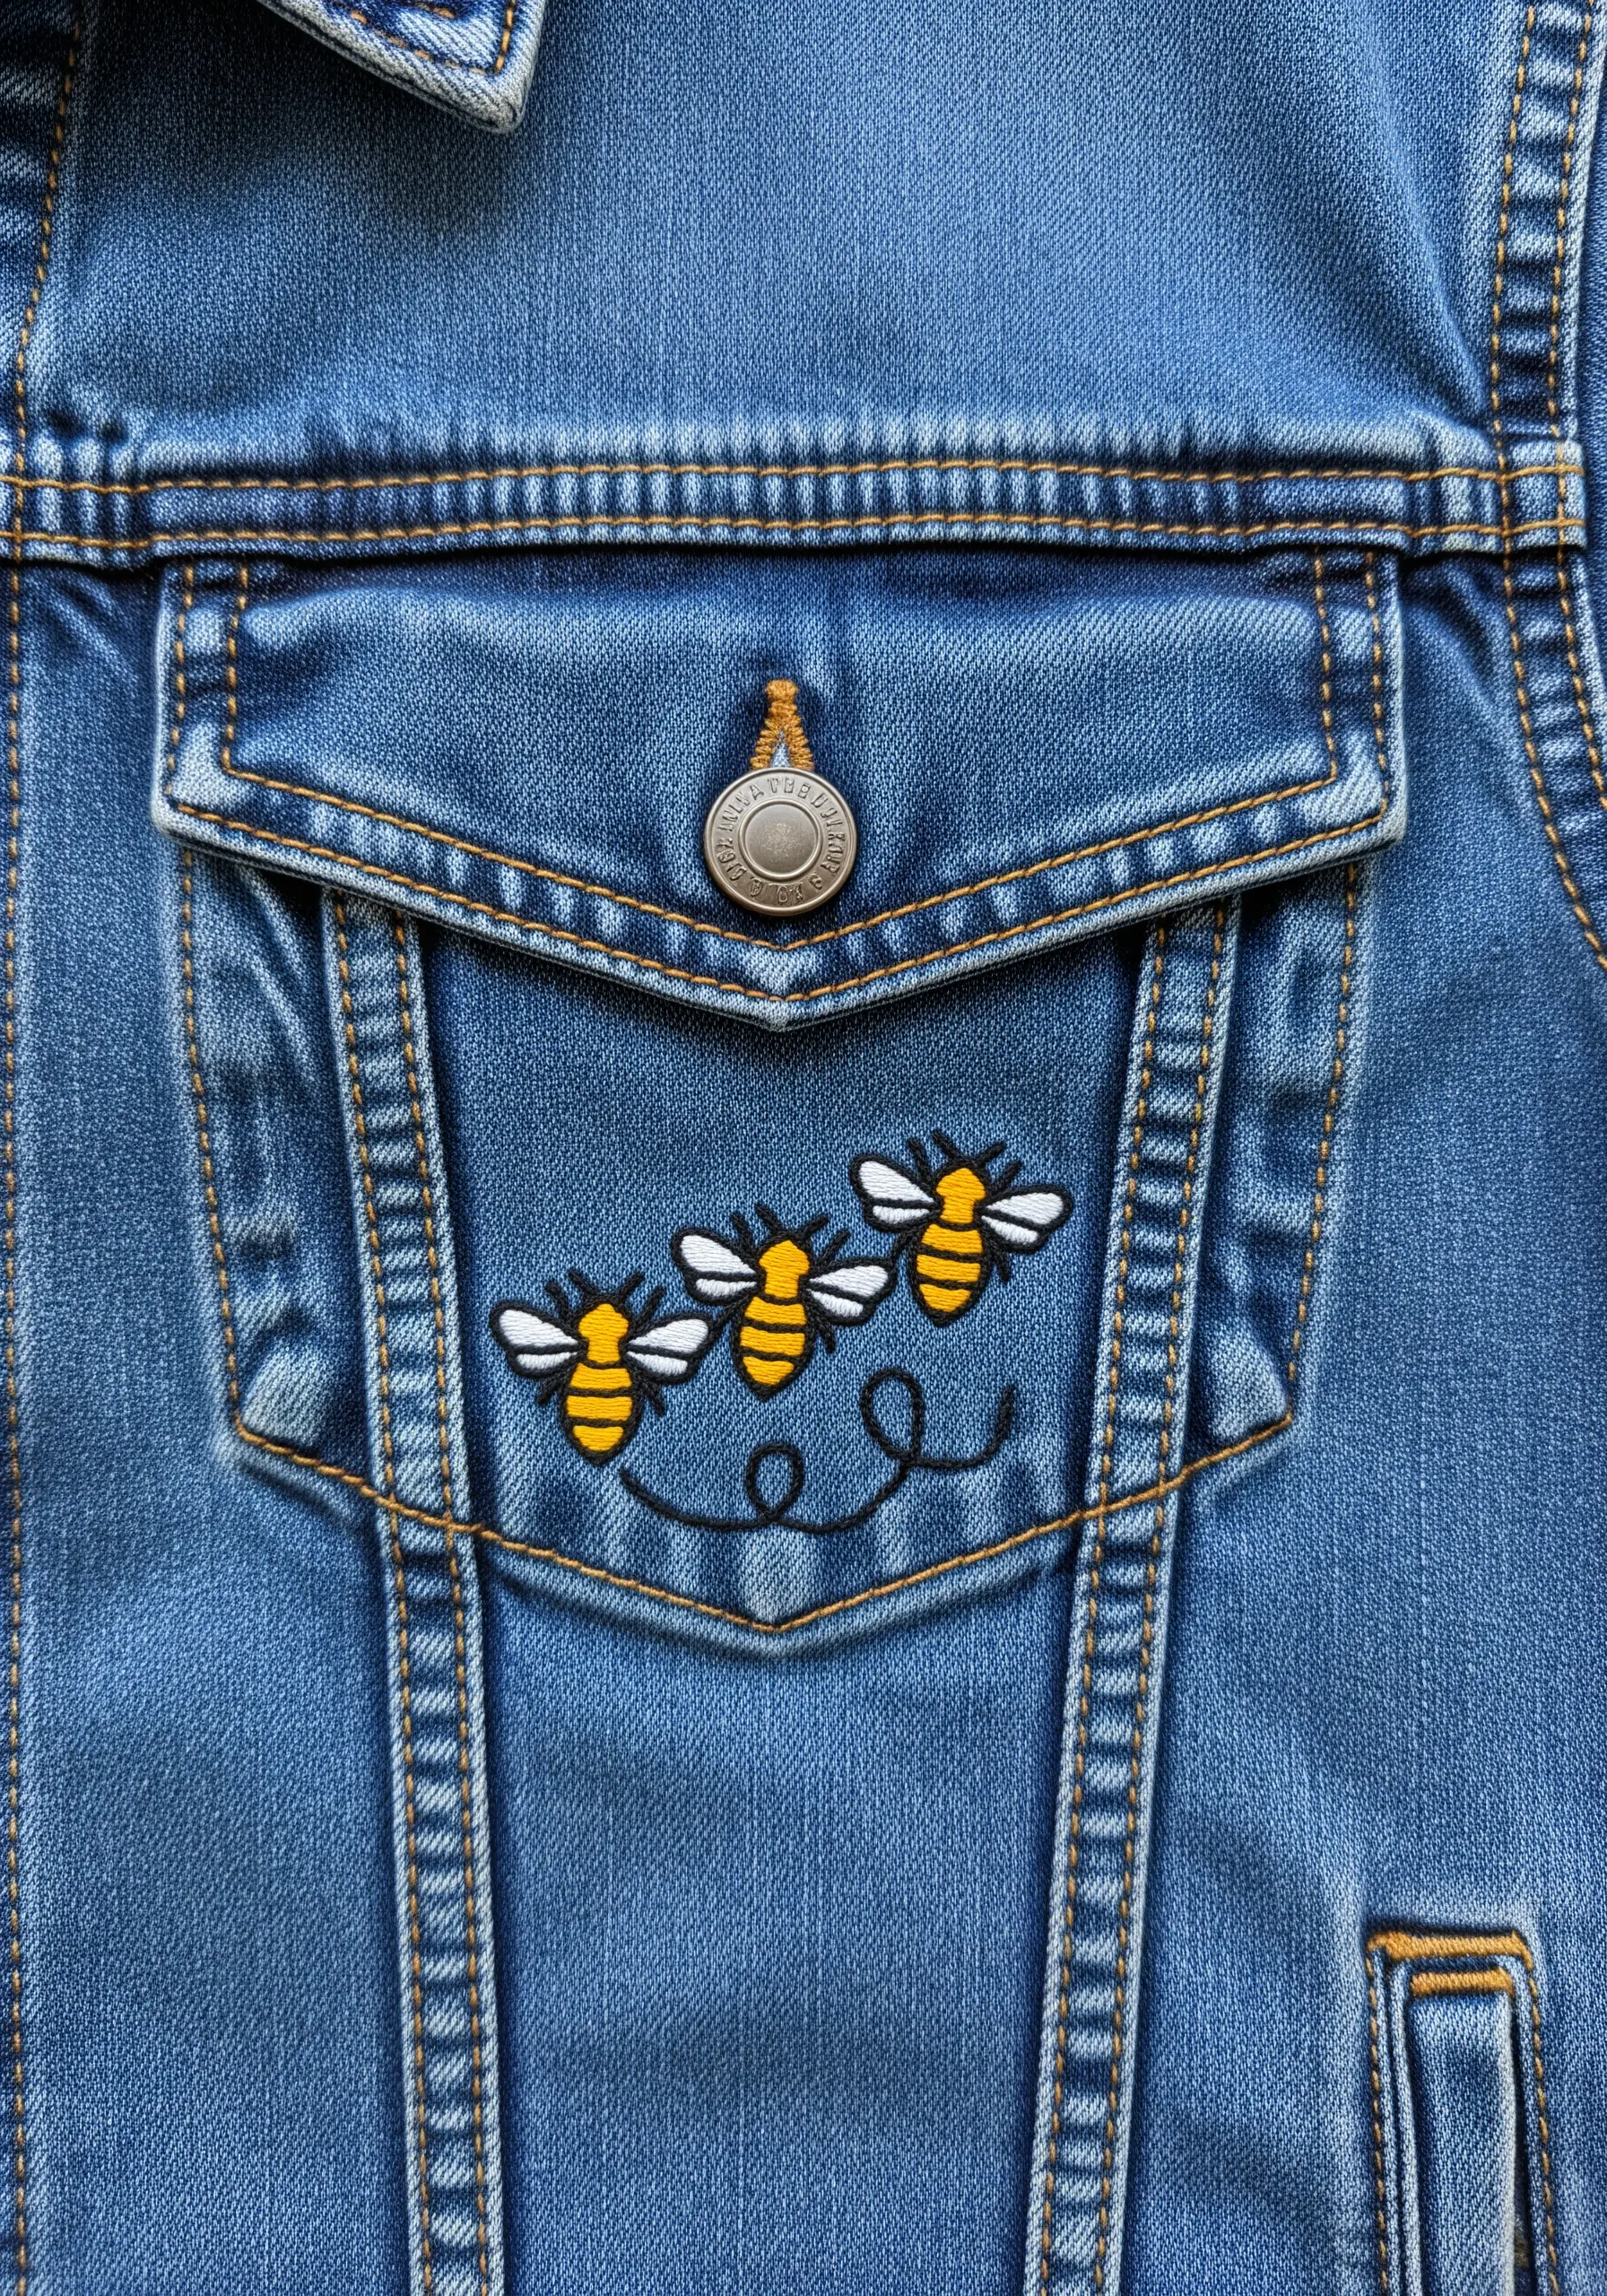
Allow your motif to interact with the garment’s existing architecture, like the seam of a pocket.
Use a bold black or dark grey outline to make your colors pop against the classic blue of denim, ensuring your design stands out.
For added dimension, use two strands of floss for the outlines and four strands for the satin-stitch fill; this subtle difference in thread weight creates depth and a professional finish.
2. Frame the Face with an Elegant Collar Motif
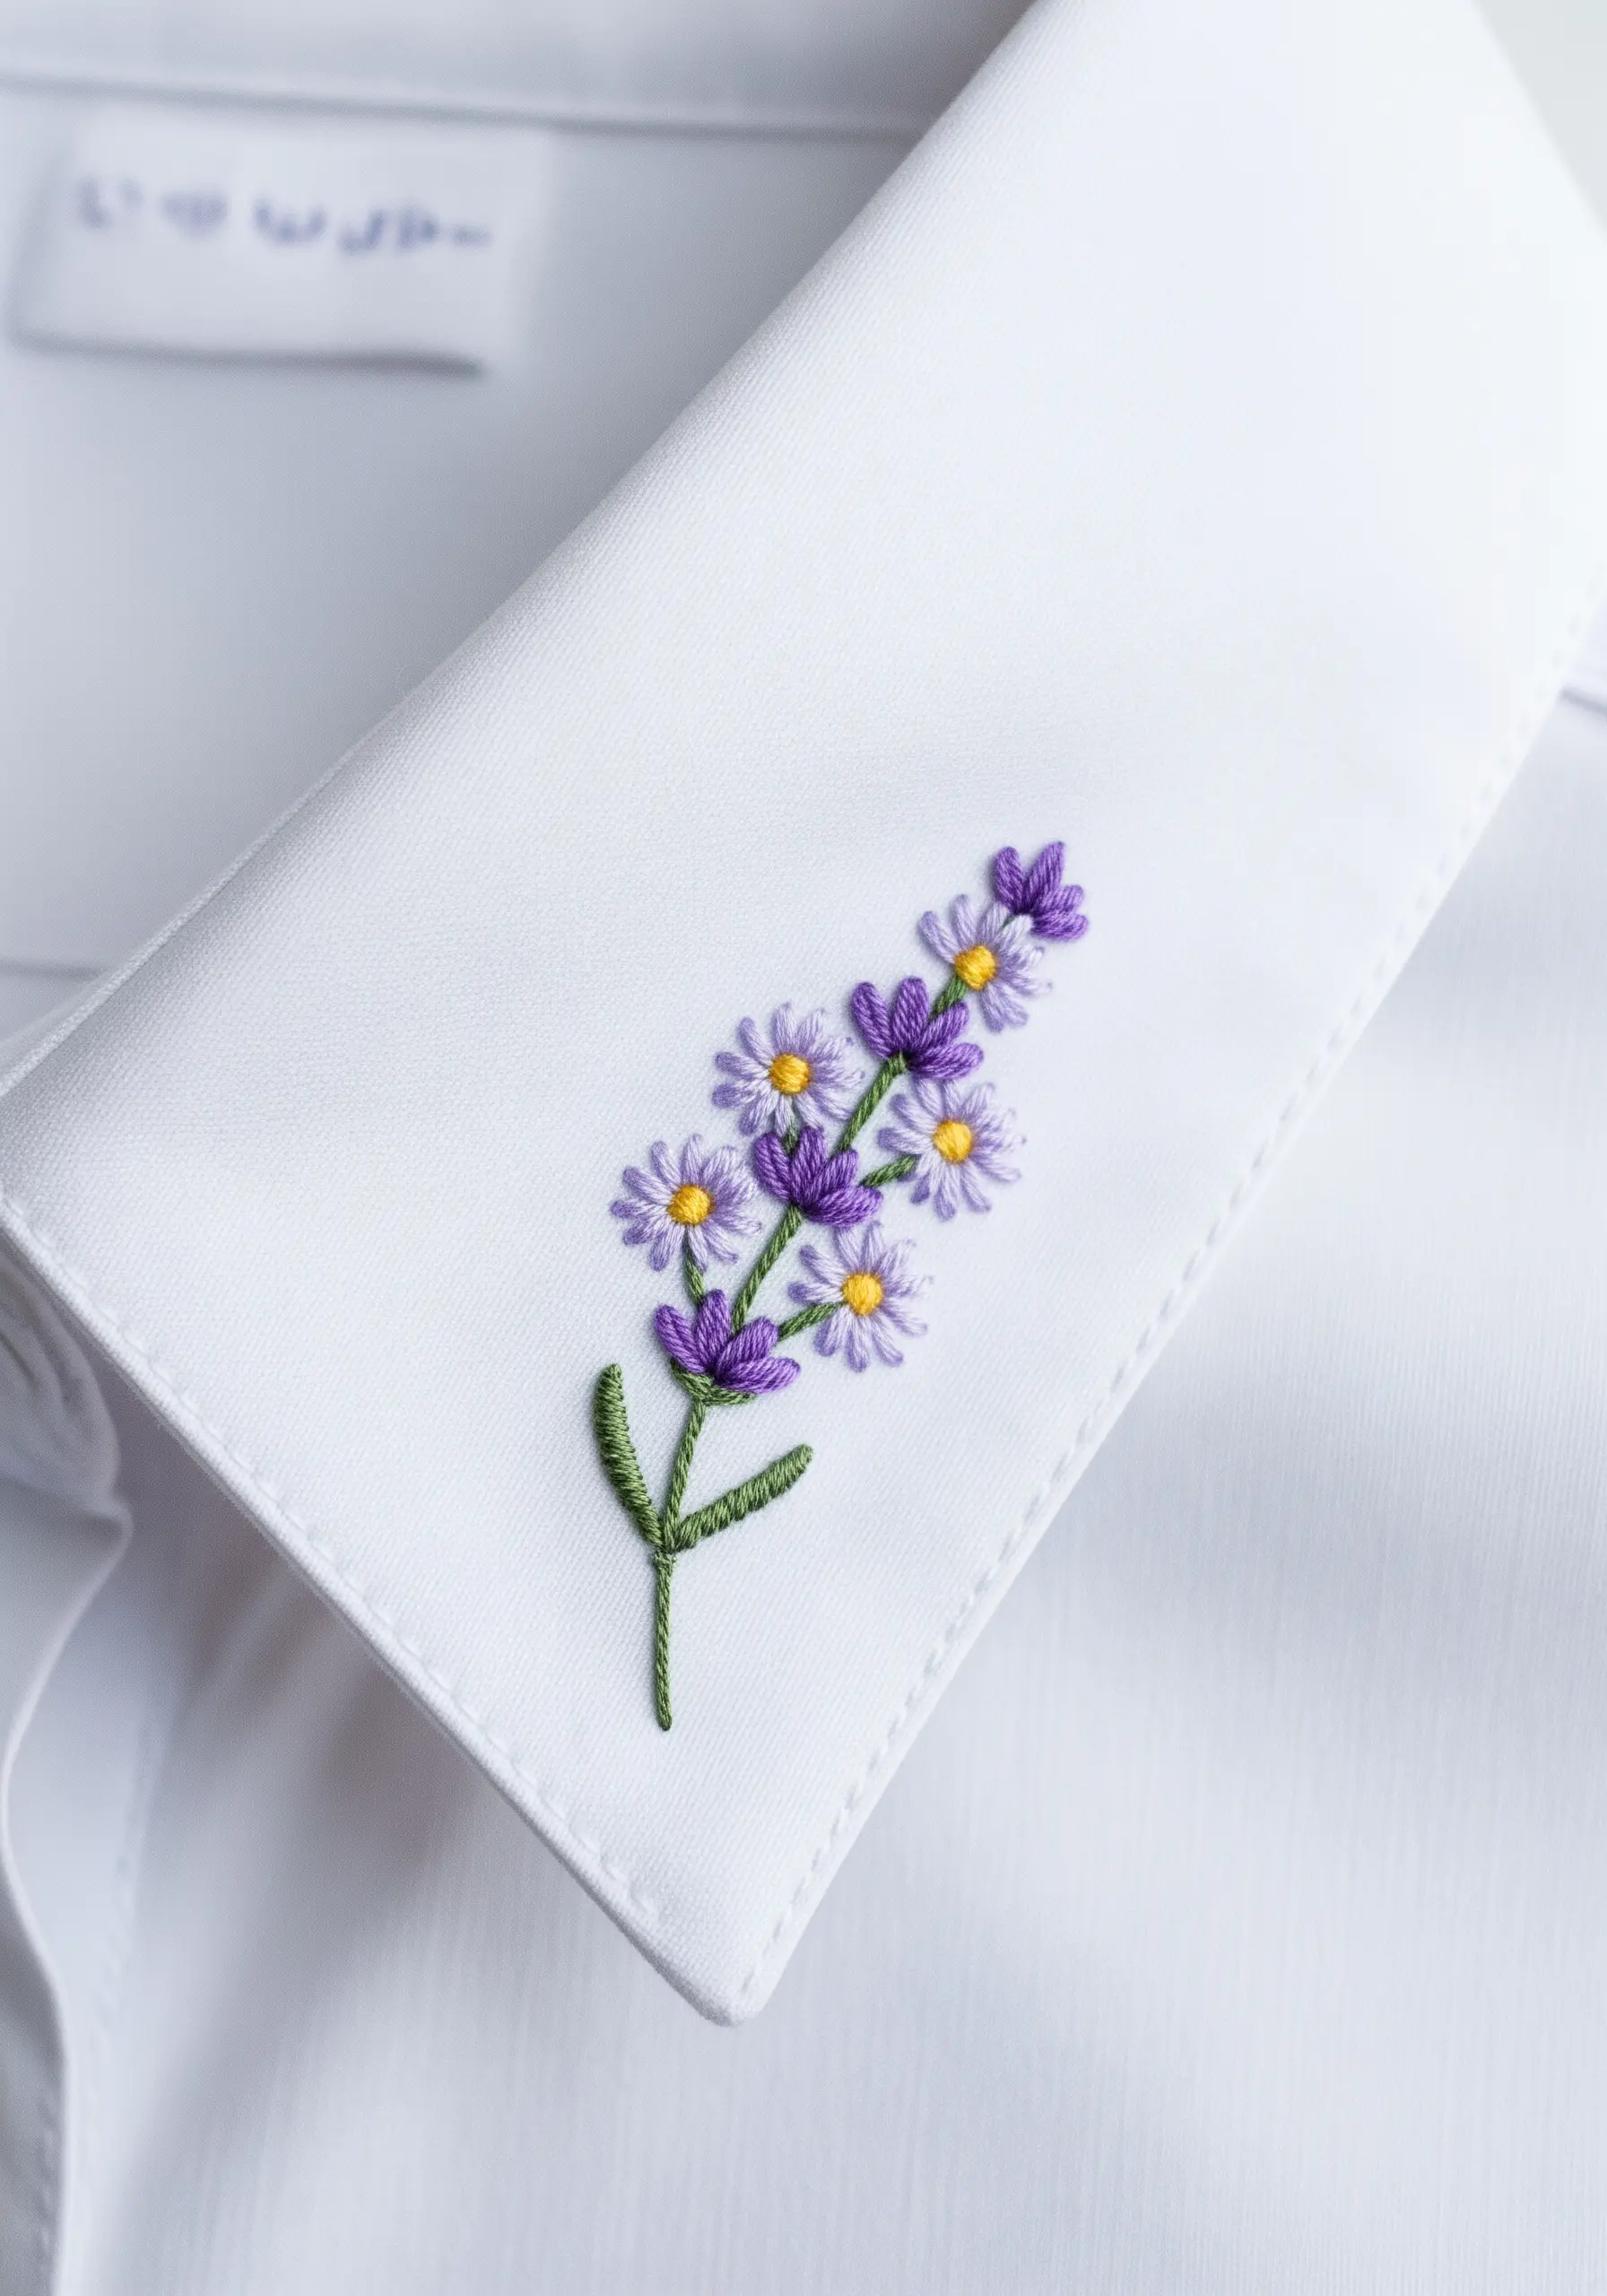
A crisp shirt collar is a prime location for a delicate botanical, drawing attention upward in a refined, subtle way.
Combine lazy daisy stitches for petals, single straight stitches for smaller buds, and tiny French knots for the flower centers to create a rich variety of textures.
Always use a lightweight stabilizer on woven fabrics like cotton poplin; this prevents the fabric from puckering and ensures your stitches remain smooth and flat.
Explore delicate lavender stitch ideas to create your own calming composition.
3. Add a Whisper of Detail to a Cuff
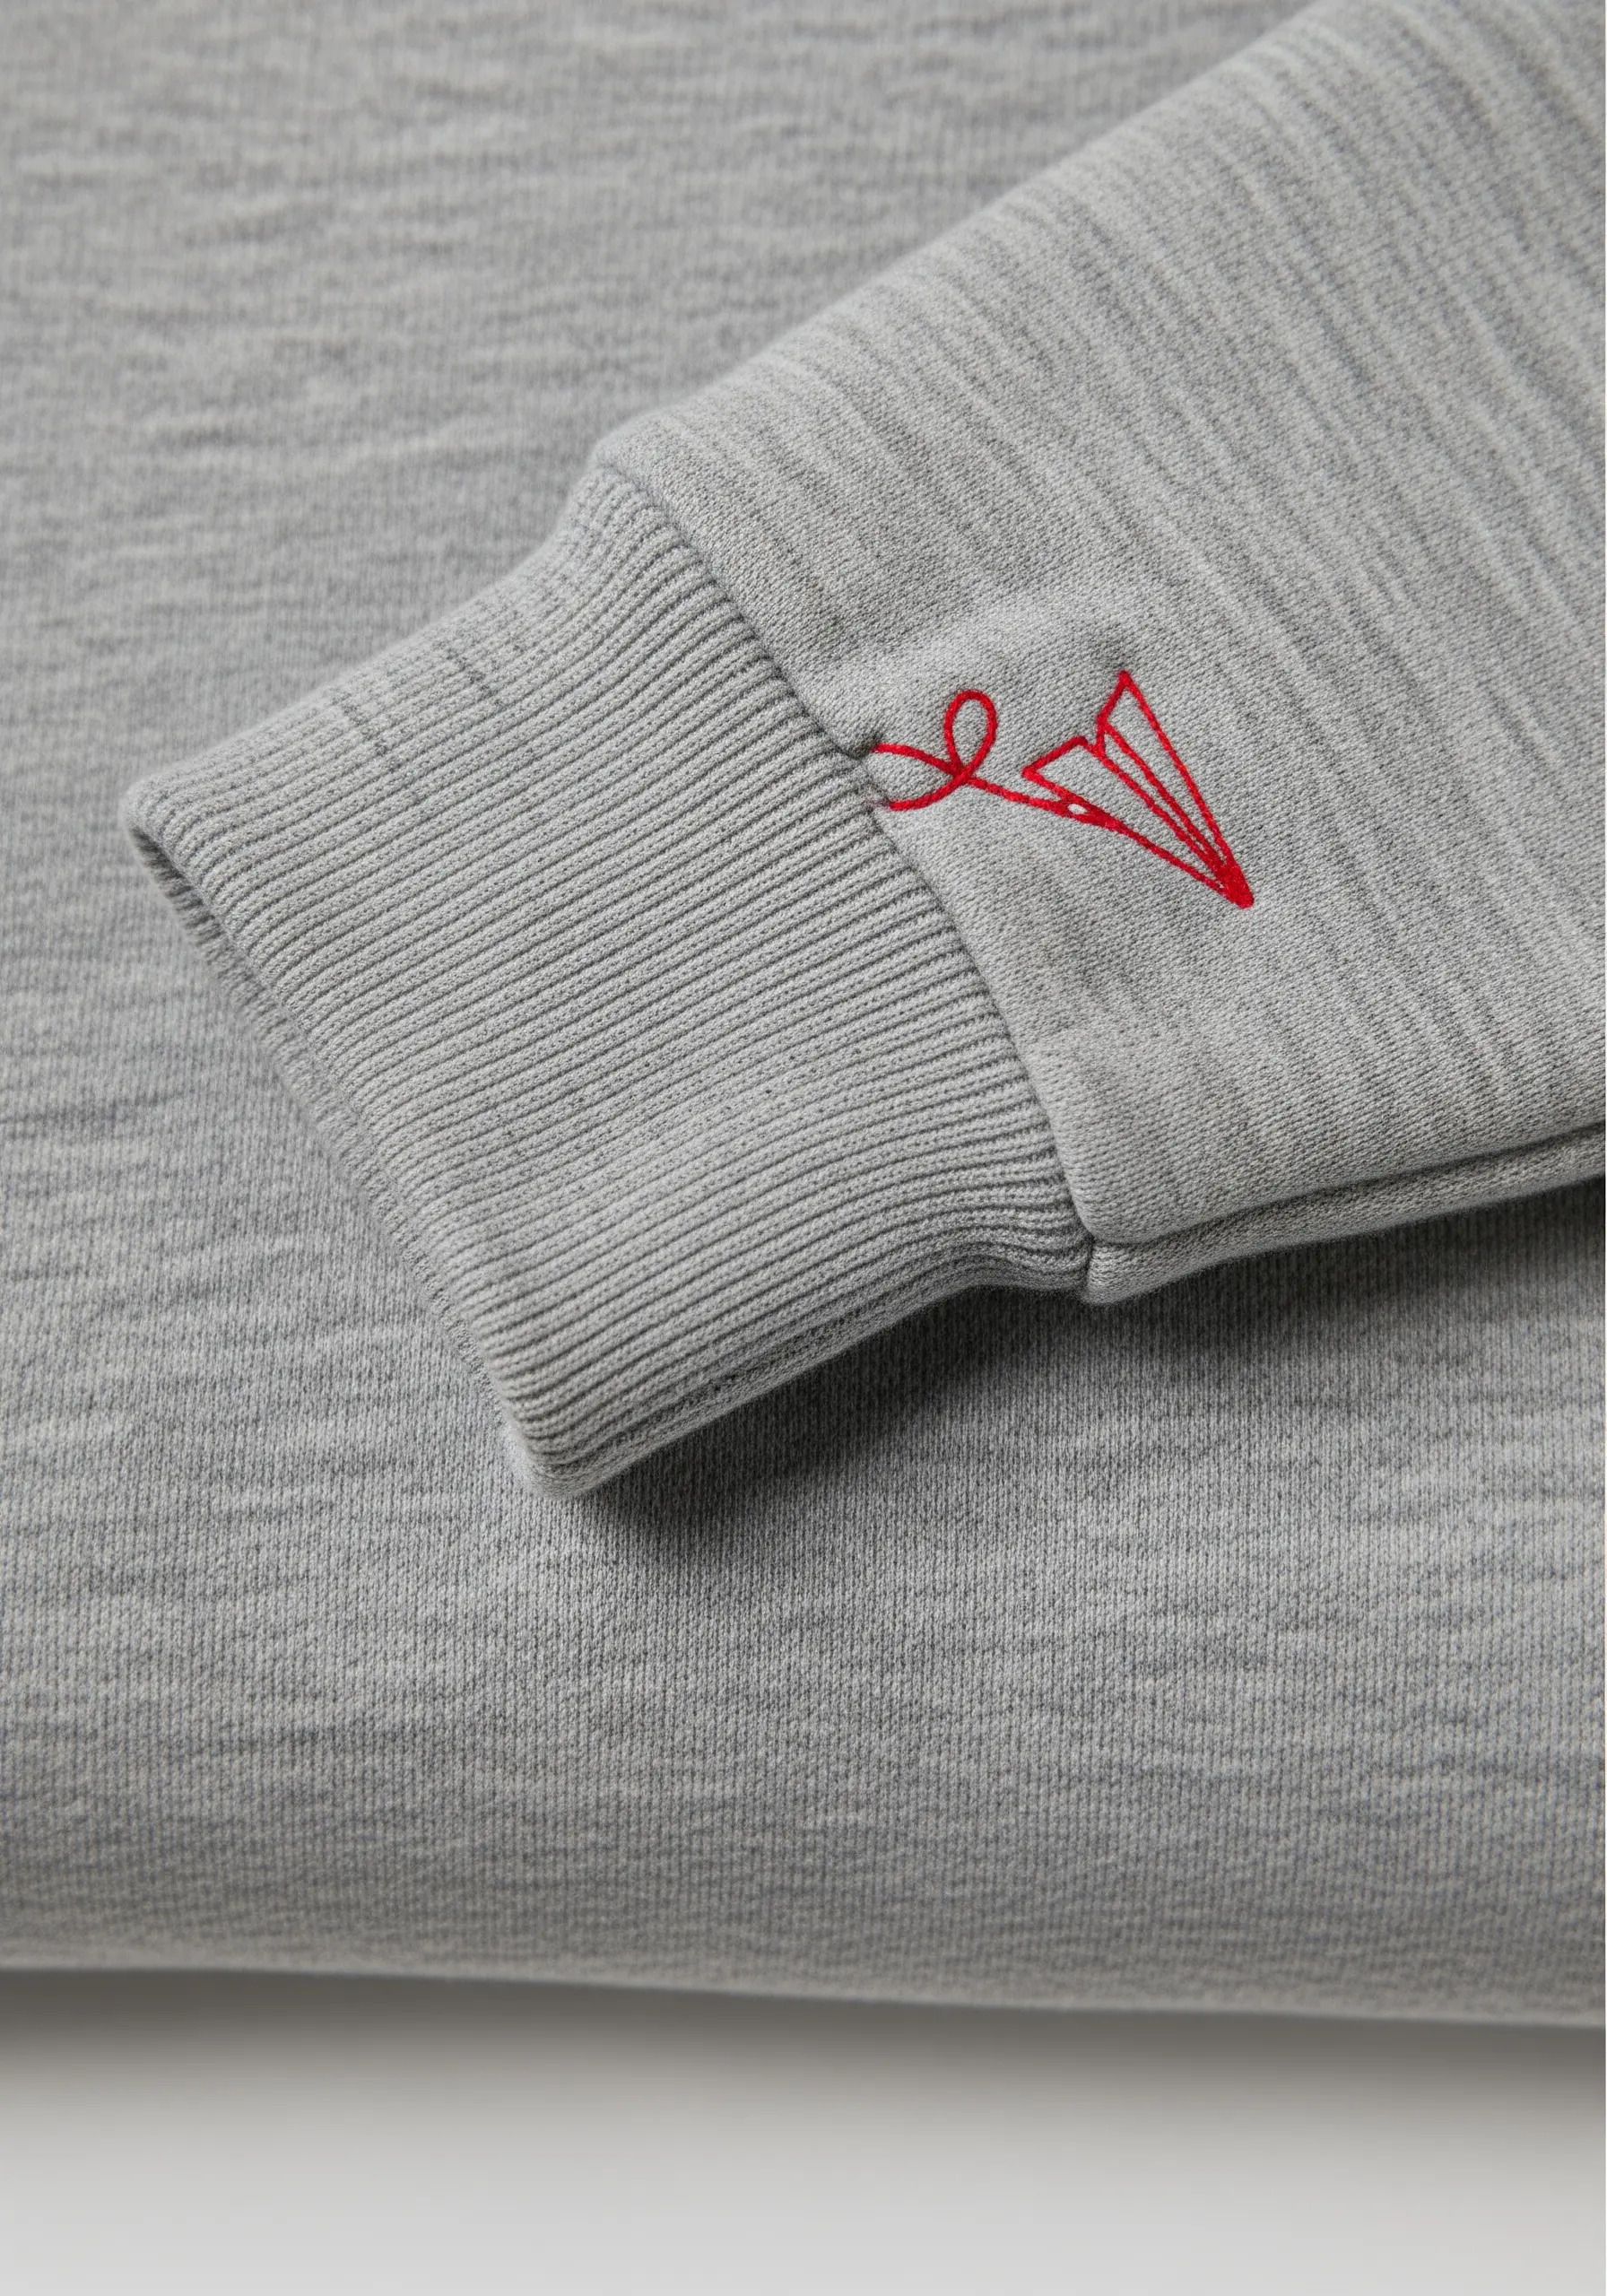
A tiny, unexpected motif stitched onto a sleeve cuff adds a flash of personality that feels both private and intentional.
Choose a simple backstitch or stem stitch in a high-contrast color to create a clean, graphic line that reads clearly from a distance.
When stitching on ribbed or stretchy knits, use a cut-away stabilizer and a ballpoint needle to part the fibers instead of piercing them, which prevents snags and distortion.
This is one of the most effective tiny secret embroidery ideas to hide inside cuffs for a truly personal touch.
4. Master Tonal Texture with Metallic Thread
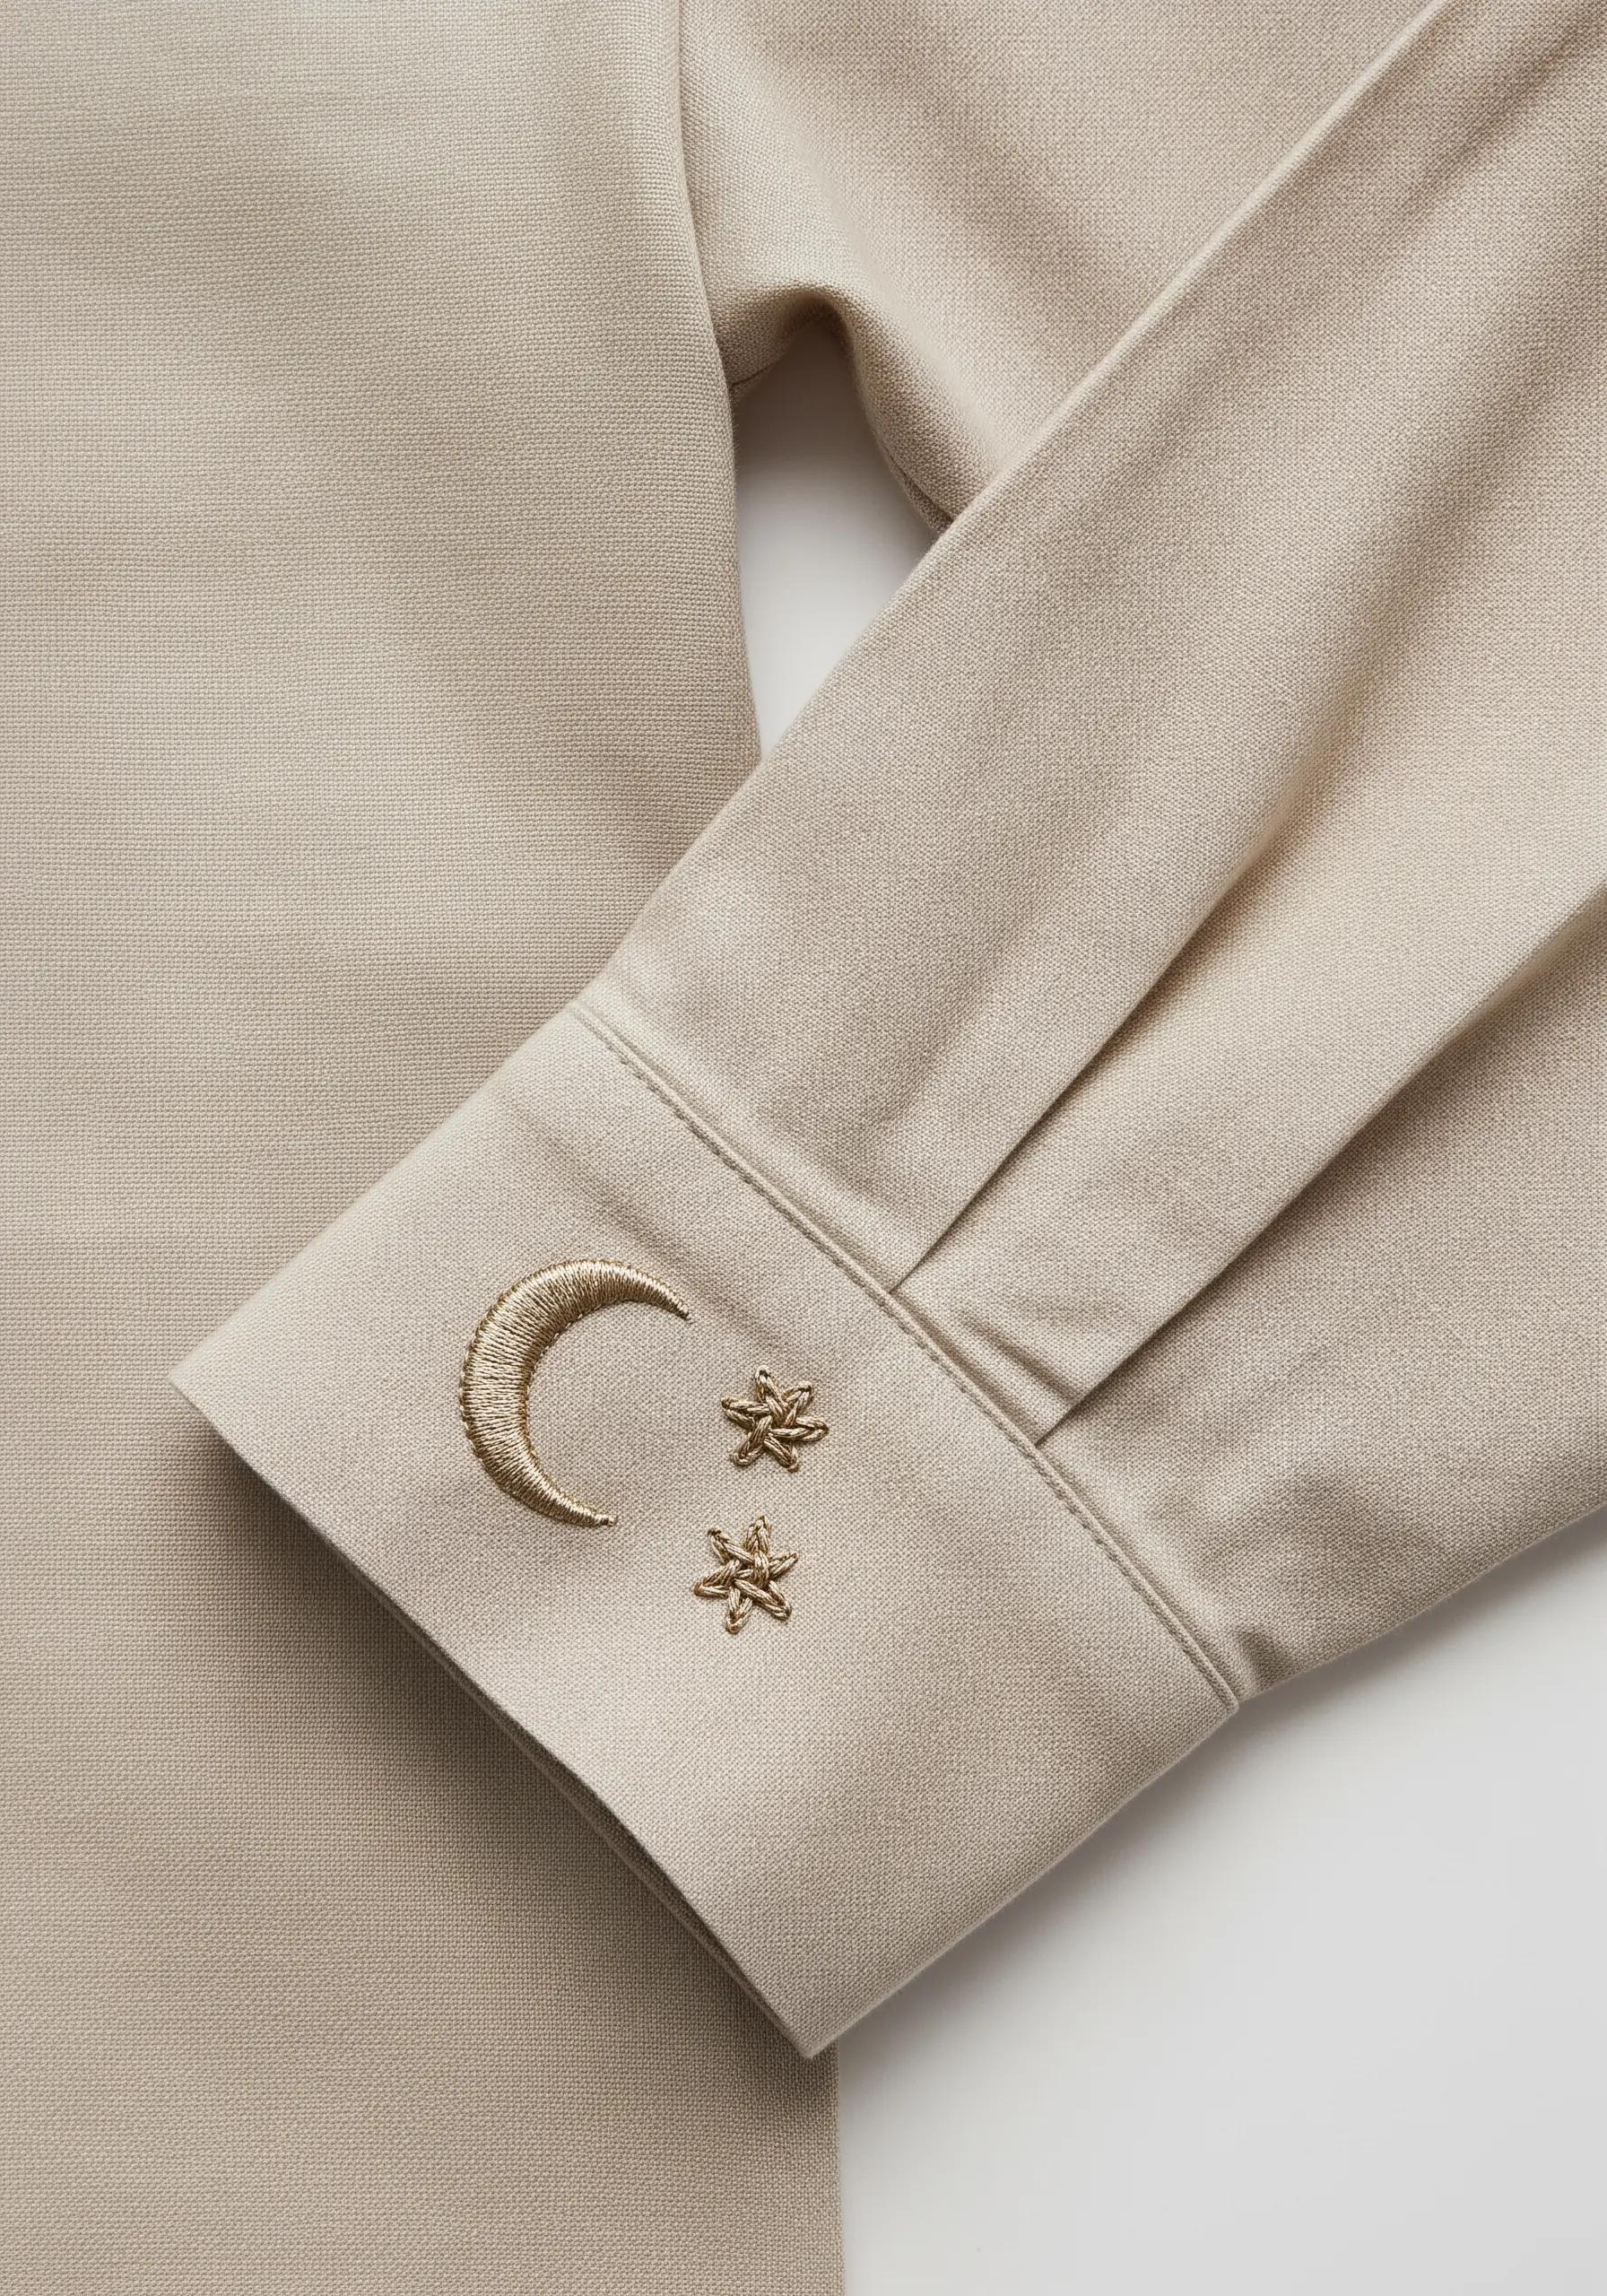
Create a sophisticated, low-contrast design by choosing a thread color that’s only a few shades different from your fabric.
Introduce a single metallic thread to add a subtle shimmer that catches the light, elevating a simple design into something luxurious without being loud.
To prevent frustration, work with shorter lengths of metallic floss (no more than 12 inches) and use a thread conditioner or beeswax to reduce friction and tangling.
5. Accentuate the Centerline with a Placket Motif
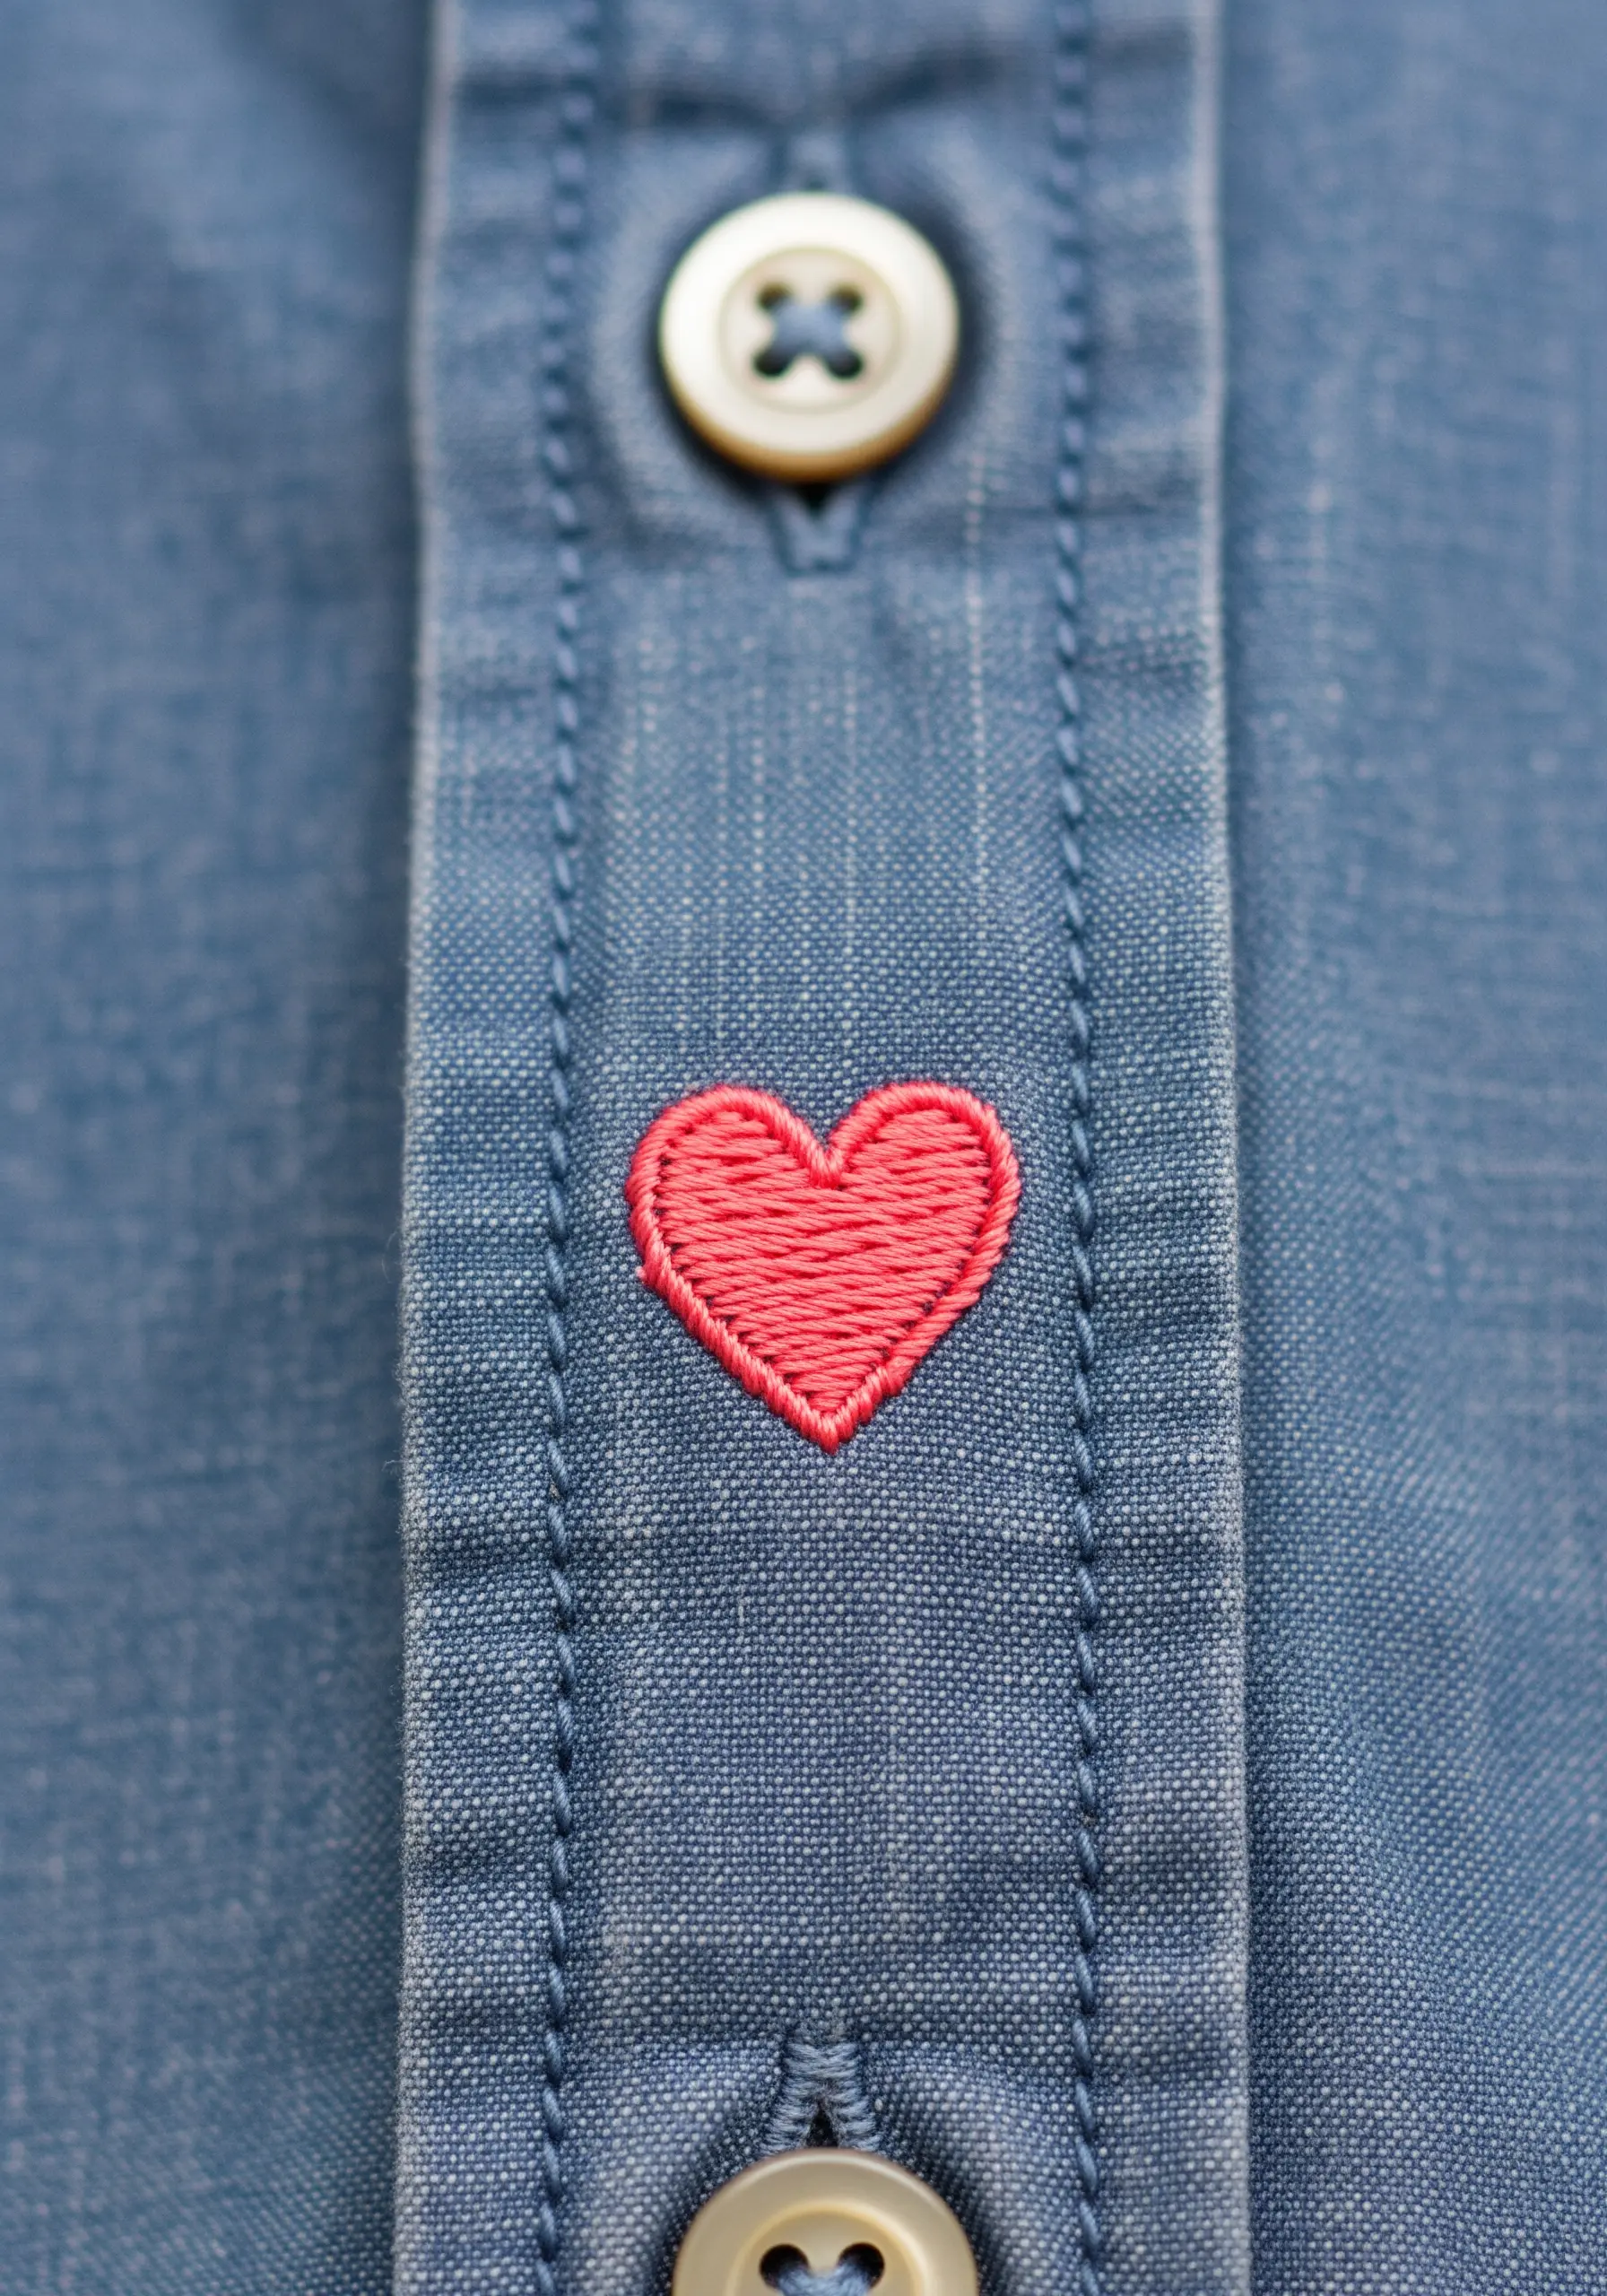
The button placket provides a natural focal point for a small, symmetrical detail that feels perfectly balanced.
For a flawlessly smooth fill on a tiny shape, outline it first with a split stitch, then fill with a brick stitch.
This technique uses staggered, short satin stitches, which eliminates long floats that can snag and creates a more durable, woven texture ideal for high-contact areas.
6. Transform a Back Pocket into a Bold Canvas
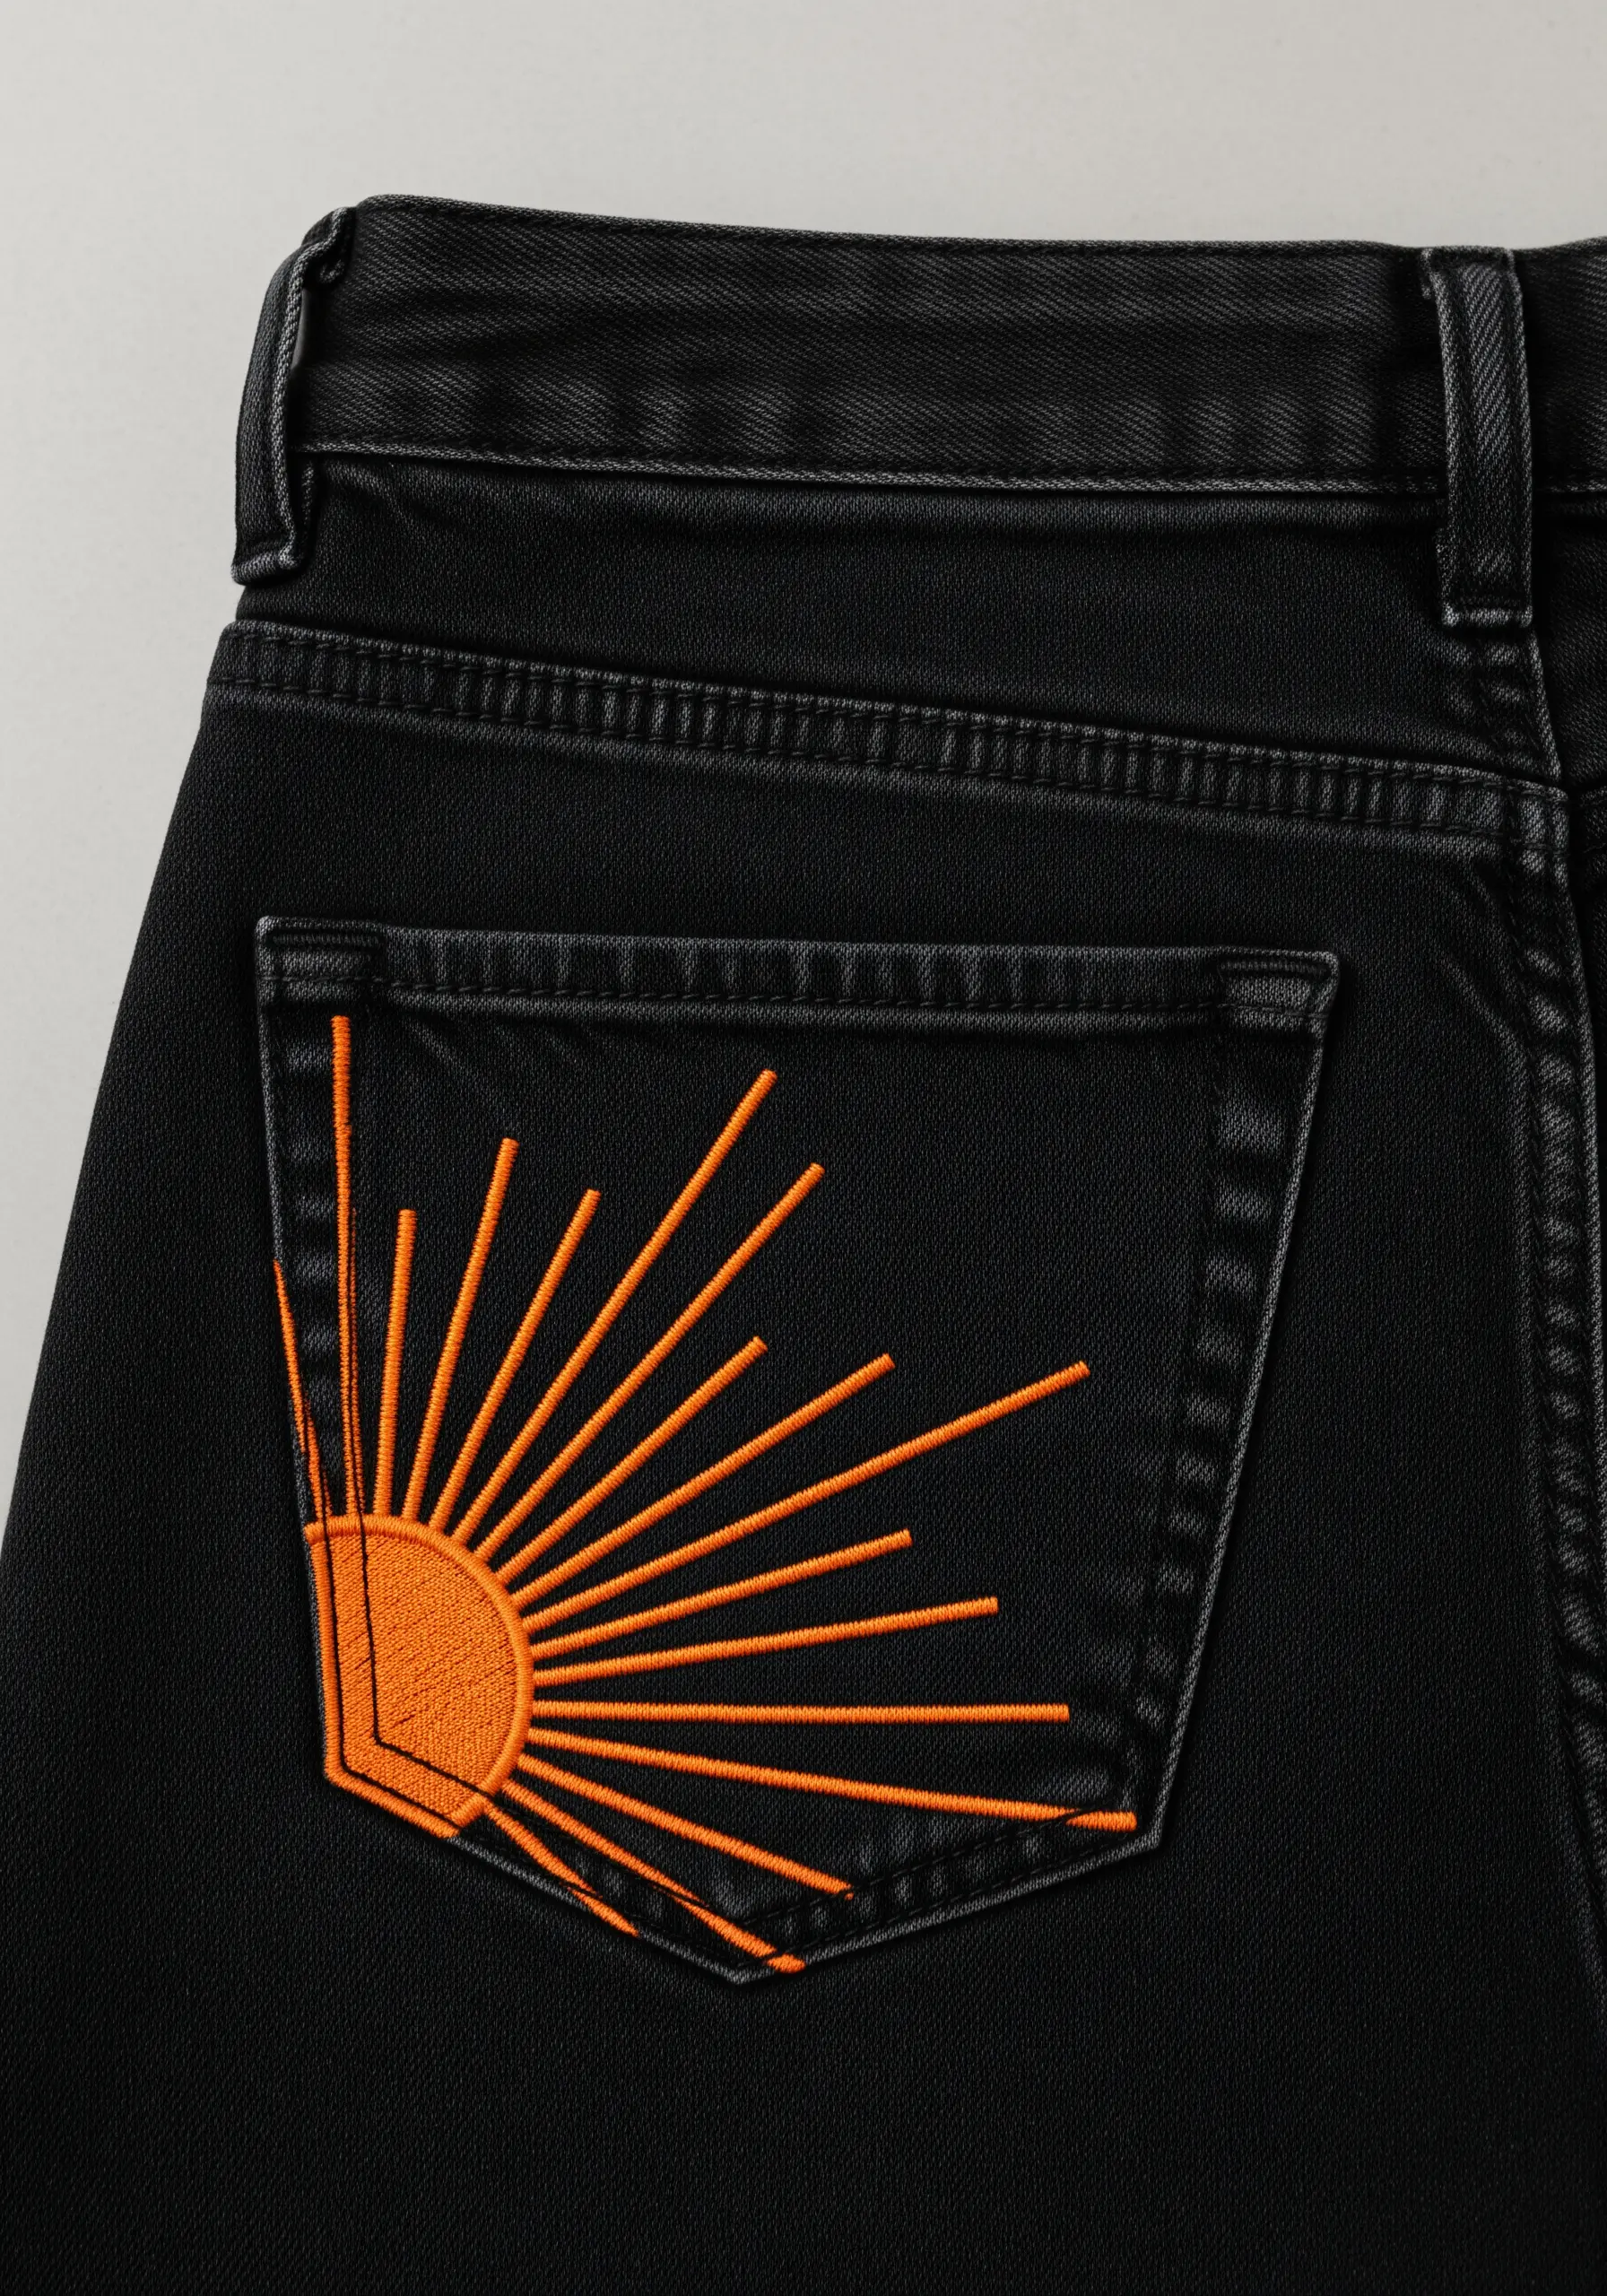
Use the entire surface of a back pocket to make a large, graphic statement that has maximum impact.
Combine a filled shape (satin stitch) with radiating lines (backstitch) to create dynamic contrast and visual energy.
For the long sun rays, use all six strands of your embroidery floss; the thickness of the thread gives the lines confidence and ensures they don’t get lost on the sturdy denim fabric.
7. Sketch with Thread for a Hand-Drawn Feel
Recreate the charm of a simple pen sketch by using a single strand of thread and a clean backstitch.
This minimalist approach adds a touch of personality to soft knits without adding weight or stiffness to the fabric.
To ensure your lines remain crisp and don’t sink into the knit, apply a layer of water-soluble stabilizer on top of your fabric before stitching; it provides support and rinses away cleanly.
8. Define a Shape with a Modern Outline
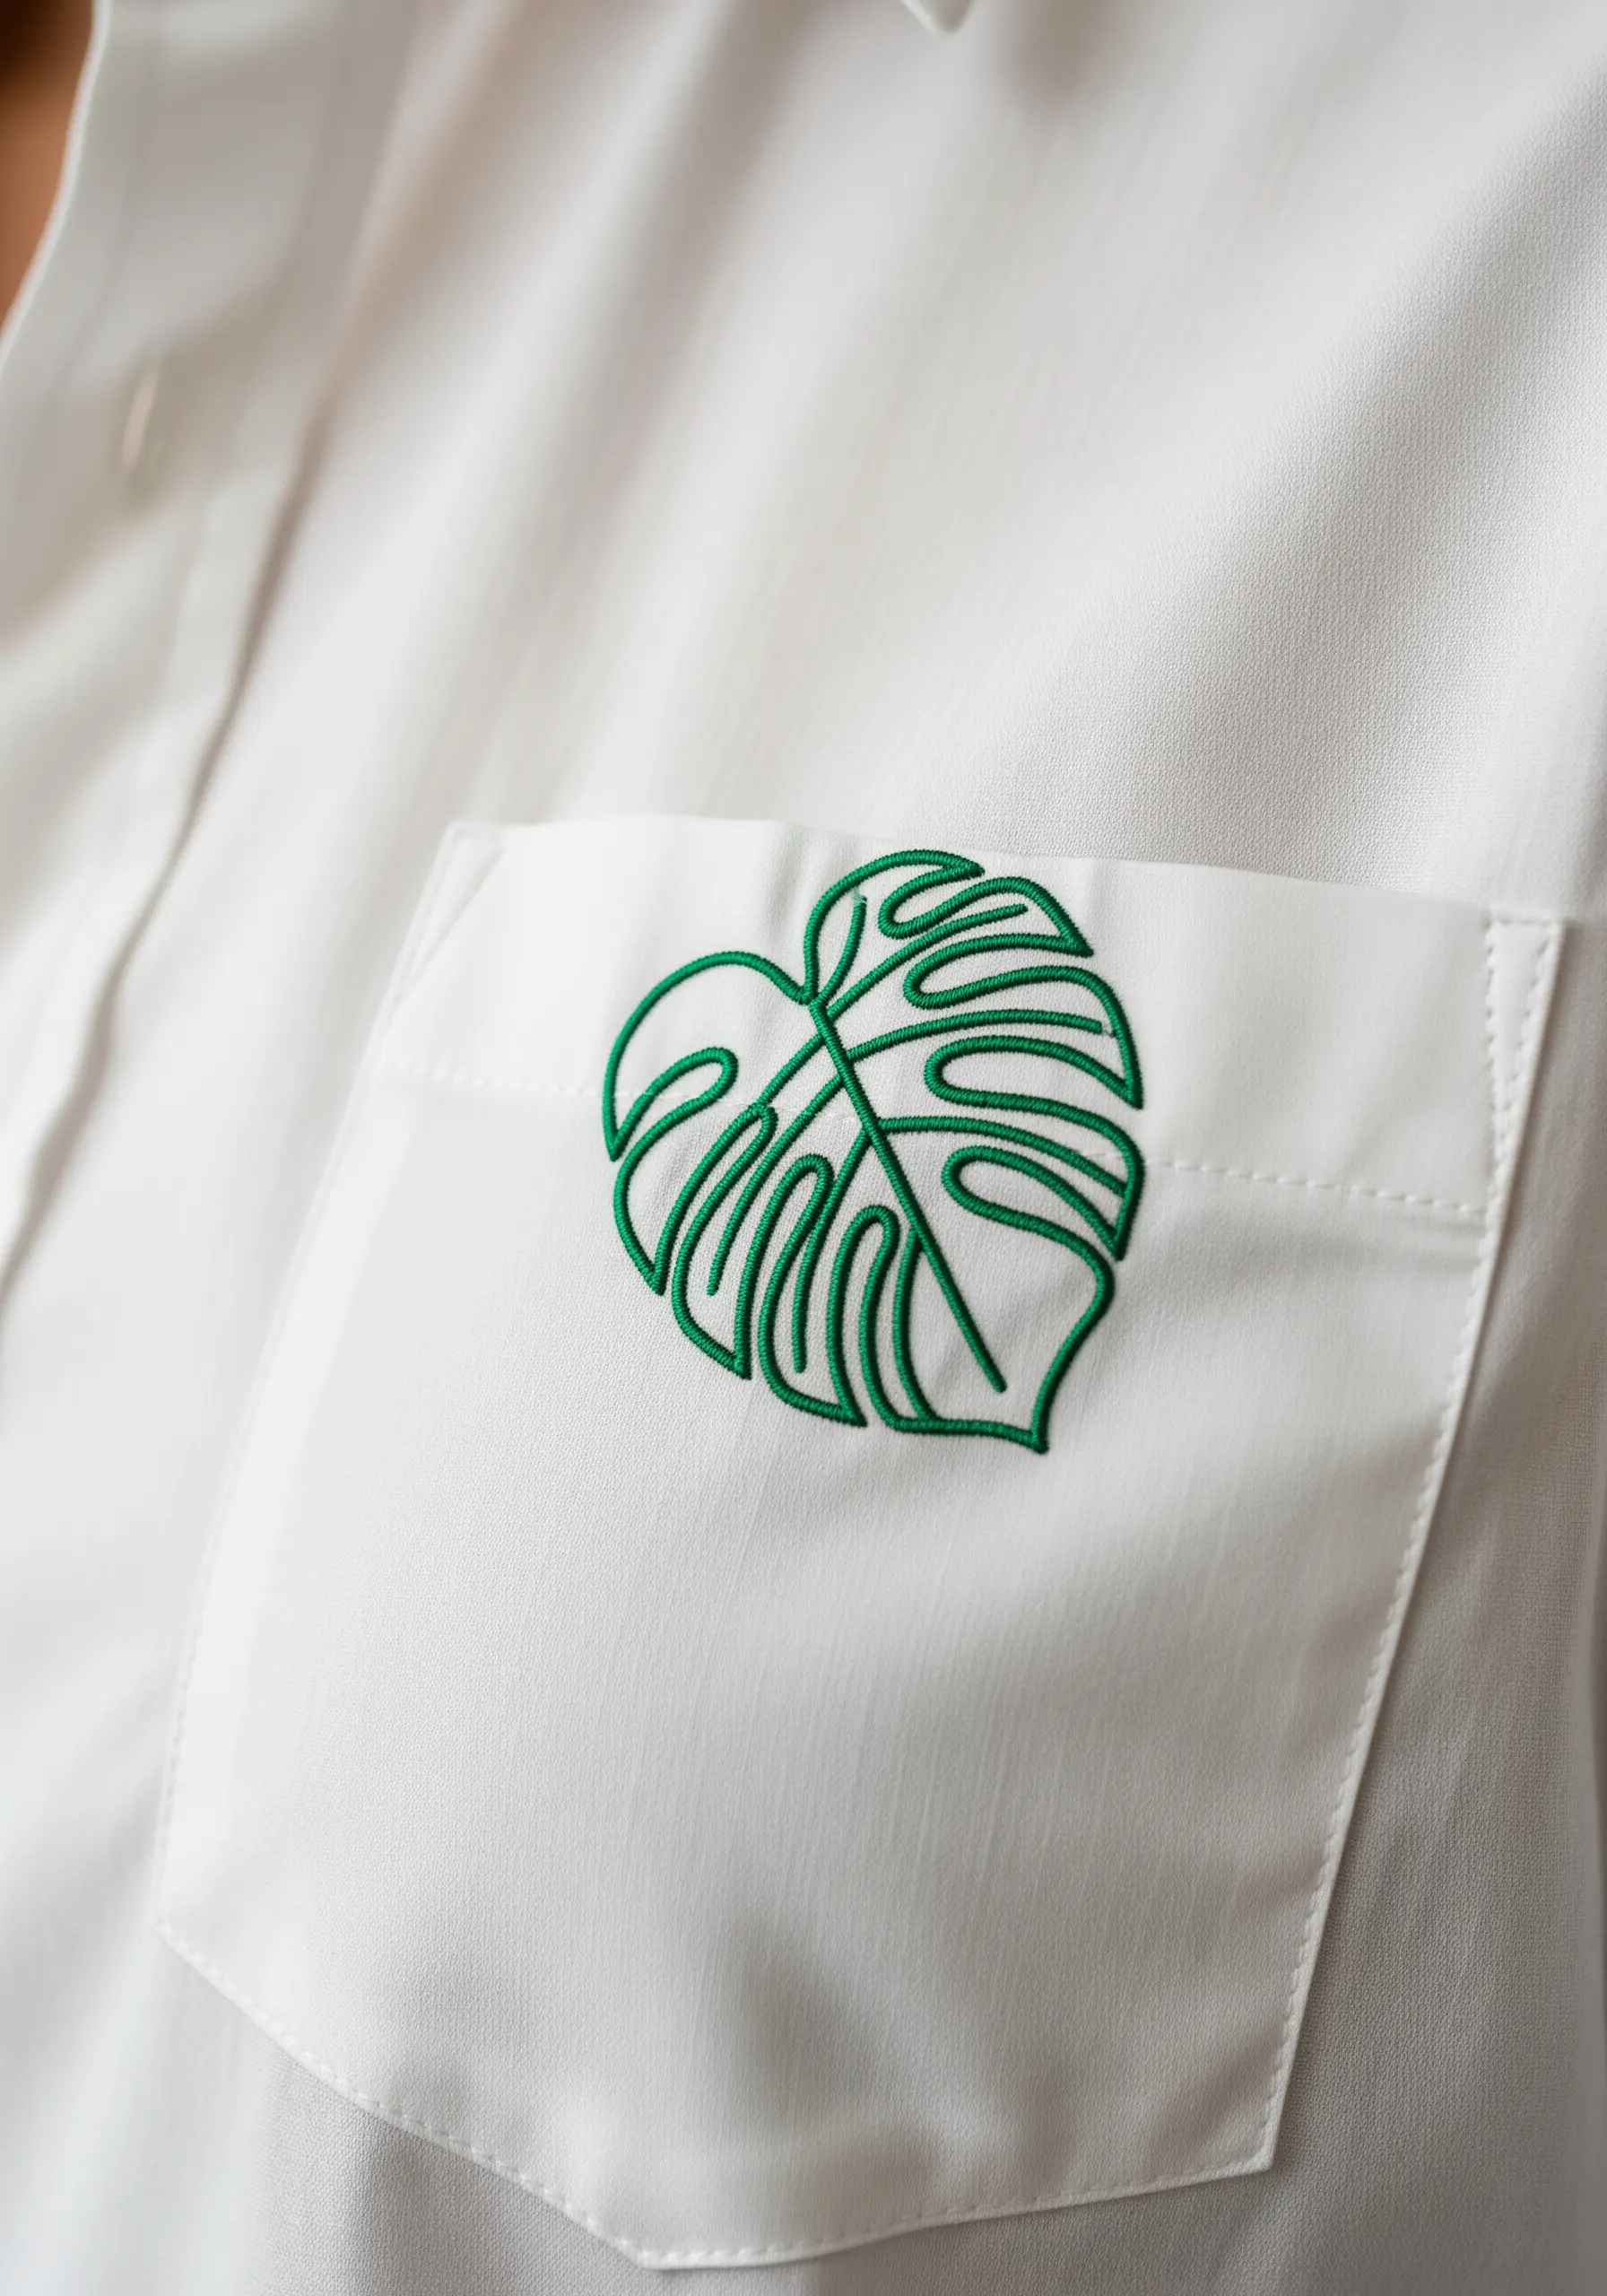
Instead of filling a motif completely, let a confident outline do the work for a modern, airy aesthetic.
Use a whipped backstitch or a stem stitch for a solid, rope-like line that stands out beautifully against crisp, plain fabric.
This technique is not only faster than a fully filled design but also creates a graphic, contemporary look perfect for botanical line art embroidery patterns.
9. Ground Your Design Along a Hemline

Placing a small motif near a structural element like a seam or hem gives it an intentional, grounded feel.
For the layered effect seen in these waves, stitch each line with a split stitch, ensuring each row is dense and uniform.
Using multiple shades of the same color—from dark to light—creates an illusion of depth and movement, transforming a simple graphic into a dynamic detail.
10. Add Dimension with a Single Highlight Stitch
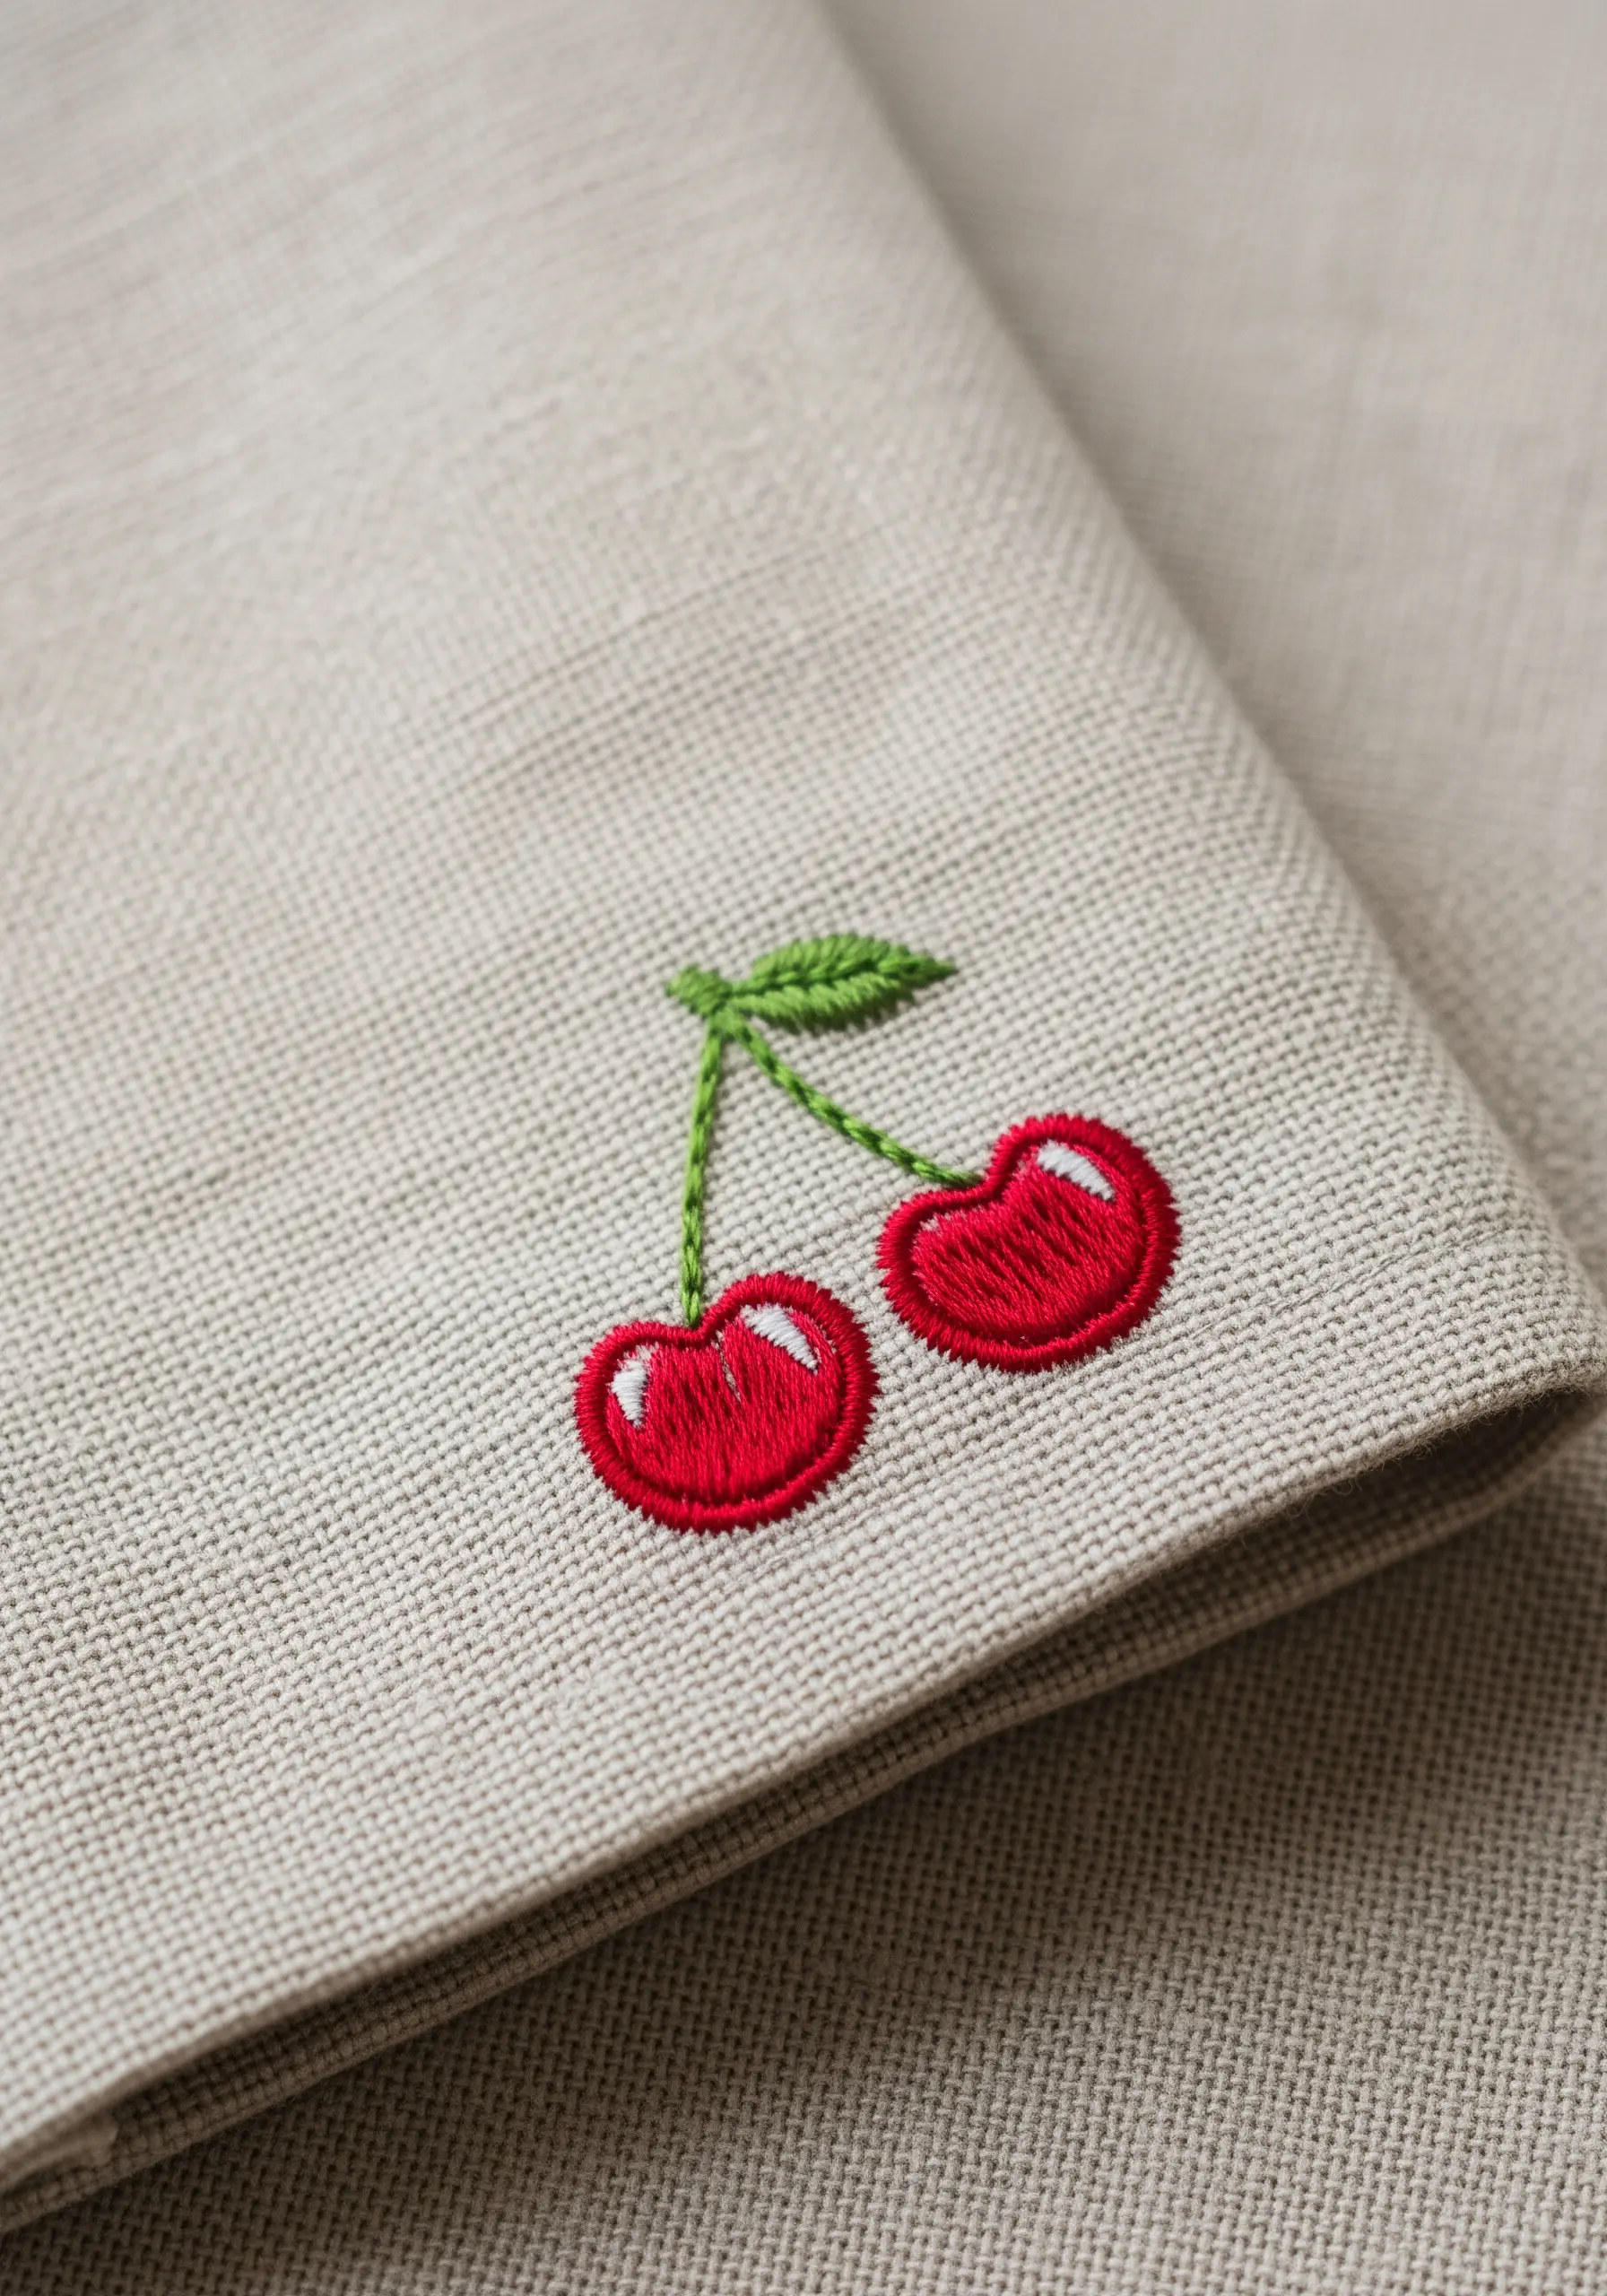
Instantly elevate a simple satin-stitched shape by adding a single, small straight stitch in white or a very light color.
This one detail mimics a reflection of light, giving the motif a subtle 3D effect and a polished, professional look.
For perfectly crisp edges on your simple line art fruit & food motifs, always create a split-stitch outline first; it provides a raised edge to tuck your satin stitches against.
11. Explore Texture with Tone-on-Tone Stitching
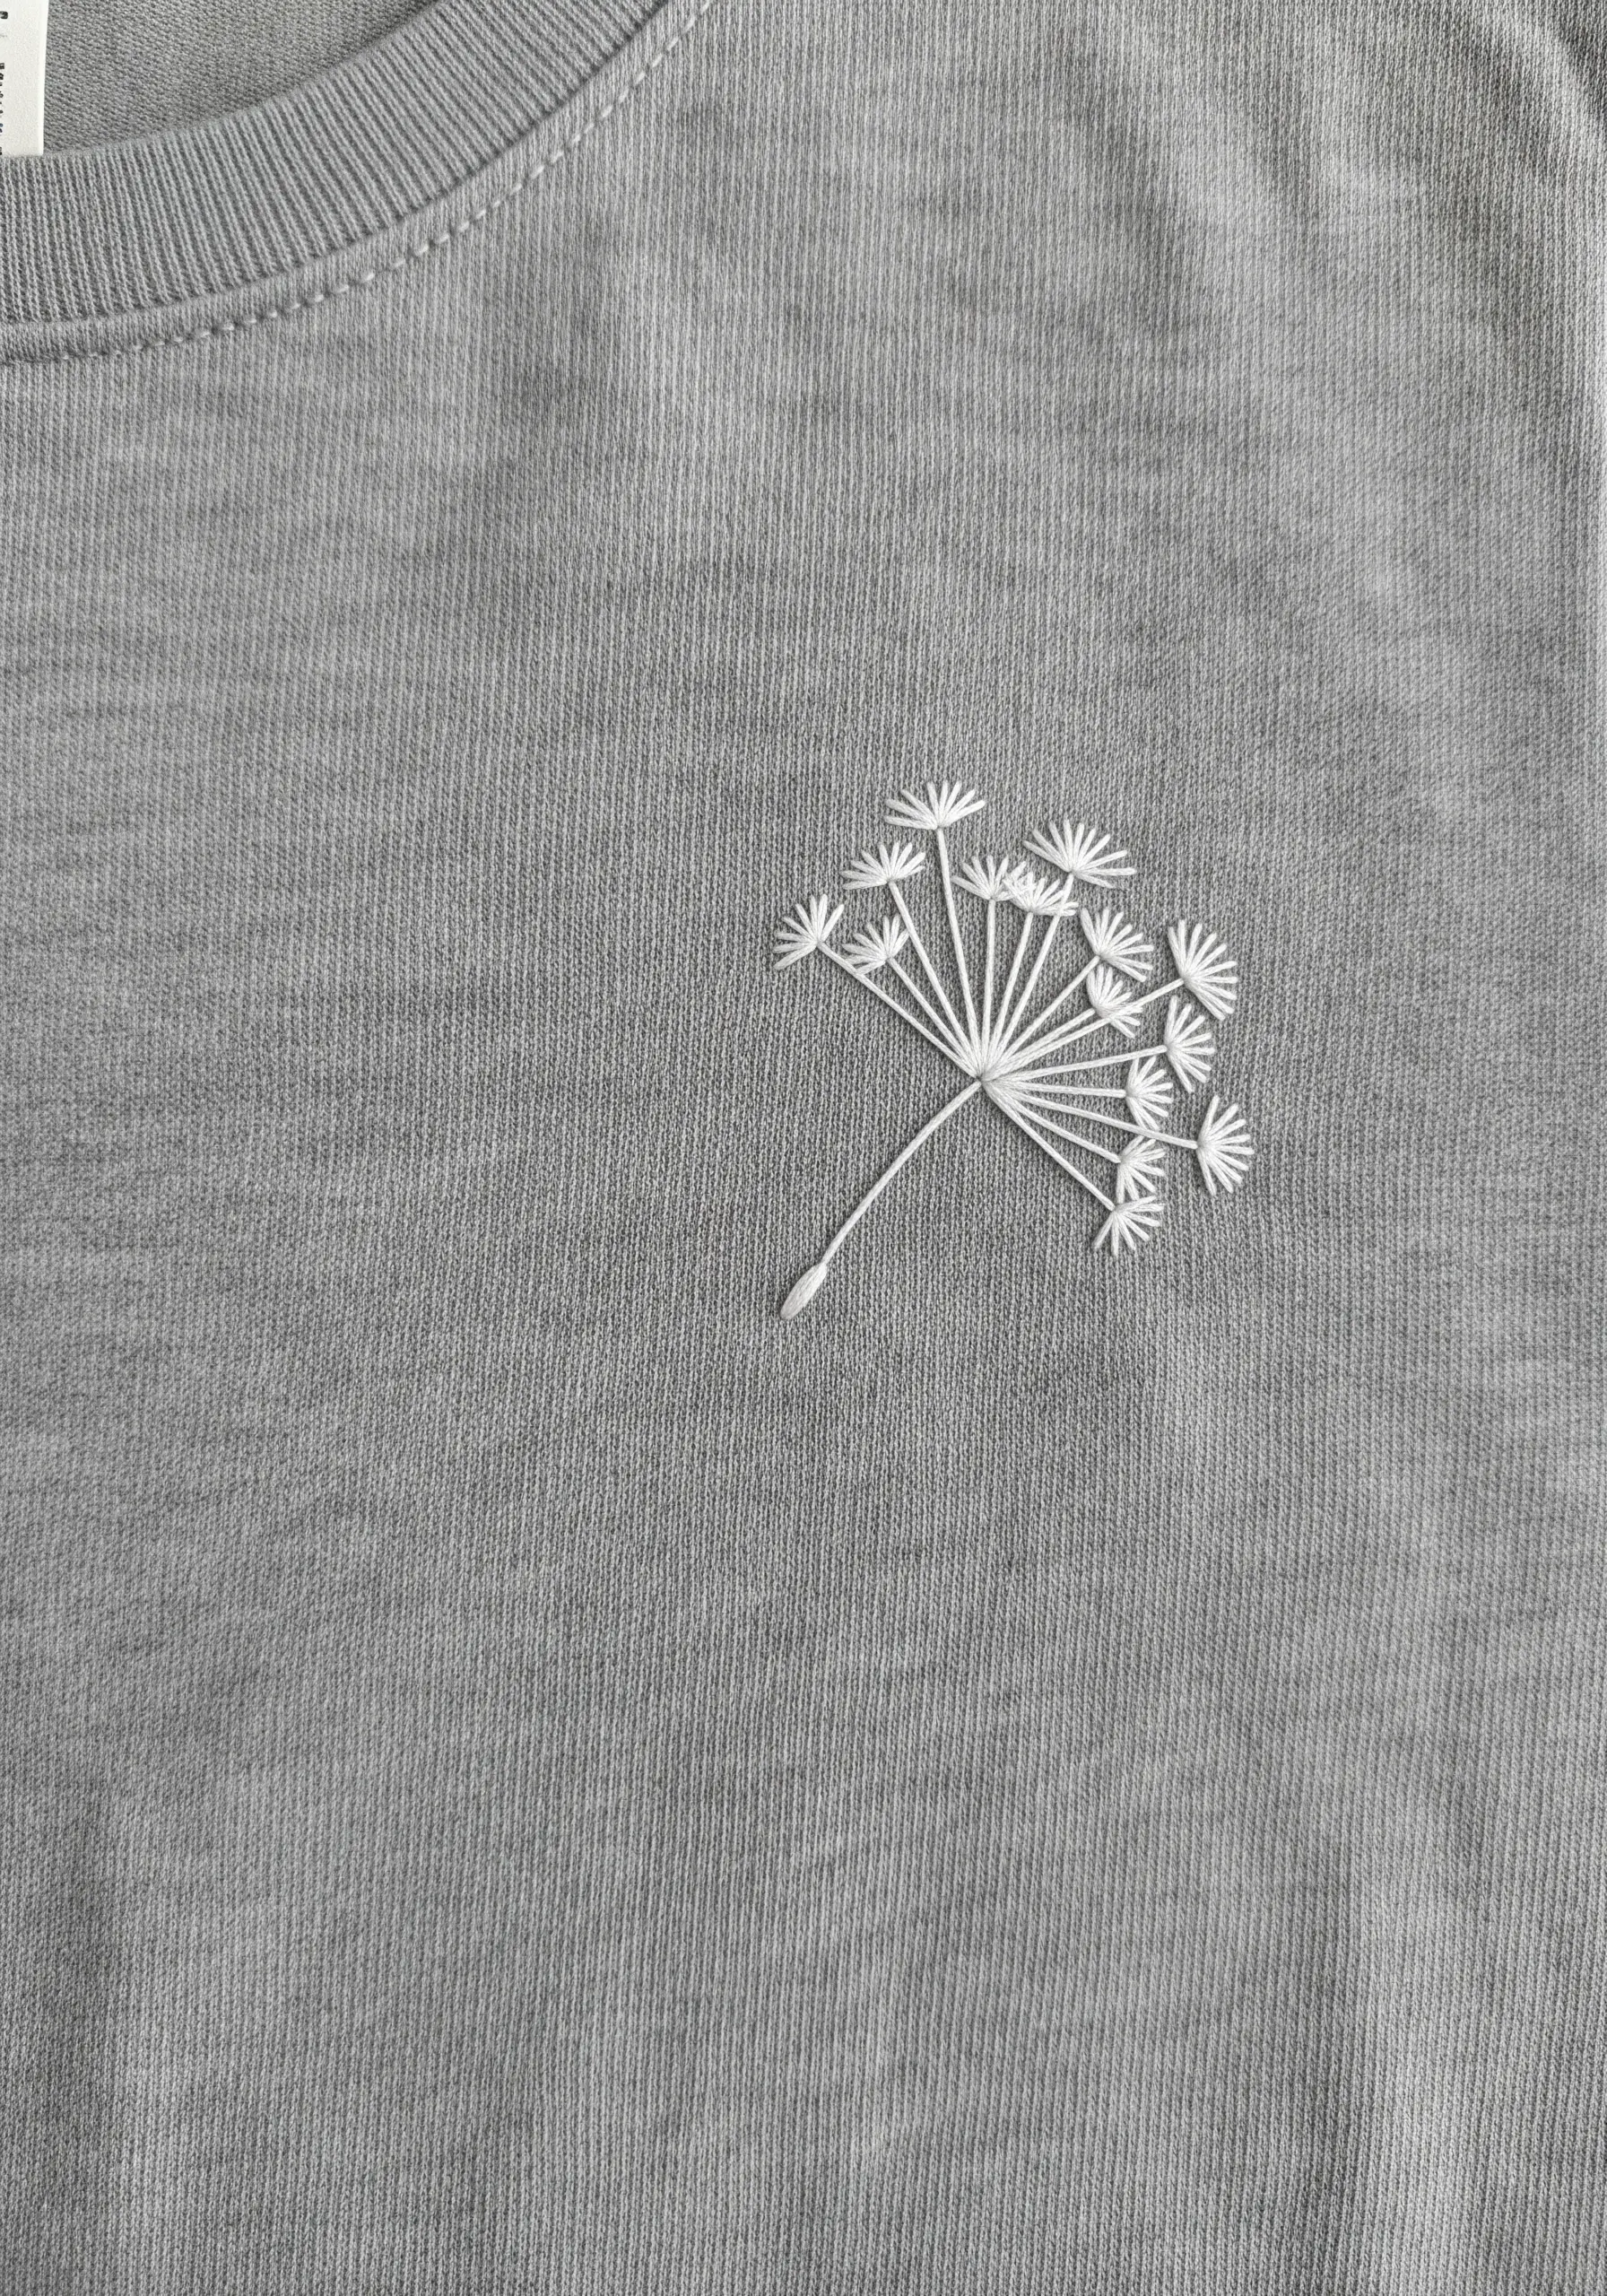
Create a sophisticated design by using thread that matches the color of your garment. The magic here is not in the color, but in the texture.
The raised quality of the stitches—a combination of delicate straight stitches and tiny French knots—is what makes the design visible as it catches the light.
This technique is perfect for adding an understated, elegant detail to everyday jersey T-shirts; just remember to use a stabilizer to prevent the fabric from stretching while you work.
12. Create a Modern Icon with Geometric Lines
Reduce a complex shape to its essential lines to create a modern, geometric motif that feels sharp and contemporary.
Use a single strand of floss and a simple backstitch for ultimate precision, ensuring each line is crisp and defined.
The power of this design comes from the high contrast between the neon orange thread and the dark navy fabric, creating a visual vibration that immediately captures the eye.
13. Make a Statement on a Patterned Fabric

When embroidering on a busy pattern like stripes or plaid, choose a solid, high-contrast color for your motif.
A simple shape filled with a dense, perfectly executed satin stitch will stand out as a confident focal point rather than getting lost in the background.
To guarantee a sharp, clean edge, first outline the entire shape with a split stitch before beginning your fill.
14. Use Fill Stitches to Build Tactile Surfaces
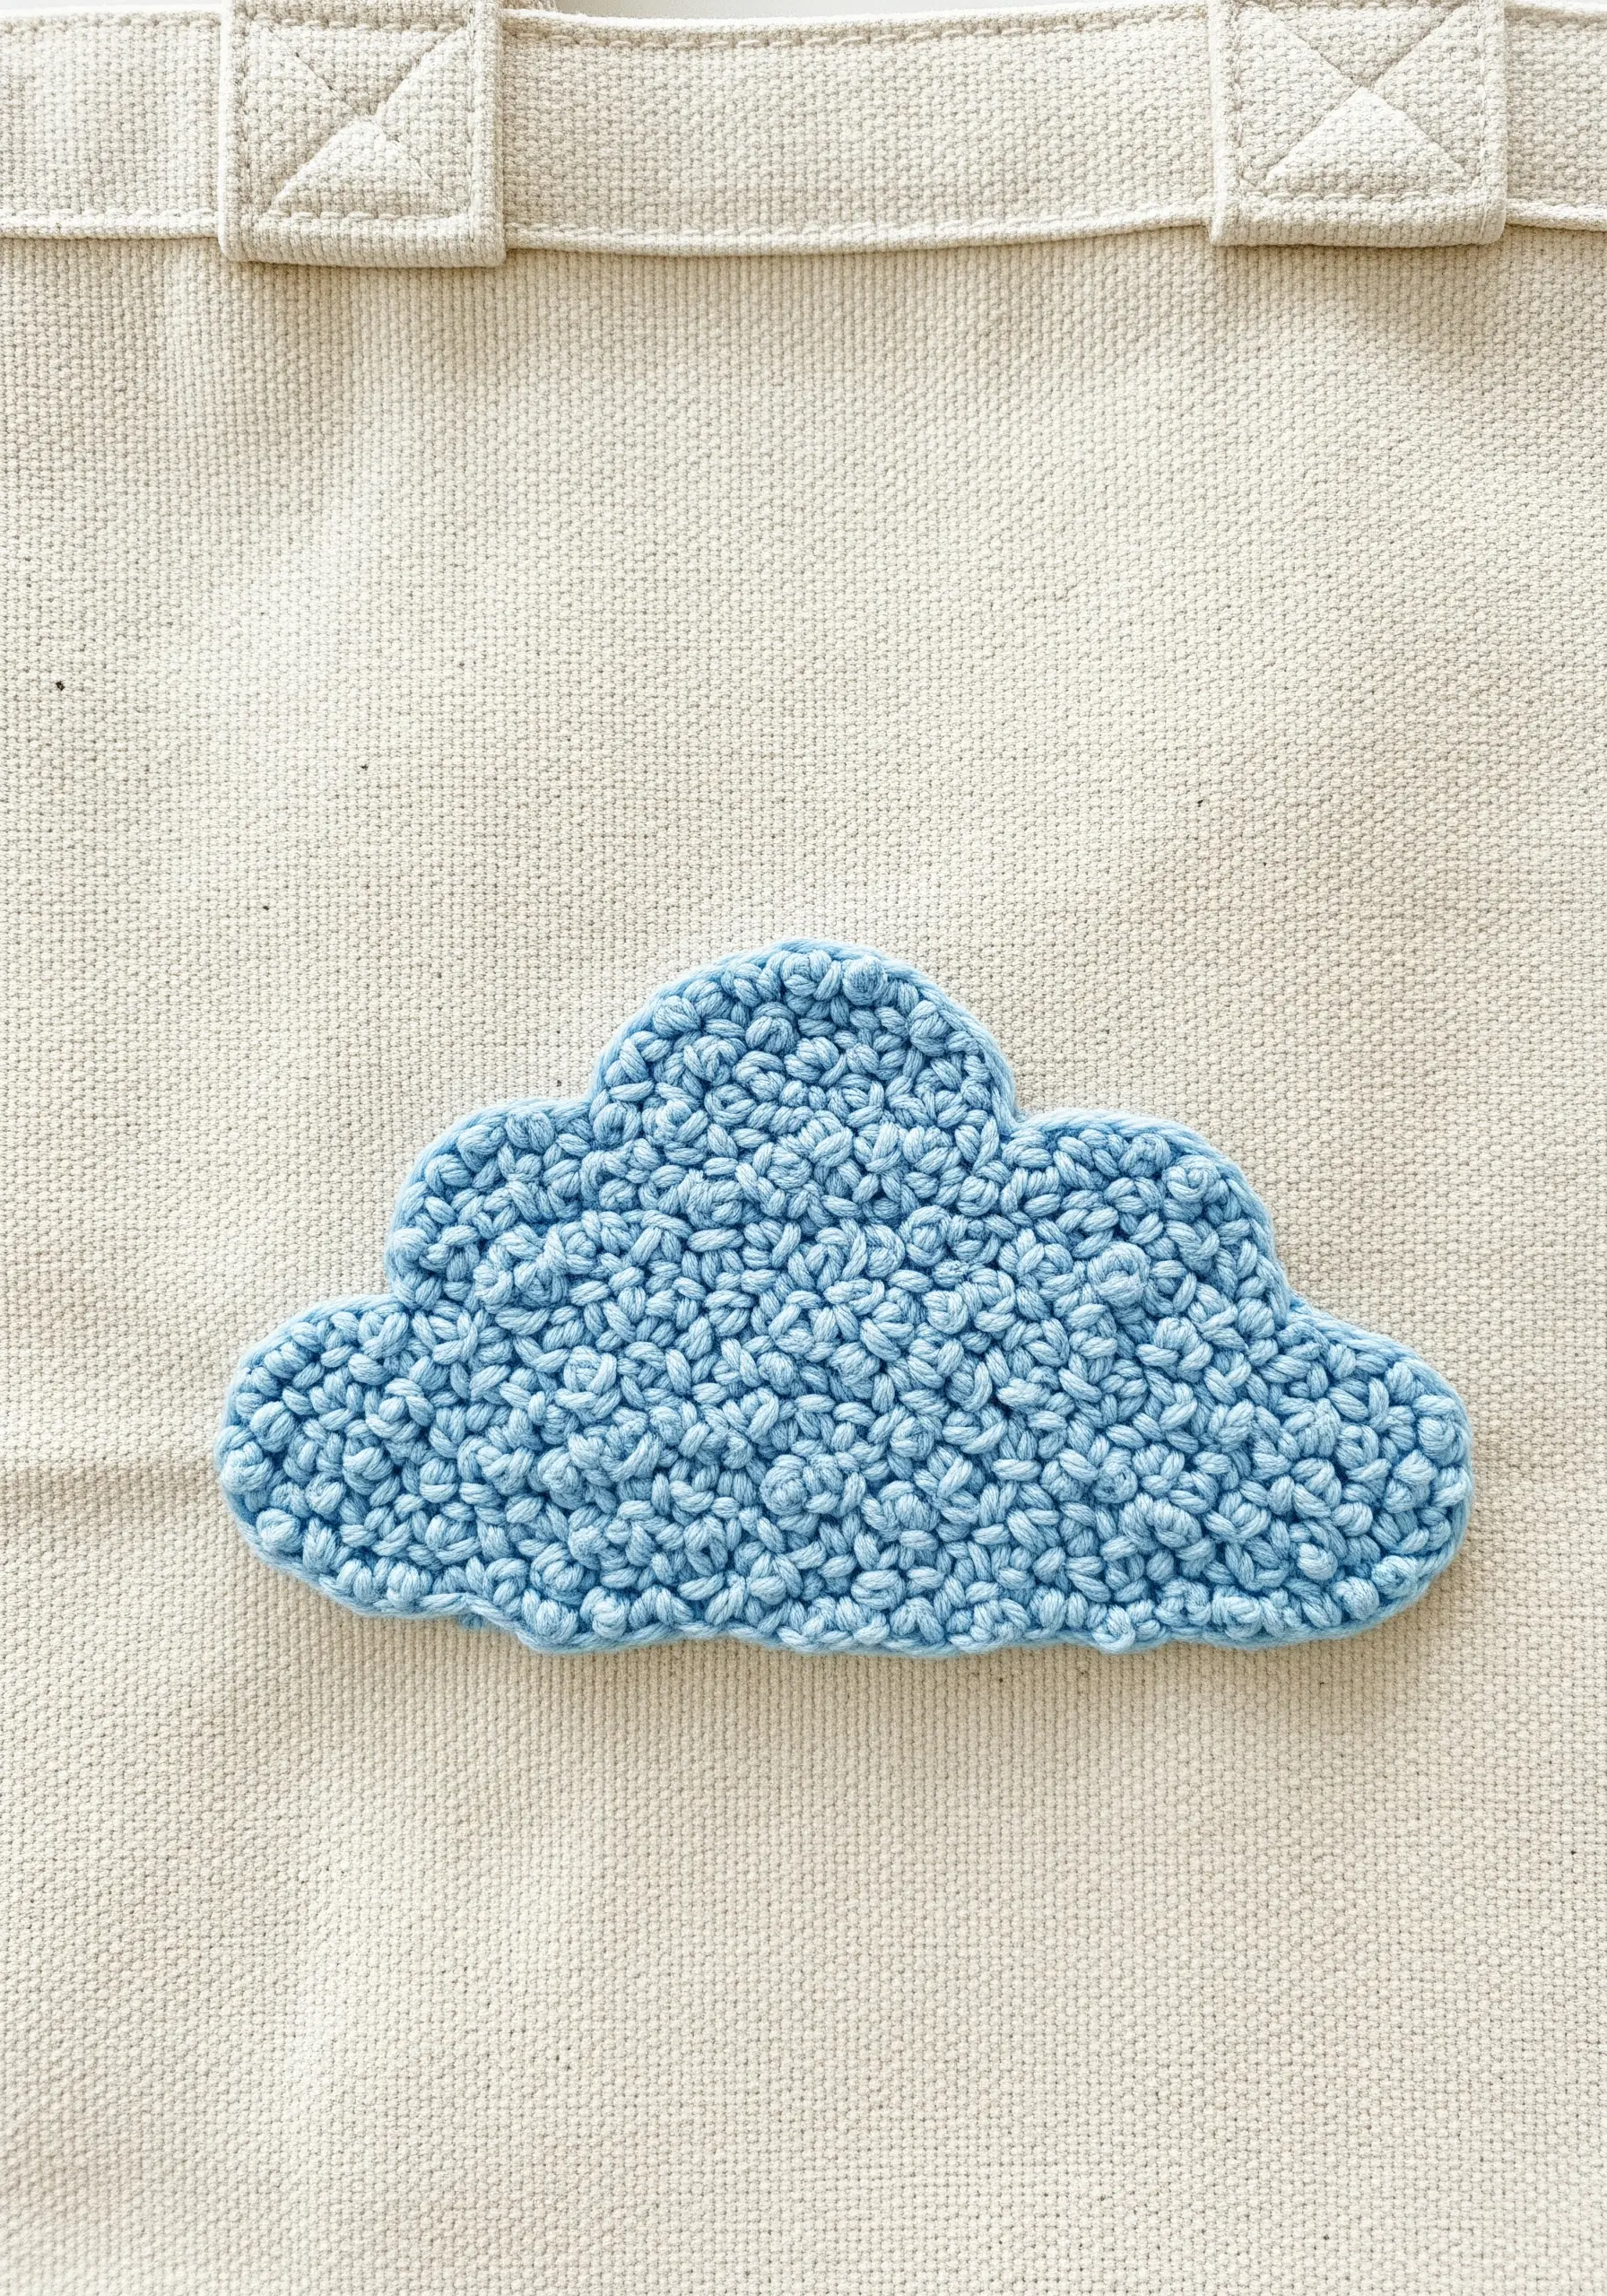
Move beyond flat fills and explore stitches that create physical texture. This cloud is filled with dense French knots, giving it a bumpy, tangible quality.
This technique works best on sturdy fabrics like canvas or heavy cotton that can support the weight and density of the knots without puckering.
To create this effect, place your knots very close together, allowing them to bunch up and form a soft, three-dimensional surface.
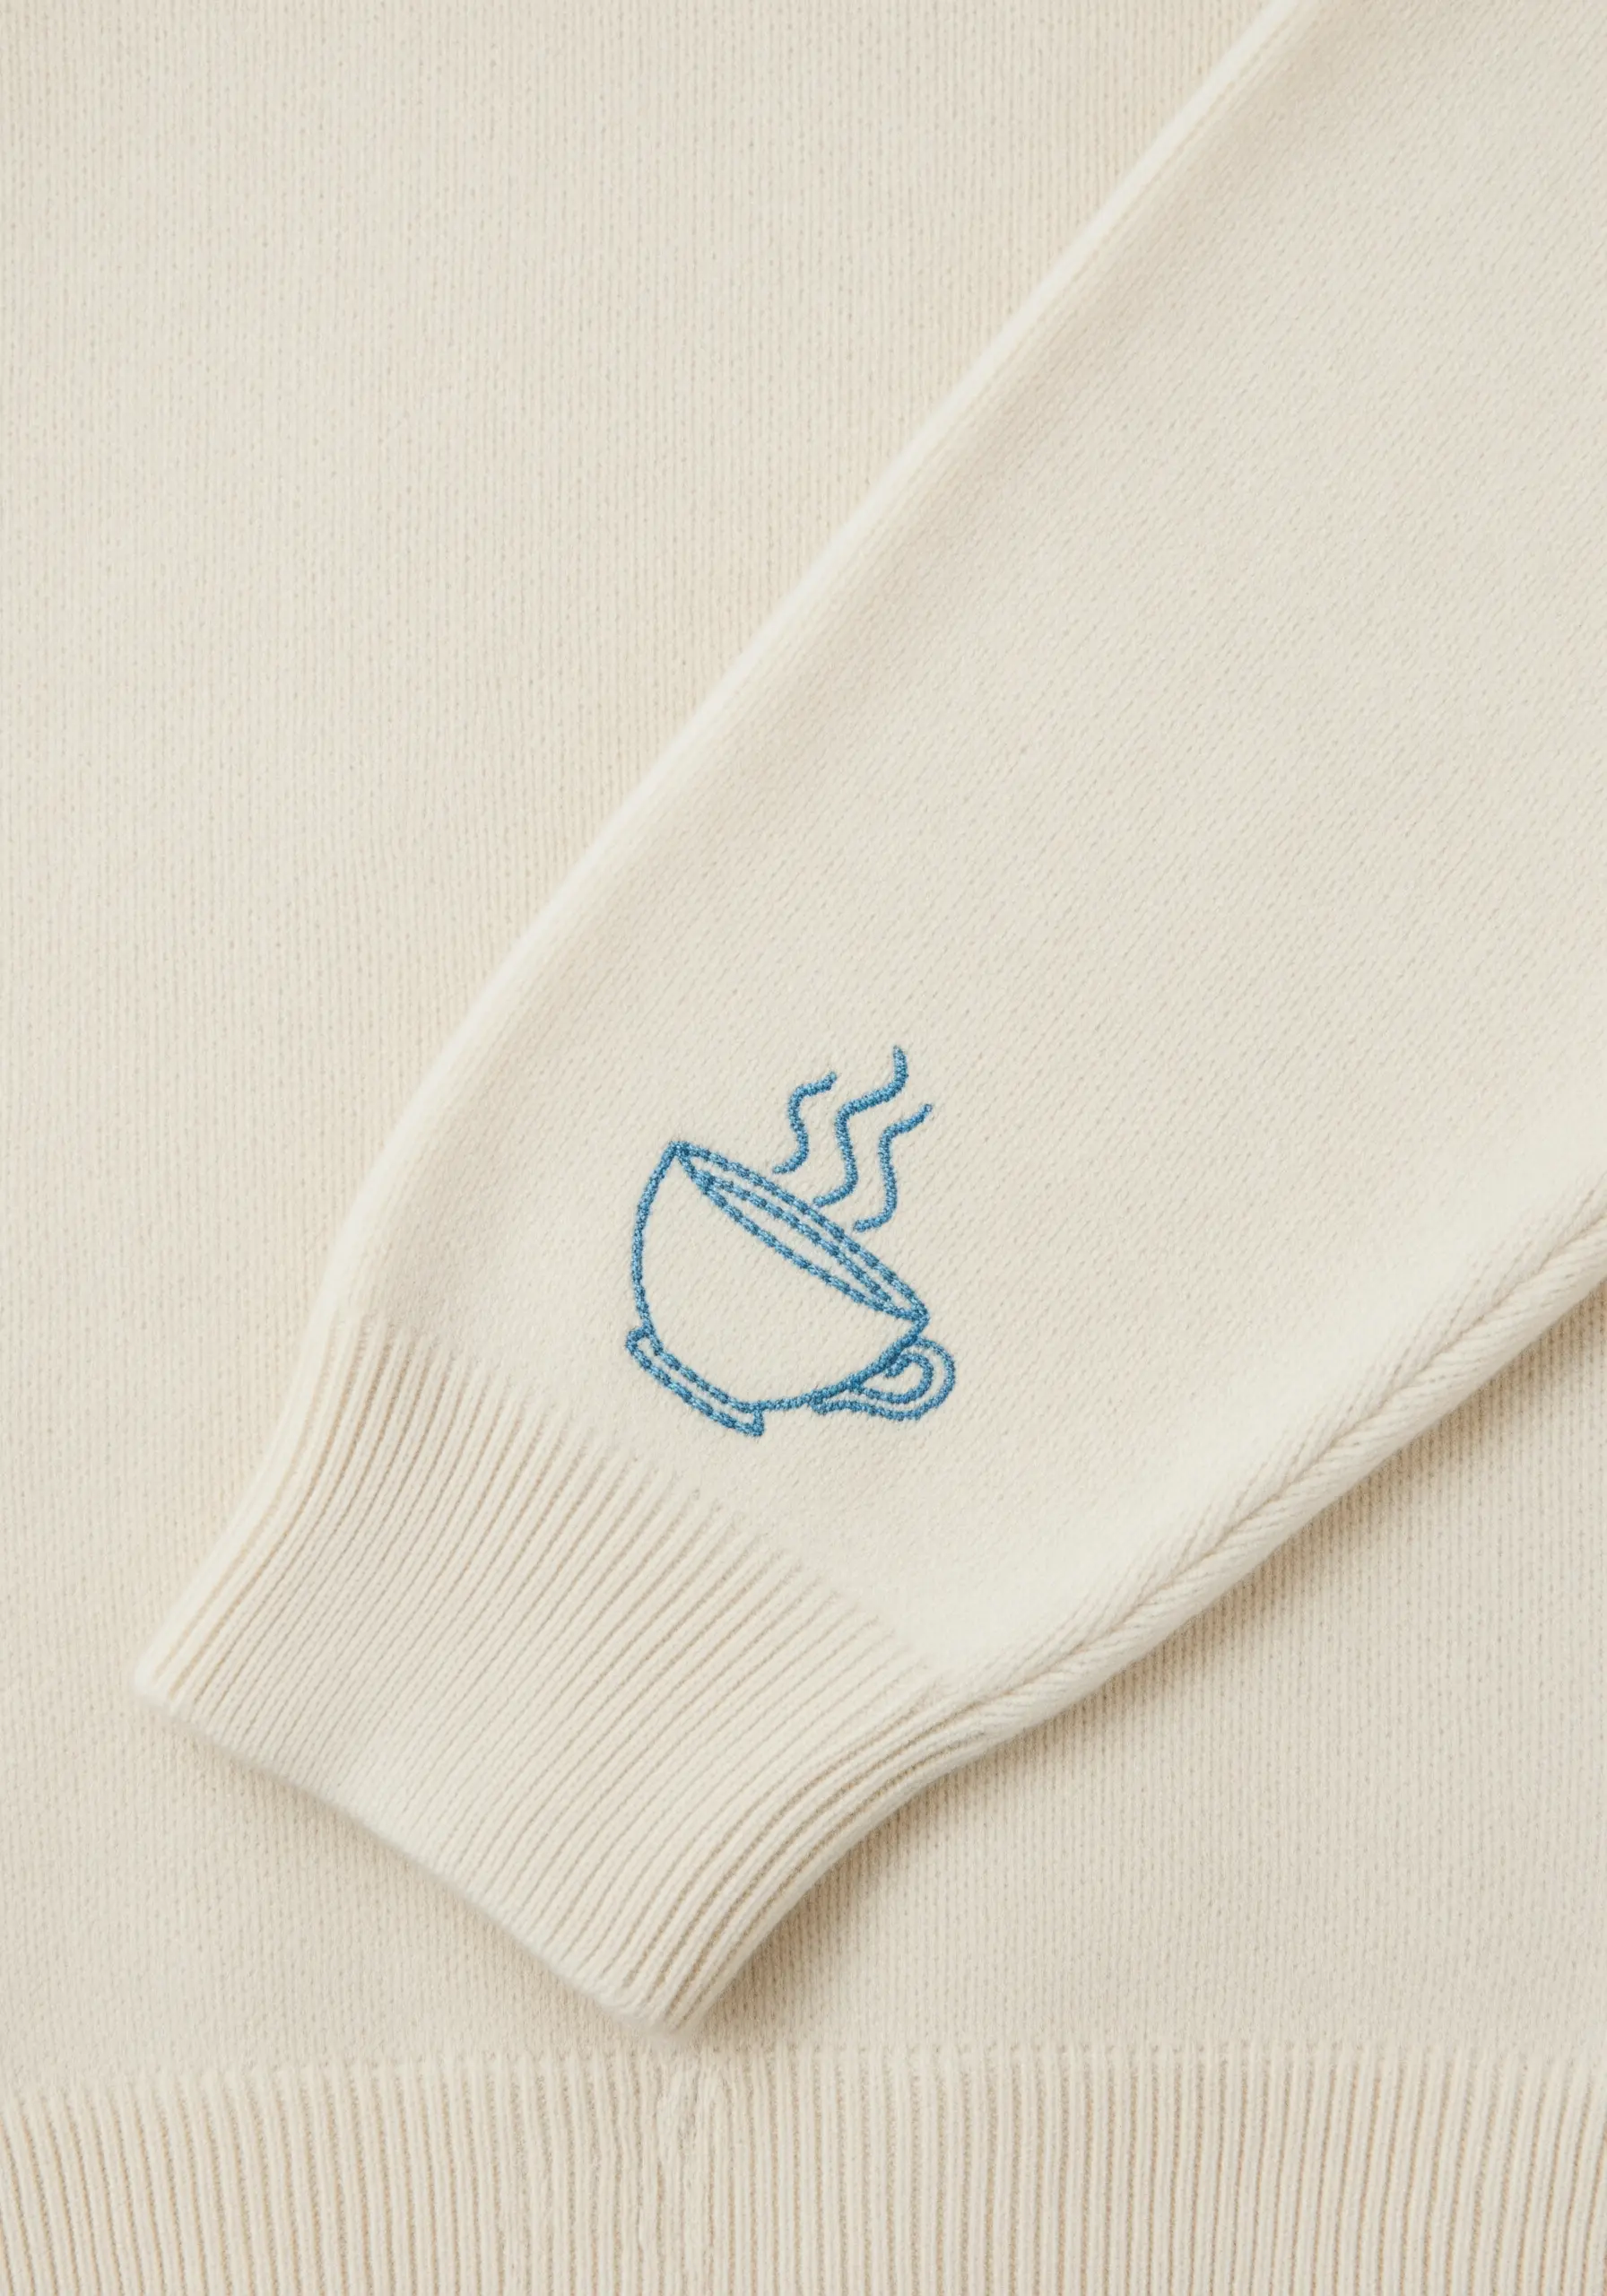
15. Add Whimsy to an Unexpected Corner
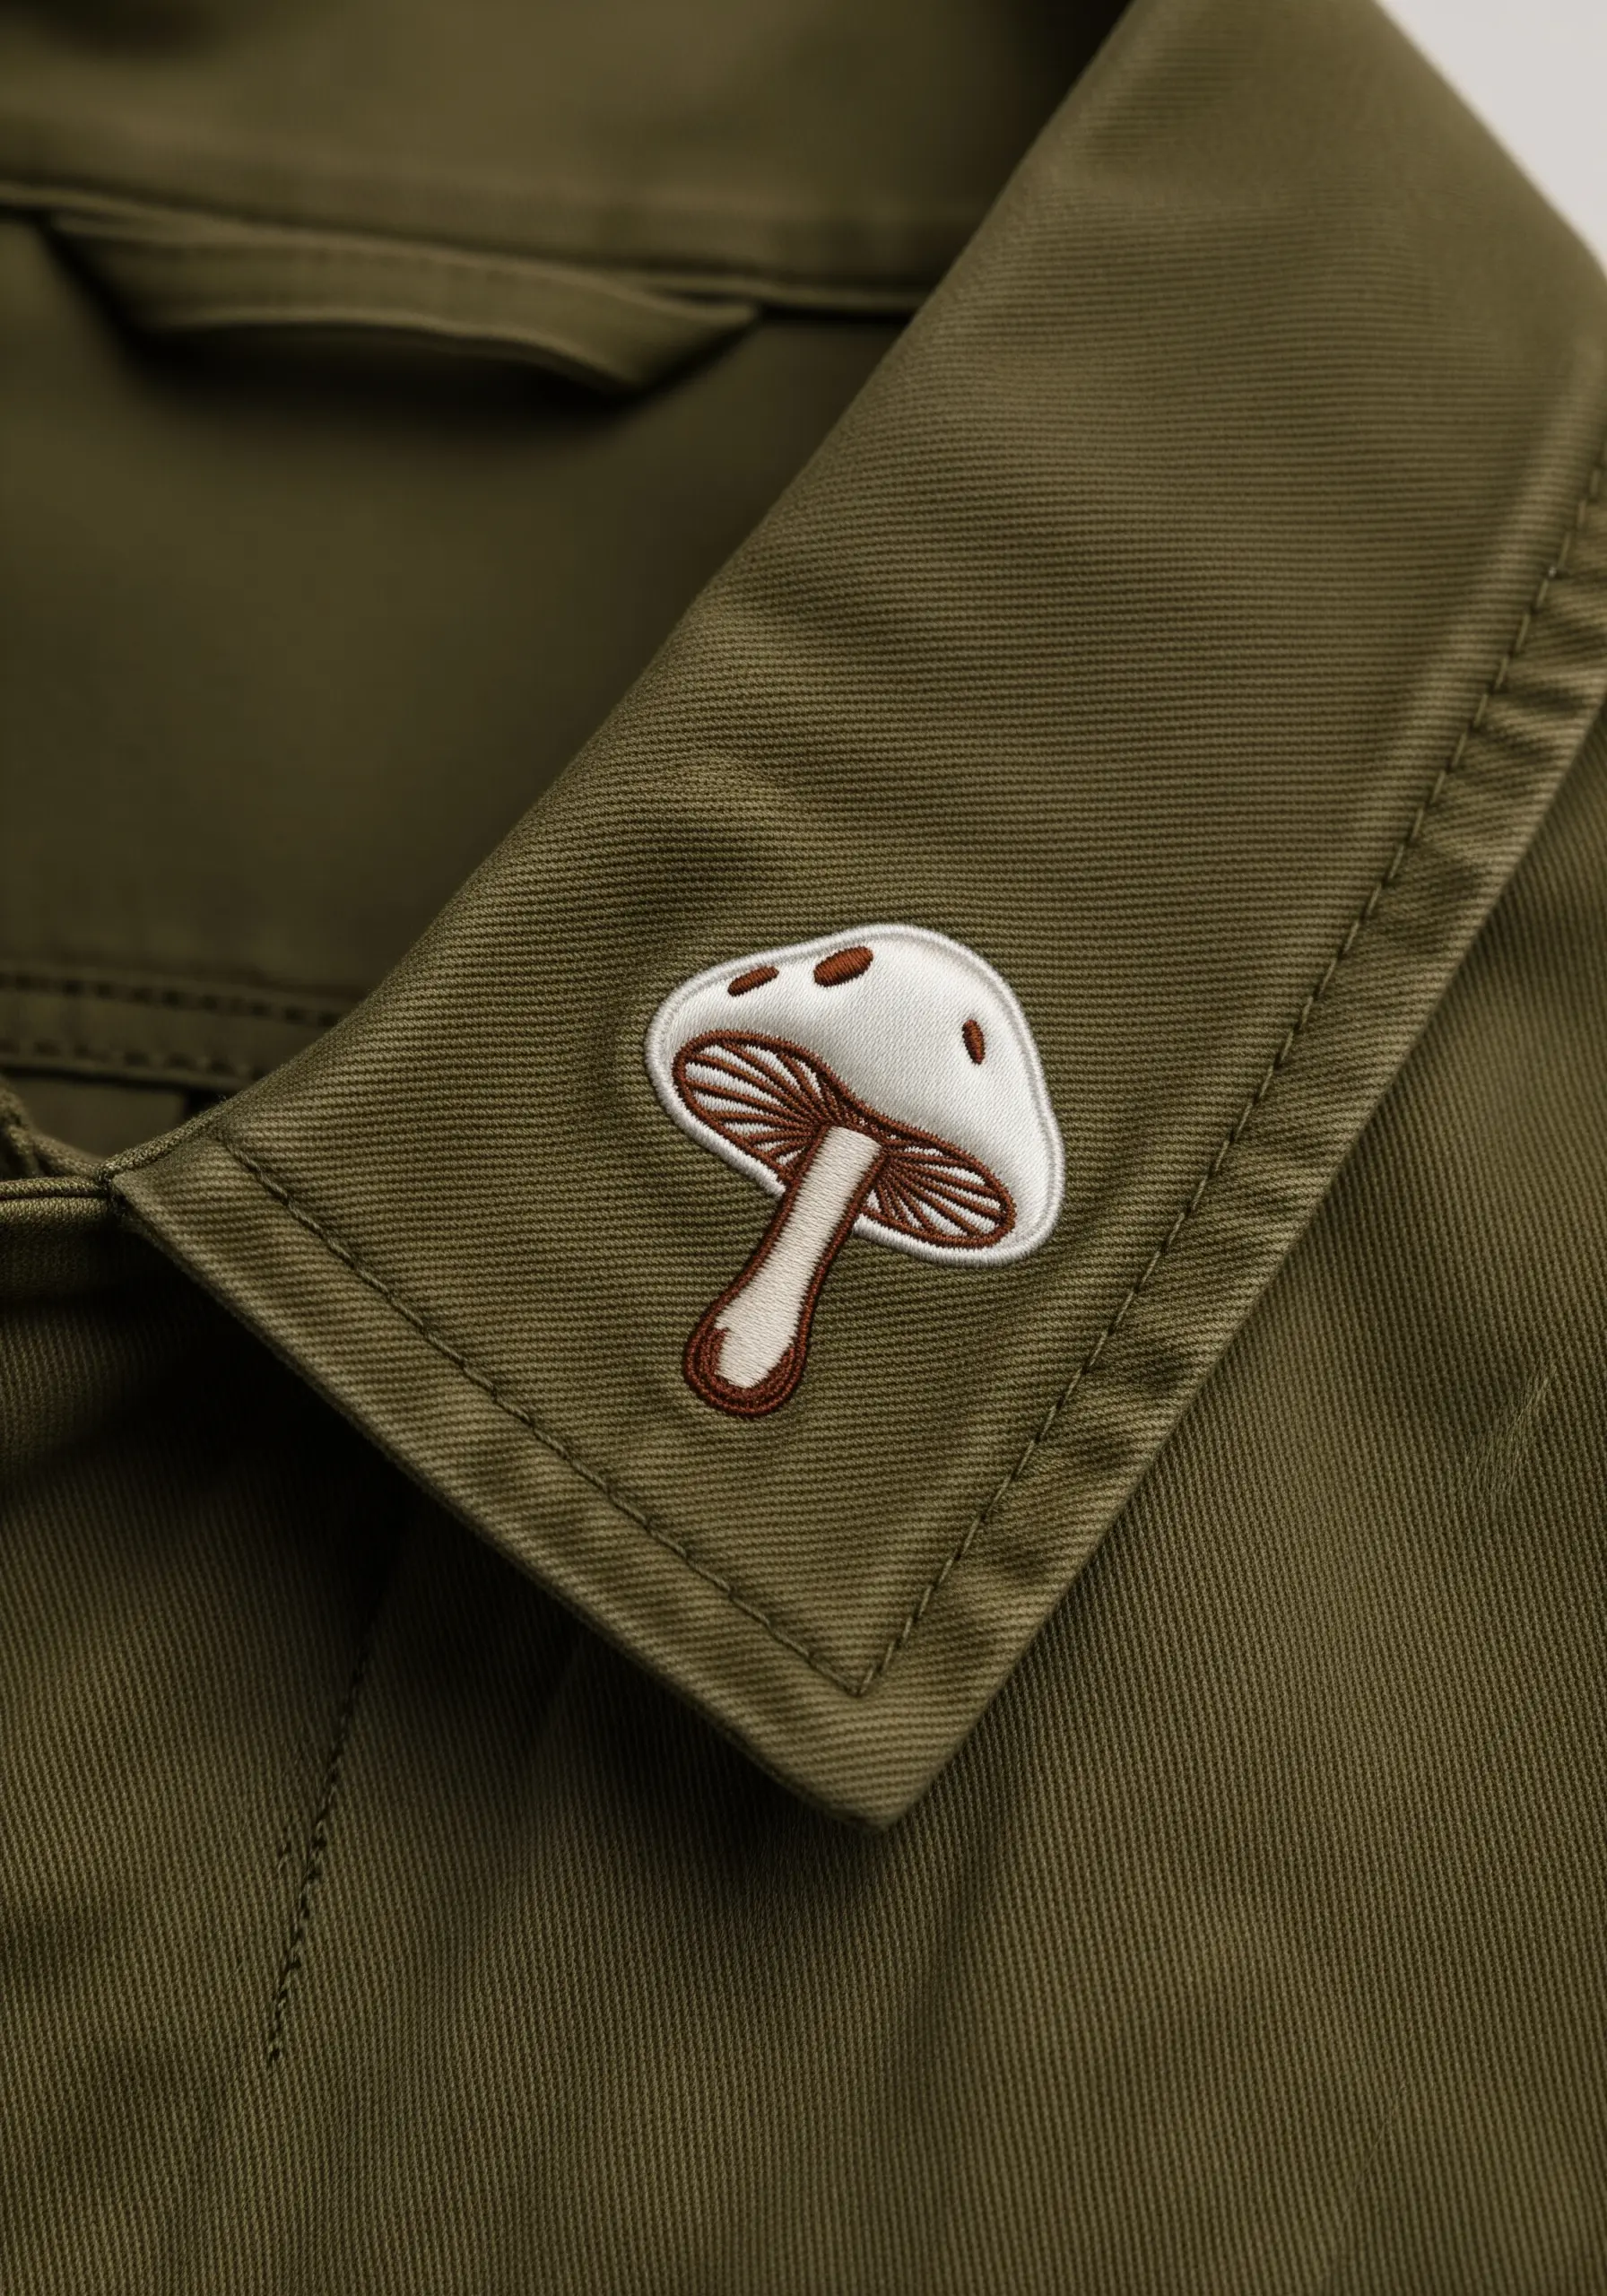
The sharp angle of a shirt collar provides a perfect natural frame for a small, charming motif that feels like a hidden secret.
Combine different stitch types to add character: a smooth satin stitch for the mushroom cap, a vertical satin stitch for the stem, and delicate backstitch for the gills.
This mix of textures and line weights gives the simple design a delightful, illustrative quality.
16. Master Perfect Circles with Directional Stitching
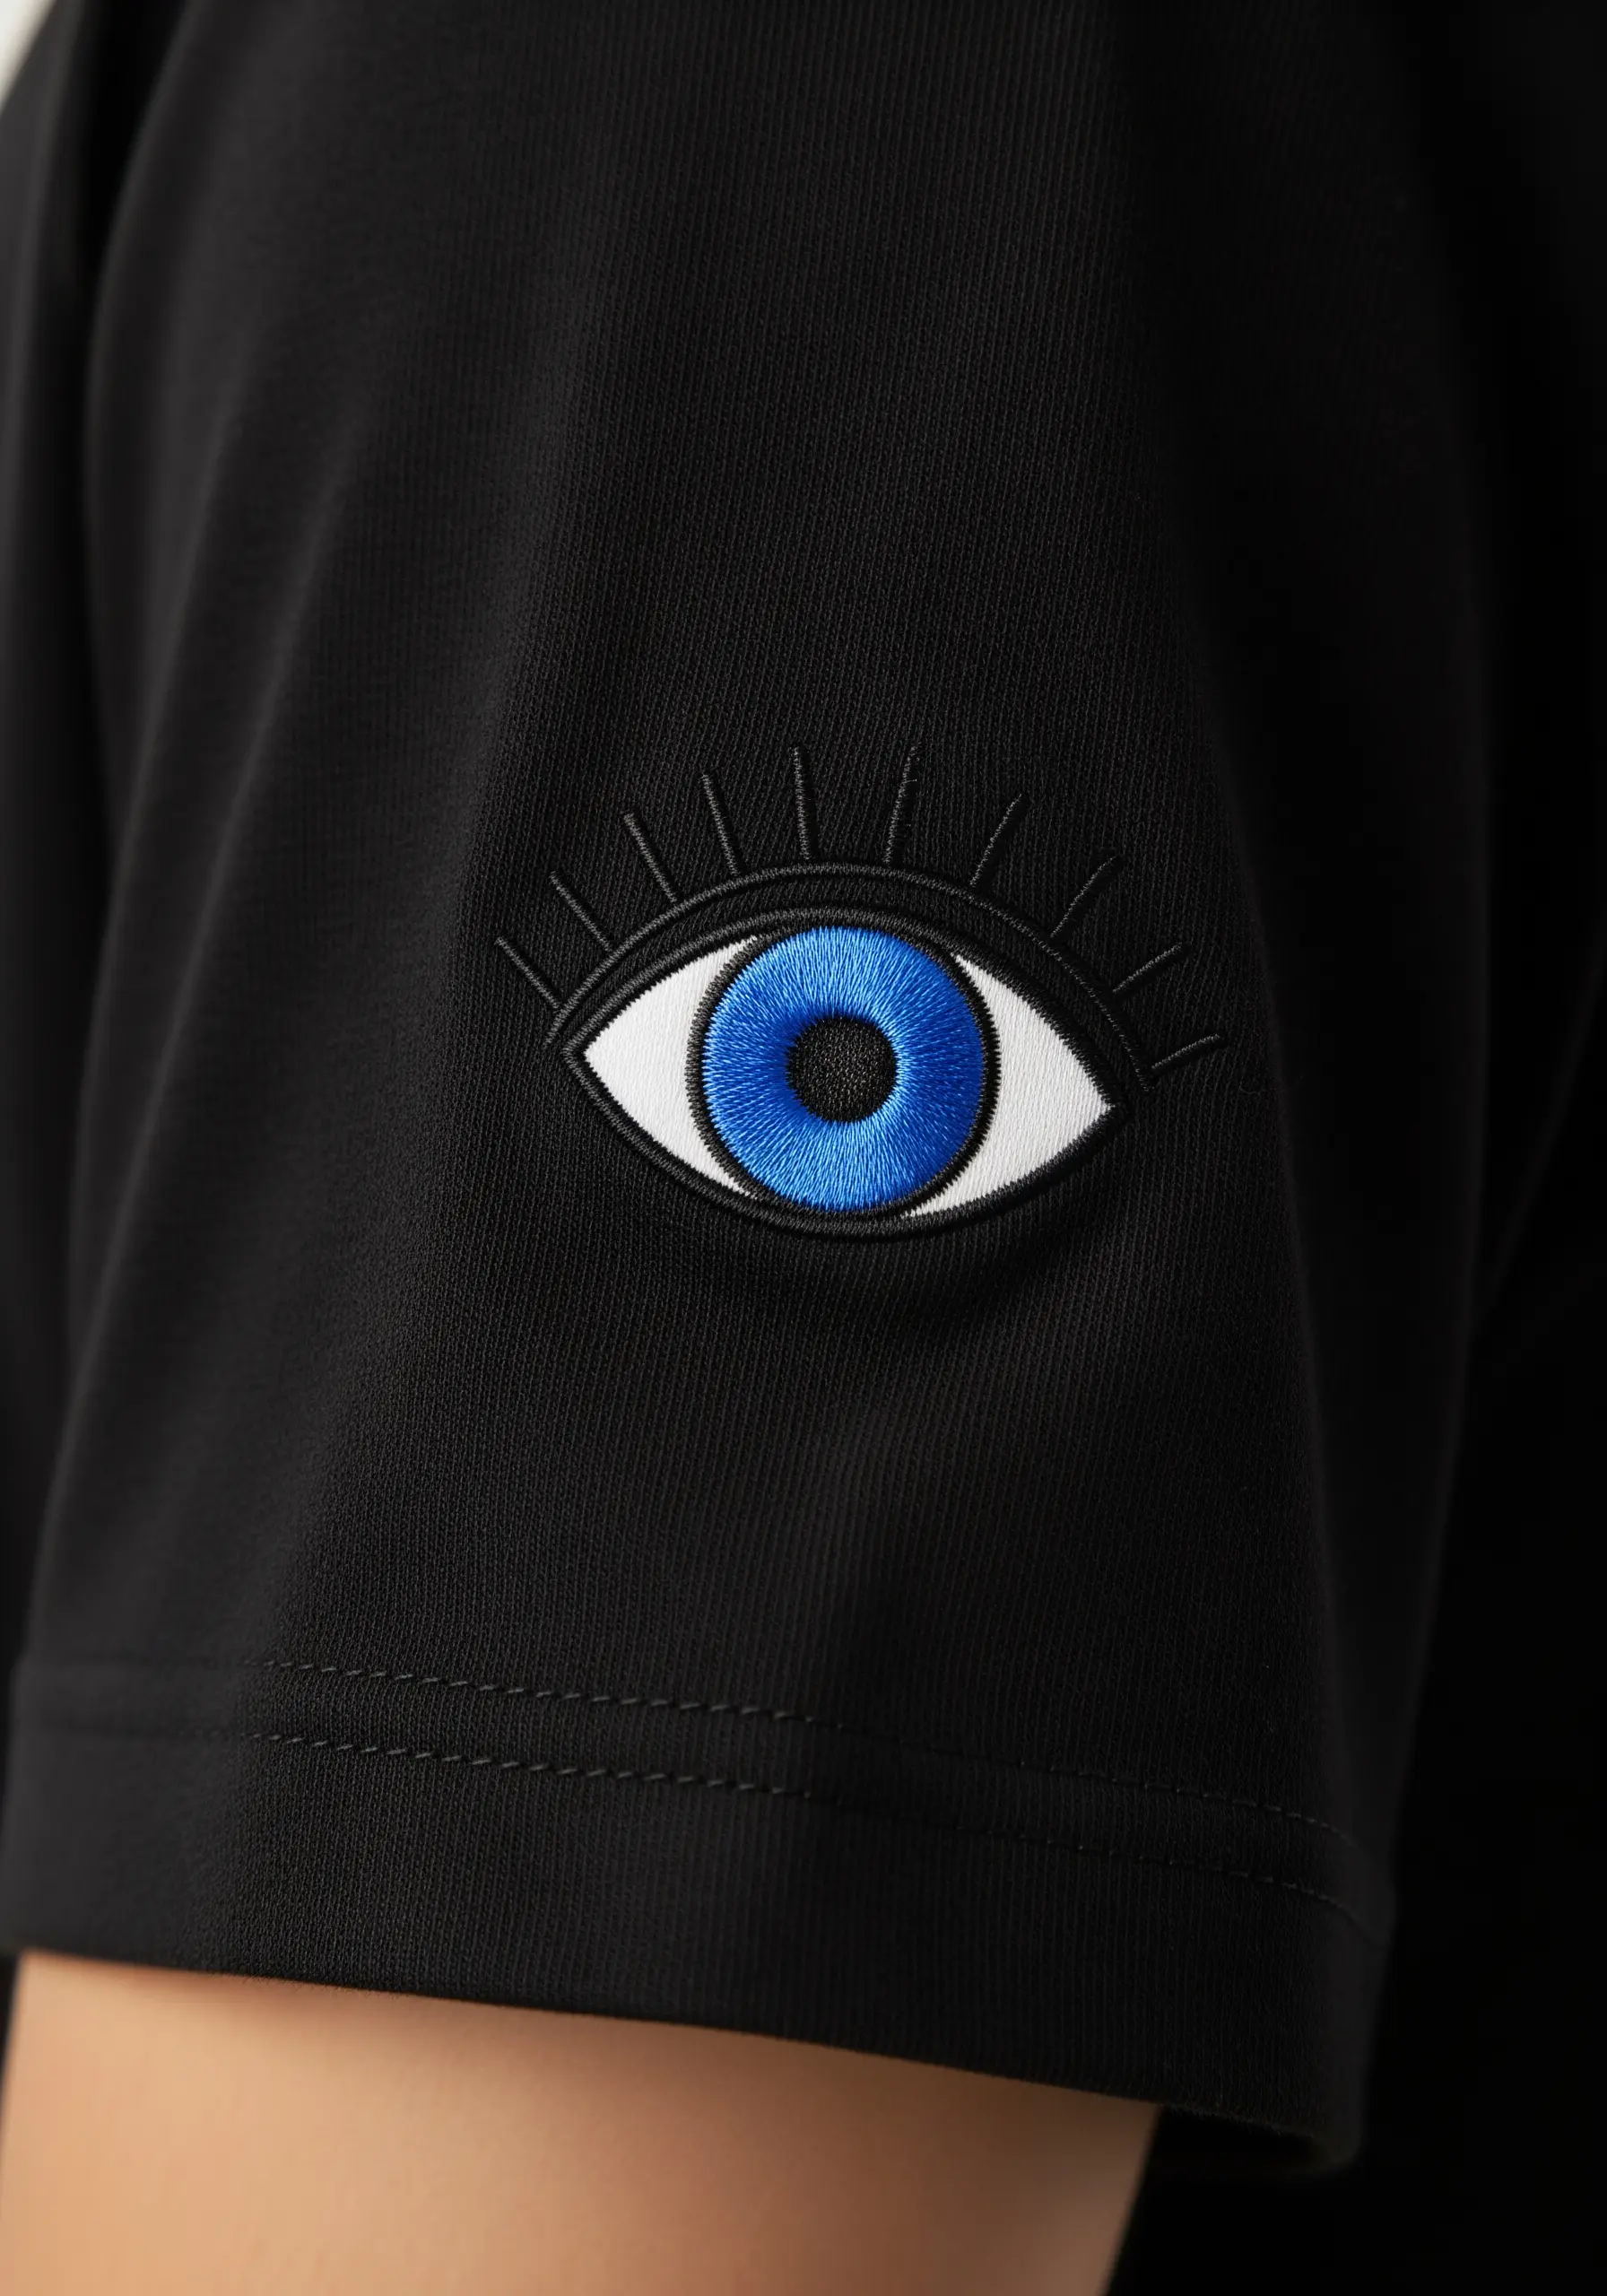
To prevent your satin stitches from pulling toward the center and distorting your circles, you must vary the stitch direction for each concentric ring.
Stitch the outer white ring with horizontal stitches, the middle blue ring with vertical stitches, and the central black pupil with horizontal stitches again.
This simple technical adjustment locks the stitches in place, ensuring each colored circle remains perfectly round and distinct.
17. Try Miniature Thread Painting for Realistic Detail
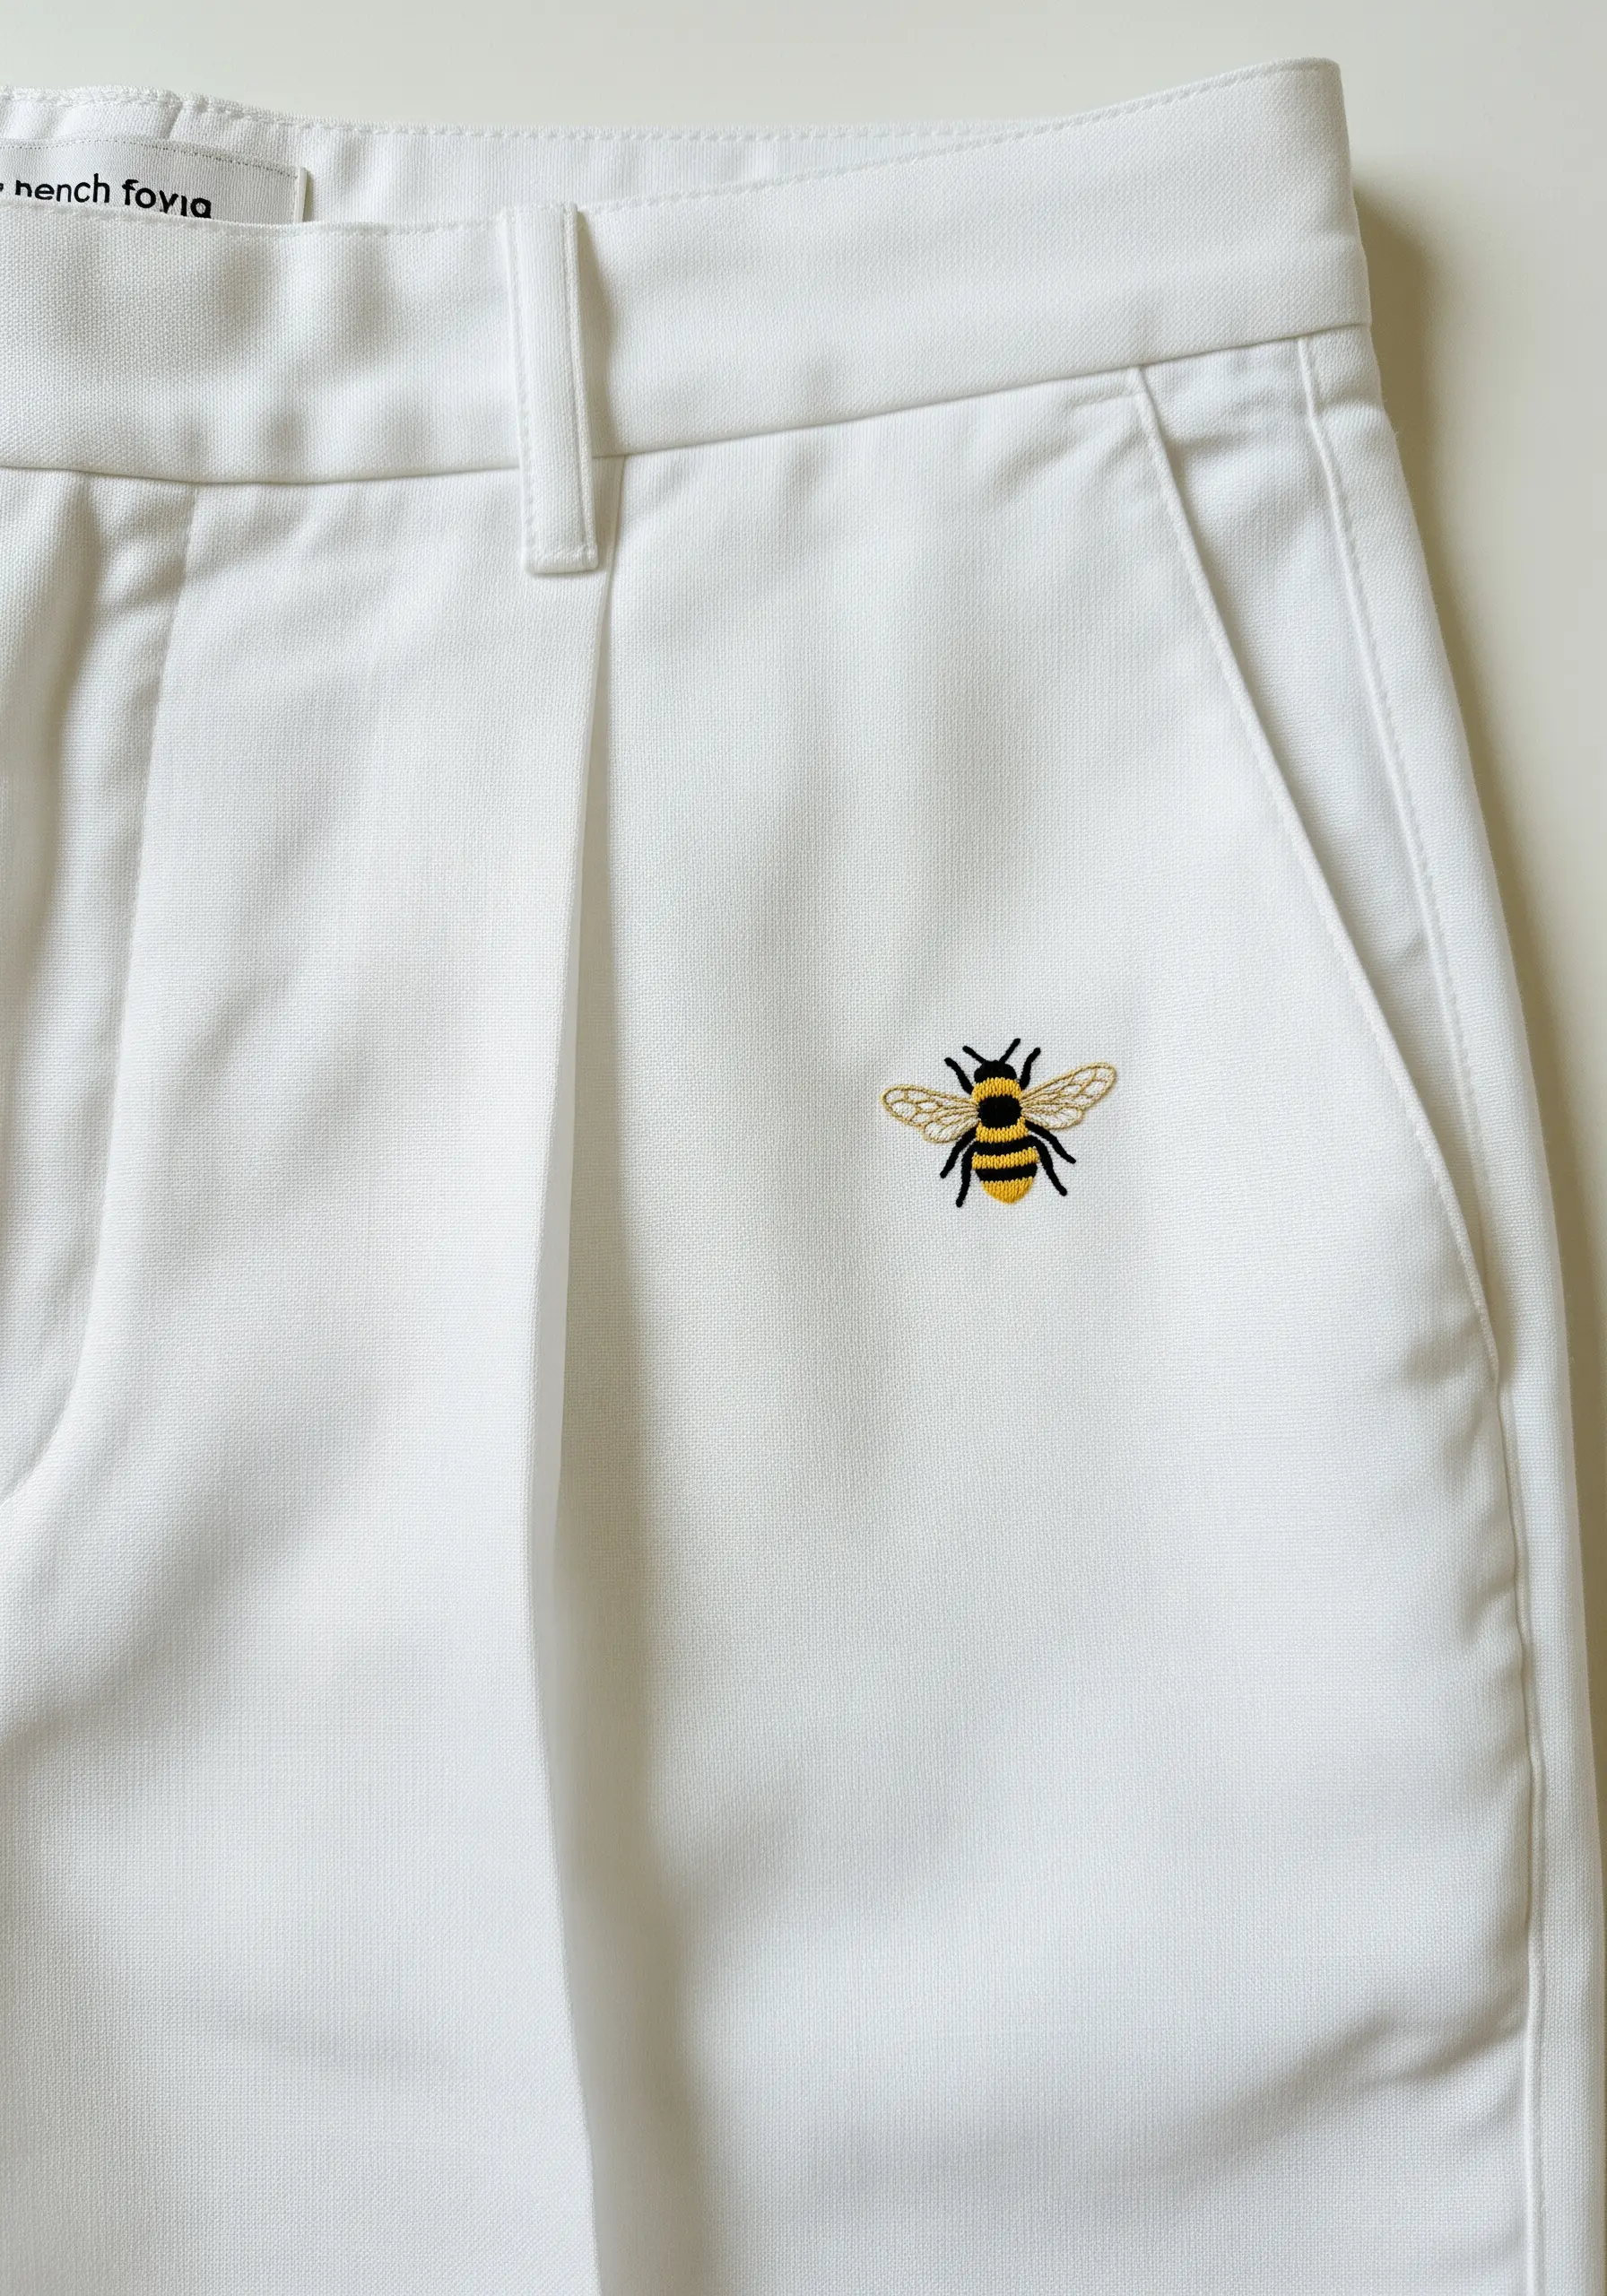
Even on a tiny scale, you can achieve realism. Use a single strand of floss and the long-and-short stitch to seamlessly blend the yellow and black on the bee’s abdomen.
For the wings, use a single, light grey thread to stitch a detached chain stitch (lazy daisy), then add a few straight stitches inside.
This combination creates an illusion of delicate, transparent wings, bringing the entire motif to life.
18. Energize Denim with a Geometric Pop
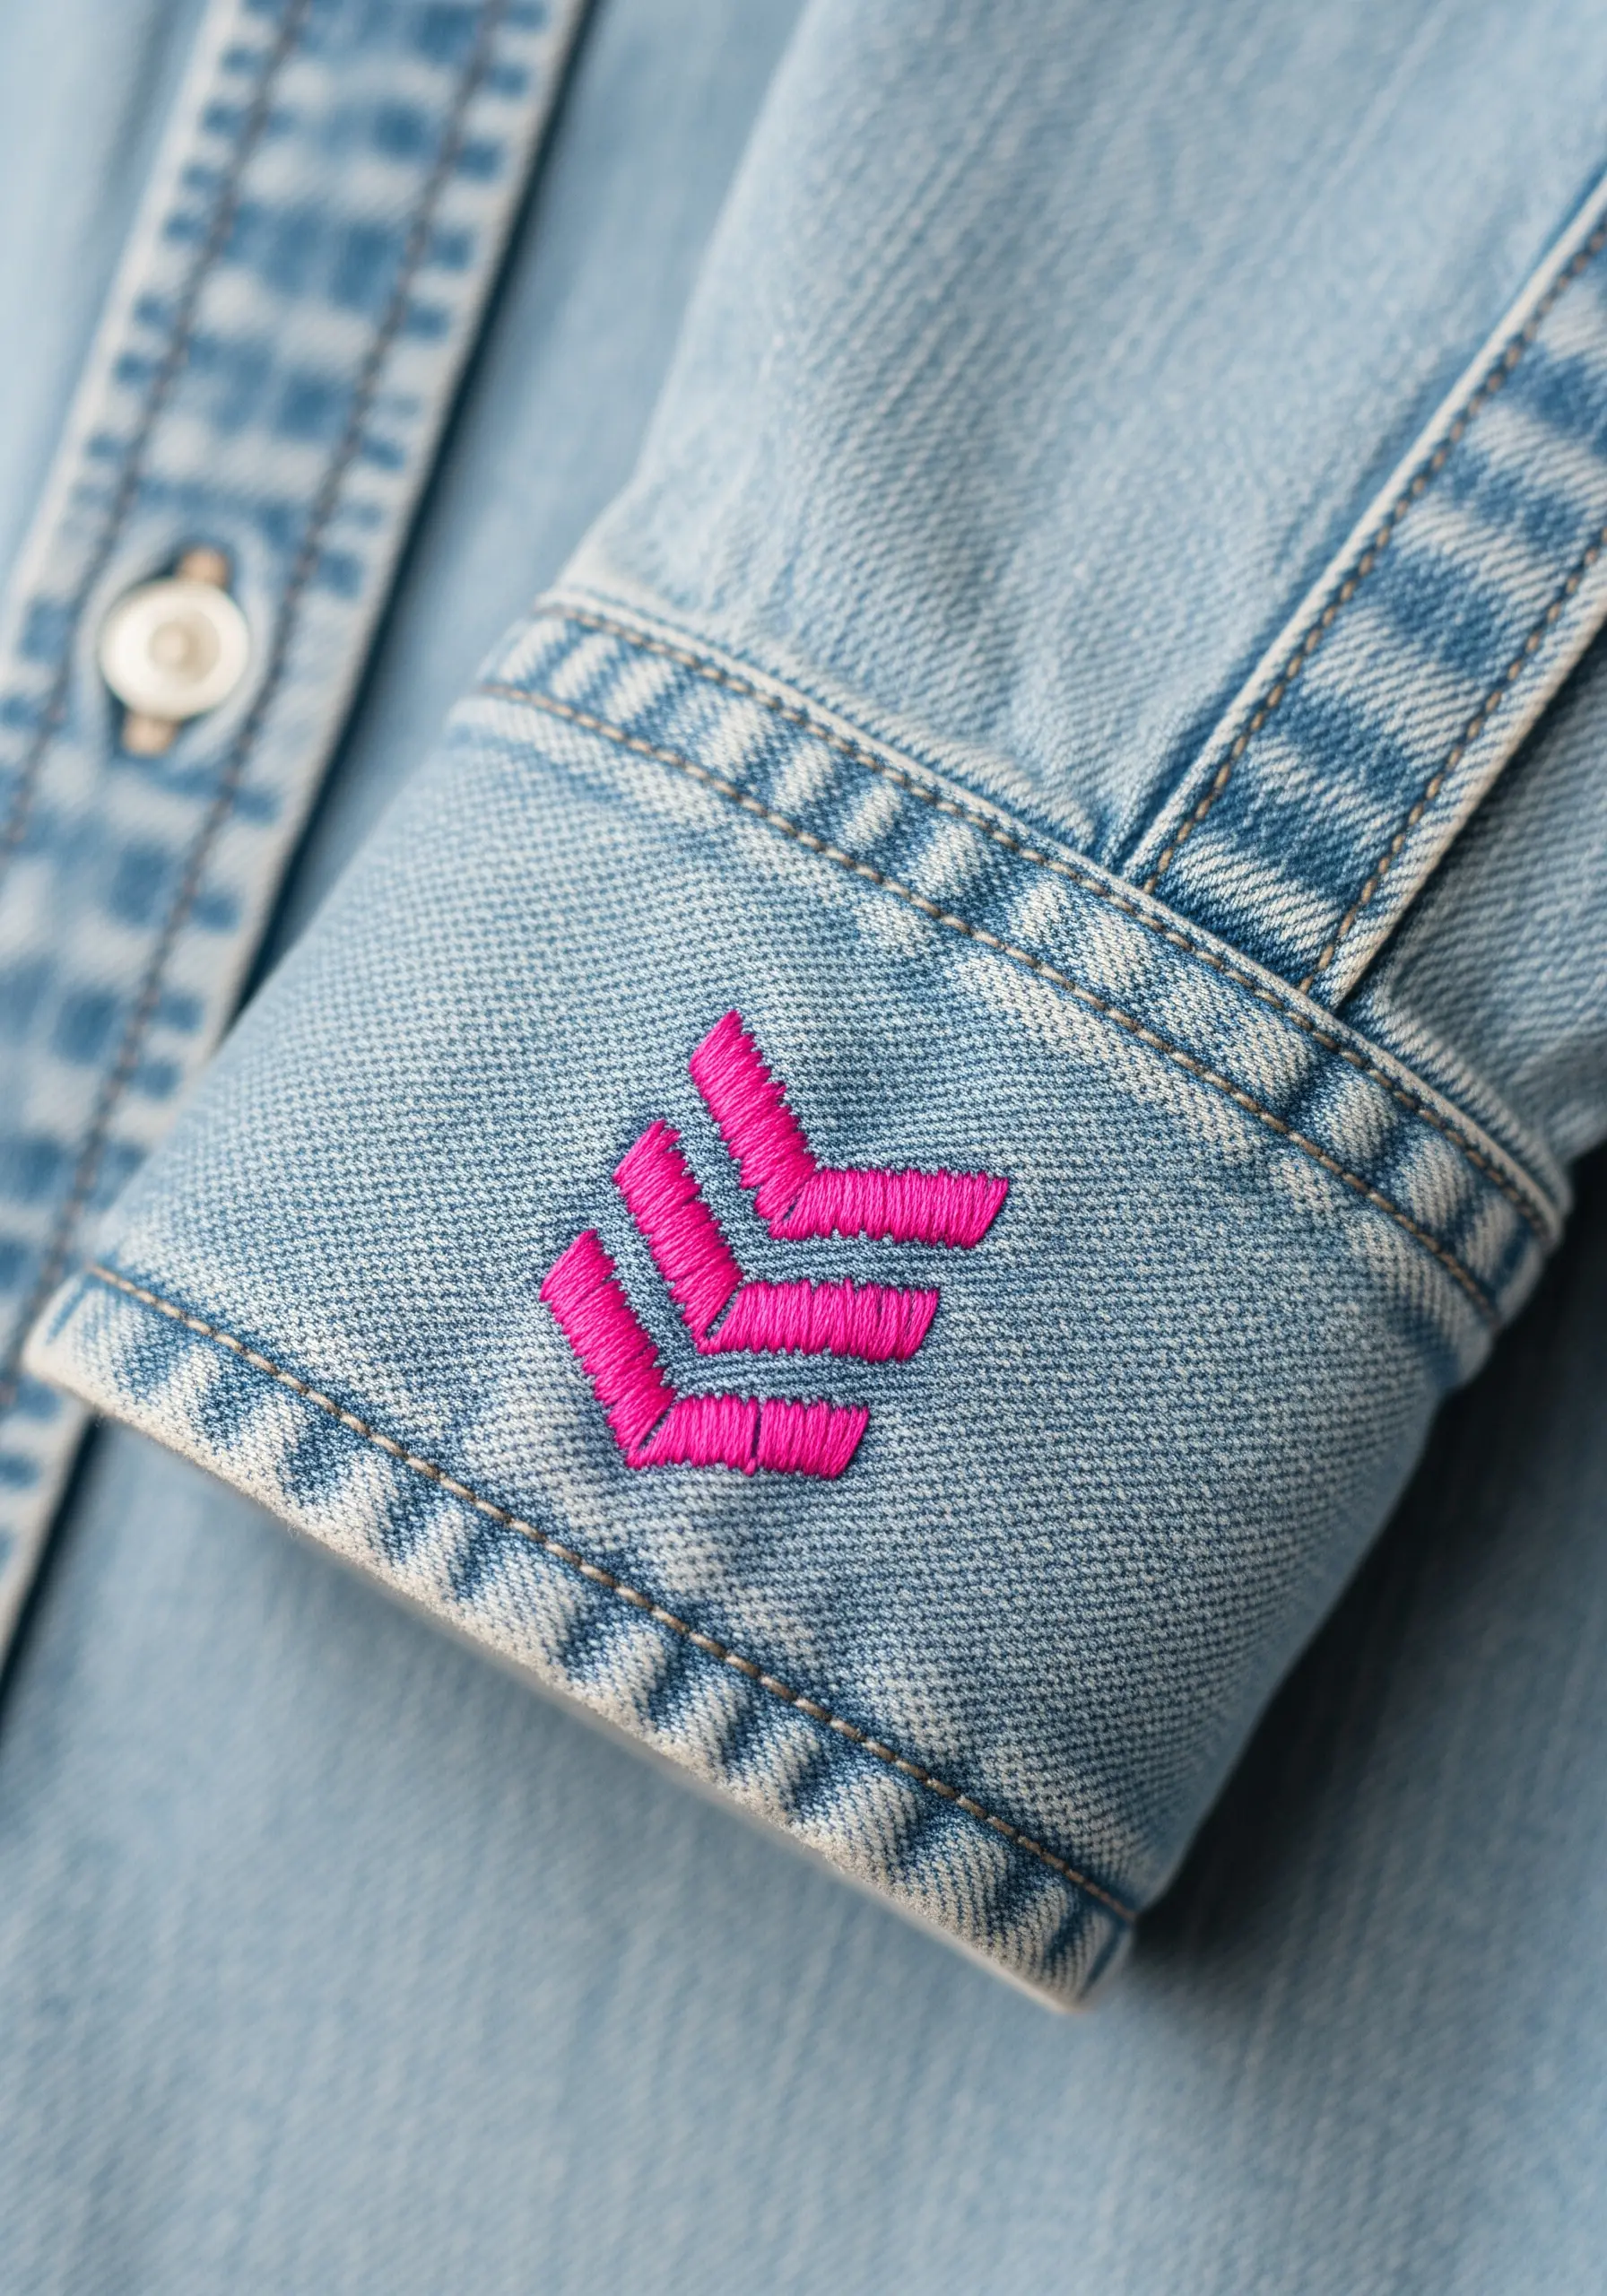
A simple geometric pattern in a shockingly bright color creates a modern, high-energy accent against classic denim.
Fill the chevron shapes with a basic satin stitch, making sure all your stitches lie parallel to one another for a uniform, light-reflecting surface.
The contrast between the soft, worn-in denim and the sharp, clean lines of the neon pink embroidery feels dynamic and intentional.
19. Stitch Gently on Stretchy Ribbed Knits
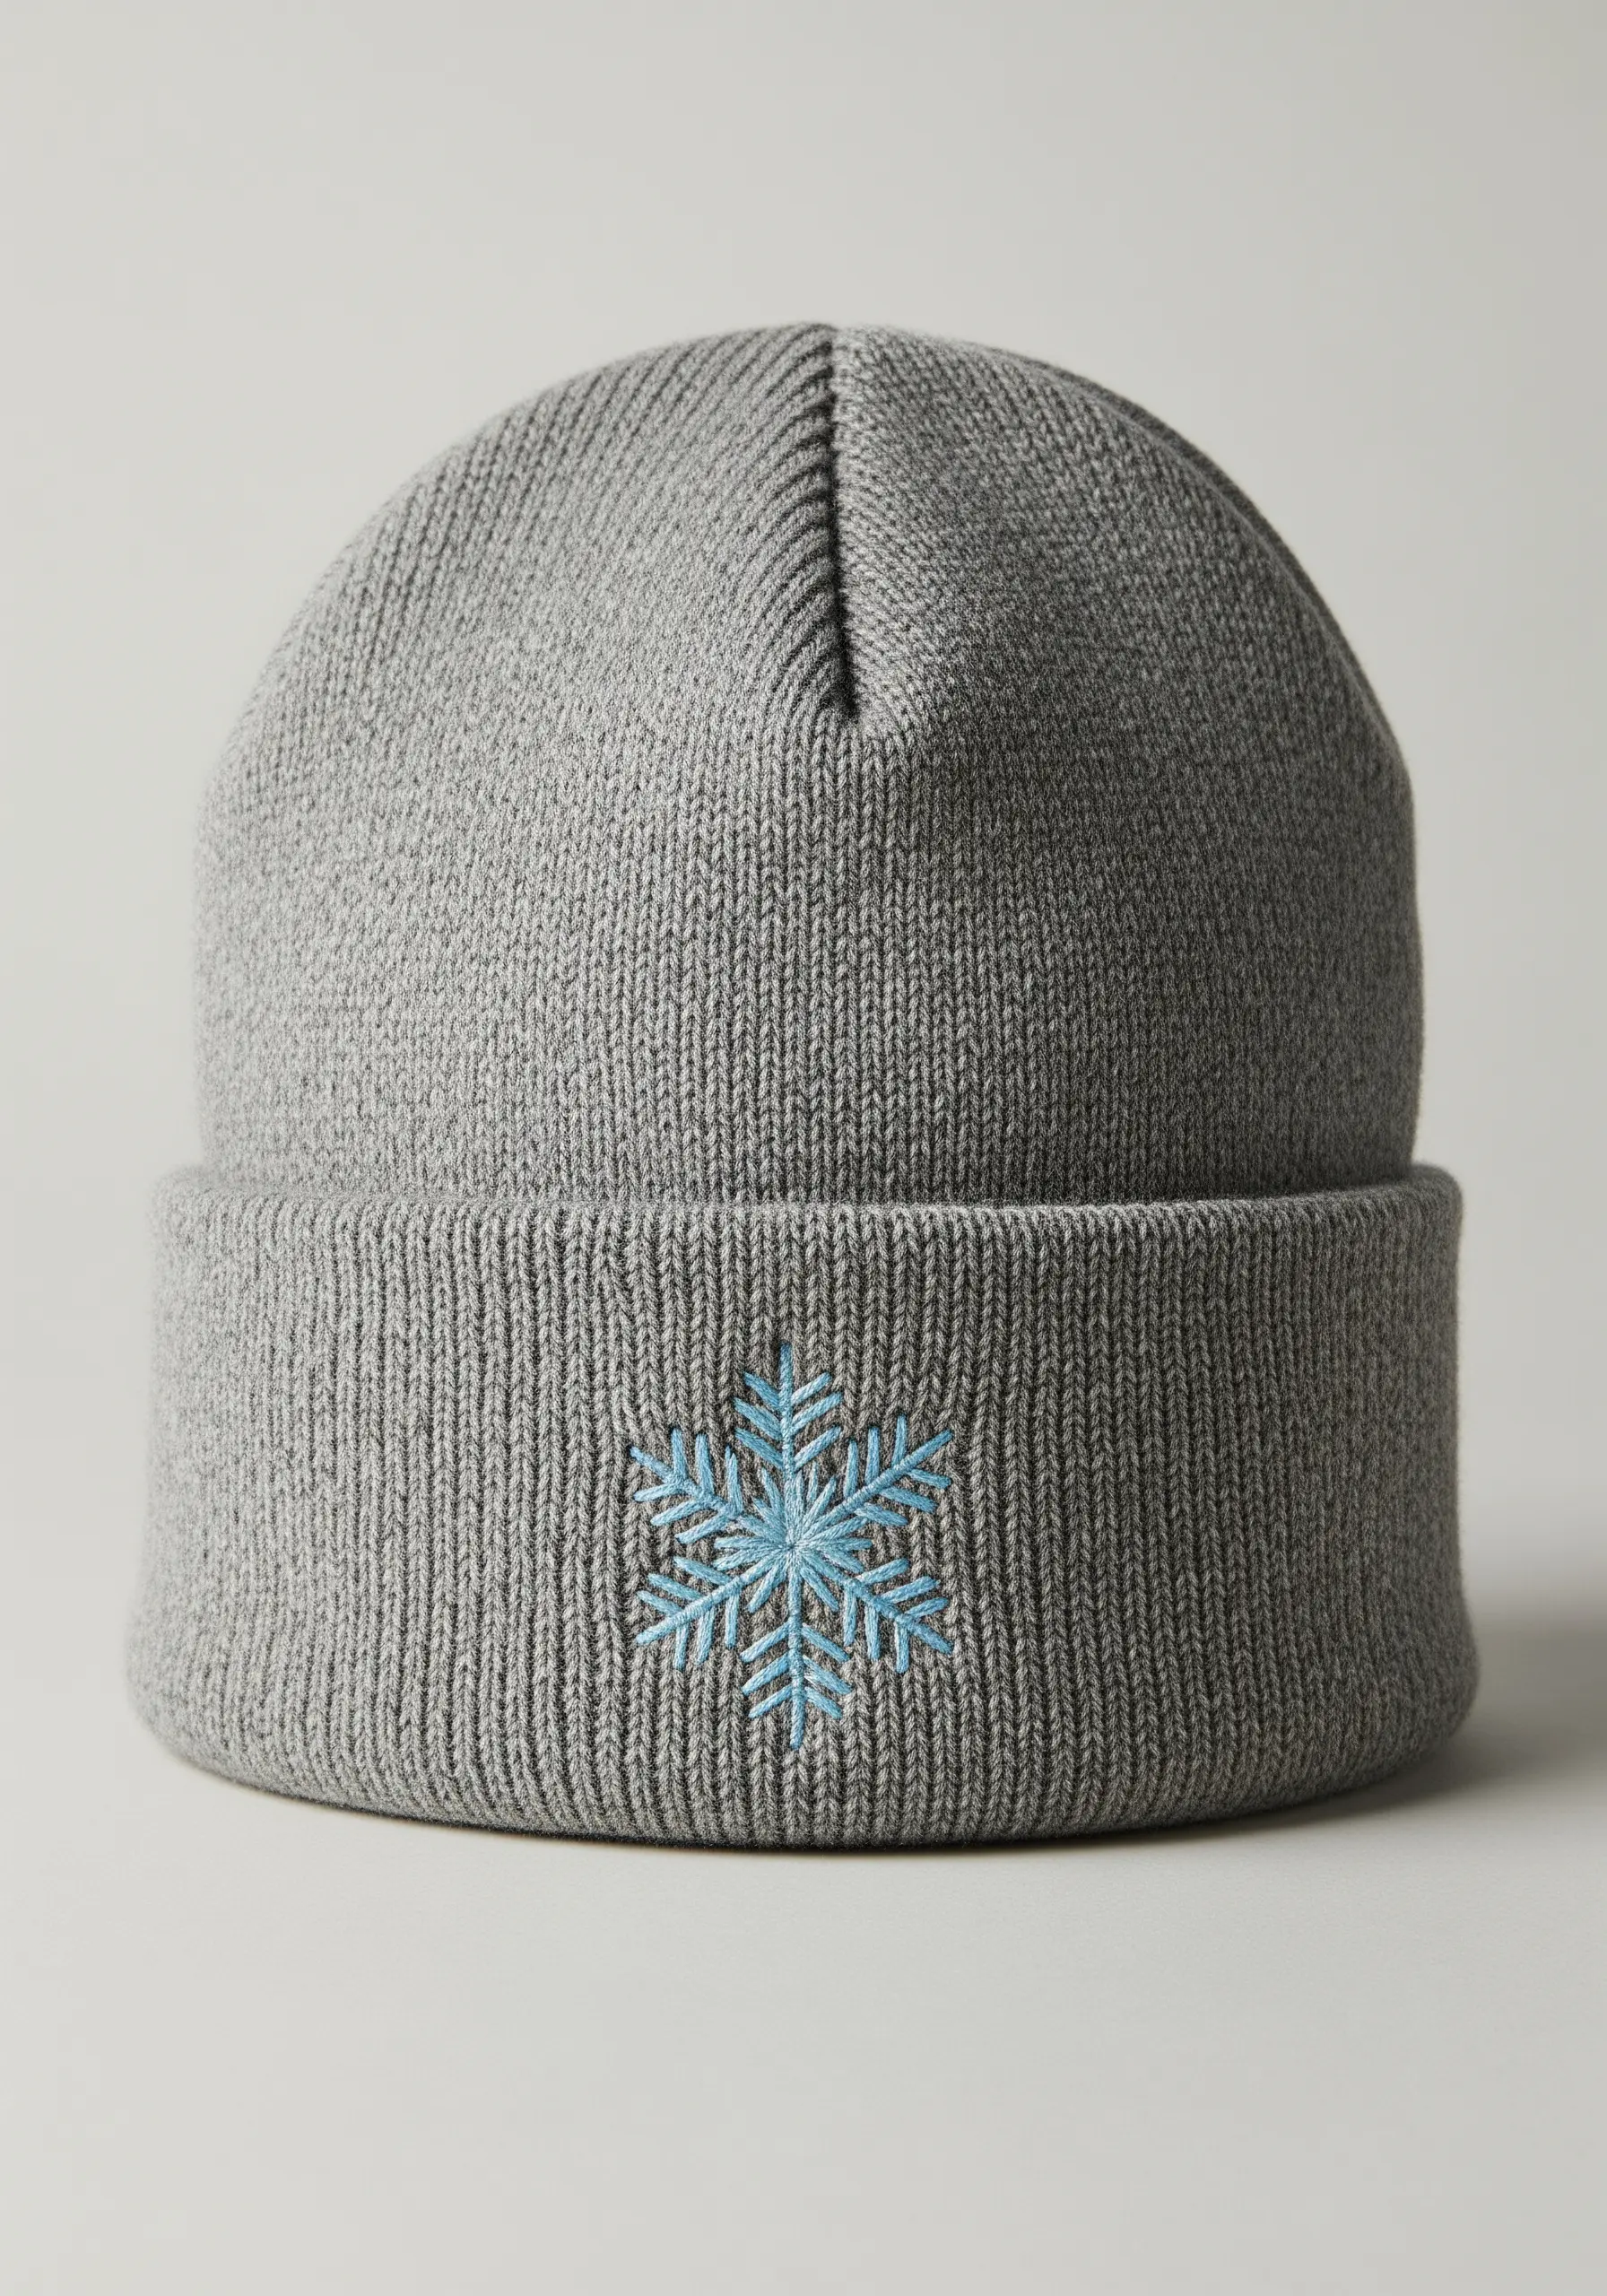
When embellishing a ribbed knit like a beanie, the most important rule is to maintain light, even tension on your thread.
If you pull your stitches too tightly, the fabric will pucker and lose its natural stretch. Use a simple backstitch for the snowflake’s lines, allowing the thread to sit gently on the surface.
A water-soluble stabilizer can provide temporary support without adding permanent bulk.
20. Layer Stitches to Create Depth and Texture
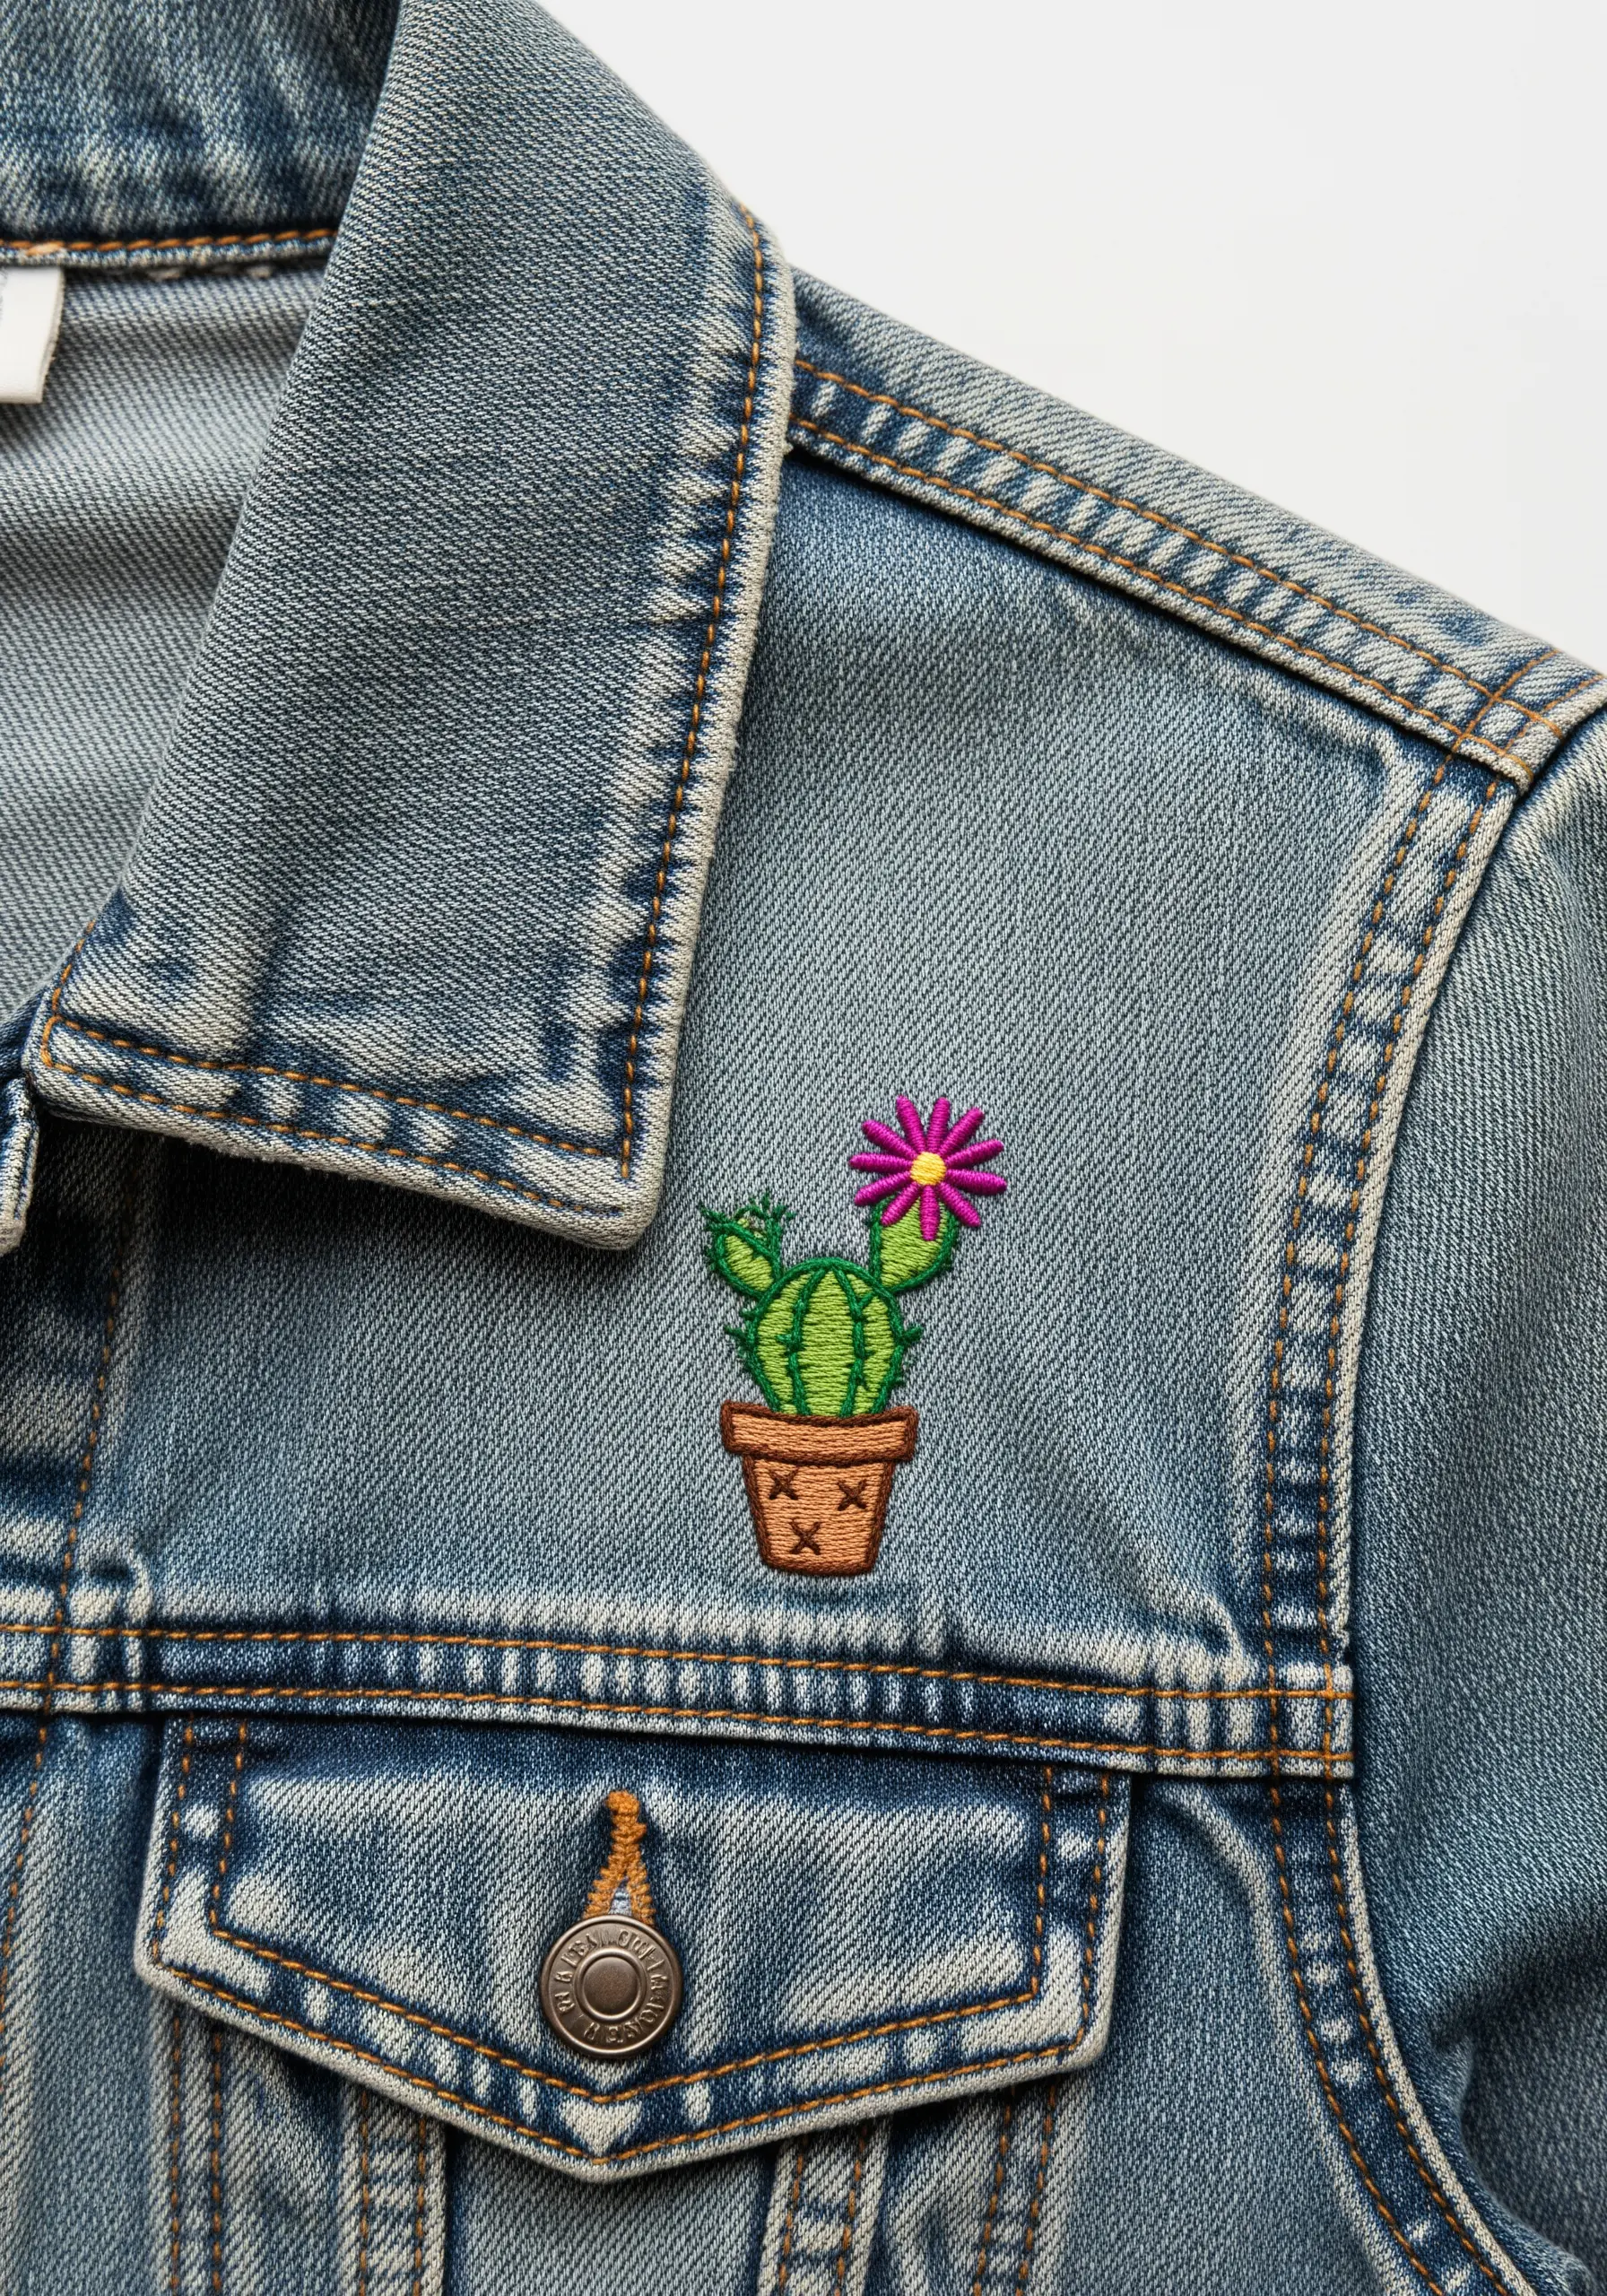
Build a three-dimensional effect by layering different stitch types within a single motif. Start with a vertical satin stitch for the main body of the cactus.
Next, add tiny straight stitches or “V” stitches directly on top to represent the spines. For the flower, contrast a smooth satin stitch fill with a central French knot.
This technique creates clear visual layers, making the simple design feel more complex and tactile.
21. Isolate Your Motif with a Bold Border
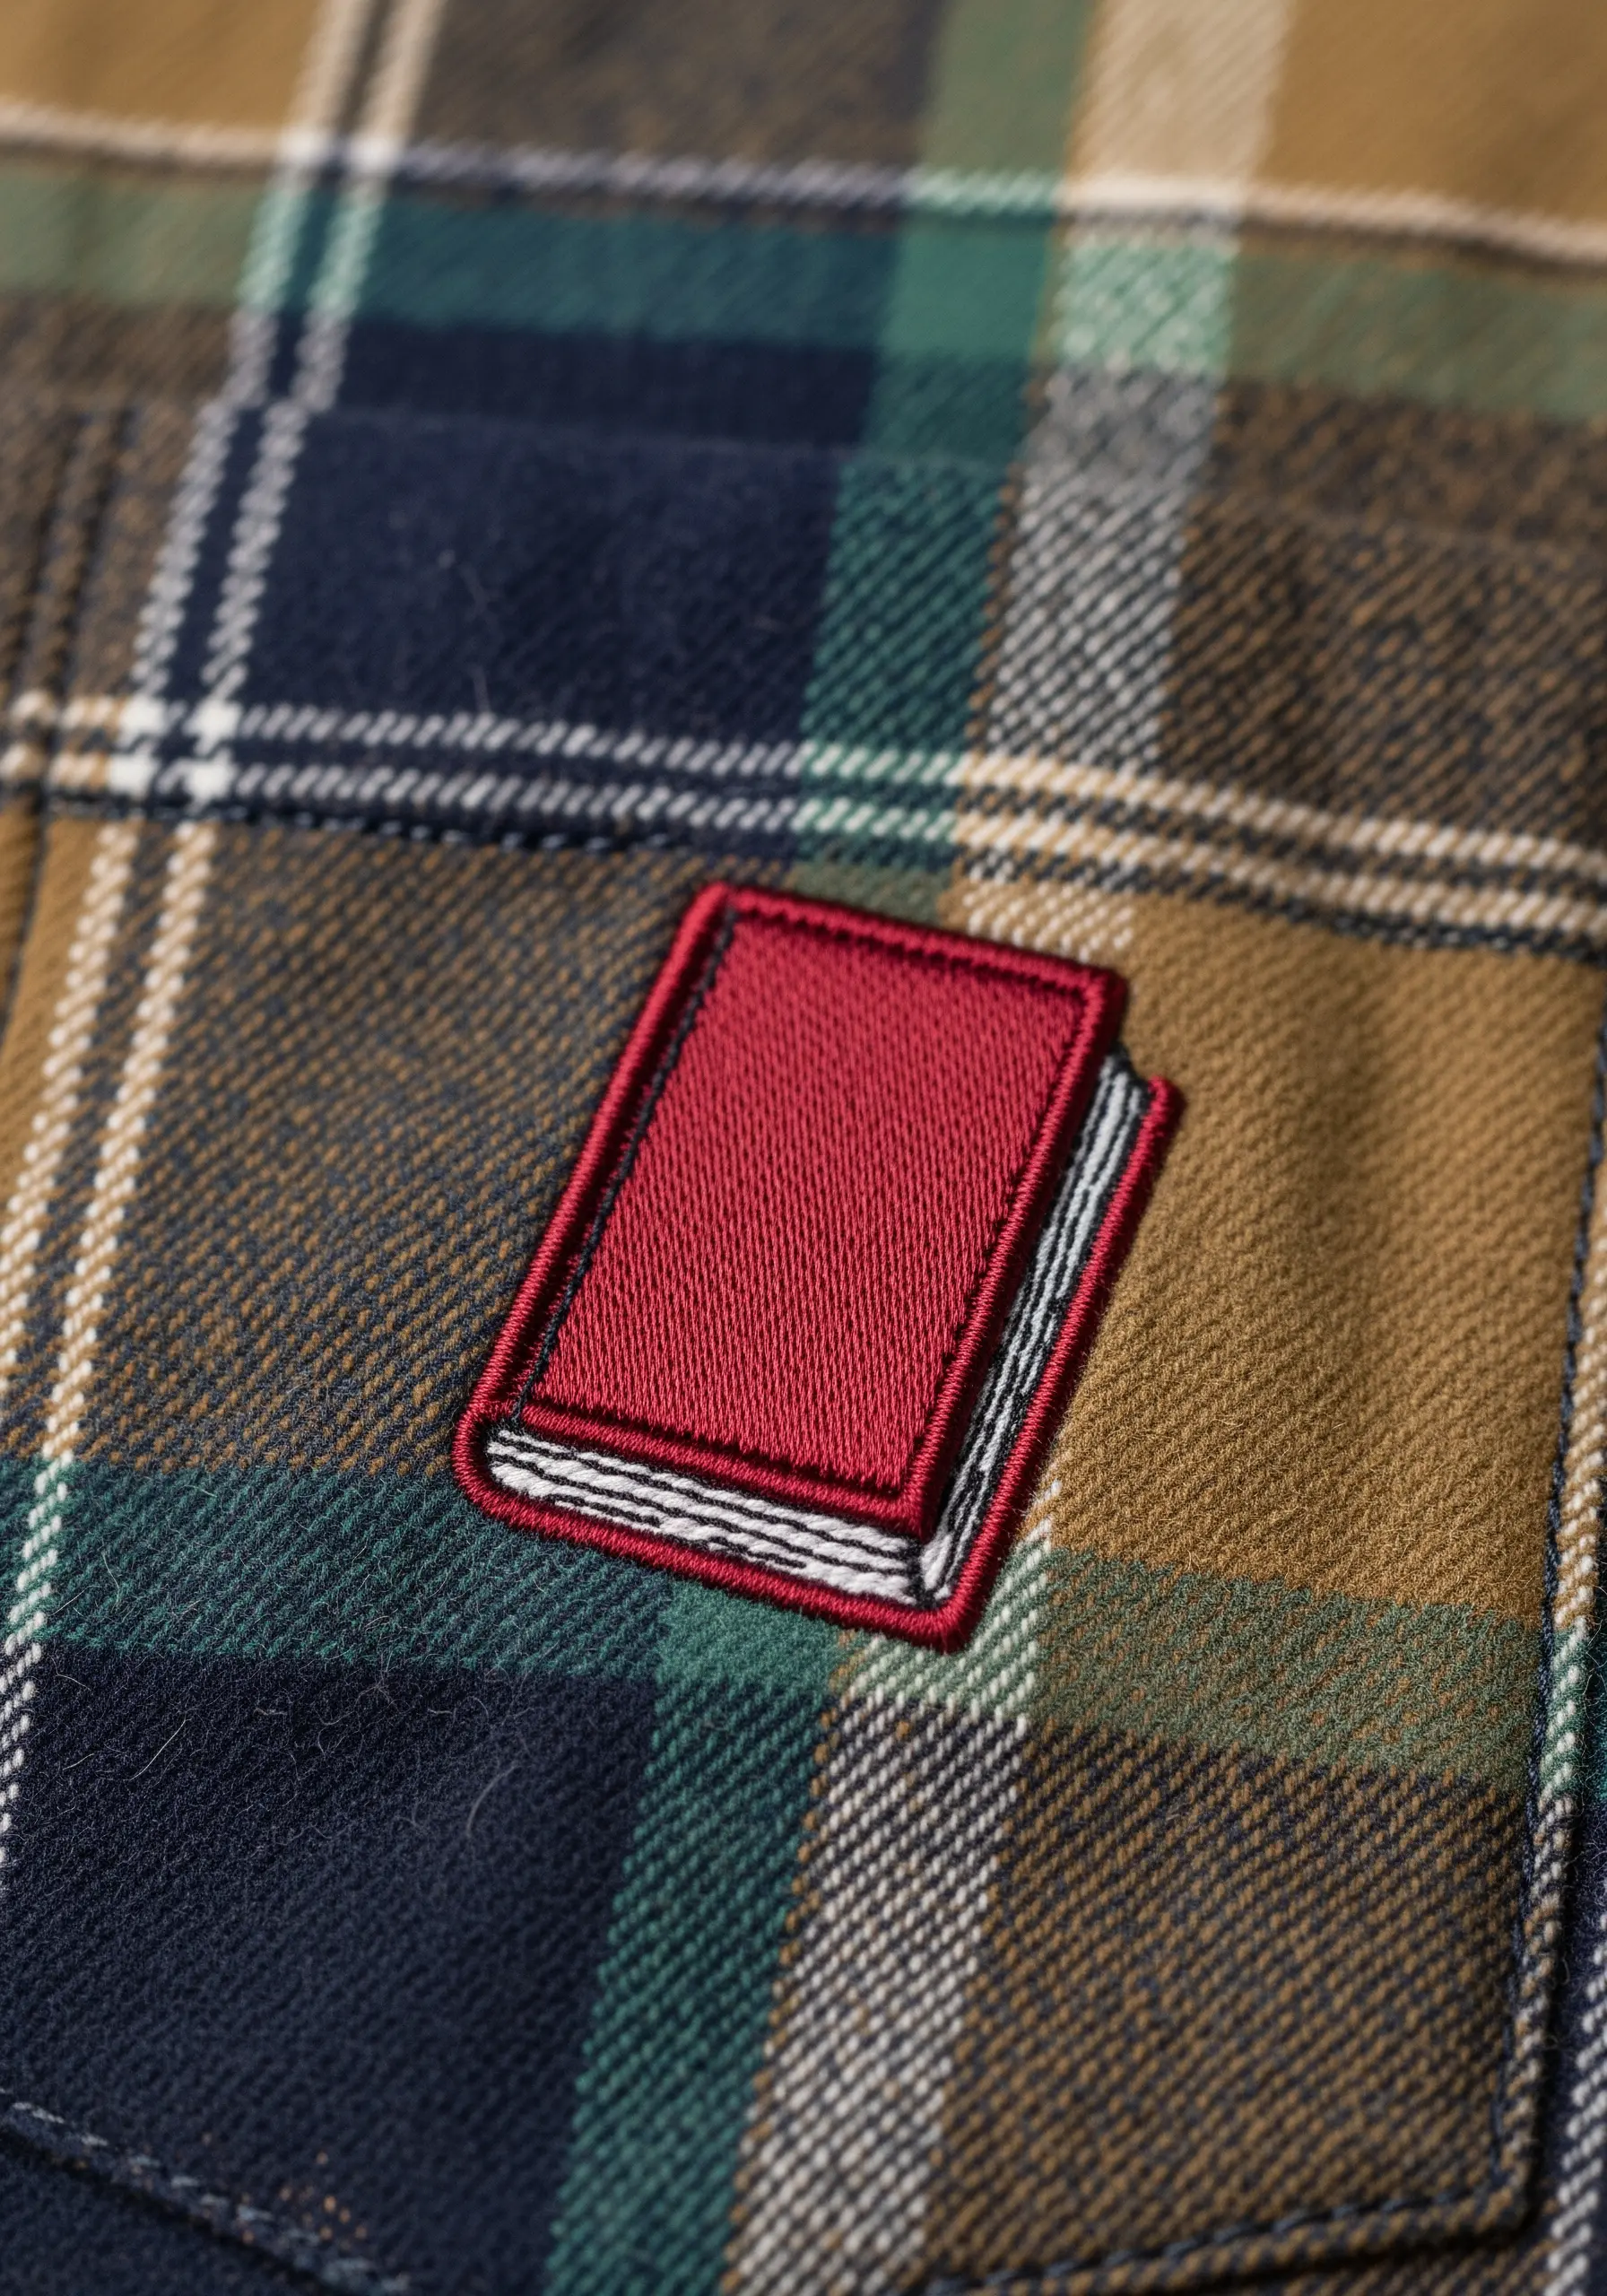
To ensure your design stands out against a busy background like plaid, create a visual frame around it.
First, complete the central filled shape—in this case, the red book cover. Then, outline the entire motif with a thick, raised border using a satin stitch or a whipped backstitch.
This technique contains the design and gives it the clean, defined appearance of a custom appliqué patch.
22. Embellish Canvas with a Zesty Accent

Canvas sneakers provide a fantastic, sturdy surface for embroidery. You’ll need a strong needle, and perhaps a thimble, to stitch through the dense fabric comfortably.
Create realistic citrus segments by using a directional satin stitch, angling your stitches toward the center of the fruit slice.
Finish with a clean whipped backstitch outline in a contrasting color to define the shape and give your design a crisp, polished edge, turning blank sneakers into botanical fashion icons.


