
Have you ever felt that your beautiful stitches deserve something more than a plain piece of linen? Your embroidery is a conversation, but often, the fabric is a silent partner. It’s time to change that.
By introducing paper—not just as a background, but as an active texture, a structural element, or a narrative layer—you unlock an entirely new dimension in your work. Paper offers crispness where fabric is soft, creates depth where a single surface is flat, and holds memories in ways thread alone cannot.
These techniques aren’t about replacing your love for stitching. They’re about enhancing it. They invite you to think like a mixed-media artist, to build layers, and to create pieces that feel not just crafted, but truly designed. Let’s explore how the humble sheet of paper can make your every stitch stand out.
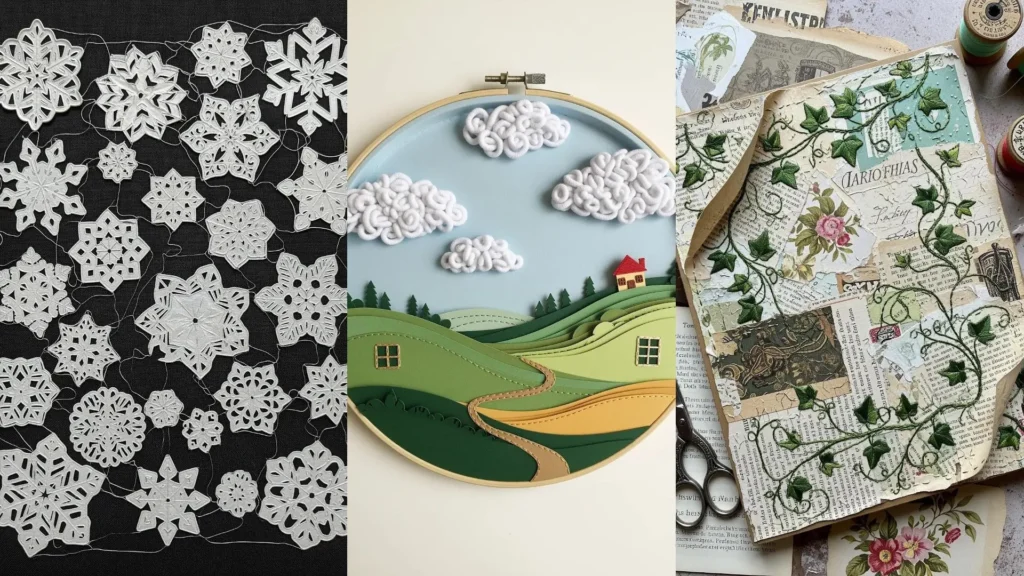
1. Weave a Paper Ribbon Canvas
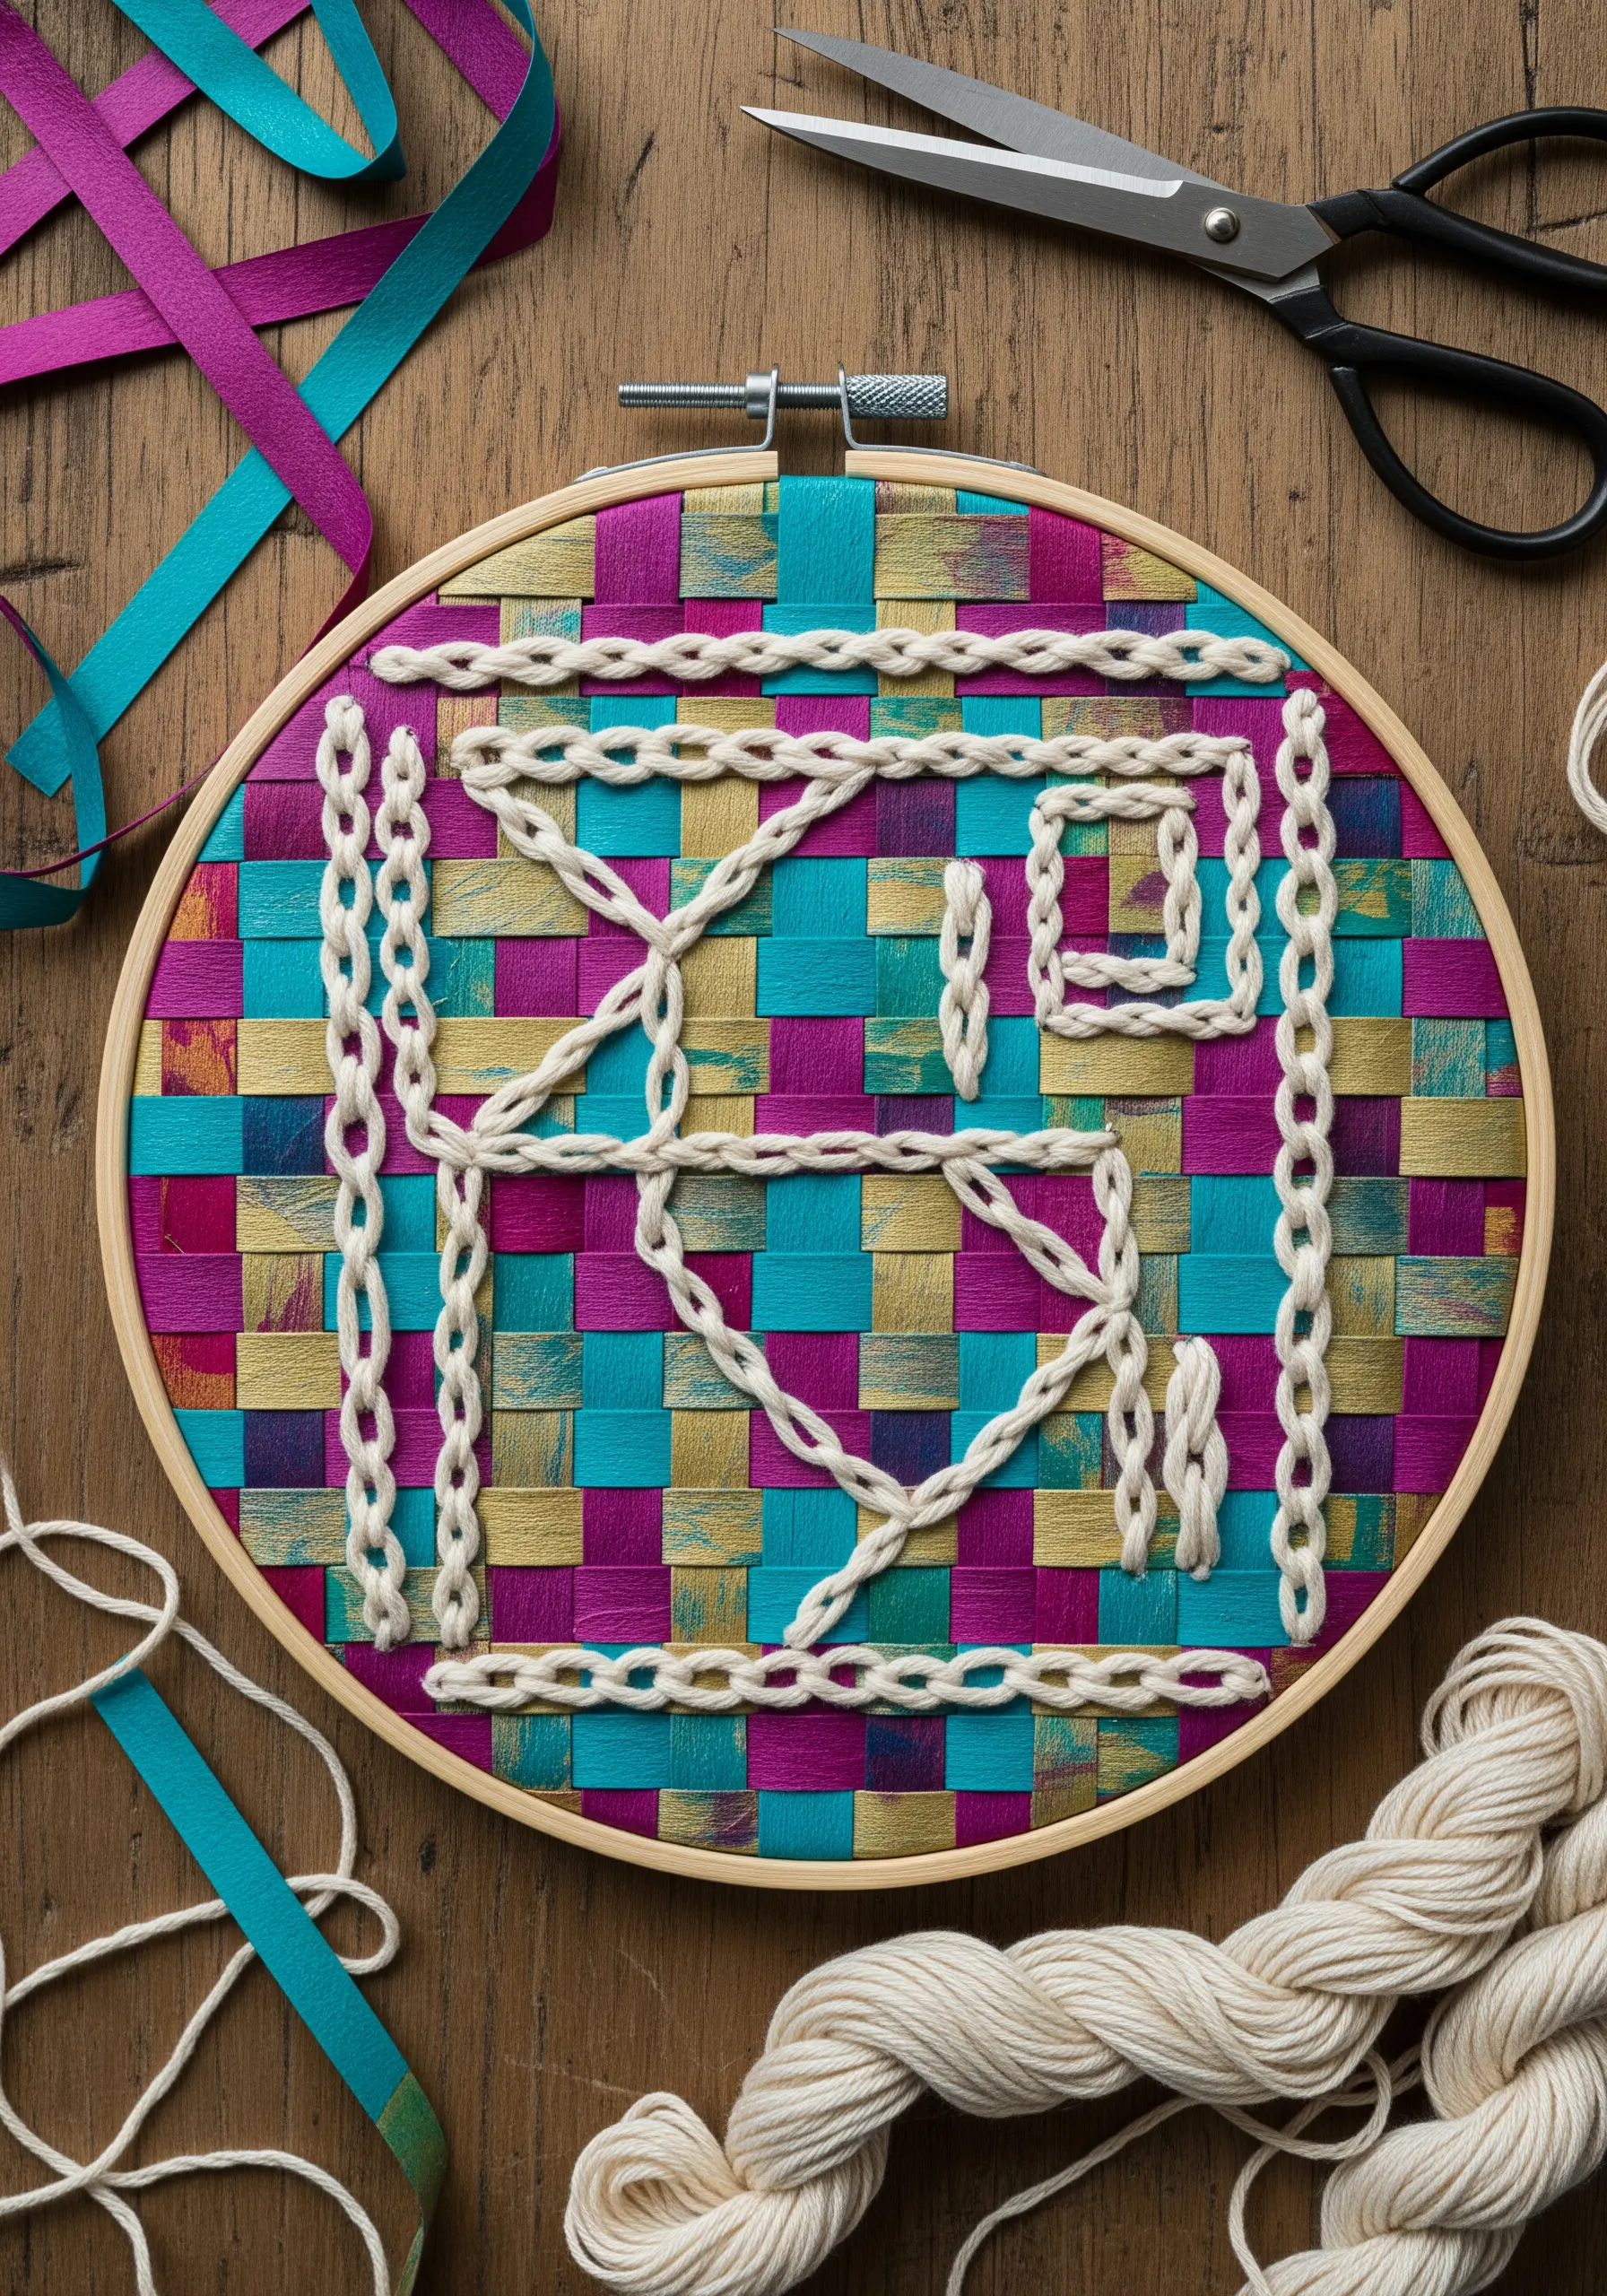
Transform your hoop’s background from a passive surface into an active design element.
Cut strips of colored cardstock and weave them directly within the hoop, securing the ends as you tighten the frame.
This creates a vibrant, graphic foundation that adds immediate texture and visual interest.
Overlay your embroidery using a bold stitch, like a heavy chain stitch, which stands out against the woven grid and creates a beautiful contrast between the soft thread and the crisp paper edges.
2. Sculptural Quilling with Thread Accents
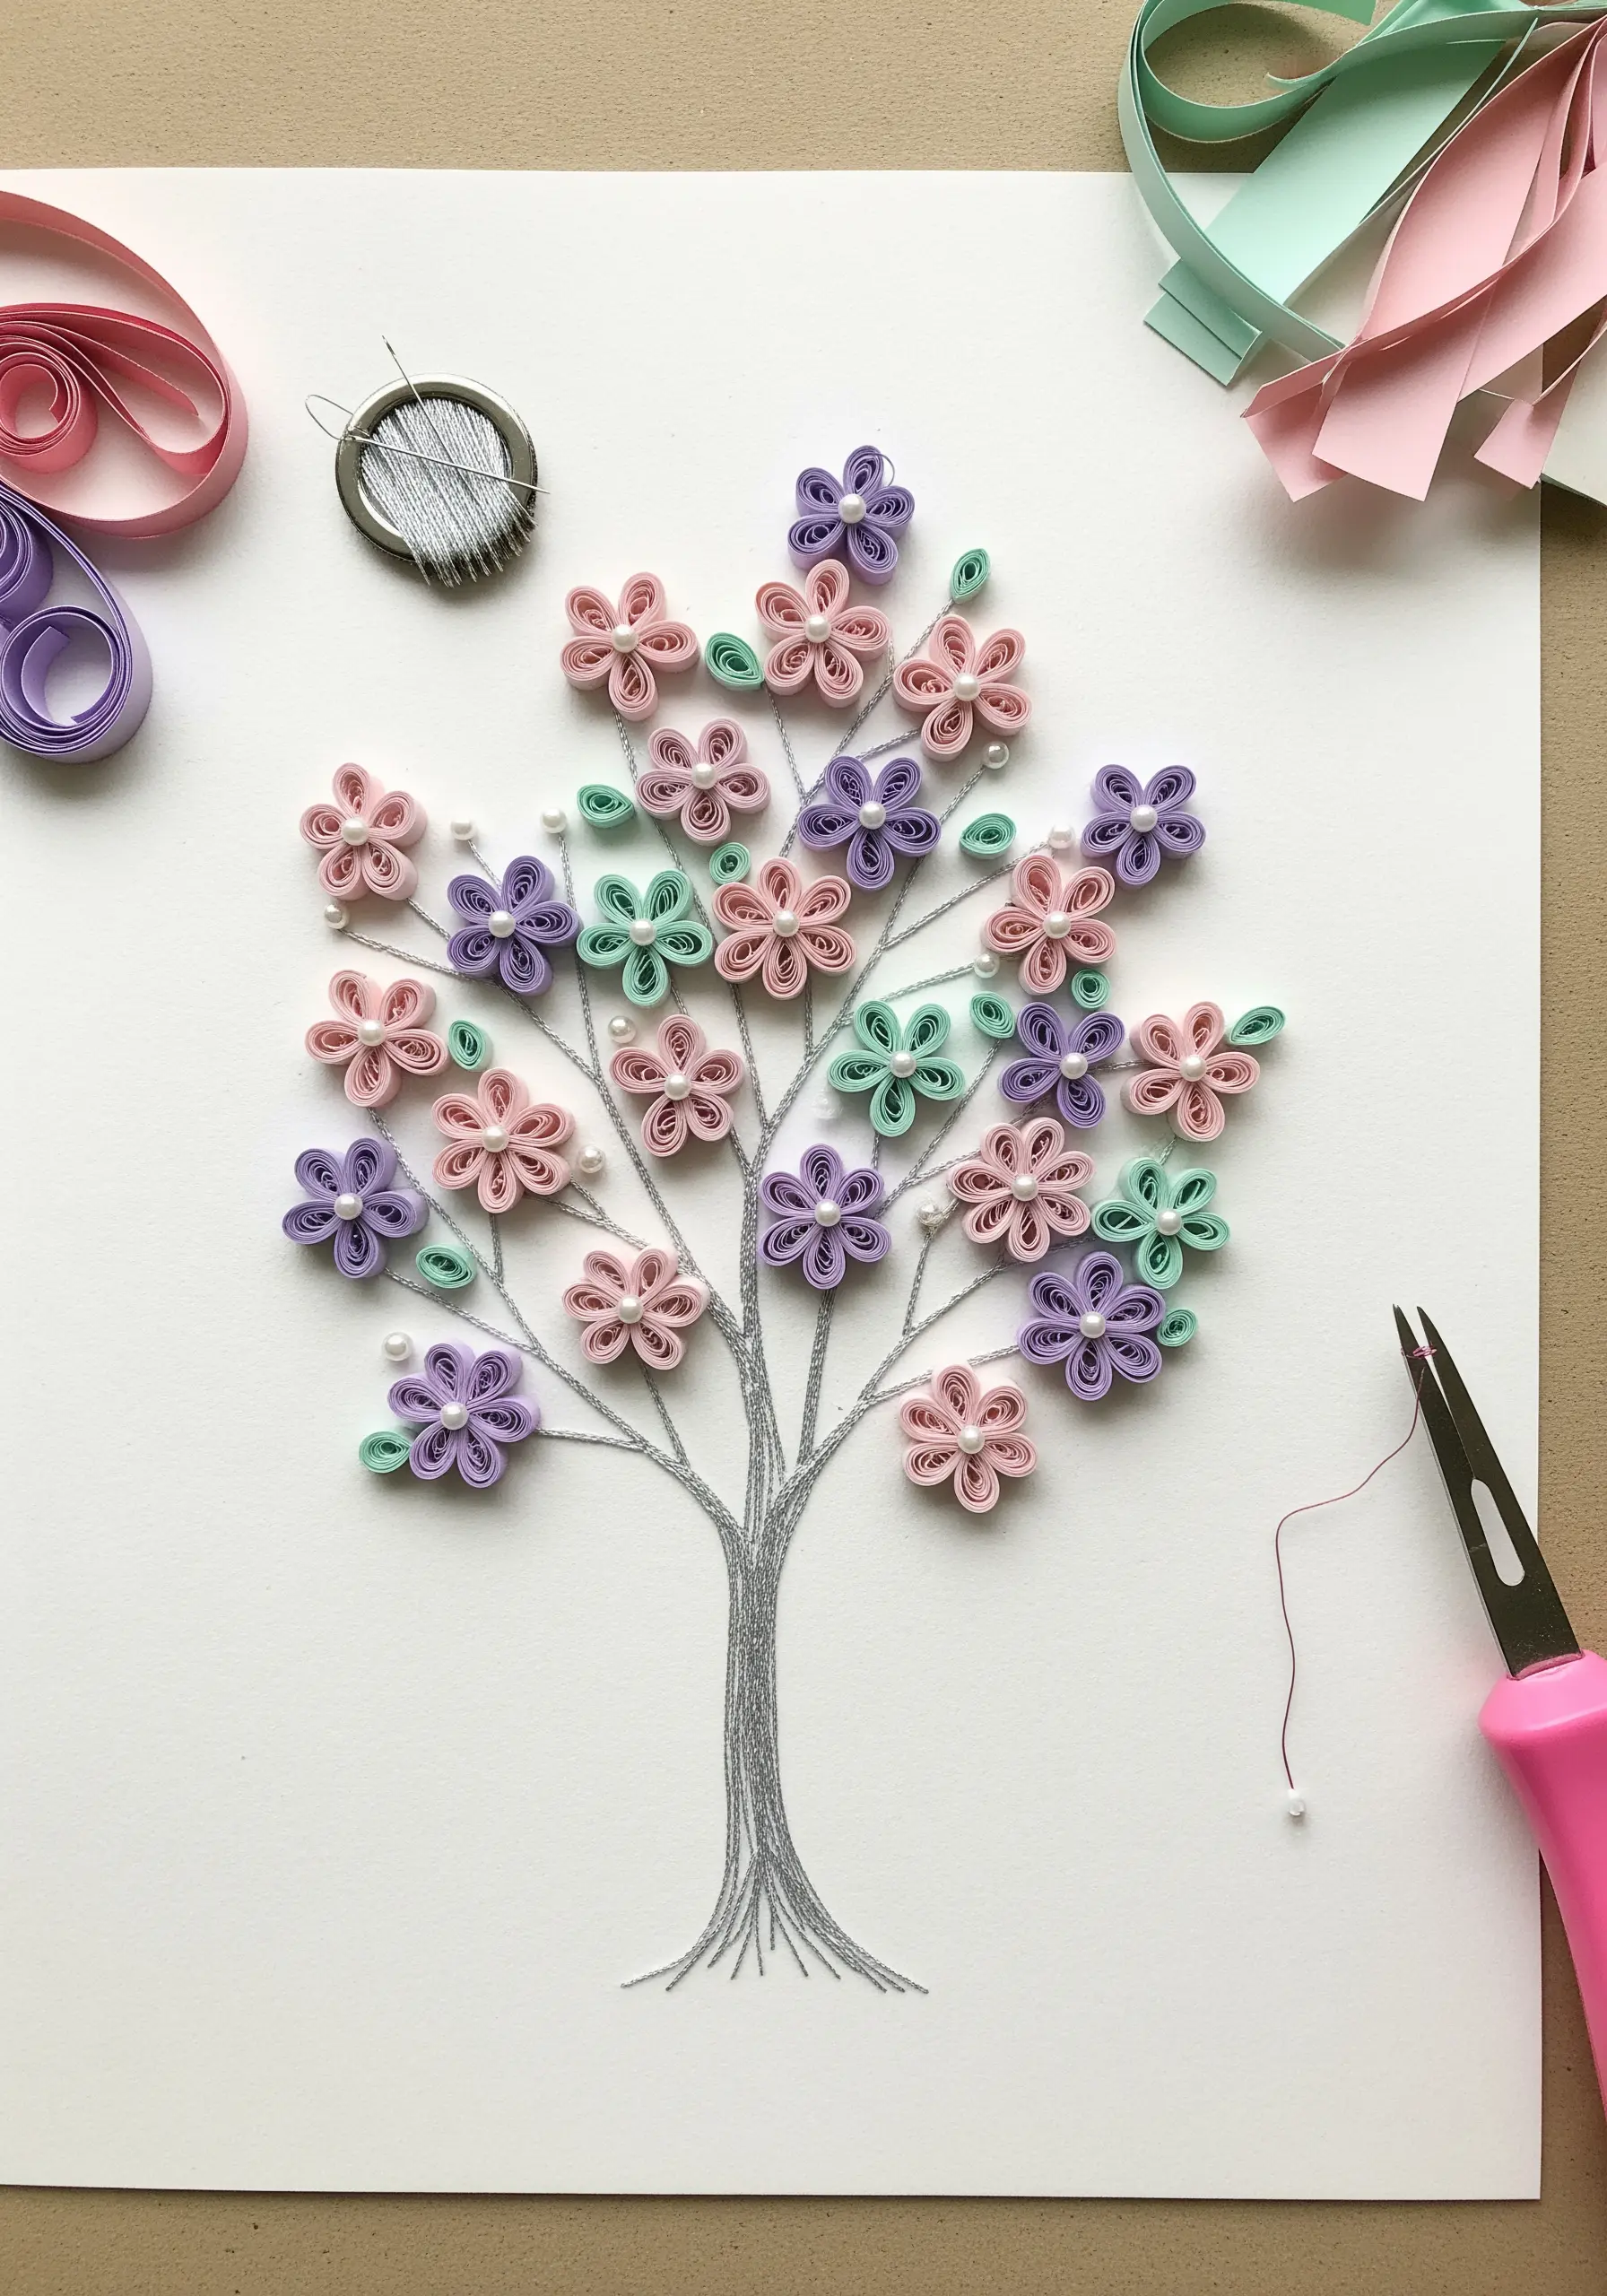
Move beyond flat stitching and into three-dimensional form by incorporating paper quilling.
Roll thin strips of pastel paper into delicate floral shapes and arrange them on a heavy cardstock base.
Use thread not for filling, but for structure and fine detail—a silver metallic thread creates elegant stems, while tiny seed pearls stitched into the centers add a touch of refinement.
This method blends paper sculpture with embroidery, resulting in a piece with stunning depth and delicacy.
3. Create Depth with Layered Paper Dioramas
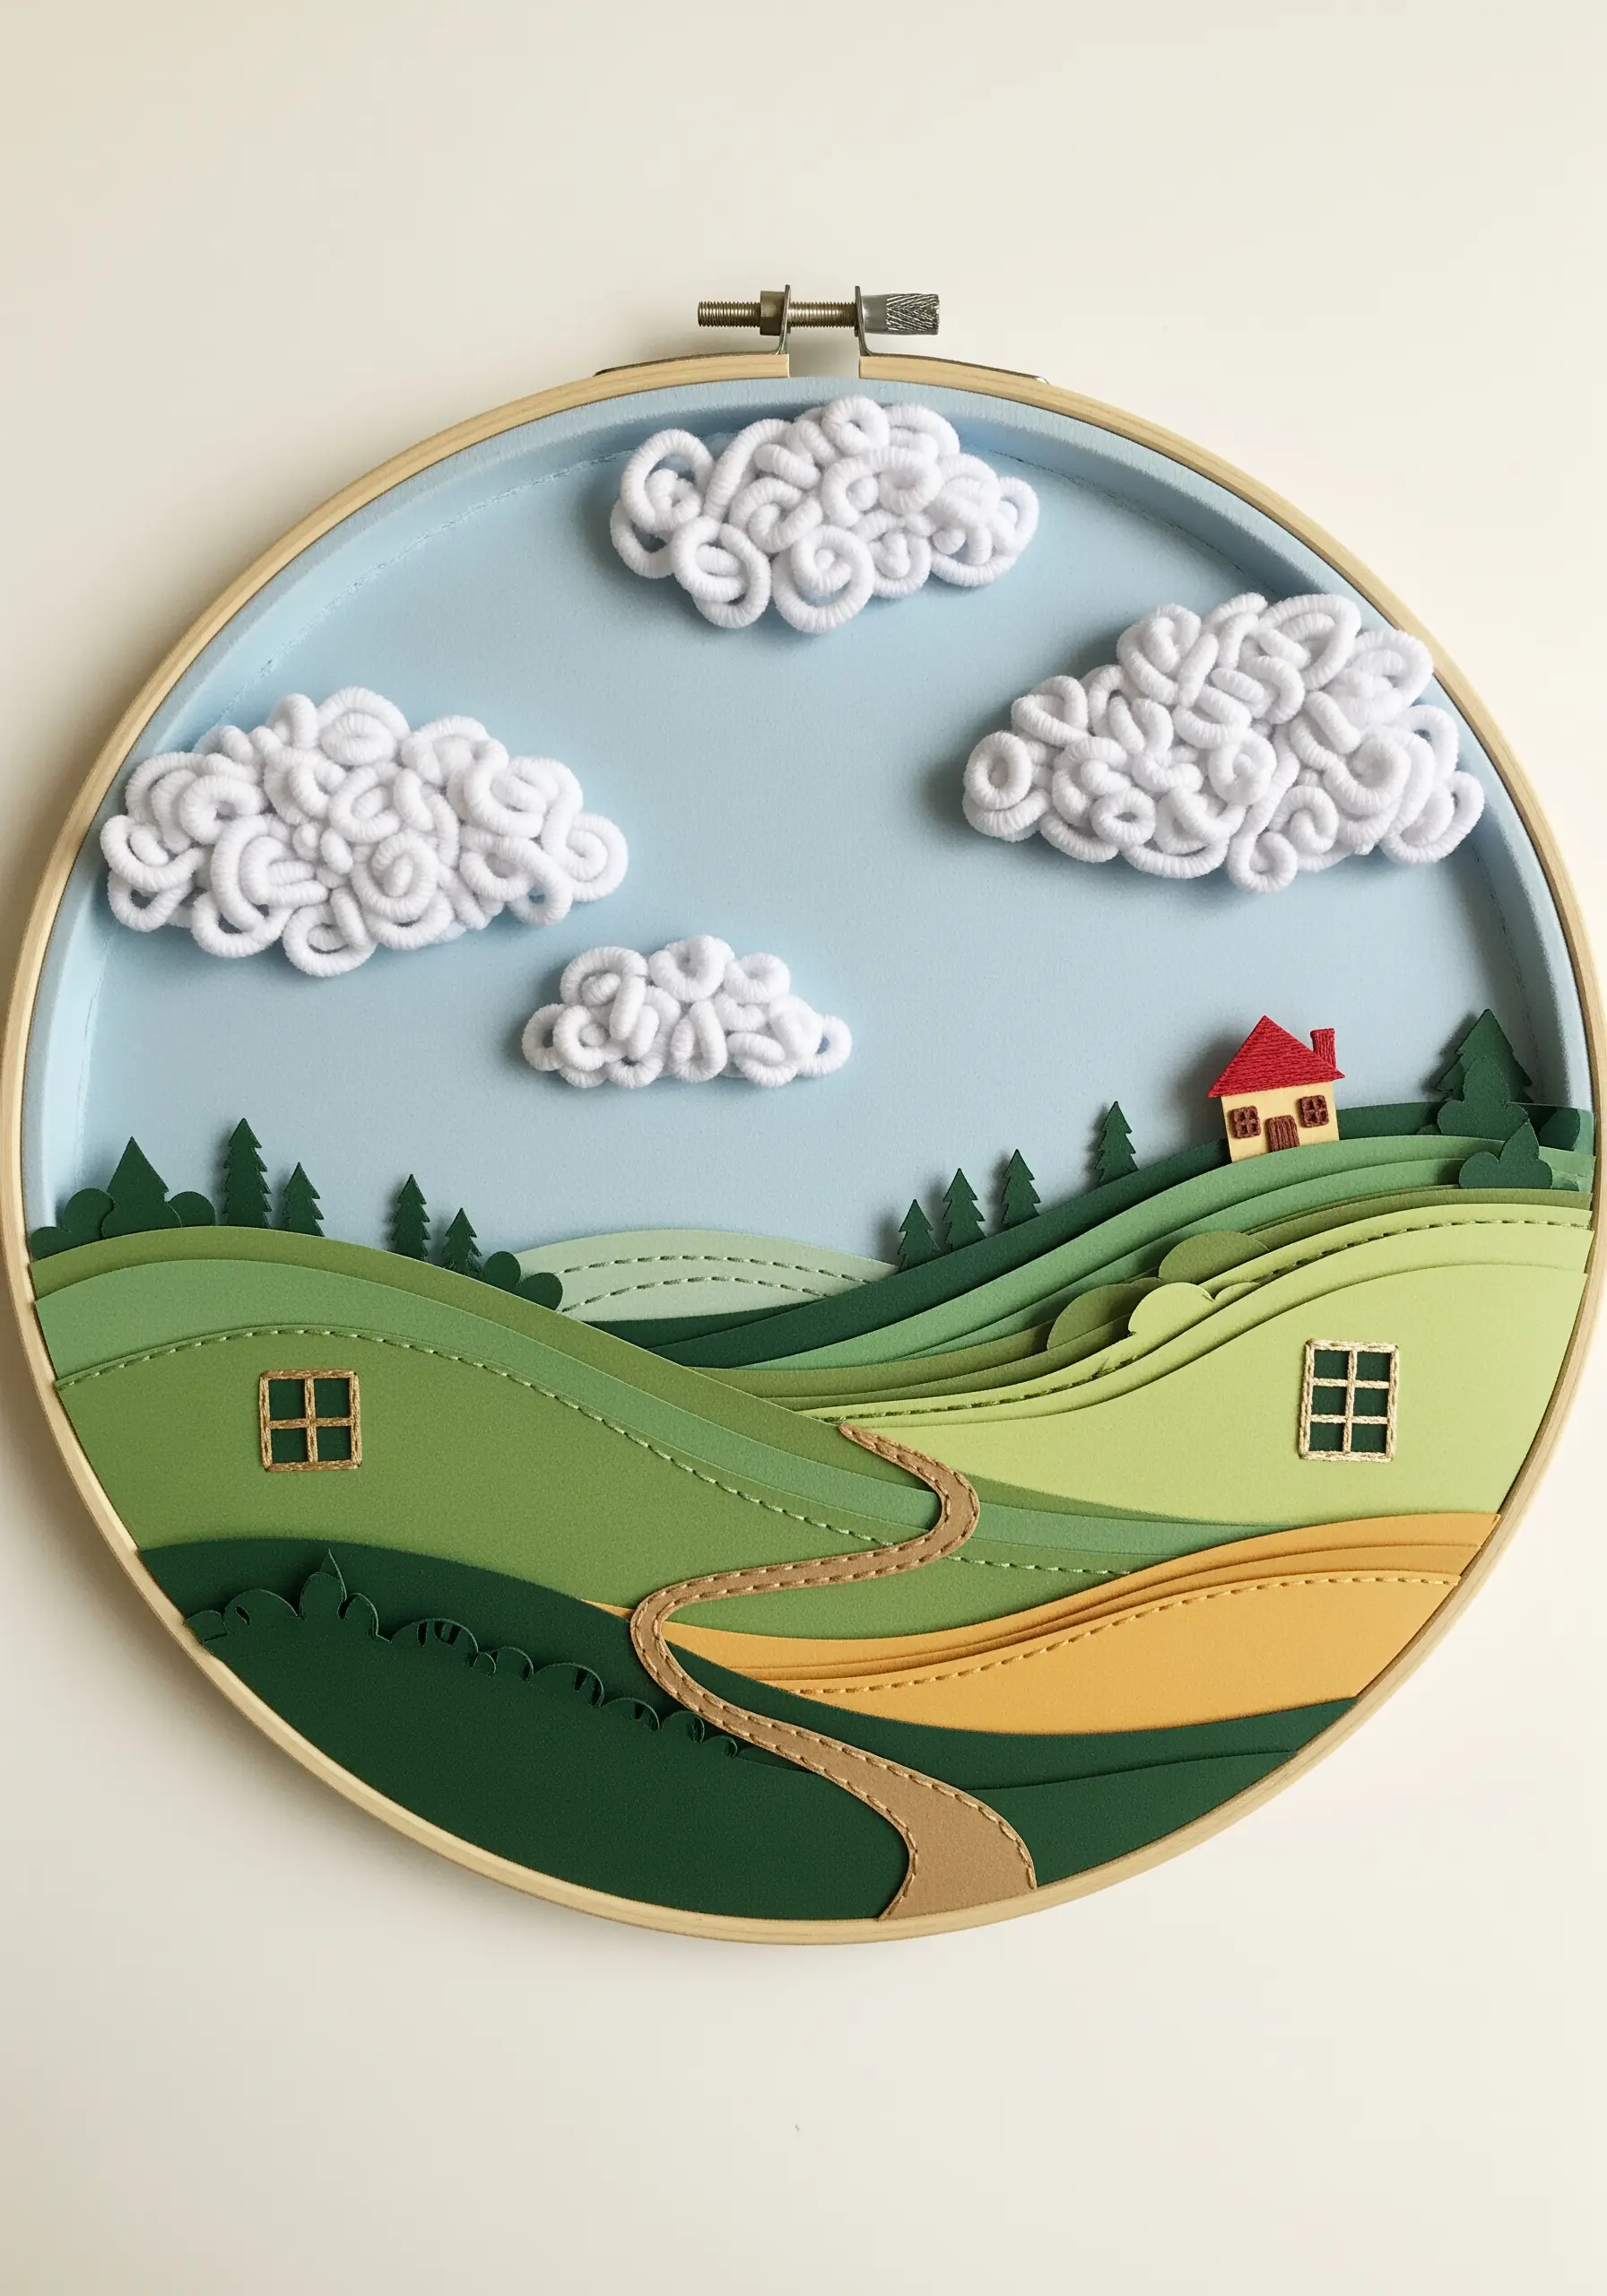
Build a world in your hoop by layering paper to create a sense of perspective and distance.
Cut rolling hills and fields from different shades of green cardstock, arranging them to build a dimensional landscape.
Your embroidery then adds the soft, tactile details that bring the scene to life.
Use a thick, couched yarn to create fluffy, textured clouds, and a simple running stitch to define a winding path—the contrast between crisp paper edges and soft fibers is what makes this technique so compelling.
4. Stitch on an Embossed Paper Surface
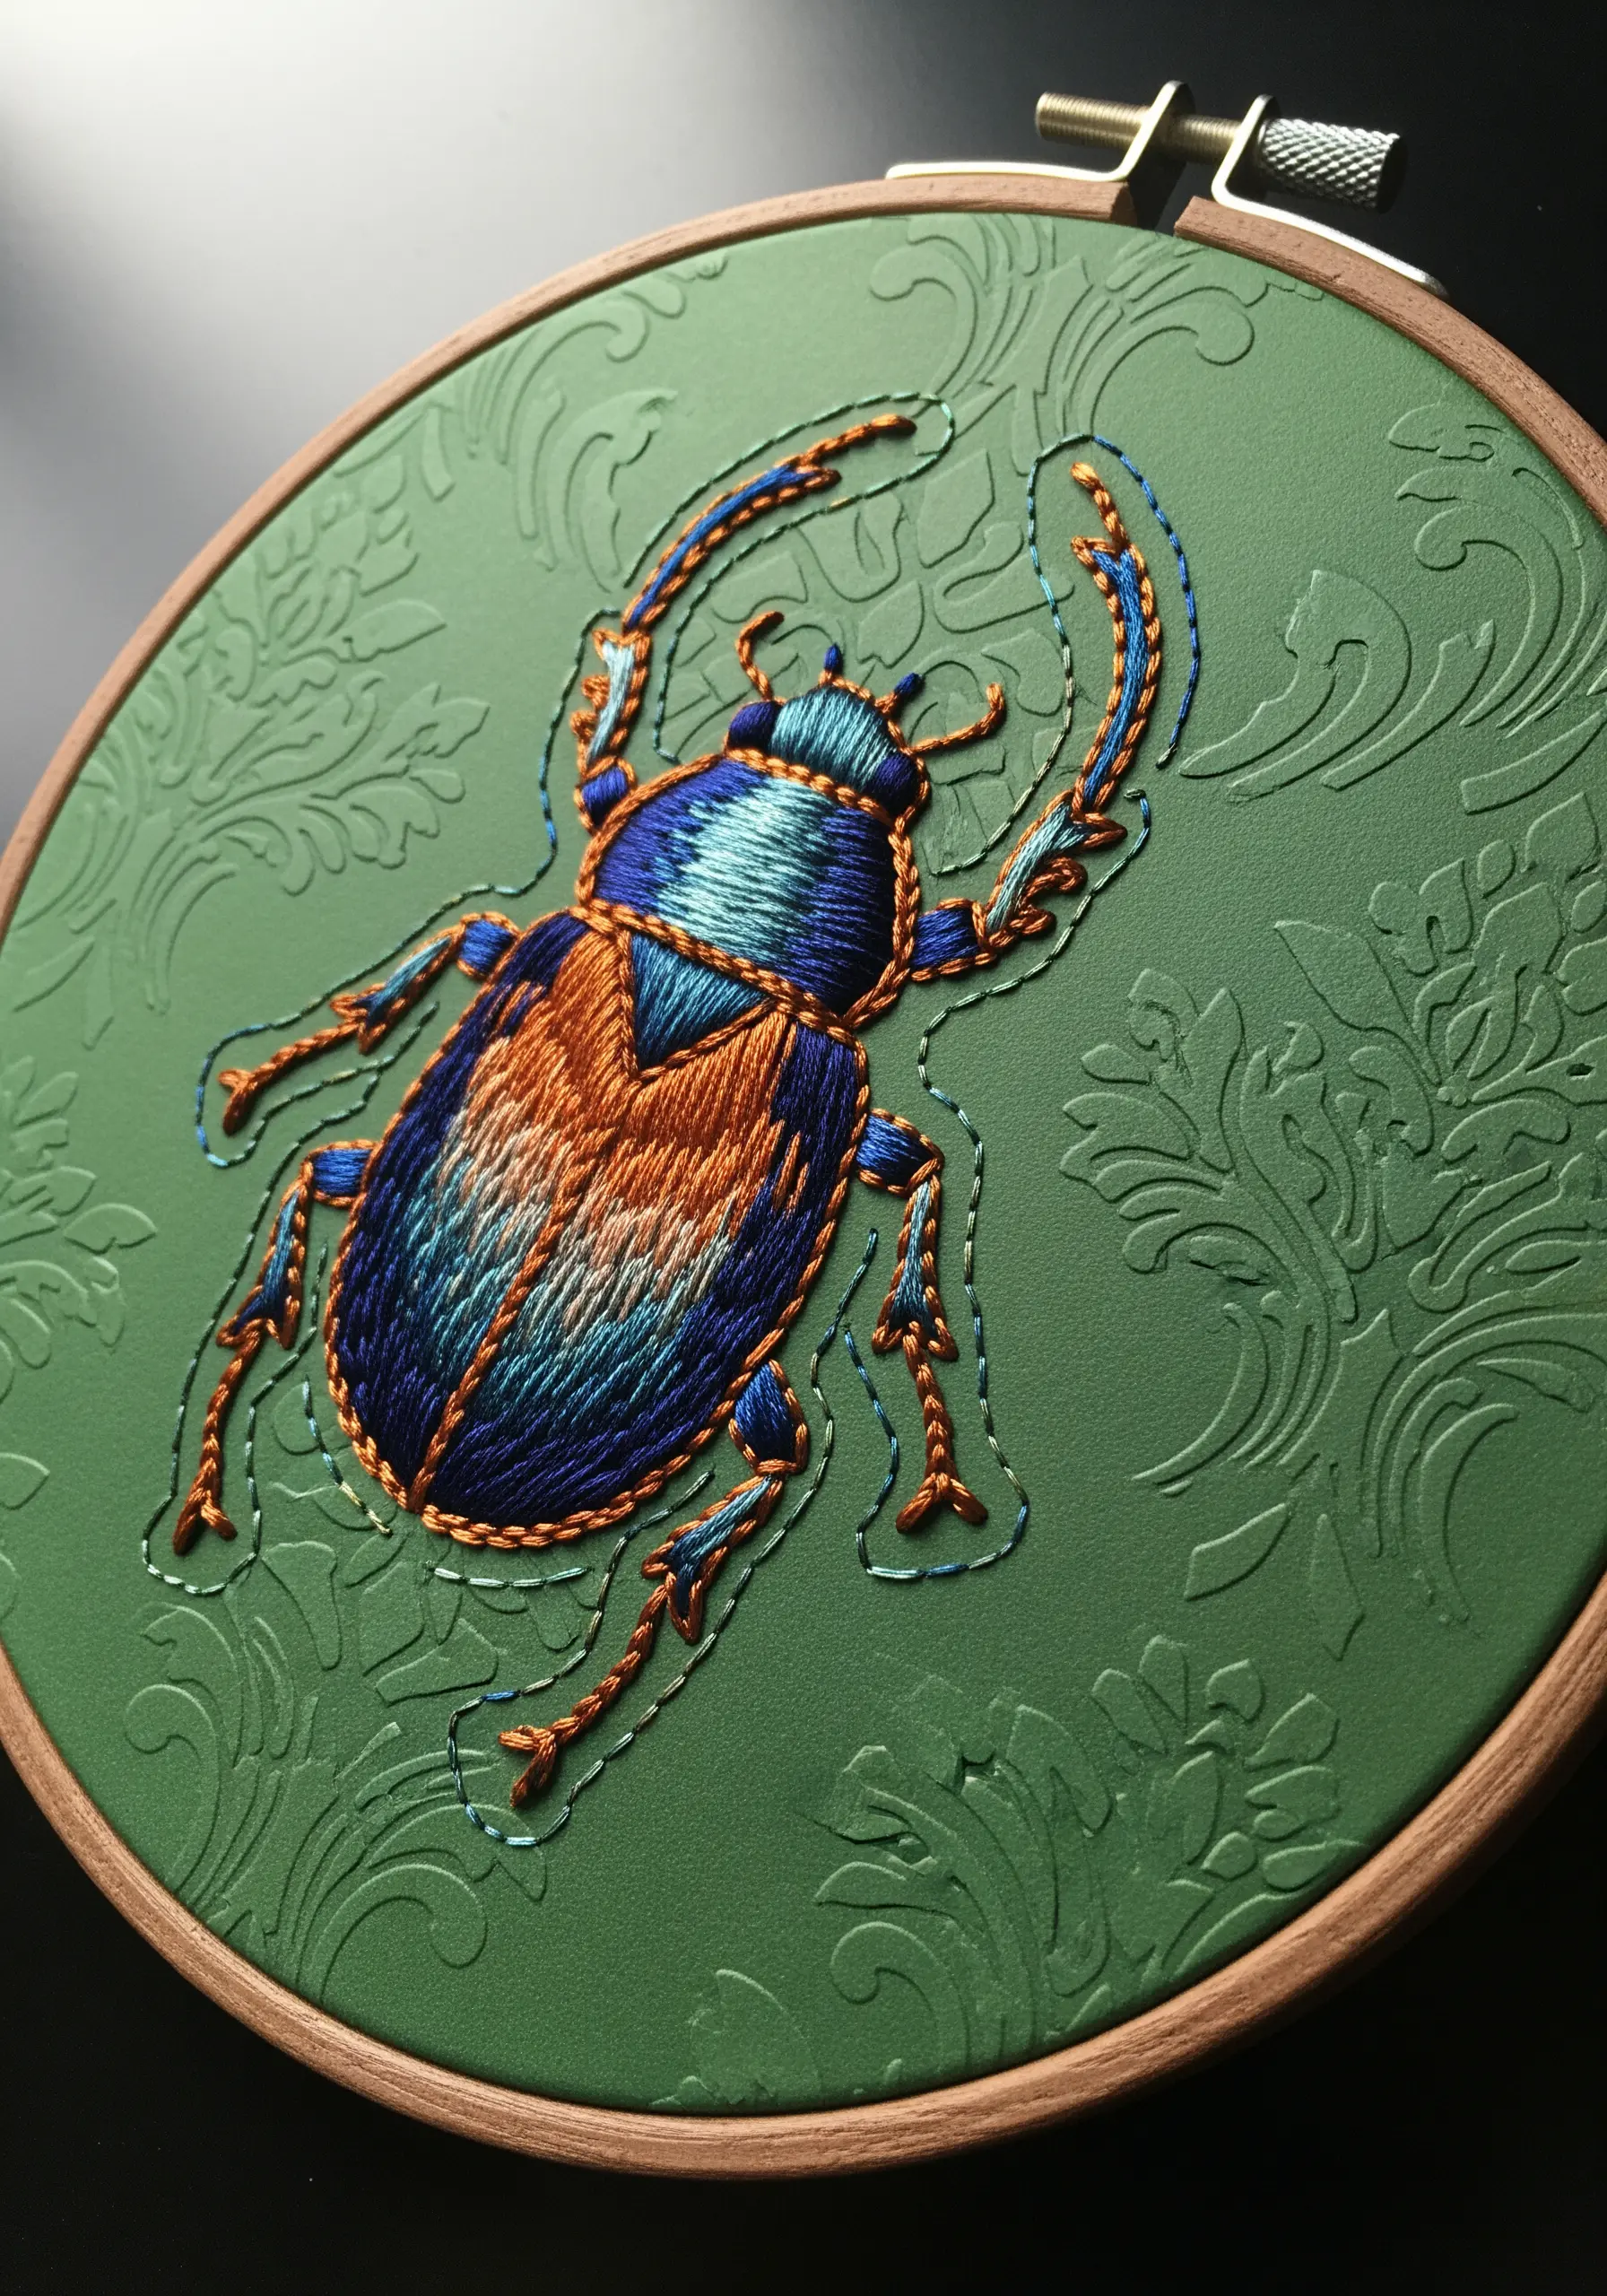
Add a layer of subtle sophistication by working on an embossed paper background.
Use an embossing folder to press a pattern into a sheet of cardstock before you begin stitching.
The raised, tone-on-tone design interacts with light and provides a textured backdrop that feels instantly more luxurious than a flat surface.
When you stitch your motif over it, the thread stands out beautifully, creating a rich interplay between the smooth floss and the detailed paper relief.
5. Add Character with Crinkled Paper
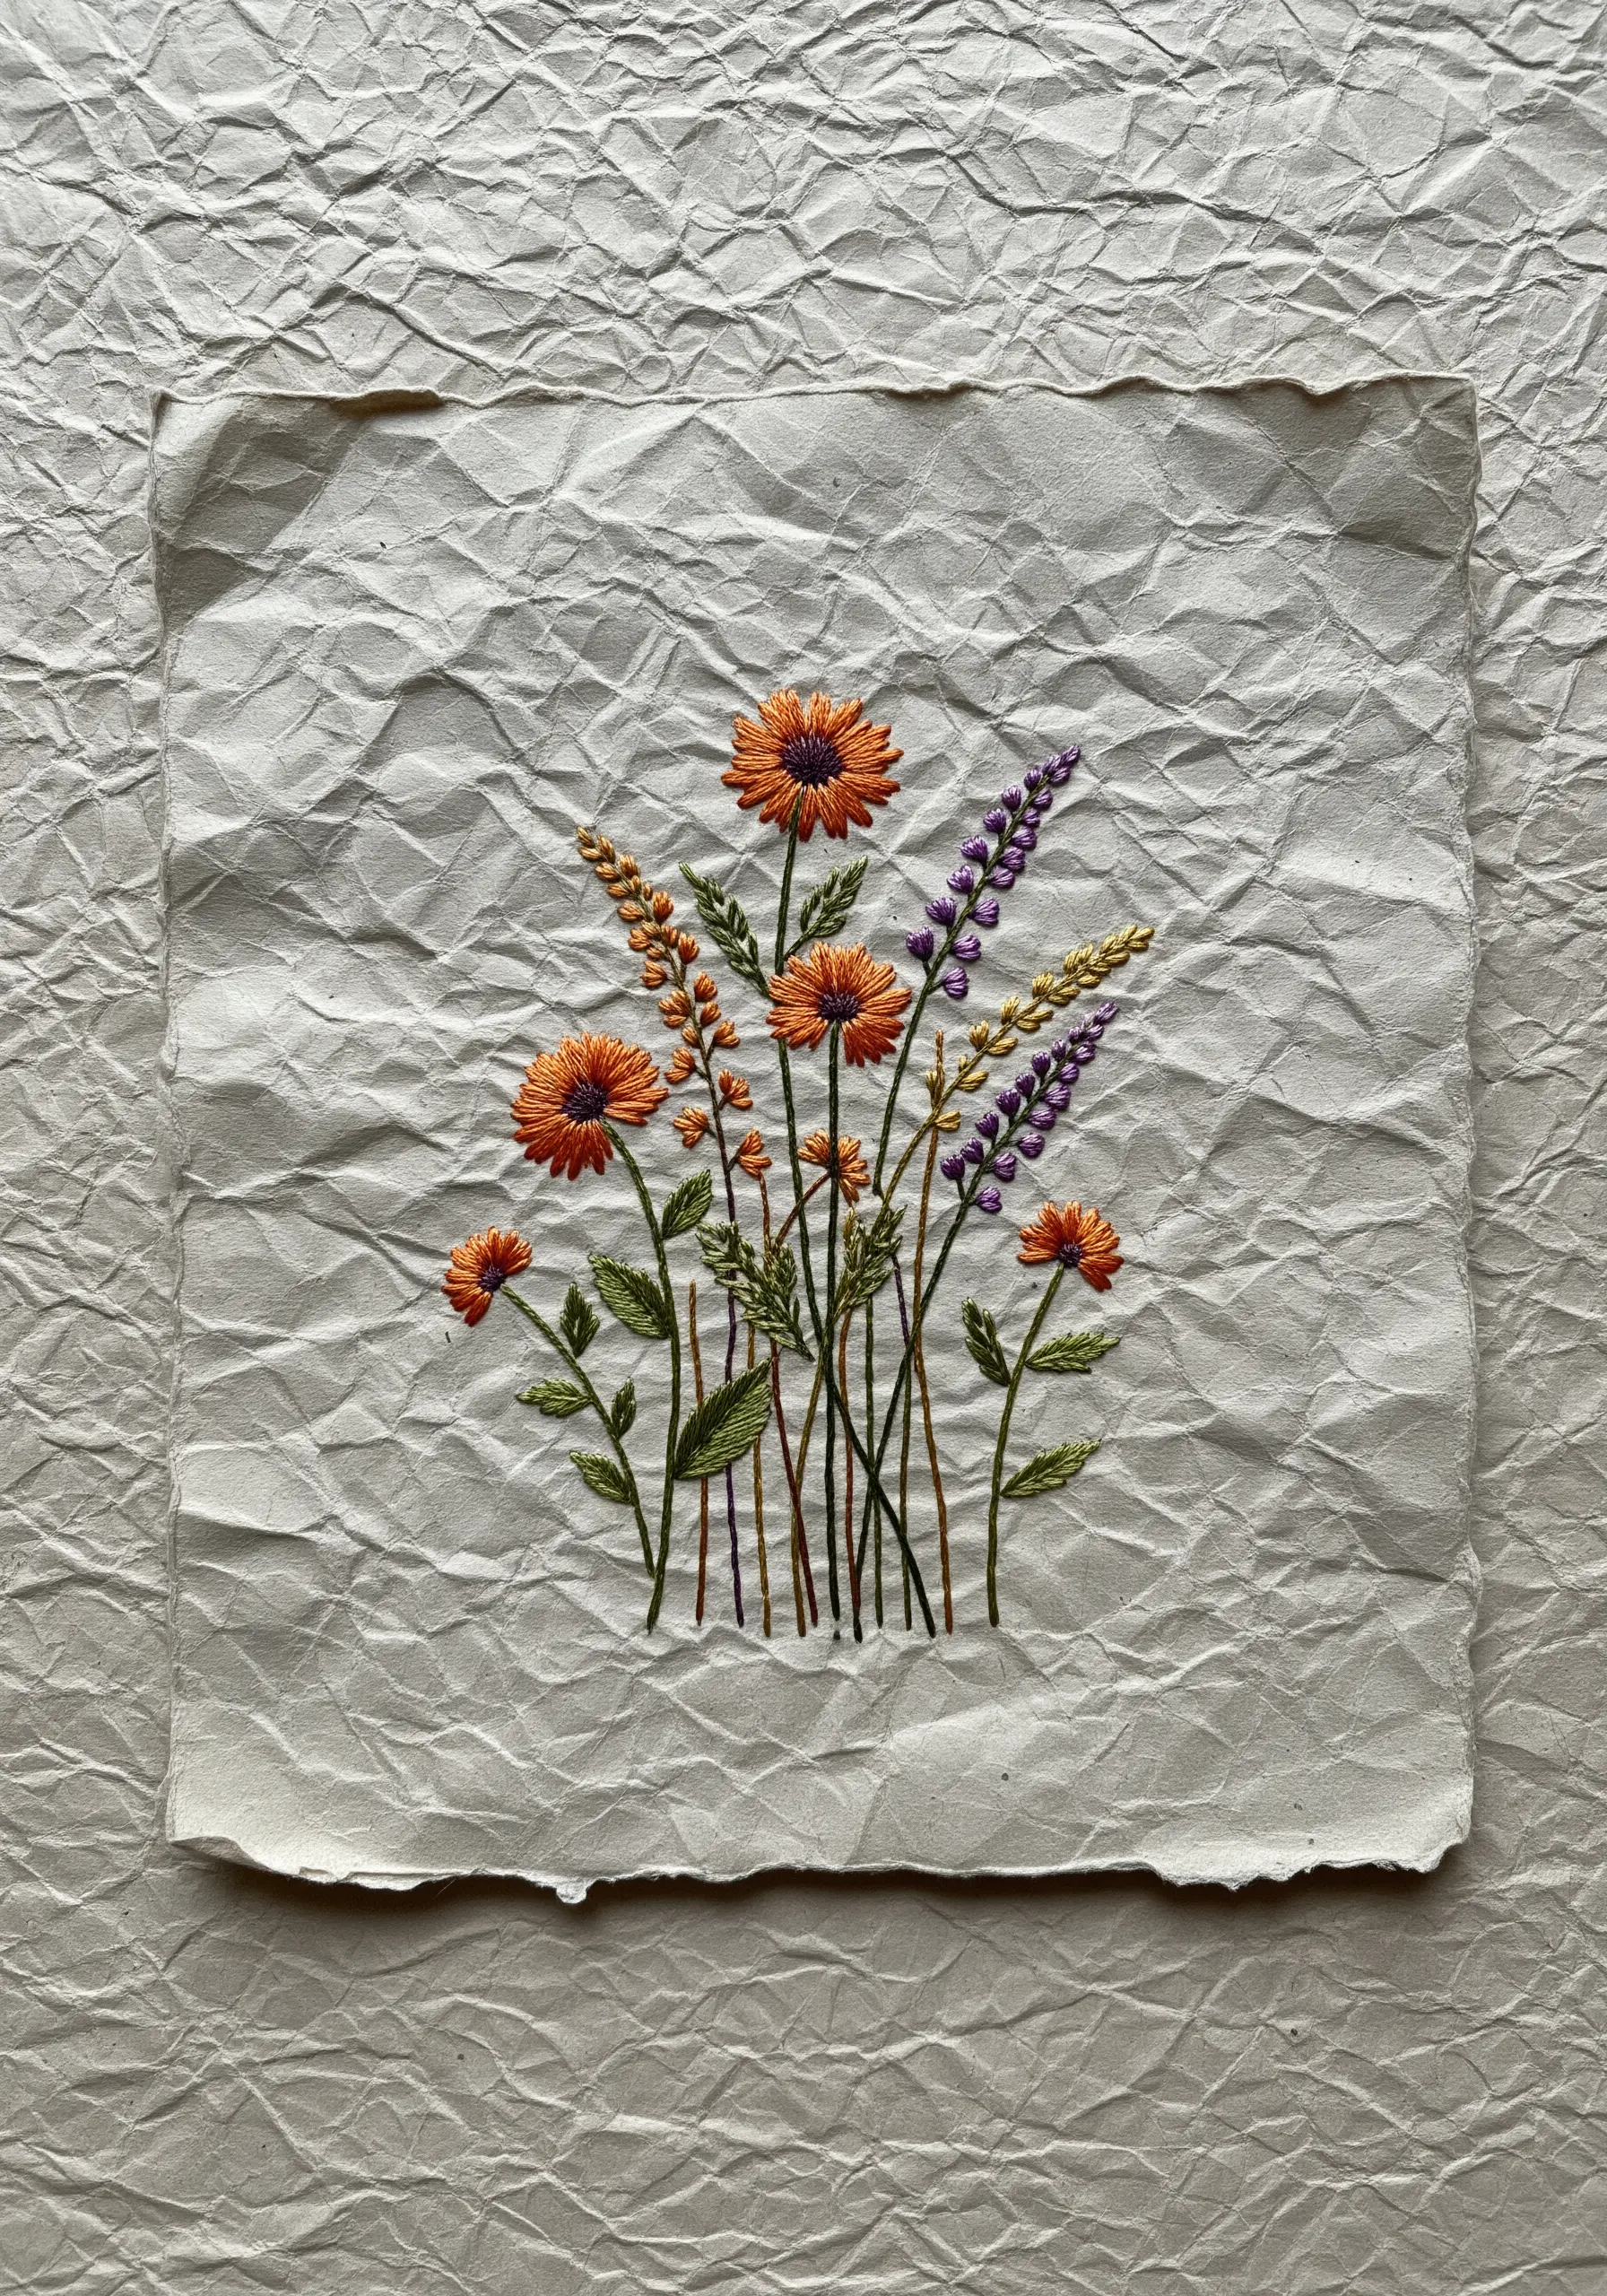
Embrace imperfection to create a surface with history and character.
Gently crumple a sheet of high-quality drawing or watercolor paper, then smooth it out again.
The network of creases and fine lines provides an organic, weathered texture that plain fabric cannot replicate.
Stitching directly onto this surface adds a rustic, tactile quality to your work, making even the simplest botanical designs feel grounded and authentic.
6. Sculpt Paper for Dramatic 3D Relief
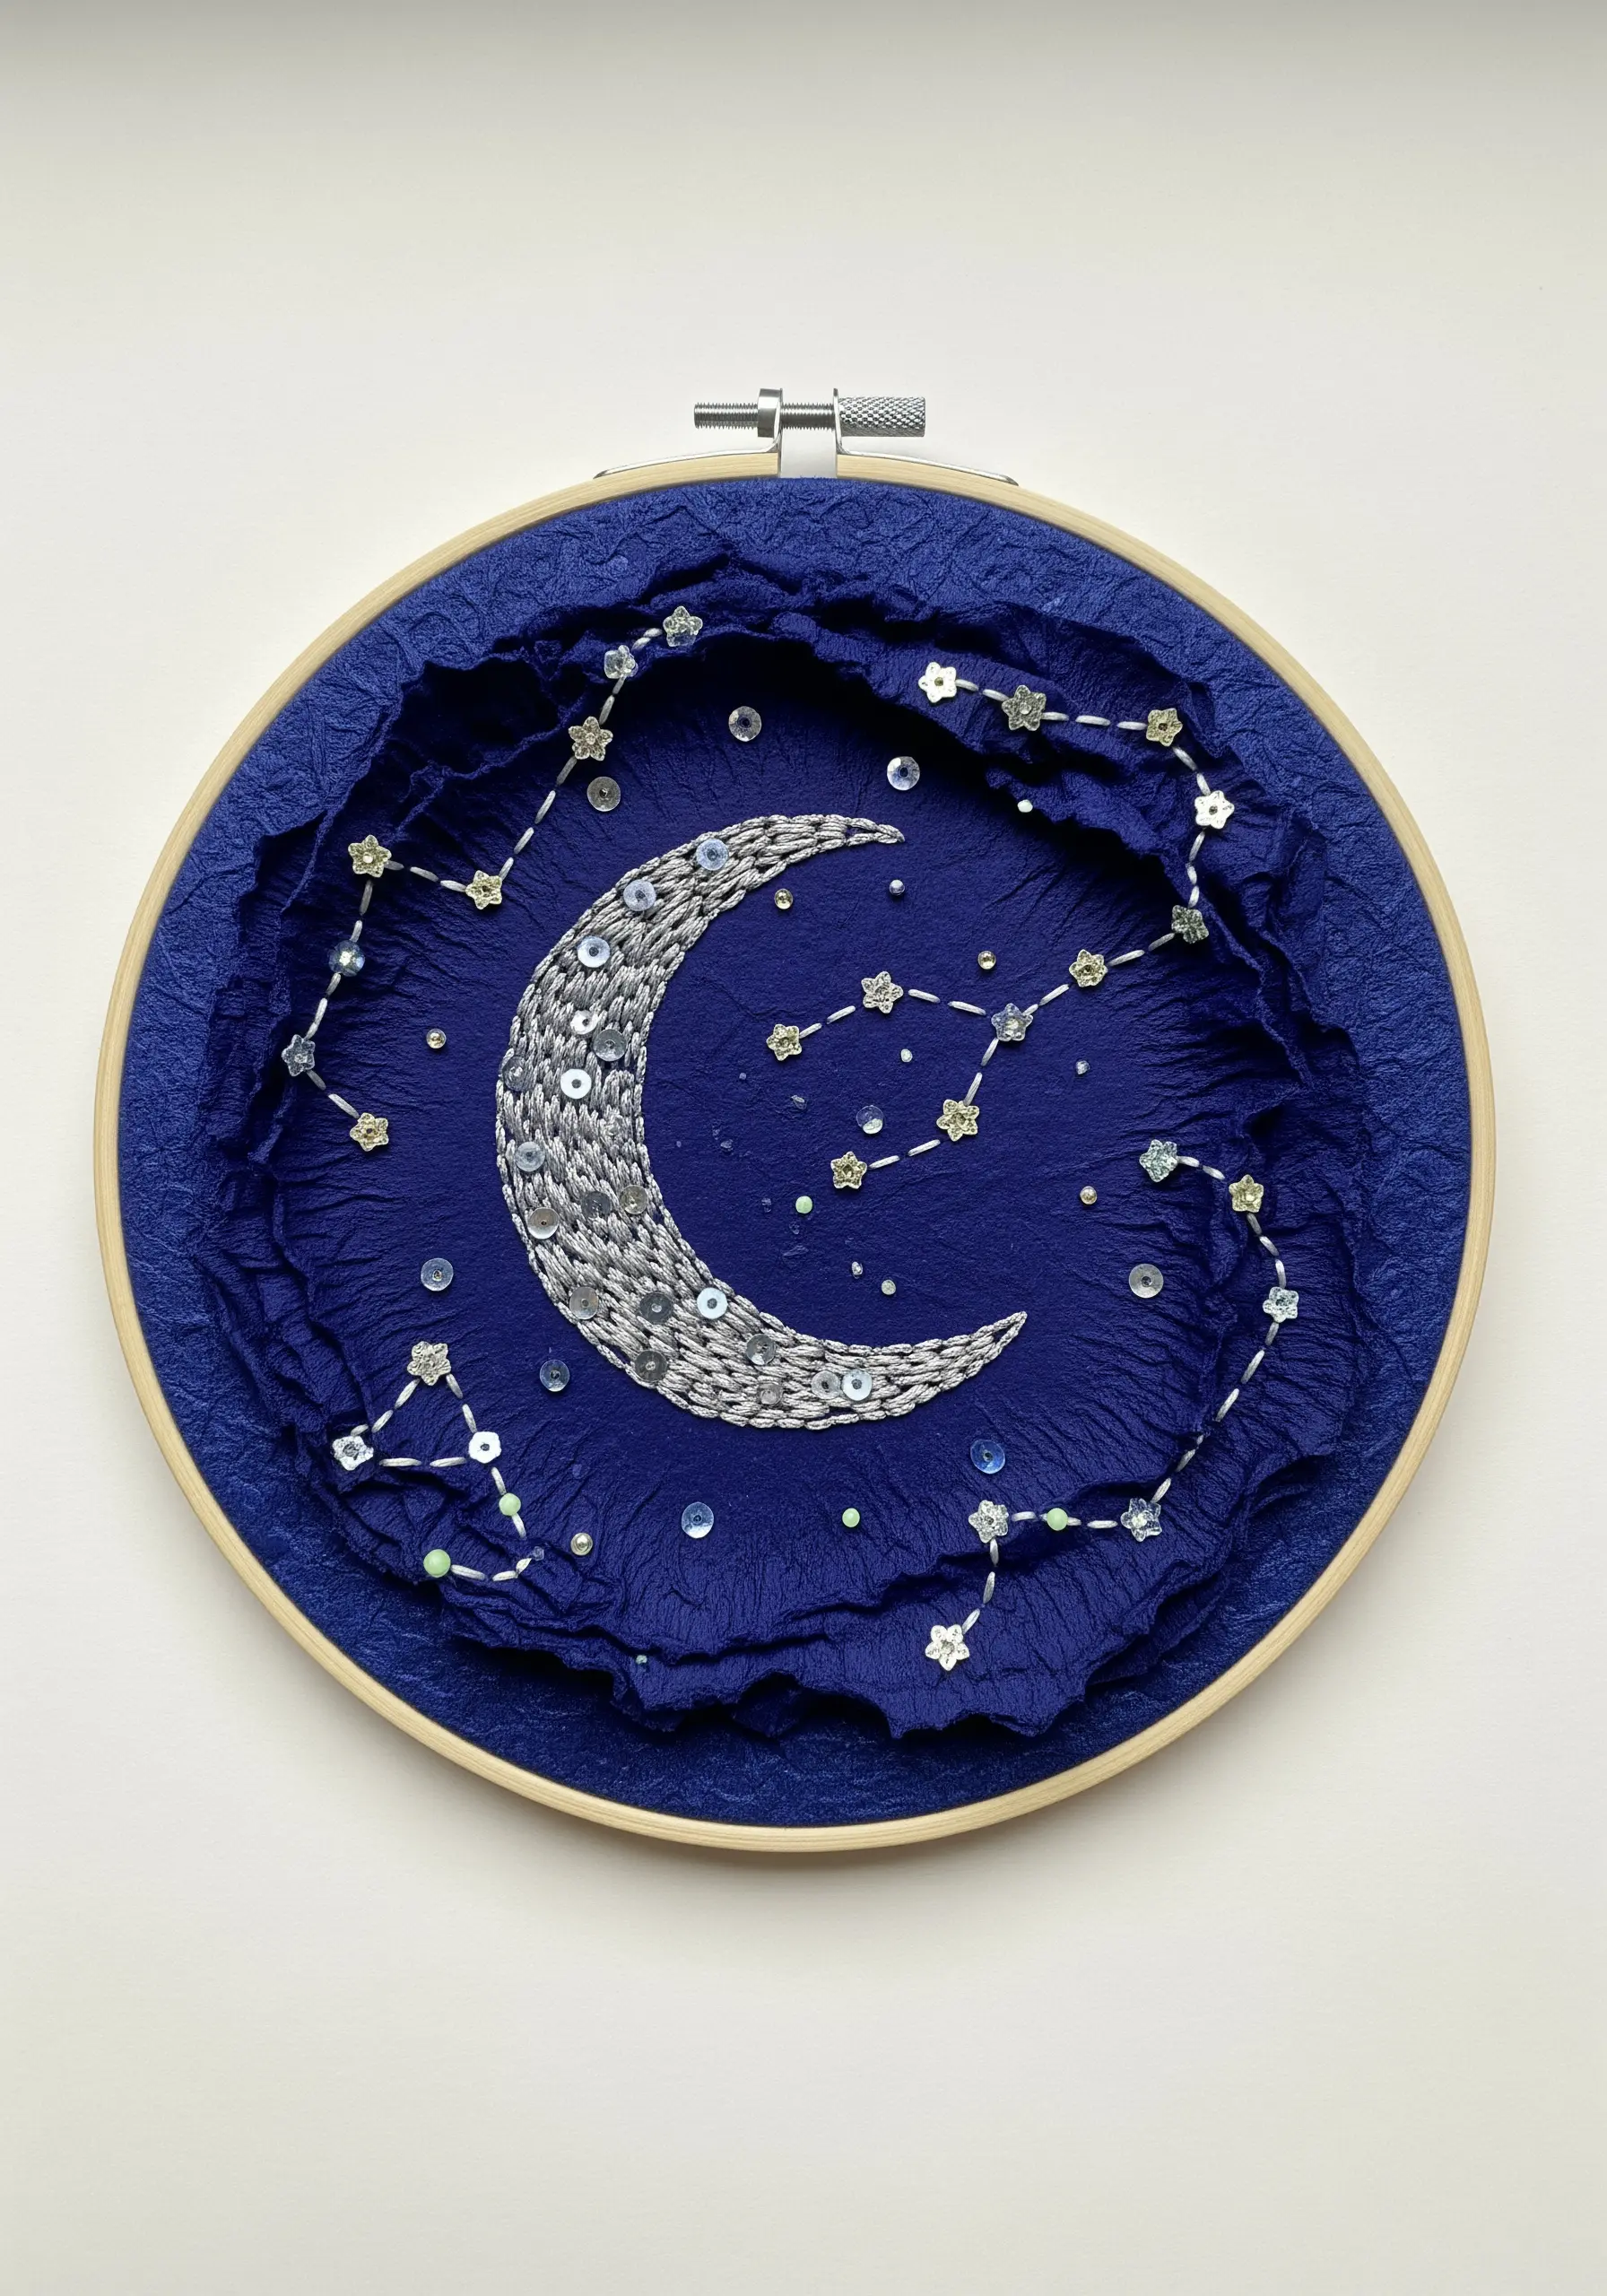
Instead of using paper as a flat base, treat it as a sculptural medium.
Here, dark blue paper is intentionally gathered and crinkled to form a cavernous, three-dimensional night sky.
Stitch the paper down to your fabric base to hold its shape, then apply your embroidery—like these shimmering constellations—directly onto the raised and recessed areas.
This technique transforms a simple hoop into a dynamic relief sculpture with captivating shadows and depth.
7. Frame Your Stitching with Marbled Paper
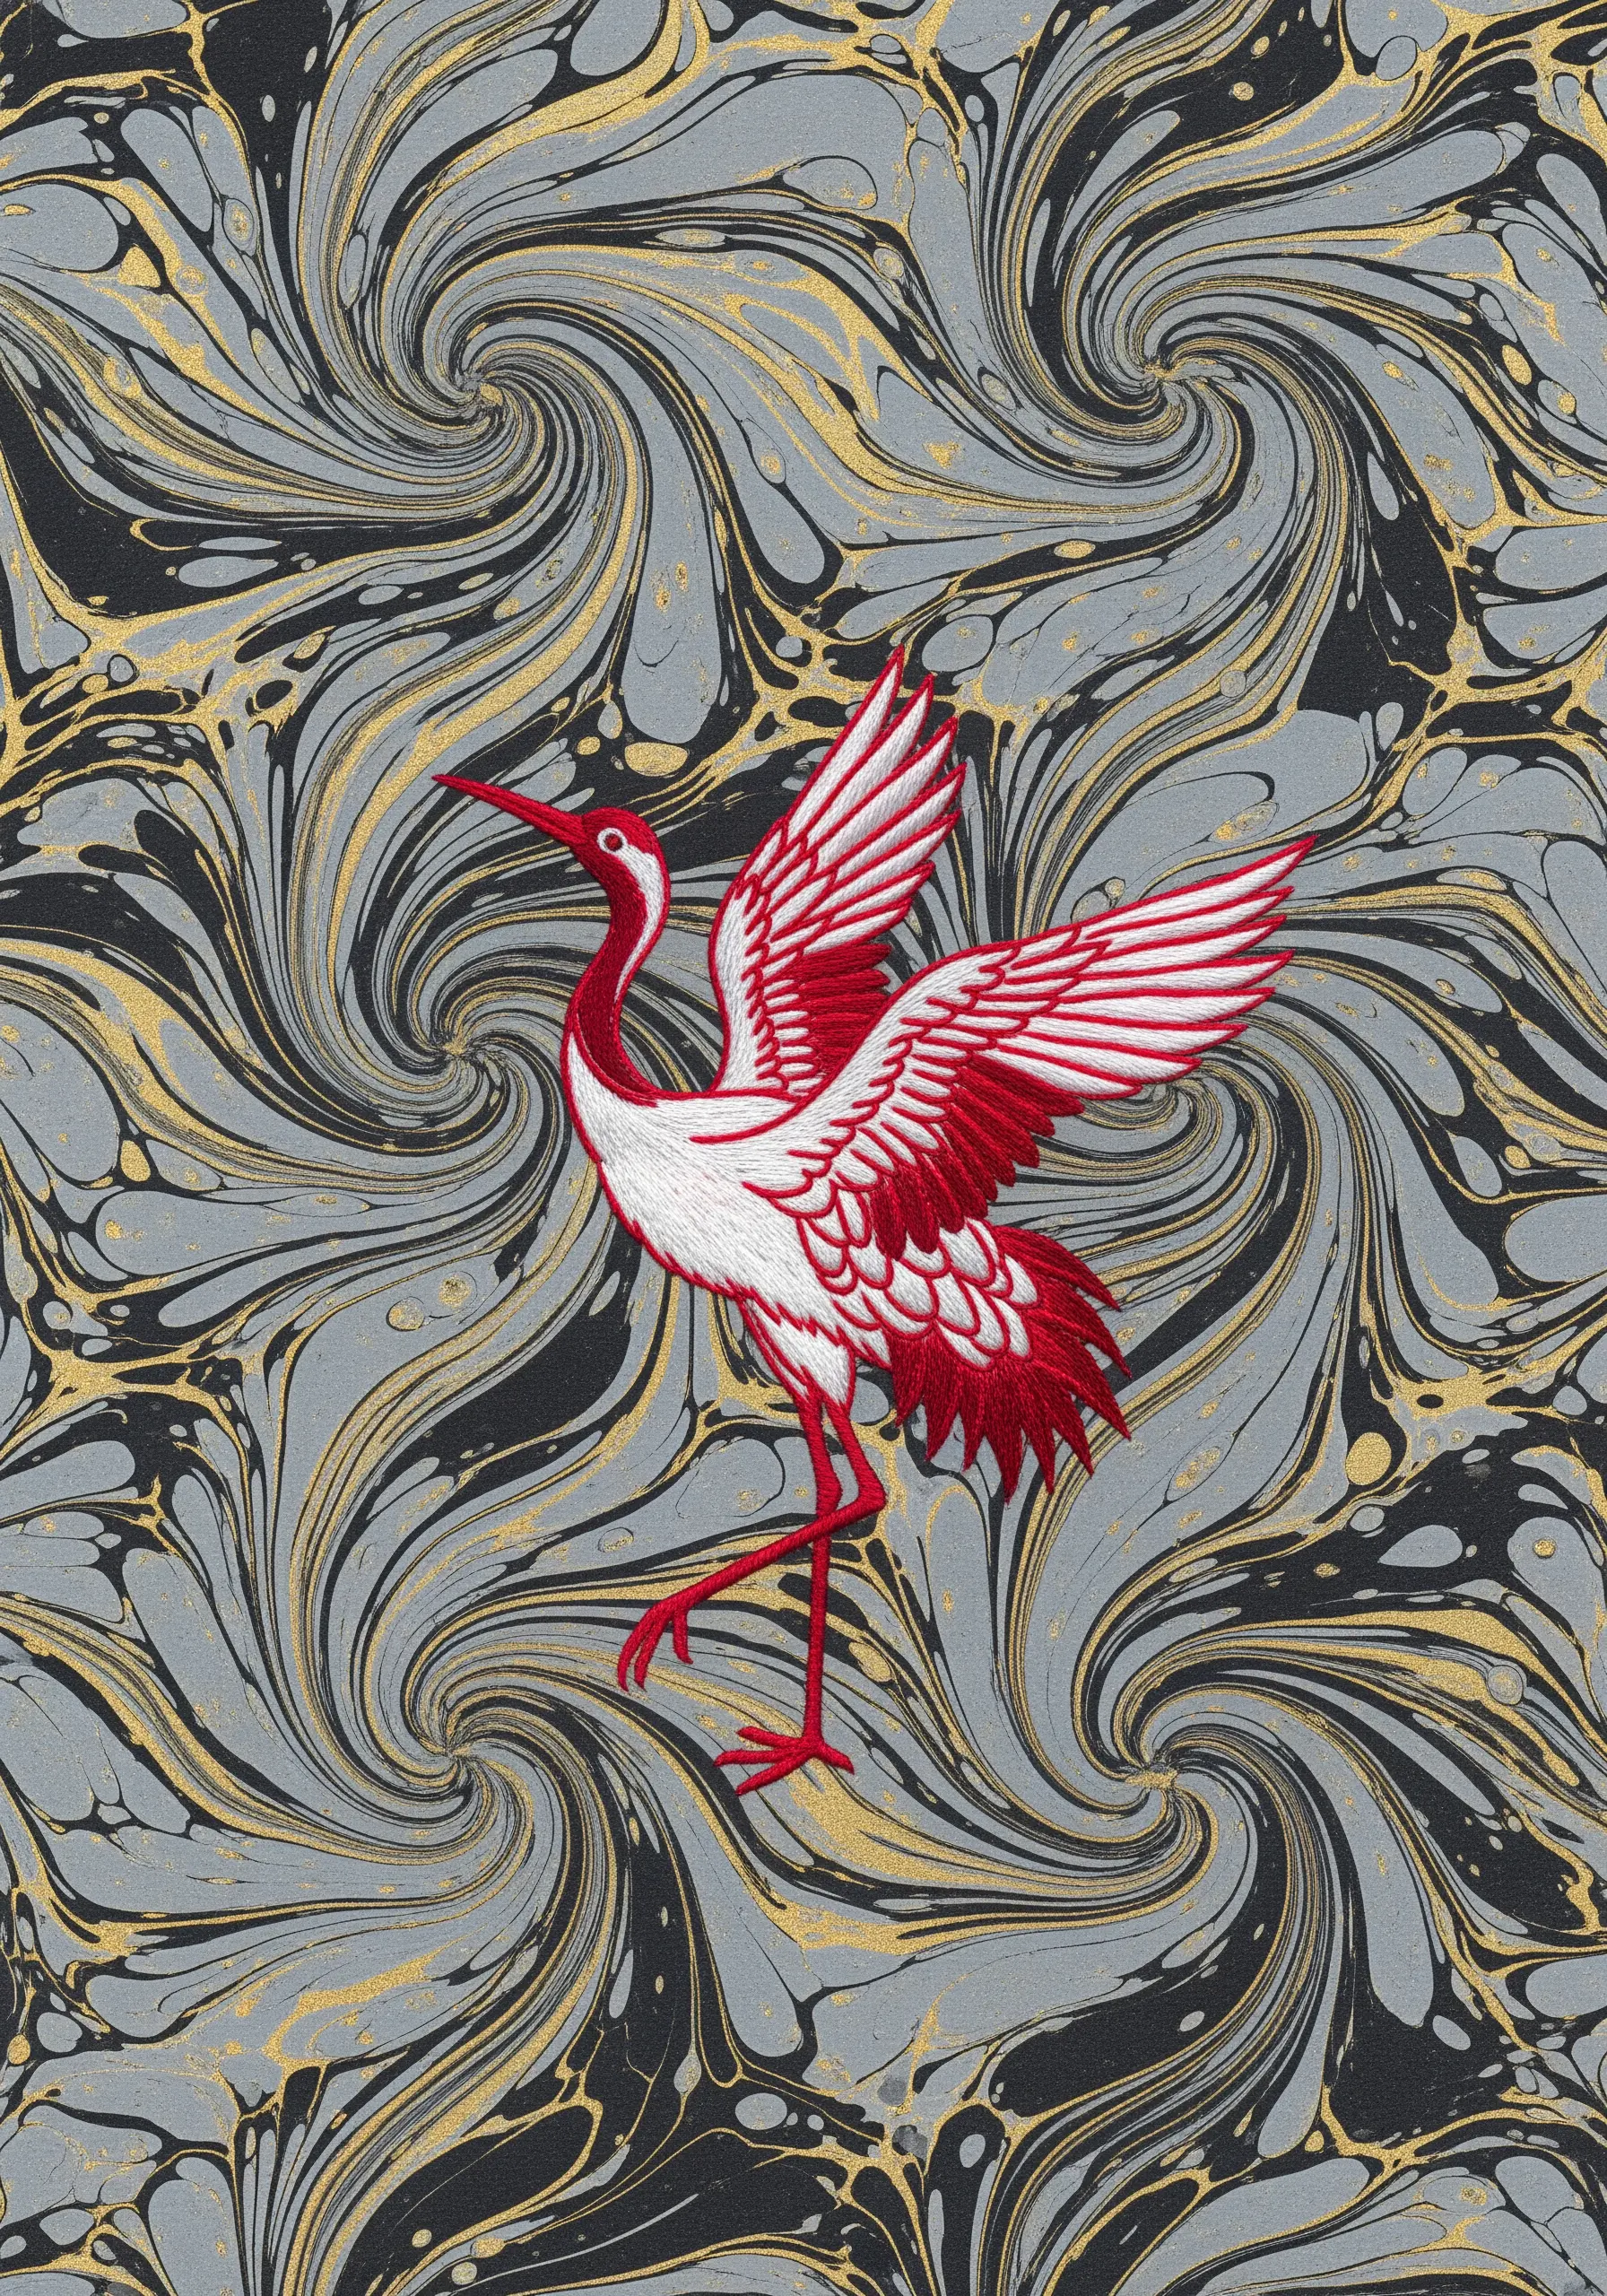
Let a bold paper background provide the movement and energy for your entire piece.
Select a sheet of decorative marbled paper with a dynamic pattern that complements your chosen motif.
Position your subject, like this striking crane, to create a strong focal point against the swirling backdrop.
Use a solid fill stitch in a high-contrast color to ensure your embroidery commands attention and doesn’t get lost in the paper’s intricate design.
8. Stitch a Narrative with Paper Collage
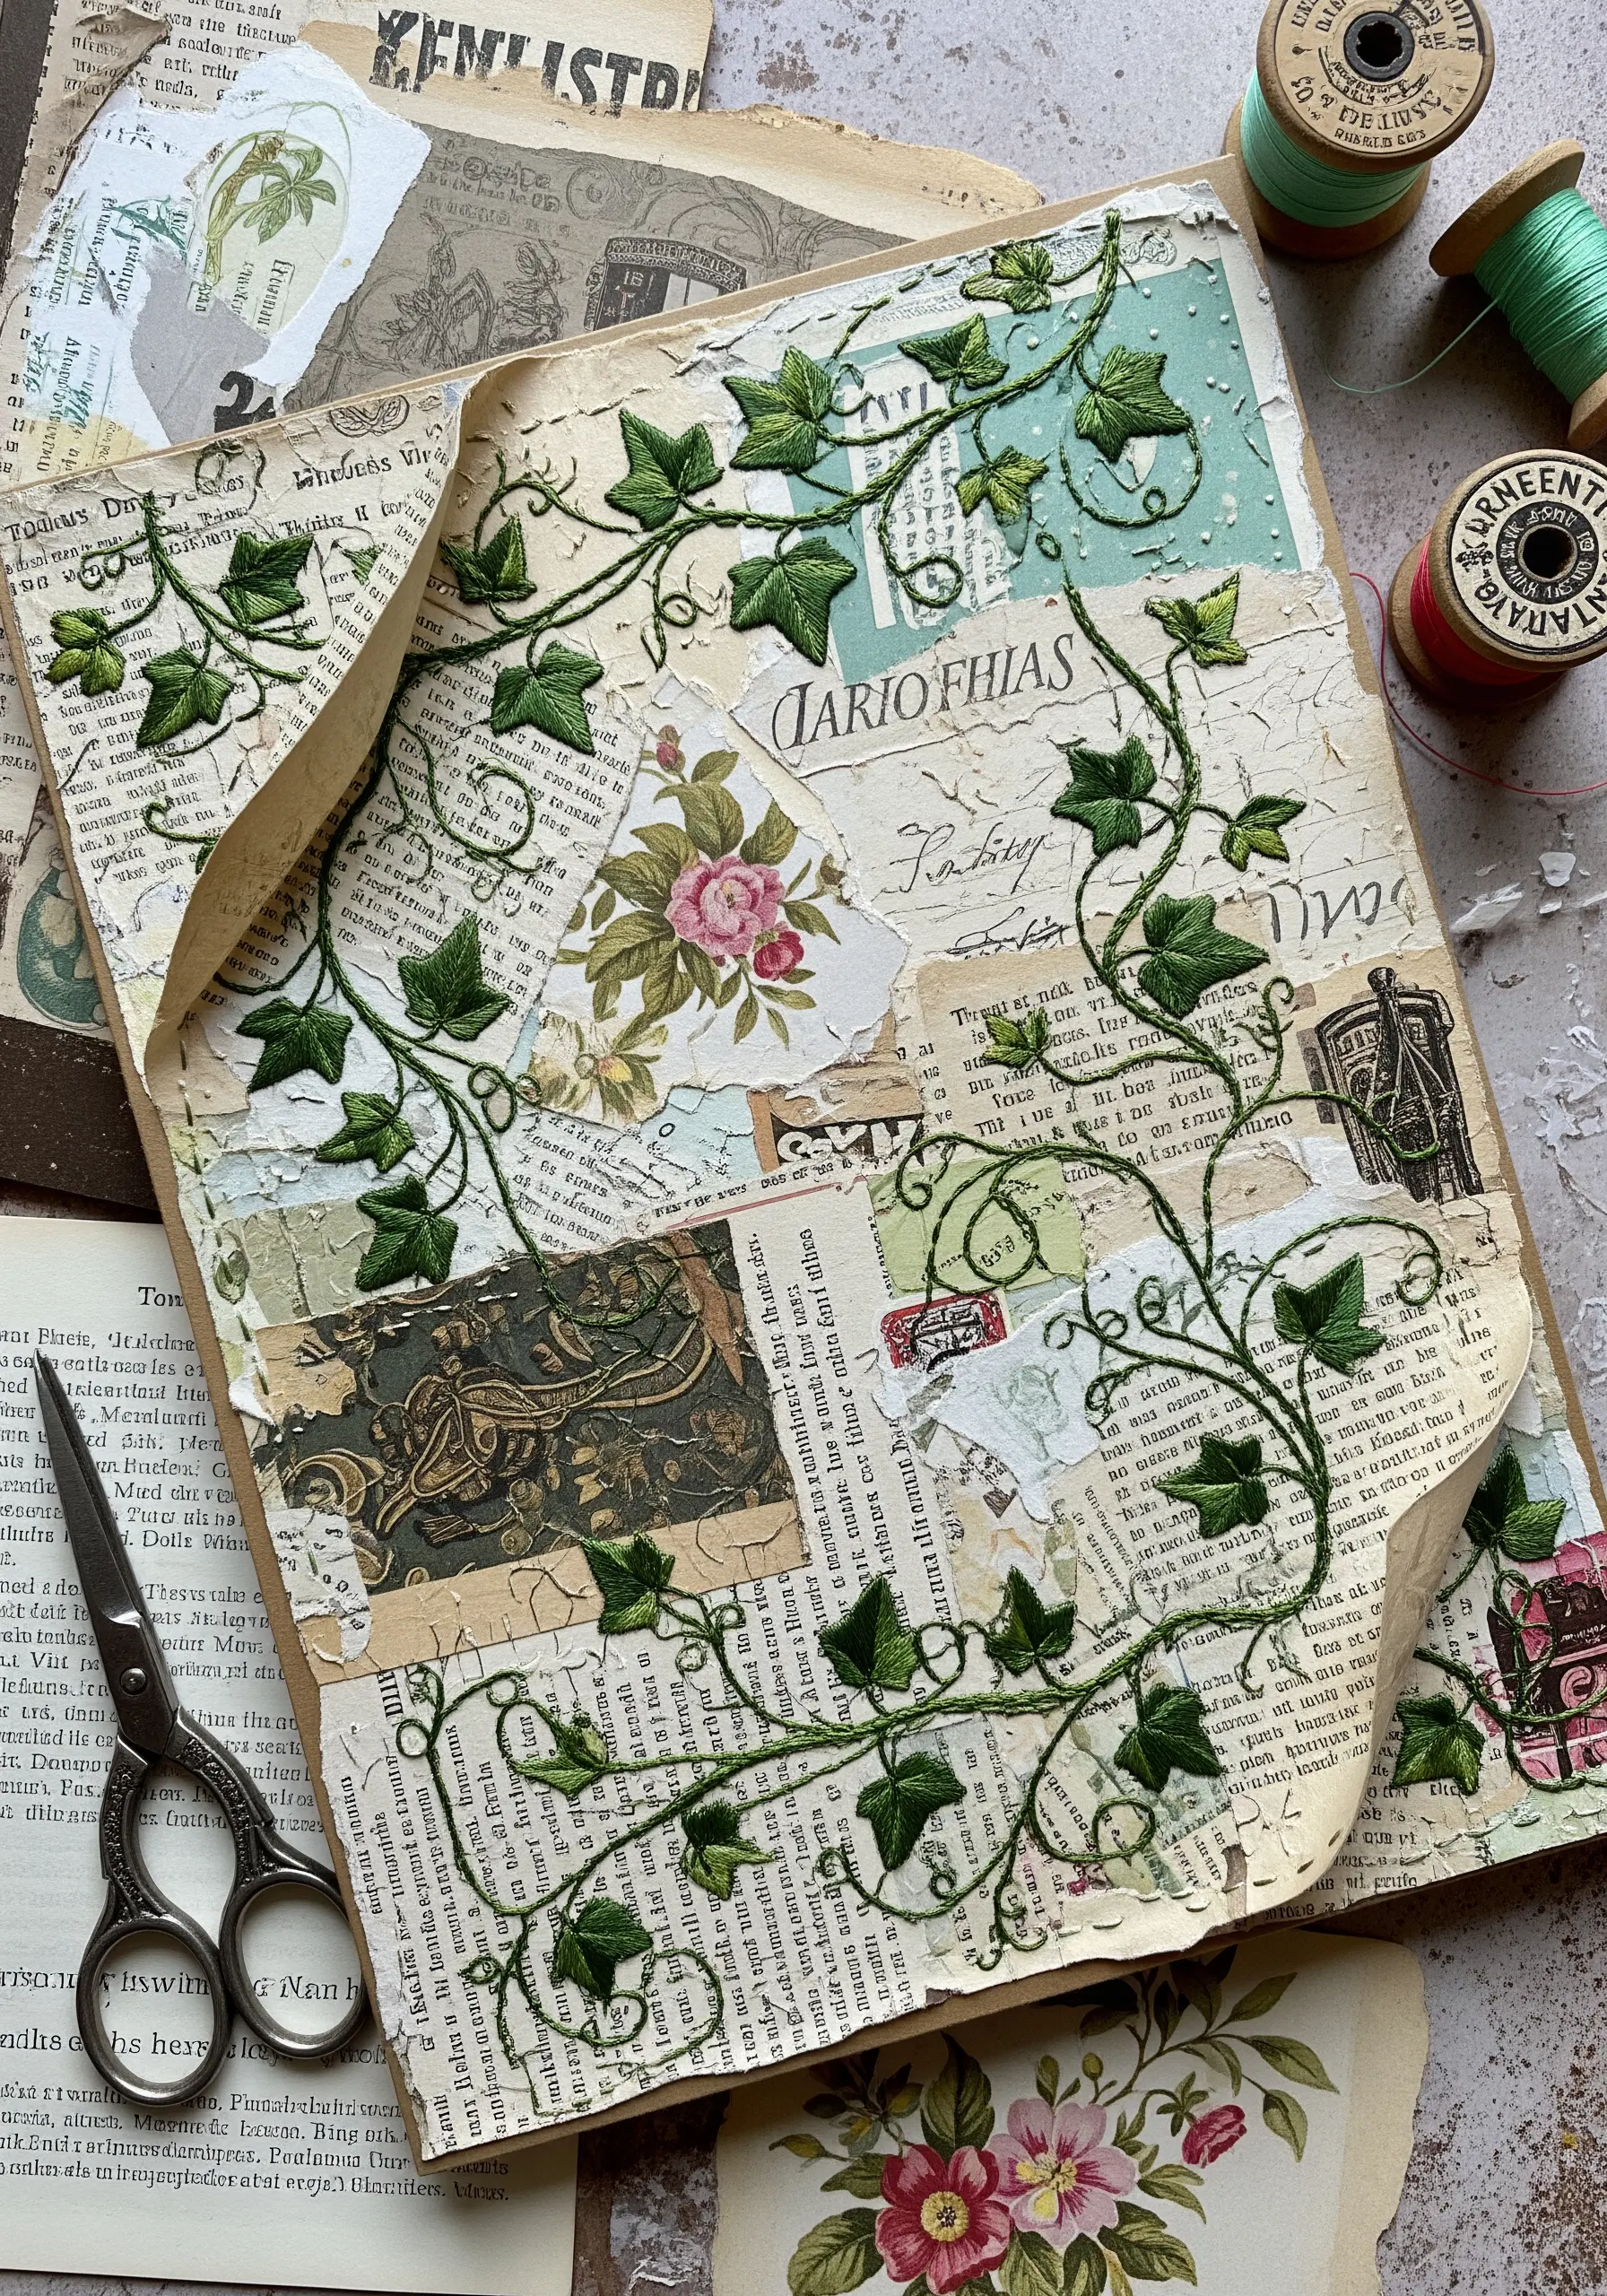
Weave a story by creating a layered foundation from vintage papers, book pages, and old letters.
Arrange your chosen pieces on a sturdy cardstock backing, creating a rich collage base on a sturdy cardstock that hints at a history.
Then, stitch your design directly through all the layers.
The thread physically connects the disparate elements, unifying them into a cohesive narrative and making your motif feel as if it’s growing from the story itself.
9. Integrate Origami into Your Embroidery
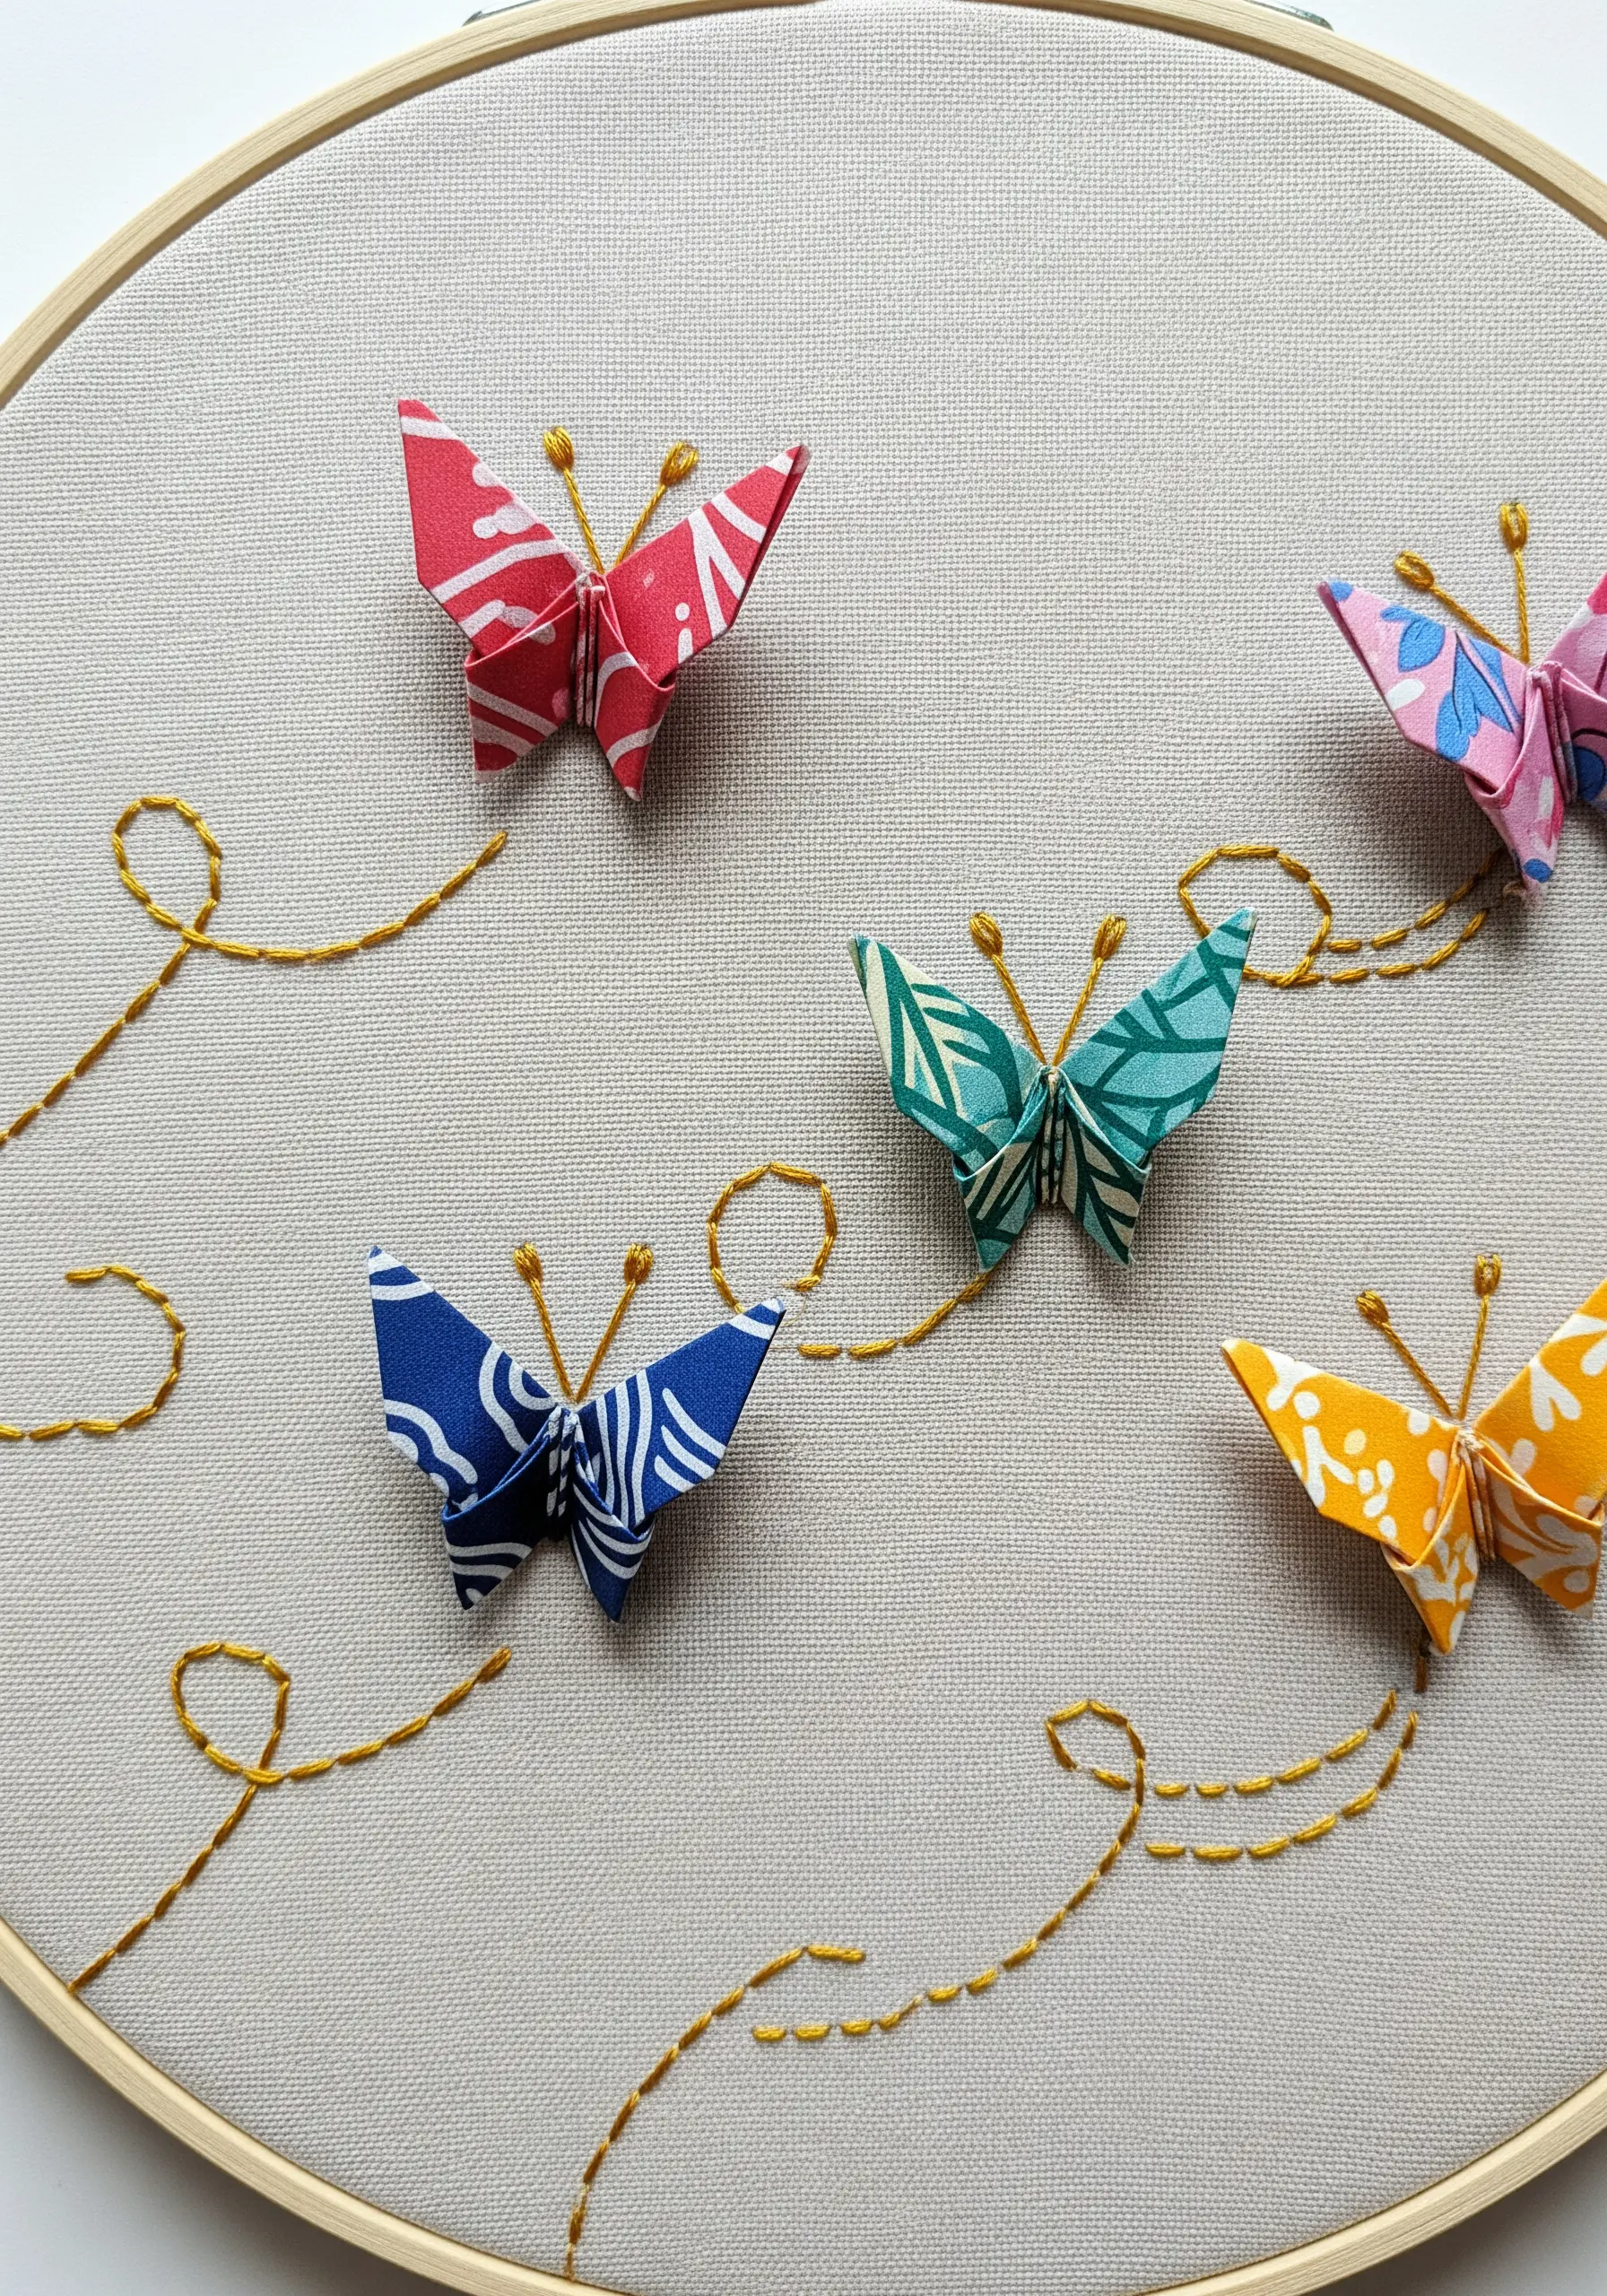
Combine the precision of paper folding with the softness of thread for a playful, mixed-media piece.
Fold small origami shapes from decorative paper and attach them to your fabric background with a few carefully placed stitches.
Use embroidery to complete the scene, stitching flight paths, antennae, or other linear details.
This technique adds an unexpected and delightful three-dimensional element that lifts your design right off the surface.
10. Create an Artifact with Aged Paper
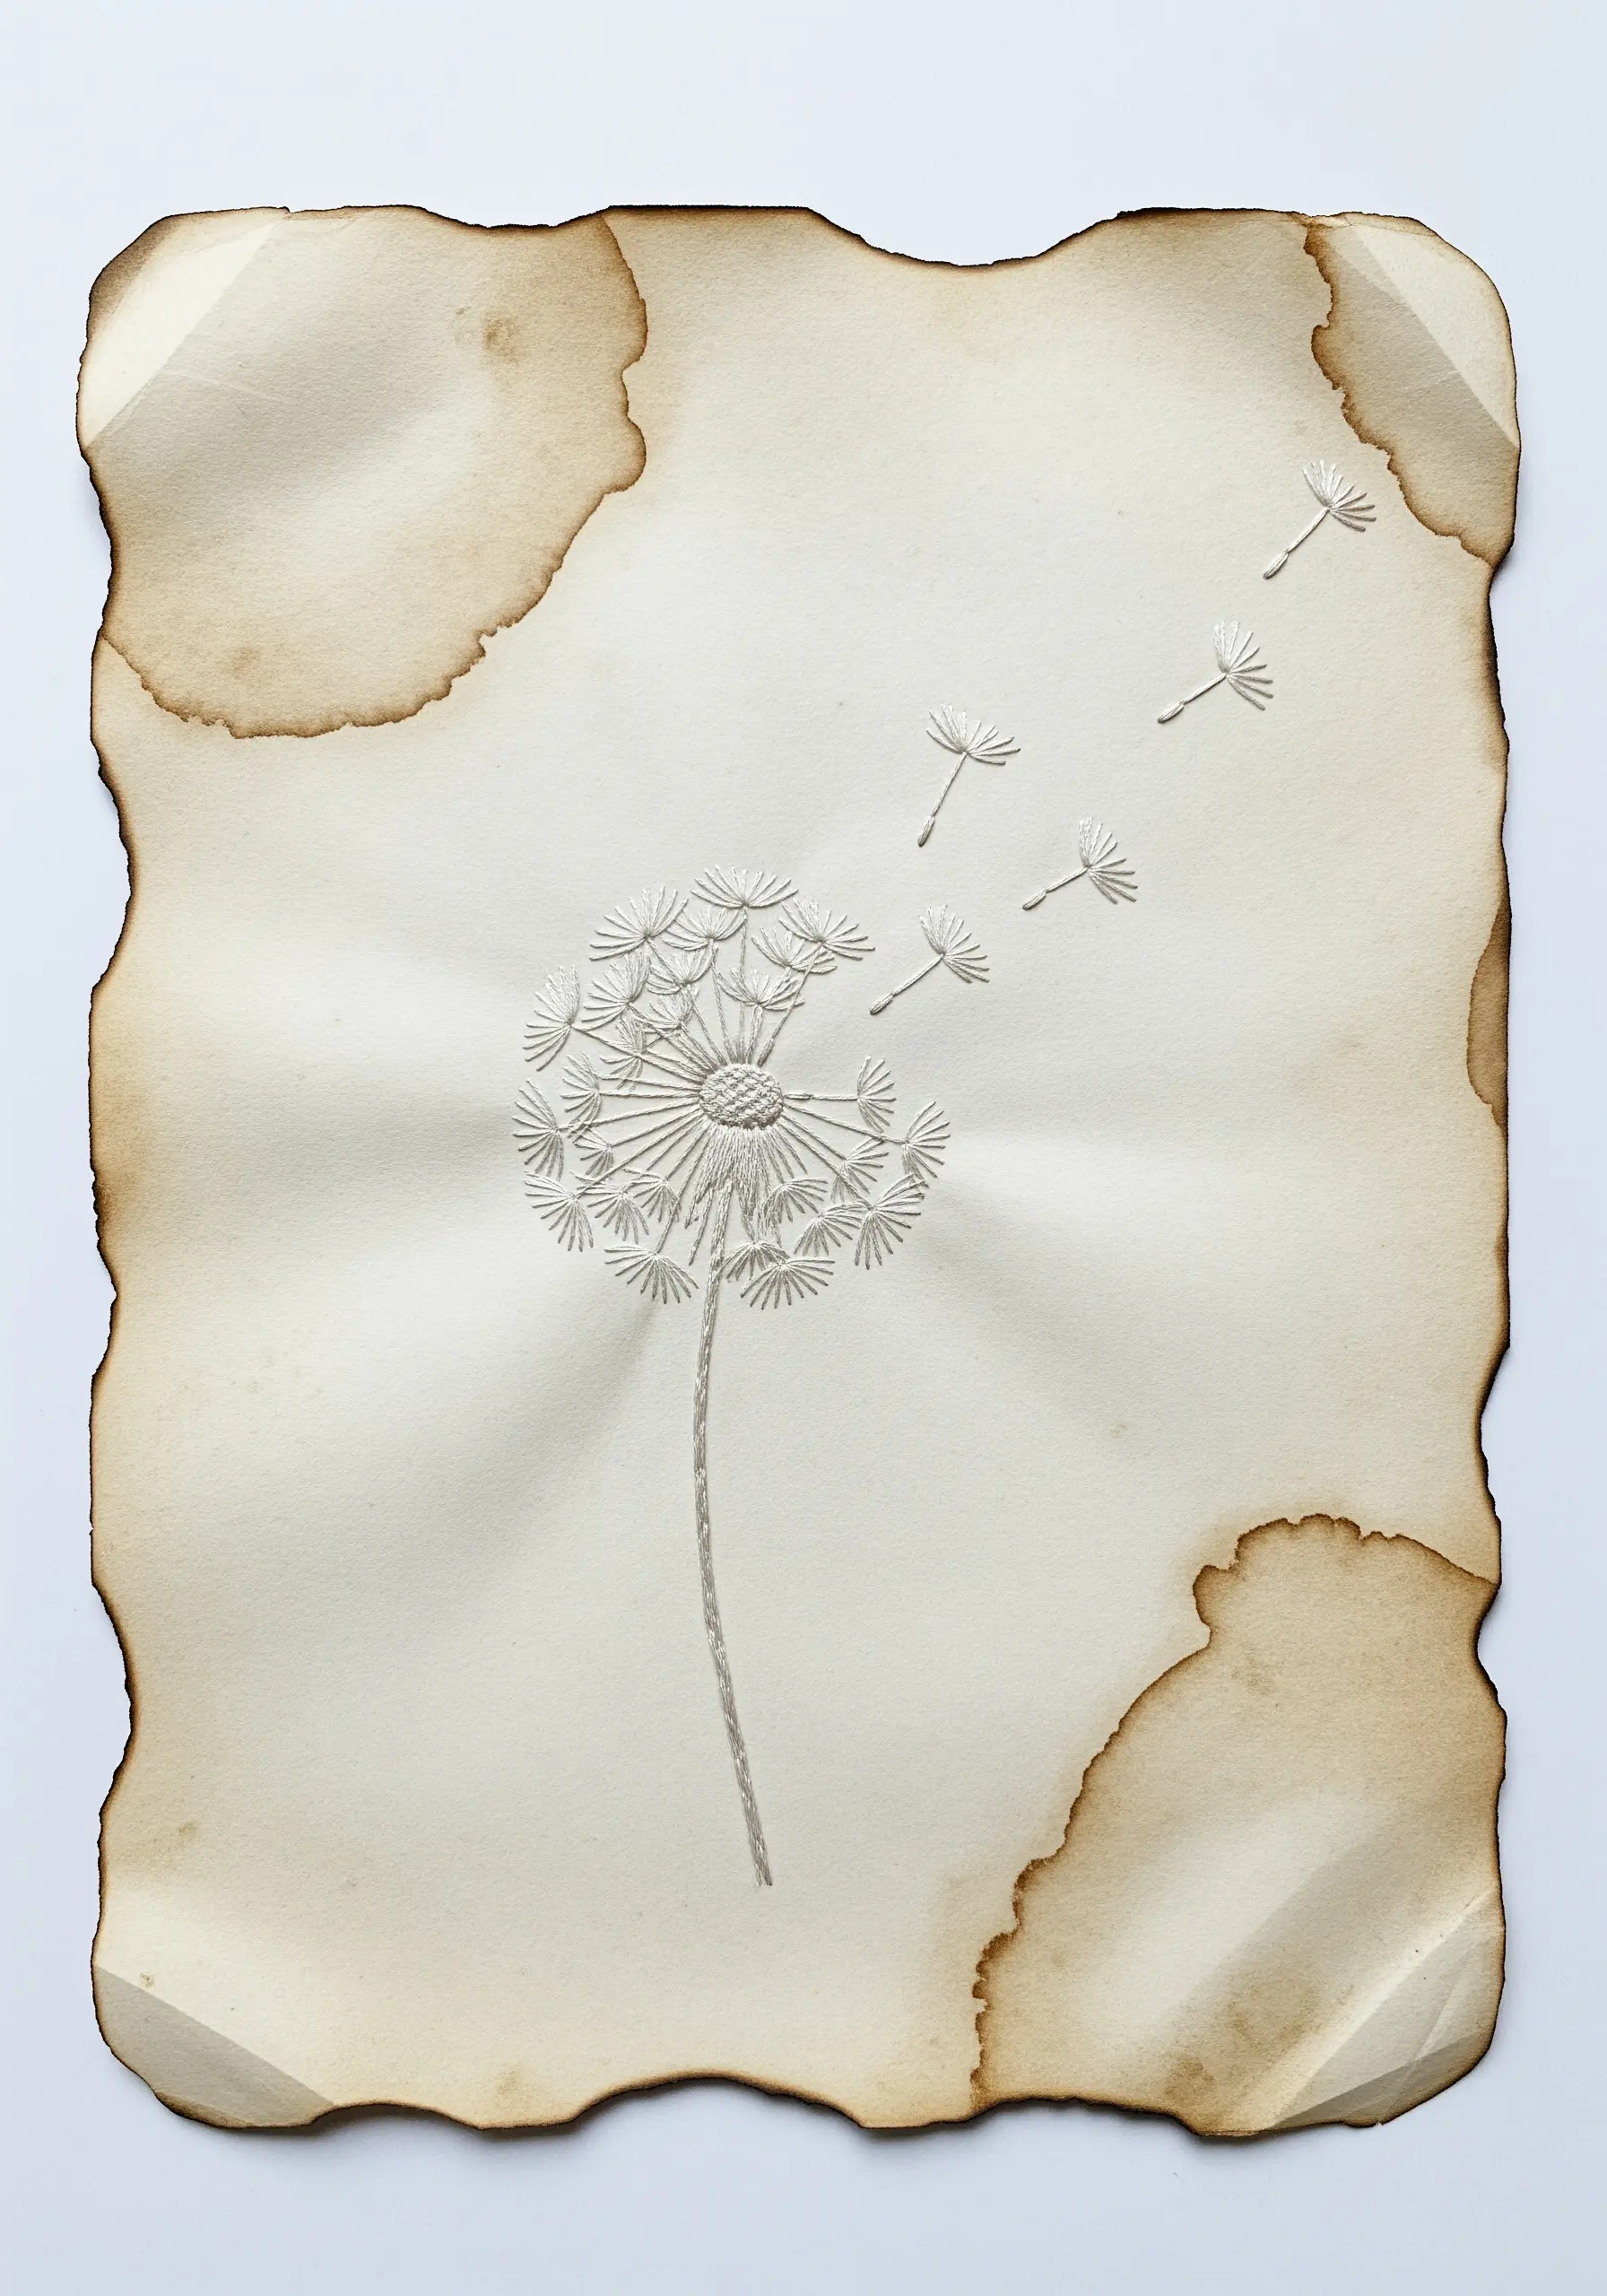
Give your artwork the feeling of a treasured historical document.
Begin by staining a sheet of heavy paper with coffee or tea, allowing it to dry unevenly for an authentic, mottled look.
Carefully singe the edges with a flame for a weathered, parchment-like finish.
Stitch your design using a single thread color; the monochrome embroidery on the aged paper creates a powerful, timeless aesthetic that feels both delicate and enduring.
11. Precision Stitching on Pierced Cardstock
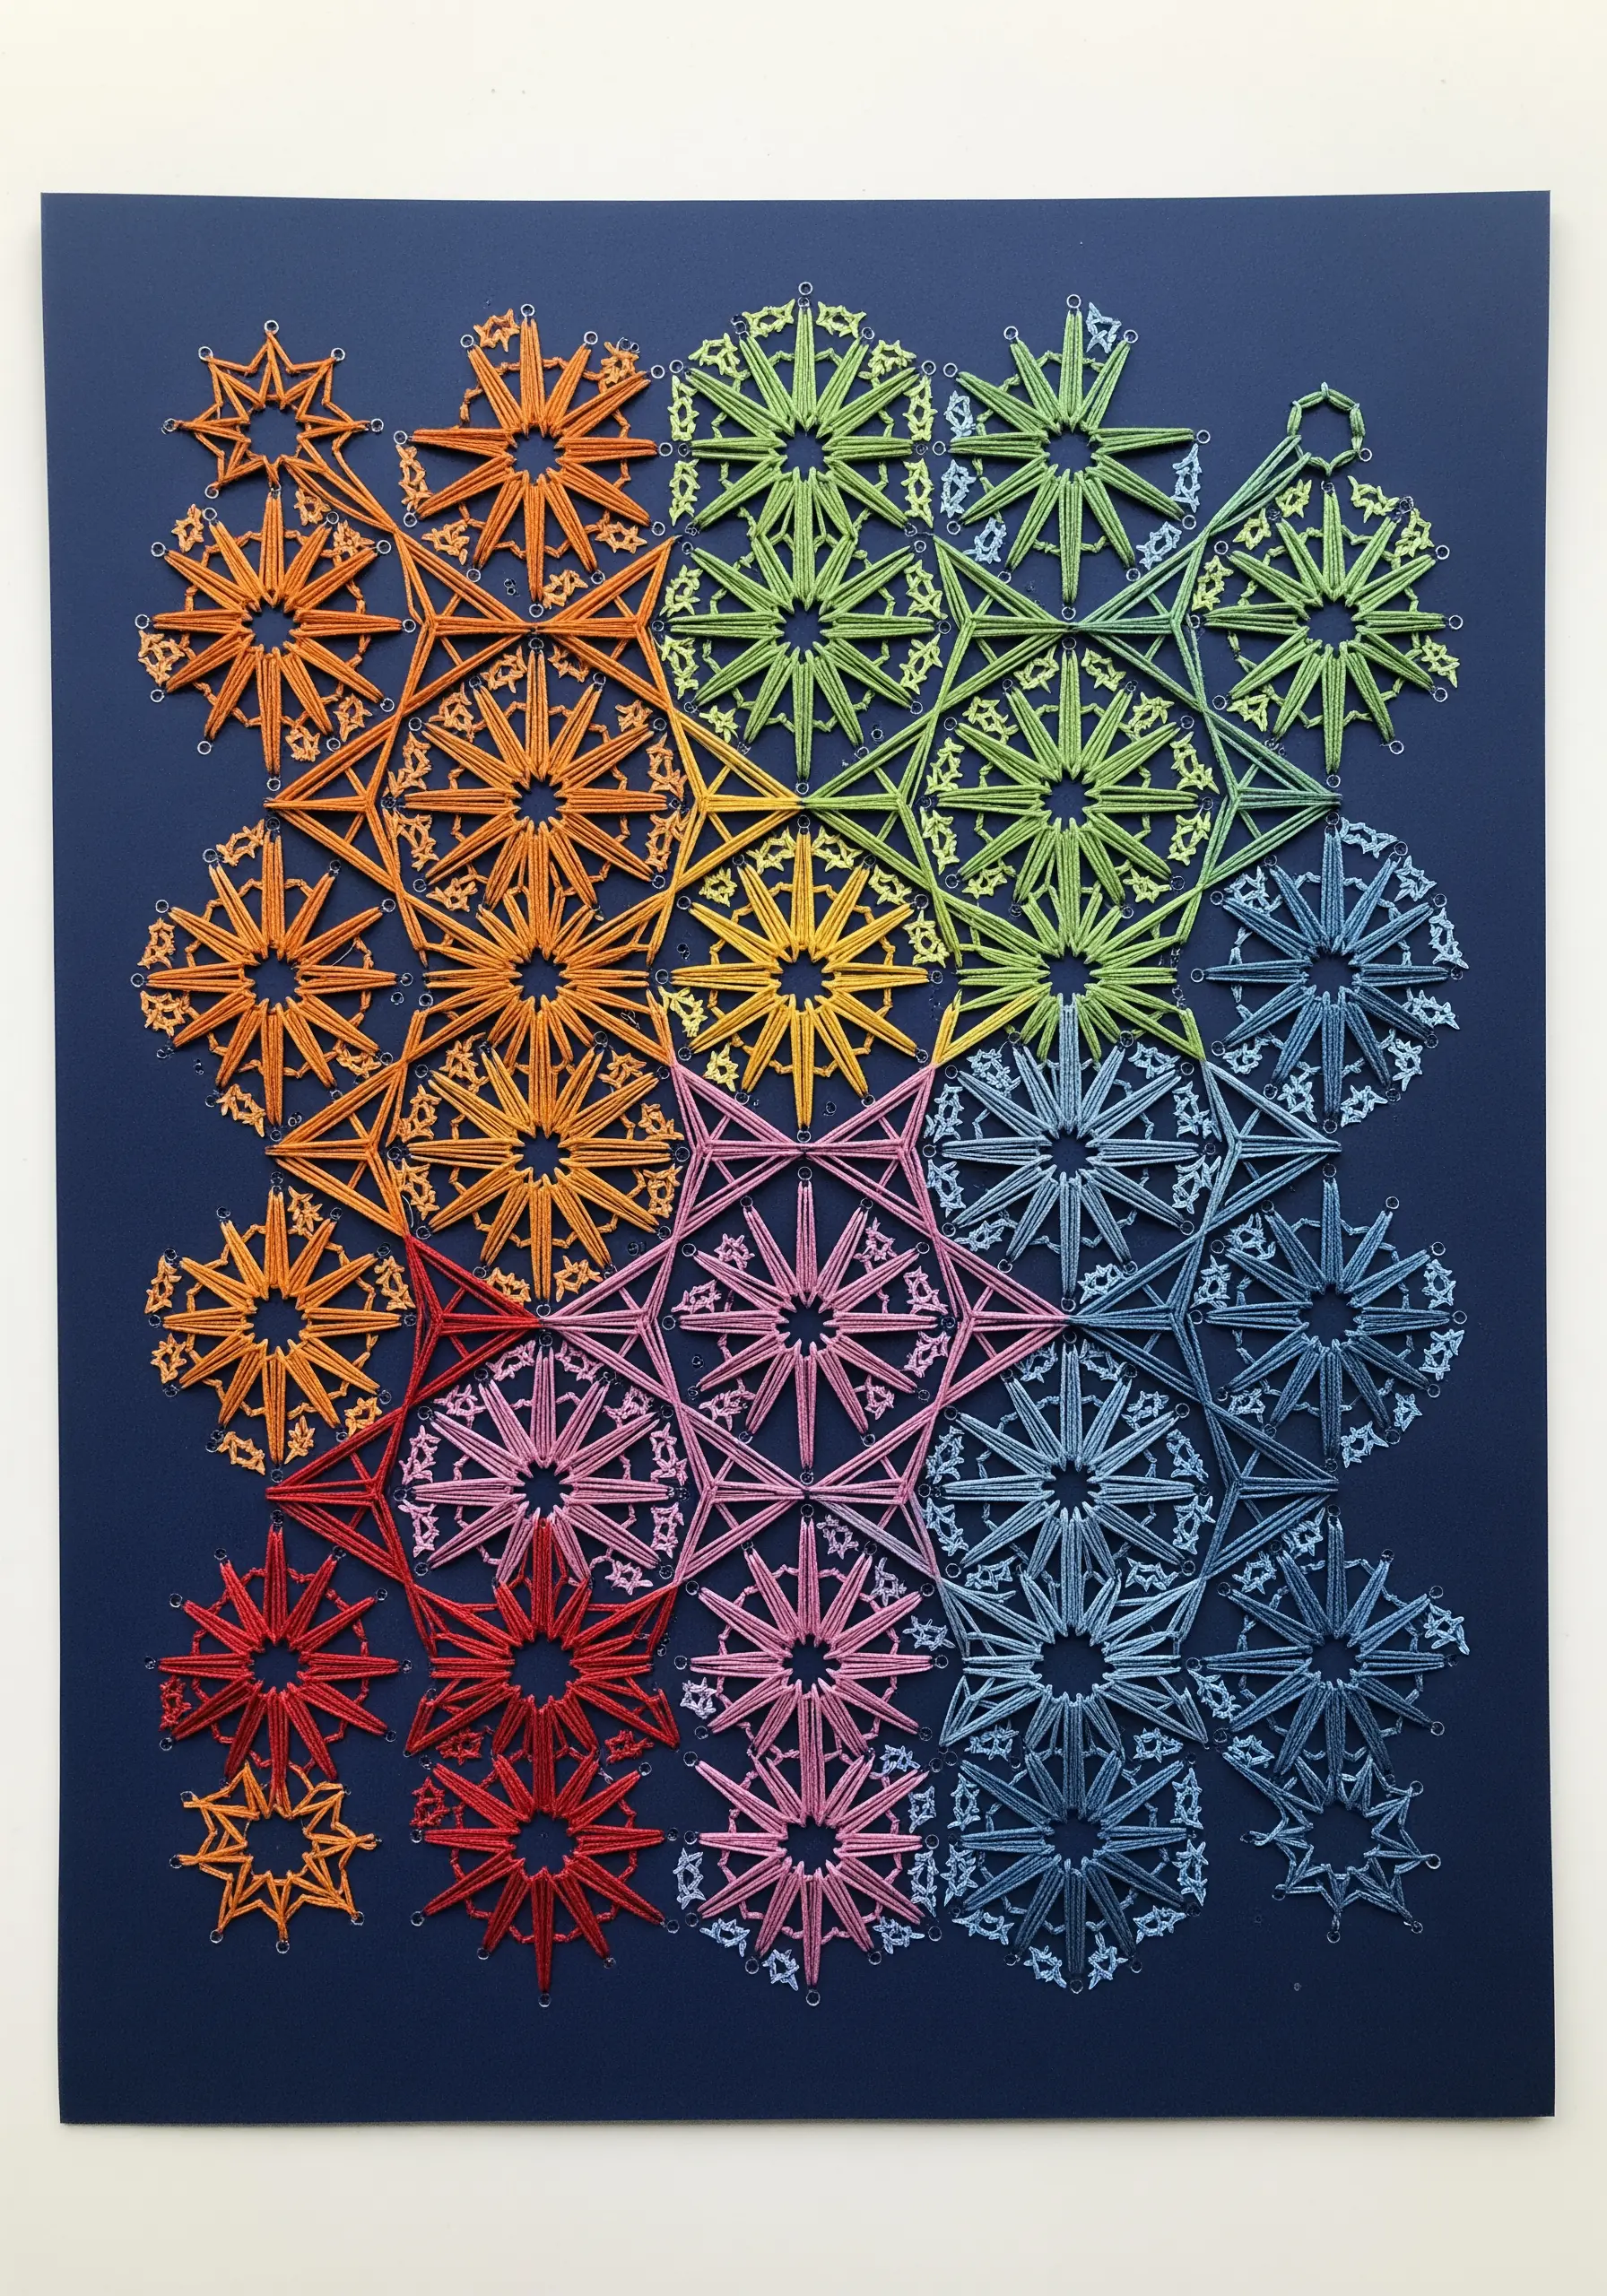
Achieve flawless geometric patterns by using pierced paper as your guide.
Start by punching a grid of holes into cardstock using a template and a piercing tool.
Use these holes to execute perfect string-art-style designs with incredible precision and tension.
The rigidity of the cardstock ensures your lines remain taut and your angles sharp, creating crisp, graphic patterns that are nearly impossible to achieve on soft fabric.
12. Stitch Contour Lines Over a Painted Base
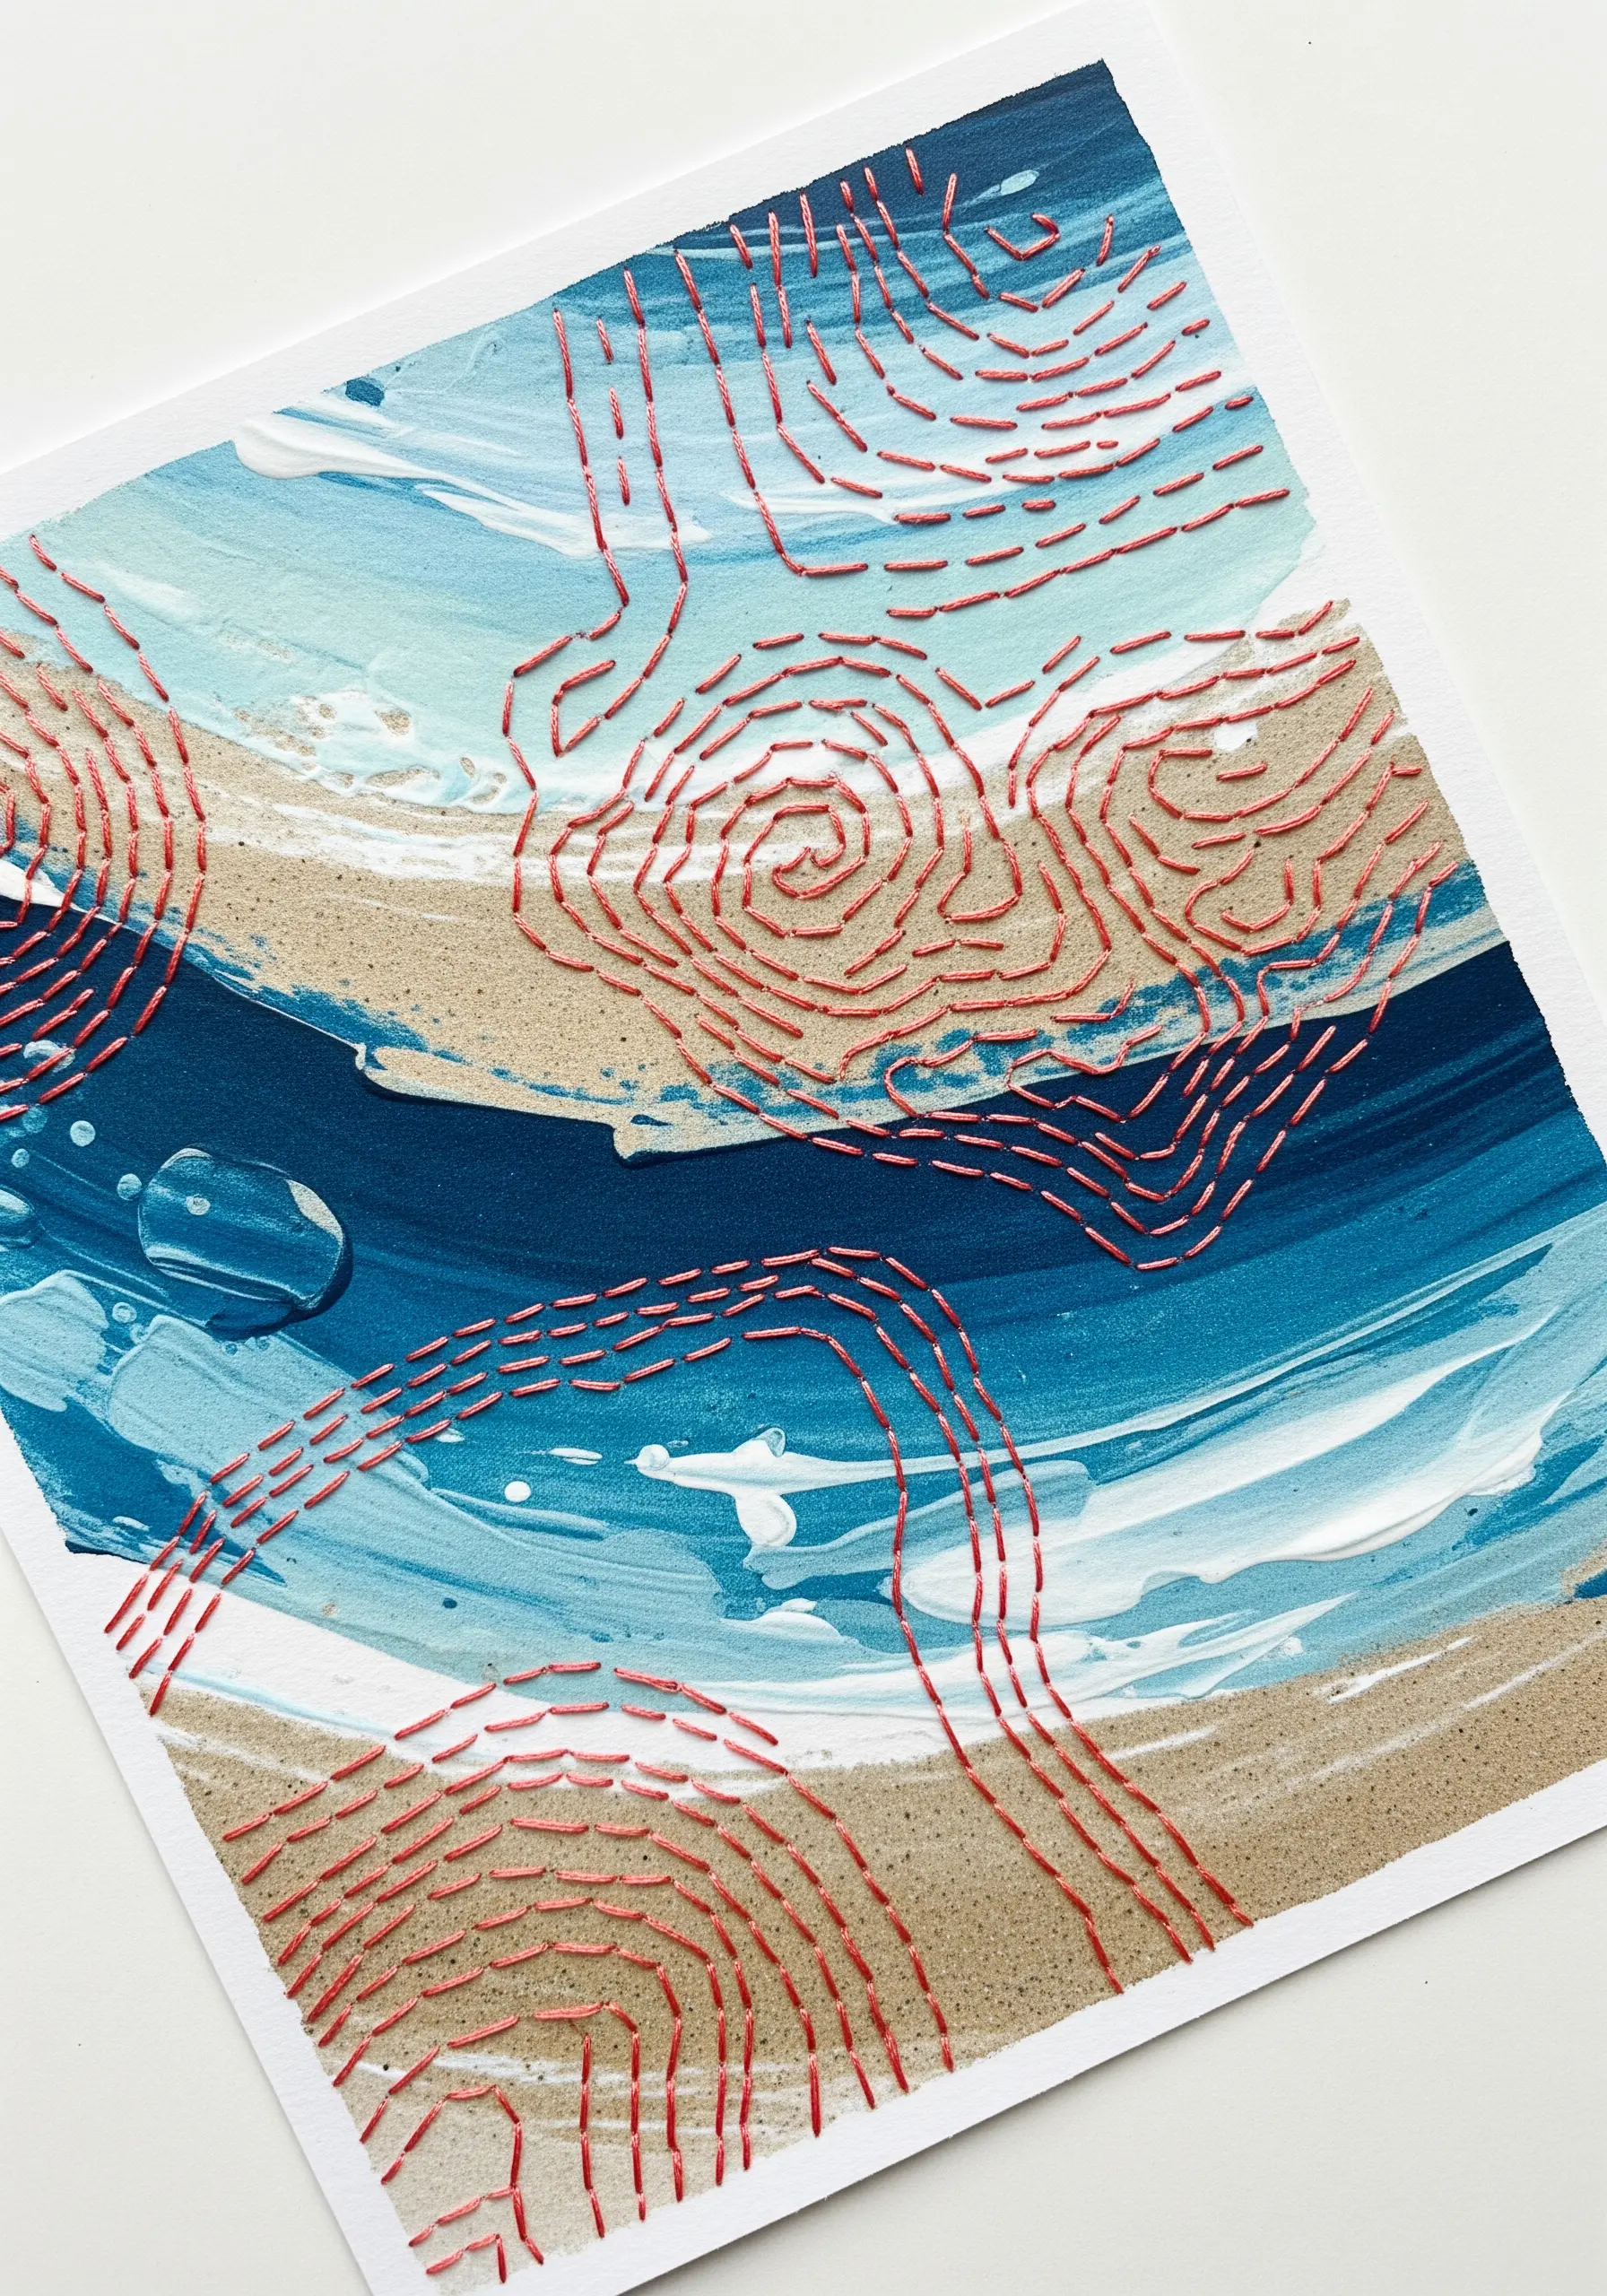
Use paint to establish the color and mood of your piece, and thread to add definition and texture.
Create an abstract background with acrylic or gouache on heavy watercolor paper.
Once it’s completely dry, stitch directly onto the painted surface with a simple running stitch.
The thread acts like a contour line on a map, adding a graphic, tactile layer that guides the eye and brings structure to the fluid, painterly base.
13. Blend Watercolor Washes with Stitched Detail
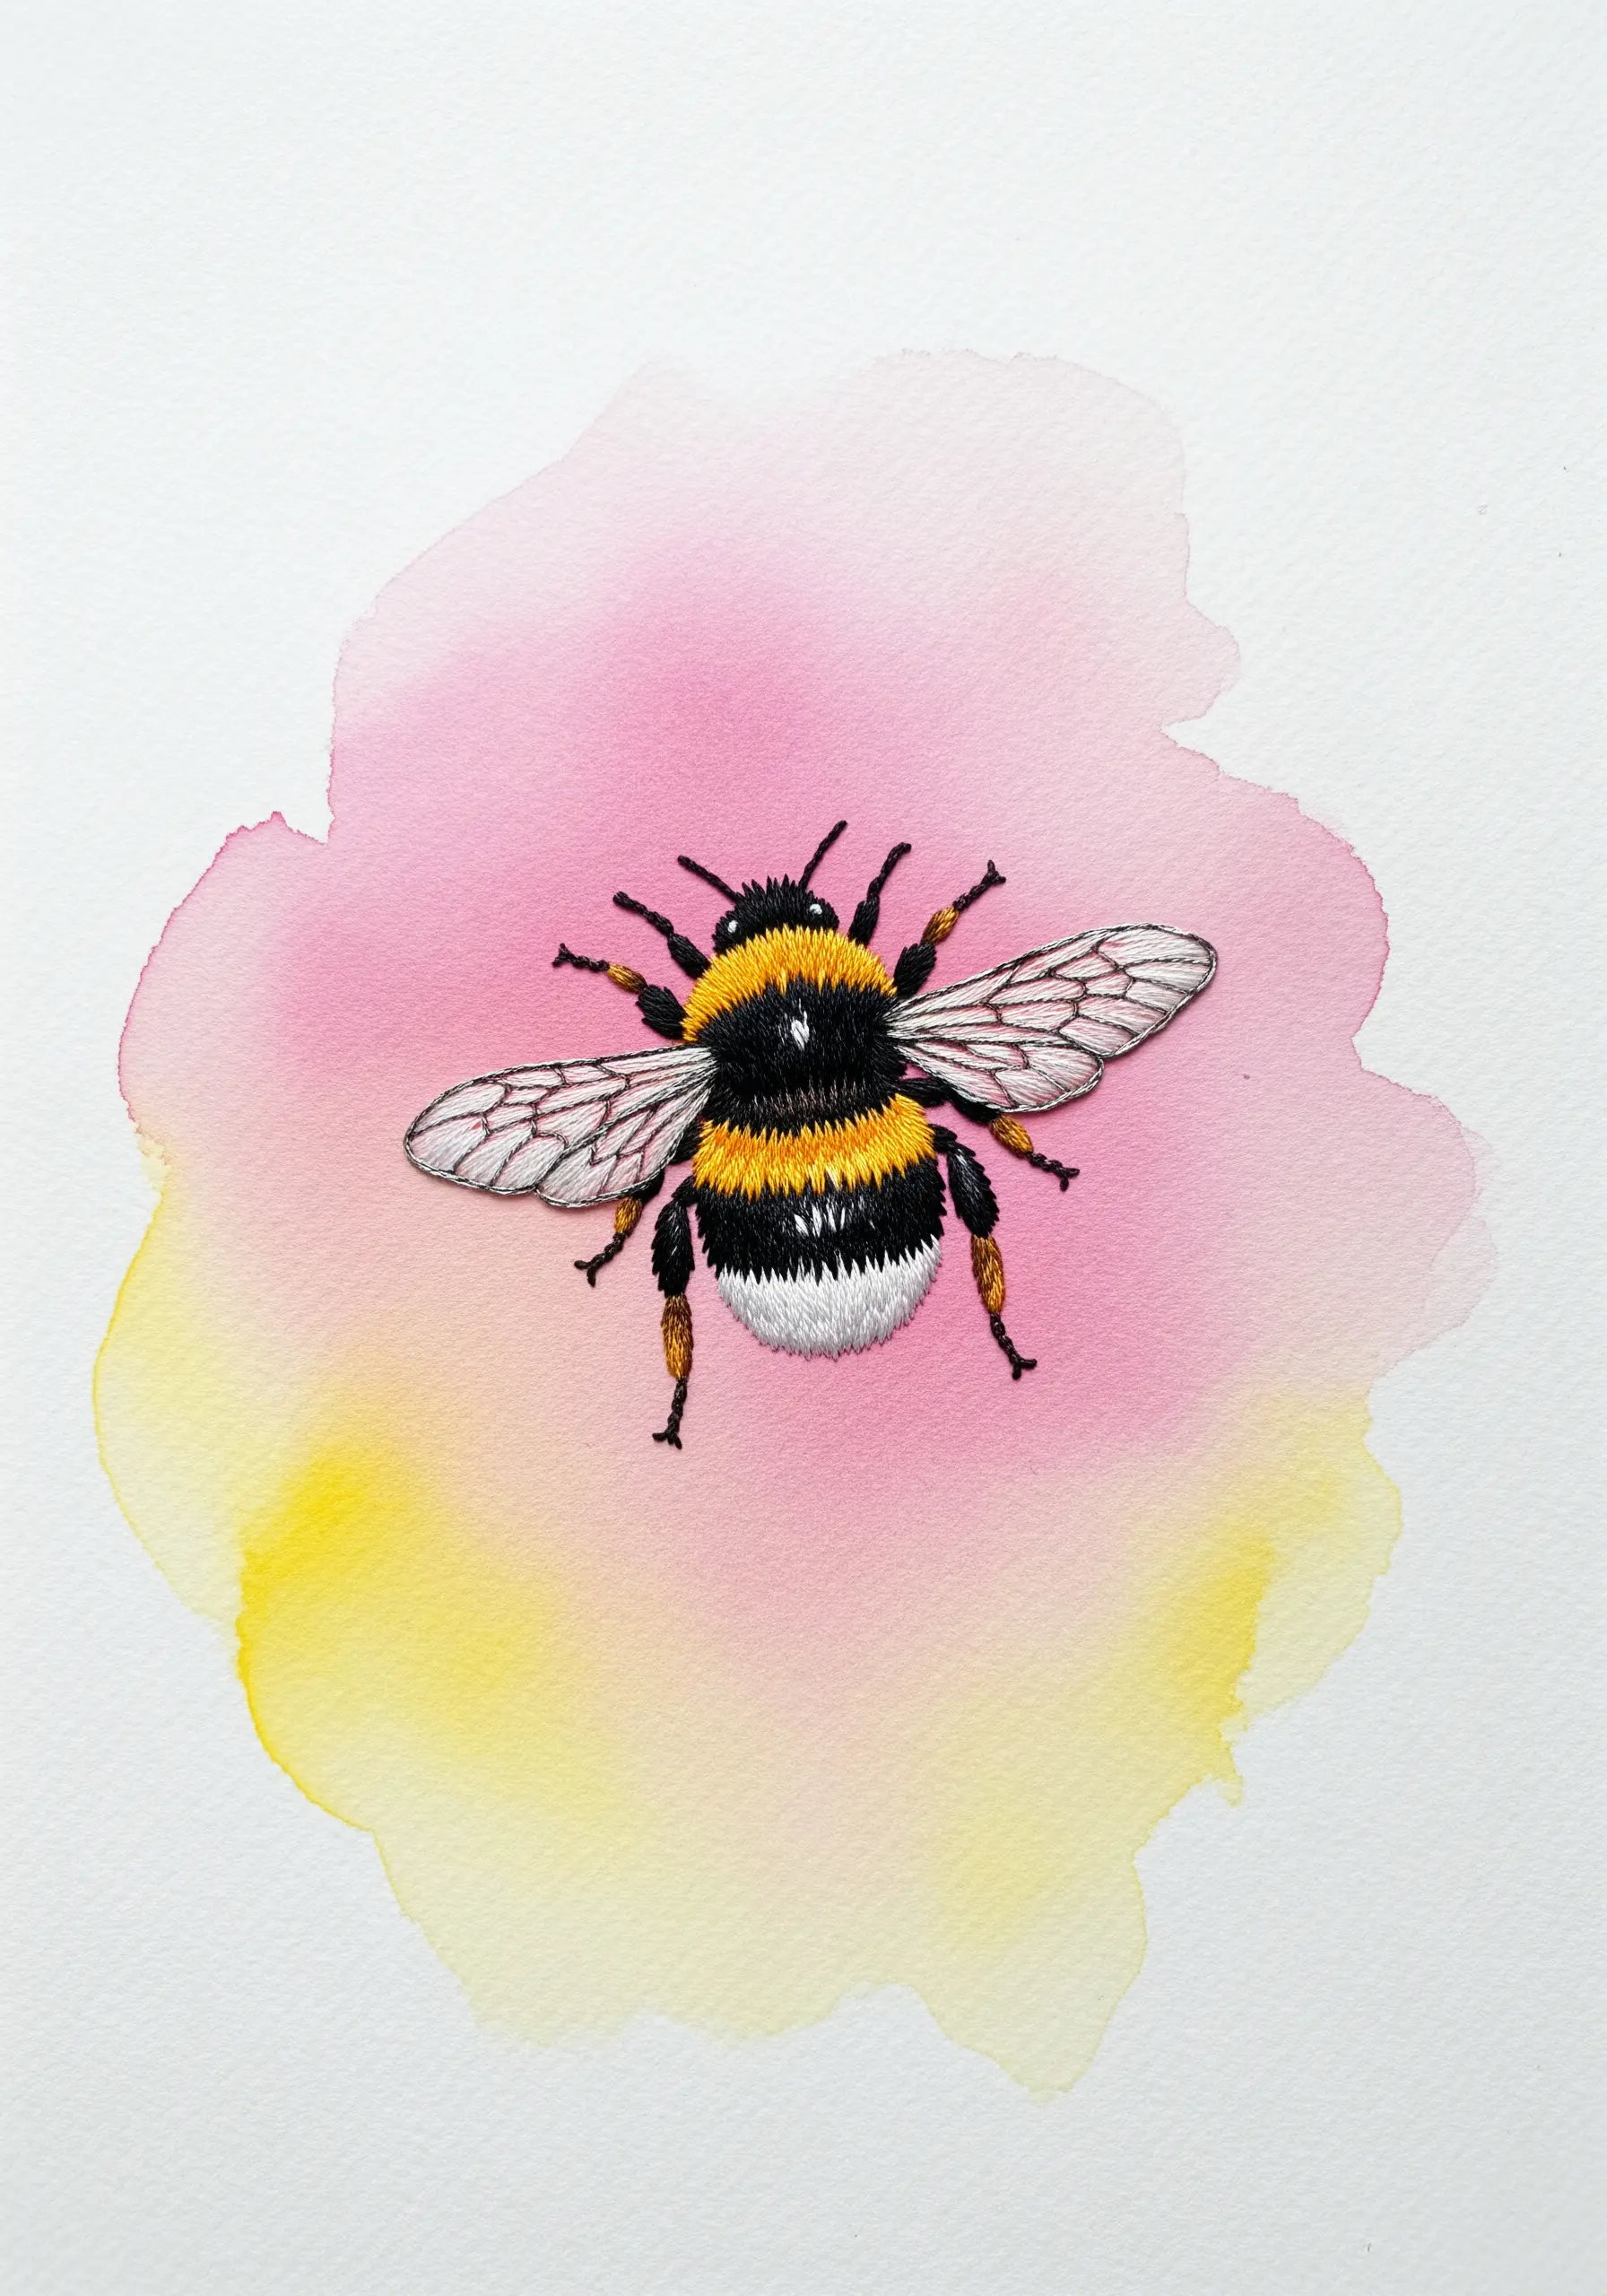
Create a soft, atmospheric backdrop that makes your detailed embroidery pop.
Apply a loose watercolor wash to thick paper, letting the colors bleed together to form a dreamy, unfocused background.
Once dry, use precise thread painting to render your subject with hyper-realistic detail.
This beautiful contrast between the soft-focus paint and the sharp-focus thread gives your work a professional, gallery-quality finish.
14. Build Texture with a Rolled Paper Mosaic
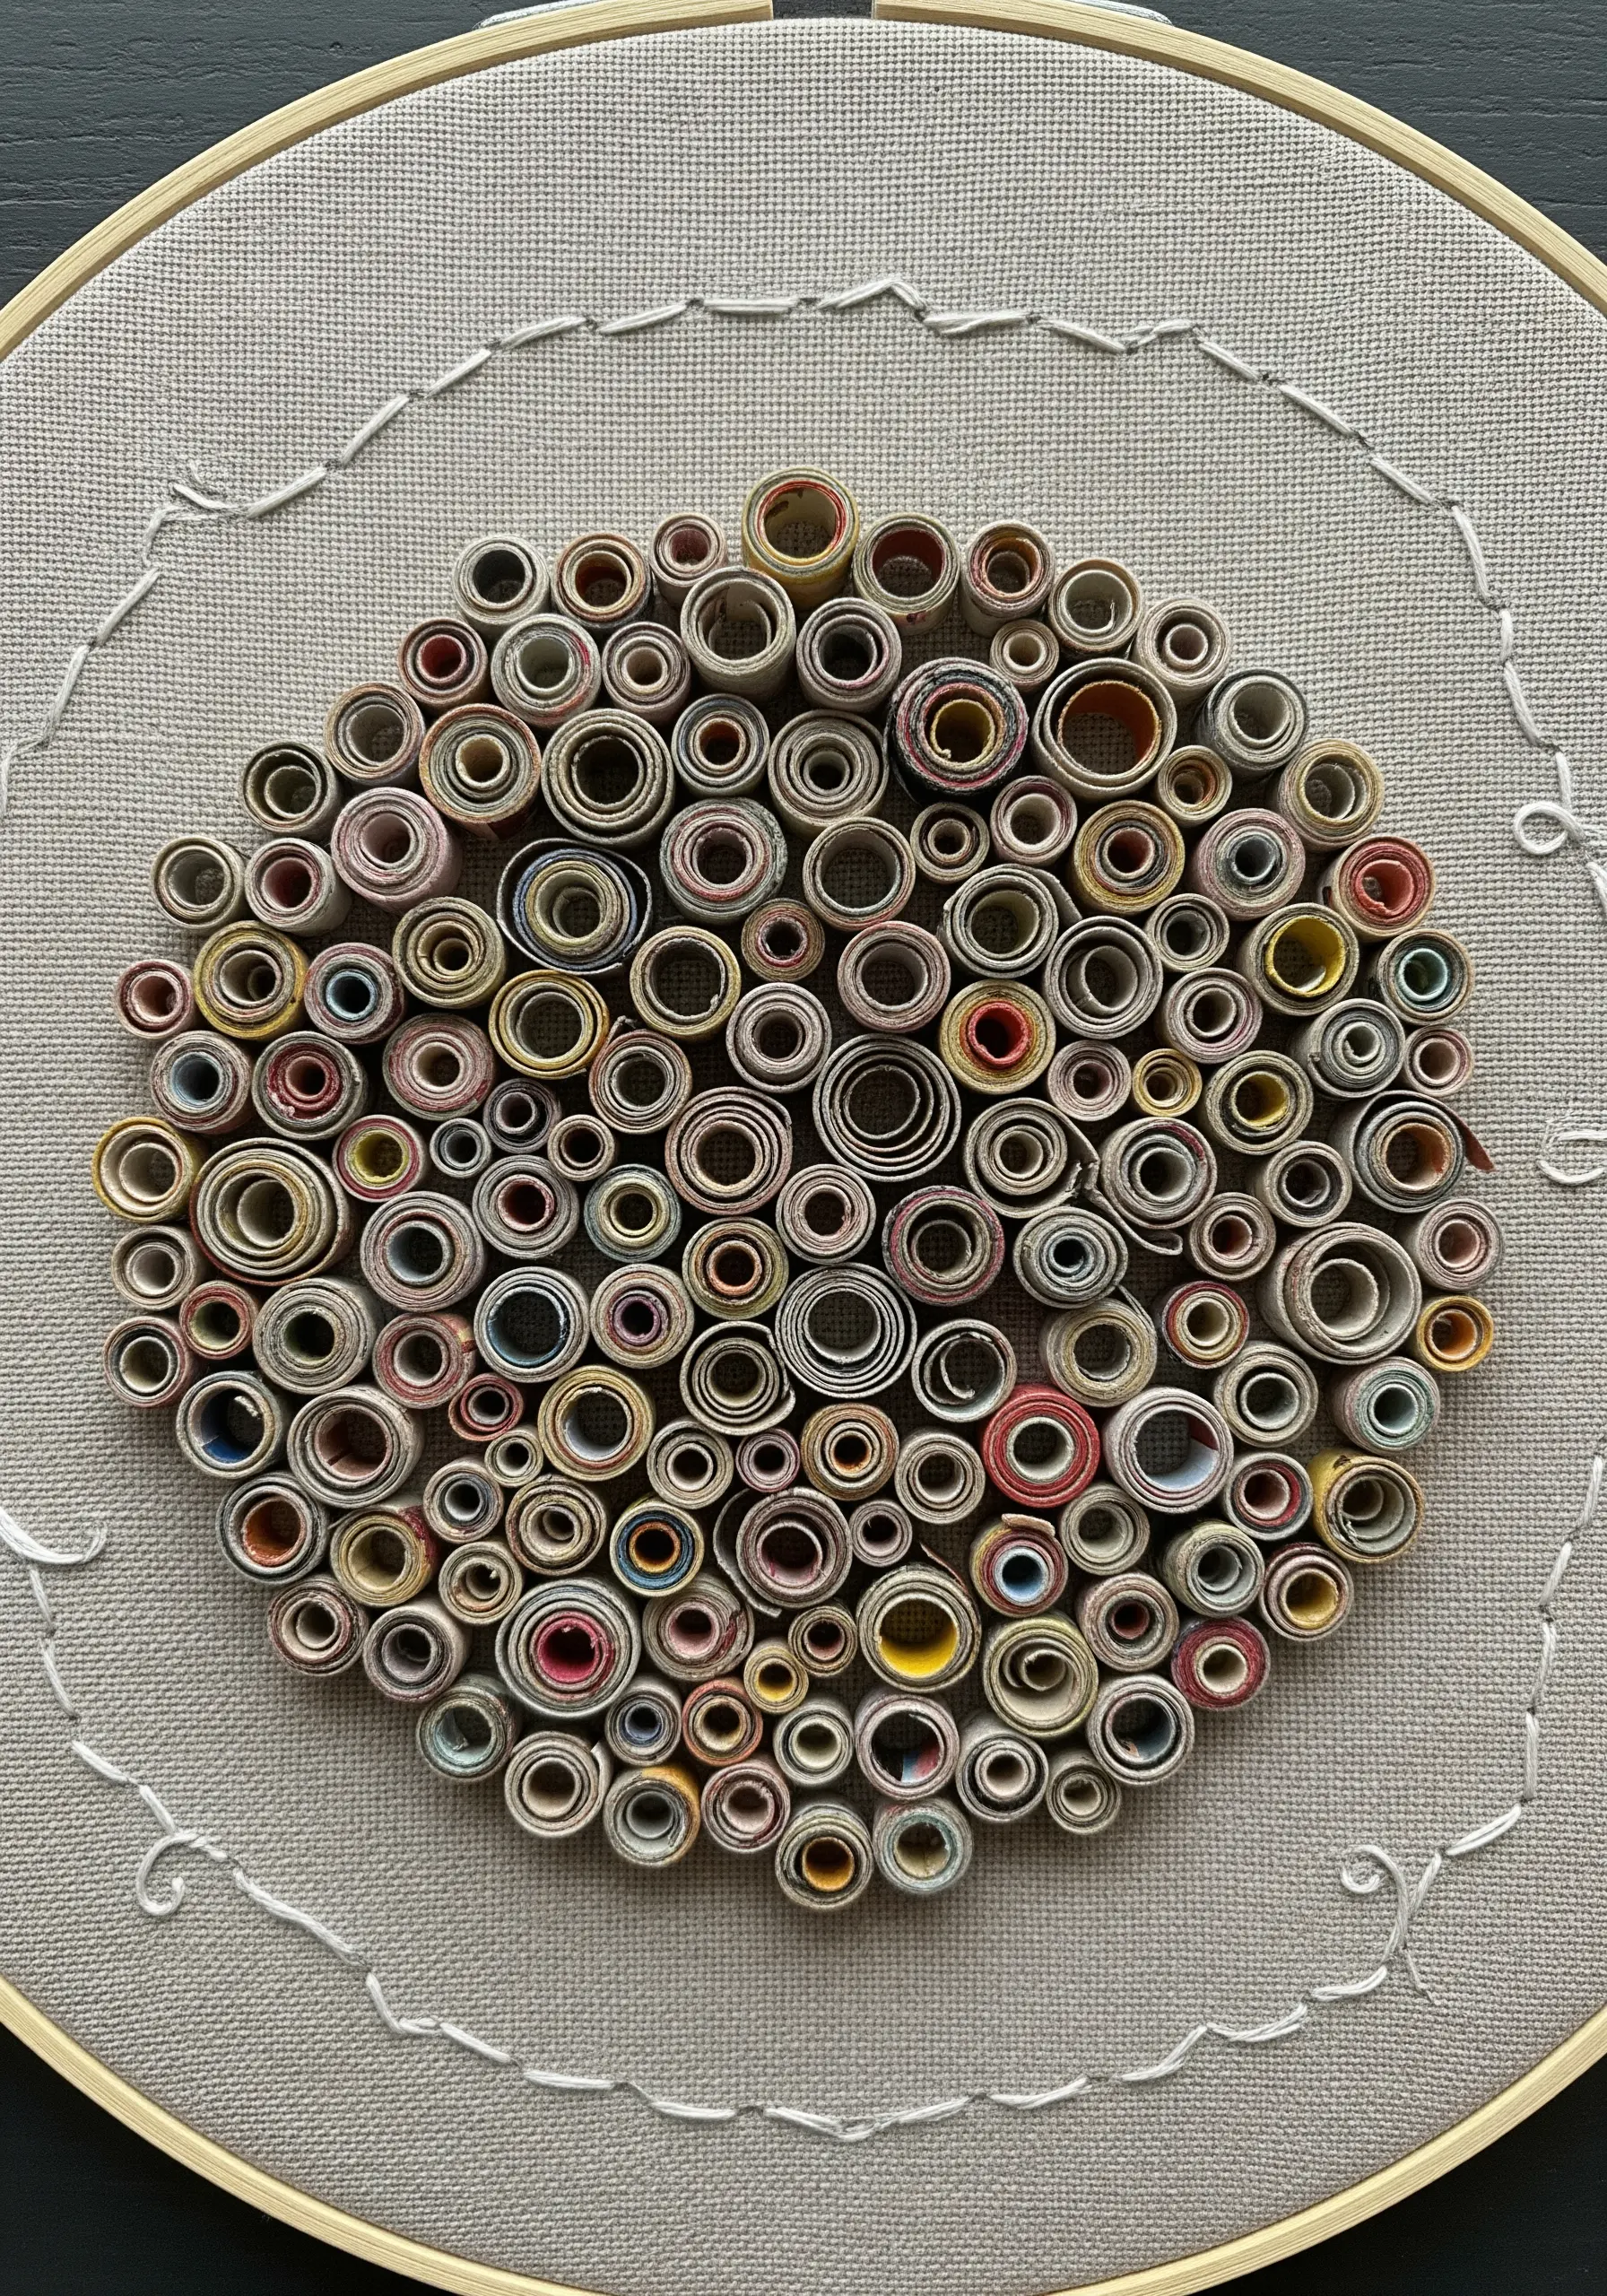
Turn discarded magazine pages into a vibrant, textural mosaic.
Cut colorful strips of paper and roll them tightly into small tubes of varying diameters.
Glue the tubes on their ends onto your fabric or cardstock base, arranging them to fill a specific shape.
Finally, use a simple outline stitch to frame the mosaic area, integrating the paper texture into the finished textile piece and giving it a clean, defined edge.
15. Create Ethereal Atmosphere with Vellum
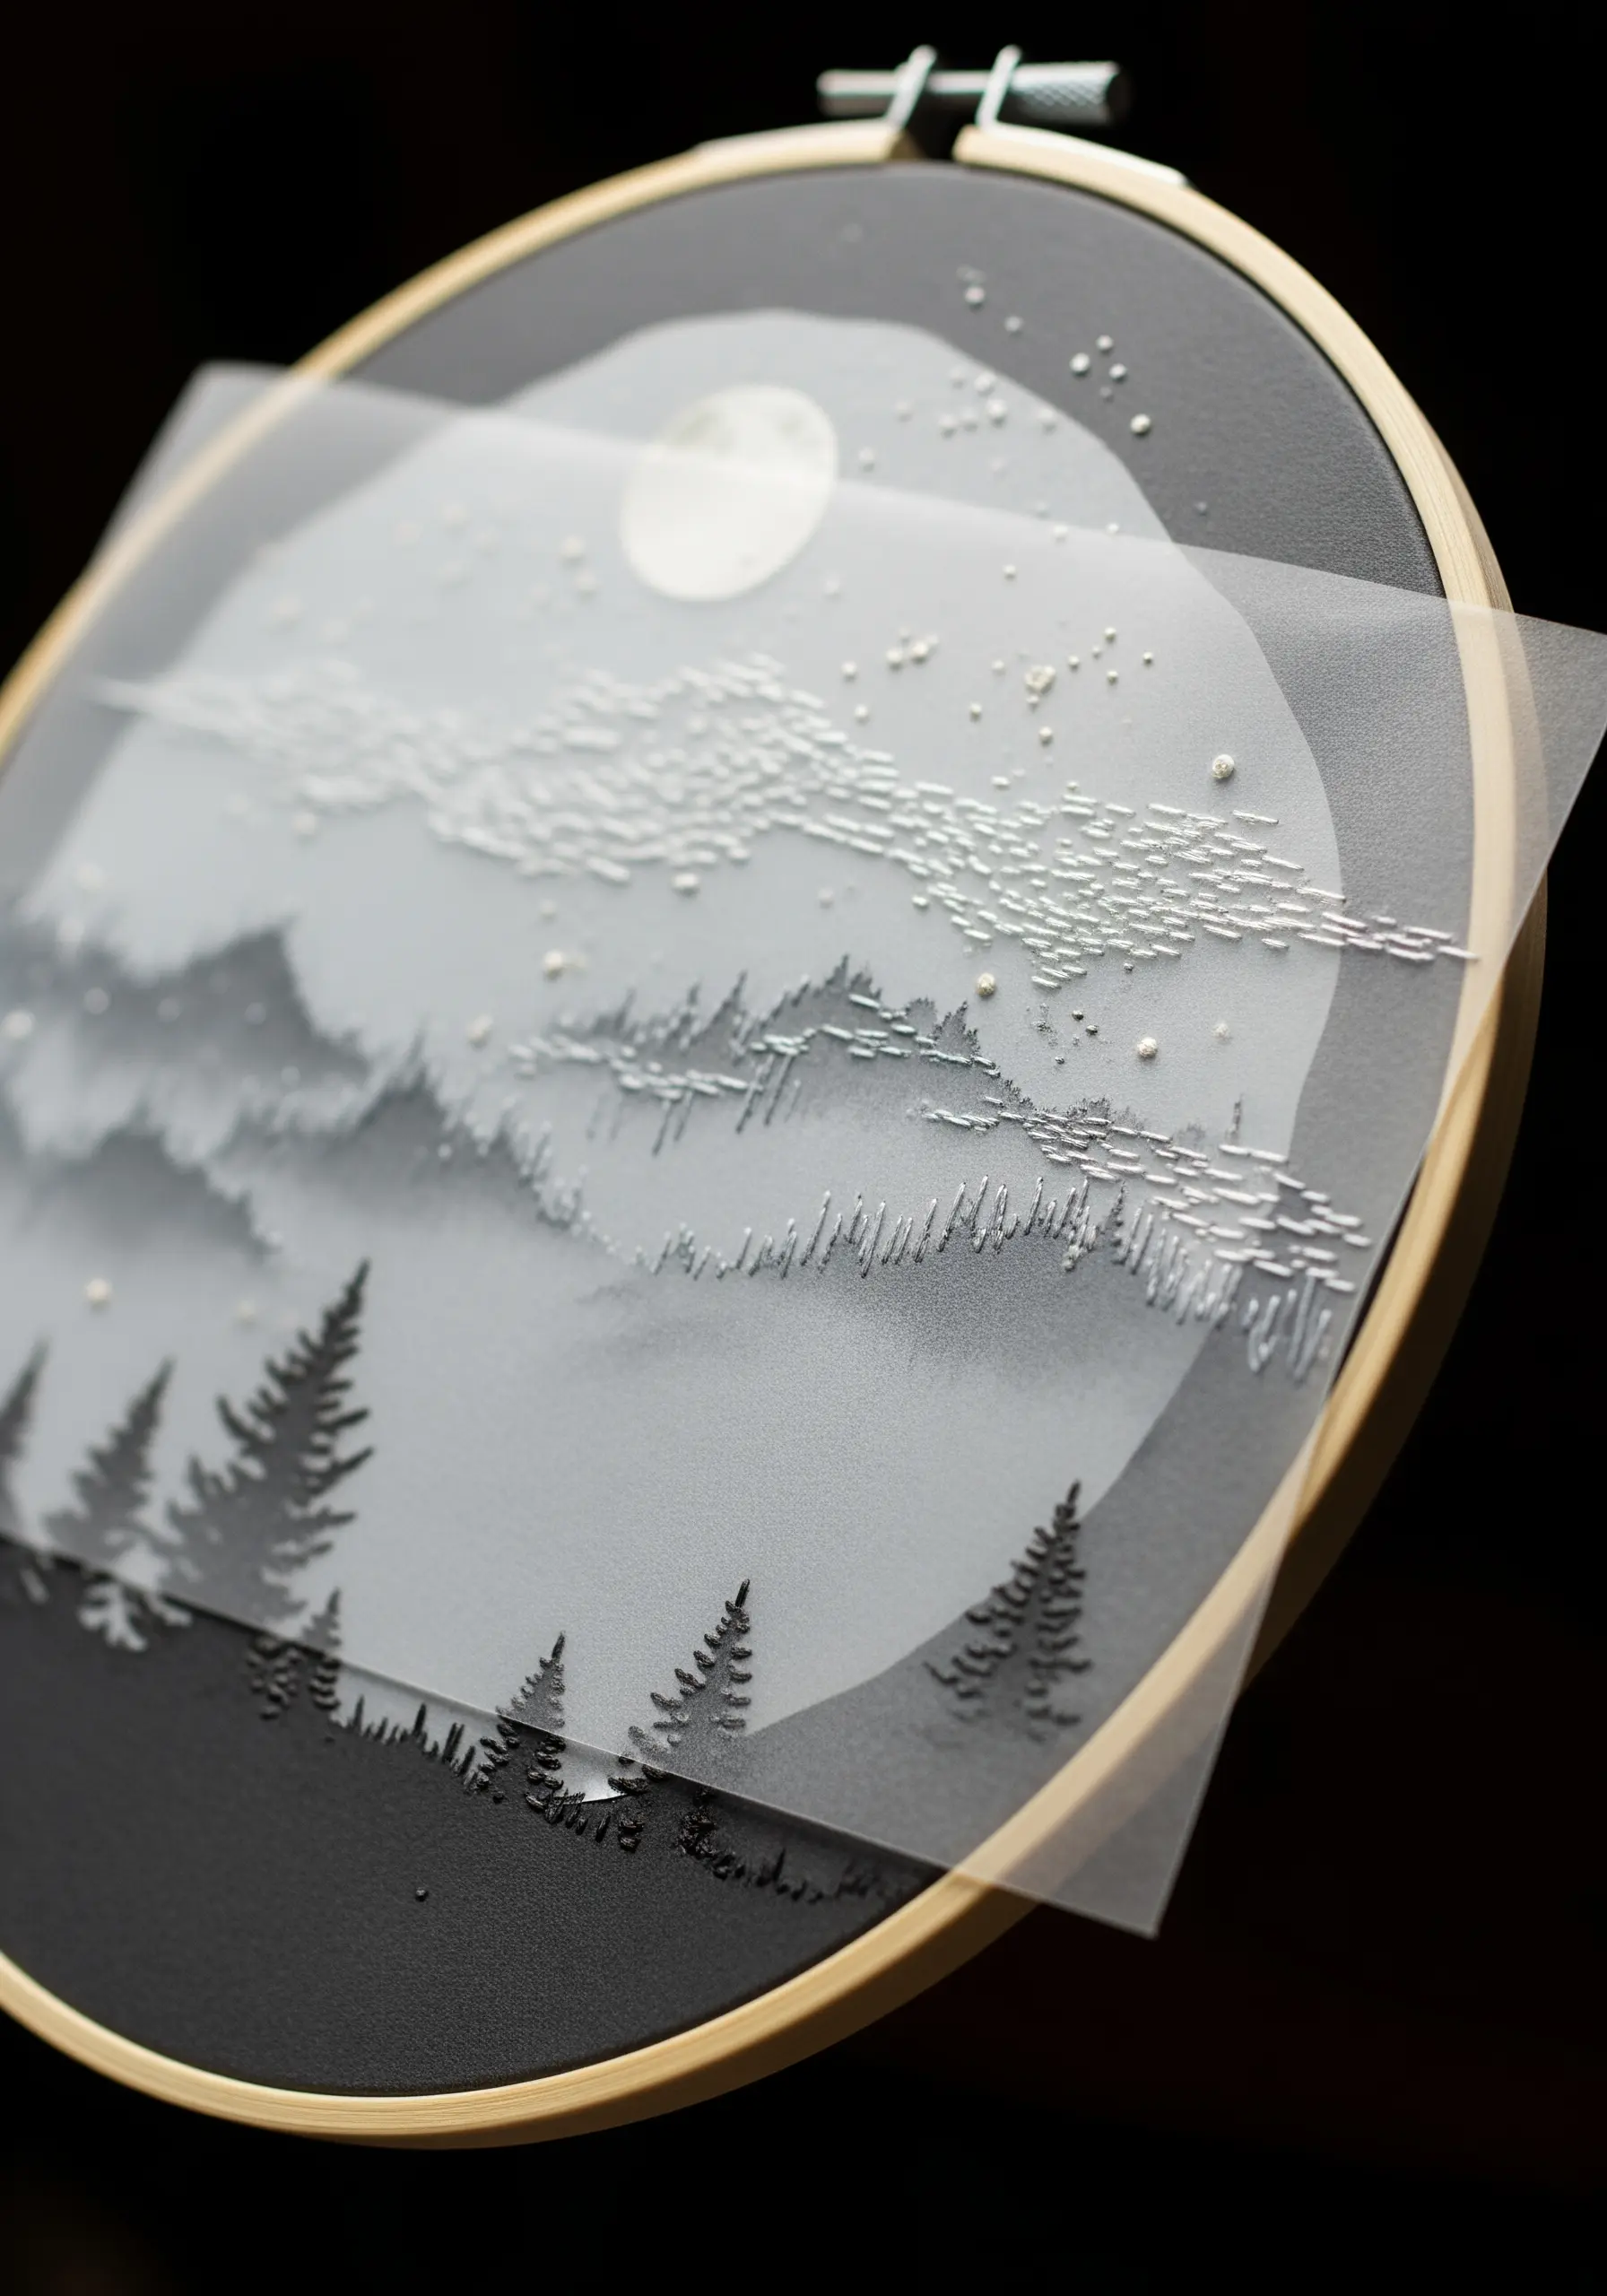
Use translucent vellum to build layers of depth and create a sense of mist or fog.
First, stitch the farthest background elements onto your base fabric.
Next, lay a sheet of vellum over the top and stitch the mid-ground elements directly onto it.
The vellum subtly obscures what’s behind it, creating a realistic atmospheric perspective and giving your landscape a moody, ethereal quality that draws the viewer in.
16. Integrate Decoupage into Your Design
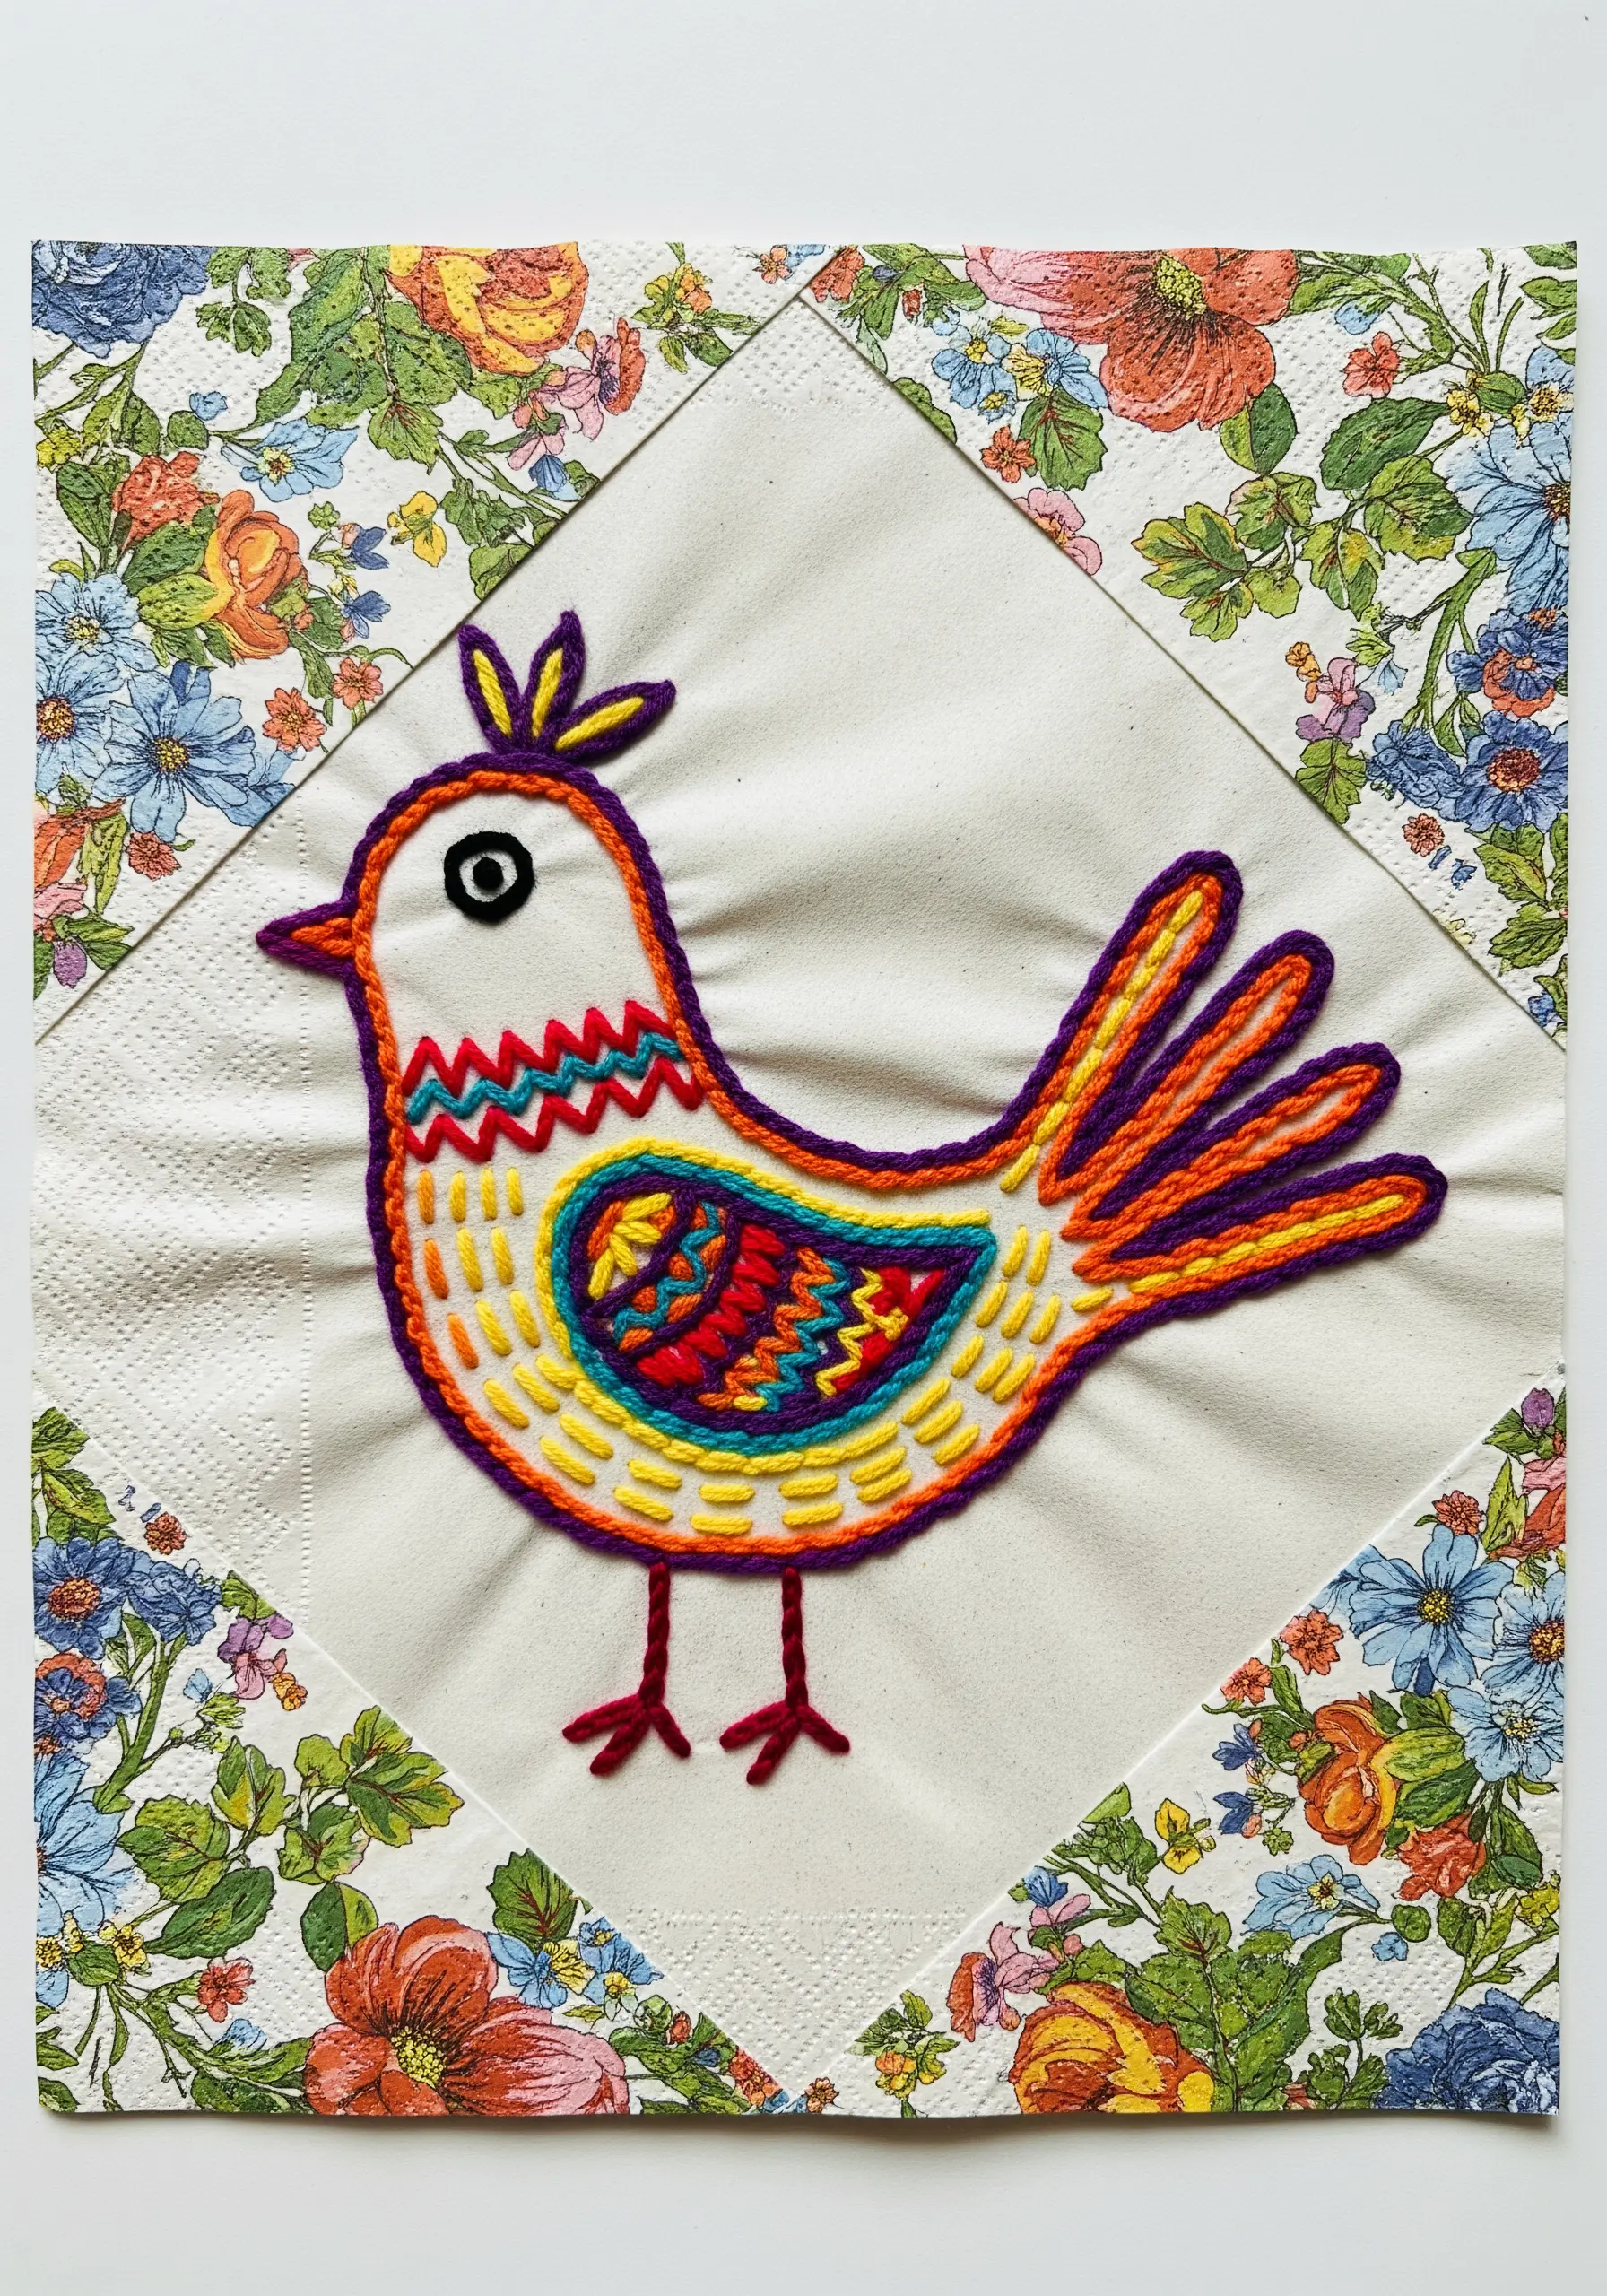
Effortlessly add intricate patterns and colors to your work by combining it with decoupage.
Carefully cut out a design from a decorative paper napkin and apply it to your fabric or paper base with decoupage medium.
Once the glue is dry, use embroidery to enhance the printed design, outlining key shapes or adding new, stitched details.
This method allows you to incorporate complex imagery without having to stitch every single element.
17. Appliqué with Intricate Papercuts
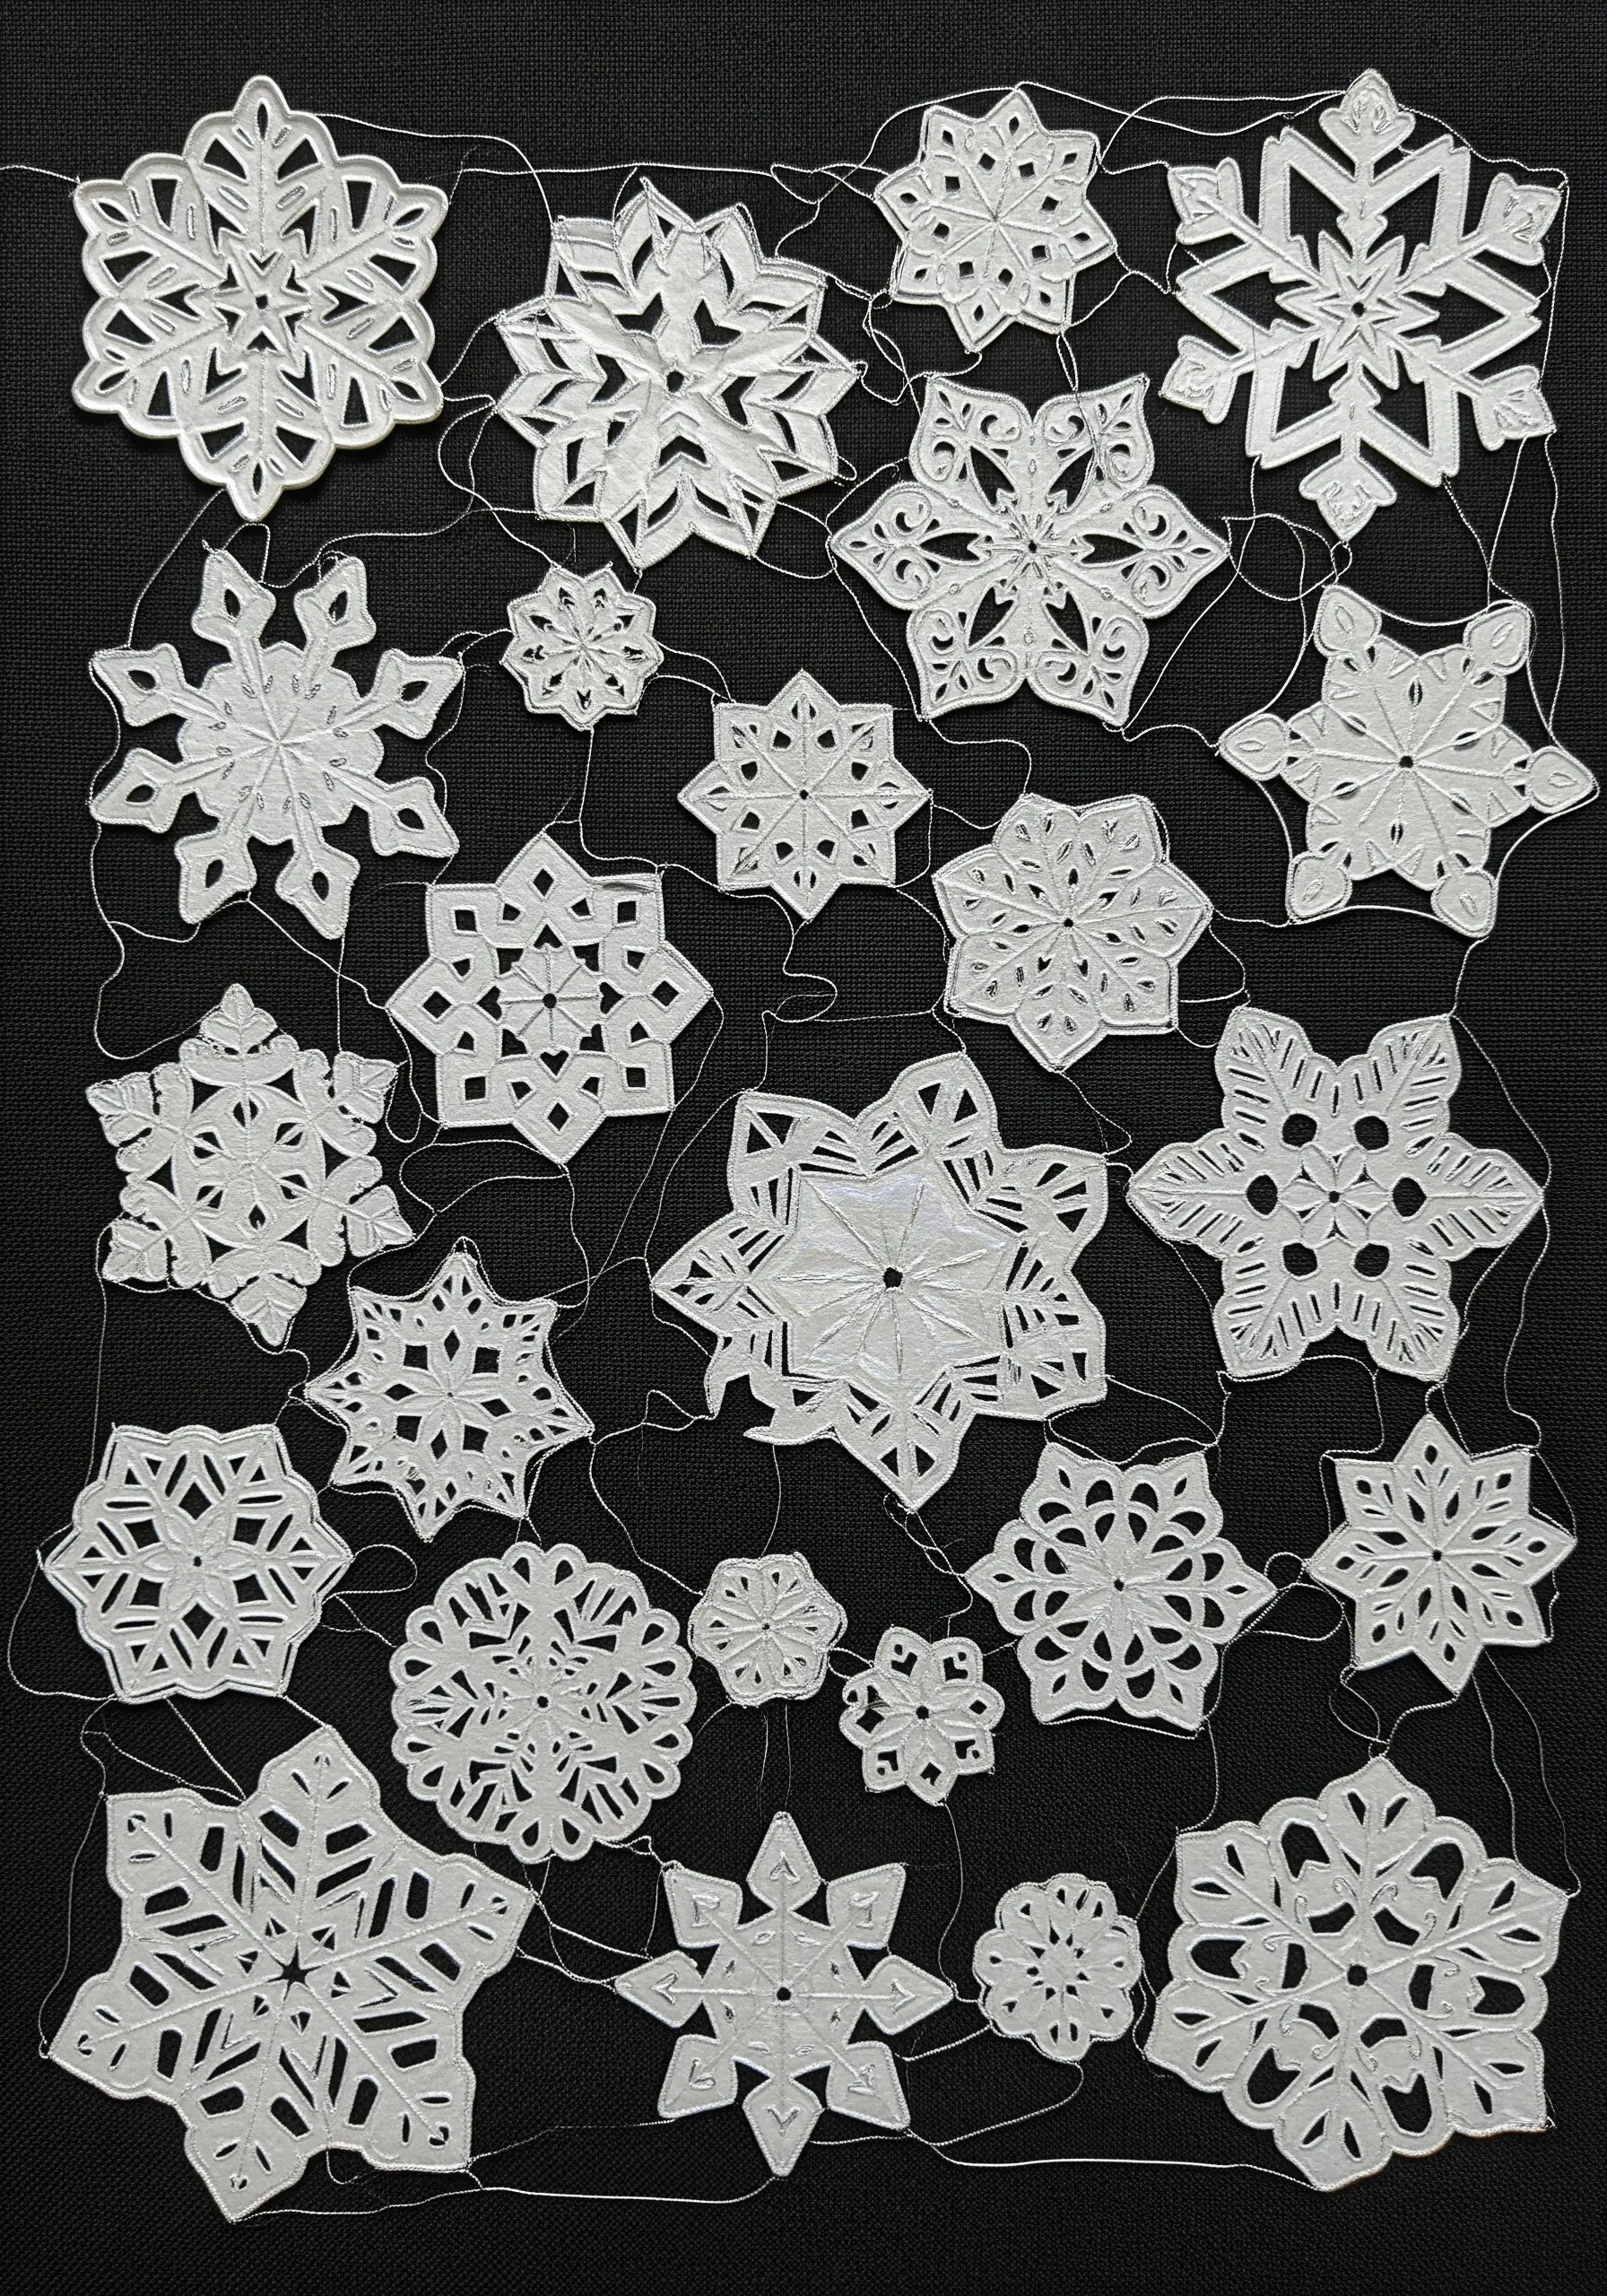
Achieve the delicate, precise look of lace using paper instead of thread.
Create intricate silhouettes, like these snowflakes, by hand-cutting or using a die-cutting machine on high-quality paper.
Arrange the papercuts on a dark, contrasting fabric background.
Secure them with tiny, almost invisible couching stitches that follow the design’s contours, resulting in a piece with stunning sharpness and delicate detail.


