
There comes a moment in every stitcher’s journey when you want your work to feel less like a hobby and more like art. You have the skills, the threads, and the ideas, but you’re seeking that final touch of polish—the shift from a piece that is simply ‘finished’ to one that is truly ‘resolved’.
This collection is your guide to making that shift. It’s not about learning dozens of complex new stitches, but about refining your approach. It’s about understanding how a simple change in thread weight can sharpen a detail, how a thoughtful frame can complete a story, and how texture can say more than color ever could.
Here, you’ll find ideas that bridge the gap between vintage inspiration and modern artistry. Think of this as a quiet conversation about intention—helping you to see your own work with new eyes and giving you the confidence to create pieces that are not only beautiful but timeless.
1. Curate a Cohesive Botanical Gallery
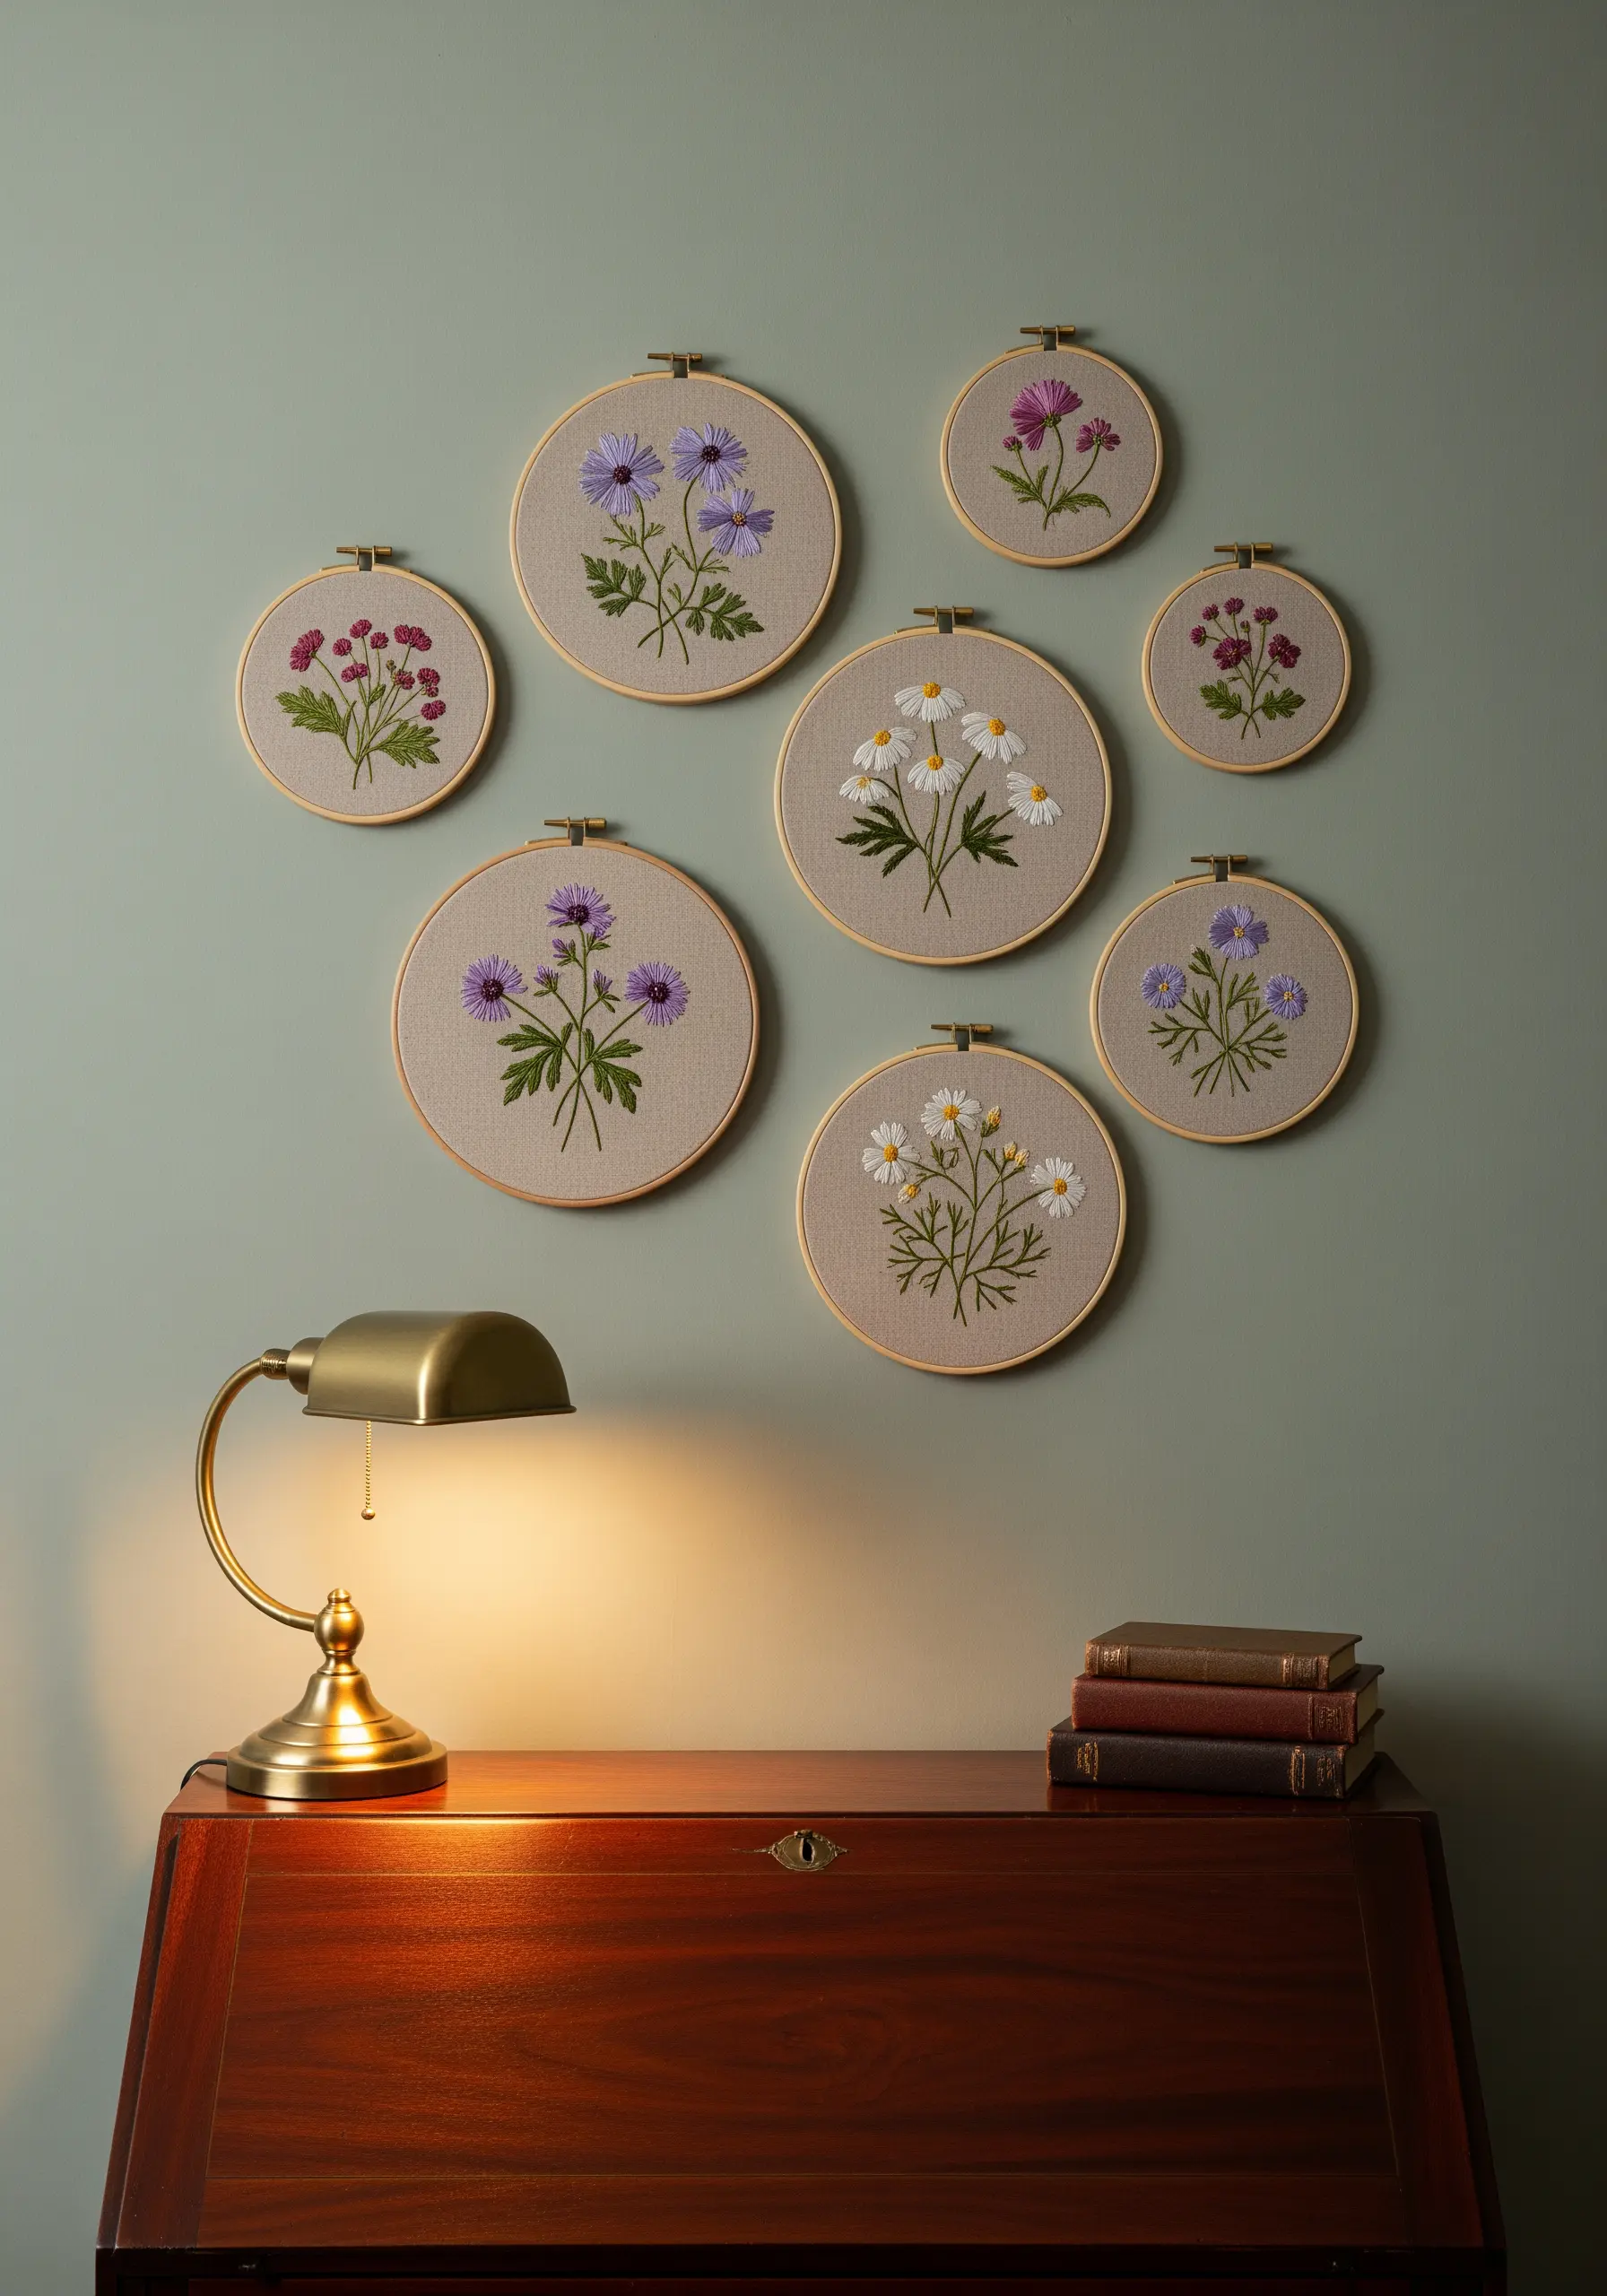
To create a harmonious collection, stitch several related designs on the same type of fabric, like a neutral linen or cotton canvas.
Use a consistent, limited color palette across all the hoops. This allows you to vary the floral motifs and hoop sizes while maintaining a unified, intentional look.
Arrange the hoops in an organic, asymmetrical cluster to create visual flow and interest, transforming a simple wall into an elegant focal point. The natural wood of the hoops acts as its own frame, adding warmth and texture.
2. Achieve Painterly Depth with Thread Painting
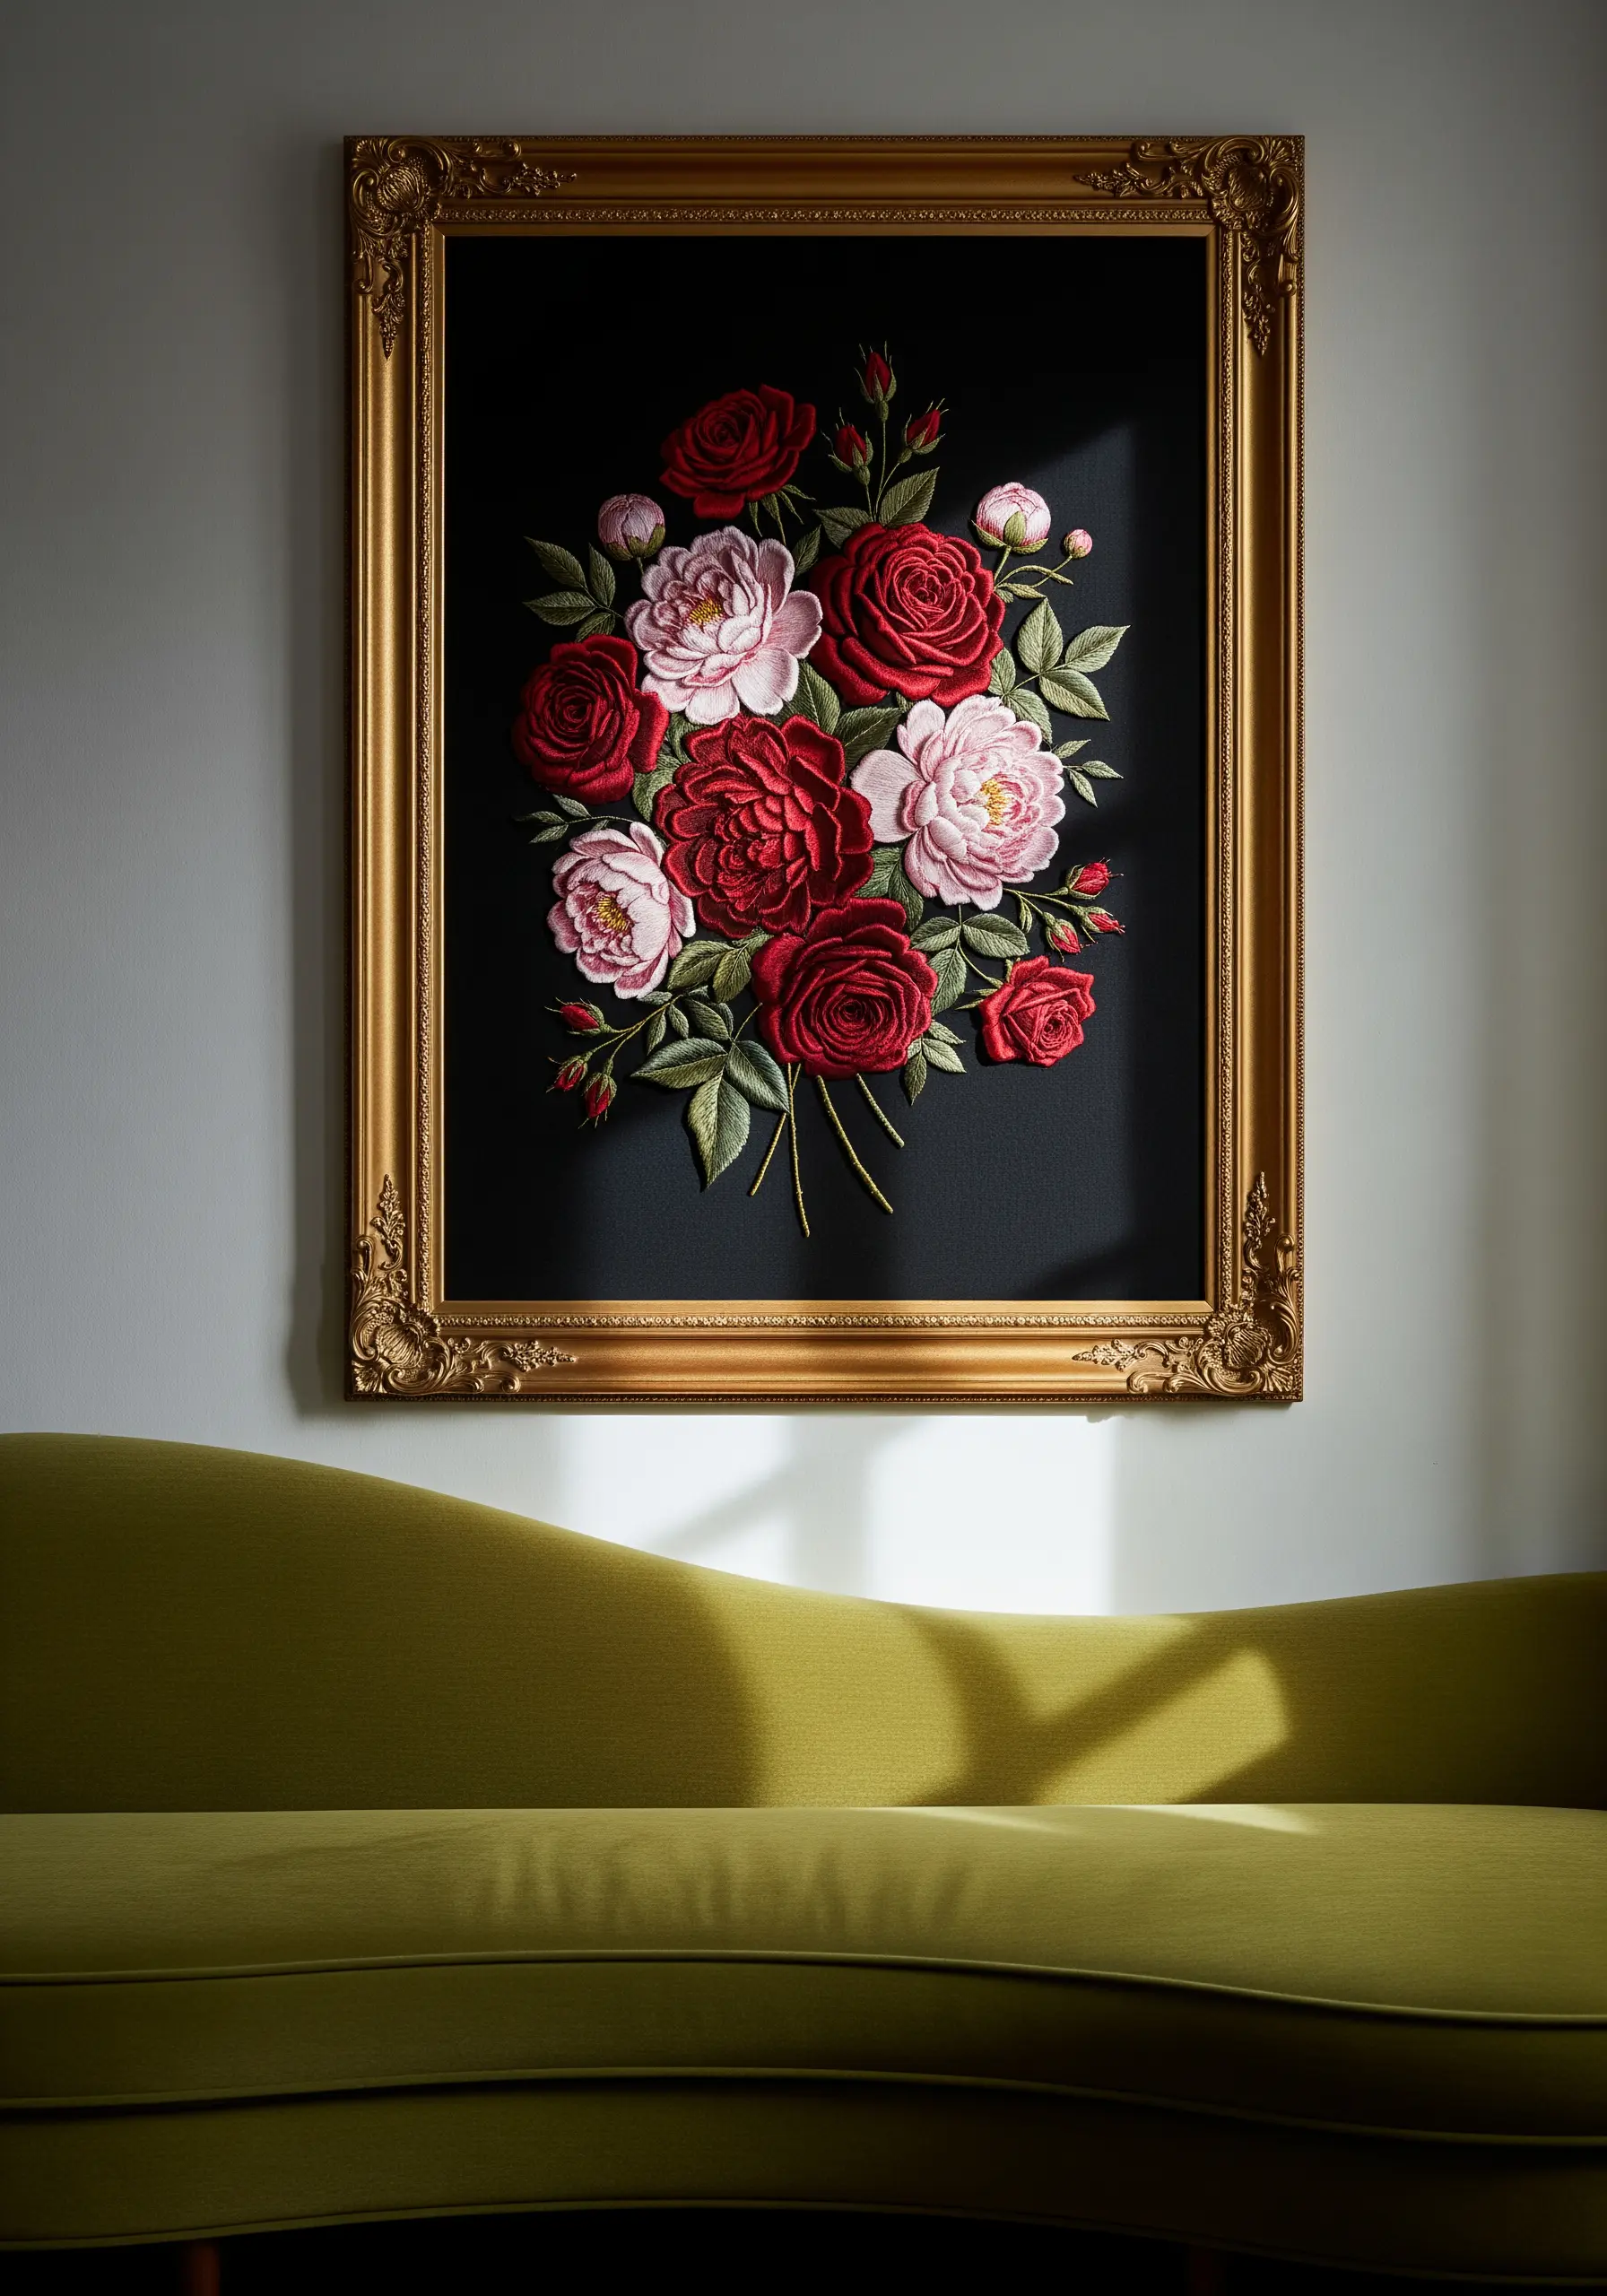
To give your florals hyper-realistic dimension, use the long-and-short stitch technique instead of a flat satin stitch.
Work with several shades of the same color, from dark to light, blending them seamlessly to create gradients that mimic how light hits each petal.
Stitching on a dark, high-contrast fabric like black cotton sateen makes the vibrant reds and pinks appear richer and more dramatic. Pairing the finished piece with an ornate, gilded frame elevates it from a craft project to a piece of fine art.
3. Capture Delicate Details in Miniature
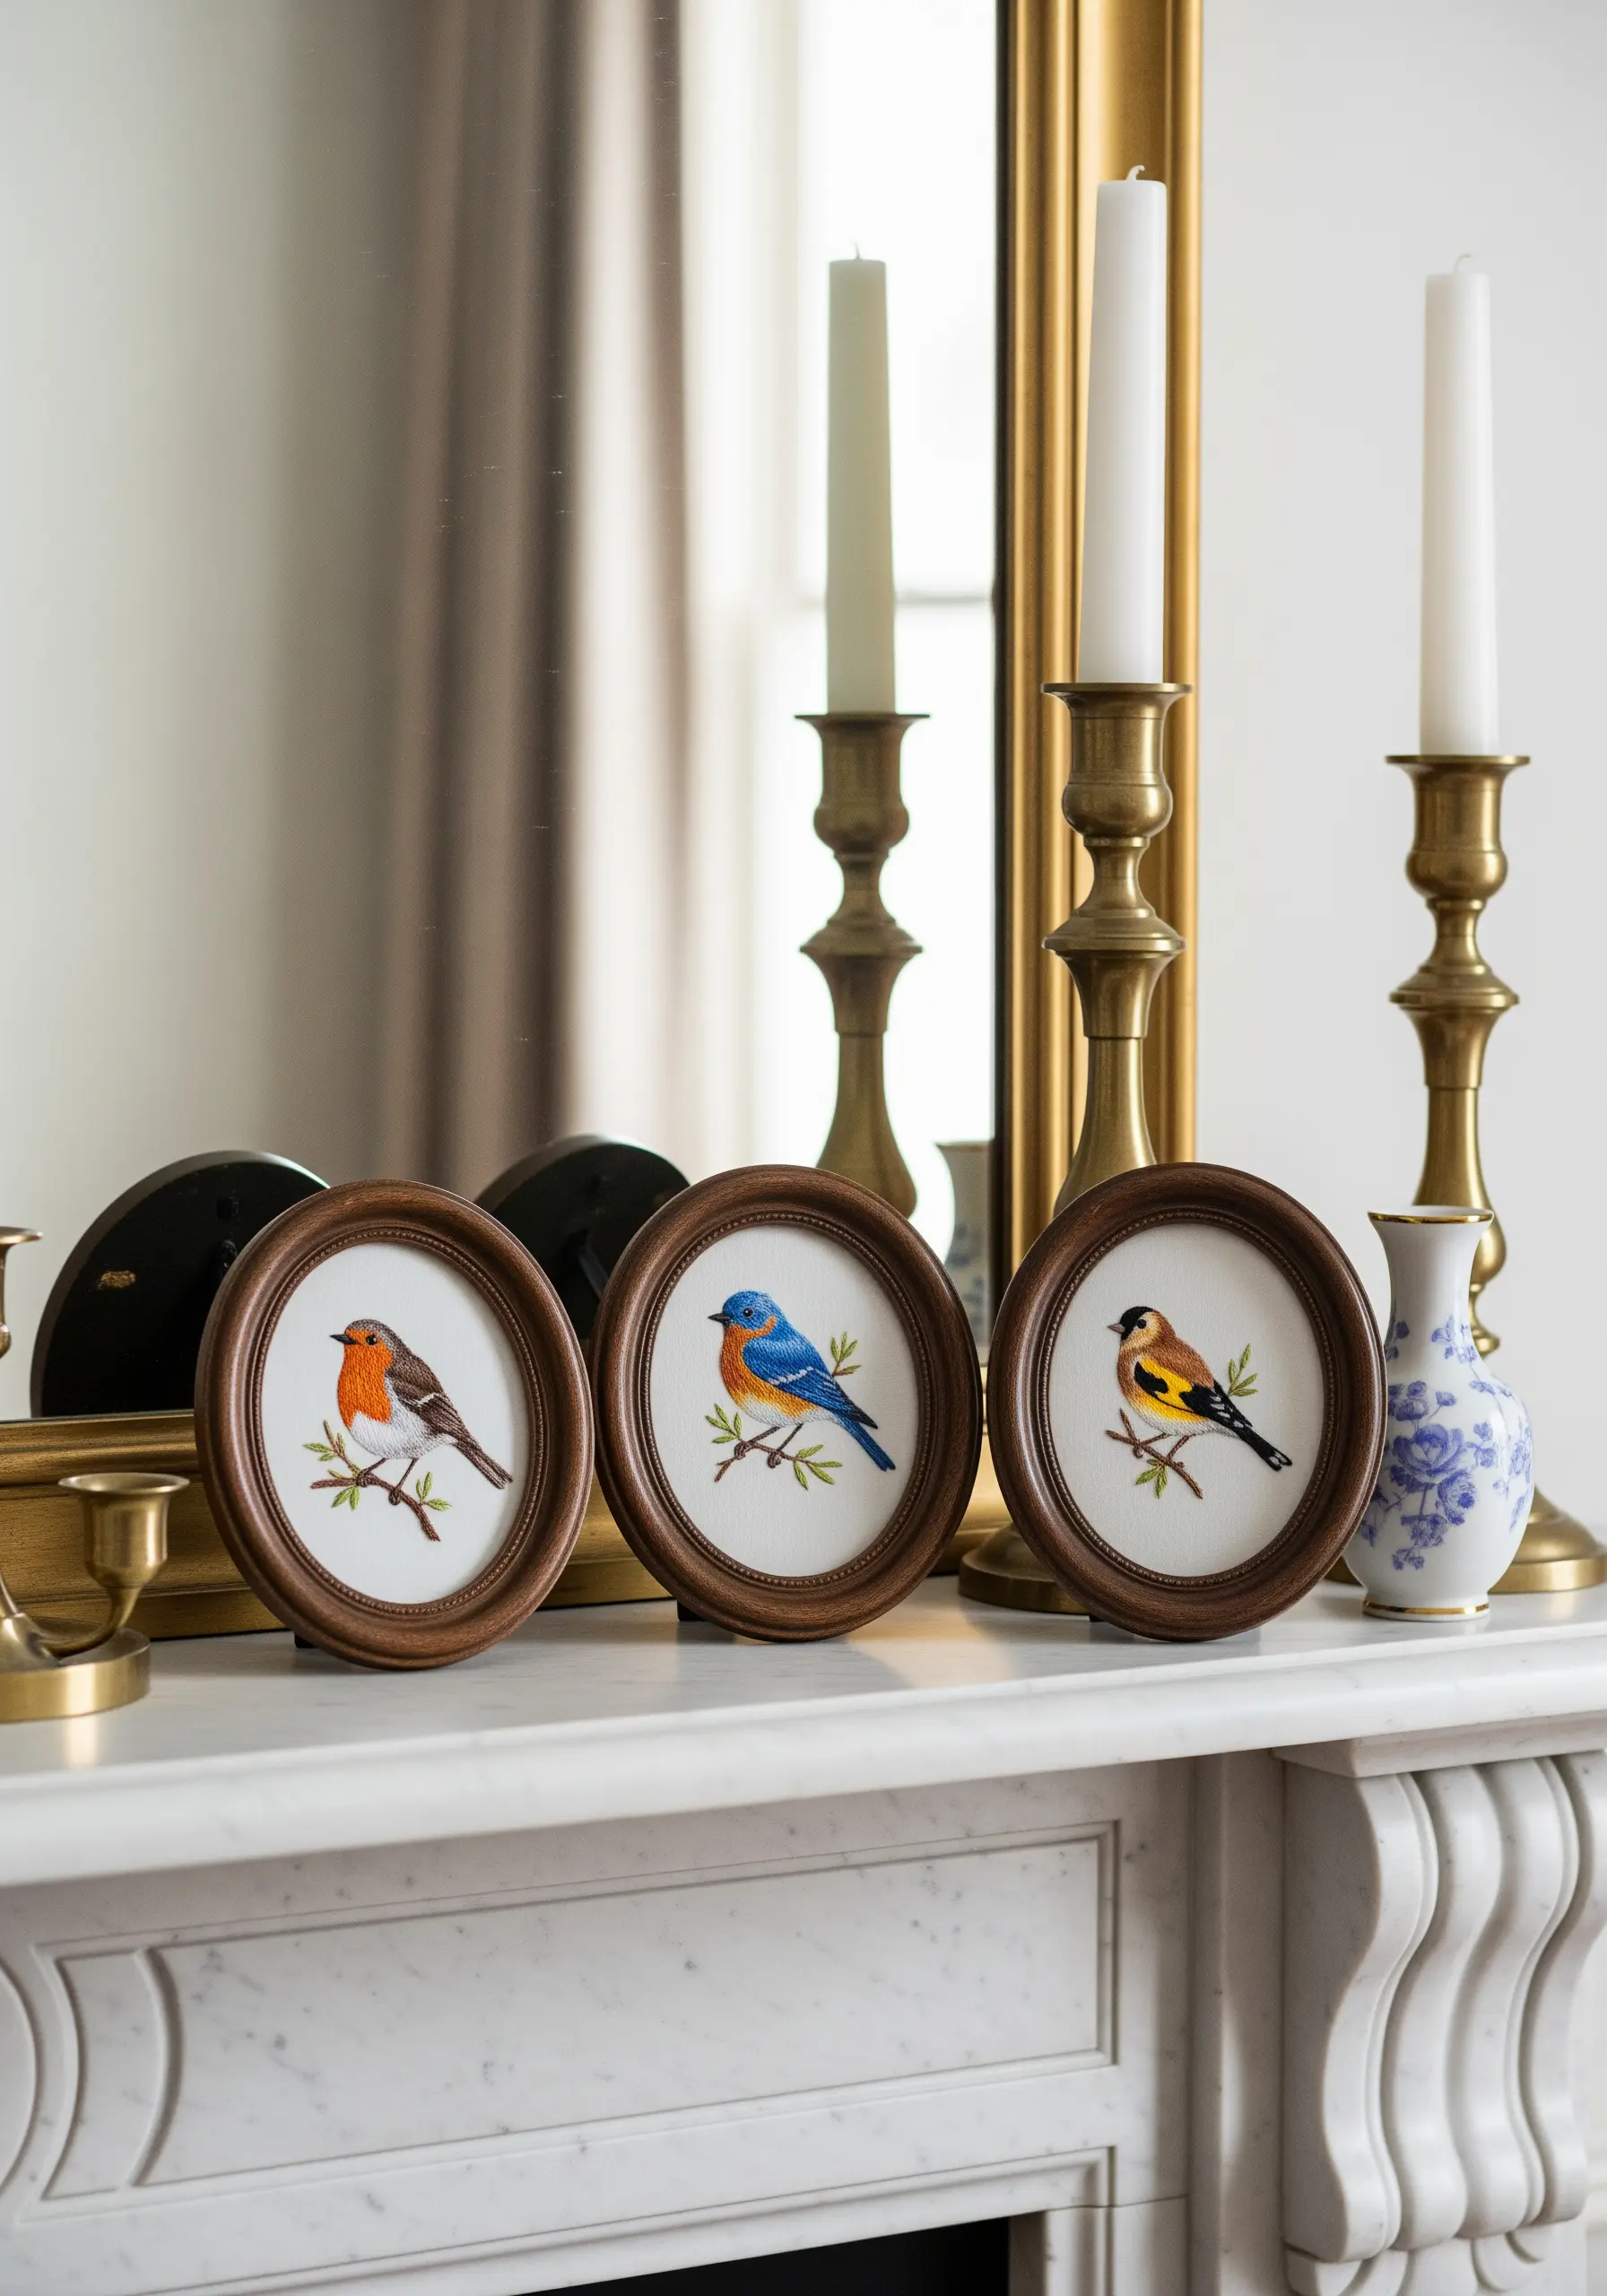
When working on small-scale subjects like birds, switch to a single strand of embroidery floss. This allows you to create fine, precise lines that won’t overwhelm the design.
Use a split stitch for outlines and tiny straight stitches to suggest the texture of feathers. This technique provides control and ensures every detail is crisp and clear.
Displaying a series of miniature embroideries in identical frames creates a powerful, curated triptych that feels like a classic naturalist’s collection.
4. Recreate Vintage Illustrations on Fabric
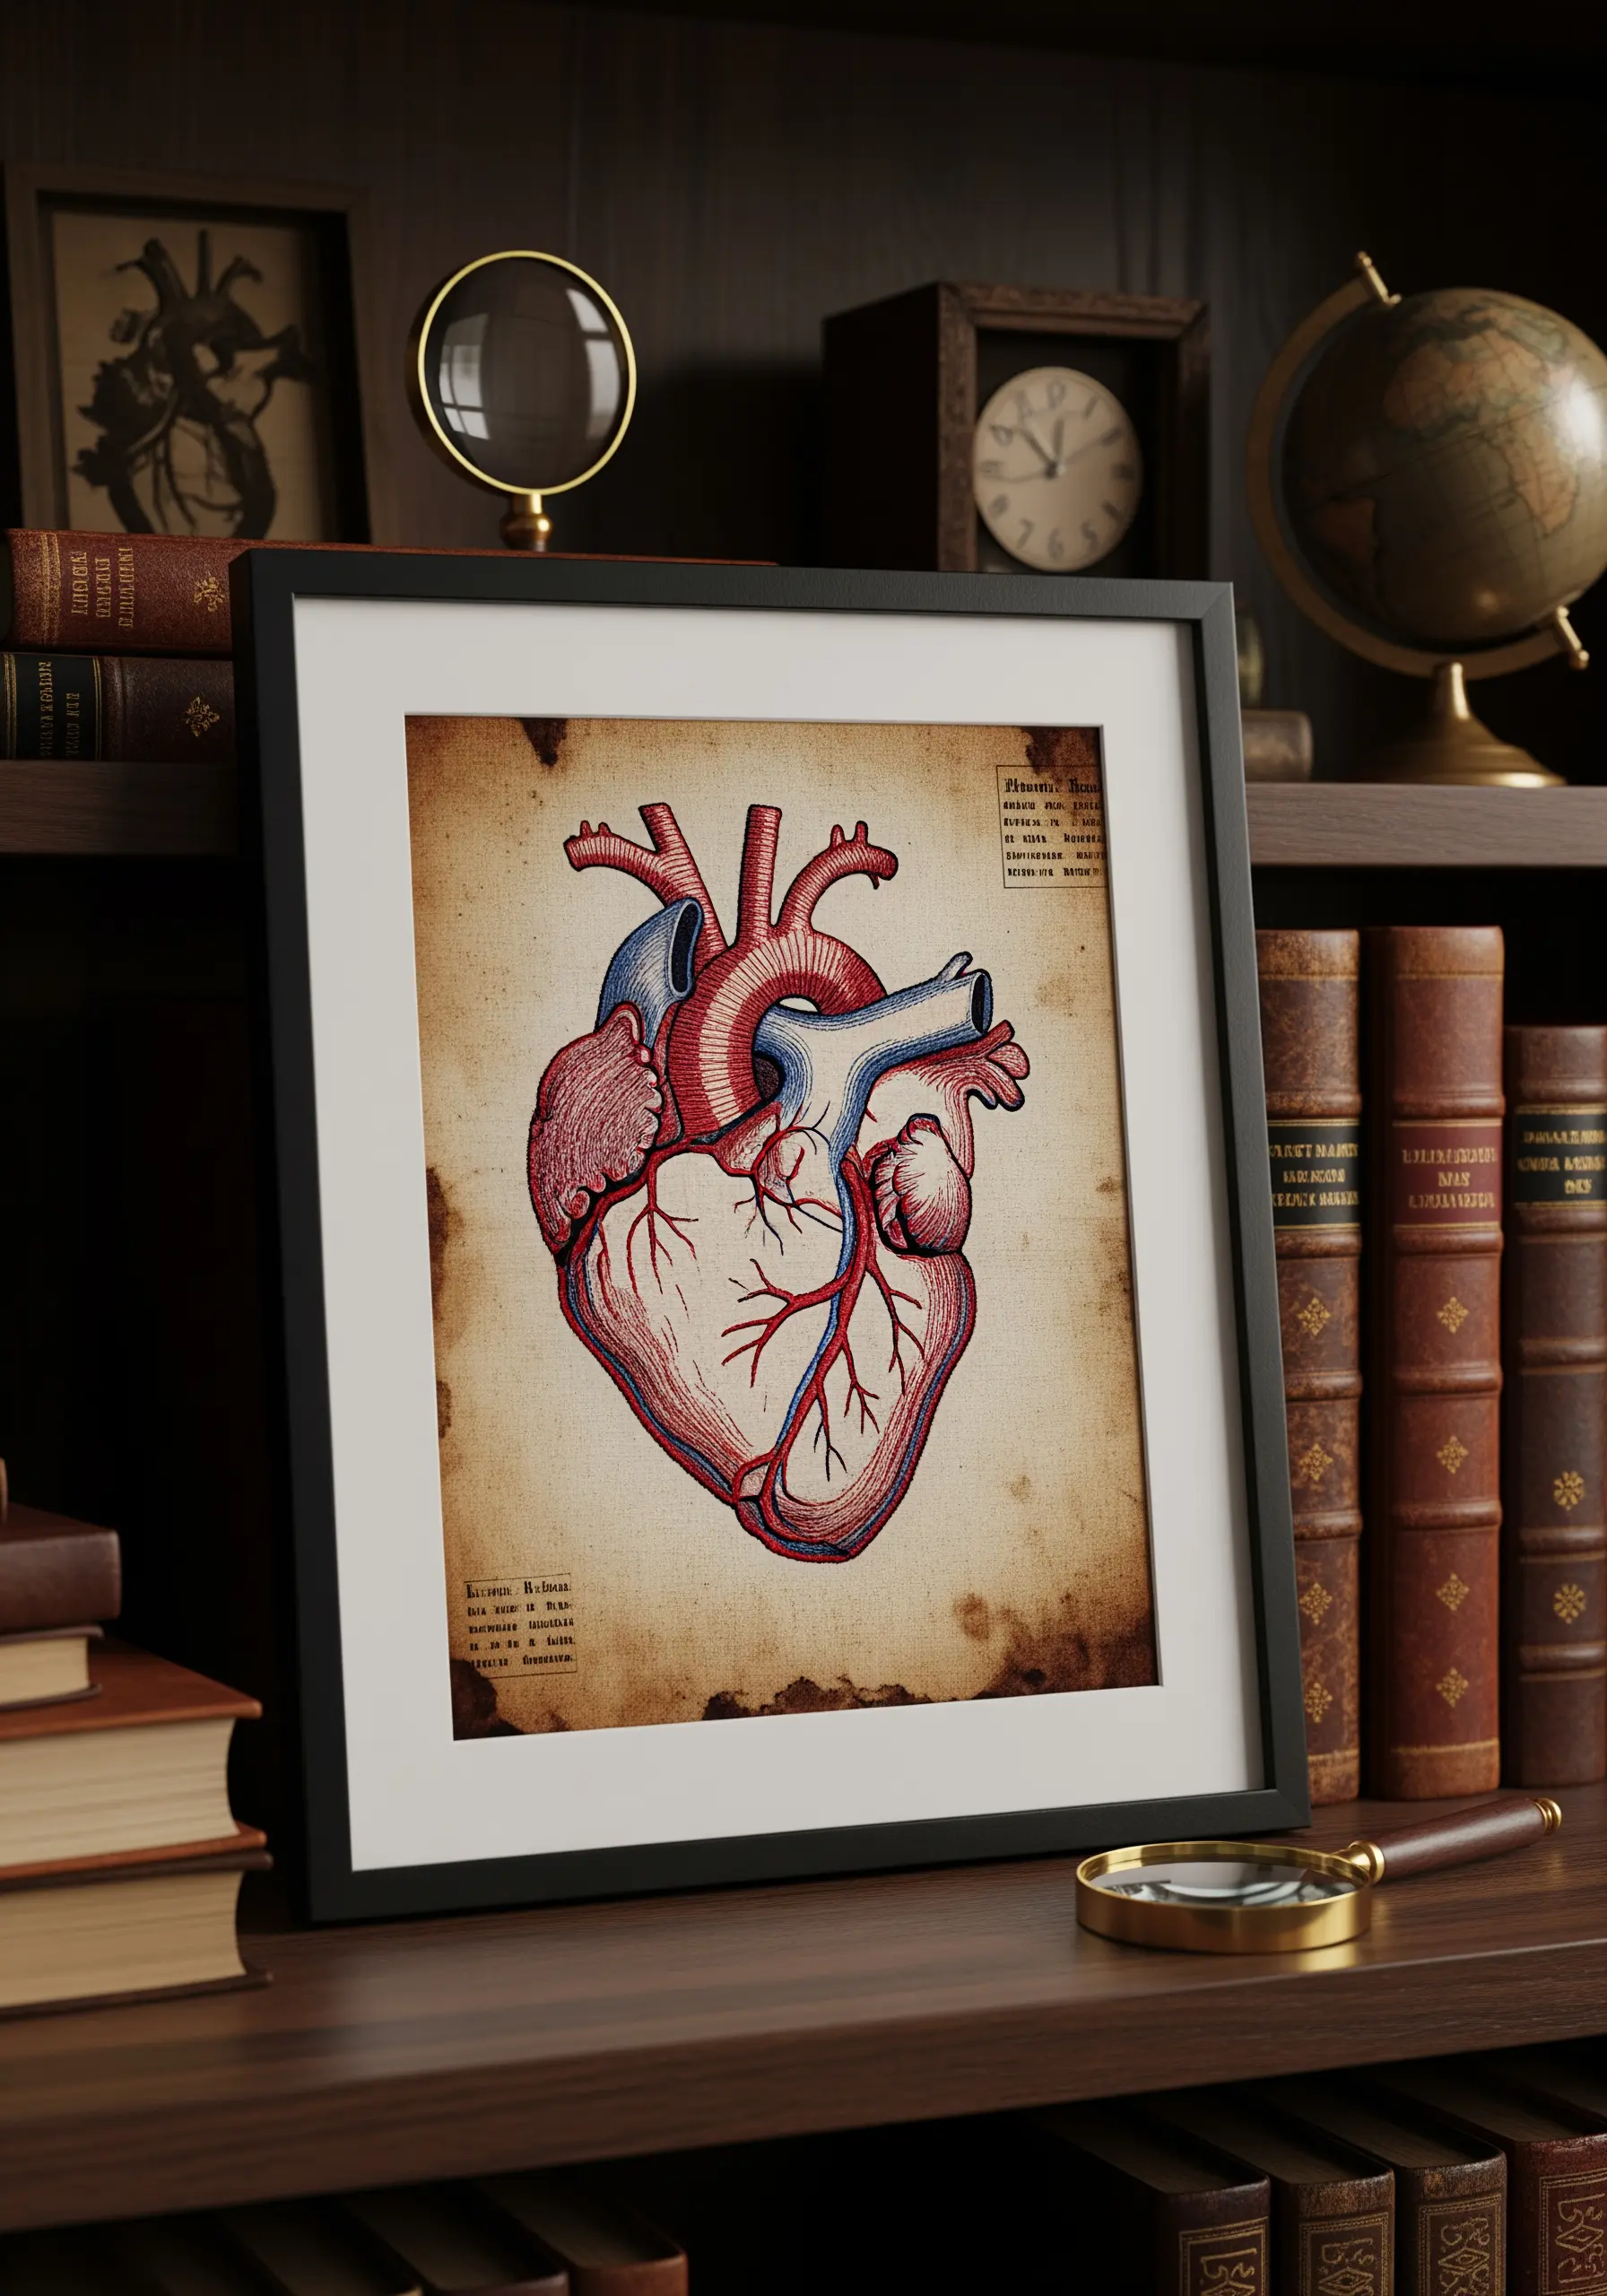
Emulate the look of antique medical or botanical drawings by choosing a fabric with a natural, aged appearance. If your fabric is too bright, you can tea-stain it before stitching for an authentic patina.
Use a fine backstitch with one or two strands of black or sepia thread to mimic the precise quality of an inked line. This creates a sharp, graphic look that honors the original illustration style.
Frame the final piece simply to let the intricate stitch work and vintage aesthetic remain the focus.
5. Build Seascapes with Sculptural Stitches
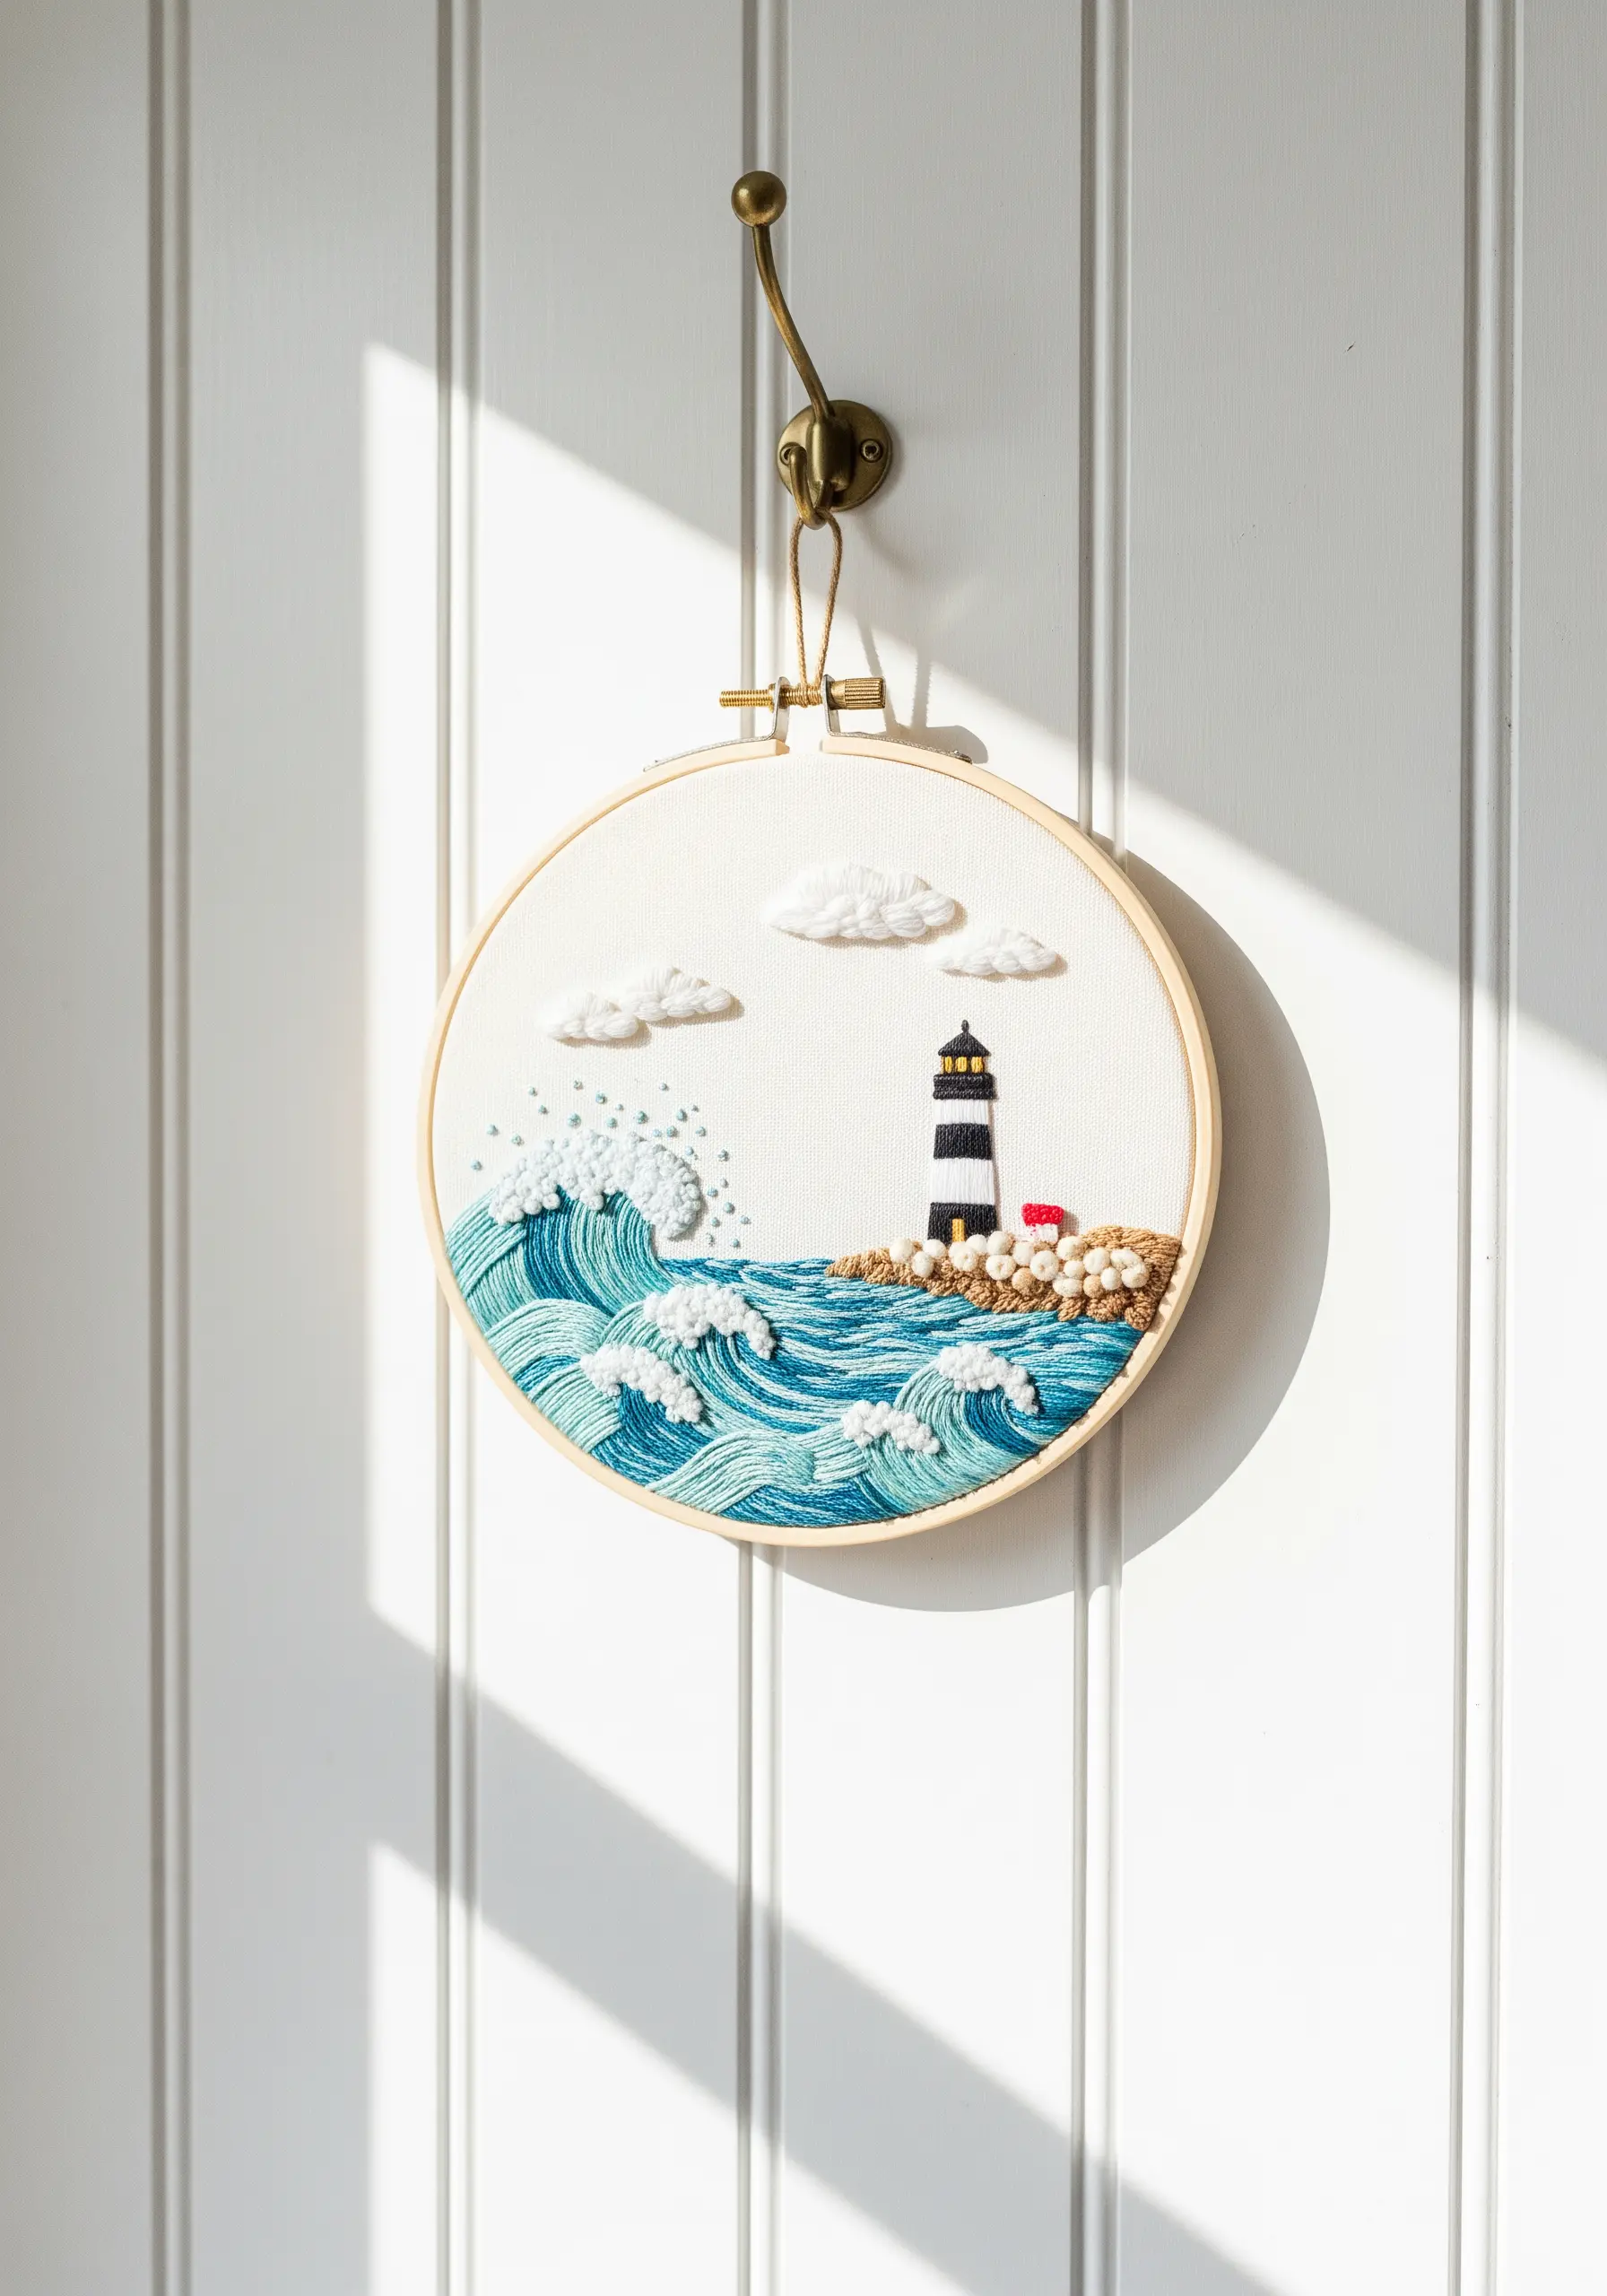
To create dynamic, textured water, fill the area with directional satin stitches, varying the angle to suggest movement. Add white French knots and straight stitches at the crest of the waves for seafoam.
For the rocky shore, use a dense collection of French knots in various neutral shades to build a pebbled, three-dimensional surface.
Incorporate turkey work for fluffy clouds or crashing waves; once trimmed, this stitch adds a soft, raised texture that contrasts beautifully with the flatter stitches.
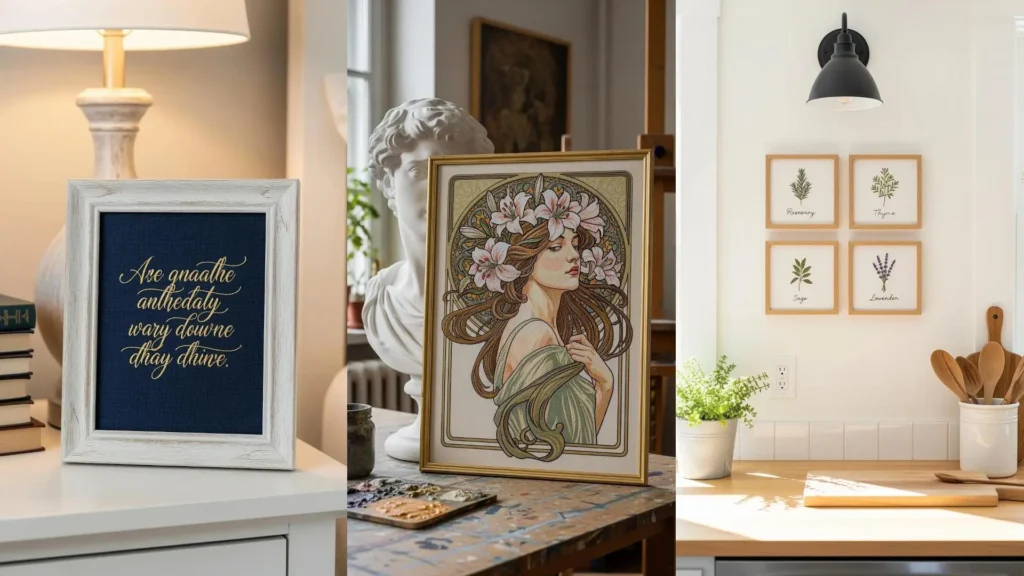
6. Stitch Elegant, Flowing Calligraphy
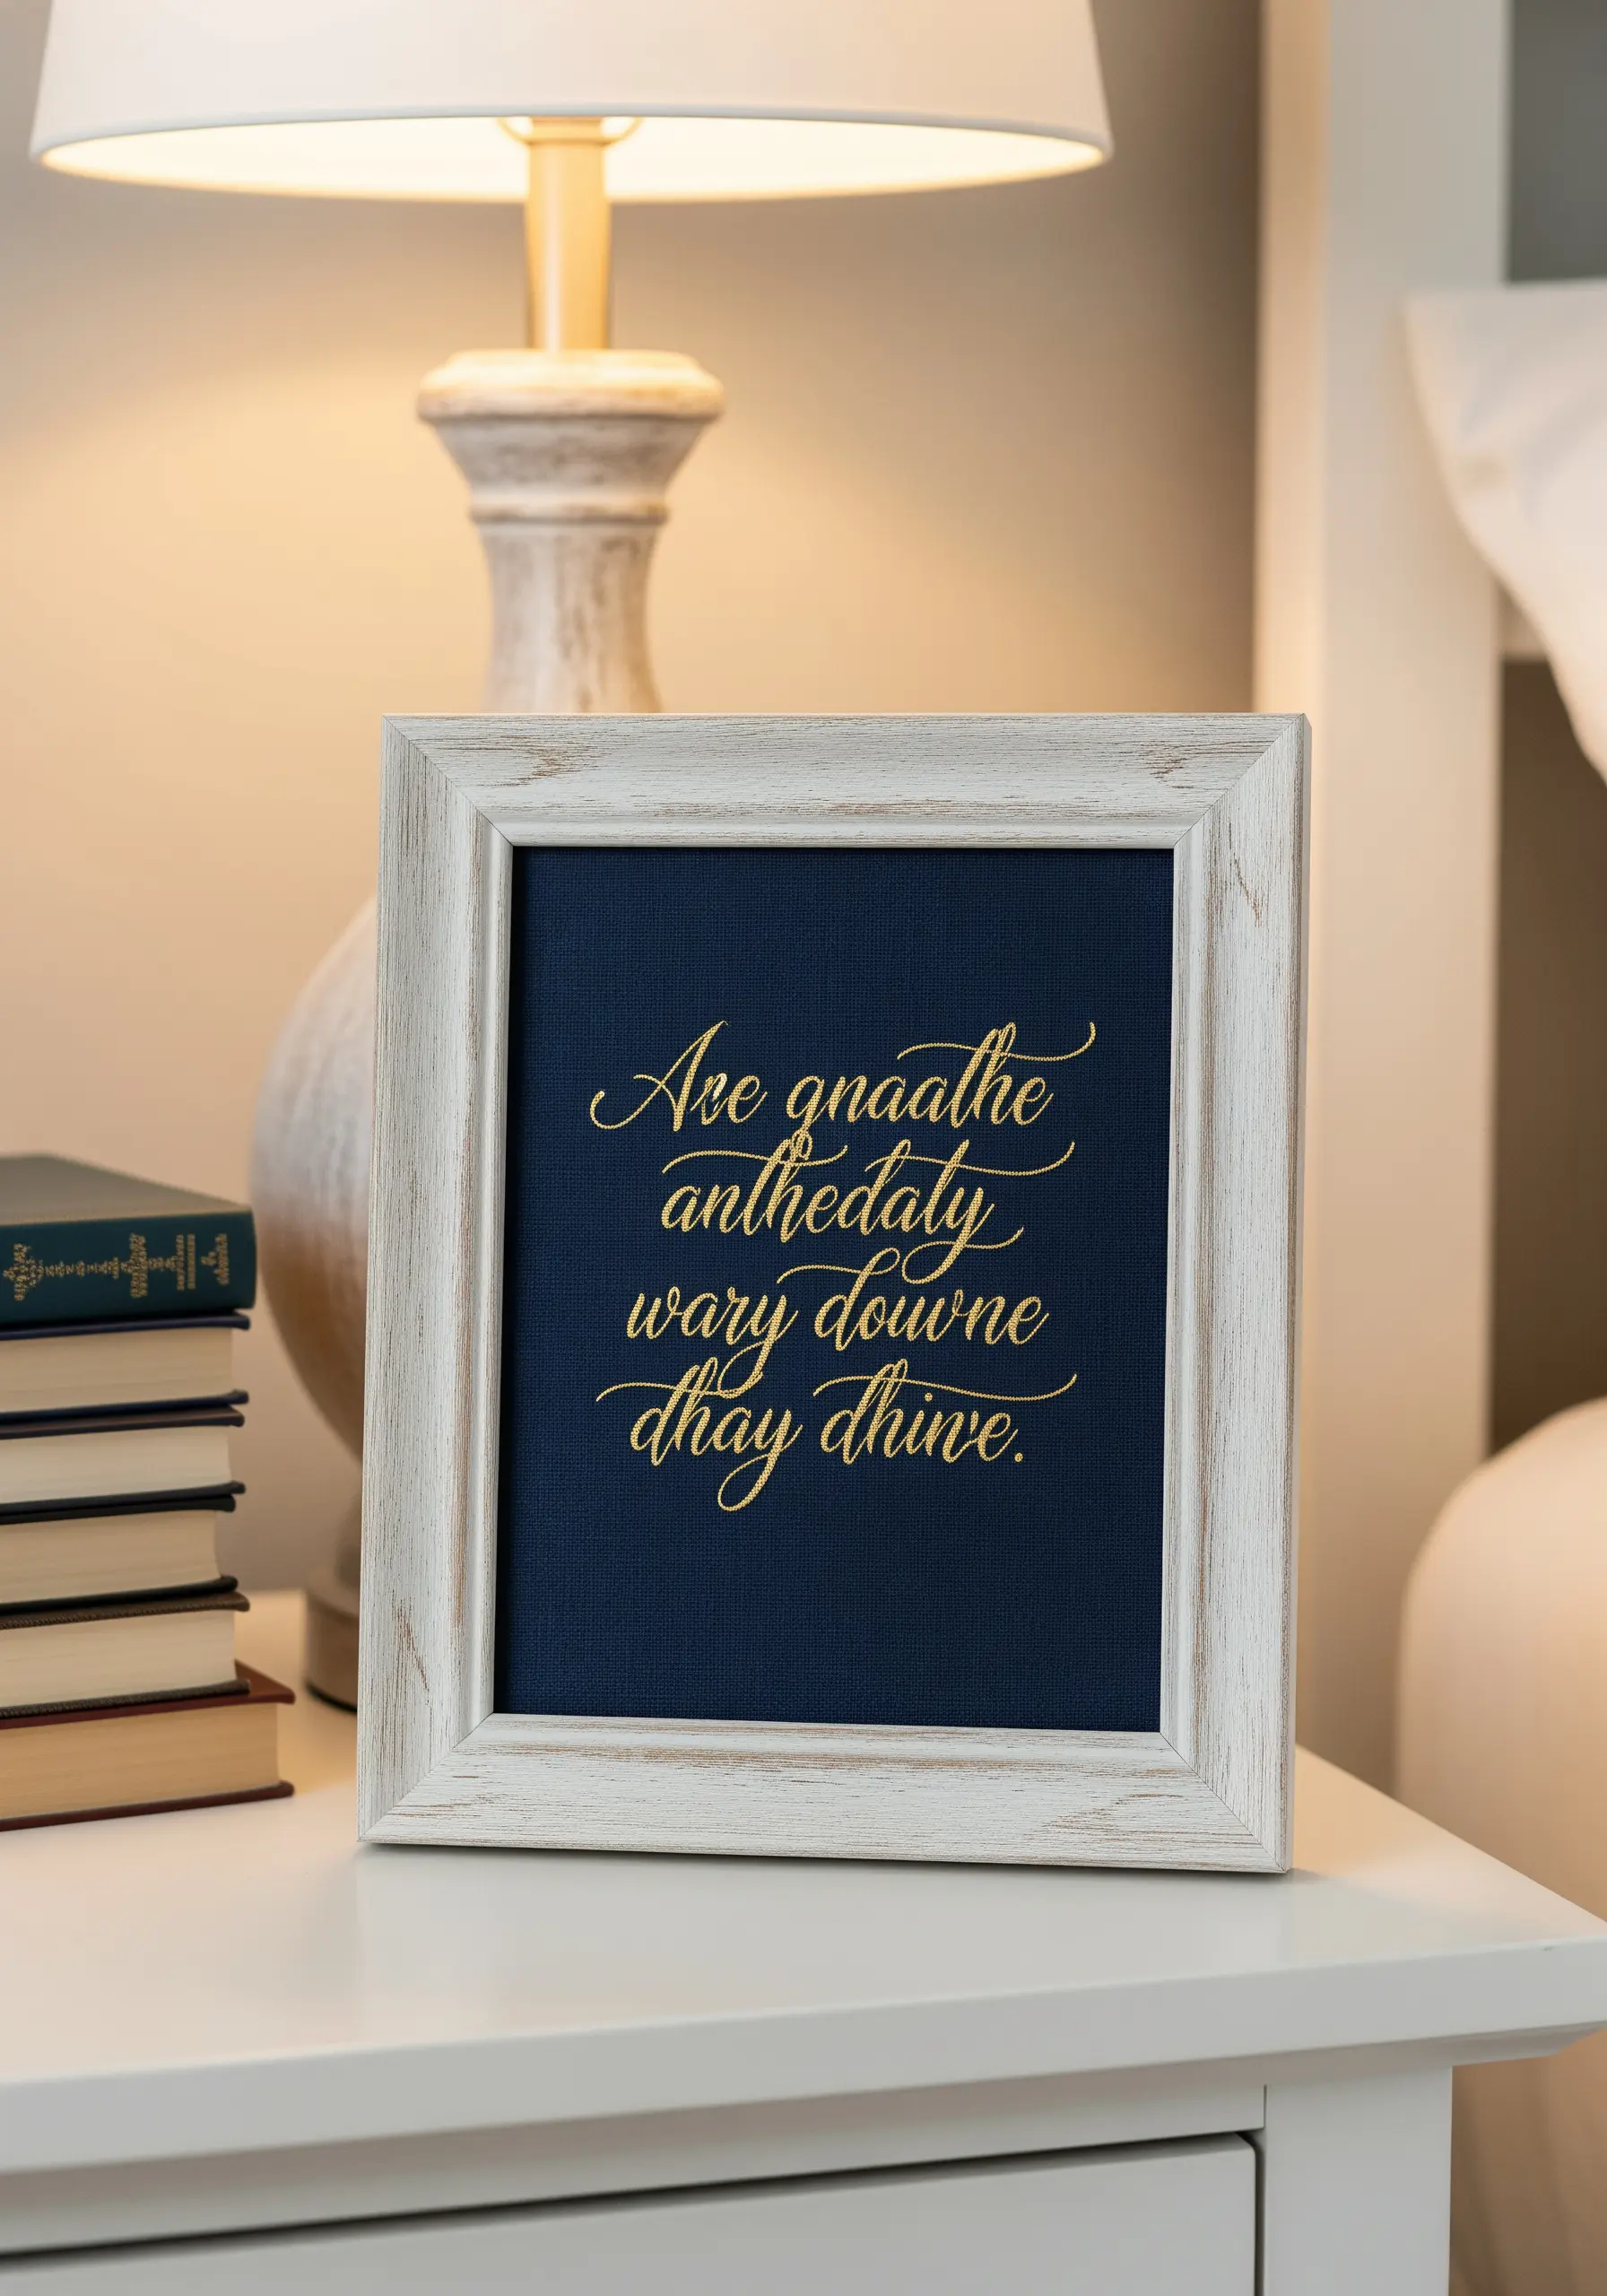
For flawless lettering, use a whipped backstitch or a tight stem stitch. These techniques cover the underlying stitches, creating a smooth, continuous line that mimics a calligrapher’s pen stroke.
Choose a high-contrast combination like metallic gold thread on navy blue linen. This not only ensures readability but also adds a sense of luxury and importance to the words you’re stitching.
When framing, ensure the fabric is pulled perfectly taut to prevent any puckering or distortion of the letters. These embroidered quote wall hangings are all about precision.
7. Use Negative Space for Graphic Impact
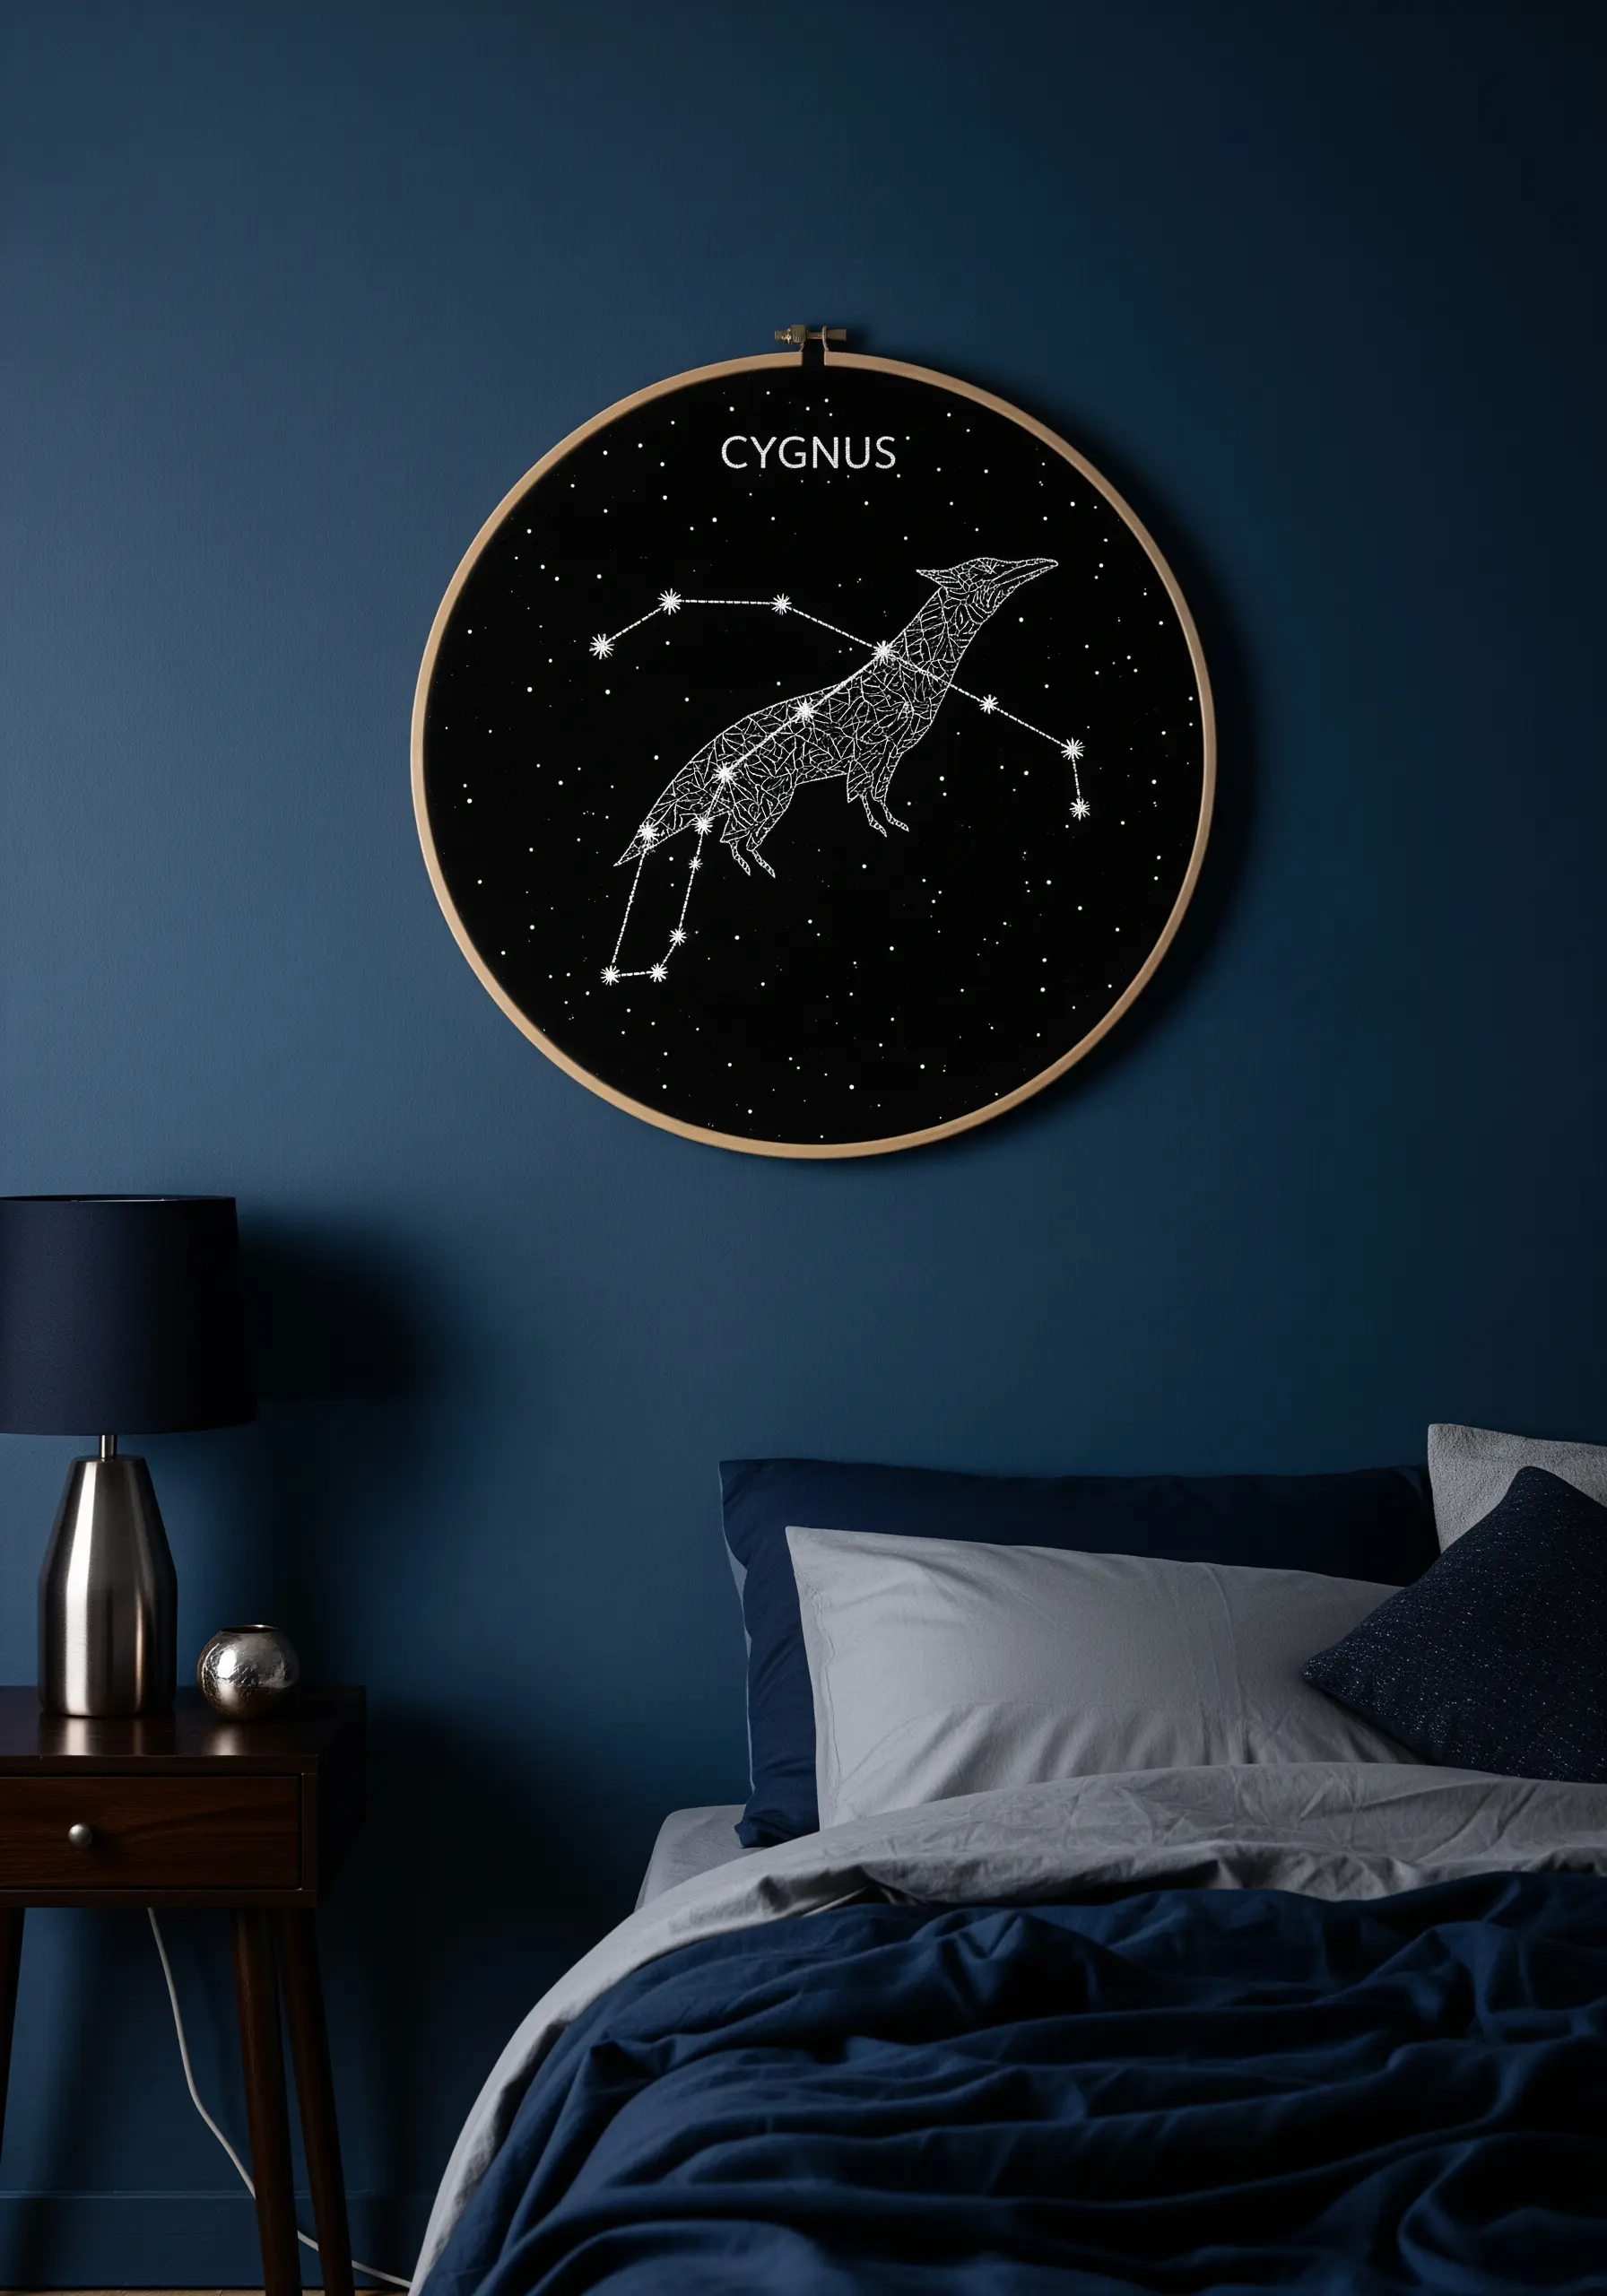
Create a striking celestial design by letting the background fabric do most of the work. On black or dark navy fabric, simple white stitches appear incredibly vivid.
Use small, scattered seed stitches or French knots for the starry sky and a clean backstitch to connect the main stars of the constellation.
This minimalist approach proves that thoughtful composition and the power of negative space can be more impactful than a design filled with dense stitching.
8. Design a Refined Botanical Quadtych
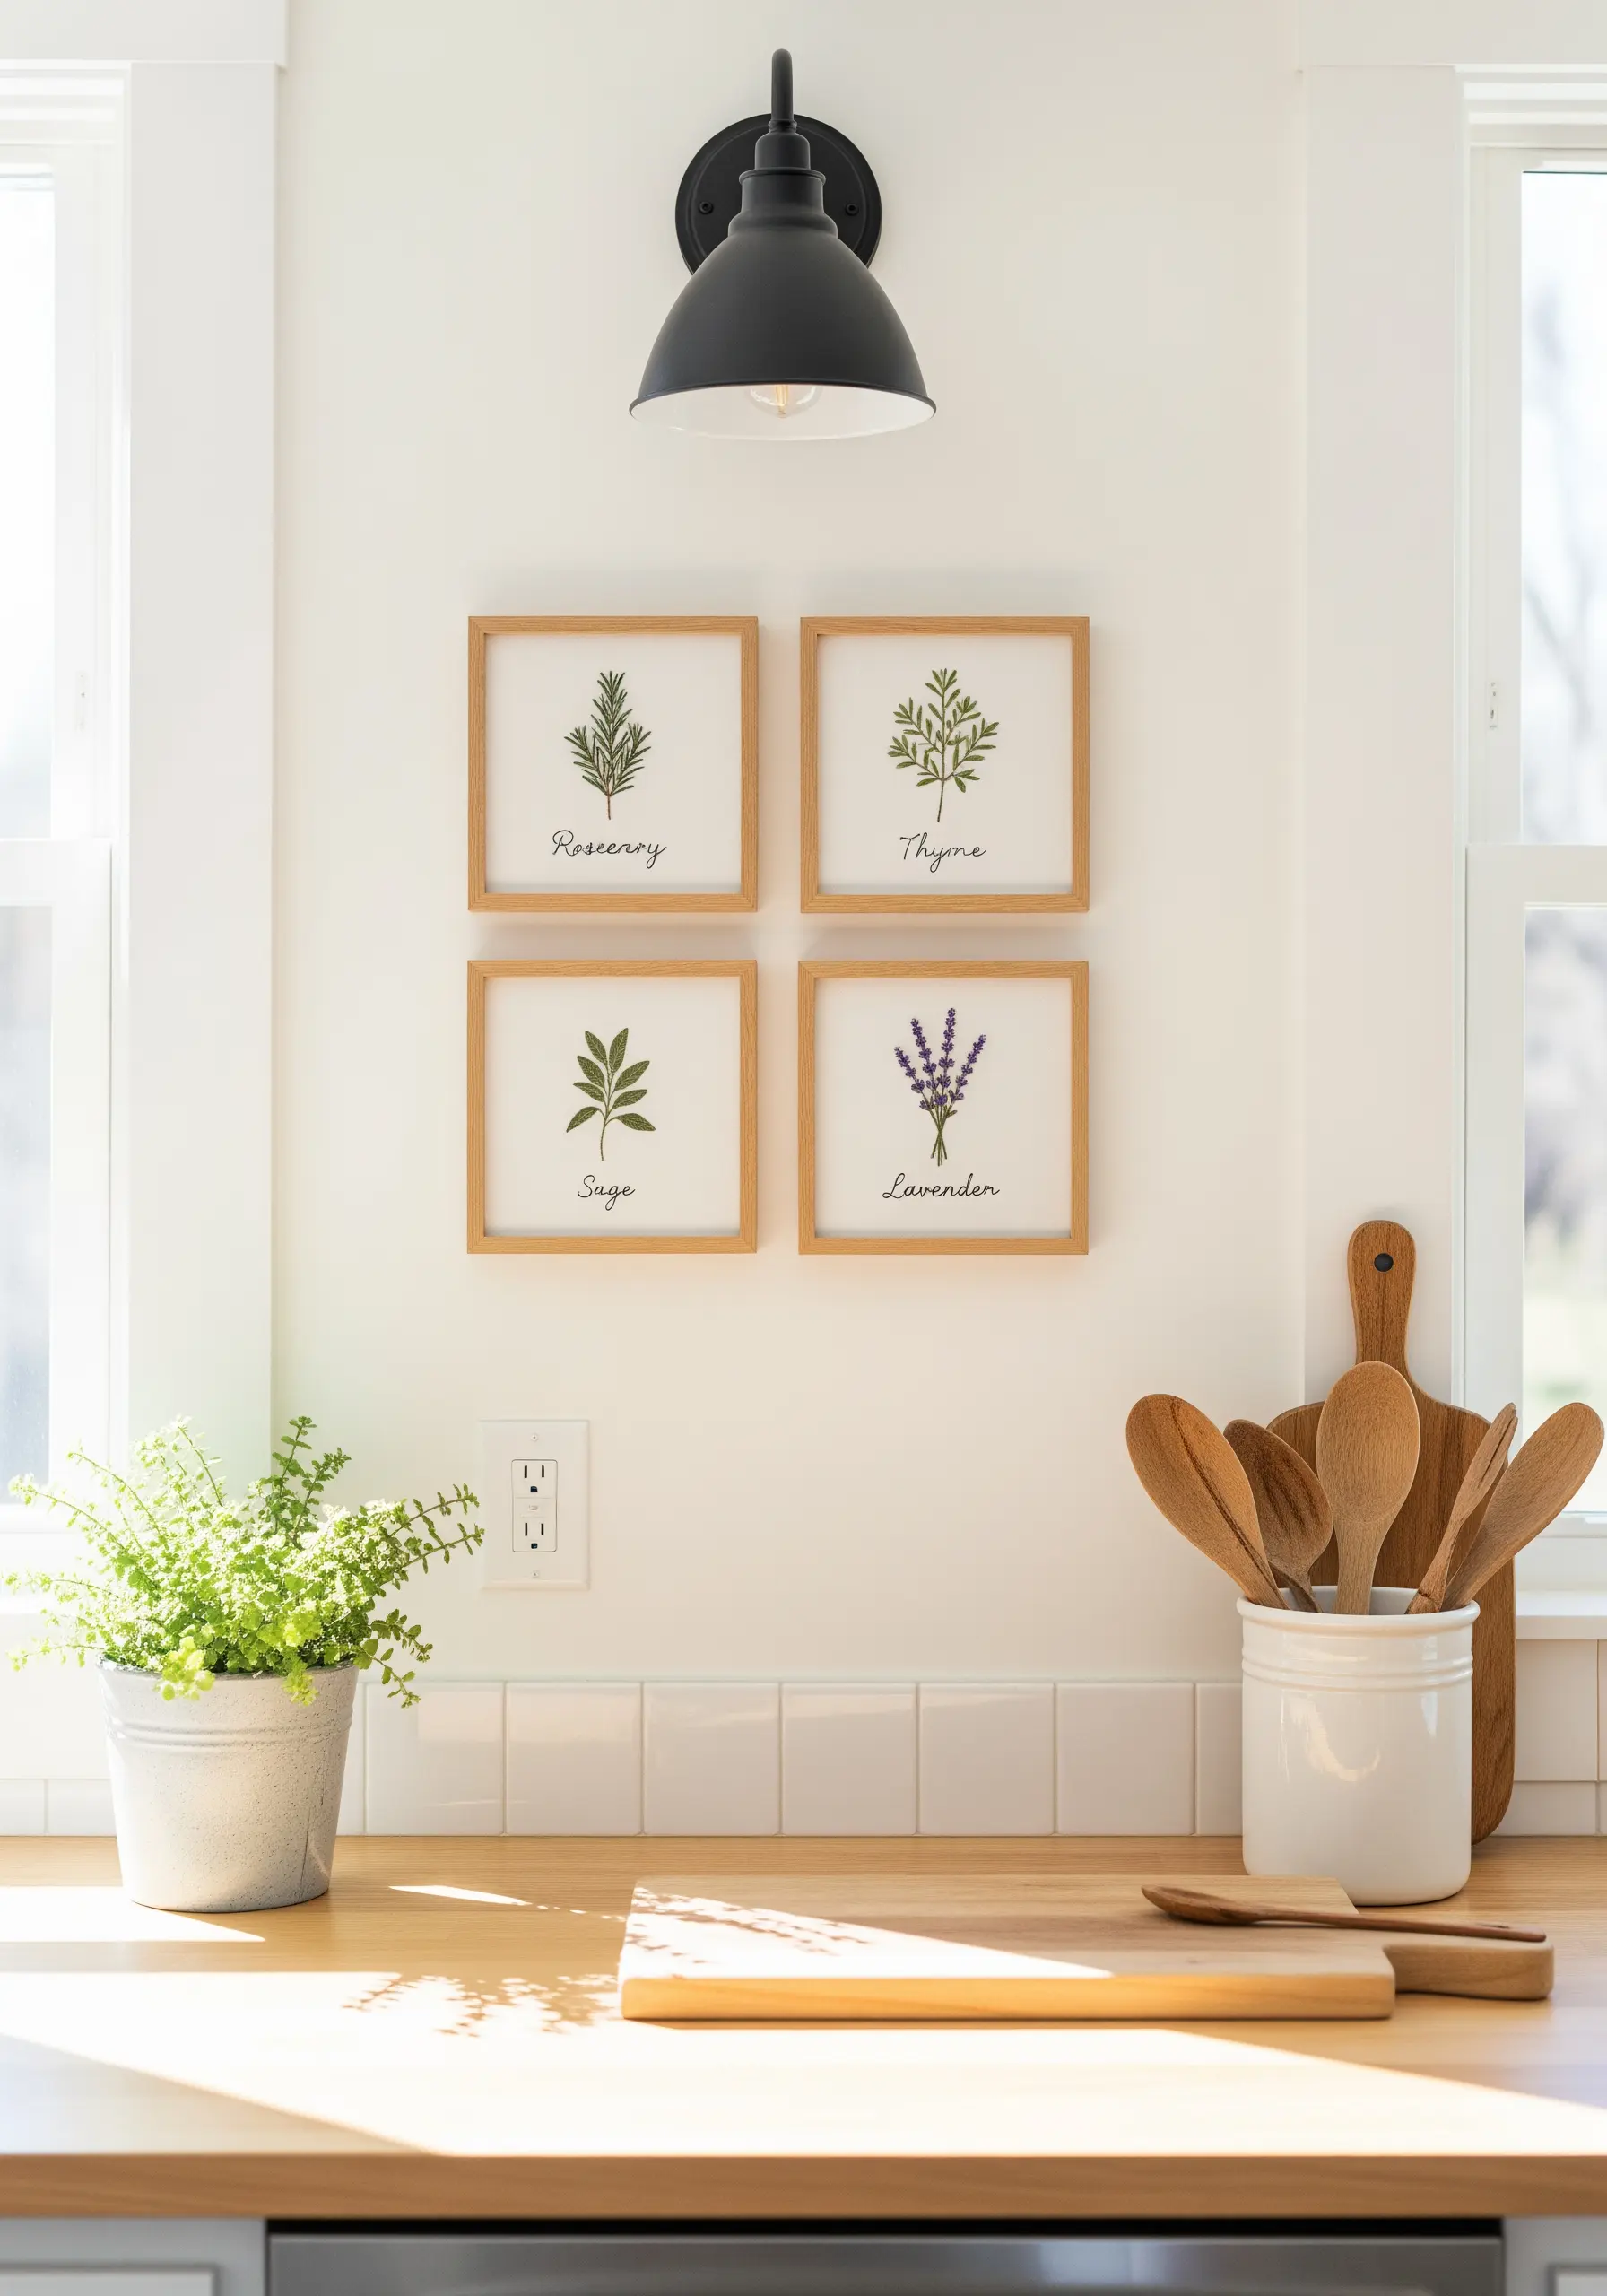
Create an effortlessly chic kitchen gallery by stitching simple herb motifs, each in its own frame. Use delicate stitches like stem stitch for the stalks and lazy daisy stitch for leaves to keep the designs light and airy.
Unify the series by using the same font for the labels on each piece. A simple, elegant script adds a touch of sophistication.
Choosing identical light wood frames ties the collection together, giving it a clean, cohesive feel perfect for a bright, modern space. It’s a simple way to celebrate medicinal herb embroidery designs.
9. Master the Solid Fill Silhouette
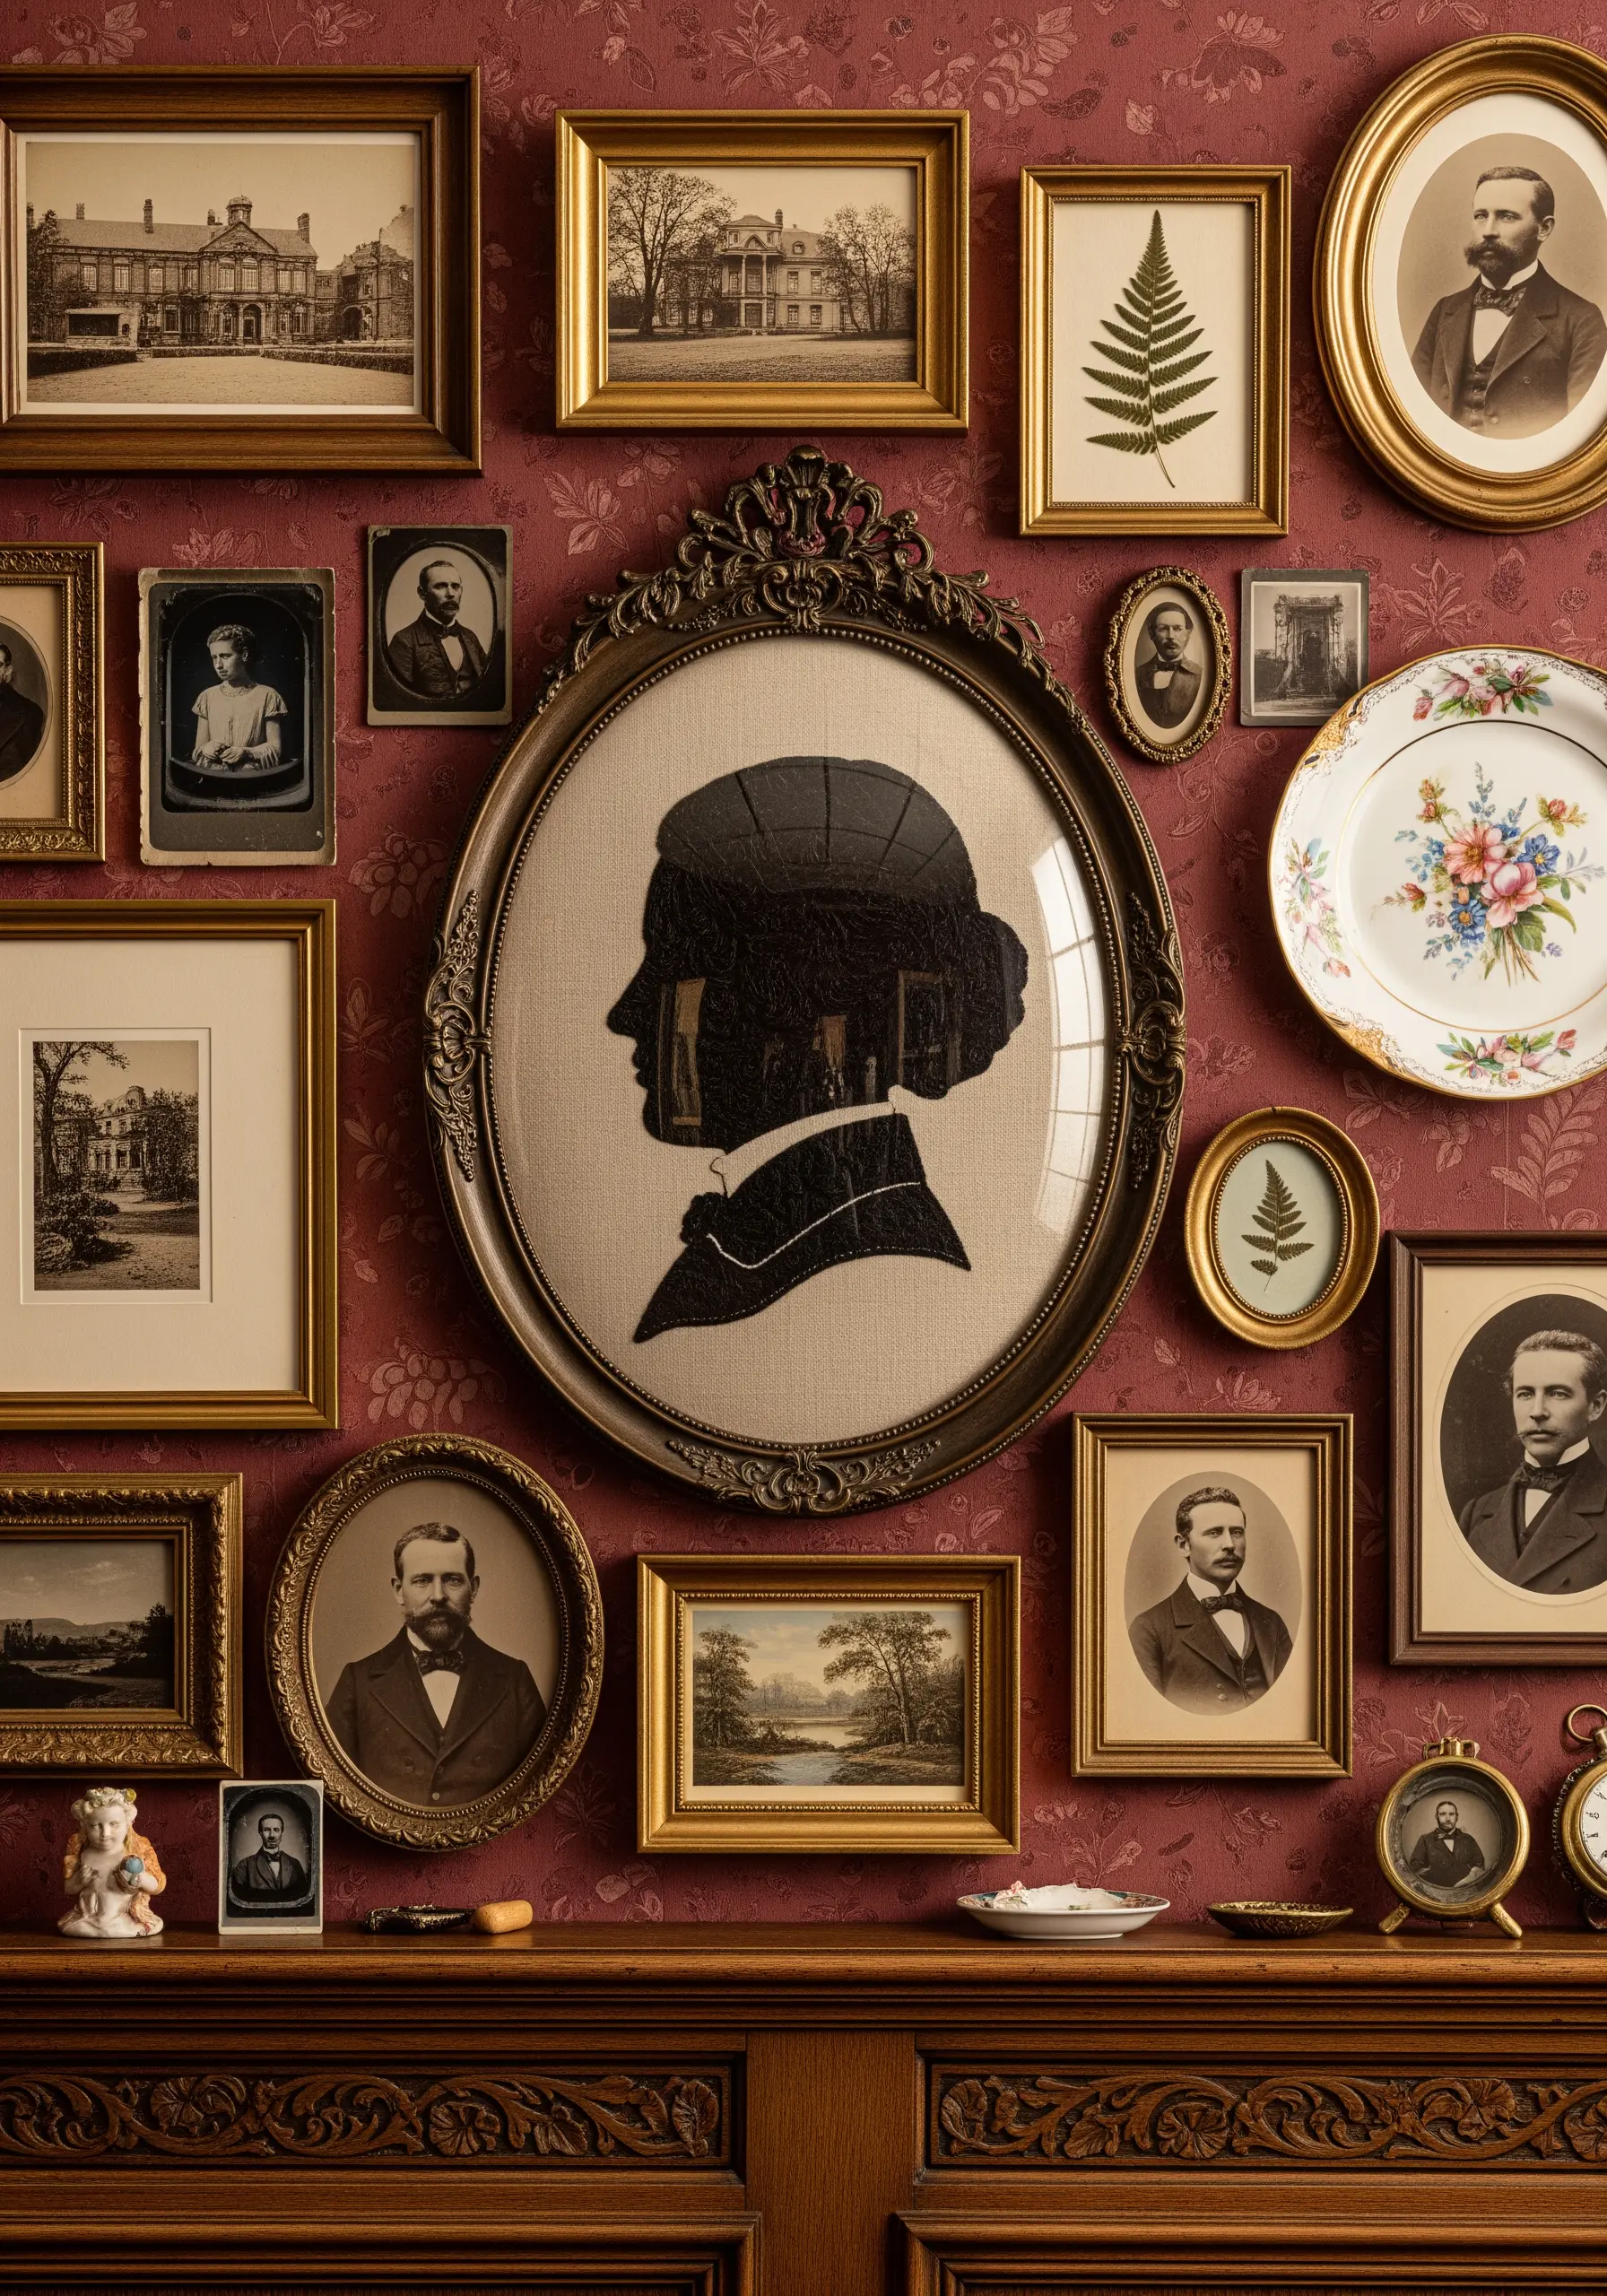
To achieve a perfectly smooth, opaque silhouette, use a dense satin stitch. Before you begin, outline the shape with a split stitch to create a raised, sharp edge for your satin stitches to rest against.
Work with all your satin stitches lying in the same direction. This consistency reflects light evenly, resulting in a solid, void-free surface that looks like a single piece of fabric.
The contrast between the flat, graphic embroidery and a highly ornate, vintage frame creates a compelling visual tension that is both classic and modern.
10. Emulate Stained Glass with Thread
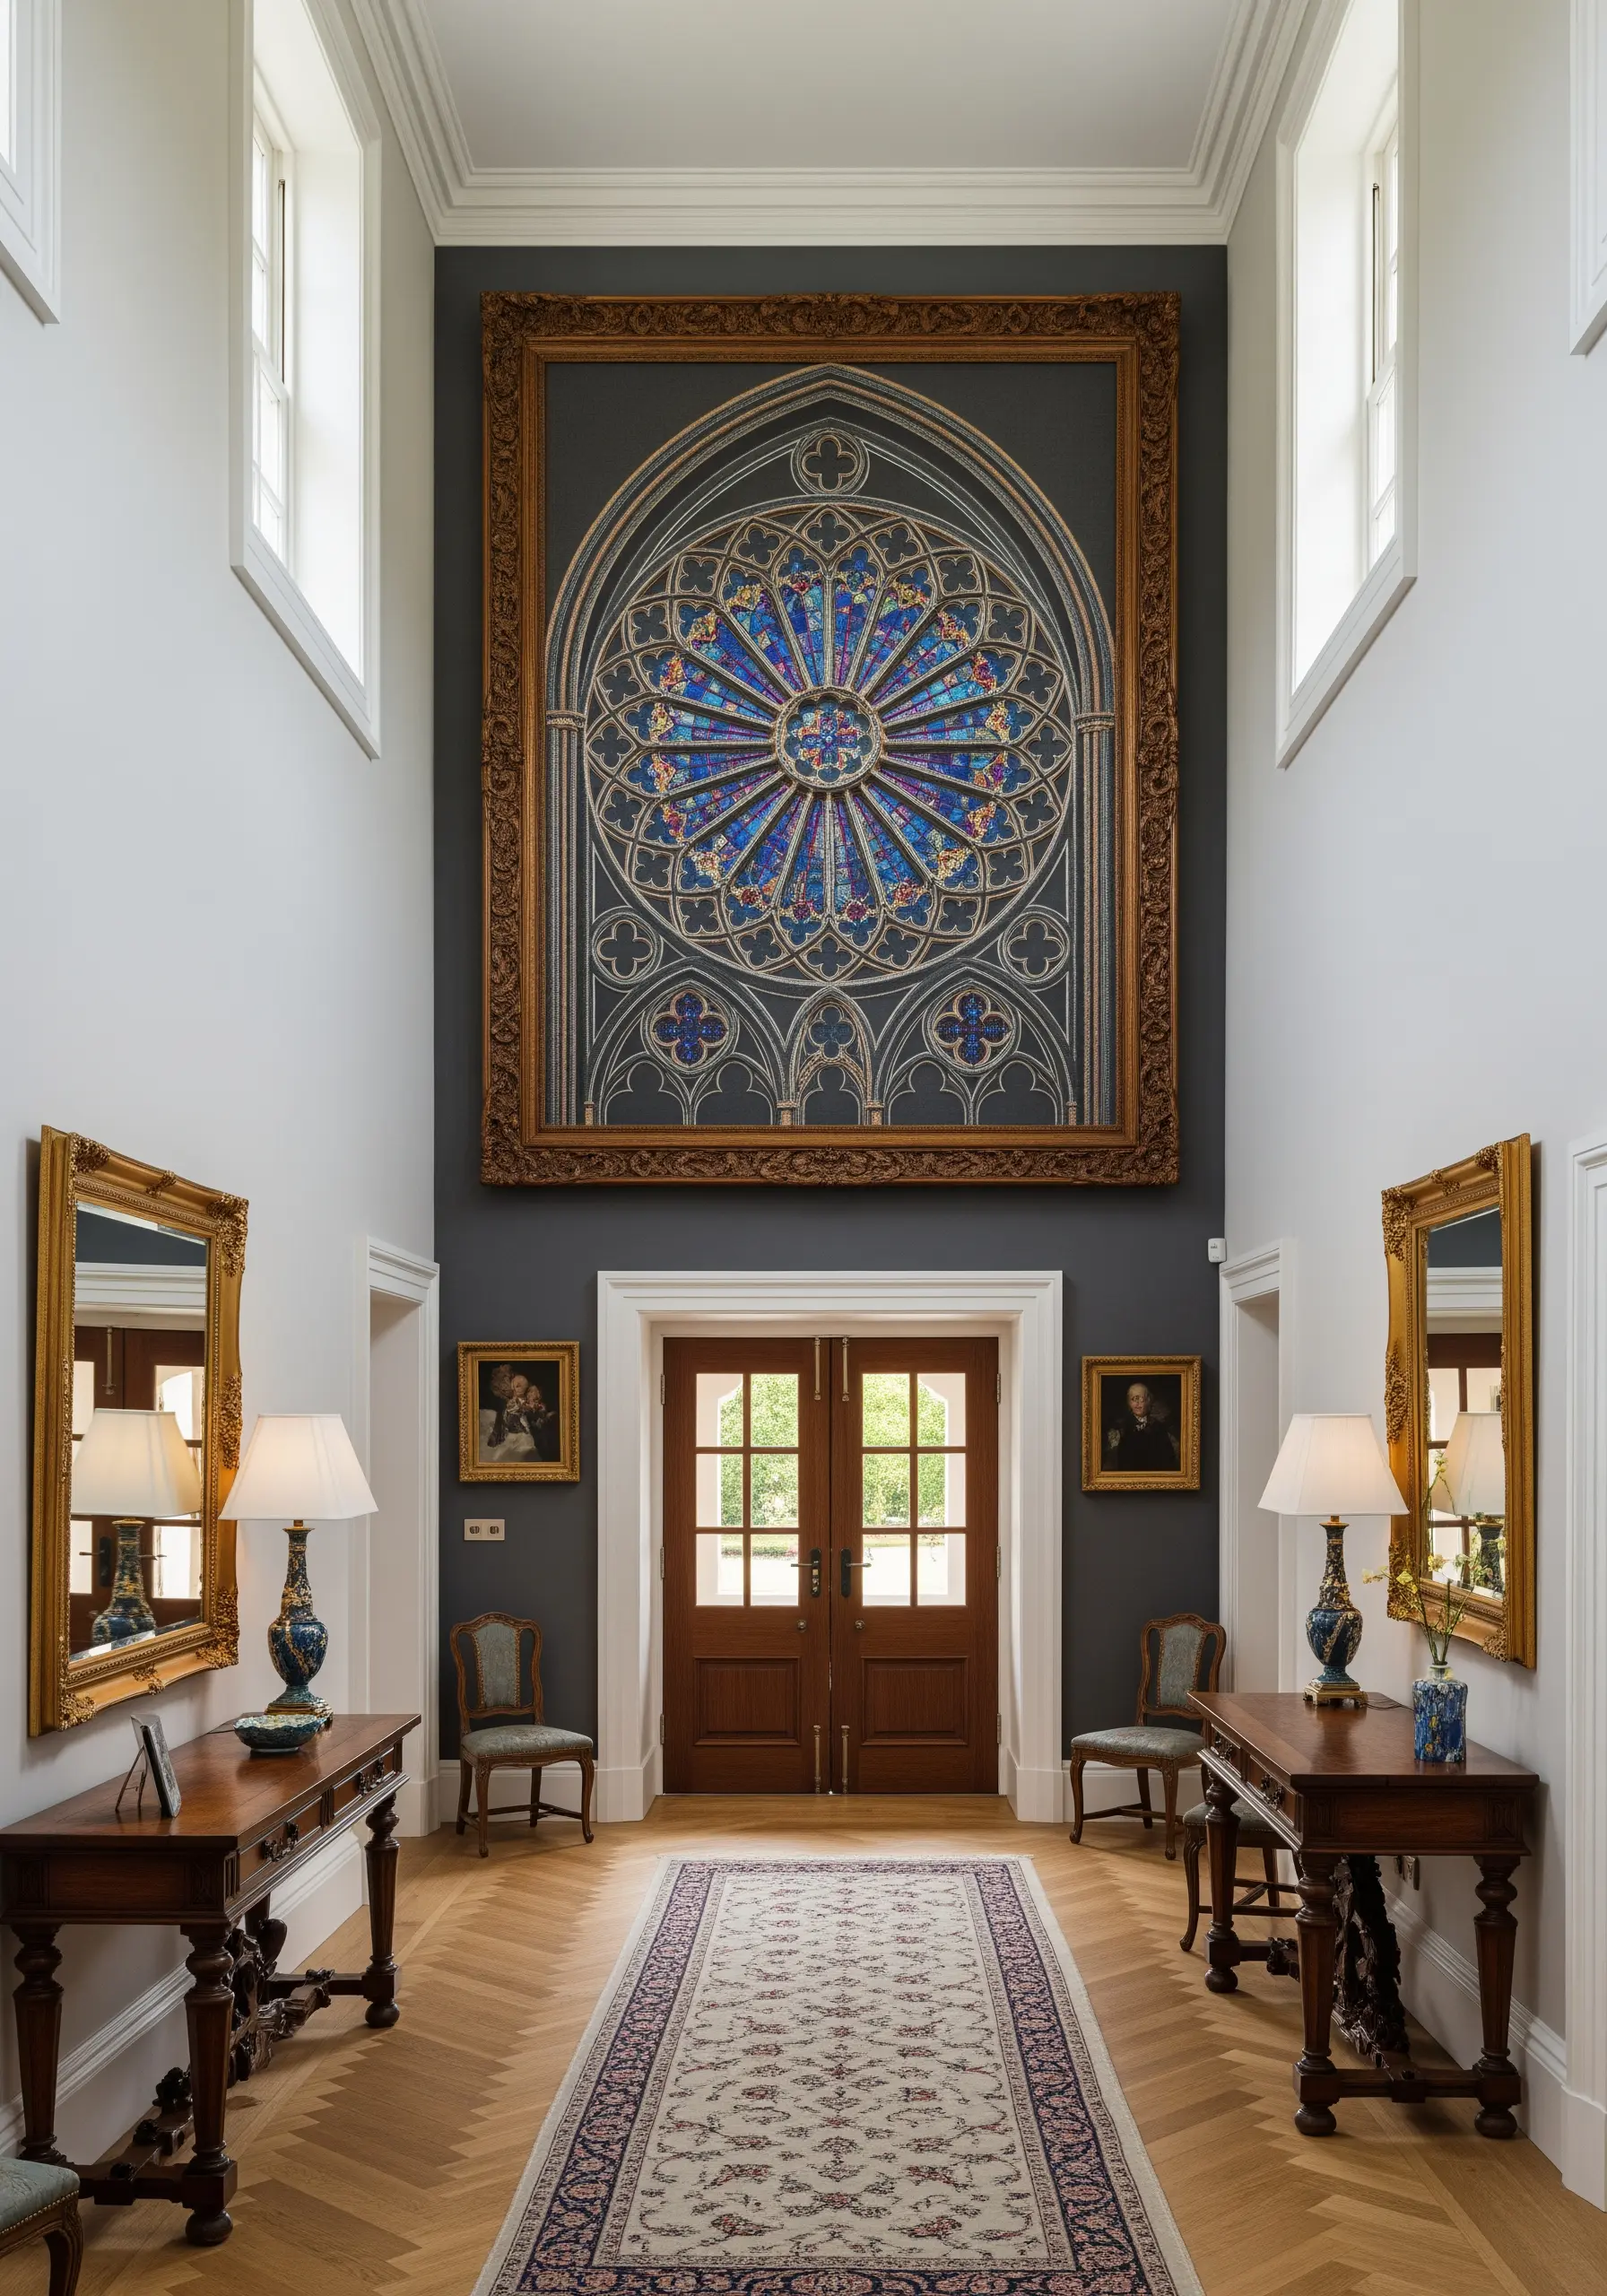
To mimic the leaded lines of a stained glass window, outline each colored section with a thick, dark thread using a heavy chain stitch or couched cord.
Fill each segment with a single, vibrant color of satin stitch. Keep the stitch direction consistent within each shape but vary it between adjacent shapes to catch the light differently, enhancing the illusion of separate glass panes.
This technique is perfect for large-scale embroidery tapestries, turning a wall into a cathedral of color and light.
11. Add Dimension with Stumpwork Specimens
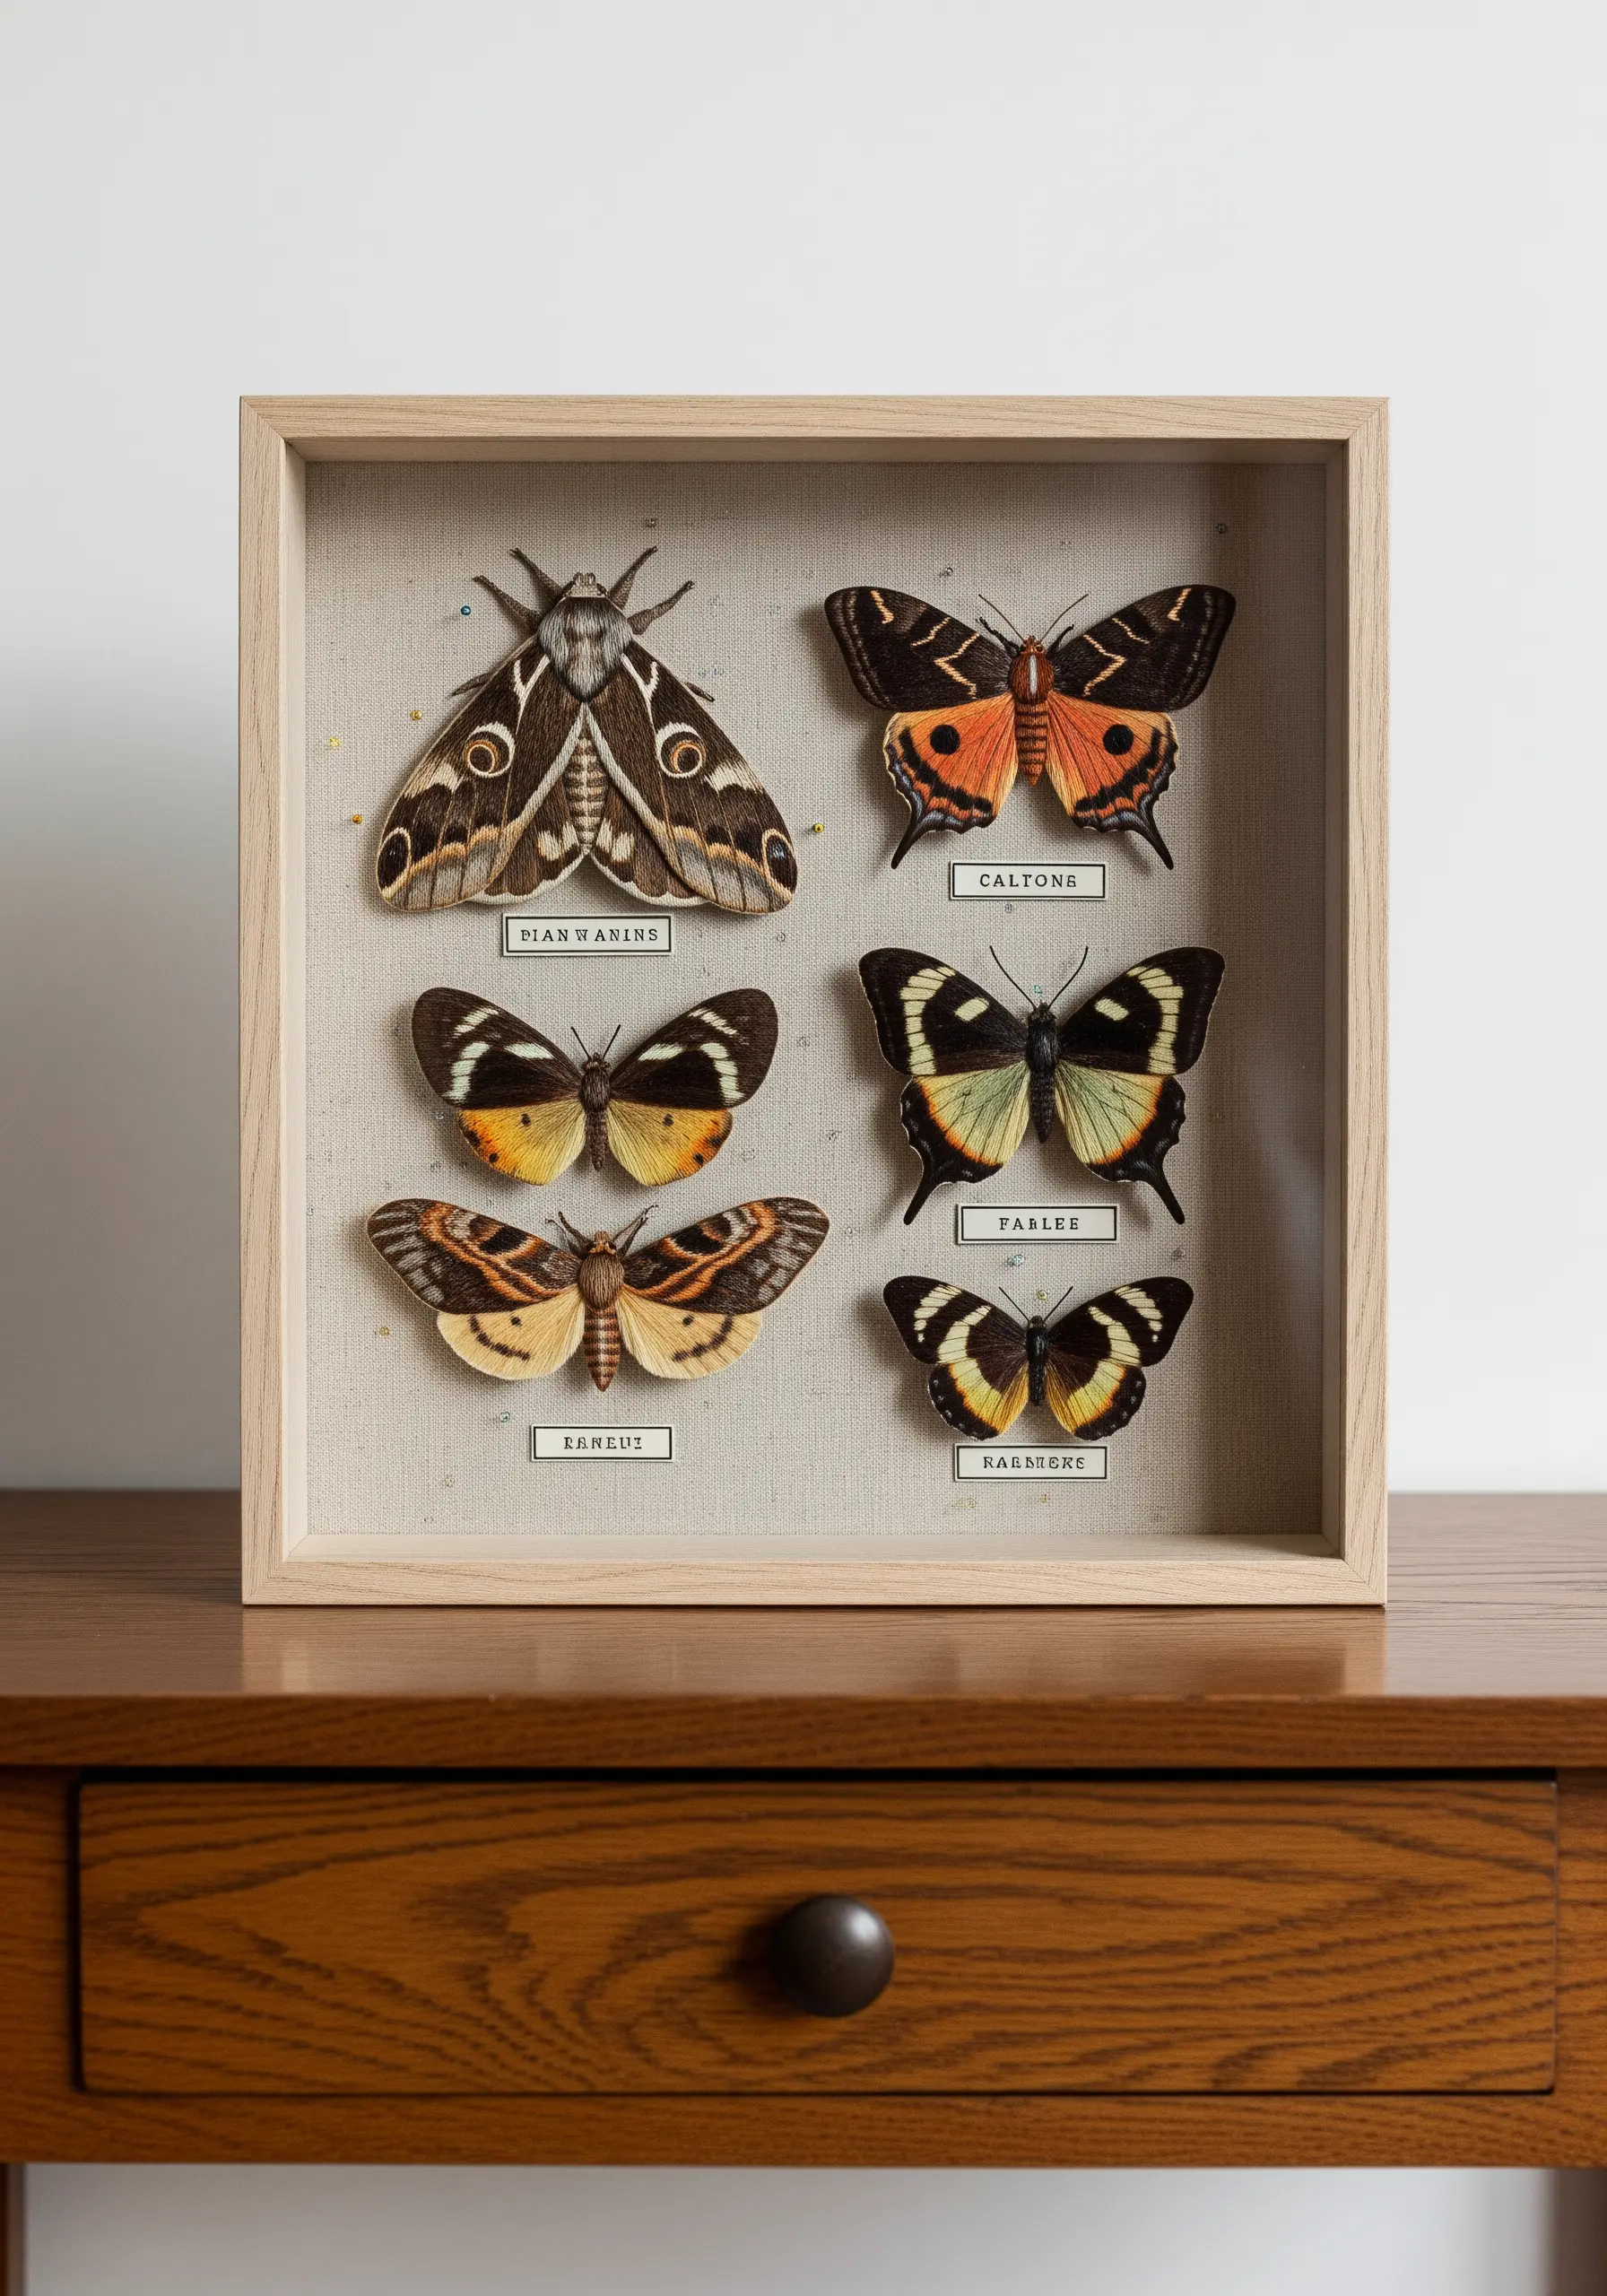
Bring your embroidered insects to life using stumpwork, a technique that creates three-dimensional elements. Stitch the butterfly wings on a separate piece of fabric, incorporating a fine wire into the edges.
Carefully cut out the embroidered wings and stitch the body directly onto your background fabric. Then, attach the wired wings to the body, gently bending them upwards to create realistic lift and shadow.
Mounting the finished piece in a shadow box frame enhances the 3D effect and completes the scientific specimen display. These bird & butterfly embroidery patterns truly feel alive.
12. Create Opulence with Goldwork and Padding
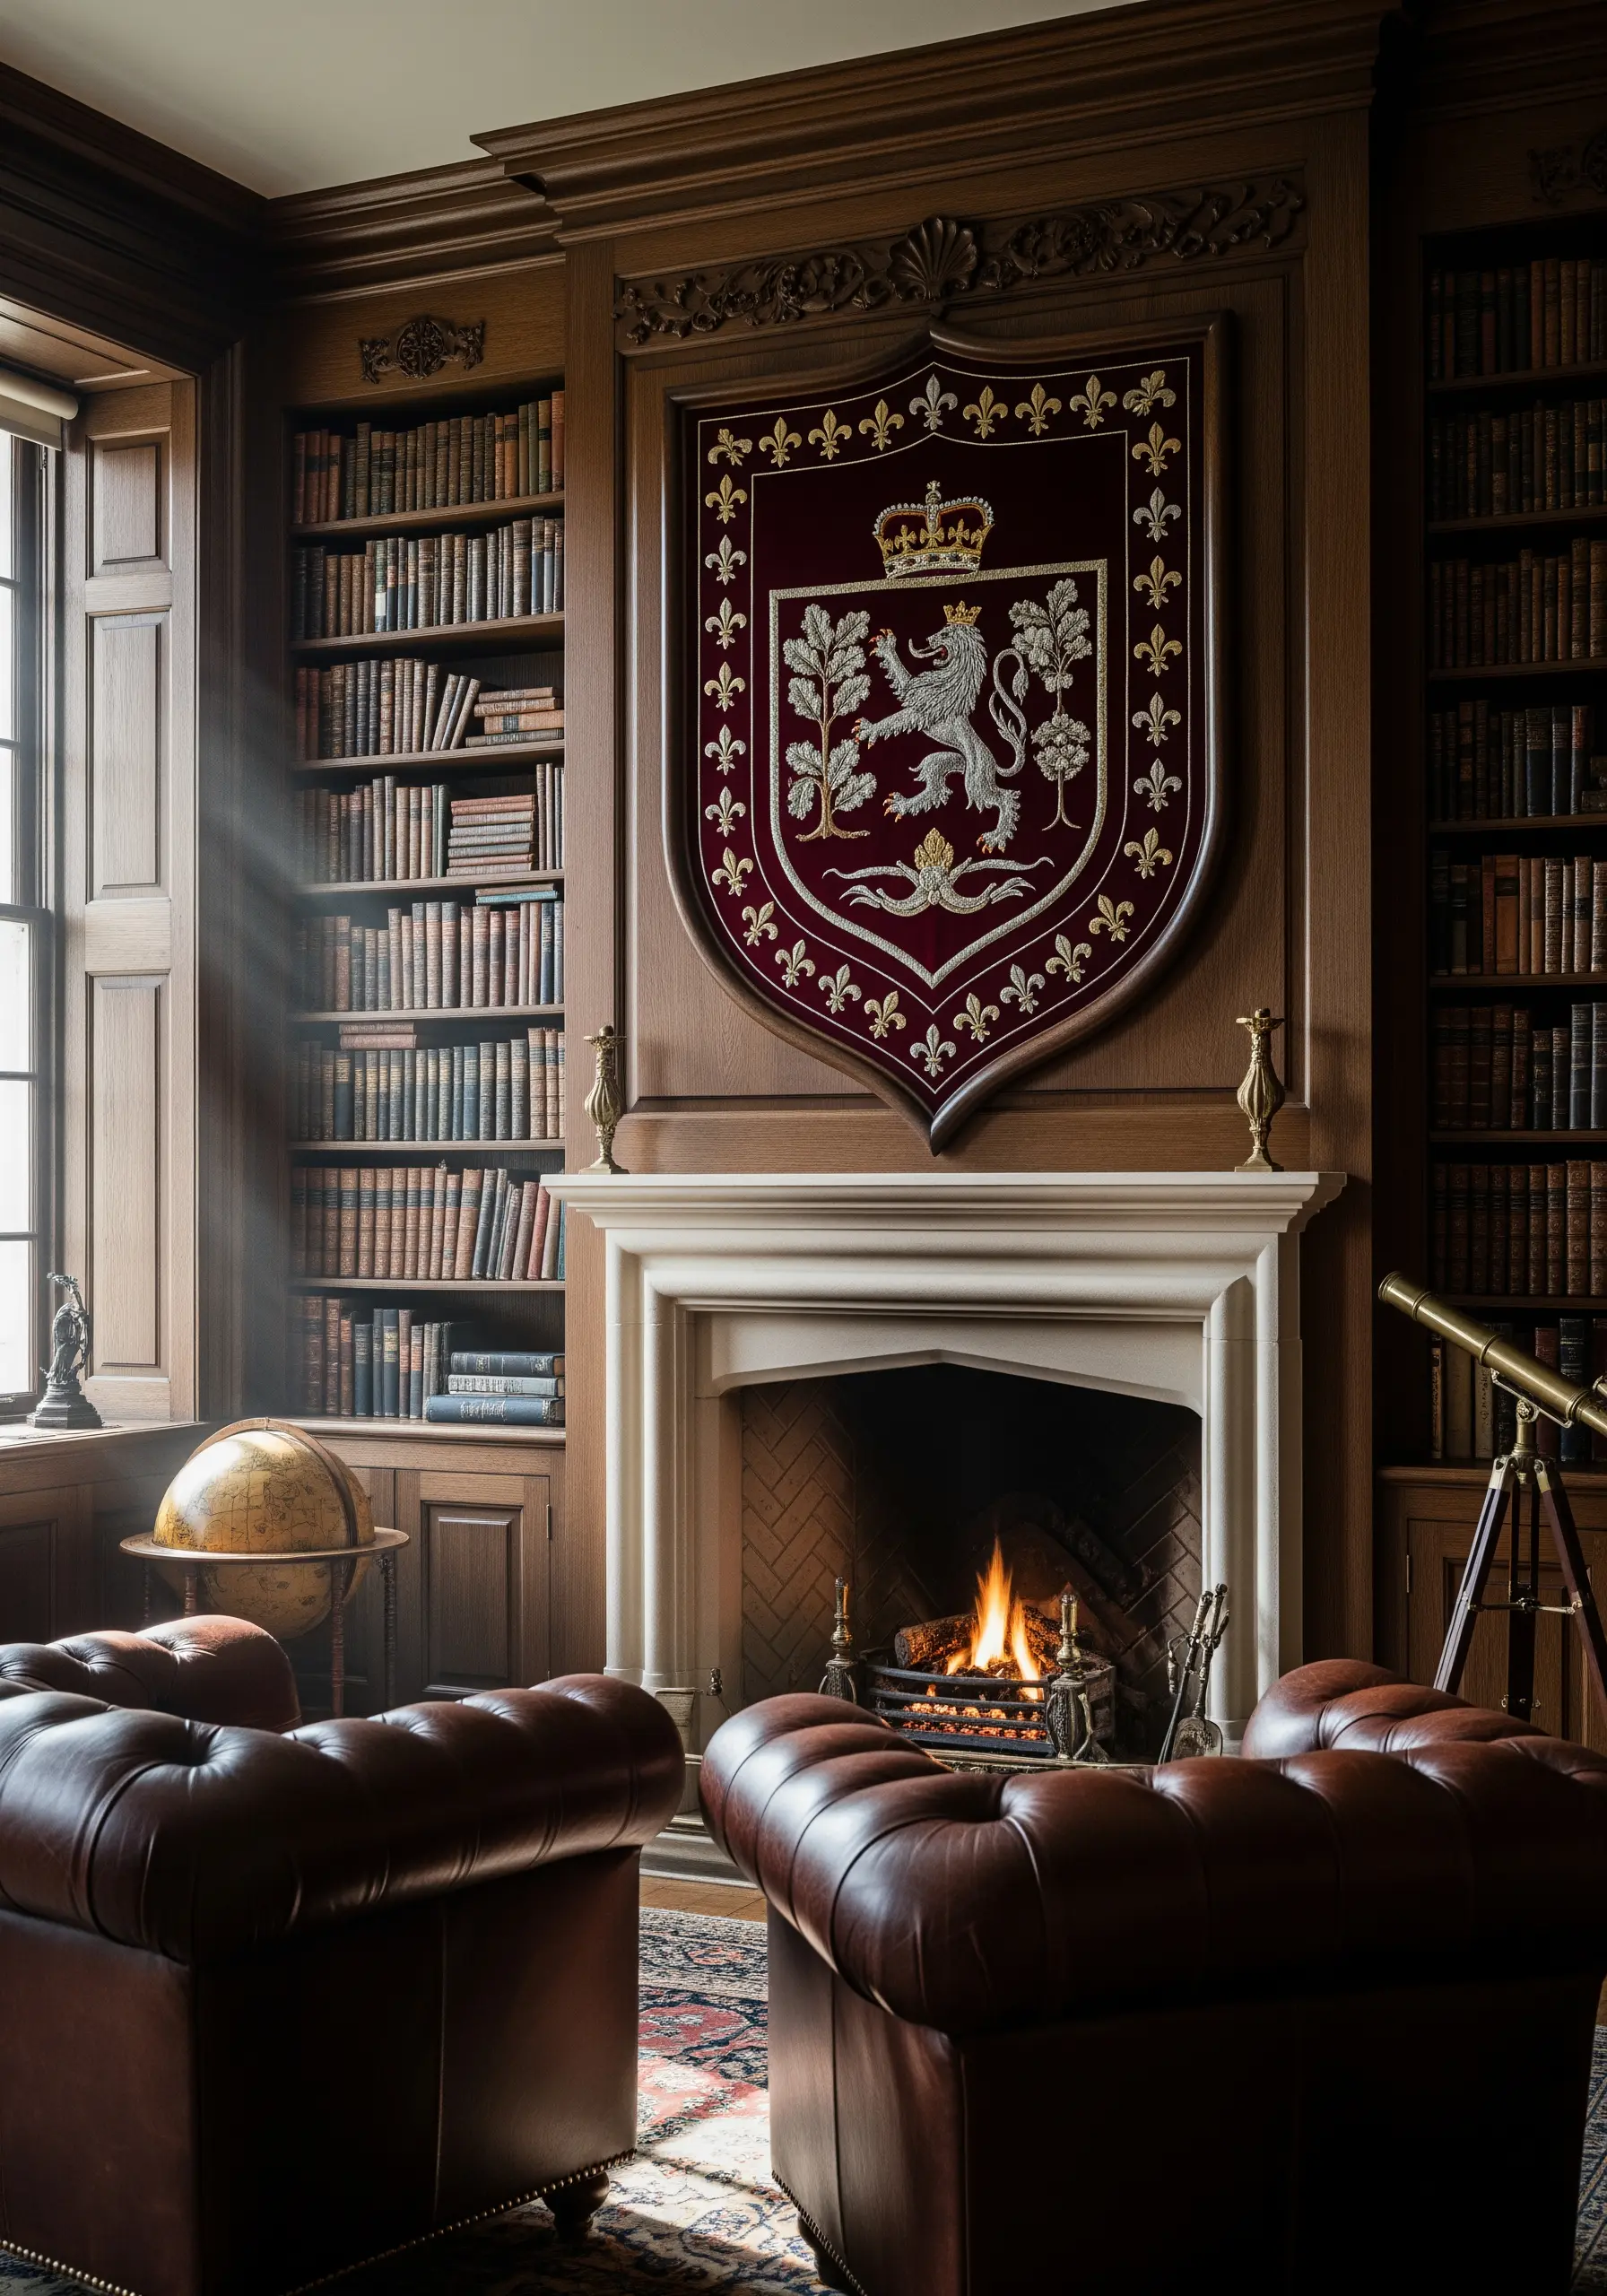
For a truly luxurious and heraldic feel, explore goldwork techniques. Instead of traditional floss, use metallic threads, couching them onto the fabric surface with a finer, less conspicuous thread.
To give motifs like the crown and lion a raised, embossed effect, add a layer of felt padding underneath before you begin stitching. This technique, called padded satin stitch, adds magnificent depth and a regal quality.
Mounting the finished work on a shield-shaped frame completes the historic, aristocratic aesthetic.
13. Paint Landscapes with Directional Stitches
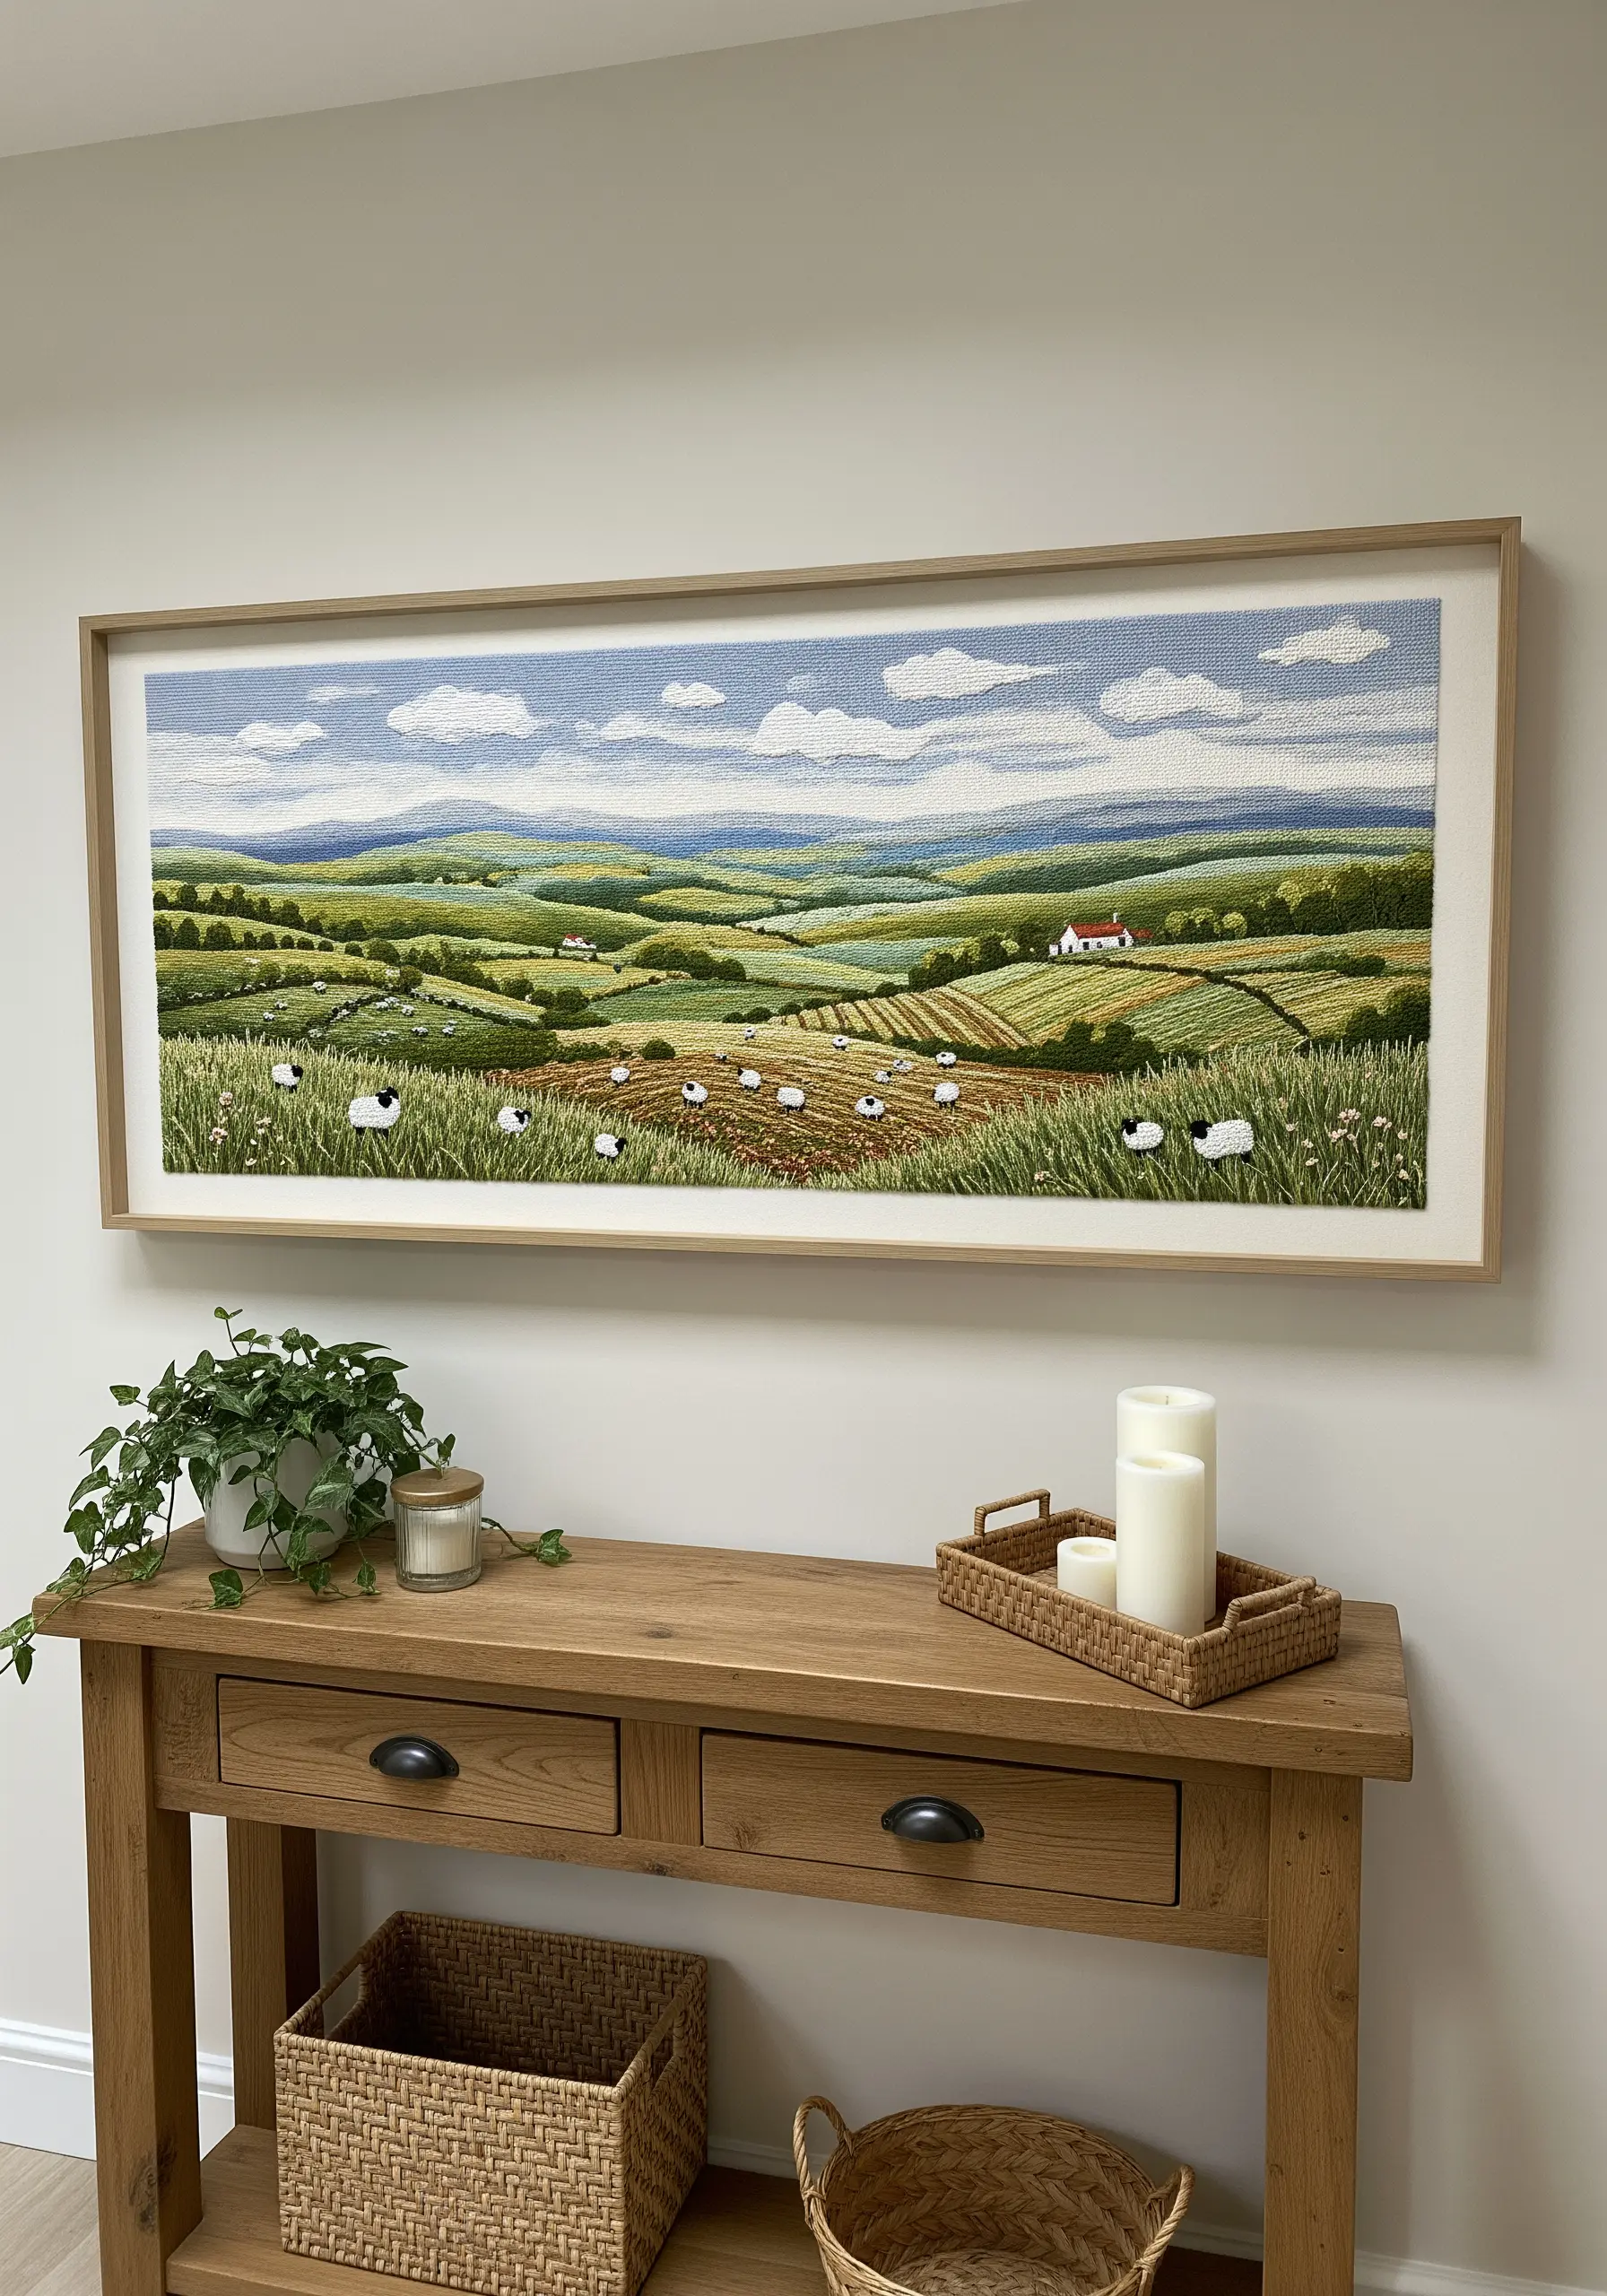
When stitching a landscape, think of your needle as a paintbrush. Use the direction of your stitches to define the contours of the land.
For rolling hills, angle your stitches to follow the curves. For plowed fields, use neat, straight rows. This subtle shift in direction creates a sense of perspective and realism.
Add textural stitches like French knots or bullion knots in the foreground for wildflowers and sheep; this brings them visually forward and adds depth to your mountain landscape thread painting.
14. Capture Art Nouveau’s Elegant Lines
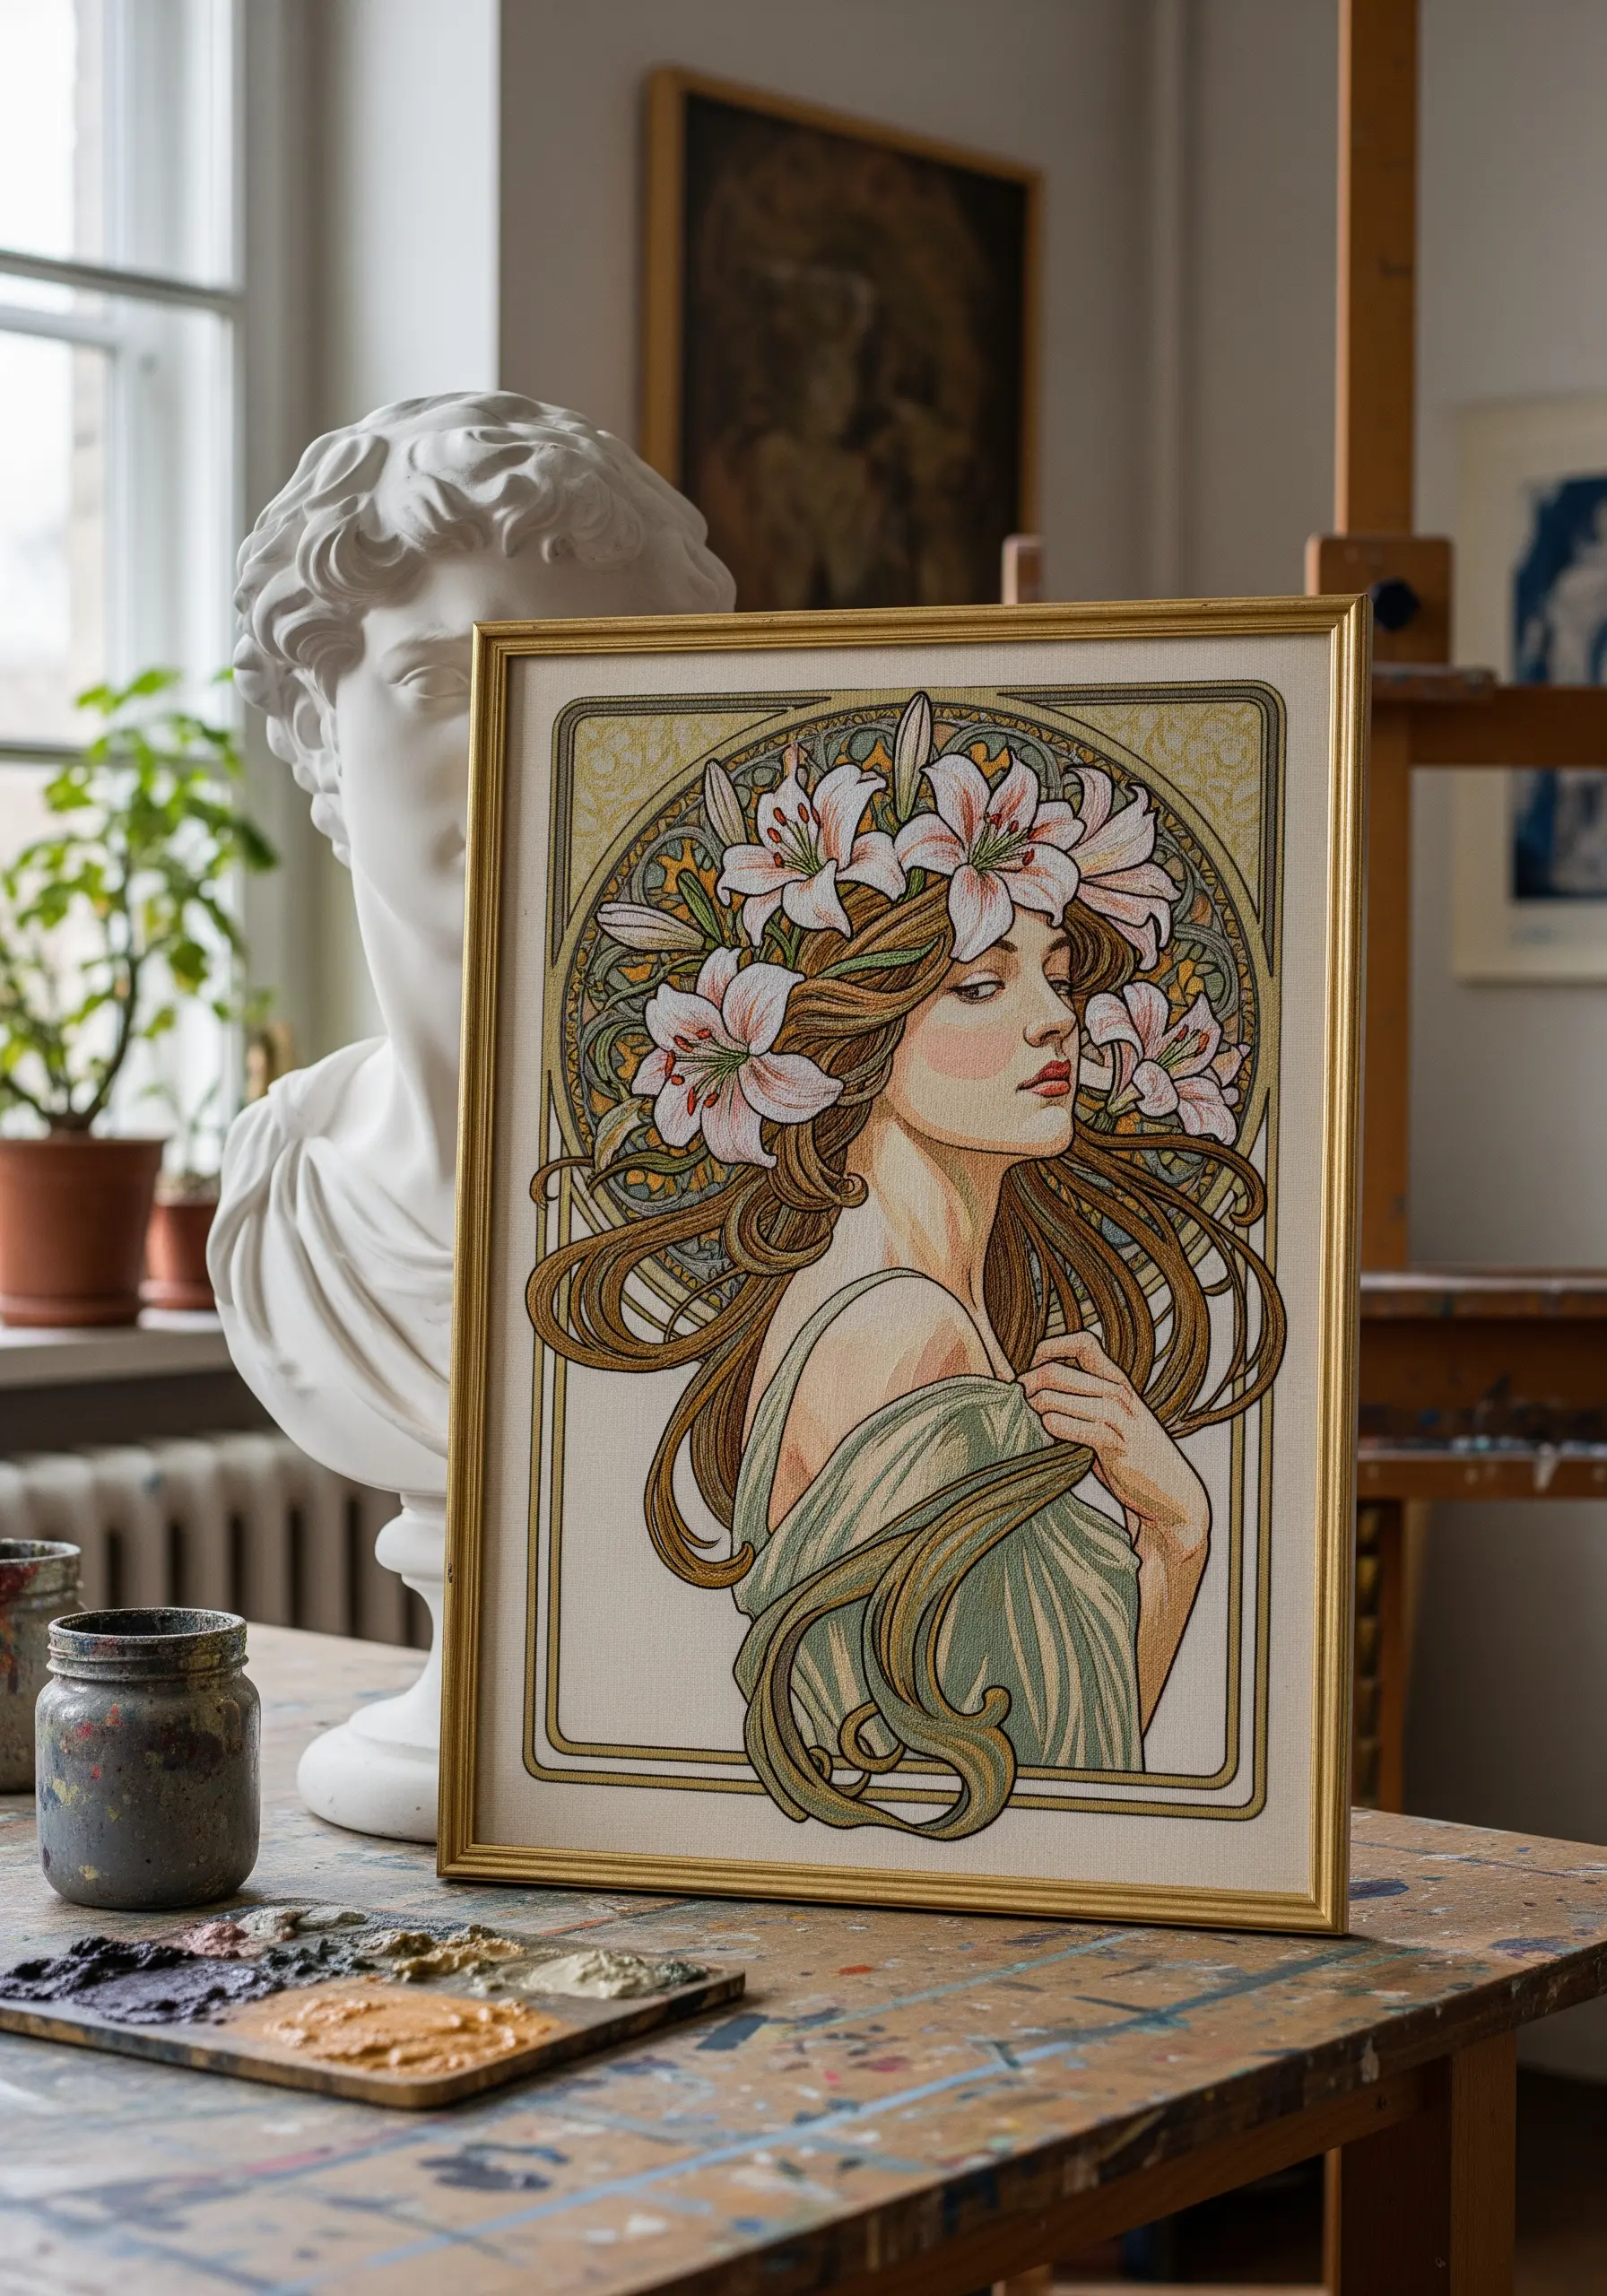
The essence of Art Nouveau is its flowing, organic line work. Emphasize this by using a bold, consistent outline stitch, like a two-strand stem stitch or a delicate chain stitch, for all the defining contours.
For the color fills, use a soft, blended long-and-short stitch. This creates a gentle gradient that feels more like an illustration or watercolor wash, honoring the style’s artistic roots.
Choosing a muted, earthy color palette of sage green, dusty rose, and cream will enhance the vintage, turn-of-the-century feel.
15. Add Charm with Delicate Outlines
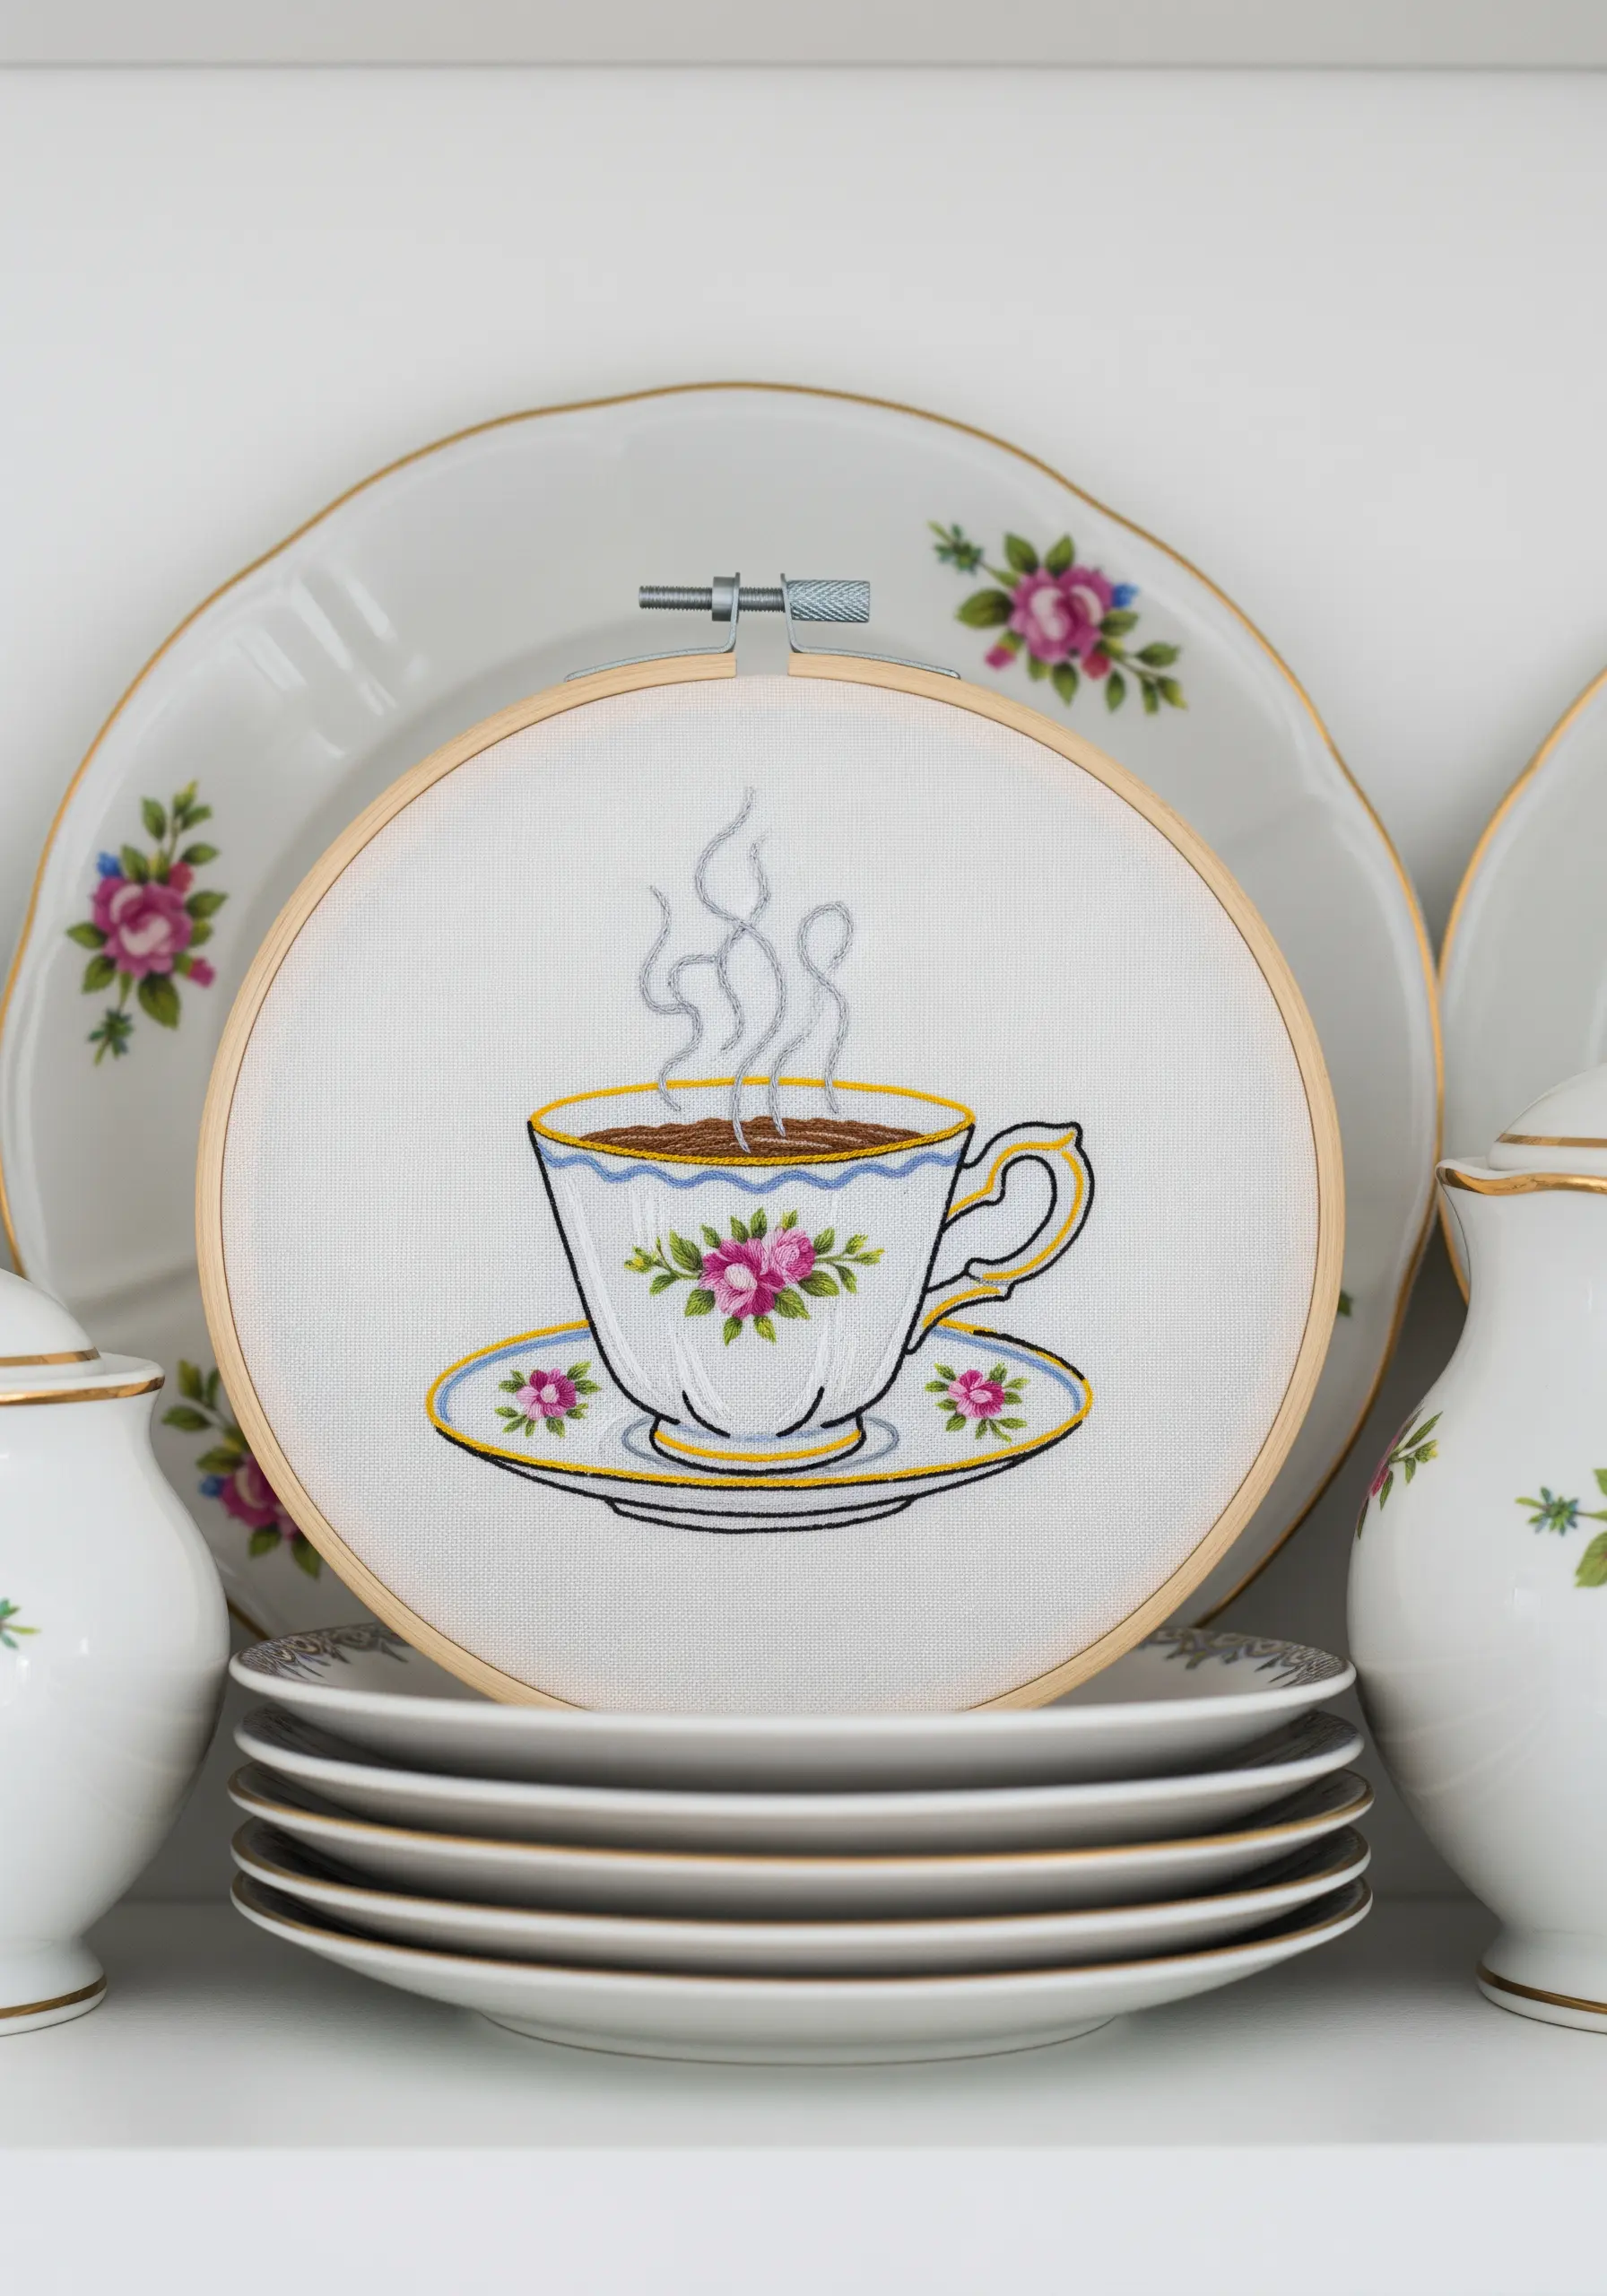
To embroider fine china patterns, precision is everything. Use a single strand of black thread and a sharp needle to execute a clean split stitch or backstitch for the cup’s outlines.
For the tiny floral details, use miniature lazy daisy stitches for petals and single French knots for the centers. This keeps the motifs delicate and in scale with the main object.
The whisper-thin grey backstitches for the steam add a touch of whimsy and movement to an otherwise static scene, making these simple mini embroidery patterns feel alive.
16. Blend Cross-Stitch with Freeform Florals
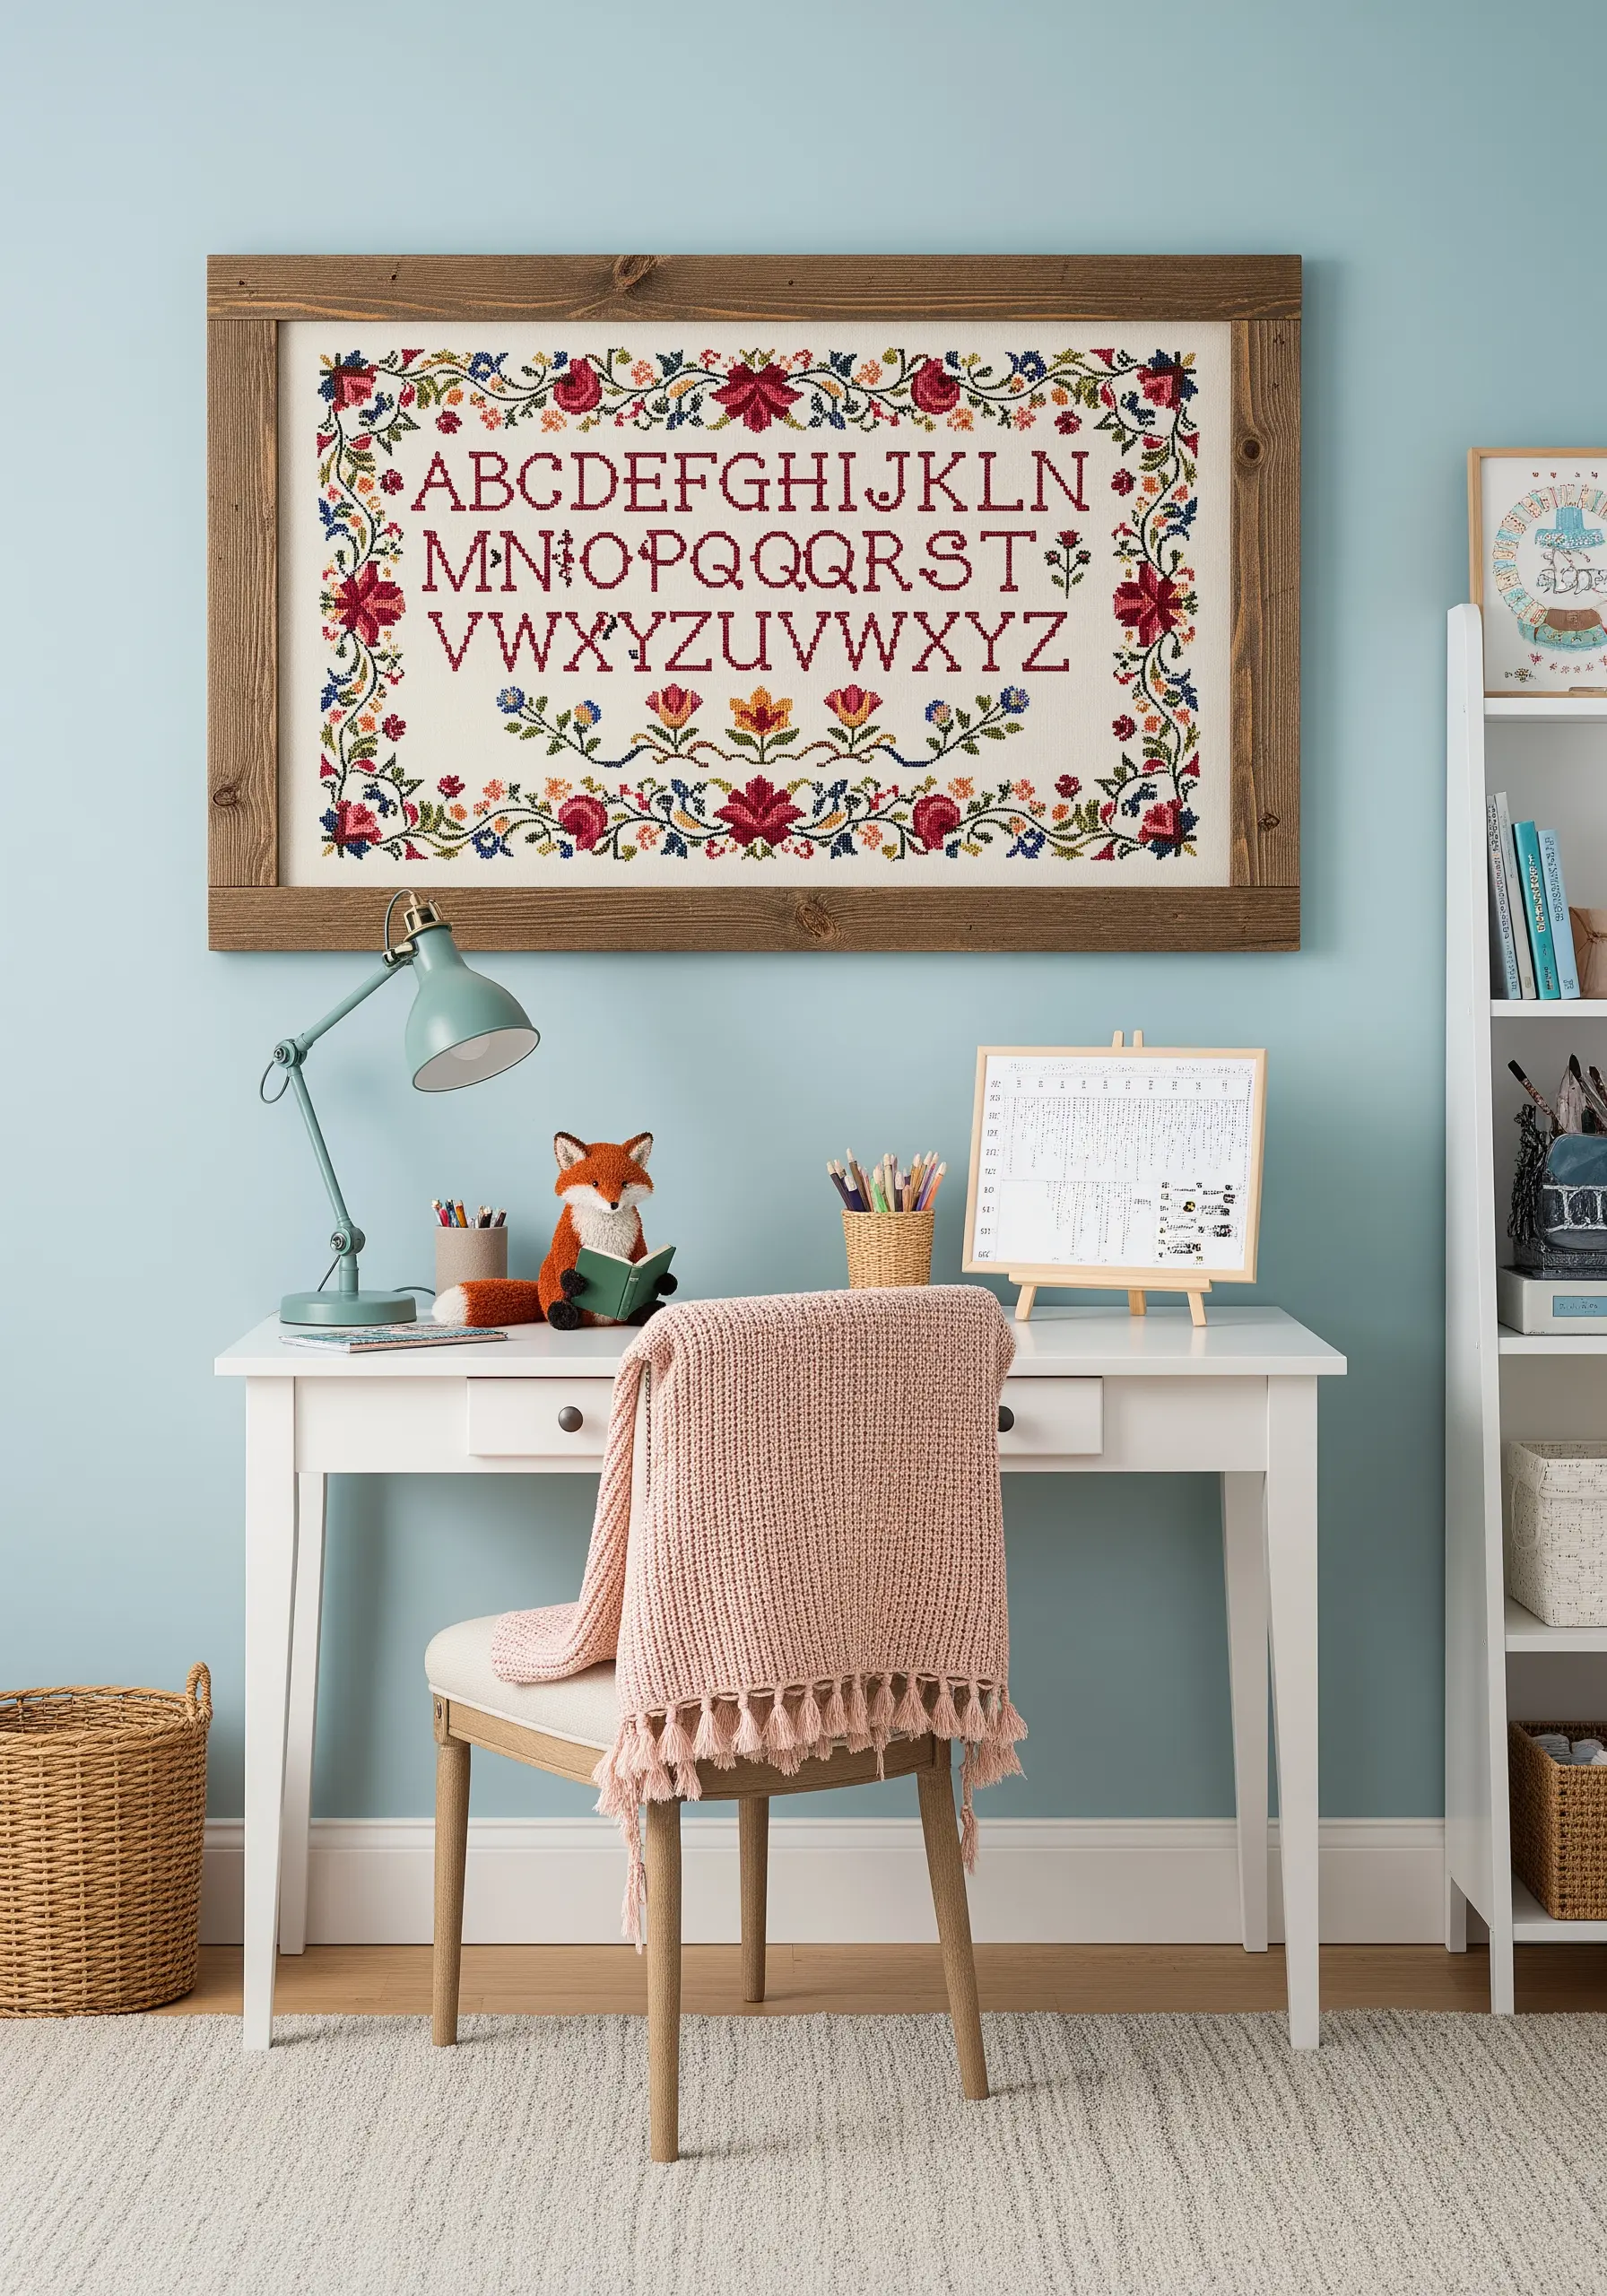
Give a traditional alphabet sampler a modern update by combining two distinct embroidery styles. Use classic cross-stitch for the structured, gridded letters.
For the border, switch to more organic, freeform stitches. Use satin stitch for petals, French knots for flower centers, and stem stitch for winding vines. This juxtaposition of disciplined and painterly styles creates a rich, dynamic texture.
A rustic wooden frame grounds the piece, balancing the intricacy of the stitching with simple, natural charm.
17. Ink a Map with a Single Stitch
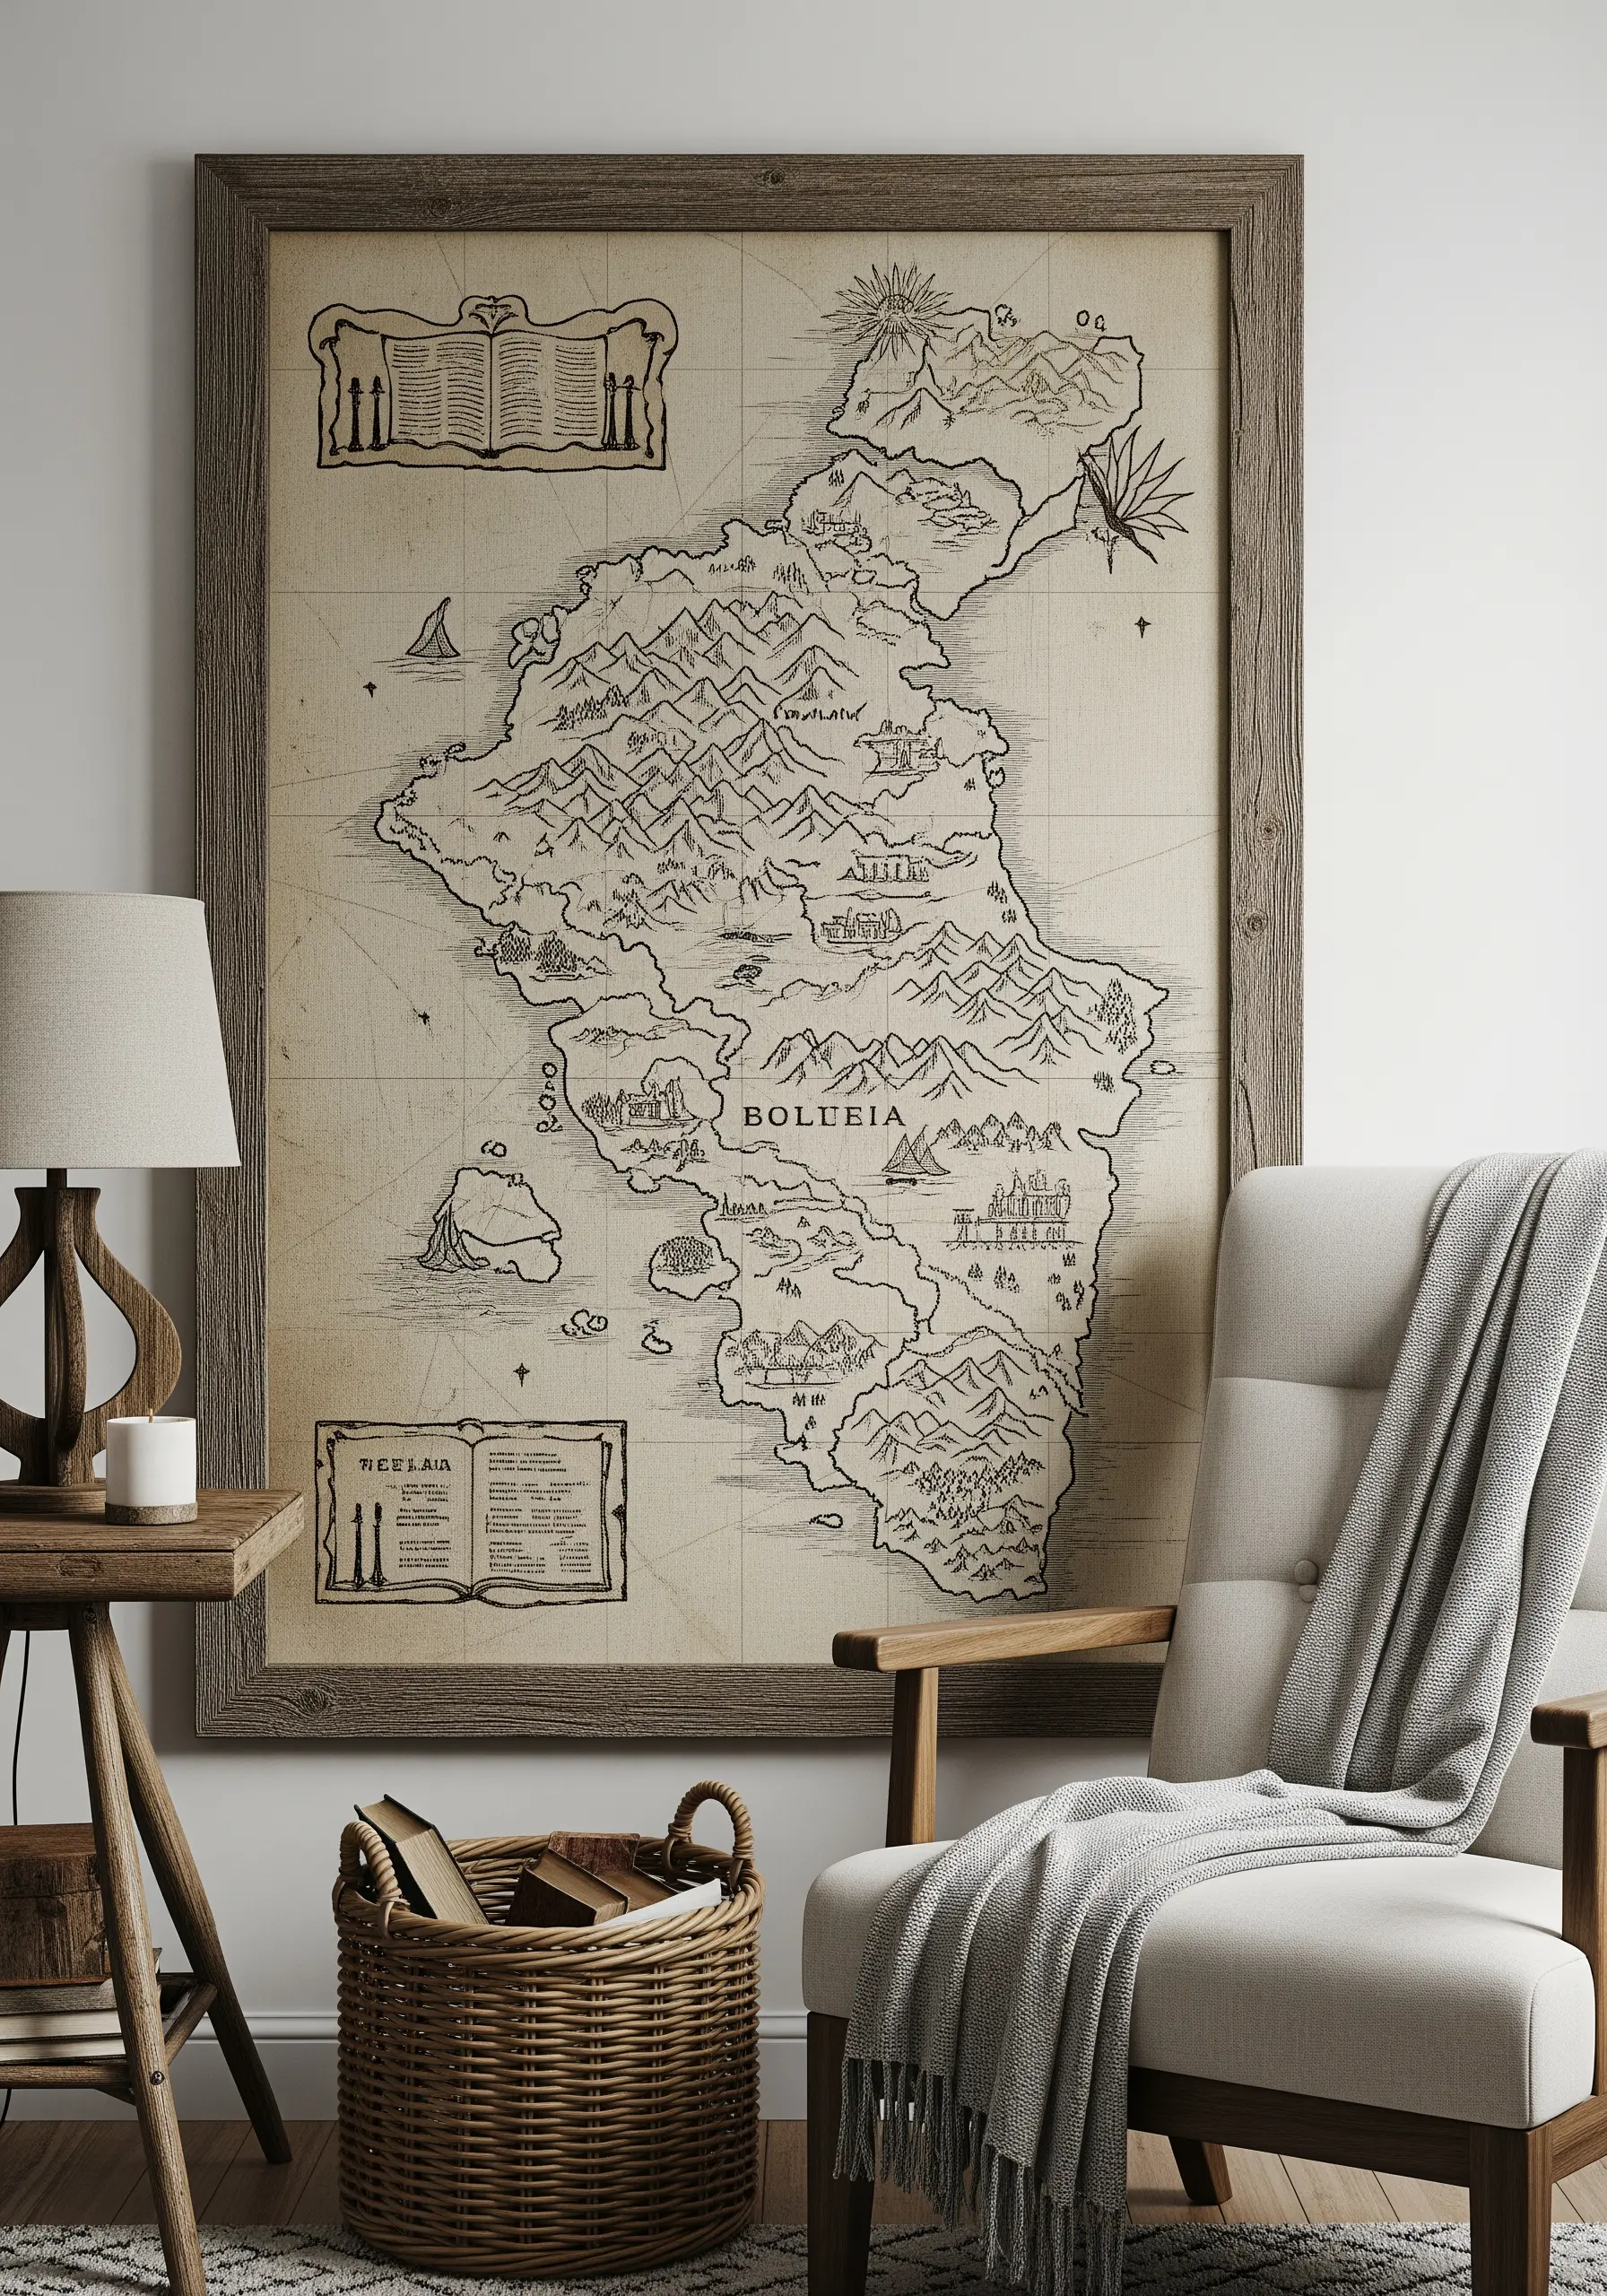
To create the effect of a hand-drawn antique map, rely on the power of line work. Use a single stitch—like a backstitch or stem stitch—for the entire piece to maintain a consistent, ink-like quality.
Stitch with a dark brown or black thread on an unbleached, textured cotton or linen fabric. This combination perfectly mimics the look of aged ink on parchment.
The key to success is patience and precision; every tiny mountain range and coastline contributes to the world you’re building, making these travel-inspired embroidery hoops a true labor of love.
18. Combine Stitches with Pressed Botanicals
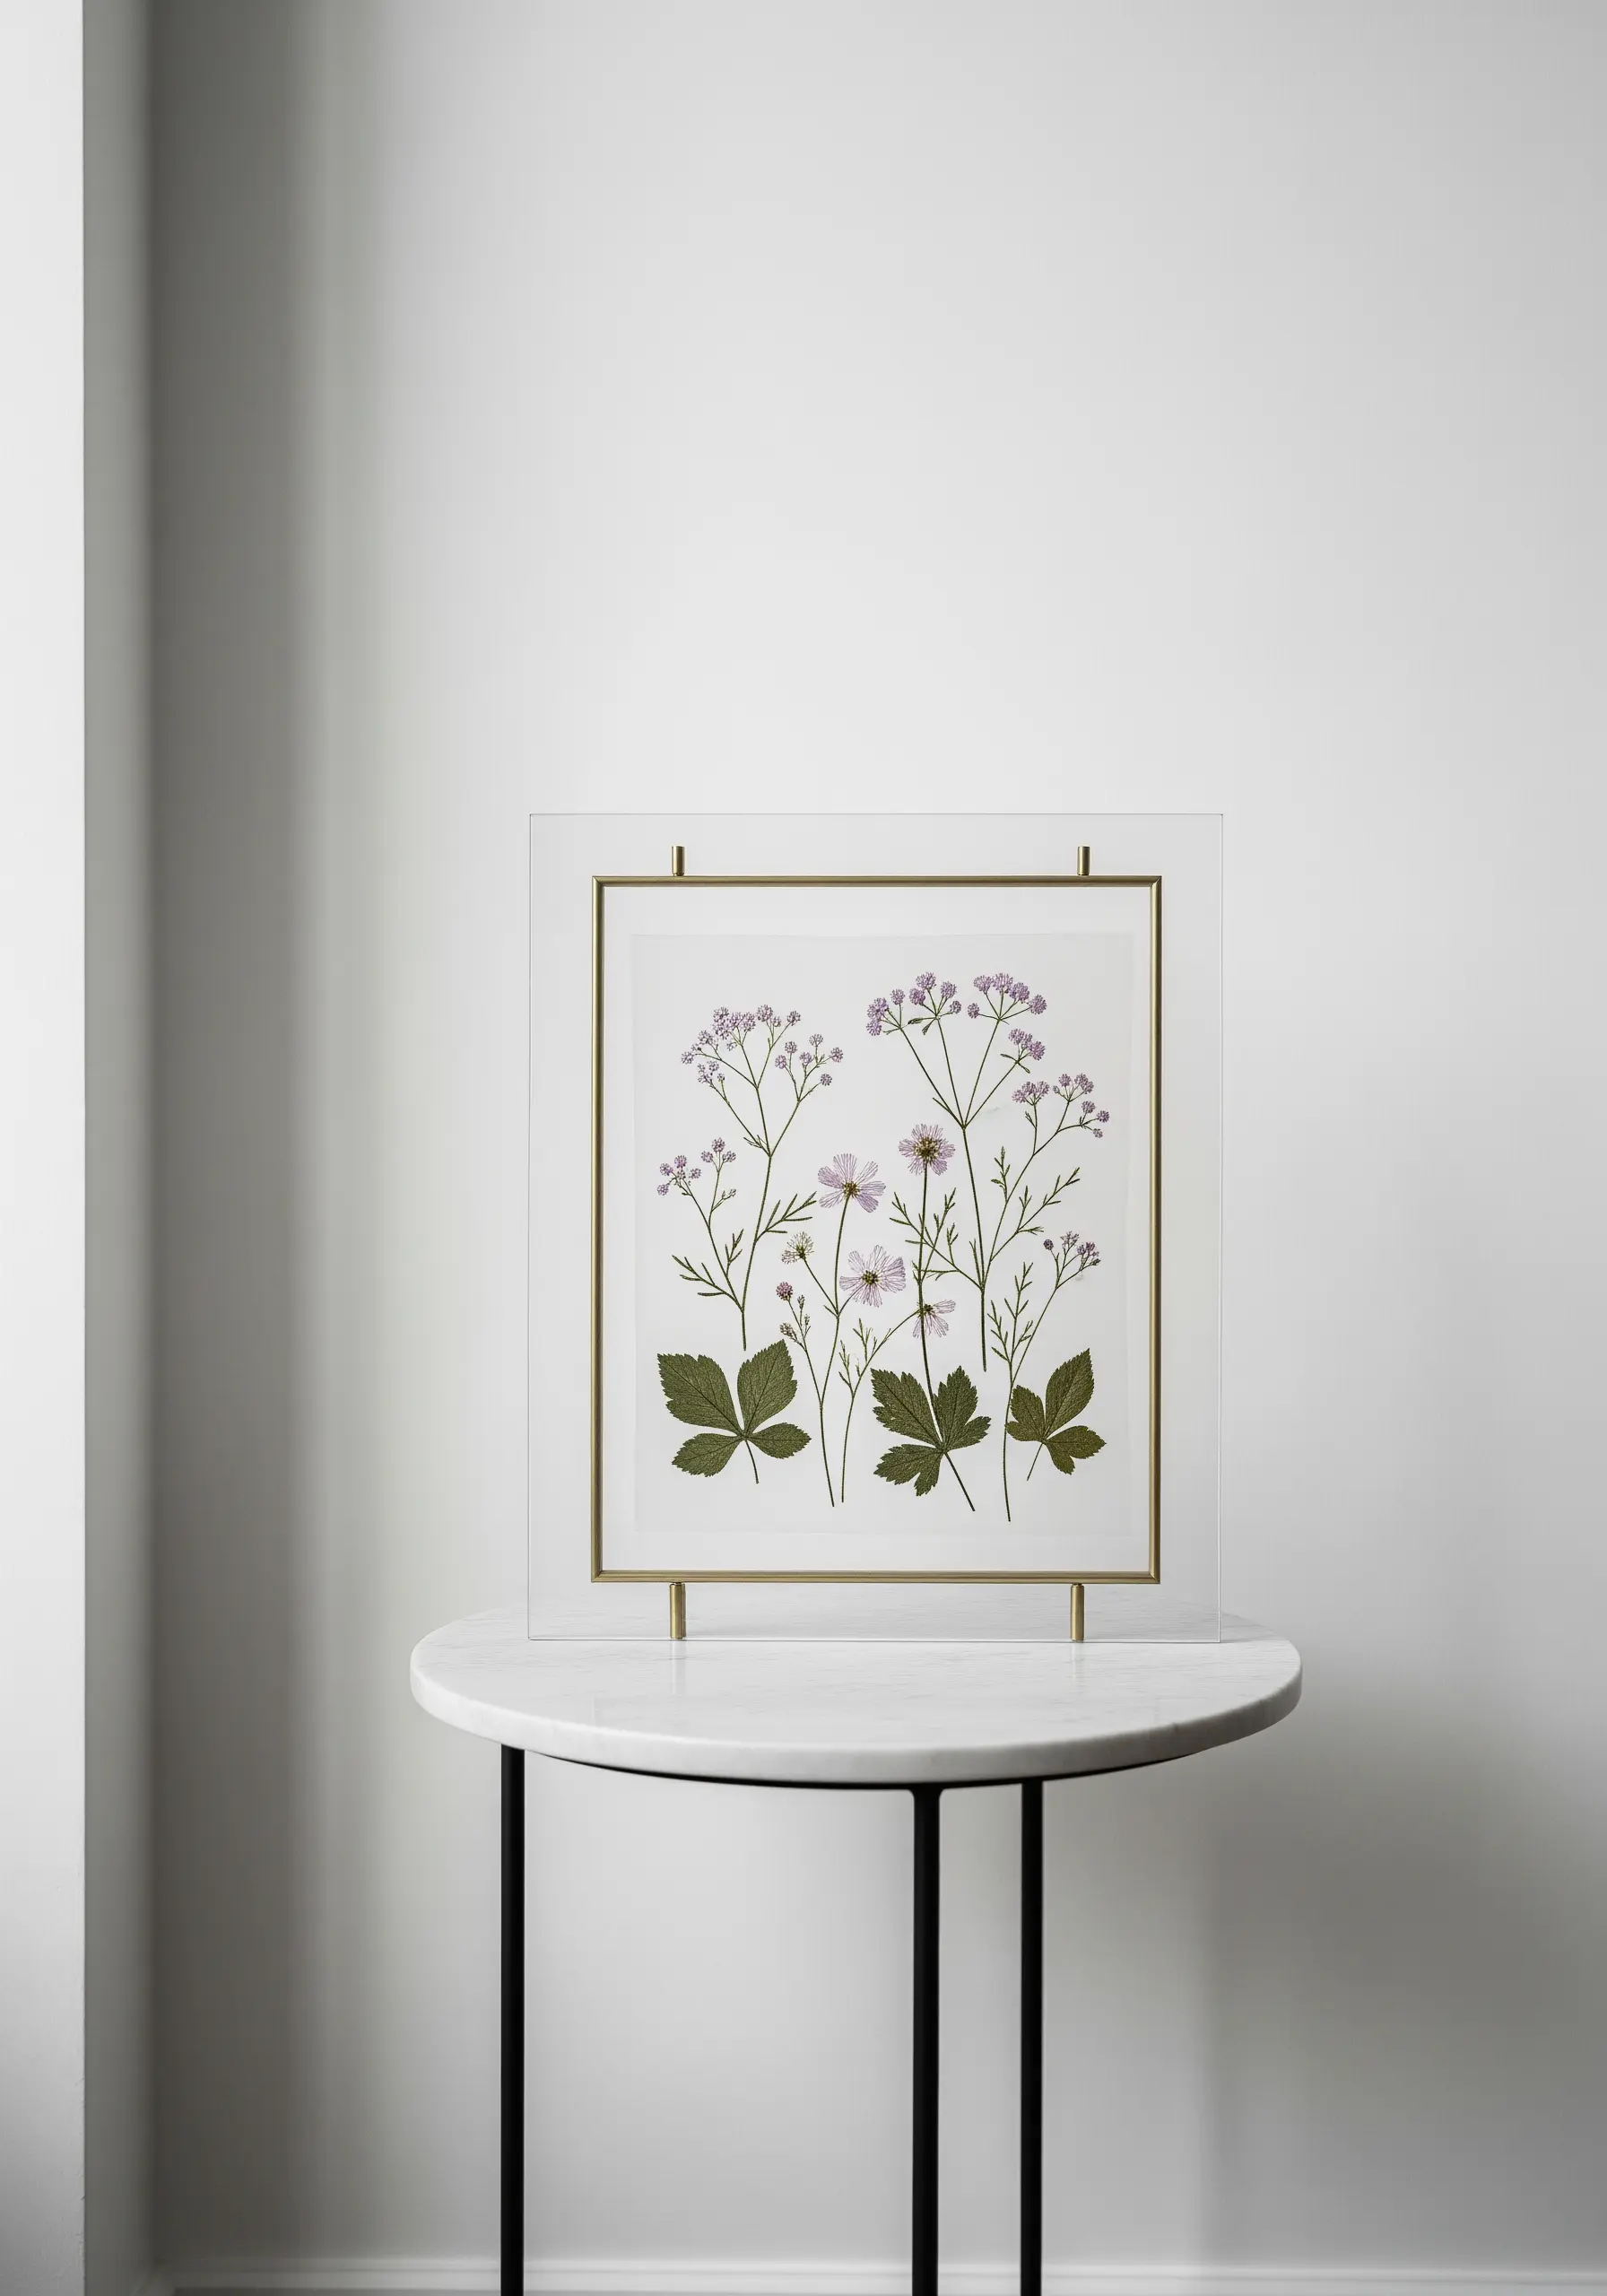
Create a stunning mixed-media piece by blending embroidery with real pressed flowers. First, stitch the stems and leaves onto your fabric using a simple stem or backstitch.
Then, carefully position your dried, pressed flower heads over the stitched stems. Secure them with a few tiny, discreet couching stitches over the center of the bloom, or with a minimal dot of archival-quality fabric glue.
A floating acrylic frame is the perfect choice for display, as it enhances the delicate, airy quality of these step-by-step pressed flower embroidery designs.
19. Achieve Geometric Precision with Stabilizer
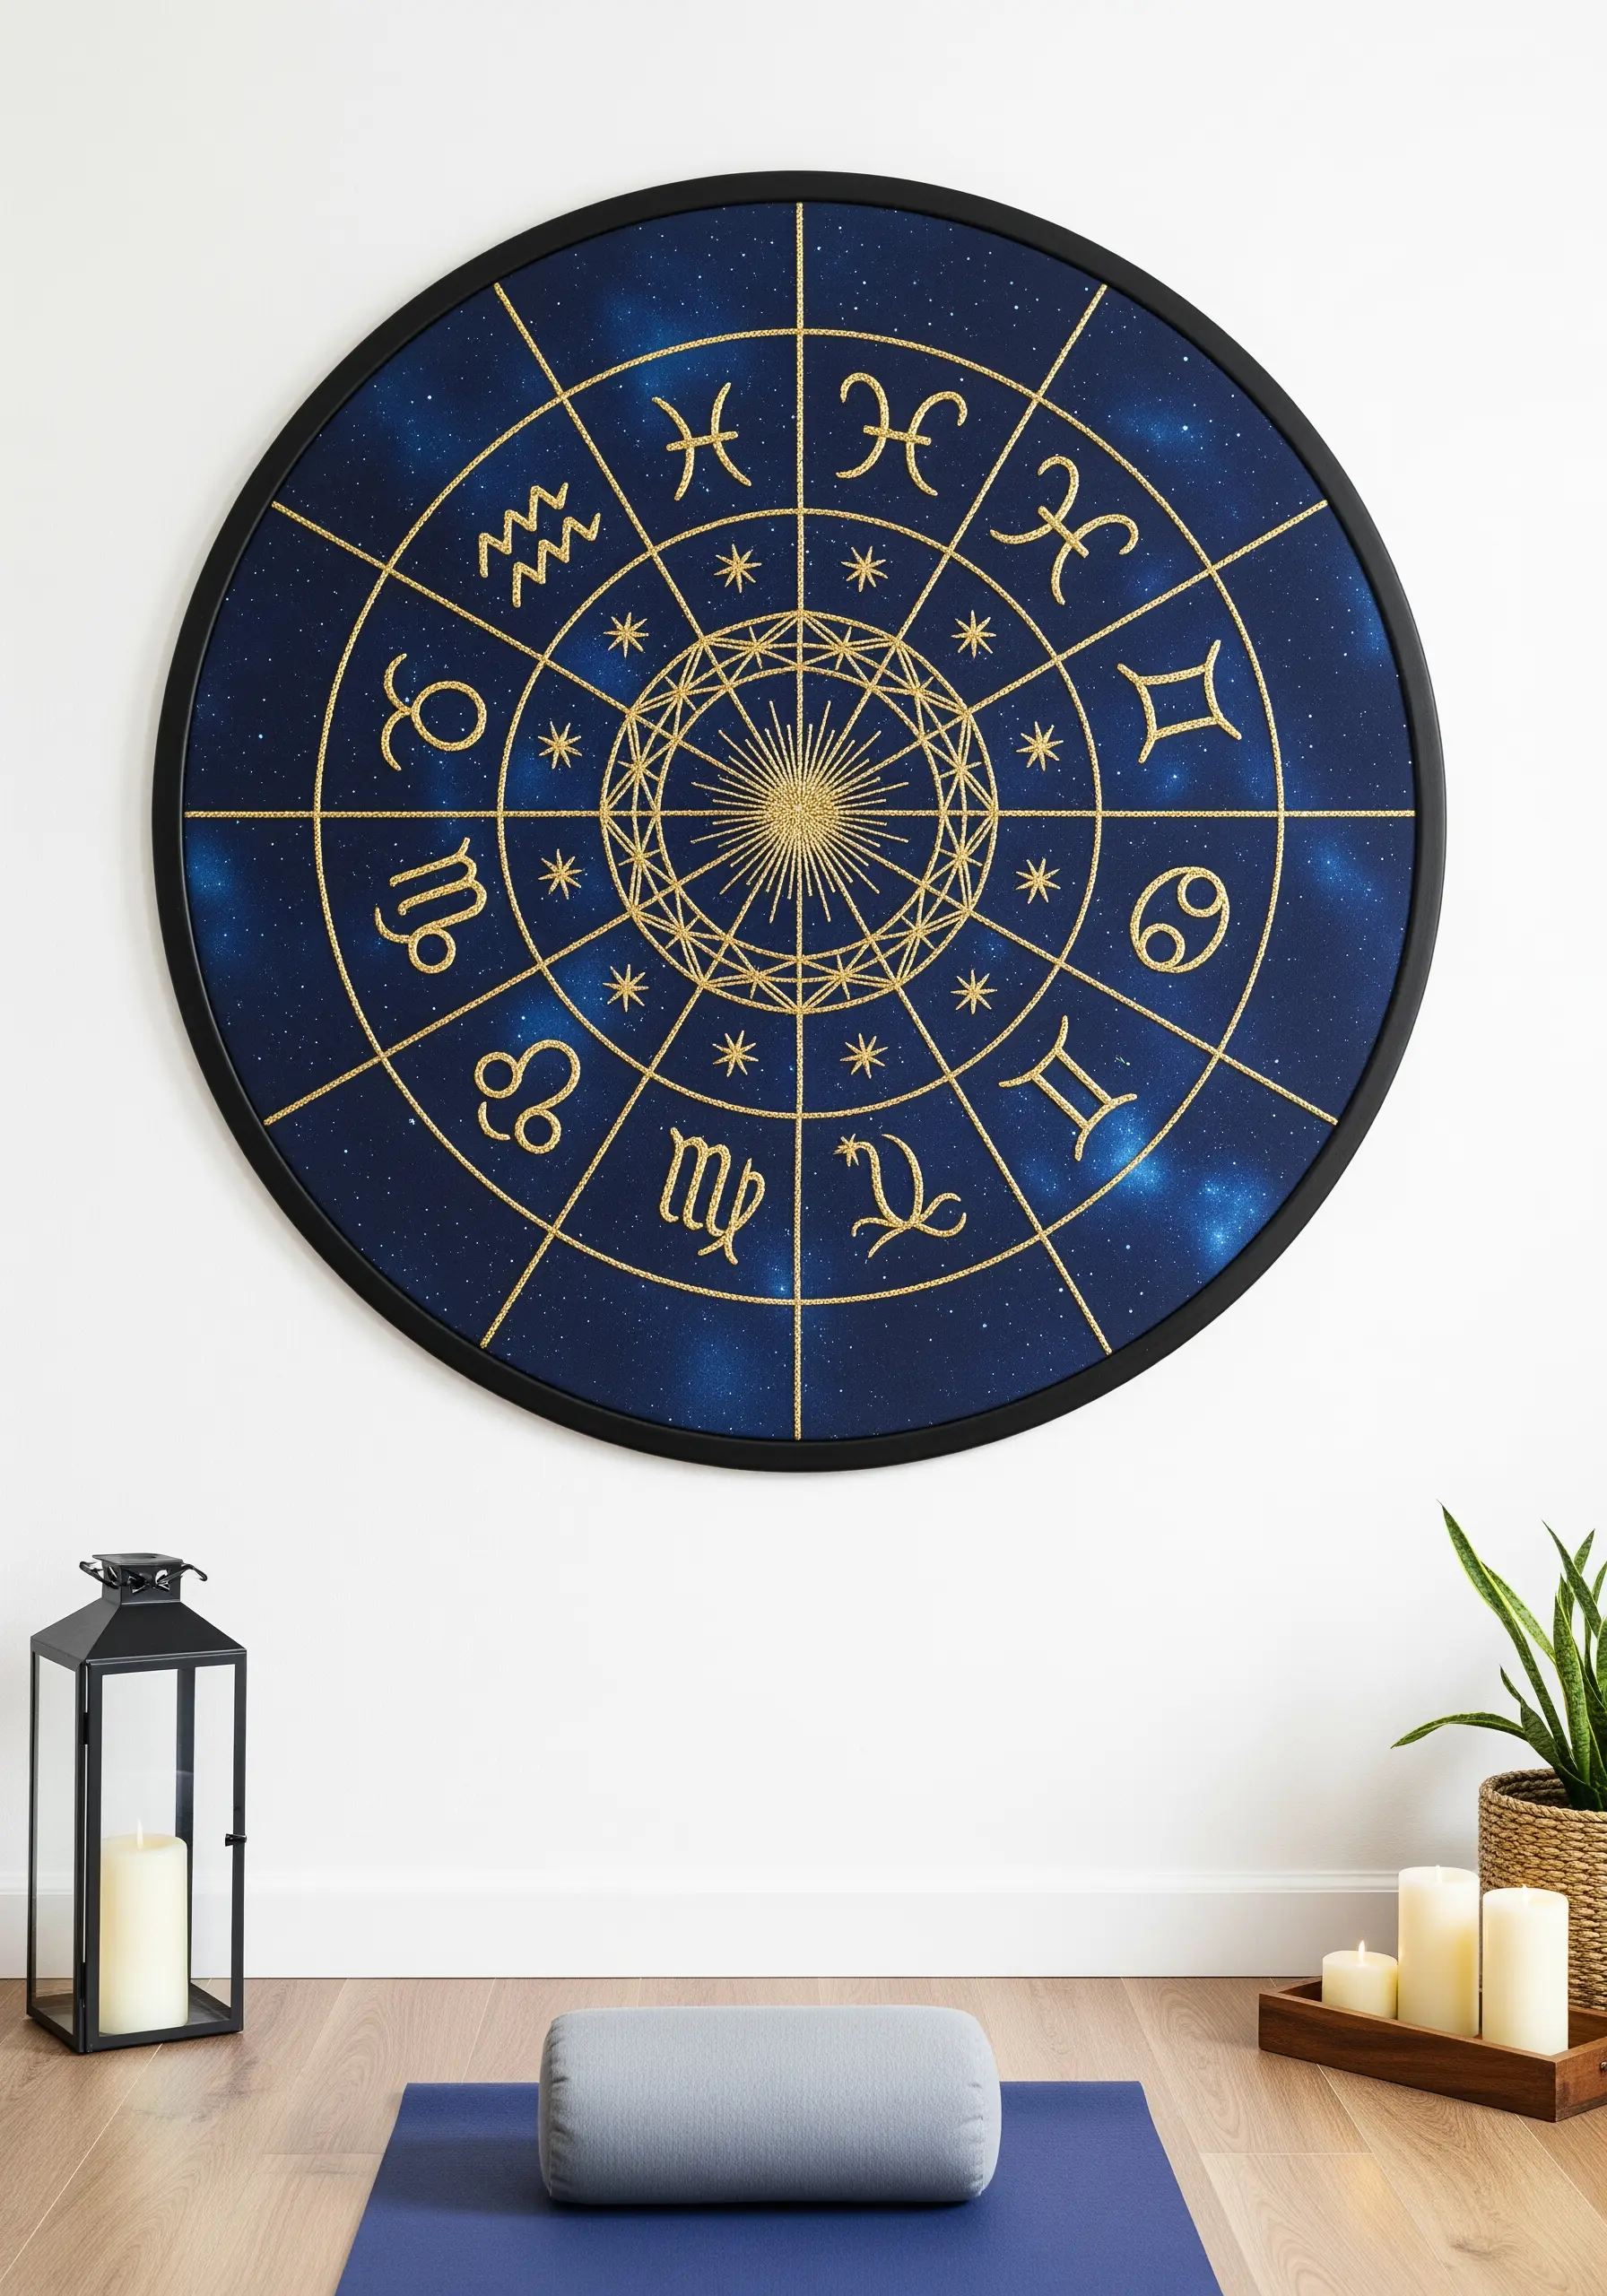
For a flawless geometric design like a zodiac wheel, perfect pattern transfer is crucial. Print your design onto a sheet of water-soluble stabilizer, adhere it to your fabric, and stitch directly through it.
When you’re finished stitching, simply dissolve the stabilizer in water, leaving behind only your crisp, perfectly placed stitches.
Use a bright metallic thread on a dark, cosmic-inspired background. The contrast makes the intricate lines pop, giving the piece a mystical, graphic quality.
20. Curate a 3D Cabinet of Curiosities
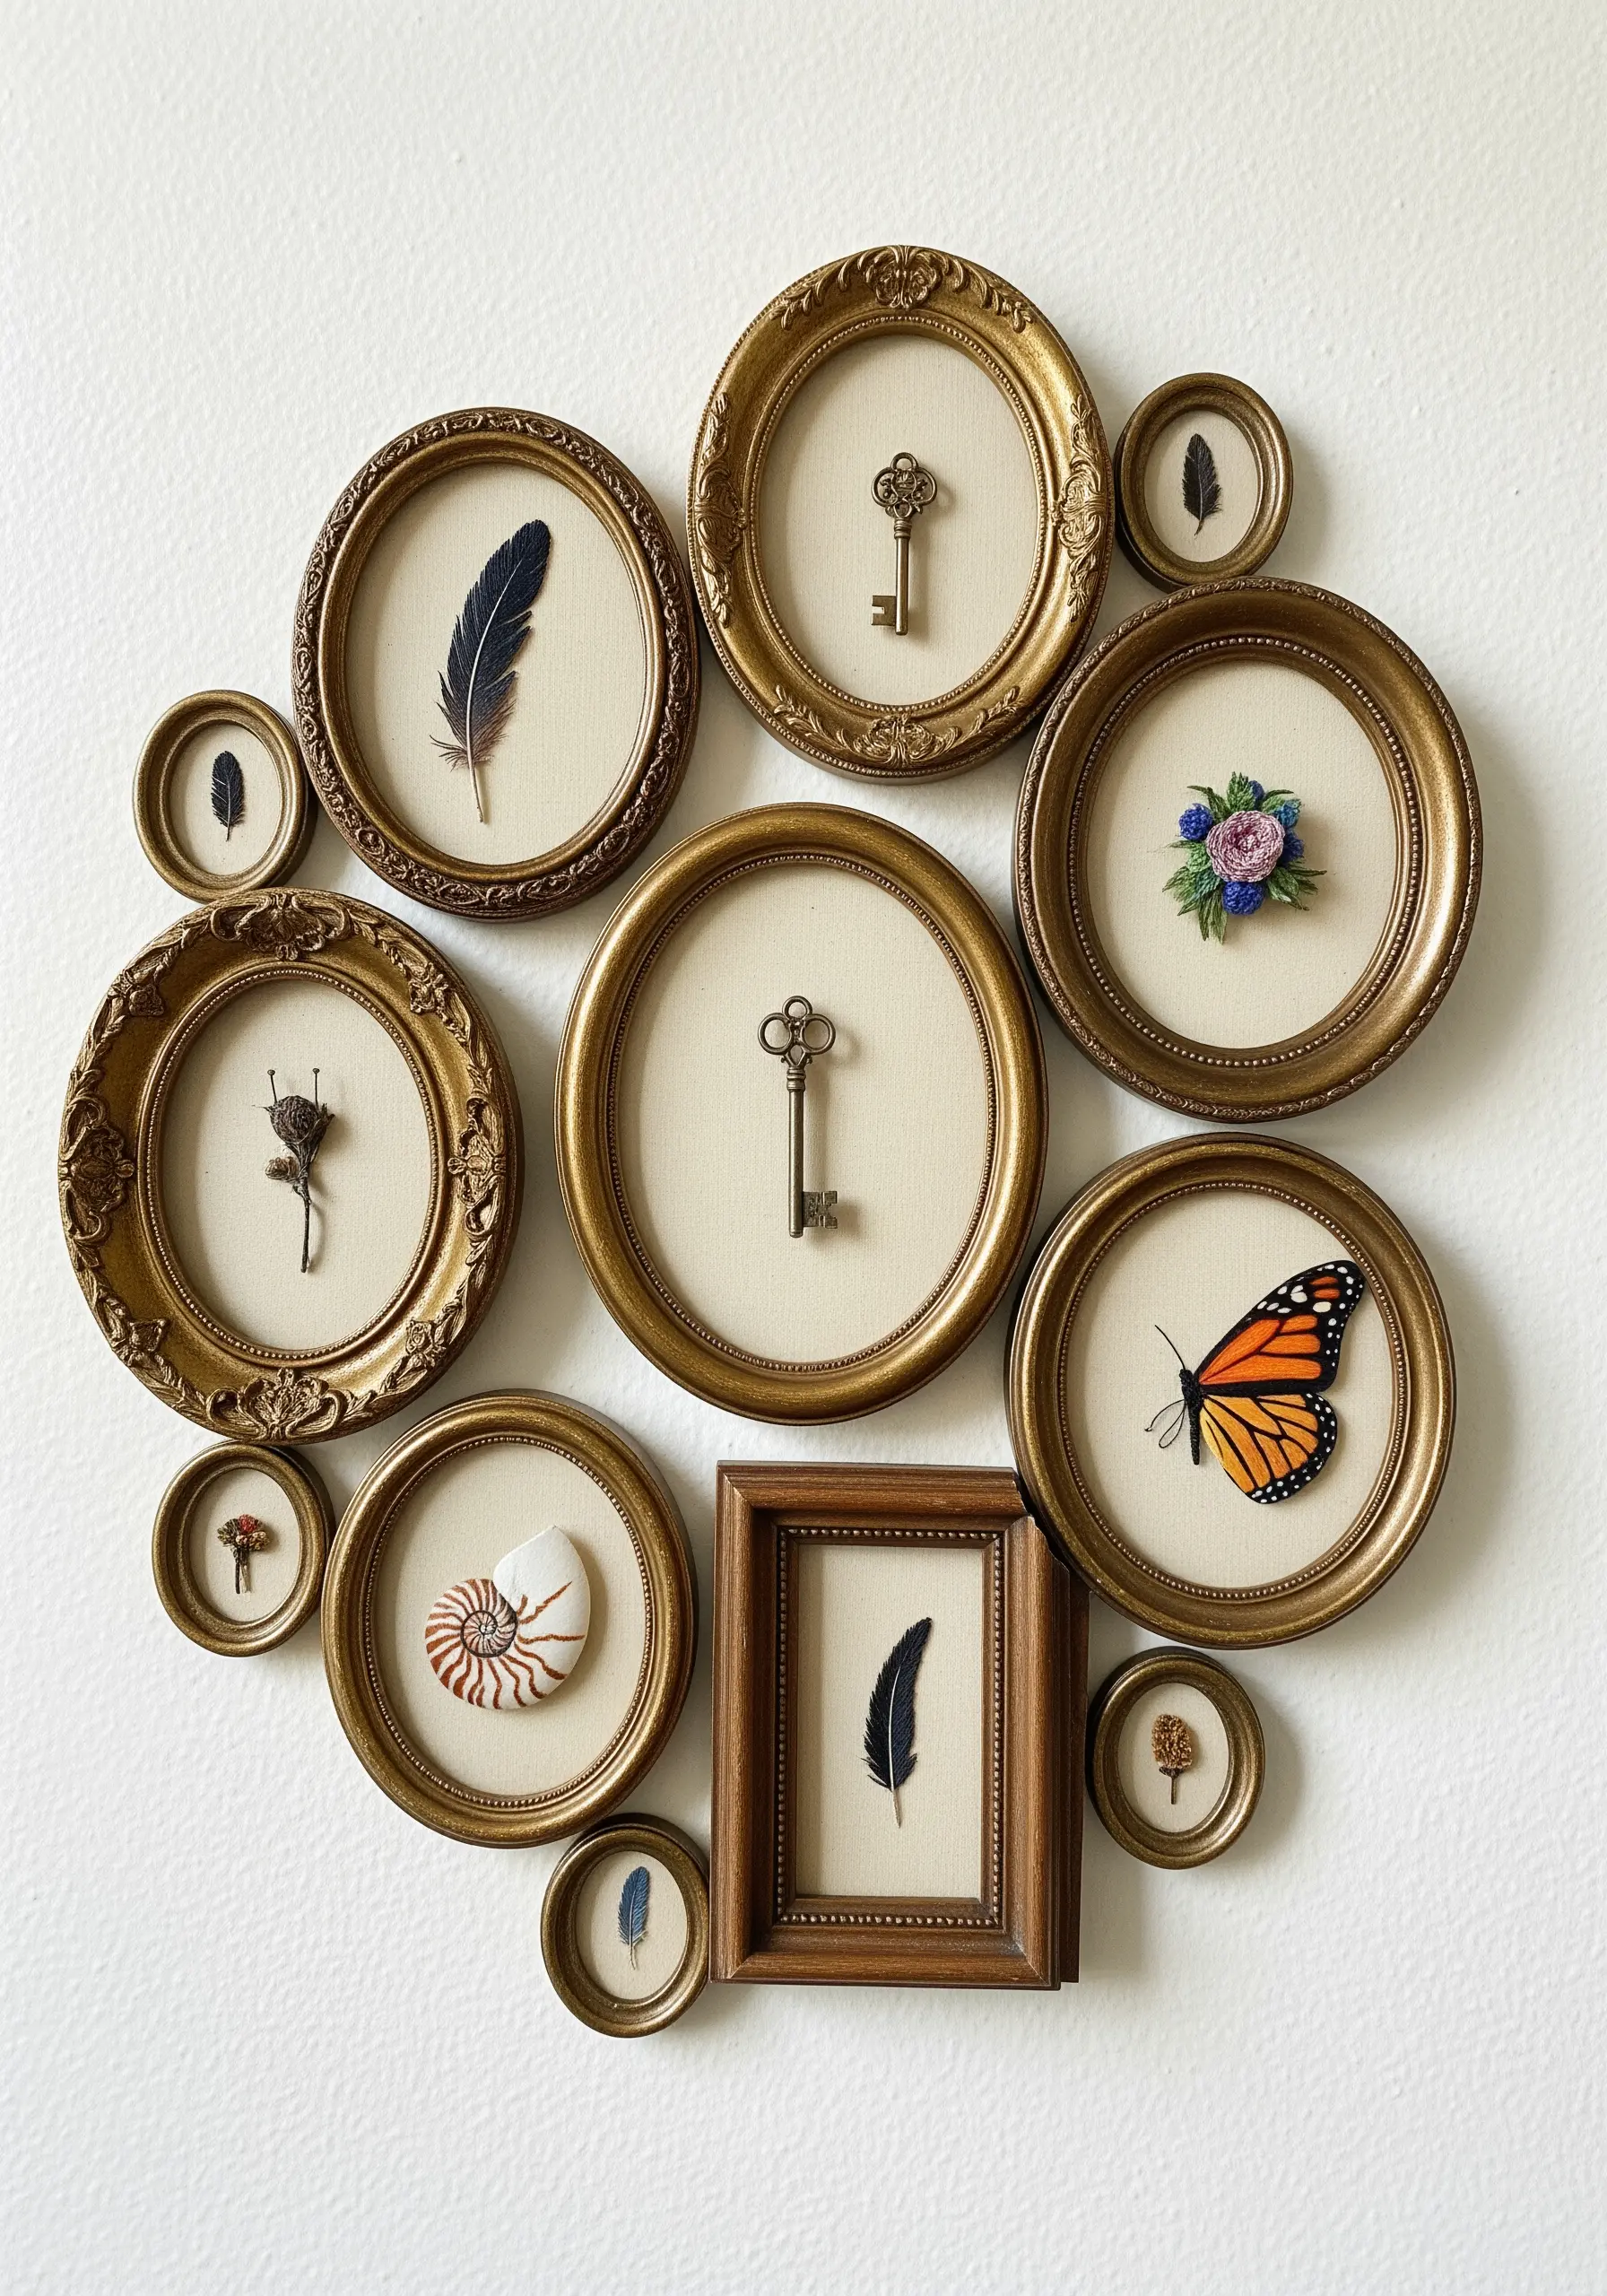
Move beyond thread and fabric by incorporating real-world objects into your display. Create a gallery wall that mixes small embroidered pieces with found items like antique keys, shells, or feathers.
To create cohesion, mount all the items on the same neutral linen background and use frames from a similar vintage style, even if they aren’t identical.
This approach transforms your wall into a personal museum, where each object and stitch tells a part of a larger story. It’s one of the most creative mixed-media contemporary embroidery designs.
21. Capture the Grace of Chinoiserie

To replicate the elegant, painterly style of Chinoiserie, focus on creating graceful movement in your stitches. For the weeping willow leaves, use a detached chain stitch or a long, flowing fly stitch to create a sense of drape.
Use a smooth satin stitch for architectural elements and birds, ensuring your stitches are flat and even to mimic brushstrokes on silk.
Choose a limited, traditional color palette—like jade green, coral, and gold—on a silk or fine cotton background to achieve an authentic and sophisticated finish.


