
When you look at a mountain range, you don’t just see a shape; you feel its scale, the texture of the rock, the way the light creates a thousand different colors. Your embroidery can capture that same feeling, moving beyond simple outlines to become a rich, tactile painting made of thread.
Forget the idea that landscape embroidery is impossibly complex. The most stunning effects often come from small, intentional choices—changing the direction of a stitch to follow a contour, using one less strand of thread to push a hill into the distance, or choosing a French knot over a satin stitch to create a field of wildflowers that feels alive.
Think of this not as a set of rules, but as a new way to see with your needle. These techniques are your tools to translate the awe of nature into something you can hold, a landscape not just depicted, but truly expressed.
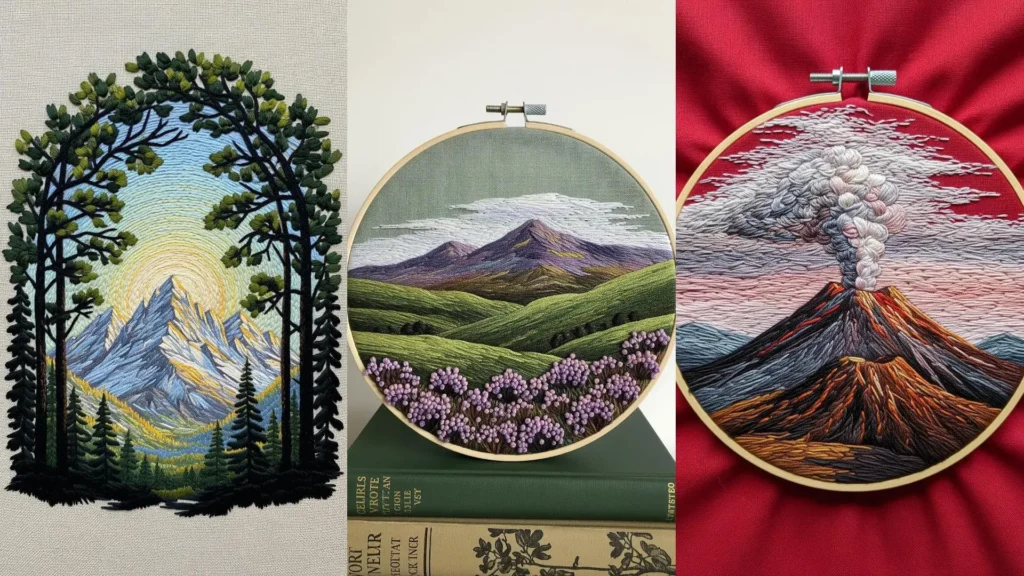
1. Create Depth with Dimensional Foreground Florals
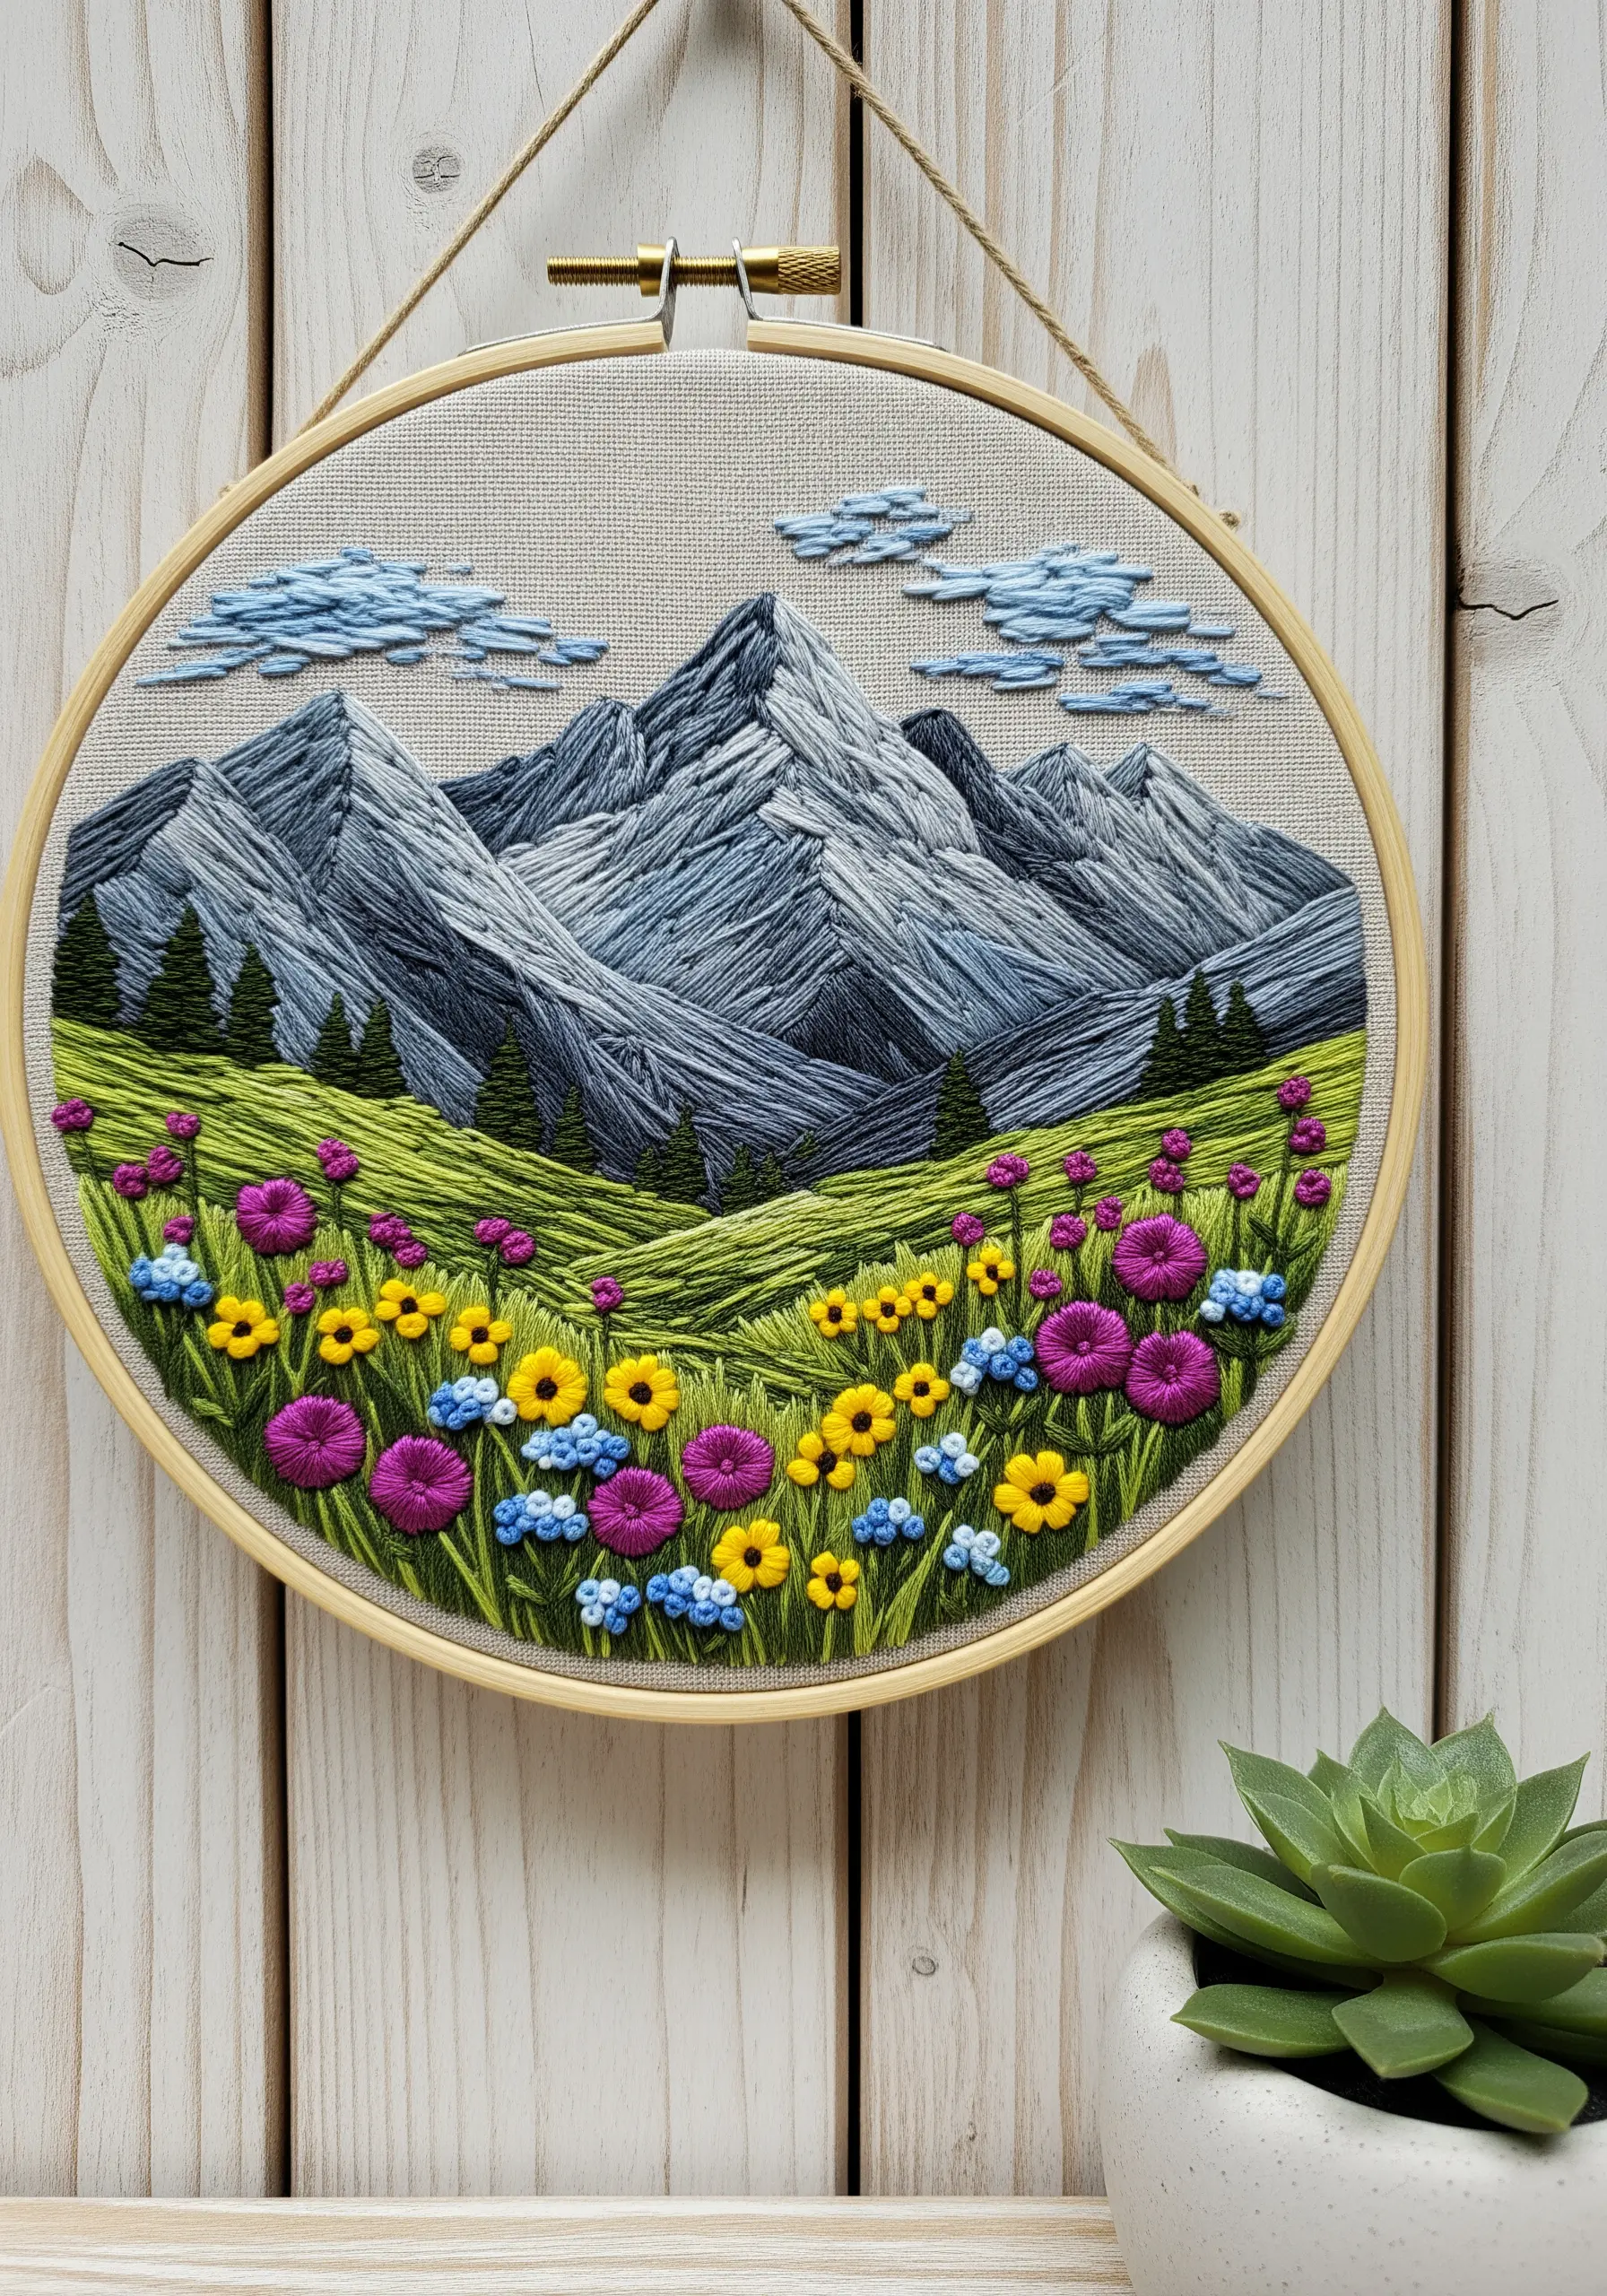
To prevent your landscape from looking flat, create a sharp contrast in texture between the foreground and background.
Use long, directional satin stitches for the distant mountains, keeping them smooth and almost impressionistic.
For the wildflowers in the foreground, use highly textured stitches like French knots, bullion knots, and lazy daisy stitches with three to four strands of floss.
This textural difference forces perspective, making the meadow feel closer and the mountains farther away, adding instant, professional-looking depth to your hoop.
2. Paint a Fiery Sky with Long-and-Short Stitch
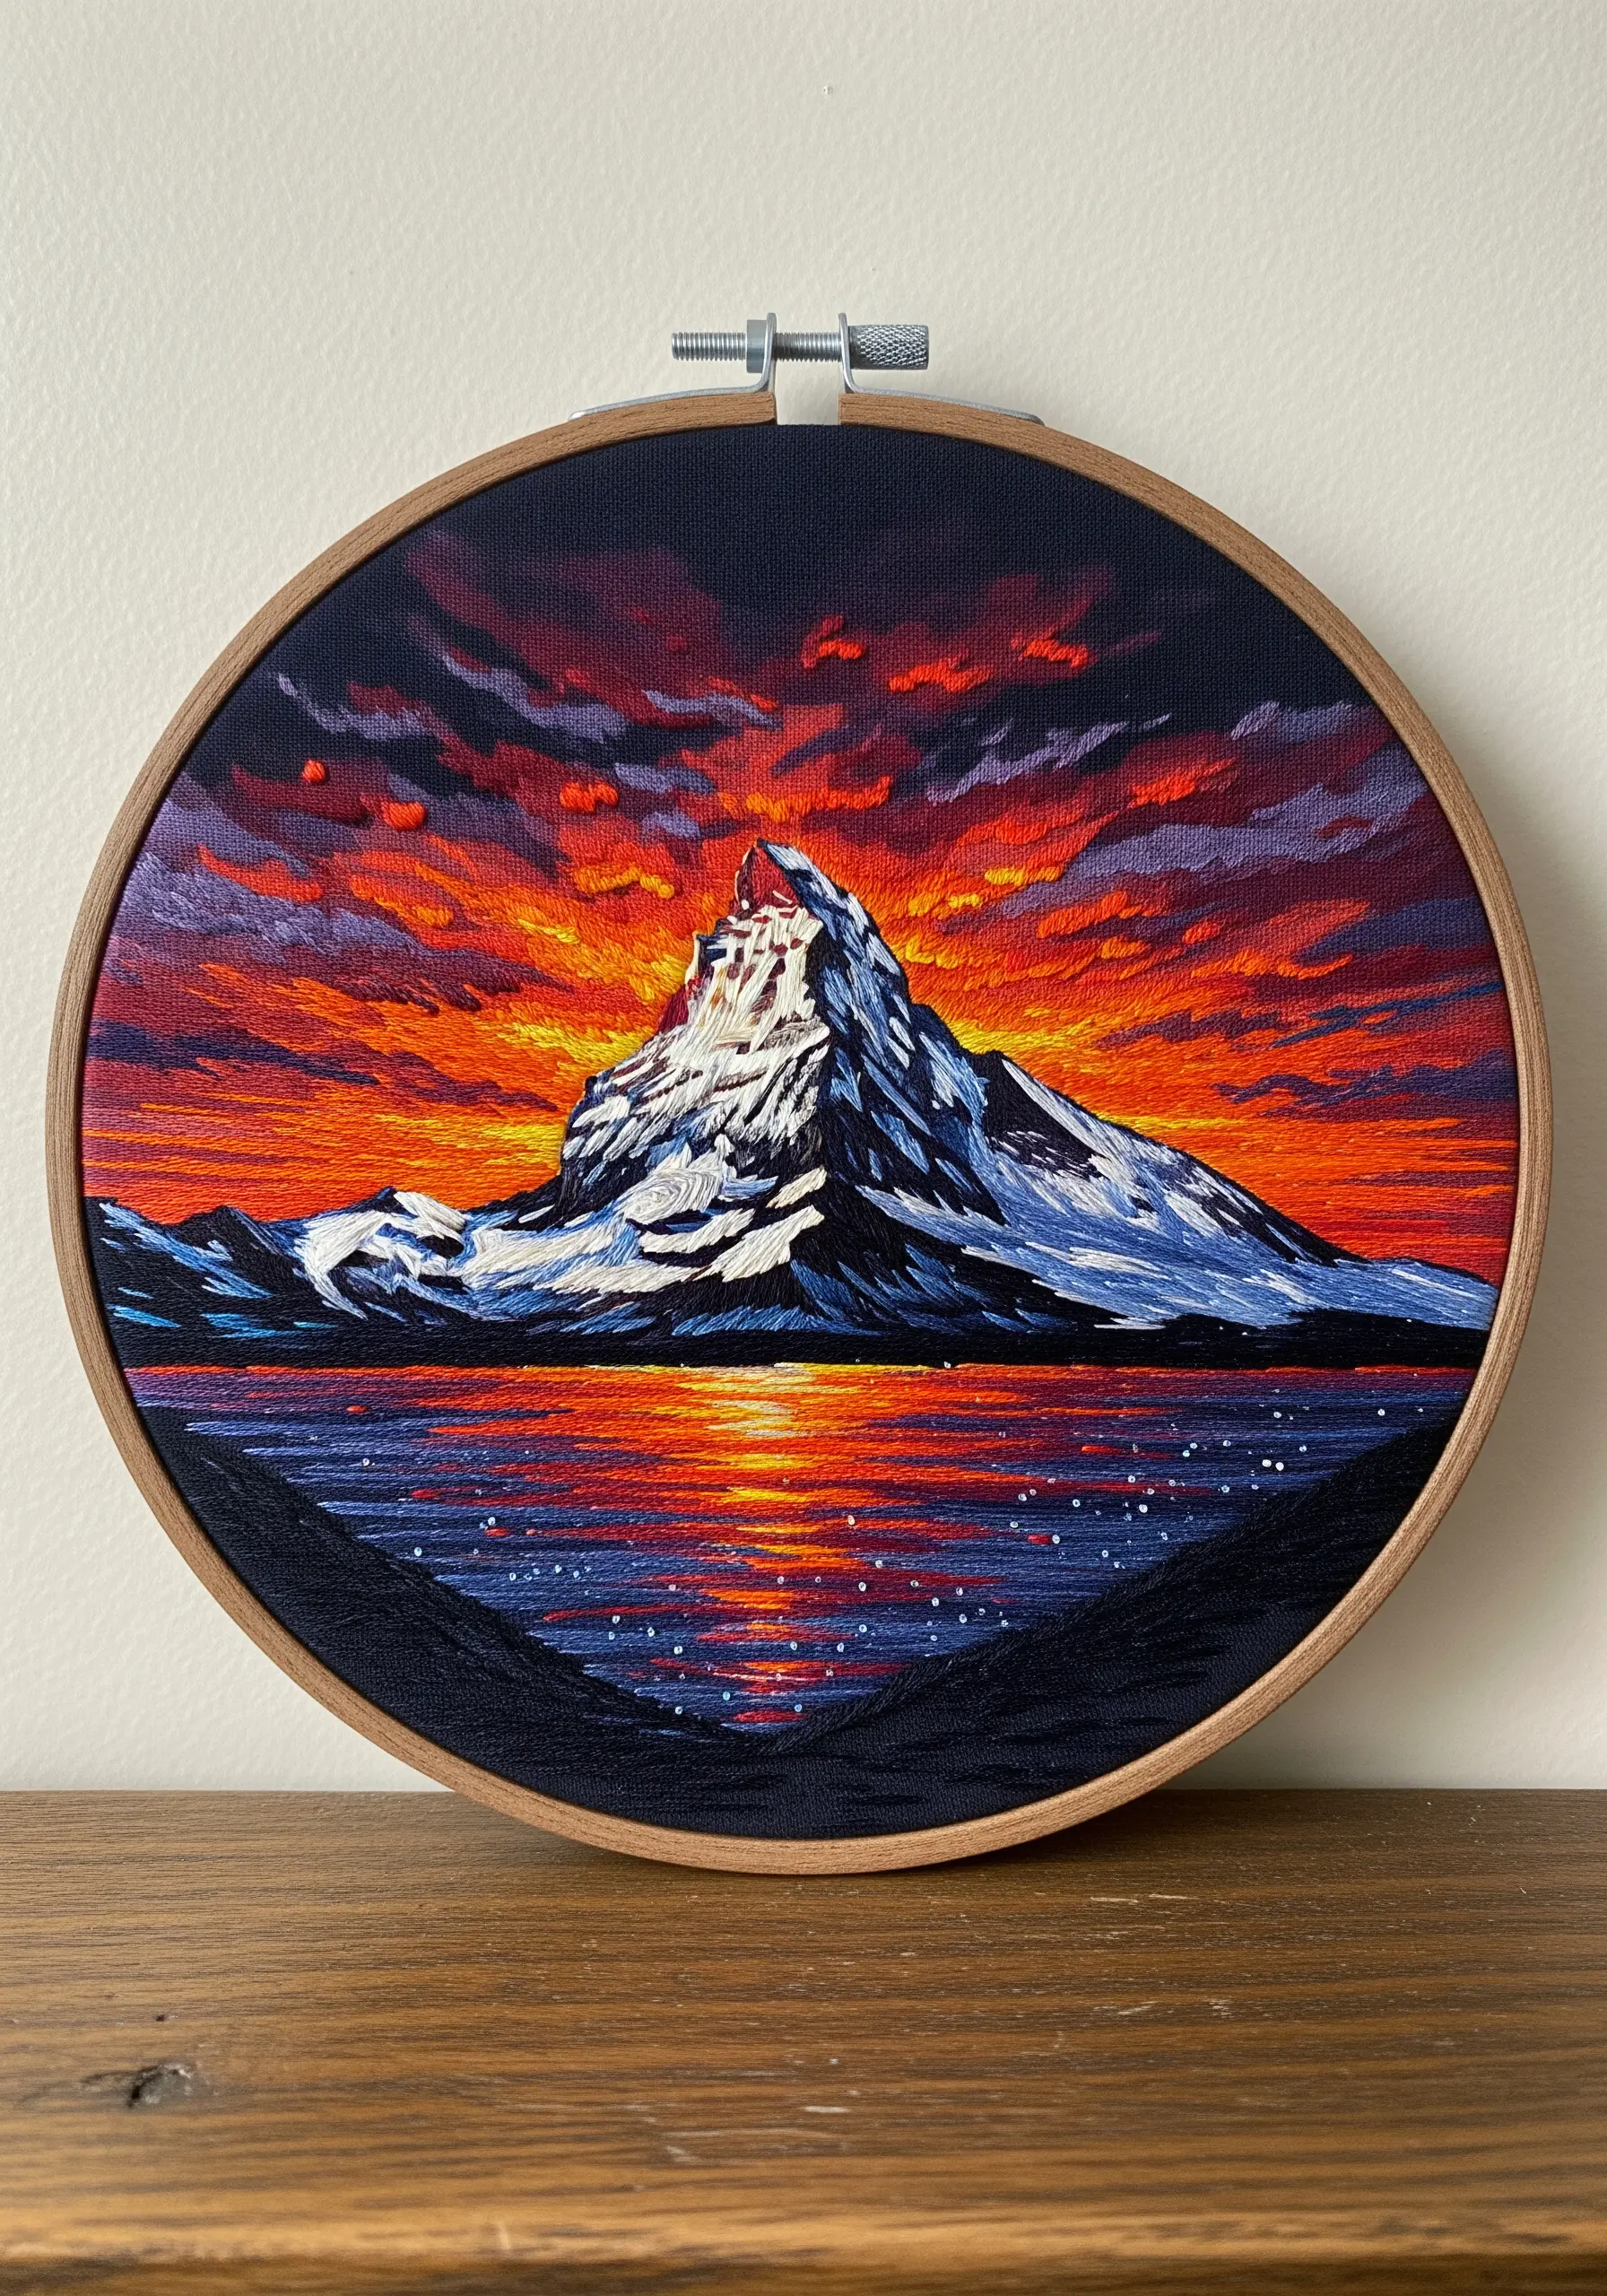
Capture the intense gradient of a sunset by using the long-and-short stitch technique as if you were painting.
Work in horizontal bands, starting with the lightest color and gradually blending in darker shades of orange, red, and deep purple.
Use only one or two strands of thread to ensure the color transitions are seamless and not blocky.
For the water’s reflection, use the same colors in short, horizontal satin stitches, adding tiny white French knots to mimic the sparkle of light on water.
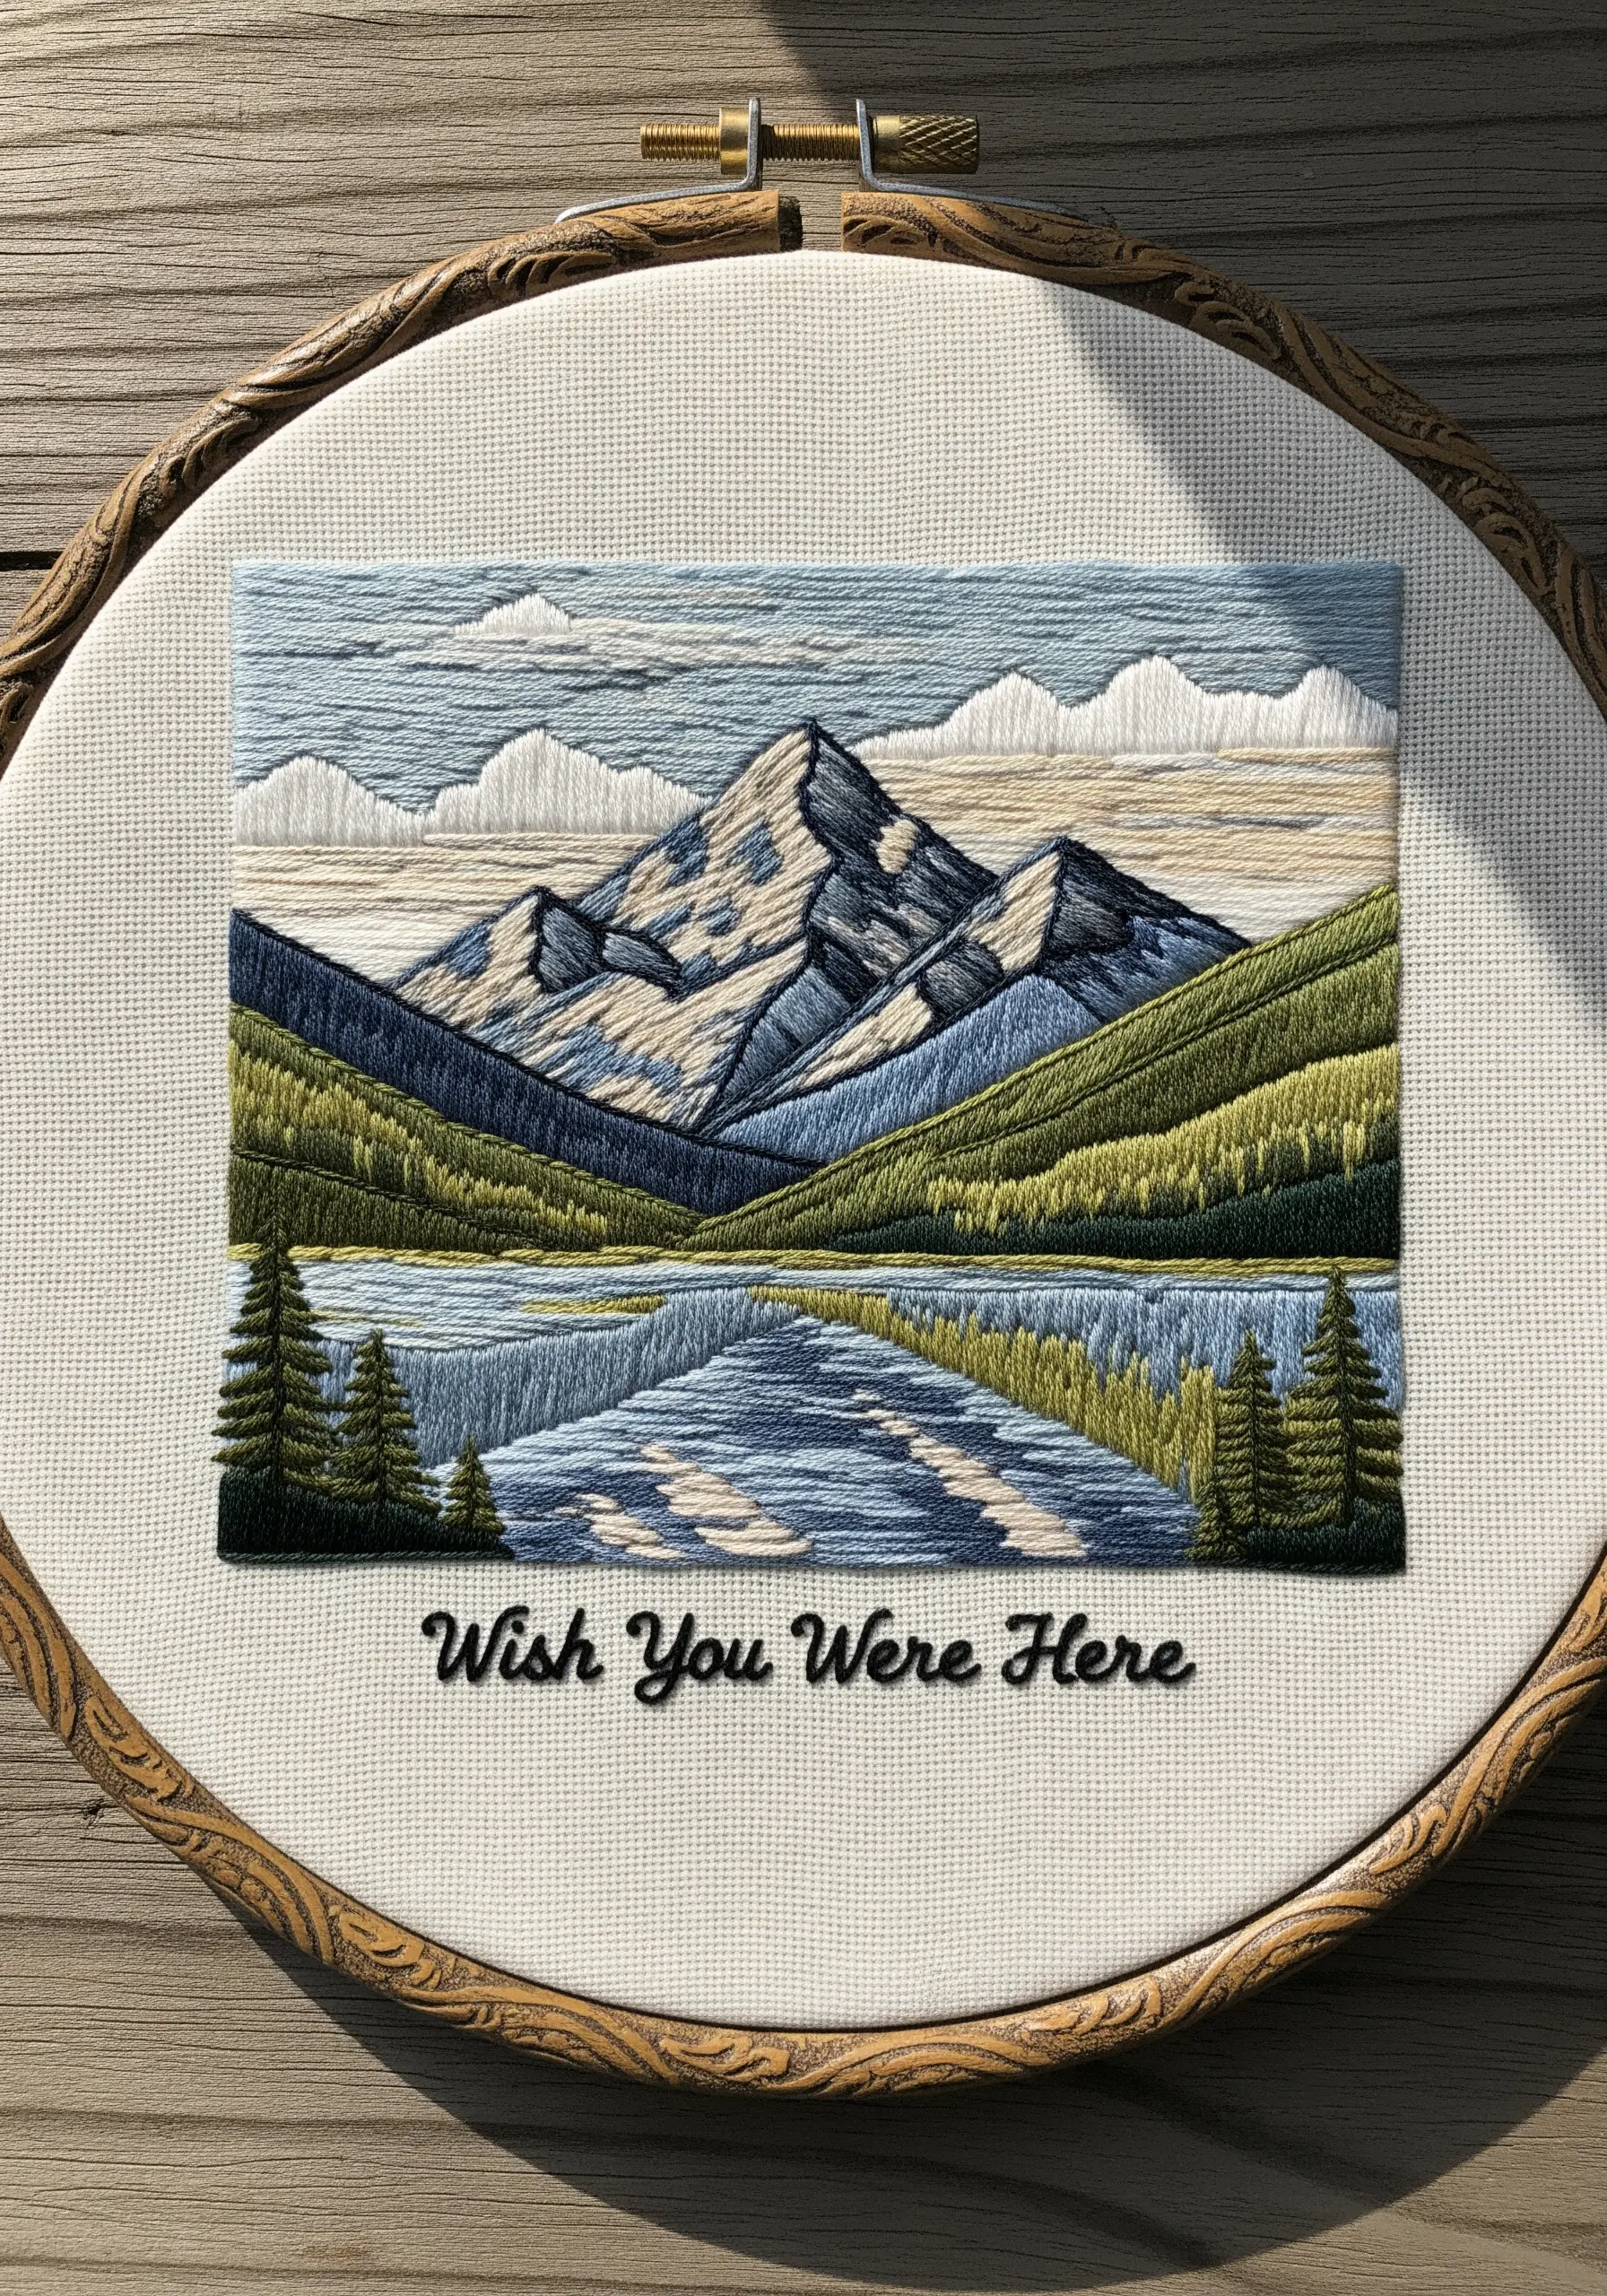
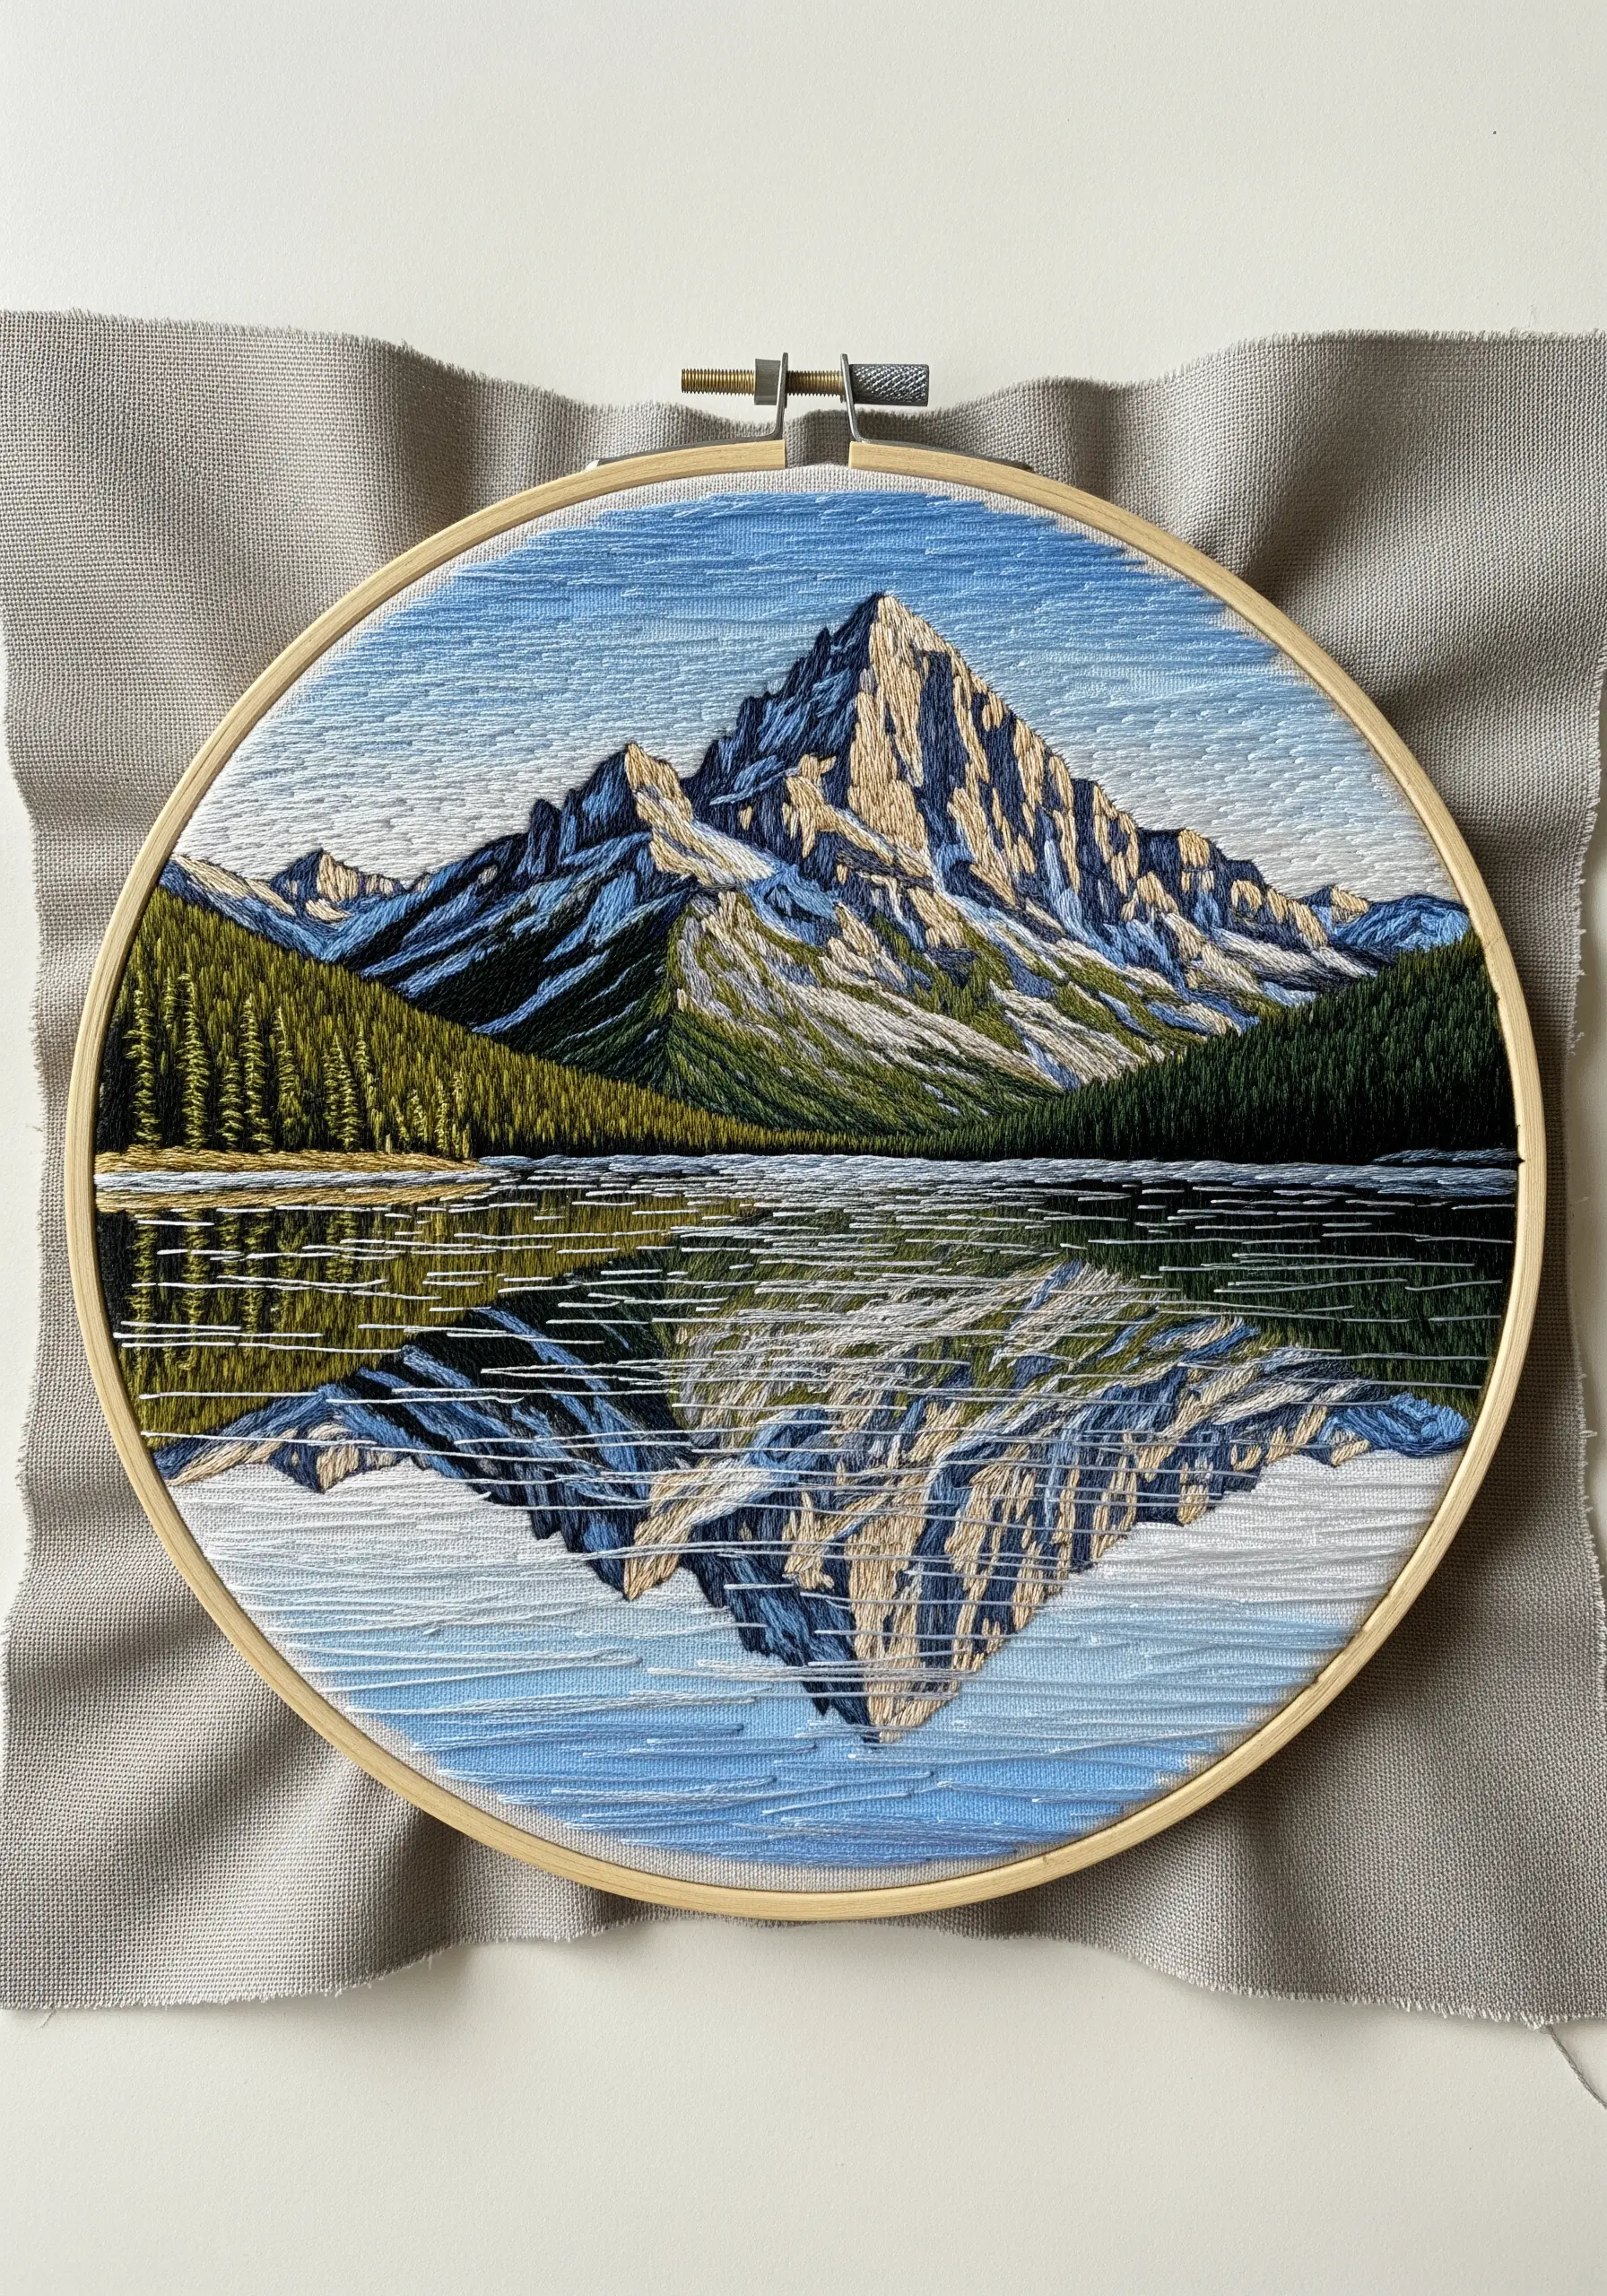
3. Master Realistic Reflections with Directional Stitching
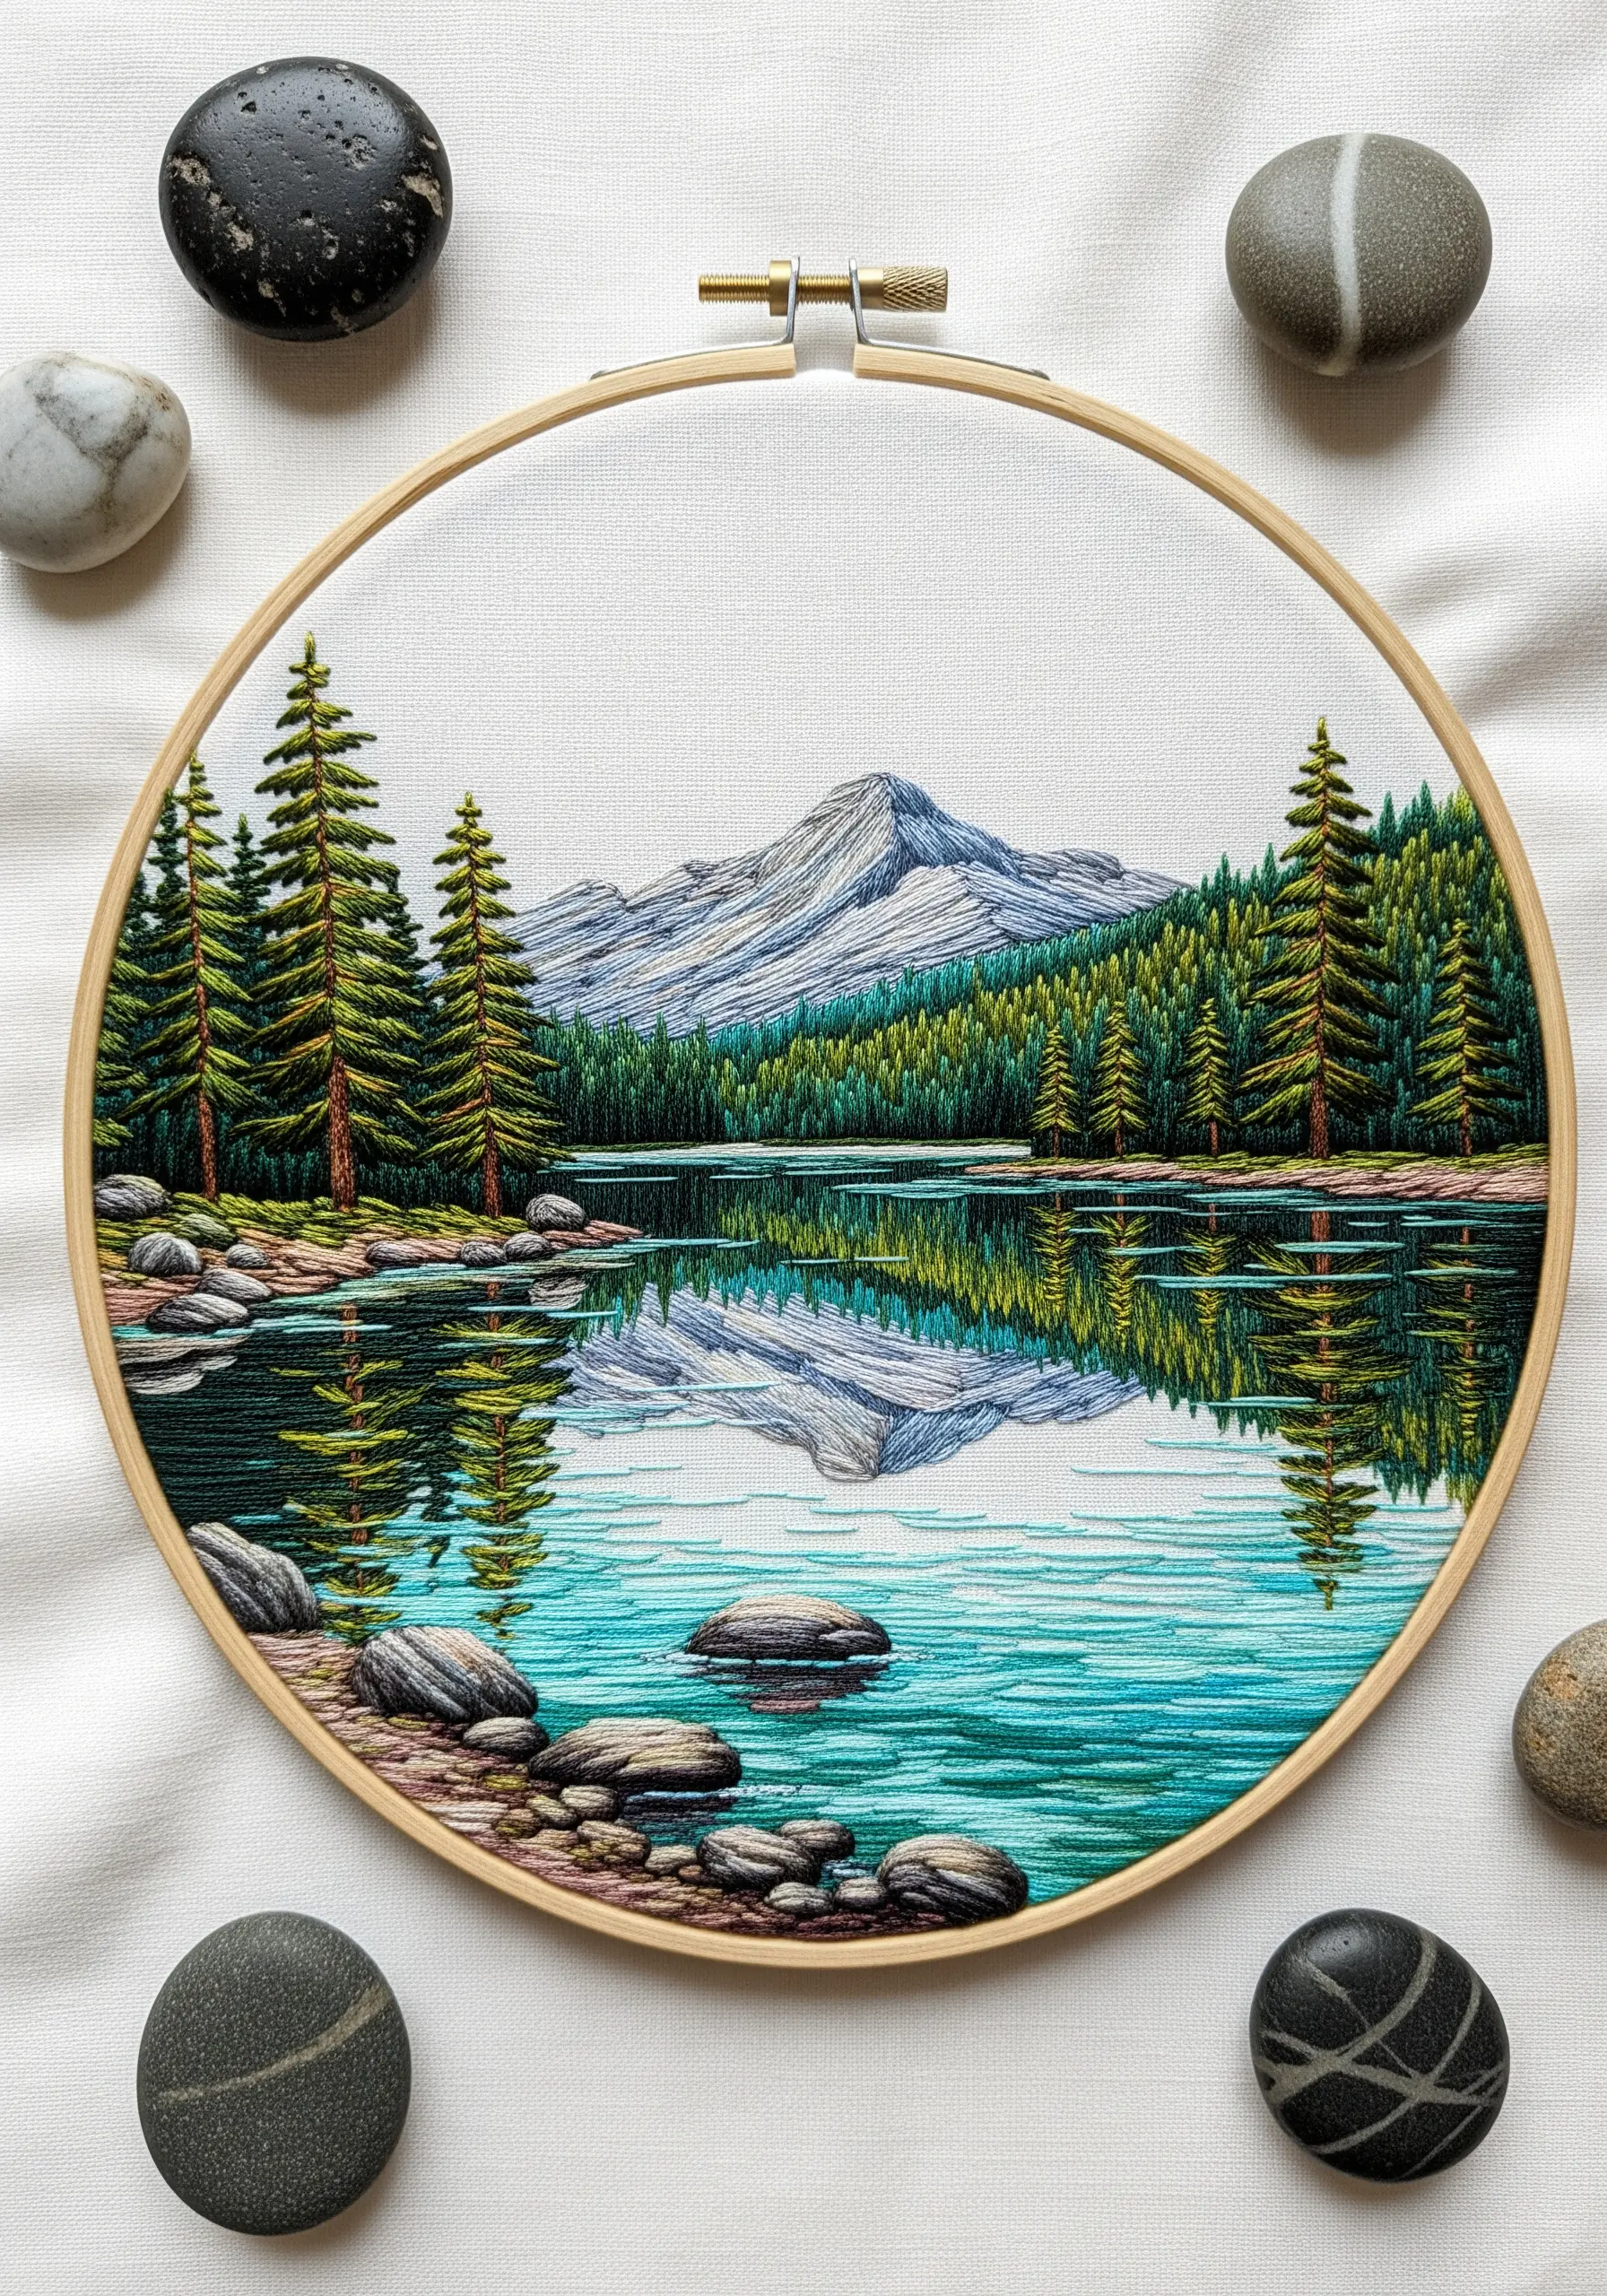
The key to a convincing water reflection is mirroring the stitch direction from the landscape above.
Stitch the mountains and trees first, paying close attention to the direction of your stitches—vertical for tree trunks, angled for mountain slopes.
Flip your design and replicate the scene below, using the same colors and stitch directions.
Introduce subtle waviness by slightly breaking up your horizontal stitches in the water, which creates the illusion of a gentle ripple on the lake’s surface.
4. Build an Autumnal Forest with Dense French Knots
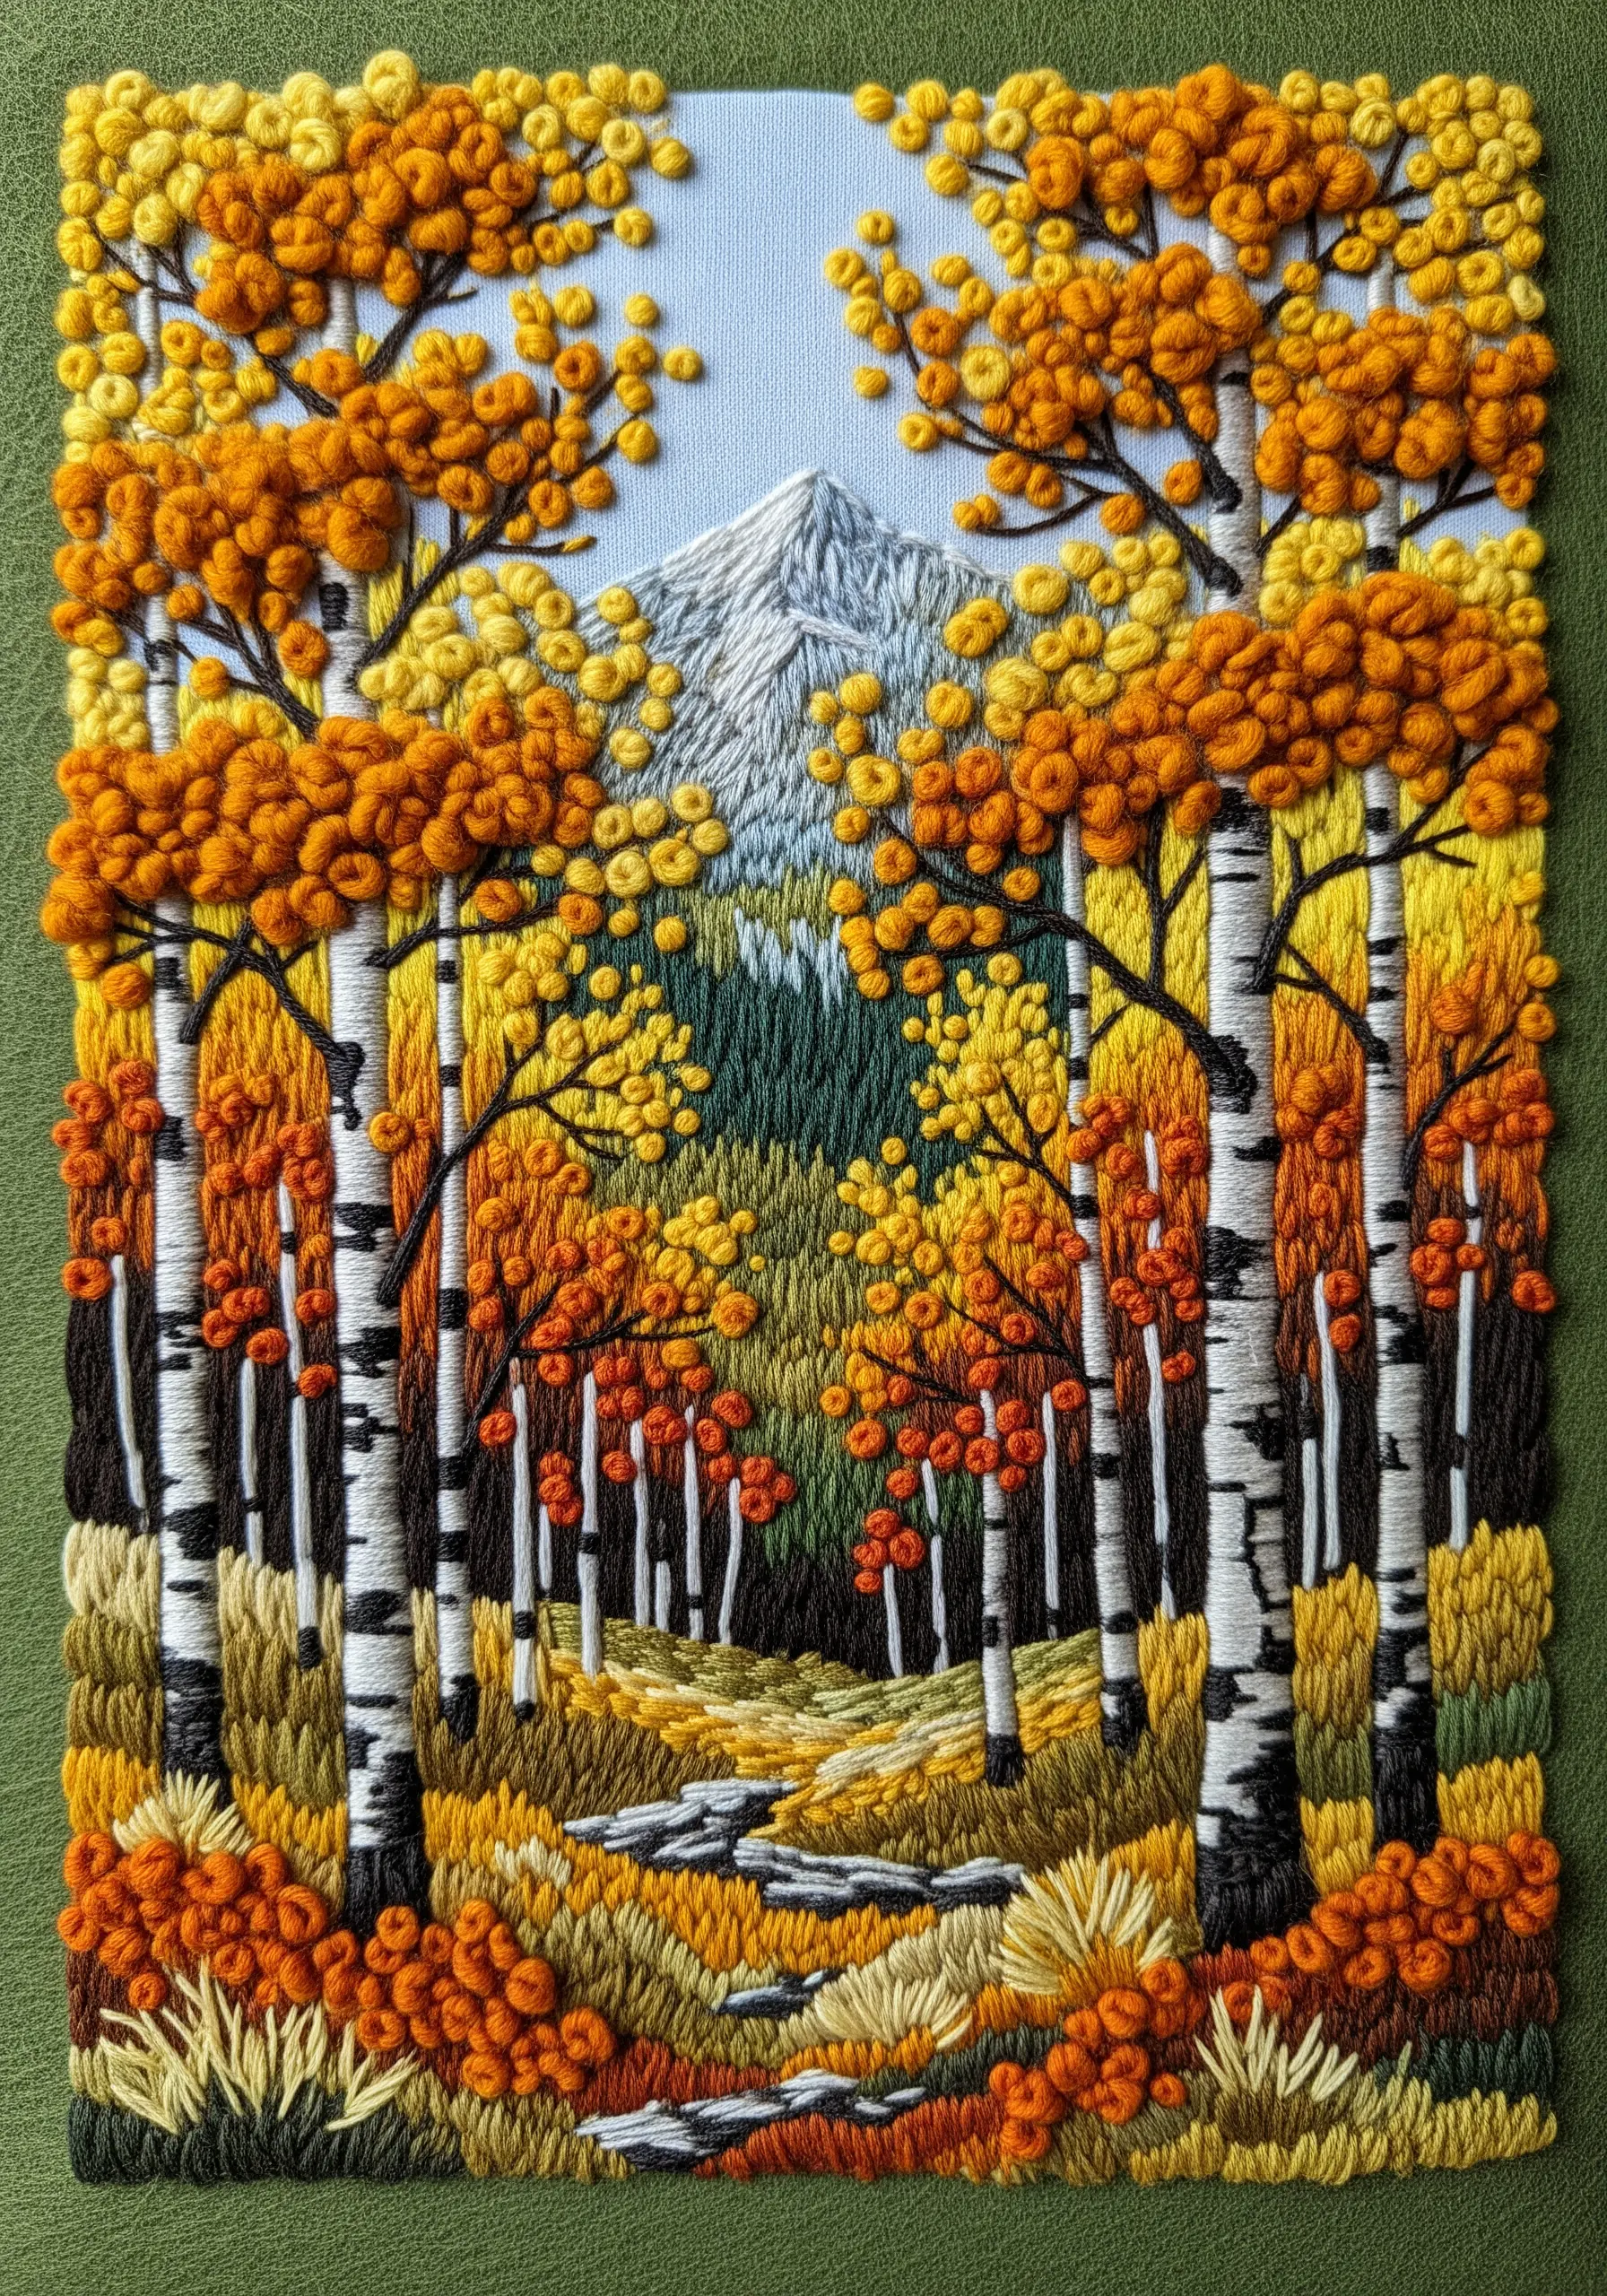
Give your autumn trees a lush, three-dimensional quality by replacing flat stitches with dense clusters of French knots.
Use variegated threads in yellows, oranges, and reds to create natural color variations within the foliage without constantly changing your thread.
For the birch tree trunks, use a clean vertical satin stitch in off-white, adding tiny horizontal stitches in black to represent the bark’s texture.
This contrast between the smooth trunks and the bumpy canopy creates a rich, tactile landscape that invites touch.
5. Define a Minimalist Peak with Precision Outlines
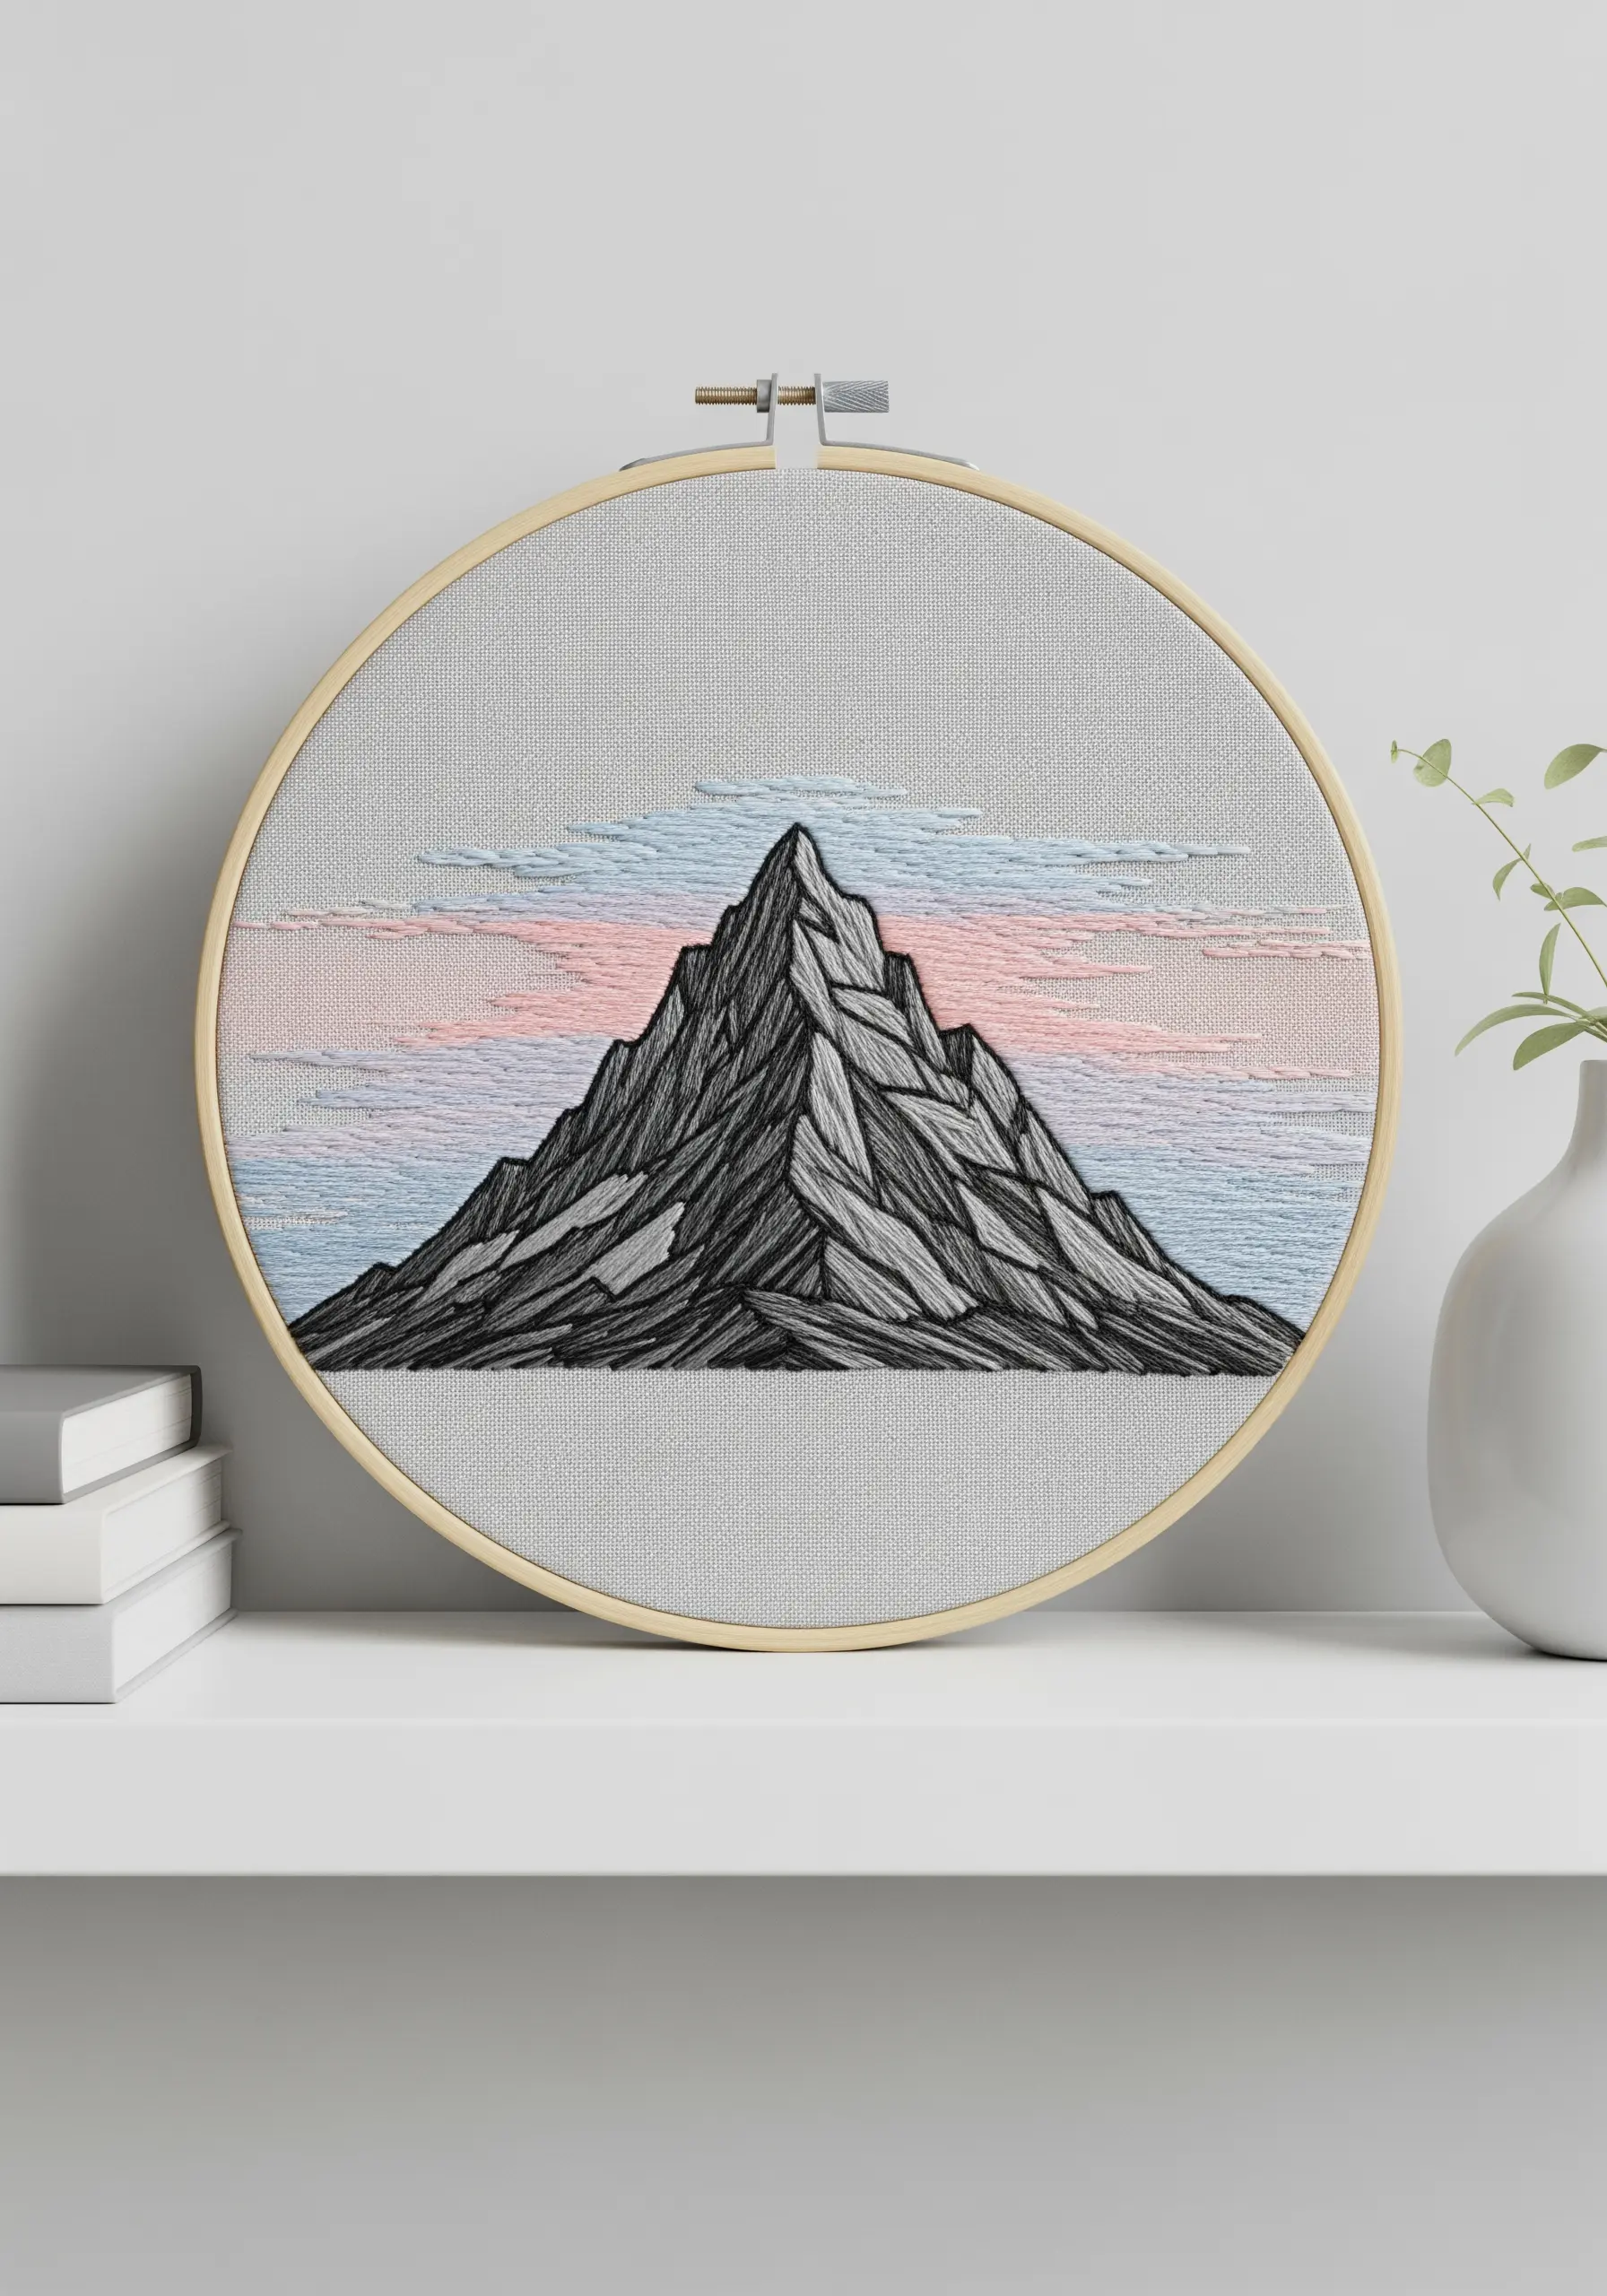
For a modern, graphic mountain, focus on the integrity of your line work rather than complex fills.
Use a two-strand split stitch or backstitch to create crisp, unwavering outlines for the mountain’s ridges.
Fill the facets with a simple, directional satin stitch using shades of grey and black to suggest shadow and form.
The sky can be filled with a soft, horizontal long-and-short stitch in pastel tones, providing a gentle backdrop that allows the sharp mountain to be the hero of the piece.
6. Sculpt Volumetric Clouds for a Dramatic Sky
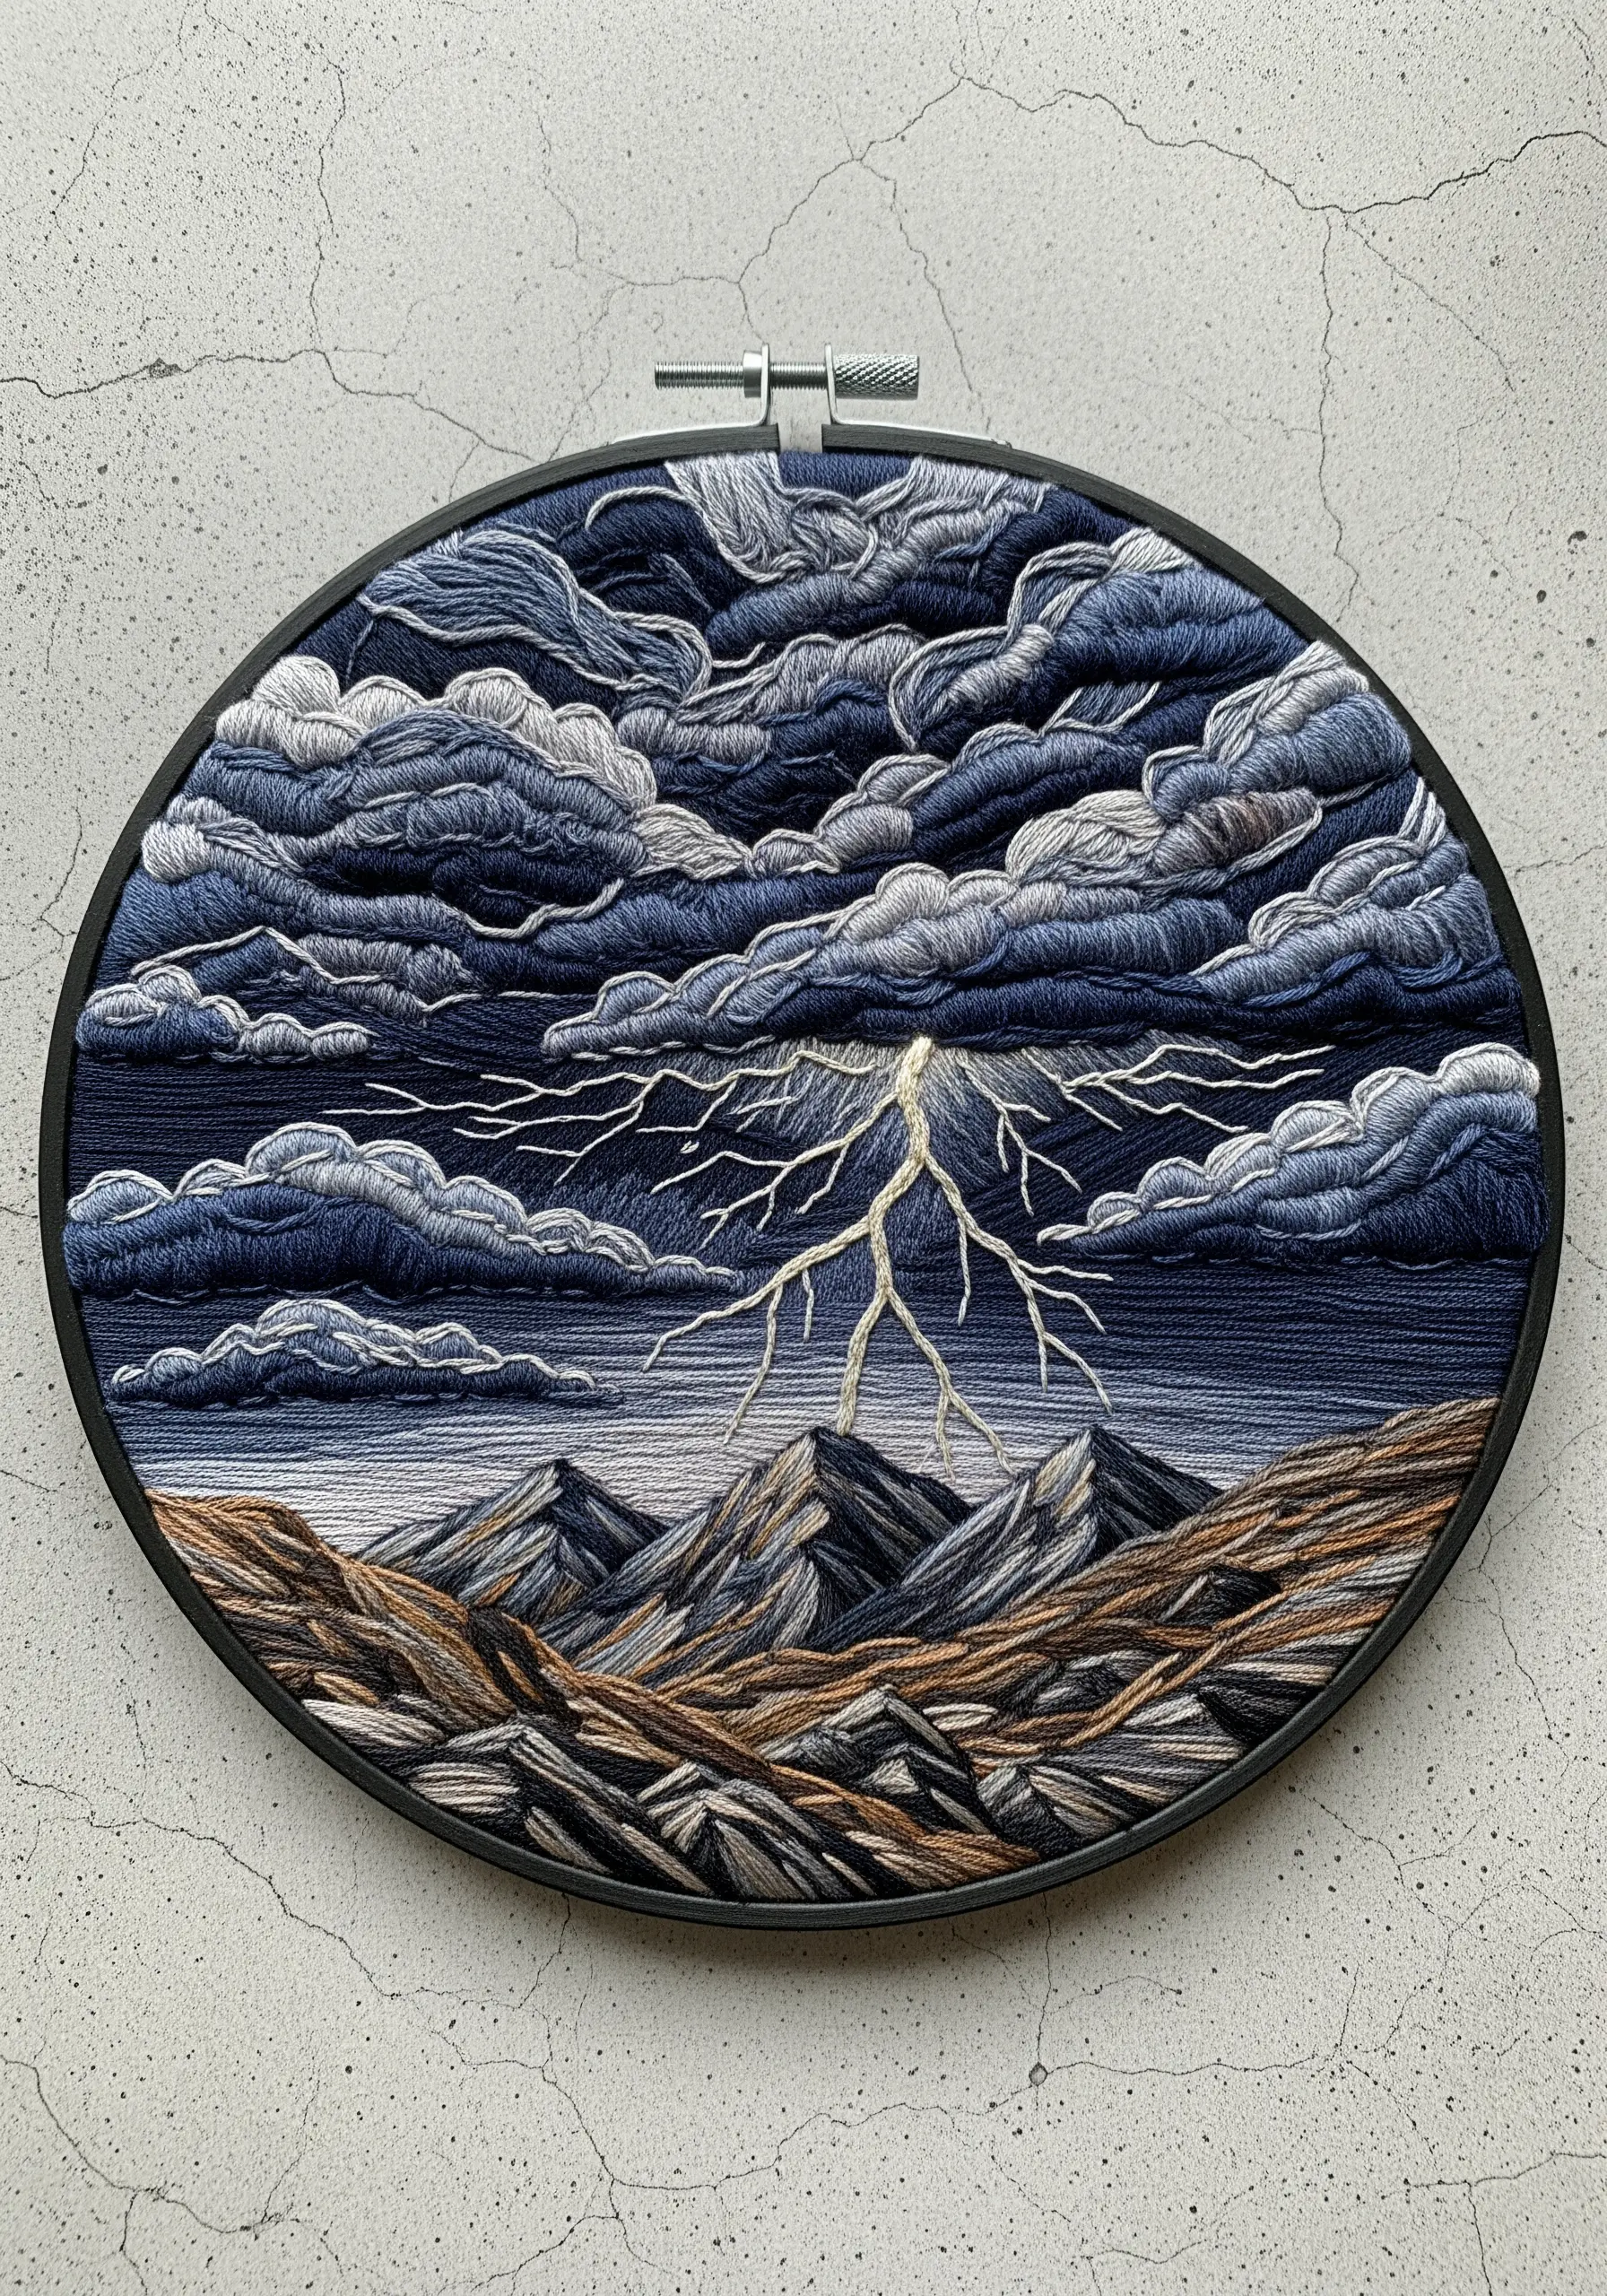
Give your storm clouds weight and dimension by varying your stitch direction and color layers.
Use a contoured long-and-short stitch, following the curves of each cloud formation to build shape.
Layer shades of dark blue, grey, and white, using the darkest tones at the base of the clouds and the lightest highlights on top.
For a striking lightning bolt, use a whipped backstitch with a single strand of pale yellow or metallic thread to make it pop against the dark, moody sky.
7. Create Fluffy, 3D Snow with Padded Satin Stitch
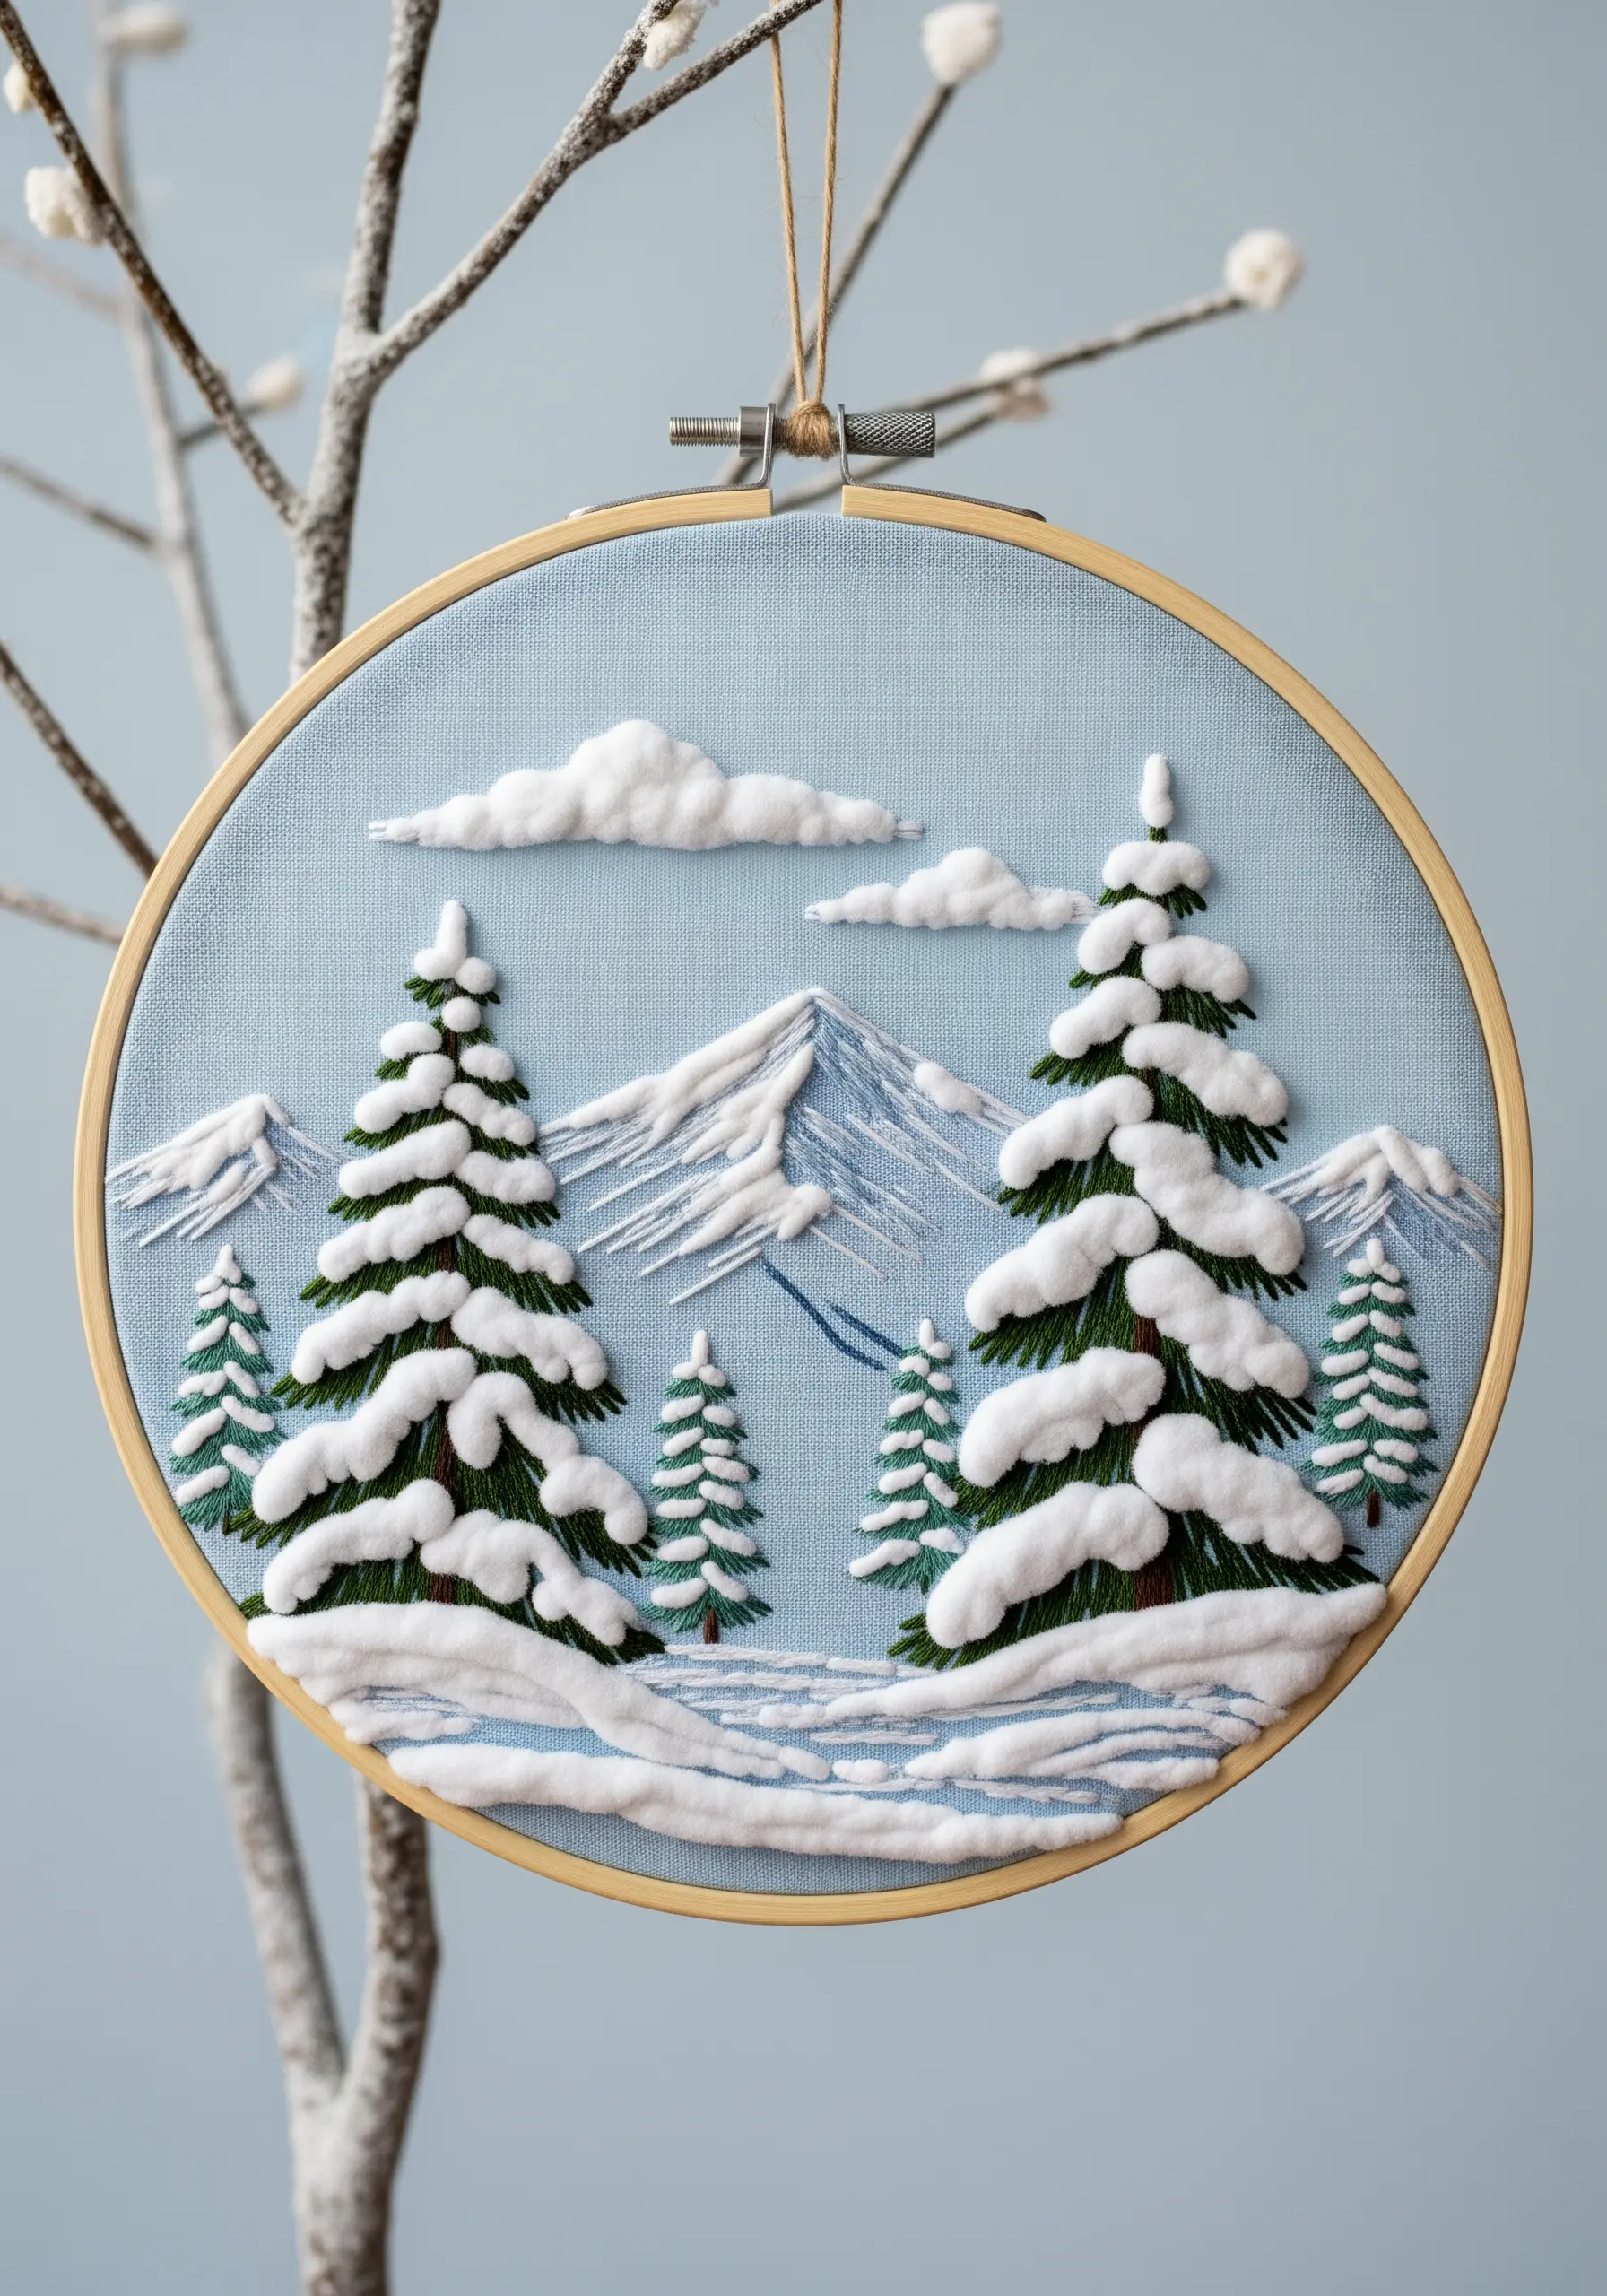
To make snow on trees look freshly fallen and soft, elevate it from the fabric surface using padding.
First, stitch a base layer of small straight stitches or lay down a small piece of felt where the snow will be.
Then, cover this padding with dense, horizontal satin stitches using a bright white, fluffy thread like wool or chenille.
This technique physically raises the snow, creating realistic shadows and a delightful tactile quality that contrasts beautifully with the flat background.
8. Blend Rolling Hills with Soft Thread Painting

Capture the gentle slopes of rolling hills by blending your greens, purples, and yellows seamlessly with long-and-short stitch.
Work with a single strand of floss to achieve a soft, painterly effect, ensuring no harsh lines exist between color changes.
For the foreground heather, create dense clusters of tiny French knots in shades of lavender and purple.
This combination of smooth, distant hills and a textured foreground creates a beautiful sense of atmospheric perspective.
9. Capture Desert Rock Striations with Directional Fills
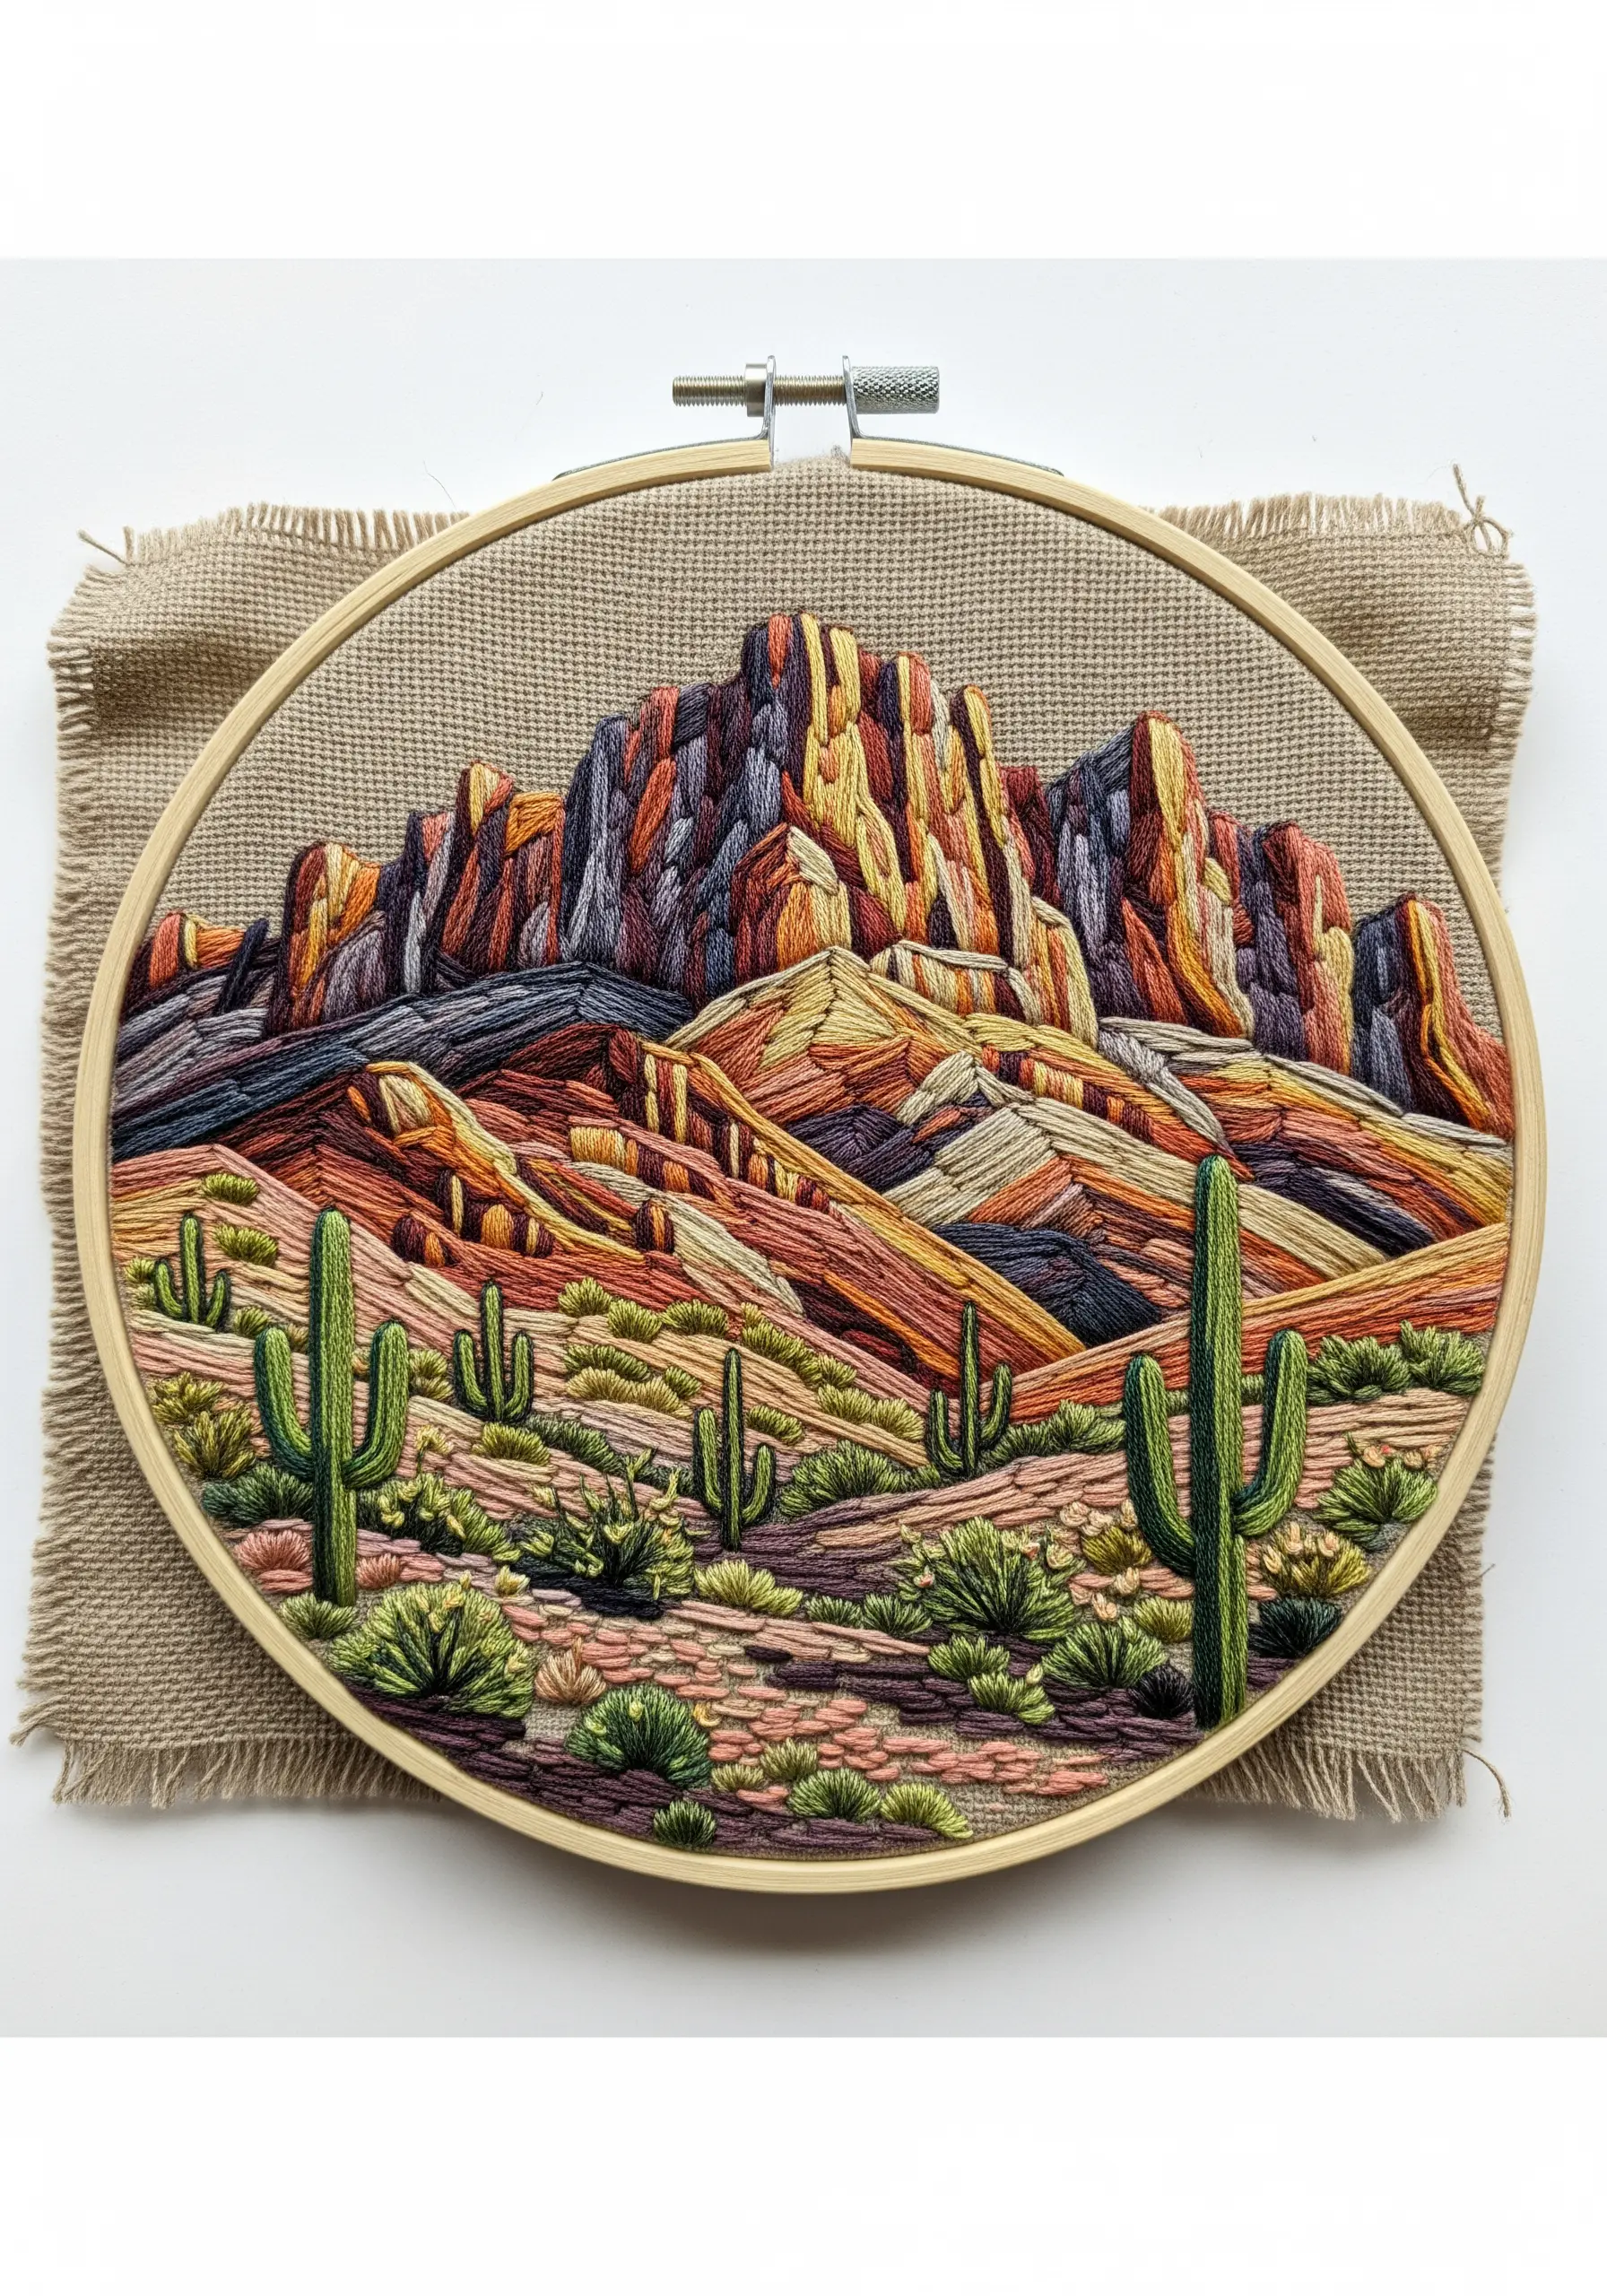
Recreate the layered look of desert rock formations by aligning your satin stitches with the geological lines.
Instead of filling an area with one uniform color, incorporate several related shades—like ochre, rust, and deep red—within the same section.
Lay your stitches side-by-side, following the natural angles and curves of the rock.
This method avoids a flat, cartoonish look and instead gives the canyon a realistic, weathered texture that showcases its history.
10. Stitch a Luminous Aurora with Vertical Gradients
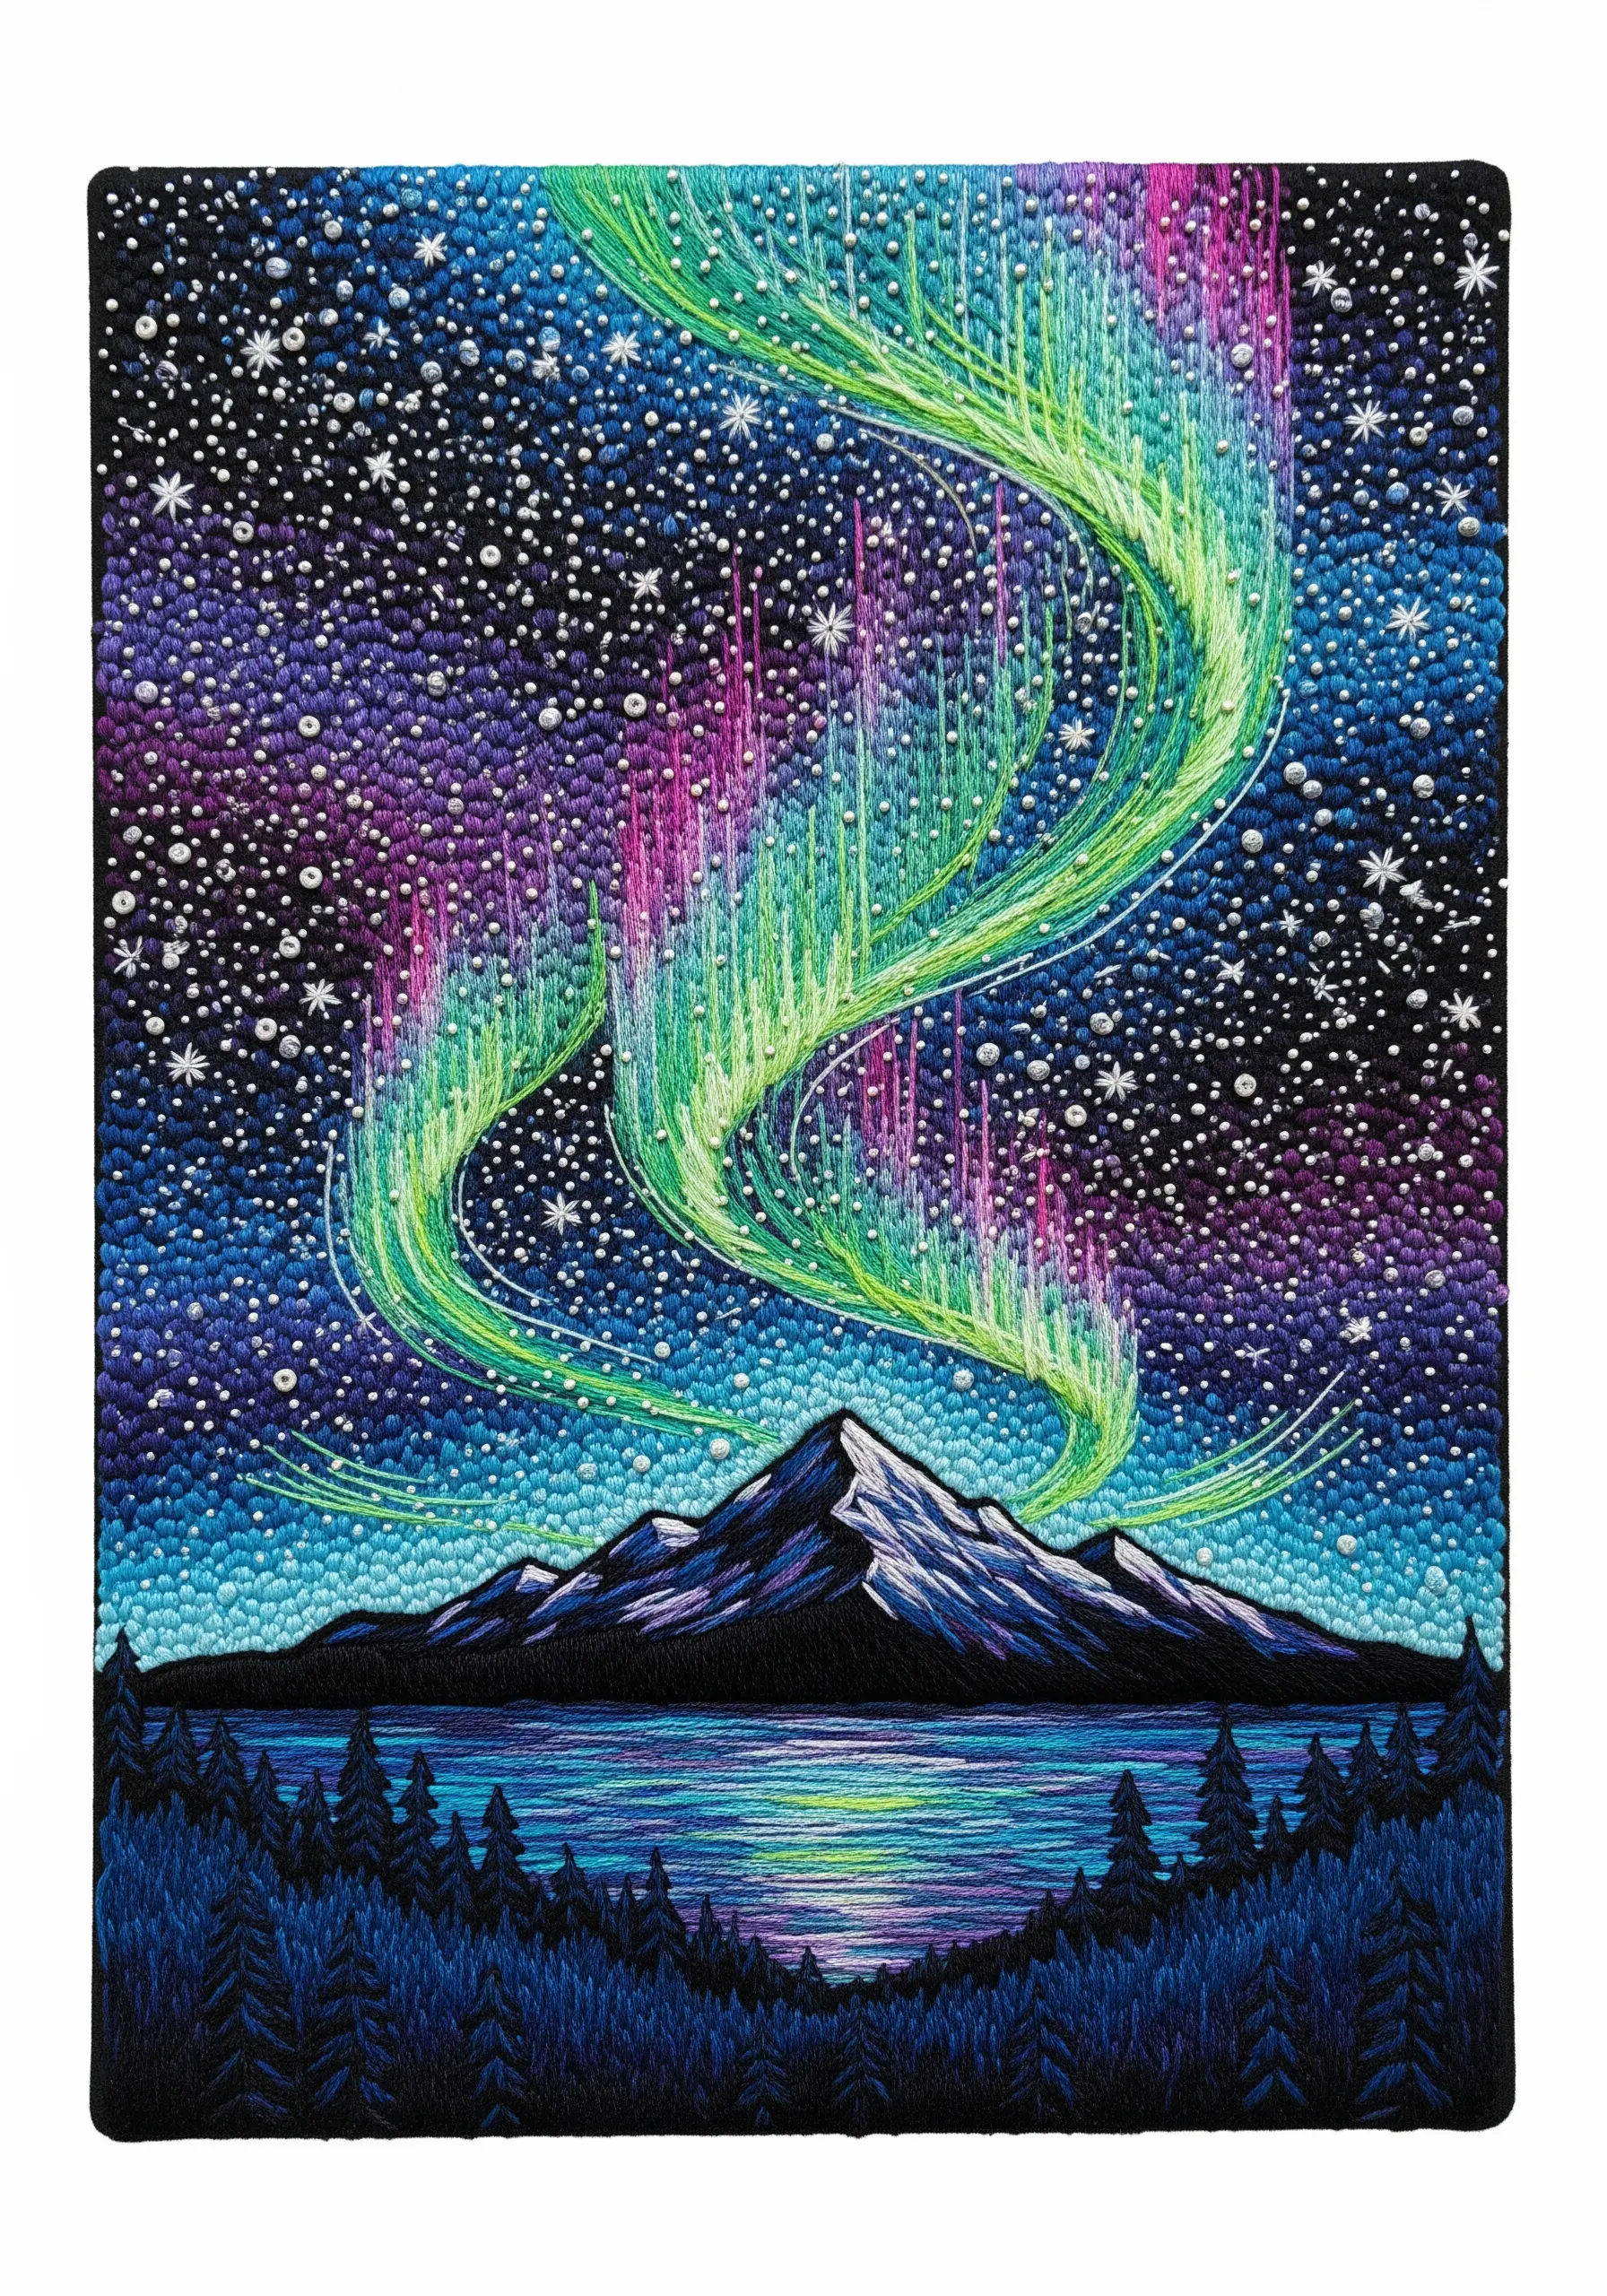
To capture the ethereal glow of the Northern Lights, use long, vertical satin stitches that flow and curve across the sky.
Use bright green, magenta, and turquoise threads, blending them by placing stitches of different colors next to each other to create a soft-edged transition.
For extra luminosity, consider using a glow-in-the-dark or neon thread.
Create a dense, starry background with hundreds of tiny French knots and single straight stitches in white and silver metallic floss.
11. Create Atmospheric Fog with Sparse Stitches
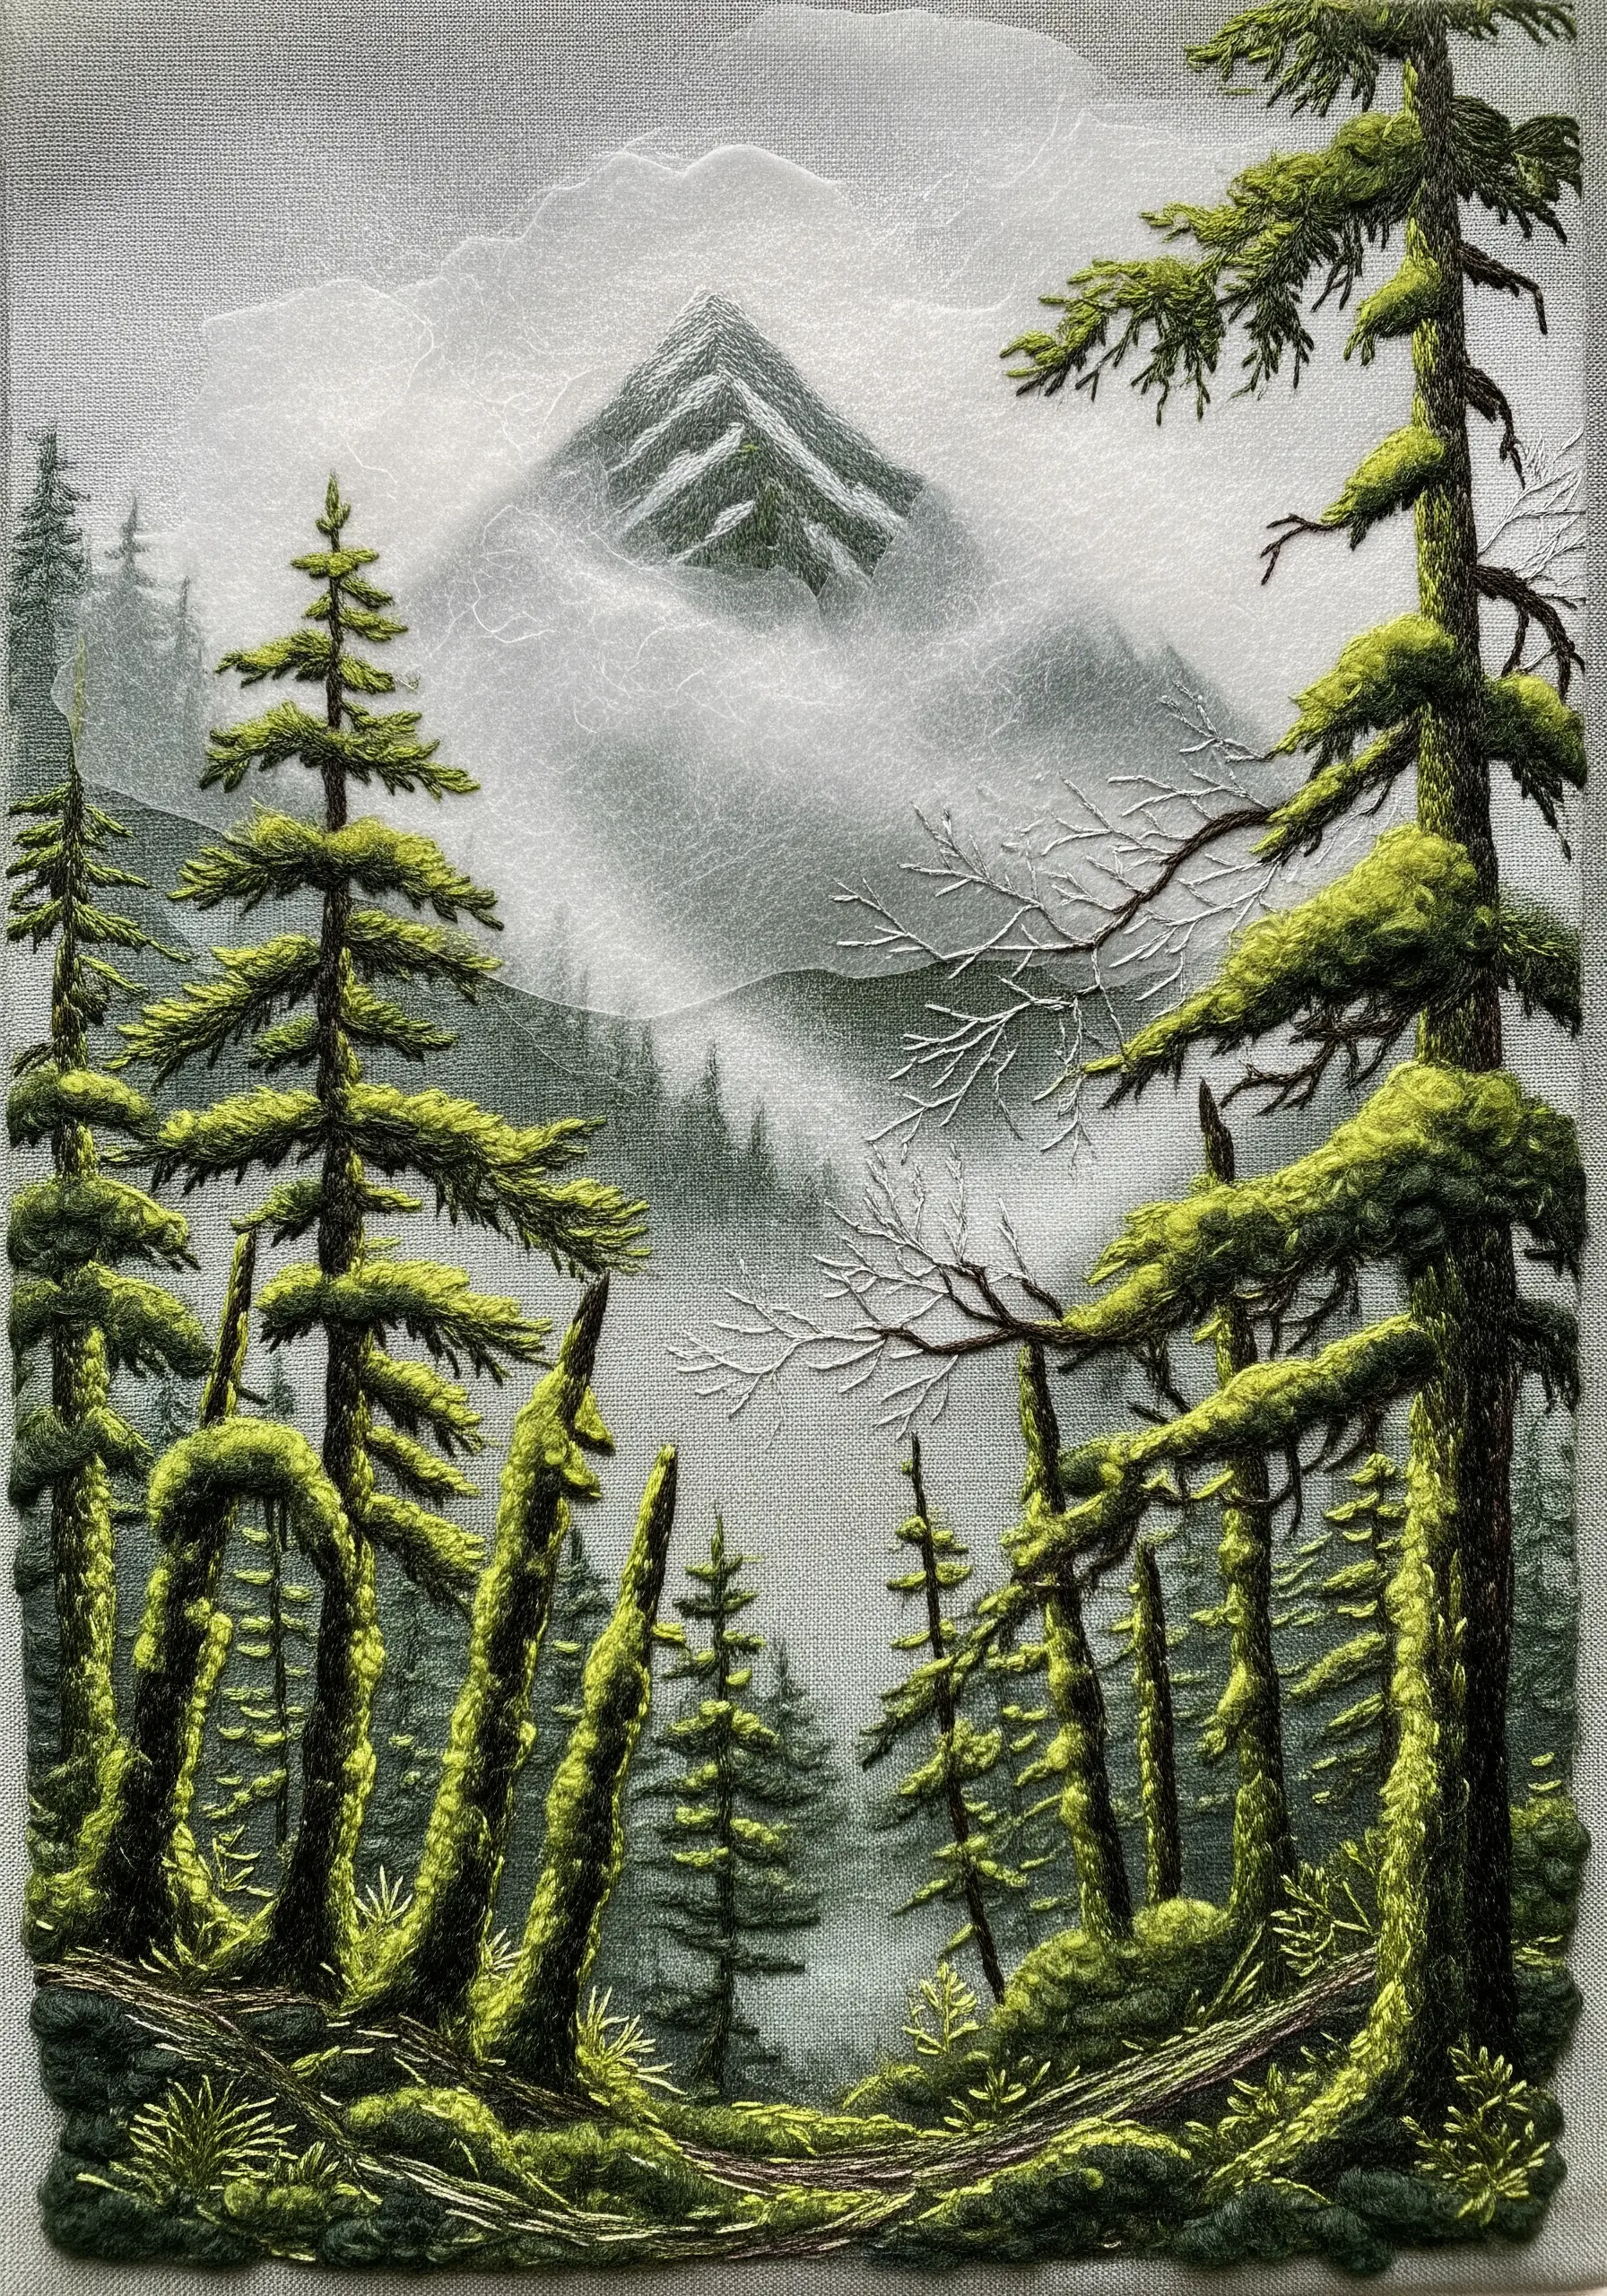
To create the illusion of mist or fog, you must stitch less, not more.
For background elements shrouded in fog, use a single strand of light grey or off-white thread.
Keep your stitches sparse—using simple straight stitches or a light fill of seed stitch—allowing the fabric color to show through.
In contrast, stitch the foreground trees with three or four strands of a darker, more saturated color. This difference in thread weight and stitch density creates an immediate and convincing sense of depth and atmosphere.
12. Build Perspective with a Textured Pathway
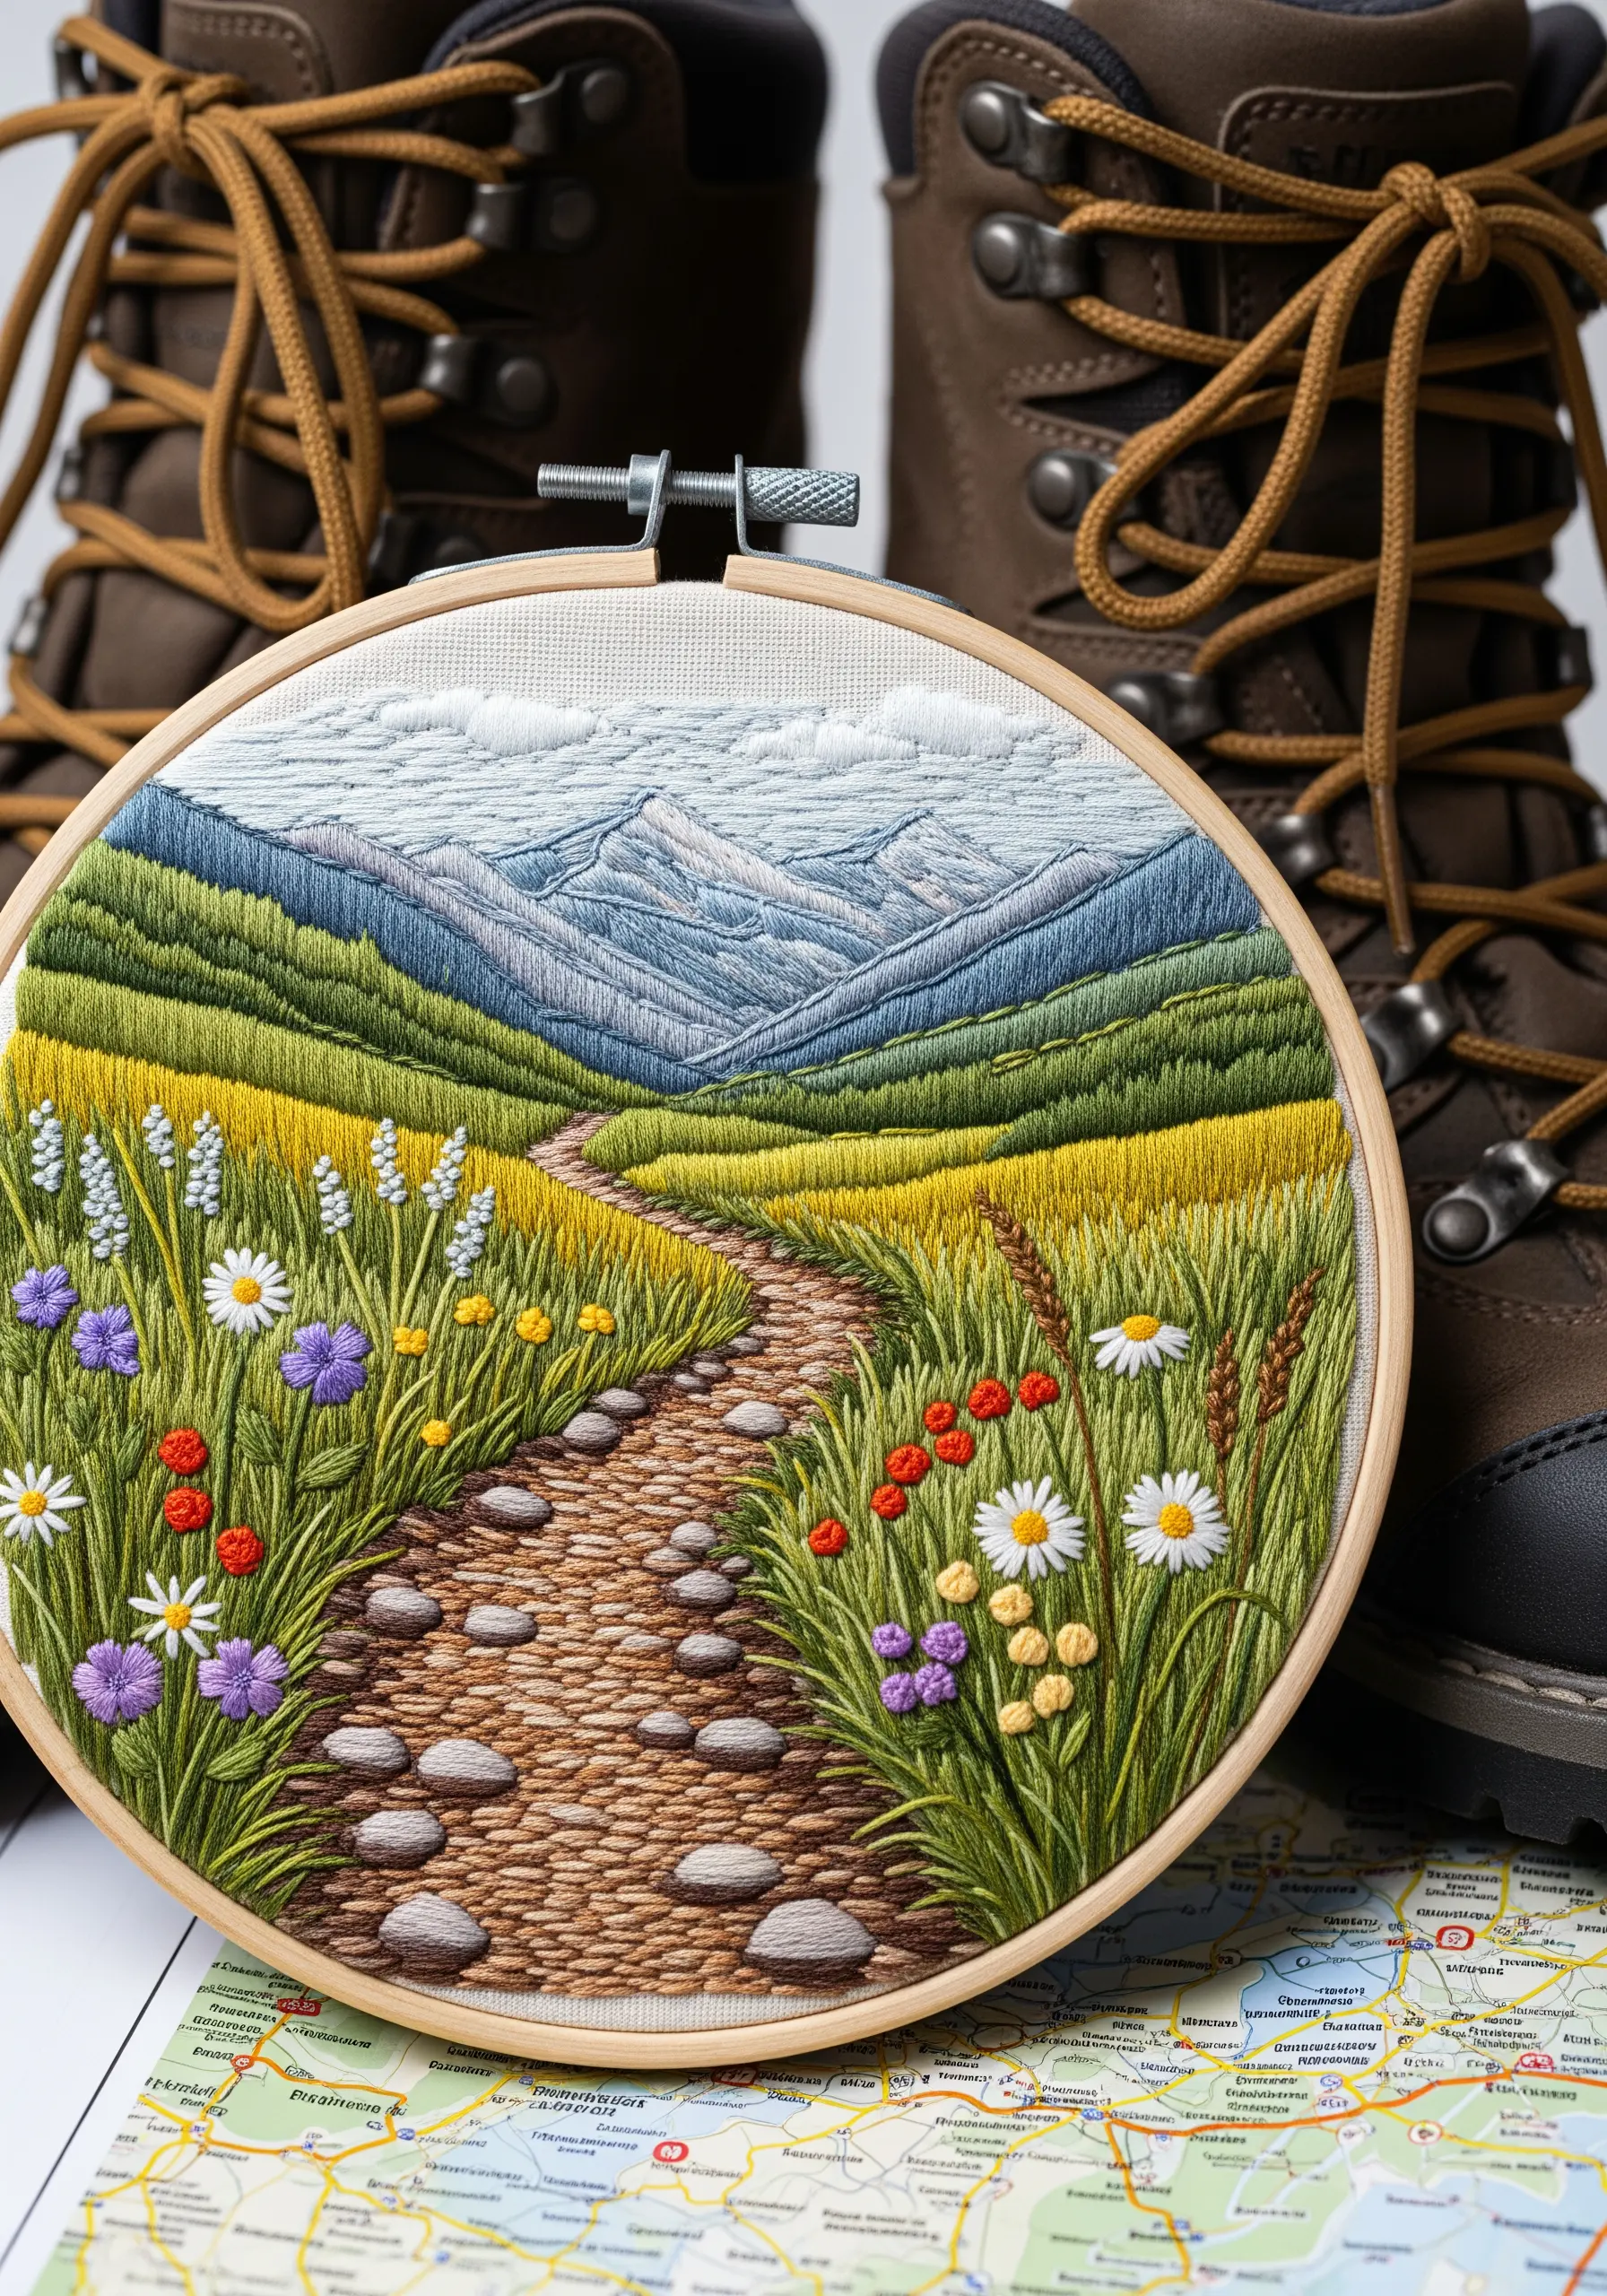
Guide the viewer’s eye into your landscape by creating a path with diminishing texture.
For the stones or gravel in the immediate foreground, use larger, more dimensional stitches like padded satin stitch or chunky French knots.
As the path recedes into the distance, gradually reduce the size of your stitches and use fewer strands of thread.
This simple trick of graduating the texture is a powerful tool for creating a strong sense of linear perspective.
13. Achieve a Clean Look with Color Blocking
For a stylized, postcard-like landscape, embrace the technique of color blocking.
Before filling each section with satin stitch, outline it with a firm split stitch using the same color.
This outline acts as a containing wall, allowing you to nestle your satin stitches right up to the edge for a perfectly clean, sharp transition between colors.
This method gives your work a polished, graphic quality and prevents the messy edges that can sometimes occur with thread painting.
14. Combine Geometric Fills and Linear Details
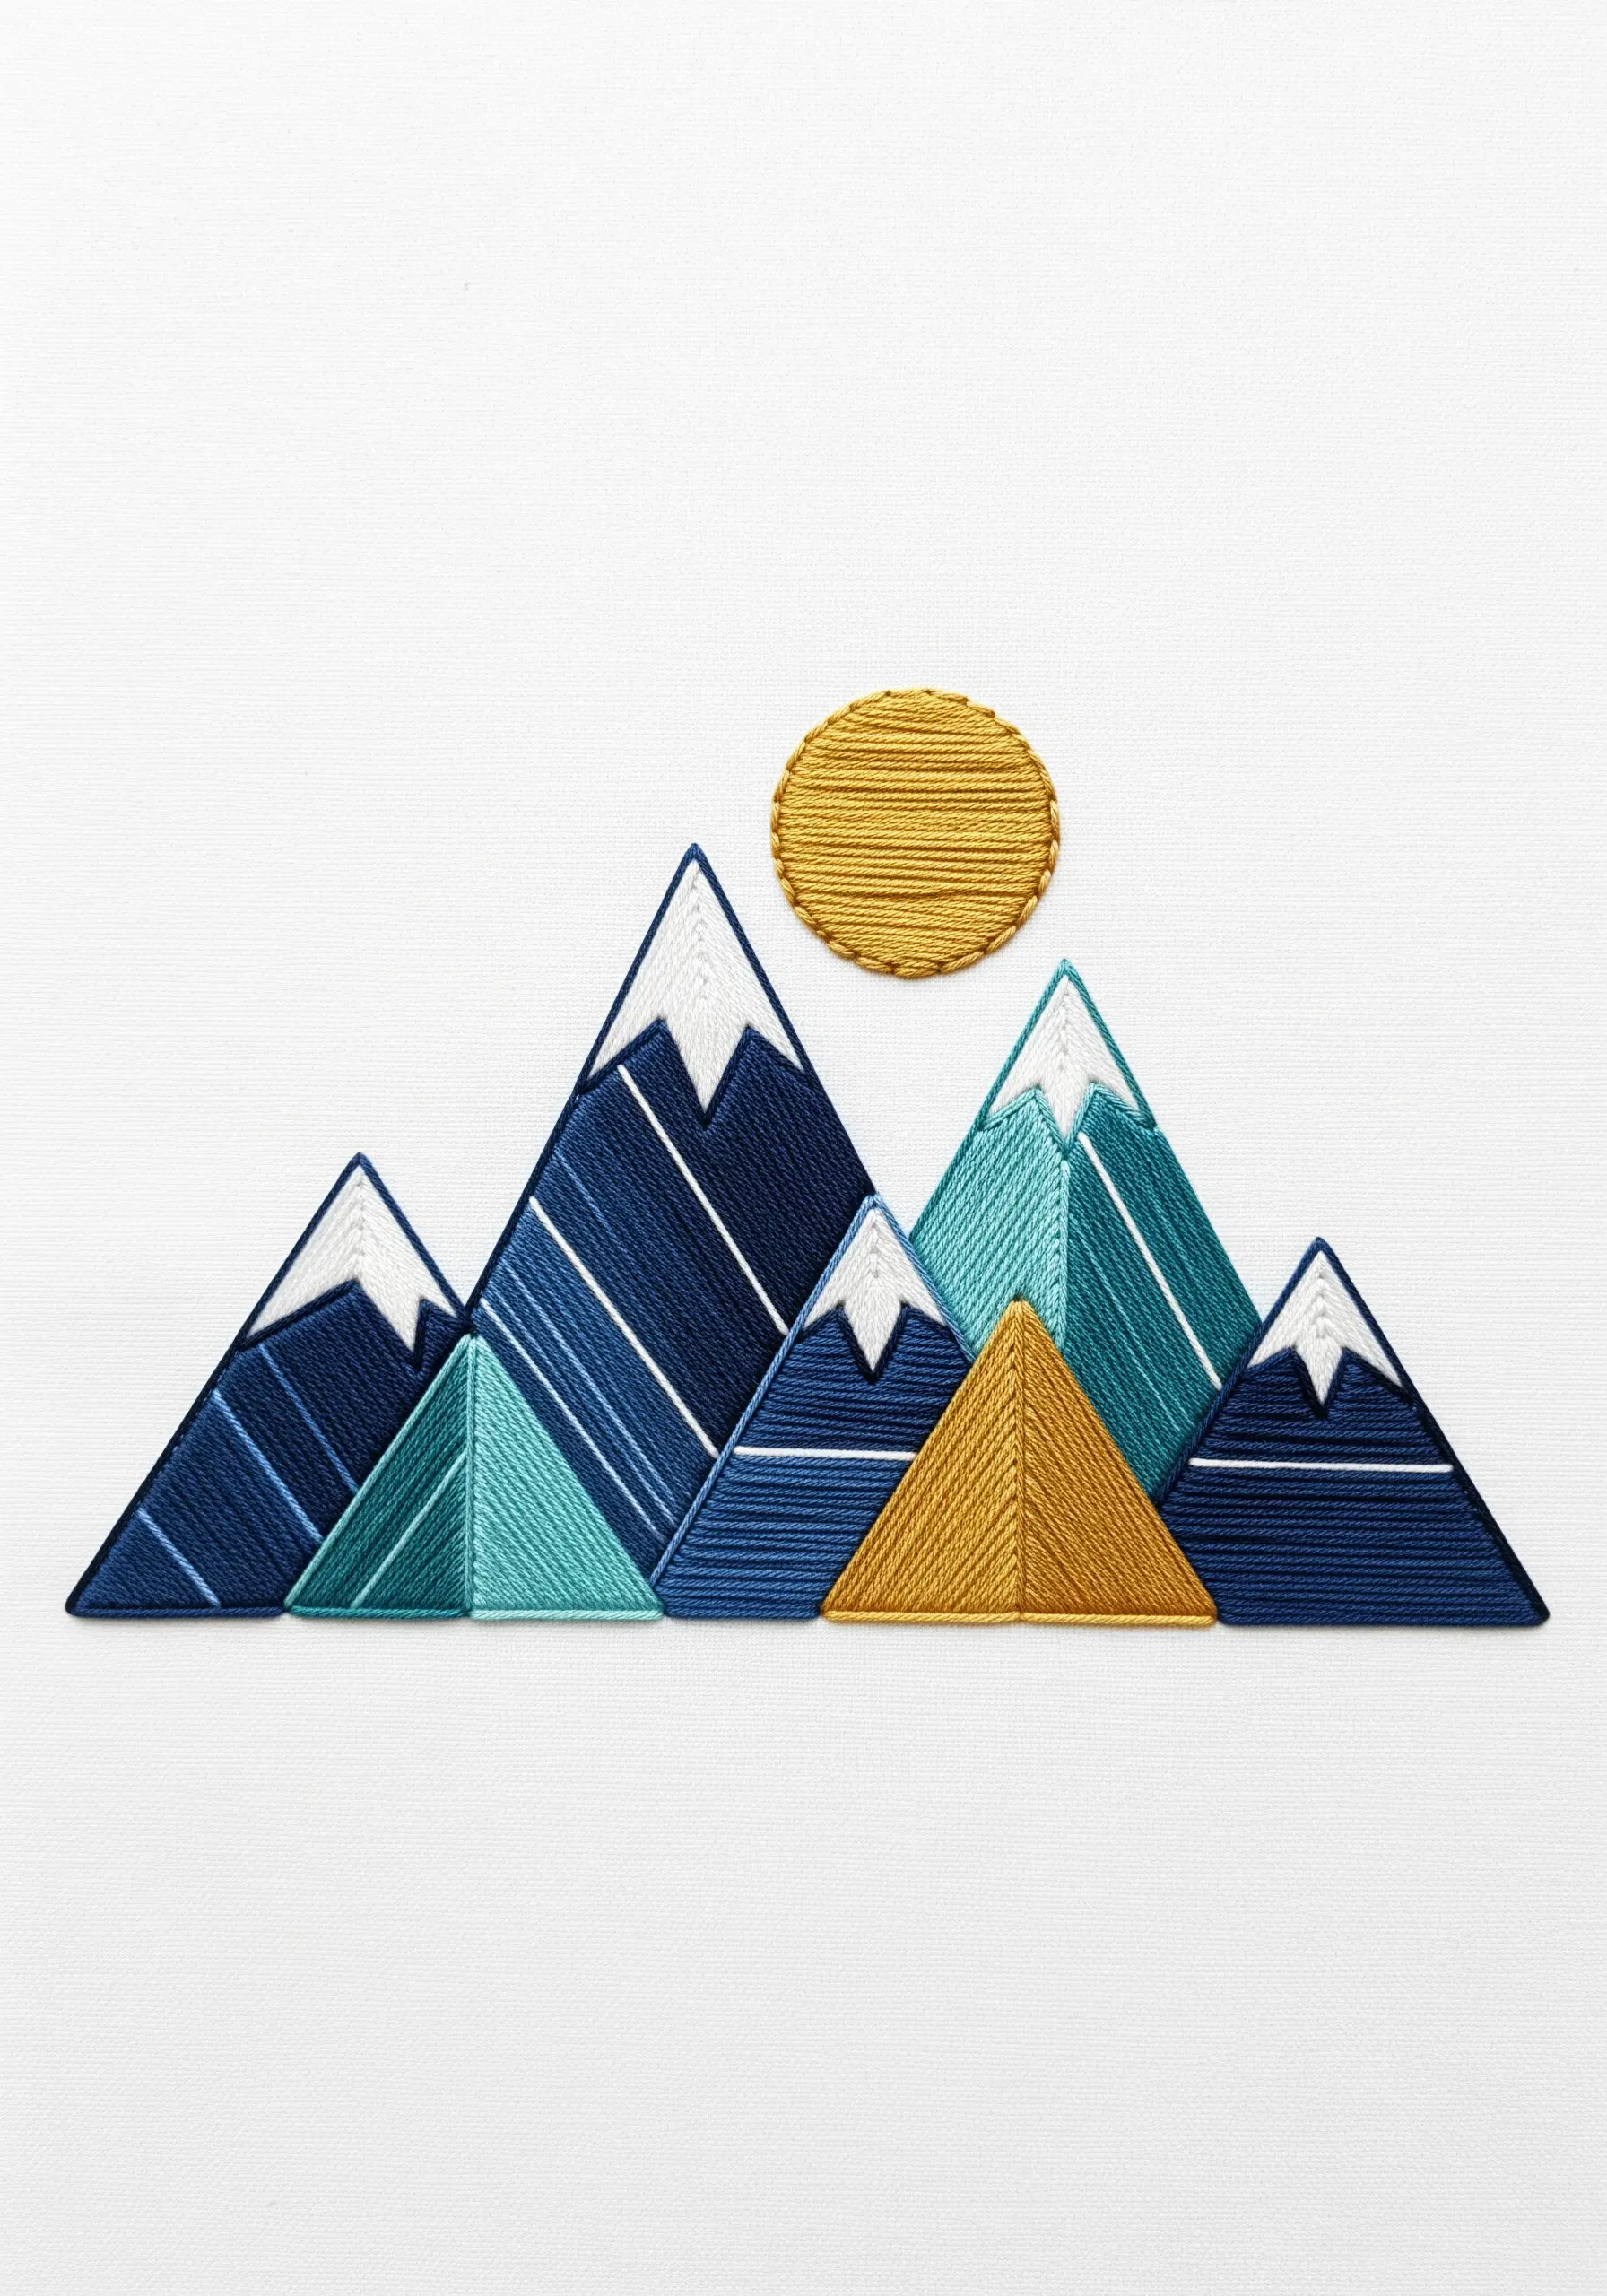
Create a striking, modern mountain range by contrasting smooth, filled shapes with sharp line work.
Fill each triangular mountain section with a perfect satin stitch, ensuring all threads lie flat and parallel for a silky finish.
Once the shapes are filled, add the decorative lines and snow caps using a simple backstitch with a high-contrast color like white or gold.
This blend of texture and line creates a minimalist design that feels both elegant and contemporary.
15. Create Turbulent Smoke with Knot Variations
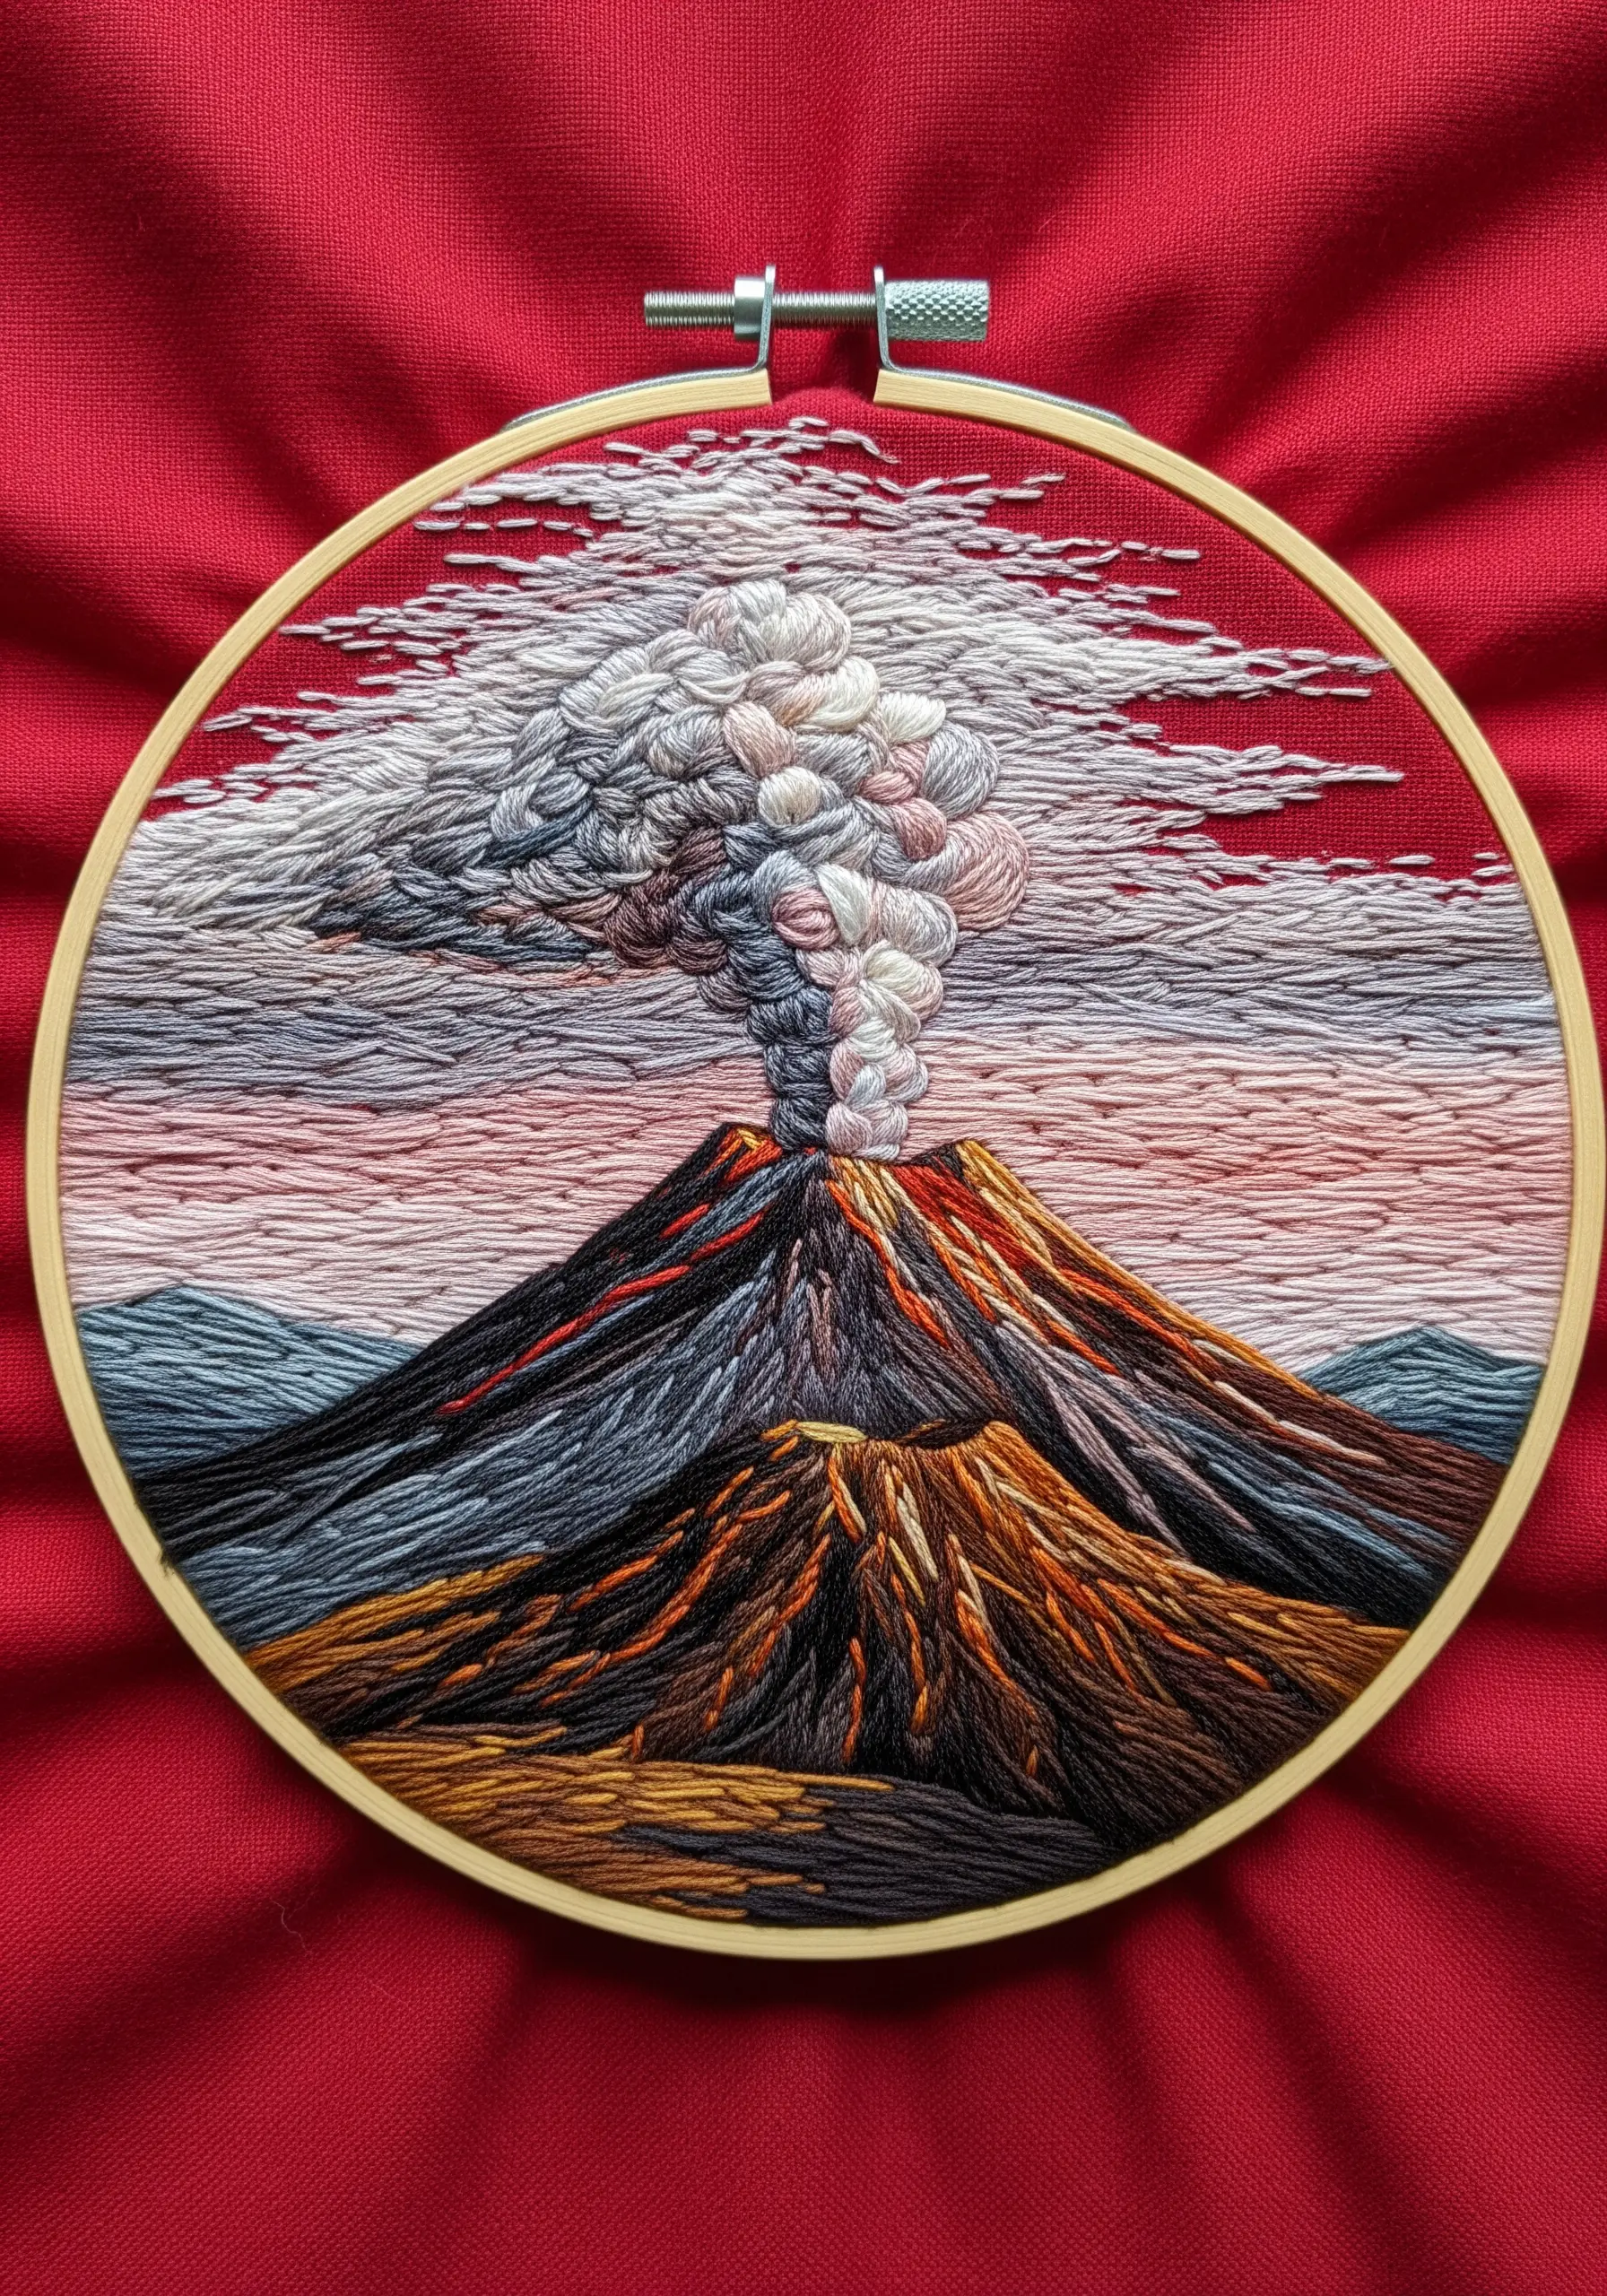
Capture the chaotic energy of an erupting volcano by building up the smoke cloud with a variety of textured stitches.
Use a dense mix of French knots, colonial knots, and bullion knots in varying sizes.
Incorporate swirling patterns of long-and-short stitch to suggest movement and direction within the plume.
Using a palette of greys, whites, blacks, and a hint of dusty pink will give the cloud a realistic sense of volume, heat, and density.
16. Add Whimsy with Expressive Line Styles
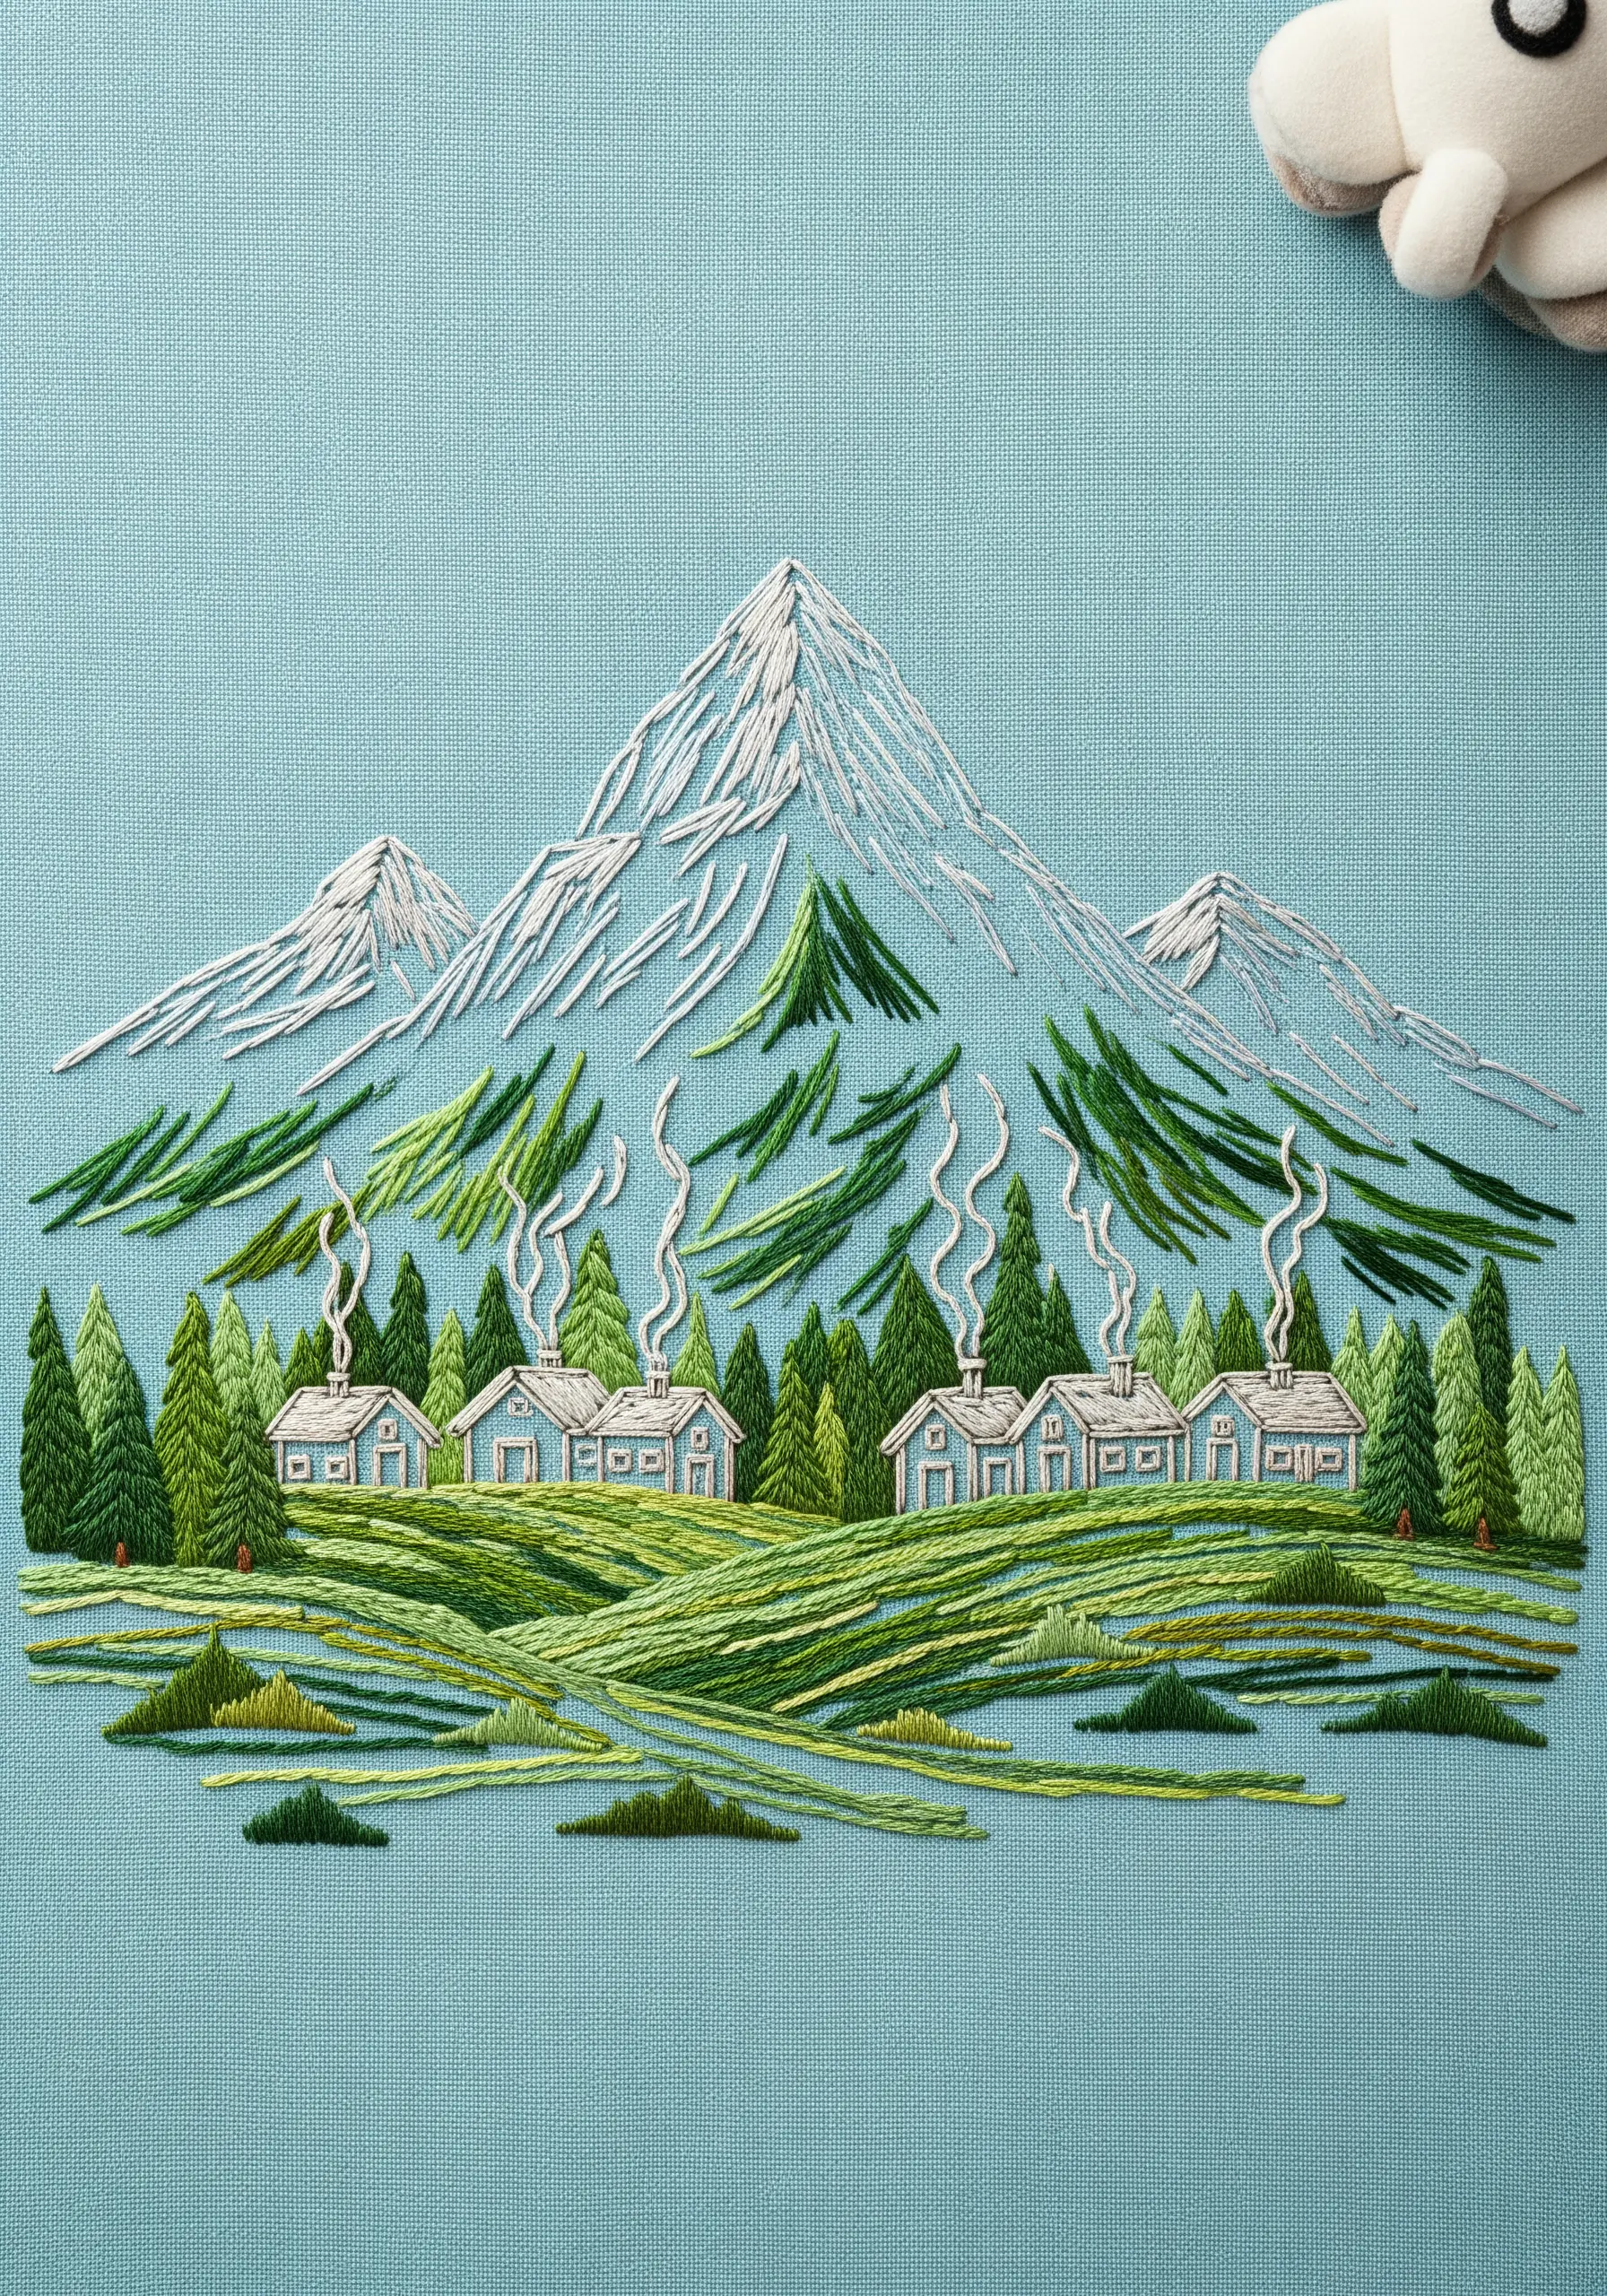
Infuse your landscape with a playful, illustrative quality by exaggerating your line work.
Instead of simple straight stitches, use a smooth, curved stem stitch or whipped backstitch to create curly, cartoon-like smoke rising from chimneys.
Fill the hills and trees with loose, sketchy satin stitches that don’t perfectly cover the fabric.
This intentional imperfection moves the piece away from realism and into a charming, storybook aesthetic that feels personal and unique.
17. Simulate Flowing Water with Vertical Stitches
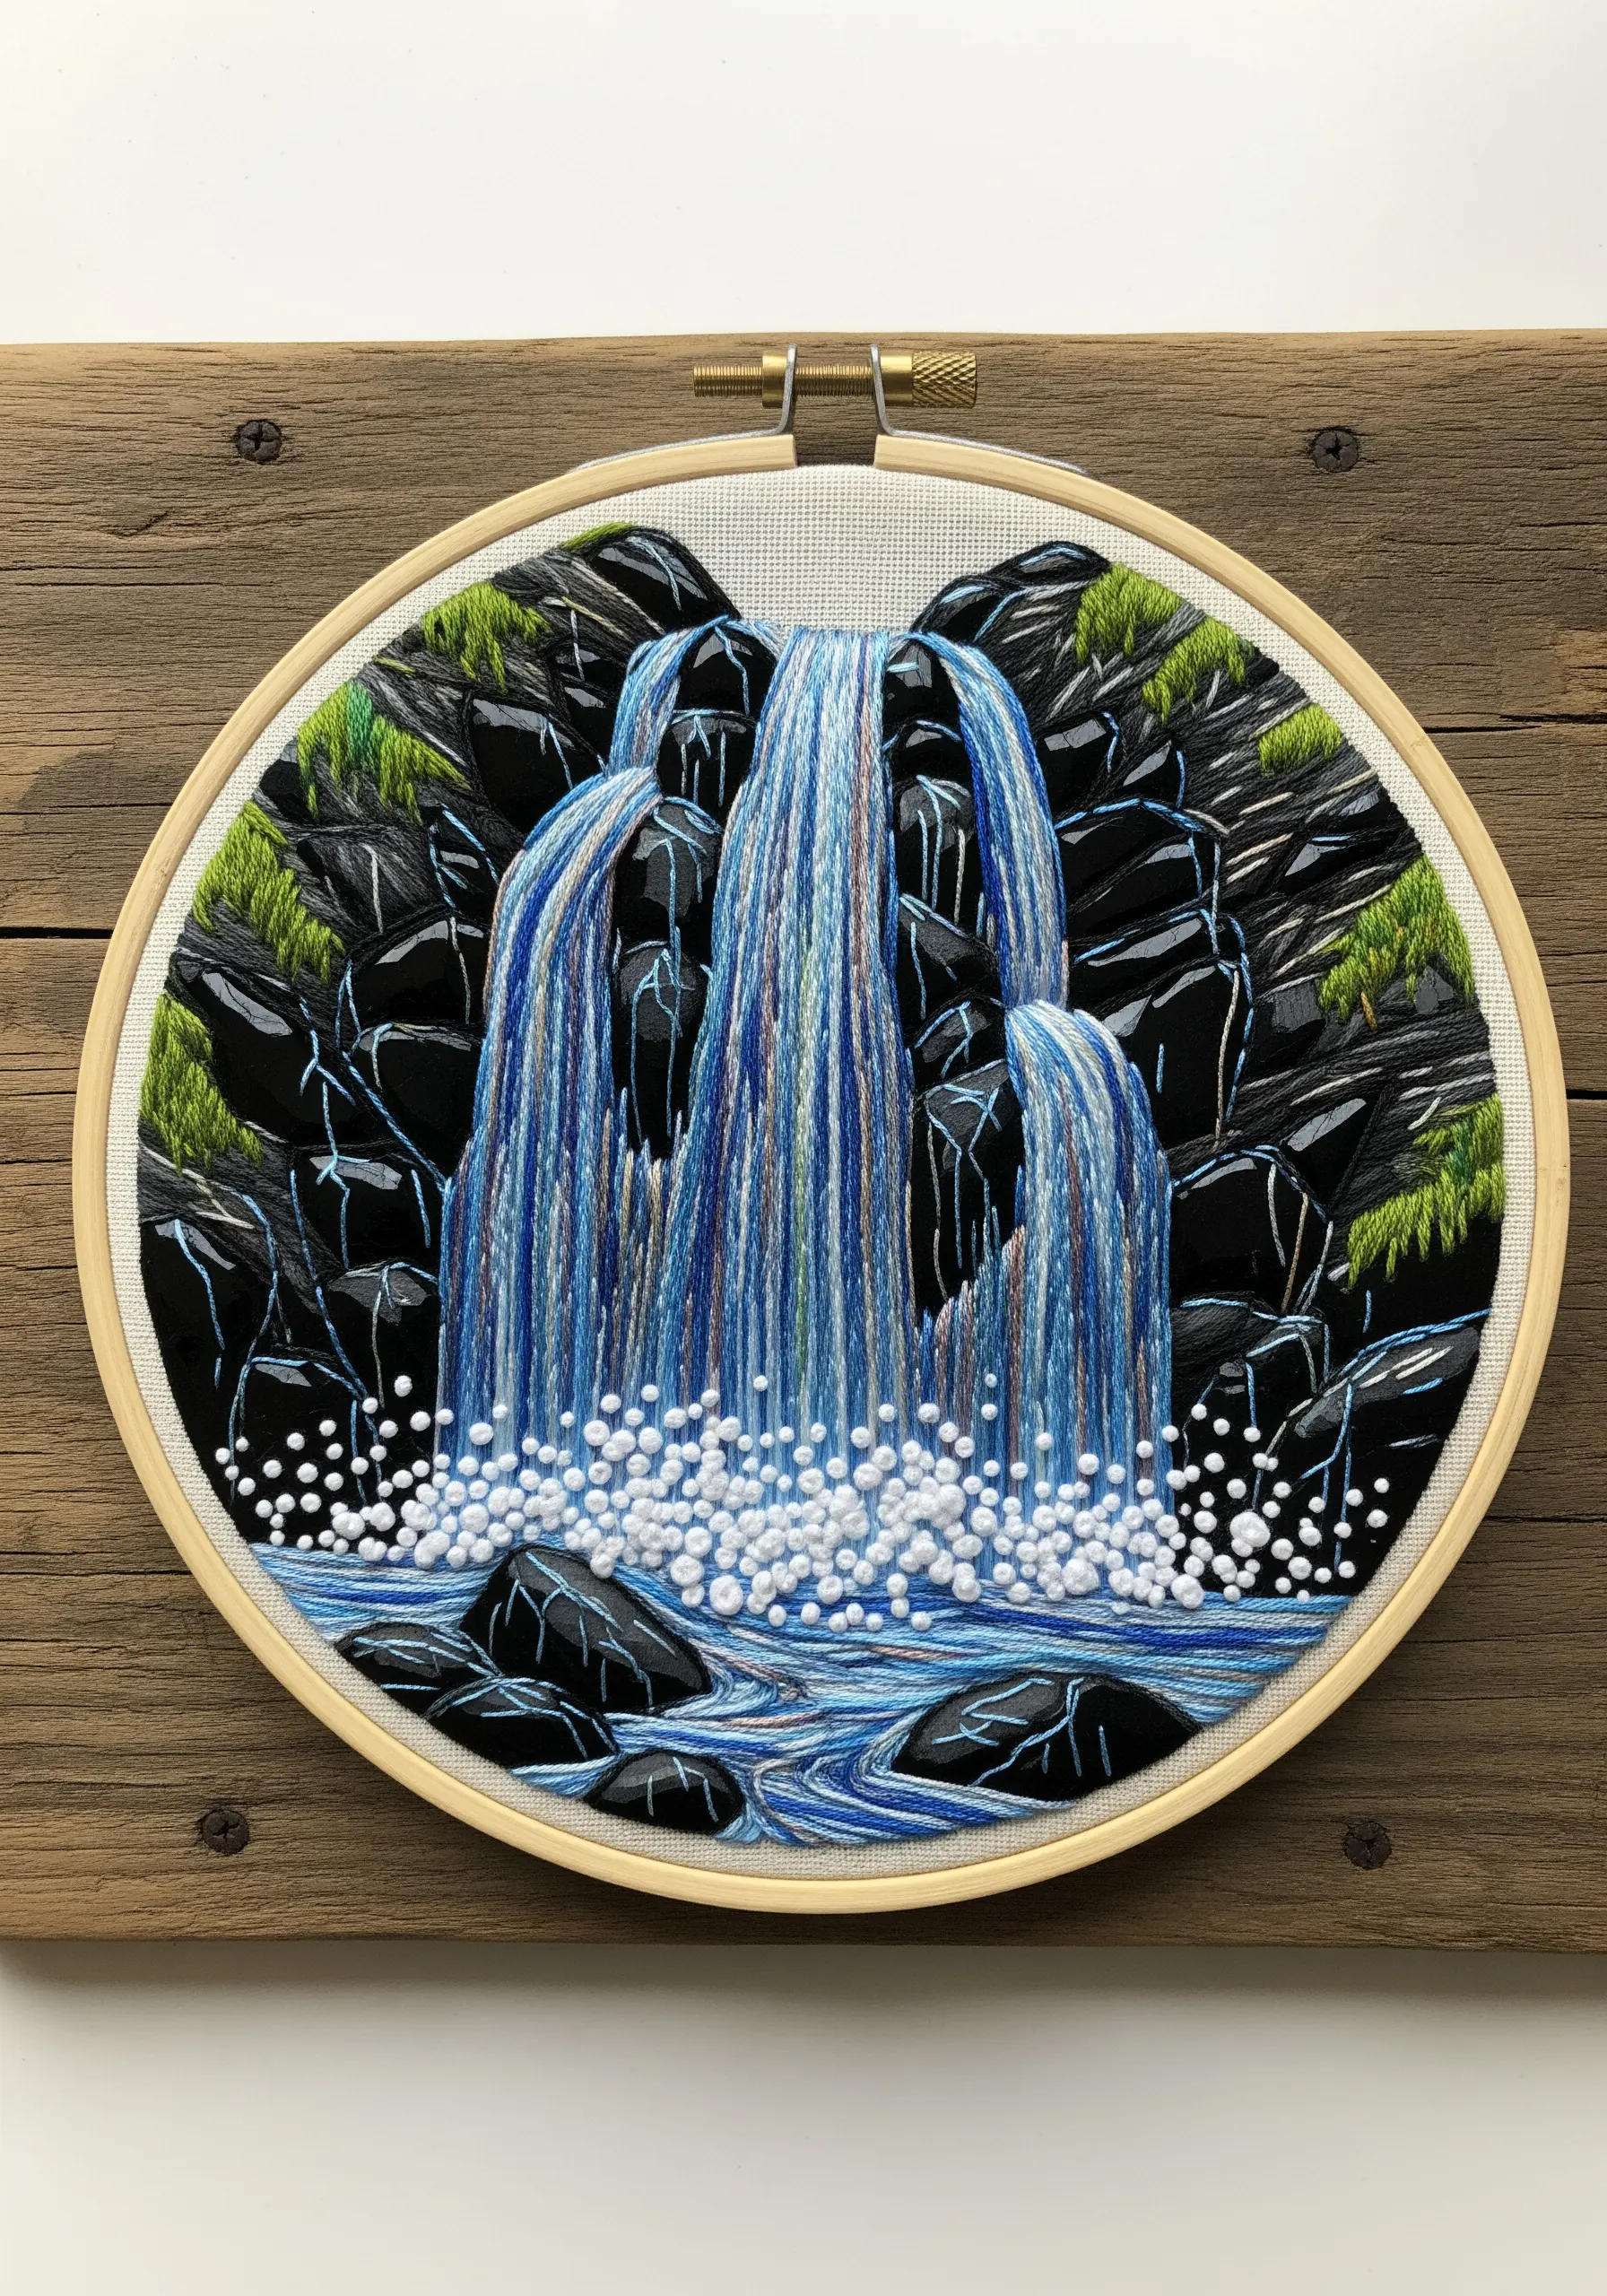
To create the illusion of a waterfall, the direction of your stitches is everything.
Use long, vertical straight stitches from the top of the falls to the bottom, allowing them to remain slightly loose to enhance the sense of movement.
Blend several shades of blue, white, grey, and even a touch of green or brown in your needle at once, or lay the colors side-by-side to mimic the way light reflects on moving water.
Use dense clusters of white French knots at the base to represent turbulent, frothy spray.
18. Emphasize Texture in a Monochrome Palette
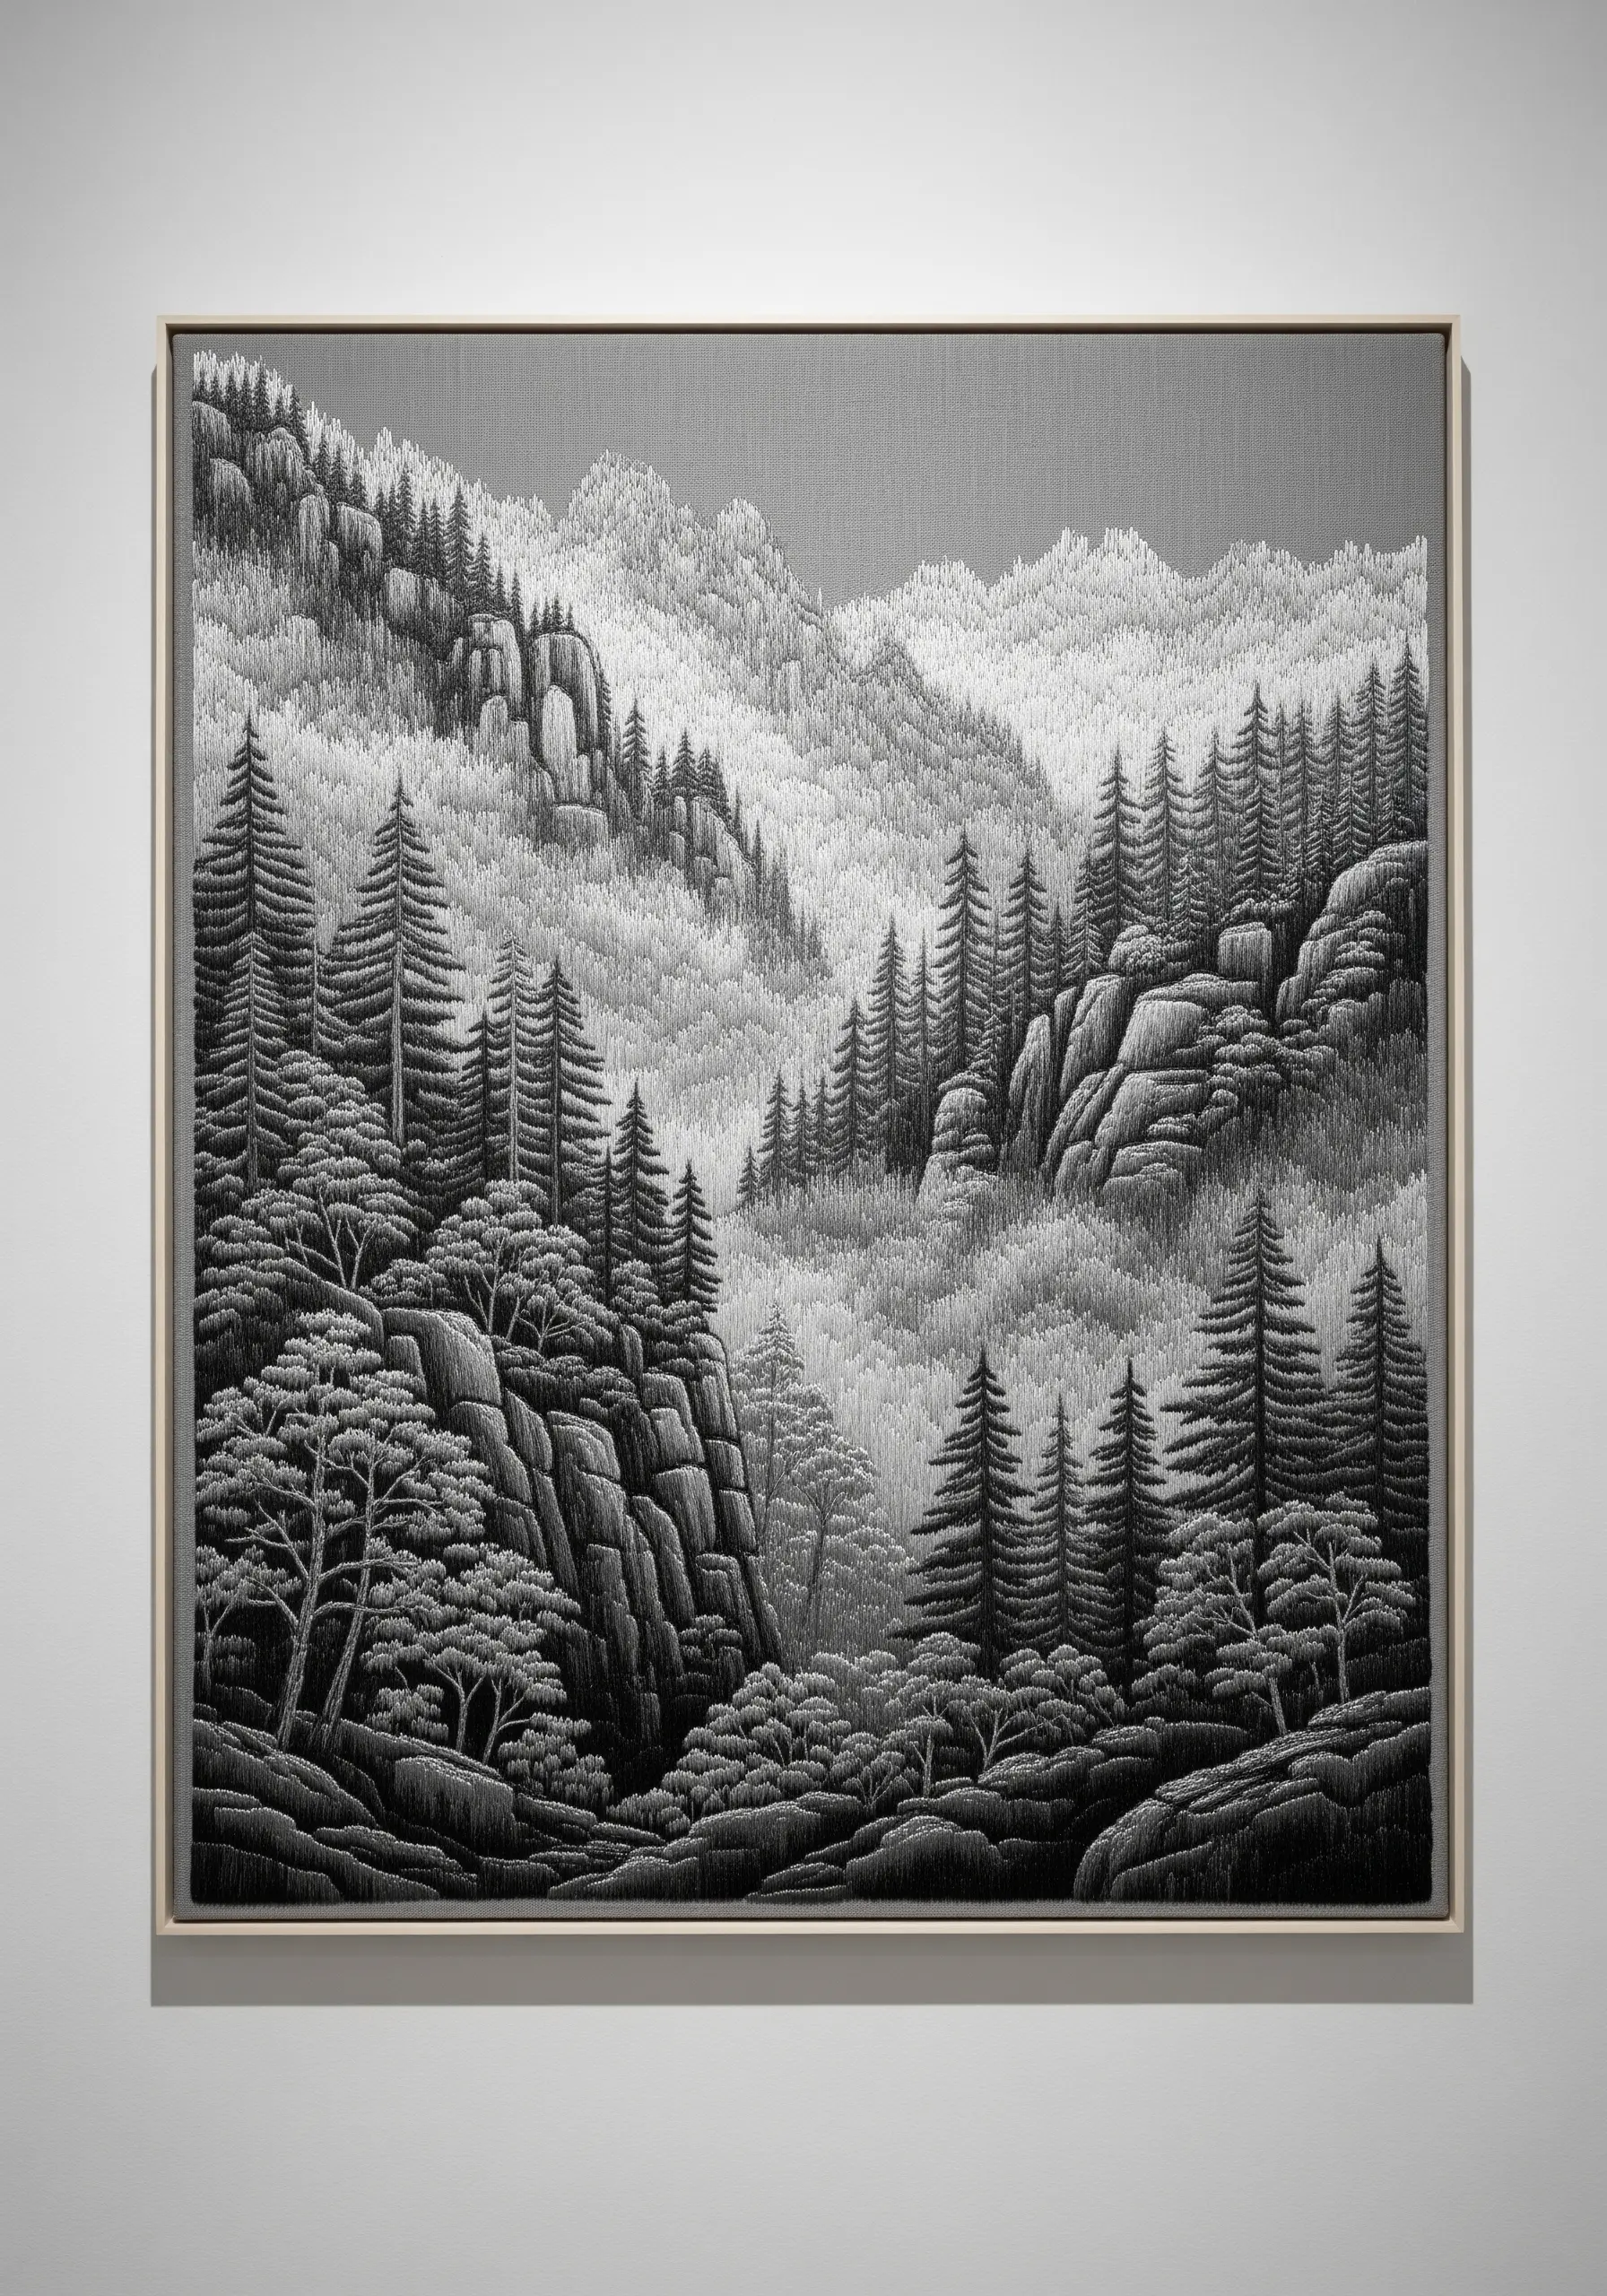
When working with a limited or monochrome color palette, you must rely on texture to define your landscape.
Create visual separation by assigning a different stitch or stitch direction to each element. For example, use dense vertical stitches for tree trunks, short horizontal stitches for misty skies, and angled satin stitches for rocky cliffs.
Varying the number of strands used—more for foreground, fewer for background—will also build depth.
This focus on texture and density results in a sophisticated piece where form and light are the true subjects.
19. Define Melting Snow with Contour Stitching
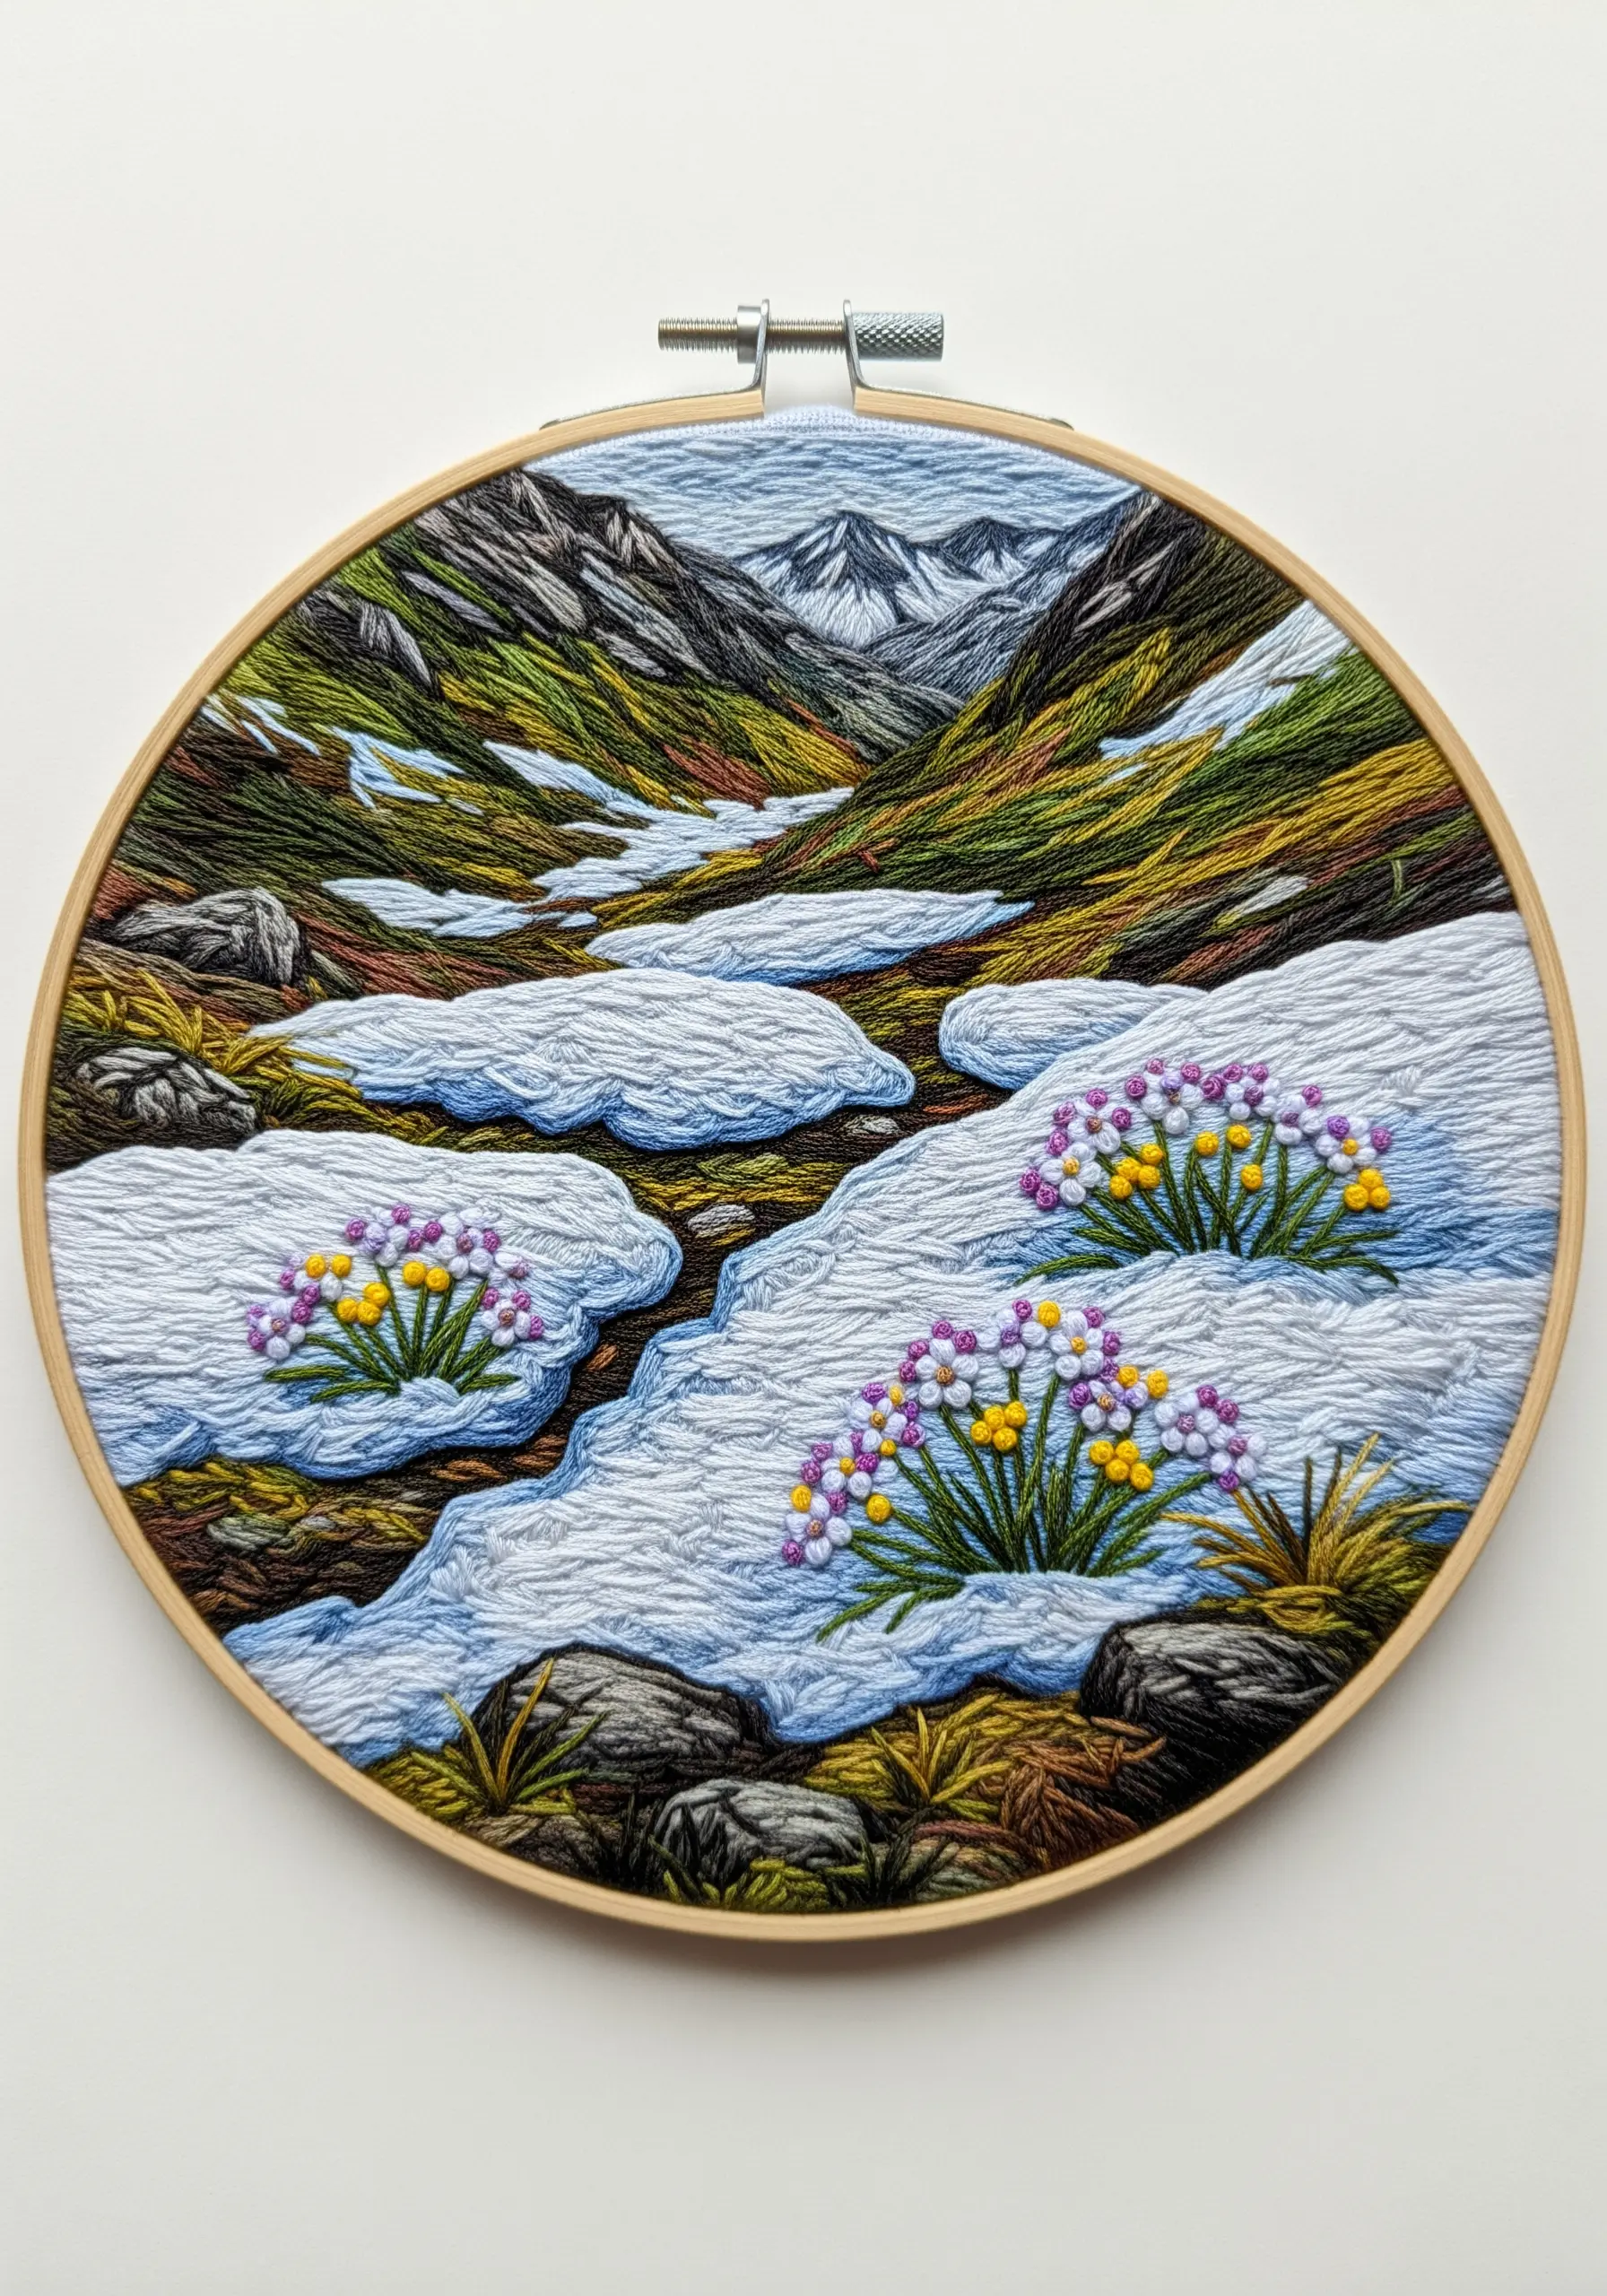
Capture the look of late-season snow by focusing on the shapes and shadows of the patches.
Fill the snow areas with a smooth, horizontal satin stitch using an off-white or very light blue thread.
To create a crisp edge and suggest a shadow, outline the underside of each snow patch with a single line of split stitch in a slightly darker color, like a pale grey.
Fill the surrounding earth with mottled seed stitches in browns and greens to contrast with the smoothness of the snow.
20. Craft an Impressionistic Water Reflection
For a more painterly and less literal reflection, use shorter, more broken stitches in the water.
Instead of a perfect mirror image, use small vertical and horizontal dashes of color that correspond to the landscape above.
This technique breaks up the reflection, mimicking the way light shimmers and distorts on a slightly disturbed water surface.
It gives the piece an artistic, impressionistic feel while still clearly communicating the idea of a reflection.
21. Tell a Story with a Diptych Display
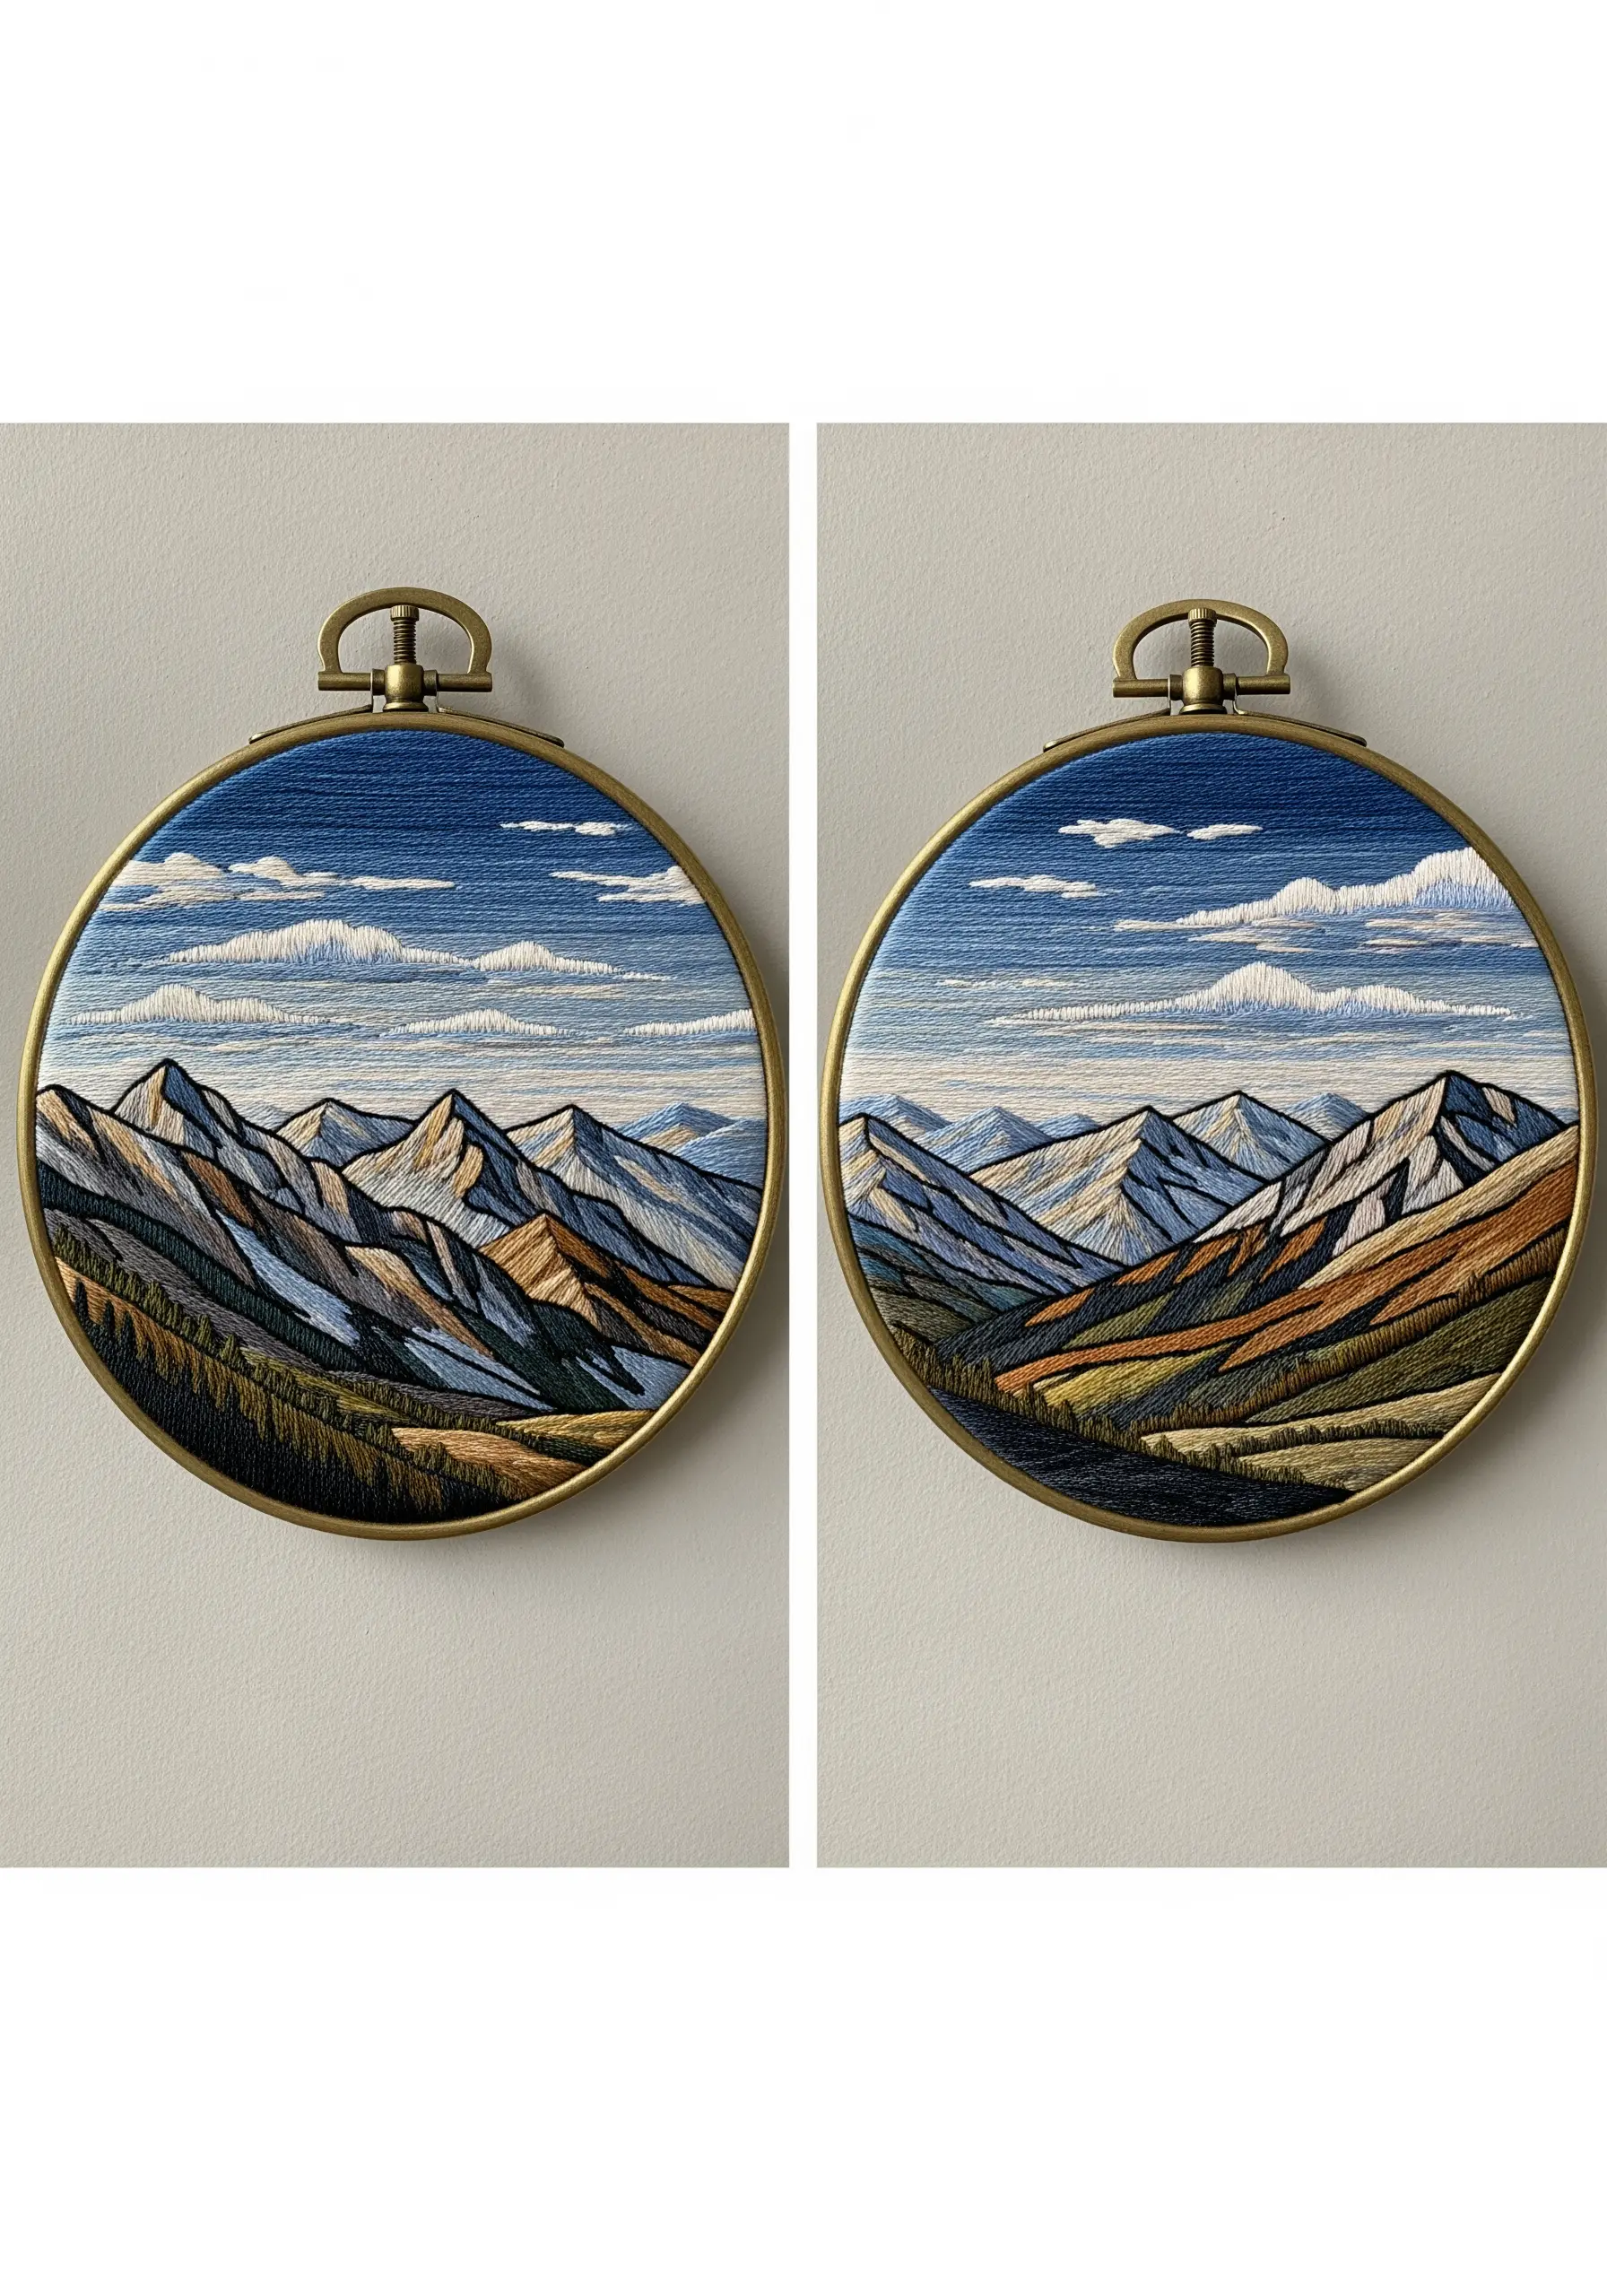
Expand your canvas by stitching a continuous landscape across two separate hoops, creating a diptych.
This approach is perfect for capturing panoramic vistas that feel too constrained by a single circular frame.
Mounting them in elegant flexi hoops or with vintage-style hardware turns two small pieces into a single, impactful statement.
These elegant framed embroidery artworks create a cohesive narrative and a sophisticated display.
22. Use a Natural Frame to Enhance Composition
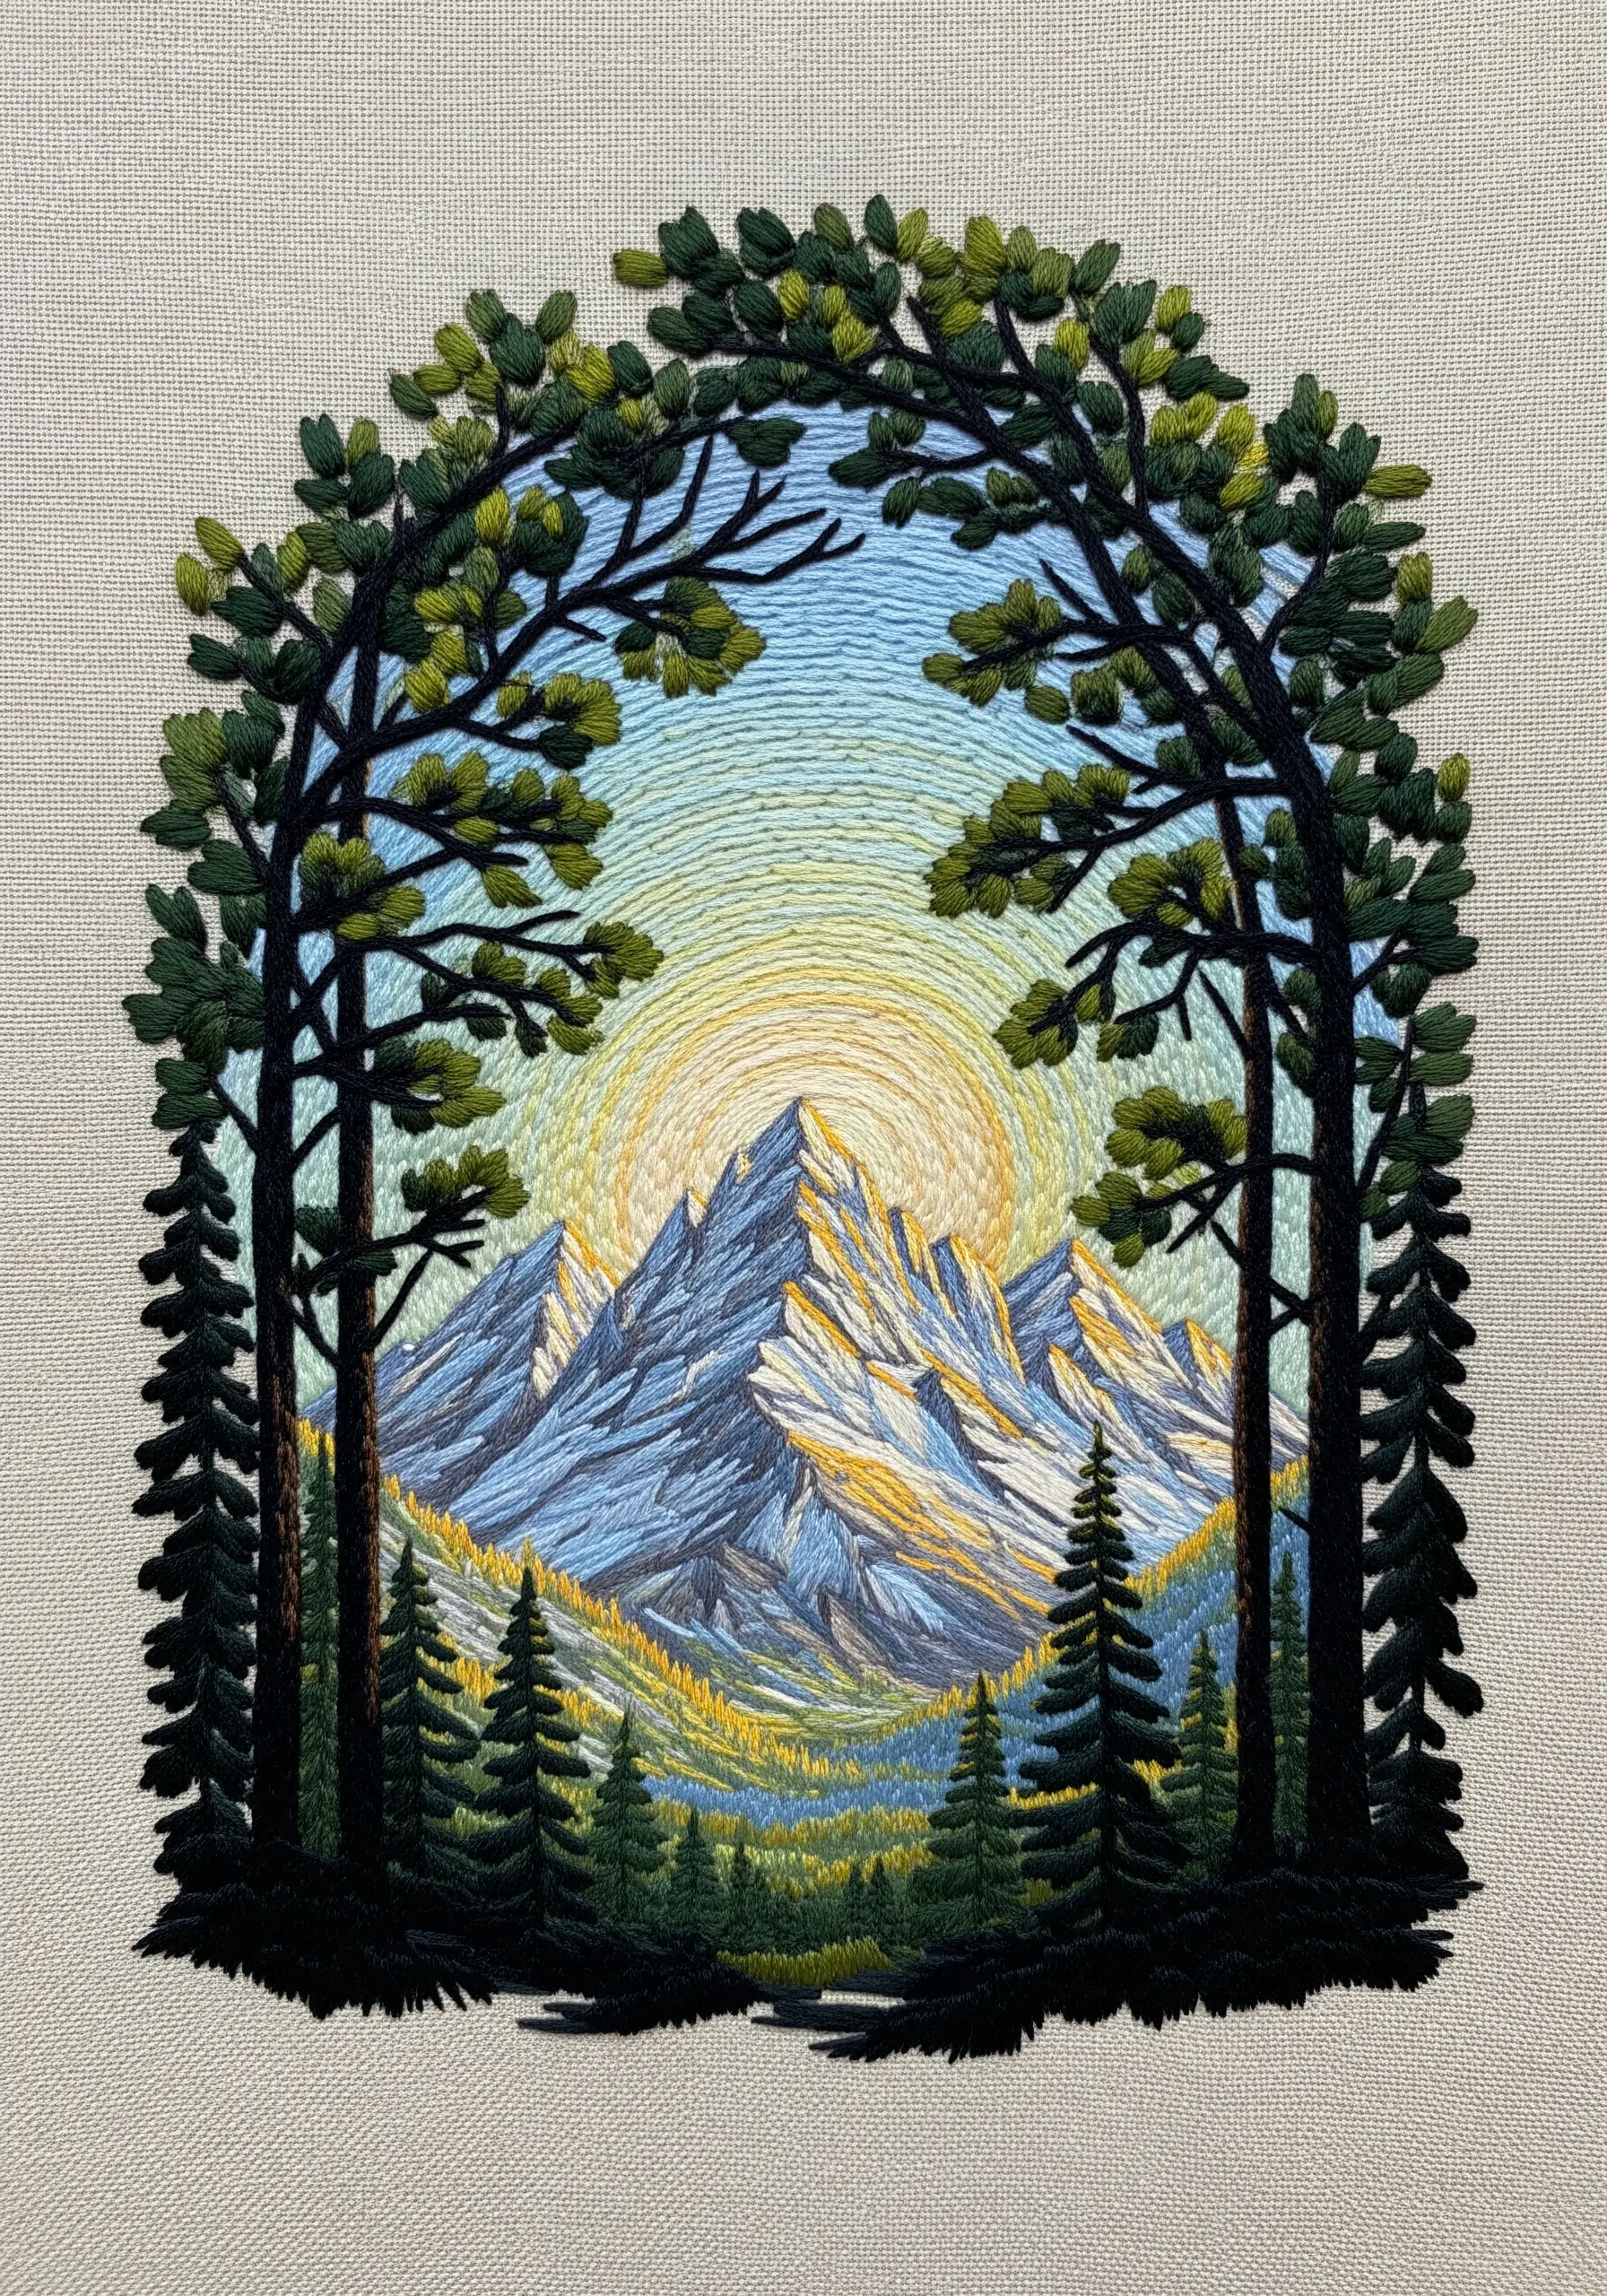
Draw the viewer’s eye directly to your focal point by using elements within the scene as a natural frame.
Stitch tall trees or rock formations in the foreground along the sides of your hoop. Use darker threads and a higher stitch density to give them visual weight.
This technique creates a window effect, pushing the foreground elements forward and the background mountains back, dramatically increasing the scene’s depth.
23. Weave an Abstract Landscape with Layered Satin Stitch
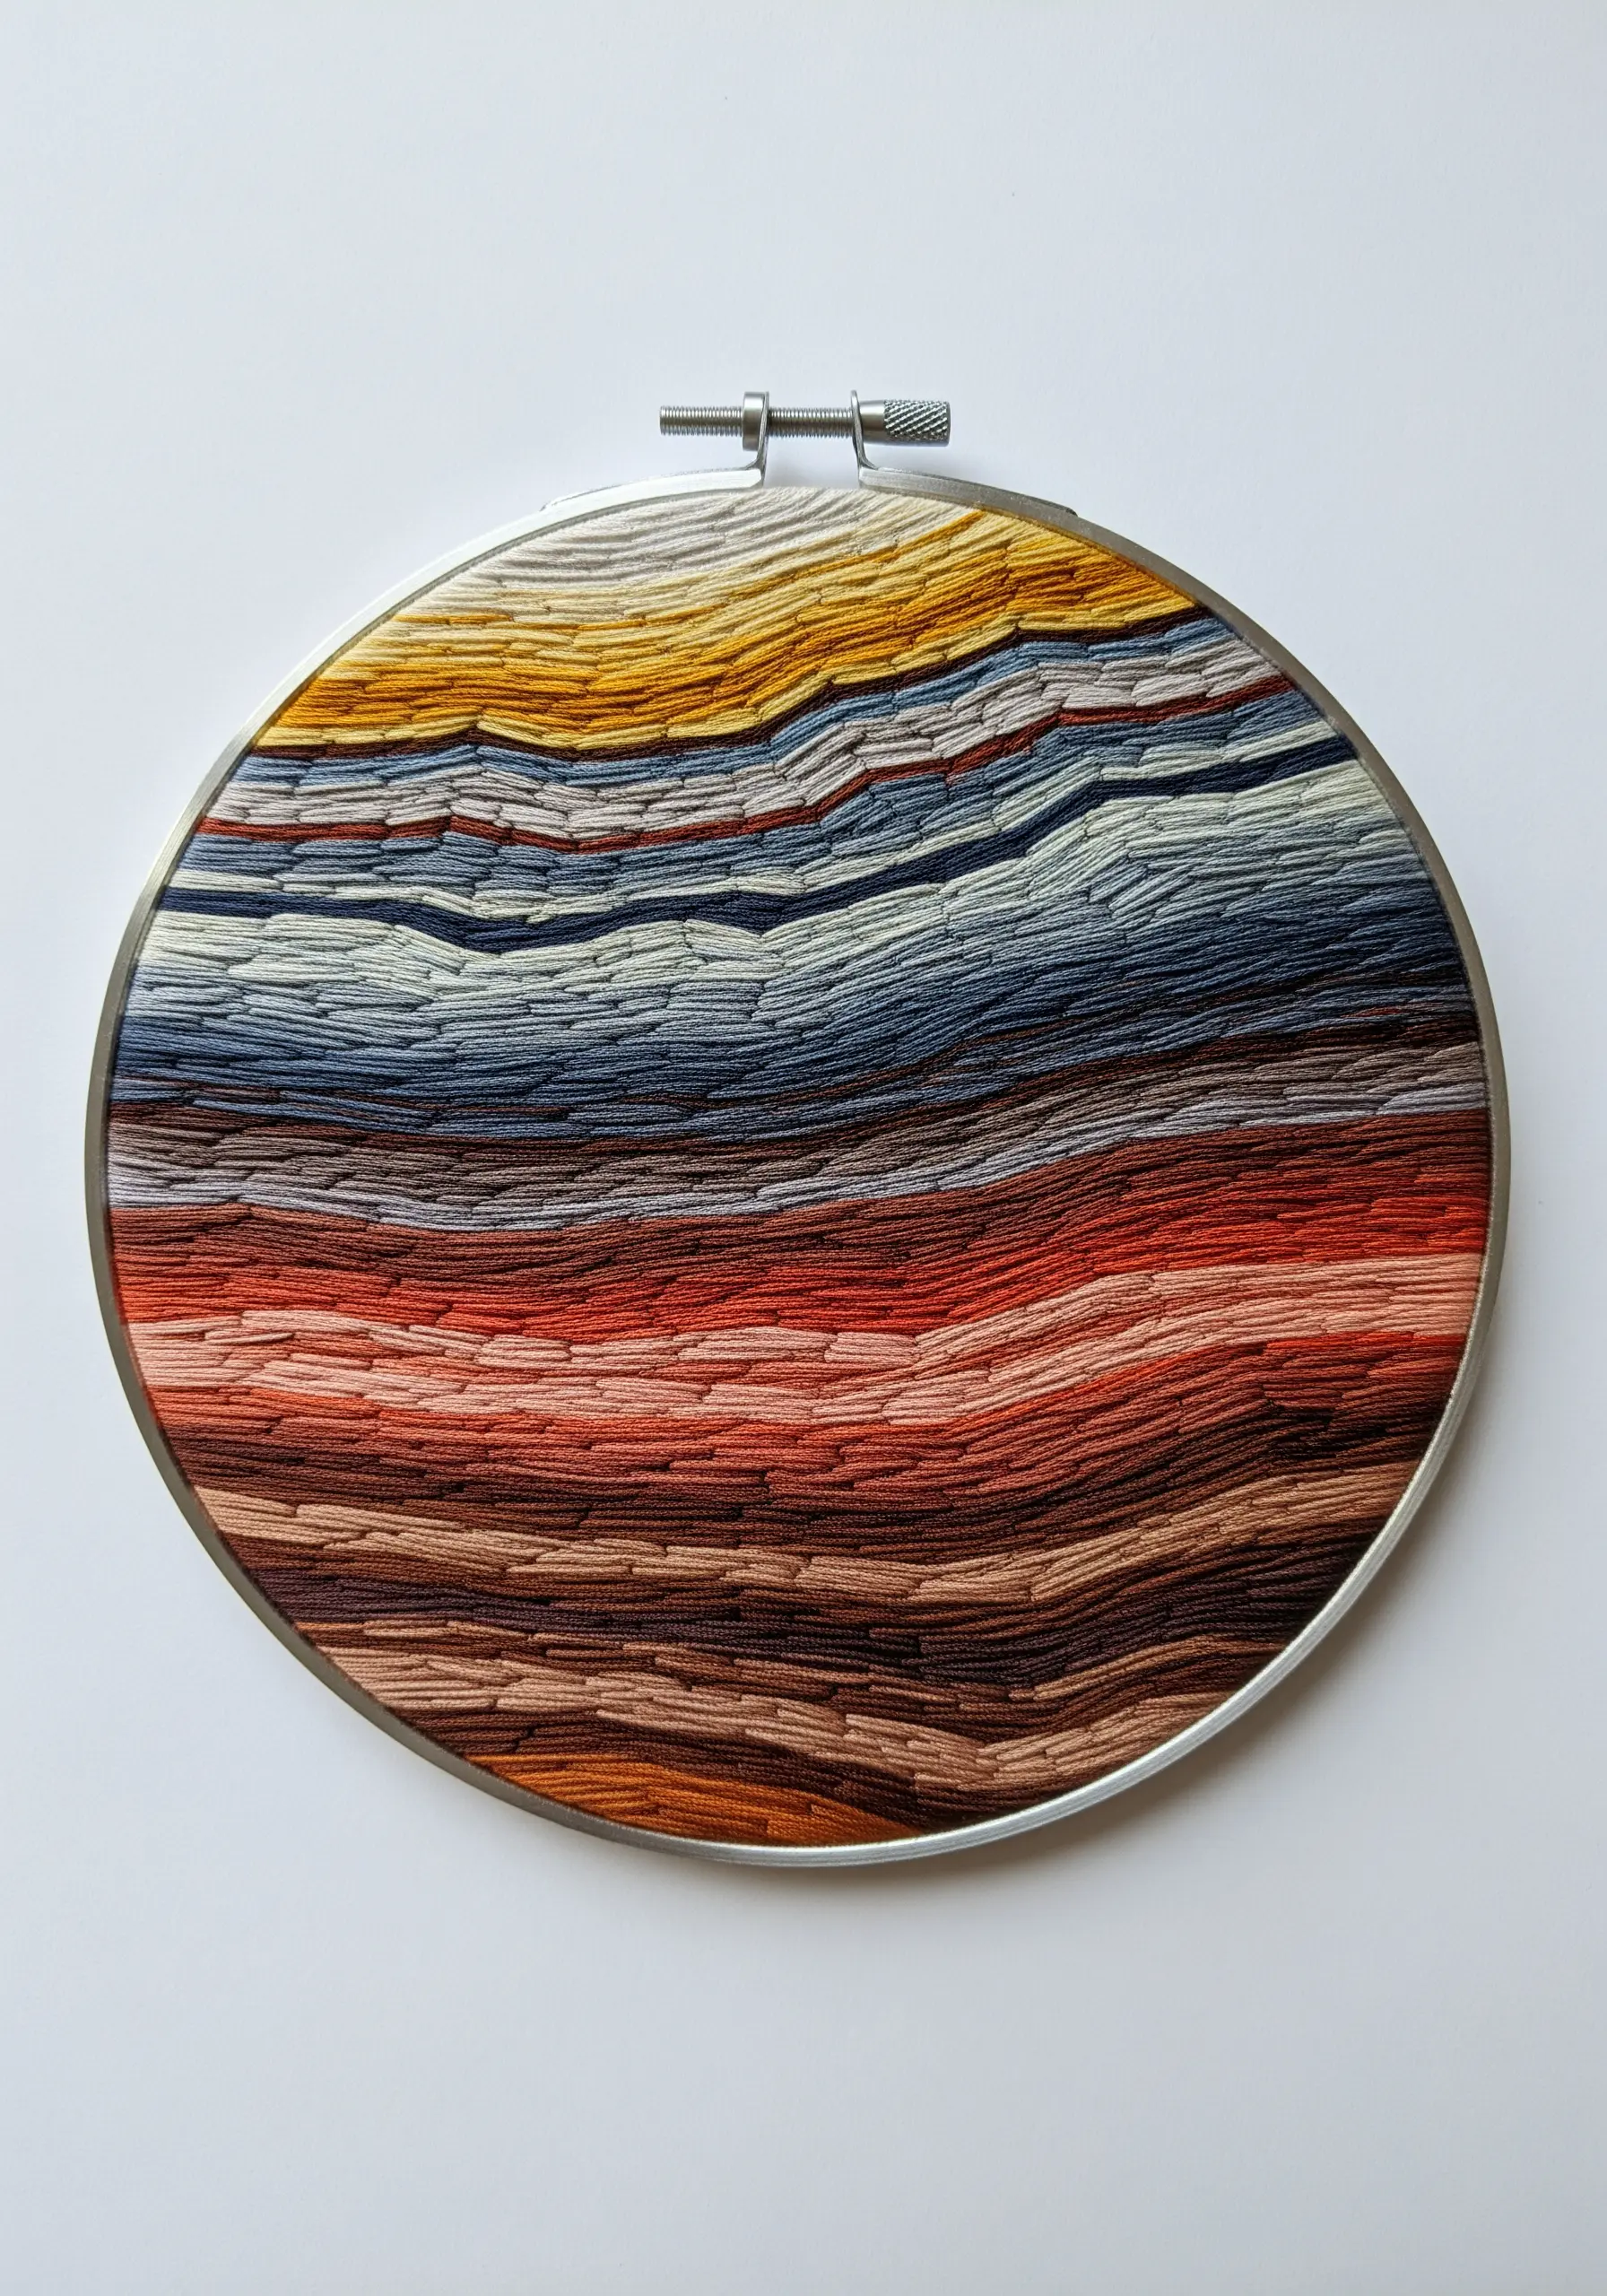
Create a textural, semi-abstract landscape by layering blocks of satin stitch on top of one another.
Work in horizontal bands of color, allowing the edges to overlap and the stitch direction to vary slightly.
This technique breaks the rules of traditional satin stitch to build a surface that feels woven and almost geological.
The result is a highly tactile piece that explores color and texture as much as it depicts a landscape, making it perfect for abstract framed embroidery patterns.
24. Unify Your Scene with a High-Contrast Palette
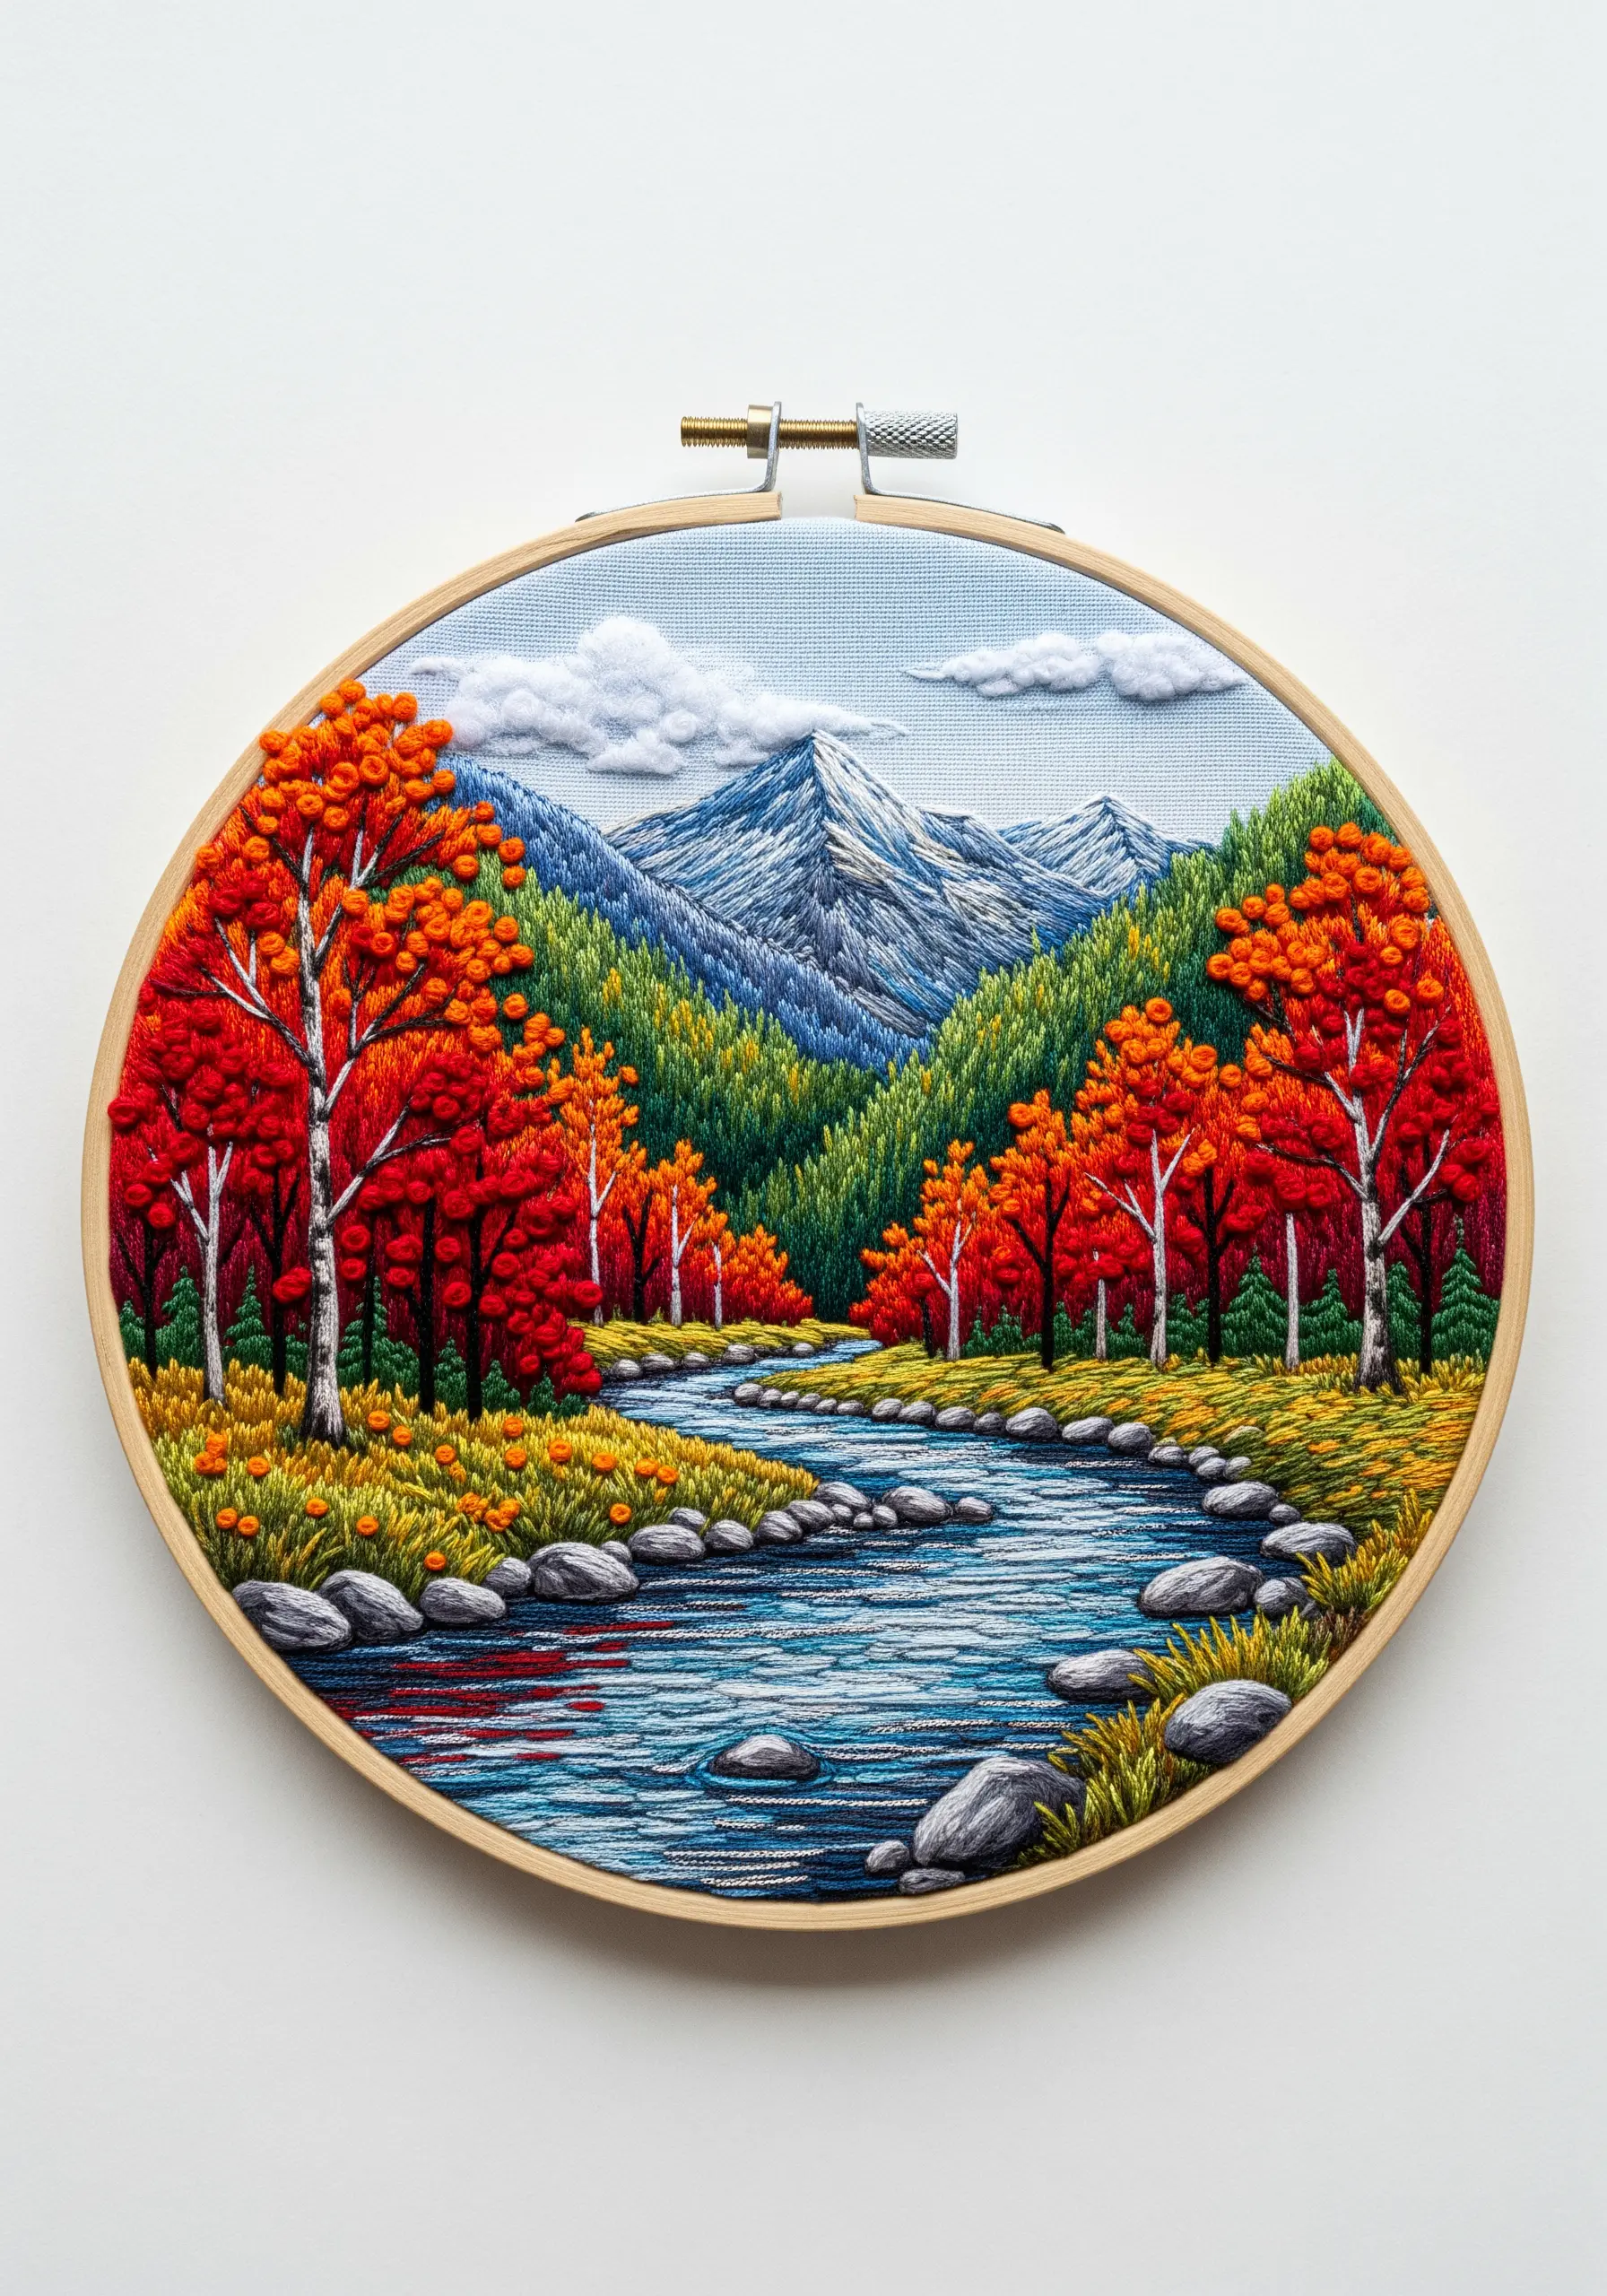
Create a visually striking and cohesive landscape by choosing a limited but bold color palette.
Select complementary colors, such as the vibrant reds and oranges of the autumn trees against the deep teal of the river.
By repeating these key colors throughout the composition, you create harmony and rhythm.
To make the water shimmer, incorporate short vertical stitches of the reflected tree colors amidst your horizontal blue stitches.
25. Elevate Balloons with Padded Satin Stitch
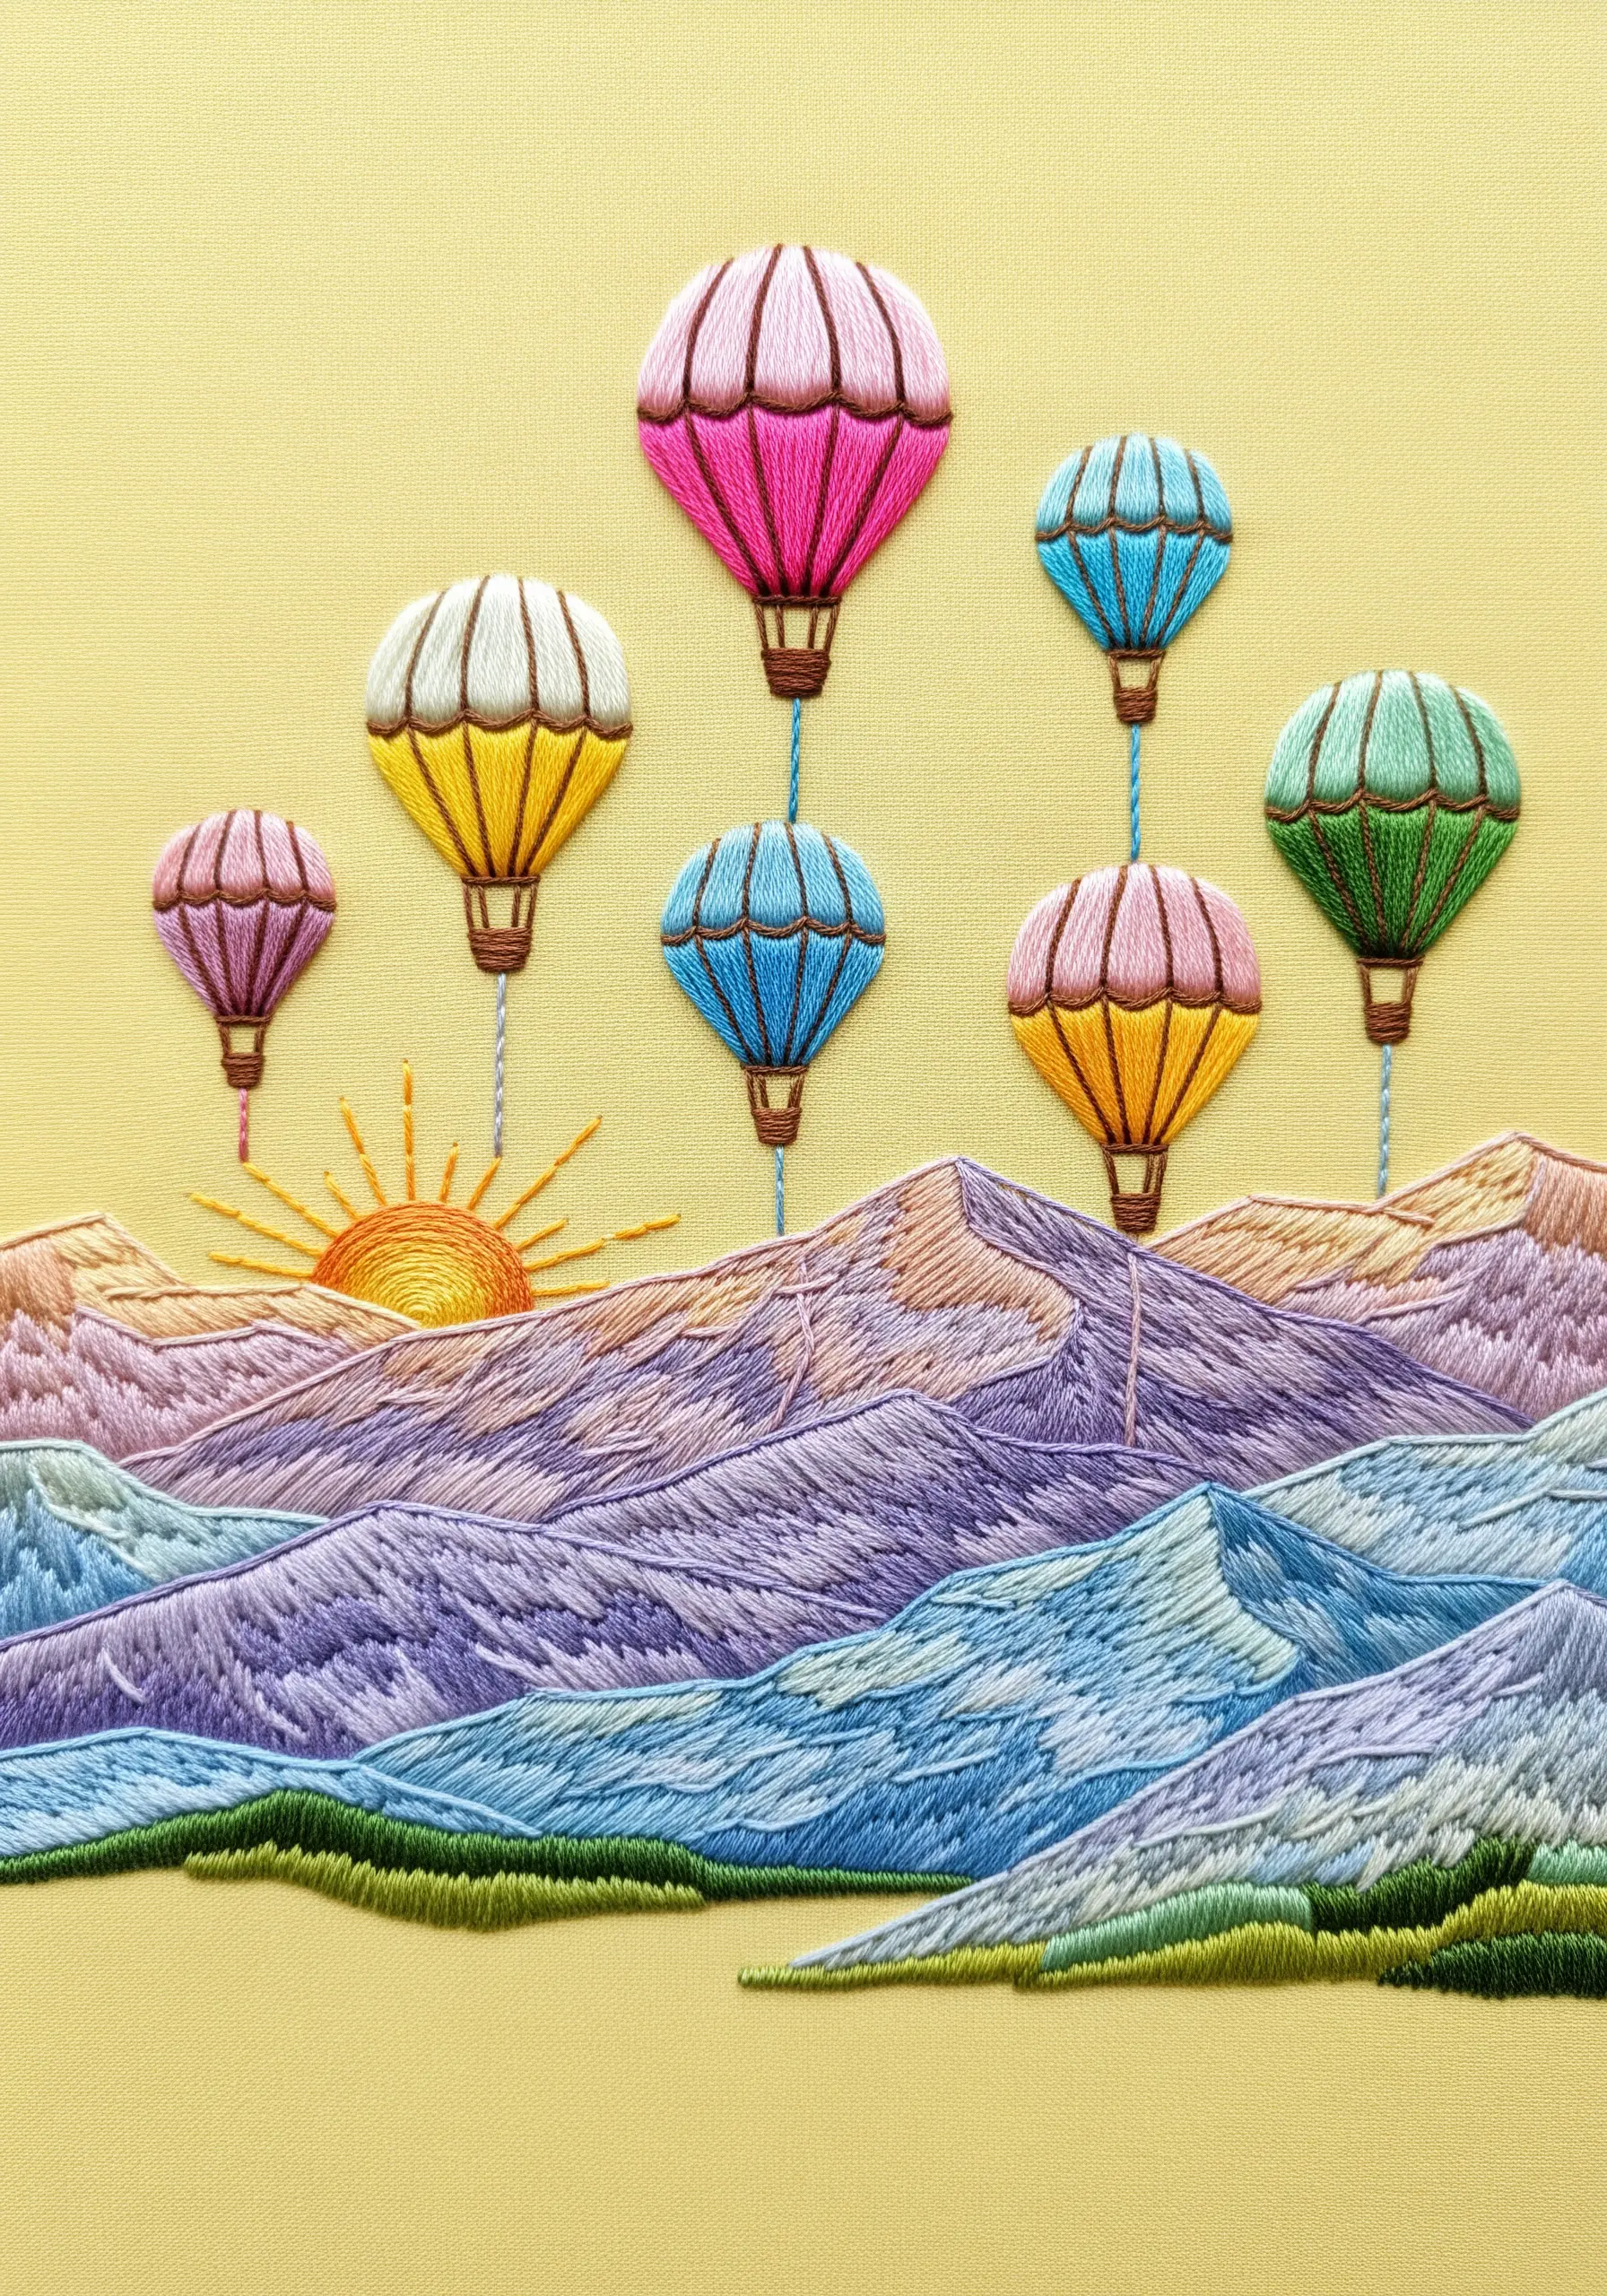
To make the hot air balloons the focal point, give them a subtle three-dimensional lift.
Create a base for each balloon section with a layer of small seed stitches, then cover this padding with a smooth, perfectly executed satin stitch.
This simple step raises the surface of the balloons, making them look plump and full.
Keep the mountains below stitched flatly with a softer long-and-short stitch to ensure the balloons pop forward visually.
26. Blend a Minimalist Night Sky Gradient
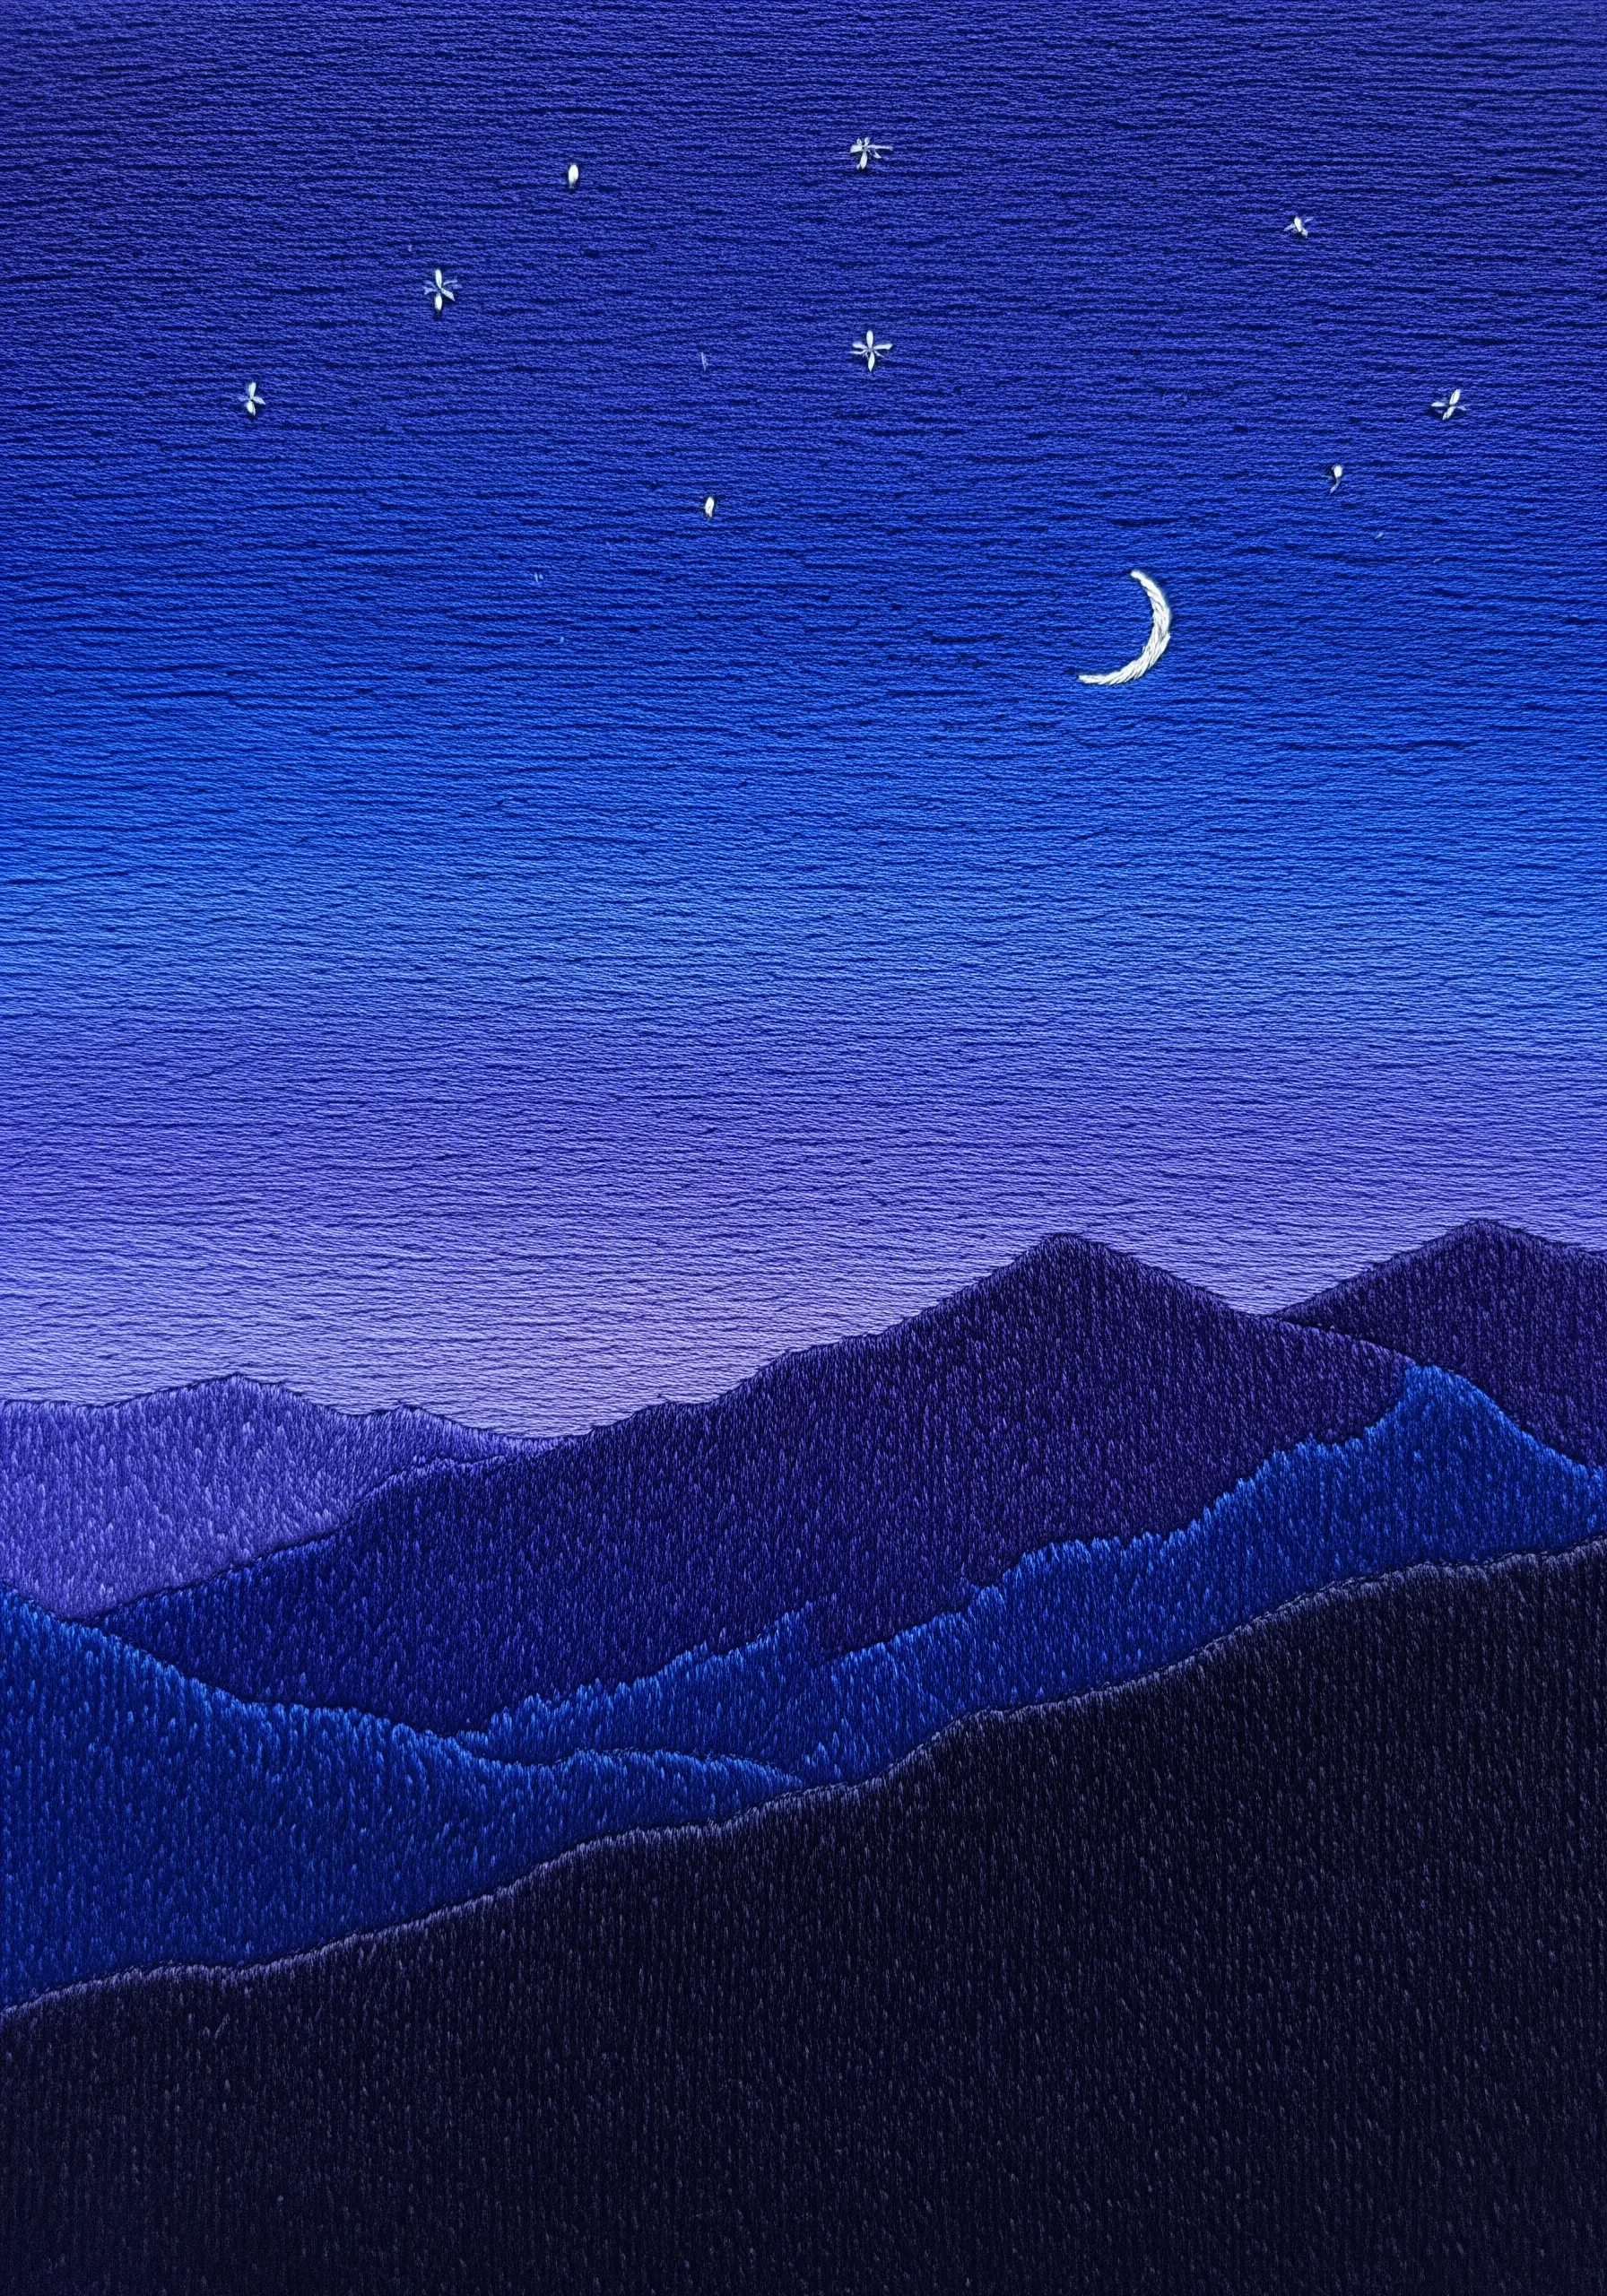
The beauty of a clear night sky is its flawless gradient, which you can replicate with careful stitching.
Using a single strand of floss, work in tight, horizontal rows of long-and-short stitch.
Start with the lightest color at the horizon and methodically introduce darker shades as you move up, blending each new color into the previous row.
This patient technique results in a perfectly smooth, atmospheric gradient that serves as a quiet backdrop for a few simple stars or a delicate moon.
27. Introduce Stumpwork for a 3D Focal Point
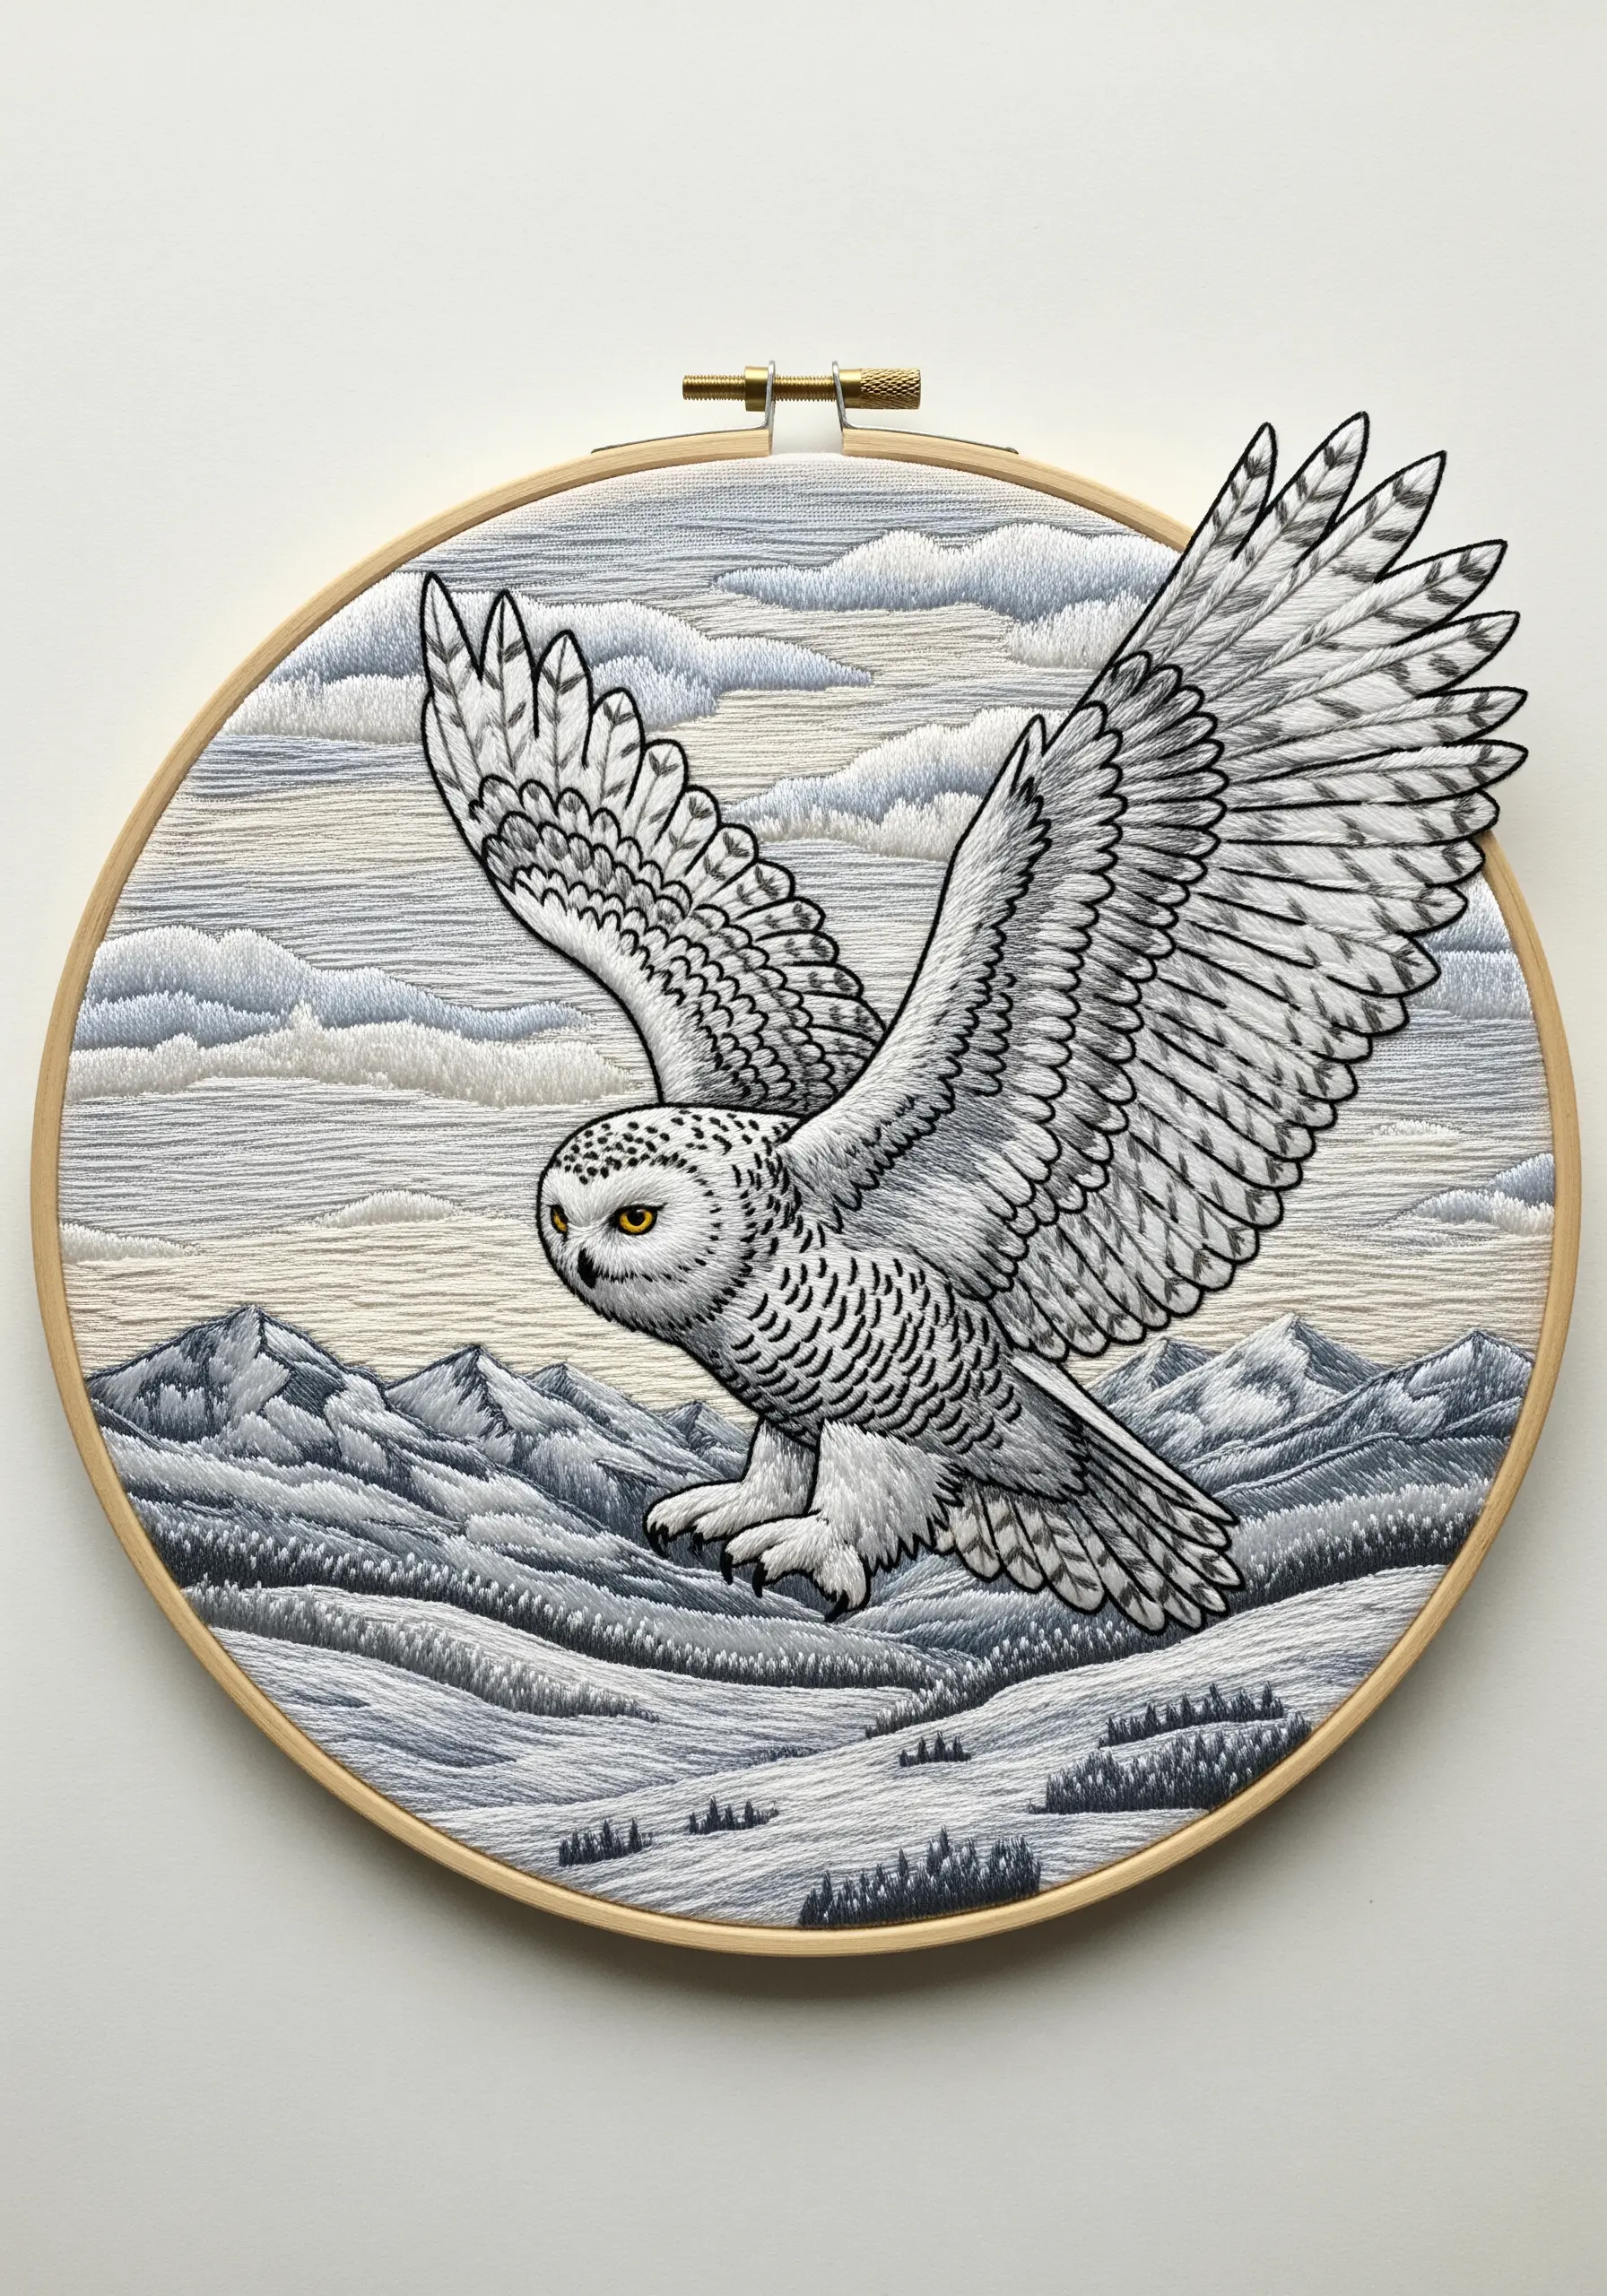
For a truly show-stopping effect, bring an element of your landscape into the third dimension with stumpwork.
Embroider your primary subject, like this owl, on a separate piece of fabric over a thin wire frame.
Once complete, carefully cut it out and stitch it onto your finished landscape background.
You can then gently bend the wired parts, like the wings, away from the background, creating dramatic shadows and a stunning, lifelike appearance.
28. Render Architecture with Precise Backstitching
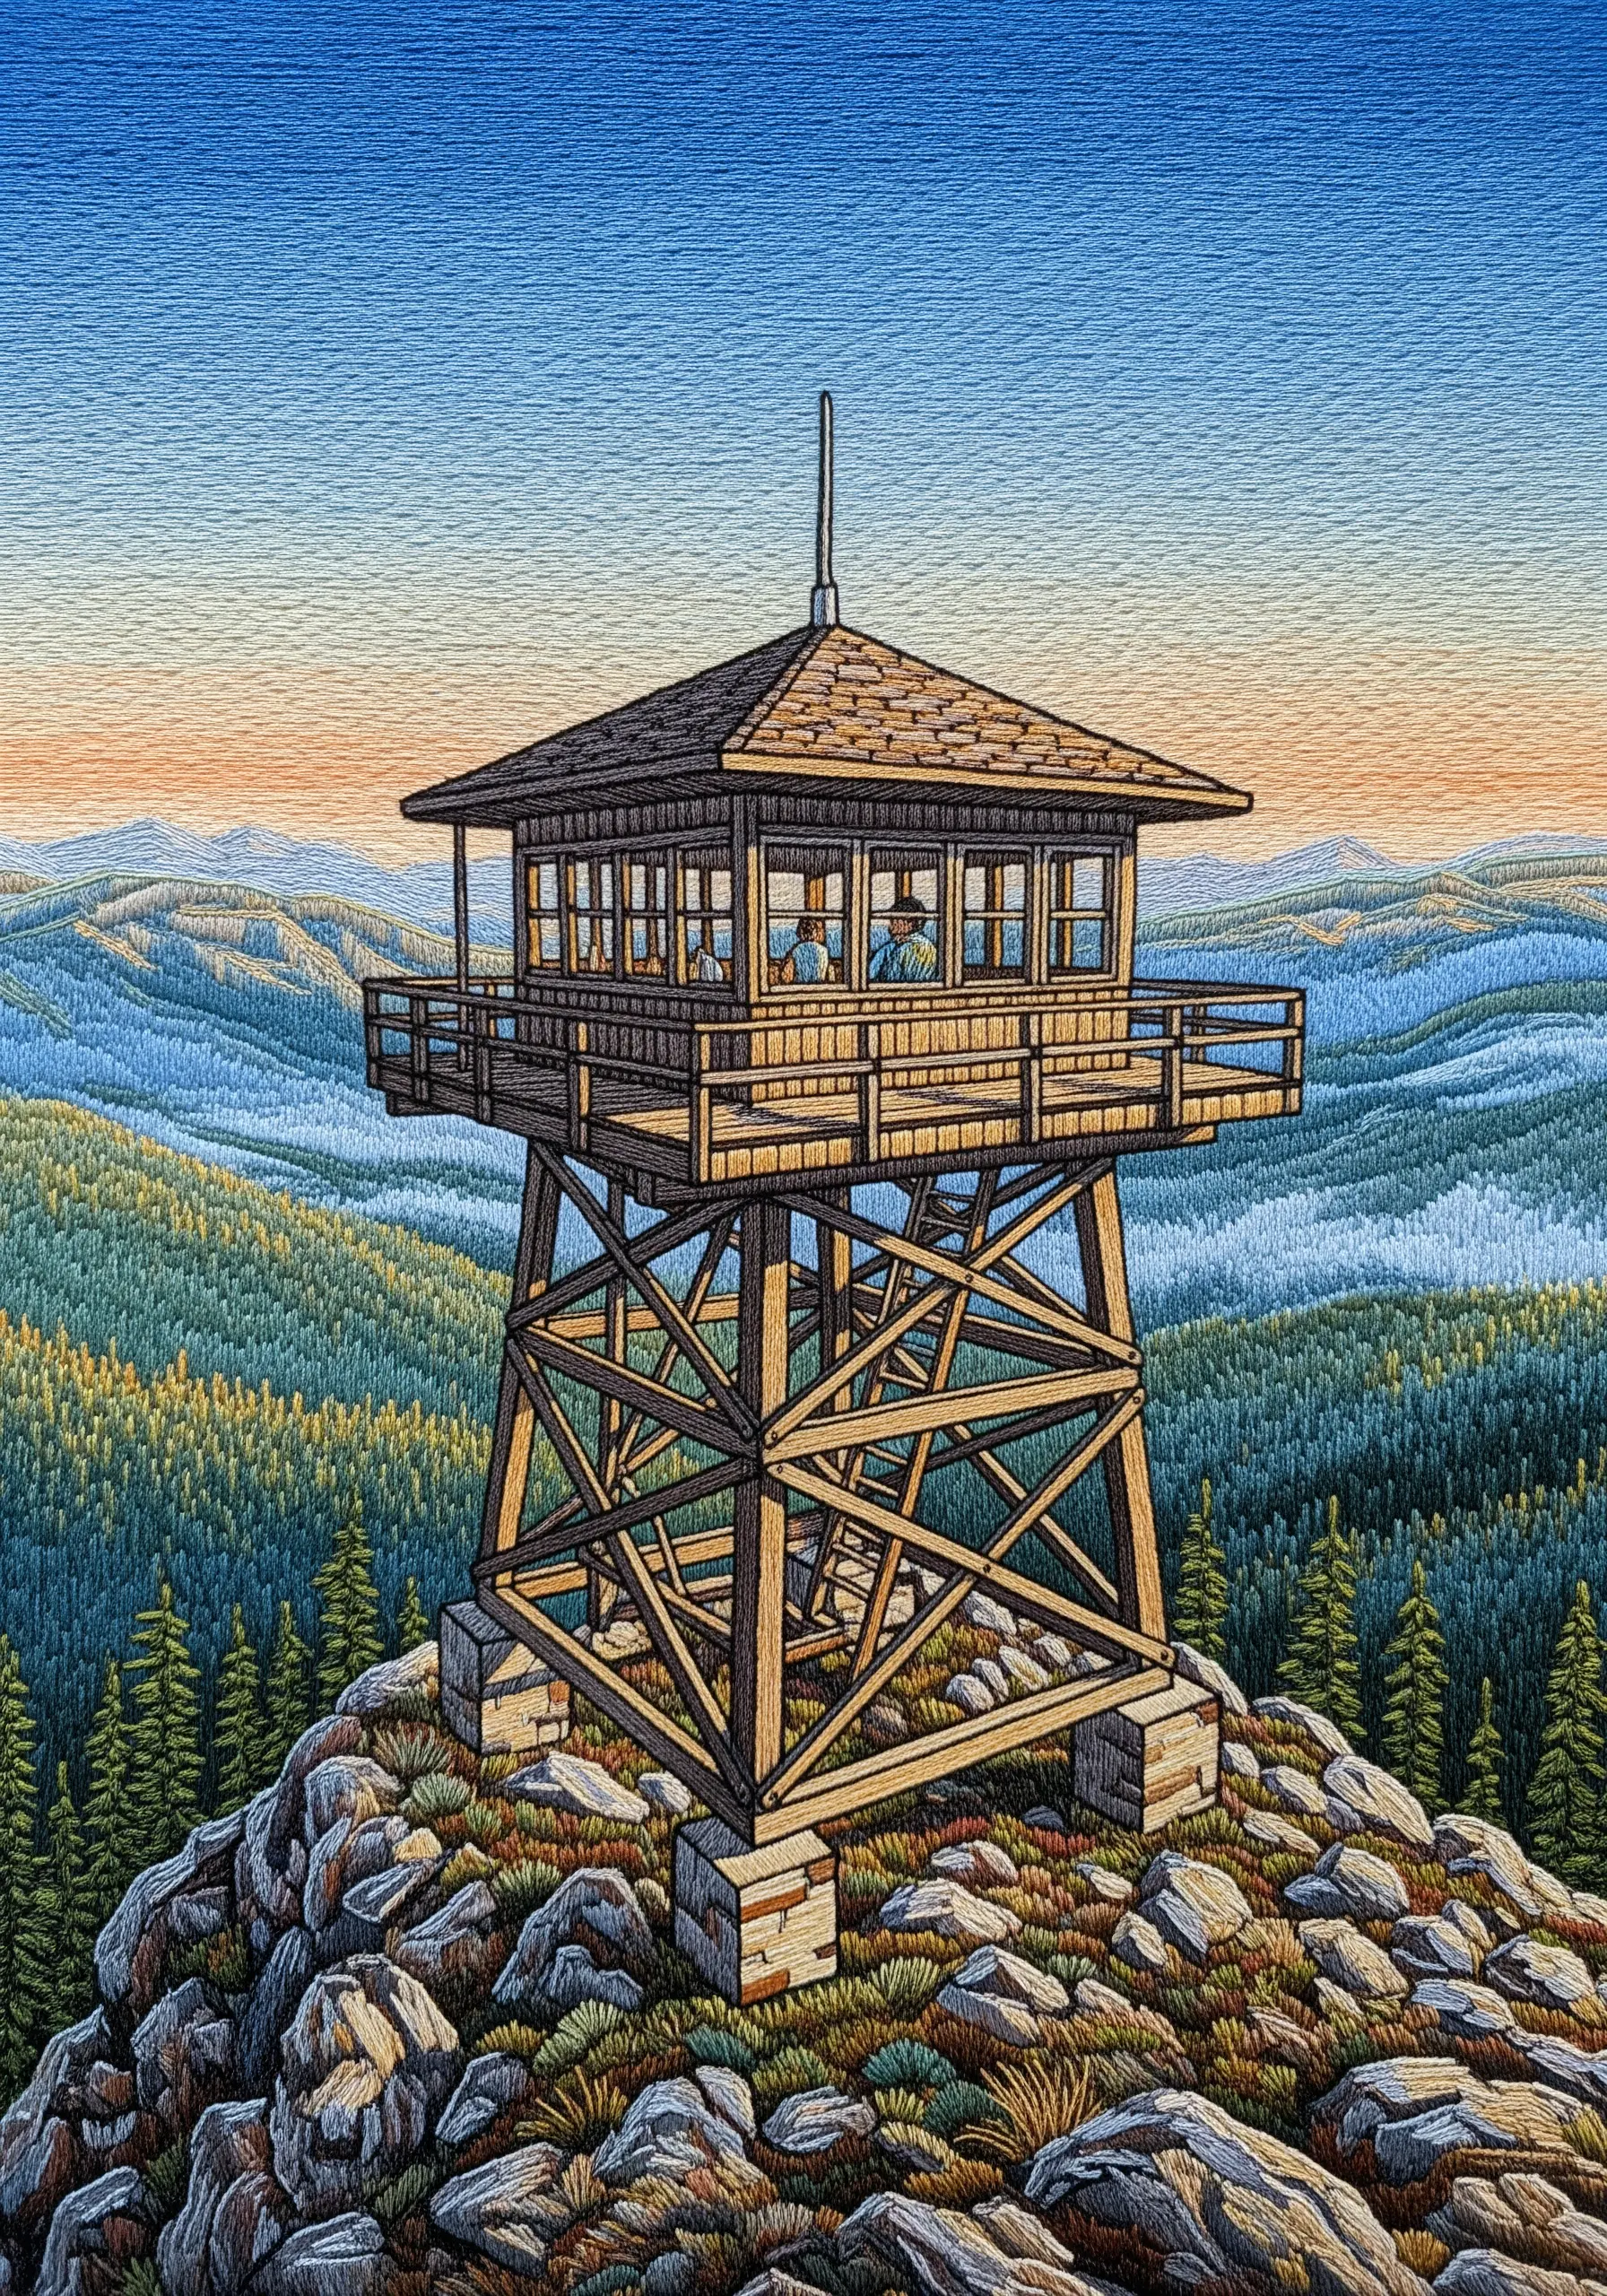
When including man-made structures in a natural landscape, precision is key to making them look realistic.
Use a single strand of dark thread and a meticulous backstitch or split stitch to render all the straight lines and geometric angles of the building.
This creates a sharp, technical look that contrasts effectively with the softer, more organic thread painting of the surrounding hills and sky.
It’s the textural difference that makes both the structure and the scenery stand out.
29. Combine Paint and Thread for Vivid Color

To achieve the intense, saturated colors of a unique landmark like Rainbow Mountain, use fabric paint as your base.
Lightly paint the characteristic stripes onto your fabric with watercolors or thinned acrylics and let it dry completely.
Then, stitch over the painted areas using long, directional satin stitches in matching thread colors.
The paint provides a vibrant foundation, while the thread adds texture, sheen, and dimension, creating a result that is richer than either medium could achieve alone.
30. Achieve Crisp Lettering on a Textured Surface
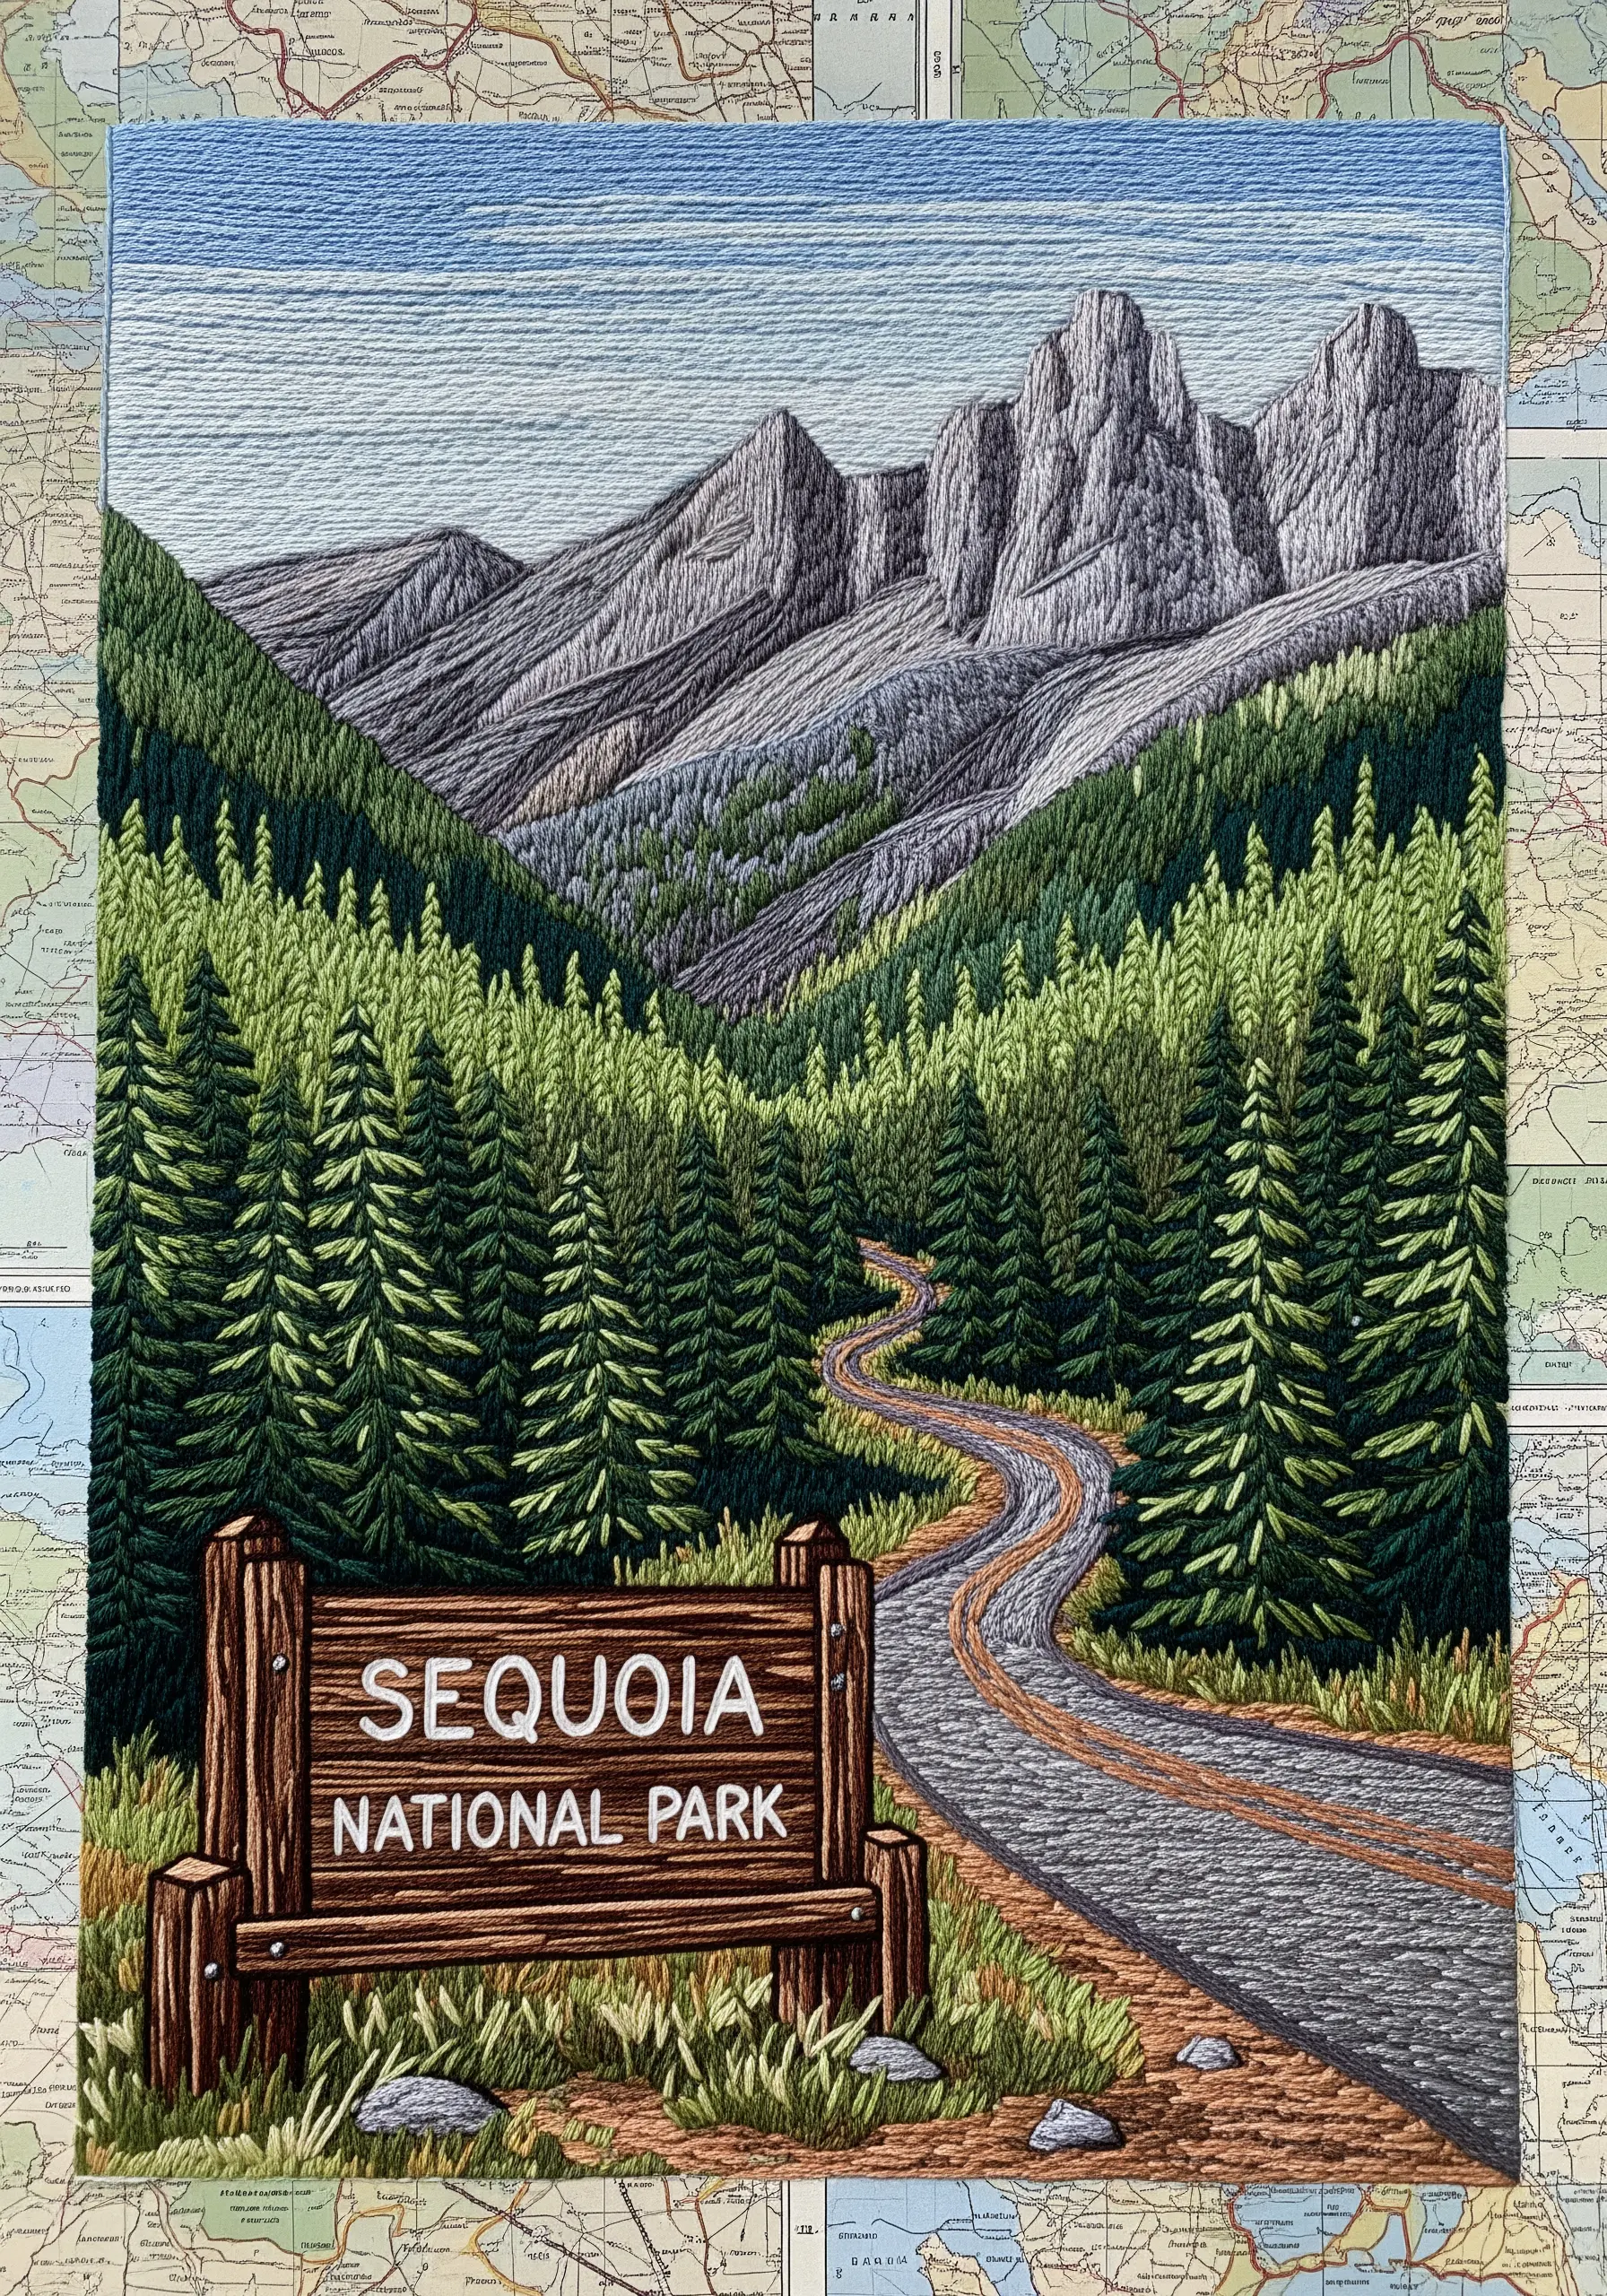
Integrating text into a landscape requires a steady hand and the right technique to keep it legible.
To create the wood grain texture of the sign, use vertical satin stitches in several shades of brown.
For the letters, switch to a tiny, precise backstitch using only one or two strands of a high-contrast thread.
Stitching the letters carefully on top of the textured background ensures they remain sharp and readable, adding a personal or place-specific detail to your scene.
31. Carve Rock Formations with Light and Shadow
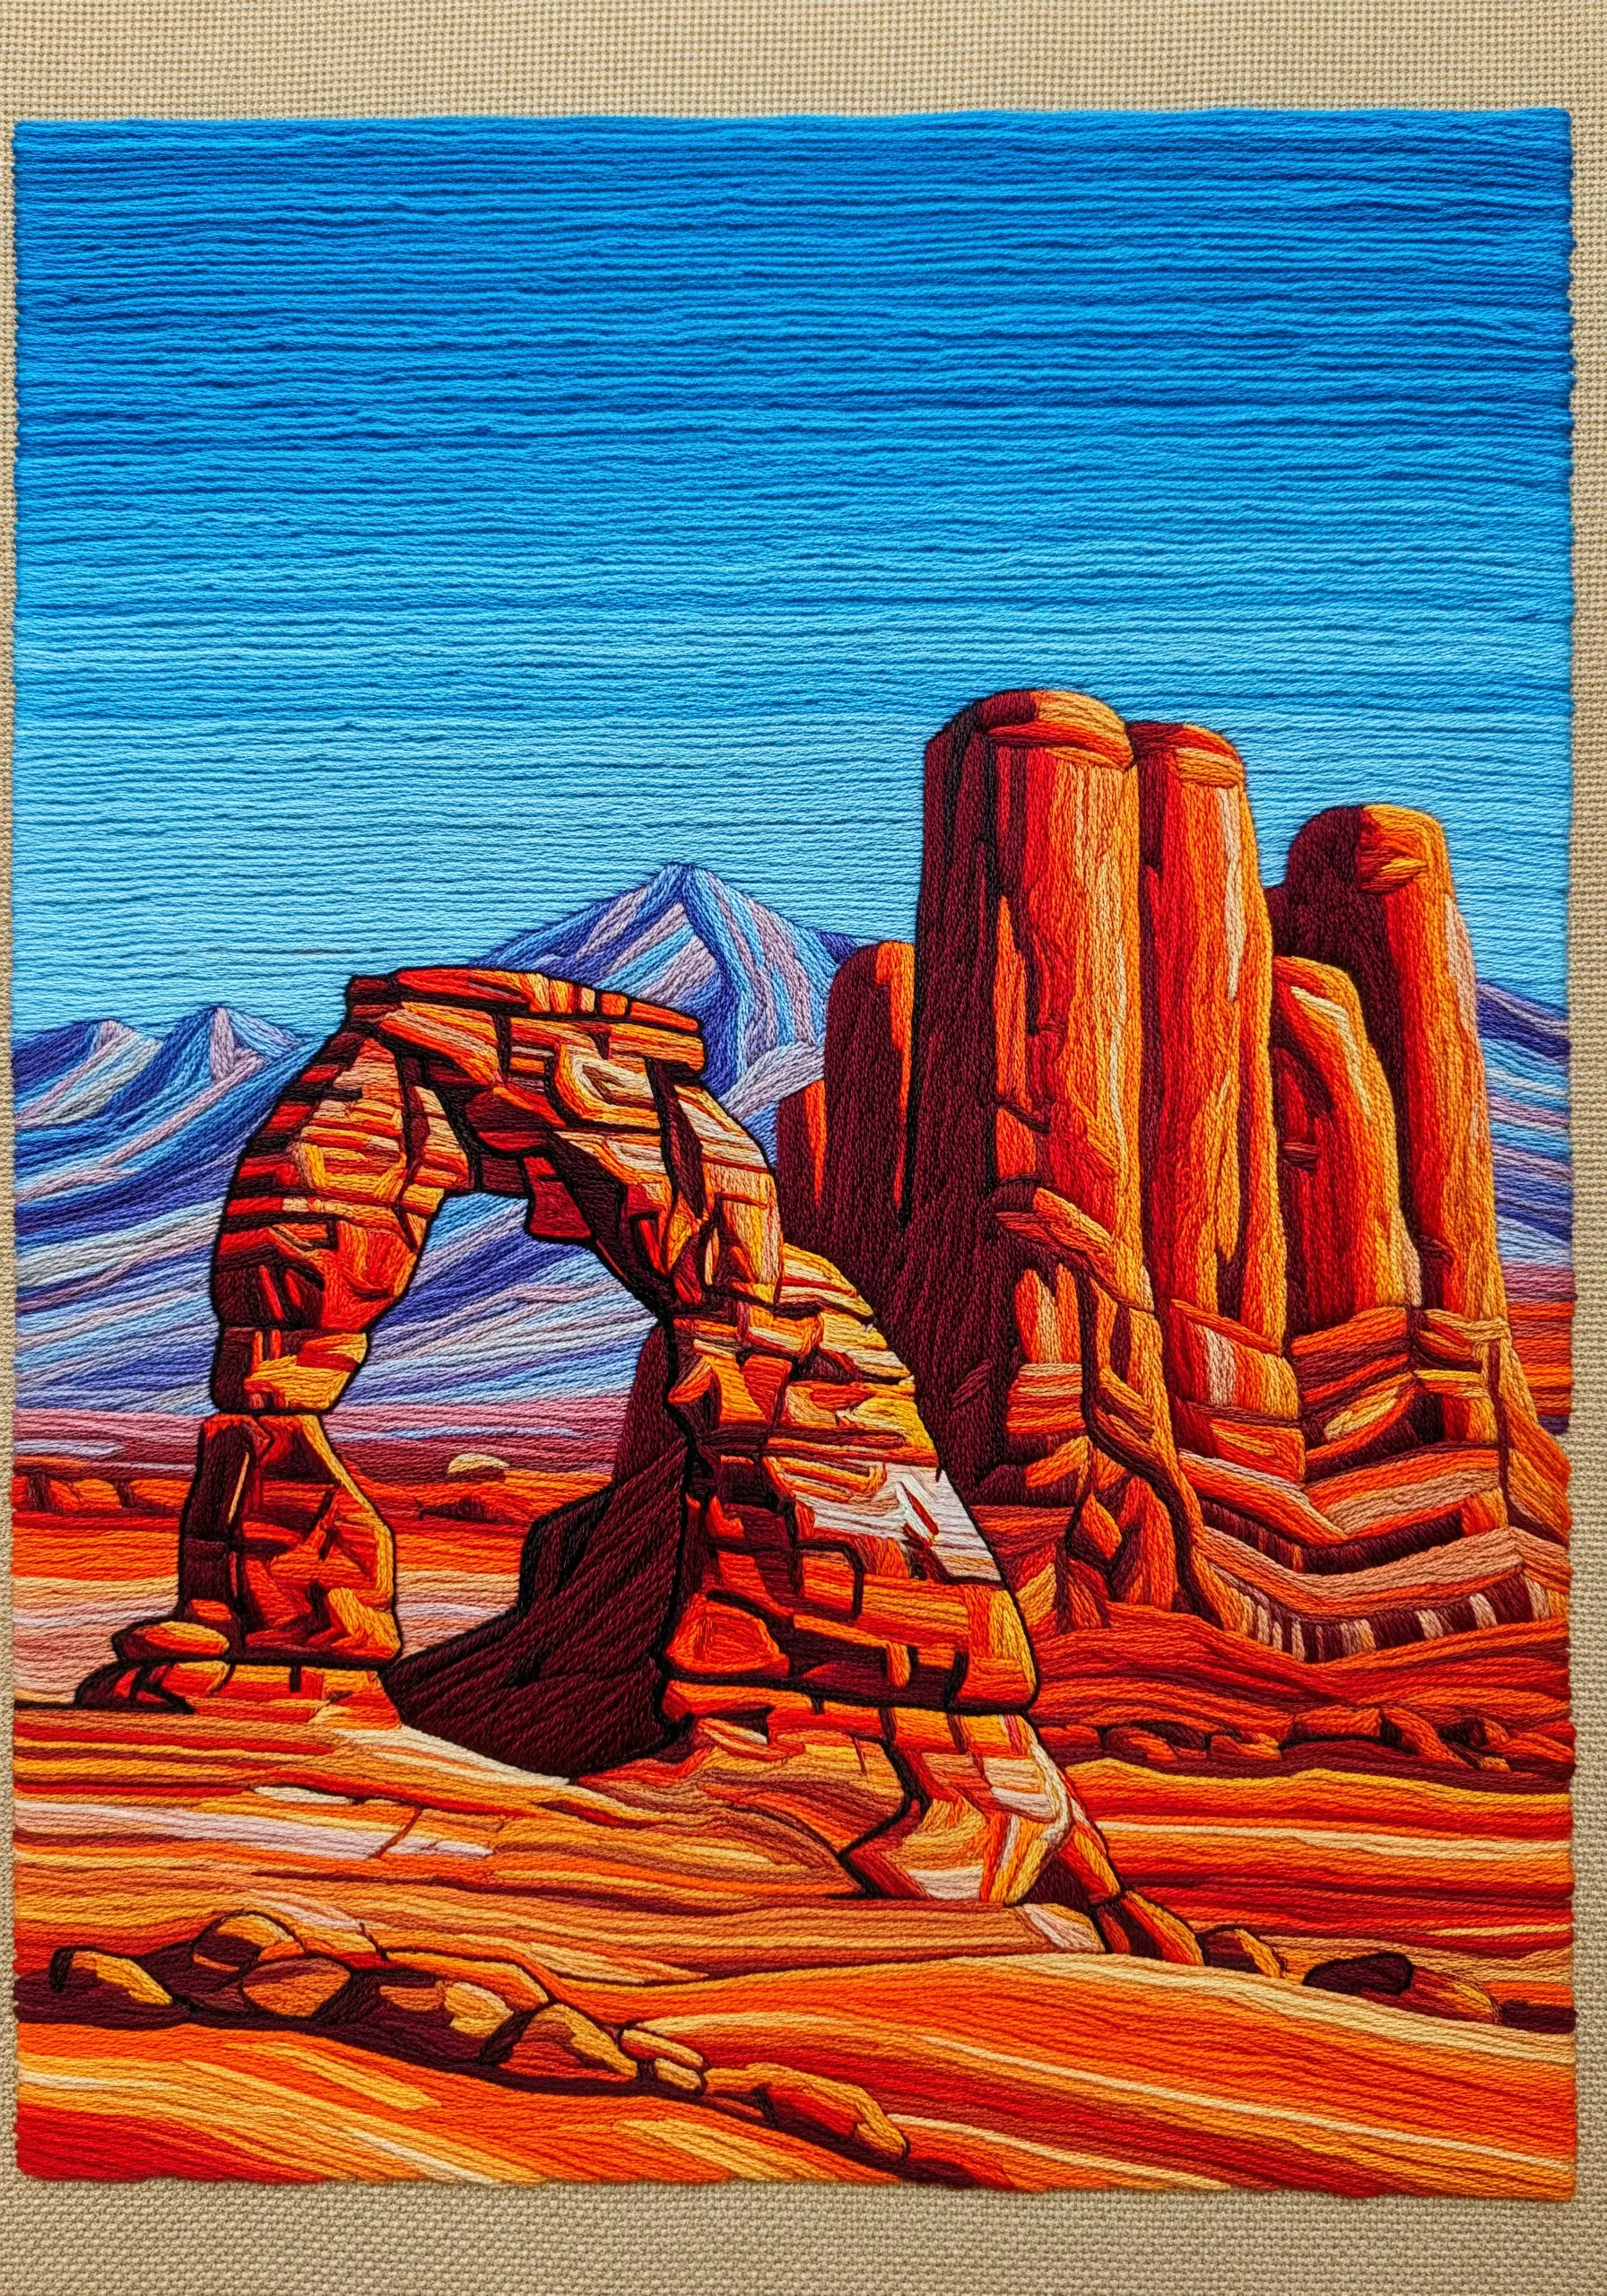
To give rock formations like these arches a solid, three-dimensional form, you must become a student of light.
Use bold, high-contrast colors to define areas of bright sunlight and deep shadow.
Place warm oranges and yellows where the sun would hit directly, and use deep reds, purples, and blues for the shadowed planes.
The direction of your stitches should wrap around the form of the rock, further enhancing its volume and weight.
32. Divide Your Hoop to Capture the Four Seasons
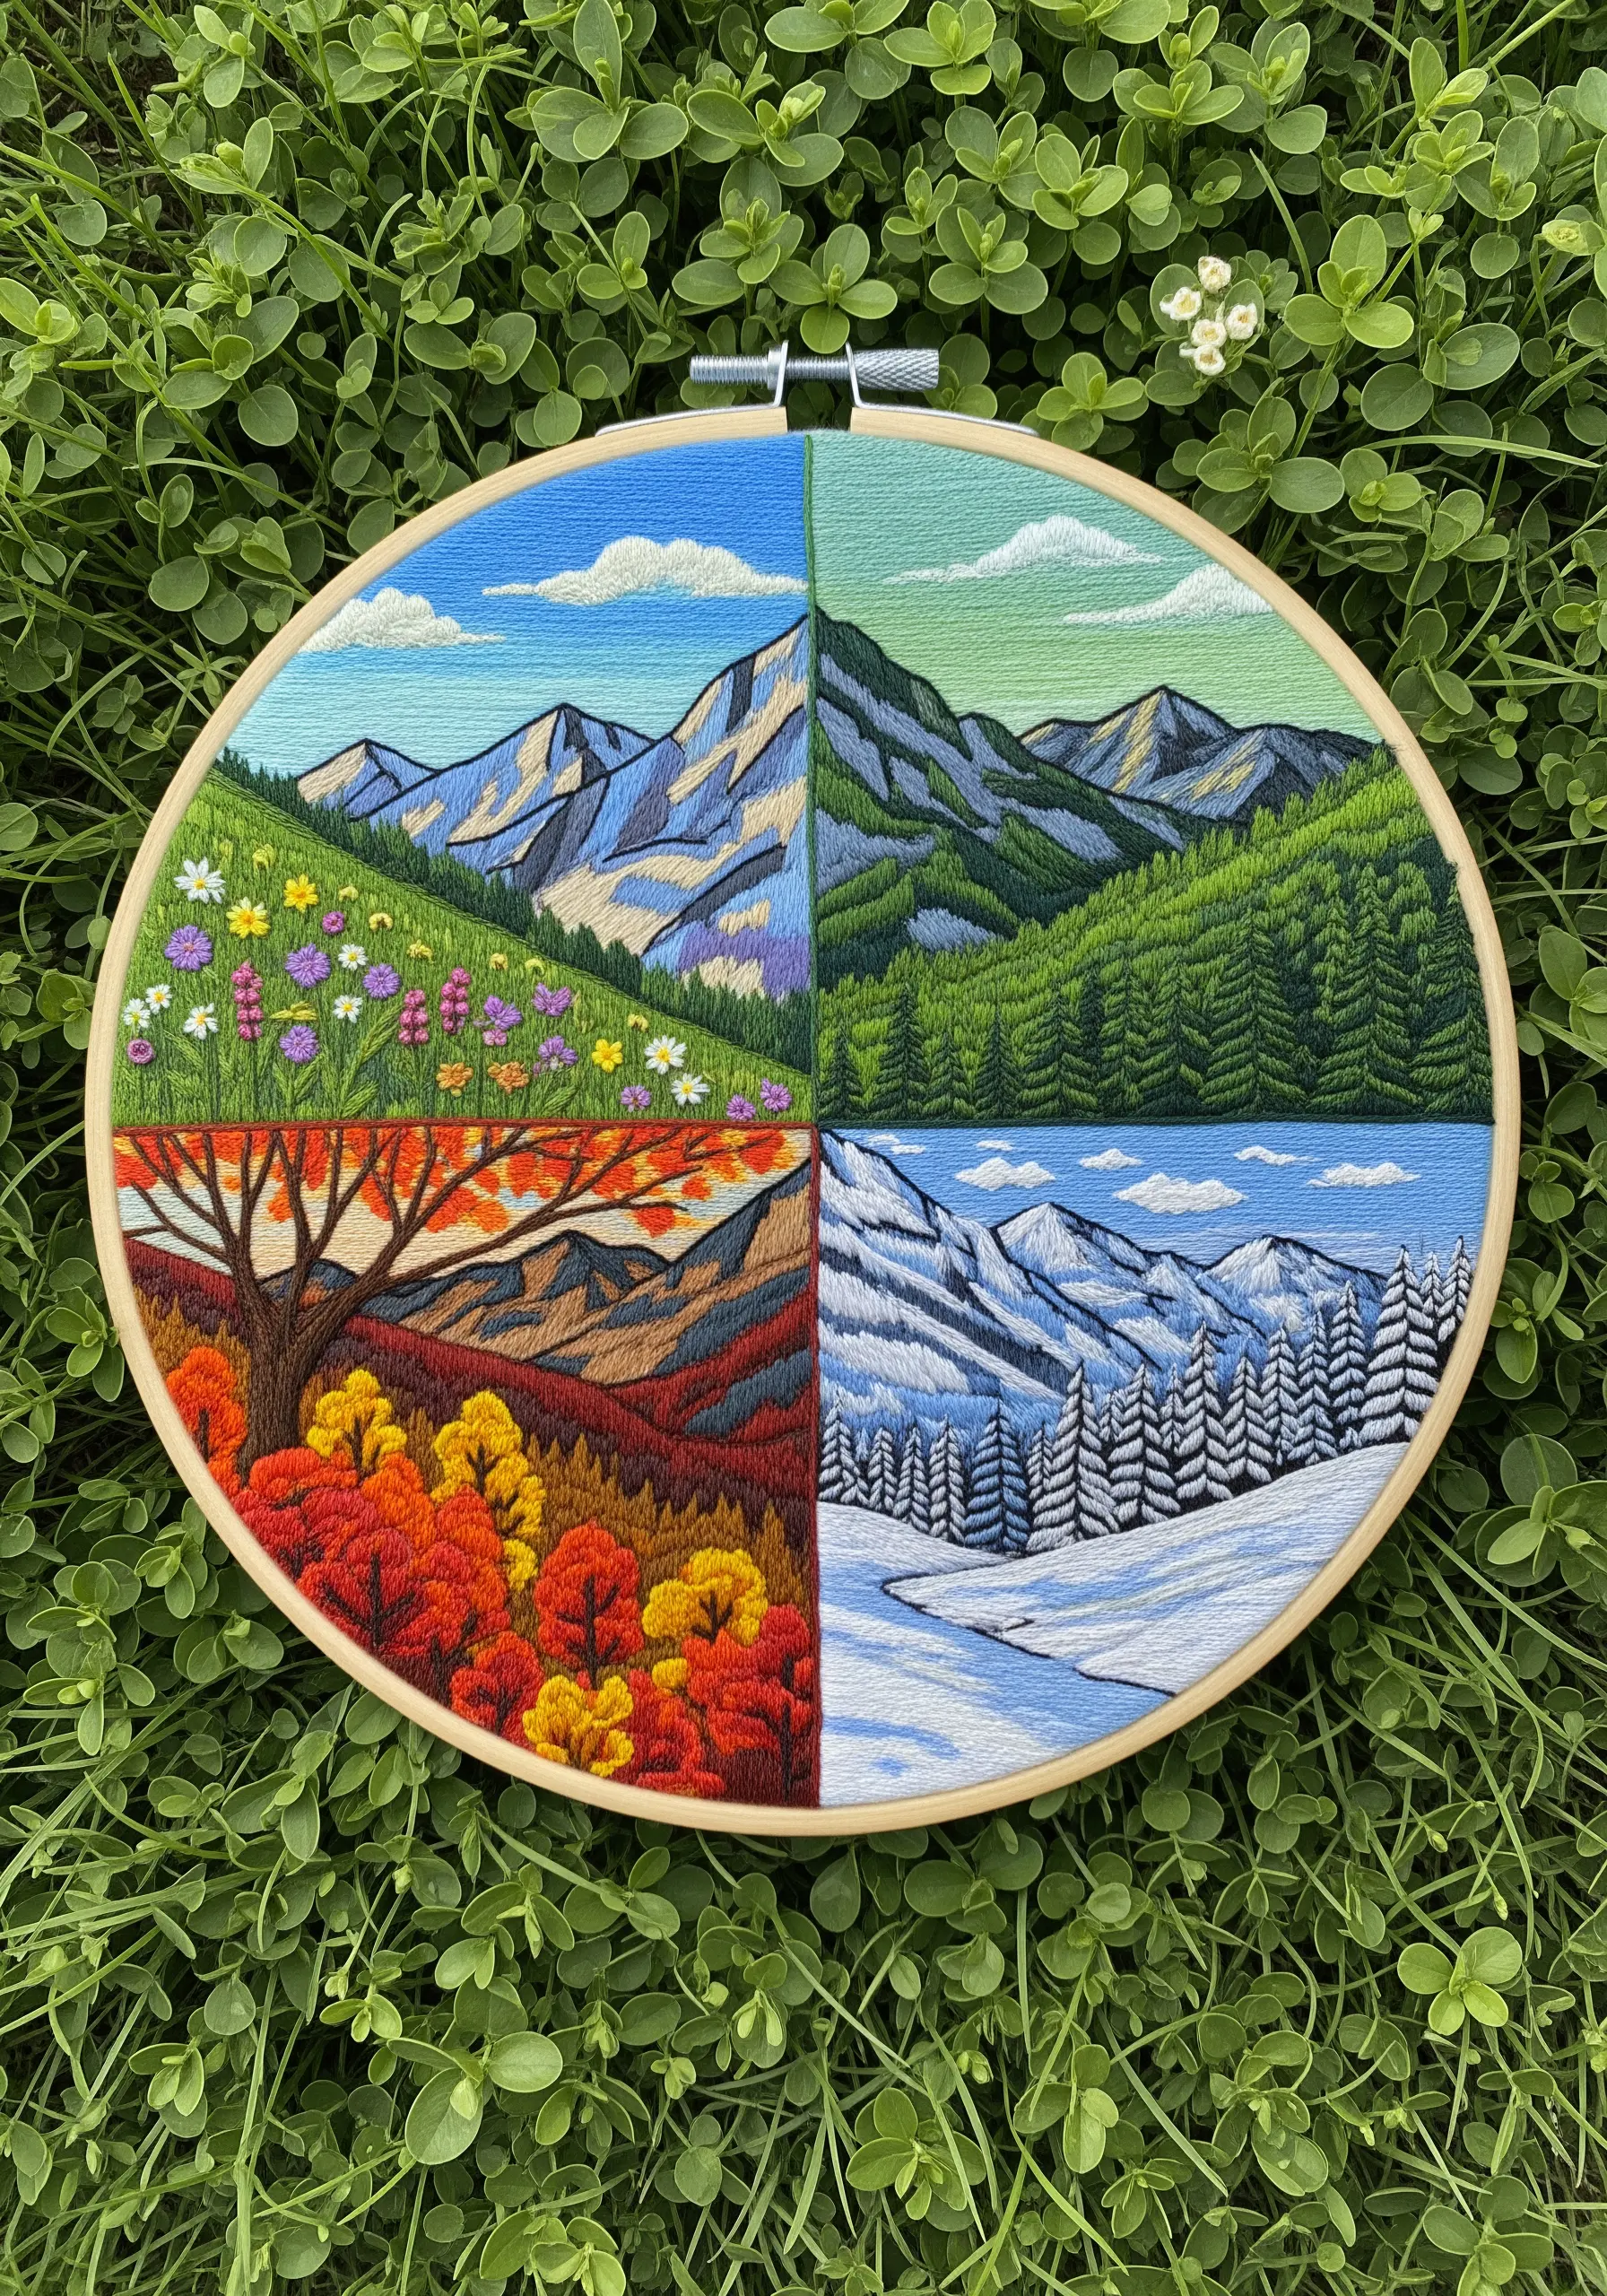
Tell the story of a year in one place by dividing your hoop into four distinct seasonal quadrants.
This compositional technique challenges you to create four mini-landscapes that are unique yet cohesive.
Assign a specific color palette and set of textures to each section: bright florals for spring, lush greens for summer, warm oranges for fall, and cool blues for winter.
A simple stitched line can divide the sections, resulting in a beautiful and comprehensive piece of embroidered wall art.


