
The secret to embroidery that truly captivates isn’t just about mastering a stitch; it’s about learning to see and translate the textures of the world around you. It’s about understanding why moss feels soft, why bark feels rough, and why water distorts light—and then choosing the right thread, stitch, and technique to evoke that feeling.
This isn’t about creating perfect replicas of nature. It’s about borrowing its language. By varying your thread weight, layering stitches, or even incorporating unconventional materials, you can add a tangible depth that draws the viewer in and transforms your work from a flat image into a living surface.
Here, we will explore ways to build these authentic, natural textures. You’ll find techniques that add immediate dimension and professional polish to your work, allowing you to create pieces that are not only beautiful to look at, but rich with feeling and story.
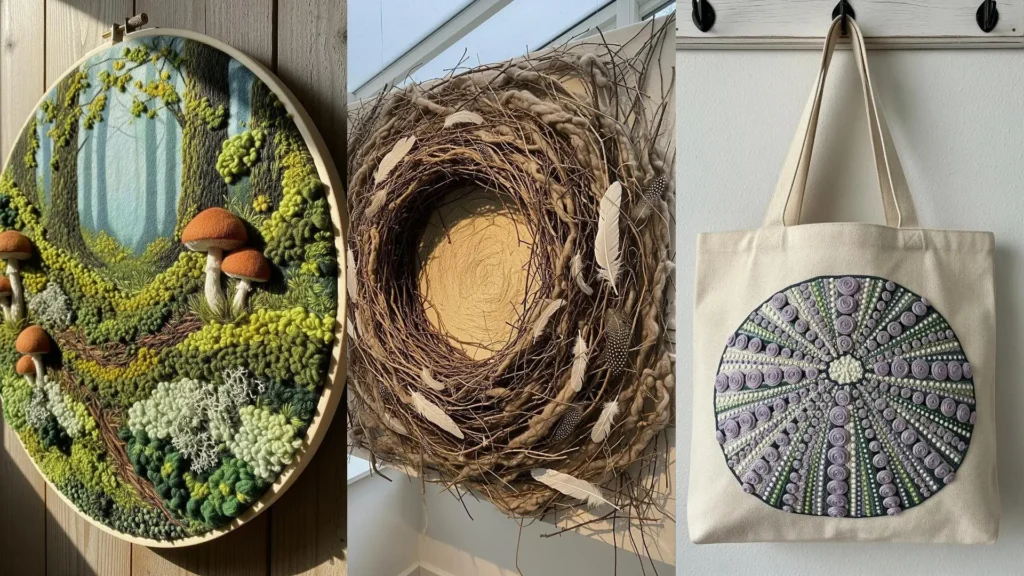
1. Layer French Knots for Mossy Depth
Create a lush, three-dimensional forest floor by densely clustering French knots in varying shades of green, olive, and ochre.
Use a thicker, matte cotton floss for the knots closest to the viewer and a finer, single-strand silk for those in the background to create atmospheric perspective.
Overlap the color sections slightly and vary the number of wraps on your needle (one, two, or three) to alter the size of each knot, mimicking the organic irregularity of real moss.
This technique turns a flat surface into a tactile landscape you can almost feel.
2. Couch Raw Fibers to Illustrate Terrain
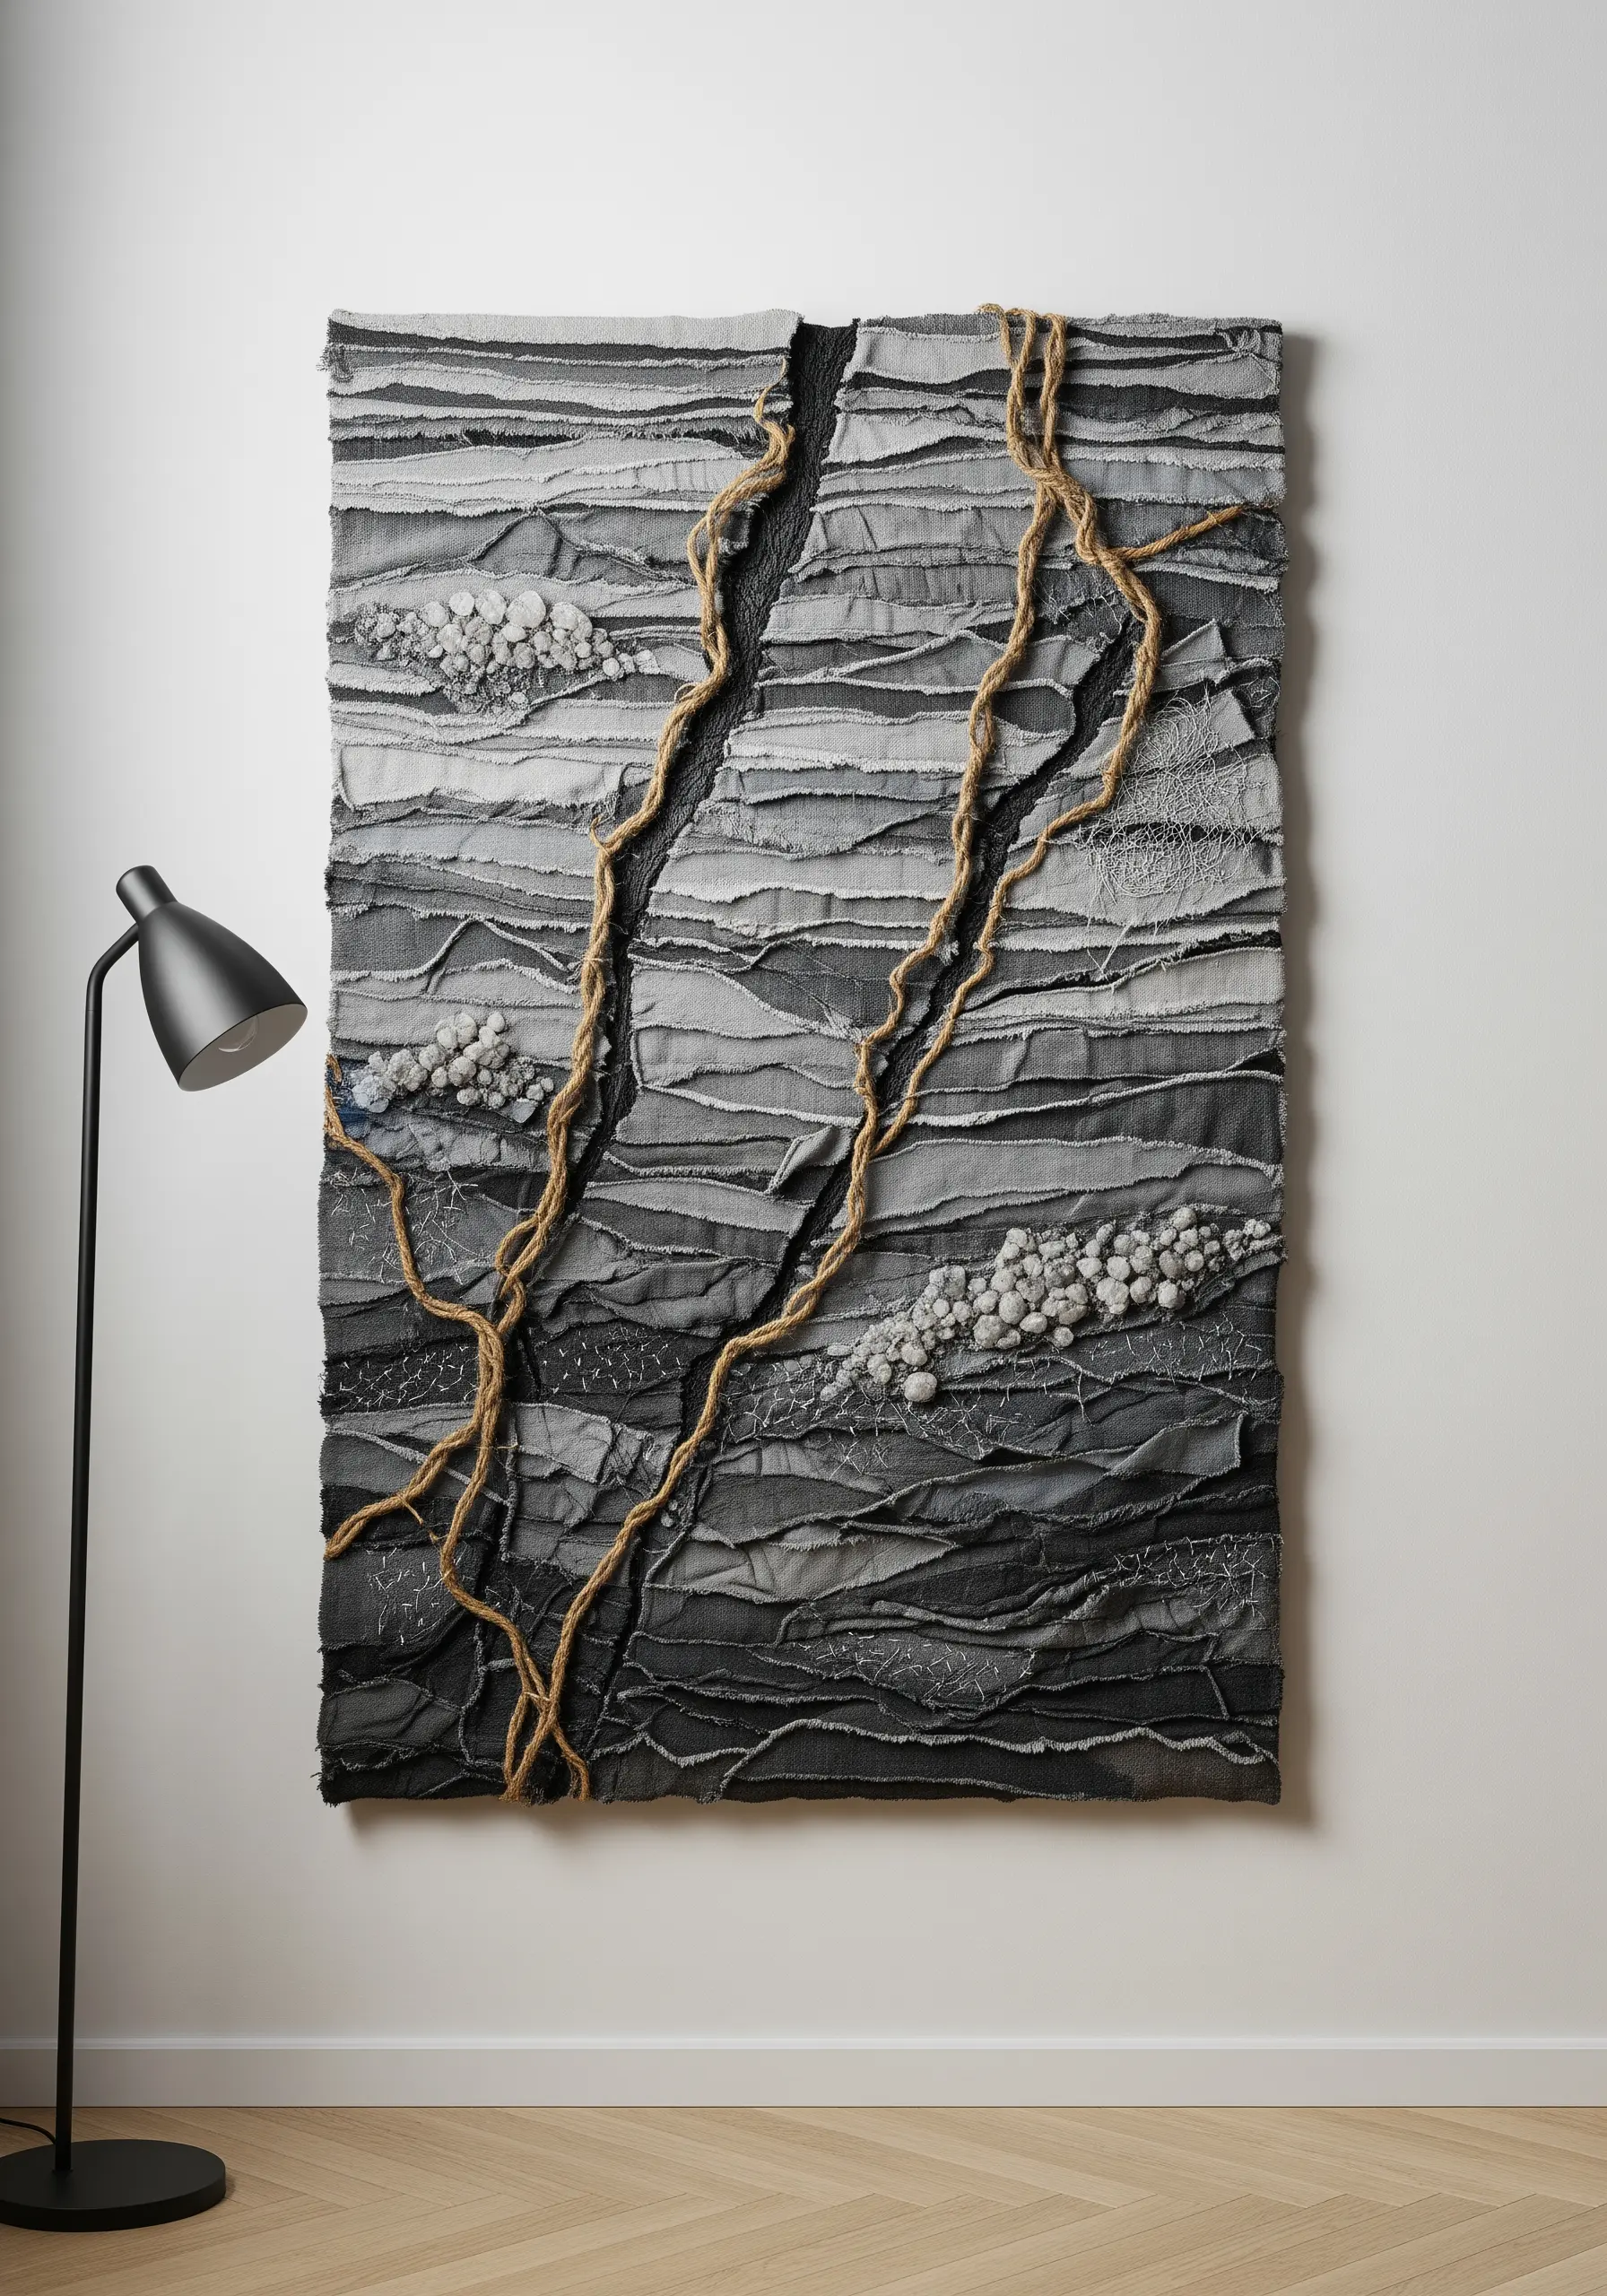
To capture the raw texture of a geological fault line or river canyon, couch thick, natural fibers like jute rope or unspun wool onto your fabric.
Lay the rope along your design line and use a thinner, matching thread to tack it down with small, evenly spaced couching stitches.
Contrast this bold element by layering torn strips of fabric with frayed edges in the background, suggesting stratified rock.
This approach adds sculptural weight and a powerful narrative element to embroidered textile wall hangings.
3. Sculpt with Stumpwork for Lifelike Forms
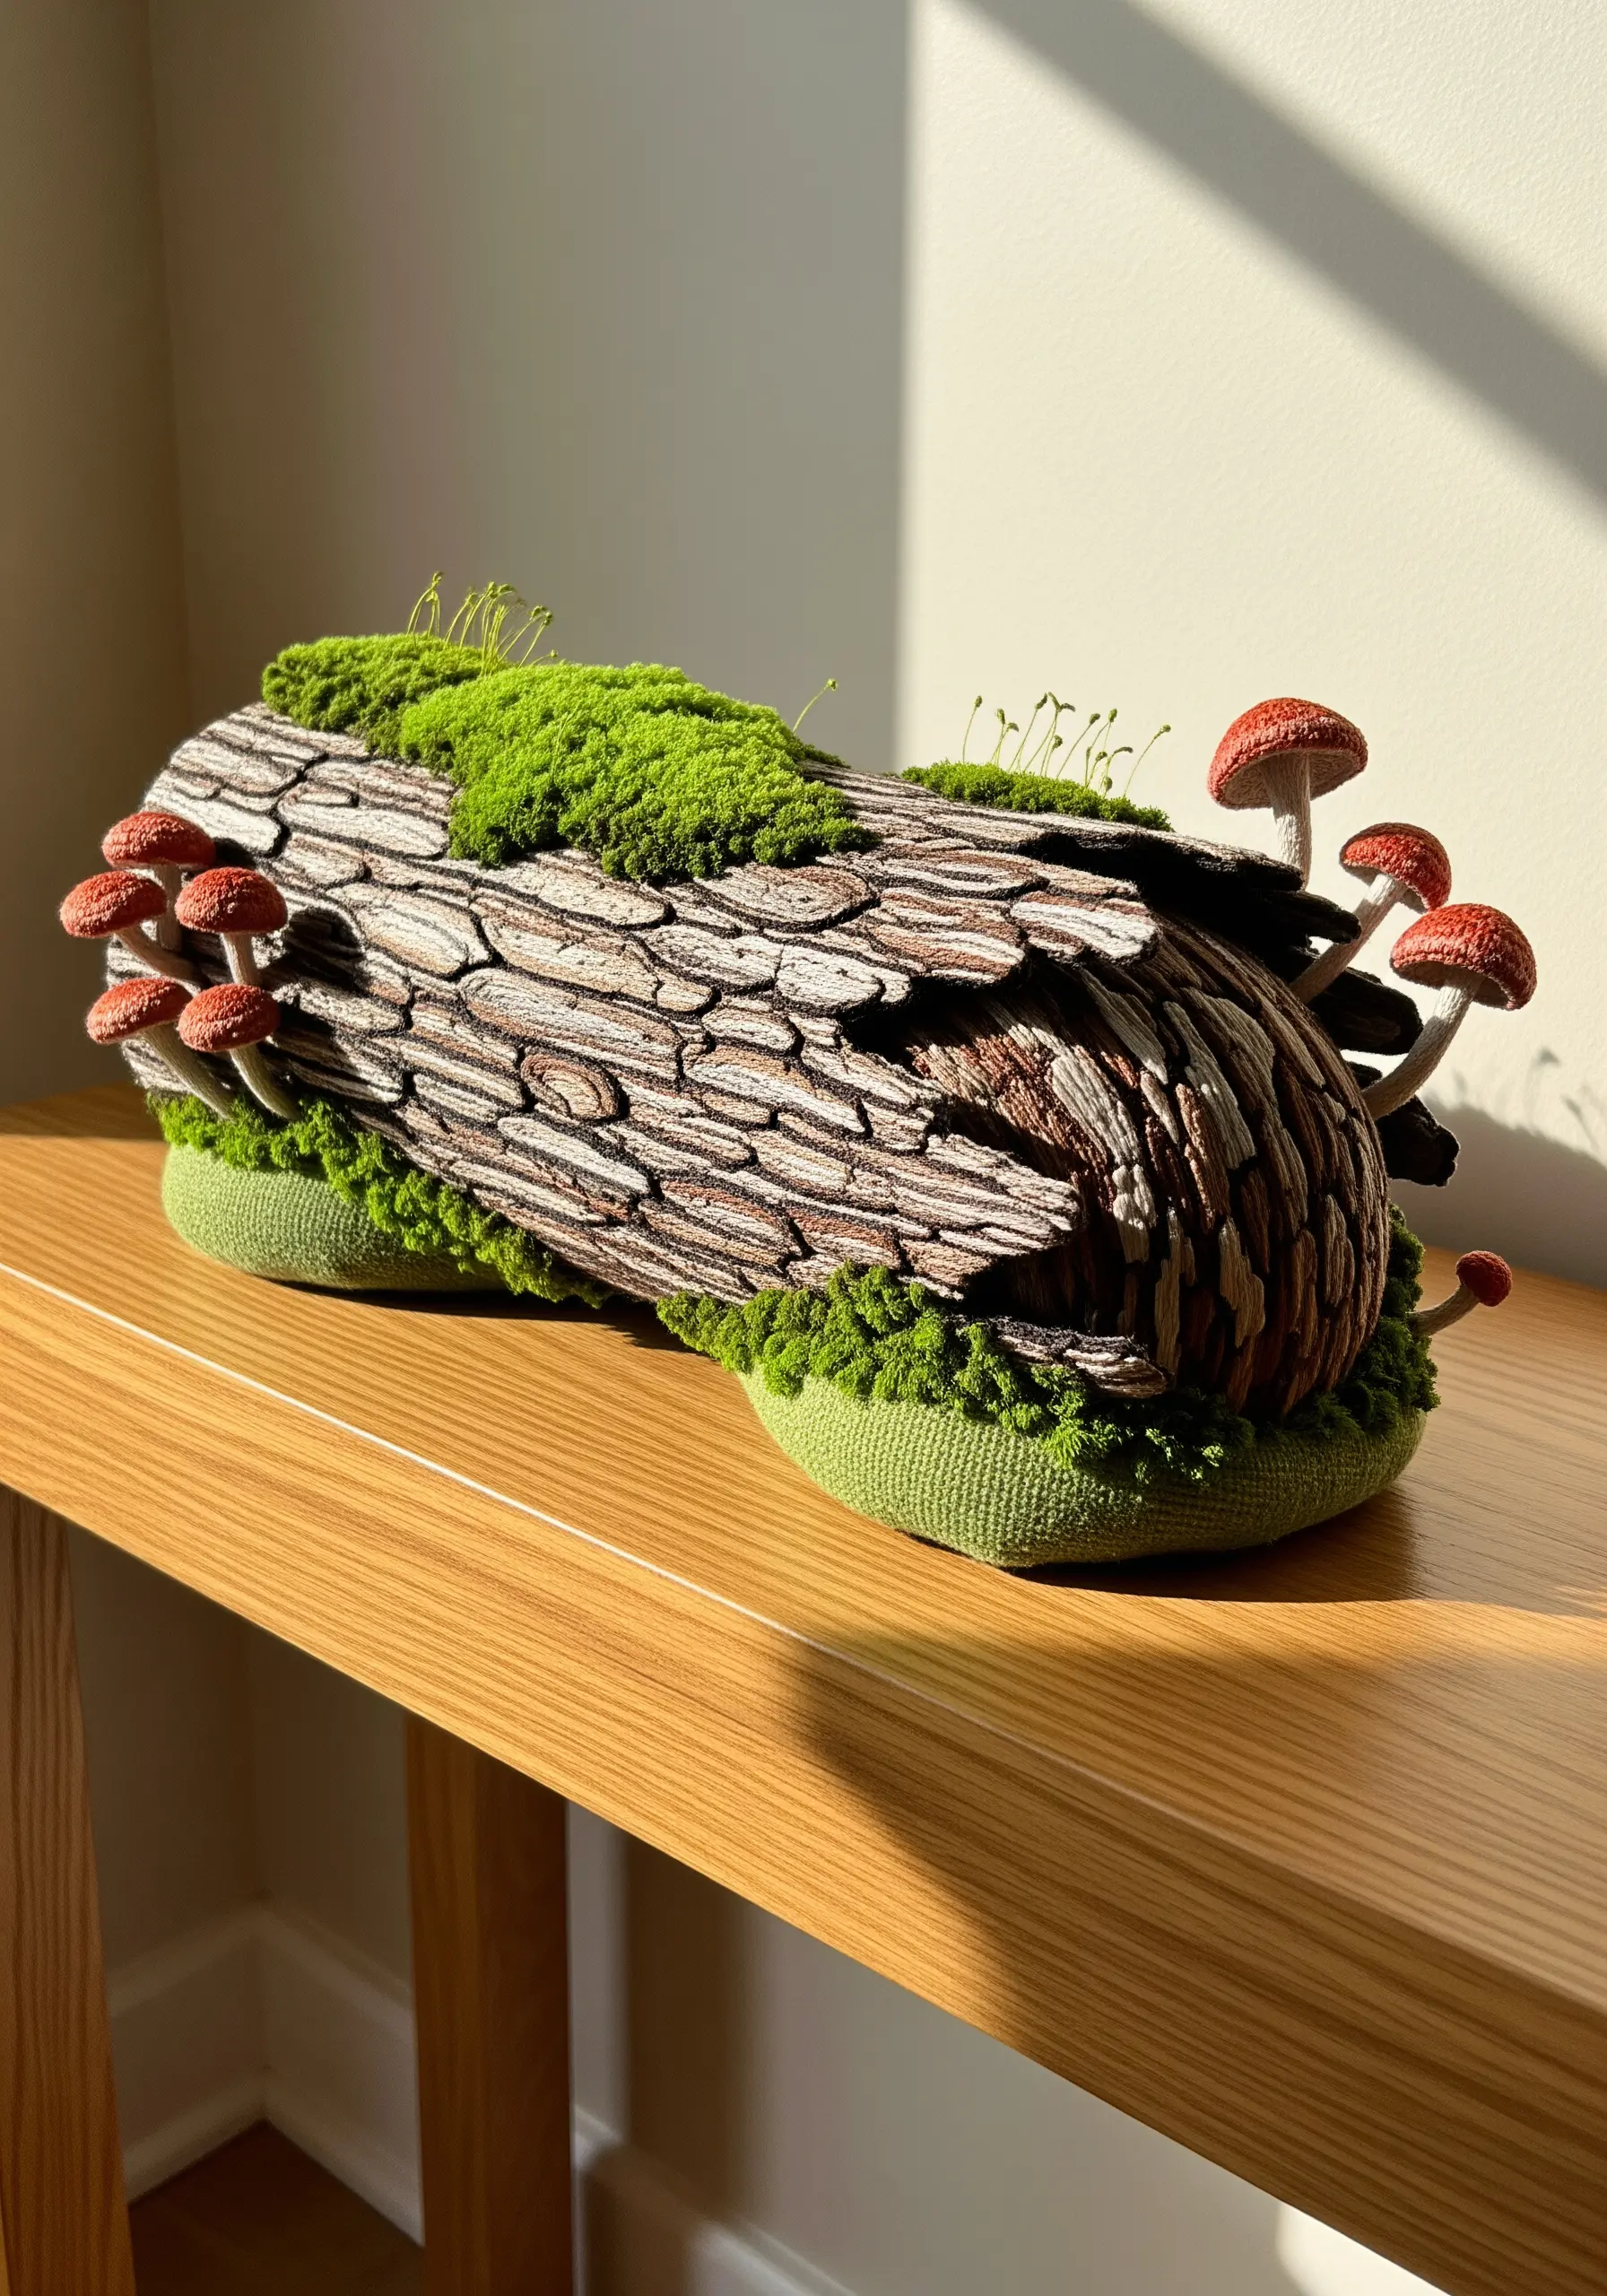
Move beyond the flat plane of the hoop by creating fully three-dimensional elements using stumpwork.
To form a mushroom cap, create a wire outline, cover it with buttonhole stitches, and then fill the shape with long-and-short stitches over a layer of felt padding.
For the bark texture, use long, vertical straight stitches in variegated brown thread, layering them unevenly to mimic natural wood grain.
This method transforms your embroidery into a sculptural object that interacts with light and shadow in a realistic way.
4. Imply Water with Sheer Fabric Overlays

Create the illusion of looking through water by layering a piece of sheer organza or tulle over your stitched elements.
First, embroider the riverbed using padded satin stitch for smooth stones and straight stitches for aquatic plants.
Then, stretch the organza over the top and secure it in the hoop, adding a few subtle, wavy lines of backstitch to represent ripples on the surface.
The translucent fabric softens the details underneath, perfectly mimicking the distorting effect of water.
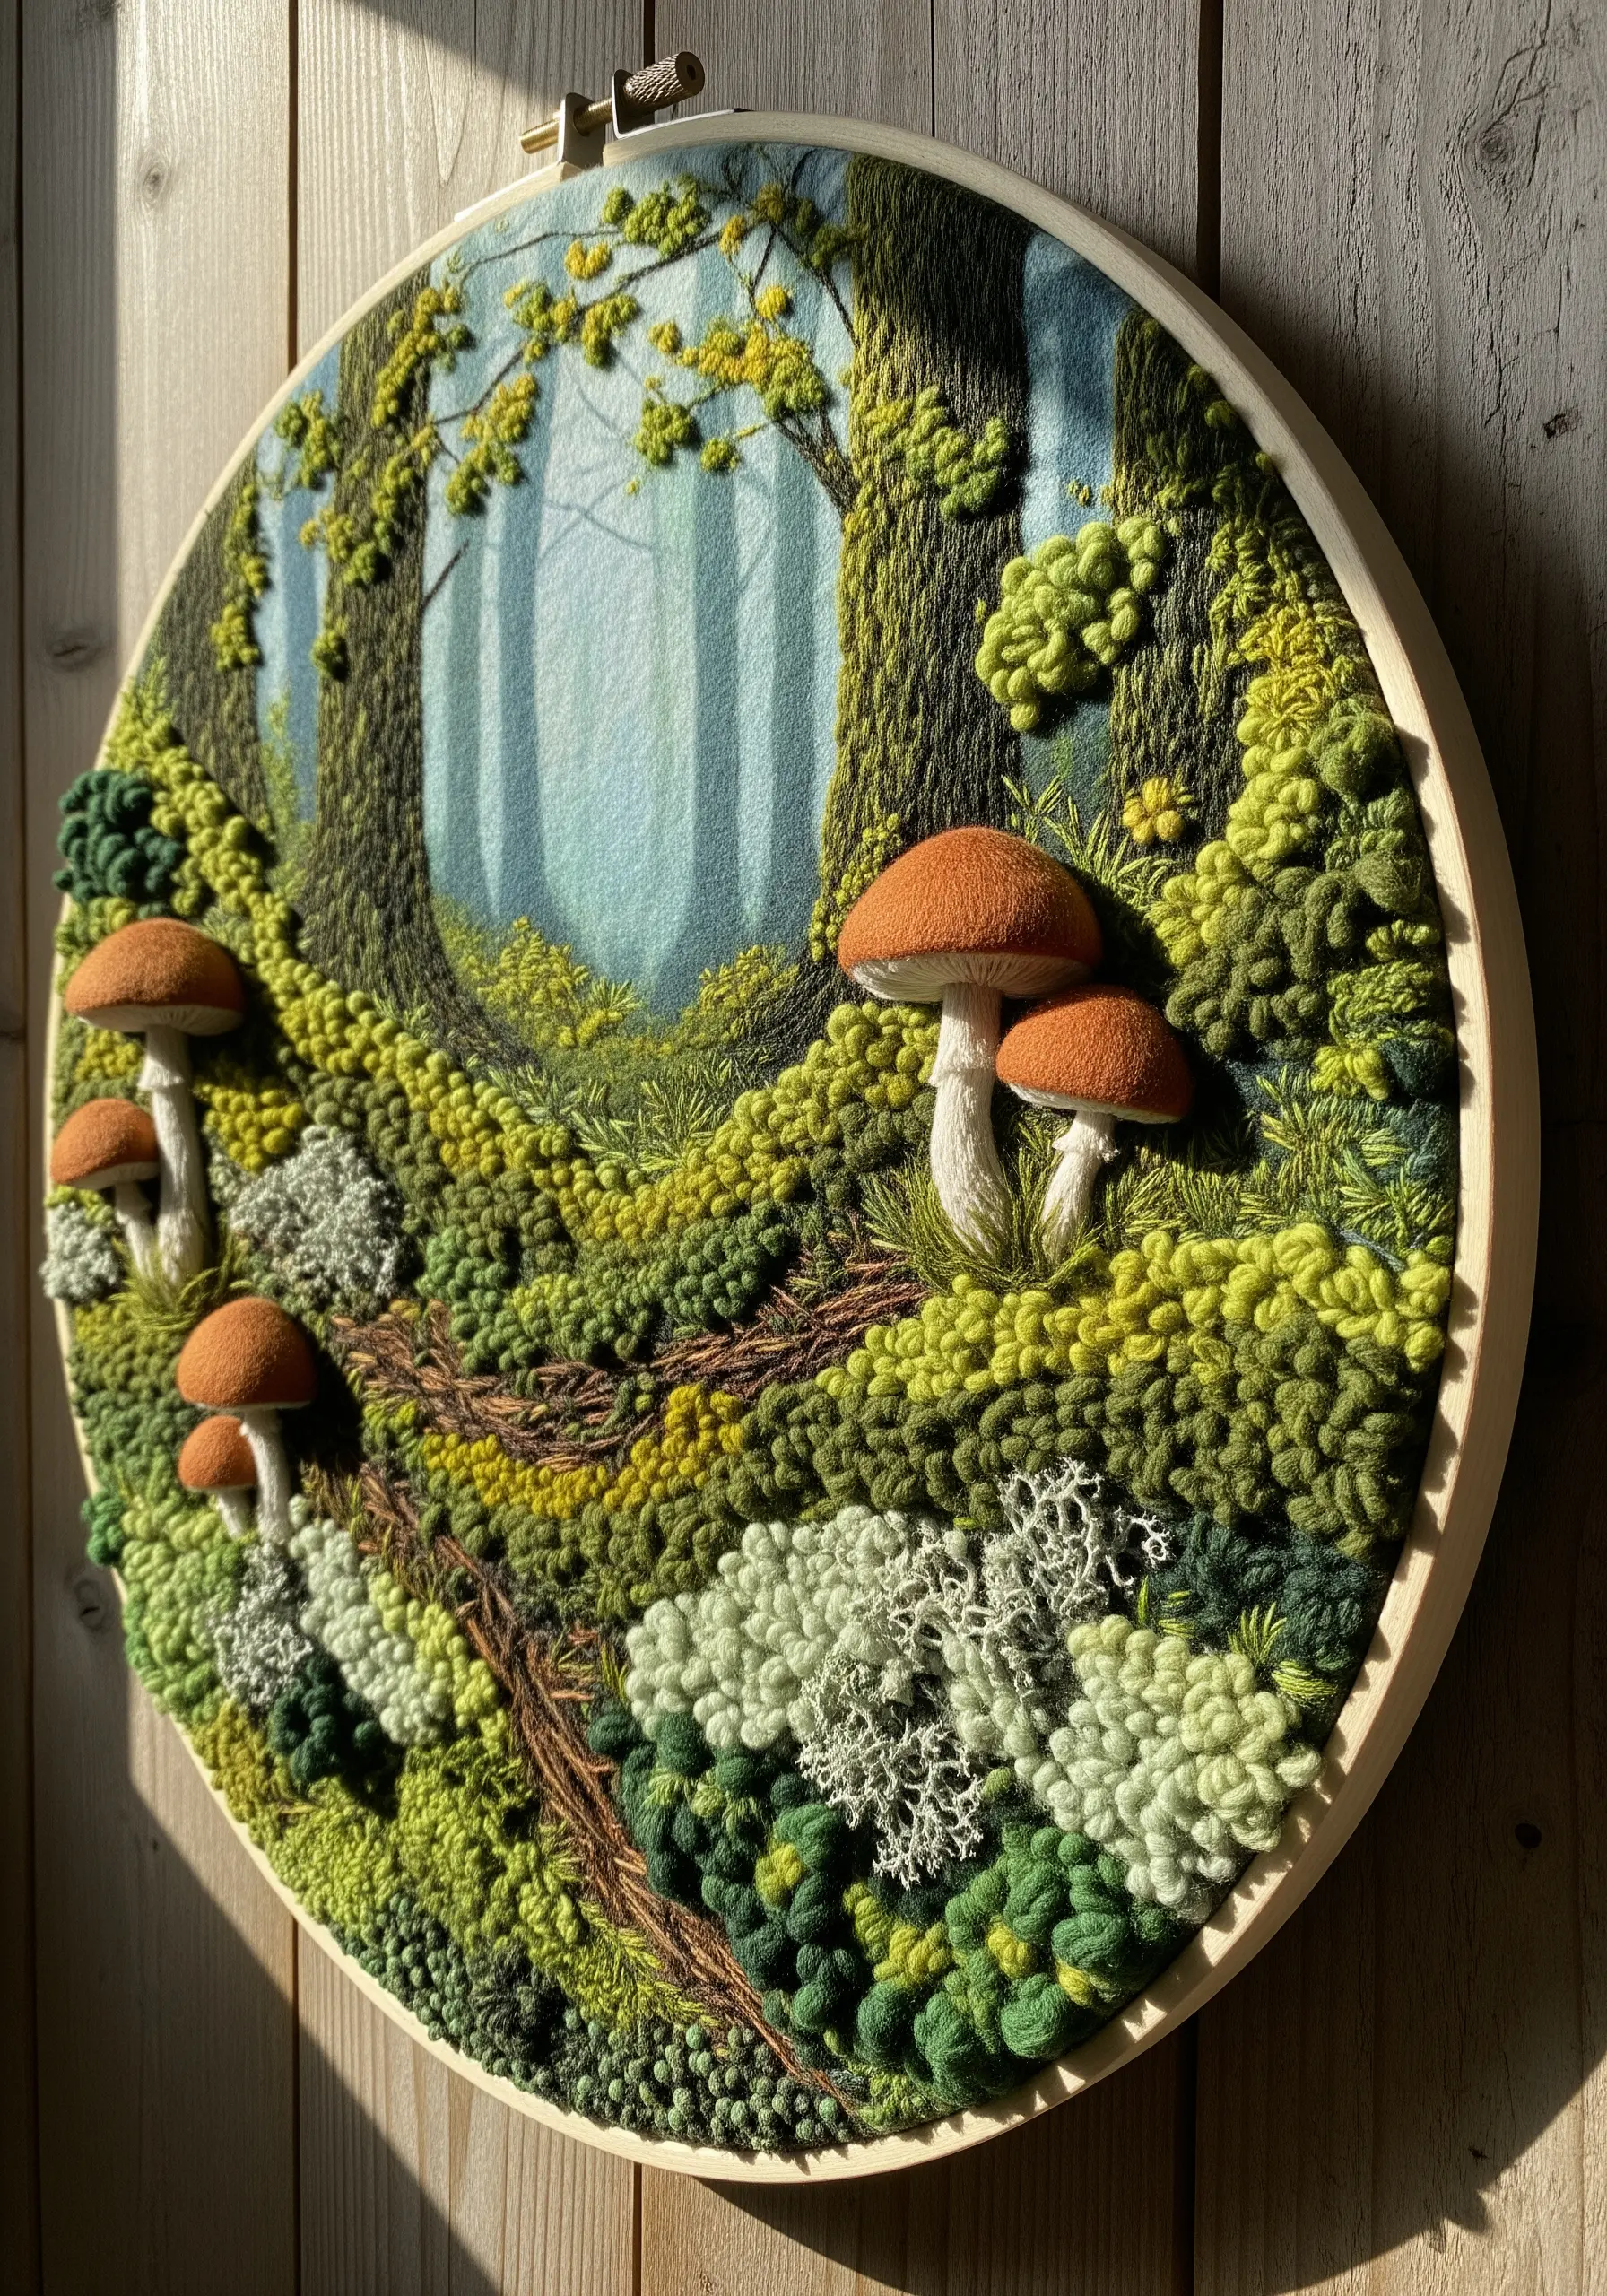
5. Weave Natural Materials into Your Fiber Art

Incorporate authentic natural textures by weaving found objects like twigs, dried grasses, or feathers directly into your work.
Create a base structure by couching thick wool roving onto a stretched canvas, leaving loops and gaps where you can insert the natural elements.
Secure the twigs with hidden stitches or clear adhesive for stability.
This mixed-media approach results in fiber art installations that are deeply connected to the environment they depict.
6. Create Barnacle Textures with Raised Rings
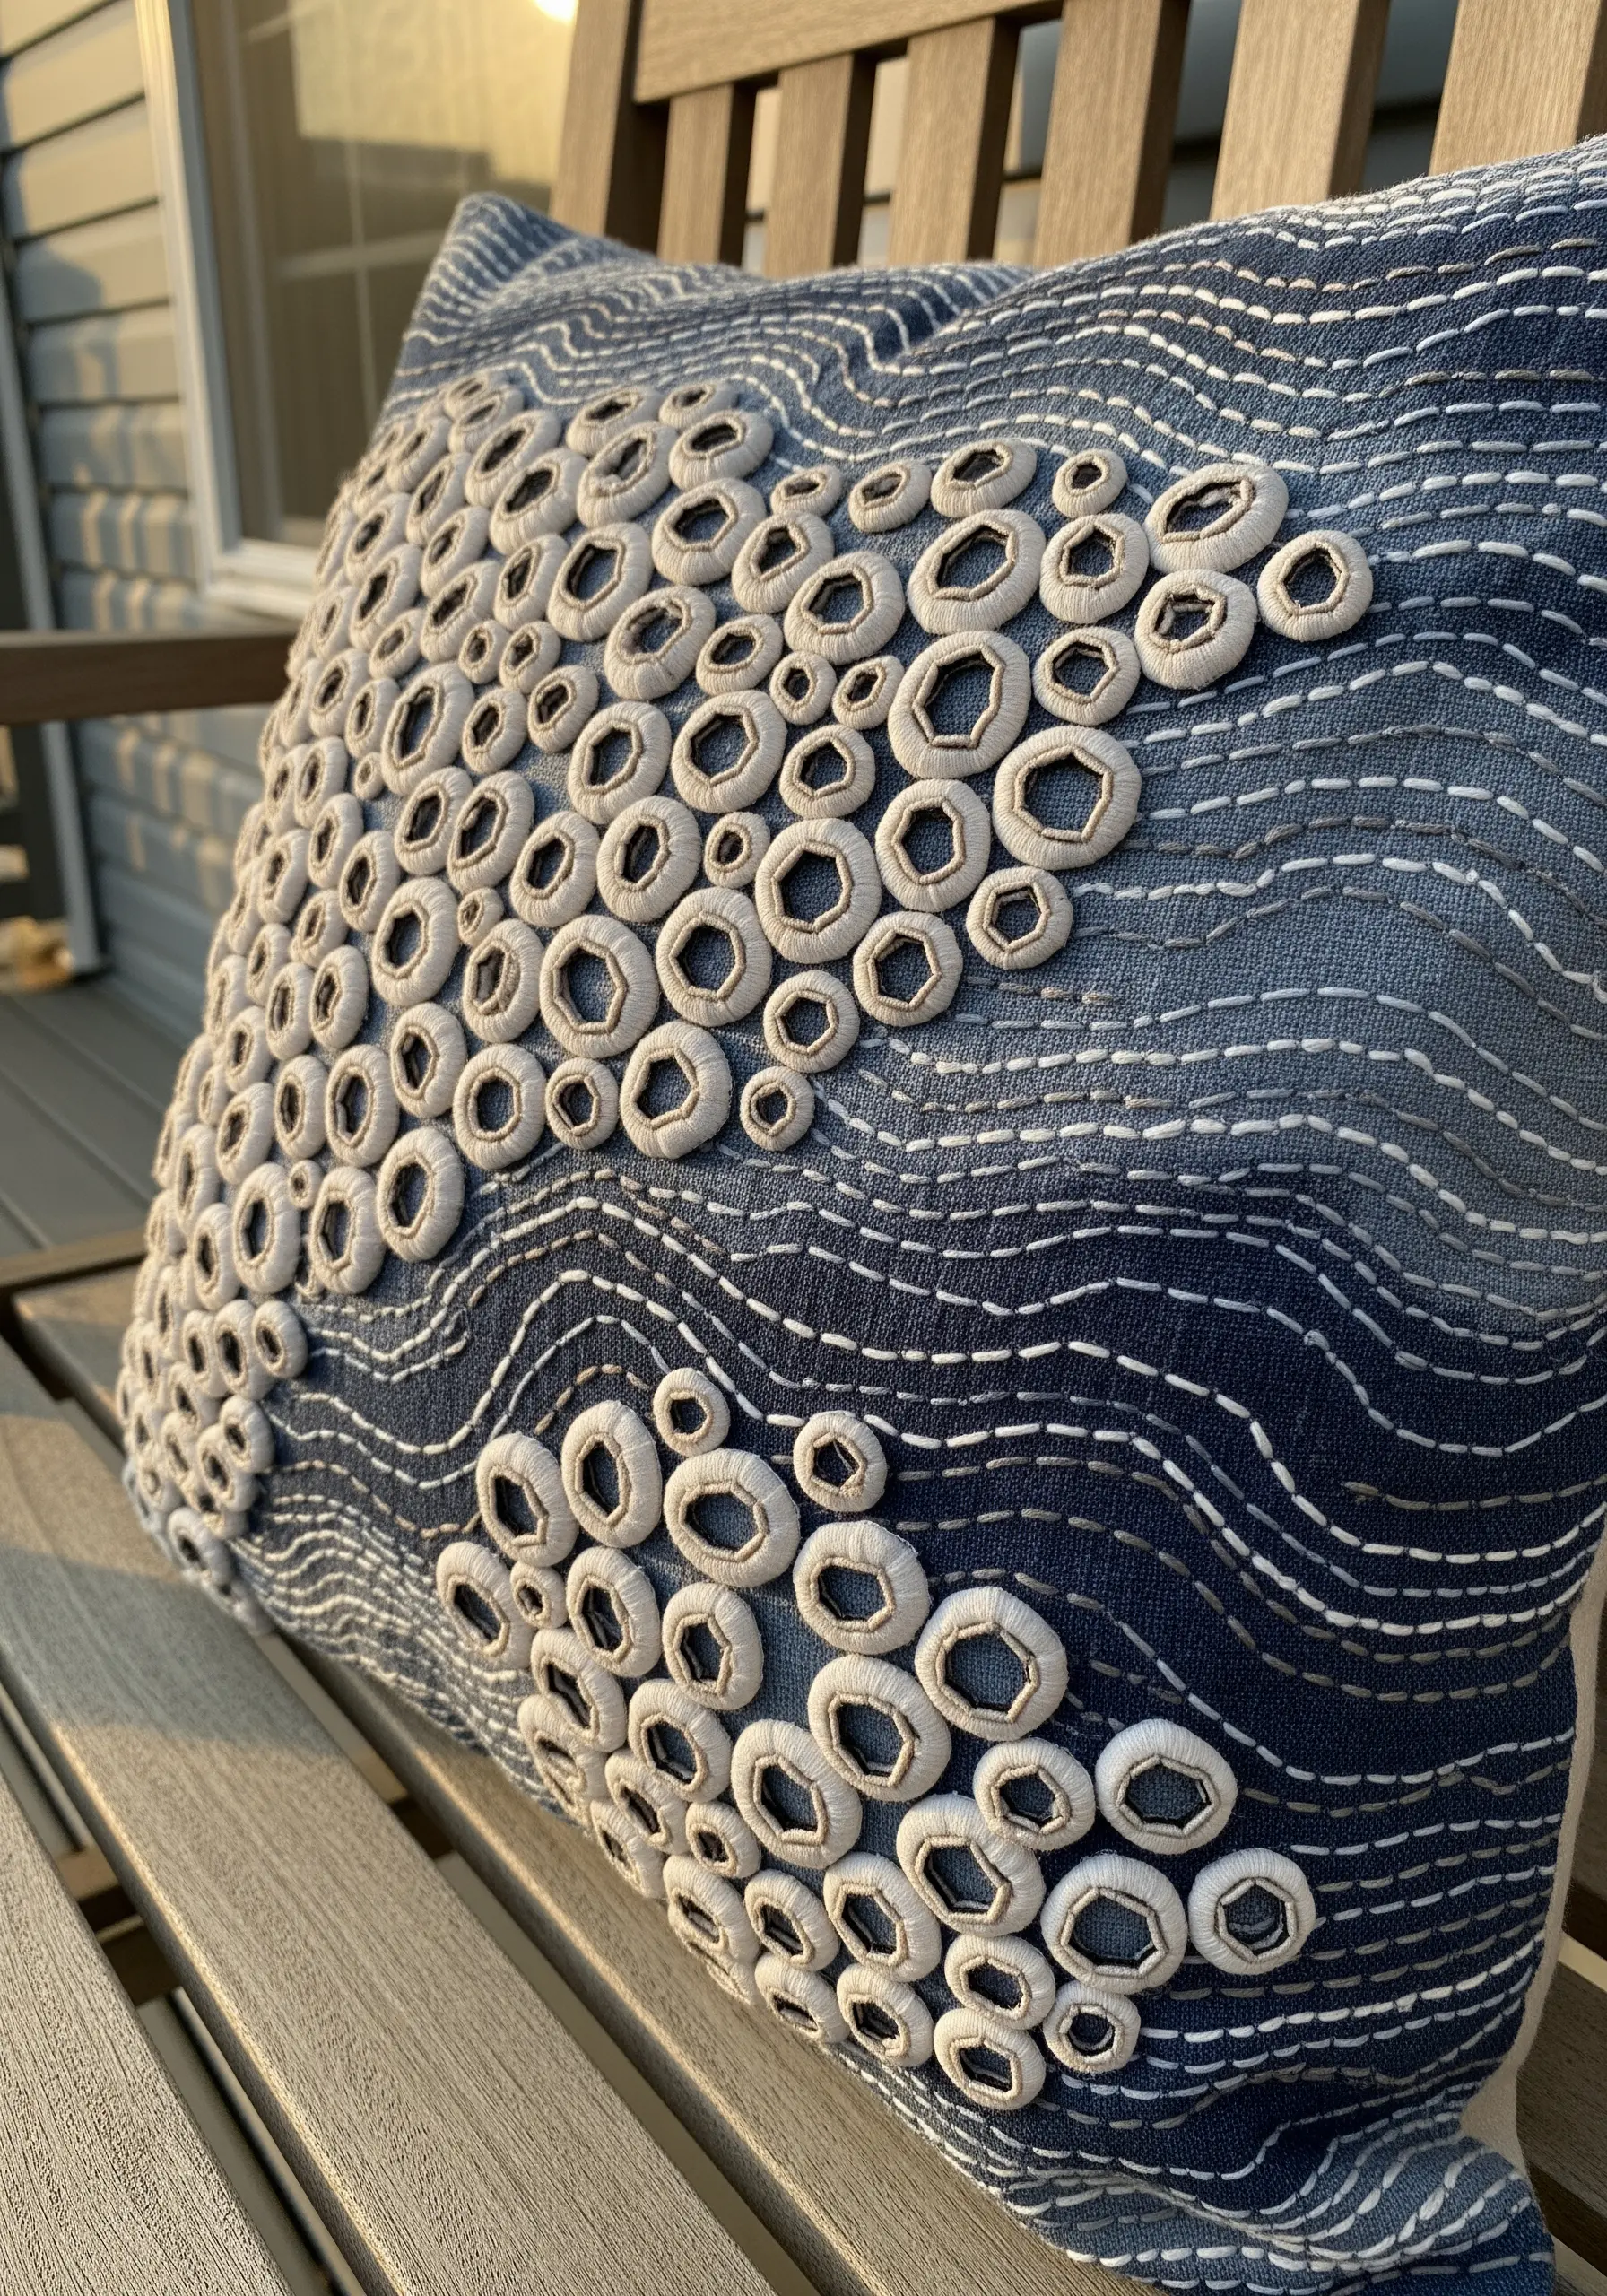
To mimic the clustered texture of barnacles, use a padded satin stitch to create raised, hollow rings.
First, stitch a small circle outline in split stitch. Then, lay down tiny padding stitches inside this line before covering it with satin stitch, leaving the center empty.
Vary the size of the rings and cluster them tightly in groups for a more organic feel.
Contrast these high-profile elements with simple, wavy running stitches in the background to suggest the movement of water.
7. Replicate Geodes with Couching and Beads
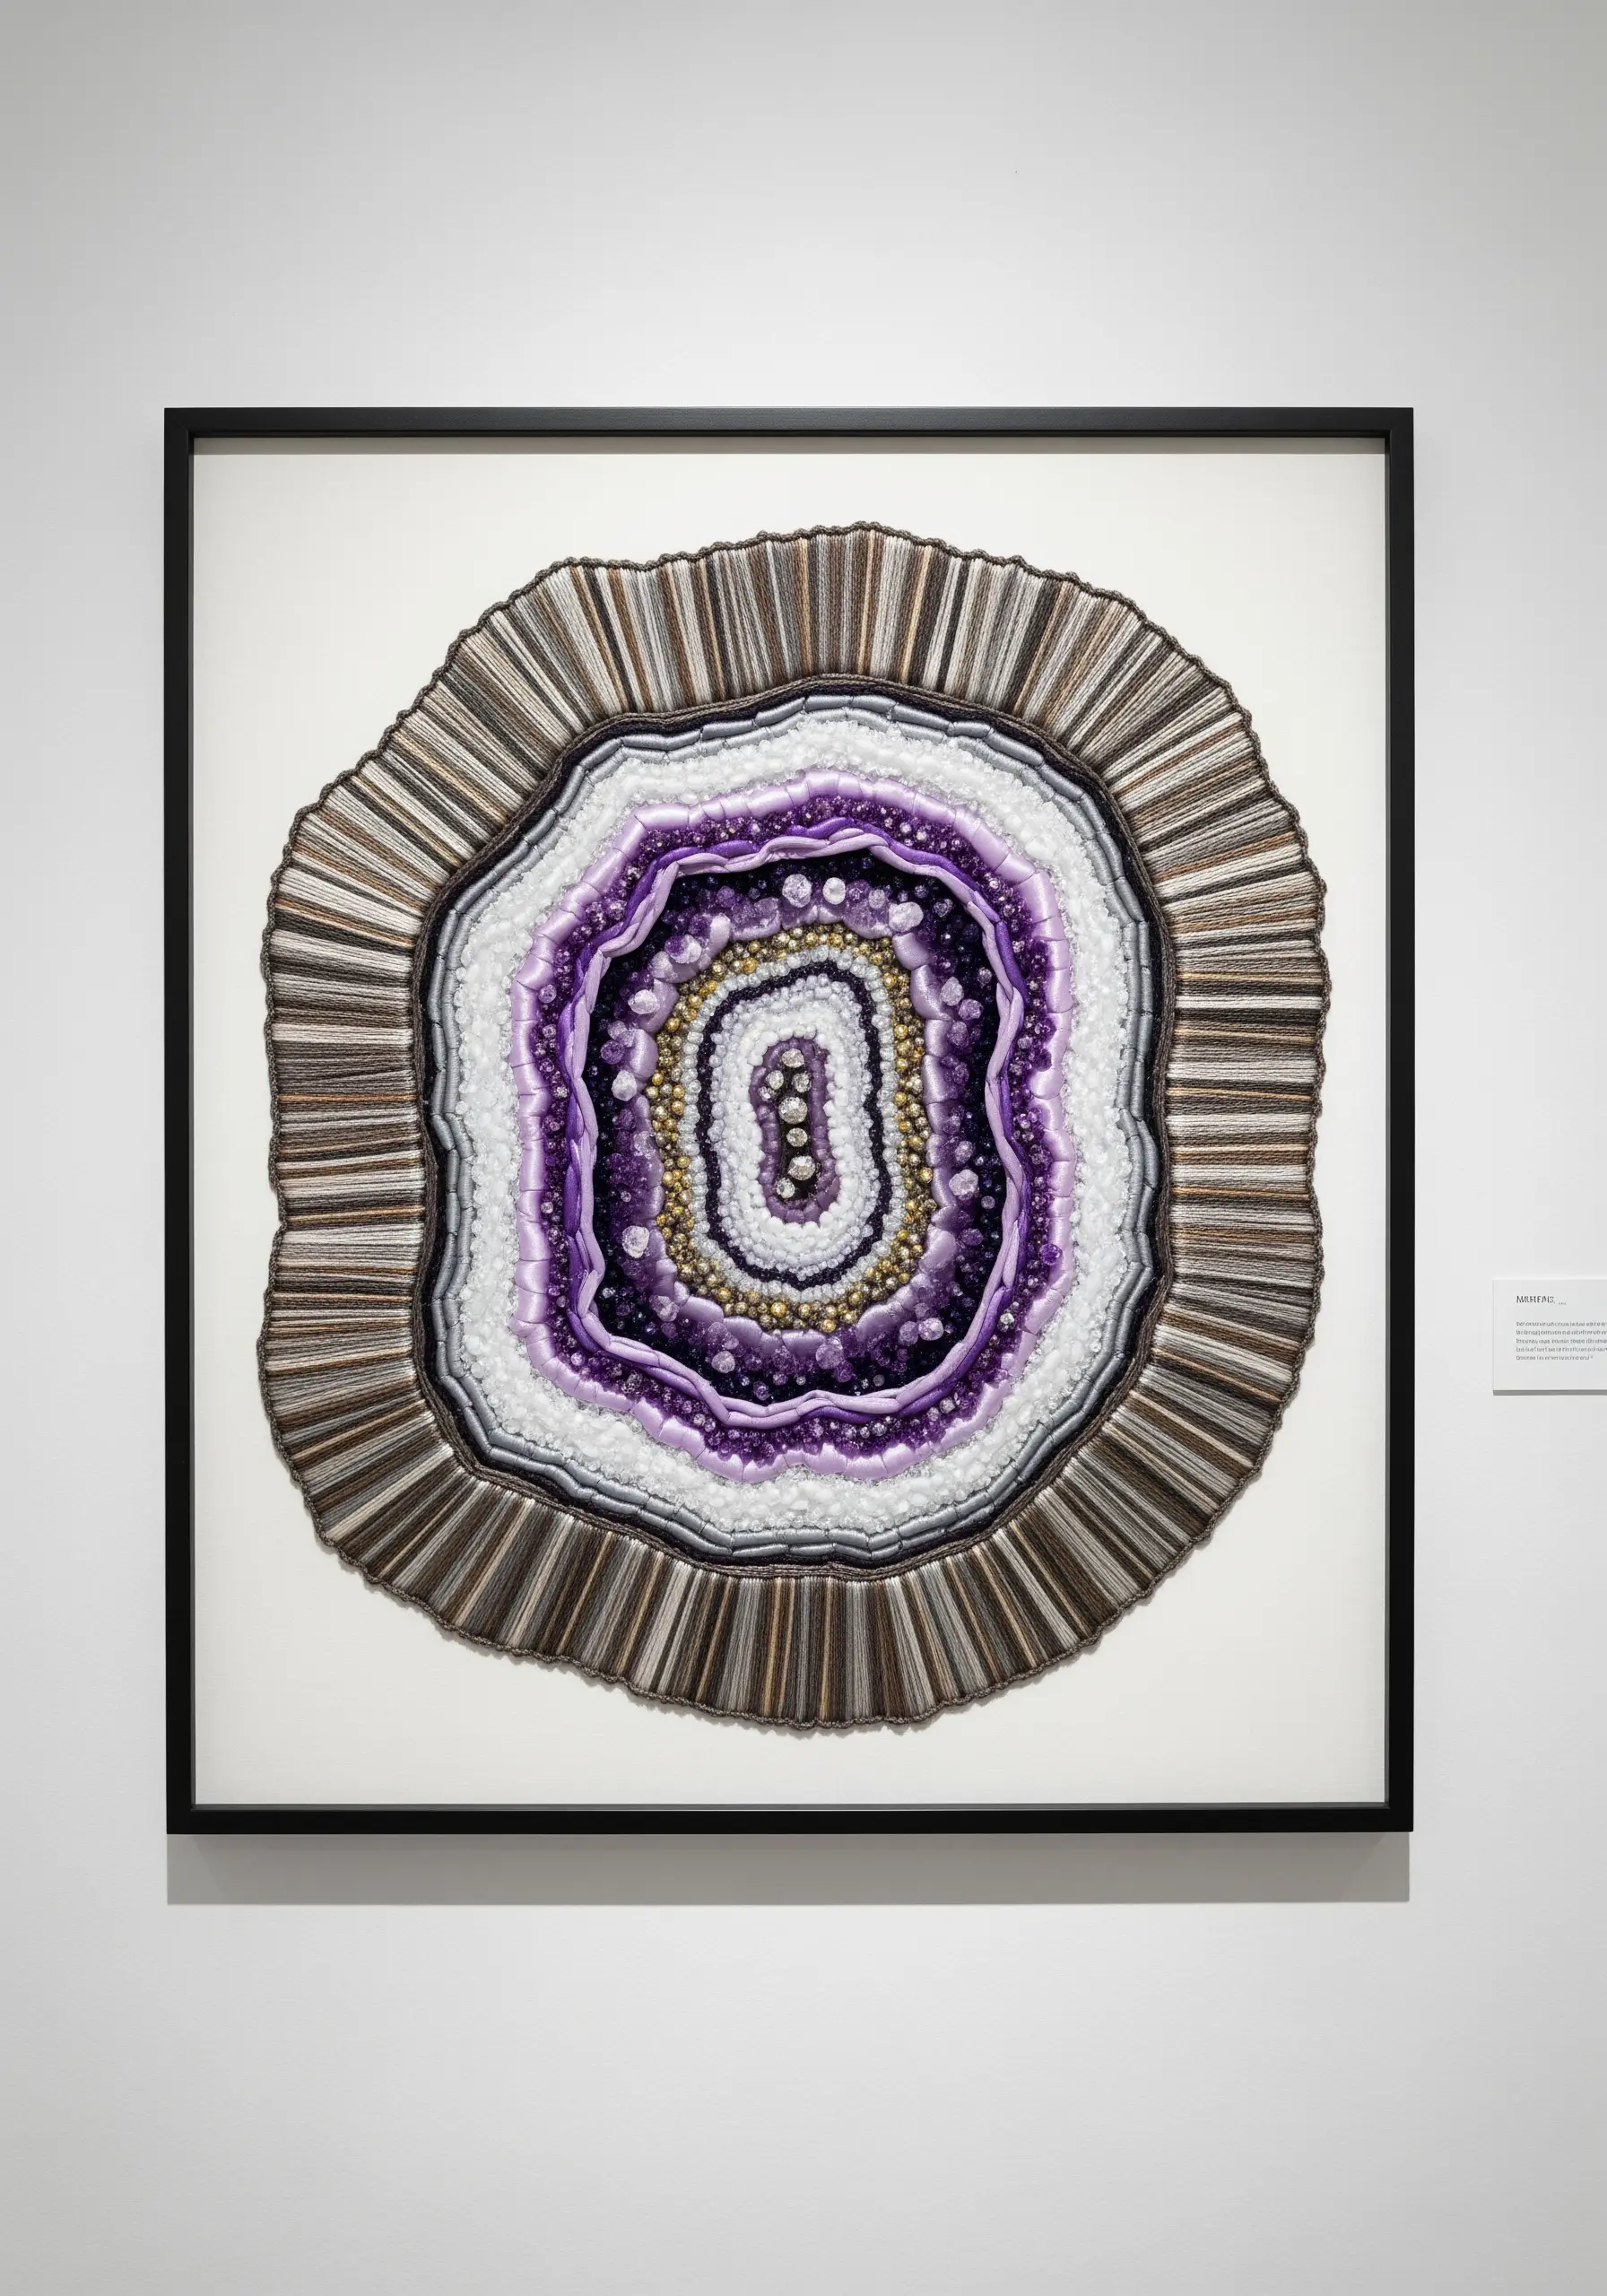
Capture the crystalline structure of a geode by building concentric rings of varied stitches and materials.
Work from the outside in, starting with rows of couched variegated yarn to form the outer crust.
As you move toward the center, switch to finer threads, metallic floss, and dense clusters of French knots.
Fill the very core with tiny, glittering seed beads or French knots made with metallic thread to replicate the druzy crystals found in nature.
8. Suggest Birch Bark with Fabric Manipulation

Create the peeling texture of birch bark by cutting, rolling, and stitching strips of fabric onto a base.
Use a plain off-white linen or cotton for the bark strips, adding horizontal dashes with a single strand of dark brown thread.
Layer these strips onto a textured, dark background fabric, securing them with stitches along one edge while allowing the other to curl and lift away from the surface.
This sculptural technique adds incredible depth and realism to your textile art.
9. Fill Space with Seed Stitch for a Sandy Feel

When you need to cover a large area with a texture that suggests sand or soil, dense seed stitch is the perfect solution.
Fill the entire beach area with tiny, randomly oriented straight stitches using a neutral, matte-finish cotton thread.
For a wet-sand effect, switch to a slightly darker shade with a subtle sheen, like a rayon floss.
This simple stitch creates a non-directional, granular texture that provides the perfect backdrop for more prominent coastal elements.
10. Cascade Yarns for an Abstract Seascape

Create a dramatic, textured wall hanging by focusing on the materials themselves rather than intricate stitches.
Use a mix of thick wool yarn, soft roving, fine cotton threads, and chenille in shades of blue and white.
Drape, knot, and loop these fibers from a top support, allowing them to hang freely to create an abstract representation of seafoam and waves.
This method allows you to build a large-scale embroidery tapestry with impressive visual depth and movement.
11. Layer Petals for Three-Dimensional Florals
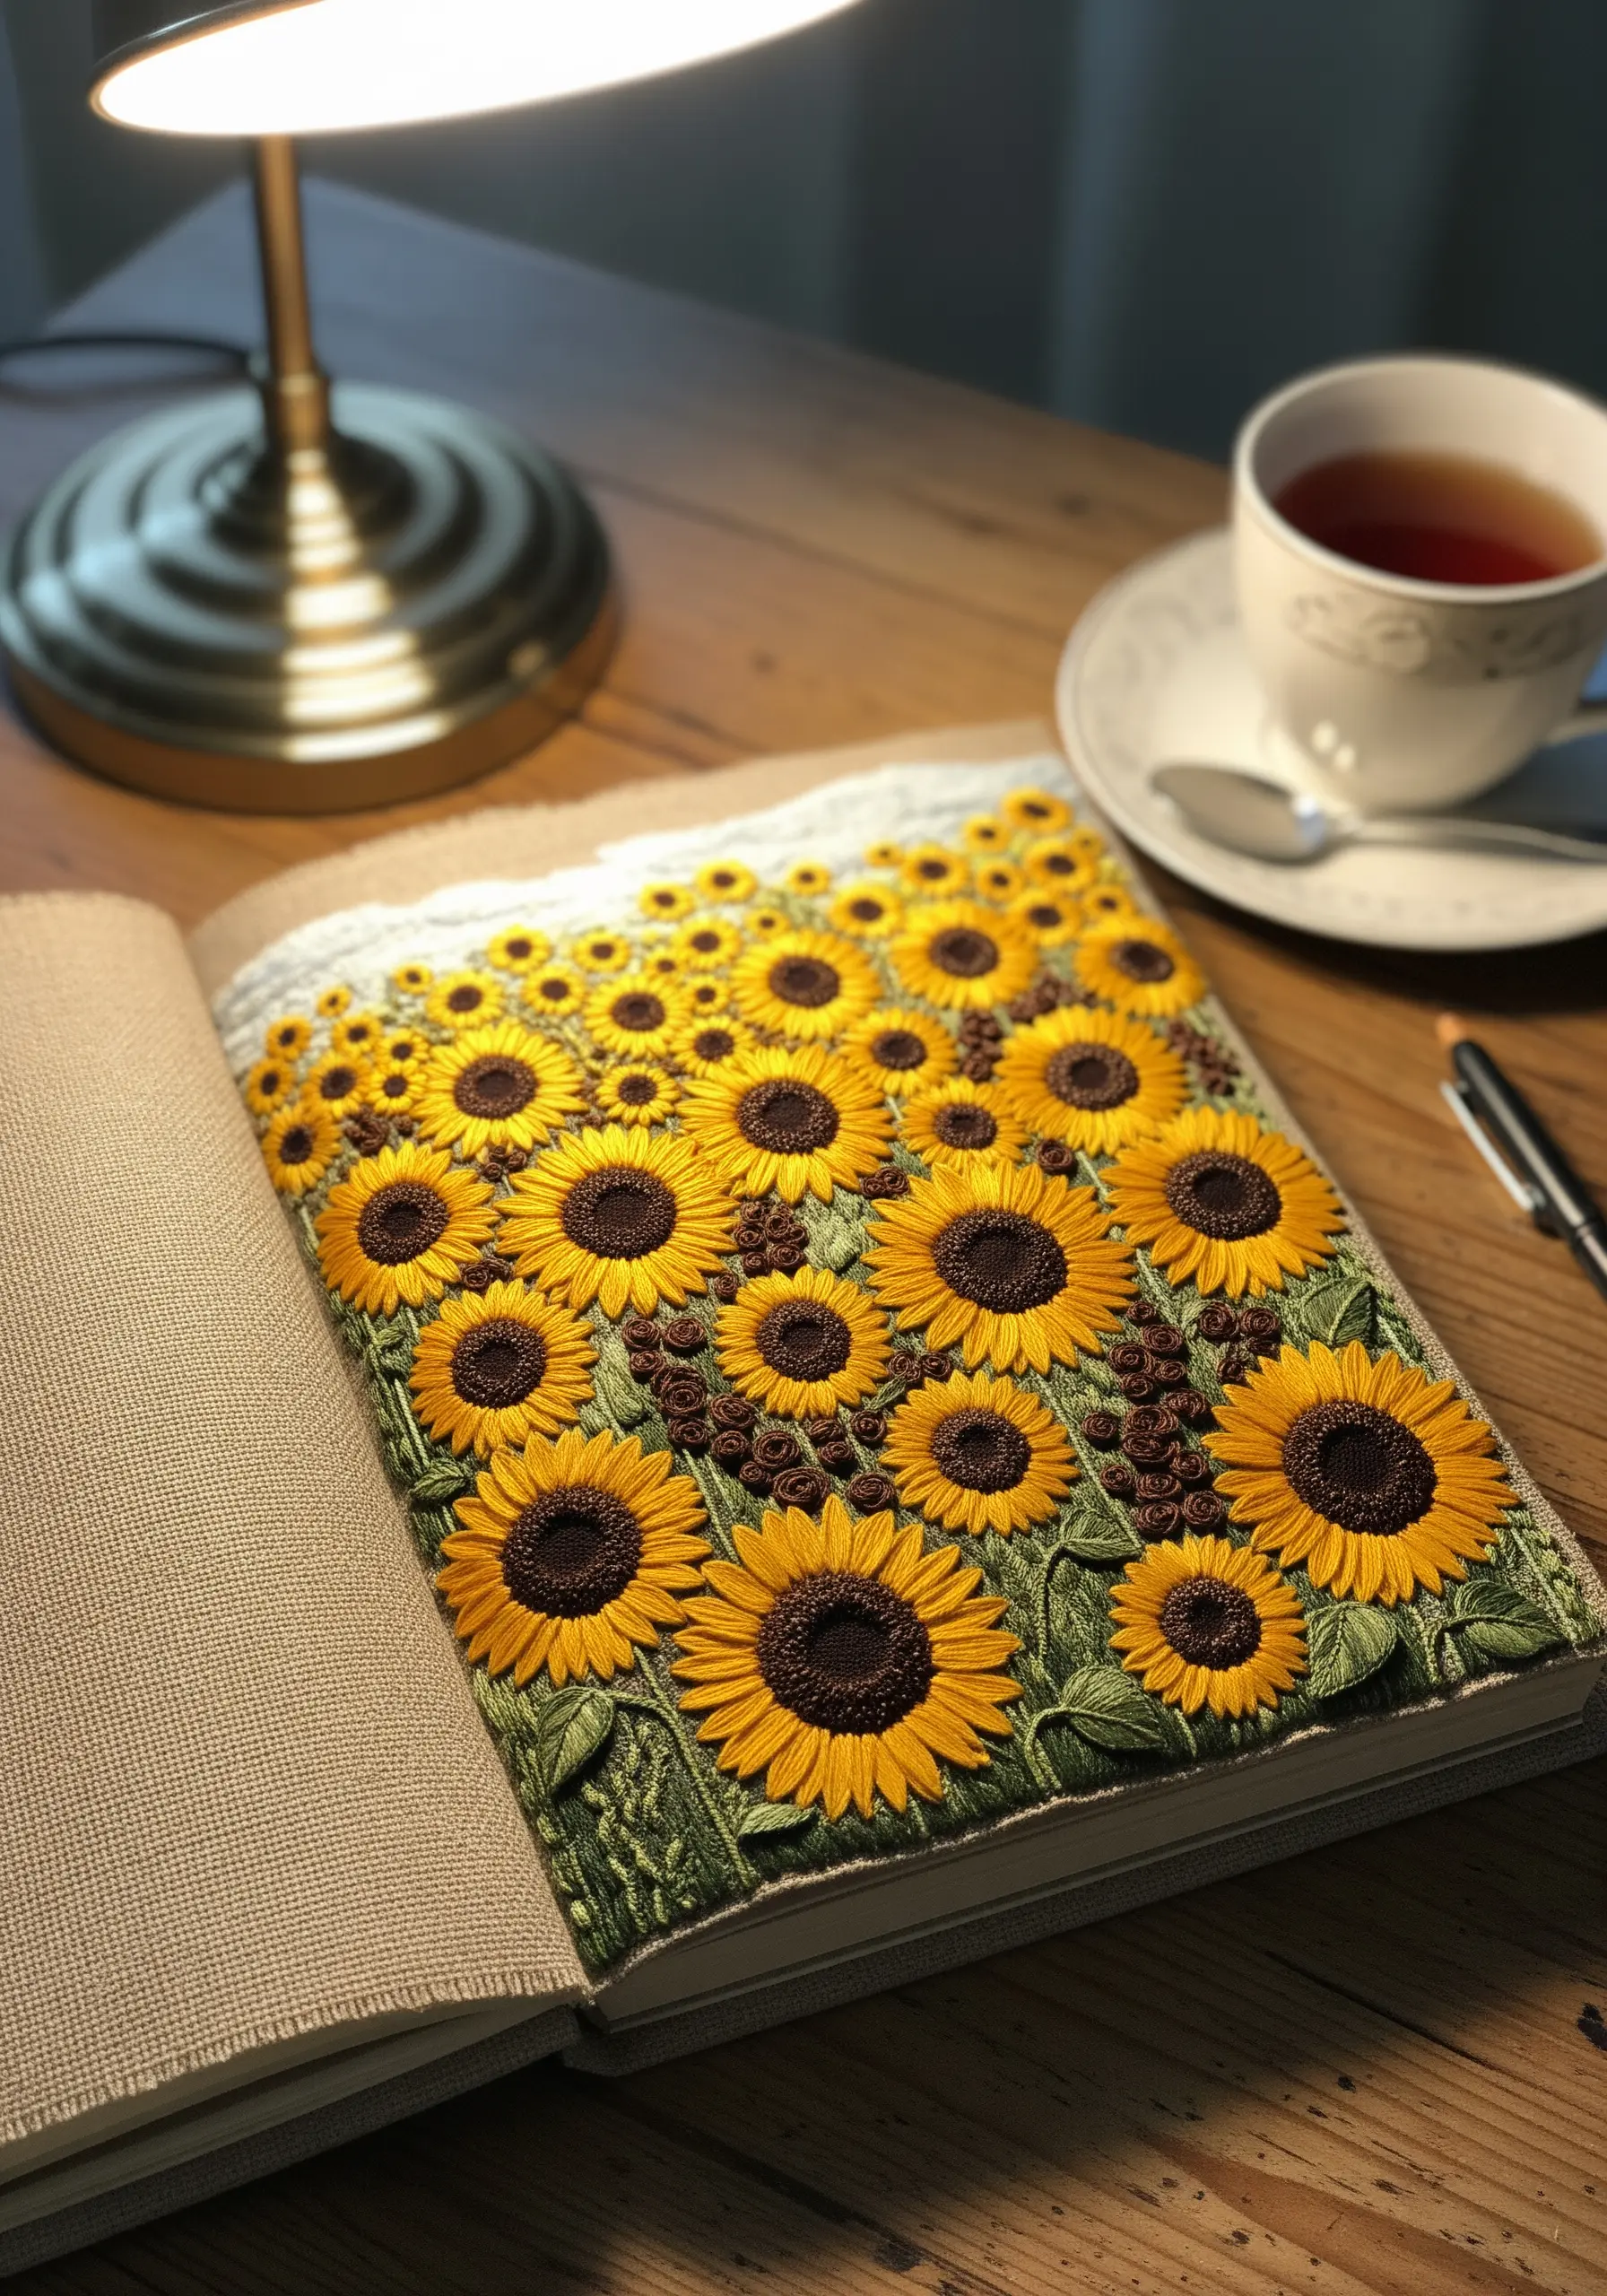
Give your flowers realistic dimension by stitching the petals in layers, starting with the ones at the back.
Use long-and-short stitch for a smooth, painted effect. Stitch the bottom layer of petals completely first.
For the top layer, bring your needle up through the fabric and over the stitches of the petals underneath.
This simple overlapping technique makes the foreground petals physically pop, creating naturalistic shadows and depth in your sunflower-to-daisy gradient petal designs.
12. Combine Crochet and Embroidery for a Coral Reef

Build a vibrant, tactile coral reef by combining freeform crochet elements with traditional embroidery stitches.
Create various coral shapes using crochet—tubes, ruffles, and spheres—in bright, textured yarns.
Securely stitch these dimensional pieces onto a sturdy fabric background, like navy blue canvas.
Fill in the surrounding space with dense clusters of French knots, bullion knots, and seed stitches to represent smaller sea life, creating a rich, multi-textured ecosystem.
13. Use Couching on Translucent Fabric for a Backlit Effect

Create a dramatic silhouette by stitching onto a semi-transparent fabric like linen or cotton voile for a lampshade.
Use couching with a thick, dark yarn to outline the main branches of the tree, giving them a bold, raised profile.
Fill in the smaller branches with a simple backstitch or stem stitch.
When lit from behind, the dense, stitched areas will appear as striking silhouettes, while the light filters through the unstitched fabric, creating a warm, ambient glow.
14. Define Botanical Shapes with Directional Satin Stitch

Give organic shapes like seed pods and leaves a sense of form and volume by carefully controlling the direction of your satin stitches.
Imagine how light would hit the object and angle your stitches to follow its natural curves.
Use a single strand of thread for a smoother finish and outline the entire shape with a darker shade in split stitch to create a clean, defined edge.
This precision transforms flat shapes into beautifully rounded, realistic forms.
15. Create Tension and Form with String Art Techniques
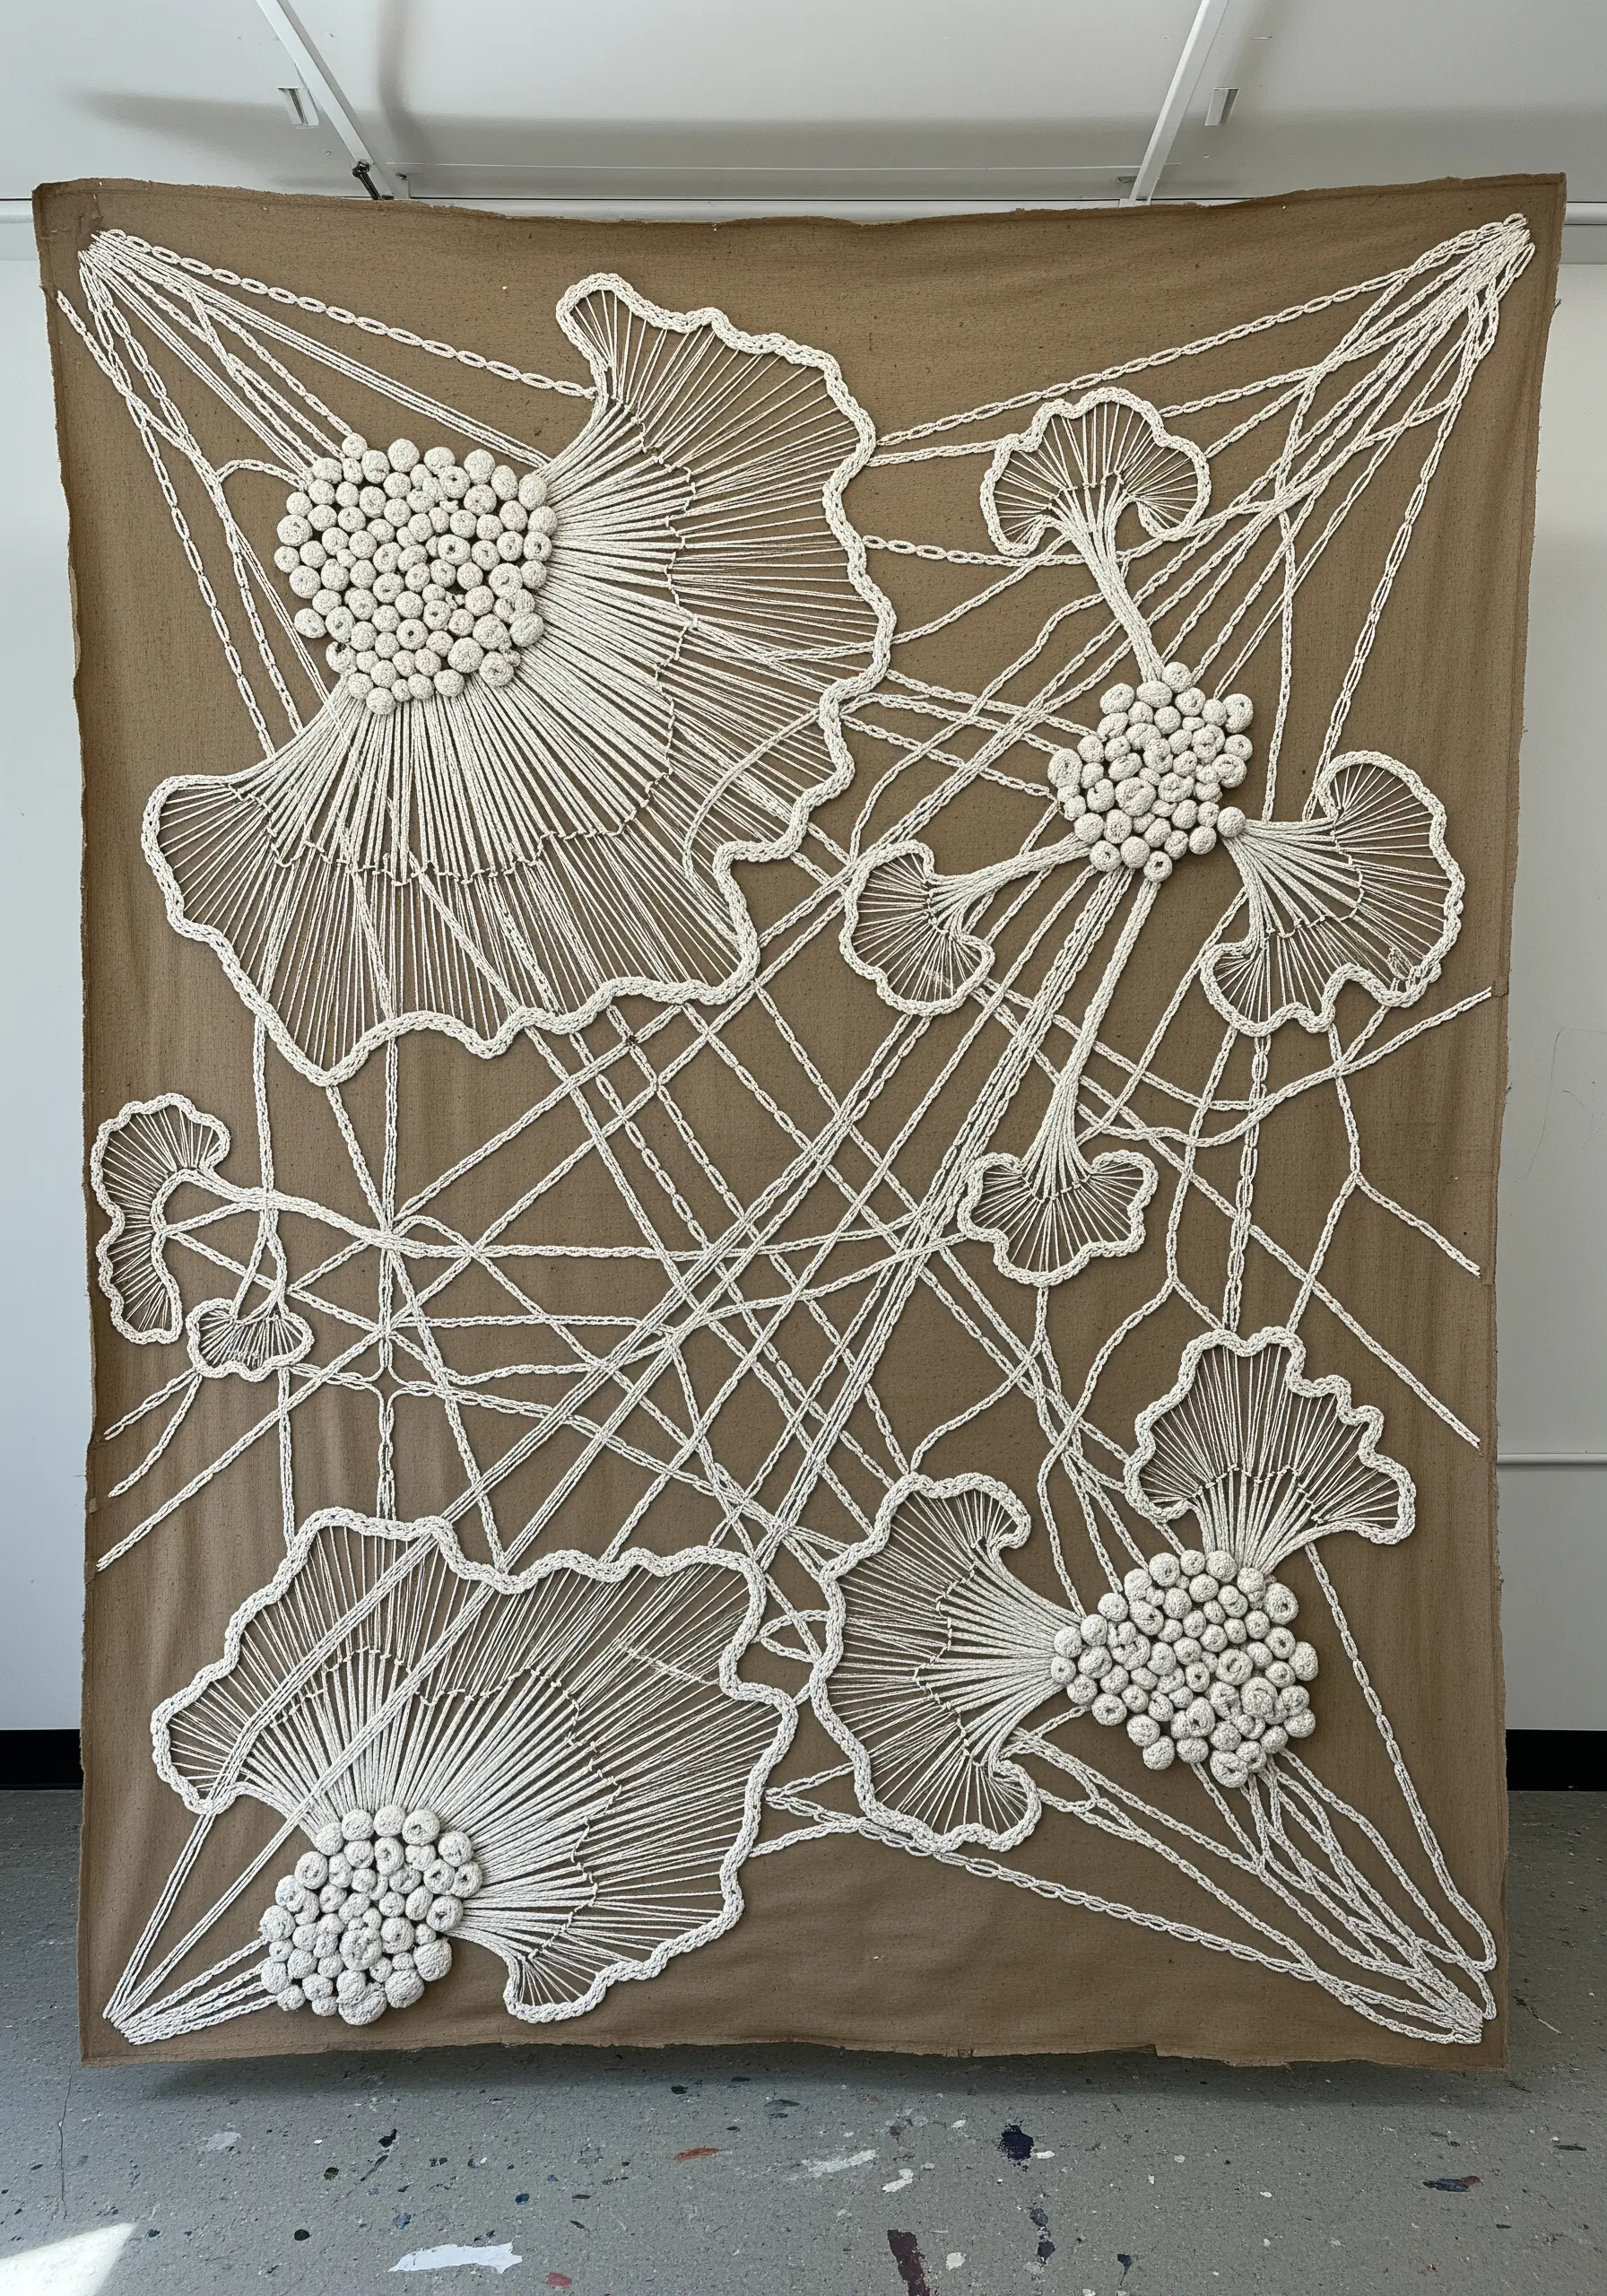
Blend embroidery with string art principles to build dynamic, geometric floral shapes with incredible depth.
Instead of stitching directly through the fabric for every line, use anchor points—like pins or small, strong stitches—to wrap your thread around.
Stretch long, straight lines of thread between these points to create the delicate petal outlines.
Combine this with dense clusters of French knots or padded satin stitch at the center to ground the design and provide textural contrast.
16. Embellish Upholstery with Beaded Contours
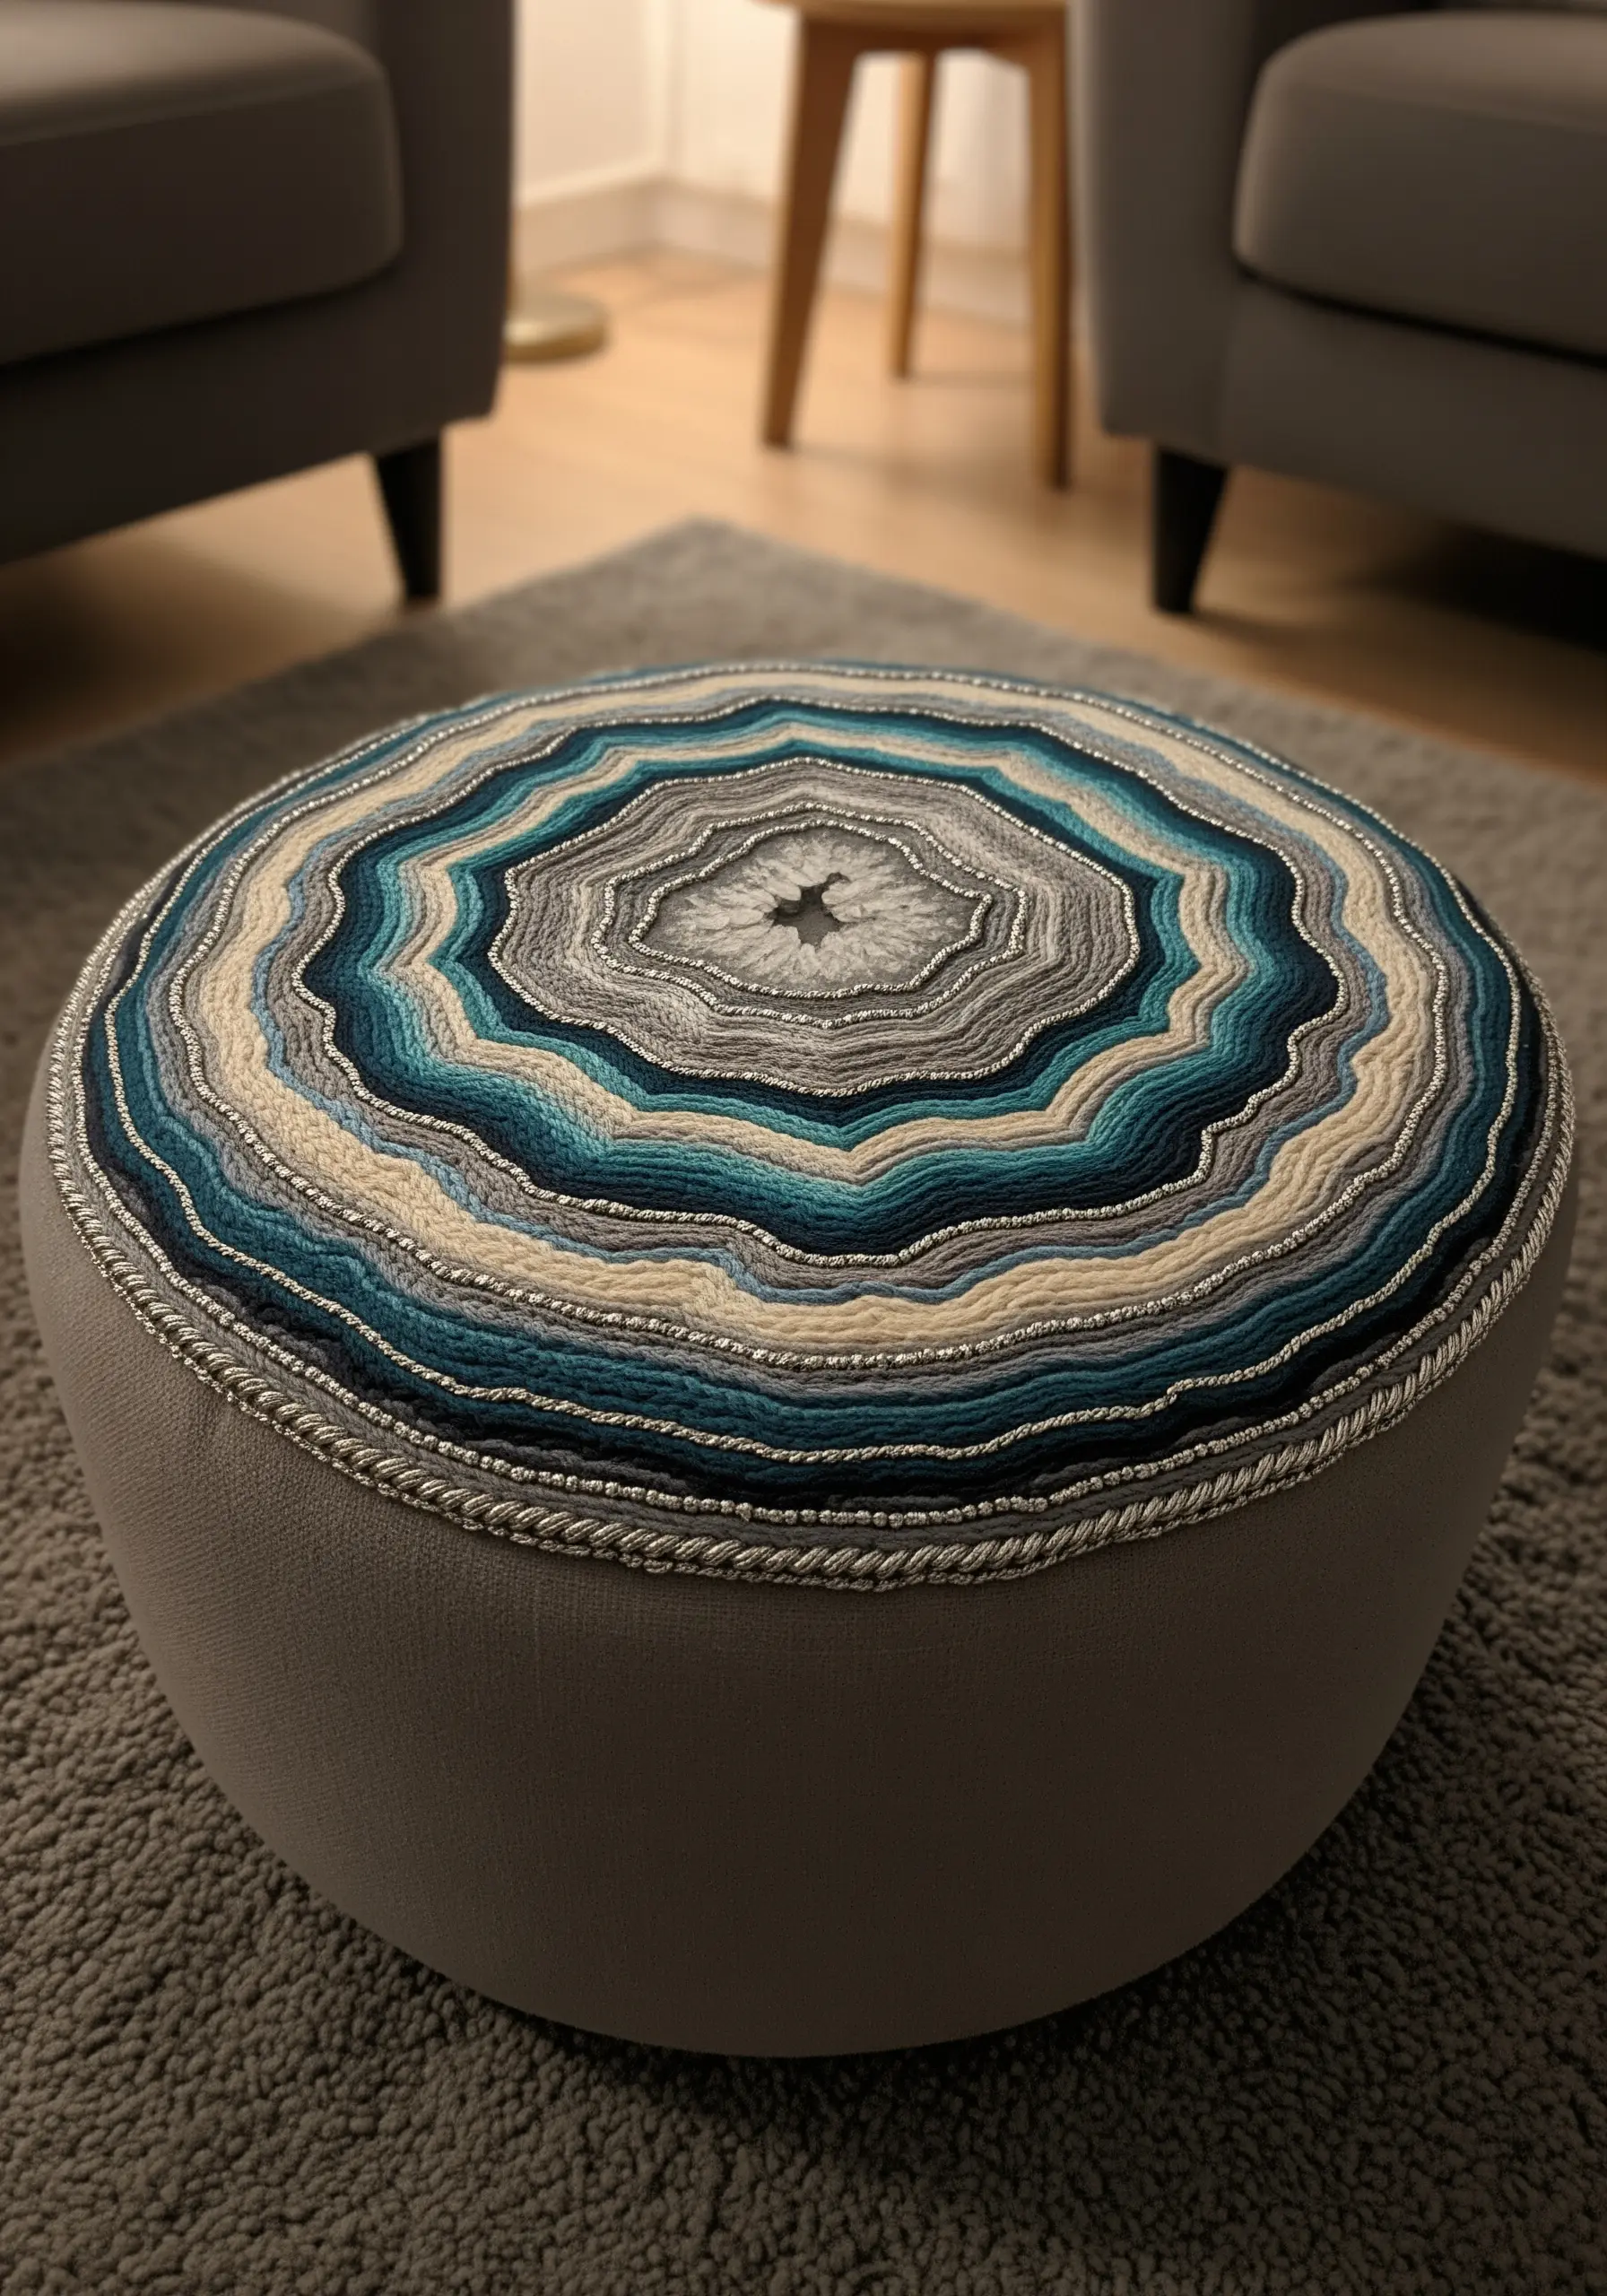
Transform a simple piece of furniture, like an ottoman, into a statement piece with contoured embroidery and beading.
Use rows of chain stitch, backstitch, or stem stitch in graduating colors to create agate-like rings.
Incorporate fine metallic threads or rows of tiny seed beads between the stitched lines to add a subtle sparkle that catches the light.
This technique elevates everyday objects into functional works of art, proving that handmade embroidery touches can redefine a space.
17. Mimic Pampas Grass with Turkey Work Loops

Capture the fluffy, airy texture of pampas grass using the Turkey work stitch, but with a slight modification.
Instead of trimming the loops short as you normally would, leave them long and loose.
Use a fine, silky thread like rayon or a single ply of silk floss, which will have a natural drape and sheen.
Once all your loops are stitched, gently comb through them with your needle to separate the fibers, enhancing their feathery appearance.
18. Mount 3D Embroidery on Natural Elements
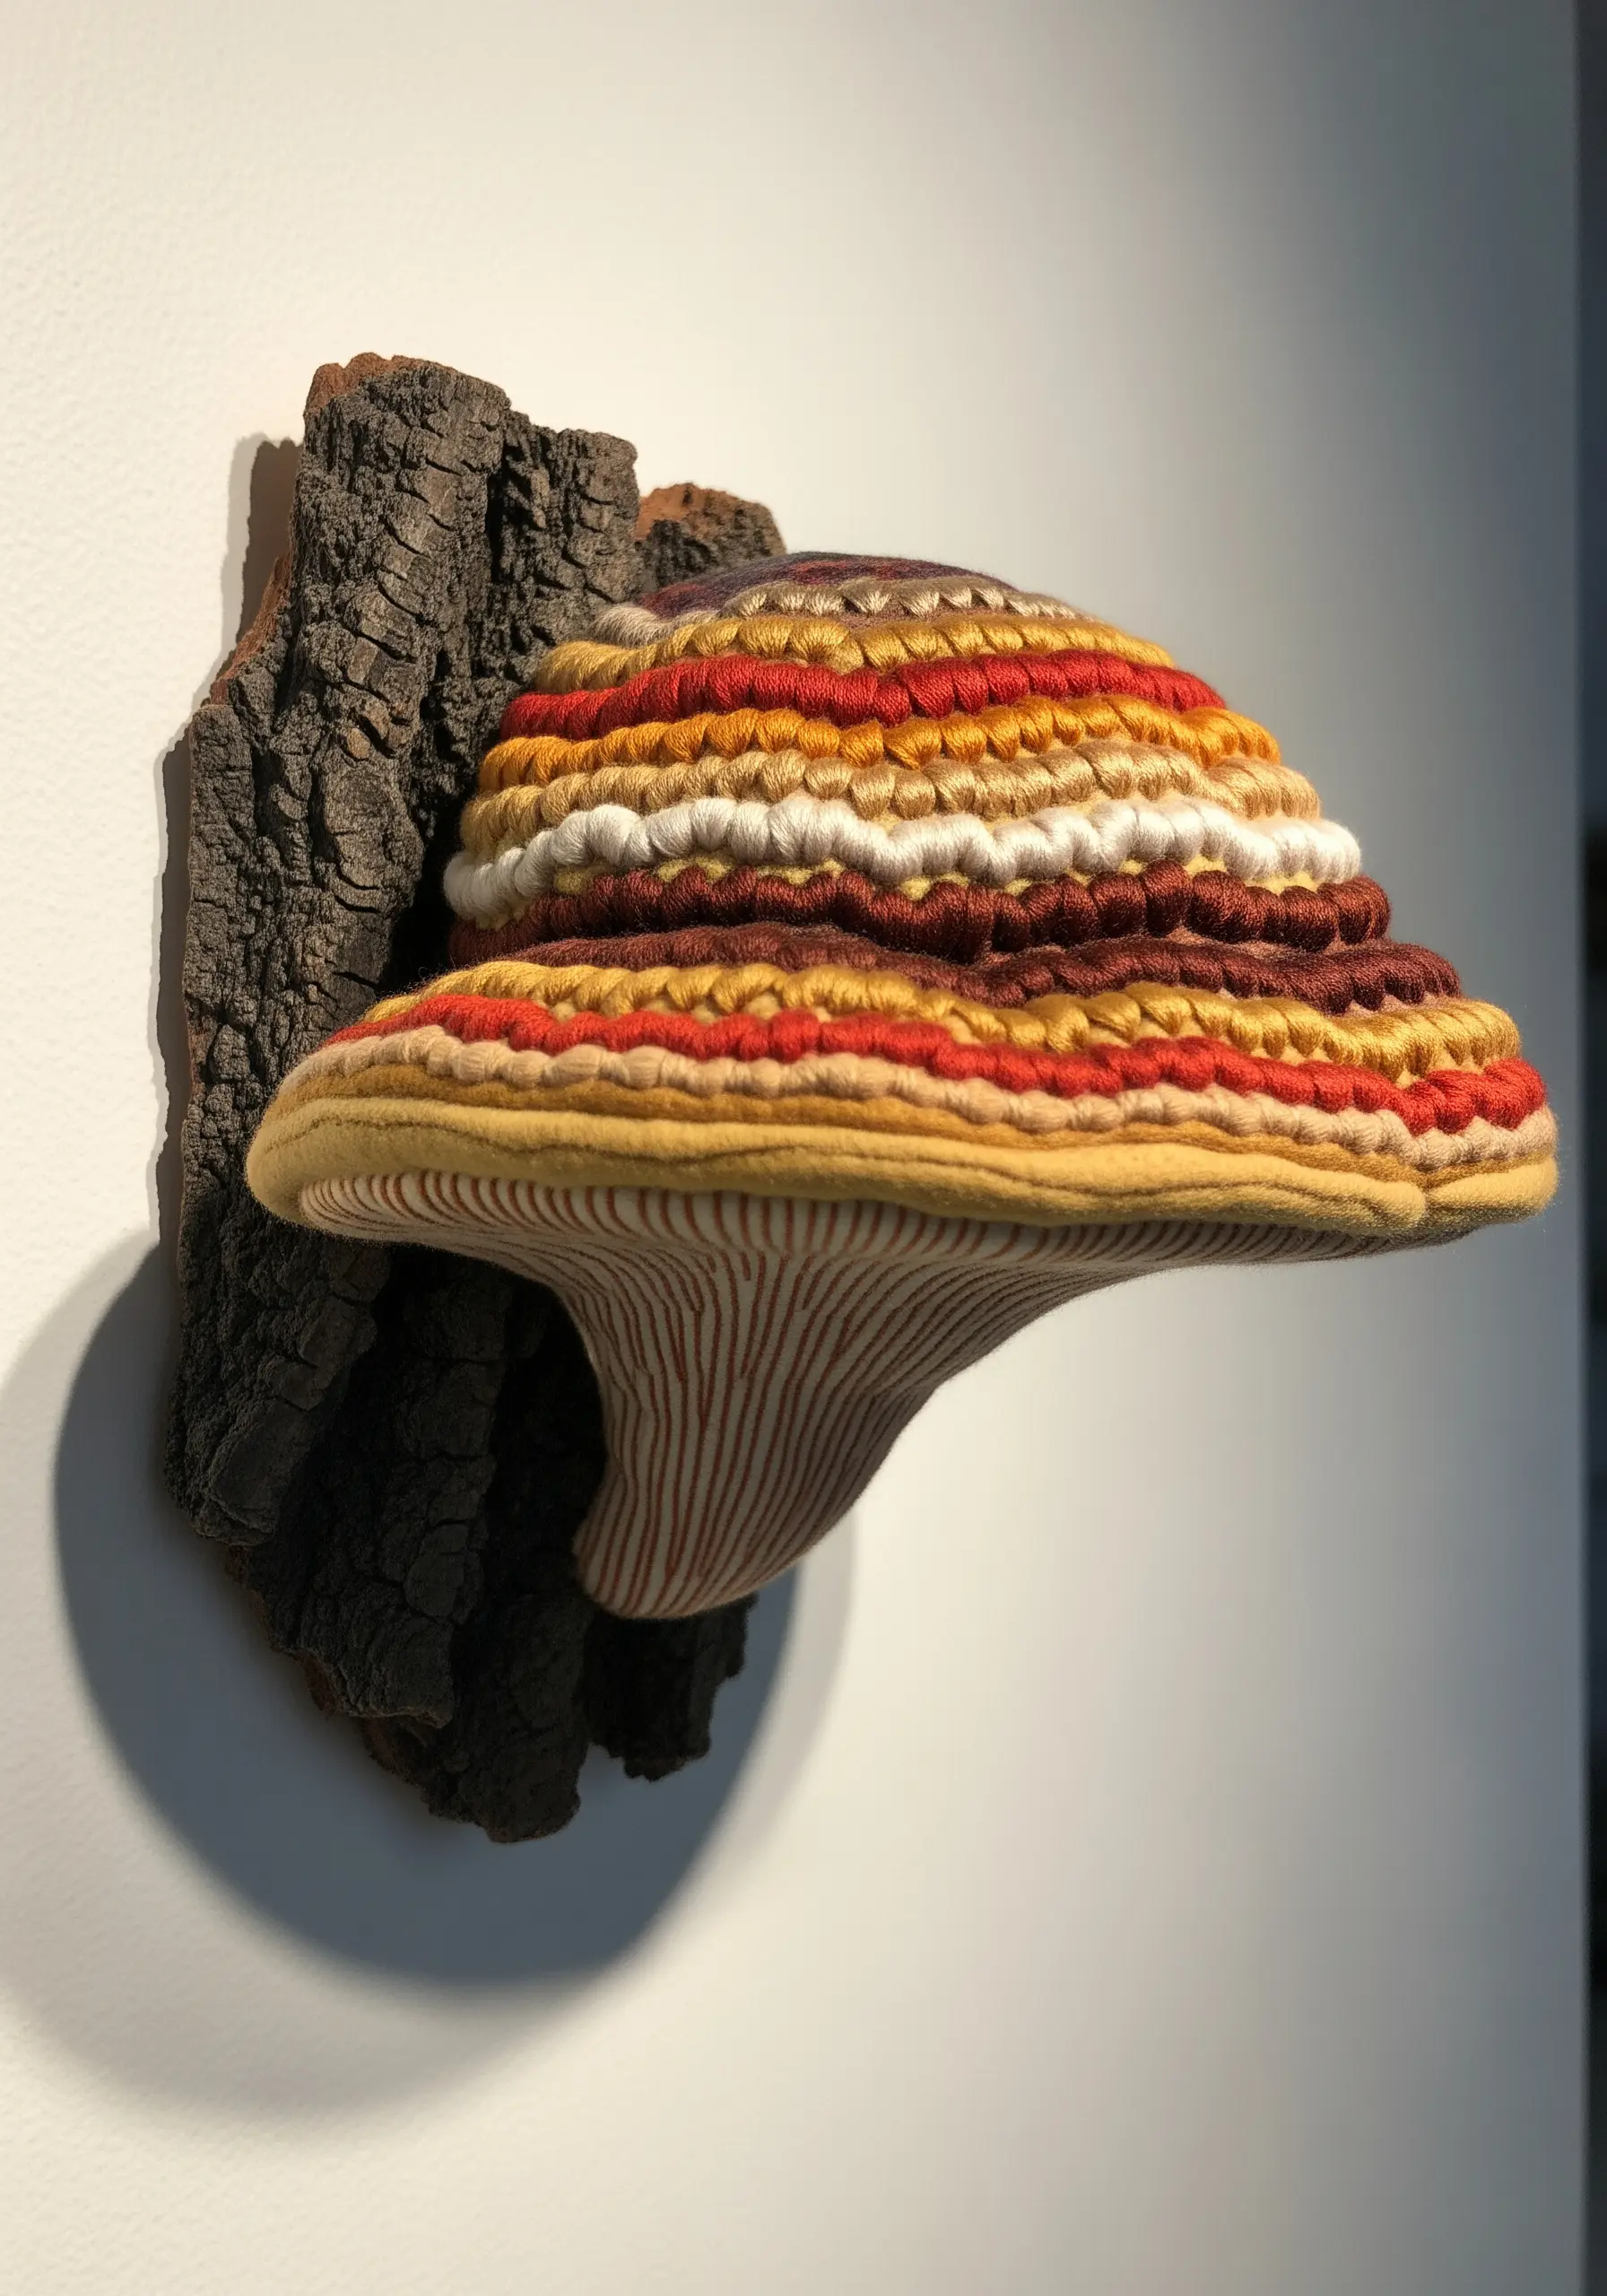
Give your stumpwork creations a powerful sense of place by mounting them onto a piece of natural material, like a piece of bark or a stone.
After creating your dimensional mushroom, leave a small fabric flange at the base.
Use a strong, clear adhesive to securely attach this flange to the bark, hiding the fabric from view.
This final step seamlessly blends your textile art with the natural world, creating a piece that feels authentic and grounded.
19. Radiate Straight Stitches for Delicate Structures

You can create incredibly delicate and complex-looking structures, like a dandelion head, using only the simple straight stitch.
Start by creating a center with French knots or seed beads. Then, work long, straight stitches radiating outwards from that center.
Group them in small, fanned-out clusters to replicate the natural structure of the seed puffs.
The key is precision in placement and maintaining even tension, which results in a design that feels both airy and structurally sound.
20. Cover Padded Forms to Create Embroidered Objects
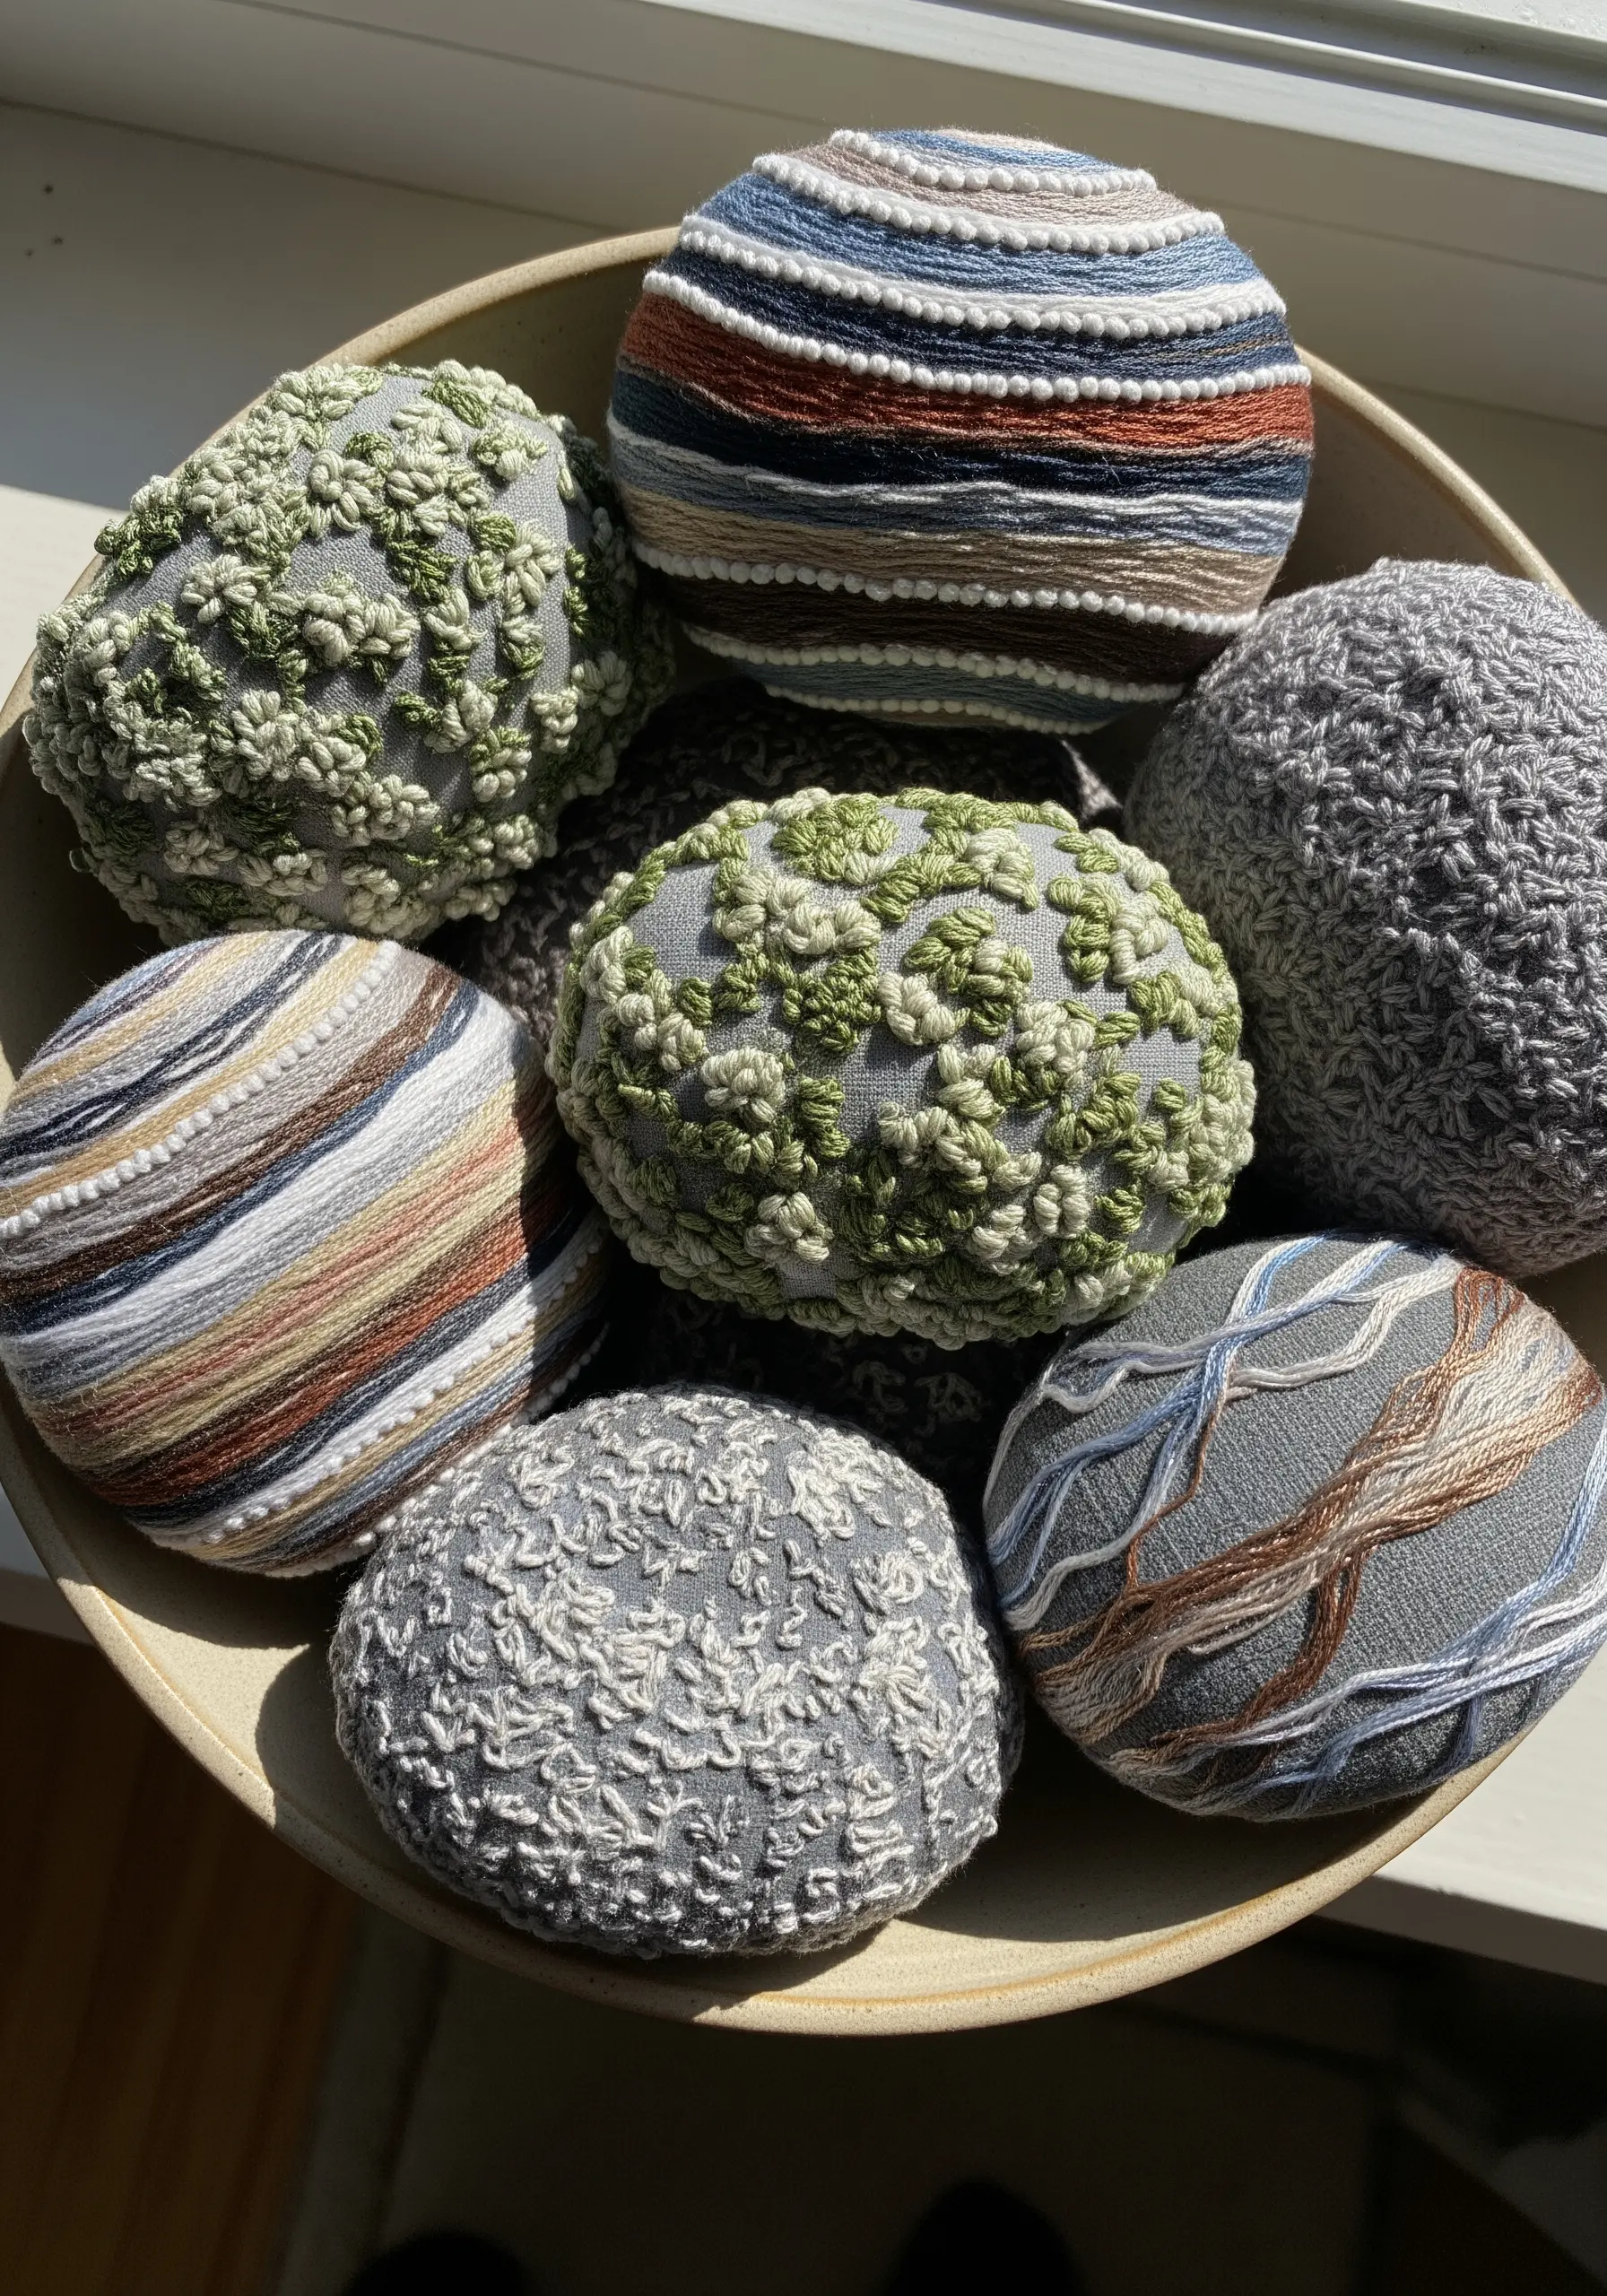
Create tactile, decorative objects by embroidering over simple, padded fabric forms.
Cut two identical circles of fabric, sew them together, and stuff with batting to create a small, stone-shaped cushion.
You can then cover this entire surface with texture-rich stitches like French knots, seed stitch, or wrapped lines.
Group these embroidered ‘stones’ in a bowl to create a beautiful, interactive centerpiece that invites touch.
21. Appliqué with Wool Roving for Soft Volume

For soft, cloud-like textures with significant volume, use wool roving instead of thread.
Lay down tufts of unspun wool roving in your desired shape directly onto your base fabric.
Use a felting needle to gently tack the fibers into place, or couch them down with a single strand of matching embroidery floss.
You can then add subtle running stitches or quilting lines on top to add definition and contour, creating a plush, high-relief effect.
22. Map Out Soil Layers with a Textural Sampler
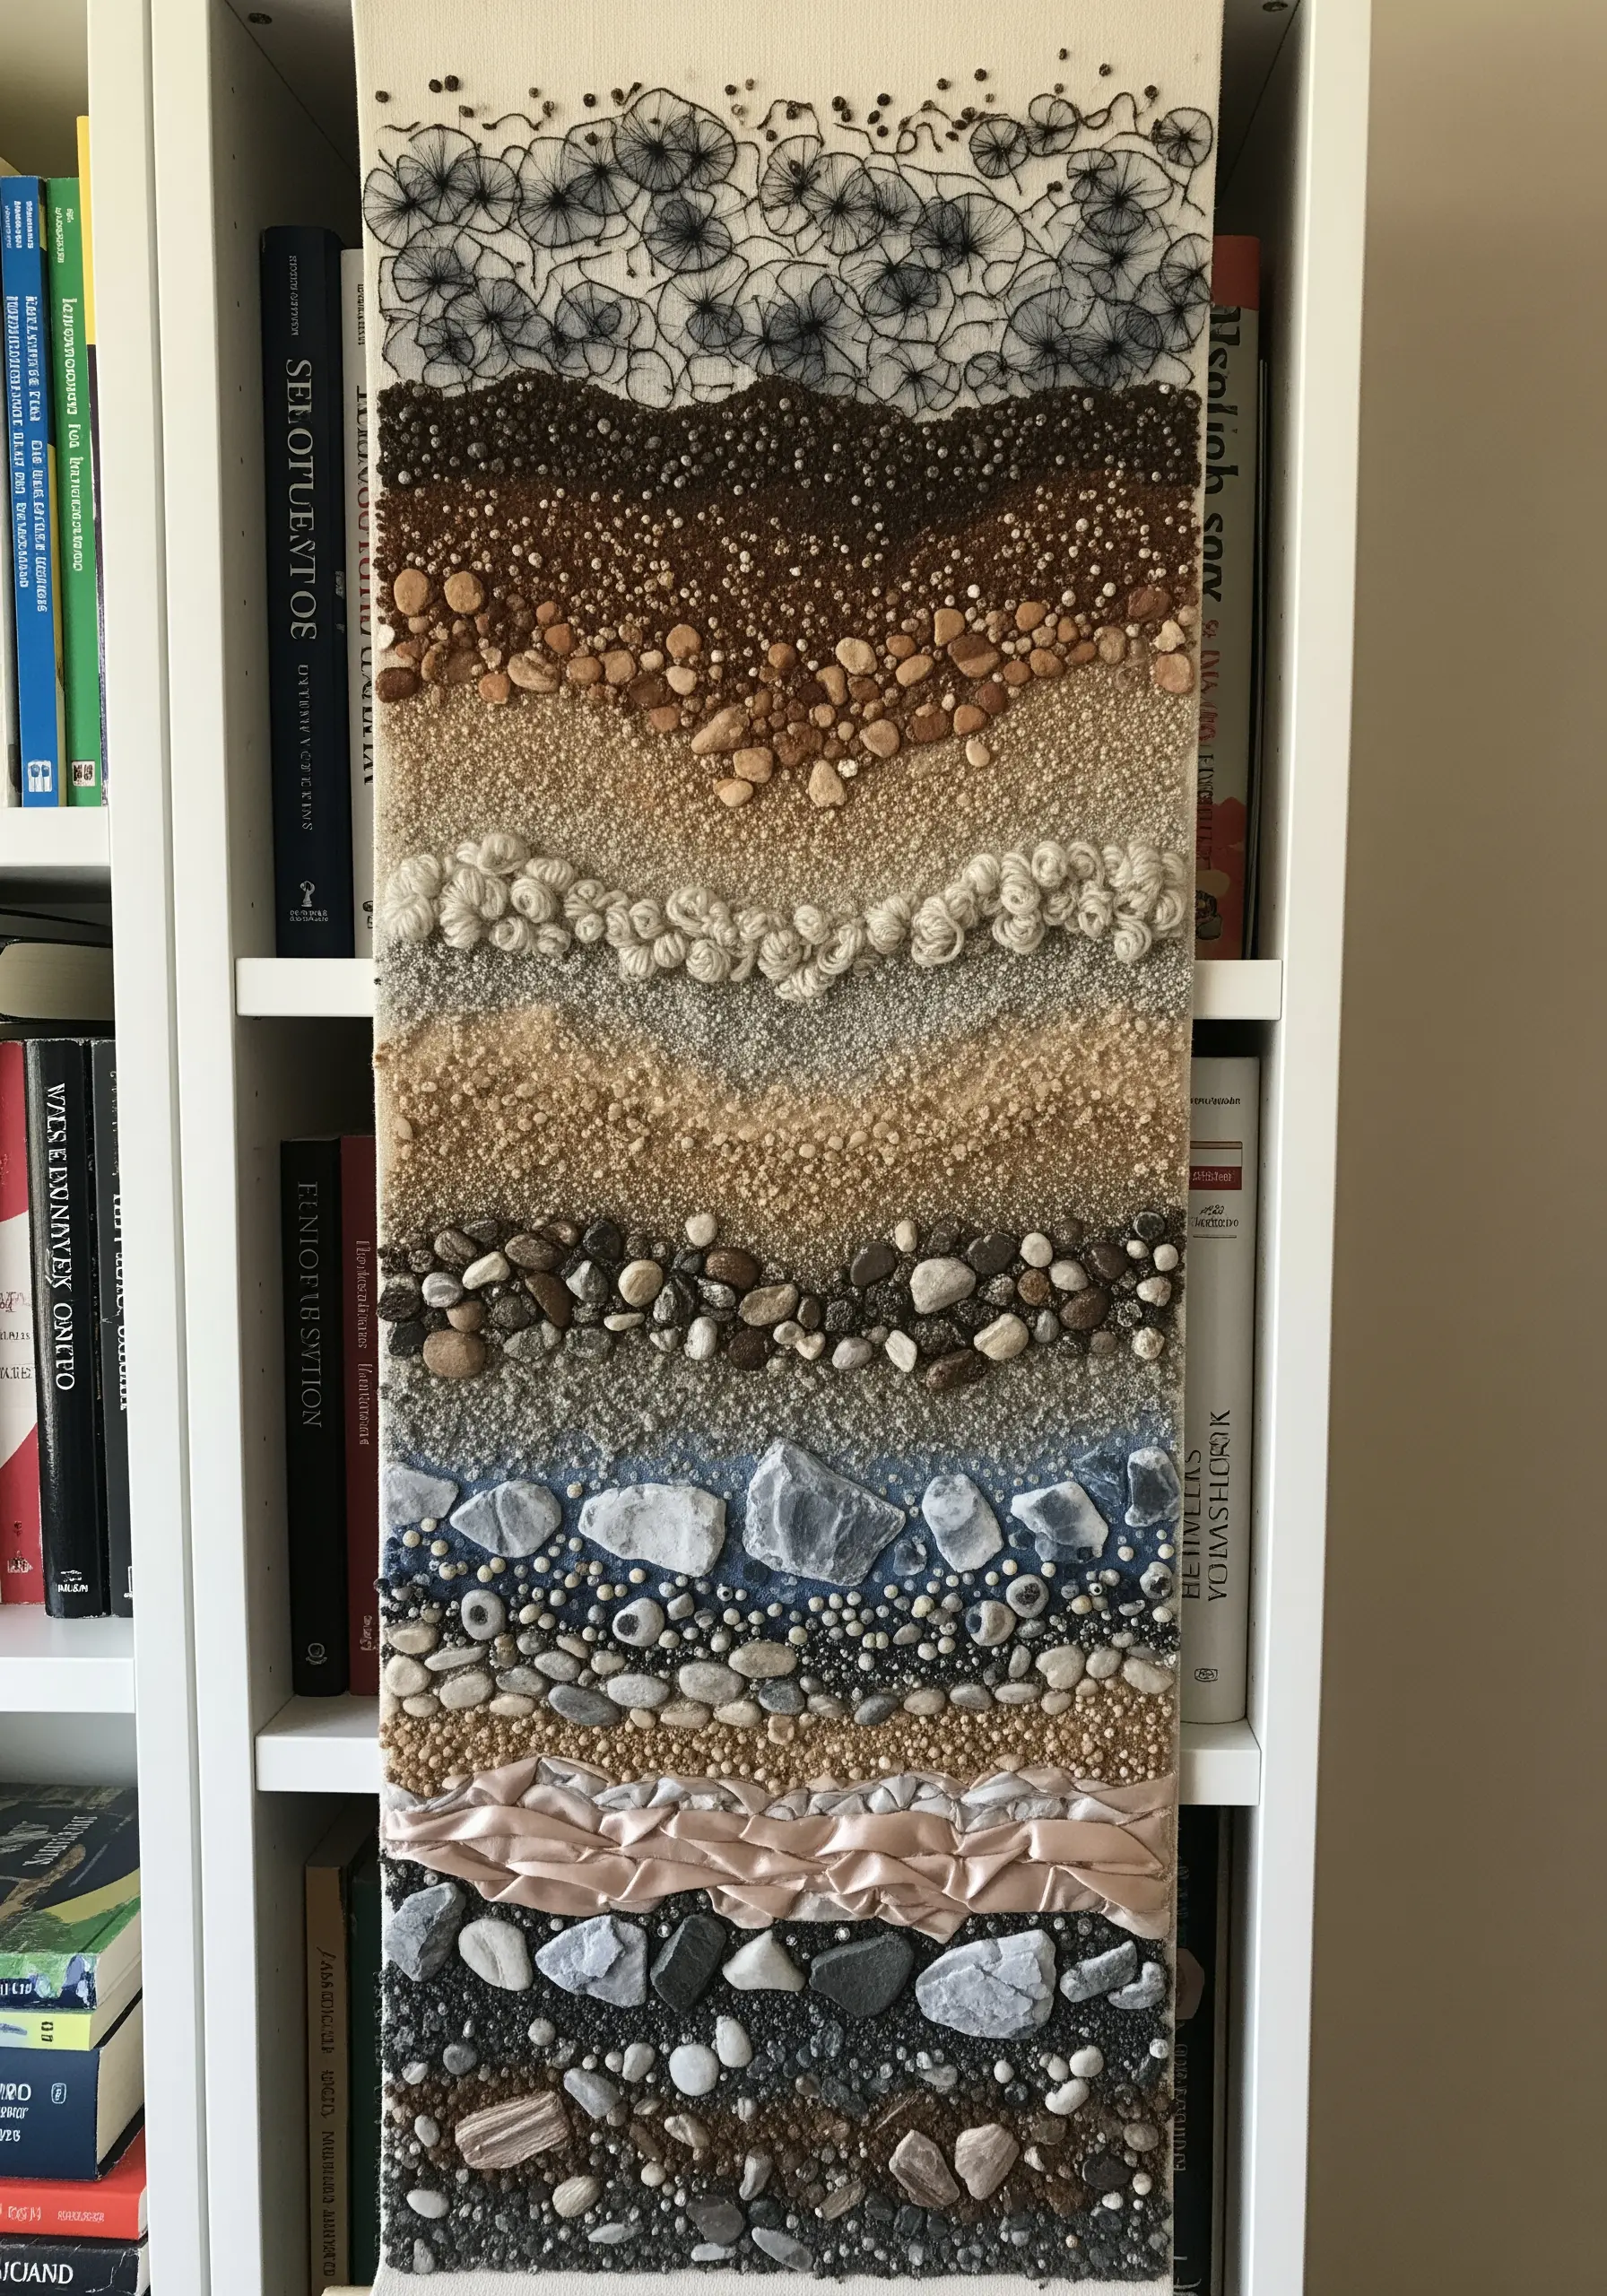
Turn a scientific cross-section into a work of art by representing different geological layers with distinct textures.
Use French knots and bullion knots for soil, couched chenille for clay, and a mix of seed beads and padded satin stitches for gravel and rock.
Arrange these textures in horizontal bands to create a visual and tactile representation of the earth’s strata.
This approach transforms a simple concept into a rich, educational piece of embroidery inspired by textures from a nature walk.
23. Construct Delicate Wings with Wire and Organza
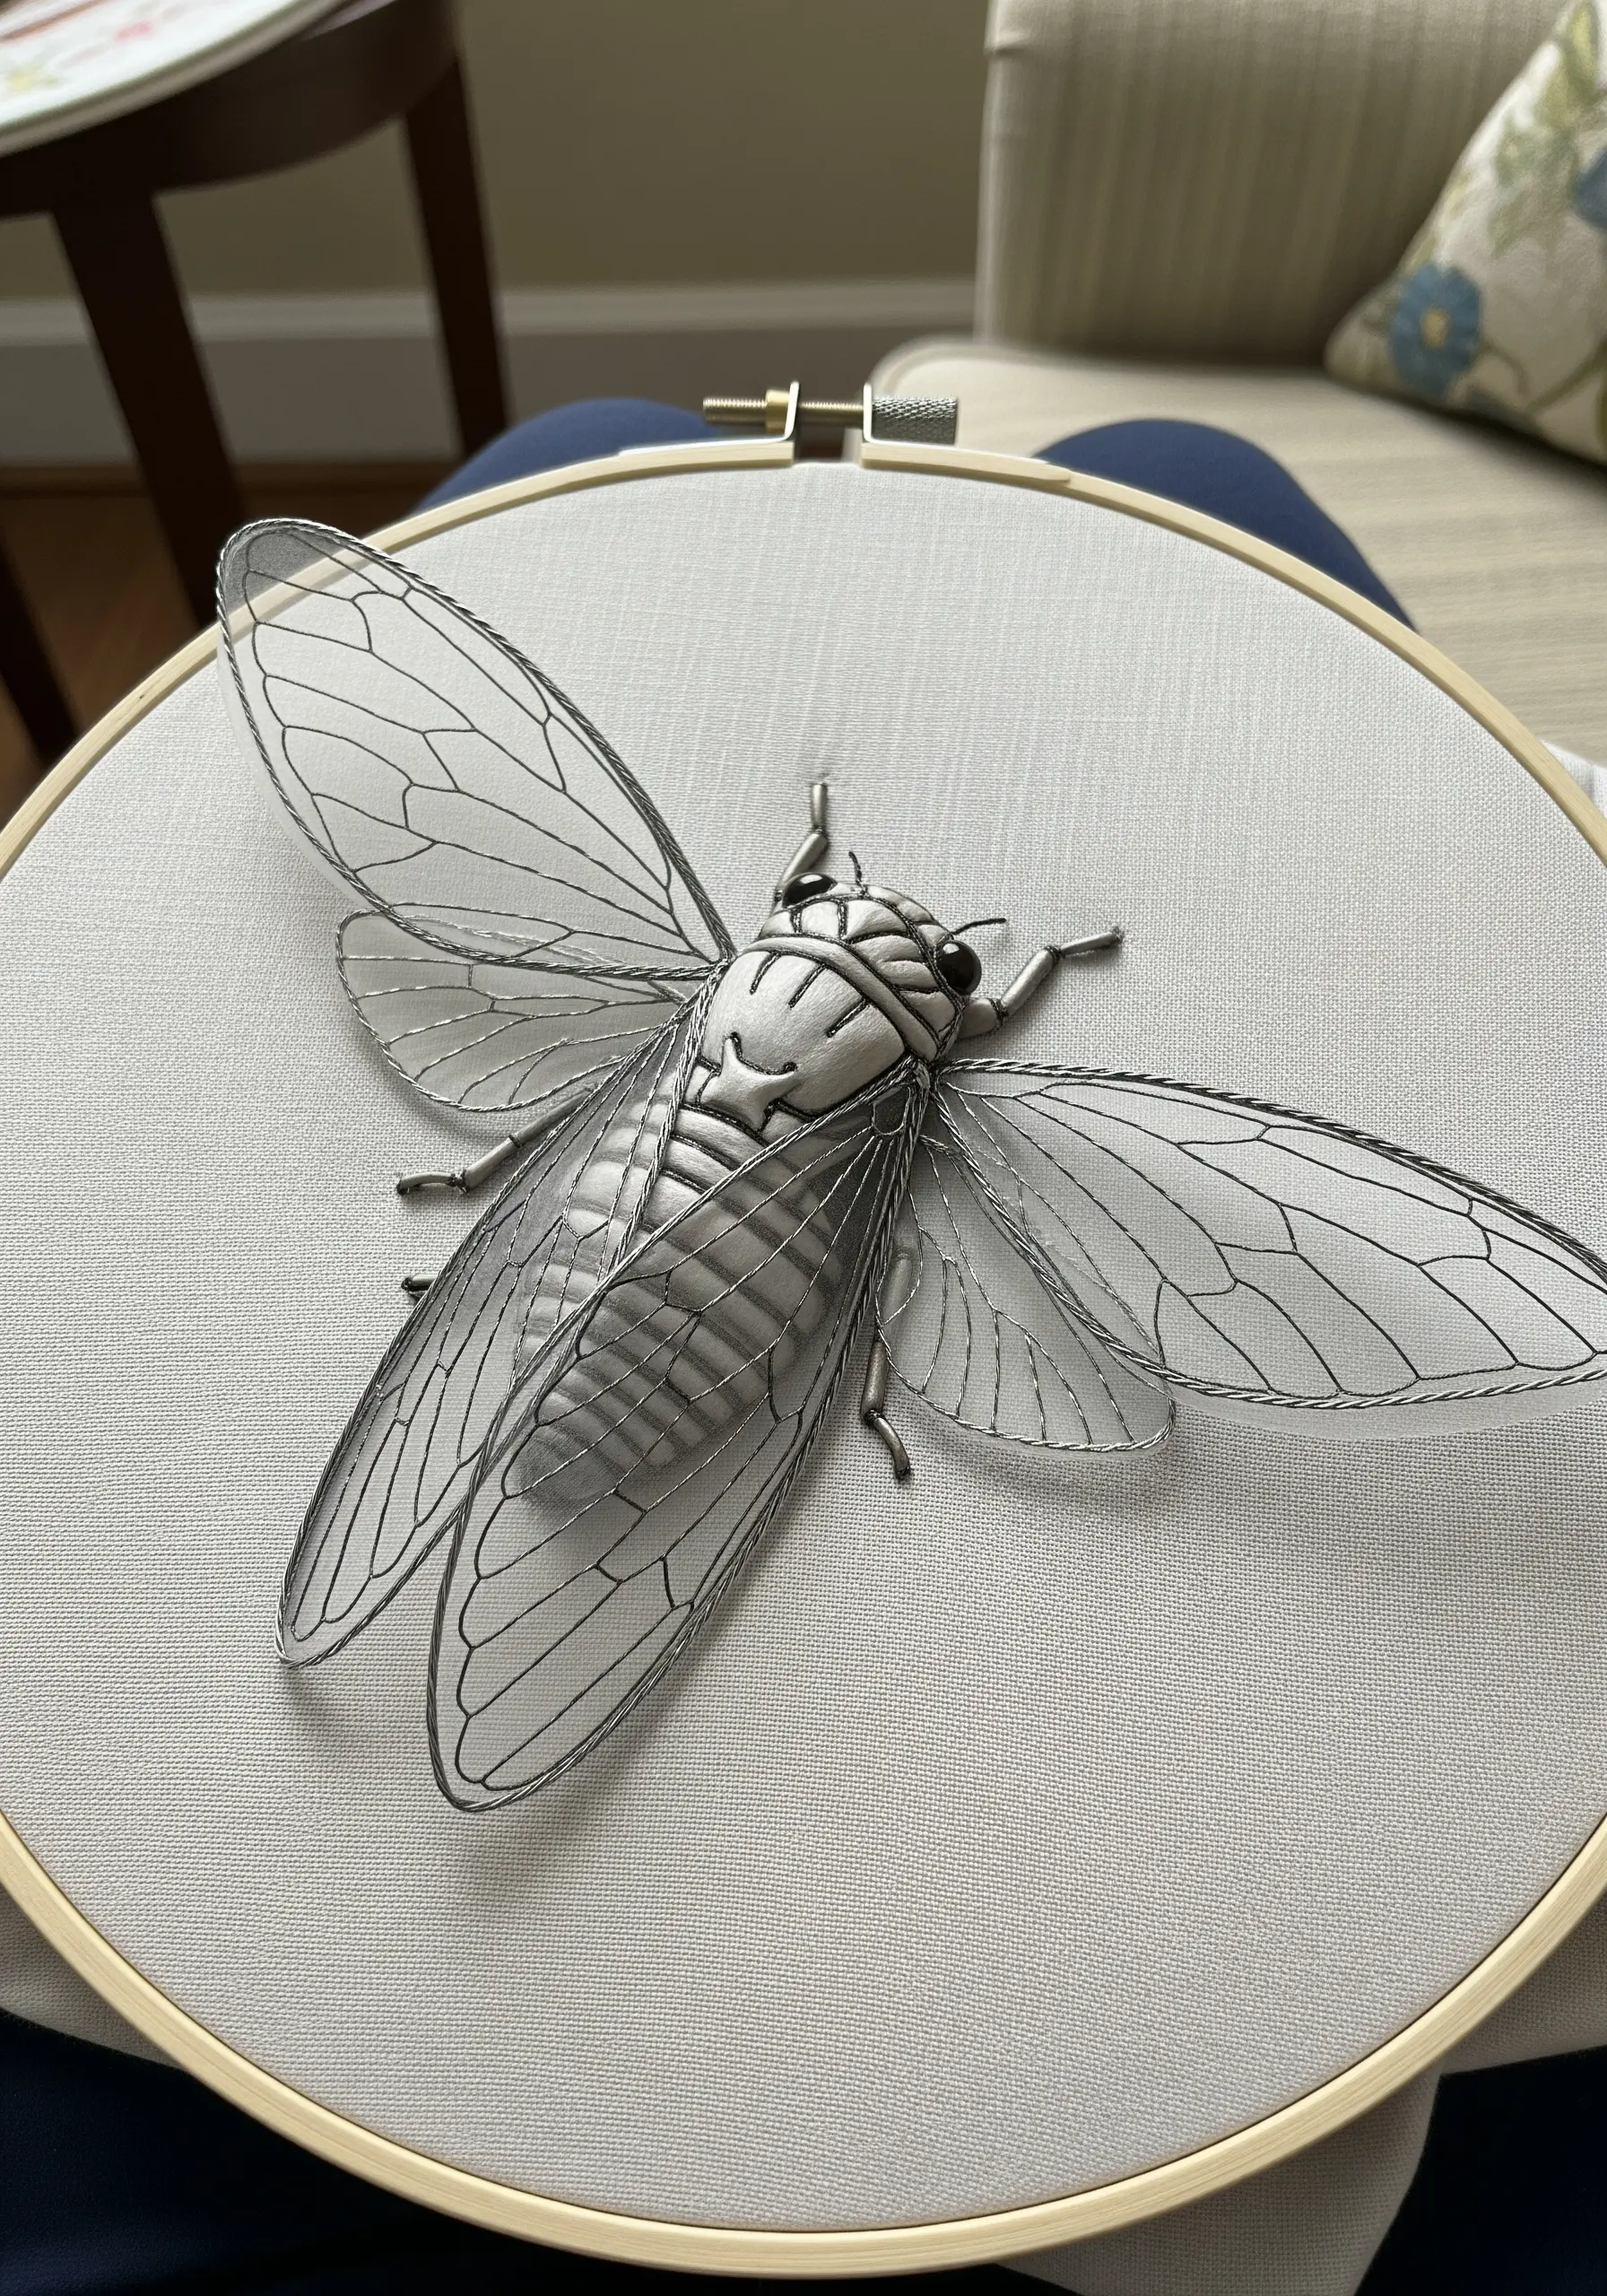
To create the transparent, veined wings of an insect, combine fine wire with sheer fabric in a stumpwork technique.
Bend a fine-gauge millinery wire into the shape of the wing. Tack it to your base fabric, then cover the wire completely with delicate buttonhole stitches.
Lay a piece of silk organza over the top and stitch the vein details using a simple backstitch, securing the organza to the background fabric inside the wire frame.
Finally, carefully trim away the excess organza and the background fabric from behind for a stunning, translucent effect.
24. Combine Beading and Stitching for a Frosted Look

Elevate delicate foliage by adding the subtle sparkle of seed beads to mimic frost or dewdrops.
First, embroider your fern or leaf patterns using stitches like fern stitch, fly stitch, or fishbone stitch in a light, silvery thread.
Then, go back and scatter tiny, clear, or silver-lined seed beads throughout the design, securing each with a tiny stitch.
This combination of matte thread and reflective beads adds a layer of magical realism and texture that feels both elegant and natural.
25. Create Freestanding Leaves with a Soluble Stabilizer
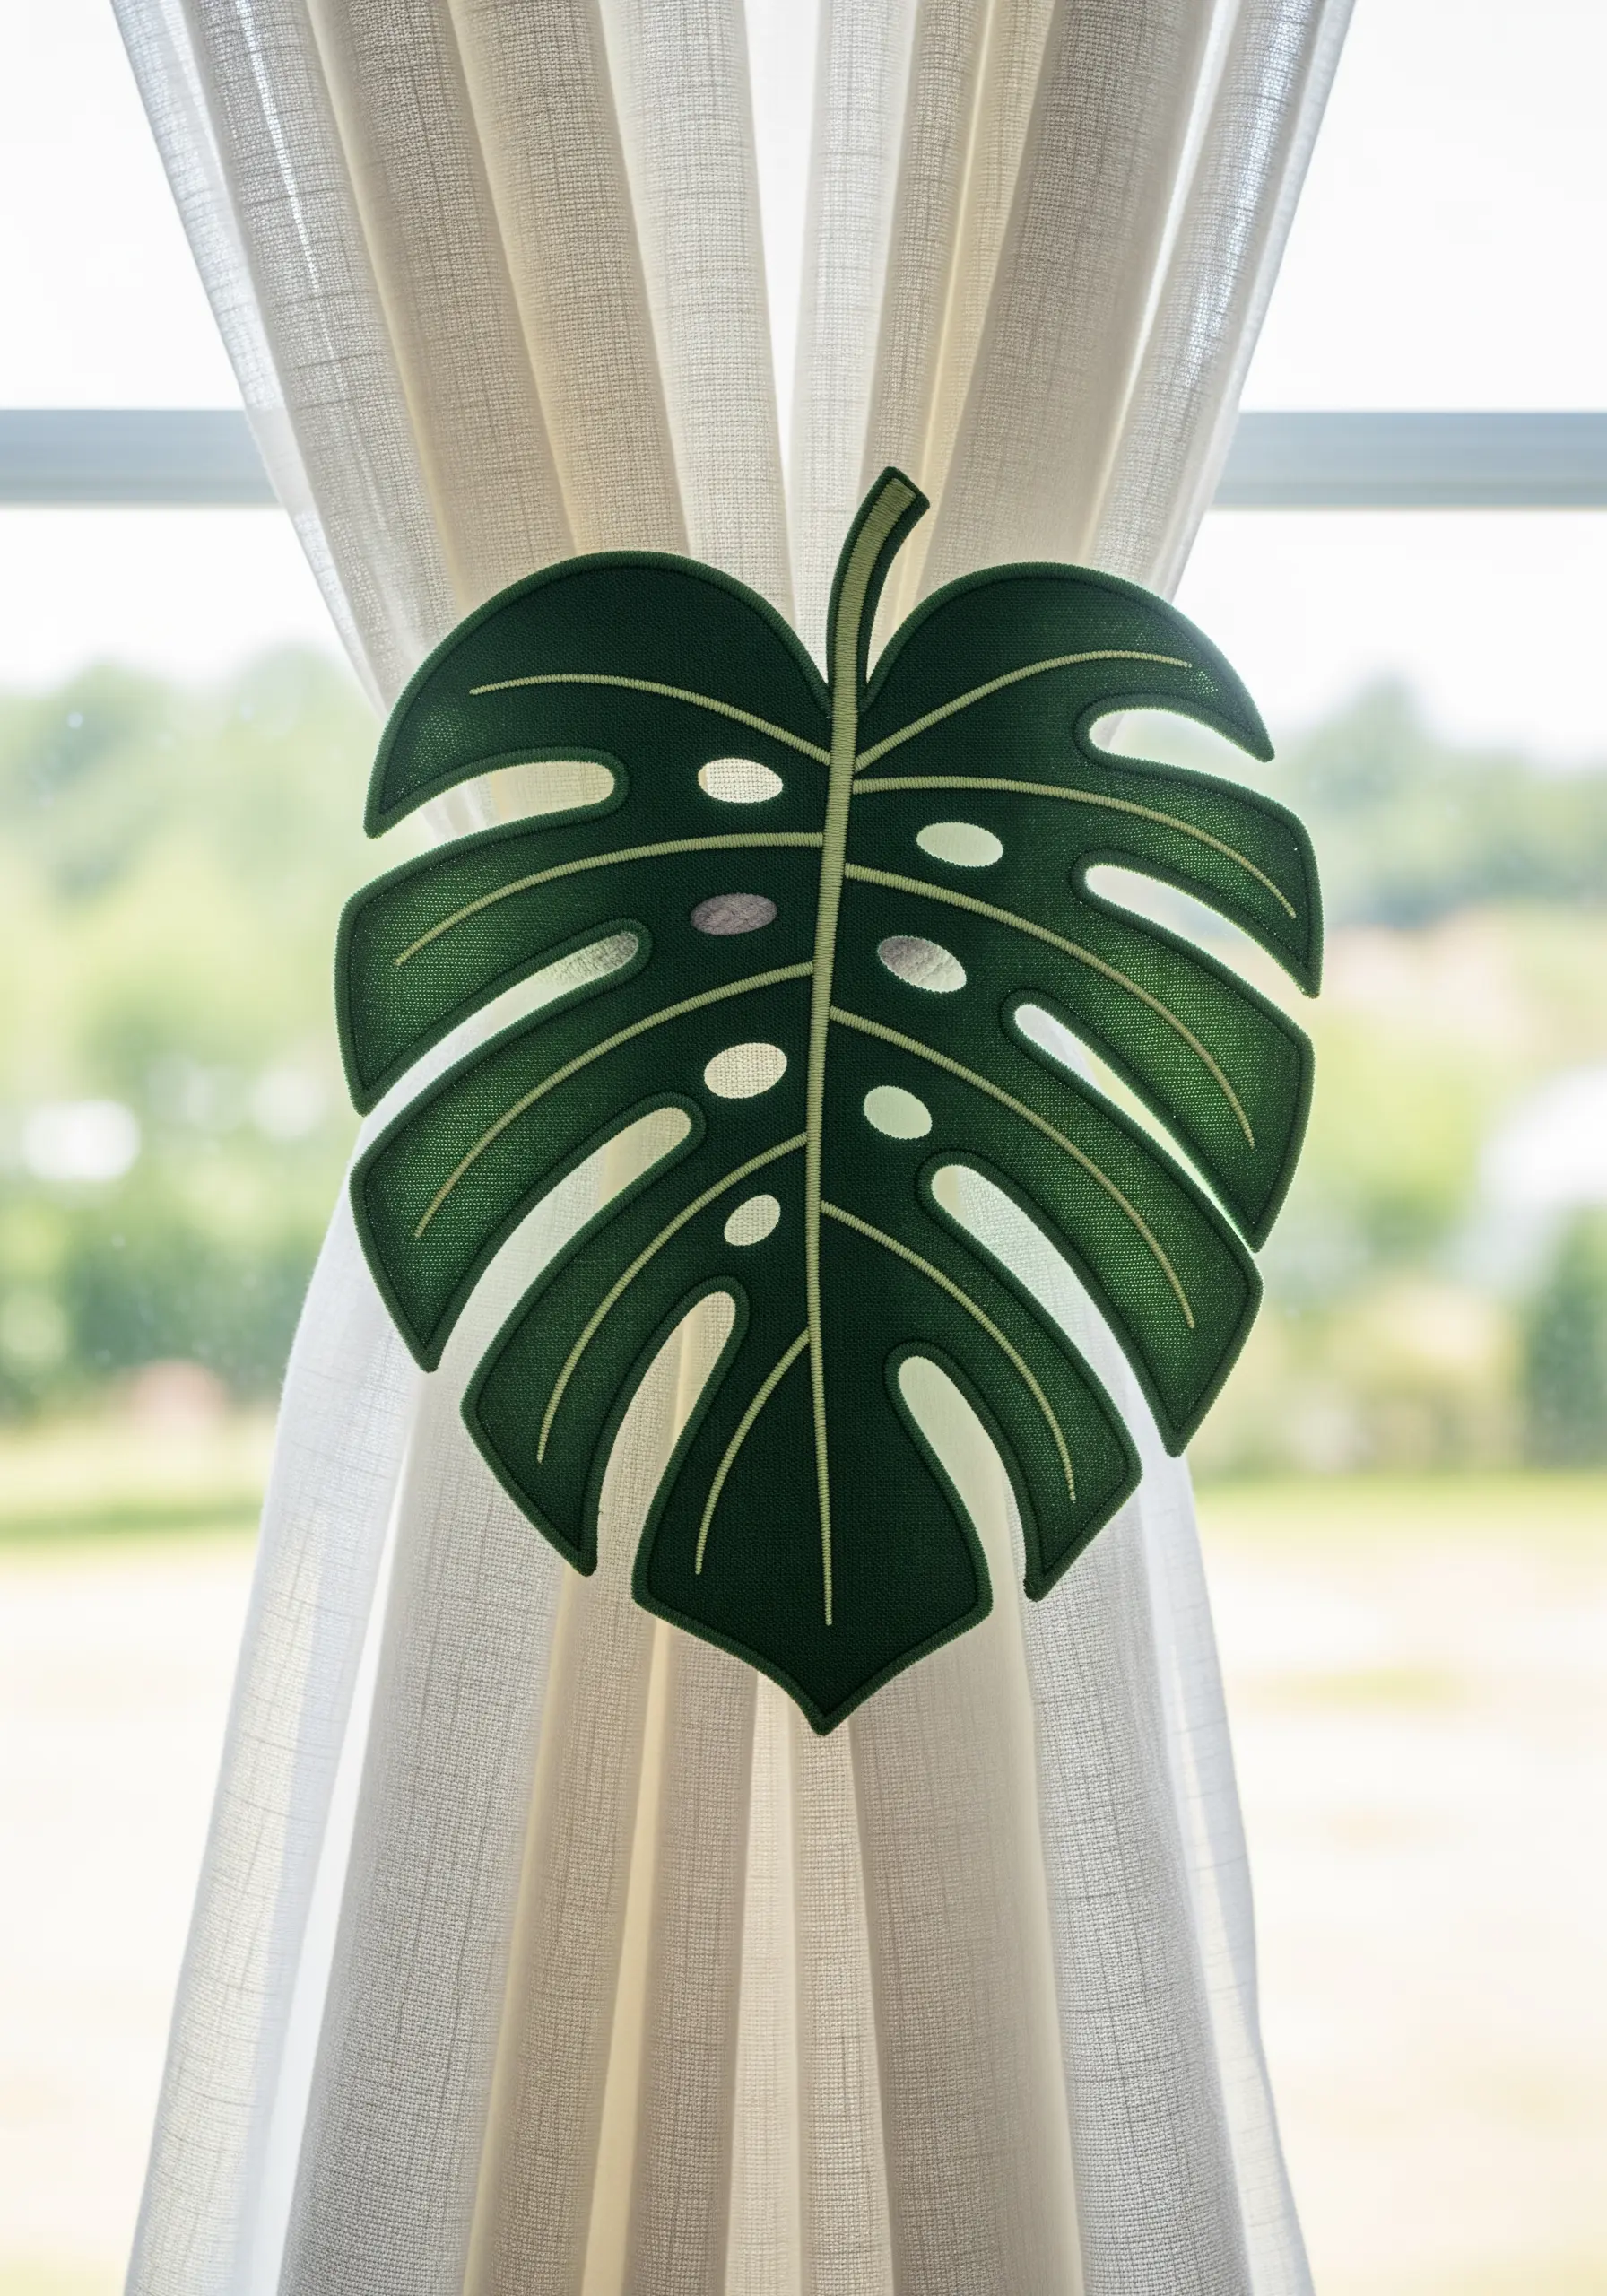
Design functional embroidered objects that are not attached to a background fabric, like this curtain tie-back.
Hoop a water-soluble stabilizer and stitch your design directly onto it, ensuring your satin stitches are dense and closely packed to create a solid structure.
Once stitching is complete, trim the excess stabilizer and dissolve the remainder in water according to the manufacturer’s instructions.
After it dries, you’ll have a sturdy, freestanding piece of embroidery that can be used in countless creative ways.
26. Define Negative Space with Thick Couching
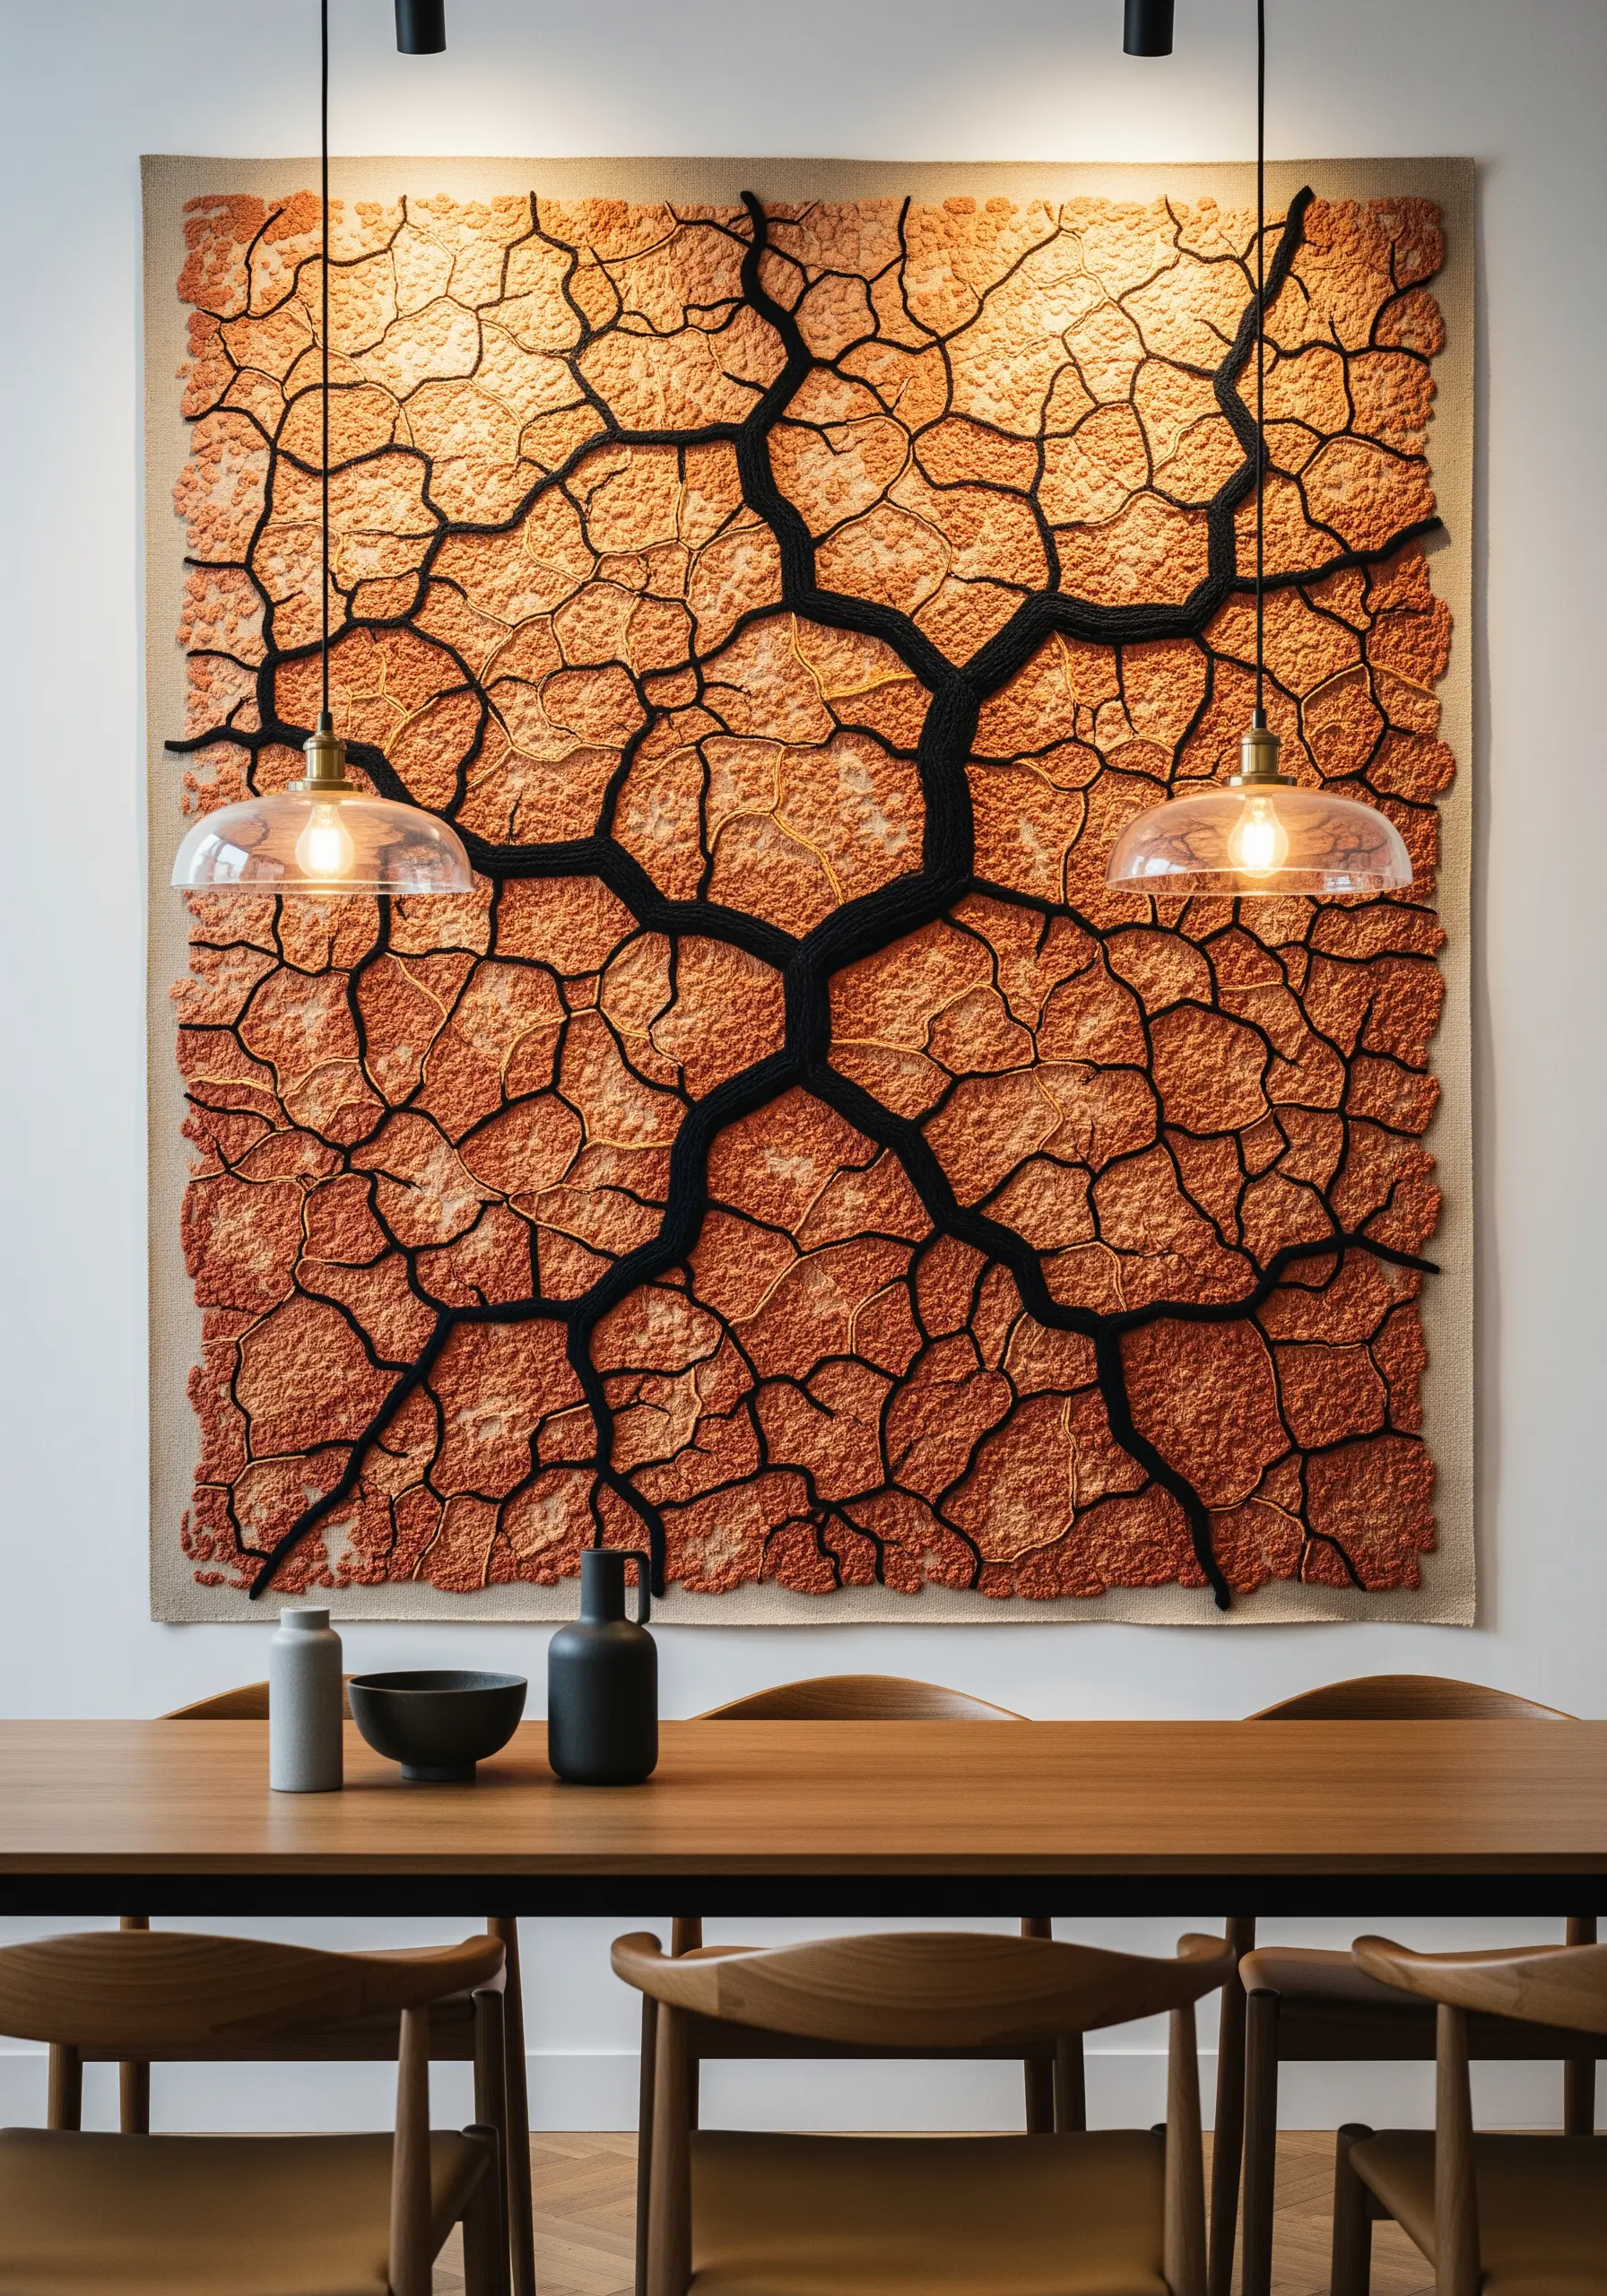
Create the dramatic effect of cracked earth by focusing on the spaces *between* the shapes.
Use a thick, contrasting yarn—like the black yarn here—and couch it down to create a bold, graphic network of lines.
Fill the resulting shapes with a dense, chaotic texture like overlapping seed stitches or French knots in earthy, variegated tones.
This technique uses negative space as a powerful compositional tool, drawing the eye and adding immense depth.
27. Build Mandala Textures with Knots and Loops
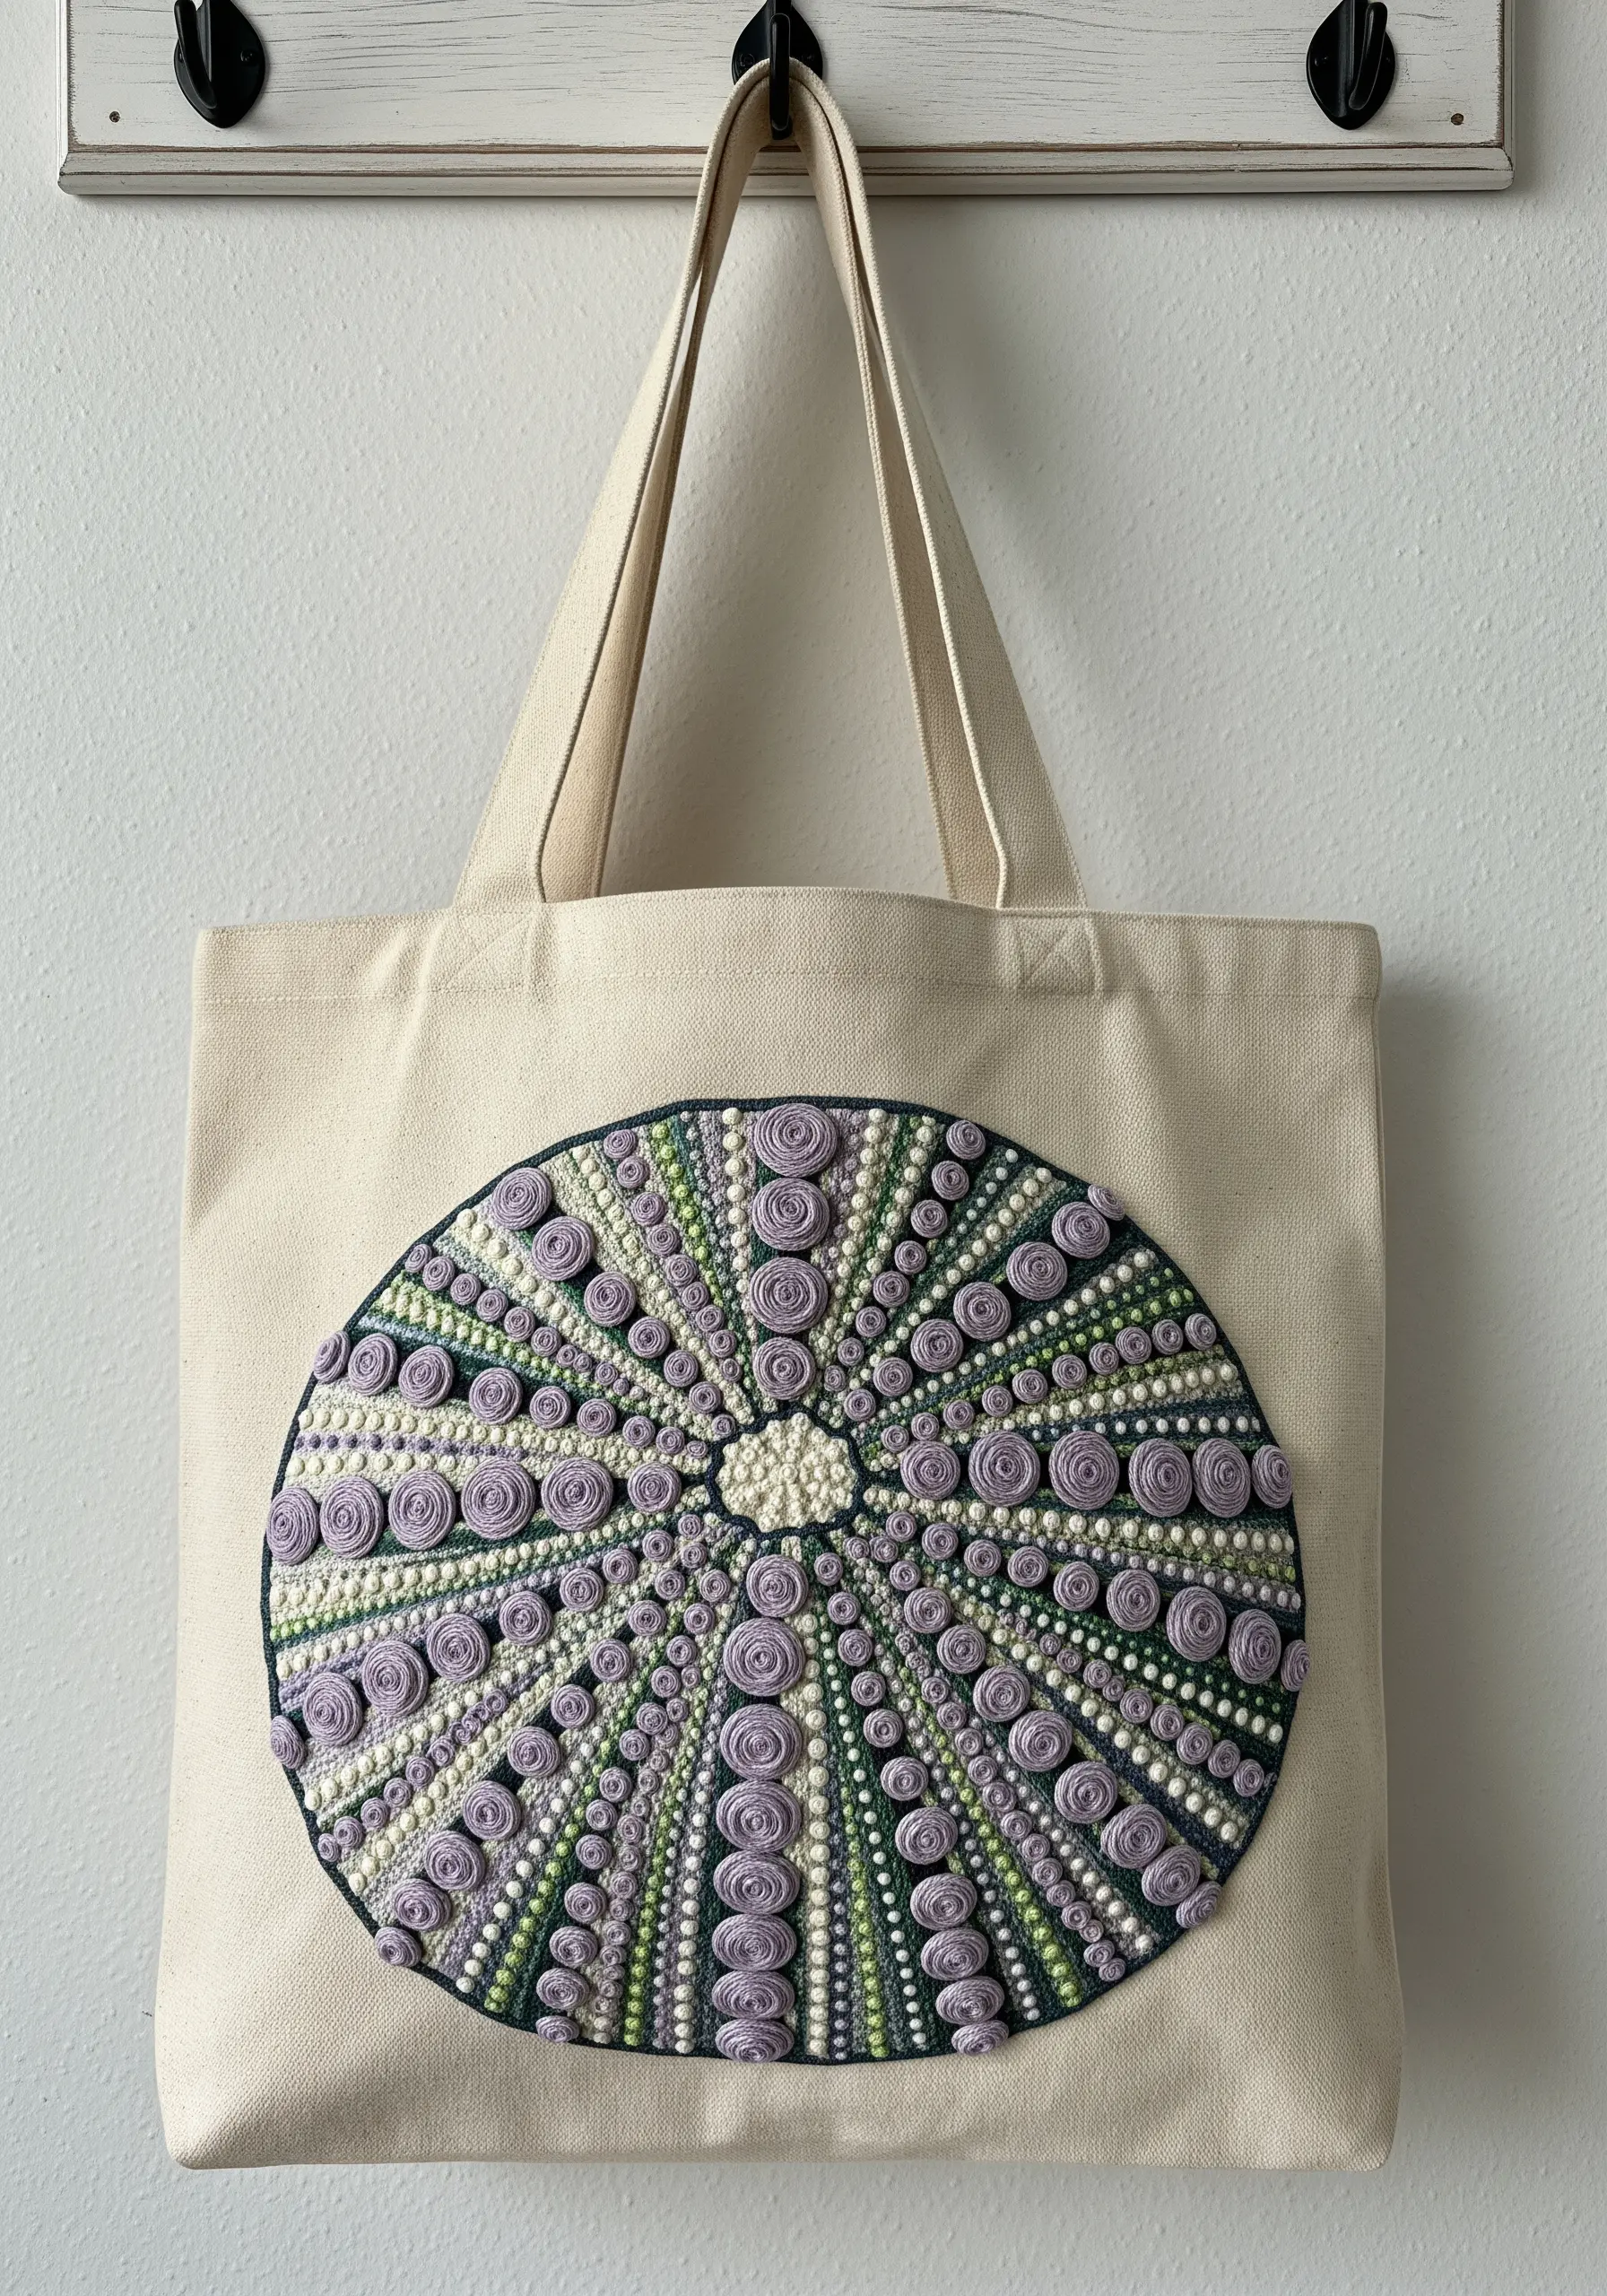
Recreate the intricate patterns of a sea urchin shell by building up concentric circles of textural stitches.
Start with a central point and work your way out, alternating rows of French knots, bullion knots, and colonial knots.
Use threads of different weights and sheens to add variety. For the raised bumps, stitch a small, padded satin circle and surround it with a ring of tiny seed stitches.
This methodical, repetitive process is not only visually stunning but also incredibly meditative.
28. Explore Macro Textures with Oversized Knitting
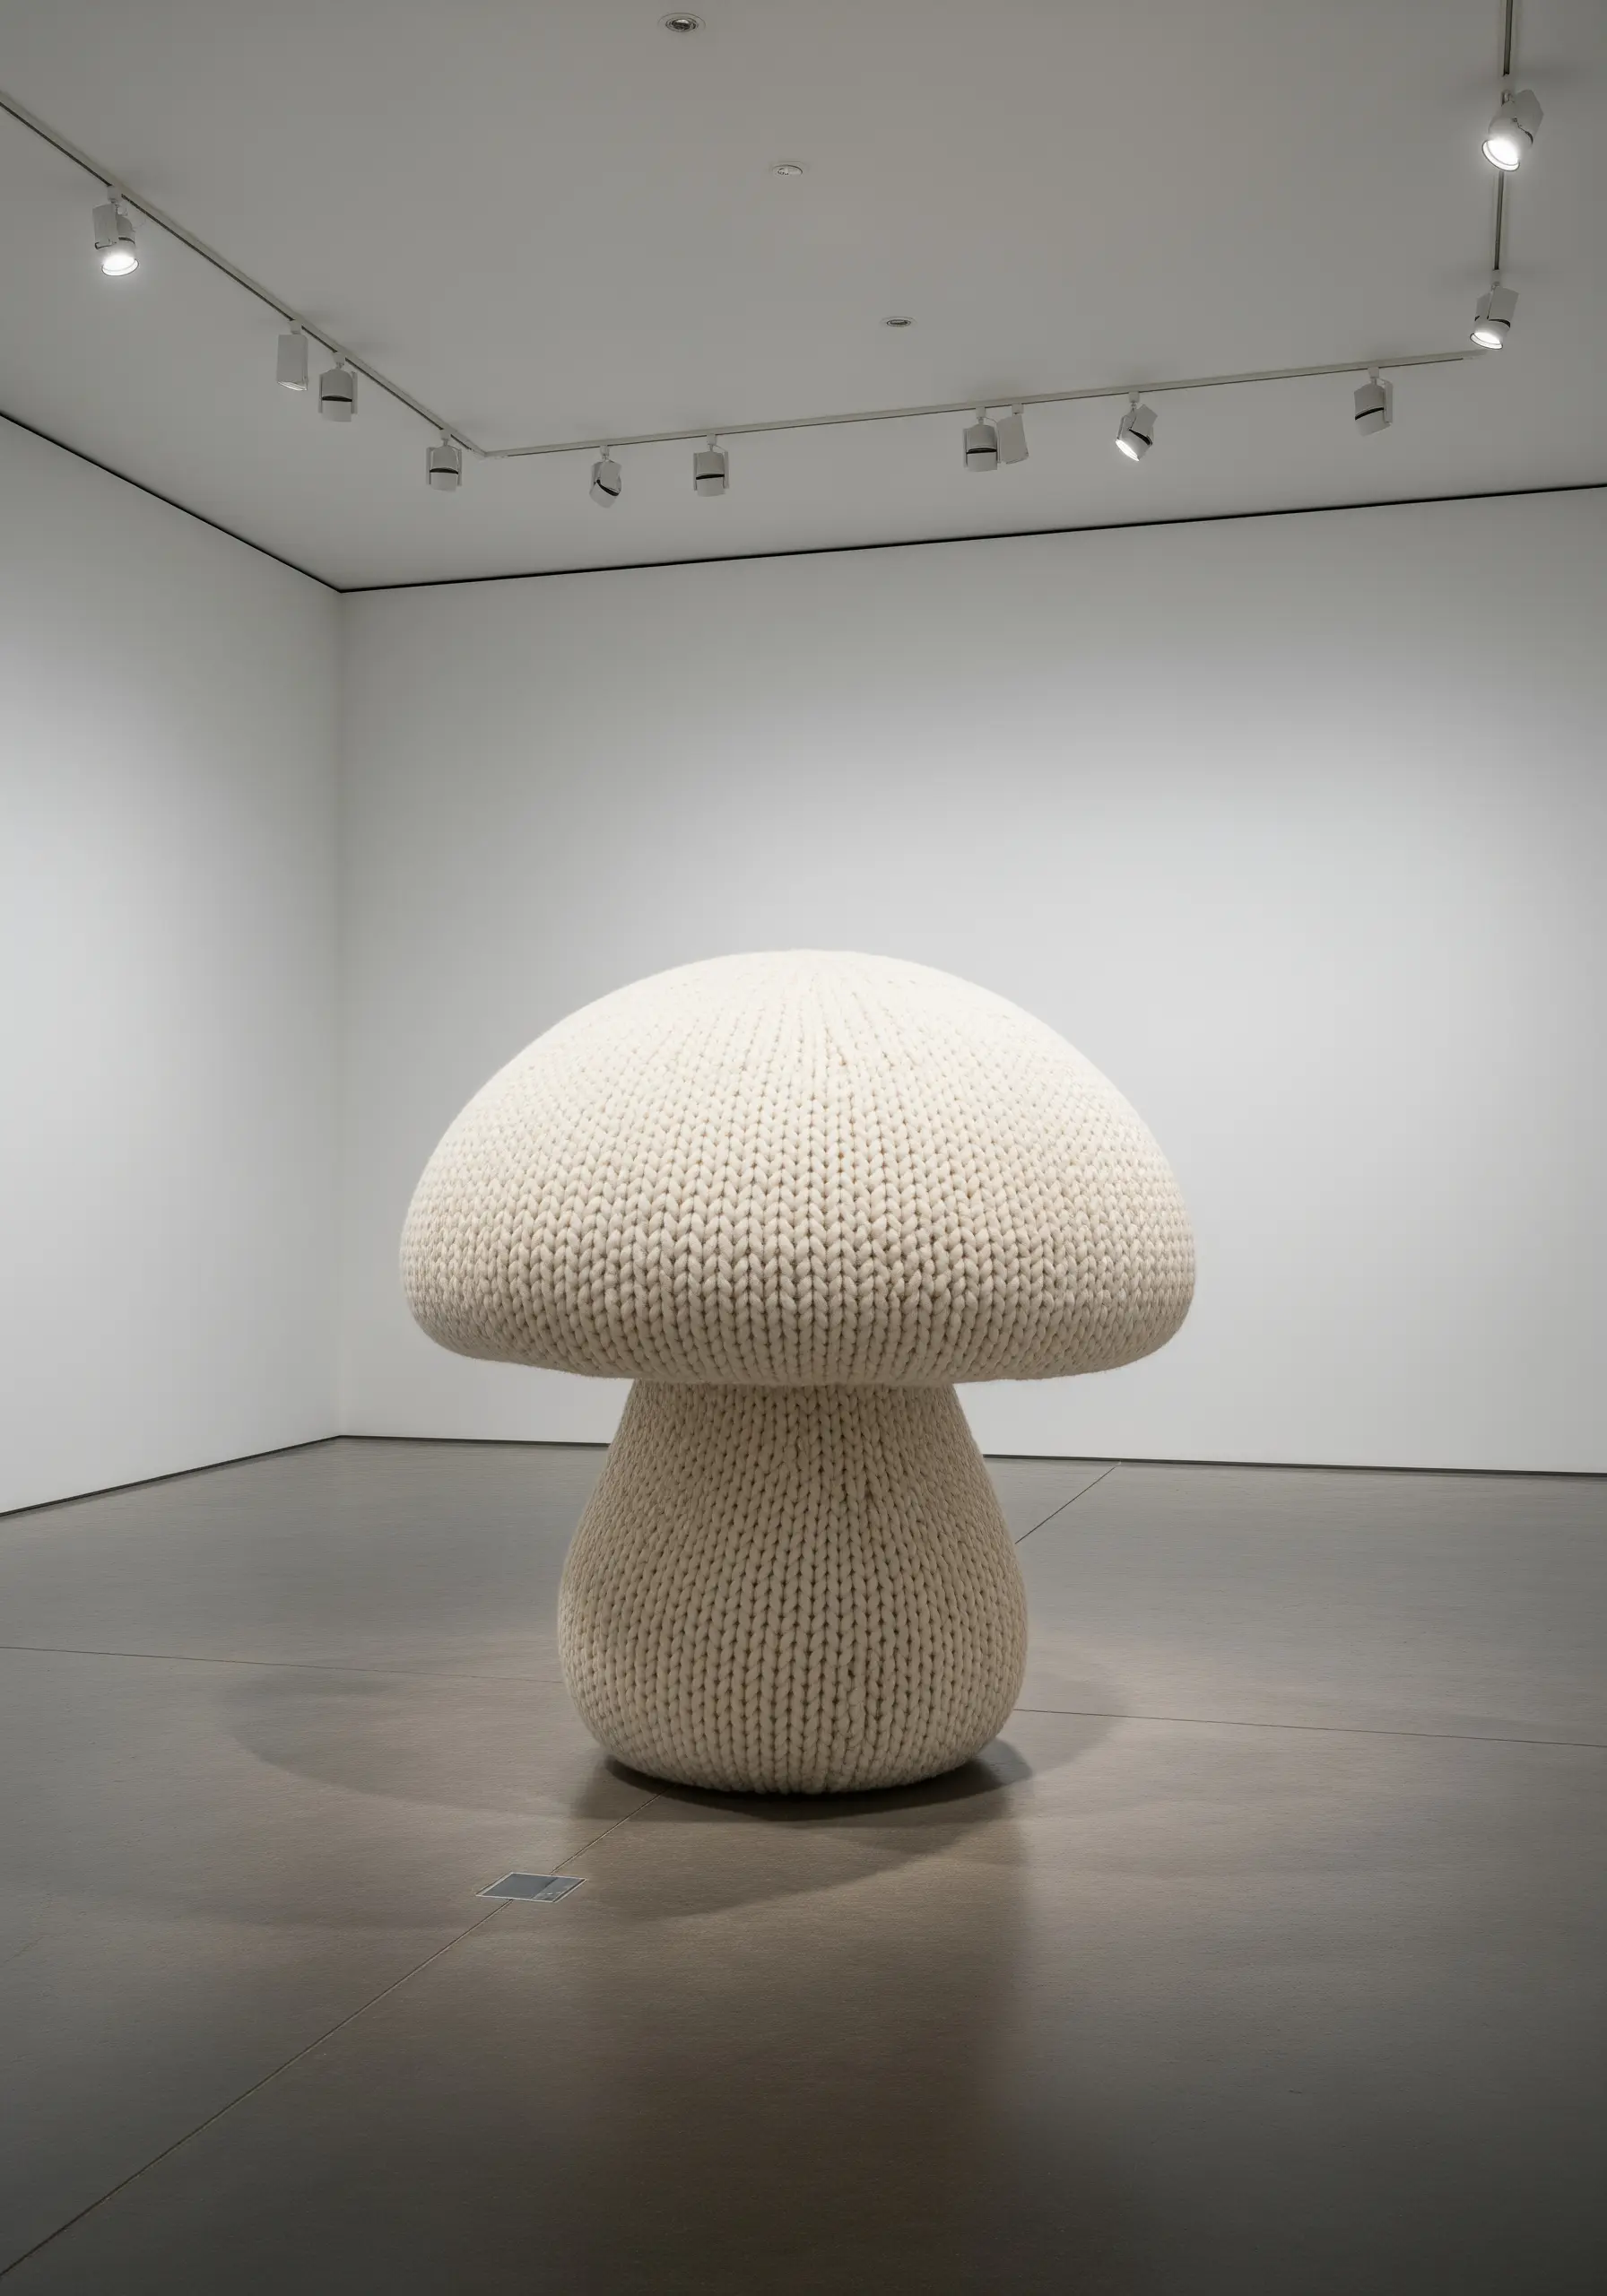
Create a huge impact by translating a natural object into a large-scale fiber sculpture.
Instead of embroidery floss, use giant yarn and oversized knitting needles or a crochet hook to build your form.
The texture in a piece like this comes from the inherent structure of the knit or crochet stitch itself—stockinette, garter, or single crochet—magnified to an enormous scale.
This approach challenges our perception of craft and transforms a simple mushroom into an immersive piece of art.
29. Isolate Elements to Emphasize Texture
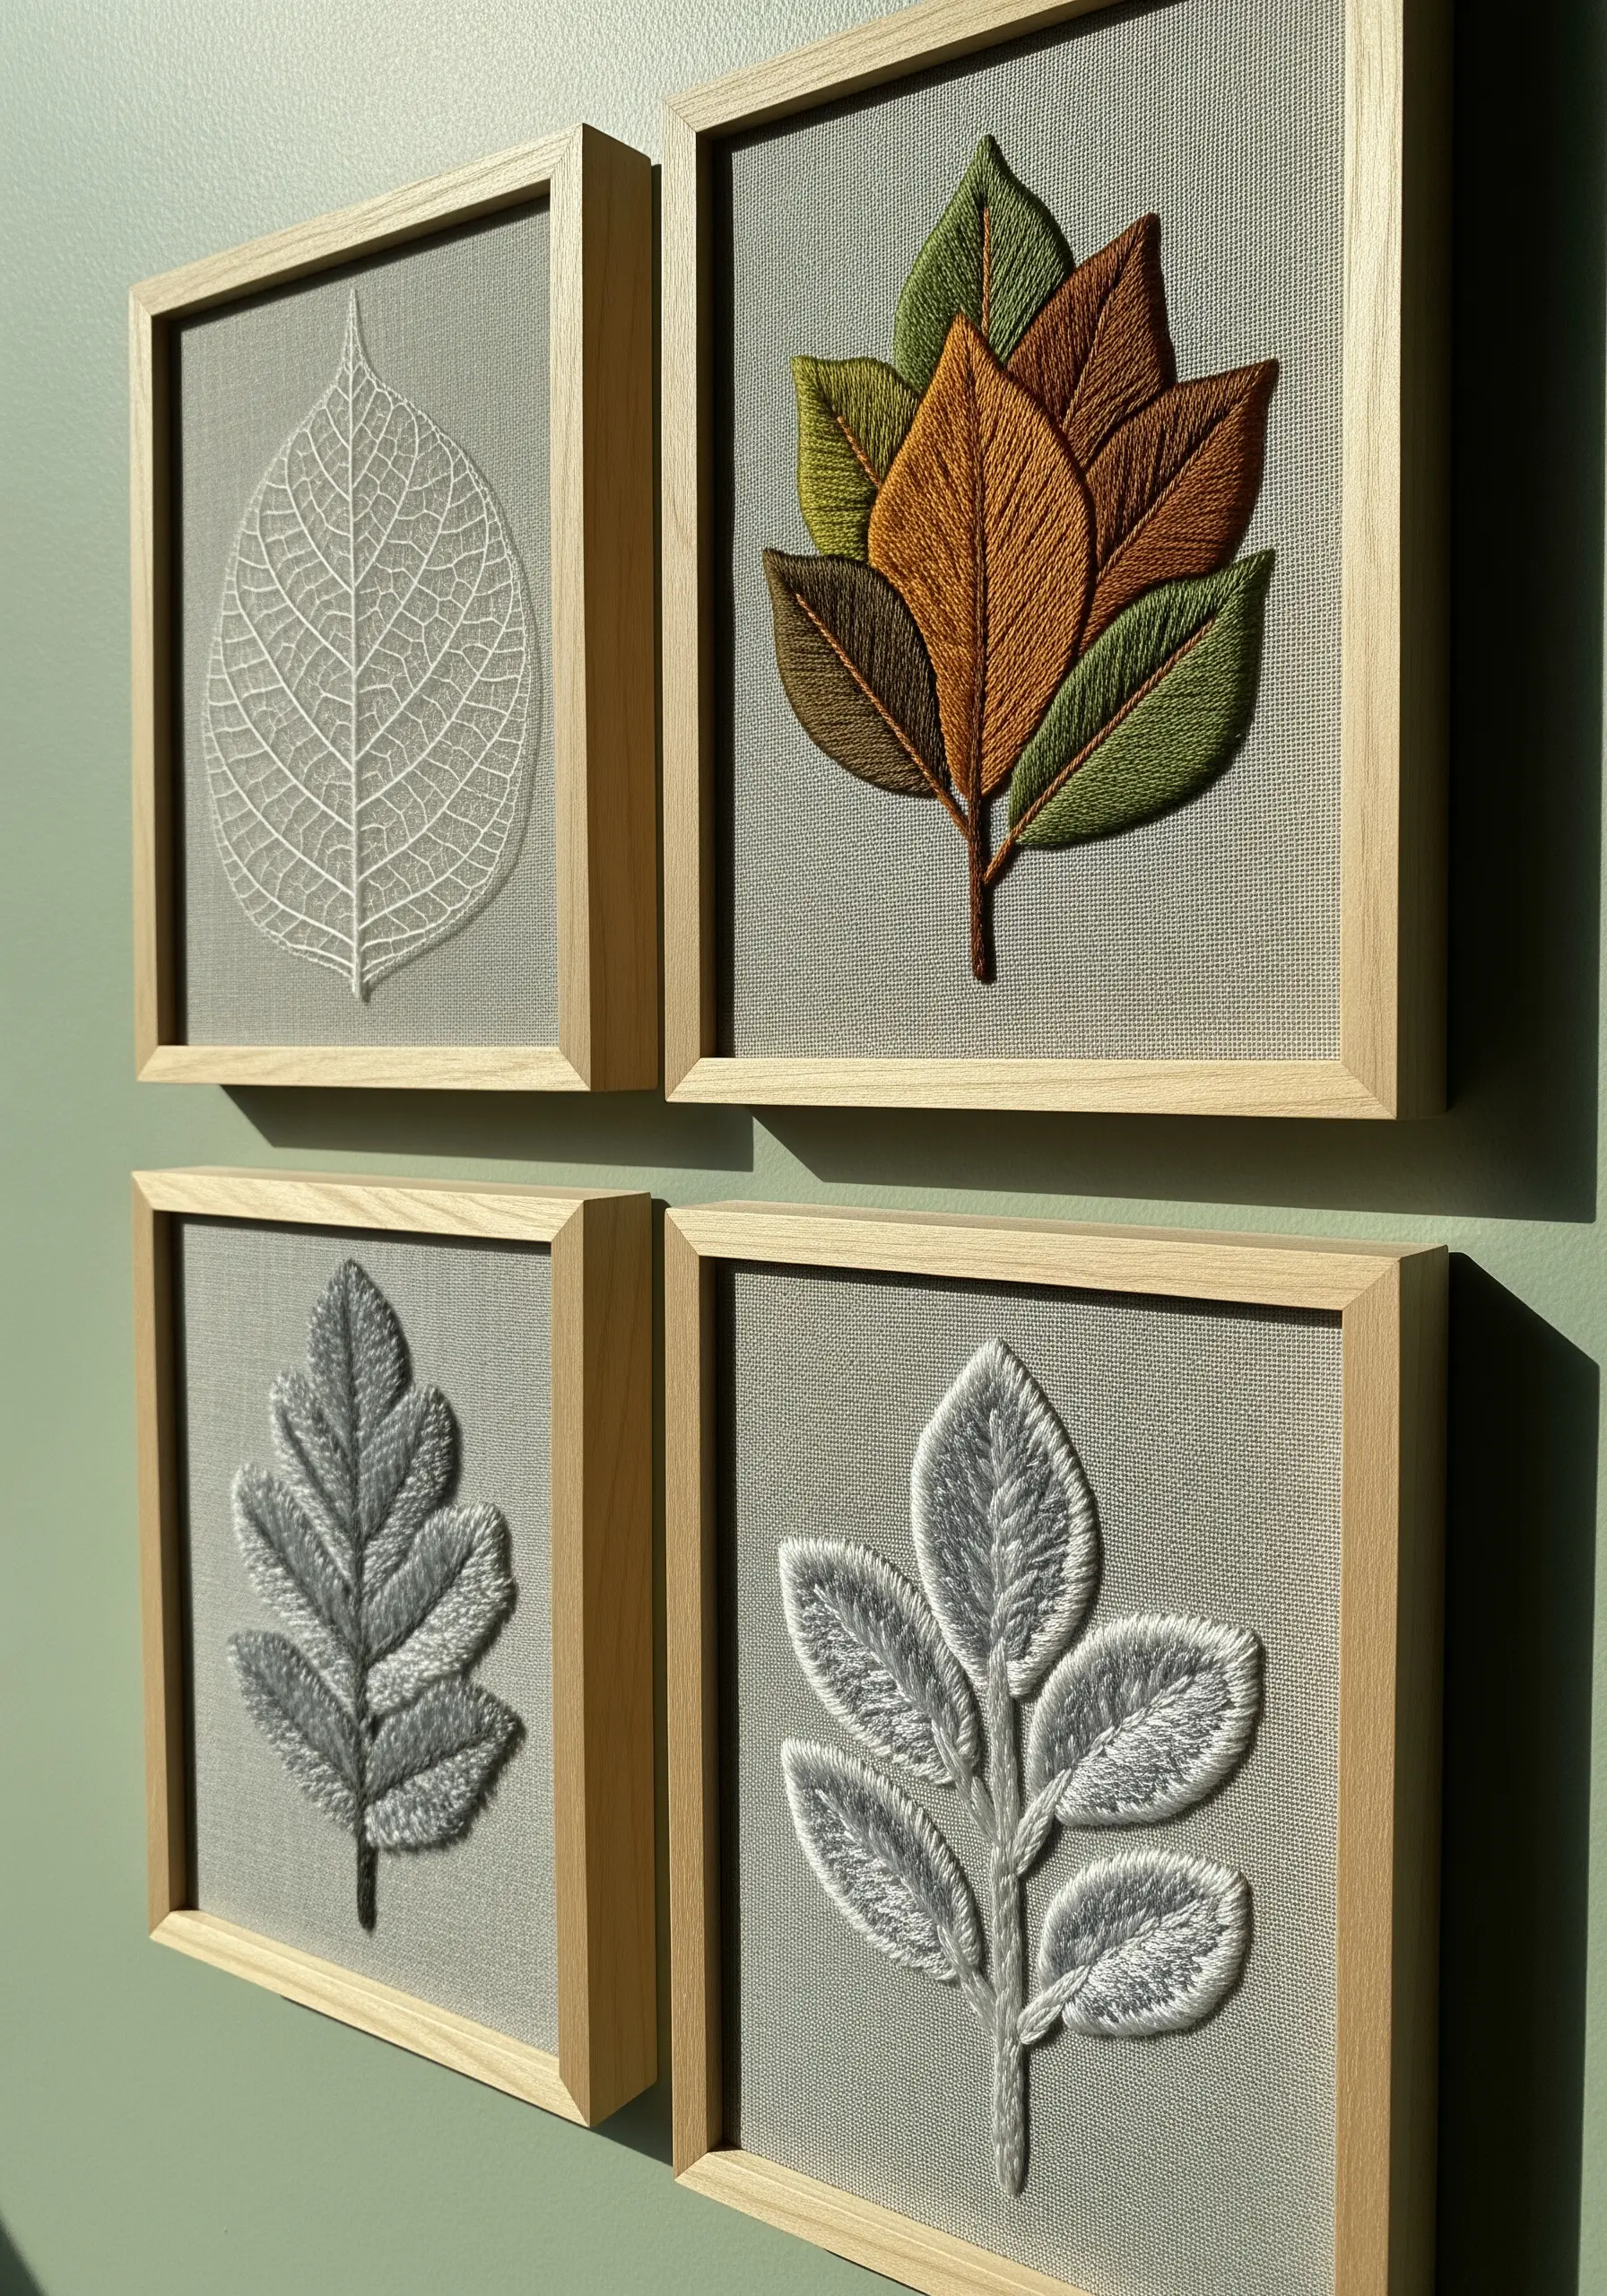
When displaying a series, create a powerful visual story by showing the same subject in different textural states.
For one leaf, focus purely on its structure by stitching only the veins in a delicate backstitch on plain fabric.
For another, use full thread painting with long-and-short stitch to explore its color and form.
Displaying these variations together, as in a gallery wall of framed embroidery ideas, highlights the beauty of both simplicity and complexity.
30. Use Layering for Fields and Foliage
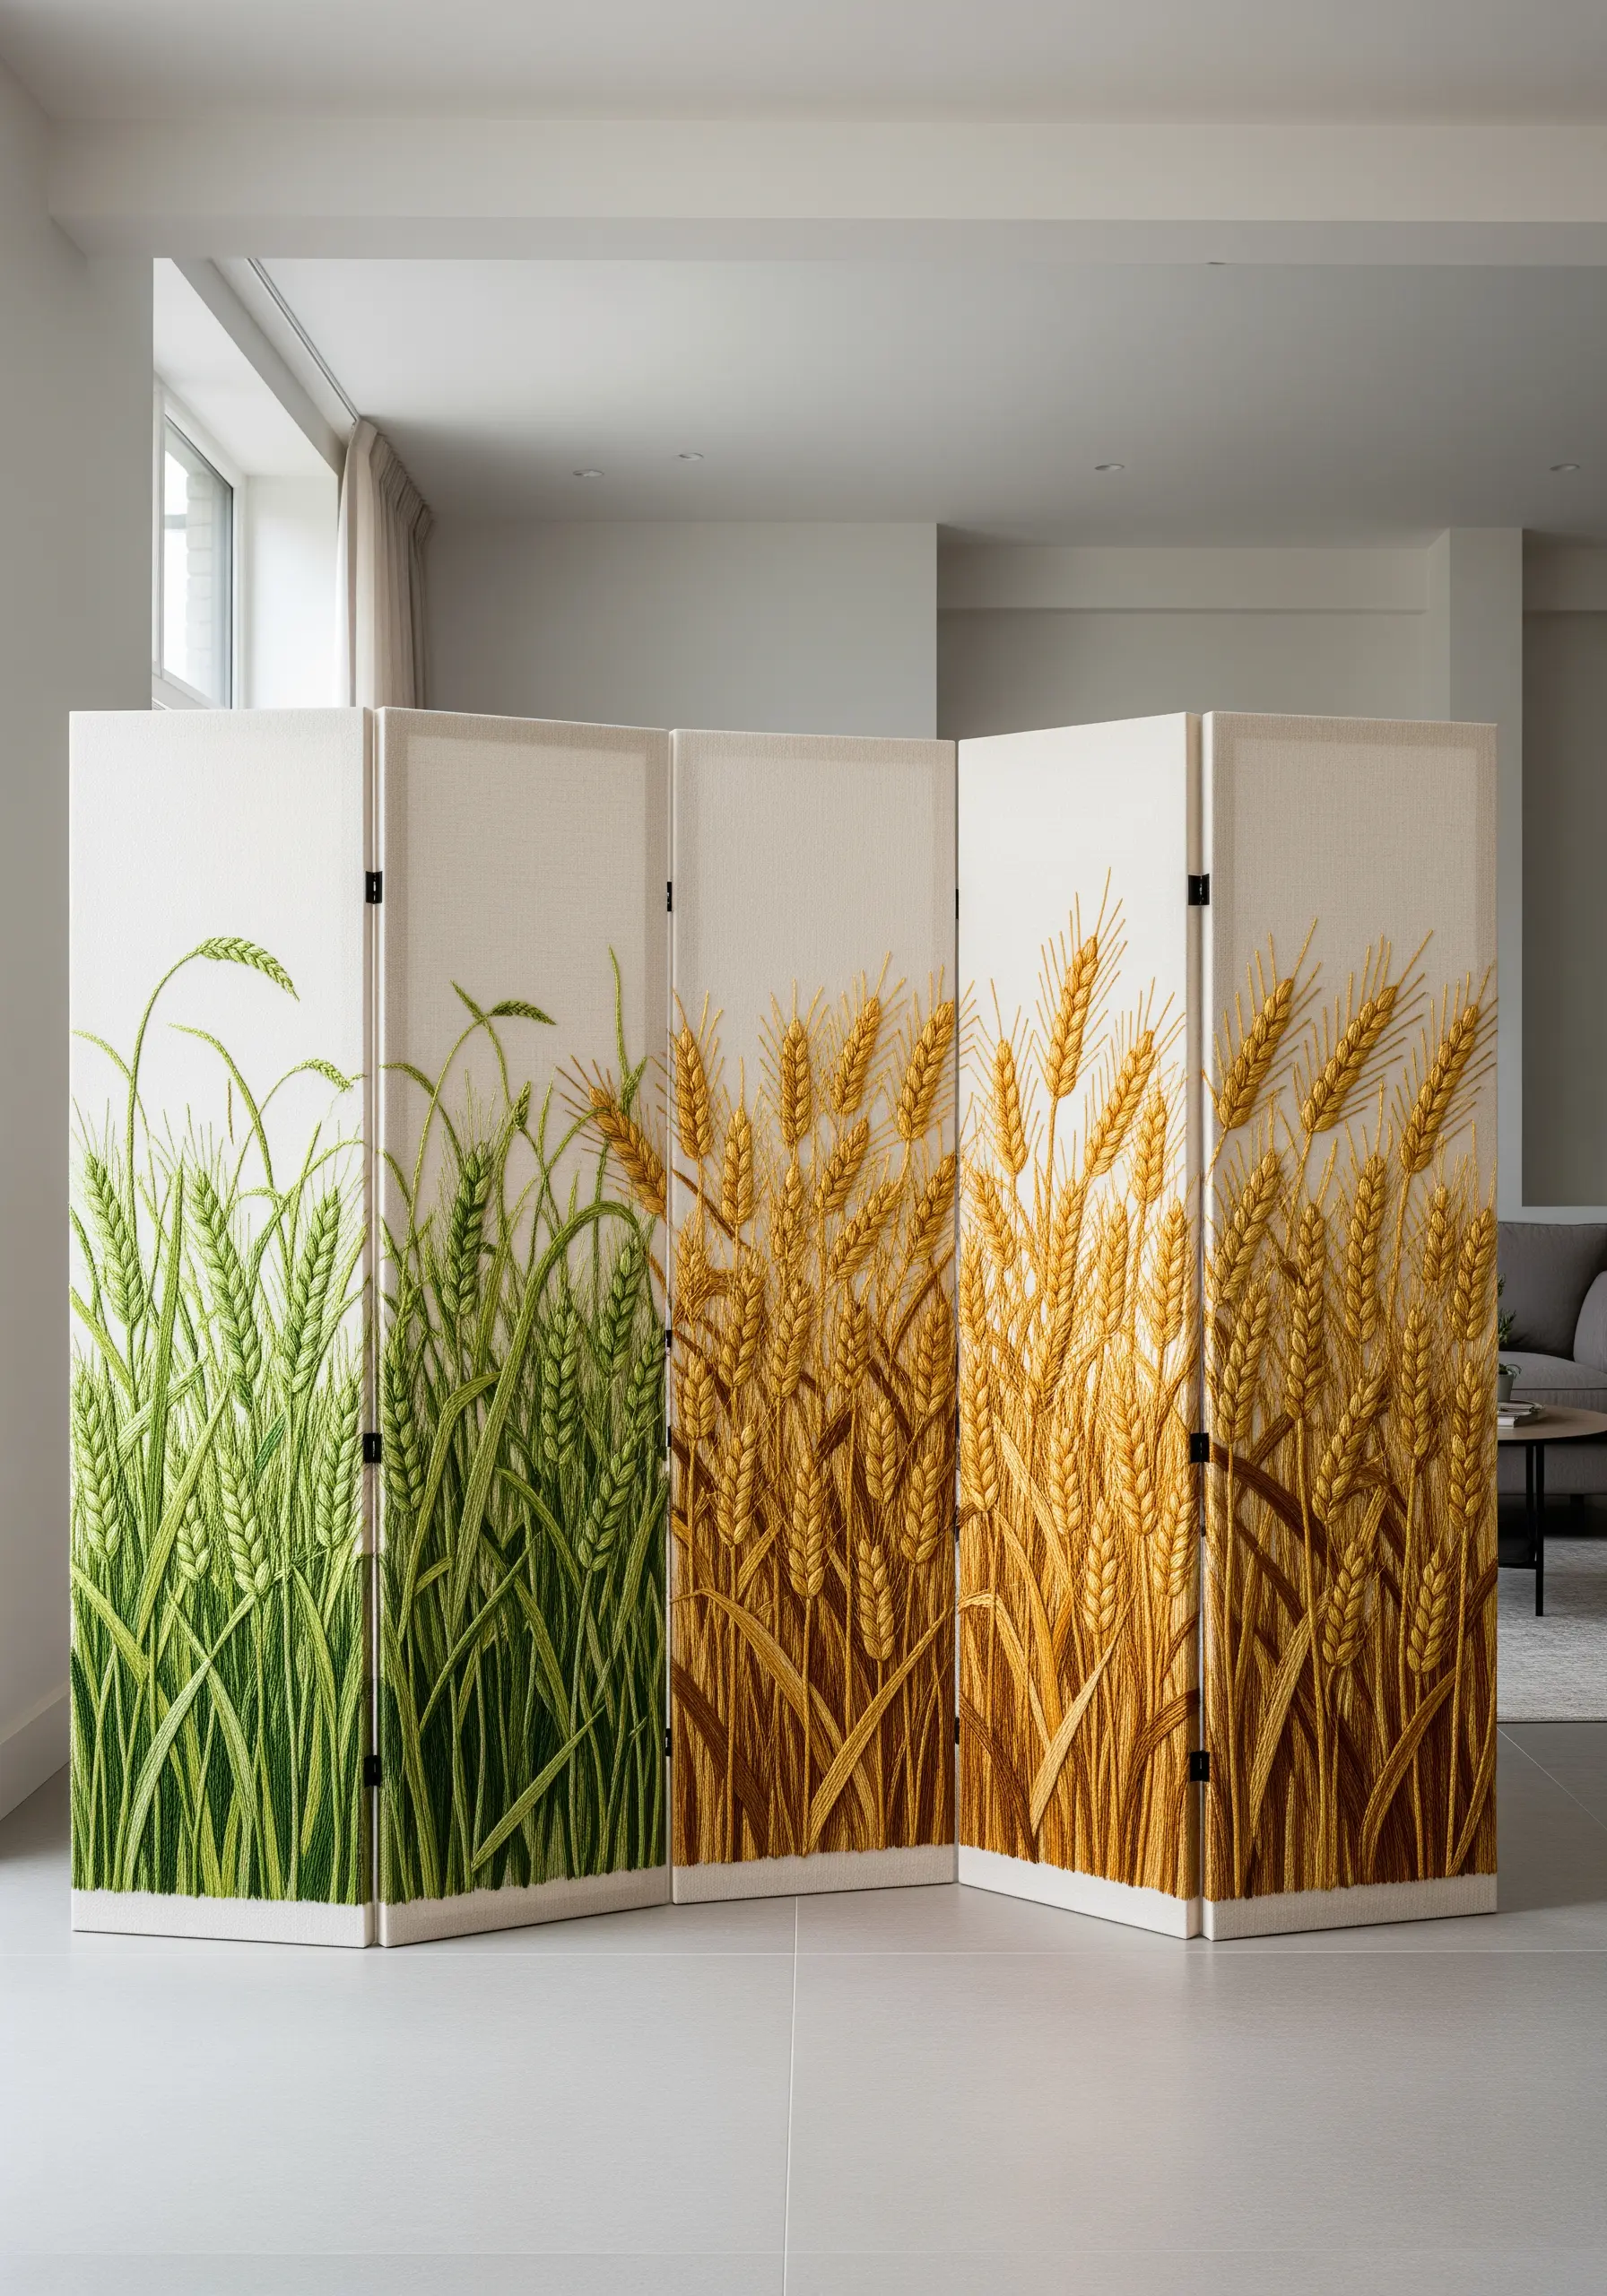
To create a sense of density in a field of wheat or grass, you need to build up your stitching in layers.
Begin by stitching the stalks that are furthest away, using lighter colors and slightly less detail.
As you work your way forward, use richer colors, thicker threads, and more defined stitches for the foreground elements.
Physically overlapping the stitches of the front layers on top of the back layers is what sells the illusion of depth and abundance.
31. Create Volcanic Rock with Felt Appliqué and Beading

Mimic the rough, porous texture of volcanic rock by layering cut pieces of thick felt.
Use a dark grey or charcoal-colored wool felt as your base, cutting organic, rounded shapes and layering them to build up a dimensional surface.
Secure the felt pieces with a simple running stitch around the edges.
Then, create the molten lava effect by stitching meandering lines of red, orange, and yellow seed beads, which contrast beautifully against the matte texture of the felt.
32. Represent Dewdrops with Clear Beads
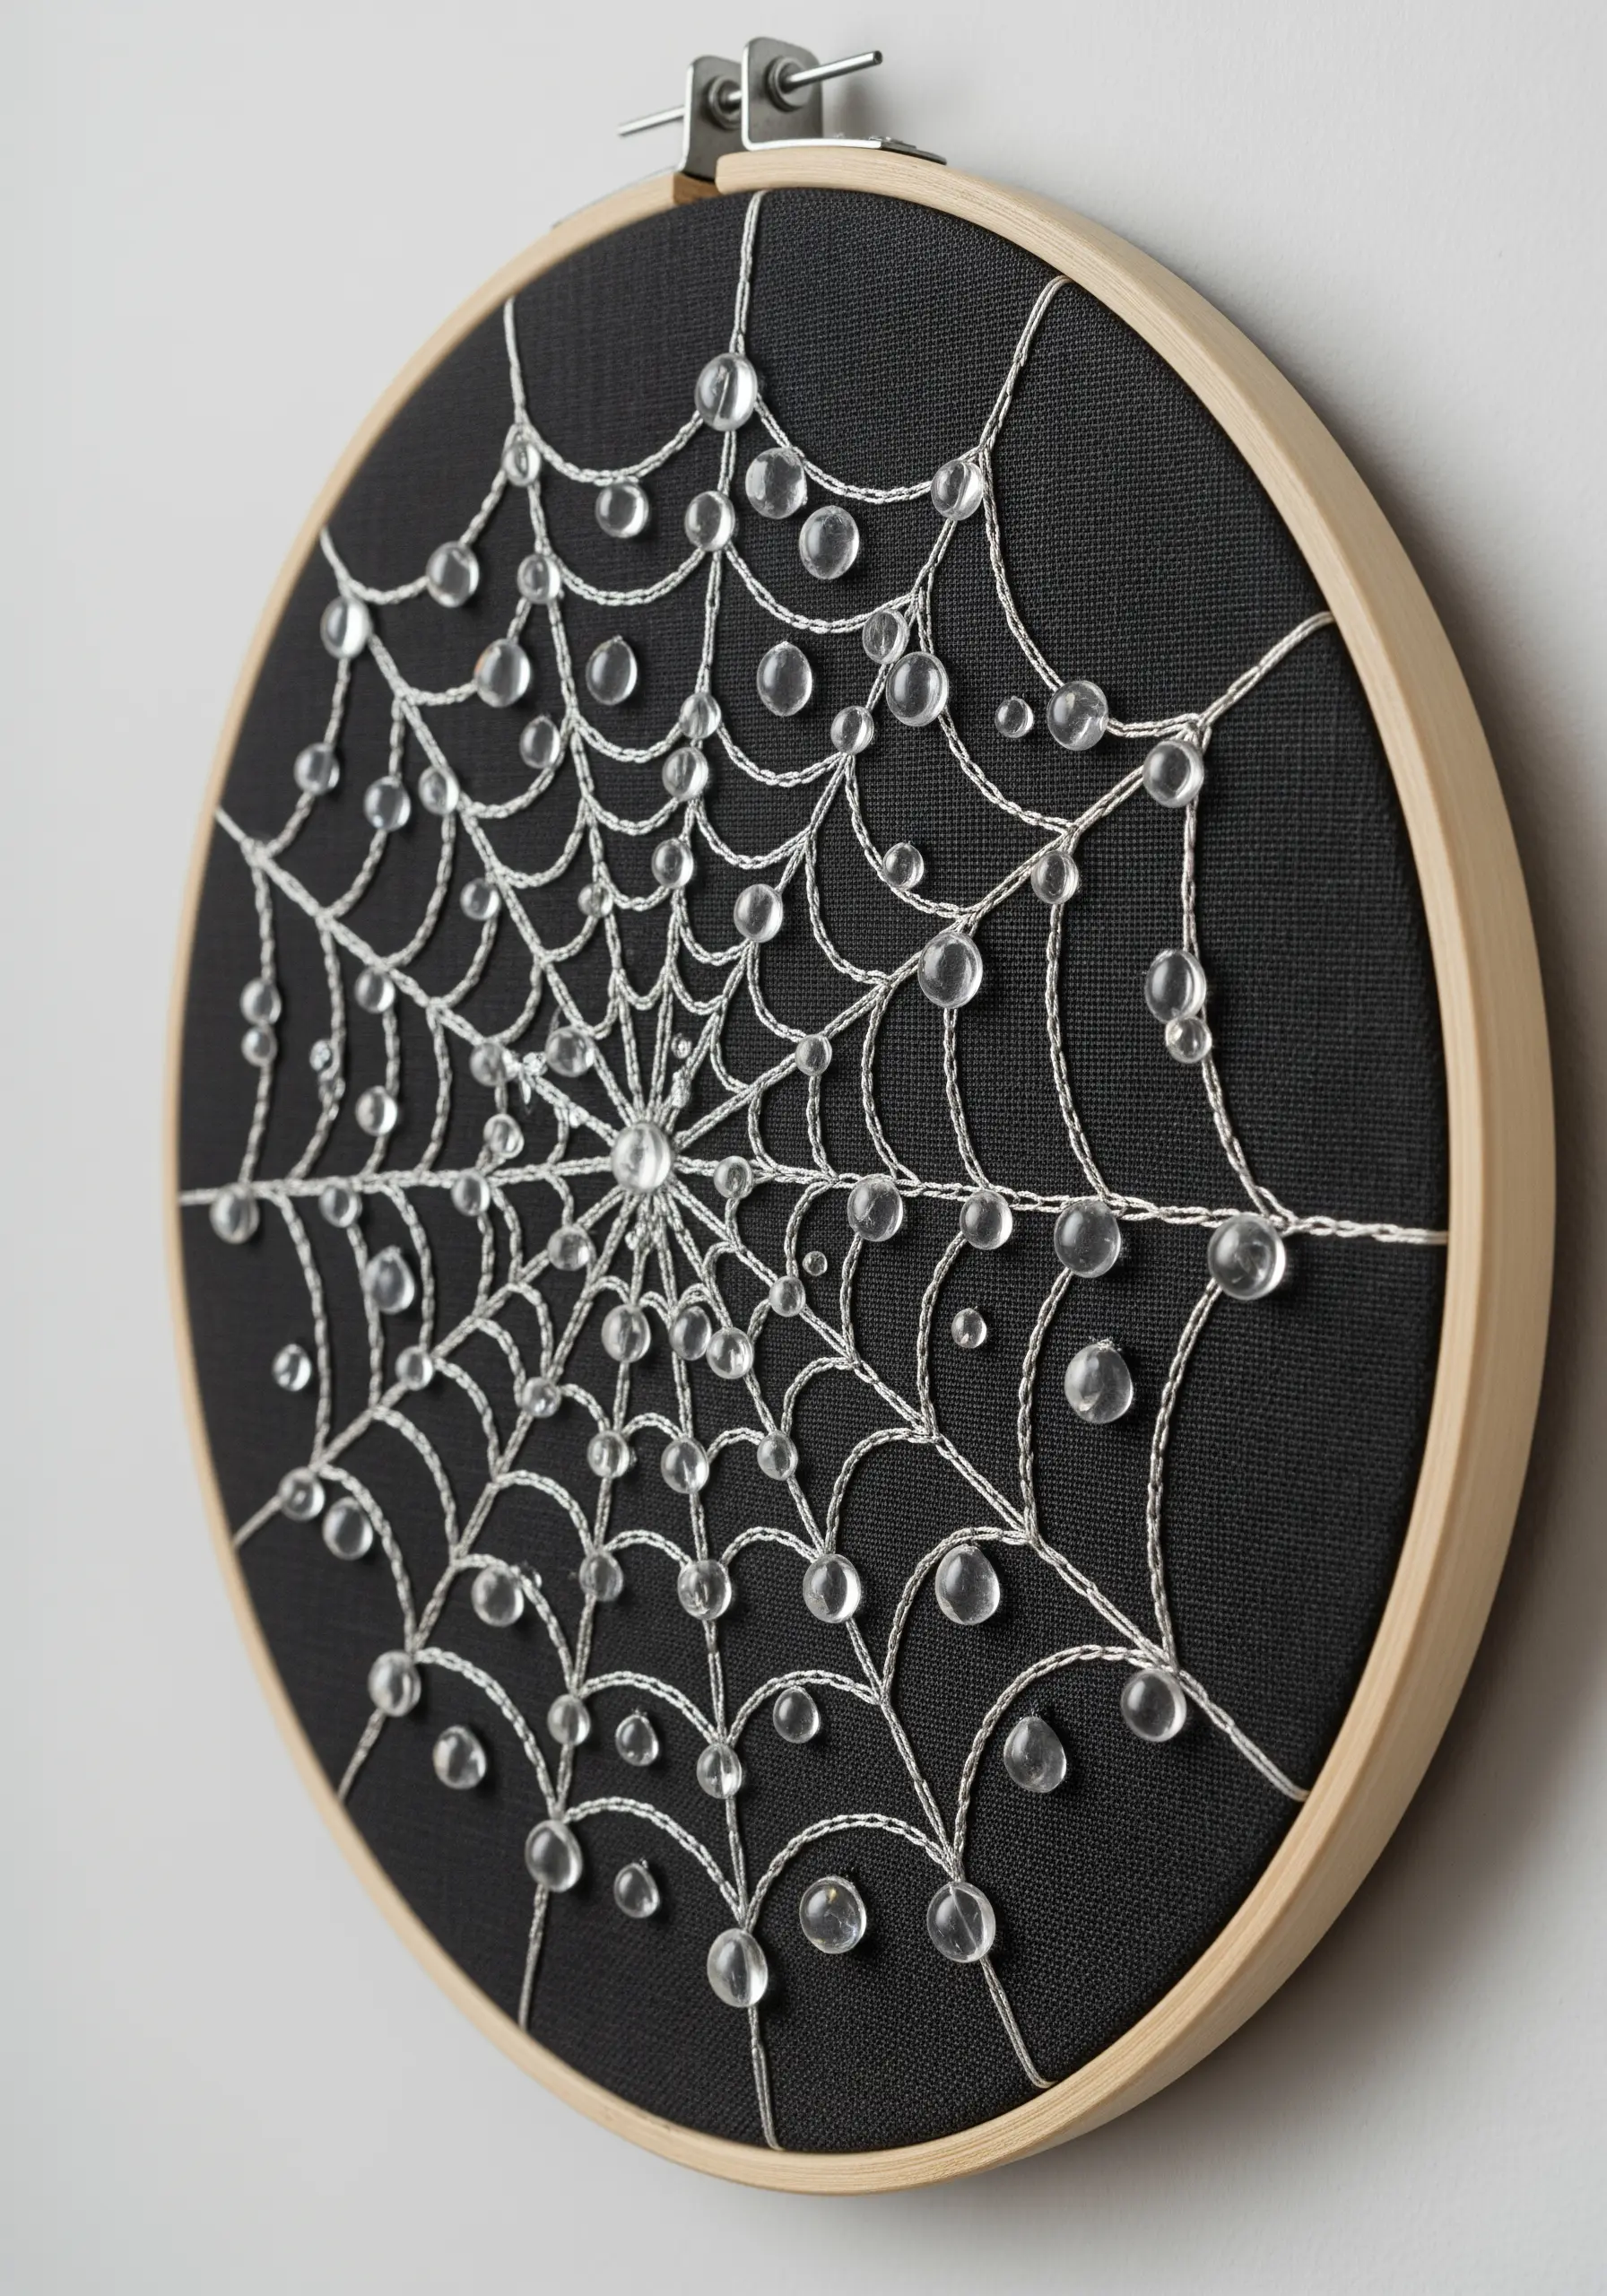
Add a touch of delicate realism to a spiderweb or plant by representing water droplets with clear glass beads.
First, stitch your web using a fine, silvery metallic thread couched onto a dark fabric background for maximum contrast.
Then, strategically place clear E-beads or seed beads at the junction of the threads, securing them with a tiny stitch using a transparent sewing thread.
The beads will catch the light and glisten, perfectly capturing the ephemeral beauty of morning dew.


