

Have you ever looked closely at the crackled bark of an oak tree, the plush surface of moss on a stone, or the delicate veins of a fallen leaf and wished you could capture that feeling in thread? It’s a common desire, but translating the richness of the natural world into stitches can feel like an impossible task.
The secret isn’t about perfectly replicating every detail. Instead, it’s about learning to interpret texture. It’s knowing that a French knot can become a lichen, a turkey stitch can become soft down, and a simple backstitch, when repeated, can become the weathered grain of wood.
Here, you’ll discover specific, thoughtful techniques that transform your needle and thread into tools for translation. We’ll move beyond flat, color-by-number designs and explore how to build dimension, imply texture, and create embroidery that doesn’t just look like nature, but feels like it, too.
1. Render Birch Bark with Strategic Linework
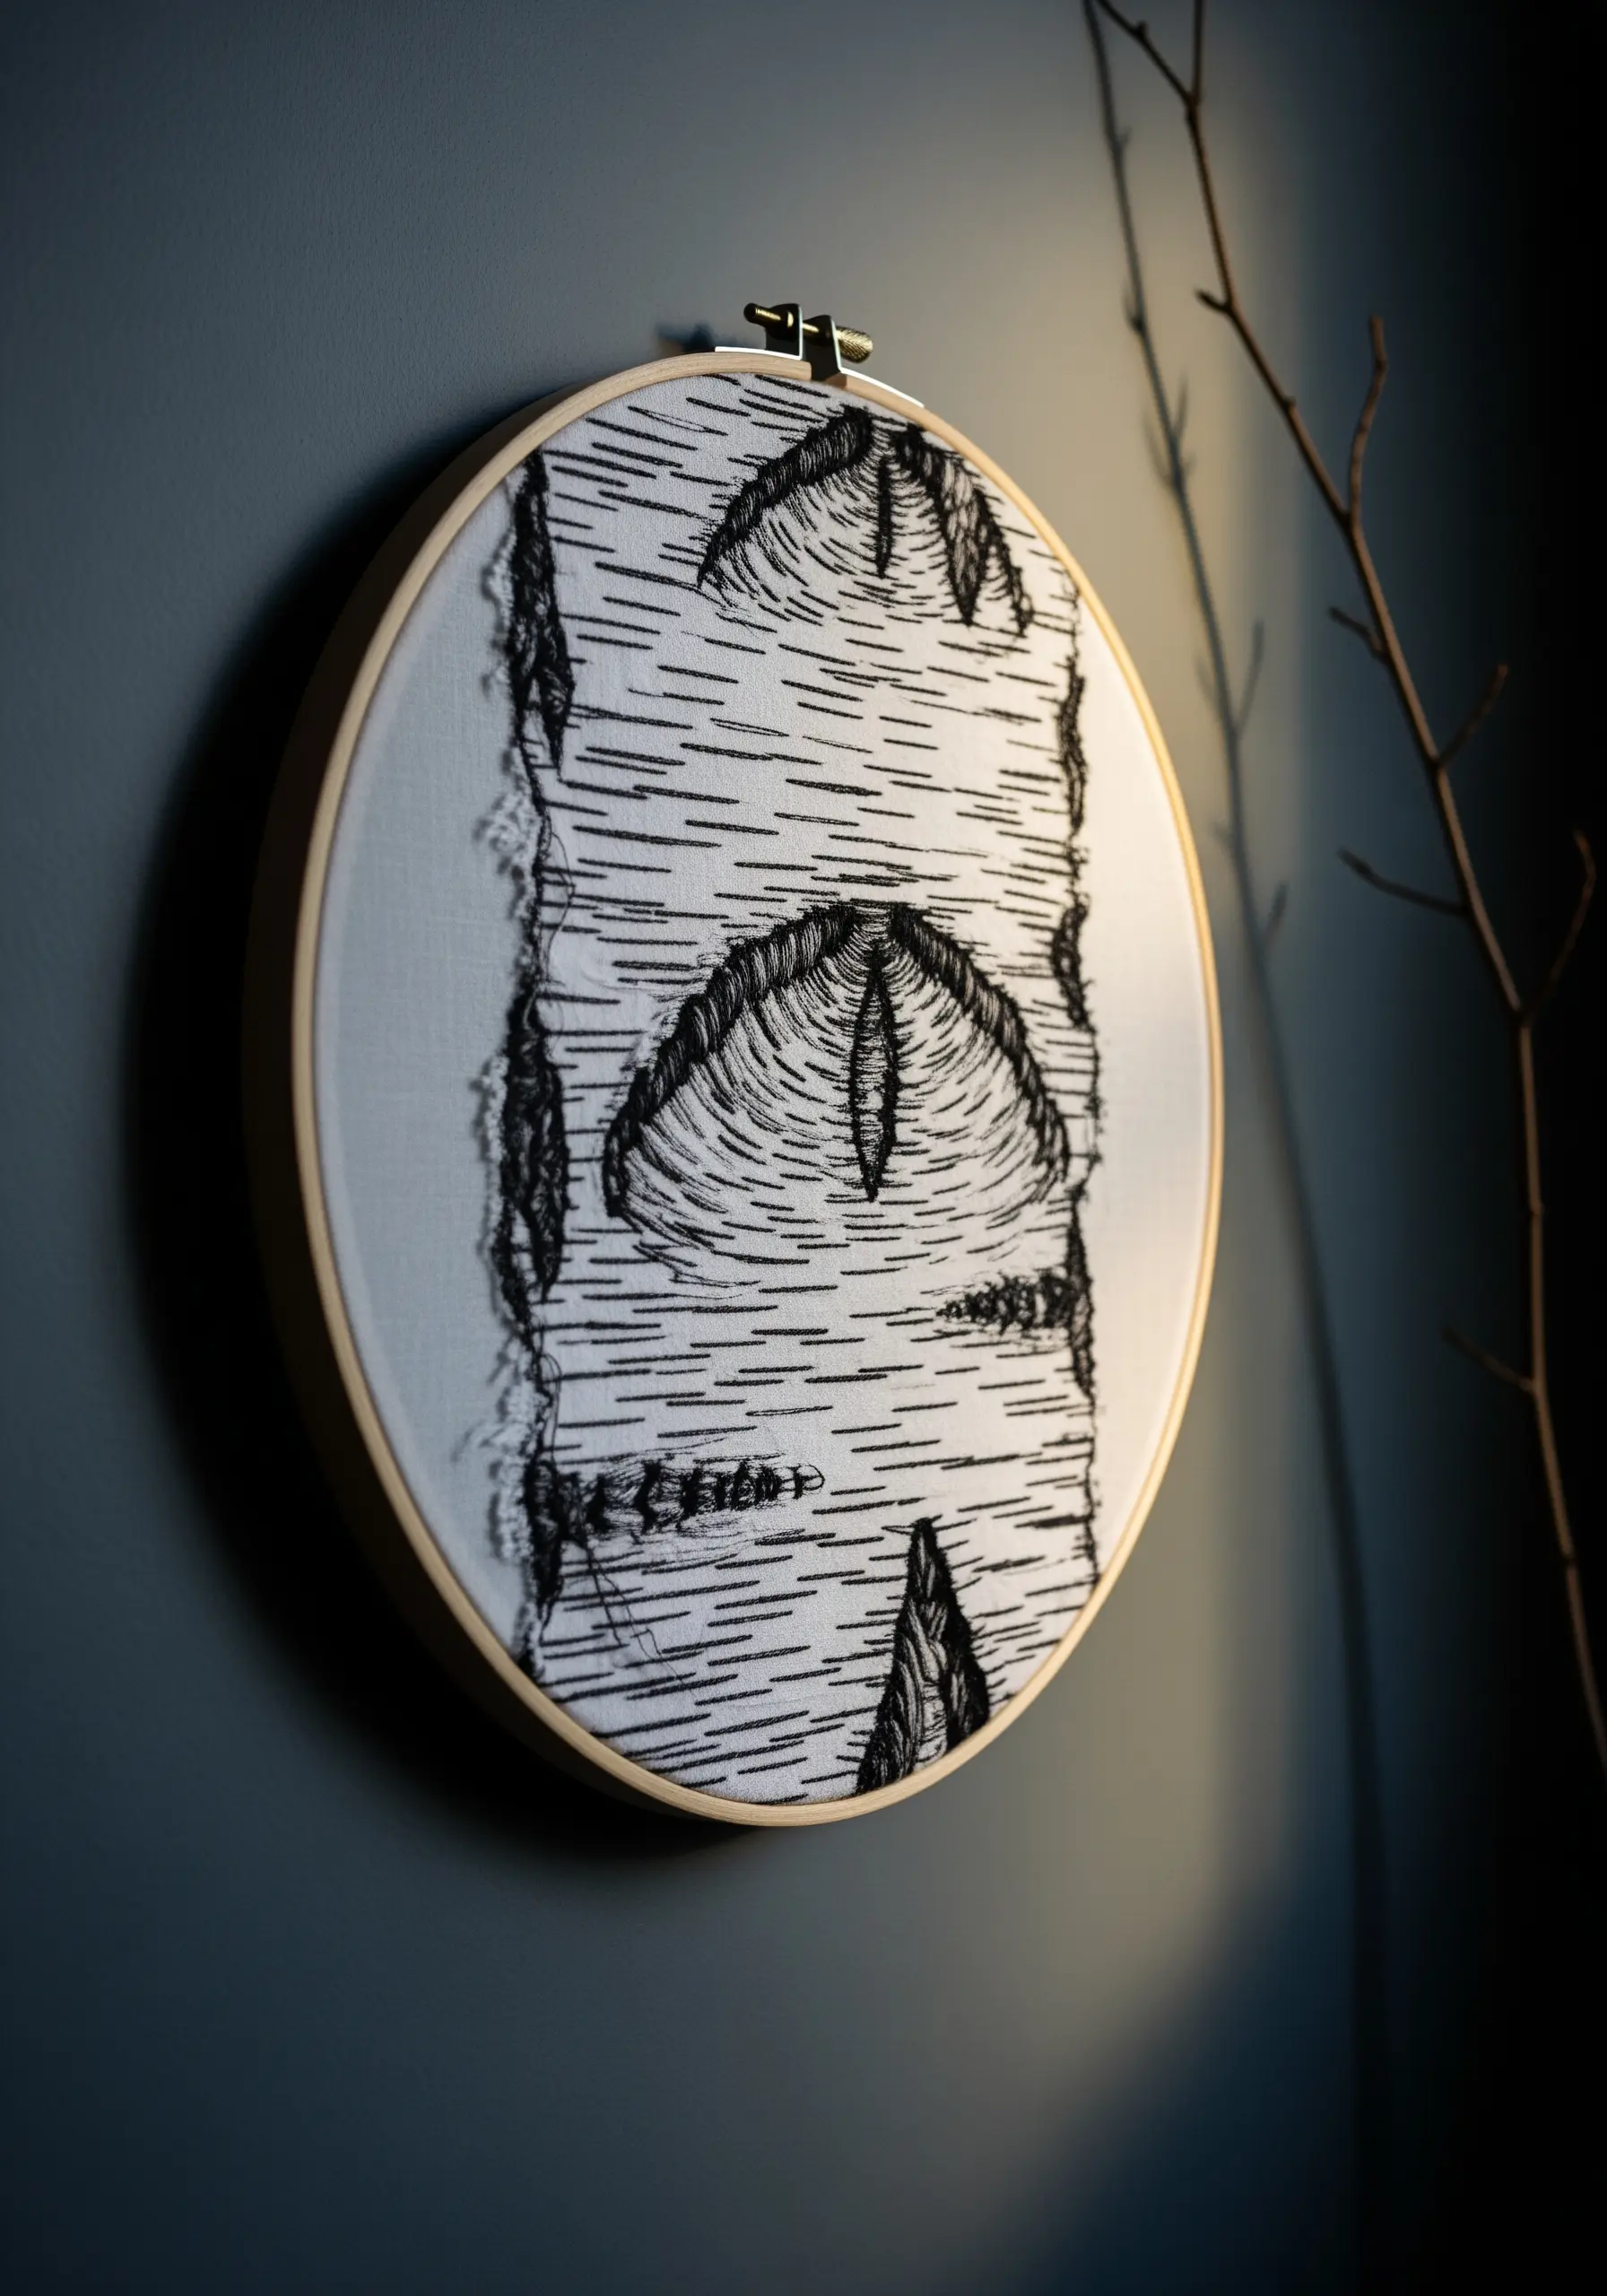
Create the papery texture of birch bark by focusing on the power of negative space.
Use a simple backstitch or split stitch with black six-strand floss on a plain white cotton or linen fabric.
Vary the length and density of your horizontal stitches to mimic the natural, imperfect lines found on the tree.
For the characteristic ‘eyes’ of the bark, switch to a dense satin stitch, ensuring your stitches follow the curved shape to create depth and shadow.
This high-contrast, graphic approach turns a simple stitch into a compelling textural study.
2. Sculpt a Mossy Landscape with Dimensional Stitches
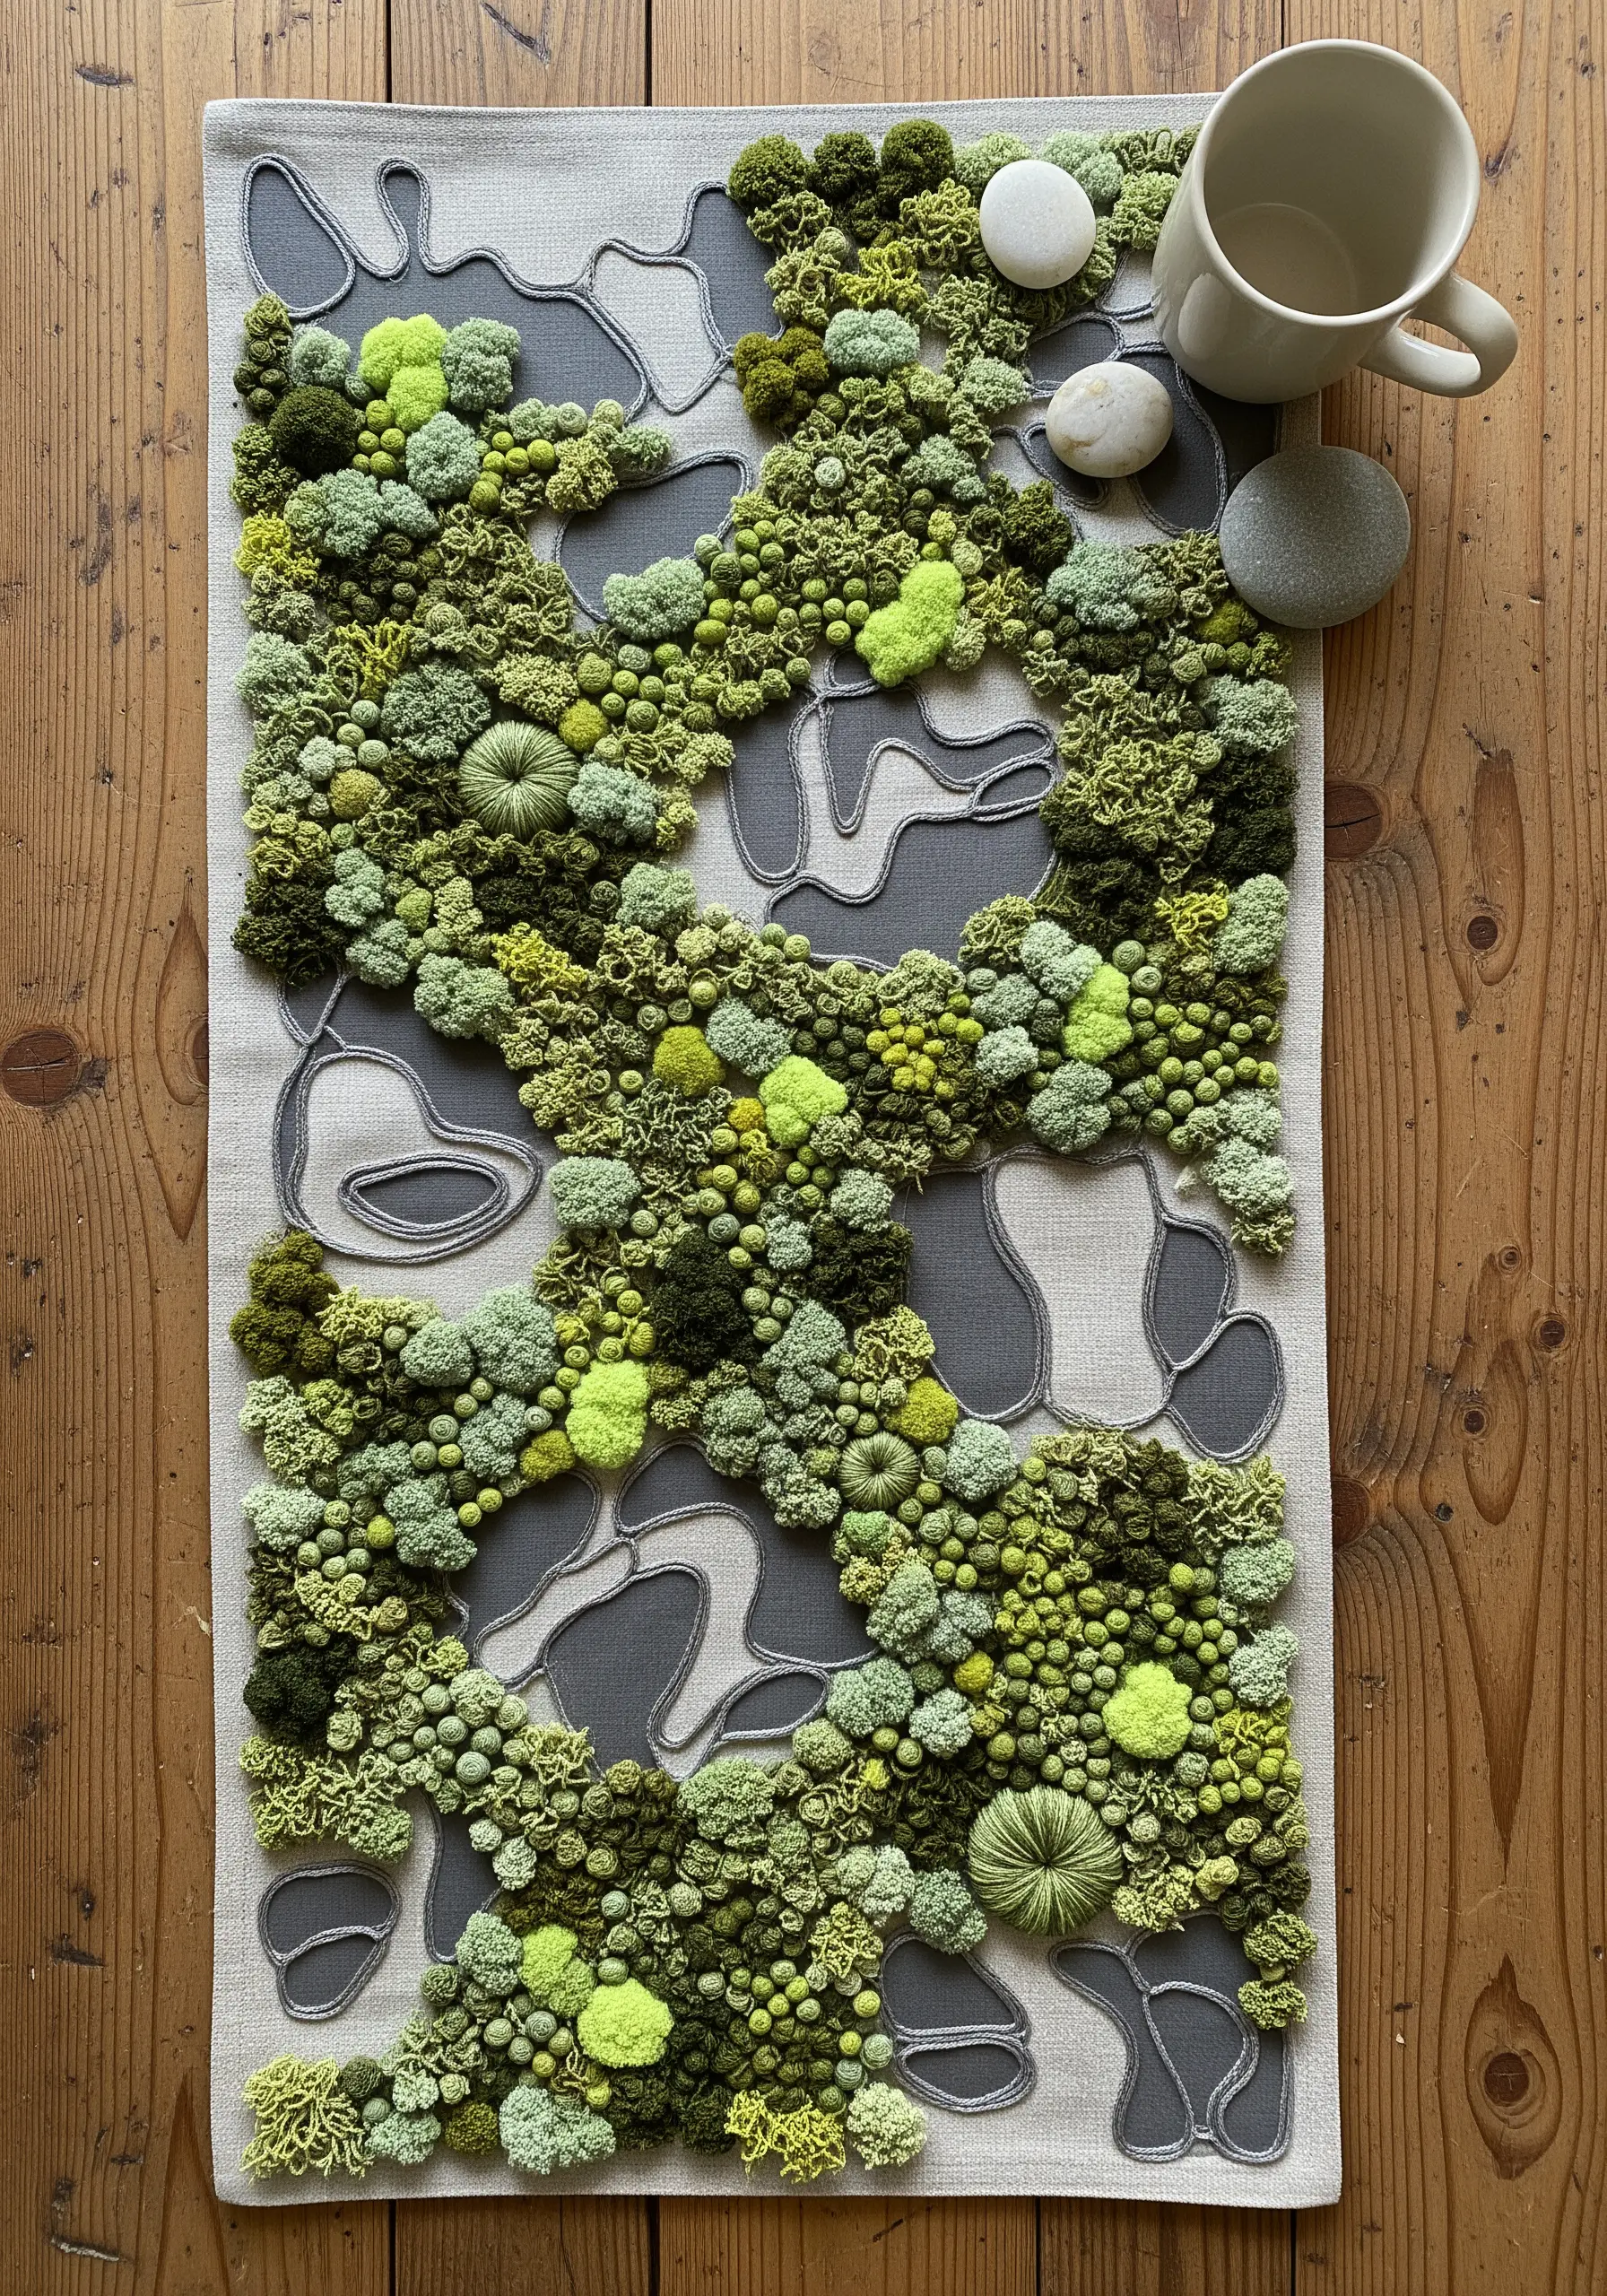
Move beyond flat surfaces by building a three-dimensional moss texture directly onto your fabric.
Use a dense variety of French knots and colonial knots in multiple shades of green, from chartreuse to deep olive.
Introduce thicker fibers like chenille yarn or wool roving for certain sections to create different types of moss.
Vary the height and tightness of your knots—tighter knots for low-profile moss, looser ones for a fluffier feel.
By layering these stitches and fibers, you can create touchable moss and fern embroidery textures that invite closer inspection.
3. Recreate Agate Slices with Smooth Gradients
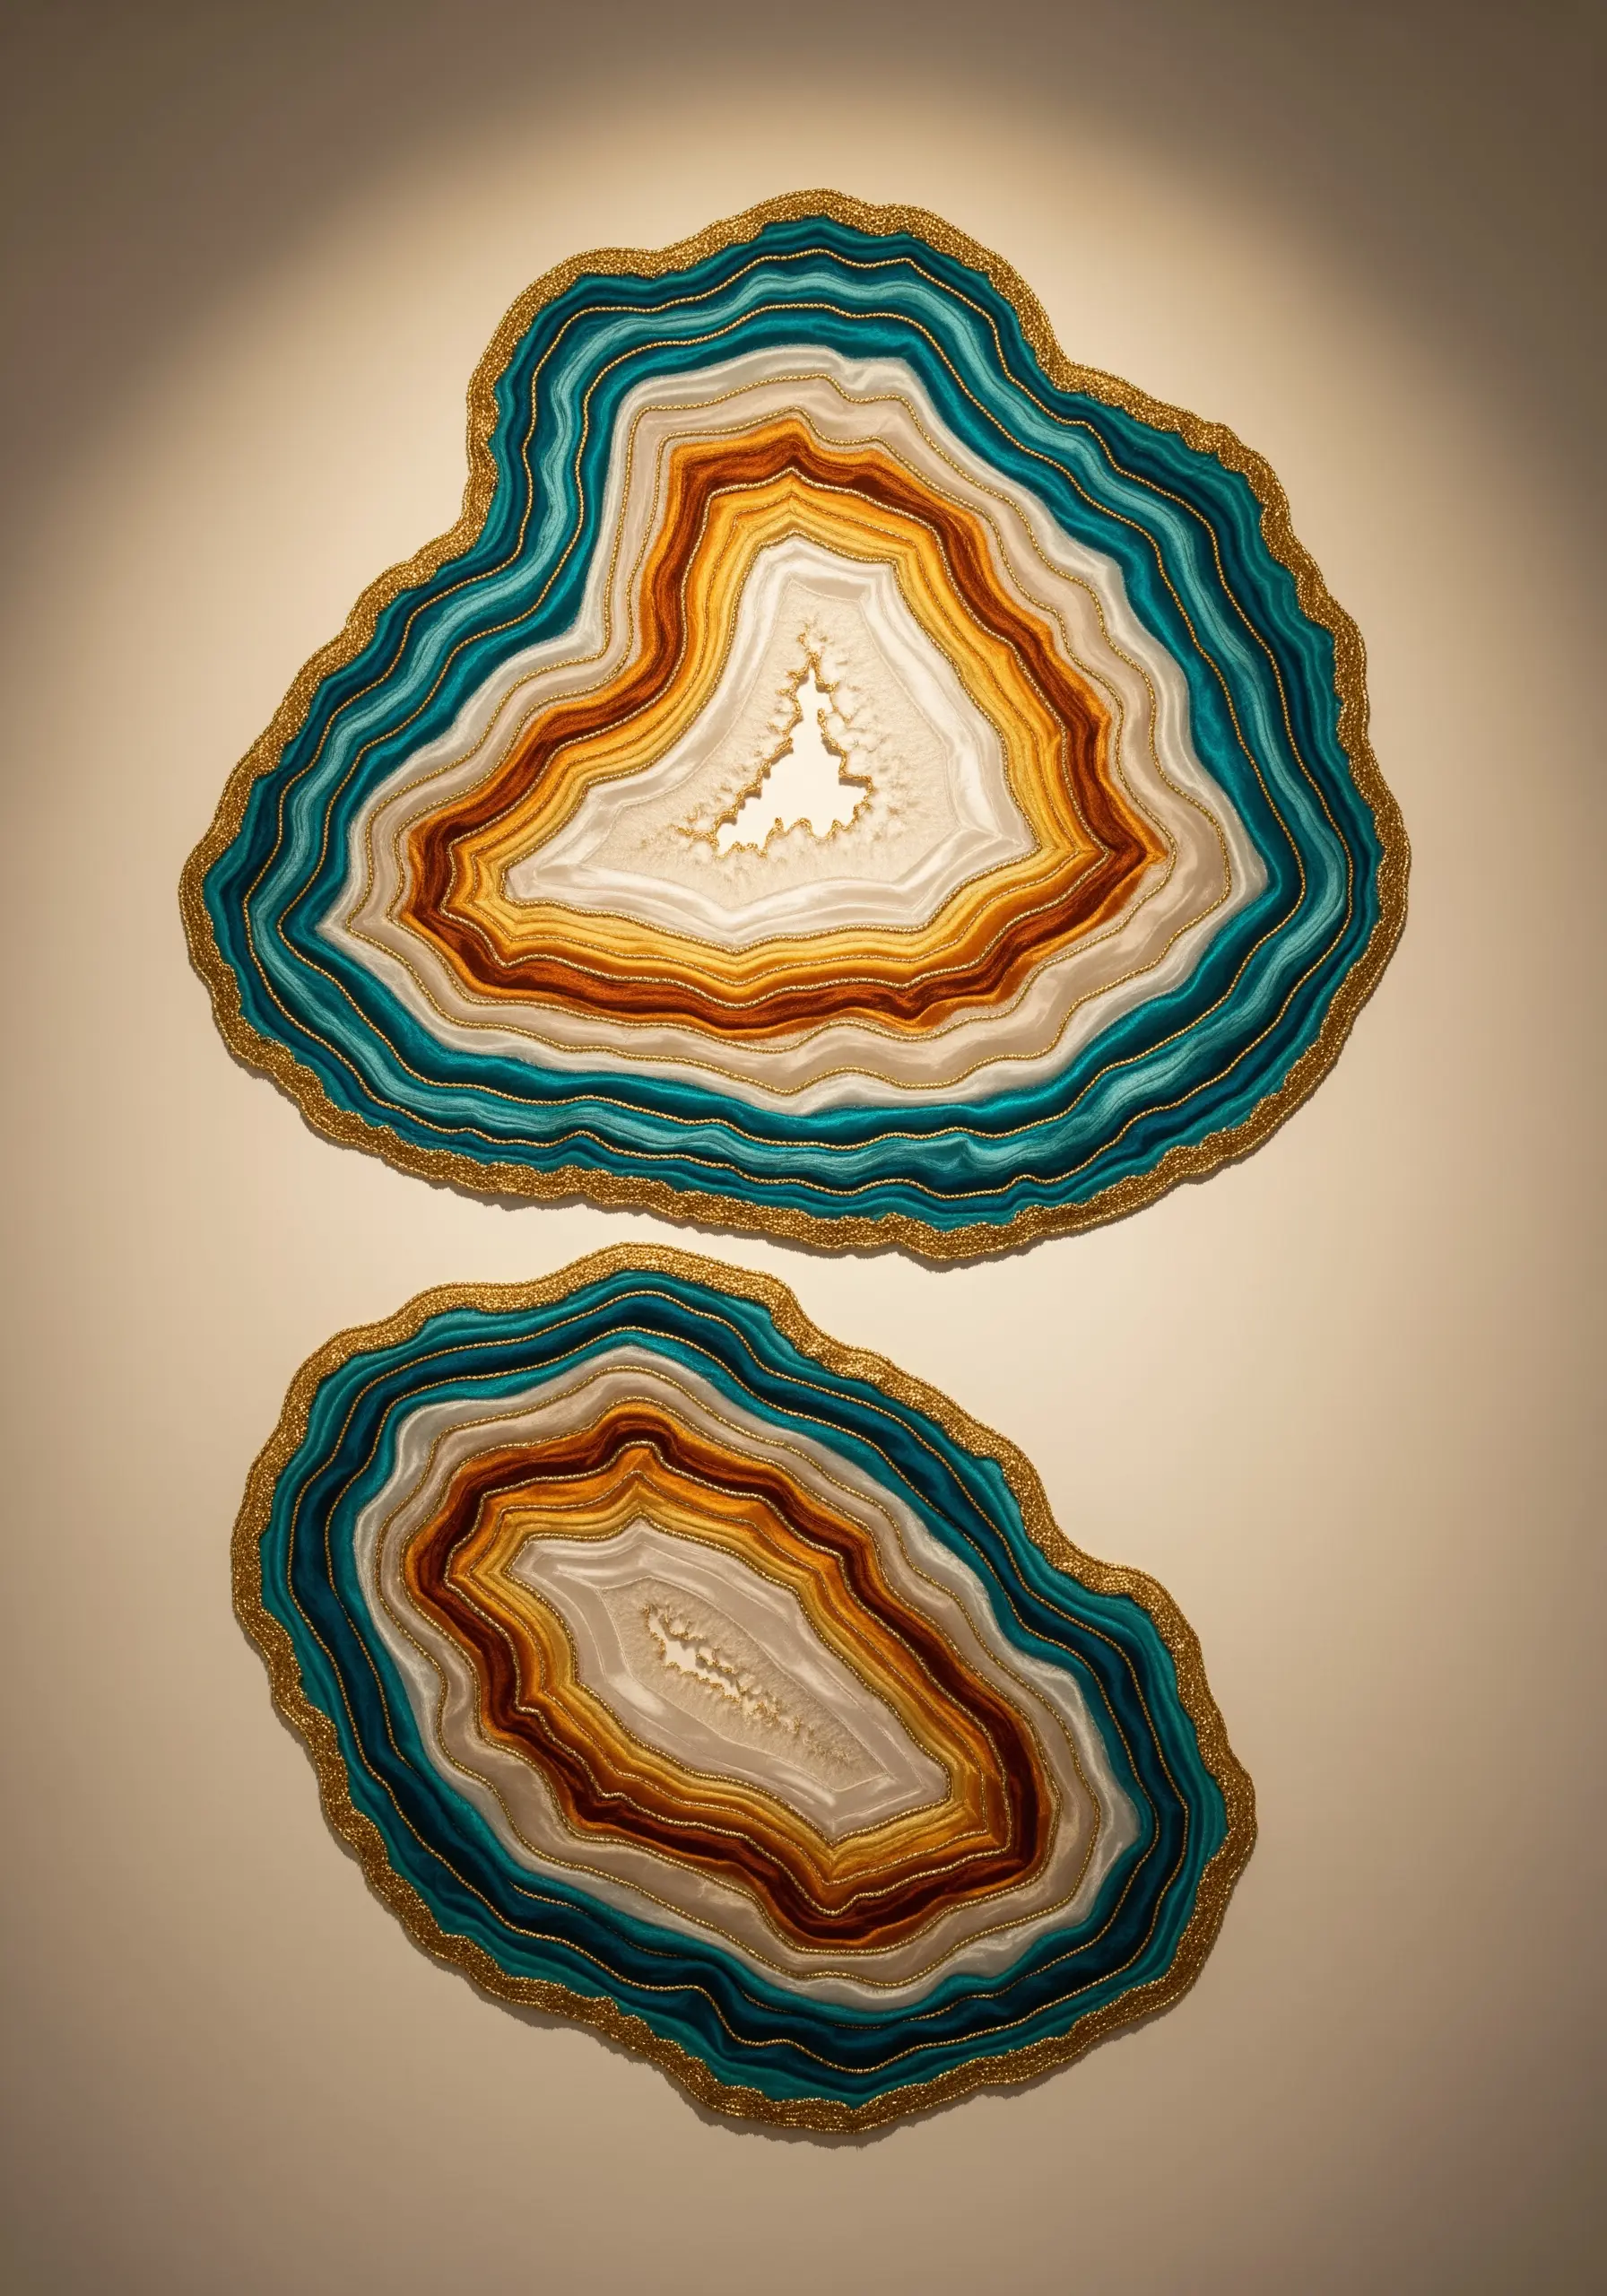
Capture the polished, layered beauty of a geode slice by mastering smooth color transitions.
Use a long-and-short stitch to fill each concentric band, blending adjacent colors seamlessly for a watercolor effect.
Choose a fine, high-sheen thread like silk or rayon to enhance the stone’s natural luster.
For the crystalline outer edge, couch a fine metallic cord or use a line of golden seed beads to provide a sharp, sparkling border that defines the shape.
4. Add Sculptural Depth to Landscapes
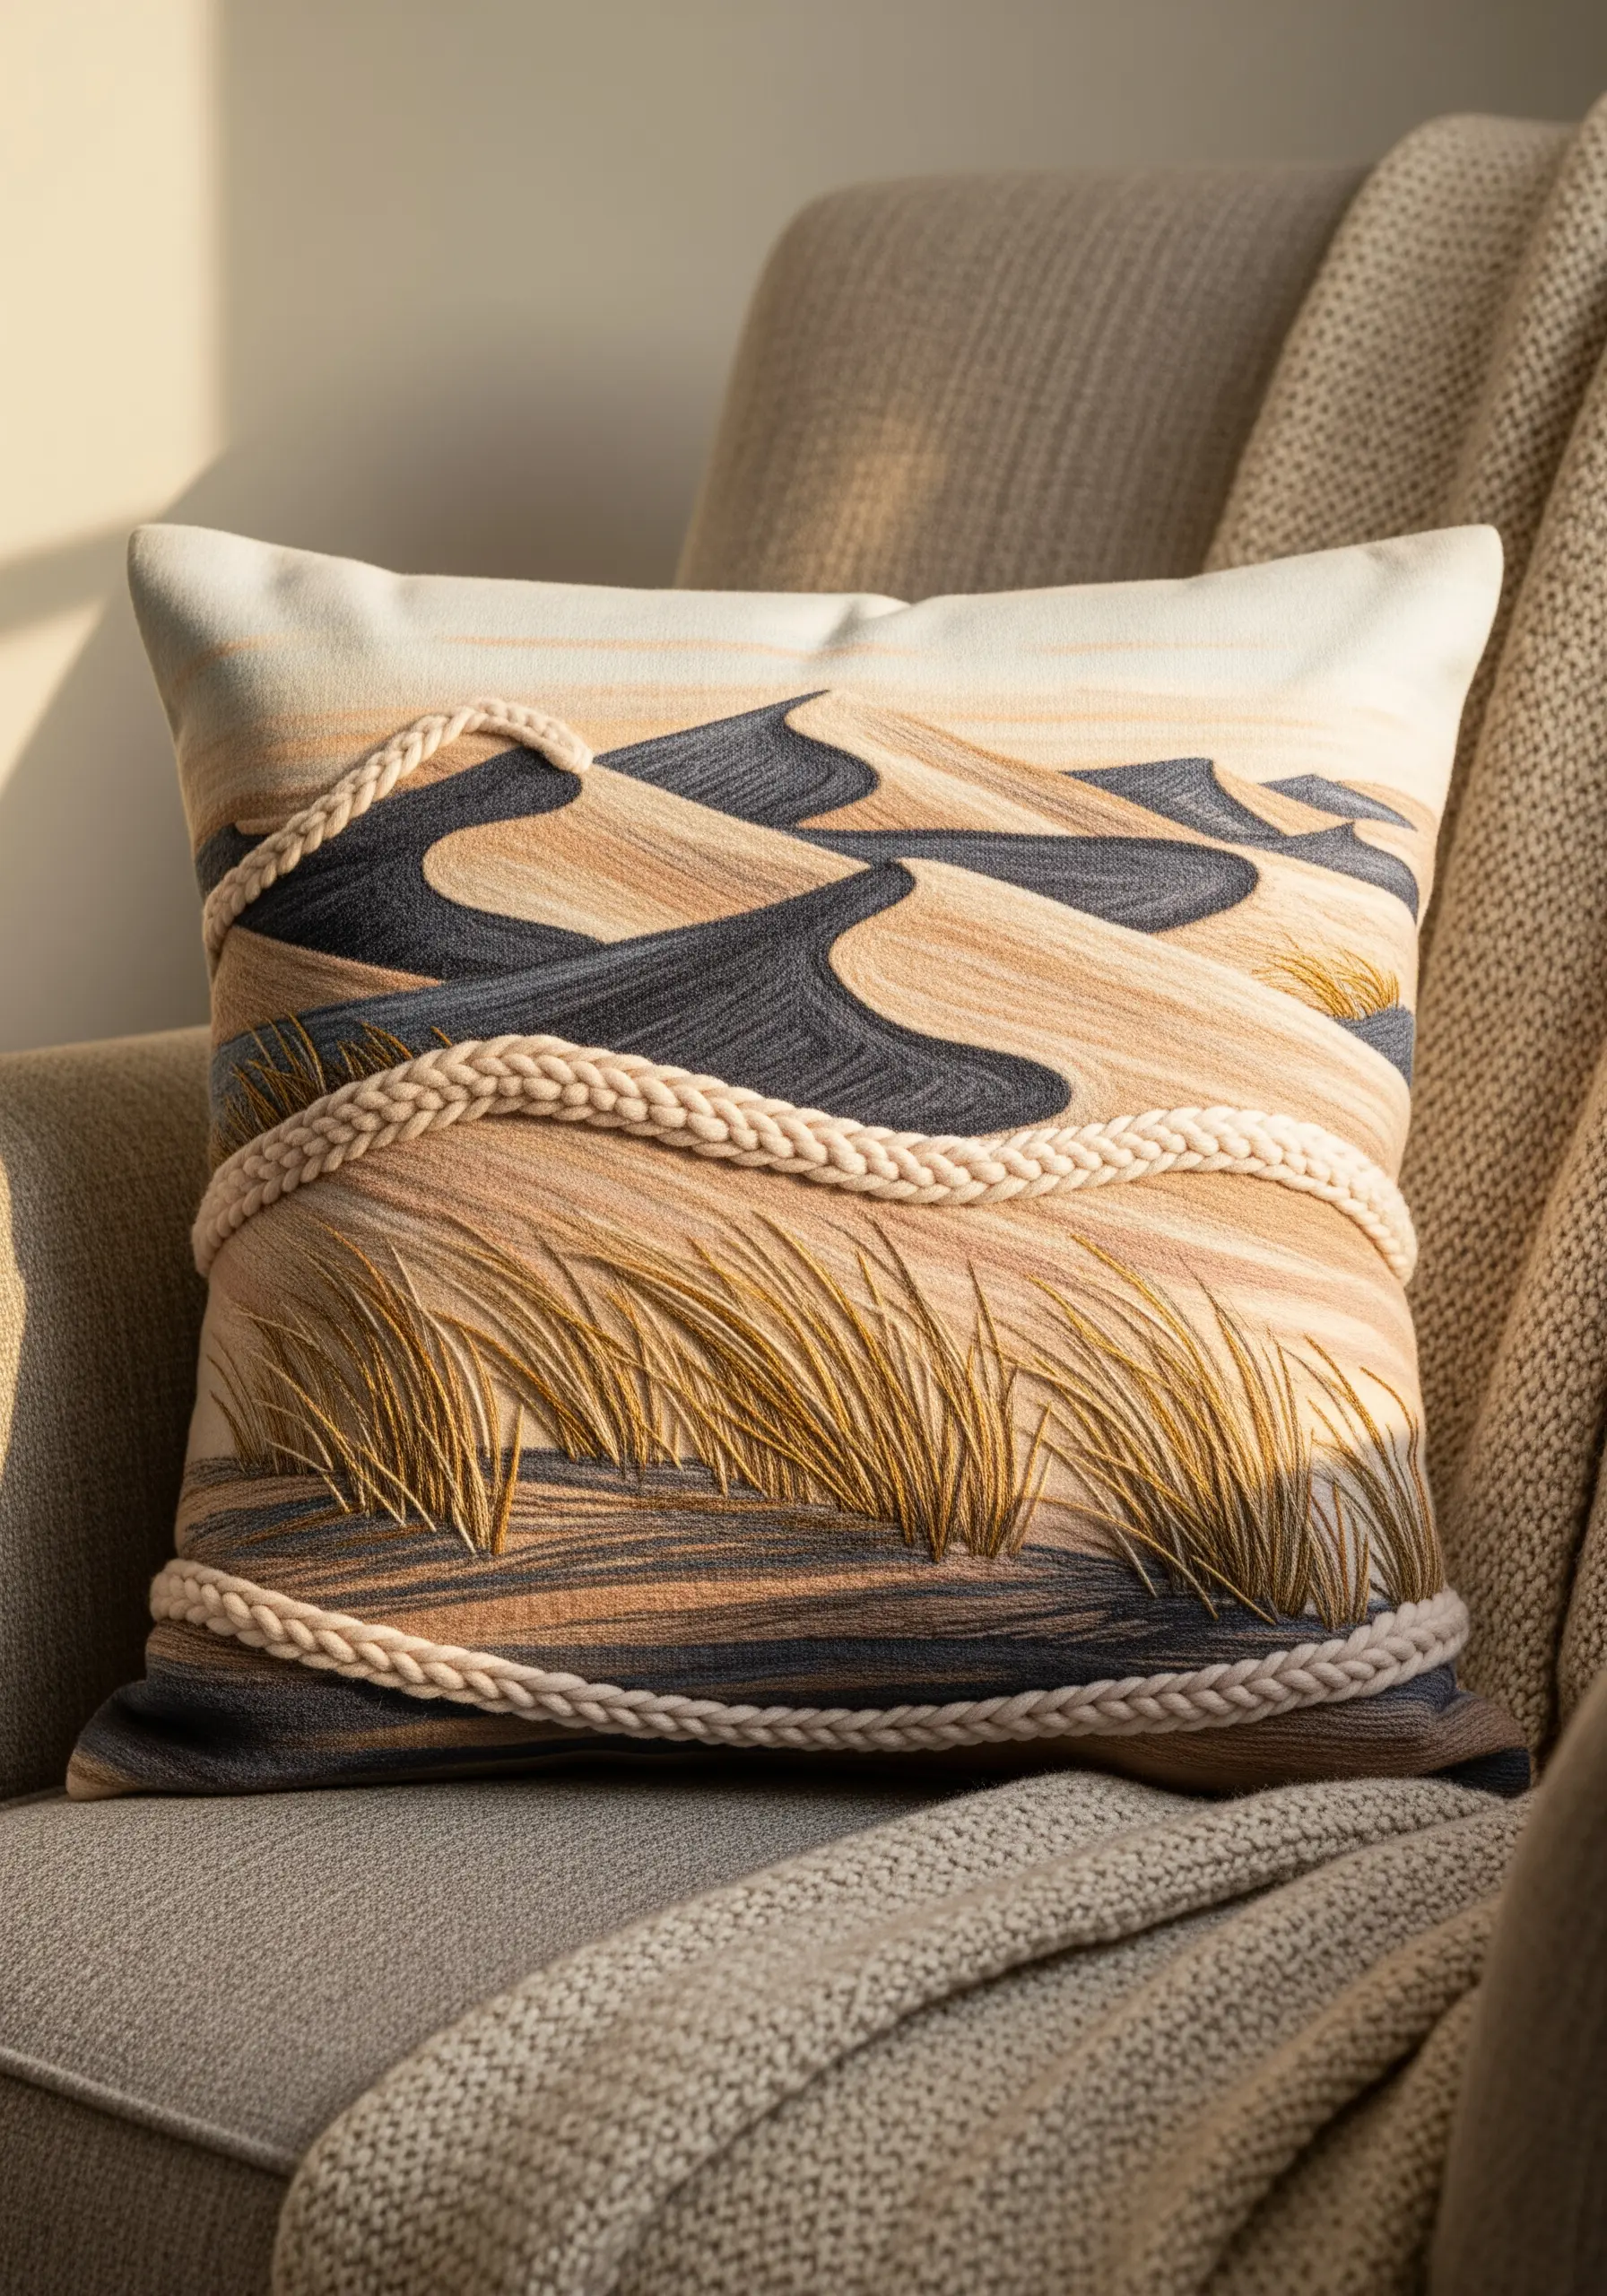
Elevate a flat landscape by incorporating a bold, three-dimensional element.
First, create the background using thread painting techniques, blending soft browns and grays to form the gentle slopes of sand dunes.
Then, create a thick, plush braid from a soft, neutral-colored yarn—like macrame cord or chunky wool.
Secure this braid onto the surface using a couching stitch with a matching, thinner thread. This technique adds immediate sculptural relief and tactile interest that draws the eye.
5. Build Realistic Fungi with Thread Painting
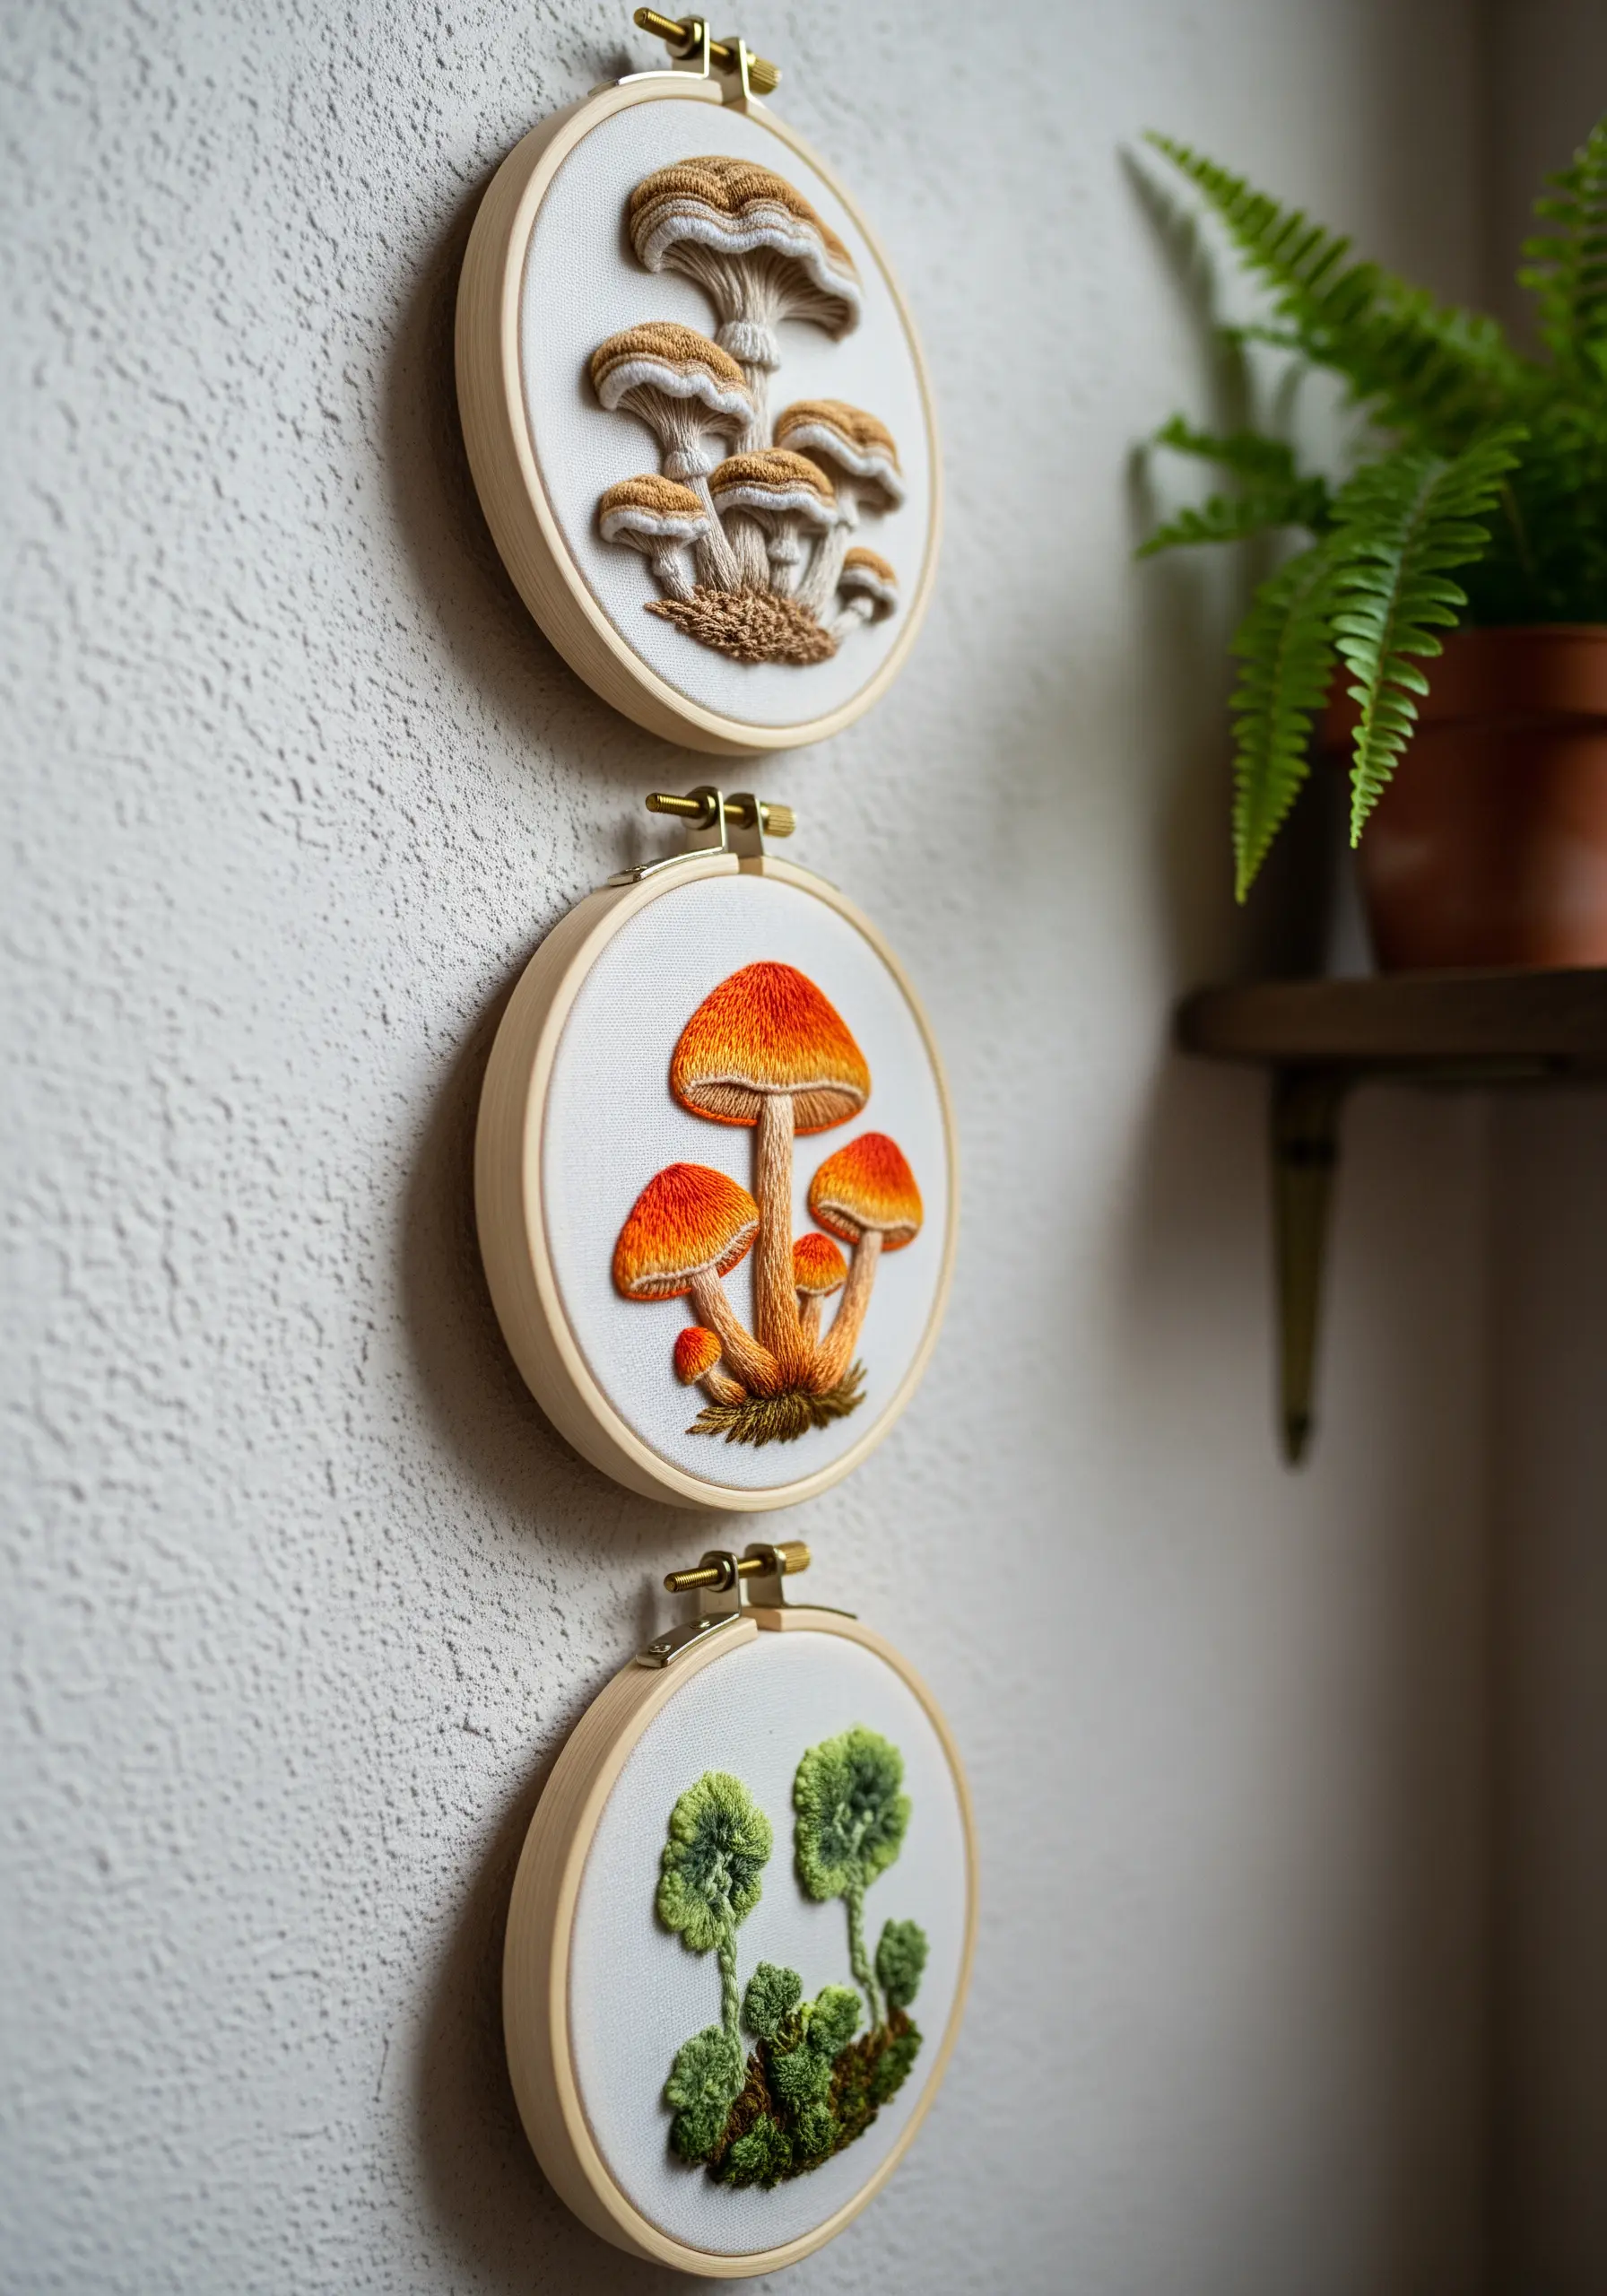
Give your mushrooms lifelike volume by paying close attention to stitch direction and color blending.
Use long-and-short stitch on the caps, carefully blending shades of orange, tan, and brown to create a rounded, sun-kissed effect.
For the delicate gills underneath, work tight, vertical satin stitches side-by-side to mimic their fine, ribbed structure.
Anchor your scene with a base of French knots and turkey work for a mossy forest floor, making your realistic mushroom forest floor embroidery projects feel complete.
6. Capture Arid Earth with Appliqué and Line
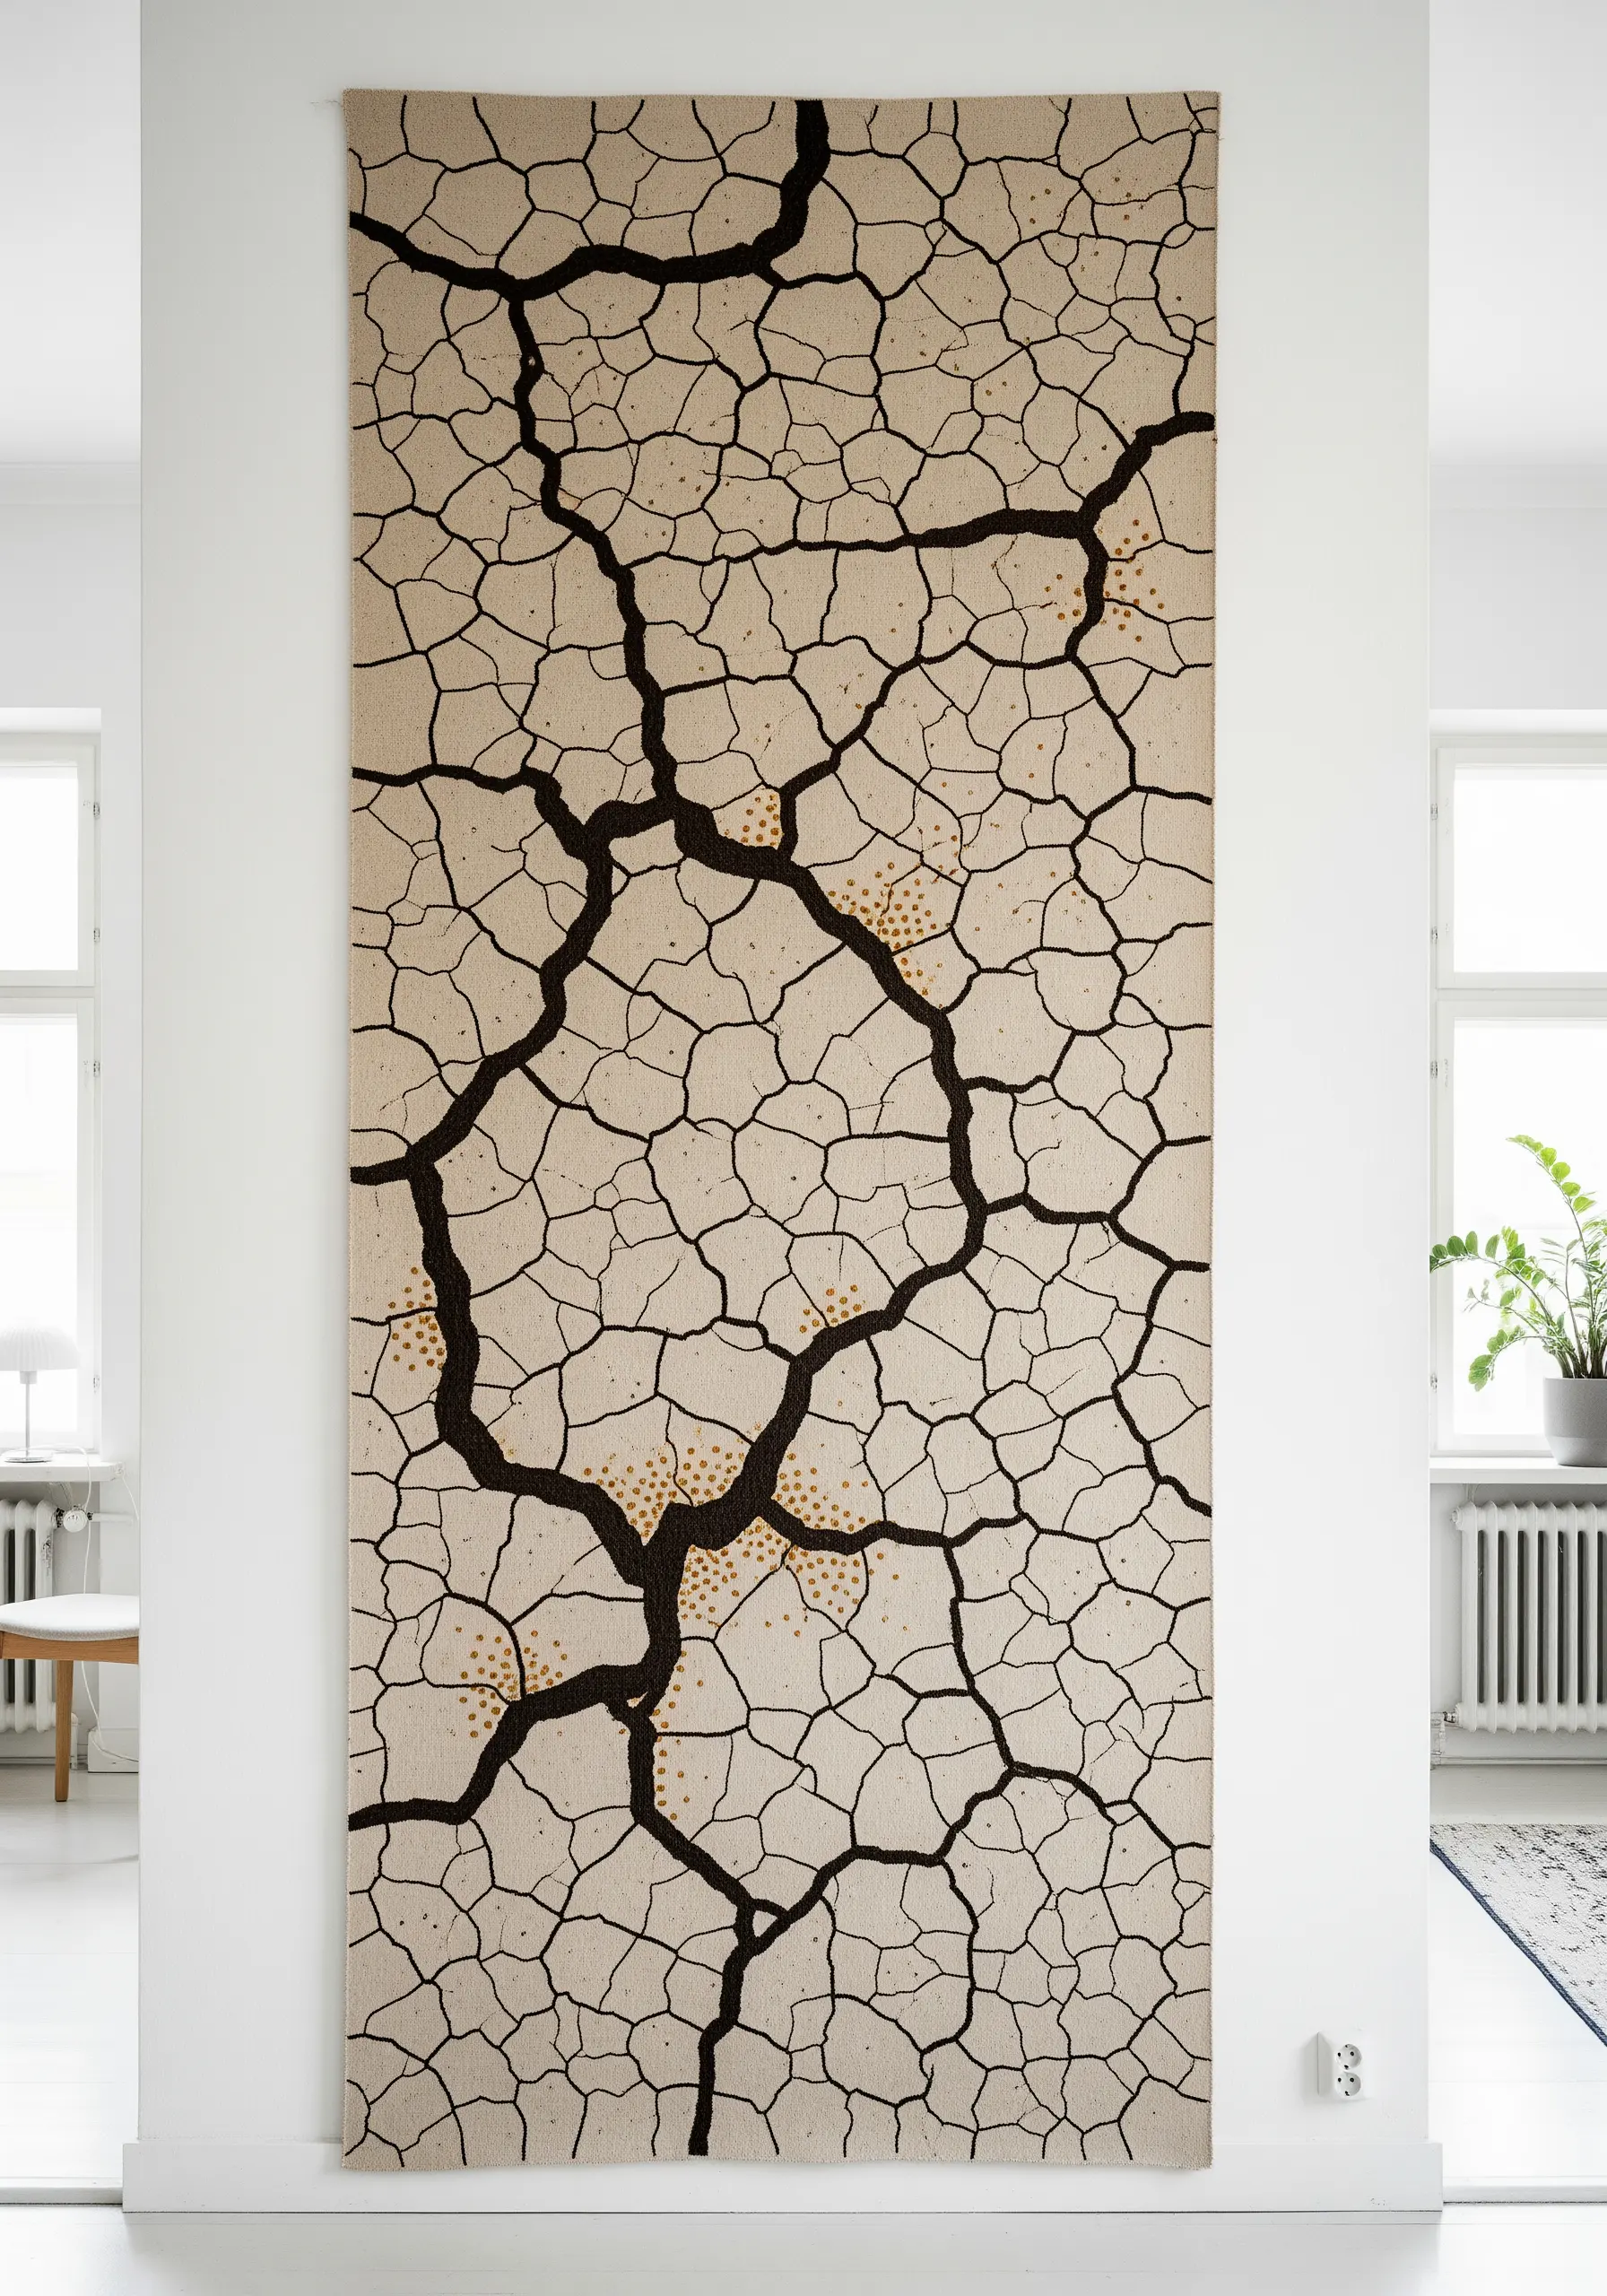
Create the stark beauty of cracked, dry earth by combining fabric appliqué with bold stitching.
Cut your main crack lines from a dark, contrasting fabric and appliqué them onto a lighter base to establish the primary shapes.
Then, use a thick black thread and a simple backstitch or stem stitch to add the network of finer, secondary cracks.
This method allows you to cover a large area effectively while creating a powerful graphic pattern that evokes a sense of vast, arid landscapes.
7. Trace Topographic Lines with Rhythmic Stitching
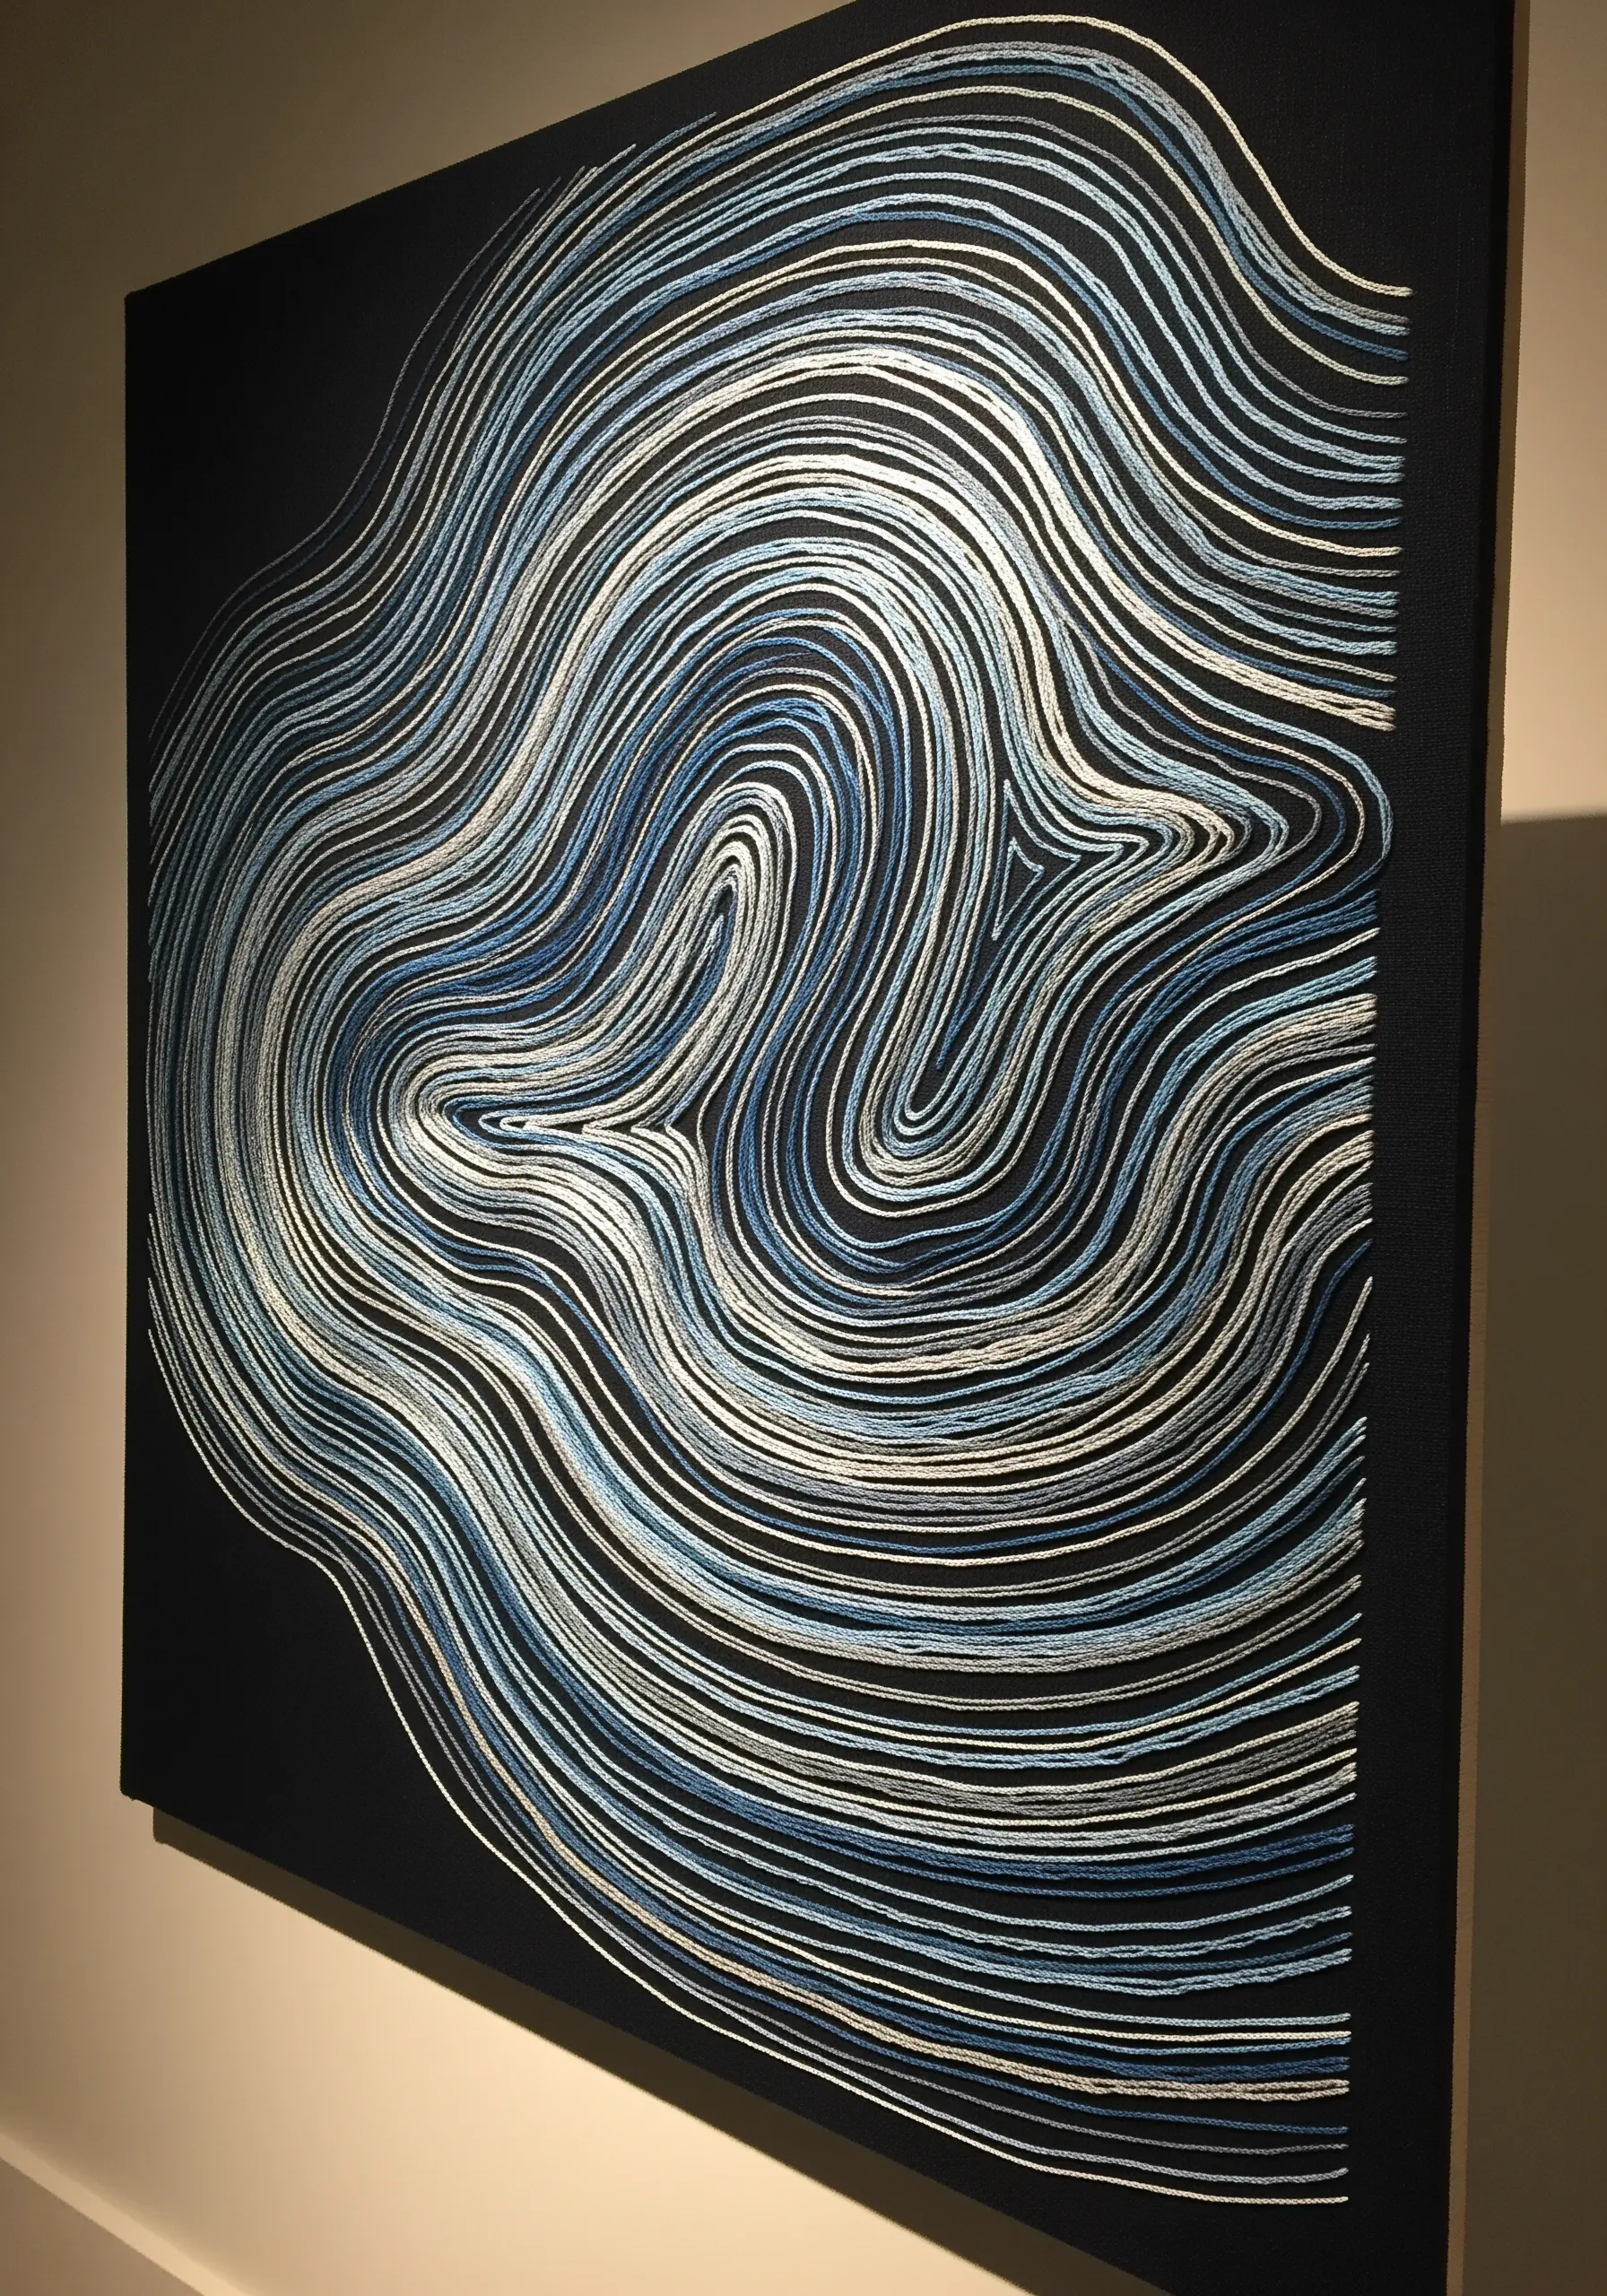
Mimic the undulating flow of topographic maps or woodgrain by focusing on clean, rhythmic lines.
On a dark, stretched canvas, use a split stitch or stem stitch to create smooth, unbroken contours.
The visual magic comes from a careful gradient of thread colors—moving from white to silver to pale blue creates a sense of light and shadow.
Working on a dark background makes lighter threads appear to vibrate, giving the composition a dynamic, almost hypnotic quality.
8. Sculpt a Rocky Cliff with High-Relief Textures
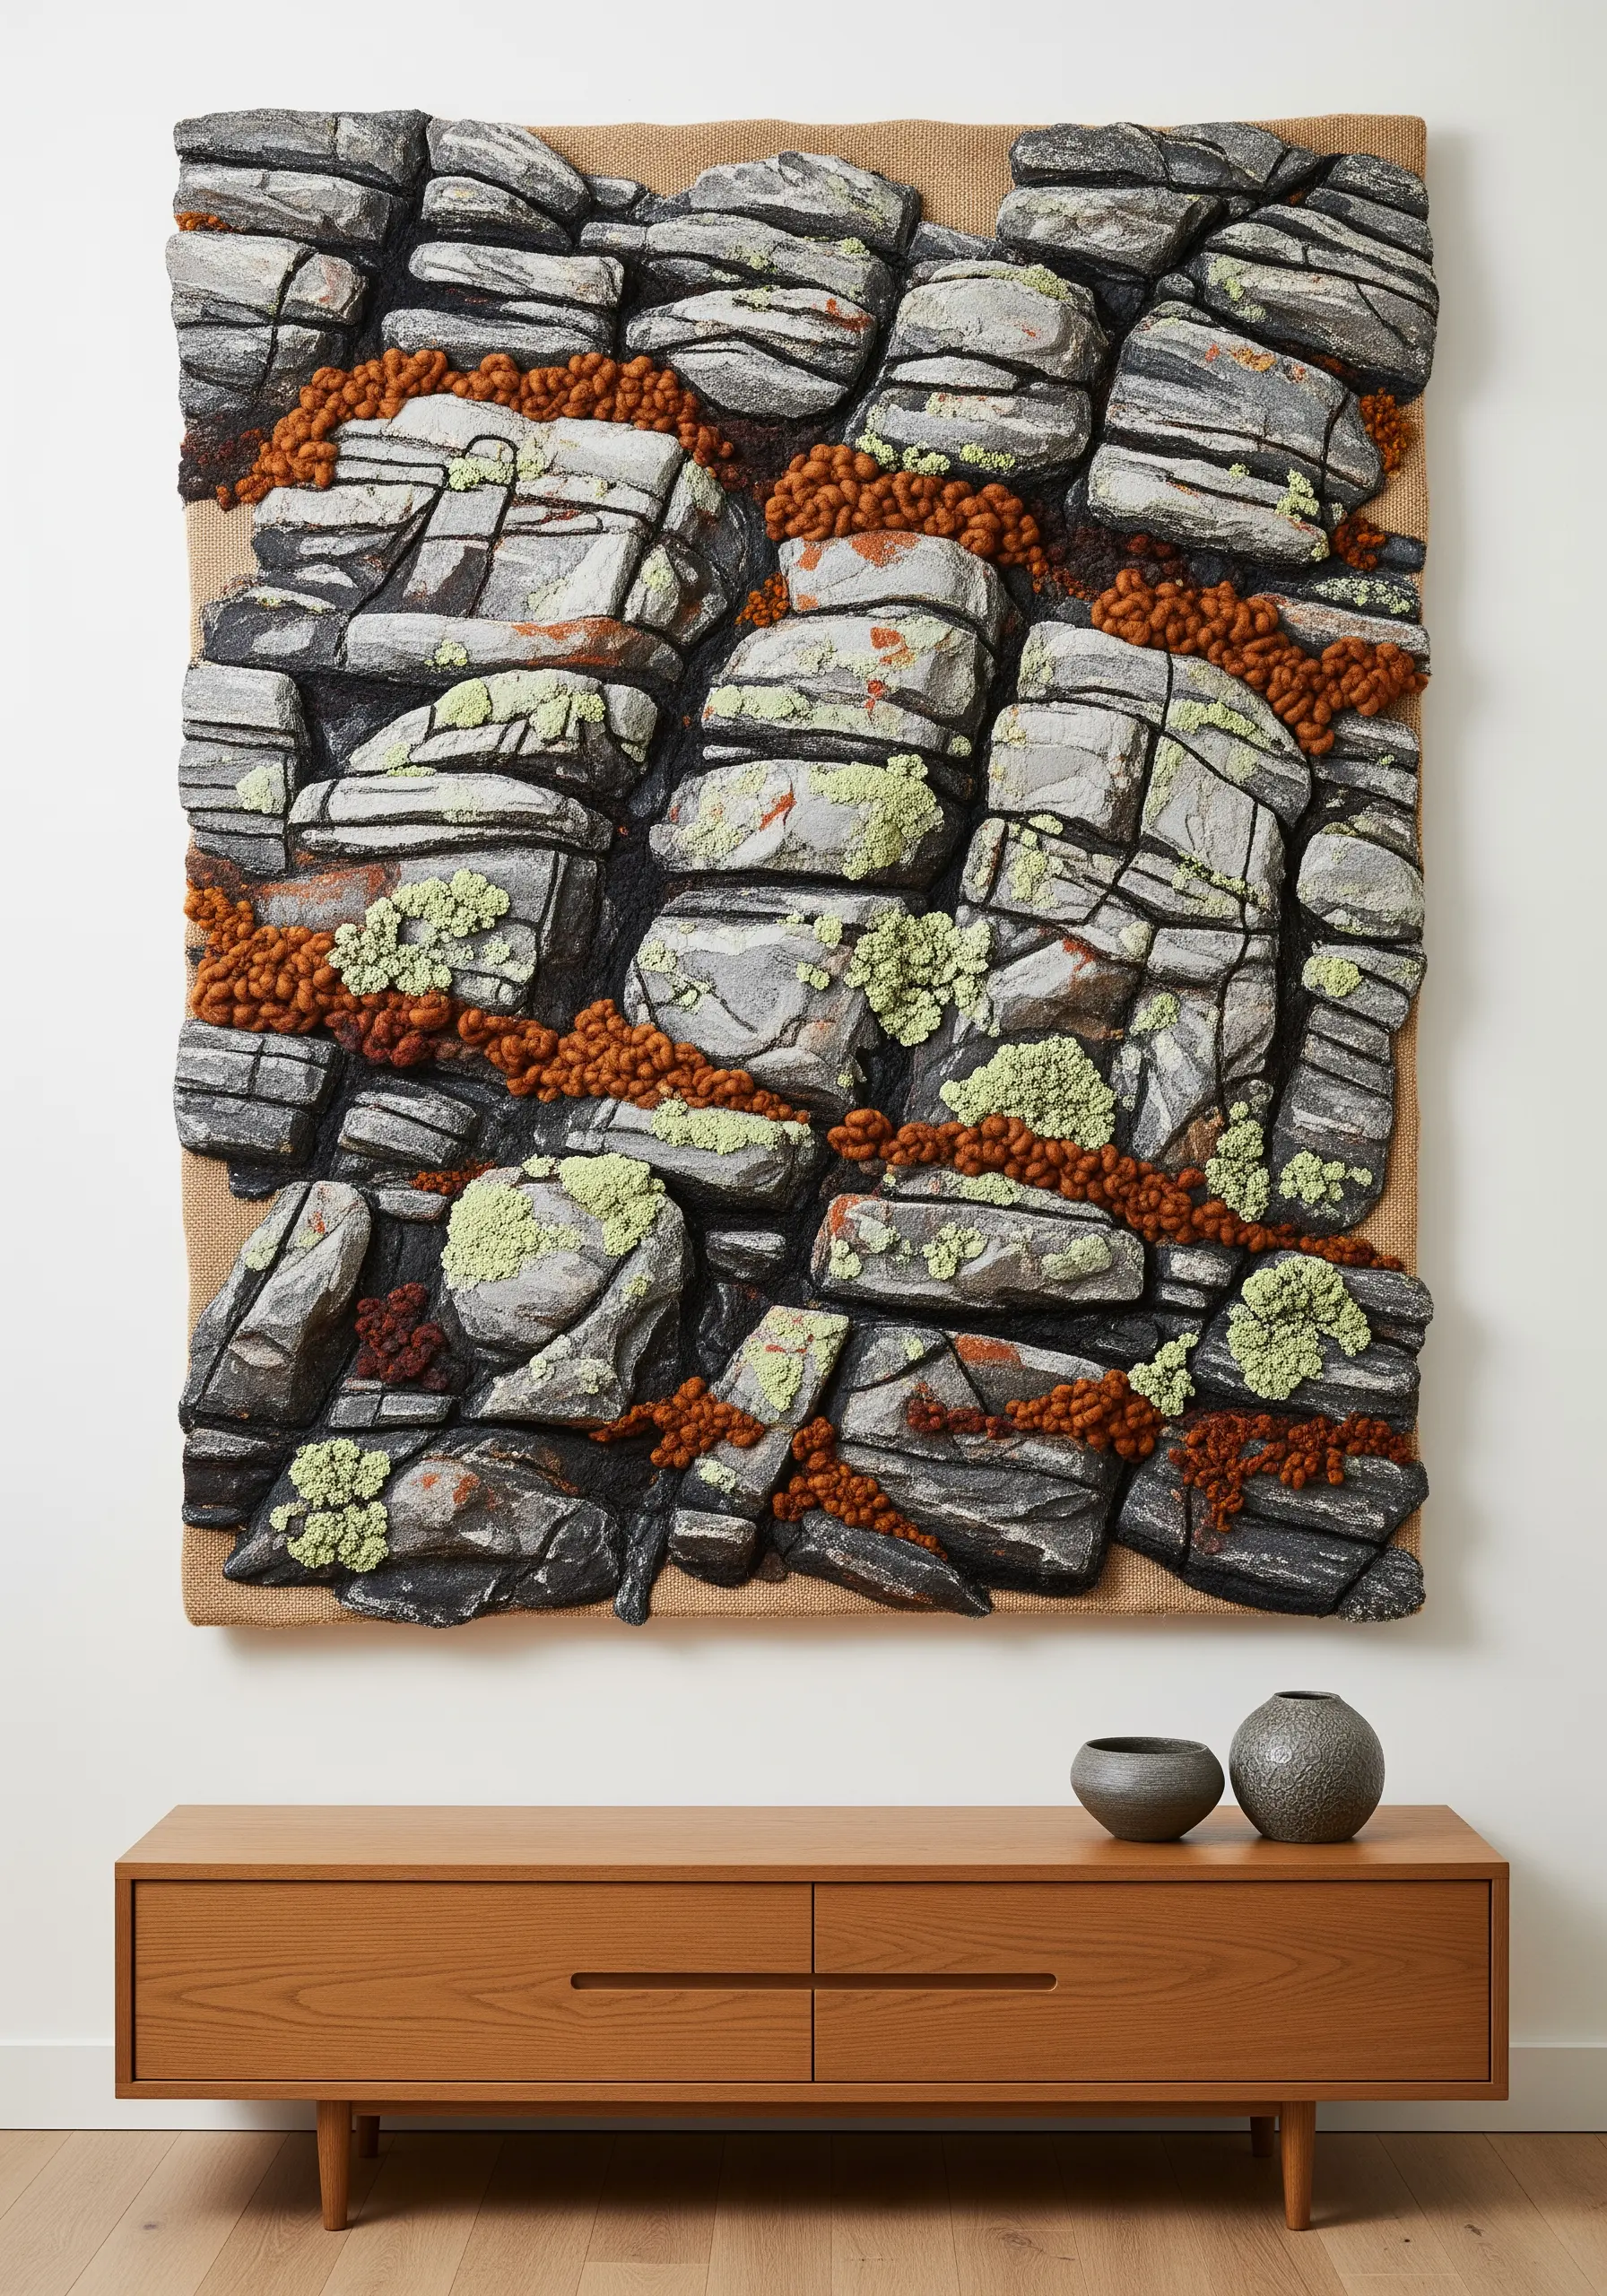
Build a truly sculptural piece by layering fabrics, padding, and chunky fibers to mimic a rock face.
Use the stumpwork technique by cutting felt shapes for the rocks and stitching over them with gray threads to create raised, three-dimensional forms.
Fill the crevices with clusters of French knots or tufts of un-spun wool in rust and mossy green to represent lichen and vegetation.
This intensive layering of materials and stitches results in a powerful, tactile artwork that pushes the boundaries of traditional embroidery.
9. Stitch Tree Rings with Meditative Circles
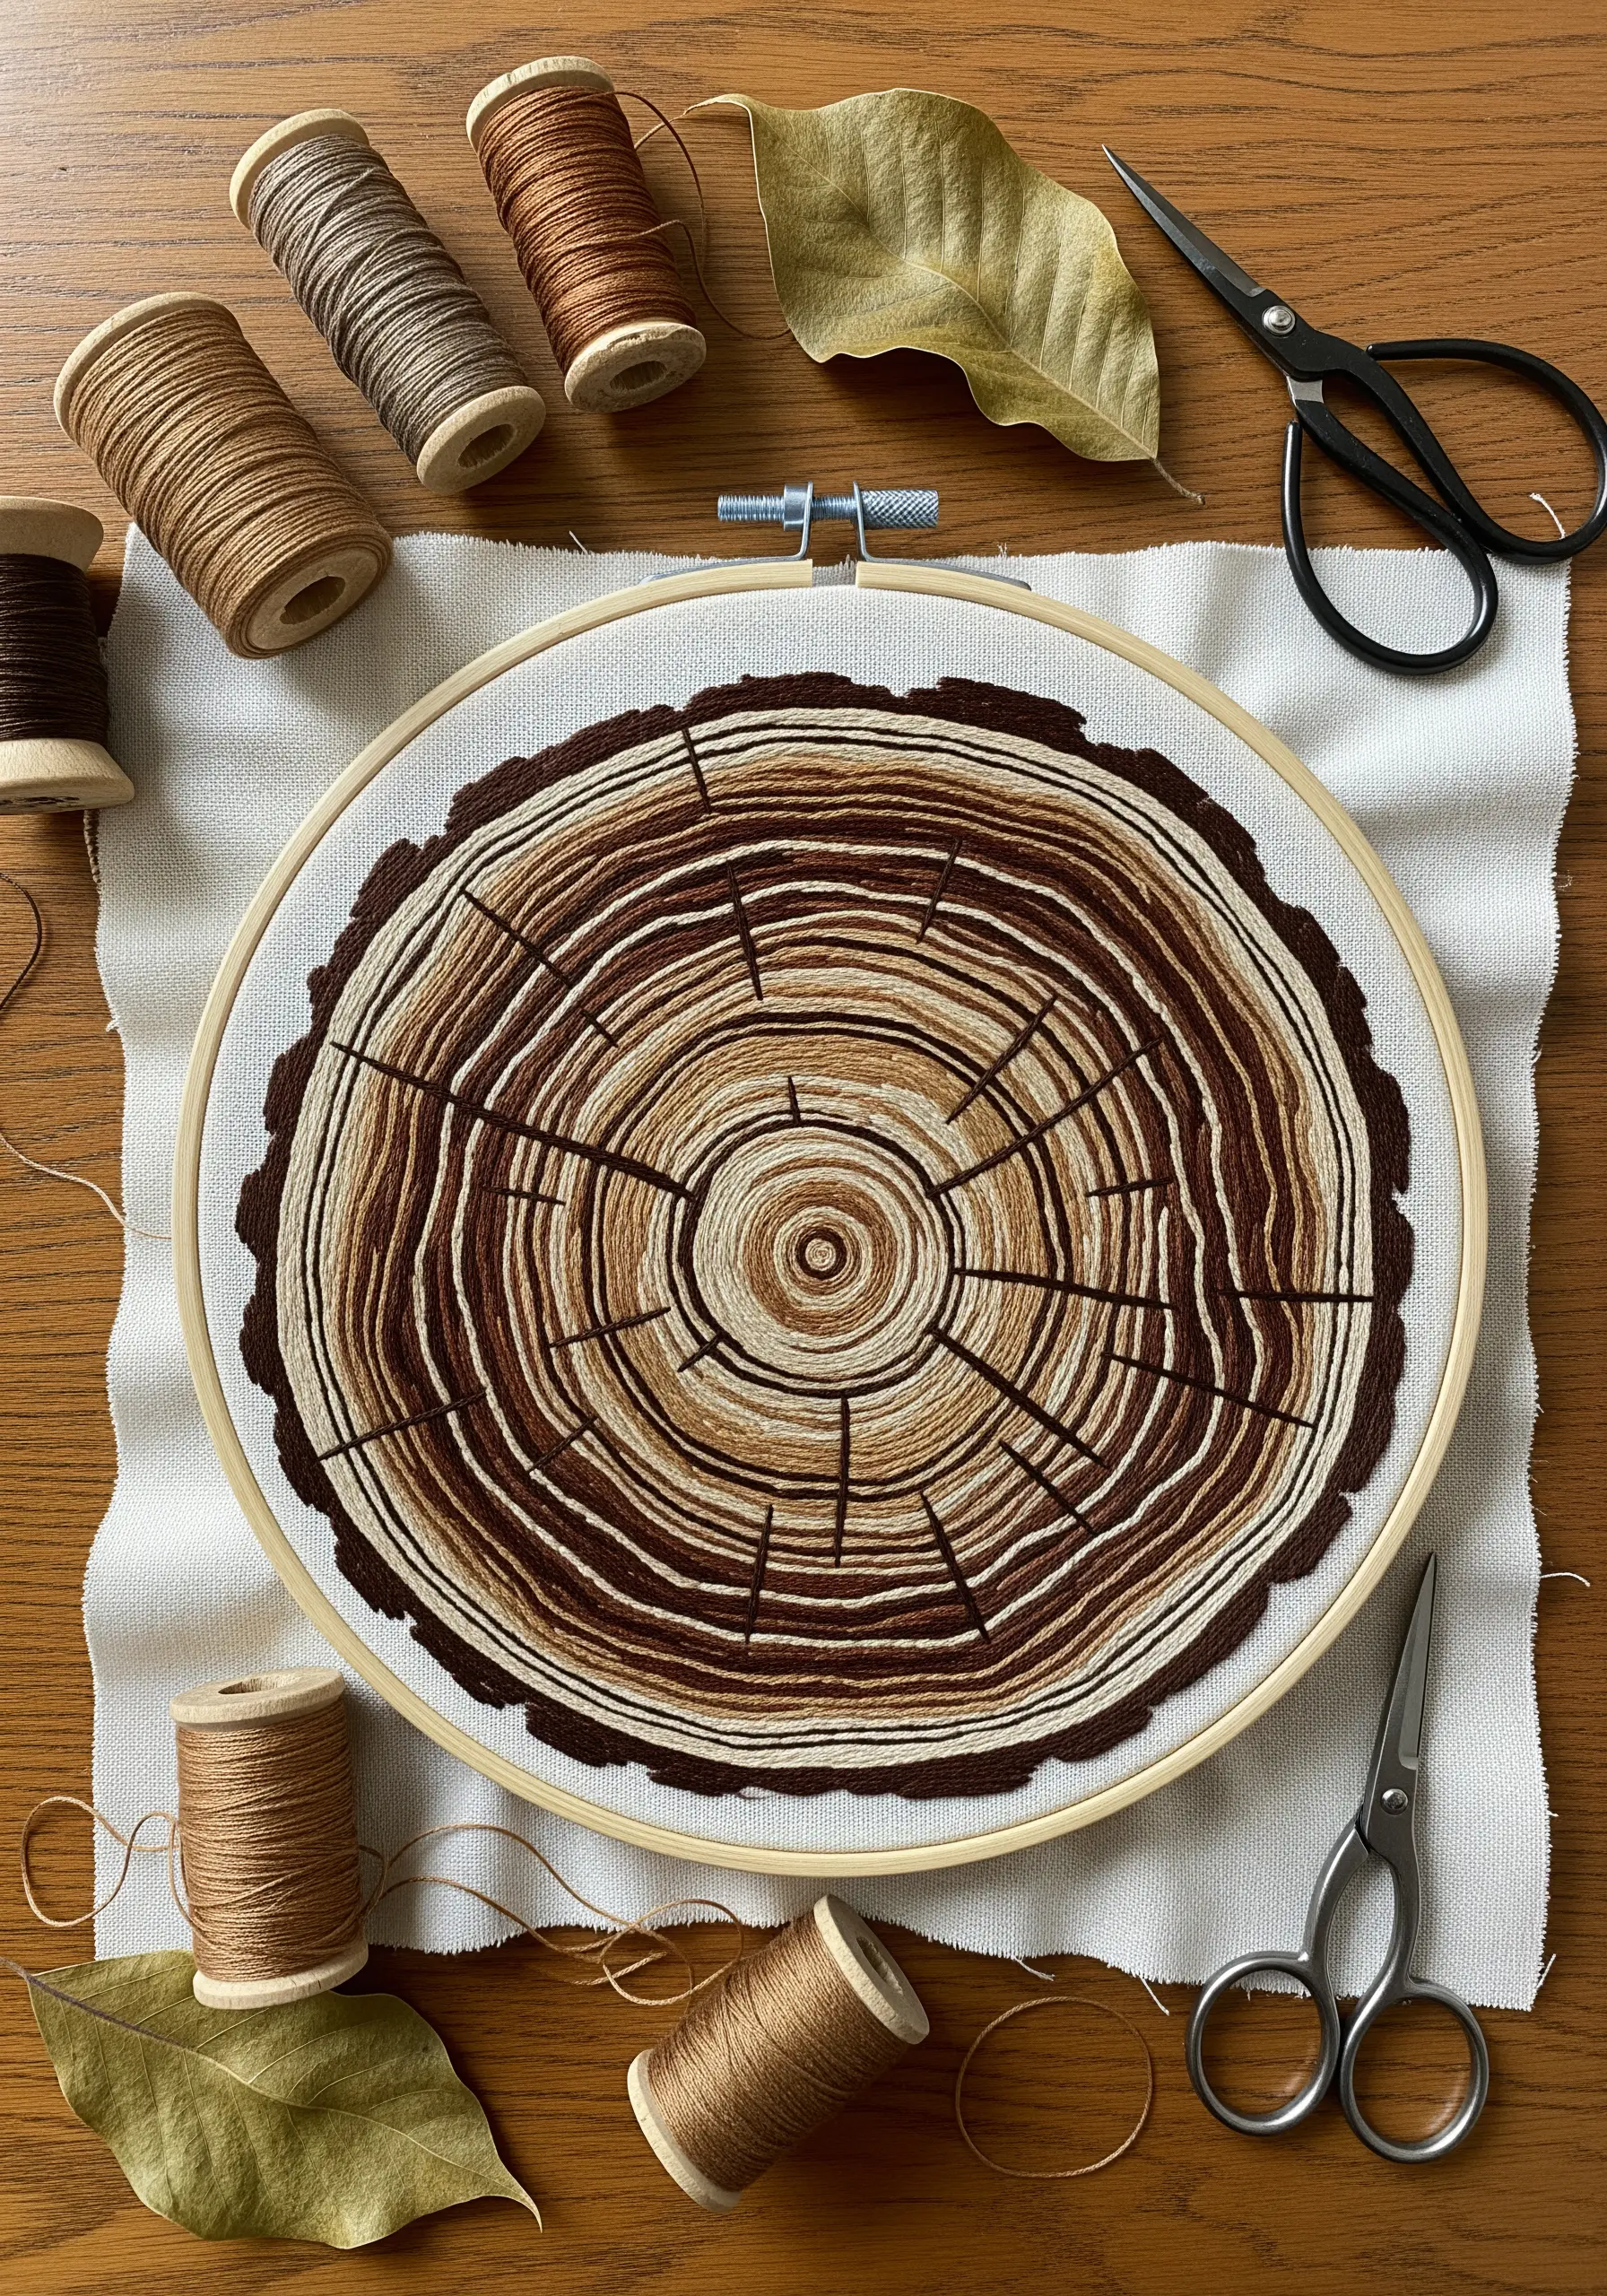
Translate the organic history of a tree’s growth rings into a meditative stitching project.
Using a simple split stitch or backstitch, work in concentric circles from the center out.
Select a palette of five to seven shades of brown, from pale tan to deep espresso, and vary the thickness of the rings randomly.
This focus on color variation and line creates a stunningly realistic cross-section that feels both graphic and natural.
10. Weave Natural Fibers into a Coiled Bowl
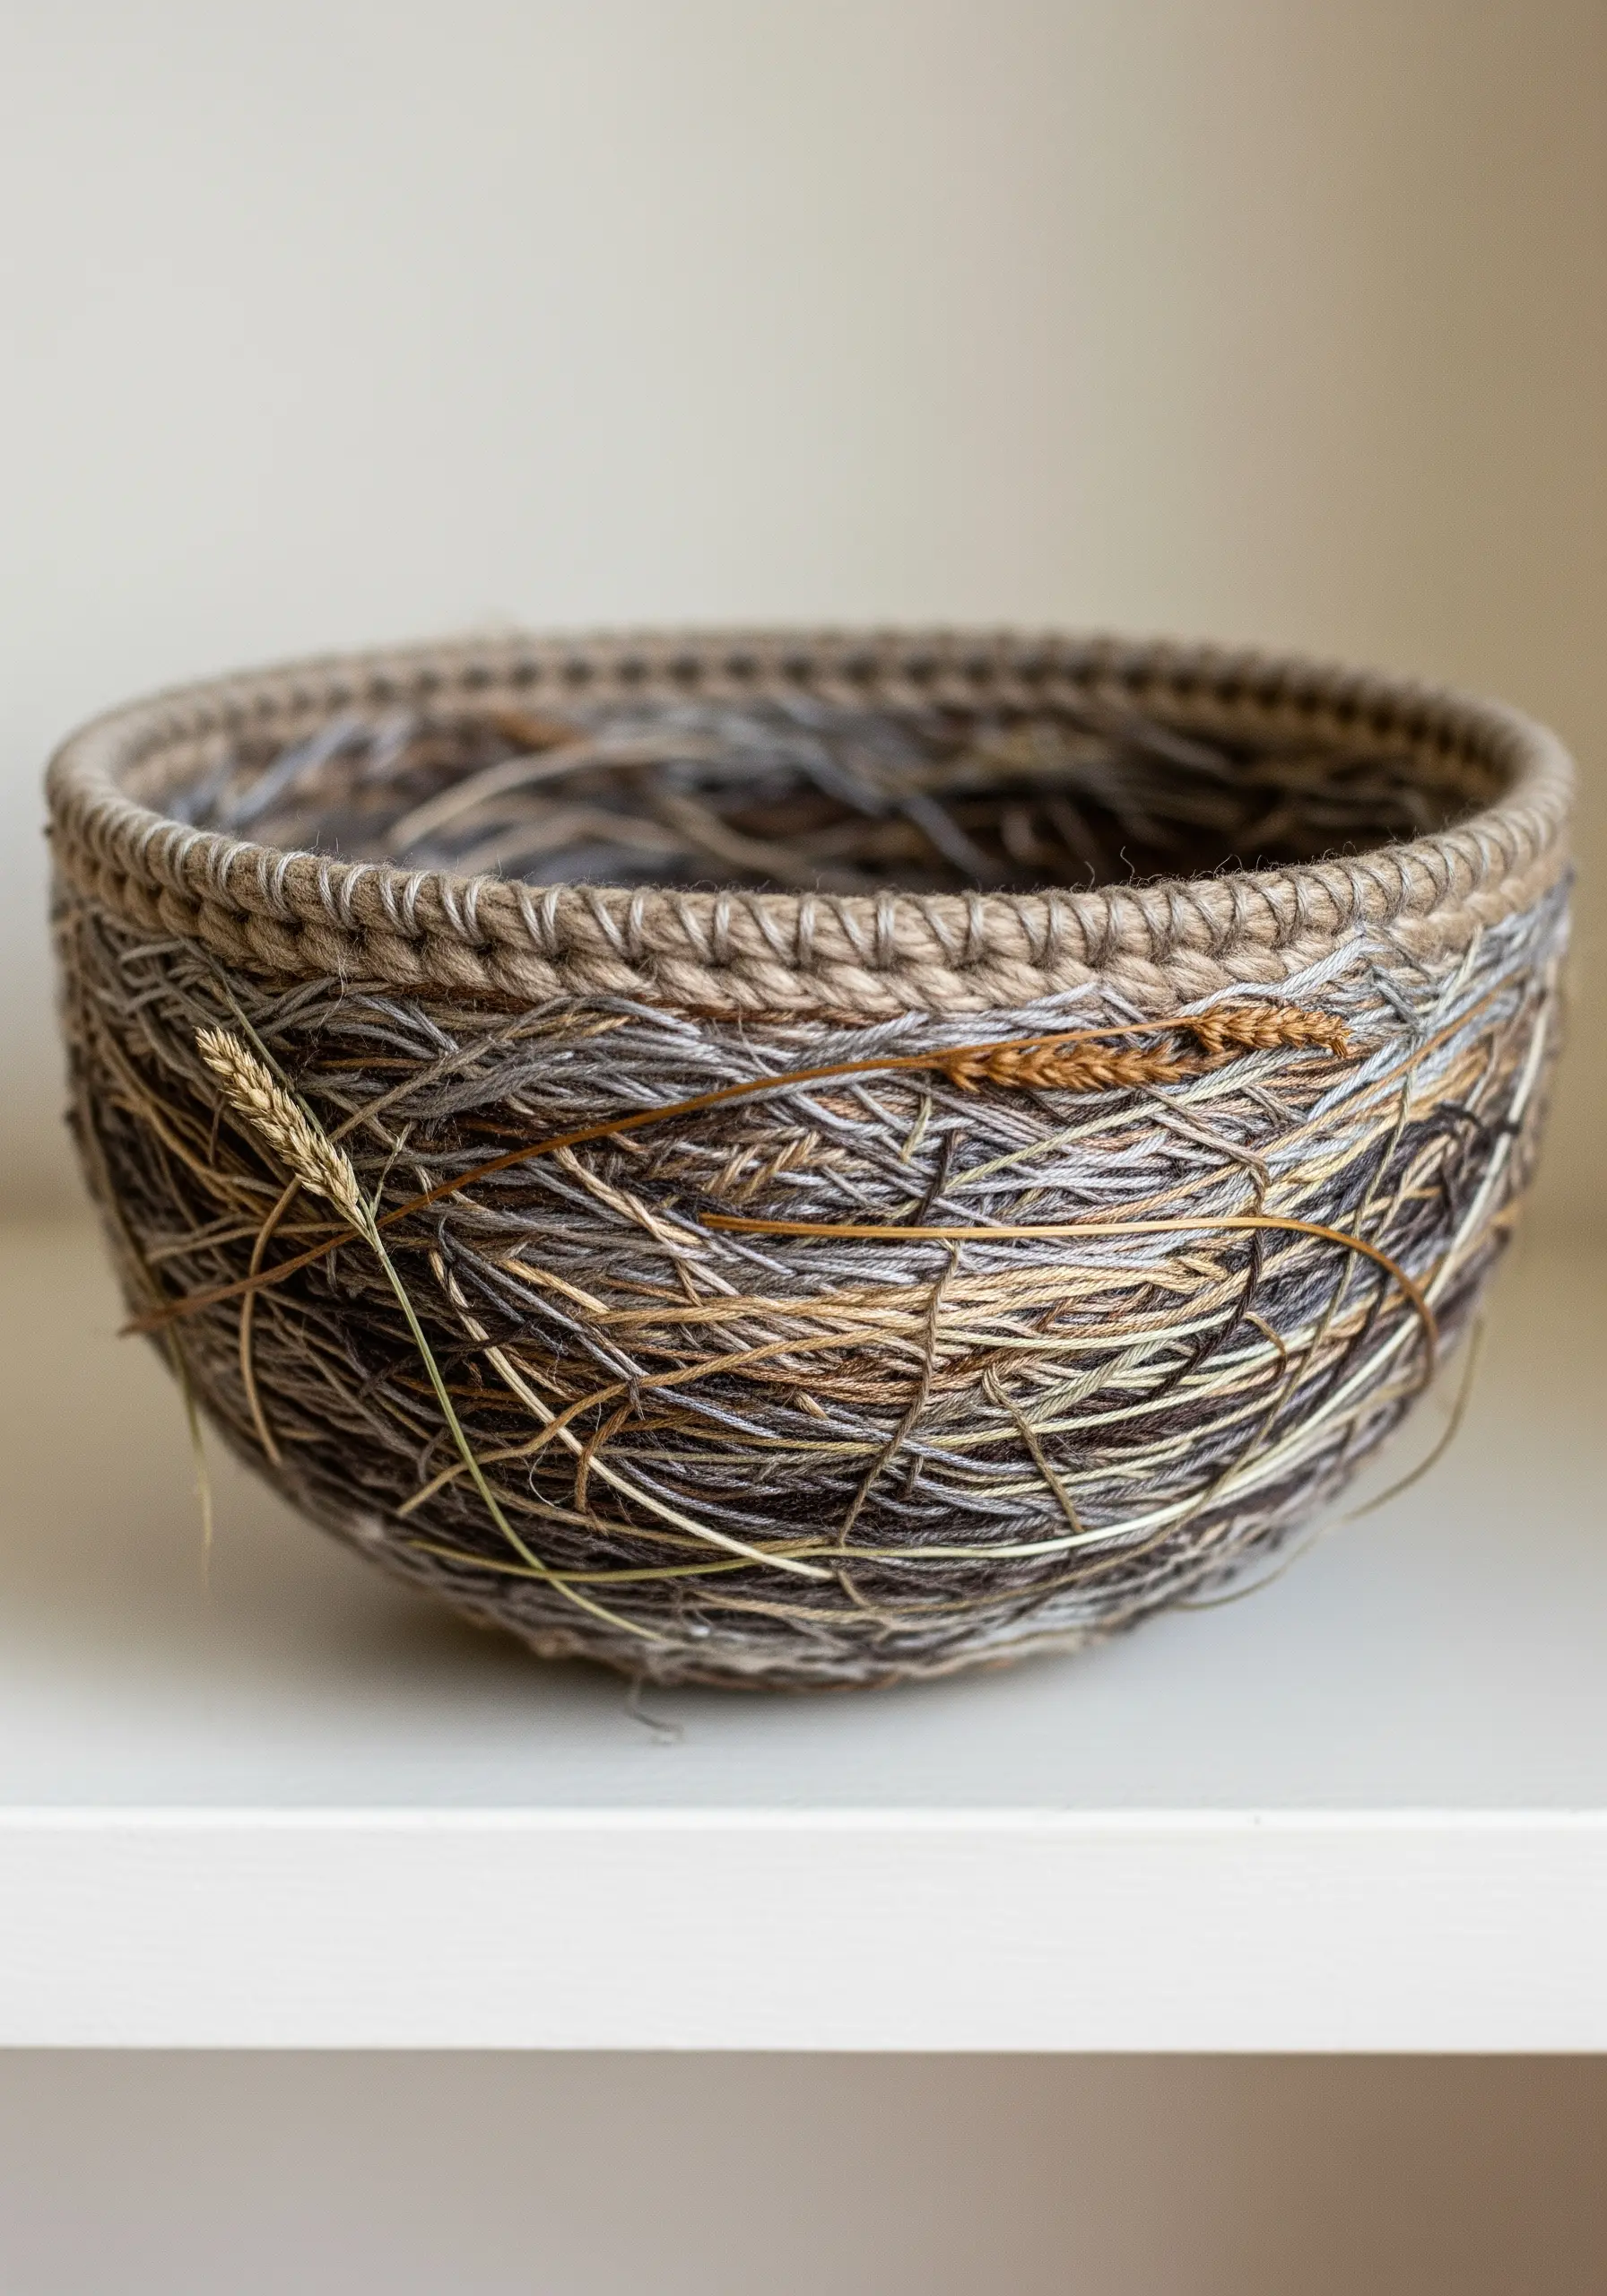
Explore textile art beyond the hoop by creating a coiled vessel that incorporates natural textures.
Start with a thick rope or cord as your base, then tightly wrap it with various threads, yarns, and even dried grasses.
Use a simple whip stitch to coil and connect the wrapped rope, building the bowl’s shape as you go.
Leaving some of the natural fibers exposed adds a rustic, organic feel that connects the finished piece directly to its source material.
11. Embody Frost’s Geometry with Delicate Stitches
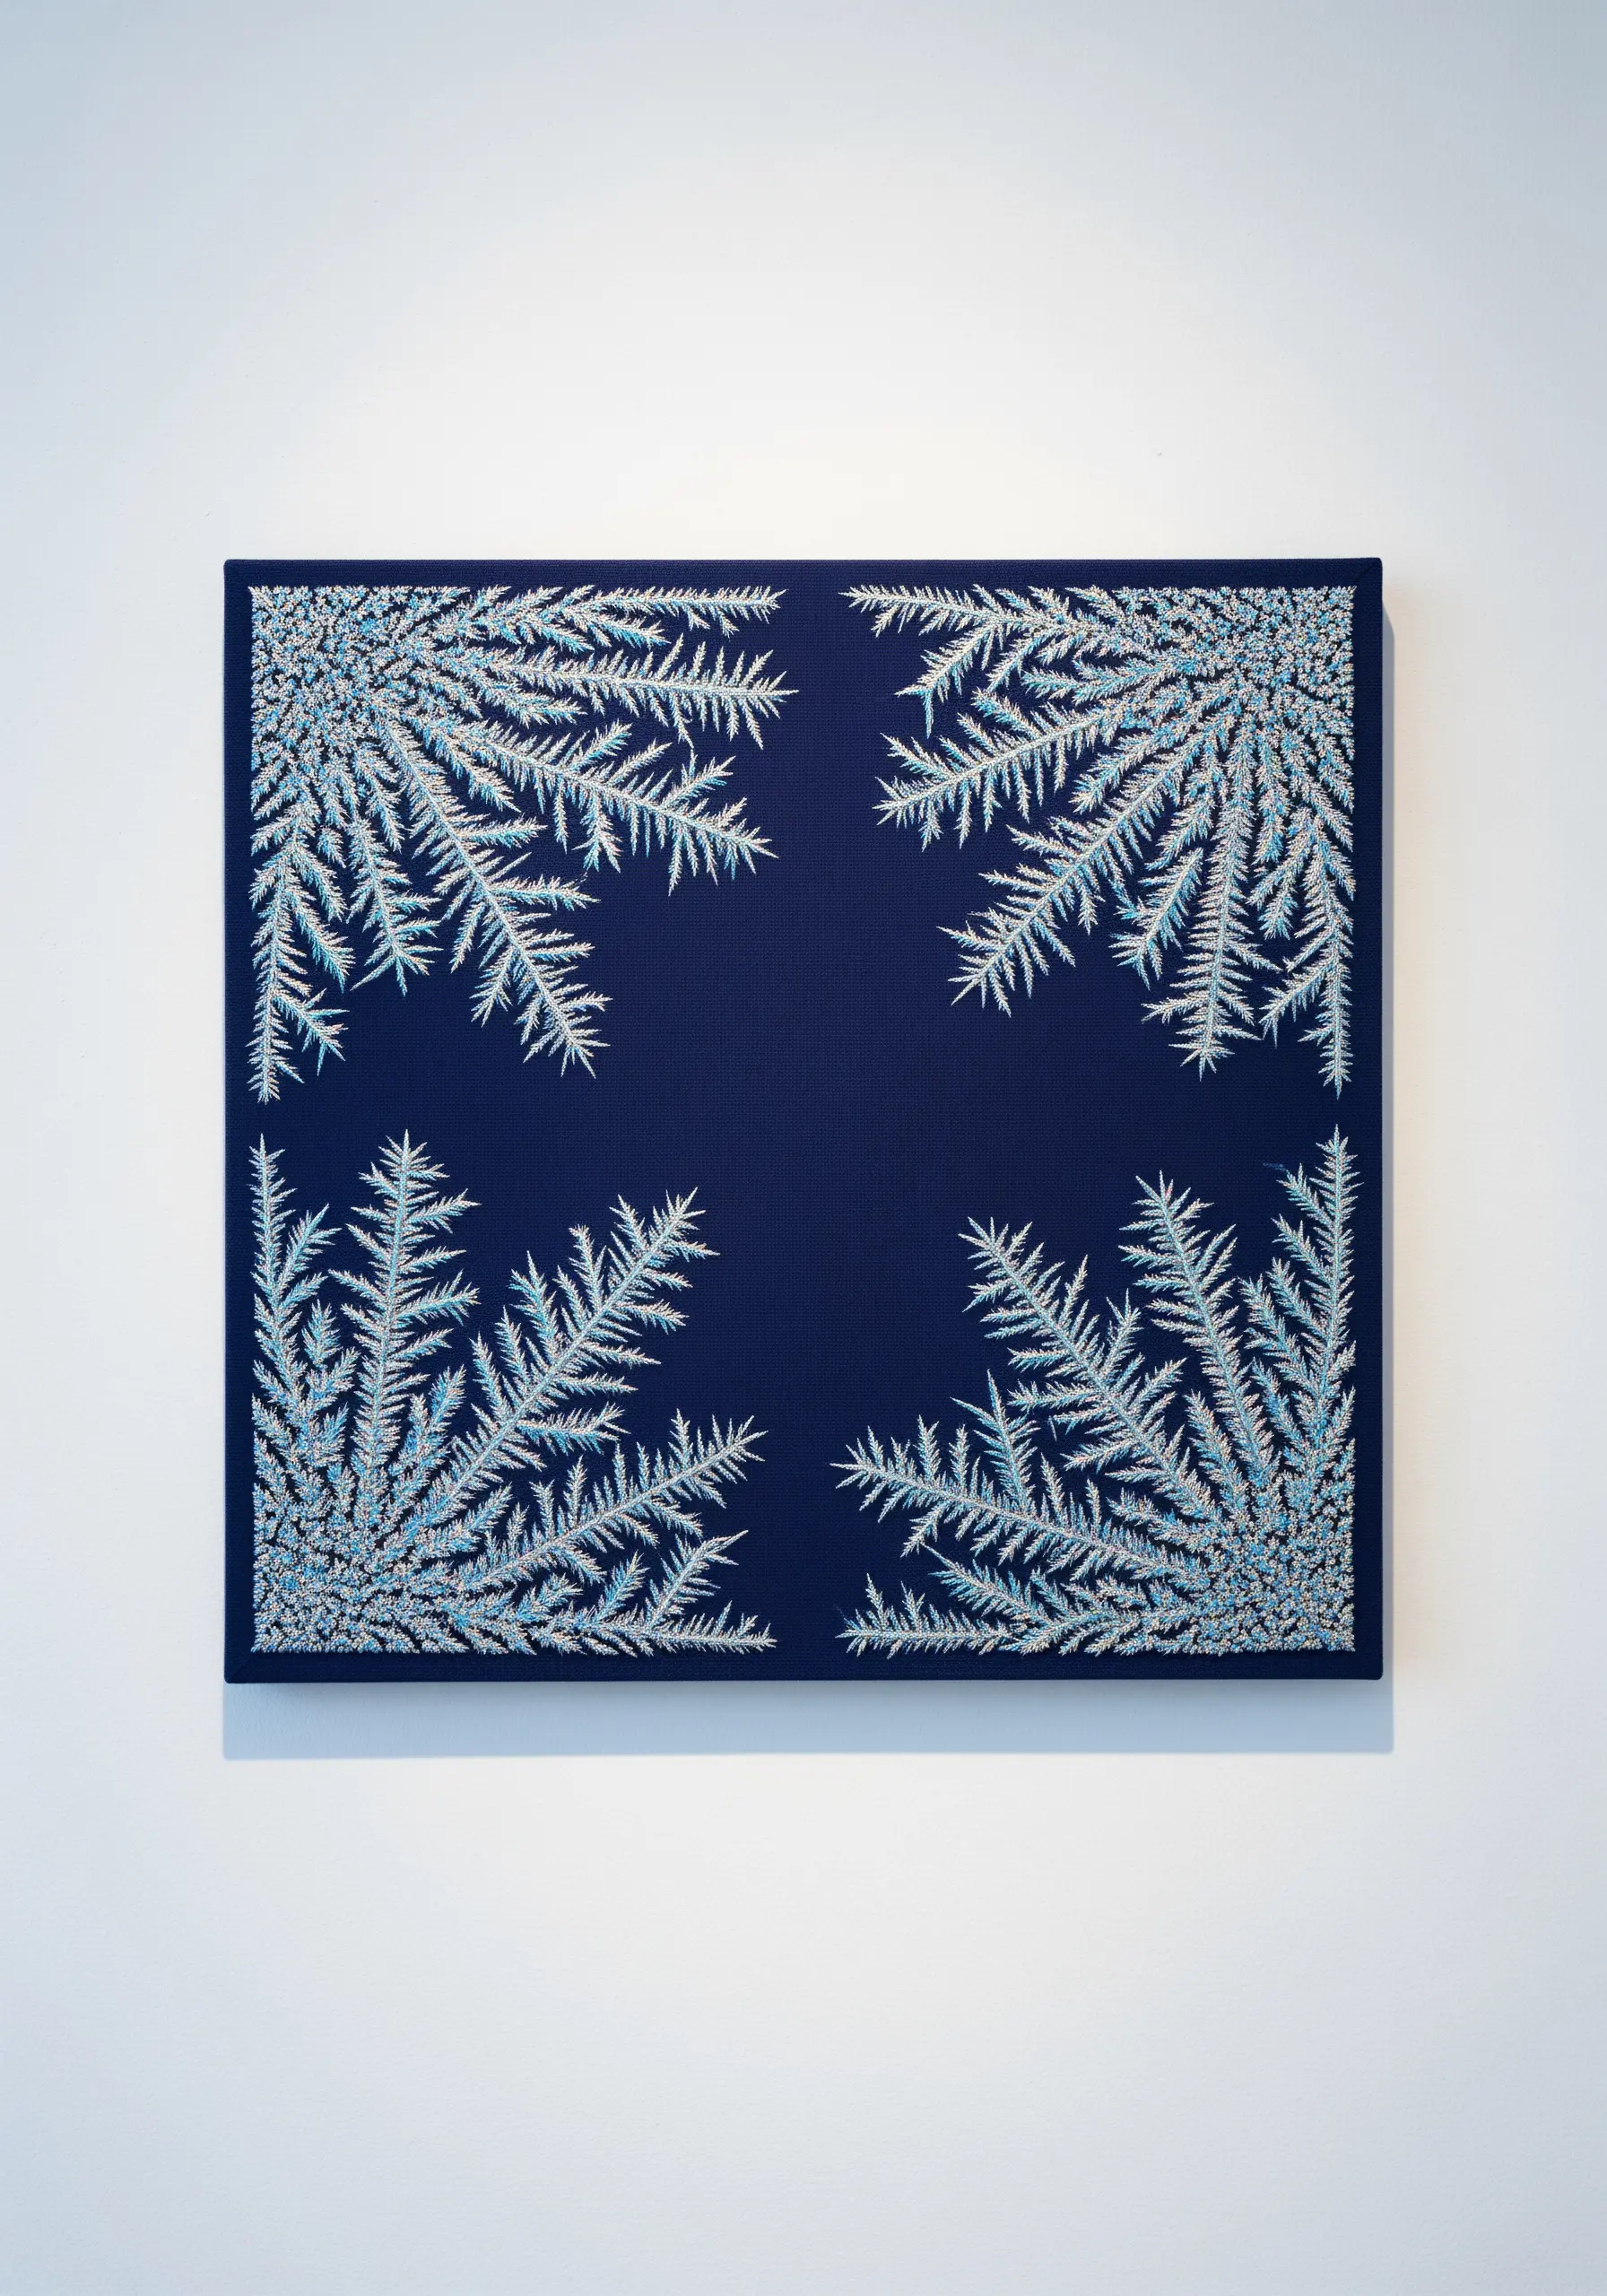
Capture the crystalline structure of frost by using precise, delicate stitches on a high-contrast background.
A deep navy or black fabric makes white and silver threads appear crisp and bright.
Use a fishbone stitch or fly stitch to create the main branching patterns, keeping your stitches small and uniform.
Introduce a single strand of fine metallic silver thread alongside your white floss to add a subtle, icy shimmer that catches the light.
12. Create Luminous Texture with Beads and Ribbon
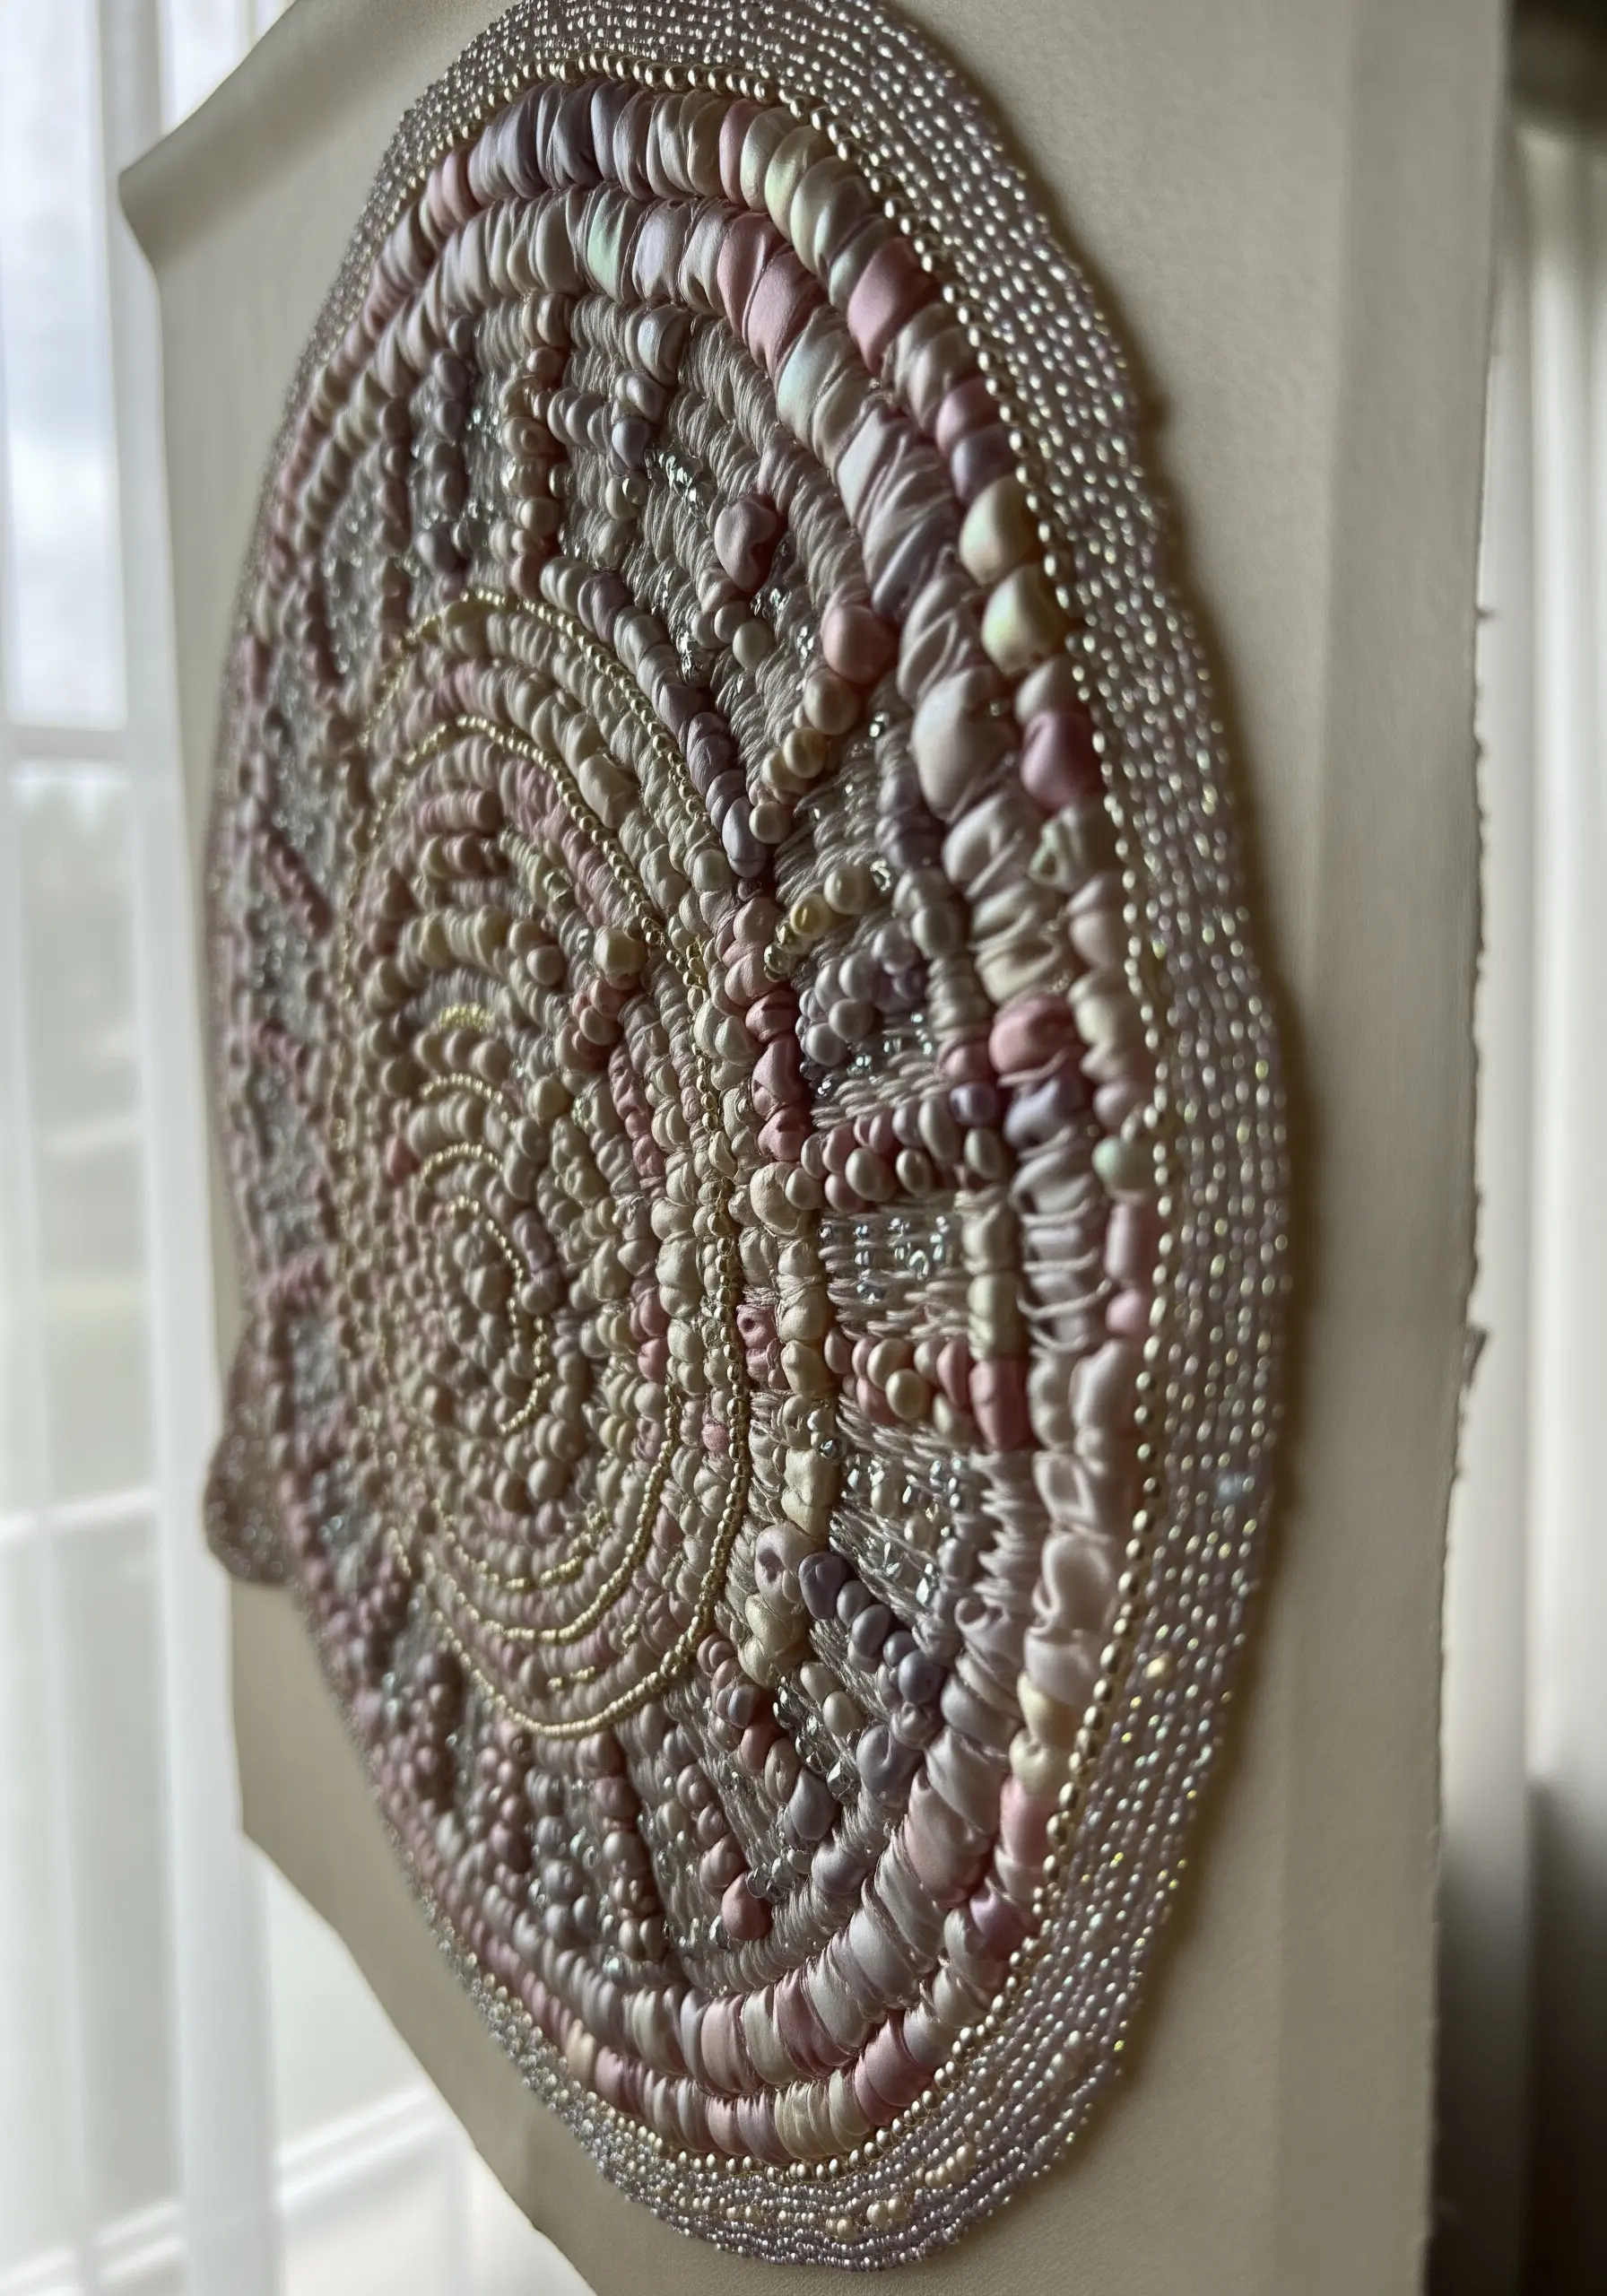
Achieve a soft, pearlescent texture by combining silk ribbon embroidery with delicate beading.
Use silk ribbon in a simple straight stitch, allowing the ribbon to twist naturally to create highlights and shadows.
Intersperse the ribbon work with tiny seed beads and freshwater pearls, attaching them with a single strand of matching thread.
This combination of matte and lustrous materials creates a rich, tactile surface that feels both opulent and organic, like the inside of a seashell.
13. Construct a Coral Reef with a Riot of Texture
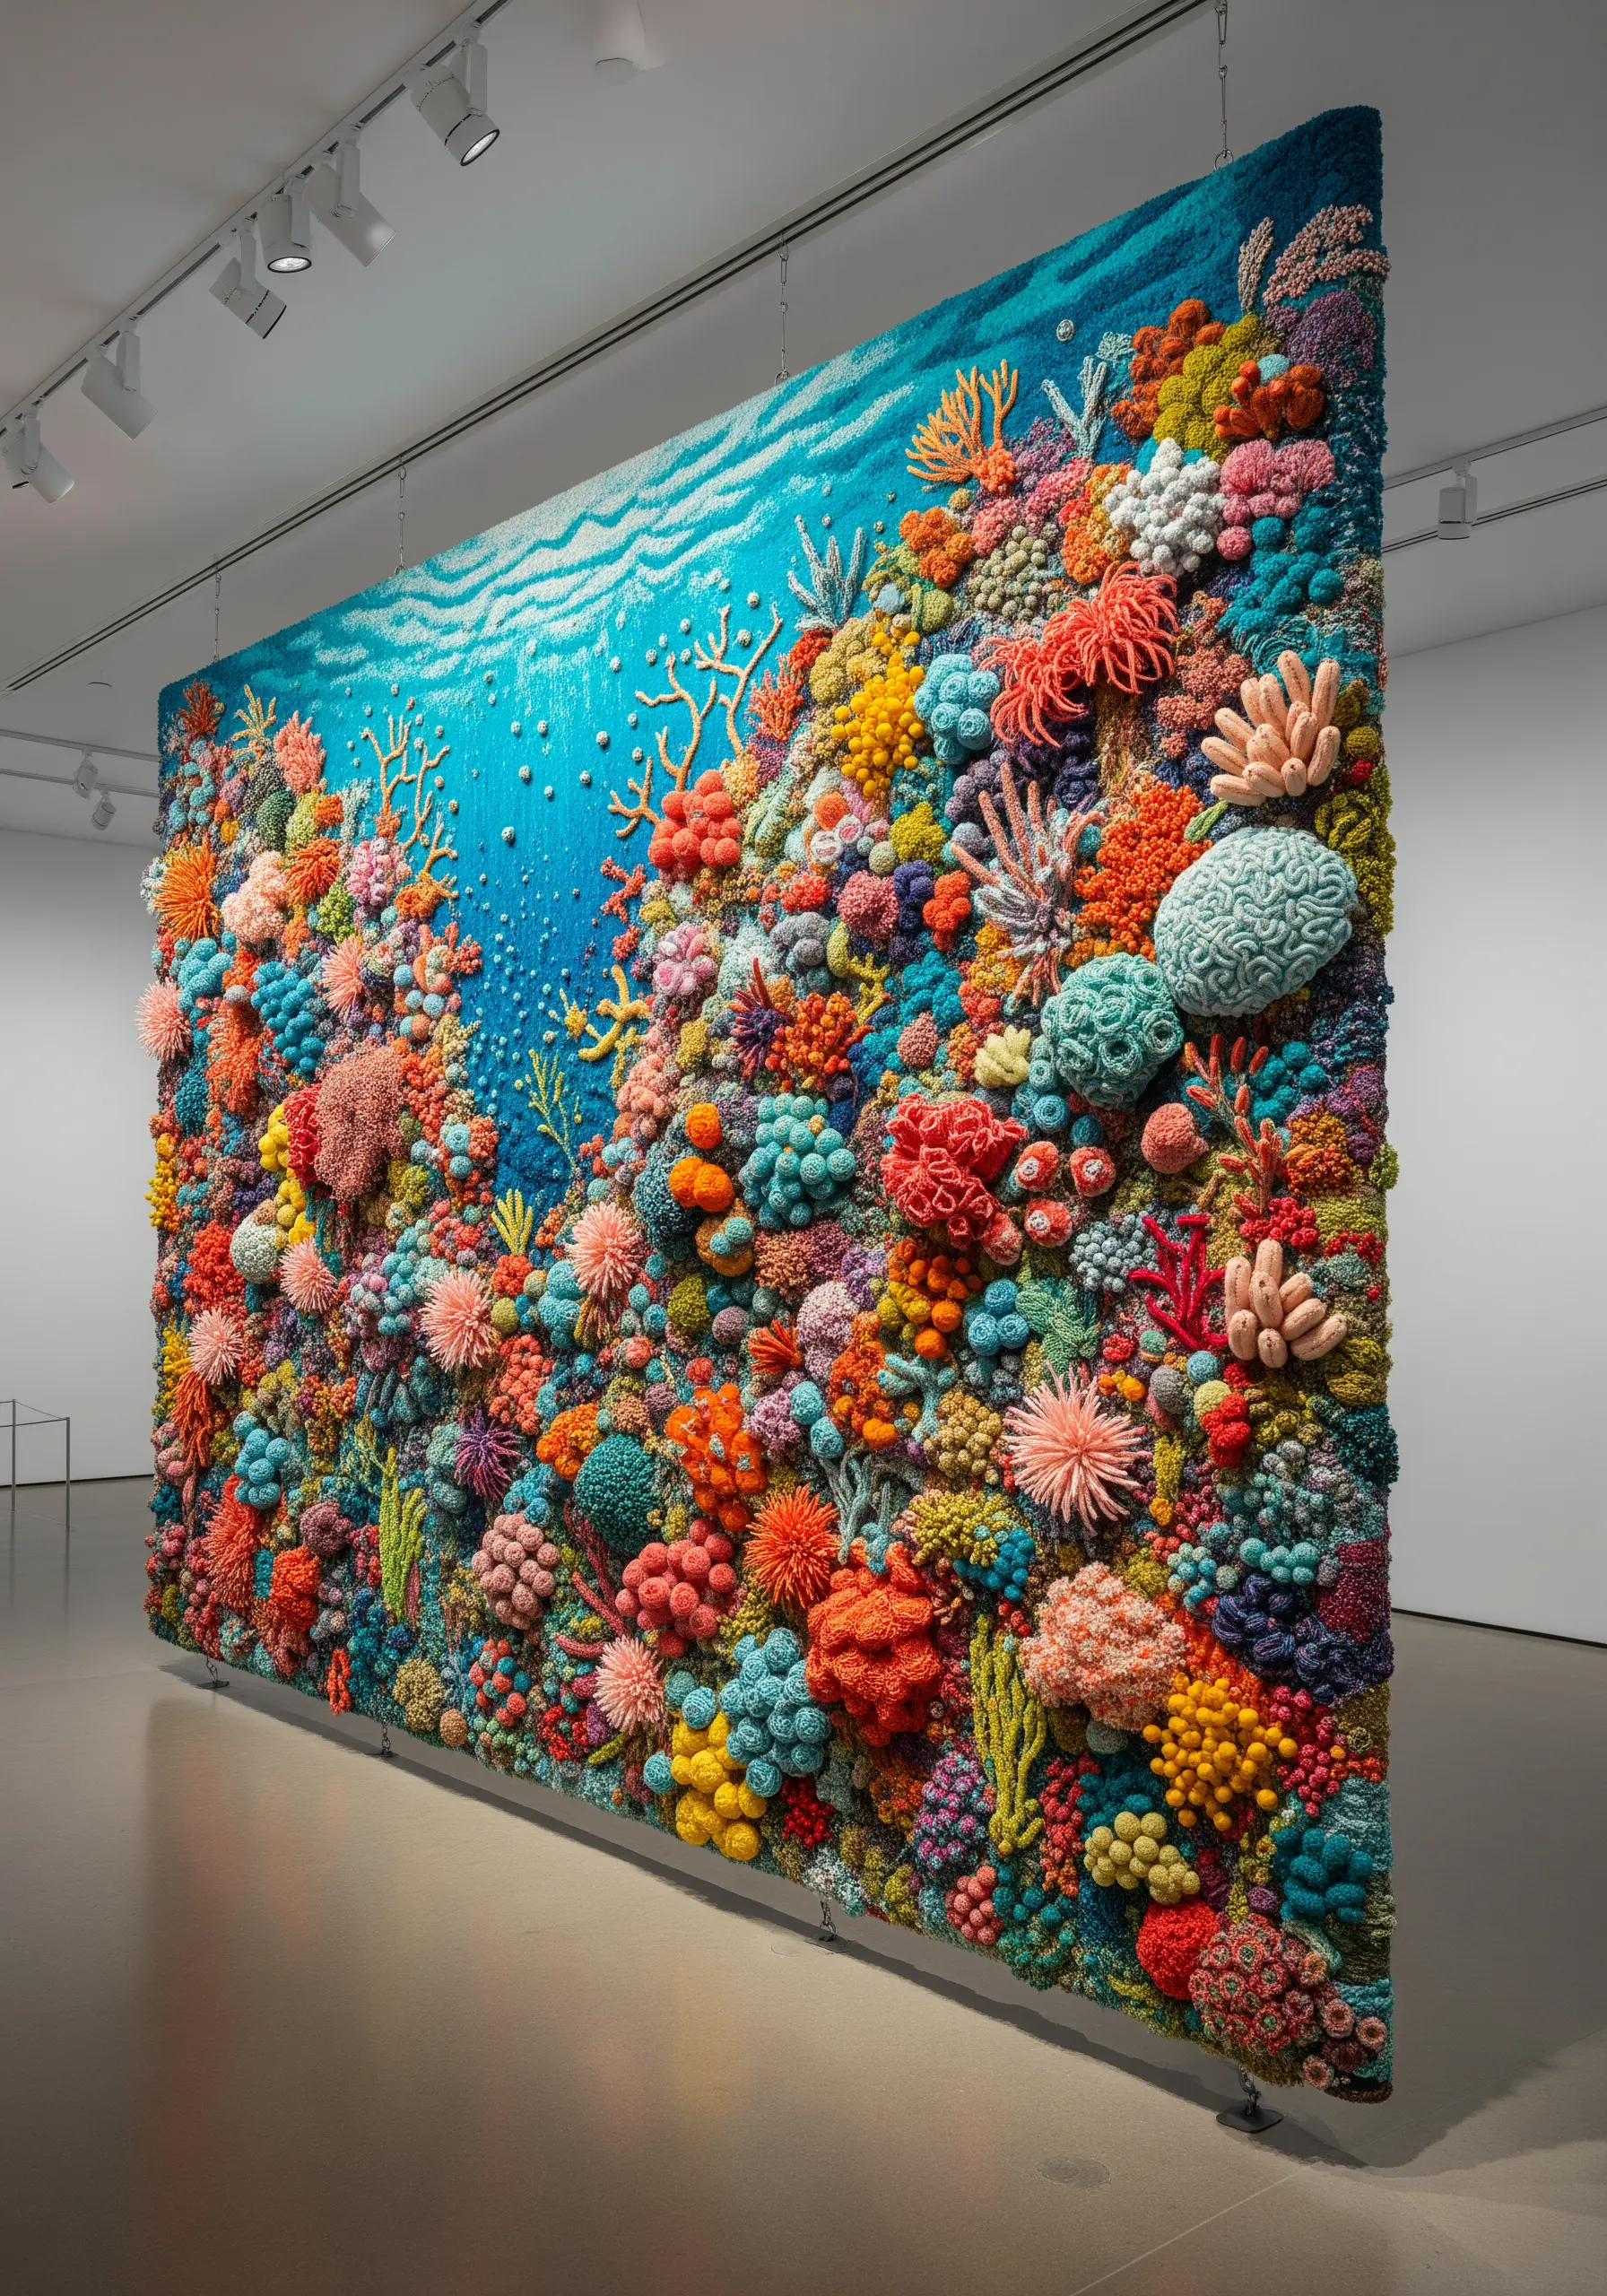
Build an underwater world by embracing maximalism and combining every dimensional stitch you know.
Use bullion knots for worm-like corals, tightly packed French knots for brain corals, and woven picot stitches for fan shapes.
Don’t limit yourself to floss—incorporate chunky yarn, velvet ribbon, and merino wool to create a diverse ecosystem of textures.
The key is to stitch densely, layering elements over one another until the background fabric is completely obscured, resulting in a stunning, high-relief textile sculpture.
14. Replicate Feathers and Fur with Directional Stitches
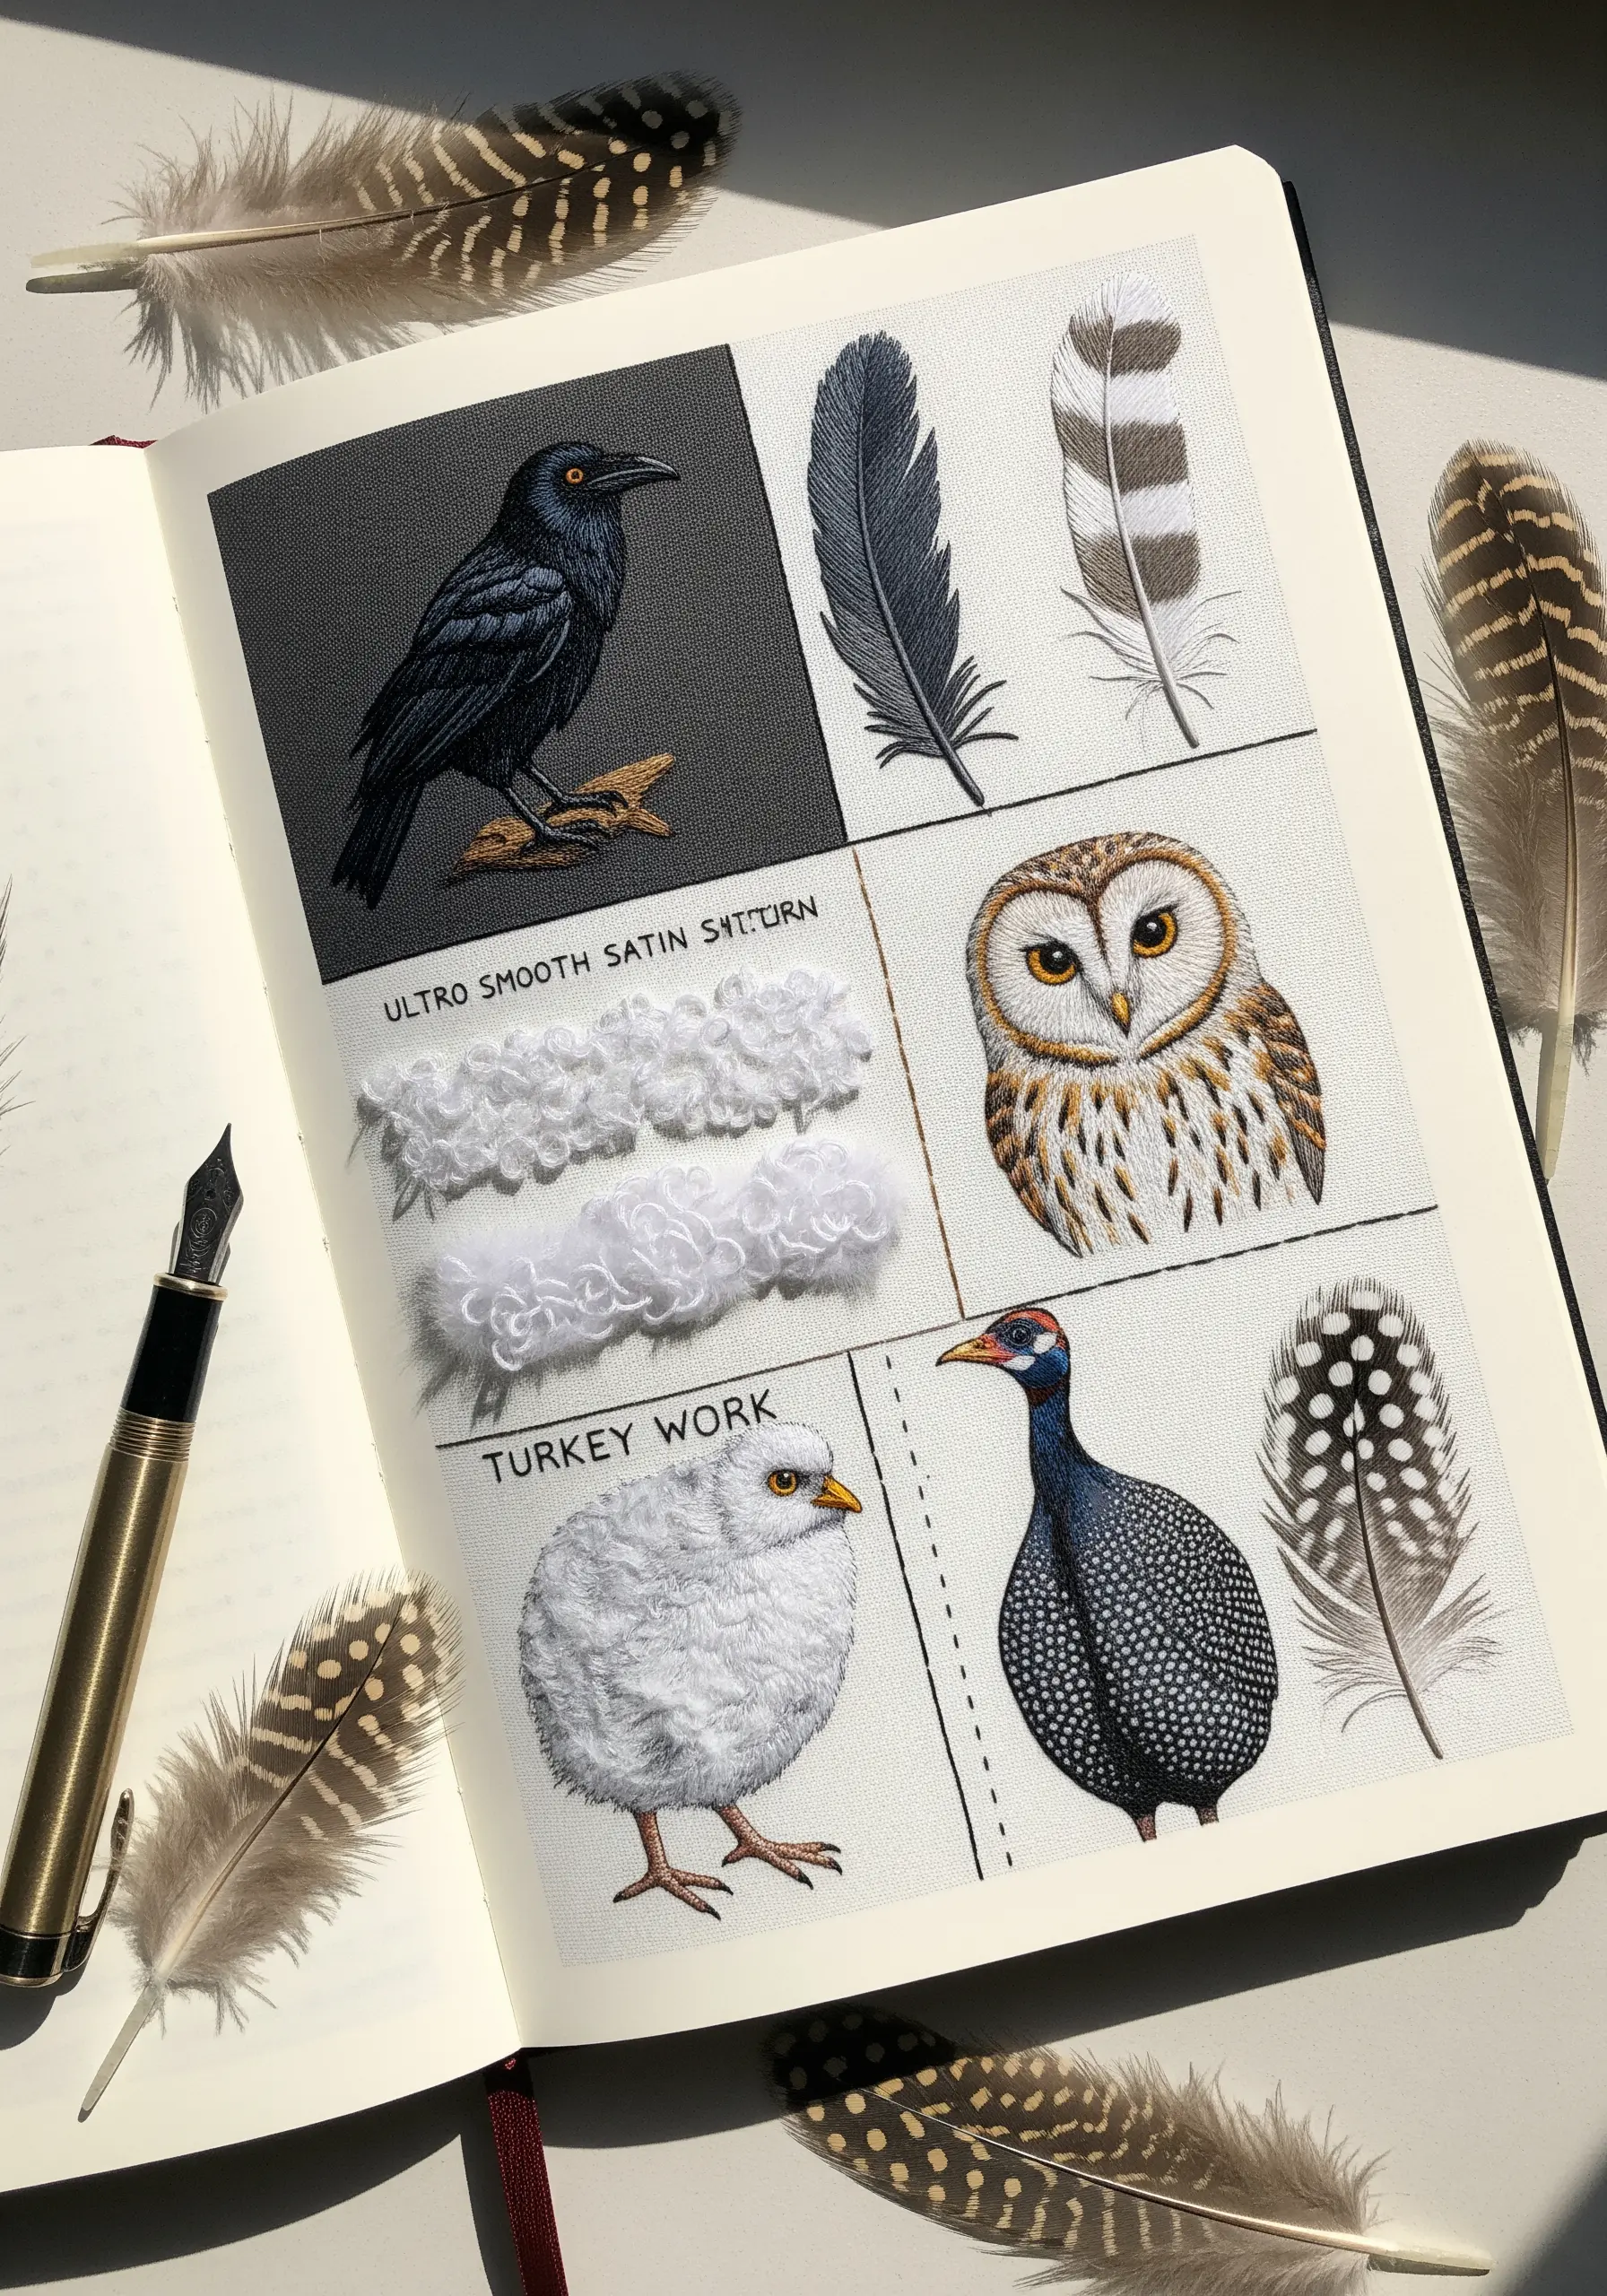
The secret to realistic birds and animals is ensuring every stitch follows the natural direction of growth.
For the sleek, dark feathers of a raven, use a short, dense satin stitch with a high-sheen rayon thread to capture iridescence.
To create the soft down of a chick, use turkey work—keep the loops dense and trim them short for a fluffy, plush feel.
This attention to stitch direction and type allows you to create incredibly lifelike realistic animal insect embroidery patterns for nature lovers.
15. Form a Geode with Beads and Crystal Chips
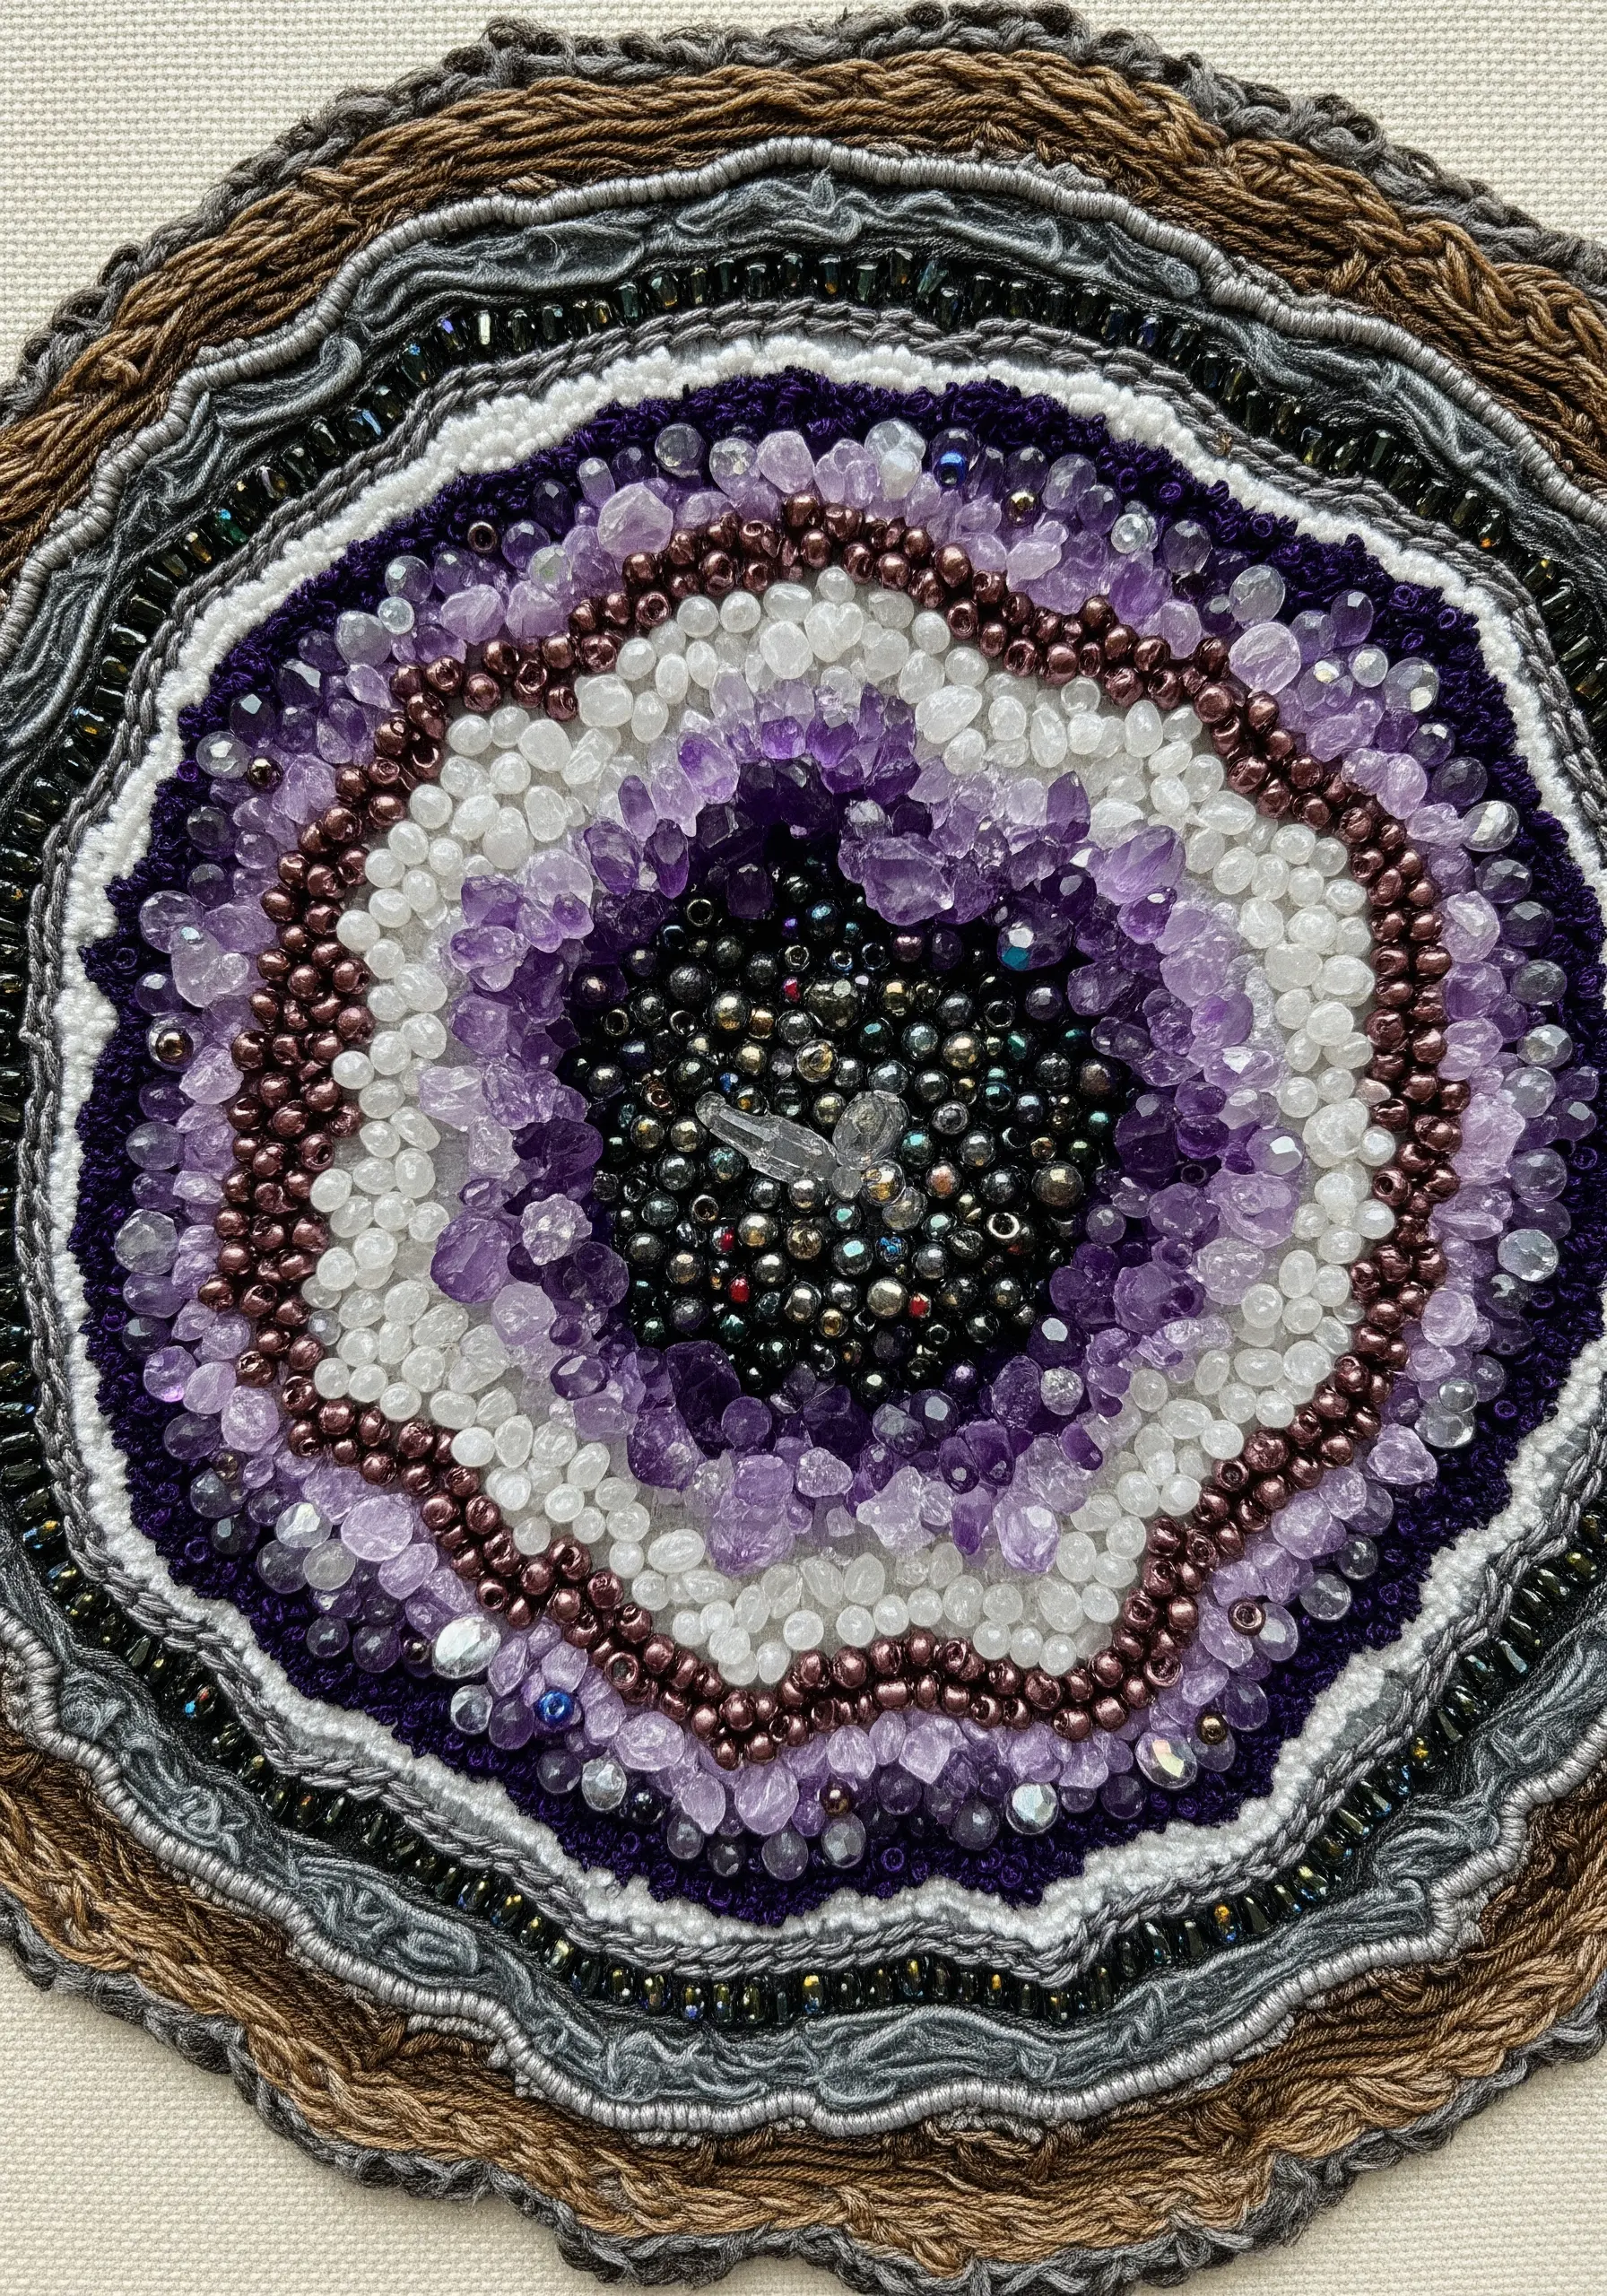
Create a stunningly realistic geode by incorporating actual gemstone chips into your beadwork.
Start from the center, securing a cluster of crystal chips and larger beads with a strong thread.
Surround this core with concentric rings of smaller seed beads and French knots in a rich amethyst palette.
Frame the entire piece with rows of couched, textured yarn in earthy tones to mimic the rough outer rock, creating a beautiful contrast between rugged and refined.
16. Illuminate Your Stitches on a Lampshade
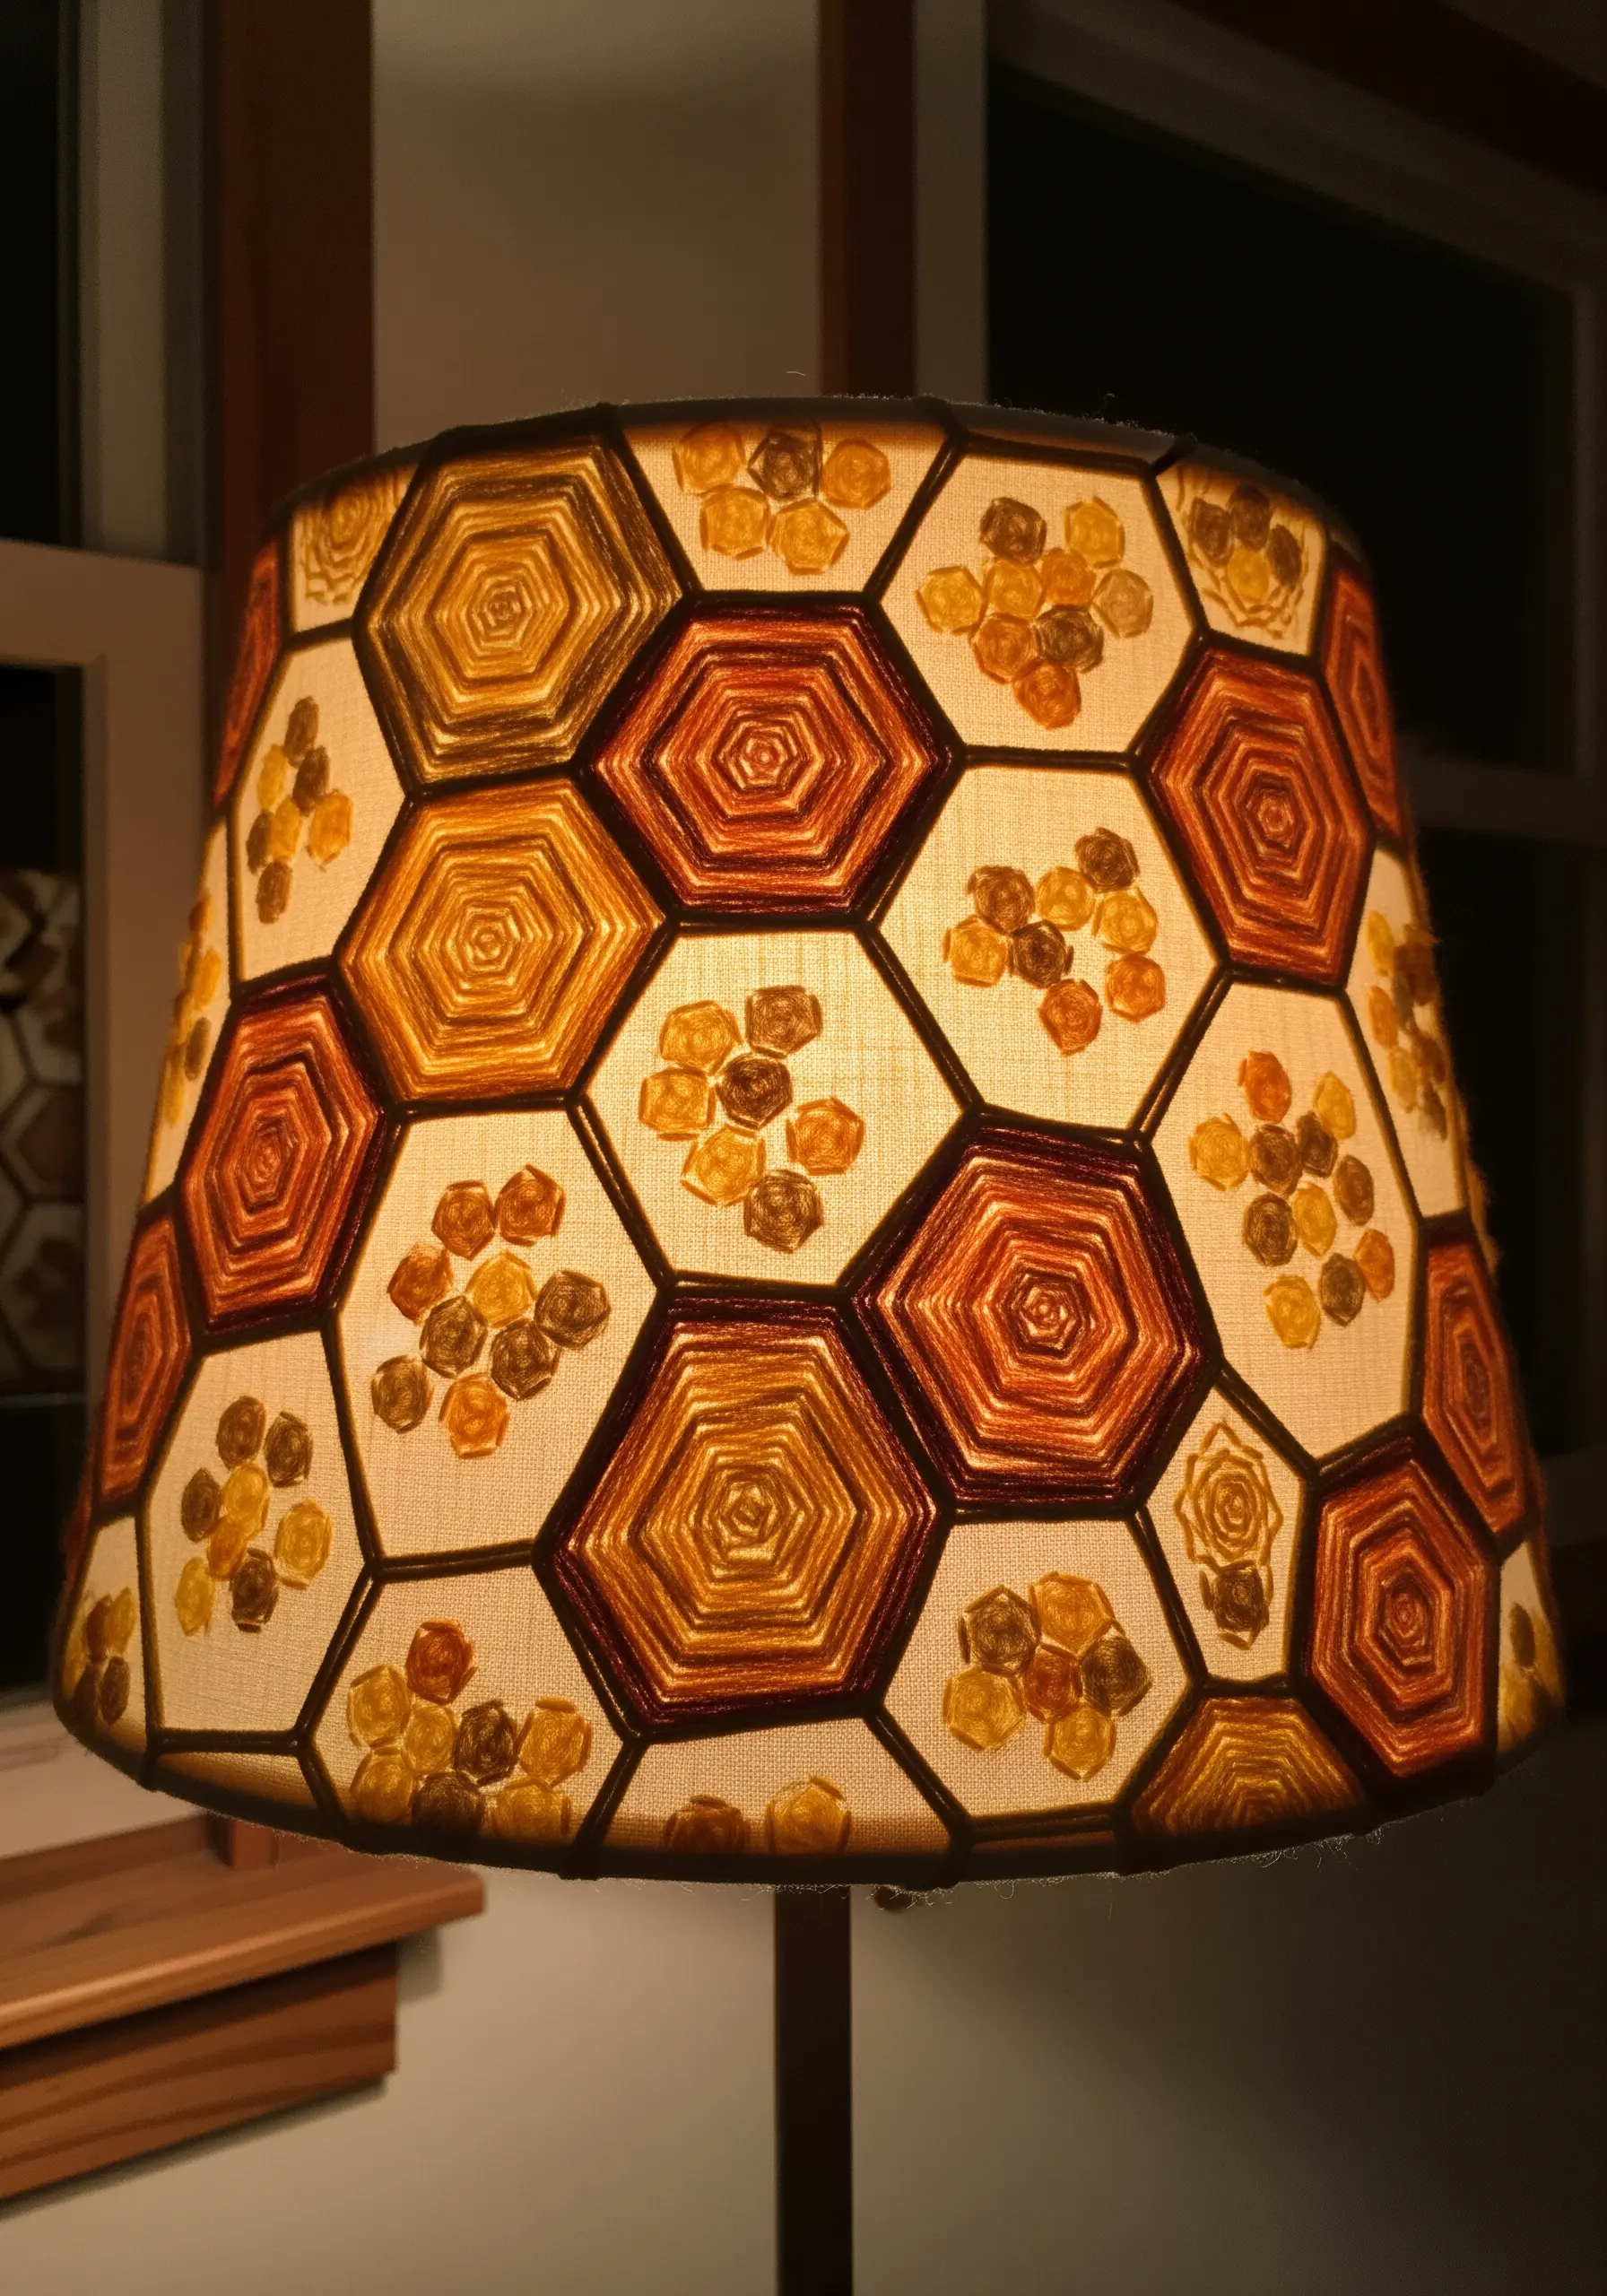
Turn a plain lampshade into a glowing work of art by using string-art-inspired techniques.
Wrap embroidery floss or yarn around a wire lampshade frame to create geometric patterns like this honeycomb design.
The magic happens when the lamp is lit, transforming your stitches into a warm, stained-glass-like display.
Choose translucent or lighter-colored threads to allow the most light to pass through, creating a cozy, ambient glow.
17. Imply Texture Through Fabric Manipulation
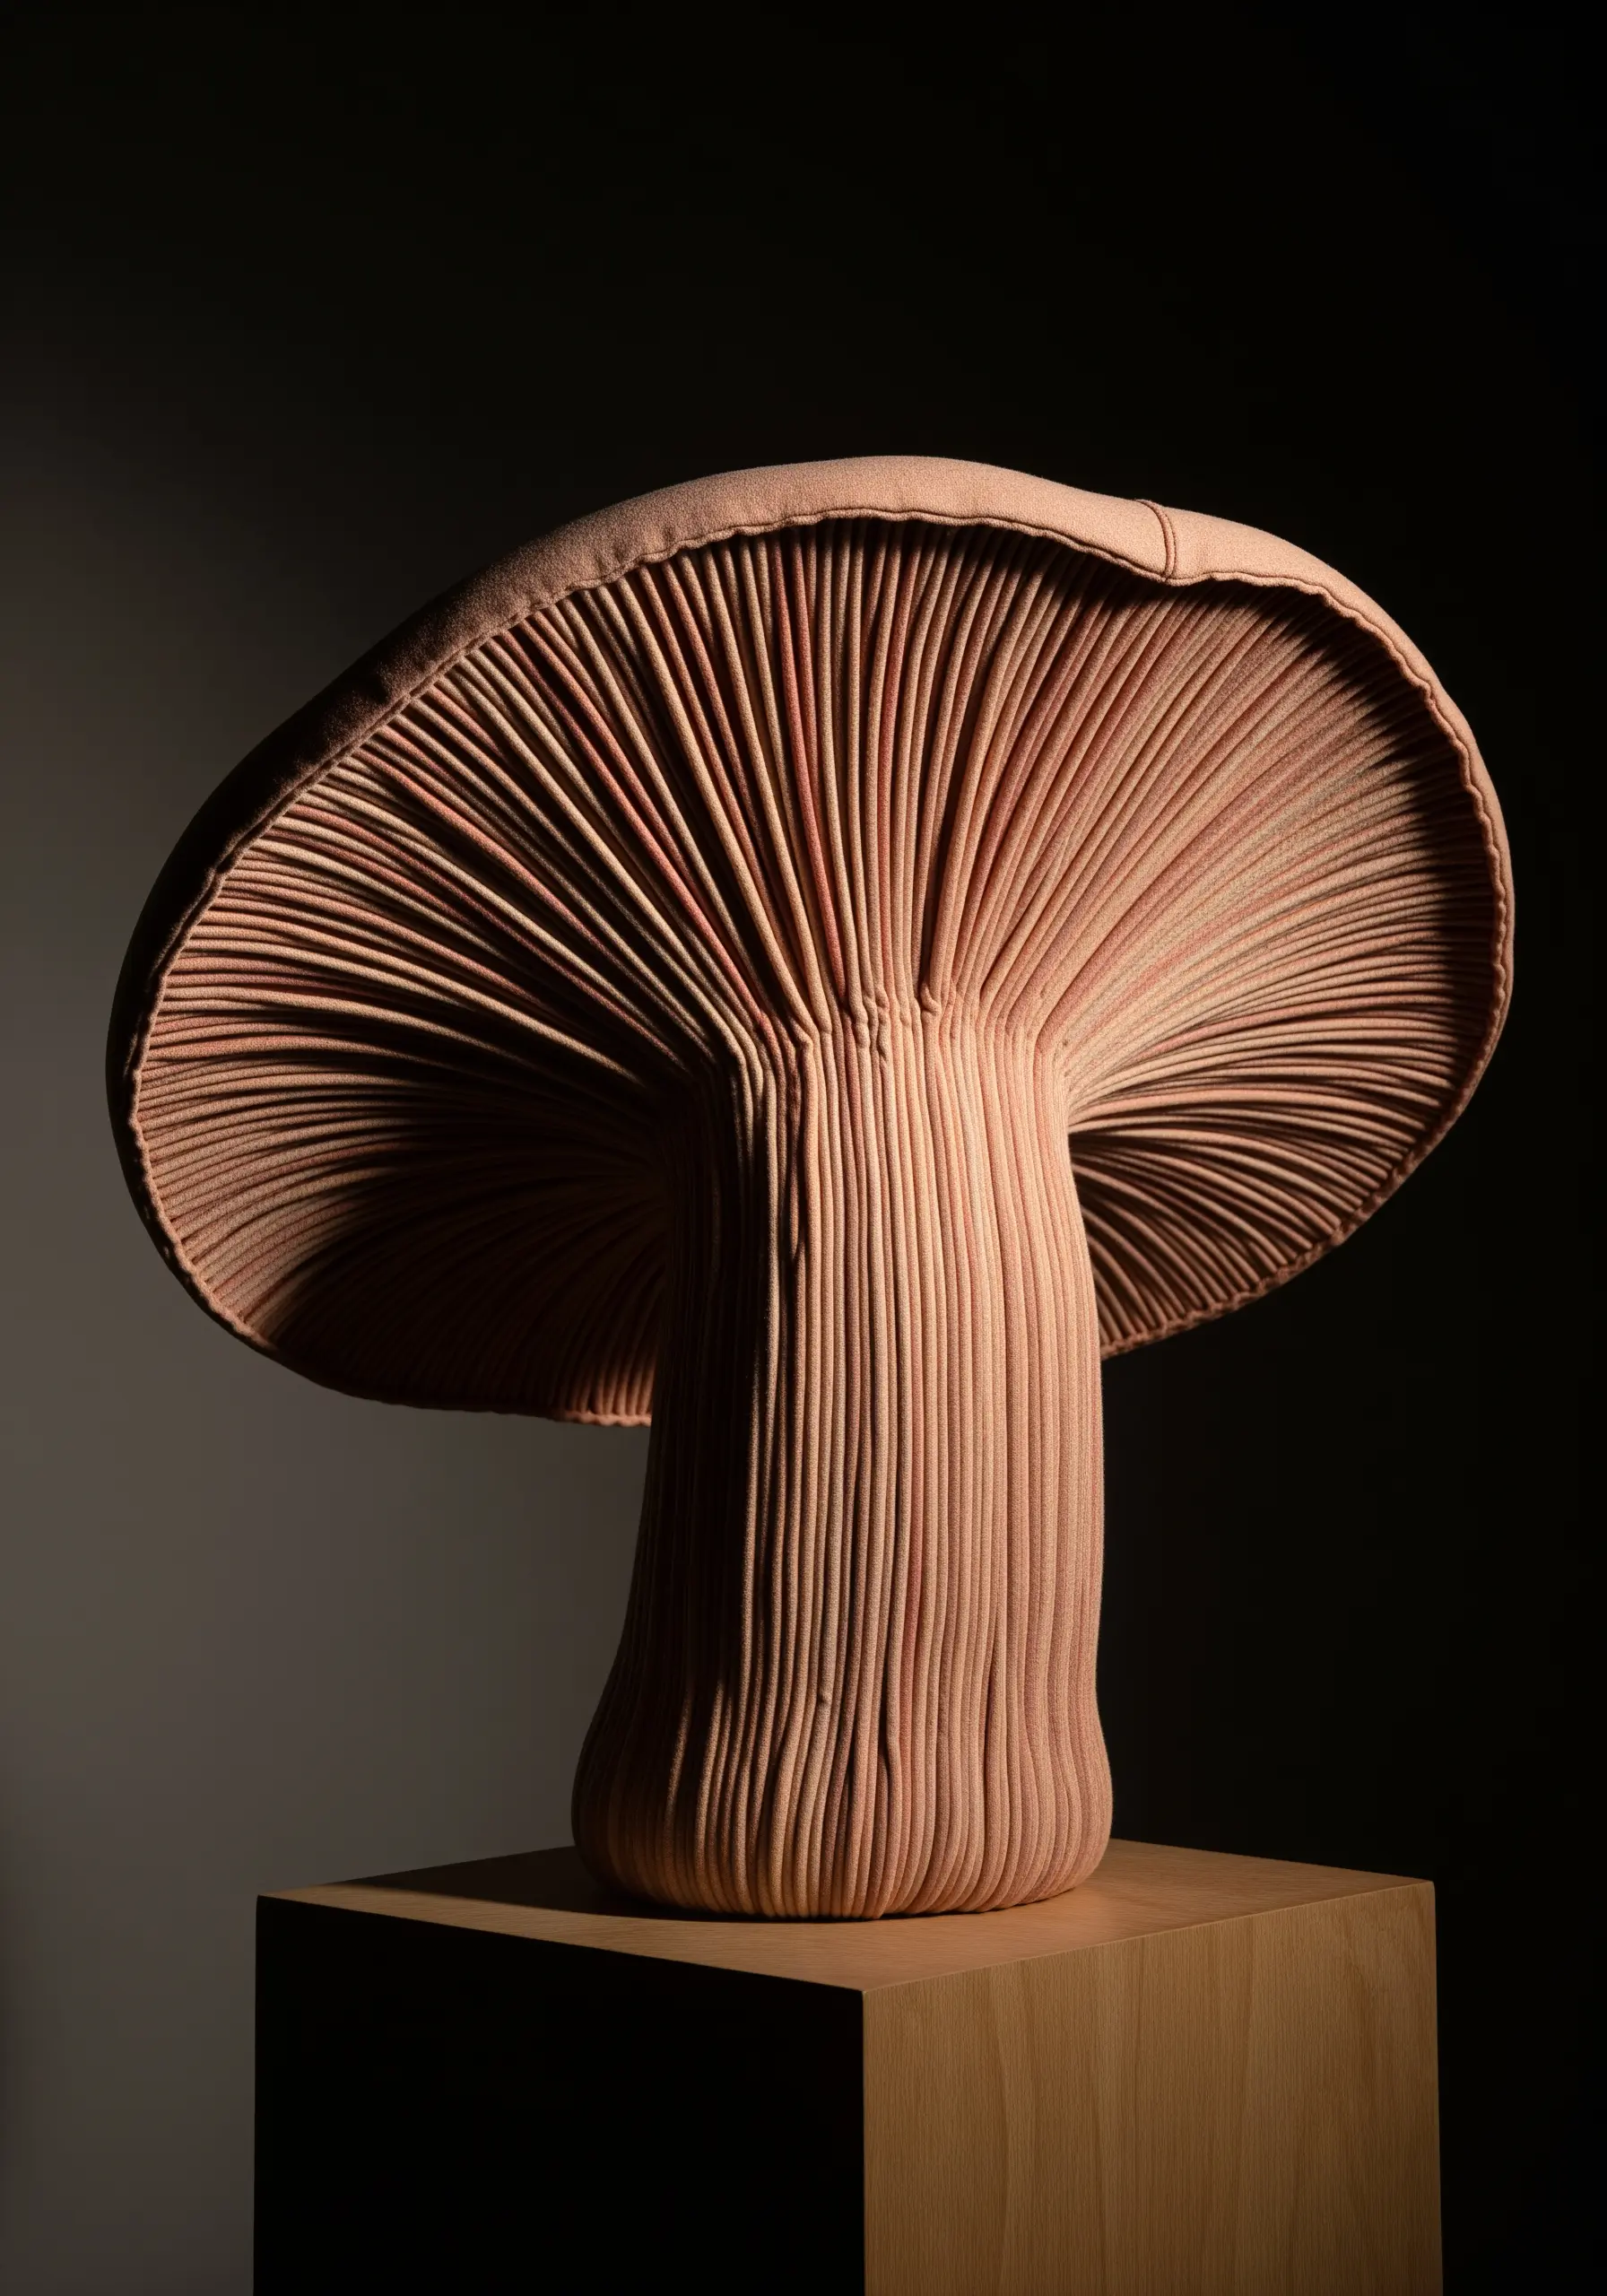
Sometimes the most powerful textures come not from thread, but from the fabric itself.
This sculptural piece uses precisely pleated and stitched fabric to mimic the delicate gills of a mushroom.
You can apply this principle to your embroidery by incorporating small, stitched pleats or tucks into your background fabric before you begin stitching.
This adds a subtle, structural texture that complements your thread work and adds a layer of sophisticated detail.
18. Trace Nature’s Veins on a Skeleton Leaf
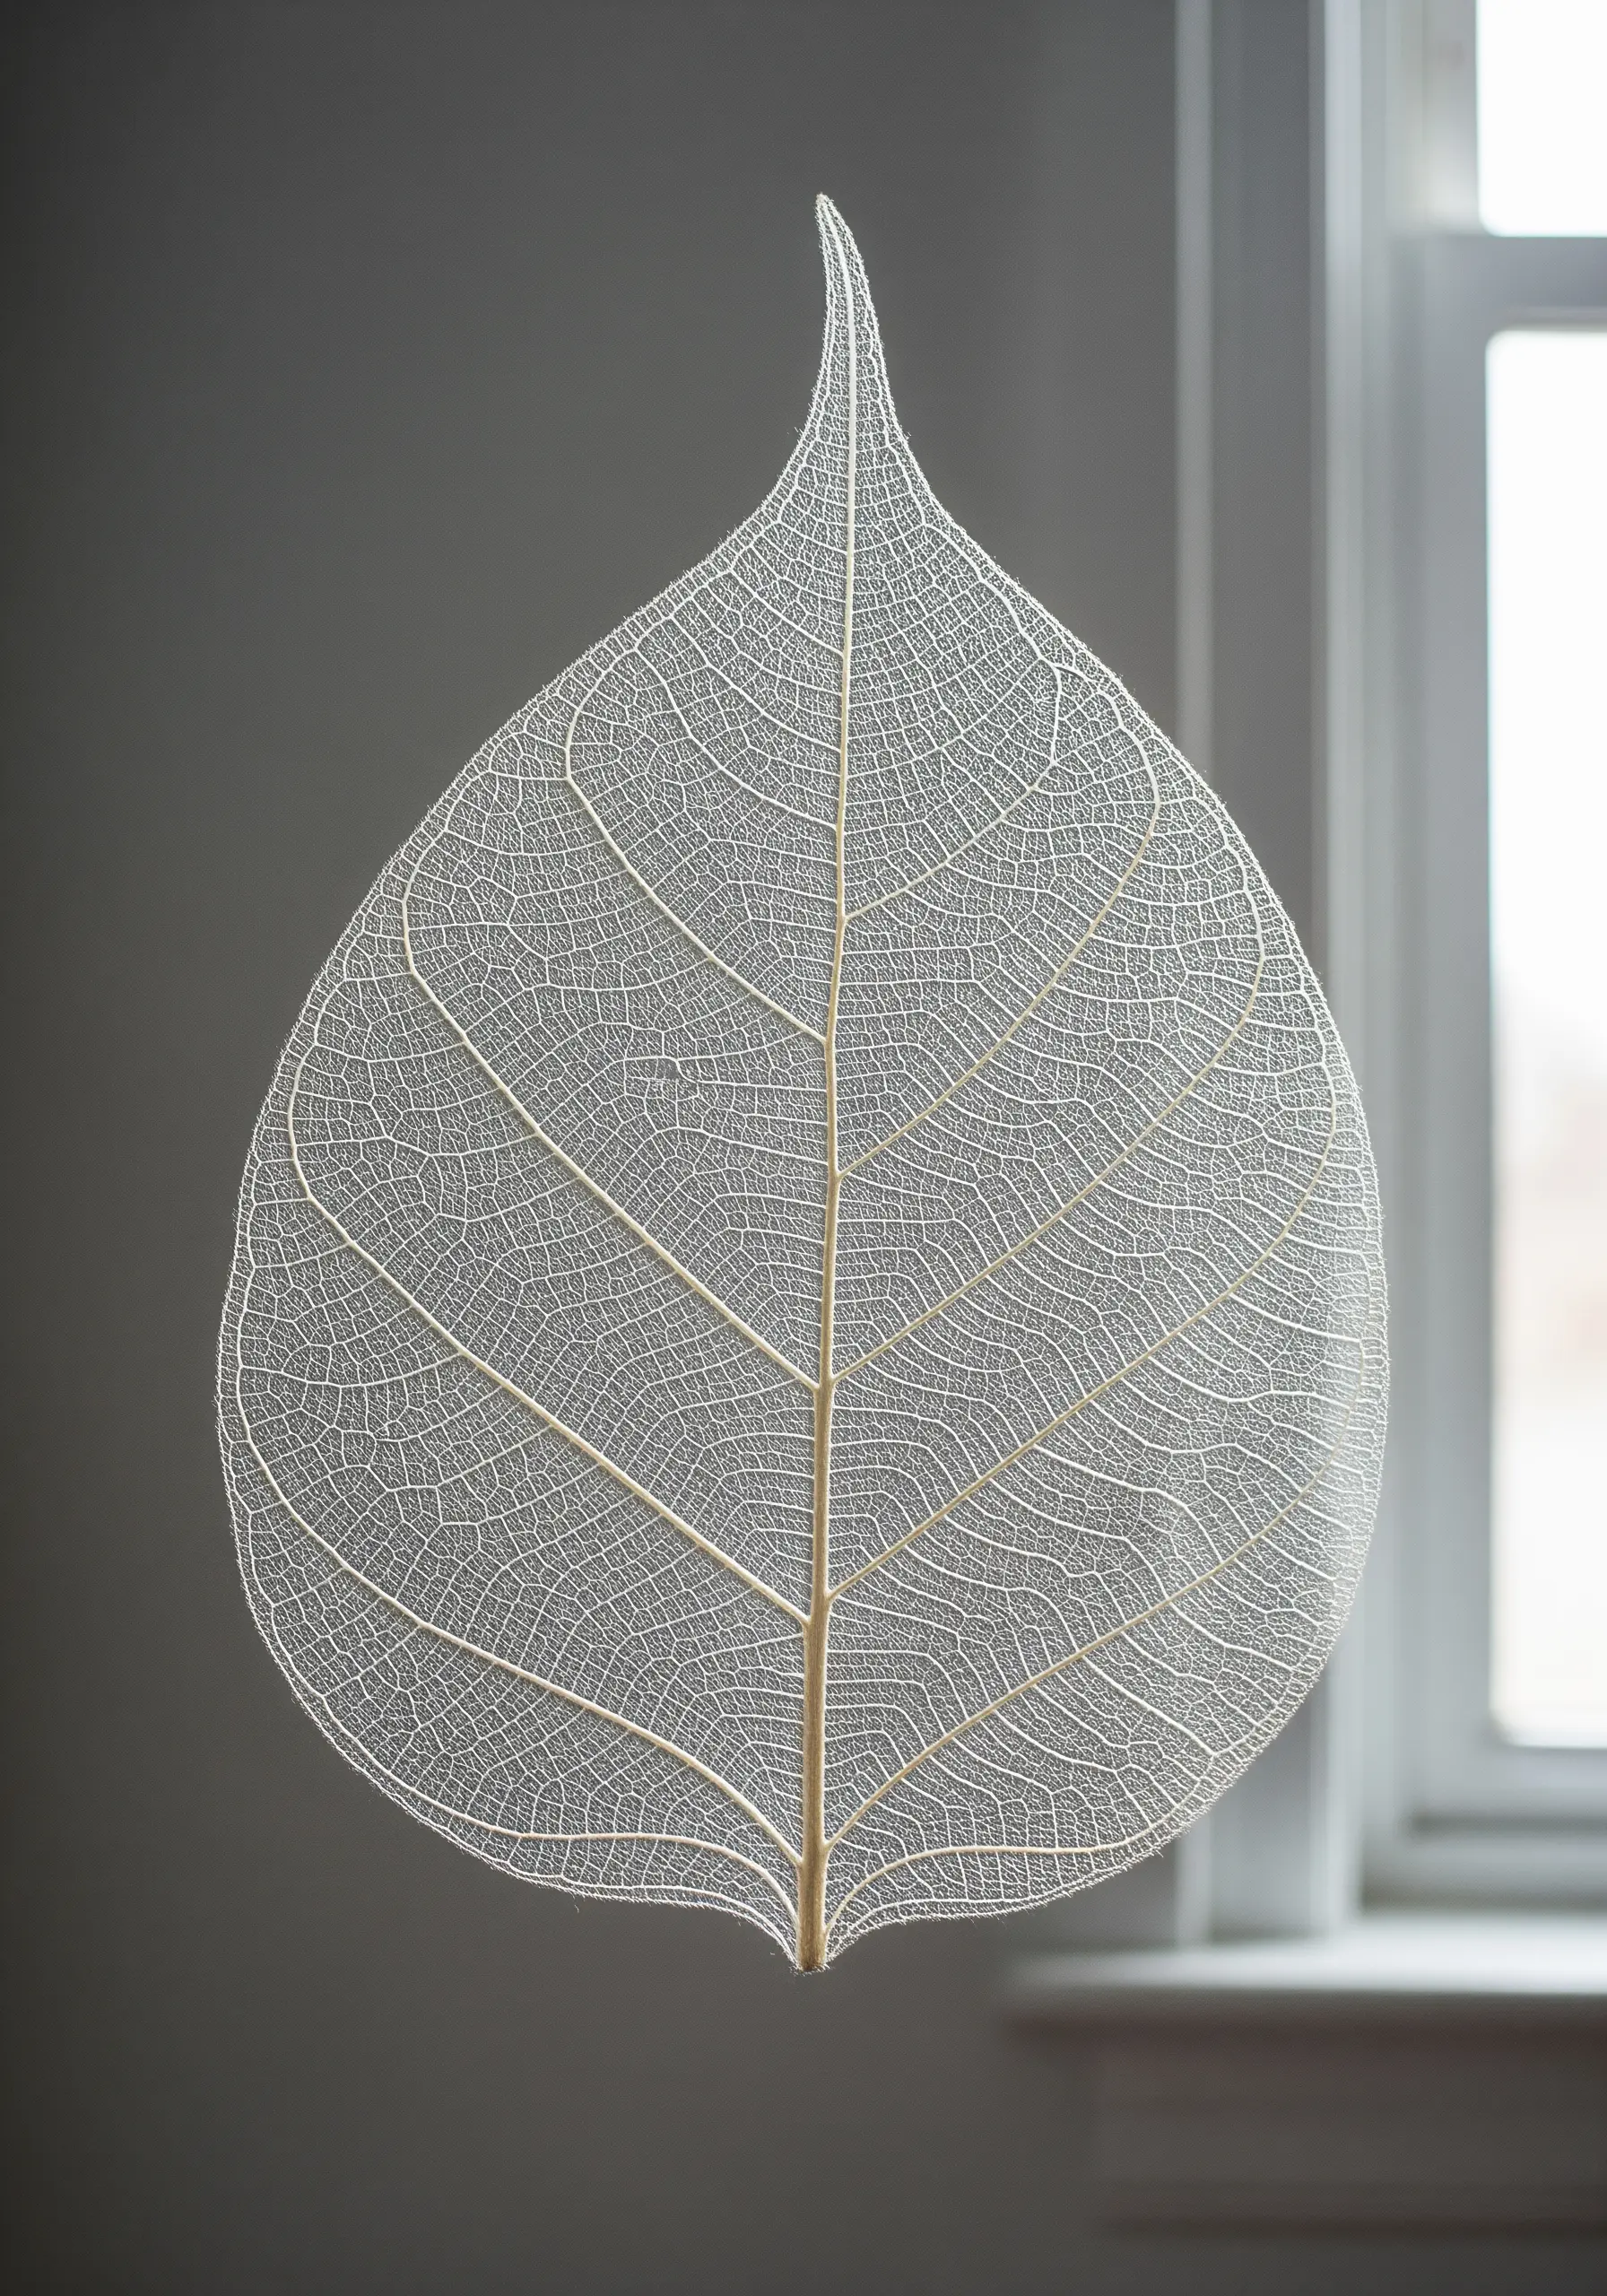
For an exercise in ultimate delicacy, try stitching directly onto a preserved skeleton leaf.
Use a very fine needle and a single strand of silk or cotton thread to avoid tearing the fragile structure.
Instead of filling shapes, use a simple running stitch or backstitch to trace the leaf’s natural veins.
The goal isn’t to add heavy decoration, but to highlight the exquisite, lace-like pattern that nature has already created.
19. Layer Scales to Create a Pinecone Effect
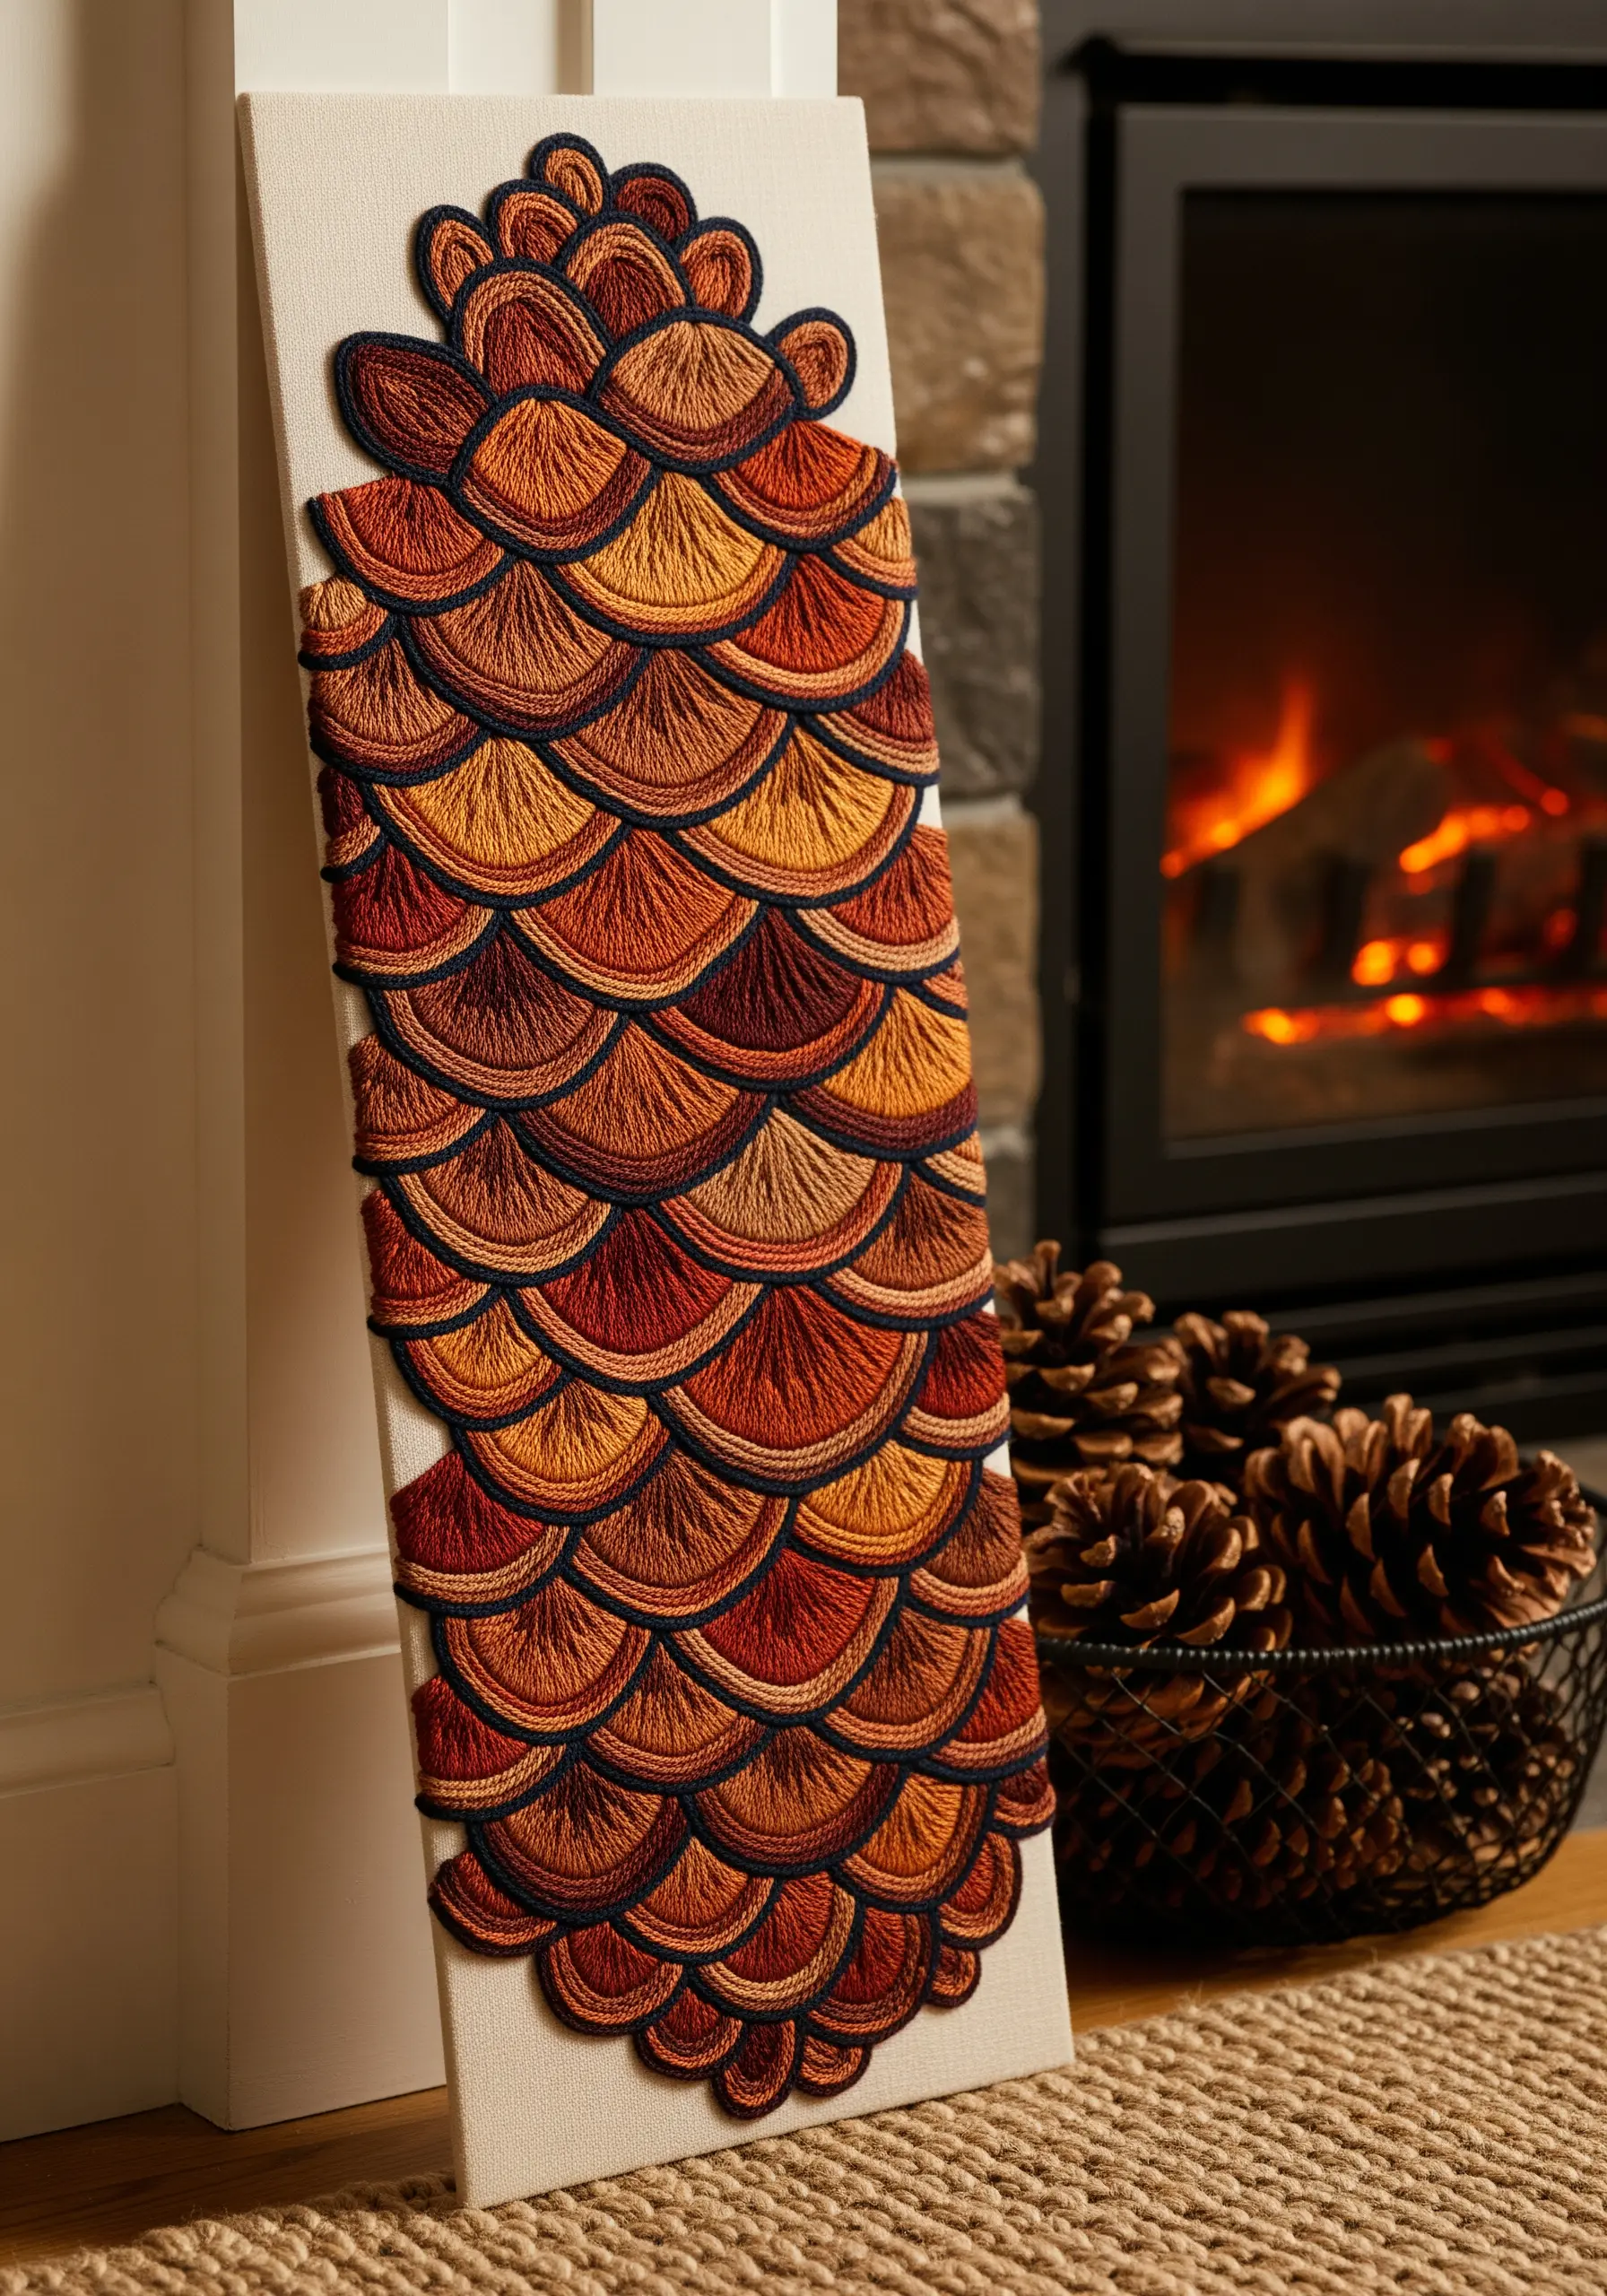
Recreate the satisfying, overlapping pattern of a pinecone by building layers of padded satin stitch.
Work from the bottom of your design upwards, so each new row of scales slightly overlaps the one below it.
Outline each scale with a dark, contrasting backstitch to give it crisp definition and enhance the sense of dimension.
Using an autumnal palette of rust, gold, and brown and blending them within each scale adds a rich, painterly quality to the finished piece.
20. Paint with Thread to Mimic Marble
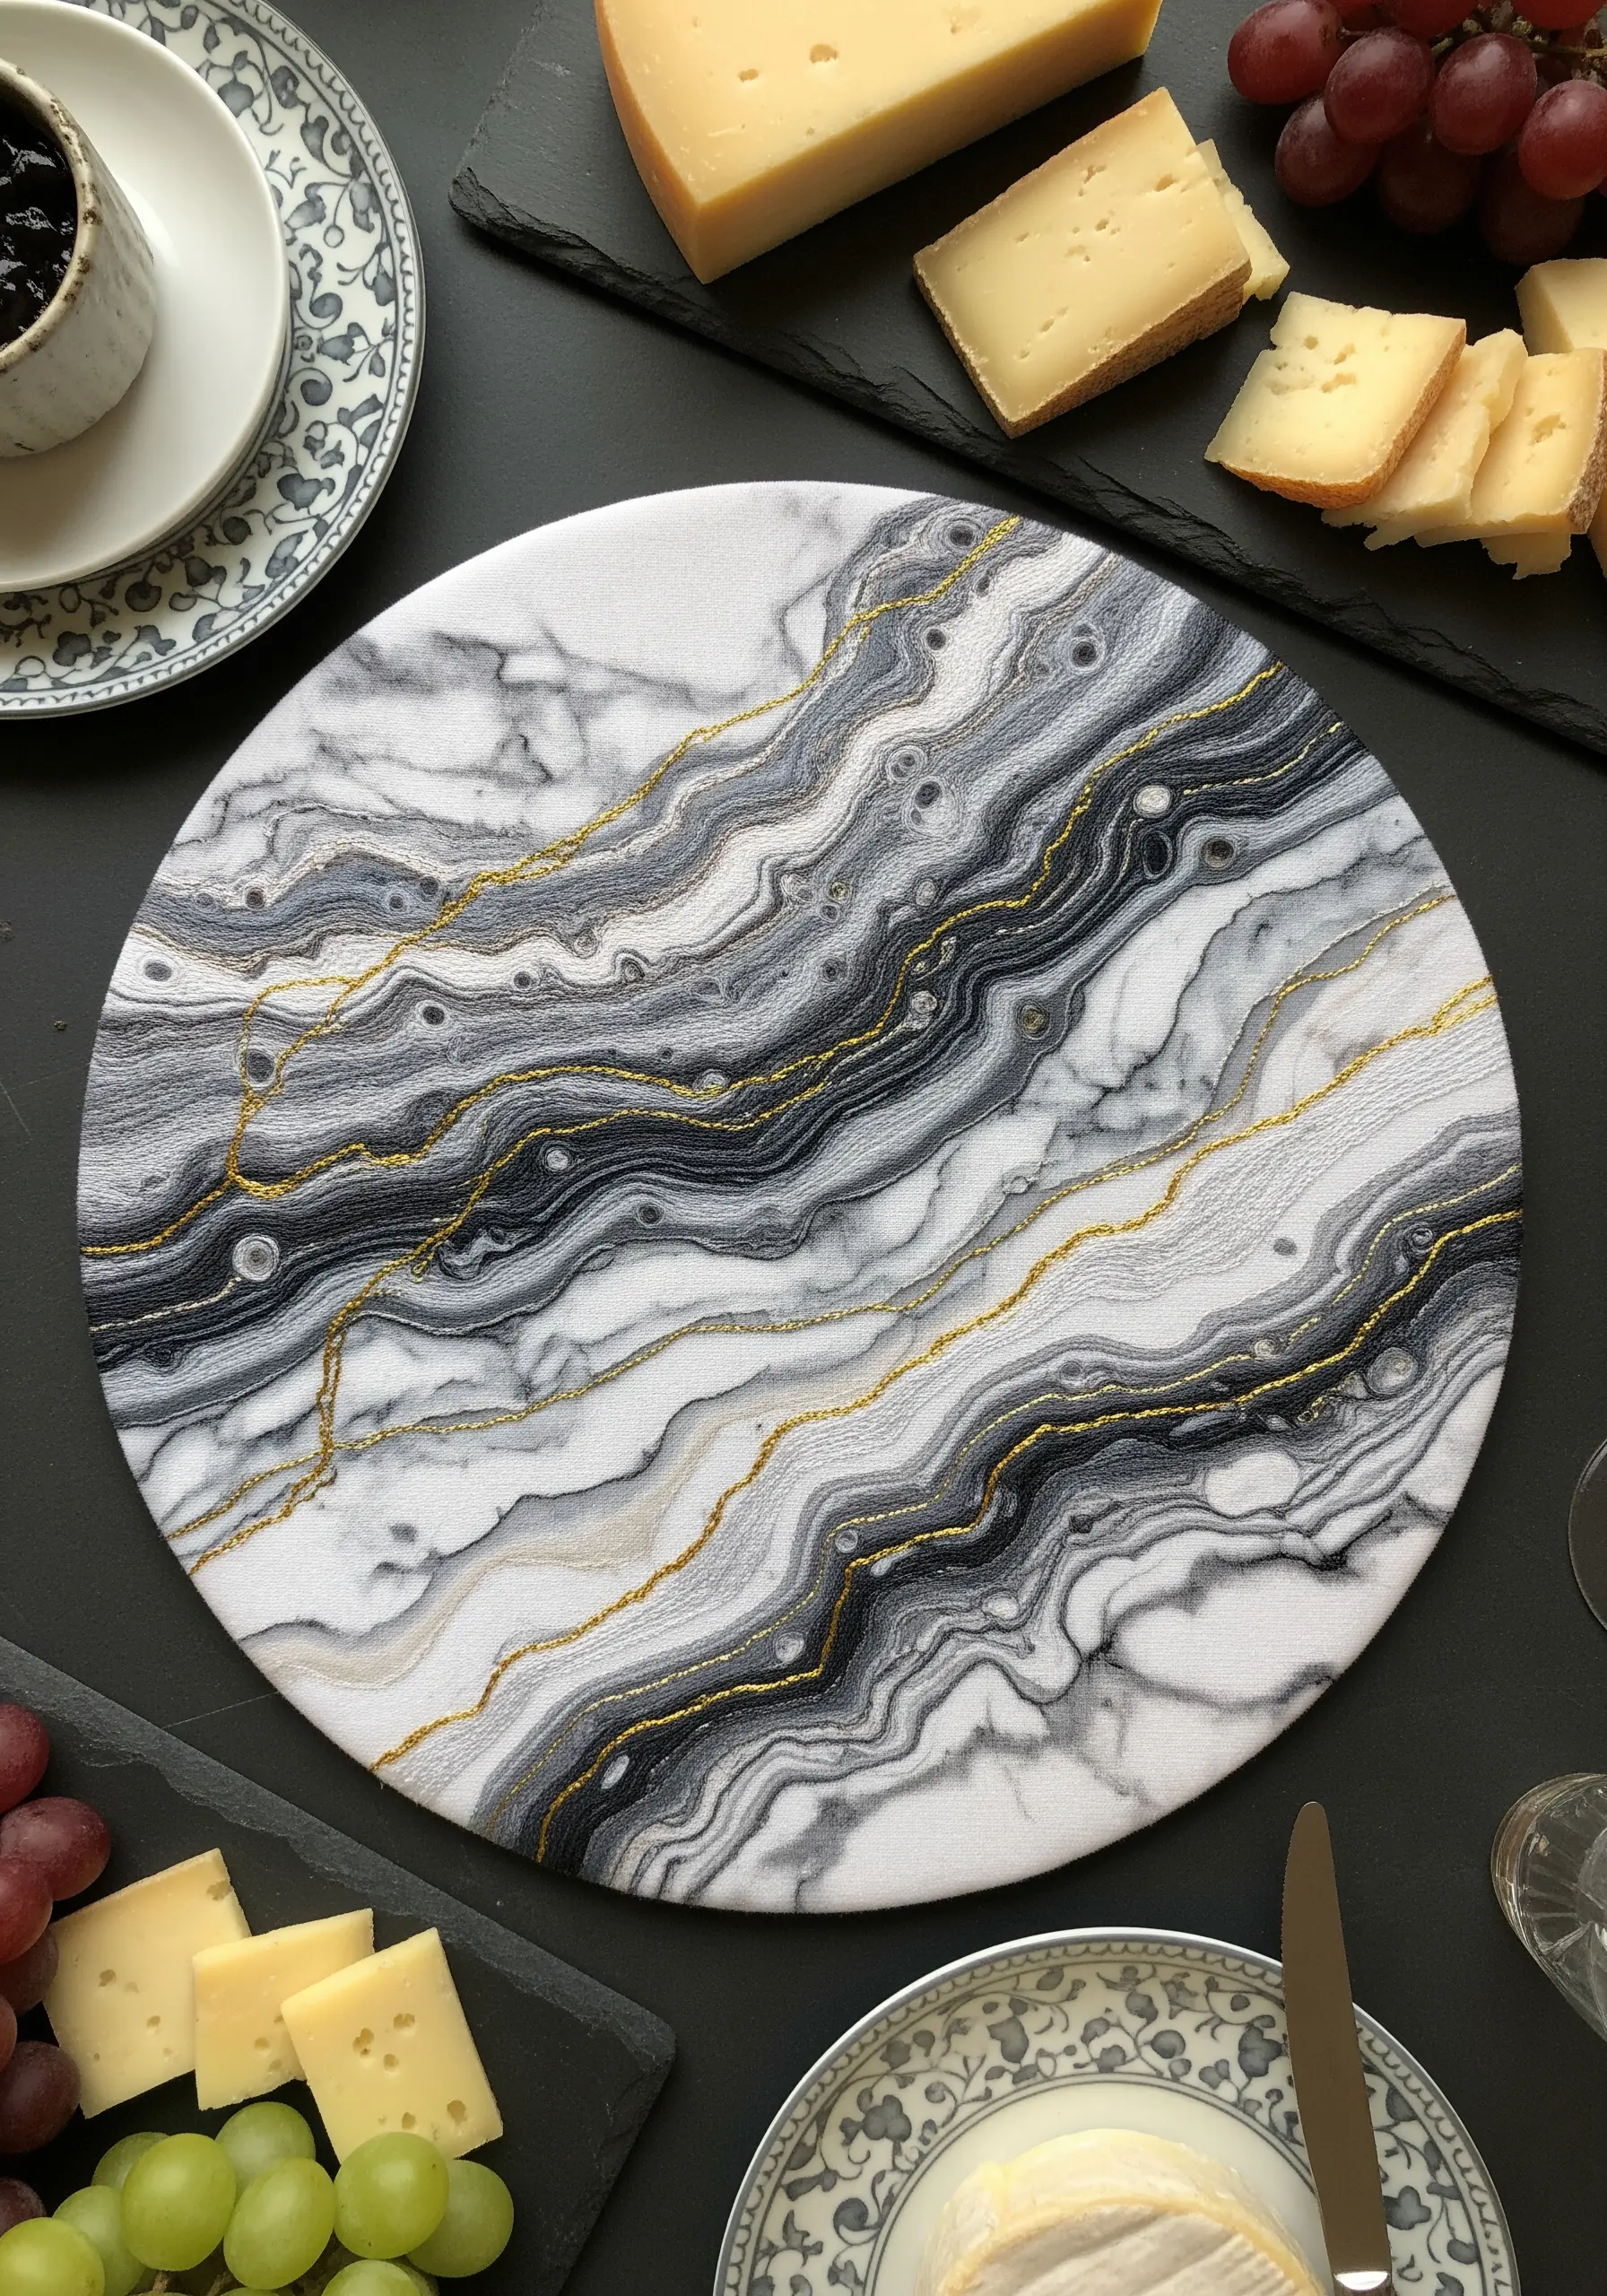
Capture the fluid, organic patterns of marble using a freeform thread painting technique.
Use long, meandering stitches that flow and curve across the fabric, varying their direction to create a natural, veined look.
Work with several shades of gray, white, and black simultaneously, allowing them to blend and merge like liquid stone.
For a touch of luxury, couch a fine gold metallic thread over the top, following the main veins to add a sophisticated glimmer to your functional simple embroidery accents to refresh your coffee table this week.
21. Chart a Galaxy on Dark Fabric
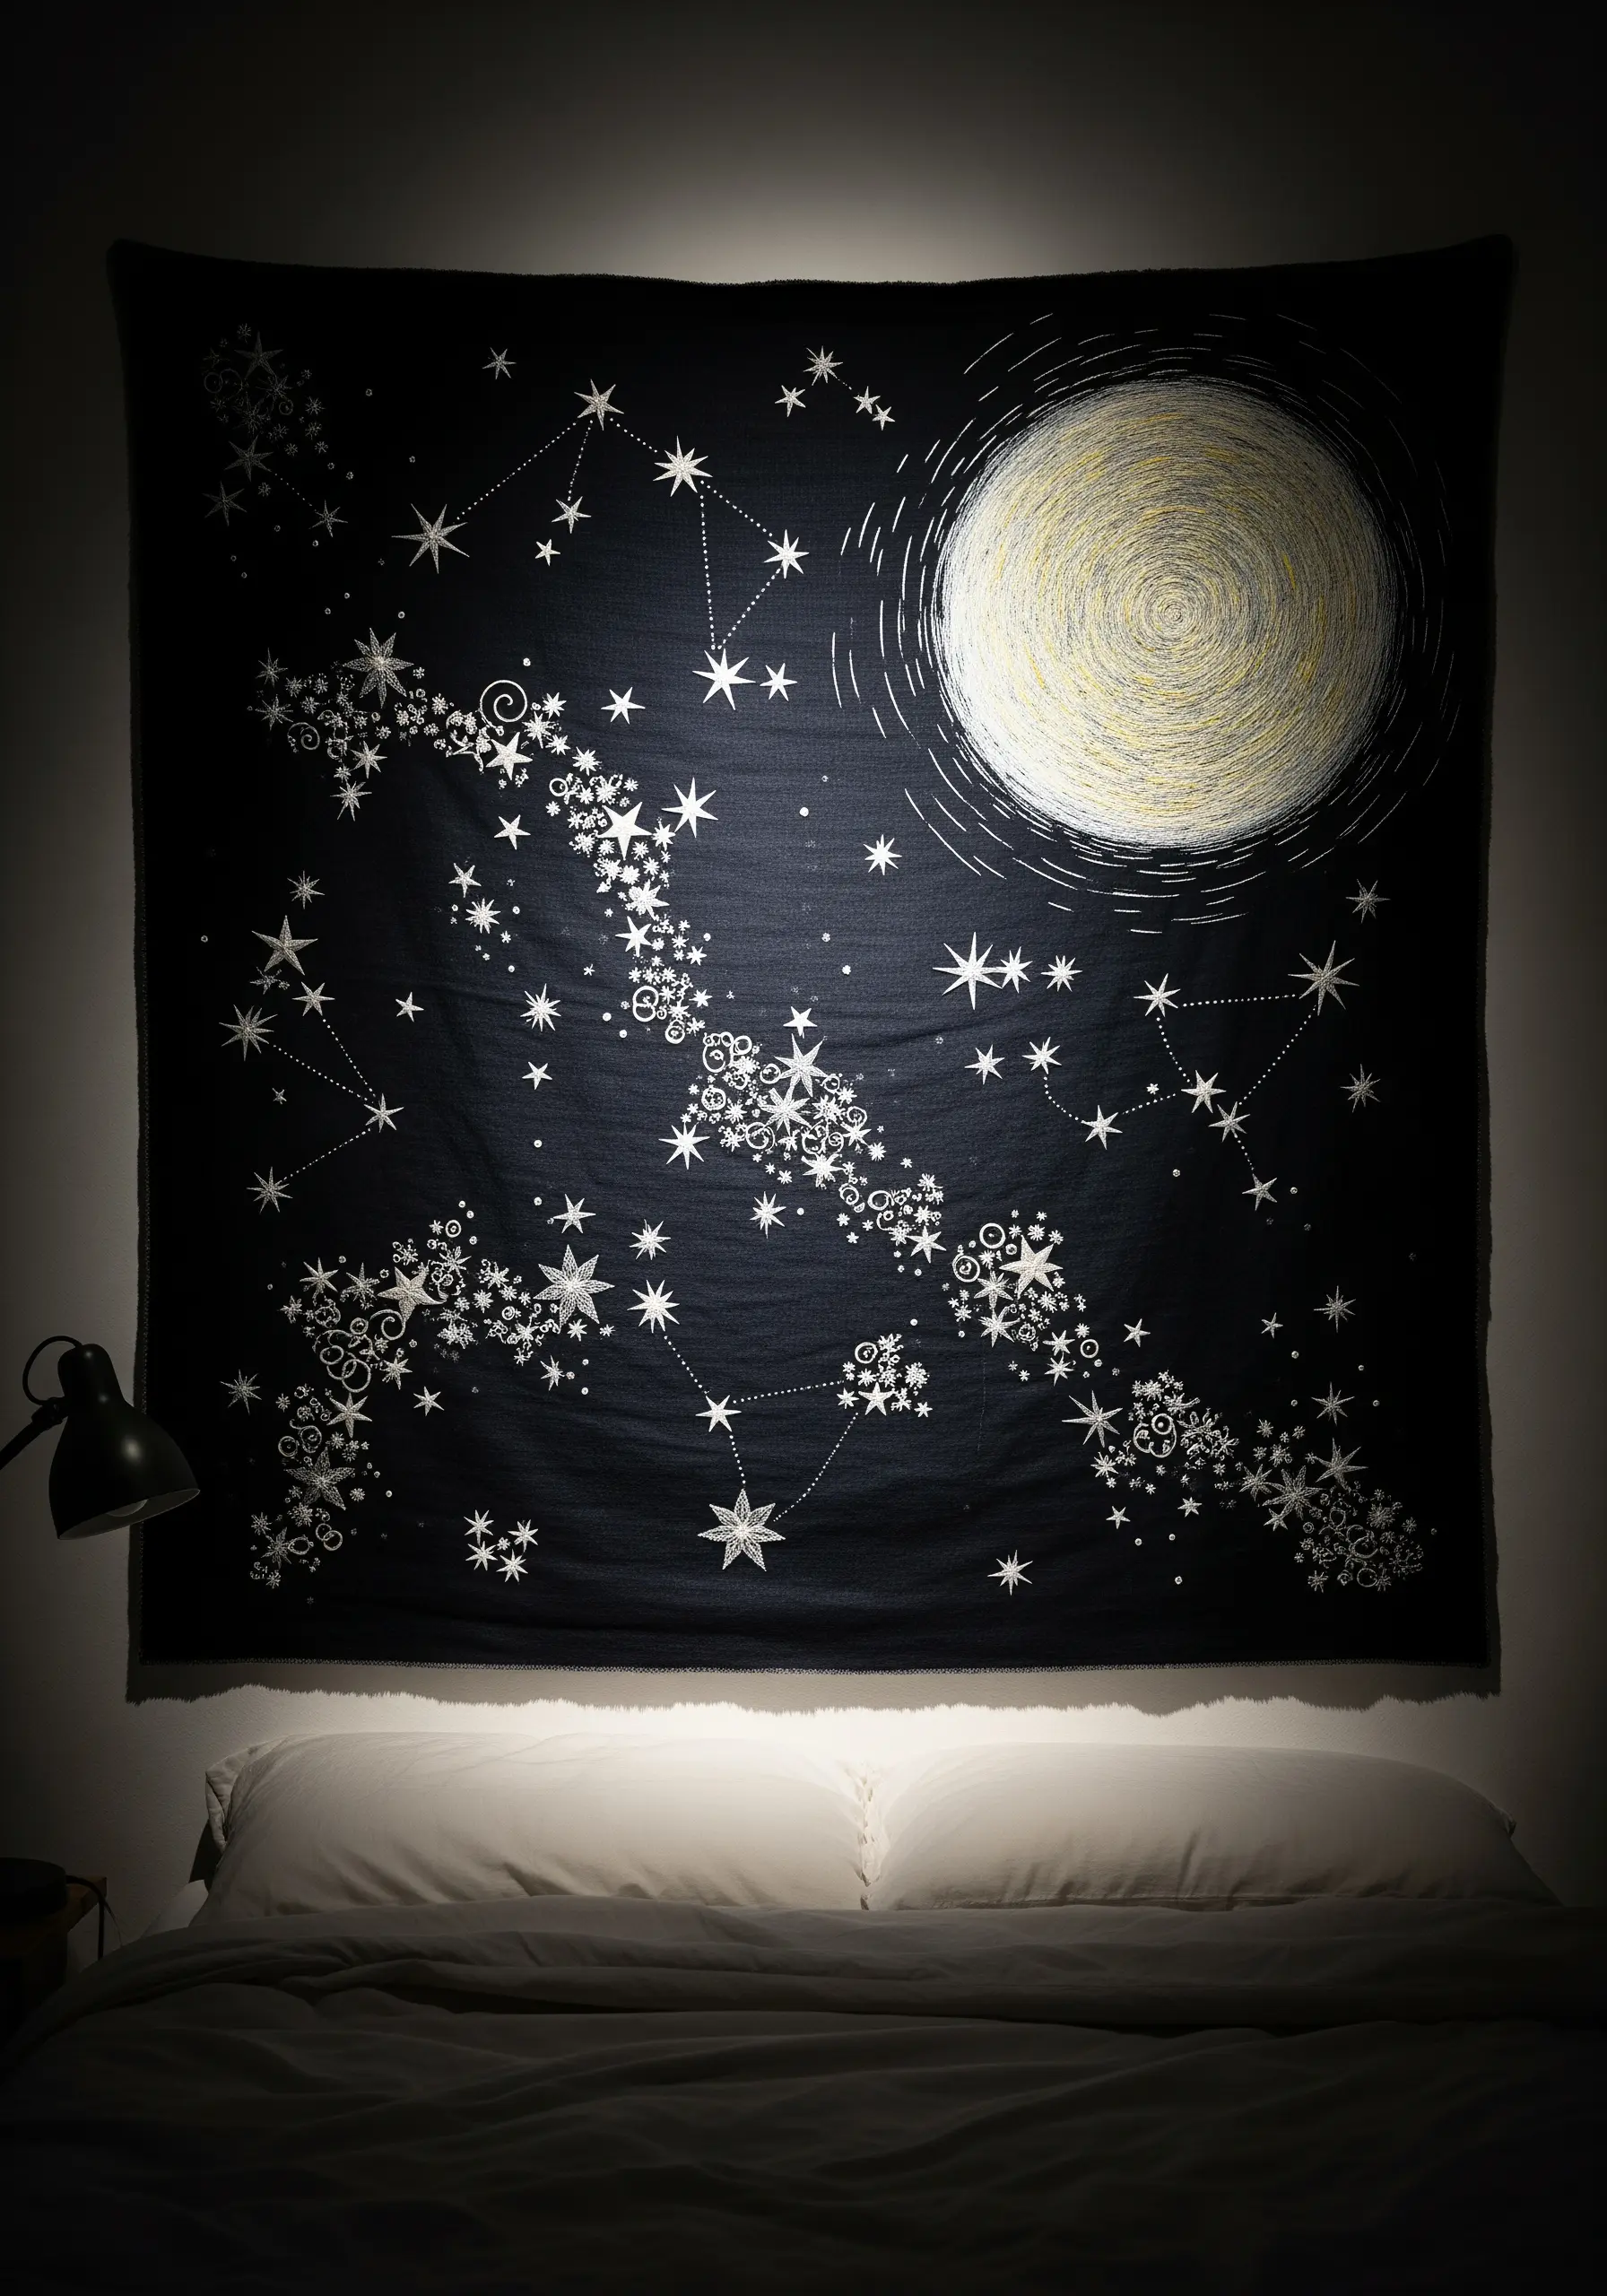
Create a dramatic celestial scene by using high-contrast threads on a deep black or navy blue background.
Use bright white or silver metallic floss for your stars, varying their form with French knots for distant stars, star stitches for prominent ones, and lazy daisies for twinkling effects.
For the moon or a swirling nebula, fill the shape with concentric circles of couched thread or a dense spiral of split stitch.
This technique creates a glowing, almost luminous effect, perfect for embroidered wall art ideas that turn any bedroom into a mind-refresh zone.
22. Differentiate Textures for Animal Portraits
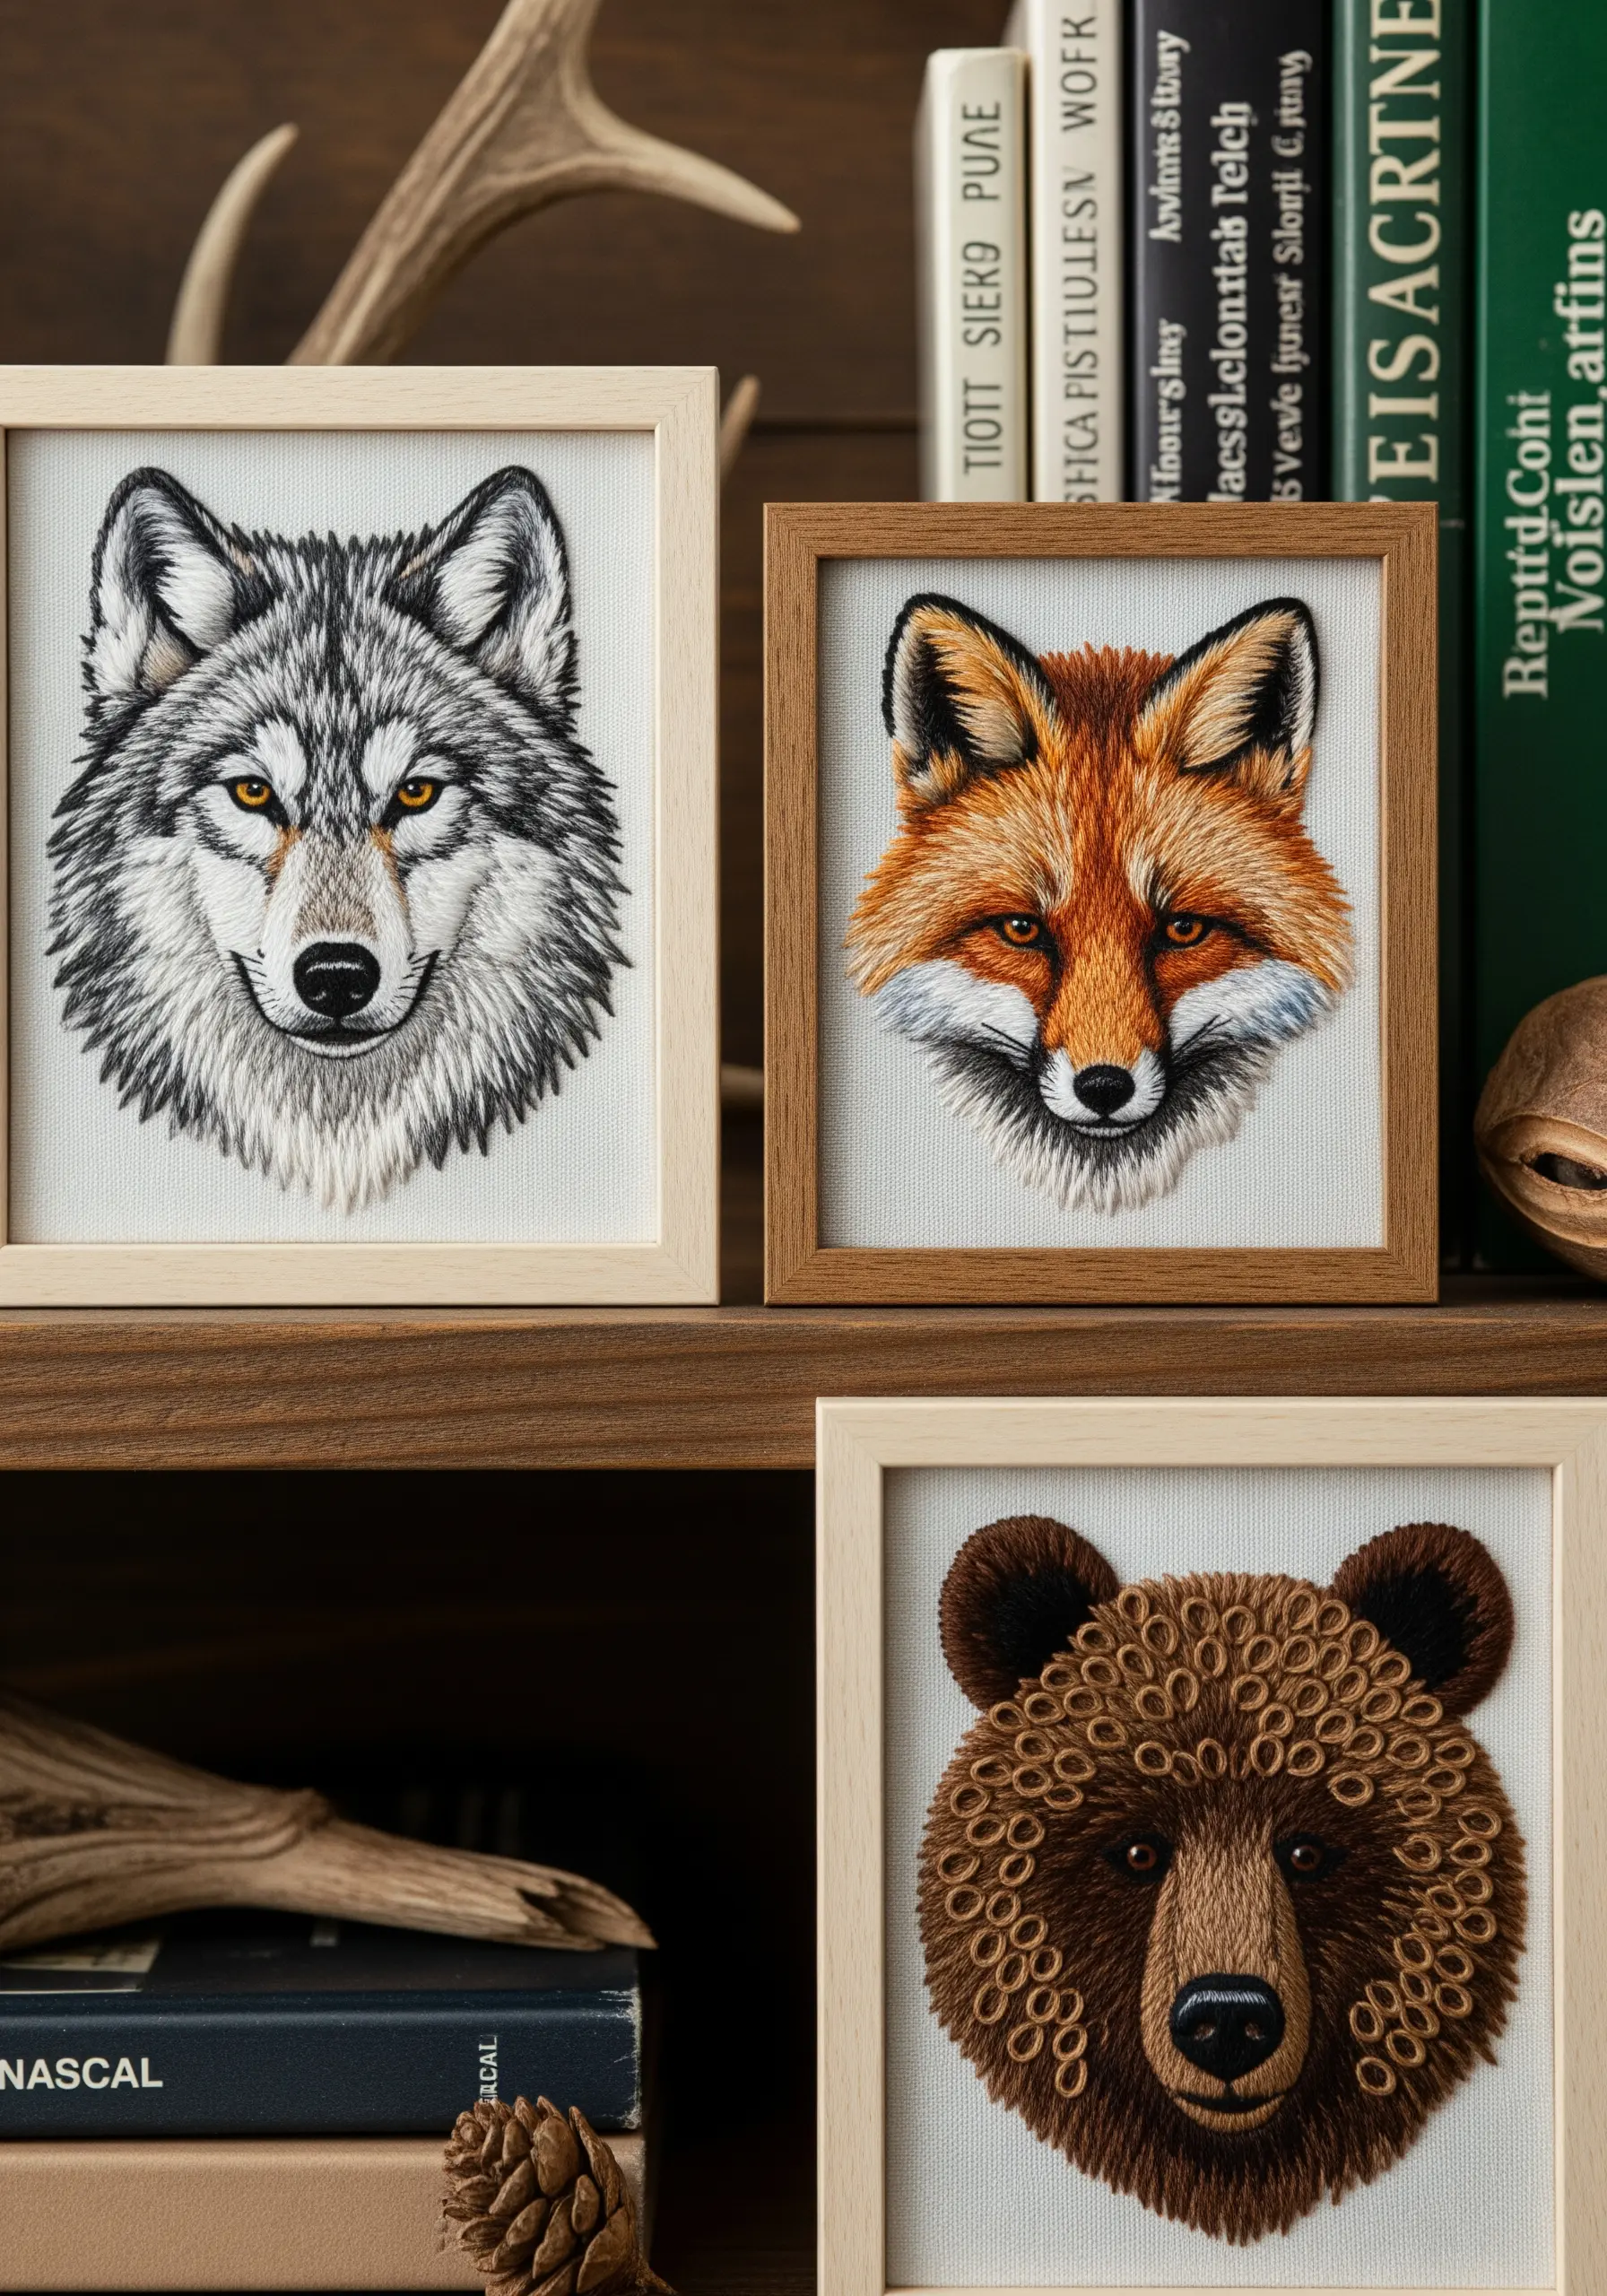
Bring animal portraits to life by tailoring your stitching technique to the specific texture of their fur or hide.
For the dense fur of a wolf, use directional long-and-short stitches with fine, single-strand thread for a soft, realistic blend.
For the thick, shaggy coat of a bear, switch to chunky wool yarn and create loops with a turkey work stitch or dense French knots.
This thoughtful variation in technique is what gives each animal a distinct and believable personality.
23. Apply Dimensional Stitching to Upholstery
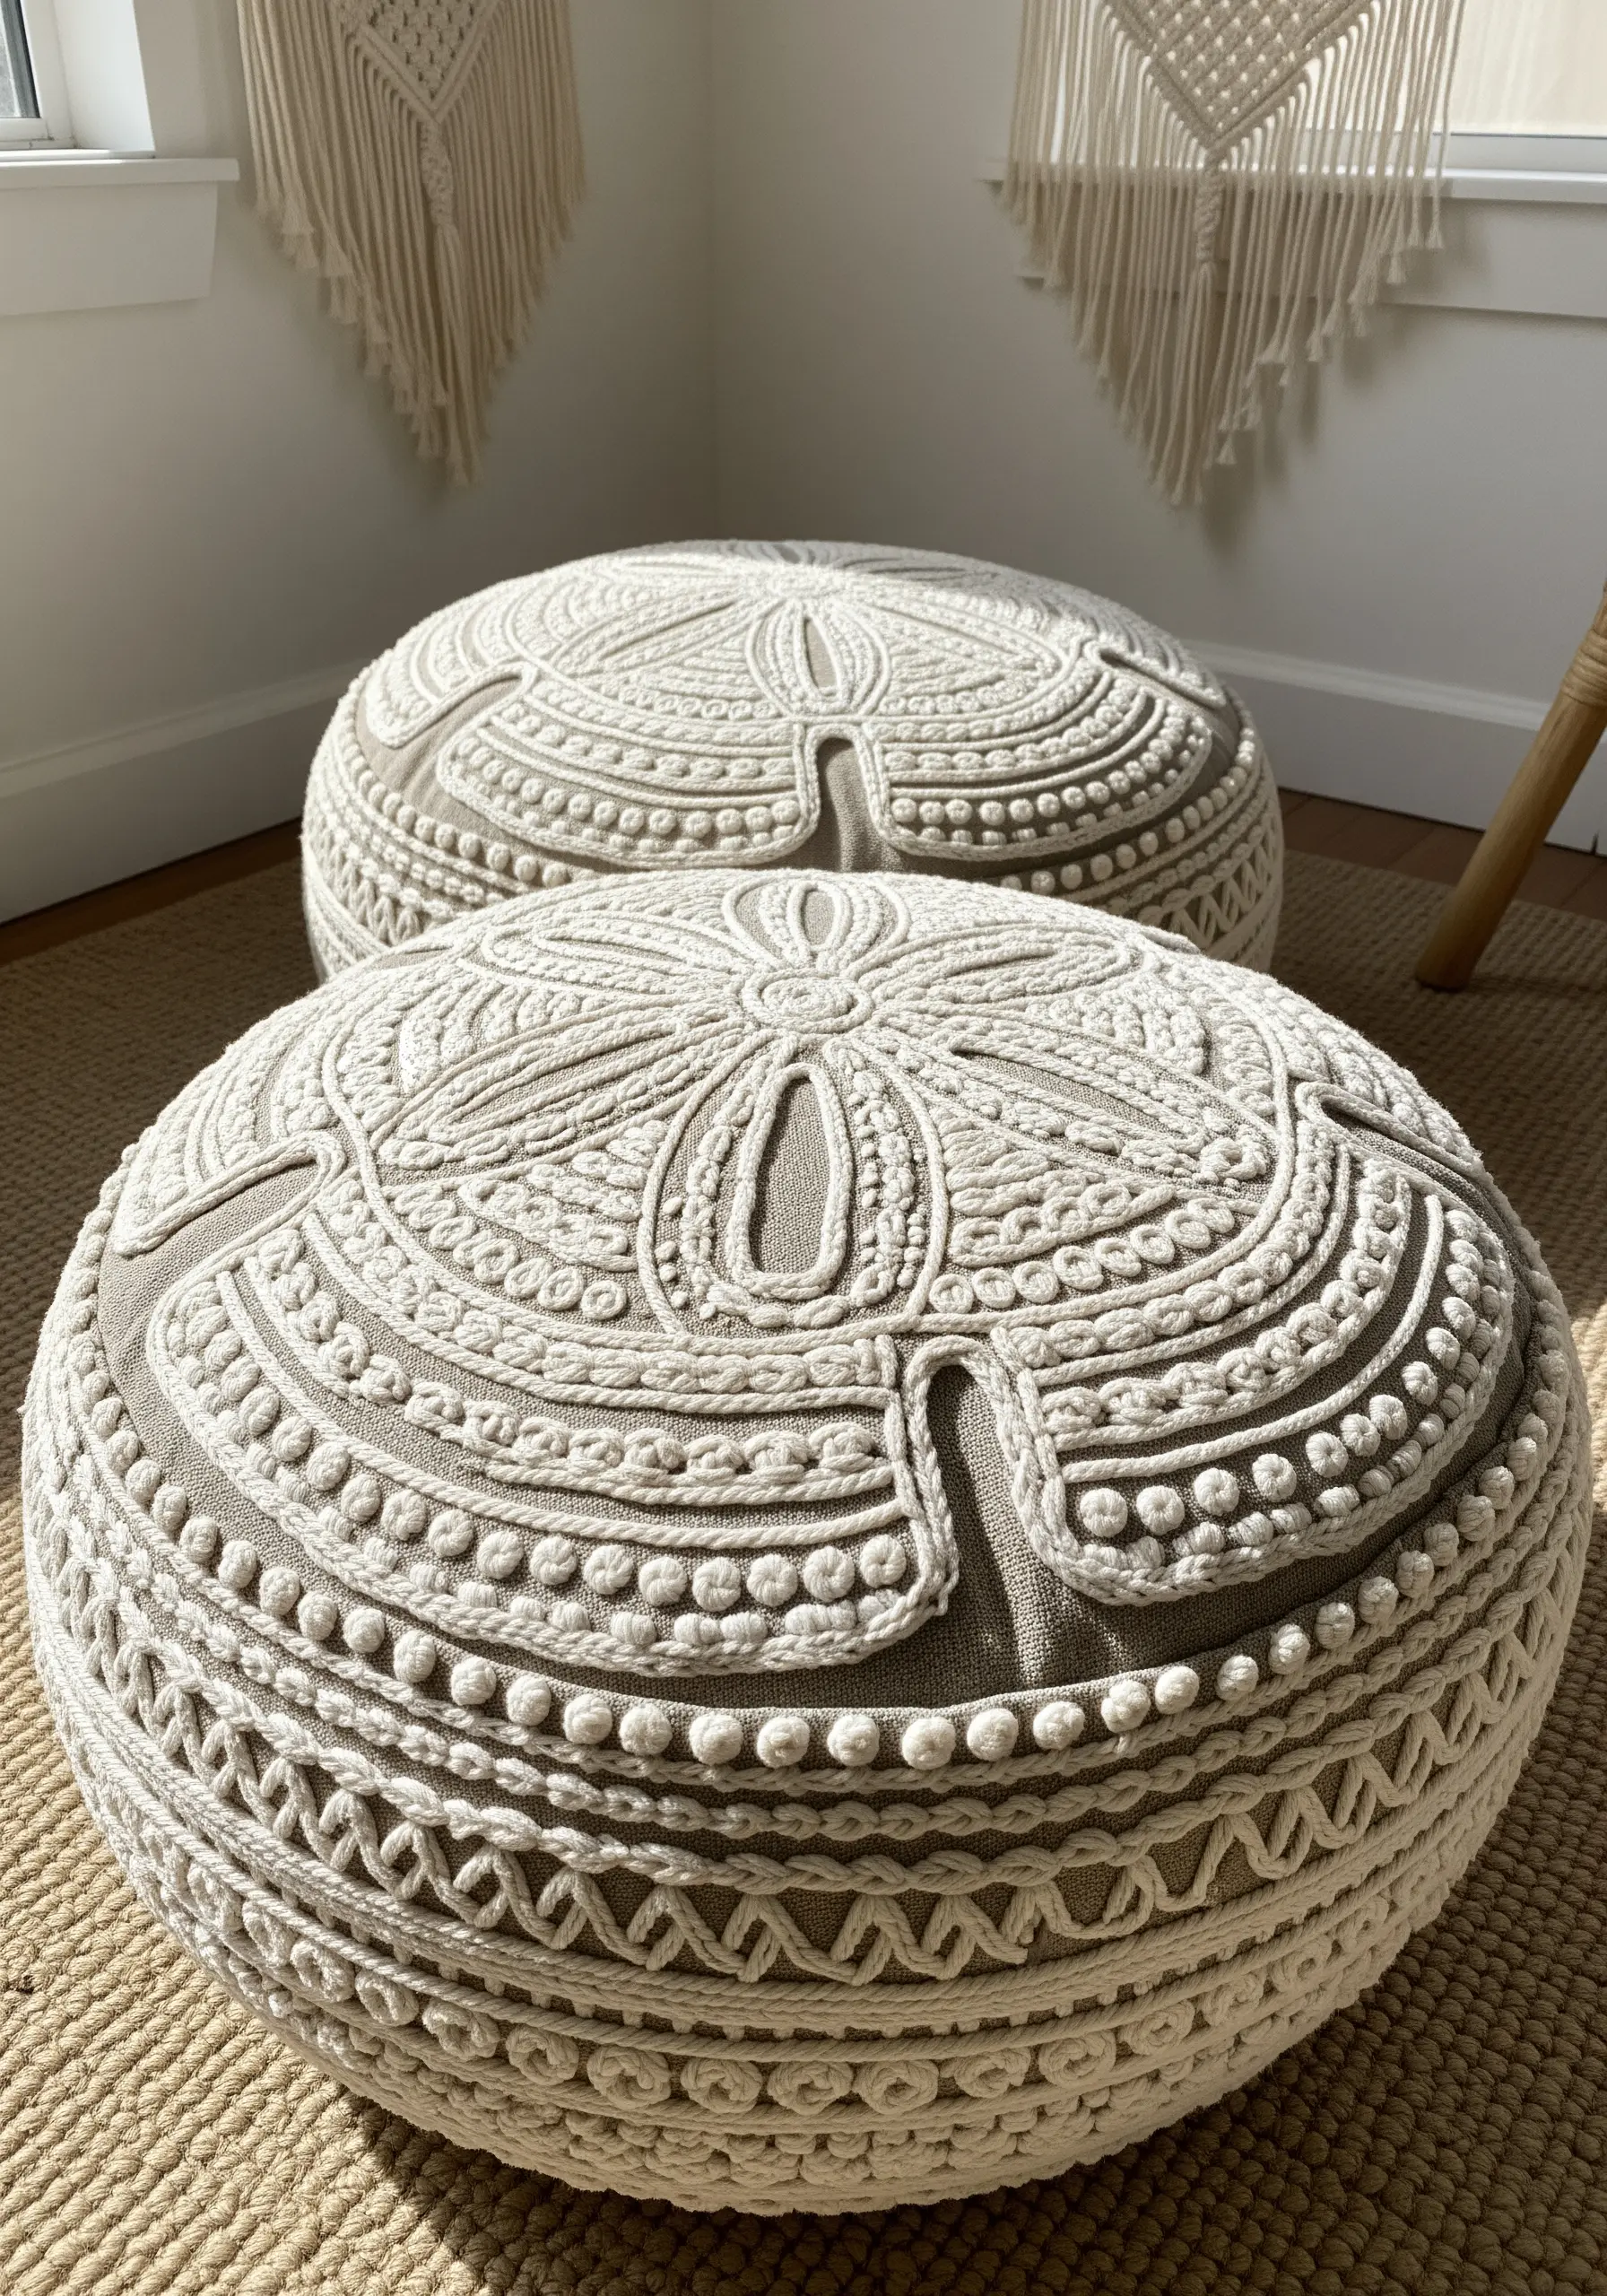
Transform functional home decor into a tactile statement piece with high-relief embroidery.
Instead of standard floss, use thick materials like macrame cord, piping, or chunky yarn for your design.
Secure these thick fibers to the surface of a pouf or cushion using a strong couching stitch with a durable, matching thread.
Build up patterns with lines of French knots and raised chain stitches to create an intricate, durable design that invites touch.
24. Embellish a Journal with Raised Stitches

Turn an everyday object into a personal keepsake by adding a touch of textural embroidery.
A raised chain stitch or a whipped backstitch is perfect for creating the bold, cord-like effect of these branches on a sturdy bookcloth cover.
Using a variegated thread in blues and greens adds instant color depth and an organic feel without the need to constantly switch floss.
This simple addition transforms a simple notebook into a piece of functional DIY hand-stitched projects that feel luxurious and artistic.
25. Paint a Grassy Field with Vertical Lines
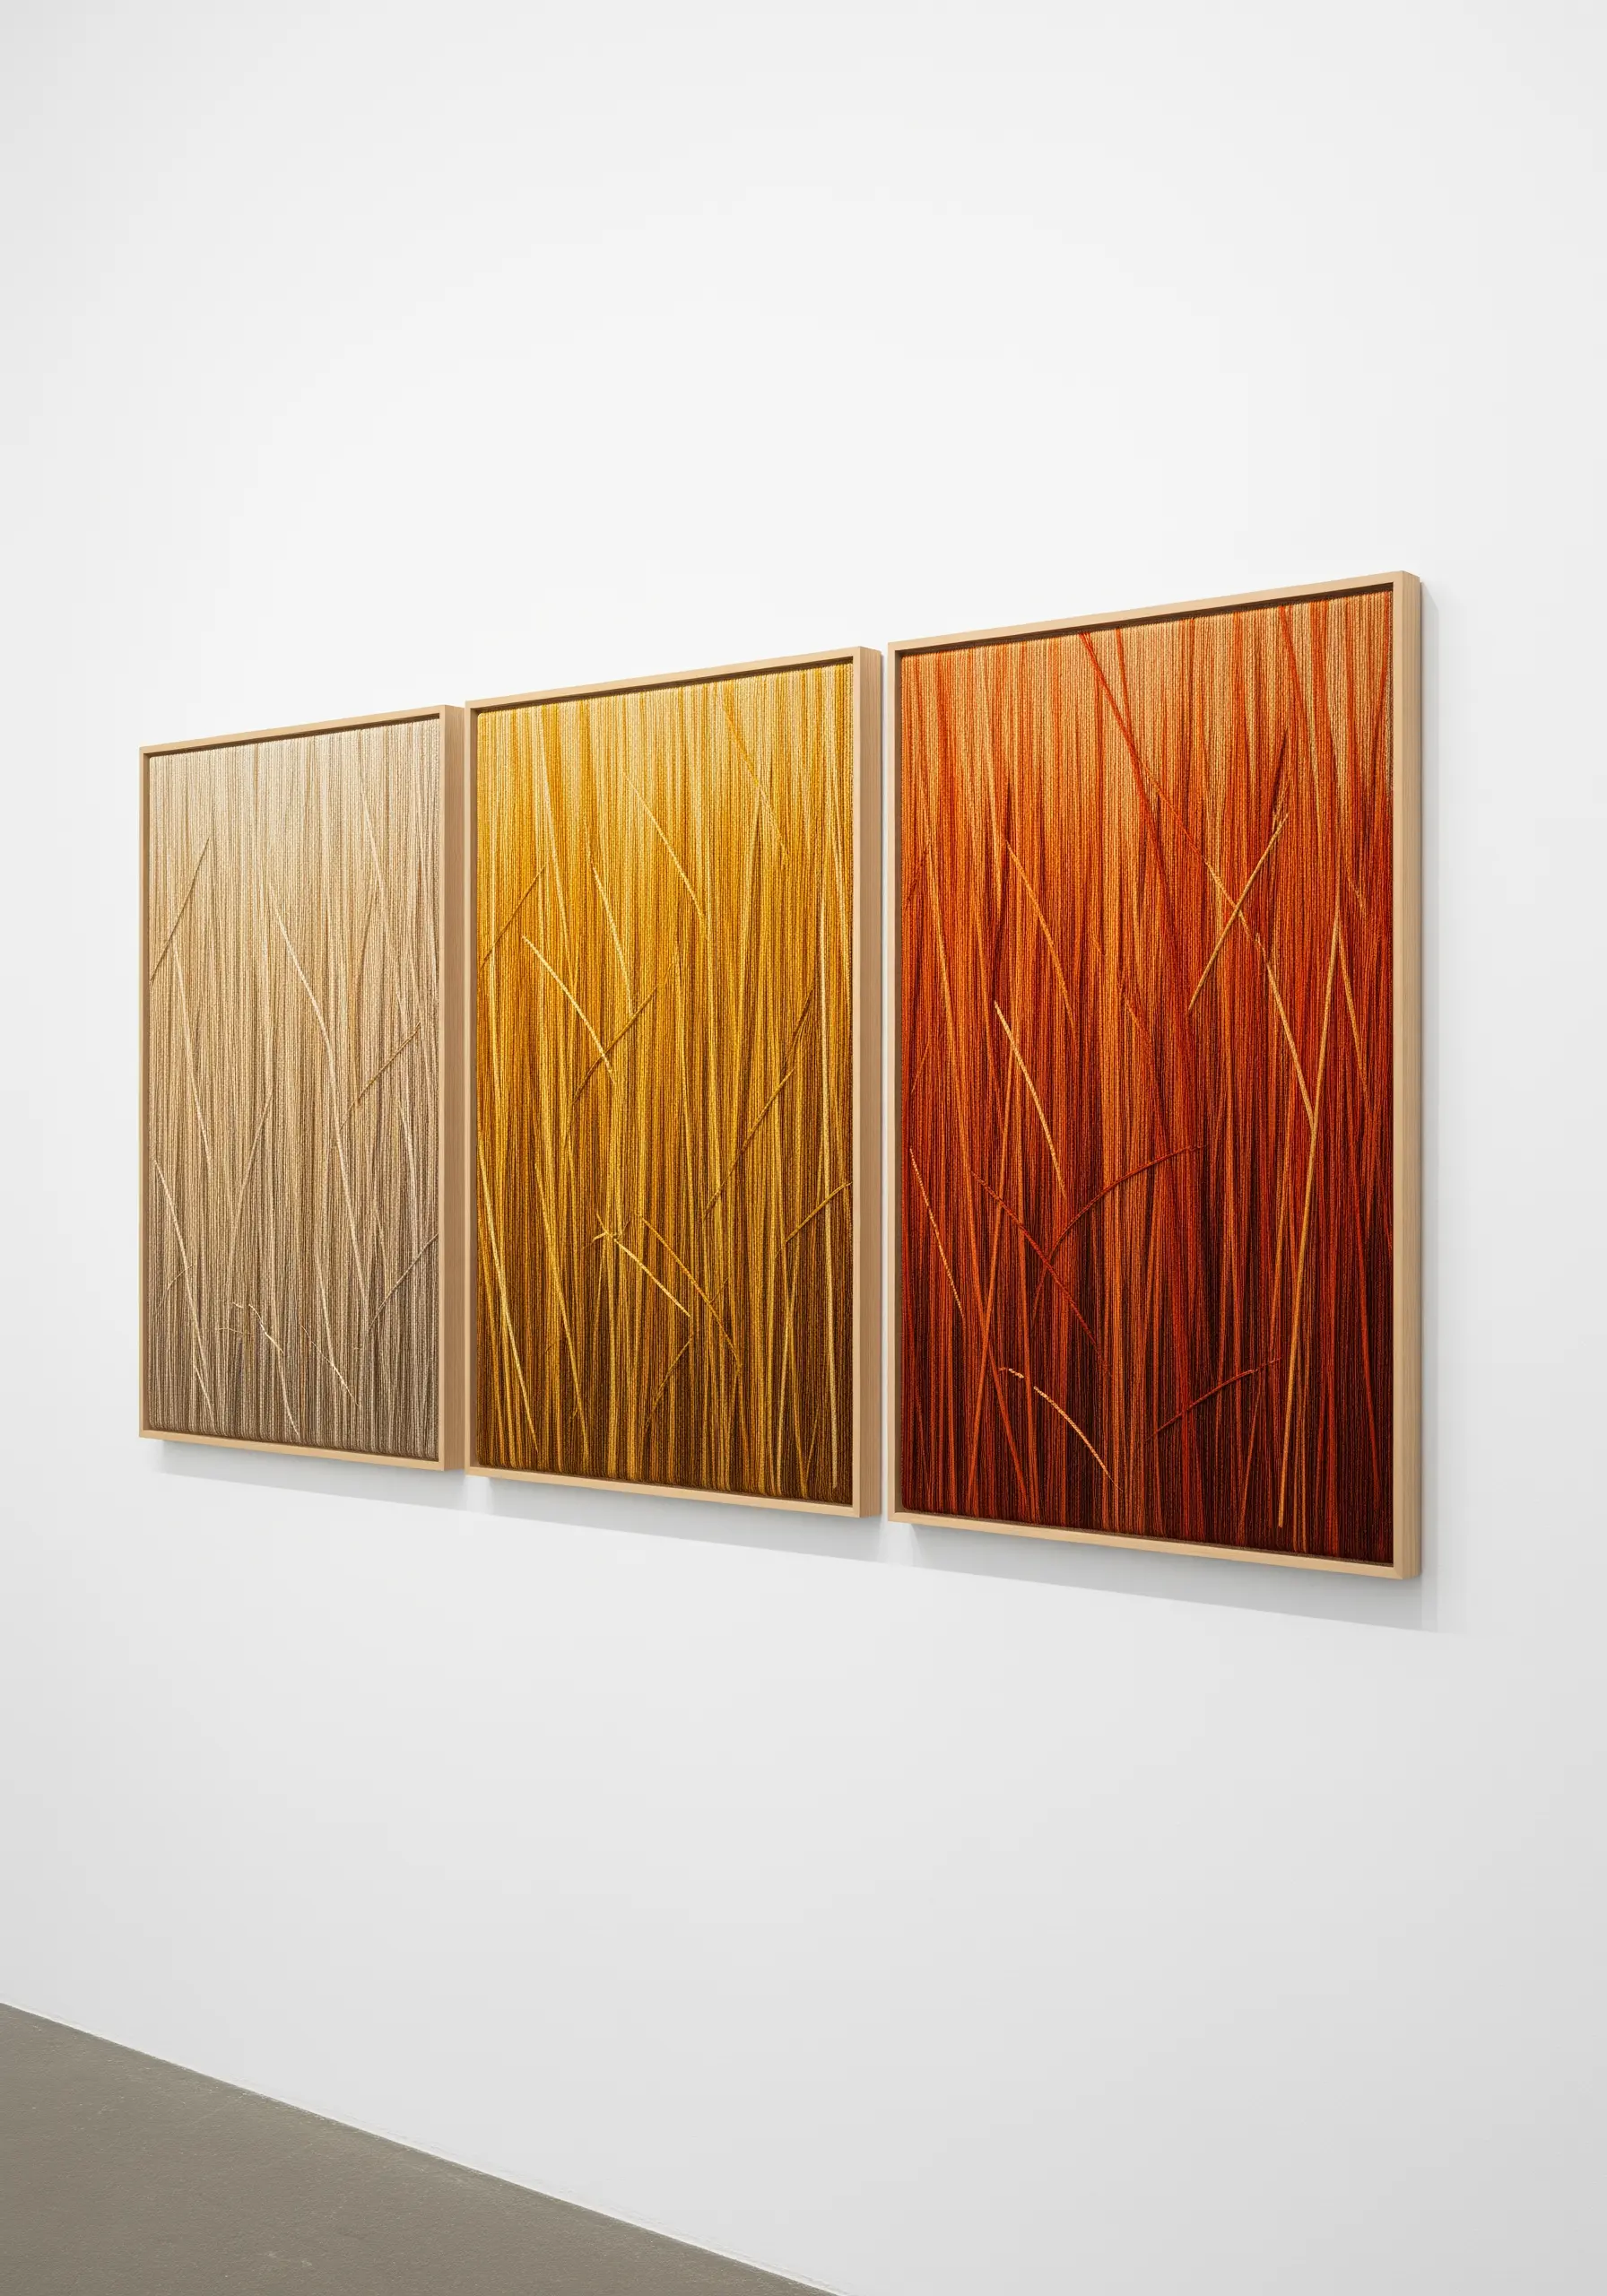
Evoke the feeling of a sun-drenched field of grass with densely packed vertical stitches.
This technique, often done with a machine but adaptable by hand, relies on thousands of straight stitches in varying lengths and colors.
Create a sense of depth by using darker, more densely packed stitches at the bottom and lighter, sparser stitches toward the top.
Grouping colors into panels, as seen here, turns a simple landscape into a modern, abstract study of color and light, making it one of the most elegant earth-tone patterns every handmade decor enthusiast needs to try.
26. Weave a Web with Dewdrop Beads
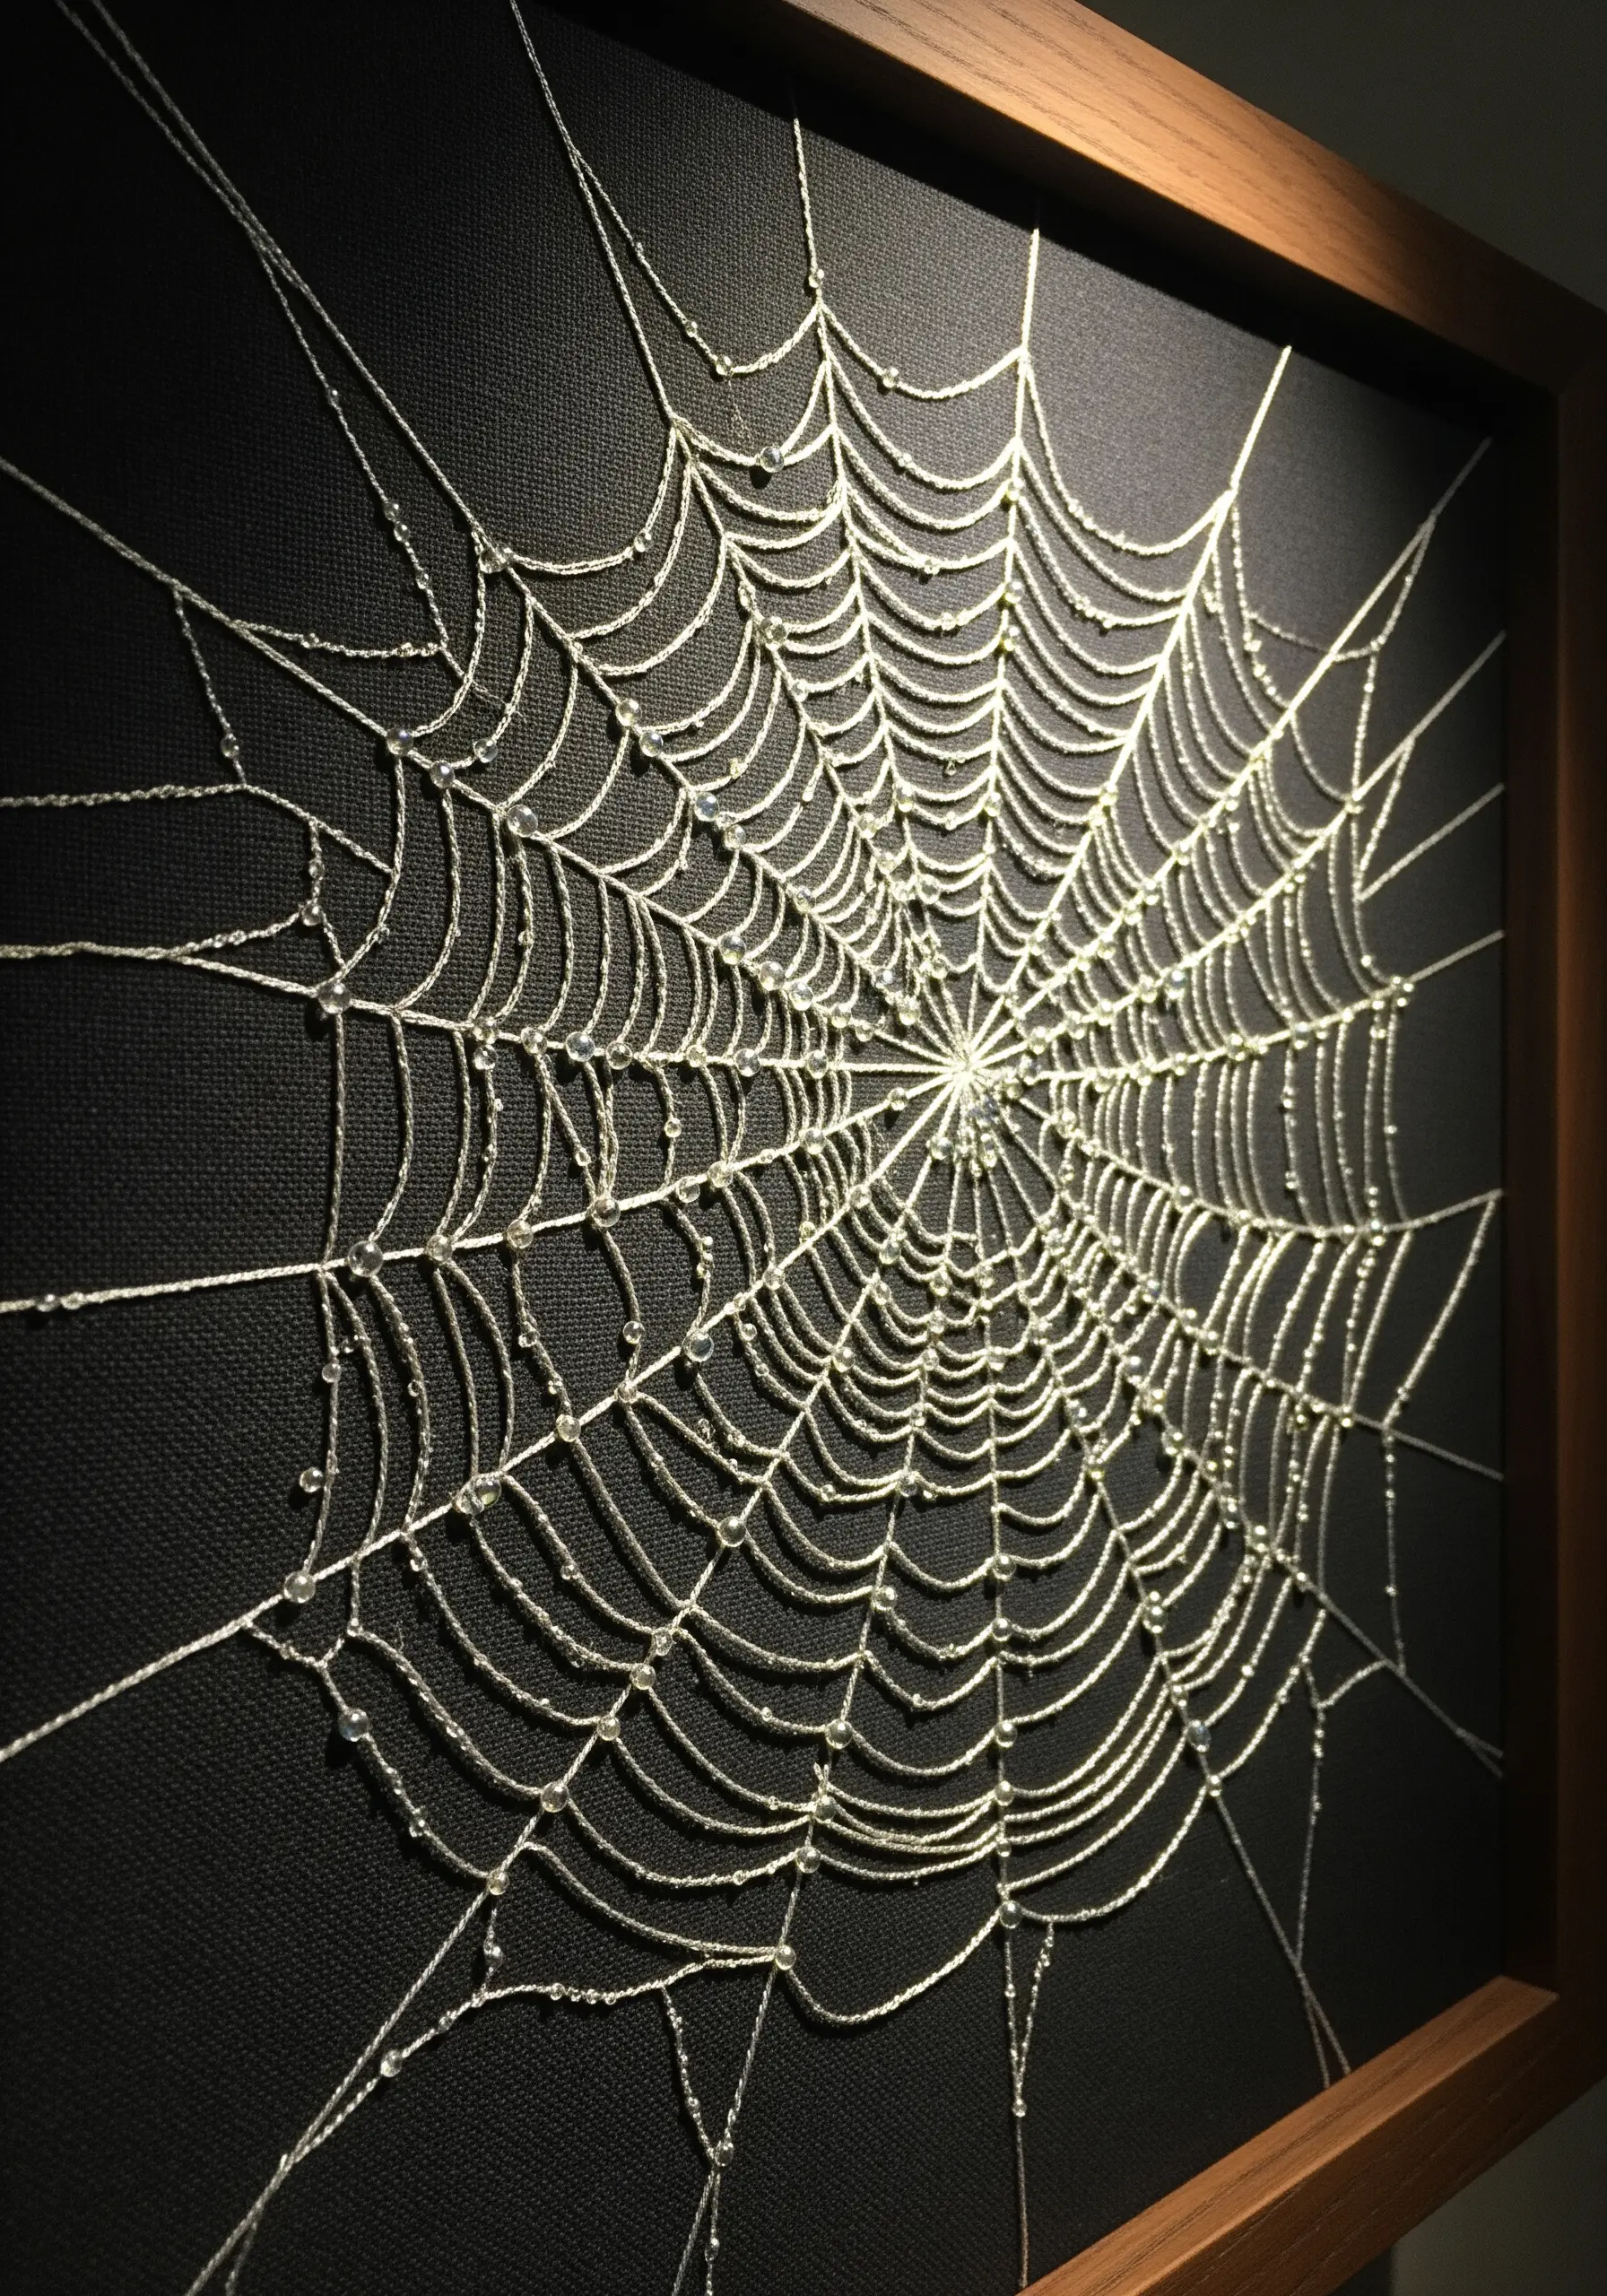
Capture the fragile engineering of a spider’s web by combining precise stitching with delicate embellishments.
First, create the radial anchor threads with long, taut straight stitches from the center outwards.
Then, weave the spiral pattern, either by couching a second thread or looping it around the anchors.
Add the final touch of realism by randomly scattering tiny, clear seed beads along the threads to represent glistening morning dewdrops.
27. Channel a Lava Flow with Punch Needle
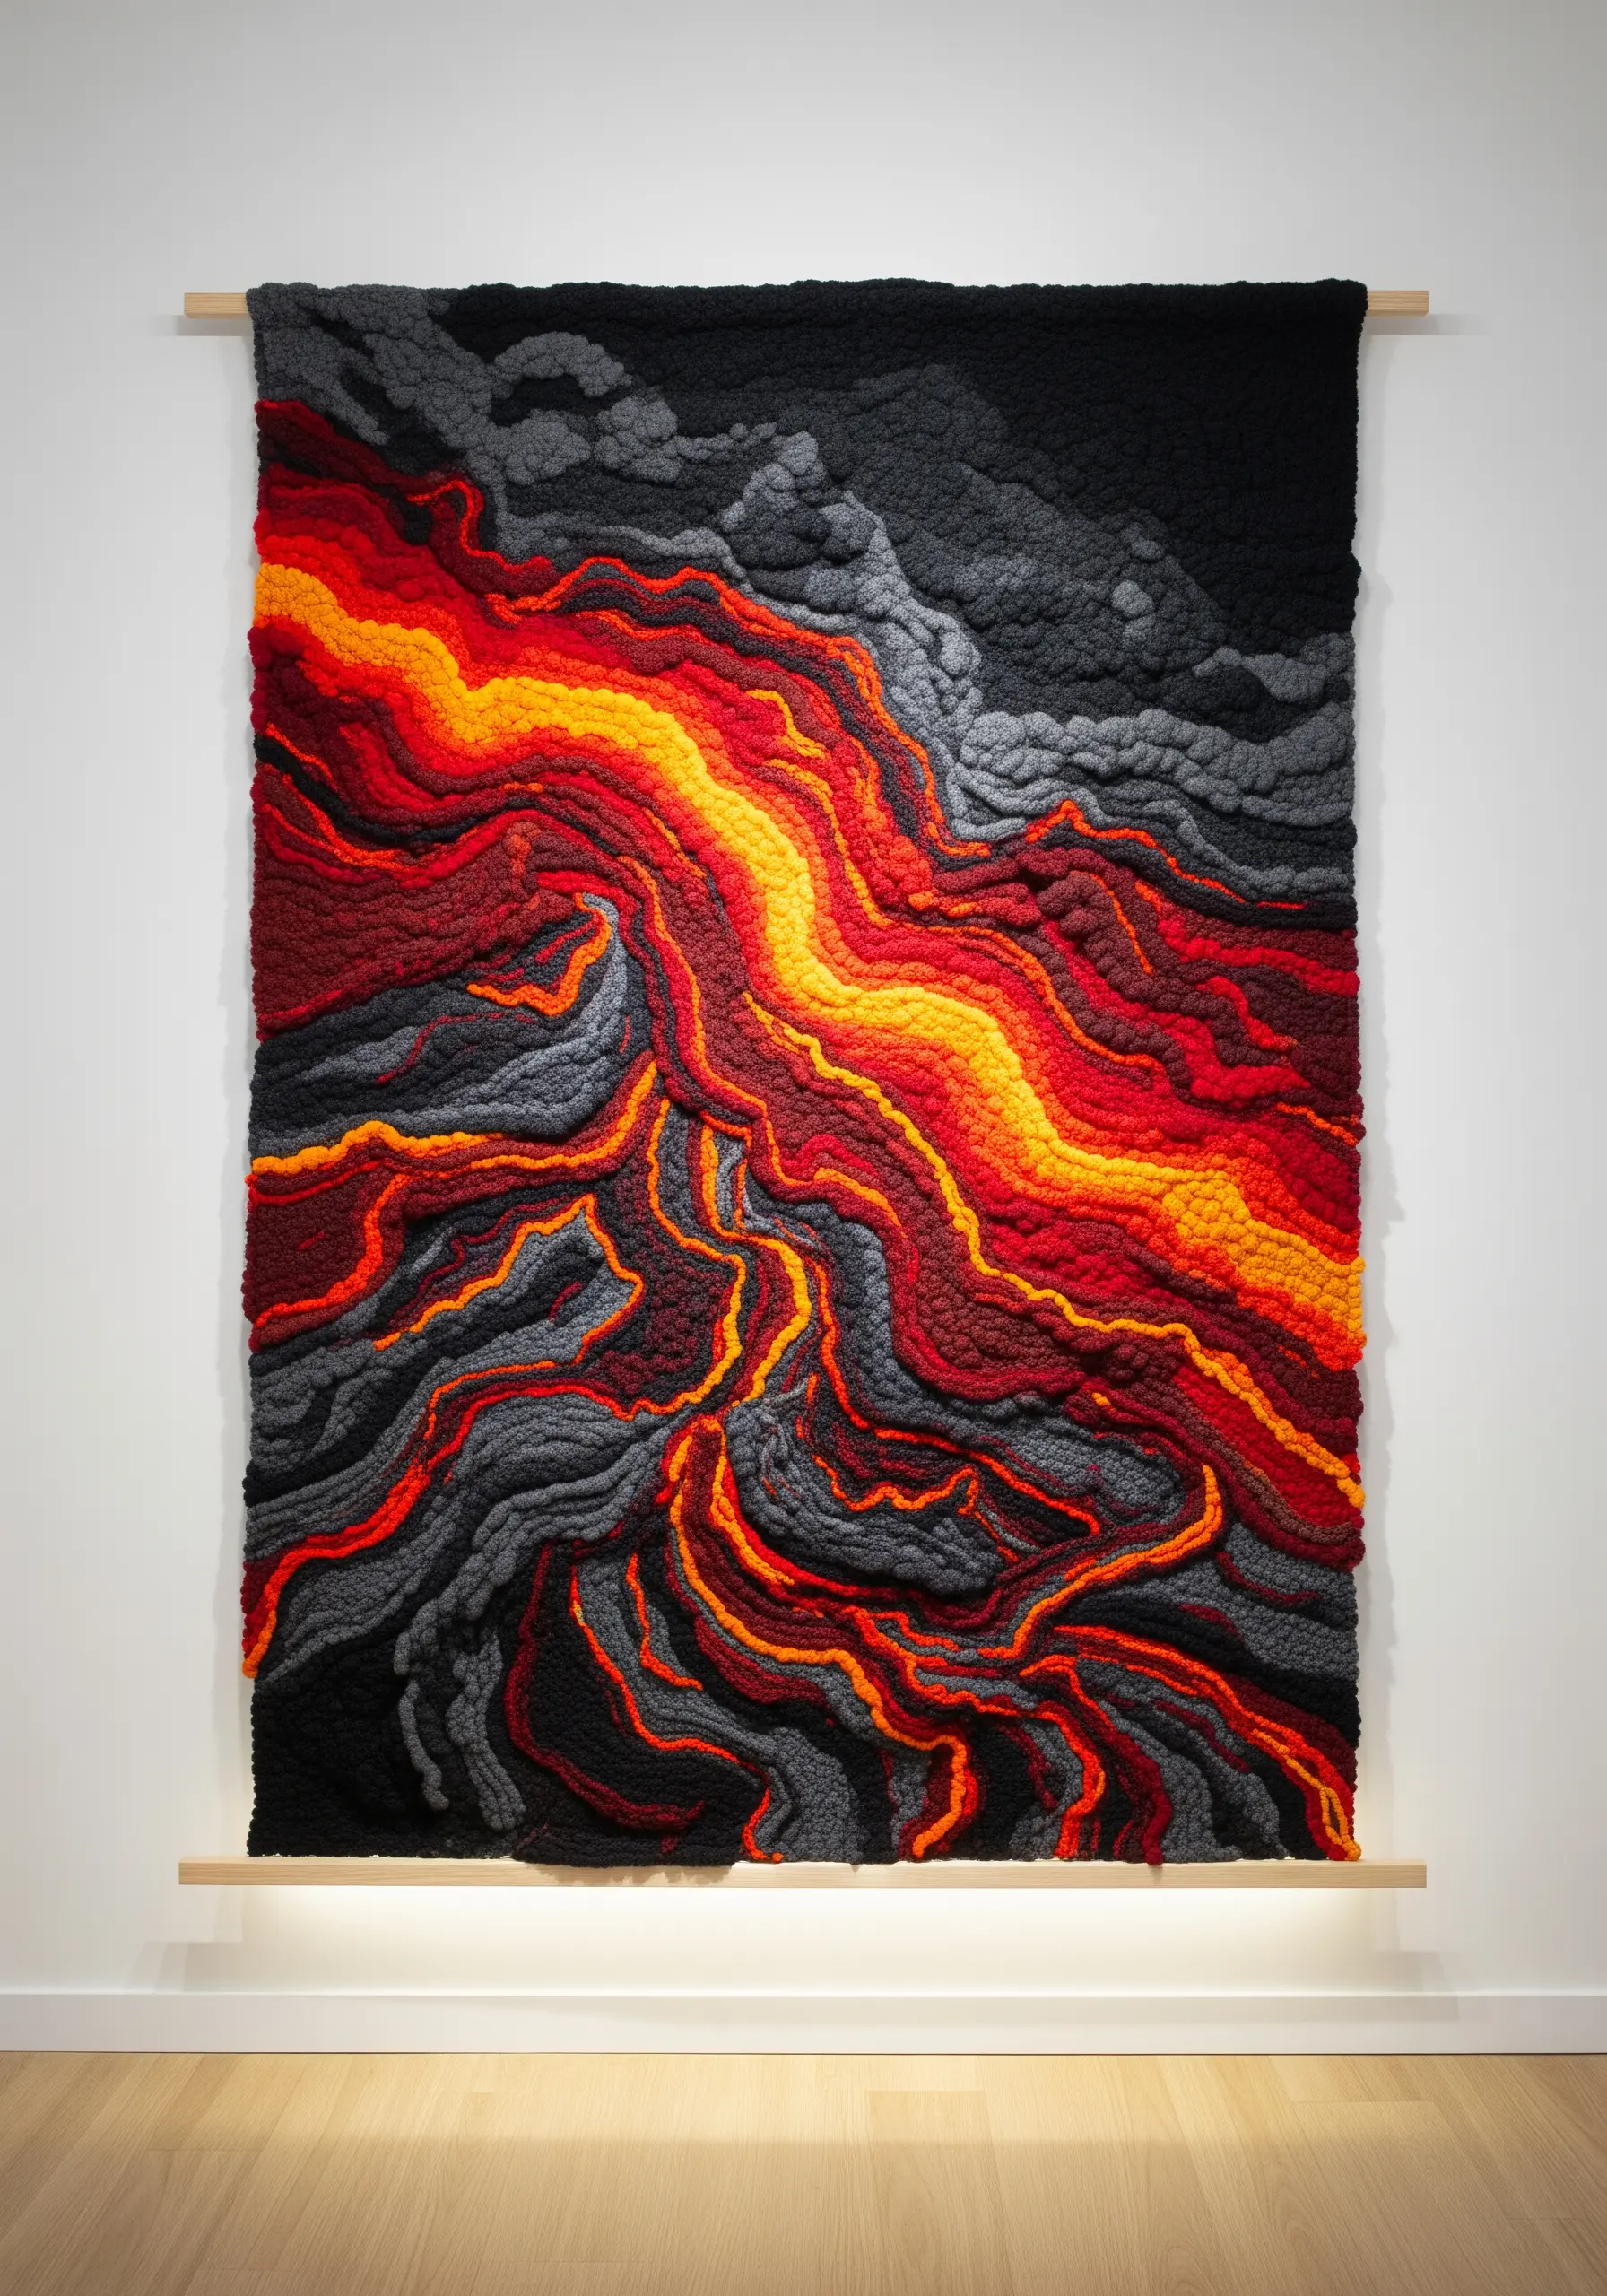
Recreate the powerful, molten texture of lava with the high-pile loops of punch needle embroidery.
Use a palette of black, charcoal, fiery red, and bright yellow yarns, blending the colors in organic, flowing lines to show the movement of the magma.
Varying the loop height can add even more dimension—shorter loops for cooling, crusty areas and taller loops for the hot, flowing center.
The resulting wall hanging is a dynamic, intensely tactile piece that captures the raw energy of a volcanic eruption.
28. Stitch Concentric Rings to Form Pebbles
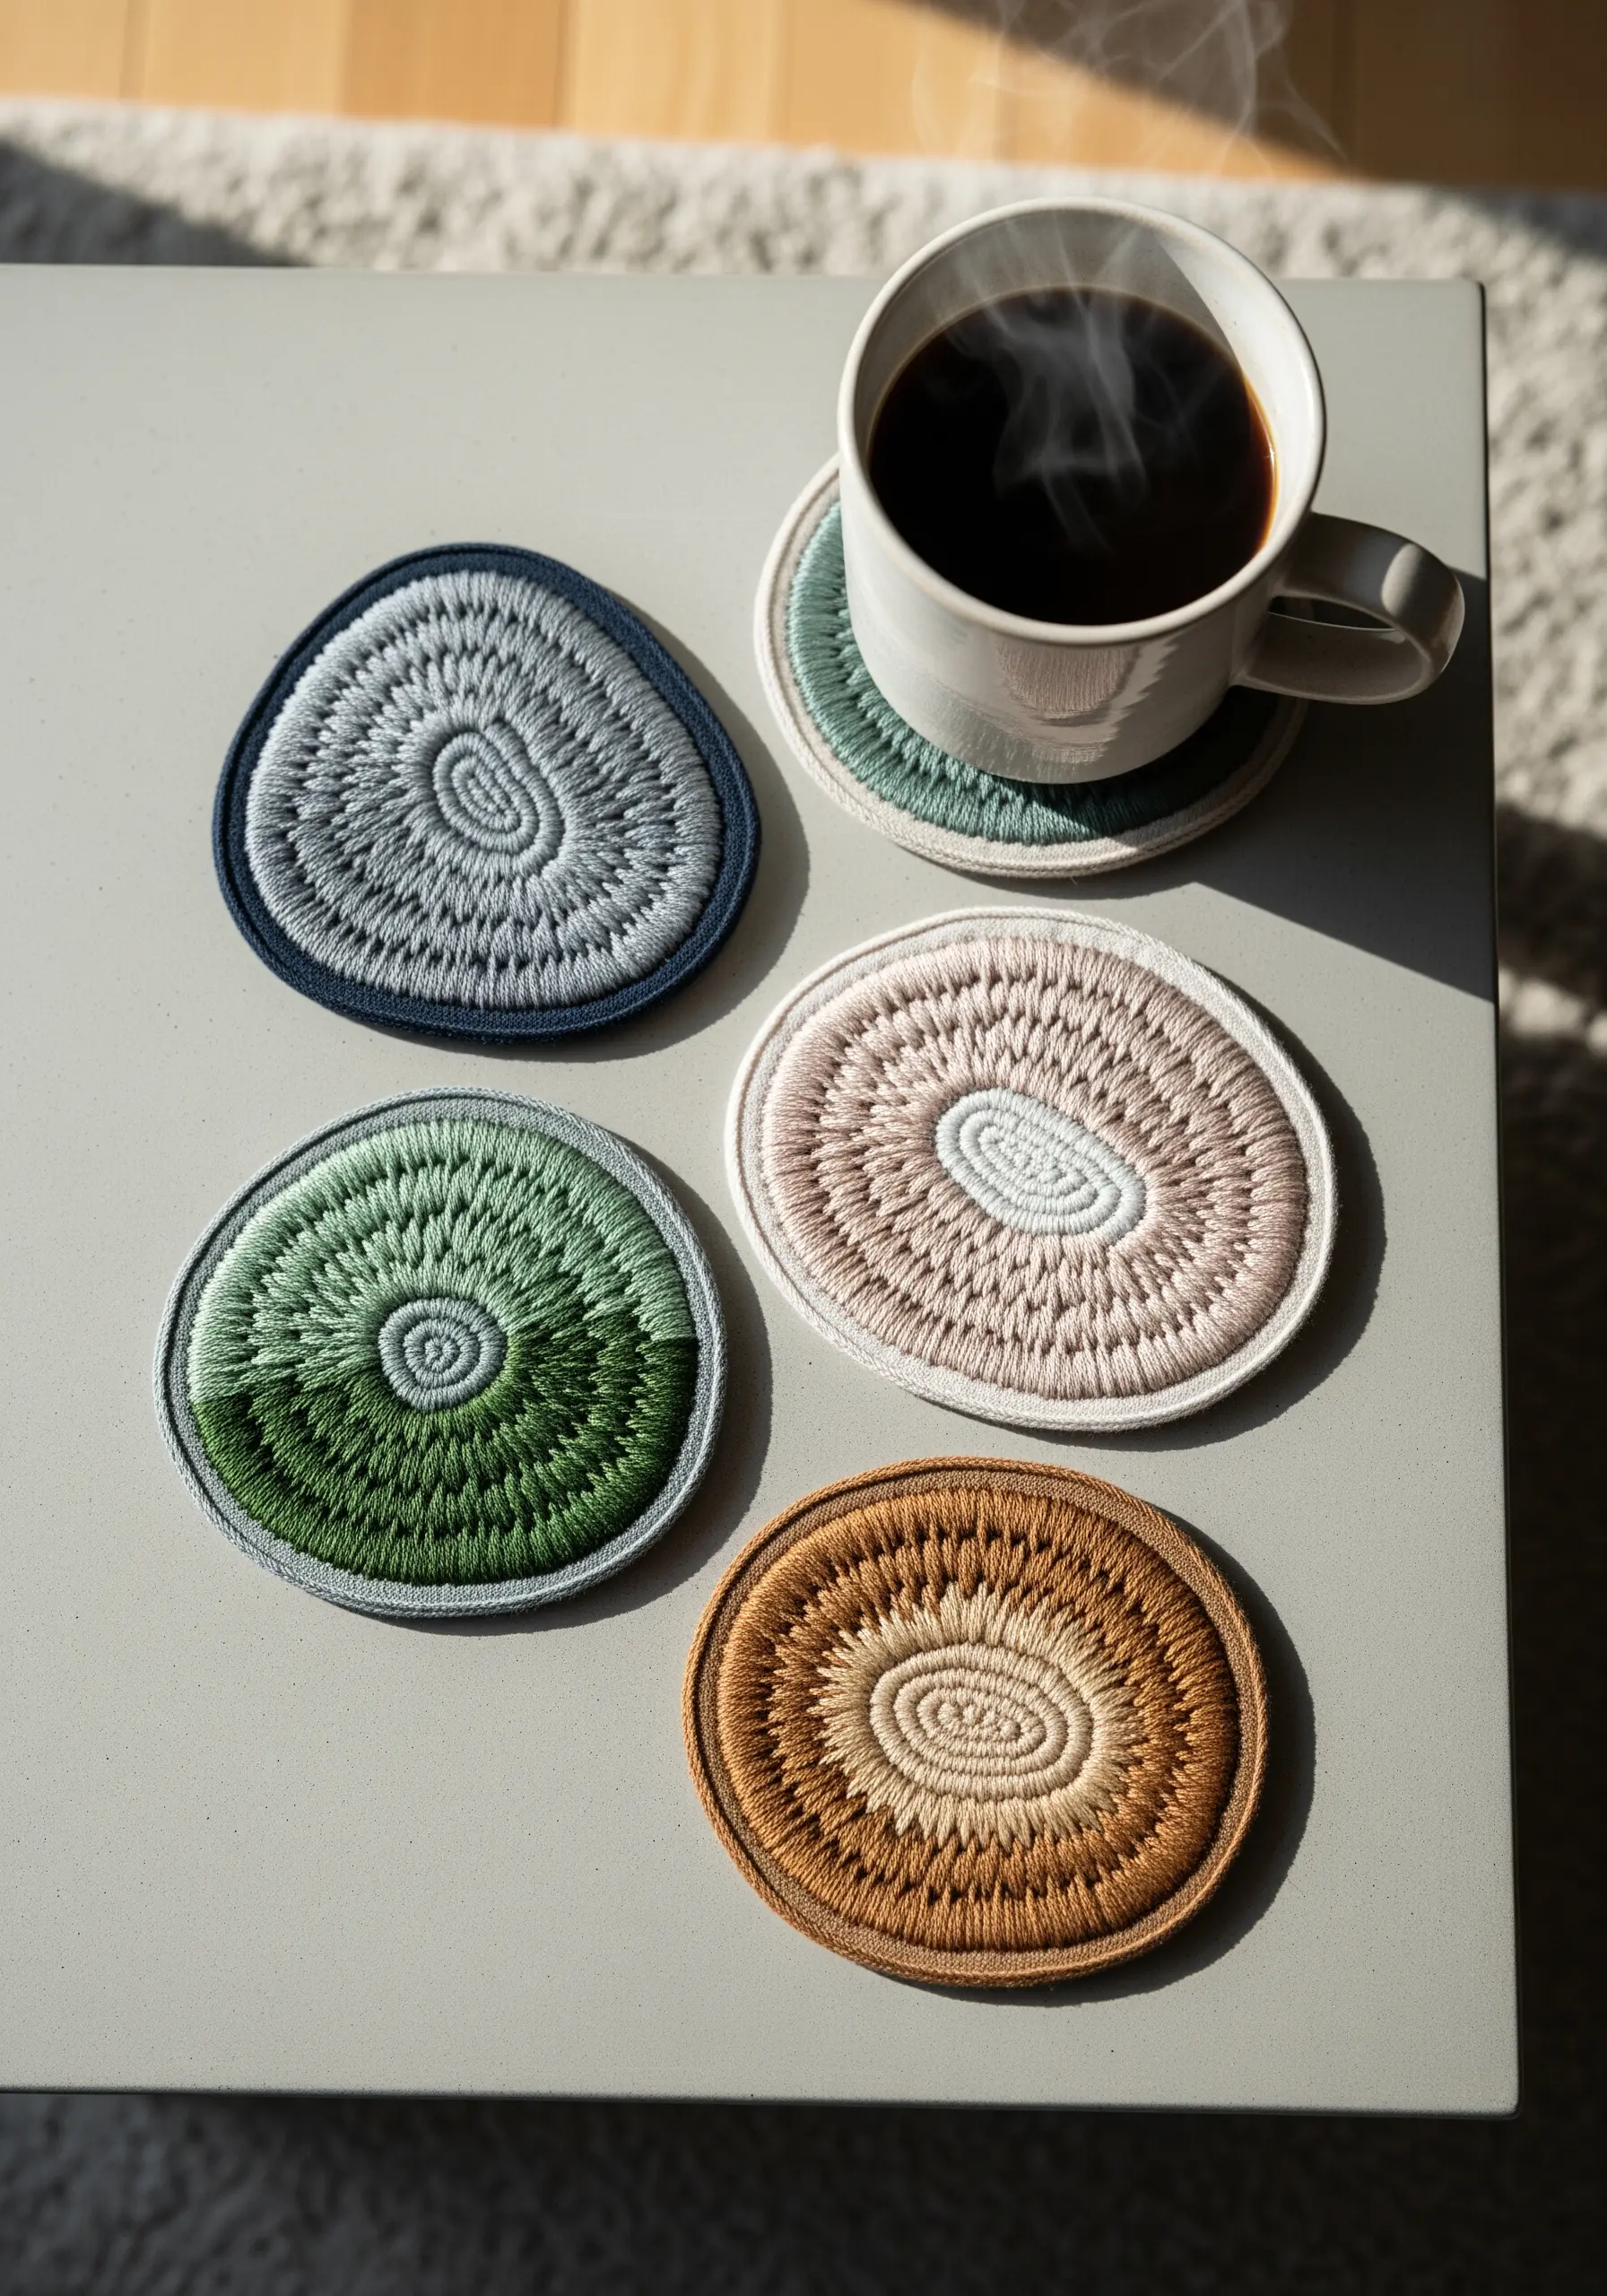
These simple coasters beautifully mimic the look of water-smoothed stones or wood slices.
The entire effect is created with a dense, spiral of split stitch or satin stitch, starting from the center and working your way out.
Use variegated thread or switch colors every few rows to create the organic, layered appearance of natural growth rings or sediment.
This meditative technique is a perfect way to turn scraps of fabric into thoughtful embroidery projects inspired by textures you’d find on a nature walk.
29. Achieve Iridescence with Meticulous Thread Painting
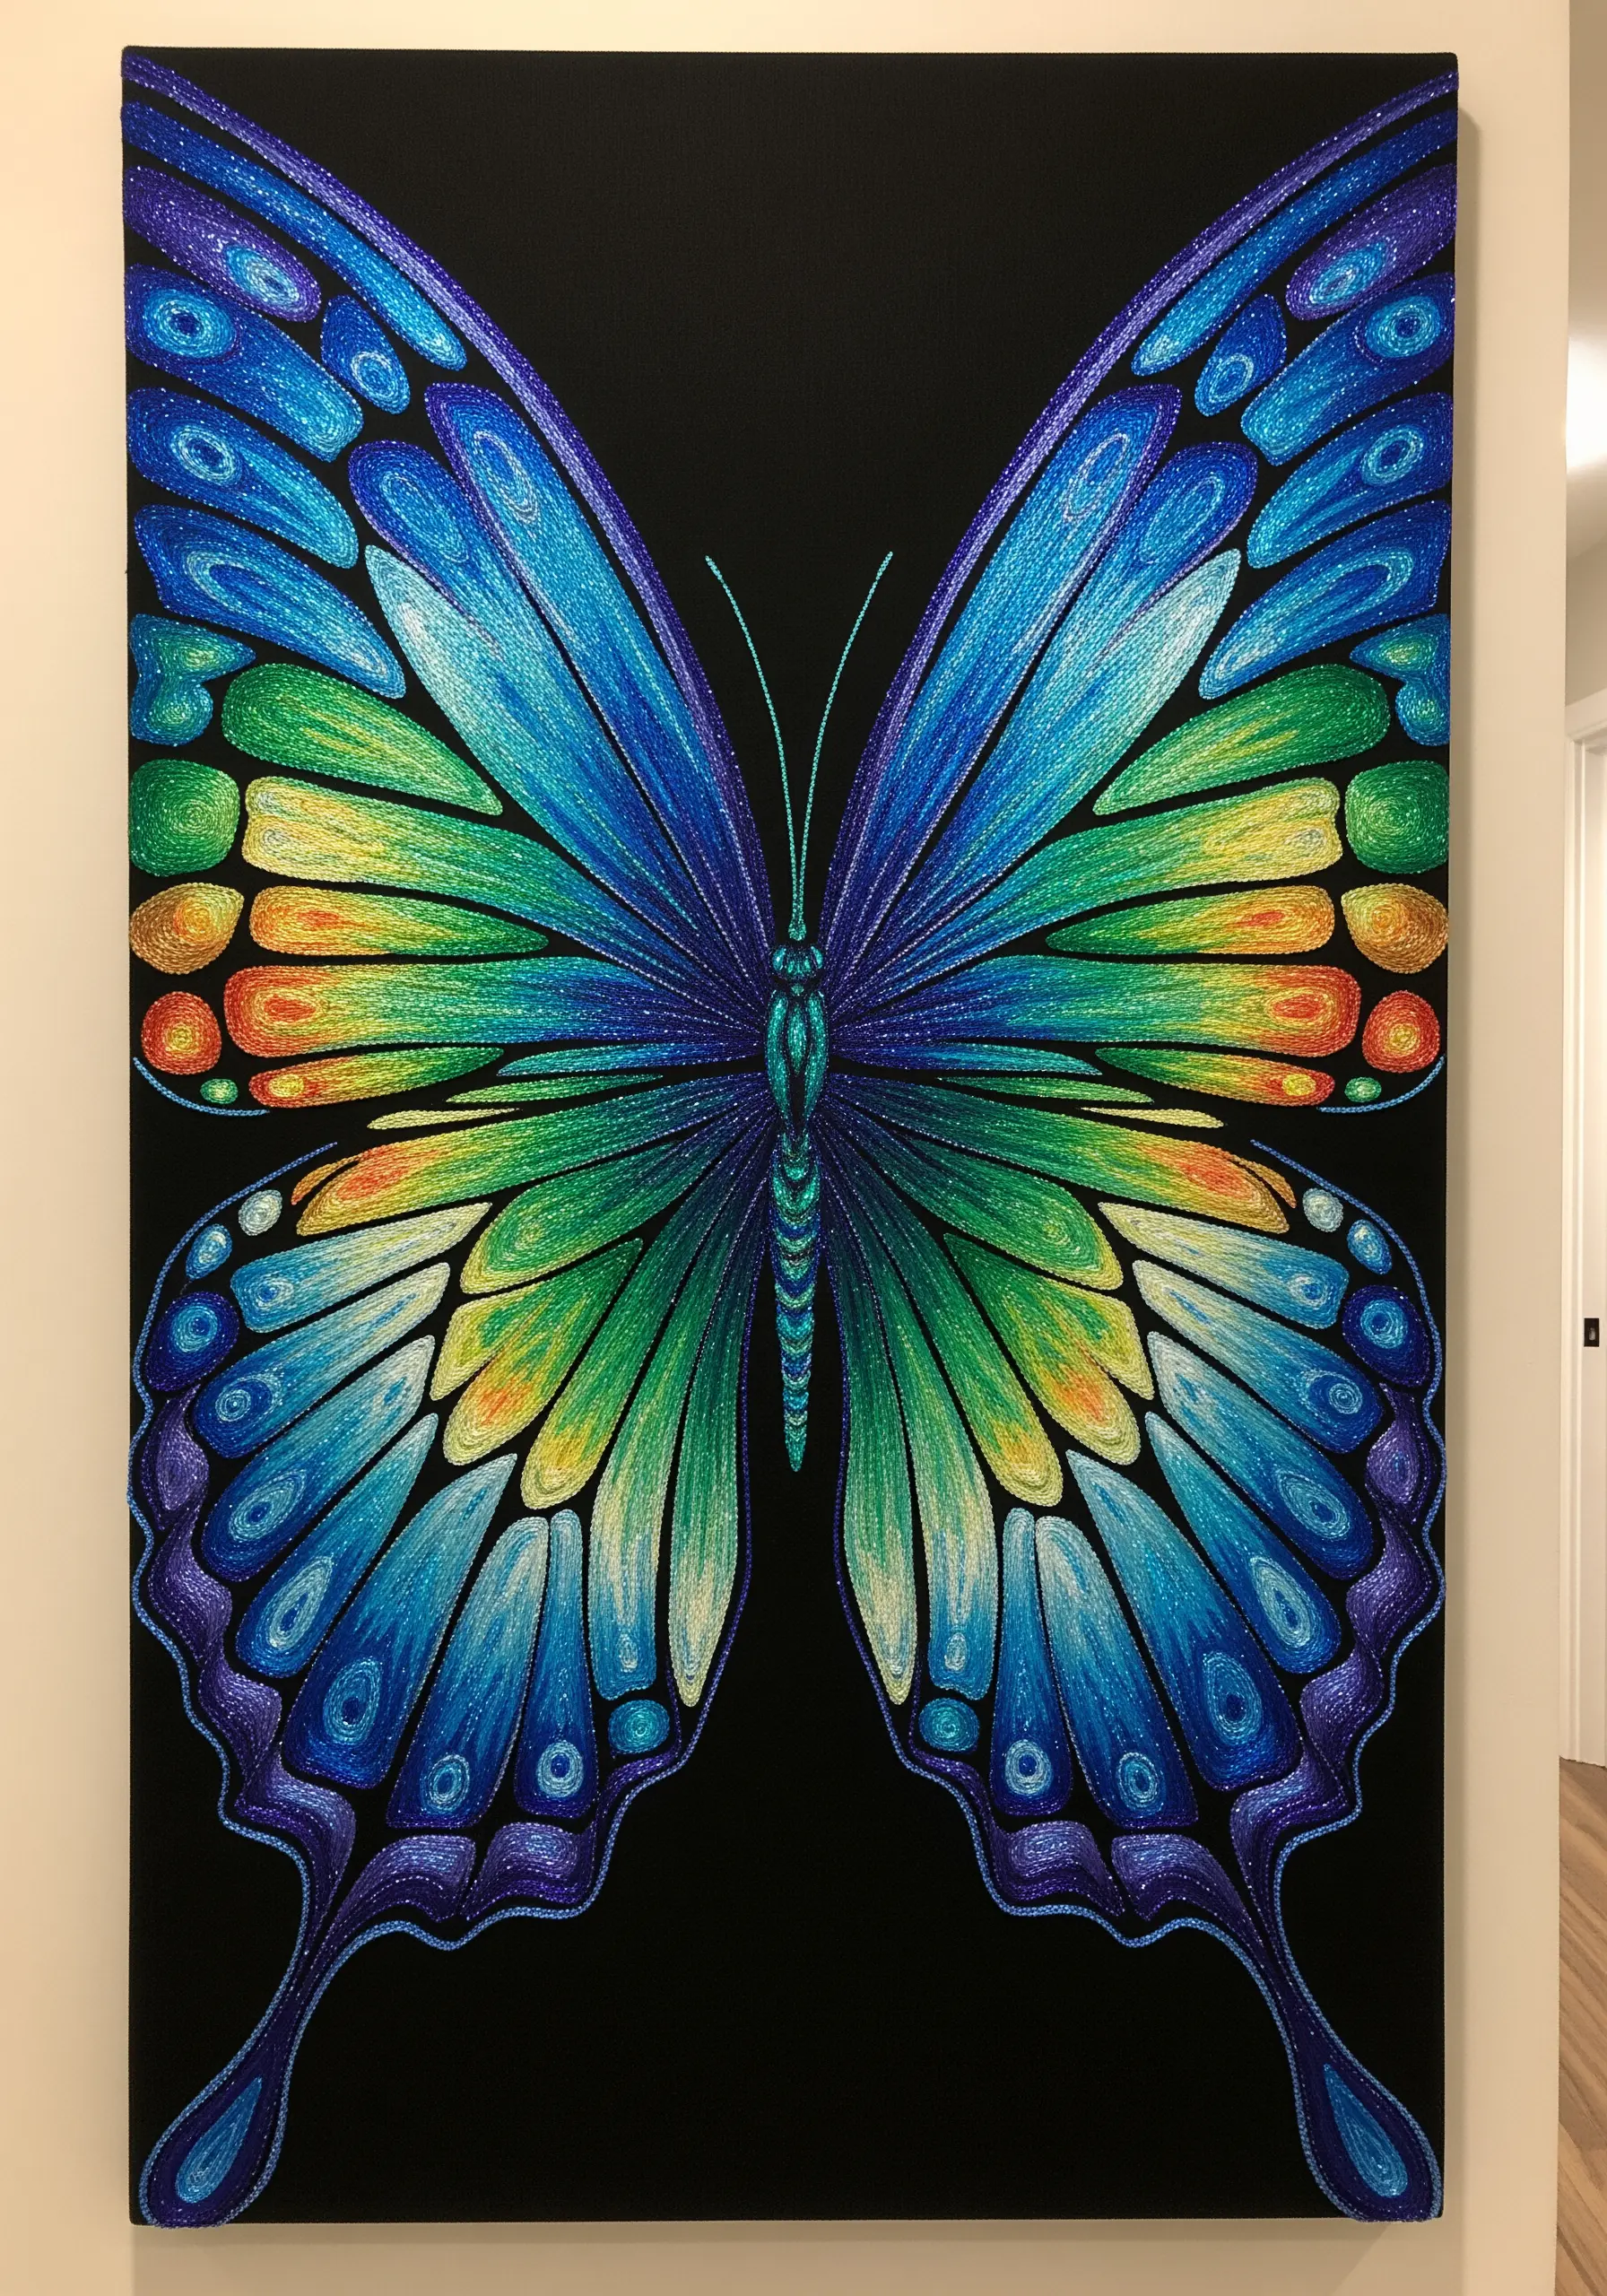
Capture the shimmering, multi-tonal quality of a butterfly’s wing with disciplined color blending.
This entire piece is an expert execution of long-and-short stitch, using dozens of shades to create flawless gradients.
The key is to use single-strand floss and make your stitches follow the direction and shape of each segment of the wing.
Working on a black background makes the colors appear exceptionally vibrant and gives the final artwork a dramatic, jewel-like quality.
30. Use Appliqué for Large-Scale Organic Patterns
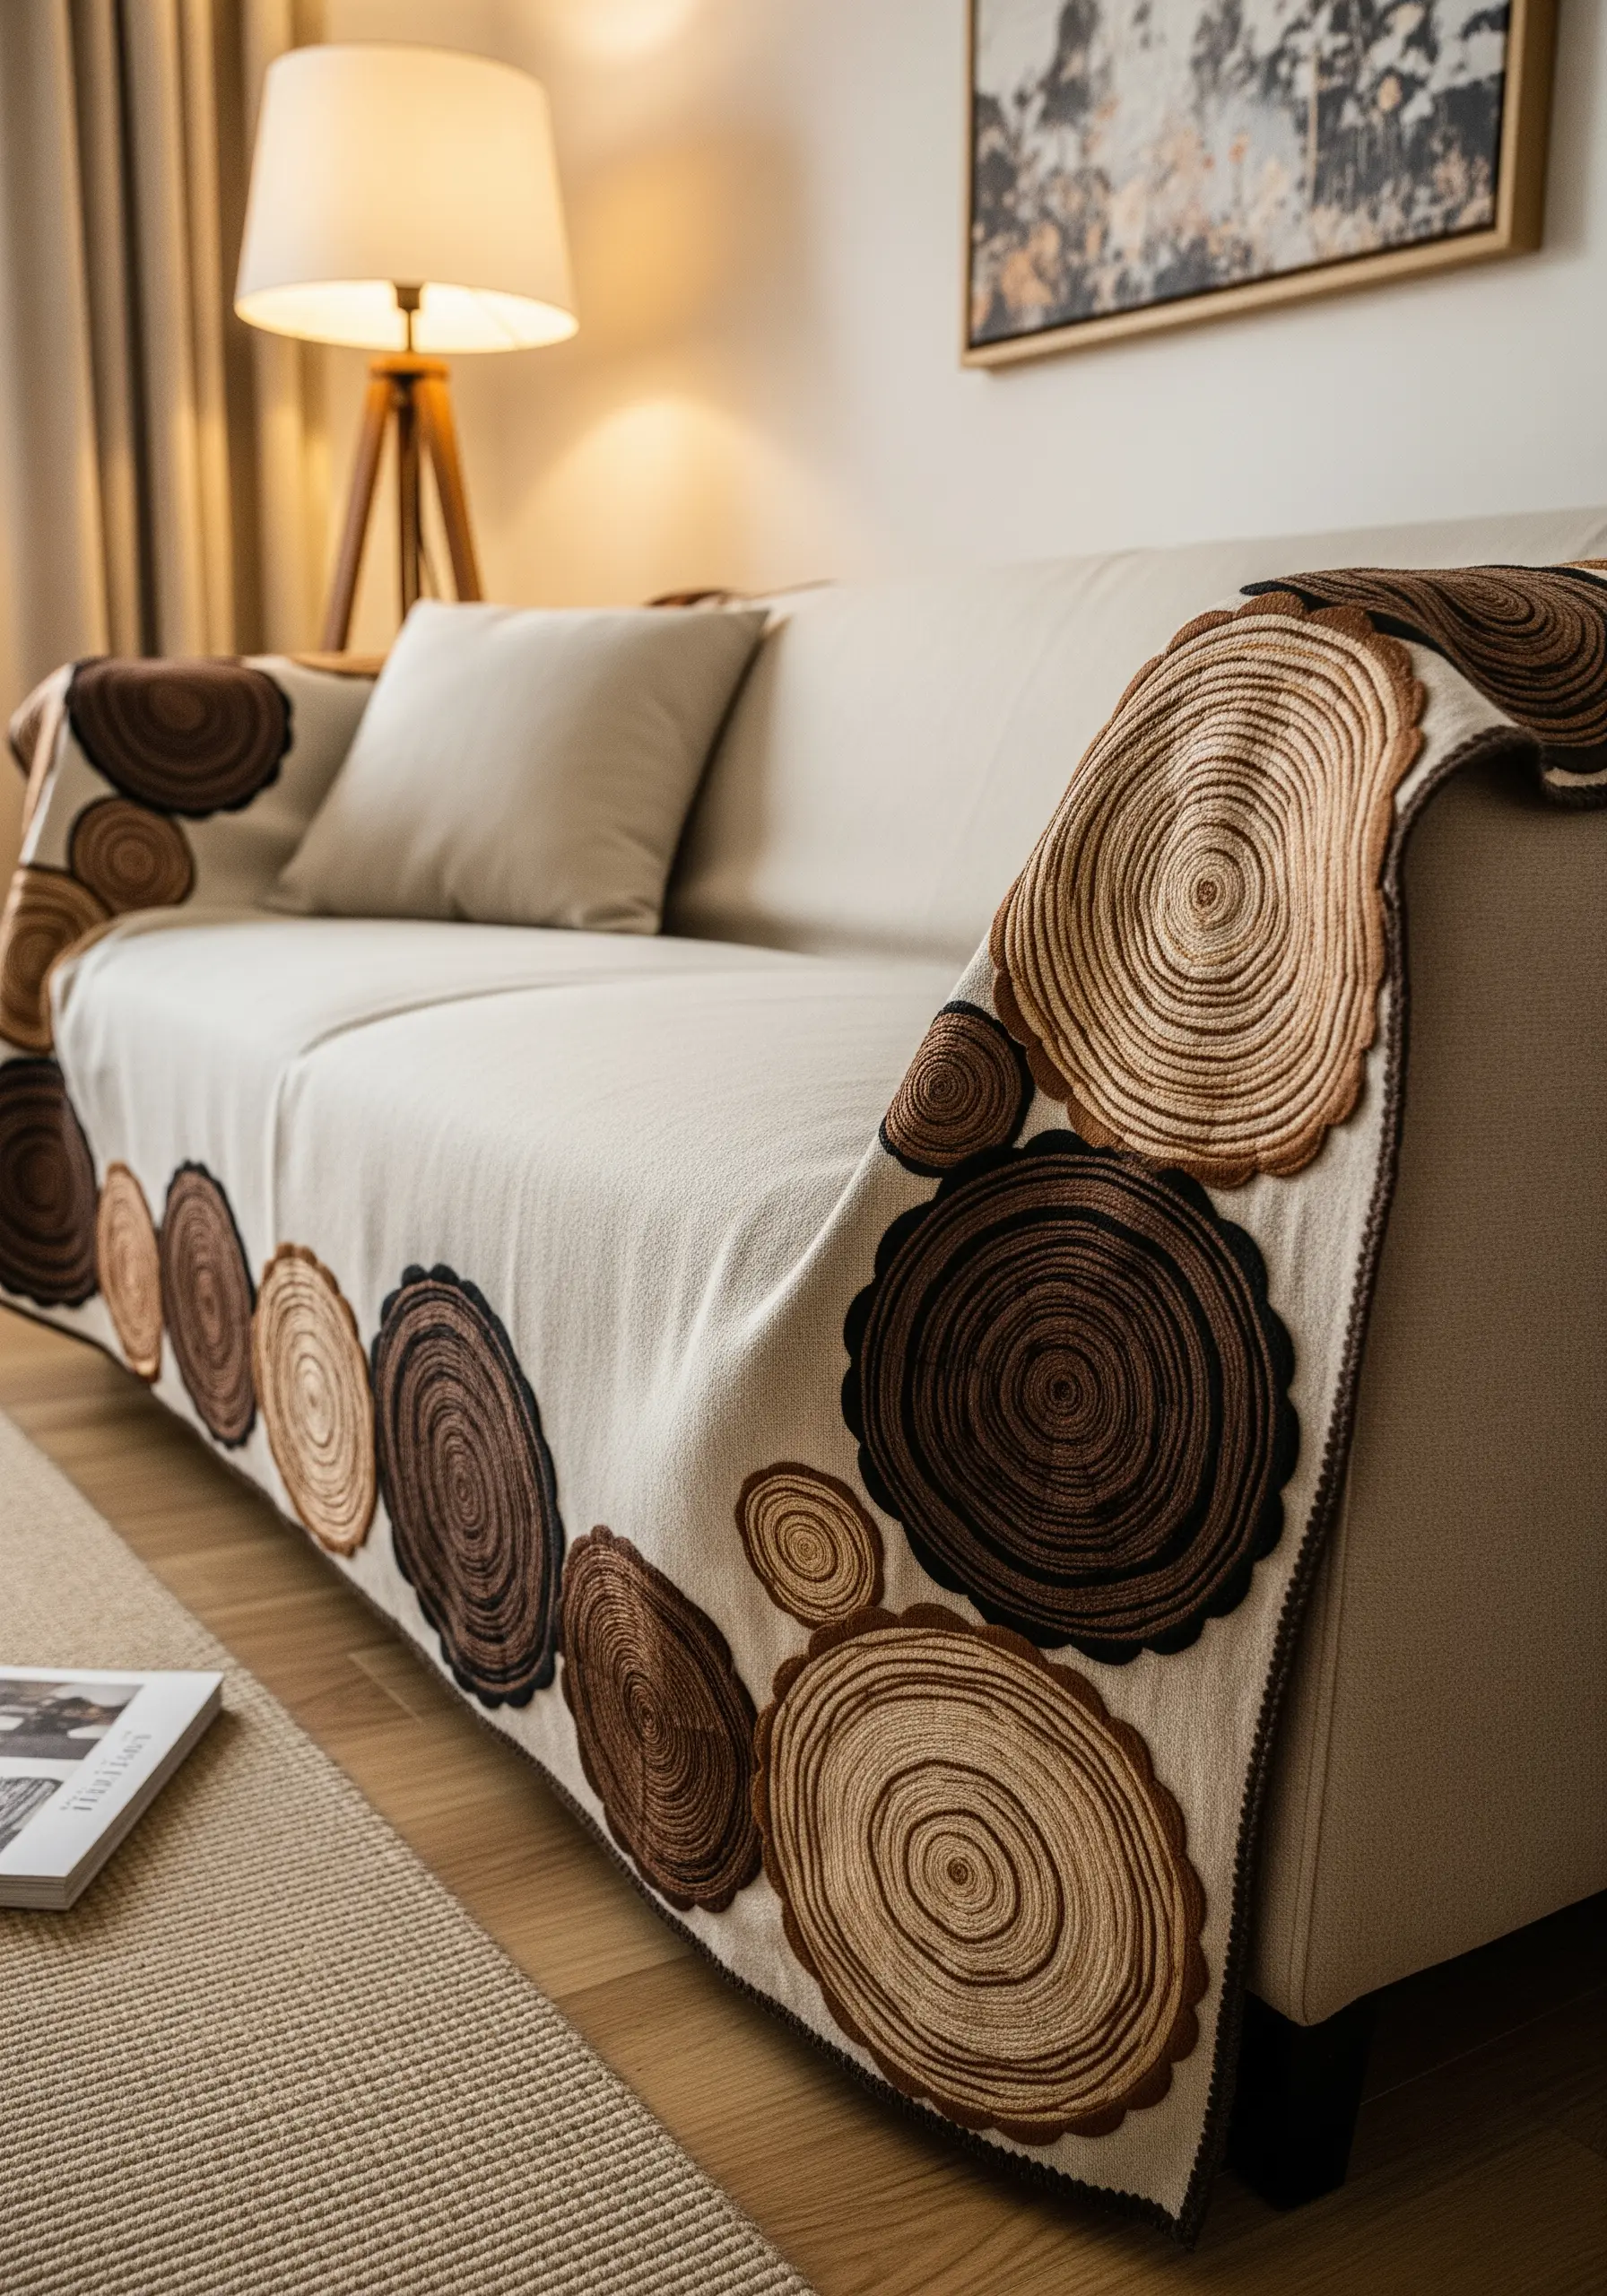
Covering a large surface like a sofa throw with dense embroidery can be daunting. Appliqué is the perfect solution.
Cut your tree ring shapes from various brown felt or non-fraying fabrics and arrange them along the edge of the blanket.
Secure each piece with a neat blanket stitch or running stitch around the edge.
You can then add the growth ring details with a simple backstitch, achieving a bold, graphic look with a fraction of the time and thread.
31. Combine Thread and Beads for Icy Sparkle
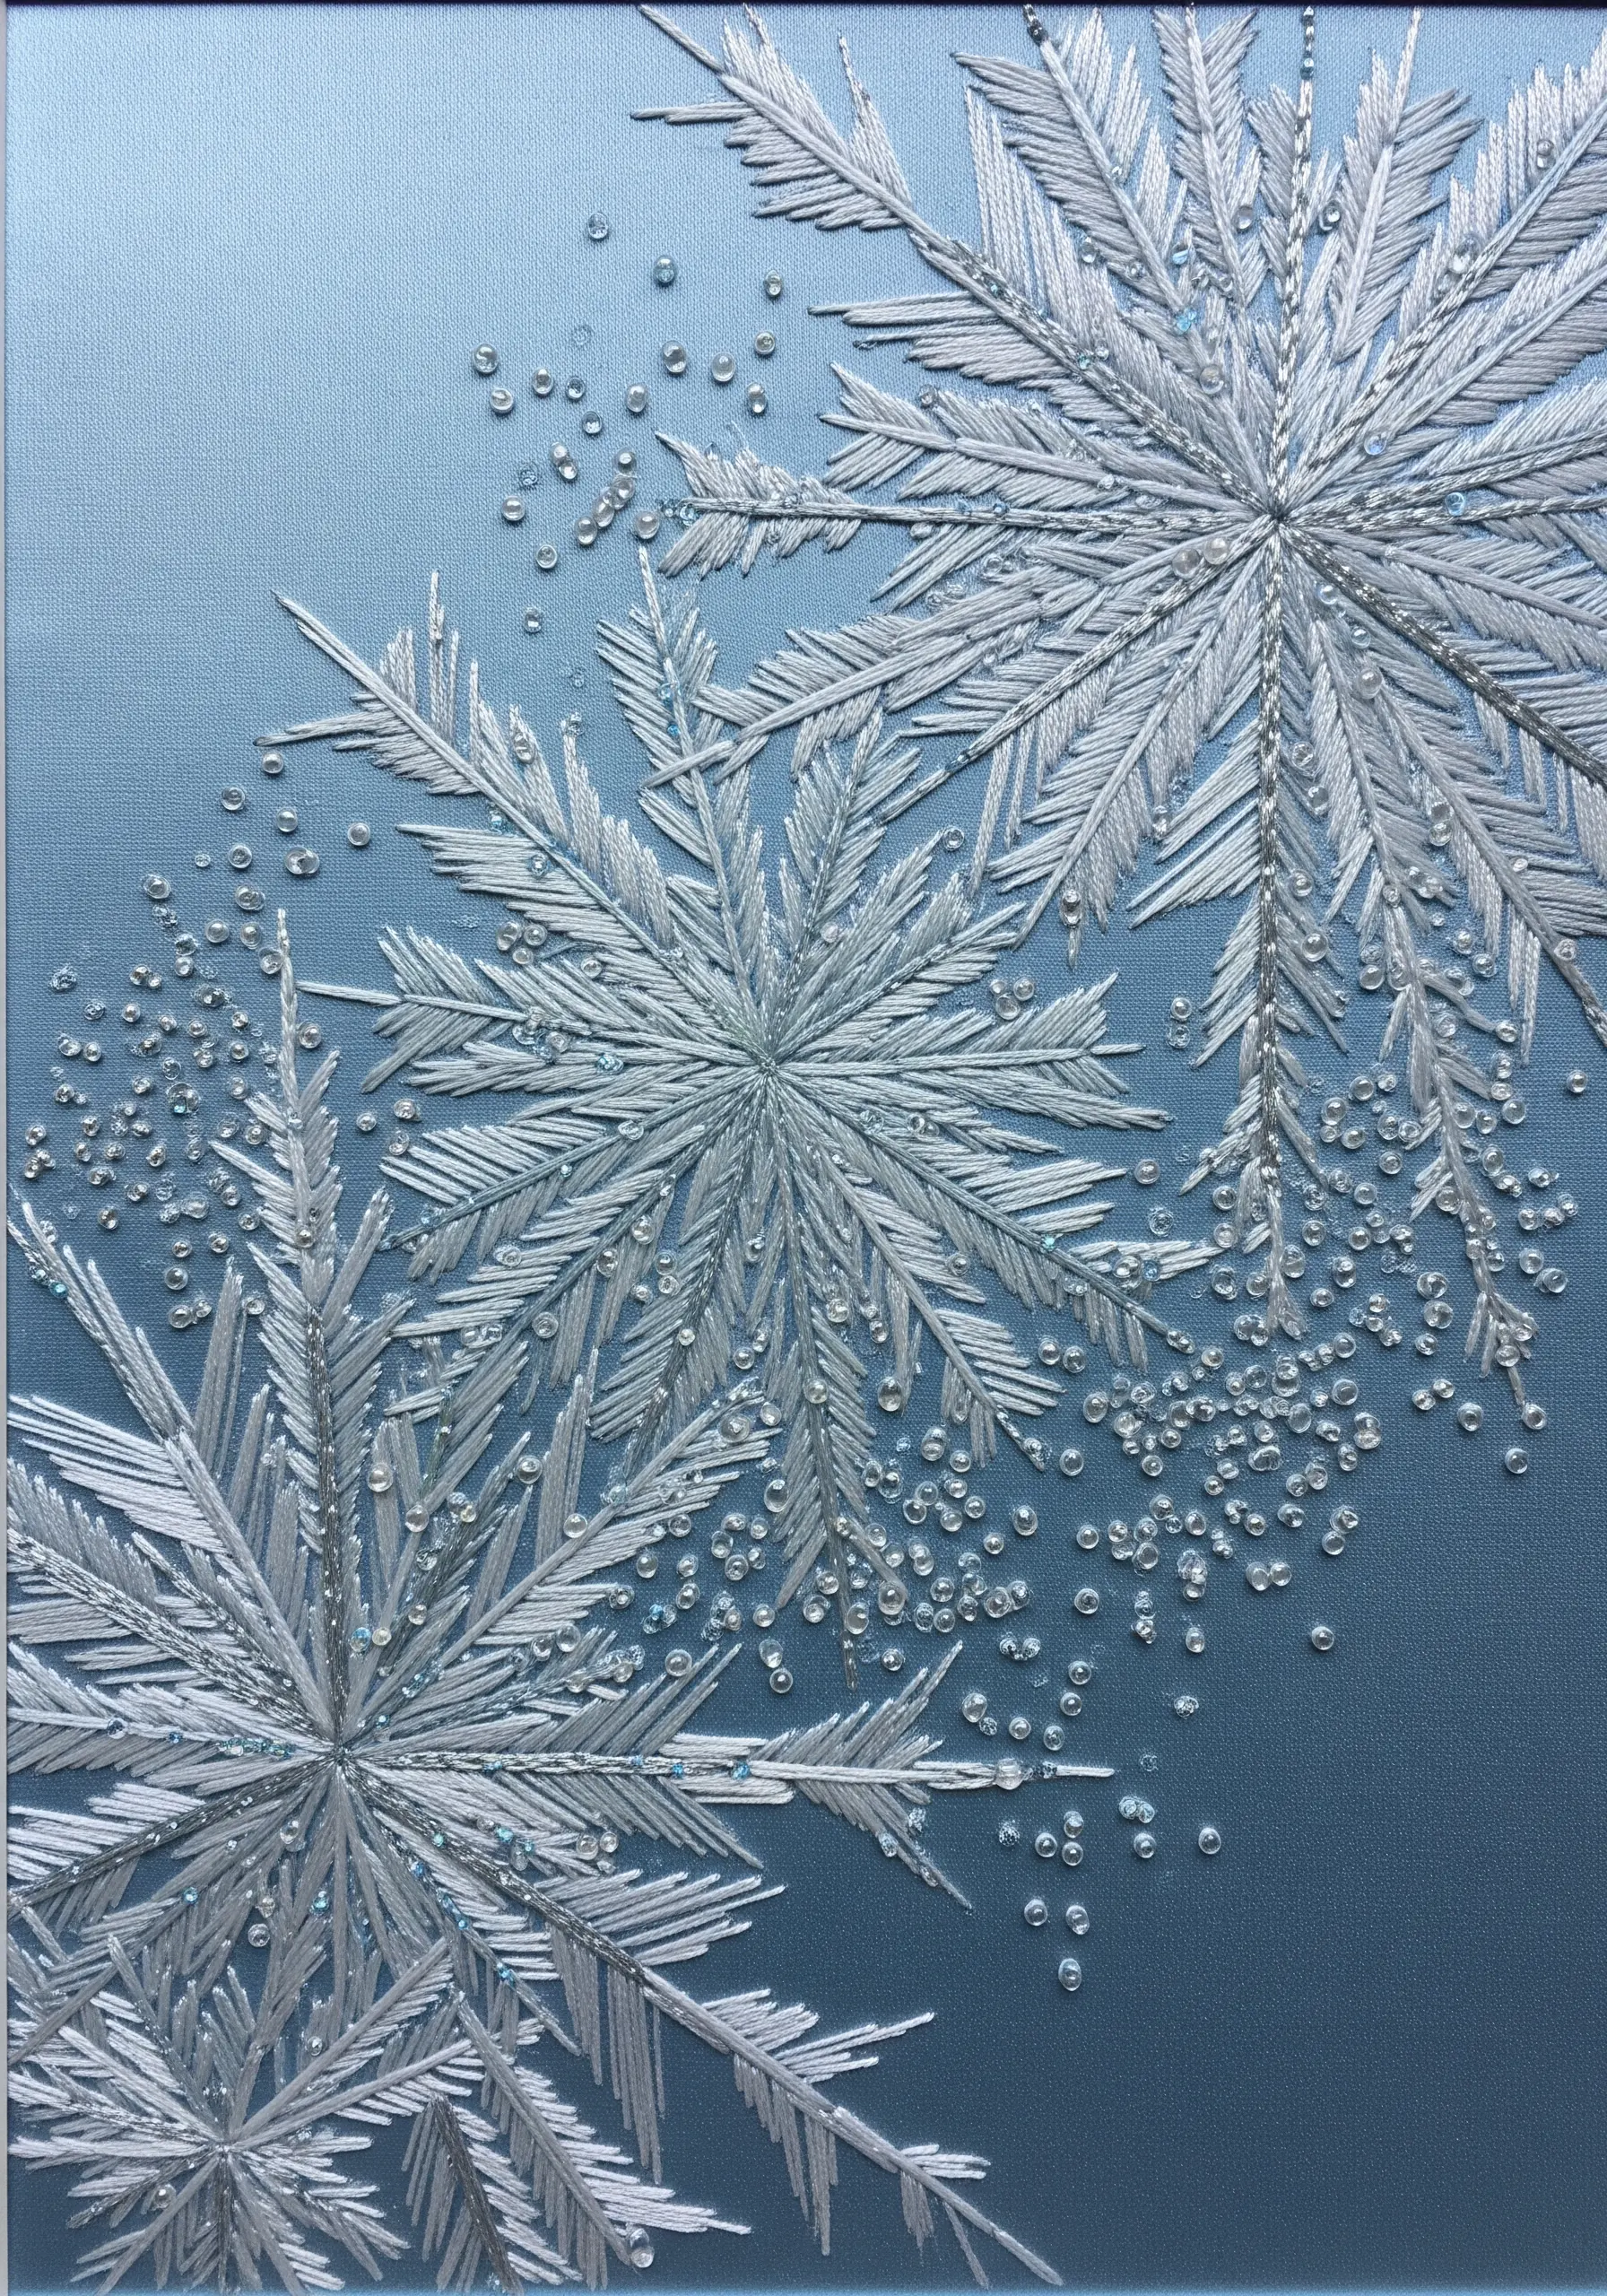
Give your embroidered snowflakes a realistic, frozen texture by adding a layer of beadwork.
First, stitch the underlying structure of the snowflake using a fishbone stitch or satin stitch with a silvery-white floss.
Then, go back and scatter a mix of clear seed beads, iridescent bugle beads, and tiny blue sequins over the design.
This mix of materials beautifully mimics the way light refracts through ice crystals, adding depth and a magical shimmer.
32. Build Dense Texture with Layered Motifs
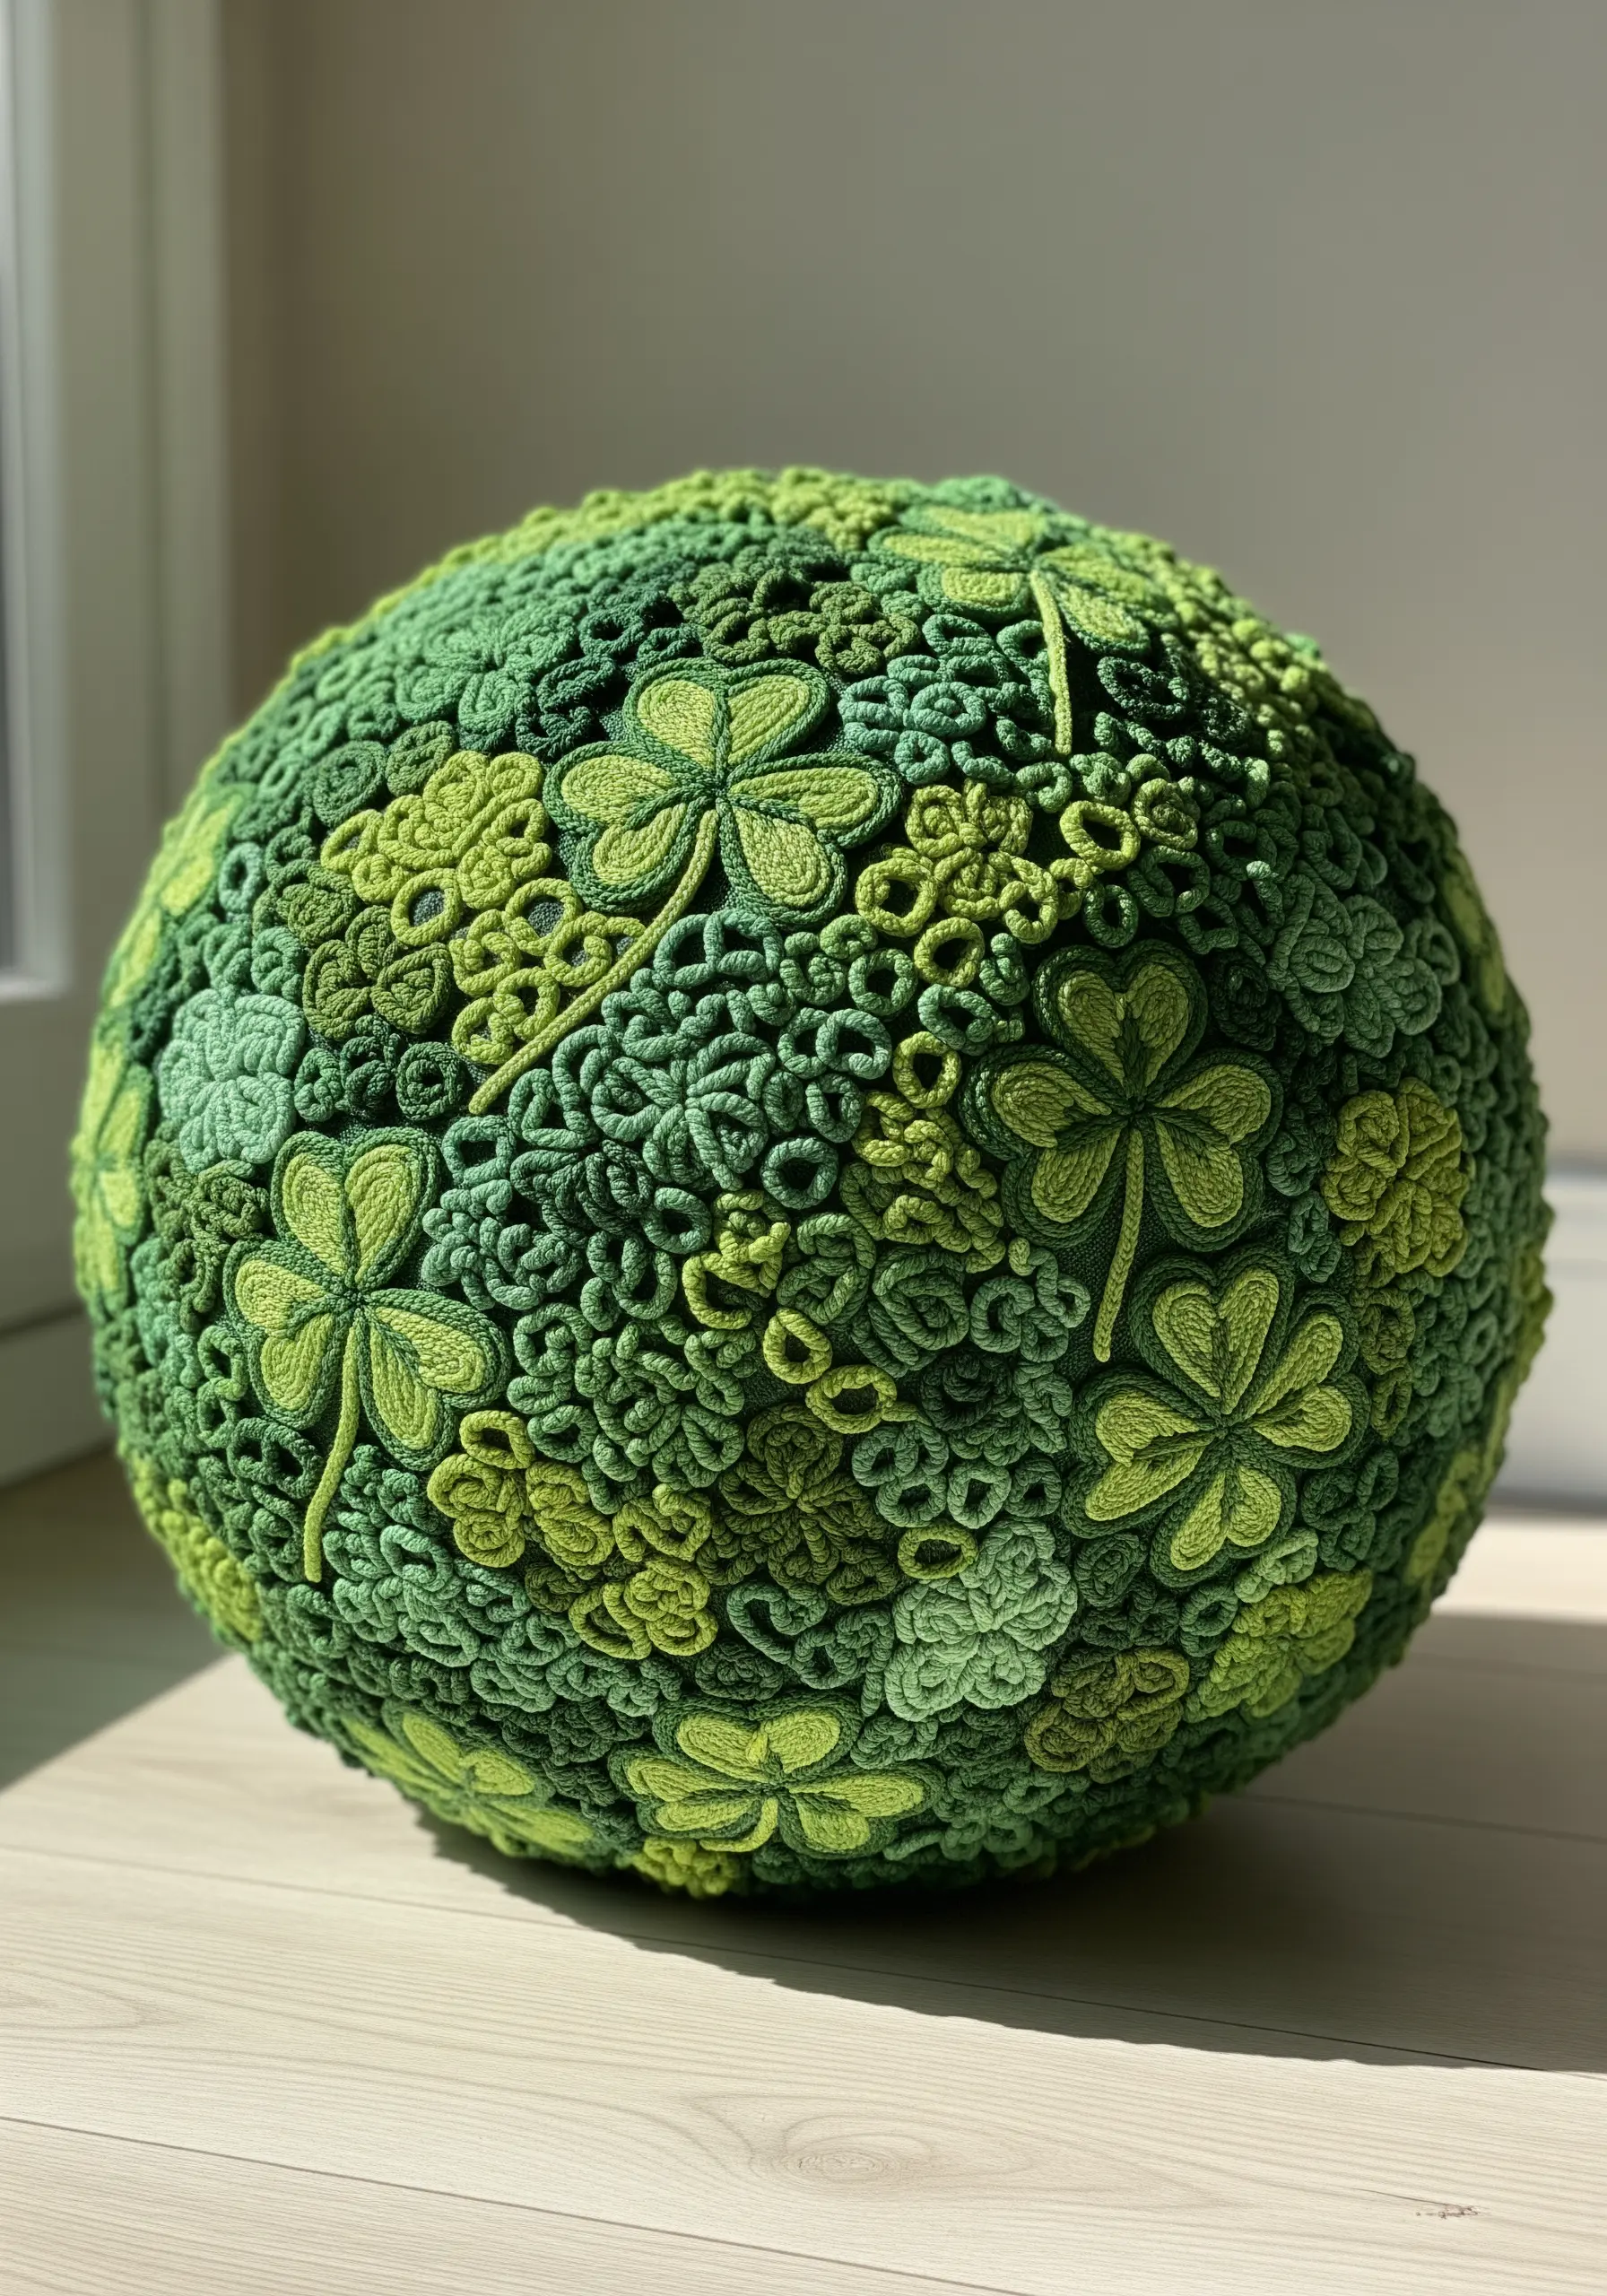
This spherical object, likely created with Irish crochet, offers a powerful lesson in layering for embroiderers.
To achieve a similar effect on a flat surface, you would create hundreds of tiny, individual motifs—like detached chain stitch clovers or small bullion knot flowers.
The key is to stitch them so densely that they overlap and build upon each other, creating a rich, three-dimensional tapestry of texture.
Using multiple shades of the same color, like the greens here, adds depth and prevents the complex pattern from looking flat.
33. Capture Ocean Spray with French Knots
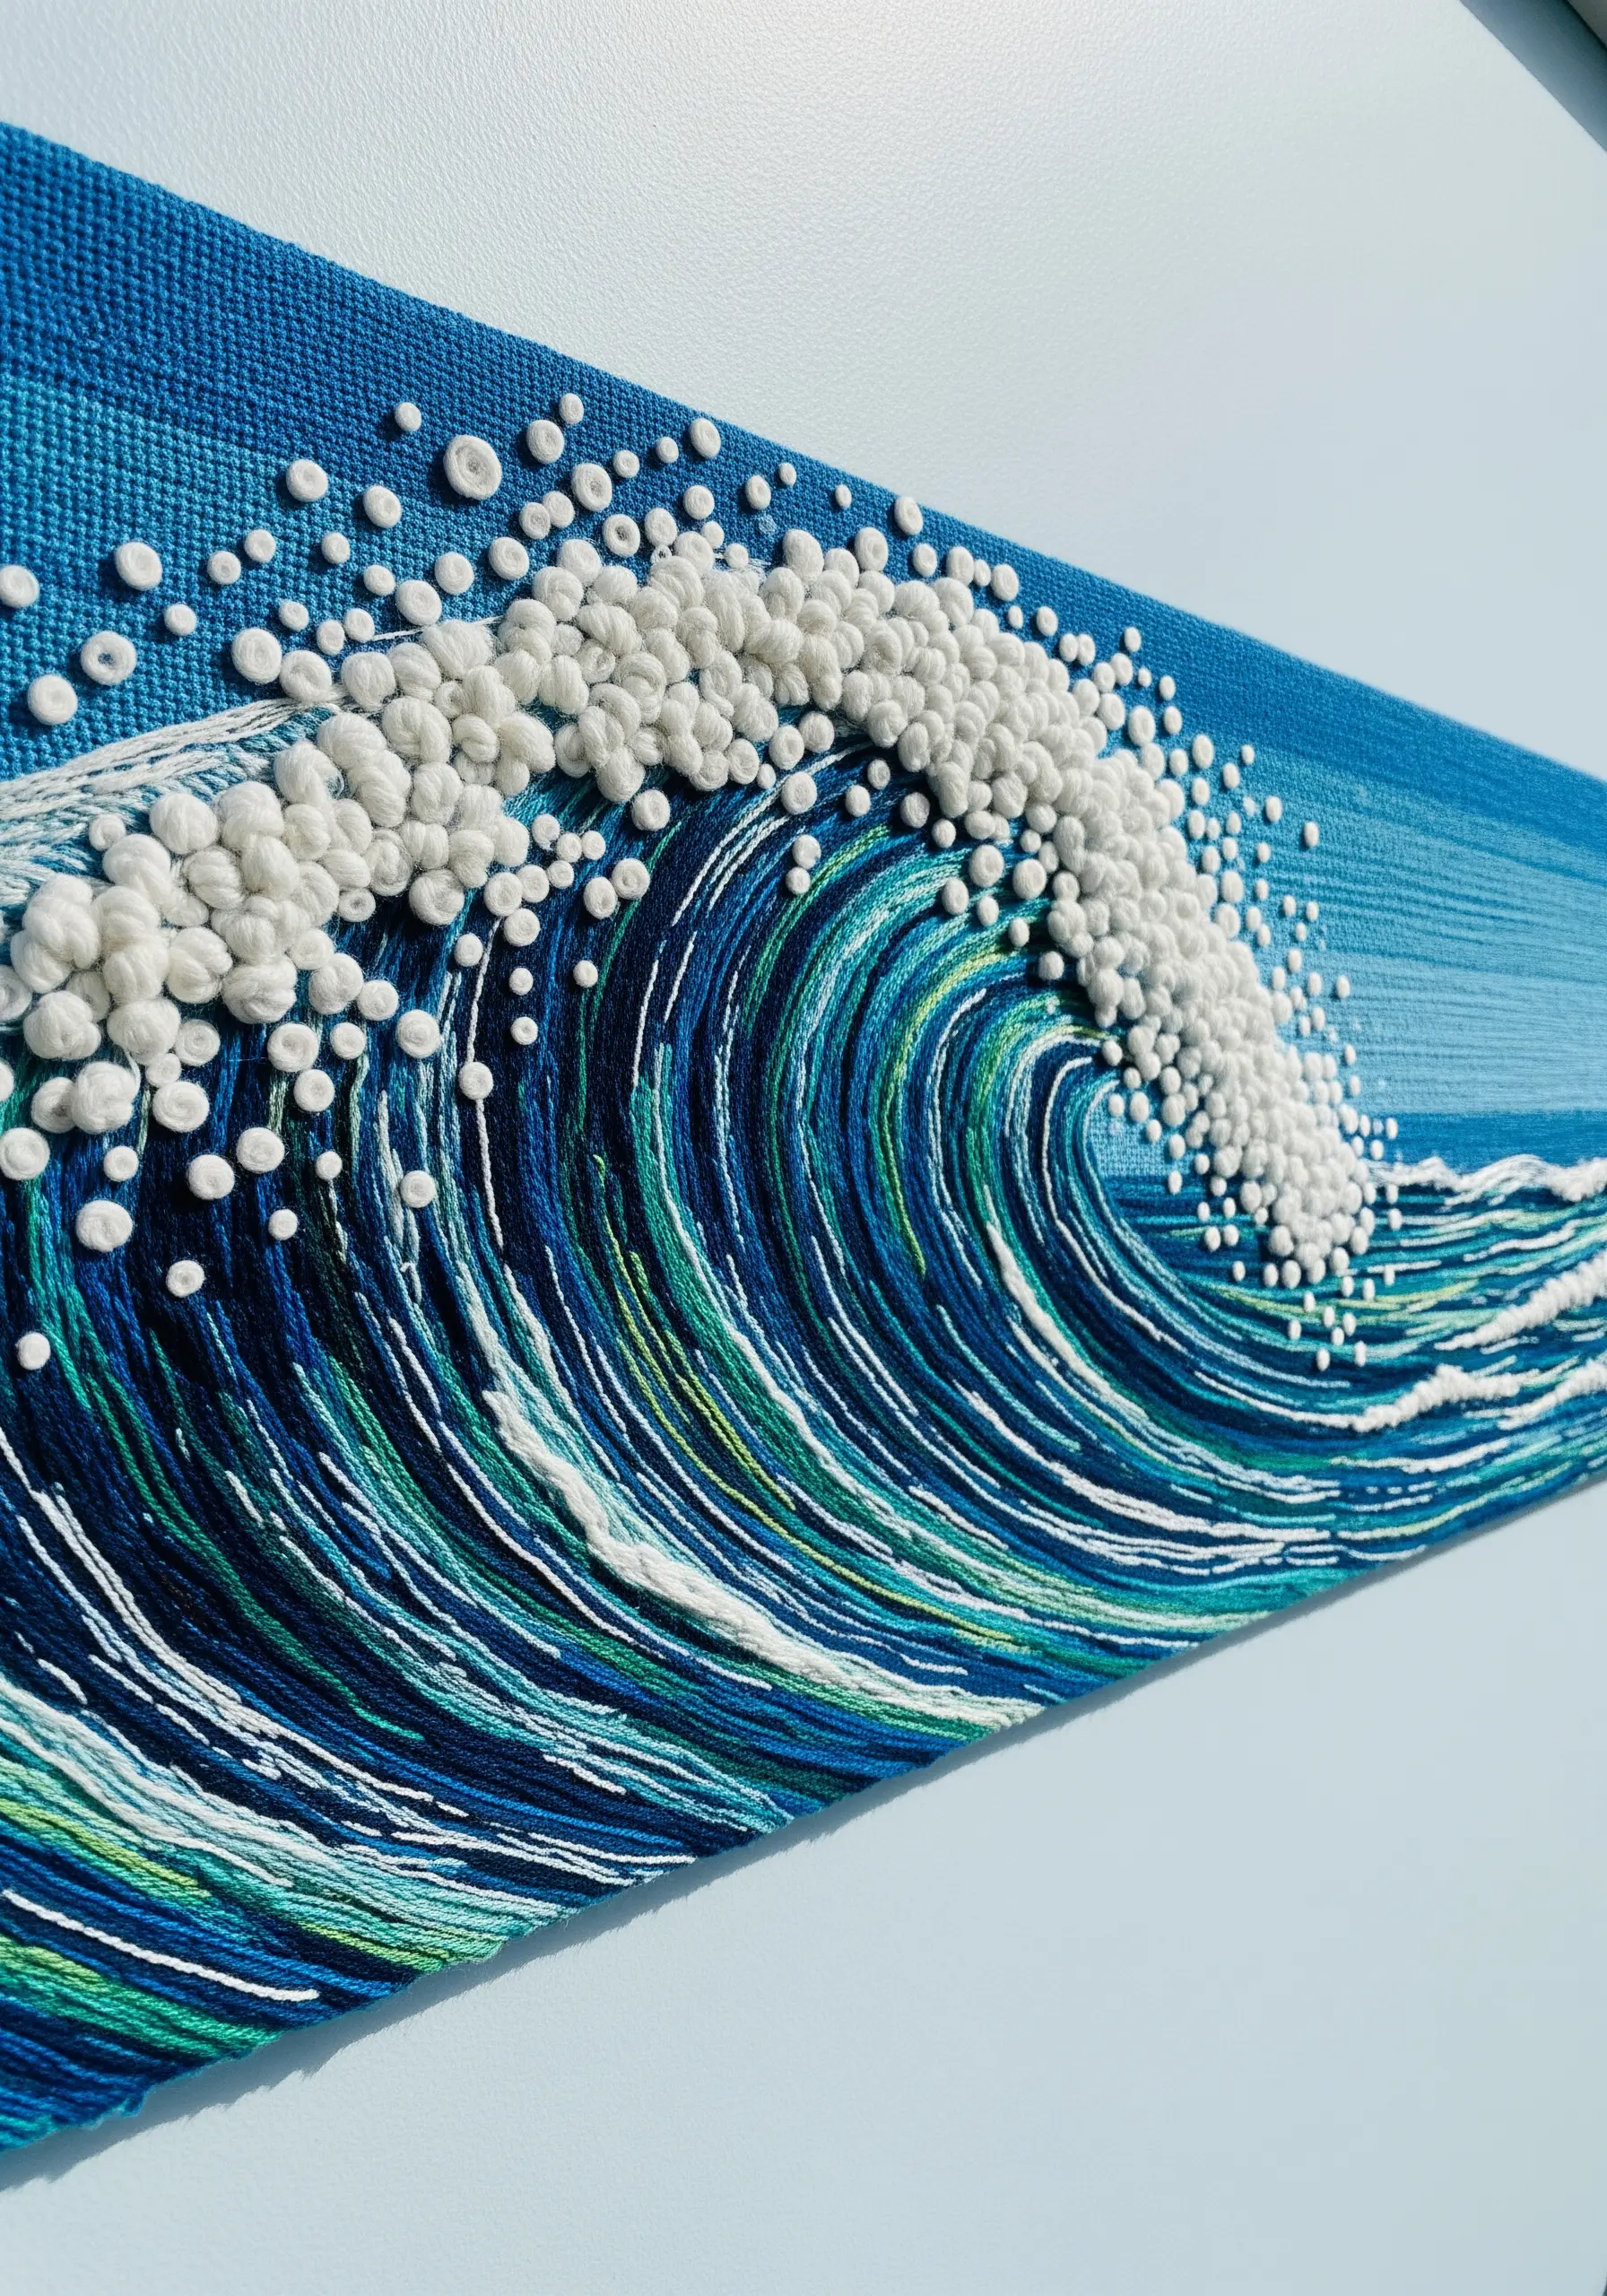
The key to a dynamic water scene is the contrast between smooth flow and chaotic spray.
Create the body of the wave with long, directional stitches—like split stitch or stem stitch—in shades of blue, green, and turquoise to show movement.
For the crashing crest, switch to a dense, chaotic cluster of white and off-white French knots.
Vary the size of the knots and let them spill over the edge of the wave to create the energetic, frothy texture of sea foam.
34. Sculpt a Lunar Surface with Coiled Thread
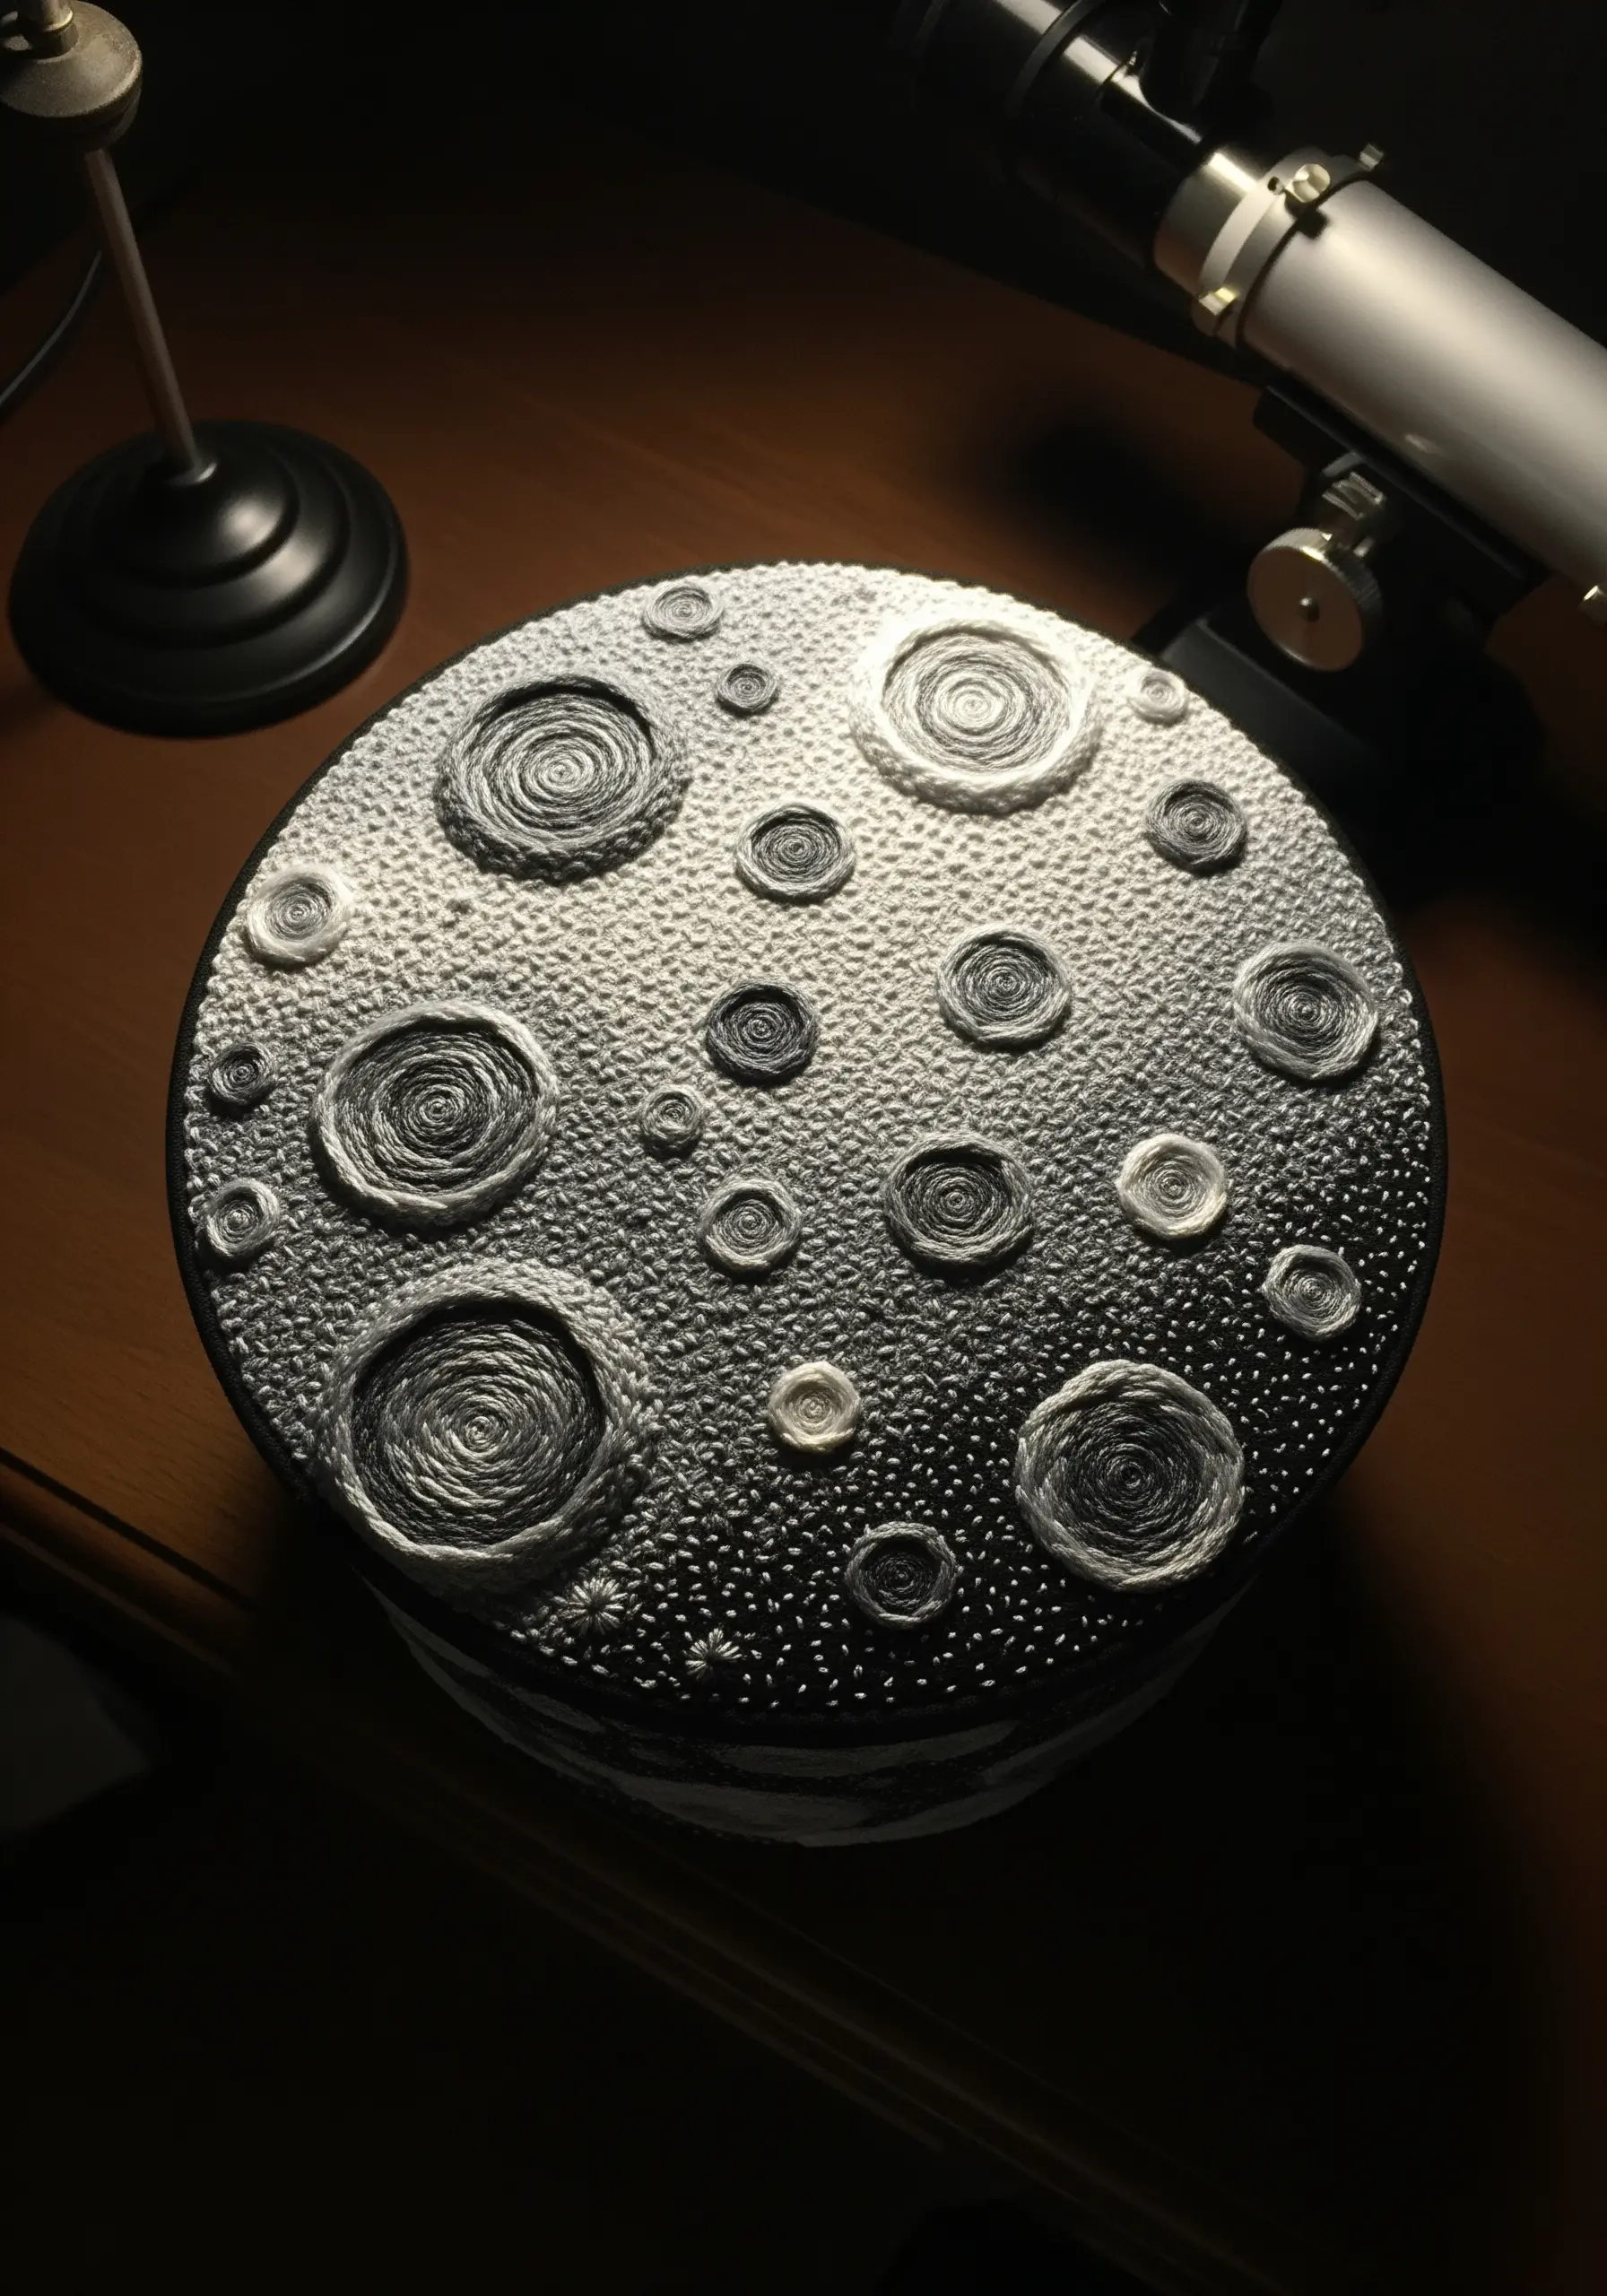
Recreate the cratered, pockmarked surface of the moon using couching and seed stitches.
For the larger craters, coil a thick cord or yarn into a circle and couch it down, then fill the inside with a spiral of satin stitch.
Fill the surrounding ‘lunar soil’ with thousands of tiny, randomly placed seed stitches or French knots in varying shades of gray, white, and silver.
This combination of smooth craters and rough terrain creates a wonderfully tactile and realistic lunar landscape.
35. Create Depth with Layered, Translucent Fabric

This stunning piece achieves its incredible depth by layering embroidered elements between sheets of organza or tulle.
First, stitch your individual leaf motifs onto a water-soluble stabilizer. Once dissolved, you’ll have freestanding embroidered leaves.
Then, arrange these leaves in rows and carefully stitch them between layers of sheer fabric within a frame.
This innovative display technique creates beautiful shadows and a sense of floating, suspended nature that is impossible to achieve on a single piece of fabric.


