

When you pick up a needle and thread, you’re doing more than just making something pretty. You are weaving calm and intention into the very fabric of your home, turning a simple bedroom into a sanctuary that feels deeply and truly yours.
But sometimes, there’s a gap between the vision in your mind and the piece in your hoop. You sense it could be more refined, more expressive, more *you*.
These ideas are here to bridge that gap. They are not just patterns, but invitations to explore technique—to understand how a simple shift in stitch direction can create depth, how contrasting textures can bring a design to life, and how the right thread can capture the light just so.
Let this be a quiet conversation between you and your craft, a way to build confidence stitch by stitch, and create a space that not only looks serene but feels it, too.
1. Create a Luminous Moon Wall Hanging
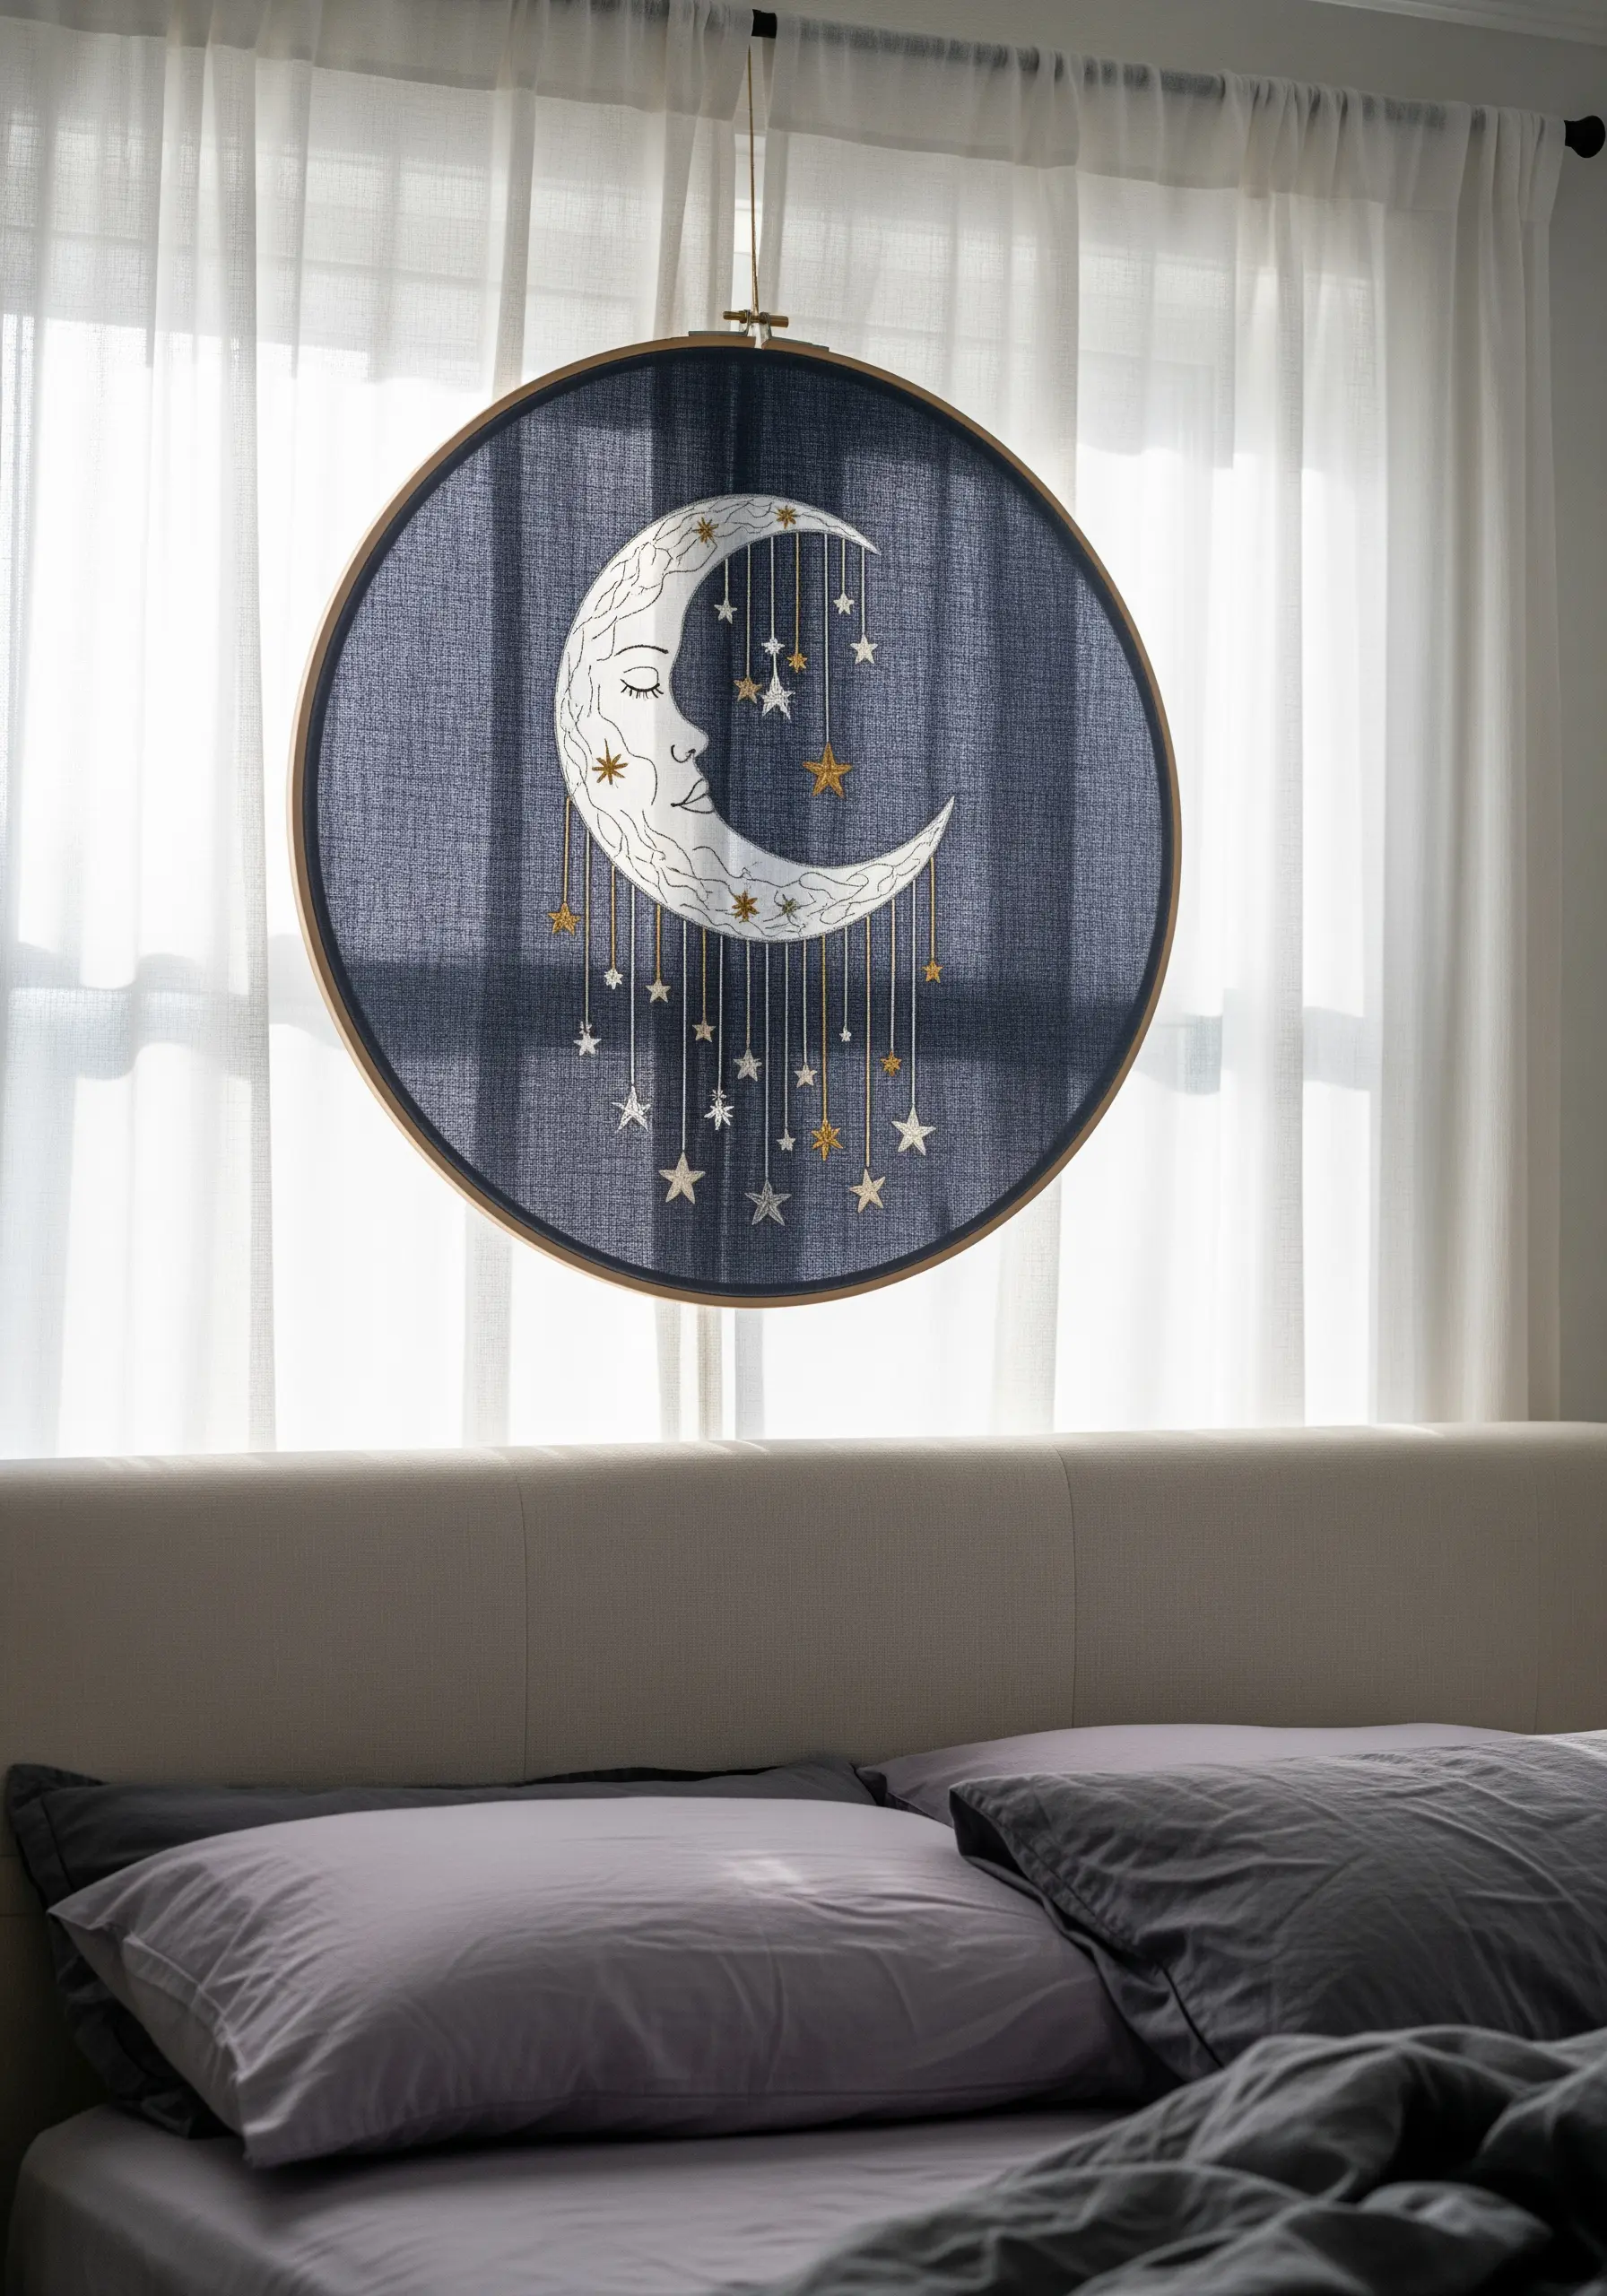
To capture this celestial glow, stitch your primary design on a dark, tightly woven linen—it makes metallic and white threads appear brighter.
Use a fine, single-strand silver metallic thread for the moon’s outline and details, but switch to a soft white cotton floss for the satin-stitched fill to create a gentle, matte luminosity.
For the dangling stars, secure the vertical threads to the back of the hoop with a dab of Fray Check before trimming; this prevents sagging and ensures they hang perfectly straight.
This combination of matte fill and metallic detail adds sophisticated depth, turning a simple hoop into one of many abstract metallic thread projects that truly sparkle.
2. Stitch a Wildflower Meadow Pillowcase

To achieve a natural, ‘untamed’ meadow look, you must vary the height and density of your stitches.
Use a simple straight stitch for the stems, but intentionally overlap them and stitch them at slight angles to avoid a rigid, uniform appearance.
Create flowers with lazy daisy stitches, French knots, and small satin-stitched buds, clustering them in some areas while leaving others sparse.
This technique of controlled randomness is how you can turn boring pillowcases into boutique home decor.
3. Add a Cozy Appliqué to Knit Throws

Stitching on a chunky knit requires stabilization to prevent the fabric from stretching or distorting your design.
Iron a cut-away stabilizer to the back of the knit area before you begin; it provides a solid foundation for your stitches.
Trace your fox motif onto felt, cut it out, and tack it onto the blanket. Then, use a bold chain stitch or split stitch to outline the shape, securing the appliqué and creating a clean, defined edge.
Fill the details with long-and-short stitch, which allows you to blend colors for realistic animal texturing.
4. Embroider a Precise Constellation Map

For a design that relies on precision, transfer your pattern using a water-soluble sticker paper—it ensures every star and line is perfectly placed.
Use a single strand of white or silver floss for the delicate connecting lines to achieve a crisp, technical look that mimics a star chart.
Stitch the stars themselves with a single French knot or a small star stitch for consistency.
The high contrast on dark fabric elevates these minimal sky moon designs from simple motifs to elegant statements.
5. Embellish Sheer Curtains with Climbing Vines

To embroider on delicate, sheer fabric without puckering, use a lightweight tear-away stabilizer on the back and a fine, sharp needle (size 9 or 10).
A whipped backstitch is perfect for the vines, as it creates a smooth, solid line that glides over the fabric’s weave without pulling it.
Keep your thread tension slightly looser than you normally would to maintain the curtain’s natural drape.
This technique is ideal for creating elegant botanical border designs that feel weightless.
6. Design a Lampshade with a Hidden Glow
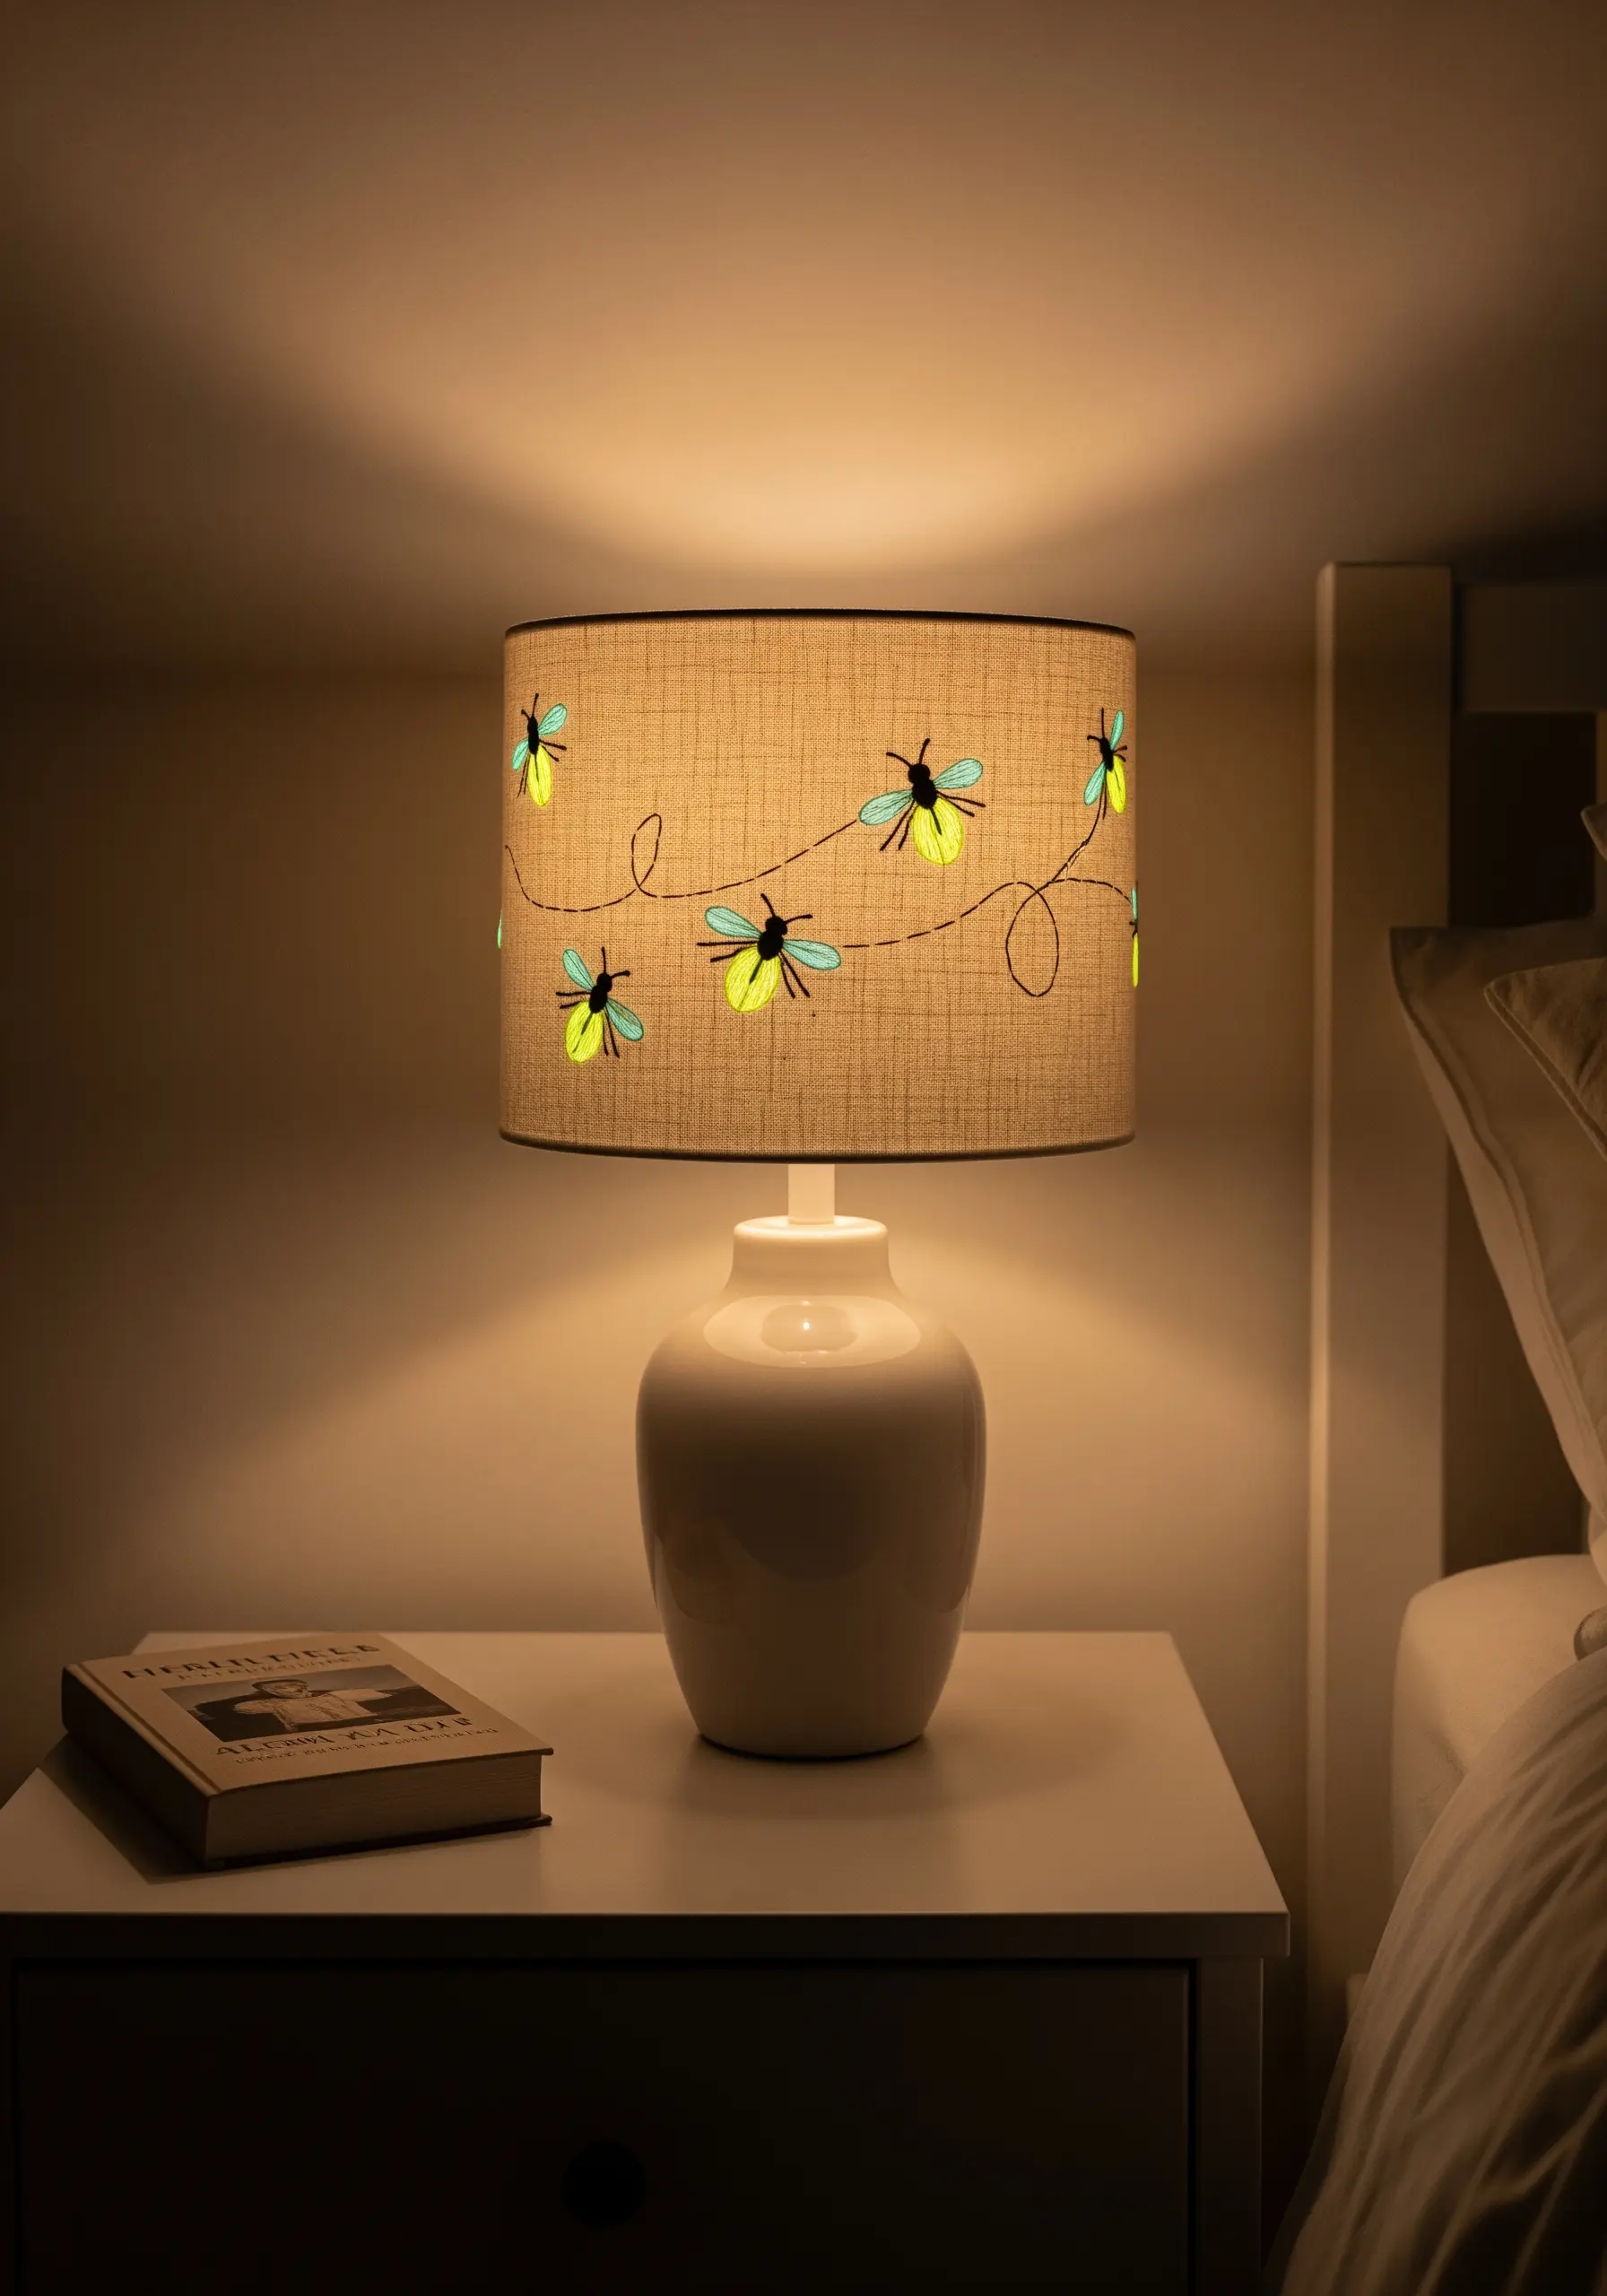
Incorporate glow-in-the-dark thread to add a magical, whimsical element to a bedside lamp.
This specialty thread can be slightly stiff, so use shorter stitches and a needle with a larger eye to prevent fraying and ensure smooth passage through the fabric.
Stitch your design onto the lampshade fabric panel while it is still flat, before it’s attached to the rings, for much easier handling.
This thoughtful detail turns everyday items into unique handmade objects.
7. Create a Scenic Headboard Tapestry

For a project of this scale, thread painting creates a stunning, painterly effect that transforms furniture into art.
Work in sections, mapping out your color zones for the rolling hills first. Use a long-and-short stitch, angling your stitches to follow the curves of the landscape to create a sense of movement and depth.
The clouds can be rendered with dense clusters of French knots in white and pale gray for a soft, fluffy texture.
This is one of those large-scale embroidery tapestries that becomes the centerpiece of a room.
8. Capture Delicate Movement on a Satin Pillow

The key to this design’s elegance is the contrast between the solid dandelion head and the weightless, drifting seeds.
Use a single strand of floss for the seed parachutes, stitching them with just a few straight stitches to give them a barely-there, ethereal quality.
For the stem, use a padded satin stitch—a foundation of straight stitches underneath—to give it a raised, dimensional look that stands out against the sleek fabric.
These subtle textural shifts can transform a minimalist sofa into a cozy haven.
9. Stitch a Geometric Origami Flock
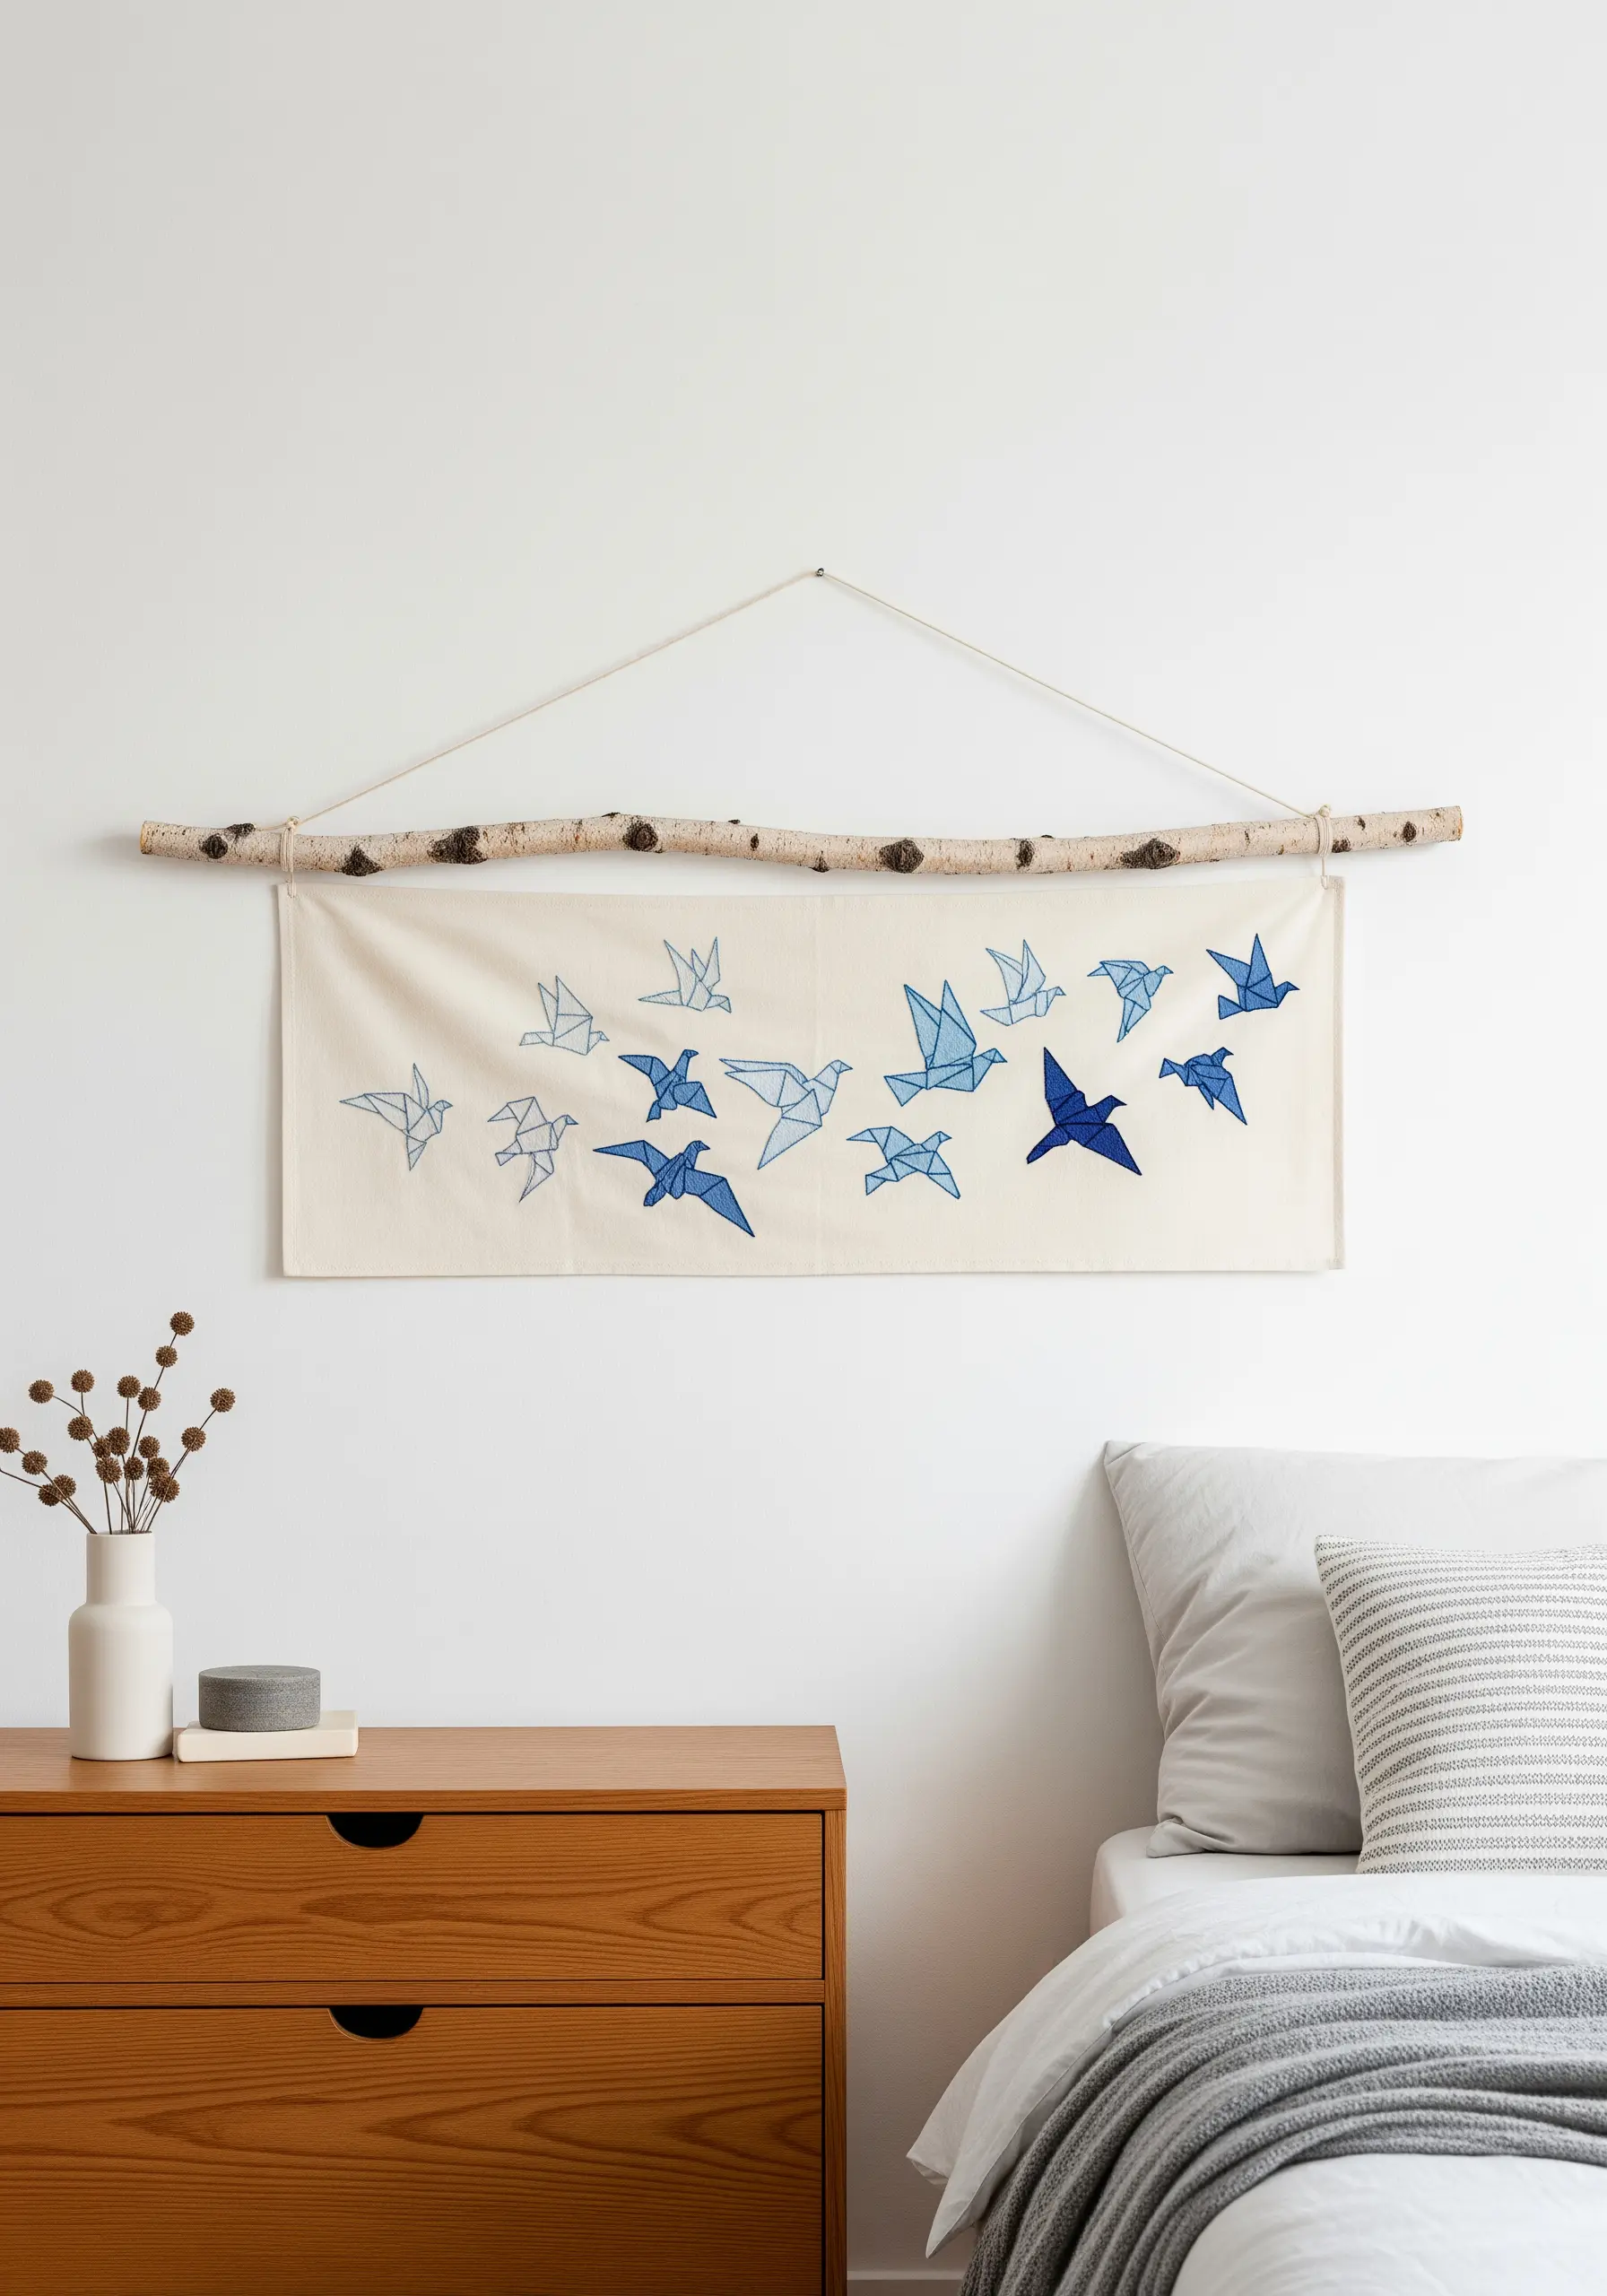
To achieve the crisp, clean lines of folded paper, outline each shape with a two-stranded split stitch. This creates a sharp, indivisible line that defines the geometric forms.
Fill the shapes with a directional satin stitch, keeping all your stitches parallel. This enhances the flat, planar effect of origami.
Arrange the birds in a gentle arc and use a gradient of thread colors to create a beautiful sense of flow and movement across the canvas.
Displaying it on a birch branch completes a piece worthy of a collection of embroidered textile wall hangings.
10. Craft a Statement Tree of Life

In a dense, complex piece, varied texture is essential to prevent the design from looking flat.
Use a thick, whipped backstitch or chain stitch for the tree trunk and branches to give them a solid, corded appearance.
For the lush canopy of leaves, fill the space with a dense sea of French knots in multiple shades of green. This creates a rich, tactile surface that contrasts beautifully with the smoother trunk and flowers.
This technique is perfect for oversized hoop wall displays that command attention.
11. Blend Thread with a Watercolor Wash

Combine painting and stitching for a soft, ethereal effect that feels both artistic and delicate.
First, apply light washes of fabric paint or watercolor to your fabric and allow it to dry completely. This creates a soft color base for your work.
Then, use a simple, fine backstitch in a slightly darker thread to outline the floral shapes. The thread adds definition without overpowering the gentle color bleeds.
These watercolor-style embroidery patterns create a serene and dreamy atmosphere.
12. Craft a Plush, Three-Dimensional Moon Cushion
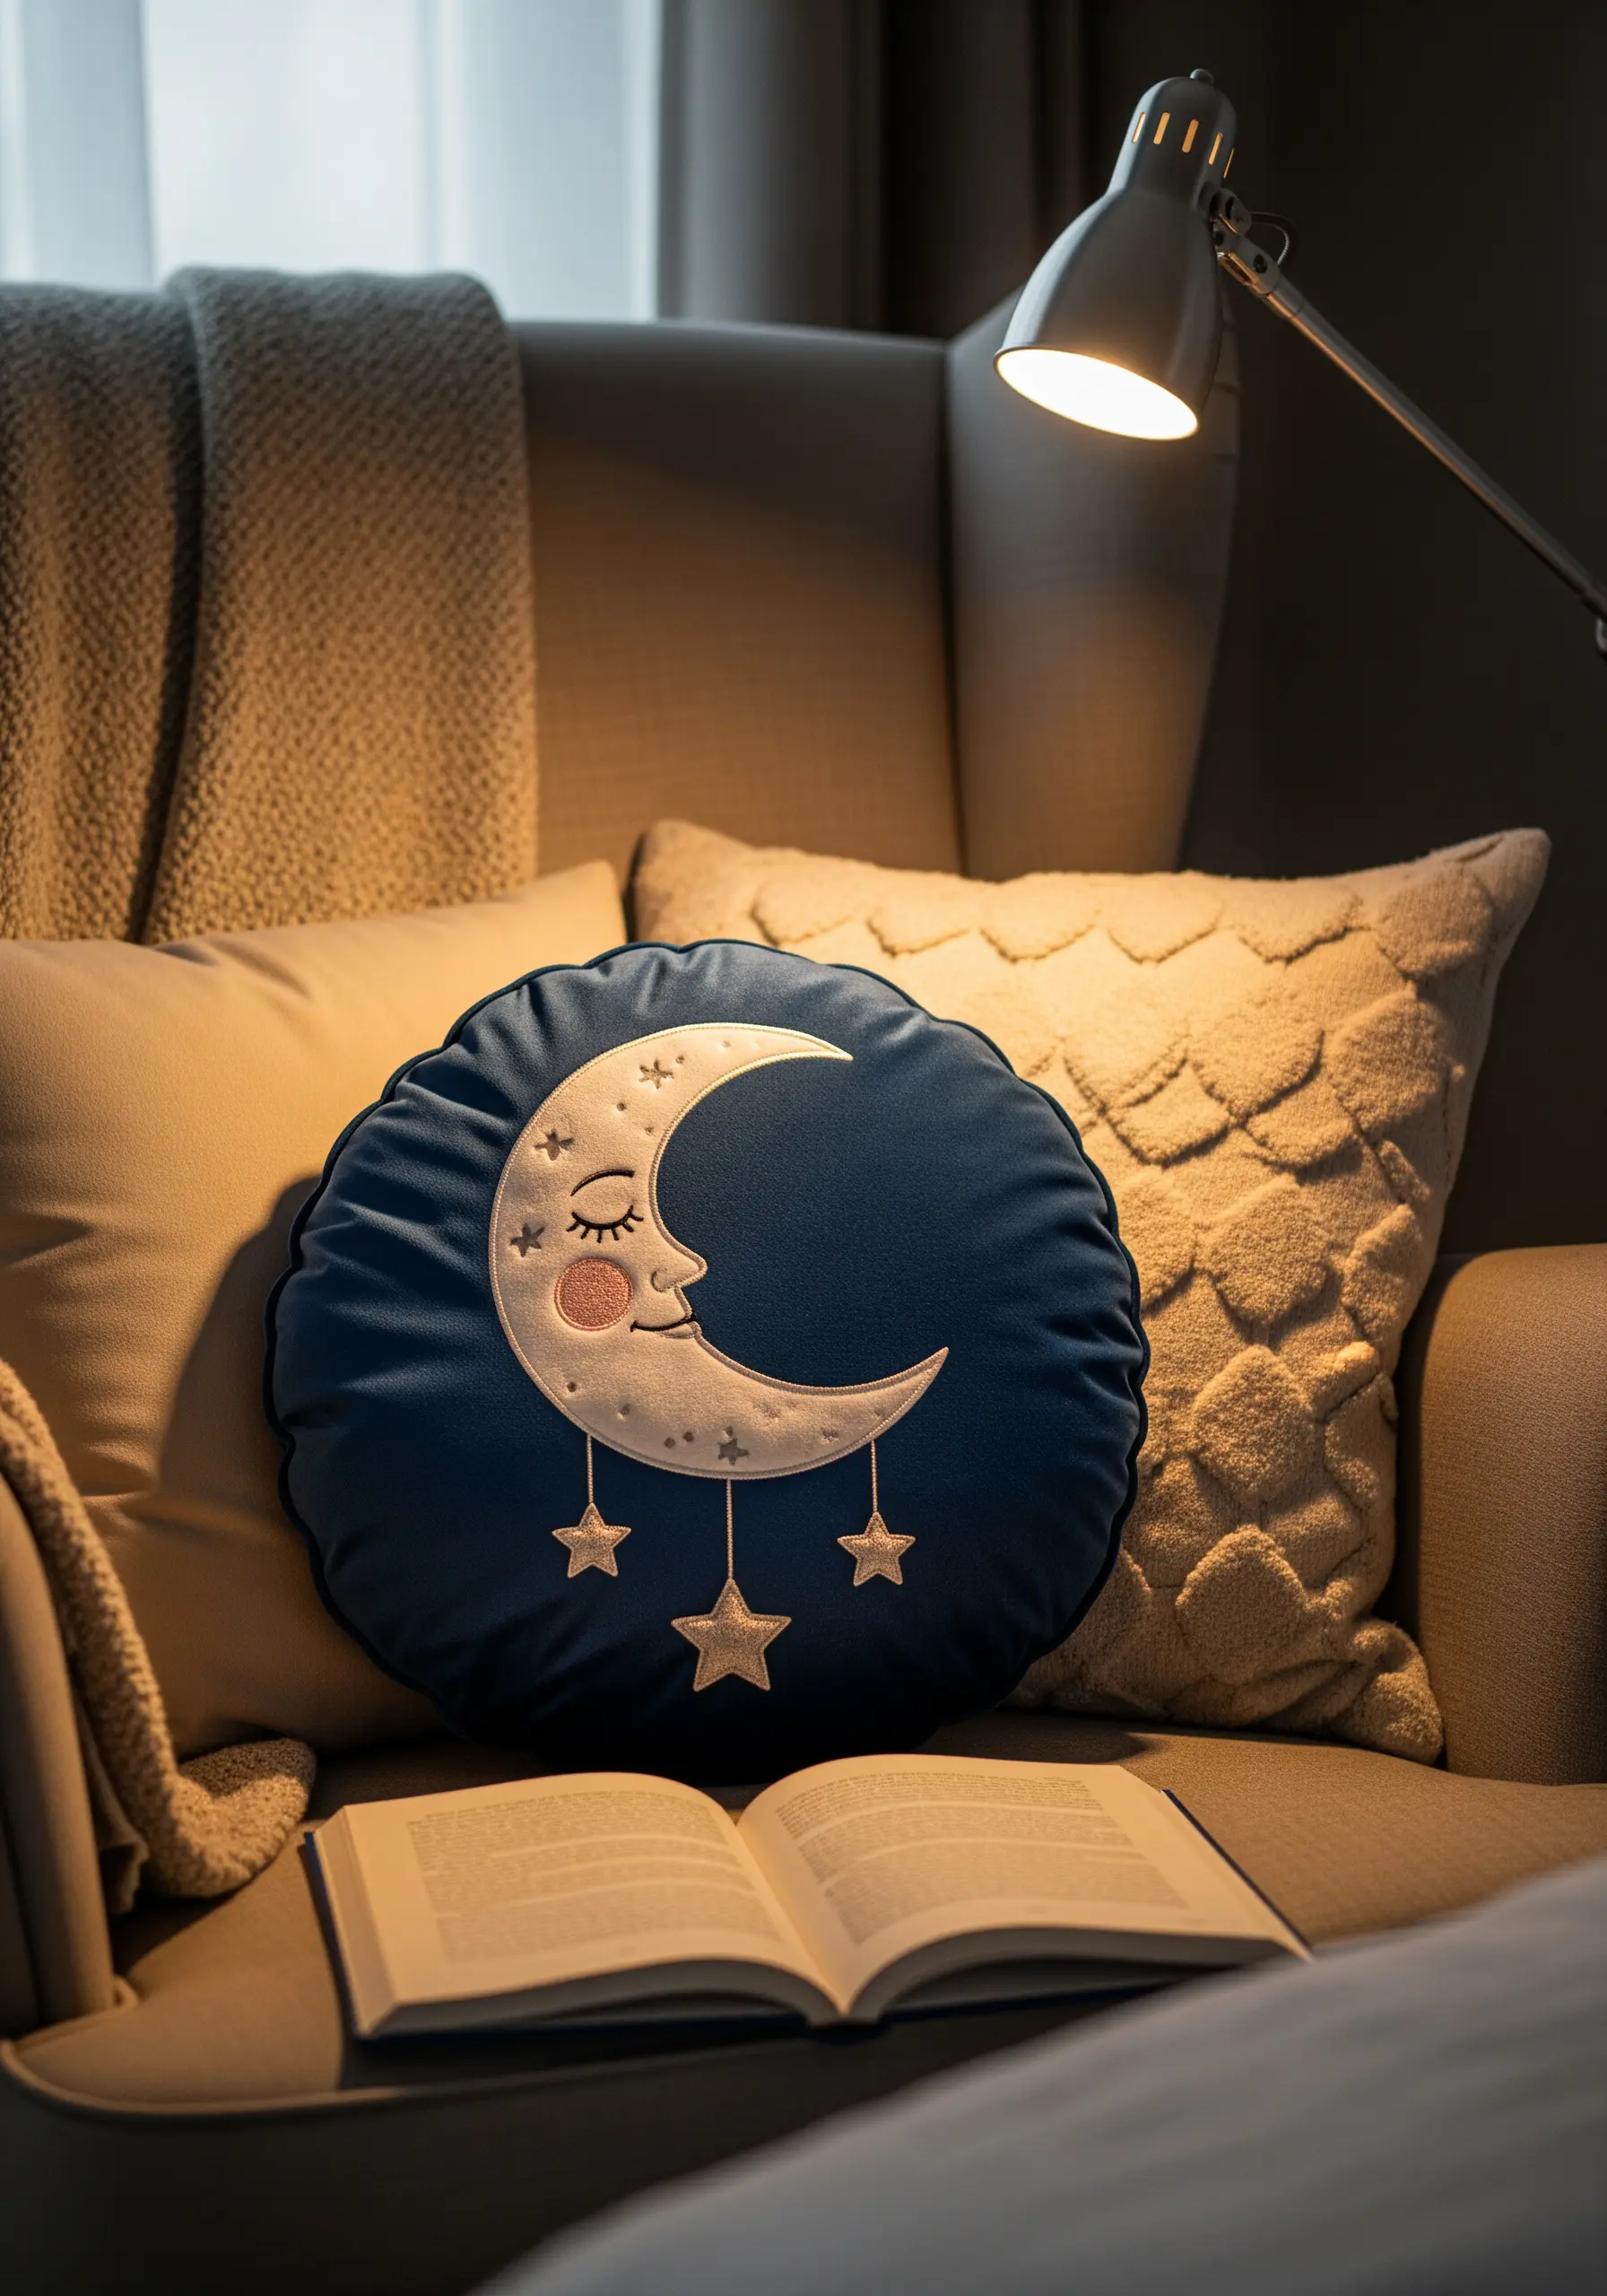
To make your embroidery stand out on a plush, velvety fabric, choose stitches that create their own dimension.
Use a dense, tightly packed satin stitch for the moon’s body, which will create a smooth, raised surface that catches the light.
For the rosy cheek, just a few scattered seed stitches in a soft pink are more effective than a solid fill, suggesting color without adding bulk.
This thoughtful approach makes for beautiful subtle pastel embroidery cushion designs.
13. Illustrate a Woodland Mushroom Runner
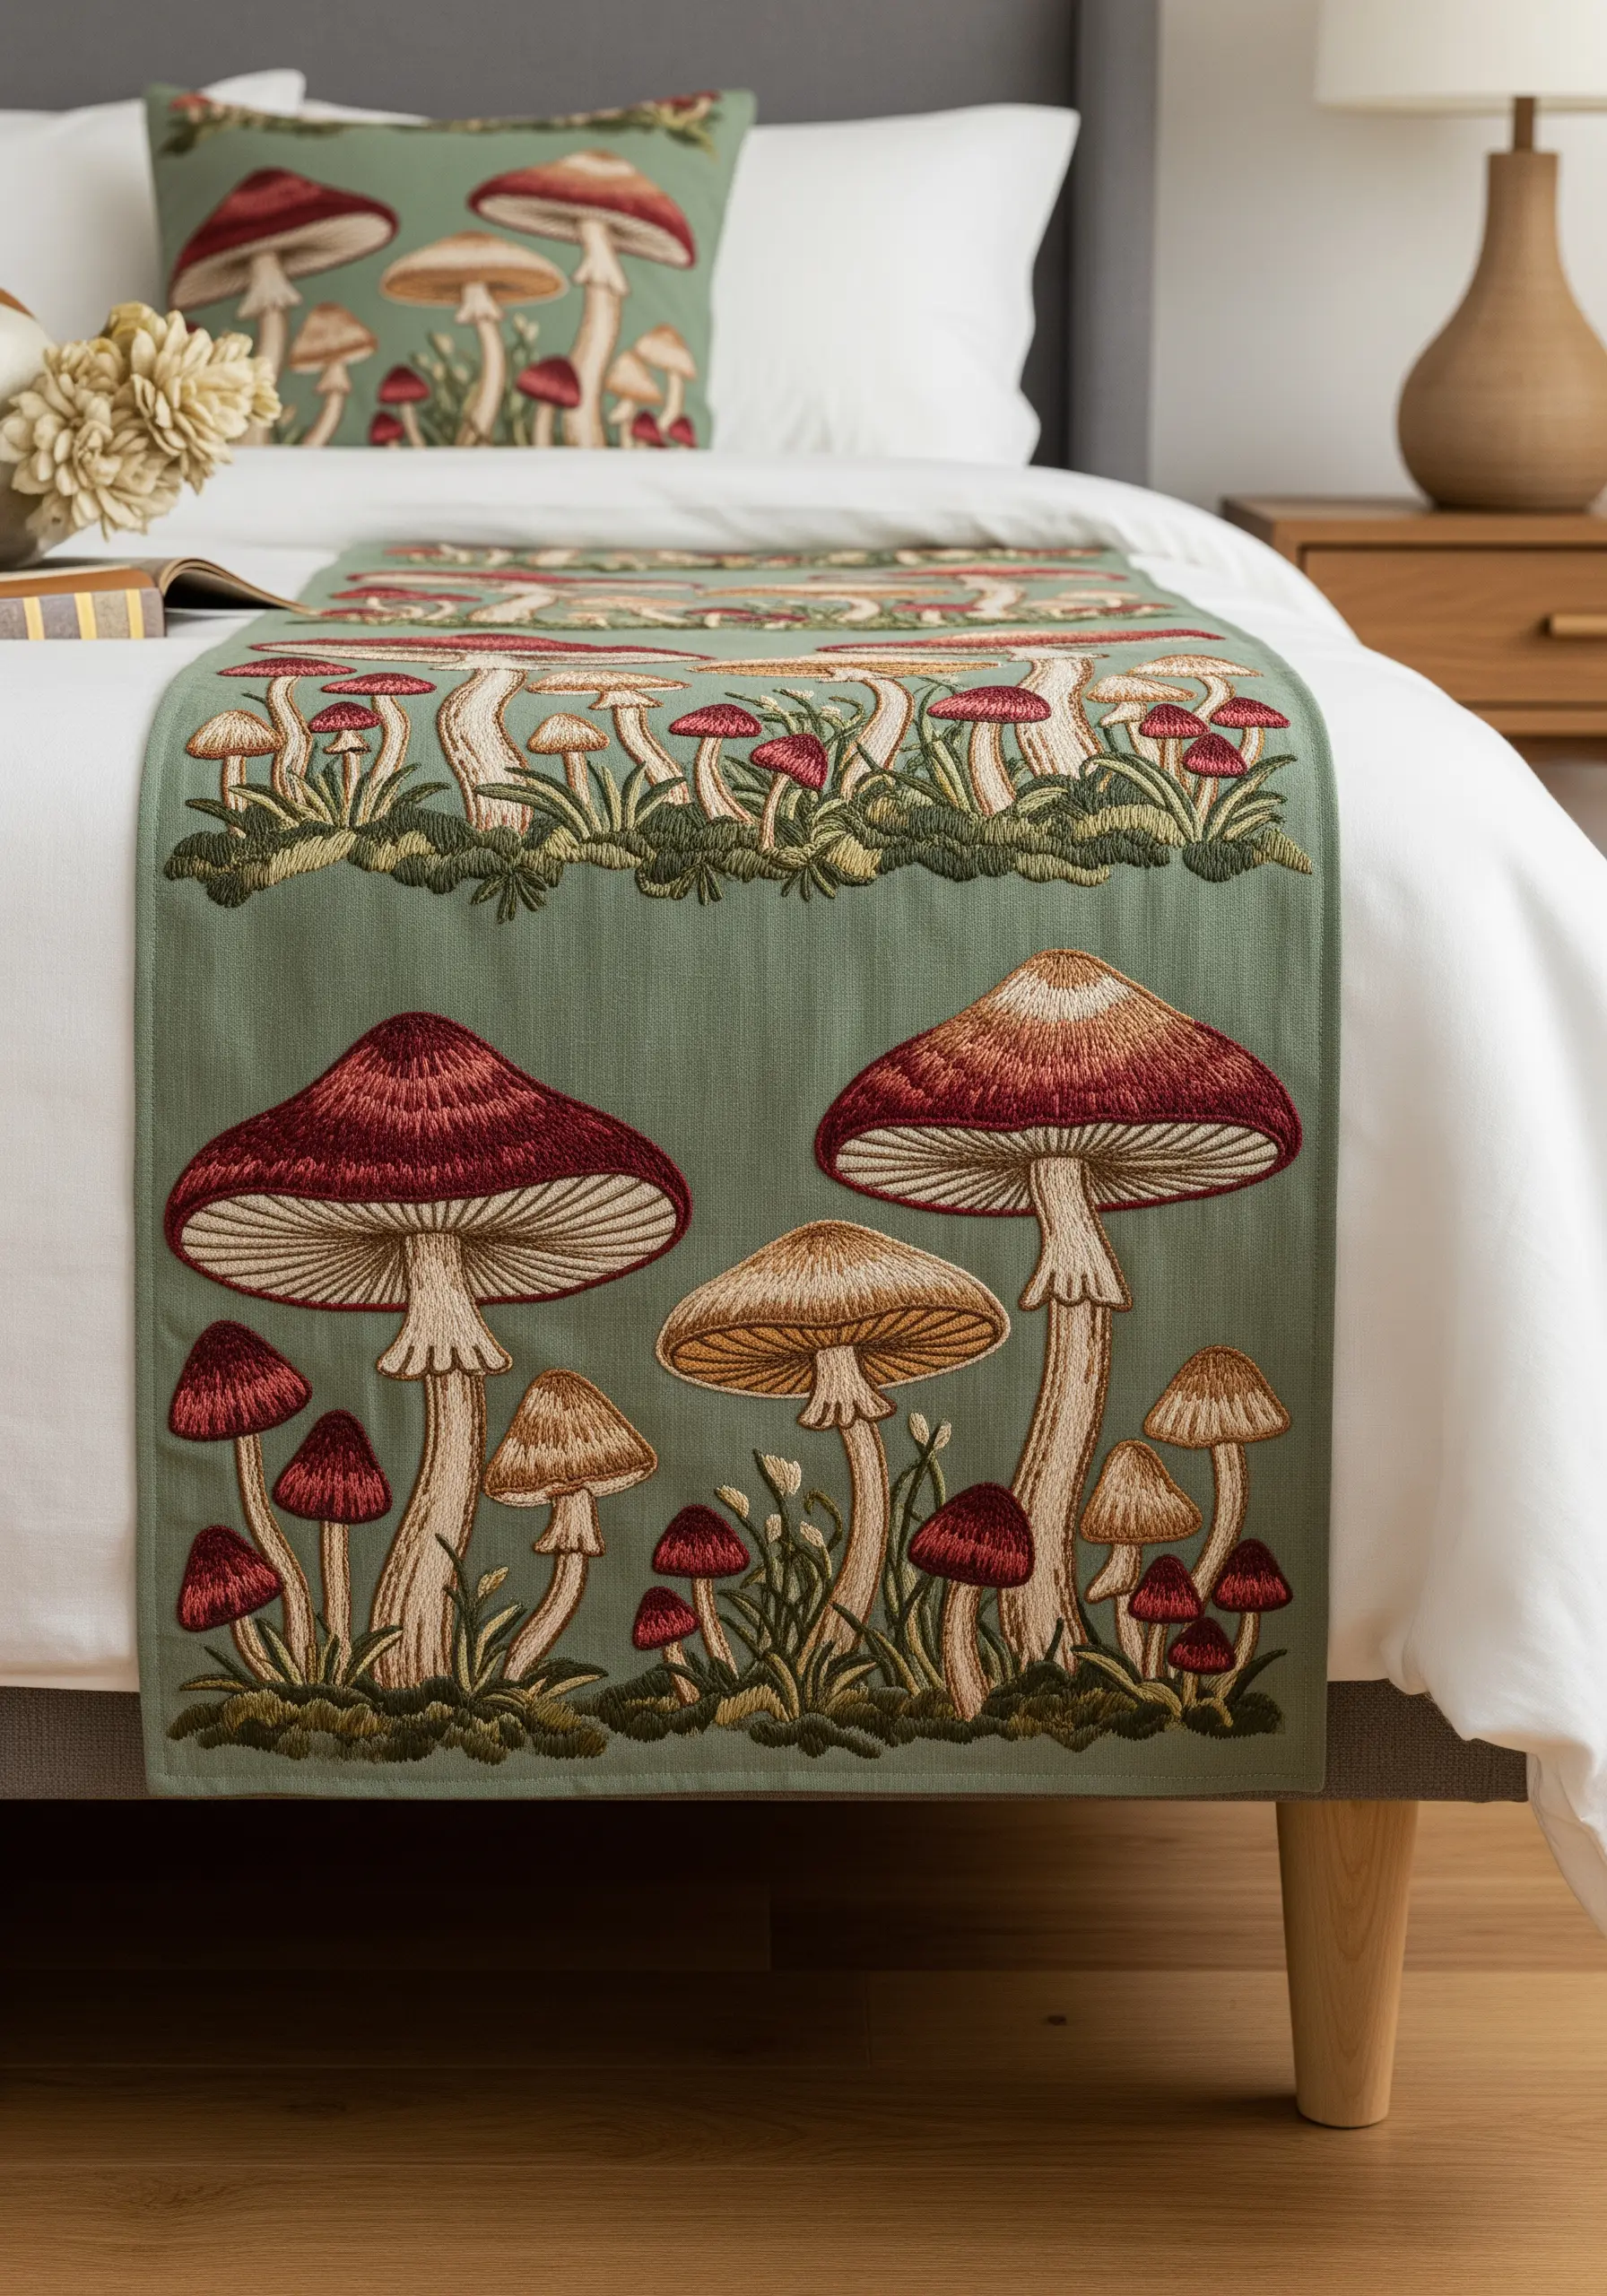
Mastering the look of realistic mushroom caps is all about directional stitching.
Use a long-and-short stitch, but instead of uniform rows, angle your stitches to radiate outward from the center of the cap. This simple shift in direction immediately creates a rounded, three-dimensional appearance.
Layer progressively darker shades of thread as you move away from the light source to build convincing shadows and depth.
It is one of the most effective ways to capture nature’s textures in your work.
14. Define a Minimalist Mountainscape on Bedding

When a design is this minimal, the quality of the line is everything.
Instead of a standard backstitch, which can look disjointed, use a stem stitch or a whipped backstitch. Both create a continuous, flowing line that gives the mountain range a more graceful and intentional quality.
Choose a thread with a slight sheen, like a pearl cotton, to make the simple line feel more luxurious and defined against the matte cotton bedding.
This elevates simple minimalist line art embroidery patterns into something special.
15. Add Vibrant Motifs to Terrycloth Towels

The biggest challenge with towels is the looped pile, which can swallow your stitches.
To solve this, place a sheet of water-soluble stabilizer (a topper) over the towel before hooping. You will stitch through the fabric and the topper.
The stabilizer creates a smooth surface, ensuring your stitches sit neatly on top of the loops rather than sinking into them.
When you’re finished, it rinses away with water, leaving a crisp, professional design like these tiny hummingbird embroidery ideas.
16. Scatter a Starfield Across a Muslin Quilt
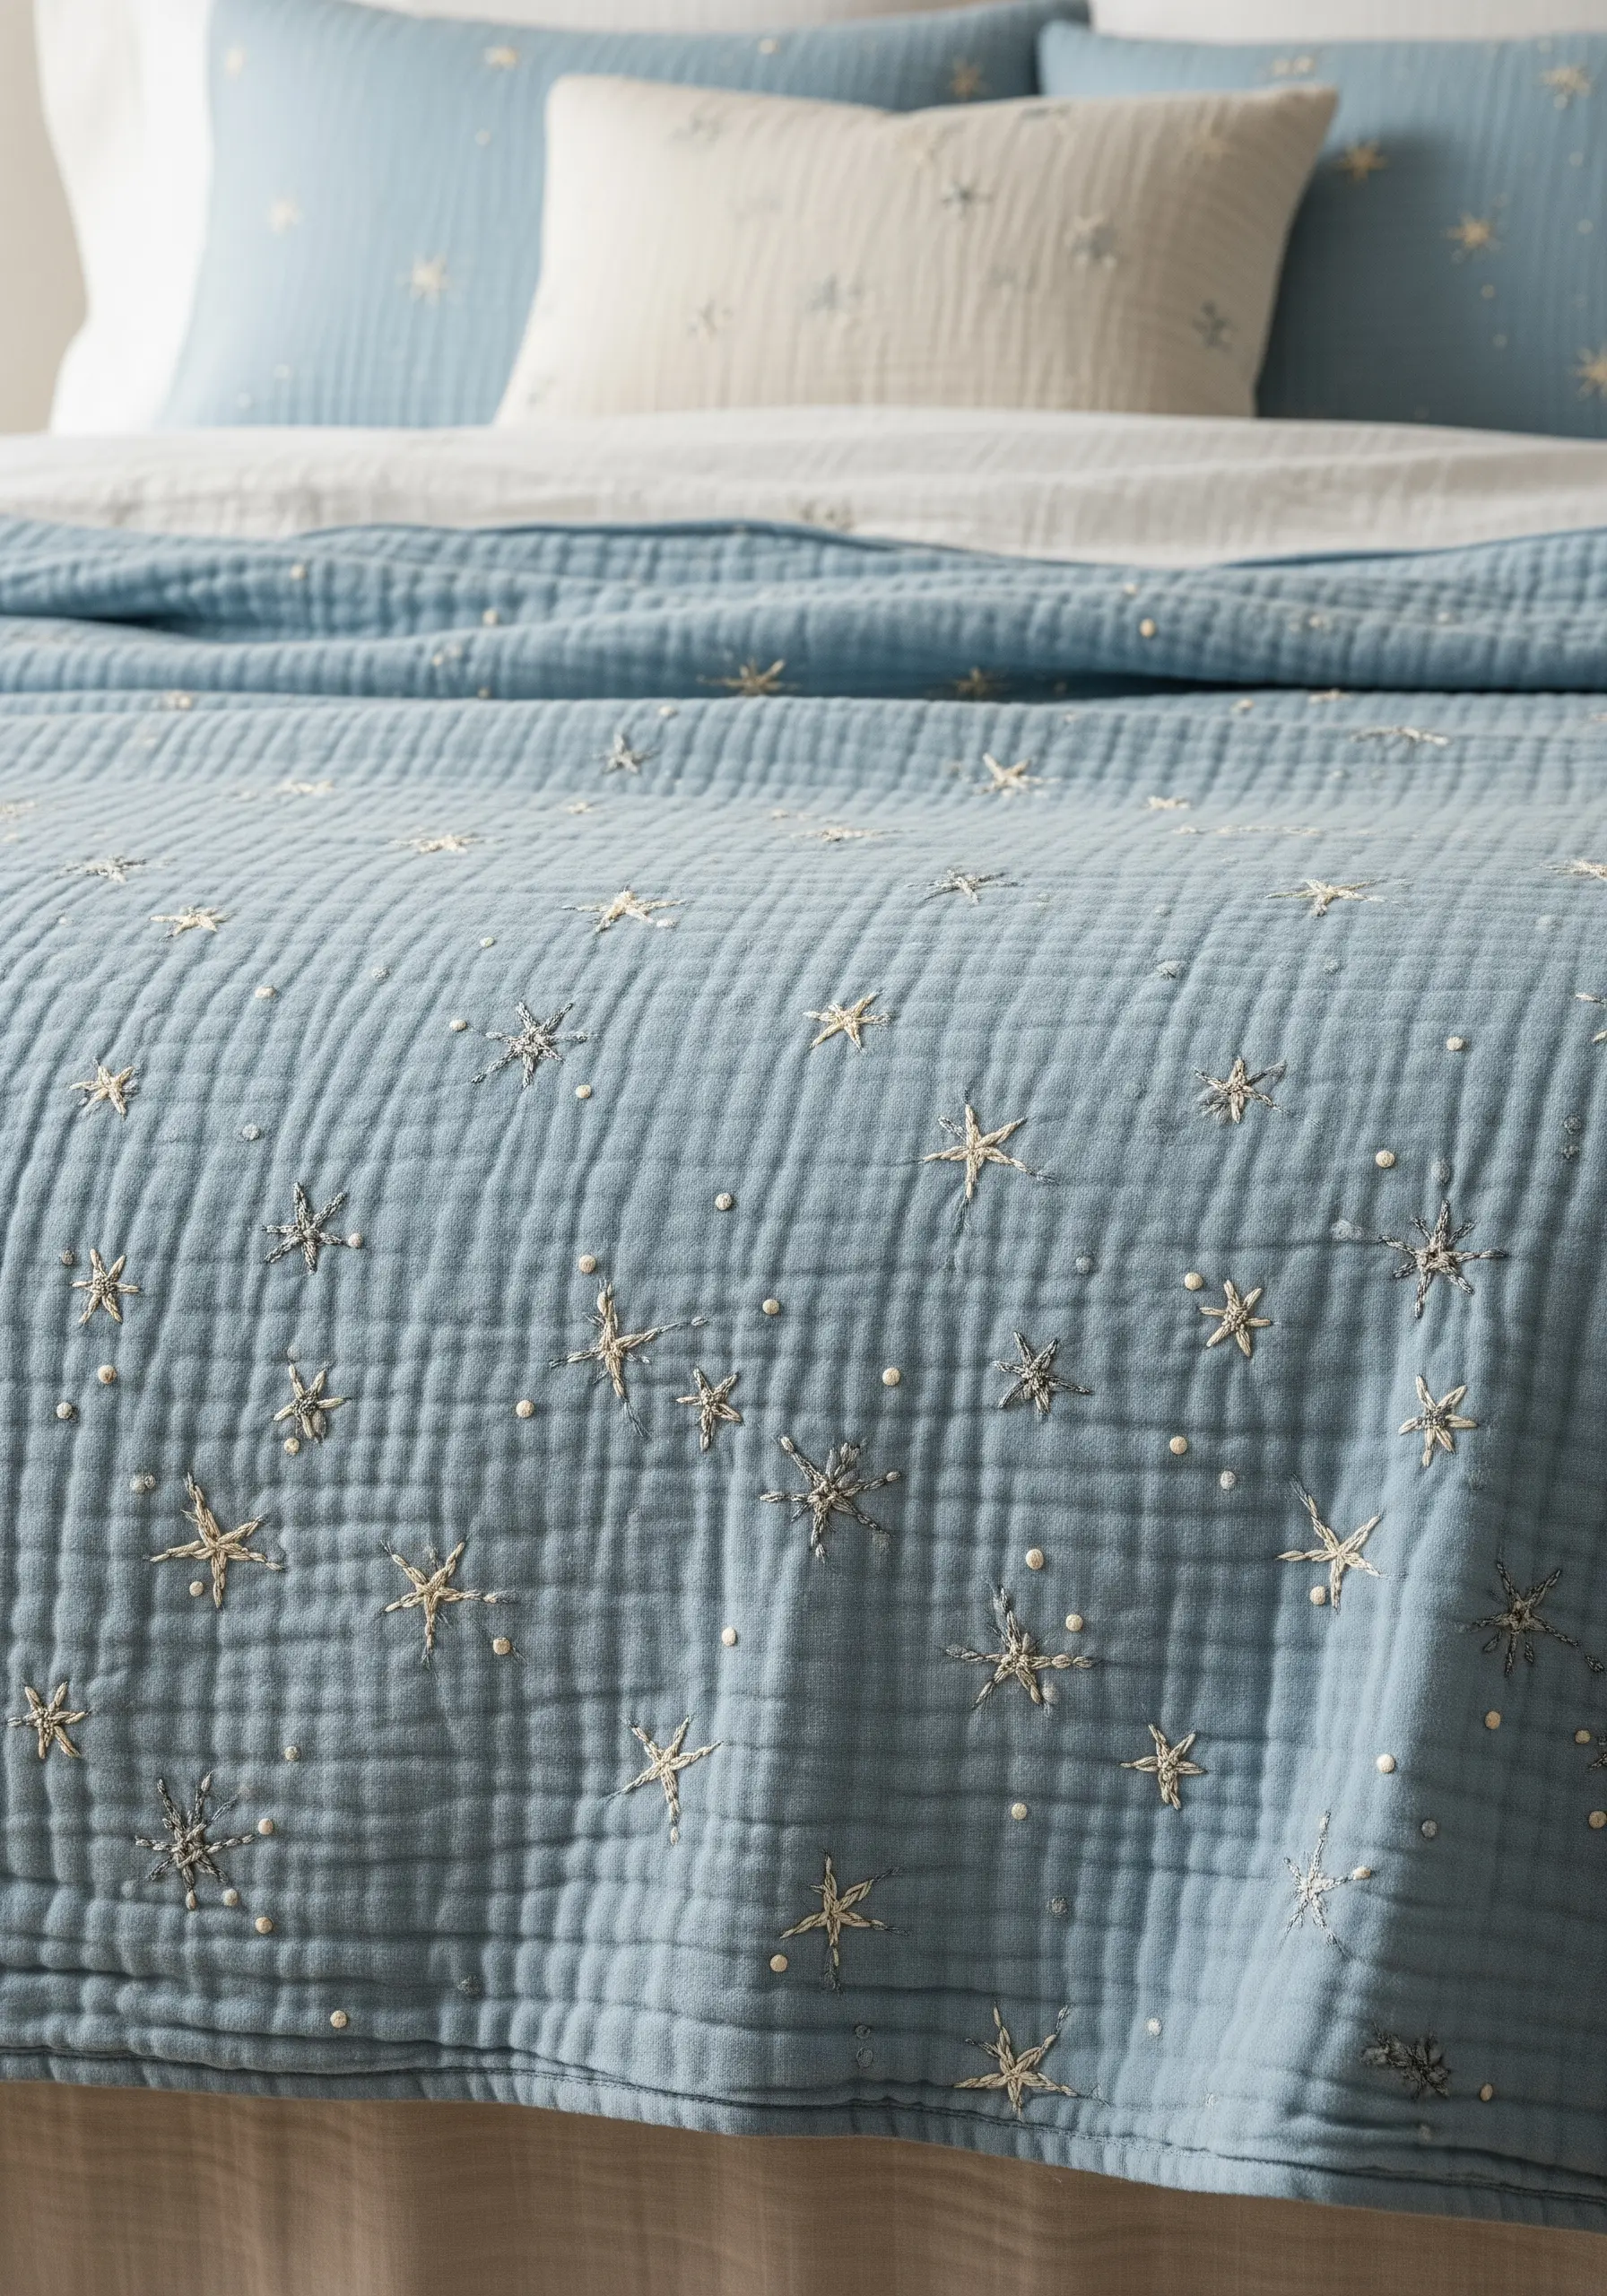
When embroidering on a soft, textured fabric like double gauze or muslin, your stitch choice should complement the fabric, not fight it.
Simple, open stitches like star stitches are ideal because they don’t require high tension and won’t cause the delicate fabric to pucker.
Use a slightly heavier thread, such as a pearl cotton in size 8, to ensure your embroidery stands out against the crinkled texture.
This is perfect for adding subtle heart star motifs to cozy textiles.
17. Paint a Forest Scene with Thread

For a full-coverage, tapestry-style piece, think of your thread like paint and your needle like a brush.
This entire scene is built with vertical straight stitches, tightly packed together. By varying the color of the thread from stitch to stitch, you can achieve a pointillist effect that creates soft blends and gradients, especially in the sunlit path and sky.
This technique is time-consuming but results in incredible depth and texture, perfect for embroidery ideas inspired by national parks.
18. Create Puffy Clouds and Raindrops

Achieve a fluffy, 3D cloud texture using the turkey stitch. This technique creates loops on the surface of the fabric, which you can then trim to your desired height to create a soft, plush pile.
For extra puffiness, pack your turkey stitches closely together and use a chunky wool or tapestry thread.
The dangling raindrops are made from thread wrapped tightly around a core, creating a smooth teardrop shape that adds a playful, kinetic element to your design.
These are perfect for nursery-friendly string art balloon cloud designs.
19. Define Iridescent Moth Wings

The magic of this design lies in its perfect symmetry and smooth color blending. For flawless outlines, use a fine, single strand of metallic gold thread in a split stitch.
Fill the wing sections using the long-and-short stitch, which allows you to seamlessly blend multiple colors and create an iridescent effect.
Stitching on black fabric provides the highest contrast, making your vibrant thread colors appear even more luminous.
This piece could easily be included in a collection of framed embroidery patterns that look like they belong in a gallery.
20. Stitch a Delicate Lavender and Eucalyptus Wreath
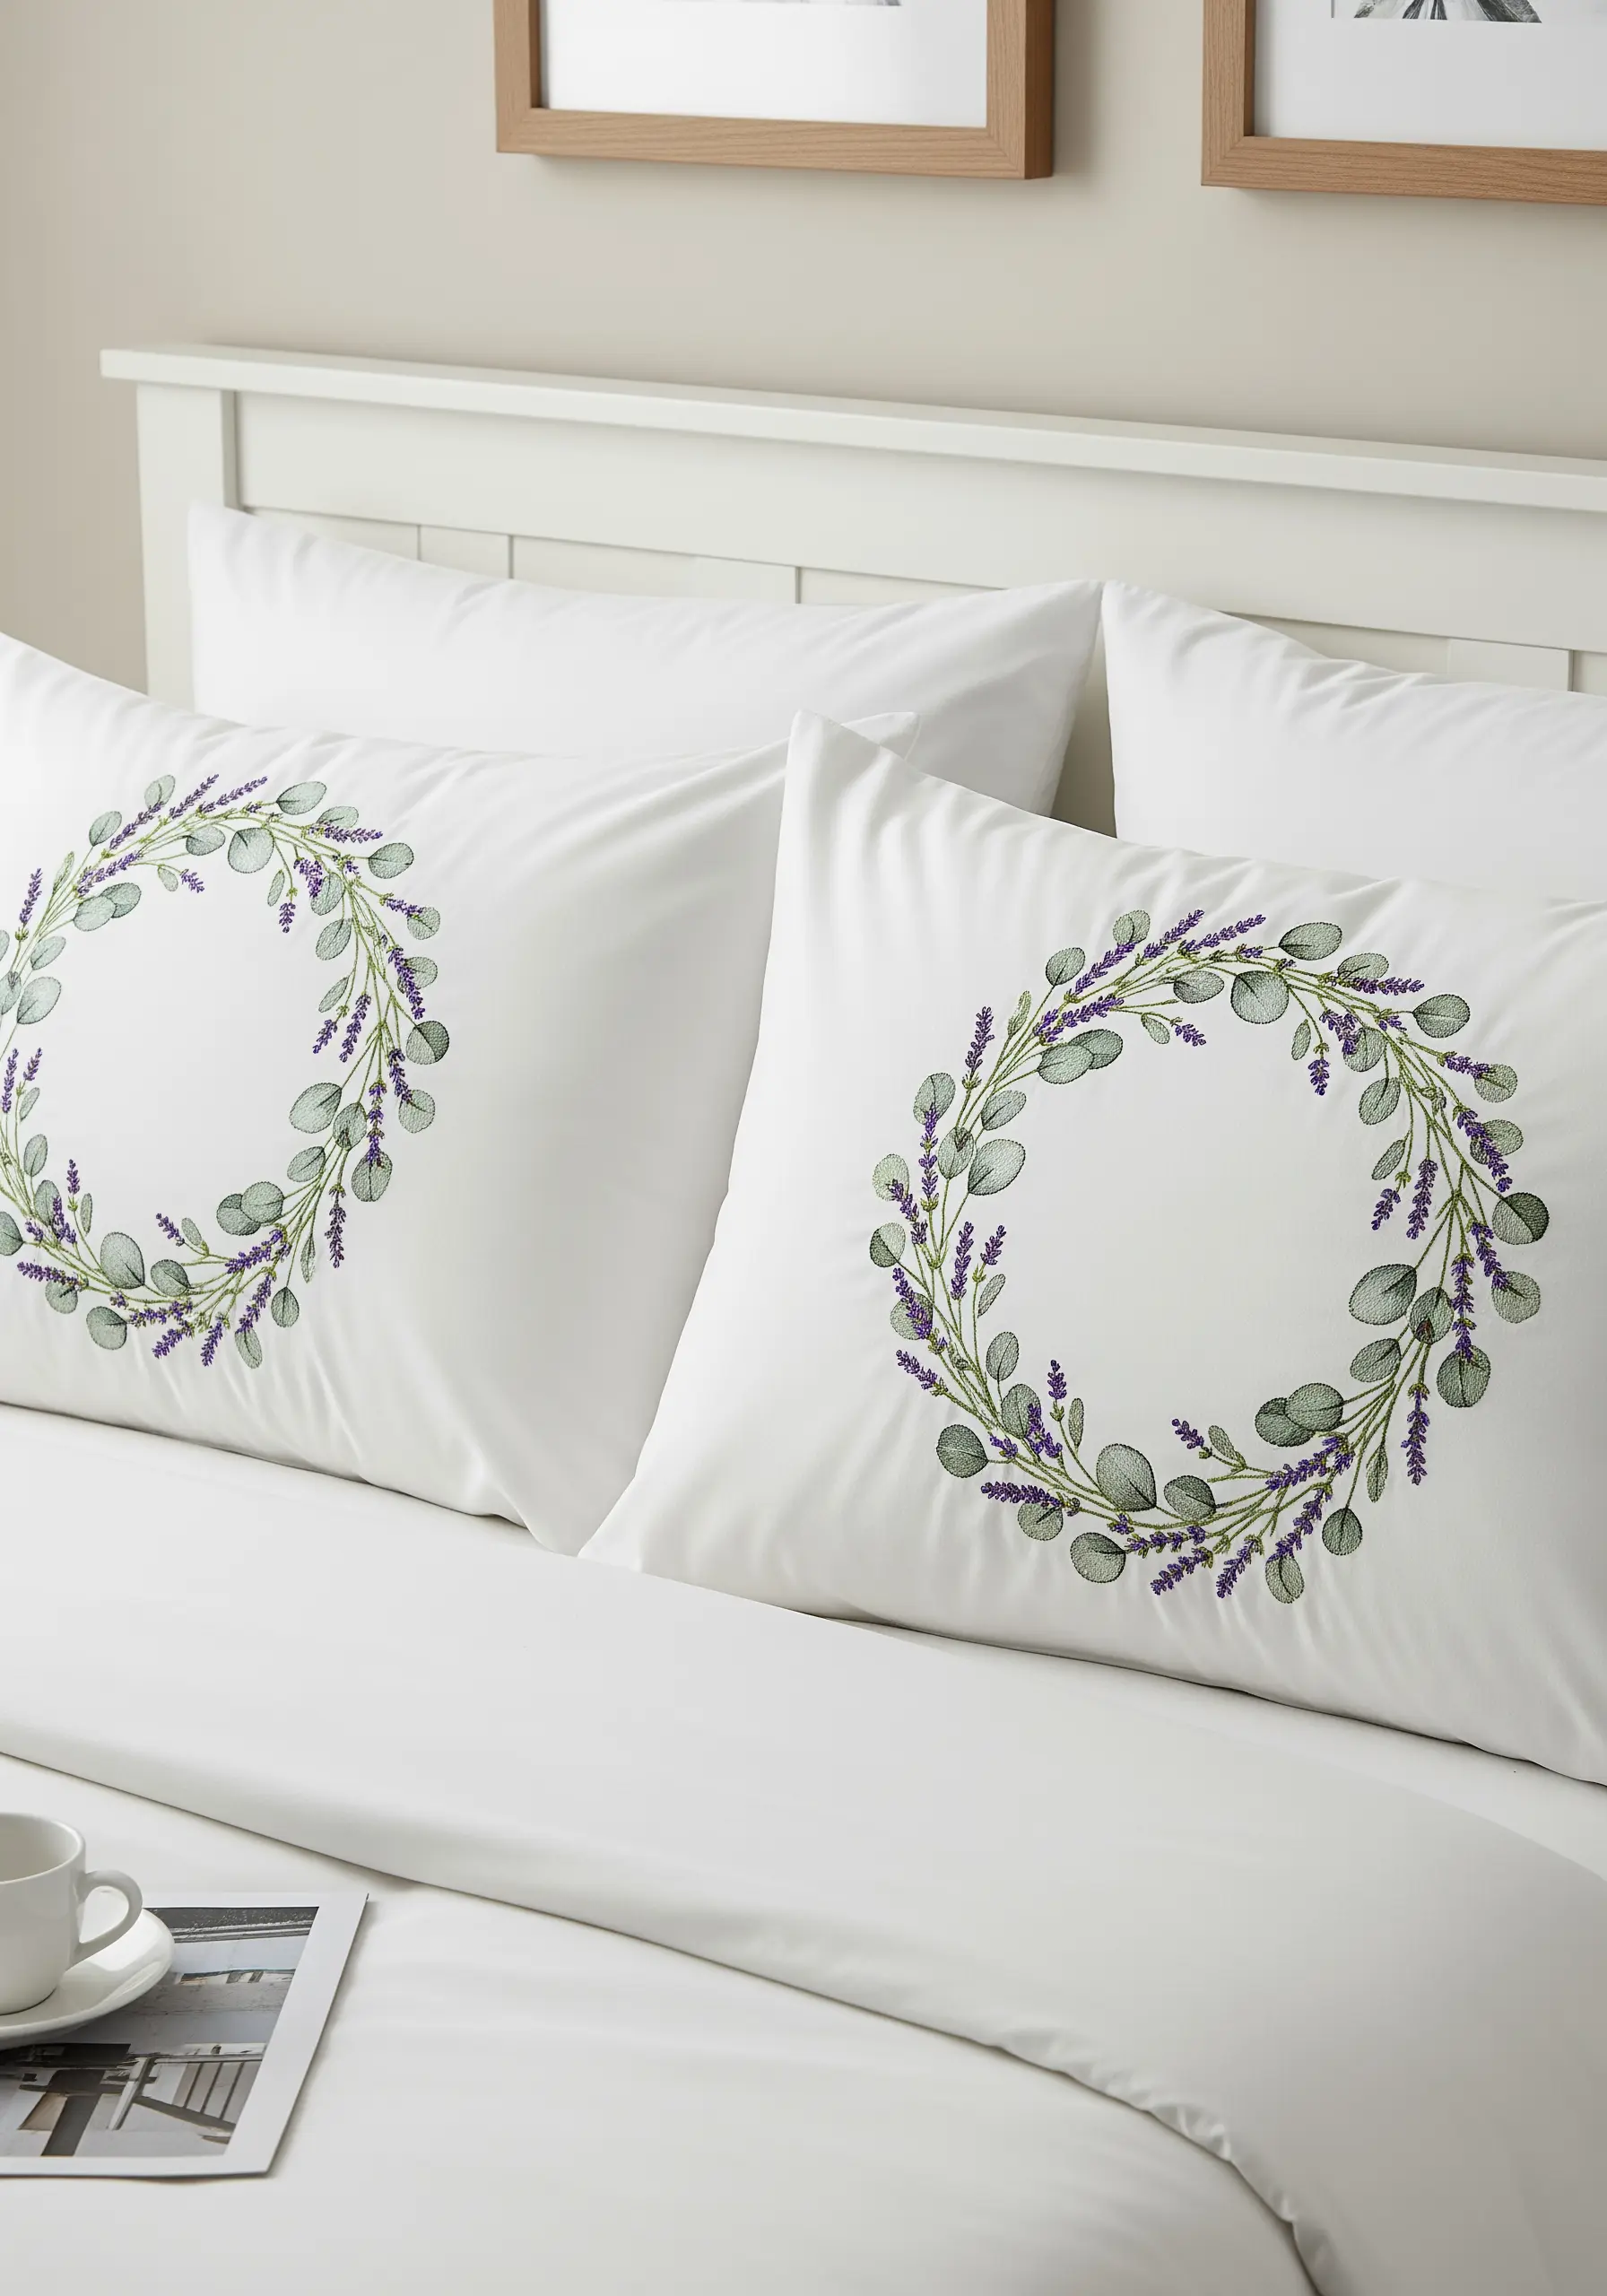
To capture the distinct shapes of these botanicals, you need two different stitches.
For the rounded eucalyptus leaves, a fishbone stitch is perfect. It creates the central vein and fills the leaf shape in one fluid motion, giving it a natural look.
For the lavender sprigs, use a series of detached chain stitches (lazy daisies) arranged up a straight-stitched stem to mimic the plant’s tiny buds.
This is one of those wild botanical wreath patterns that feels both elegant and serene.
21. Embellish an Ottoman with Swimming Koi
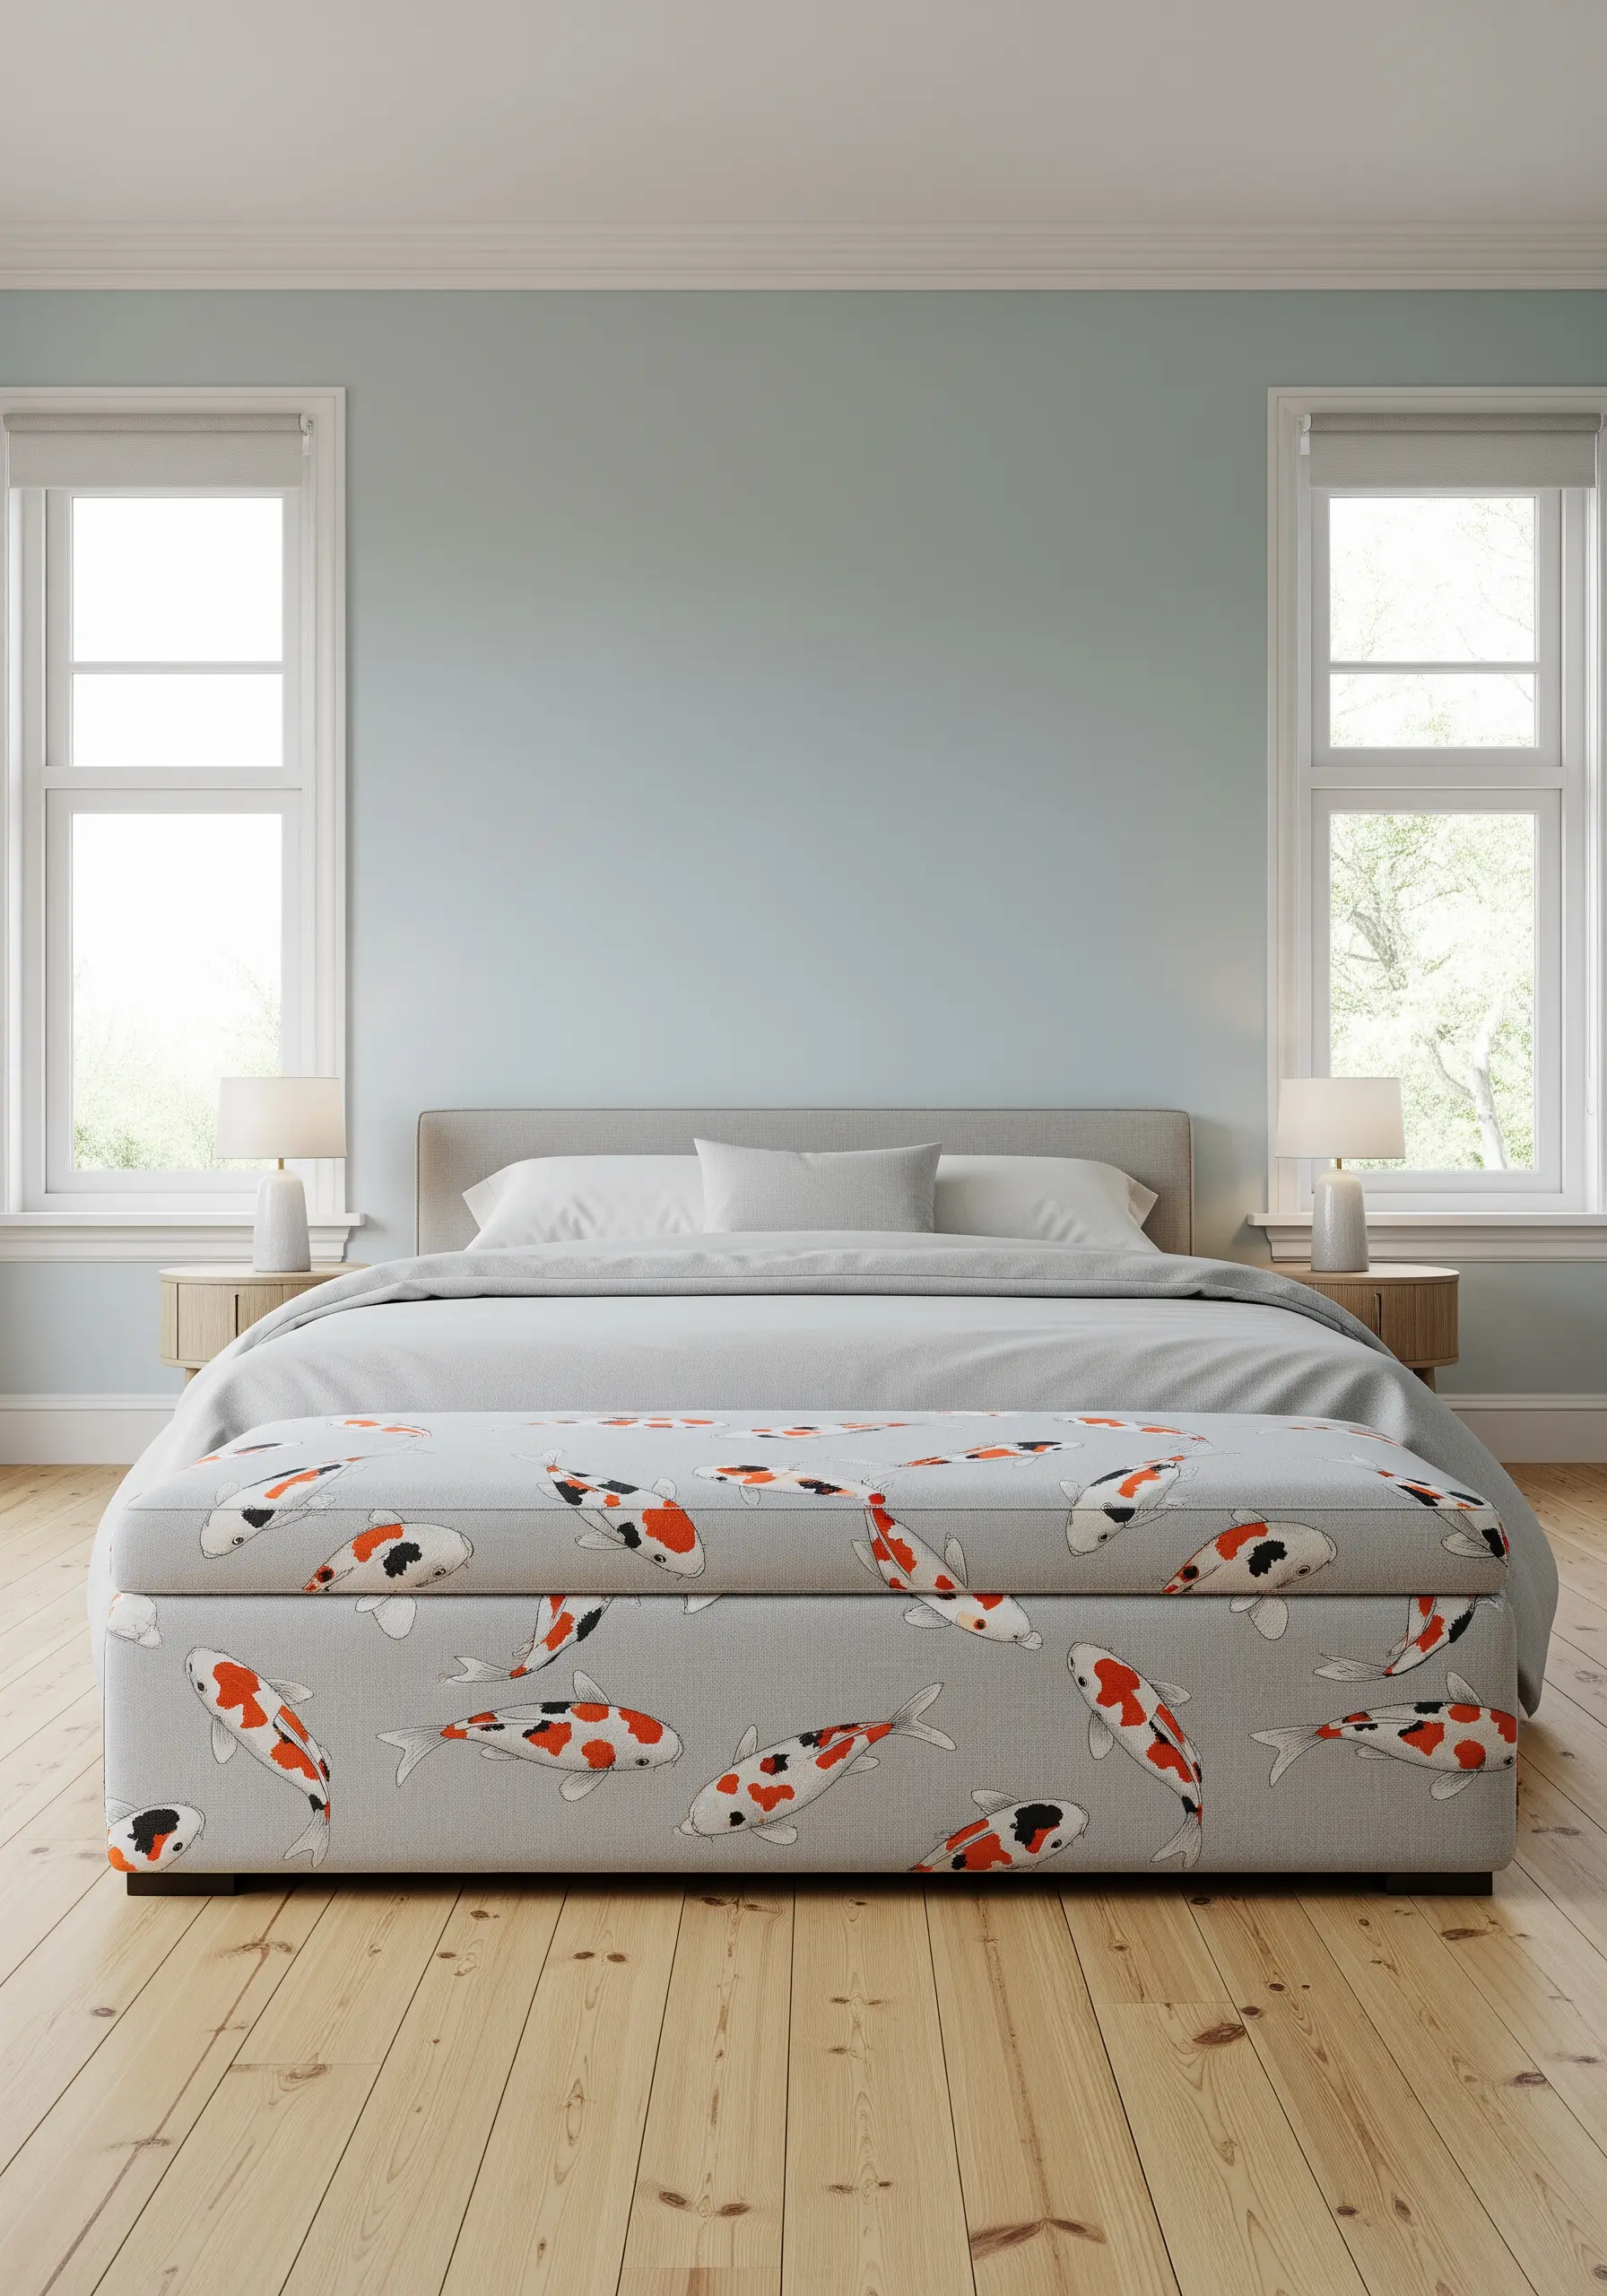
When embroidering on functional furniture like a bench or ottoman, durability is key.
Use a strong thread like pearl cotton, which is less likely to snag or fray with use. Choose an even-weave upholstery-grade fabric that can support dense stitching without puckering.
The koi can be filled with a smooth satin stitch, but ensure your stitches aren’t too long, as they can catch easily. Break longer areas into smaller sections of satin stitch for longevity.
The result is one of those handmade art pieces that tell a story.
22. Create Perspective in a Lavender Field

To create the illusion of depth in this landscape, you need to manipulate thread weight and stitch size.
For the lavender rows in the foreground, use a full six strands of floss and make your stitches larger and more defined. As you move toward the horizon, gradually reduce the number of strands—down to two, then one.
Make the stitches in the distance smaller and less detailed. This simple trick of atmospheric perspective will make your landscape feel vast.
It’s one of the most beautiful delicate lavender stitch ideas for creating a sense of place.
23. Frame a Miniature Floral Bouquet
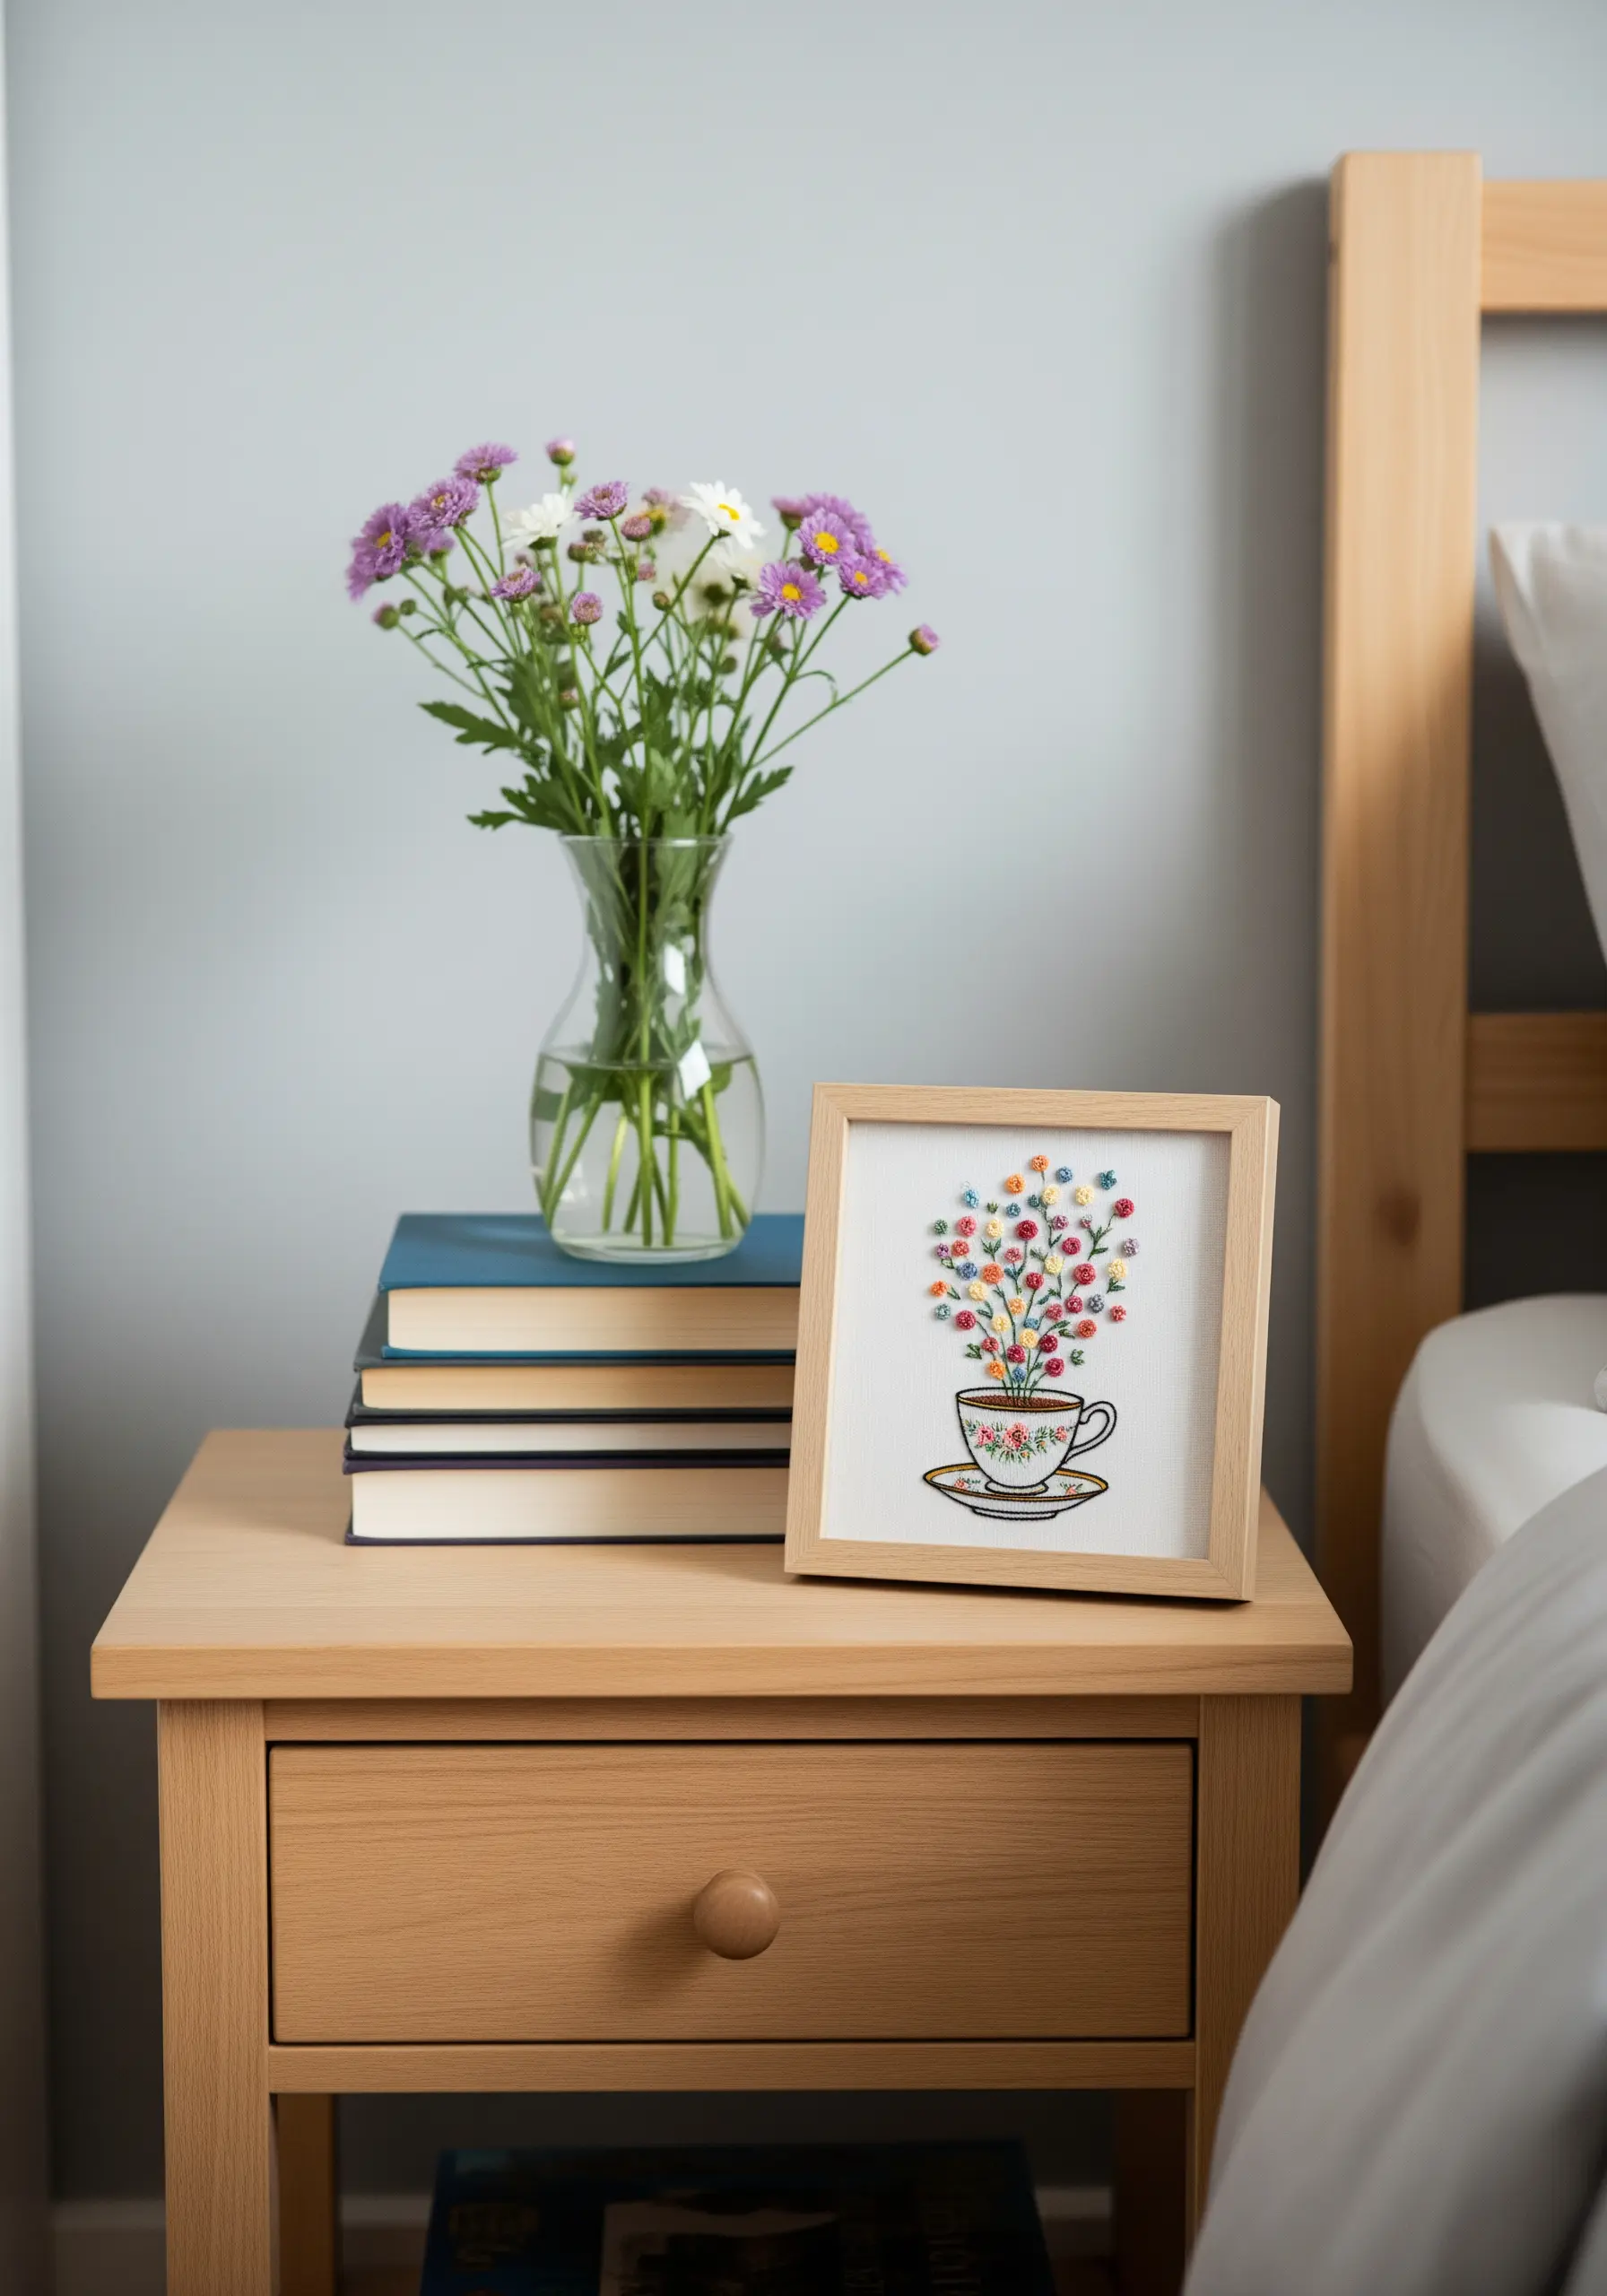
To create a dense, overflowing bouquet in a small space, you need a variety of textural stitches.
Combine French knots, bullion knots (for rosebuds), and lazy daisy stitches in a tight cluster. Vary the colors and the number of thread strands for each knot to create depth and visual interest.
Keep the teacup itself simple, using a clean backstitch or split stitch for the outline. This ensures the intricate floral arrangement remains the star of the piece.
This makes for lovely framed embroidery ideas for a bedside table.


