

There comes a moment in every creative journey when following a pattern is no longer enough. You start to crave a style that feels personal, intentional, and refined. If you’ve been searching for that next step, I want you to consider the profound elegance of a single black thread.
Think of it not as stitching, but as drawing. With black thread on a neutral background, every line you make is deliberate. There are no colors to hide behind, only the pure, expressive quality of your stitch. This is where you learn to master tension, perfect your curves, and understand the subtle power of a well-placed line.
This approach isn’t about complexity; it’s about clarity. By stripping away the noise, you can focus on the details that transform a simple craft into a piece of minimalist art. You will be surprised by how a single, confident line can say more than a thousand decorative stitches ever could.
1. Master Line Weight in a Single Stitch
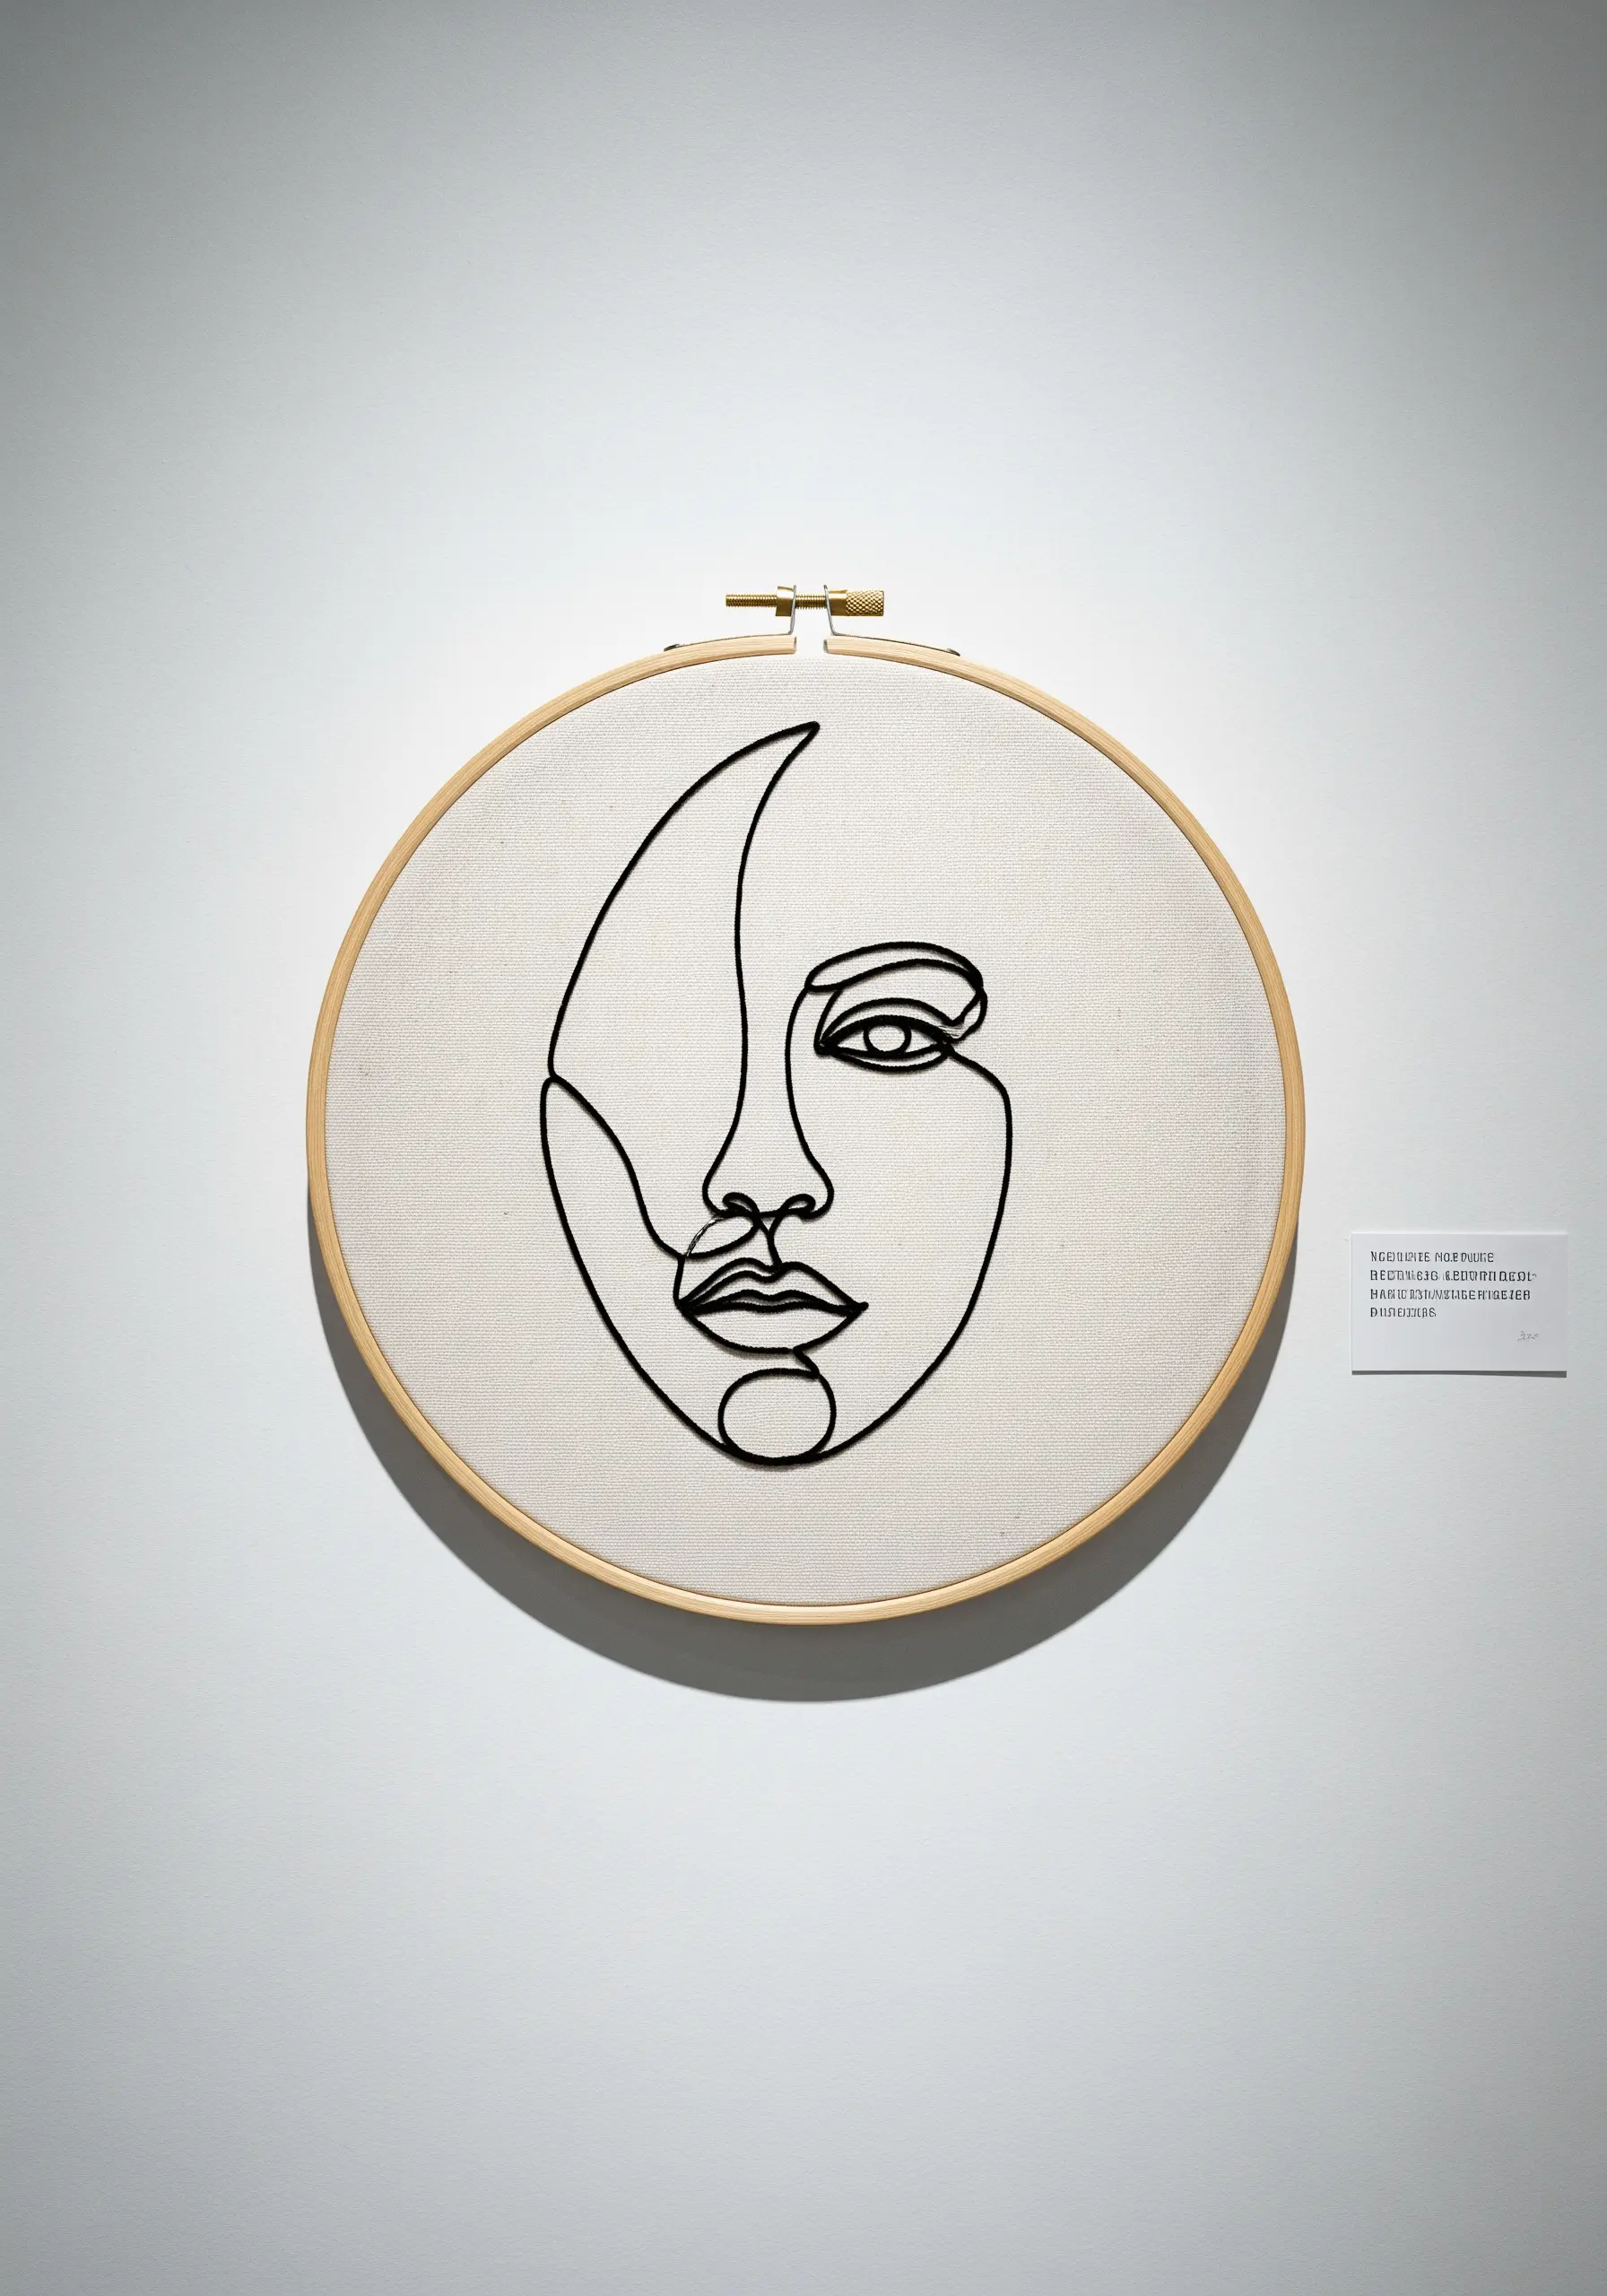
Create the illusion of a pen stroke by varying the number of thread strands within your design—use four or five for bold, primary lines and drop to two for delicate facial features.
Stitch with a whipped backstitch to conceal the individual stitches, resulting in a smooth, ink-like line that flows without interruption.
This technique gives your portrait depth and dimension, preventing the flatness that comes from a uniform outline.
Treat your thread as a drawing tool, letting its thickness define the form and create visual hierarchy.
2. Embrace the Elegance of the Interrupted Line
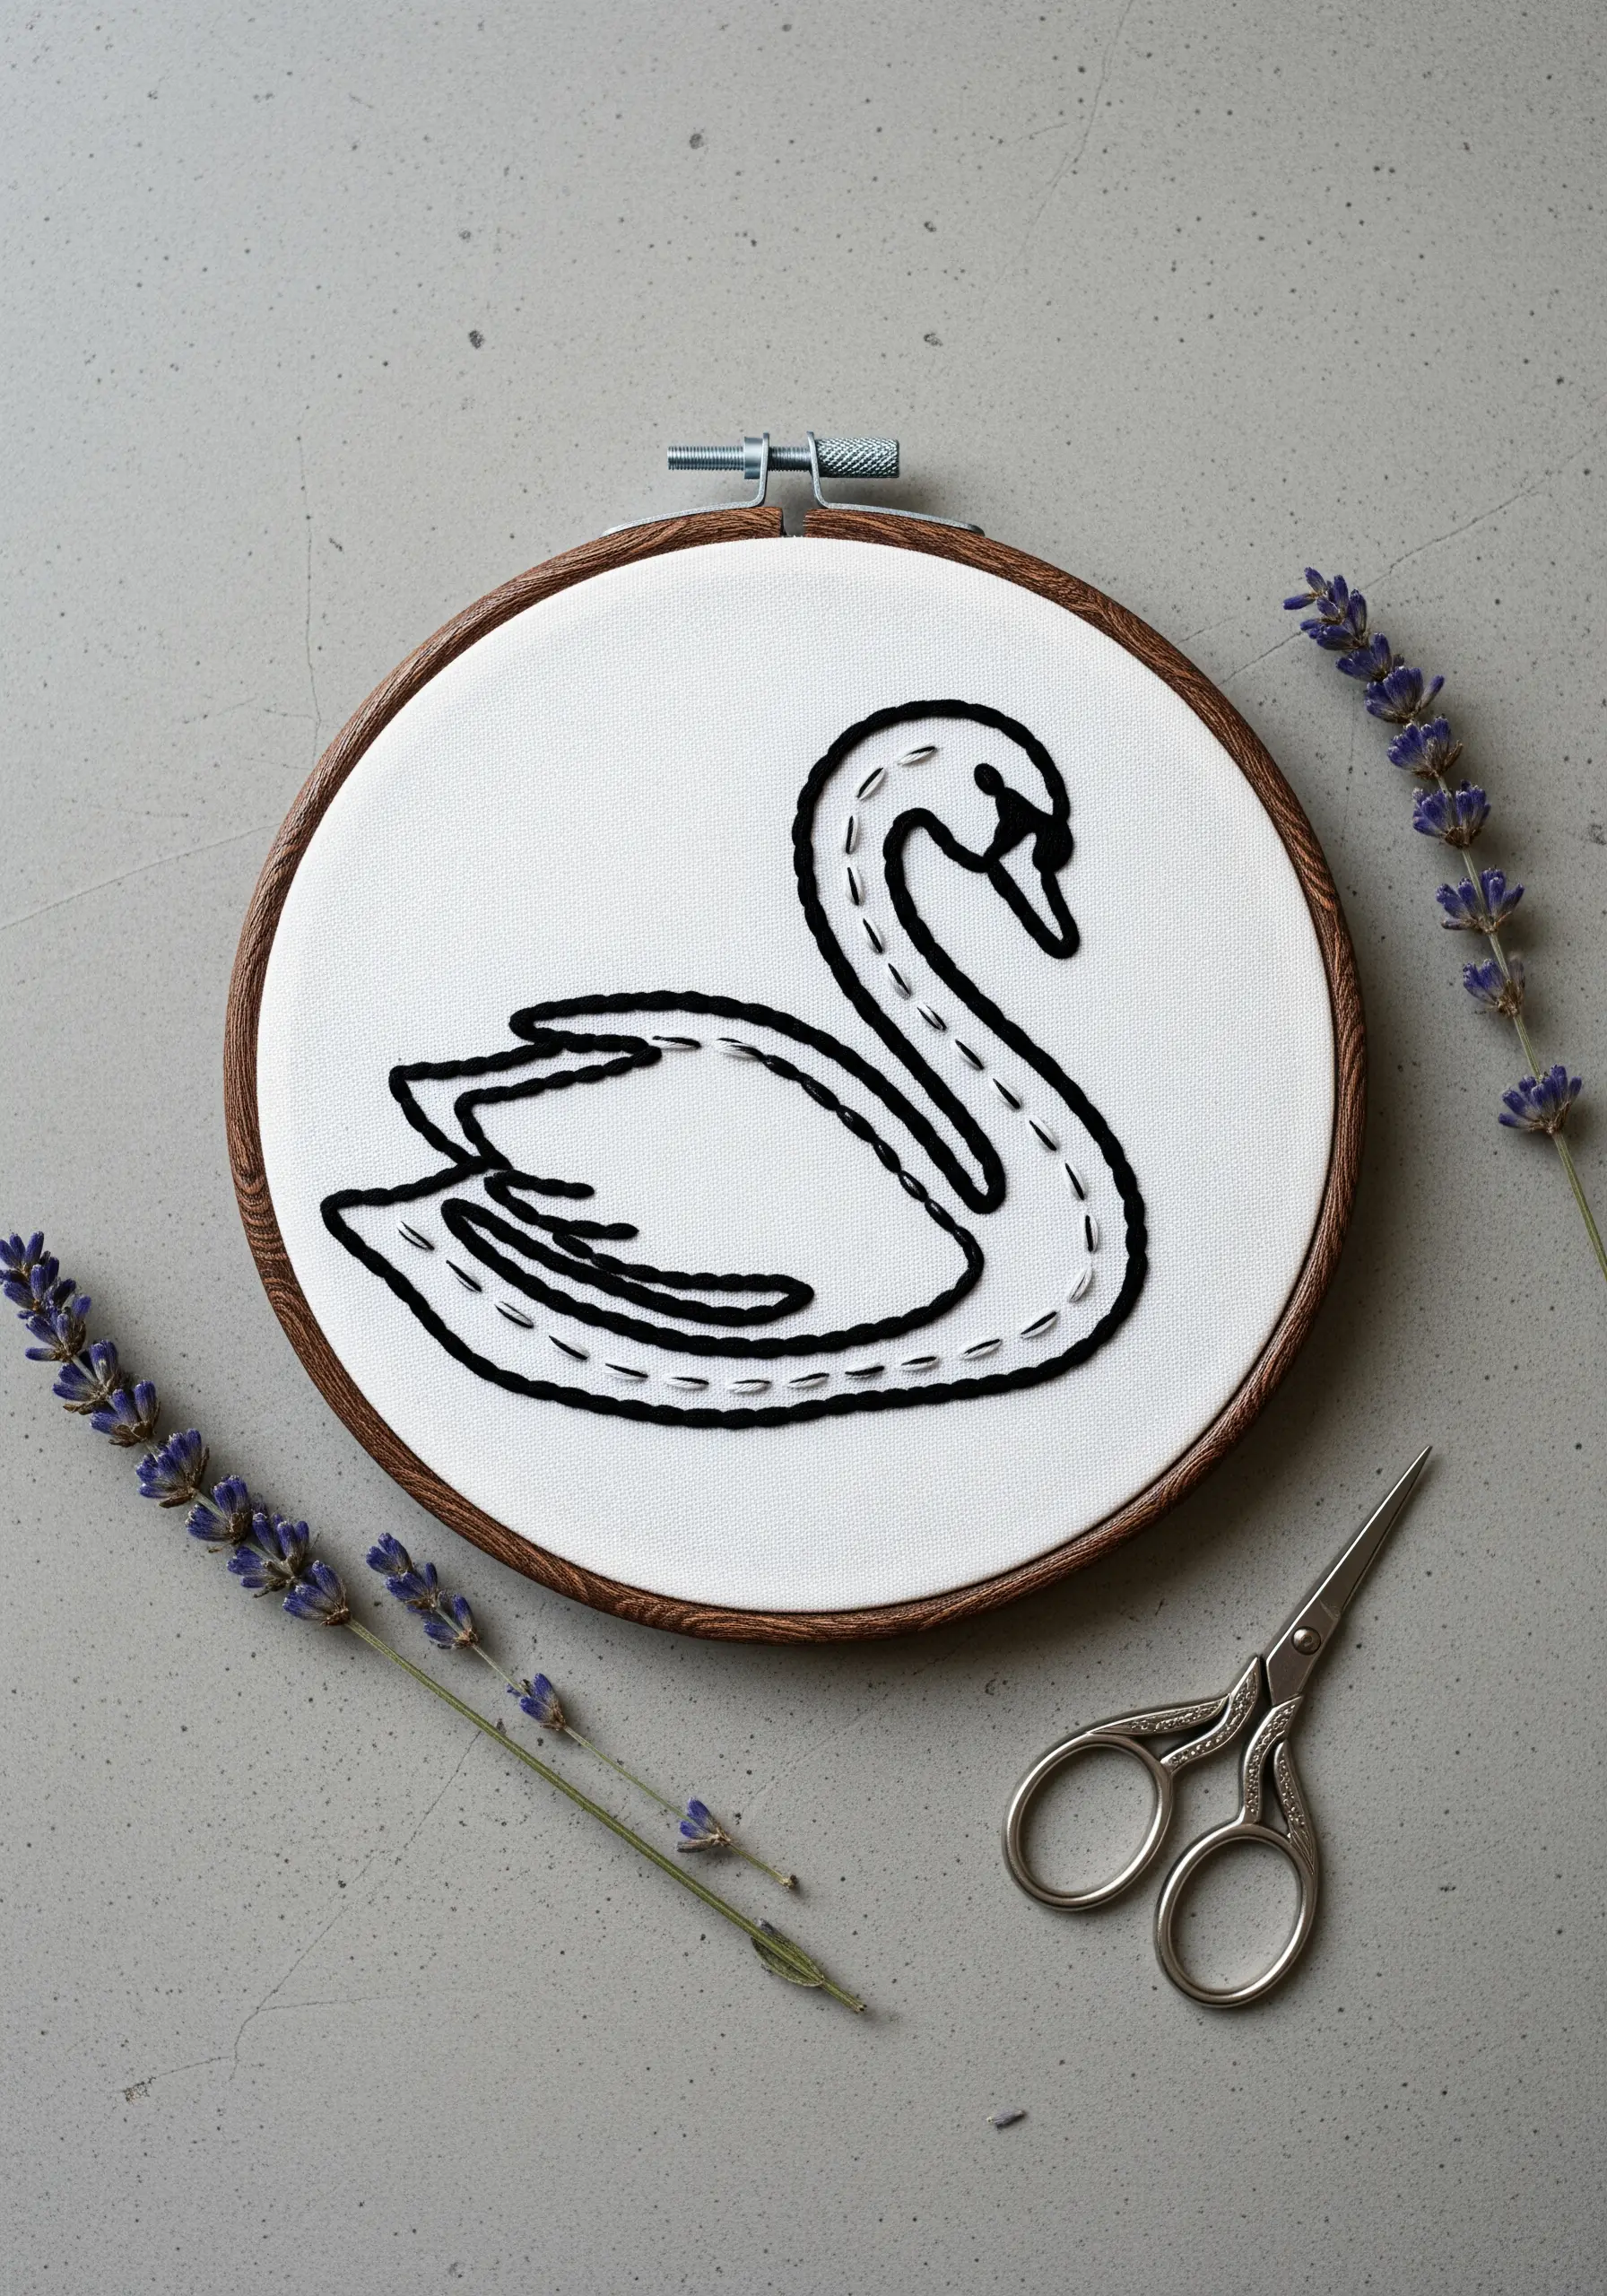
Instead of a solid outline, use a measured running stitch or a dashed backstitch to create a lighter, more gestural feel.
This technique introduces negative space directly into the silhouette, making the design feel airy and reminiscent of a quick sketch.
Vary the length of your stitches and the gaps between them to control the visual rhythm and flow of the outline.
It’s a sophisticated method for adding illustrative charm to classic motifs without adding complexity.
3. Achieve Architectural Precision with Stem Stitch
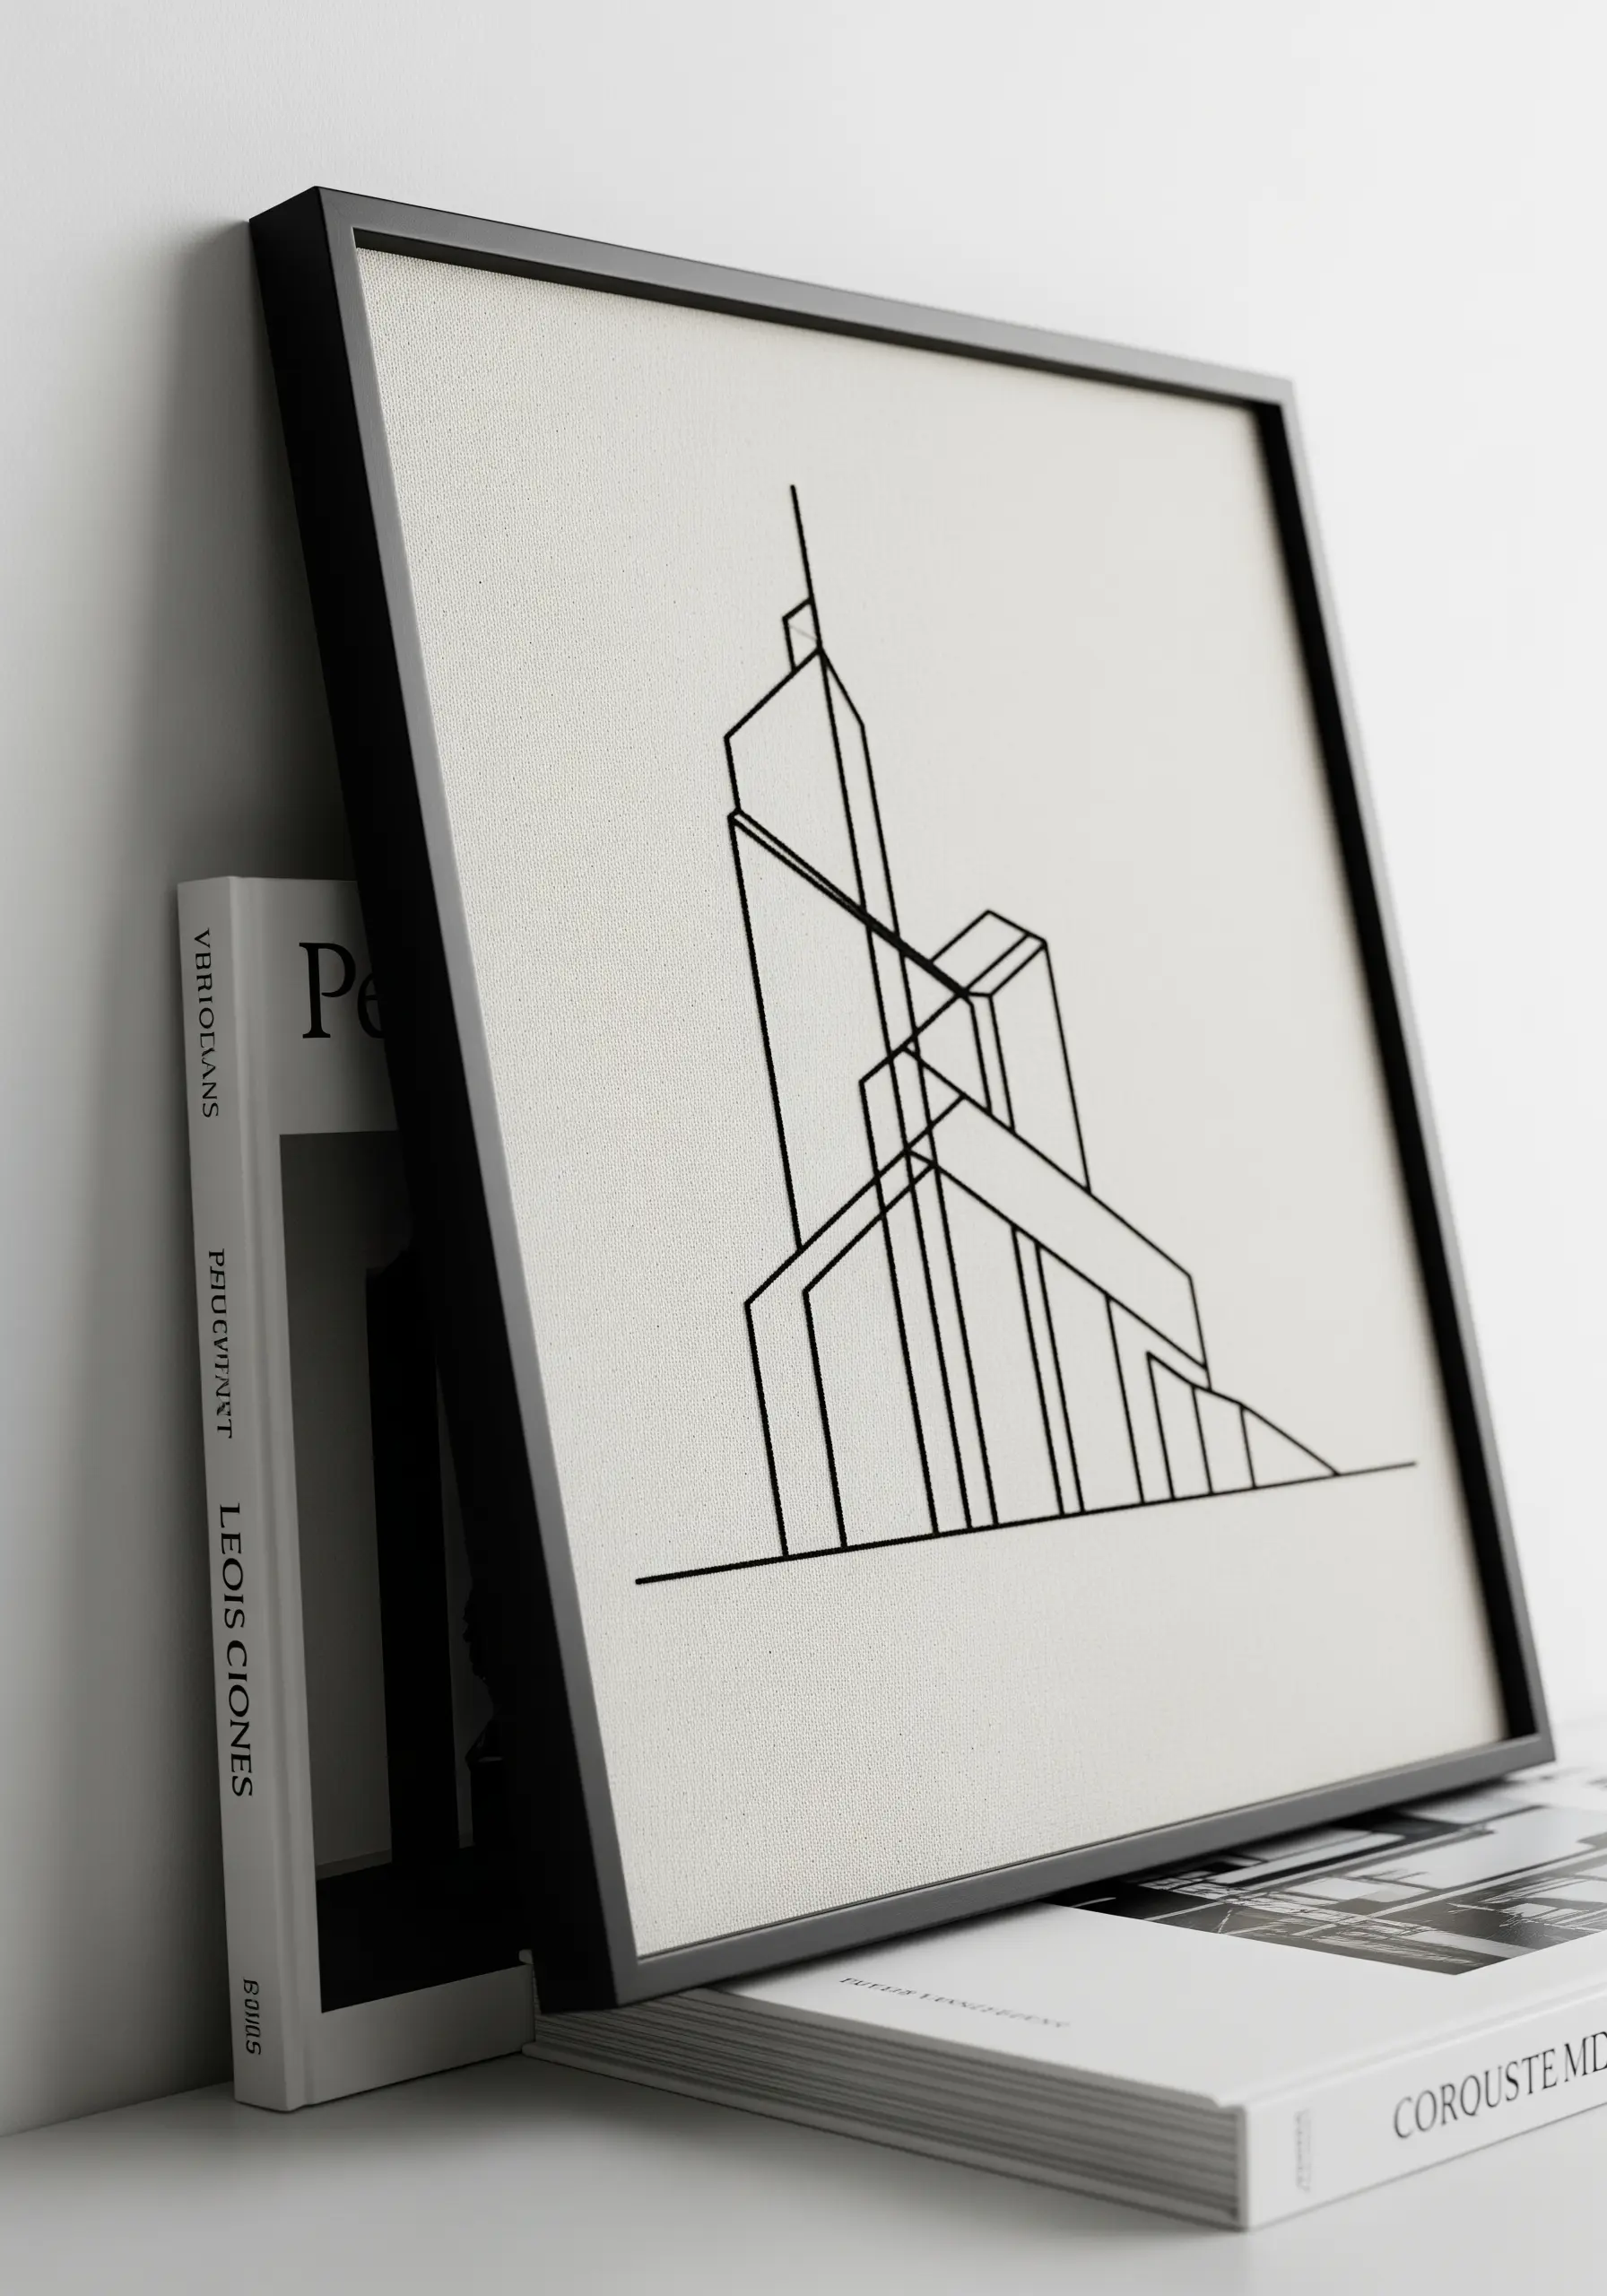
For crisp, geometric designs, replace the common backstitch with a perfectly executed stem stitch using just one or two strands of floss.
This creates a sharper, more defined line that mimics the precision of a technical drawing pen.
Work on a tightly woven linen or canvas to prevent your lines from distorting under tension.
When you’re done, display your work in a simple, modern black frame to extend the piece’s graphic quality and create cohesive stitched details that make plain walls pop.
4. Contrast Solid Fills with Delicate Outlines
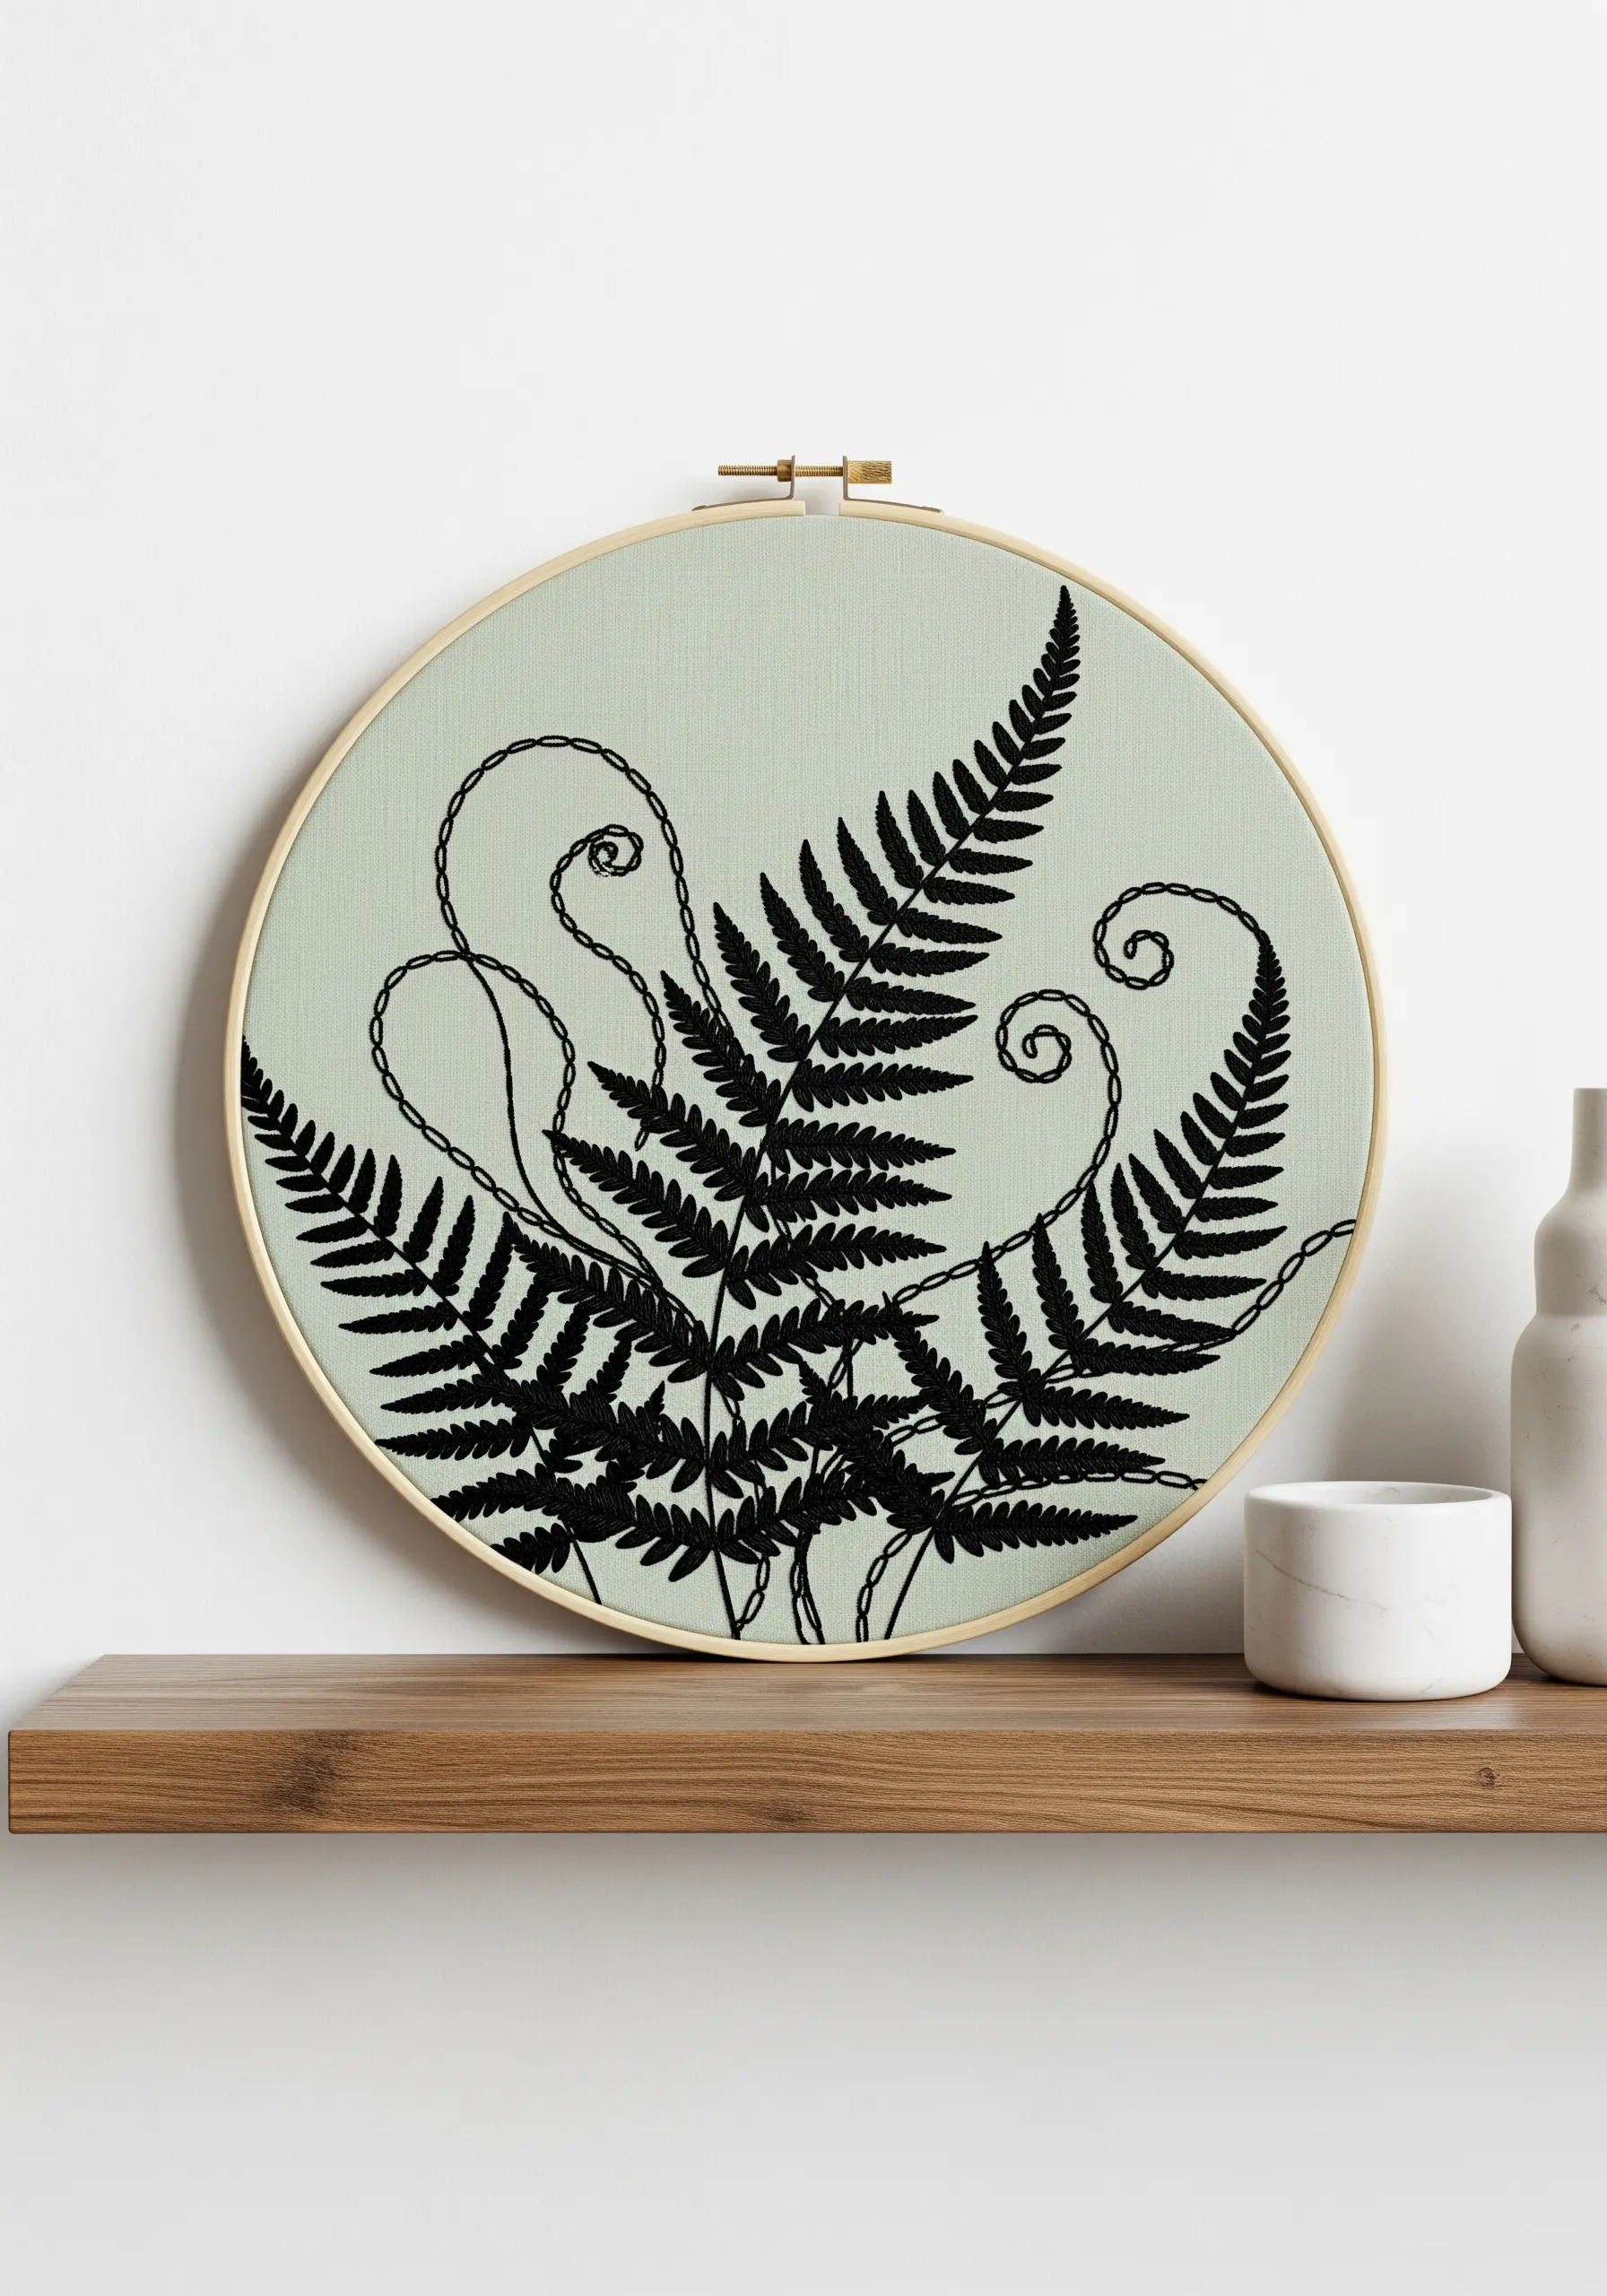
Elevate a simple botanical silhouette by combining two distinct textures for visual depth.
Use a dense, flawlessly smooth satin stitch for the fern leaves to create a bold, solid shape that reflects light beautifully.
For the swirling stems, switch to a delicate whipped backstitch using fewer strands of thread.
This contrast makes the solid areas appear richer and the lines more graceful, adding a sophisticated visual hierarchy to the piece.
5. Curate a Cohesive Geometric Triptych
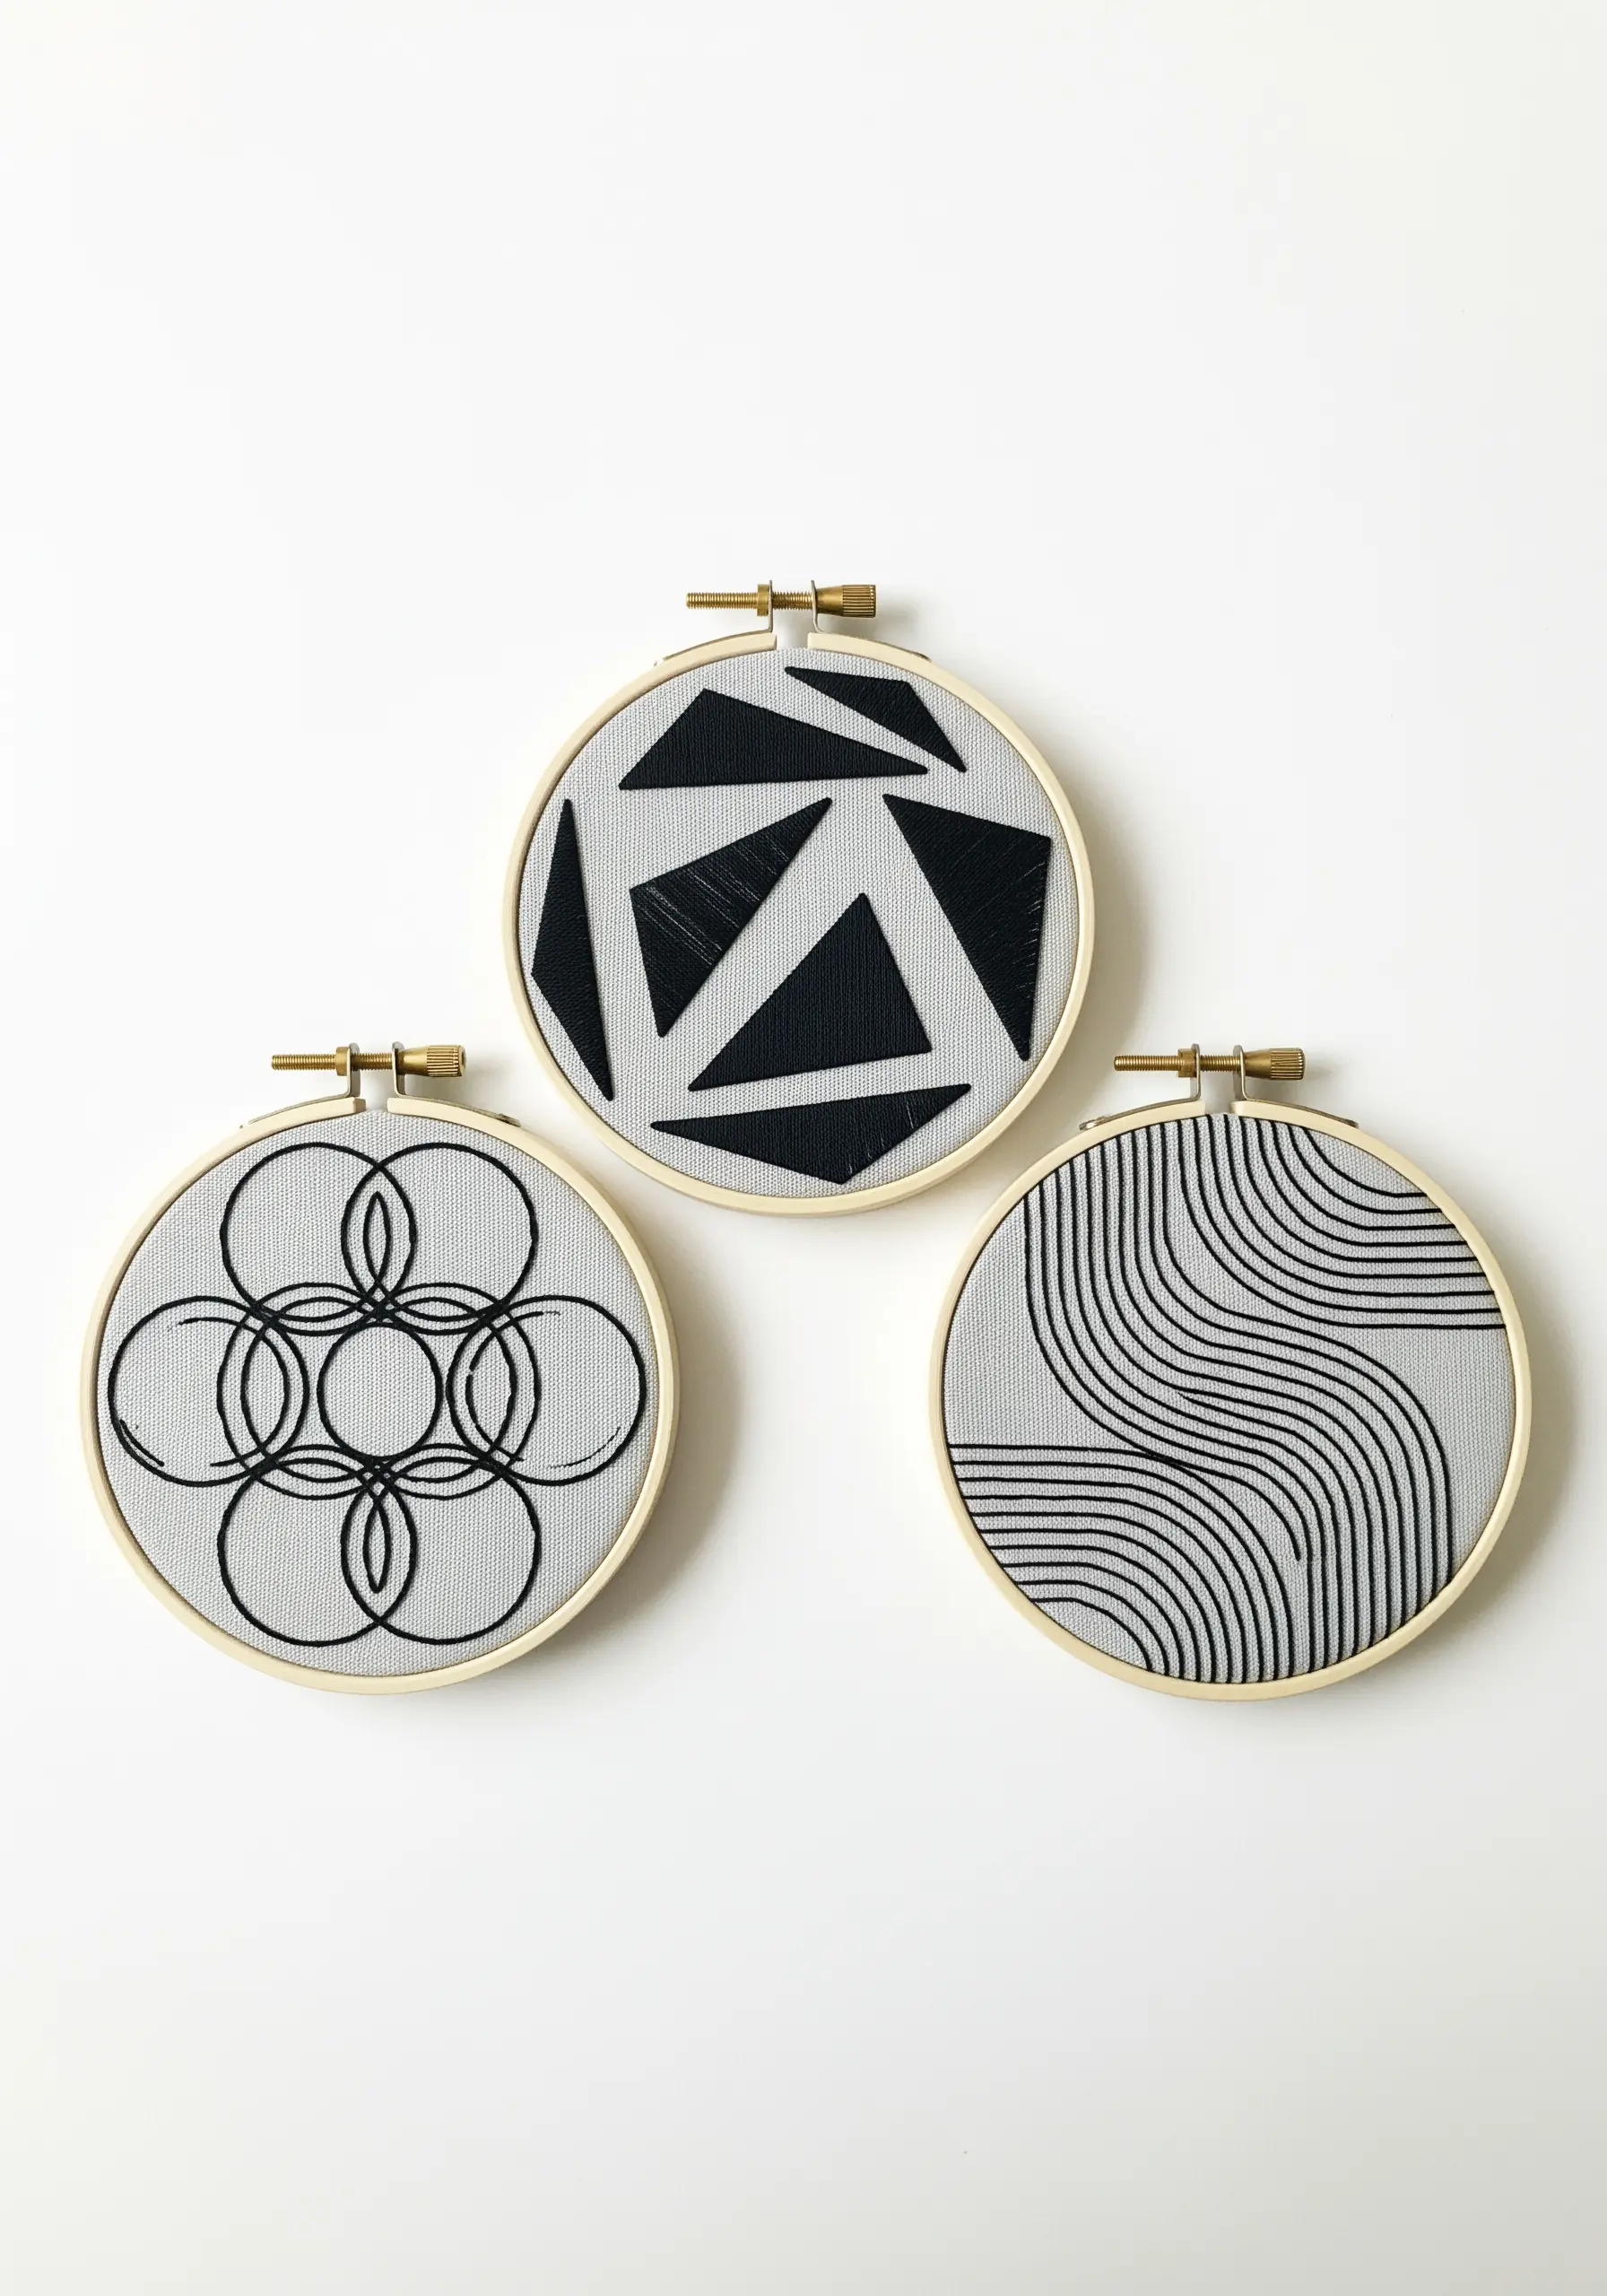
When creating a series, unify the pieces with a consistent color palette, fabric choice, and hoop style.
Explore different ways to interpret a line: as an outline, a fill pattern, or a solid shape filled with satin stitch.
Use a split stitch for any curved lines to ensure they remain perfectly smooth, and a dense satin stitch for filled geometric forms.
Arranging them together turns simple hoops into a single, intentional art installation, transforming them into handmade mini decor pieces that look like museum art.
6. Stabilize Denim for Flawless Apparel Art

Stitching on heavy, textured fabric like denim requires preparation to prevent puckering and uneven tension.
Always apply a stick-on, wash-away stabilizer to the surface before you begin.
This gives you a smooth guide for your pattern and supports the fabric as you stitch, ensuring your lines are crisp.
Choose a slightly thicker thread, like pearl cotton #8 or 3-4 strands of floss, so the design stands out against the denim’s weave.
7. Channel Raw Energy with Scribble Stitching
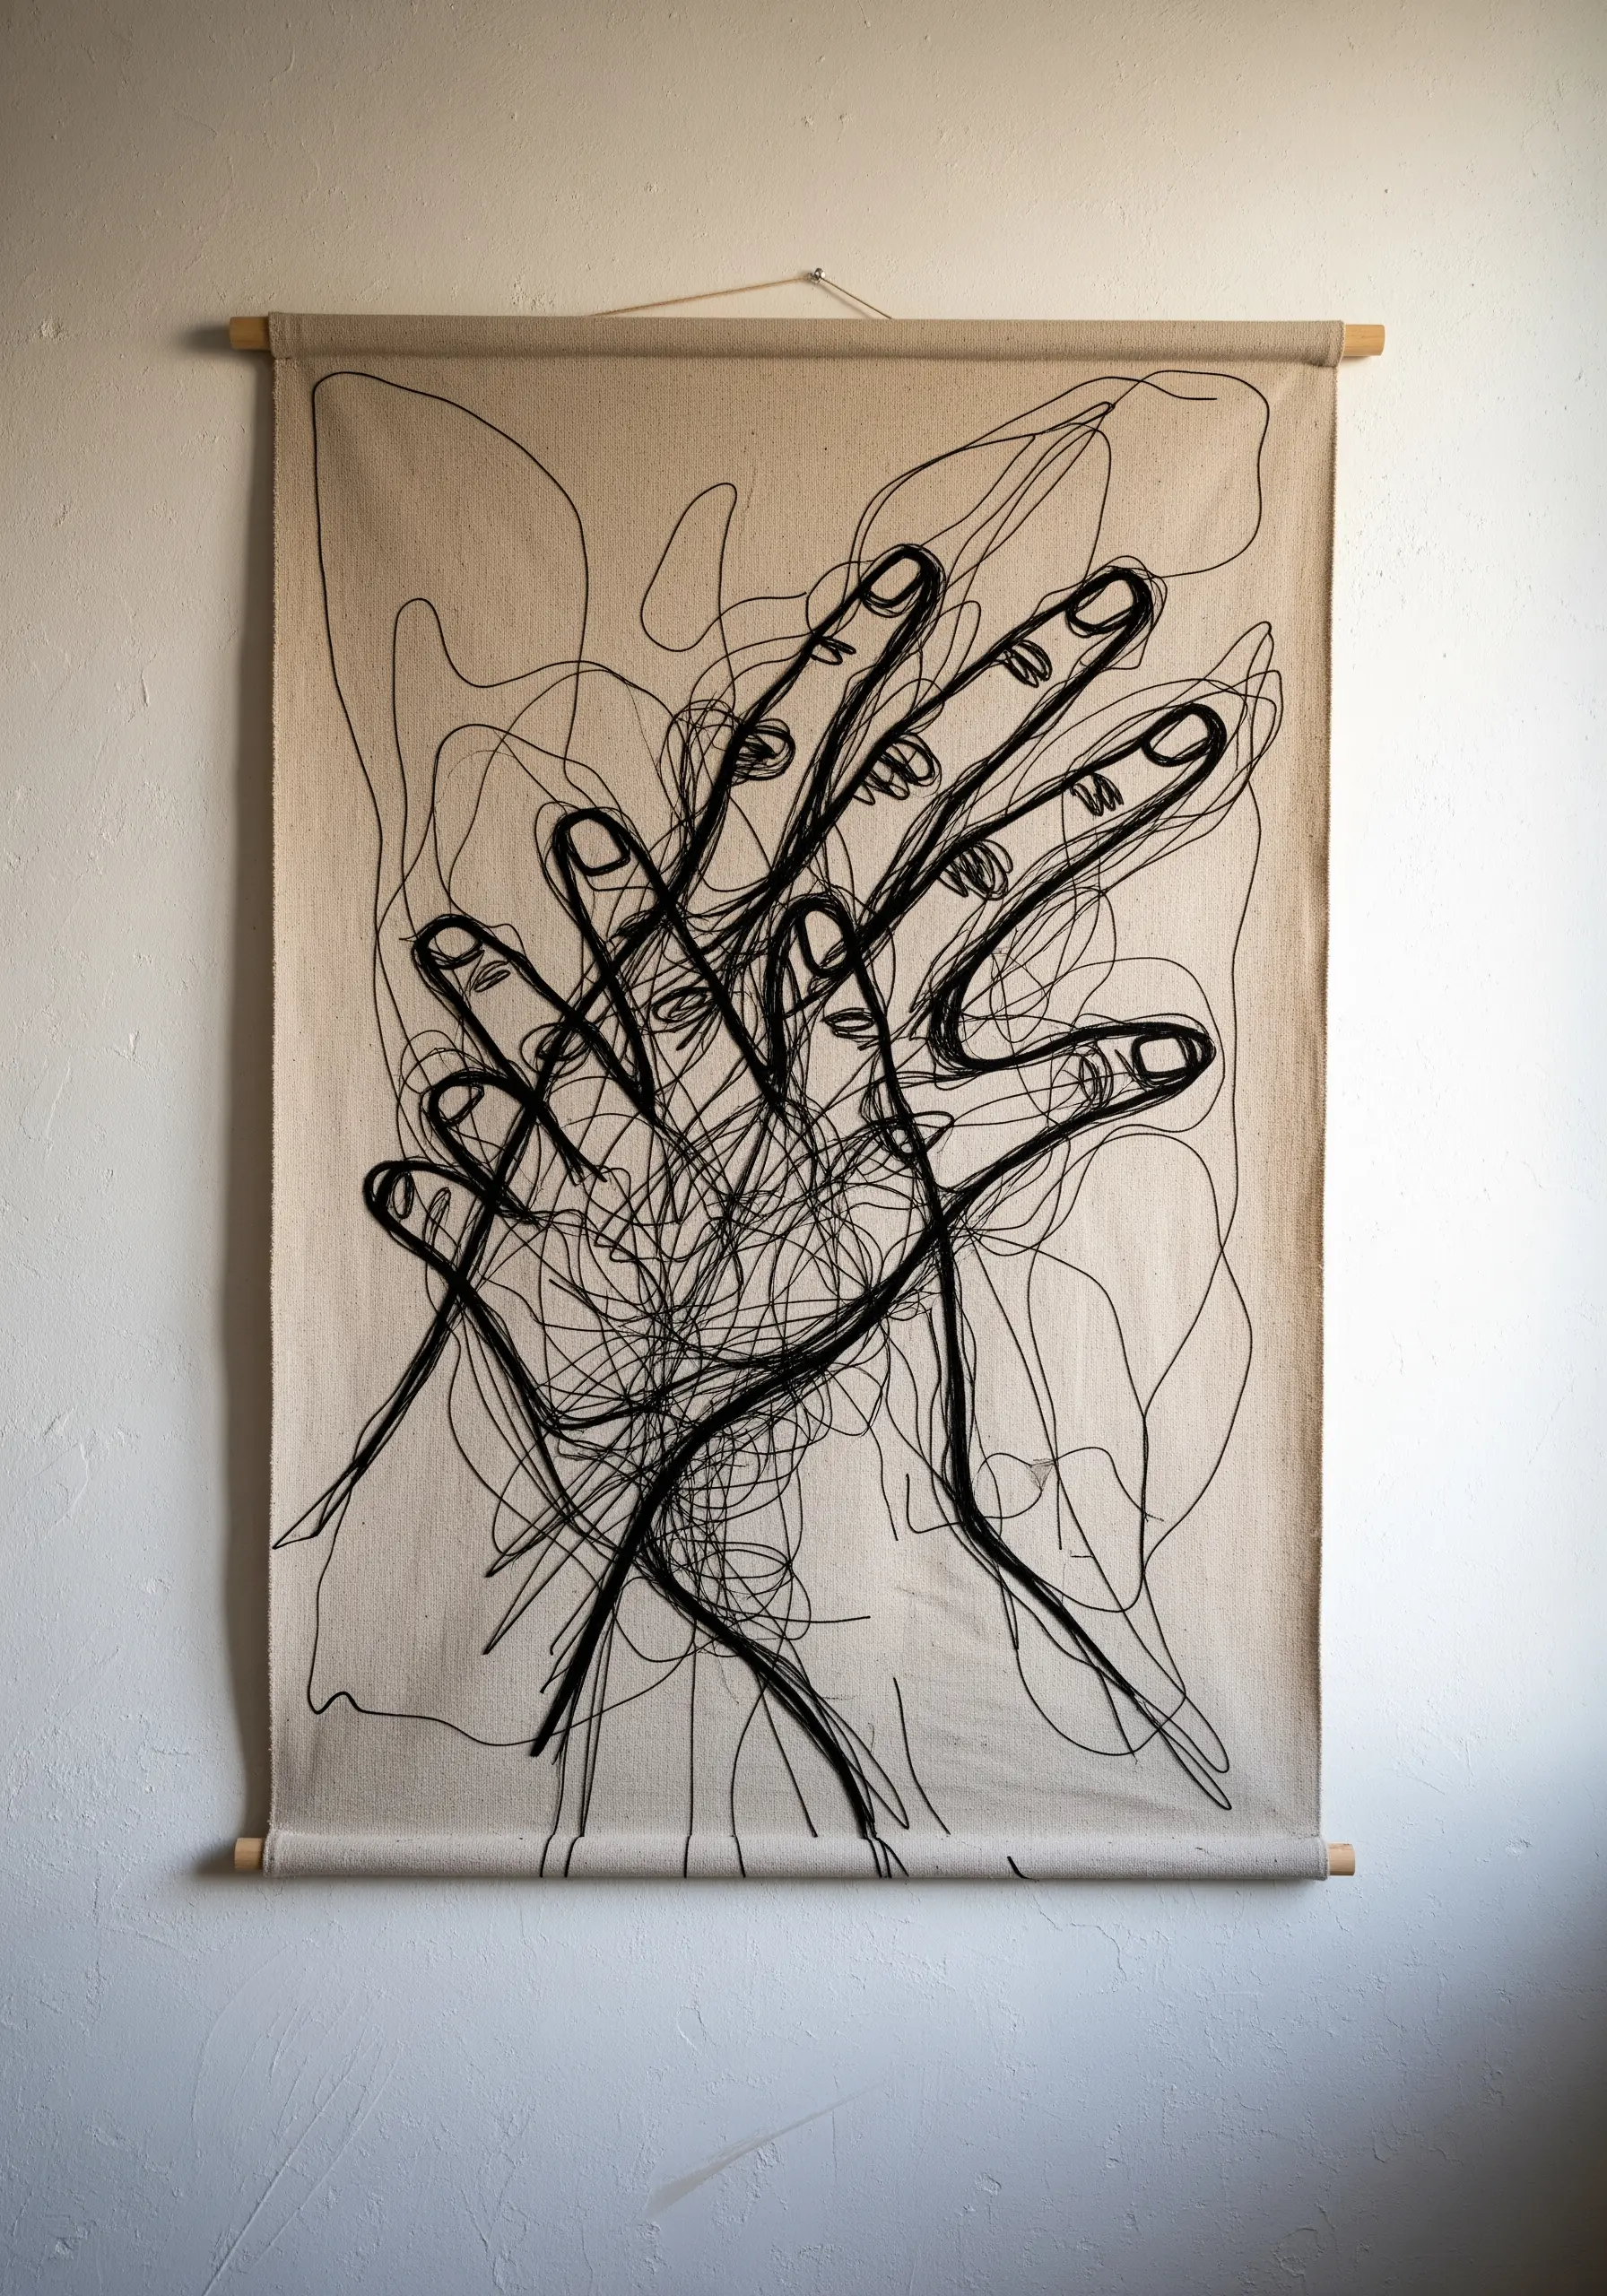
Recreate the energetic marks of a charcoal sketch by layering random straight stitches, either by hand or with a free-motion embroidery machine.
Do not aim for perfection; the artistic goal is to build up density and controlled chaos to express emotion.
This liberating technique turns thread into a powerful tool for mark-making, resulting in unique abstract thread embroidery projects based on music, rhythm, and flow.
8. Plan Your Stitching Path for a Continuous Line
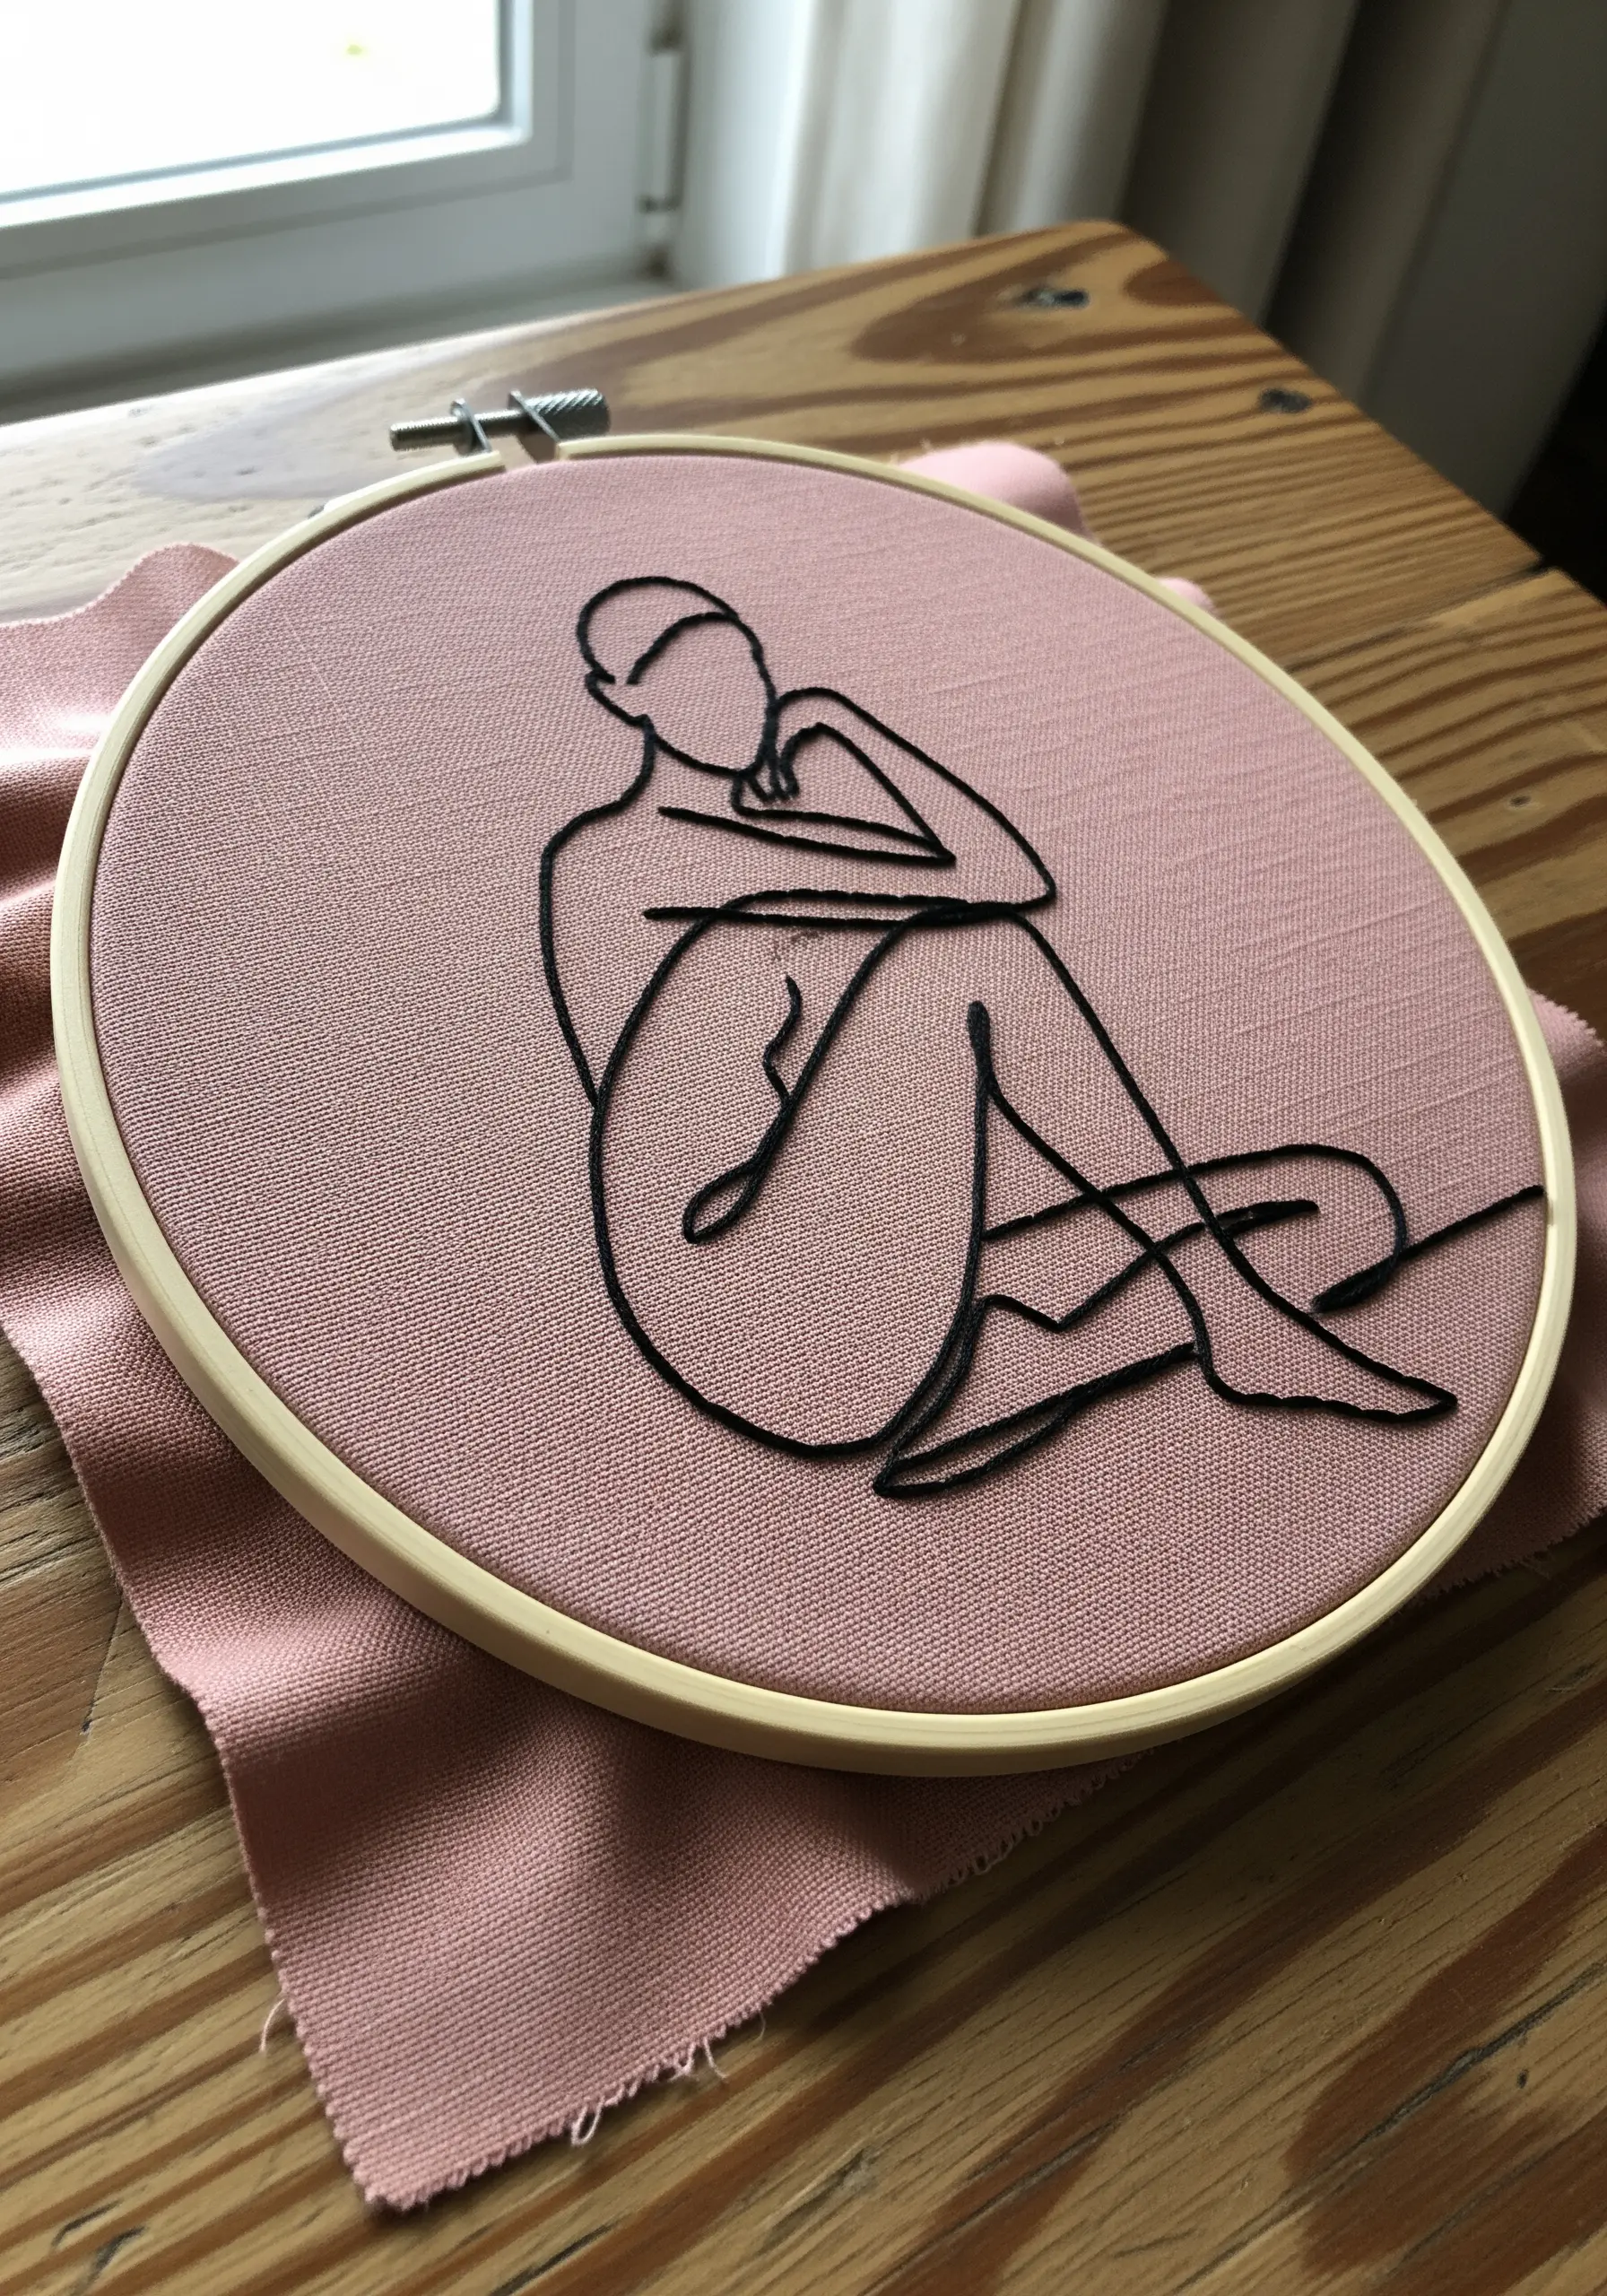
For single-line art, map out your stitching route before you begin to minimize the need to tie off and restart your thread.
A stem stitch or whipped backstitch is ideal for this, as it flows beautifully around curves and maintains a consistent thickness.
This thoughtful preparation results in a truly seamless silhouette that honors the fluidity of the original drawing and feels intentional.
9. Use Parallel Lines to Create Shading and Form
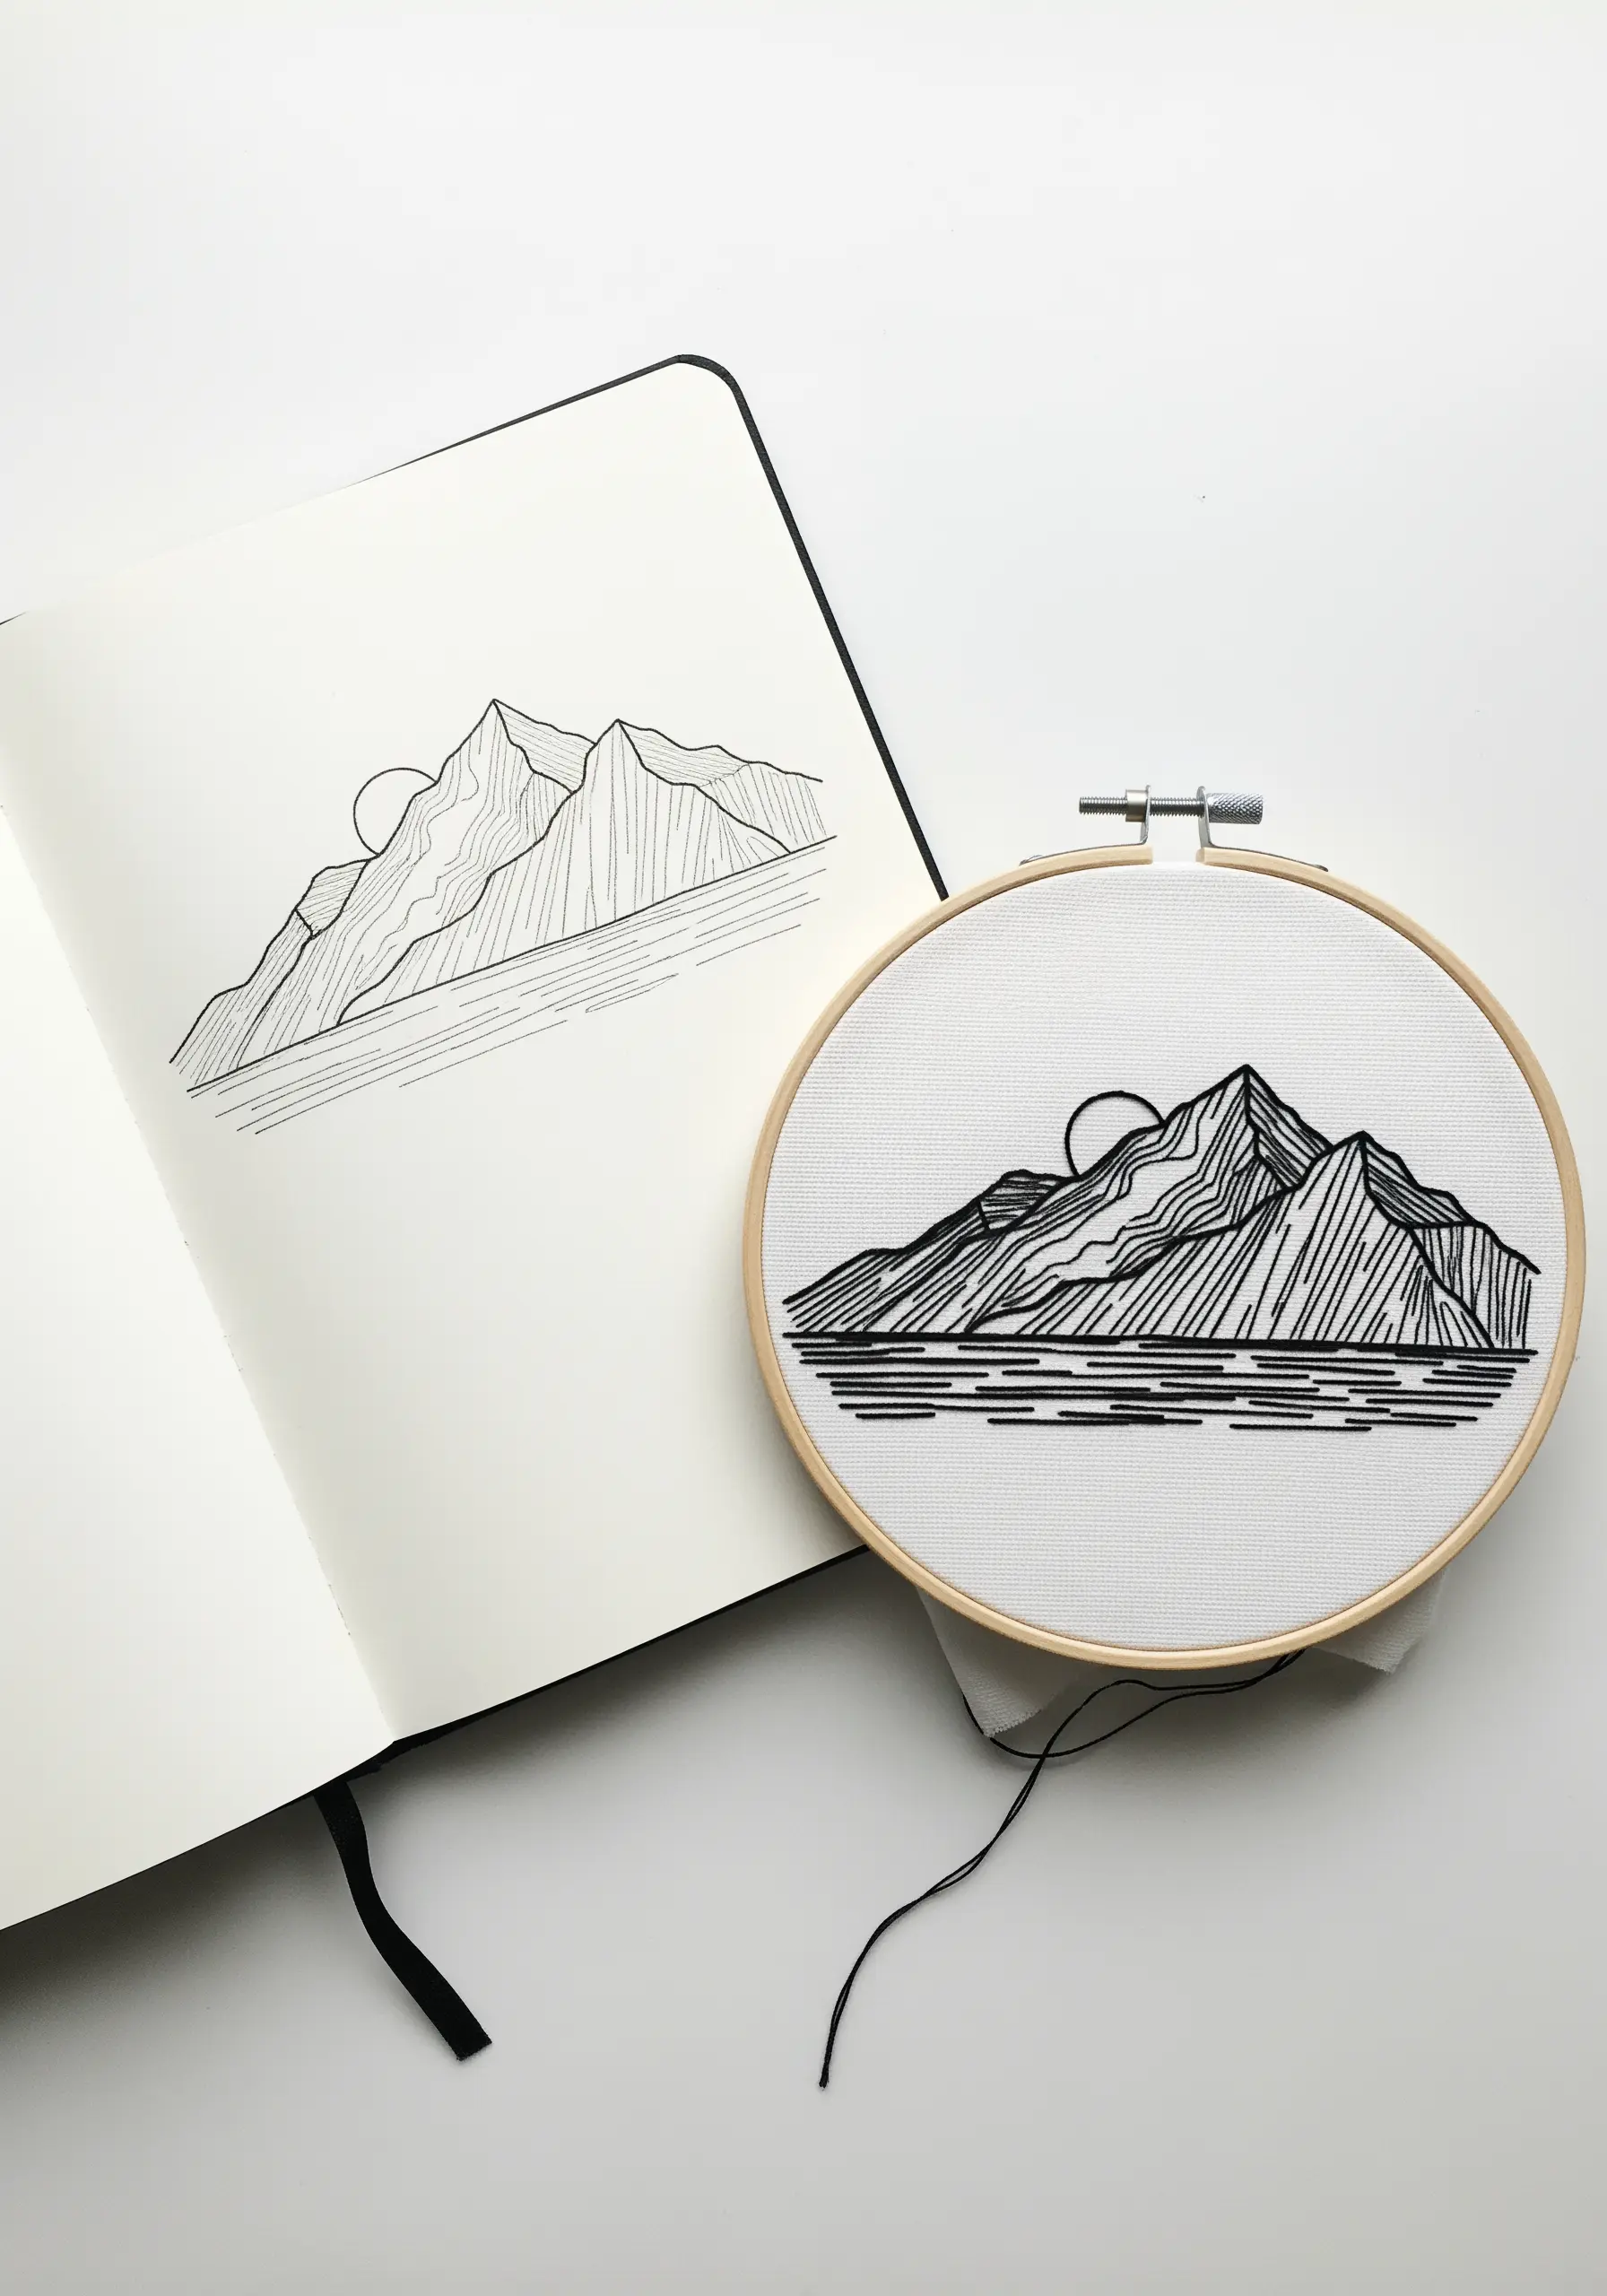
Translate the hatching and cross-hatching from a pen-and-ink sketch directly into thread.
Use single-strand straight stitches, placed closely together, to indicate shadow and contour on the mountainsides.
Keep your lines parallel and consistent for a clean, graphic look that feels deliberate and controlled.
This method adds impressive depth and dimension without relying on complex fill stitches, turning a simple outline into a detailed landscape.
10. Add Sculptural Dimension with Couching
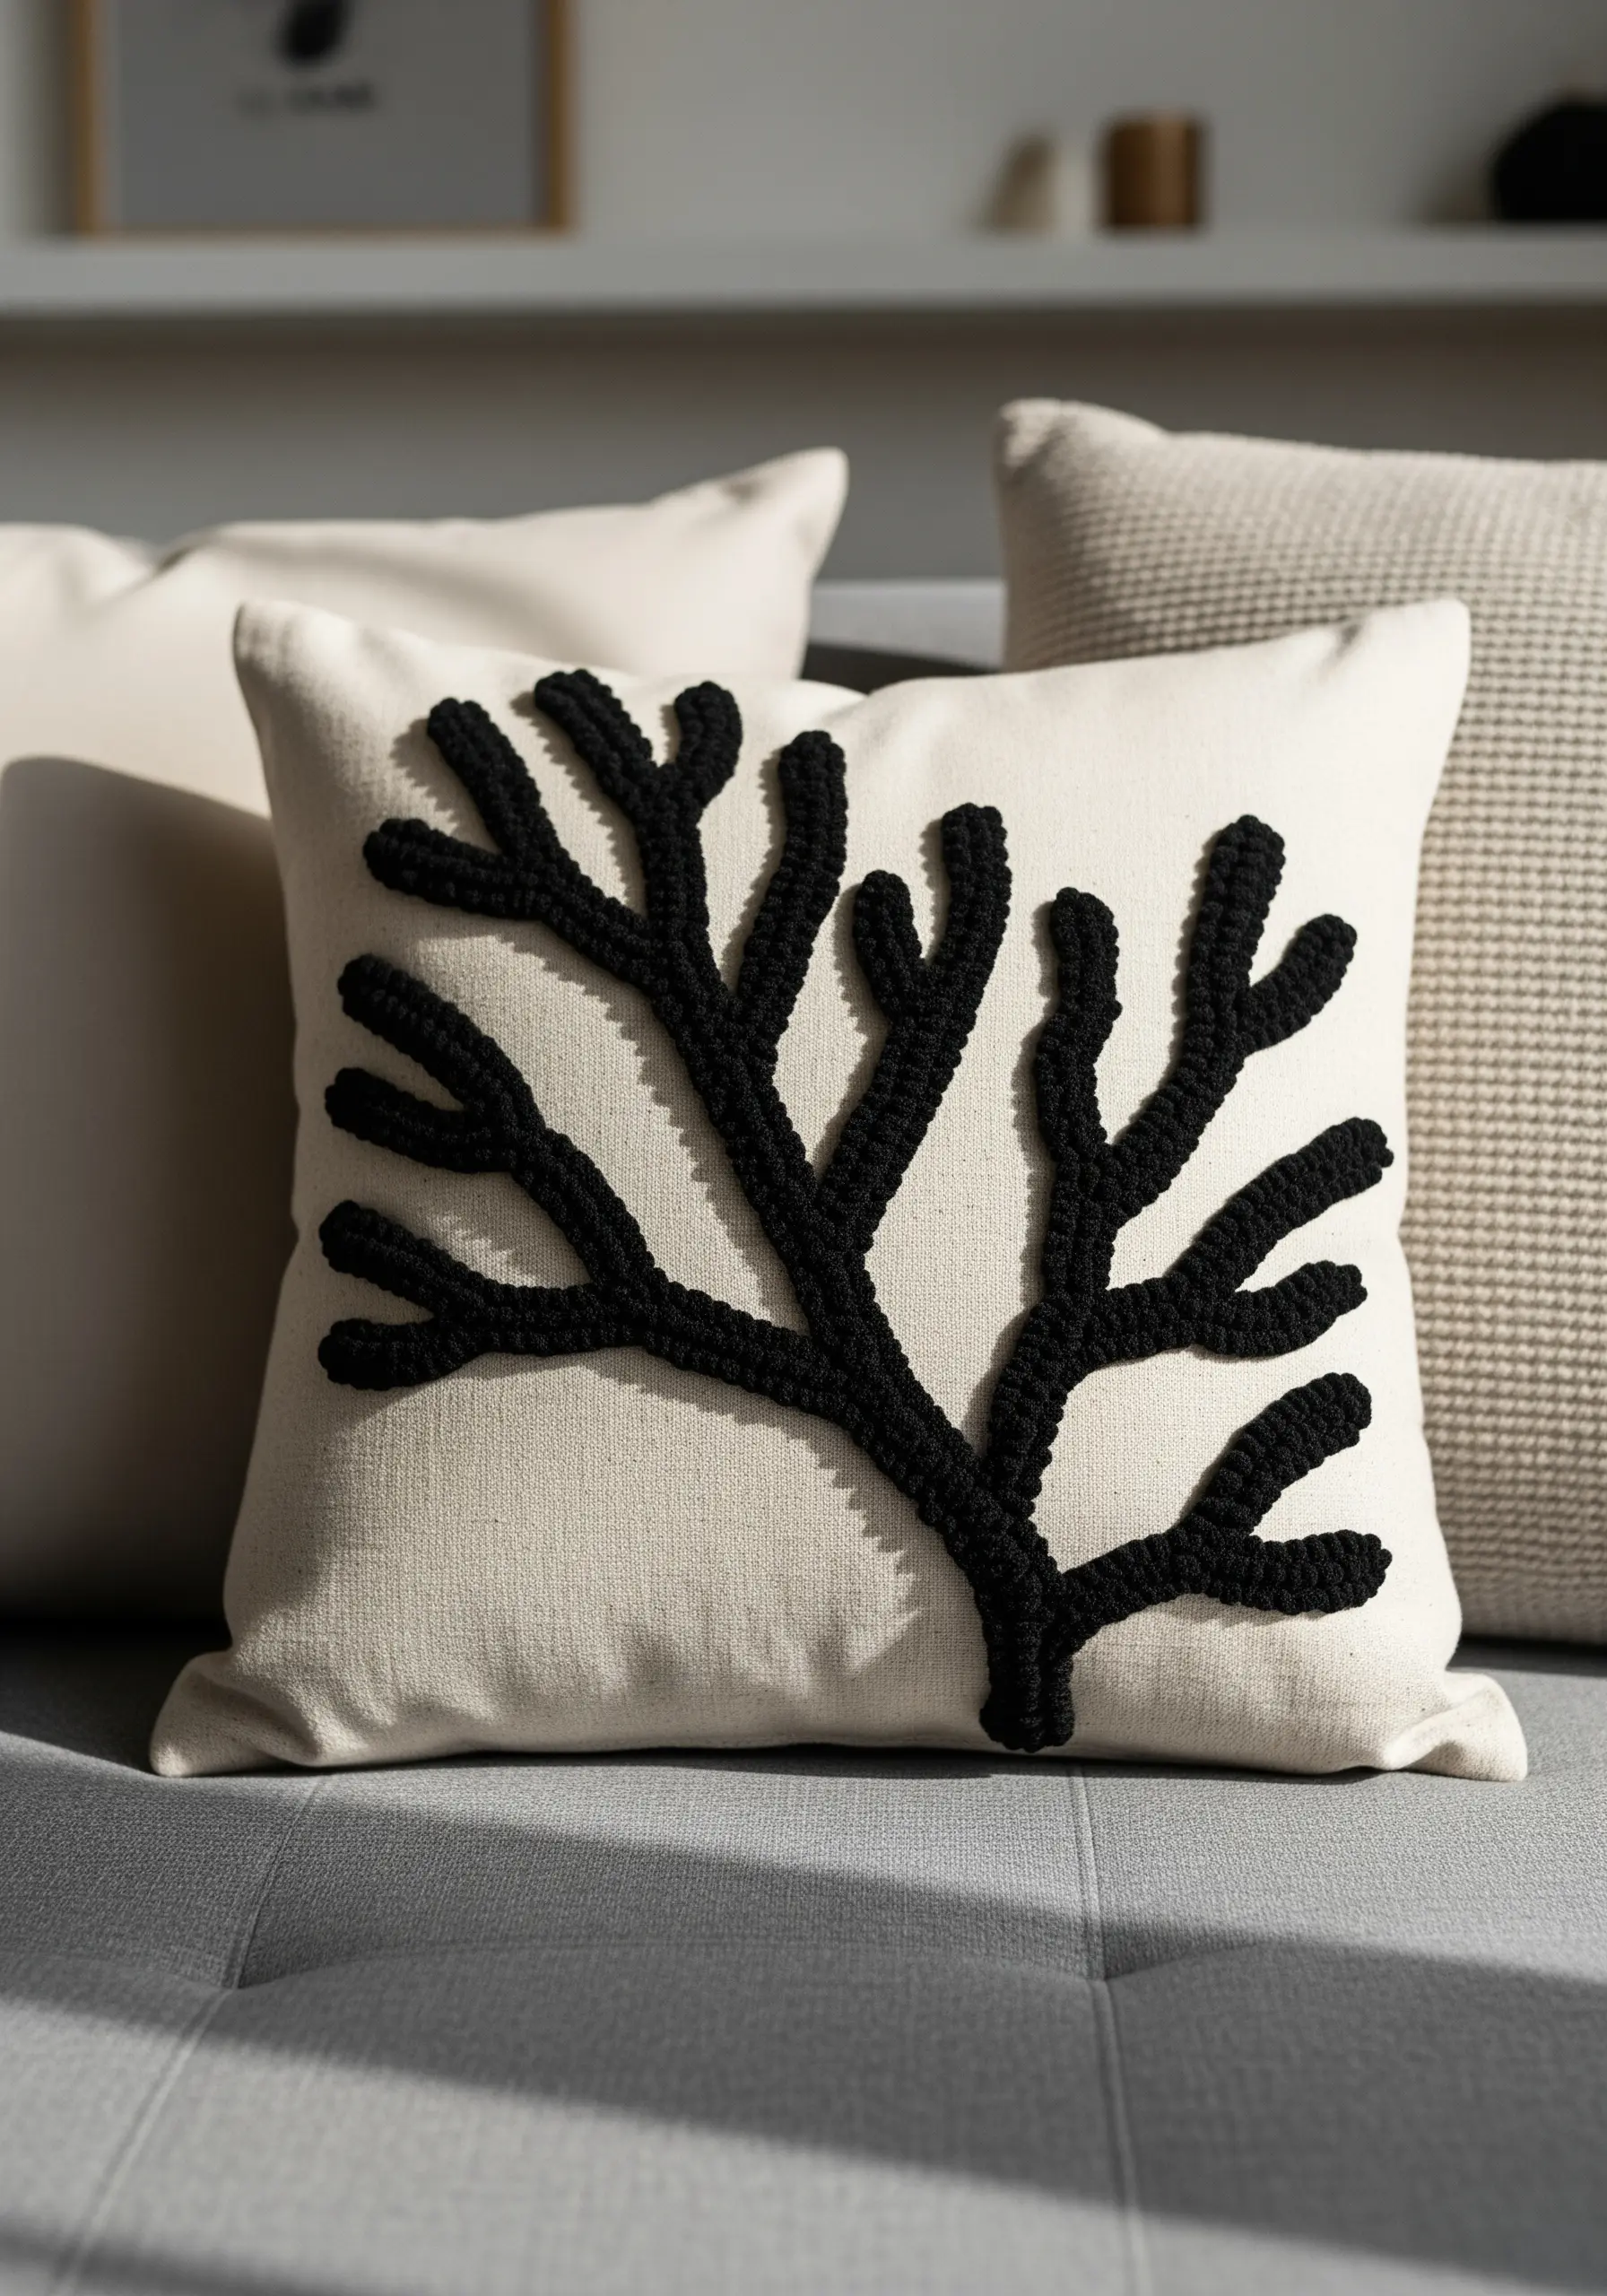
To achieve a bold, raised effect on home decor like pillows, use a couching technique for a clean, high-impact result.
Lay down a thick cord or multiple strands of yarn along your design line, then use a thinner, matching thread to tack it down with small, discreet stitches.
This method is much faster than satin stitch for creating thick lines and creates a stunning, tactile result that feels both modern and luxurious.
11. Design a Diptych for Minimalist Storytelling
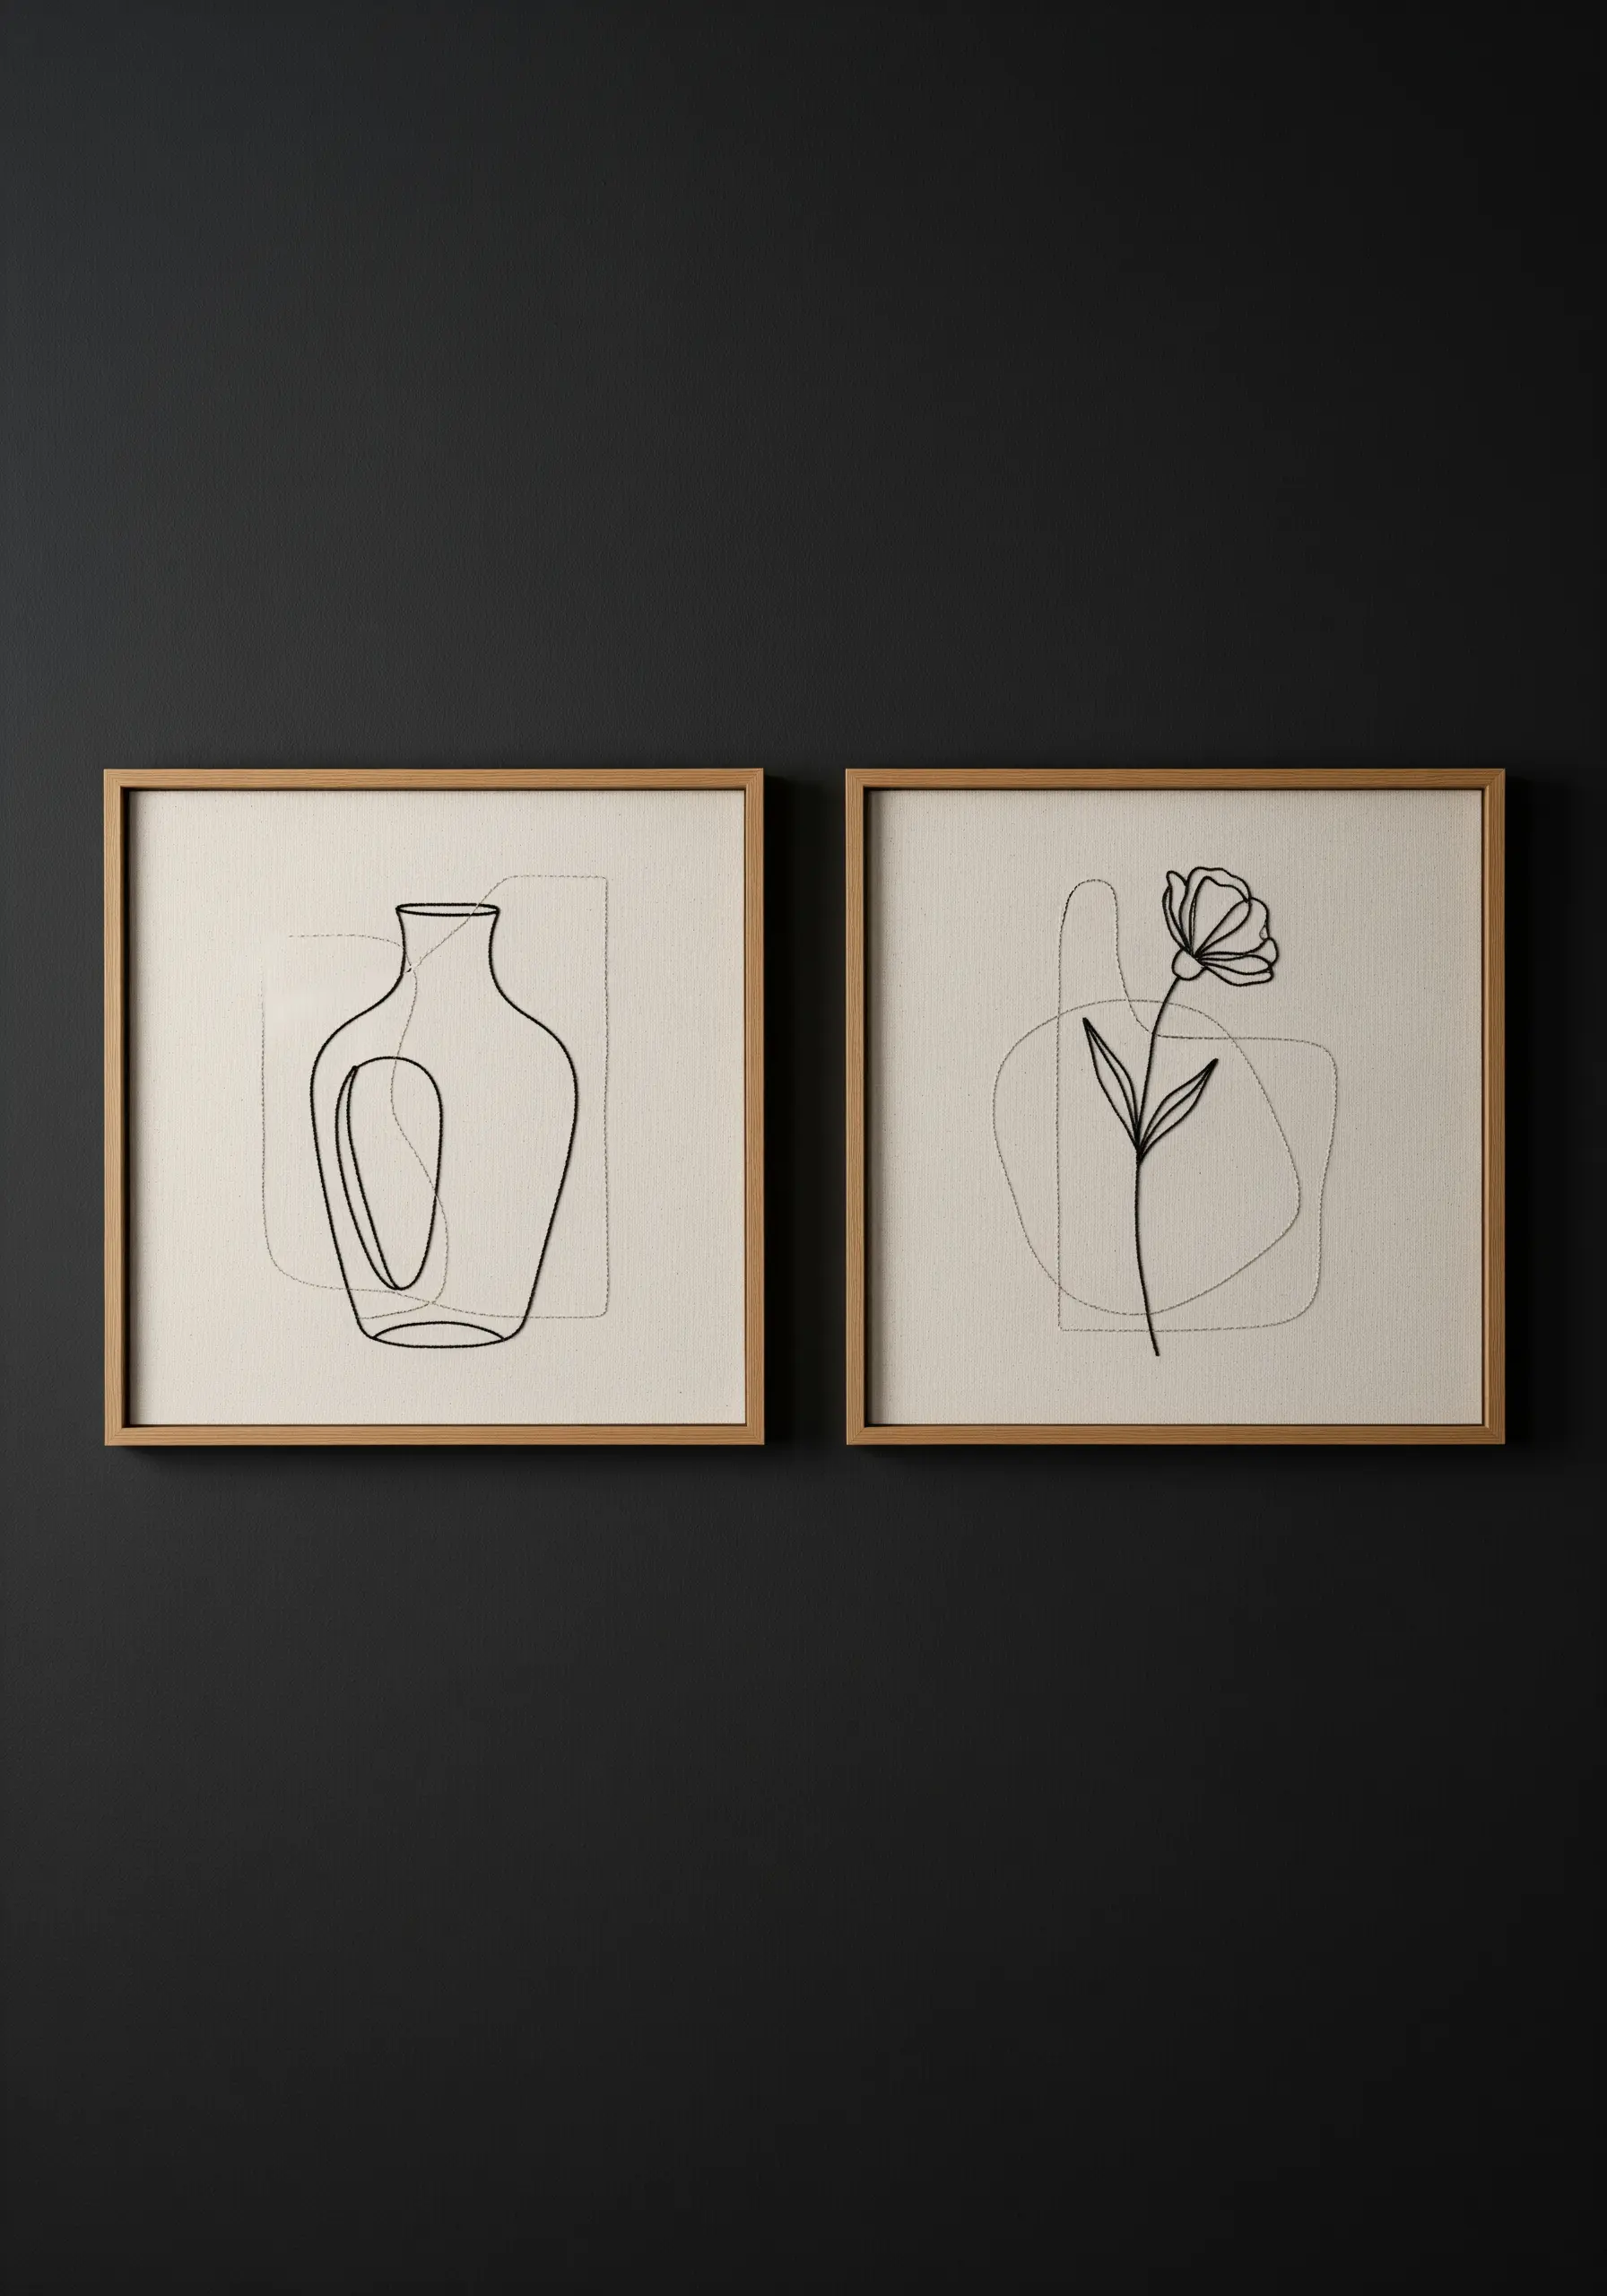
Elevate simple motifs by presenting them as a matched pair, which creates a visual conversation and gives each piece more artistic weight.
Use a light touch—a single strand of thread and an airy backstitch—to maintain a delicate, sketched feel that doesn’t overwhelm the eye.
The overlapping, “unfinished” background lines add a layer of abstract interest that makes the composition feel both intentional and contemporary.
These are perfect minimal embroidery wall pieces that instantly make small apartments feel bigger and brighter.
12. Let the Fabric Grid Guide Your Stitches
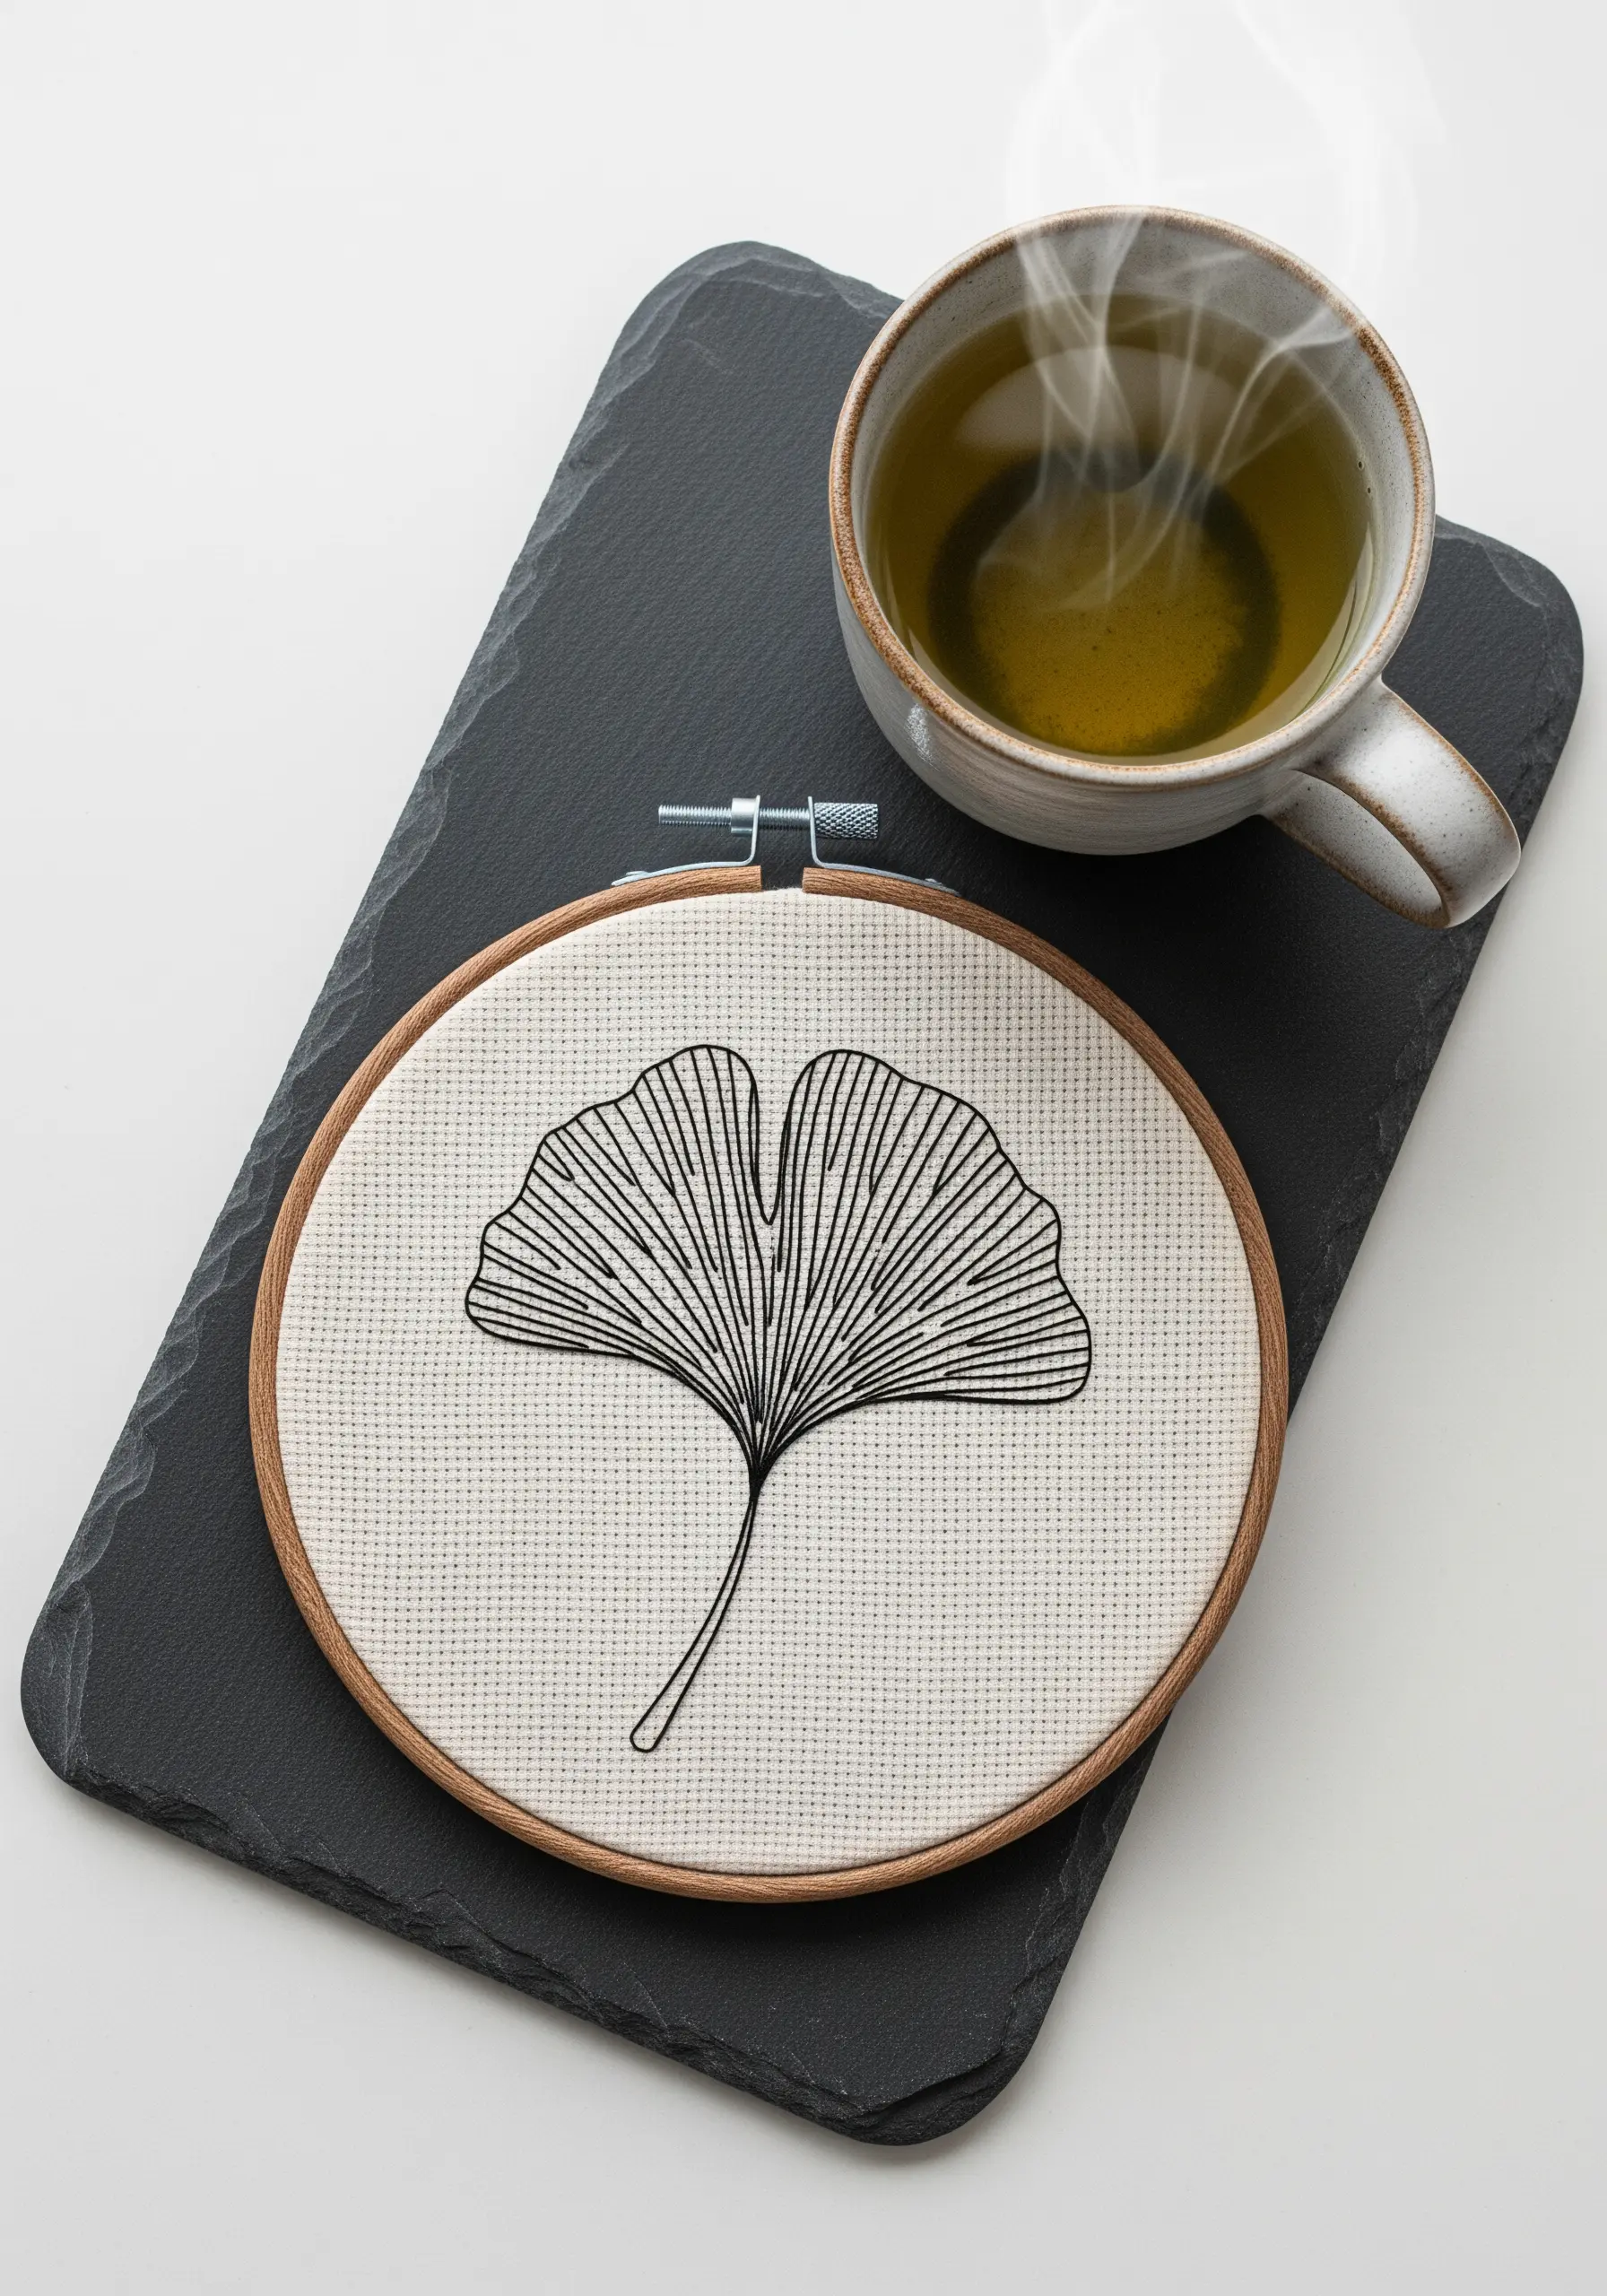
When working on Aida or another evenweave fabric, use the woven grid to your advantage for perfectly spaced, clean lines.
A simple backstitch becomes incredibly precise, allowing you to create sharp geometric or fan-like patterns where consistency is key.
The visible texture of the grid becomes an integral part of the design, adding a subtle layer of complexity to an otherwise minimalist motif.
13. Imply Motion with Dynamic, Overlapping Lines
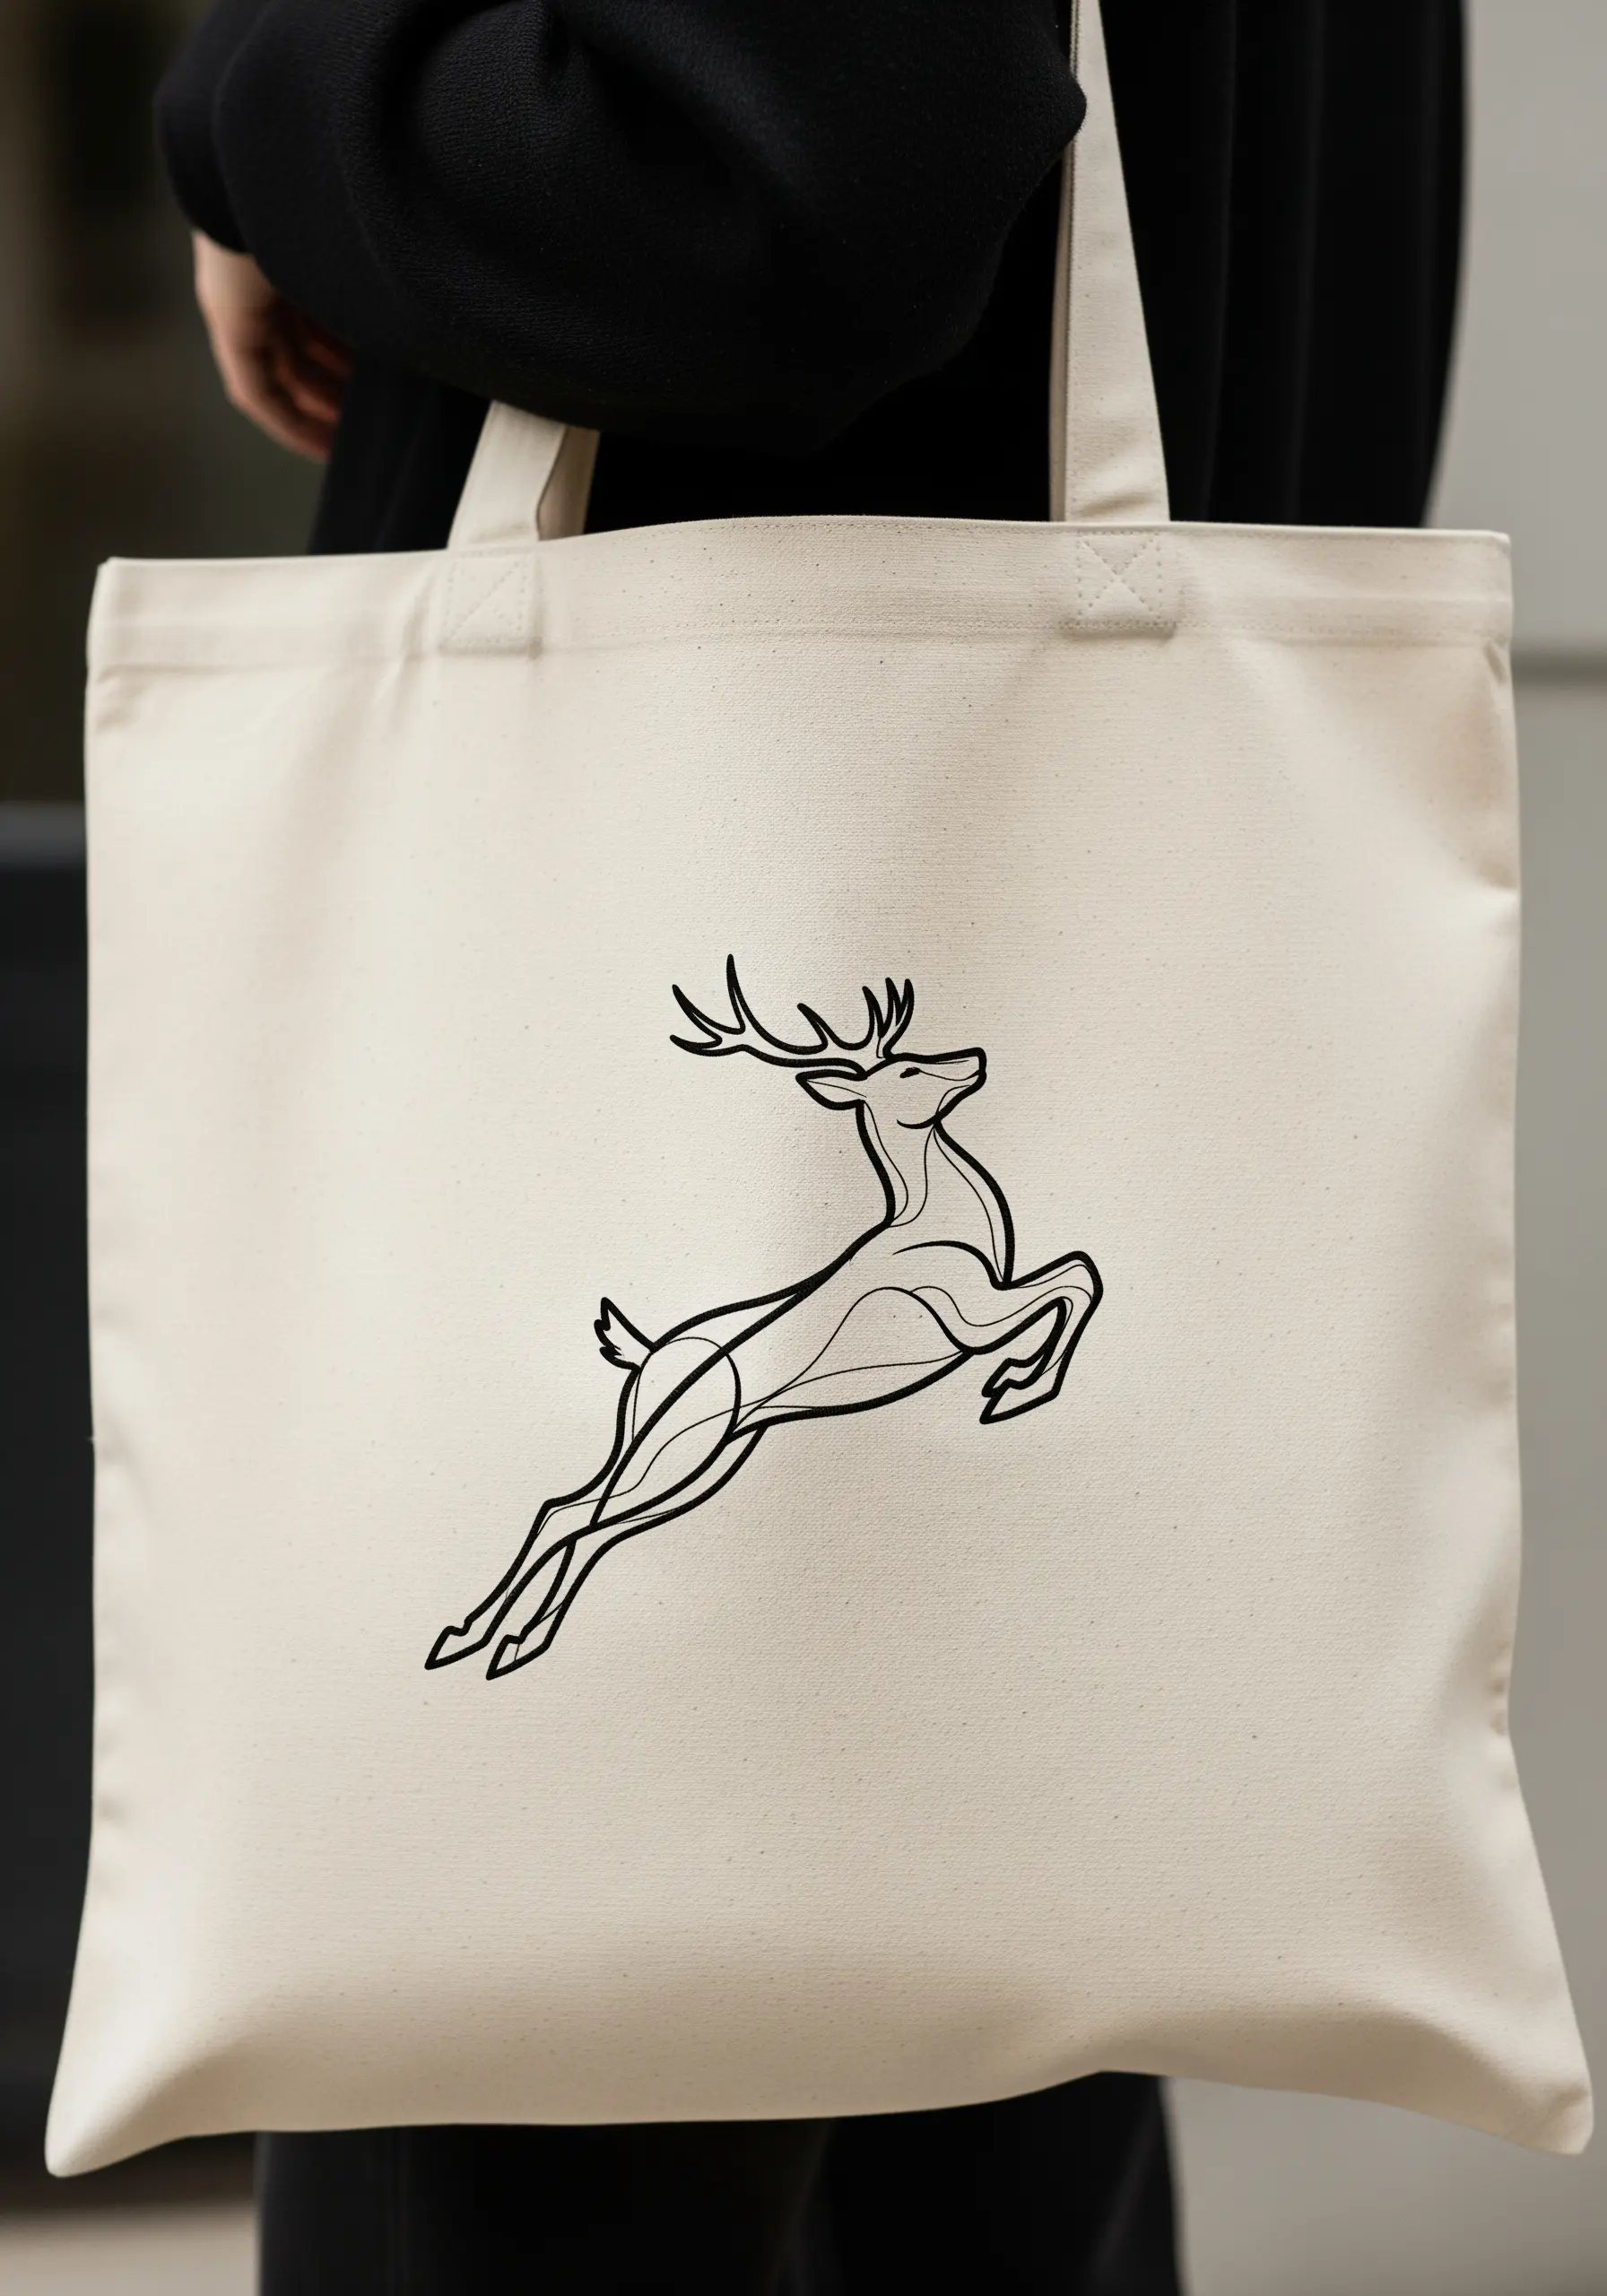
Capture the energy of a moving figure by using lines that flow, intersect, and even overlap.
Create a subtle sense of depth by varying the line weight; switch between one and two strands of floss to distinguish foreground and background elements.
On a functional piece like a tote bag, this brings the static image to life, turning it from a simple drawing into a captured moment of action.
14. Explore 3D Space with Thread and Pins
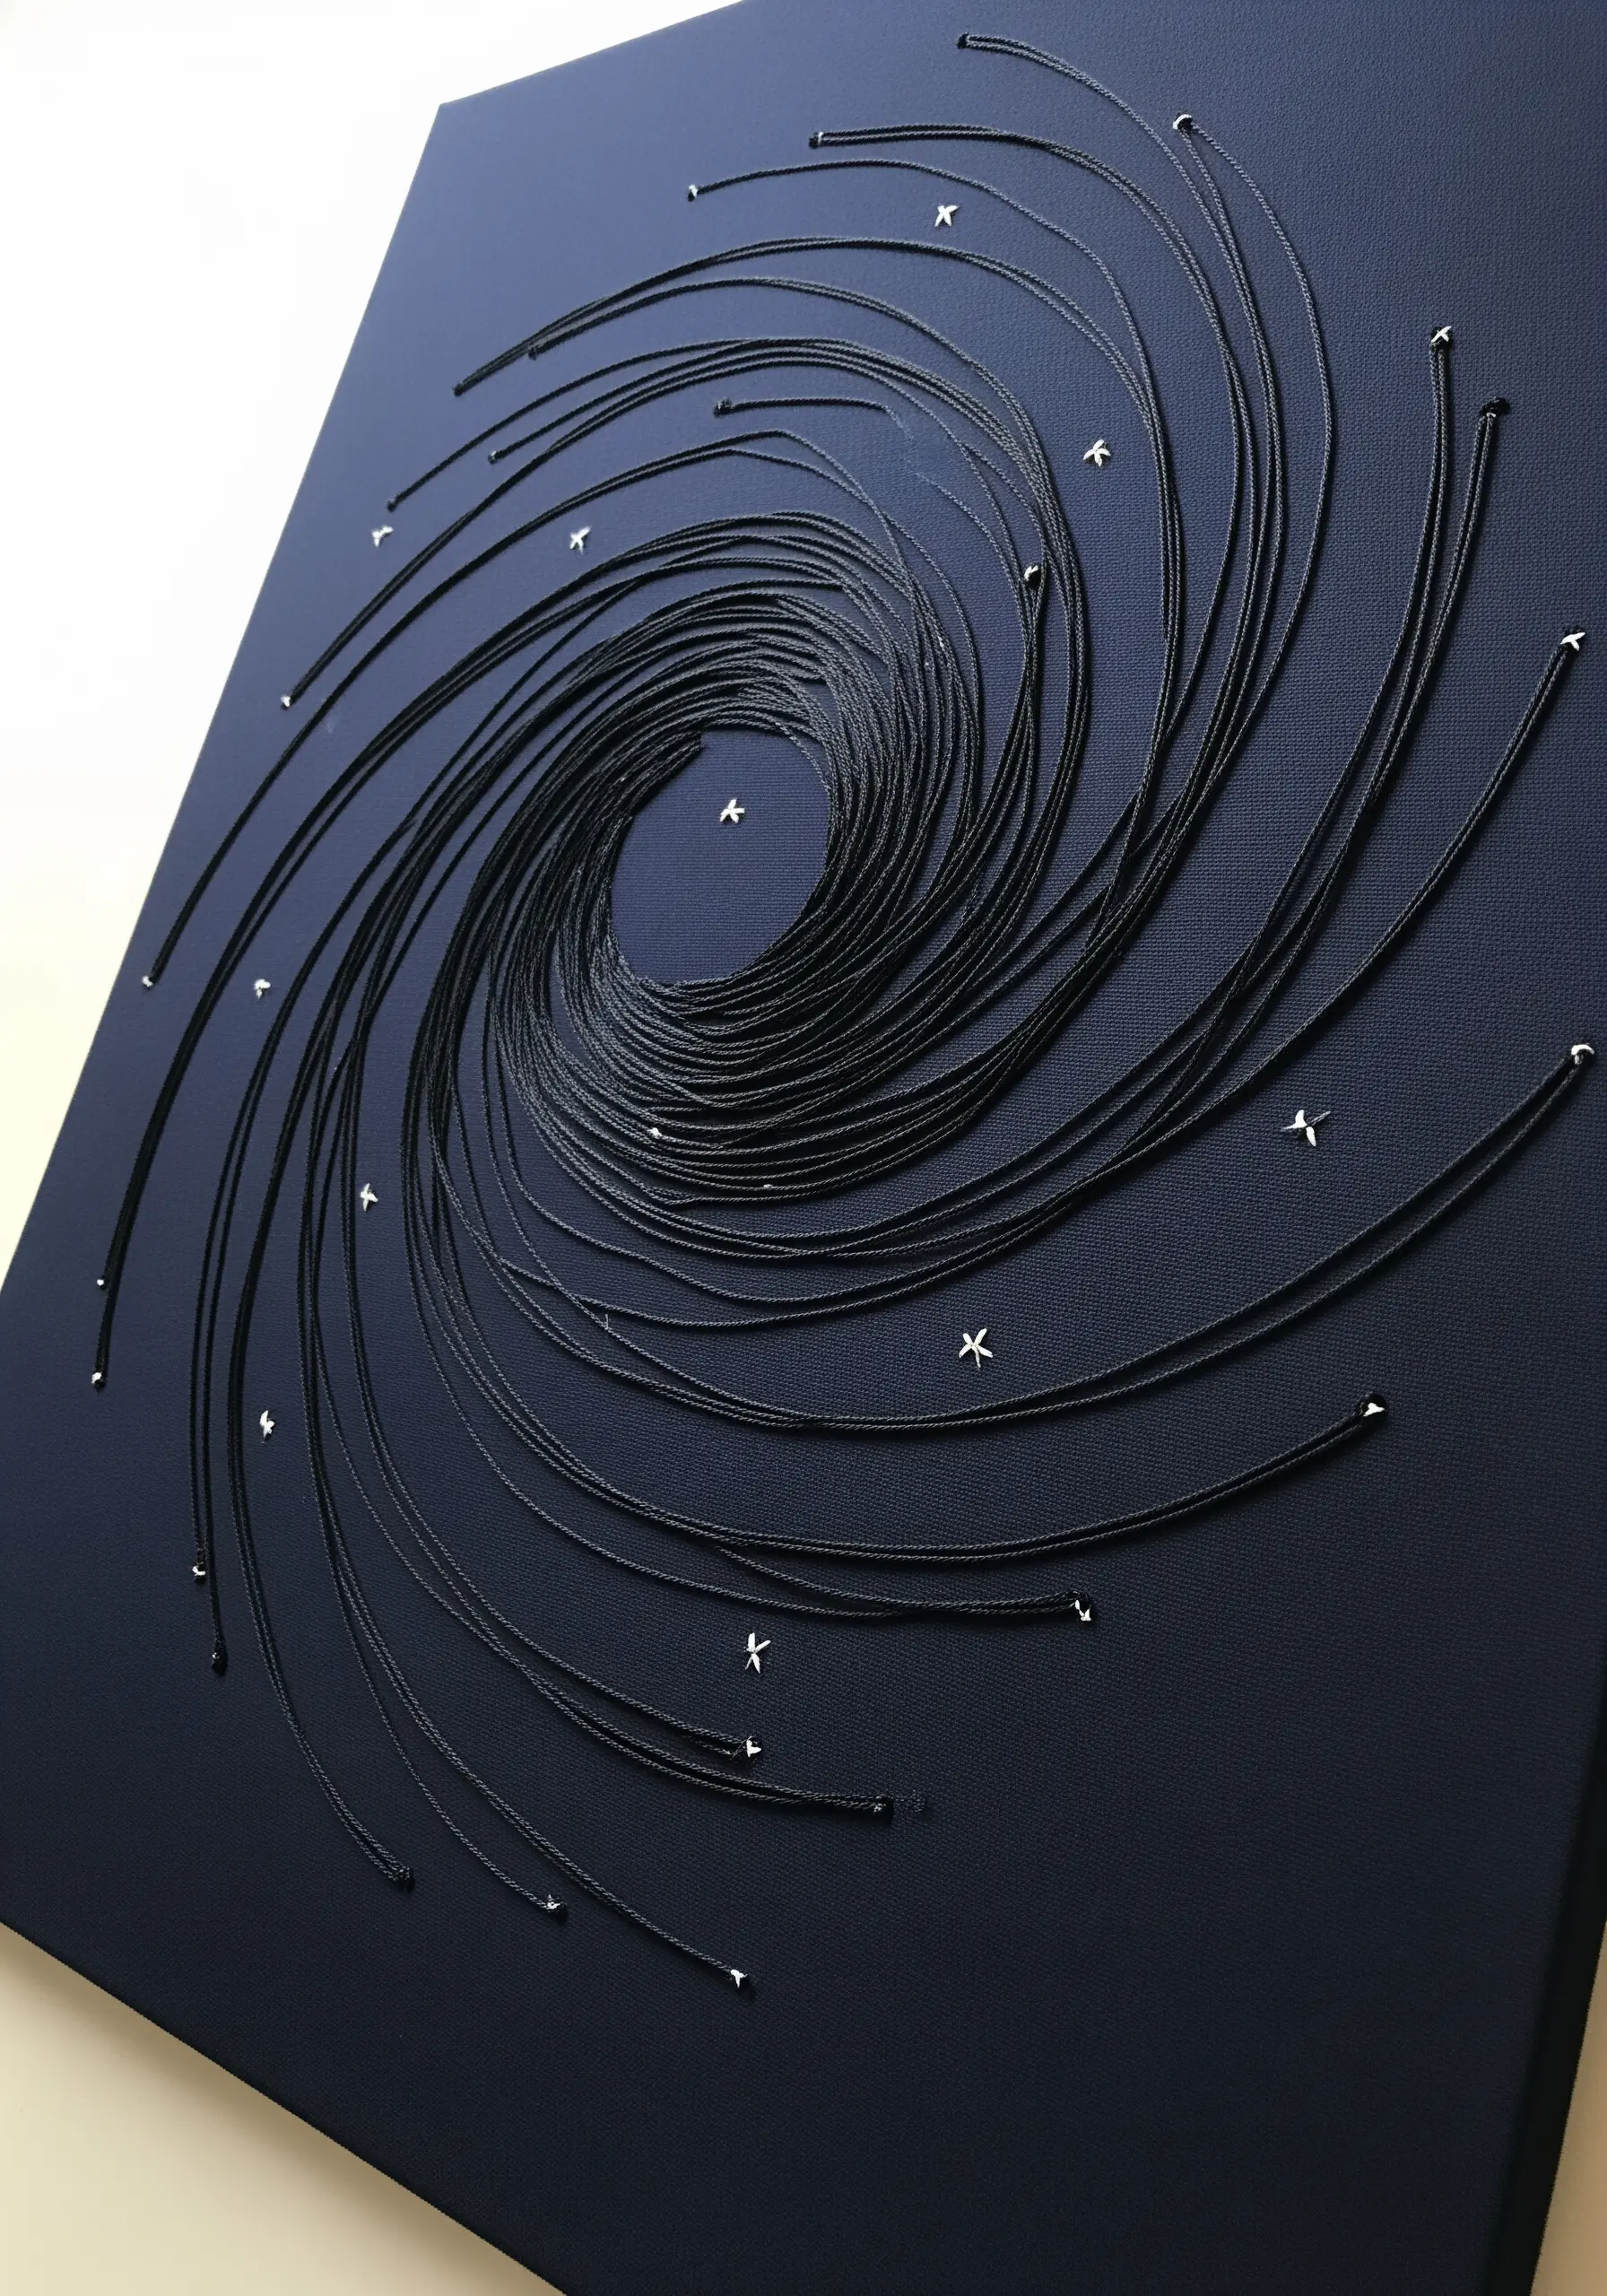
Move your embroidery beyond the hoop by using a stretched canvas and pins to create a string art effect.
This technique relies on building tension and layering thread by wrapping it around strategically placed pins or small nails to build a swirling, galactic form.
Tiny embroidered cross stitches can serve as distant stars, completing the celestial illusion and resulting in stunning fiber art installations that are perfect for gallery-worthy DIY.
15. Scale Up a Single Line for Statement Art
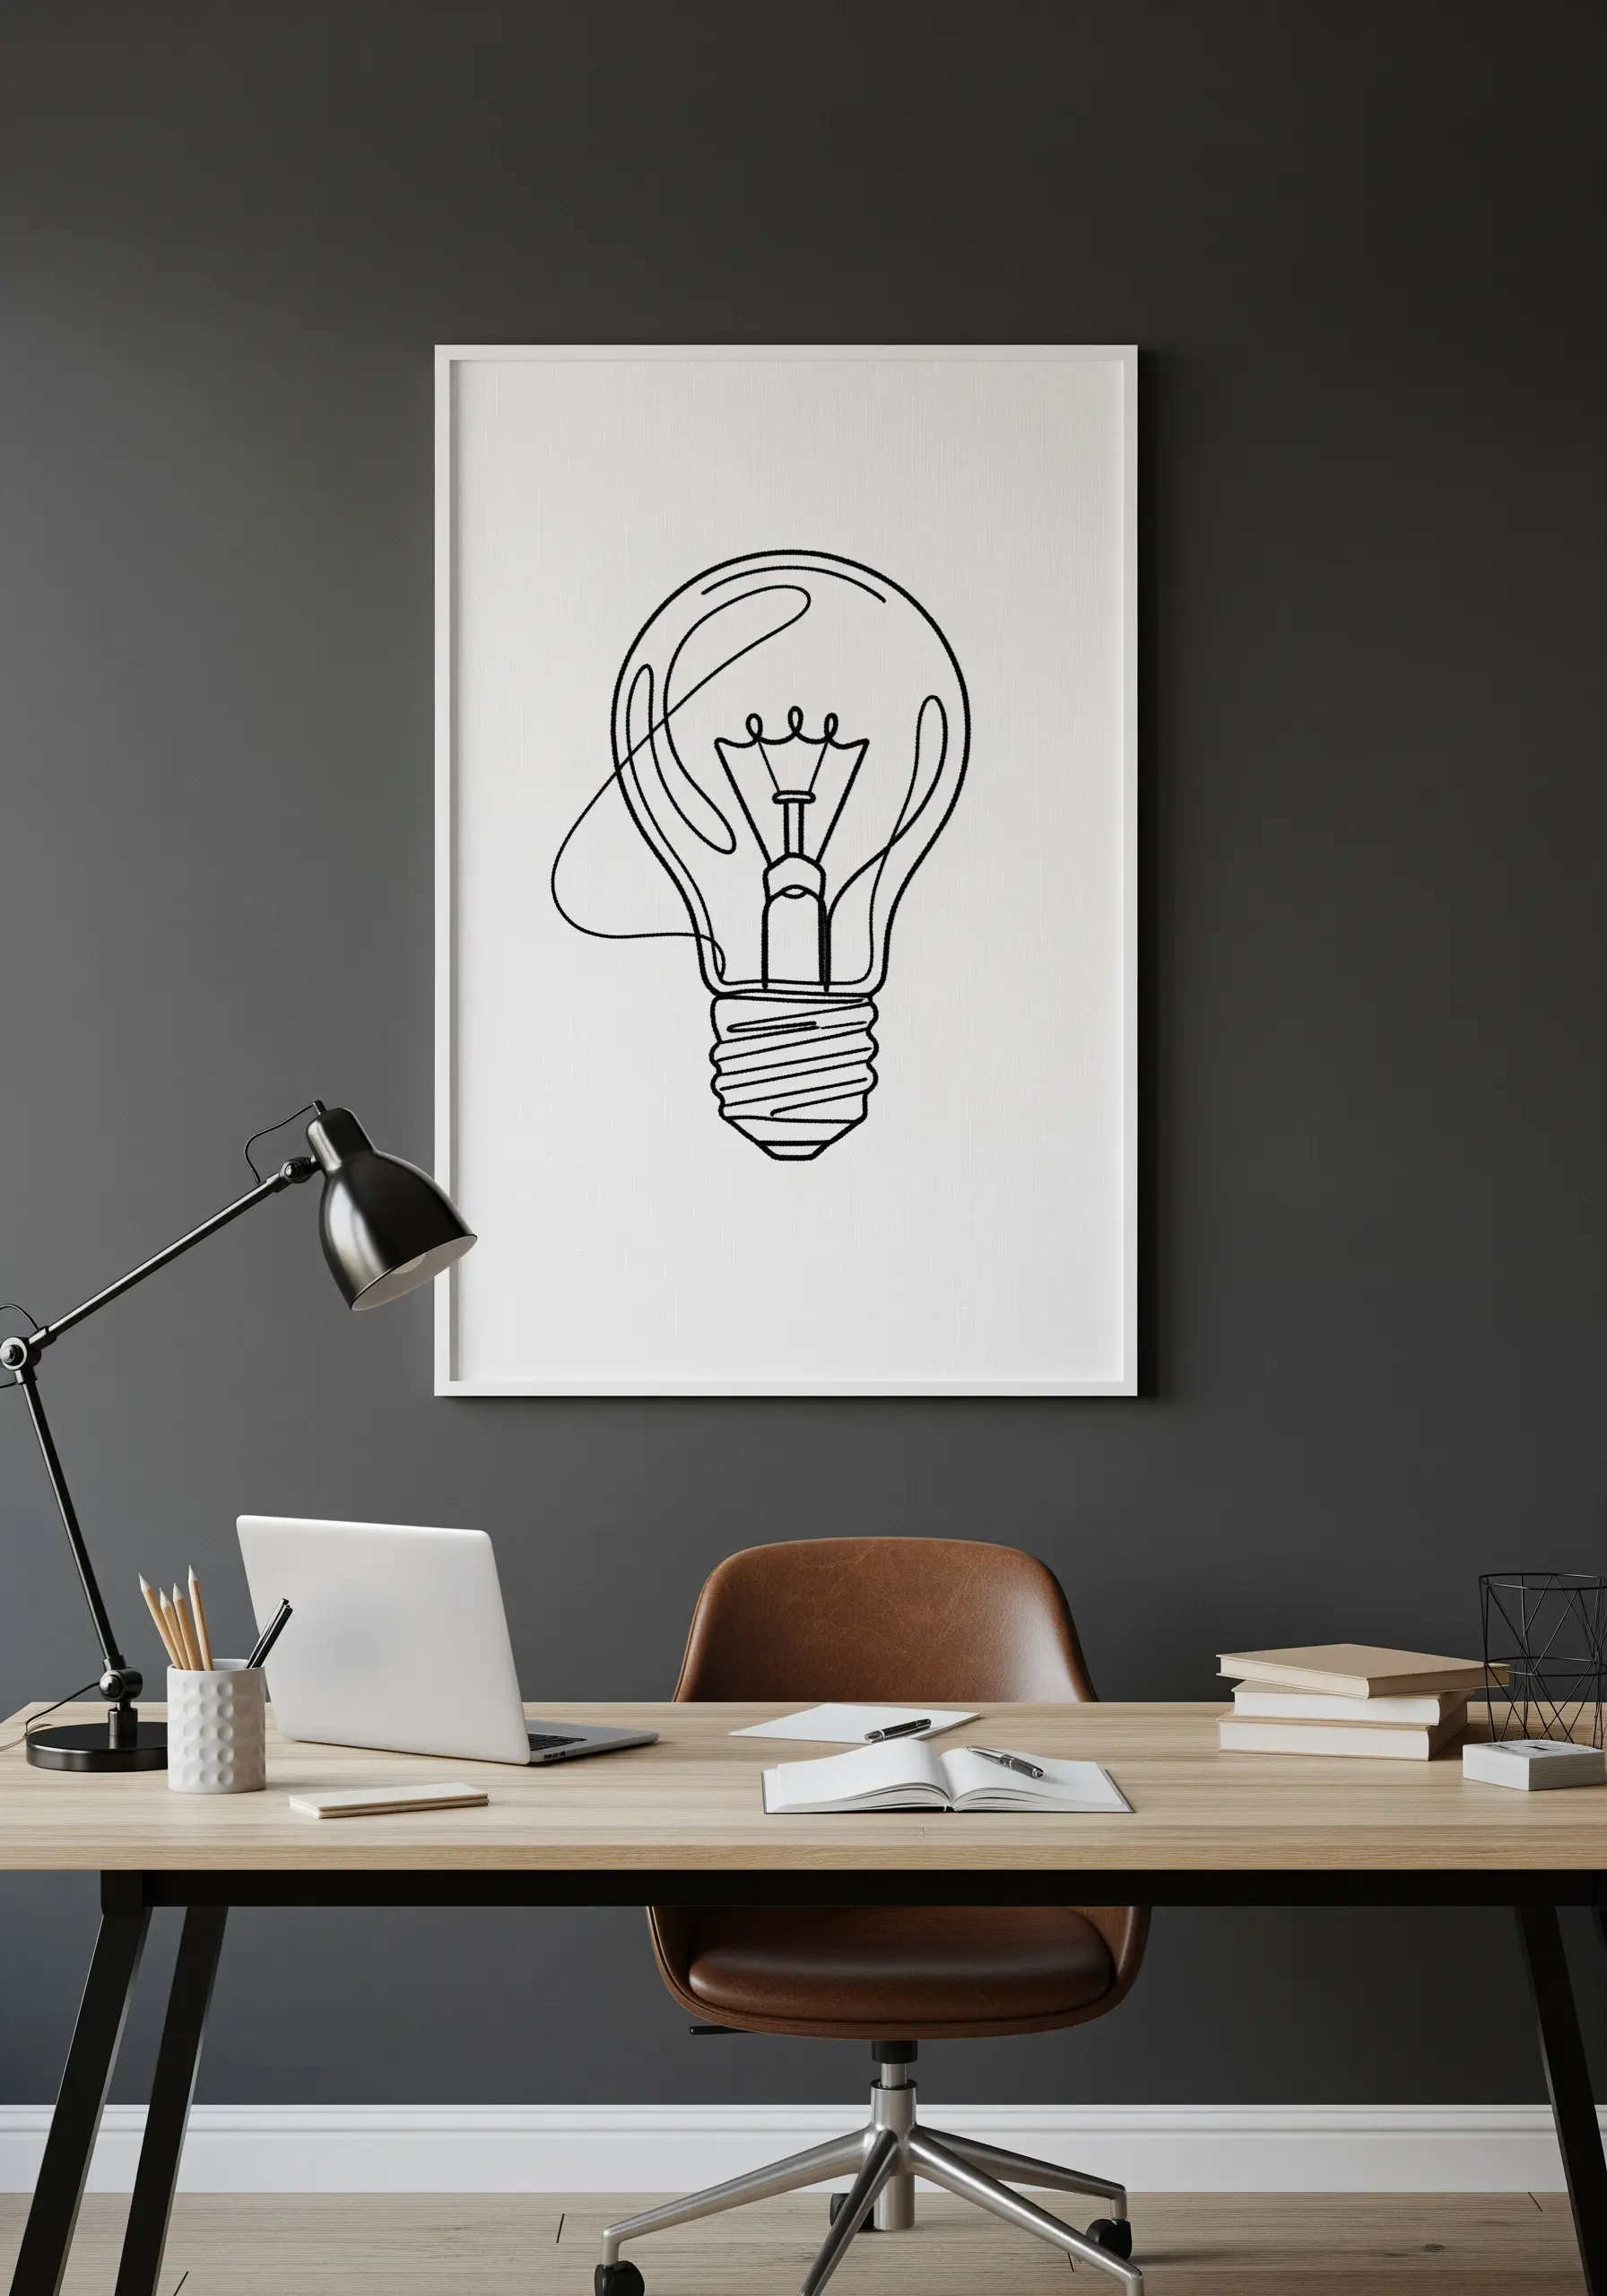
Do not be afraid to take a simple line-art concept and make it large enough to be a focal point.
When working on a large-scale piece, consistency is everything.
Use a full six strands of embroidery floss and a confident, even backstitch to create a bold, unwavering line that commands attention.
A simple white frame keeps the focus entirely on the artwork, making it a sophisticated centerpiece for a modern home or workspace.
16. Create a Woven Texture with Padded Stitches

For a thick, rope-like effect, first create a foundation of padding stitches along your design line.
Then, work a dense layer of satin stitches over this padding at a perpendicular angle.
This gives the knot a true three-dimensional quality you can see and feel, and it works best on a rustic fabric like burlap or heavy linen, where the texture contrast is most dramatic.
17. Merge Silhouette and Line to Capture Movement
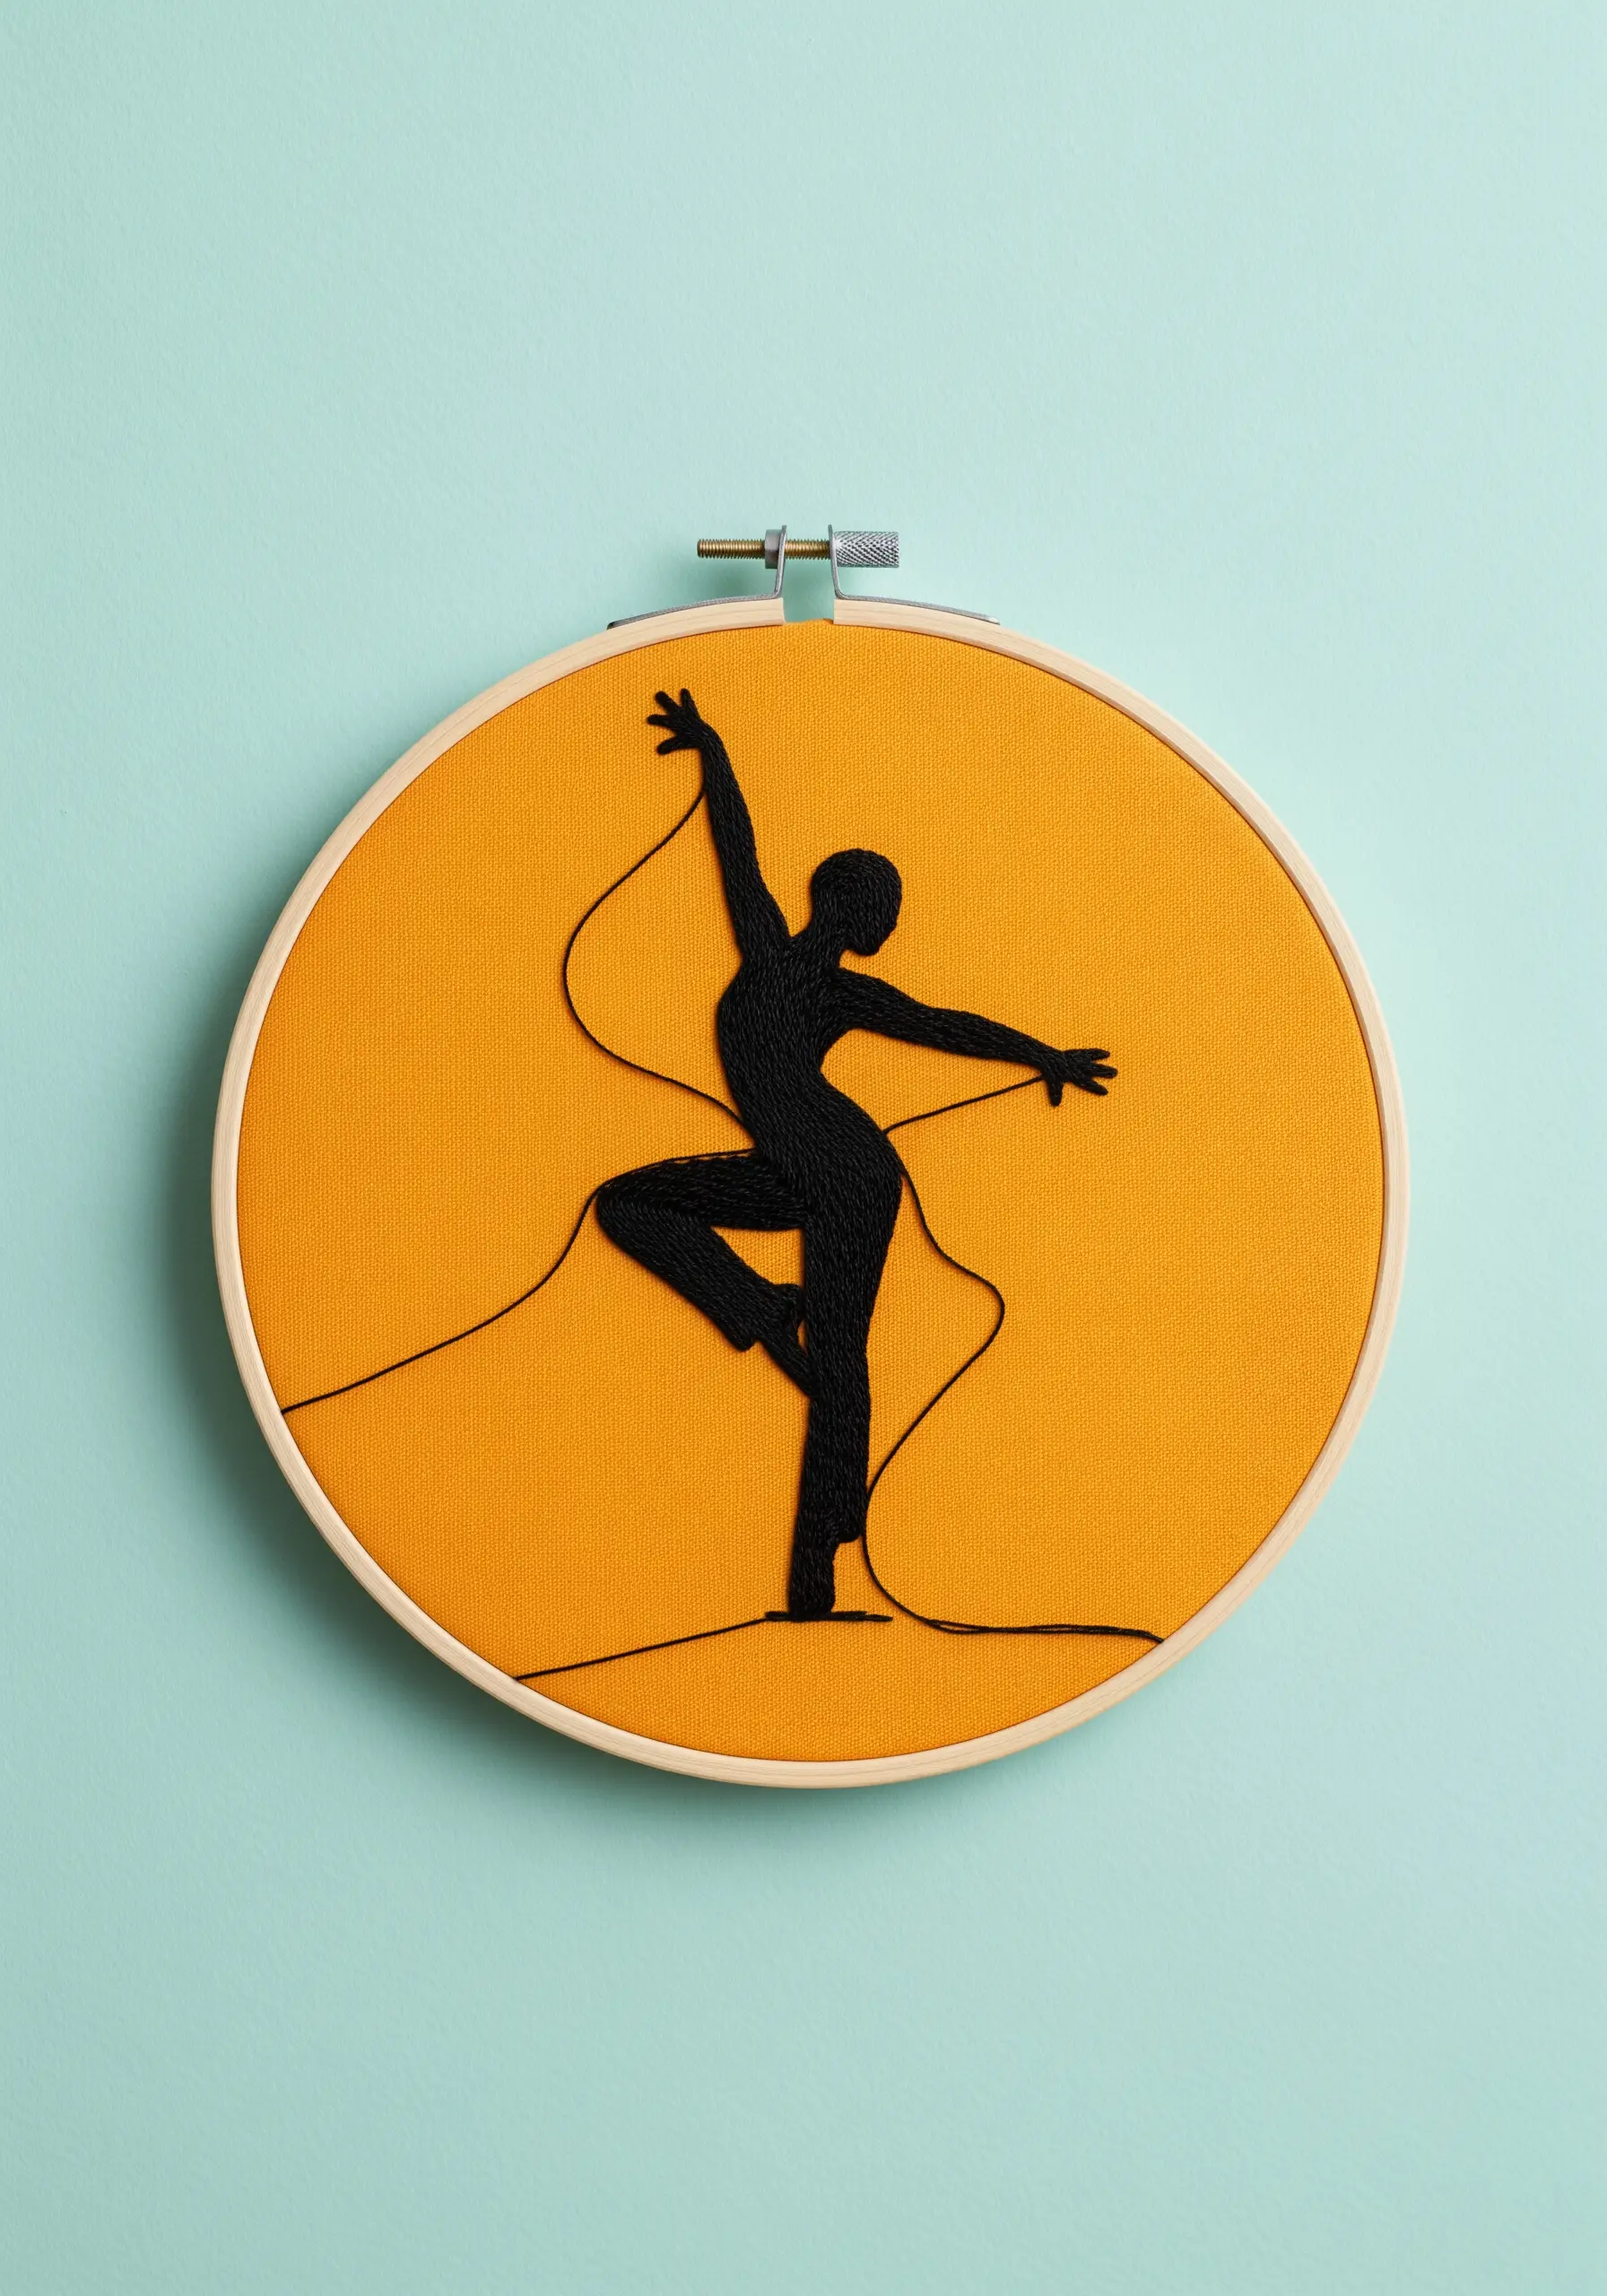
Tell a story of motion by combining a filled silhouette with expressive, free-flowing lines.
Stitch the dancer’s body with a dense, flat satin stitch for a solid, graphic presence.
Then, let single strands of thread trail off from the figure, looping loosely across the fabric before being tacked down at the edge of the hoop.
This striking contrast suggests the path of movement, turning a static pose into a dynamic performance.
18. Choose Felt for a Forgiving and Stable Base

If you struggle with fabric puckering, stitch your next line-art piece on a sheet of high-quality craft felt.
Its non-woven structure provides excellent stability without needing a stabilizer, making it perfect for beginners practicing clean line work.
The soft, matte surface also makes black thread appear incredibly crisp and defined, ensuring your silhouette becomes the star of the show.
This is one of the most effective minimal embroidery patterns that look harder than they are.
19. Achieve a Floating Effect with Sheer Fabric
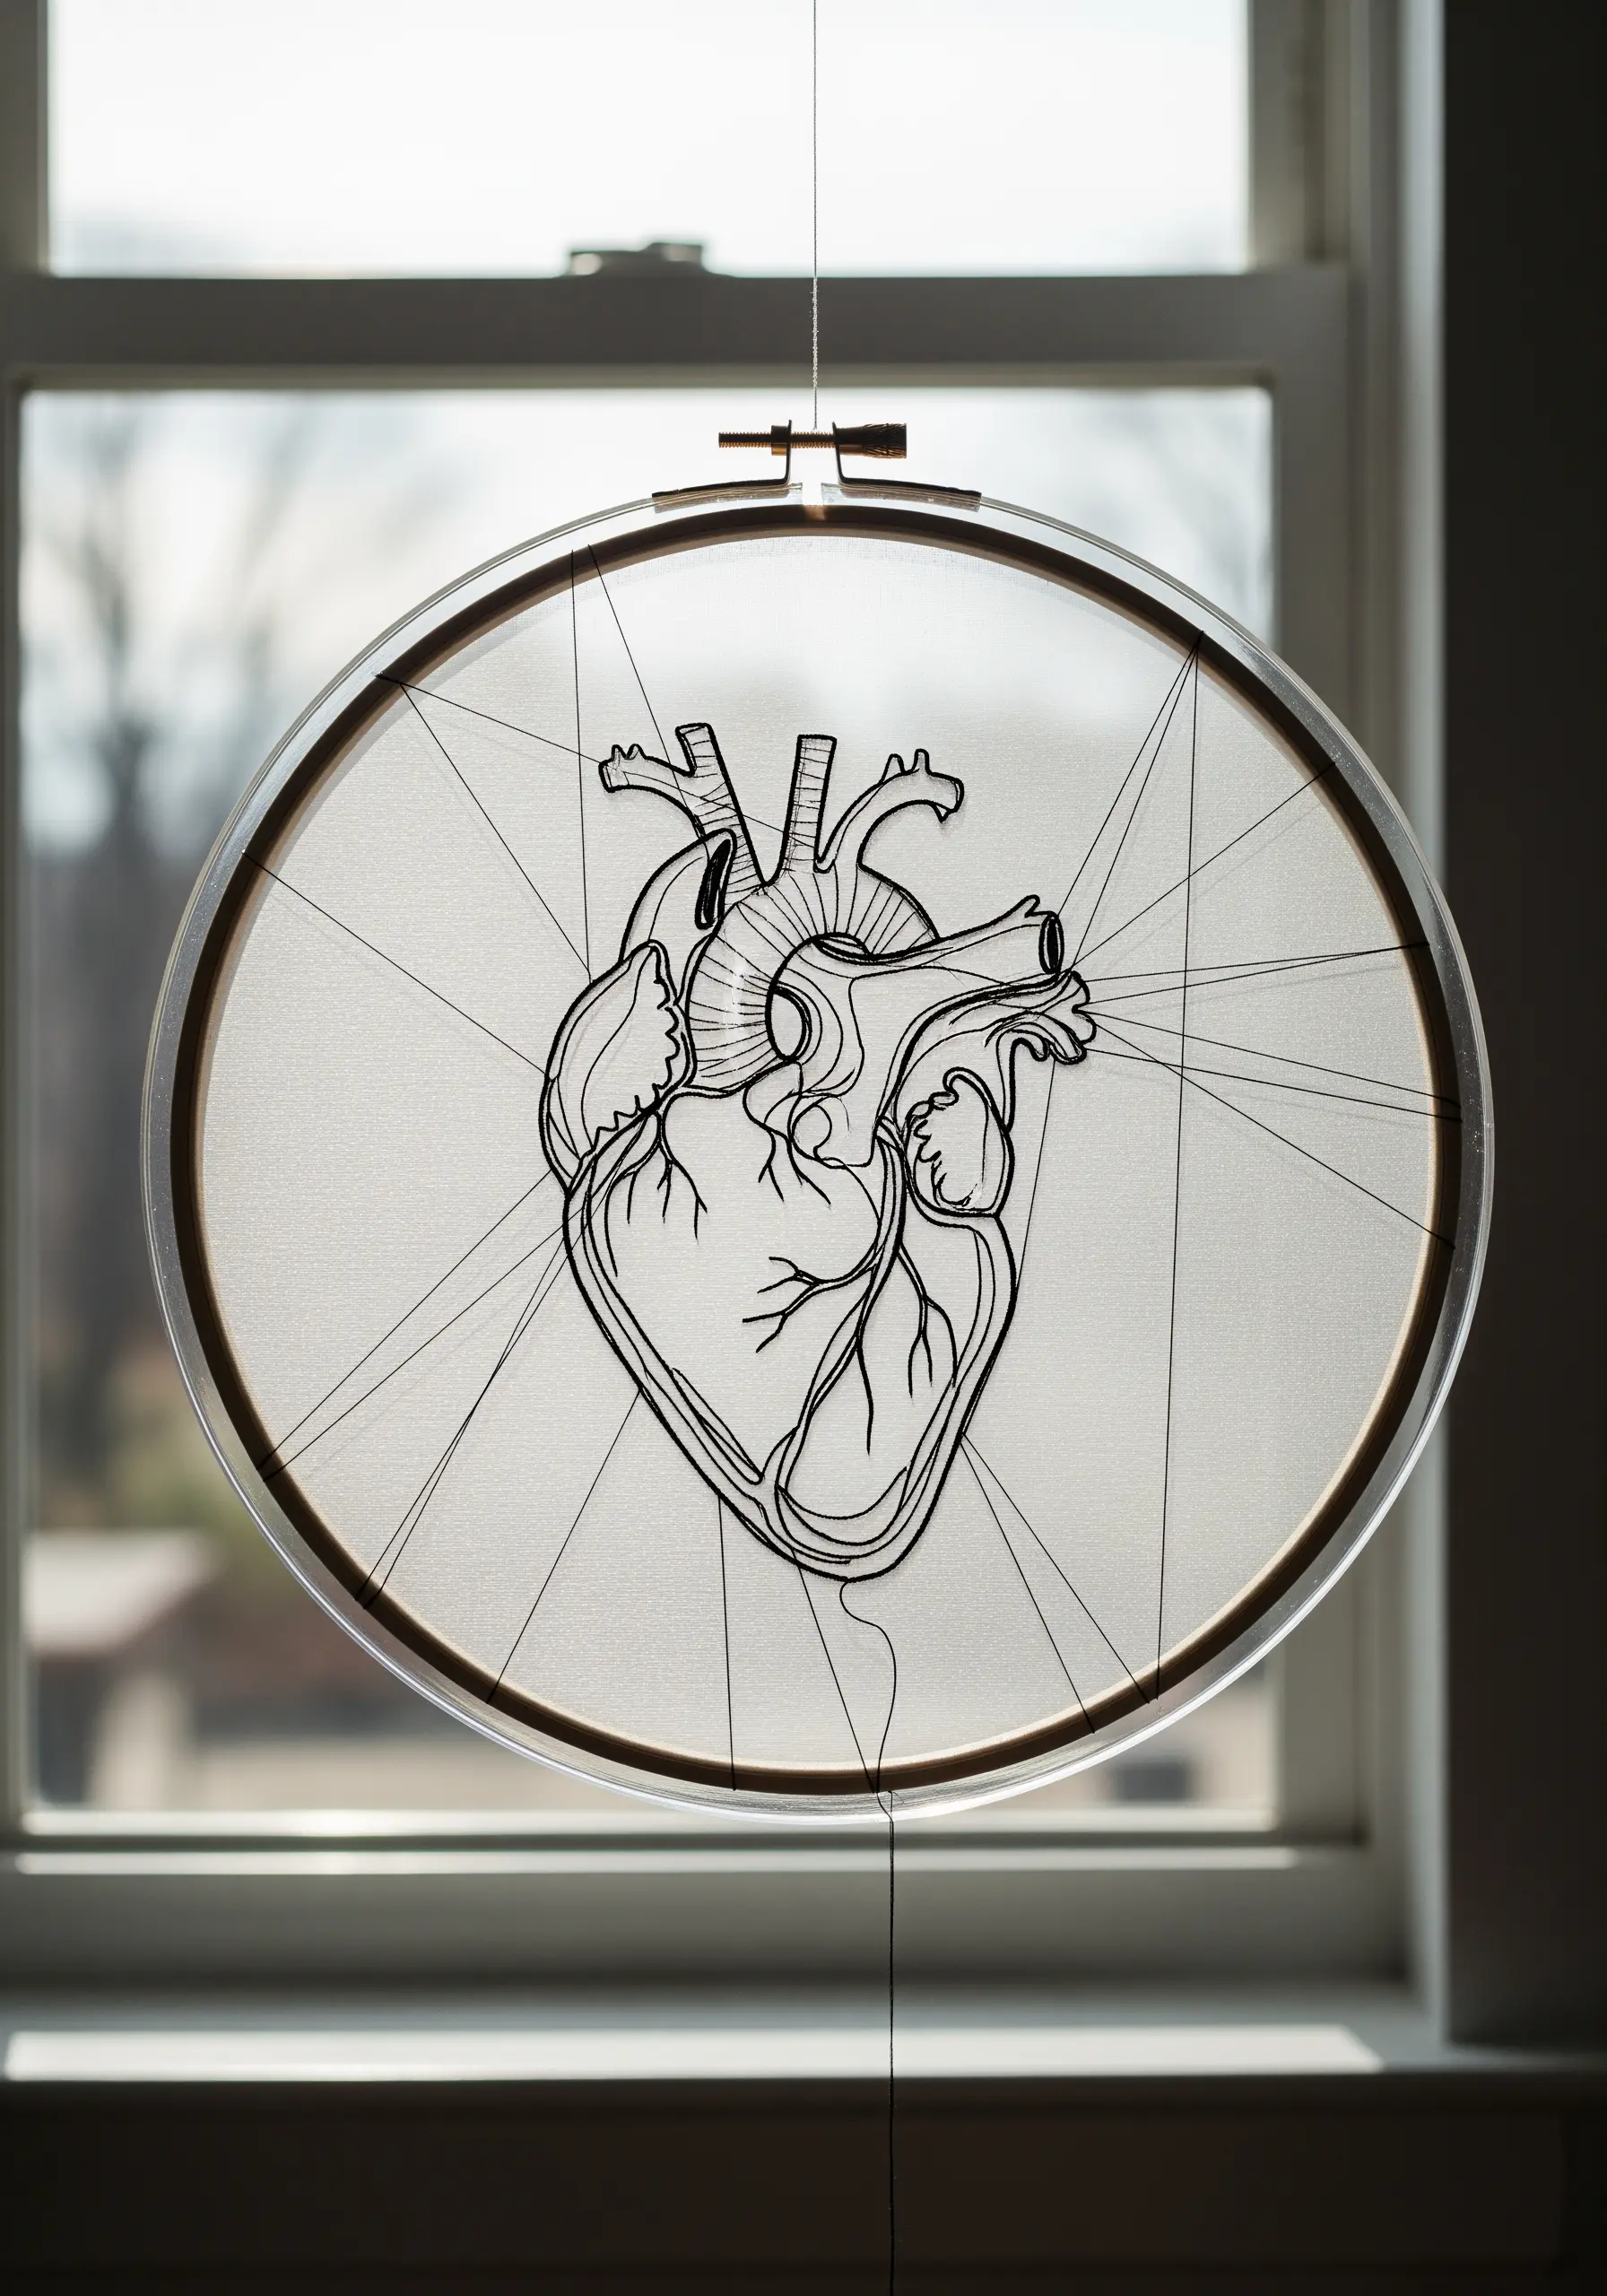
Stitch your design on a sheer material like tulle or organza for a stunning, ethereal effect.
You must use a water-soluble or tear-away stabilizer to support your stitches during the process.
Once the stabilizer is removed, the design will appear to float weightlessly inside the hoop.
The radial lines stitched to the hoop’s edge add structural tension and a beautiful, web-like frame that completes the composition.


