
You’ve mastered the satin stitch, your French knots are perfect, but you feel a creative plateau. You look at your embroidery and wonder how to make it feel less like a craft and more like art. The answer isn’t always a new, complex stitch; sometimes, it’s a shift in perspective.
These large-scale installations aren’t just spectacles to be admired—they are a library of techniques waiting to be translated into your own hands. They teach us to think about yarn not just as a line, but as a sculptural material capable of creating texture, form, tension, and flow.
In each example that follows, I’ll show you how to borrow the core principle—be it architectural tension, modular construction, or tactile layering—and apply it to your own work. It’s time to move beyond the flat surface and start building worlds with your thread.
1. Translate Grand Scale Gradients into Thread
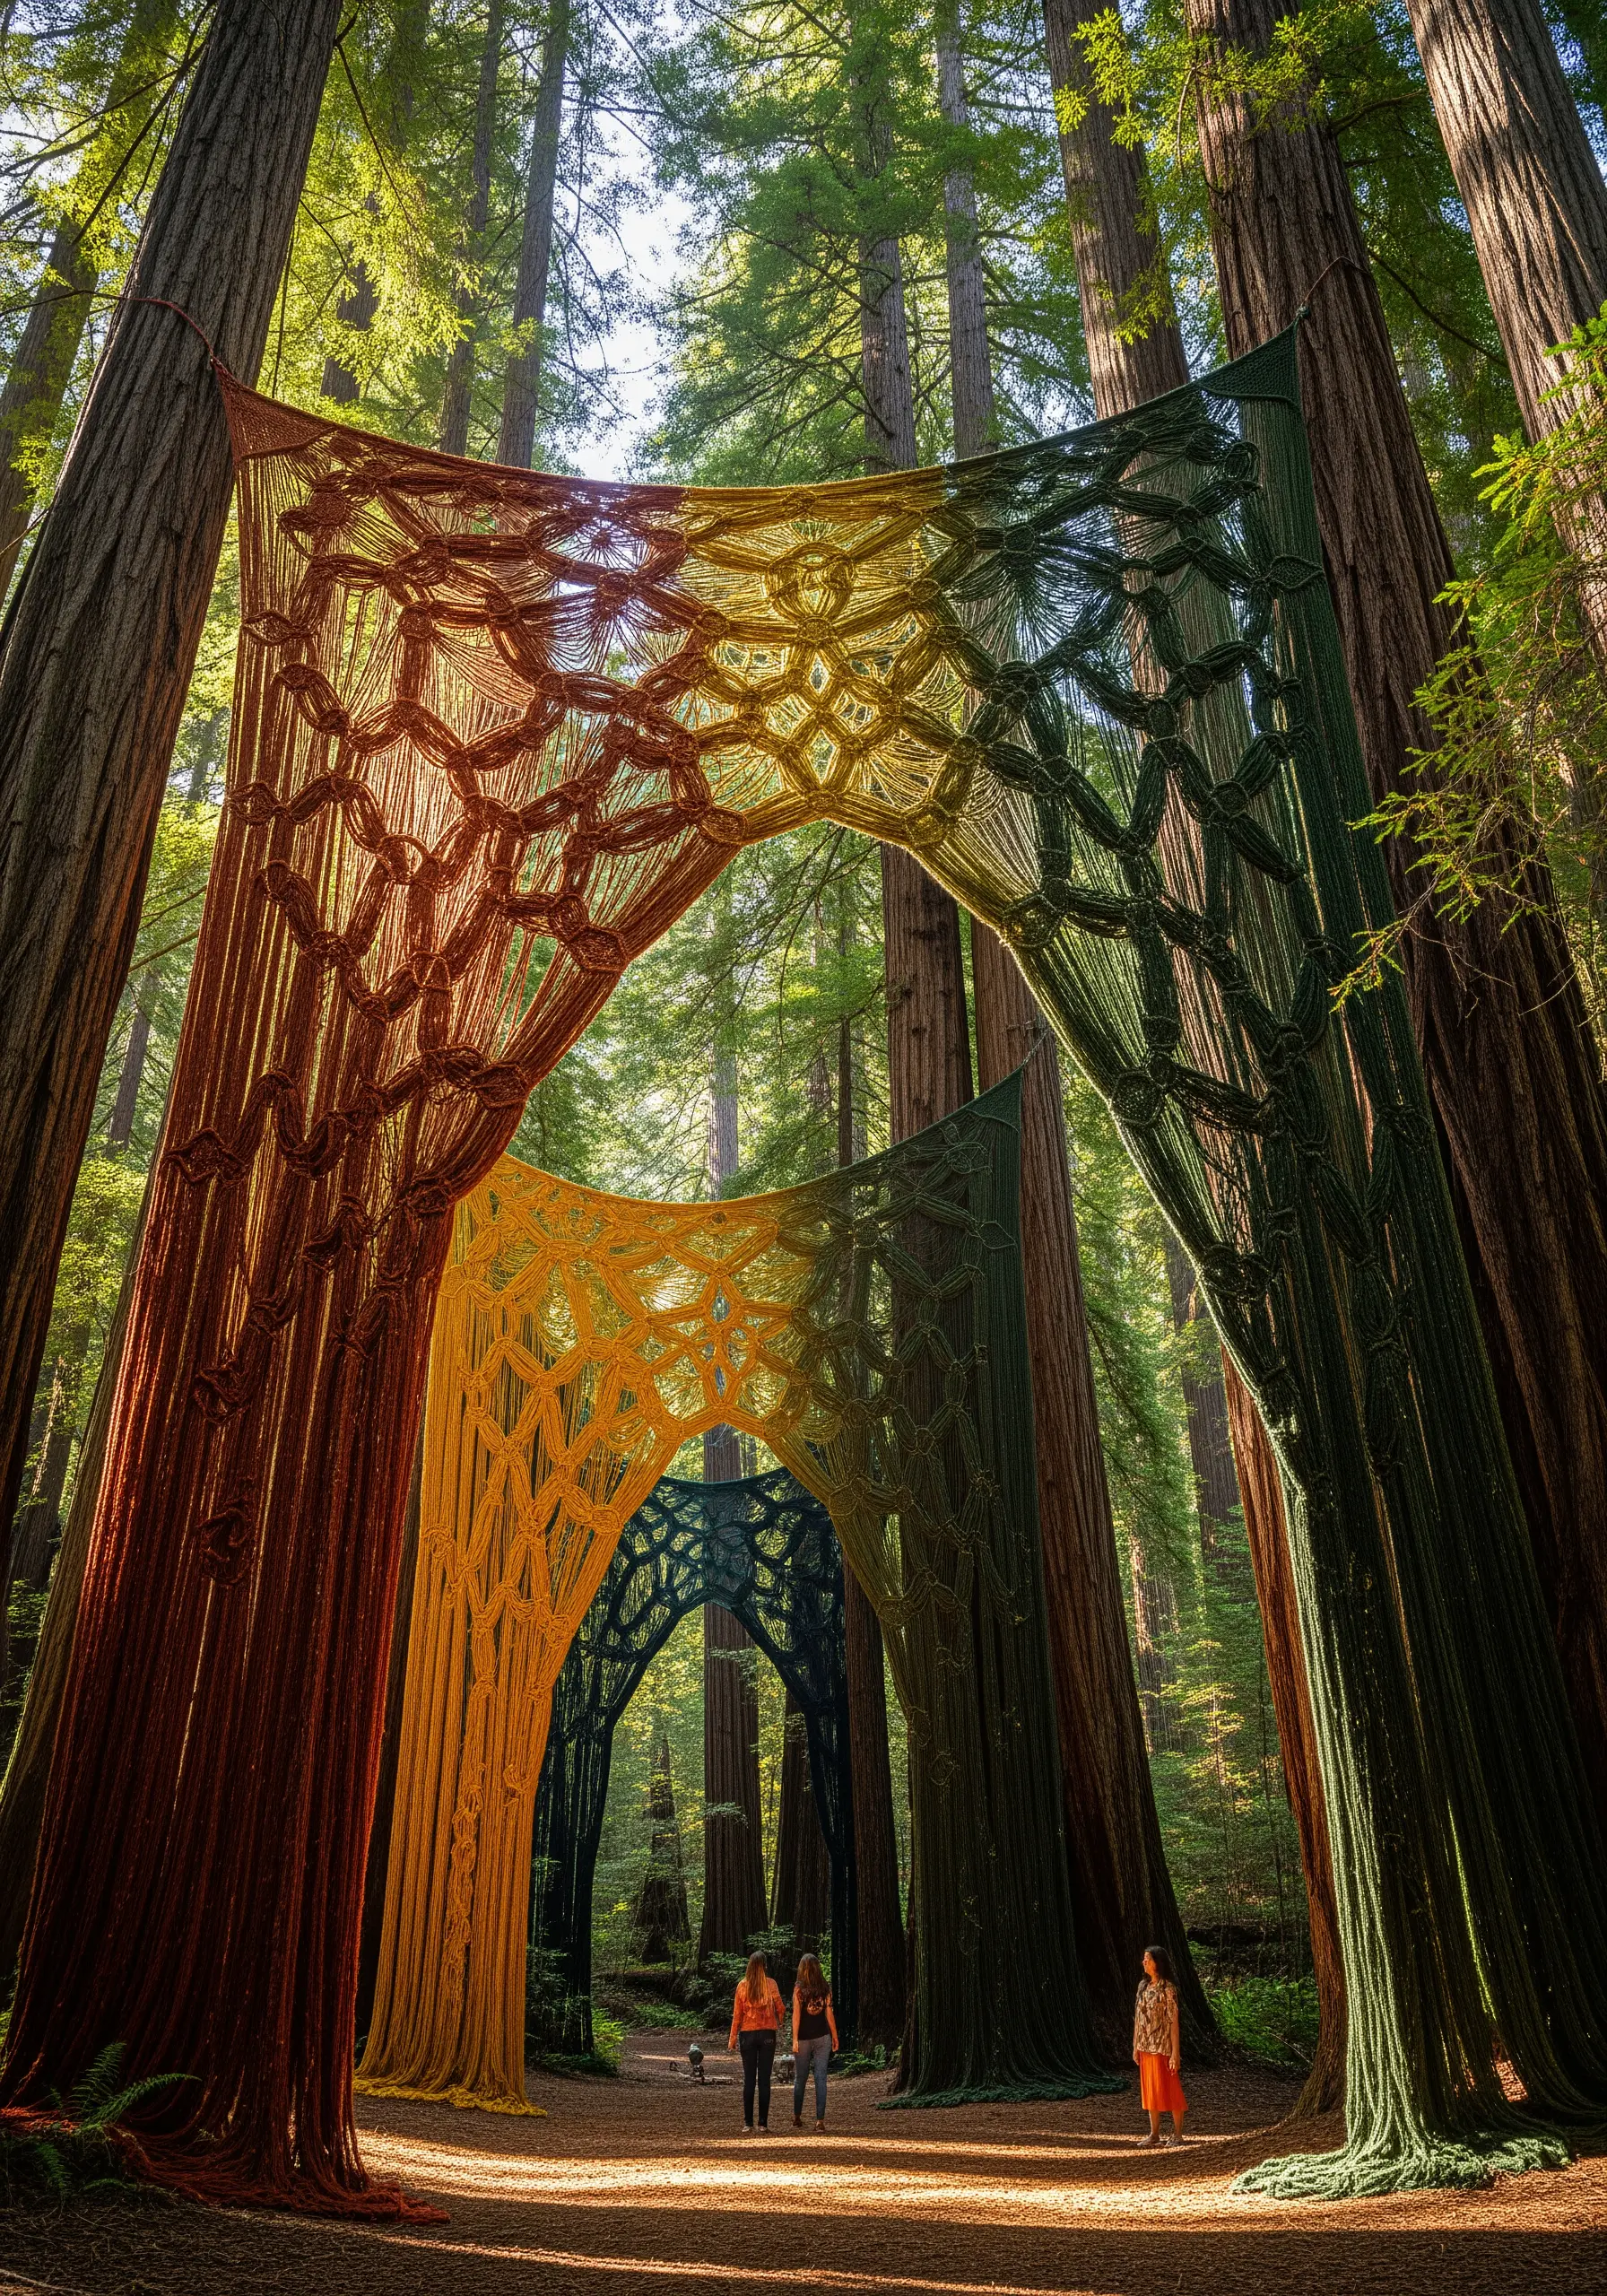
You don’t need a forest to create this effect; you only need to control your color transitions within a hoop.
Instead of switching colors abruptly, use a long-and-short stitch to blend hues seamlessly, creating a soft, painterly gradient that mimics the flow of light.
For a quicker method, choose a variegated thread that contains your entire color palette in one strand.
This allows you to achieve a similar flowing color effect with simple satin stitches, letting the thread do the work of blending for you.
2. Use Tension and Overlap to Build Architectural Depth
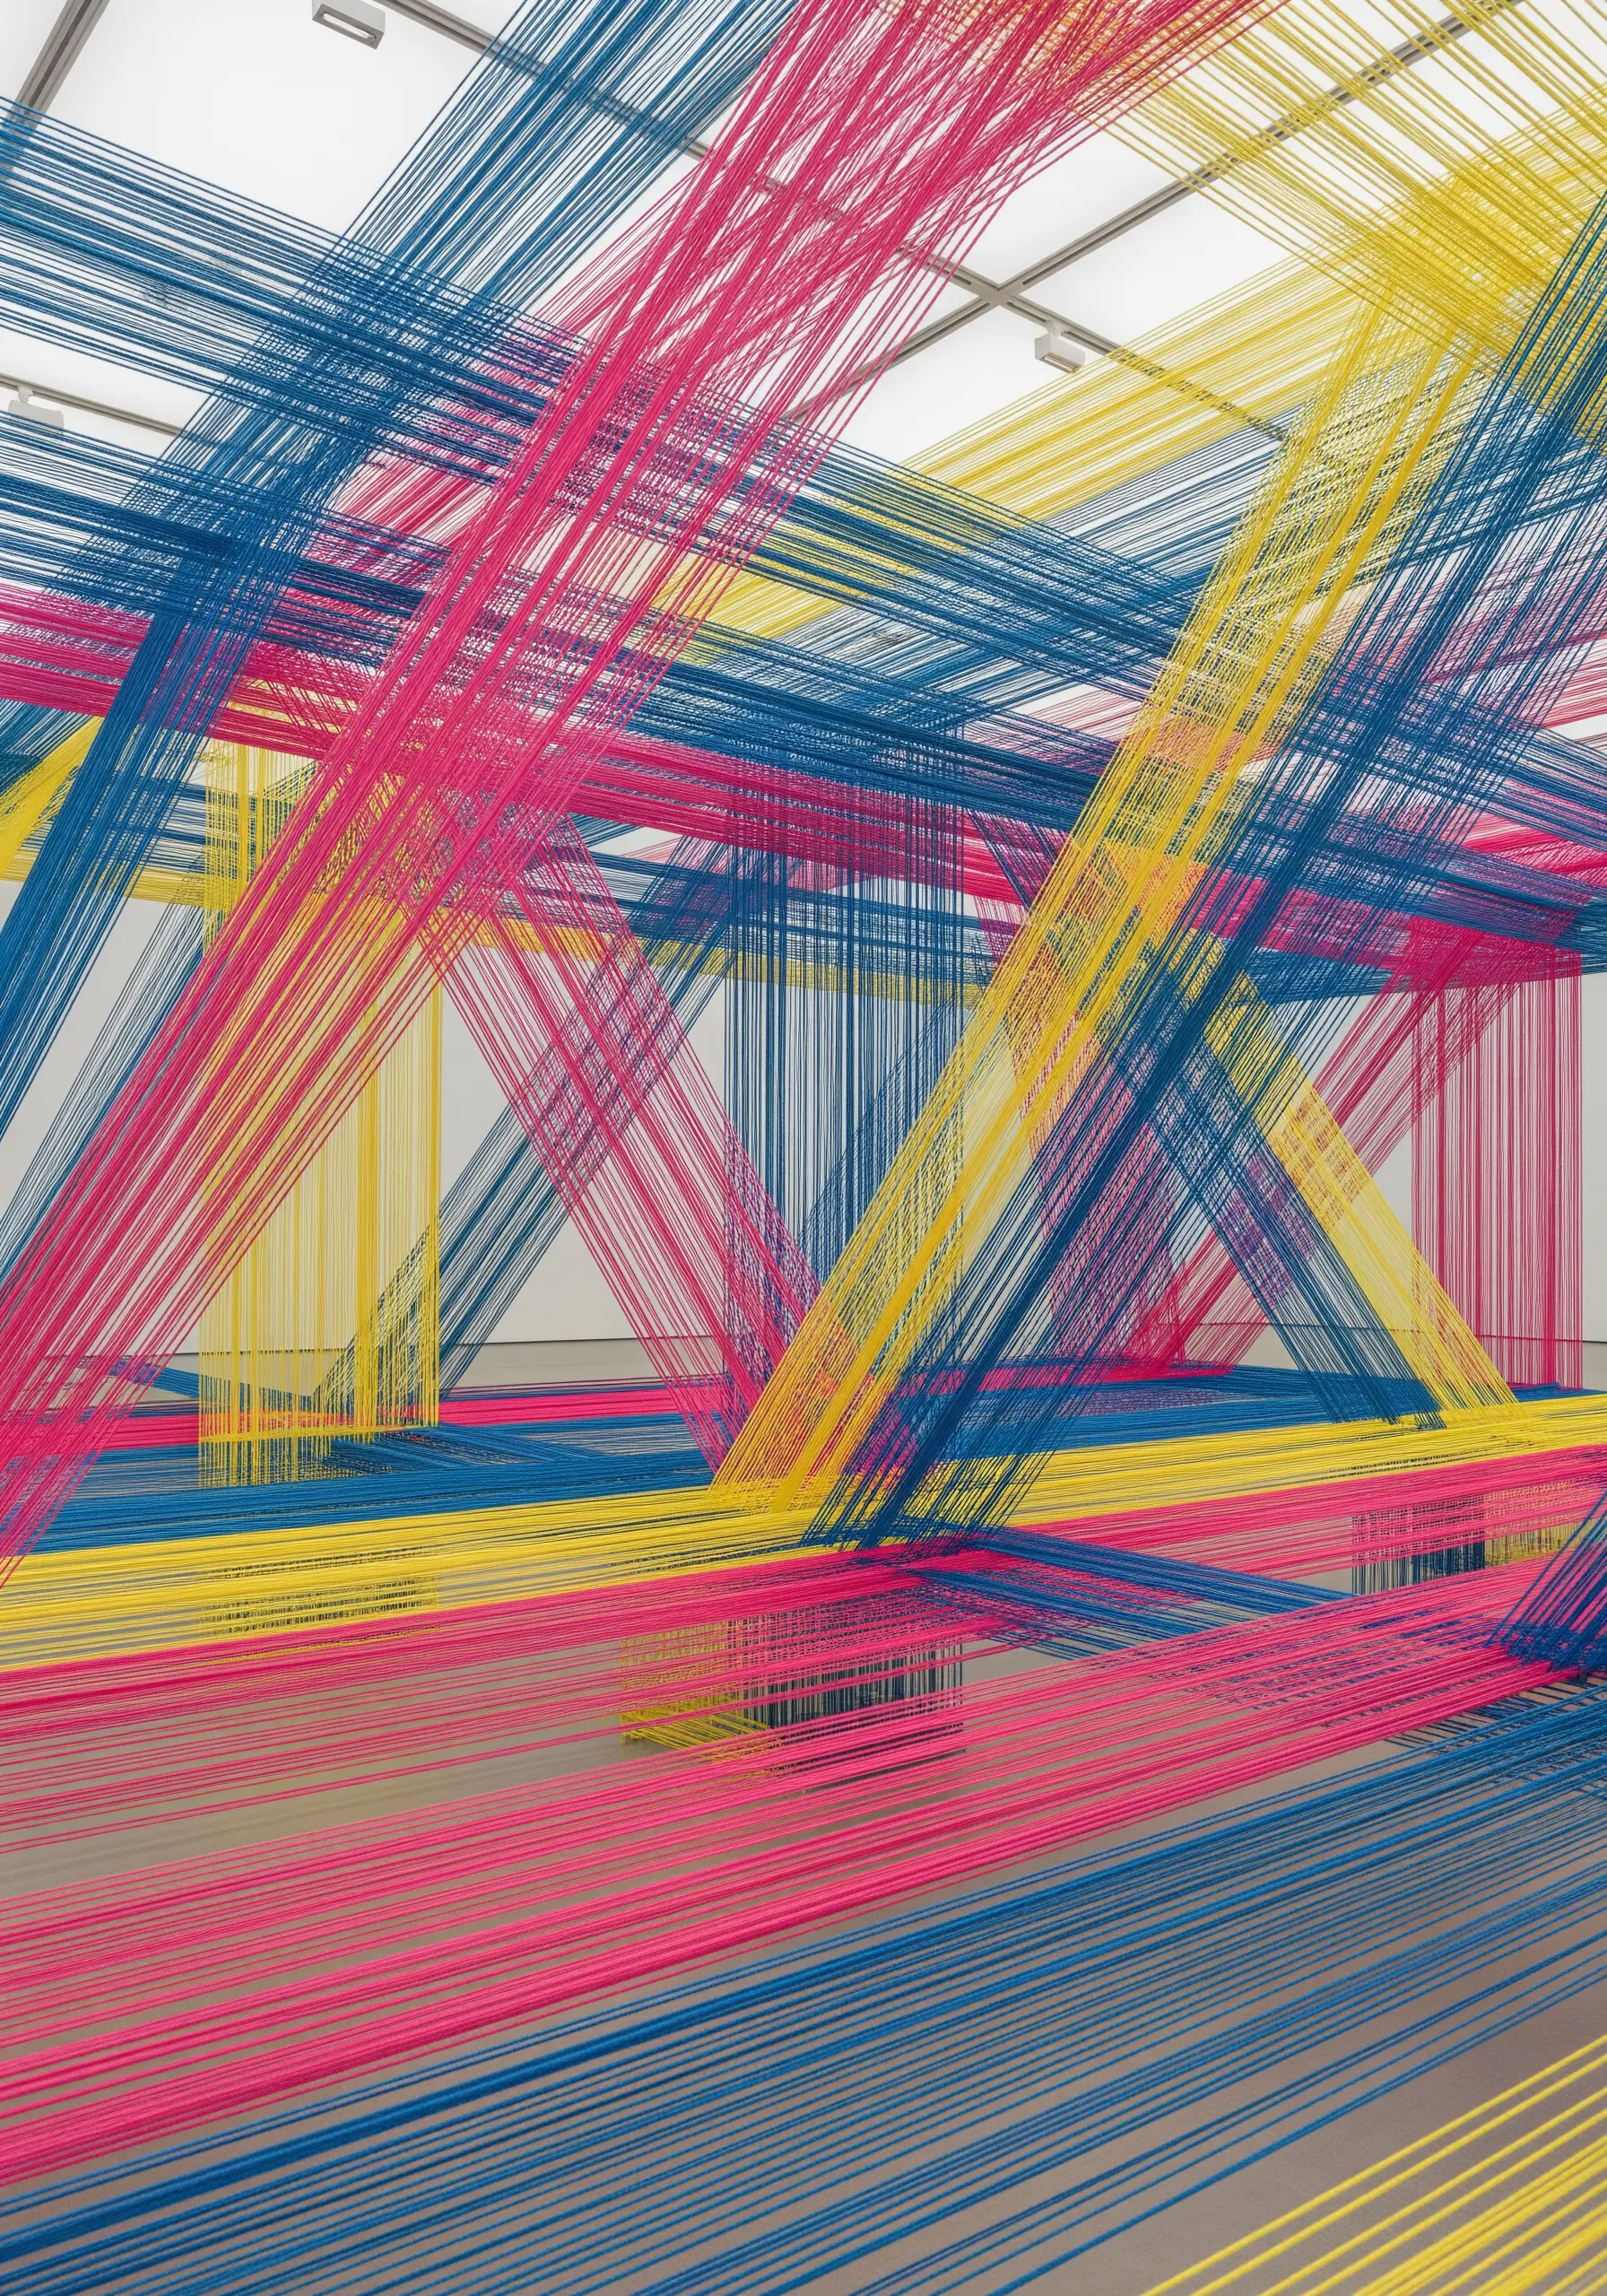
Recreate this gallery-style tension by anchoring straight stitches across a frame or hoop, pulling each strand taut to keep it perfectly linear.
The key is not the complexity of the stitch, but the precision of the layering.
Start with your background color, laying down a foundation of parallel lines.
Then, introduce new colors at different angles, weaving them over and under your initial layer to build graphic, three-dimensional forms.
This technique turns the simplest stitch into a study of modern thread art.
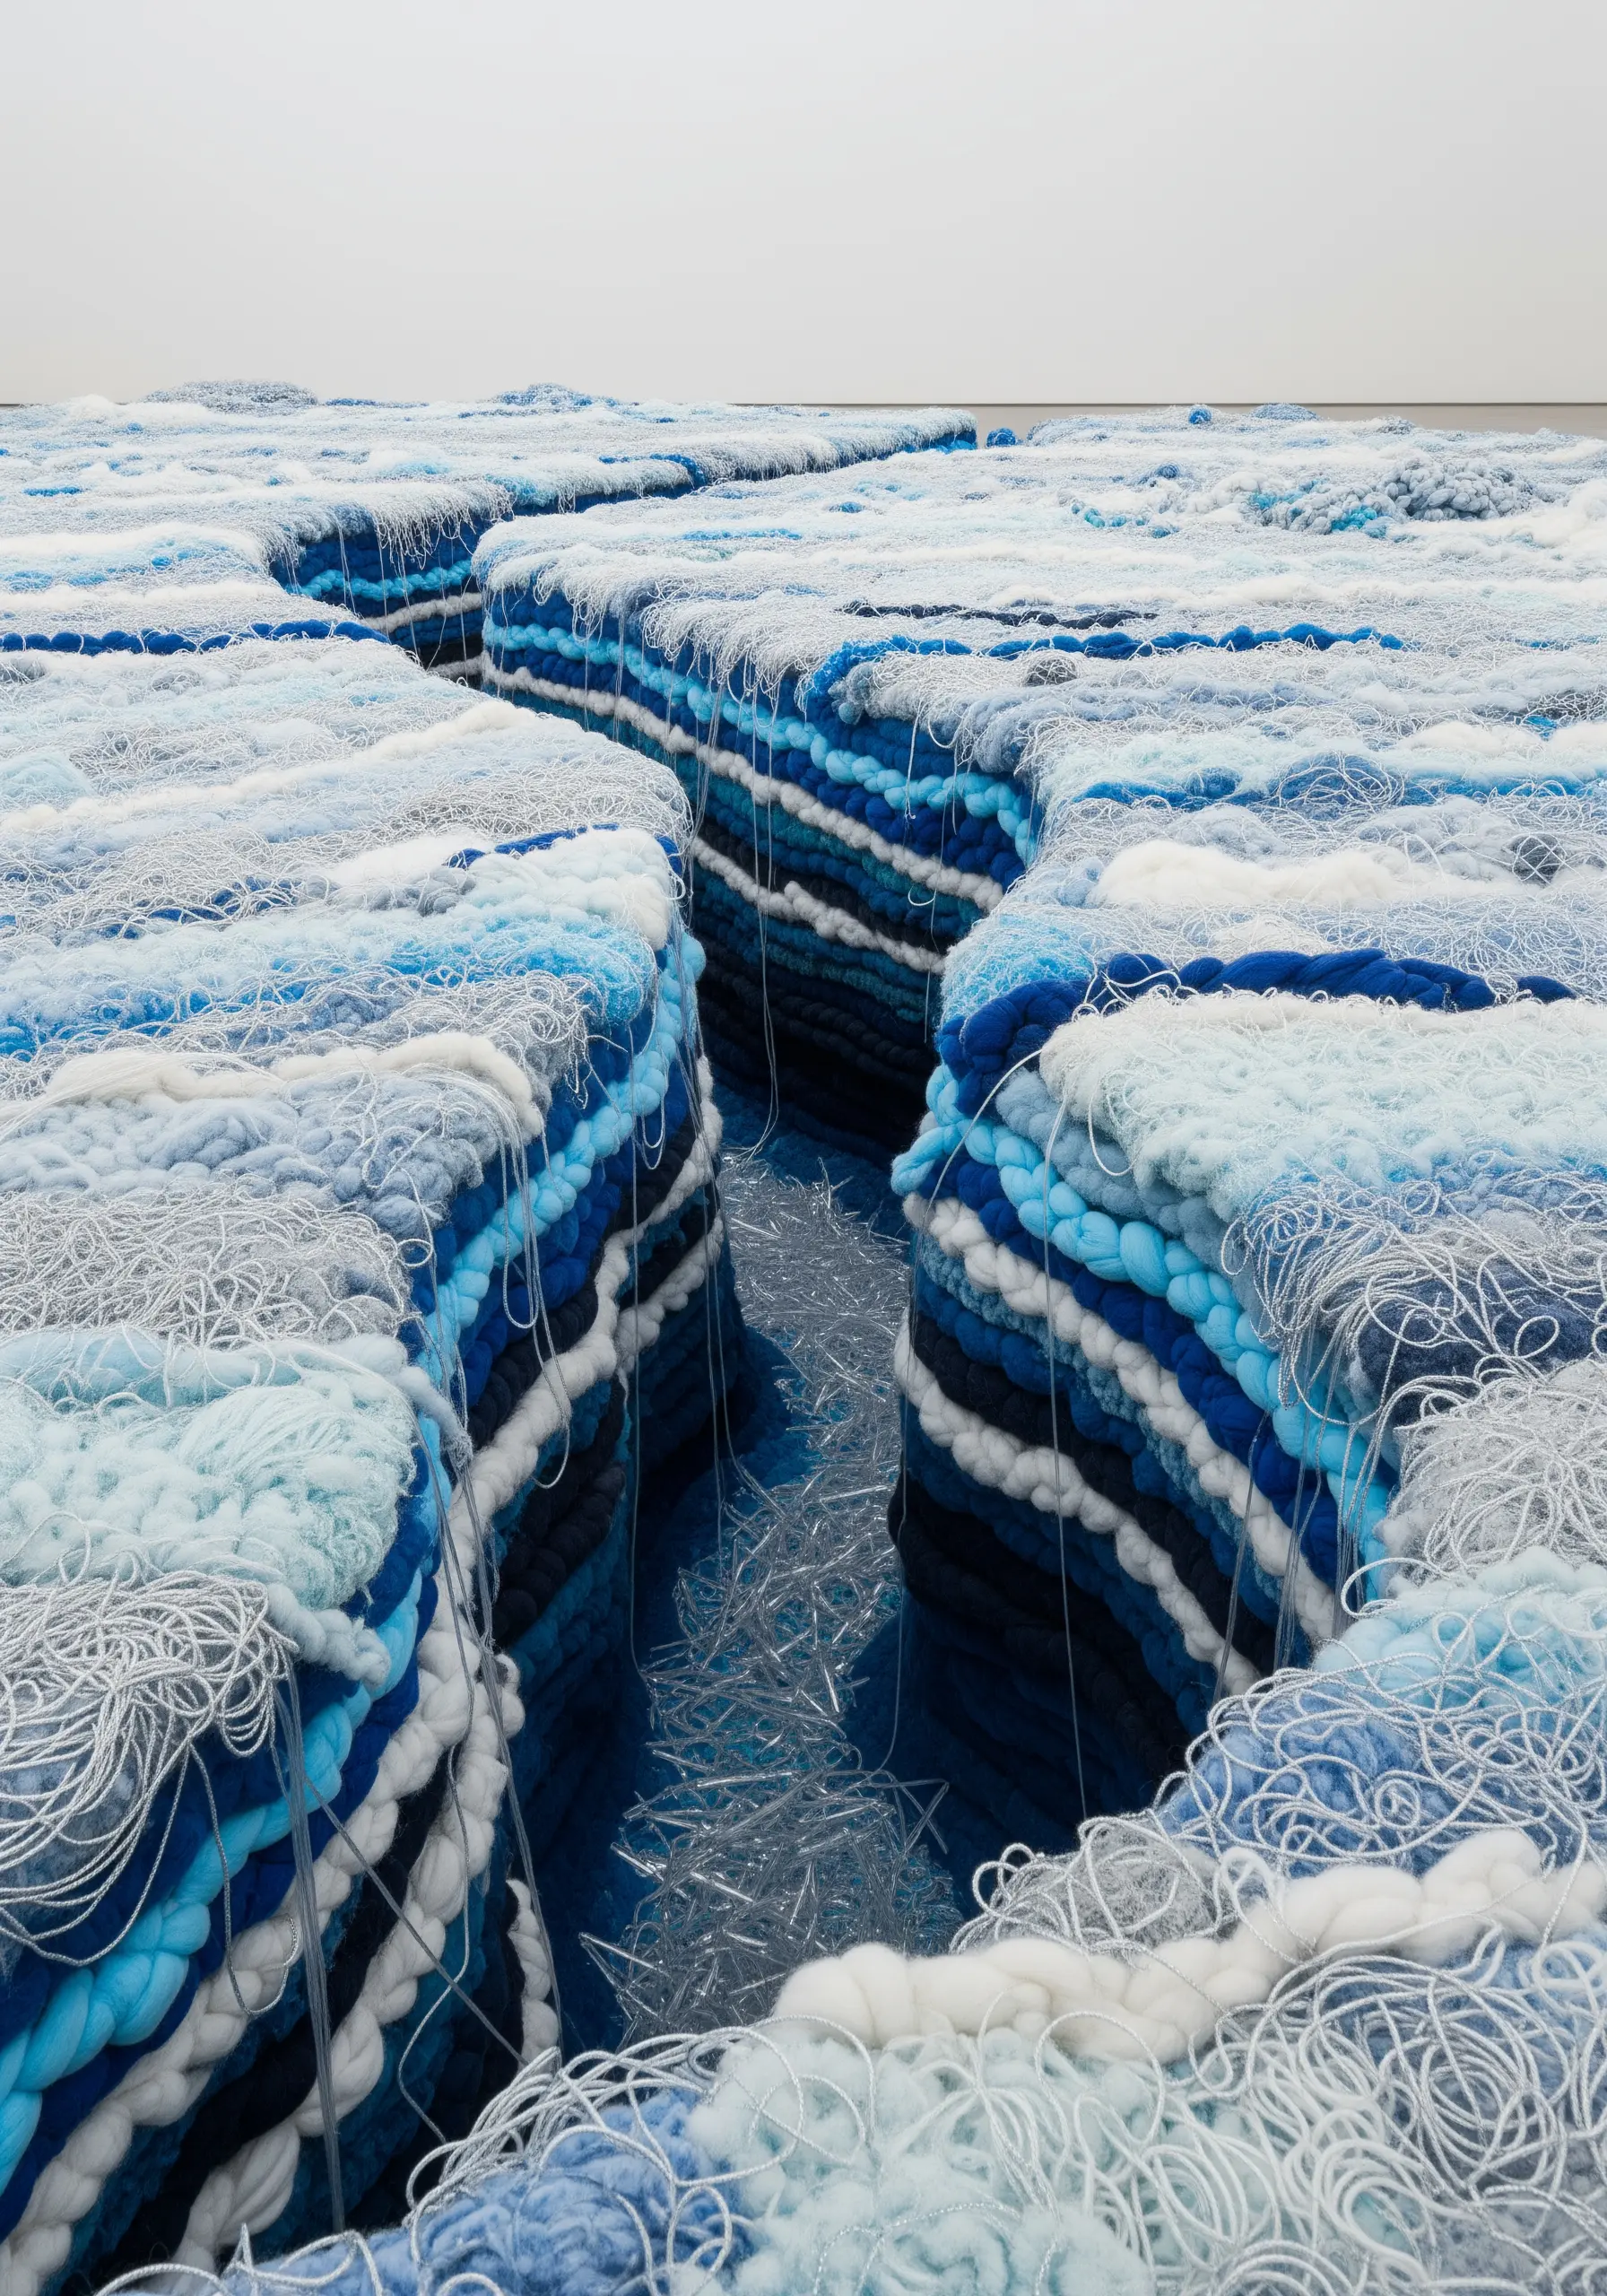
3. Sculpt an Underwater World with High-Texture Stitches
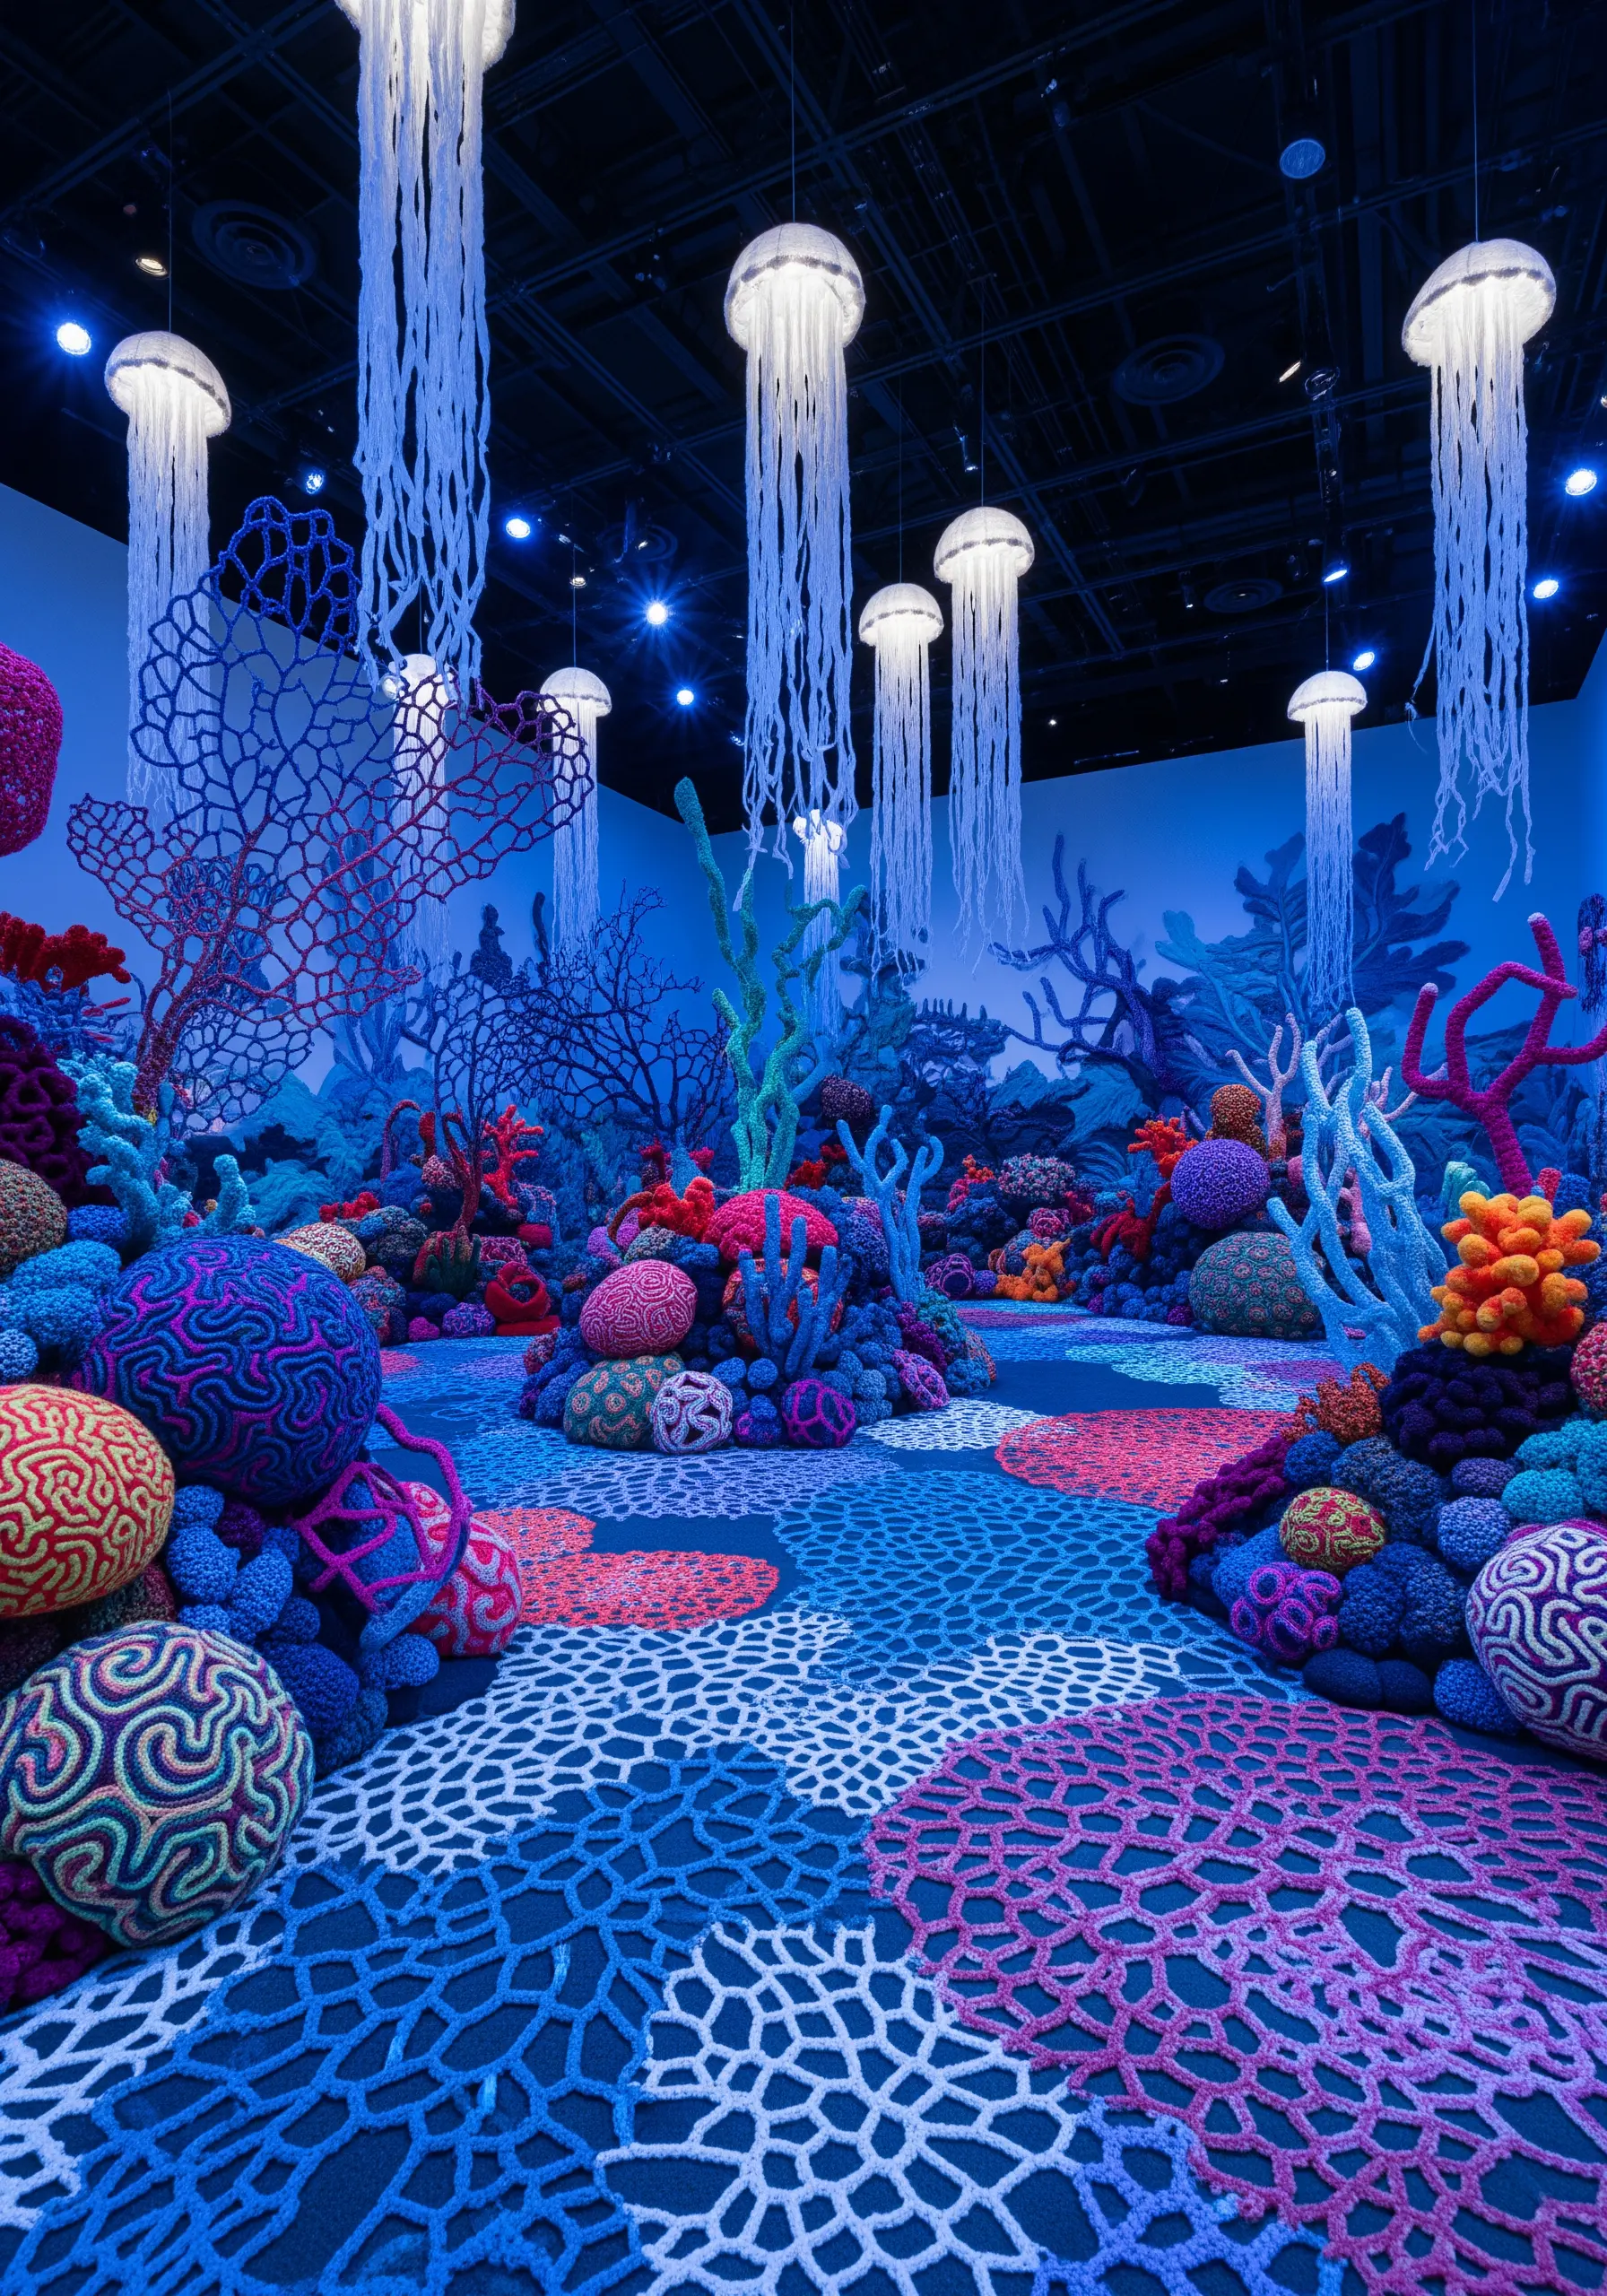
To build a tactile environment like this, move beyond flat stitches and embrace sculptural techniques.
Use tightly packed French knots or bullion knots to form the dense, rounded shapes of coral, varying the number of wraps to alter their size and height.
For the delicate, lacy structures, try detached chain stitches or cast-on stitches, which allow you to build textures that lift away from the fabric.
Combine these with couching—tacking down thick, textured yarns—to create a rich, multi-dimensional reef on your canvas.
4. Weave with Natural Fibers for Organic Form

Capture this raw, powerful texture by incorporating unconventional materials into your work.
Instead of standard embroidery floss, couch thick jute twine or unspun wool roving onto your fabric base.
Use a simple, wide couching stitch with a finer thread to secure these bulky fibers, allowing their natural twists and imperfections to define the piece.
This method celebrates the texture of the material itself, creating handmade organic pieces with depth and character.
5. Map Rhythm and Movement with Wrapped Stitches

Translate a soundwave or any rhythmic pattern into a dynamic line by focusing on tension and density.
Lay down anchor points (pins or temporary stitches) on your fabric to map out the peaks and valleys of your design.
Then, wrap a thick, vibrant yarn tightly around these points, concentrating the wraps at the center to build mass and tension.
This technique creates a clean, graphic line with sculptural presence that stands out from the wall or fabric.
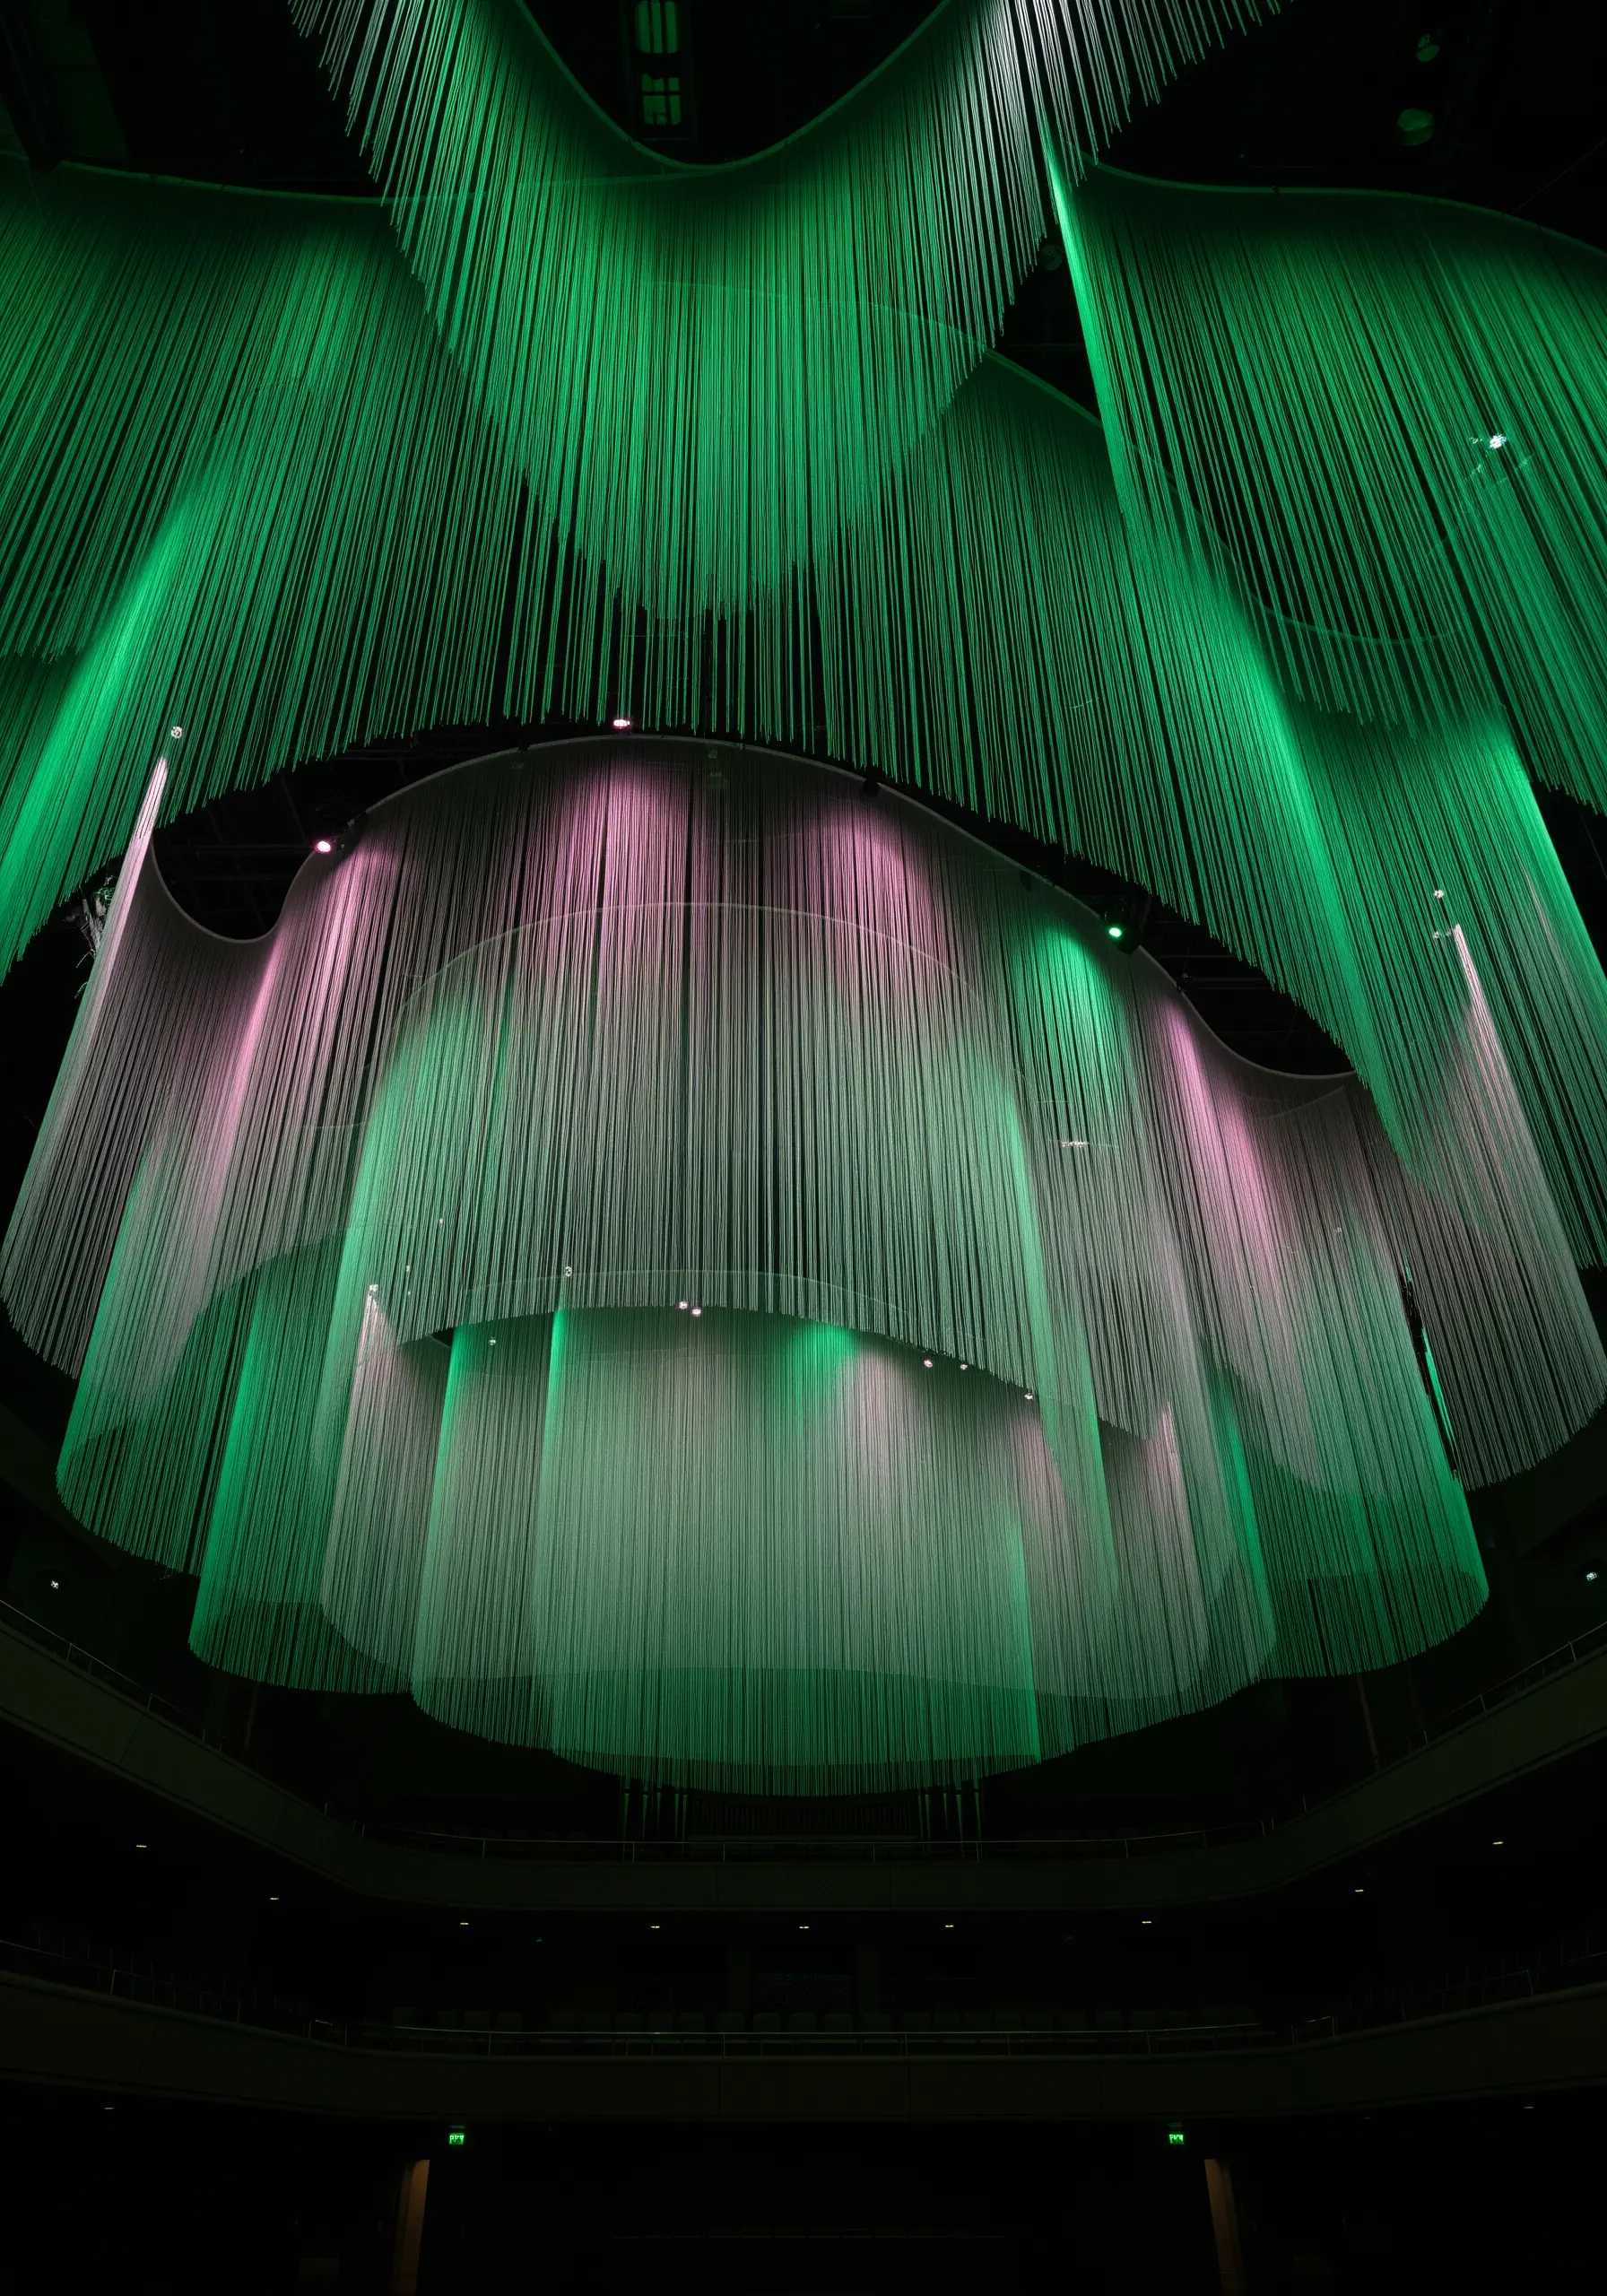
6. Harness Light with Geometric String Art Techniques
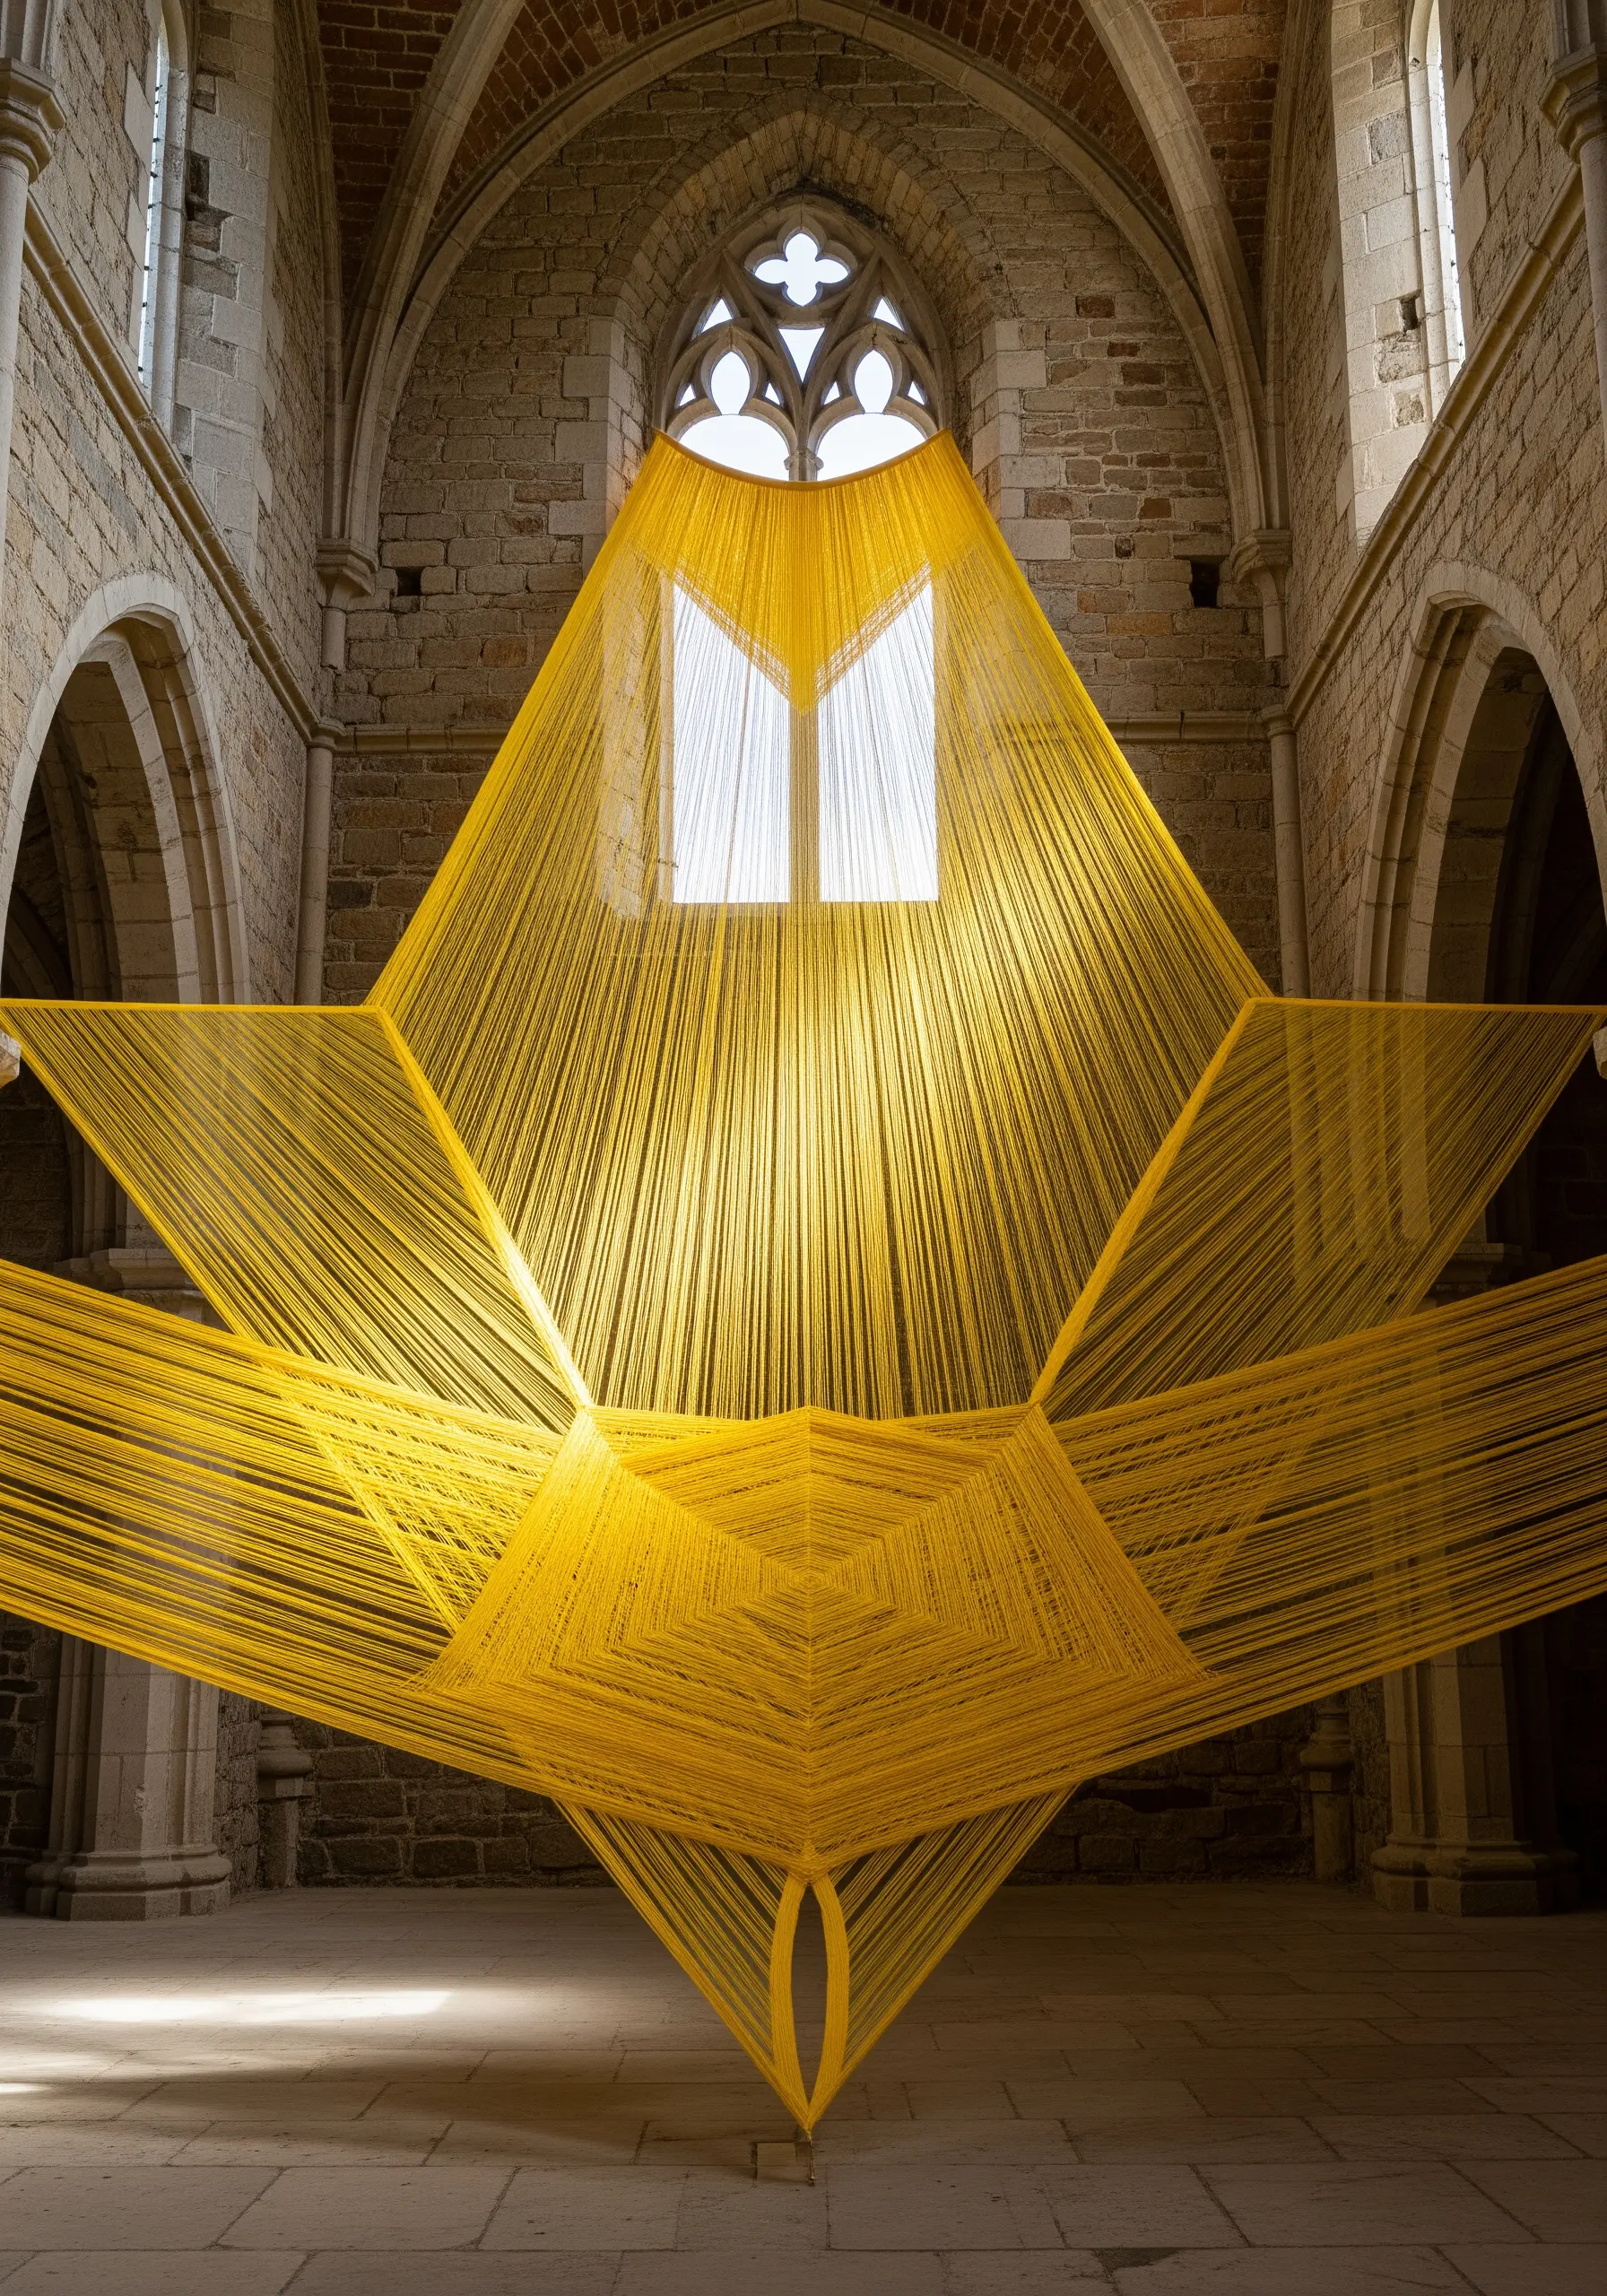
You can create this stunning illusion of light and form by adapting string art principles to your embroidery.
Work on a dark fabric to maximize contrast, using a high-sheen or metallic thread.
Plot out your geometric shape with a series of anchor points around the perimeter—small, secure stitches will do.
Then, run your thread from point to point in a systematic pattern, allowing the overlapping straight stitches to build a dense, light-catching core that seems to glow from within.
7. Assemble Small Motifs into a Grand Composition
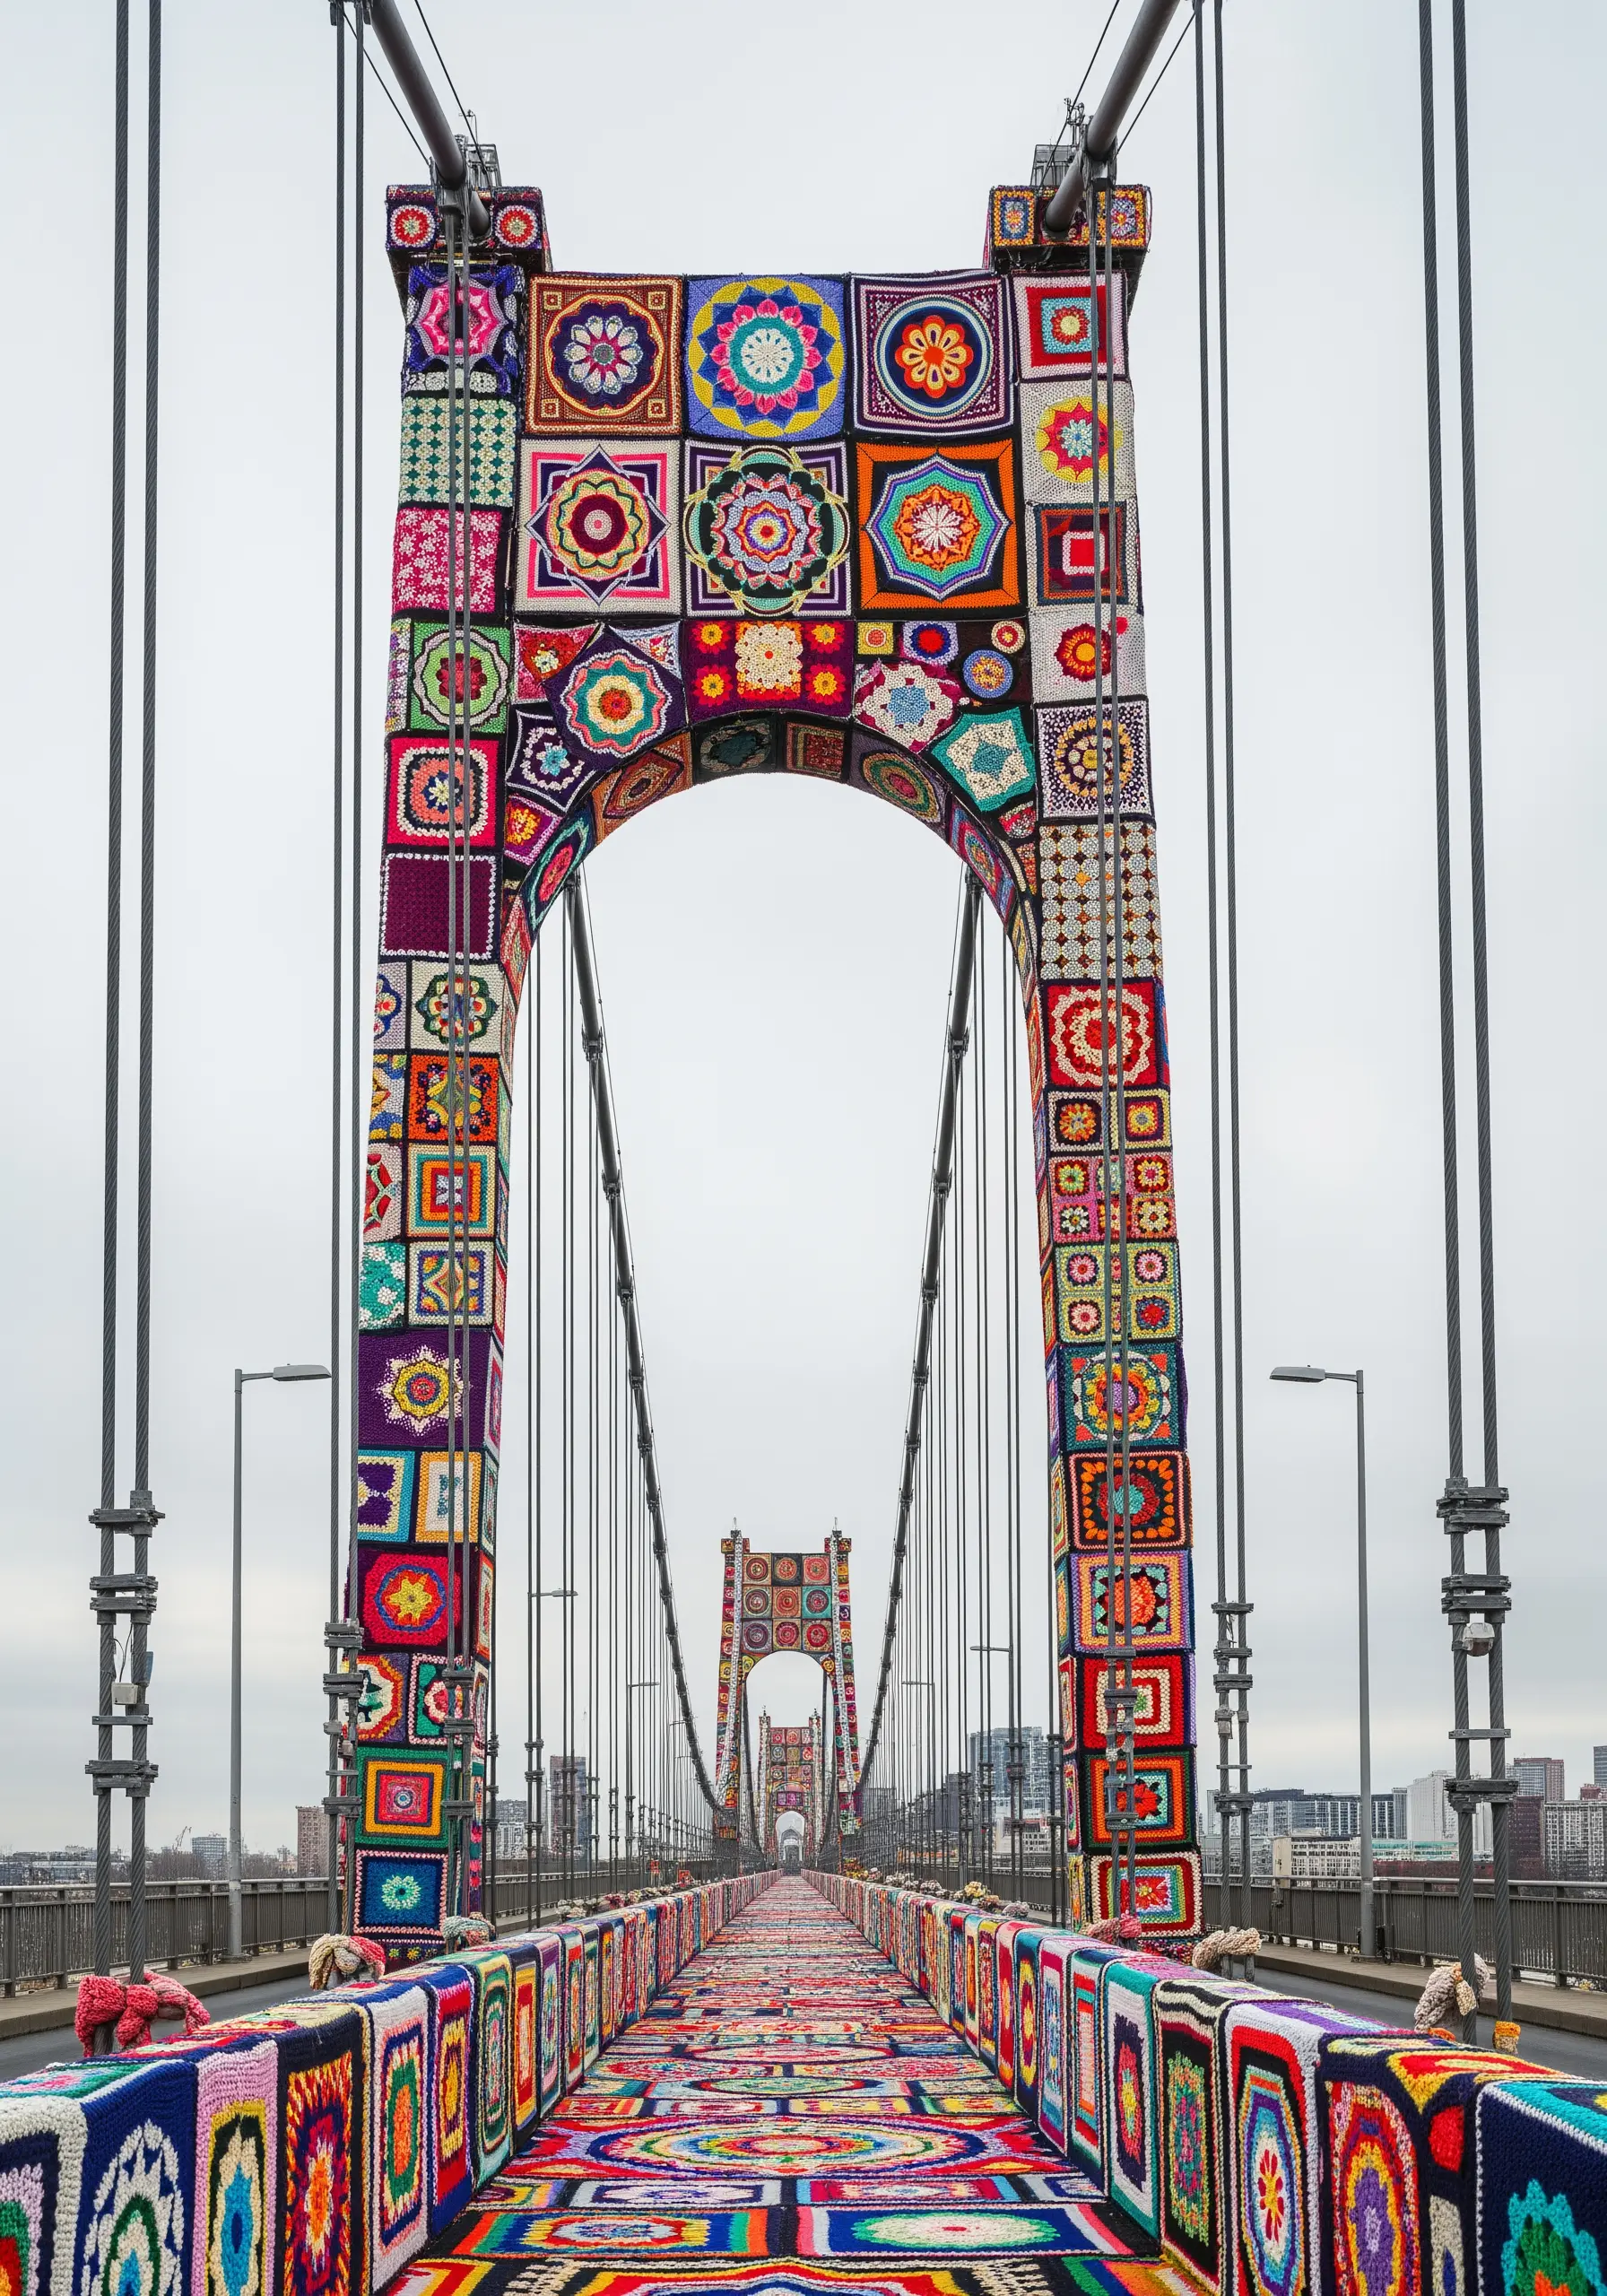
A large-scale project doesn’t have to be overwhelming. Approach it in modular sections, like these crocheted squares.
Create a series of small, individual embroidered motifs in mini hoops—they can be geometric patterns, tiny florals, or abstract color studies.
Once you have a collection, arrange them and stitch them together onto a larger backing fabric.
This method allows you to build an impressive, quilt-like tapestry piece by piece, making it manageable and perfect for using up scrap threads.
8. Create Depth Using Monochrome Texture

Explore the power of a single color by focusing entirely on texture.
Combine different fibers in the same hue—think chunky wool, fine silk floss, matte cotton, and fuzzy chenille.
Use simple, repetitive stitches like the seed stitch or French knots, but vary the thread’s thickness and finish.
This contrast between lustrous and matte, or thick and thin, creates a visually rich surface that invites touch, proving that monochrome thread embroidery can be incredibly dynamic.
9. Sculpt Soft Forms with Felting and Quilting Stitches
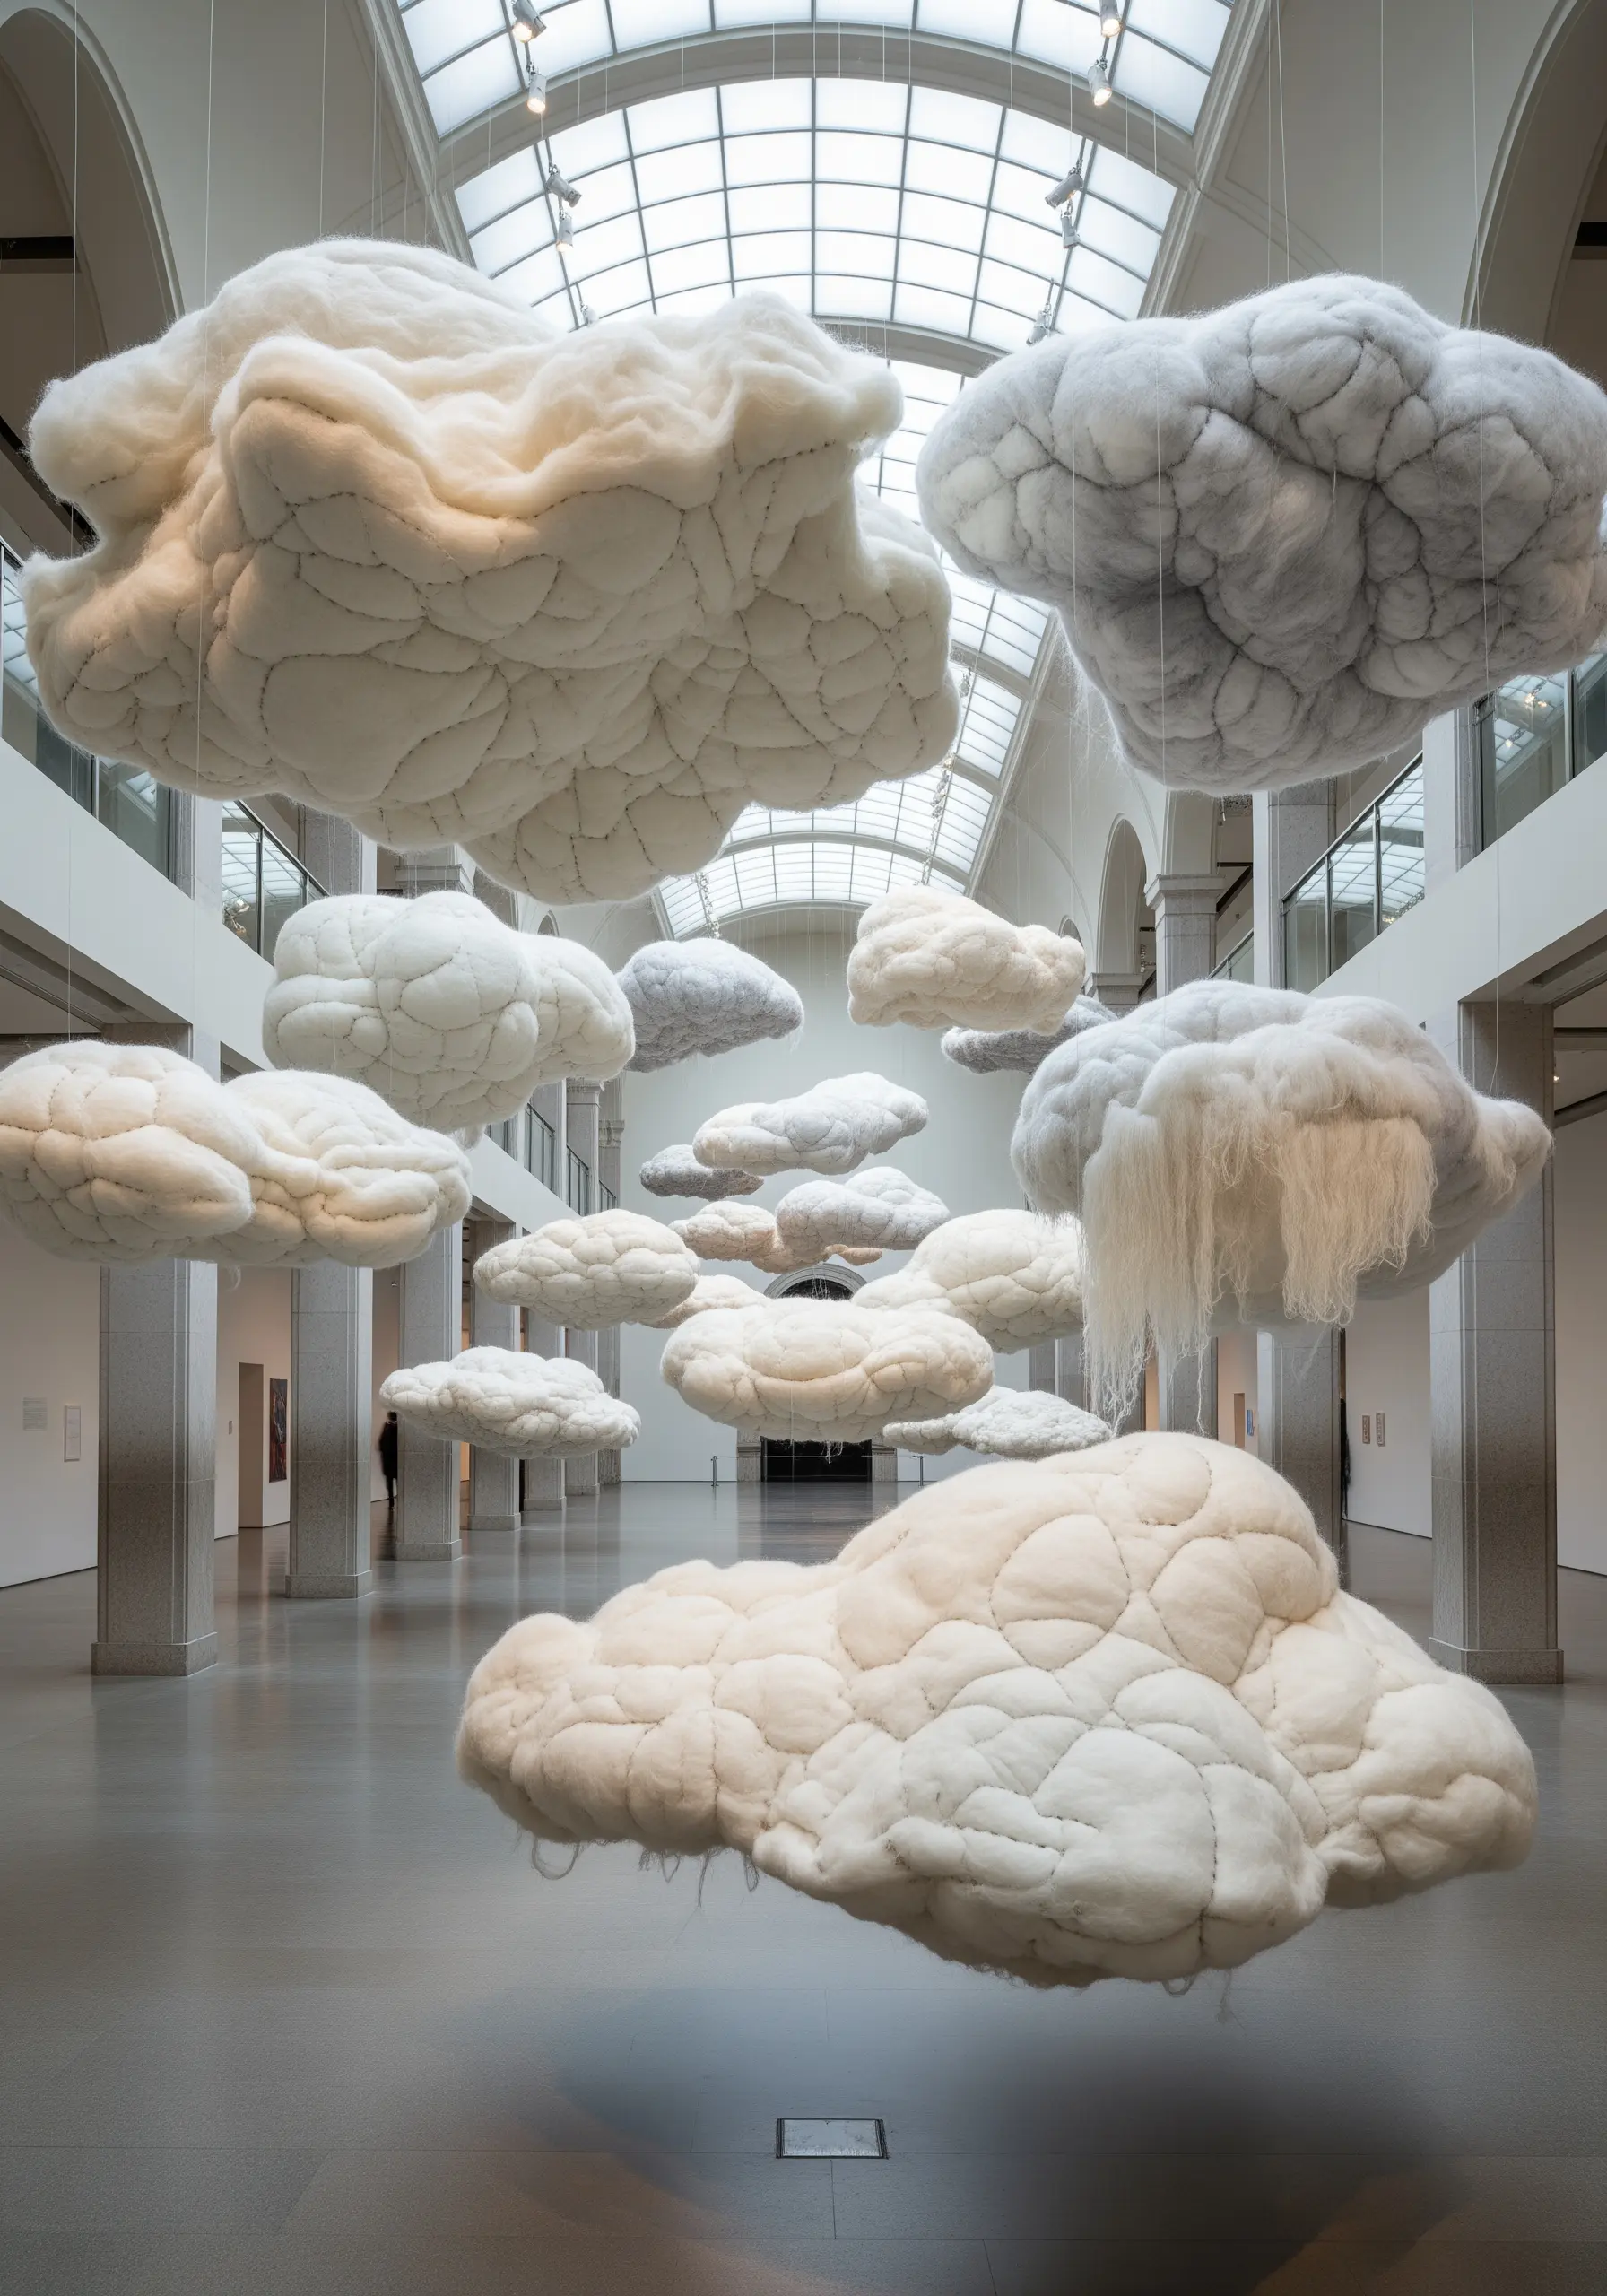
Achieve these soft, cloud-like dimensions by combining needle felting with simple hand stitching.
Start by felting wool roving directly onto a felt or heavy fabric base to build your basic shape.
Then, use a simple running stitch in a contrasting thread to add contour and definition, essentially quilting the felted form.
This technique creates pillowy, three-dimensional shapes that have a beautiful, soft structure without needing complex armatures.
10. Mimic Cable Knits with Padded Stitches
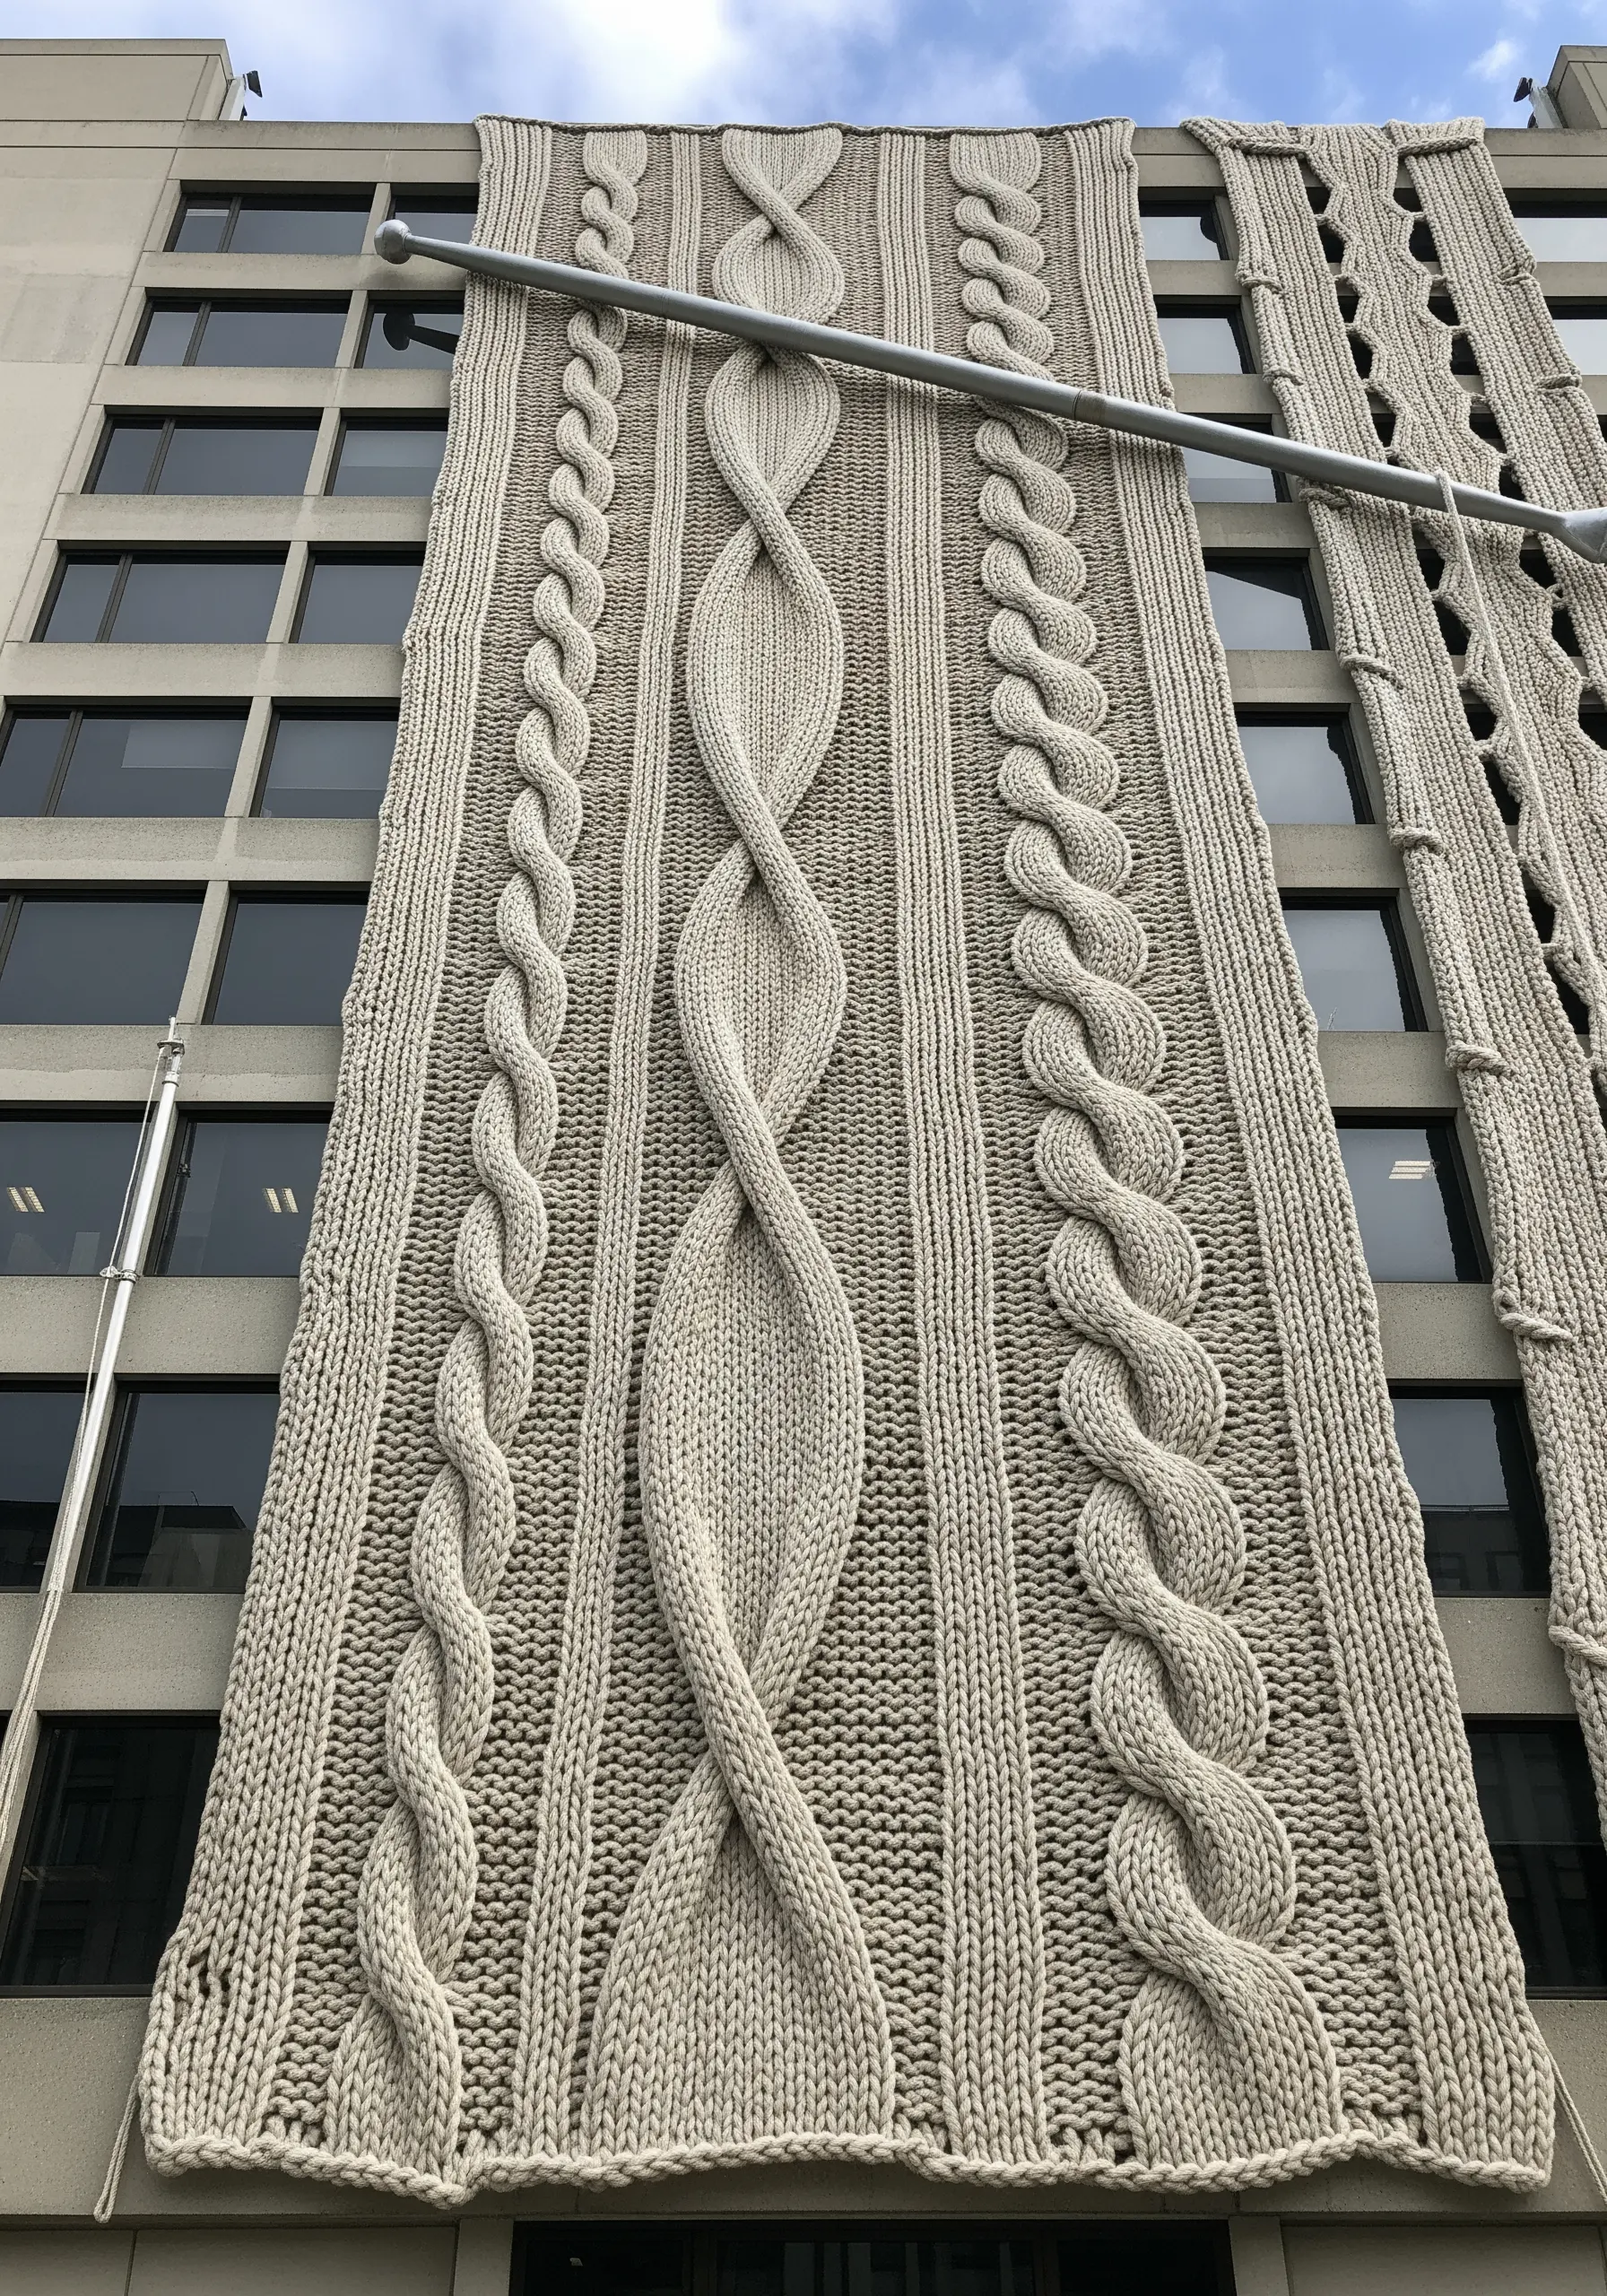
You can achieve the dramatic texture of an oversized cable knit without ever picking up knitting needles.
First, create a padded base by laying down several layers of felt or thick yarn in the shape of your cable.
Then, work satin stitches over this padding, keeping your stitches uniform and tight.
For an even simpler approach, braid multiple strands of chunky yarn together and then couch the resulting braid onto your fabric for an instant, high-relief cable effect.
11. Build Landscapes with Layered Fiber and Raw Edges
Create an expressive, textural landscape by thinking like a collage artist.
Cut or tear strips of thick, non-fraying fabrics like felt or boiled wool in different colors.
Layer these strips onto your backing fabric to build up fields of color, securing them with simple, visible running stitches or French knots.
Embrace the raw edges and the slight variations in height between the layers; these imperfections add depth and a tactile, geological quality to your work.
12. Stitch with Light Using Fiber-Optic Effects
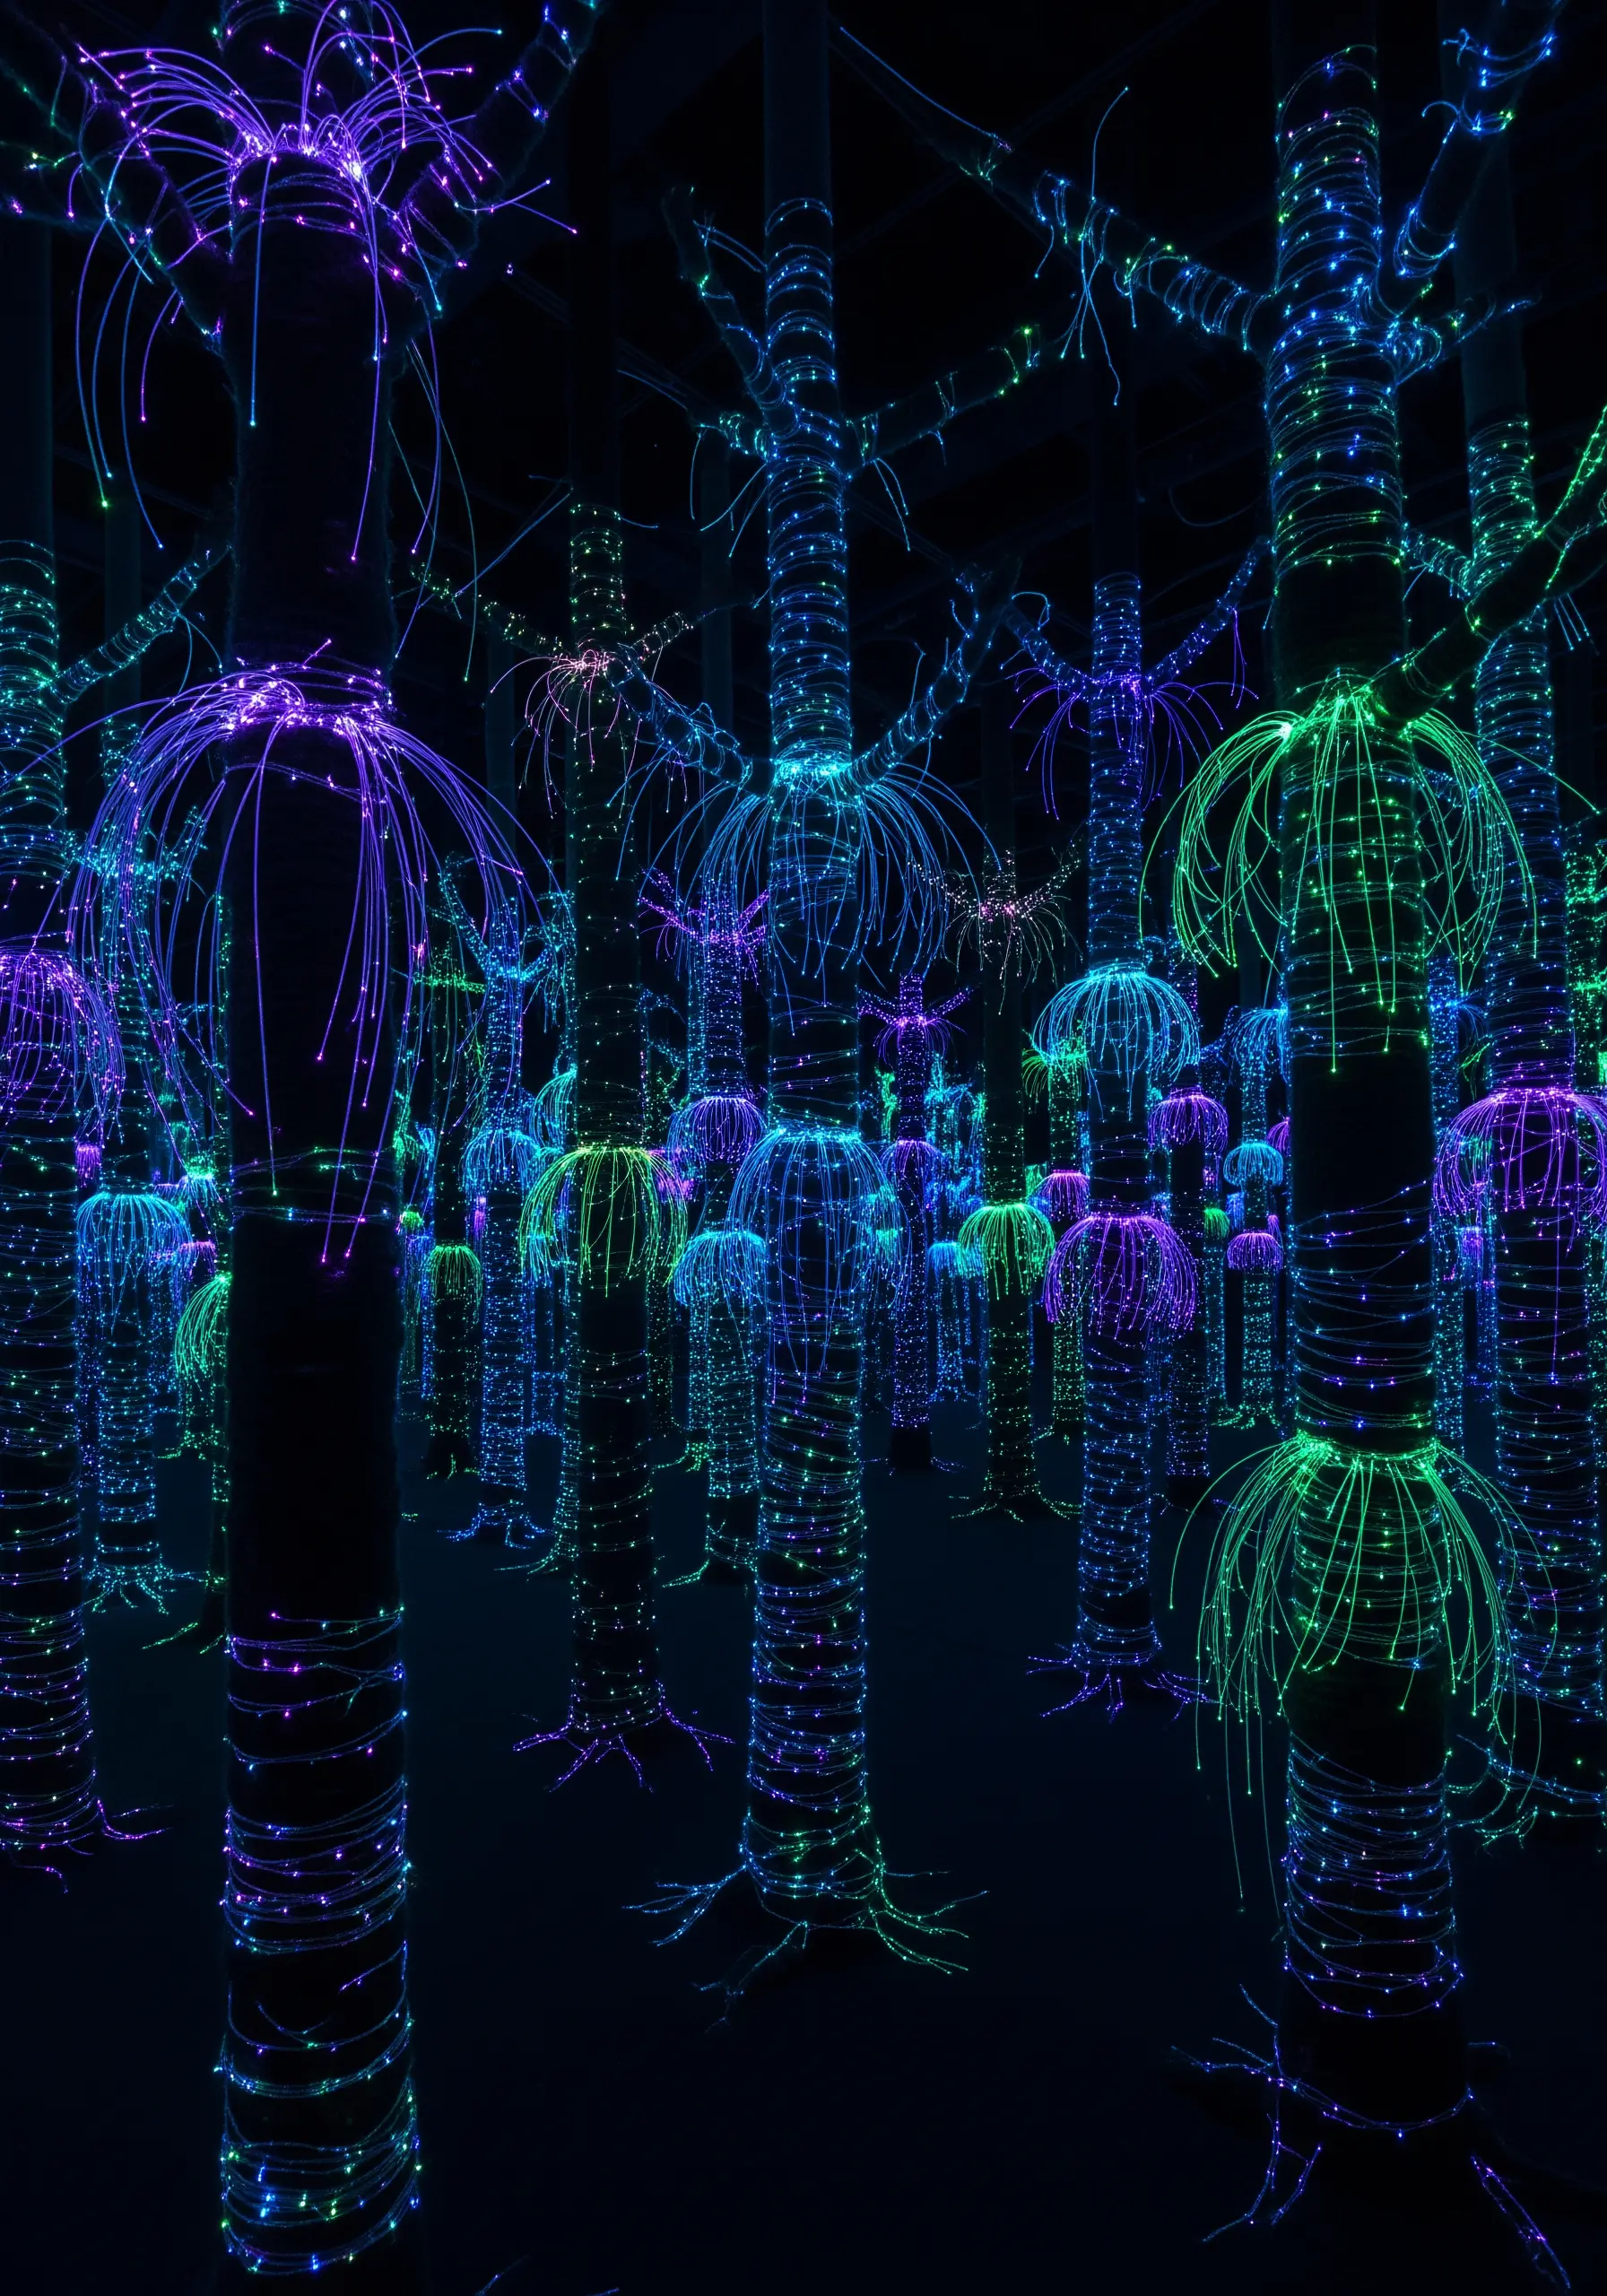
Capture this ethereal glow by using threads that interact with light.
Work on a black or dark navy fabric for maximum impact.
Use a single strand of metallic, fluorescent, or glow-in-the-dark floss to stitch radiating straight stitches or scattered seed stitches.
The technique is simple, but the material choice transforms the piece, creating a design that seems to emit its own light, much like tiny night sky embroidery designs.
13. Guide the Eye with Flowing, Couch-Stitched Lines
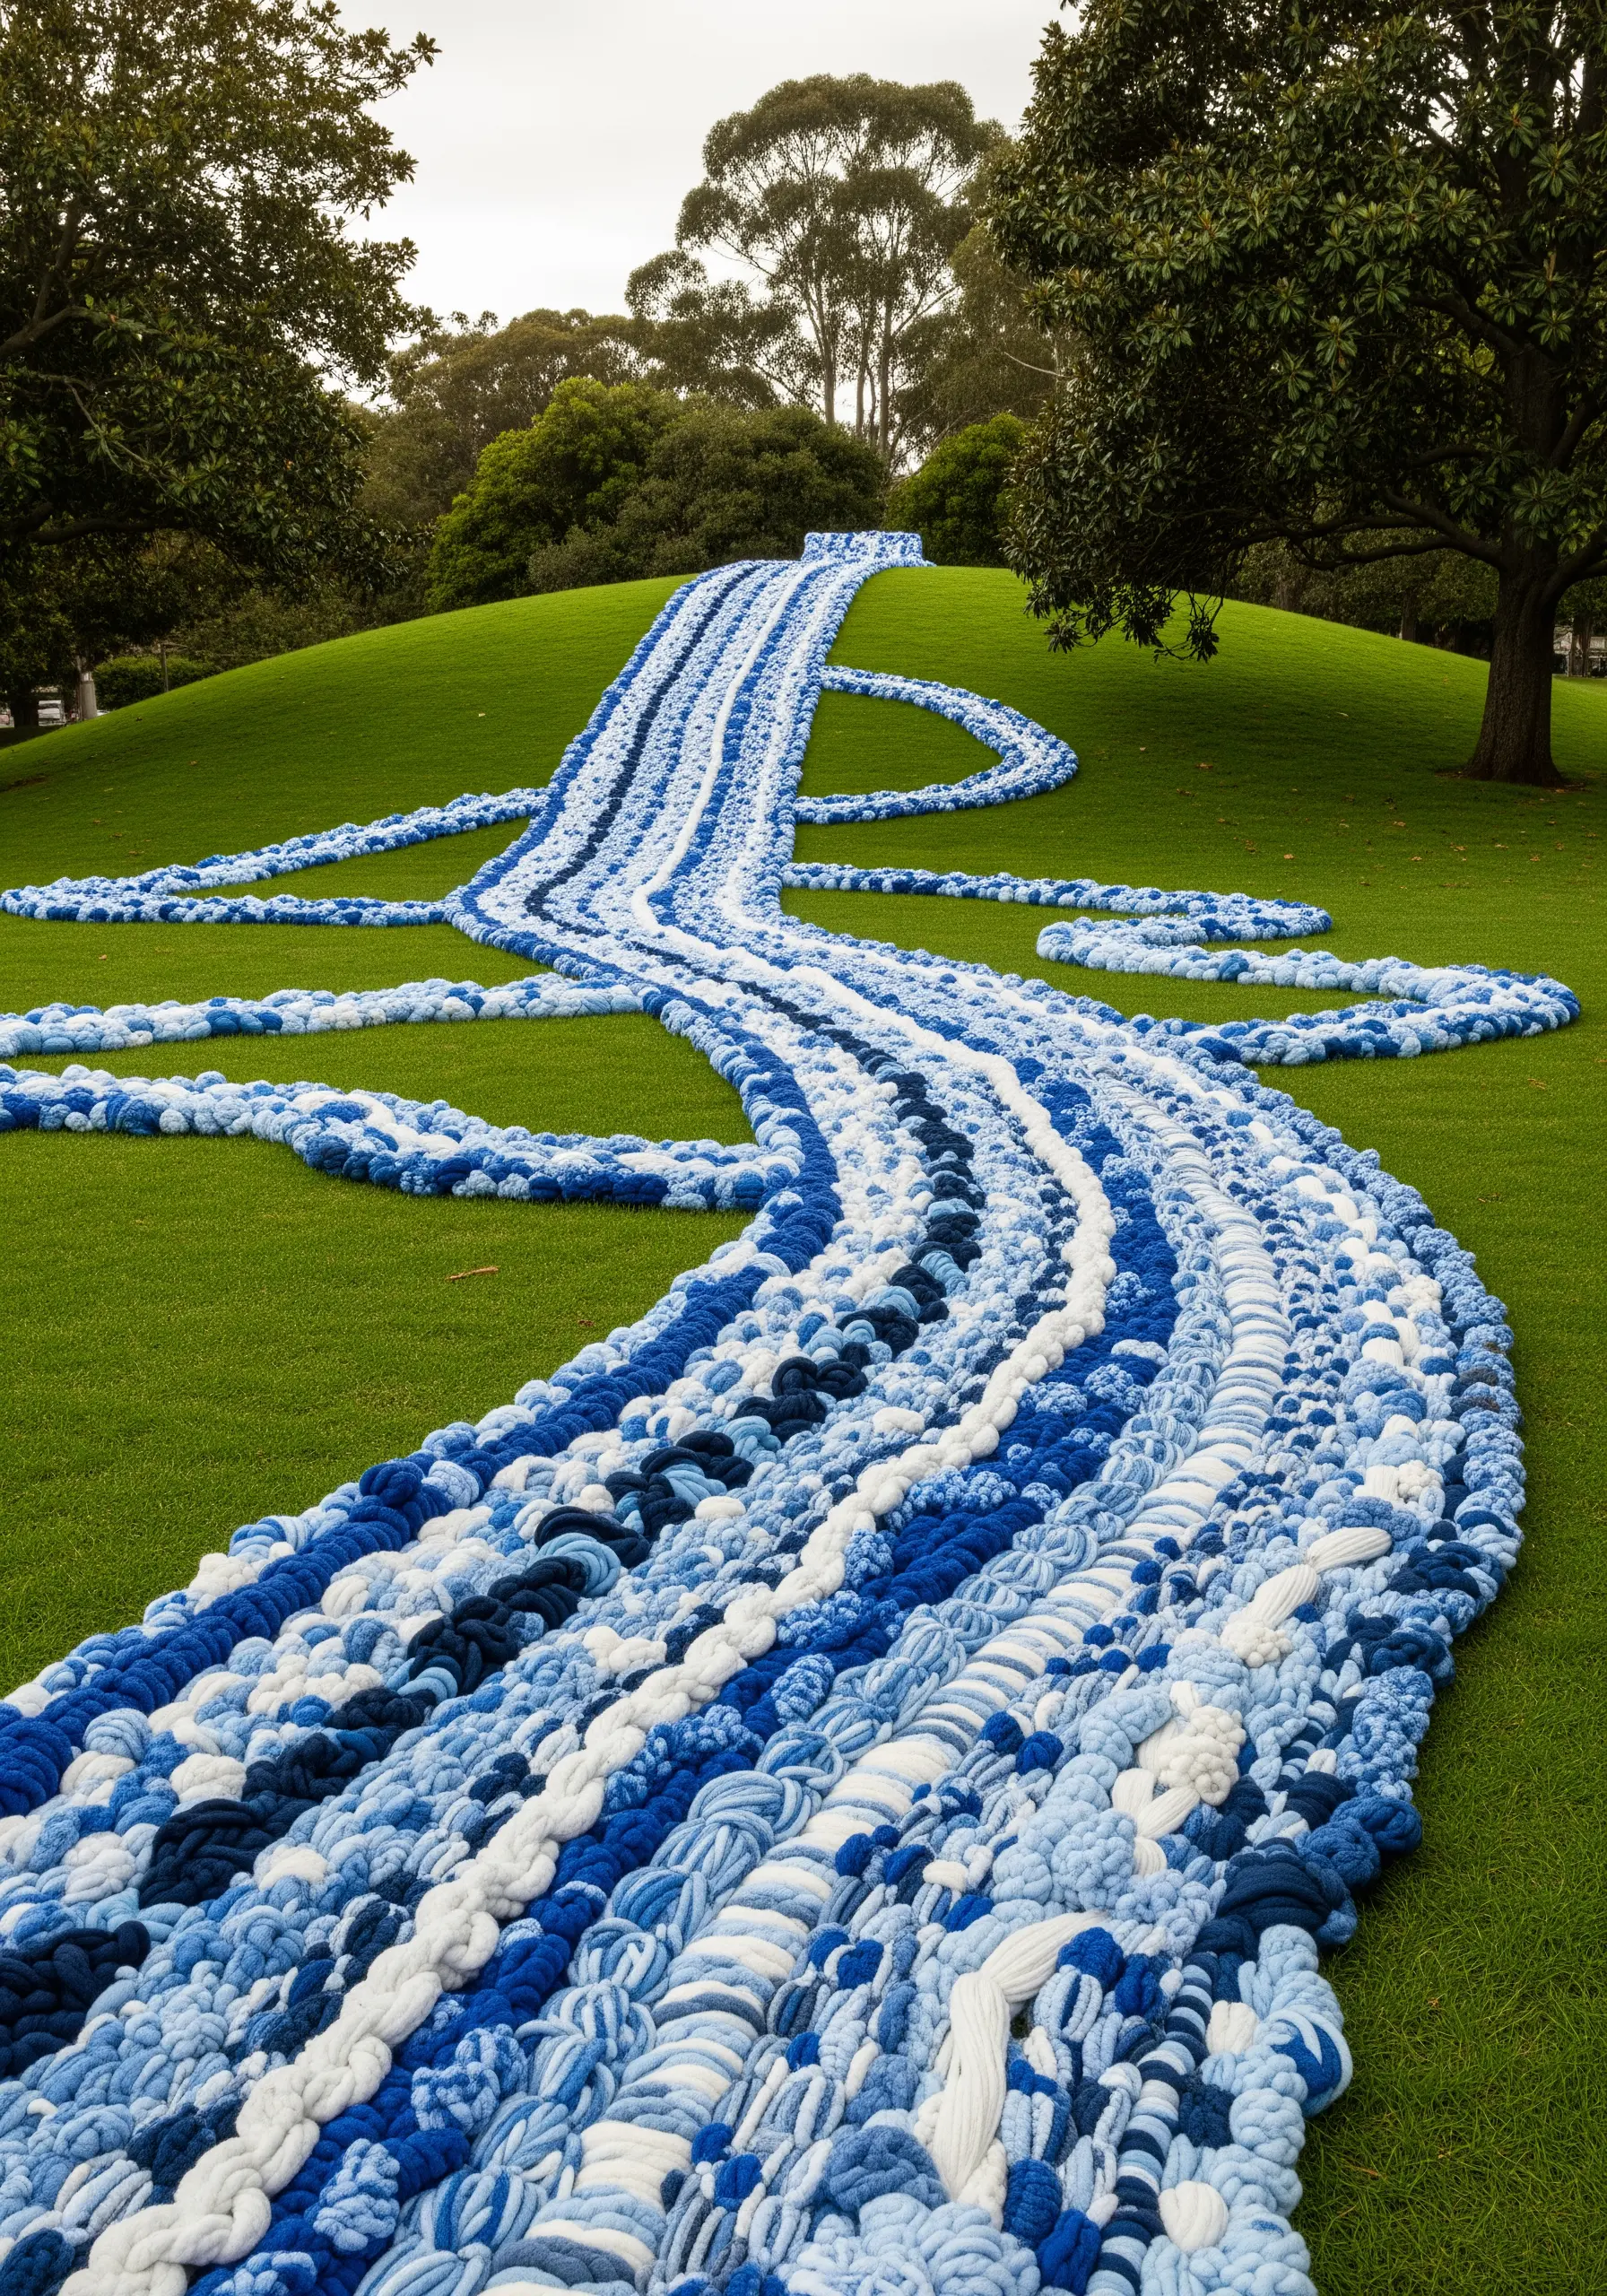
Create a sense of movement and direction by couching down thick, flowing lines of yarn.
Gather a variety of yarns in your chosen color palette, mixing textures and thicknesses for interest.
Arrange these yarns on your fabric to create a meandering path, then use a thinner, contrasting or matching thread to tack them down.
This technique allows you to draw with fiber on a large scale, creating bold, graphic pathways that lead the viewer’s eye through the composition.
14. Construct Delicate 3D Forms with Openwork Stitching
To create these airy, lantern-like structures, you need to work in three dimensions.
Use a water-soluble stabilizer as your base and stitch intricate, lace-like patterns using stitches that connect to each other, like buttonhole wheels or detached chain stitches.
Once your design is complete, dissolve the stabilizer, leaving behind a delicate, self-supporting thread structure.
You can shape these pieces around a mold while they dry to create spheres, pods, or other hollow forms.
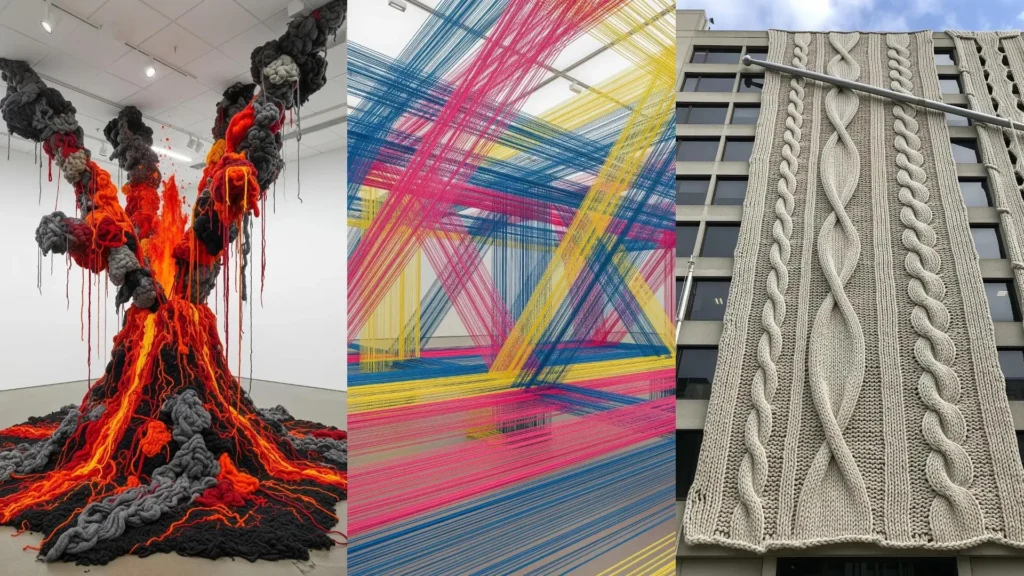
15. Express Energy with Explosive Textures and Colors
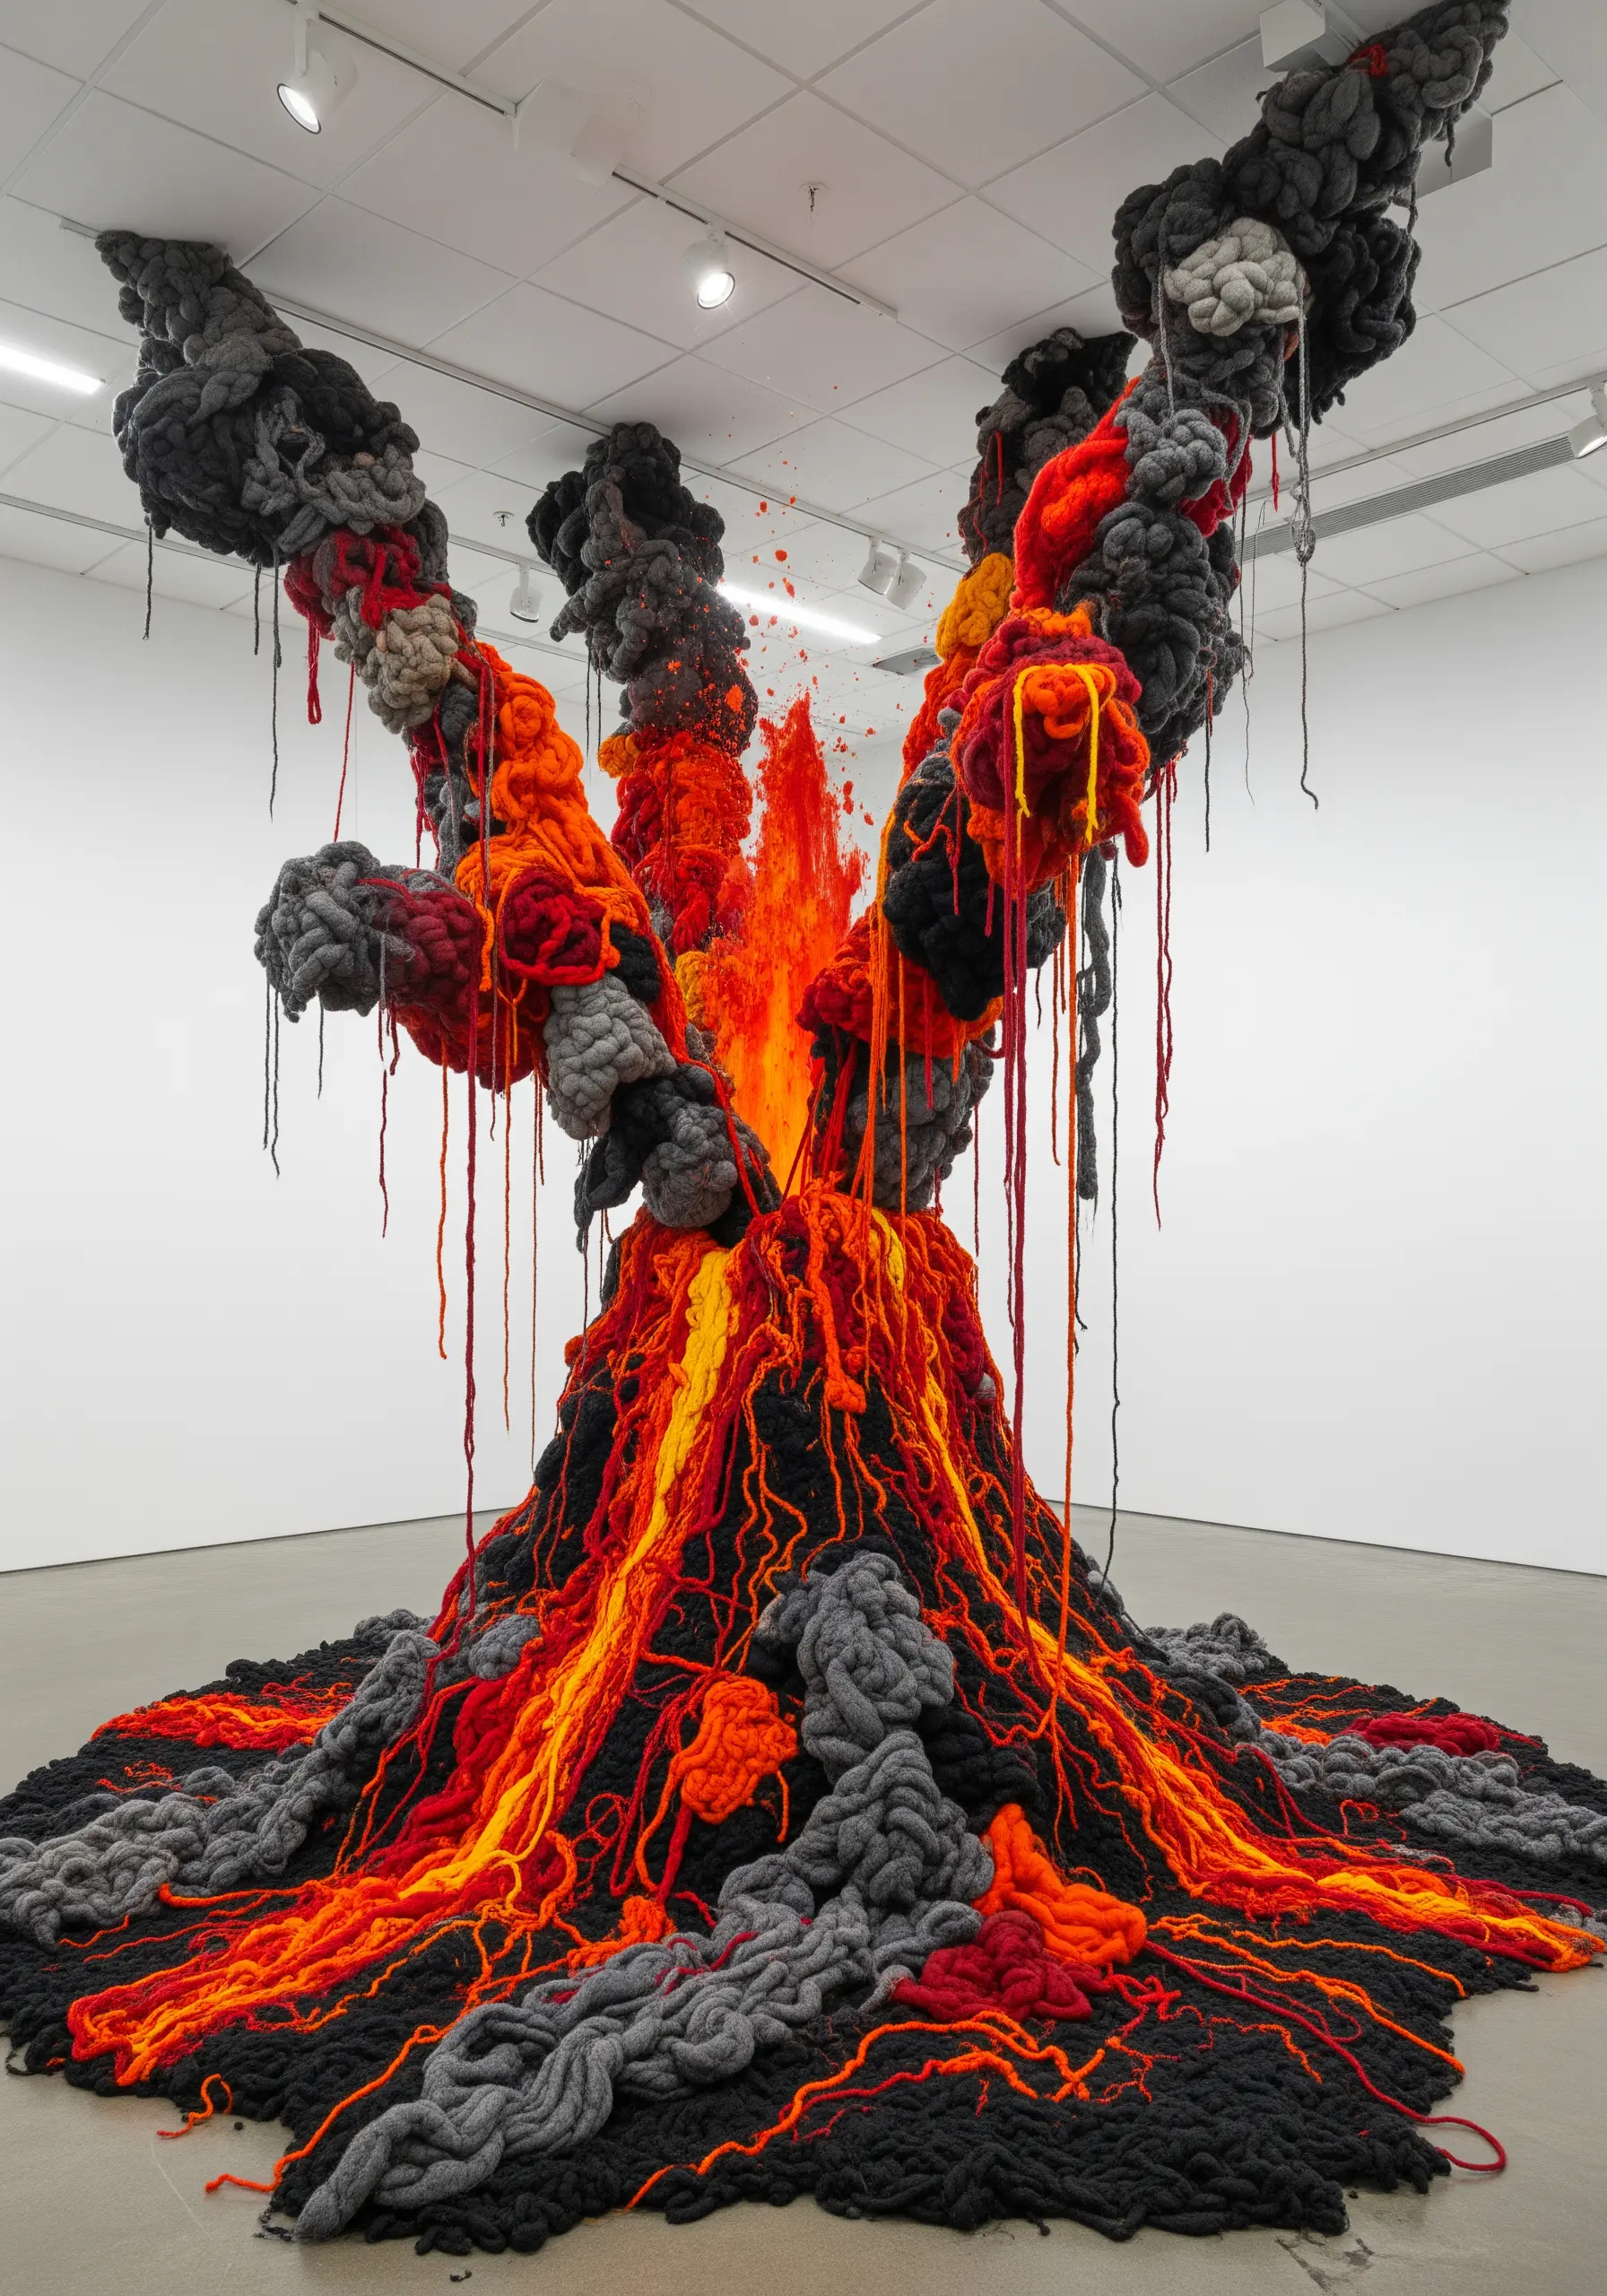
Capture the dynamic energy of an eruption by combining contrasting textures and directional stitches.
Use Turkey work or create chunky, knotted piles of thick wool for the smoldering, rocky base, using dark grays and blacks.
Then, for the erupting lava, switch to long, chaotic straight stitches in vibrant reds, oranges, and yellows, letting the threads overlap and spill down the sides.
This juxtaposition of static, clotted texture and fluid, energetic lines creates a powerful visual story.
16. Build Topography with Coiled Fibers
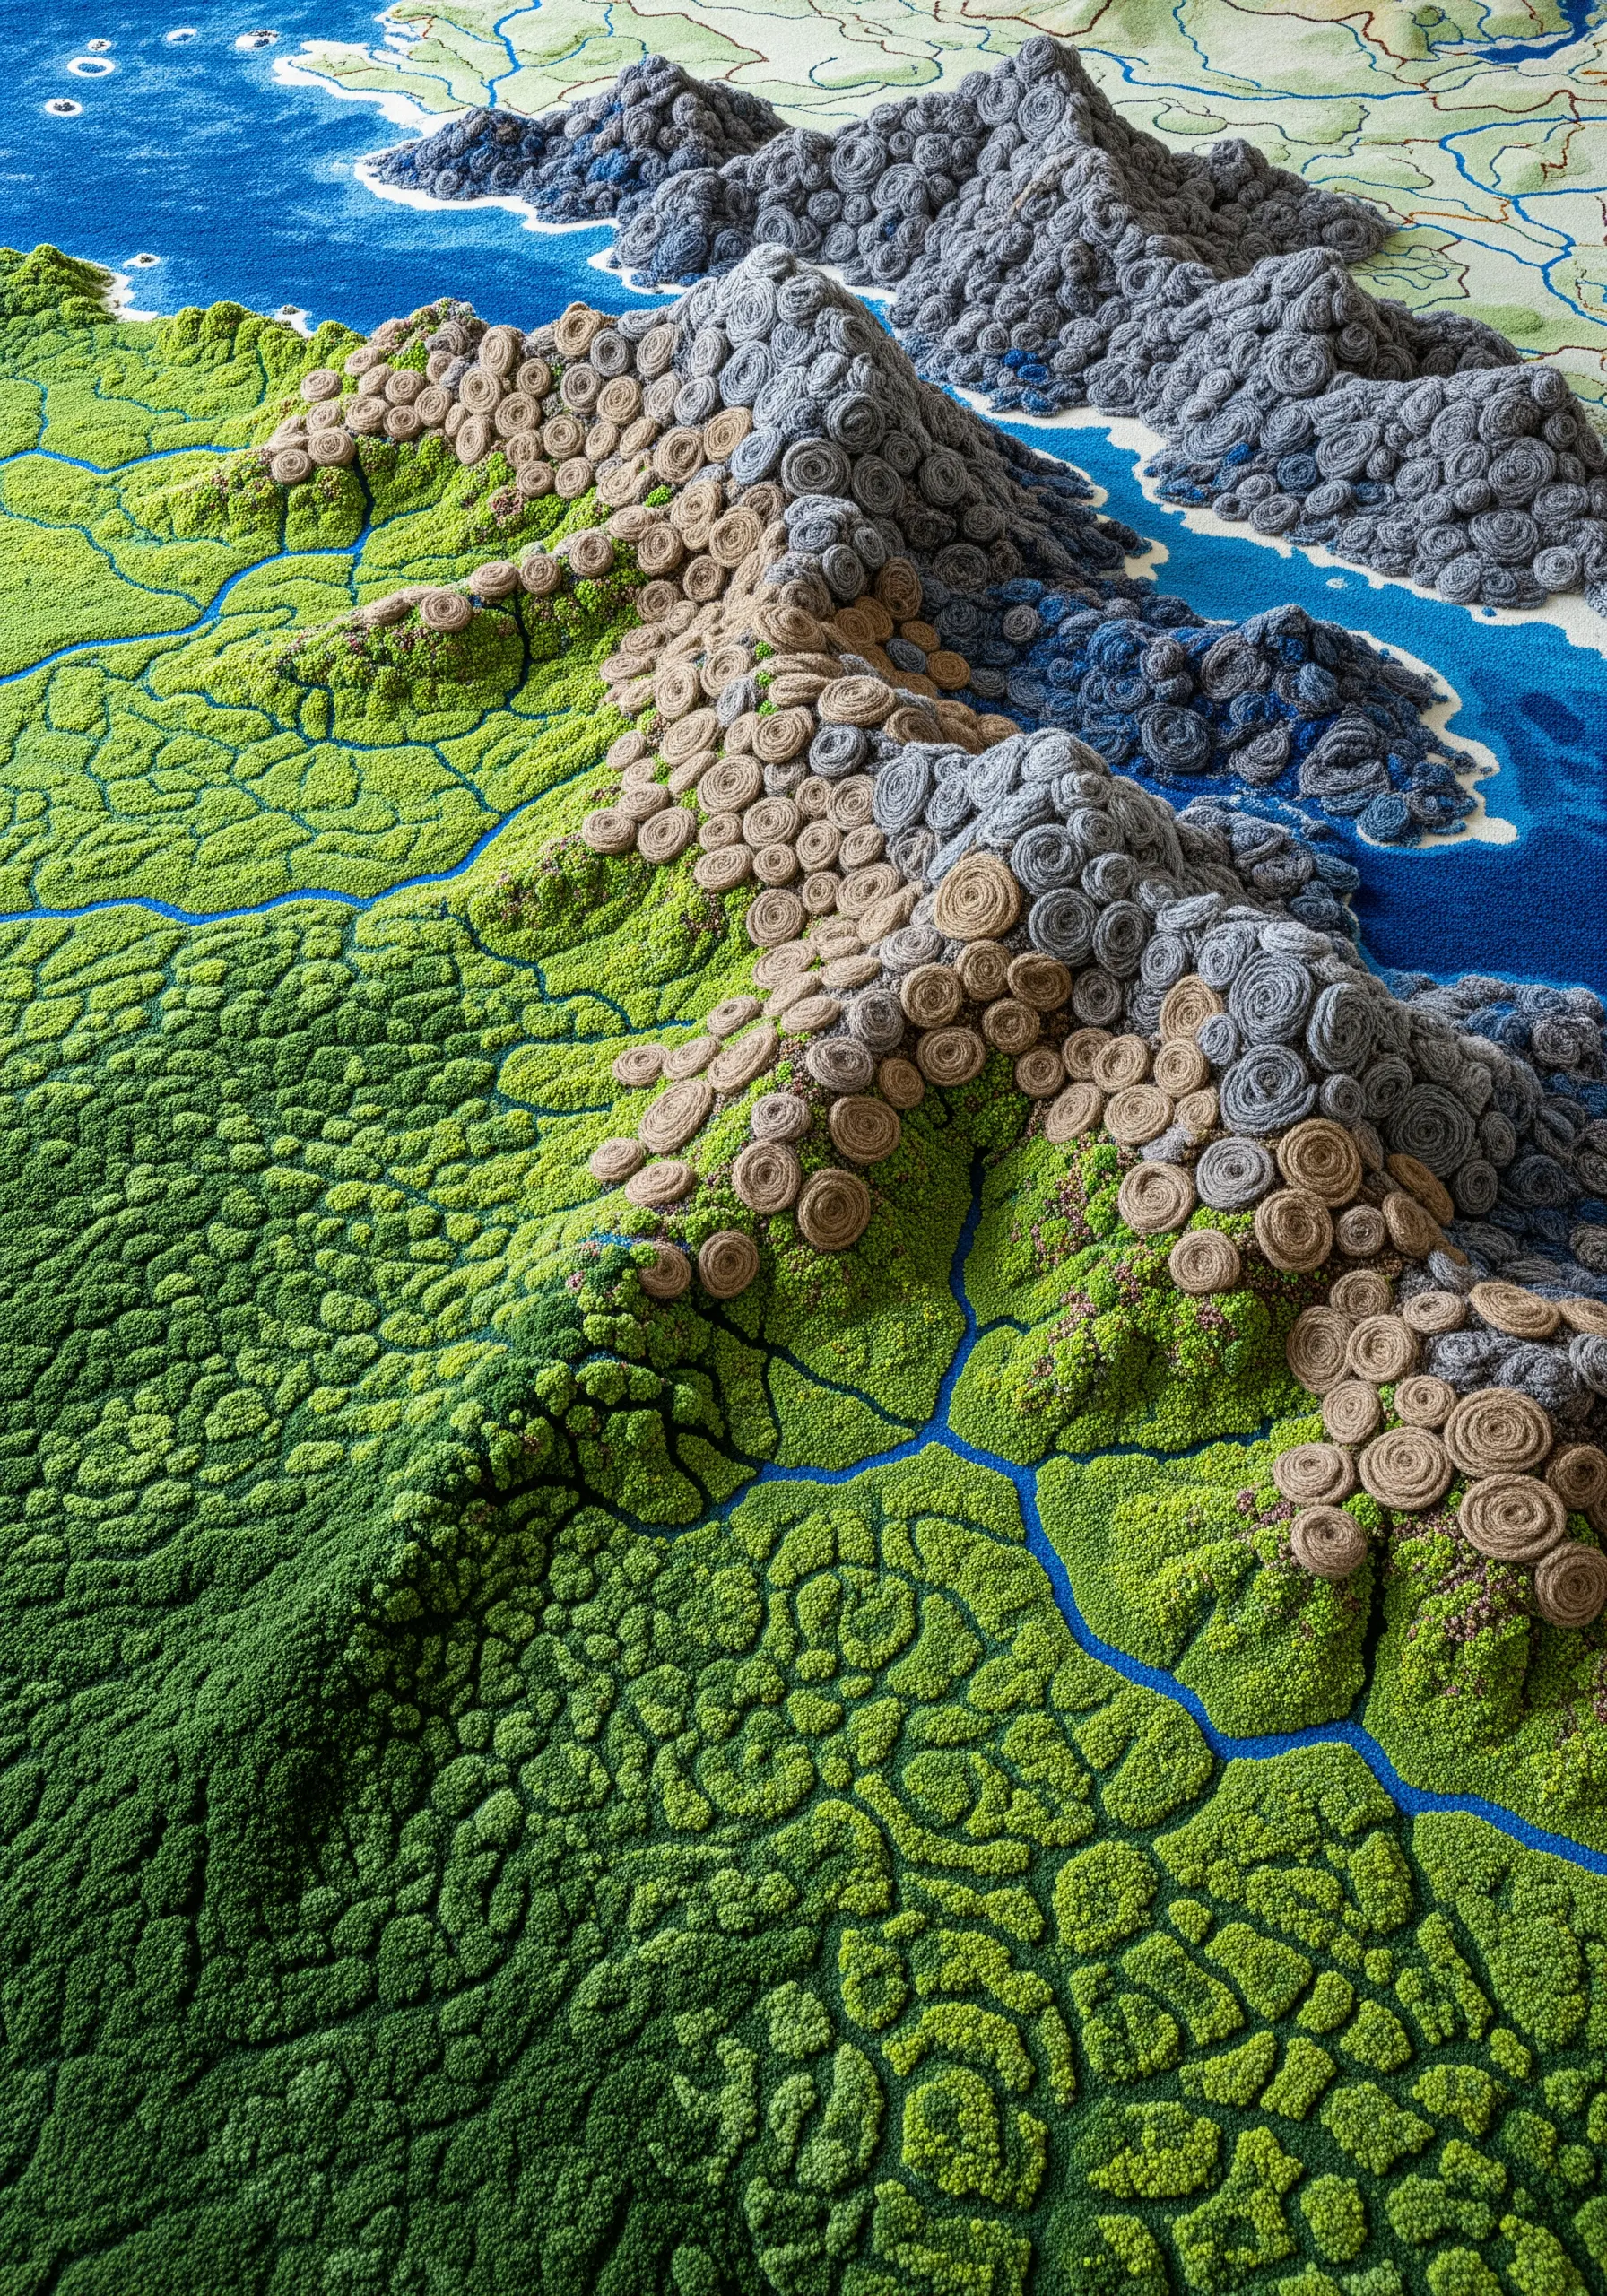
You can create a 3D topographical map effect using coiling and color gradients.
Tightly coil strips of felt or thick yarn into small circles, securing the ends with a stitch.
Arrange and stitch these coils onto your fabric base, packing them closely together to form landmasses.
To create the illusion of mountains and valleys, vary the height of the coils by adding more or less padding underneath them, and use a gradient of colors to signify changing elevations.
17. Create Sculptural Botanicals with a Wire Armature

Take your floral embroidery off the fabric by building it around a flexible wire frame.
Shape a thin, pliable wire into the outline of a petal or leaf.
Then, use a buttonhole stitch or crochet to cover the wire completely, filling in the center with a web of stitches to create the body of the form.
You can then assemble these individual components into vibrant, three-dimensional flowers and vines that hold their shape.
18. Define Form with Negative Space and Linear Grids
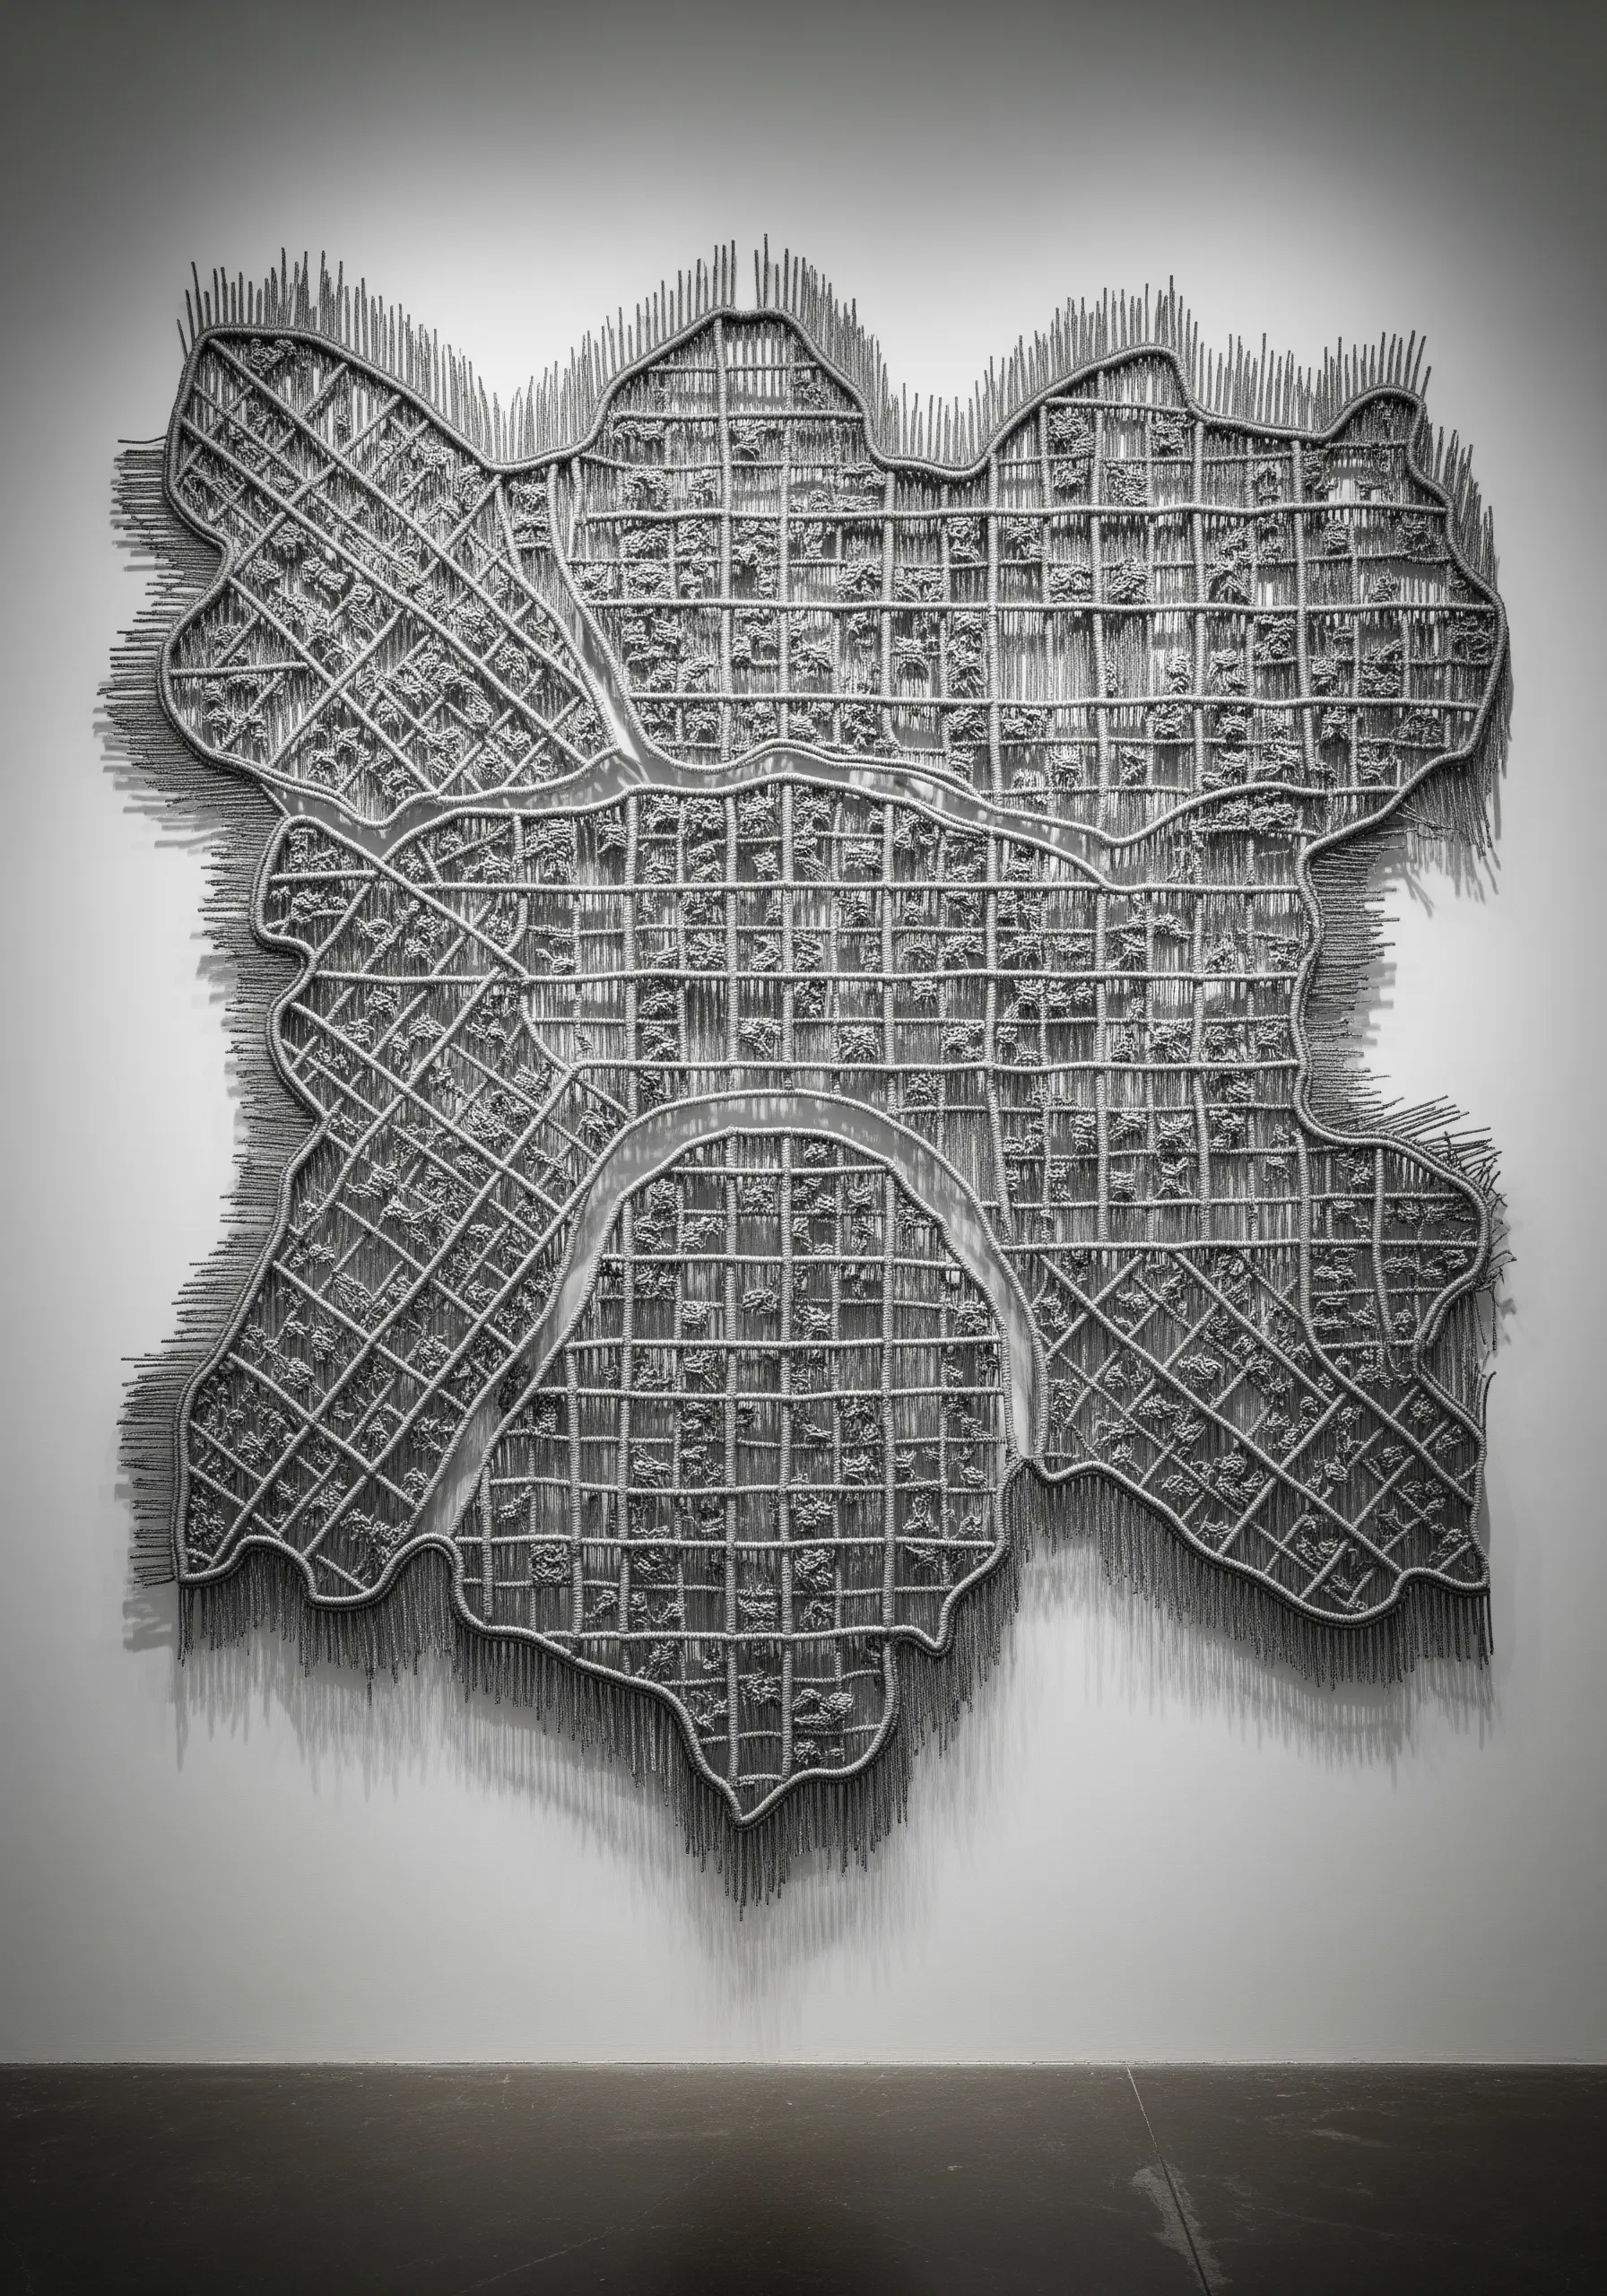
This intricate map relies as much on the empty spaces as it does on the stitched lines.
When tackling a complex linear design, focus on creating a clean, consistent grid with a simple backstitch or stem stitch.
Pay close attention to the negative space—the unstitched areas of fabric—as these are crucial for defining the shapes and creating clarity.
Using a single color of thread forces the viewer to focus on the purity of the form and the precision of your line work.
19. Deconstruct the Process with Mixed-Media Weaving
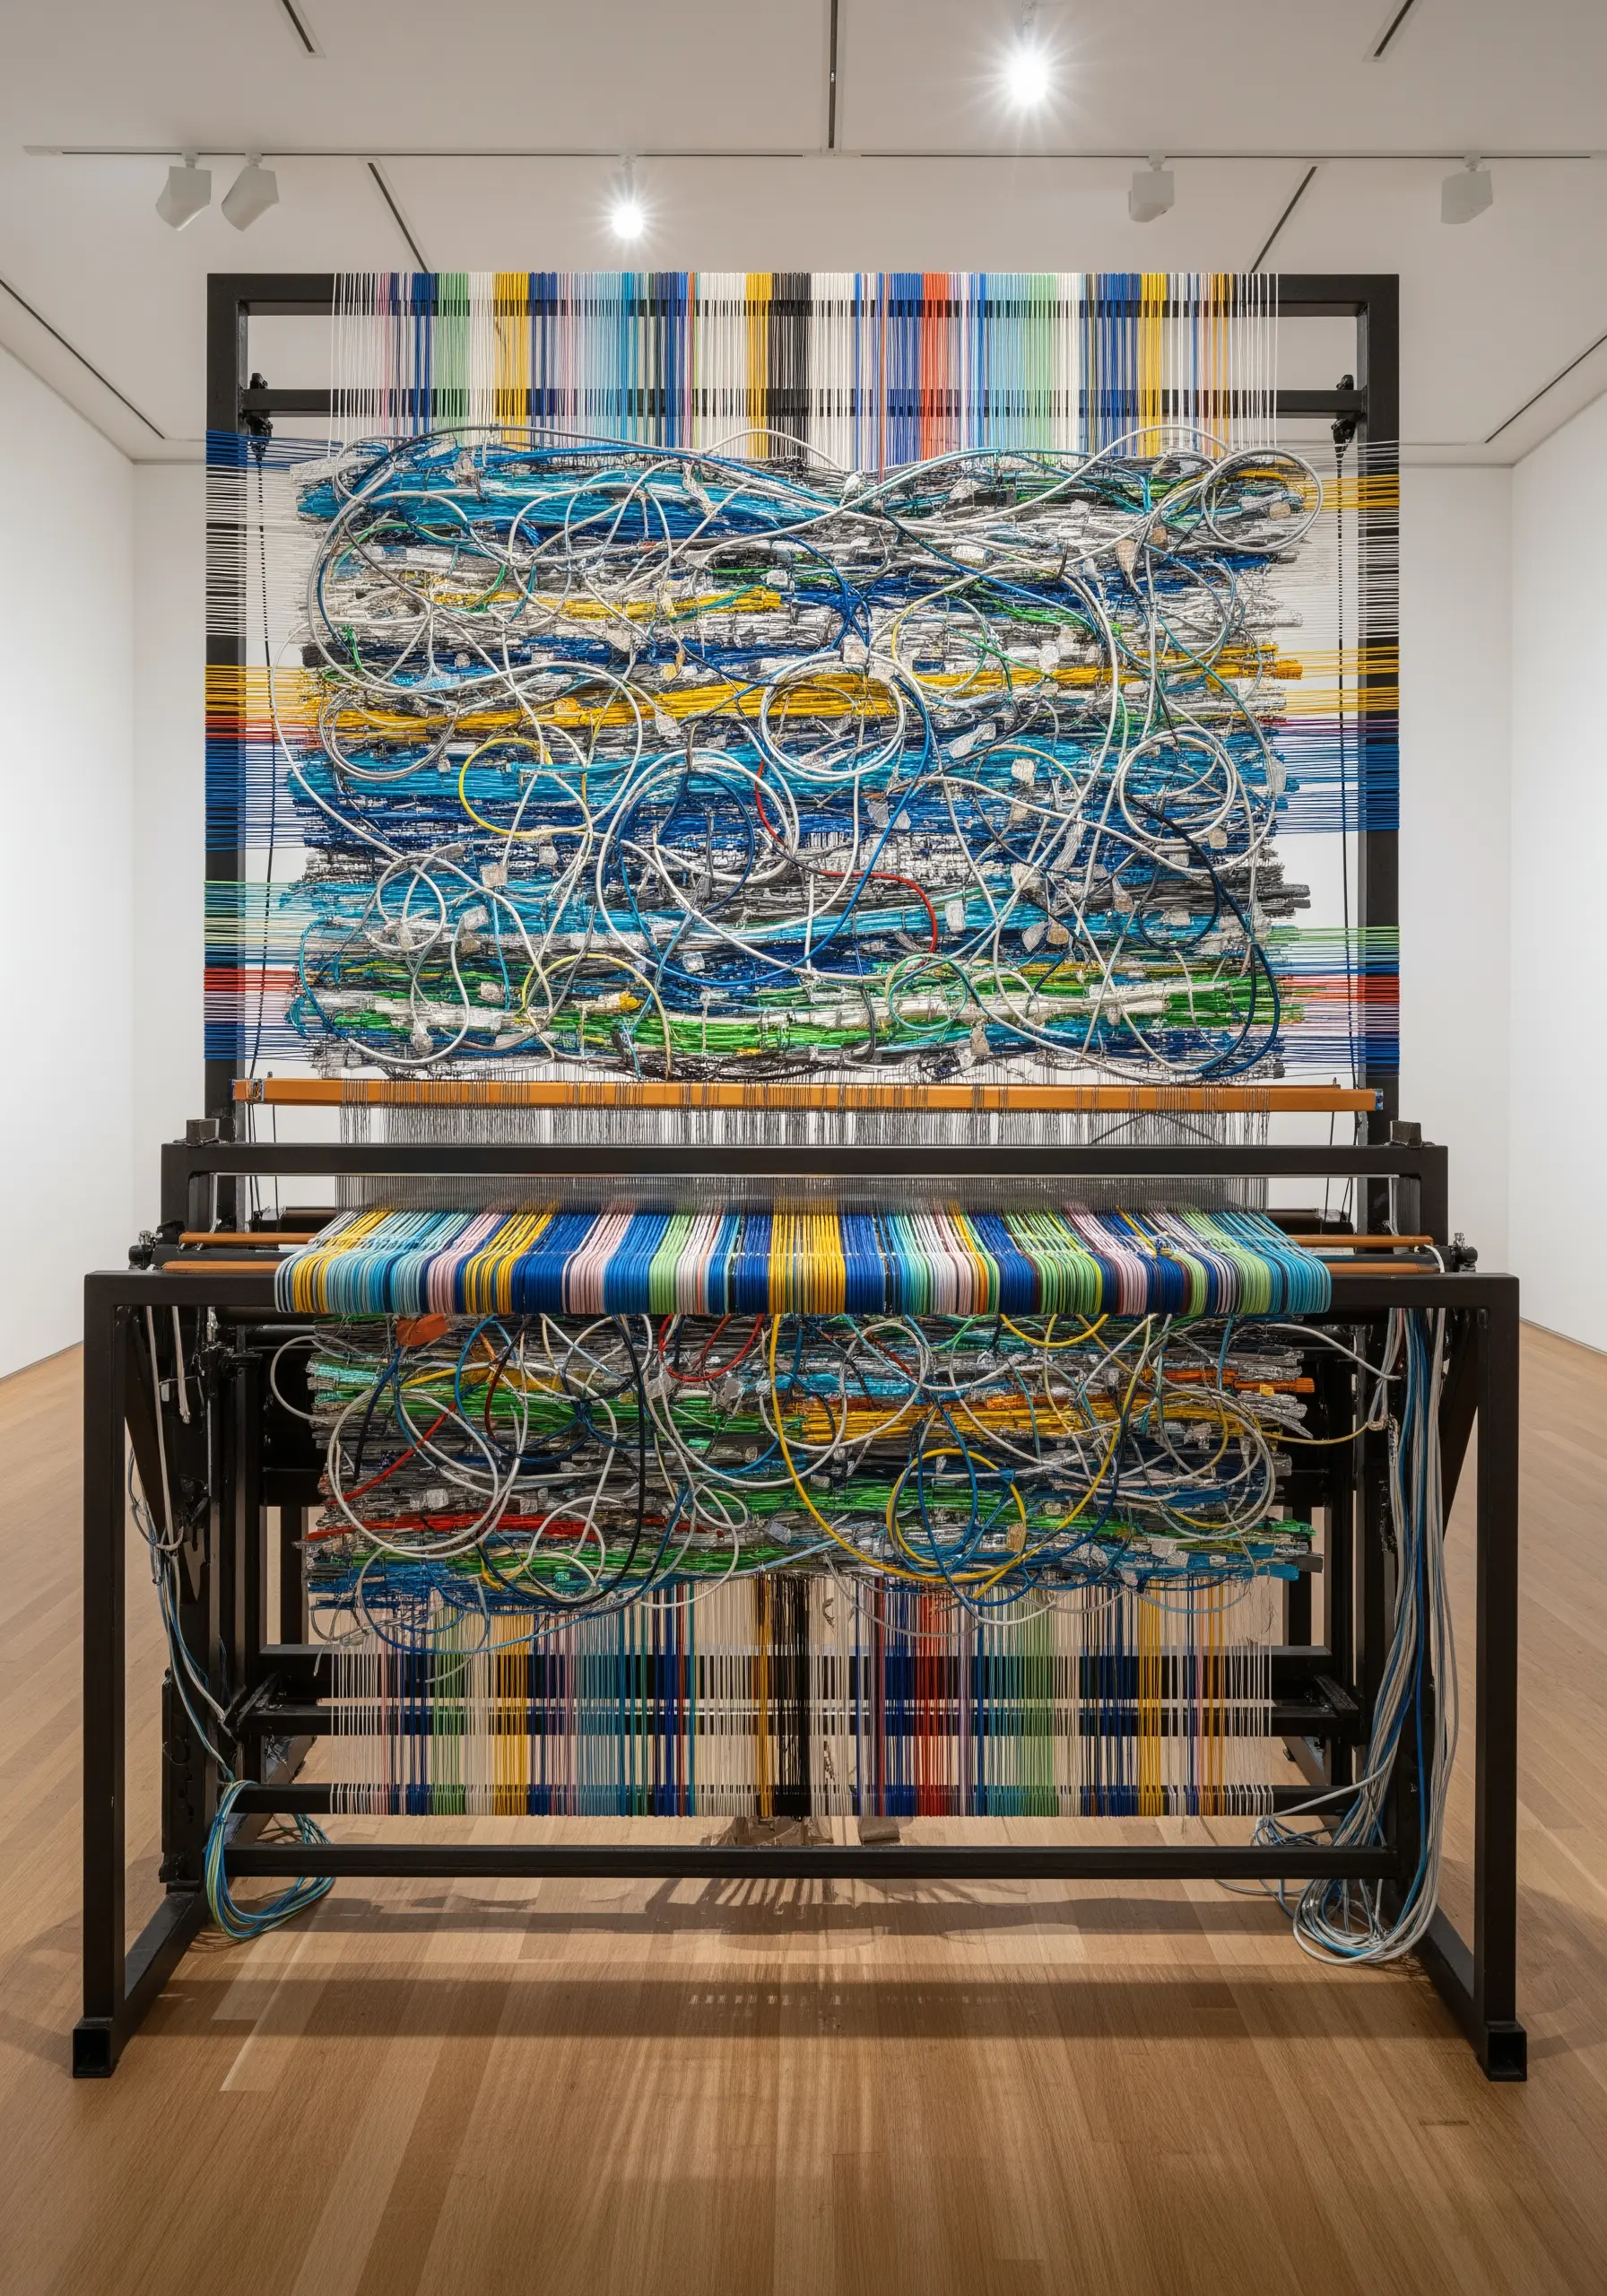
Challenge the idea of a ‘finished’ piece by incorporating unconventional materials and showing your process.
Instead of traditional yarn, try weaving or couching with unexpected items like stripped electrical wires, plastic tubing, or metallic cords.
Allow these elements to tangle and loop freely, breaking from the rigid structure of the warp and weft.
This approach transforms a traditional craft into a contemporary statement, celebrating texture, chaos, and raw materials.
20. Paint with Thread on Sheer, Layered Fabrics
Create an ethereal, atmospheric effect by working on multiple layers of translucent fabric like organza or tulle.
Stretch each layer in its own hoop or frame, and stitch a different part of your design on each one.
When you layer the finished pieces one behind the other, the elements appear to float and blend, creating a sense of depth and soft focus.
This technique is perfect for capturing abstract concepts like light, fog, or water.
21. Achieve Sculptural Relief with Padded Appliqué
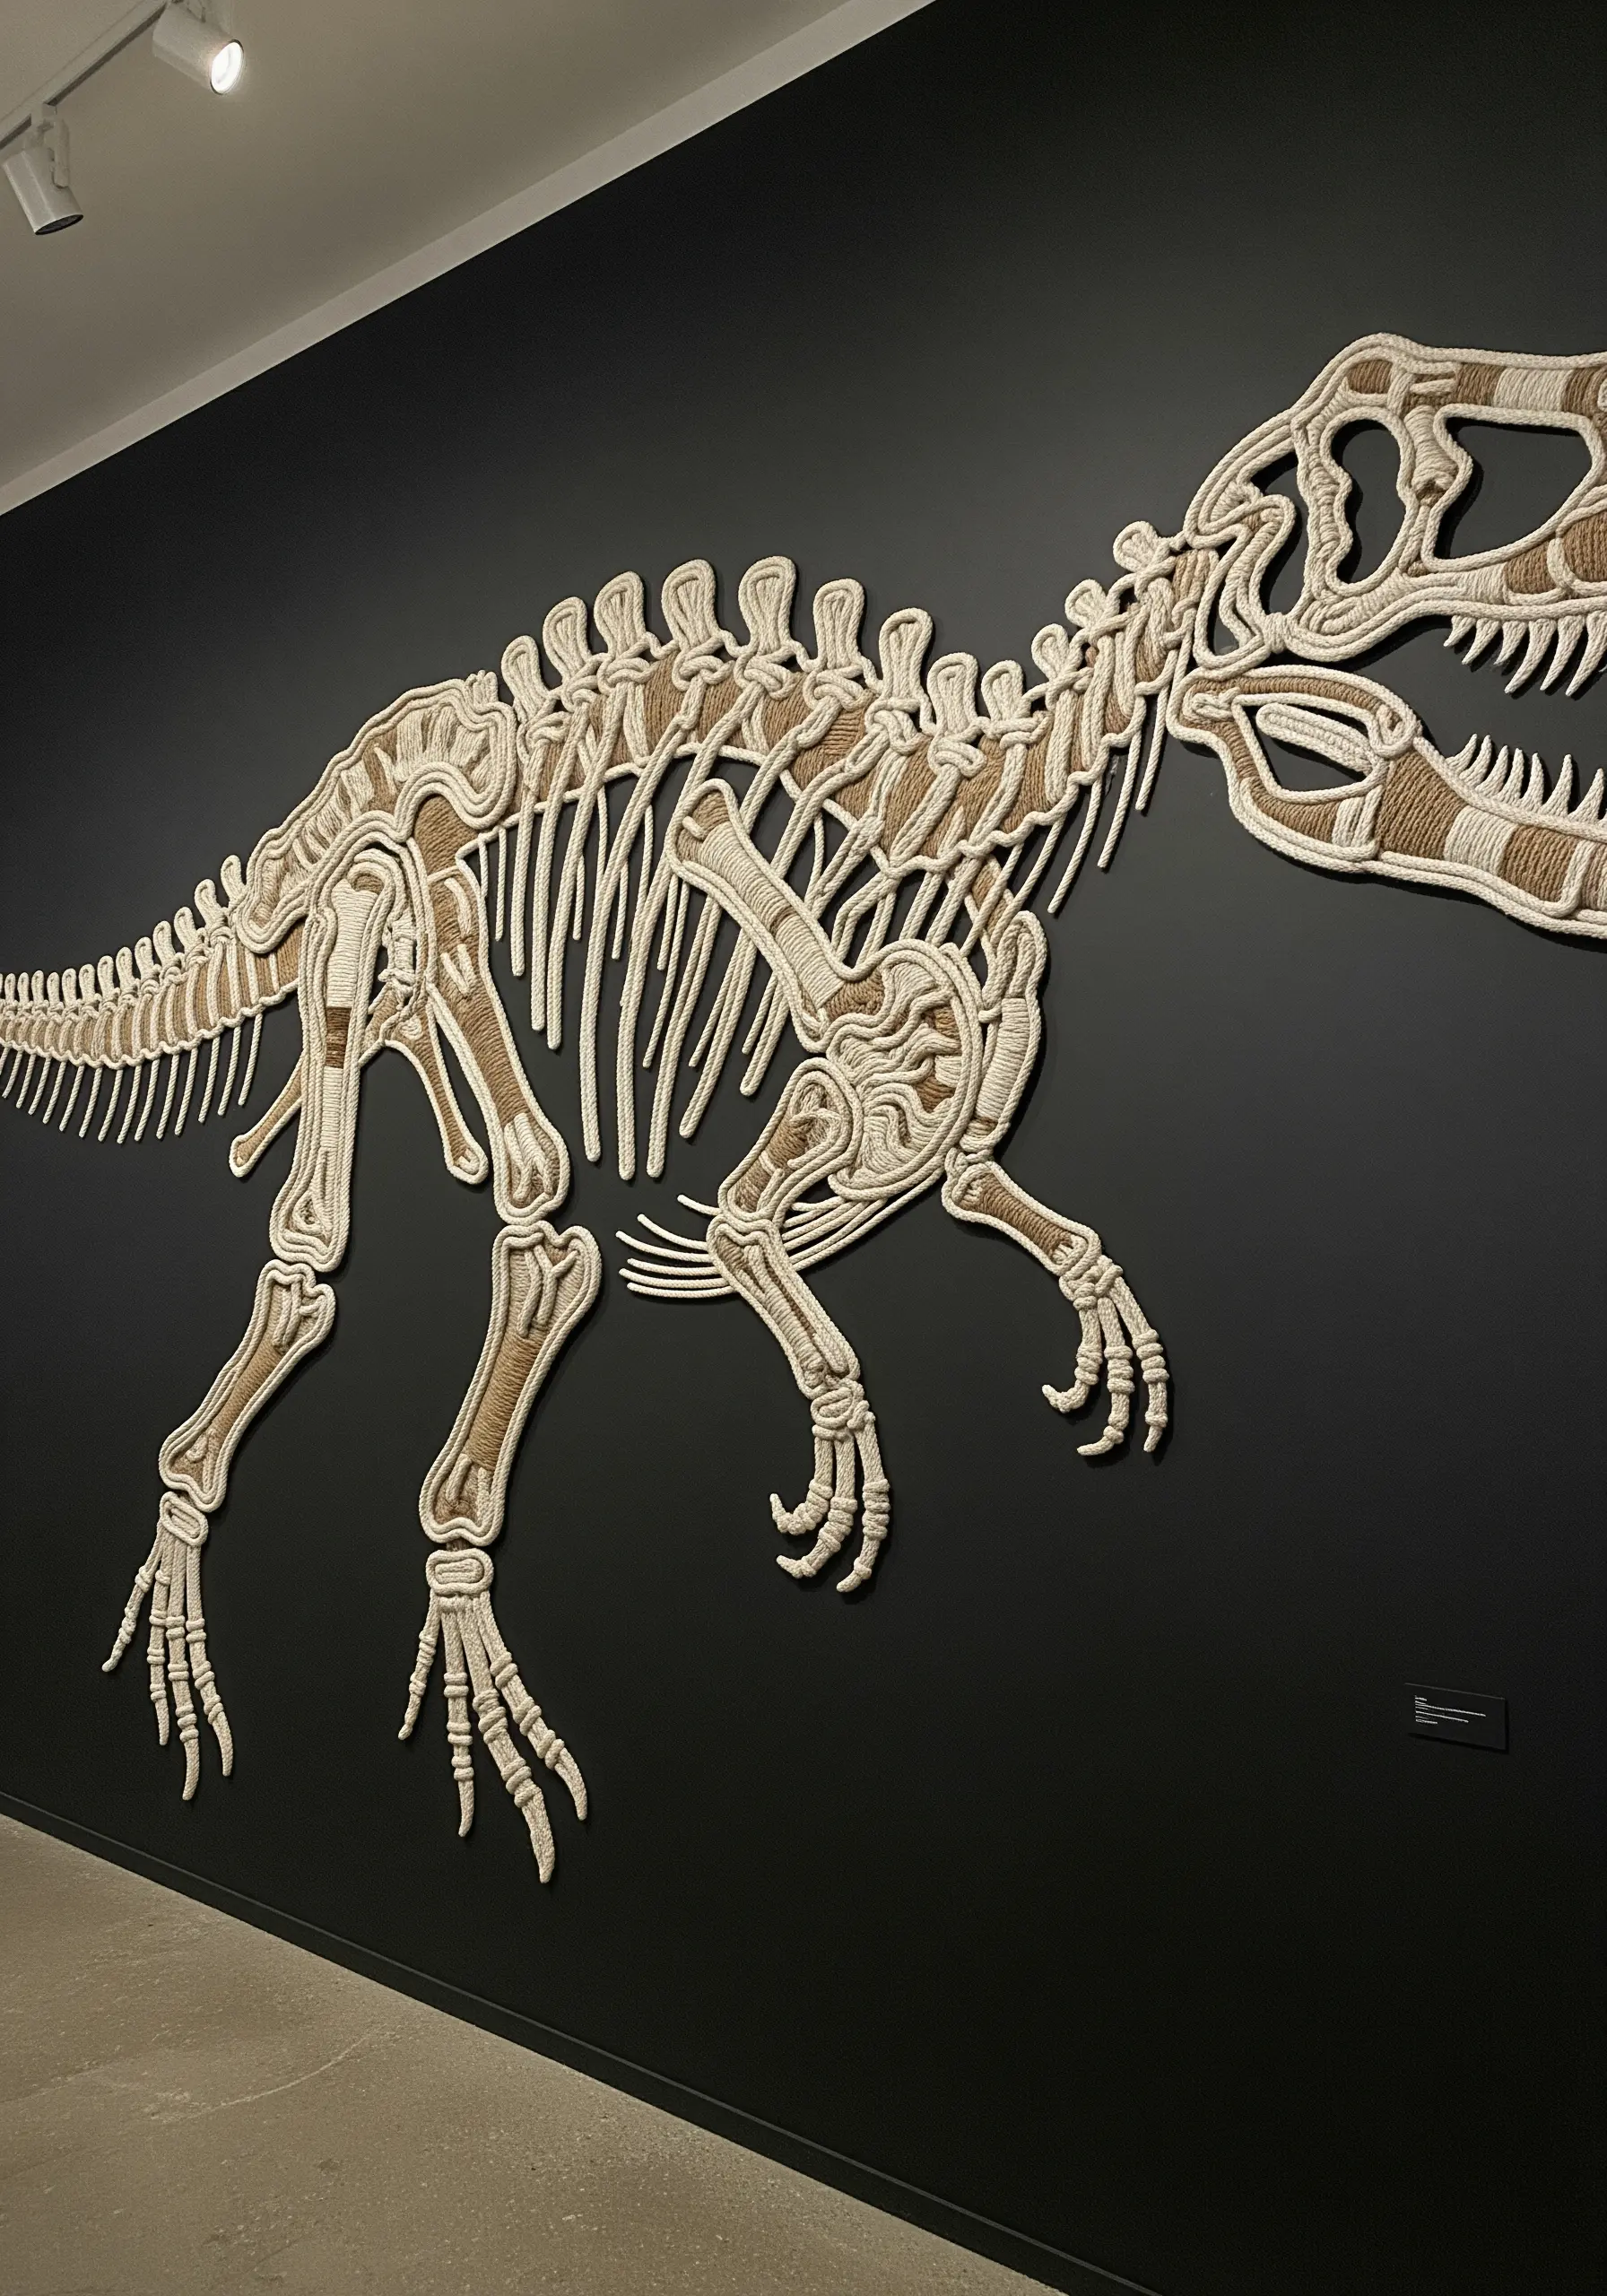
To make your designs stand out with fossil-like relief, use padding to lift them from the background.
Cut your main shapes from a piece of felt or stiff fabric. Before attaching them, stitch a smaller piece of padding (like quilt batting or more felt) to the back.
Then, appliqué the padded shape onto your base fabric using a neat satin stitch or whip stitch around the edges.
This raises the form, creating dramatic shadows and a powerful 3D effect.
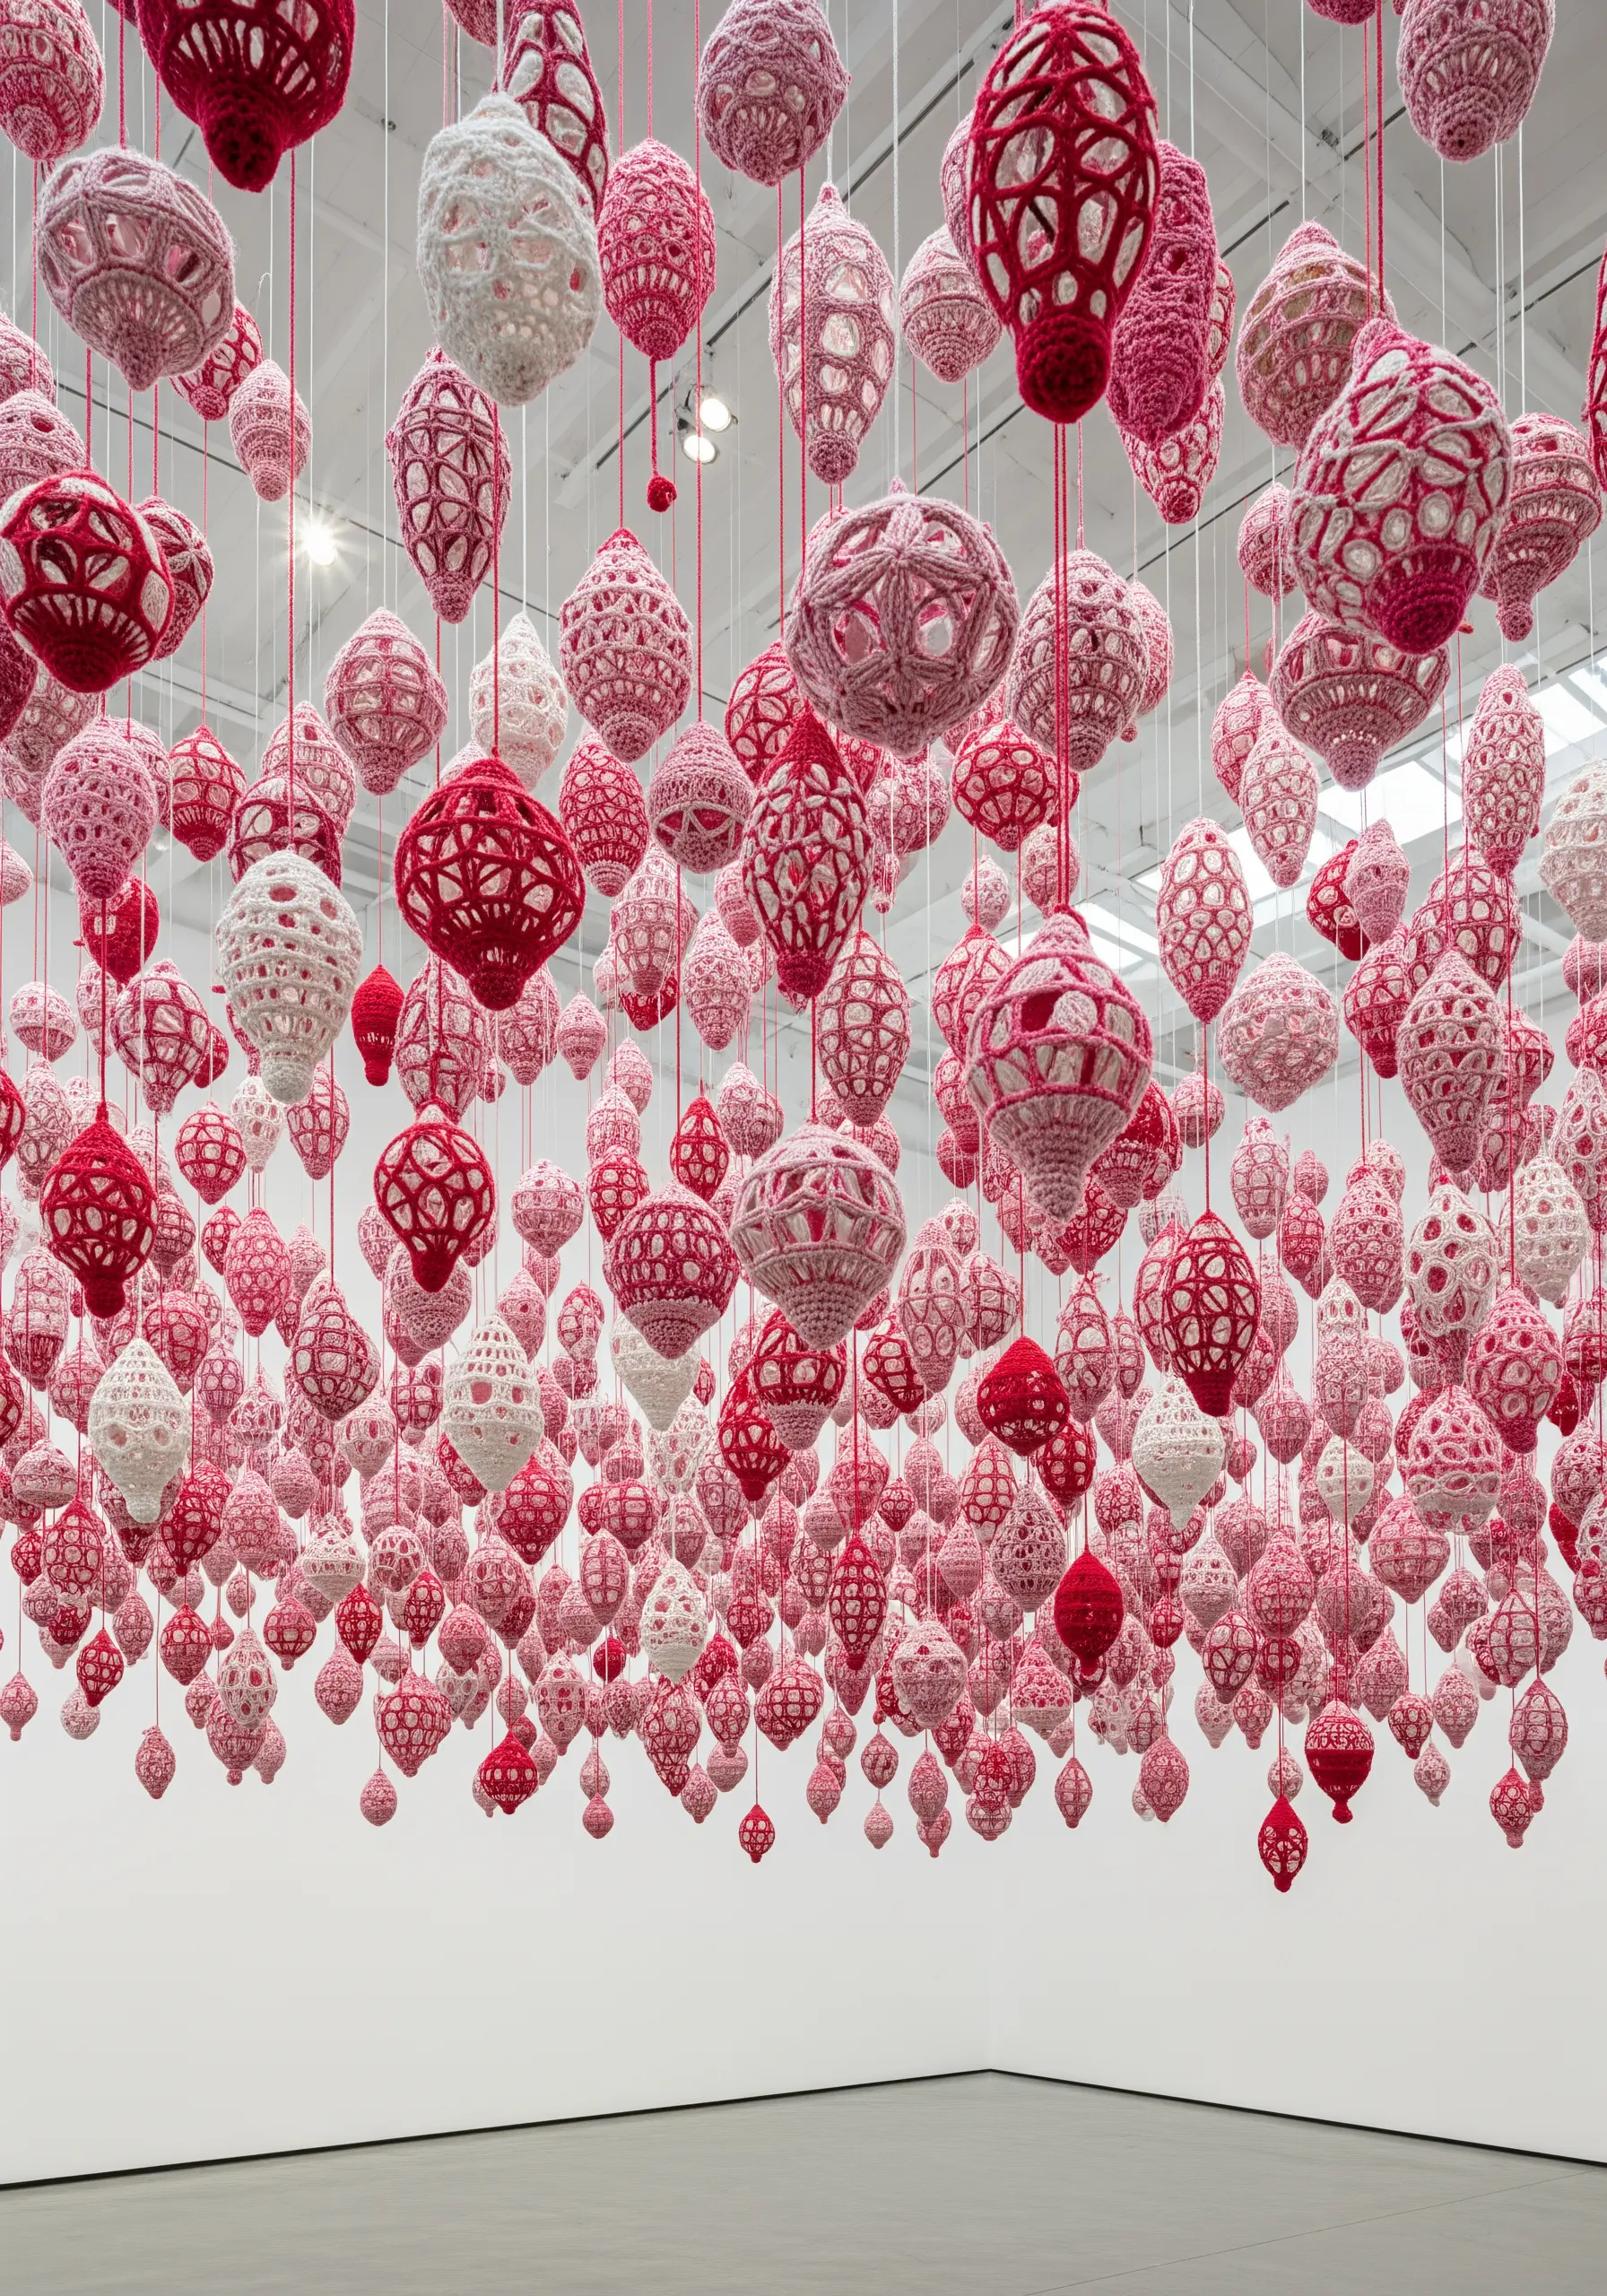
22. Suspend Delicate Forms for an Airy Installation
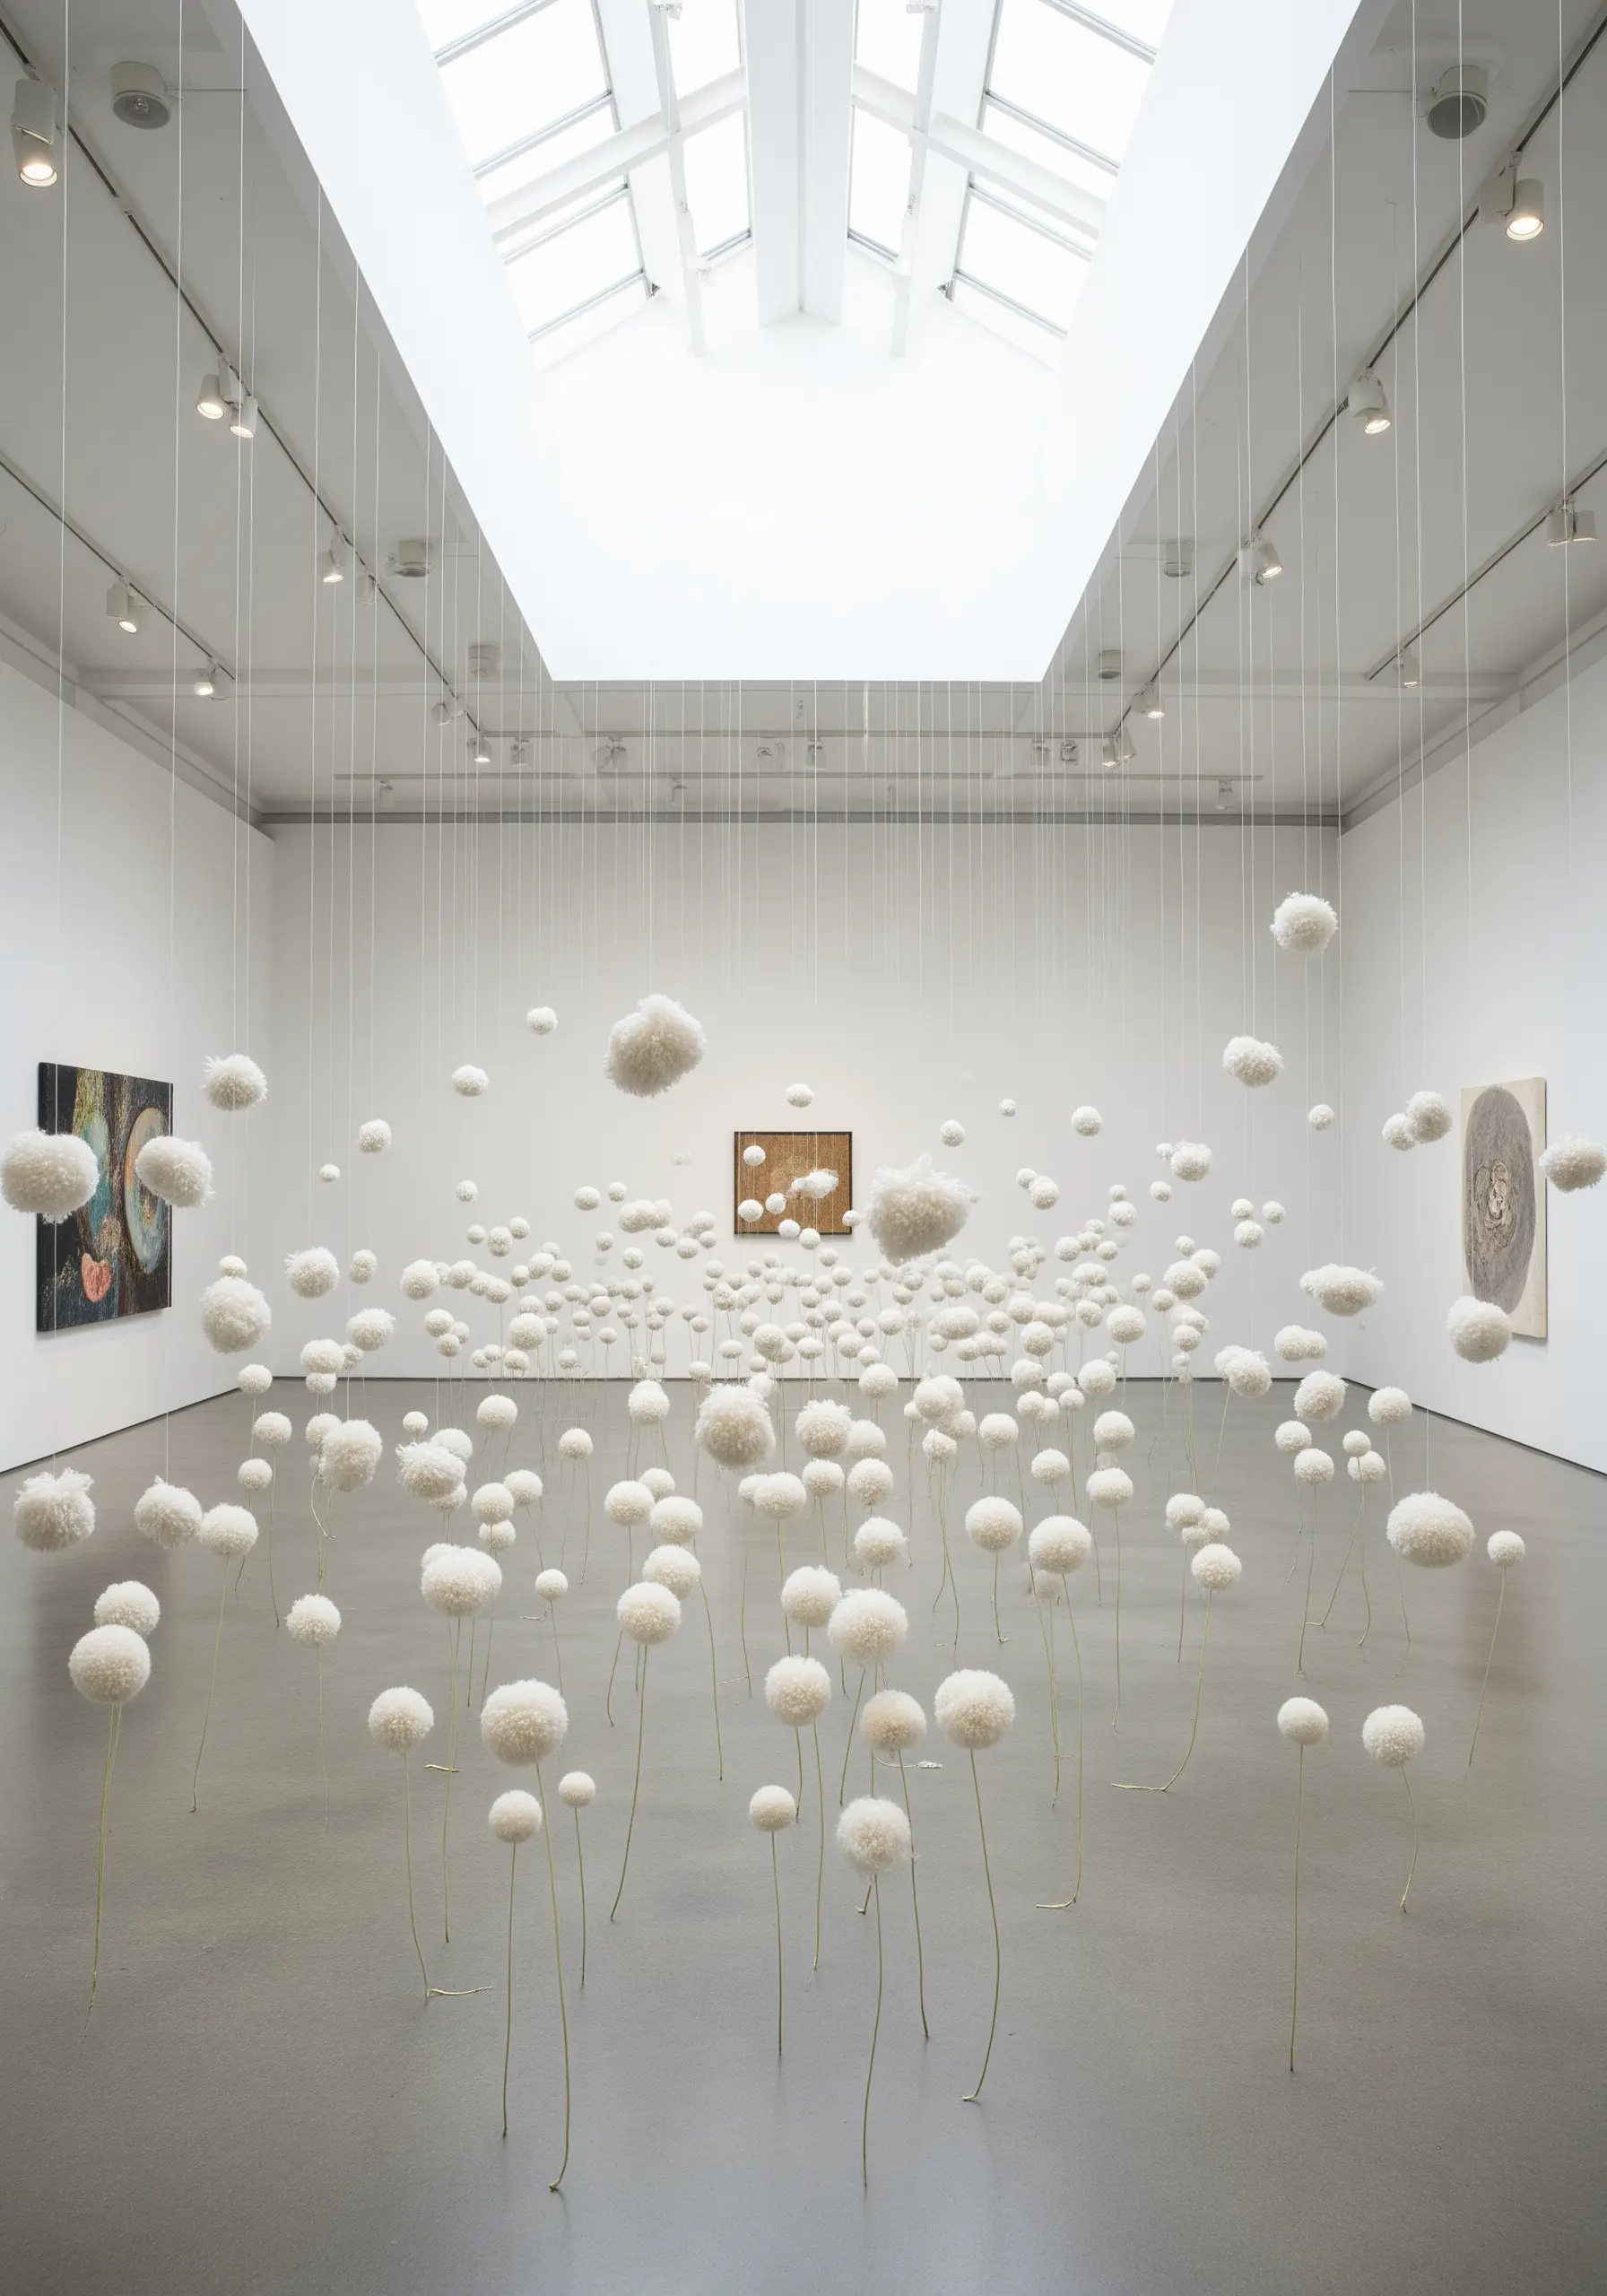
Create the illusion of weightlessness by focusing on repetition and delicate suspension.
Make multiple small, airy forms like pom-poms from fine wool or dandelion puffs from detached Turkey work loops.
Then, suspend each one from the ceiling or a frame using a very fine, strong thread that is nearly invisible, such as a monofilament or a single strand of silk.
The repetition of the delicate forms combined with the hidden suspension creates a magical, floating field of texture.
23. Create Contrast with Raw Rope and Industrial Surfaces
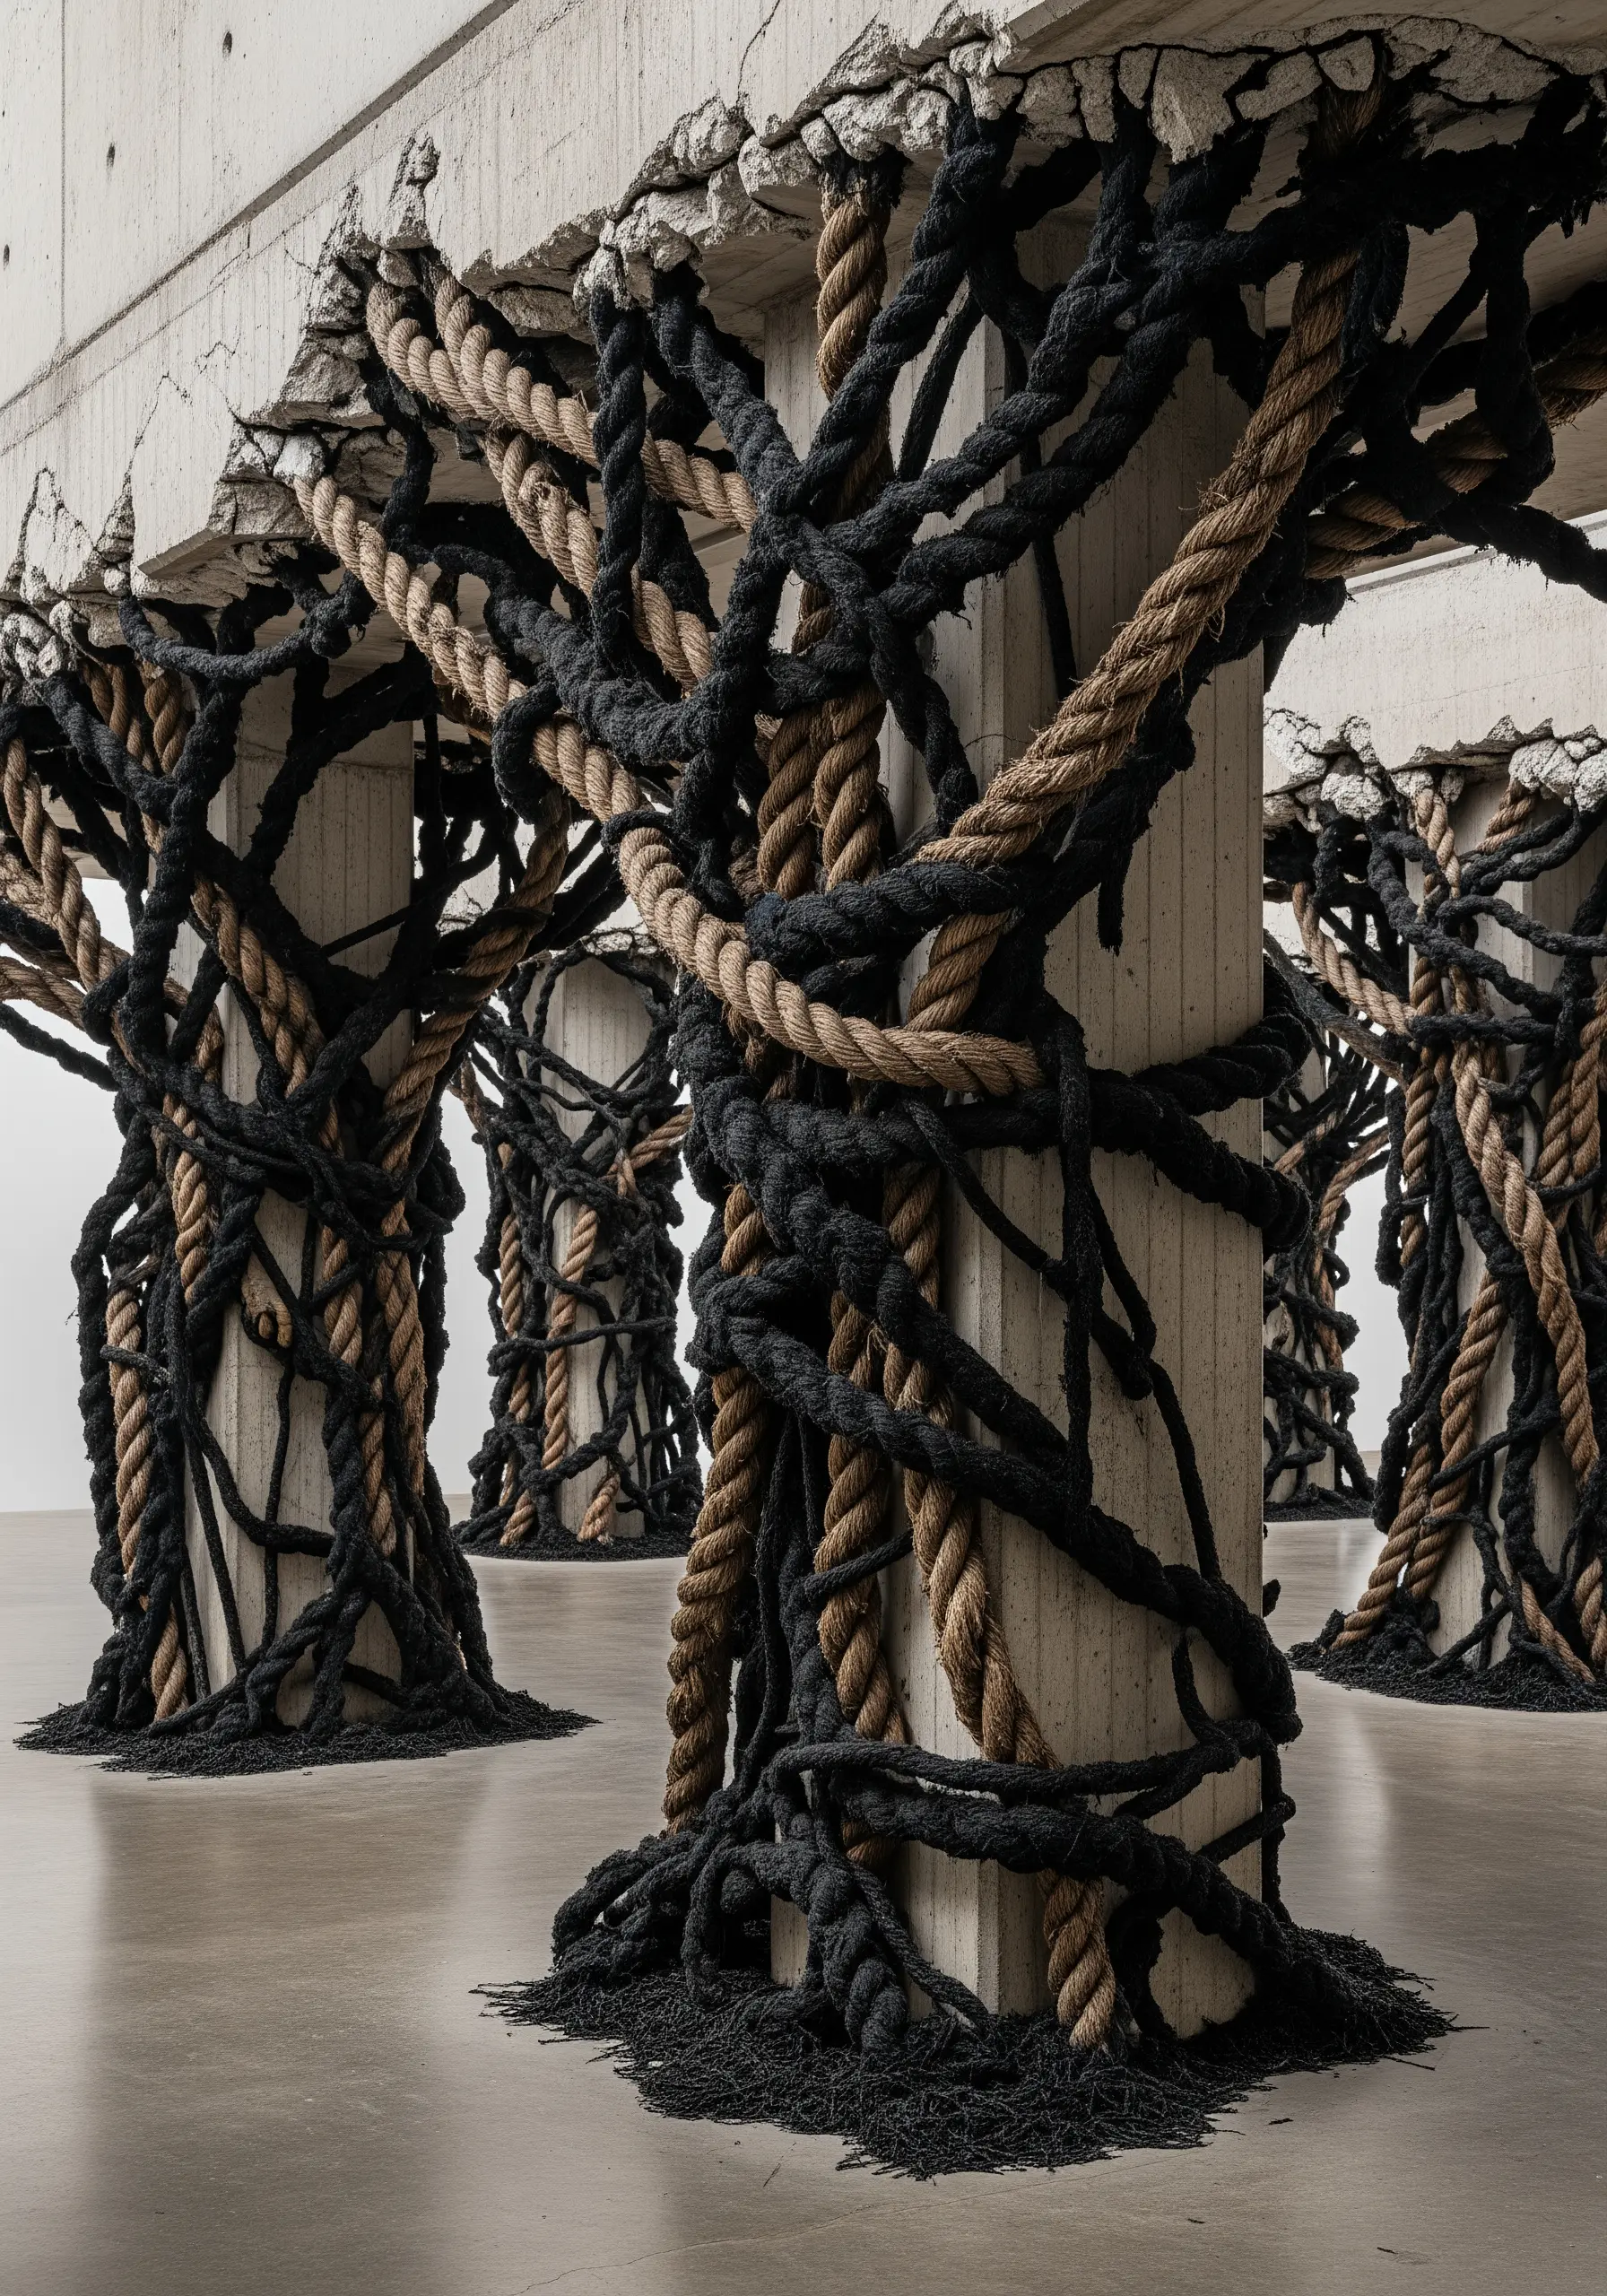
Juxtapose soft fibers with hard structures to create a powerful statement.
Instead of fabric, consider using an unconventional base like a concrete block, a piece of wood, or a metal sheet.
Use thick, coarse materials like jute or sisal rope, securing them to the surface with industrial adhesives or by drilling holes and threading the rope through.
The tension between the rough, architectural surface and the organic, pliable fiber creates an unforgettable tactile and visual contrast.
24. Direct Energy with Bold, Flowing Color
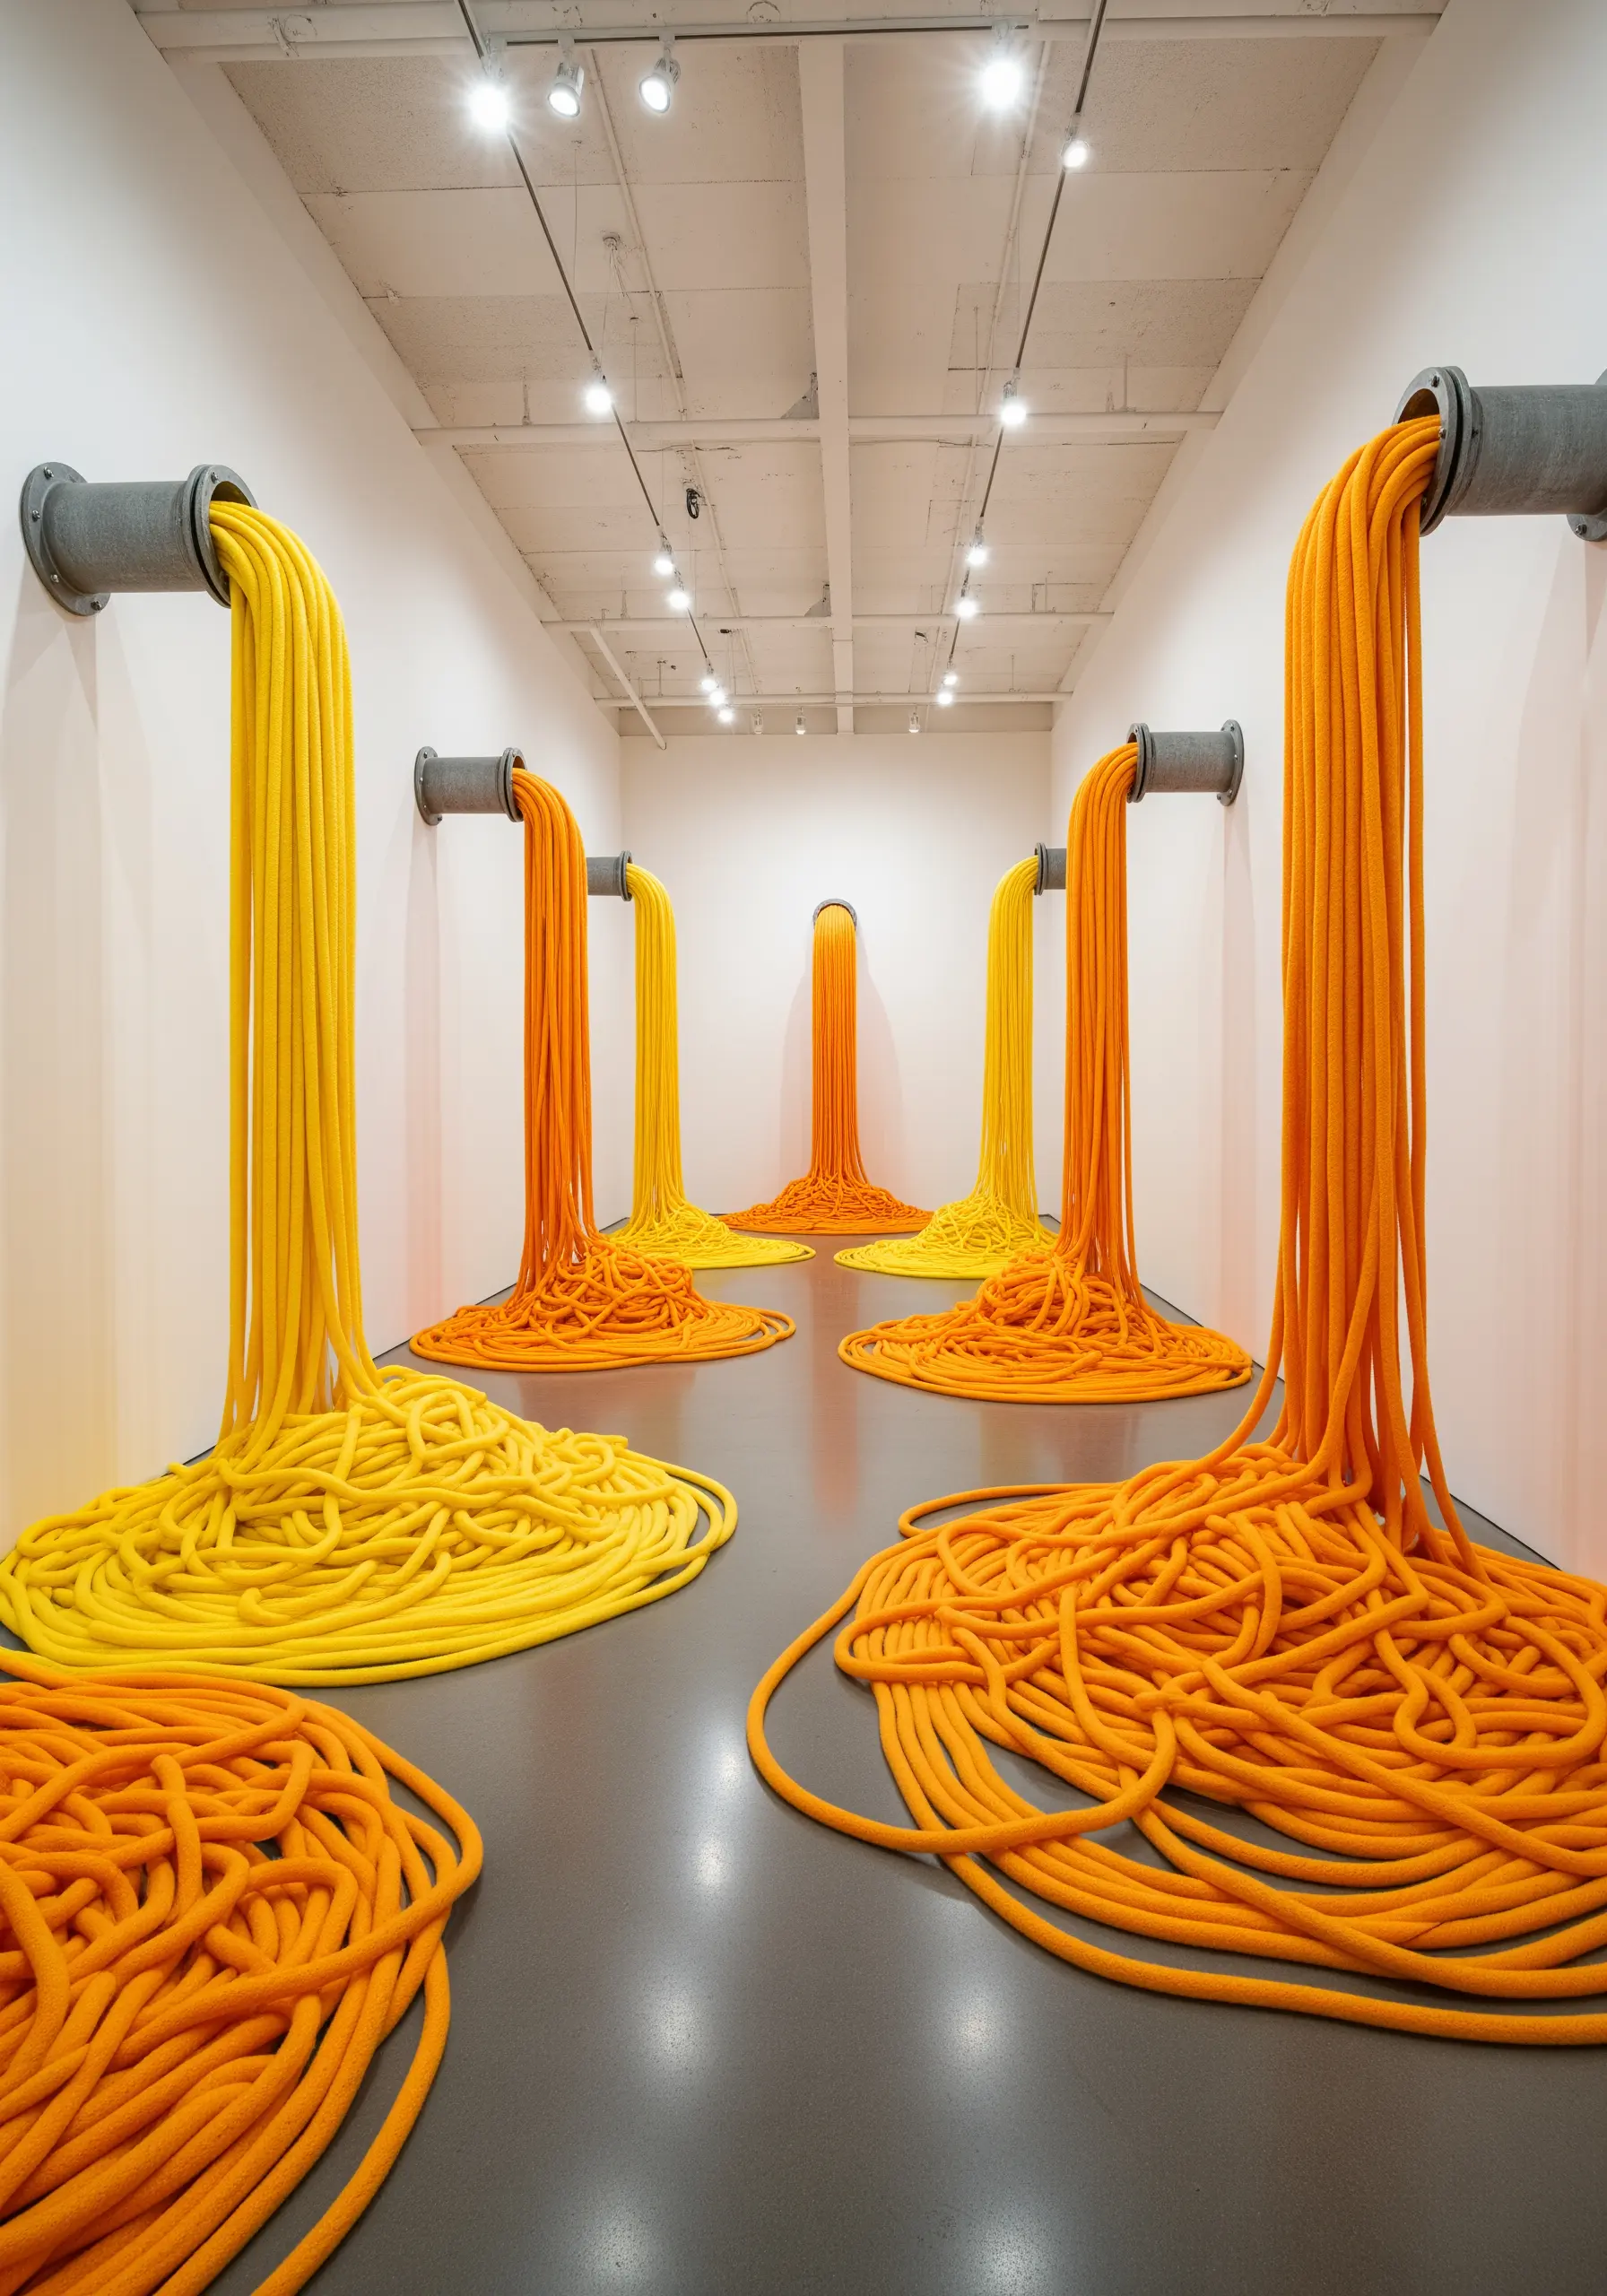
Use thick, sculptural lines of color to create a sense of dynamic flow and energy.
Choose chunky, soft yarns in a limited, high-contrast palette.
Instead of intricate stitches, simply lay the yarn on your surface in bold, sweeping curves and pools, securing it from underneath or with minimal couching stitches.
The impact comes from the mass of color and the implied movement, turning the yarn itself into a powerful, graphic gesture.
25. Build Anatomical Forms with Padded and Wrapped Stitches
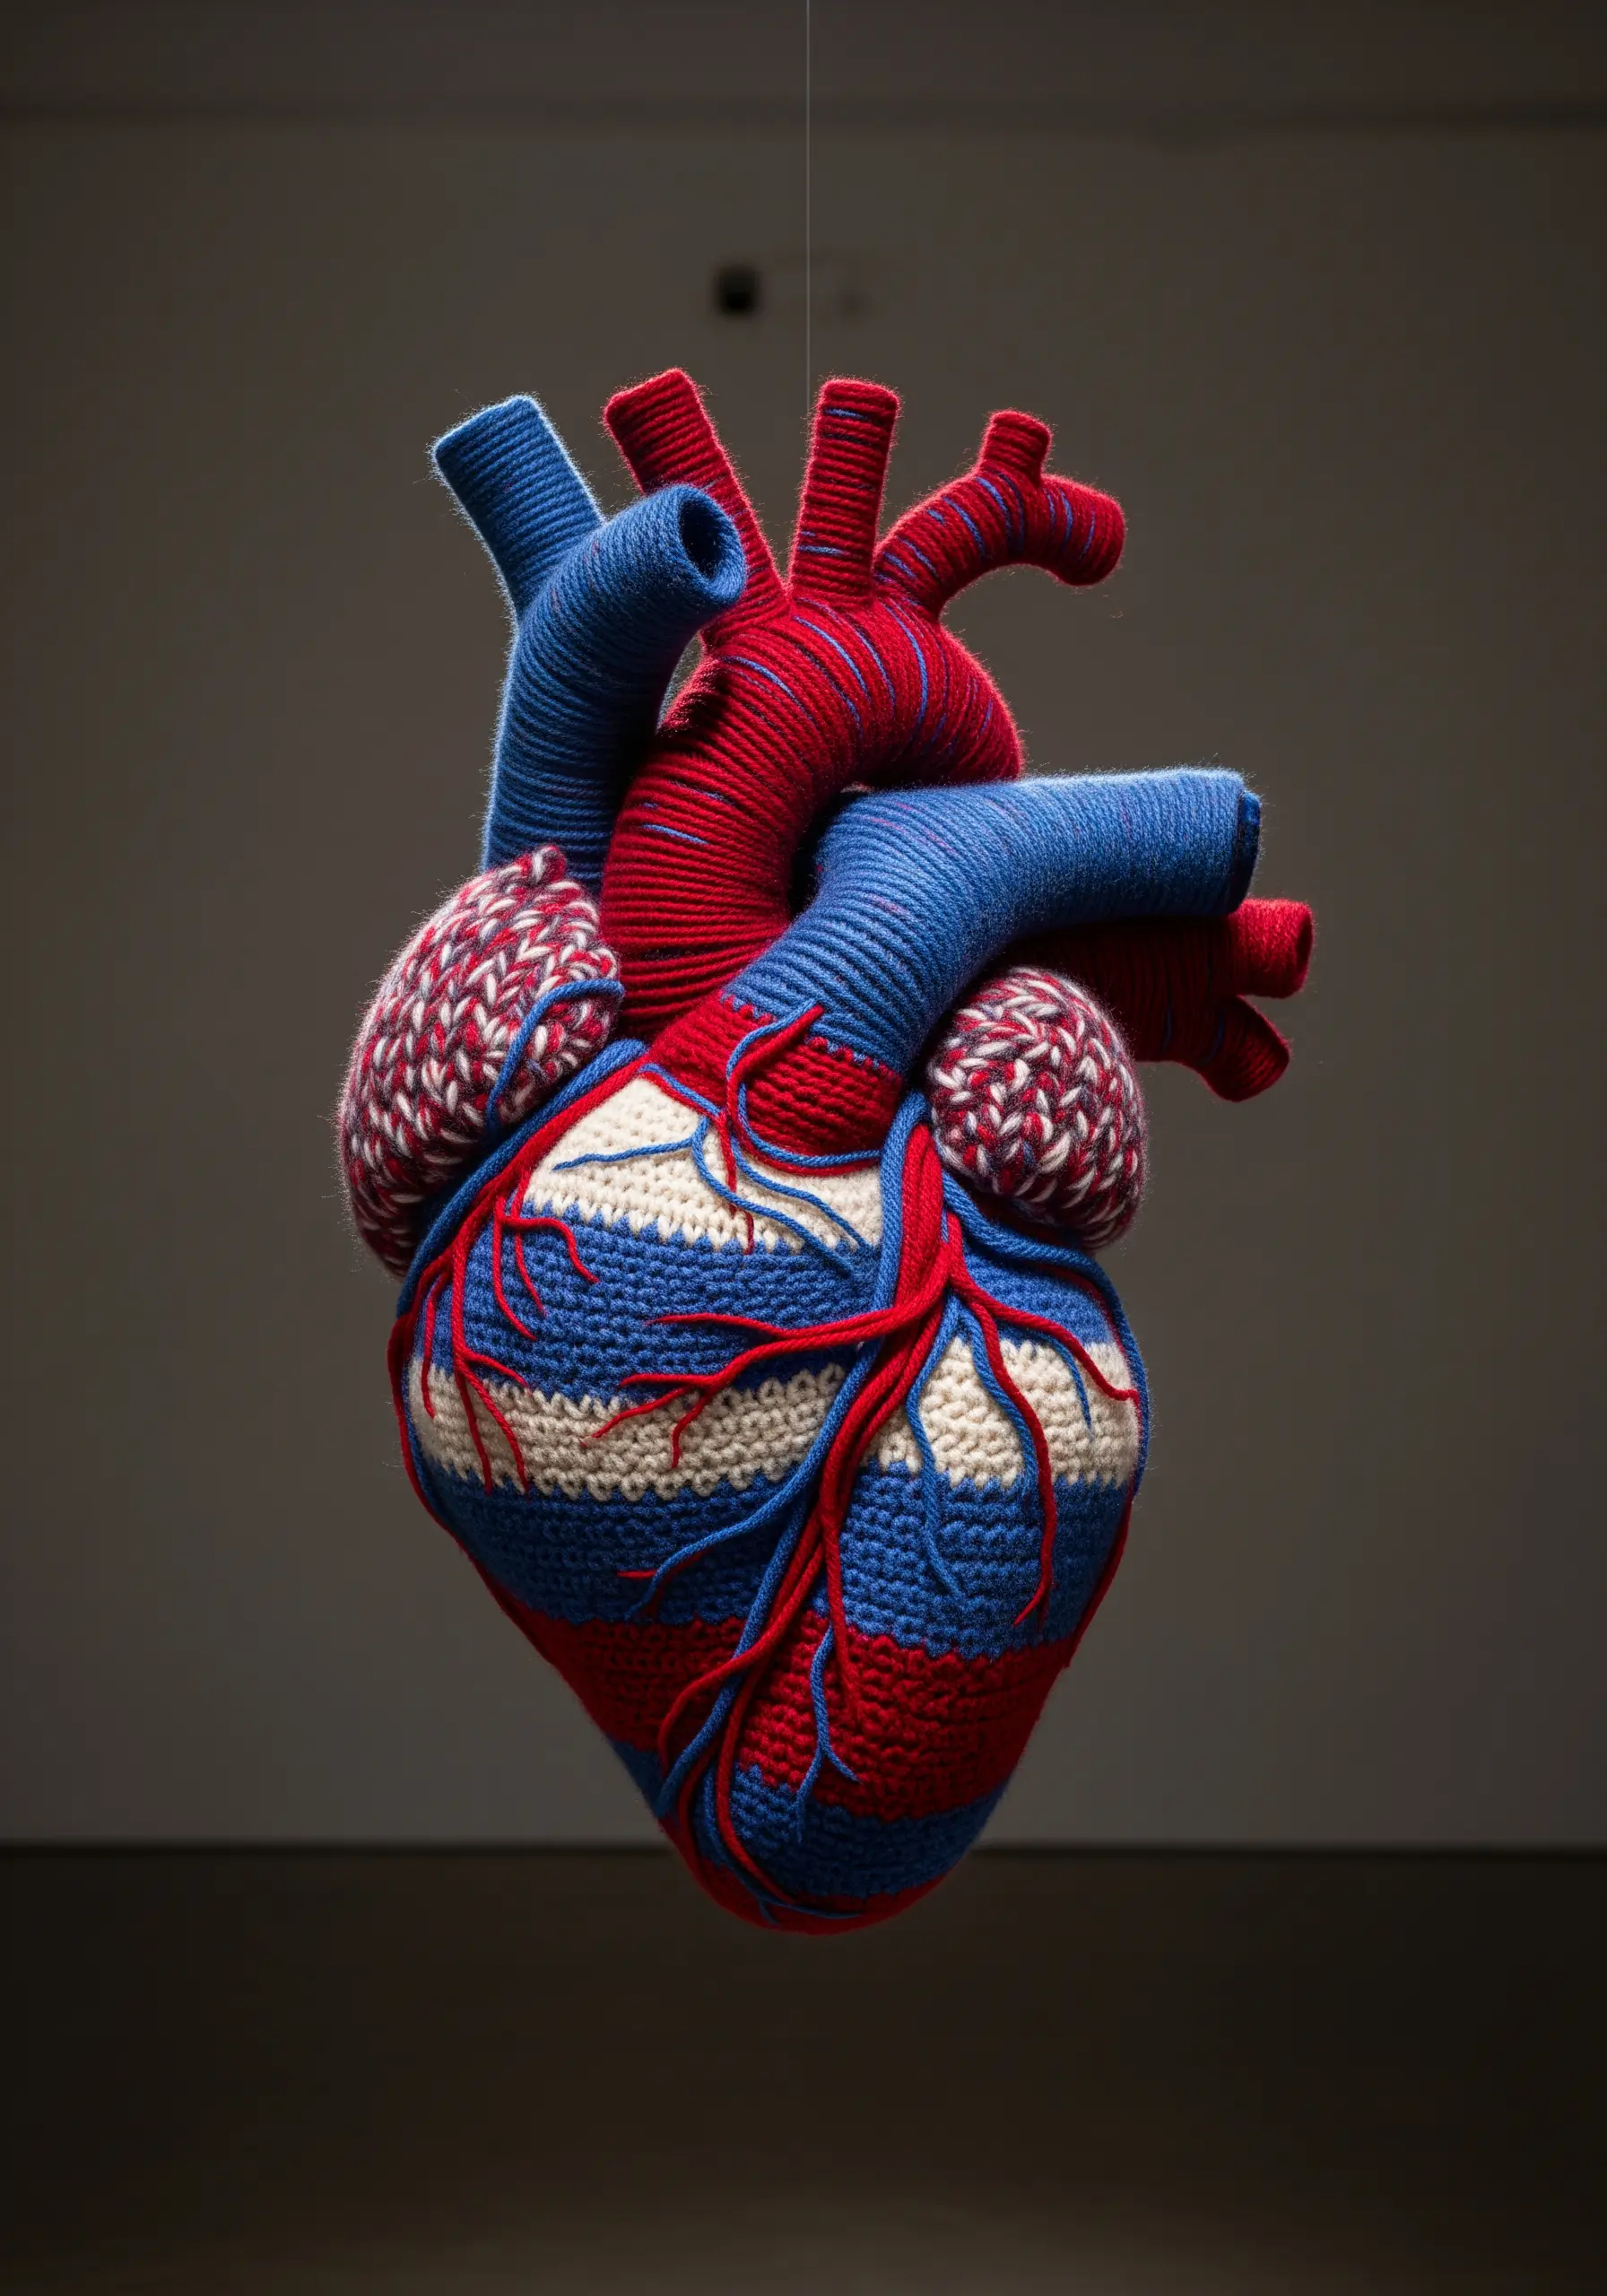
To embroider complex, organic forms like this heart, combine multiple techniques to mimic different tissues.
Use padded satin stitch to create the soft, muscular volumes of the heart chambers.
For the arteries and veins, couch down thinner cords or tightly twisted strands of floss to create raised, defined vessels.
This combination of soft, filled shapes and sharp, linear details gives your anatomical studies a realistic and compelling three-dimensionality.


