

Have you ever finished a project and felt it was missing a certain polish, a quiet confidence? That feeling is often the space between simply following a pattern and truly understanding how each stitch can shape your work.
Stunning embroidery isn’t about complexity; it’s about intention. It’s knowing when to use a single strand of thread instead of two, how to angle a stitch to catch the light, or how a simple change in texture can transform a flat shape into something with life and dimension.
These ideas are more than just pretty designs. They are invitations to refine your technique. Each one holds a small, accessible secret to making your work look more thoughtful, more professional, and more beautifully you. Let’s begin.
1. The Art of Directional Satin Stitch

To give simple florals a natural, lifelike quality, focus entirely on the direction of your satin stitches.
Instead of stitching straight across, angle each stitch to follow the curve of the petal, starting from the base and fanning outwards.
This simple adjustment mimics how petals catch the light, creating dimension and movement without any complex shading.
For the stem, use a whipped backstitch to create a smooth, raised line that contrasts beautifully with the flat petals.
2. Master Flawless Satin Stitch Lines
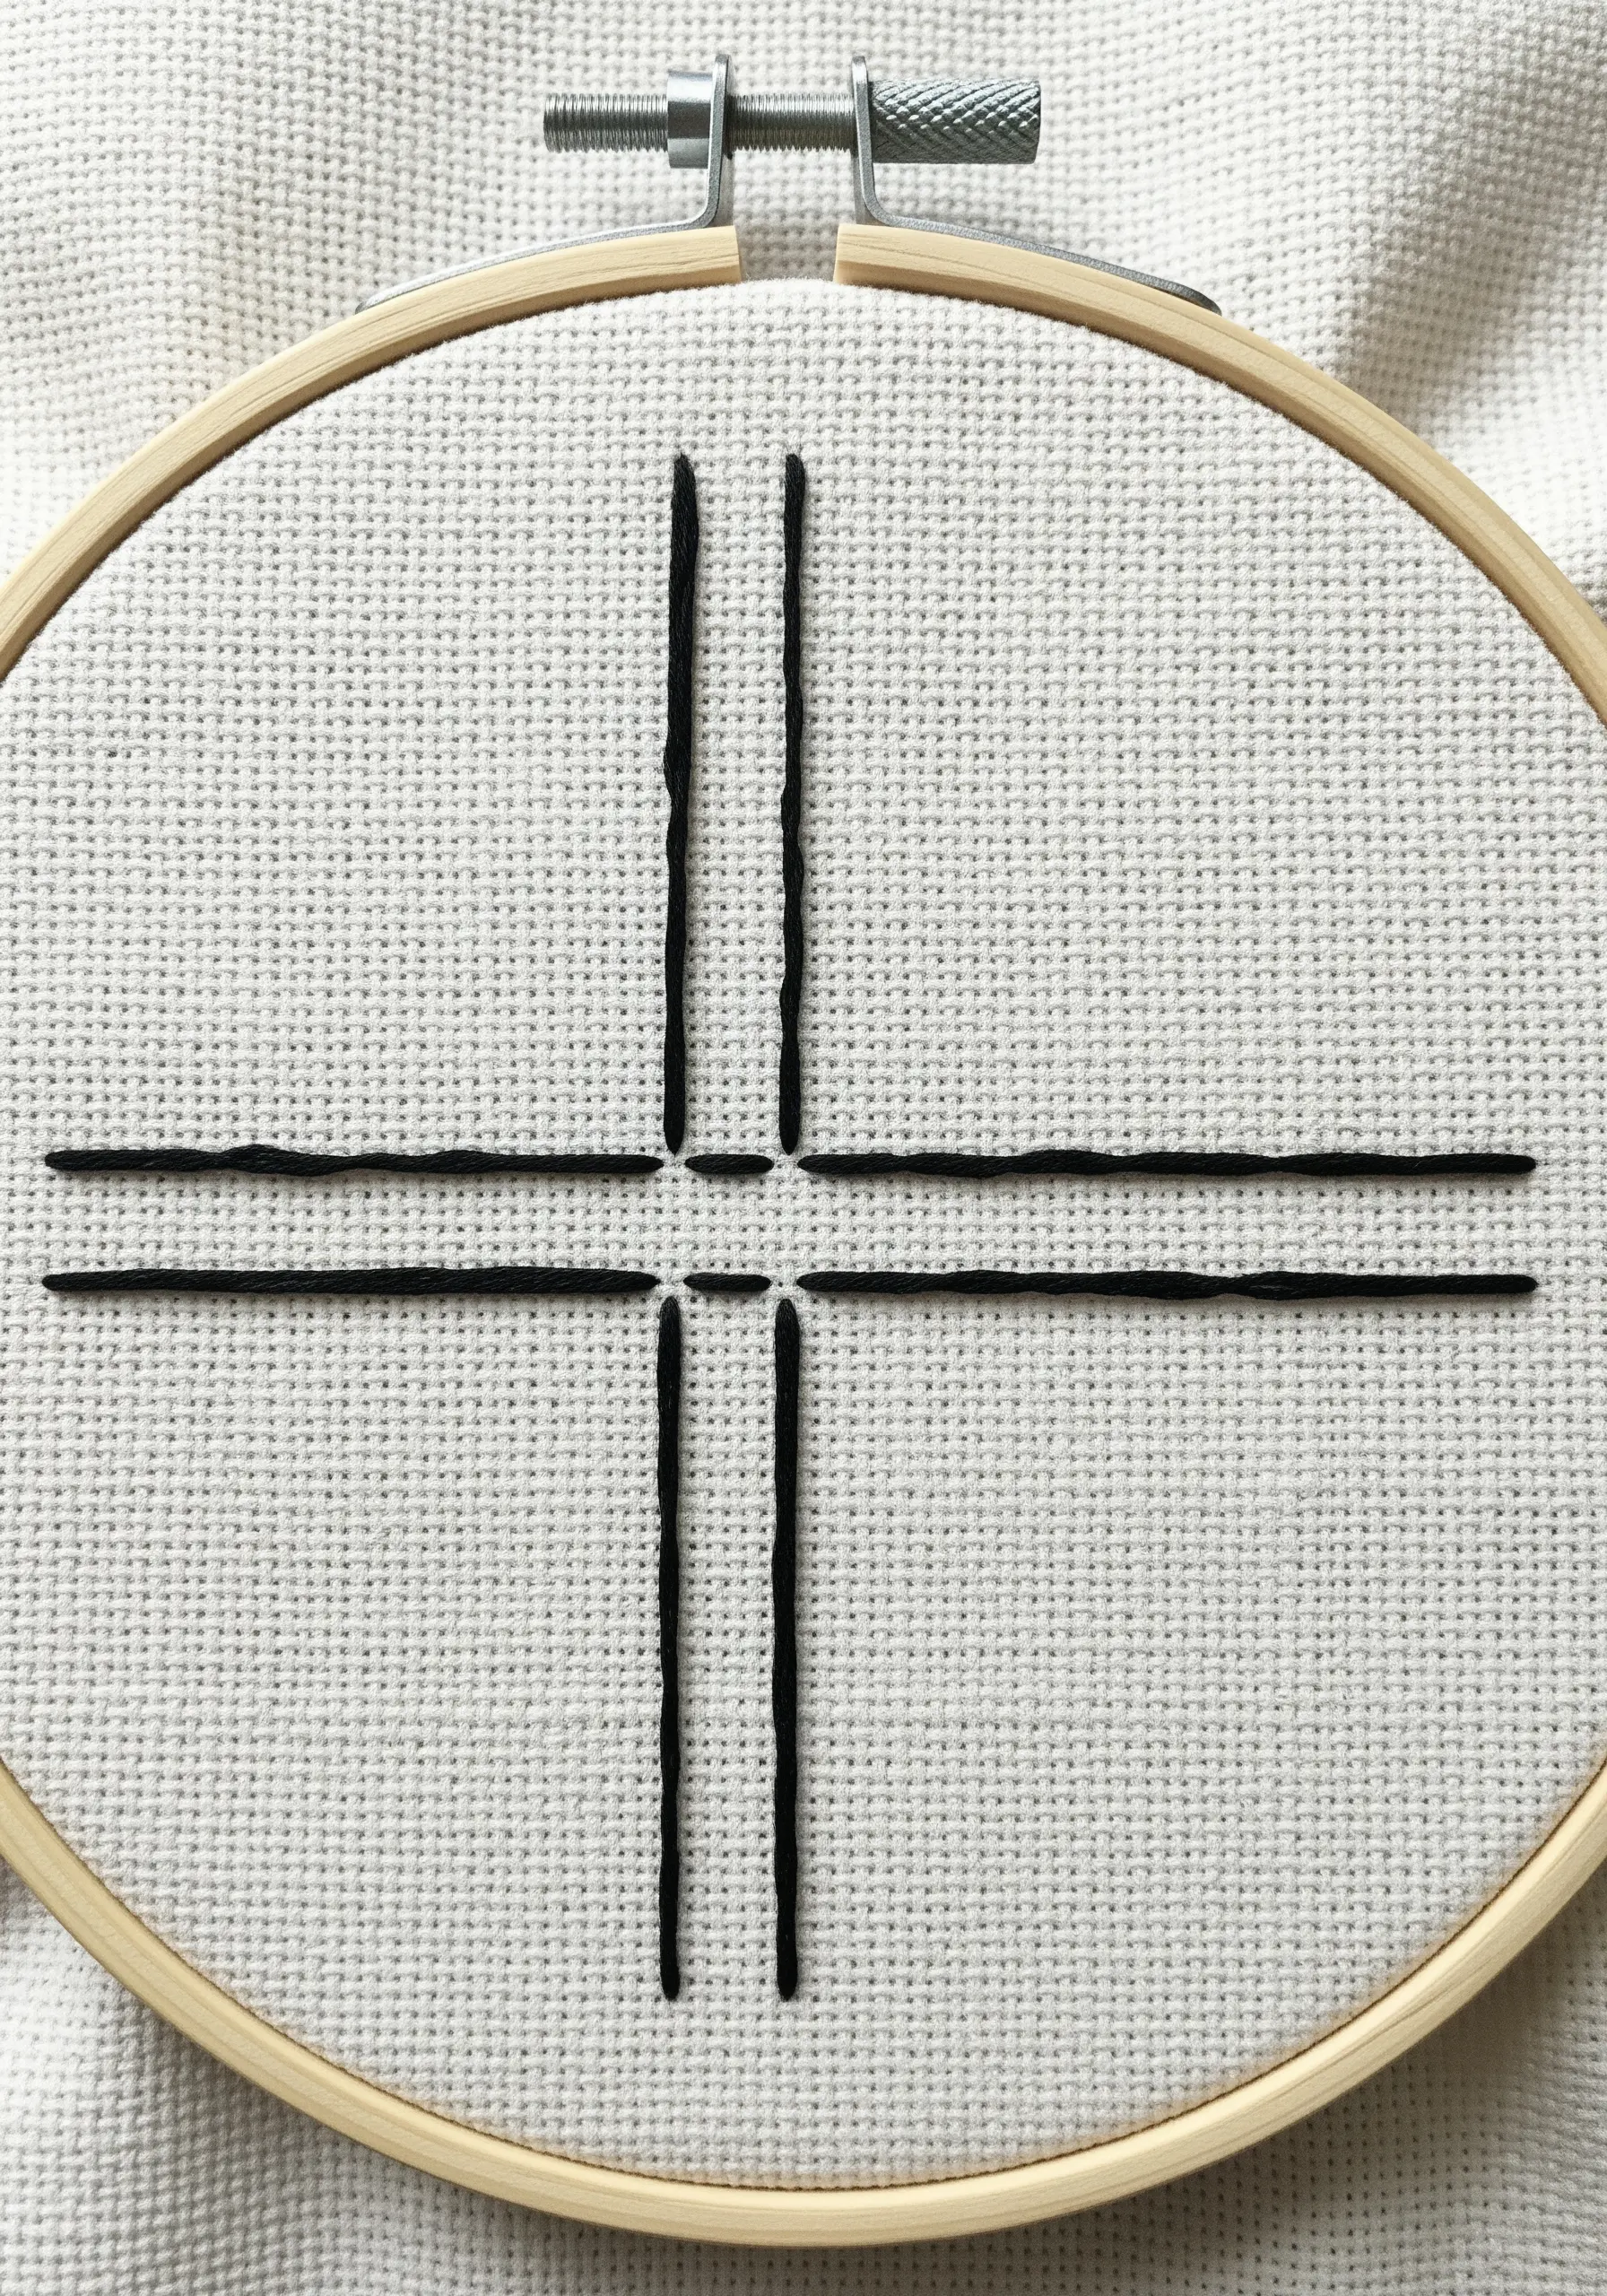
Achieve perfectly straight, uniform satin stitches by first creating a foundation with a single strand of thread along your intended outline.
Work your satin stitches over this guide thread, which prevents them from sinking into the fabric weave and keeps the edge perfectly crisp.
Always start stitching from the center of the line and work your way out to each side.
This technique ensures even tension and symmetry, transforming a basic line into a bold, professional statement.
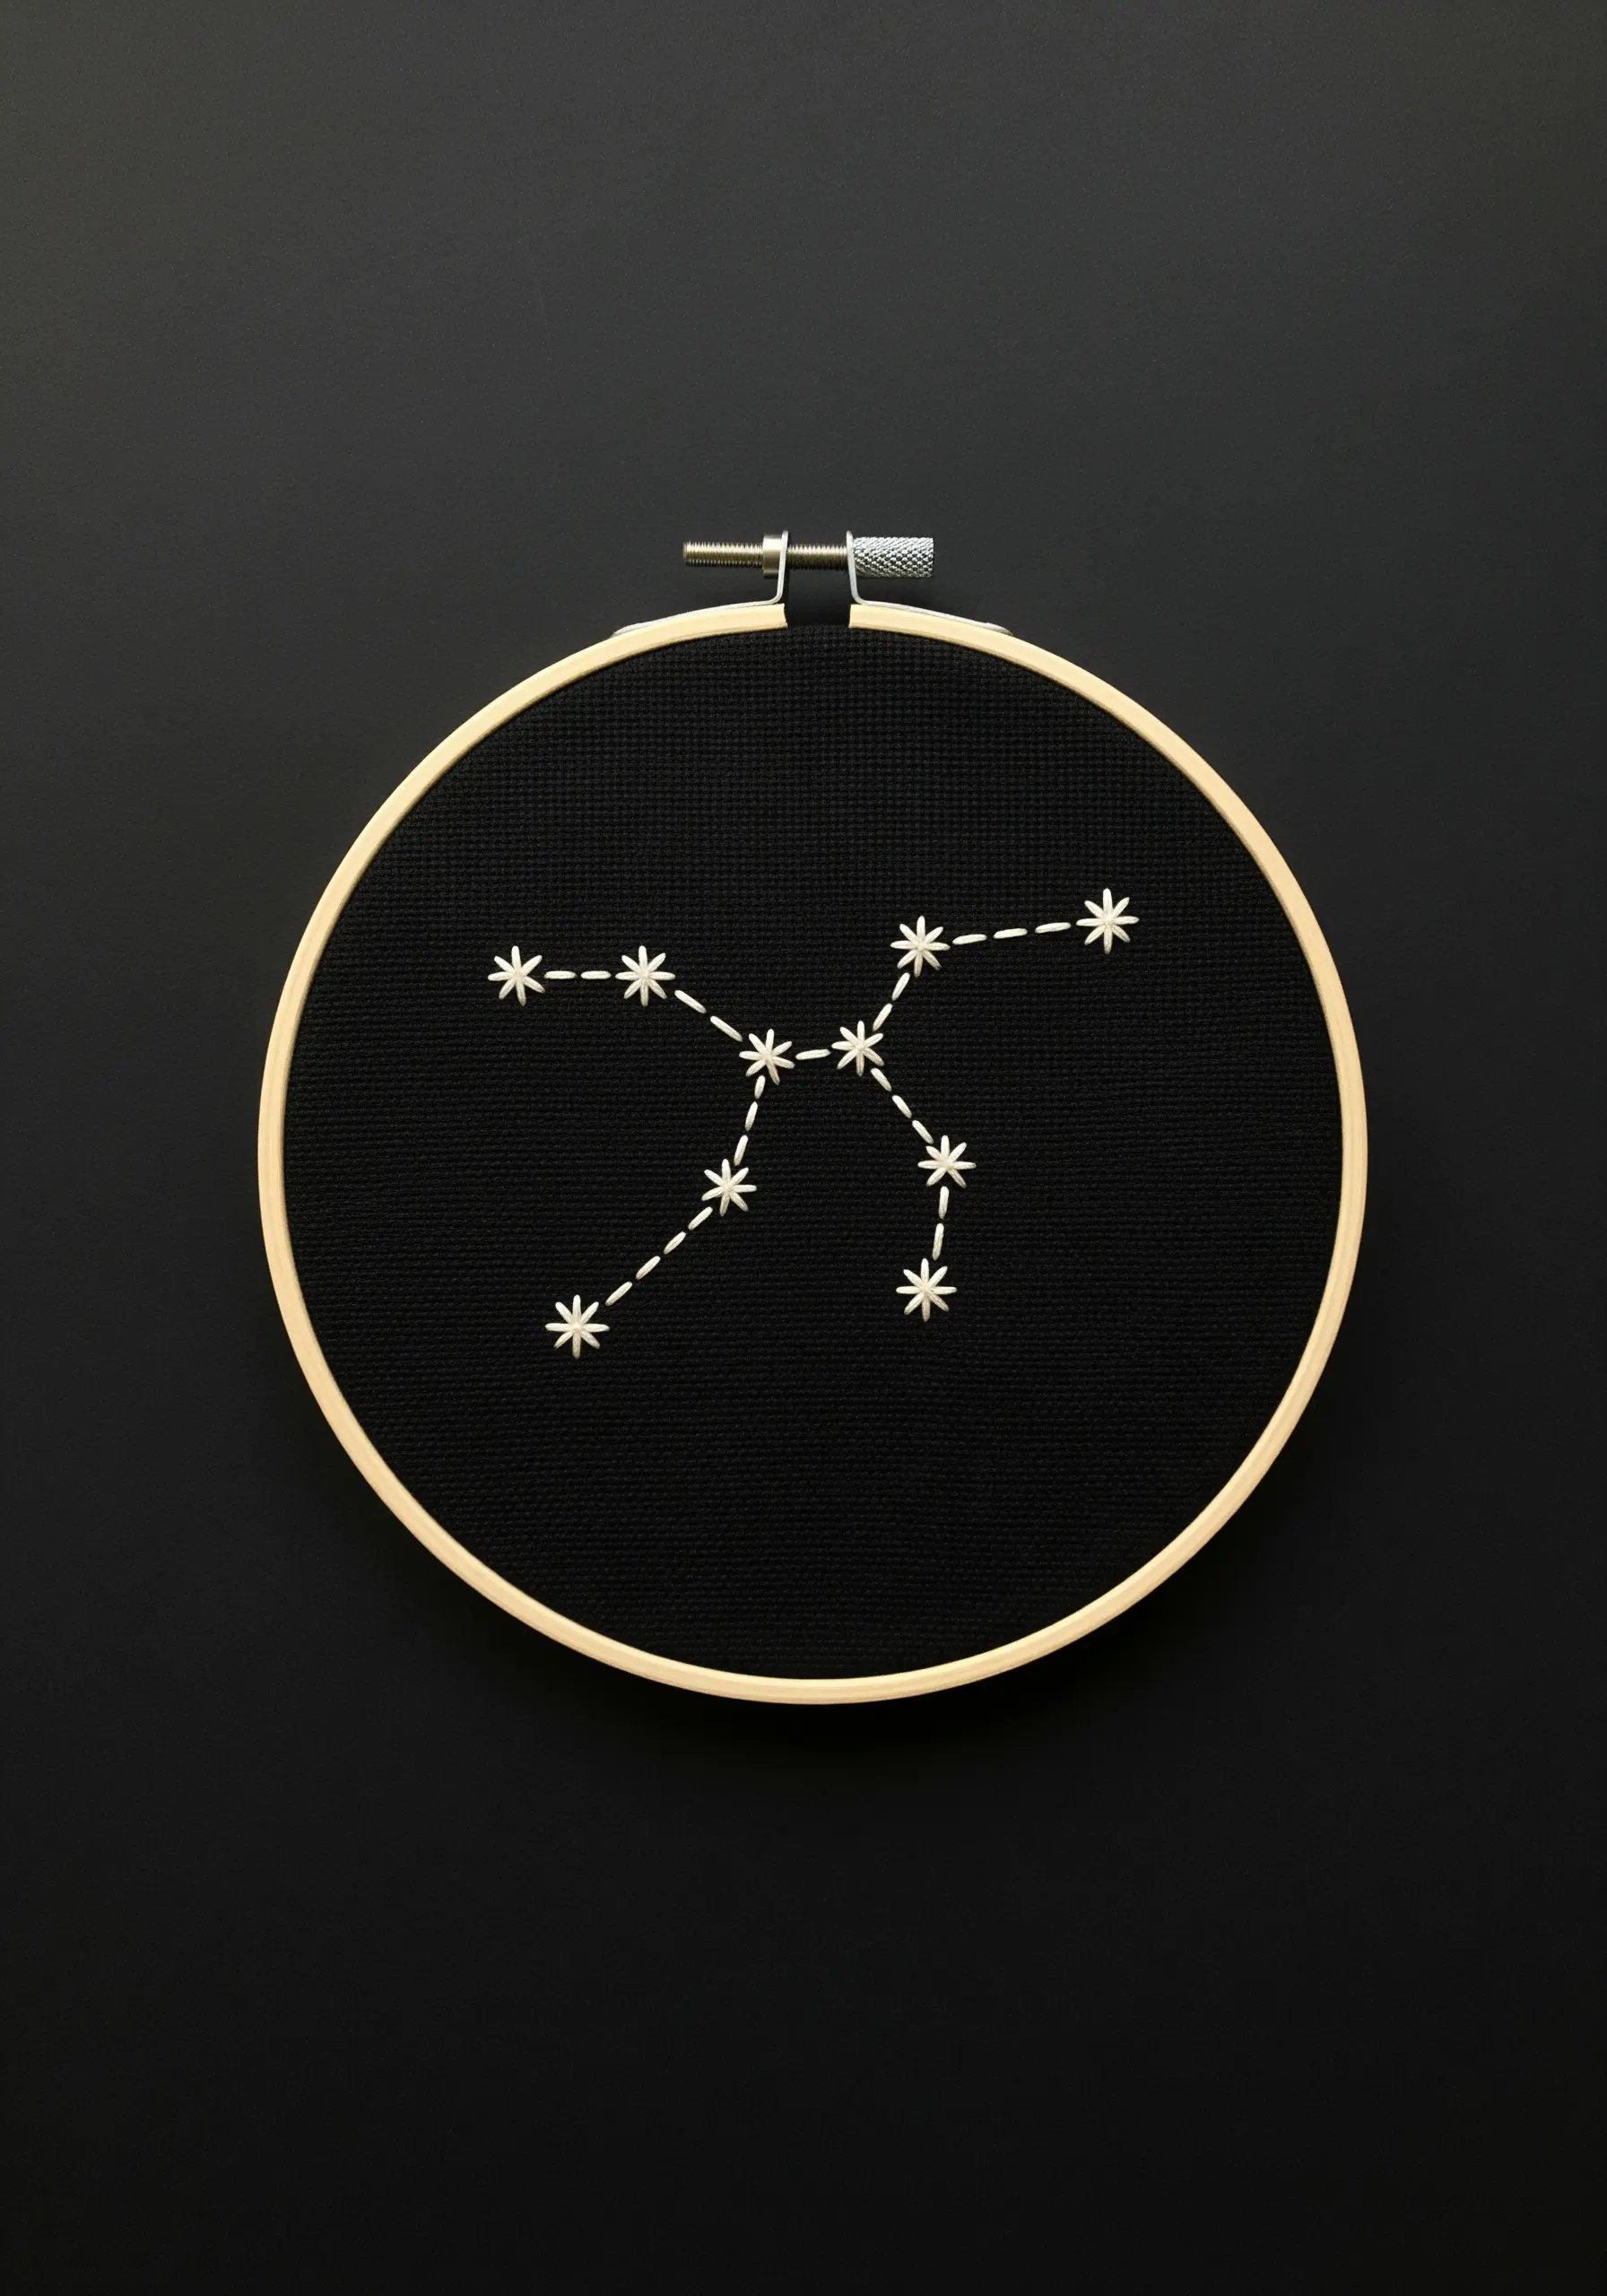
3. Sculptural Texture with Chain Stitch Fill
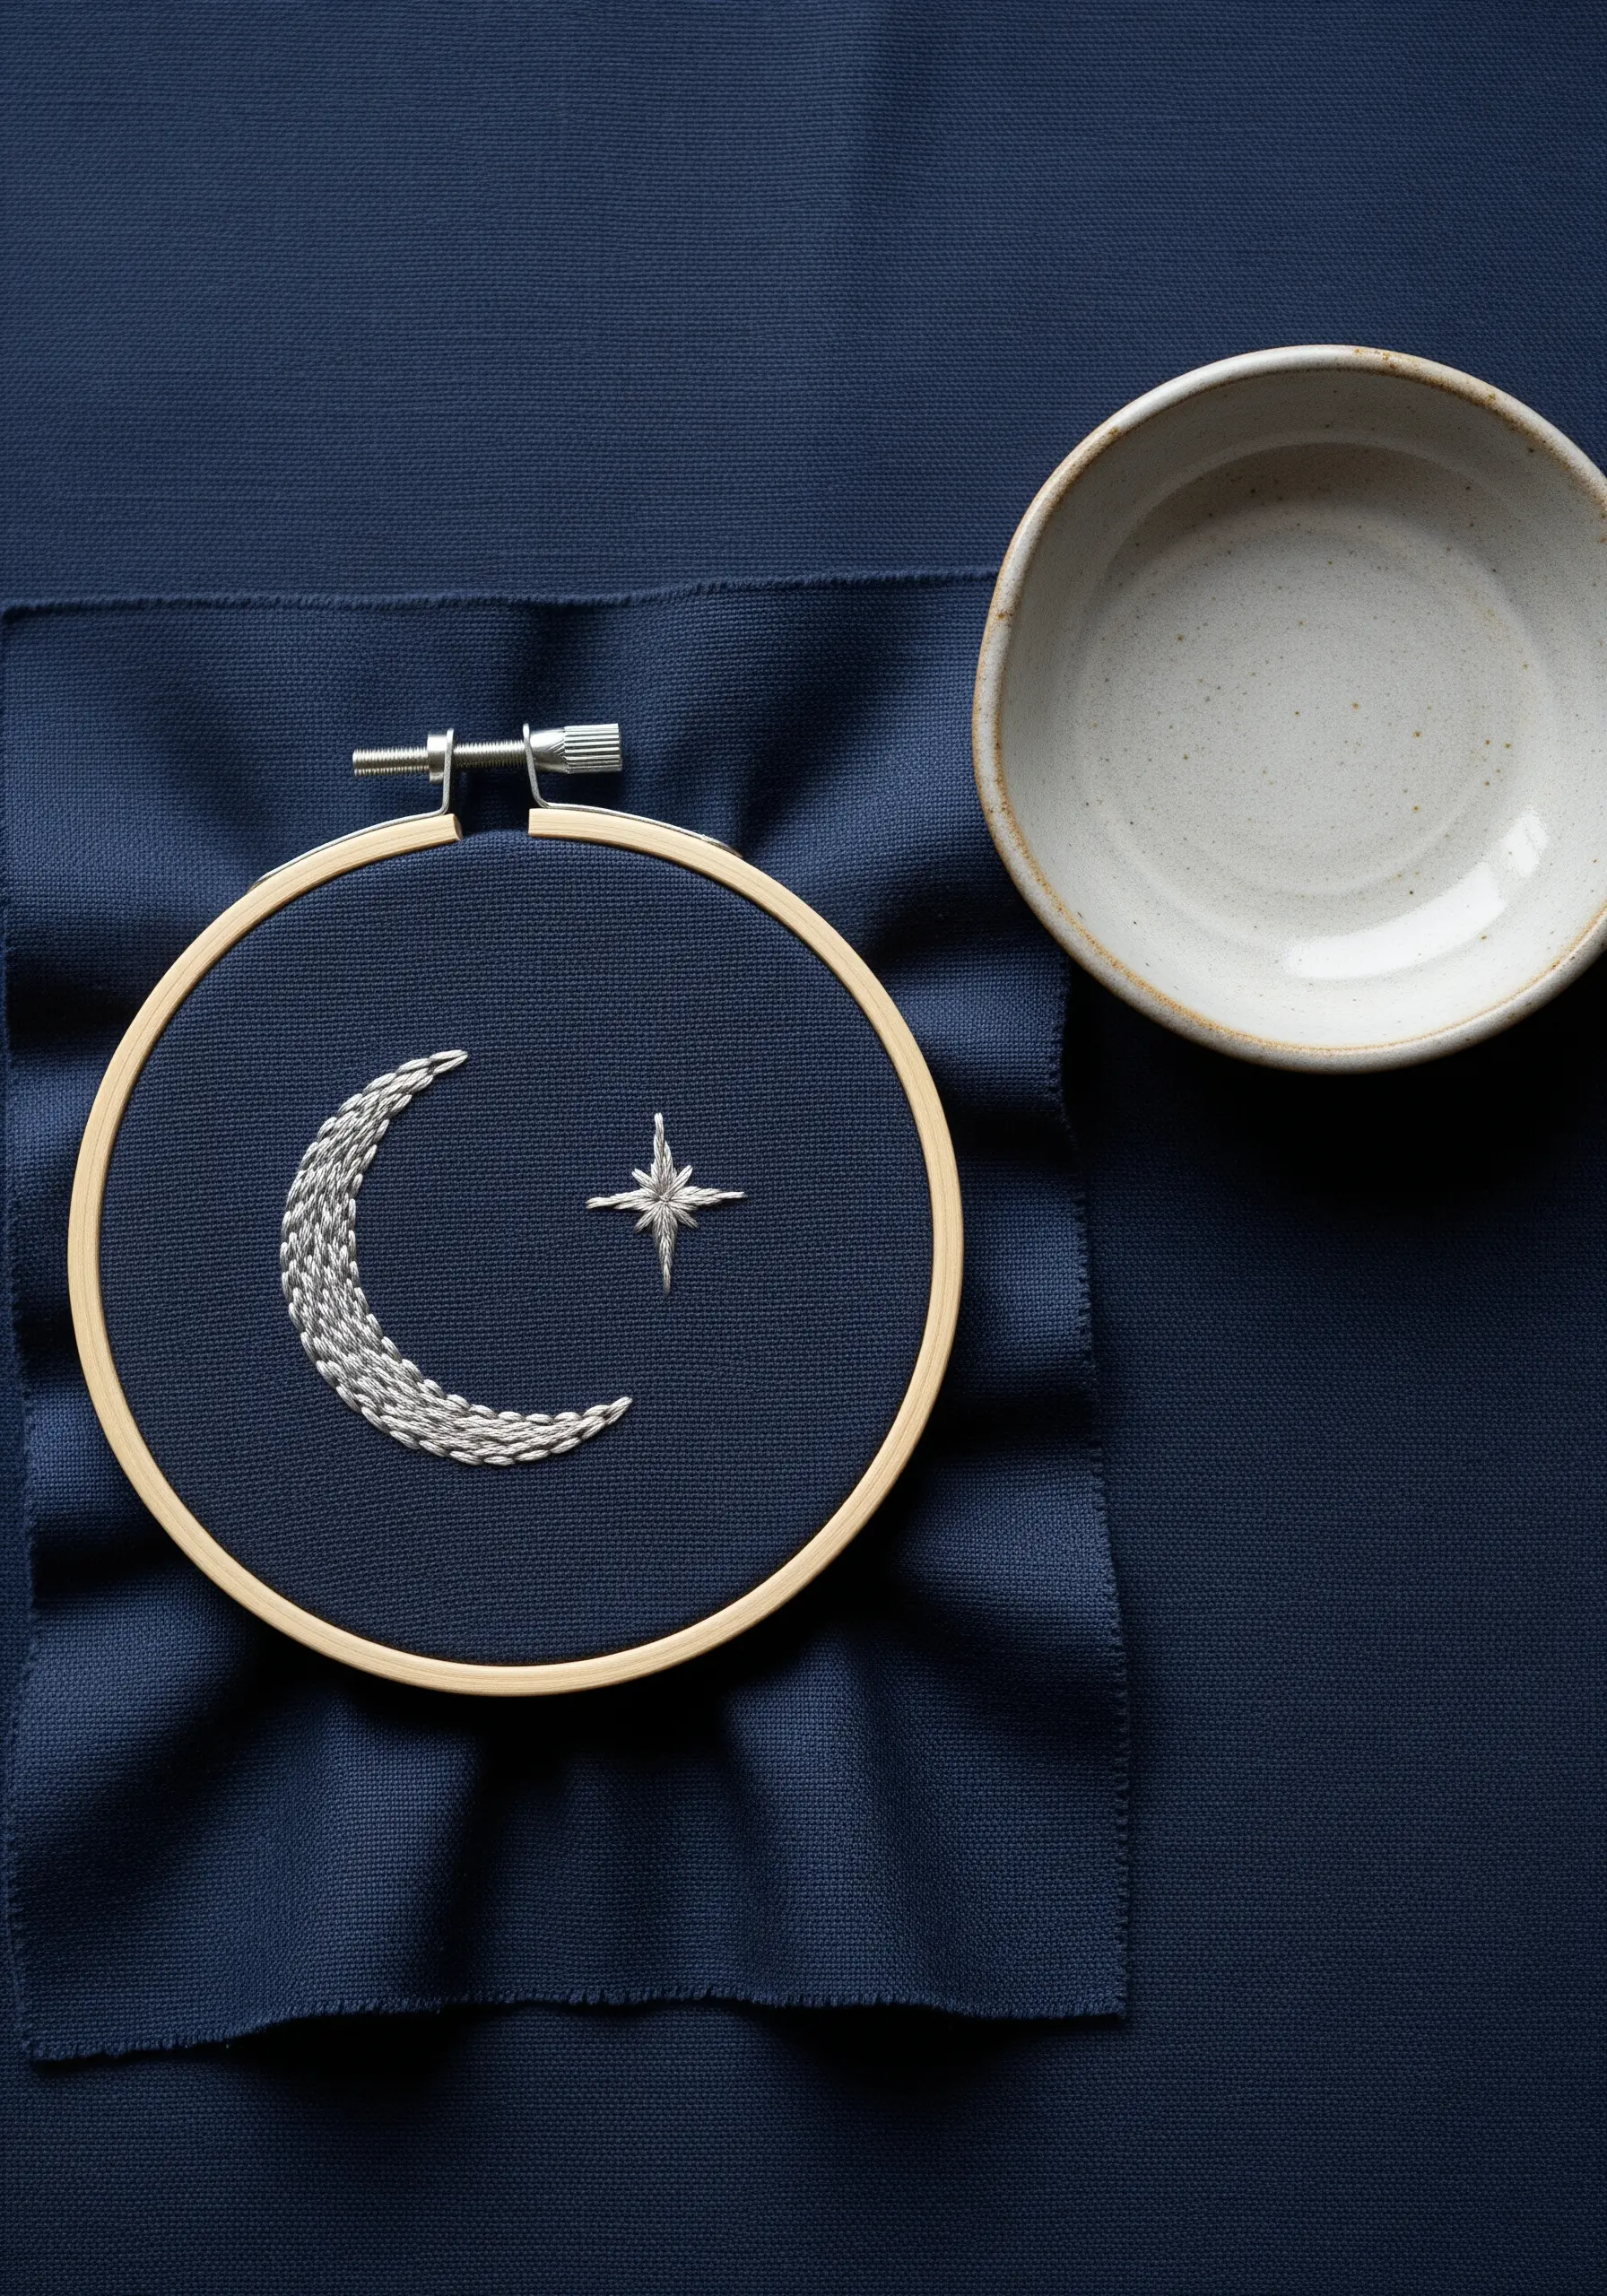
Instead of a traditional satin stitch, fill shapes like a crescent moon with rows of dense chain stitch.
This method creates a beautiful, braided texture that adds depth and catches the light, especially when using silk or dark fabric metallic threads.
Contrast this texture with sharp, radiating straight stitches for celestial elements like stars.
The interplay between the woven fill and the crisp lines creates a sophisticated and balanced composition.
4. Impressionistic Fields of French Knots
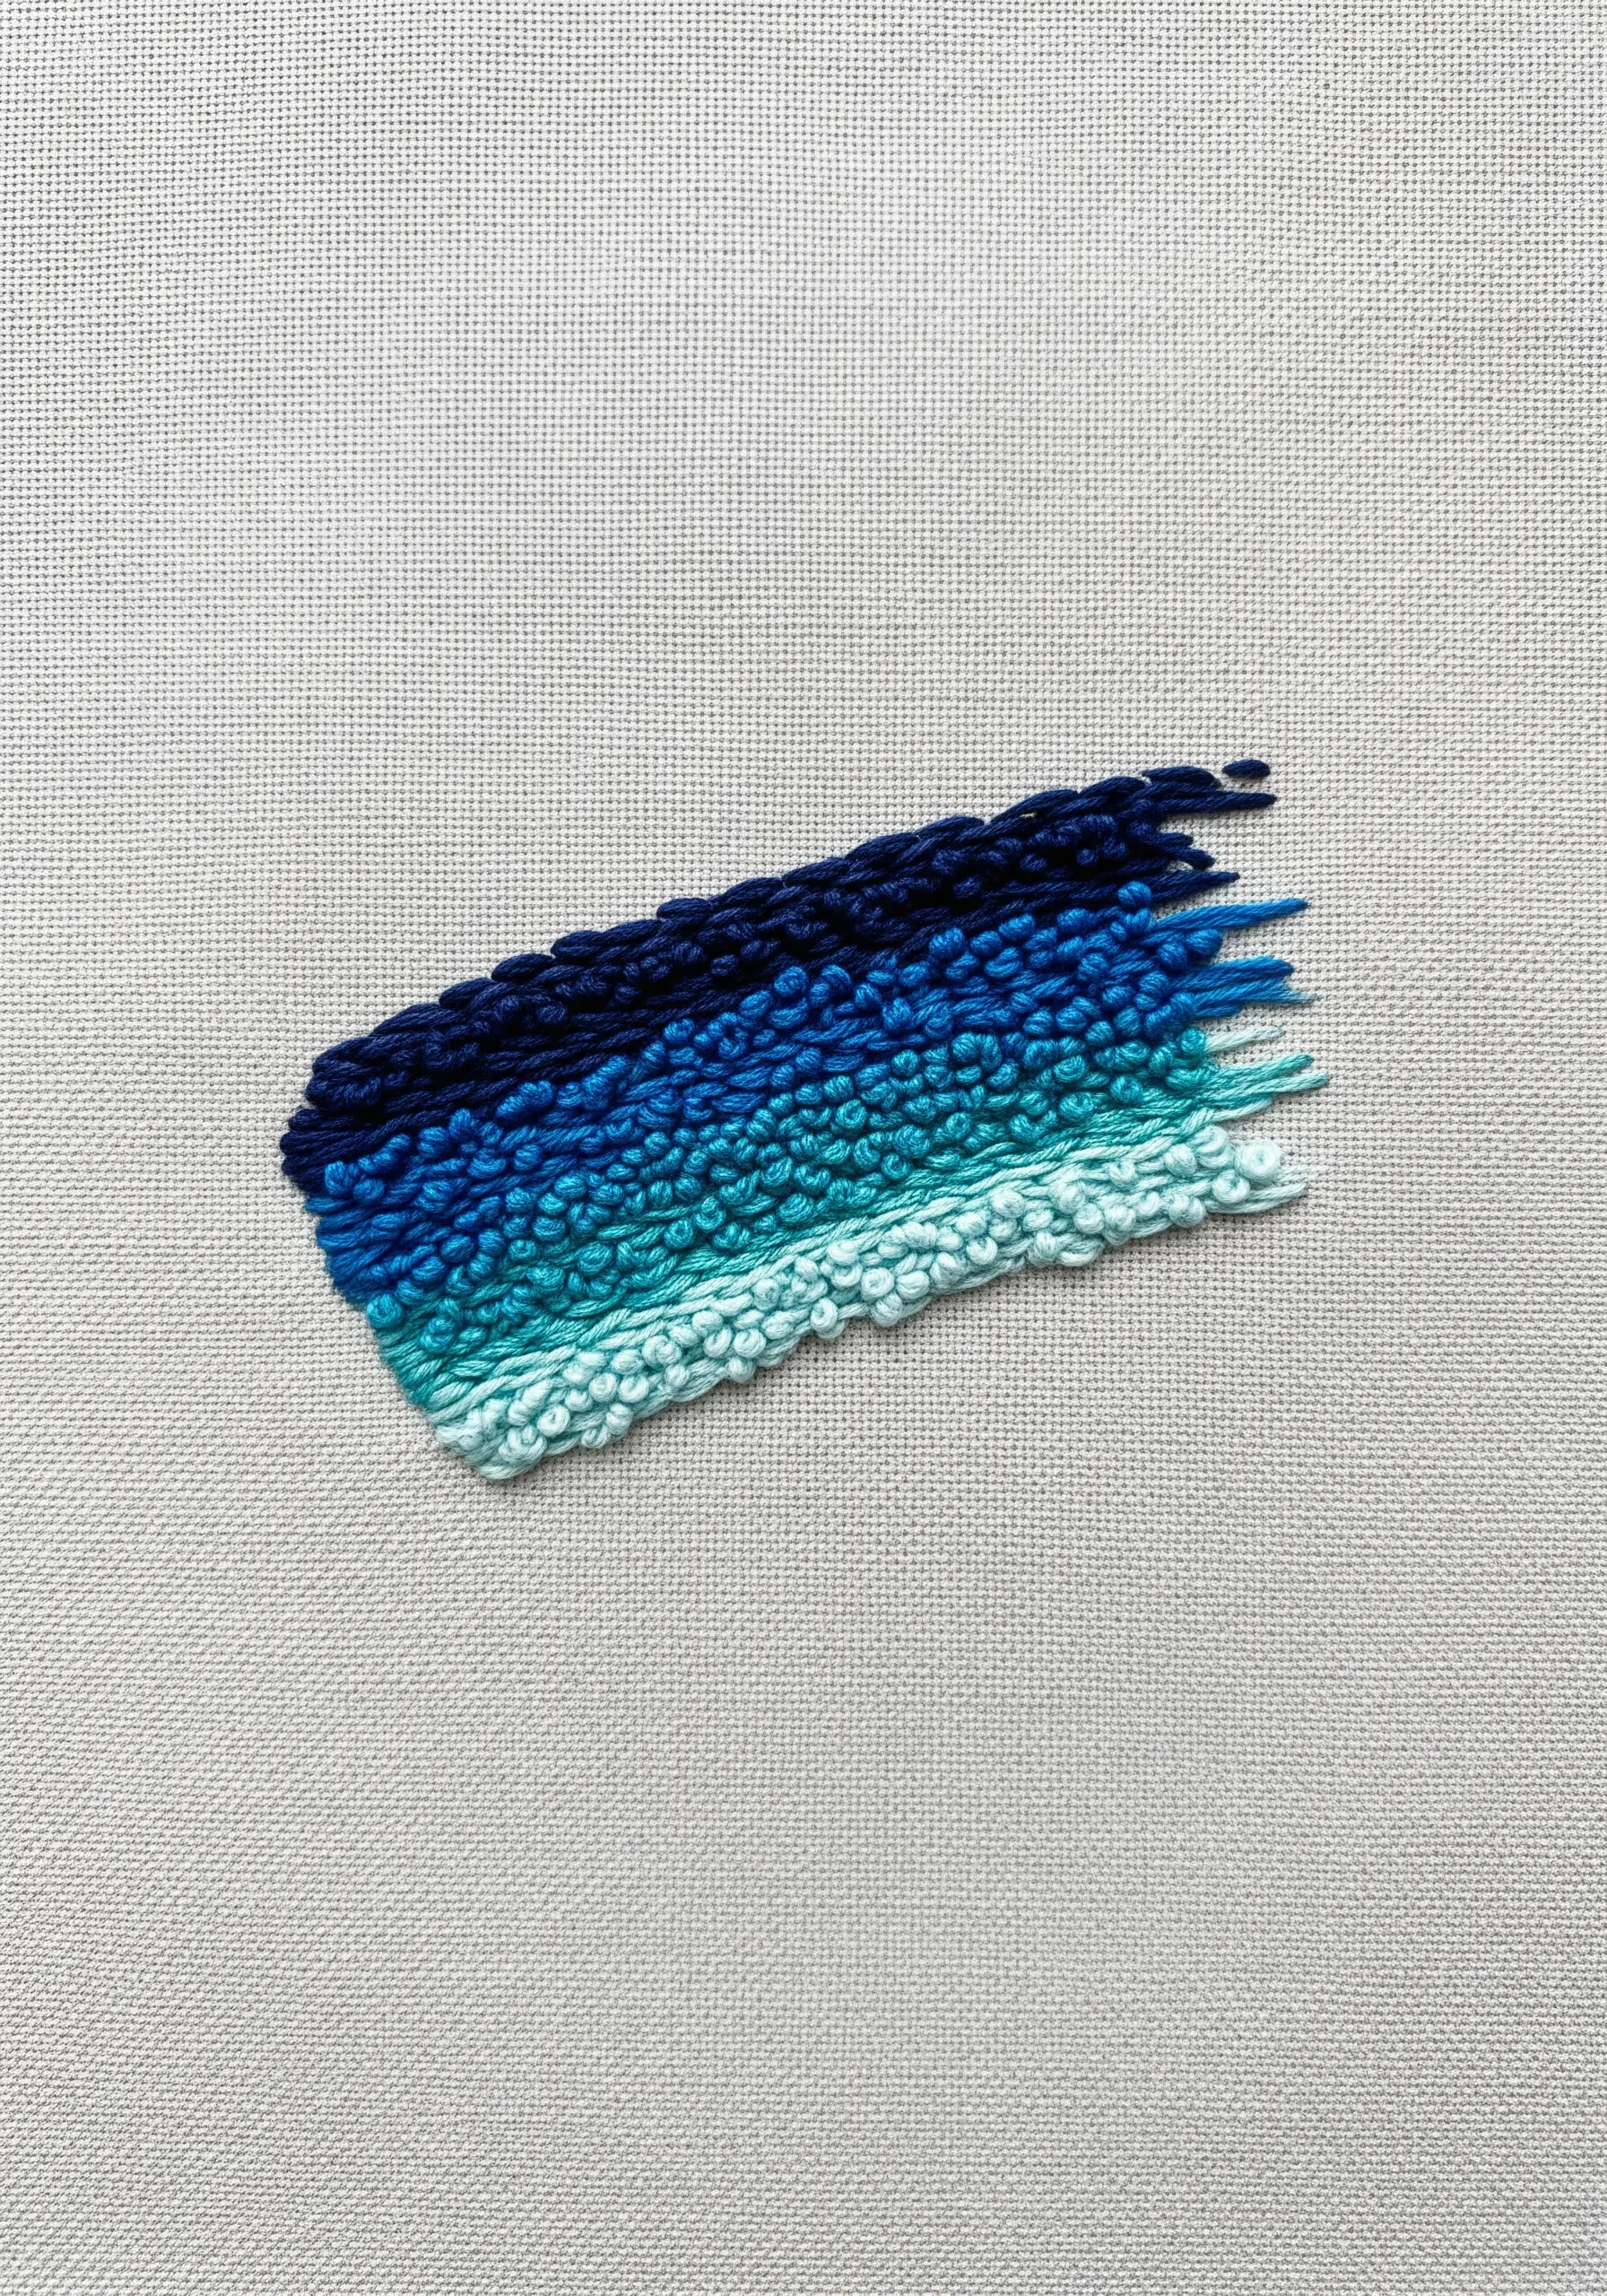
You can paint with thread by clustering French knots to create an abstract gradient.
Group knots of the same color tightly to form blocks of tone, then allow them to mingle slightly at the edges for a soft, painterly effect.
Varying the number of times you wrap the thread (once or twice) will create subtle differences in knot size, adding another layer of texture to your abstract color blend stitch ideas.
This technique is incredibly forgiving and makes a stunning impact with minimal effort.
5. Achieve Fluid Lettering with a Whipped Stitch
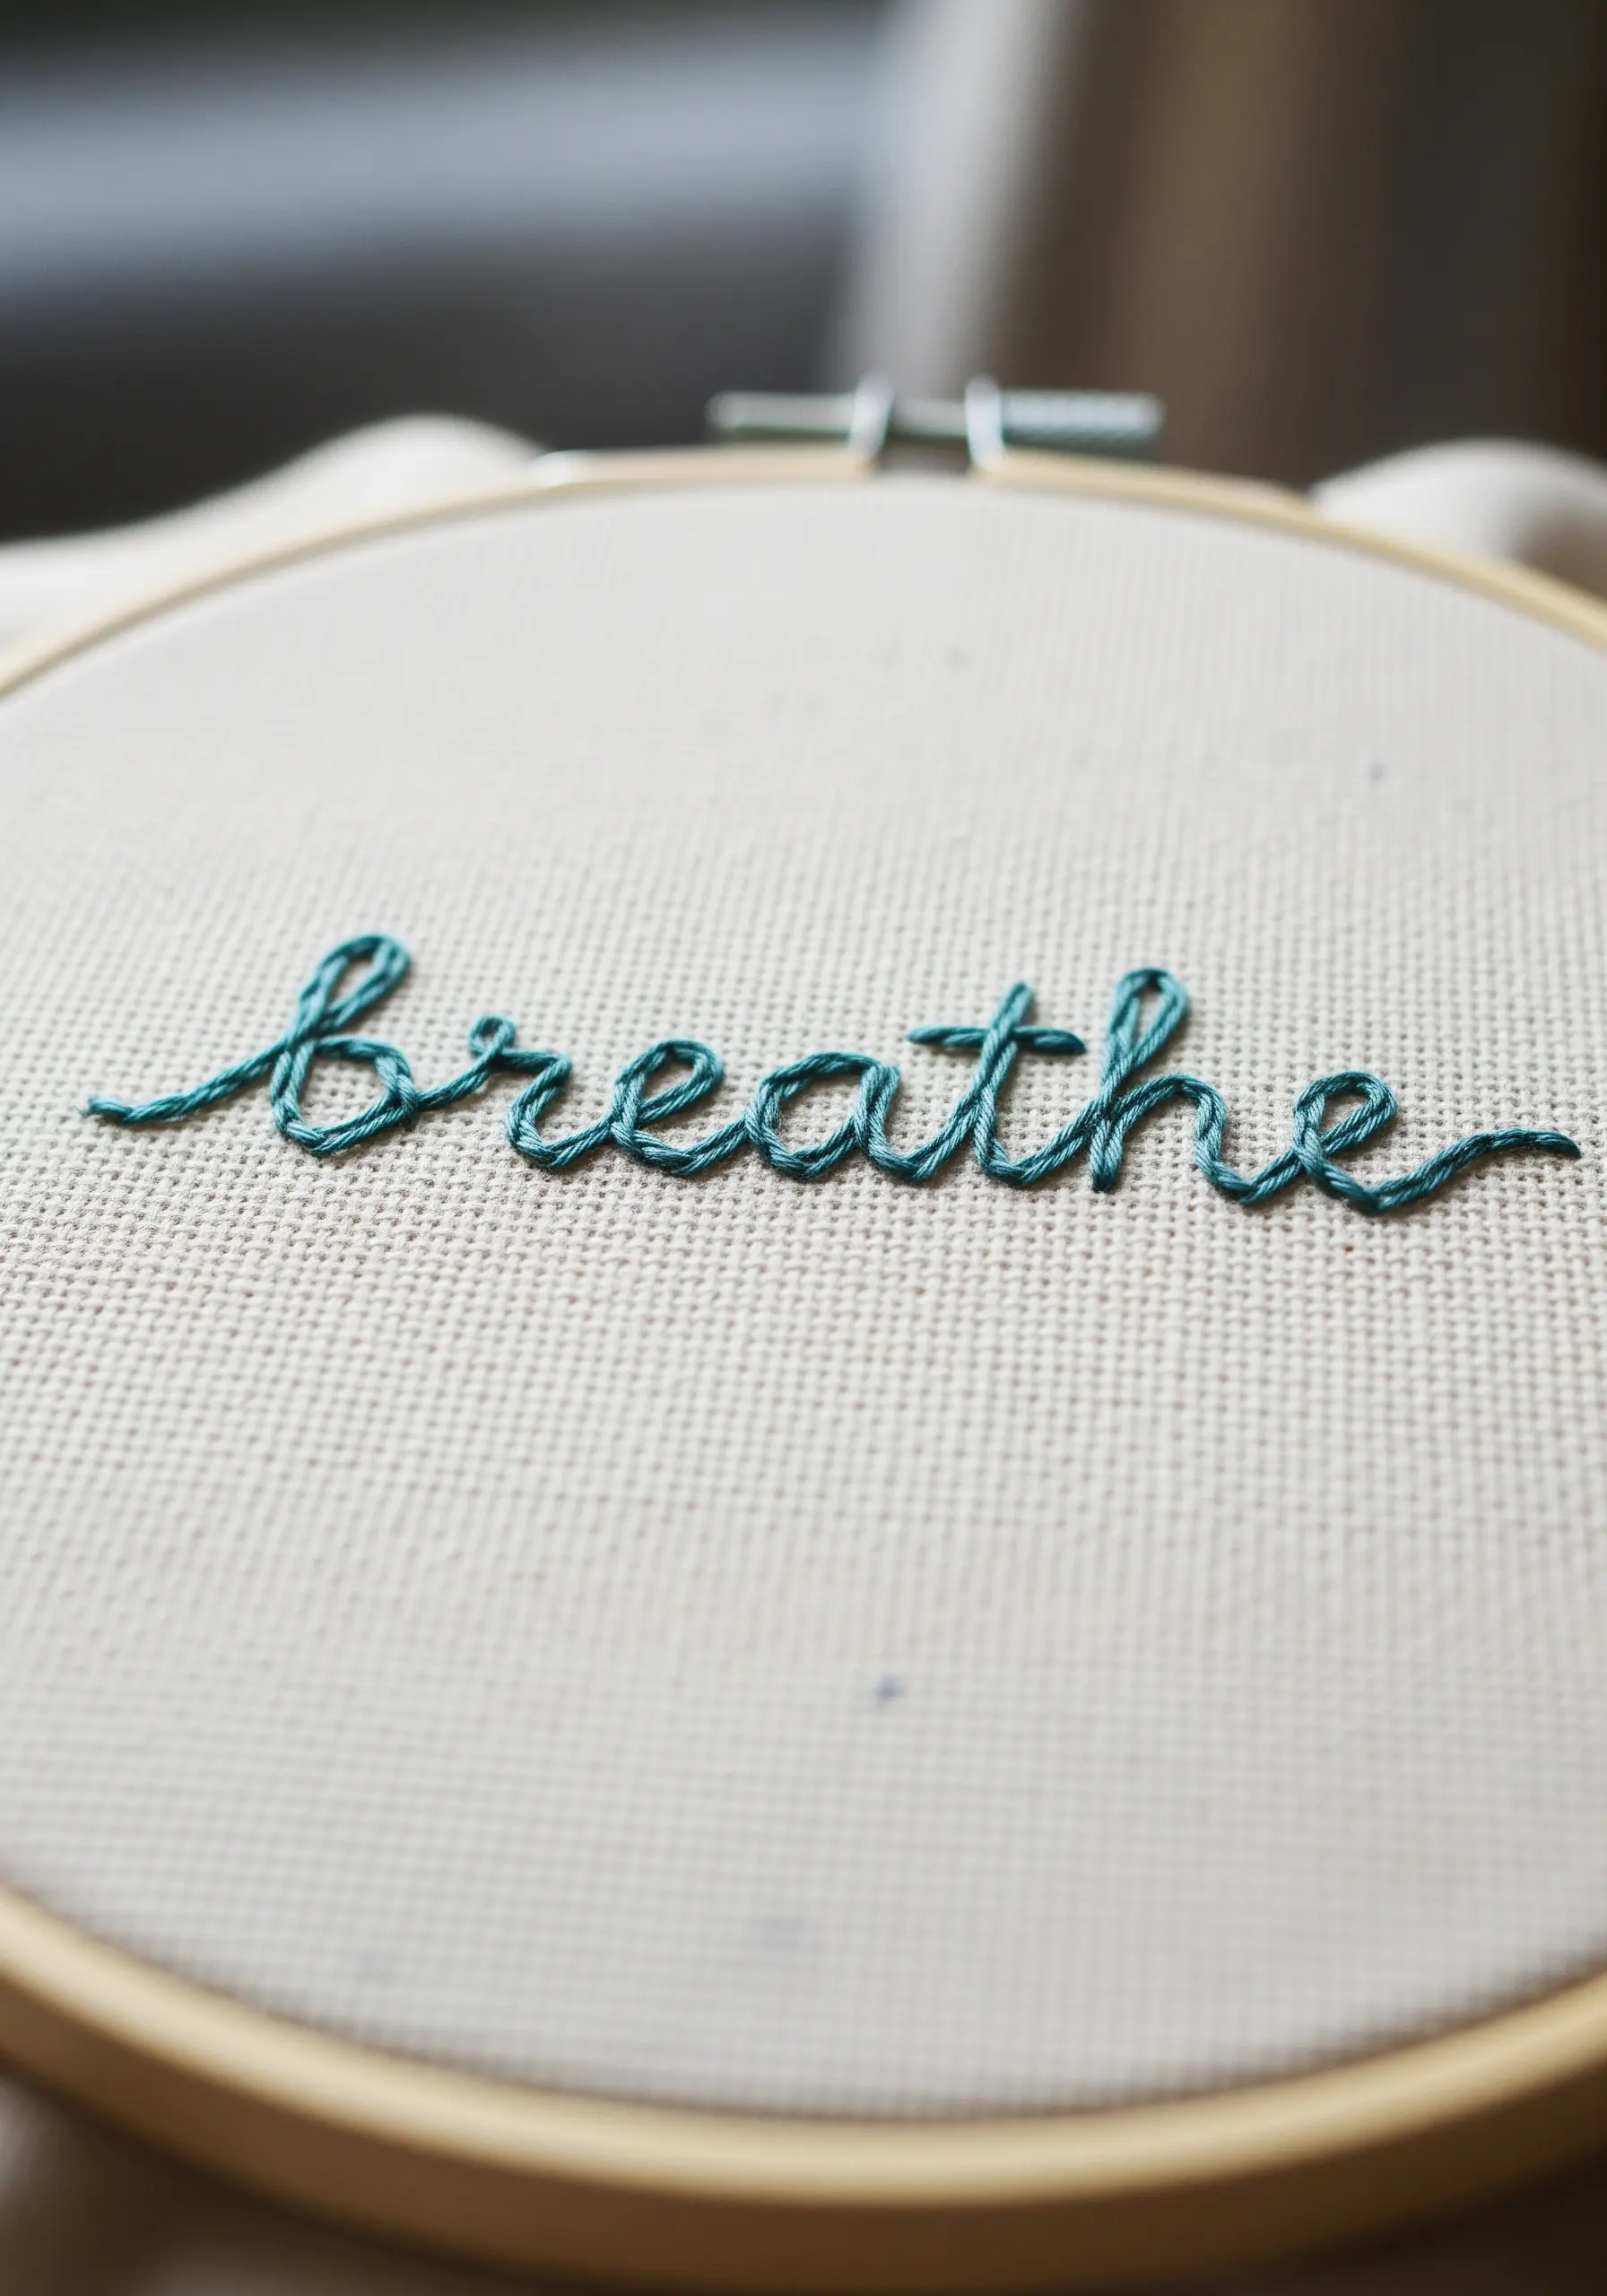
For elegant script that flows like ink, elevate your backstitch with a simple whipping technique.
First, stitch your word using a standard backstitch.
Then, take a new length of the same thread and weave it under and over each backstitch without piercing the fabric.
This action smooths the segmented look of the backstitch, creating a single, raised, and continuous line that is perfect for cursive lettering.
6. Add Realism with Layered Seed Stitches
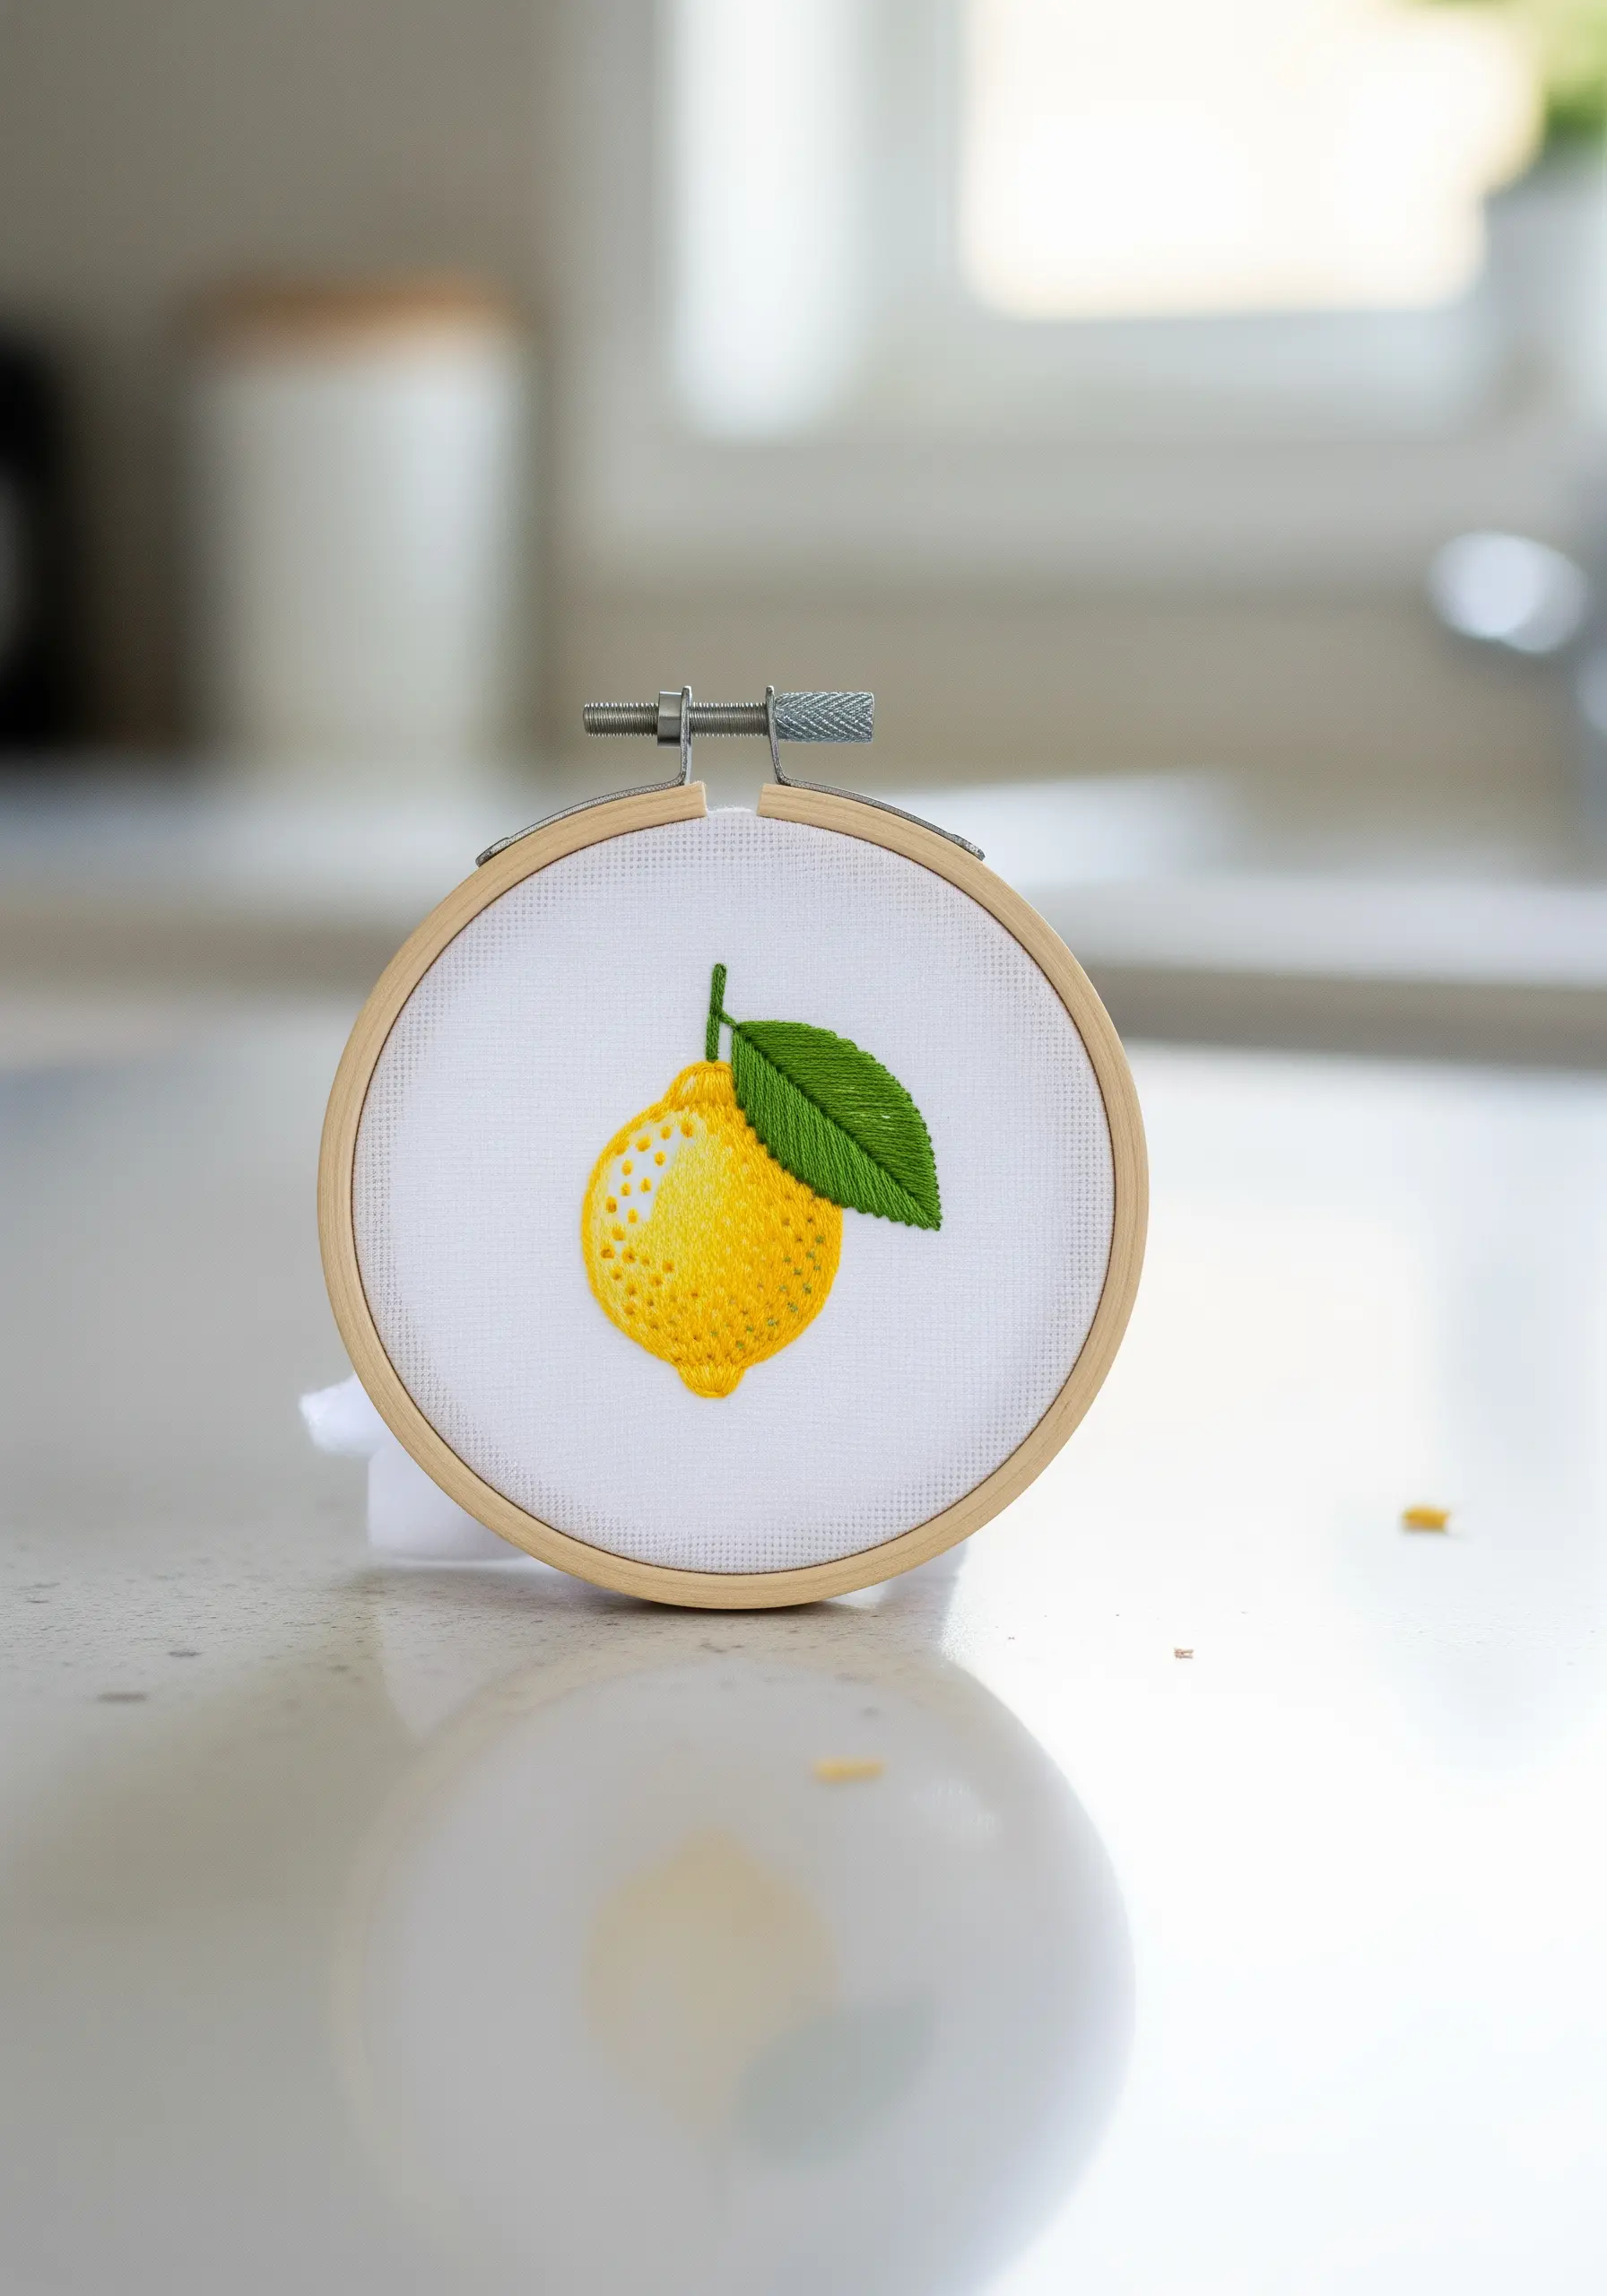
To give an embroidered lemon a believable texture, move beyond a simple satin stitch fill.
First, fill the body with a smooth long-and-short stitch.
Then, using a lighter shade of yellow, scatter tiny, individual straight stitches (seed stitches) across the surface.
This subtle layering technique mimics the dappled, porous texture of citrus peel, adding a surprising level of realism and sophistication to your work.
7. Create Dynamic Outlines with Varied Stitches
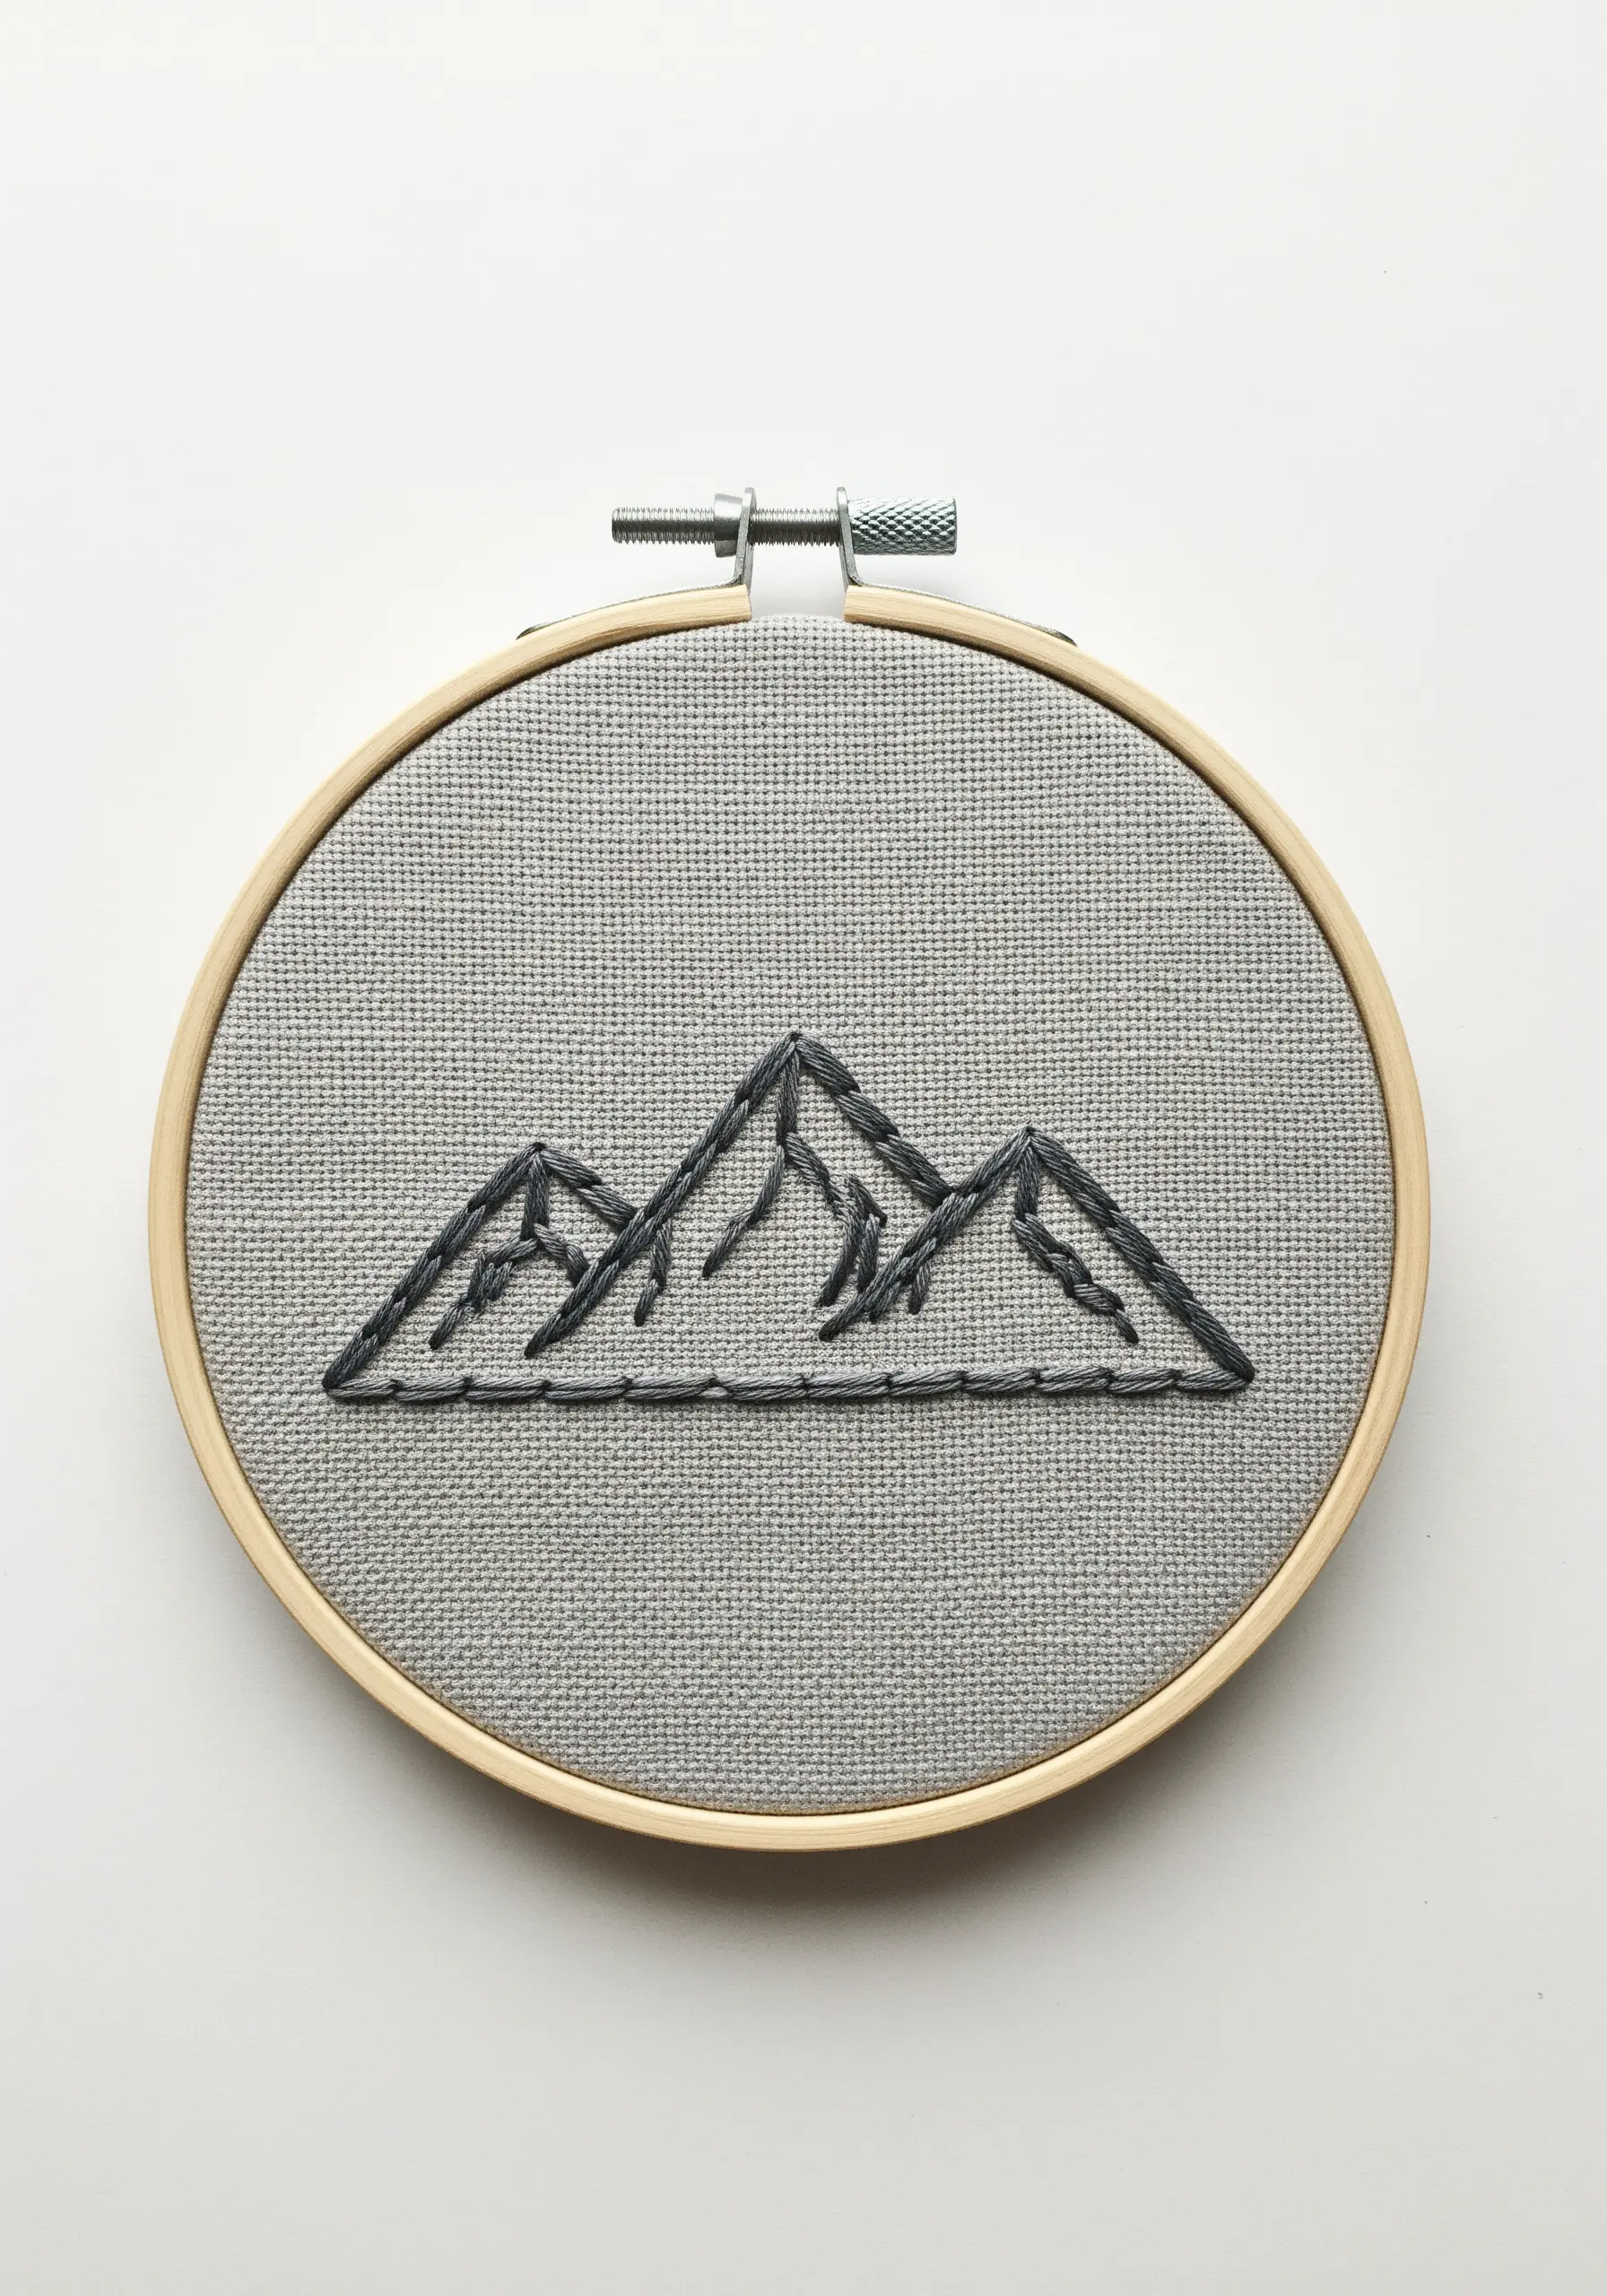
Bring a simple mountain outline to life by varying the length of your stitches to match the terrain.
Use longer, smoother split stitches for the gentle slopes and shorter, more compact stitches for the sharp, rocky peaks.
This subtle variation in stitch rhythm adds a sense of movement and dimension that a uniform outline lacks.
It transforms a simple graphic into a miniature landscape, like those seen in string art nature trails featuring mountains.
8. The Split Stitch Fill for Bold Silhouettes
For a solid, modern fill that won’t pucker or warp, choose split stitch over satin stitch.
Work in tight, parallel rows, ensuring each new stitch splits the thread of the one in the previous row.
This creates a durable, matte surface with a subtle braided texture that is perfect for filling in bold, graphic shapes.
It gives you complete control over the edges, resulting in a crisp and clean silhouette every time.
9. Compose Abstract Art with Knot Clusters
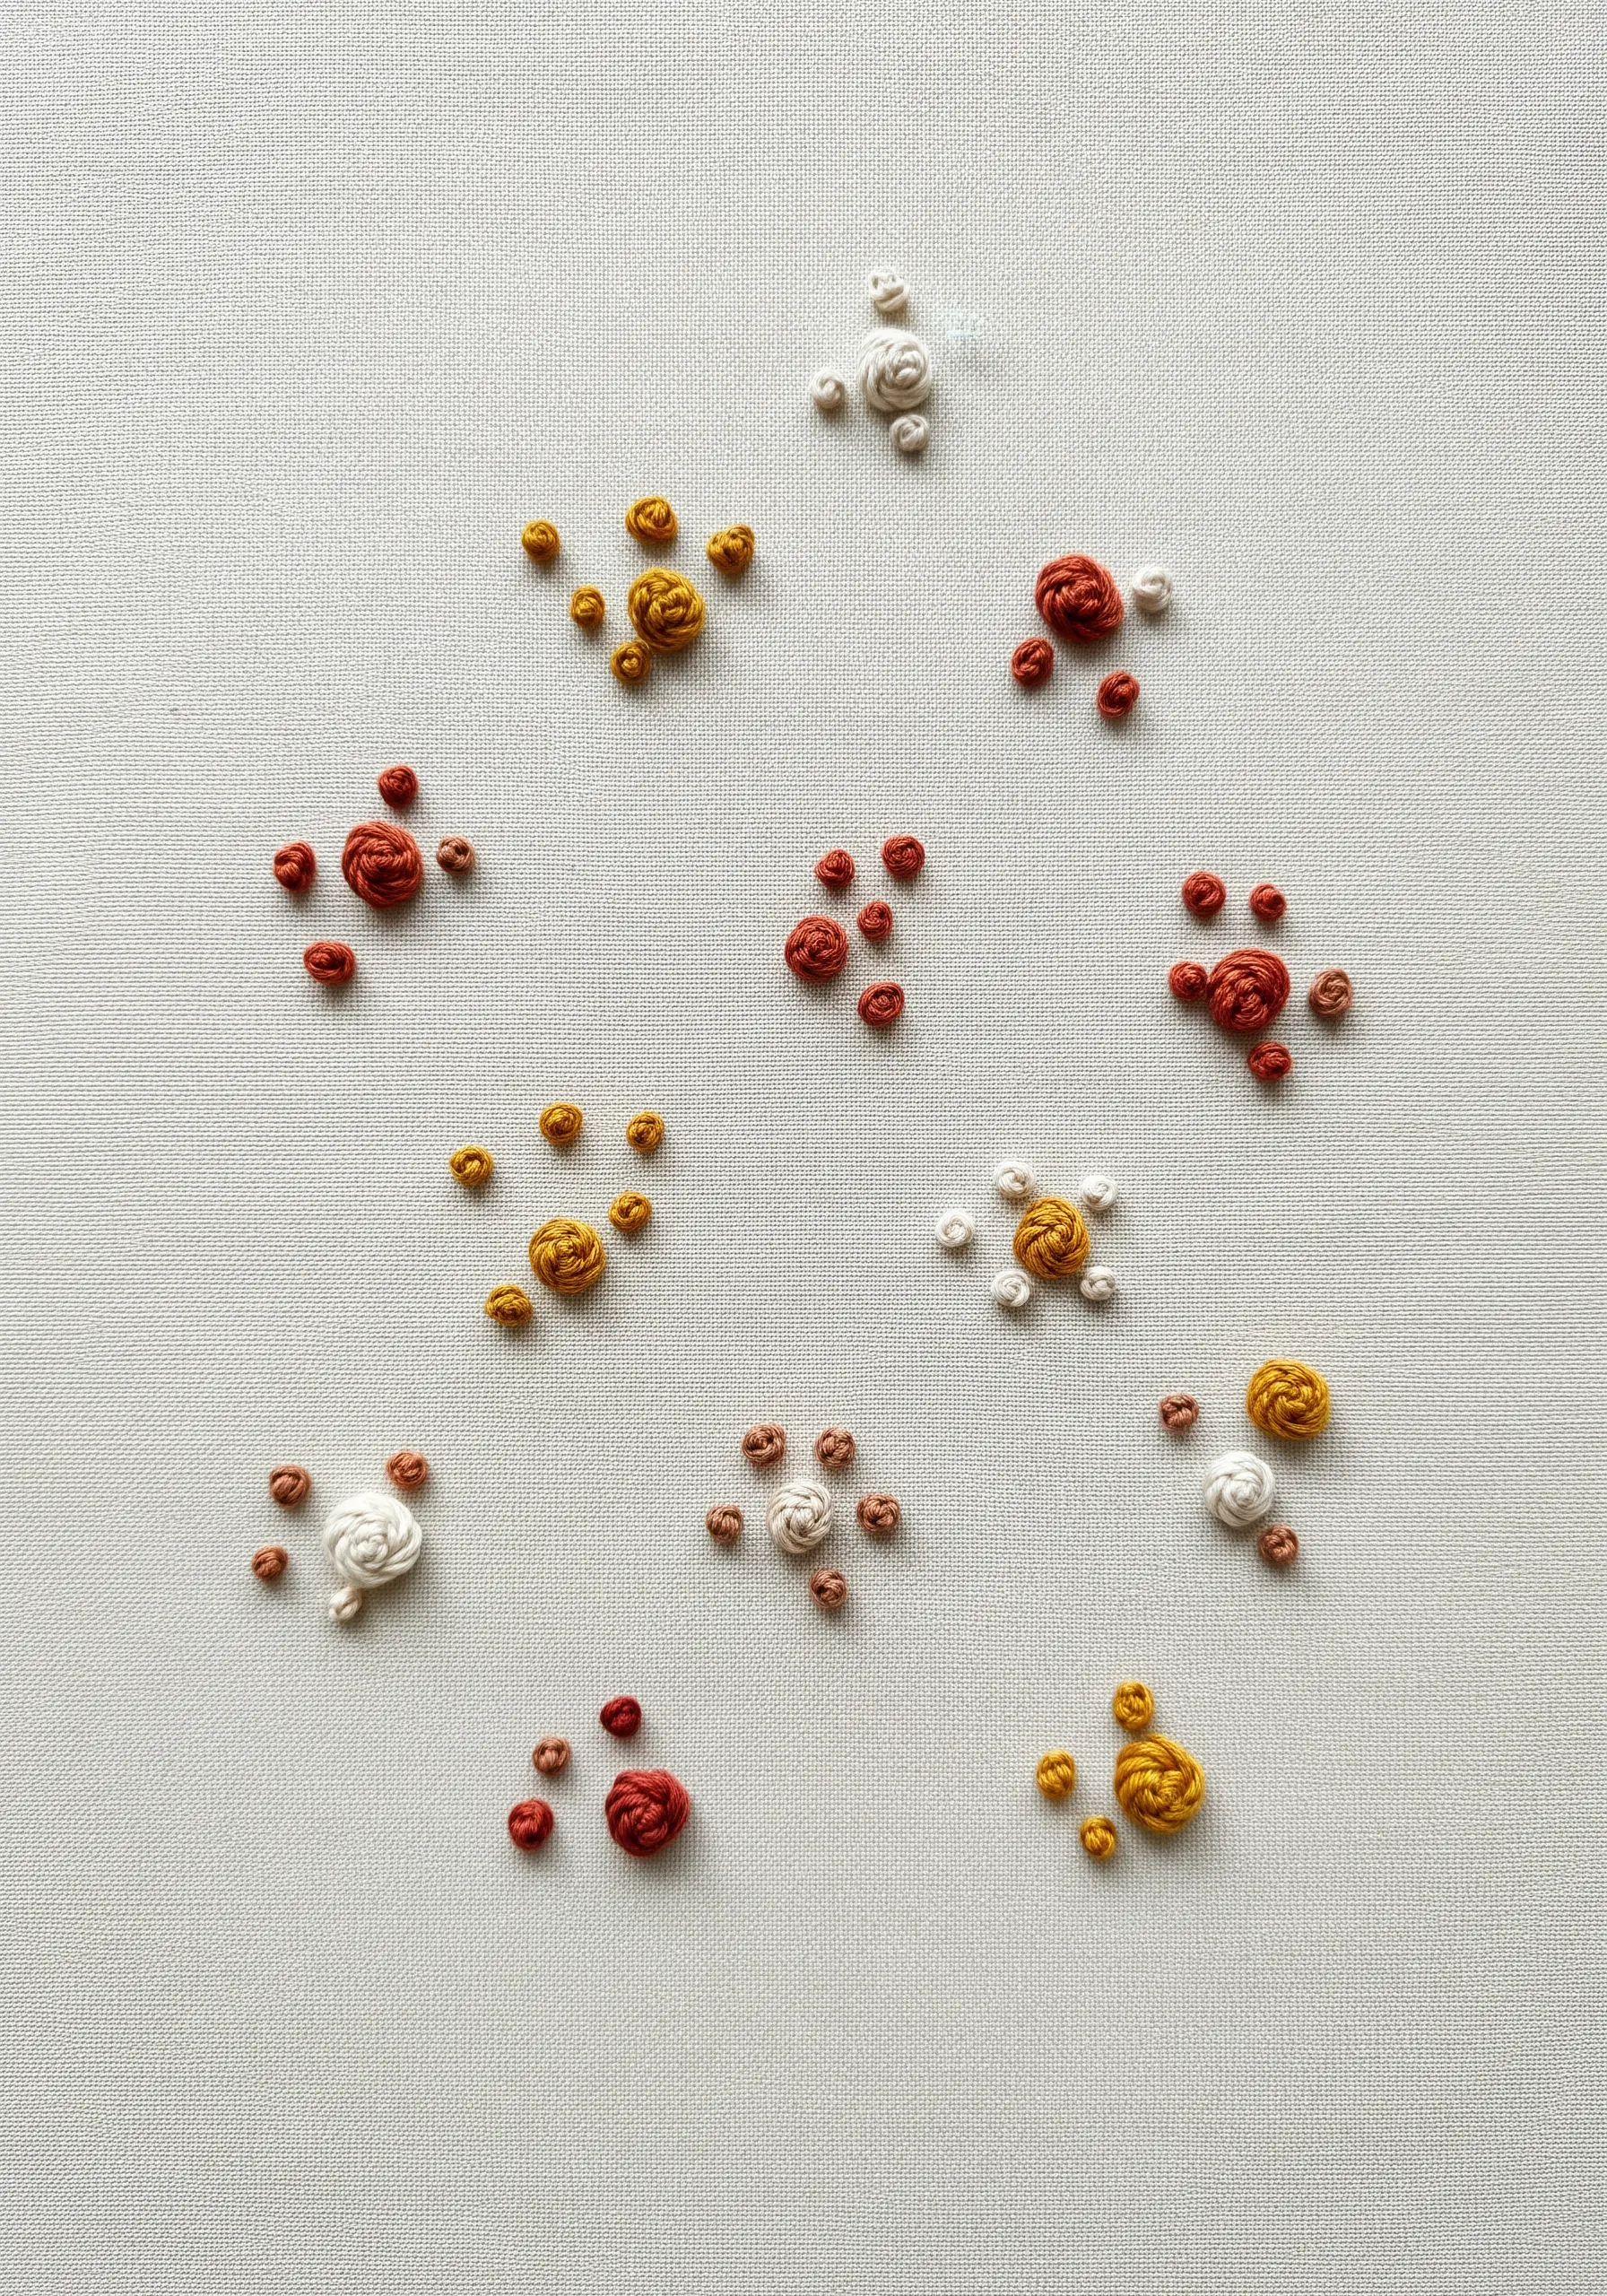
Turn simple knots into a sophisticated composition by thinking like a designer.
Group French or bullion knots into small, intentional clusters of varying sizes and colors.
Arrange these clusters across your fabric, paying careful attention to the negative space between them.
This thoughtful placement creates rhythm and balance, elevating a basic stitch into a piece of abstract texture play designs.
10. Geometric Precision with Strategic Straight Stitches
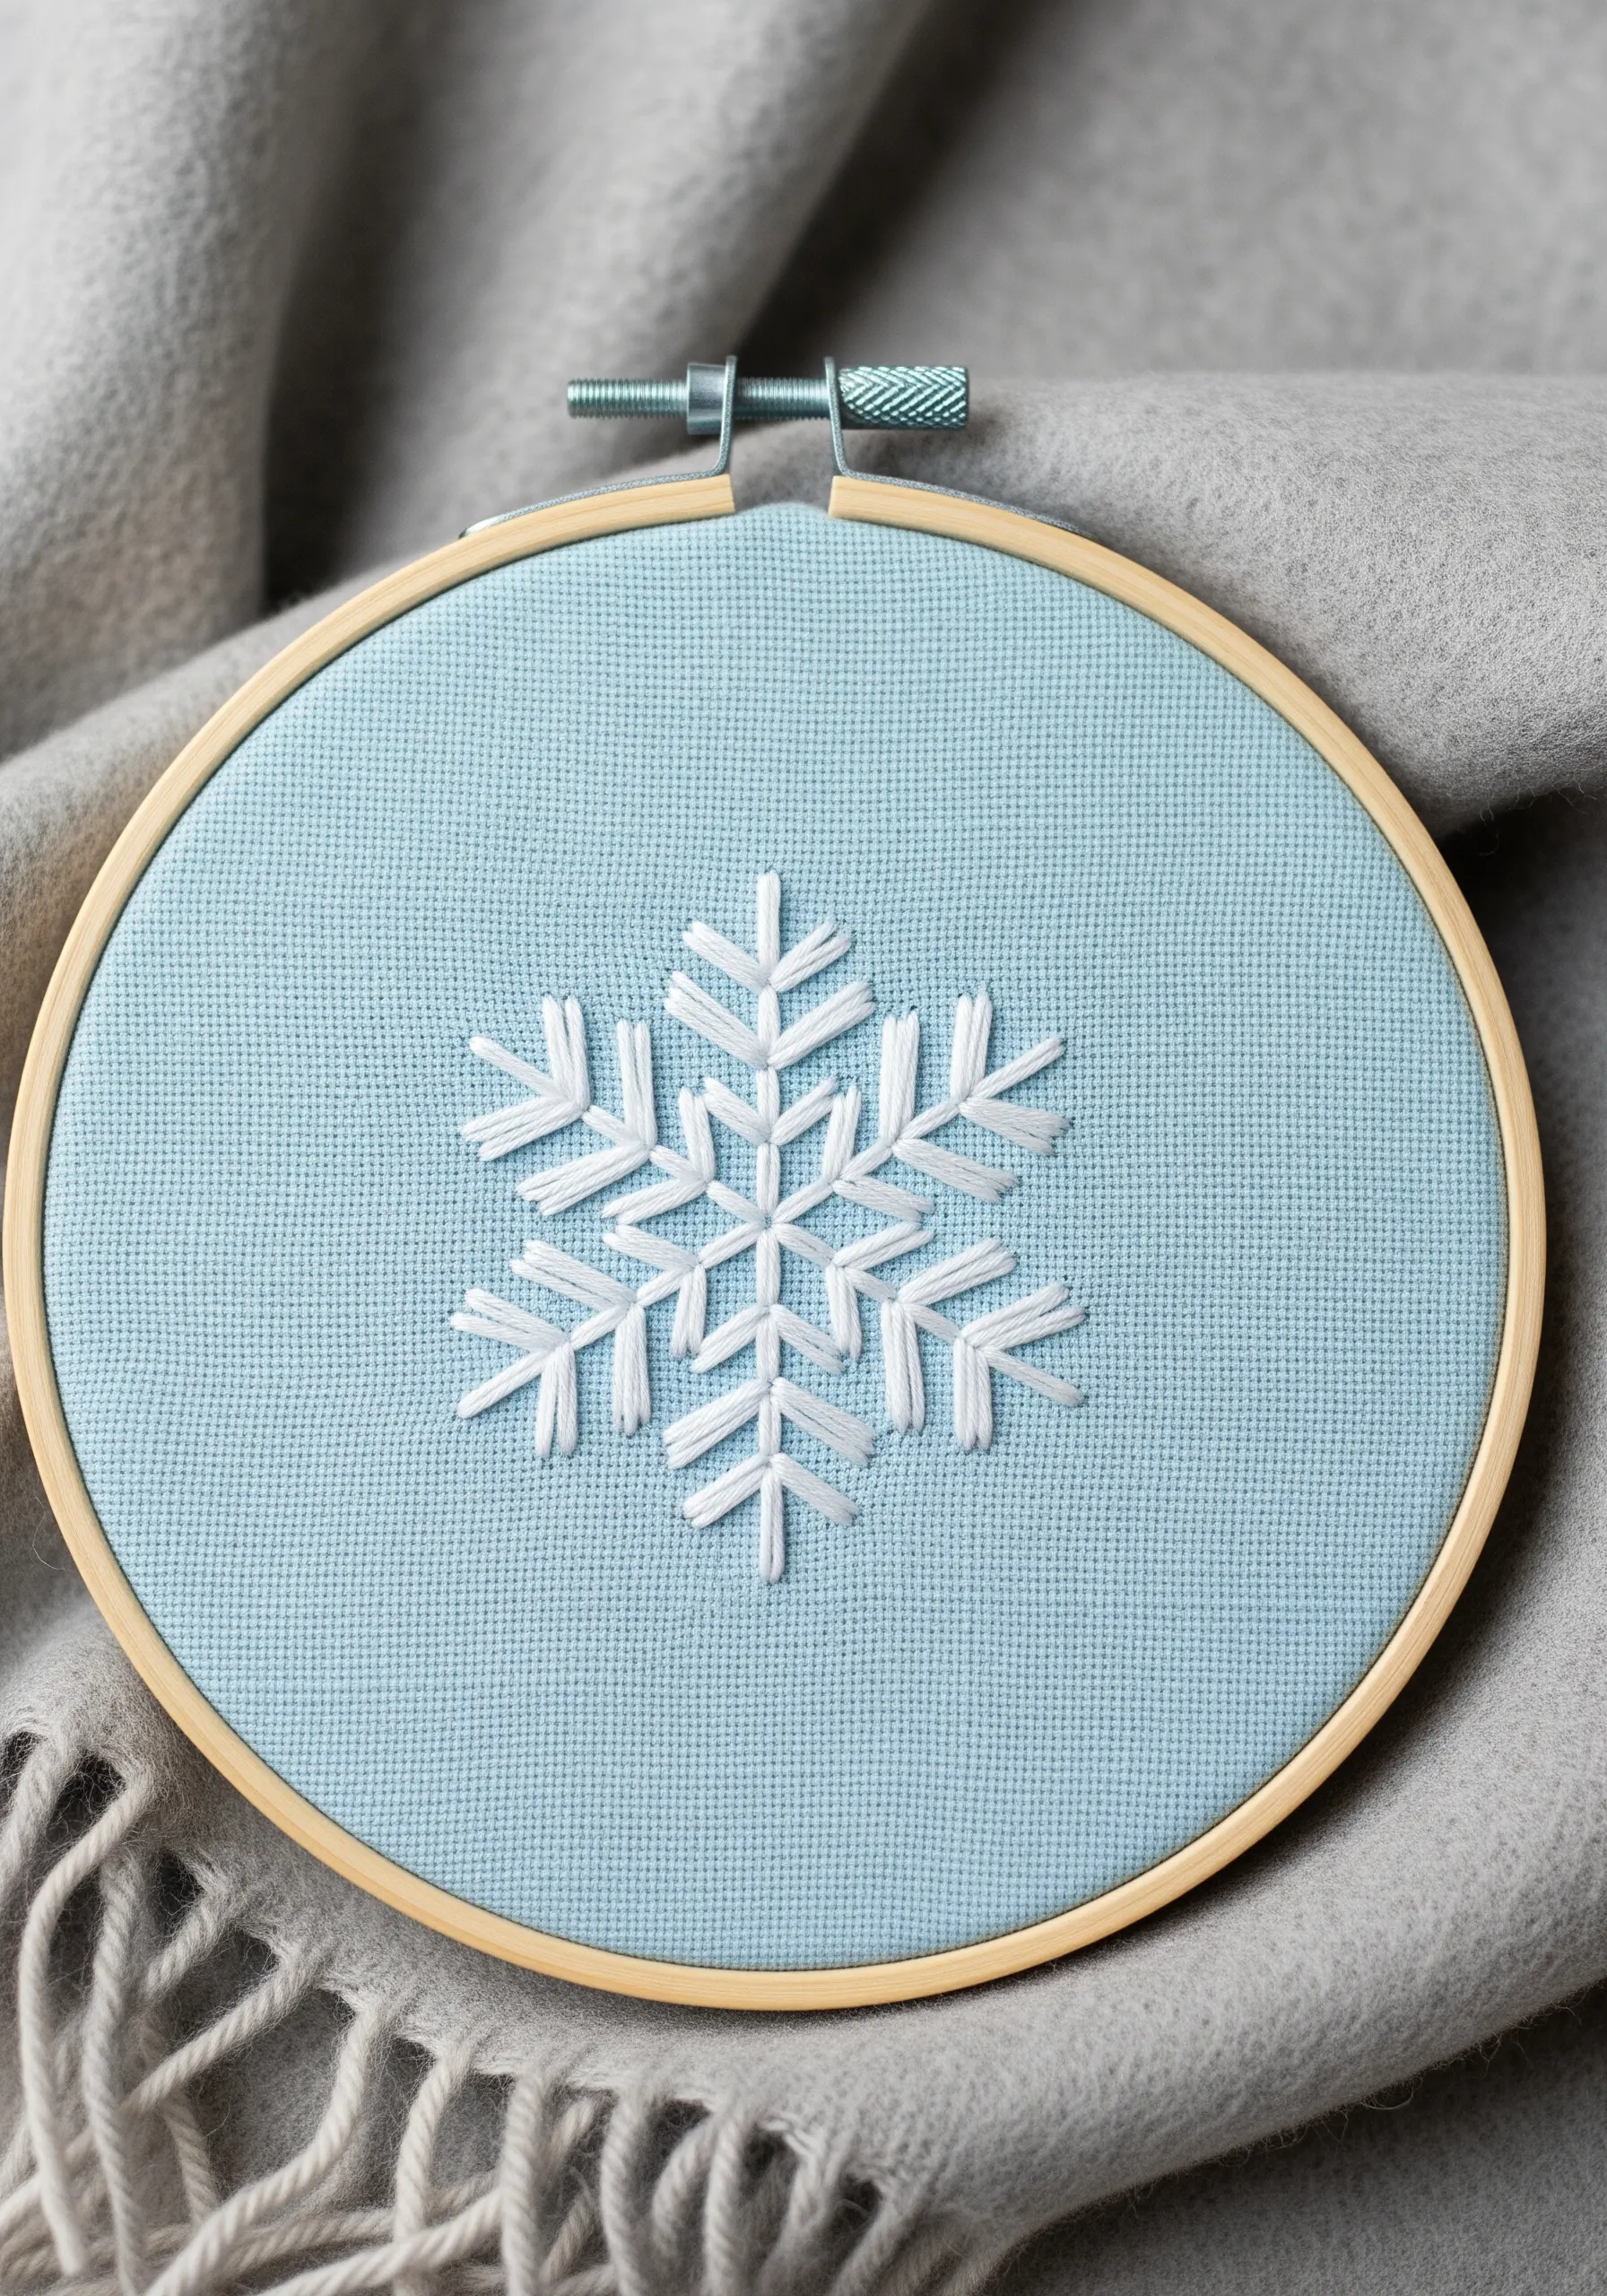
The key to a perfect geometric design, like a snowflake, is a well-planned foundation.
Use a water-soluble marker to draw guidelines on your fabric before you begin stitching.
Execute the entire design with simple straight stitches, focusing on consistent tension to prevent puckering.
You can add depth by layering shorter stitches over longer ones, a technique often used in seasonal embroidery wall decor ideas.
11. Create Depth with Layered Outlines
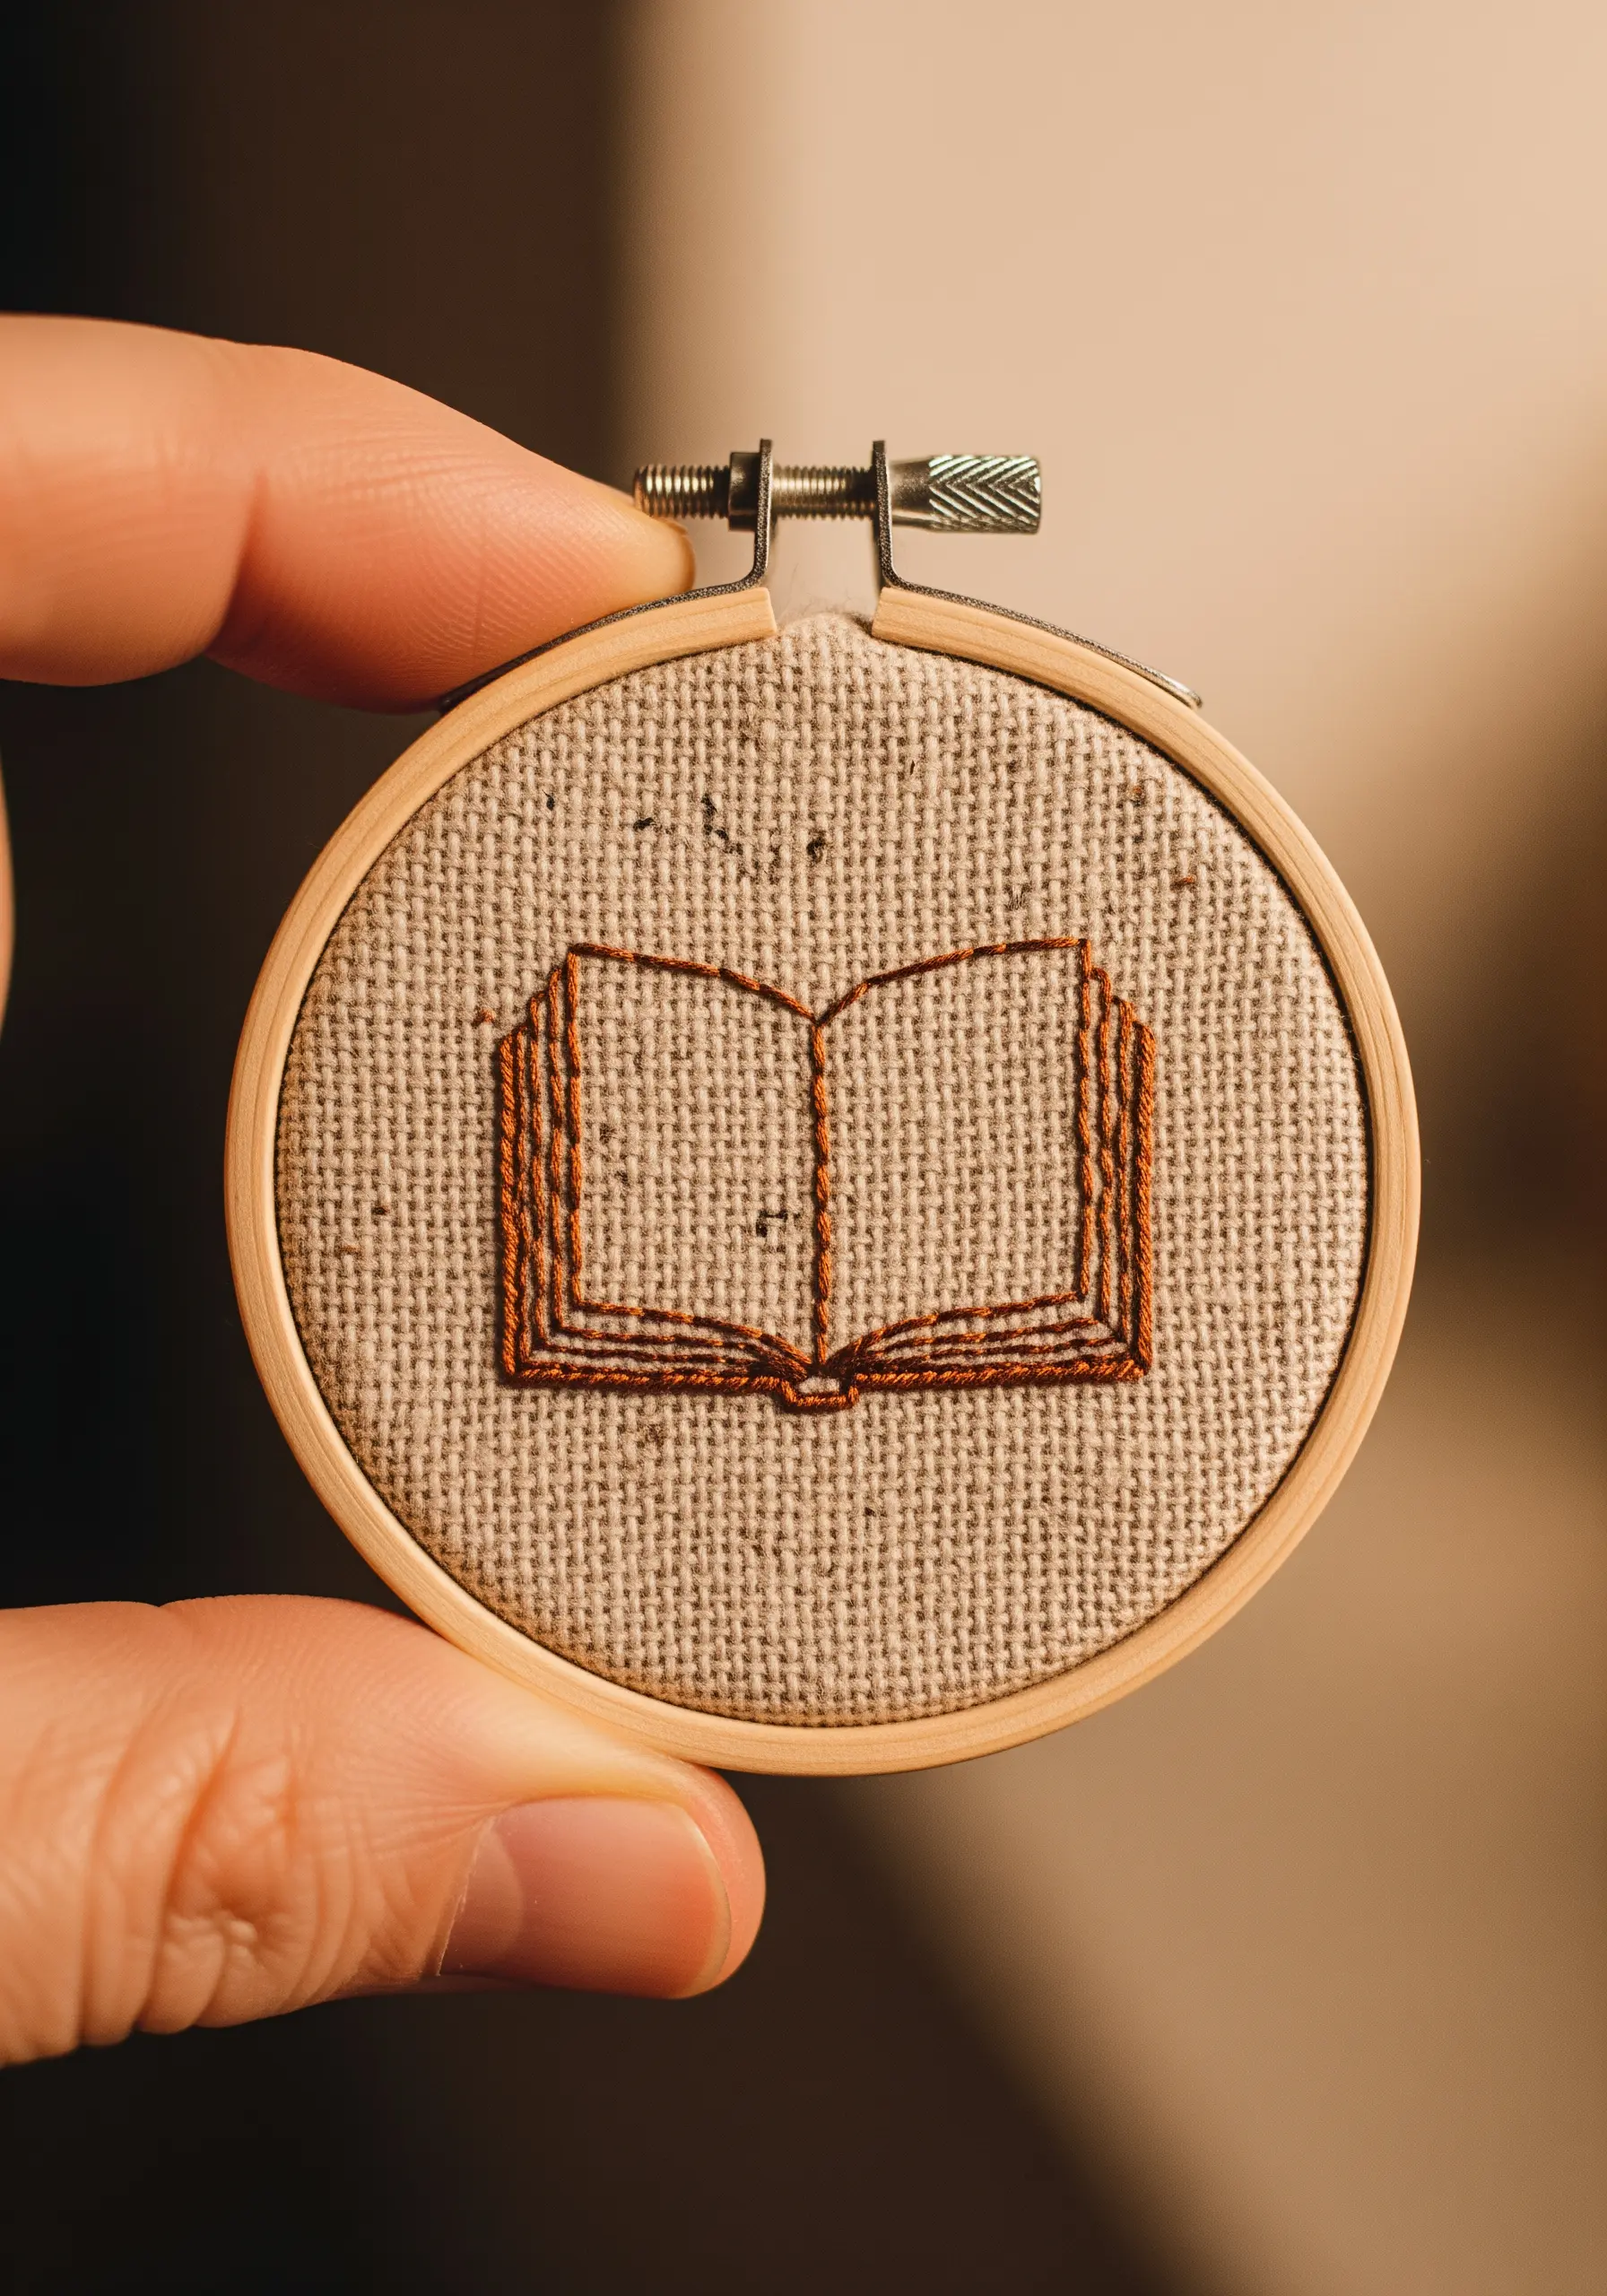
You can give a simple line-art design a surprising sense of three-dimensionality with a simple color trick.
Use a darker thread for the primary outlines, such as a book’s cover, and a slightly lighter shade for the interior details, like the pages.
This subtle tonal shift tricks the eye into seeing depth and layers.
This technique works beautifully for all kinds of minimal embroidery patterns, adding sophistication without complexity.
12. The Open Chain Stitch for Modern Borders

For a border that feels both delicate and graphic, use the open or square chain stitch.
Unlike a standard chain stitch, each loop is anchored on either side, creating a series of interconnected lines that form a beautiful, repeating pattern.
It’s a rhythmic and meditative stitch that is perfect for creating modern minimal border designs on table linens or as a standalone decorative element.
13. Build Delicate Texture with Fly Stitches
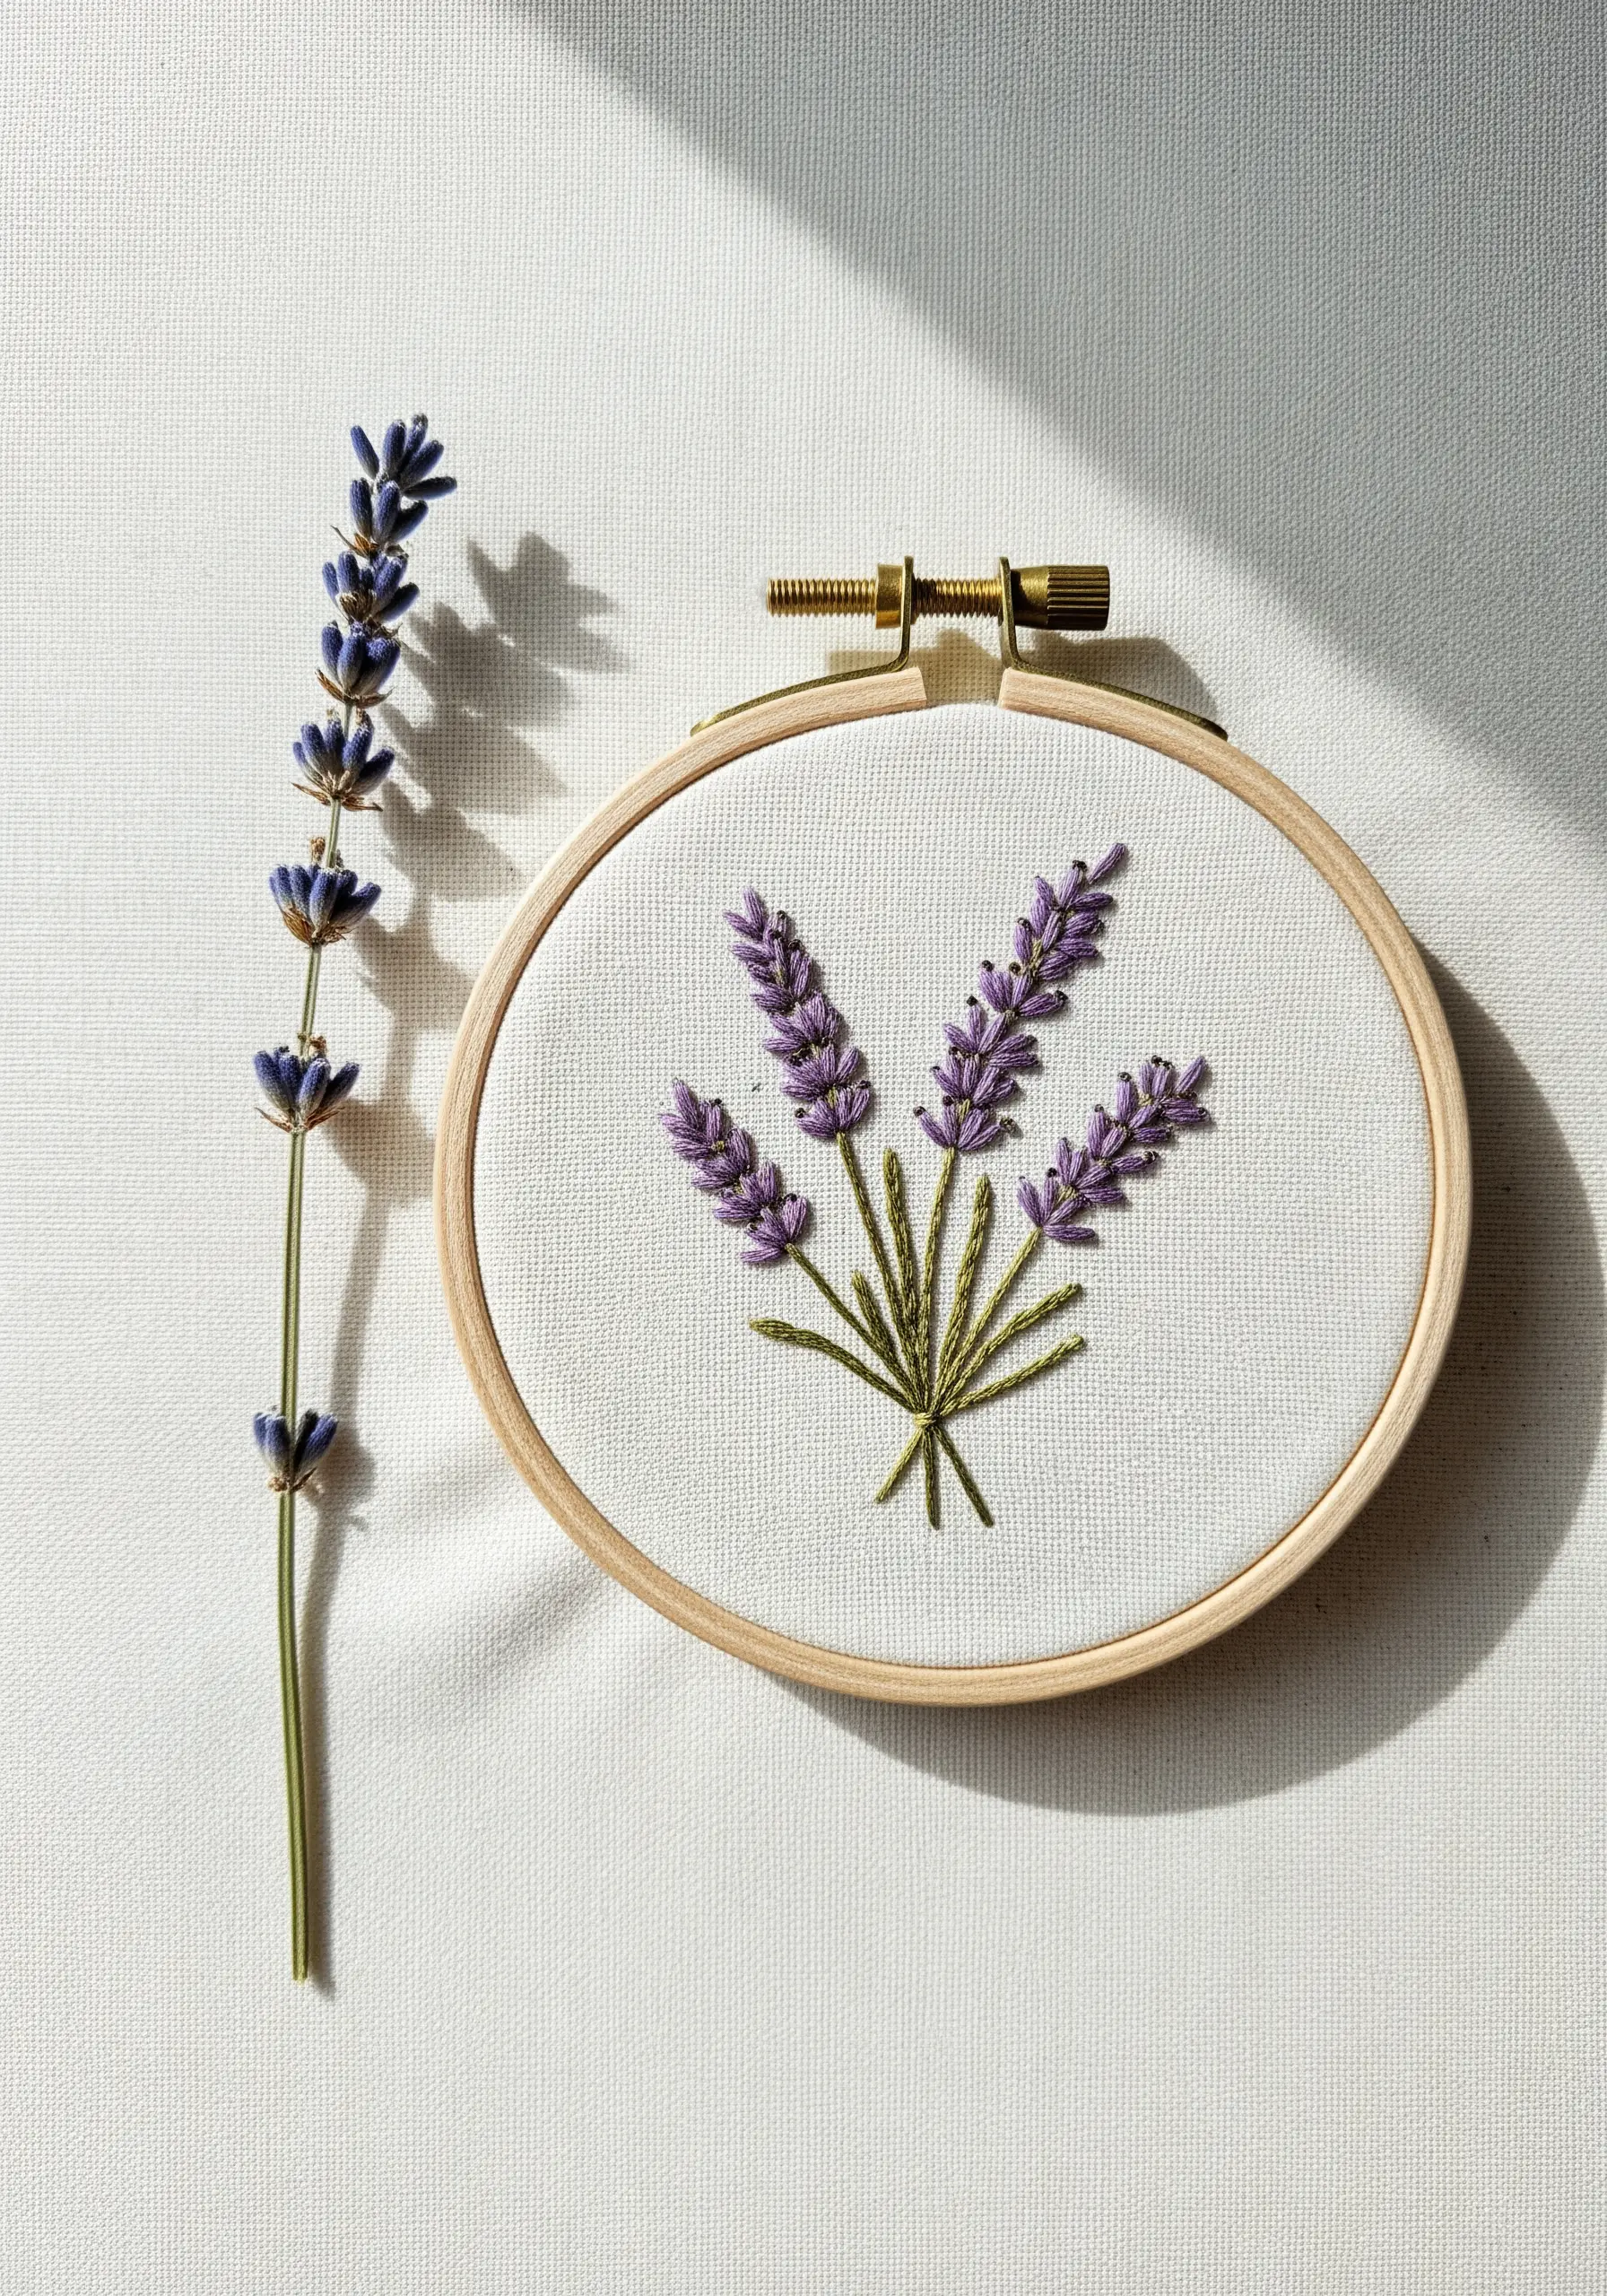
To capture the airy quality of lavender, use a combination of simple, textured stitches.
Use tiny French knots or detached chain stitches for the individual purple buds, clustering them at the top of the stalk.
For the delicate green leaves, use single fly stitches arranged along the stem.
This pairing of stitches creates a realistic, multi-dimensional effect that elevates simple botanical designs, just like in these delicate lavender stitch ideas.
14. Radiating Lines and the Power of Negative Space
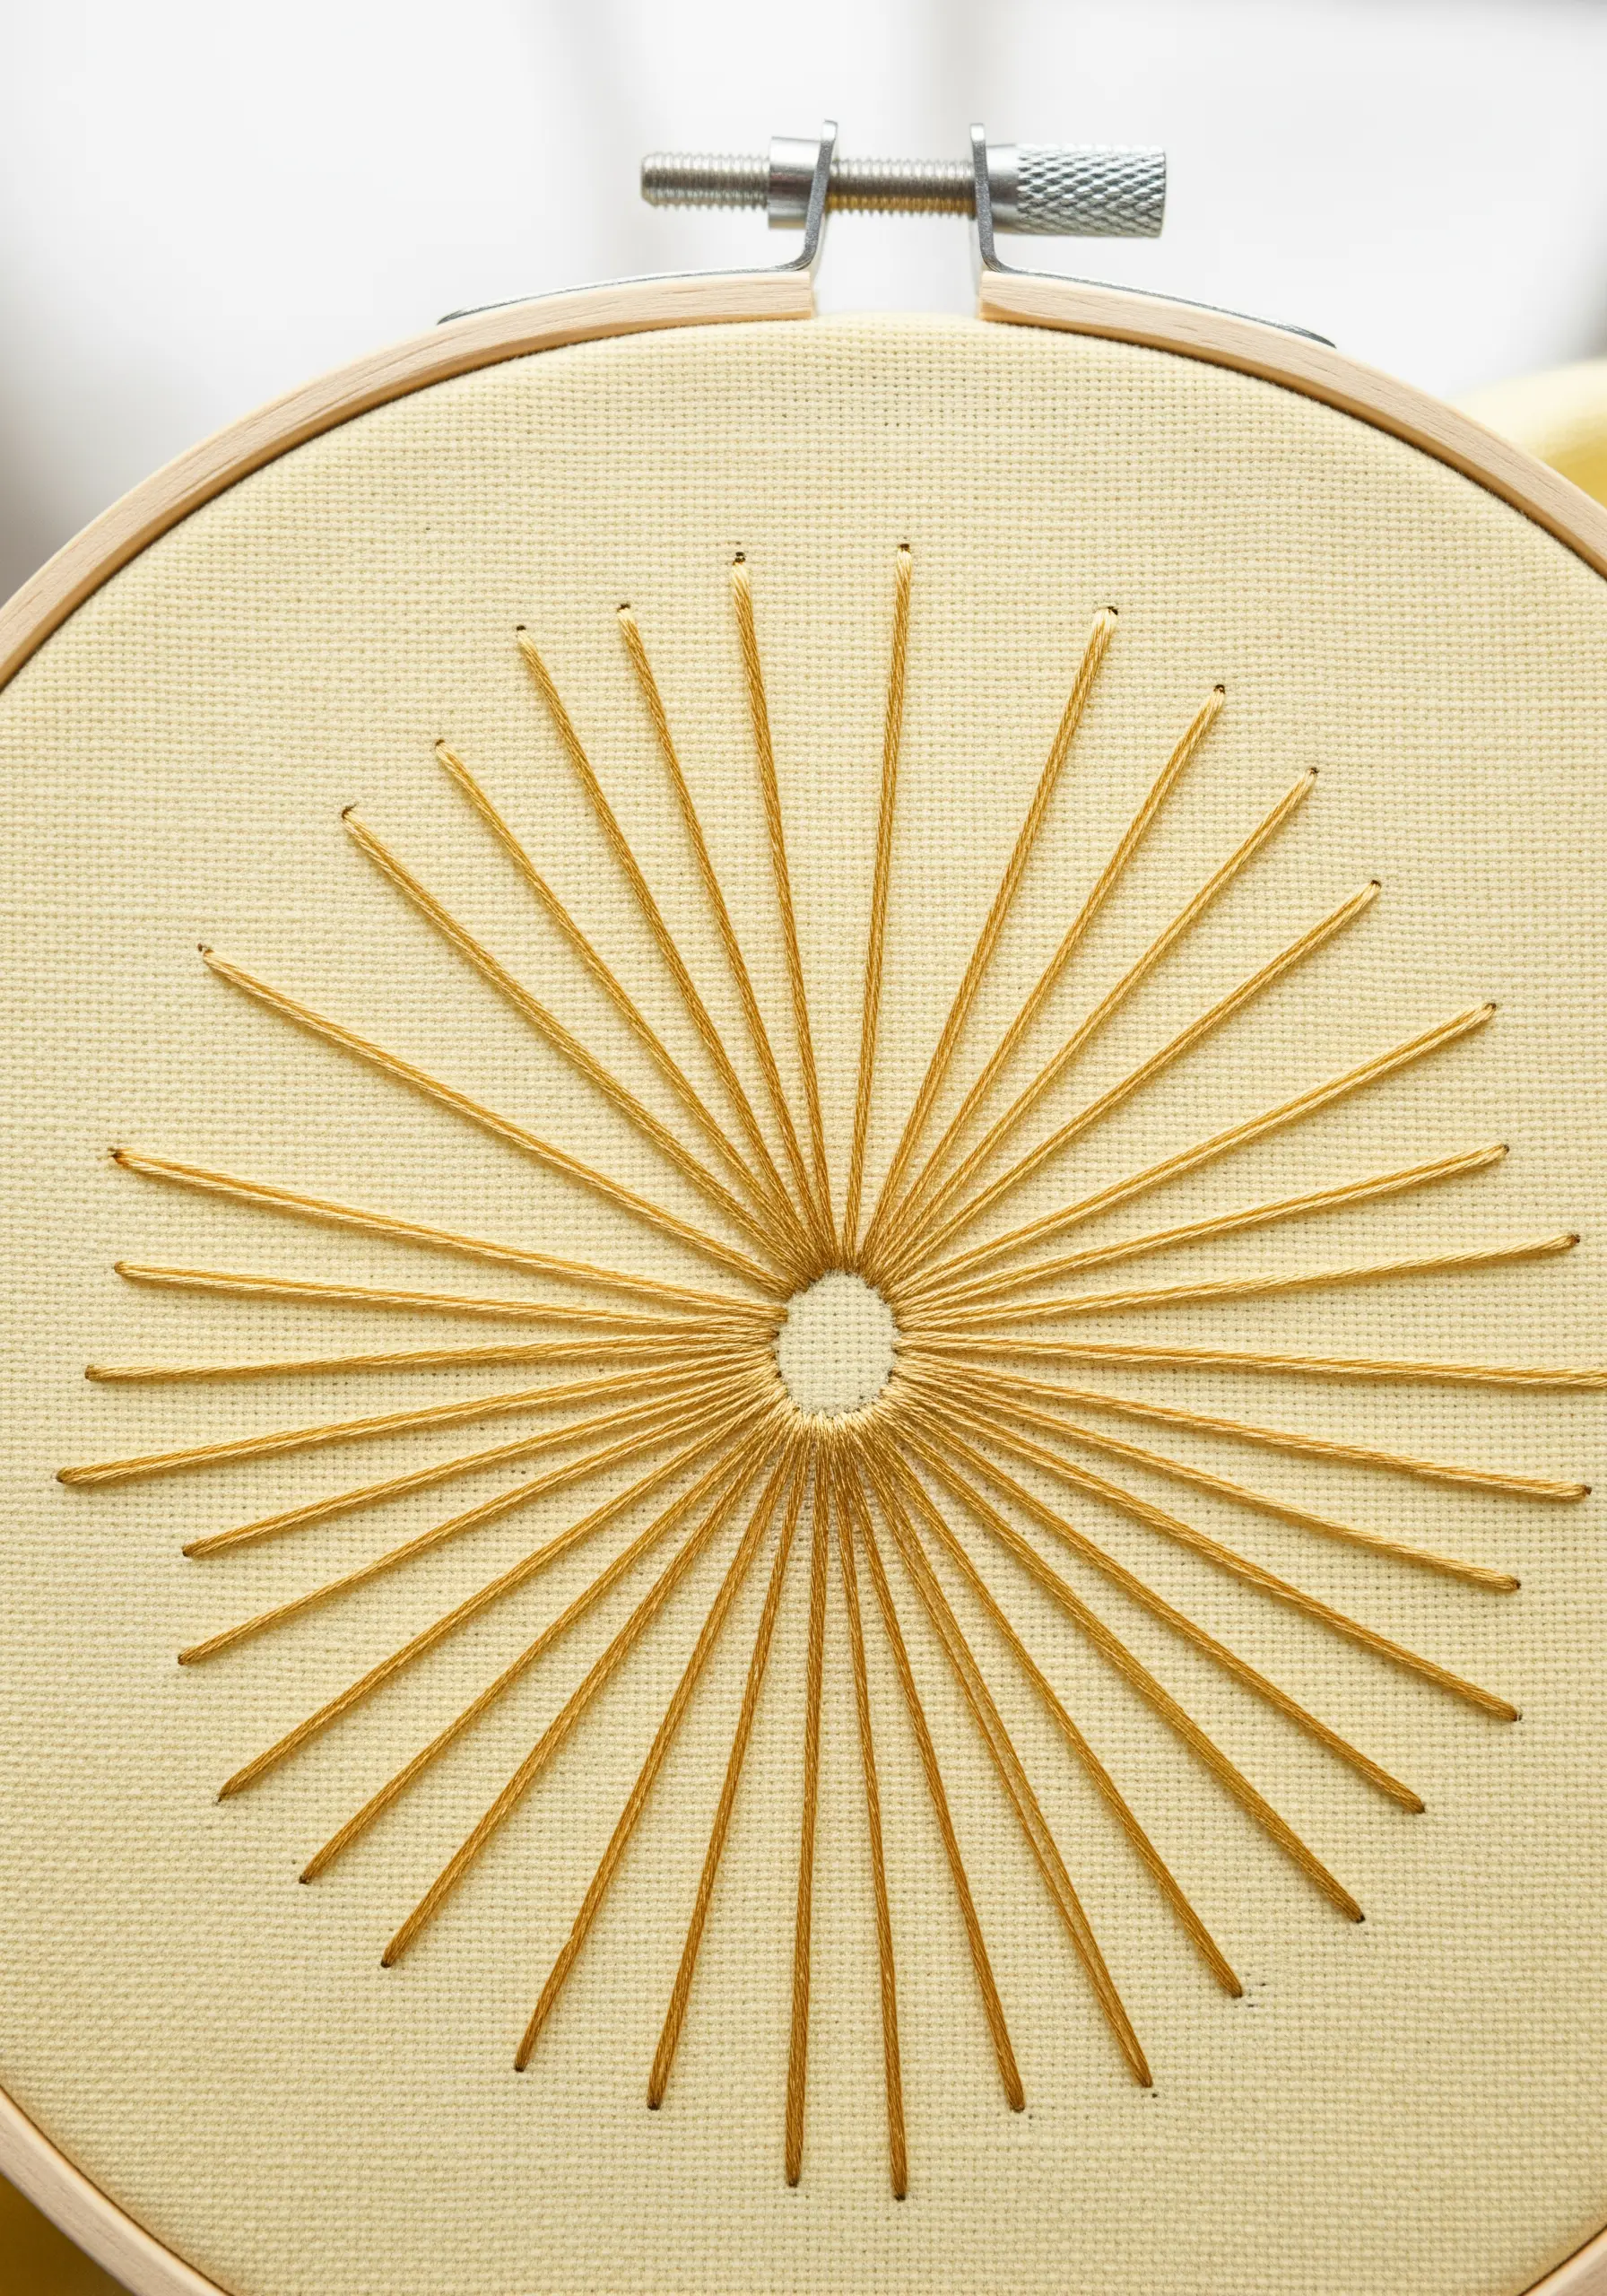
Create a striking sunburst not just with stitches, but with the space you leave empty.
Work your straight stitches from a larger outer circle towards a smaller inner one, but leave the very center of the design unstitched.
This void creates a powerful focal point and gives the design a clean, modern edge.
To ensure perfect spacing, use a compass and a fabric pen to draw your concentric circles as a guide before you begin.
15. Minimalist Impact Through High Contrast
The easiest way to make a simple design feel dramatic and intentional is to maximize contrast.
Stitching a delicate constellation with a bright white thread on a stark black fabric immediately commands attention.
The fabric itself does half the design work for you.
Use simple star stitches or French knots connected by a neat backstitch for clean, graphic tiny night sky embroidery designs that look effortlessly chic.
16. Raised Metallic Lines with Couching
To create smooth, raised lines with metallic or other specialty threads, use the couching technique.
Lay your thicker decorative thread on the surface of the fabric along your design line.
Then, use a second, finer thread to tack it down with tiny, perpendicular stitches.
This method gives you perfect control over tricky threads, allowing you to create clean curves and sharp corners for a result that looks far more complex than it is to execute.
17. Create Motion with Directional Stitching
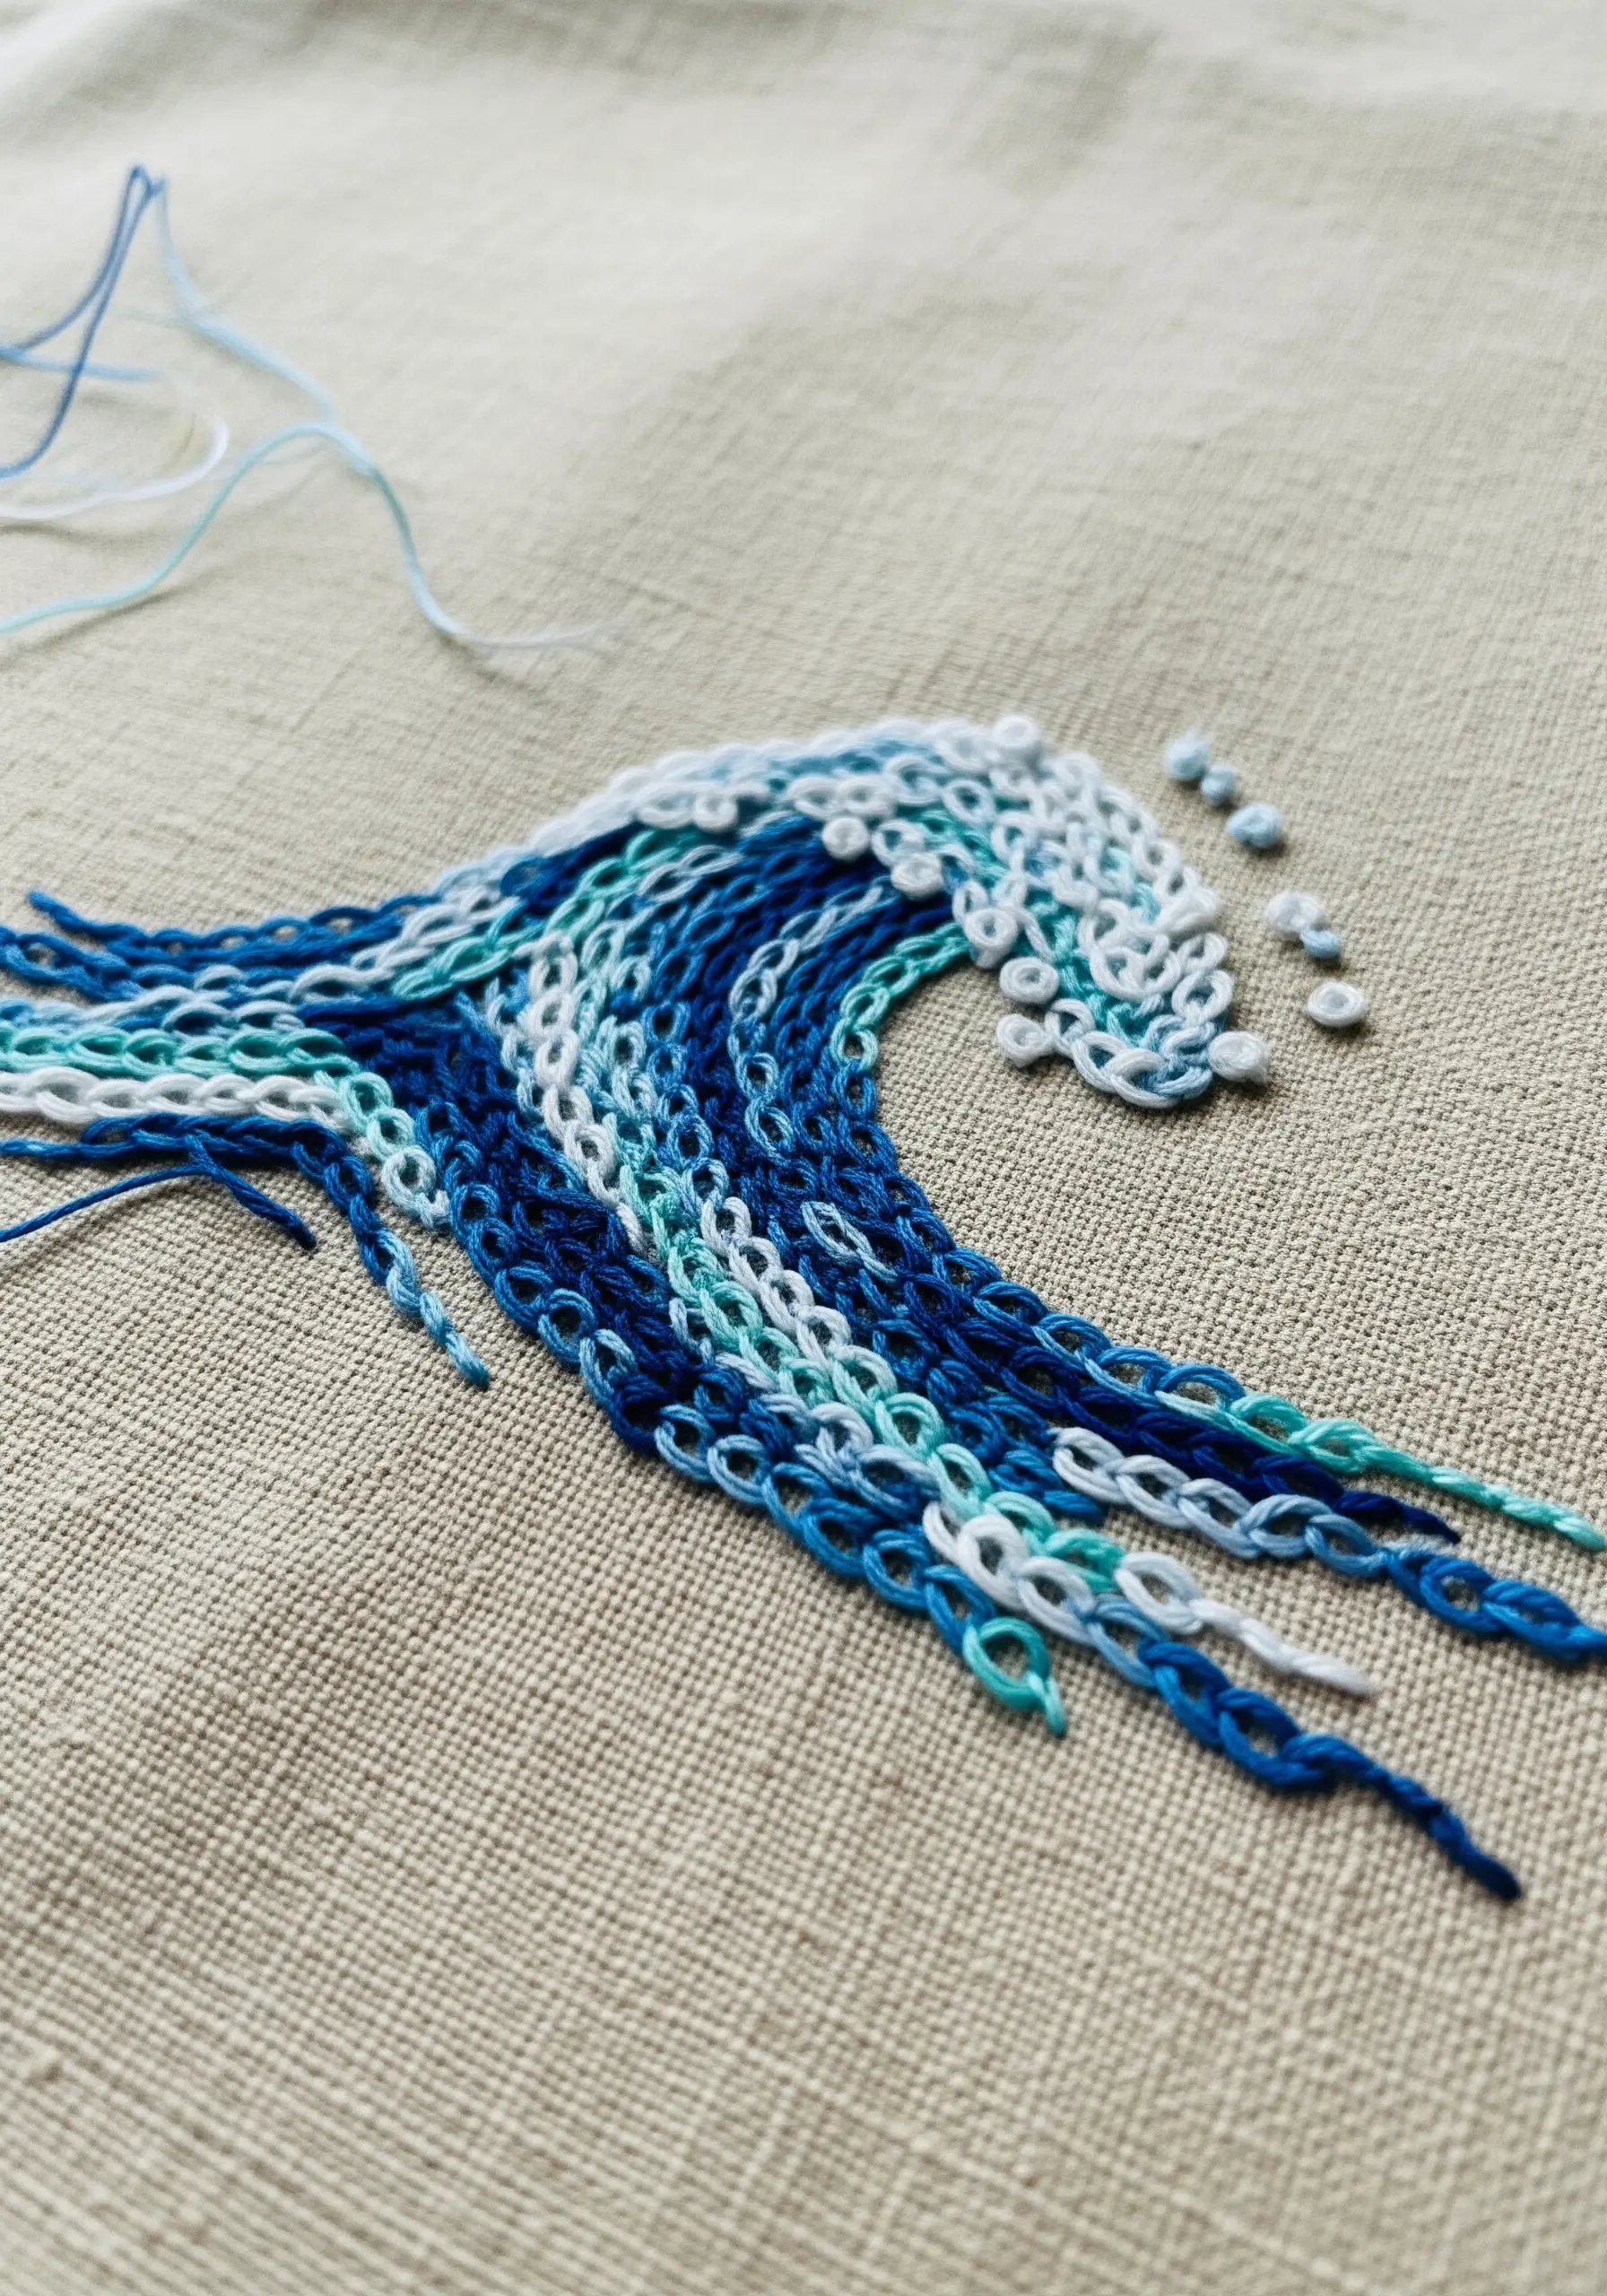
Capture the essence of movement by ensuring your stitches follow the flow of your subject.
For an ocean wave, work your rows of chain stitch to mimic the arc of the water, creating natural contours and energy.
Enhance the effect by leaving the ends of the threads loose in the ‘spray’ area, adding a touch of untamed texture.
This is one of the best abstract thread waves swirls techniques for dynamic results.
18. The Elegance of a Single Continuous Line
Embrace minimalist artistry by stitching a design as if you were drawing it with a single, unbroken line.
A stem stitch or whipped backstitch is ideal for this, as they create a smooth, solid line that can navigate curves and corners with ease.
This creative constraint forces you to simplify shapes down to their essence, resulting in a fluid and exceptionally graceful piece.
It’s a powerful exercise in seeing the beauty in simplicity.


