
Think of these small patterns not just as quick projects, but as focused moments to perfect a single, beautiful technique. In the time it takes to watch a movie, you can master the curve of a satin stitch, the texture of a French knot, or the clean confidence of a perfect line.
This isn’t about rushing; it’s about intention. It’s about giving yourself a small, manageable canvas to see and feel a real improvement in your work. Each tiny hoop is an opportunity to slow down, to focus on the rhythm of needle and thread, and to create something polished and personal.
So choose a design that speaks to you, gather your favorite threads, and let’s turn one quiet afternoon into a beautiful, tangible skill. You’ll be surprised at what you can accomplish.
1. Create Dimensional Lavender Buds
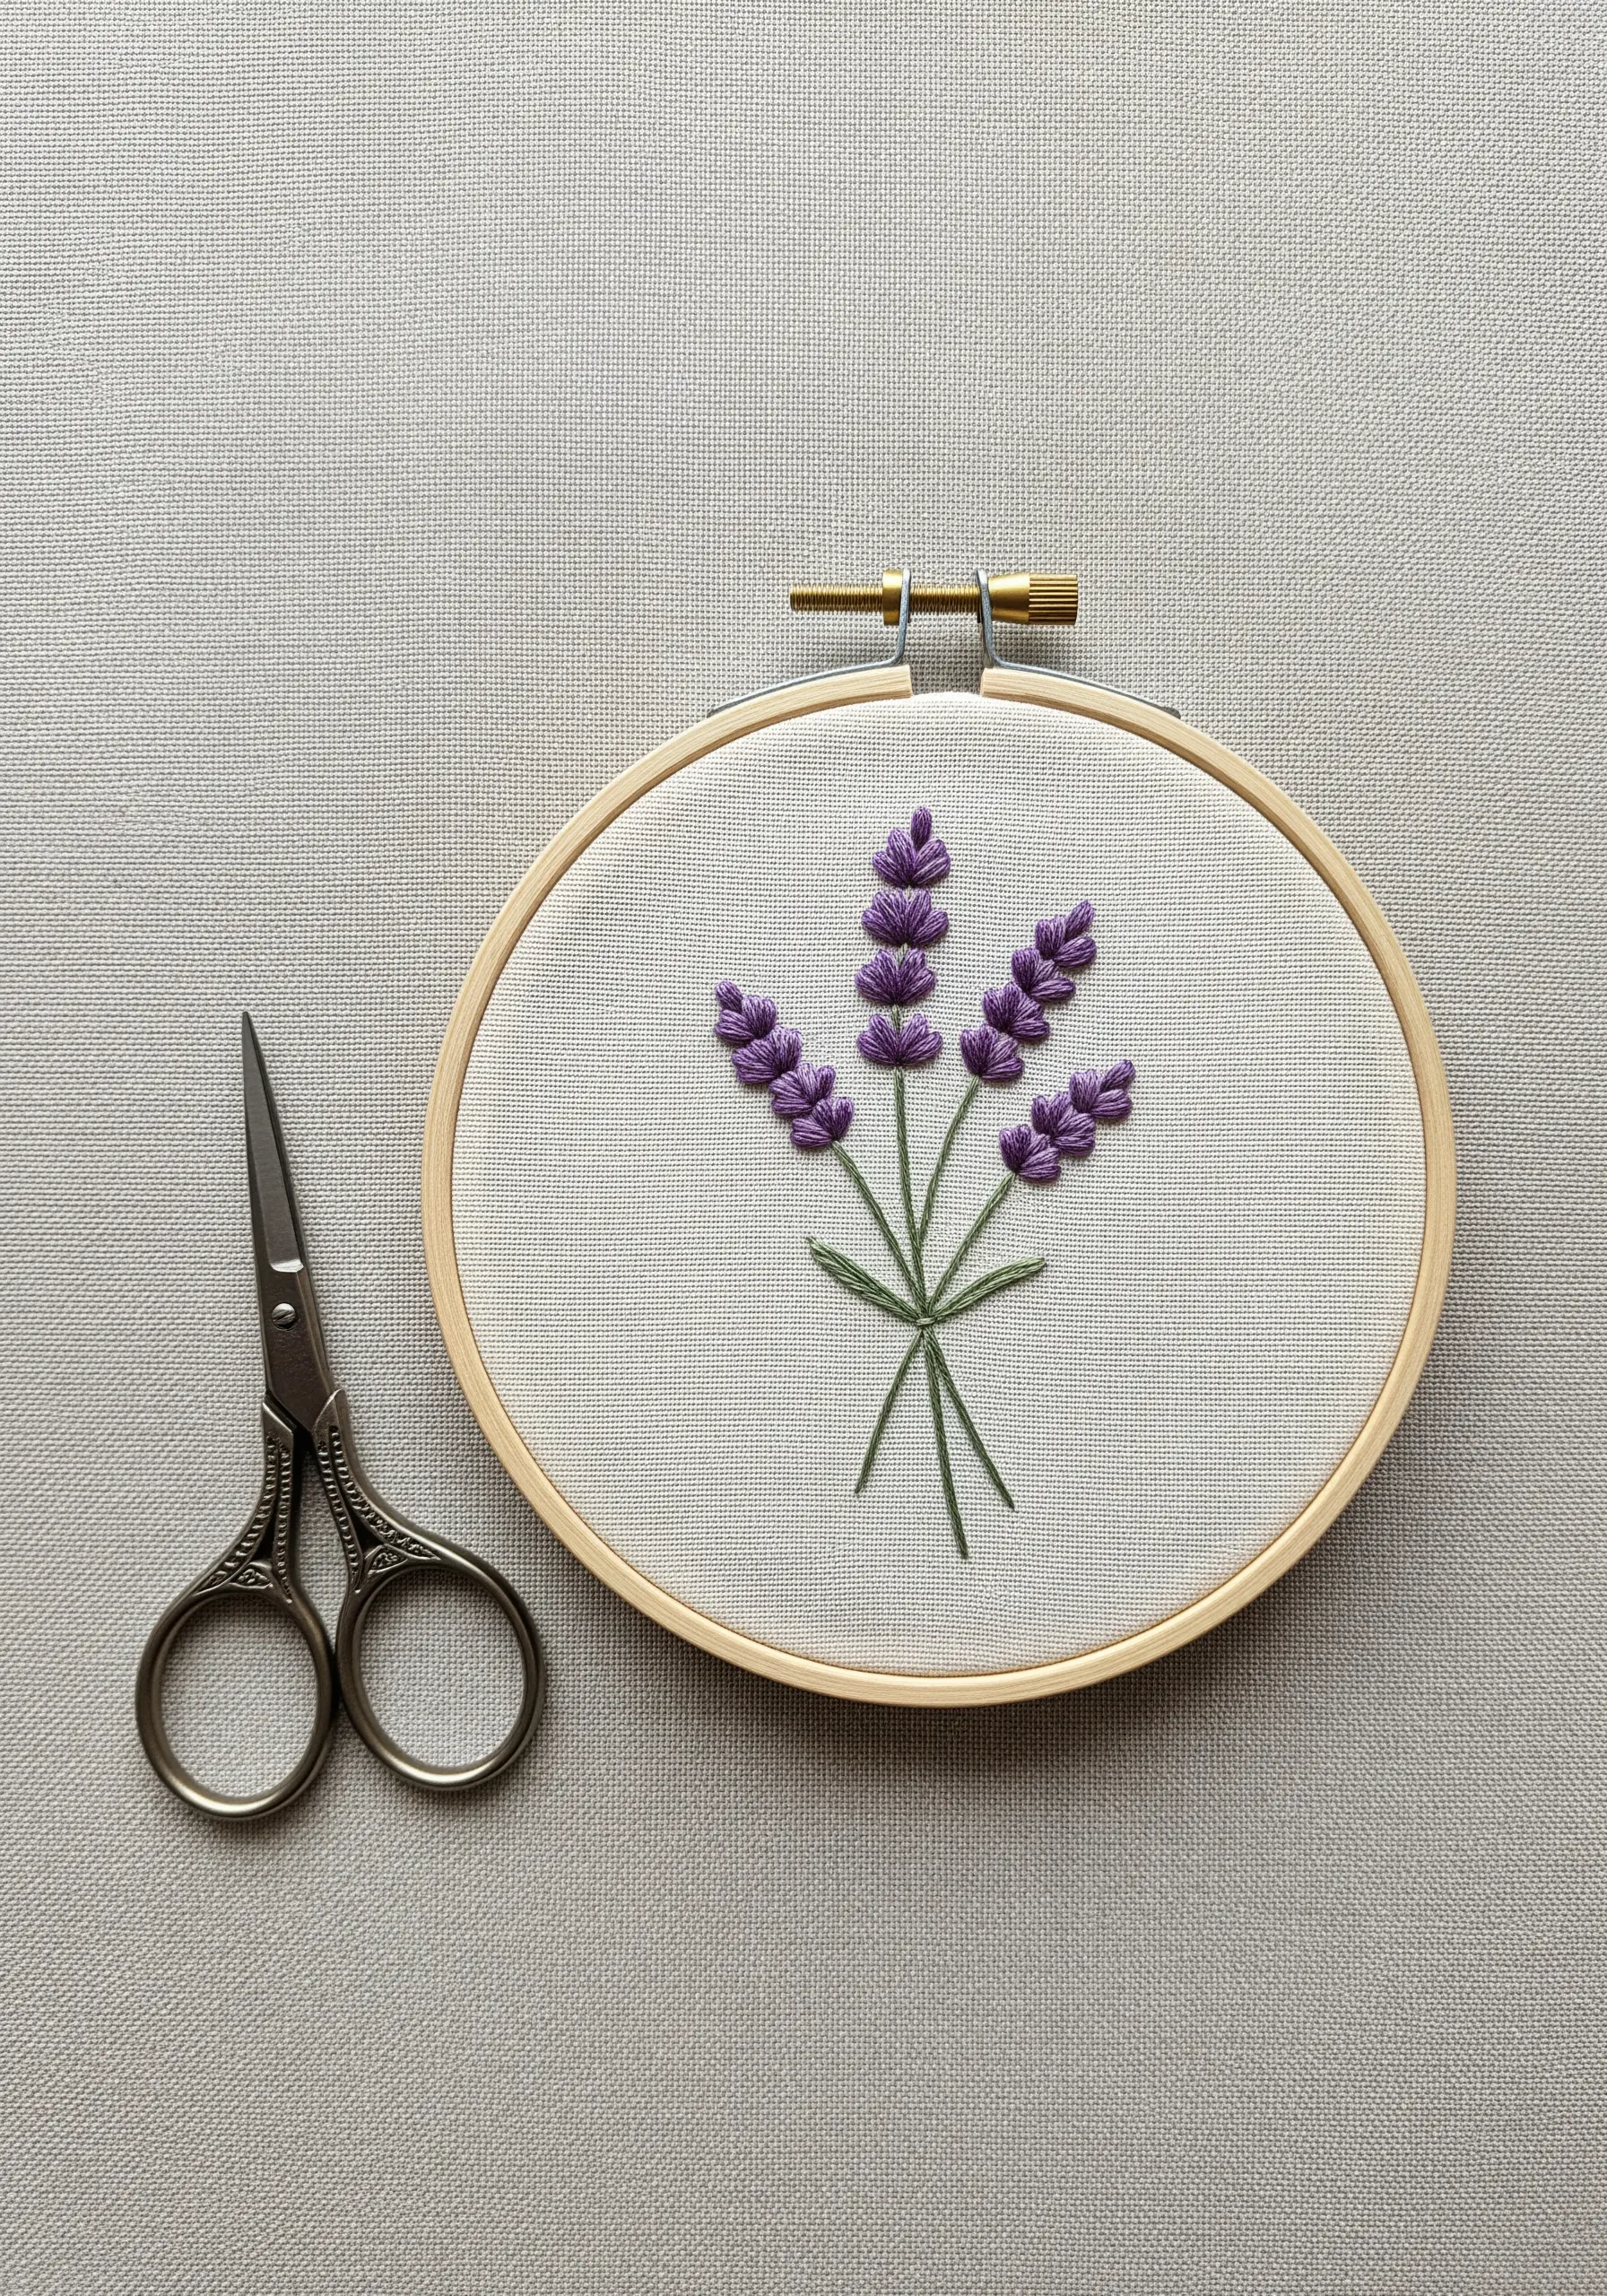
Instead of a flat satin stitch, use French knots or tiny bullion knots for the lavender buds.
Vary the size and tightness of each knot to mimic the organic, clustered texture of a real lavender sprig.
For the stems, use a single strand of floss in a simple stem stitch to maintain a delicate, elegant line that doesn’t overpower the florals.
This contrast between the textured buds and the fine stems is what gives the piece its refined, professional finish.
2. Stitch a Luminous Crescent Moon
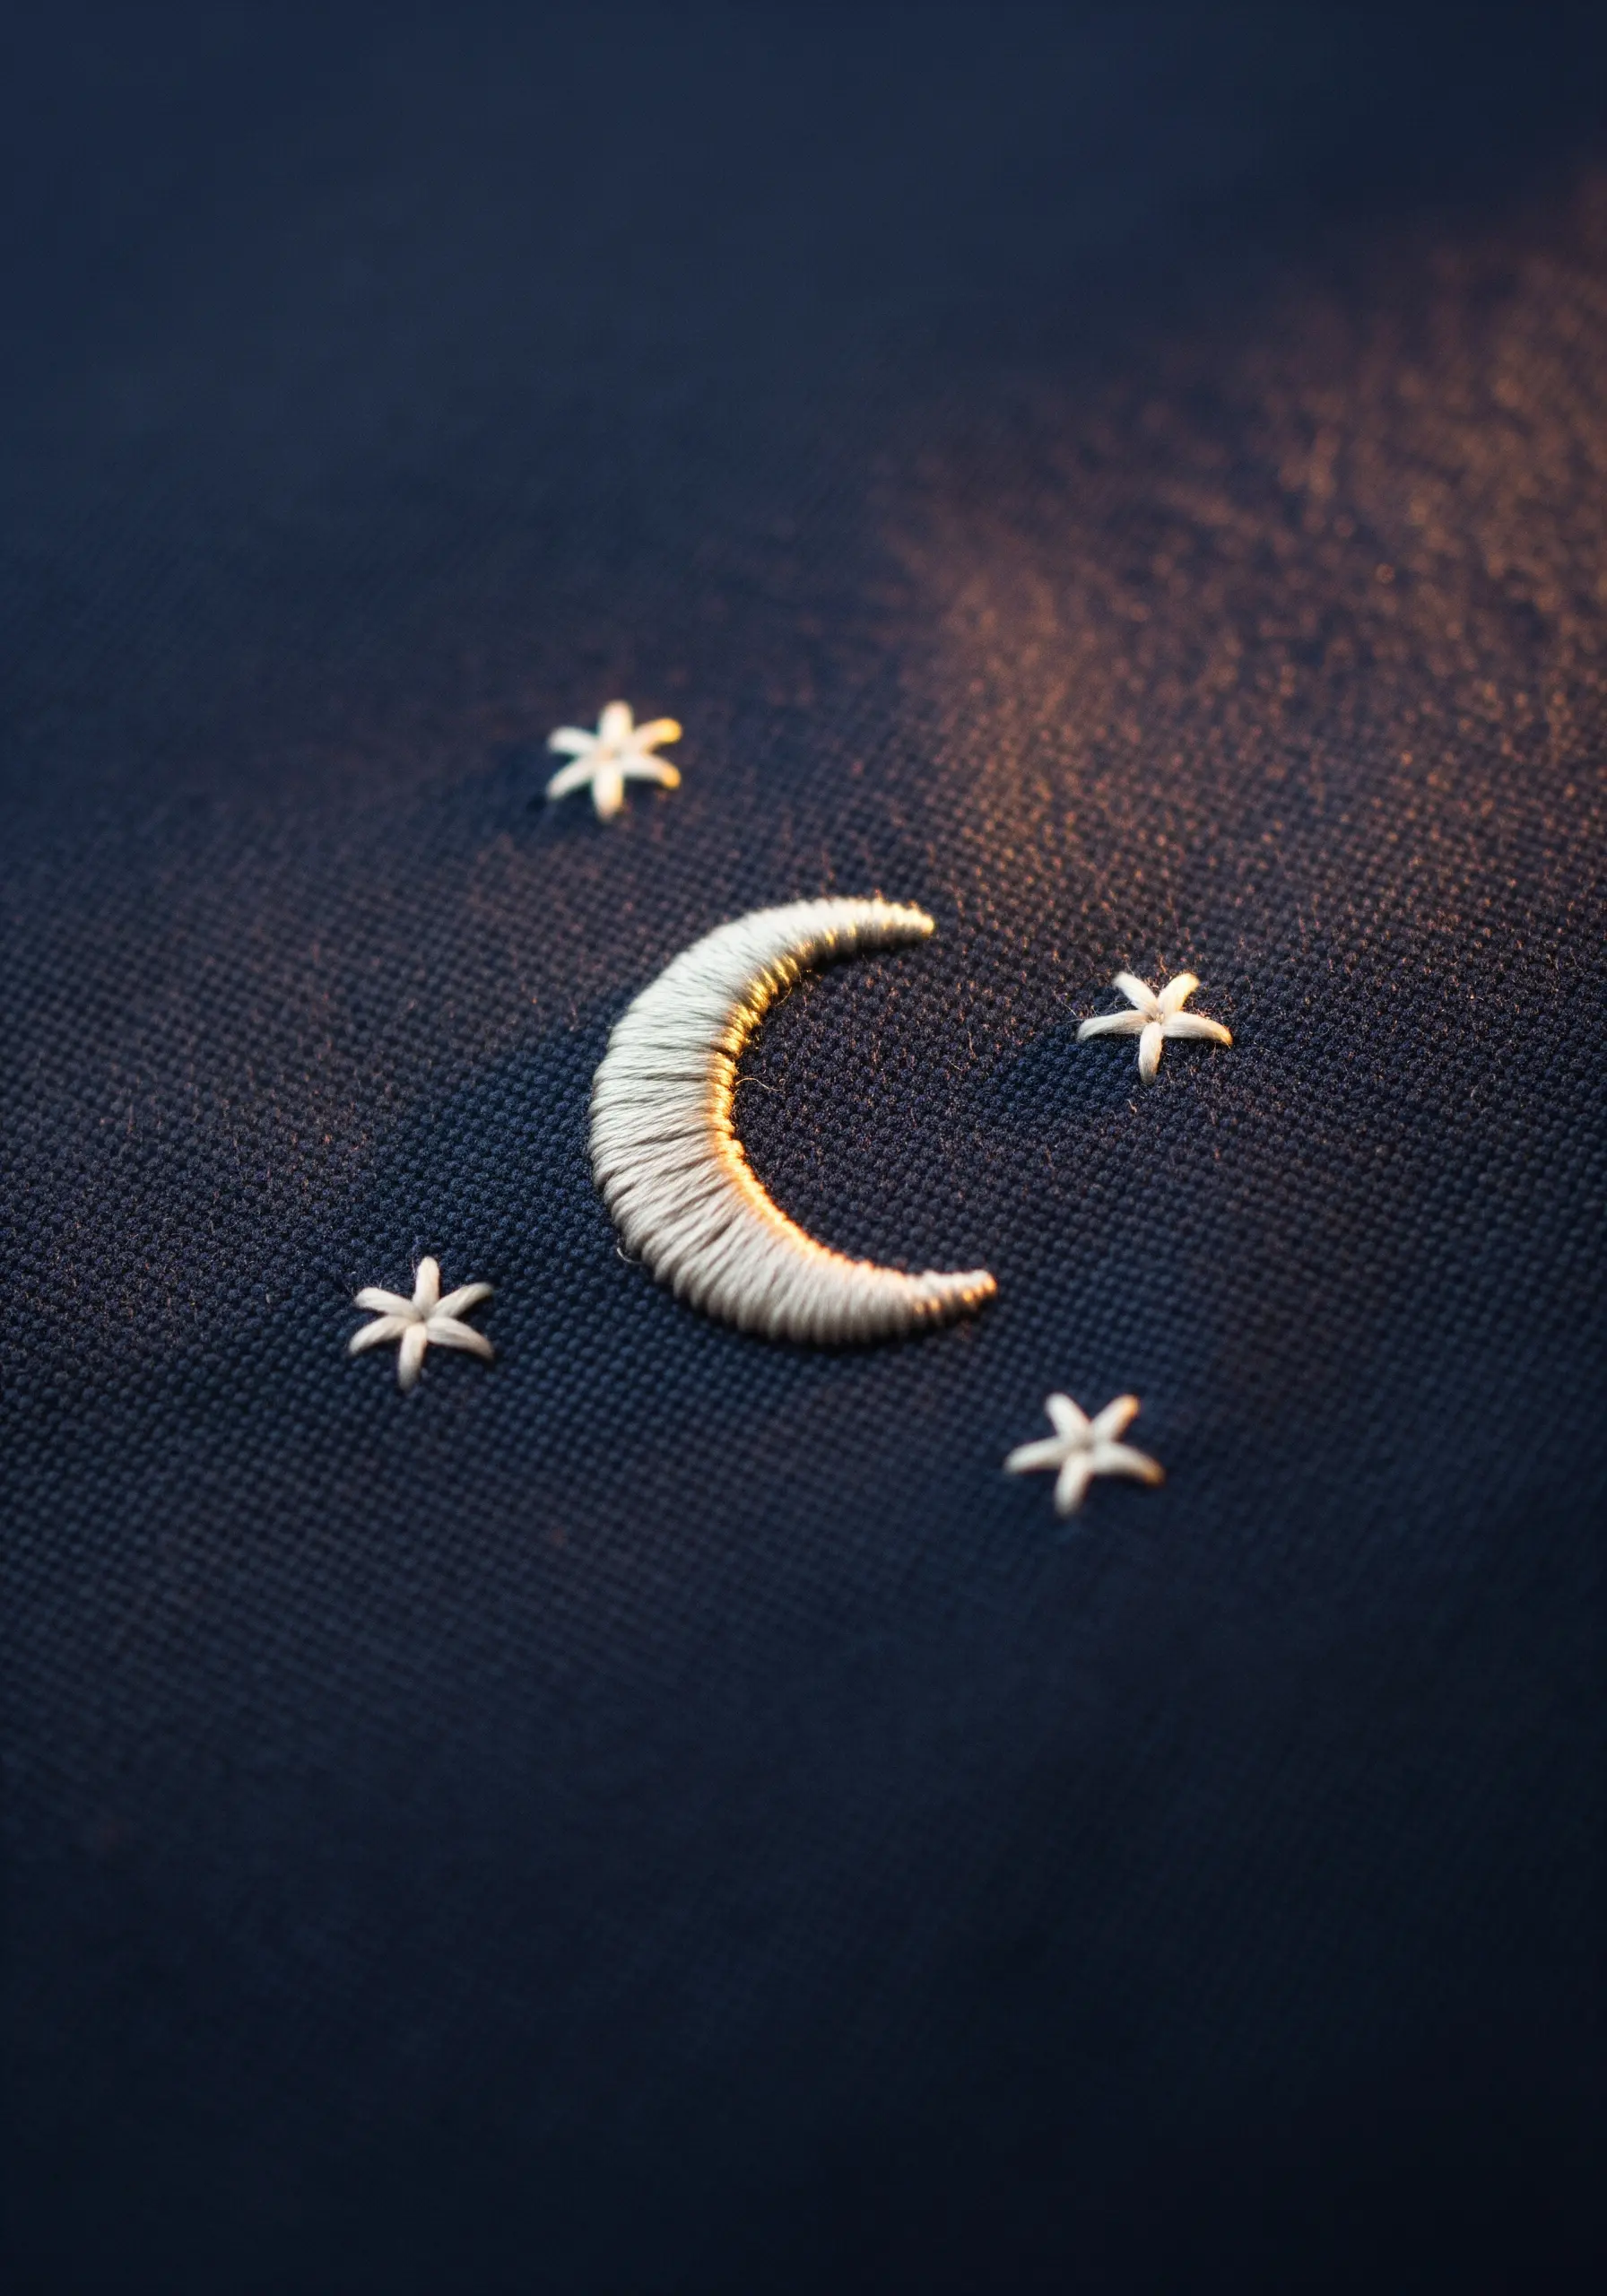
To achieve that smooth, curved satin stitch, first outline the moon shape with a split stitch.
This raised edge acts as a guide and gives your satin stitches a sharp, clean border to rest against, preventing unevenness.
For a subtle glow, blend one strand of a light silver or pearlescent metallic thread with two strands of your white or cream floss.
This technique adds a gentle shimmer without the stiffness of using full metallic thread, perfect for tiny night sky embroidery designs.
3. Master the Minimalist Sunrise
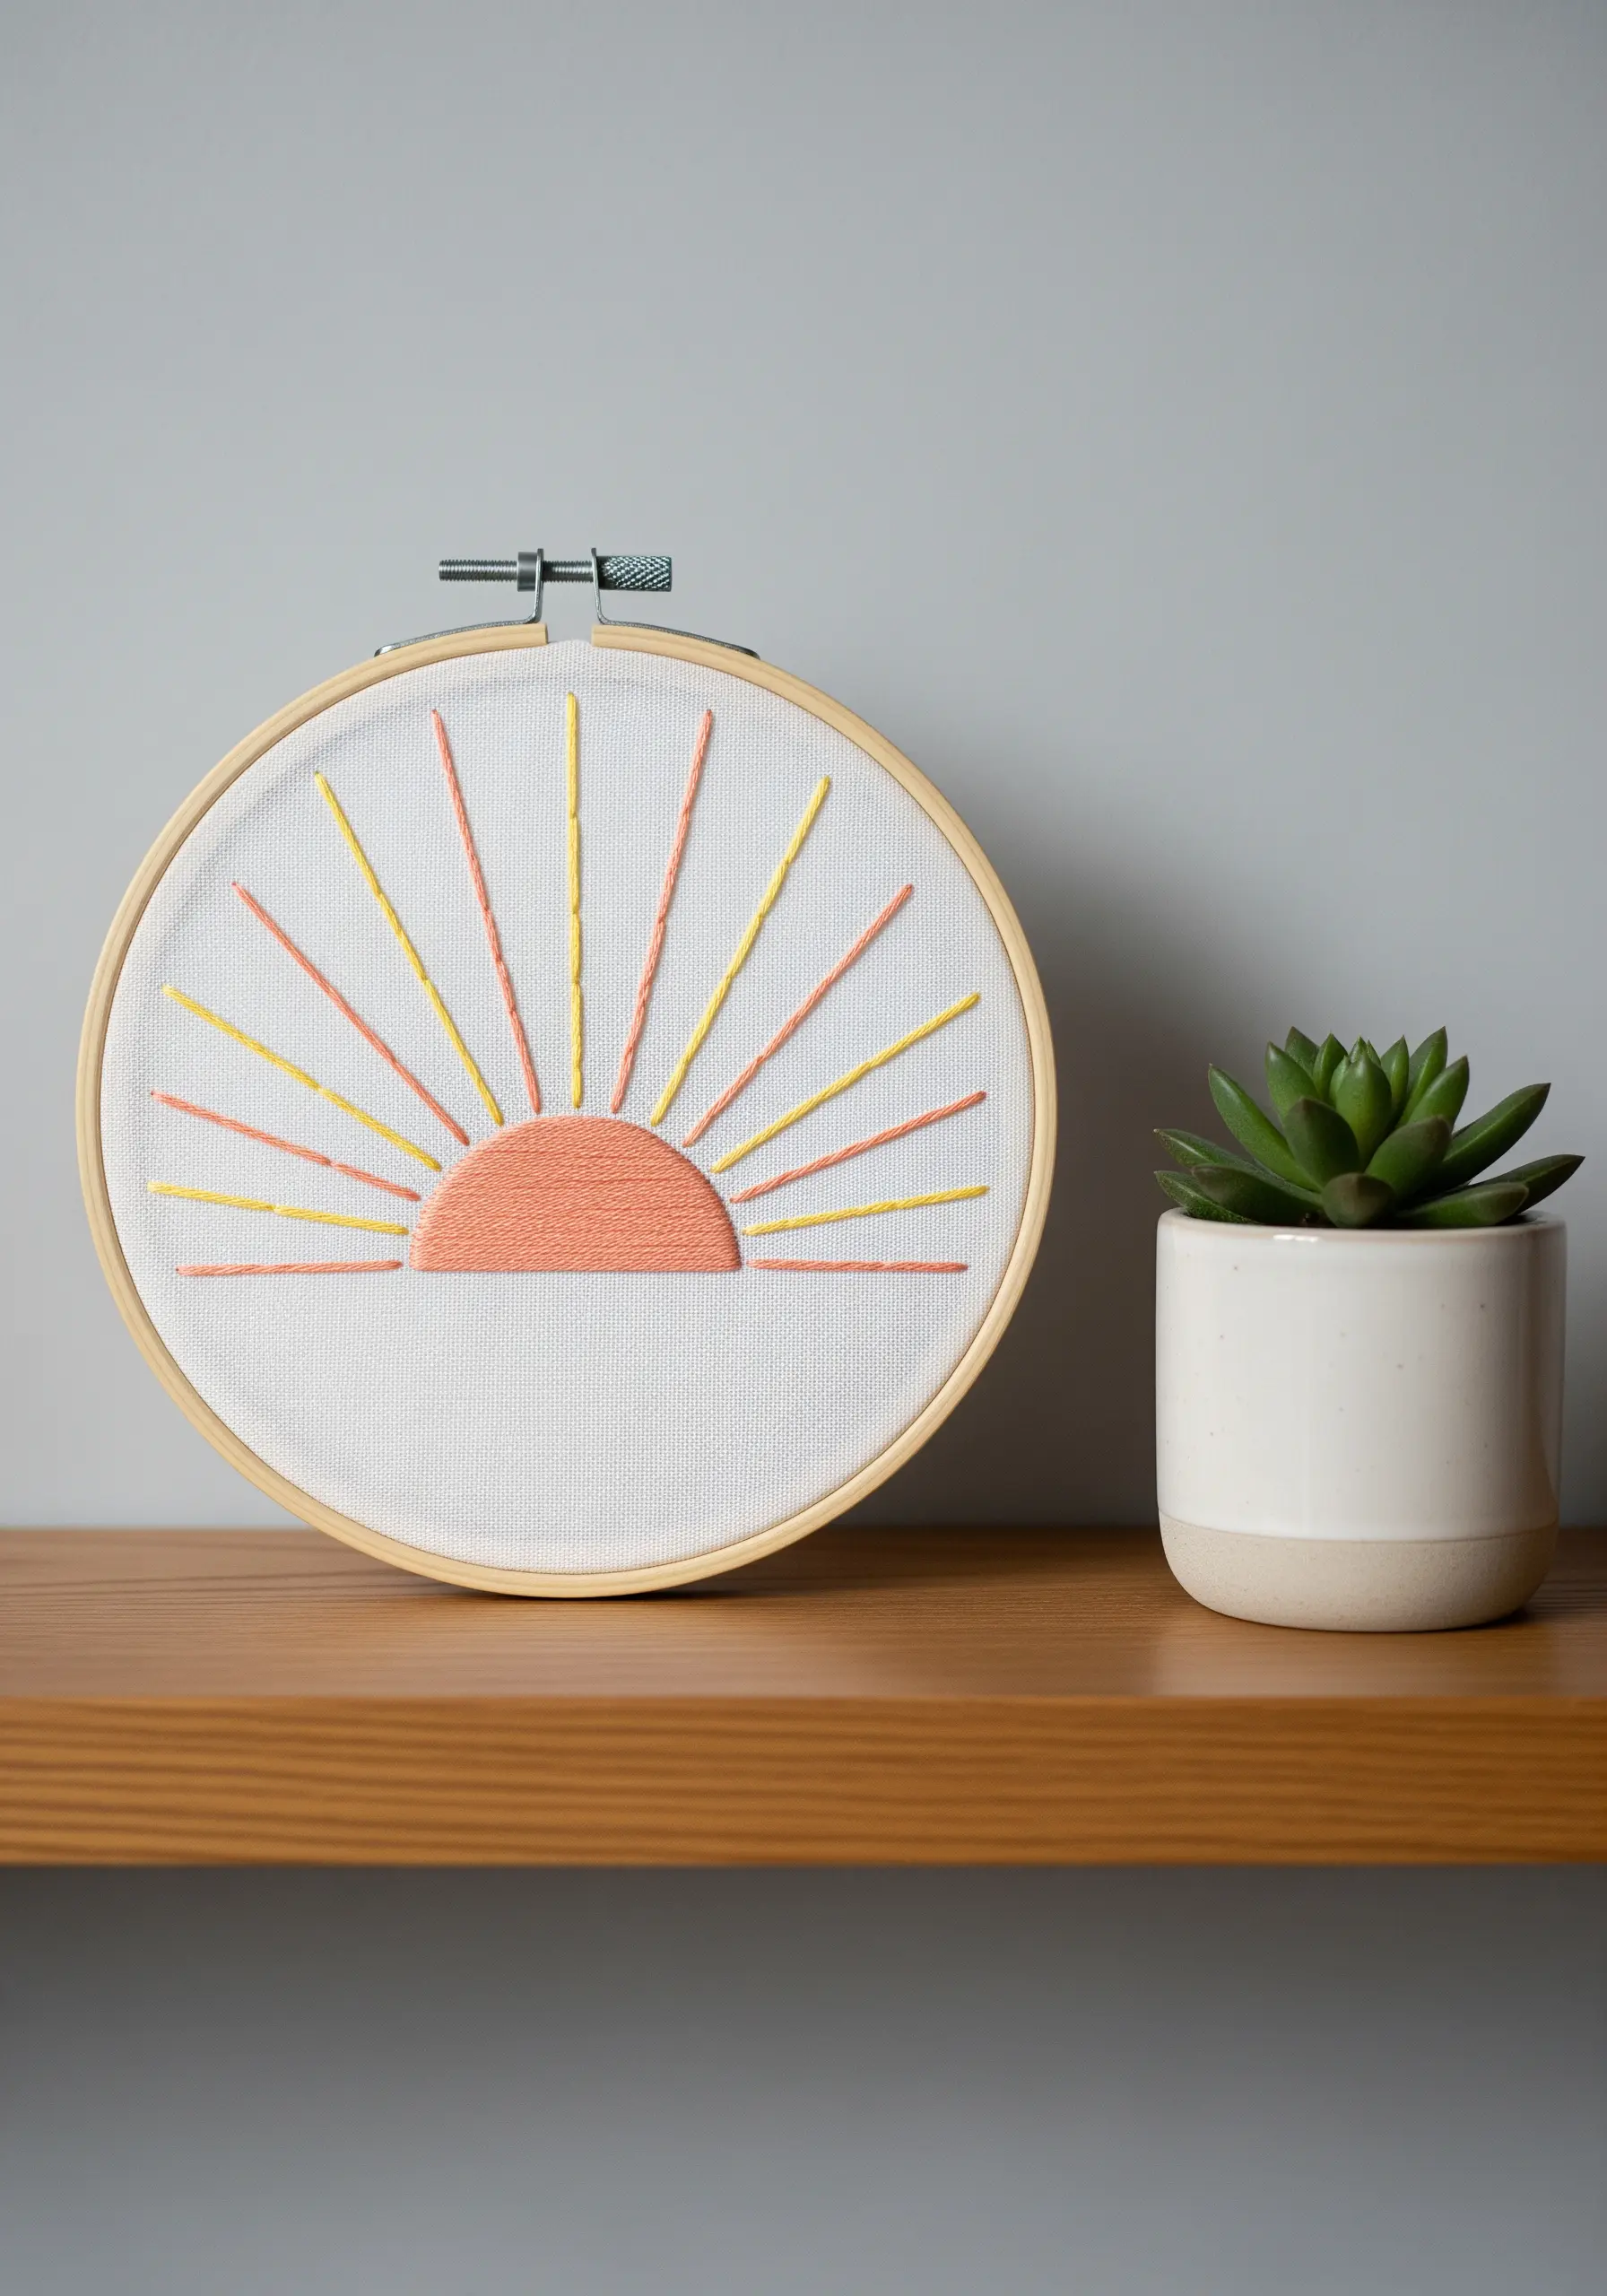
For clean, radiating lines, mark your anchor points with a disappearing ink pen before you begin.
Maintain consistent thread tension on each sun ray to prevent the fabric from puckering—pulling too tight is the most common mistake.
Fill the semicircle with a basic satin stitch, angling your stitches to follow the curve rather than going straight across.
This small adjustment creates a much smoother, more cohesive shape and enhances the sense of radiating warmth.
4. Refine Your Outline with a Single Thread
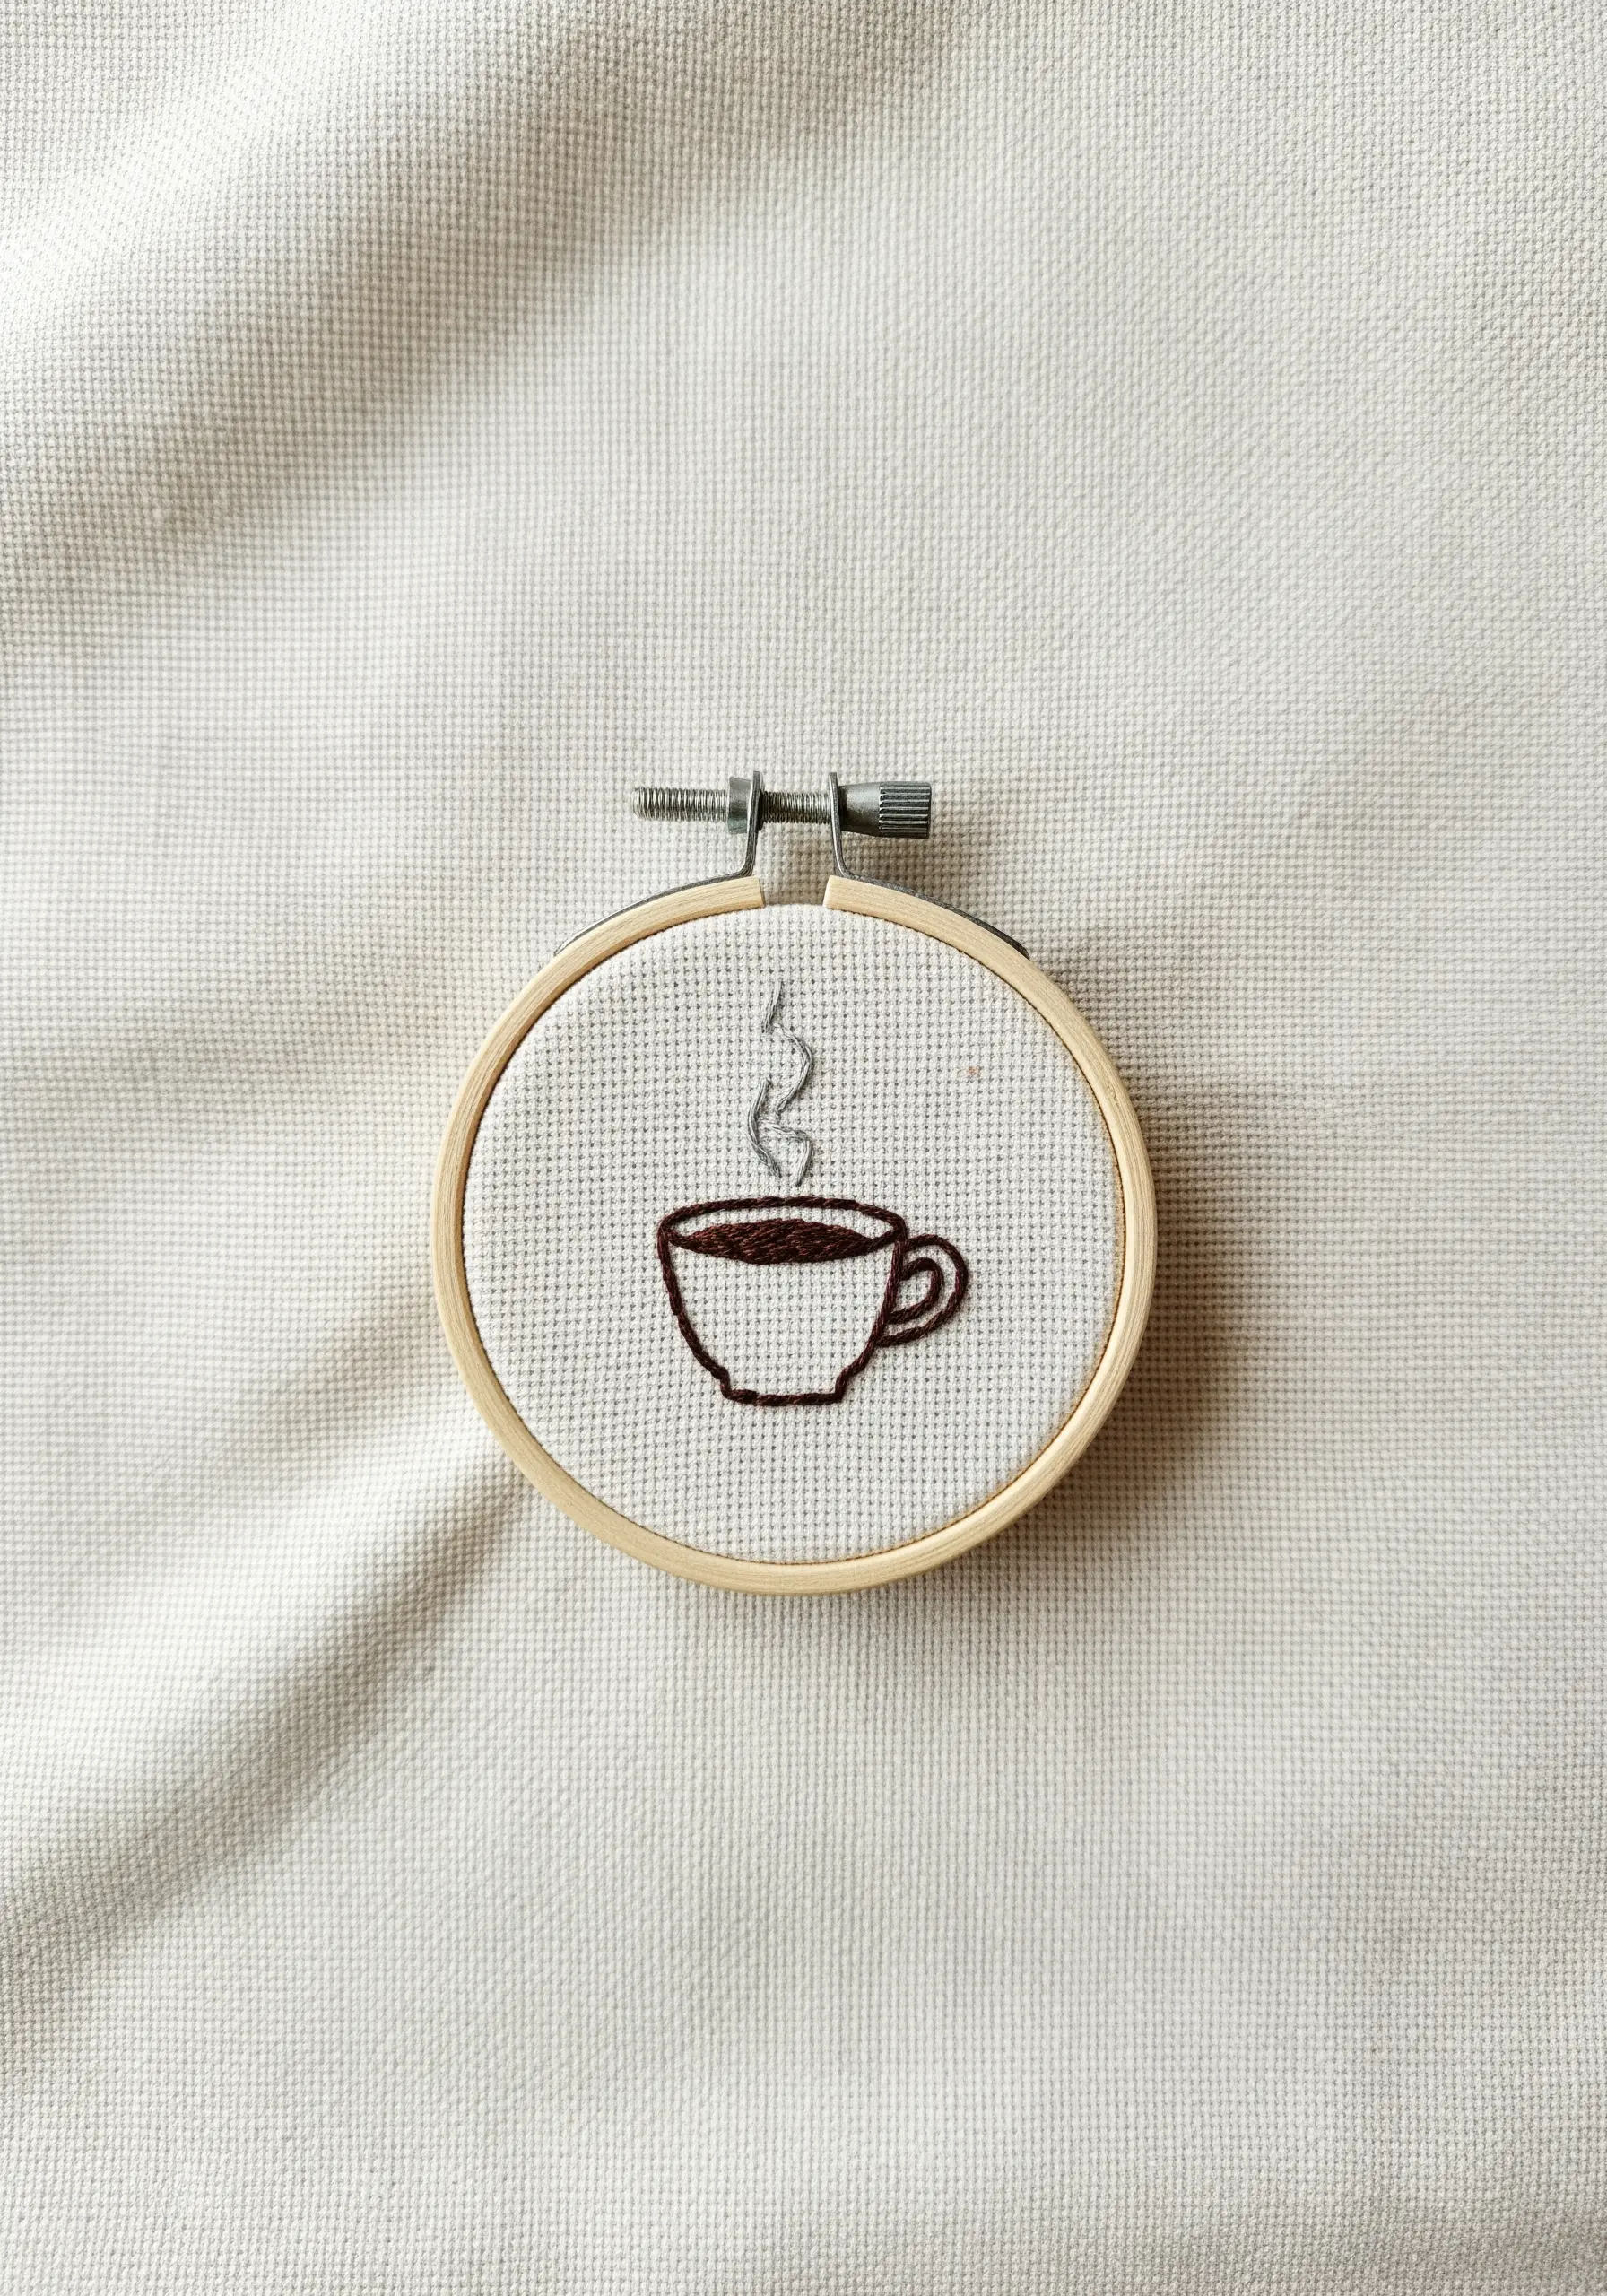
When working on a small motif like this, resist the urge to use multiple strands of floss for the outline.
A single strand of black or dark brown thread, worked in a meticulous backstitch, creates a delicate, pen-and-ink illustration effect.
For the steam, use an even lighter thread weight—perhaps a single strand of pale grey—and space your stitches out slightly to create a wispy, ethereal feel.
The fill stitch should be just dense enough to suggest color without adding bulk, preserving the design’s light and airy quality.
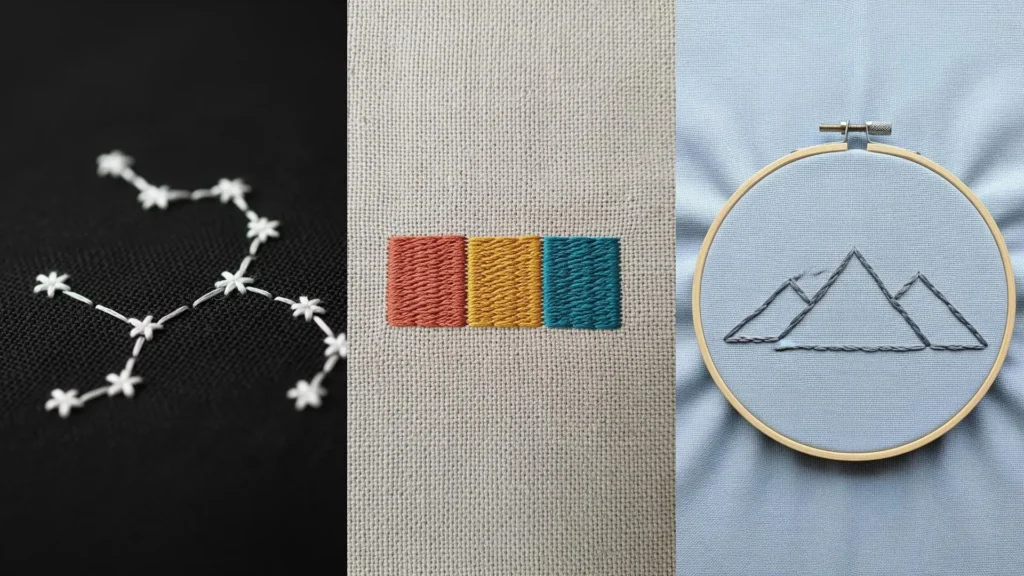
5. Perfect Your Satin Stitch Color Blocks
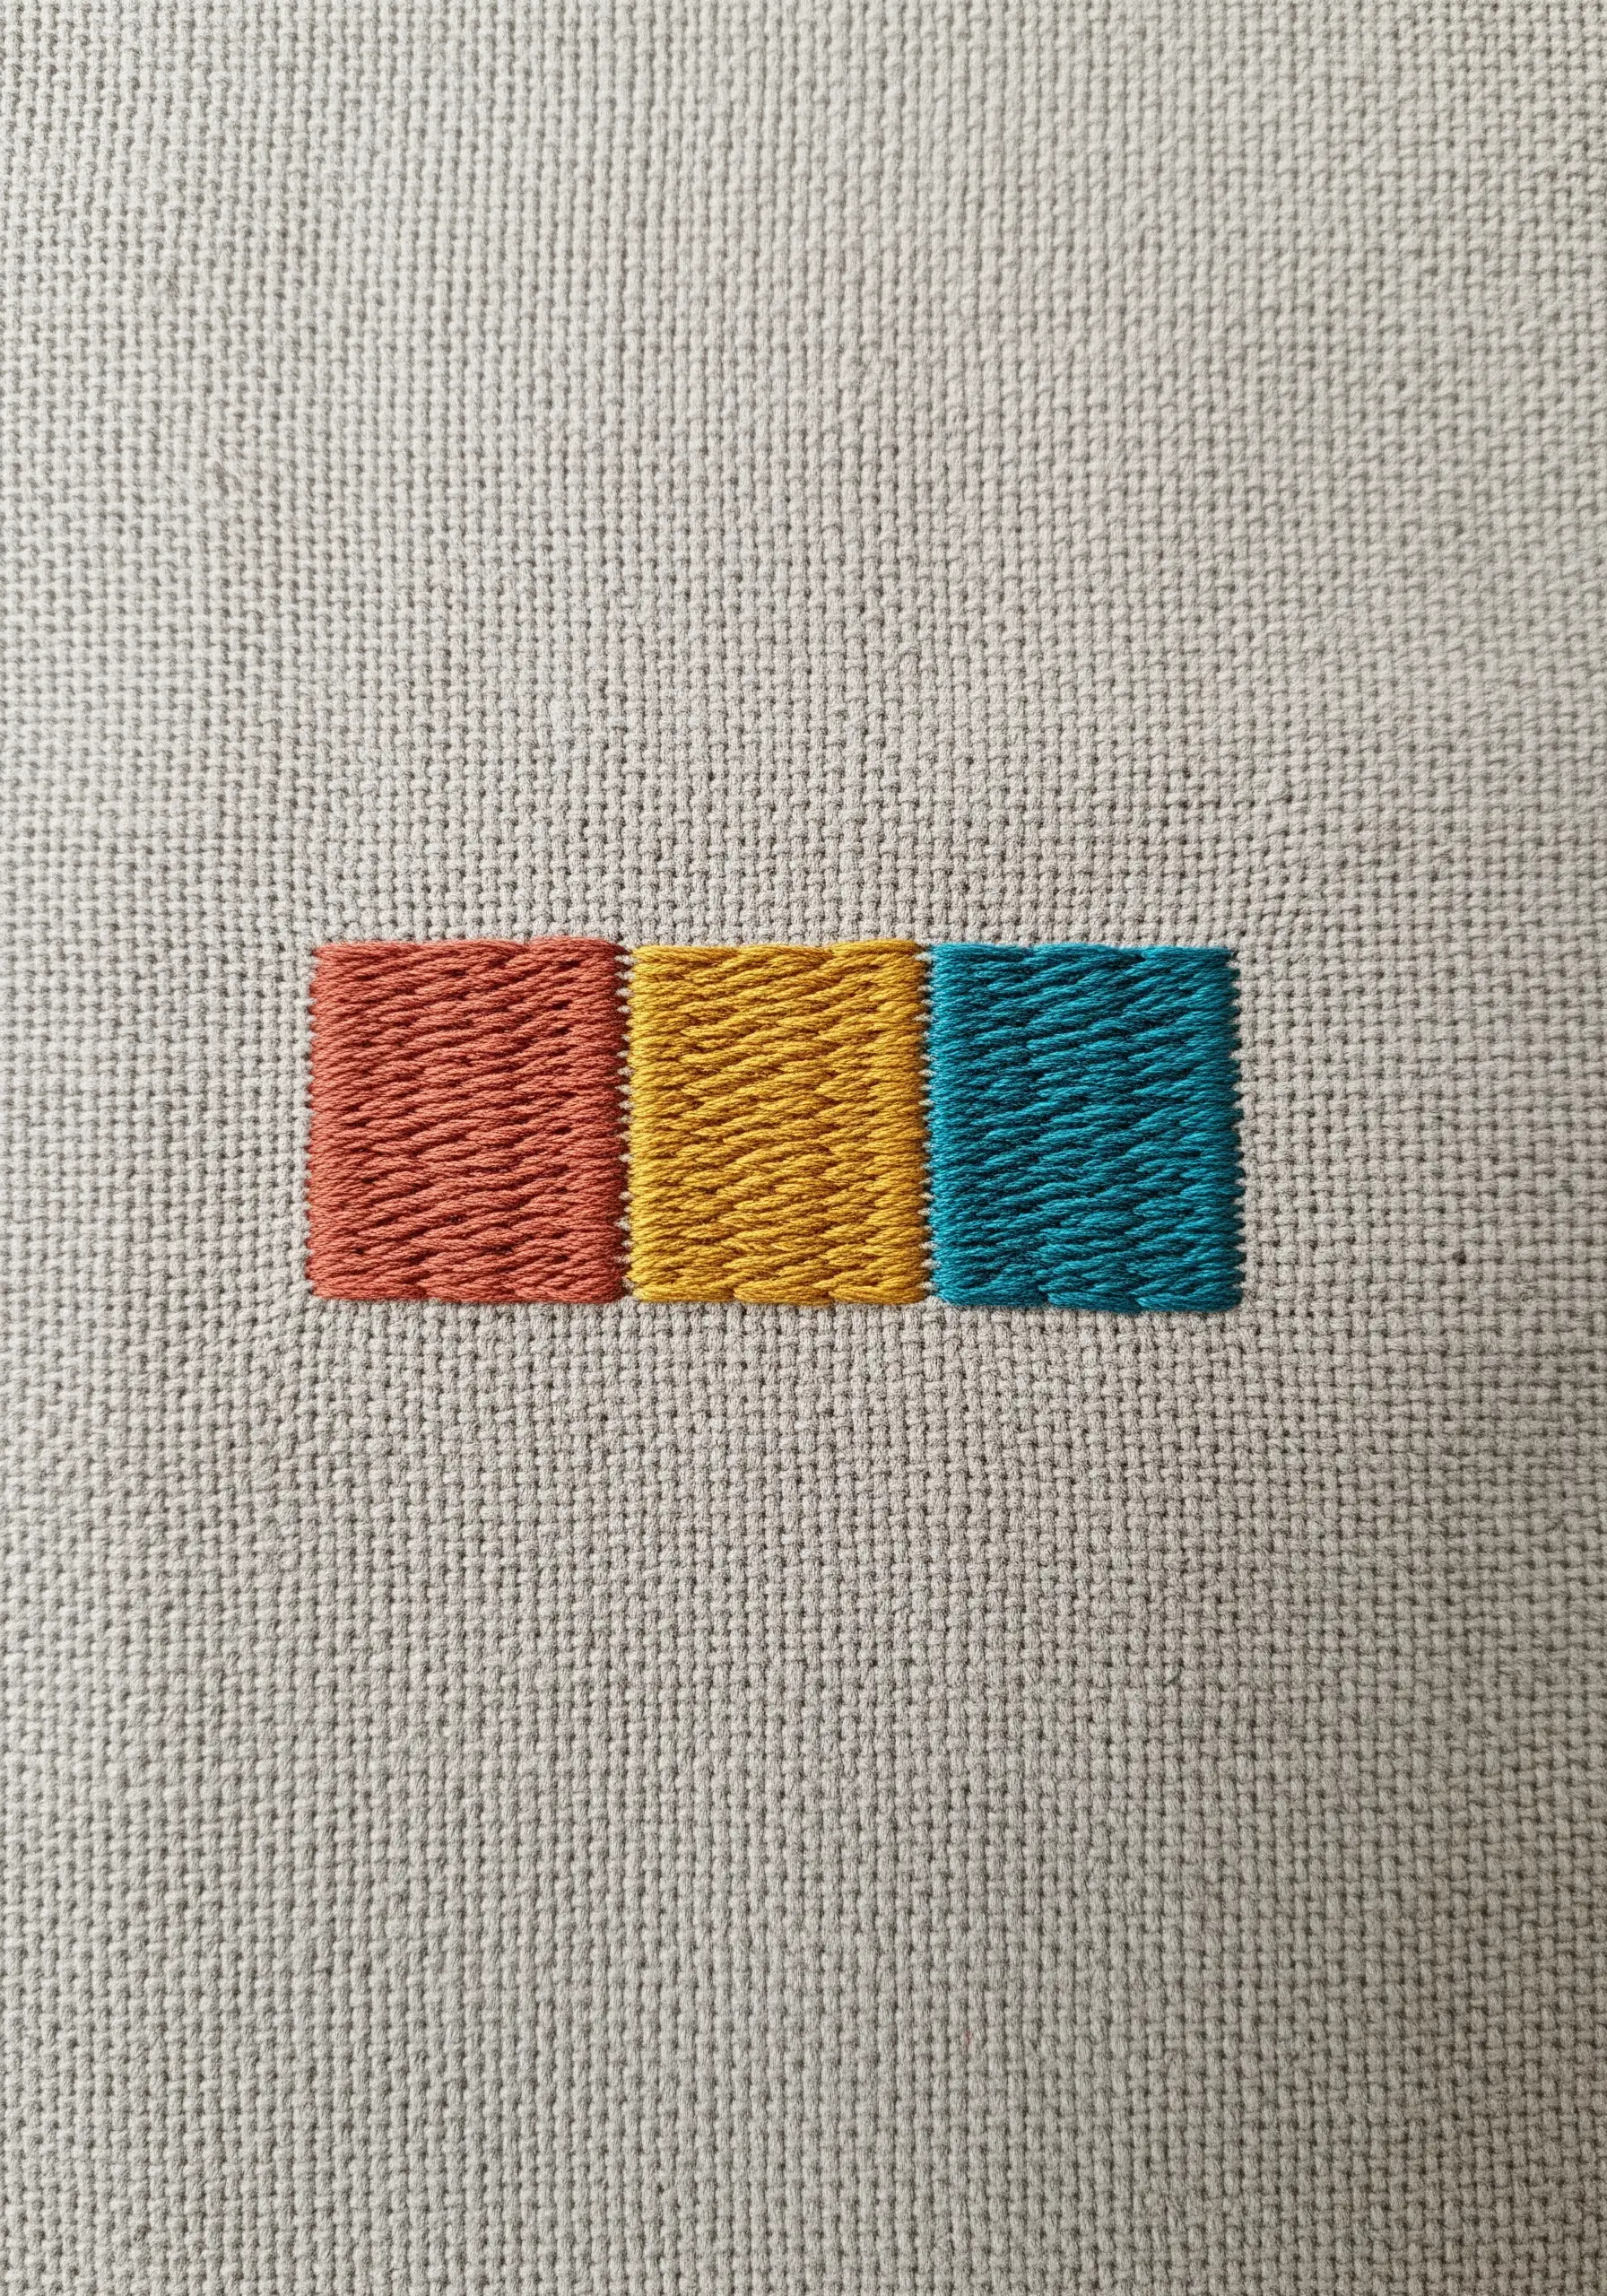
Achieving a perfectly smooth, dense fill is a study in precision.
Use a short needle and guide each strand of floss to lay flat next to the previous one, as if you are painting with thread.
To avoid a bulky edge, outline your shape with a split stitch in the same color first, then fill inwards.
This creates a subtle, self-contained border that keeps your satin stitches perfectly uniform, ideal for abstract color psychology stitch ideas.
6. Capture the Delicacy of a Dandelion
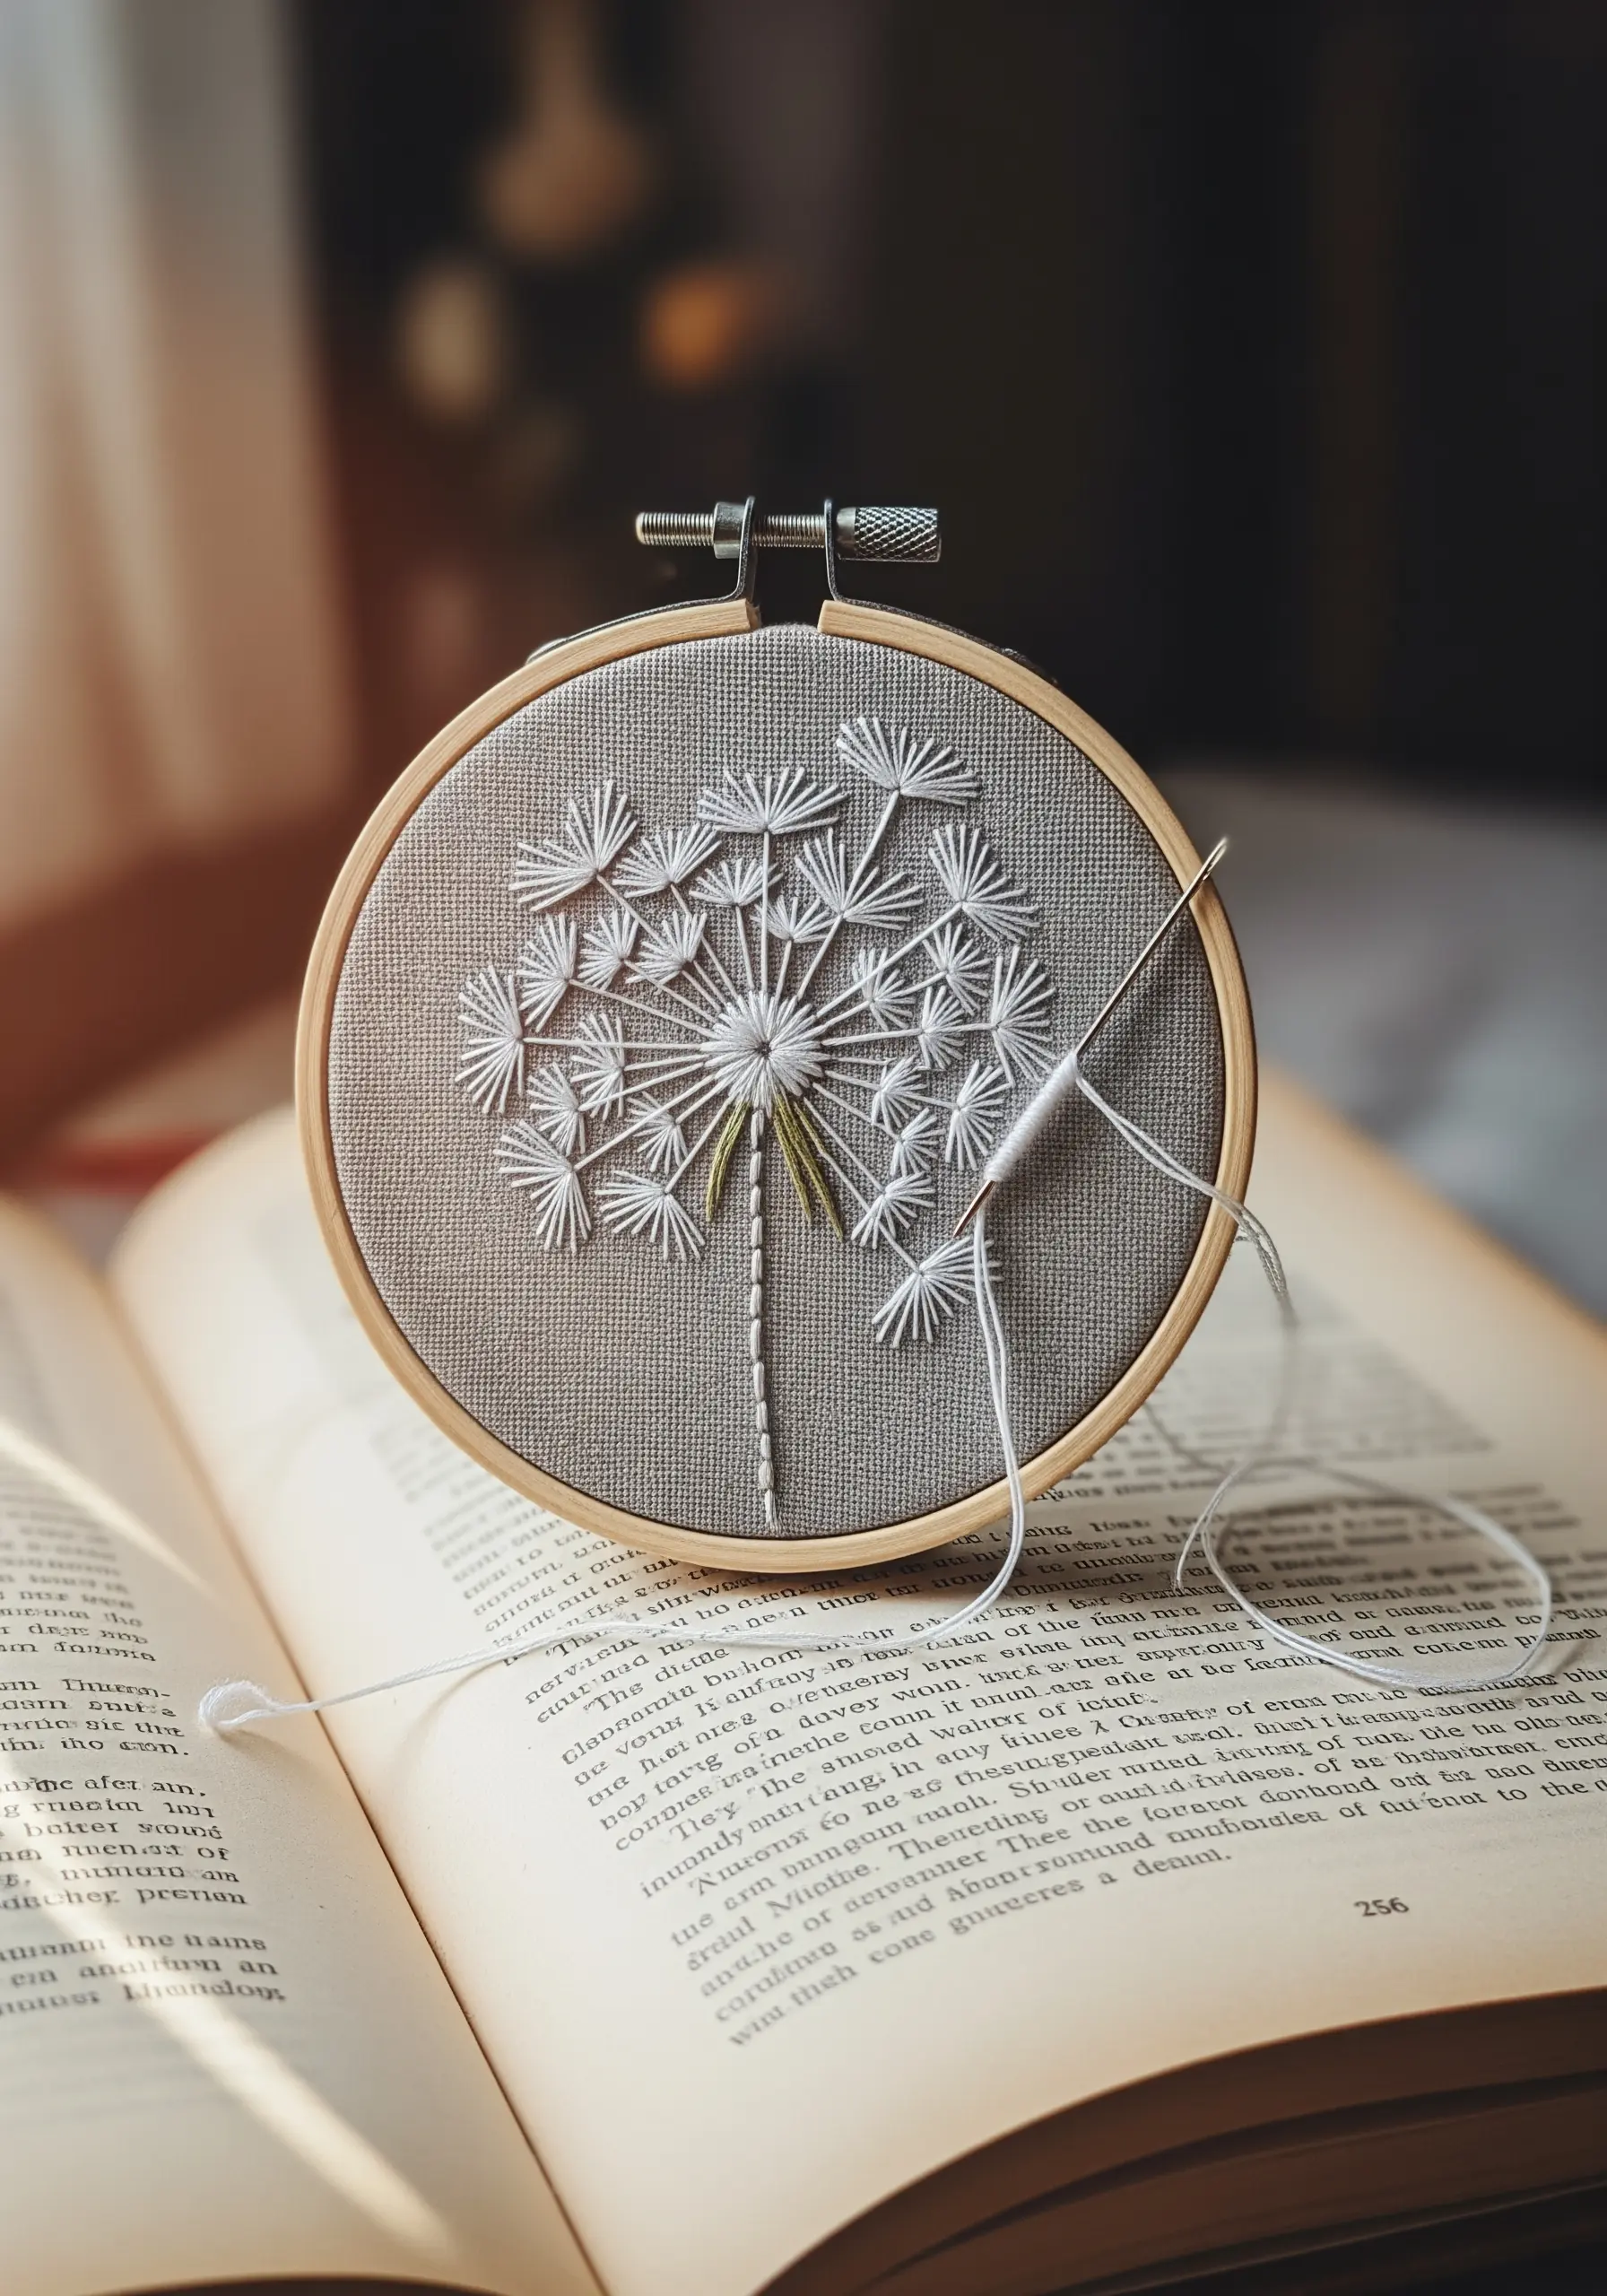
The key to this design is creating a sense of weightlessness.
Use a single strand of white floss for the dandelion seeds and flyaway stitches, which keeps them looking airy and light.
Vary the length and angle of each straight stitch to mimic the natural, chaotic spread of a dandelion head.
A few detached chain stitches at the end of some lines will perfectly replicate the tiny seed parachutes, adding a final touch of realism.
7. Define Shapes with a Whipped Backstitch
For a bold, continuous line that looks more refined than a standard backstitch, try a whipped backstitch.
First, complete your entire outline with a simple backstitch.
Then, using a second thread (or the same one), whip it around each backstitch without piercing the fabric, creating a smooth, cord-like effect.
This technique elevates a simple line drawing into a polished, dimensional statement piece, perfect for minimalist line art.
8. Stitch a Celestial Constellation
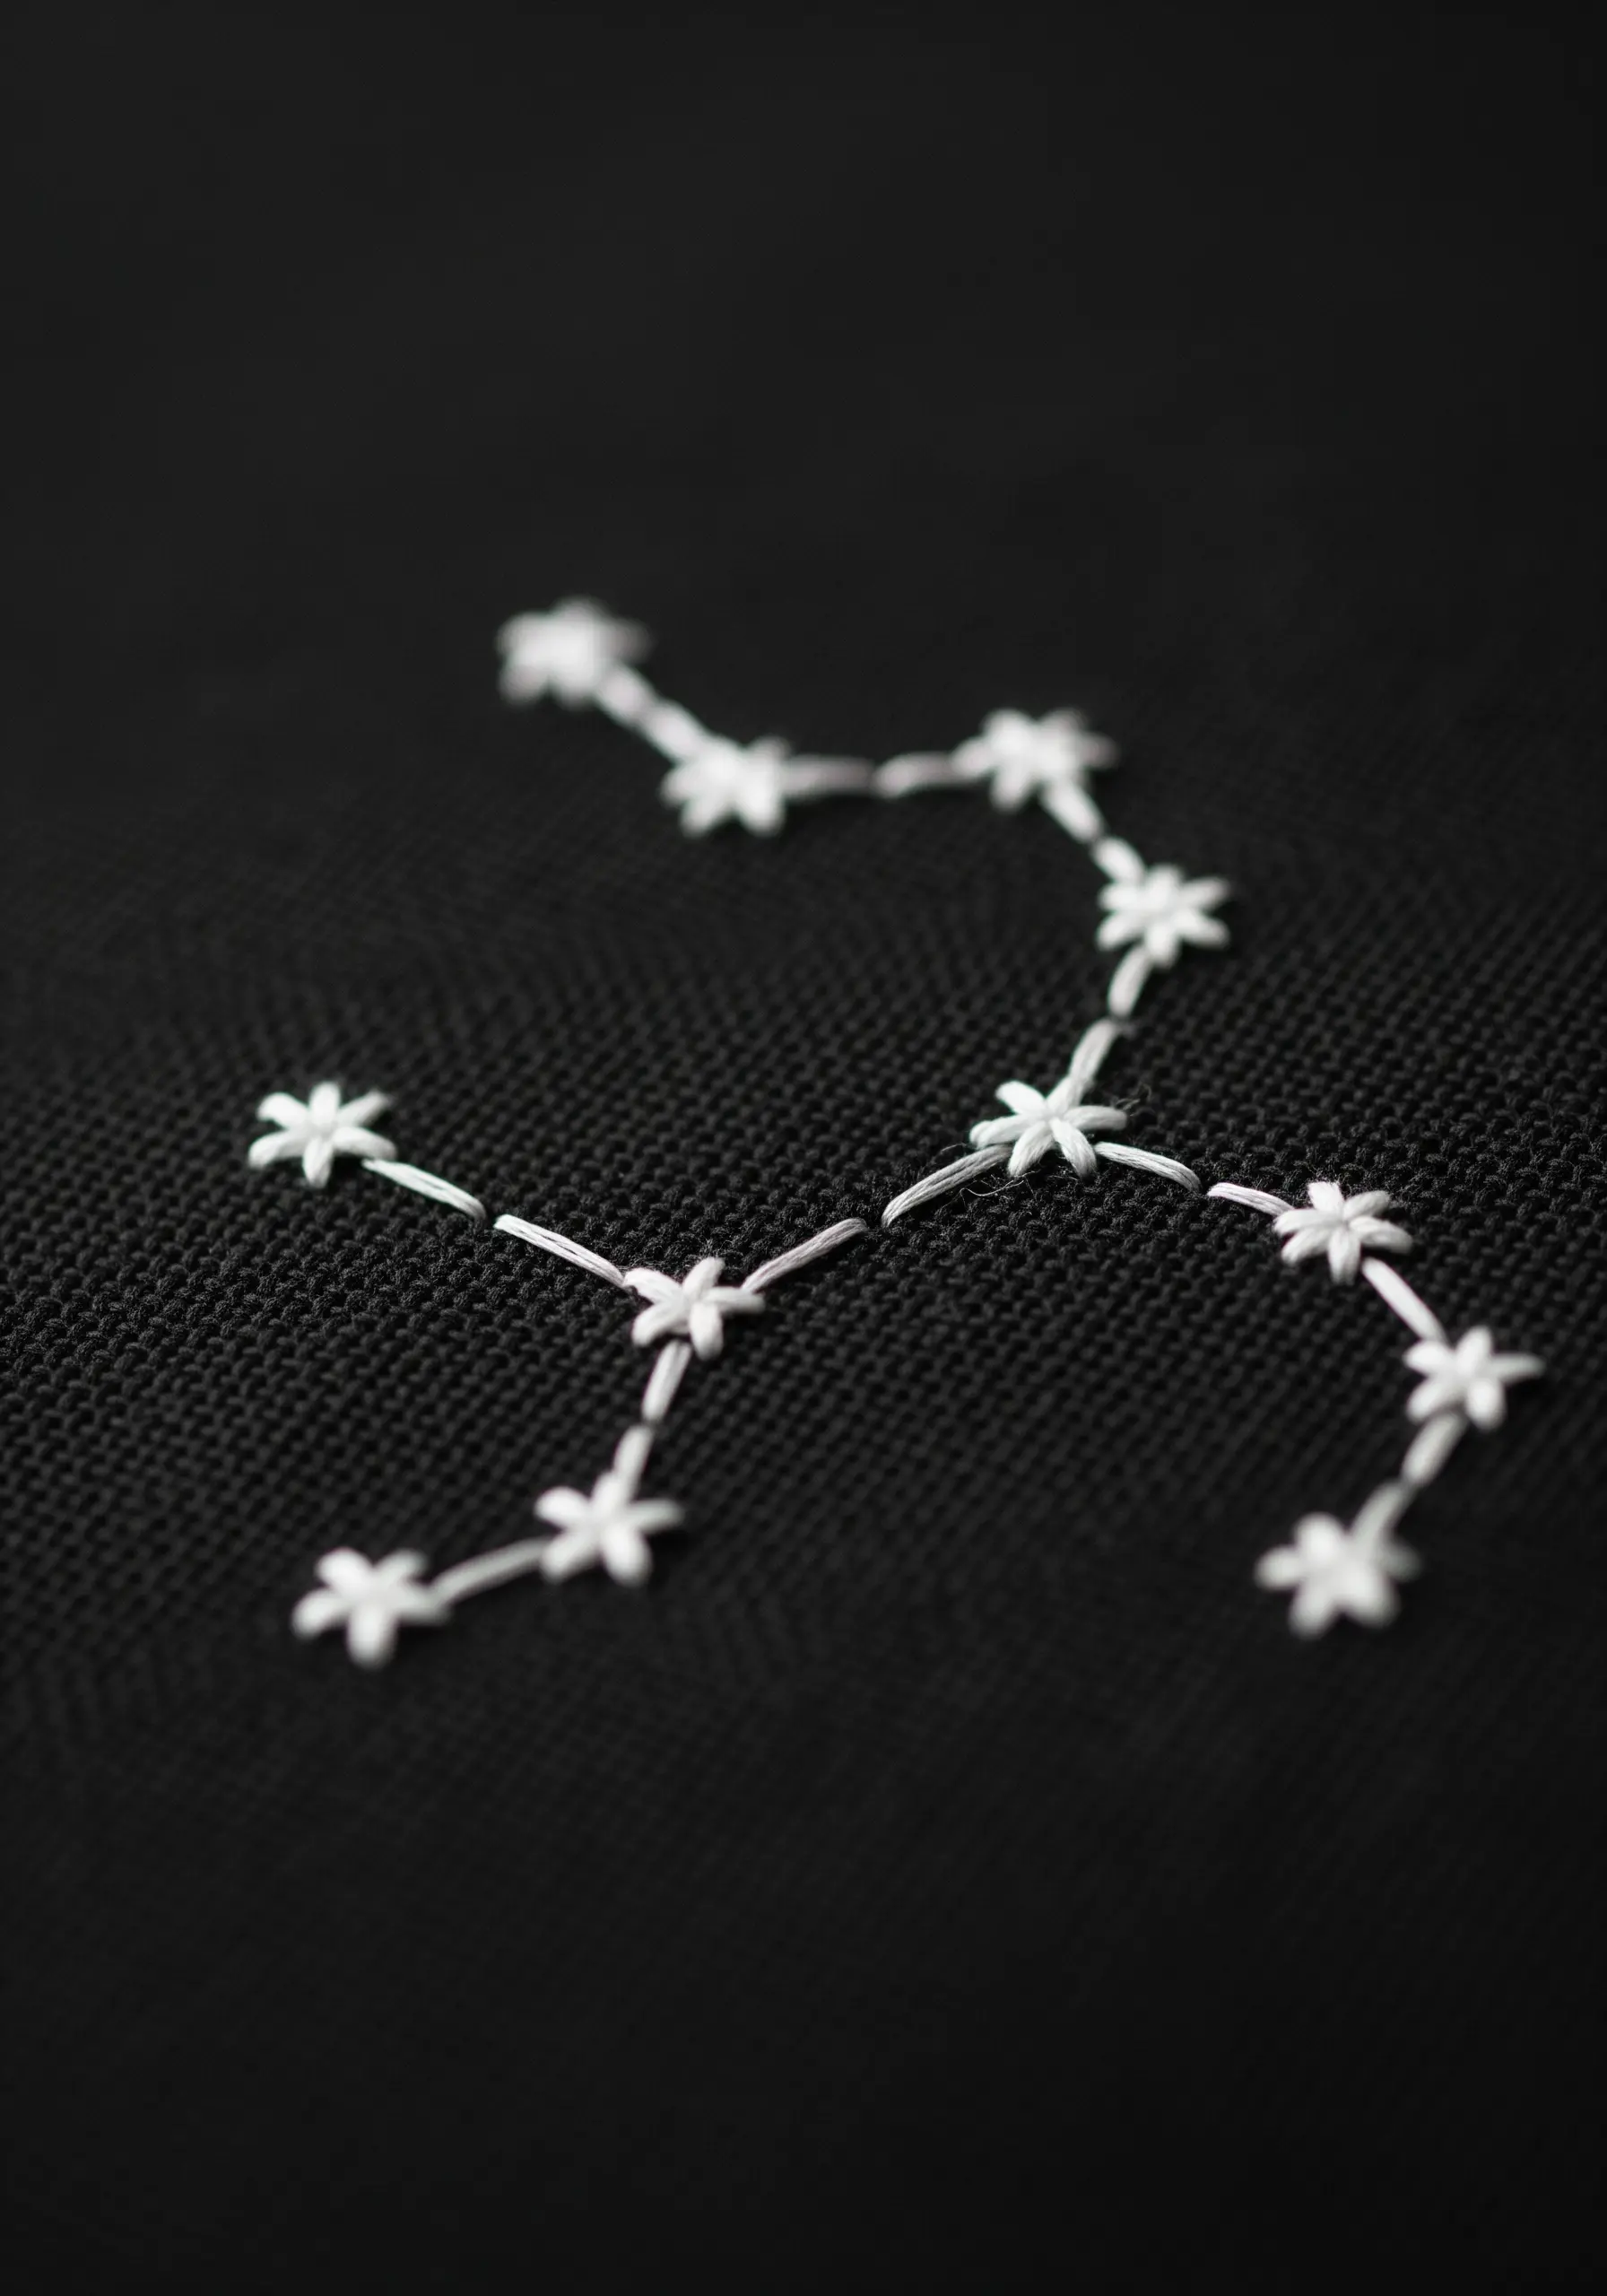
To give your star stitches a clean, defined shape, always bring your needle up from an empty hole and down into a shared center hole.
This prevents thread buildup in the middle and keeps each point of the star sharp.
Use a high-contrast thread—like bright white on black fabric—to make the design pop.
For added delicacy, connect the stars with a single, fine backstitch line to map out the constellation without adding unnecessary weight.
9. Build Texture with Directional Satin Stitch
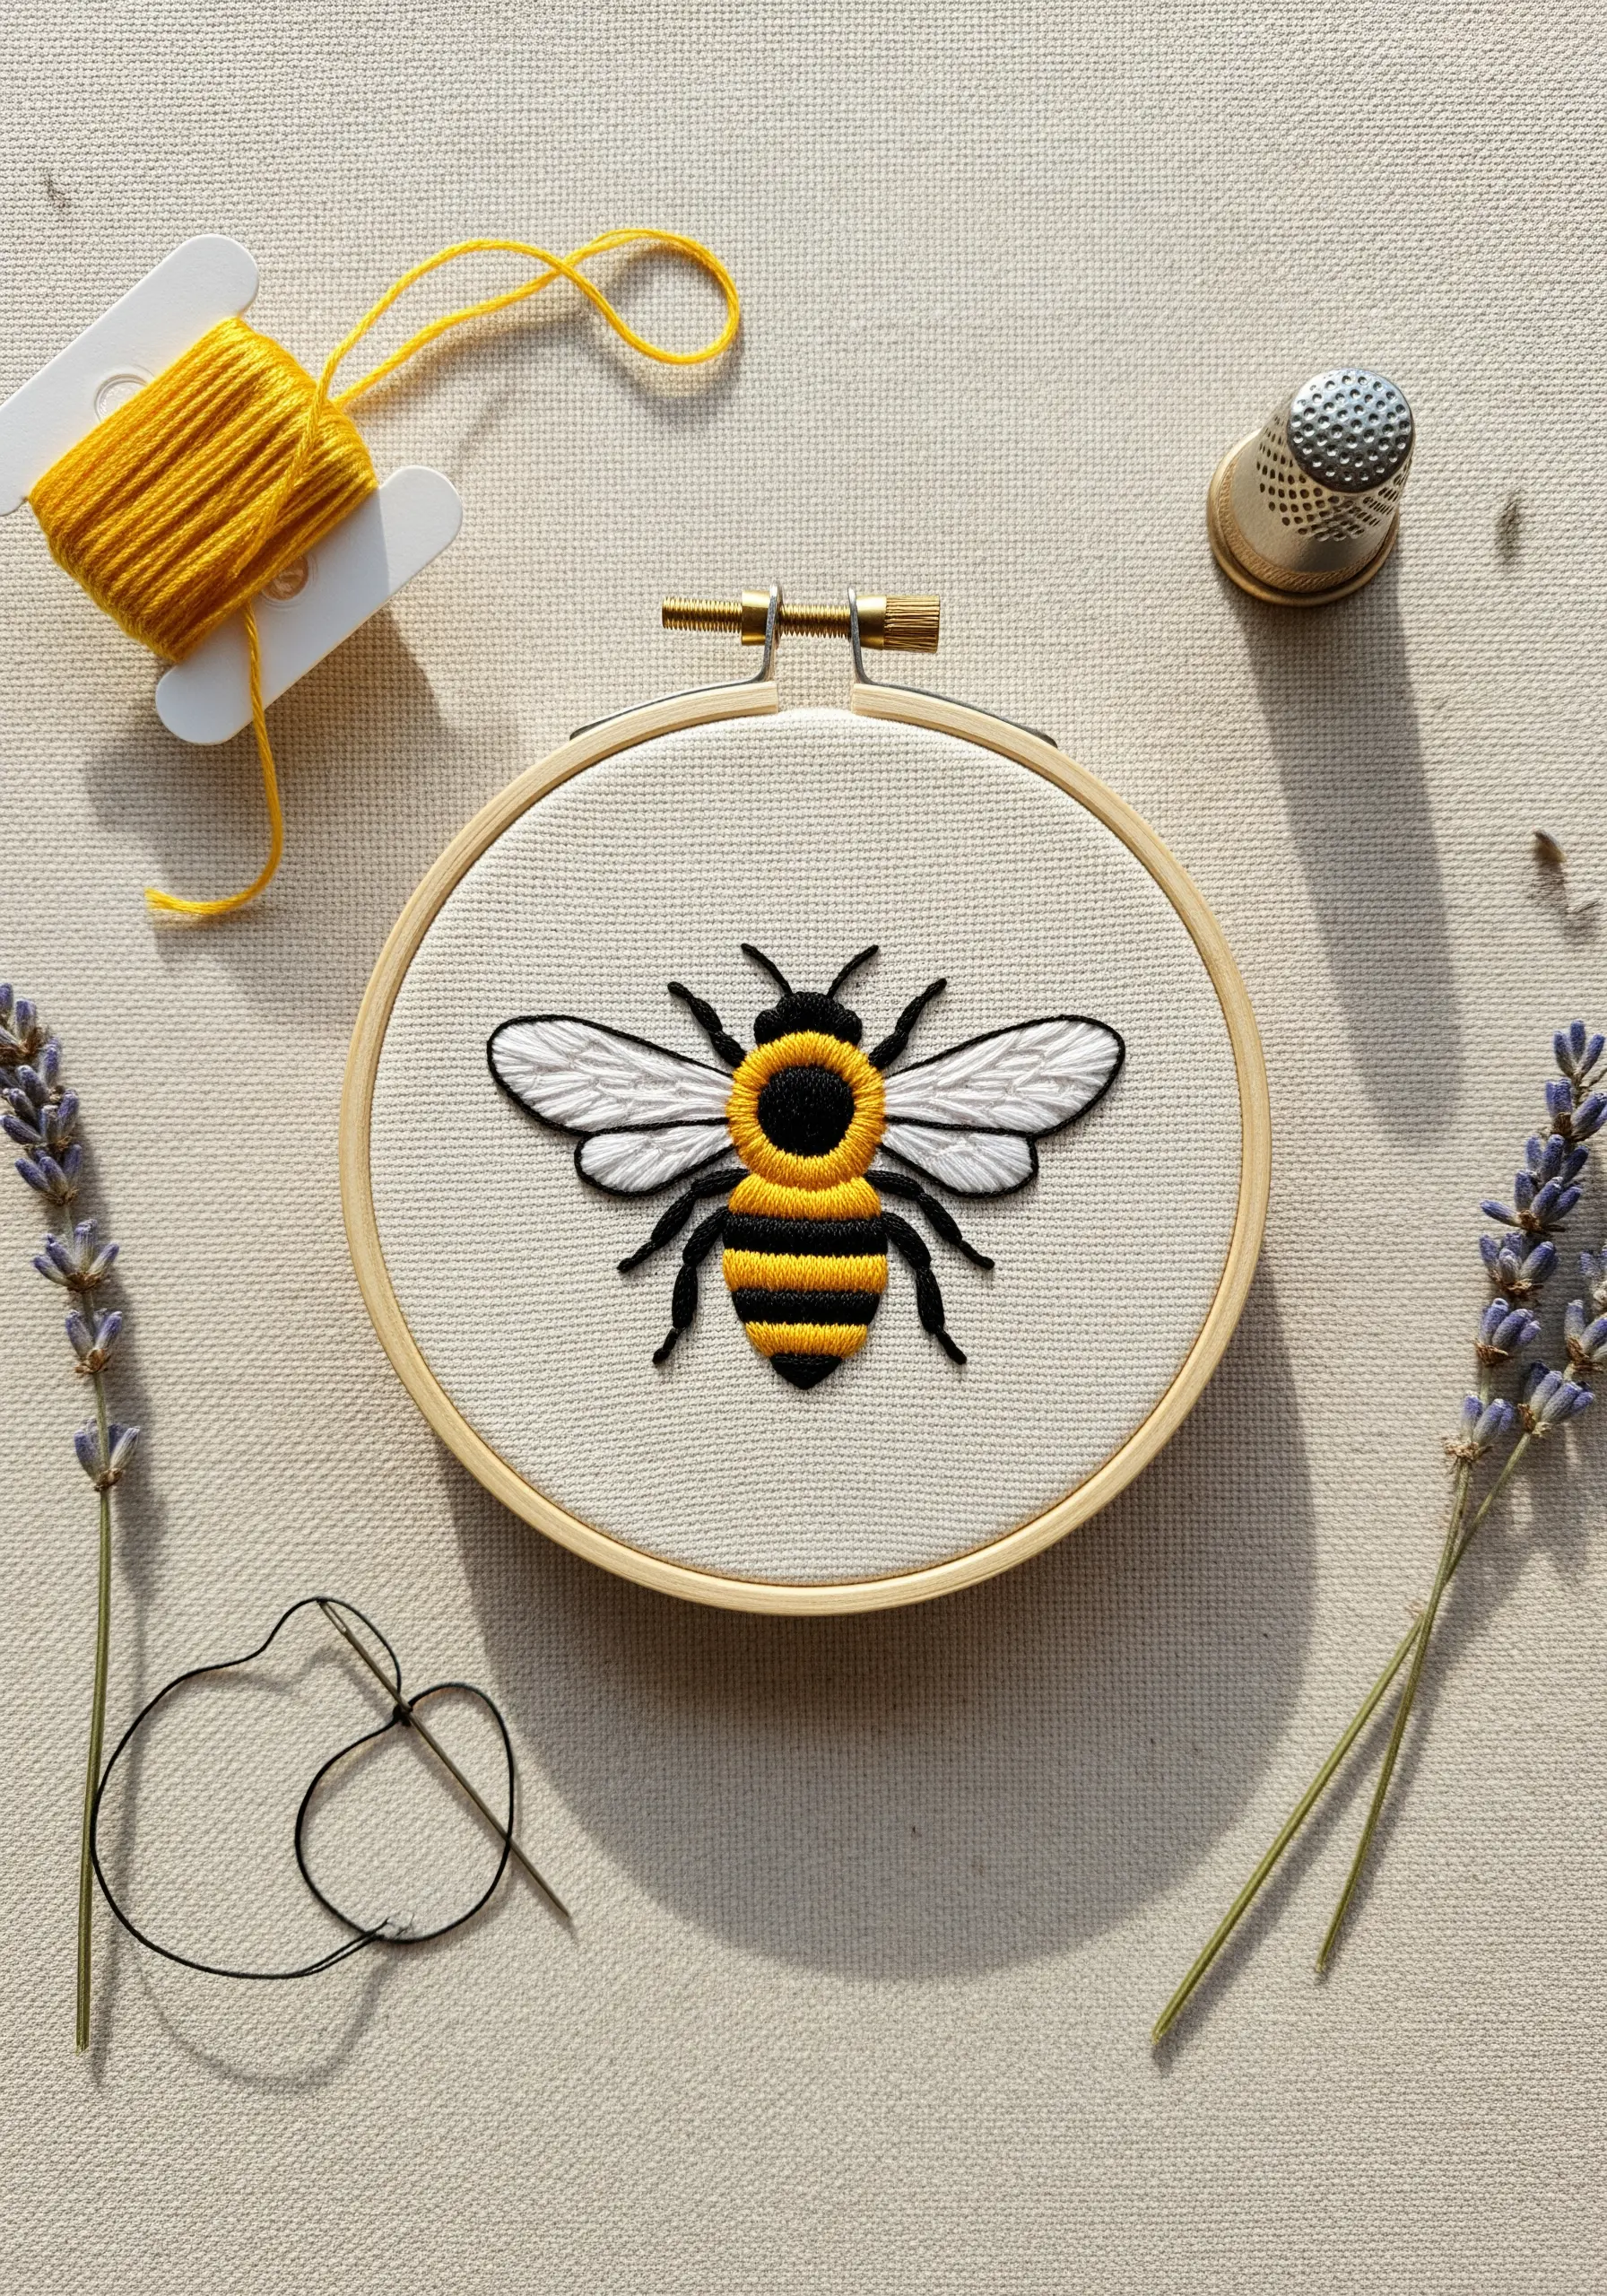
To make a simple motif like a bee feel more dynamic, pay close attention to the direction of your satin stitches.
Stitch the yellow and black stripes horizontally to follow the curve of the bee’s body, giving it a rounded, plump look.
For the wings, stitch vertically from the body outwards to create the illusion of delicate, veined membranes.
This simple shift in stitch direction adds life and dimension, turning a flat shape into a recognizable form.
10. Add Detail with Contrasting Outlines
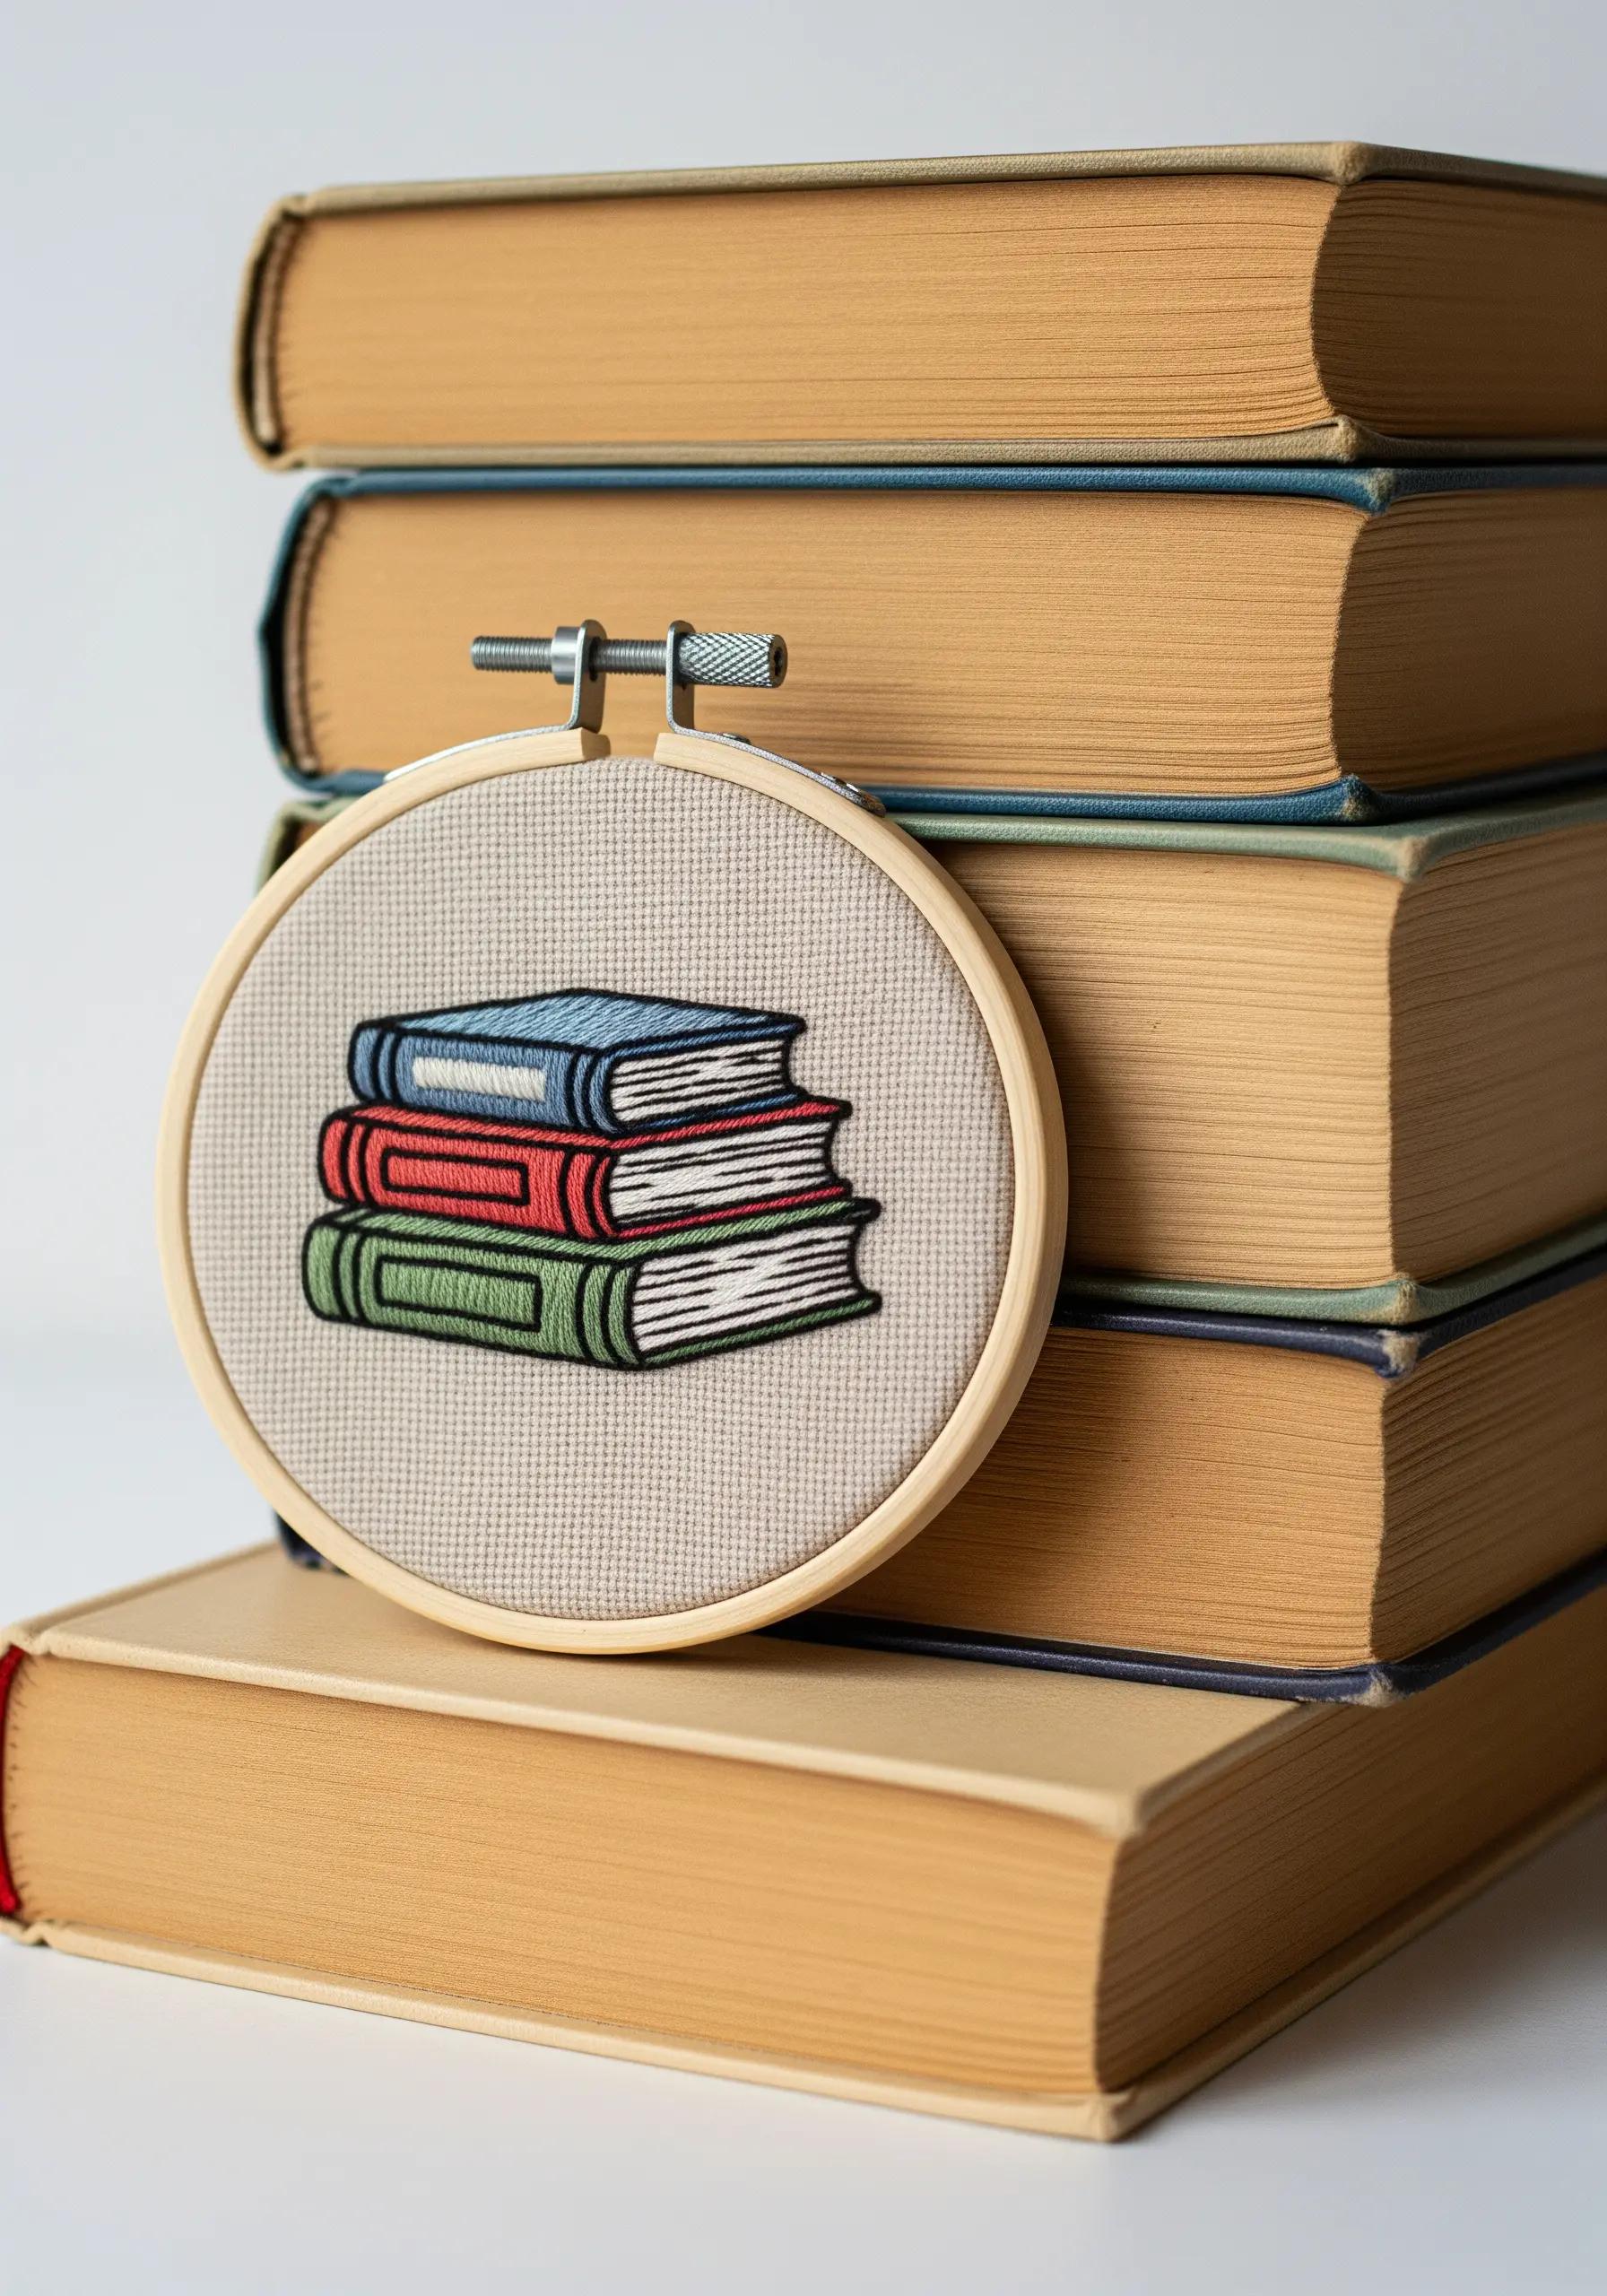
When working with filled shapes in close proximity, a strong outline is essential for clarity.
After filling each book with a smooth satin stitch, define its shape with a single-strand backstitch in a darker, contrasting color.
This not only separates the elements but also adds a charming, illustrative quality to the entire piece.
For the book pages, use off-white thread and stitch a few simple straight stitches to suggest texture without overworking the design.
11. Create a Perfect Sheen on Satin Stitch
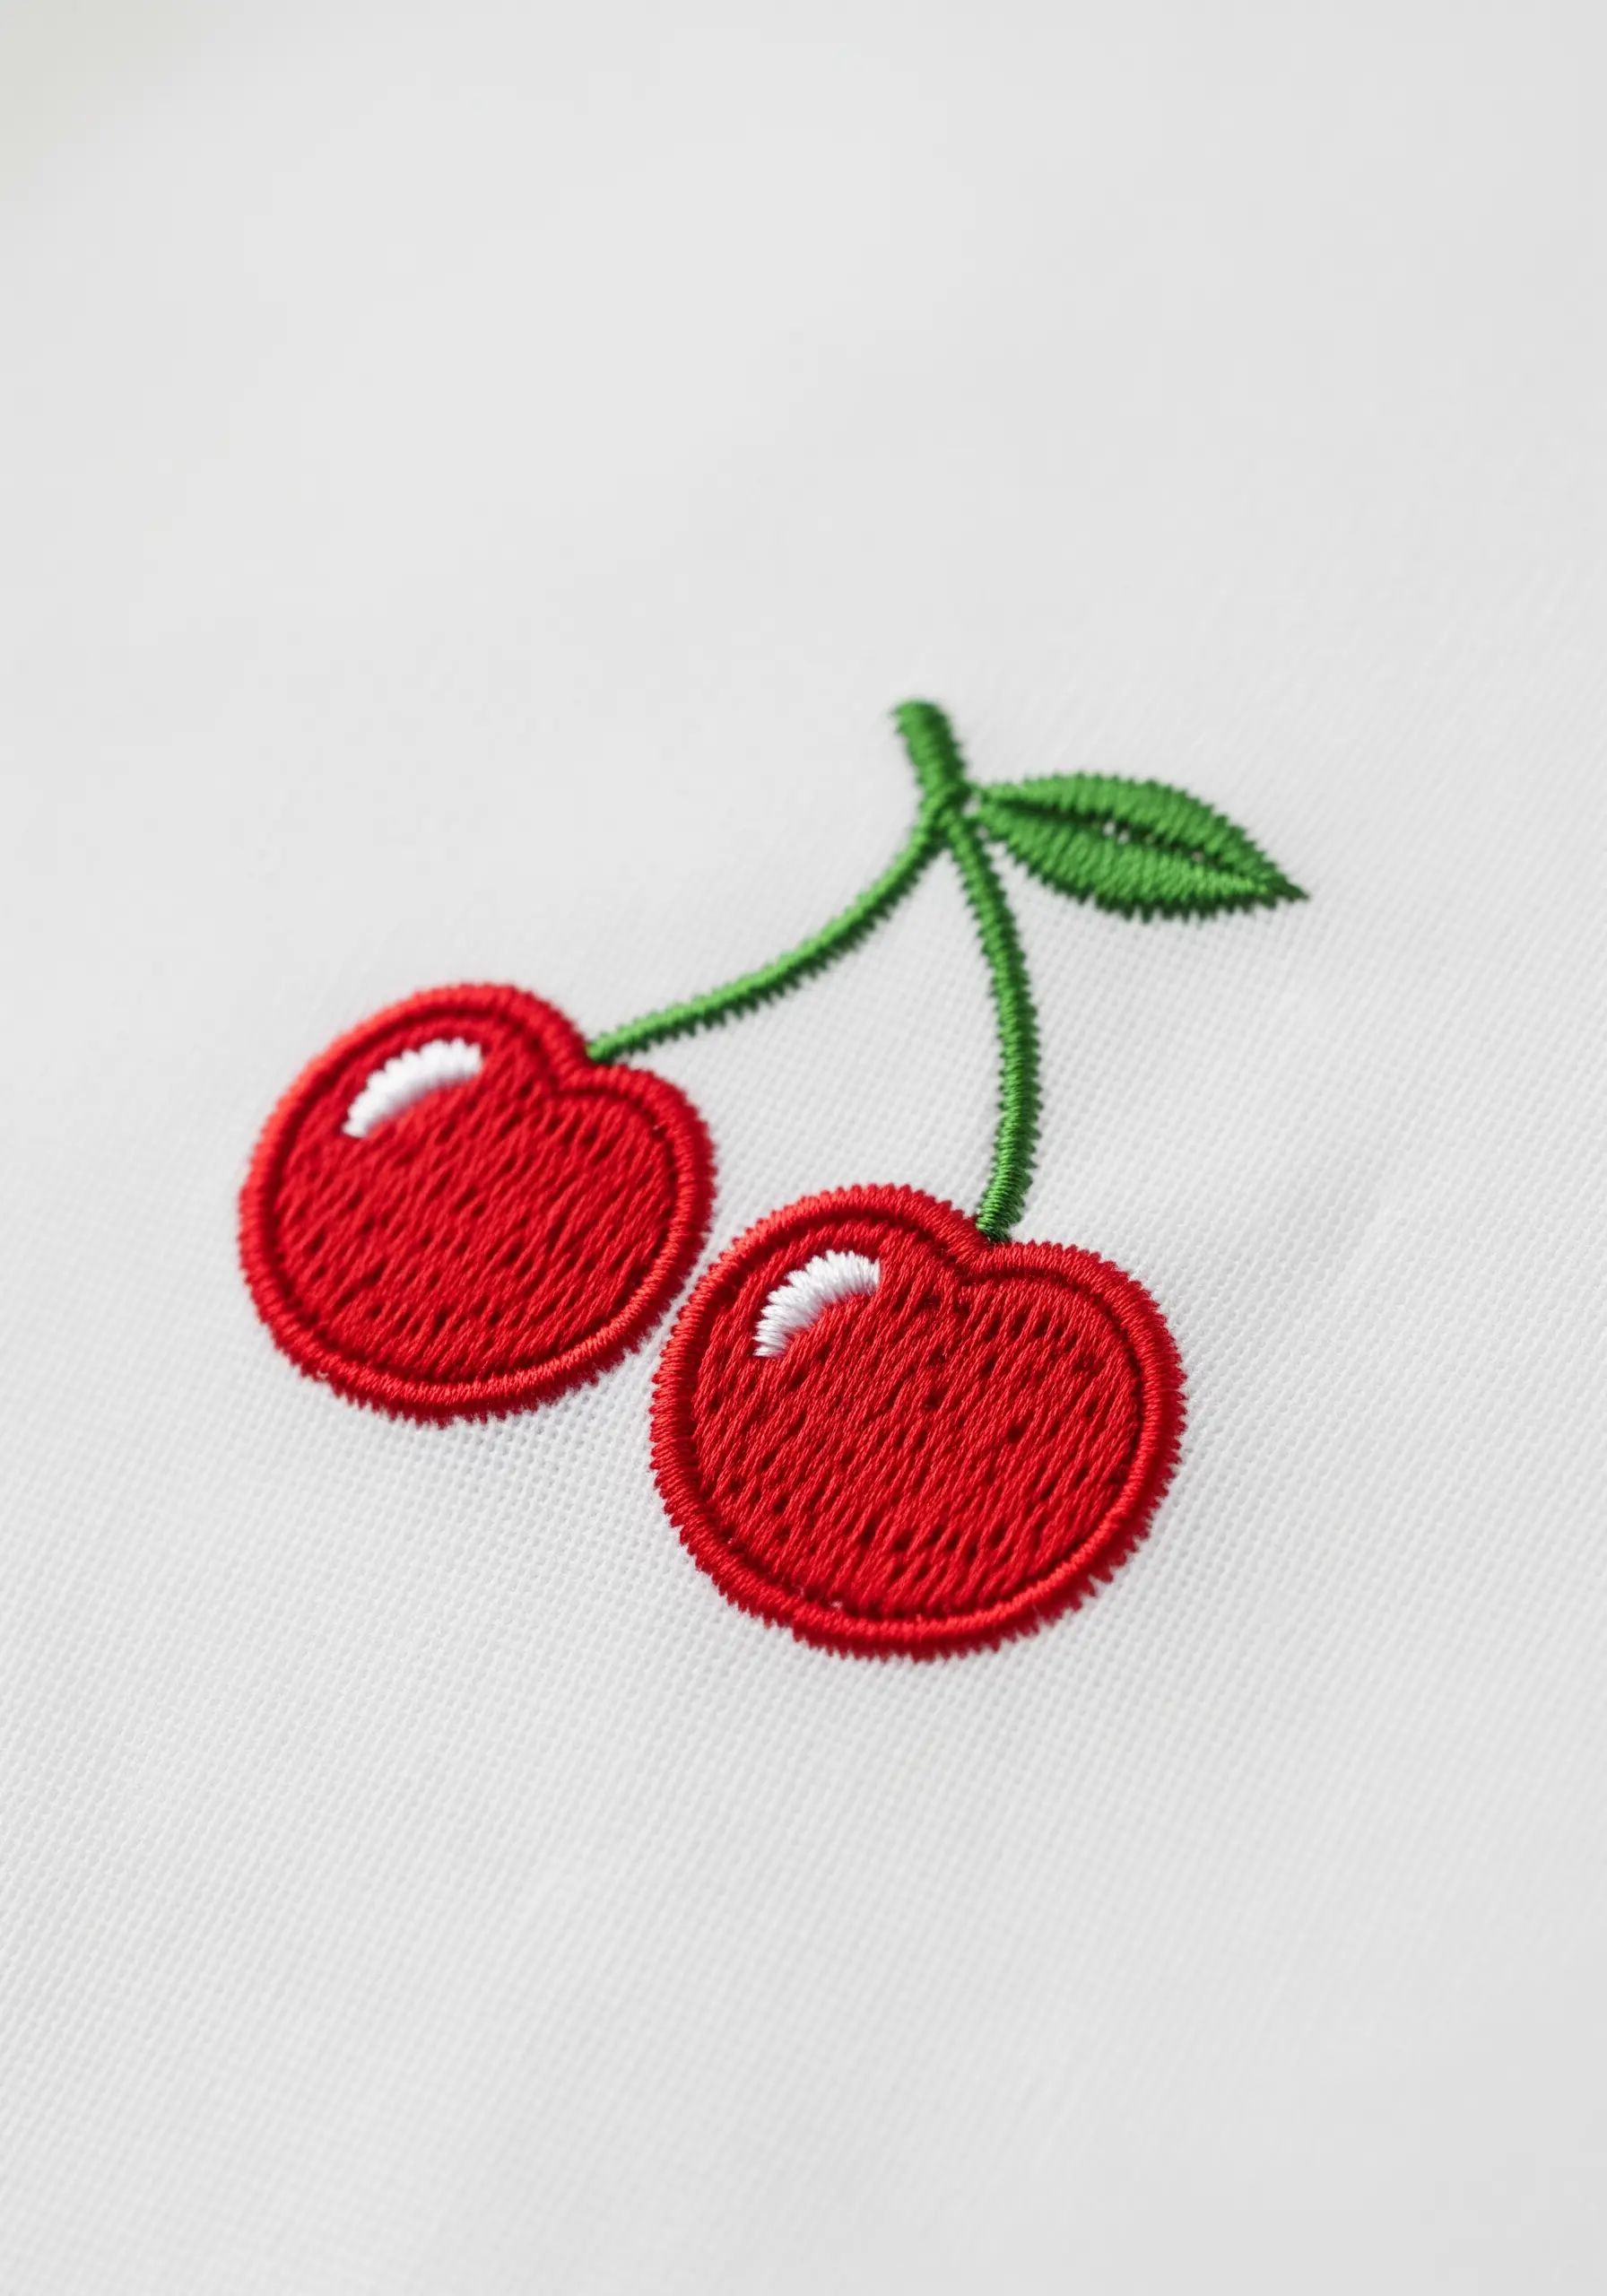
The highlight on these cherries isn’t paint—it’s a clever use of negative space.
Plan your satin stitches to leave a small, deliberate gap, allowing the white fabric to show through.
To achieve the glossy red fill, use a high-sheen rayon or silk thread instead of standard cotton floss.
Ensure your stitches are perfectly parallel and lay flat; a laying tool or the shaft of your needle can help smooth them down as you work.
12. Suggest Texture with Variegated Thread
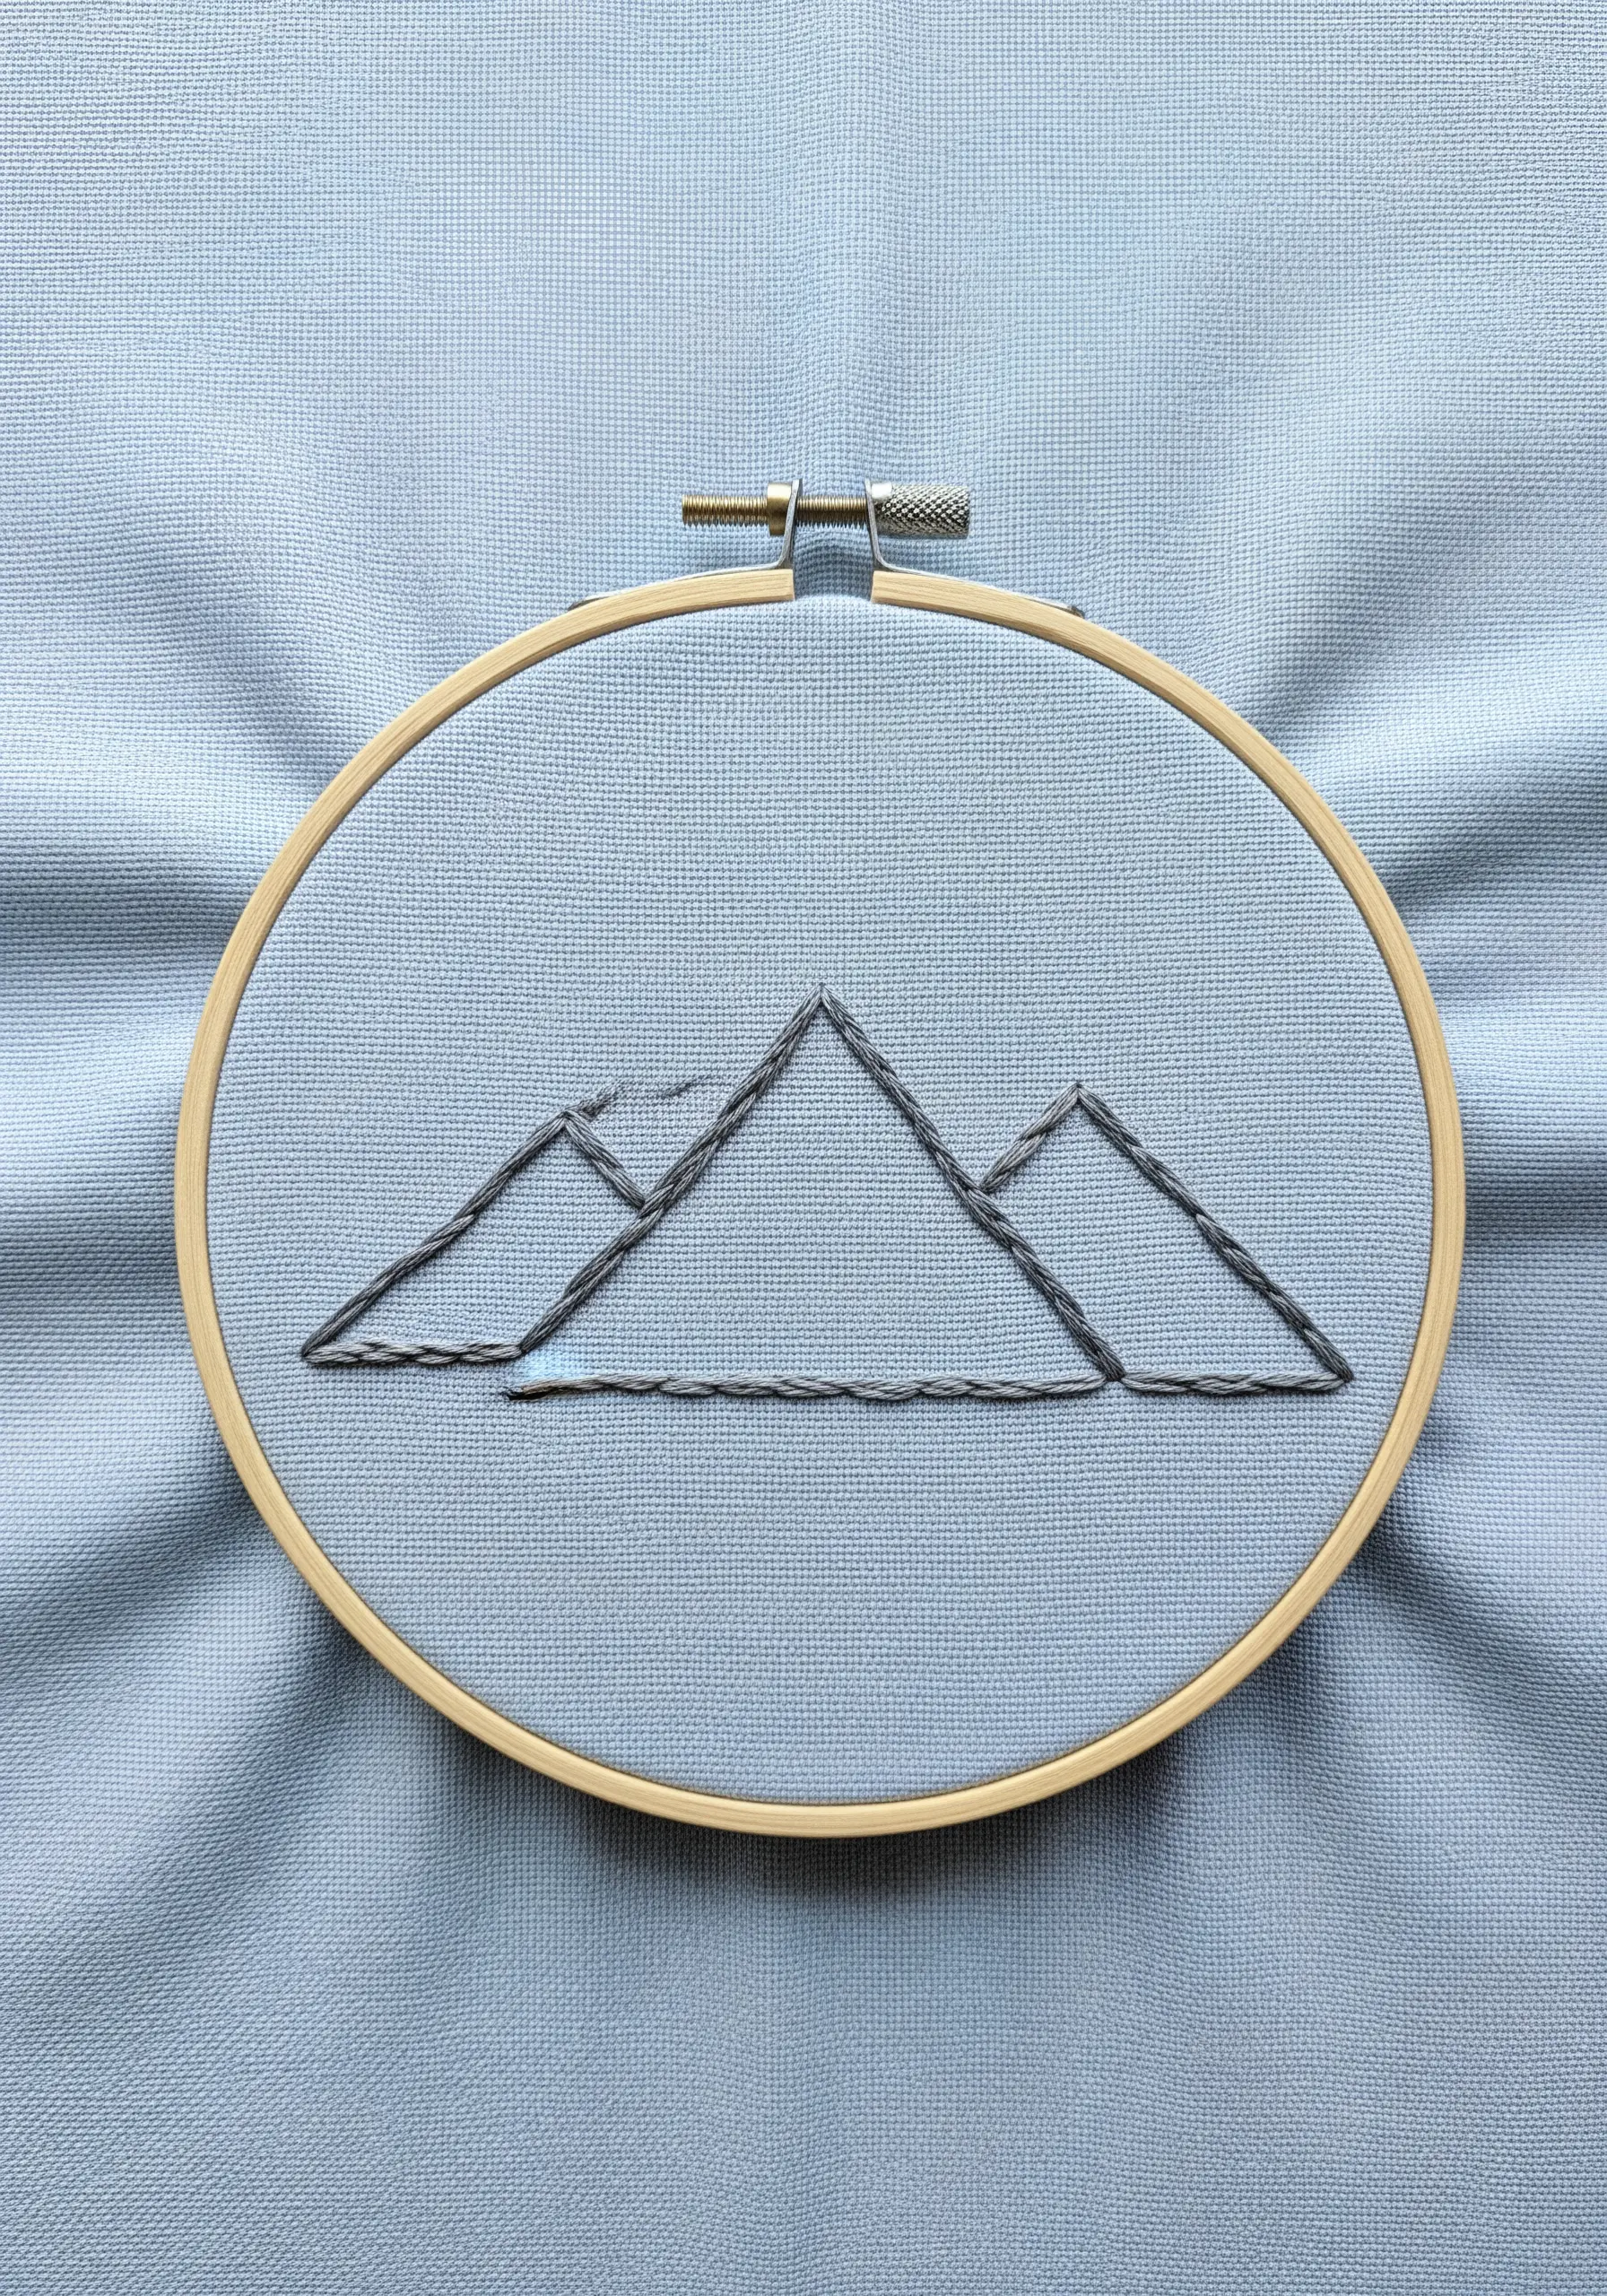
To give a simple mountain outline a sense of depth and texture, use a variegated grey or brown thread.
The subtle, built-in color shifts will mimic the natural shadows and highlights of a rocky surface without any complex shading techniques.
Use a whipped backstitch or stem stitch to create a solid, continuous line that lets the color variations shine.
This is one of the quickest ways to add visual interest to minimalist landscape embroidery.
13. Imply Motion with a Dashed Line

A simple dashed line, or running stitch, is incredibly effective for suggesting movement and direction.
For a playful, looping trail like this one, vary the length of your stitches and the curve of your line to create a sense of whimsical, looping flight.
Use a contrasting color that stands out against your base fabric to make the flight path a central element of the design.
This small detail transforms a static object into a dynamic scene, perfect for travel-inspired embroidery.
14. Combine Stitches for Illustrative Effect
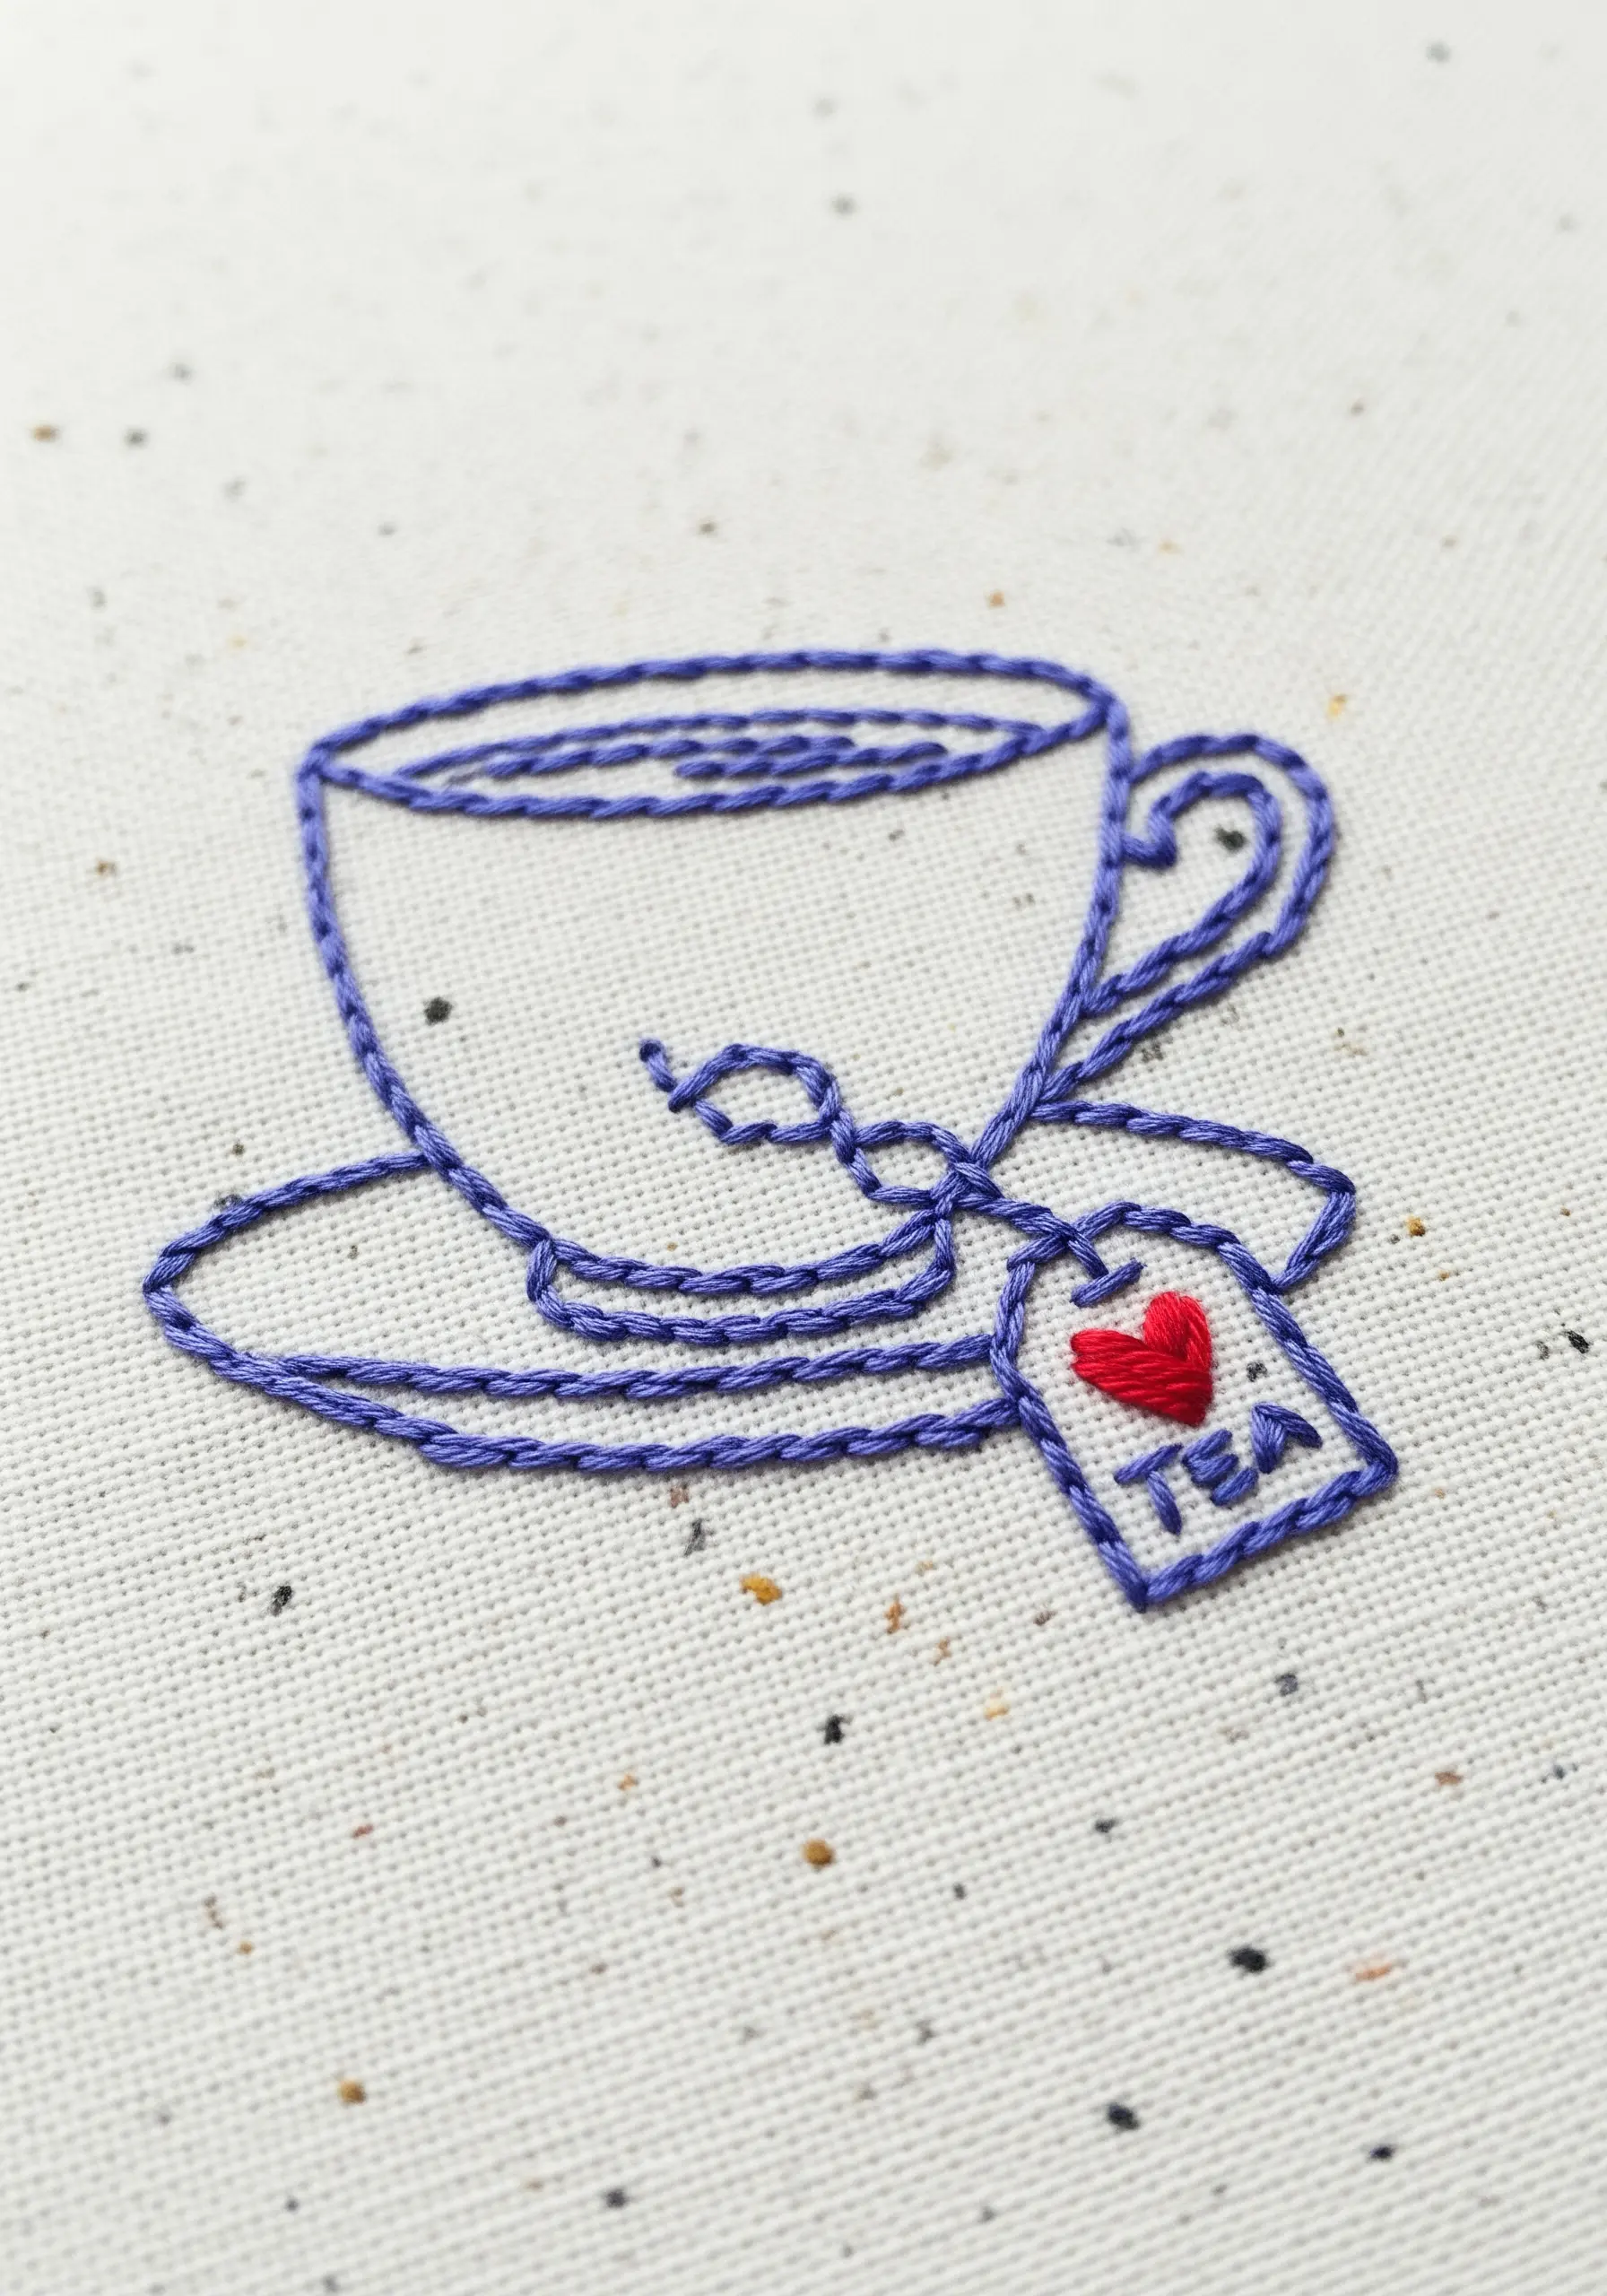
This design cleverly combines different line stitches to create an elegant, hand-drawn look.
Use a whipped chain stitch for the main outline of the teacup and saucer; its rope-like texture adds substance and a beautiful finish.
For the delicate lettering and the string on the tea tag, switch to a simple backstitch using fewer strands to create a lighter line.
The tiny heart is a perfect spot for a single, bold satin stitch, creating a focal point.
15. Create Flawless Circles with Directional Fill
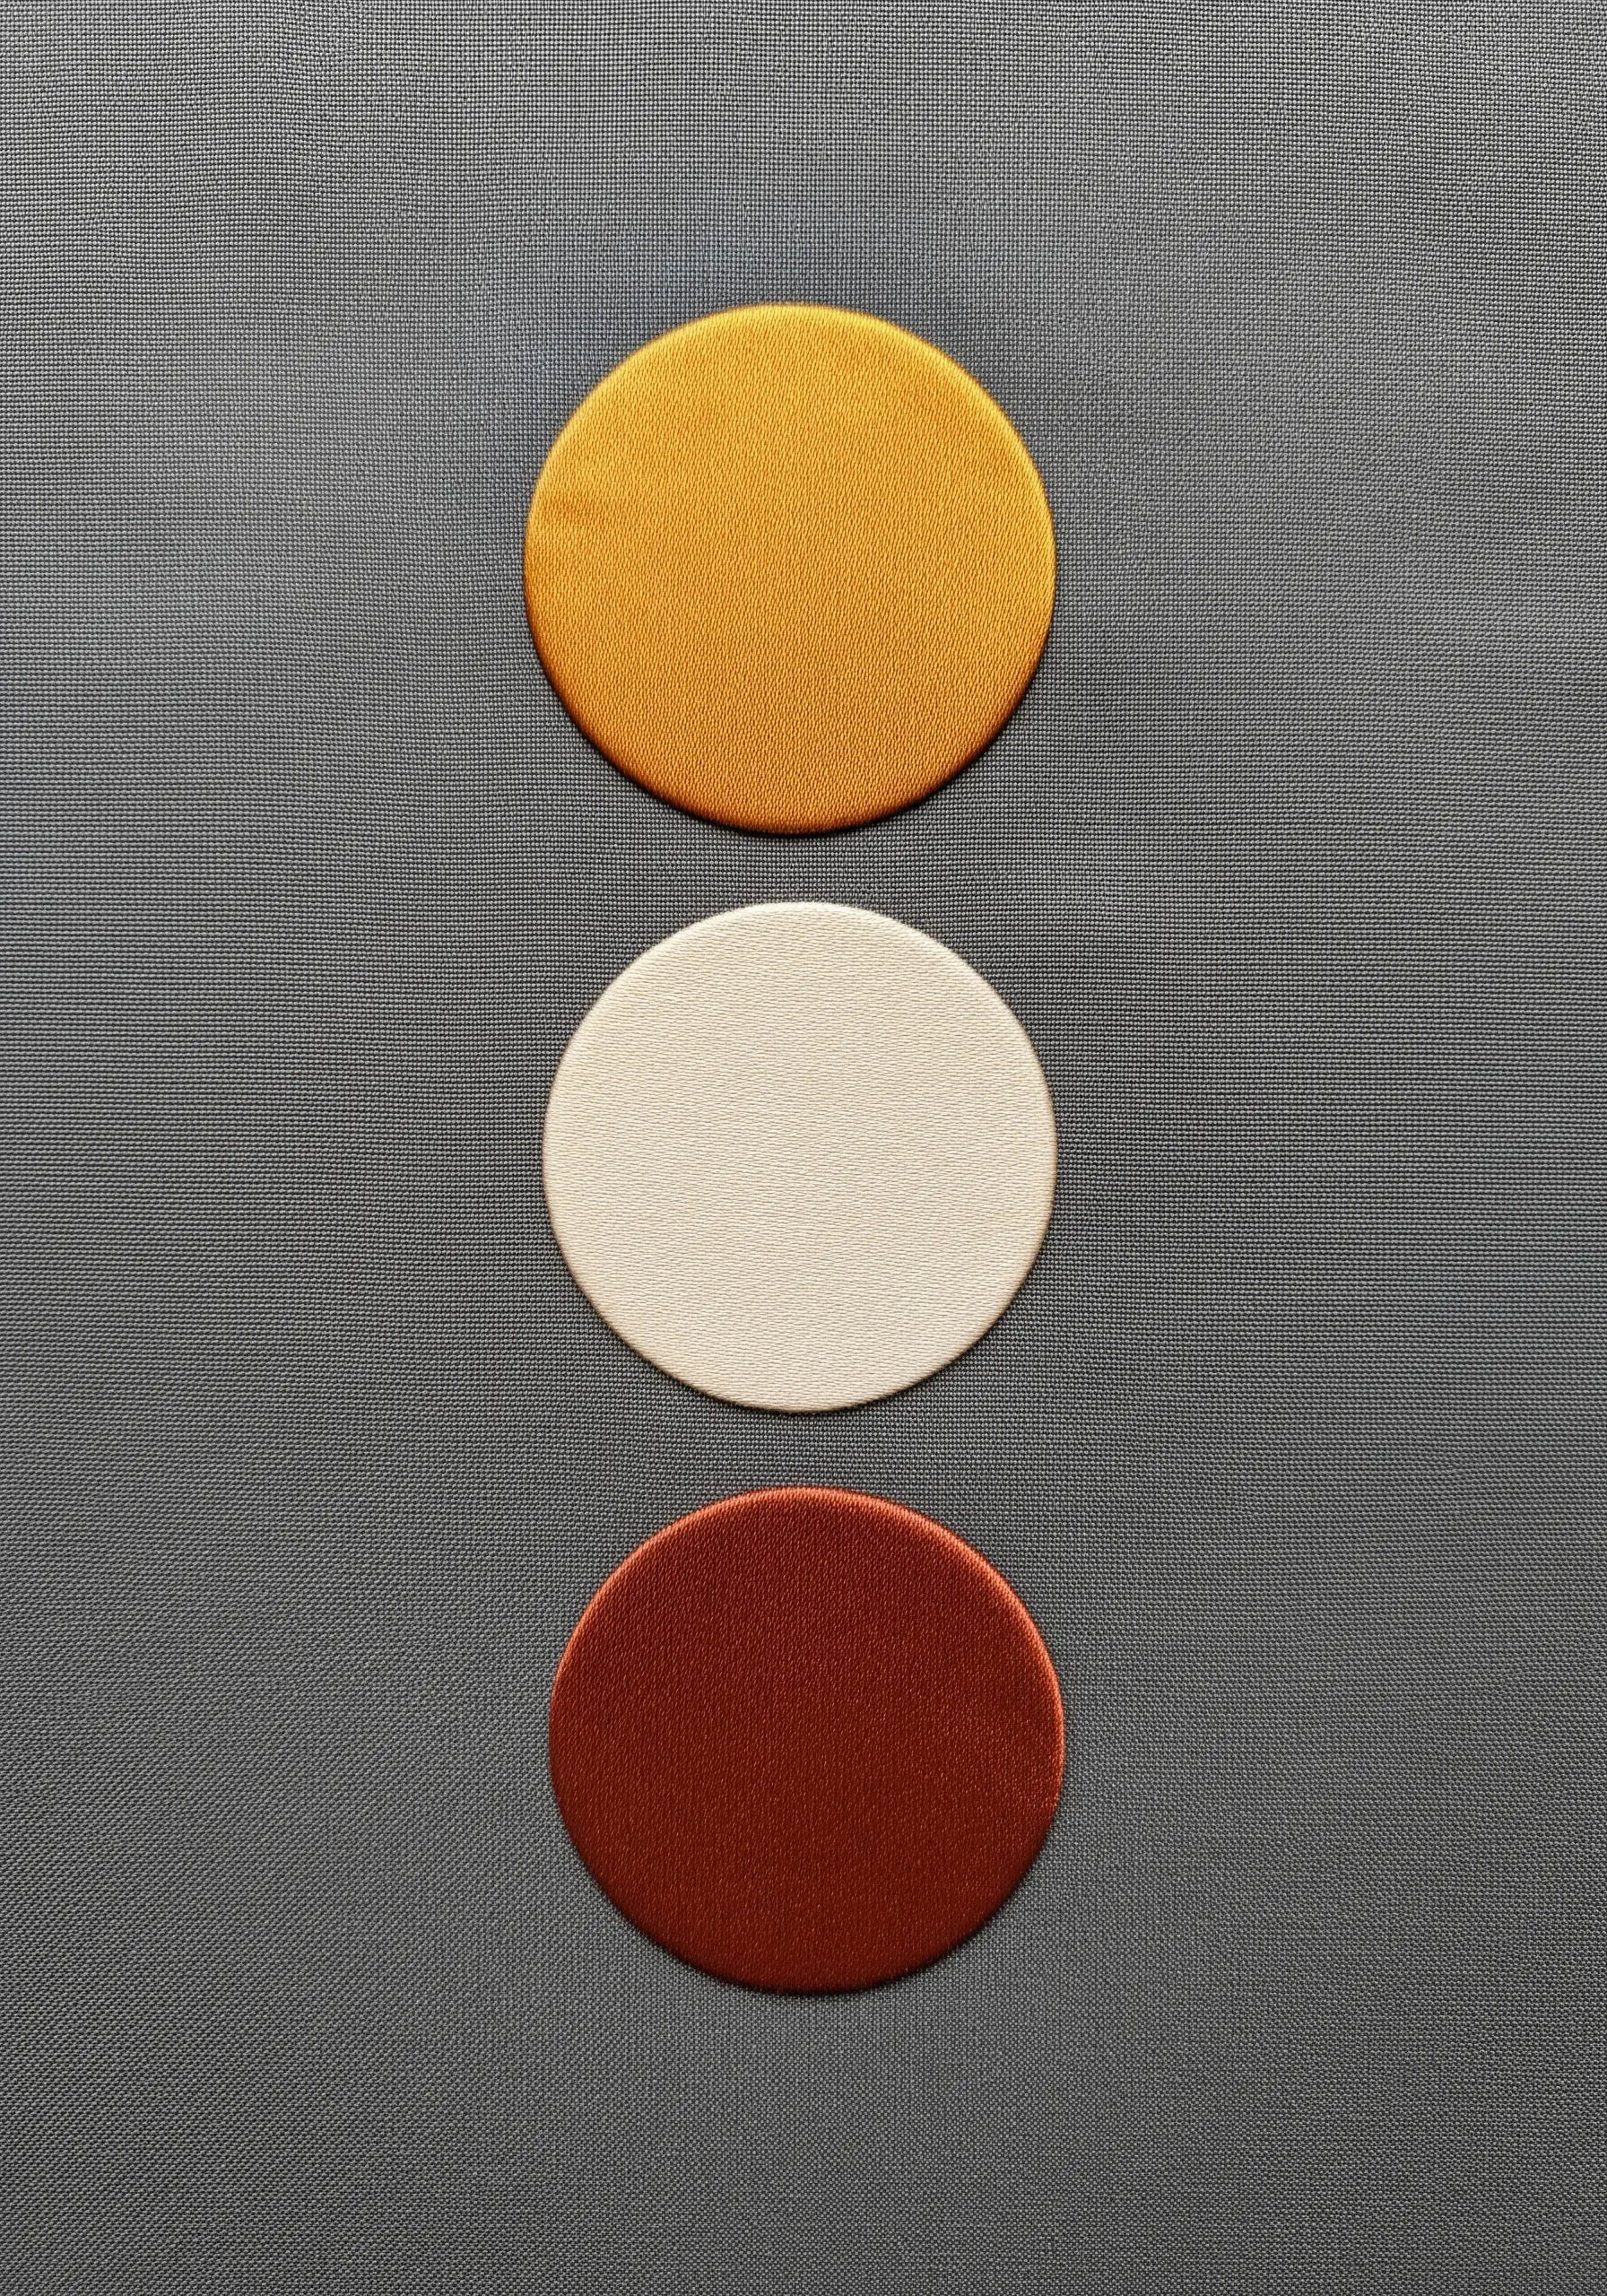
Stitching a perfectly smooth, filled circle is a common challenge. The secret is stitch direction.
Instead of stitching straight across, which can create flat edges, work your satin stitches in a spiral or pie-like wedges meeting at the center.
For an even better result, first outline the circle with a split stitch to create a firm boundary.
This approach ensures your threads follow the curve, resulting in a beautifully round shape with a subtle, light-catching texture.
16. Elevate Linens with a Botanical Border
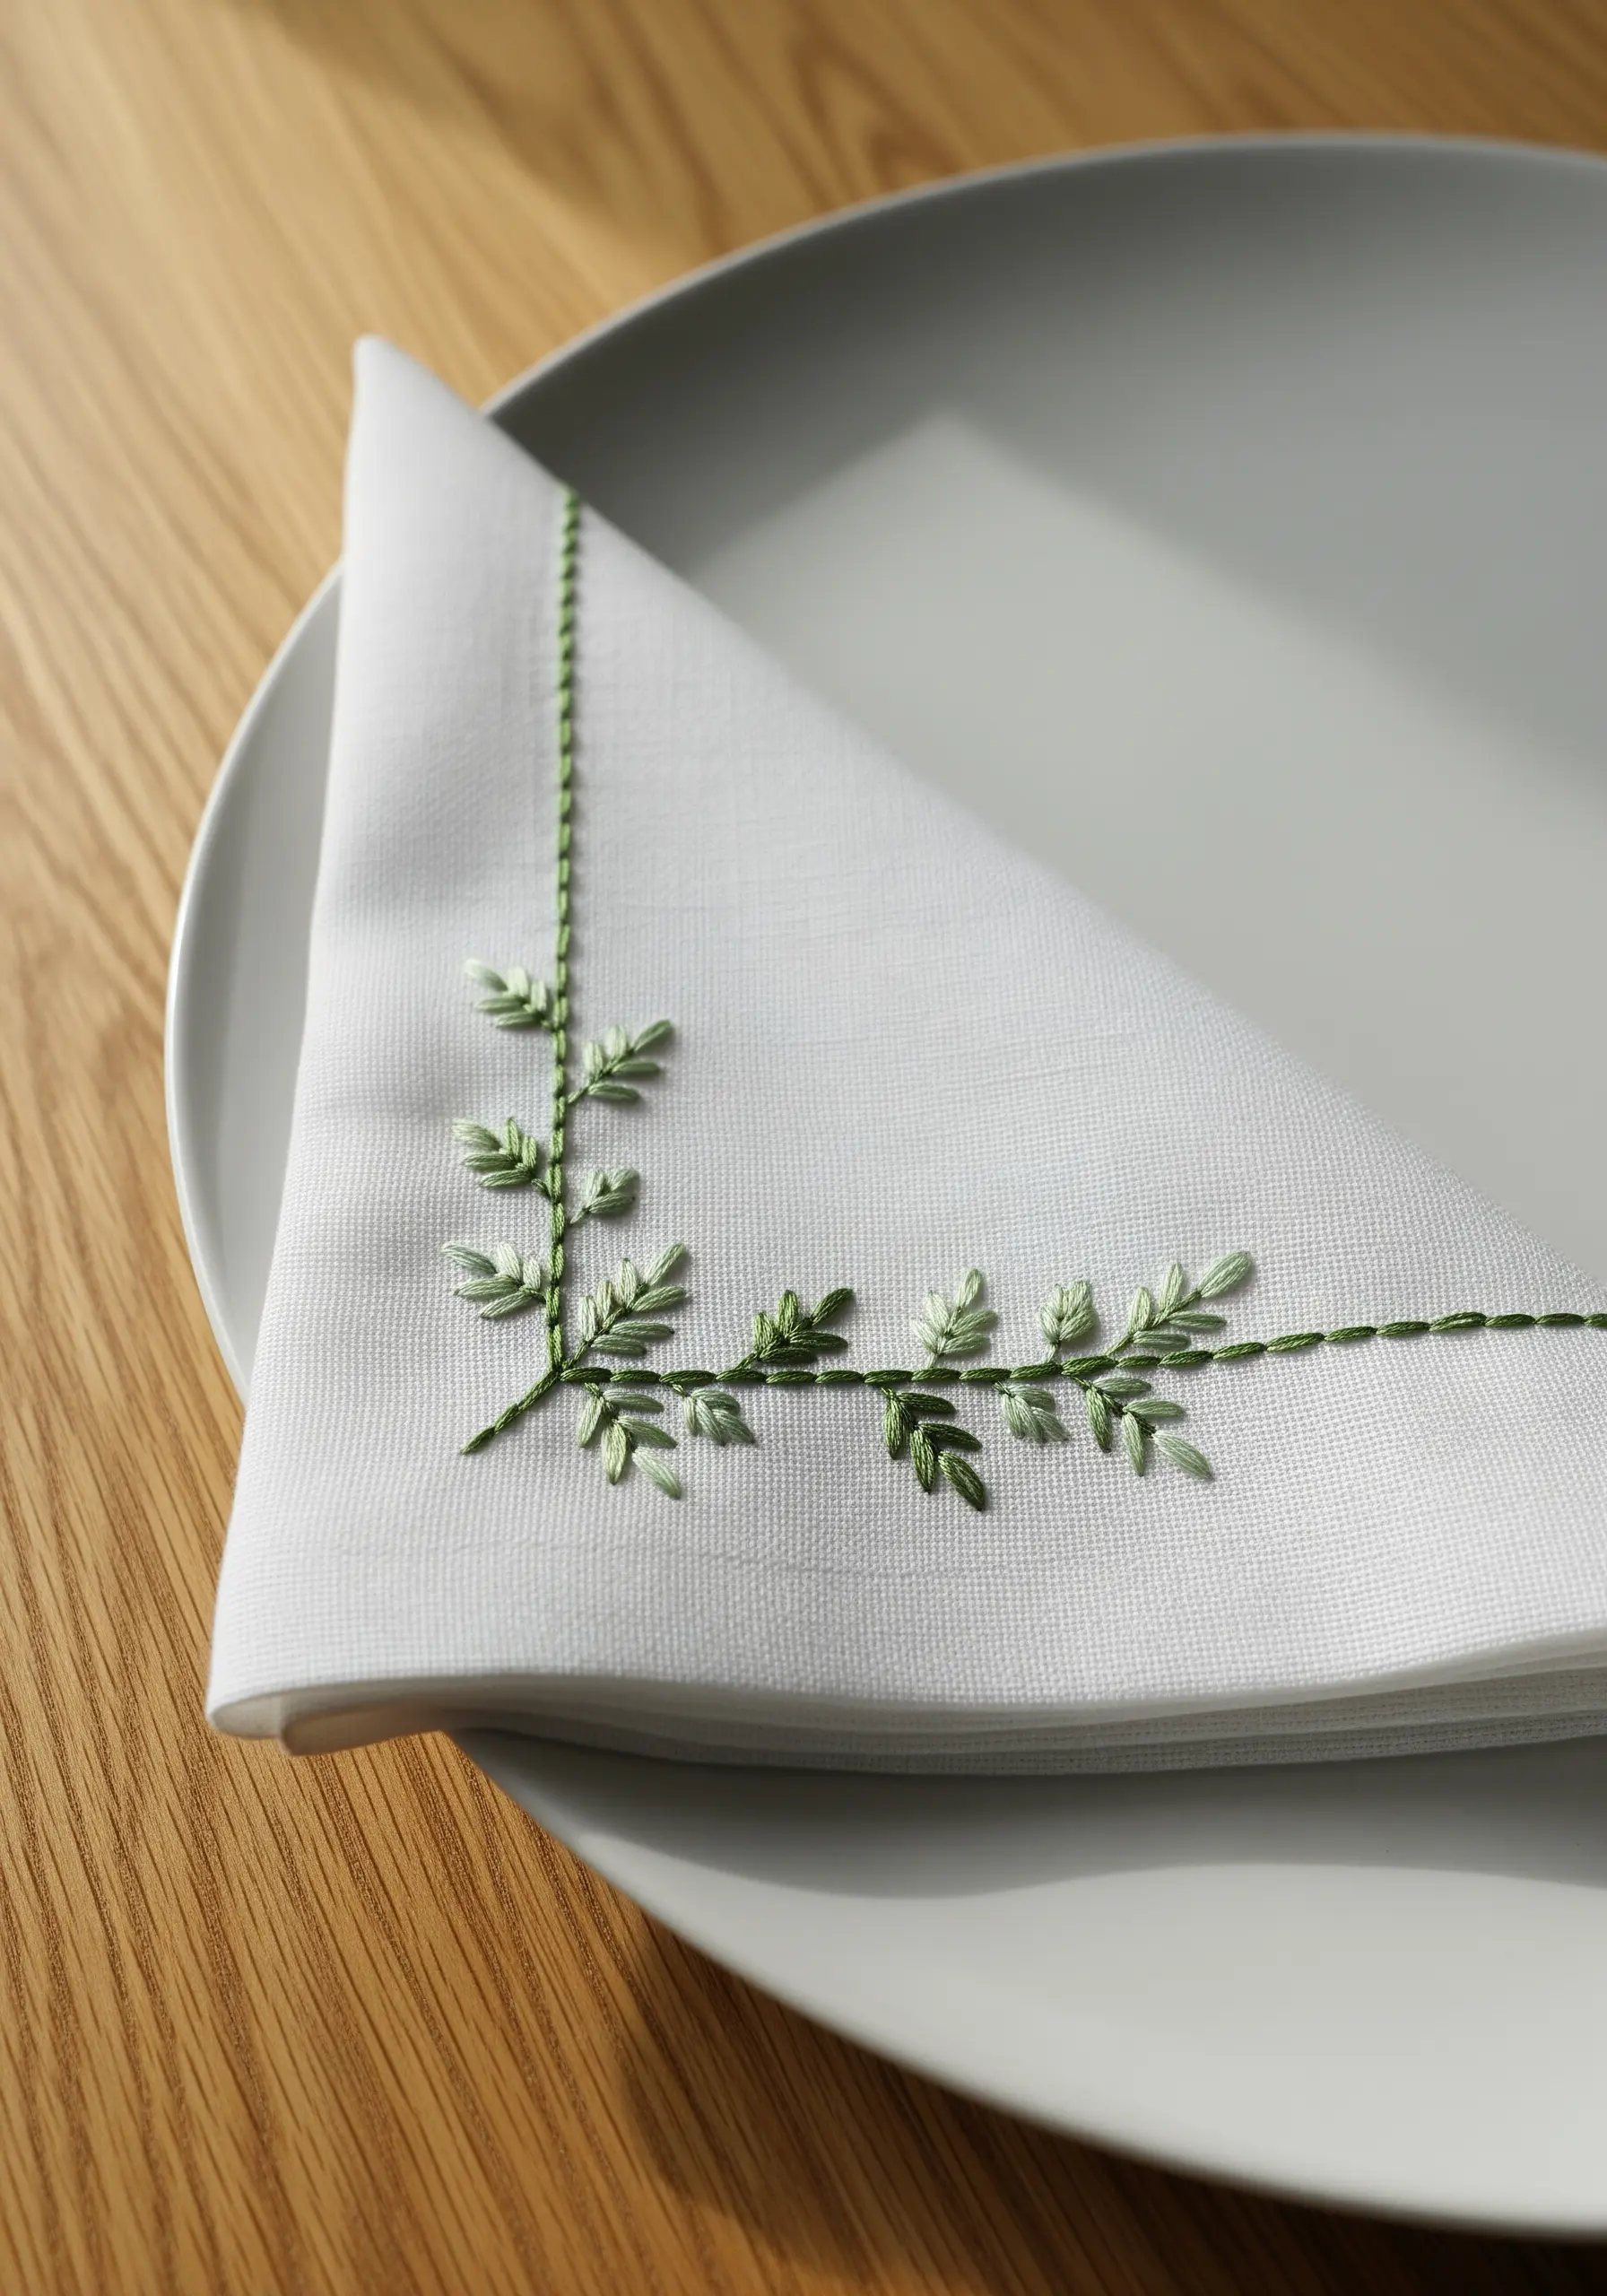
Transform a plain napkin with a simple yet elegant botanical border.
Use a stem stitch for the main vine to create a smooth, curving line.
For the leaves, a fishbone stitch or satin stitch will give them a solid, defined shape. Use two slightly different shades of green to add depth and realism.
This small detail adds a luxurious, hand-stitched touch to everyday table linens.
17. Achieve a Metallic Sheen with Twisted Thread
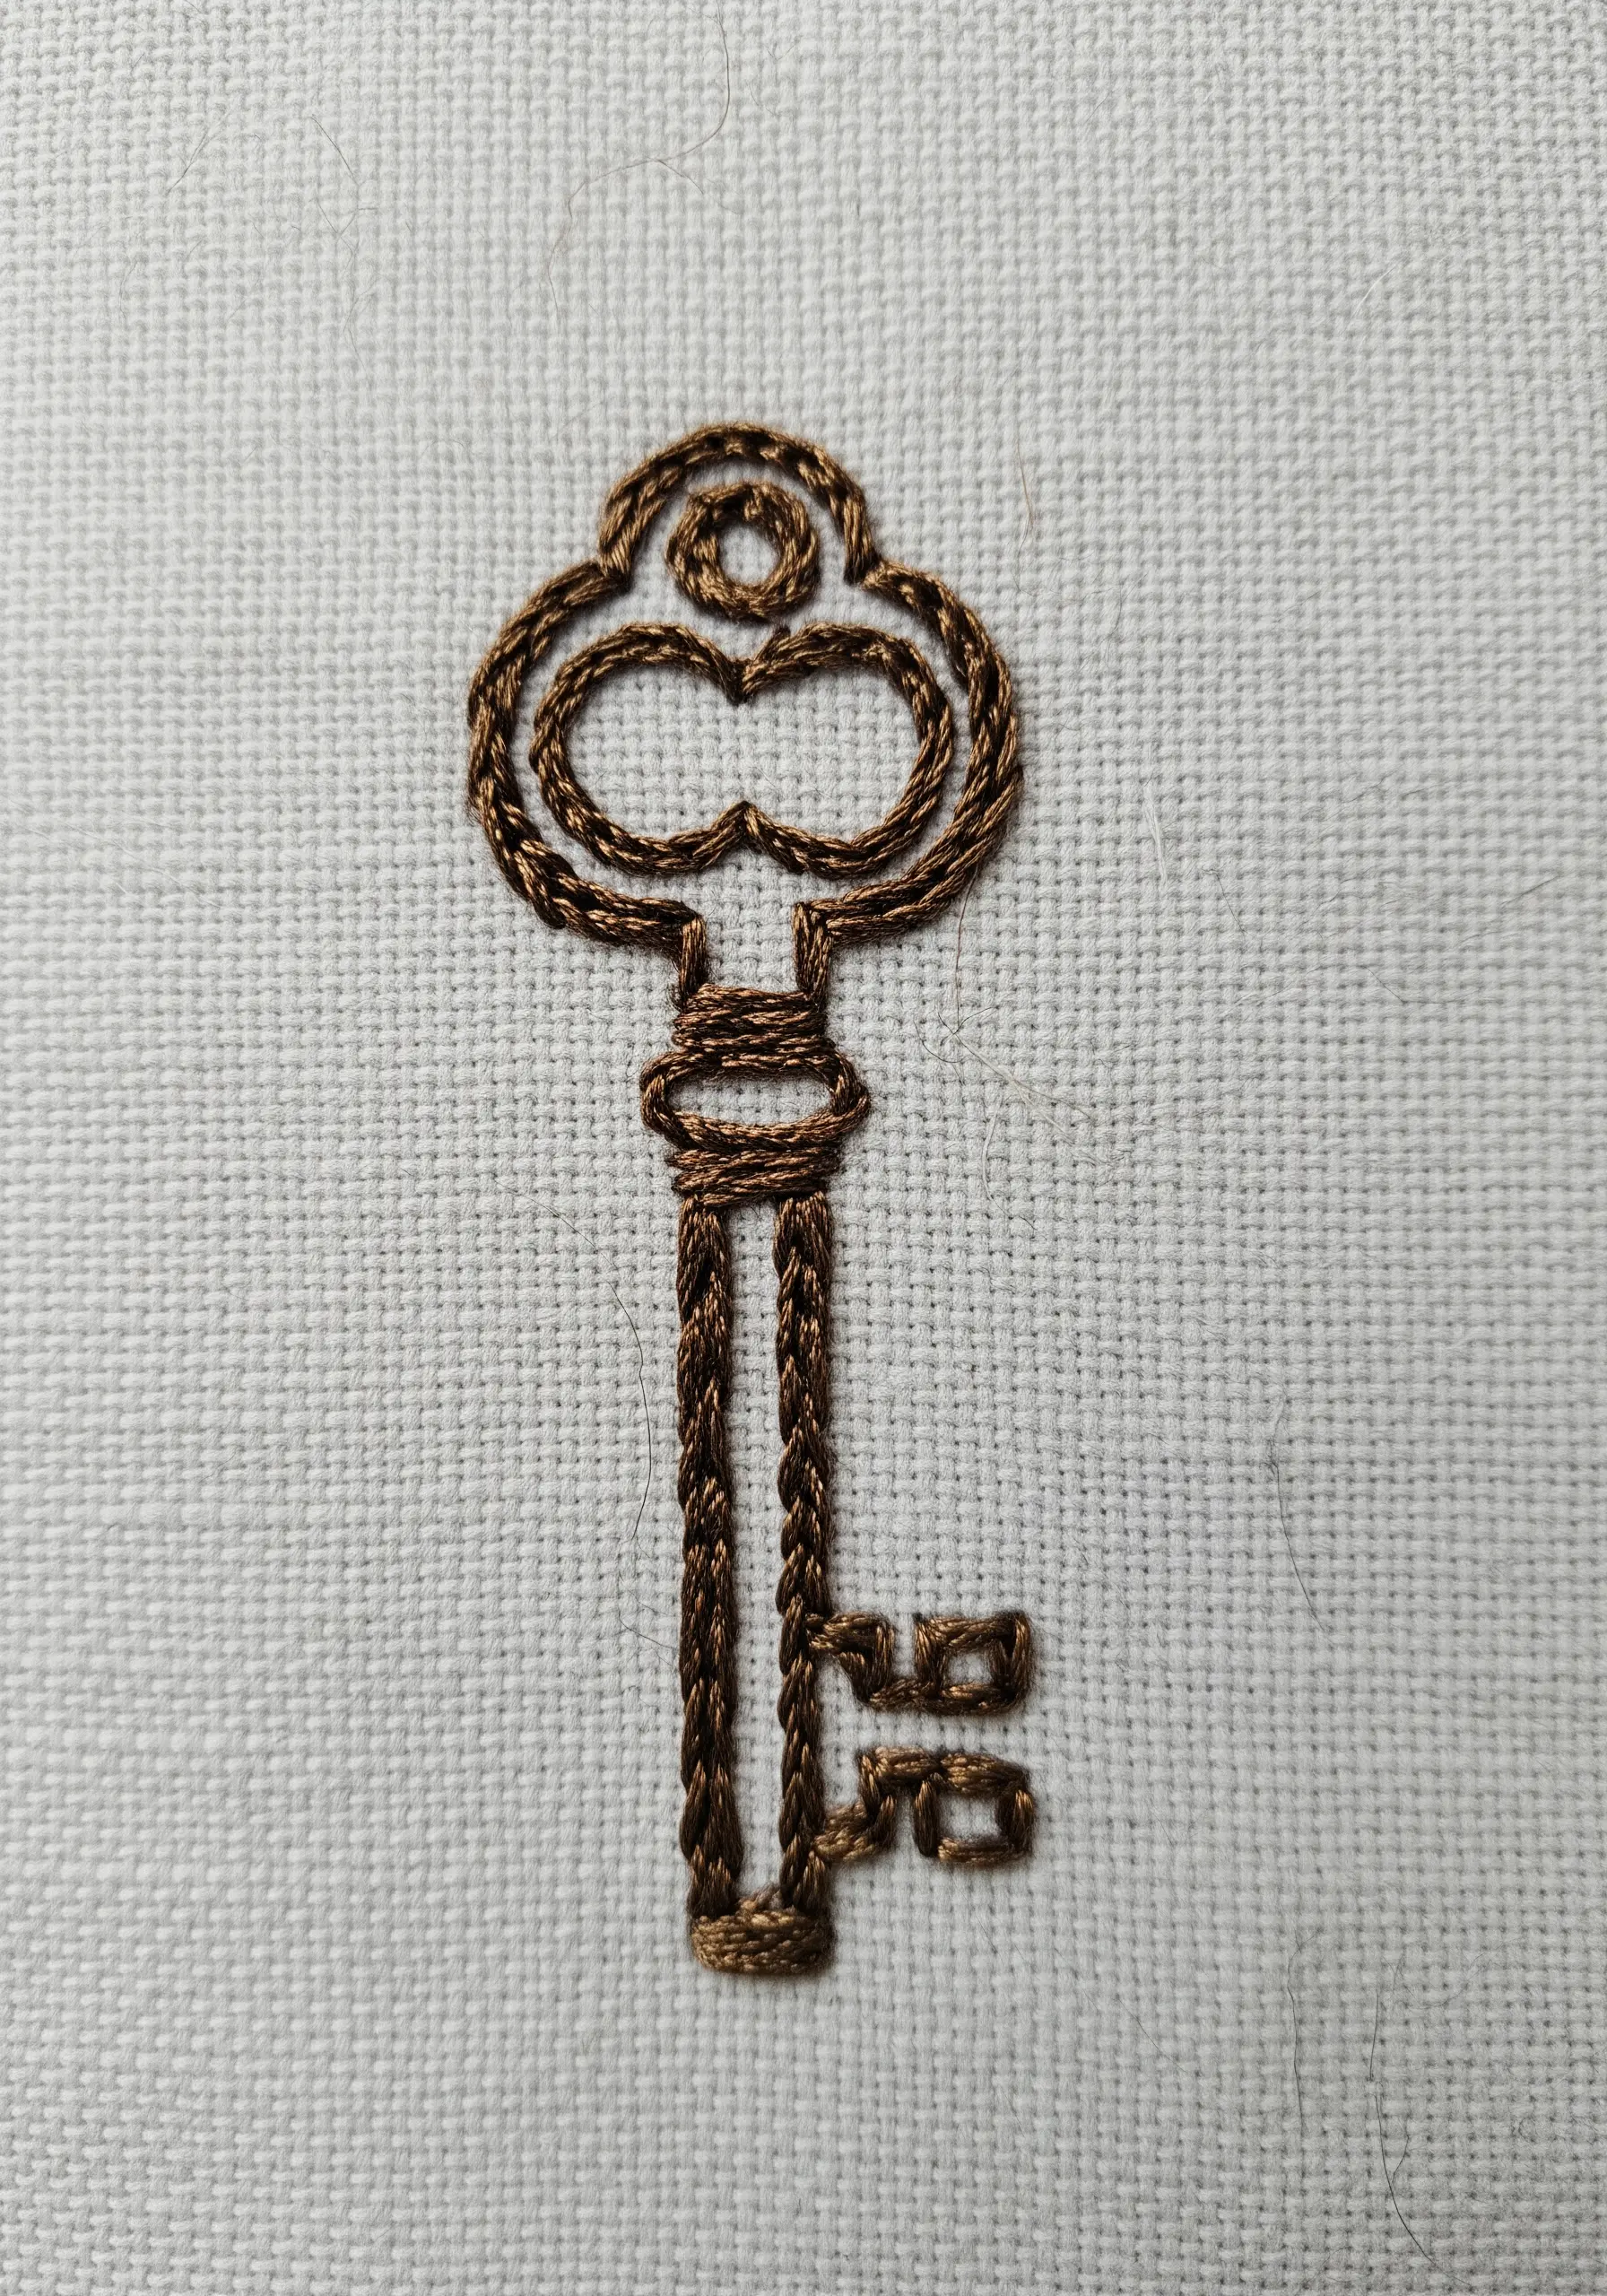
To give this key a metallic, almost engraved appearance, use a whipped chain stitch with a high-sheen thread.
The twisted, rope-like texture of the stitch catches the light beautifully, mimicking the look of aged metal.
Choose a bronze, gold, or silver rayon or silk floss, which offers more pliability and shine than standard metallic threads.
This technique turns a simple outline into a rich, textural element with an antique feel.
18. Layer Colors to Depict Water
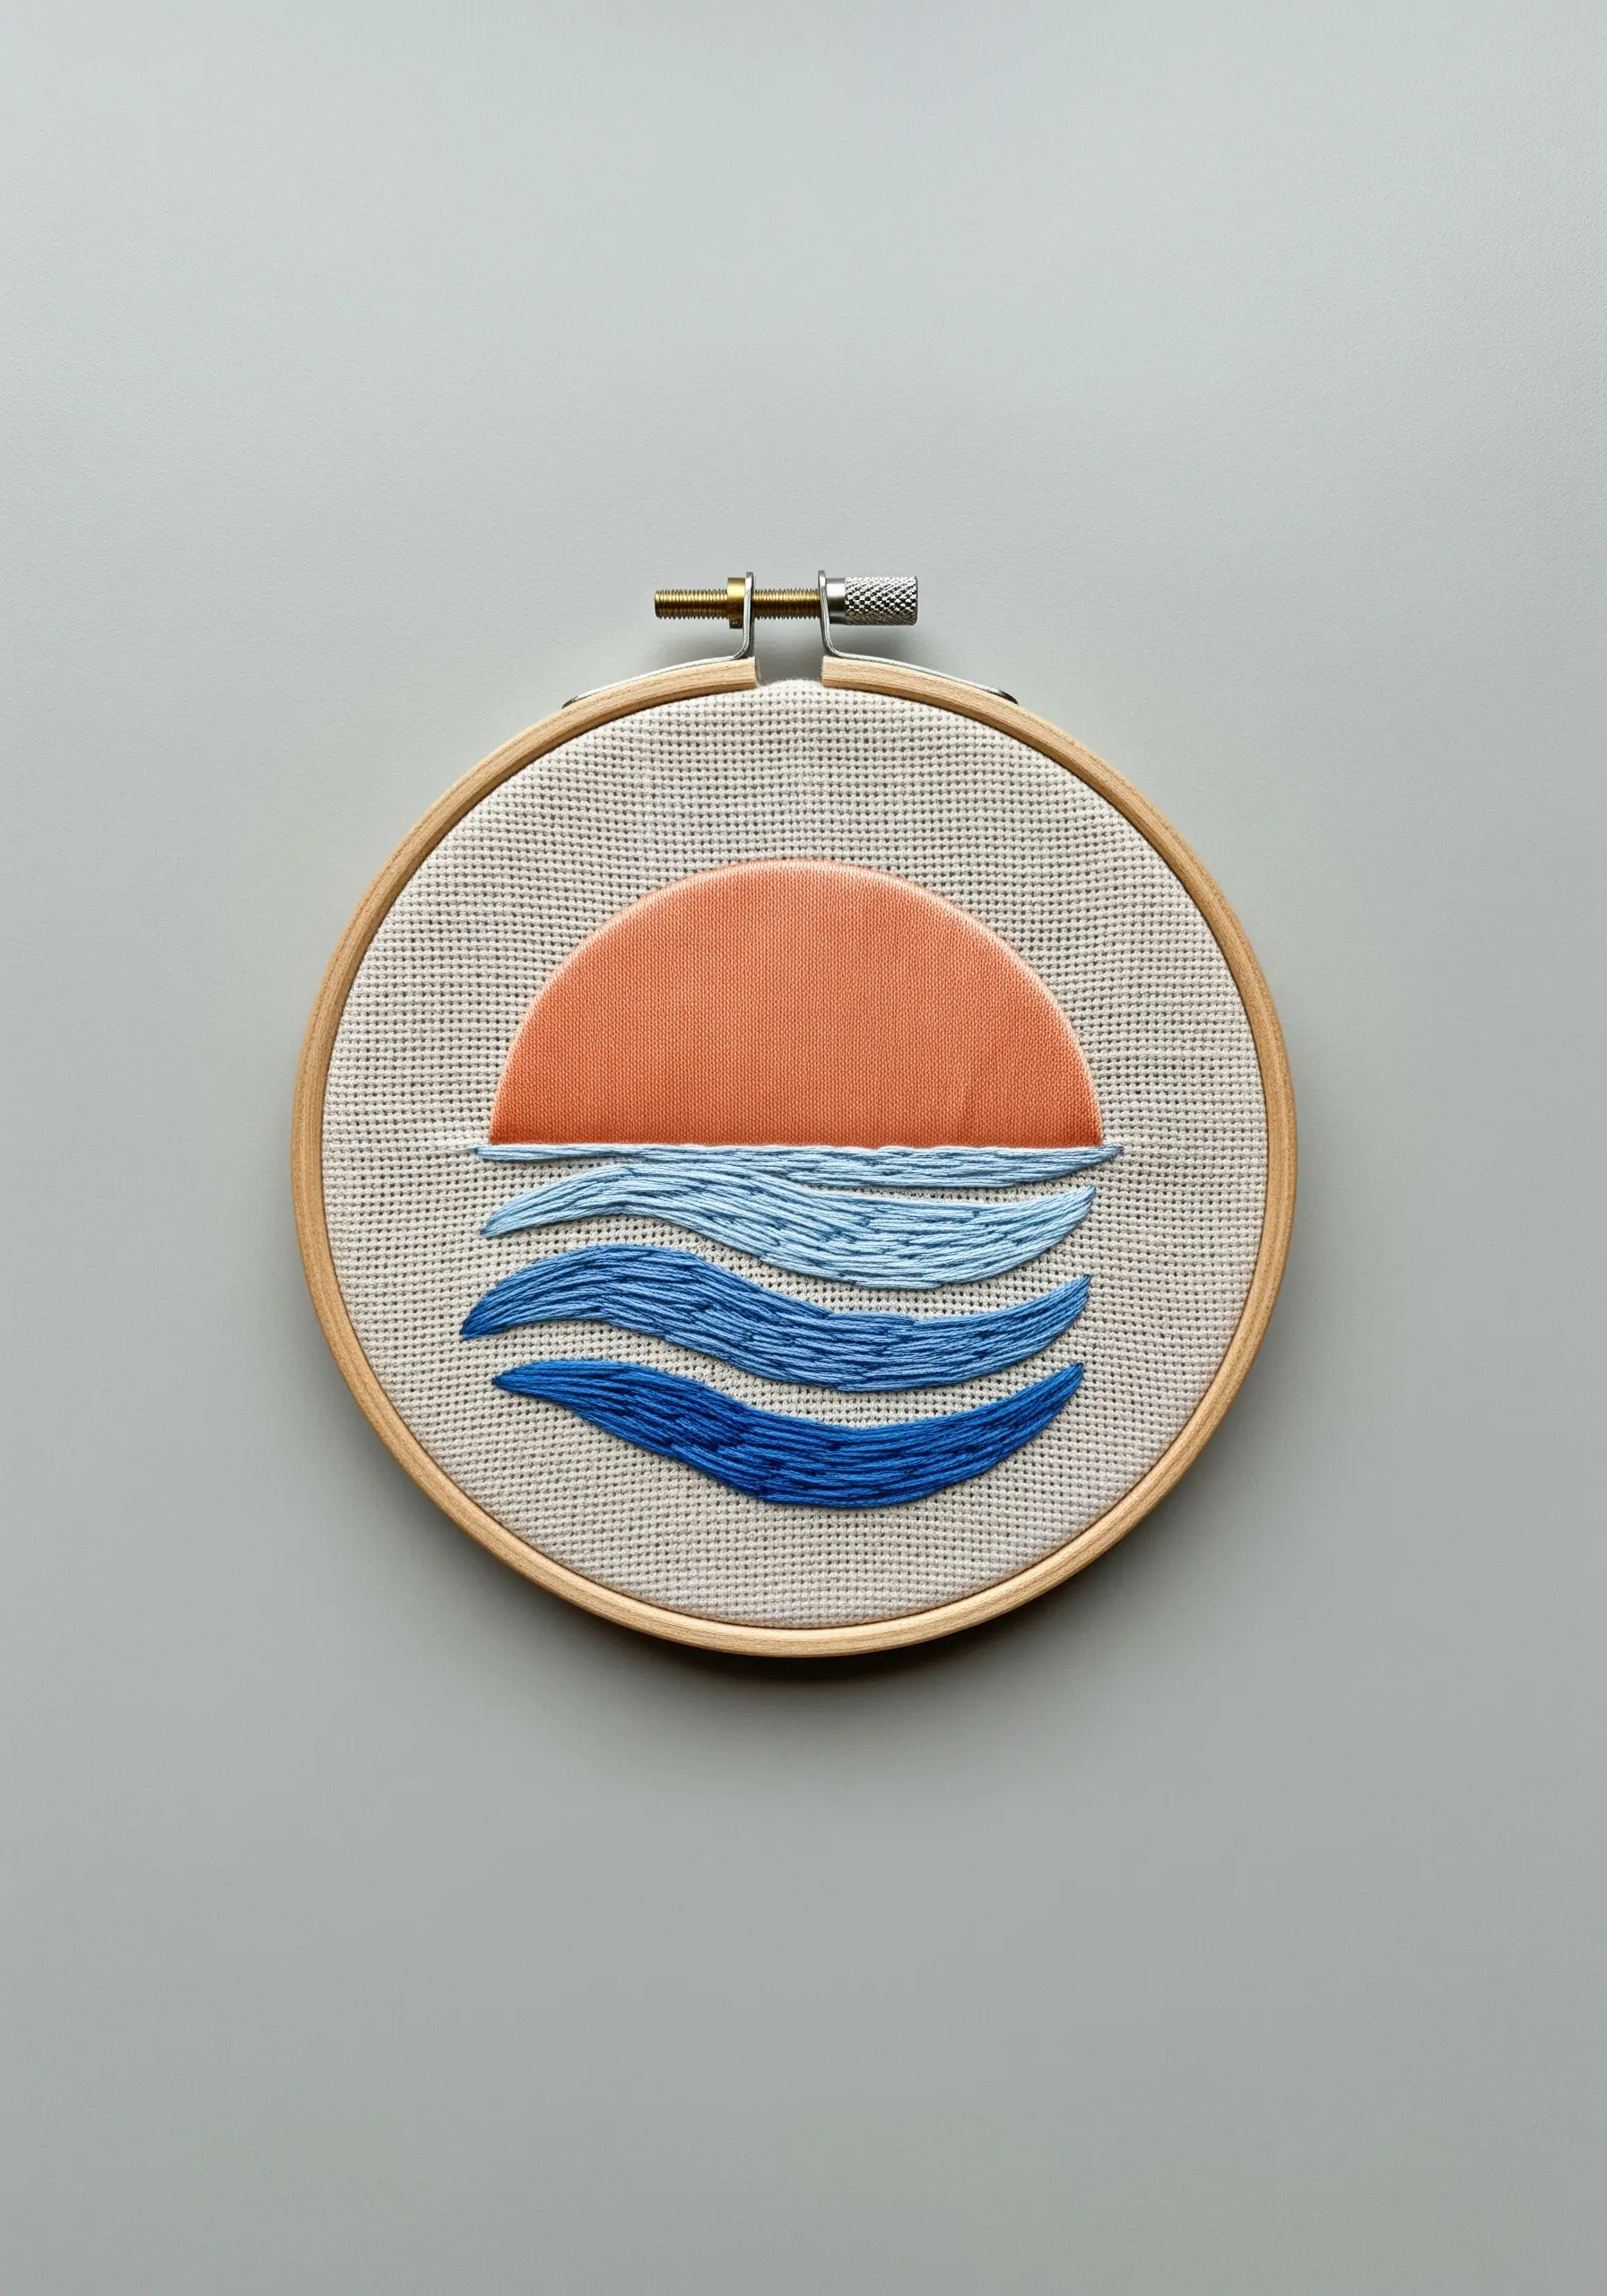
To create the illusion of water, layer bands of color using a long-and-short stitch.
Start with the darkest blue at the bottom and work your way up to the lightest shade, slightly overlapping each new color into the one below it.
Keep your stitches horizontal and slightly wavy to mimic the movement of the ocean.
This technique provides a painterly, blended effect that is far more dynamic than solid blocks of color for ocean-inspired hoop embroidery.
19. Stitch Realistic Feathers with Precision
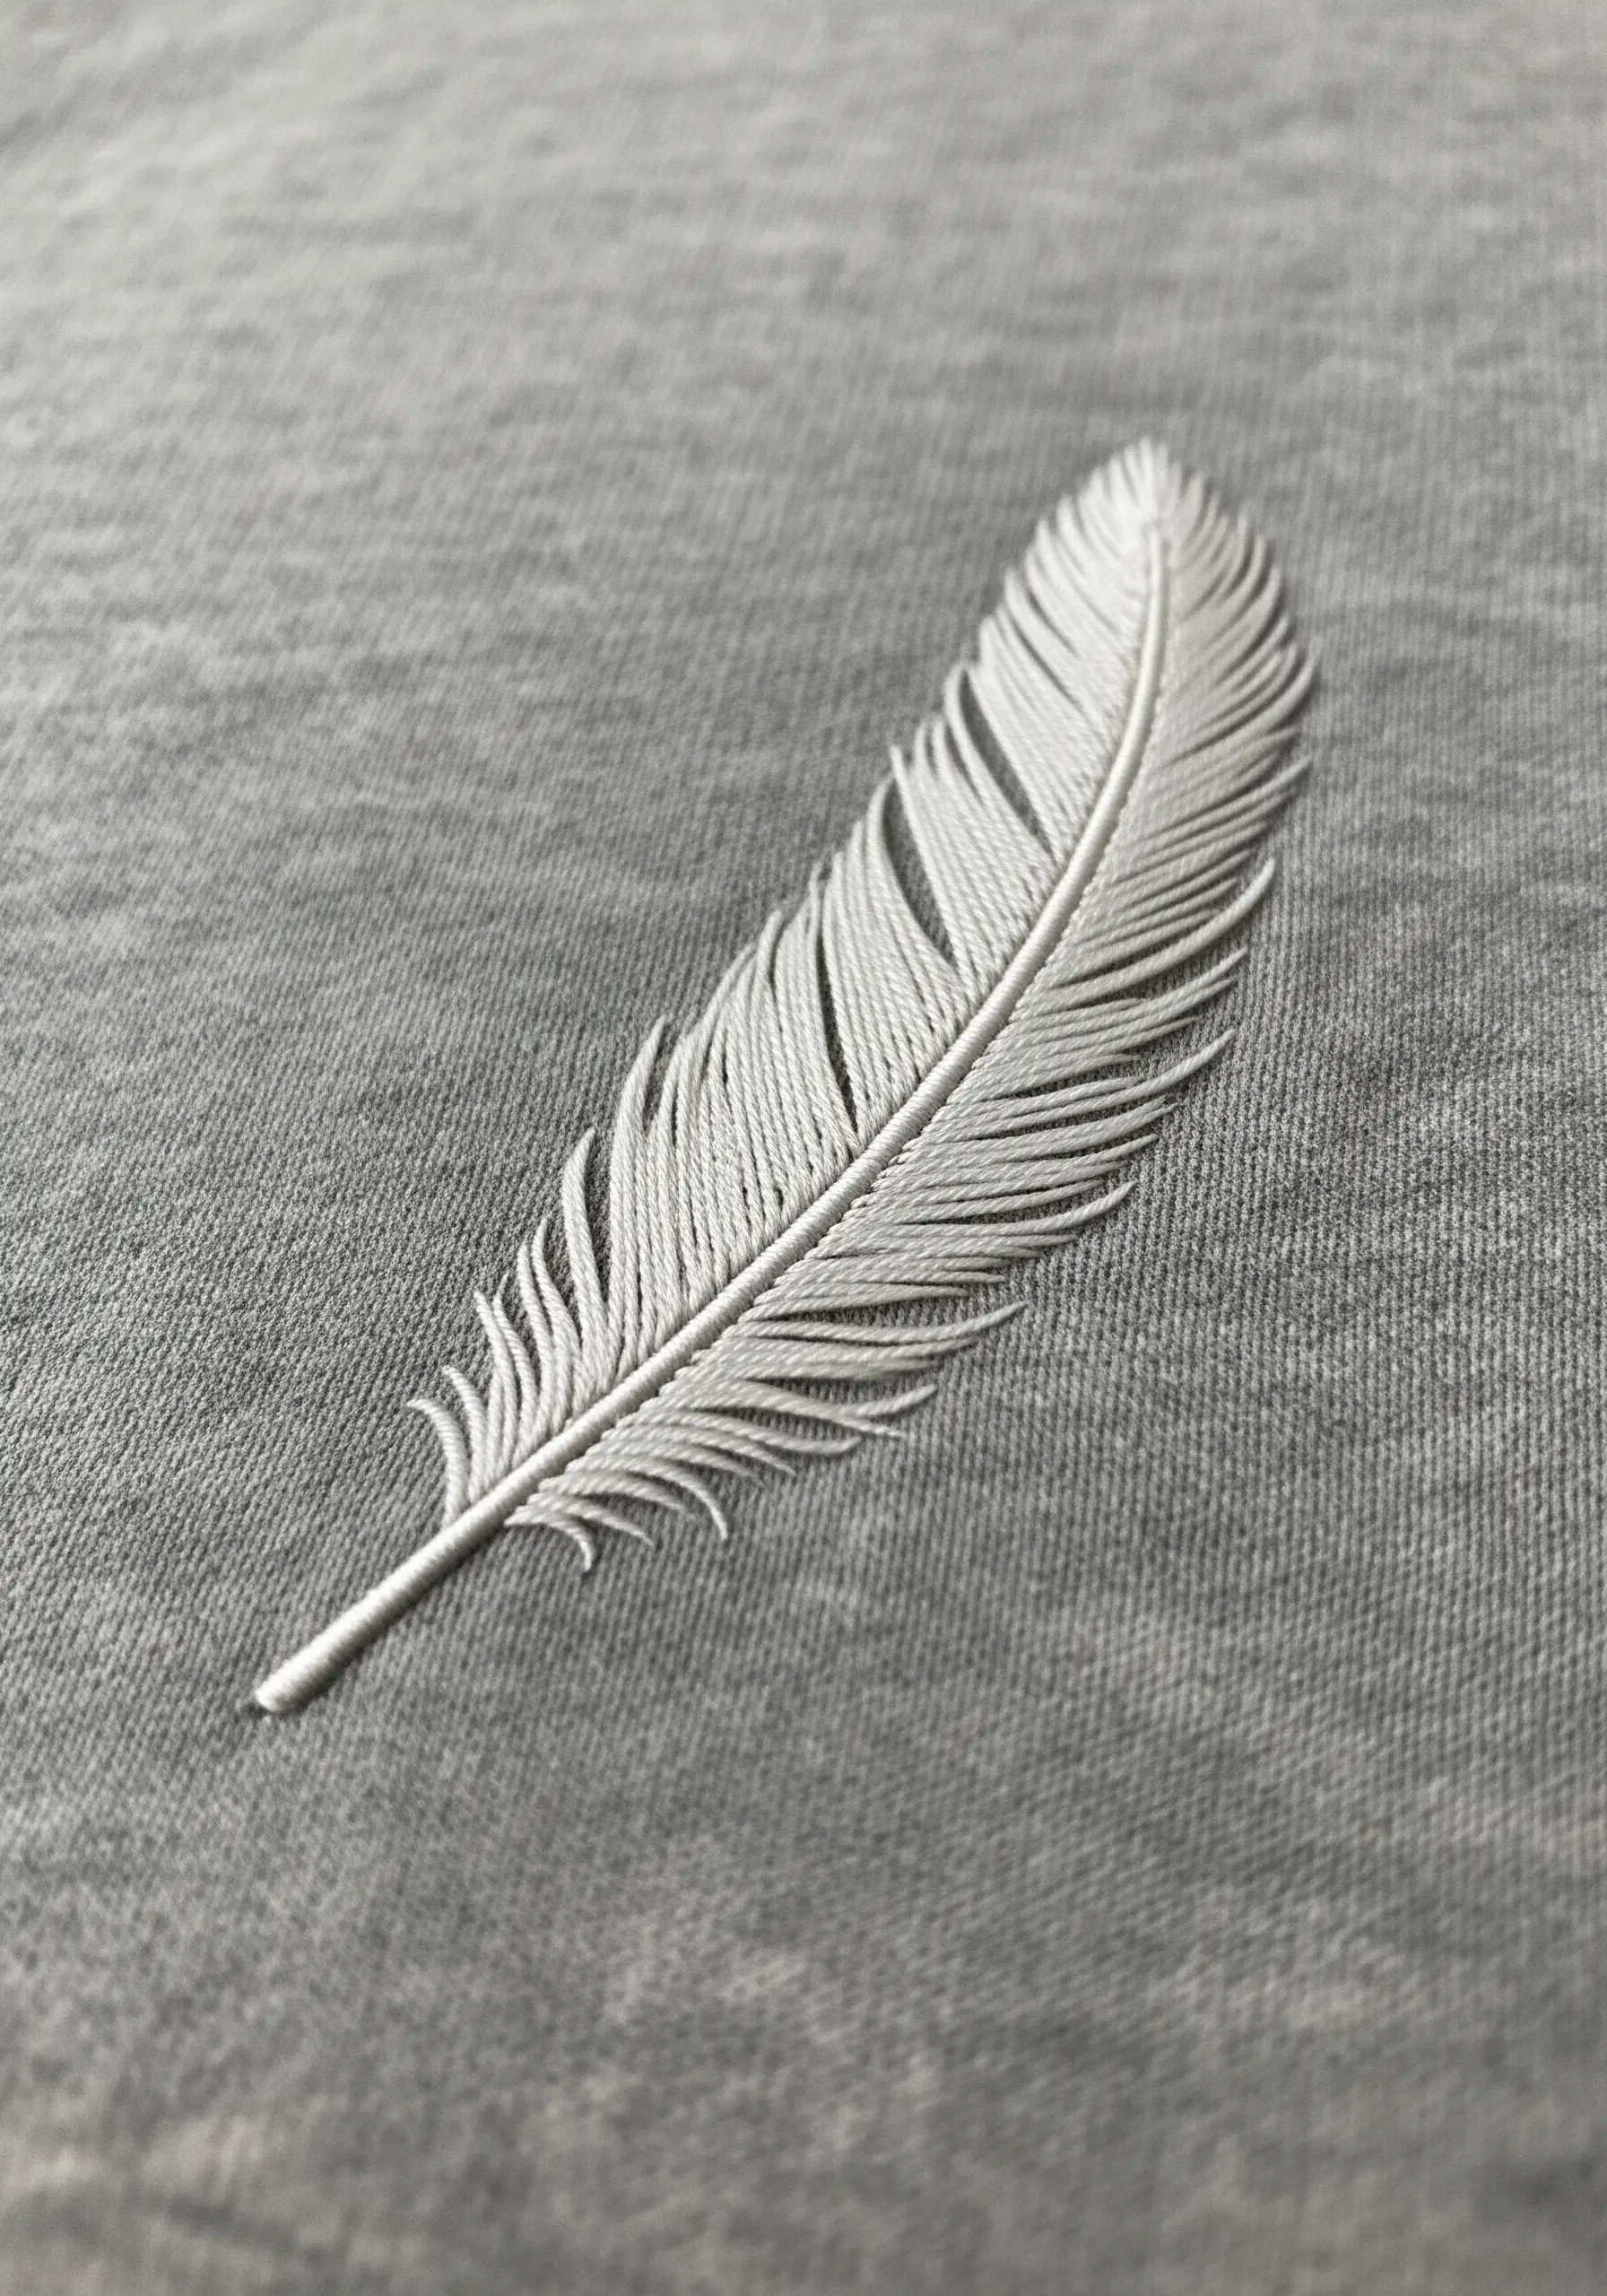
The key to a realistic feather is creating the central shaft first with a line of stem stitch.
From there, work individual straight stitches or flat stitches outwards on a diagonal, keeping them long and close together near the shaft and shorter and more spaced out at the edges.
Using a single color on a tonal fabric creates a subtle, elegant effect where the texture of the stitches becomes the main focus.
This delicate technique captures the essence of realistic feather embroidery beautifully.
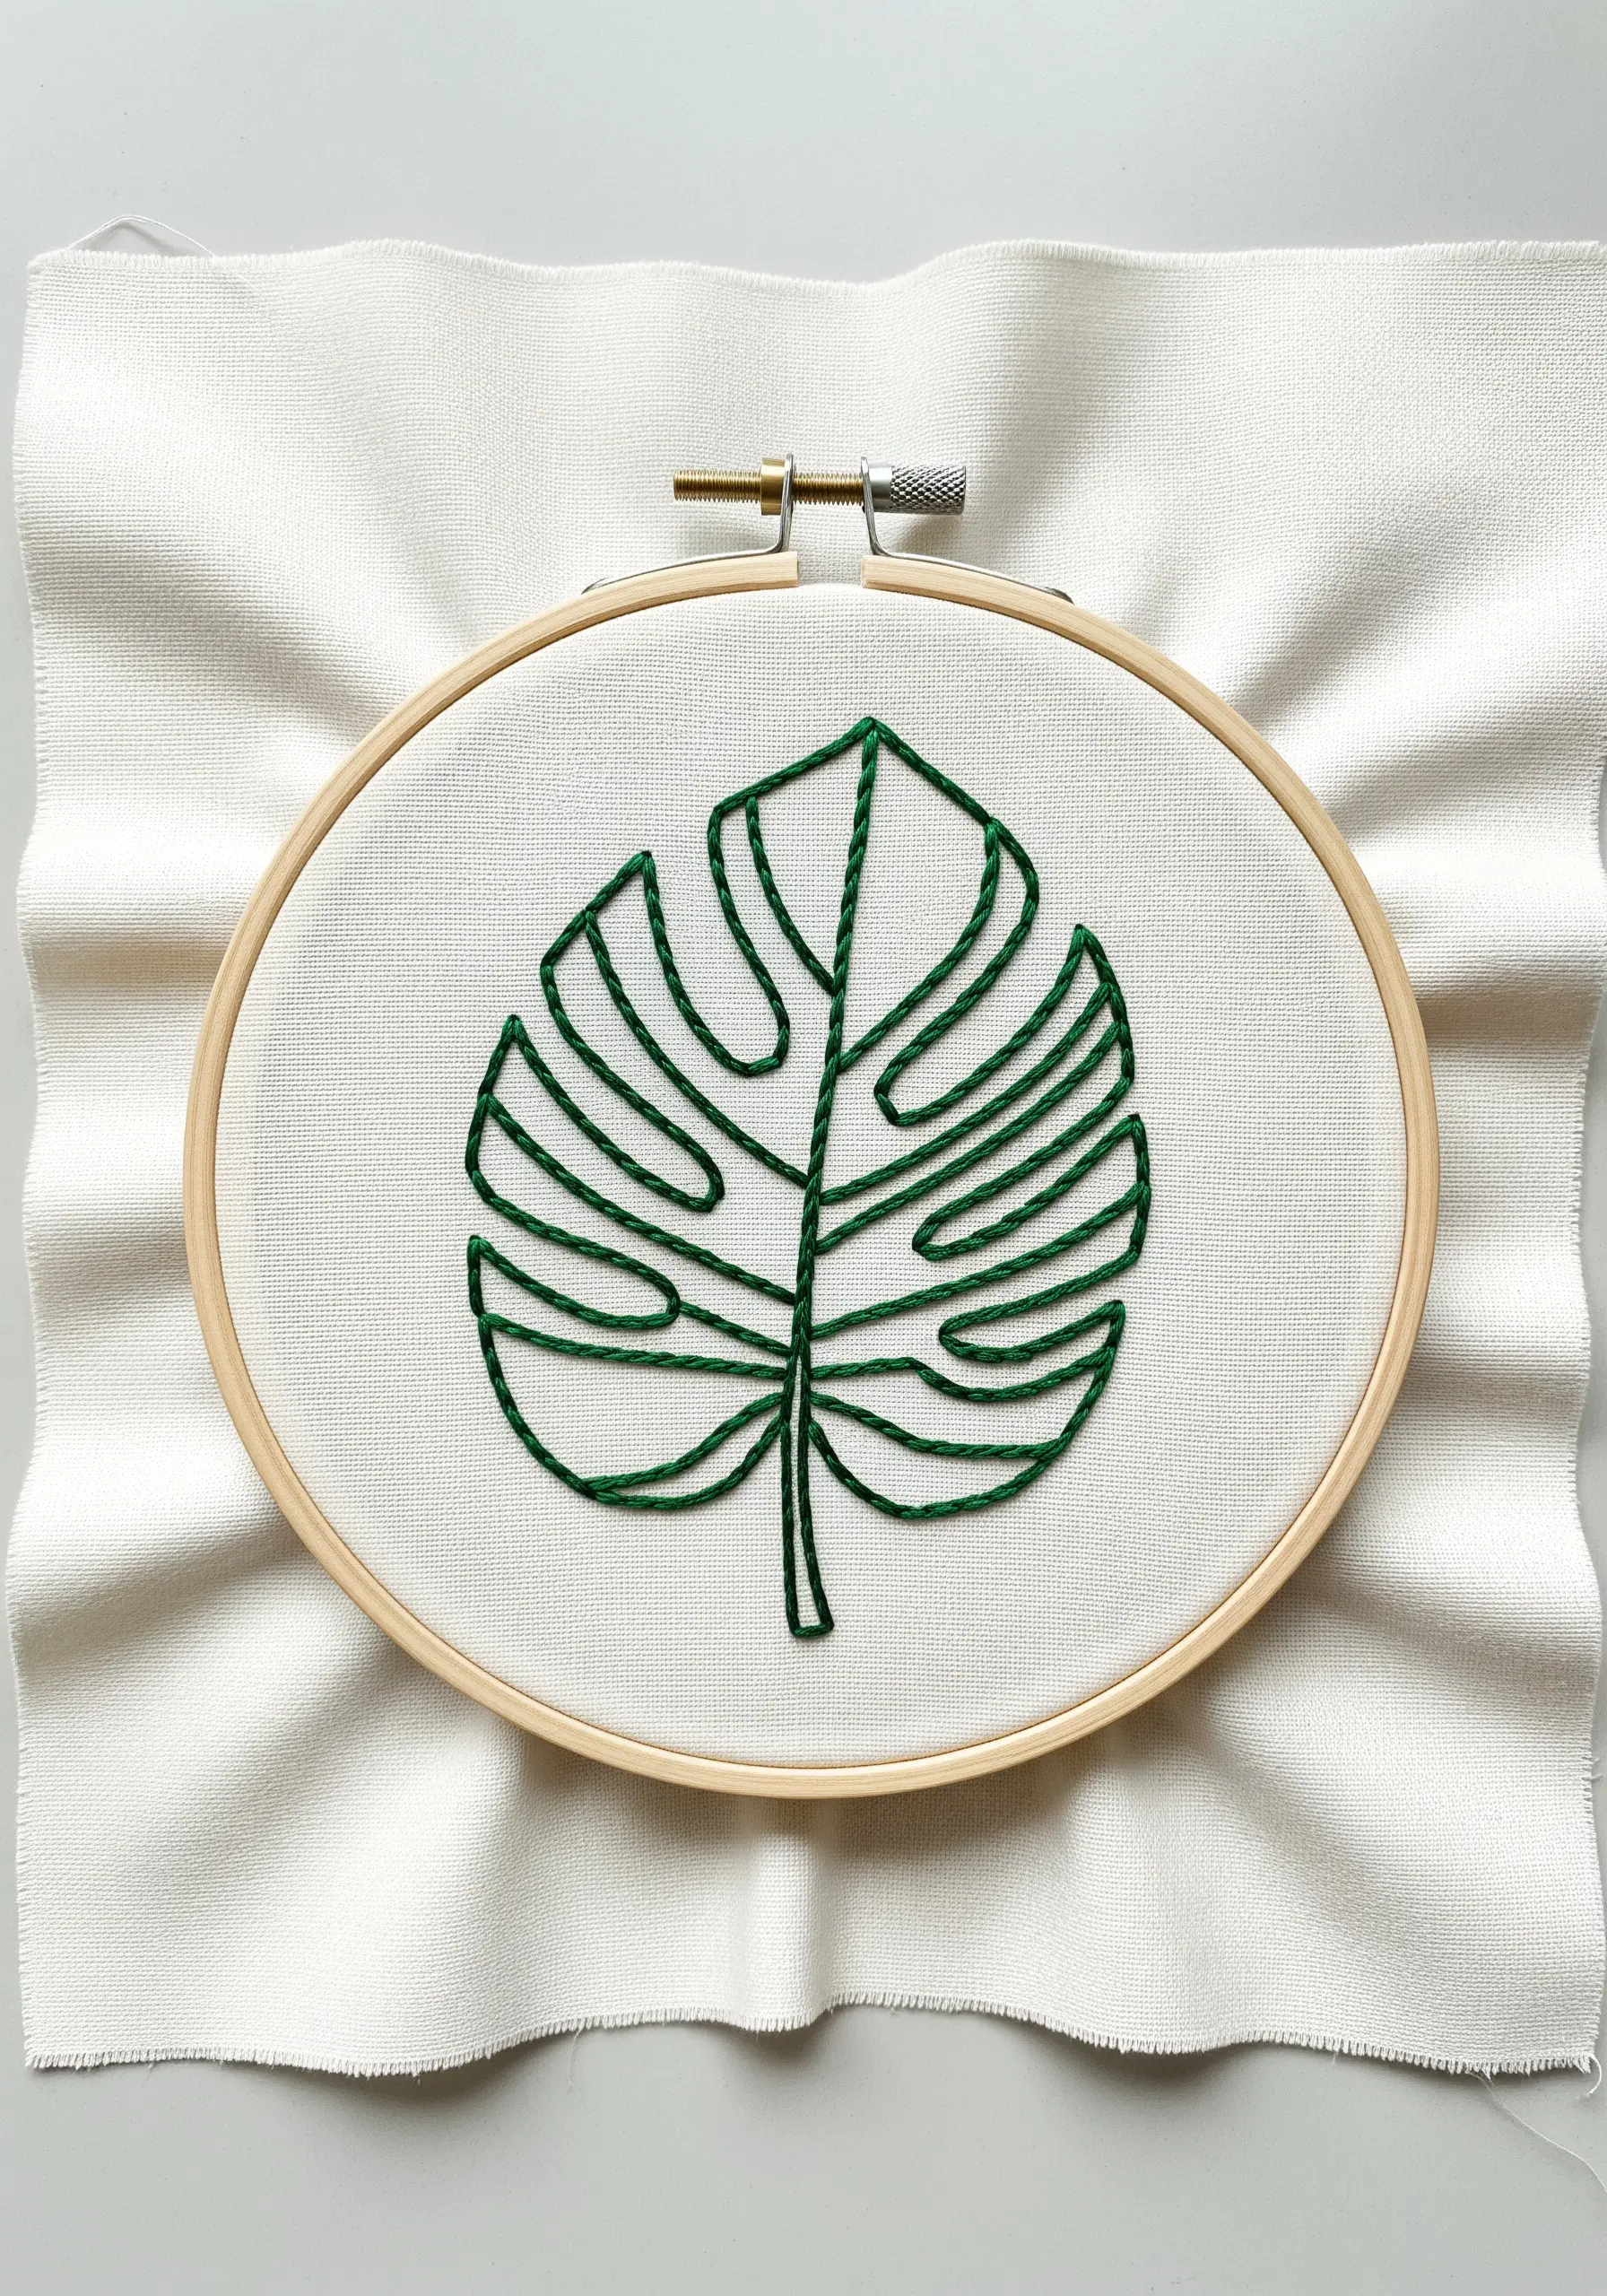
20. Define Form with Minimalist Outlines
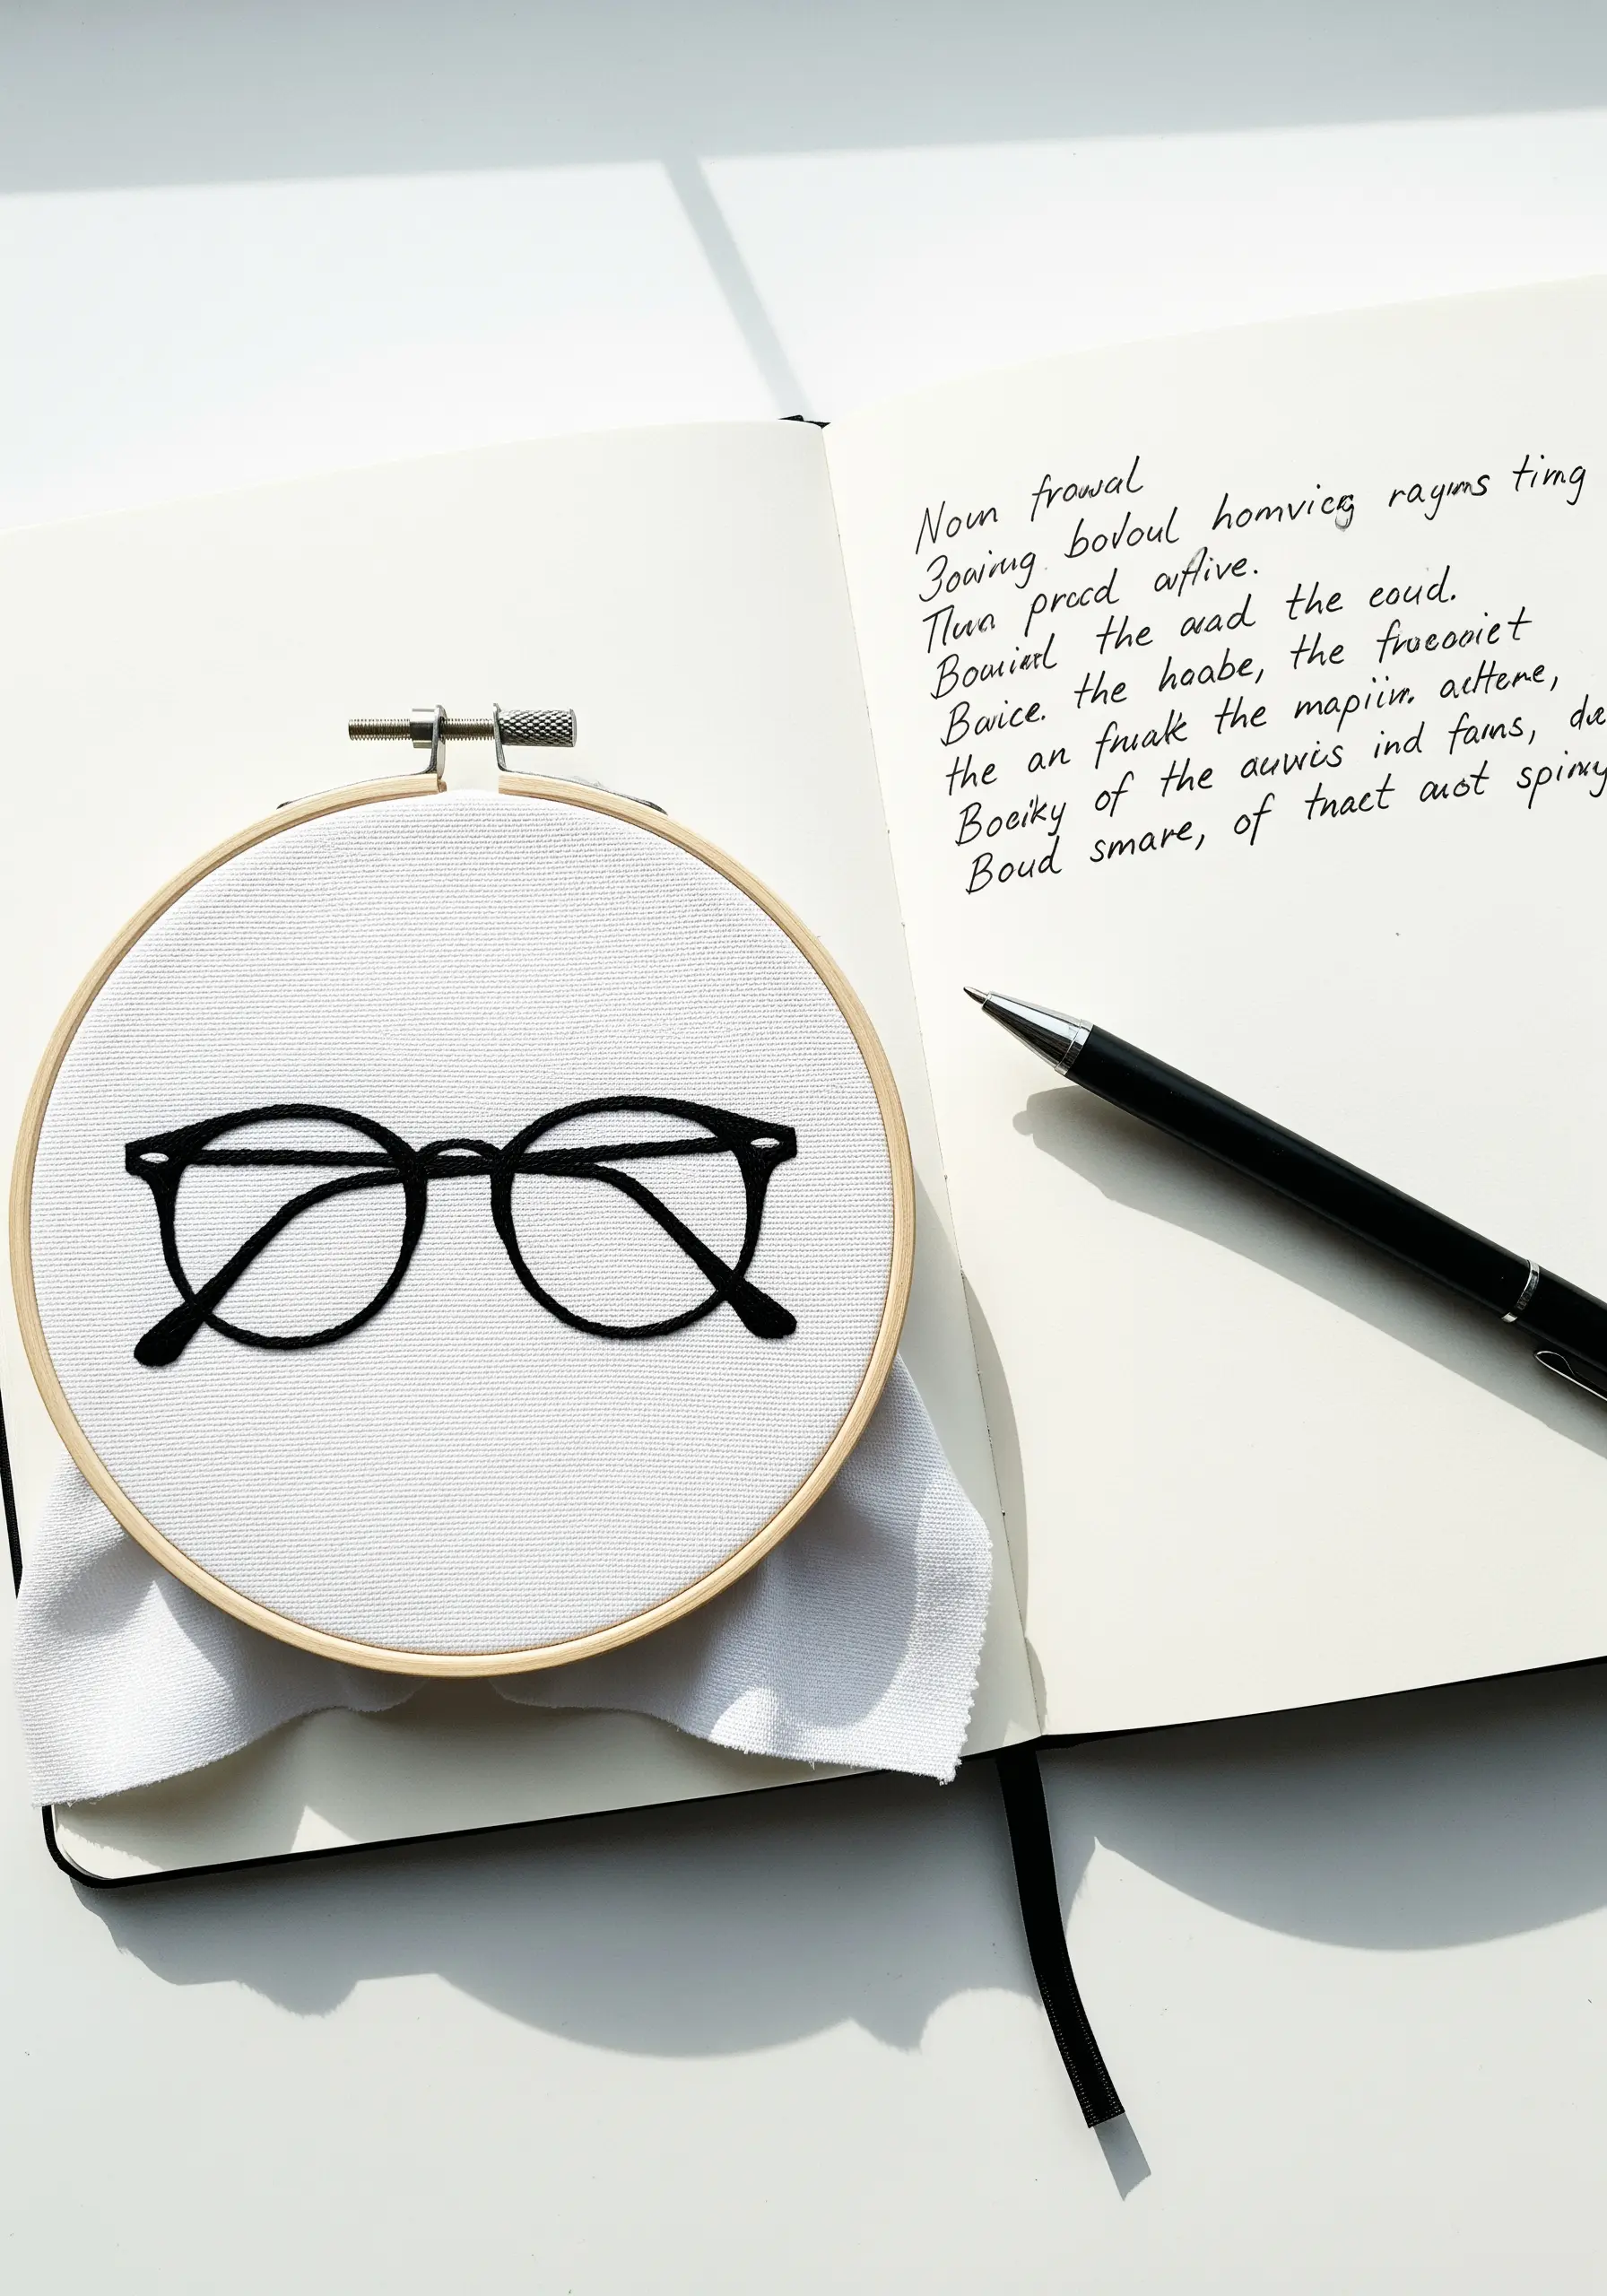
When your goal is a clean, graphic look, the consistency of your outline is everything.
Use a stem stitch or a whipped backstitch for a smooth, solid line that has more presence than a simple backstitch.
Pay close attention to the corners and curves, shortening your stitches as you navigate tight turns to maintain a crisp shape.
This approach is perfect for transforming everyday objects into classy, minimalist statements.
21. Build Fluffy Clouds with French Knots
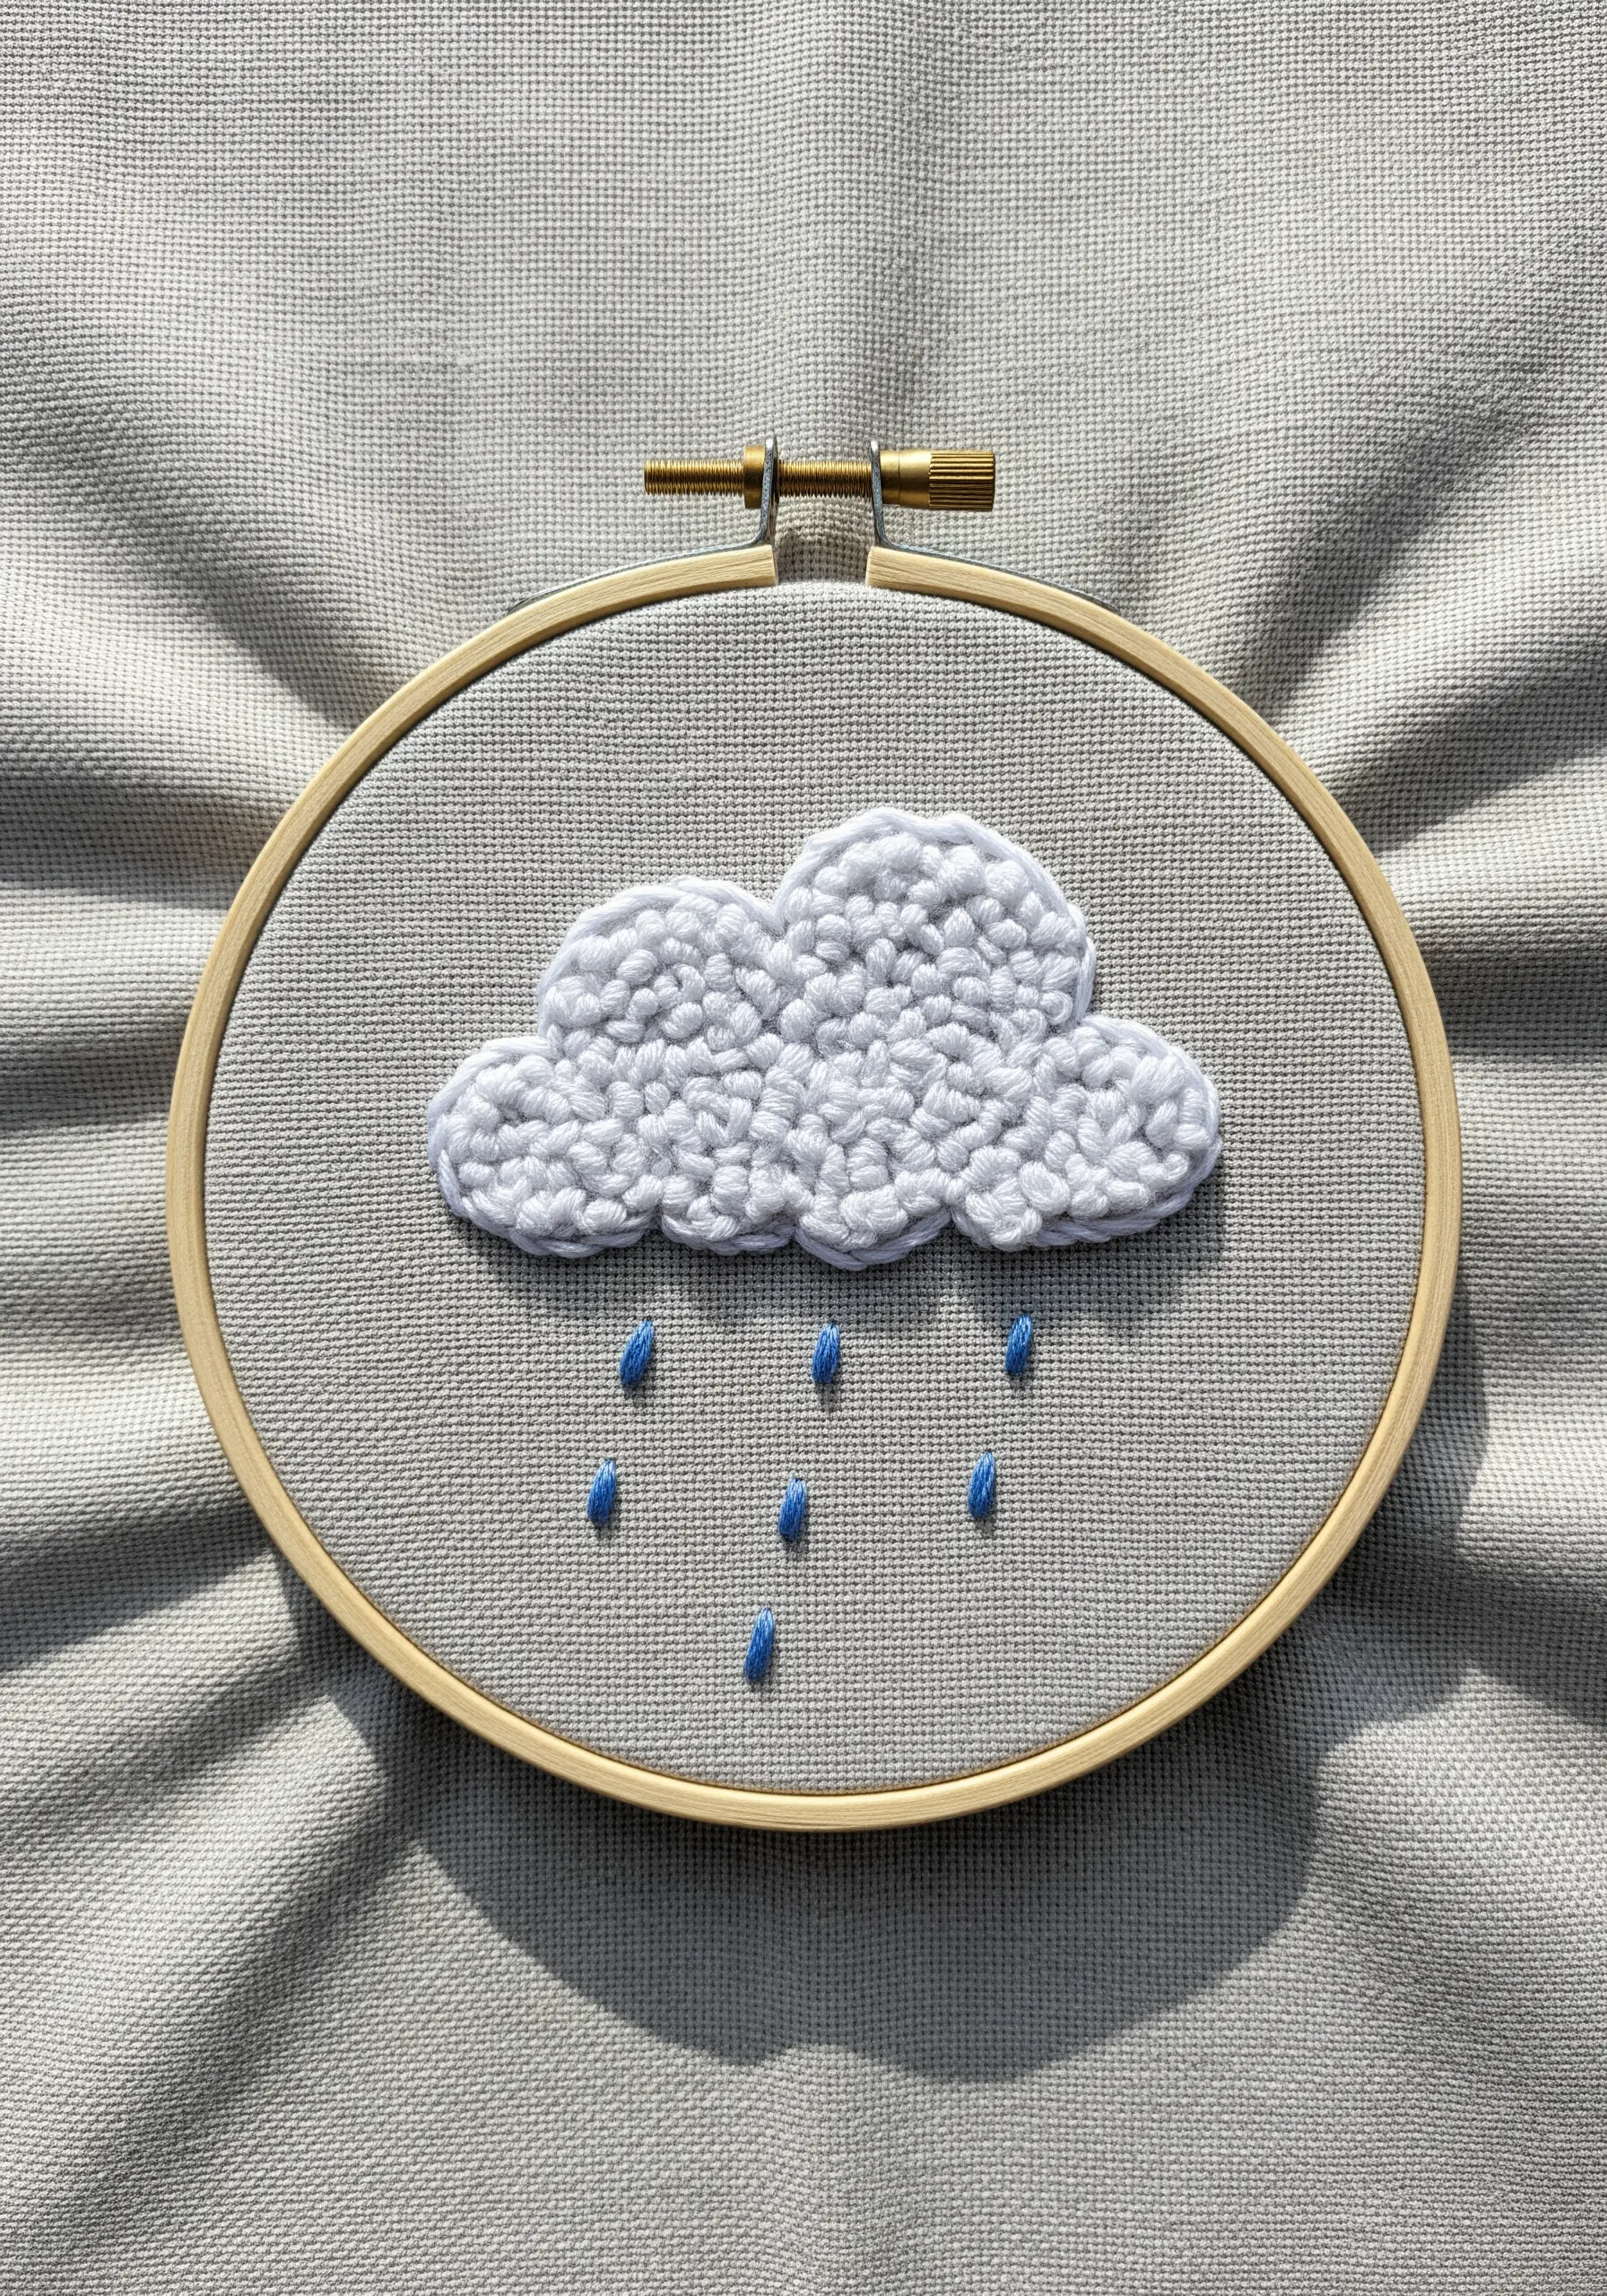
To create a fluffy, three-dimensional cloud, fill the shape with densely packed French knots.
Use a thicker thread, like all six strands of cotton floss or even a fine wool thread, to get a plush, textured result faster.
Vary the number of wraps on your needle for each knot (one, two, or three times) to create subtle variations in size, making the cloud feel more organic and less uniform.
The raindrops, stitched as simple teardrop-shaped satin stitches, provide a perfect contrast in texture.
22. Communicate Emotion Through Simple Lines
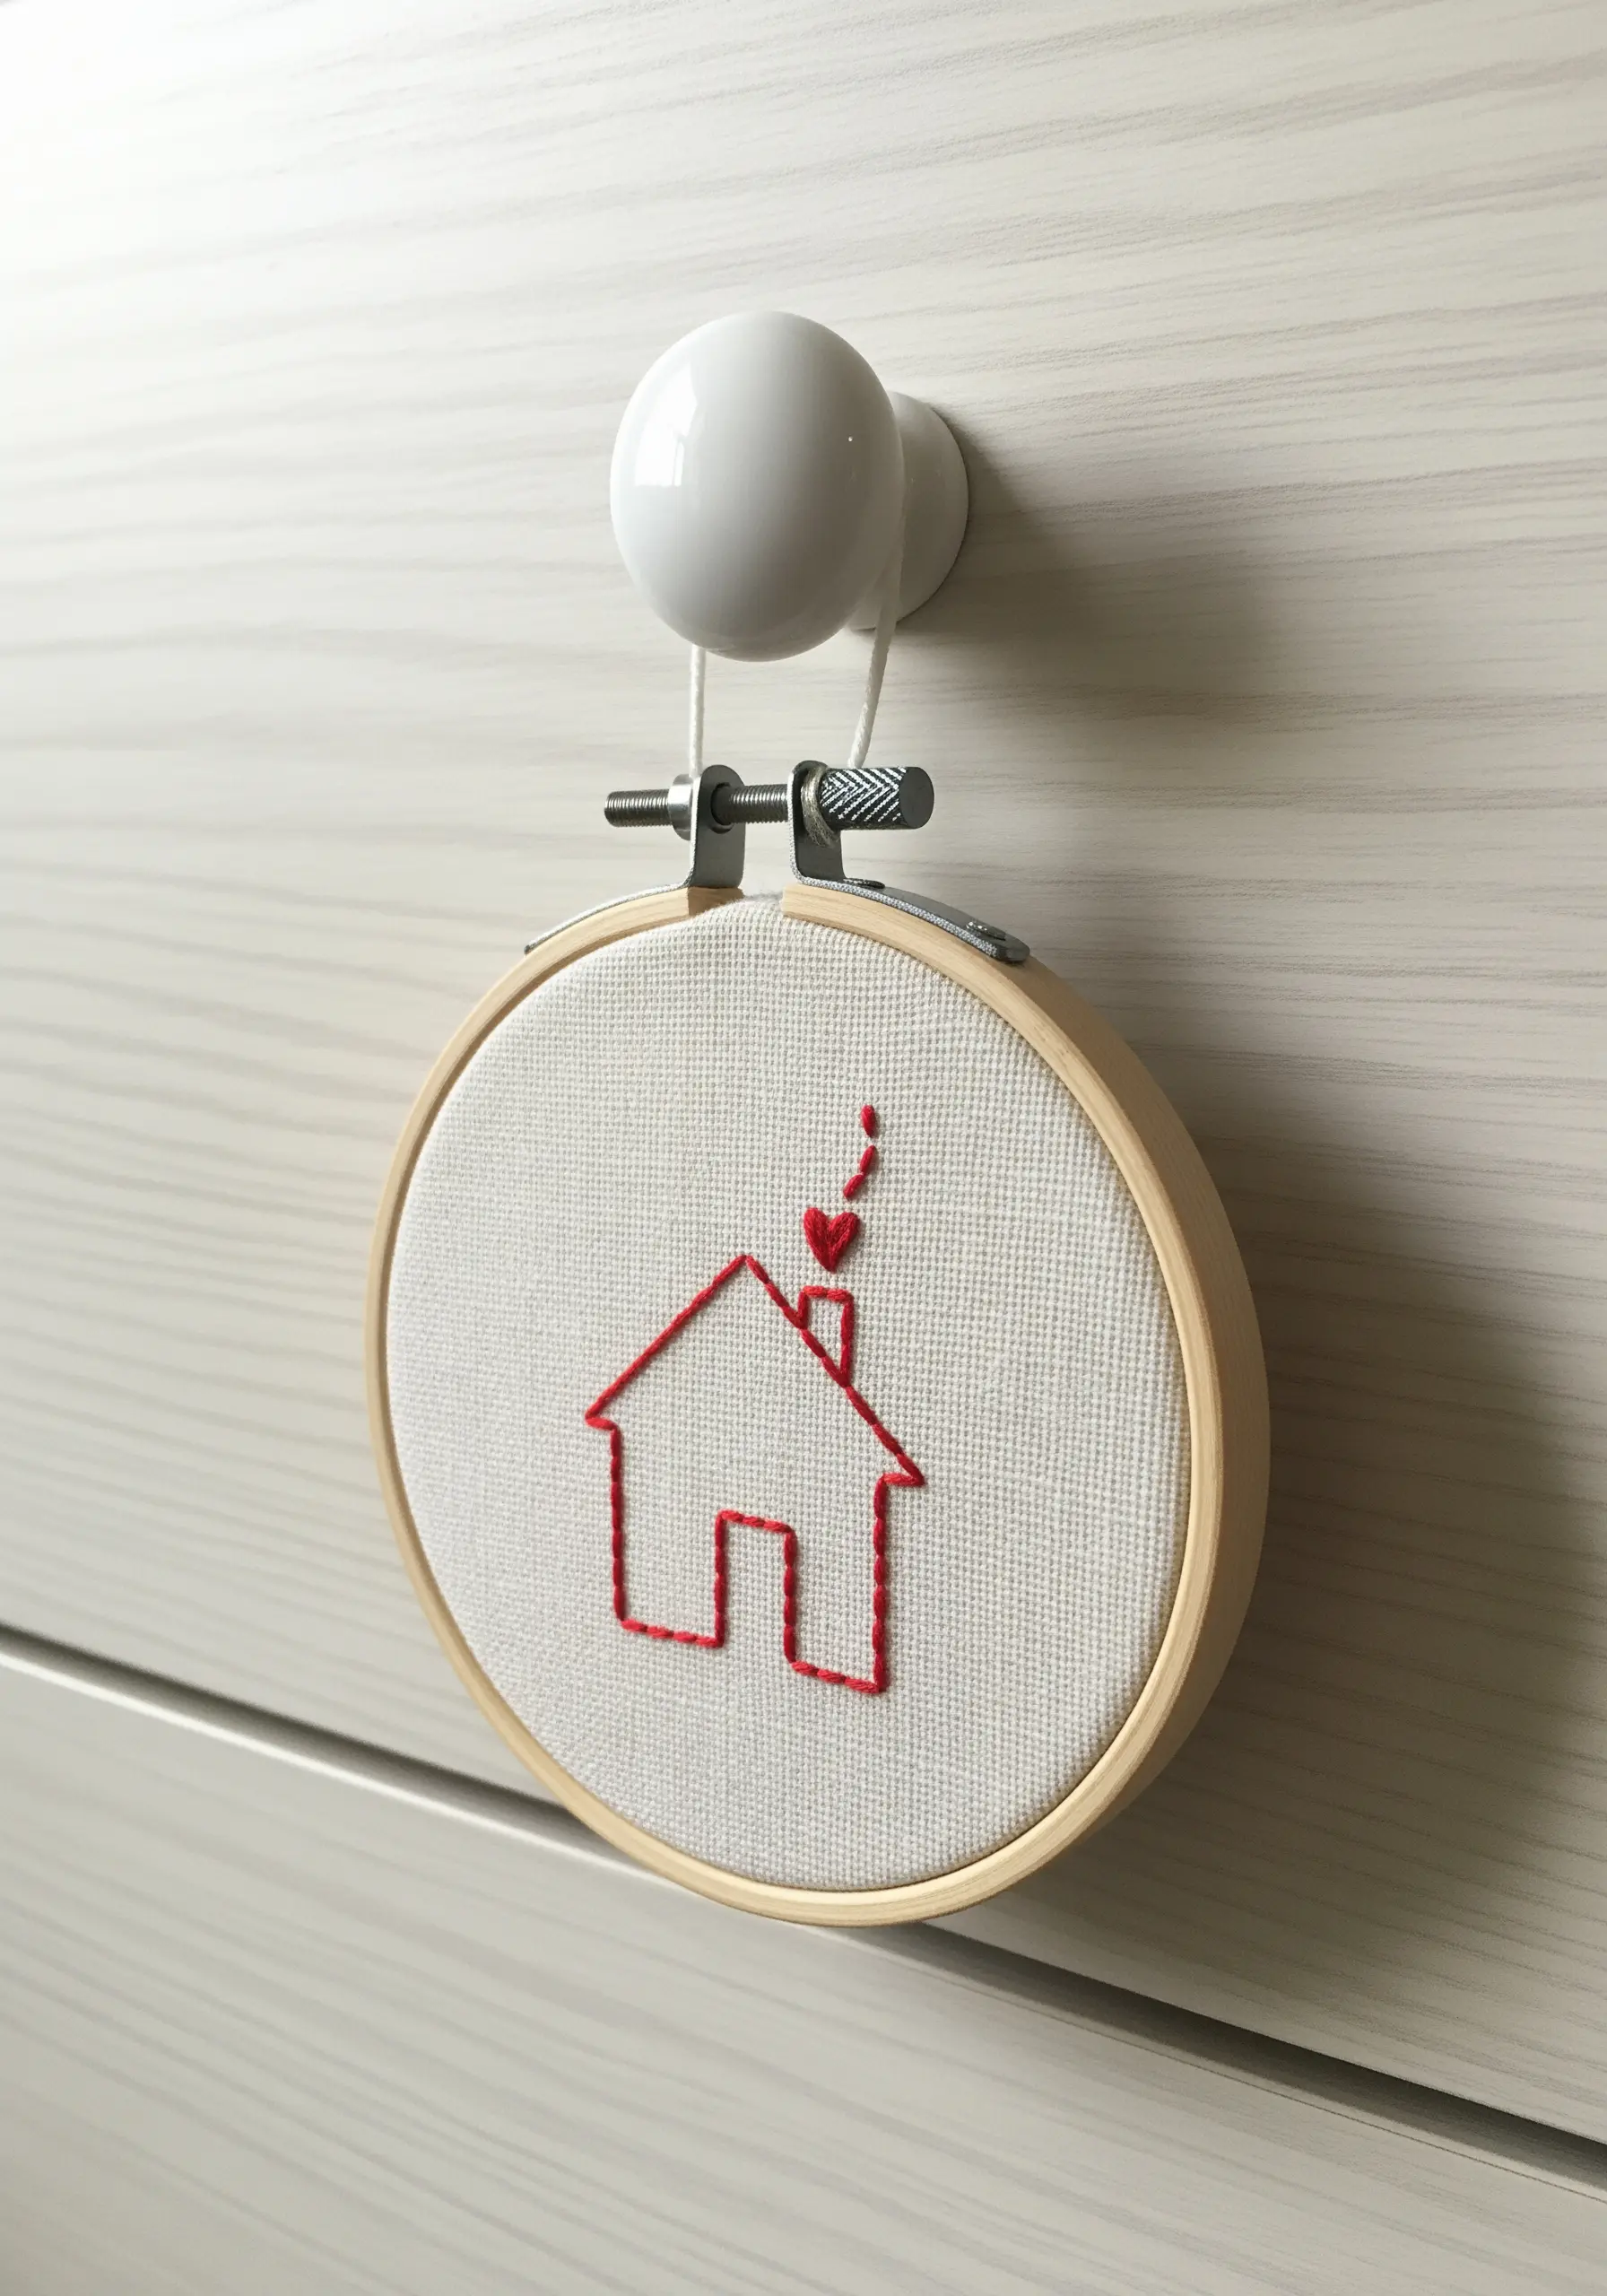
Even the simplest outline can tell a story.
Here, a basic backstitch creates the universal symbol for ‘home,’ while a single detached chain stitch for the smoke adds a touch of whimsy.
The tiny satin-stitched heart elevates the design from a mere house to a feeling of love and warmth.
This is a beautiful reminder that thoughtful details, not complexity, are what give handmade pieces their soul.
23. Create Realistic Leaves with Satin Stitch
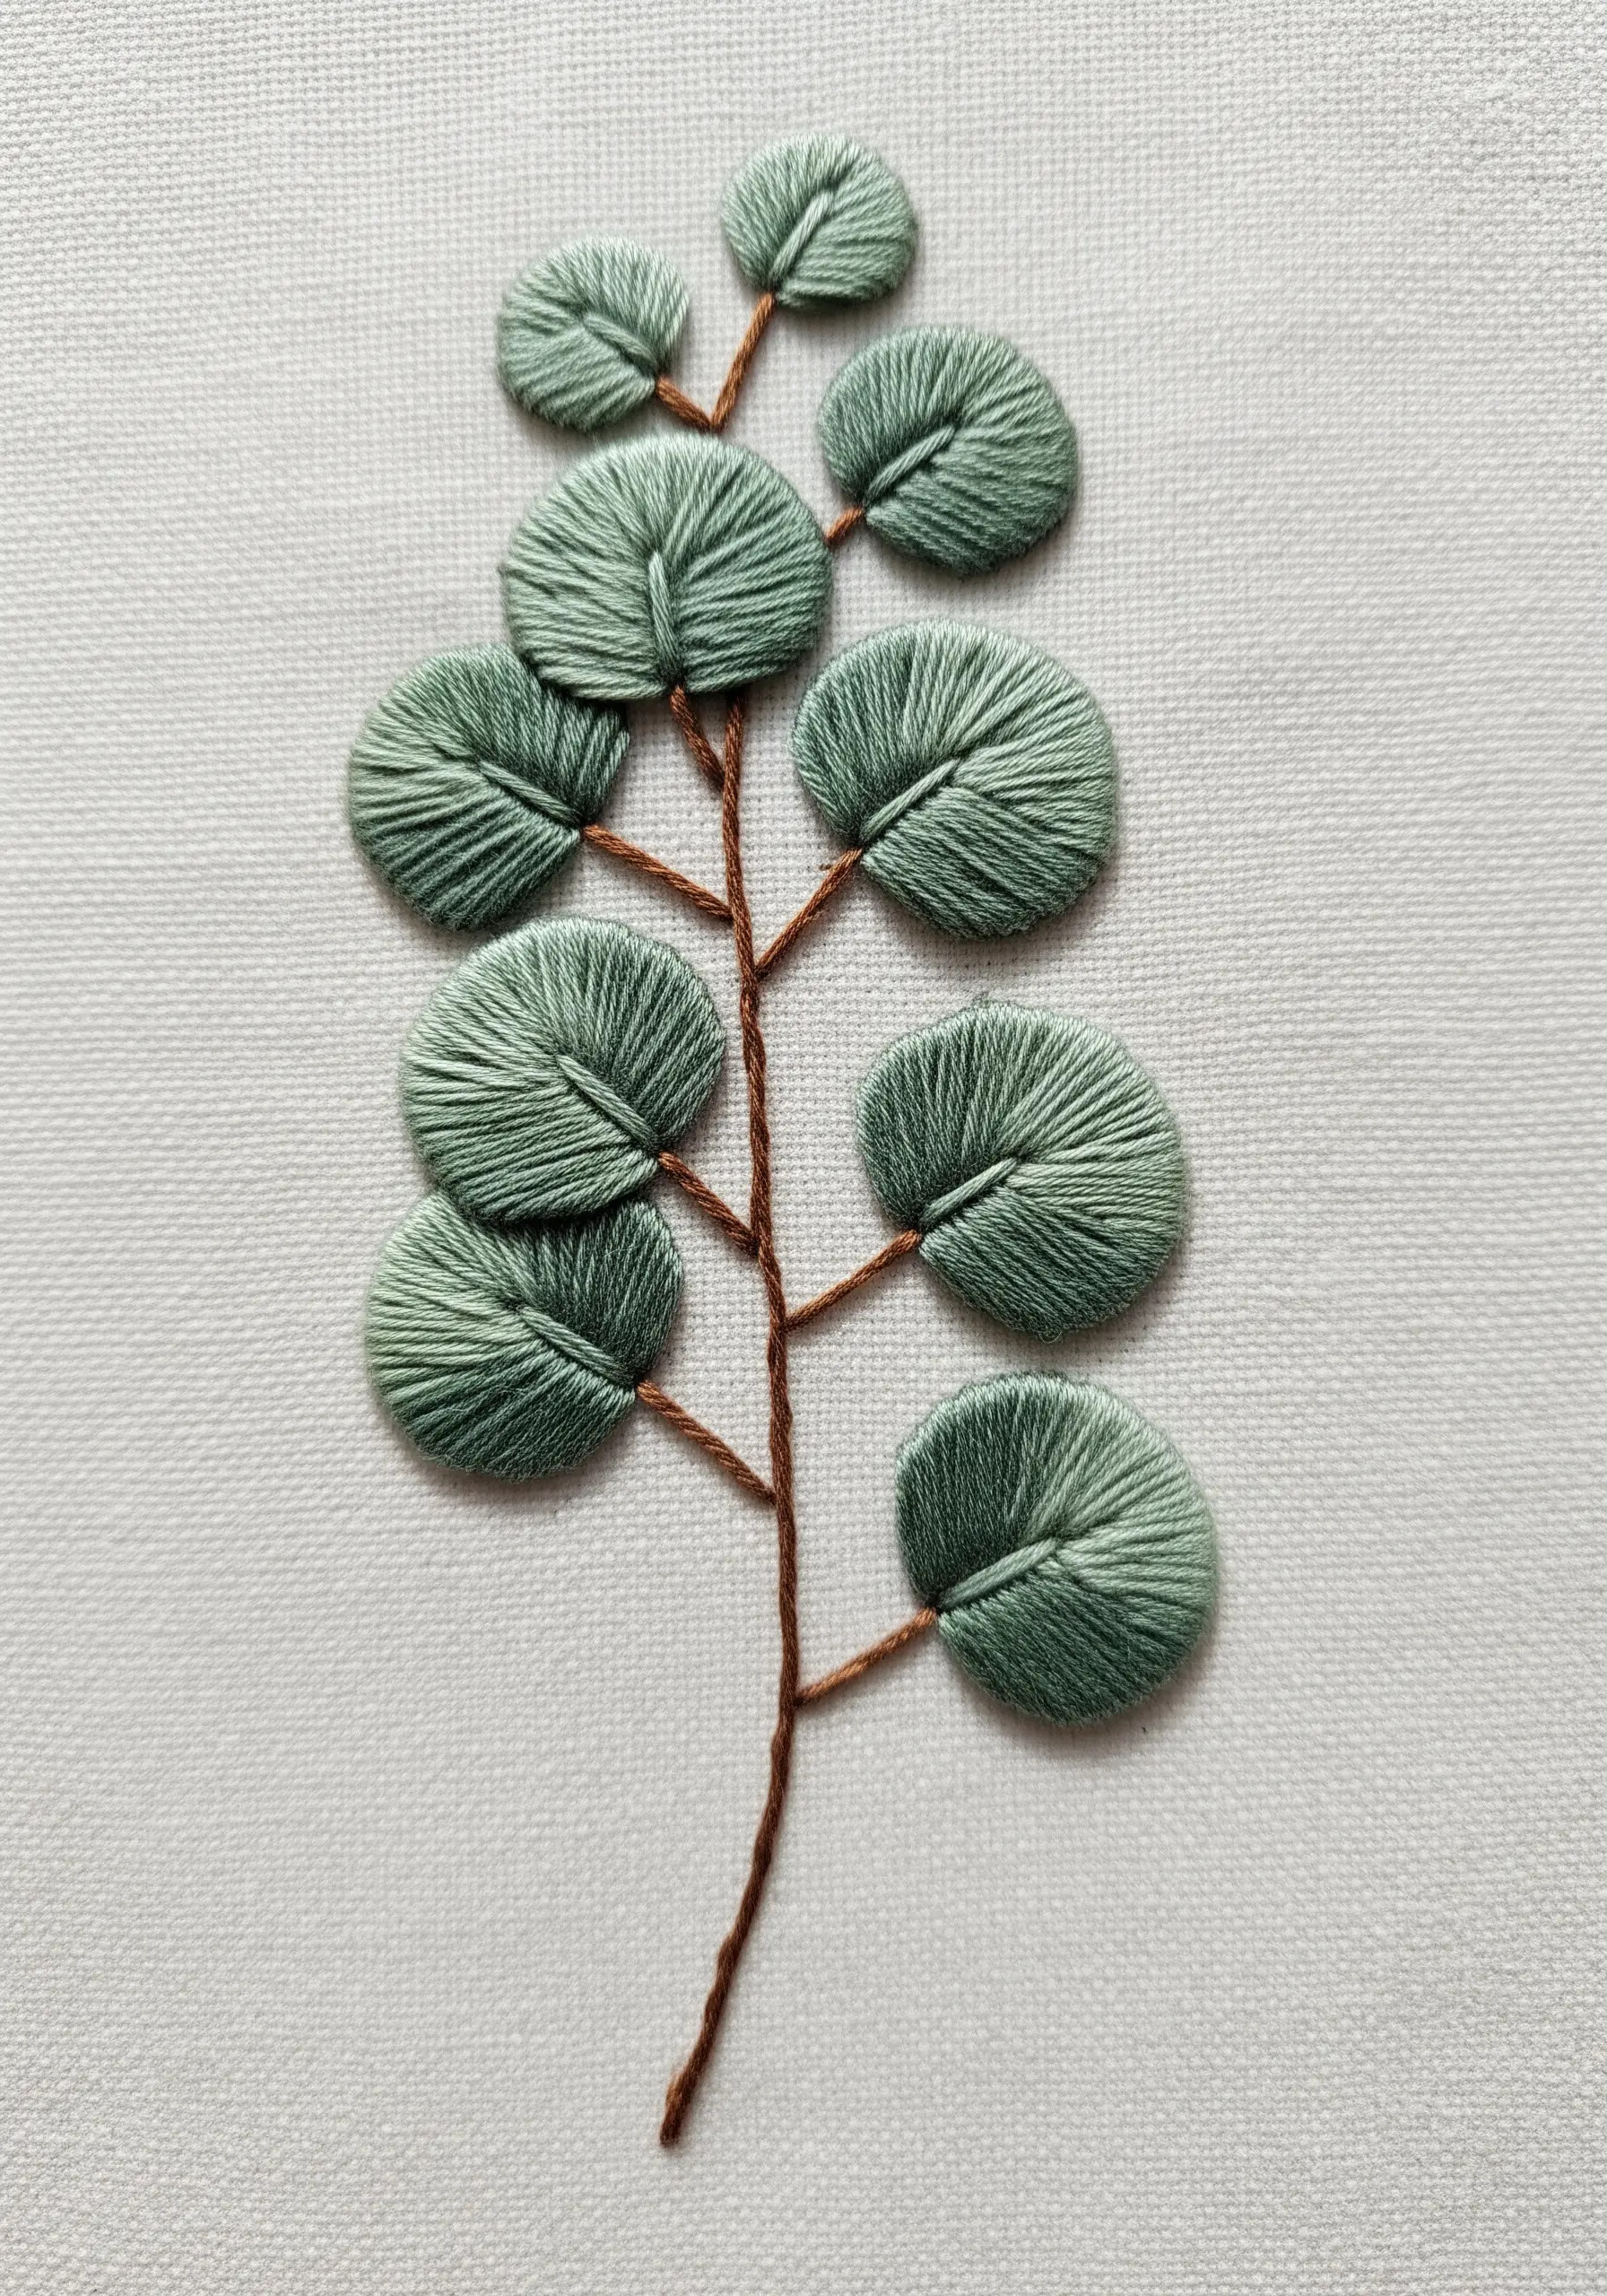
For realistic, rounded leaves like eucalyptus, the direction of your satin stitch is crucial.
Divide each leaf in half mentally and stitch from the center line outwards to the edge at a slight diagonal.
This technique creates a subtle ridge in the middle, mimicking a real leaf’s central vein and giving it a natural, dimensional look.
Using a slightly variegated or tonal green thread will further enhance the realism of these nature-inspired textures.
24. Achieve a Flawless Silhouette with Fill Stitch
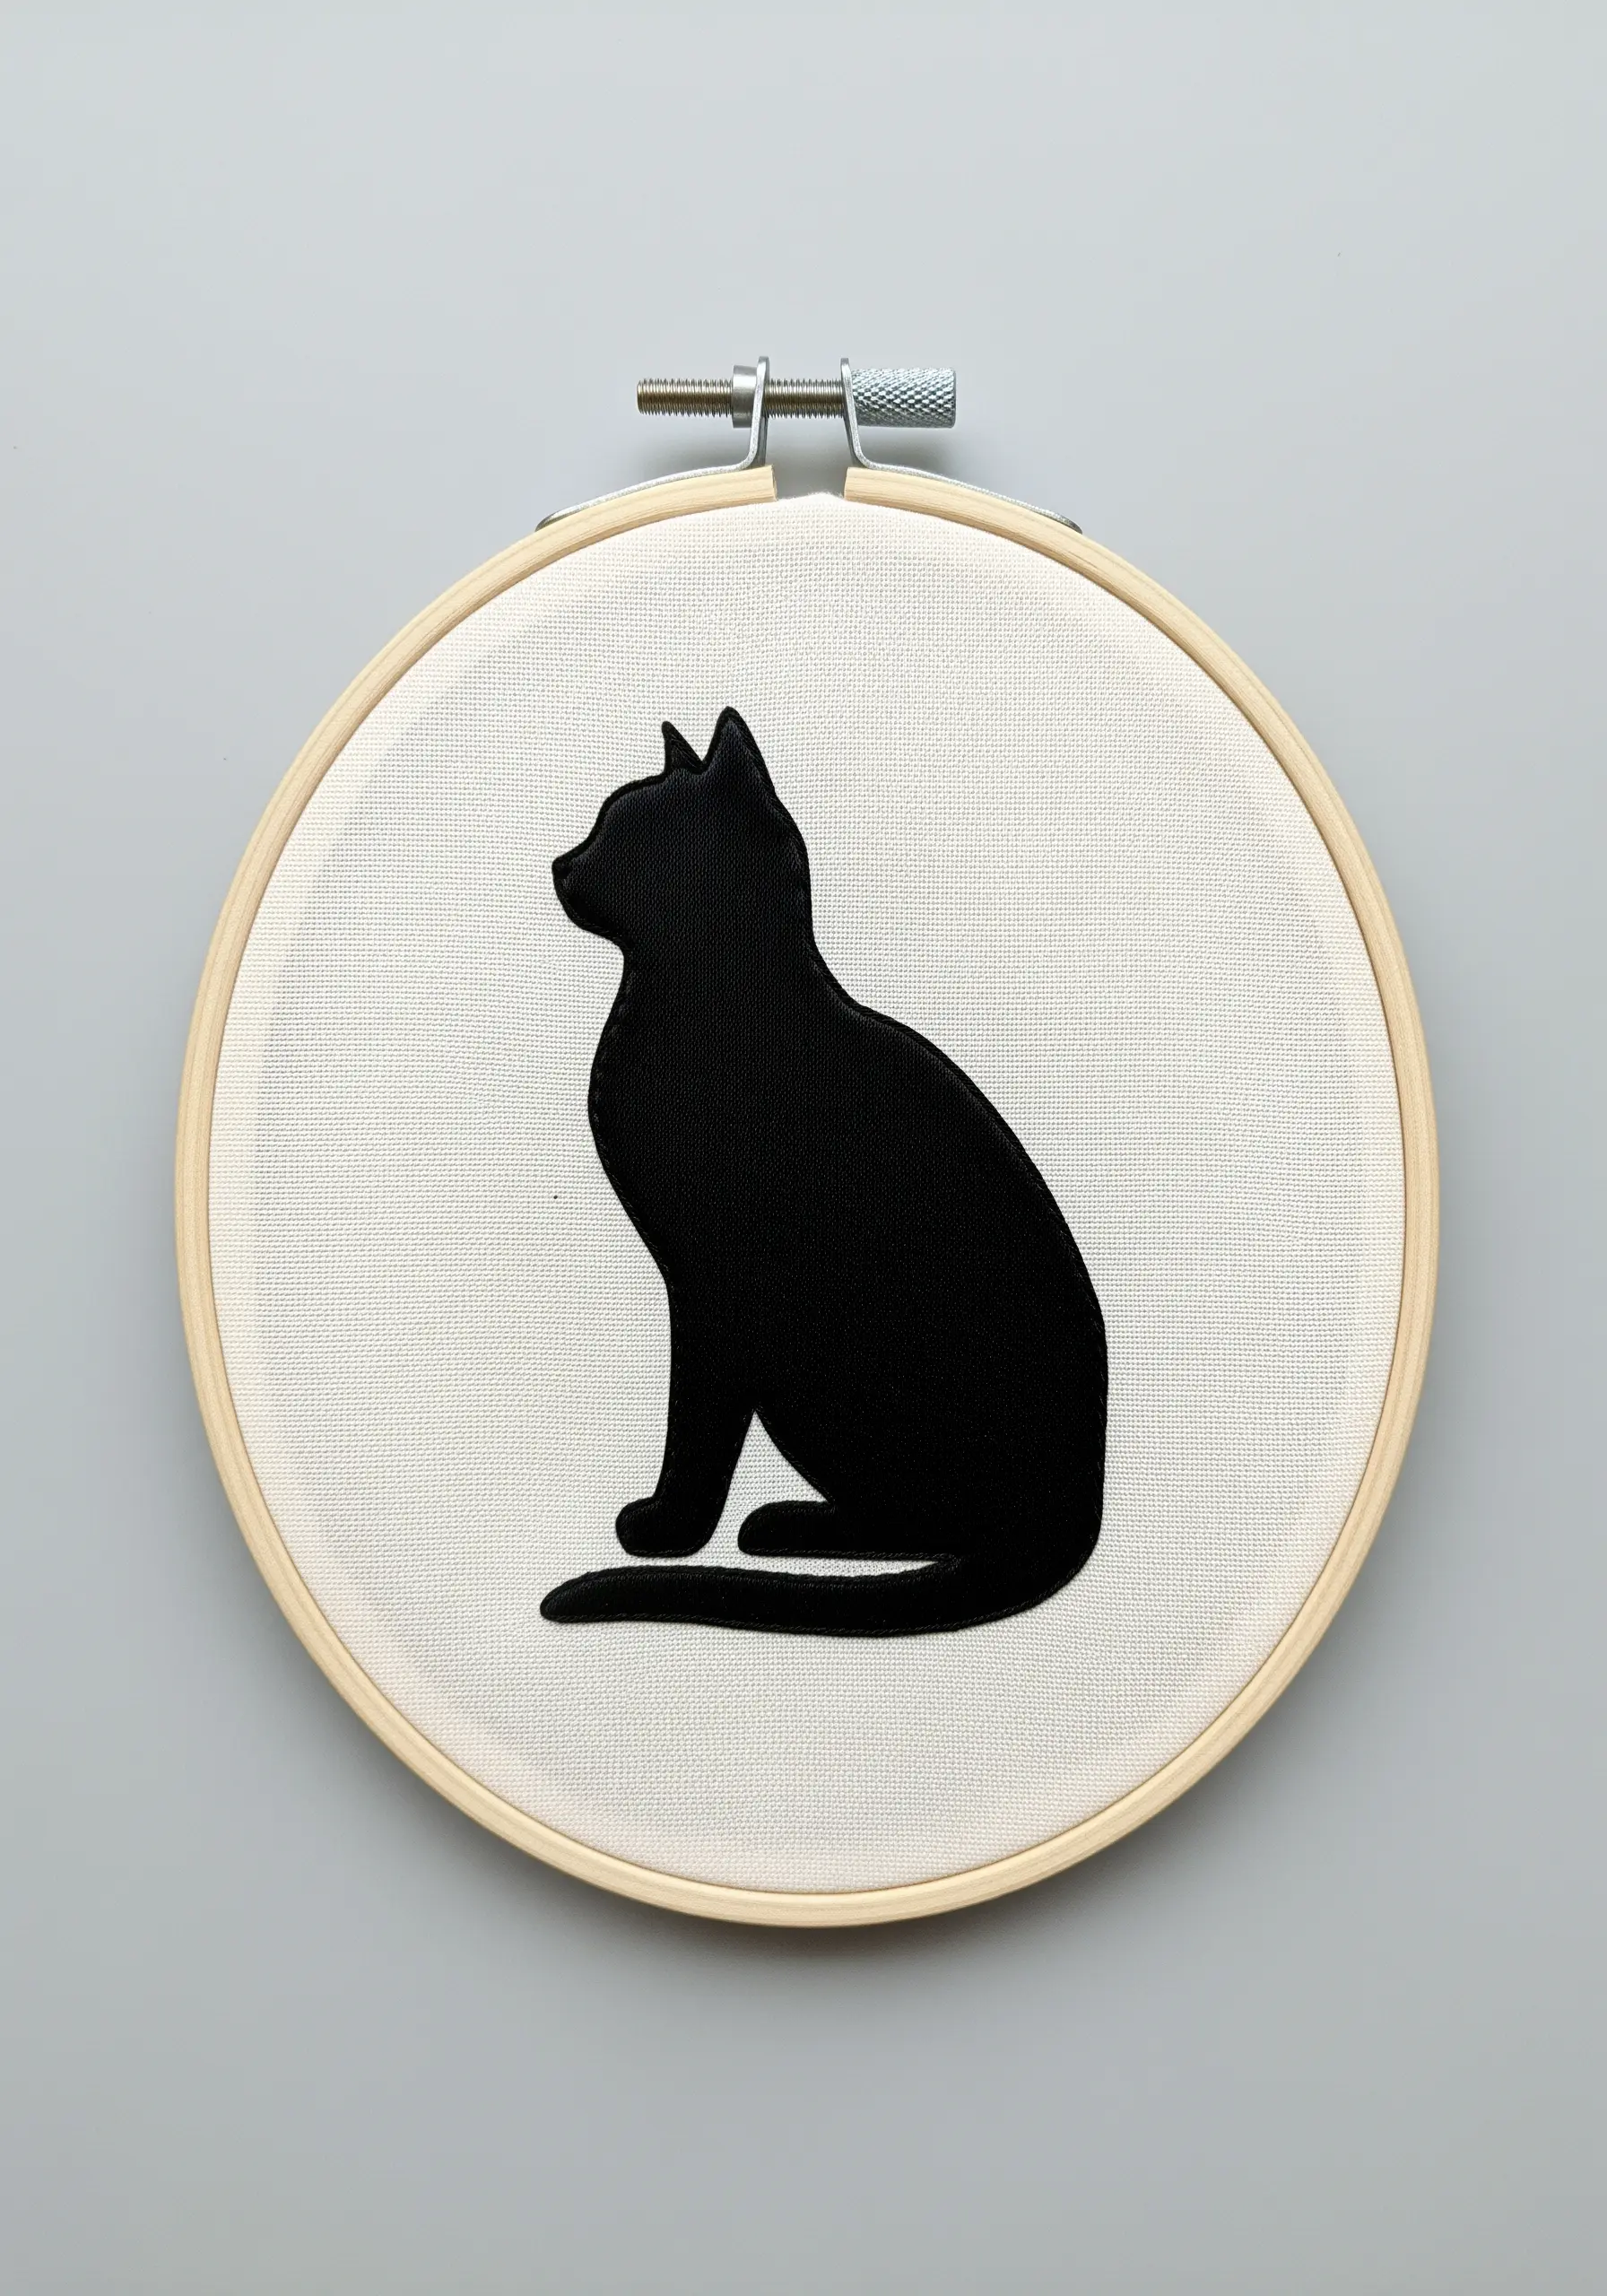
For a solid, opaque silhouette, the long-and-short stitch is your best tool.
Unlike satin stitch, it allows you to fill a large, irregular shape without leaving gaps or creating overly long, snag-prone threads.
First, outline the entire shape with a tiny split stitch to create a sharp, defined edge.
Then, work rows of interlocking long and short stitches to fill the interior, ensuring a smooth, seamless finish that looks almost like fabric appliqué.
25. Explore Decorative Border Stitches
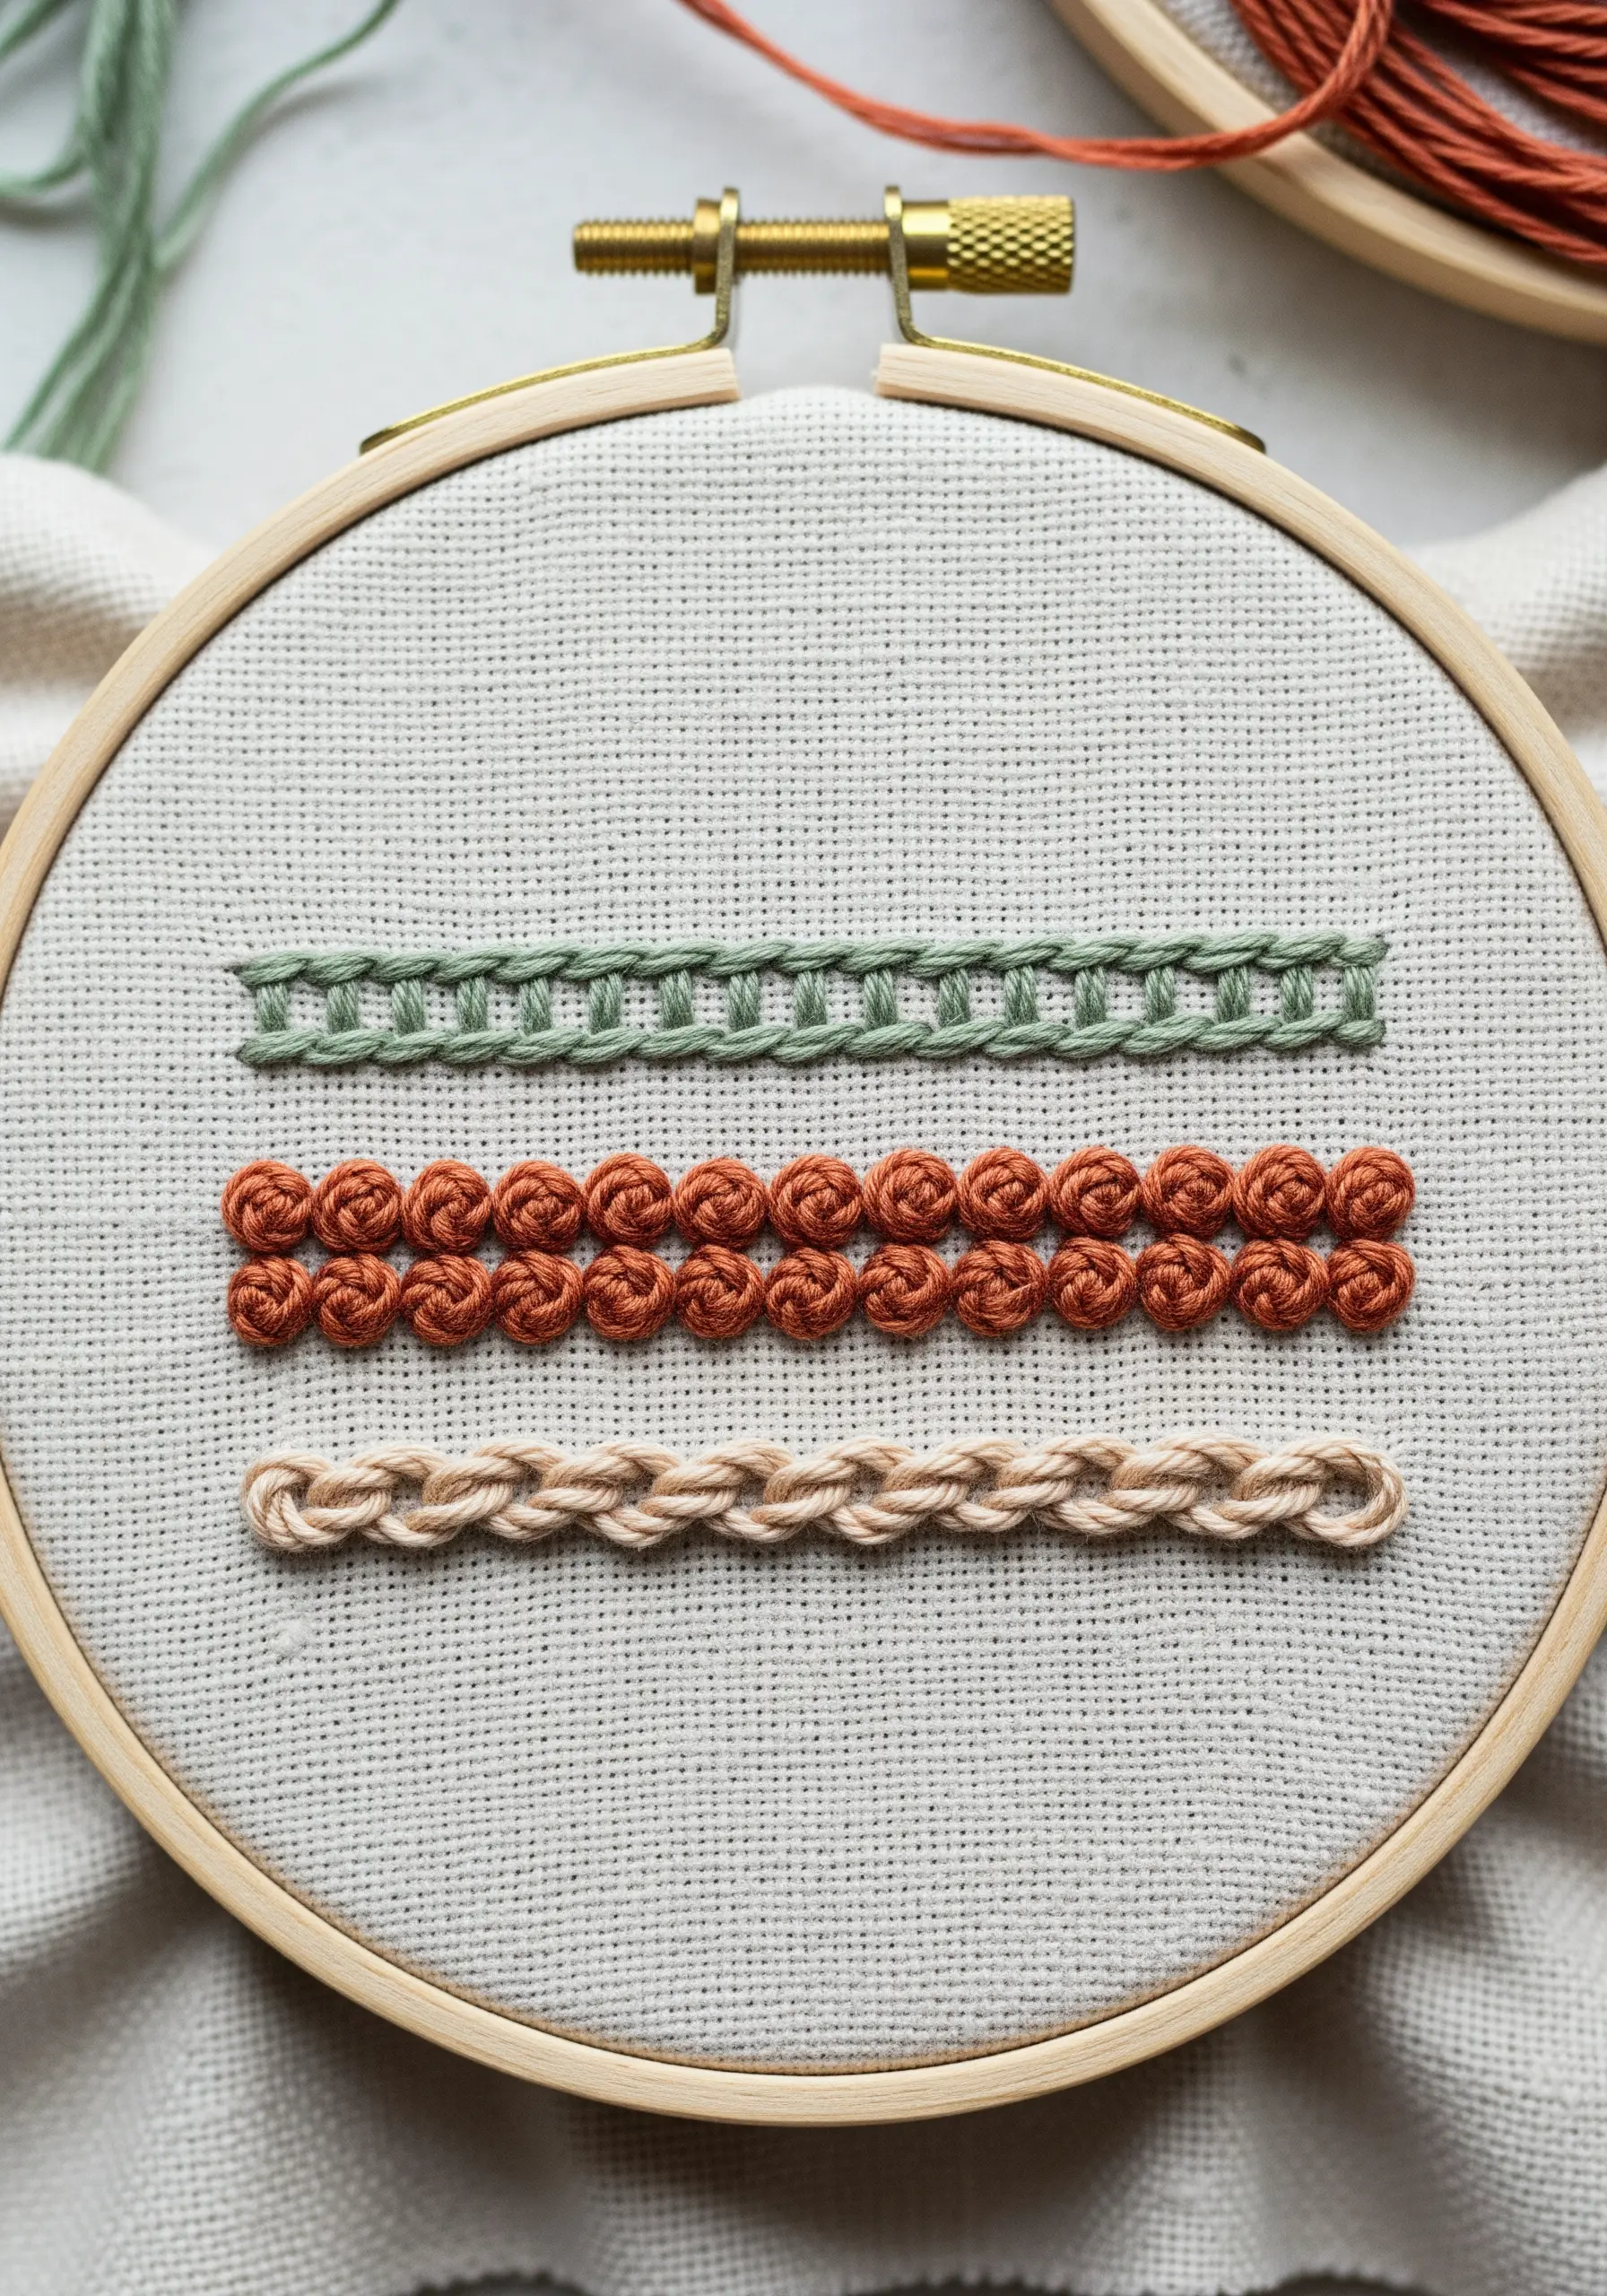
Move beyond basic lines and explore the world of decorative border stitches.
The top stitch is a variation of the feather stitch, creating a tidy, ladder-like effect.
The middle line features woven rose stitches (or bullion knots) for a highly textural, floral band.
The bottom stitch is a braided chain stitch, which offers a beautiful, thick, and plaited texture.
Practicing these on a sampler is a fast way to expand your stitch vocabulary for future projects.
26. Craft a Three-Dimensional Embroidered Patch
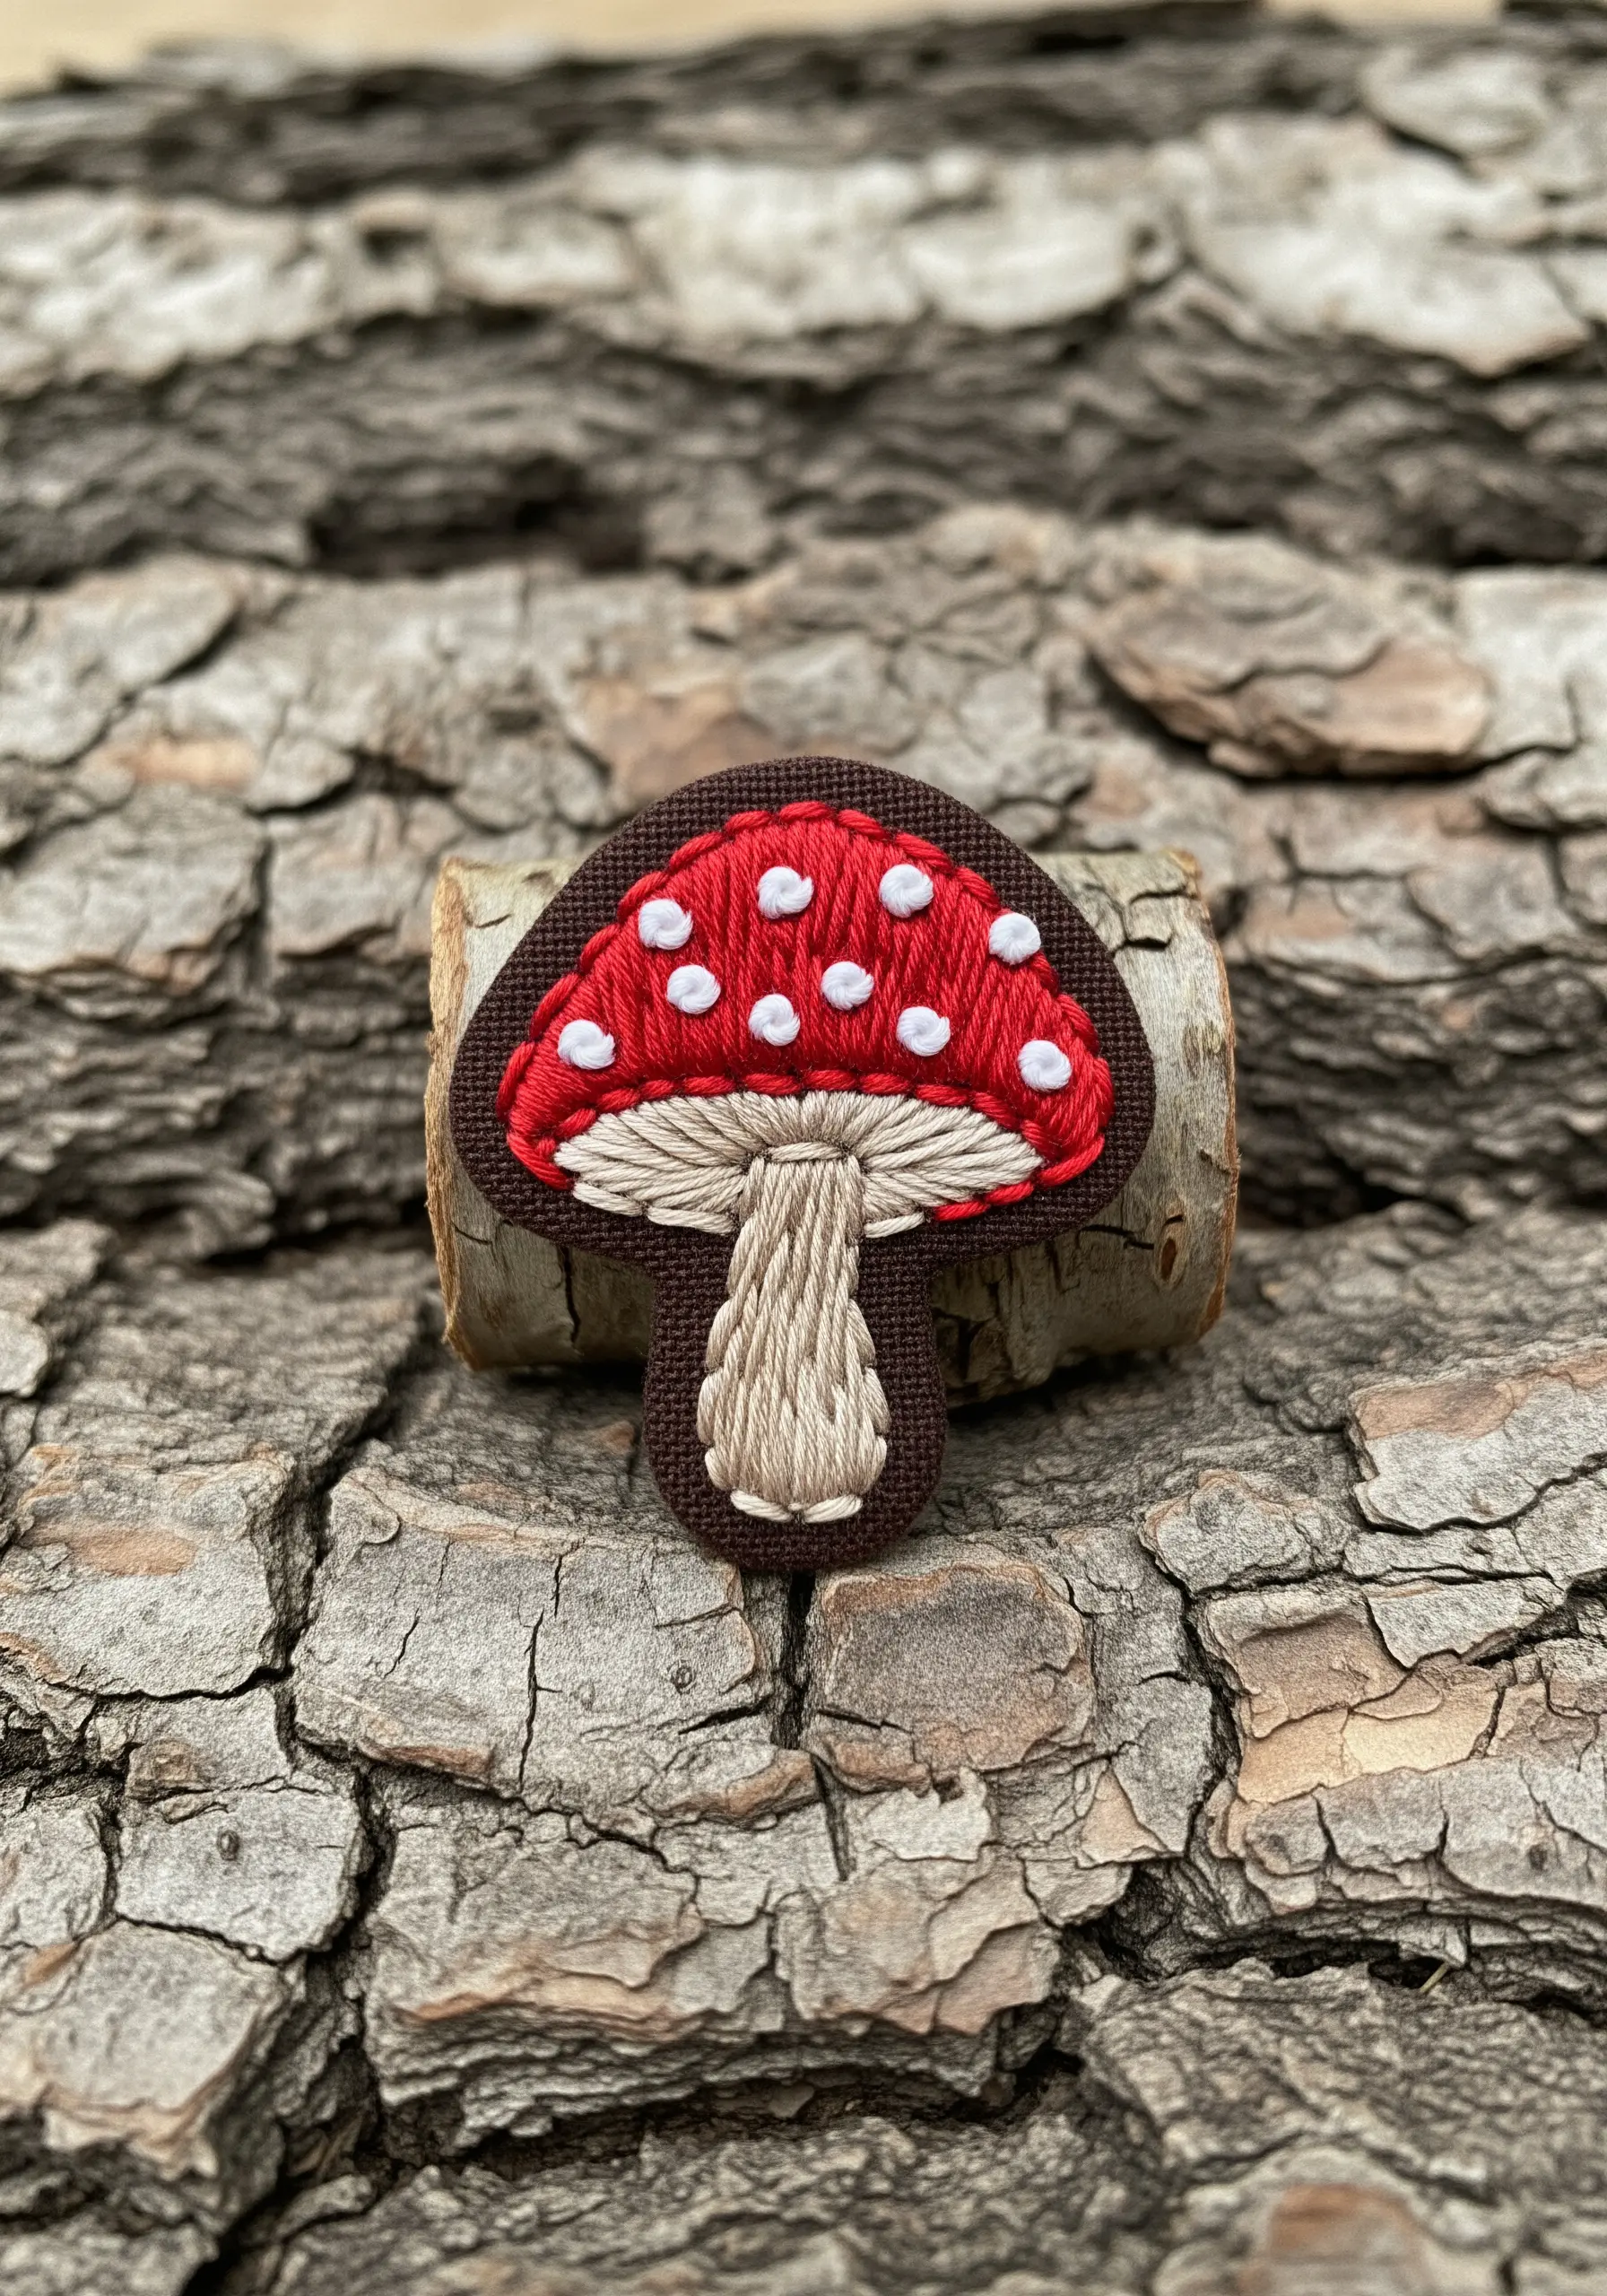
To create a sturdy patch, embroider your design on a piece of felt or heavy-duty fabric.
Once your stitching is complete, carefully cut out the shape, leaving a small border of fabric around the edges.
Finish the raw edge with a tight buttonhole or blanket stitch all the way around. This not only prevents fraying but also gives your patch a clean, professional border.
You can then sew or iron it onto any garment or accessory, a great idea for personalizing a denim jacket.
27. Create an Openwork Effect with Straight Stitches
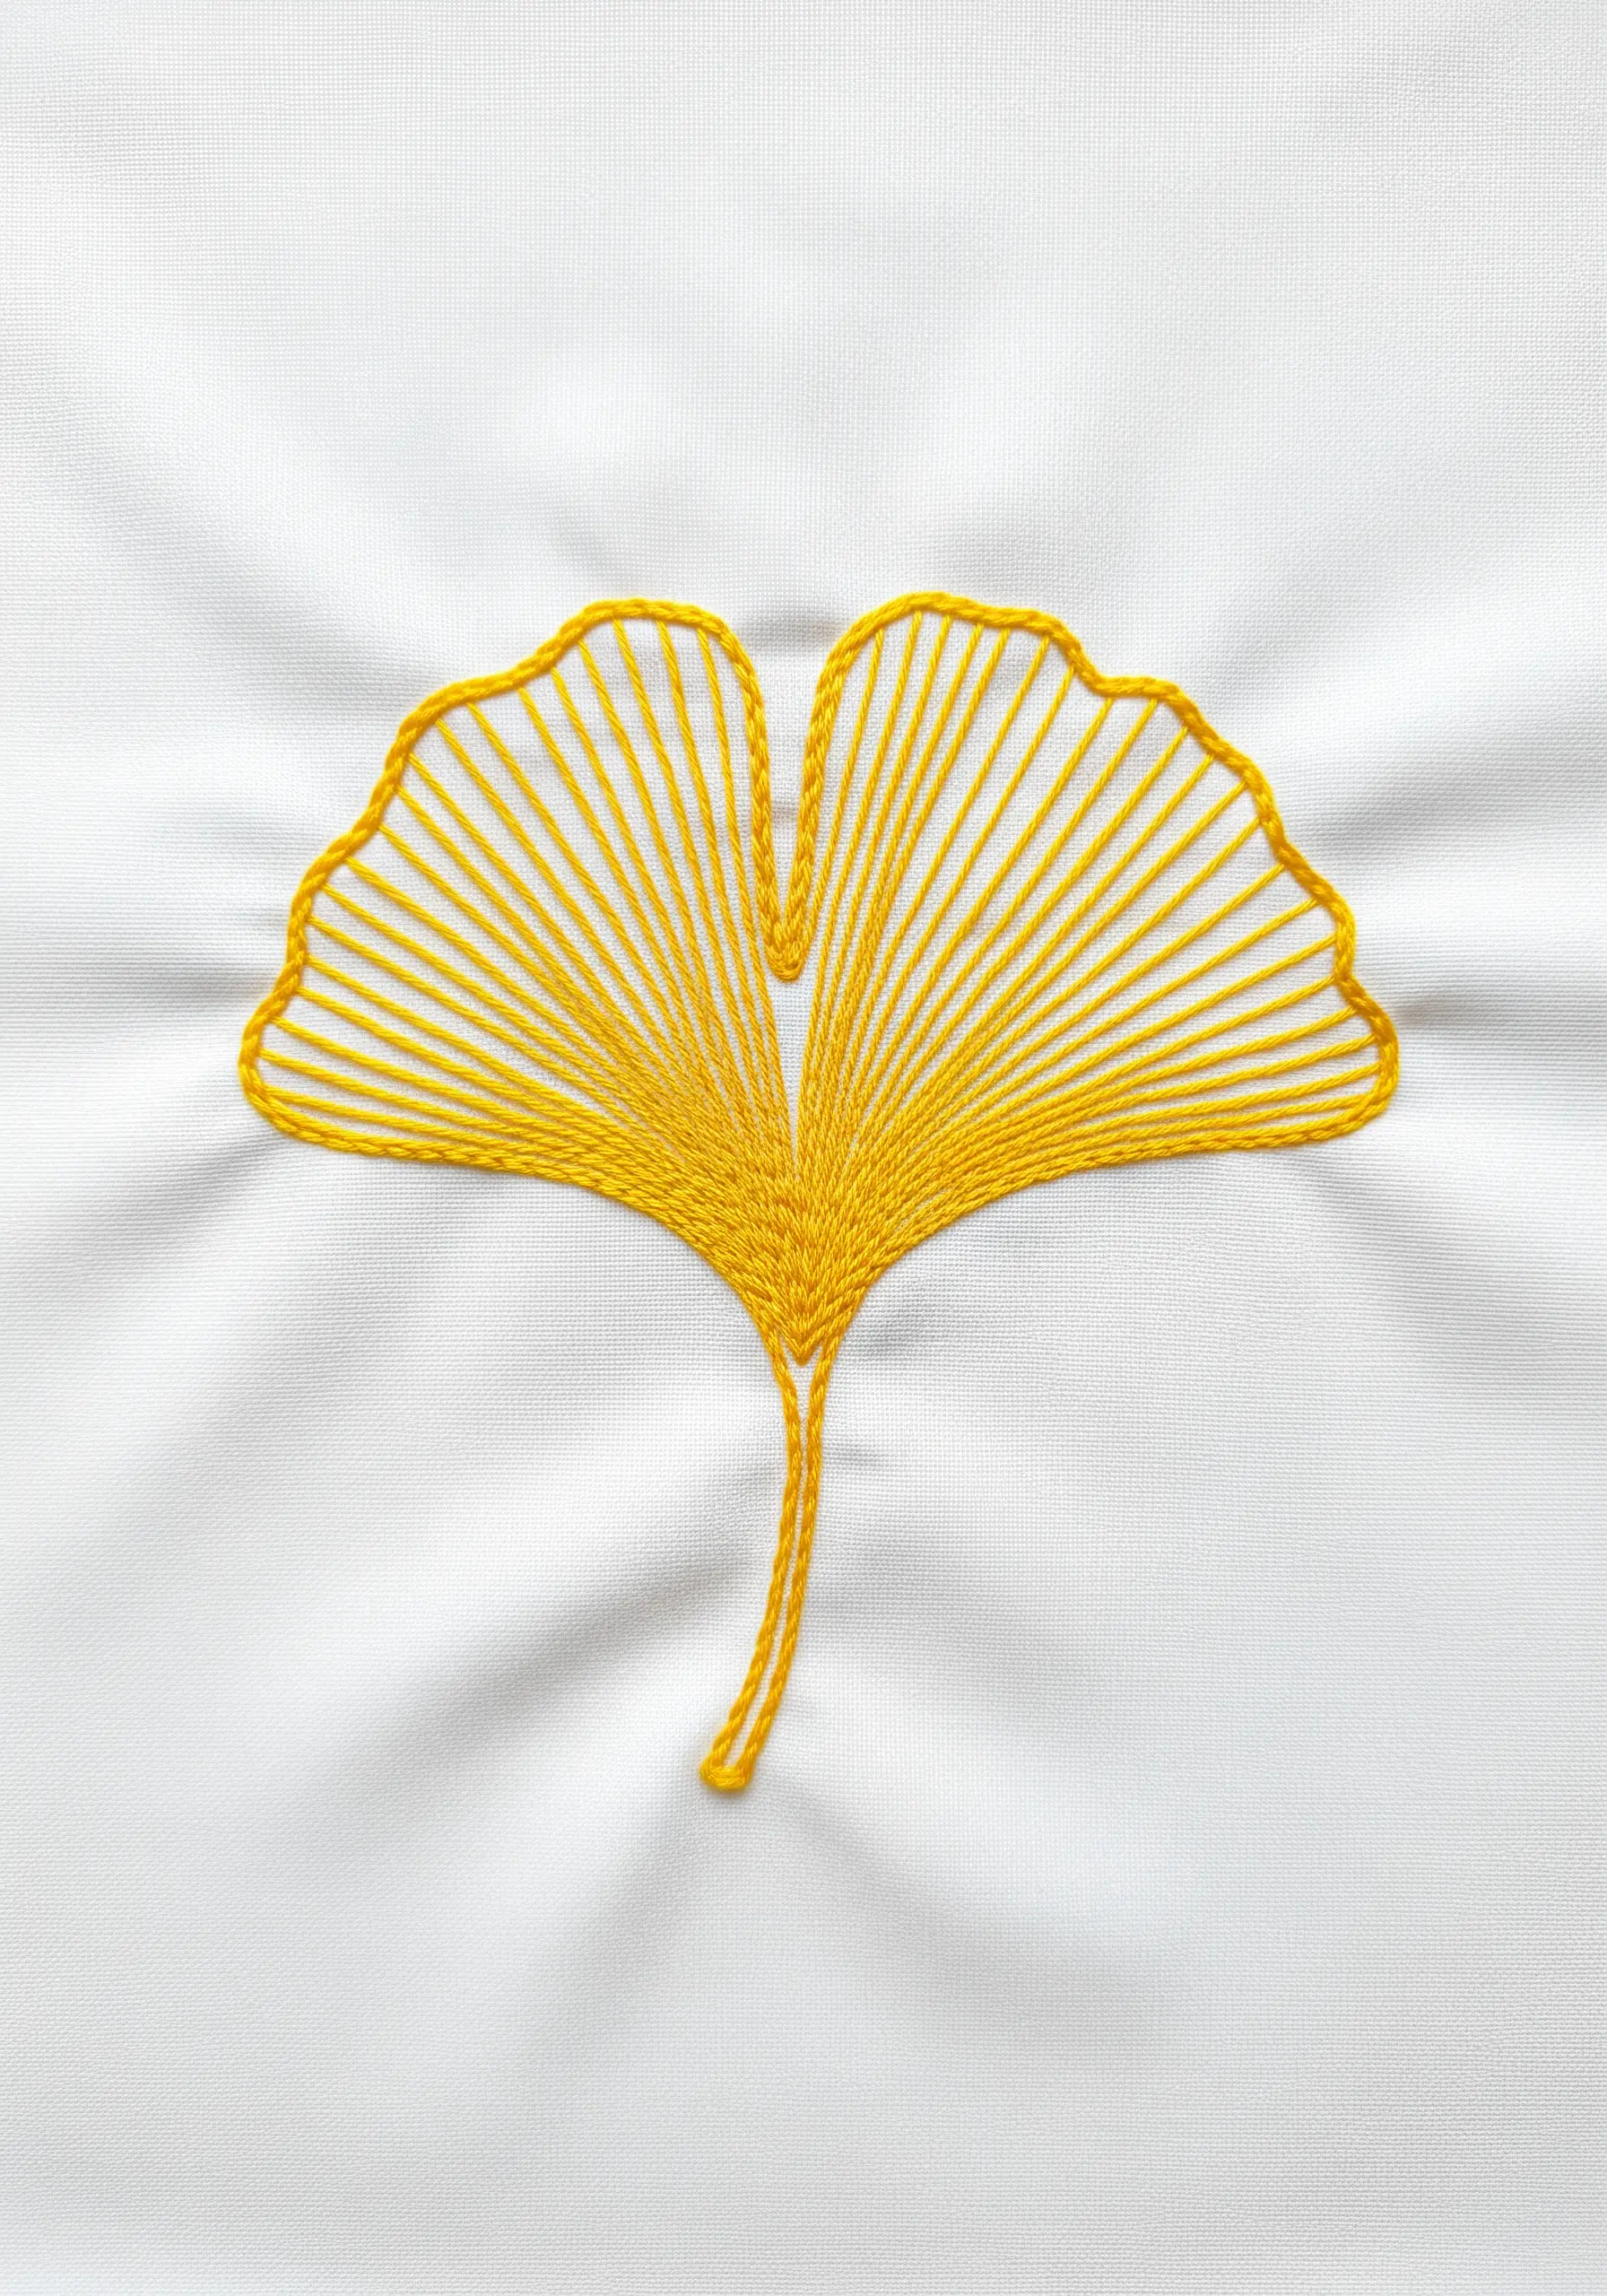
This delicate ginkgo leaf uses carefully placed straight stitches to create a light, airy design.
First, create the outer boundary and central veins with a stem stitch to provide structure.
Then, fill the shape with long straight stitches radiating from the base to the scalloped edge. The key is to keep them parallel and evenly spaced.
The negative space between the stitches is just as important as the thread itself, creating a beautiful, fan-like effect.
28. Combine Textural Stitches for Conceptual Art
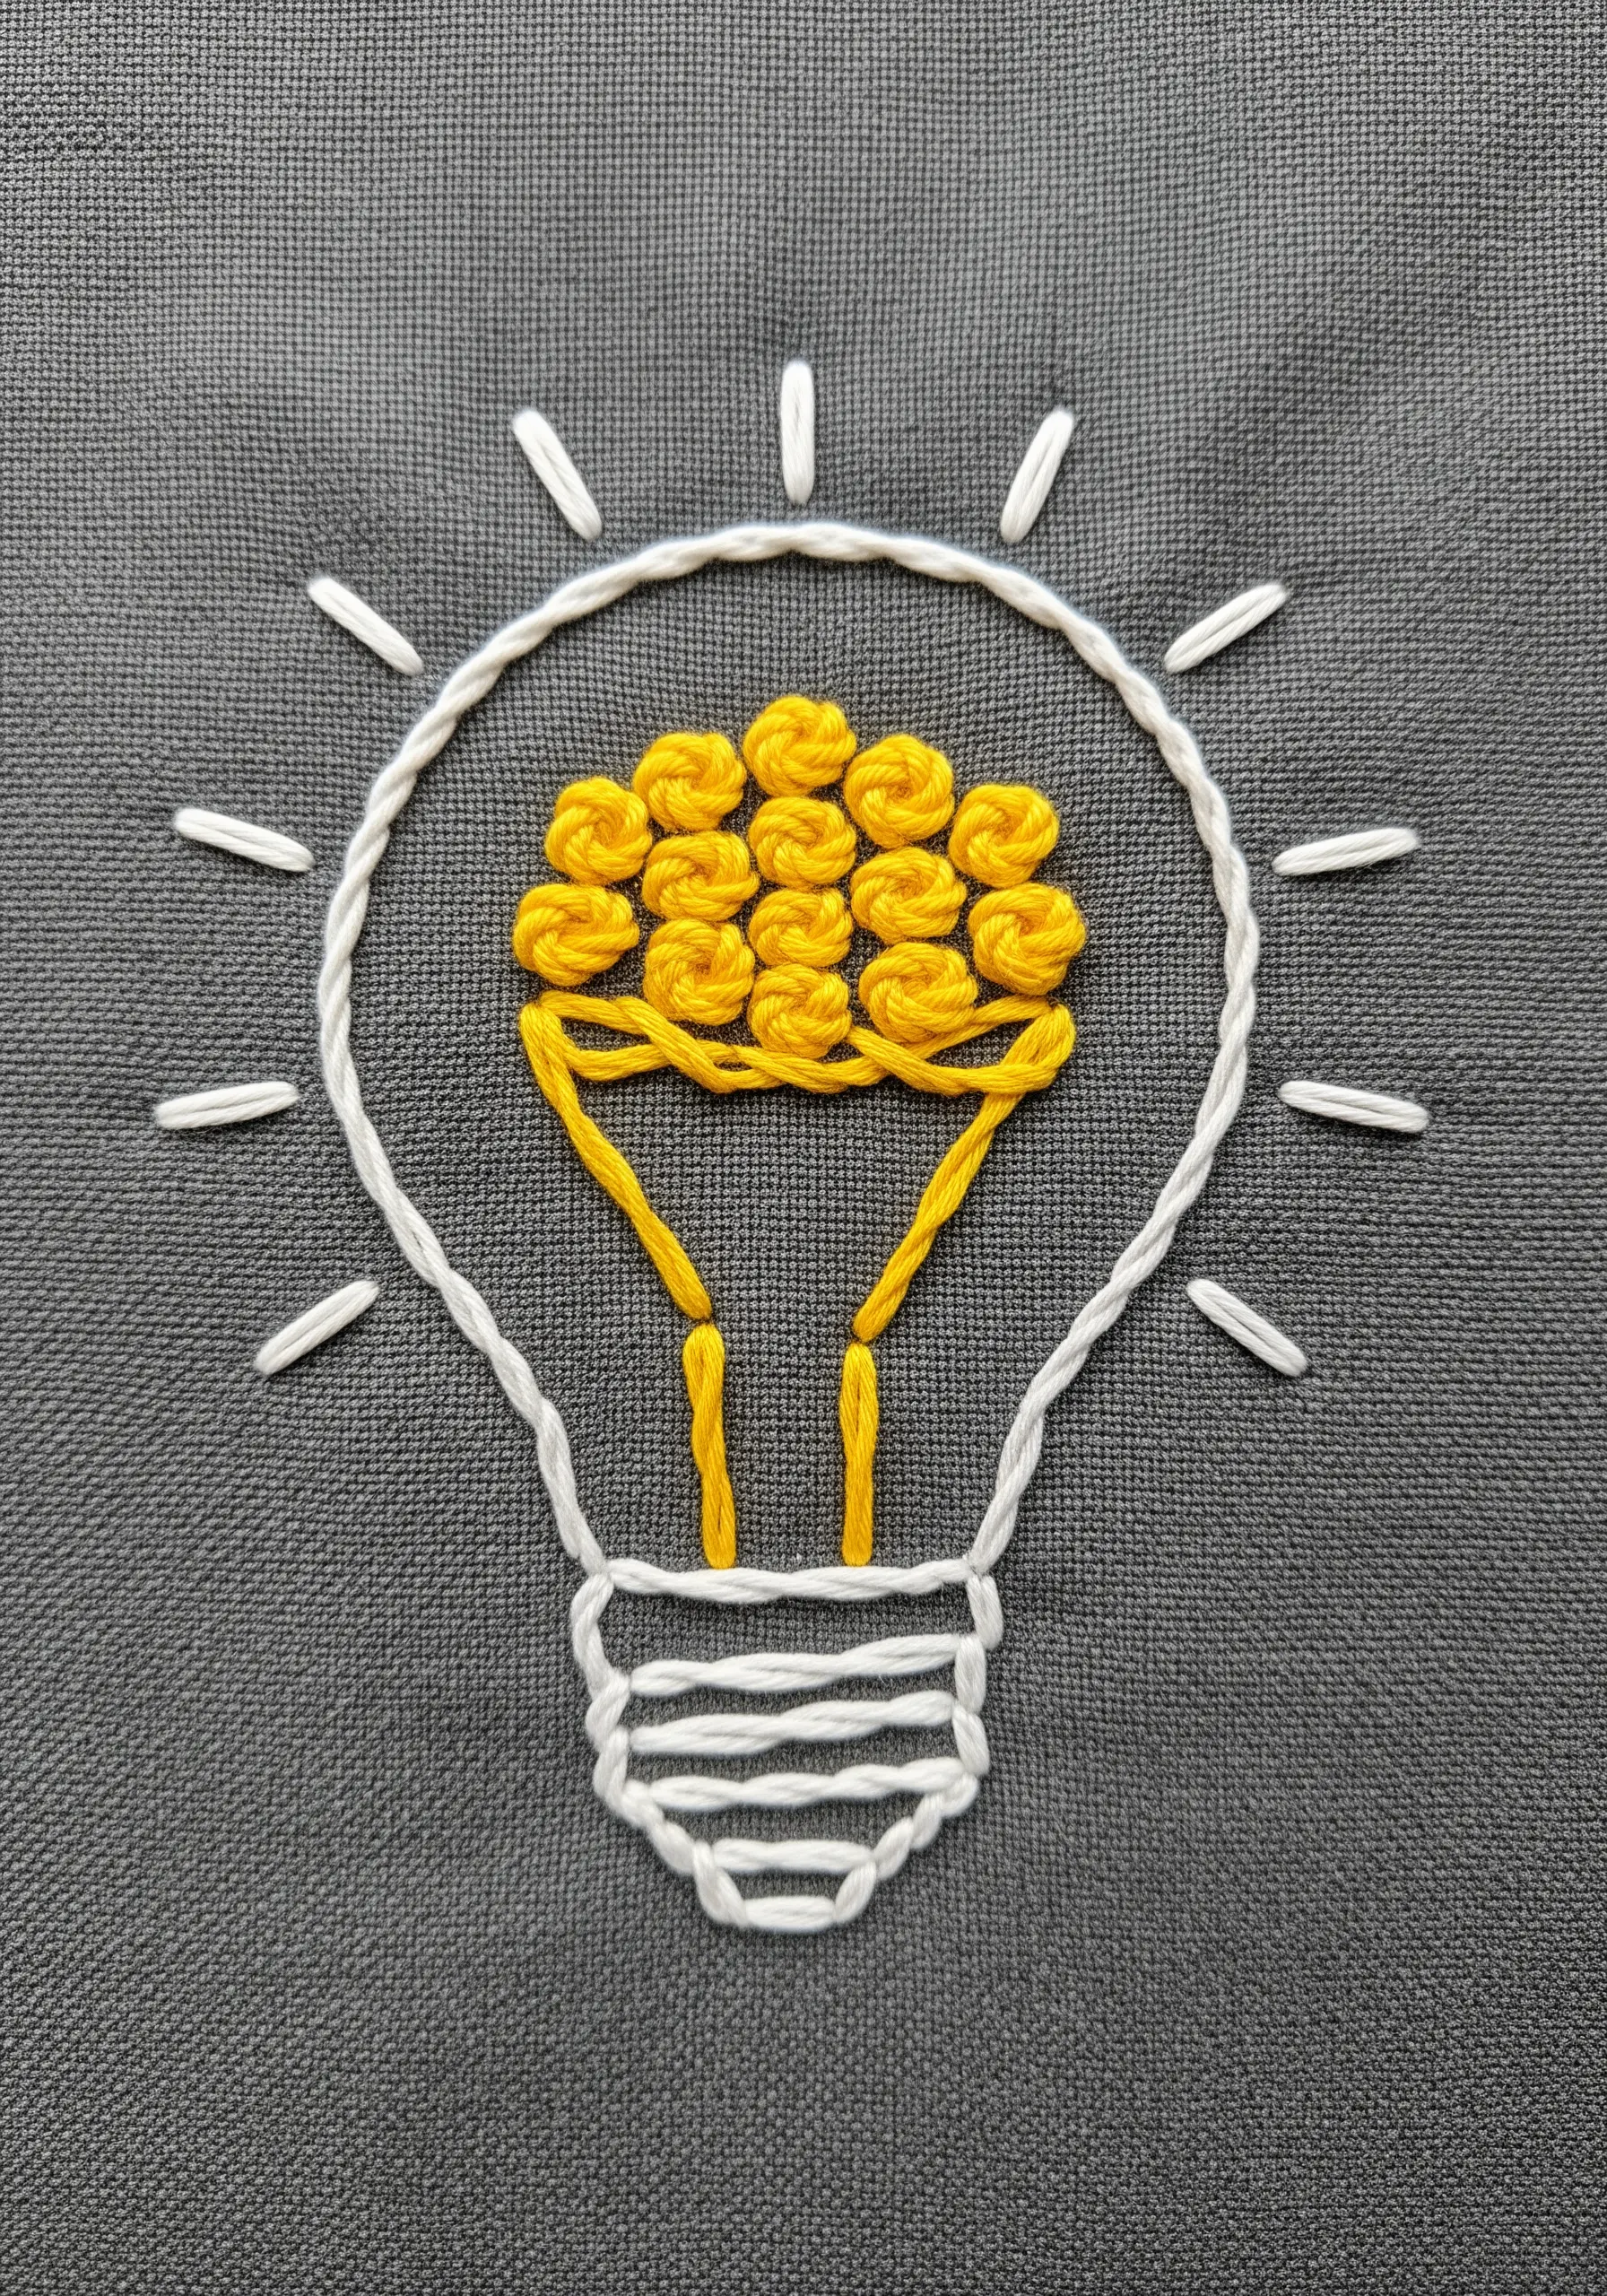
Elevate a simple concept by combining different stitch textures.
Here, the filament of the lightbulb is represented by densely packed woven wheel stitches (or spiderweb roses), creating a highly dimensional, floral-like cluster.
This contrasts beautifully with the simple, smooth backstitch used for the bulb’s outline and base.
This thoughtful combination turns a basic icon into a clever piece of abstract thread art that symbolizes creativity and ideas.
29. Add Dimension with Appliqué and Stitching
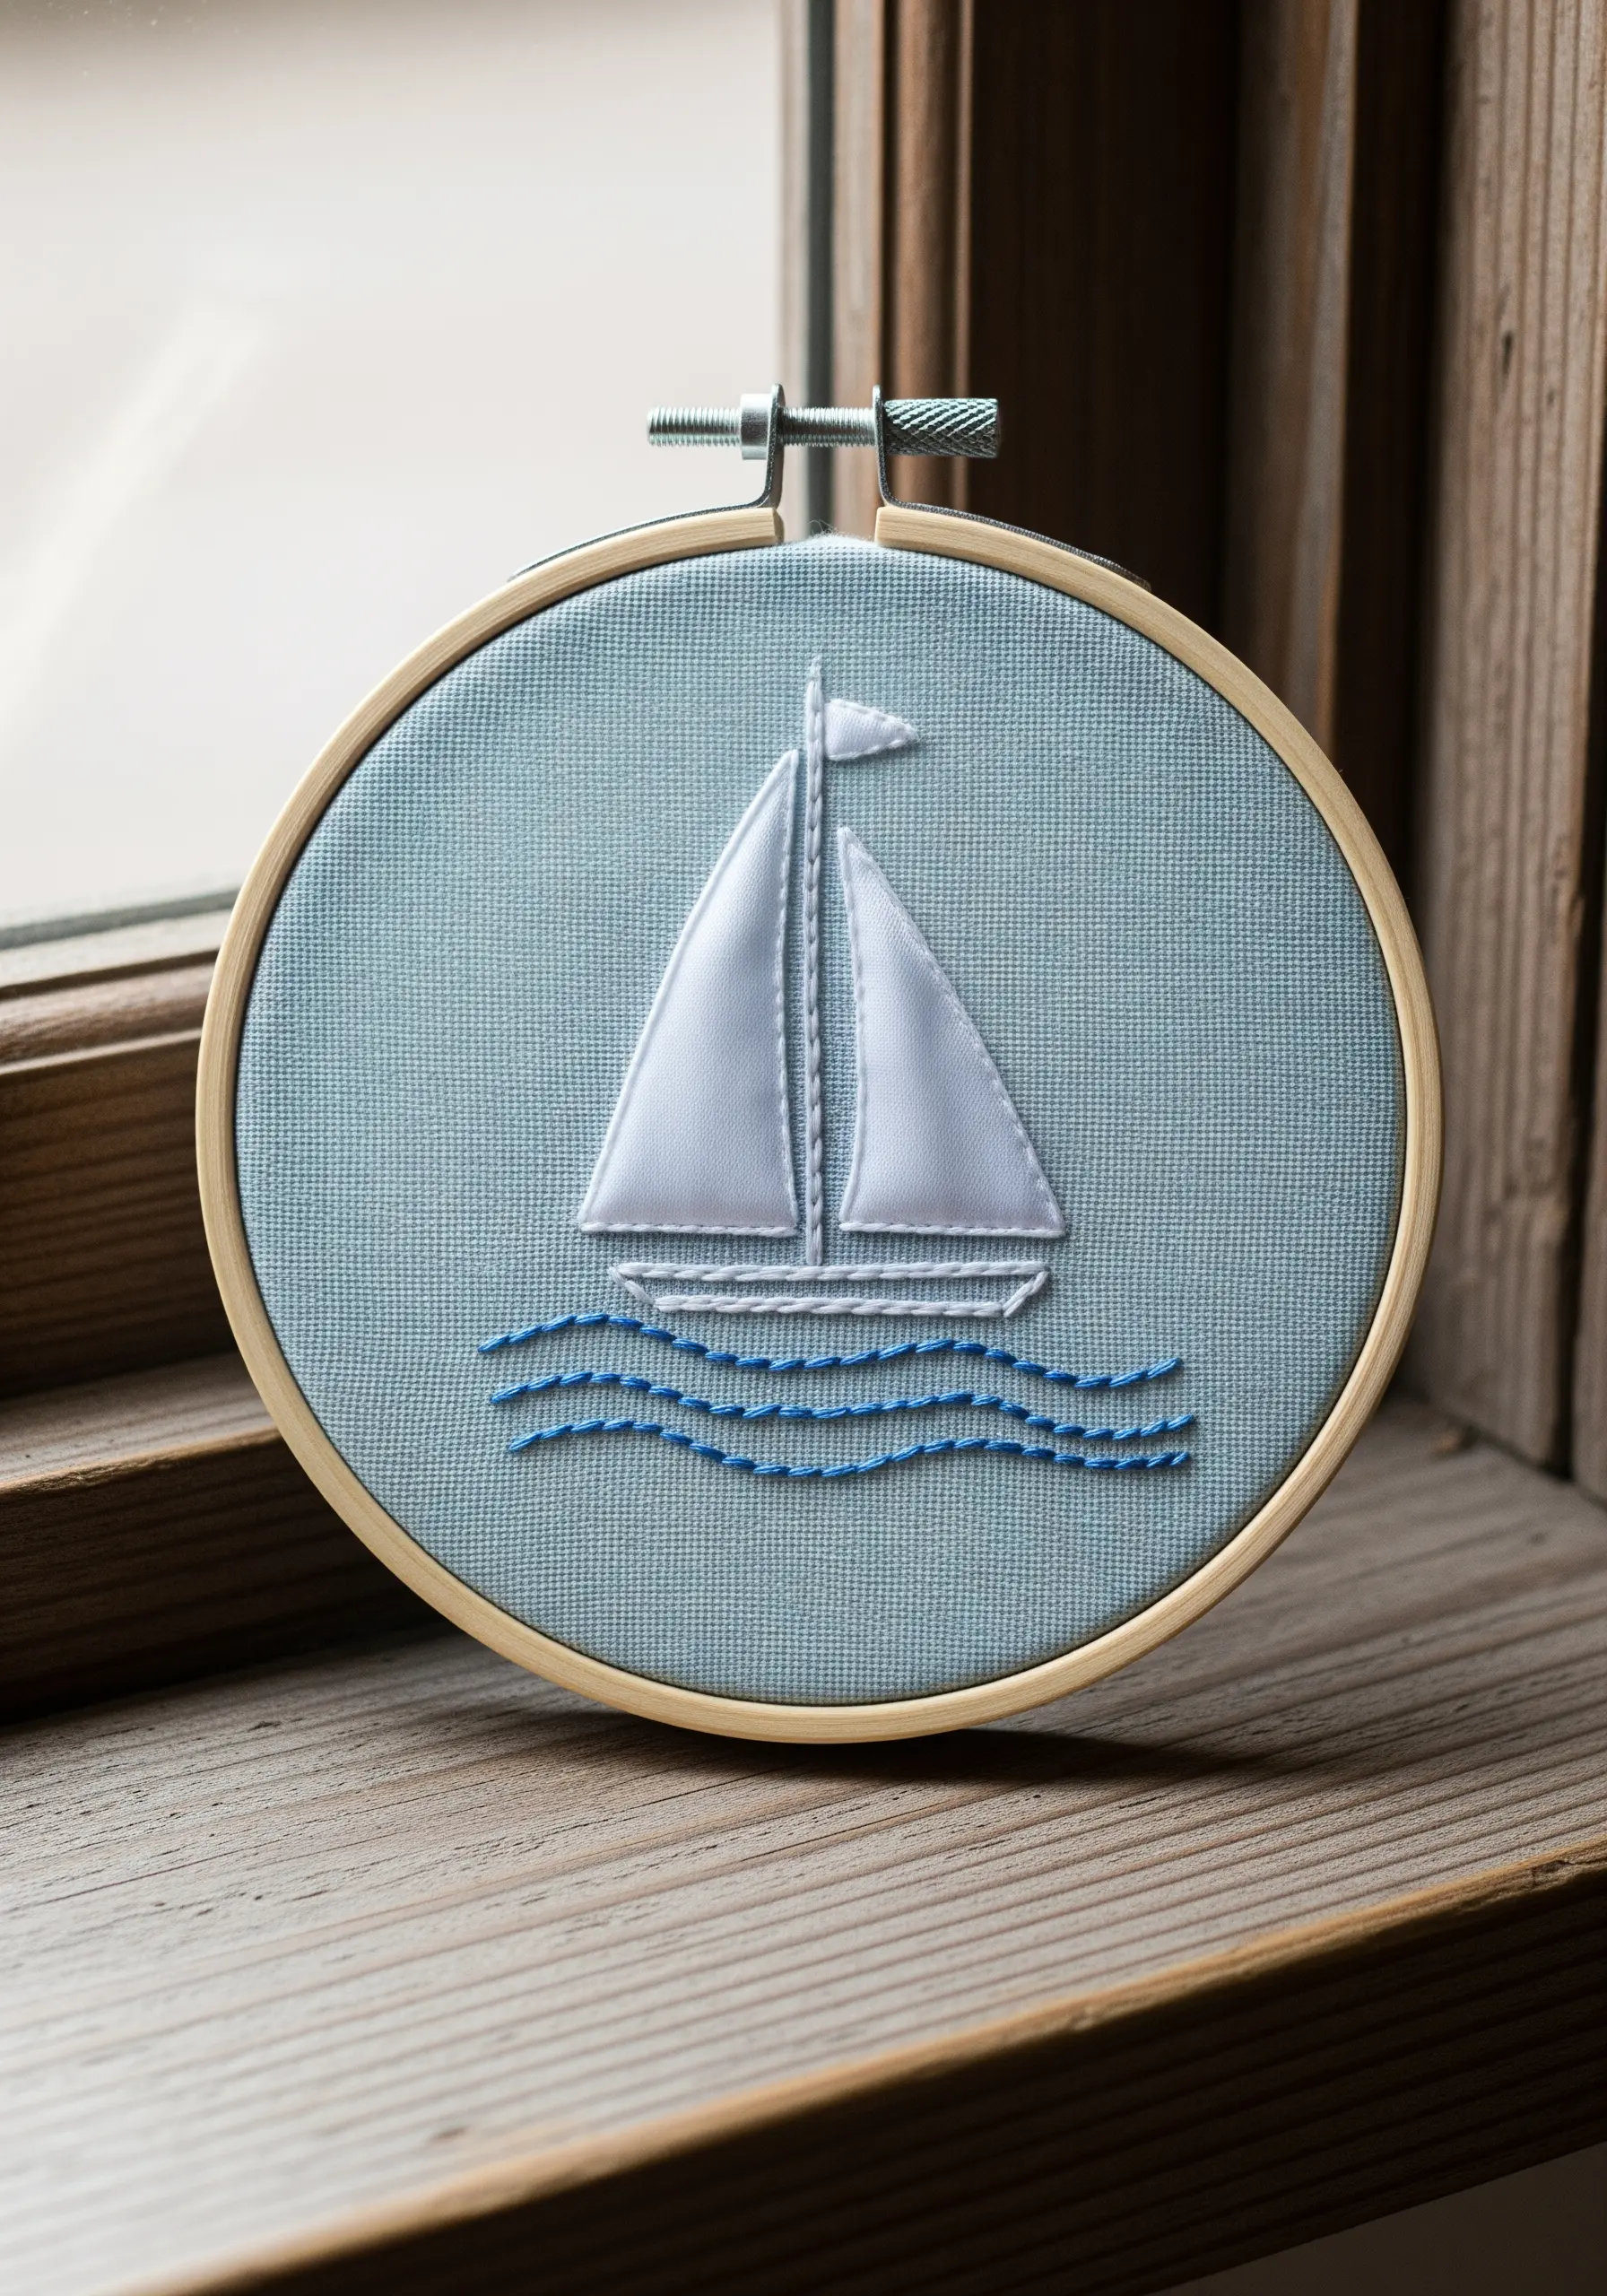
Combine fabric appliqué with embroidery for a fast way to add color and dimension.
Cut your sail shapes from a piece of white fabric and secure them with a fusible web or a few tiny anchoring stitches.
Then, outline the appliqué with a clean backstitch or stem stitch. This not only secures the fabric permanently but also adds a crisp, illustrative detail.
The simple running stitches for the waves provide a gentle contrast to the solid sails, a technique often used in fabric collage embroidery.
30. Master Cursive Lettering with Chain Stitch
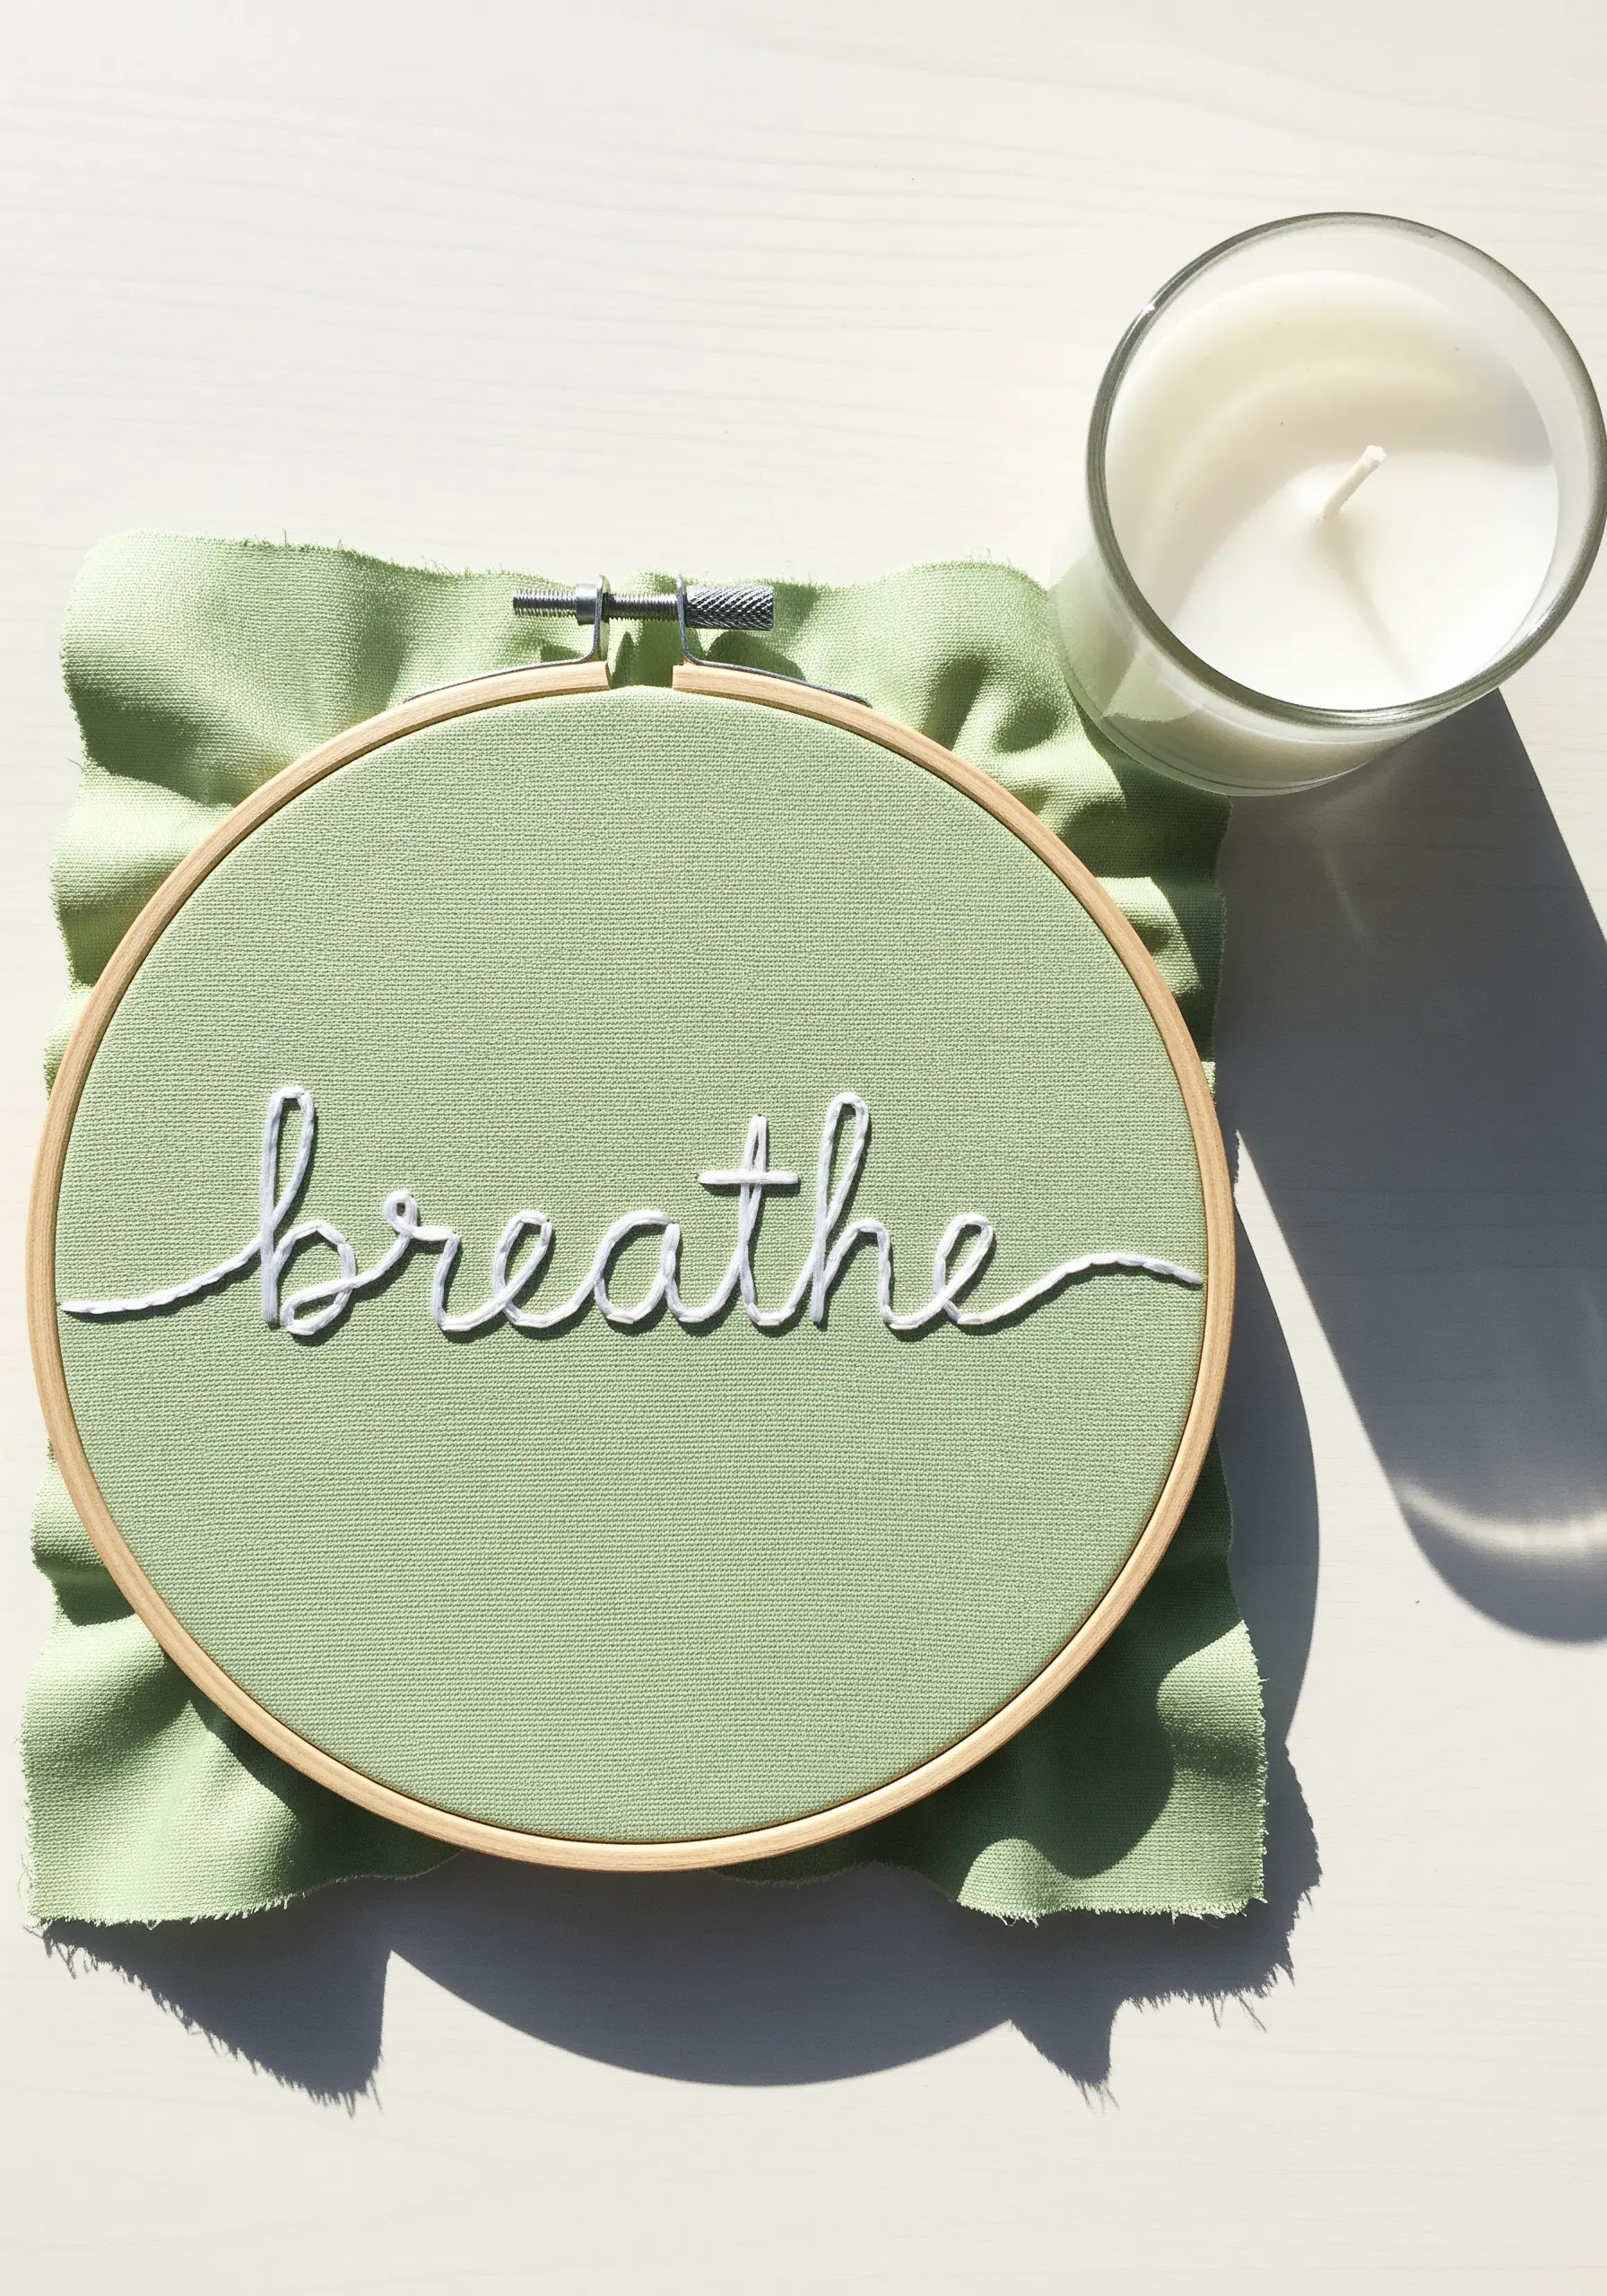
For bold, continuous cursive lettering, a whipped chain stitch or a standard stem stitch is your best choice.
To ensure smooth curves, use a heat-erasable pen to write your word on the fabric first, paying attention to the flow and connection between letters.
Use all six strands of floss for a thick, impactful line that has the appearance of dimensional cord.
This technique makes embroidered quotes feel substantial and intentional.


