

You’ve mastered the satin stitch and your French knots are perfect, but you feel a pull toward something more. You want your fiber art to move off the hoop and into your life, to transform a room, not just decorate a small corner.
Think of thread and yarn not just as materials for stitching, but as architectural elements. They can define a space, soften a hard edge, or tell a story on a grand scale. The techniques that create large installations are often rooted in the same principles you already know: tension, texture, and color harmony.
Here, we will explore how to scale up your ideas. You will learn to see your walls, furniture, and even your staircase as a canvas, ready for you to make your mark with bold, tactile, and meaningful fiber art.
1. Define Space with Architectural Macrame

Transform an open-plan area by creating a fiber room divider instead of a solid wall.
Use a thick, sturdy cotton cord (5mm or more) to give the piece structure and weight, ensuring your knots are firm and consistent.
Mount the dowel securely to the ceiling or high on a wall, and plan your design in symmetrical panels; this creates a sense of order and calm.
Incorporating wooden beads or other elements breaks up the visual repetition and adds a focal point, drawing the eye inward.
This technique turns simple knots into minimal embroidery wall pieces that not only decorate but also function.
2. Weave a Headboard with Plush Roving

Create a soft, sound-absorbing headboard by weaving with unspun wool roving or chunky tube yarn.
Build a simple frame loom larger than your bed width, or purchase a large-scale weaving loom.
Alternate thick, plush rows of roving with thinner, tightly woven yarns to create dynamic horizontal bands of texture.
The key to this design is embracing imperfection; gentle waves and varied tension in the roving add organic softness.
This approach is one of the most effective texture-rich embroidery ideas for creating a cozy, statement piece in a bedroom.
3. Introduce Color with Yarn Wrapping

Turn a structural element like a staircase banister into a vibrant installation with simple yarn wrapping.
Choose a smooth, medium-weight yarn to ensure even coverage without too much bulk.
Secure the starting end with a hidden knot or a dab of fabric glue, then wrap tightly, ensuring each new loop sits snugly against the last.
Create sharp color blocks by cleanly cutting one color and starting the next right beside it, tucking the ends underneath the wrapping.
This method lets you explore how abstract color blend stitch ideas can be applied three-dimensionally.
4. Paint with Thread Using a Punch Needle

Achieve a painterly, impressionistic effect by using a punch needle and multiple shades of yarn.
Work with a punch needle that allows for adjustable loop heights; shorter loops in the background and longer loops in the foreground create subtle depth.
To blend colors, work in organic, flowing lines rather than hard shapes, allowing different hues to sit side-by-side and mix visually.
Using variegated yarn in certain sections can also create effortless, subtle color shifts that mimic light and shadow.
This technique transforms your wall into a textured, abstract thread landscape with incredible tactile appeal.
5. Design a Gradient Wall Hanging with Dip-Dyeing

Create a stunning ombré wall hanging by dip-dyeing hanks of natural fiber yarn before you even begin knotting or weaving.
Choose 100% cotton, wool, or silk yarn, as these fibers absorb dye much more evenly than synthetics.
Simply dip sections of your yarn hanks into fabric dye for varying lengths of time to achieve a smooth color gradient.
Once dry, loop the hanks over a piece of driftwood or a copper pipe, arranging them by color to create a cascading waterfall effect.
These types of yarn wall art creations inspired by nature rely on color flow rather than complex stitches.
6. Create Sculptural Forms with Yarn-Wrapped Branches
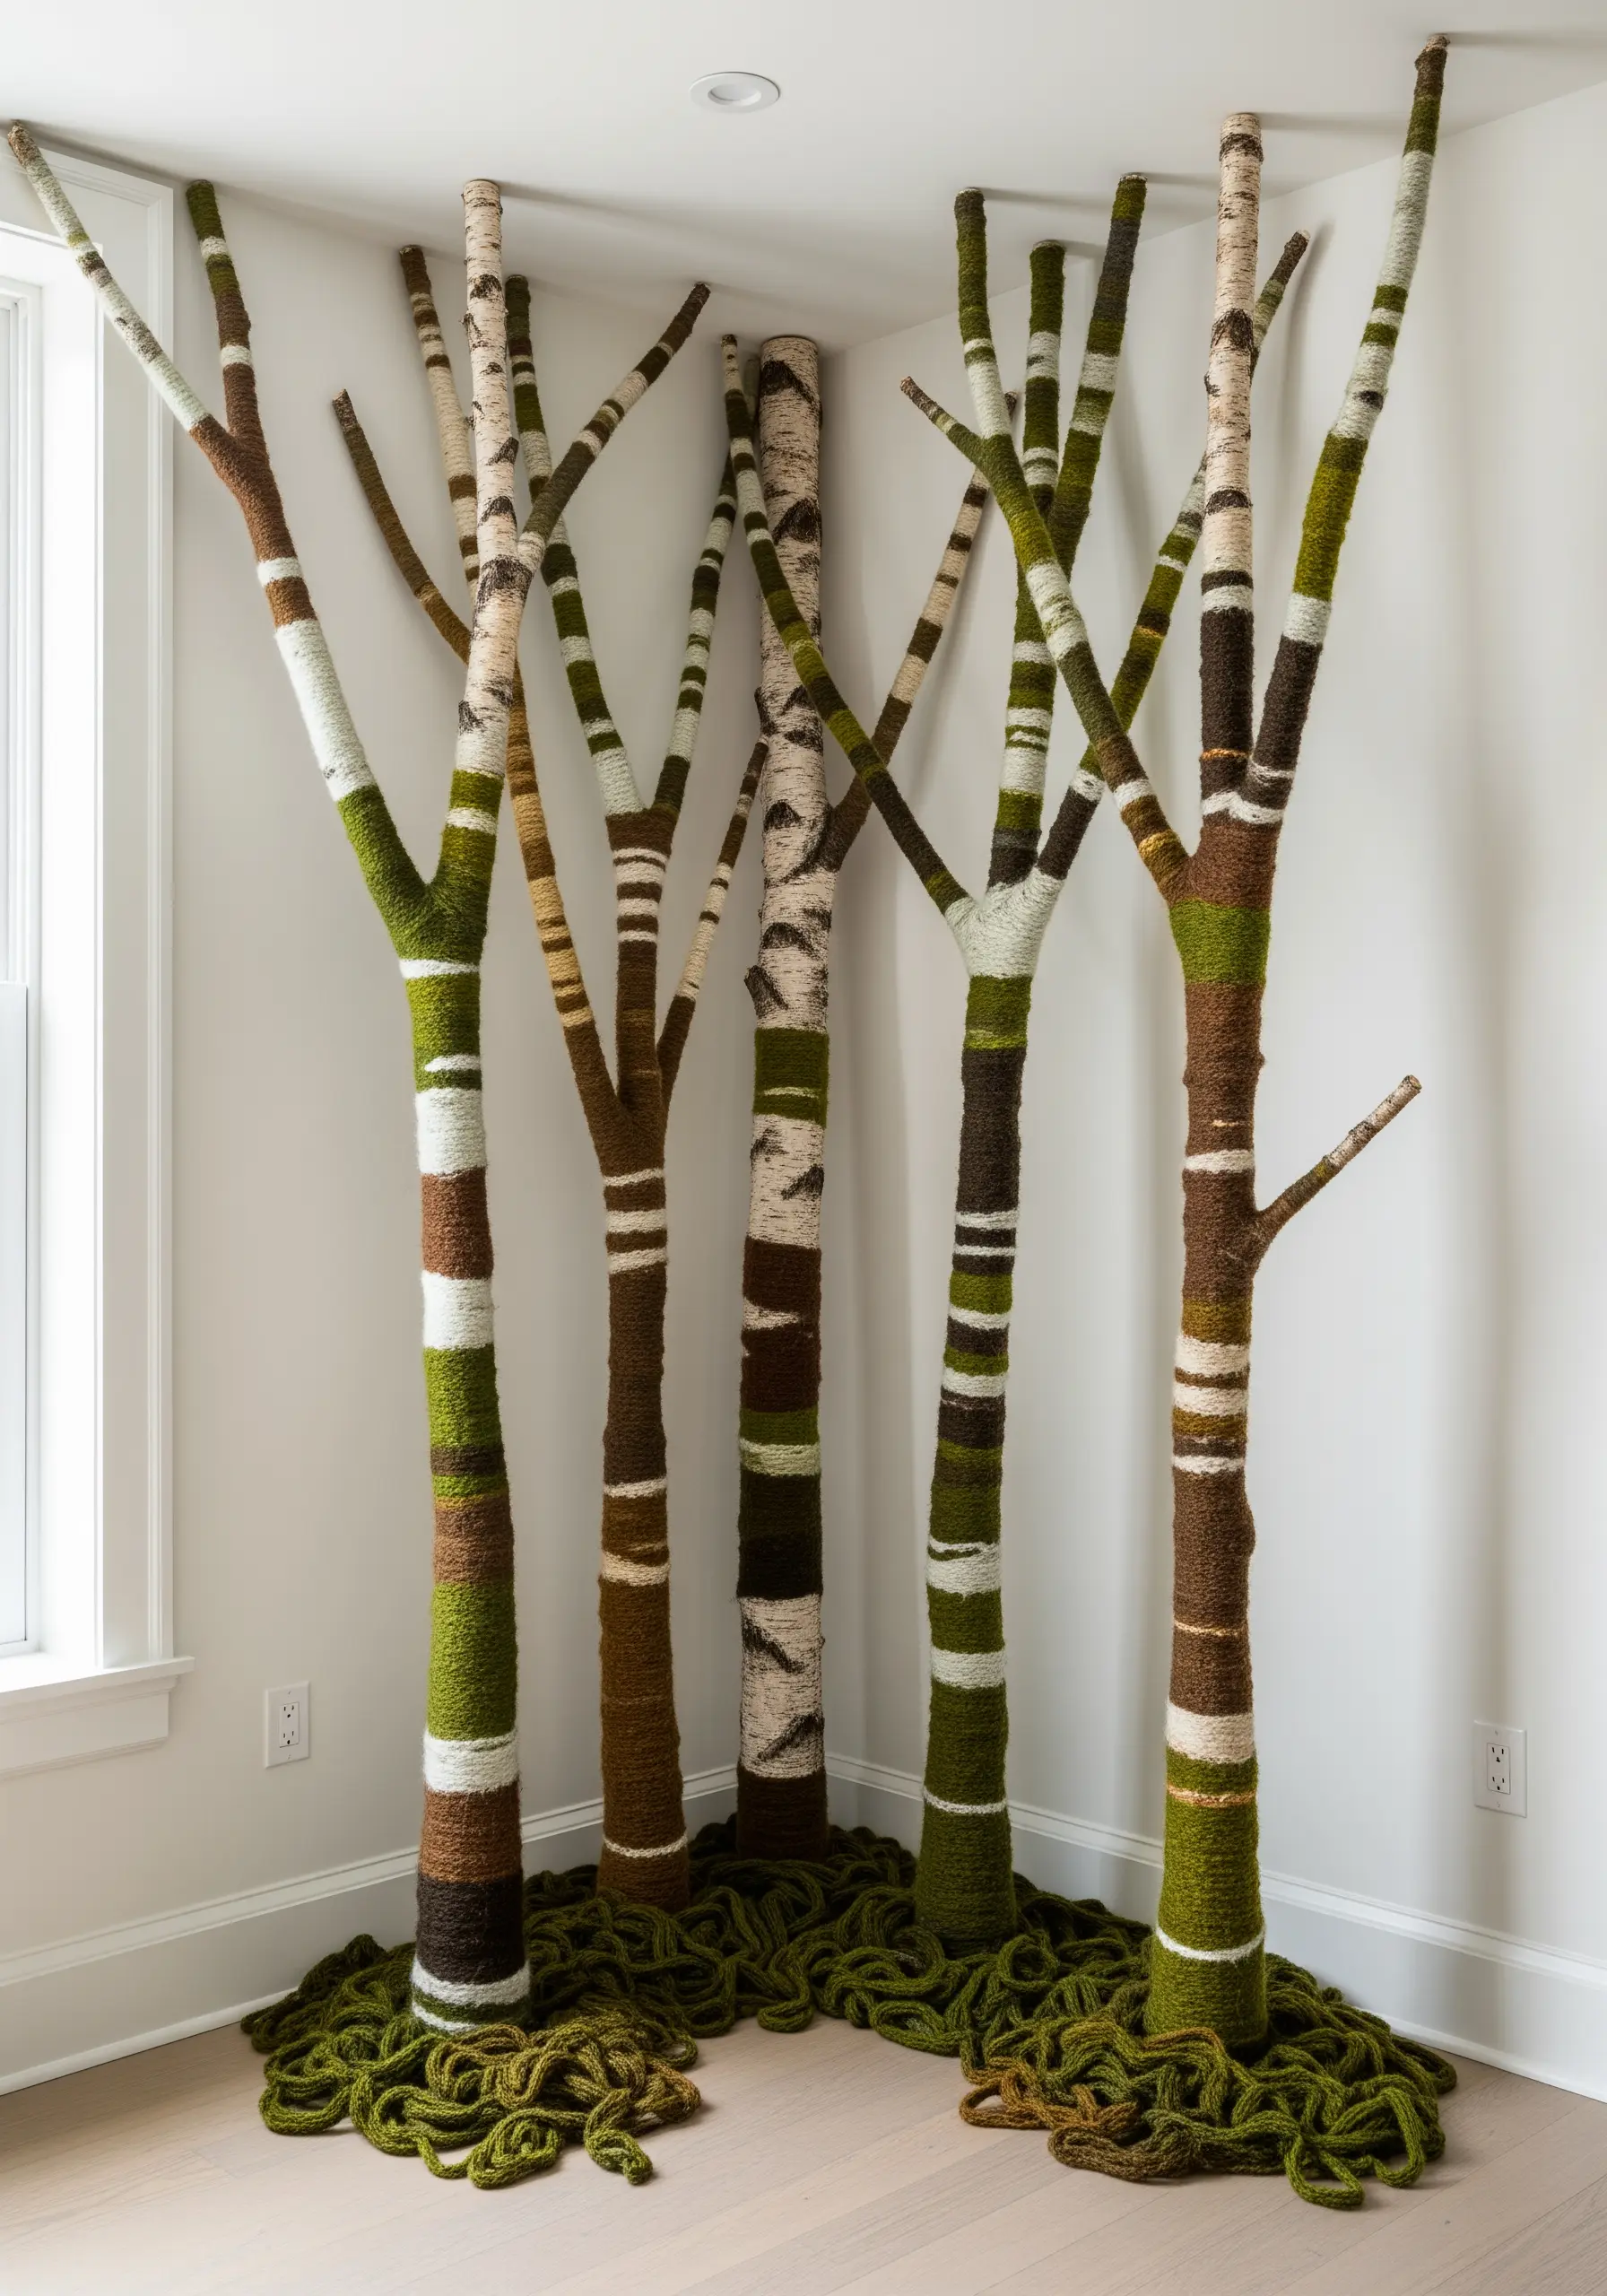
Bring the outdoors in by transforming simple branches into sculptural art pieces through yarn wrapping.
Forage for interesting shapes, then clean and dry them thoroughly before you begin.
Use variegated or multi-toned yarns in natural shades of green, brown, and cream to mimic the texture of bark.
Create clean stripes by wrapping specific sections with masking tape before you start, then removing it to reveal the natural wood underneath.
This is one of the most accessible creative embroidery ideas inspired by tree bark and leaves, blending fiber with natural forms.
7. Weave Miniature Landscapes in Embroidery Hoops

Use standard embroidery hoops as small, circular looms to create a collection of woven vignettes.
Warp your hoop with a strong cotton thread, creating the vertical foundation for your weaving.
Incorporate different textures—like fluffy roving, silky ribbon, and thin embroidery floss—to build a tactile landscape within the hoop.
Group hoops of various sizes together to form a cohesive gallery wall, united by a consistent color palette.
This technique is perfect for turning weaving into small, contained pieces for an inspiring hoop art project.
8. Elevate Lighting with a Macrame Chandelier

Craft a statement lighting fixture by adding intricate macrame work to a tiered lampshade frame.
Start with a metal frame—either new or upcycled—and use it as the anchor for your design.
Use a simple, repetitive knot, like the square knot or half-hitch, to create a uniform pattern that allows light to filter through beautifully.
Keep the fringe at the bottom of each tier precisely trimmed for a clean, professional finish that enhances the geometric shape.
You can use this technique to make elegant embroidery accents that are both beautiful and functional.
9. Weave a Story with Upcycled Textiles

Construct a deeply personal wall hanging by weaving with strips of meaningful fabric, such as old jeans, t-shirts, or scarves.
Cut your fabric into continuous strips about one to two inches wide; jersey fabrics will curl nicely, while denim provides rigid texture.
On a large frame loom, alternate rows of fabric with traditional yarn to add stability and visual variety.
Allowing some pieces to hang loose or scrunch up adds a relaxed, bohemian feel that celebrates the materials’ history.
This is a powerful way to create upcycled fabric wall art projects that hold memories.
10. Craft Geometric Art with Tufting Techniques
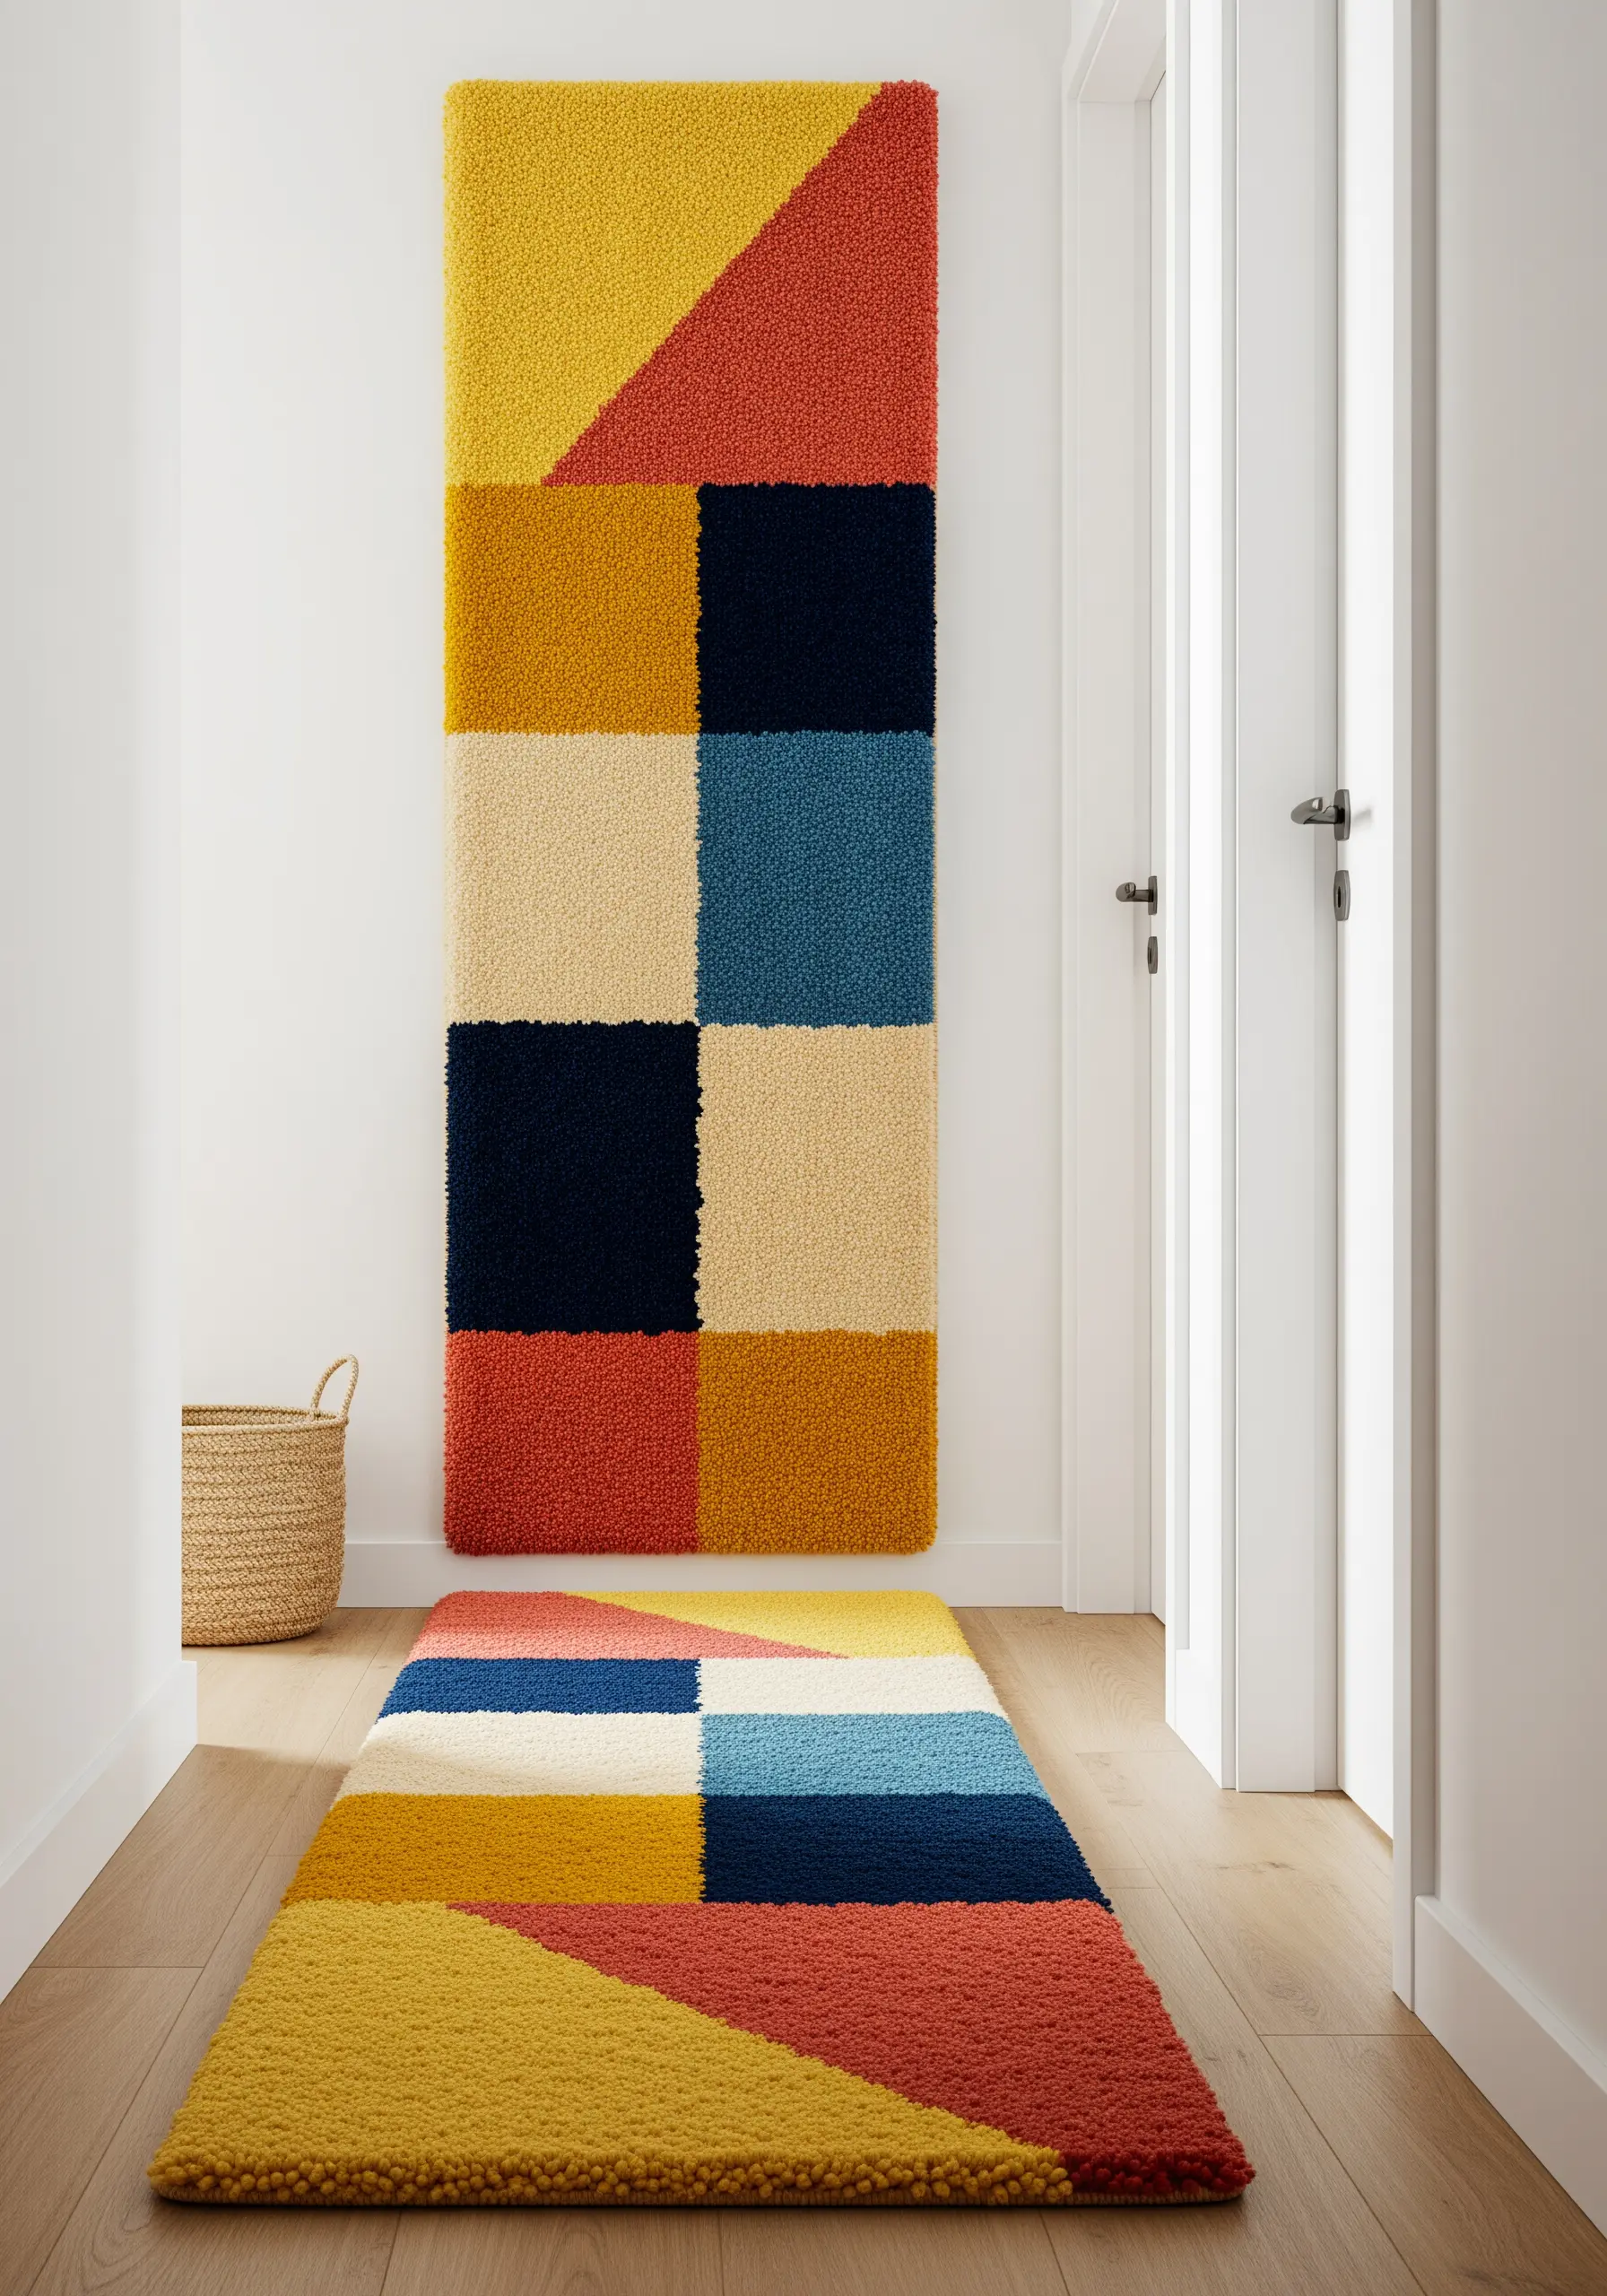
Create bold, graphic wall art or a matching runner using a tufting gun or punch needle for a dense, carpet-like texture.
Sketch out a simple grid or geometric design on your monk’s cloth foundation before you begin.
Work in solid blocks of color, packing your stitches tightly to ensure a plush, uniform surface with no gaps.
The precision of a geometric pattern provides a modern contrast to the softness of the tufted yarn, creating a balanced and striking piece.
Explore modern geometric thread art ideas to bring this clean, contemporary look to your home.
11. Assemble a Sculptural Fiber Mobile
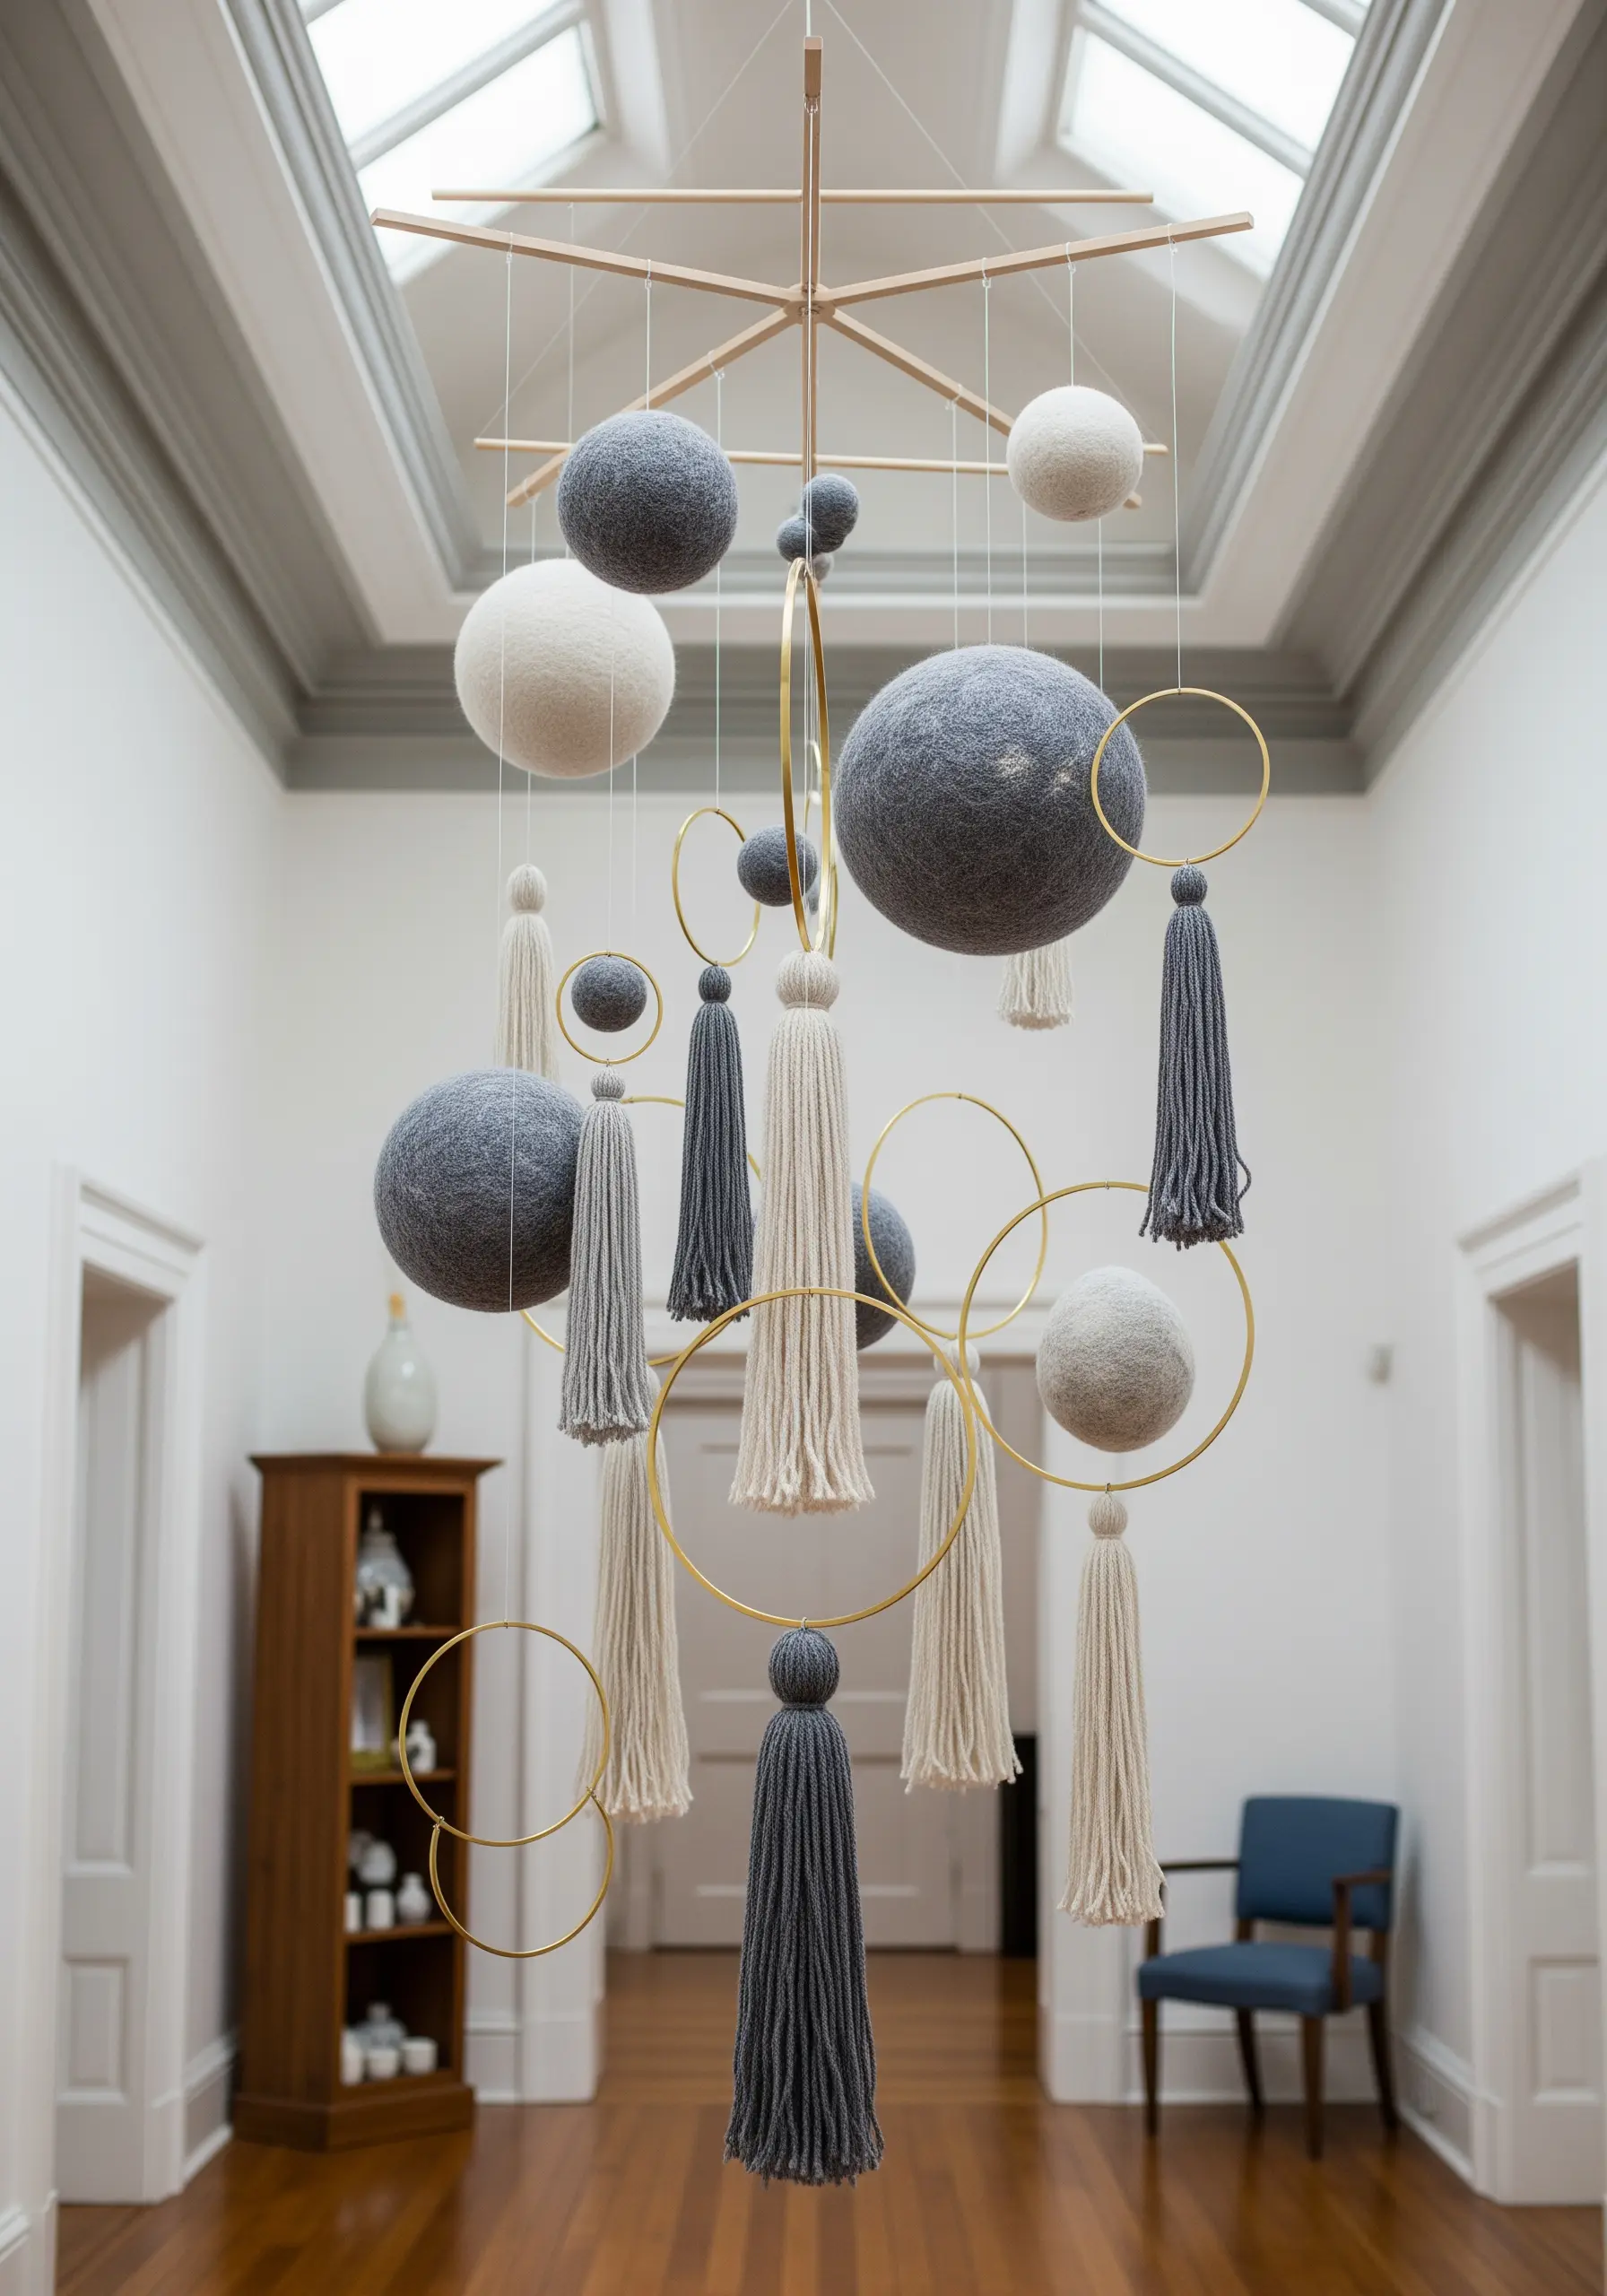
Construct a sophisticated mobile that plays with weight, balance, and texture using simple materials like felted wool, brass hoops, and yarn.
Create your own felted wool balls through needle felting or wet felting, varying their sizes for visual interest.
Assemble the mobile by suspending the elements from a central point, using metal hoops to add a rigid, geometric counterpoint to the soft tassels and spheres.
The key to a successful mobile is achieving dynamic balance; experiment with placement until the piece hangs gracefully.
This project results in handmade mini decor pieces that have a gallery-quality, sculptural presence.
12. Map the Stars with String Art
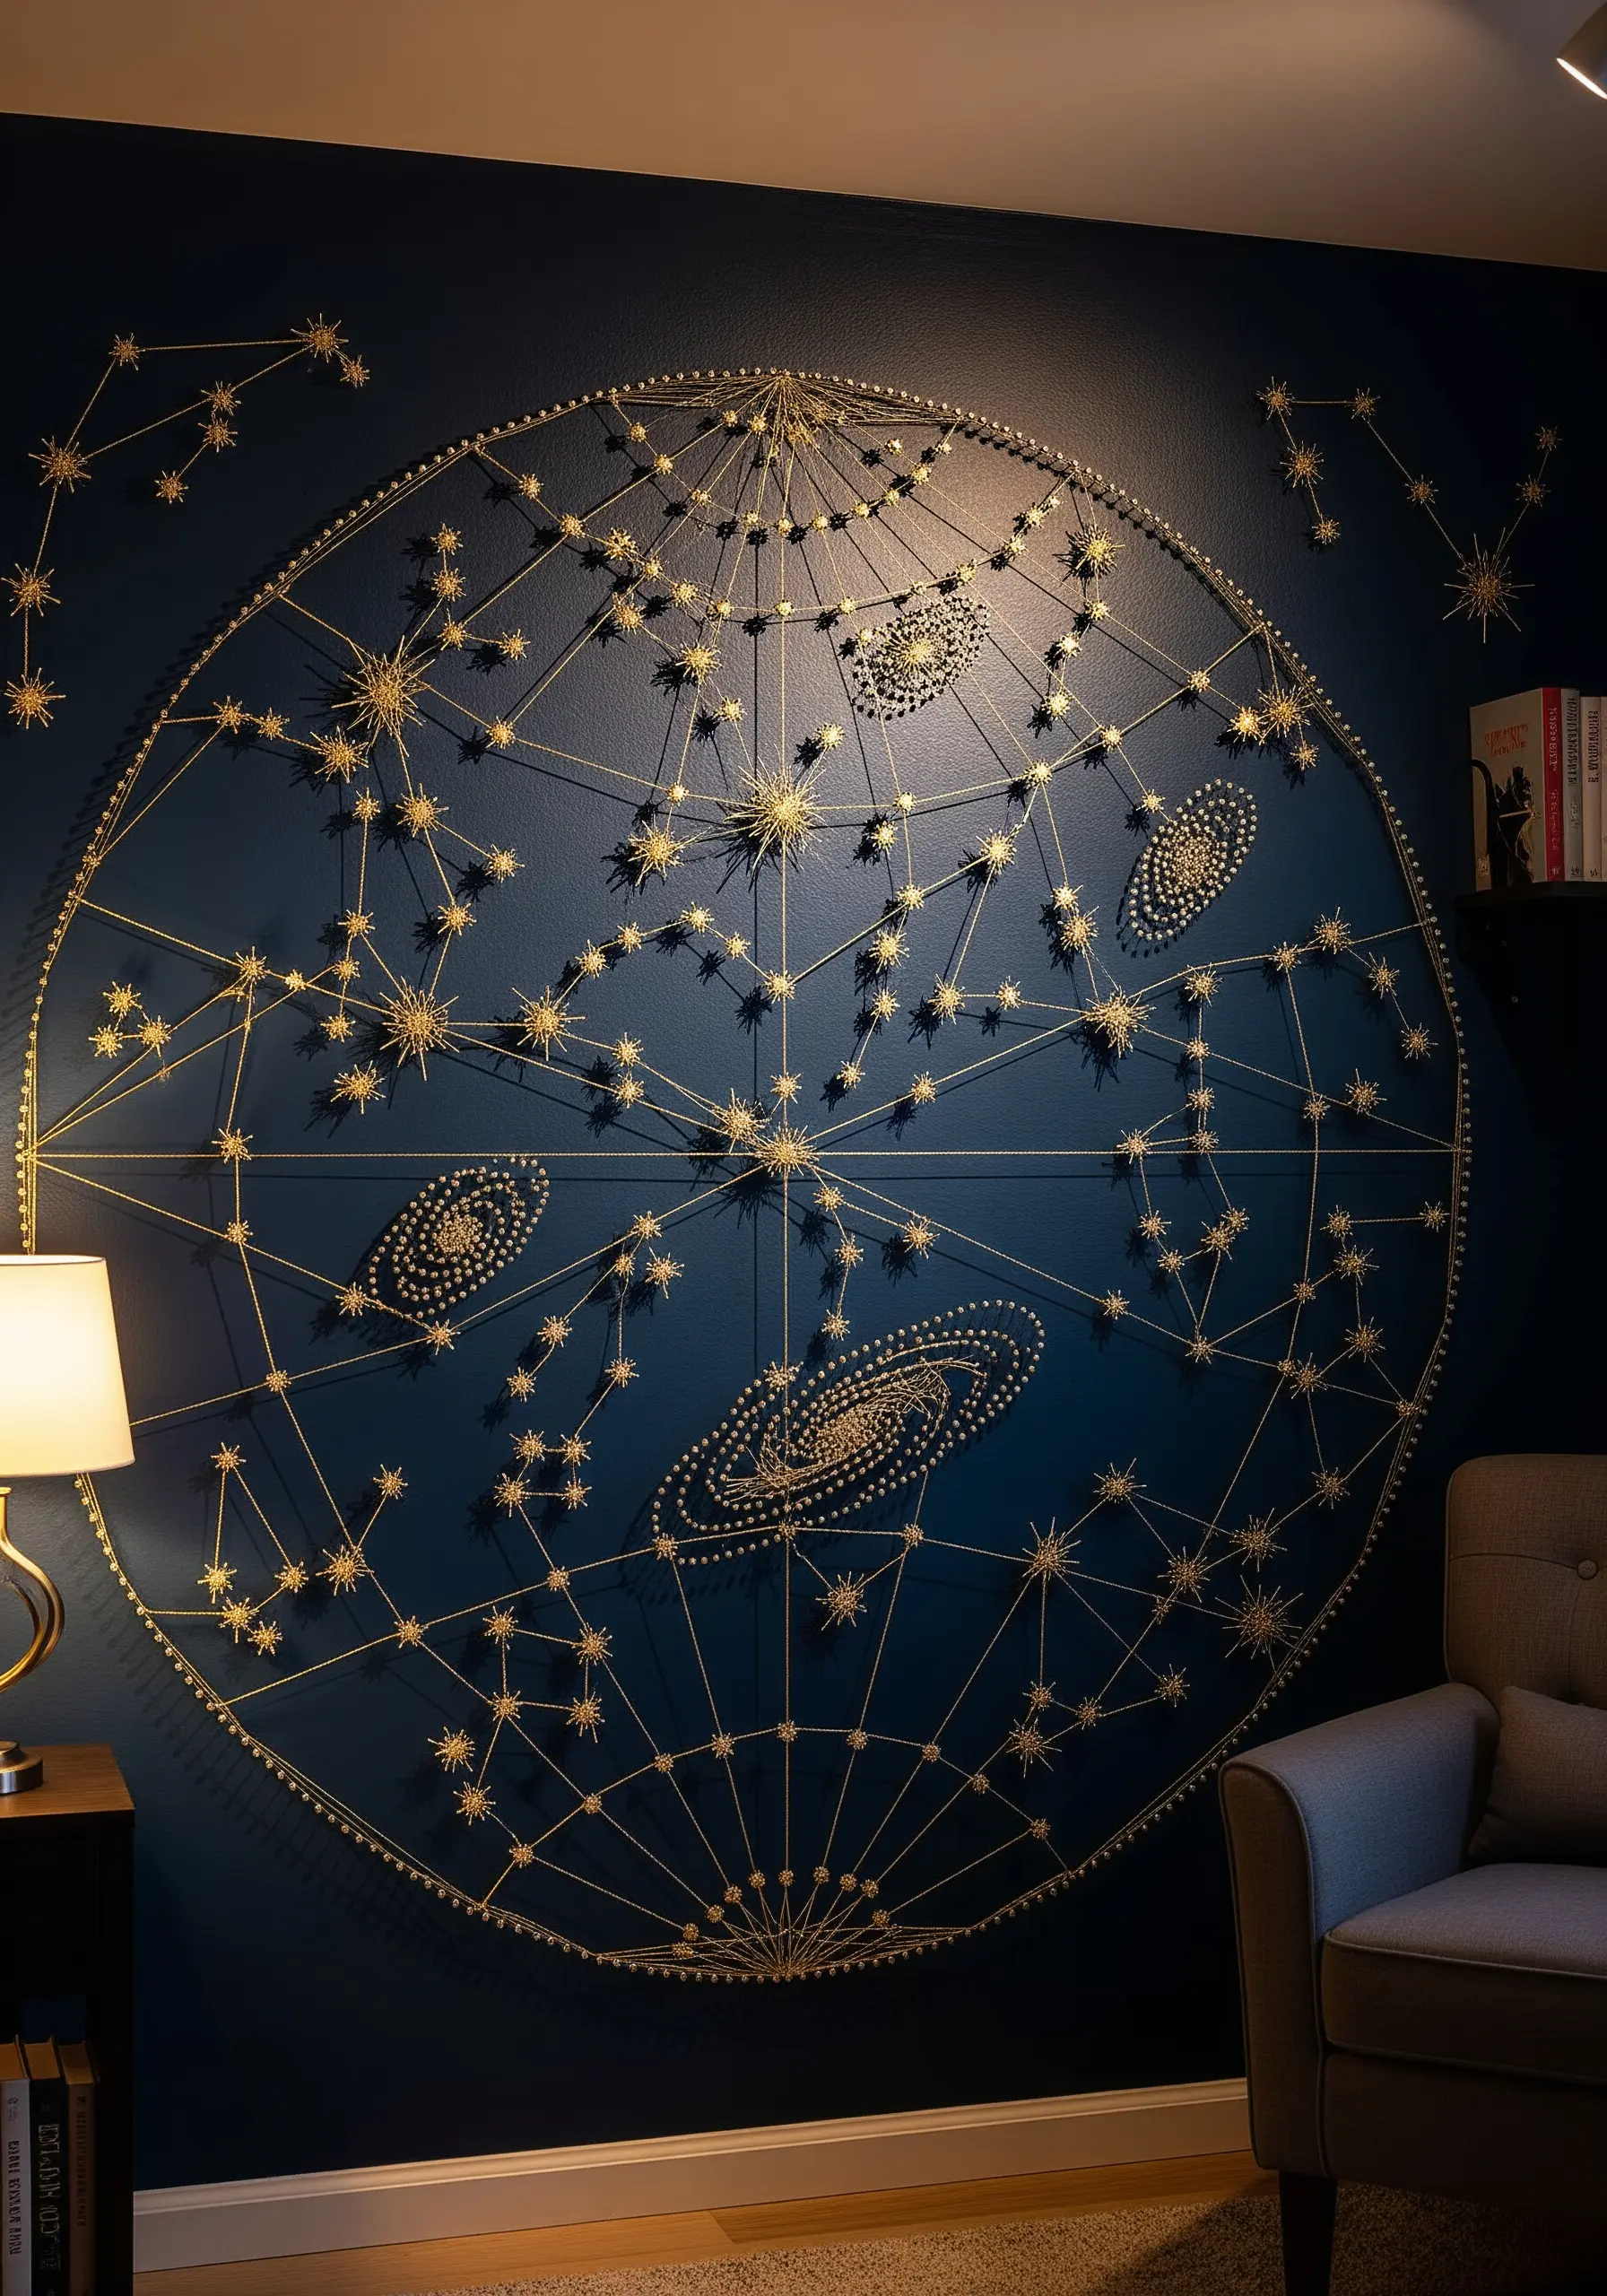
Create a celestial masterpiece directly on your wall using the simple principles of string art.
Start with a dark, moody wall color to make your threads pop. Lightly sketch your constellation design, then hammer in small nails at key intersection points.
Use a fine, strong metallic thread and begin wrapping it between the nails, creating both straight lines and dense, star-like clusters.
The magic of string art is how overlapping straight lines can create the illusion of curves and depth.
Explore other metallic thread wall art designs to bring a touch of glamour to any room.
13. Knit Functional Storage with Chunky Yarn
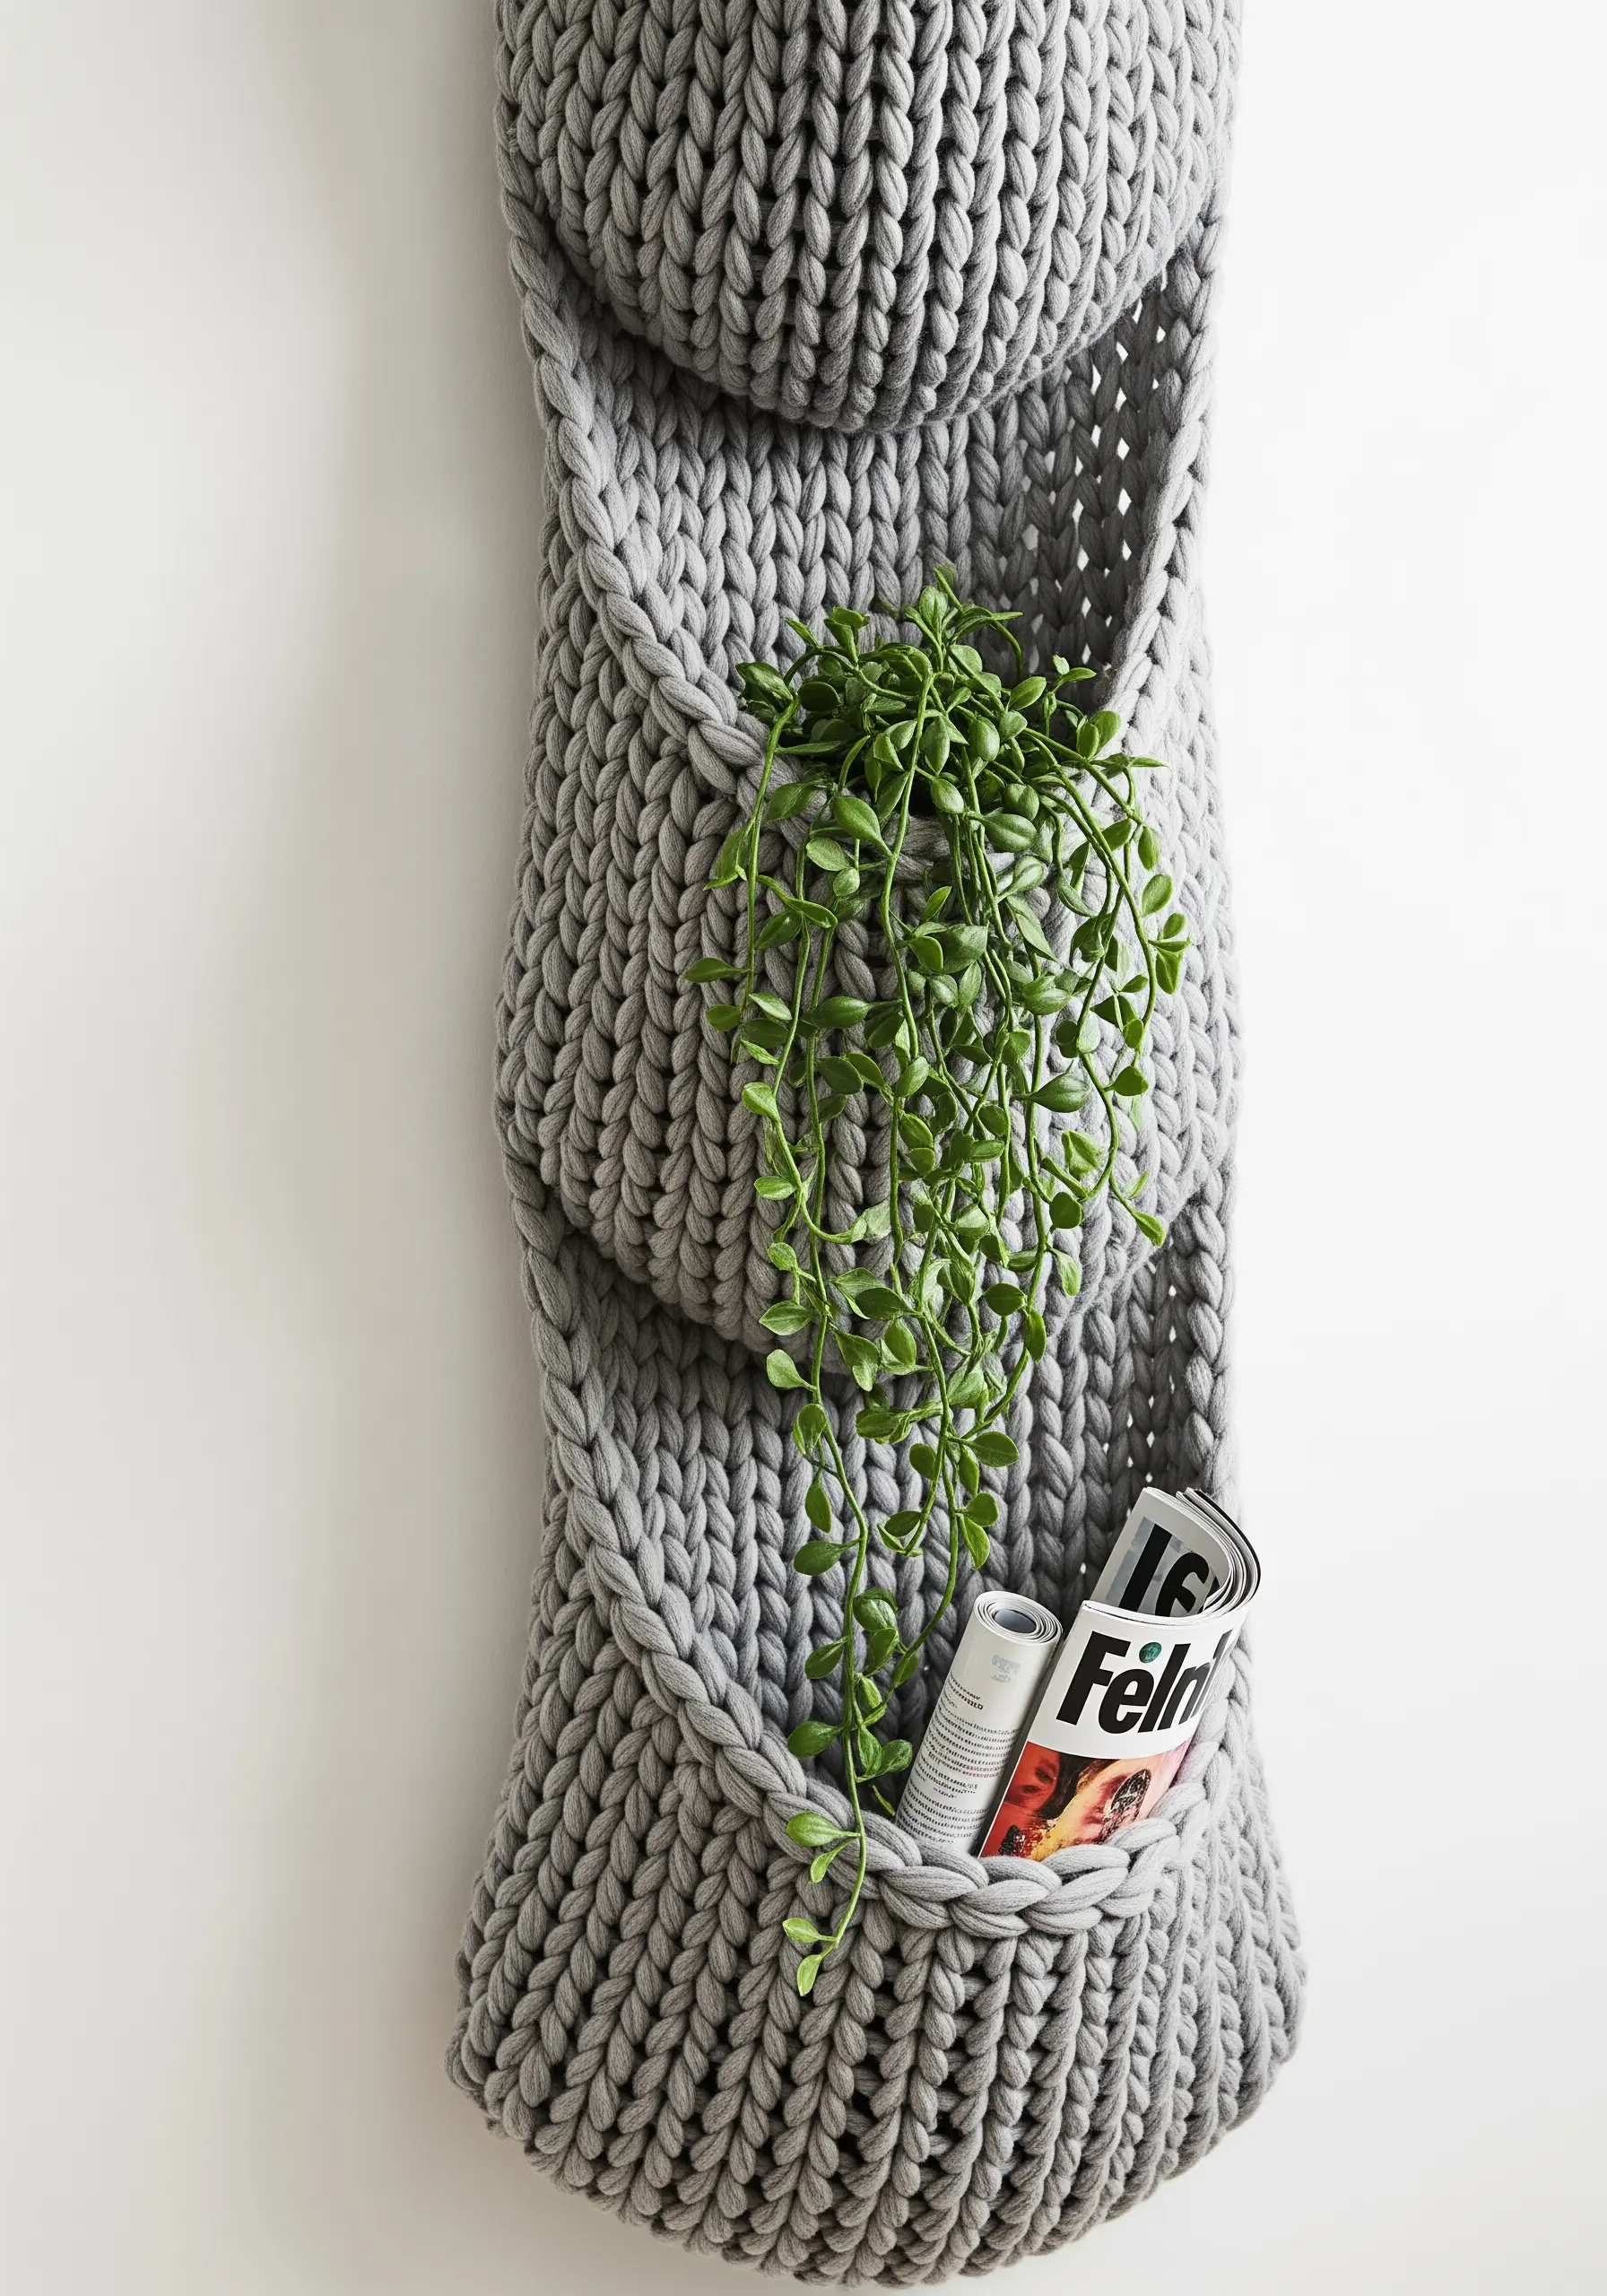
Go beyond blankets and scarves by using giant knitting techniques to create functional home storage.
Use jumbo knitting needles or the arm-knitting method with super-chunky tube yarn, which holds its shape better than unspun roving.
Knit a simple, flat rectangle, then fold it and stitch the sides to create pockets for mail, magazines, or even a small plant.
The oversized stitches themselves become the dominant design element, celebrating texture and form.
This is one of the smartest DIY embroidery projects that keep your space clutter-free and beautiful.
14. Sculpt a Mossy Landscape with 3D Stitches

Build a hyper-realistic, three-dimensional moss terrarium using a variety of advanced embroidery and fiber techniques.
Create a base of rolling hills with needle-felted wool, then stitch directly into it.
Use dense clusters of French knots for a fine, moss-like texture, and Turkey work (or Ghiordes knots) for taller, grassier sections that you can trim to shape.
Incorporate bullion knots for worm-like forms and small, needle-felted mushrooms to complete the woodland scene.
This project is the ultimate expression of capturing nature’s textures in your embroidery.
15. Create Meditative Art with Coiled Rope
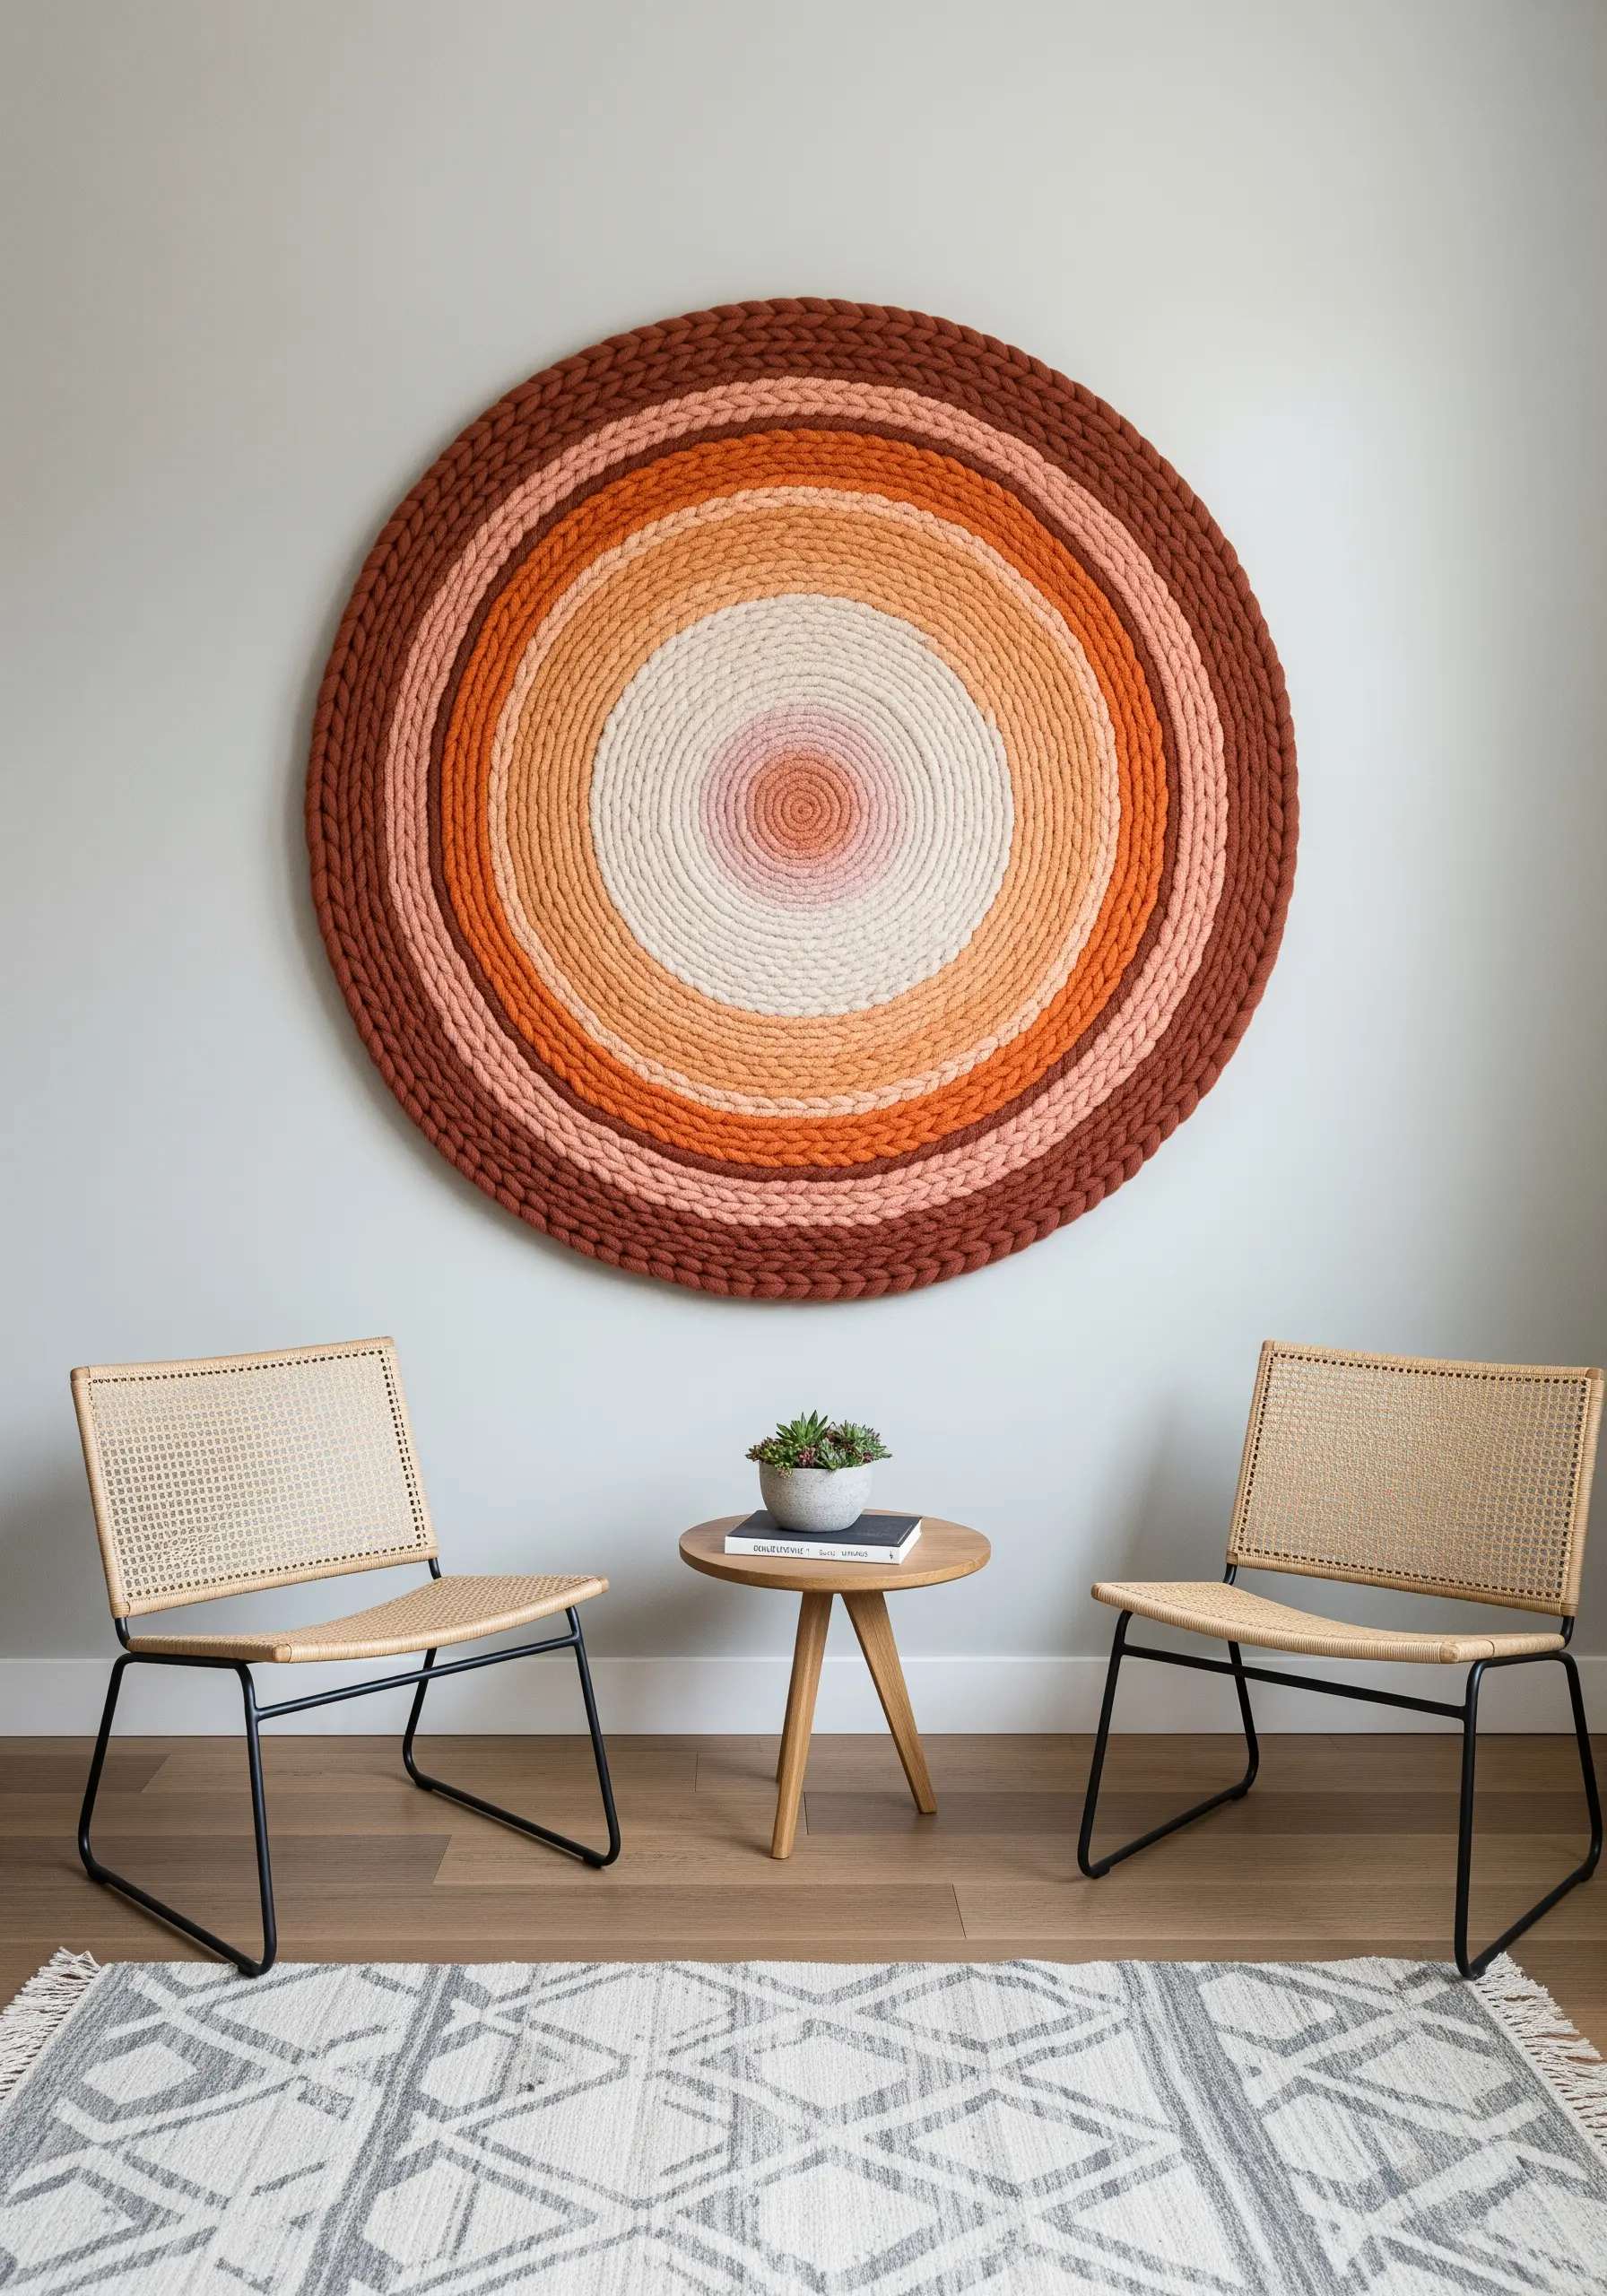
Construct a large-scale, circular wall hanging by coiling yarn-wrapped rope into a serene, mandala-like pattern.
Start with a thick cotton rope and wrap it tightly with different colors of yarn, securing the yarn ends with a touch of glue.
Begin coiling the wrapped rope from the center, stitching the coils together on the back side with a heavy-duty needle and thread as you go.
Plan your color changes to create concentric rings or a soft, blended gradient for a calming, hypnotic effect.
This method allows you to explore modern thread mandala ideas on a grand, impactful scale.
16. Explore Asymmetry in Modern Macrame

Move beyond traditional macrame by creating a composition that emphasizes negative space, clean lines, and sculptural knots.
Instead of filling the entire piece, allow unwoven cords to create graphic lines and define open areas.
Use a single, oversized, complex knot as the central focal point, contrasting it with the simplicity of the straight cords.
Combining different materials, like thick jute rope and smooth cotton cord, adds another layer of textural and visual contrast.
This minimalist approach turns plain linen or an empty wall into a showcase for contemporary stitch designs.
17. Frame an Archway with Tufted Art
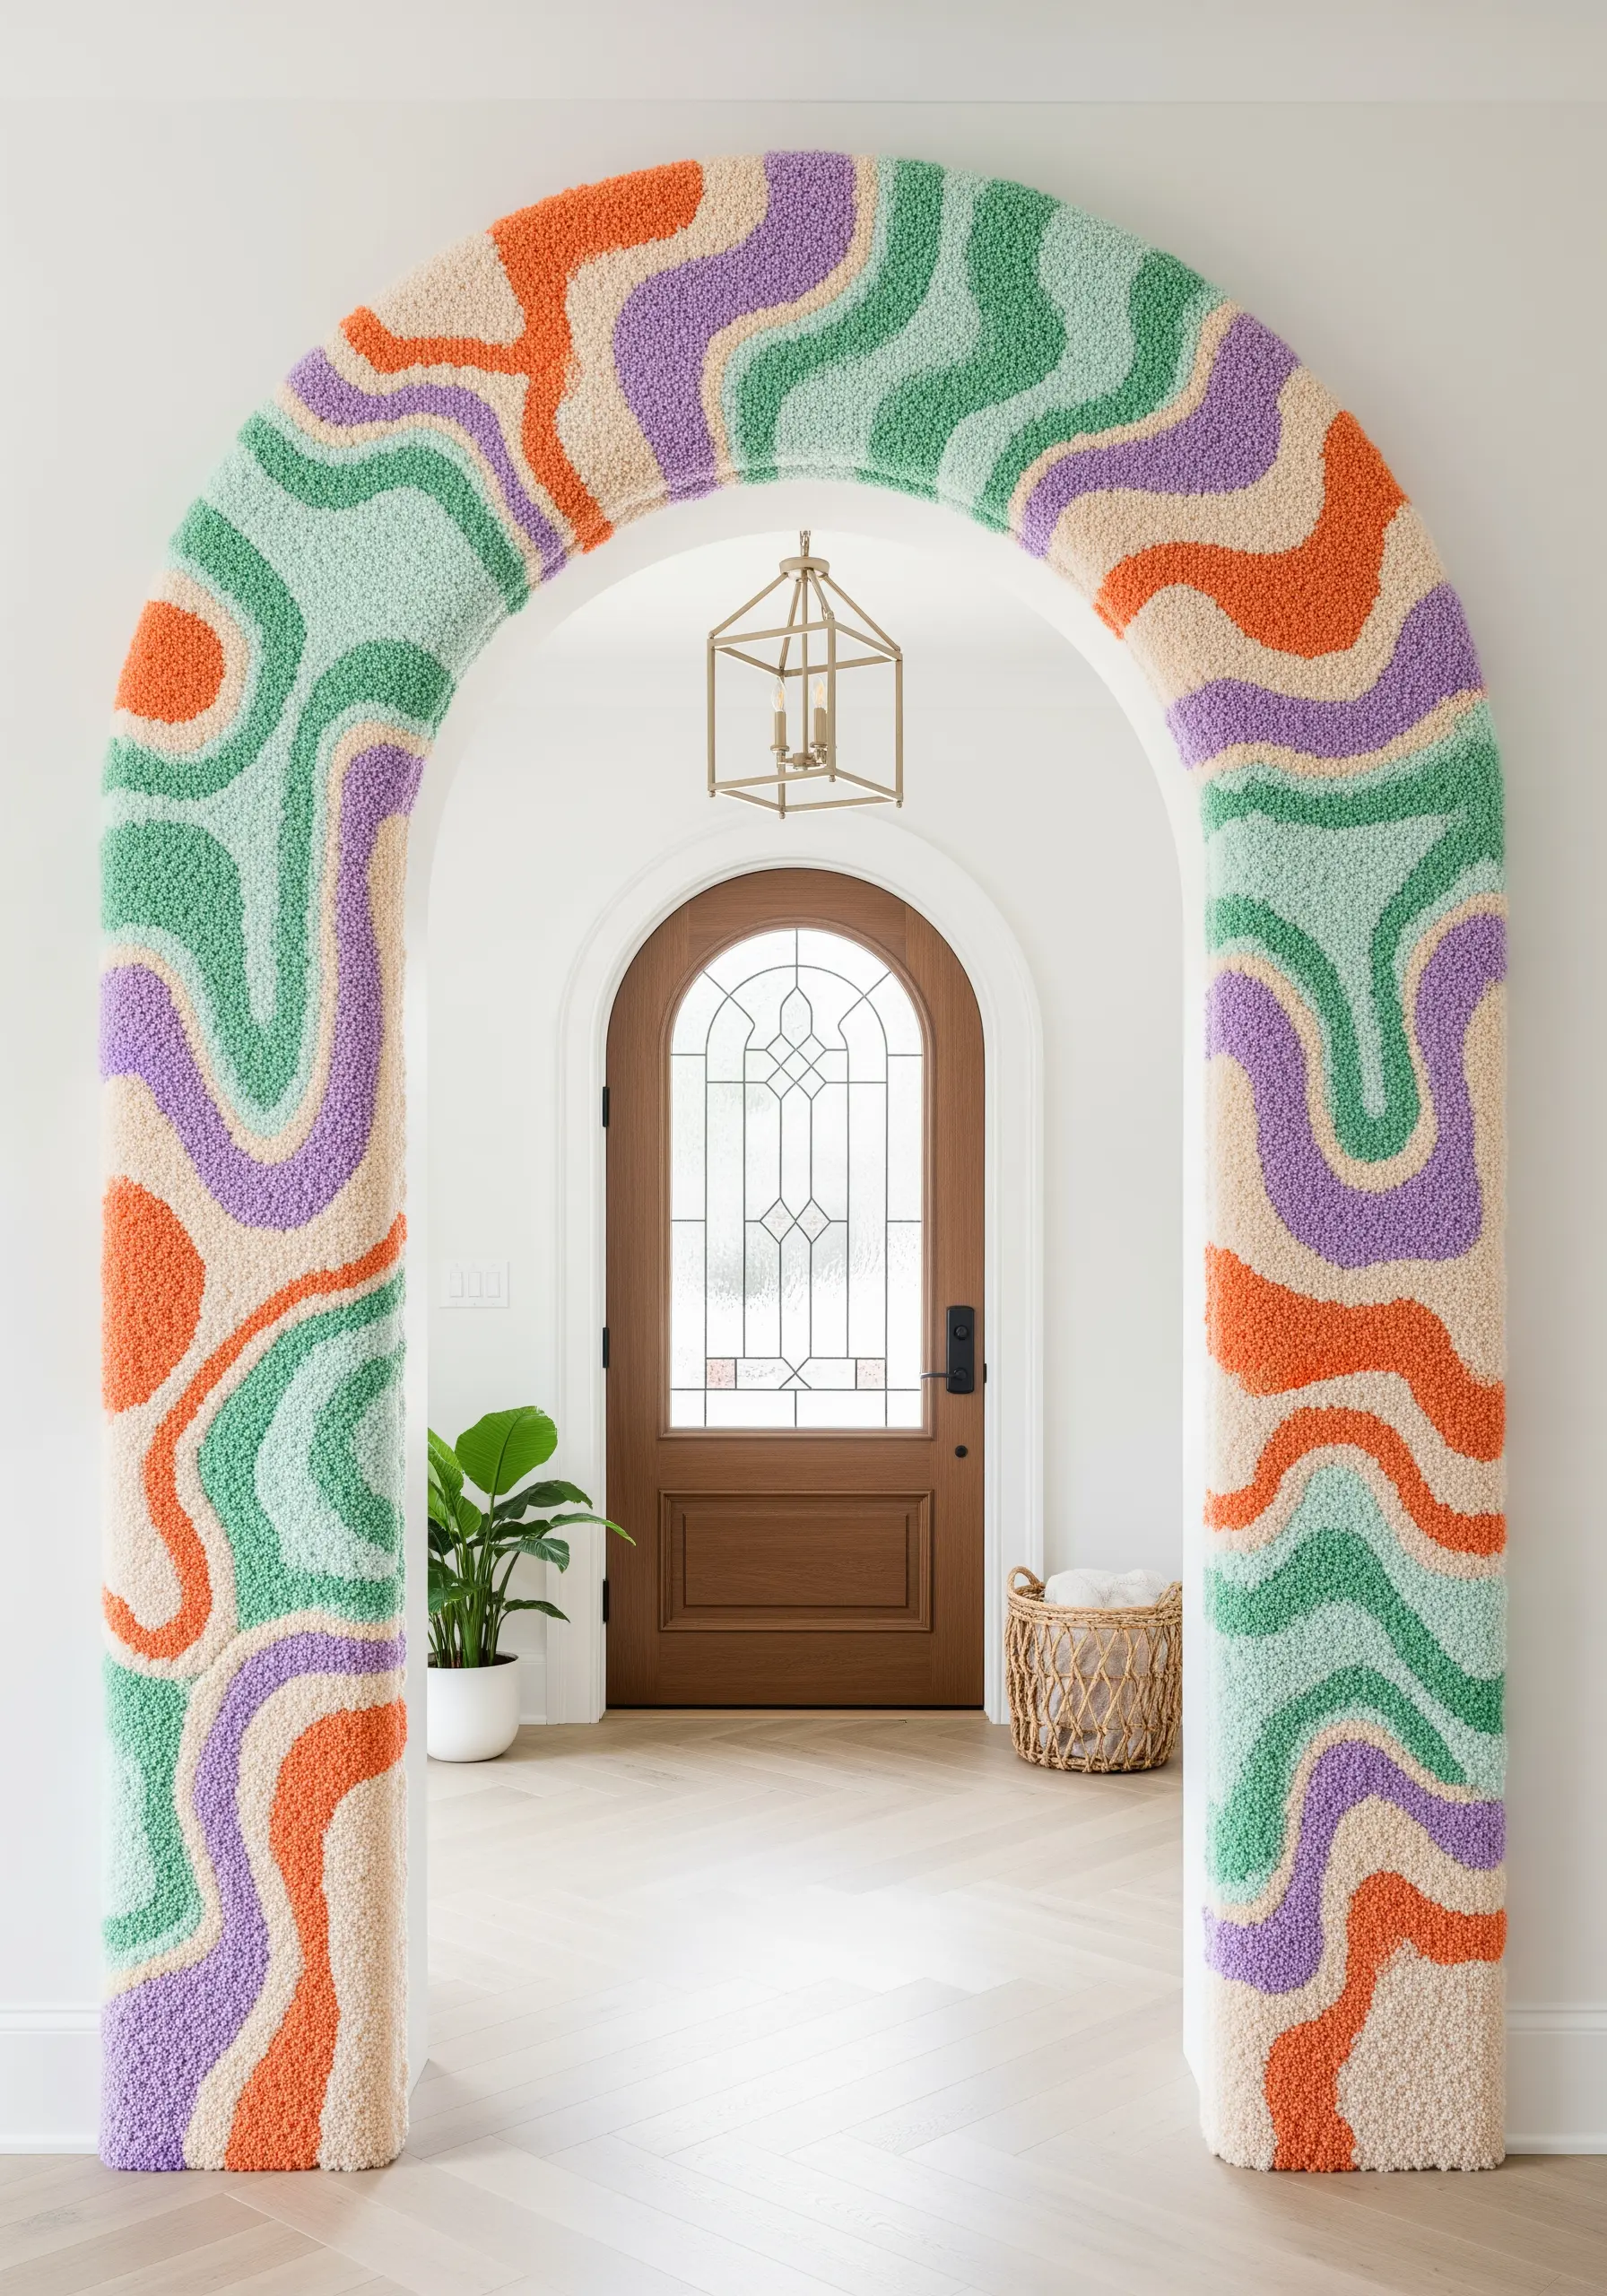
Turn an architectural feature like a doorway or arch into a soft, inviting focal point with custom-fit tufted panels.
Create a template of your archway using paper, then transfer the design onto your tufting cloth.
Use a tufting gun to fill the shape with organic, flowing waves of color, creating a dynamic sense of movement.
Once complete, finish the backing and mount the tufted panels onto thin, custom-cut plywood that can be affixed to the wall around the arch.
This is one of the ultimate statement-size wall art ideas for integrating fiber art directly into your home’s architecture.


