
Let’s move beyond simply filling a space with stitches. Instead, let’s think about how yarn, texture, and color can truly transform a room. This is your chance to explore how different fibers interact with light, how simple knots can become architectural, and how a limited color palette can create more emotion than a whole rainbow.
You don’t need complex tools or years of practice to create something with presence and intention. What you need is a new way of seeing your materials. Think about yarn not just as a line of color, but as a sculptural element. Consider how a shadow will fall, how a texture will invite touch, and how a bold, simple form can quiet a busy wall.
Here, you’ll find ideas that focus on technique and impact. Each one is a starting point for you to create something that feels both modern and deeply personal—a true reflection of your own quiet, creative confidence.
1. Weave a Landscape with Textural Depth
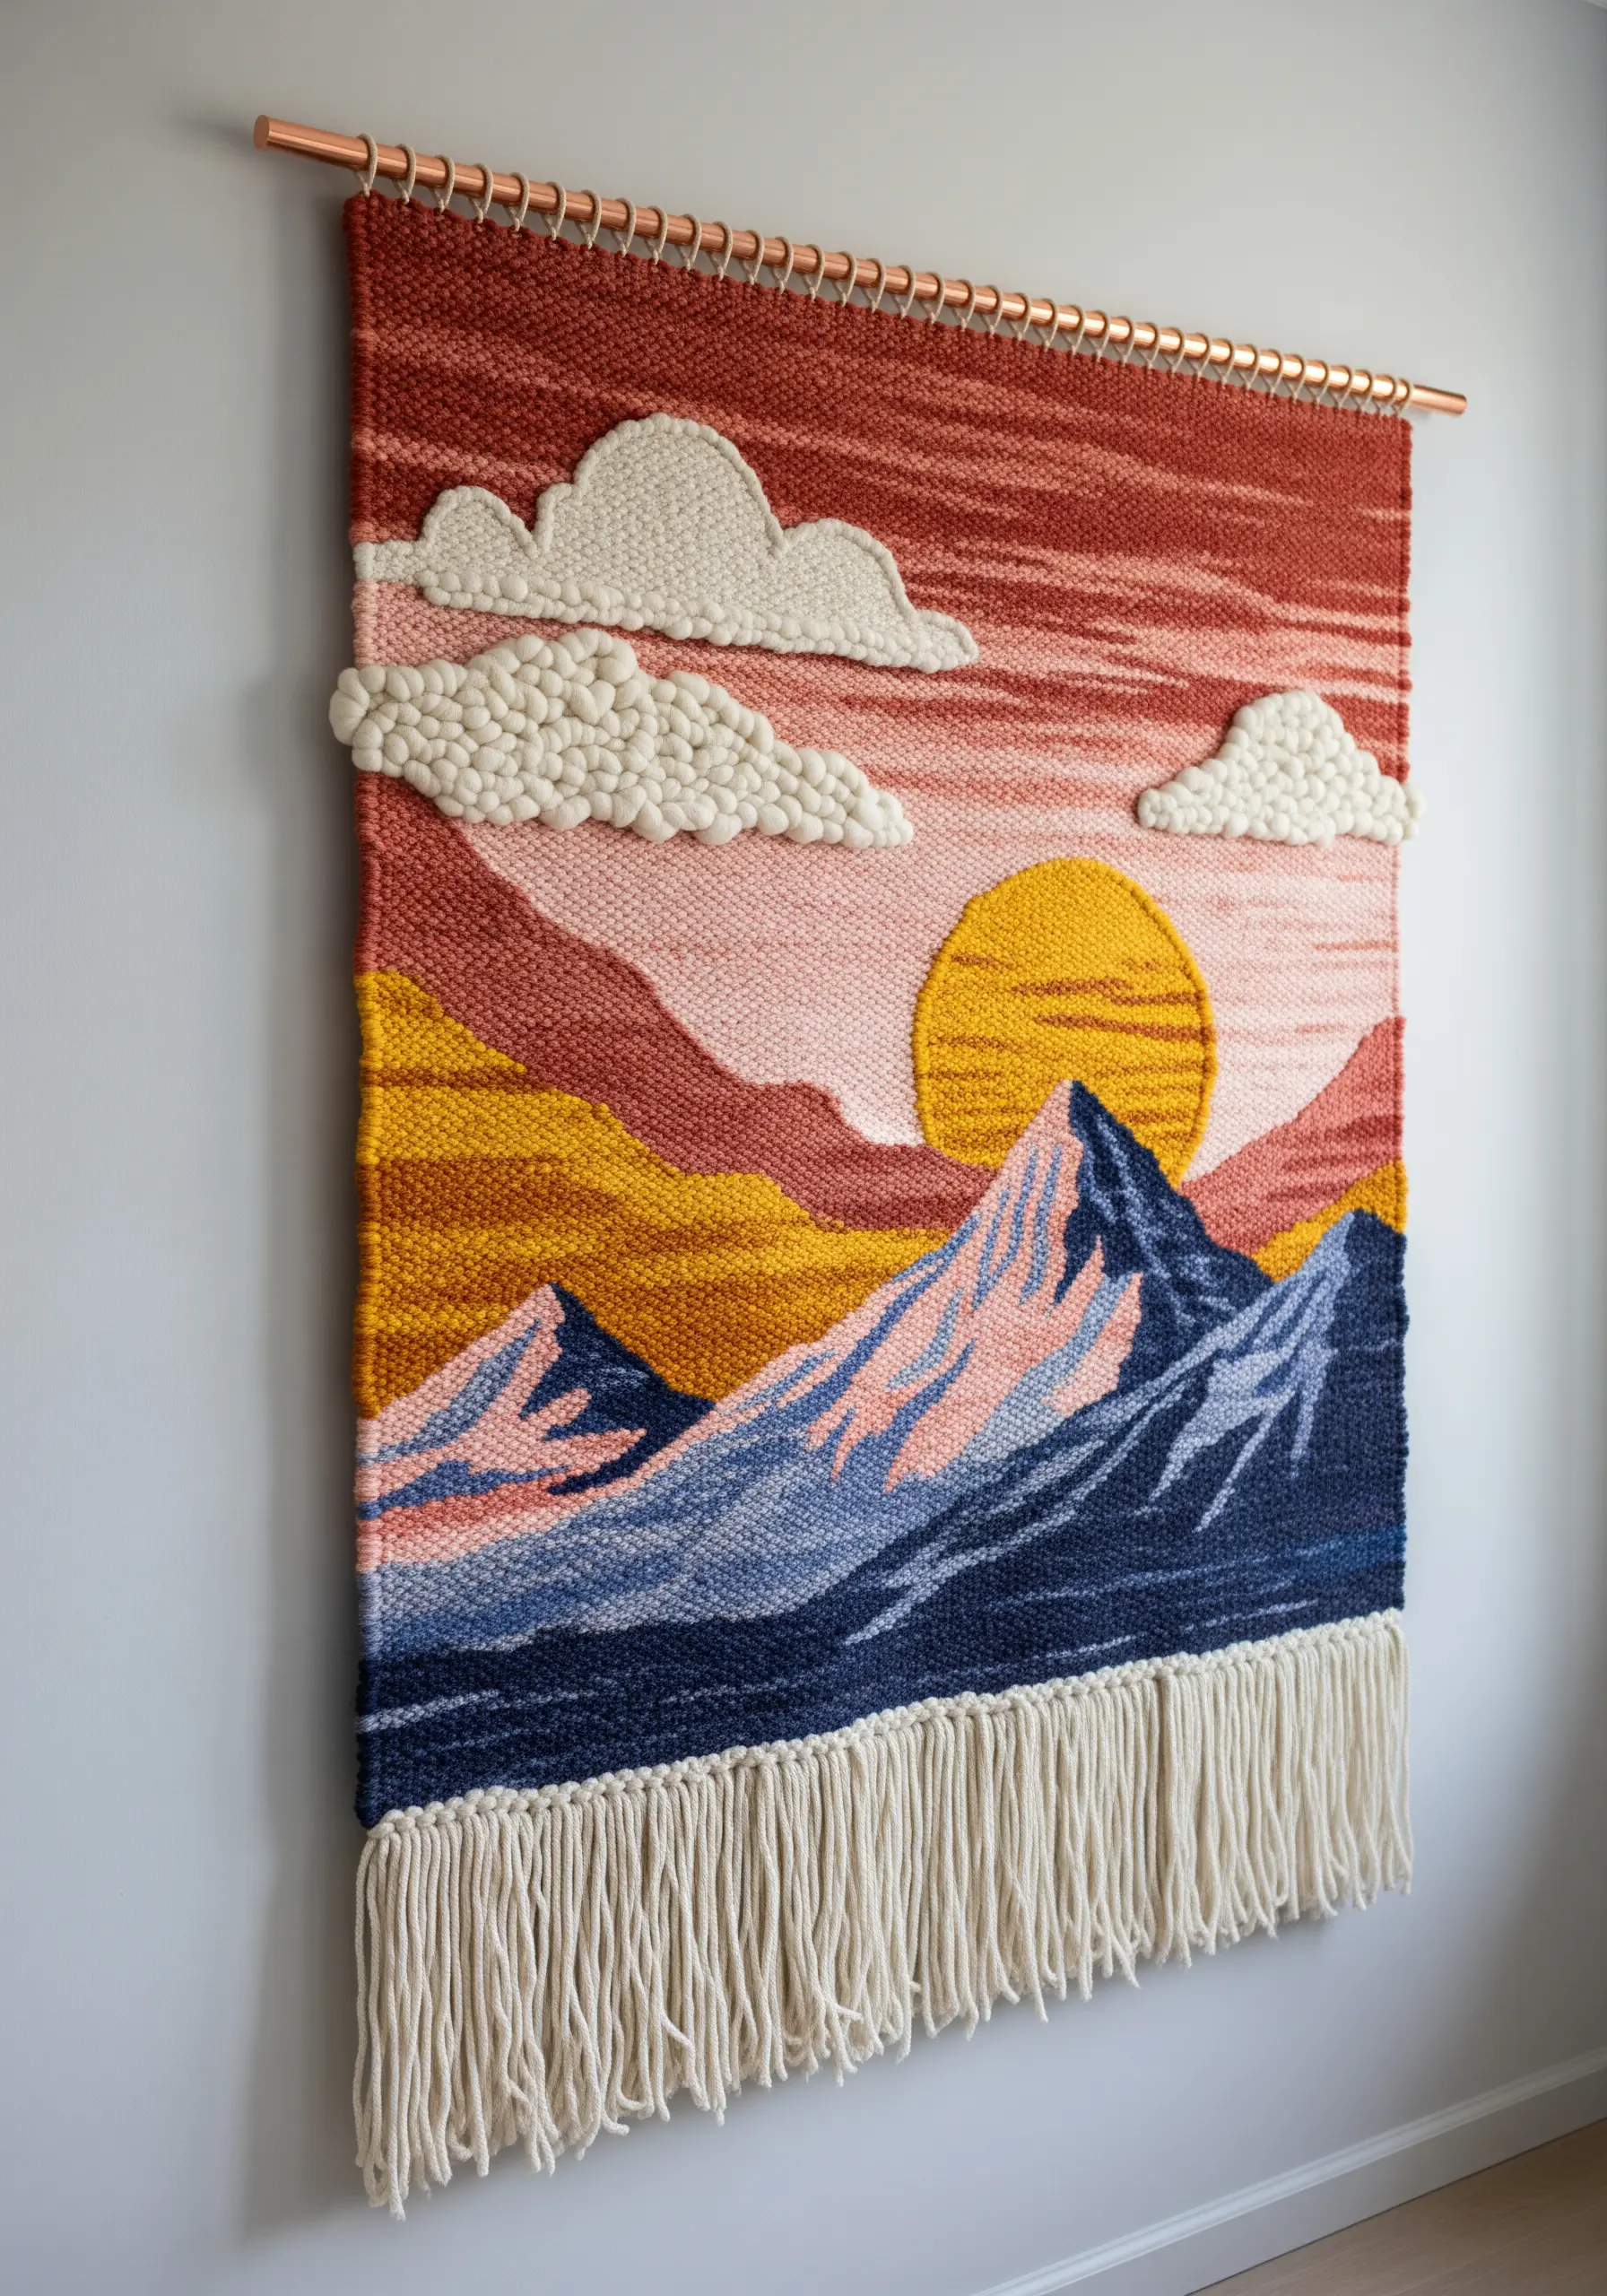
Create a sense of distance in your woven scenes by varying your yarn weights and textures.
Use chunky, unspun roving for foreground elements like clouds or hills to make them pop, while reserving smoother, thinner yarns for the sky to suggest recession.
This technique, known as textural perspective, adds incredible dimension without needing complex color blending.
Limit your palette to analogous colors—like reds, oranges, and pinks—to ensure the final piece feels harmonious rather than chaotic.
The contrast between the soft, bumpy clouds and the flat-woven sky is what gives the artwork its sophisticated, tactile appeal.
2. Master the Ombré Dip-Dye Effect
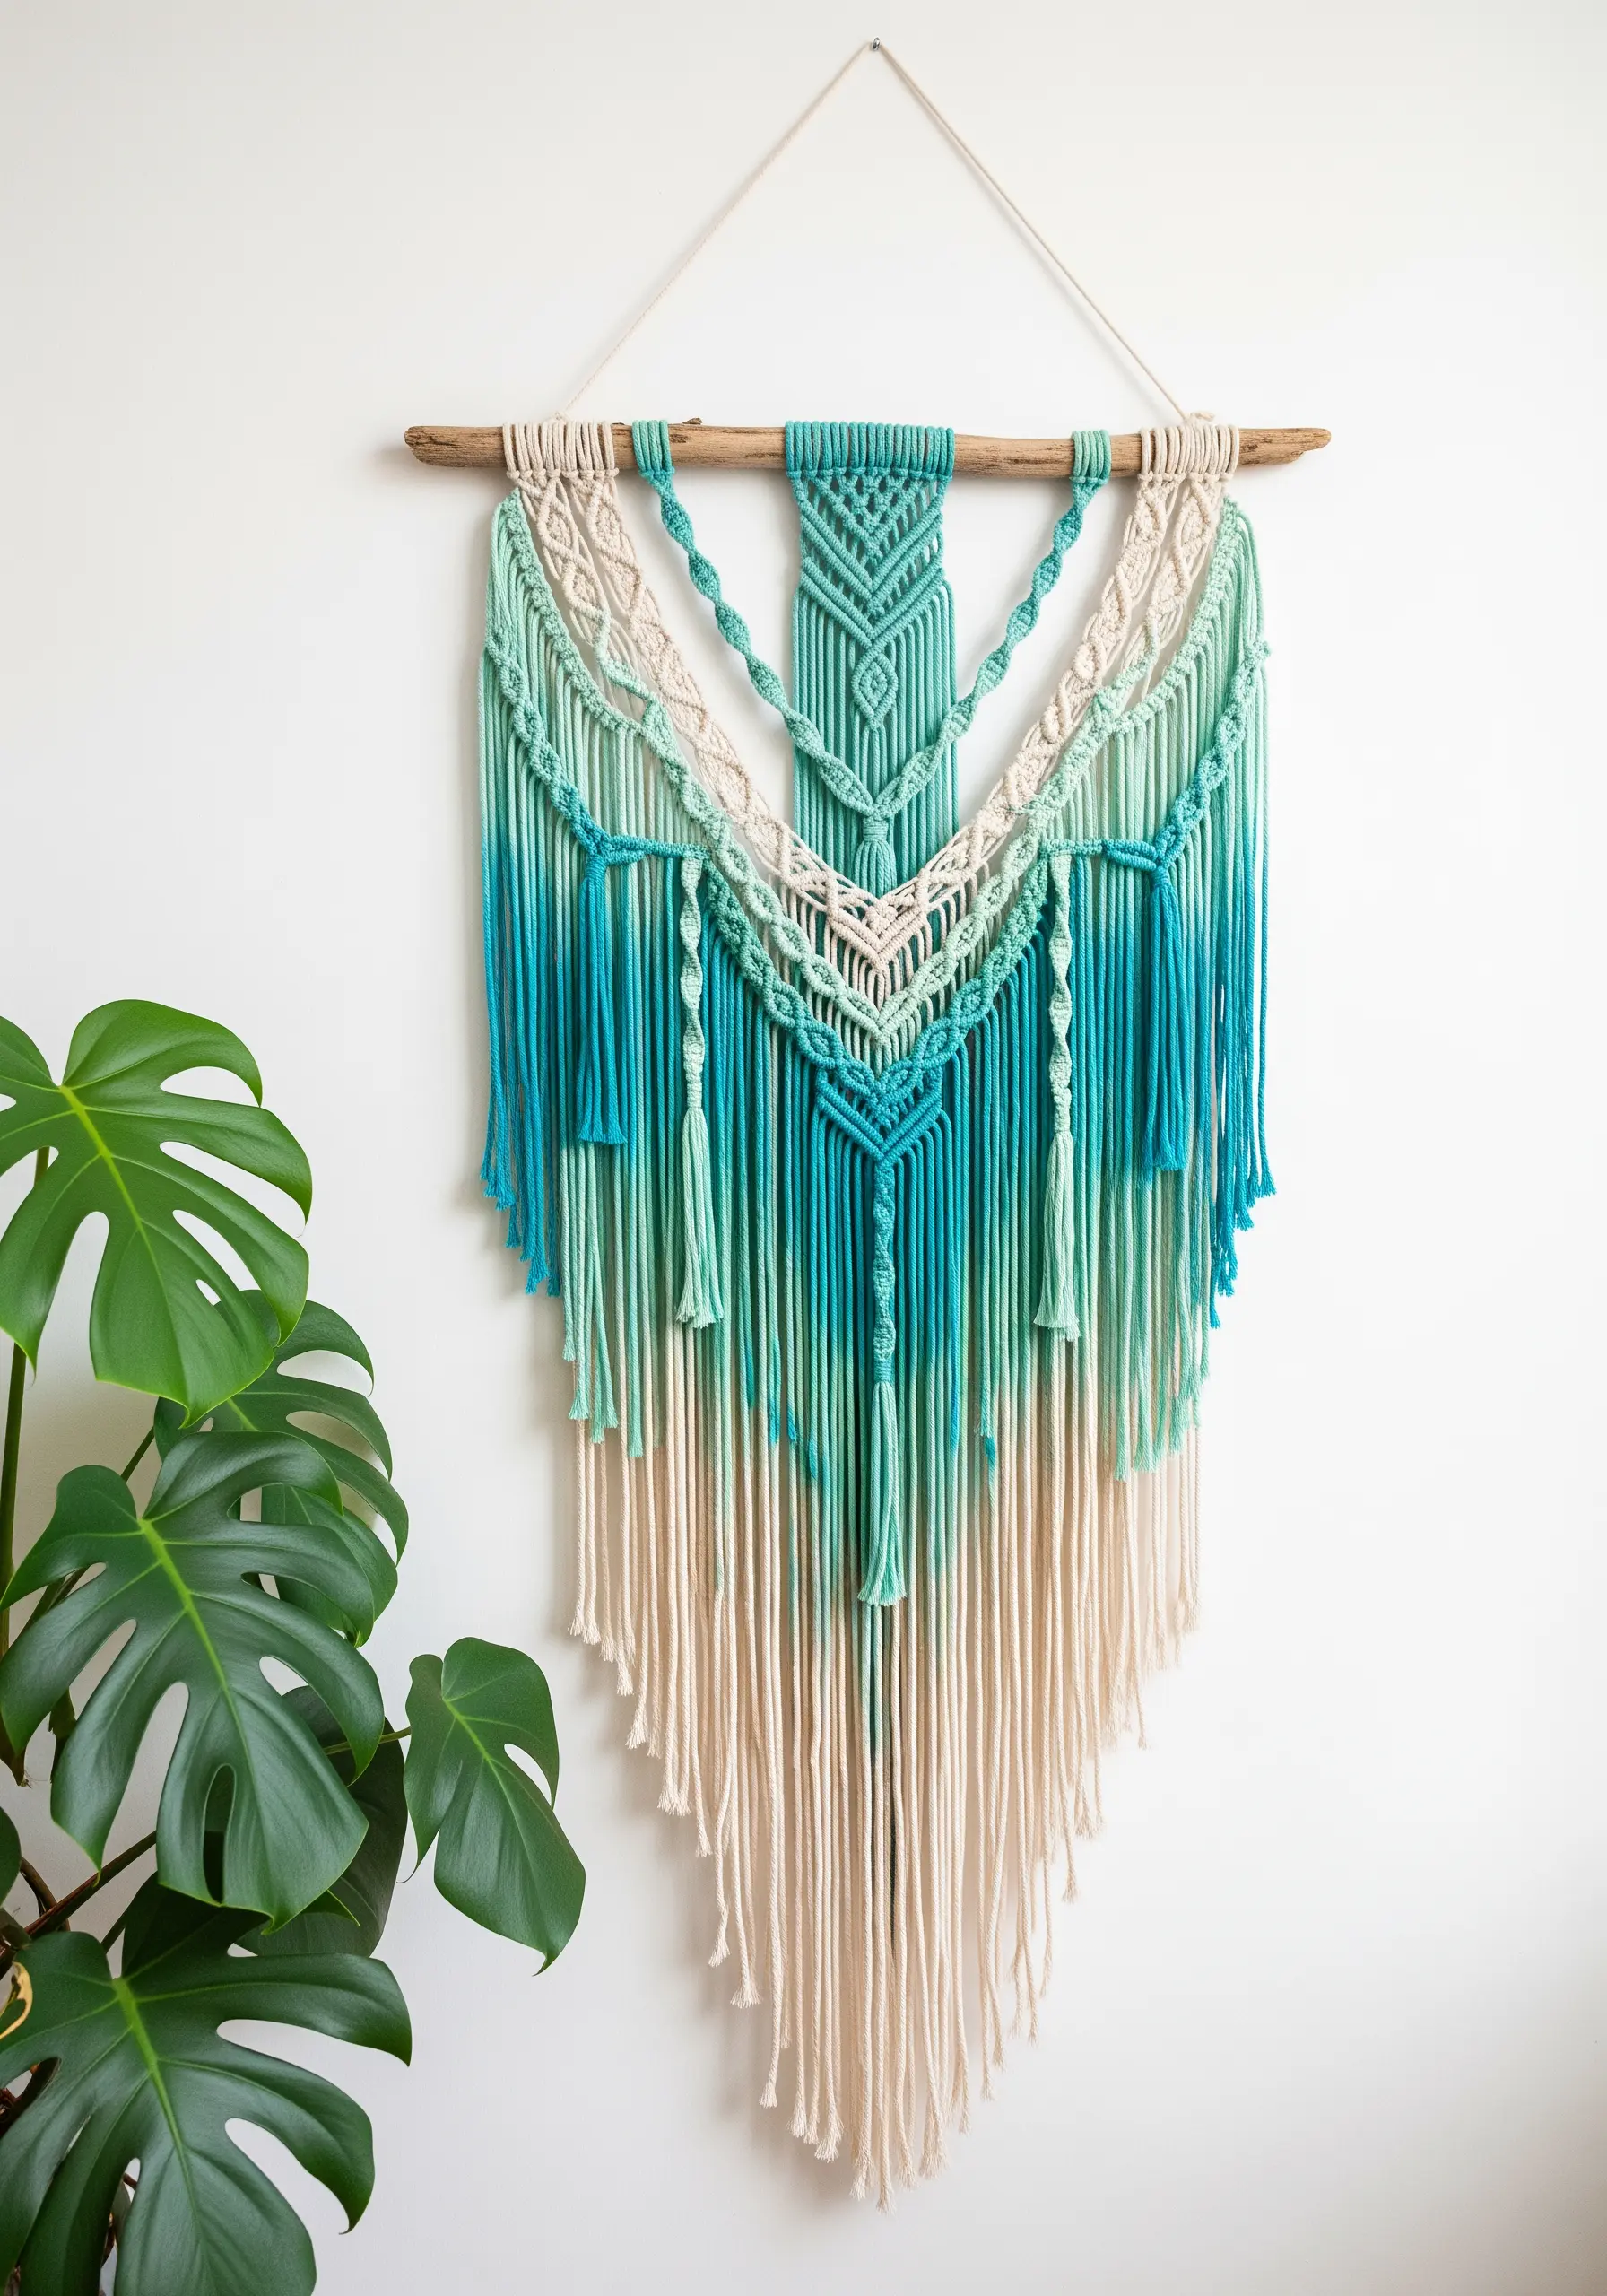
Elevate a simple macrame wall hanging with a gradual dip-dye technique for a soft, painterly finish.
Mix a fabric dye according to the instructions and submerge only the tips of the cotton cord.
Slowly pull the cord out of the dye bath over several minutes; the longer a section is submerged, the deeper its color will be.
This creates a seamless gradient that highlights the structure of your knots without overwhelming them.
Work with damp cord for a softer, more blended transition, or dry cord for a crisper line between colors.
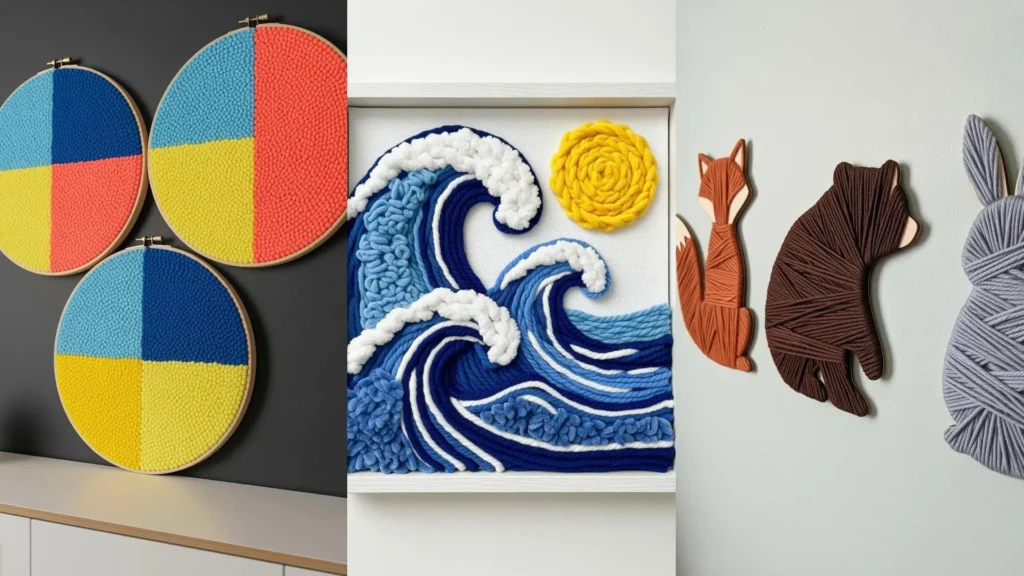
3. Create Graphic Impact with Punch Needle
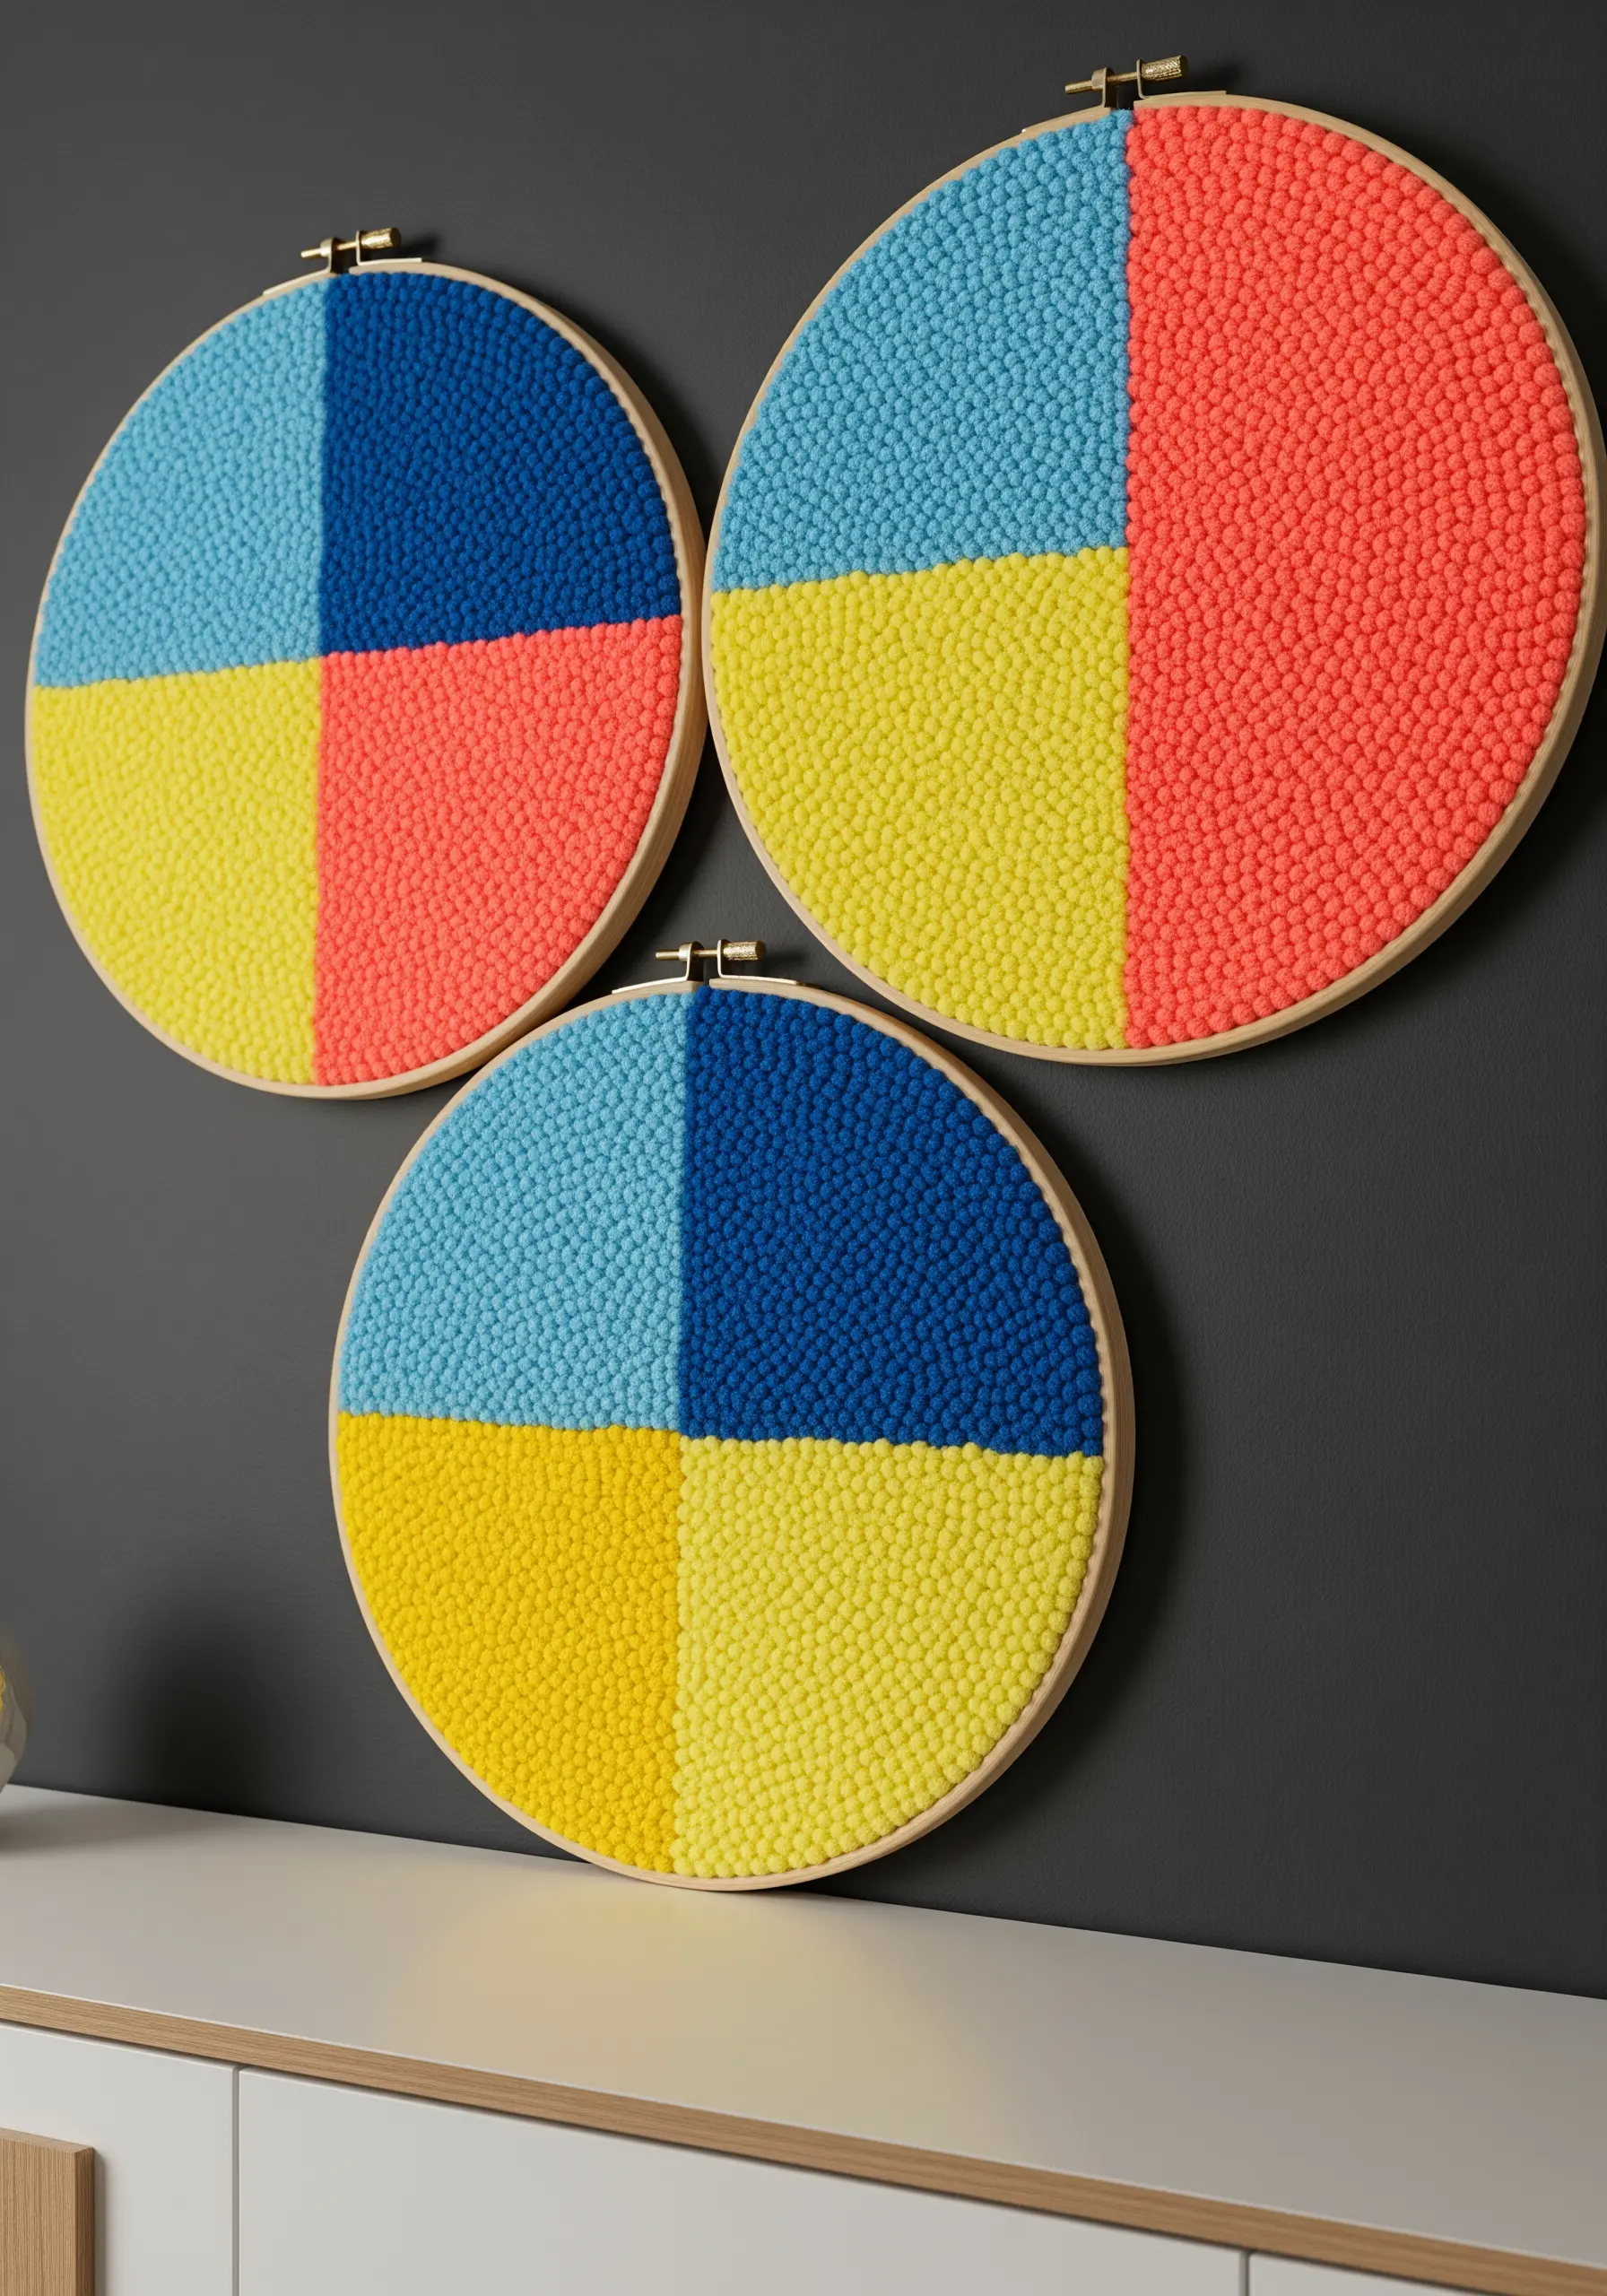
Use punch needle embroidery to create bold, graphic art with satisfyingly uniform texture.
Divide your hoop into quadrants and assign each a high-contrast primary or secondary color for maximum visual impact.
The key to a polished finish is maintaining a consistent loop height and stitch density across the entire piece.
Adjust your punch needle tool to the same setting for every color and work in tight, concentric rows to fill each block completely.
Grouped together, these colorful embroidery hoops create a powerful, modern statement.
4. Design a Festive Pom-Pom and Tassel Garland
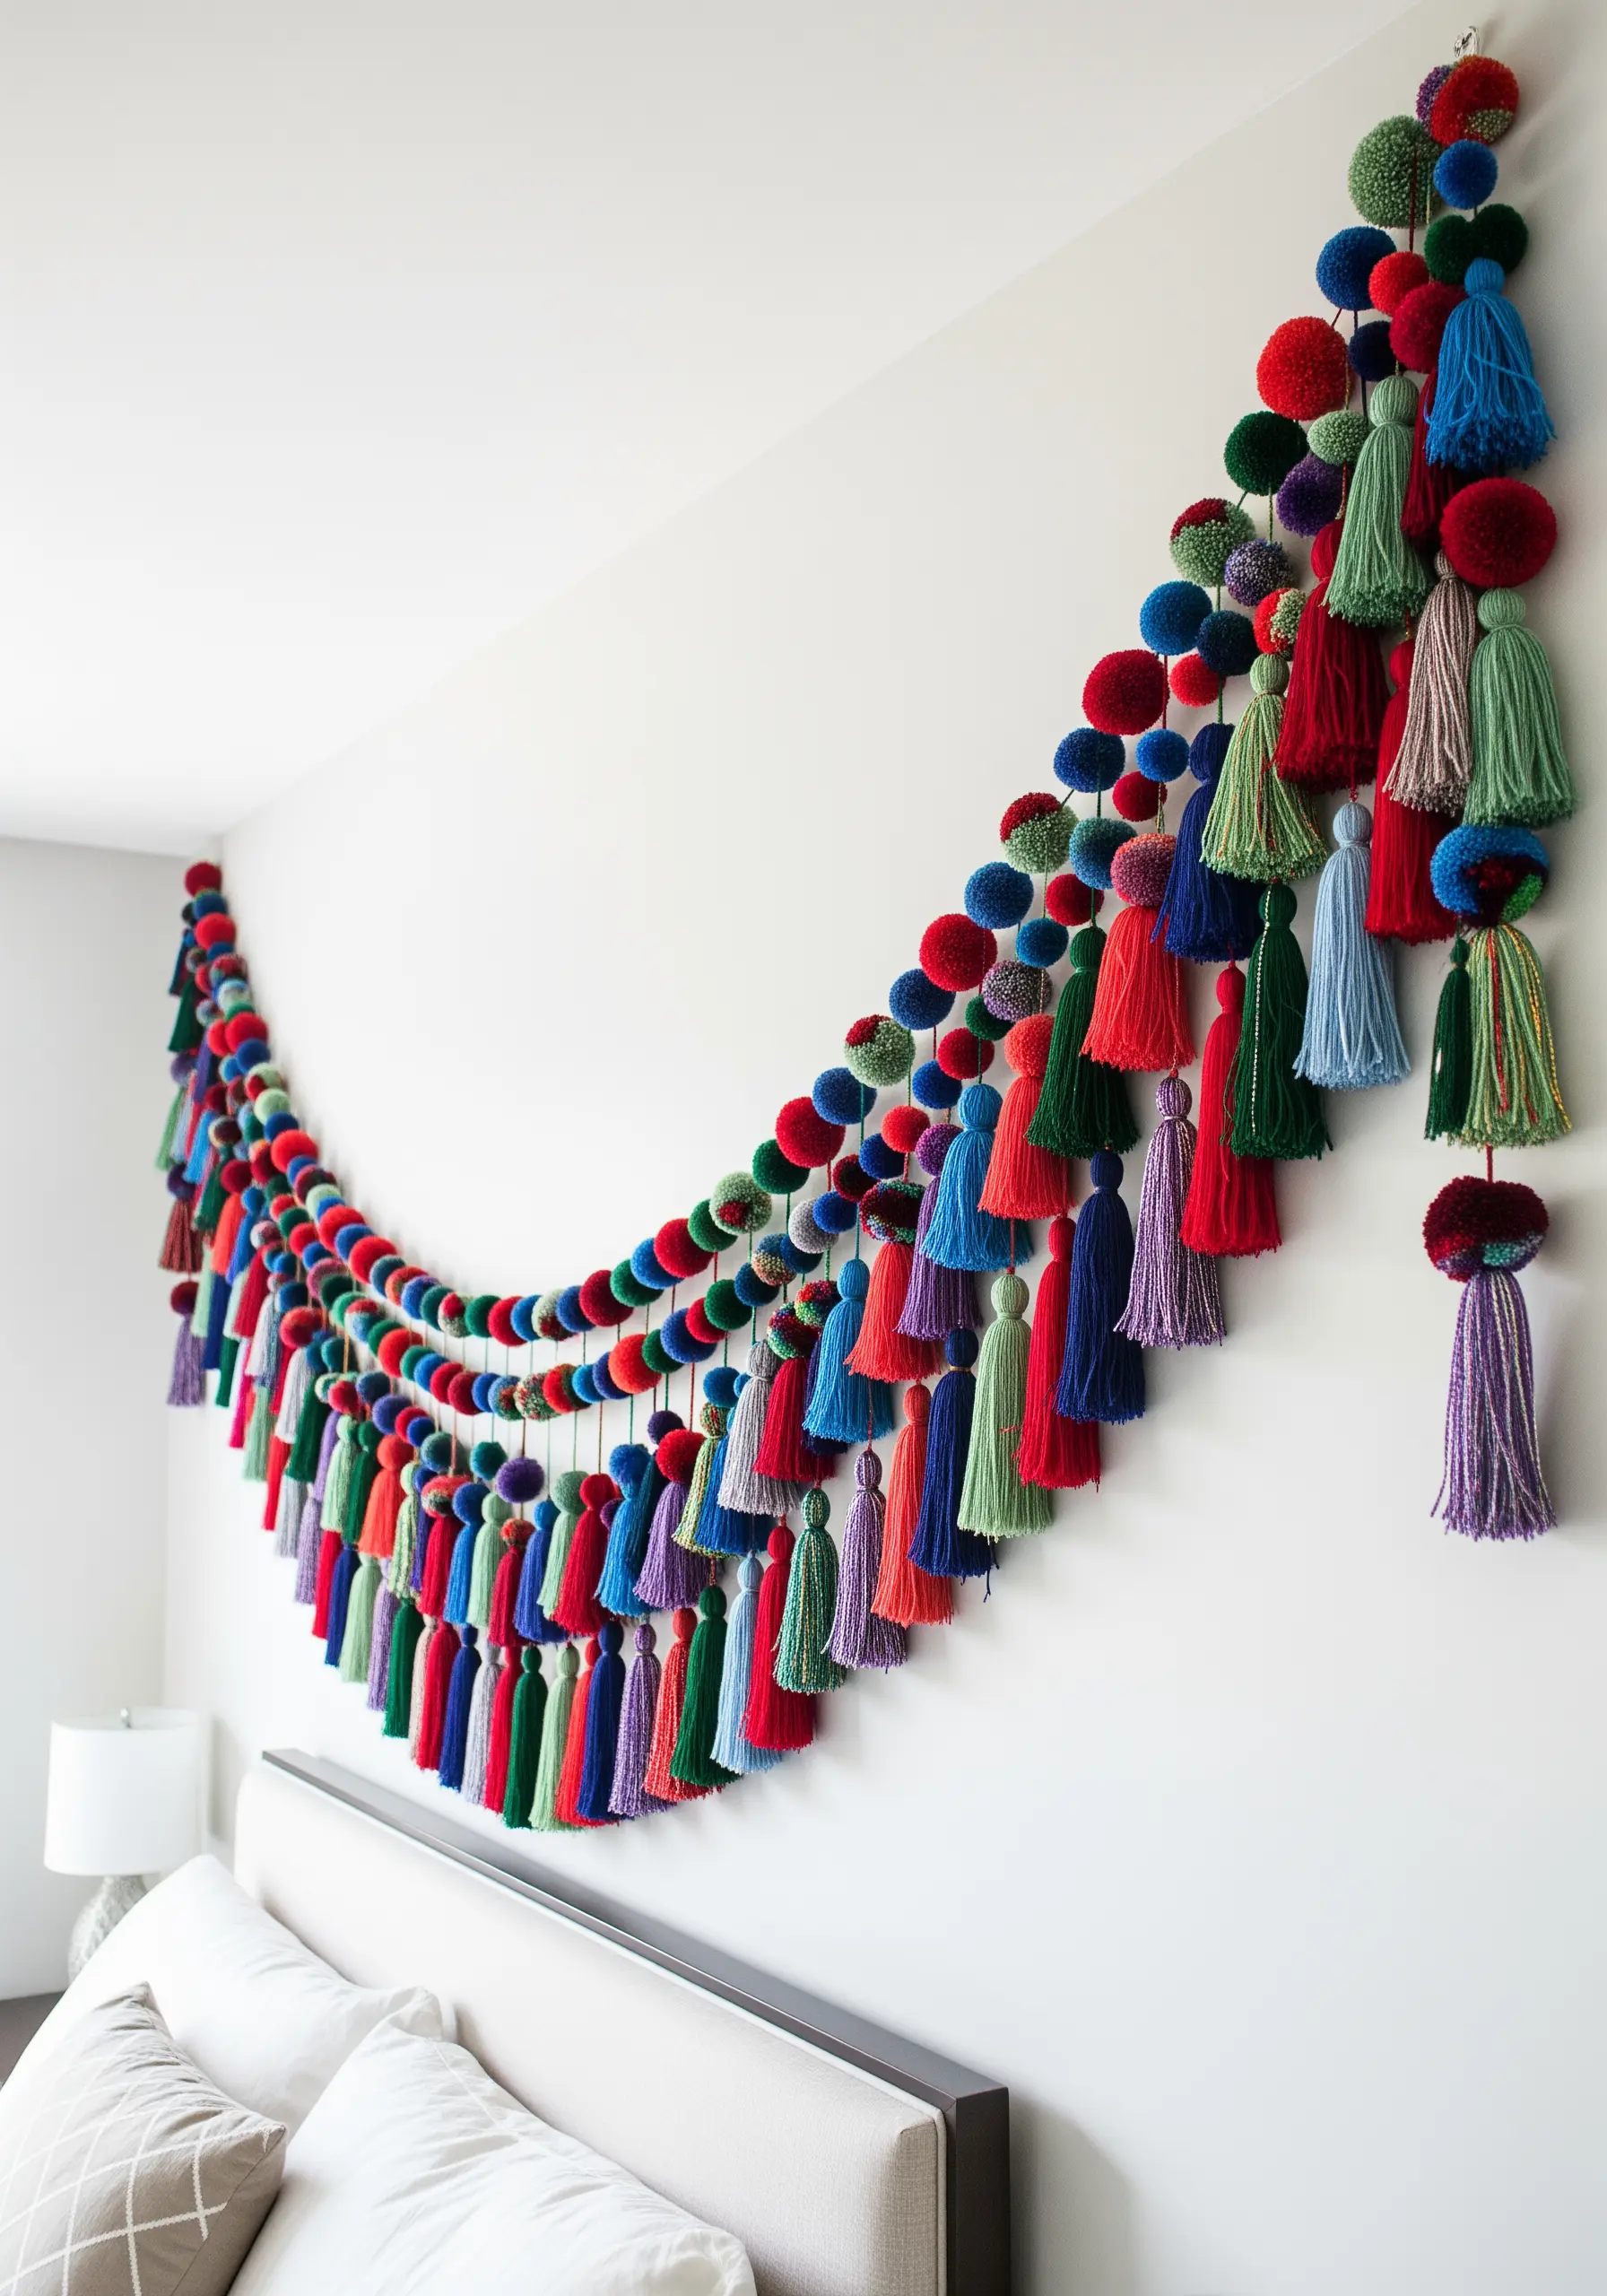
Transform a blank wall into a focal point with a dramatic, draping garland made of pom-poms and tassels.
Create visual rhythm by varying the size, color, and texture of your yarn elements.
Anchor the design with a thick, sturdy cord and attach your creations in repeating or asymmetrical patterns.
For a sophisticated look, choose a rich, jewel-toned palette and intersperse large, fluffy pom-poms with sleek, long tassels.
This approach turns simple craft components into a statement-size wall art piece with vibrant energy.
5. Achieve Precision with a Wrapped Rainbow
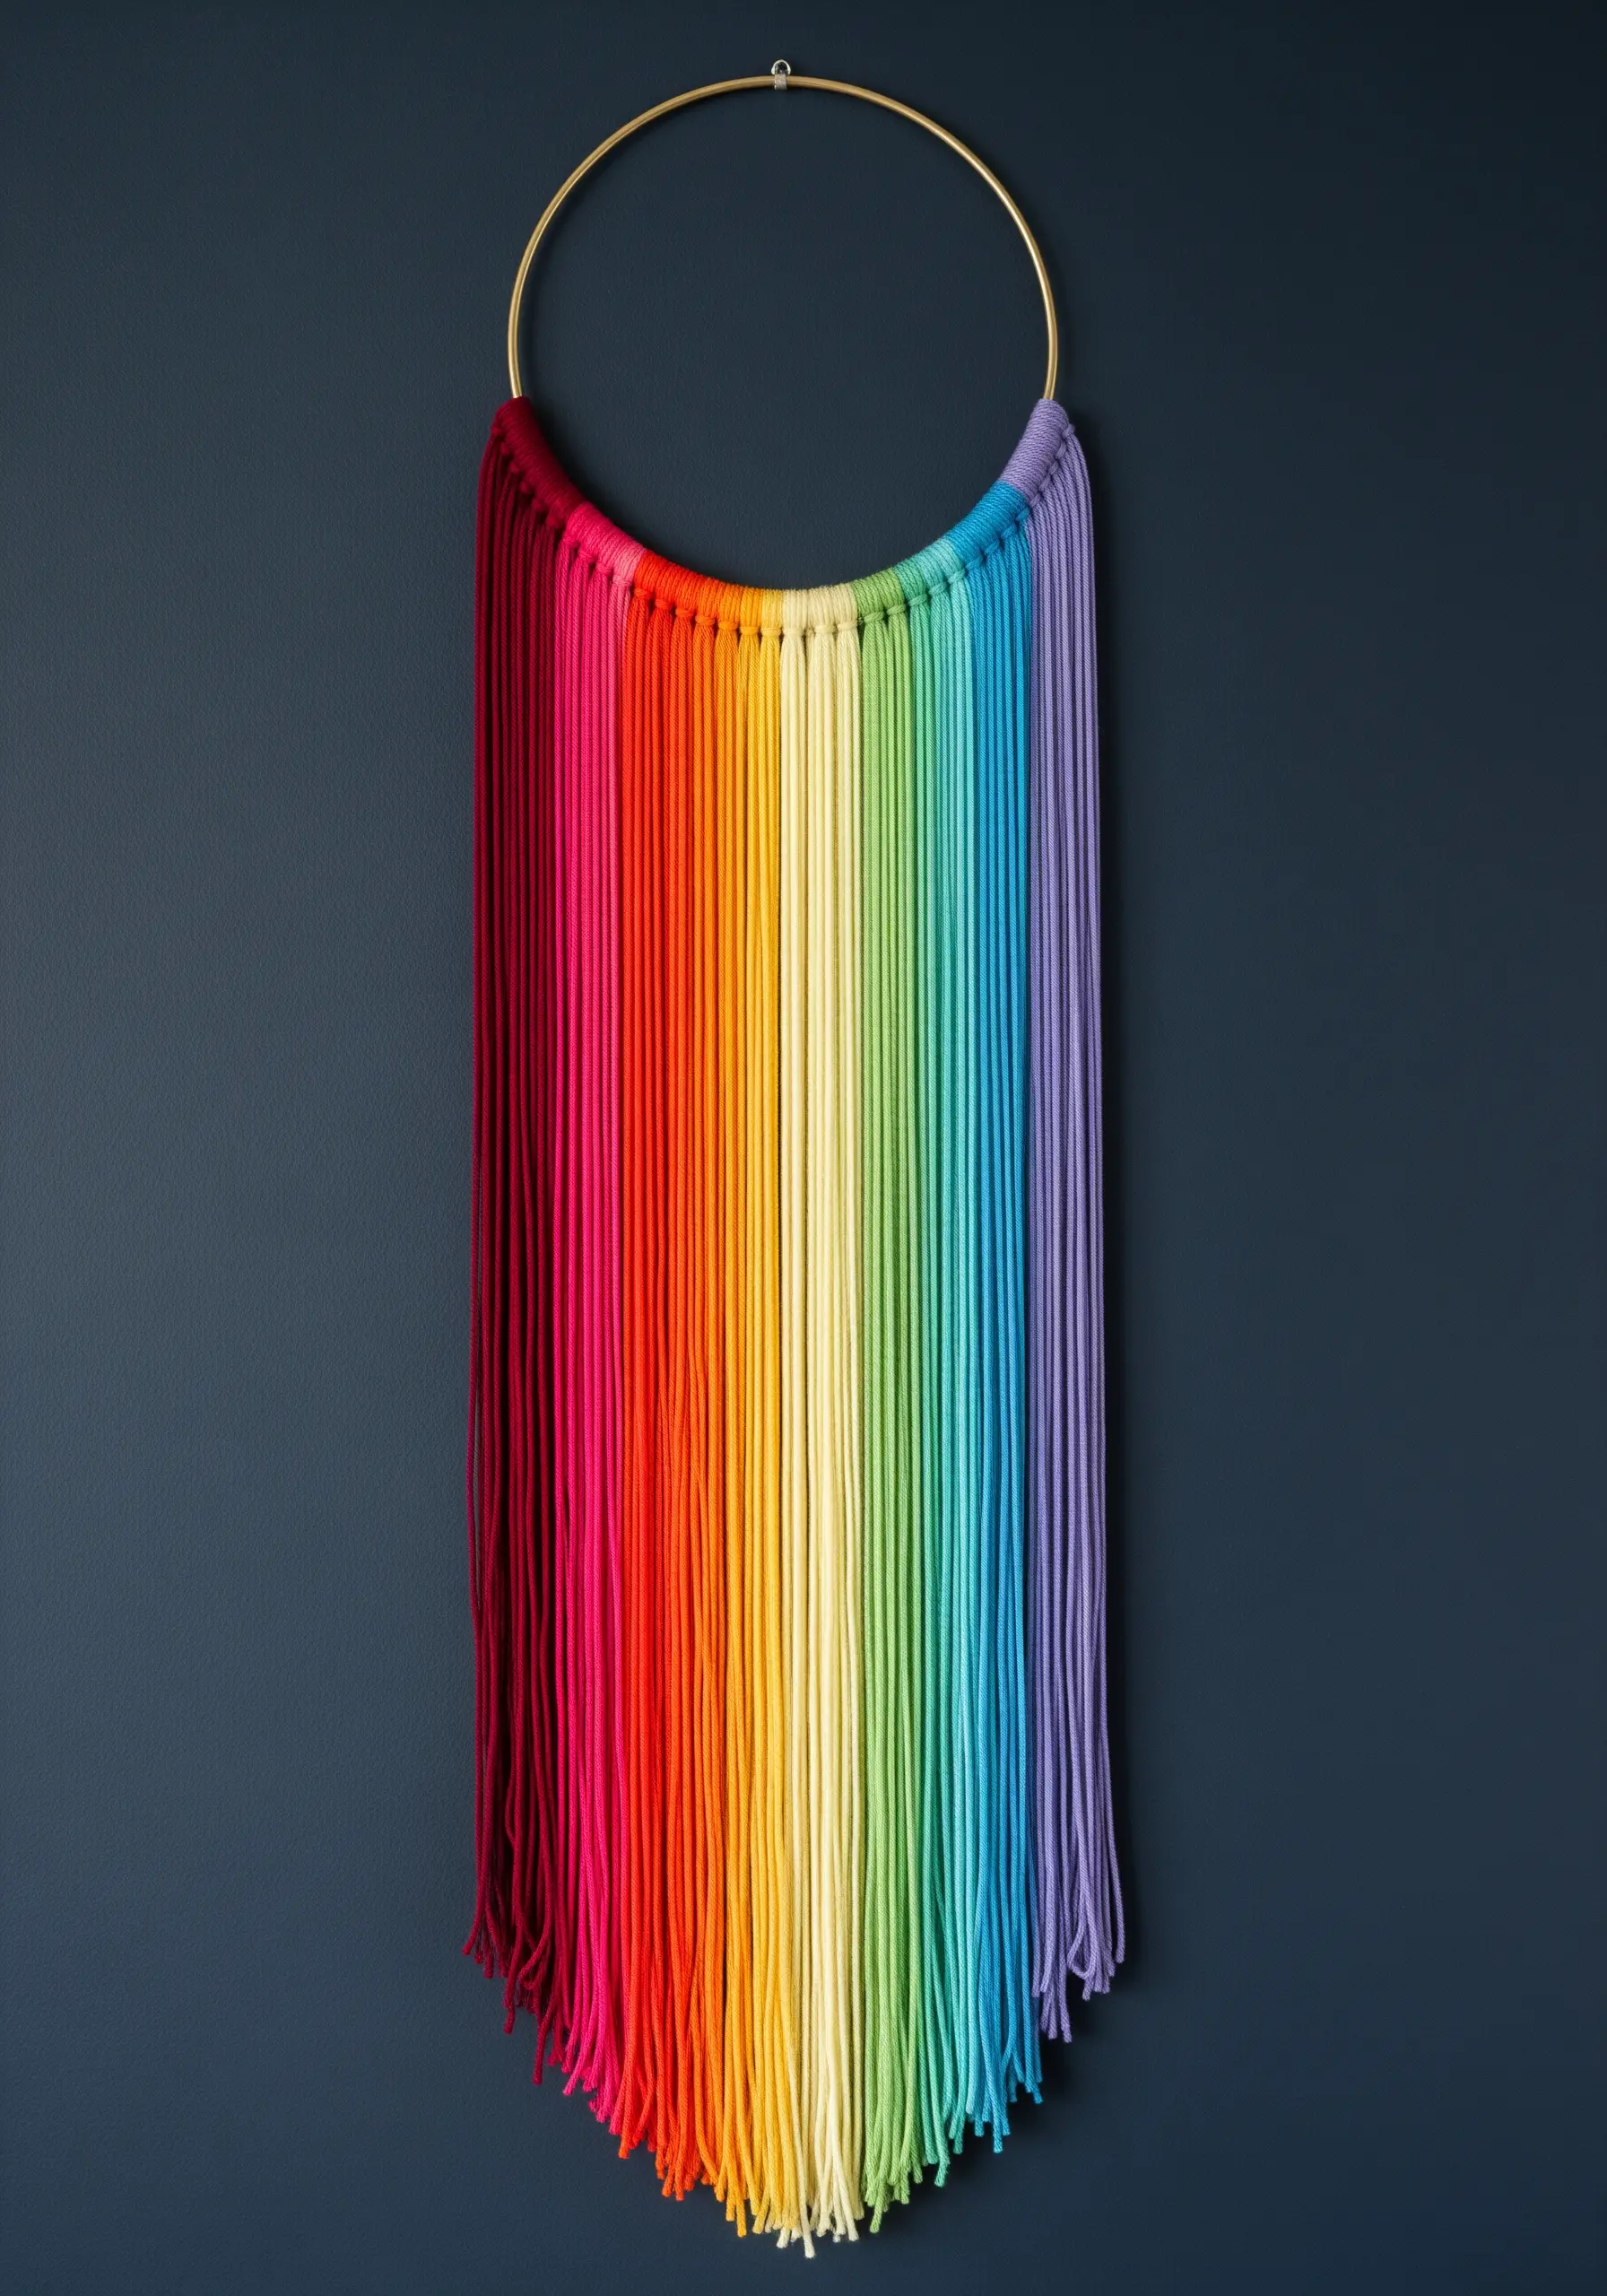
This minimalist design gains its power from absolute precision and color harmony.
Use a sturdy metal hoop as your frame and wrap sections with yarn, ensuring each strand lies perfectly flat against the next with no gaps.
Maintain consistent tension throughout to prevent the yarn from slipping or bunching.
When you finish, let the yarn ends hang freely, then trim them into a clean, sharp ‘V’ shape for a polished, geometric finish.
This is one of the most effective minimalist thread art ideas for adding a block of color to a modern space.
6. Tuft an Organic Geode Pattern
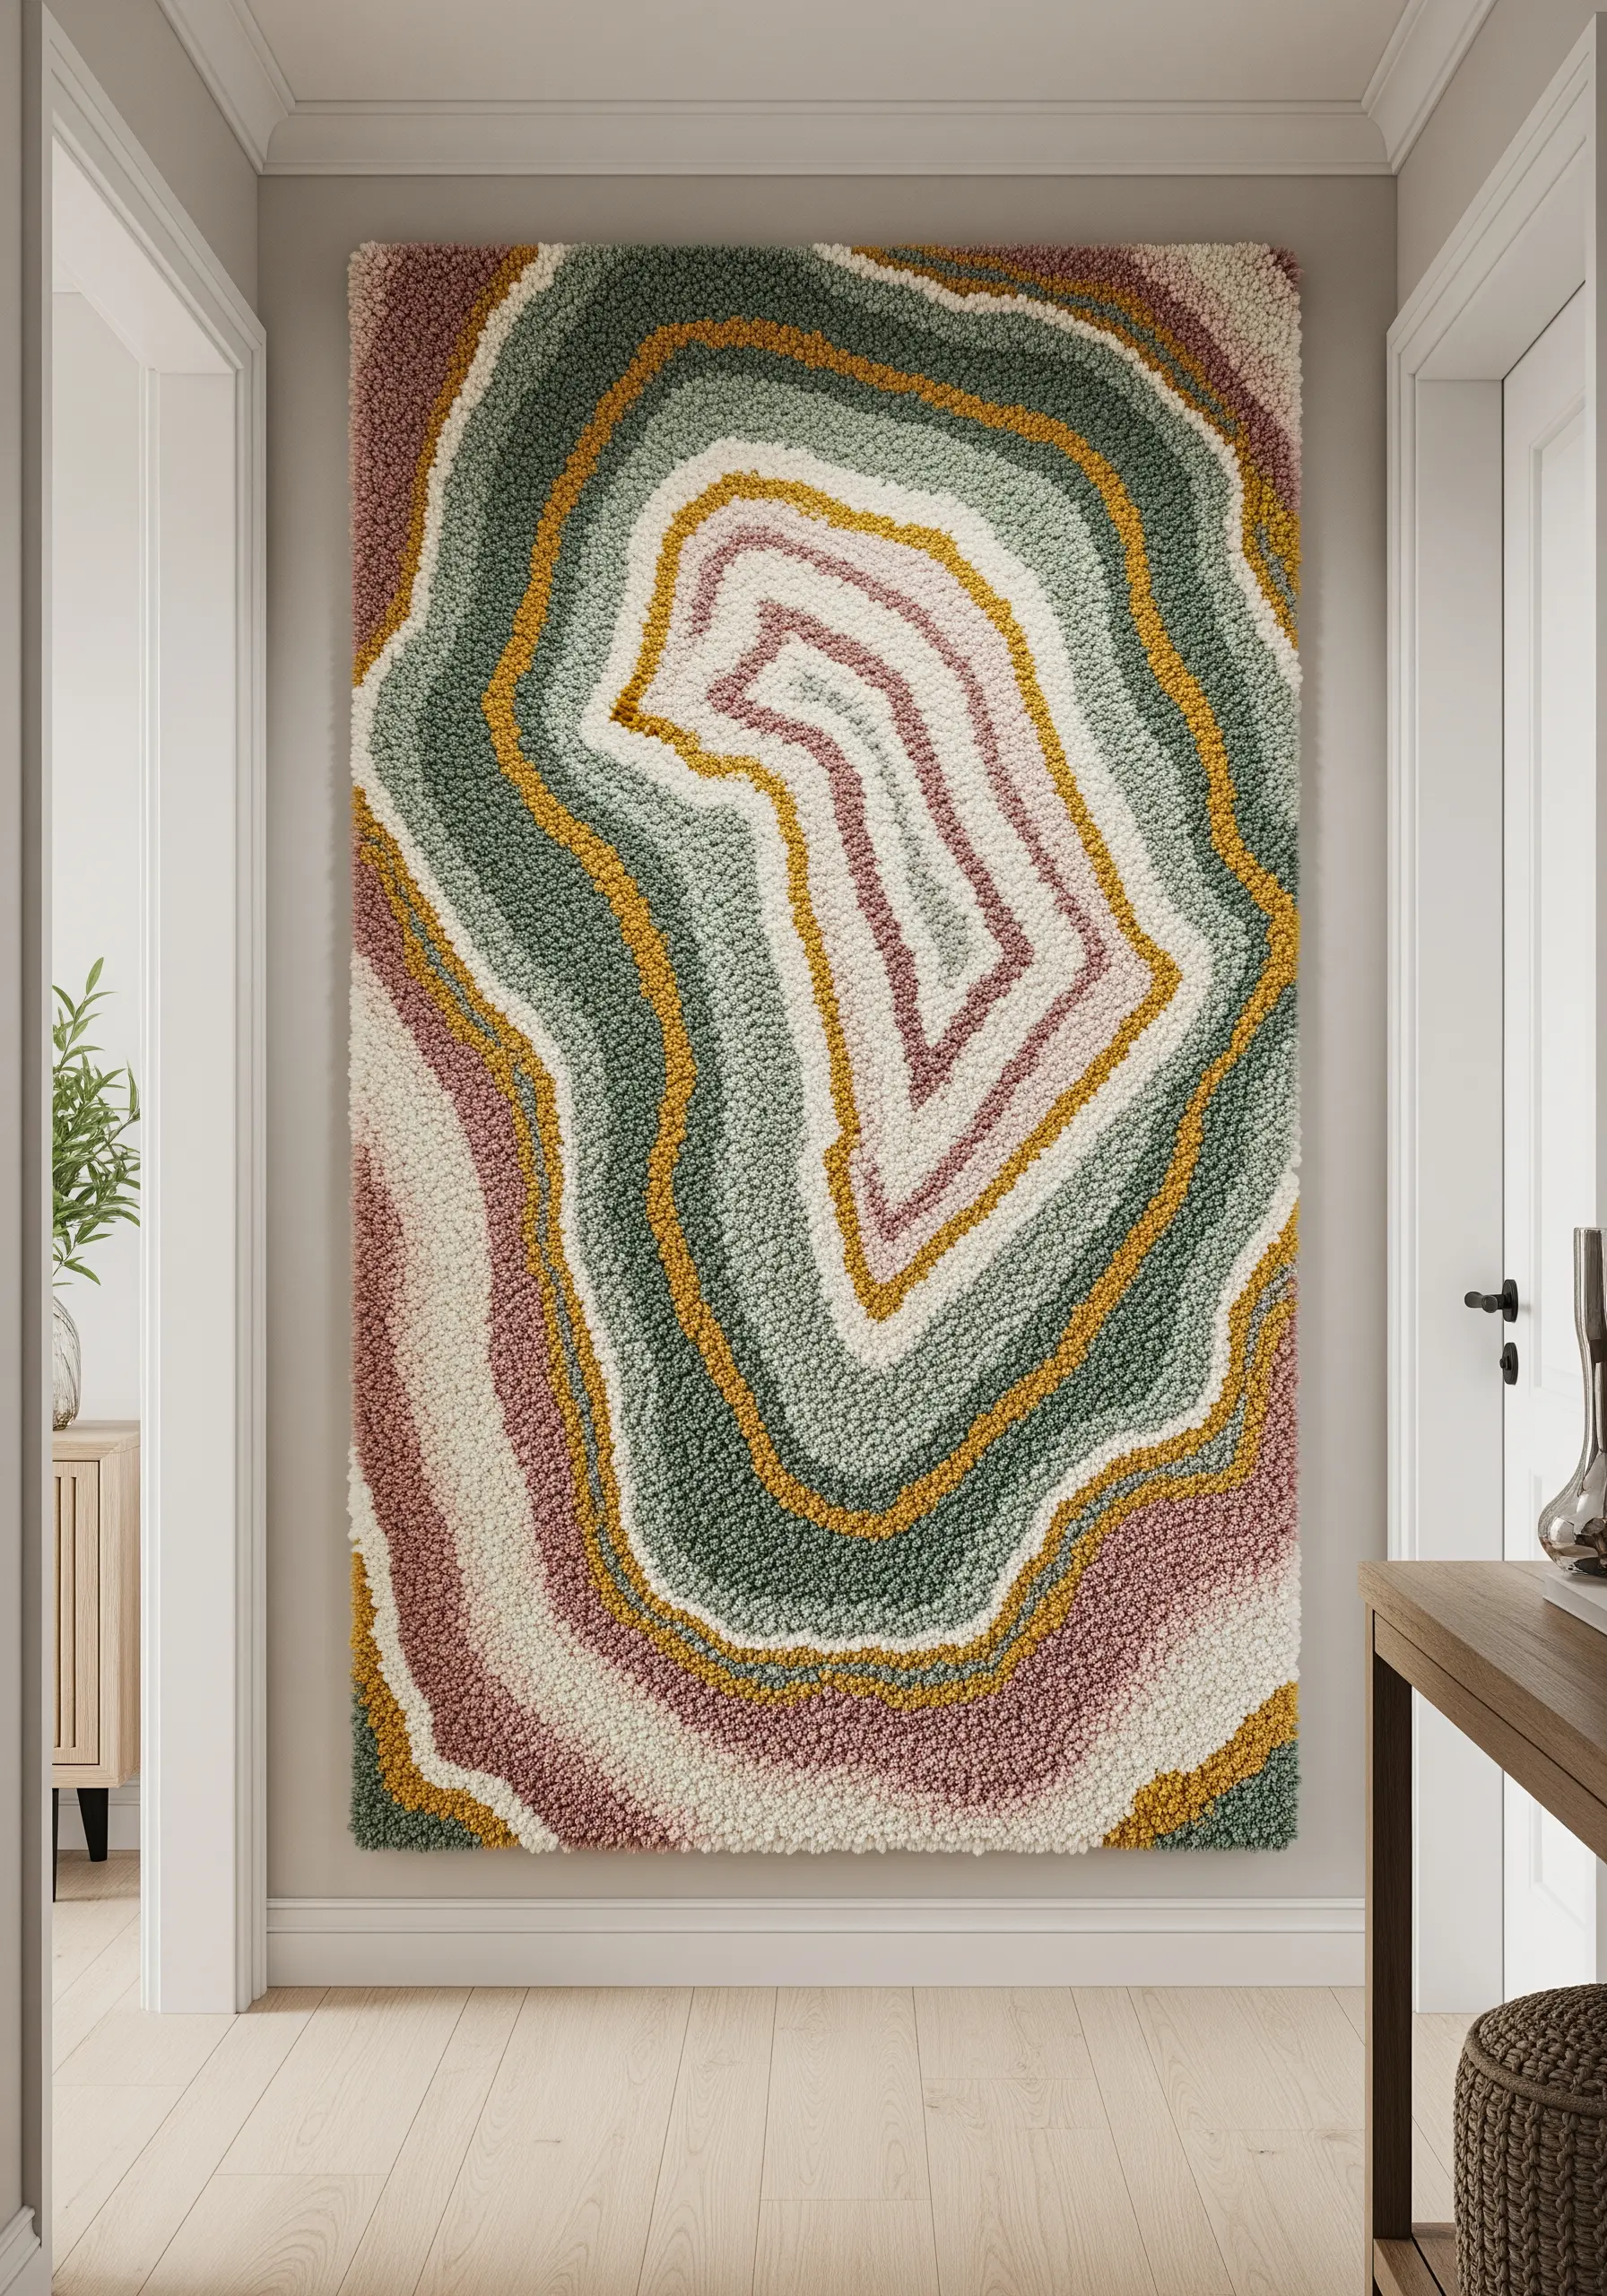
Translate the organic beauty of a geode into a large-scale textile piece using a tufting gun.
Start by drawing your concentric rings onto a stretched monk’s cloth backing fabric.
Use a cut-pile tufting gun to fill in each color section, working from the outside in to ensure clean, defined lines between colors.
The dense, plush texture mimics the crystalline structure of a real agate slice, turning your wall into an earthy, luxurious focal point.
Choose a muted, nature-inspired palette to keep the design feeling sophisticated and grounded.
7. Sculpt a Minimalist Form with Wrapped Wire
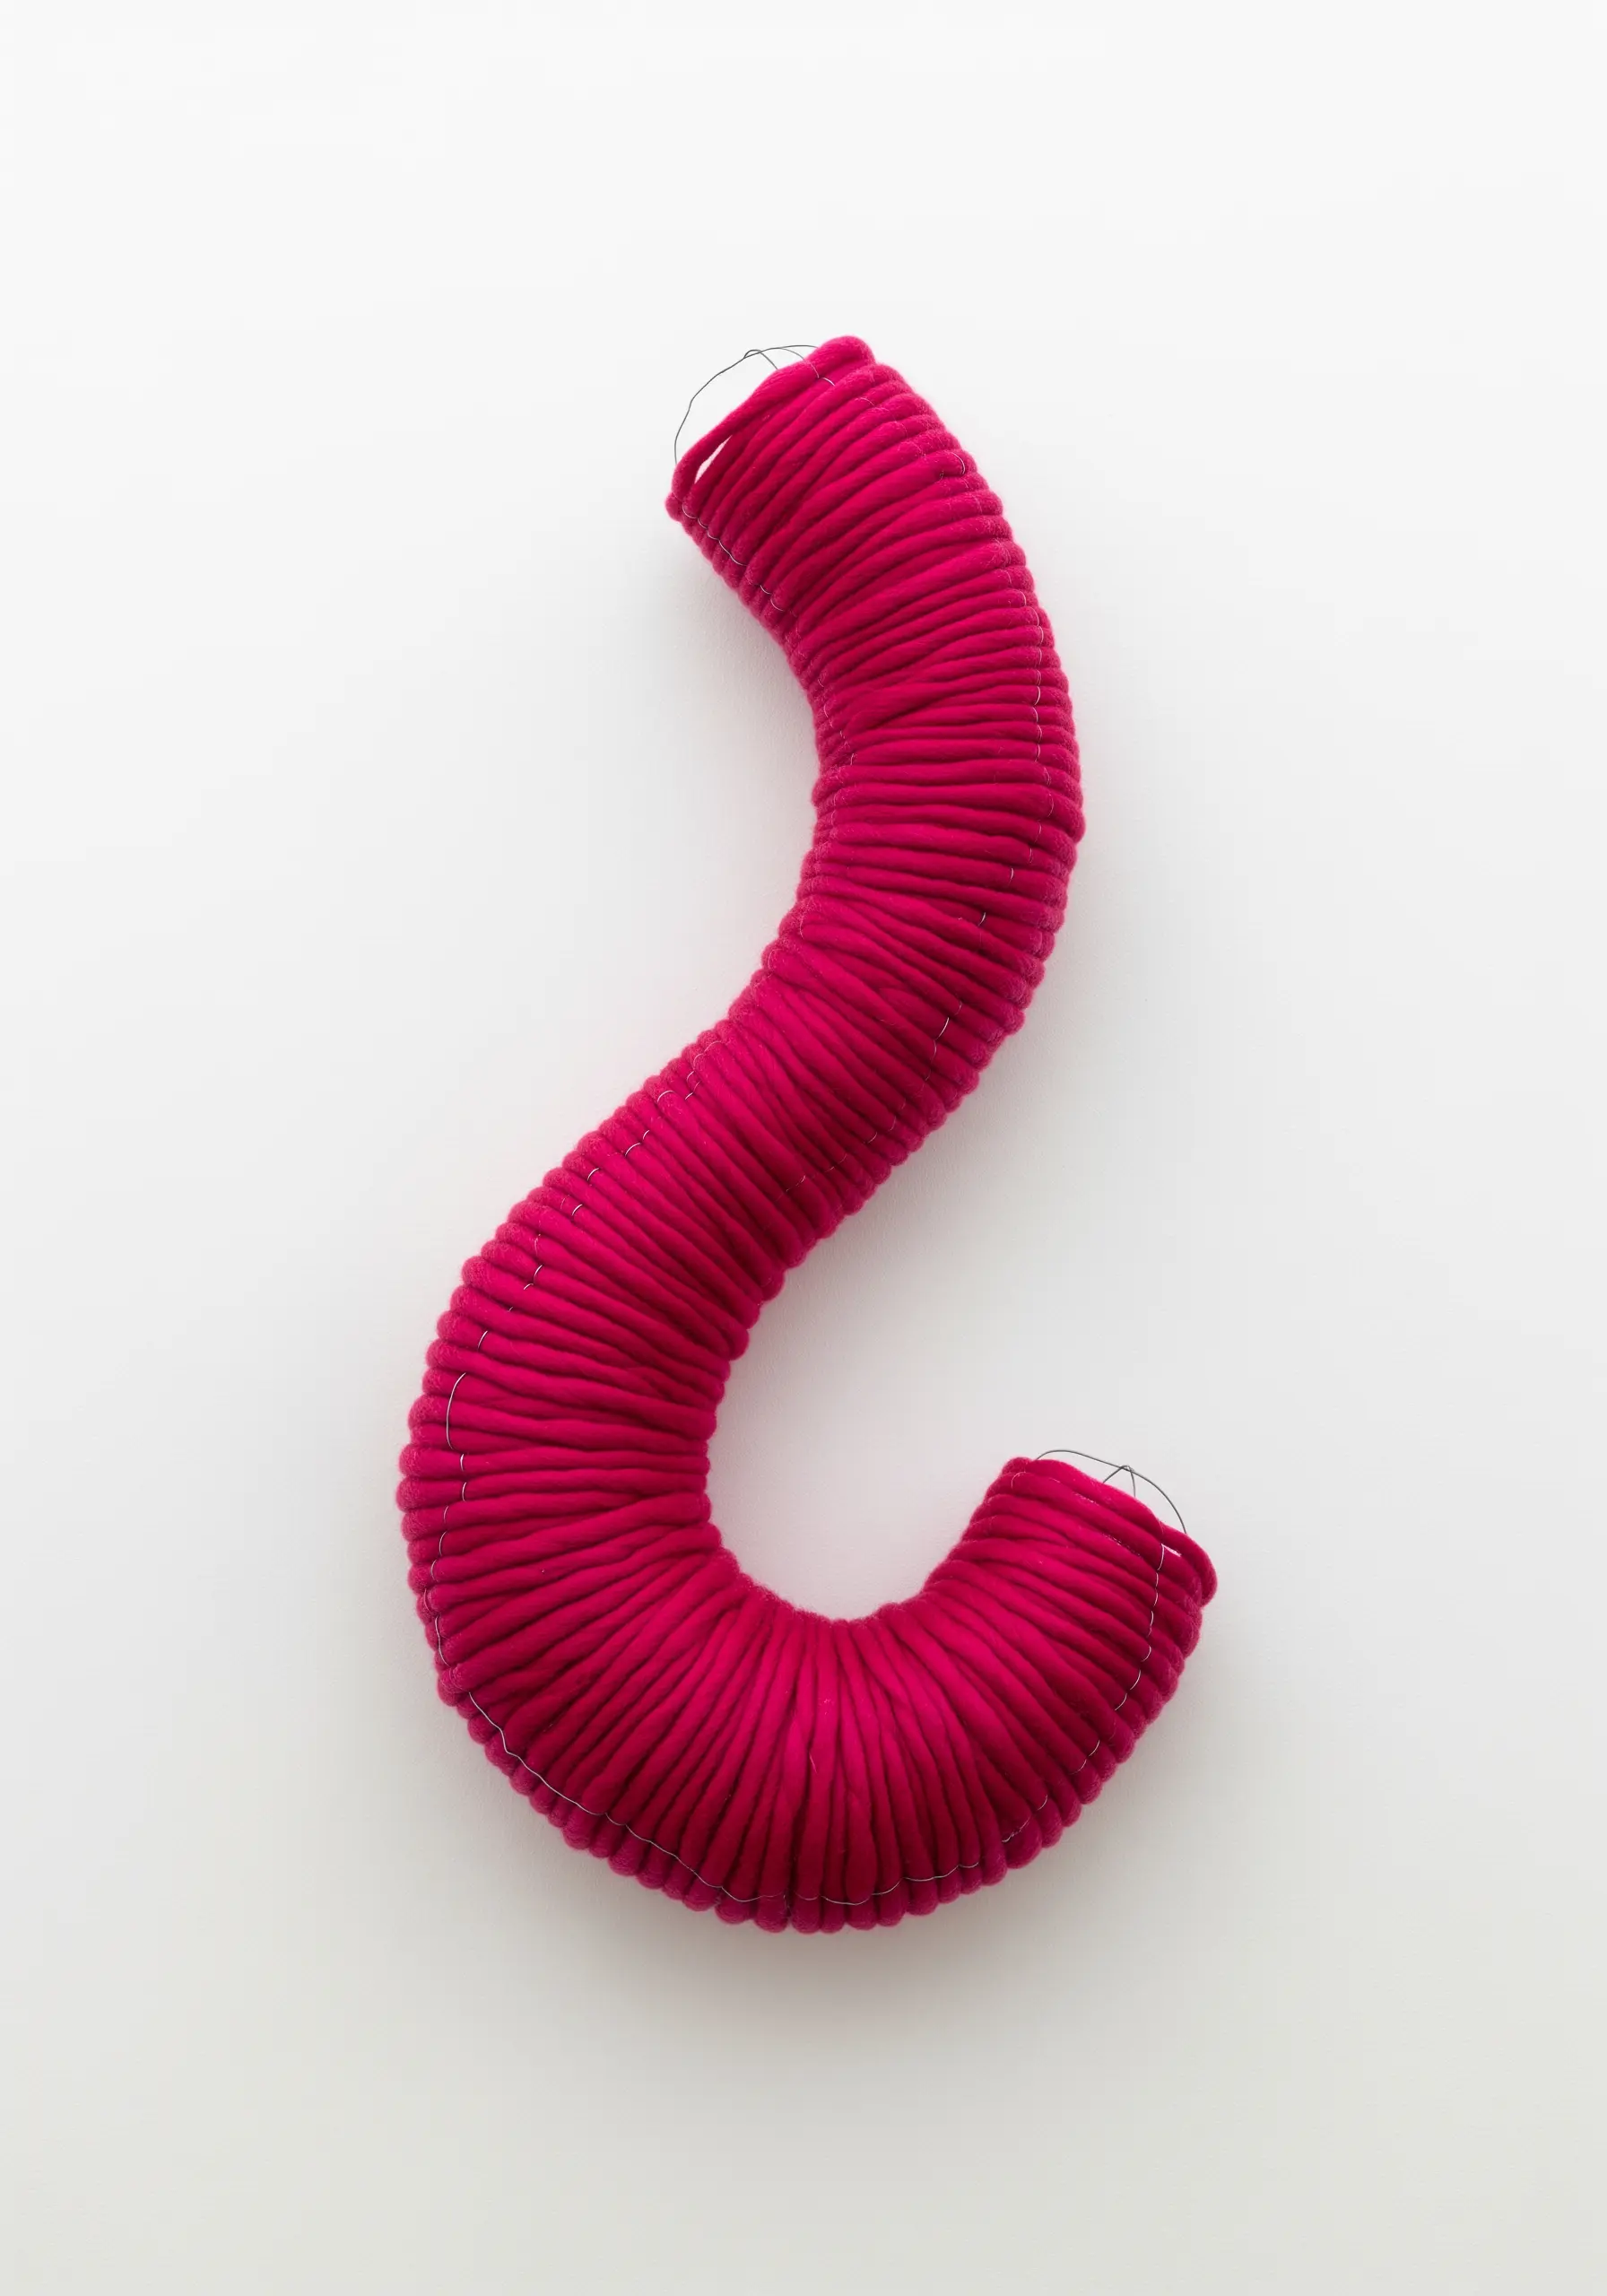
Explore three-dimensional line art by creating a yarn-wrapped sculpture.
Start with a thick, malleable wire, such as armature wire or aluminum craft wire, and bend it into a simple, abstract curve.
Tightly wrap the entire form with a single, continuous strand of chunky wool yarn, ensuring no wire is visible.
The technique highlights pure form and color, turning a simple line into a piece of minimalist wall sculpture.
This is a perfect way to introduce abstract line art off the fabric and into your space.
8. Weave a Meditative Ojo de Dios Mandala
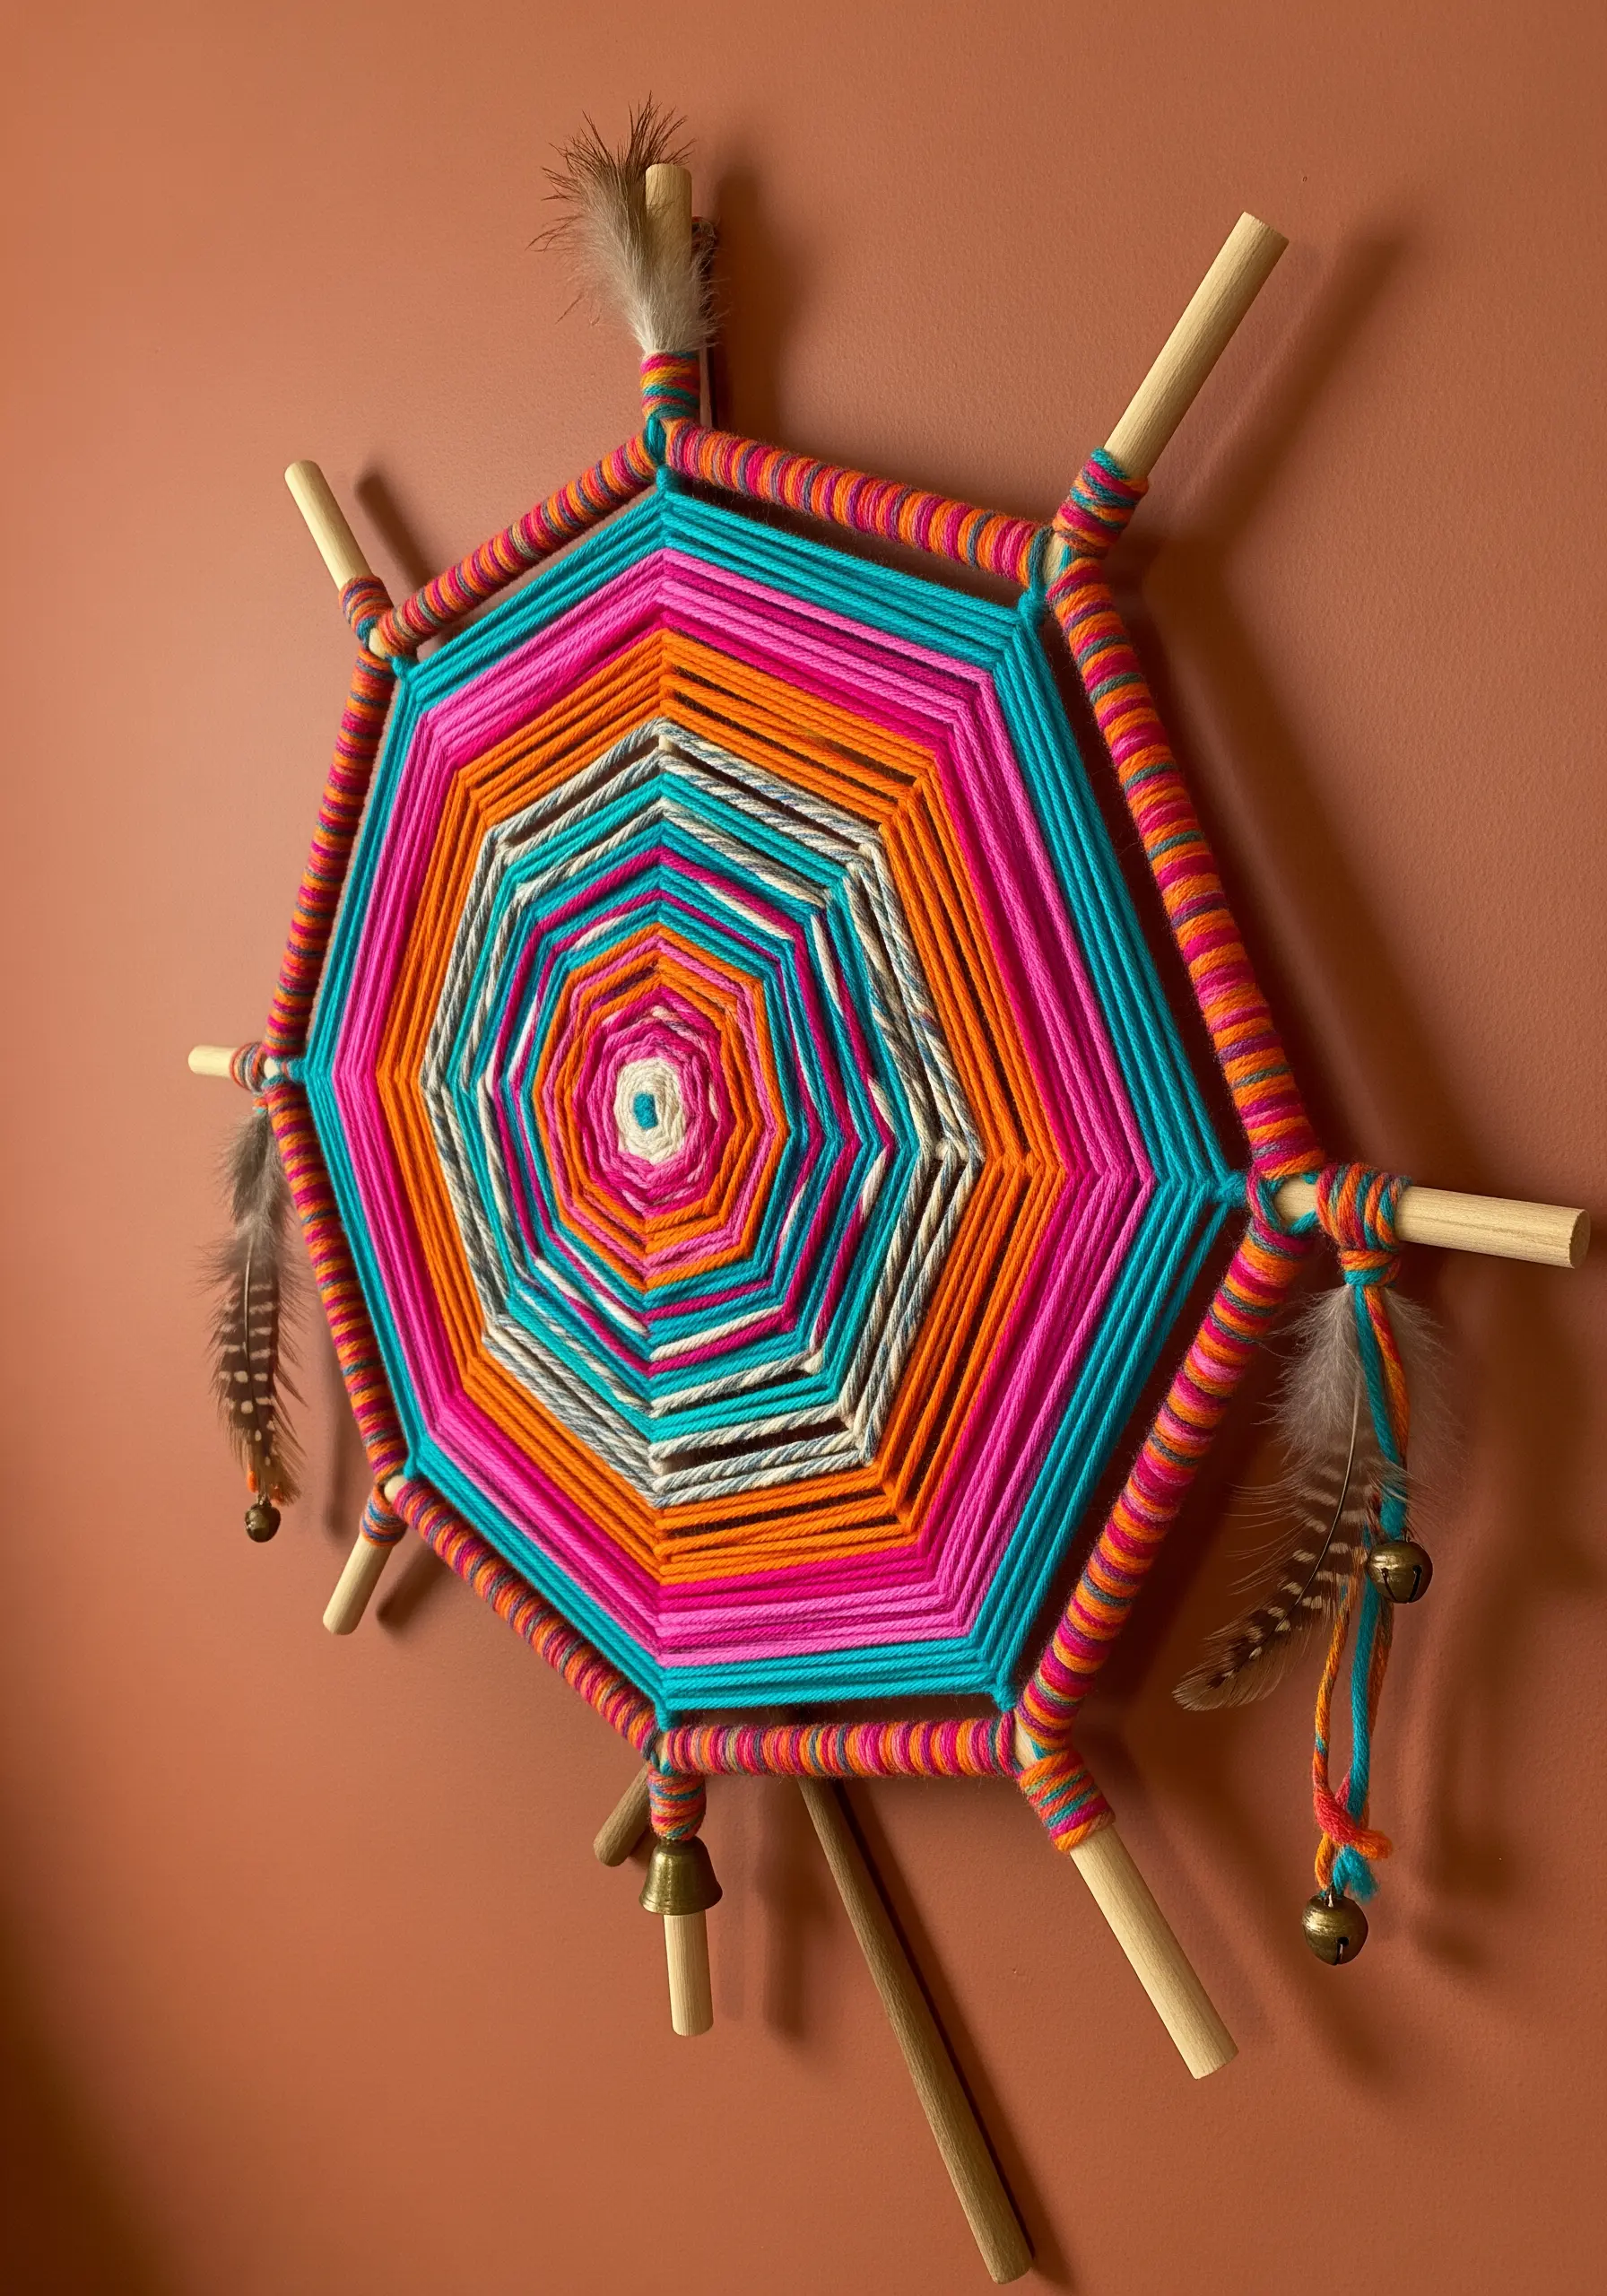
Create a vibrant, geometric mandala using the traditional Ojo de Dios (God’s Eye) weaving technique.
Lash two or three wooden dowels together at their center to form a stable frame.
Weave your yarn by wrapping it around one dowel, crossing through the center, and then wrapping it around the next dowel in sequence.
The magic comes from layering colors and creating concentric patterns that radiate from the center.
This process is wonderfully meditative, making it one of the most calming modern thread mandala ideas you can try.
9. Construct an Immersive String Art Installation
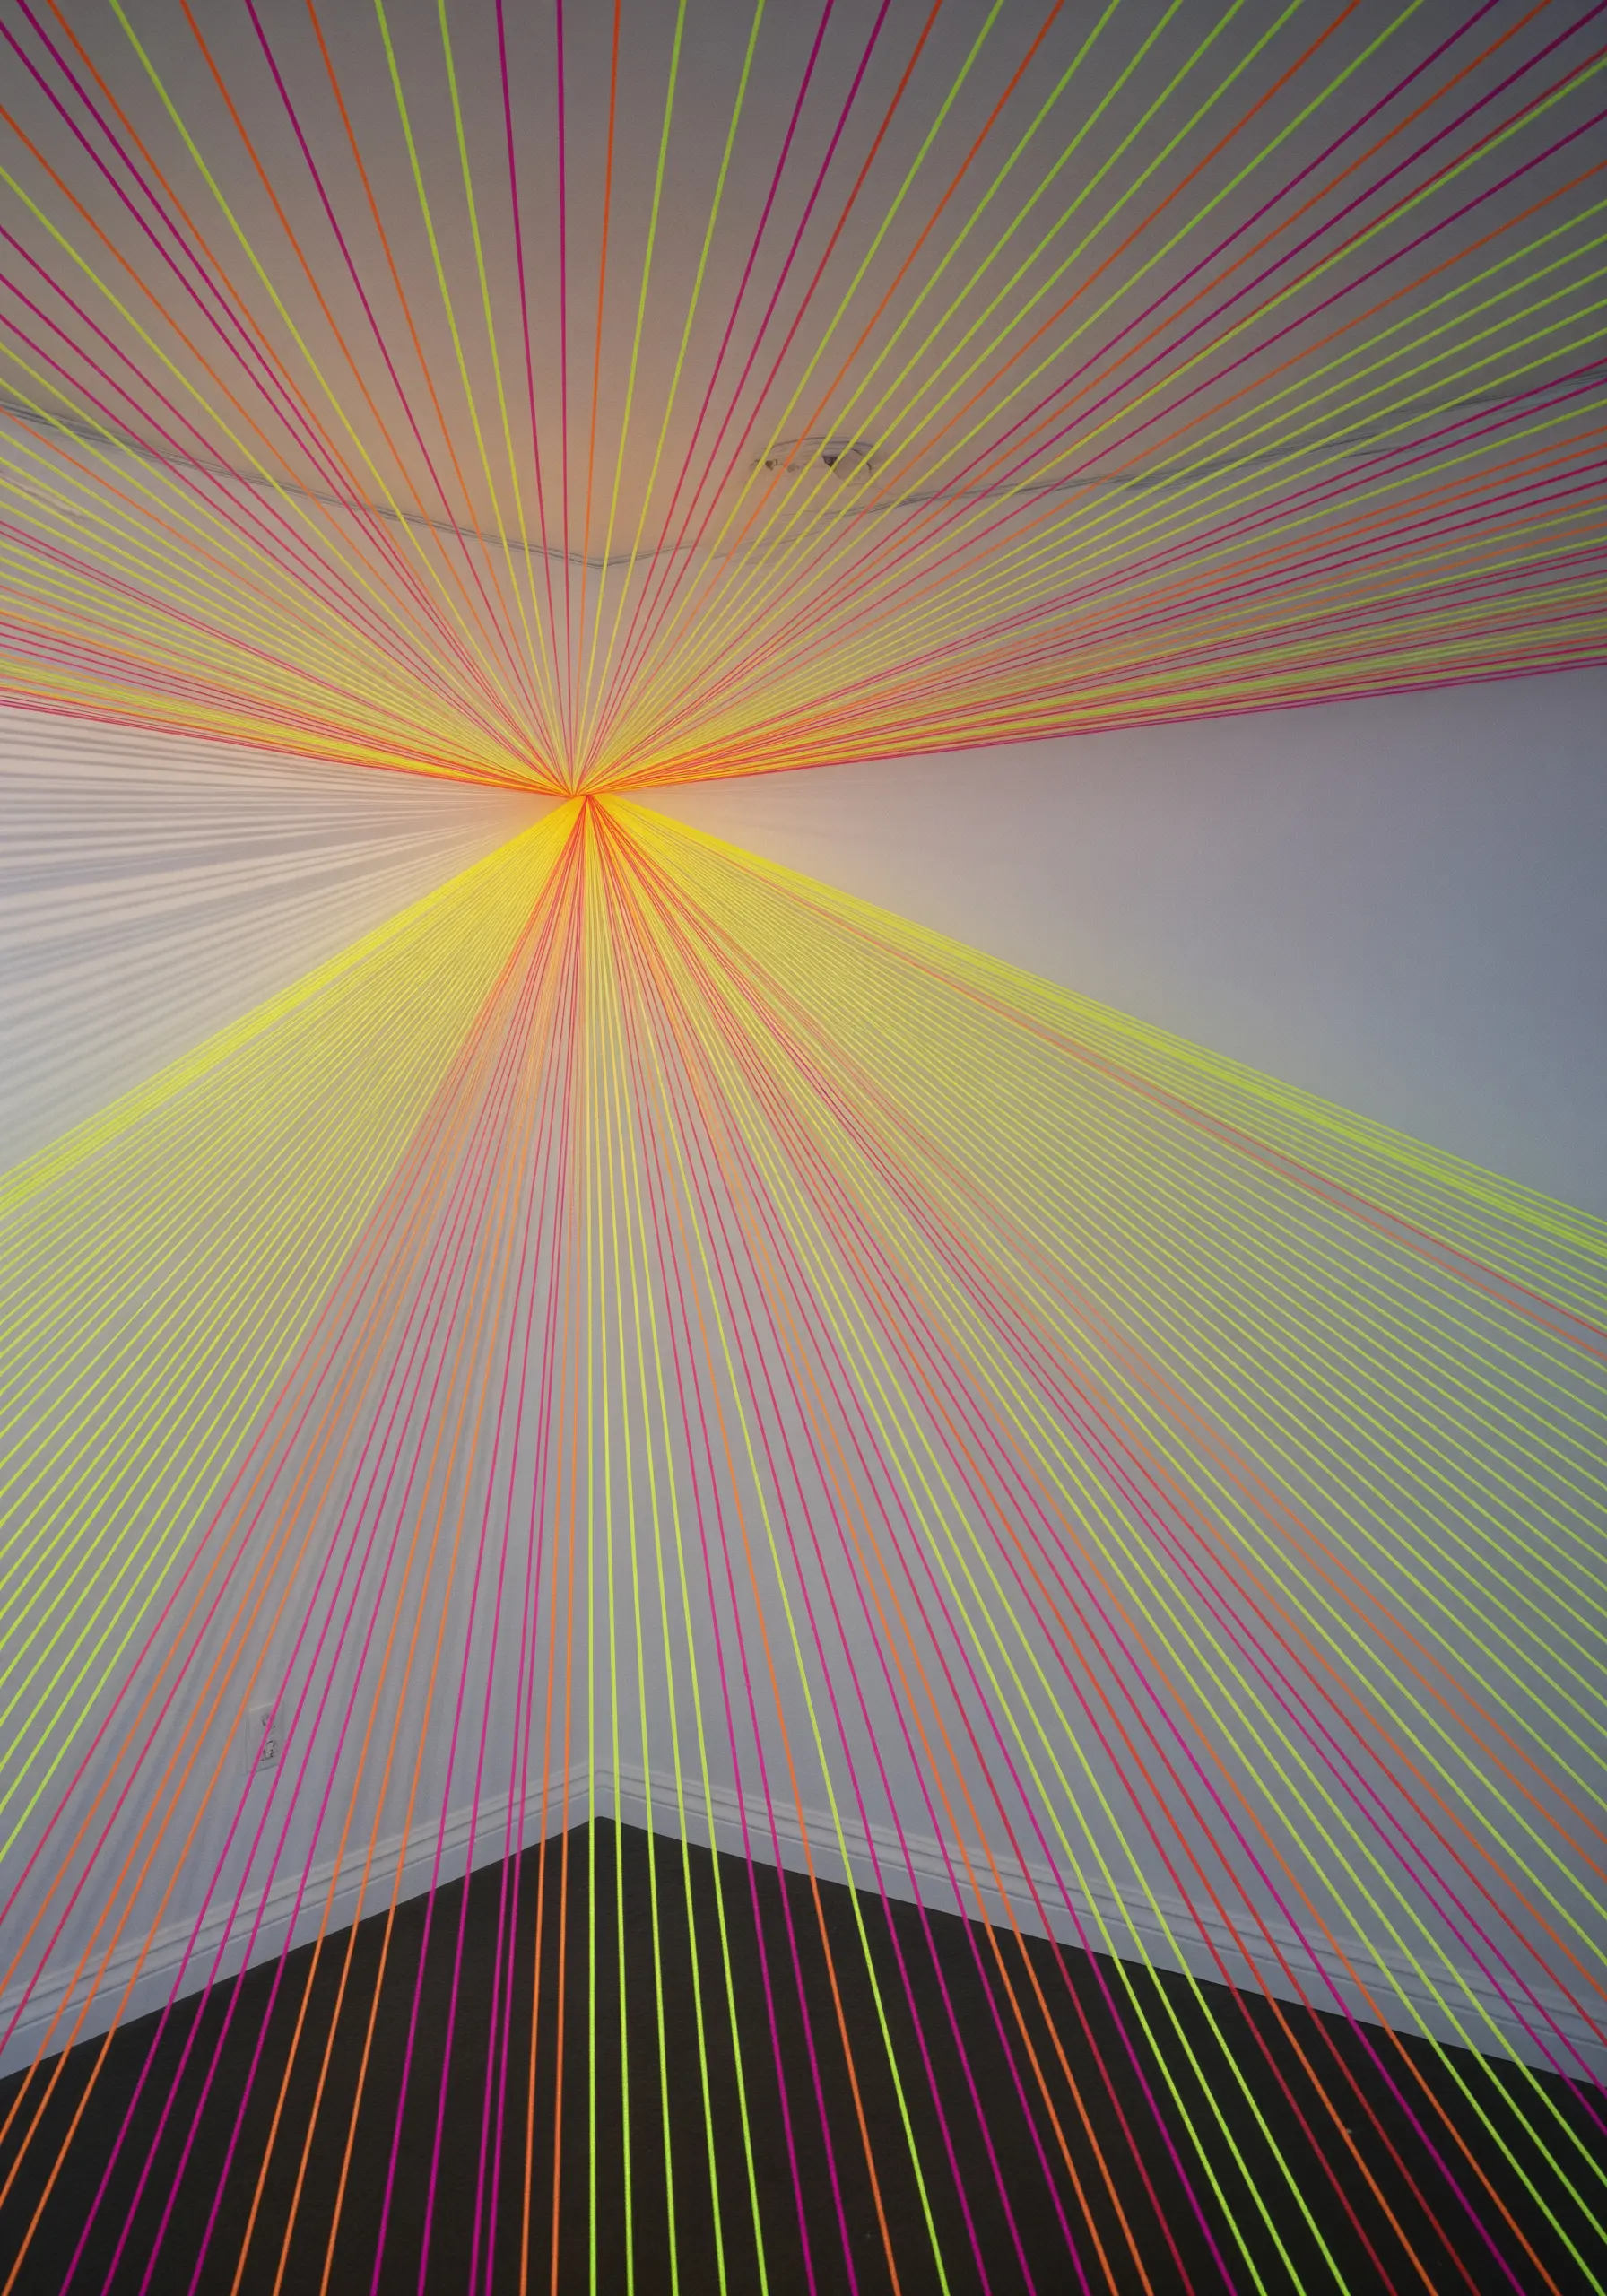
Transform an entire room by using yarn to create an architectural light installation.
Install small hooks or nails at strategic points on your walls and ceiling.
Stretch fluorescent yarn between these anchor points, creating intersecting lines that radiate from a central point.
The key is to maintain high tension on each strand to achieve perfectly straight lines.
Layering multiple colors—like neon pink, yellow, and orange—creates a stunning visual effect that plays with perspective and fills the space with energy.
10. Add Dimension with 3D Punch Needle Florals
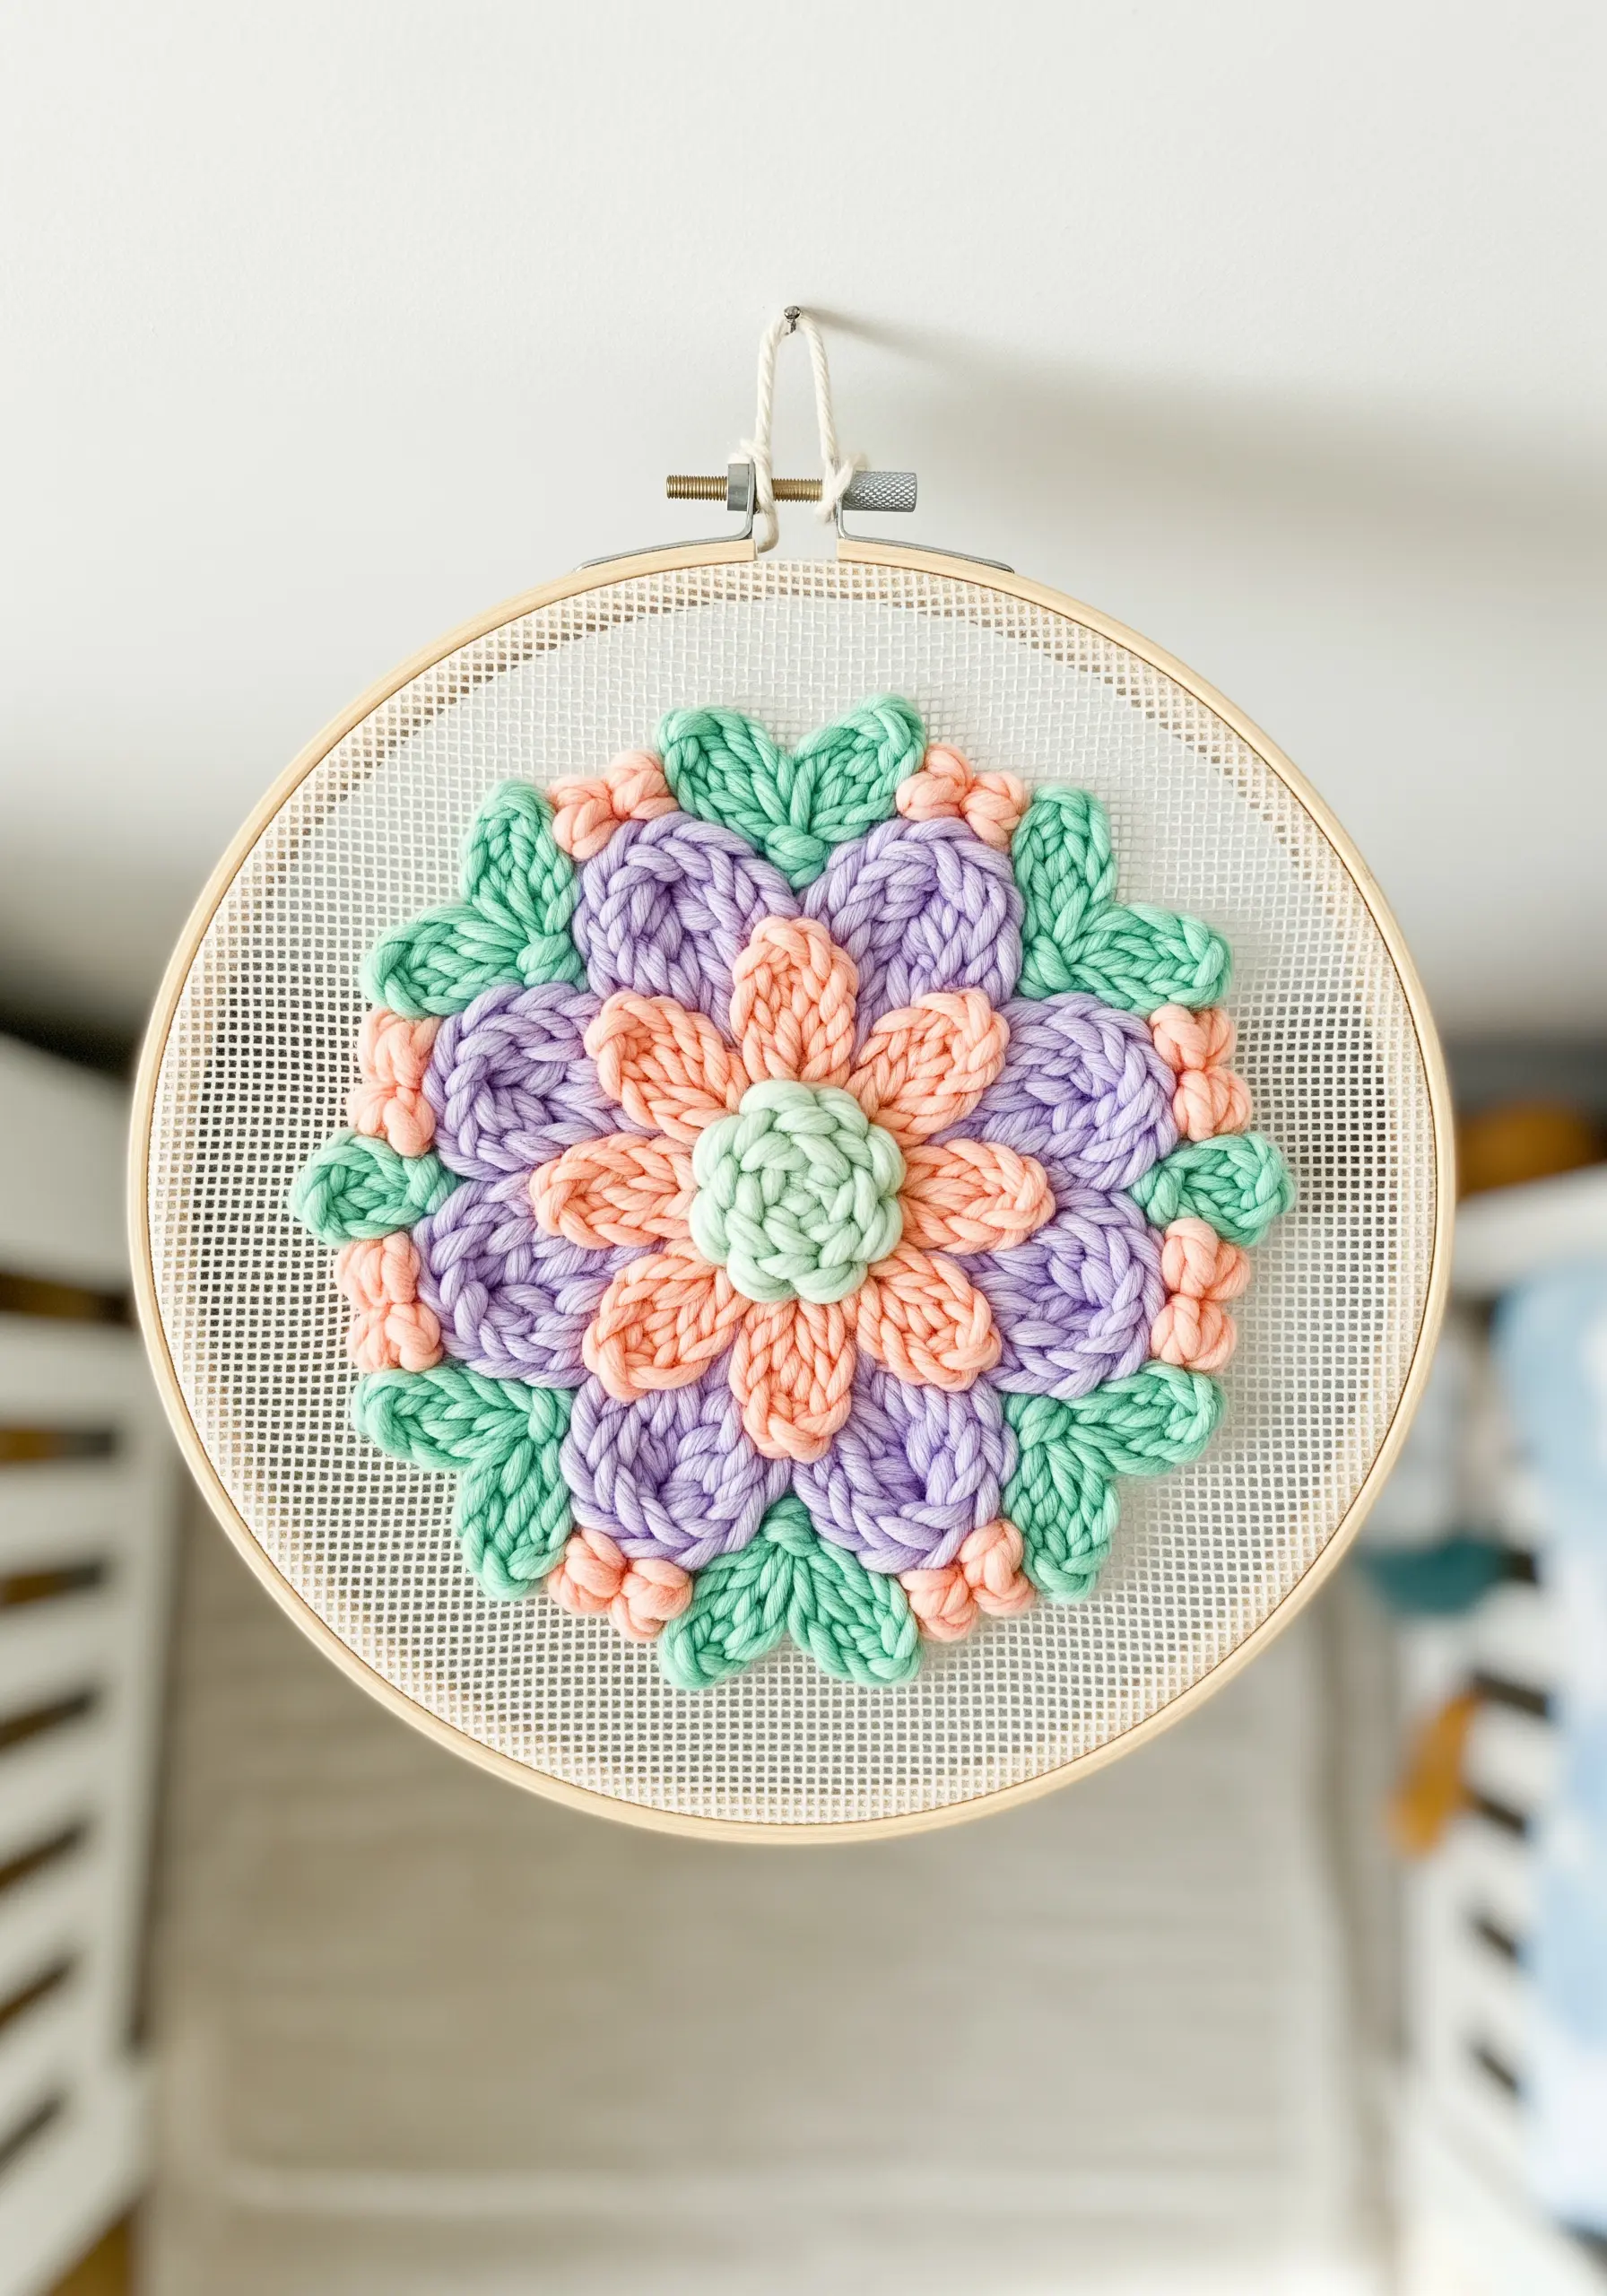
Give your punch needle motifs a three-dimensional effect by varying the loop height.
Use a shorter loop setting on your punch needle for the flat background and the center of the flower.
Switch to a longer loop setting for the petals, causing them to physically lift off the fabric surface.
This simple adjustment creates instant depth and texture, making your floral designs feel more lifelike and sculptural.
It’s a wonderful technique for nursery decor or any space needing a soft, tactile touch.
11. Assemble a Geometric Wrapped-Dowel Sculpture

Create a sophisticated, mid-century modern wall sculpture with yarn-wrapped dowels.
Tightly wrap wooden dowels in complementary colors like olive green, navy, and terracotta.
To add a touch of glamour, incorporate a yarn with a metallic fleck or a thin metallic thread alongside your primary color.
Arrange and bind the dowels into an abstract, intersecting composition that plays with line and angle.
This project elevates simple materials into modern geometric thread art ideas perfect for a contemporary home.
12. Embroider a Luminous Celestial Map
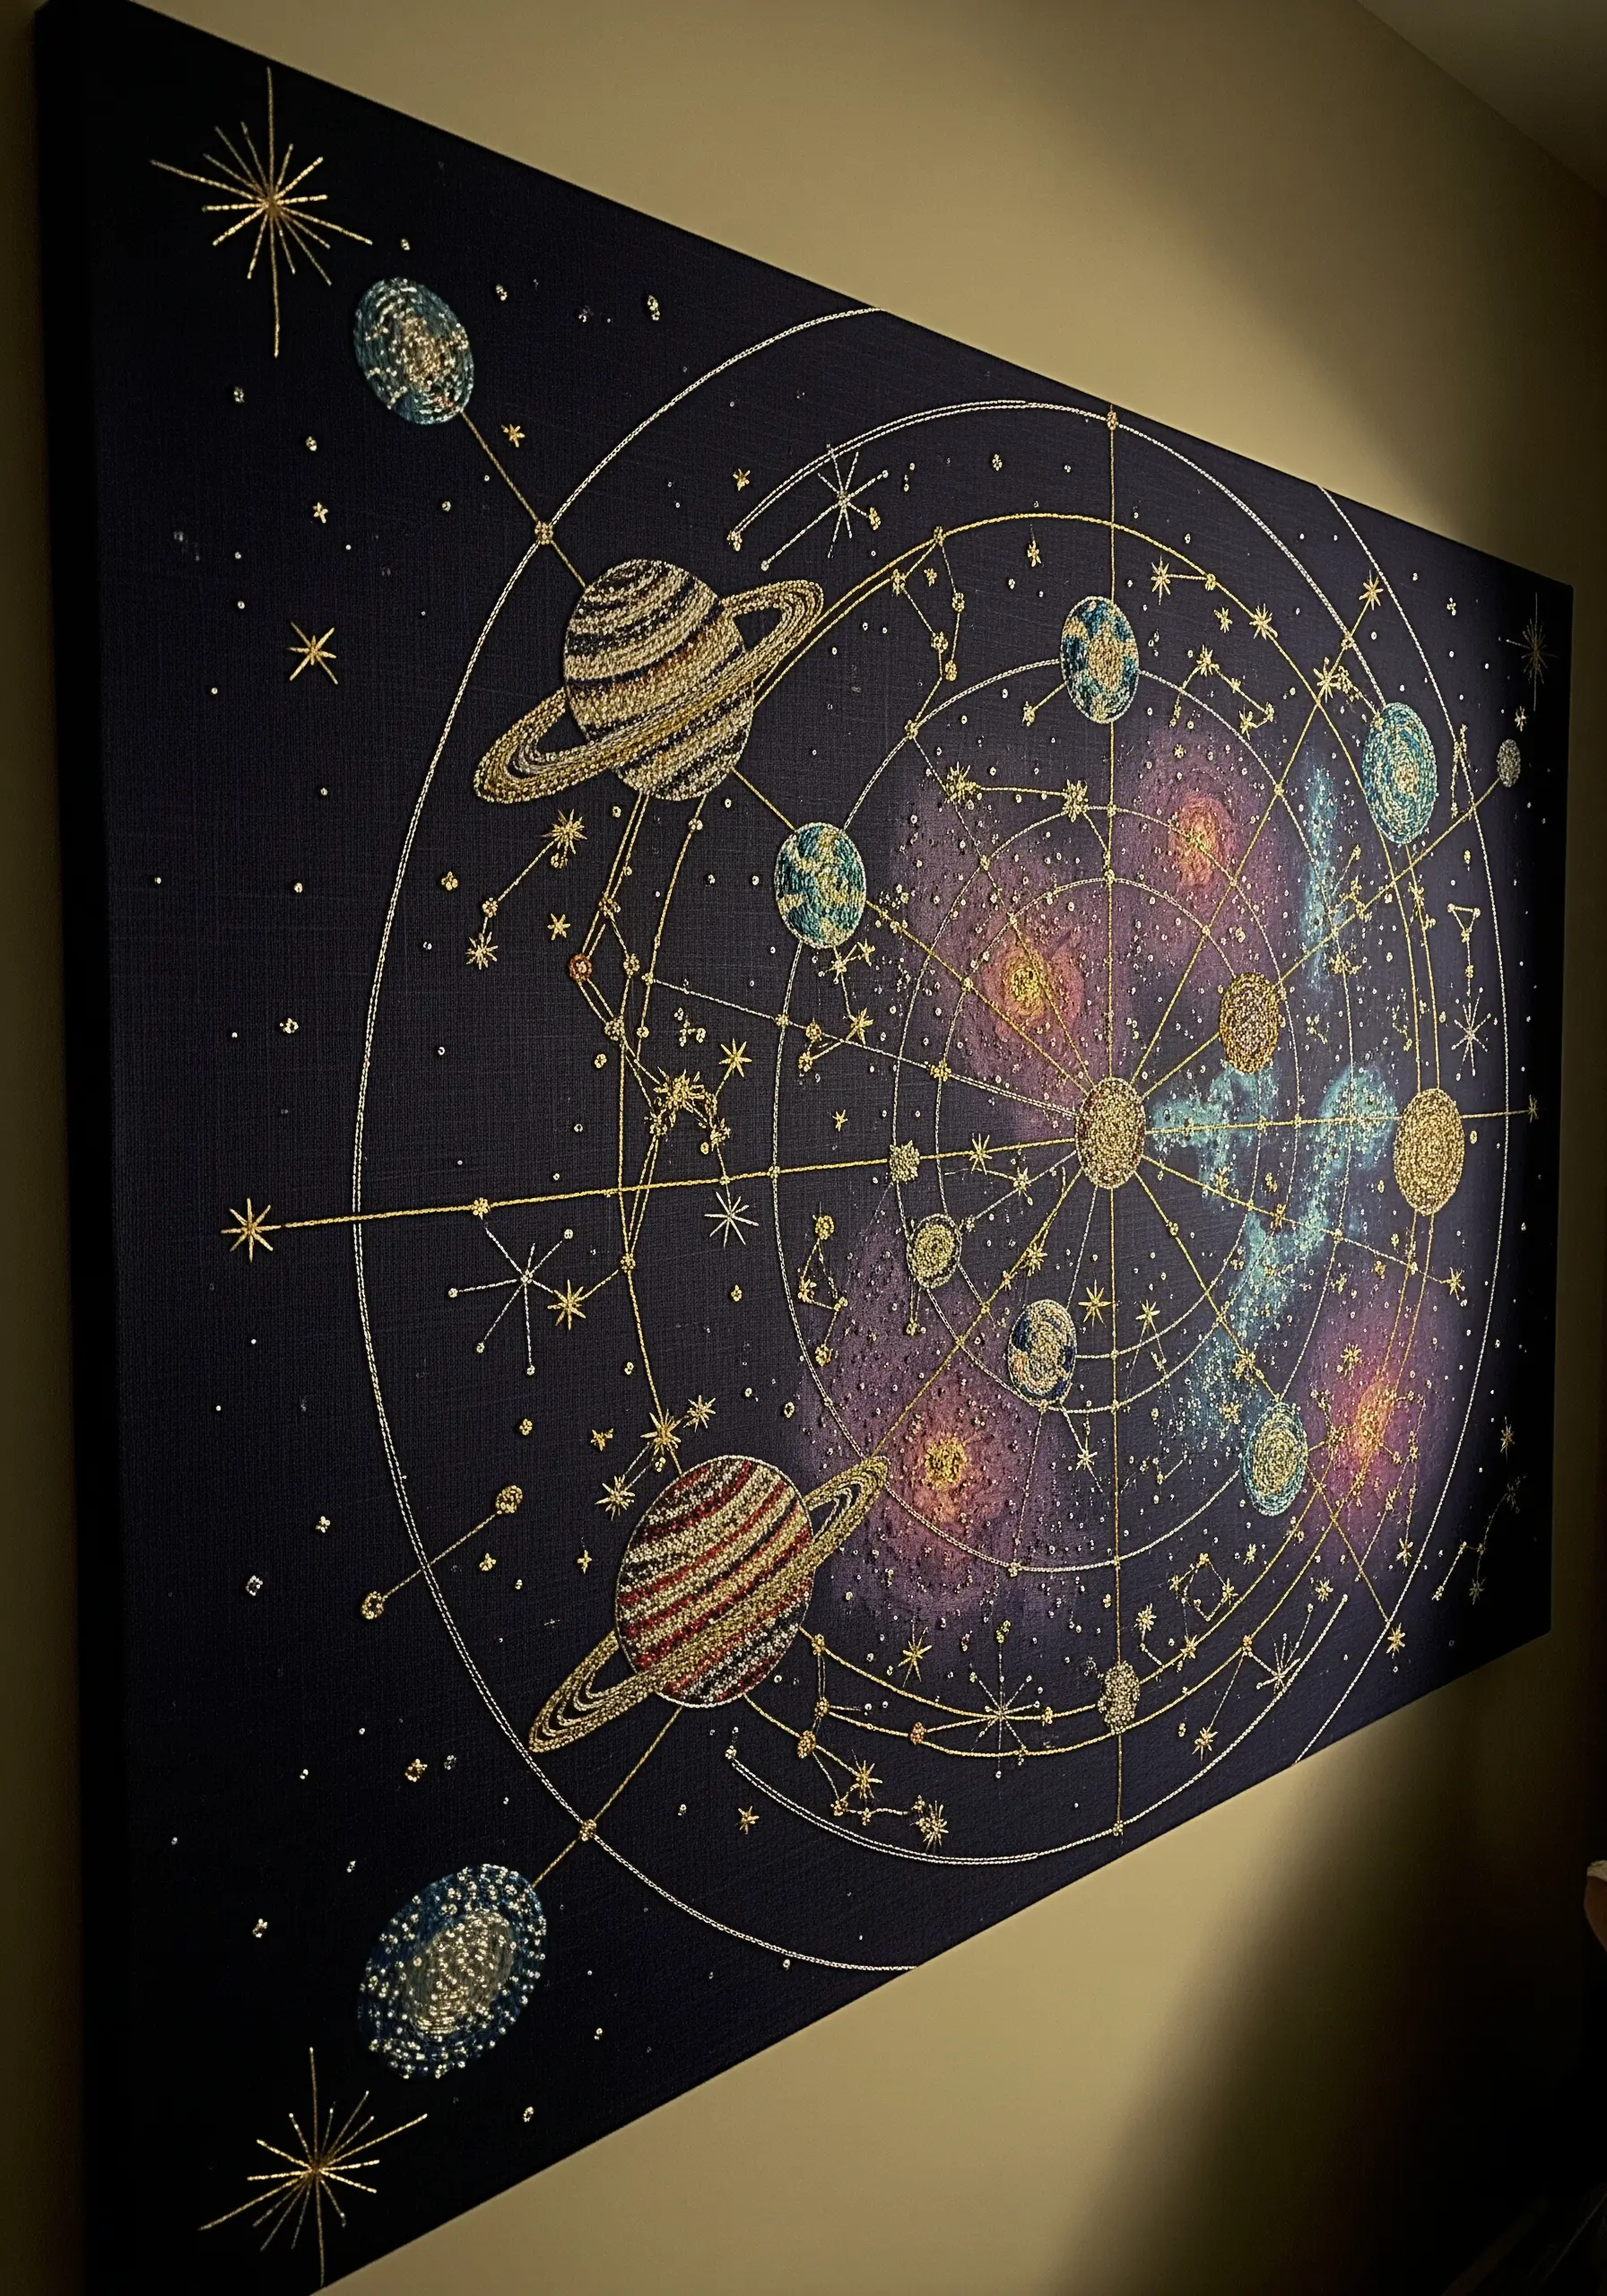
Stitch a breathtaking celestial scene on dark canvas by combining fine metallic threads and beadwork.
Use a single strand of gold metallic thread and a simple backstitch to create the delicate constellation lines and orbits.
Fill in the planets with dense satin stitch or tiny seed beads to give them texture and dimension, making them catch the light.
The high contrast between the shimmering threads and the deep navy background creates a sense of cosmic depth and wonder.
These are the metallic thread wall art designs that truly shine.
13. Build a Statement-Making Rainbow Arch
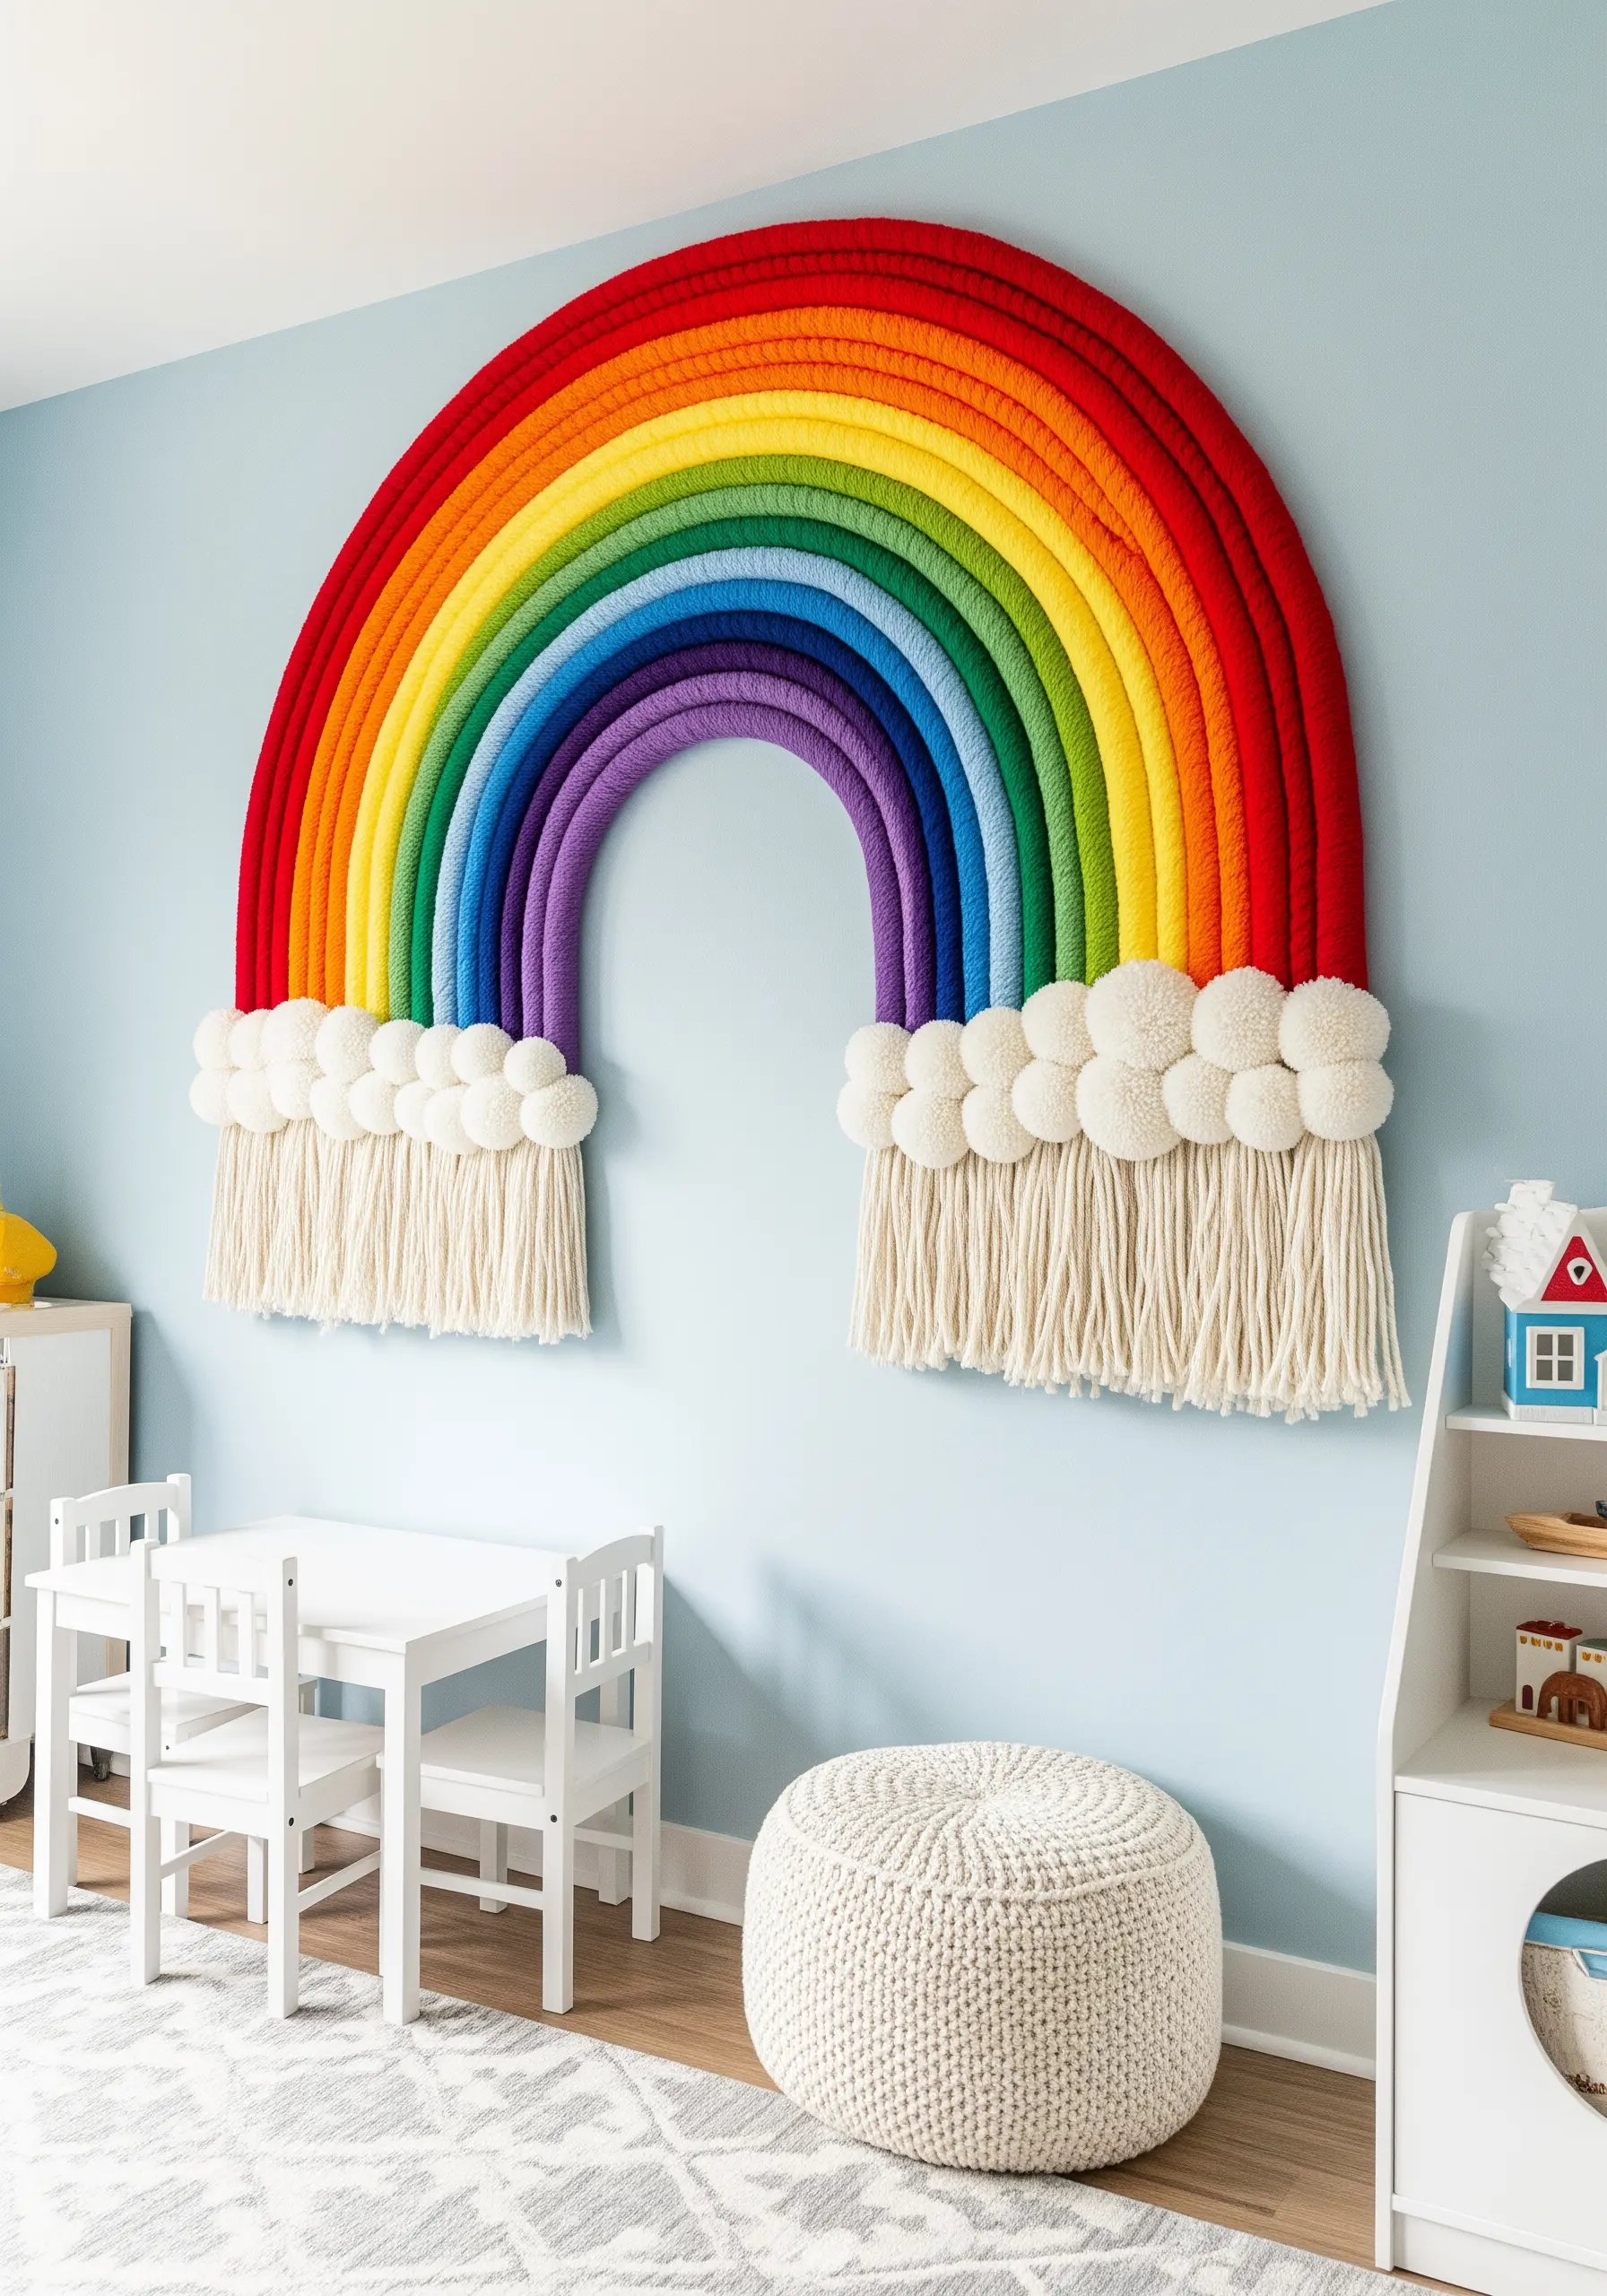
Craft a joyful, large-scale rainbow that makes an unforgettable impact in a child’s room or playroom.
Create a sturdy but lightweight base for each arc using thick rope, foam pipe insulation, or even pool noodles.
Wrap each arc meticulously with yarn, ensuring the colors are vibrant and the wrapping is tight and even.
Anchor the rainbow with fluffy, cloud-like pom-poms made from thick, soft white yarn to complete the playful aesthetic.
This is one of those playful hoop art ideas that scales up beautifully.
14. Embrace Asymmetry in Freeform Weaving
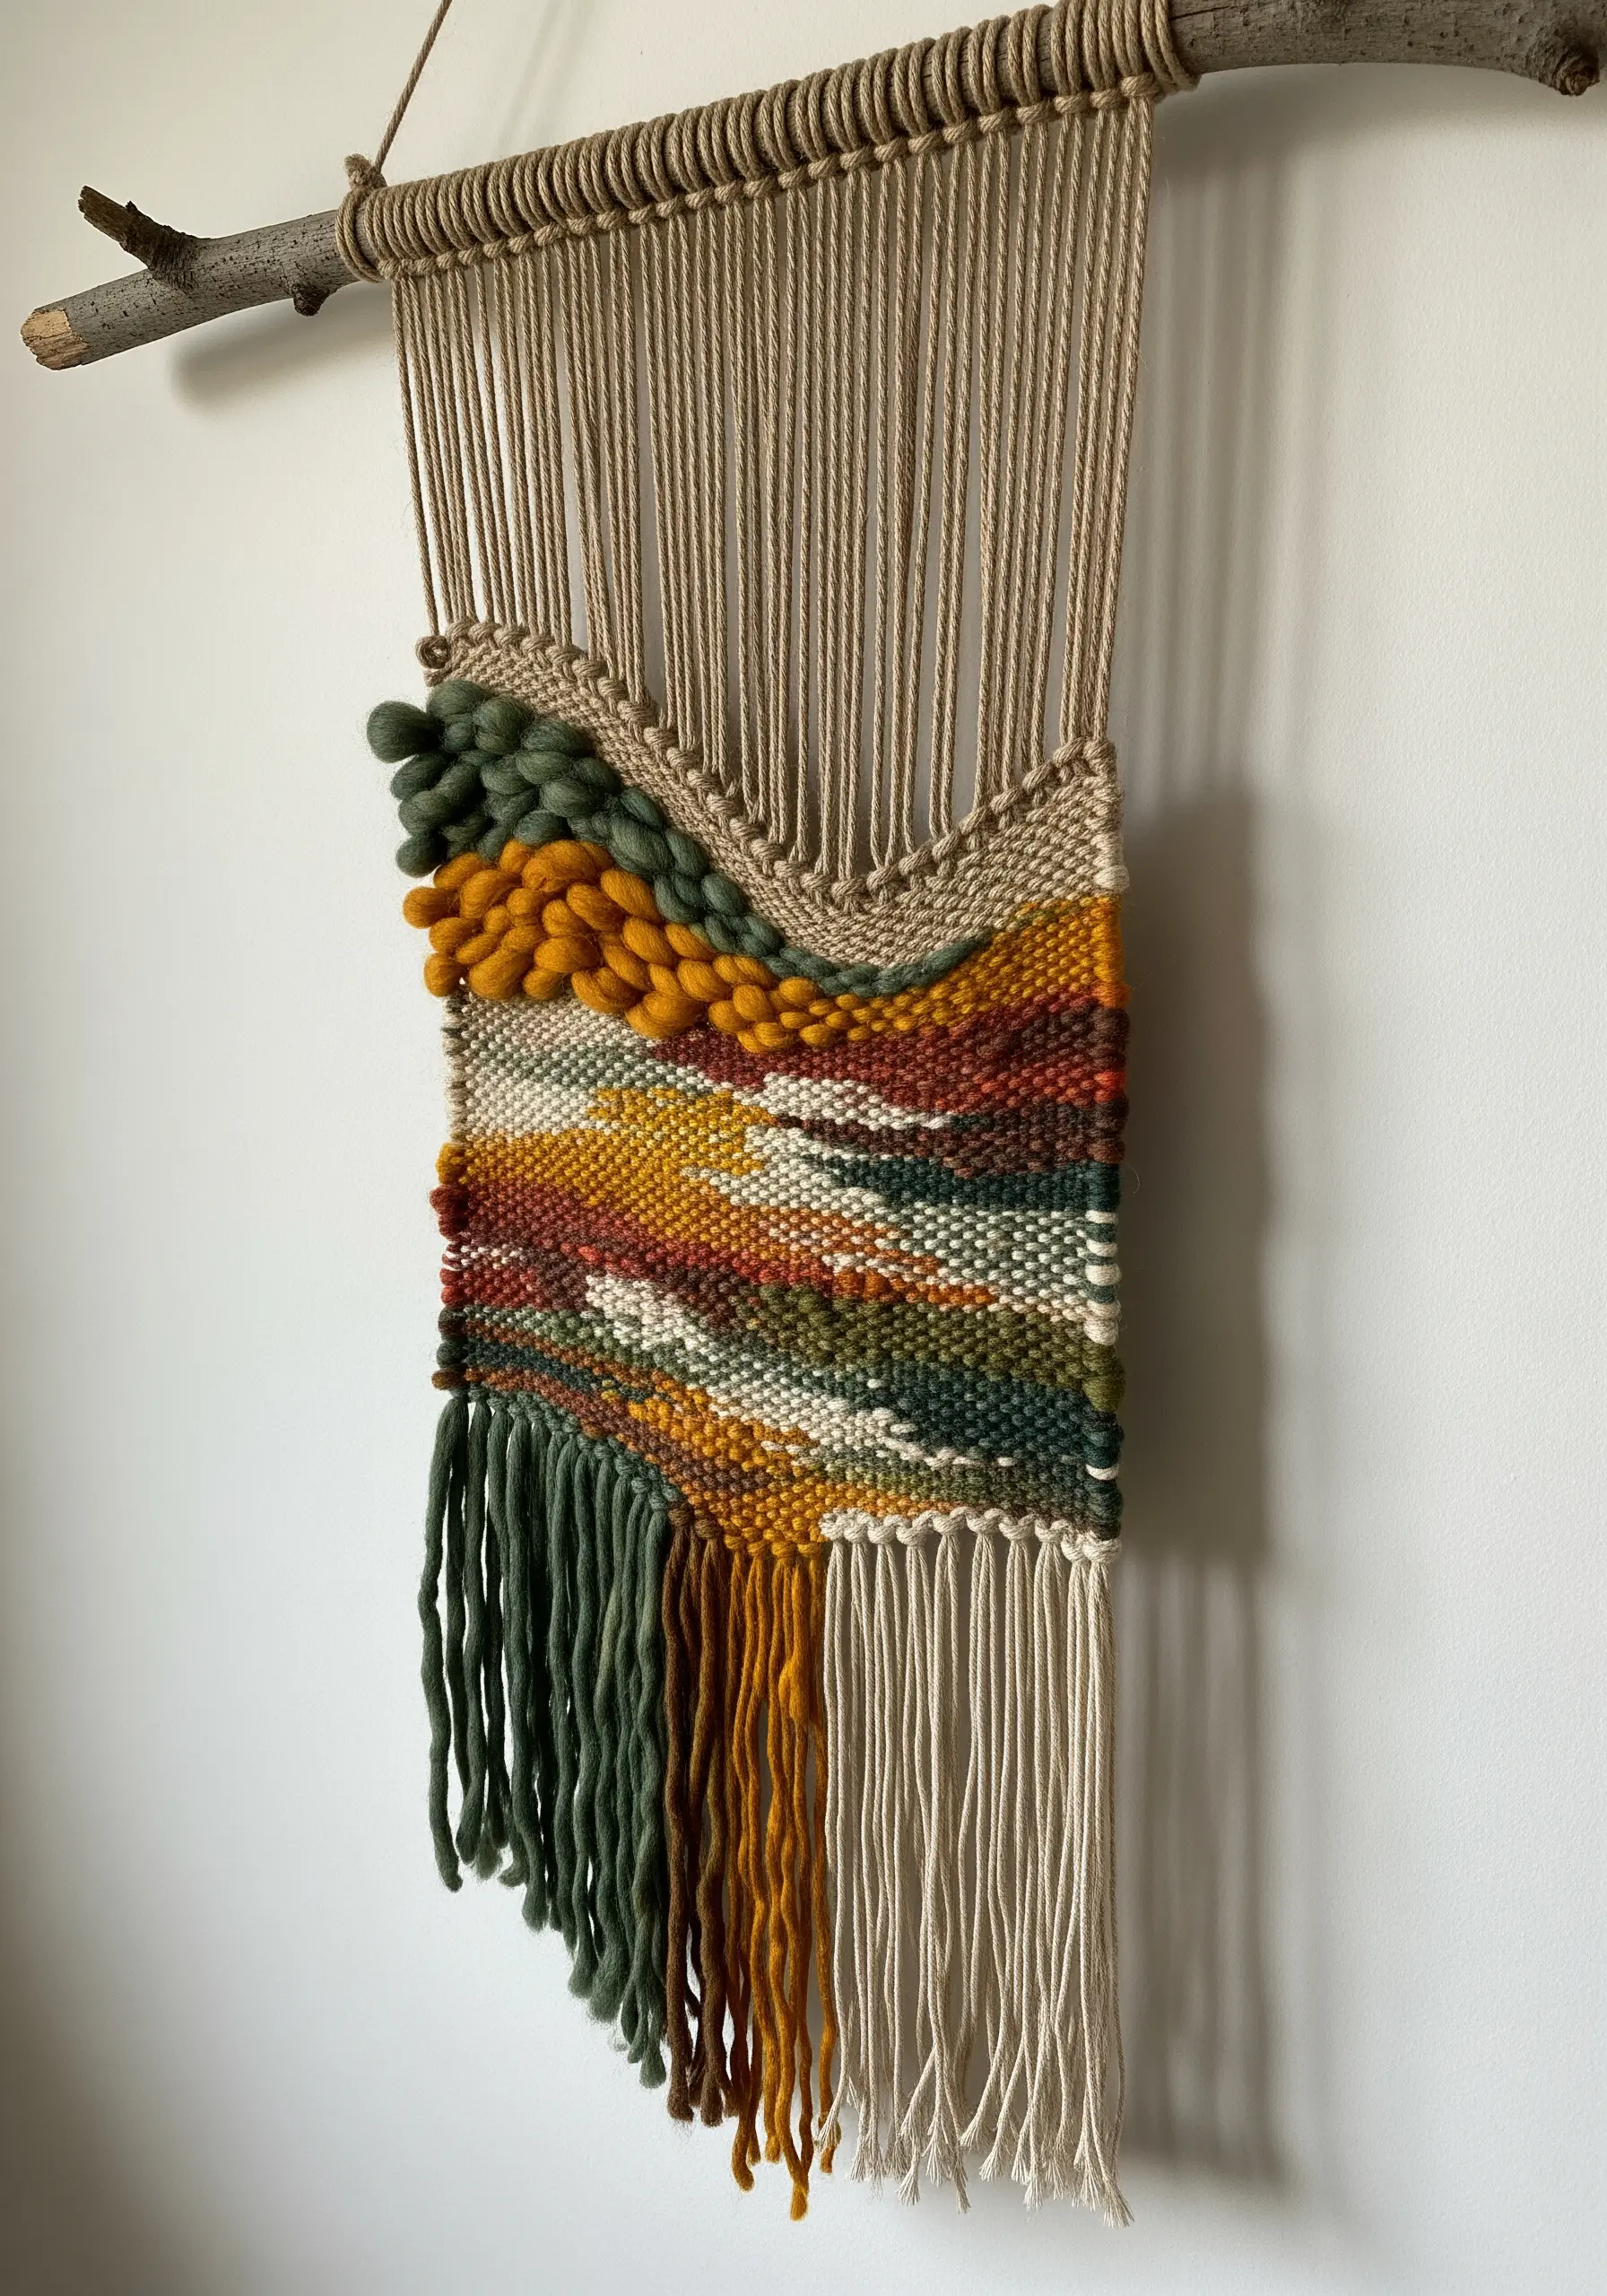
Move beyond rectangular weaving by creating an organic, asymmetrical tapestry.
Let your design flow naturally on the loom, building up shapes and textures intuitively rather than following a rigid grid.
Incorporate chunky soumak stitches, high-pile rya knots, and unspun wool roving to create dramatic textural shifts.
Hanging the finished piece from a natural, unfinished branch enhances its earthy, free-spirited aesthetic and celebrates the beauty of imperfection.
This is one of the best ways to capture nature’s textures in fiber.
15. Weave a Library of Textural Swatches
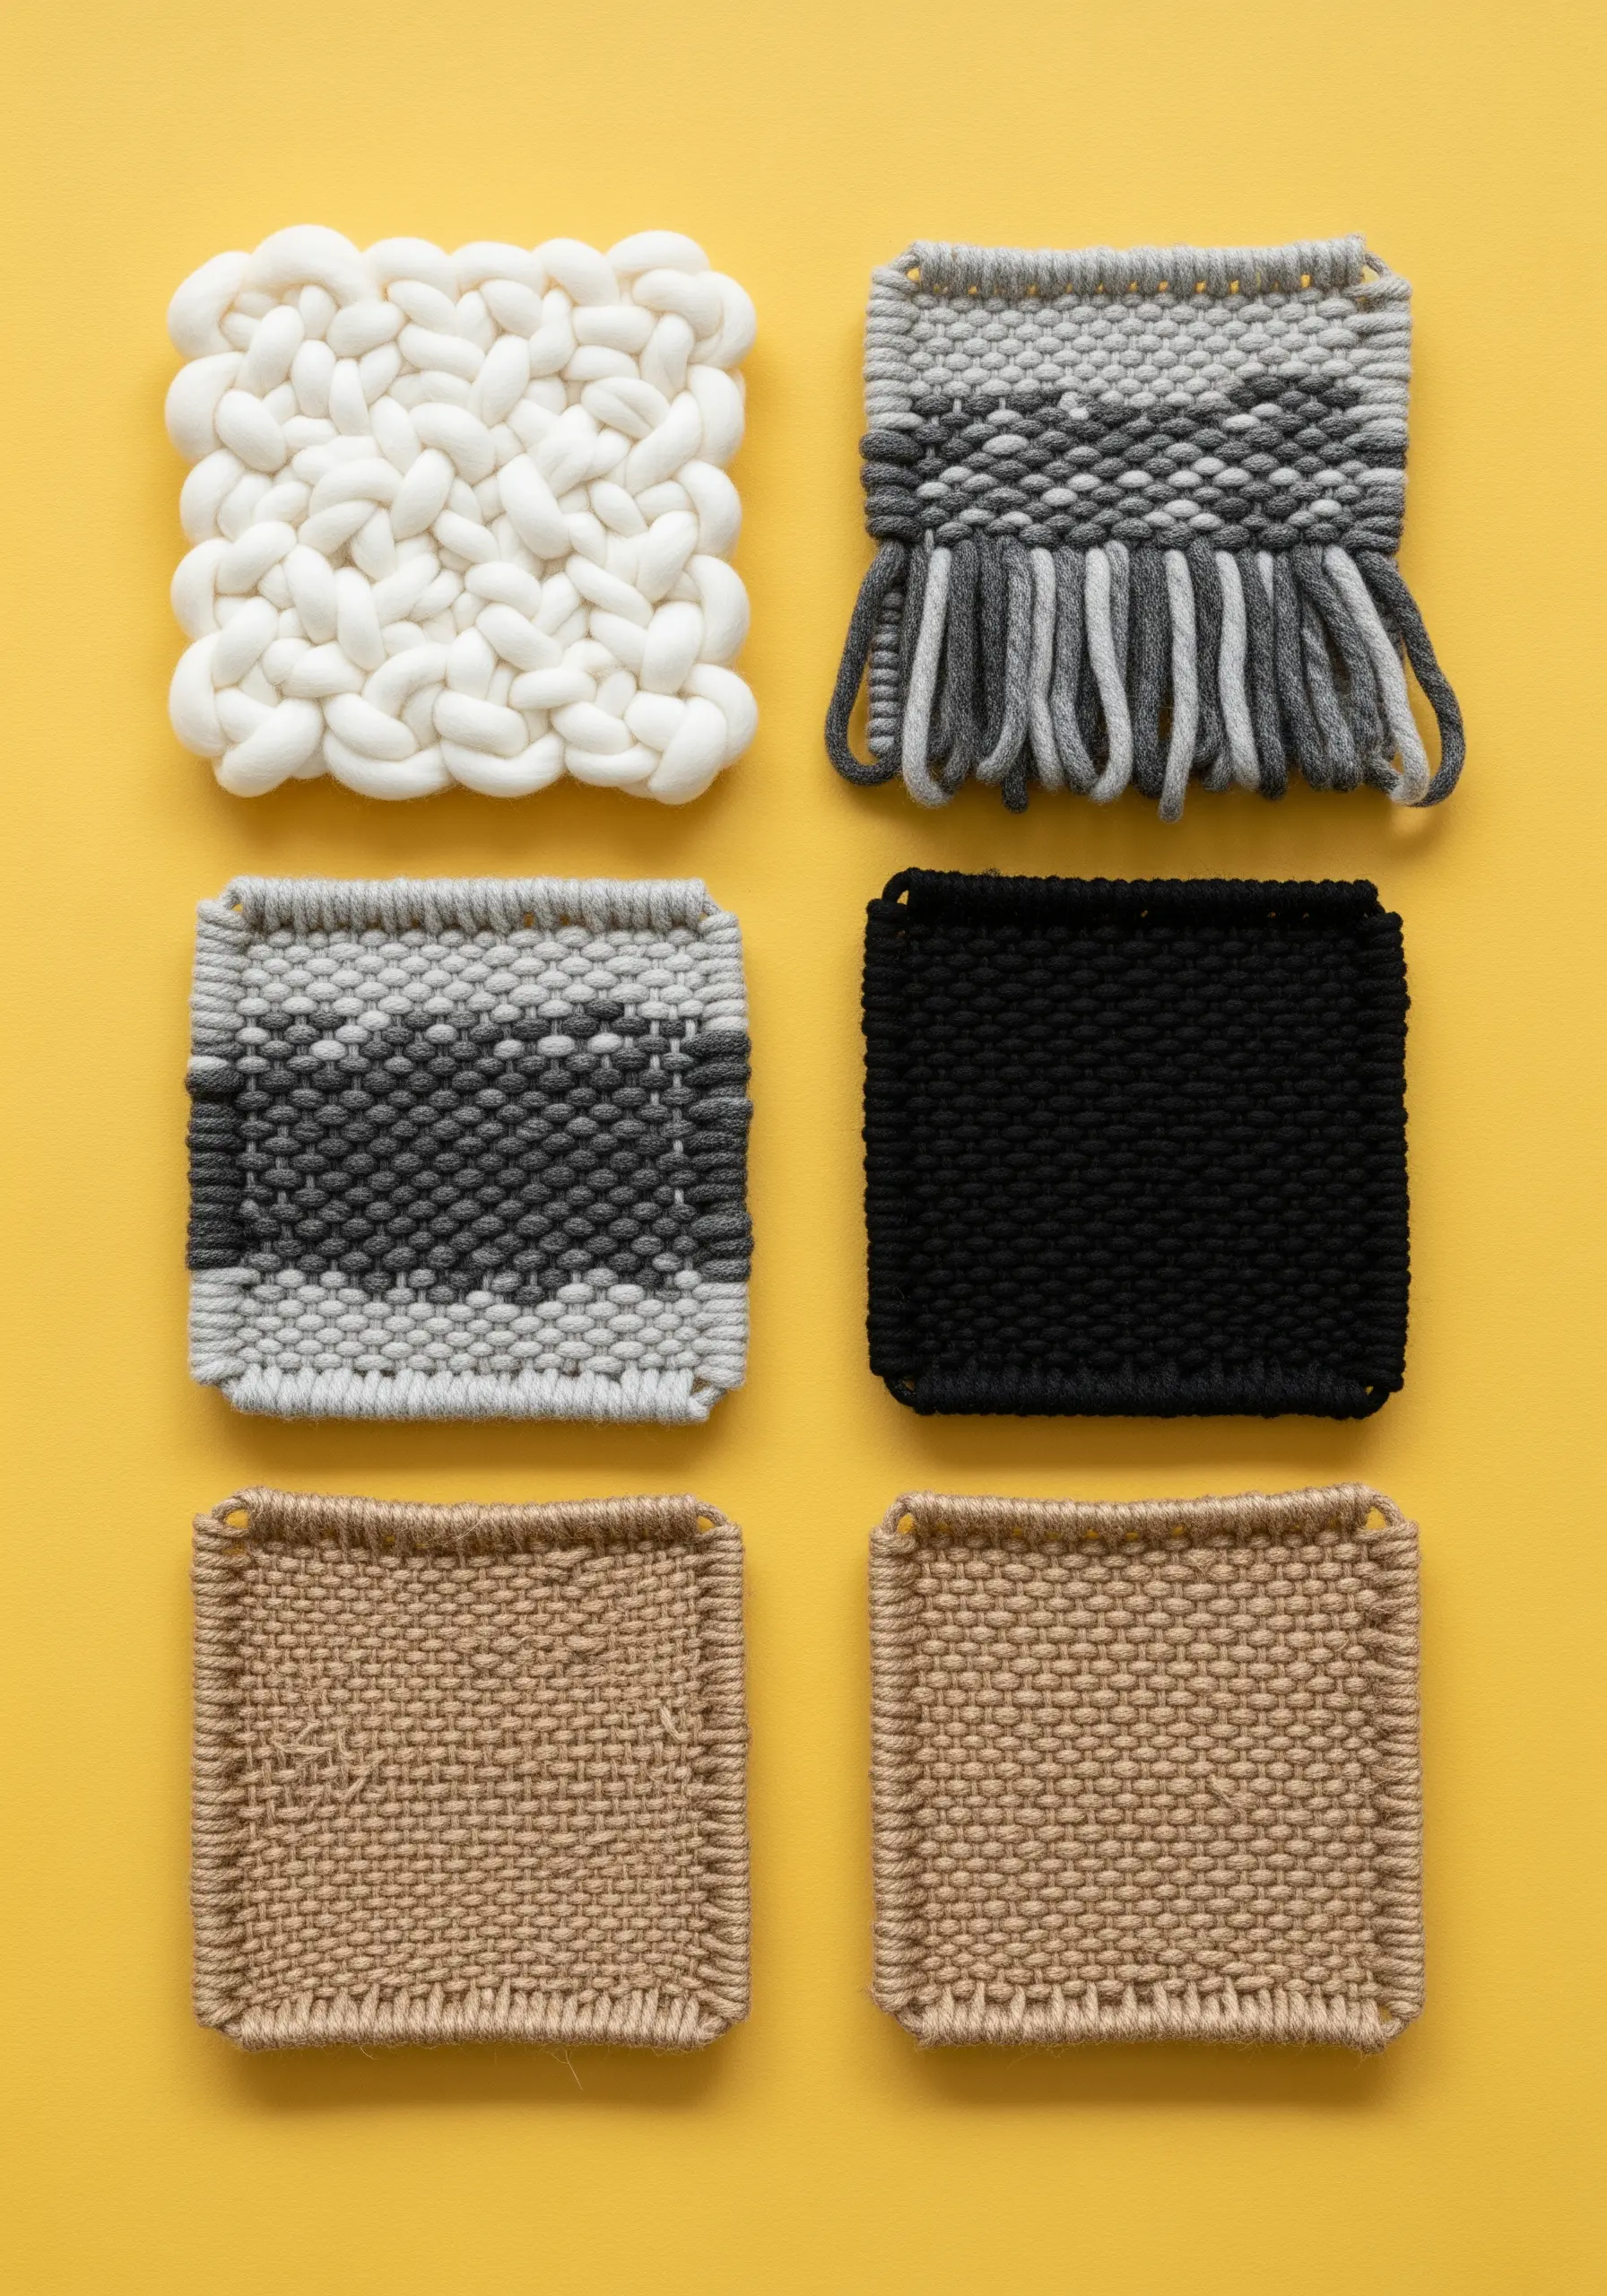
Before committing to a large project, experiment by creating a collection of small woven swatches.
Use a small frame loom to test out different weave structures, such as plain weave, twill, and basket weave.
Play with combining yarns of different weights and materials—like chunky merino wool, sleek cotton, and rustic jute.
This practice allows you to build a personal reference library of gorgeous mixed-fiber textures that you can confidently use in future designs.
Arrange your finished swatches on a board for a unique piece of process-driven art.
16. Sculpt Motion with Directional Punch Needle
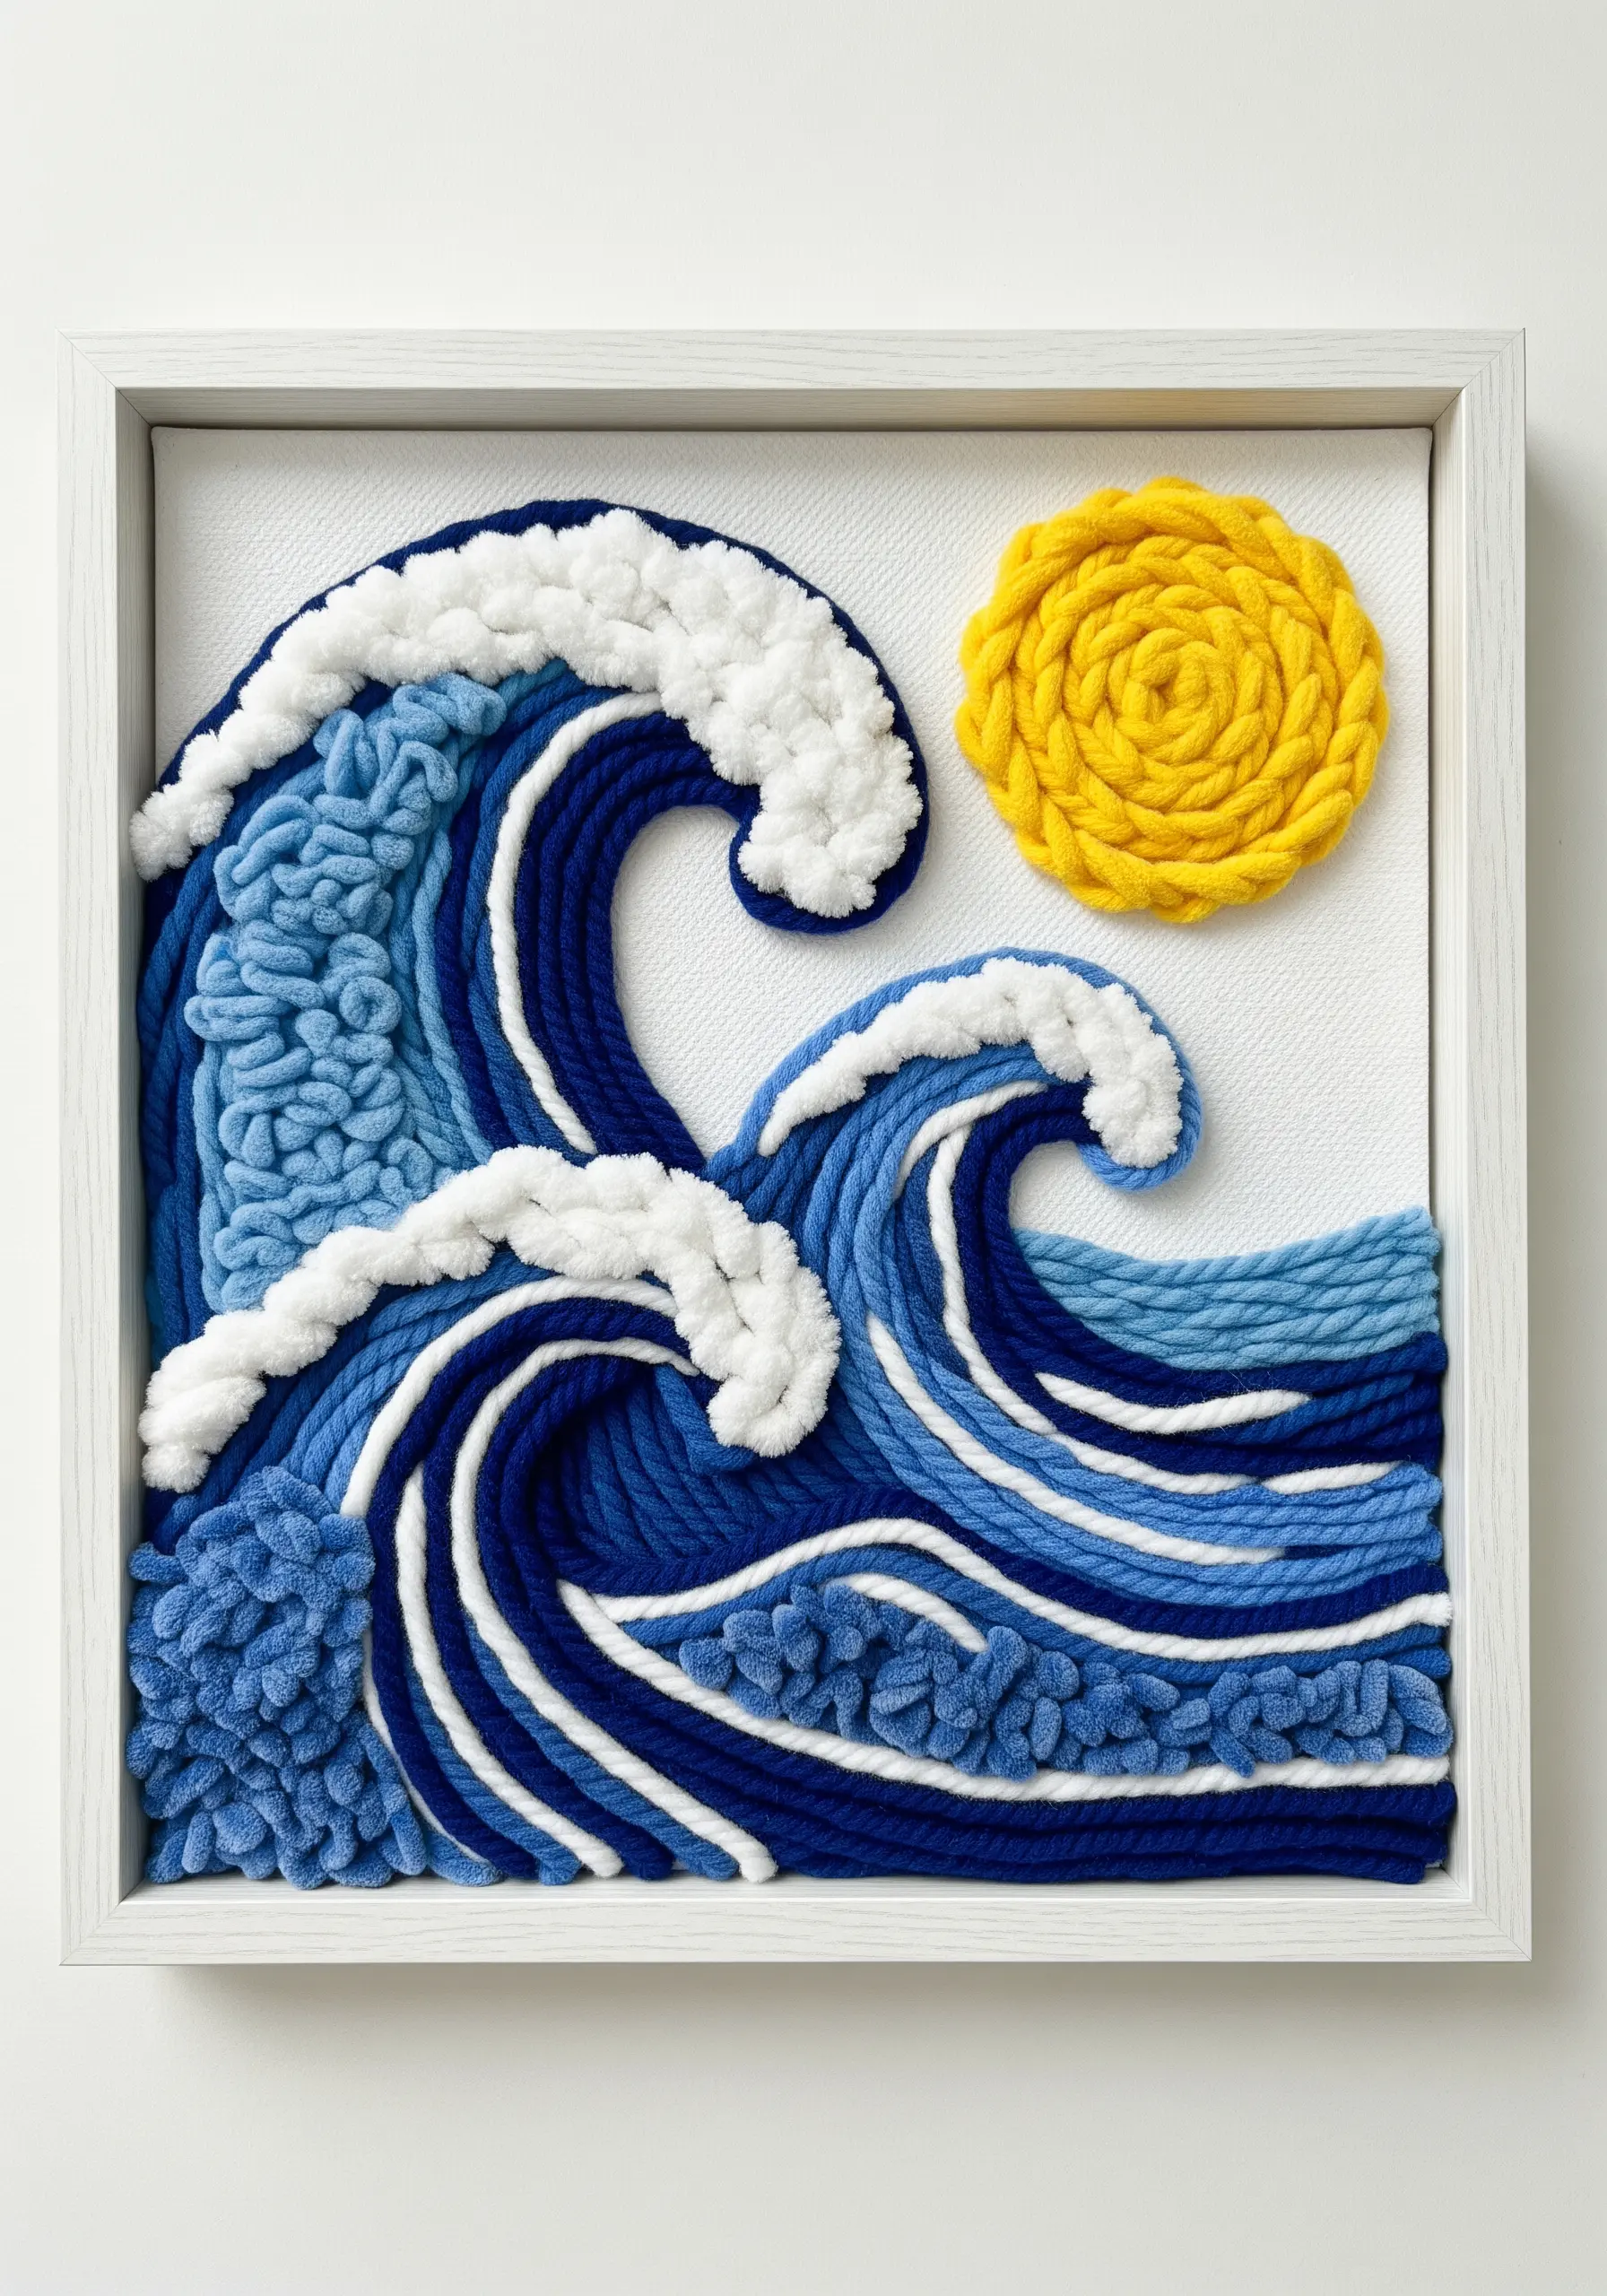
Capture the energy of ocean waves by paying close attention to the direction of your punch needle loops.
Instead of working in straight rows, angle your stitches to follow the curve and flow of the wave’s crest and crash.
Use a variety of blue yarns to create depth and movement, and switch to a thick, plush white yarn for the sea foam.
This directional technique turns a flat design into a dynamic, sculptural piece that feels alive, making it perfect for ocean-inspired hoop embroidery ideas.
17. Construct a Modular, Gradient Wall
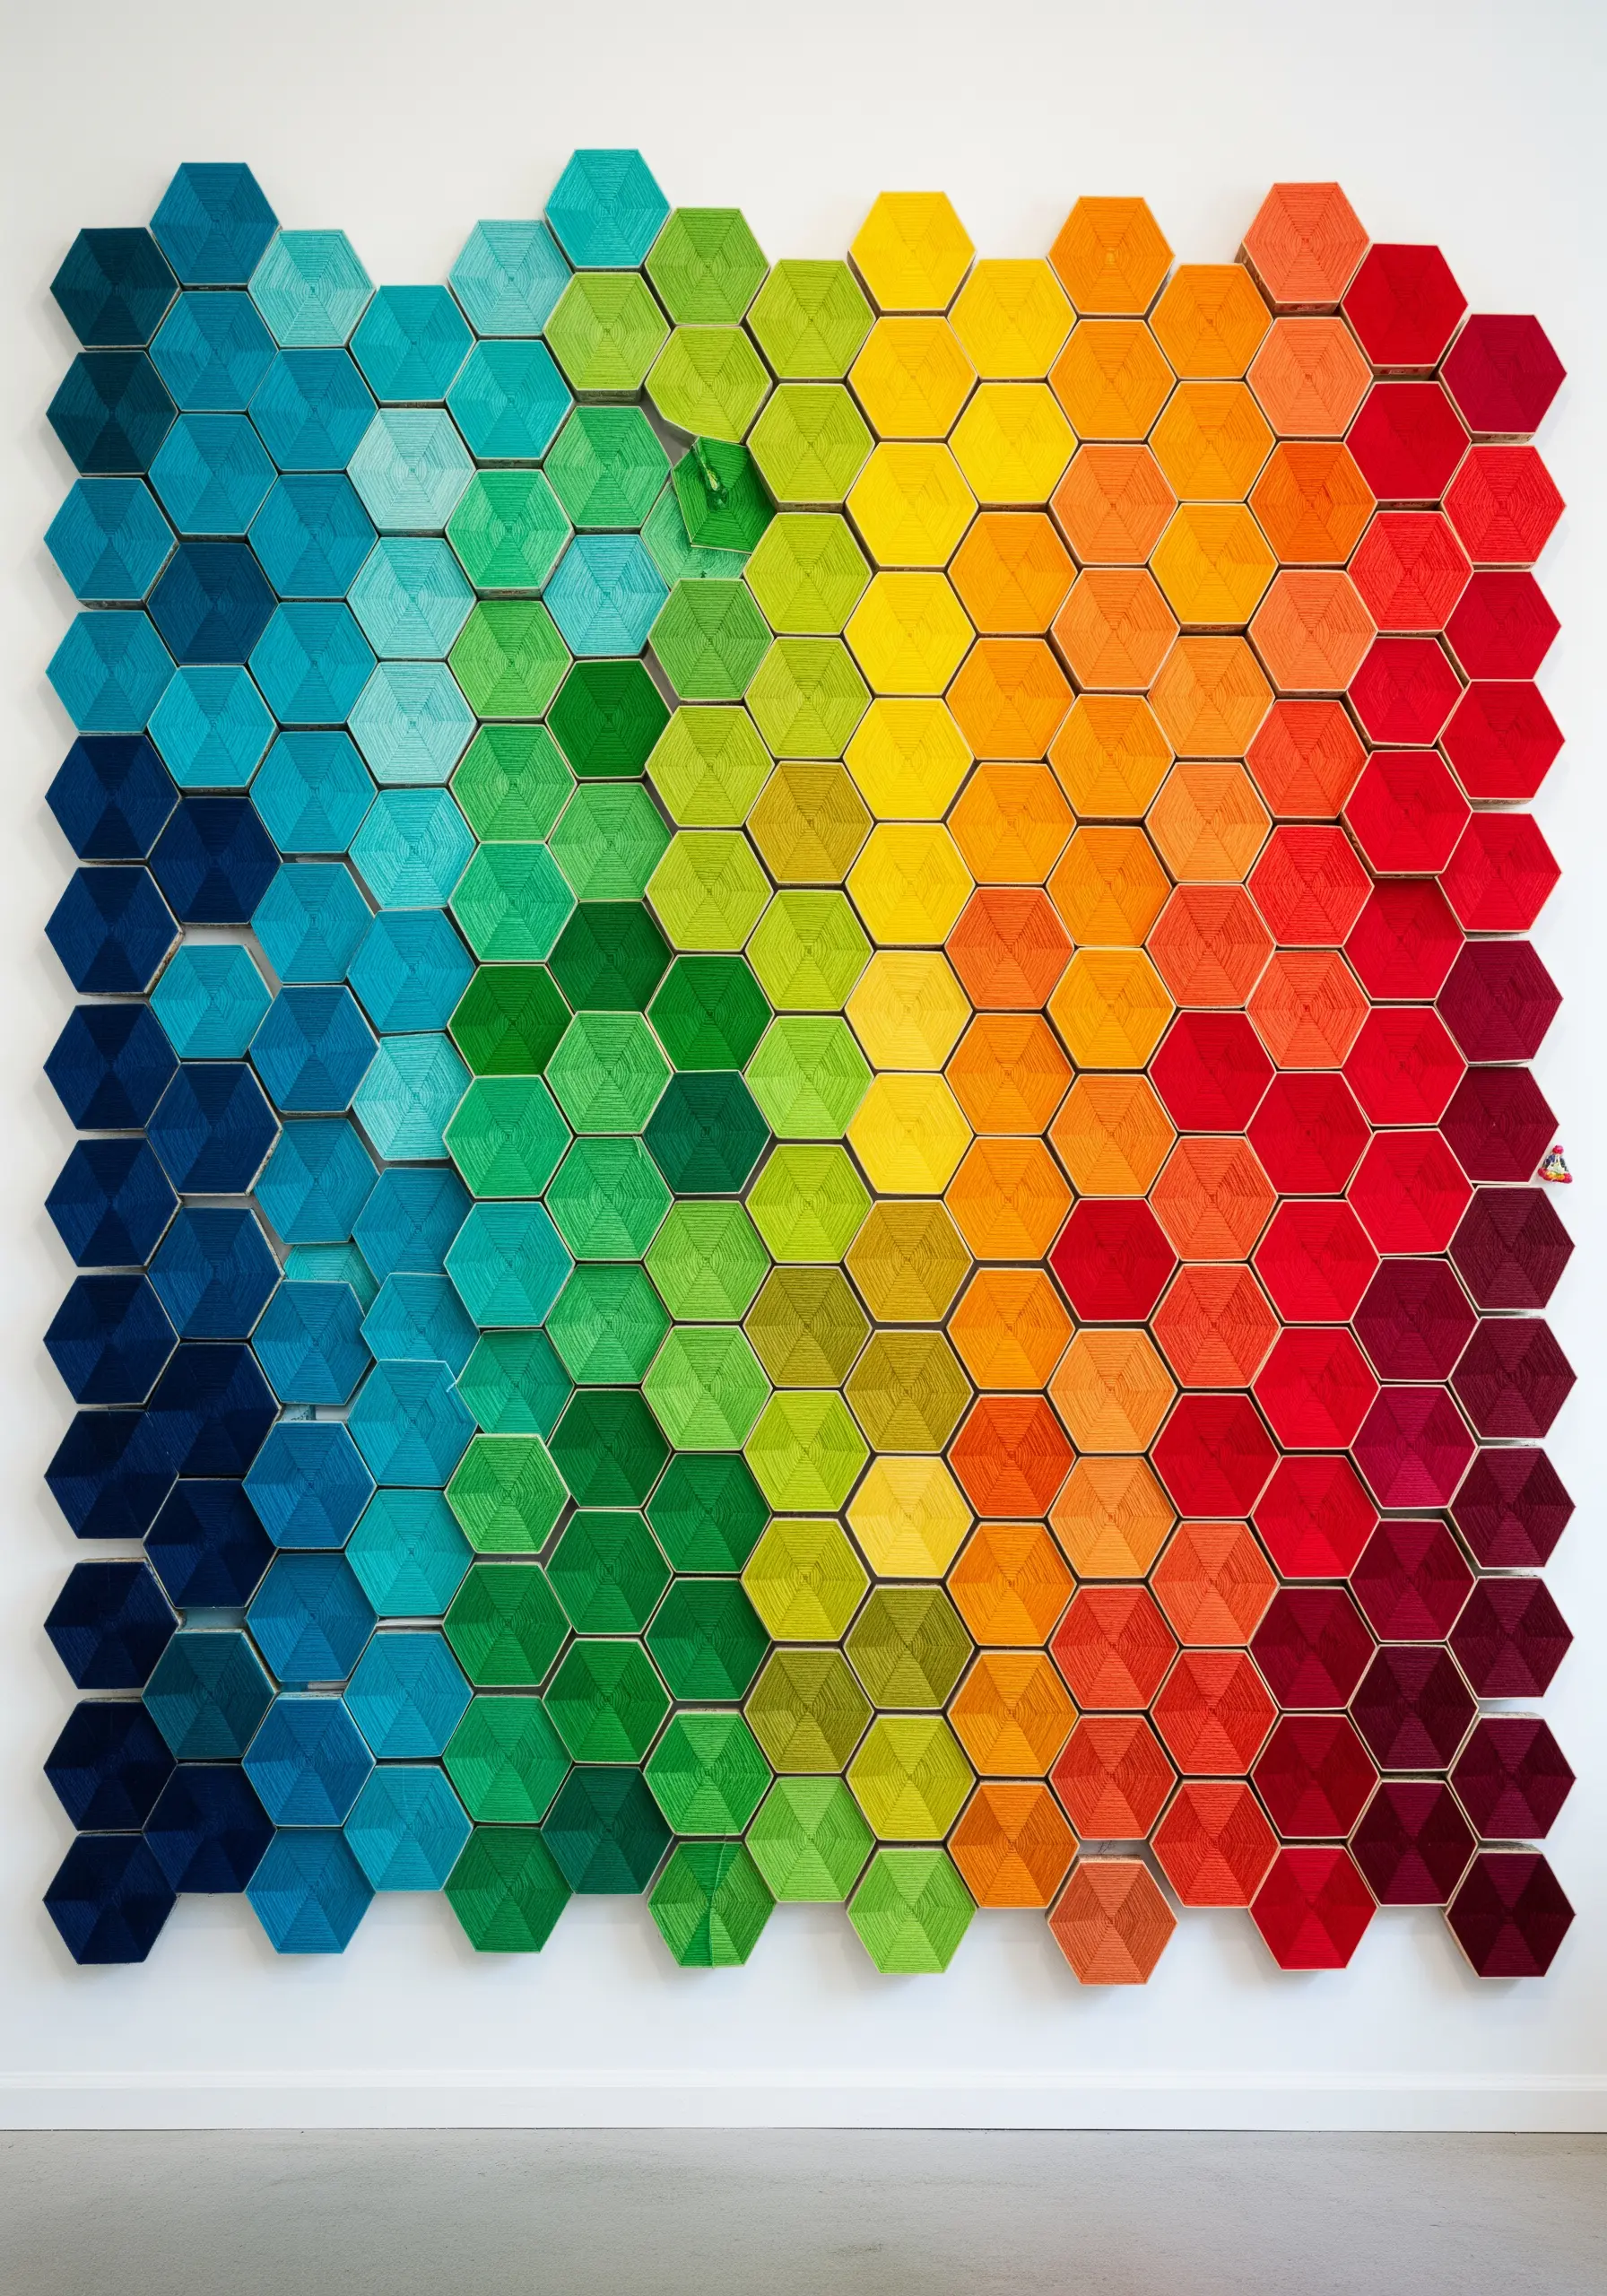
Create a stunning, large-scale color gradient with modular hexagonal panels.
Wrap individual cardboard or wood hexagons with felt or yarn in a wide spectrum of colors.
Arrange the finished panels on your wall, transitioning smoothly from one color family to the next, like from deep blues through greens, yellows, and into reds.
This approach allows you to create a massive, pixelated rainbow effect that is both highly organized and visually breathtaking.
The result is a work of abstract color-blend art that feels architectural.
18. Weave Sharp Art Deco Geometry
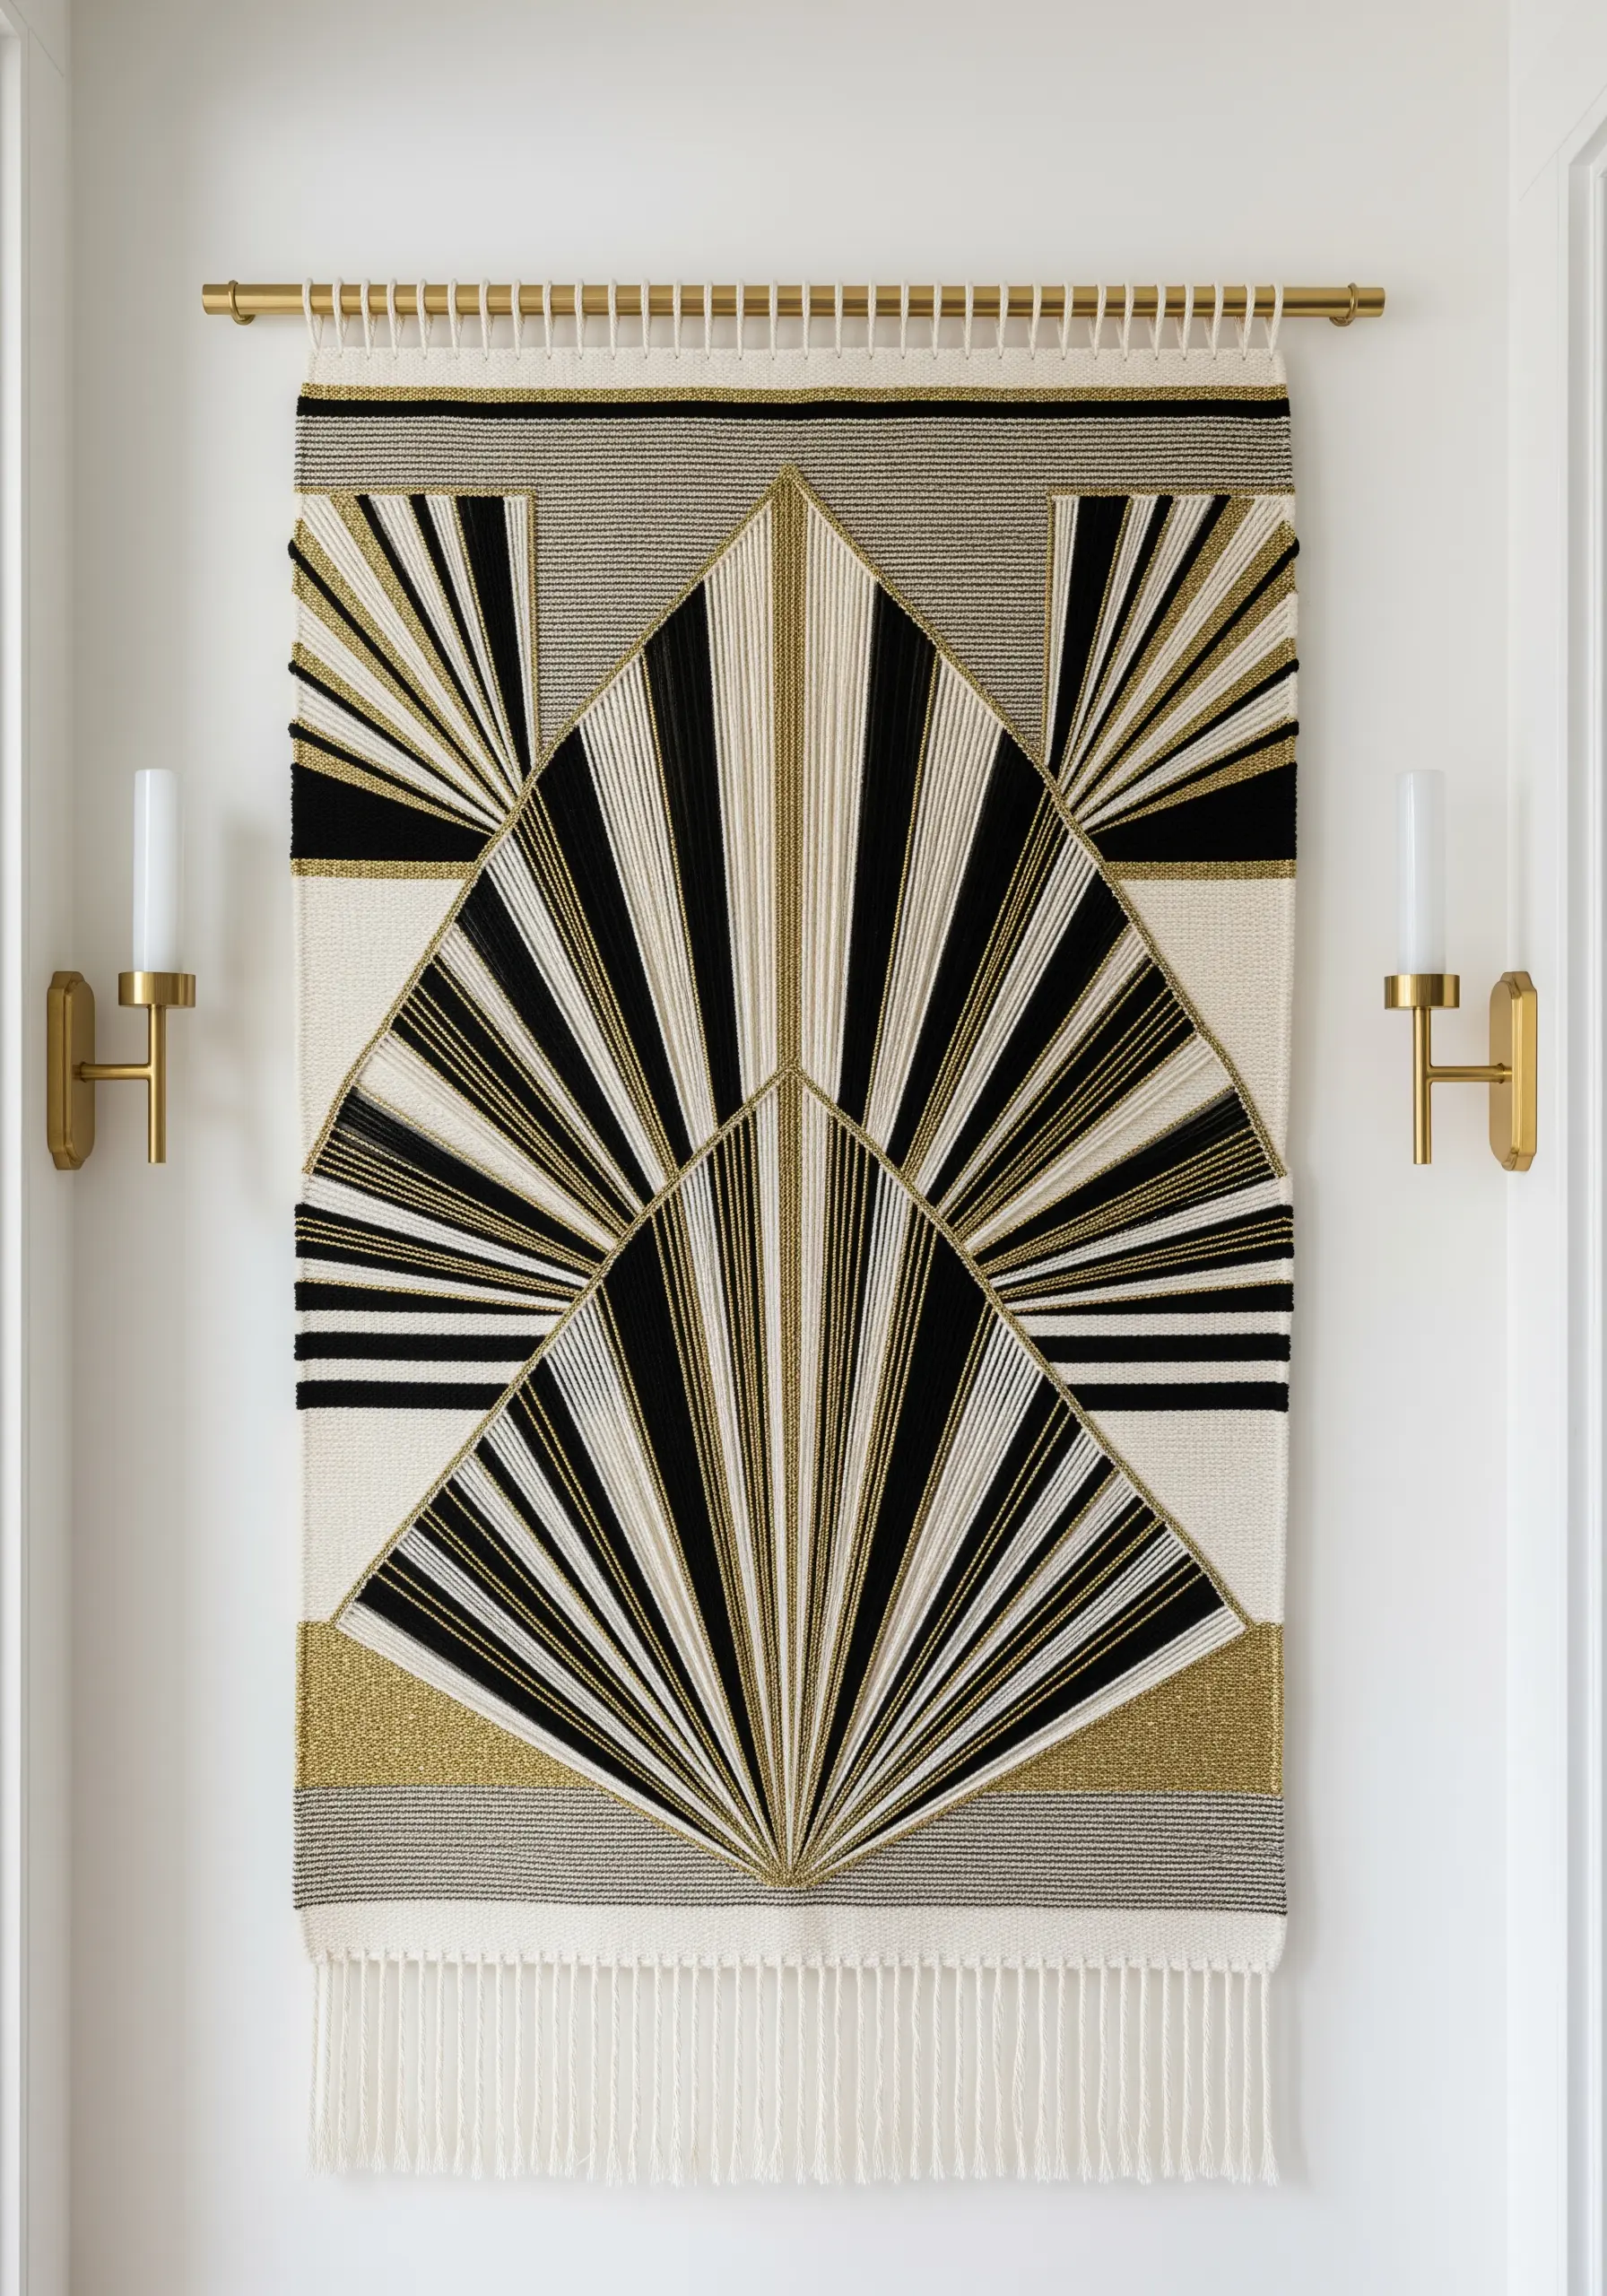
Capture the glamour of the Art Deco era by weaving a design with strong, graphic lines and metallic accents.
Use high-contrast colors like black, cream, and gold to define your geometric shapes.
To achieve the crisp, radiating lines, use a tapestry technique like slit or interlocking weaving, where colors meet but don’t blend.
The combination of matte cotton and shimmering metallic thread gives the piece a luxurious, sophisticated finish, elevating it beyond a simple wall hanging into a piece of true fiber art.
19. Craft Woodland Creatures with Wrapped Forms
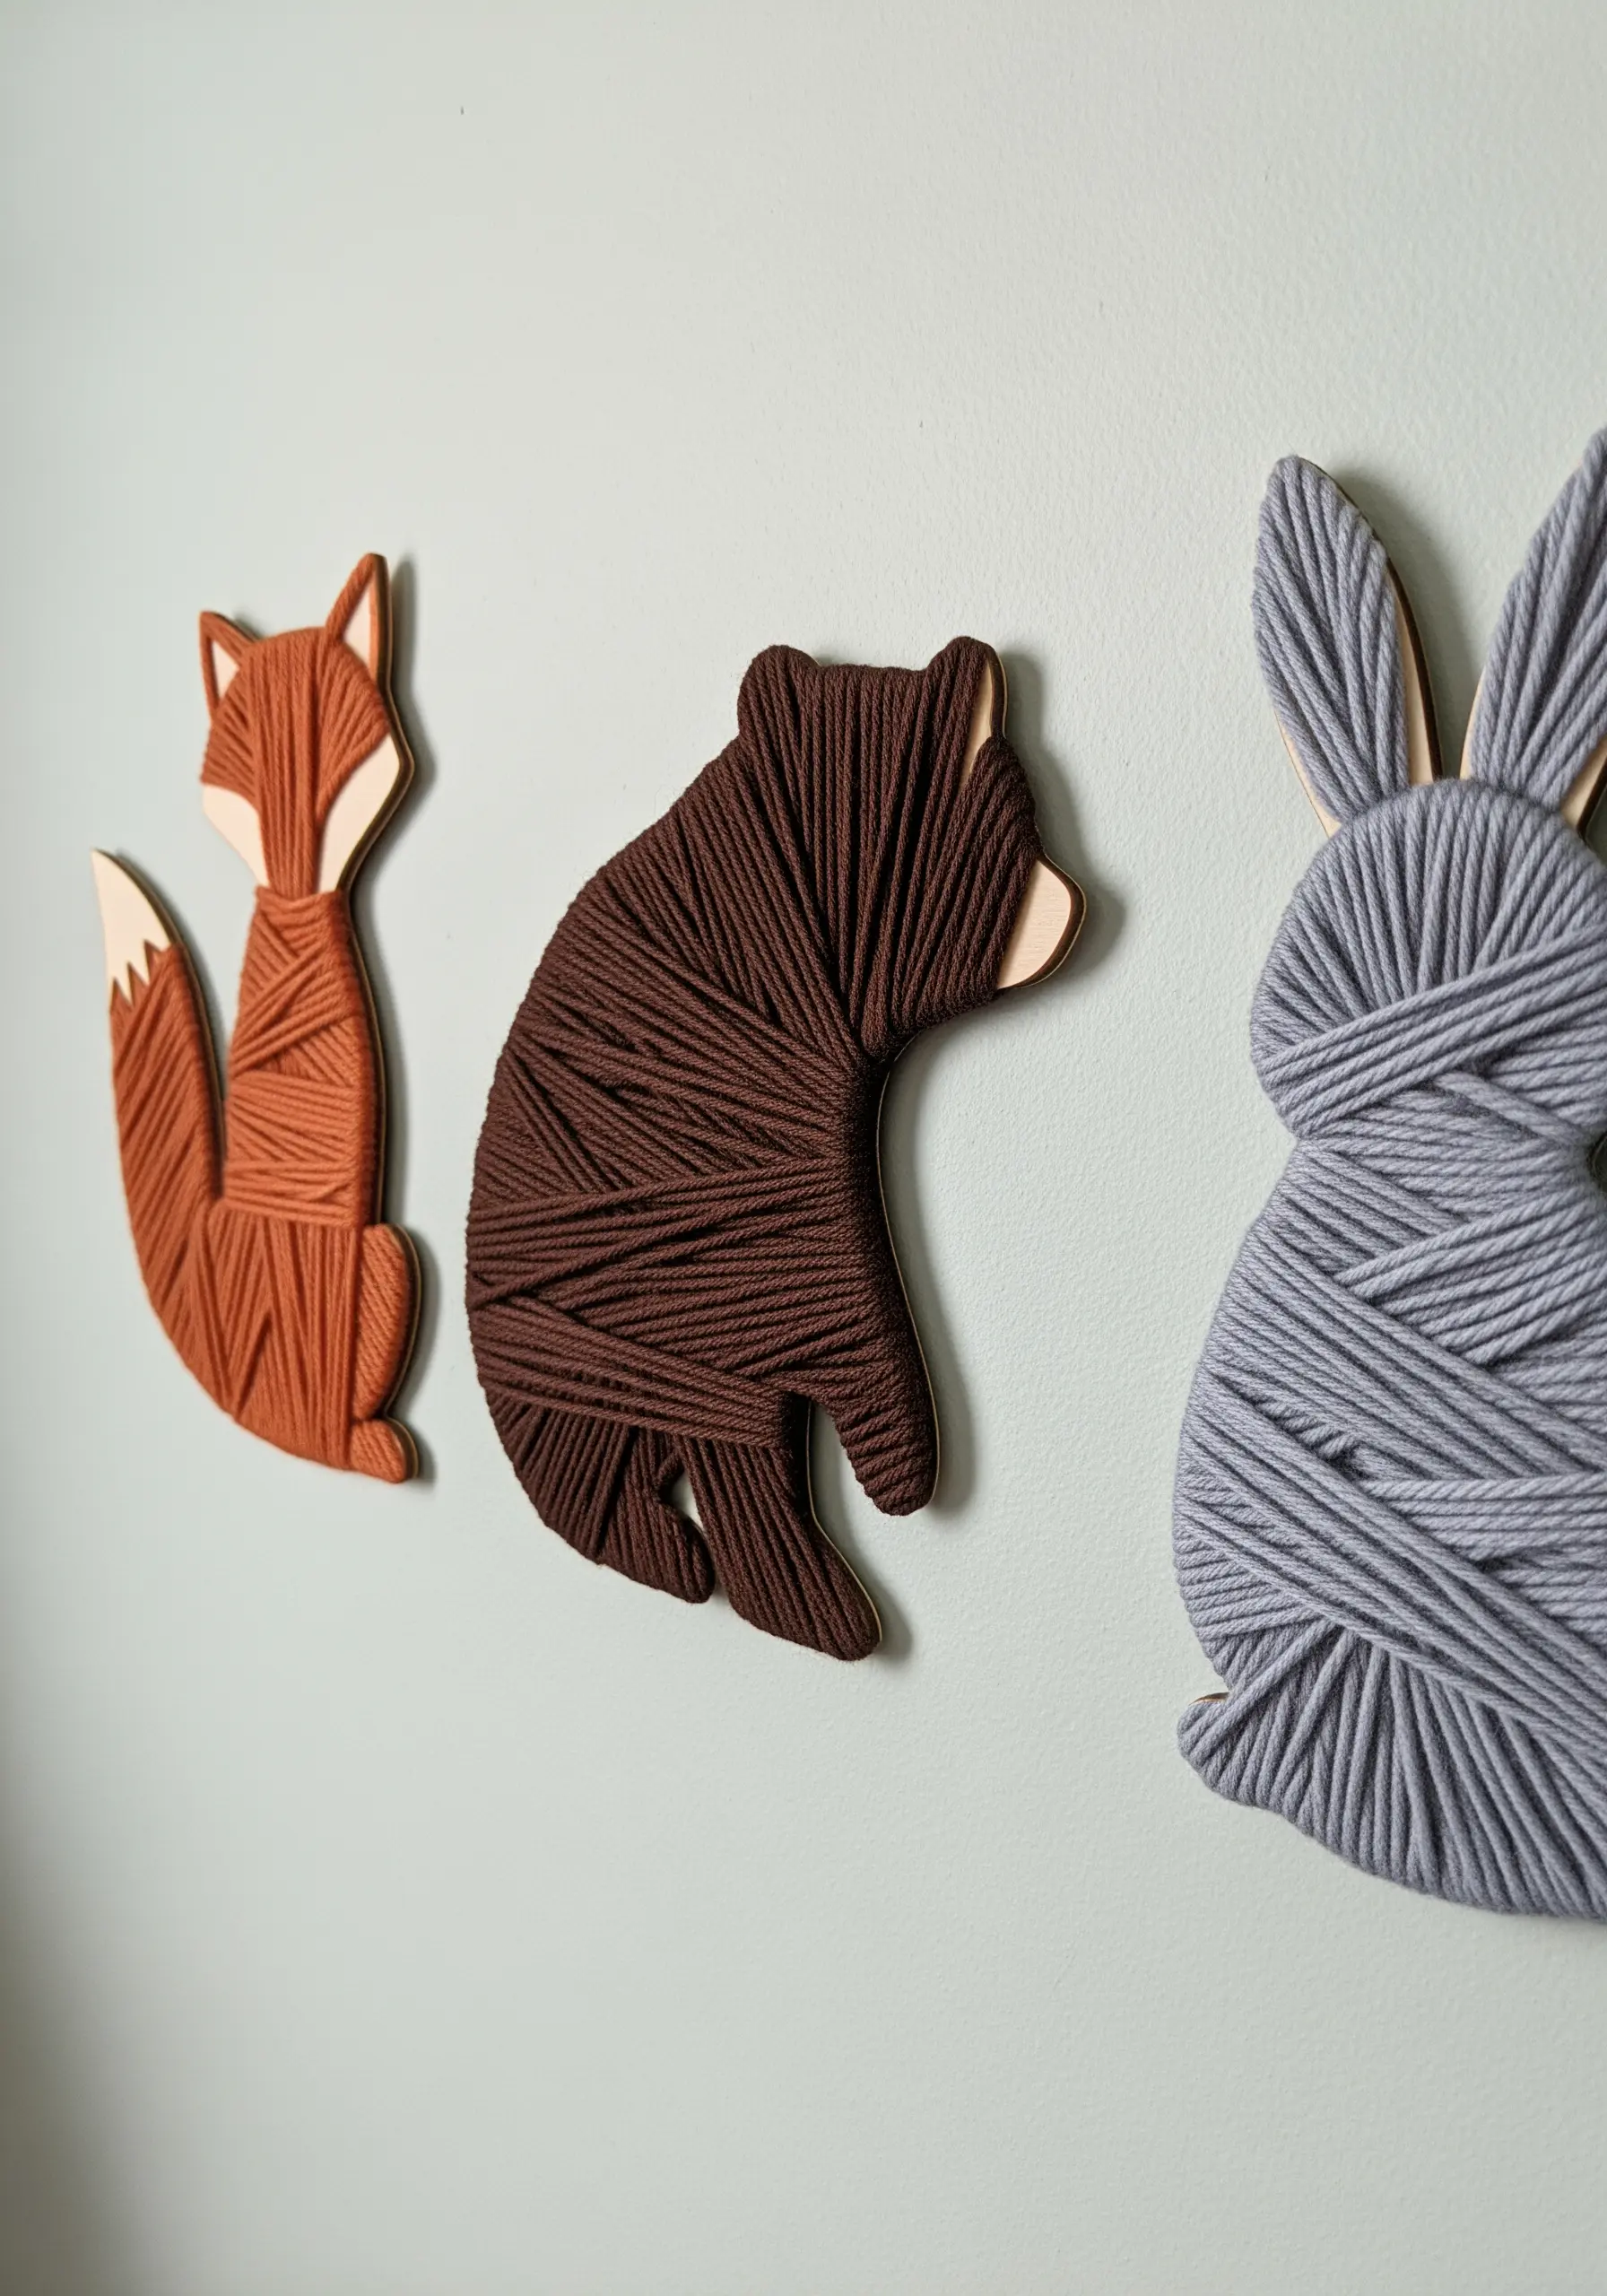
This technique offers a simple way to create charming, sculptural wall decor for a nursery or child’s room.
Start with pre-cut wooden animal silhouettes as your base.
Carefully and tightly wrap the forms with a single color of yarn, following the contours of the shape to suggest form and texture.
Leaving small sections of the wood exposed—like the tip of a tail or the inside of an ear—adds a rustic, handmade touch that enhances the design.
These are charming, tactile alternatives to flat minimalist line art animal designs.
20. Fabricate a Cascading Yarn Chandelier
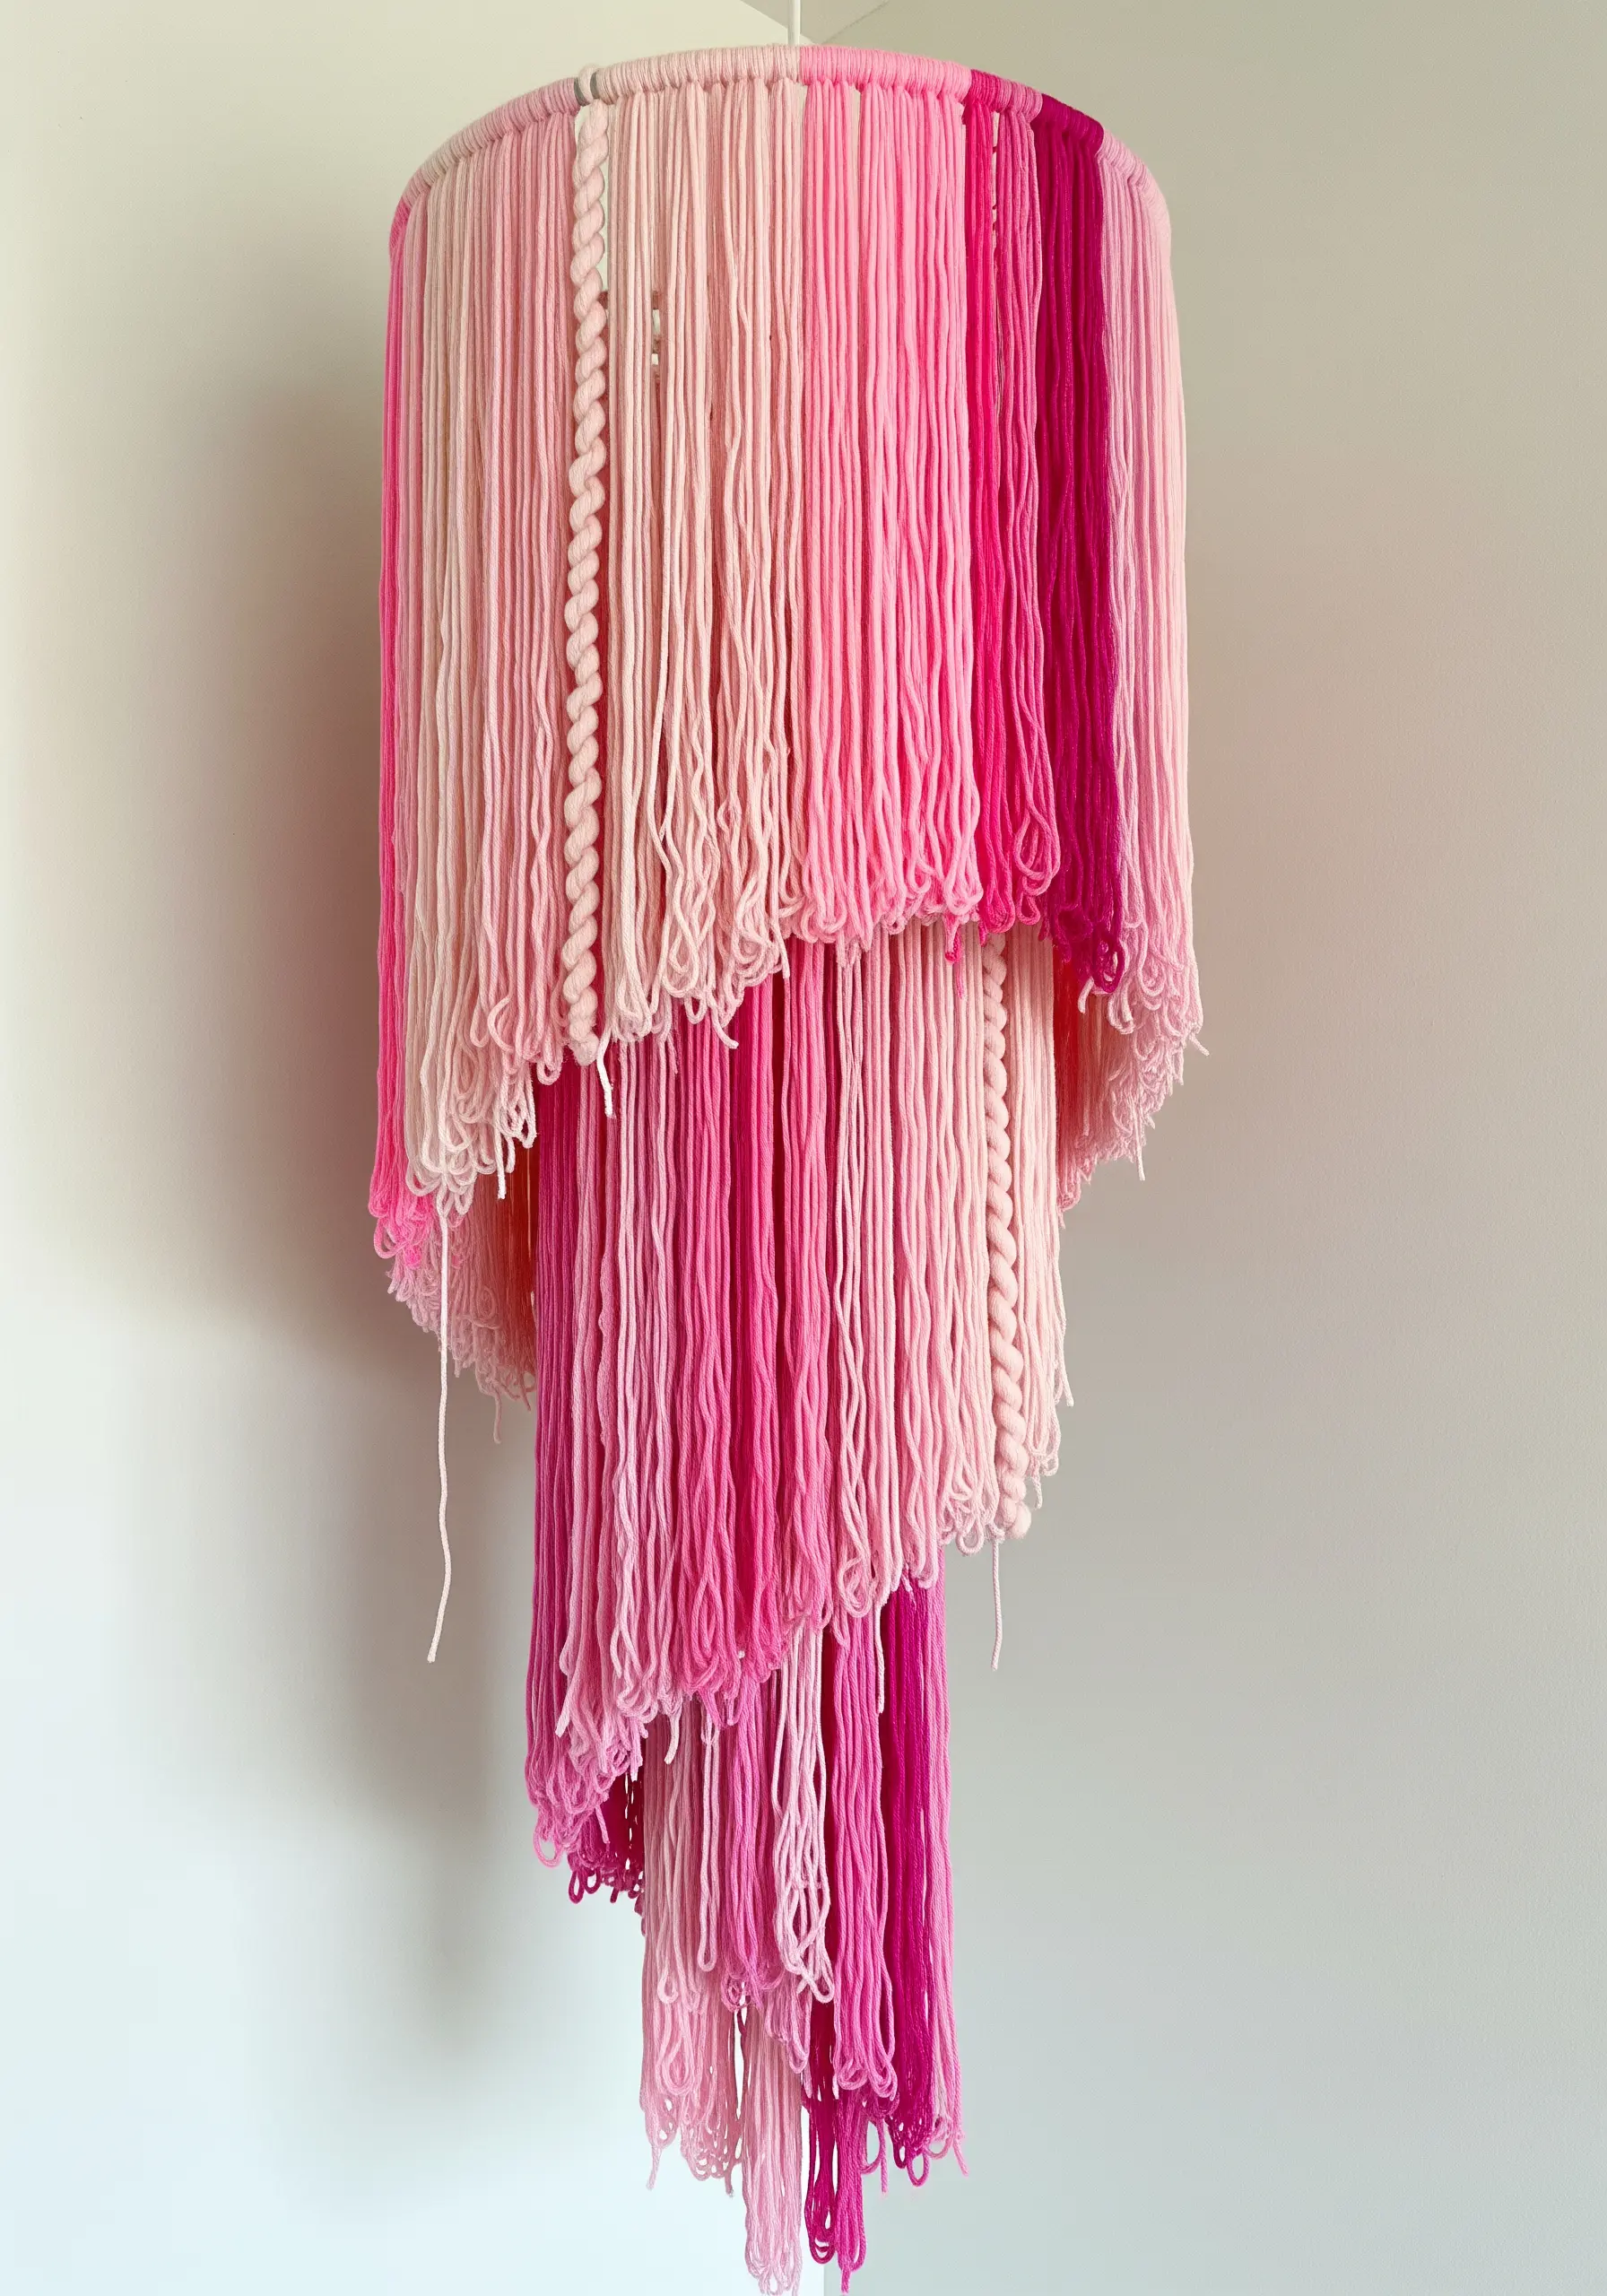
Construct a soft, sculptural chandelier that adds a cascade of color and texture to any room.
Use a set of tiered metal rings (found in lampshade-making kits) as the frame.
Tie long strands of yarn in various shades of the same color family to each ring, creating a layered, ombré effect.
Incorporate different yarn textures—some smooth, some braided, some beaded—to add visual interest and depth.
This is one of the most effective soft pastel textile wall decor ideas for creating a dreamy, romantic focal point.
21. Weave with Intentional Negative Space
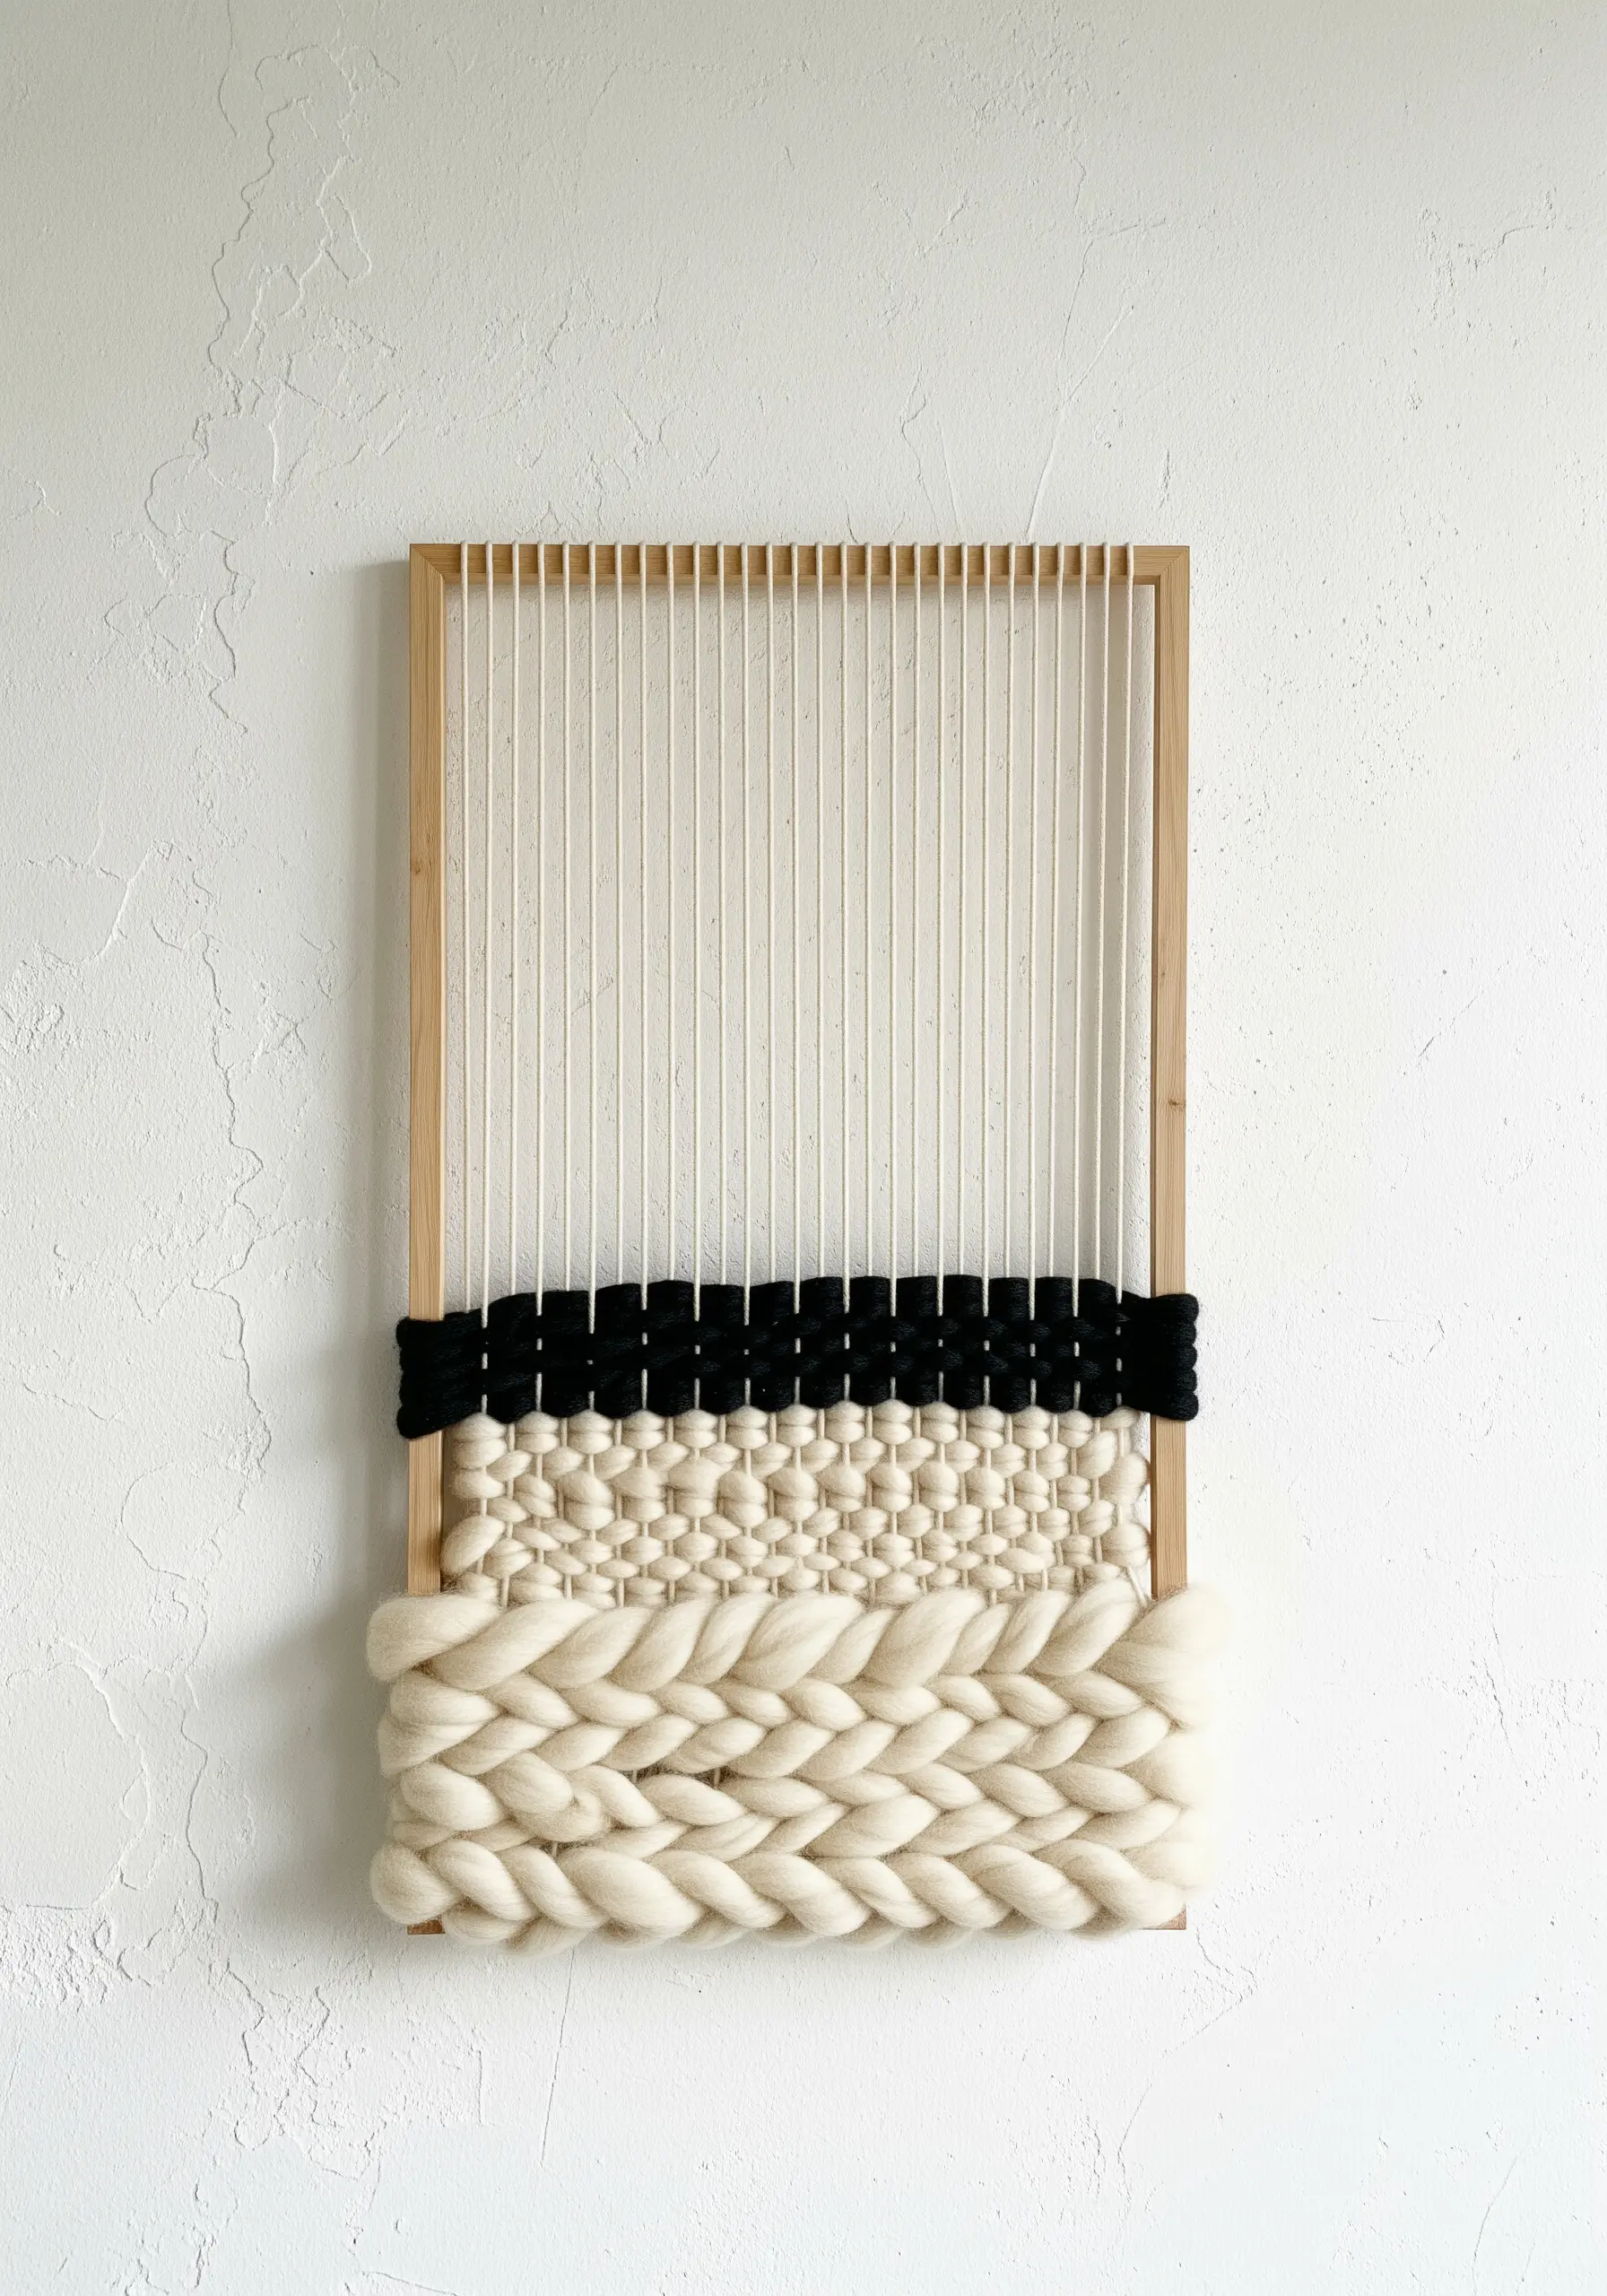
Create a modern, airy weaving by incorporating negative space directly into your design.
On a simple frame loom, weave only the bottom portion, leaving the upper warp threads exposed.
This technique draws the eye to the woven section and emphasizes the contrast between the dense texture of the yarn and the delicate lines of the thread.
Use a very chunky, unspun wool roving for the woven part to maximize this textural contrast.
It’s a hallmark of thoughtful minimalist embroidery projects that value simplicity and material honesty.


