
I know you’re looking for that shift—the moment your embroidery moves from simply following a pattern to creating something that feels truly yours, polished, and full of intention. You have the stitches down, but you want your work to feel more cohesive, more artistic, more *you*.
The secret isn’t in learning dozens of complicated new techniques. It’s in the small, deliberate choices: how you vary the number of threads to create depth, how a different stitch can change a flower’s entire personality, or how a simple, consistent color palette can turn separate hoops into a single, beautiful story.
Here, you’ll find ideas that focus on those very details. Each one is a gentle nudge to help you refine your technique, trust your creative instincts, and fill your home with hand-stitched pieces that are not just cozy, but also a quiet reflection of your own artistry.
1. Render Lavender with Dimensional Stitches
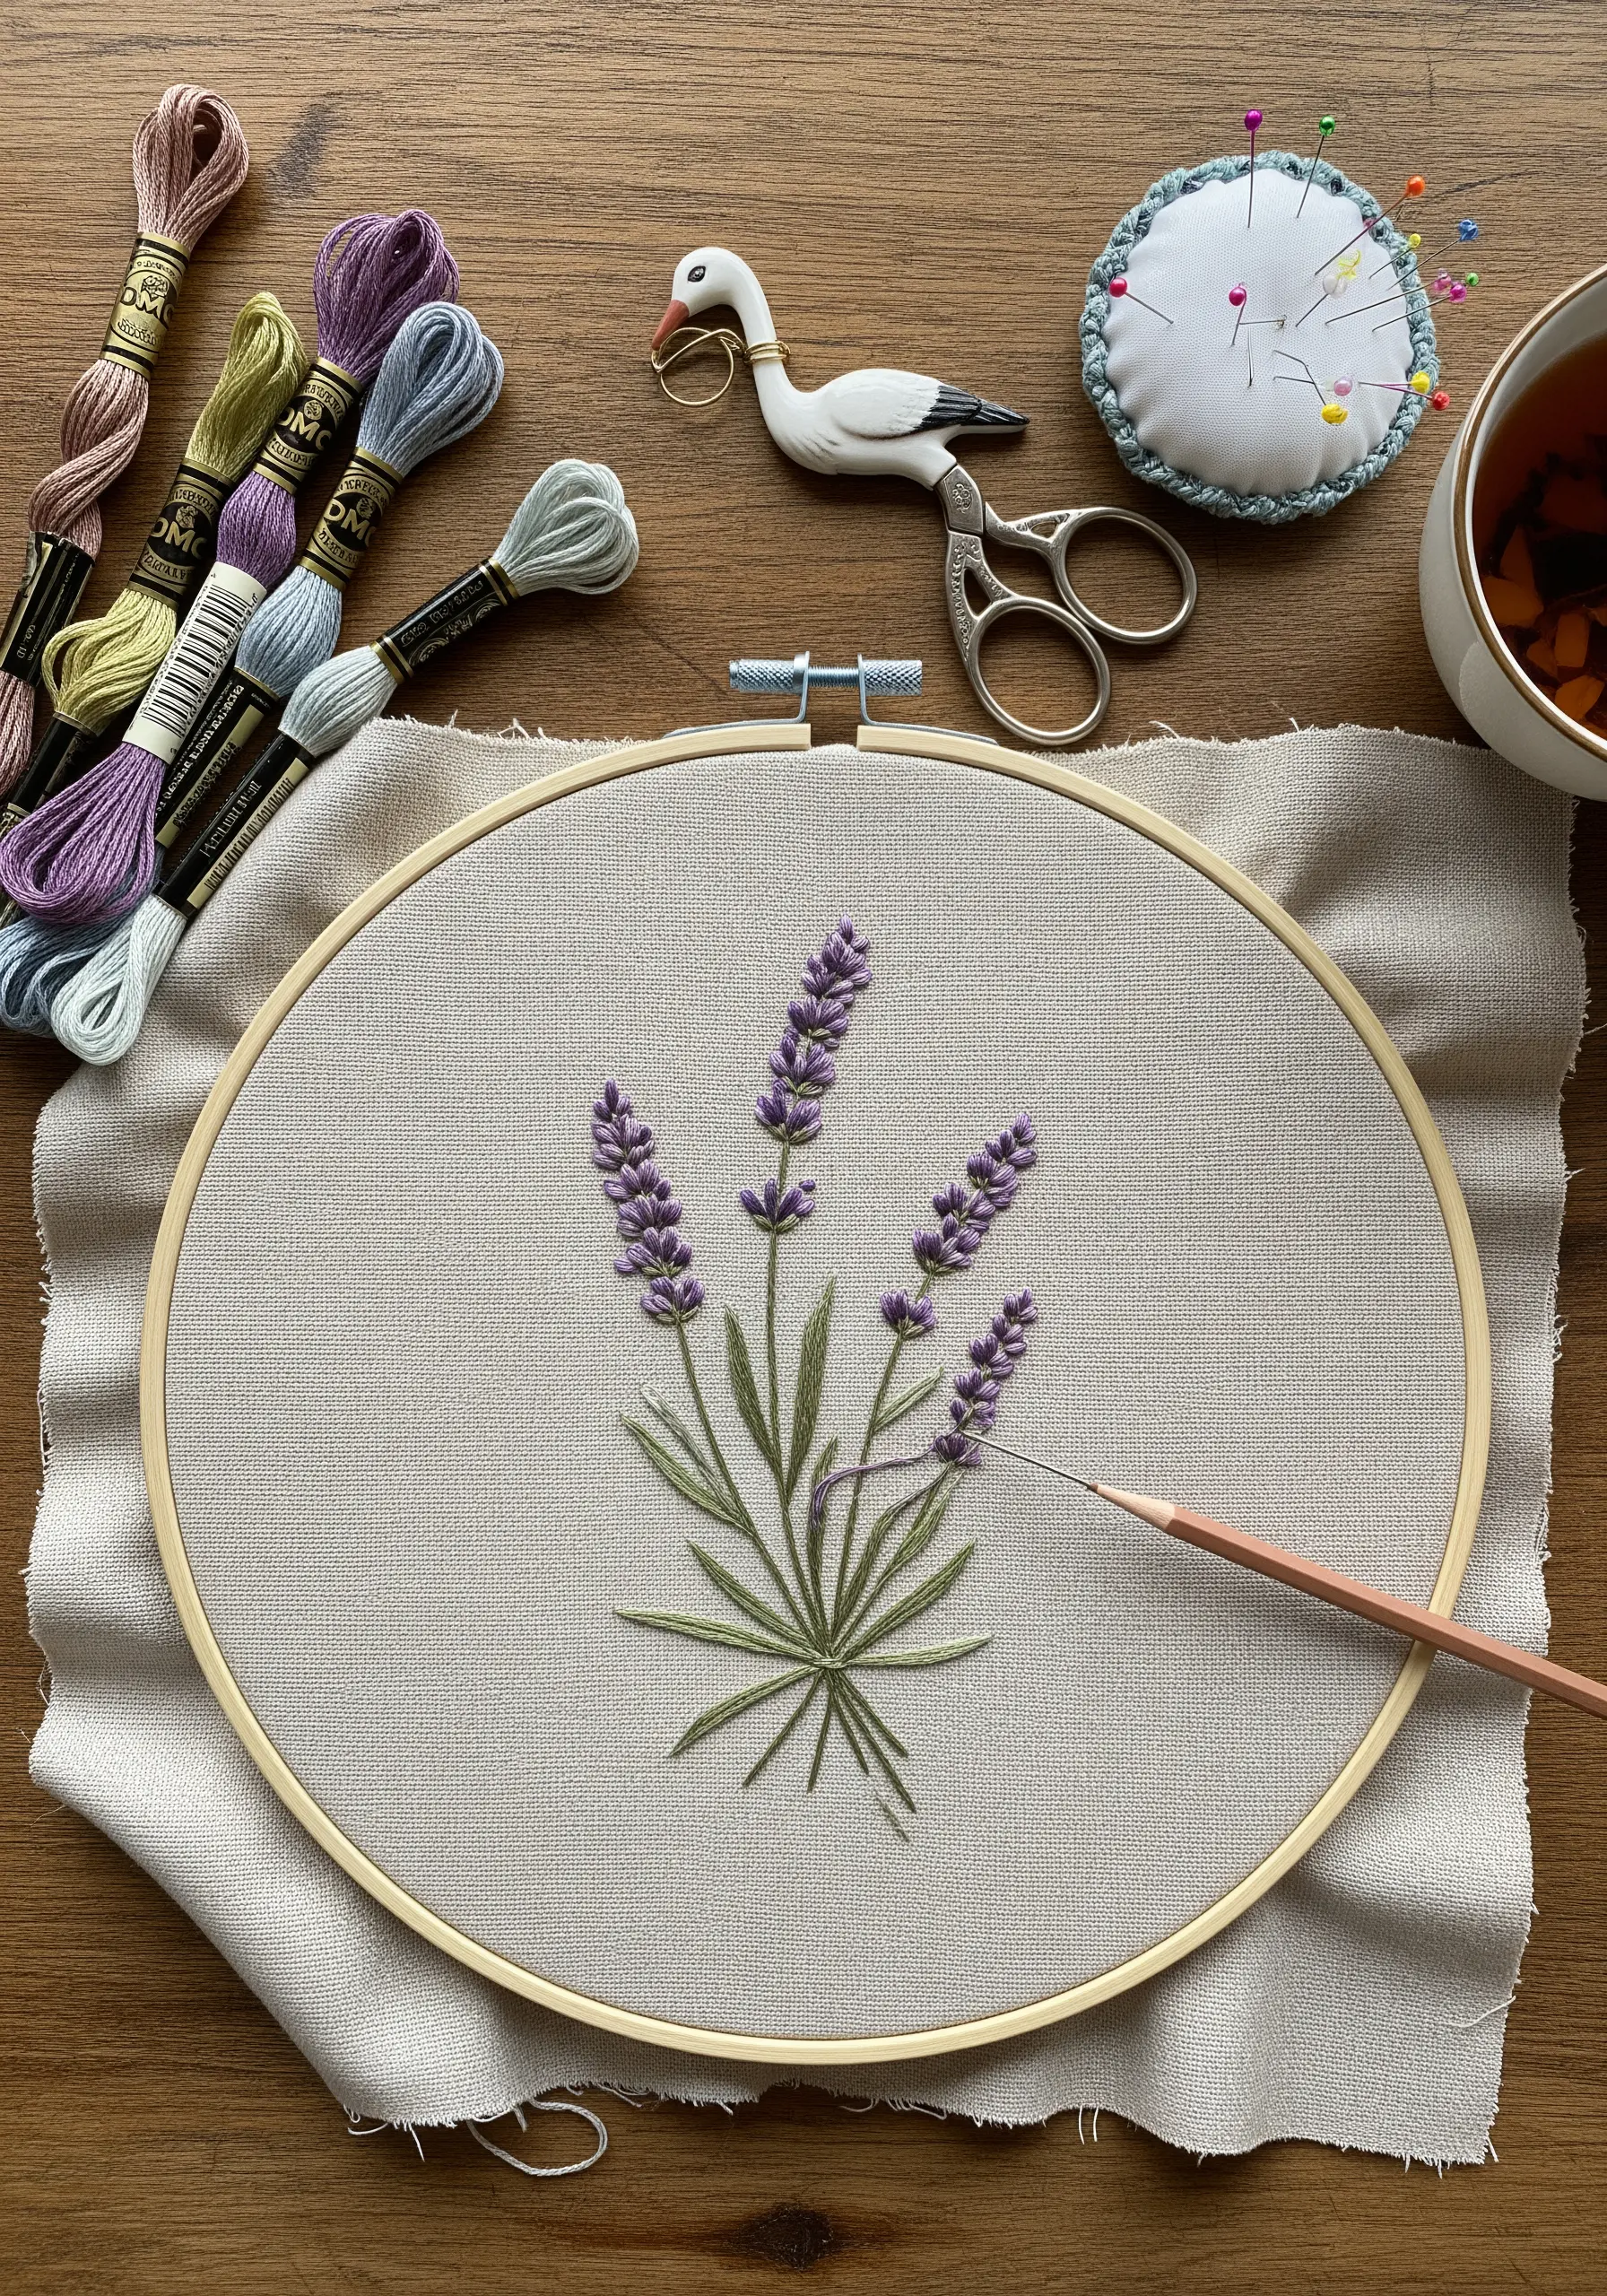
To create textured lavender buds, replace basic satin stitches with a thoughtful combination of French knots and straight stitches.
Use three strands of floss for the French knots at the base of each floret to create fullness, then taper to single-strand straight stitches at the tip for a delicate, natural look.
For the stems, a whipped backstitch provides a smoother, more rounded finish than a standard stem stitch, giving your botanicals a polished, illustrative quality.
Select a neutral, tightly woven linen or cotton fabric; its subtle texture complements the embroidery without competing with it.
2. Elevate Knits with Bold Accent Stitching
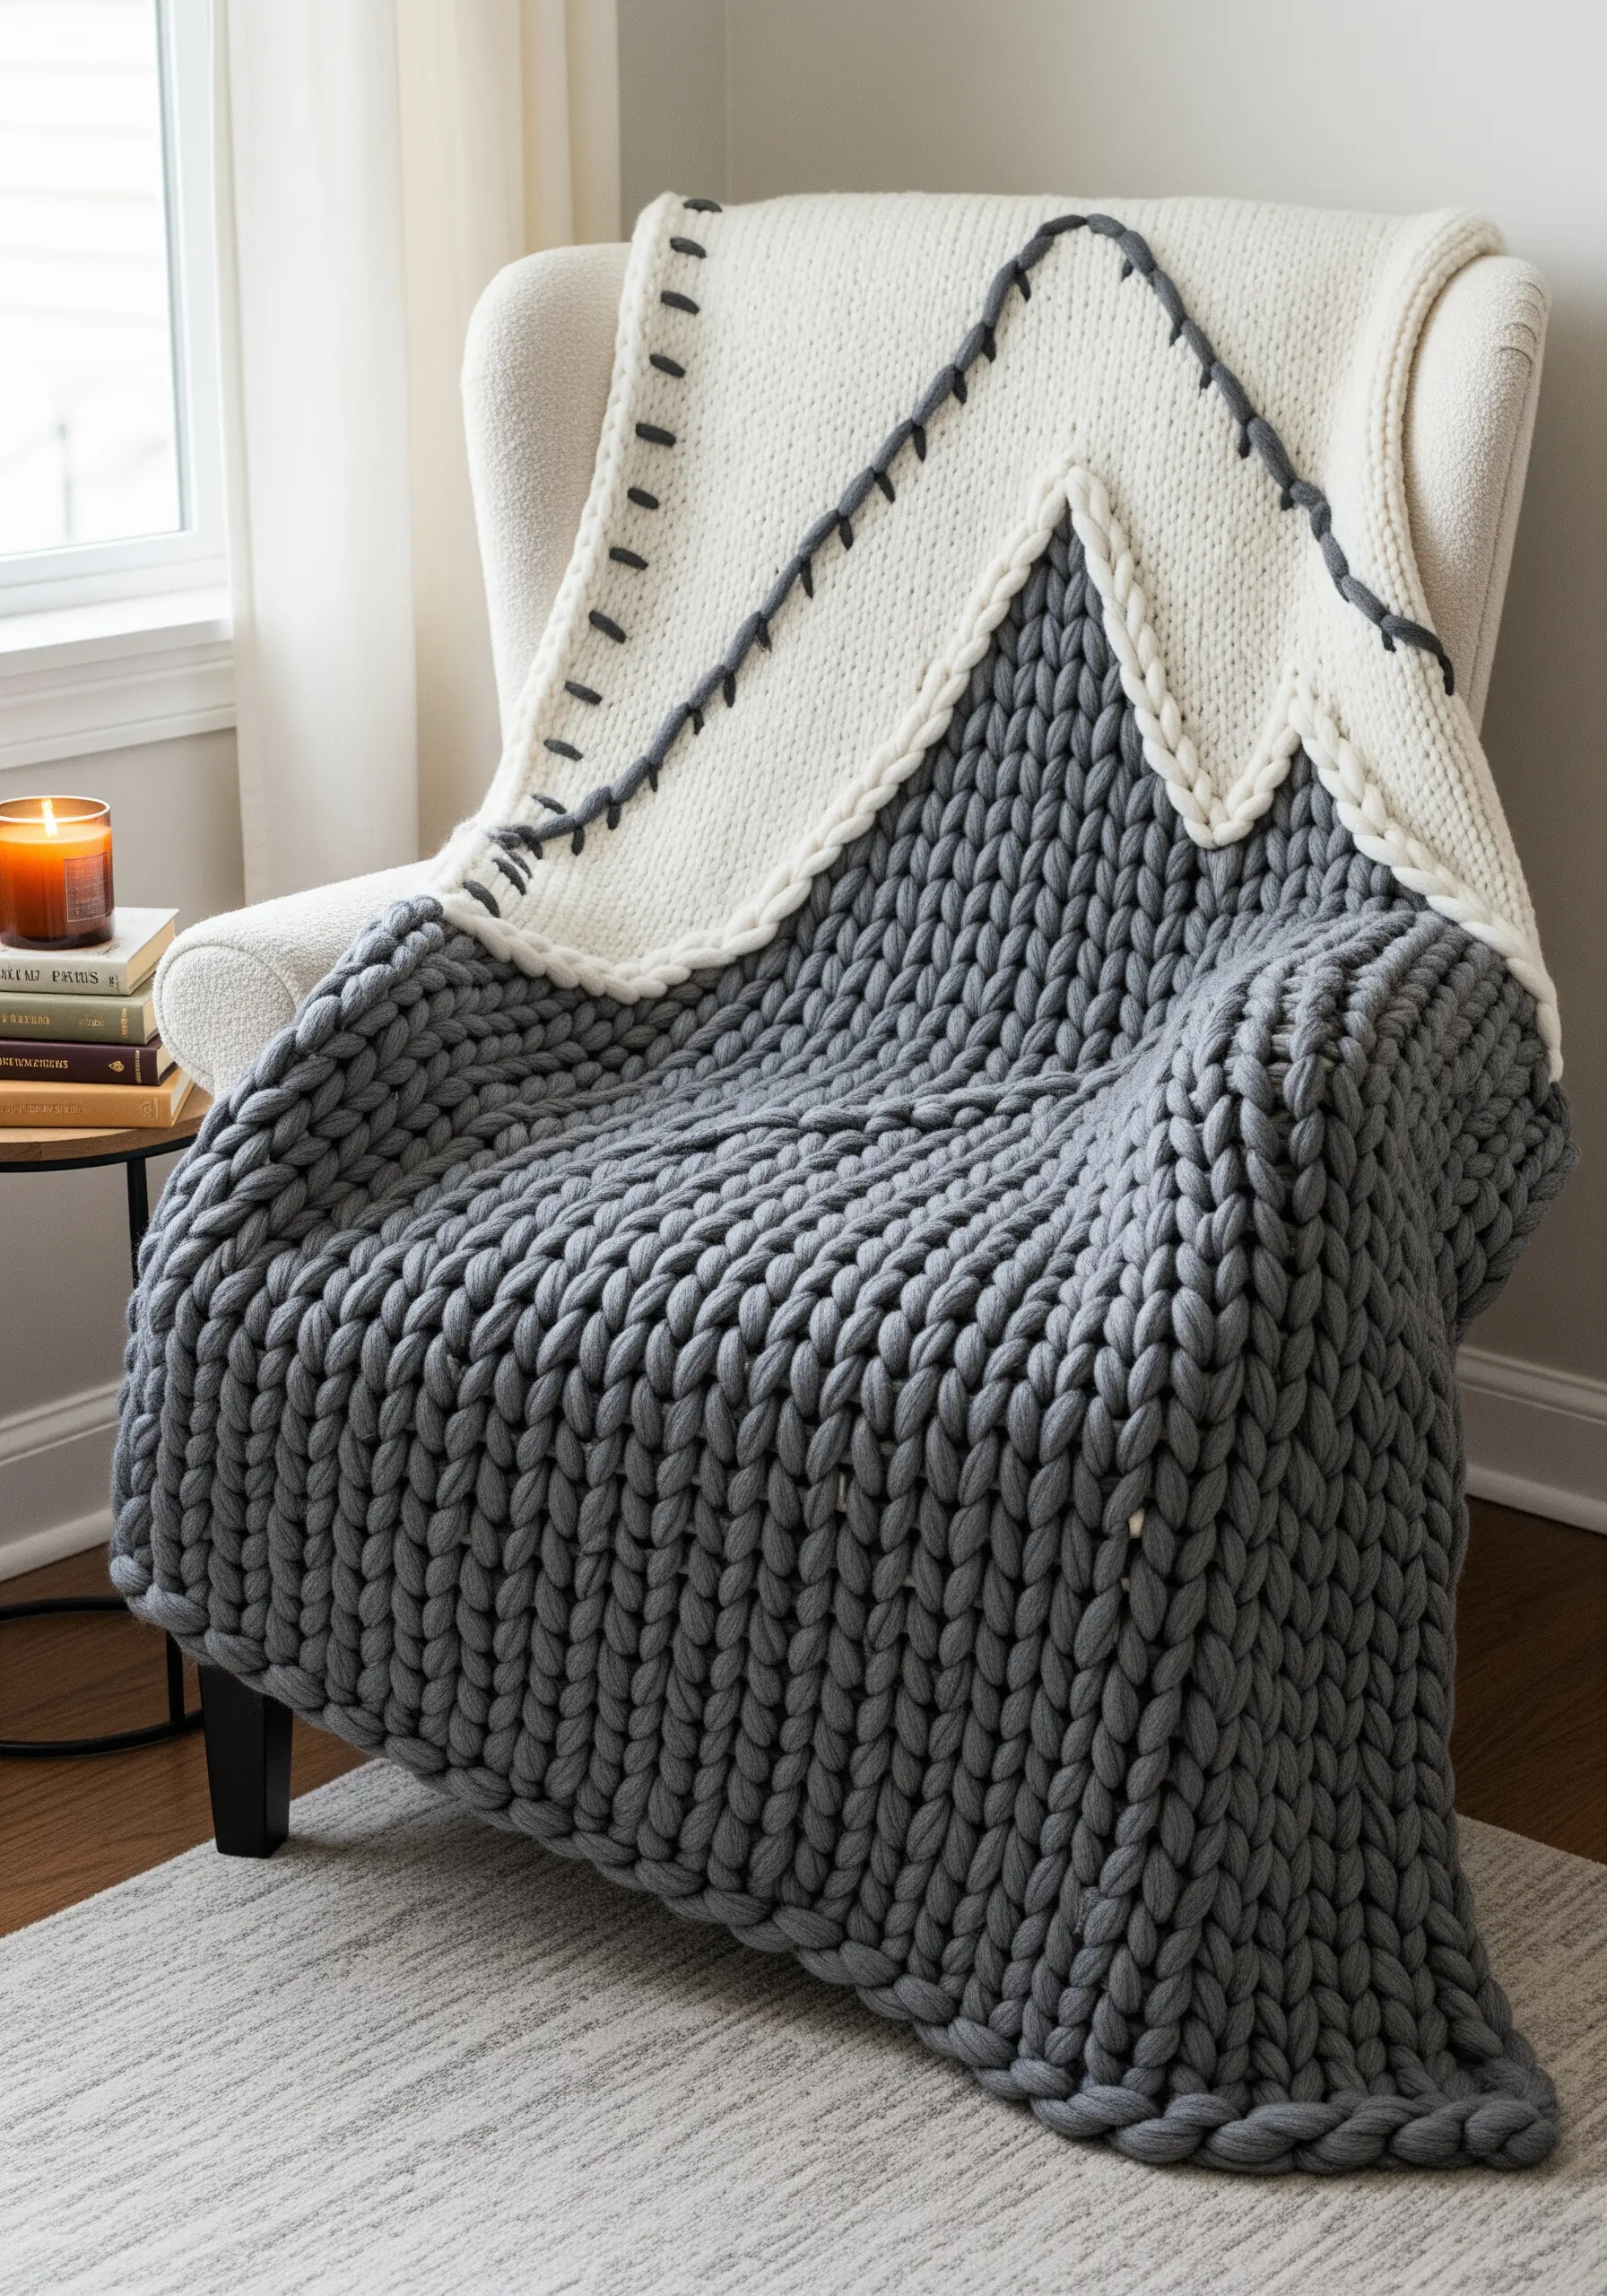
Turn a functional stitch into a prominent decorative element on chunky textiles like blankets or pillows.
Instead of hiding your seams, celebrate them with a large-scale blanket stitch or whipstitch using a contrasting yarn or leather cord.
This technique works because it introduces a graphic, handmade quality that balances the soft, bulky texture of the knit.
Use a blunt tapestry needle to avoid splitting the yarn, ensuring each stitch is clean, evenly spaced, and contributes to the overall mountain-inspired design.
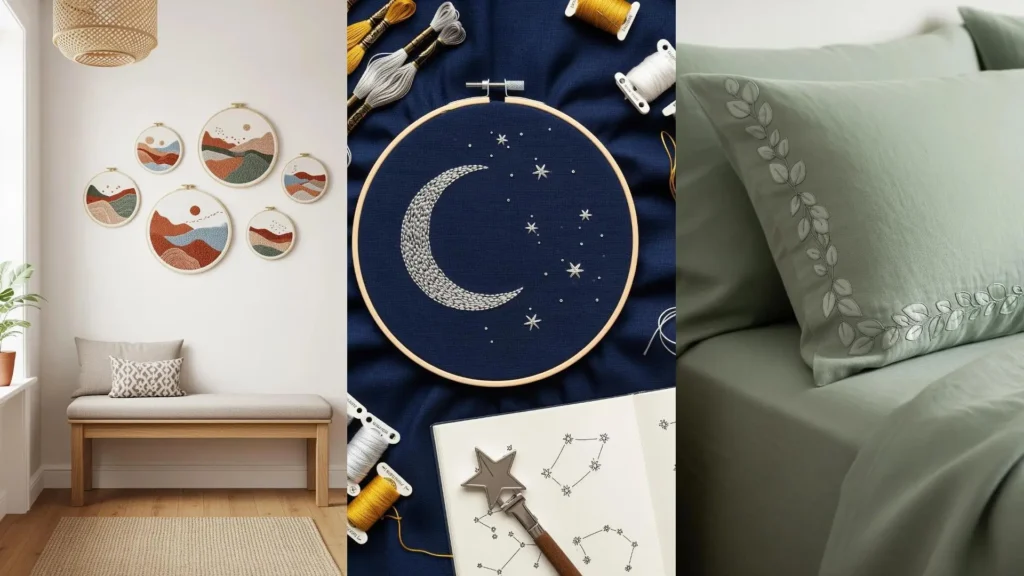
3. Curate a Cohesive Hoop Art Gallery Wall
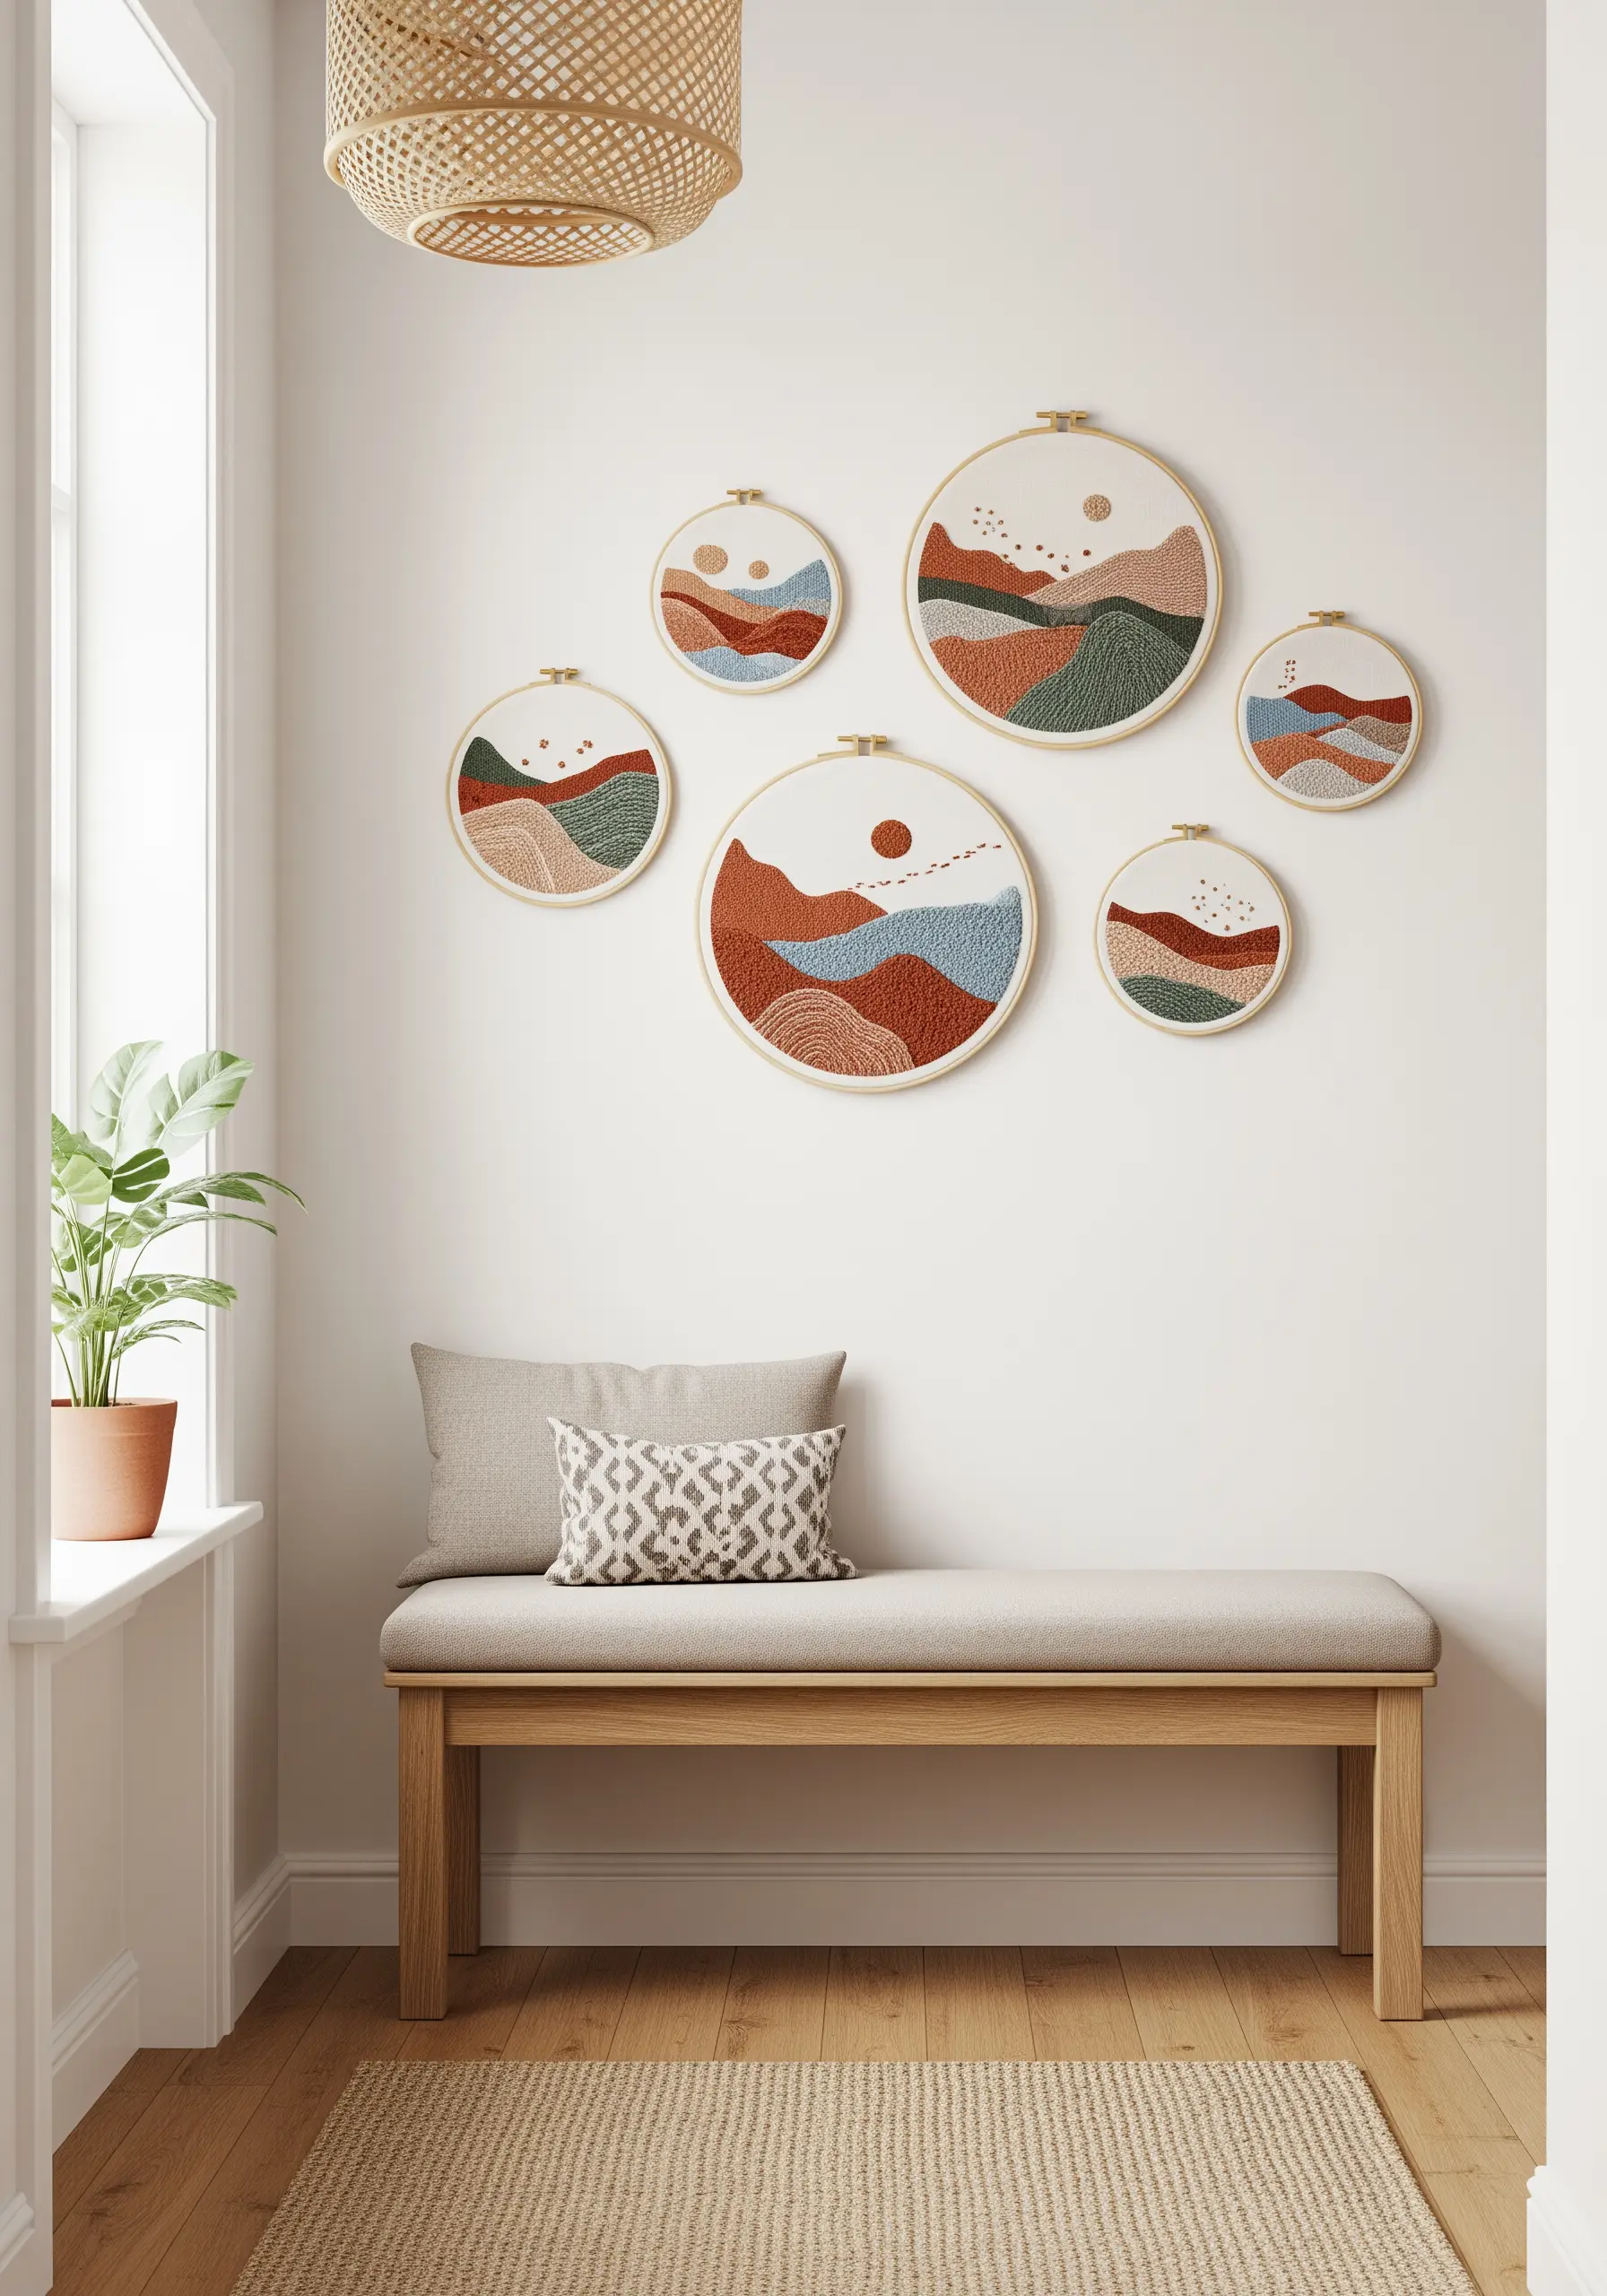
The key to planning a cohesive gallery wall is a unified color palette and recurring textures, not identical designs.
Select four to five complementary colors—like terracotta, sage, and dusty blue—and use them across a series of abstract landscape hoops in varying sizes.
Vary the stitch density to create visual interest: use dense satin stitches for solid hills, scattered seed stitches for textured fields, and simple backstitches for clean horizon lines.
Arrange the hoops organically on the wall, allowing the collection to feel balanced yet dynamic, telling a single visual story.
4. Master the Crescent Moon with Brick Stitch
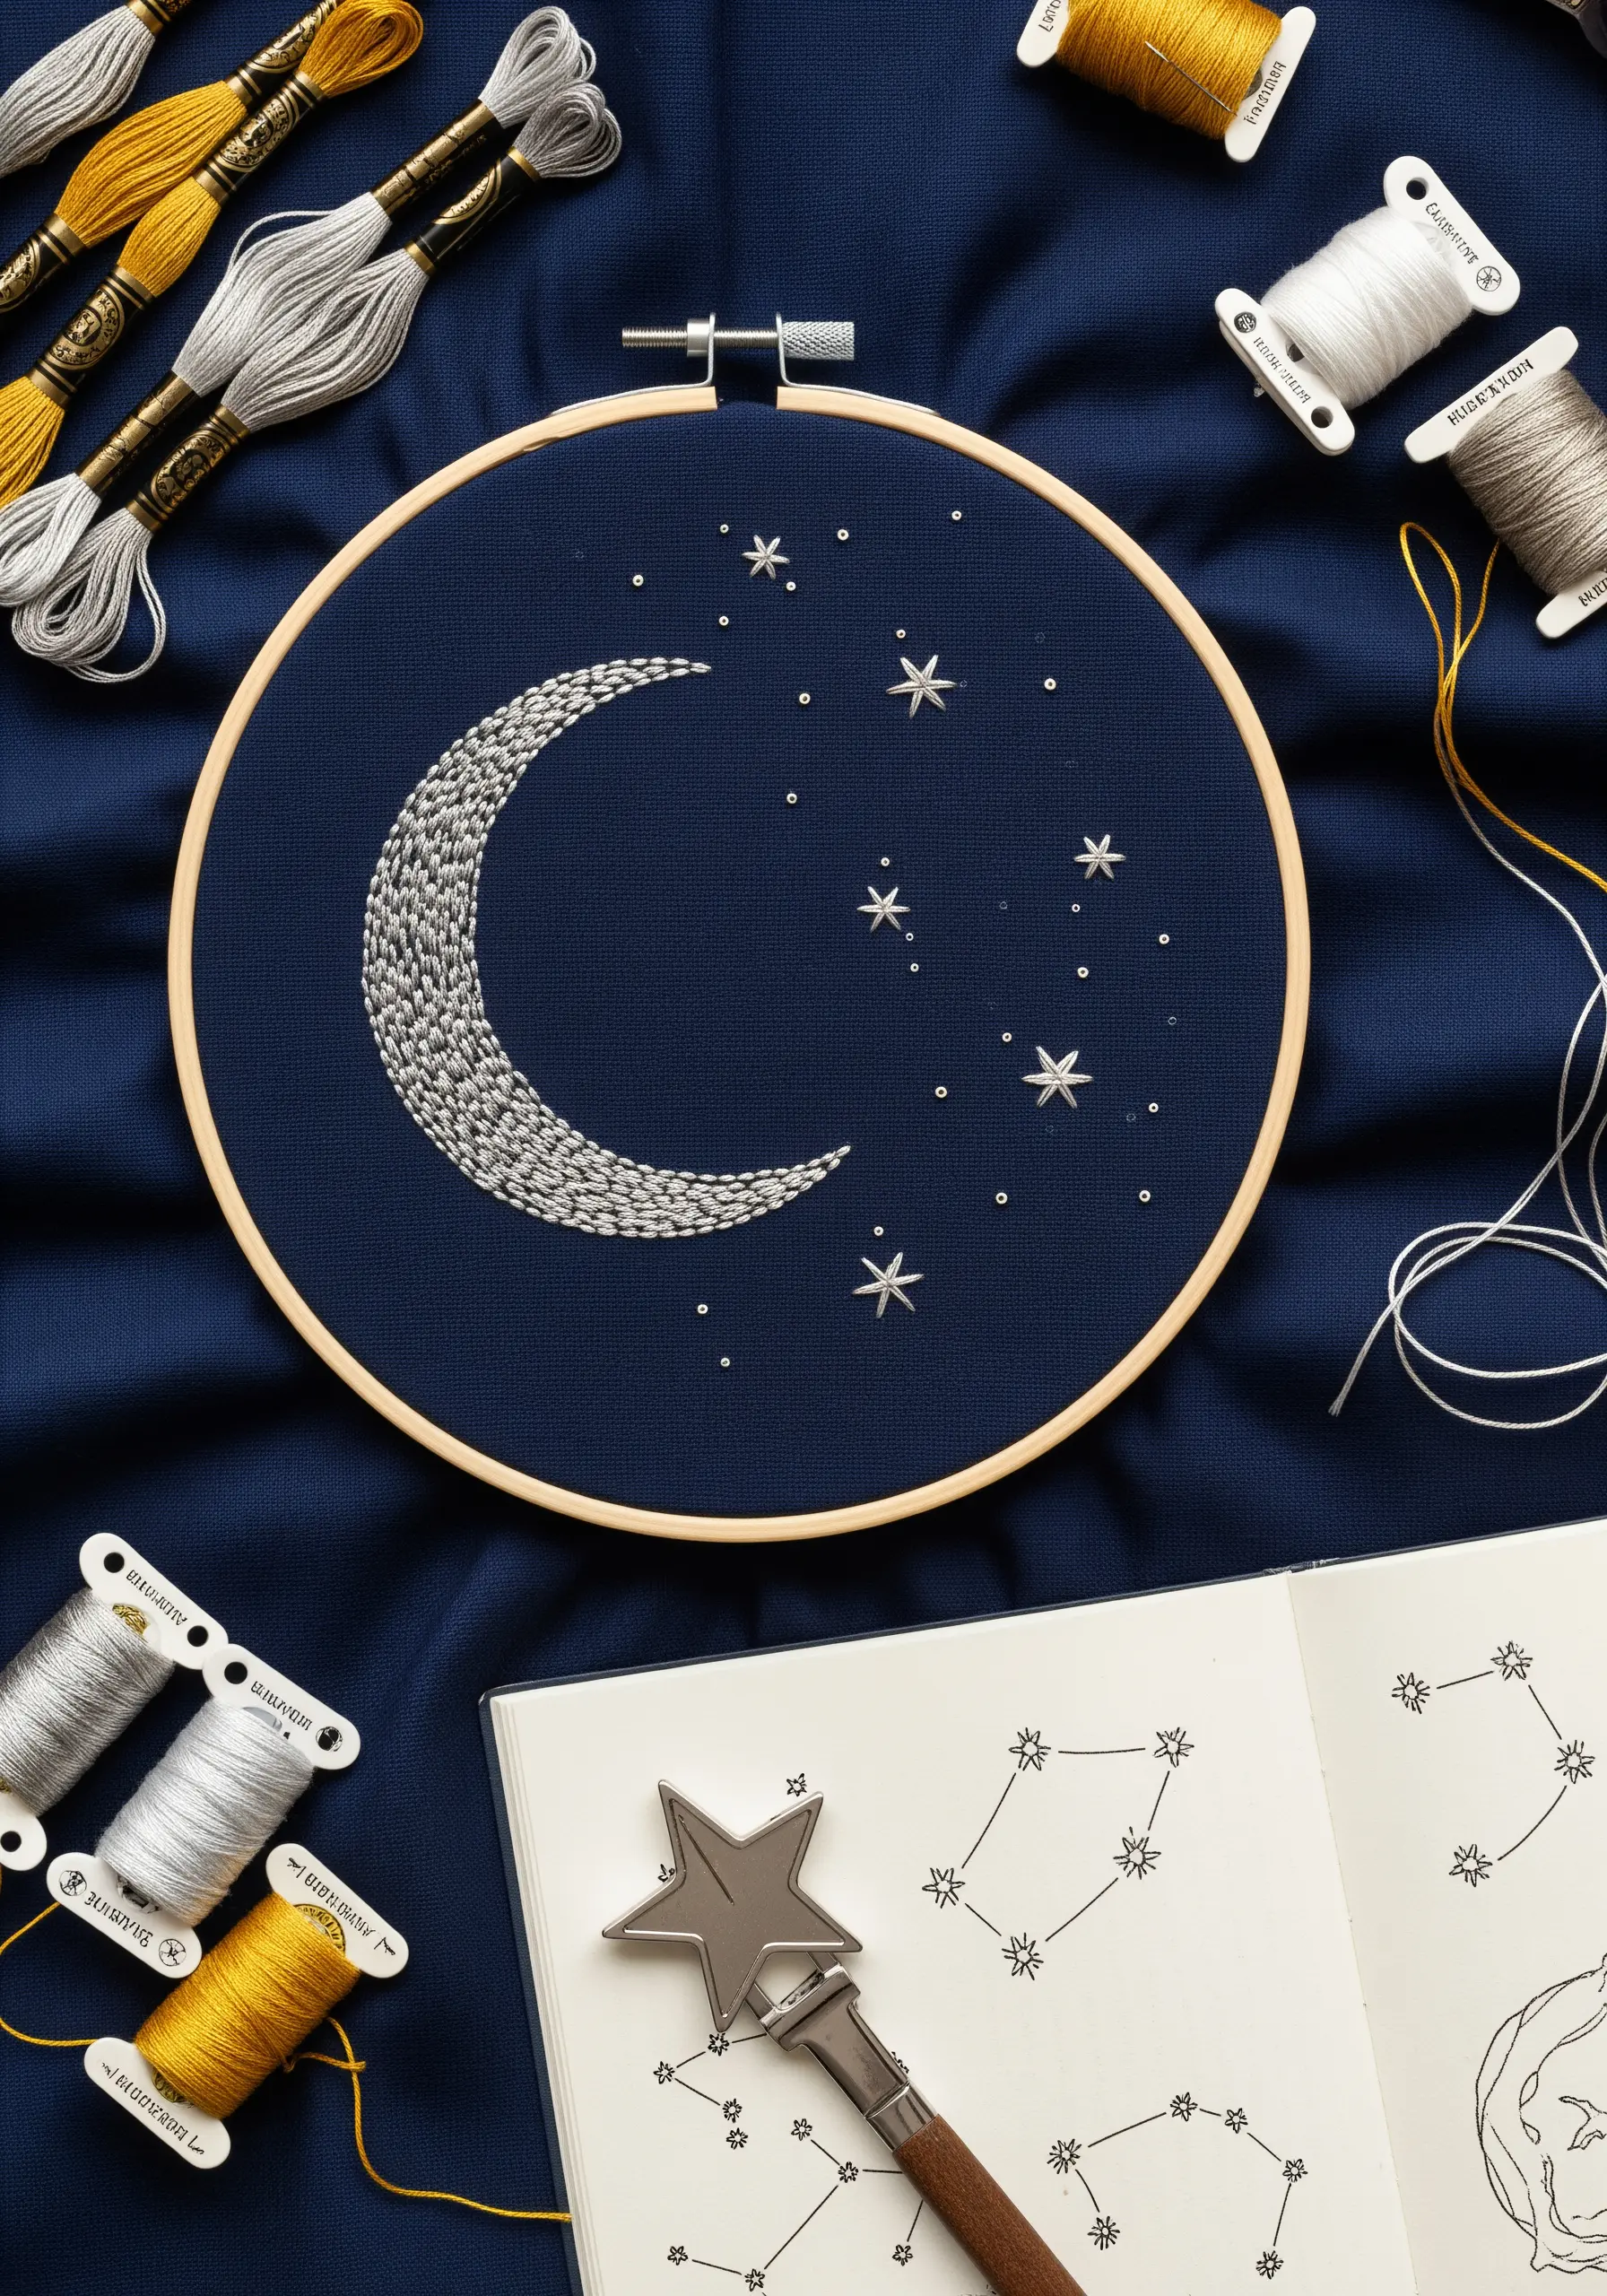
To create a smooth, light-reflecting surface on a celestial motif, use a meticulously executed brick stitch.
Work with a single strand of gray or silver floss to achieve fine detail, staggering each stitch like bricks in a wall to avoid obvious lines and create a seamless fill.
For an extra touch of magic, use a metallic blending filament with your main thread or scatter tiny silver seed beads instead of French knots for the stars.
A dark navy cotton fabric provides the perfect deep-sky backdrop, making the metallic and white elements appear to glow.
5. Add Dimension with Layered Satin Stitch
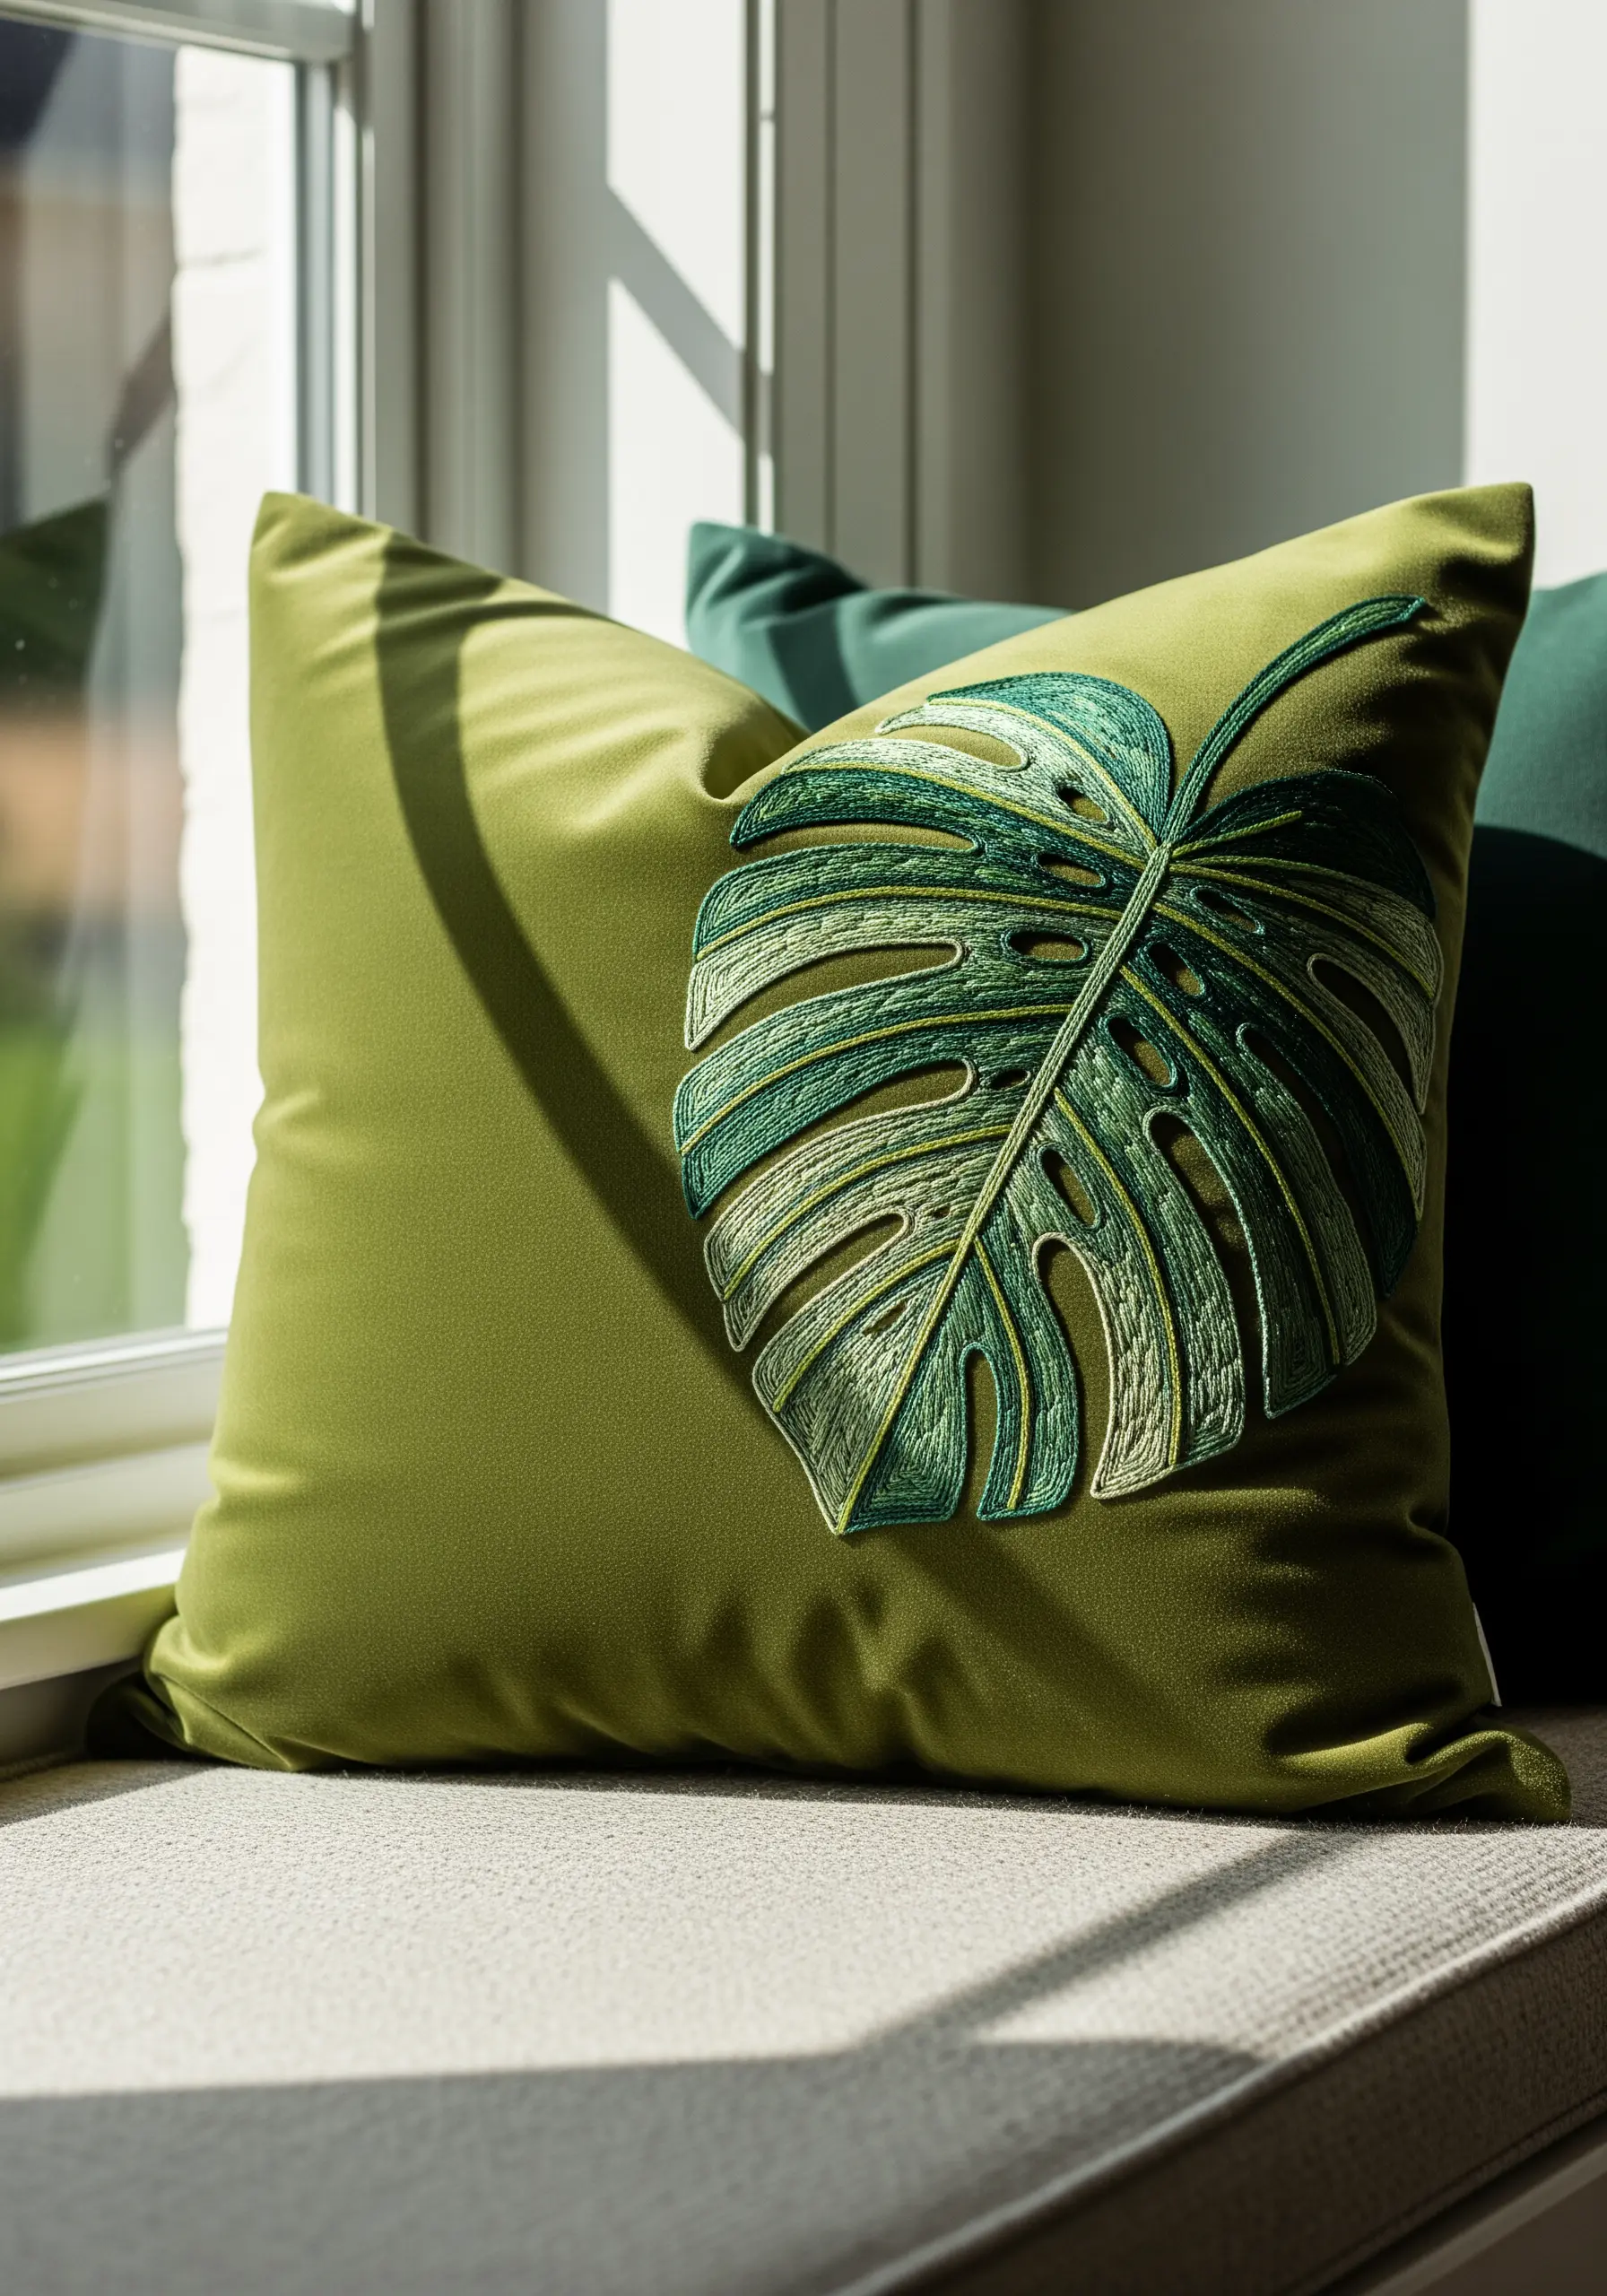
For a statement piece like this monstera leaf, move beyond flat fills to create realistic depth in botanical forms.
Embroider the leaf as a separate appliqué on a piece of felt or stabilizer, using long-and-short stitch to blend several shades of green.
Stitch the darker veins and shadows first, then layer the lighter green sections on top. This builds physical dimension and enhances the play of light and shadow.
Once complete, carefully cut out the leaf and attach it to the cushion with small, hidden stitches around the edge for a clean, three-dimensional effect.
6. Capture Elegance with Minimalist Herbal Sprigs
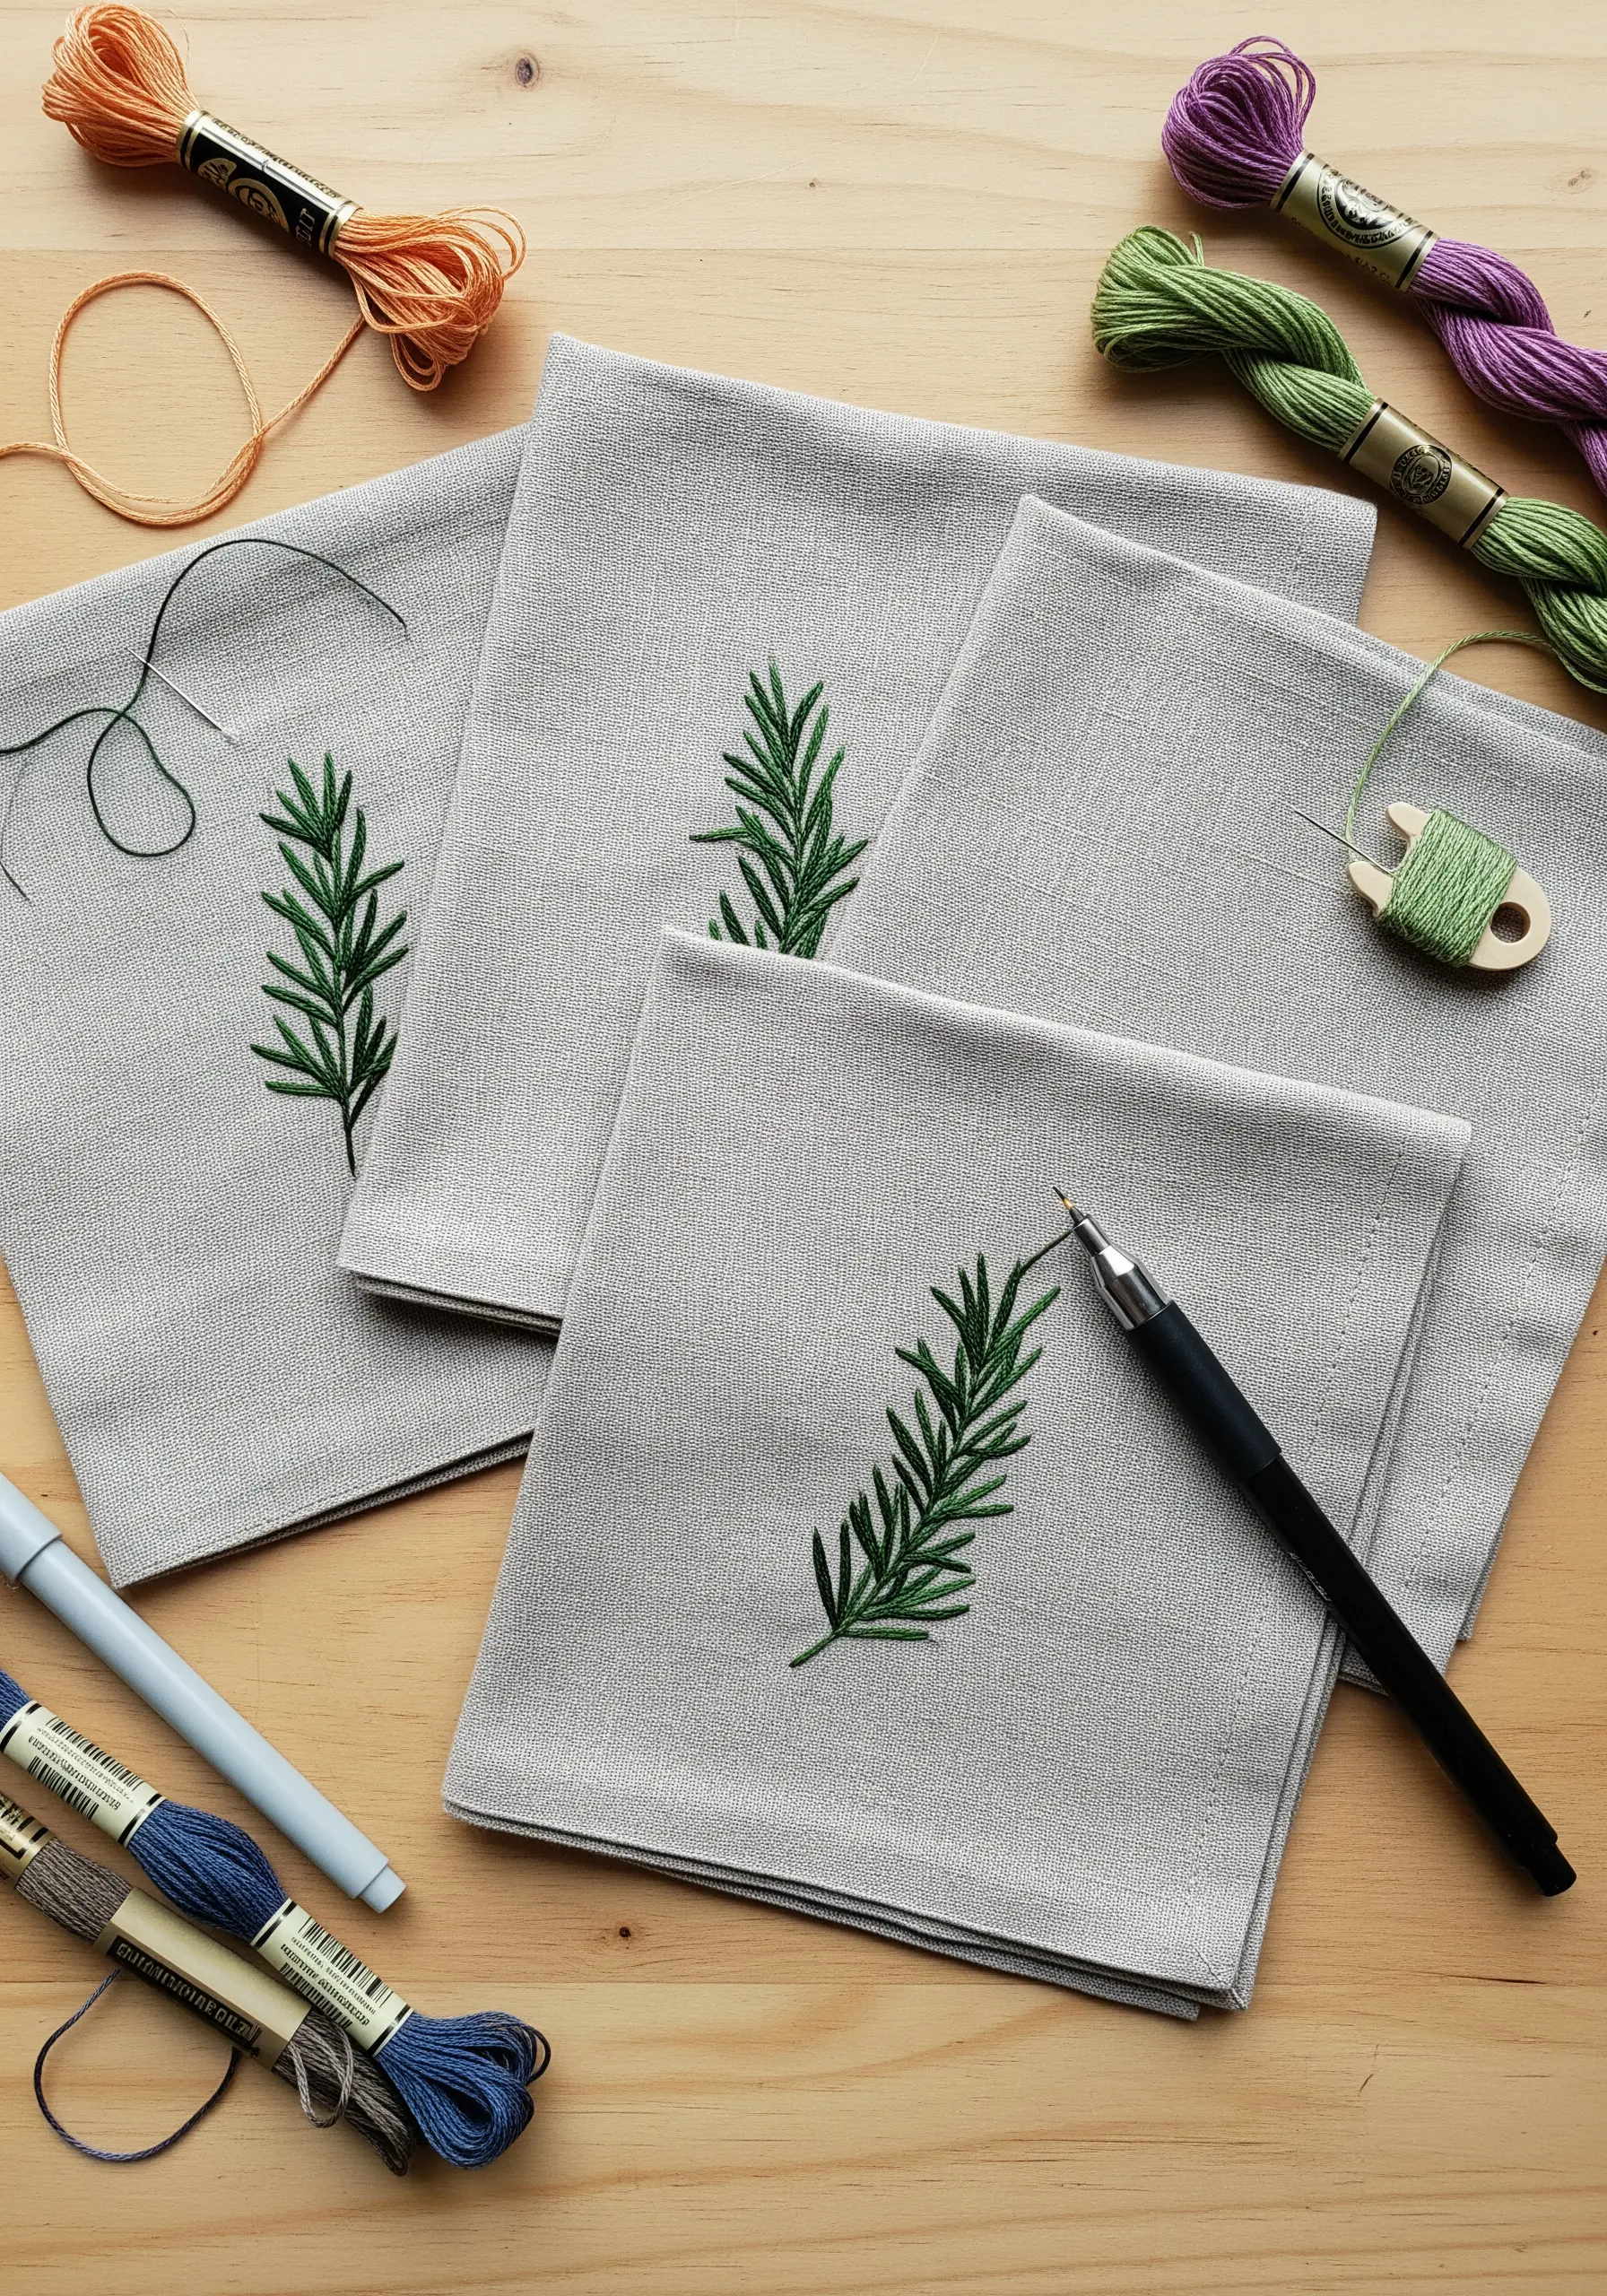
The beauty of transforming a simple sprig of rosemary into a refined motif lies in its restraint.
Use a single, sharp stem stitch for the central stalk to establish a strong line. For the delicate leaves, opt for short, angled straight stitches or tiny detached chain stitches.
Vary the angle and length of the leaf stitches slightly to mimic natural growth. Two strands of a muted green floss on a neutral linen napkin create a timeless, organic aesthetic that feels both rustic and chic.
The negative space around the motif is as important as the stitching itself, allowing the design to breathe.
7. Achieve Crisp Edges on Felt Surfaces
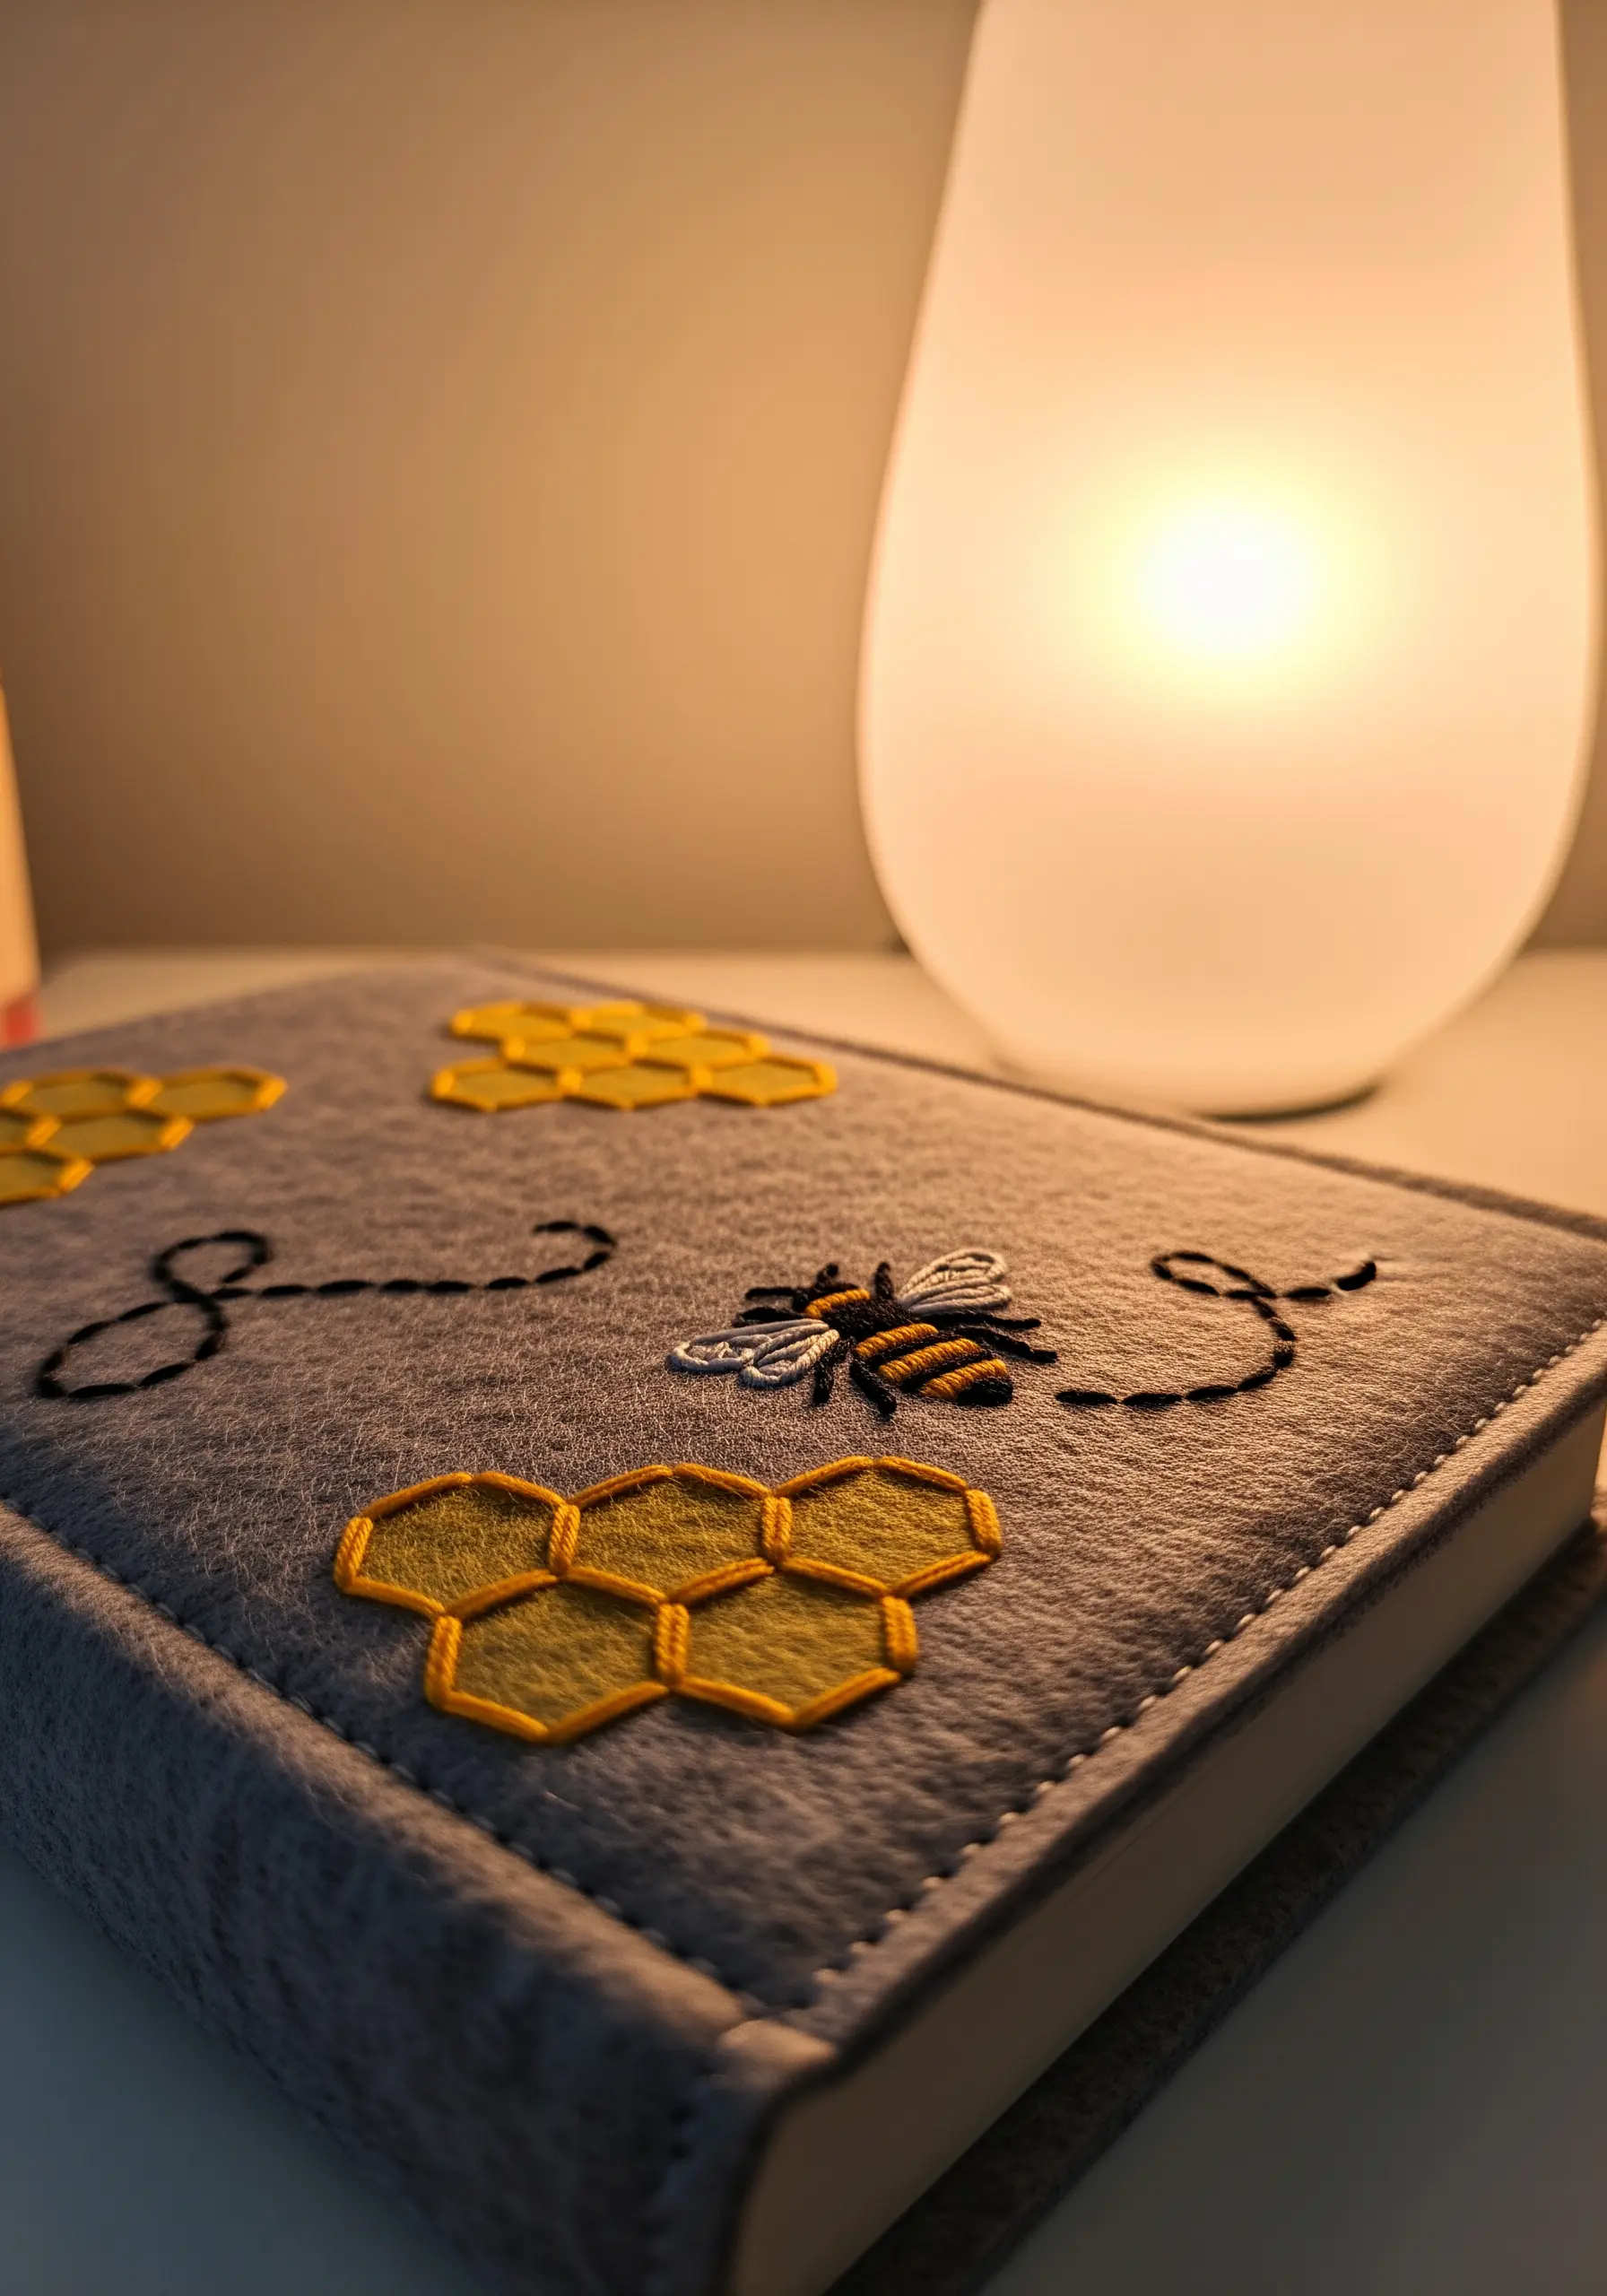
The key to clean, graphic embroidery on felt is managing stitch tension and direction, especially with satin stitch.
Before stitching on non-woven felt, outline your honeycomb shapes with a split stitch. This raised edge acts as a guide and gives your satin stitches a sharp, defined border to meet.
To keep the honeycomb fill perfectly flat, ensure your satin stitches are parallel and pulled just taut enough not to pucker the felt.
For the bee’s wings, use a light gray or silver thread in an open fishbone stitch to create a sheer, delicate effect against the solid body.
8. Frame with a Bold, Functional Stitch

Turn a structural element into a core design feature on handmade fabric items like this storage basket.
Instead of subtle, matching thread, use a contrasting, thick thread—like a perle cotton or even fine yarn—to join panels with a decorative blanket stitch.
The deliberate spacing and vibrant color draw attention to the construction, celebrating the handmade process and adding a pop of modern, graphic detail.
This approach works beautifully on heavy canvas or felt, where the fabric’s sturdiness can support the tension of a bold, utilitarian stitch.
9. Mimic a Woven Sunset with Thread
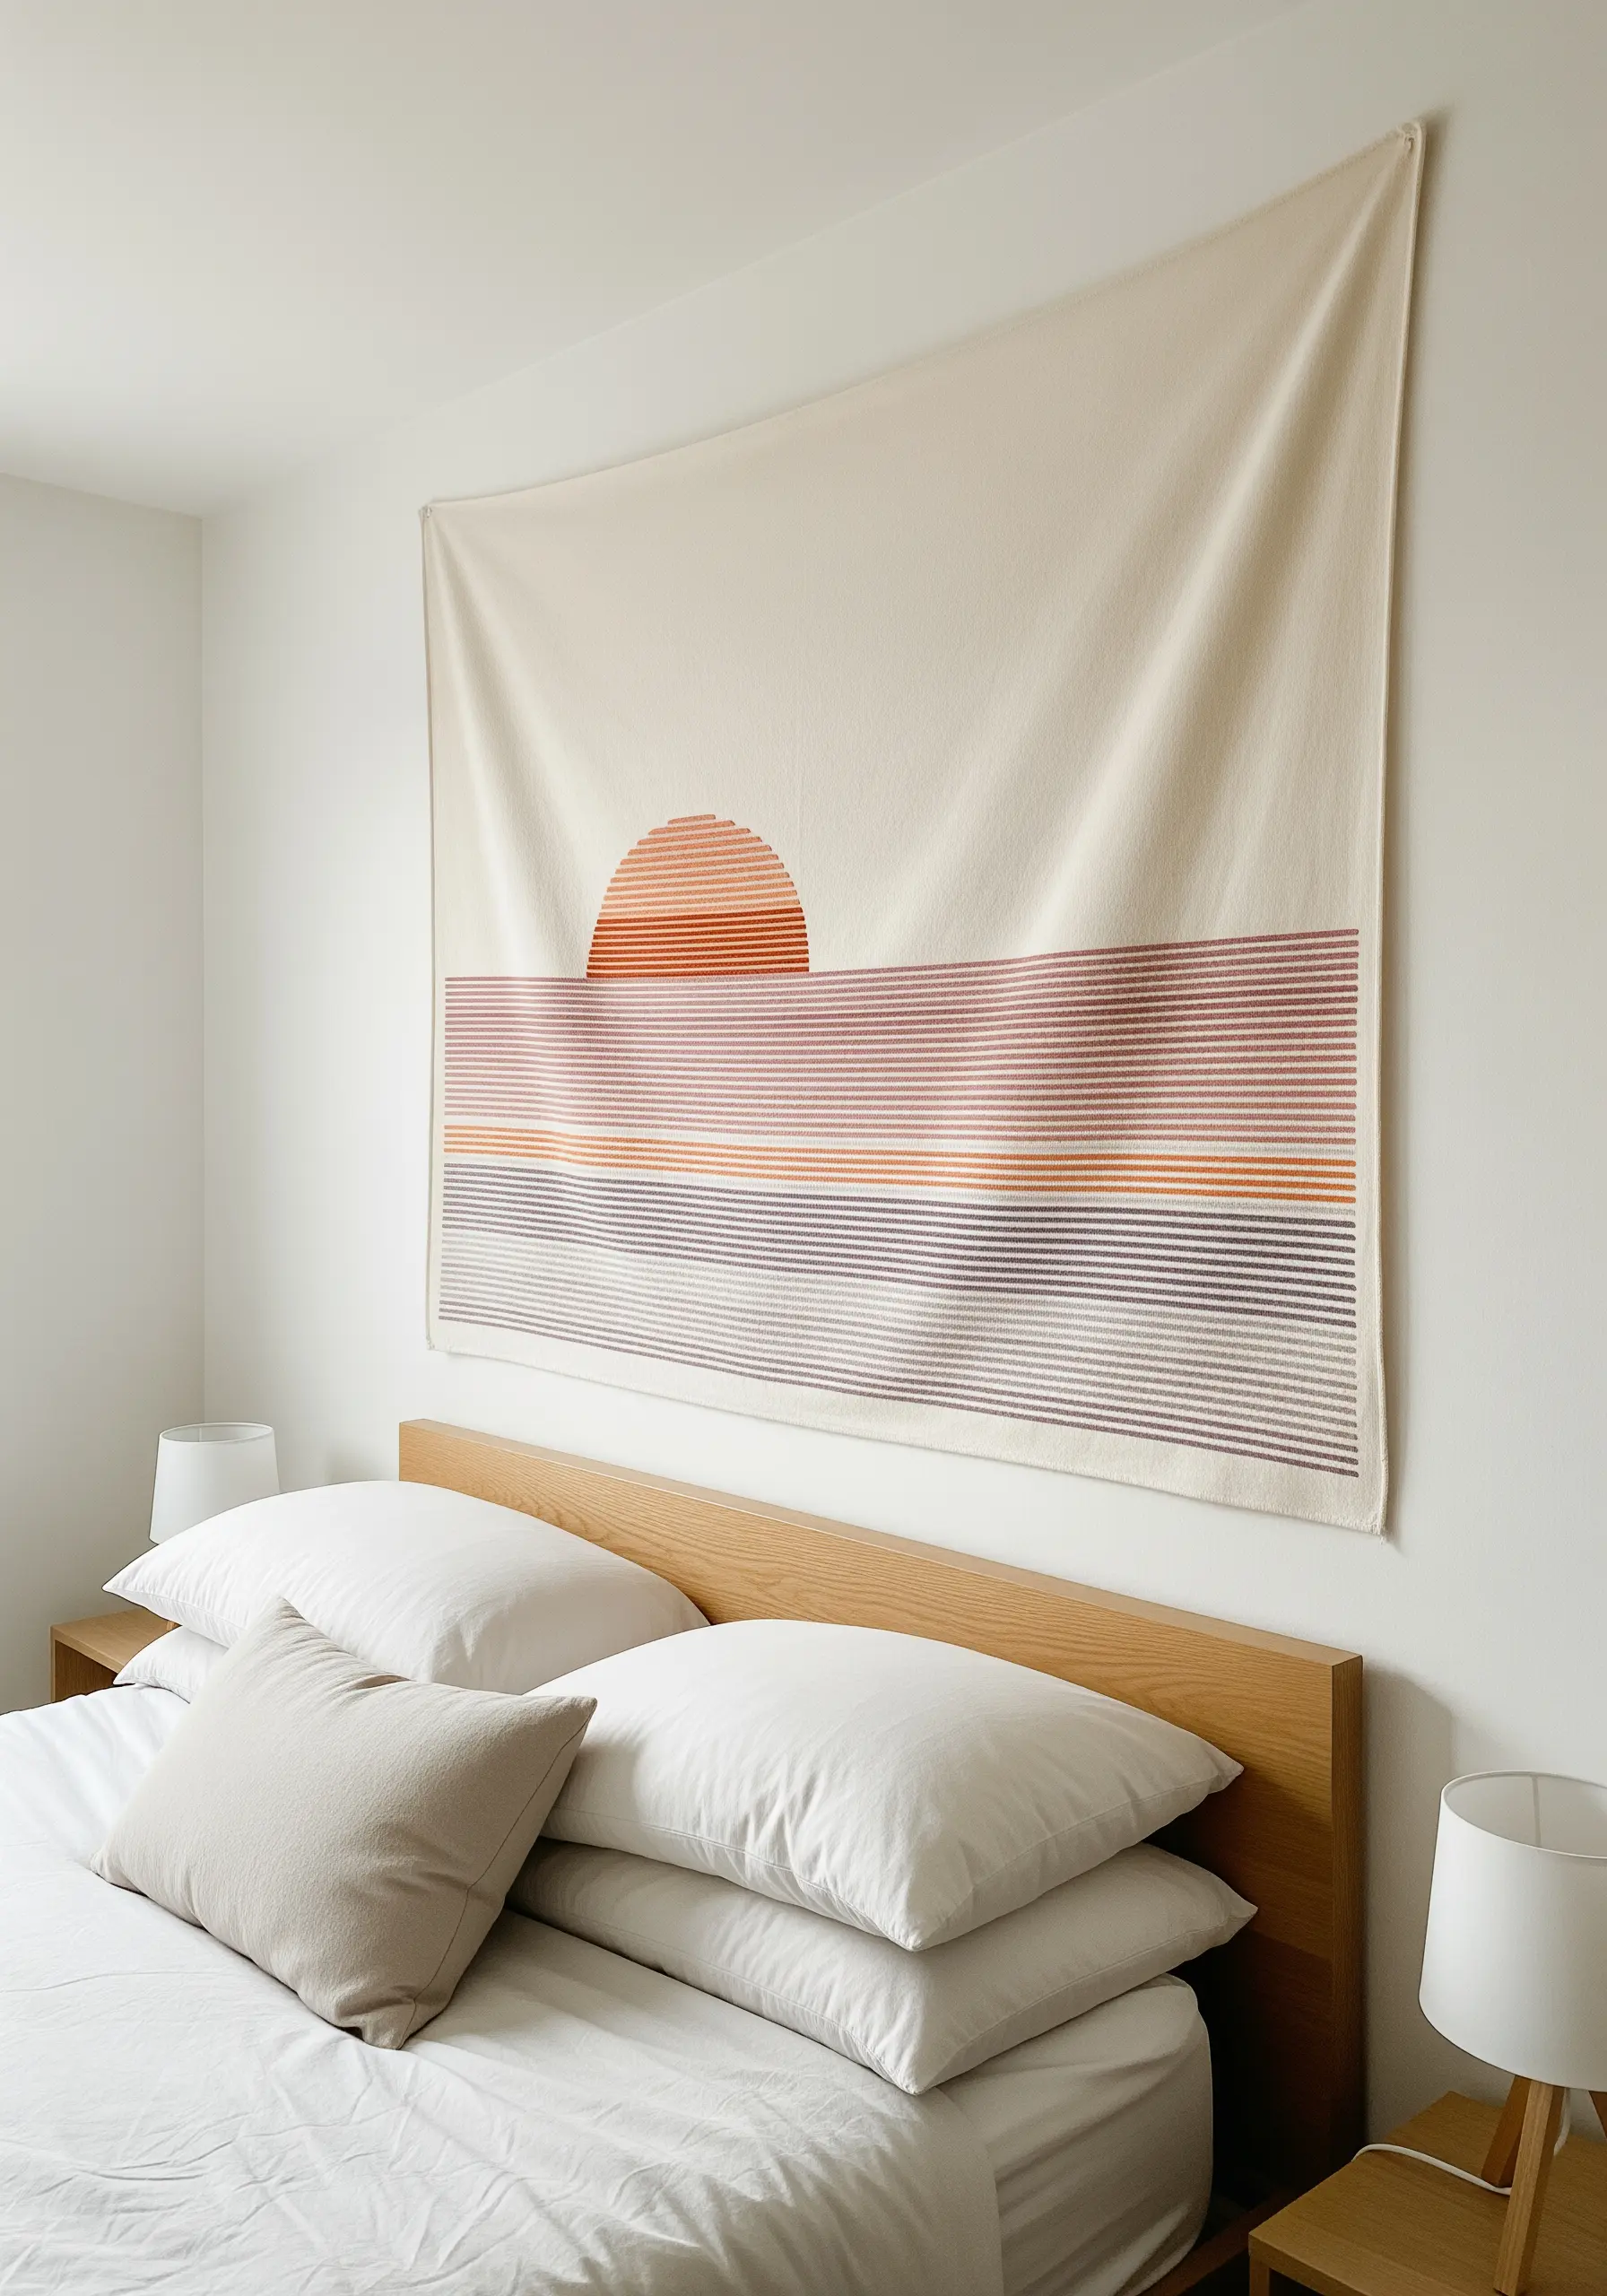
To create a large-scale wall hanging with a sunset gradient, you don’t need a loom—just a needle and a thoughtful approach to long stitches.
Use rows of long, straight satin stitches, laying them side-by-side to form the horizontal bands of color. To create the blended, woven effect, switch thread colors every few rows.
For the sun, stitch concentric half-circles using a split stitch, which creates a subtle texture and clean lines.
Working on a heavy, stable fabric like cotton canvas will ensure your long stitches remain taut and don’t distort the piece.
10. Embrace Visible Mending with Sashiko
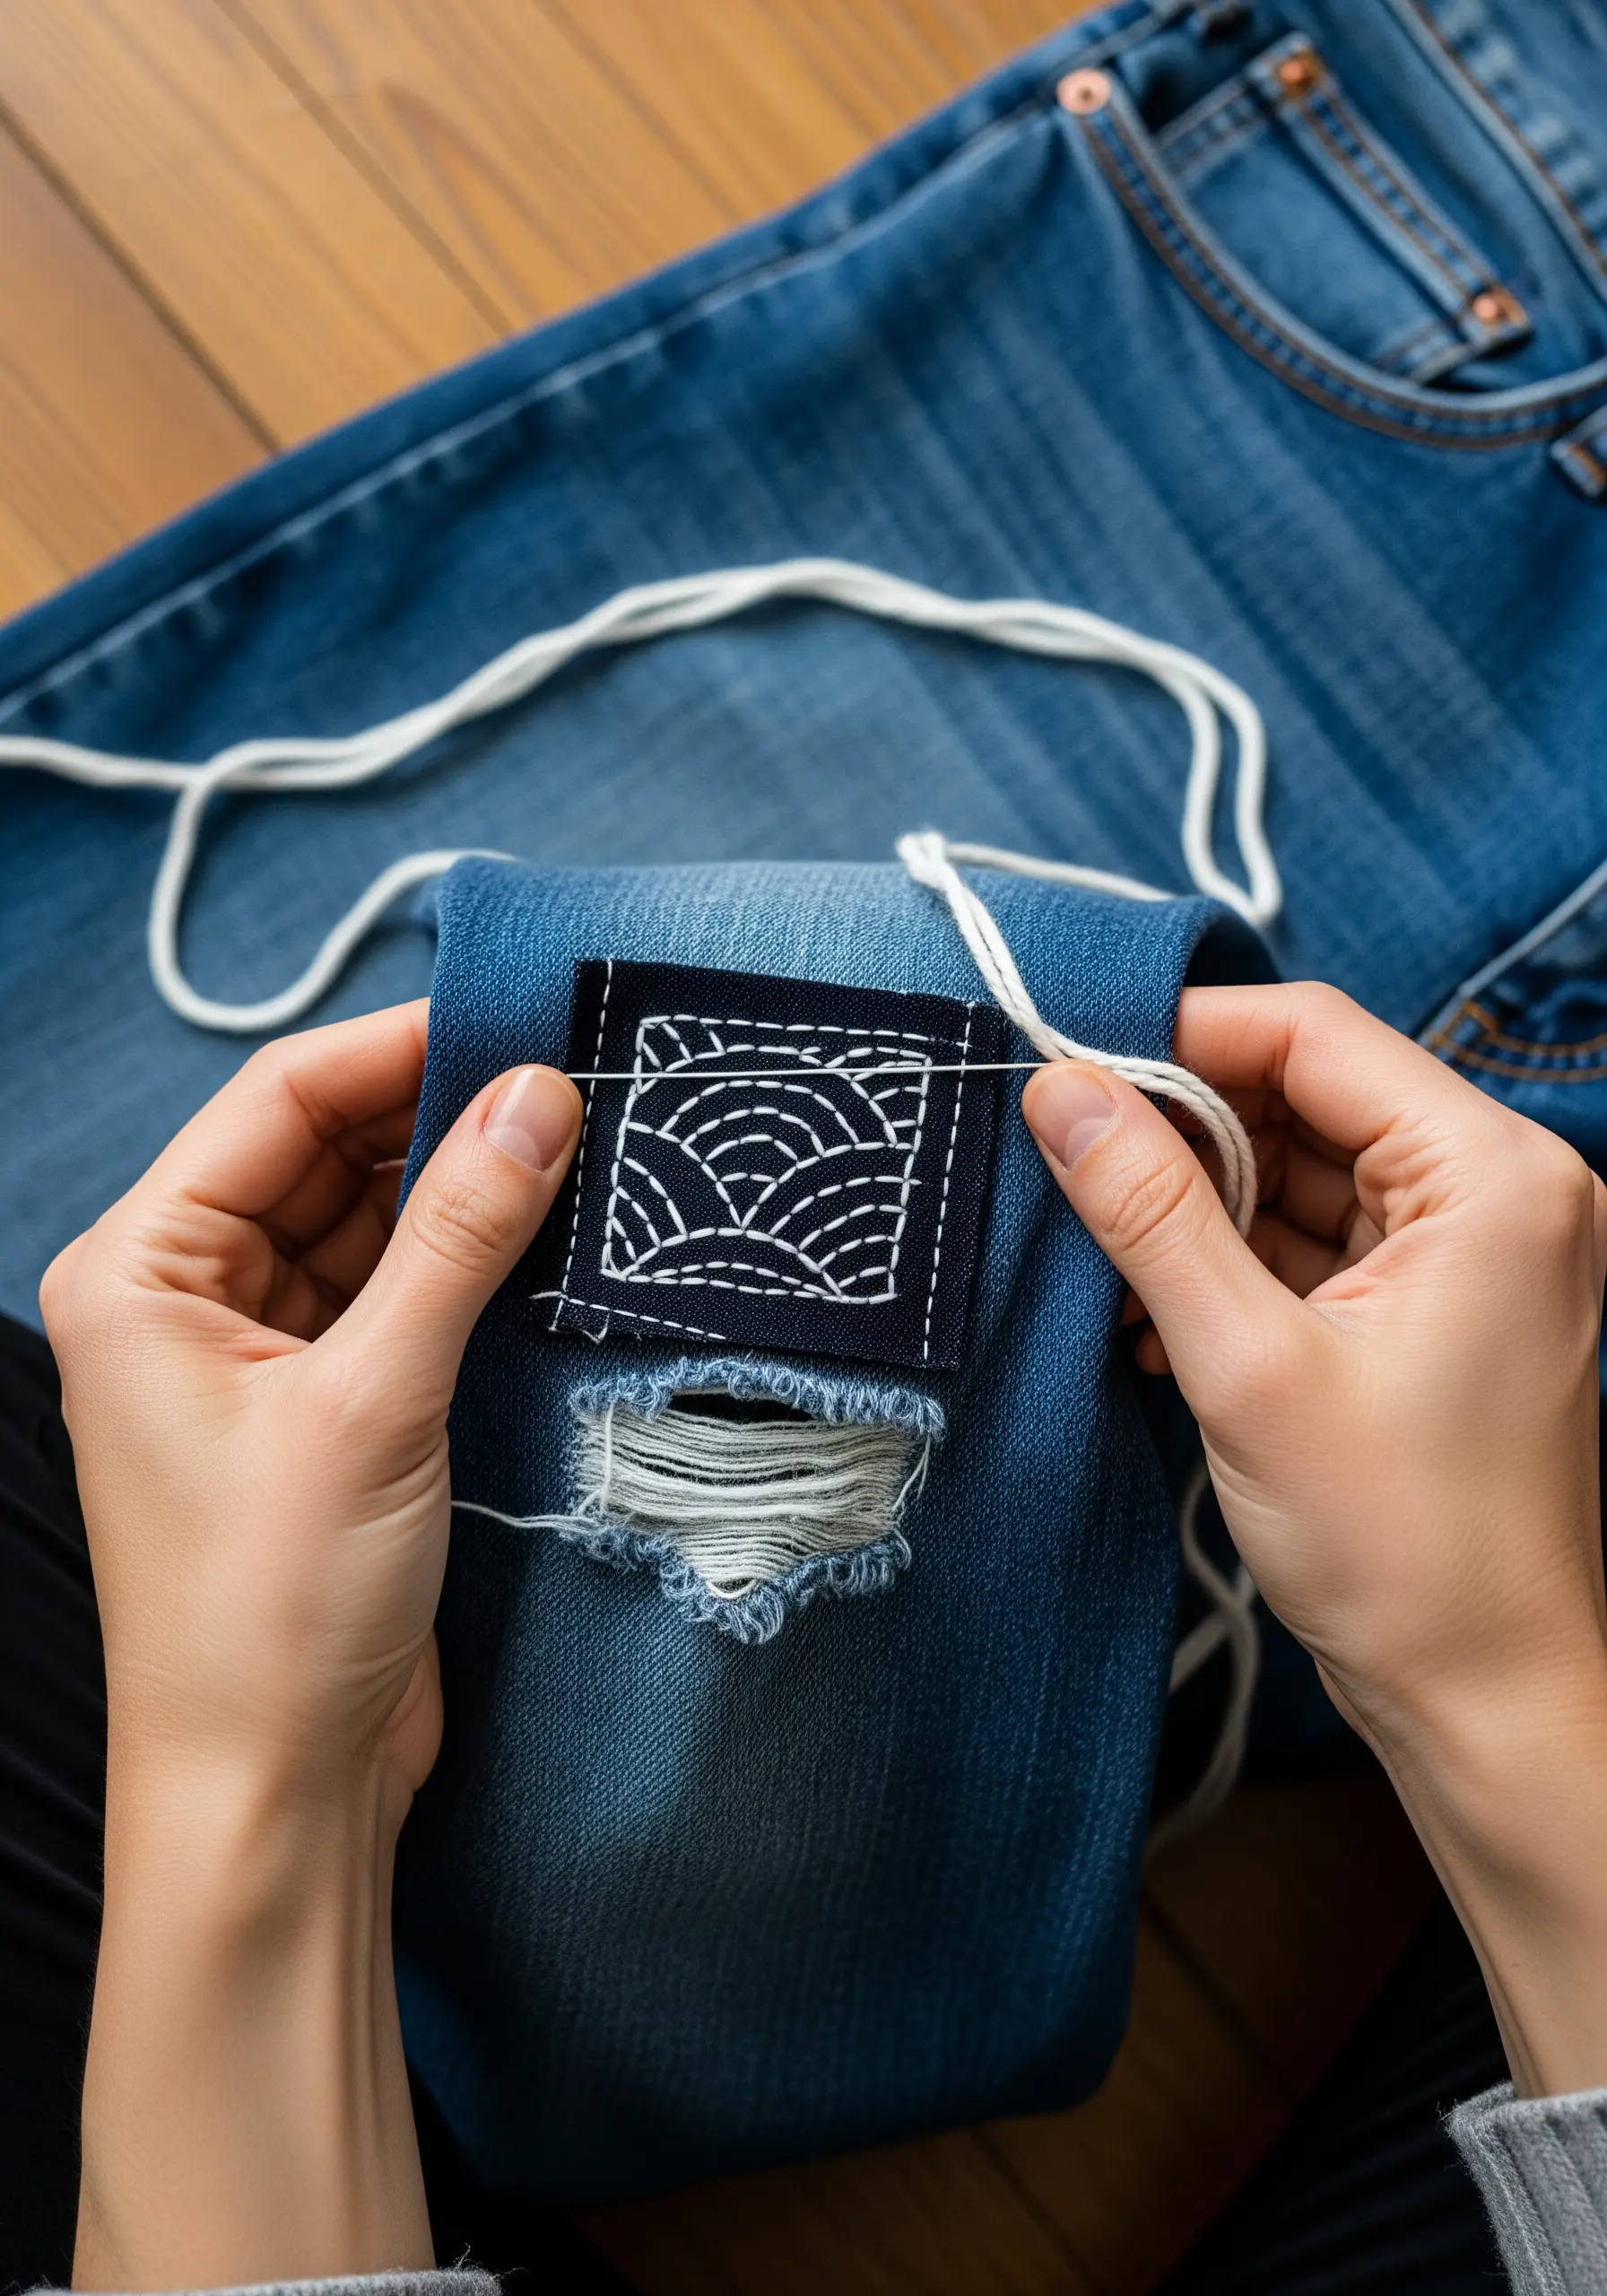
Sashiko is more than a repair technique; it is the art of visible mending that adds beauty and strength to worn fabric.
Use a contrasting, heavy-duty thread, like sashiko thread or perle cotton, to make your stitches a deliberate design choice.
The pattern is created with a simple running stitch, but the magic lies in the precision: keep your stitches even in length and maintain a consistent gap between them.
When stitching, your needle should travel through the fabric in a straight, rhythmic motion without pulling the thread too tight, which can cause puckering.
11. Master Fills on Textured Kitchen Towels
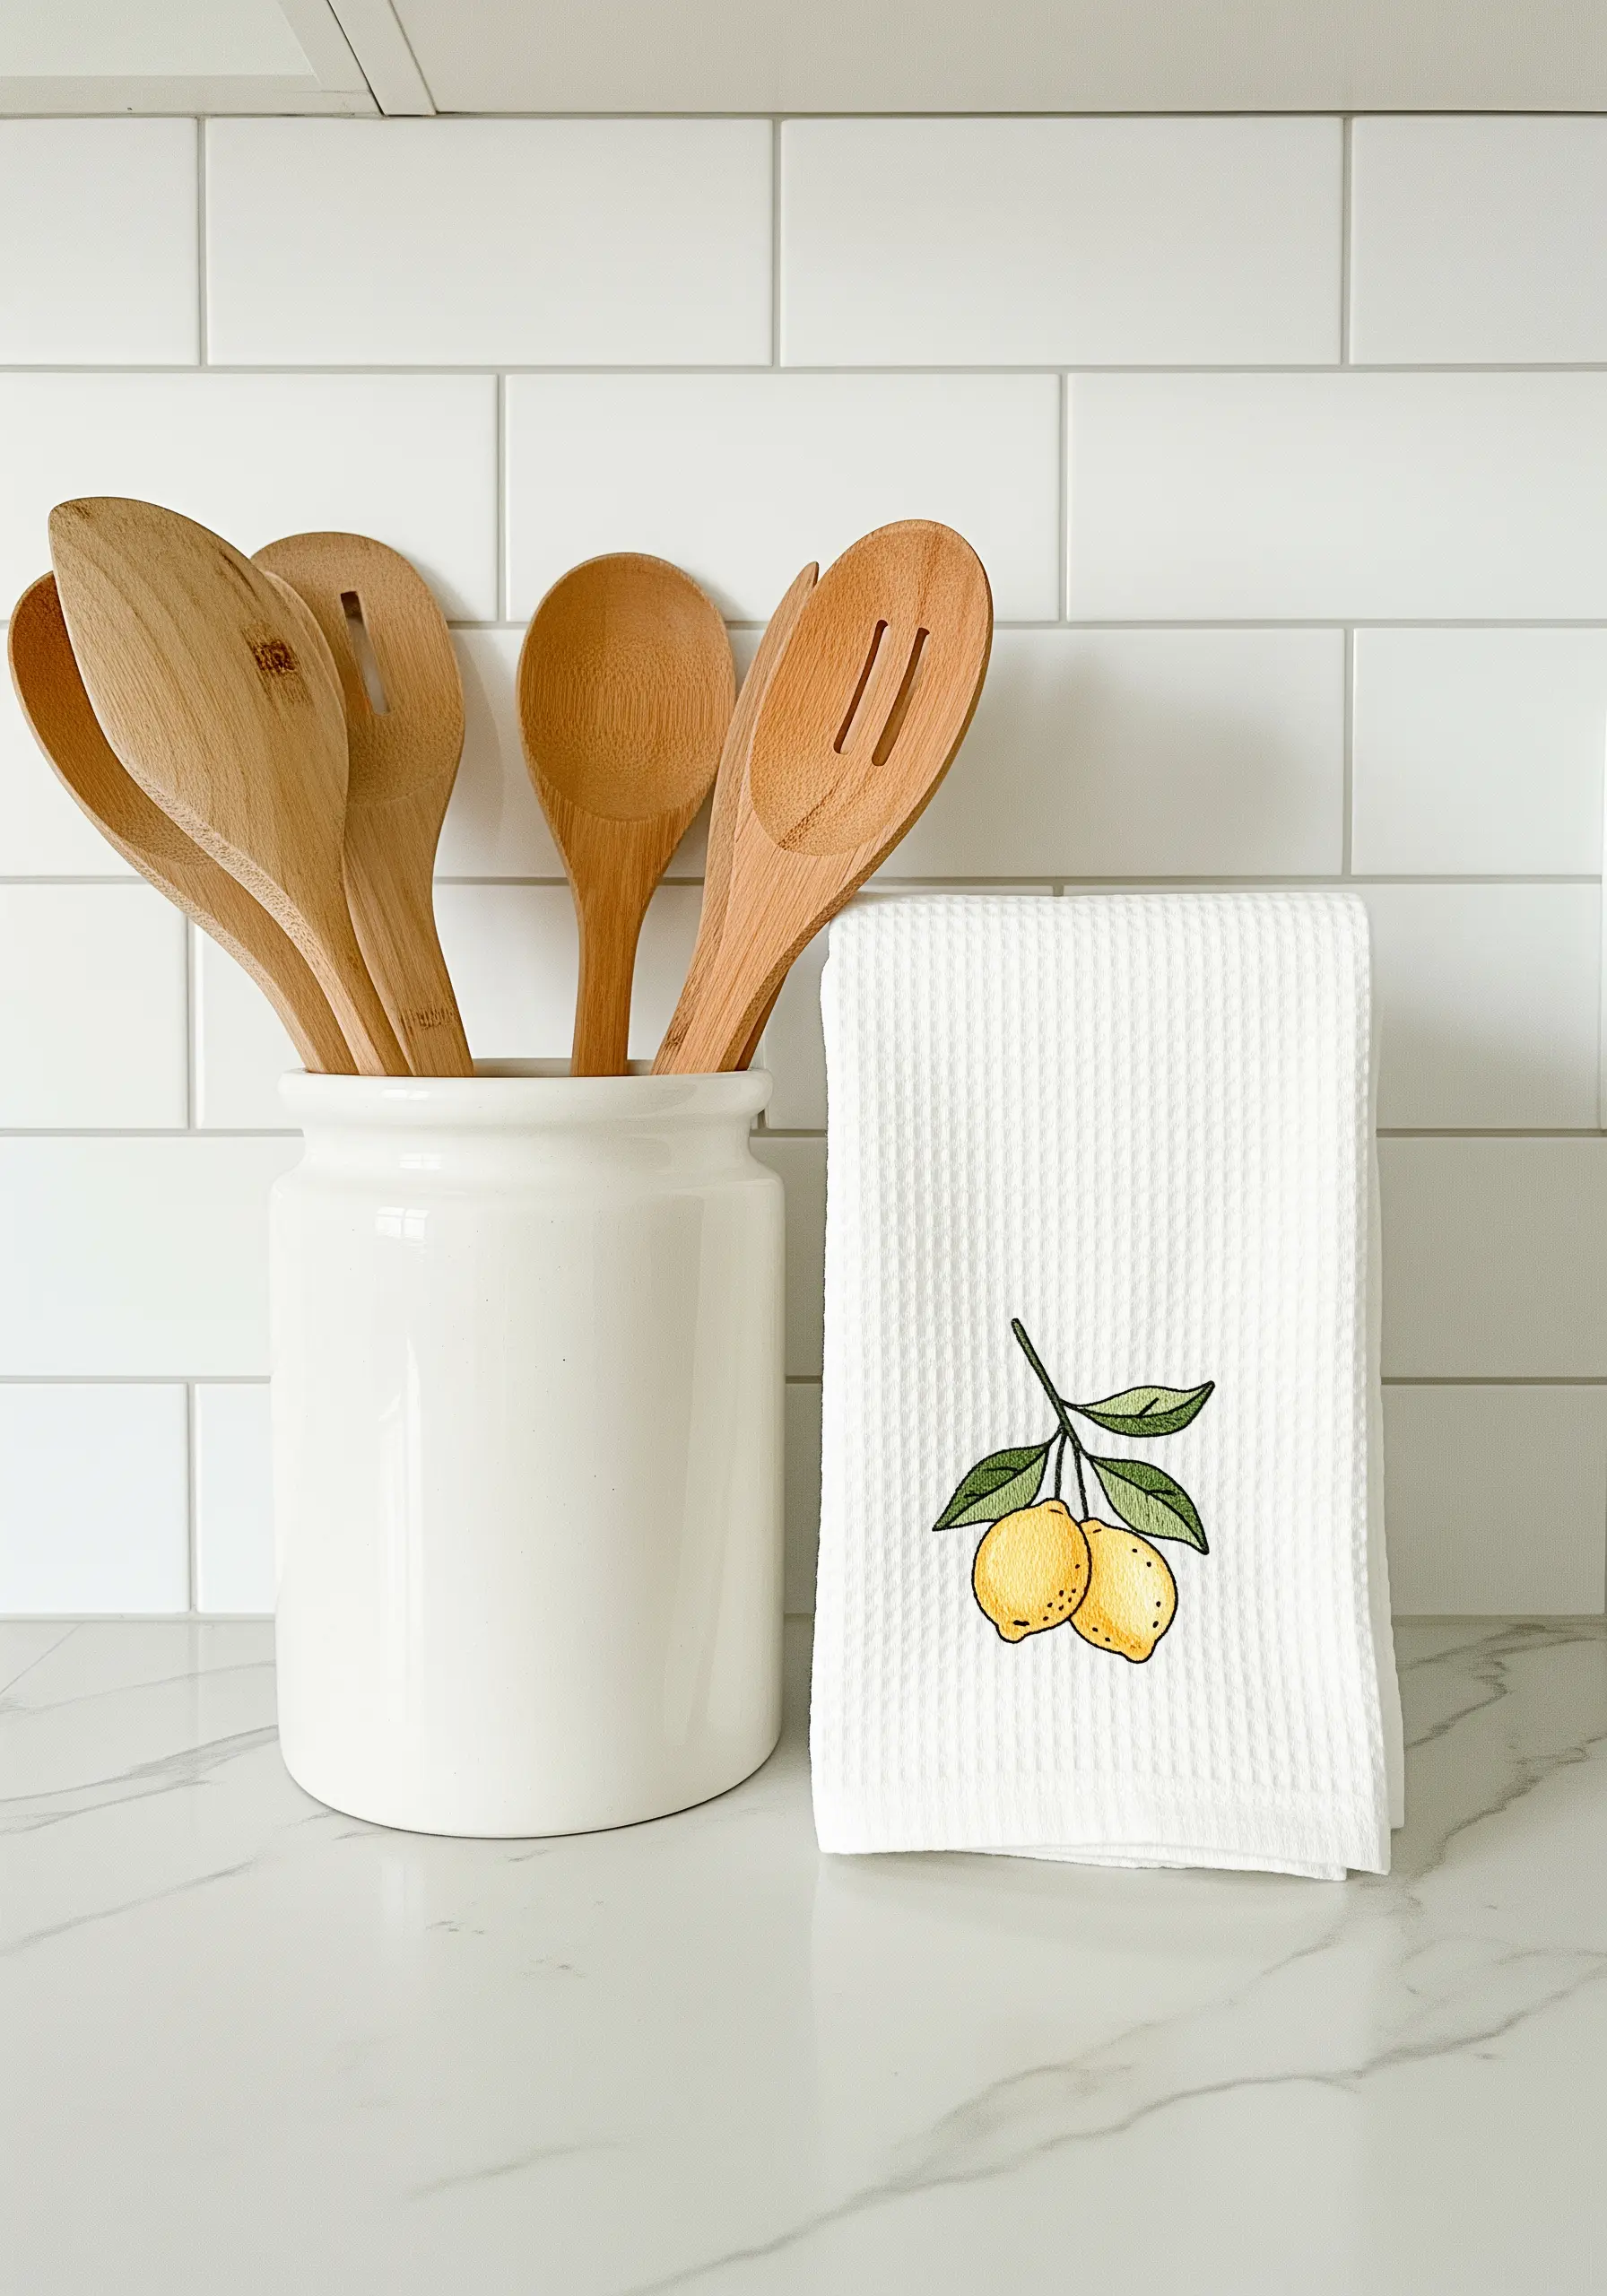
The challenge of stitching on textured waffle-weave fabric is preventing your stitches from sinking into the grid.
To solve this, use a water-soluble or tear-away stabilizer on top of the fabric. It provides a smooth surface to stitch on, ensuring your fills are even and professional.
For the lemons, a long-and-short stitch creates a beautiful, painterly blend of yellows and whites, mimicking the way light hits the fruit.
Outline the entire motif with a sharp split stitch using a darker thread to define the edges and make the design pop against the towel’s texture.
12. Design Modern Coasters with Geometric Lines

You don’t need complex stitches to create clean geometric patterns. A simple running stitch is all it takes to craft these modern, minimalist coasters.
The key is precision. Use a chalk pencil or a water-soluble pen to draw your geometric guides directly onto the felt before you begin.
Choose a thread color that offers high contrast, like this warm yellow on gray, to make the linework the star of the design.
Keep your stitch length and the spaces between them perfectly consistent for a sharp, graphic finish that feels intentional and thoughtfully designed.
13. Stitch Elegant Lettering with Whipped Backstitch
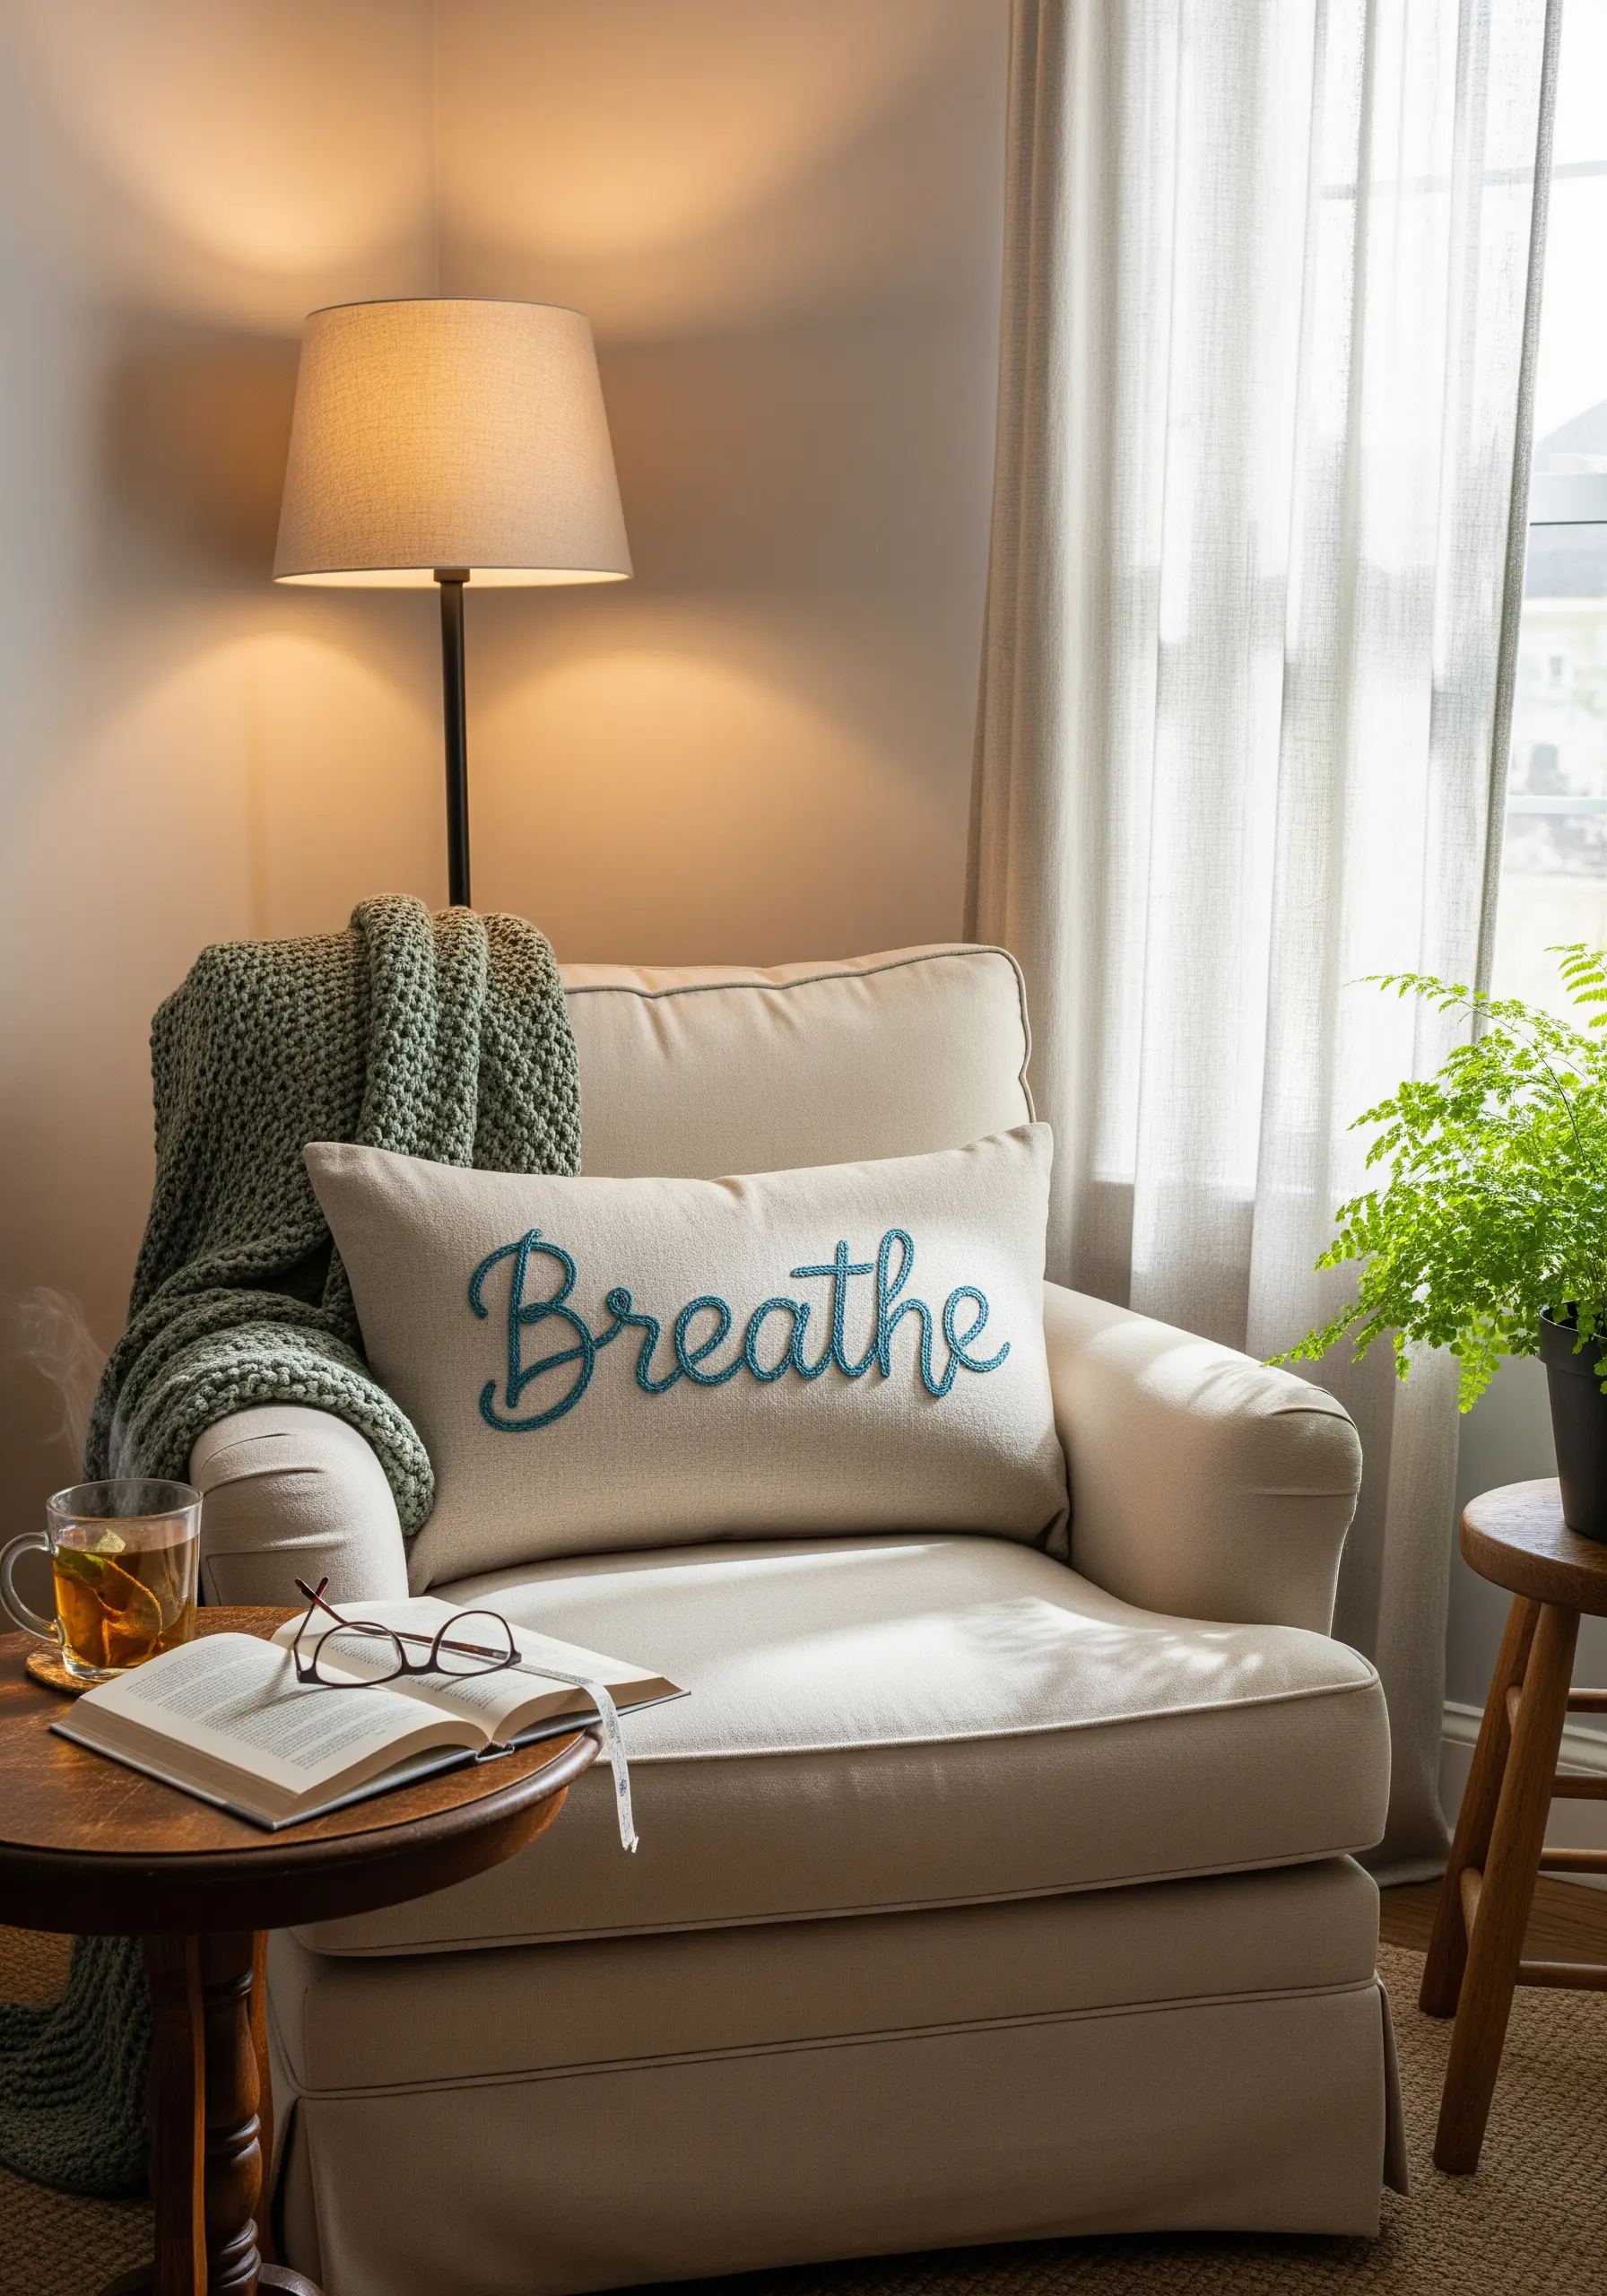
To achieve smooth, elegant script that looks like a single, continuous line, a whipped backstitch is your best technique.
First, lay down a foundation of simple backstitches along your lettering guide. Then, using the same thread, pass your needle under each backstitch without piercing the fabric.
This ‘whipping’ motion covers the segmented look of the backstitch, resulting in a raised, cord-like line that flows beautifully around curves.
Using a perle cotton thread will add a subtle sheen and extra thickness, making your word art a focal point on any cushion or wall hanging.
14. Craft Aromatic Sachets with Simple Motifs
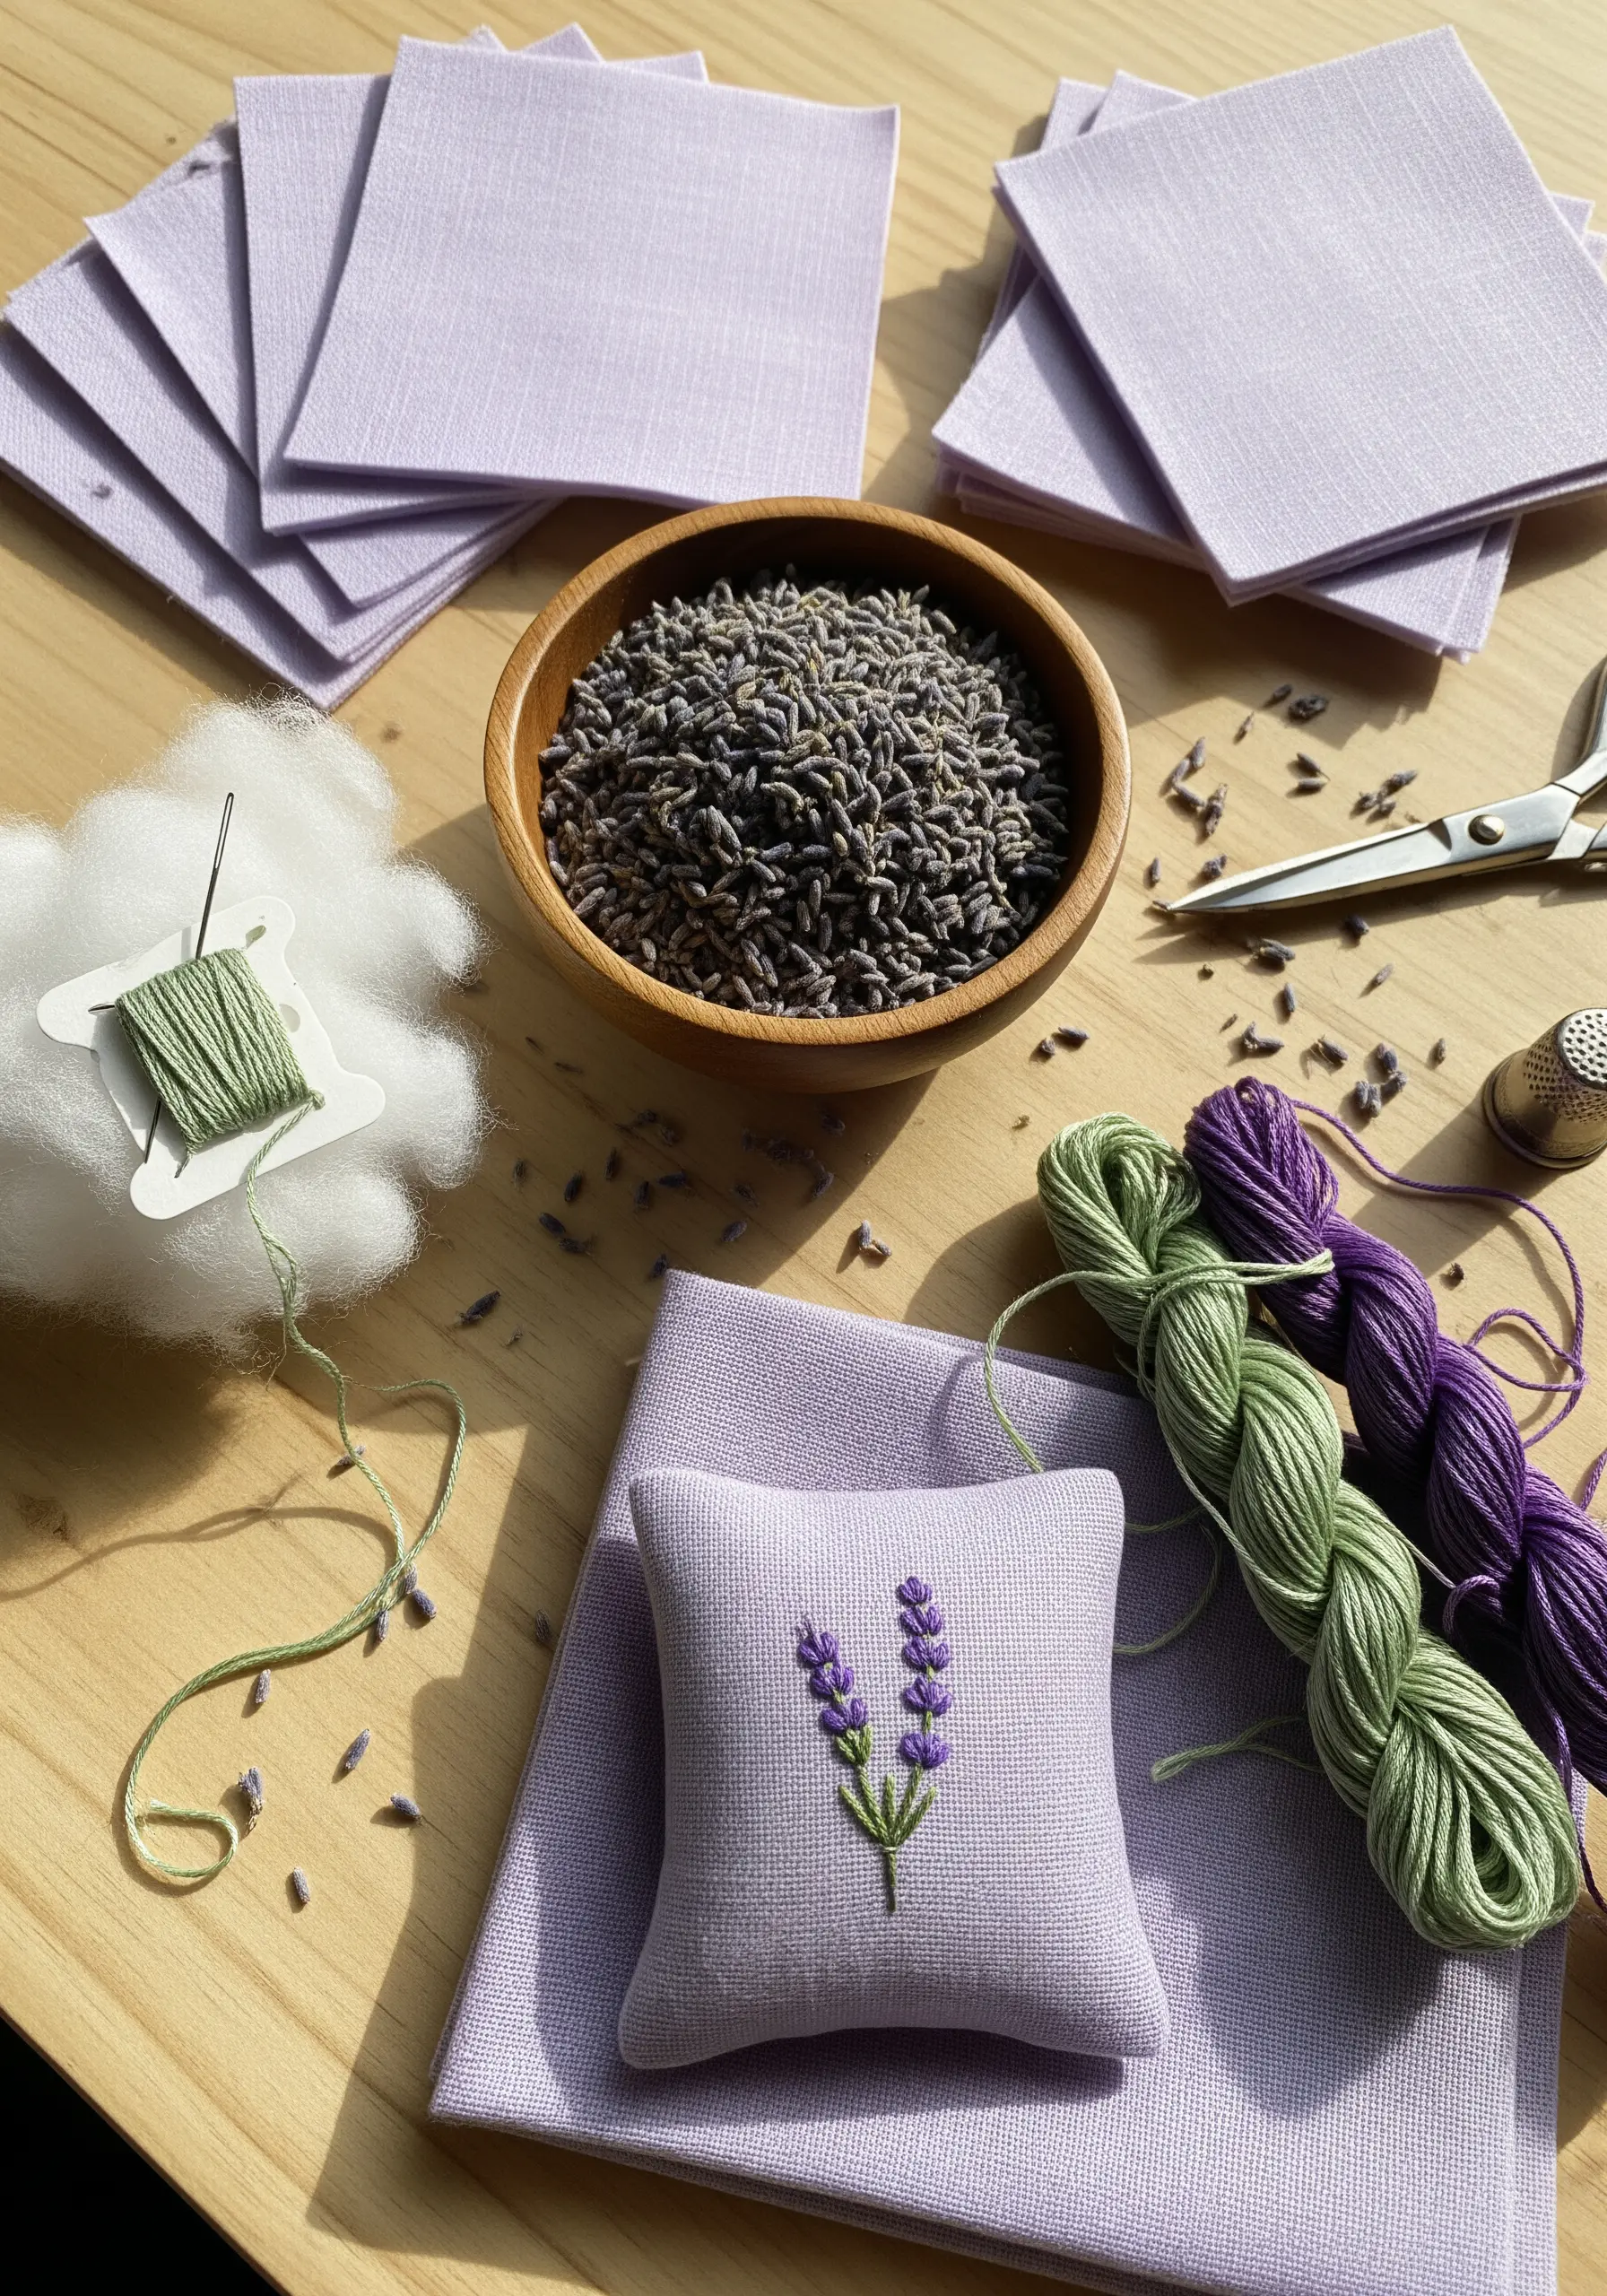
This project is about creating small moments of calm through functional embroidery for scented sachets.
For a tiny motif, simplify your stitches. Use a single stem stitch for the lavender stalks and just two or three small straight stitches or a single lazy daisy stitch for each floret.
Choose a fabric with a visible weave, like linen, which is breathable and allows the scent of the dried lavender to release slowly.
To construct the sachet, place two embroidered squares right-sides together, stitch around three sides, turn it right-side out, fill with lavender, and neatly slip-stitch the final opening closed.
15. Add Character with Hand-Stitched Pennants
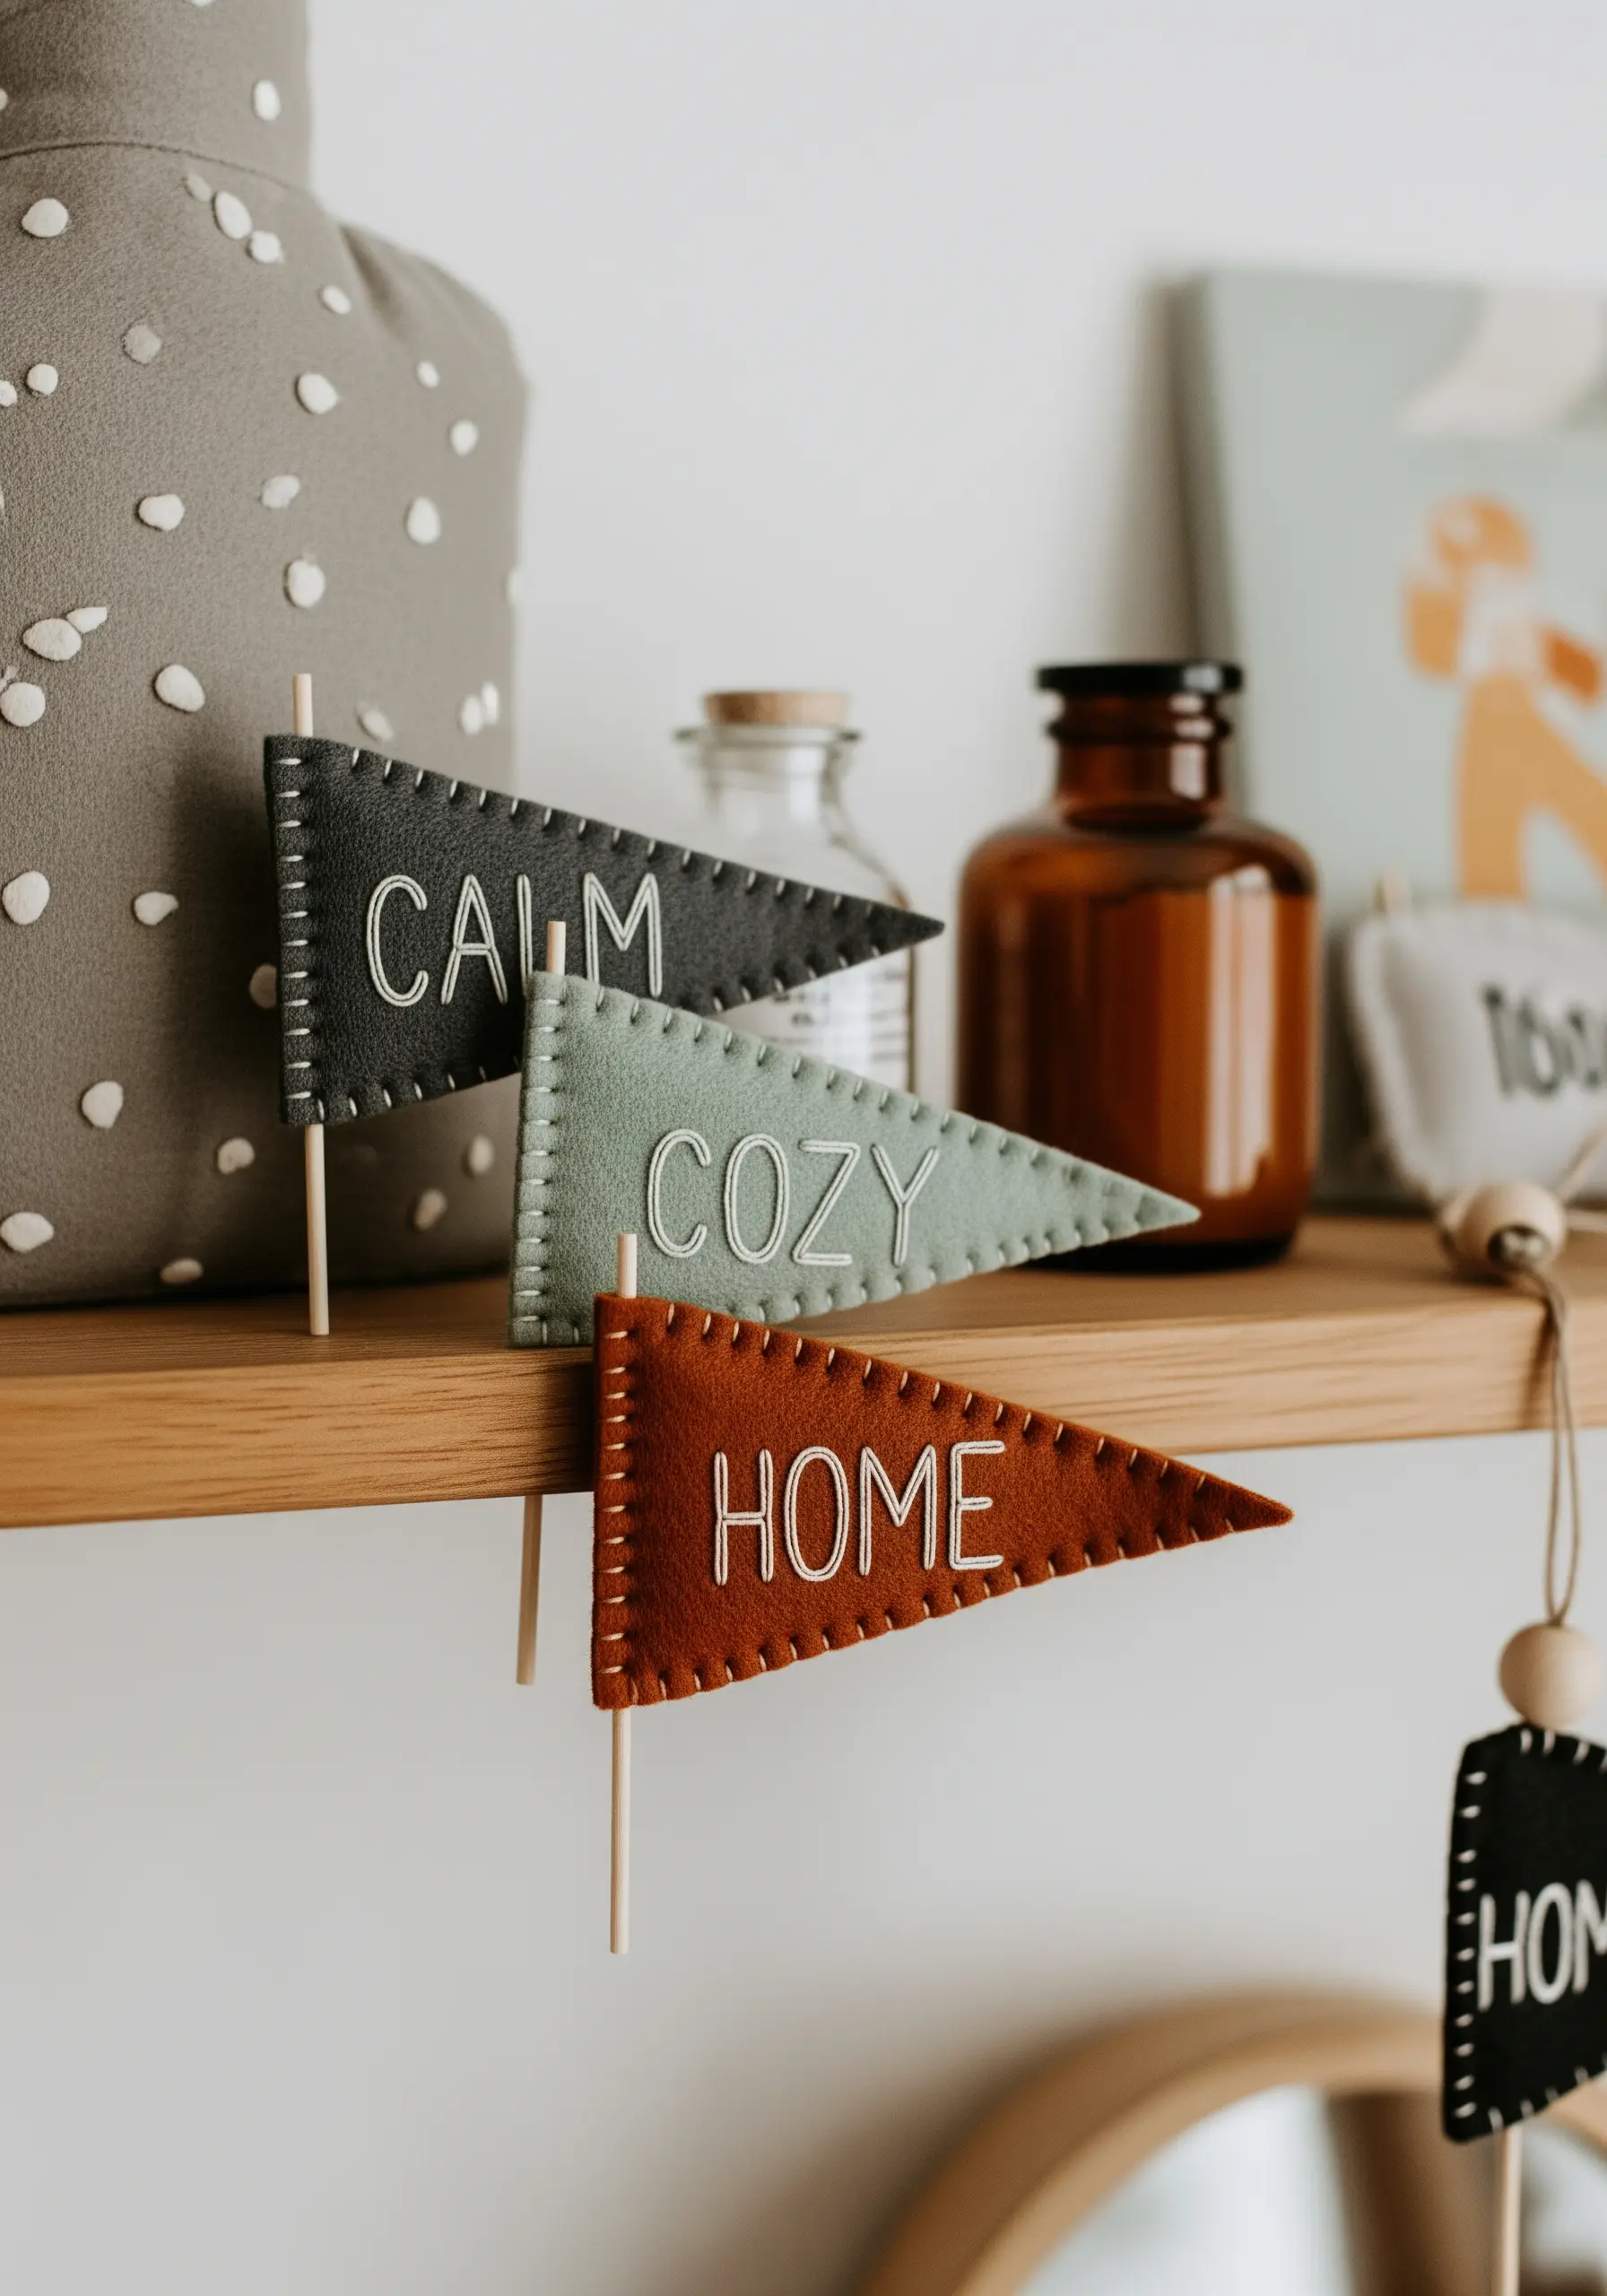
A simple backstitch for clean, modern lettering is all you need to create these charming decorative pennants.
Choose a sturdy, non-fraying material like felt, which provides a stable base and a soft, matte finish that lets the thread stand out.
To achieve the neat, typewriter-style font, focus on keeping your stitch length uniform, especially around the curves of the letters.
A decorative running stitch along the border adds a final handmade touch and visually frames the word, making the entire piece feel complete and polished.
16. Illuminate Your Stitches on a Lampshade

Embroidery on a lampshade allows you to play with light and shadow in a unique way. The key is to transform a plain lampshade by choosing stitches that create interesting silhouettes.
Use a solid fill stitch like satin stitch for the leaves. When the lamp is on, the light will be blocked by the dense thread, turning the leaves into dark, graphic shapes.
For the swirling vines, a bold chain stitch or stem stitch works best, creating a strong, continuous line that will be clearly visible whether the light is on or off.
Work carefully without a hoop, holding the shade taut and making sure not to pull your stitches too tight to avoid denting the surface.
17. Explore Texture and Line with Couching
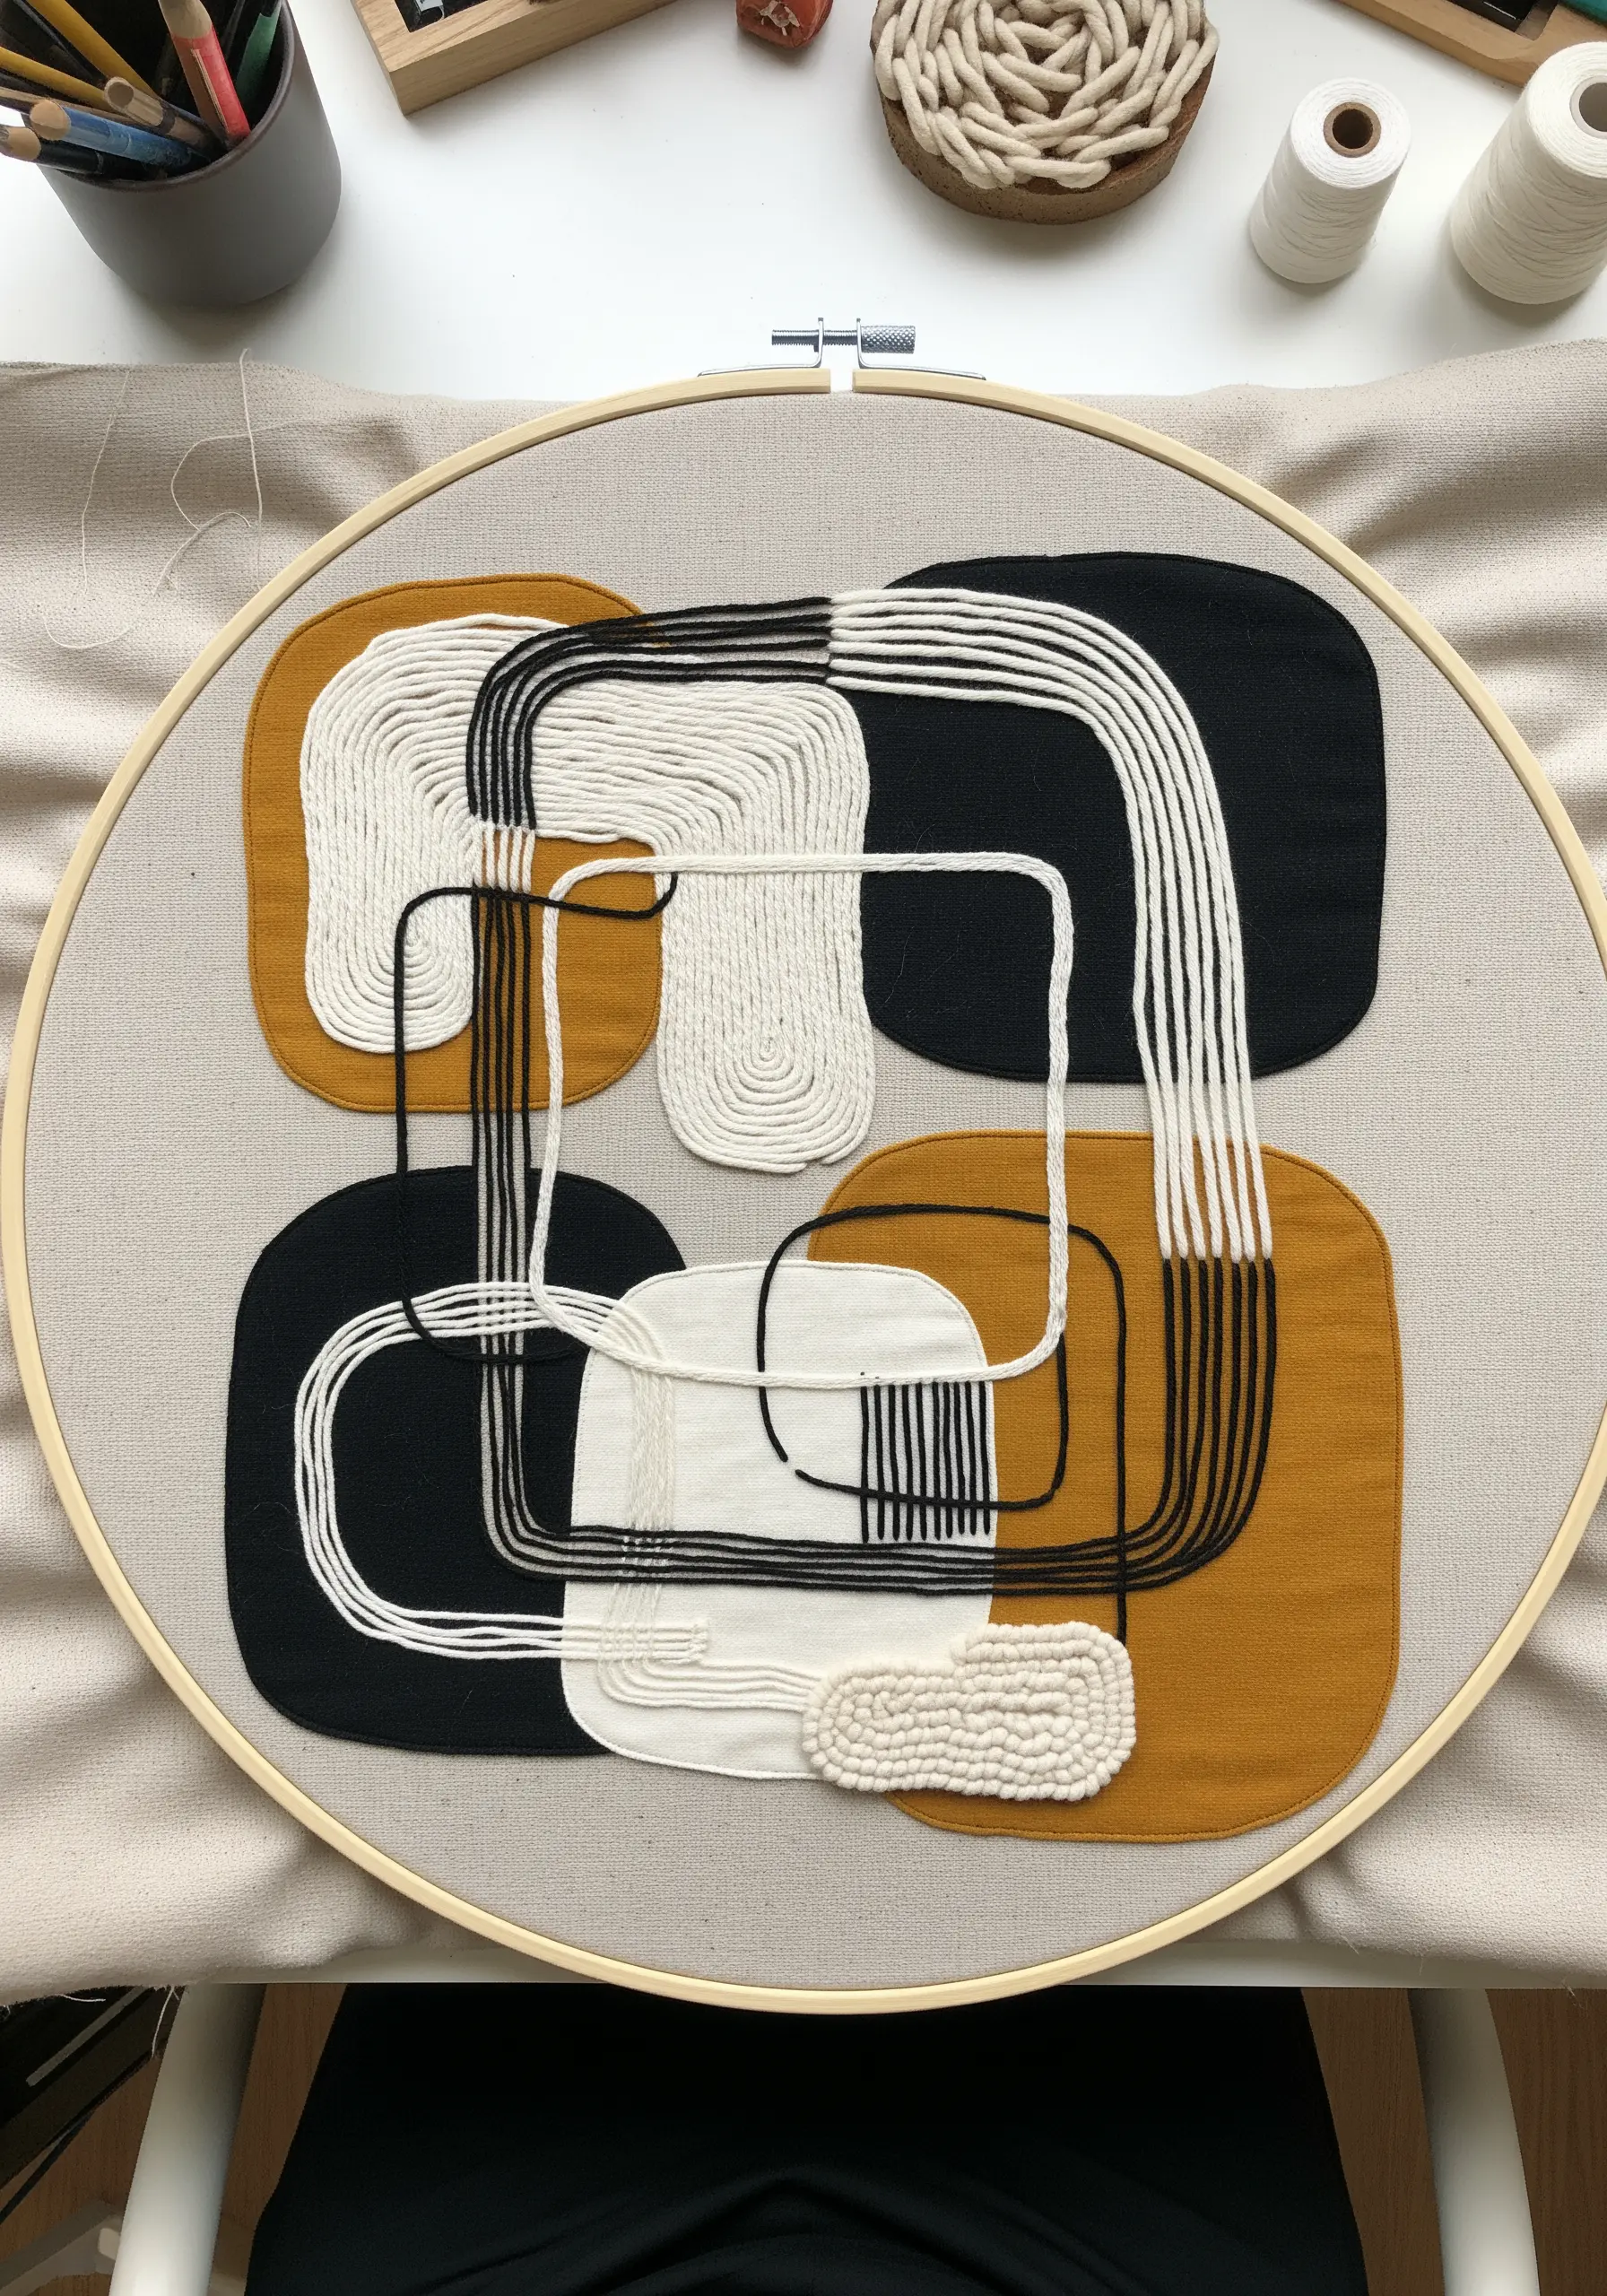
To create bold, graphic lines with couching, you lay a thick yarn or cord onto your fabric and tack it down with a thinner, contrasting thread.
This technique allows you to create fluid, sculptural lines that would be impossible with traditional stitches. It’s perfect for abstract art where the texture and path of the line are the main focus.
Combine this with other textures, like blocks of appliqué fabric and densely packed French knots, to create a composition with rich tactile variation and depth.
The contrast between the thick, couched yarn and the fine tacking stitches adds another layer of subtle, sophisticated detail.
18. Achieve Subtlety with Tone-on-Tone Embroidery
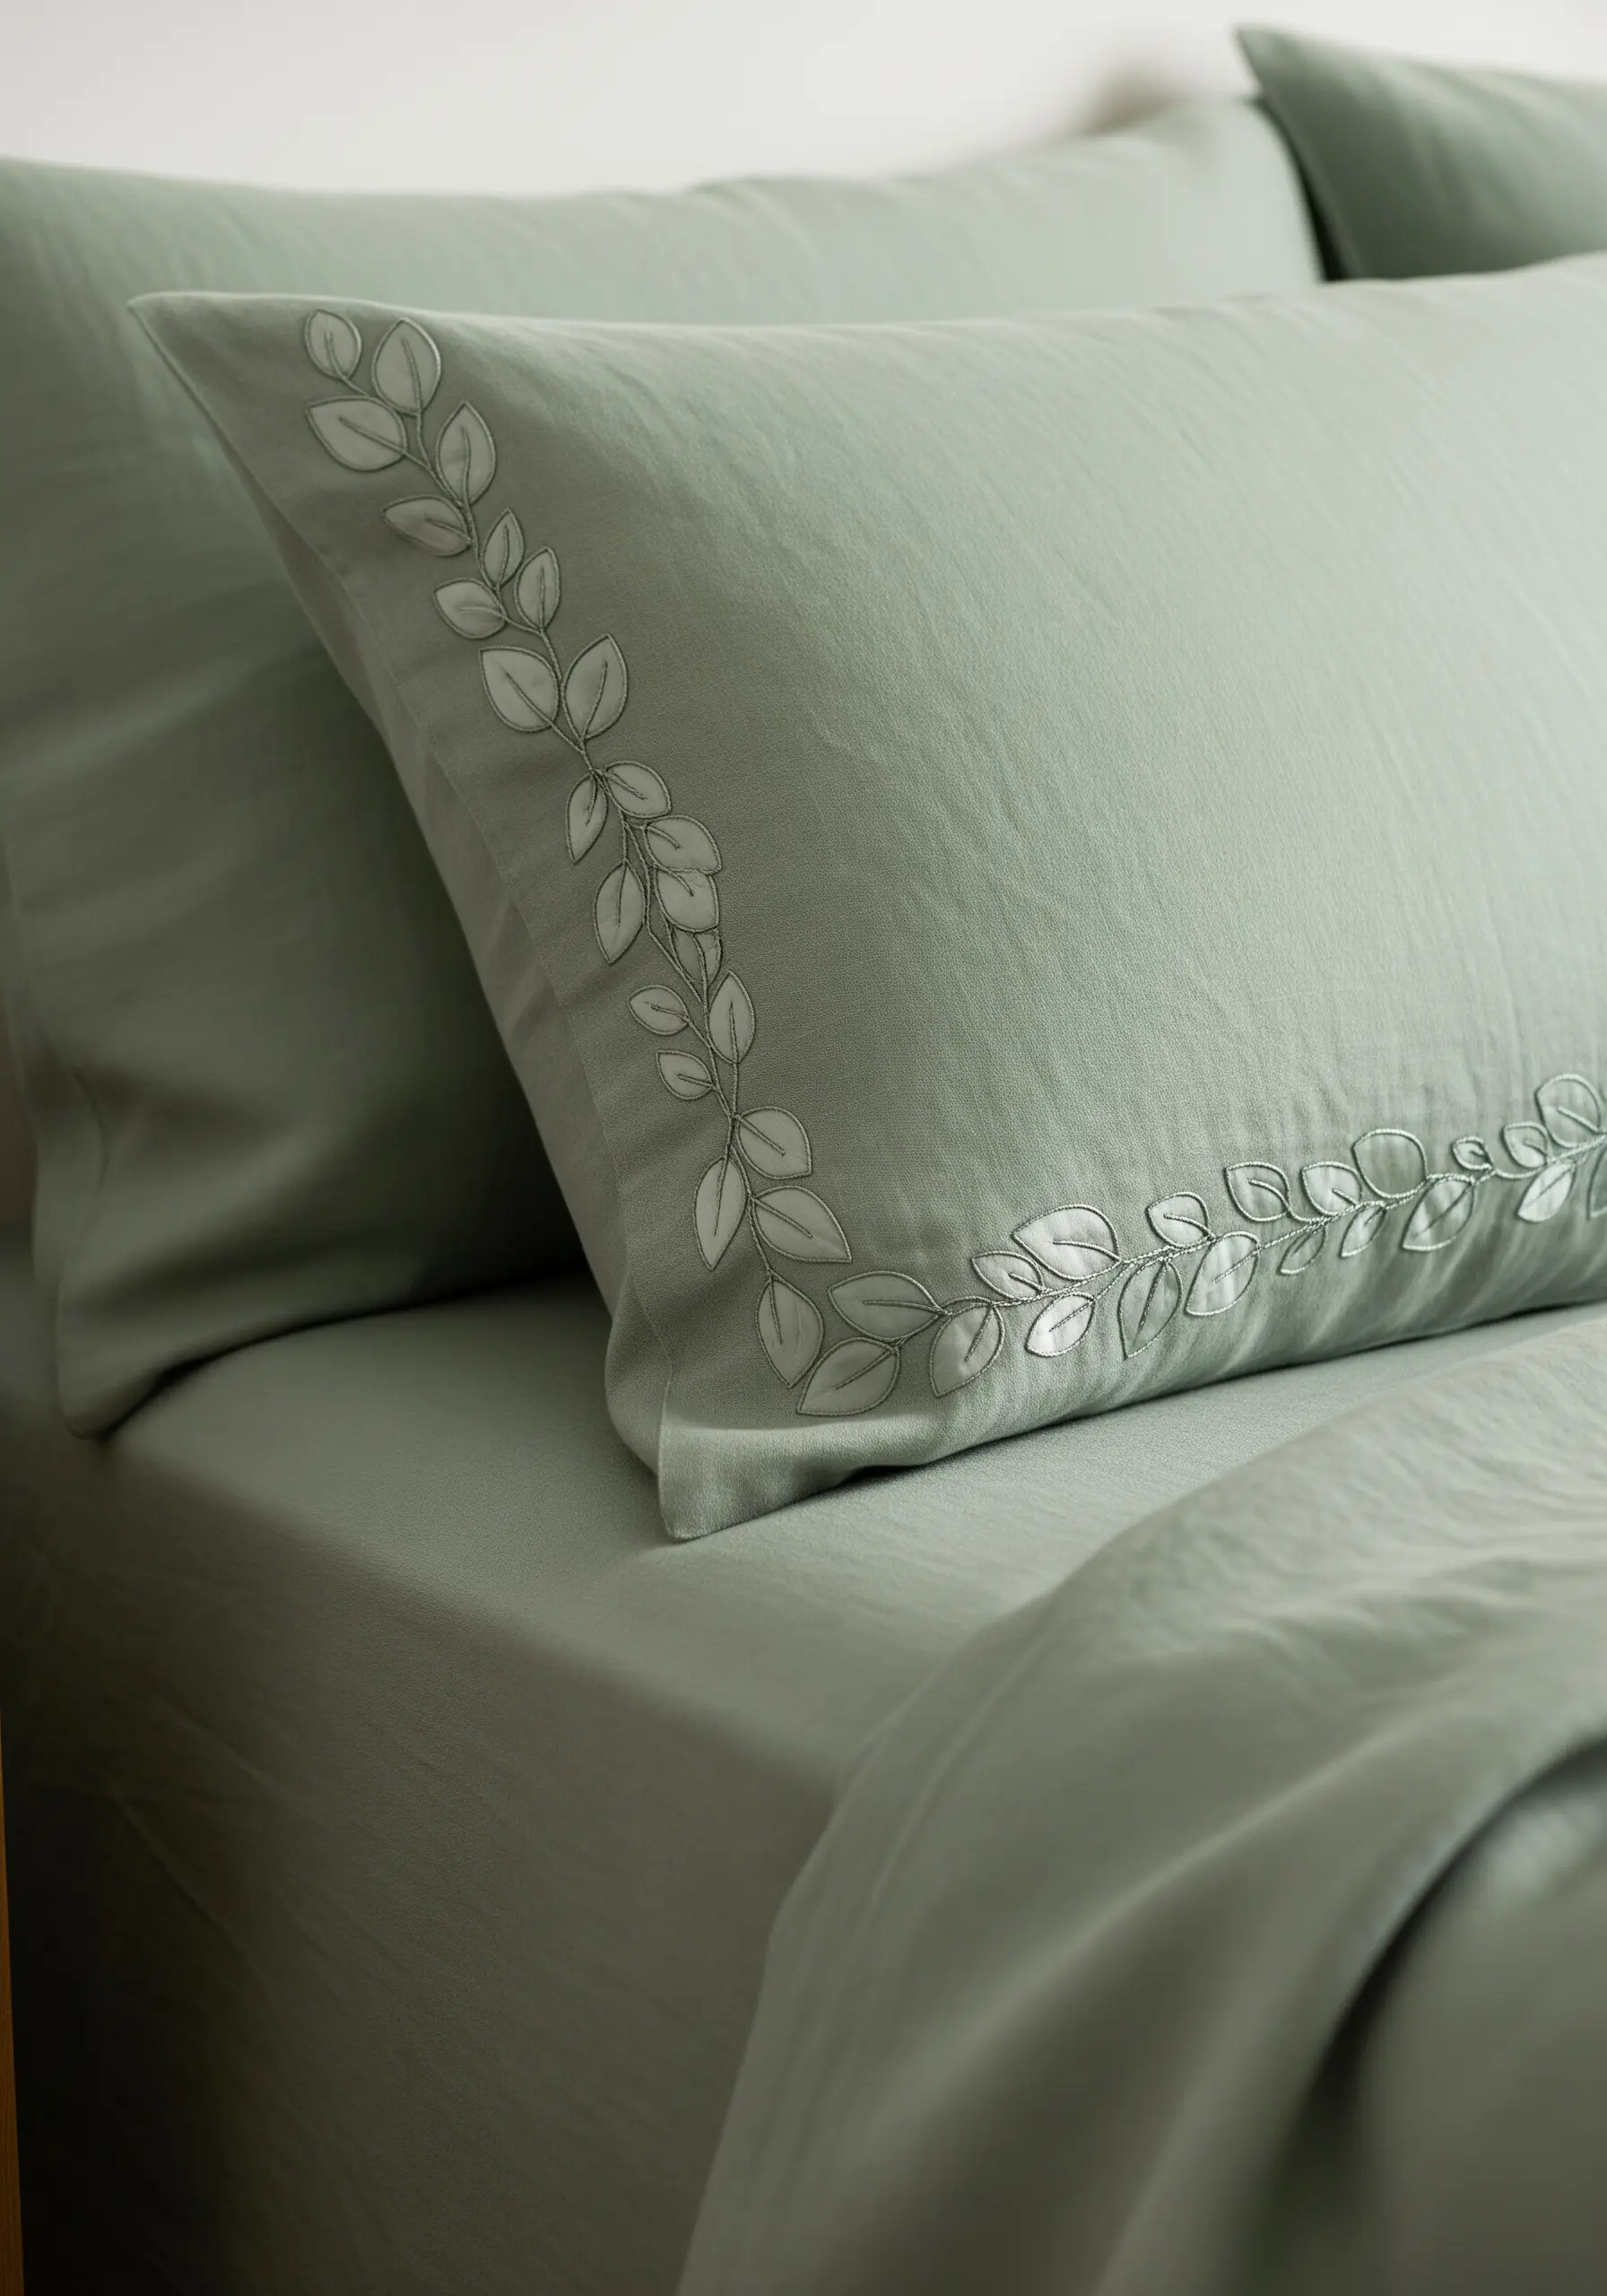
For an effect that is both luxurious and understated, embroider with thread that is only a few shades lighter or darker than your fabric.
This a tone-on-tone effect relies on texture and sheen, not color, to make the design visible. The way light hits the raised stitches creates a subtle, elegant pattern.
Use a satin stitch for the leaves to maximize the light-reflecting surface of the thread, and outline it with a simple backstitch for definition.
This technique works beautifully on bed linens or cushion covers, adding a touch of bespoke detail without disrupting a calm, monochromatic color scheme.
19. Build a Wildflower Meadow on a Tote Bag
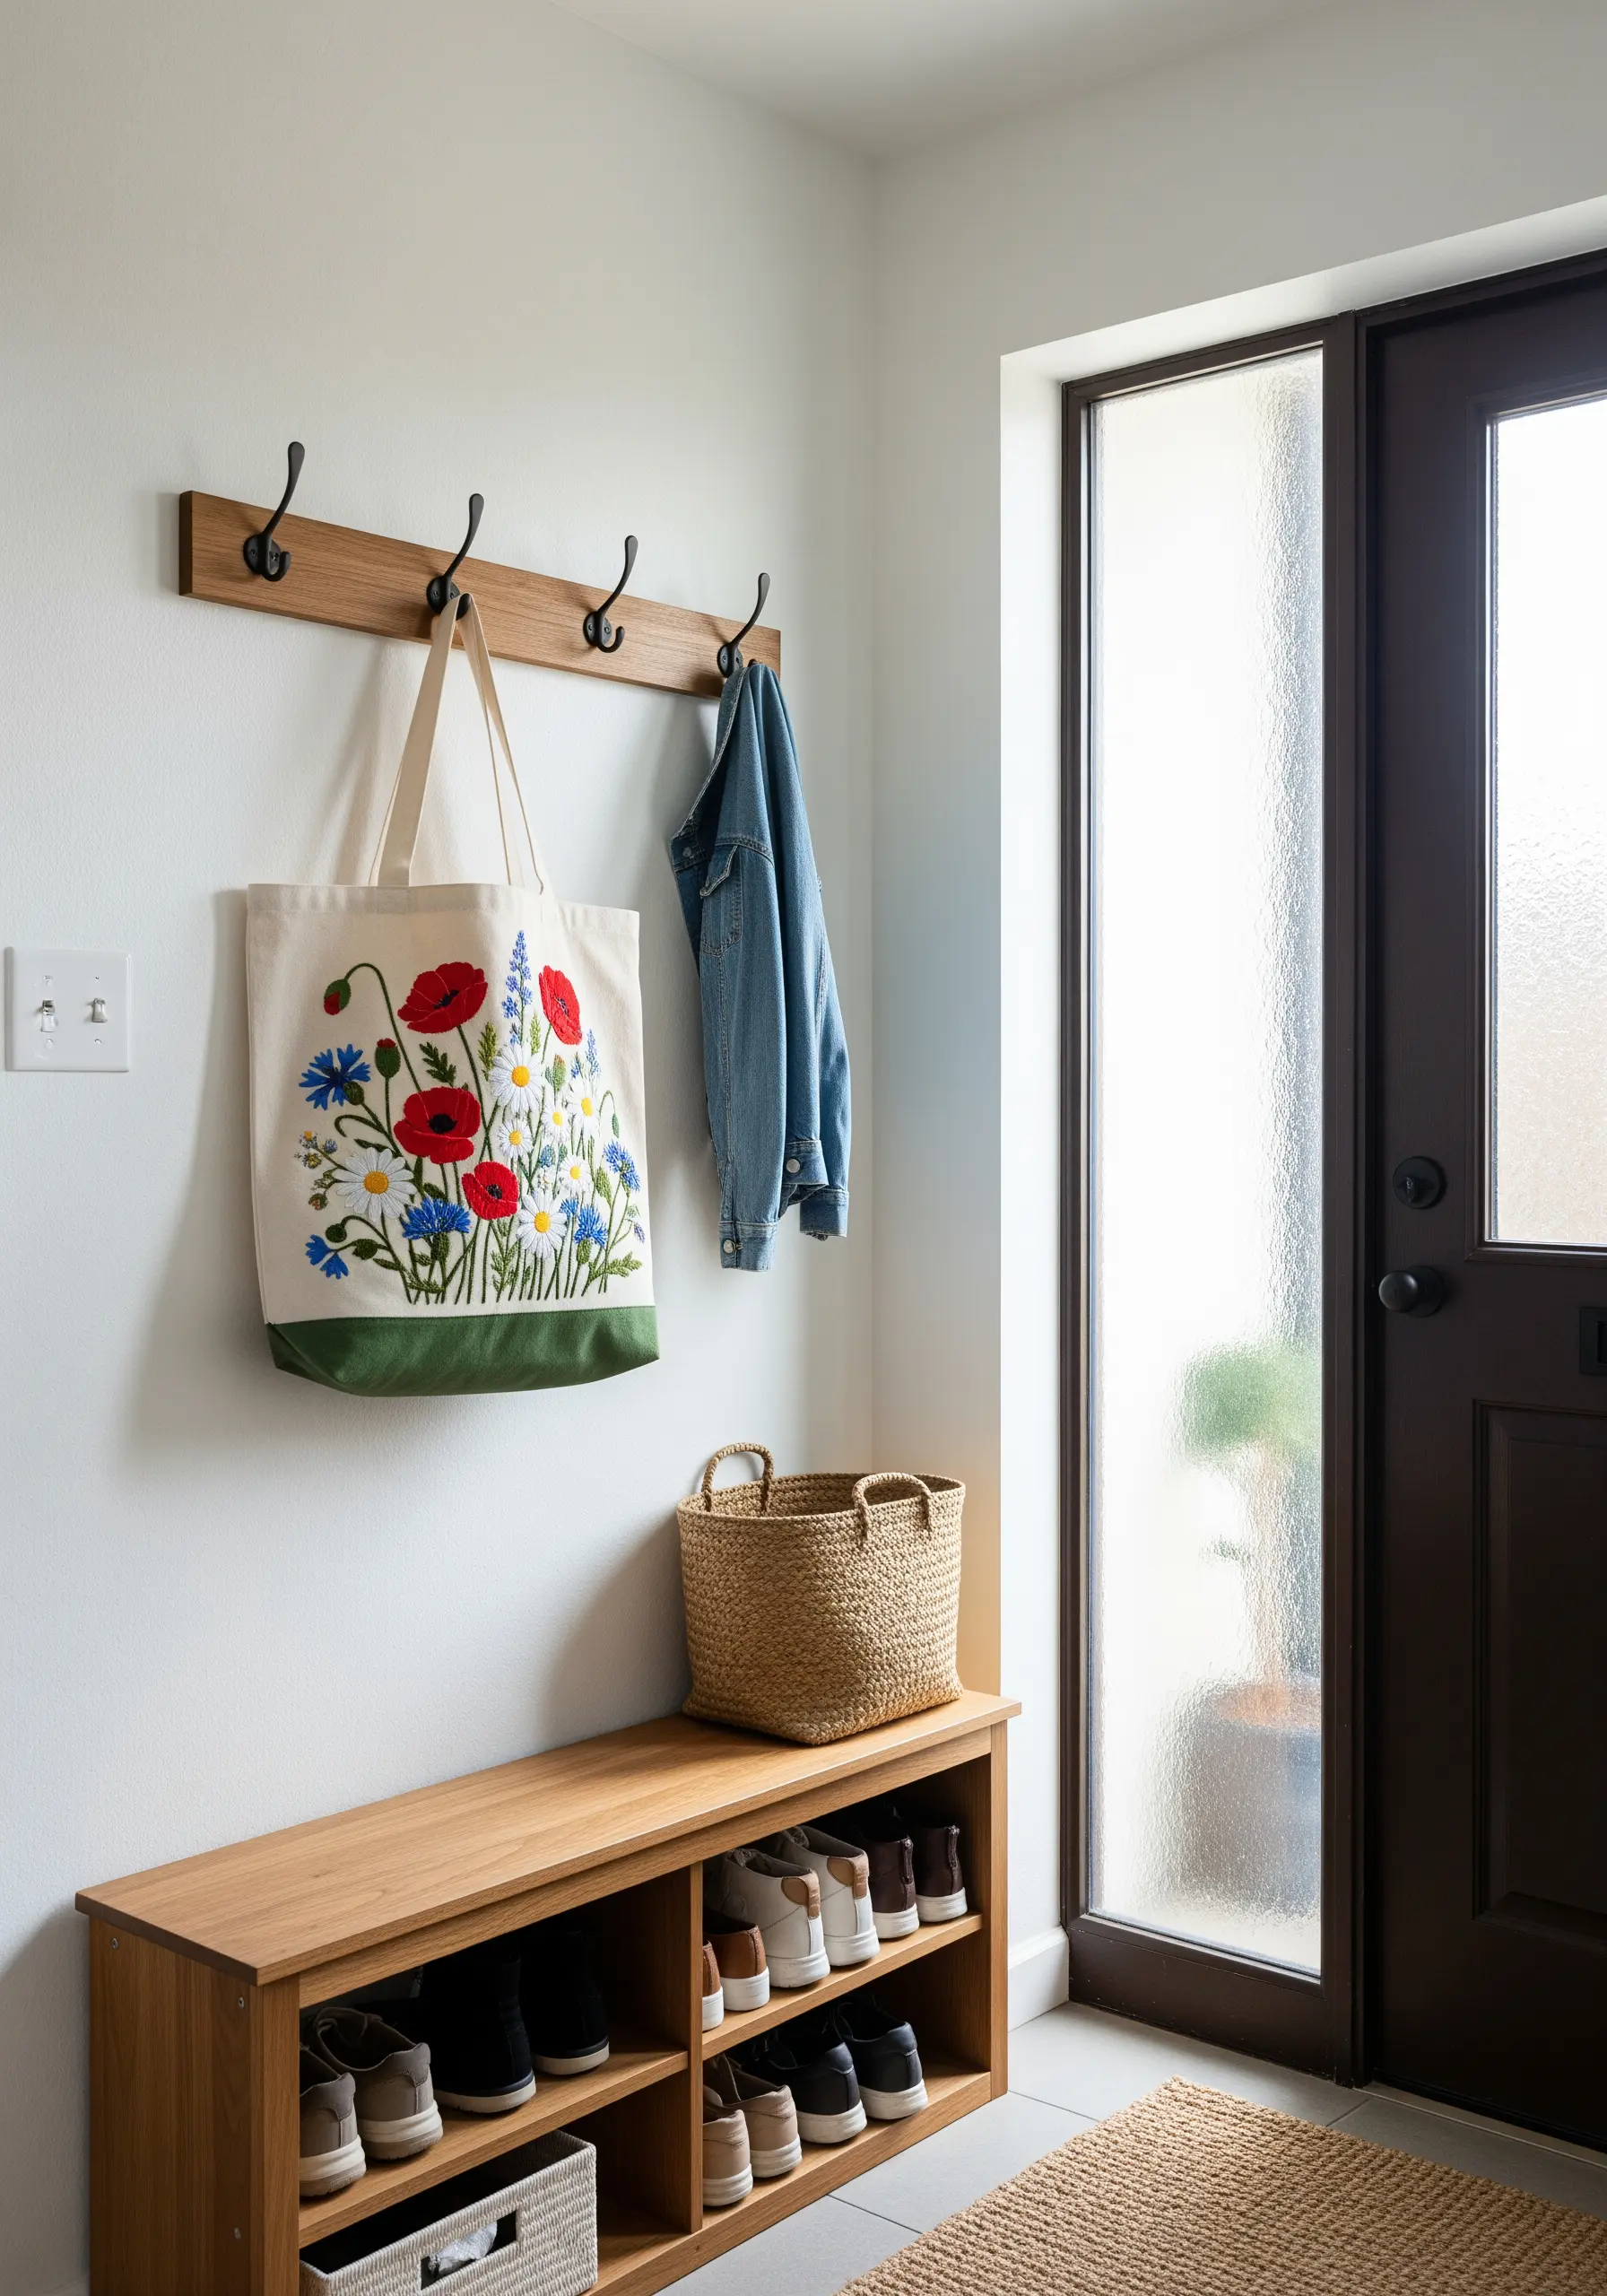
The secret to a vibrant, natural-looking floral composition is layering and stitch variety. Don’t place your flowers in neat rows; allow them to overlap and cluster naturally.
To create a dense, meadow-like texture, use a mix of stitches: satin stitch for the bold poppy petals, lazy daisy stitch for the smaller cornflowers, and French knots for the centers and filler flowers.
Start by stitching the elements that are furthest in the ‘background’ first, then layer the foreground flowers on top to create a sense of depth.
Using a heavy-duty canvas tote ensures the fabric can support the weight and density of the embroidery without puckering.
20. Create an Underwater World with Mixed Media
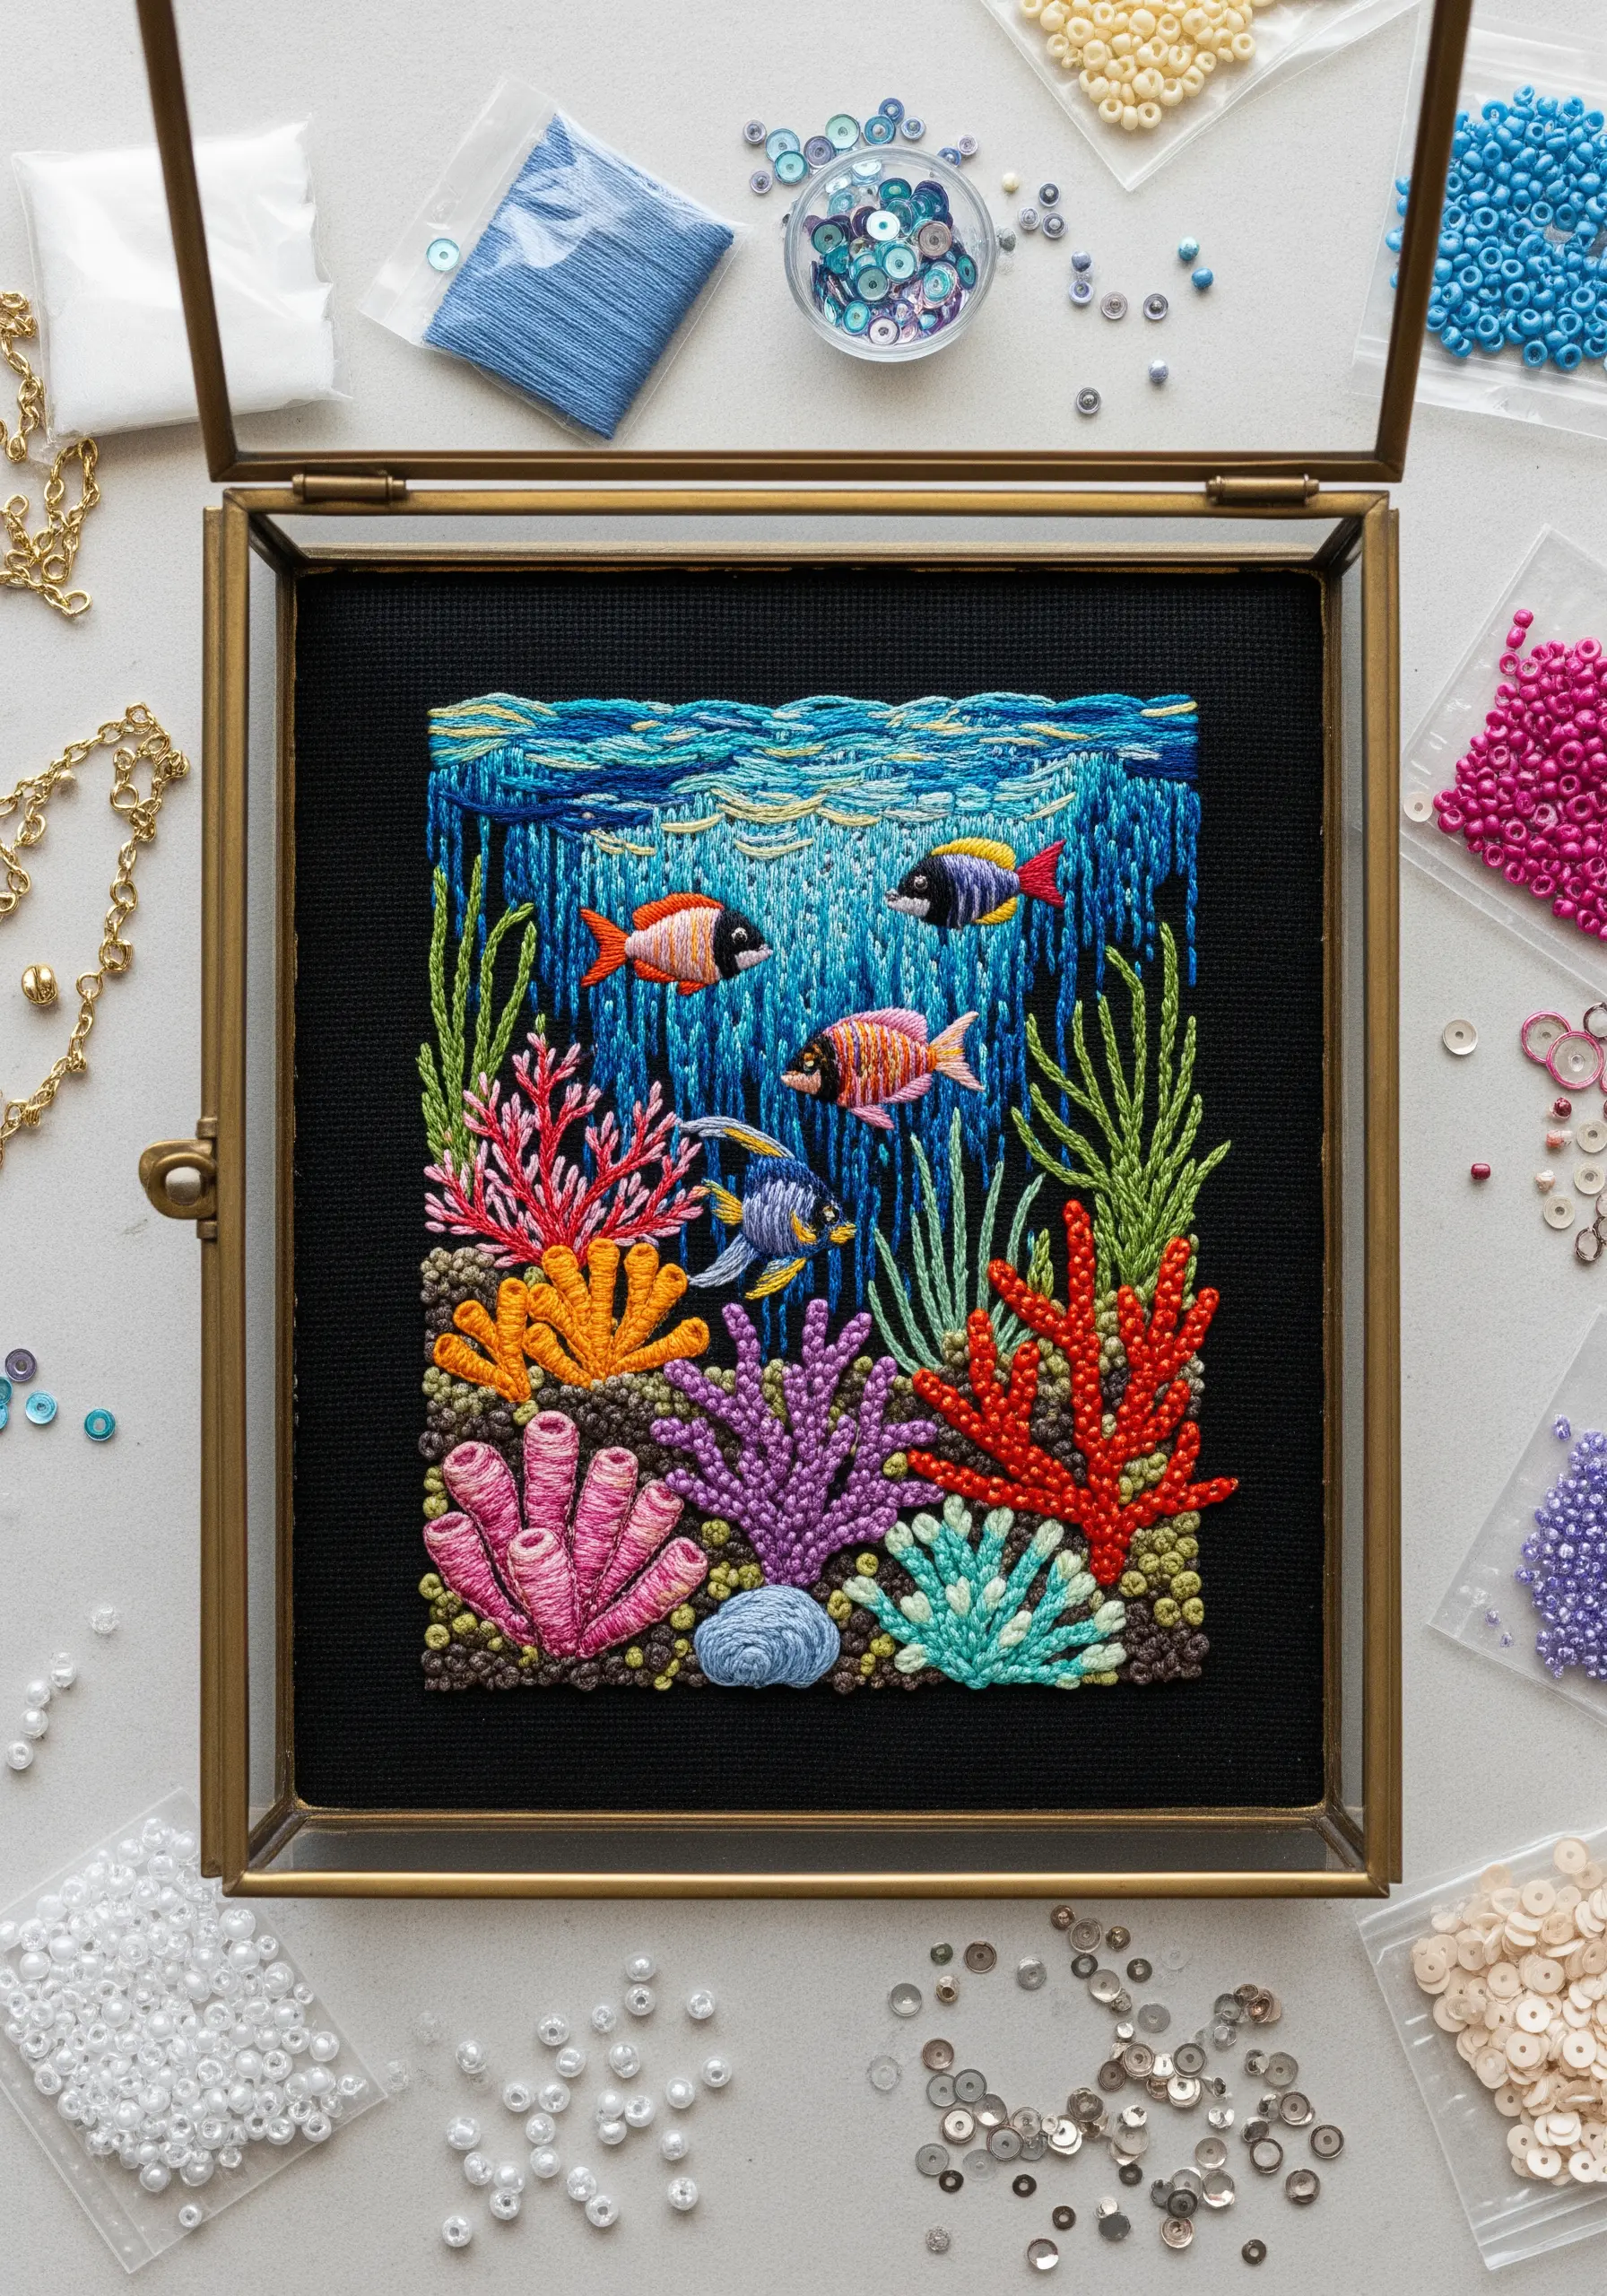
To capture the shimmering, multi-textured environment of a coral reef, incorporate more than just thread. This is the perfect project to add dimension with beads and sequins.
Use dense clusters of French knots in various colors to build the bumpy texture of coral. For seaweed, a smooth fishbone stitch or chain stitch works well.
Stitch long, vertical straight stitches in shades of blue for the water, and then scatter a few iridescent sequins or tiny beads throughout to mimic light filtering from the surface.
Working on black fabric makes the vibrant colors of the floss and the sparkle of the beads pop, creating a dramatic and captivating scene.
21. Make Lettering Pop with Padded Satin Stitch
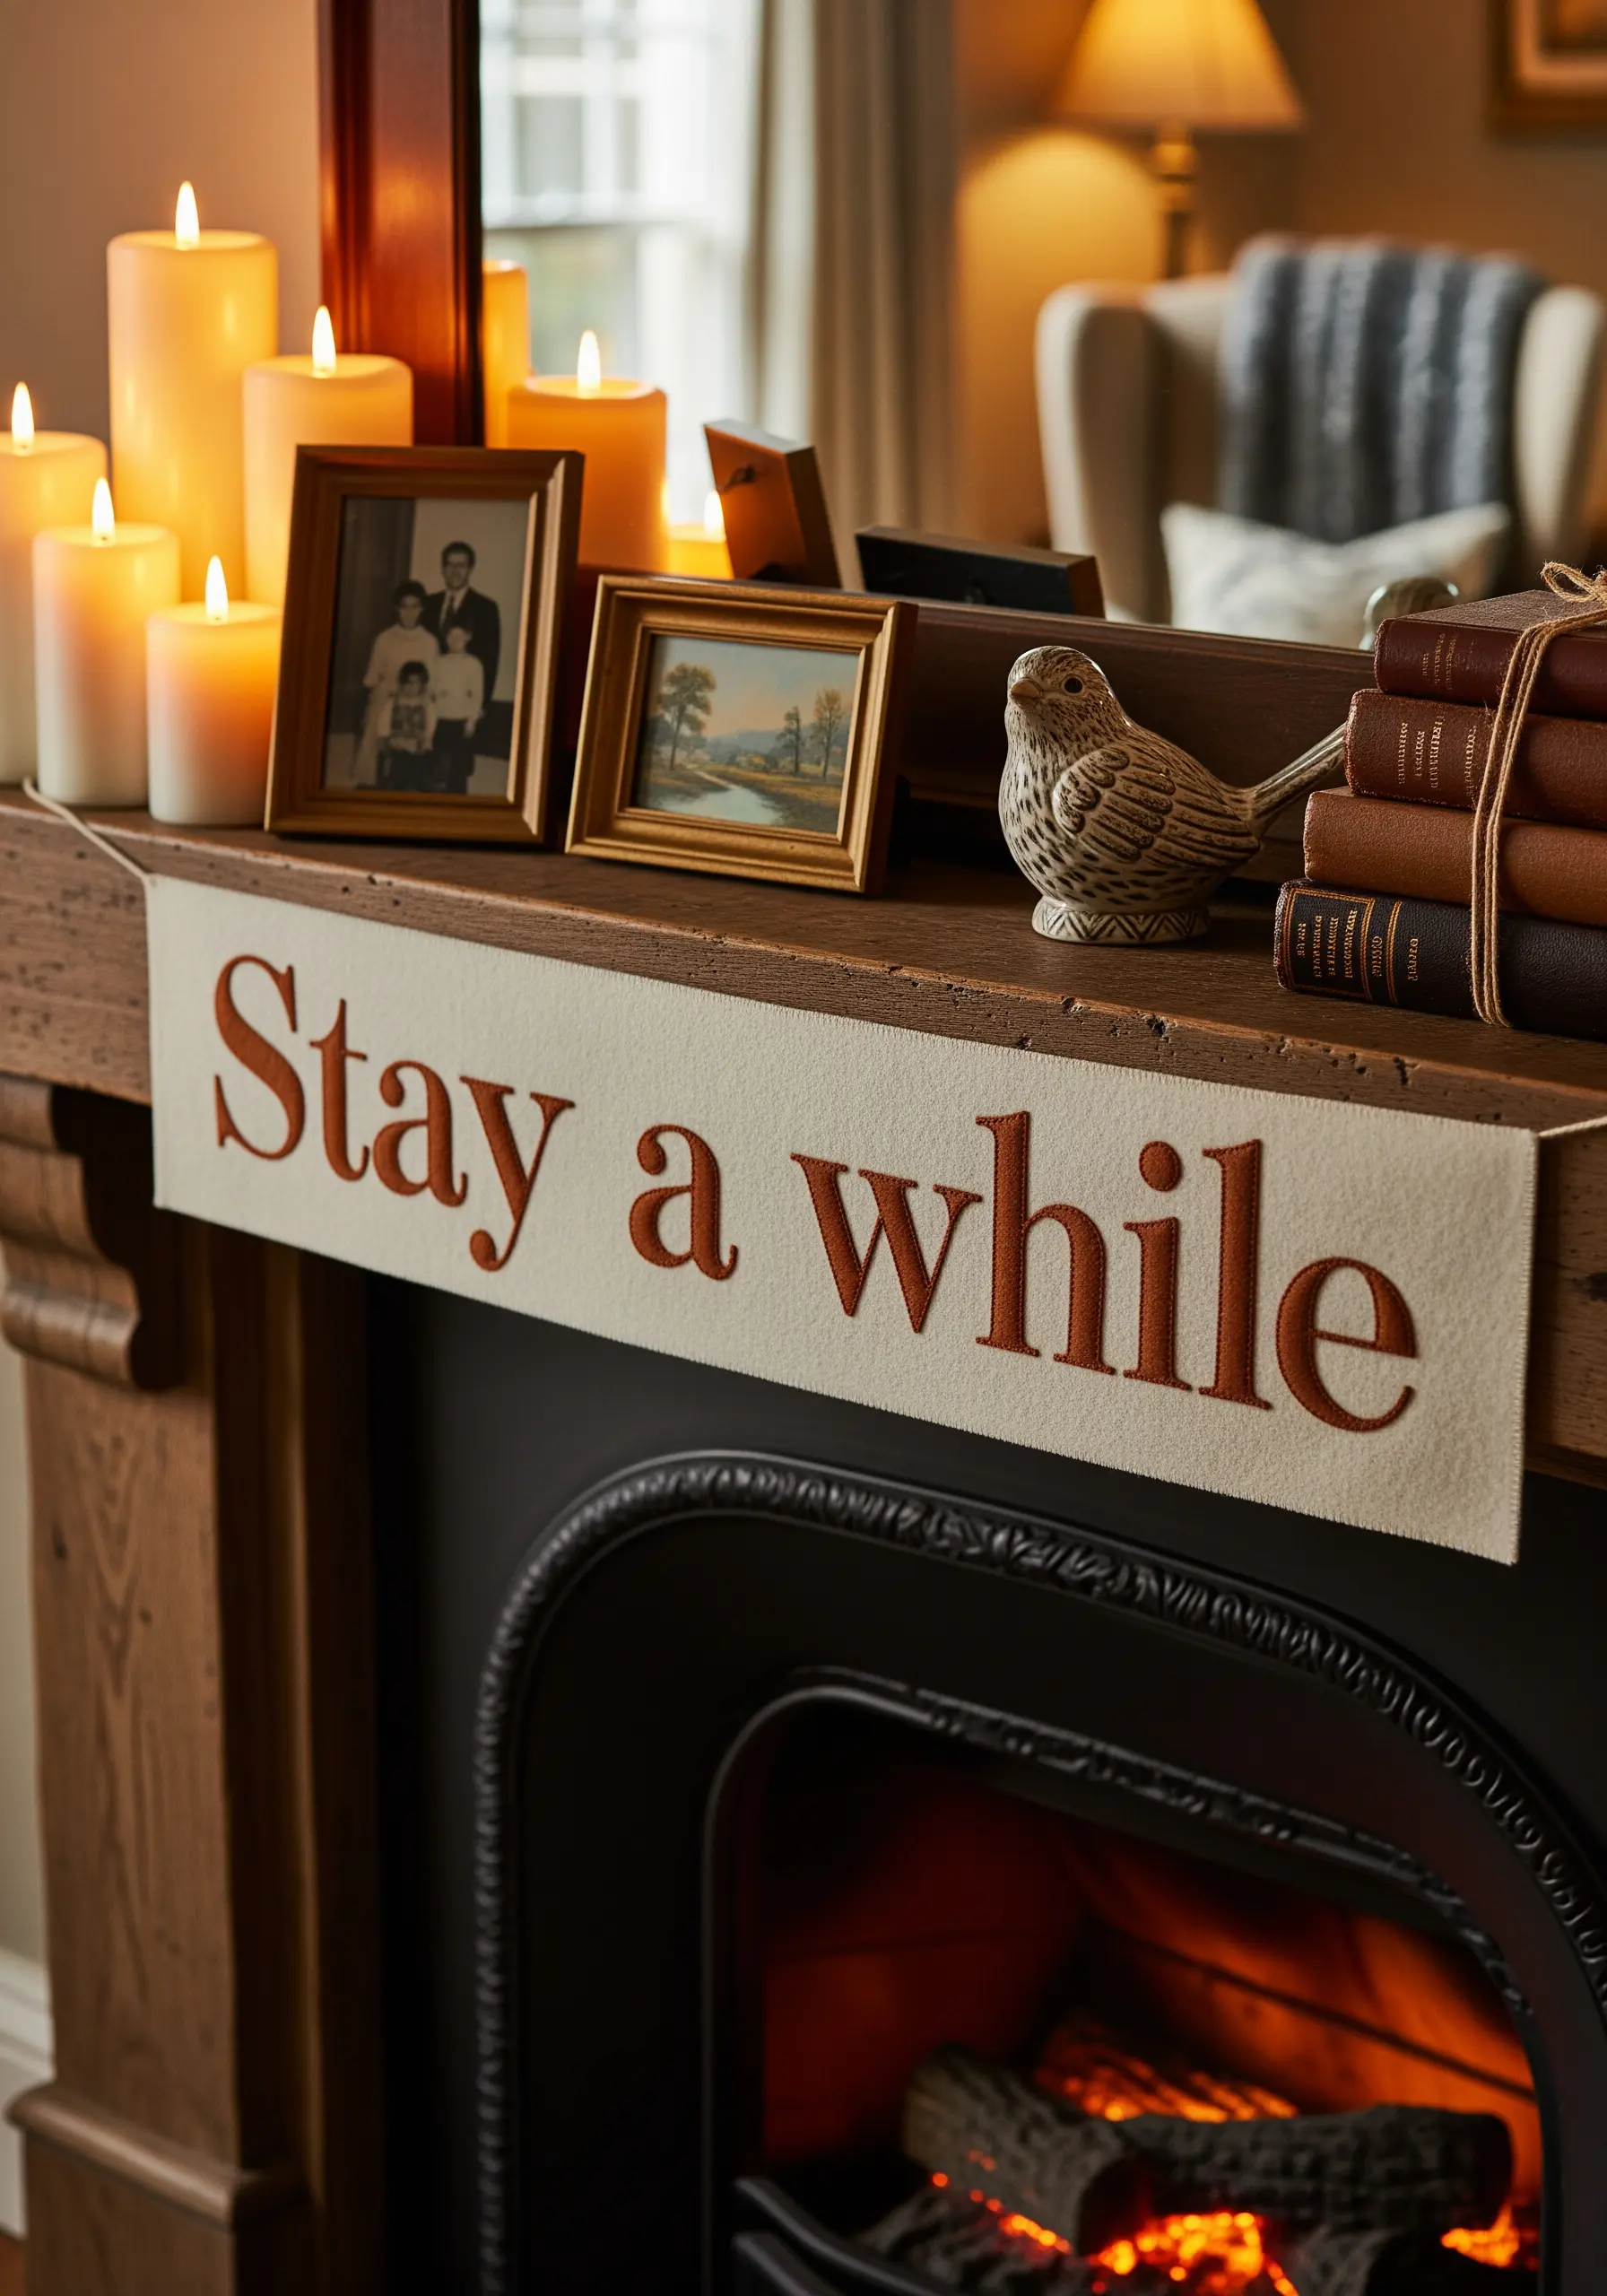
For bold lettering that stands out on home decor, a simple satin stitch can sometimes fall flat. Instead, use a padded satin stitch to give your letters a raised, three-dimensional look.
First, fill the inside of your letters with a base layer of small seed stitches or horizontal straight stitches. This underlay creates the ‘padding’.
Then, work your final satin stitch layer vertically over the padding. The added height catches the light beautifully and gives the text a satisfying, tactile presence.
This technique is especially effective for mantel banners or statement pillows where you want the message to be the undeniable focal point.
22. Design Delicate Bookmarks with Gradient Stitches
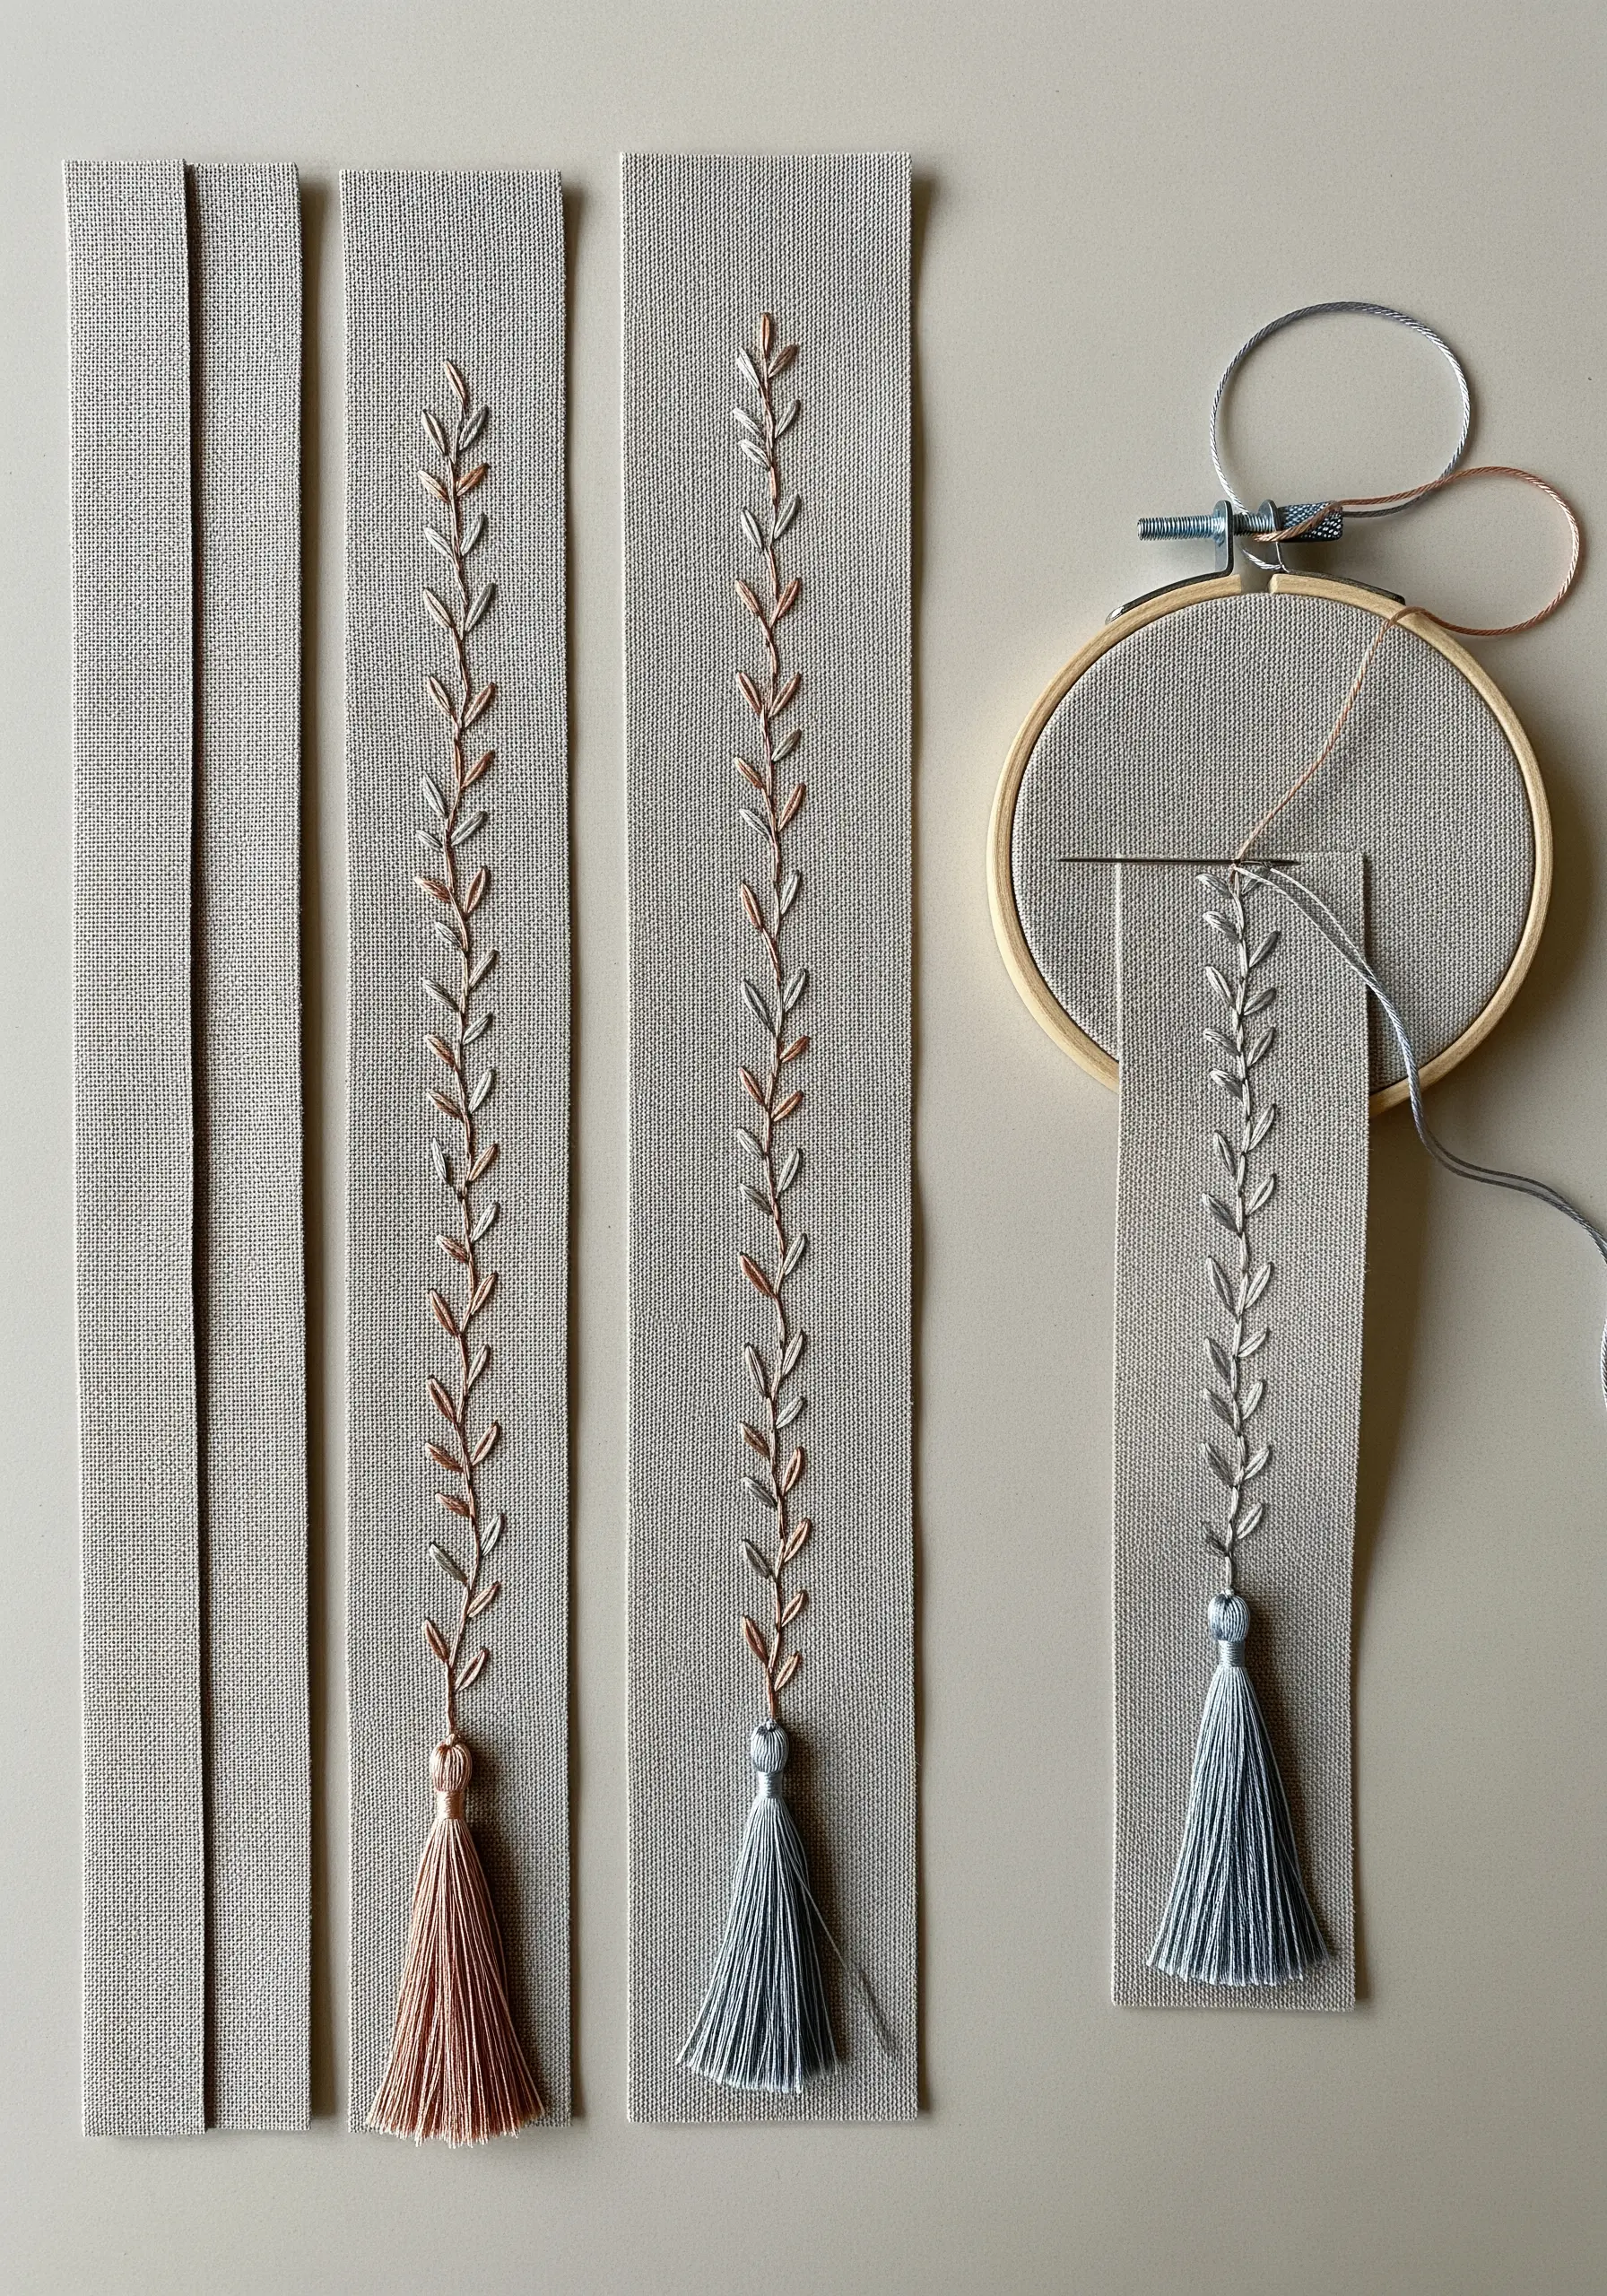
On a small, narrow surface like a bookmark, even subtle details make a big impact. Here, the goal is to create subtle color gradients within each tiny leaf.
Achieve this by using the long-and-short stitch. Fill the first half of a leaf with one color, making your stitches varied in length. Then, fill the second half with a new color, bringing your needle up through the stitches of the first color to blend them seamlessly.
For an even simpler approach, thread your needle with one strand of two different colors at the same time. The threads will twist randomly as you stitch, creating a variegated, heathered effect.
Finish with a handmade tassel using the same floss colors to tie the whole design together.


