

In a small space, every object matters. It’s not about filling walls, but about curating moments of meaning and beauty. Tiny botanical embroidery offers just that—a way to cultivate a garden of art that asks for nothing more than a small patch of wall, a corner of a shelf, or the space above your desk.
This isn’t just about the stitching itself, but the art of display. The way you frame, group, and place your work is what transforms a simple craft into a thoughtful interior statement. It’s how you guide the eye, create a mood, and make a space feel intentionally, beautifully yours.
Here, you’ll find not just inspiration, but practical ways to think about composition, color, and context. Let these ideas empower you to pick up a needle and thread, knowing that even the smallest stitched leaf or petal can breathe life and personality into your home.
1. Create a Cascading Vertical Display
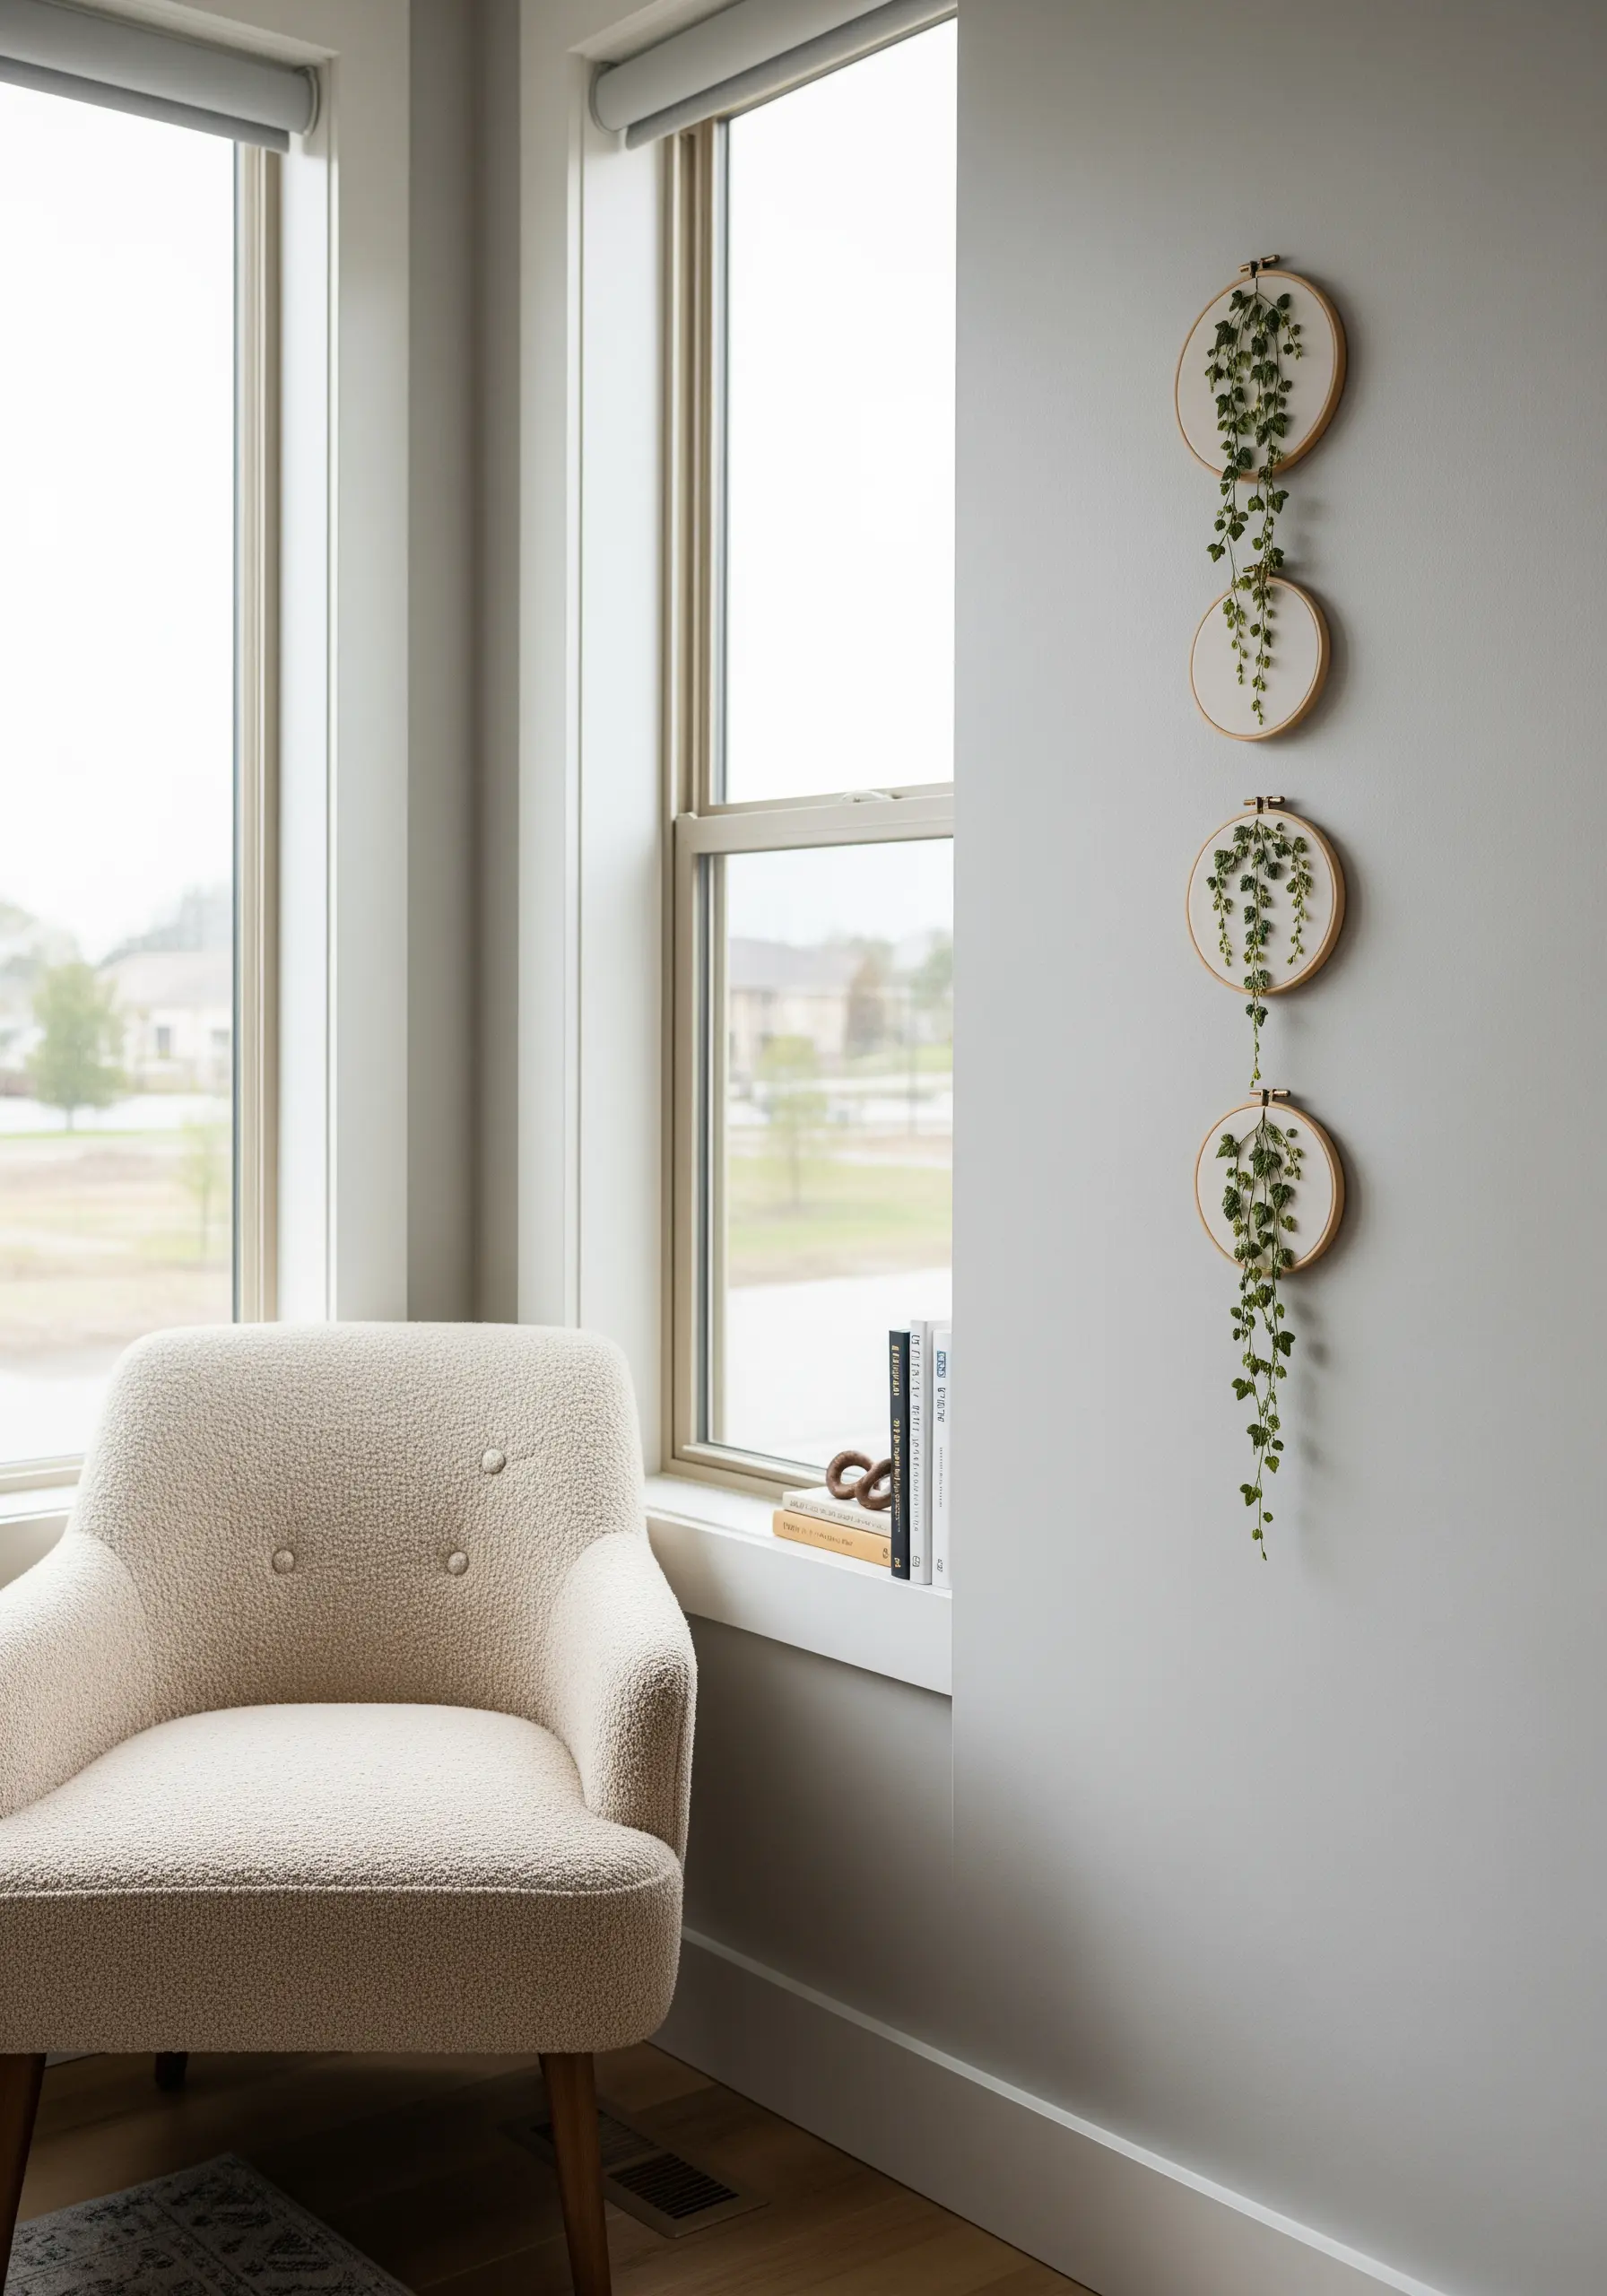
Transform a narrow wall by arranging hoops in a vertical line to draw the eye upward, creating an illusion of height.
For a trailing plant effect, let a few stitched vines or even a delicate faux plant extend beyond the hoop’s edge, connecting the pieces and adding a touch of three-dimensional life.
This technique works because it turns multiple small pieces into a single, cohesive statement, making it feel intentional rather than cluttered.
Use hoops of the same size for a clean, rhythmic pattern, or vary them slightly to create a more organic flow.
2. Arrange Geometric Frames in a Modern Cluster

Move beyond the traditional circle and embrace hexagonal frames to add a sharp, contemporary edge to your botanical subjects.
Group them in a honeycomb-inspired formation above a desk or workspace for a burst of structured creativity.
This arrangement feels balanced and intentional, allowing each succulent or flower to stand as its own clean specimen while contributing to a larger design.
To stitch succulents, use French knots and bullion stitches to build up the dense, fleshy texture of the petals, contrasting beautifully with the frame’s clean lines.
3. Curate a Serene Headboard Gallery
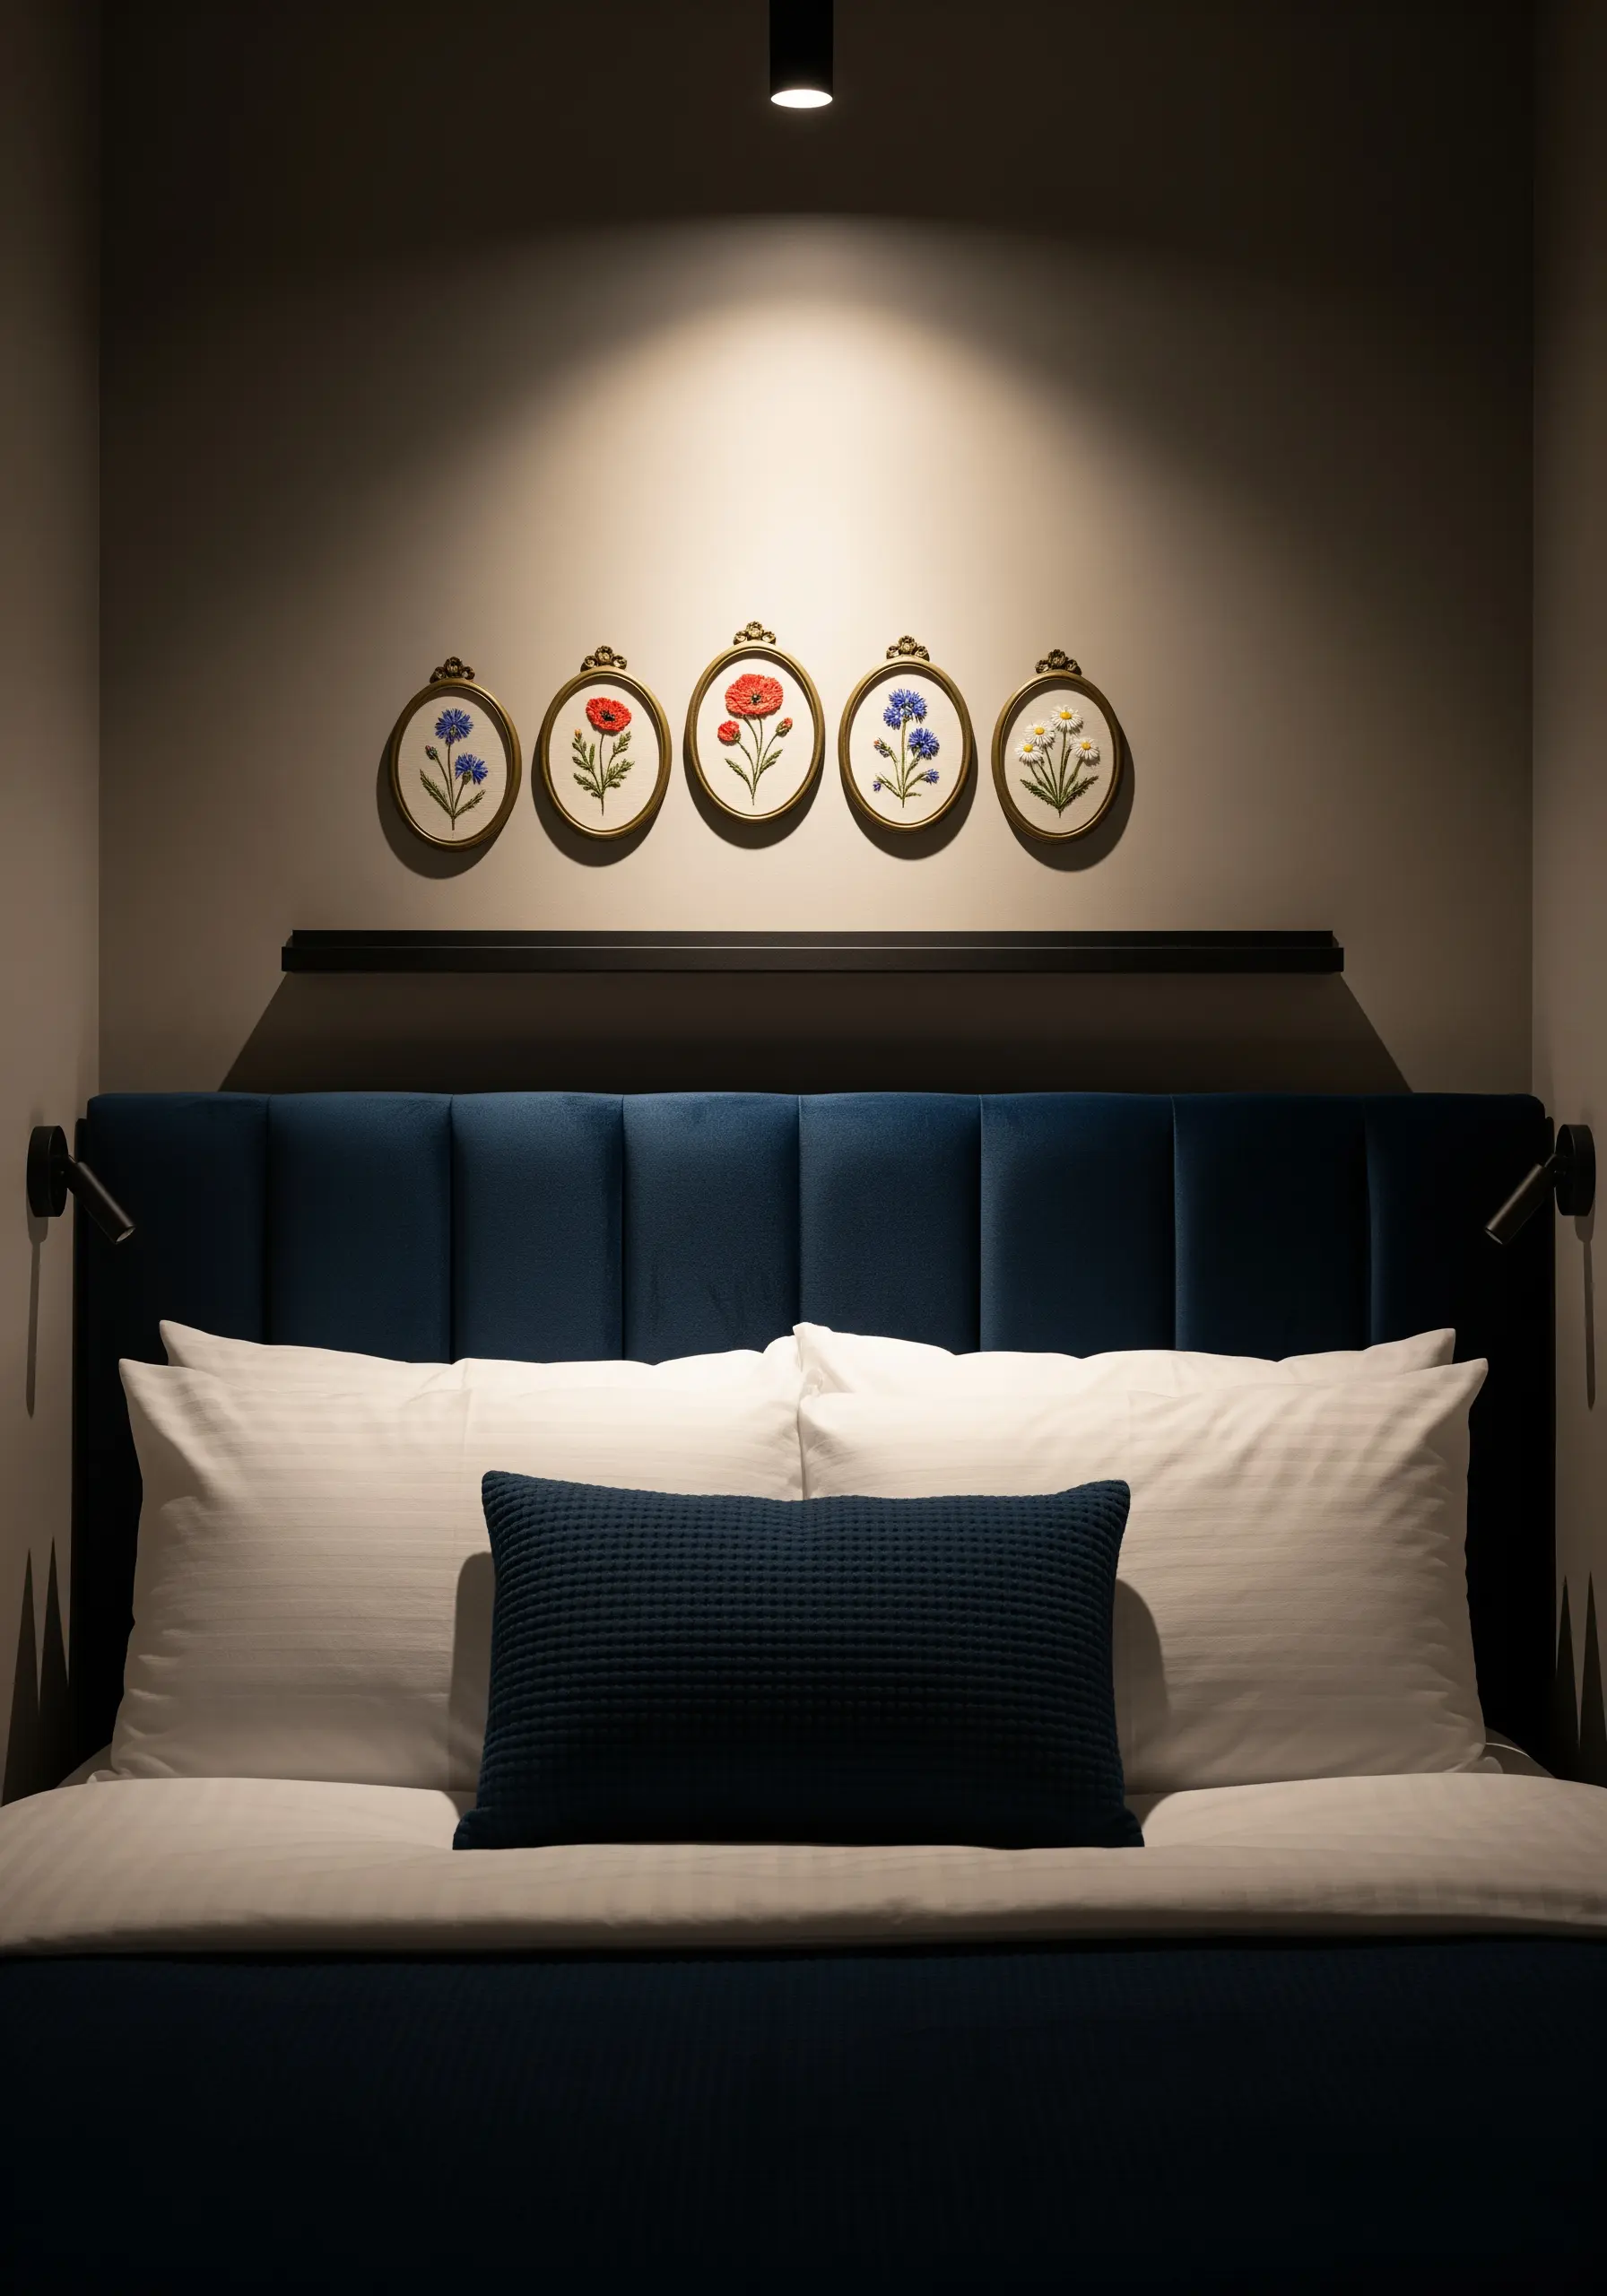
Create a calming focal point above your bed by arranging a series of small floral hoops on a floating shelf.
Choose a limited color palette—like blues, reds, and yellows on a neutral background—to ensure the collection feels serene rather than busy.
Using small, ornate frames elevates the embroidery, transforming simple hoops into miniature art pieces.
For delicate wildflowers, work with a single strand of floss to capture the fine details of petals and stems, making the work feel refined and precious.
This creates a personal, boutique-hotel feeling, perfect for serenity-filled bedroom walls.
4. Stitch Functional Art for Your Kitchen Nook
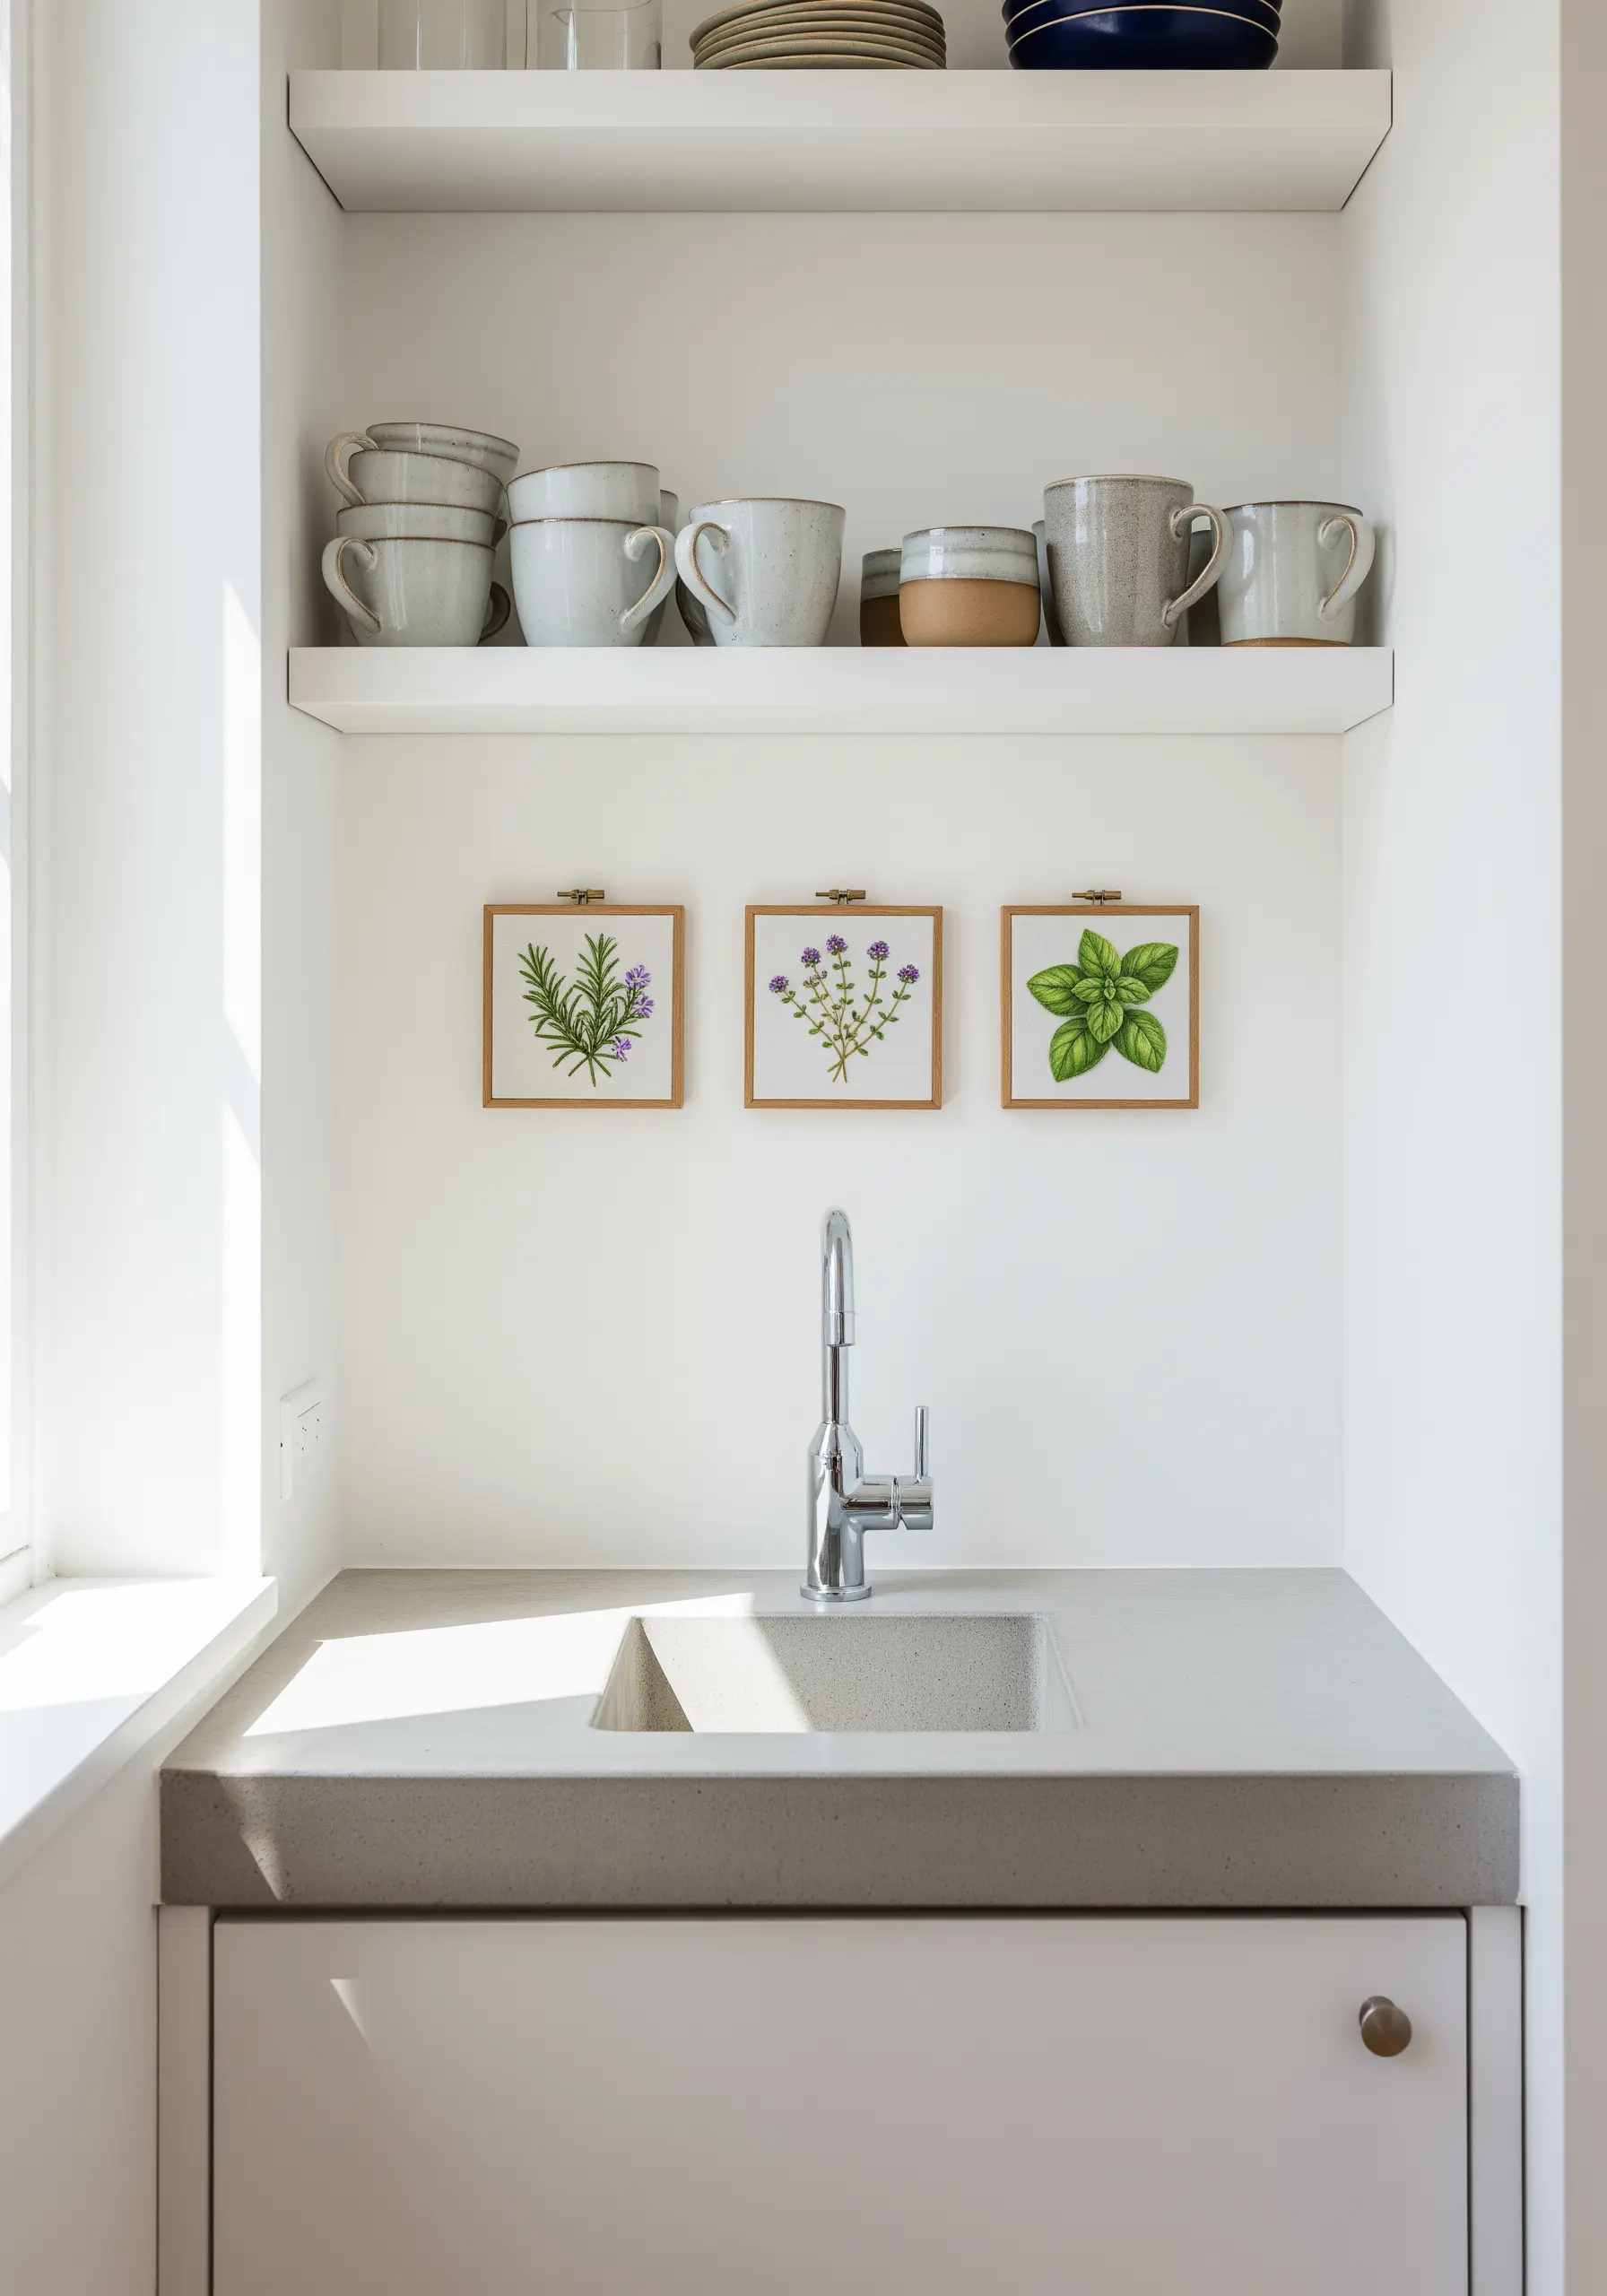
Bring the garden into your kitchen by stitching culinary herbs like rosemary, thyme, and basil.
Displaying them in simple square frames near a sink or prep area adds a touch of freshness and connects the art to the room’s purpose.
Use a crisp split stitch for the stems and a smooth satin stitch for the leaves to create a clean, illustrative style that pops against a white wall.
These medicinal herb embroidery designs are not just decorative; they celebrate the ingredients you use every day.
5. Build an Organic, Asymmetrical Cluster
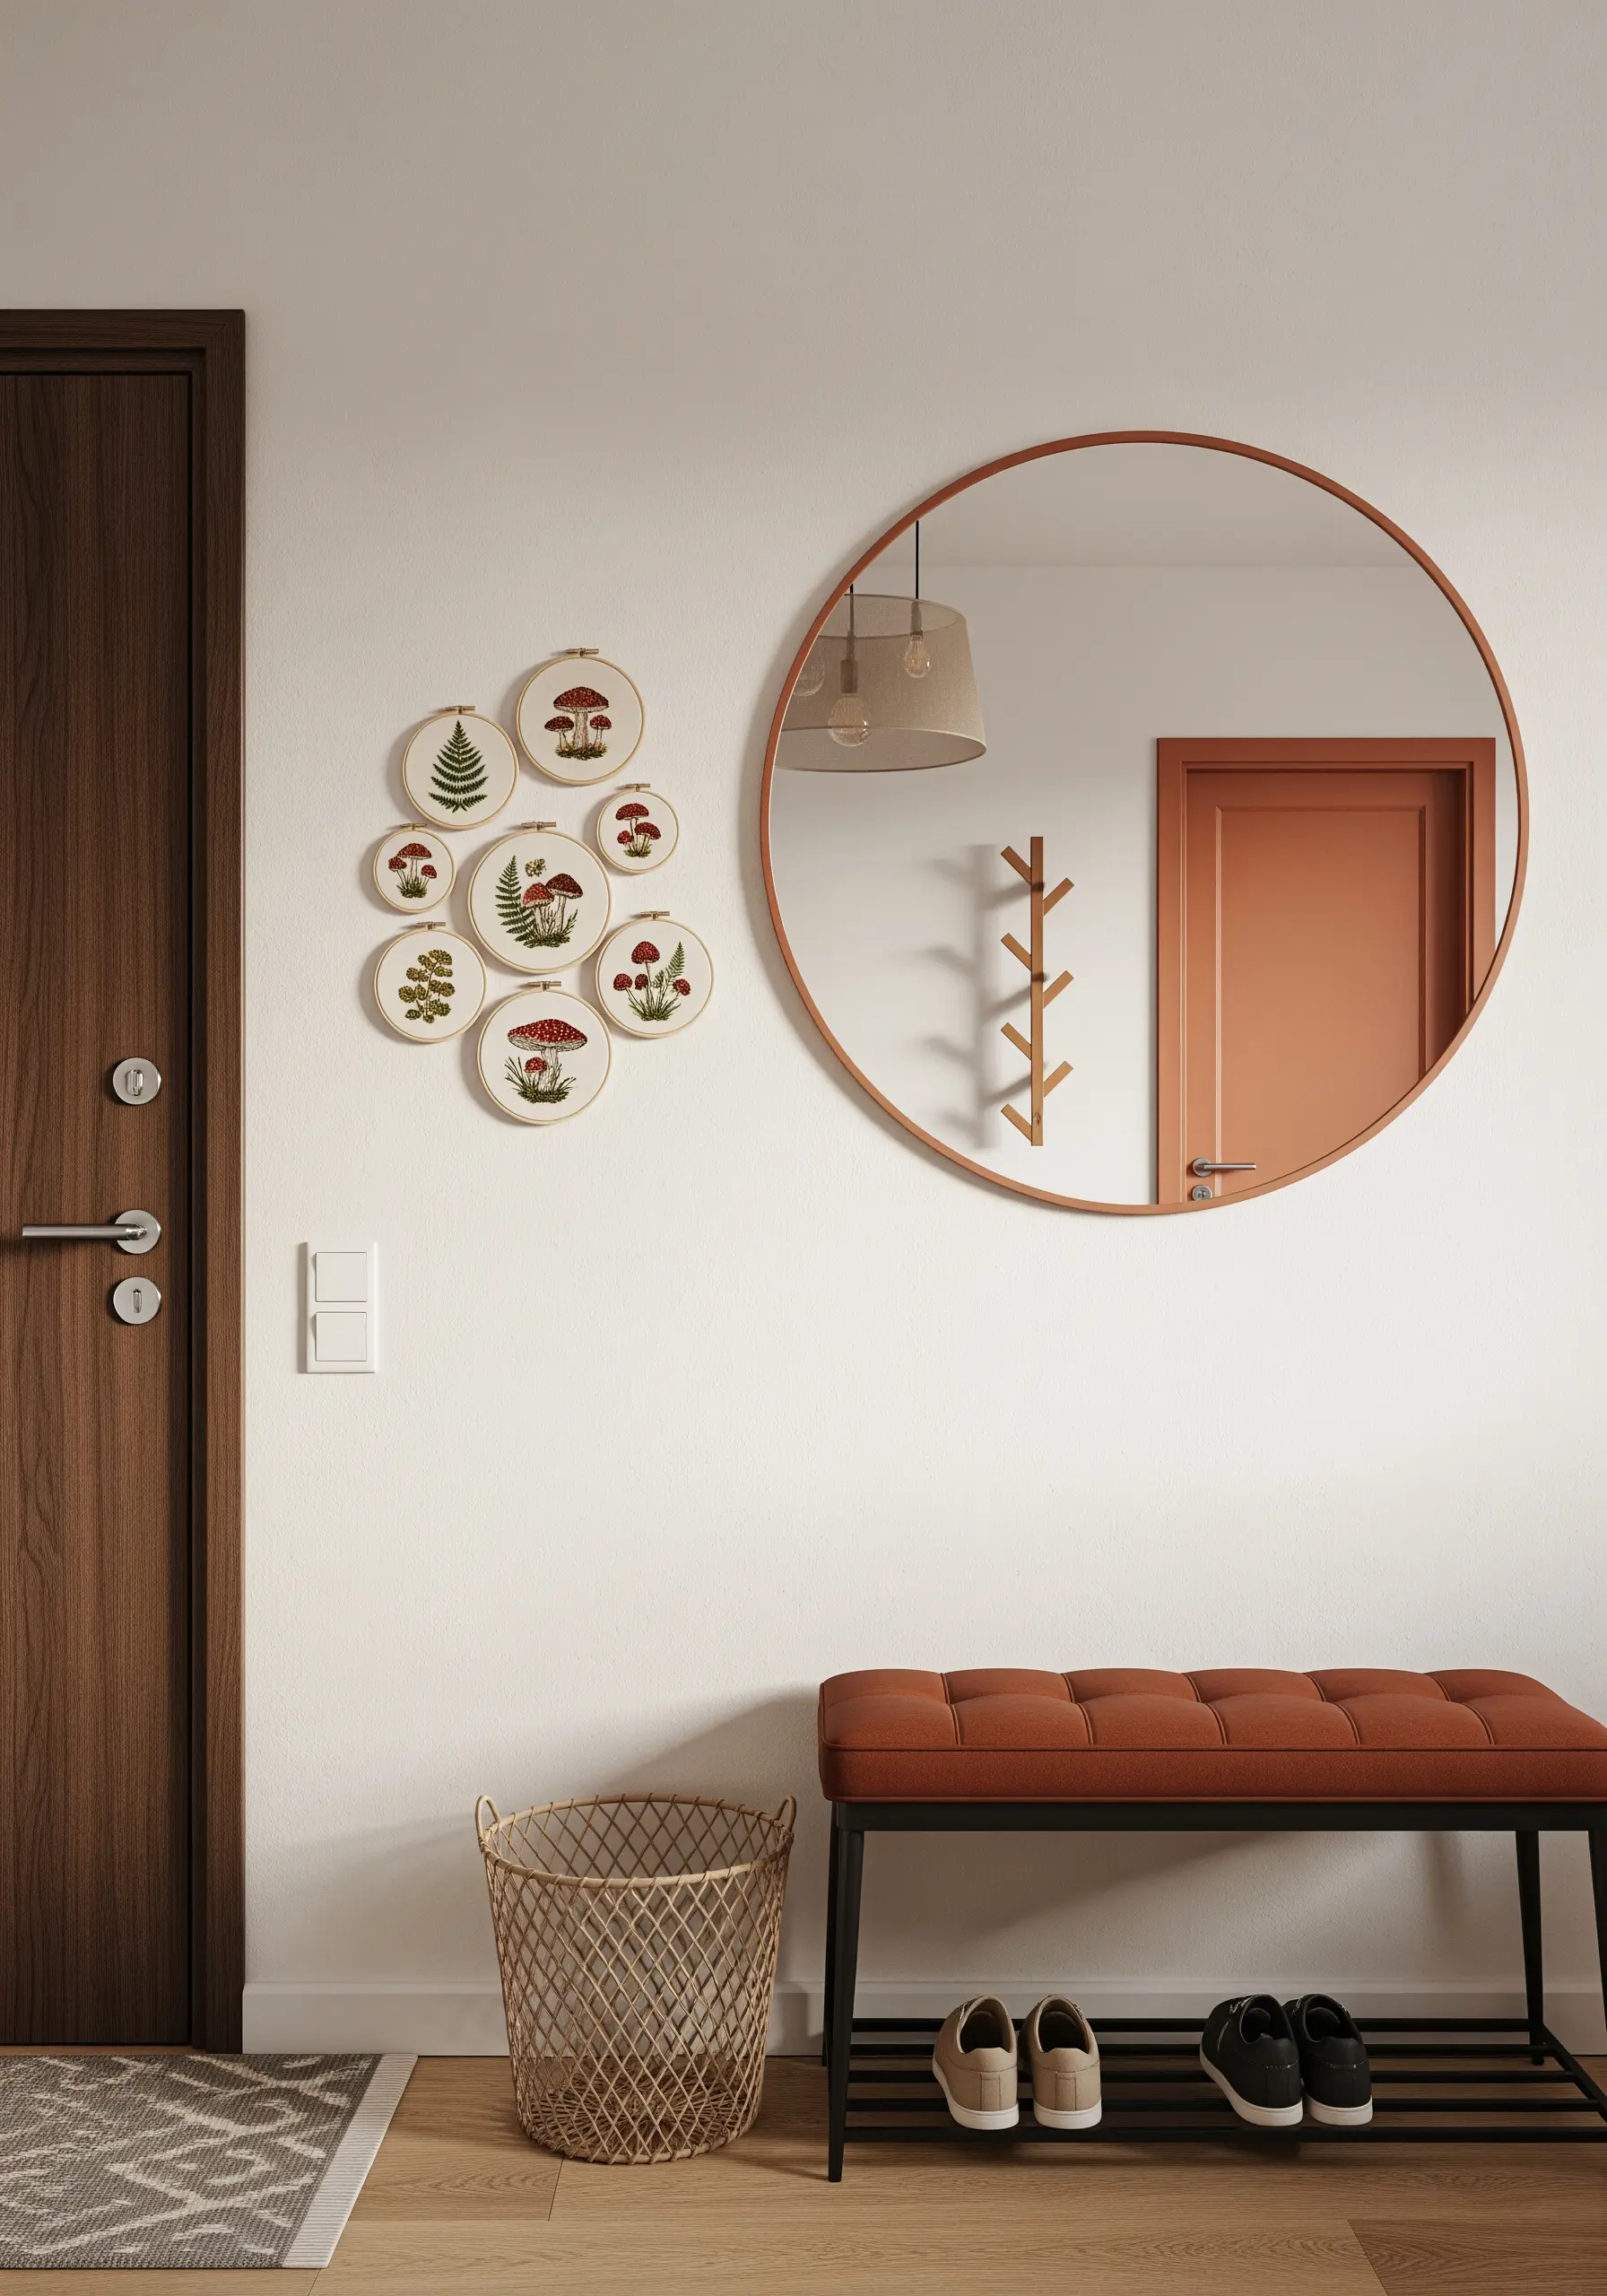
Tell a story on your wall by grouping botanicals in a free-flowing, asymmetrical arrangement, mimicking how they grow in nature.
Varying the hoop sizes—mixing tiny 3-inch hoops with larger 5-inch ones—adds rhythm and visual interest to the composition.
For toadstools and ferns, play with texture: use padded satin stitch to give the mushroom caps a rounded, 3D feel and fishbone stitch for the fern’s delicate fronds.
This approach is perfect for creating rustic woodland cottage themes in an entryway or hallway.
6. Isolate a Single Motif for Minimalist Impact
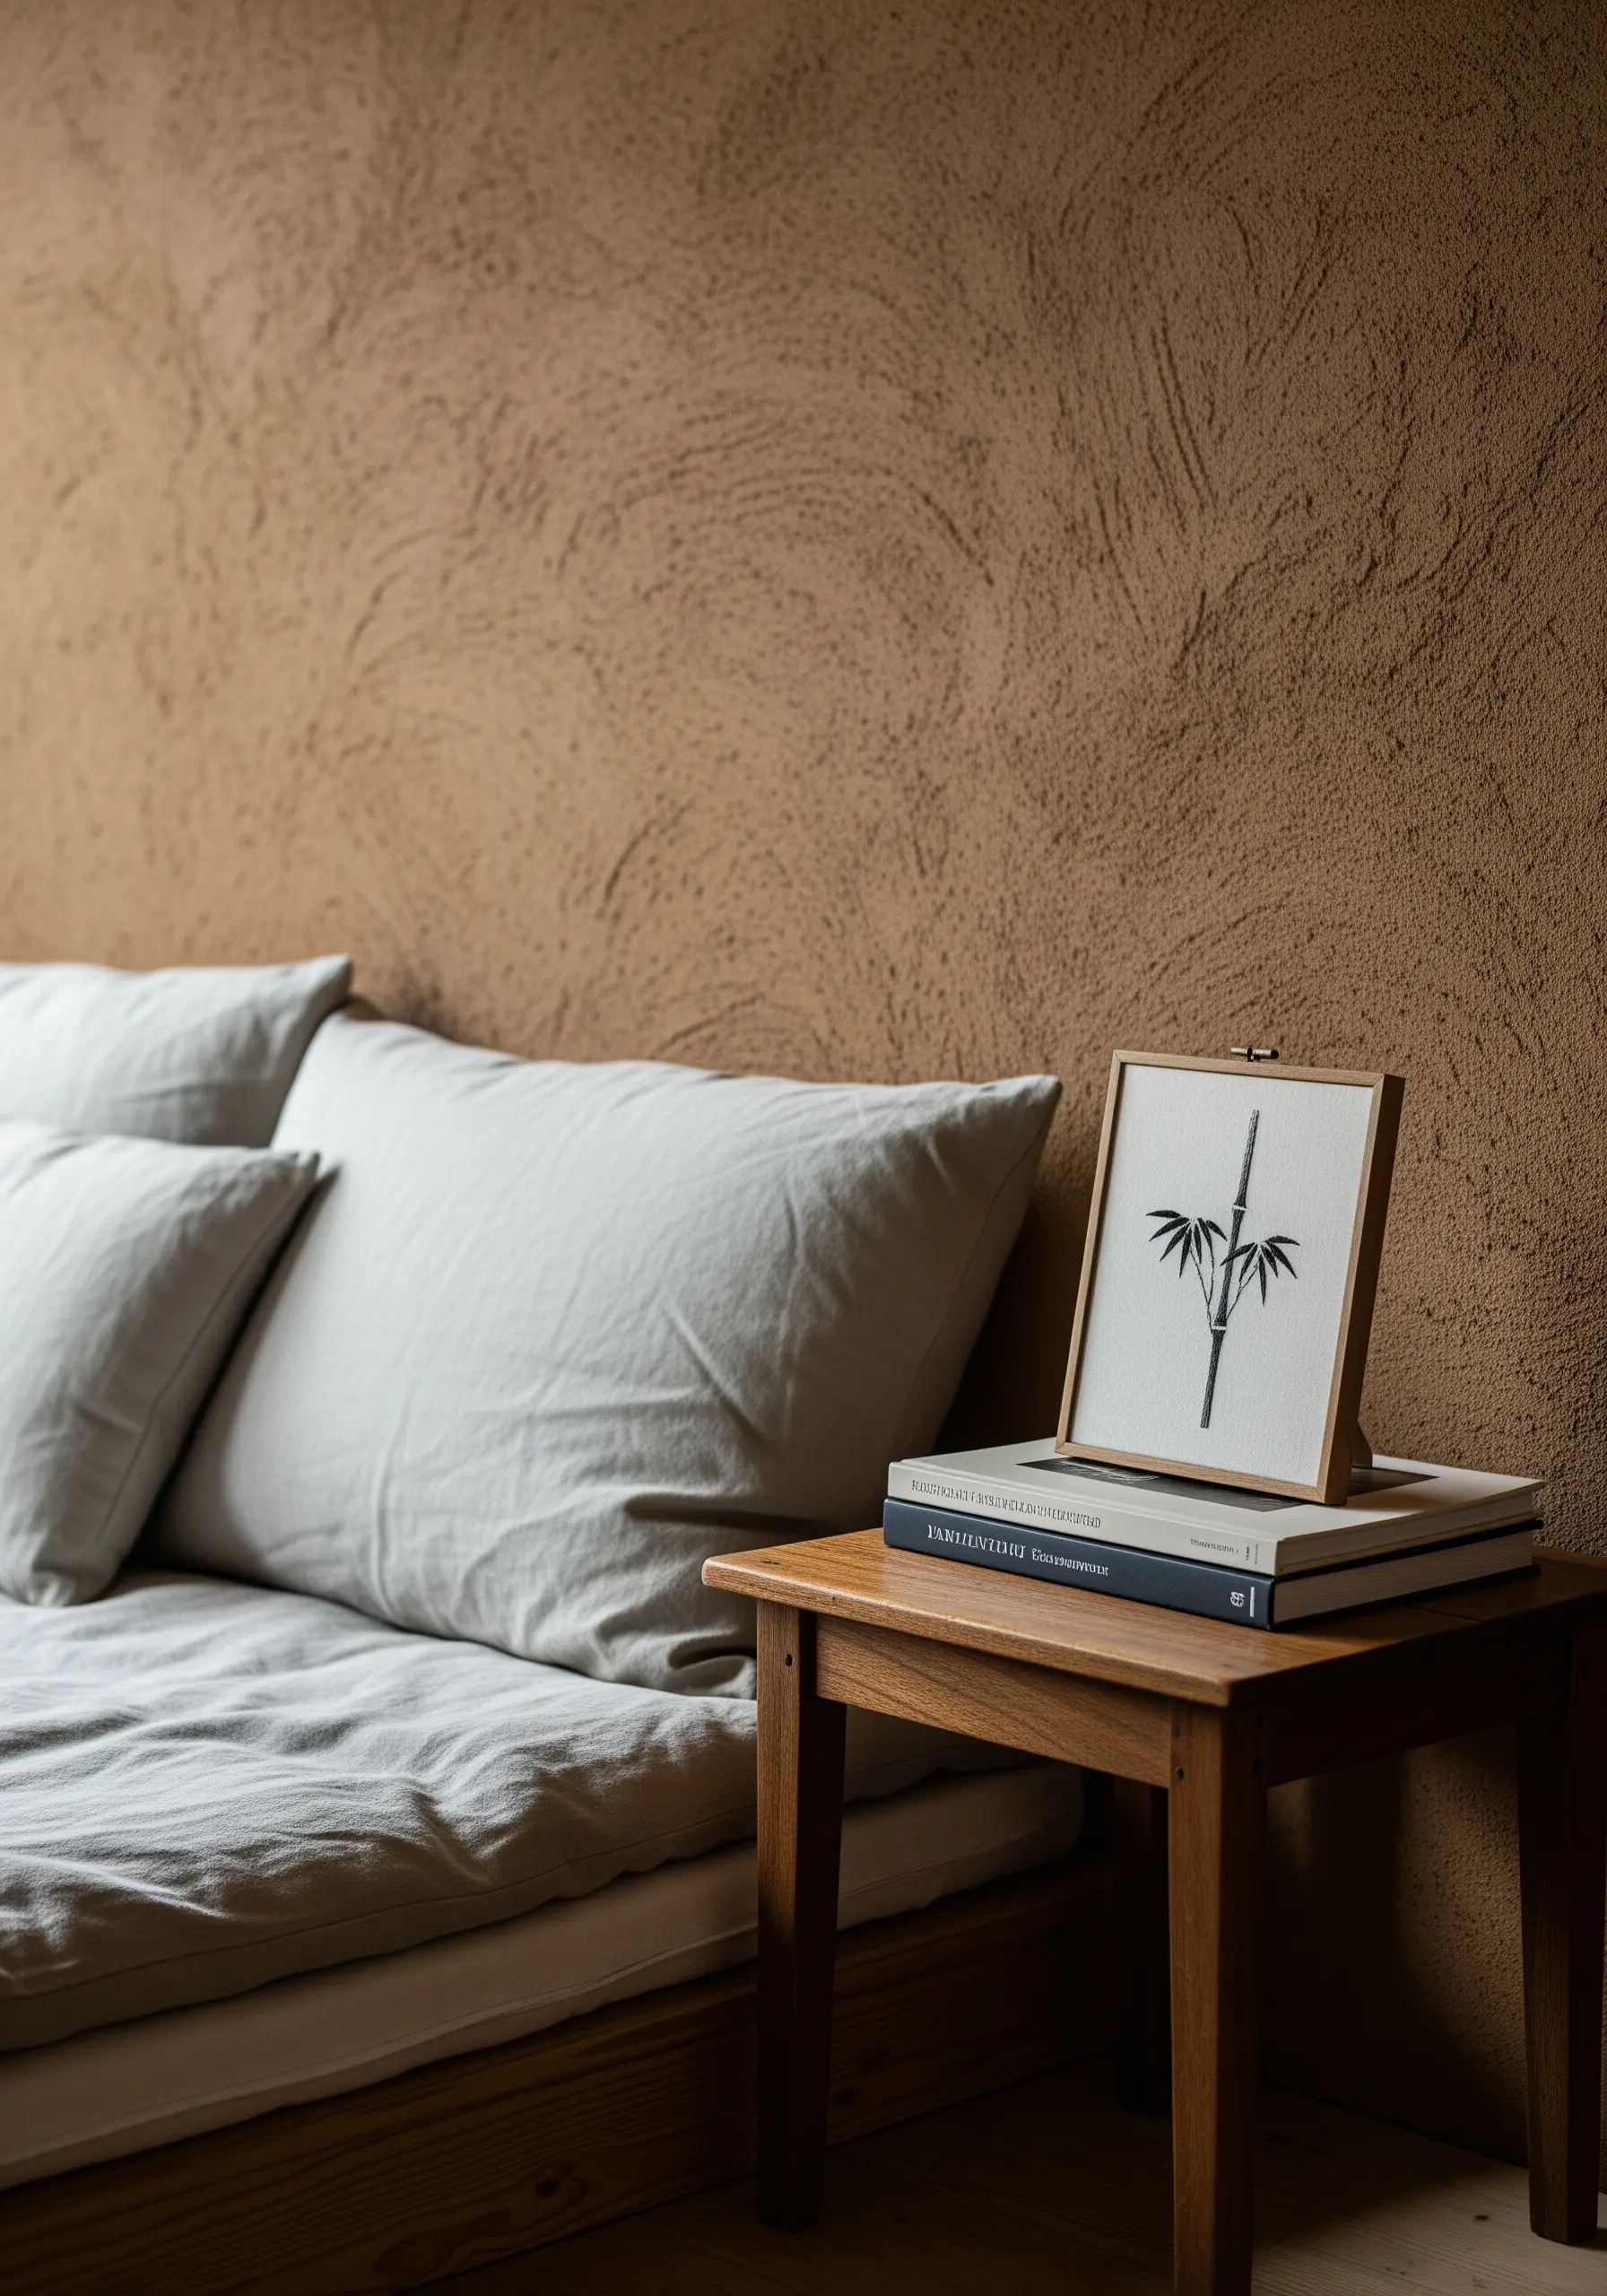
Create a powerful statement by isolating a single, elegant motif in a simple frame.
Stitching a bamboo stalk in a single dark color on a light, textured fabric creates a graphic, almost calligraphic effect that feels both modern and serene.
This technique relies on the power of negative space, allowing the subject to breathe and draw the viewer’s full attention.
Focus on precise linework using a stem stitch or backstitch to ensure every line is crisp and intentional, turning a simple design into a piece of refined art.
7. Use Dark Fabric for a Dramatic Pop of Color
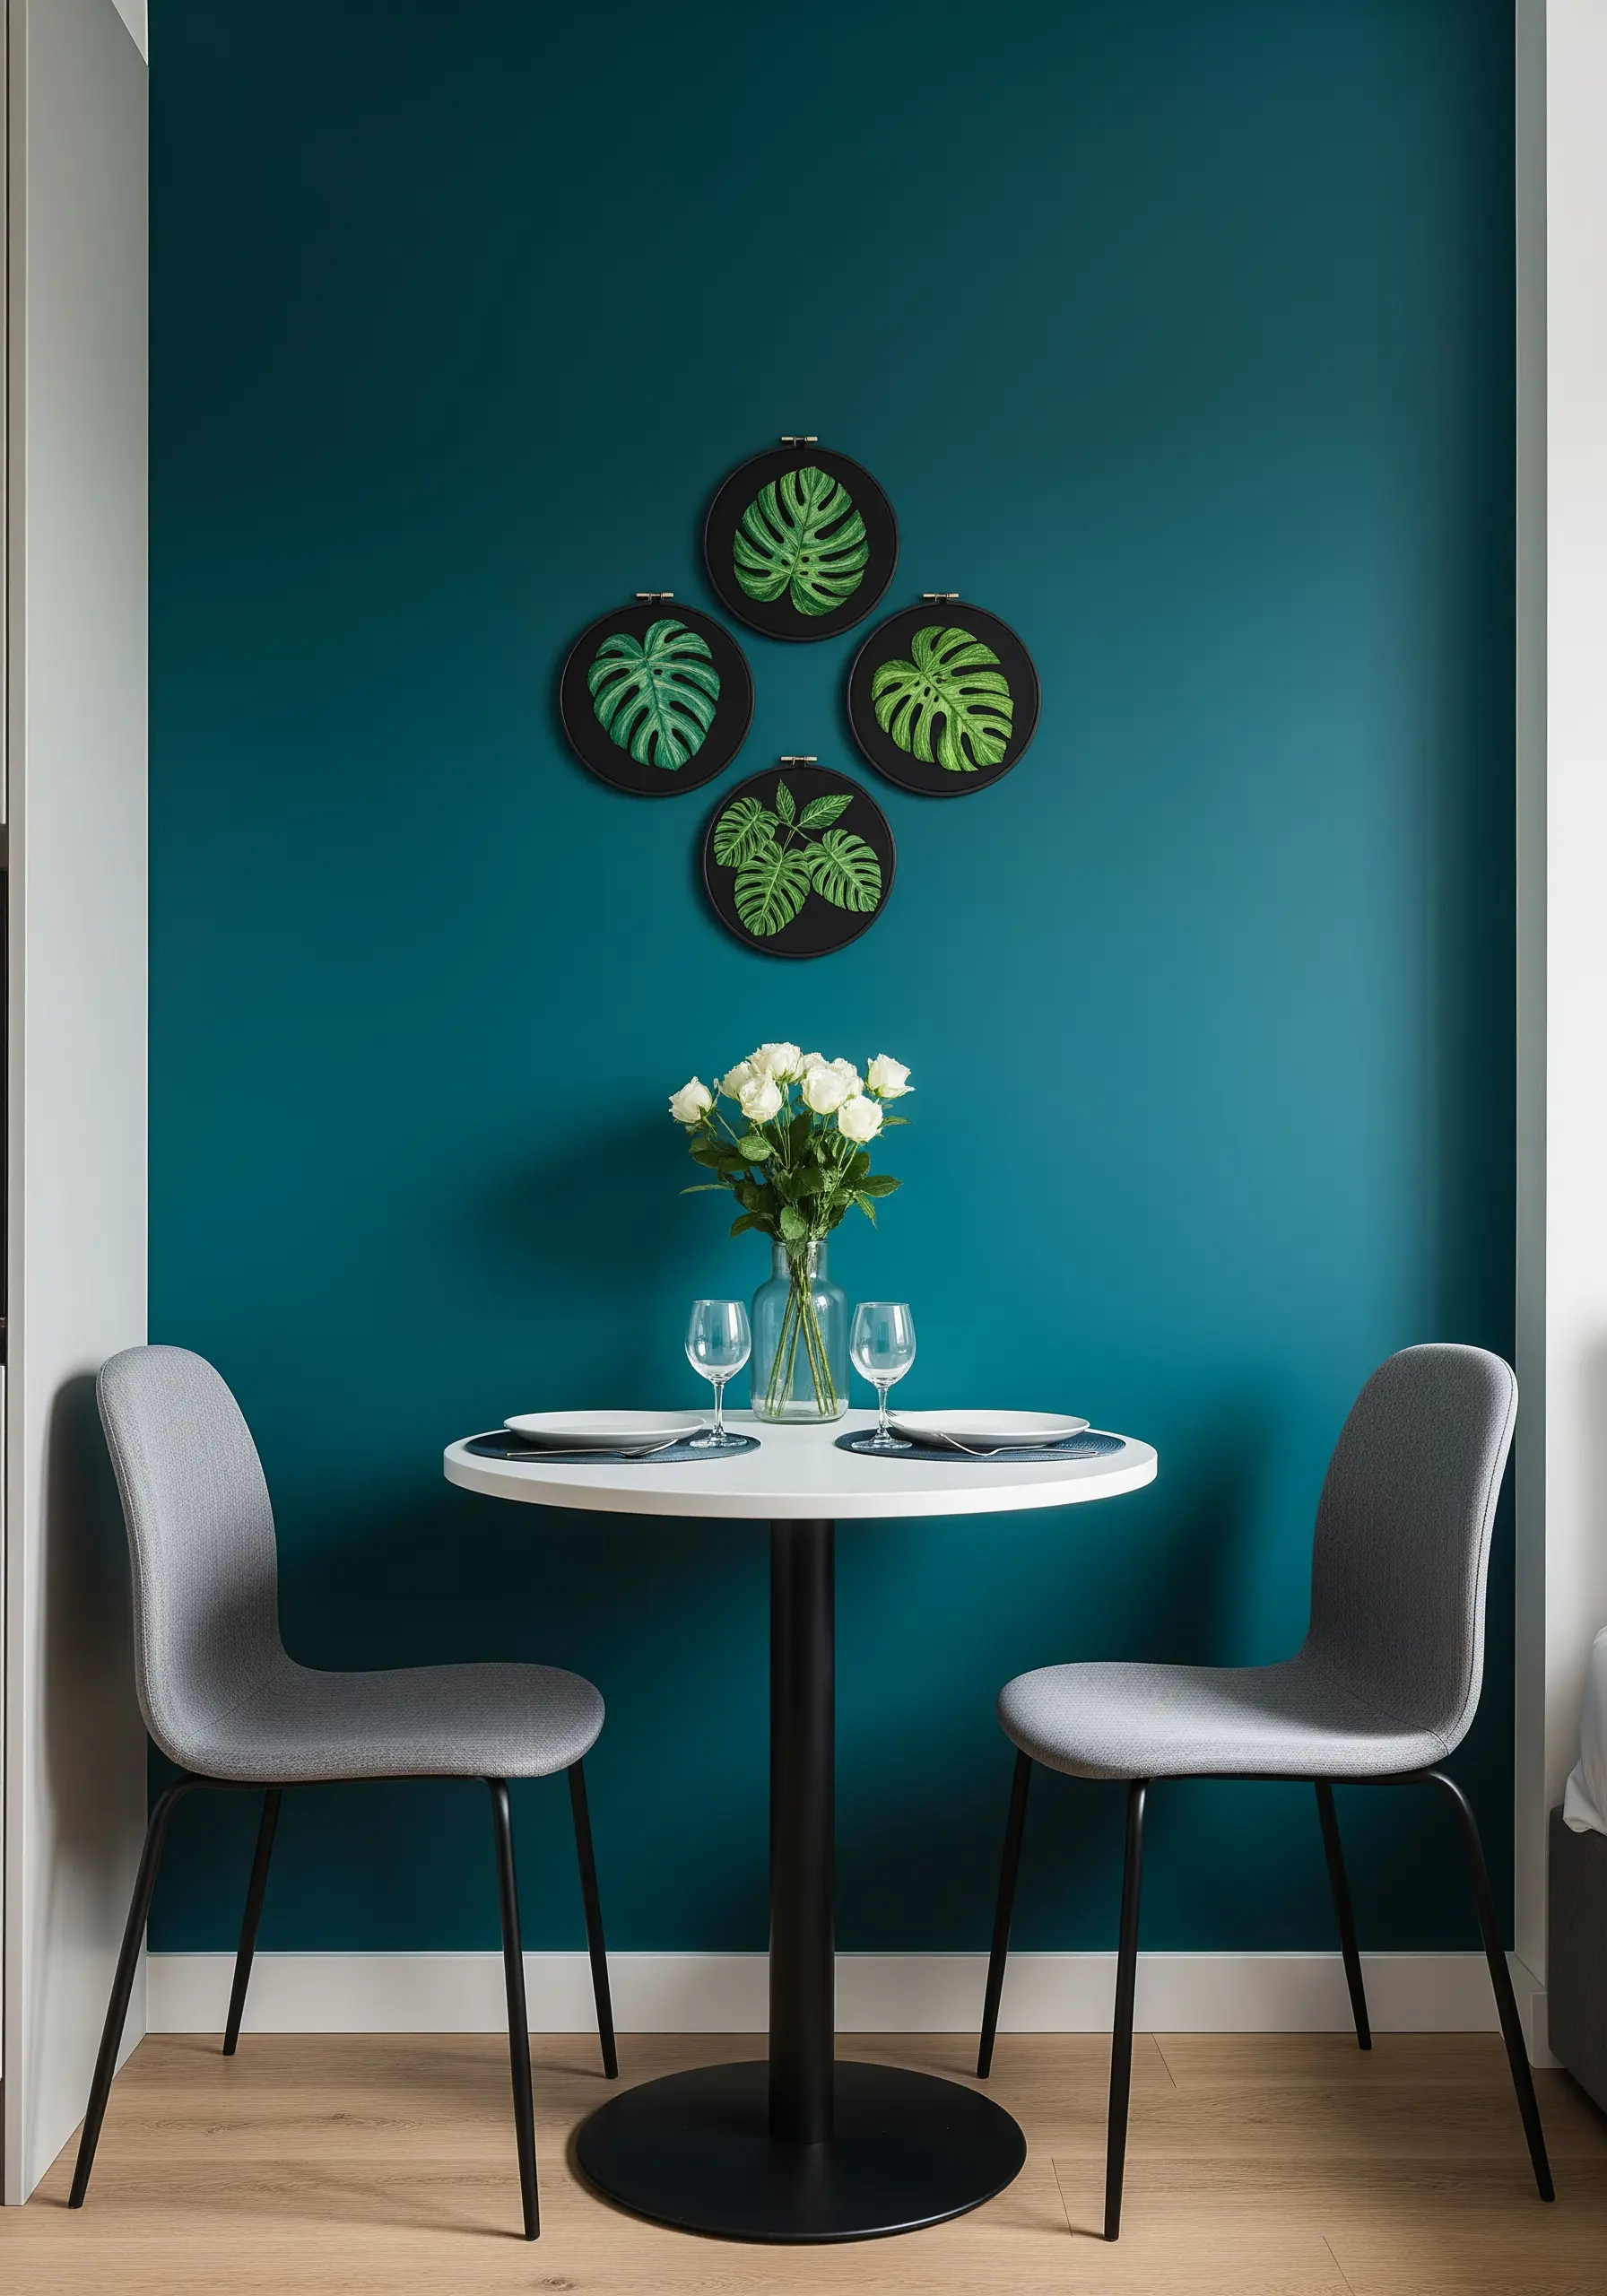
Make your botanicals unforgettable by stitching them on dark fabric, like black or deep teal linen.
The high contrast makes greens and whites appear more vibrant and luminous, giving your work a dramatic, modern edge.
When arranging on a jewel-toned wall, use matching dark hoops to create a seamless look where the frames almost disappear, leaving the embroidered leaves to float.
For variegated tropical leaf embroidery designs, blend two shades of green with a long-and-short stitch to capture their natural beauty.
8. Integrate Hoops into Your Bookshelf Decor
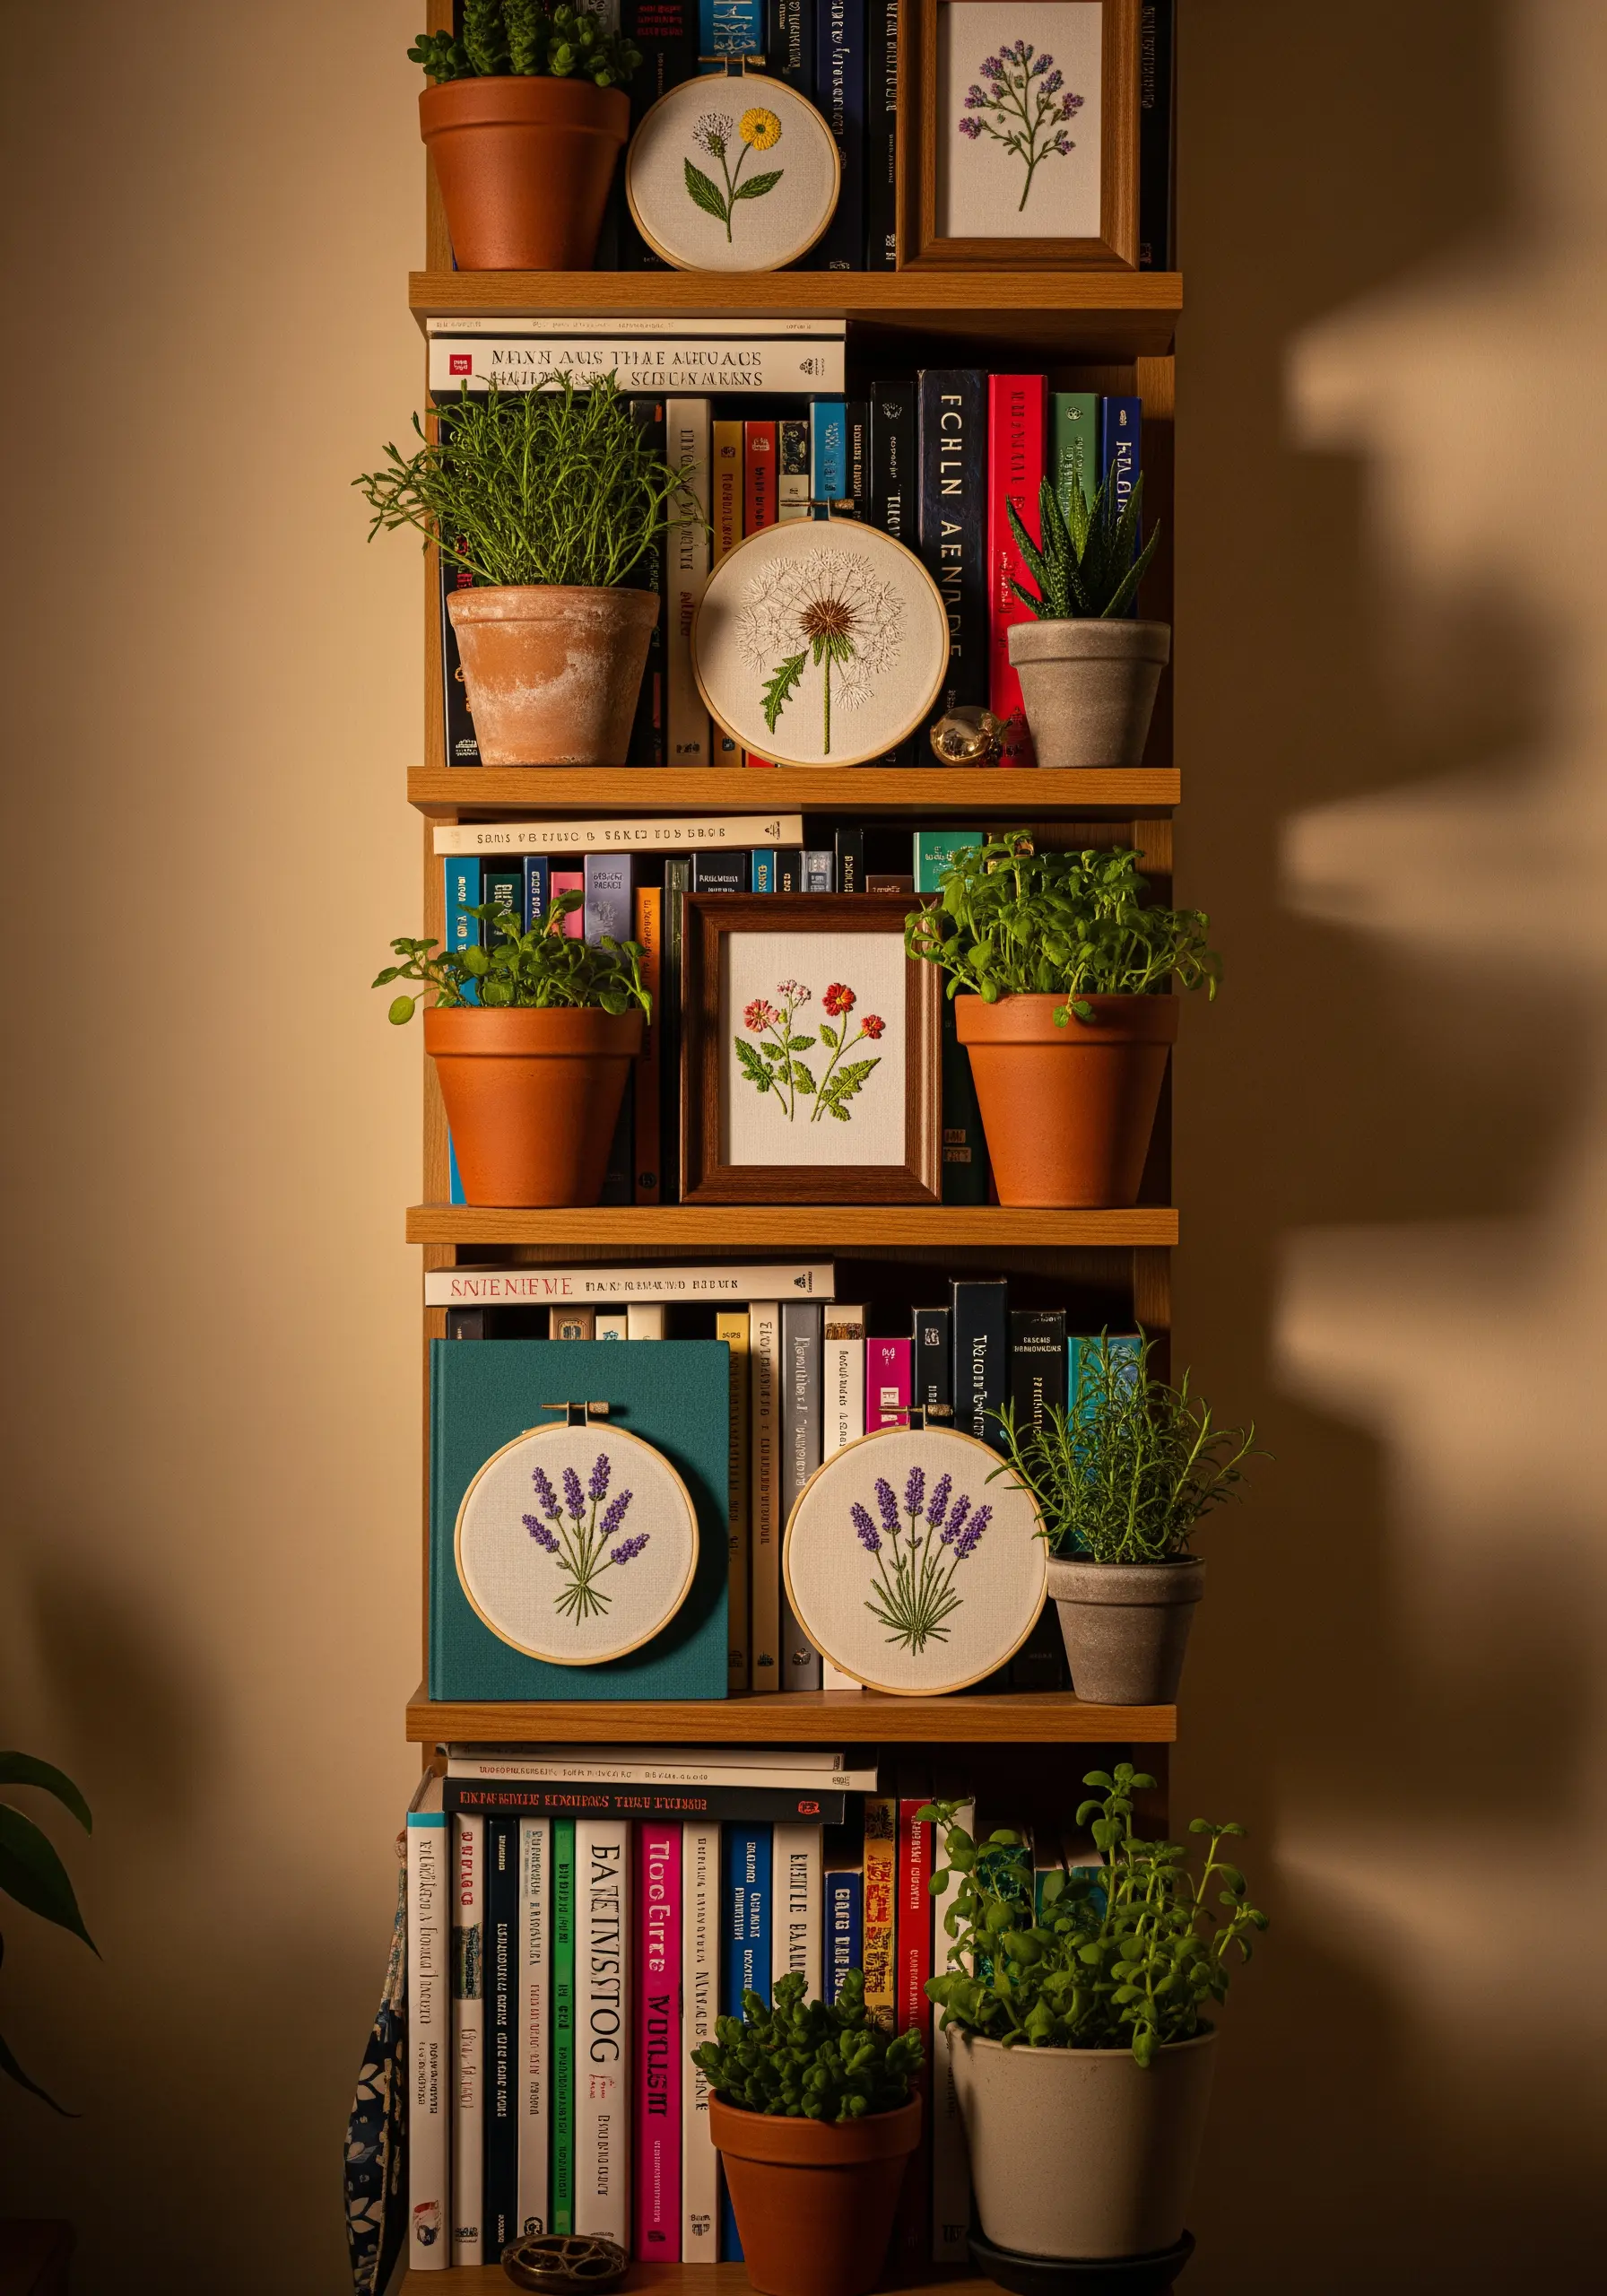
Weave your embroidery into your daily life by styling hoops and framed pieces directly on your bookshelves.
Alternate your stitched art with live plants, books, and objects to create a rich, layered display that feels curated and personal.
This method breaks up the monotony of book spines and adds soft, handmade texture to your shelving.
Choose simple, airy designs like dandelions or lavender sprigs that add a touch of nature without overwhelming the space, turning your shelf into a cabinet of curiosities.
9. Compose a Large, Cohesive Gallery Wall
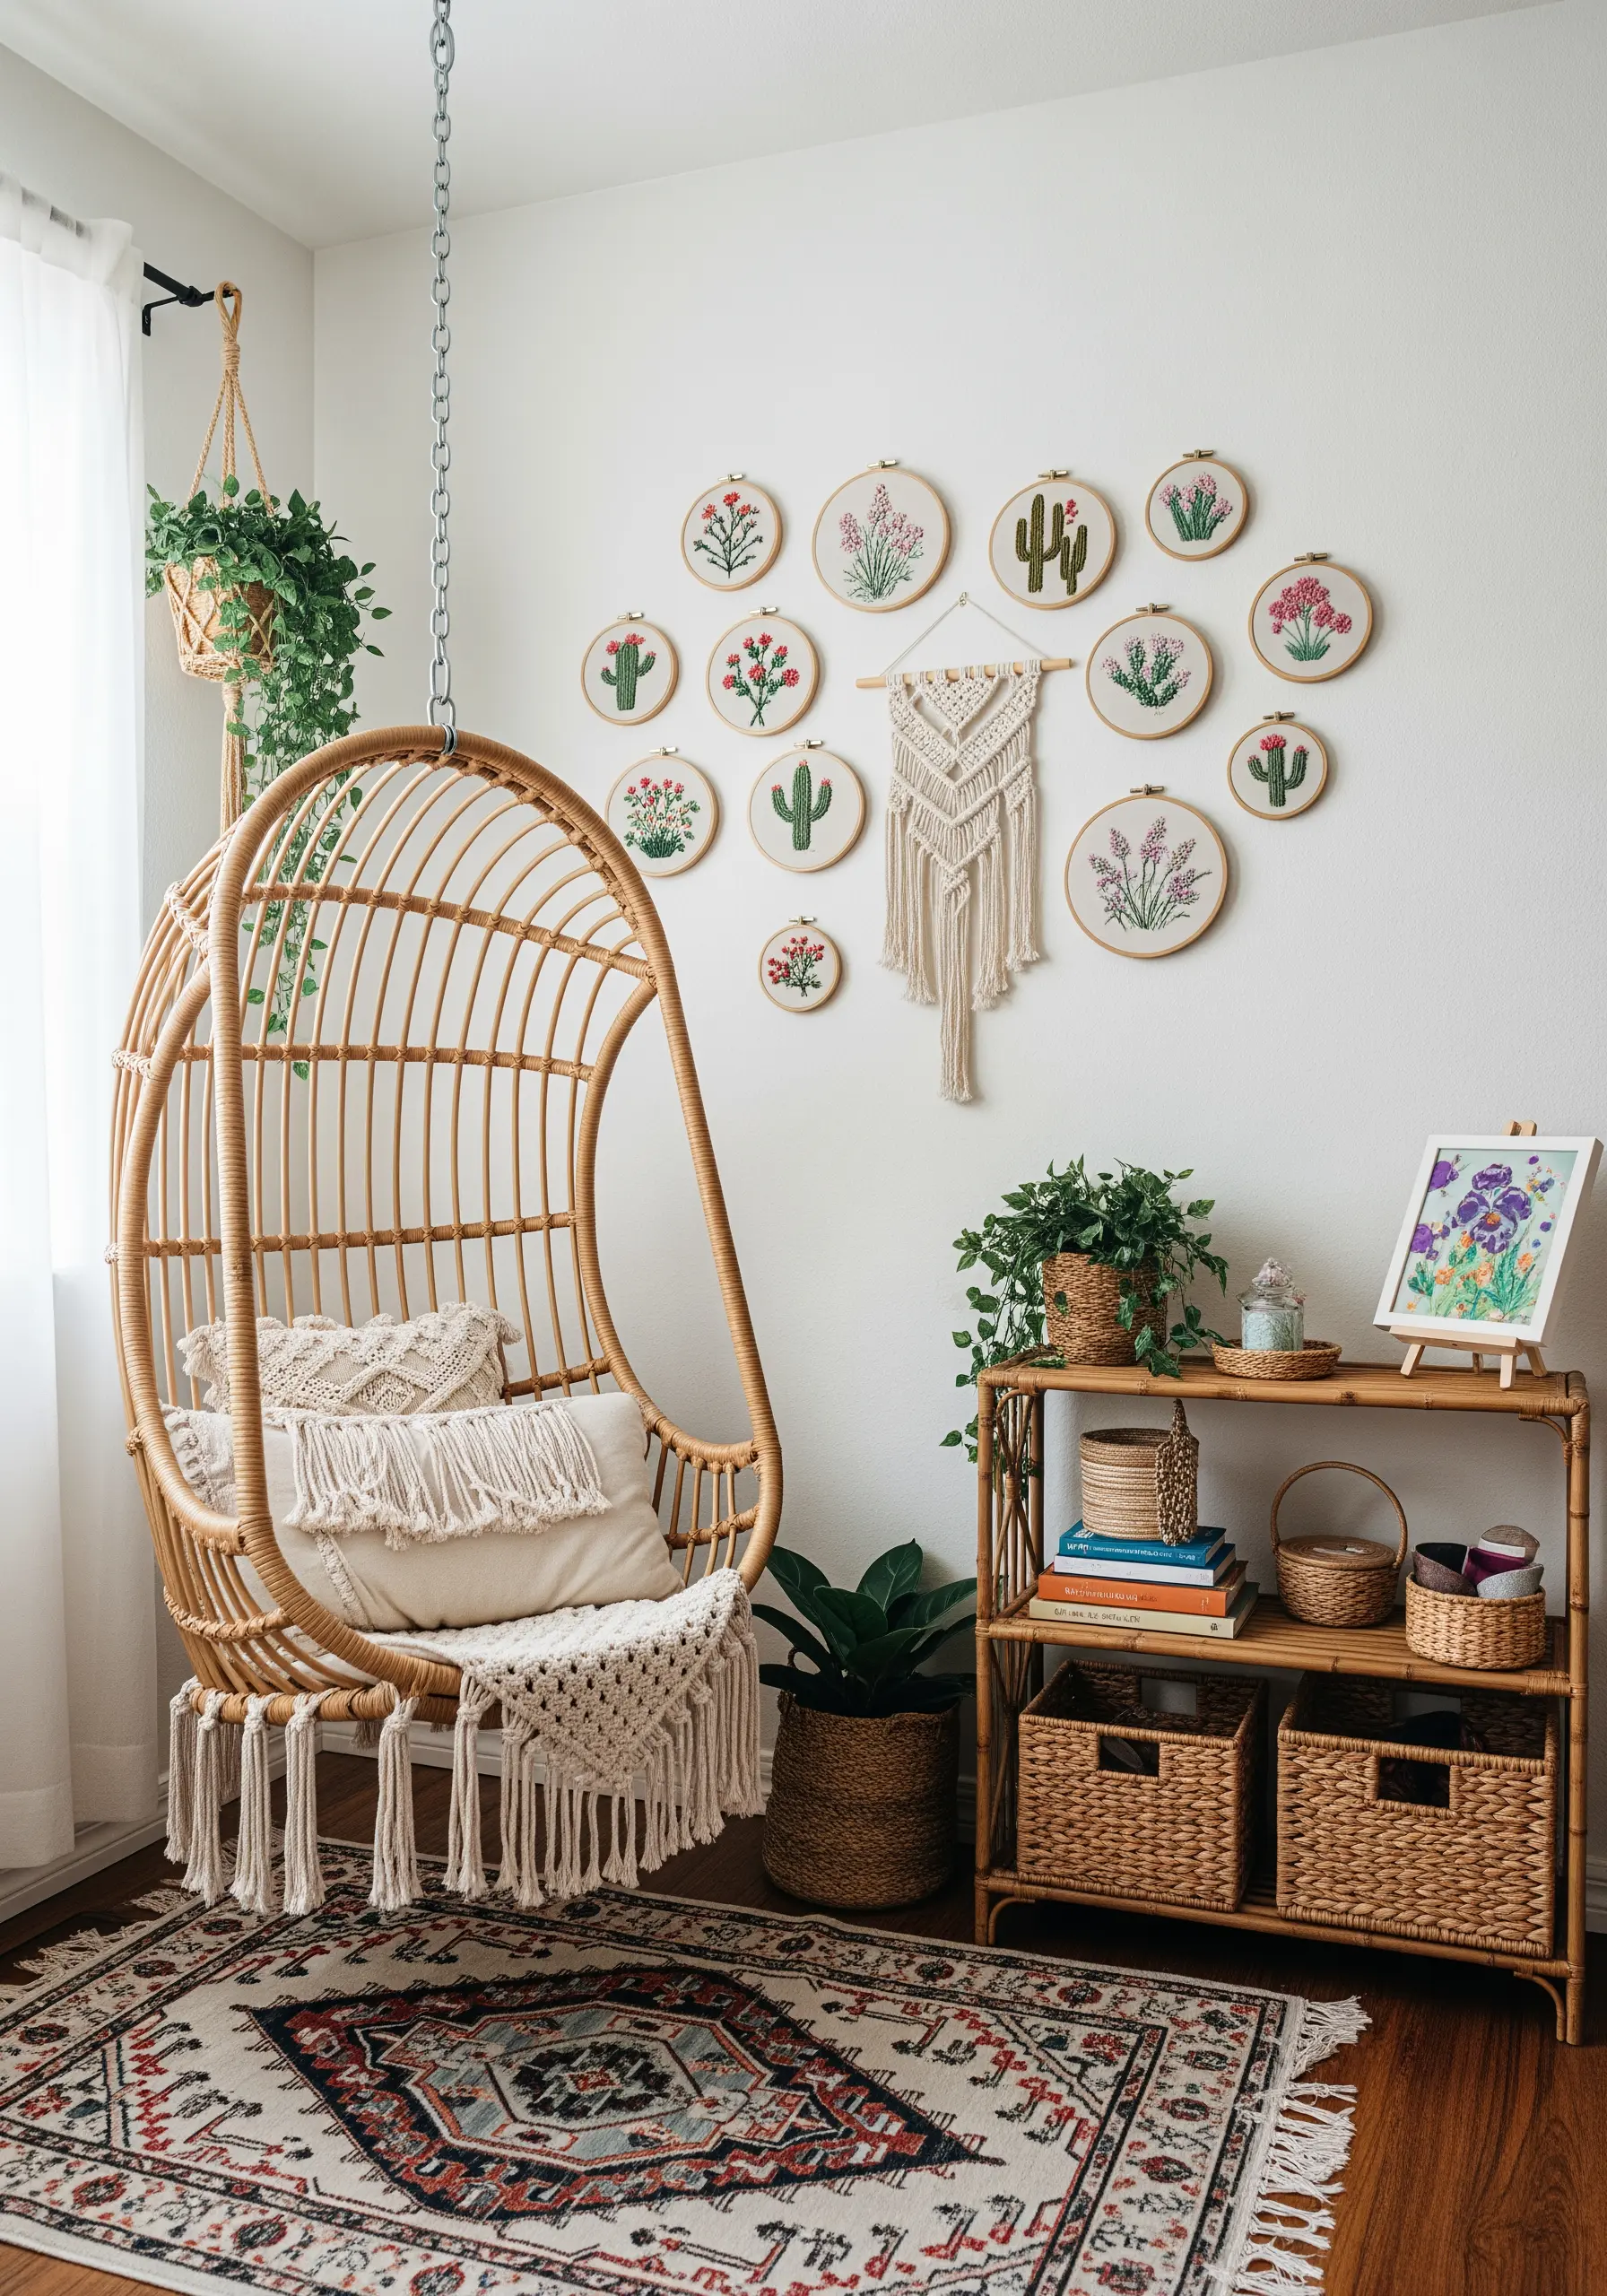
Commit to a larger vision by creating an entire gallery wall dedicated to your embroidery.
To keep the collection cohesive, stick to a common theme—like desert botanicals—and a consistent hoop style and fabric color.
Incorporate a central macrame piece or other fiber art to add a different texture and create a focal point for the arrangement.
This immersive approach turns a blank wall into a testament to your craft, perfect for creating warm, boho-inspired textile wall art.
10. Frame a Stitched Landscape Panorama
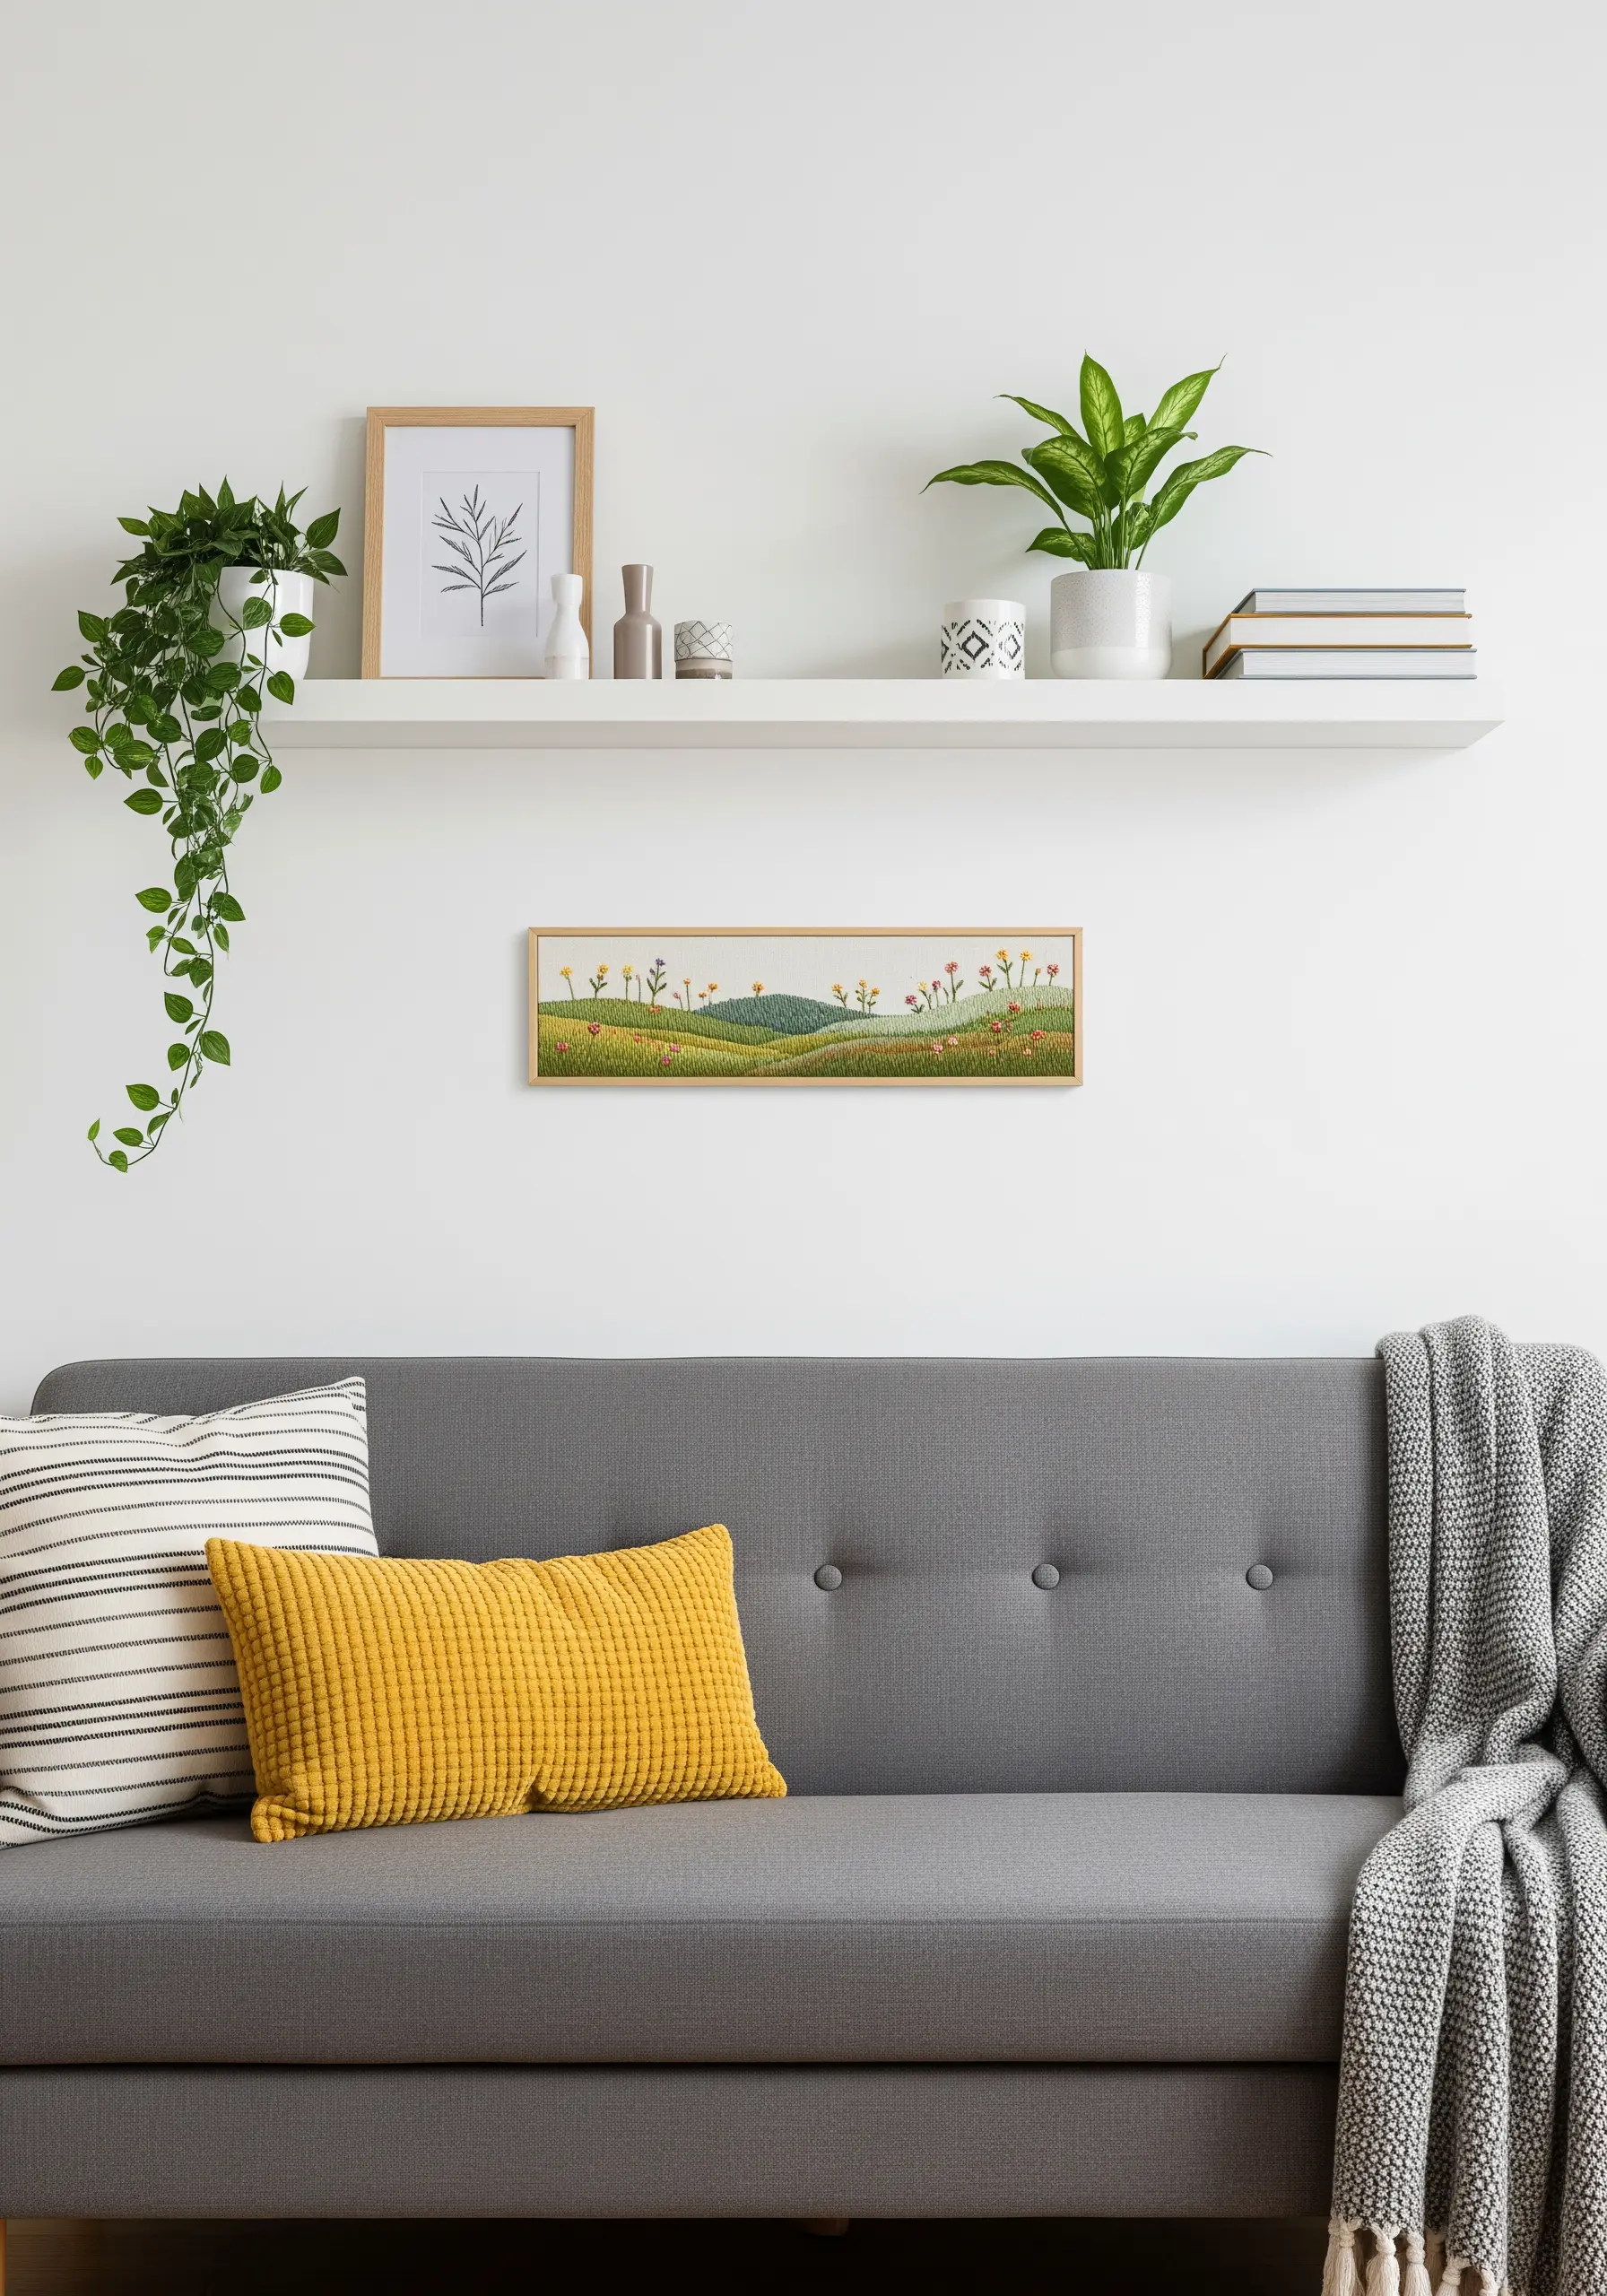
Think beyond single motifs and use a long, rectangular frame to capture a tiny embroidered landscape.
This panoramic format invites you to tell a wider story, creating depth with foreground and background elements.
Use French knots and seed stitches to suggest fields of wildflowers and low, rolling hills, playing with stitch density to create texture.
Display it on a floating shelf above a sofa to serve as a delicate, calming focal point in your living space and create beautiful abstract thread landscapes.
11. Curate a Thematic Pair for a Small Nook
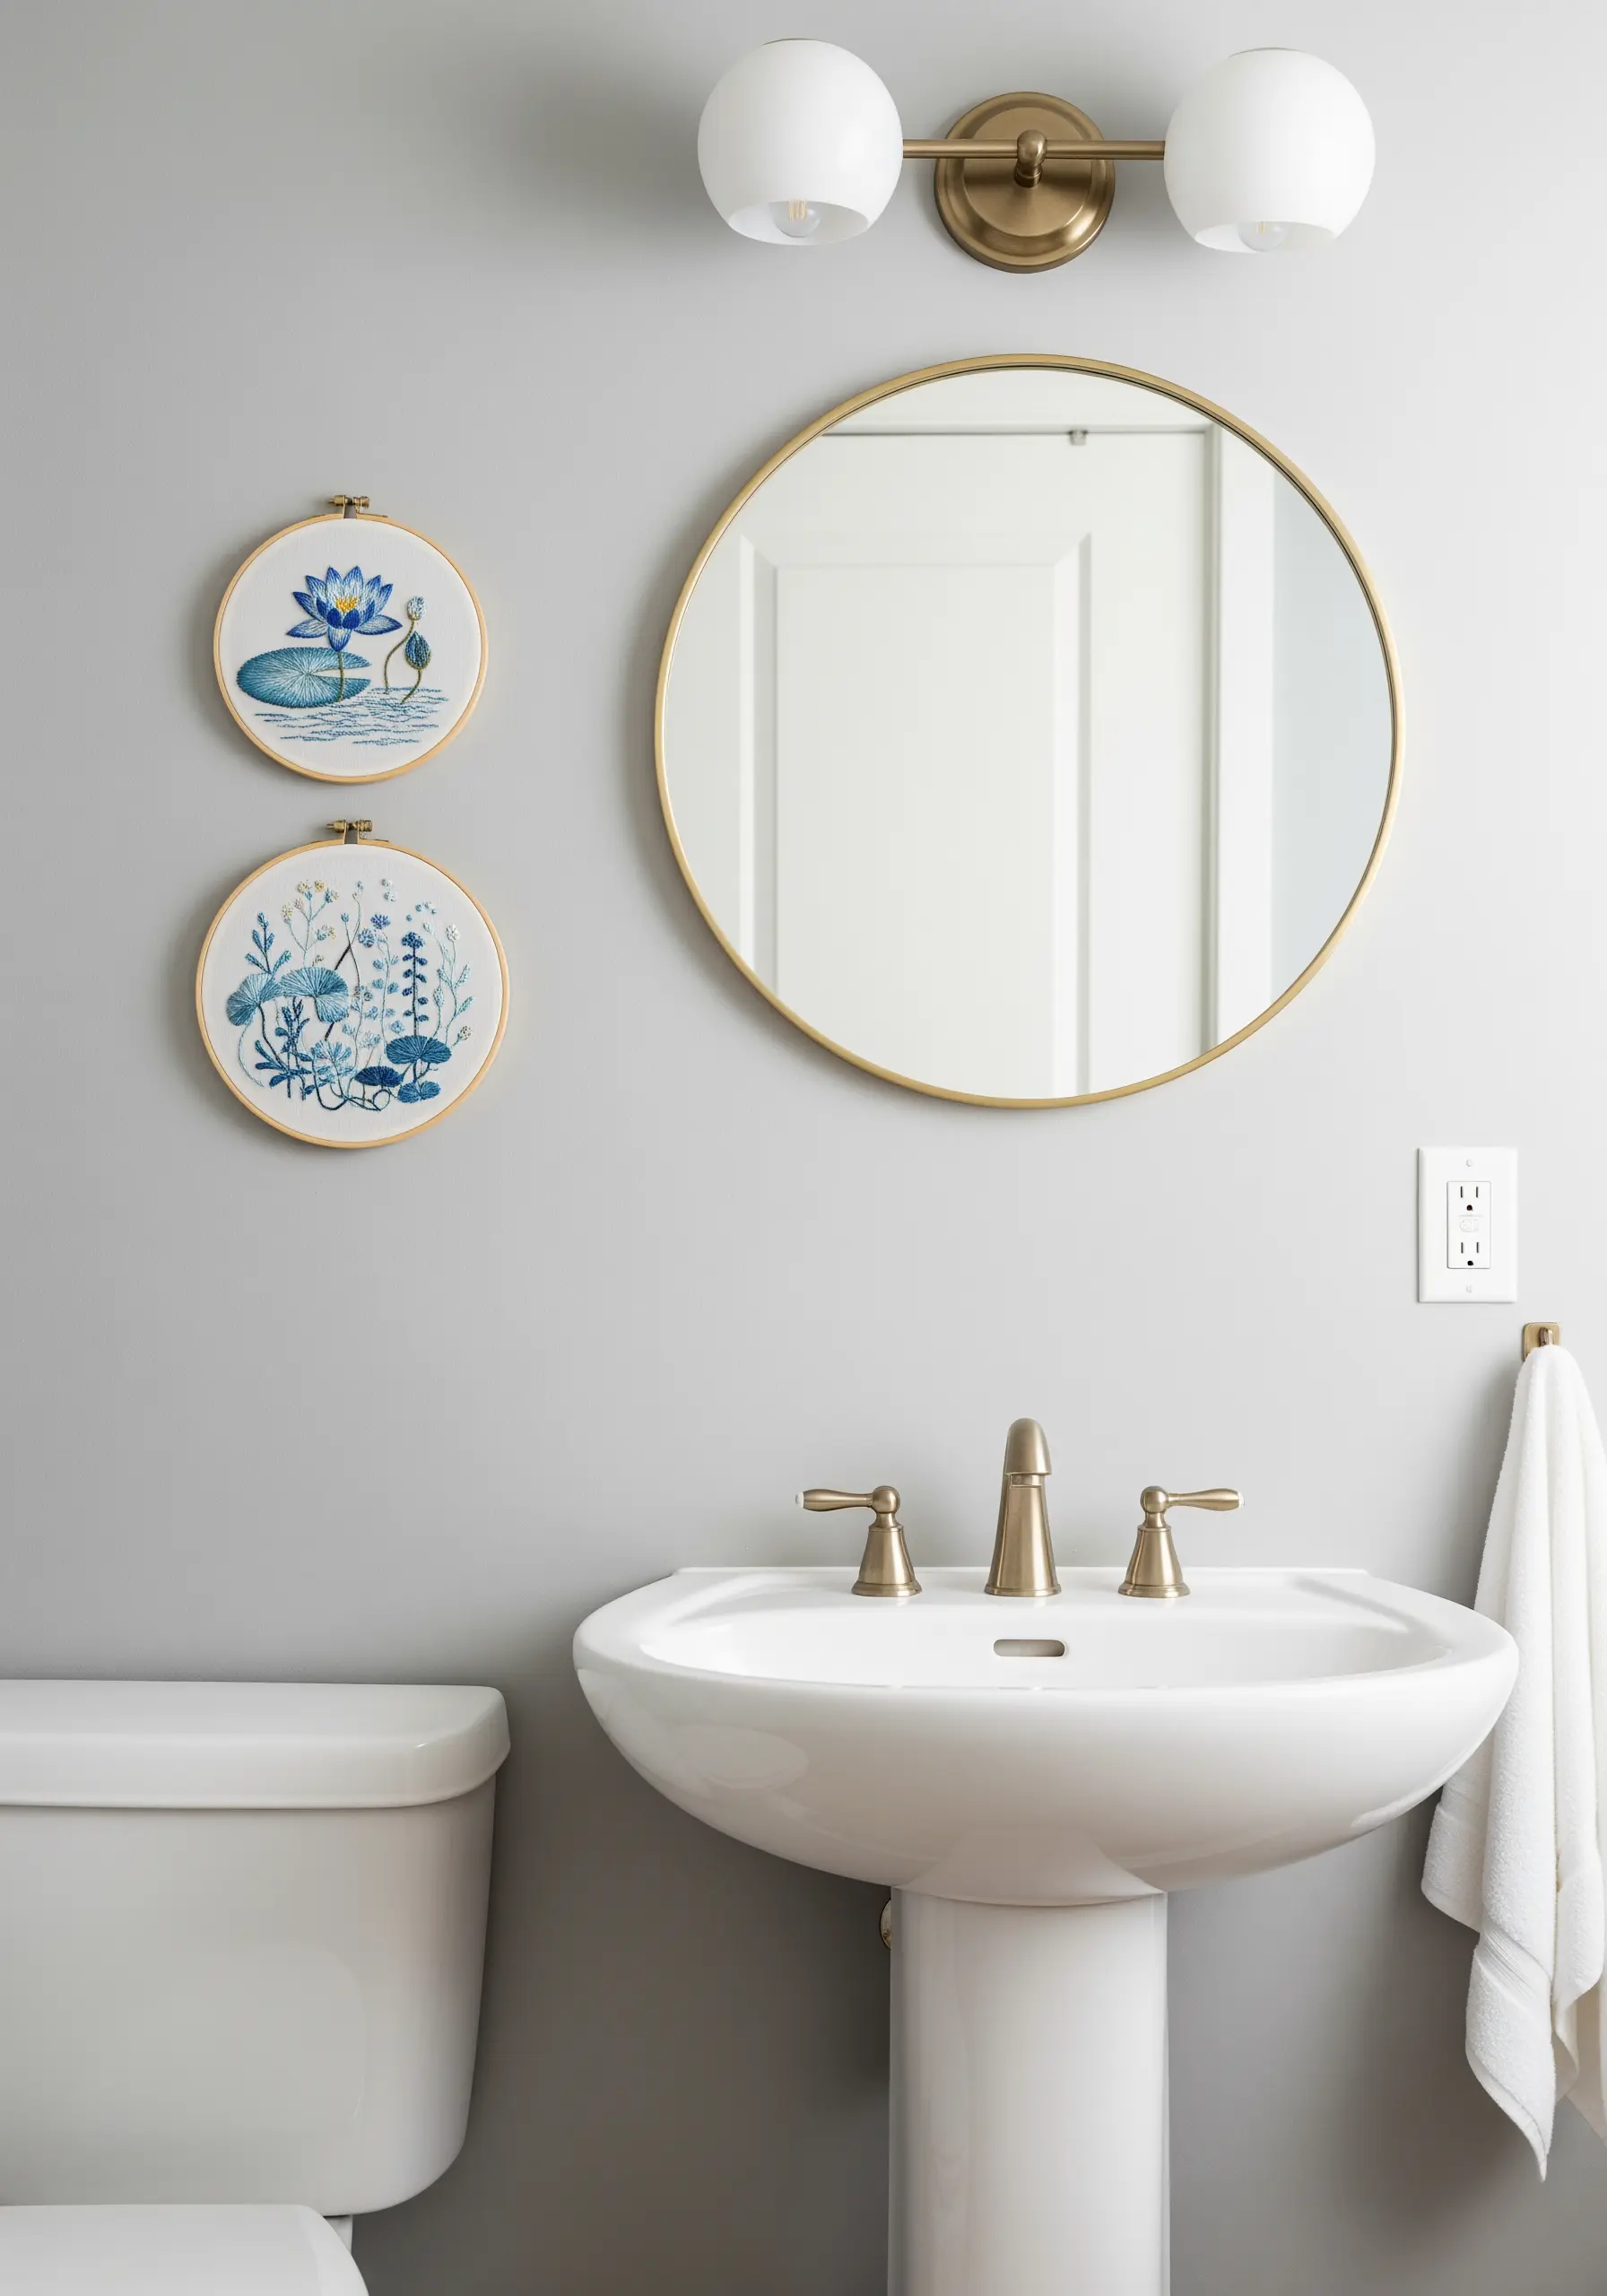
Even the smallest spaces, like a bathroom wall, can become a mini-gallery with a thoughtfully chosen pair of hoops.
Select a theme that complements the room’s atmosphere—water lilies and aquatic plants create a serene, spa-like feeling.
Use a single color family, like shades of blue and green, to ensure the two pieces feel connected and harmonious.
This simple pairing adds a touch of bespoke art, bringing calm oceanic vibes into an often-overlooked corner of your home.
12. Design a Botanical Grid for a Modern Look

For an immediate sense of order and sophistication, arrange your botanical pieces in a clean, symmetrical grid.
Using identical square frames gives the collection a polished, scientific-illustration feel, perfect for showcasing different leaf varieties.
This disciplined layout works exceptionally well on a minimalist white wall, where the structure and color of the leaves become the main focus.
Try experimenting with layer leaf stitching by using fishbone stitch or raised stem stitch to give each leaf dimension and realism.
13. Add Narrative with Tiny Fauna

Bring your floral scenes to life by adding a tiny embroidered insect, like a bee or butterfly.
This small detail instantly adds a sense of narrative and movement, transforming a static botanical portrait into a dynamic ecosystem.
Use a padded satin stitch for the bee’s body to make it plump and three-dimensional, and a single, detached chain stitch for delicate, translucent wings.
Displaying these tiny scenes on miniature easels turns them into precious objects that invite closer inspection and make fabric come alive.
14. Elevate Hoops with Decorative Ribbons
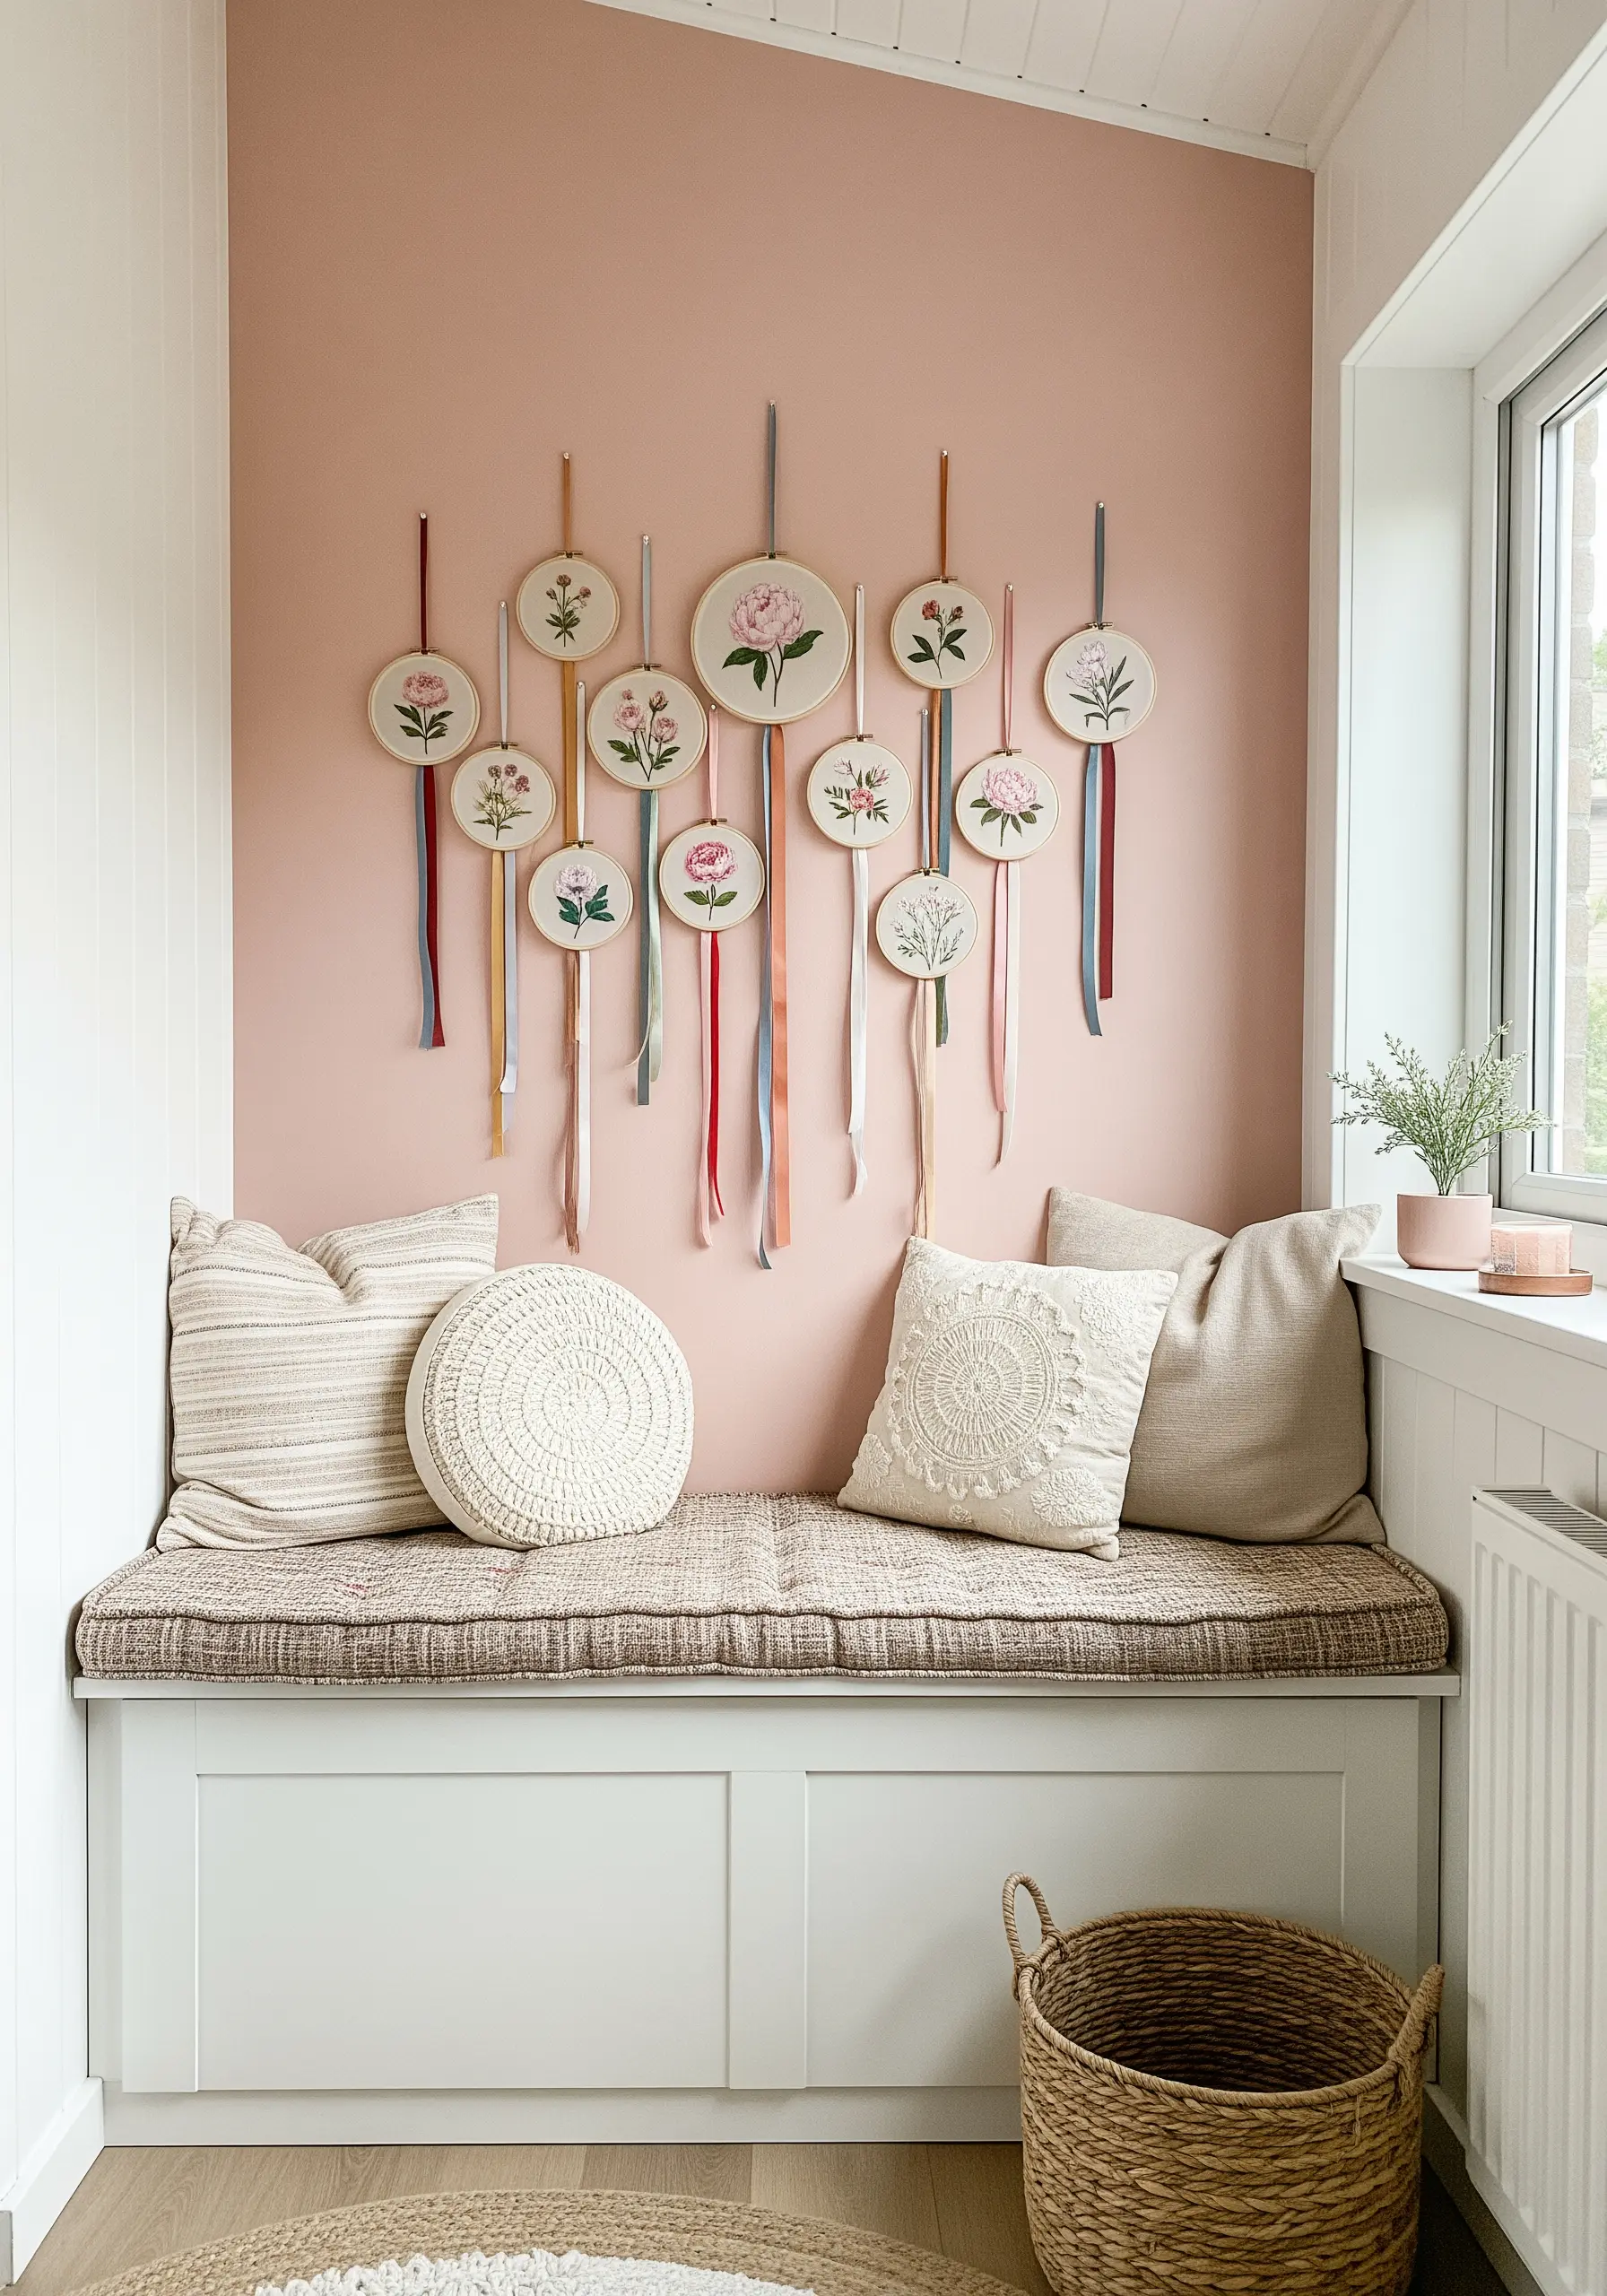
Give your embroidery hoop display a soft, romantic touch by attaching long, flowing ribbons to the hardware.
Choose ribbons in a variety of textures—velvet, silk, grosgrain—and colors that coordinate with your thread palette to create a cohesive look.
This technique adds vertical length, color, and movement to your wall, turning a simple hoop into a more elaborate and decorative wall hanging.
It’s a simple adjustment that introduces a dreamy, feminine aesthetic perfect for a reading nook or bedroom.
15. Embrace Bold, Graphic Line Art
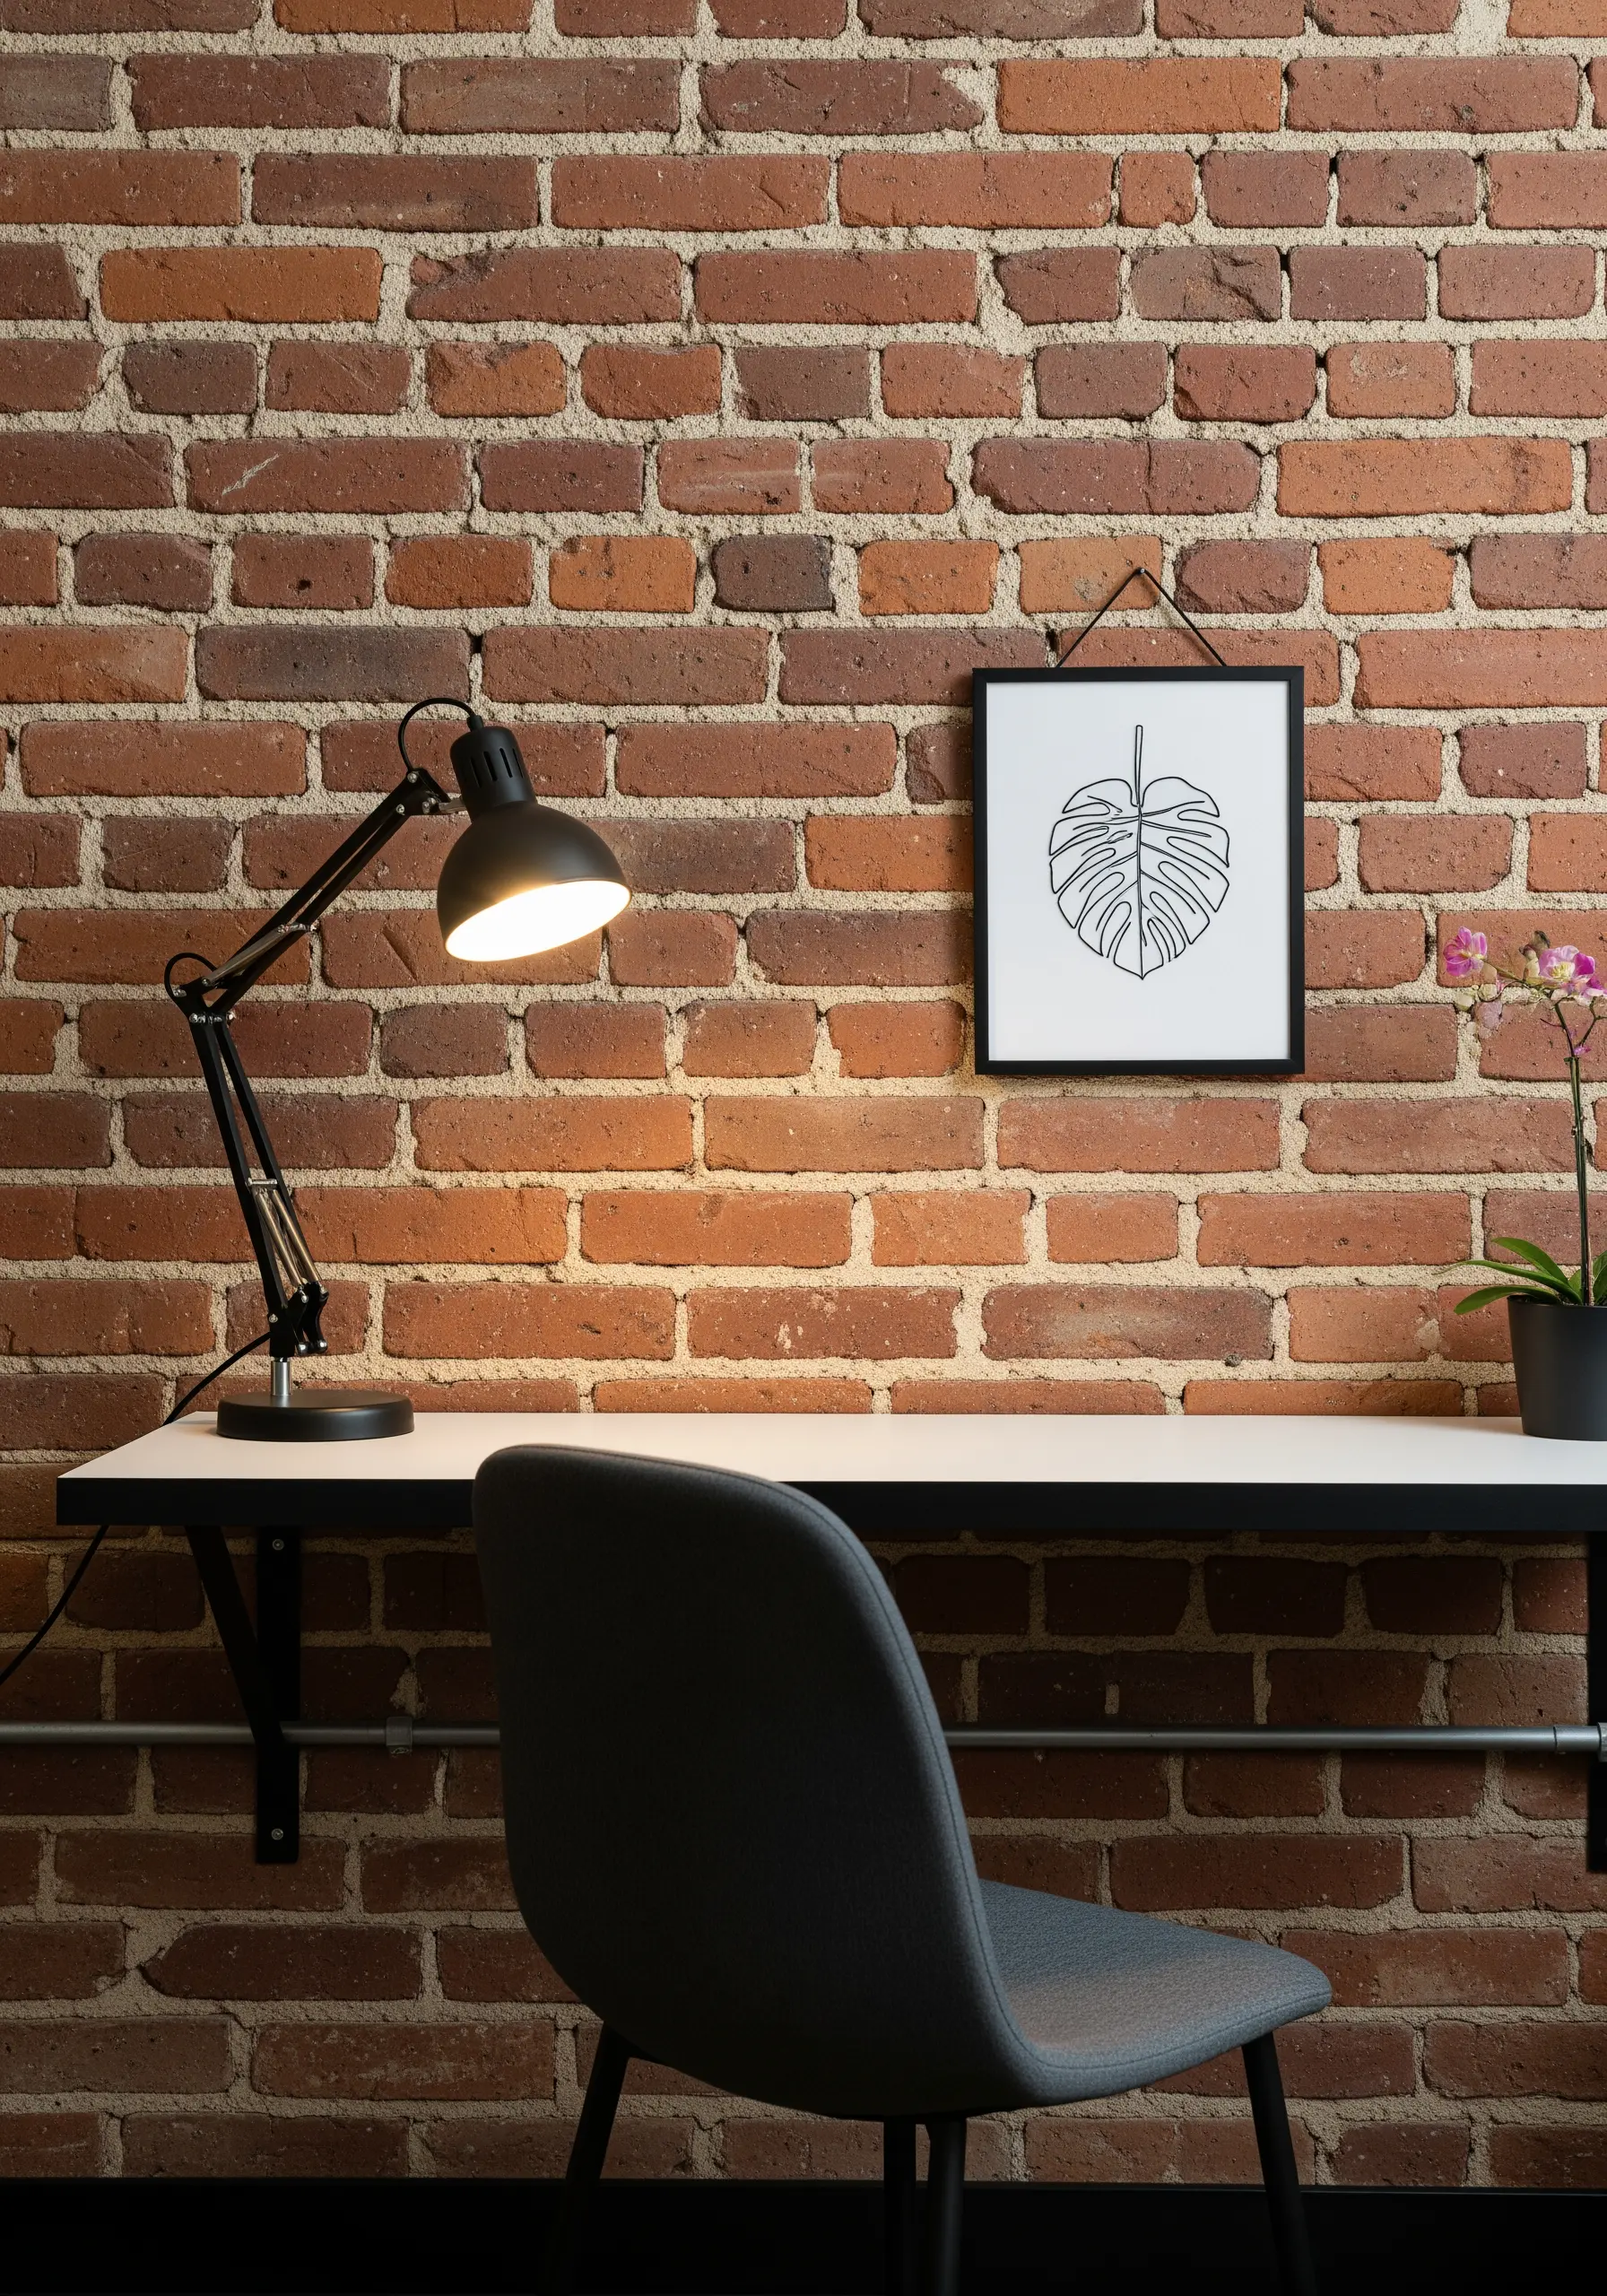
Make a strong impression with simplicity by framing a single piece of botanical line art.
Against a textured, industrial background like brick, a clean black-and-white design creates a sophisticated, graphic focal point.
Use a 6-strand floss or a Perle cotton thread with a crisp backstitch to ensure your lines are bold and unwavering.
This minimalist line art nature embroidery proves that you don’t need dense stitching to create a powerful piece of art.
16. Mix Frame Shapes and Sizes in One Collection
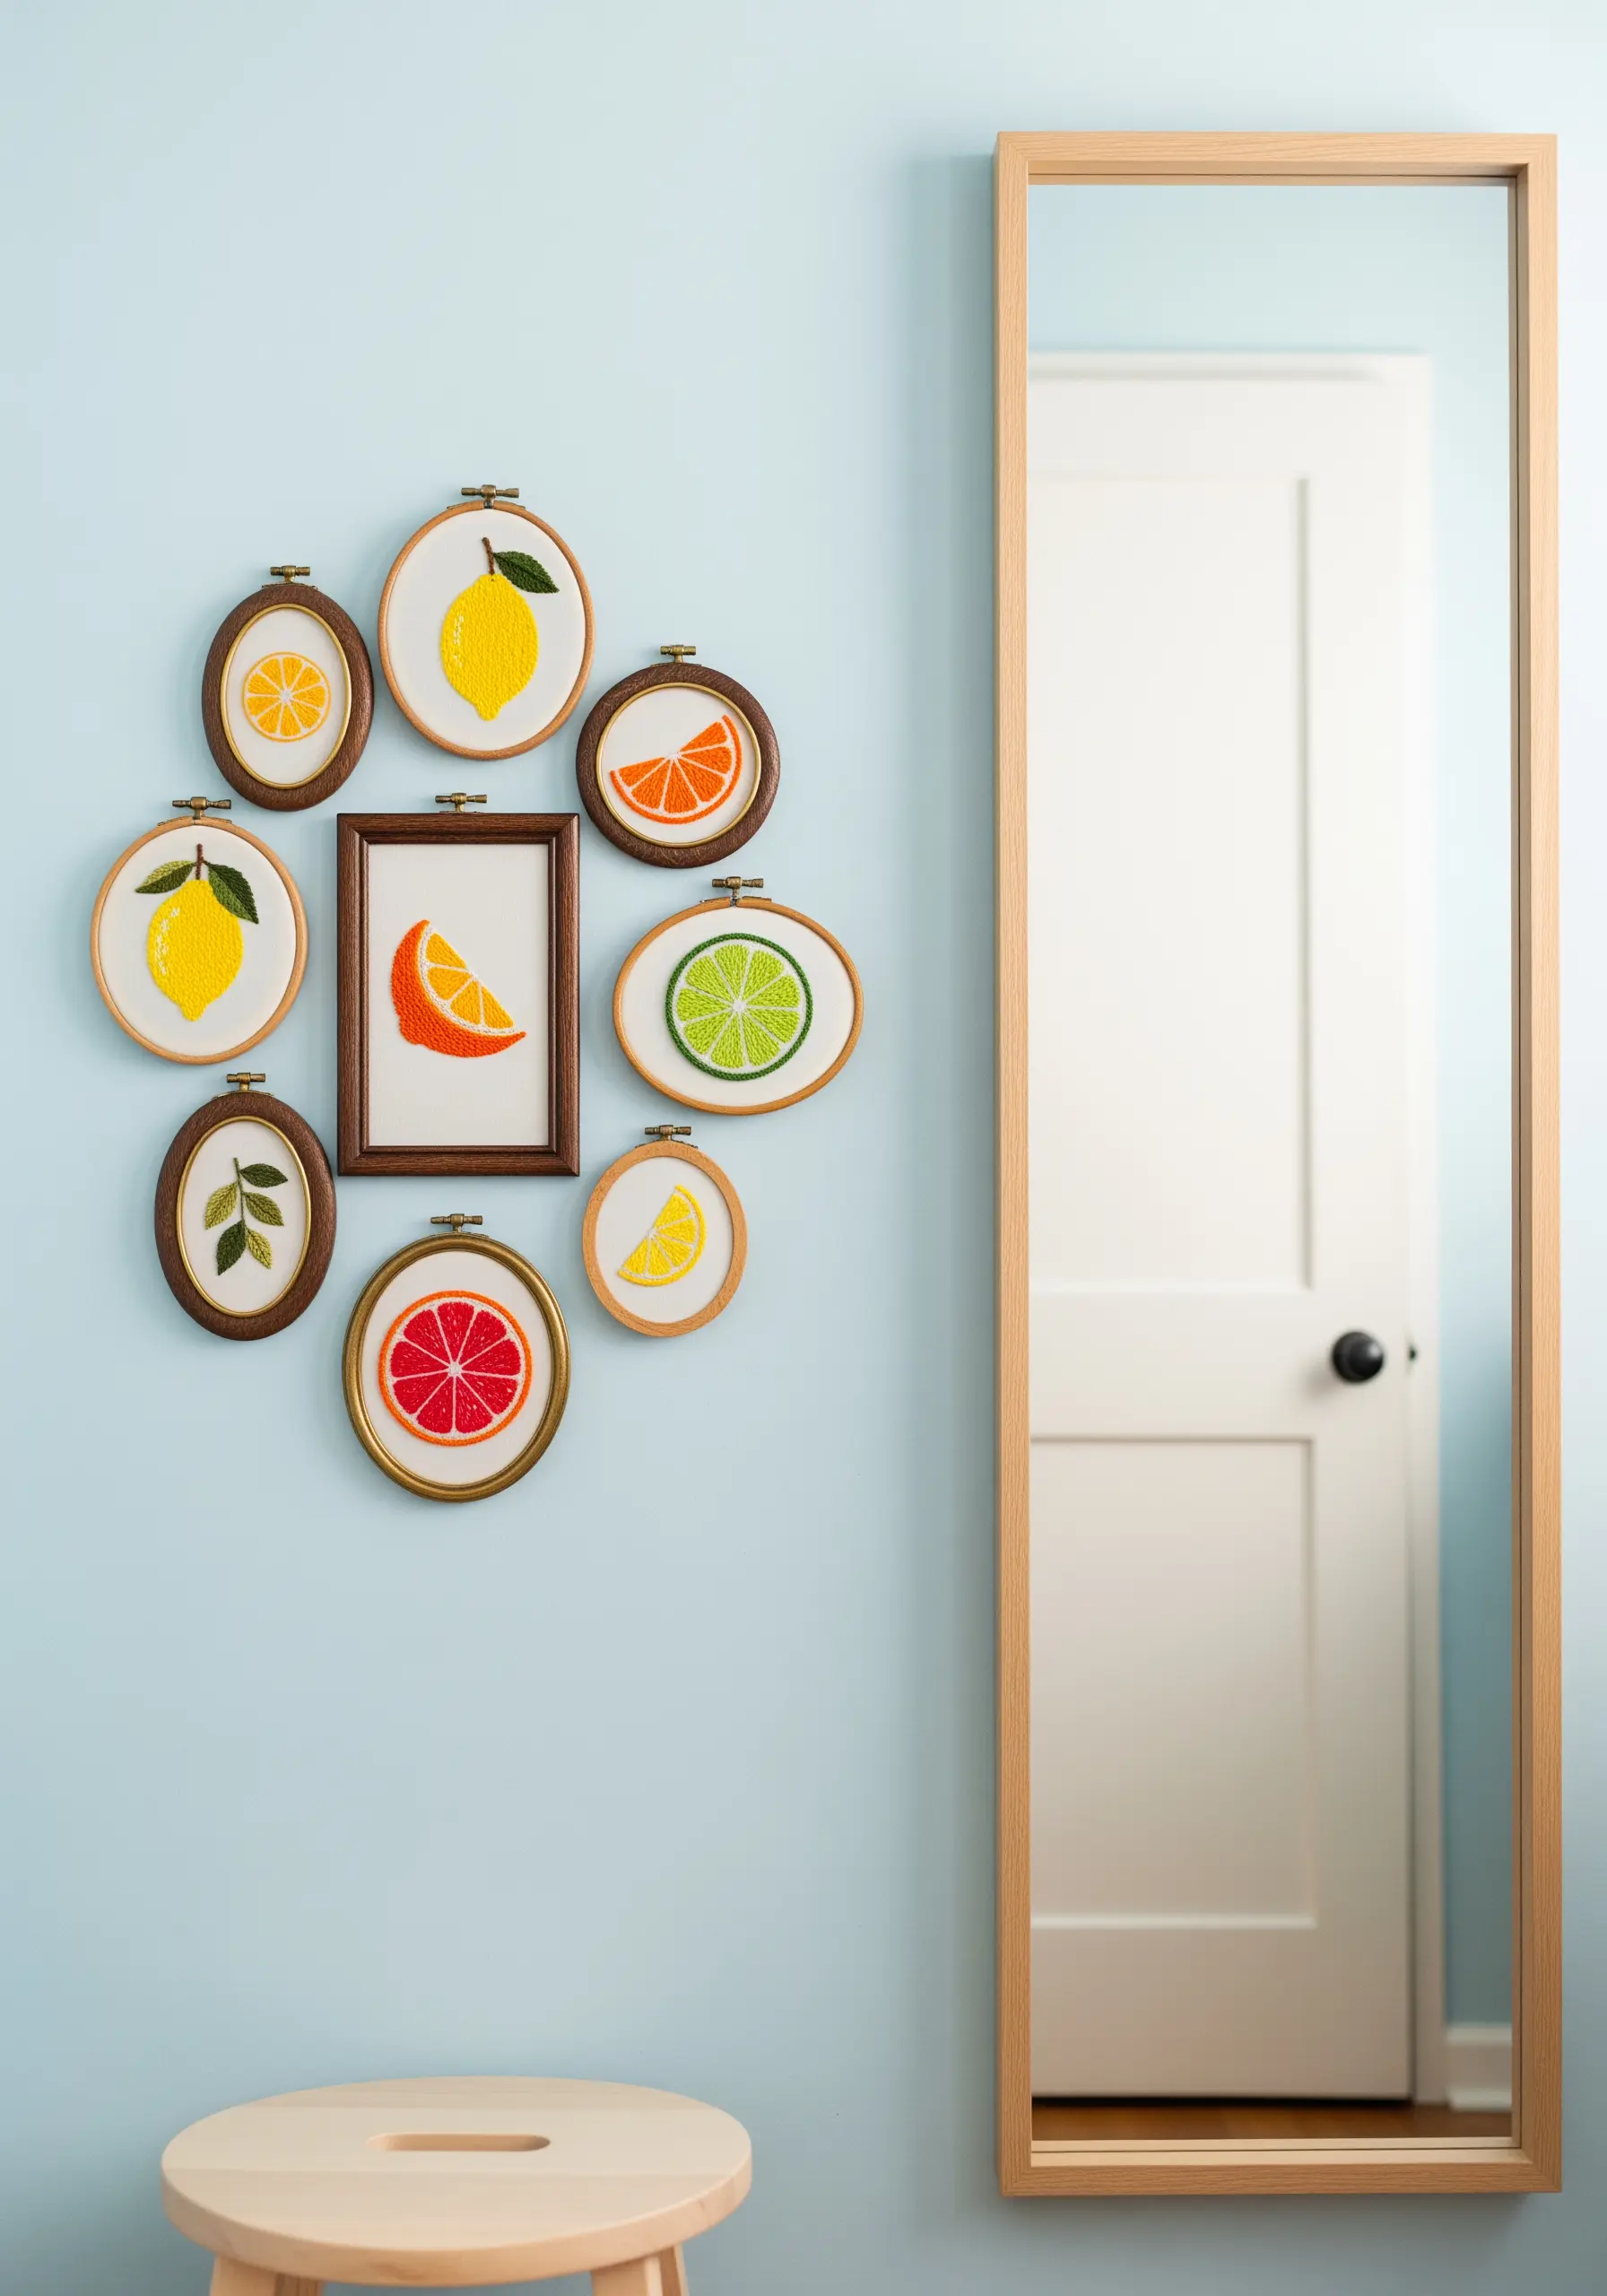
Add energy and visual interest to a themed gallery wall by mixing and matching frame shapes and sizes.
Combining circular, oval, and rectangular frames within a single collection breaks up monotony and creates a more dynamic, curated feel.
A central, uniquely shaped frame can act as an anchor for the surrounding pieces.
This approach works especially well for a vibrant theme like citrus fruits, where the varied shapes echo the natural diversity of the subject matter.
17. Create a ‘Night Garden’ with High-Contrast Threads
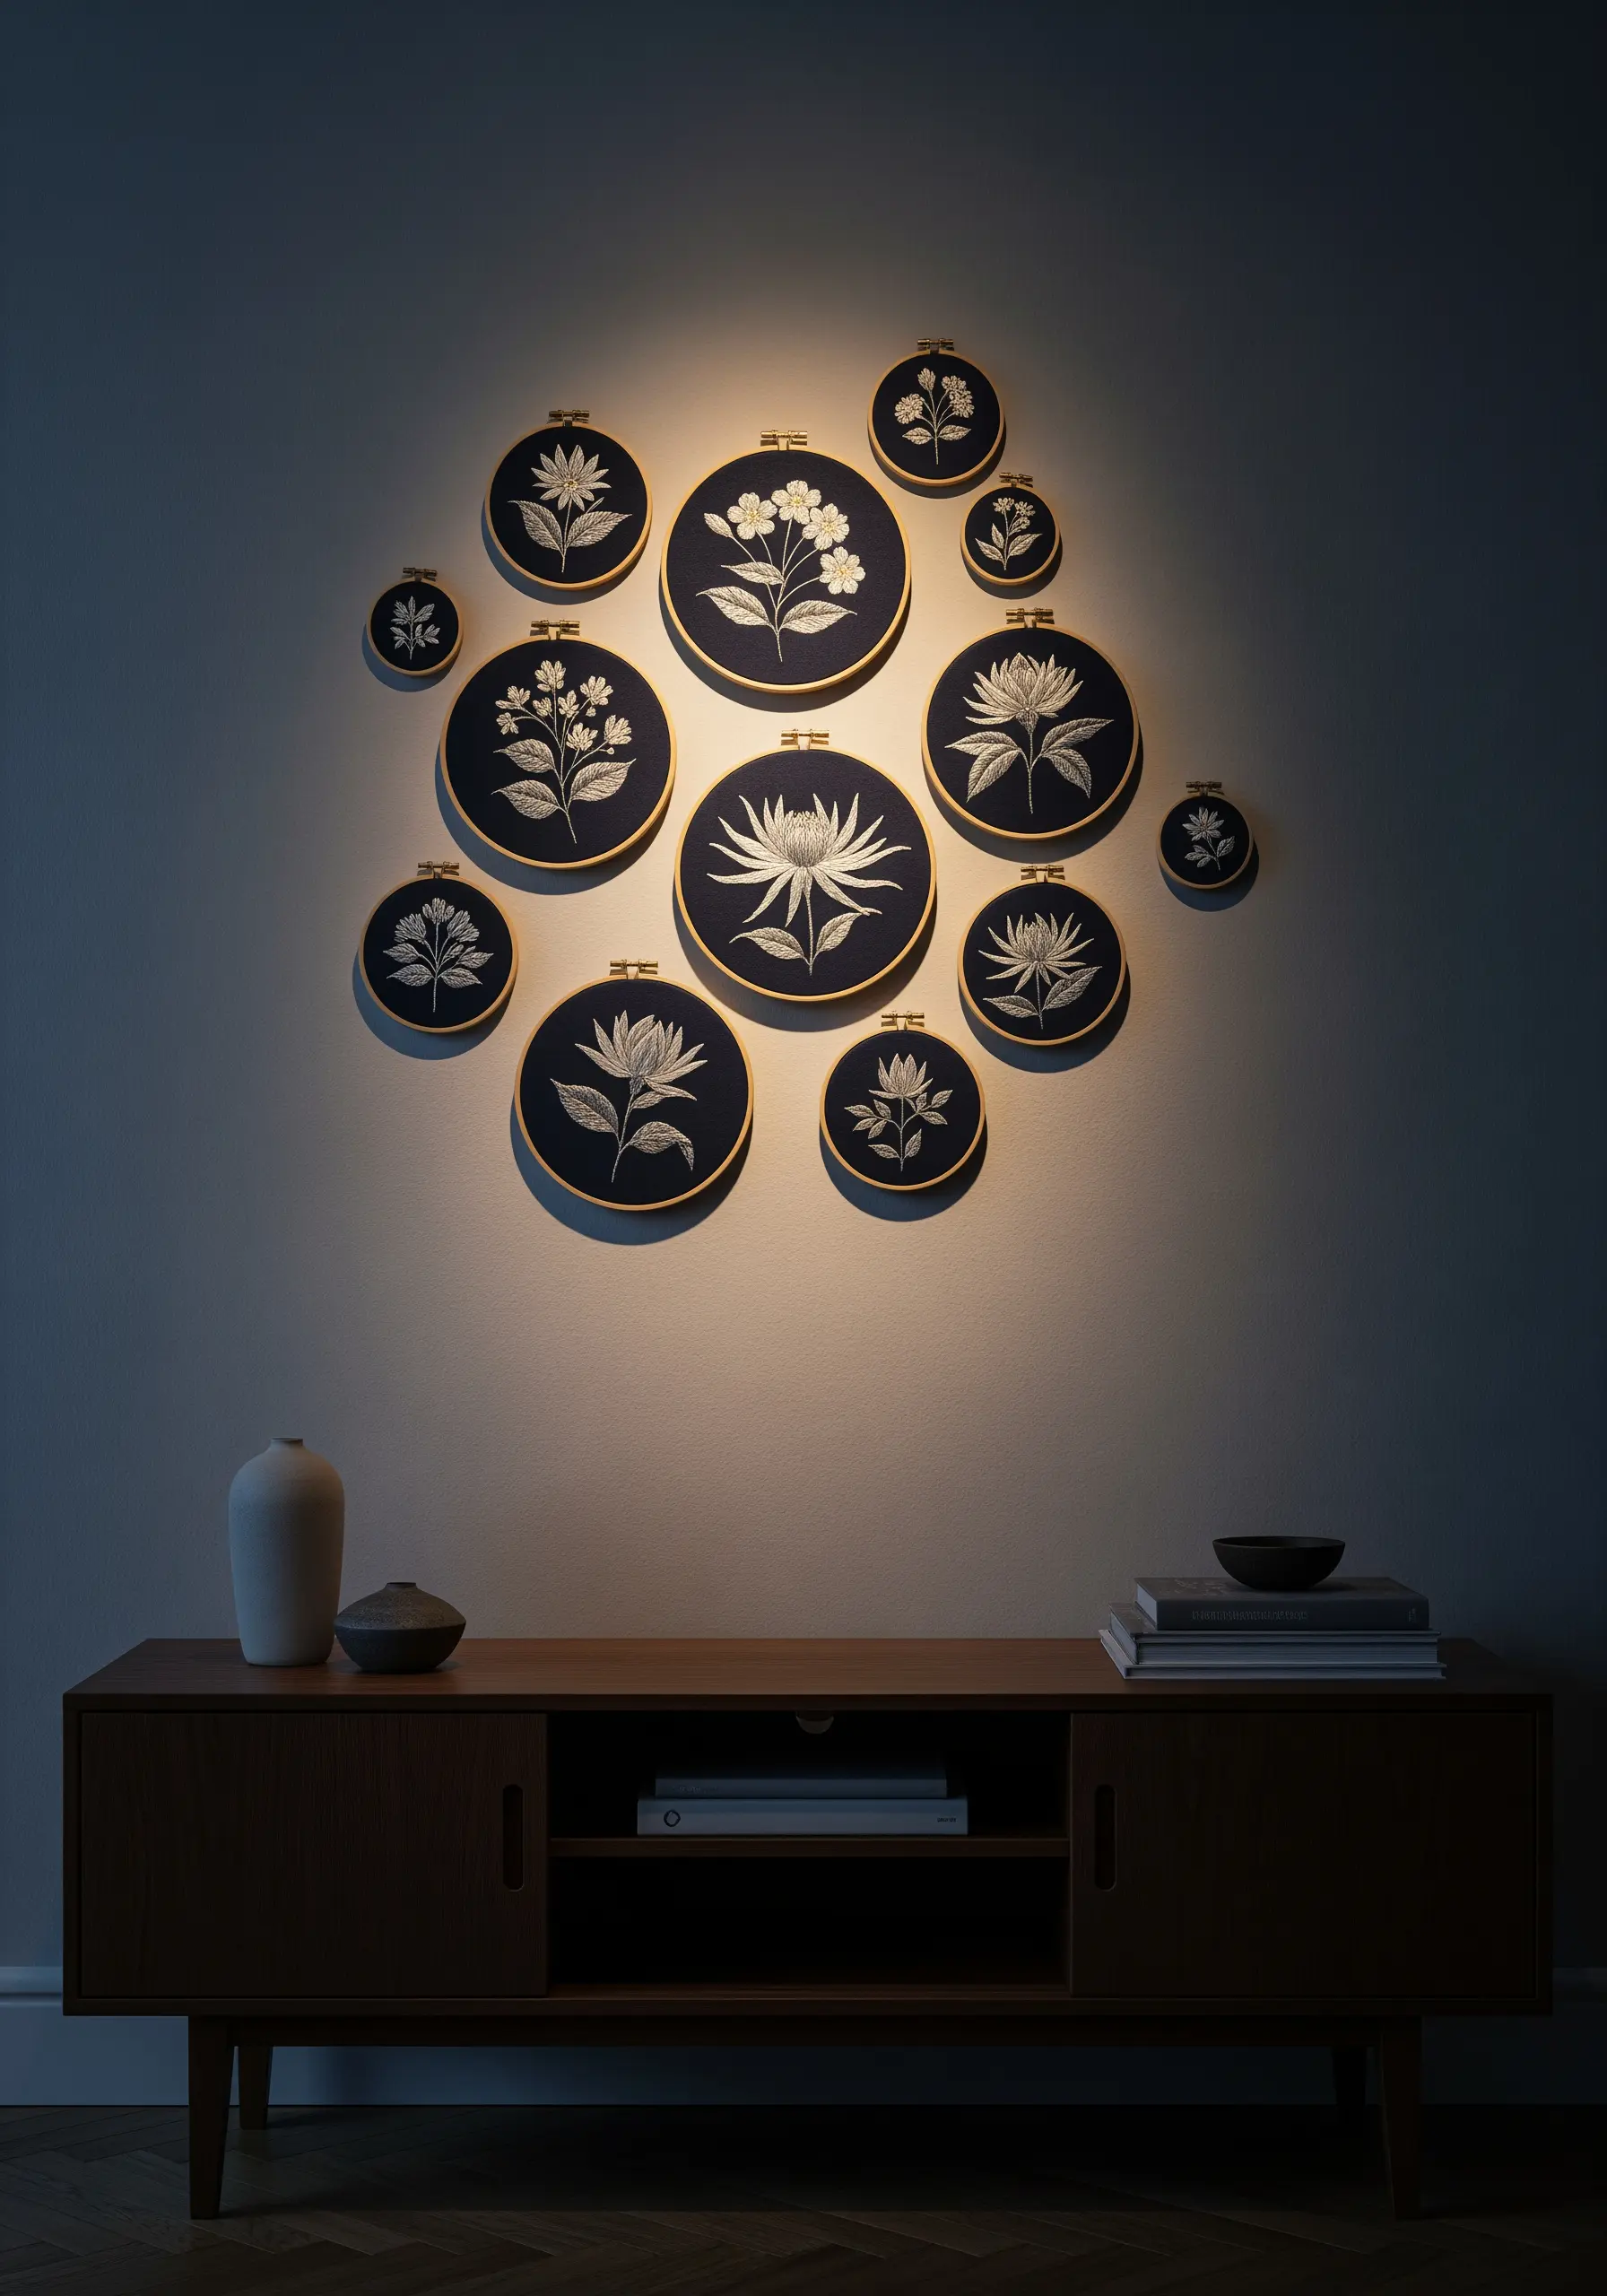
Design a dramatic and elegant botanical collection by stitching with a single light-colored thread on dark navy or black fabric.
This high-contrast technique gives your work a striking, illustrative quality that glows, especially when spotlit.
Arranging the hoops in a dense, organic cluster enhances the feeling of a magical, moonlit garden discovered in the dark.
Explore these Night garden embroidery ideas to add a touch of moody sophistication to your decor.
18. Dedicate a Corner to Mindful Stitching
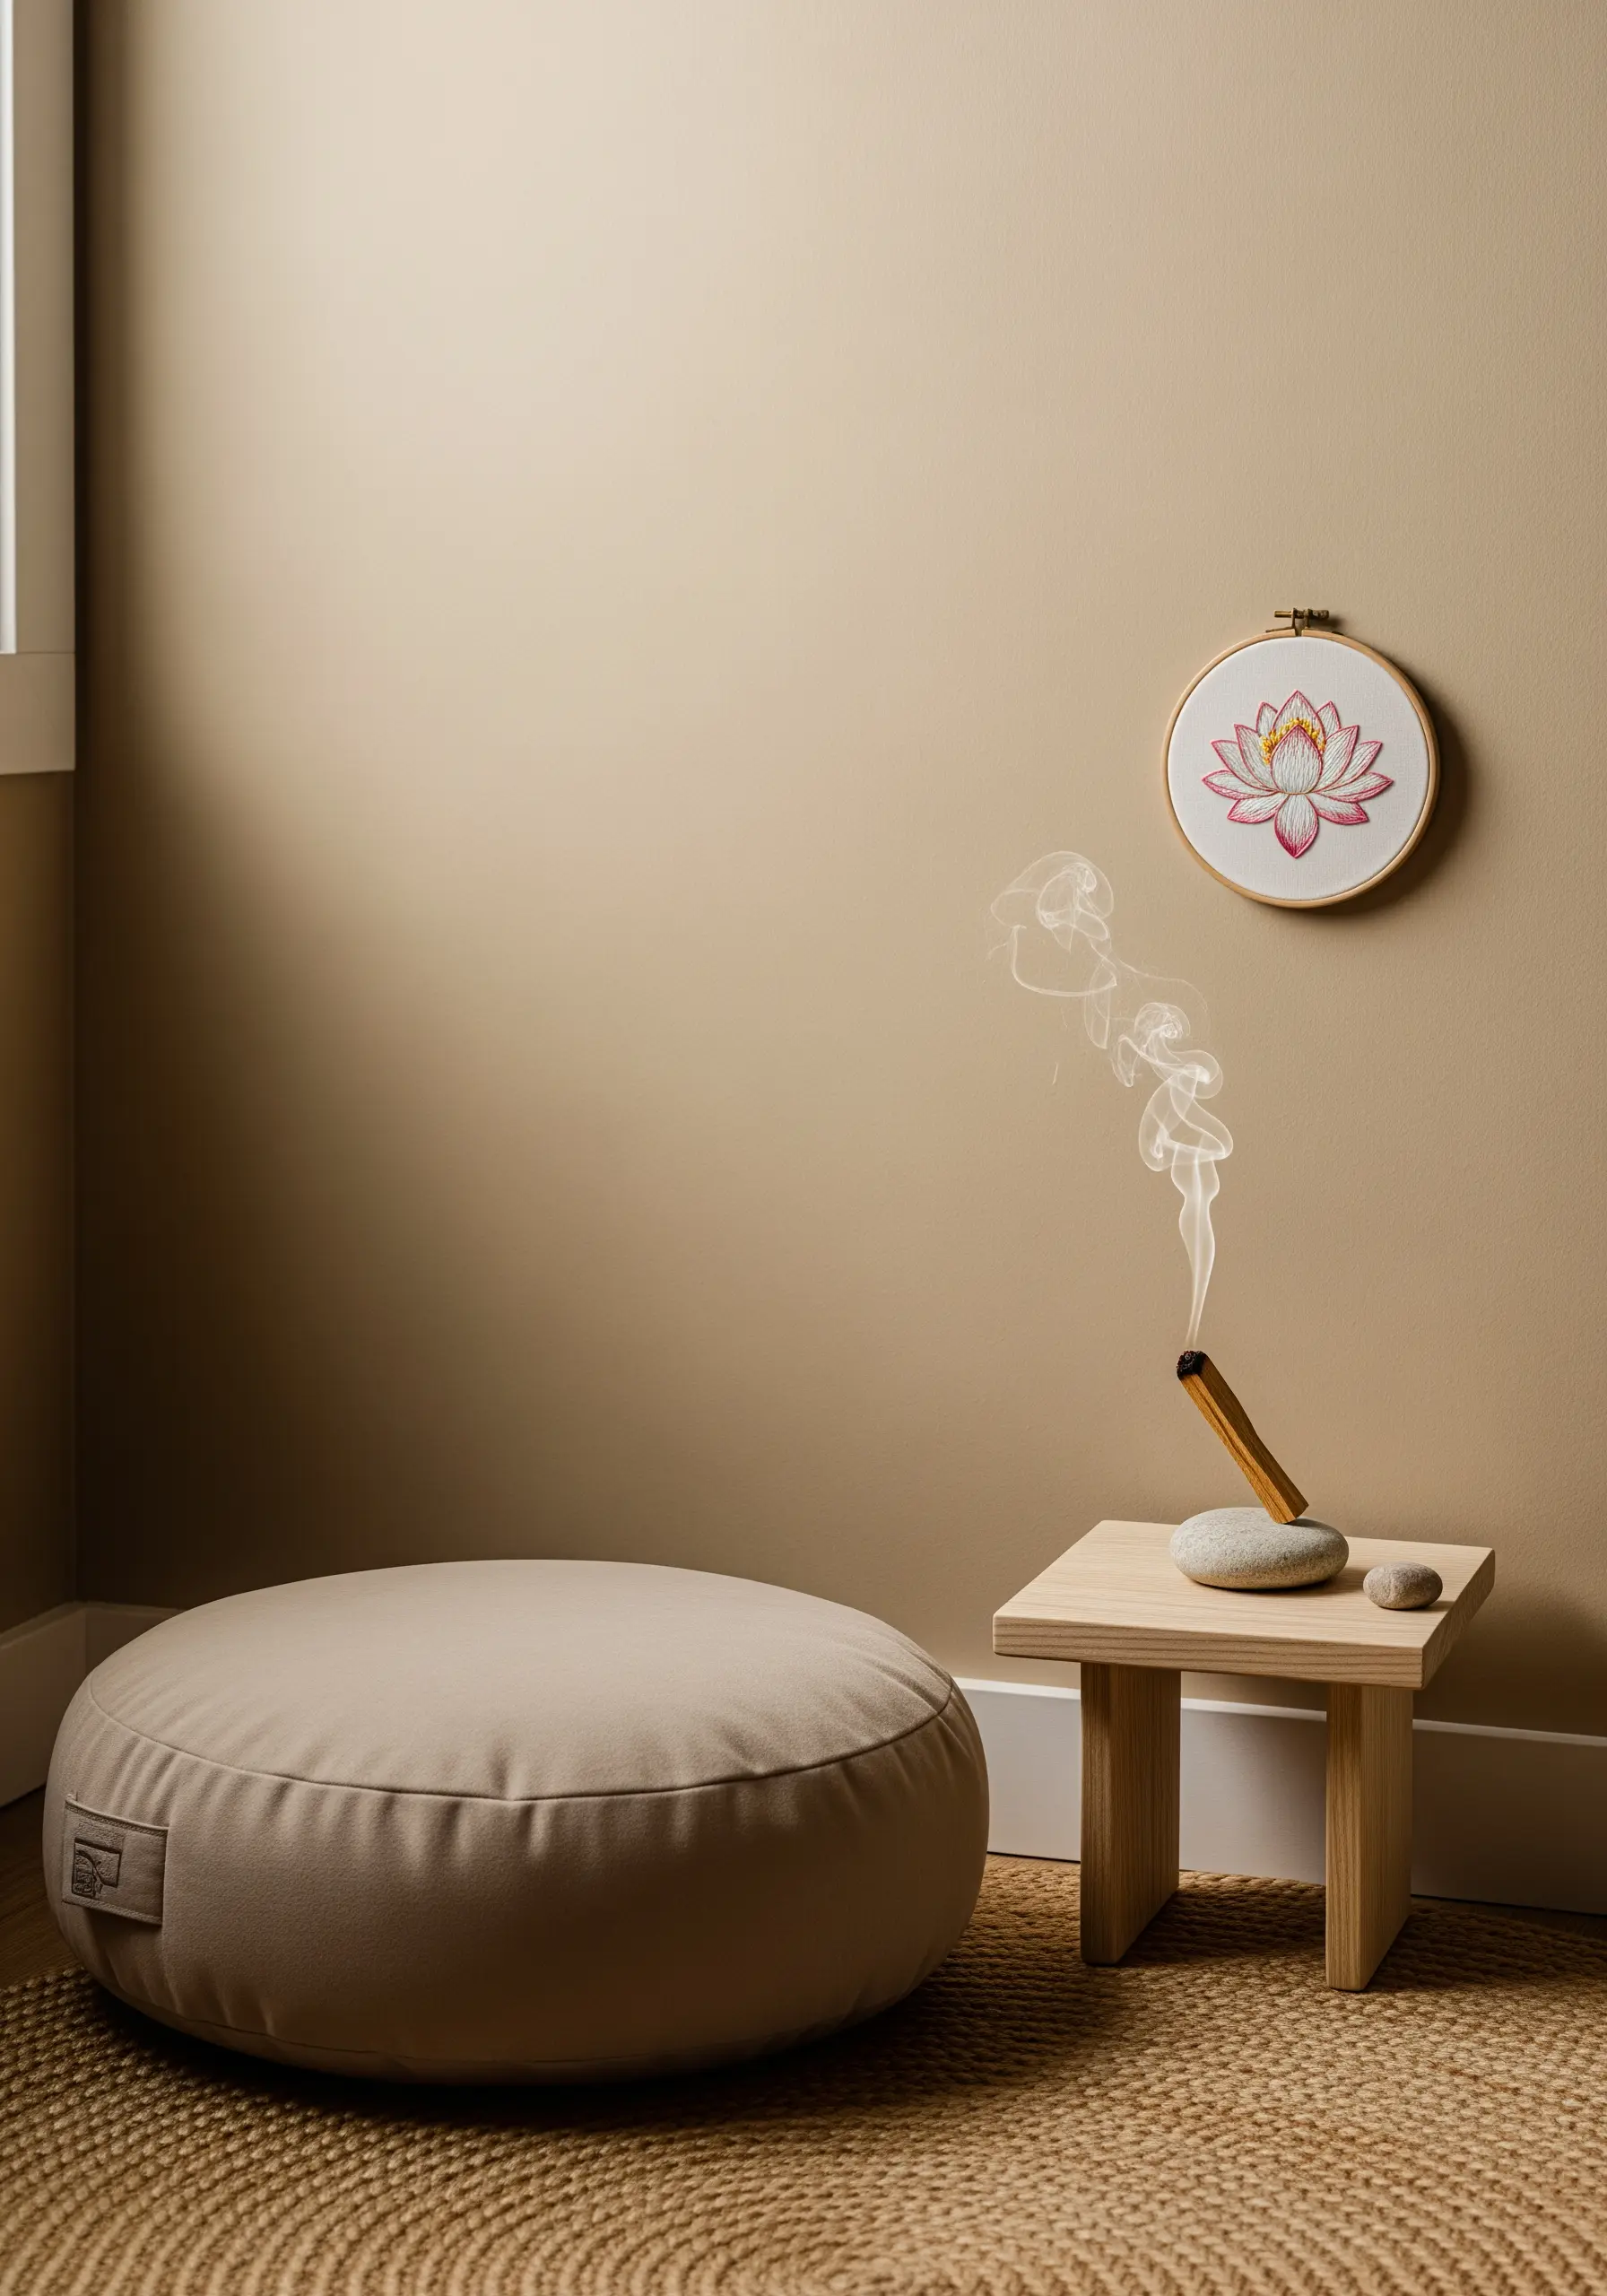
Elevate a single piece of embroidery by giving it a dedicated space for contemplation, such as a meditation corner.
A calming motif like a lotus flower, stitched with soft color gradients, becomes more than just decoration—it becomes a focal point for mindfulness.
For the petals, blend two or three shades of pink using a long-and-short stitch to create a soft, watercolor-like effect.
This thoughtful placement turns your embroidery into an integral part of your daily ritual, especially when paired with other elements of your mandala embroidery wall art.
19. Punctuate a Photo Wall with Bursts of Texture
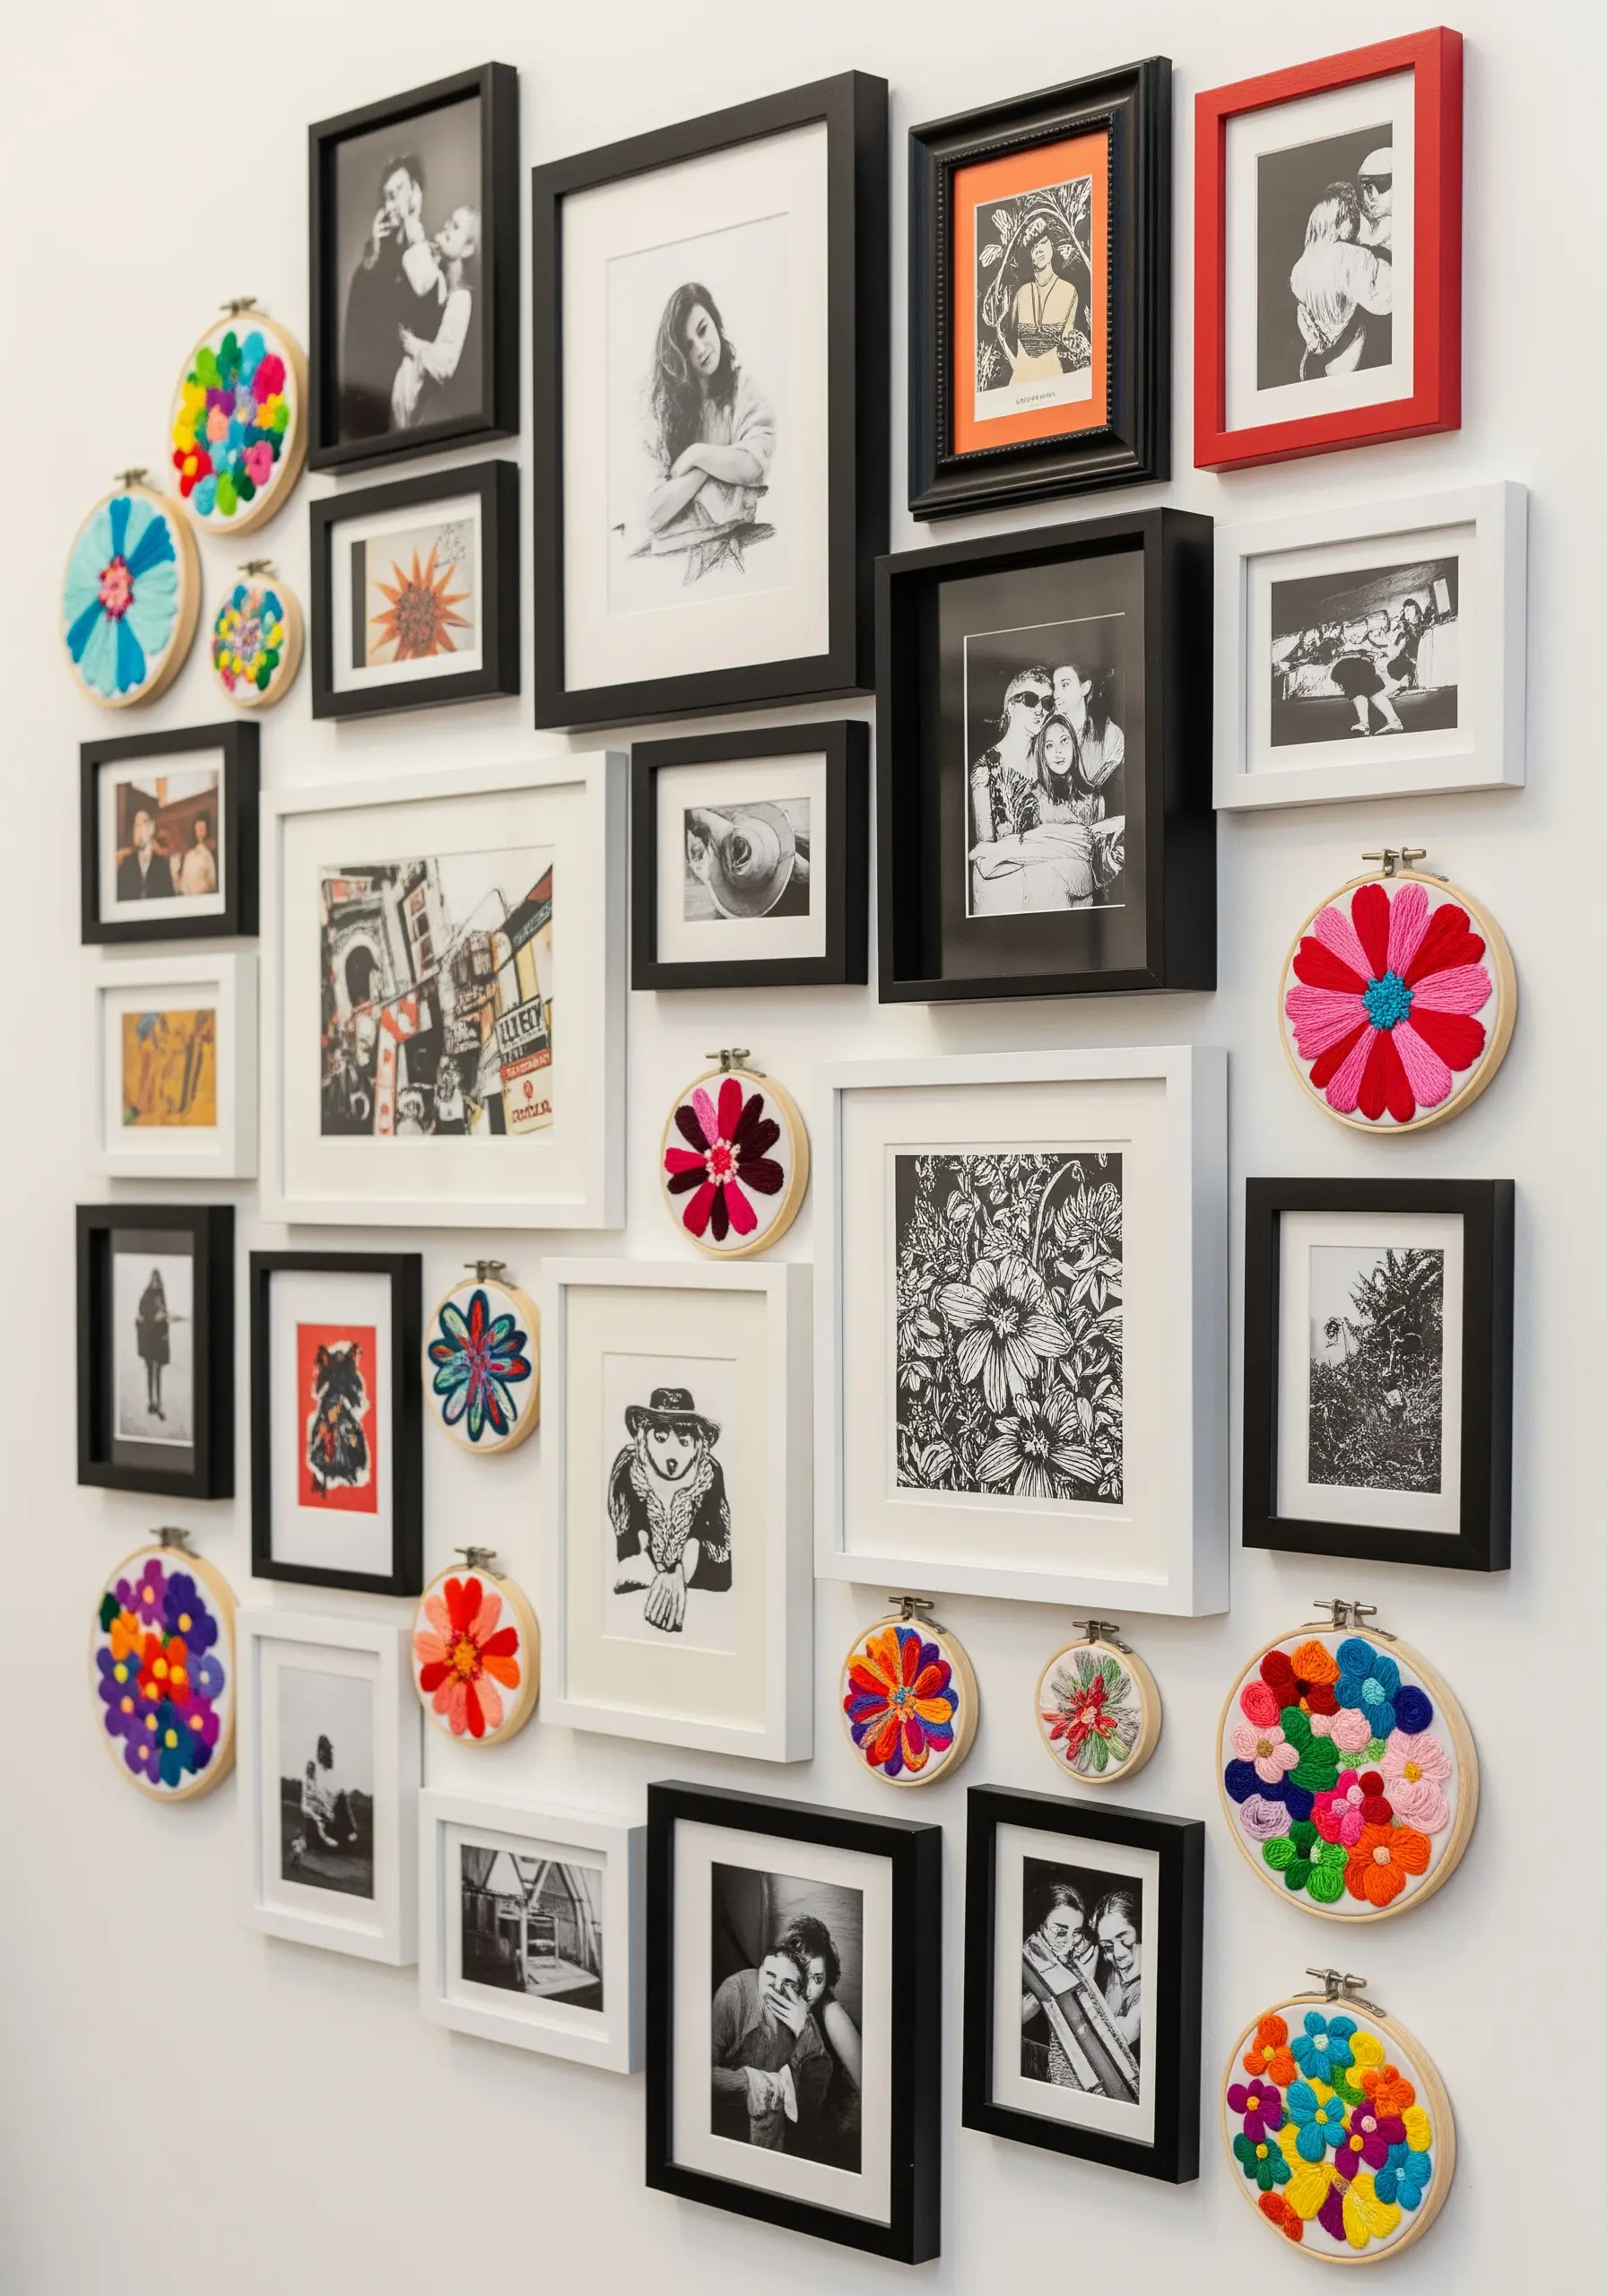
Integrate your embroidery into a larger gallery wall by using small, vibrant hoops as textural punctuation marks among framed photos.
The bright colors and three-dimensional stitches of the embroidery provide a wonderful contrast to flat, monochrome photographs.
Use highly tactile stitches like Turkey work, French knots, and woven wheels to create abstract floral bursts that demand to be touched.
These fabric collage embroidery artworks add a handmade, personal layer to your collection of memories.
20. Organize Your Craft Space with Thematic Art

Let your studio decor reflect your passion by hanging embroidery that celebrates the art of making.
Simple, graphic botanicals like carrots, radishes, and tomatoes add a cheerful, homegrown feel to a craft room pegboard.
Use a clean satin stitch to fill in the shapes, giving them a satisfyingly smooth and solid appearance that mimics vintage botanical illustrations.
This not only beautifies your workspace but also provides inspiration, much like other simple line art fruit & food motifs.
21. Elevate Simple Motifs with Formal Framing
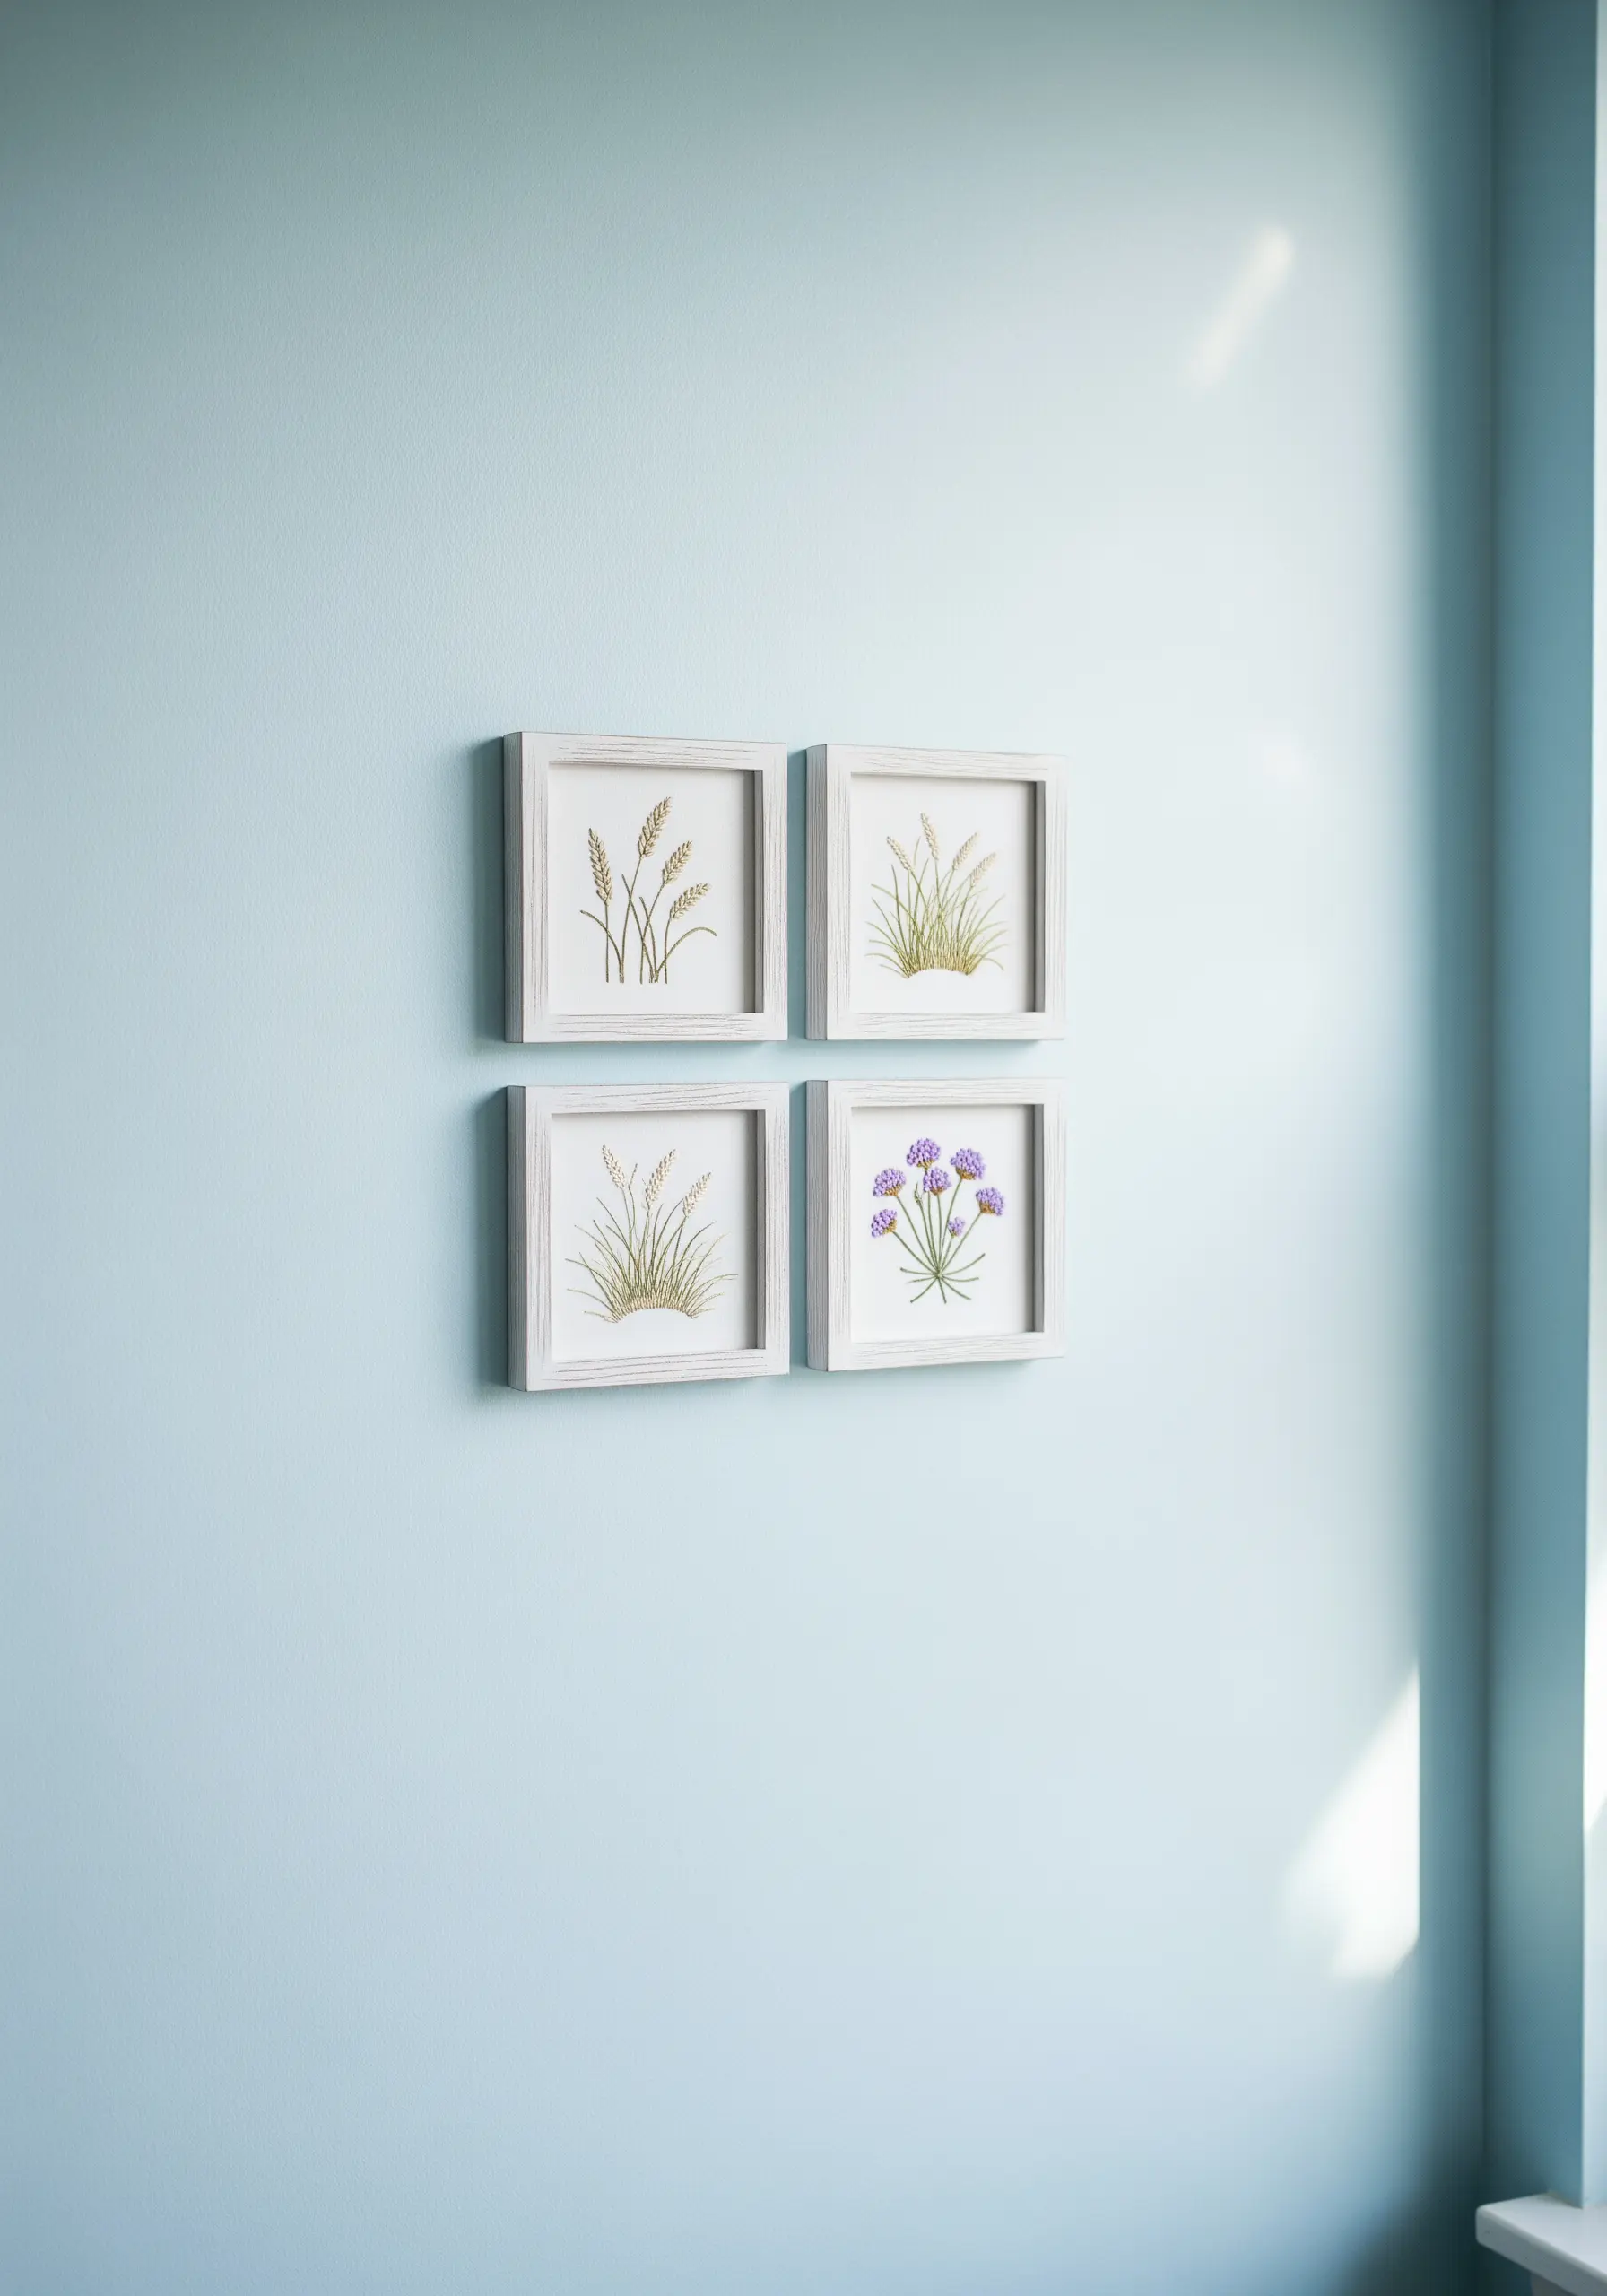
Transform simple botanical sketches into sophisticated art pieces by mounting them in matching square frames.
This treatment gives your embroidery a formal, gallery-like quality and works especially well for delicate subjects like wildflowers and grasses.
For wispy grasses, use a single strand of thread and a combination of straight stitches and seed stitches to capture their light, airy quality.
The clean white frames create a beautiful contrast against a colored wall, making the subtle details of your stitching stand out.
22. Create a Cohesive Banner Display
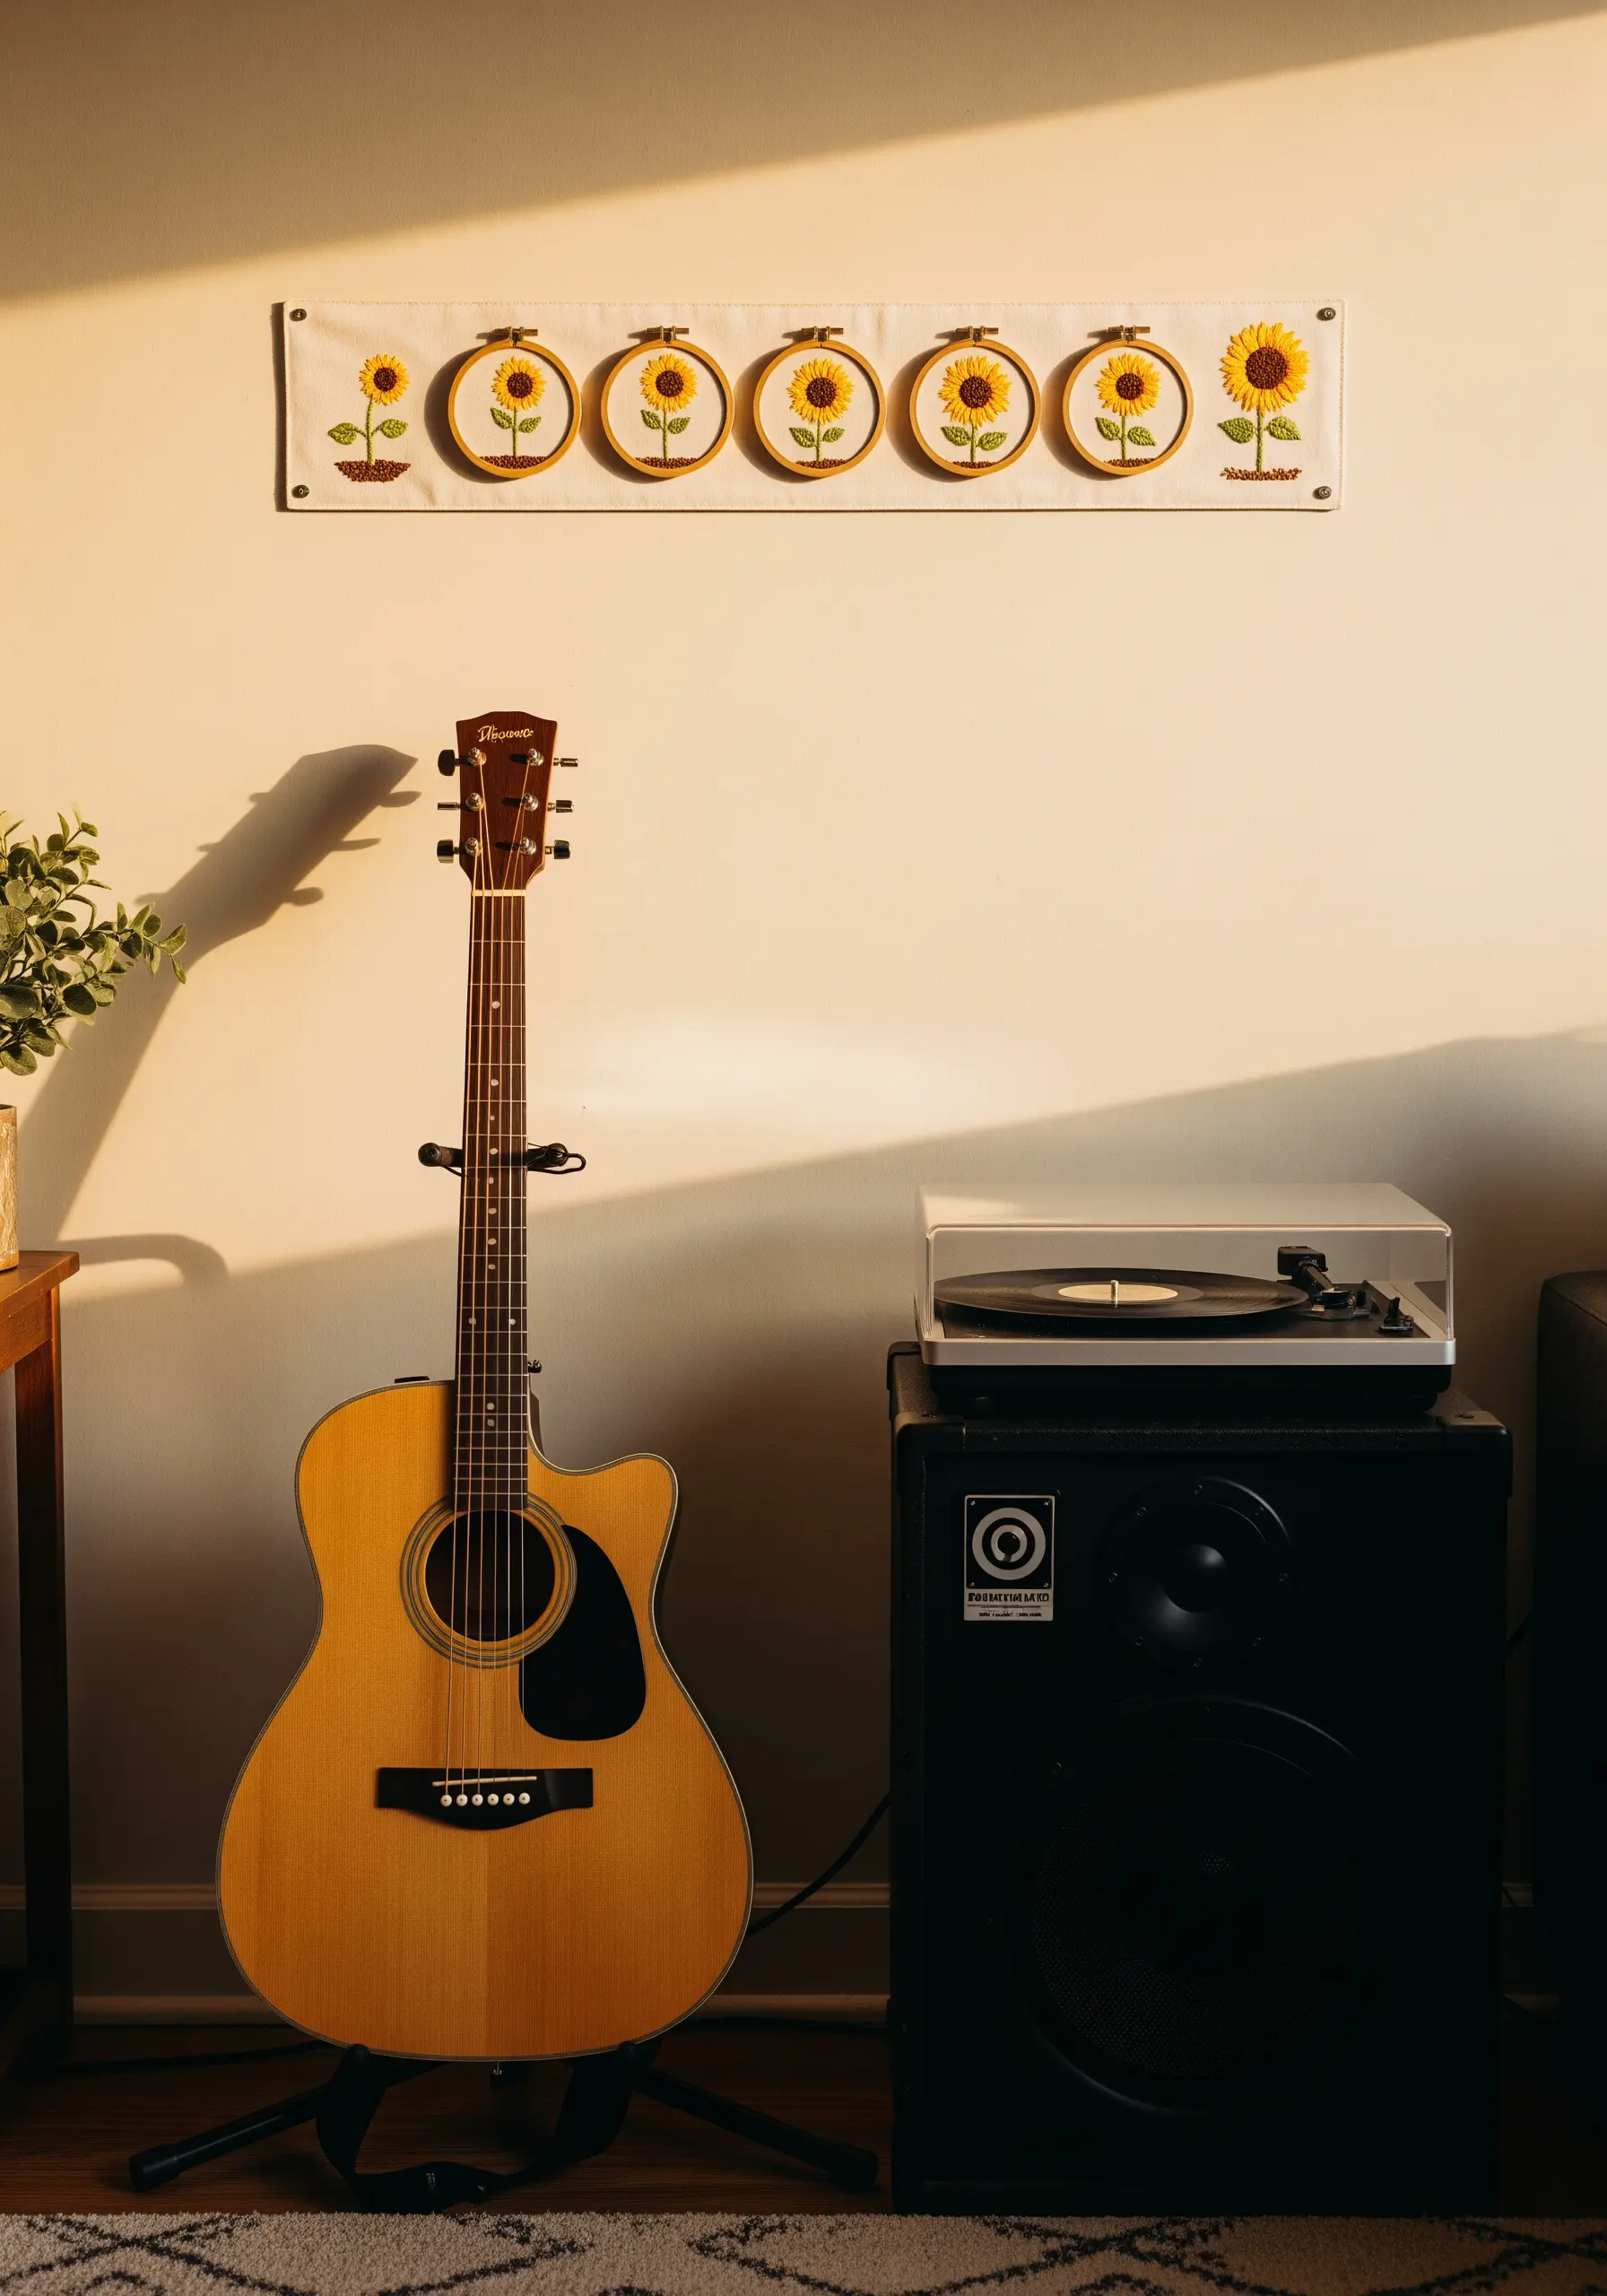
Instead of hanging hoops individually, create a custom wall banner to showcase a series of small embroideries.
Stitch your mini-motifs in their hoops, then attach them in a neat row to a rectangular piece of fabric for a single, unified wall hanging.
This method is perfect for a themed collection, like a series of sunflowers, and adds a soft, textile element to your wall decor.
For dense sunflower centers, use a heavy concentration of French knots in varied browns and blacks to build realistic texture.
23. Spotlight a Single, Intricate Piece
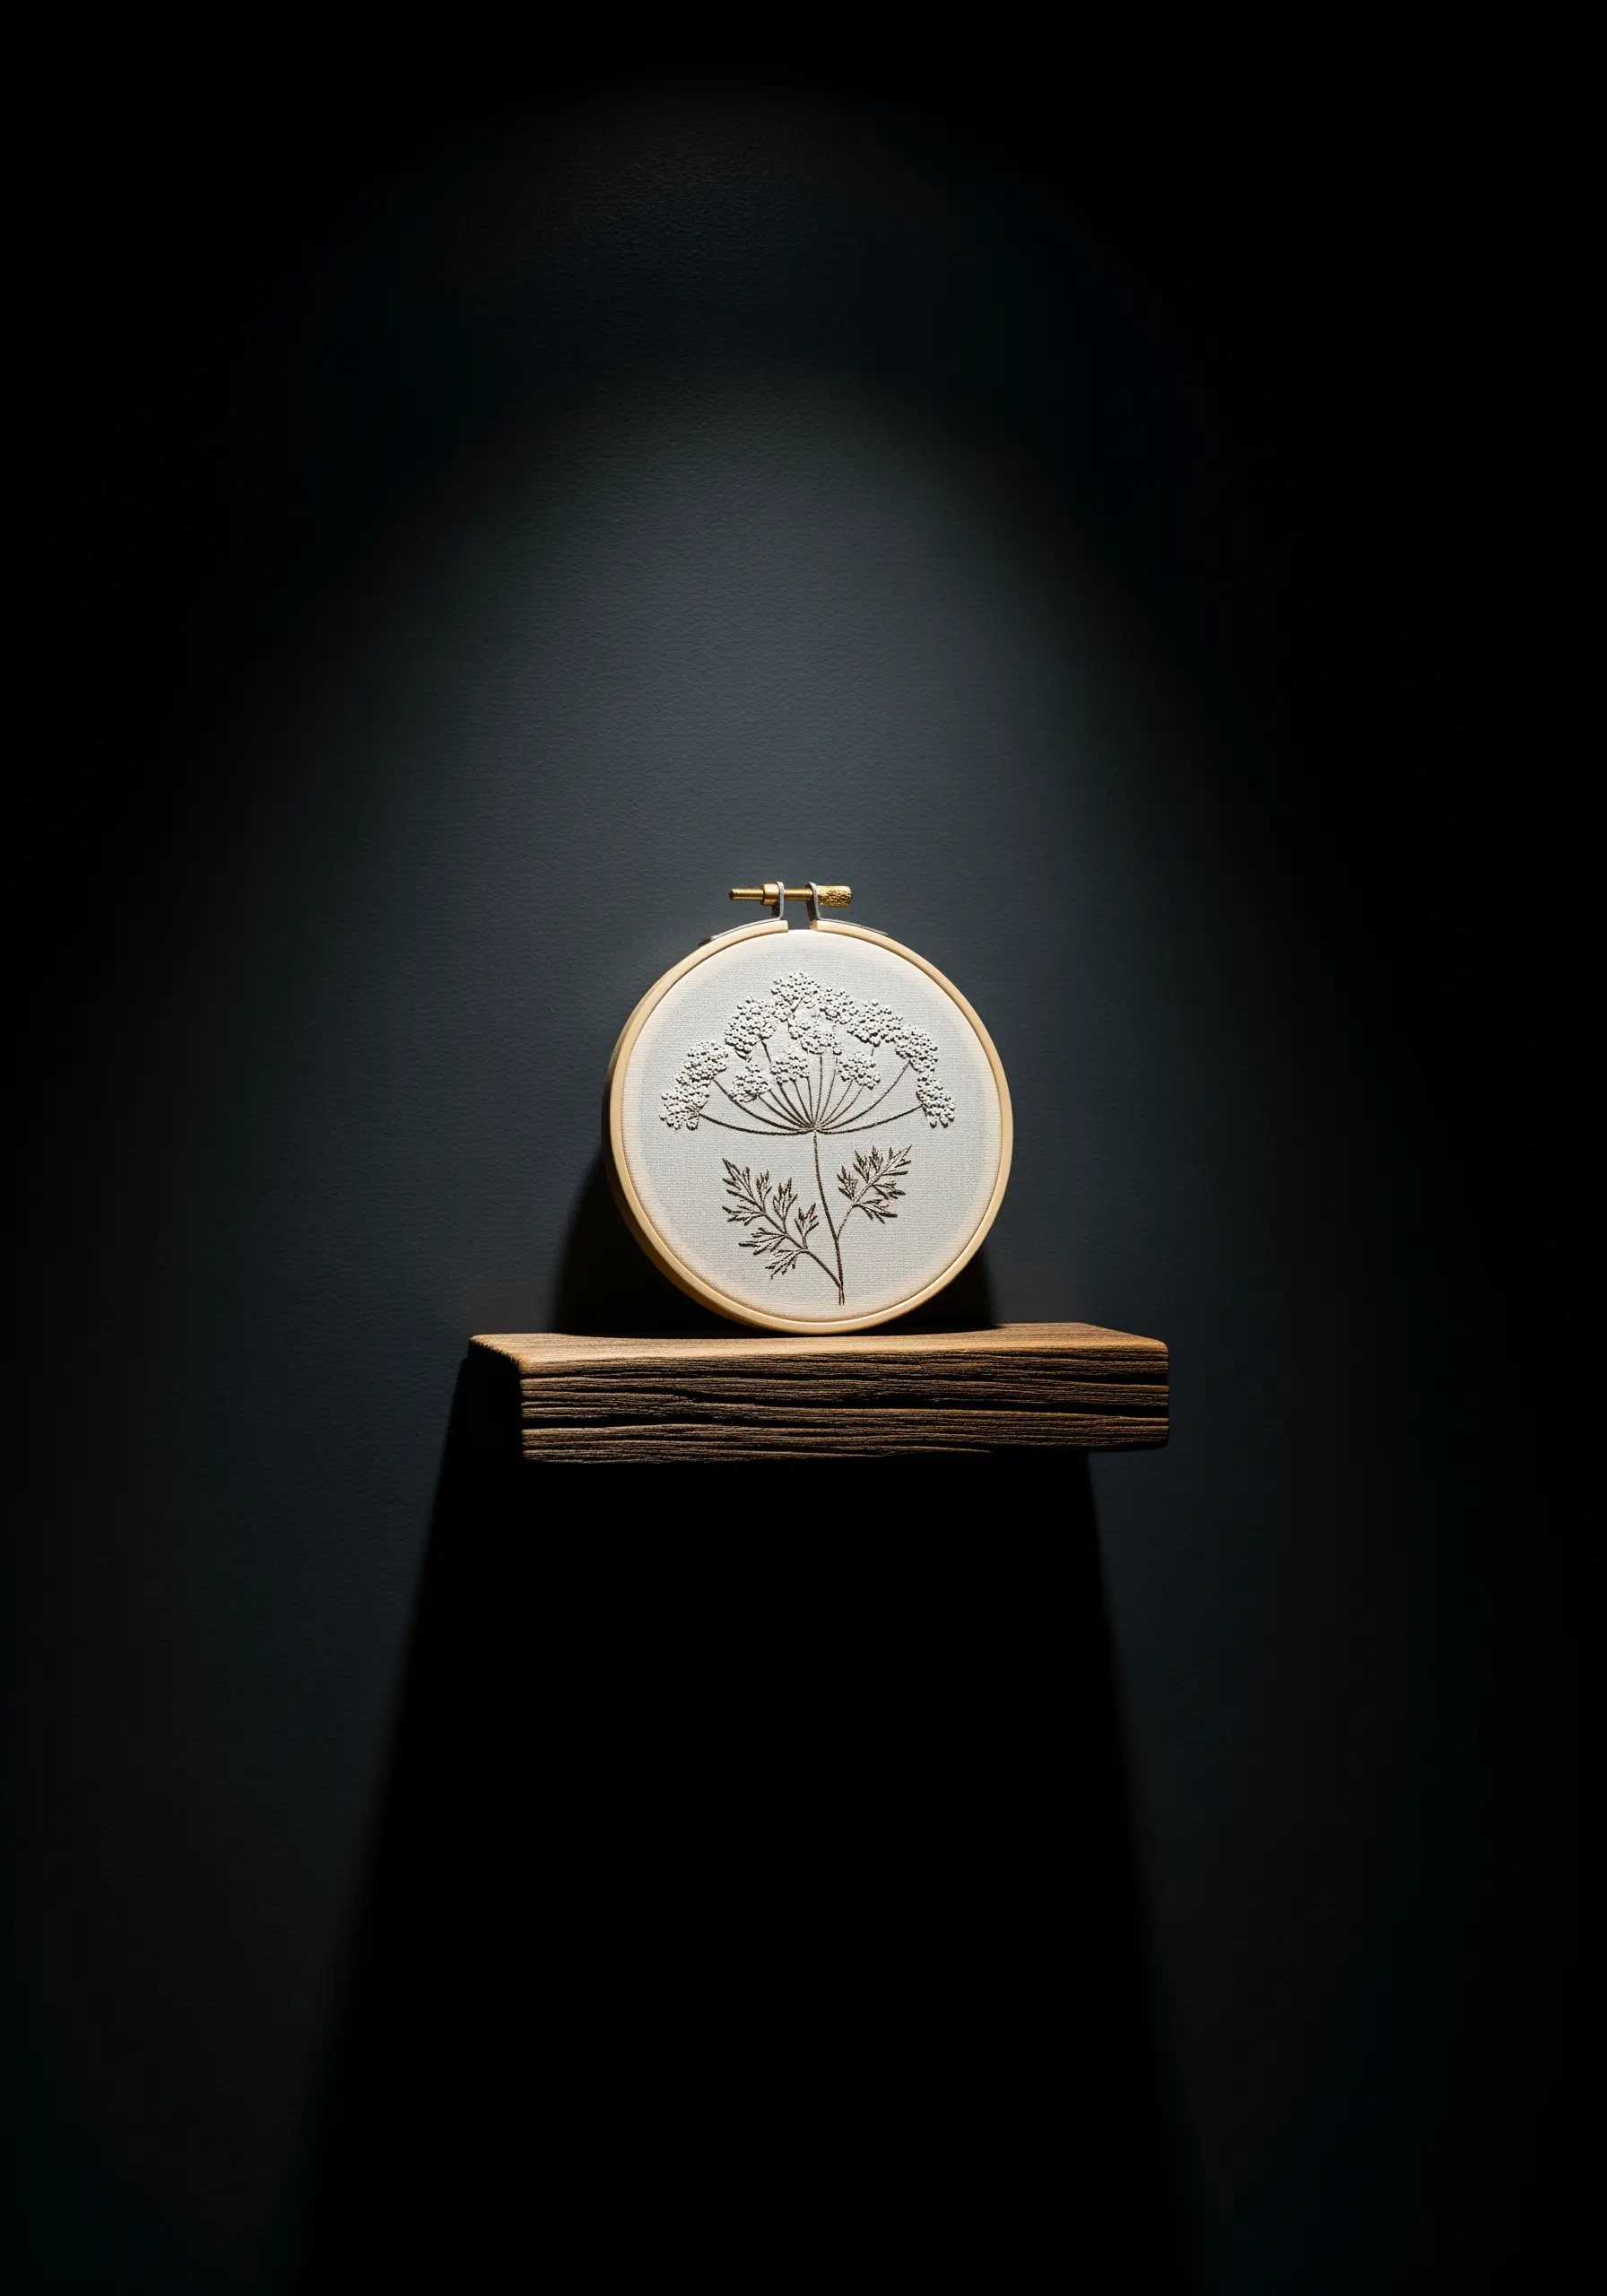
Give a special piece the attention it deserves by displaying it alone on a floating shelf under a dramatic spotlight.
This display technique turns your embroidery into a precious artifact, encouraging viewers to appreciate the intricate detail and craftsmanship.
Choose a design with fine detail, like the delicate florets of Queen Anne’s Lace, which can be created with tiny, clustered French knots or bullion stitches.
The high contrast of a dark wall and focused light makes even minimal embroidery patterns feel like masterpieces.
24. Stitch Art Inspired by Your Daily Rituals

Create embroidery that connects to your everyday life, like a rendering of the coffee plant that fuels your mornings.
Placing this art near the object of its inspiration—in this case, your coffee machine—creates a charming, personal vignette.
To capture the glossy sheen of coffee leaves, use a satin stitch with a silk or rayon thread, which reflects light beautifully.
Use padded satin stitch for the red coffee cherries to give them a plump, realistic dimension, celebrating one of your favorite houseplant embroidery motifs.


