Have you ever finished an embroidery project and felt it was missing a certain spark? You followed the pattern, used the right colors, but the final piece lacks the professional polish and personal voice you were hoping for. It’s a common feeling, but the solution is often simpler than you think.
The secret to elevating your embroidery isn’t about mastering hundreds of complex stitches. It’s about making small, intentional choices—switching from a backstitch to a stem stitch for a smoother line, using fewer strands of floss for delicate details, or choosing a fabric with a texture that enhances your subject. It’s in understanding how a simple French knot can mimic sand, or how directional satin stitches can create the shimmer of water.
Think of your bathroom or balcony not just as a space to decorate, but as a personal gallery for these thoughtful coastal miniatures. Each tiny piece is an opportunity to practice a specific technique and create something that feels uniquely yours. Let these ideas guide you toward stitching with more confidence, intention, and artistry—transforming simple thread into small, serene windows to the sea.
1. Architectural Precision in Miniature
Create a sharp, contained edge on your lighthouse by outlining it with a split stitch before filling with satin stitch.
Use a single strand of floss for the finest architectural details, ensuring your work looks crisp and deliberate, not bulky.
For the rocky ground, build organic texture with a dense cluster of French knots in varying grey tones, which contrasts beautifully with the lighthouse’s smooth lines.
Presenting your work in a simple, rustic frame elevates it from a craft project into one of those stunning framed embroidery pieces that feel like intentional art.
2. A Study in Flight: The Triptych Display
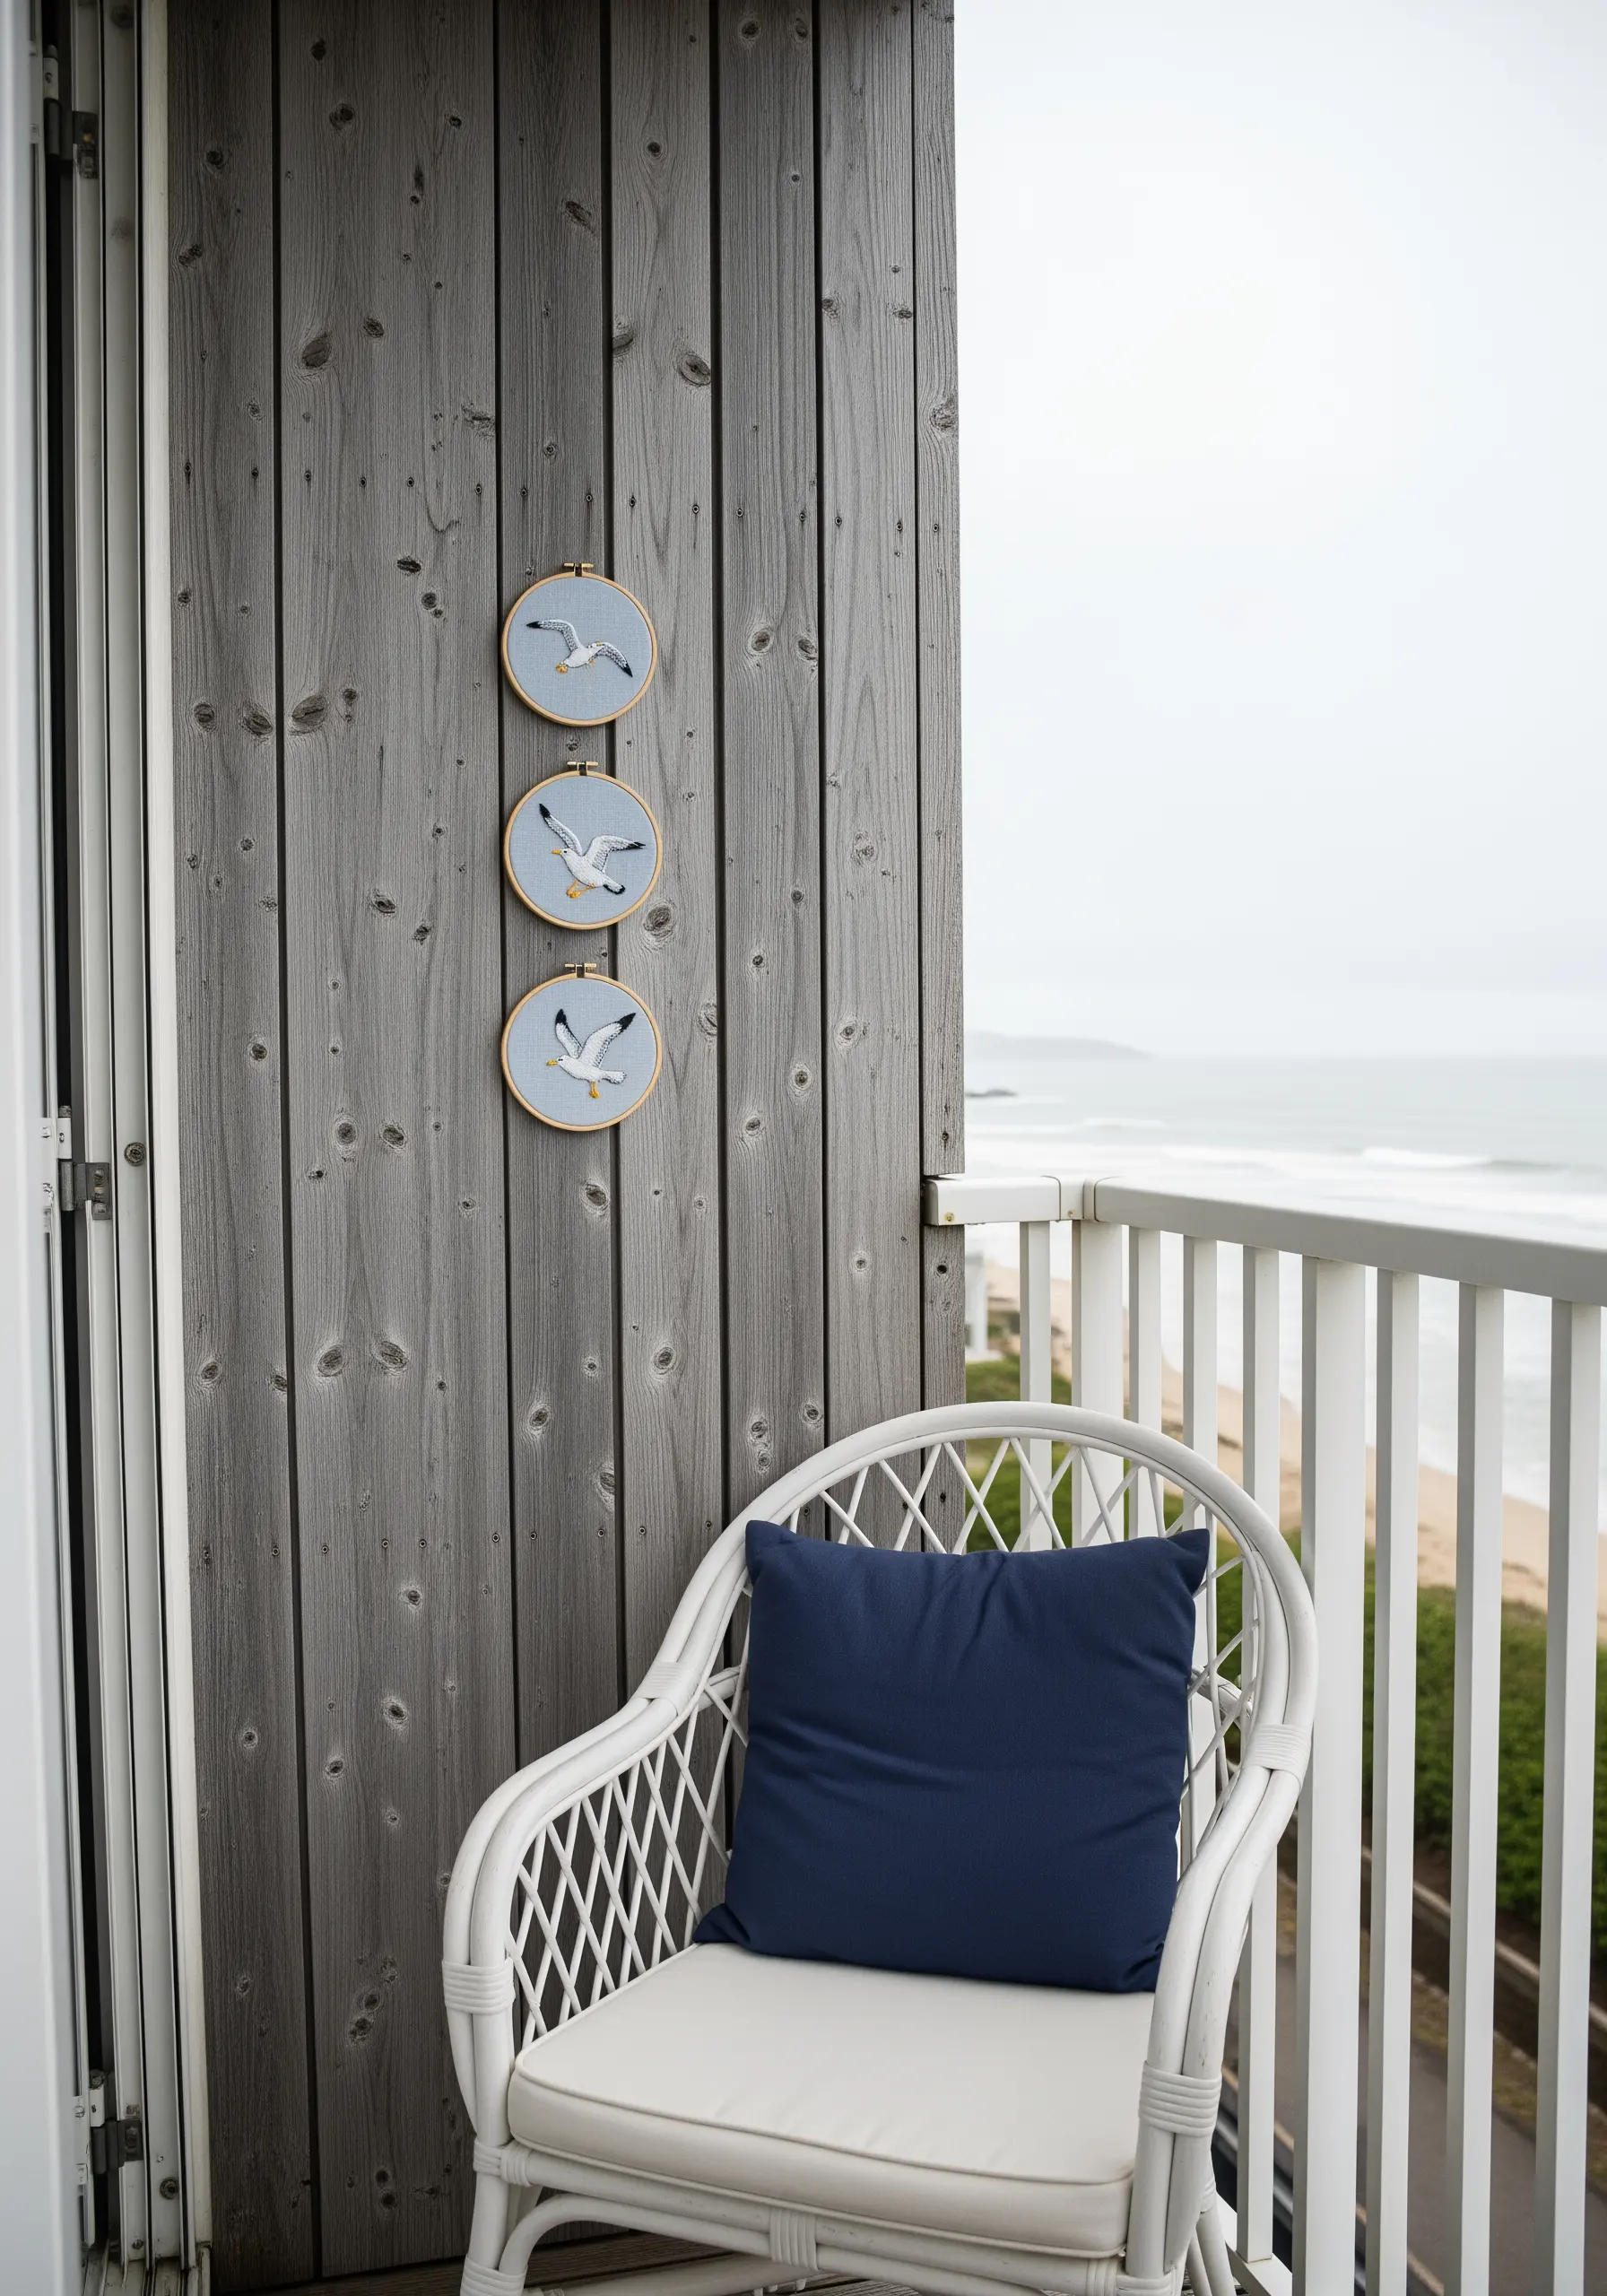
To capture the essence of movement, stitch a series of three seagulls, varying the wing positions slightly in each hoop.
Use a long-and-short stitch to blend light grey and white threads on the birds’ bodies, suggesting dimension and the way light hits their feathers.
A single dark French knot for the eye provides a necessary focal point without adding complexity.
Grouping small hoops tells a more dynamic story, proving you don’t need oversized hoop wall displays to create a powerful statement wall.
3. The Collector’s Canvas: Shell Line Work

Approach this piece like a scientific illustration, focusing on the grace and precision of each line.
Use a single strand of dark floss in a whipped backstitch to achieve clean, uninterrupted outlines that mimic the quality of a pen-and-ink drawing.
For areas that require subtle shading, use tiny seed stitches spaced closely together—a technique that adds texture without overwhelming the delicate forms.
This method works beautifully for any collection of natural objects, similar to how you might render botanical line art embroidery patterns.
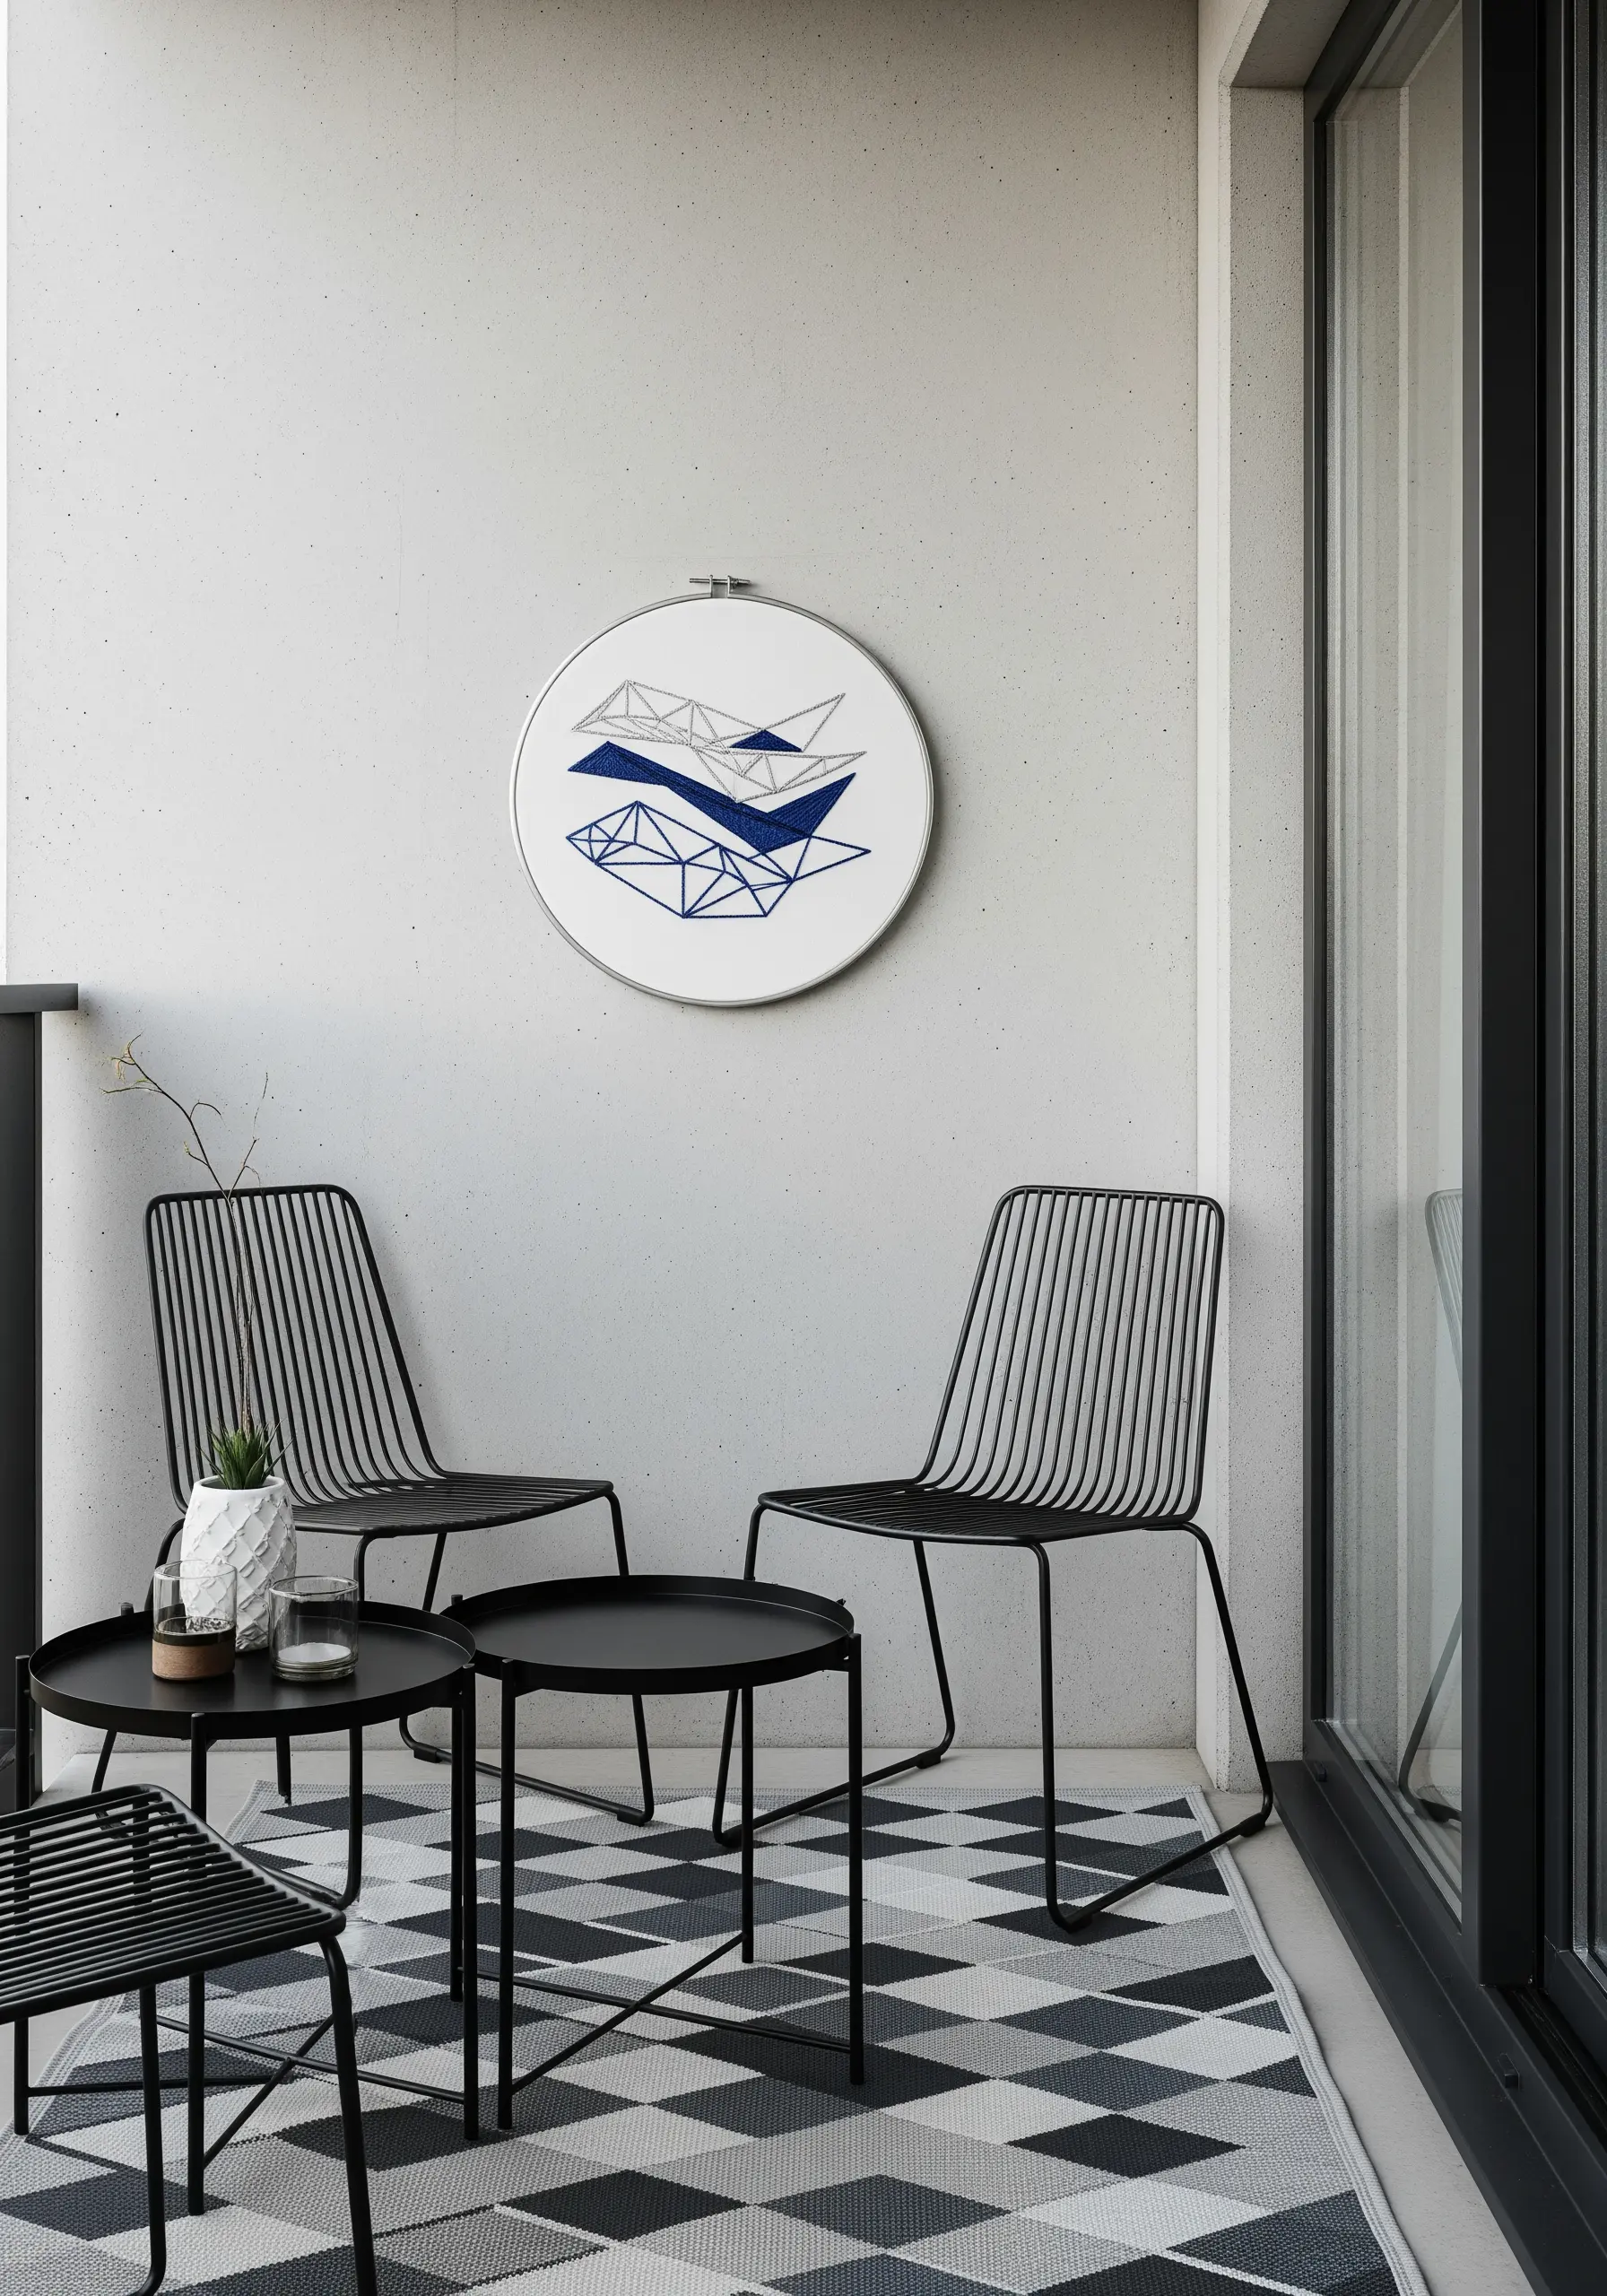
4. Navigational Graphics with Satin Stitch

For a design this graphic, flawless satin stitch is non-negotiable.
Use a laying tool or the side of your needle to ensure every thread lies perfectly flat and parallel, creating a smooth, almost printed finish.
Before you fill any shape, outline it with a split stitch; this creates a raised boundary that acts as a ‘fence’ for your satin stitches, keeping every edge perfectly sharp.
The combination of bold color blocks and fine outlines gives it a timeless, classic appeal, much like some inspirational quote string art designs.
5. Sculpting Waves with Directional Stitches

Create the illusion of churning water by layering directional stitches that follow the curve of the waves.
Begin with long split stitches in your darkest teal, then add lighter shades on top using a long-and-short stitch, slightly altering the angle to build depth.
For a final touch, add pops of white or silver metallic thread with single straight stitches to mimic the glint of seafoam.
This method creates high-texture fabric collage effects using only thread and thoughtful placement.
6. A Minimalist Regatta in a Series
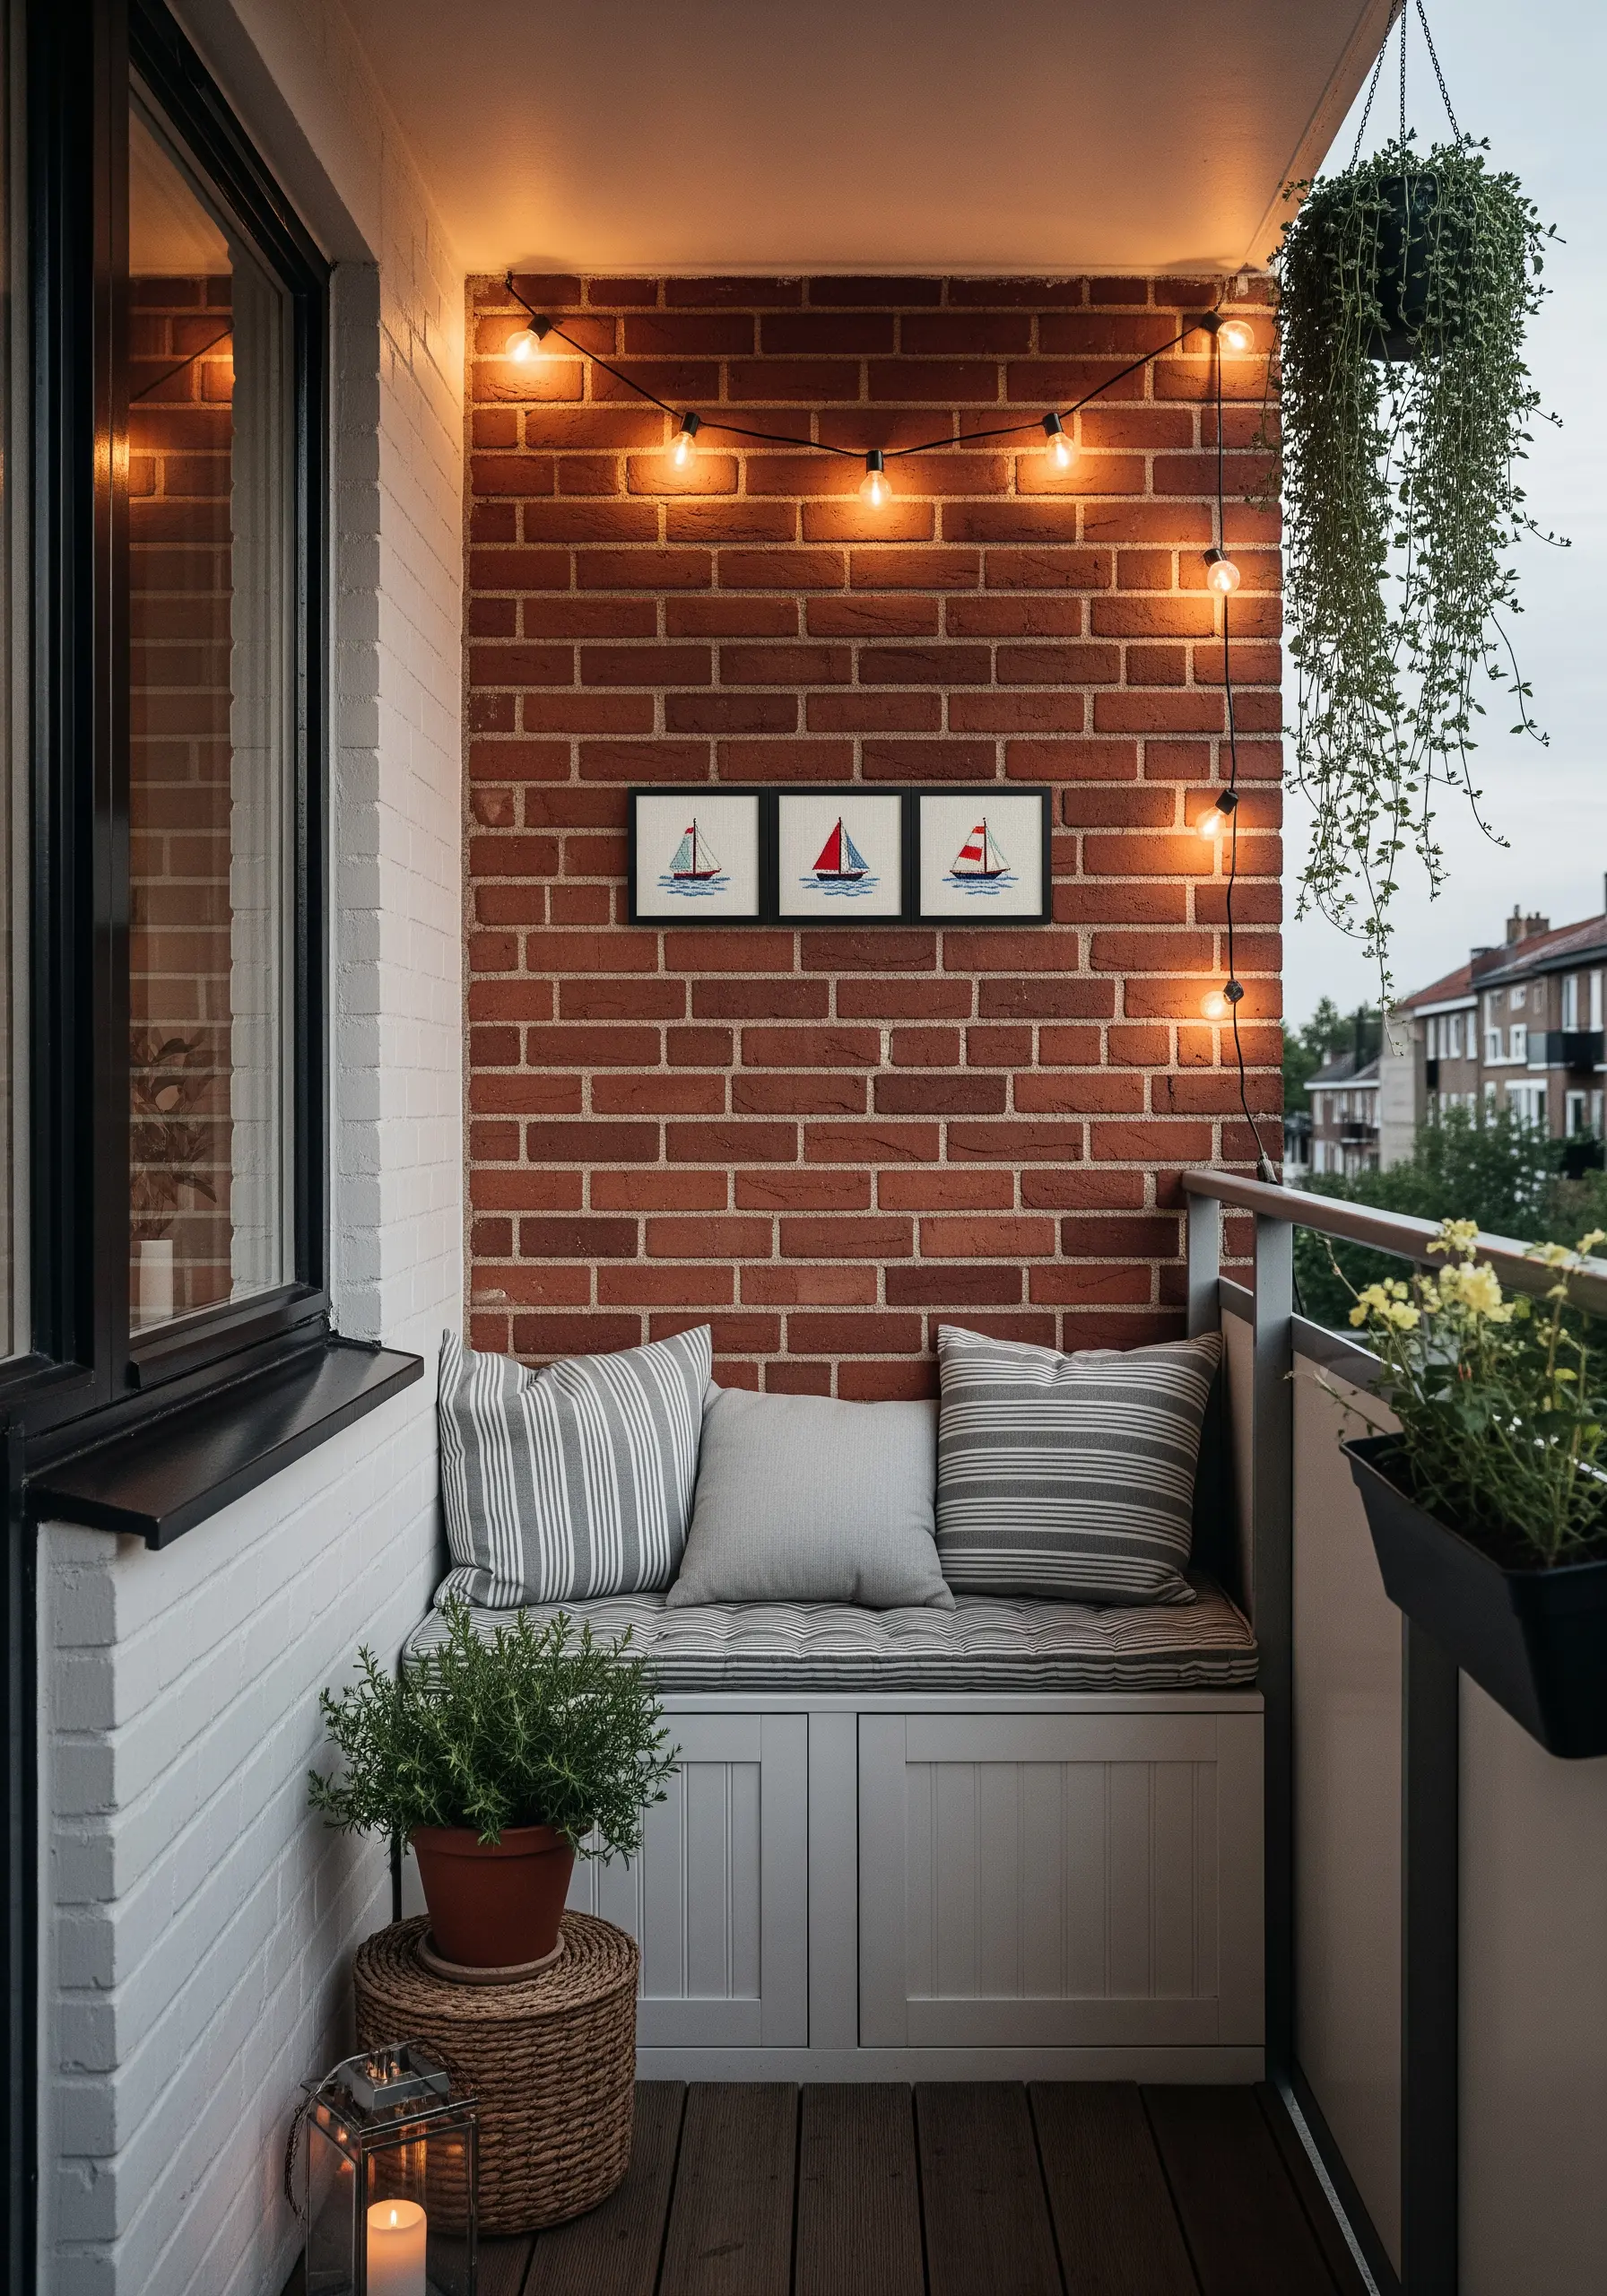
When your motifs are simple, your fabric choice becomes a key design element.
Select a slightly textured linen or a cotton-linen blend to add subtle depth that complements the clean shapes without distracting from them.
Use just two or three strands of floss for the satin-stitched sails to keep them flat, neat, and elegant.
Framing each boat individually in a matching series transforms these tiny embroidery designs from simple stitches into a cohesive, curated art collection.
7. Coral Silhouettes: The Power of One Color
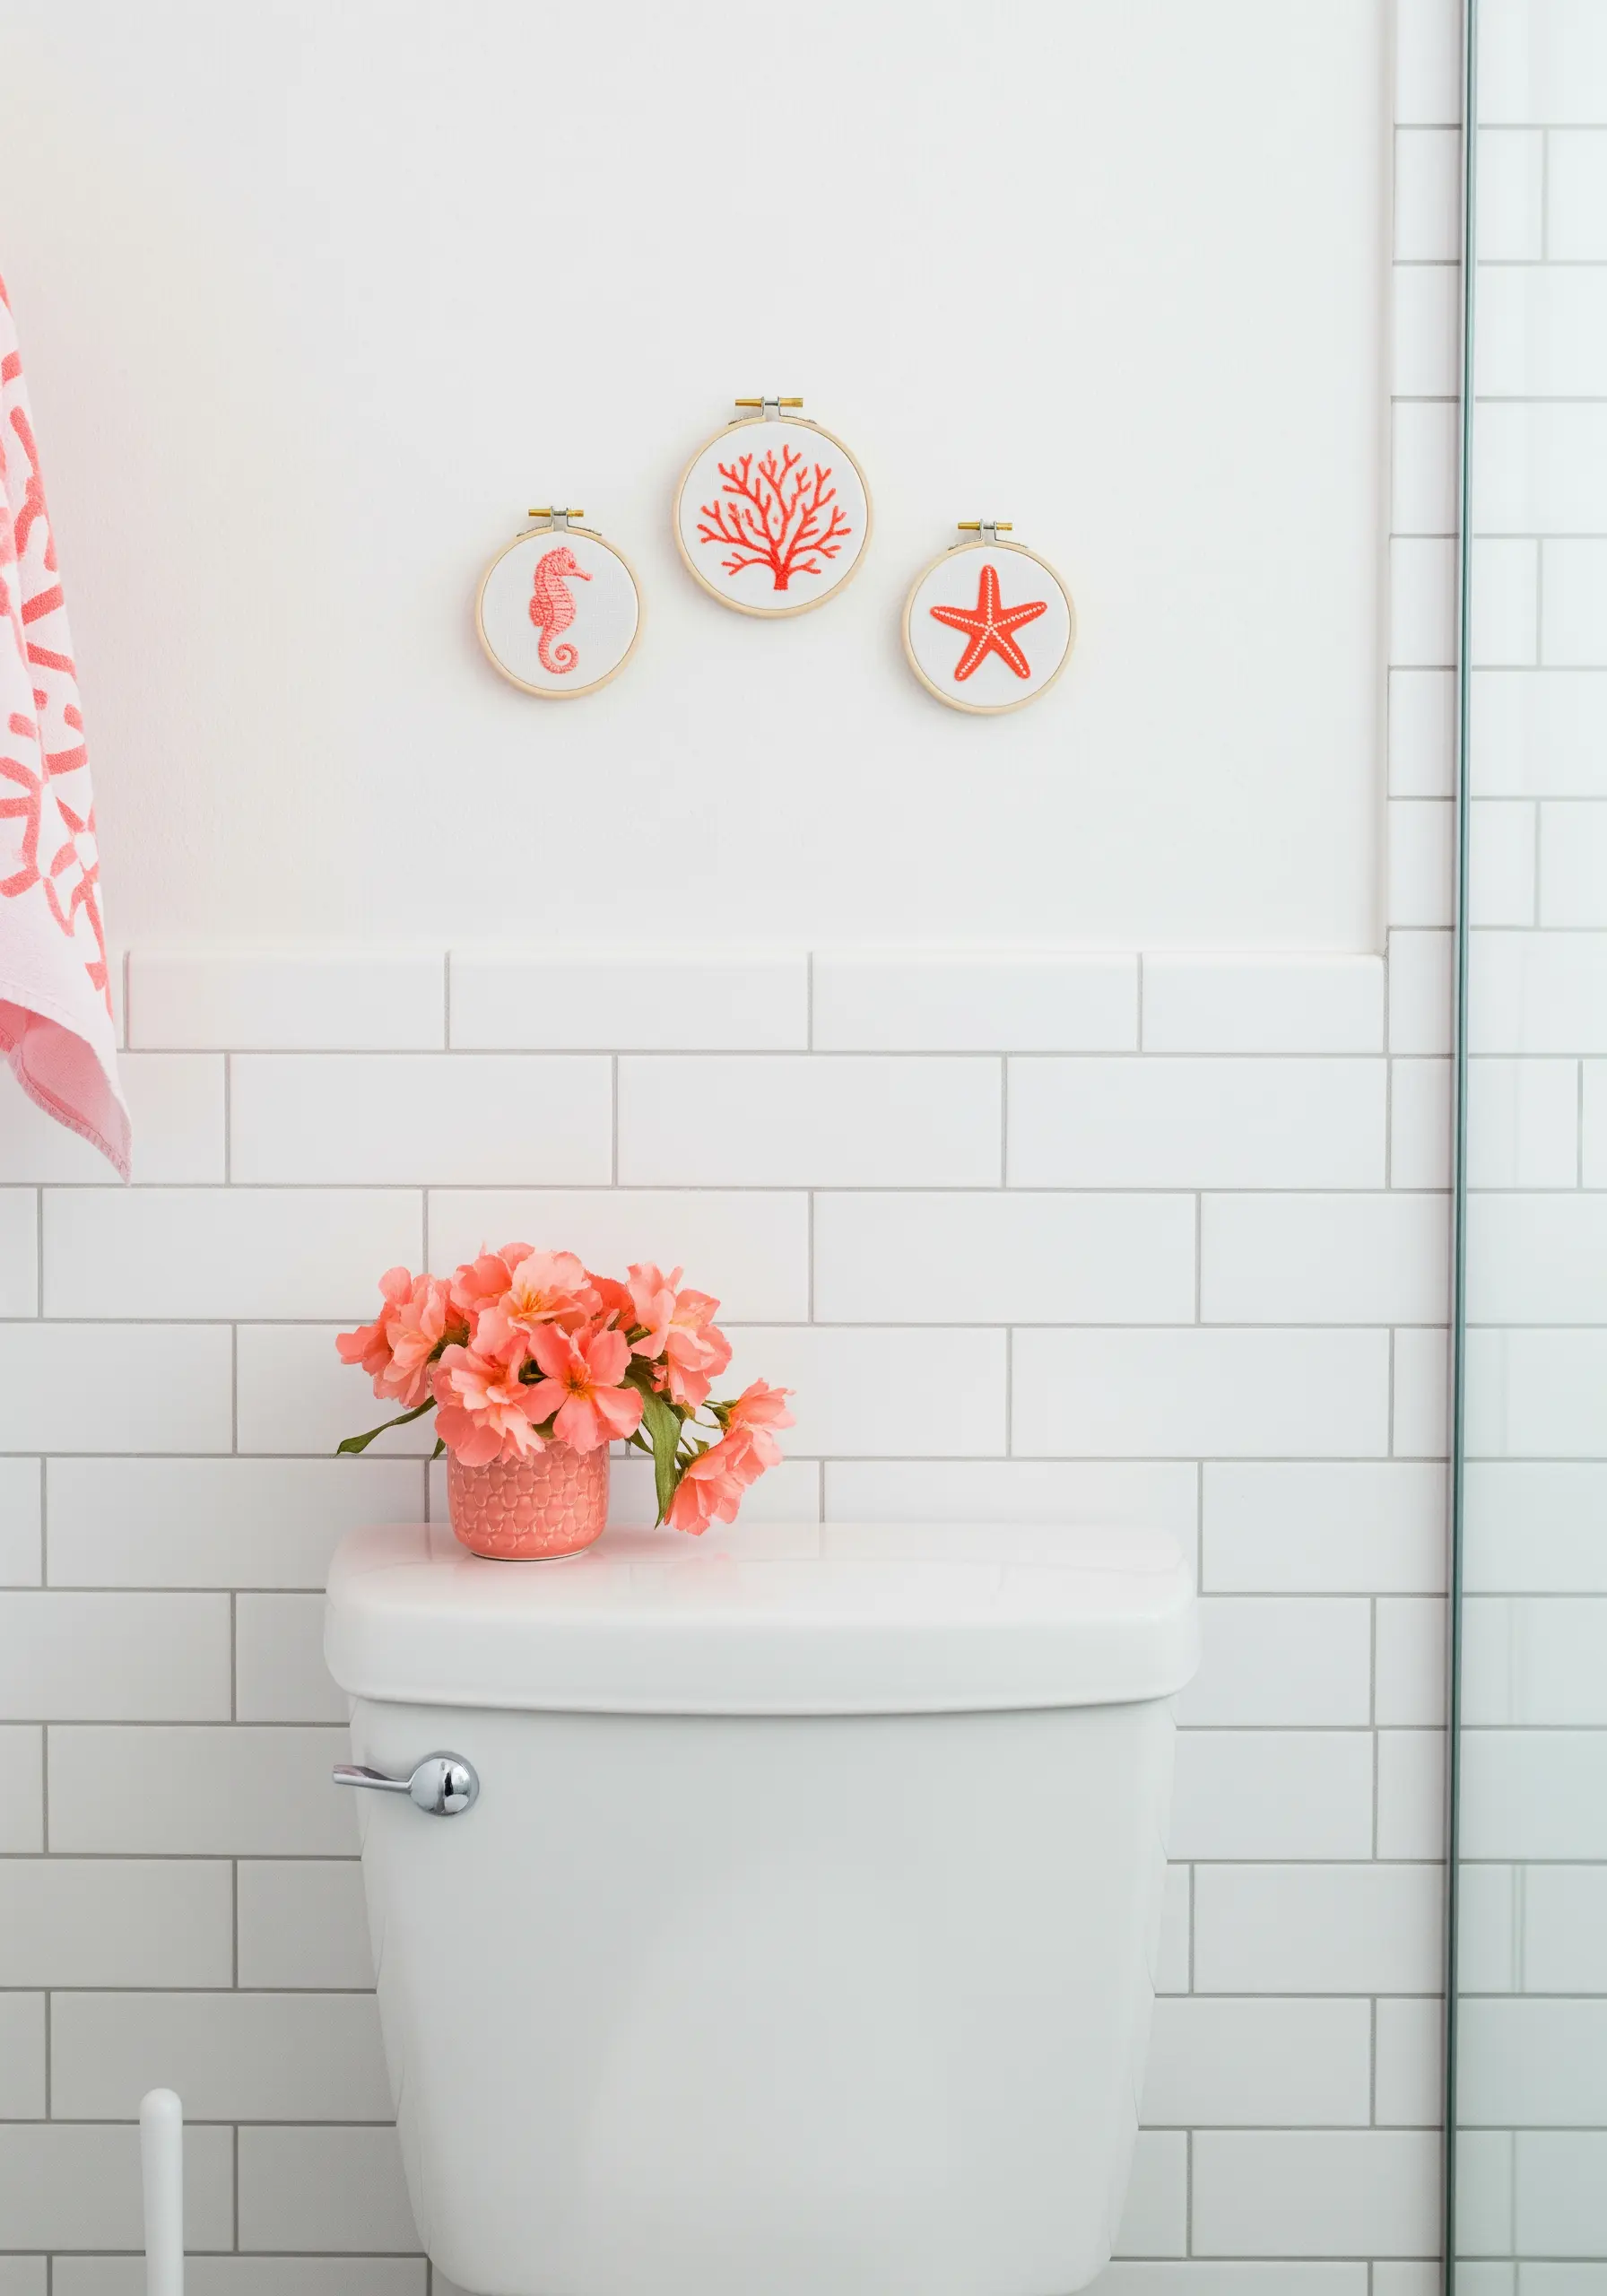
Elevate simple silhouettes by giving each one a distinct texture, even while using a single color.
Try French knots for the starfish, a whipped backstitch for the seahorse’s outline, and a combination of lazy daisy and straight stitches for the branching coral.
Using a single, vibrant color like this coral red creates a bold, graphic statement where the negative space becomes just as important as the stitching.
This is a perfect example of easy small embroidery patterns that deliver maximum visual impact.
8. Stitching Coastal Dune Botanicals
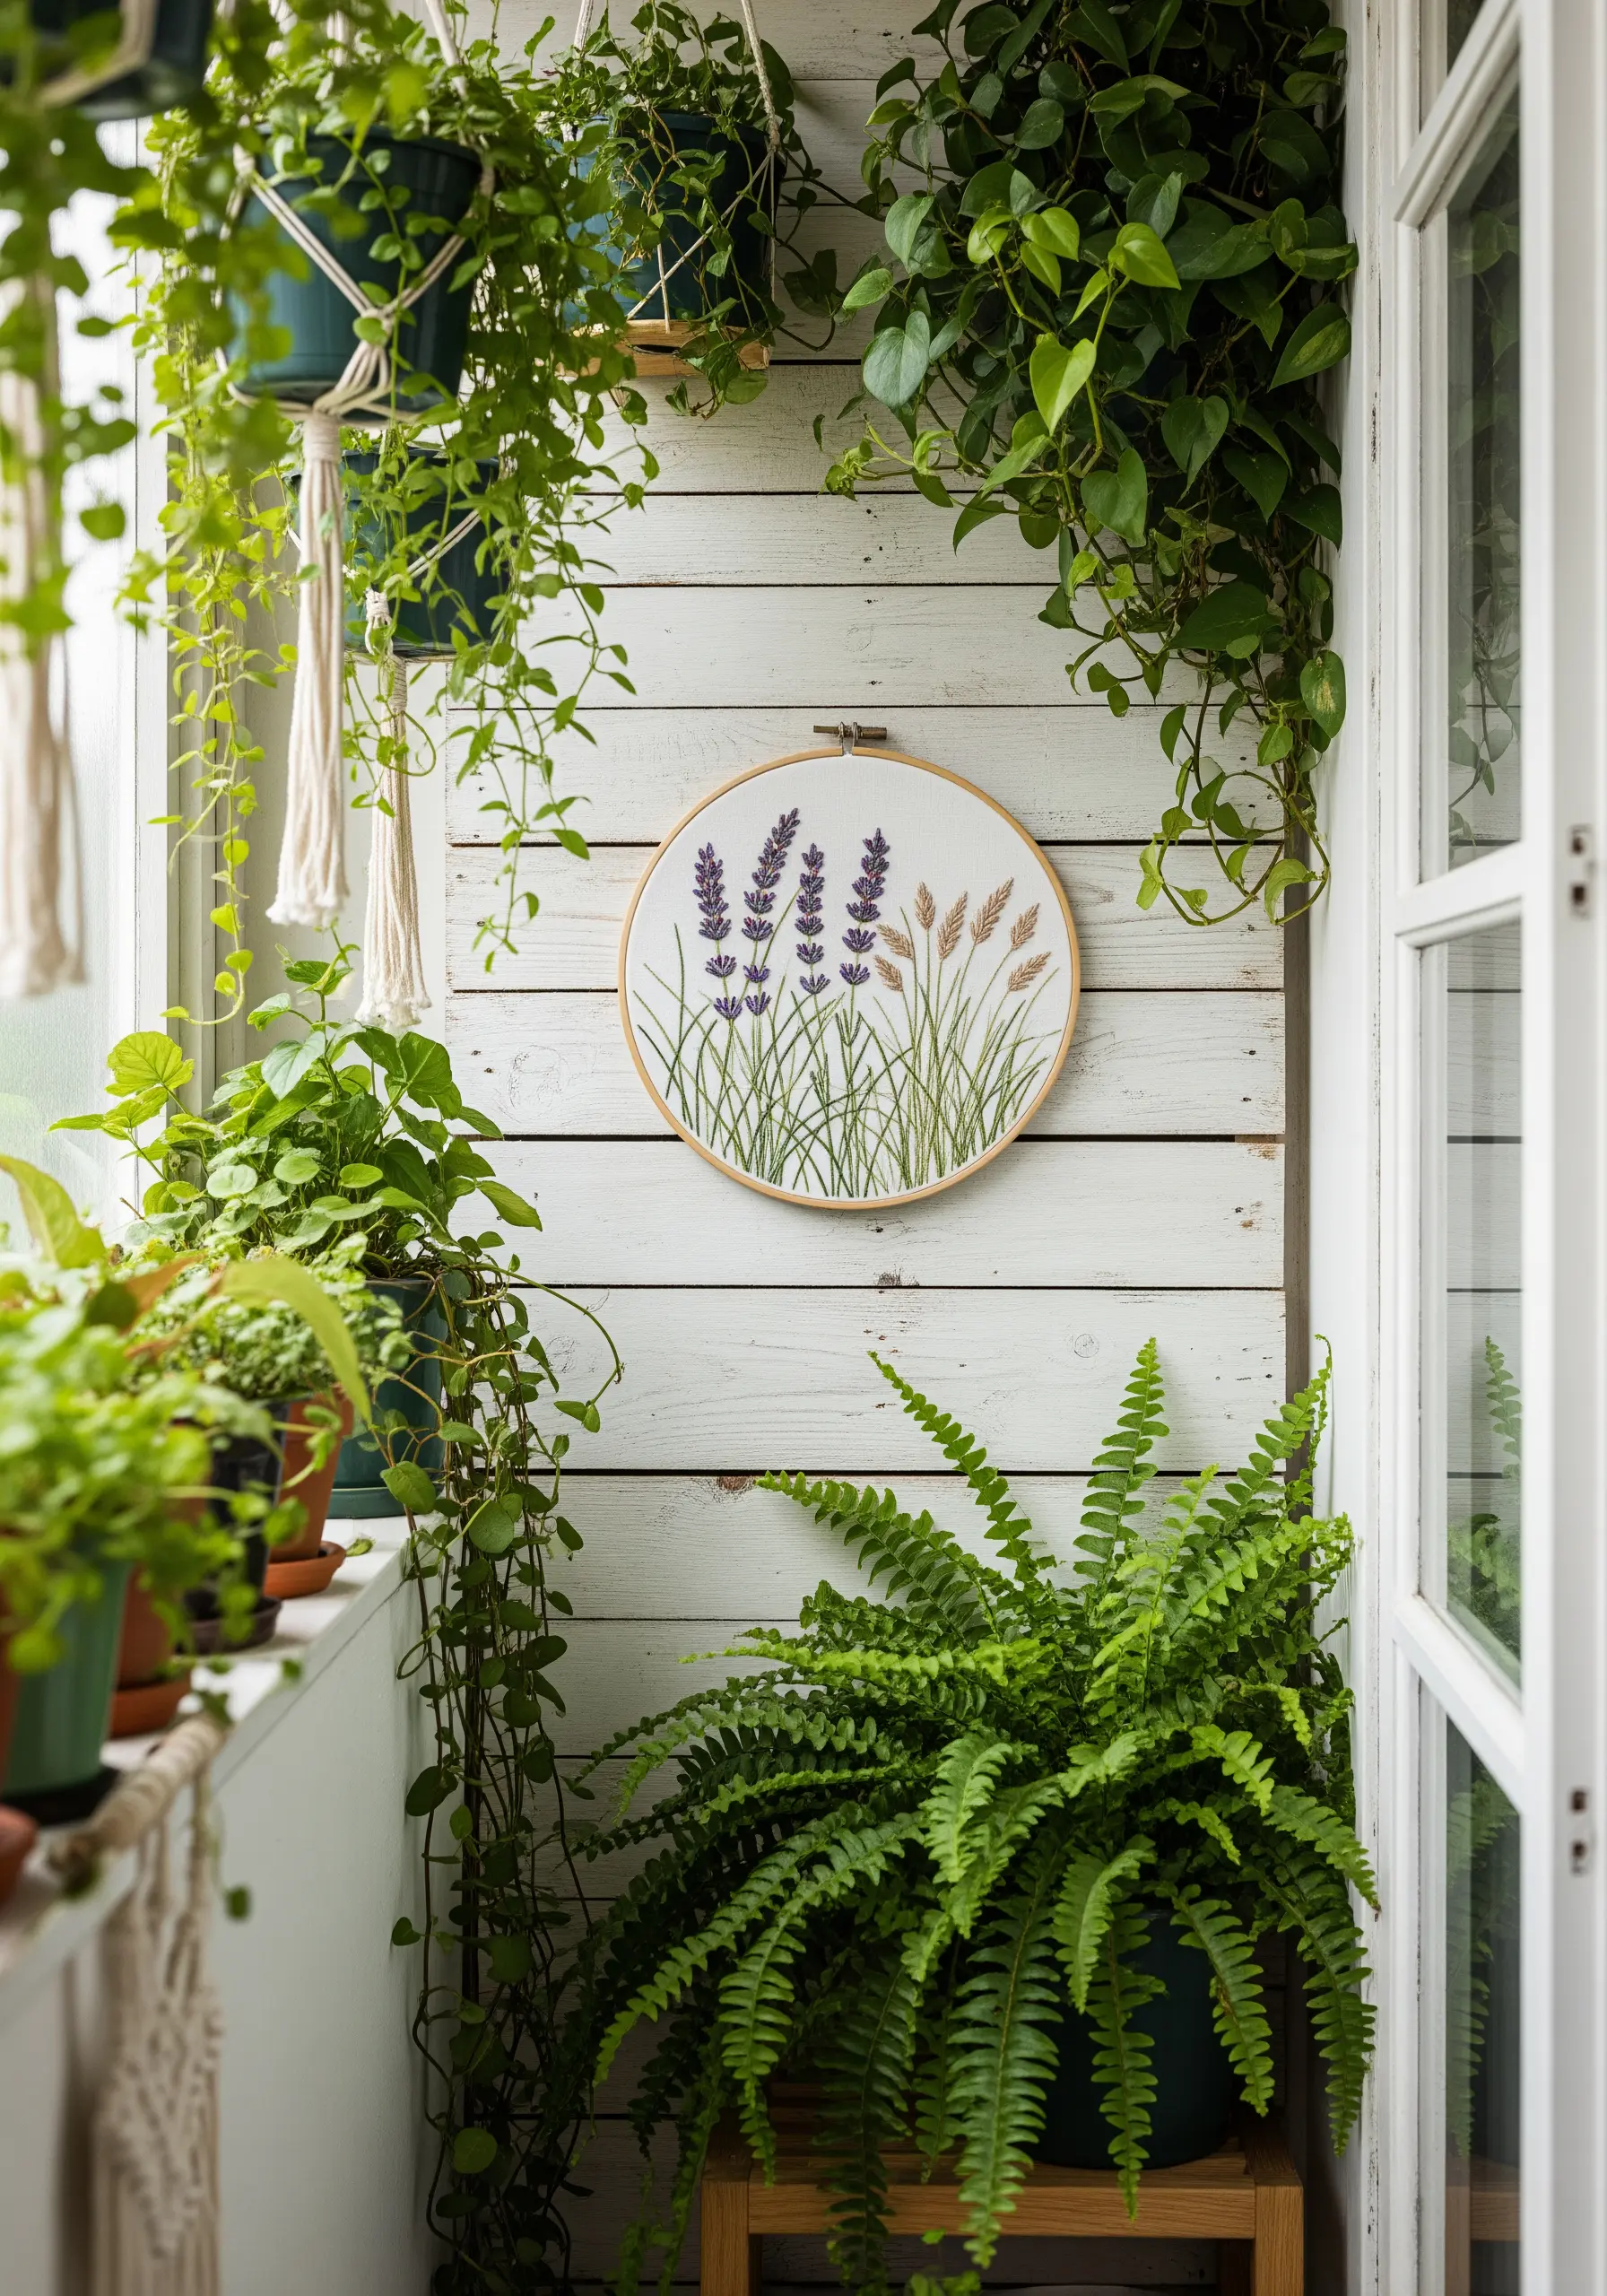
To capture the textures of dune grass and sea lavender, you must vary your stitch vocabulary.
Use long, elegant straight stitches for the blades of grass, allowing them to overlap slightly for a natural effect.
For the lavender blossoms, create tight clusters of French knots or tiny bullion knots at the top of each stem.
Using a slightly lighter thread for the knots at the very top suggests a sun-bleached highlight, creating one of those nature-calm stitching projects that feels authentic and serene.
9. A Graphic Anchor on a Moody Background
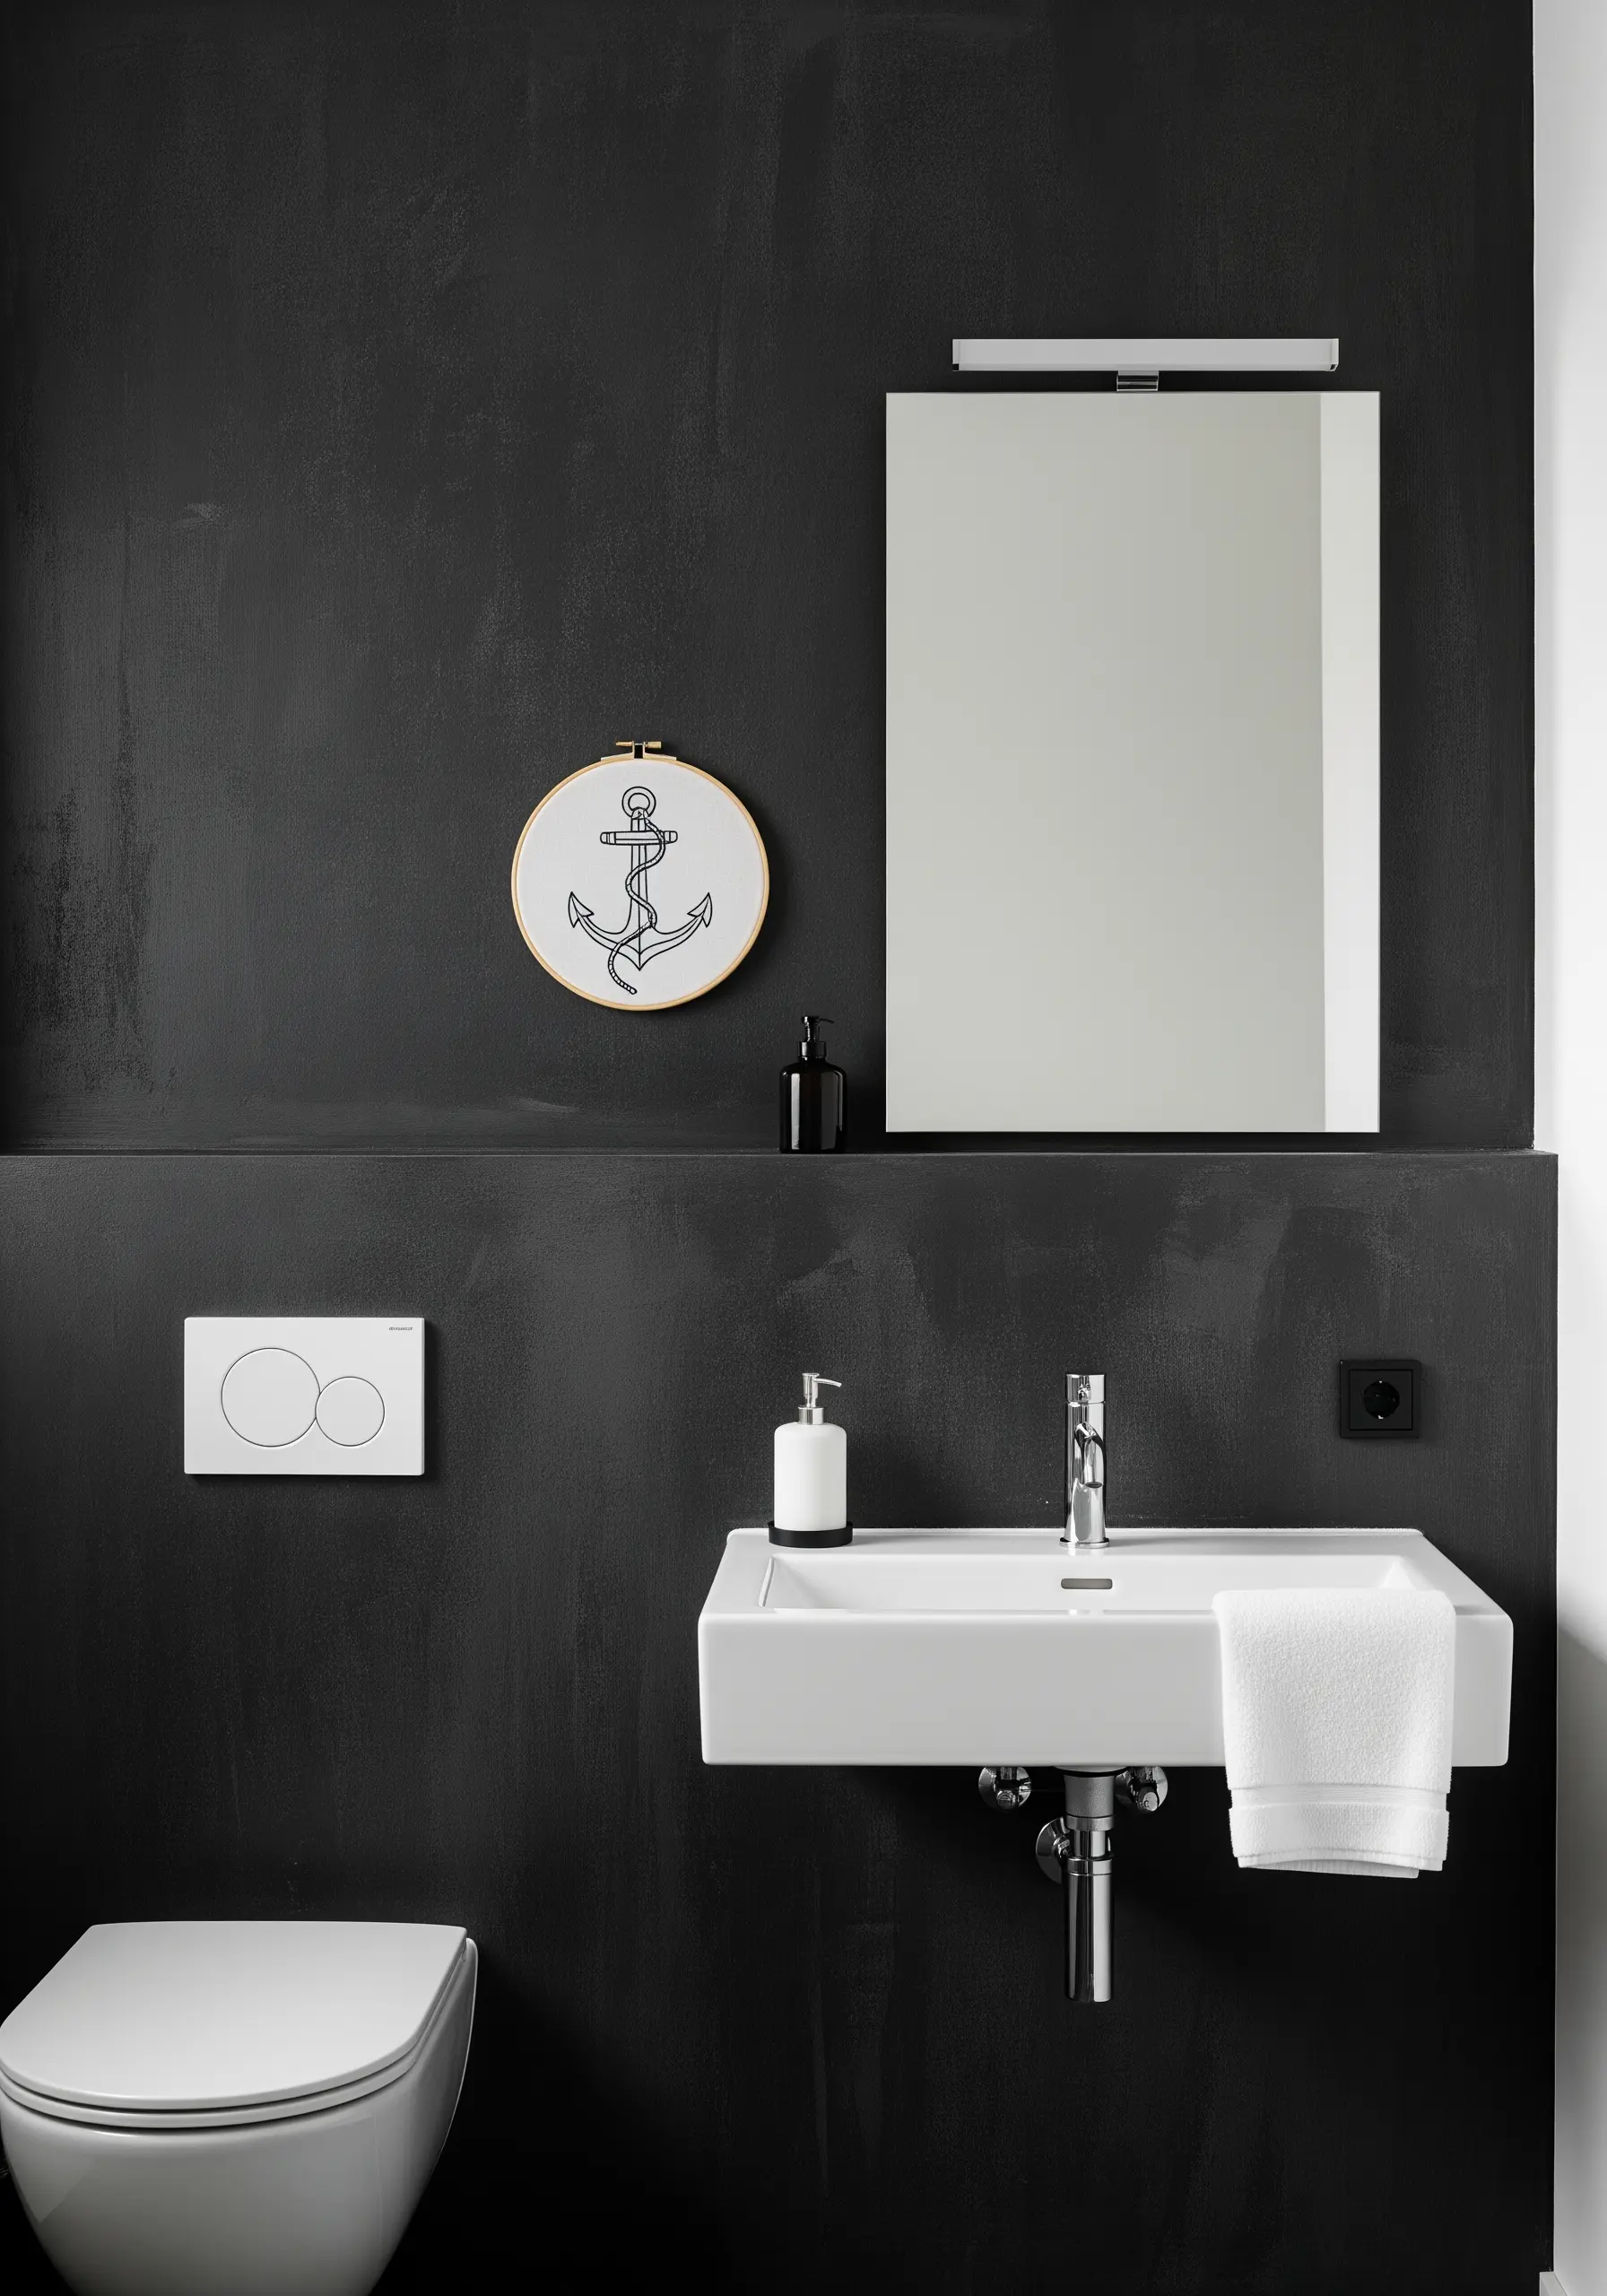
To make your stitches pop on dark fabric, use a lighter transfer method like white carbon paper or a chalk pencil for your design.
Choose a slightly thicker floss—three to four strands—for your backstitch or stem stitch outline.
The added weight ensures the white thread has presence against the dark background, resulting in a crisp, high-contrast look.
This technique is central to creating minimal embroidery designs that use only three colors for maximum impact.
10. Sculptural Ropework Using Couching
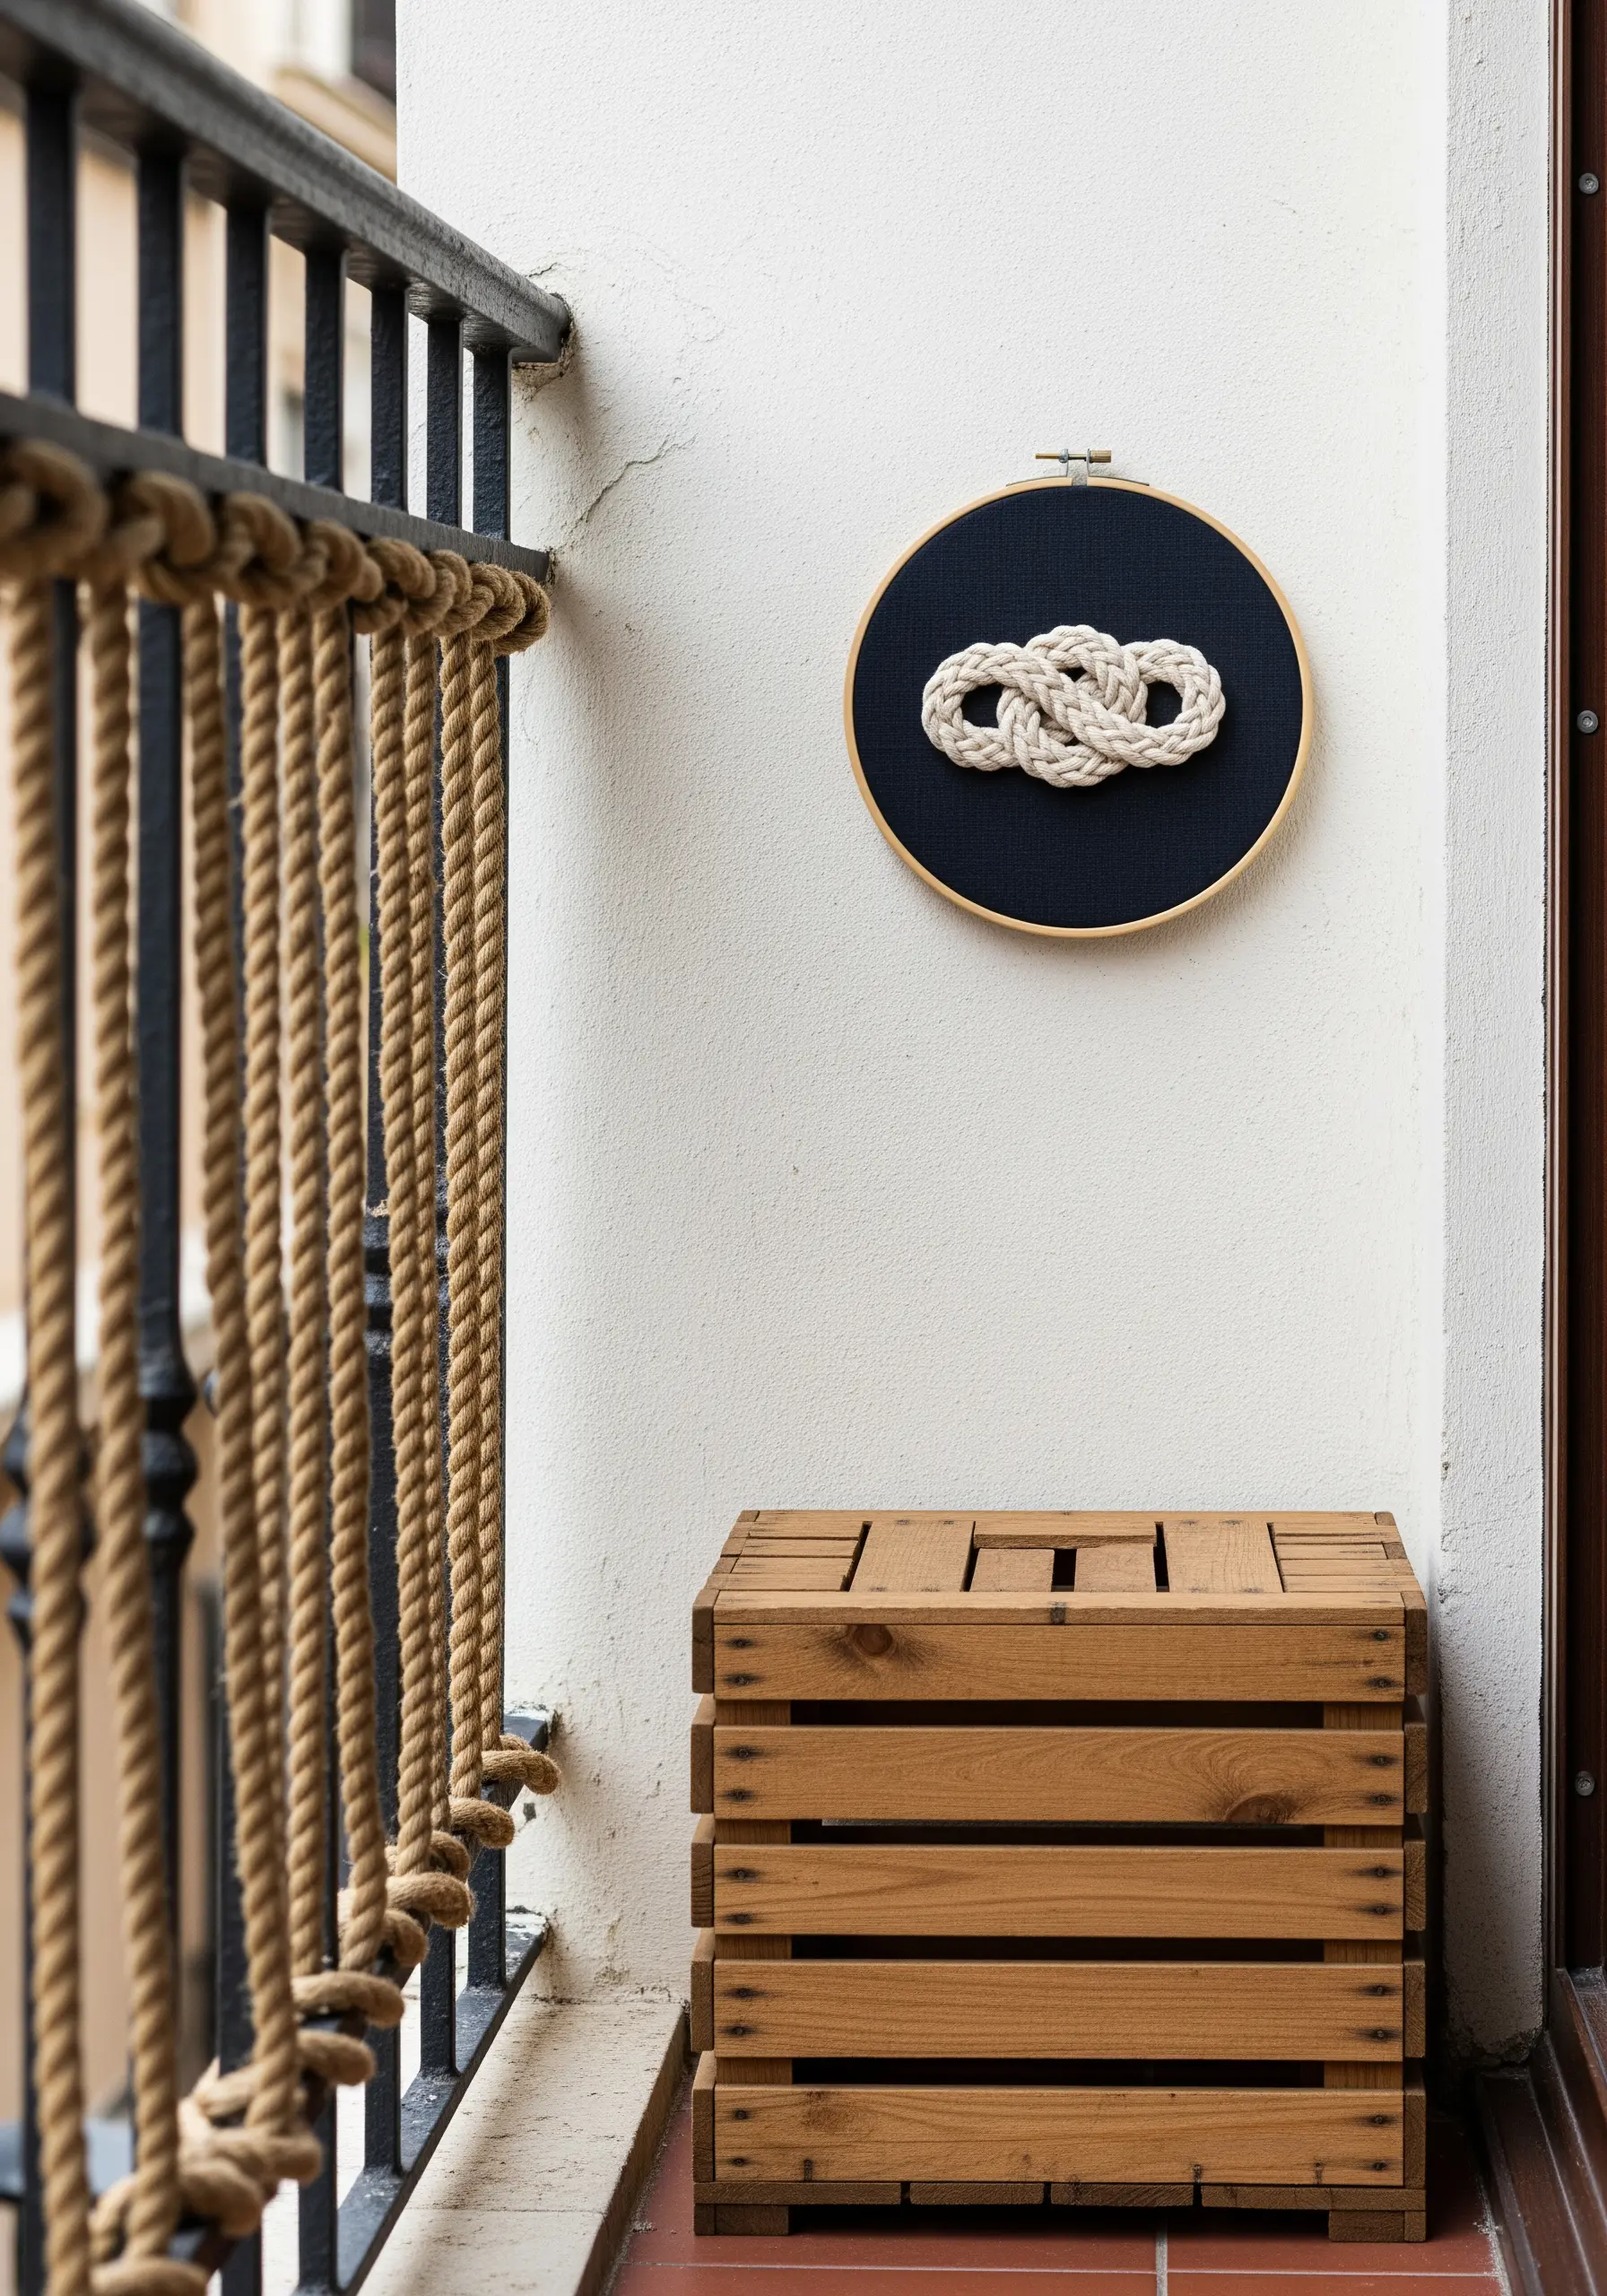
For a realistic, three-dimensional sailor’s knot, traditional stitches won’t suffice; you need to use couching.
Lay down a thick piece of cotton cord or yarn in the shape of the knot.
Then, using a single strand of matching embroidery floss, make small, evenly spaced stitches over the cord to tack it securely to the fabric.
This method gives you incredible texture and dimension, perfect for mixed fiber creations that invite touch.
11. An Underwater Menagerie with Dimension

Give your sea creatures personality by incorporating mixed-media and dimensional elements.
For the jellyfish, allow strands of thread or thin ribbon to hang loose below the hoop, creating tentacles with real, physical movement.
Use a smooth satin stitch for a whale’s body but switch to tiny French knots for a turtle’s shell to create textural contrast.
These are charming details for animal-themed pillow stitching ideas as well.
12. The Helm: Integrating Design and Frame
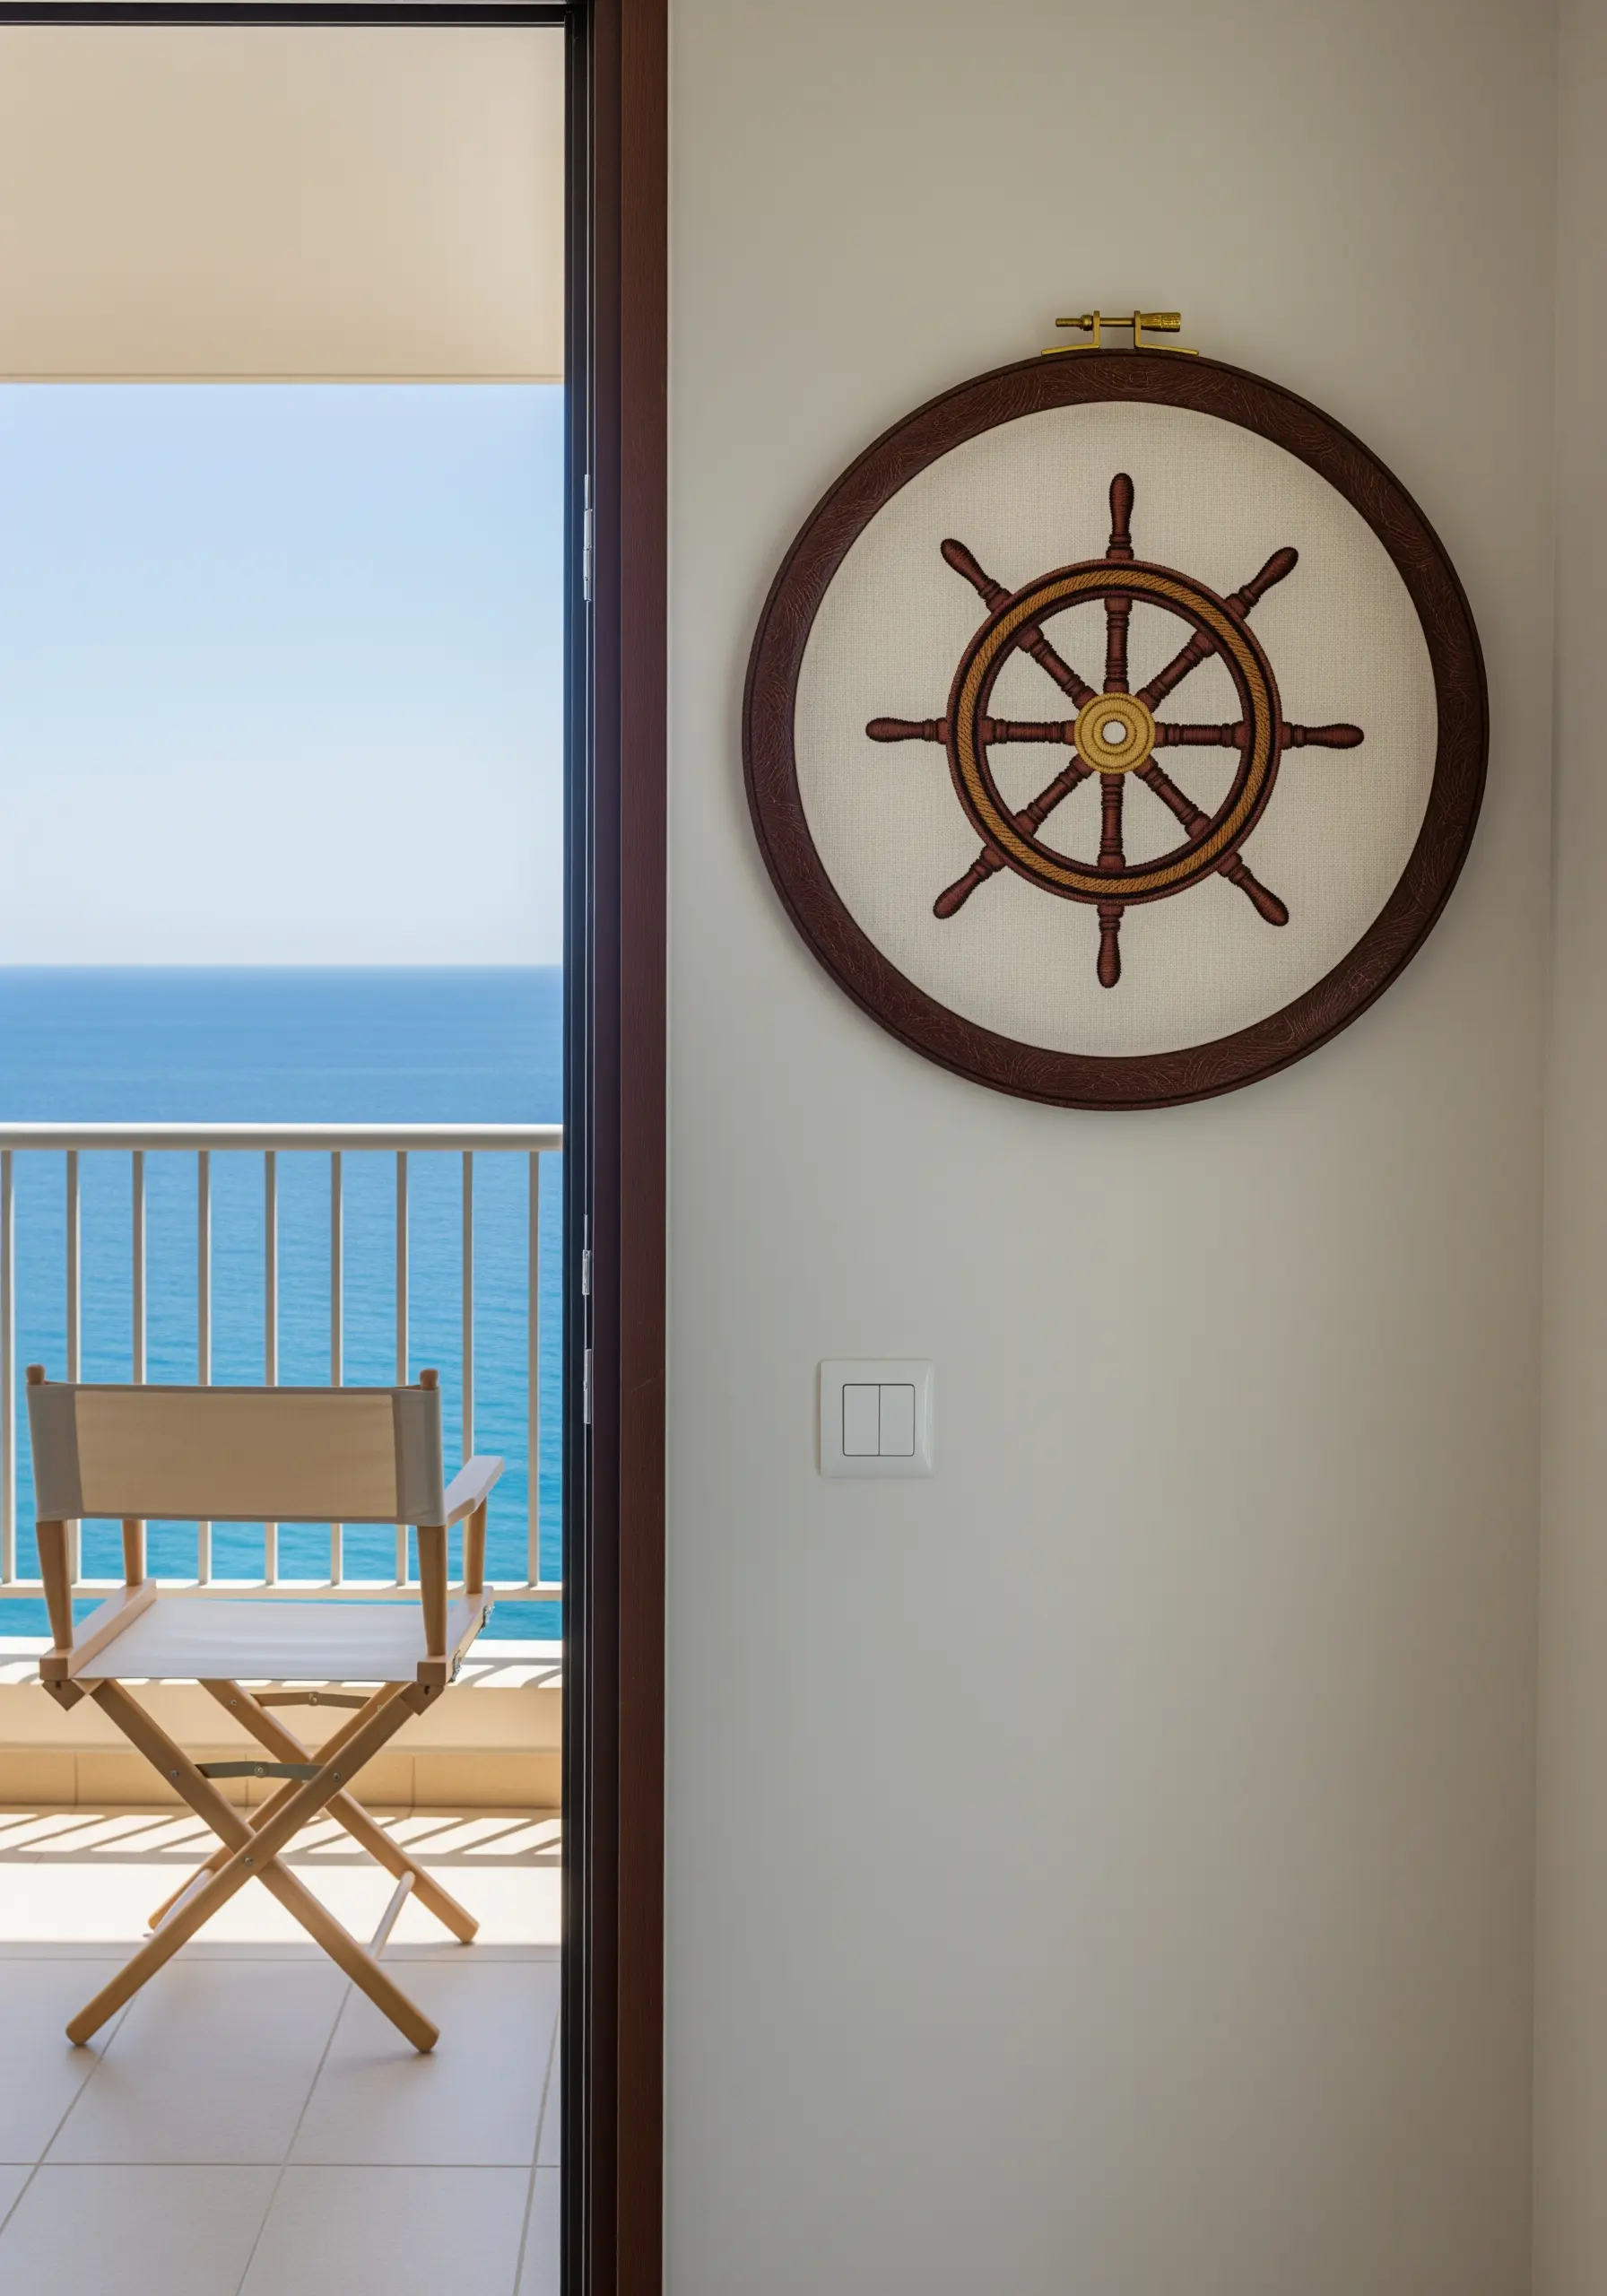
For a perfectly symmetrical design like a ship’s wheel, precise marking is your best tool.
Lightly draw guidelines on your fabric with a water-soluble pen to ensure every spoke is evenly spaced and perfectly straight.
Use a stem stitch for the outlines to give them a slightly rounded, rope-like quality.
Staining the outer embroidery hoop a dark walnut color makes it an integral part of the design, creating framed embroidery ideas that pair perfectly with rustic interiors.
13. Layered Texture with Appliqué Starfish
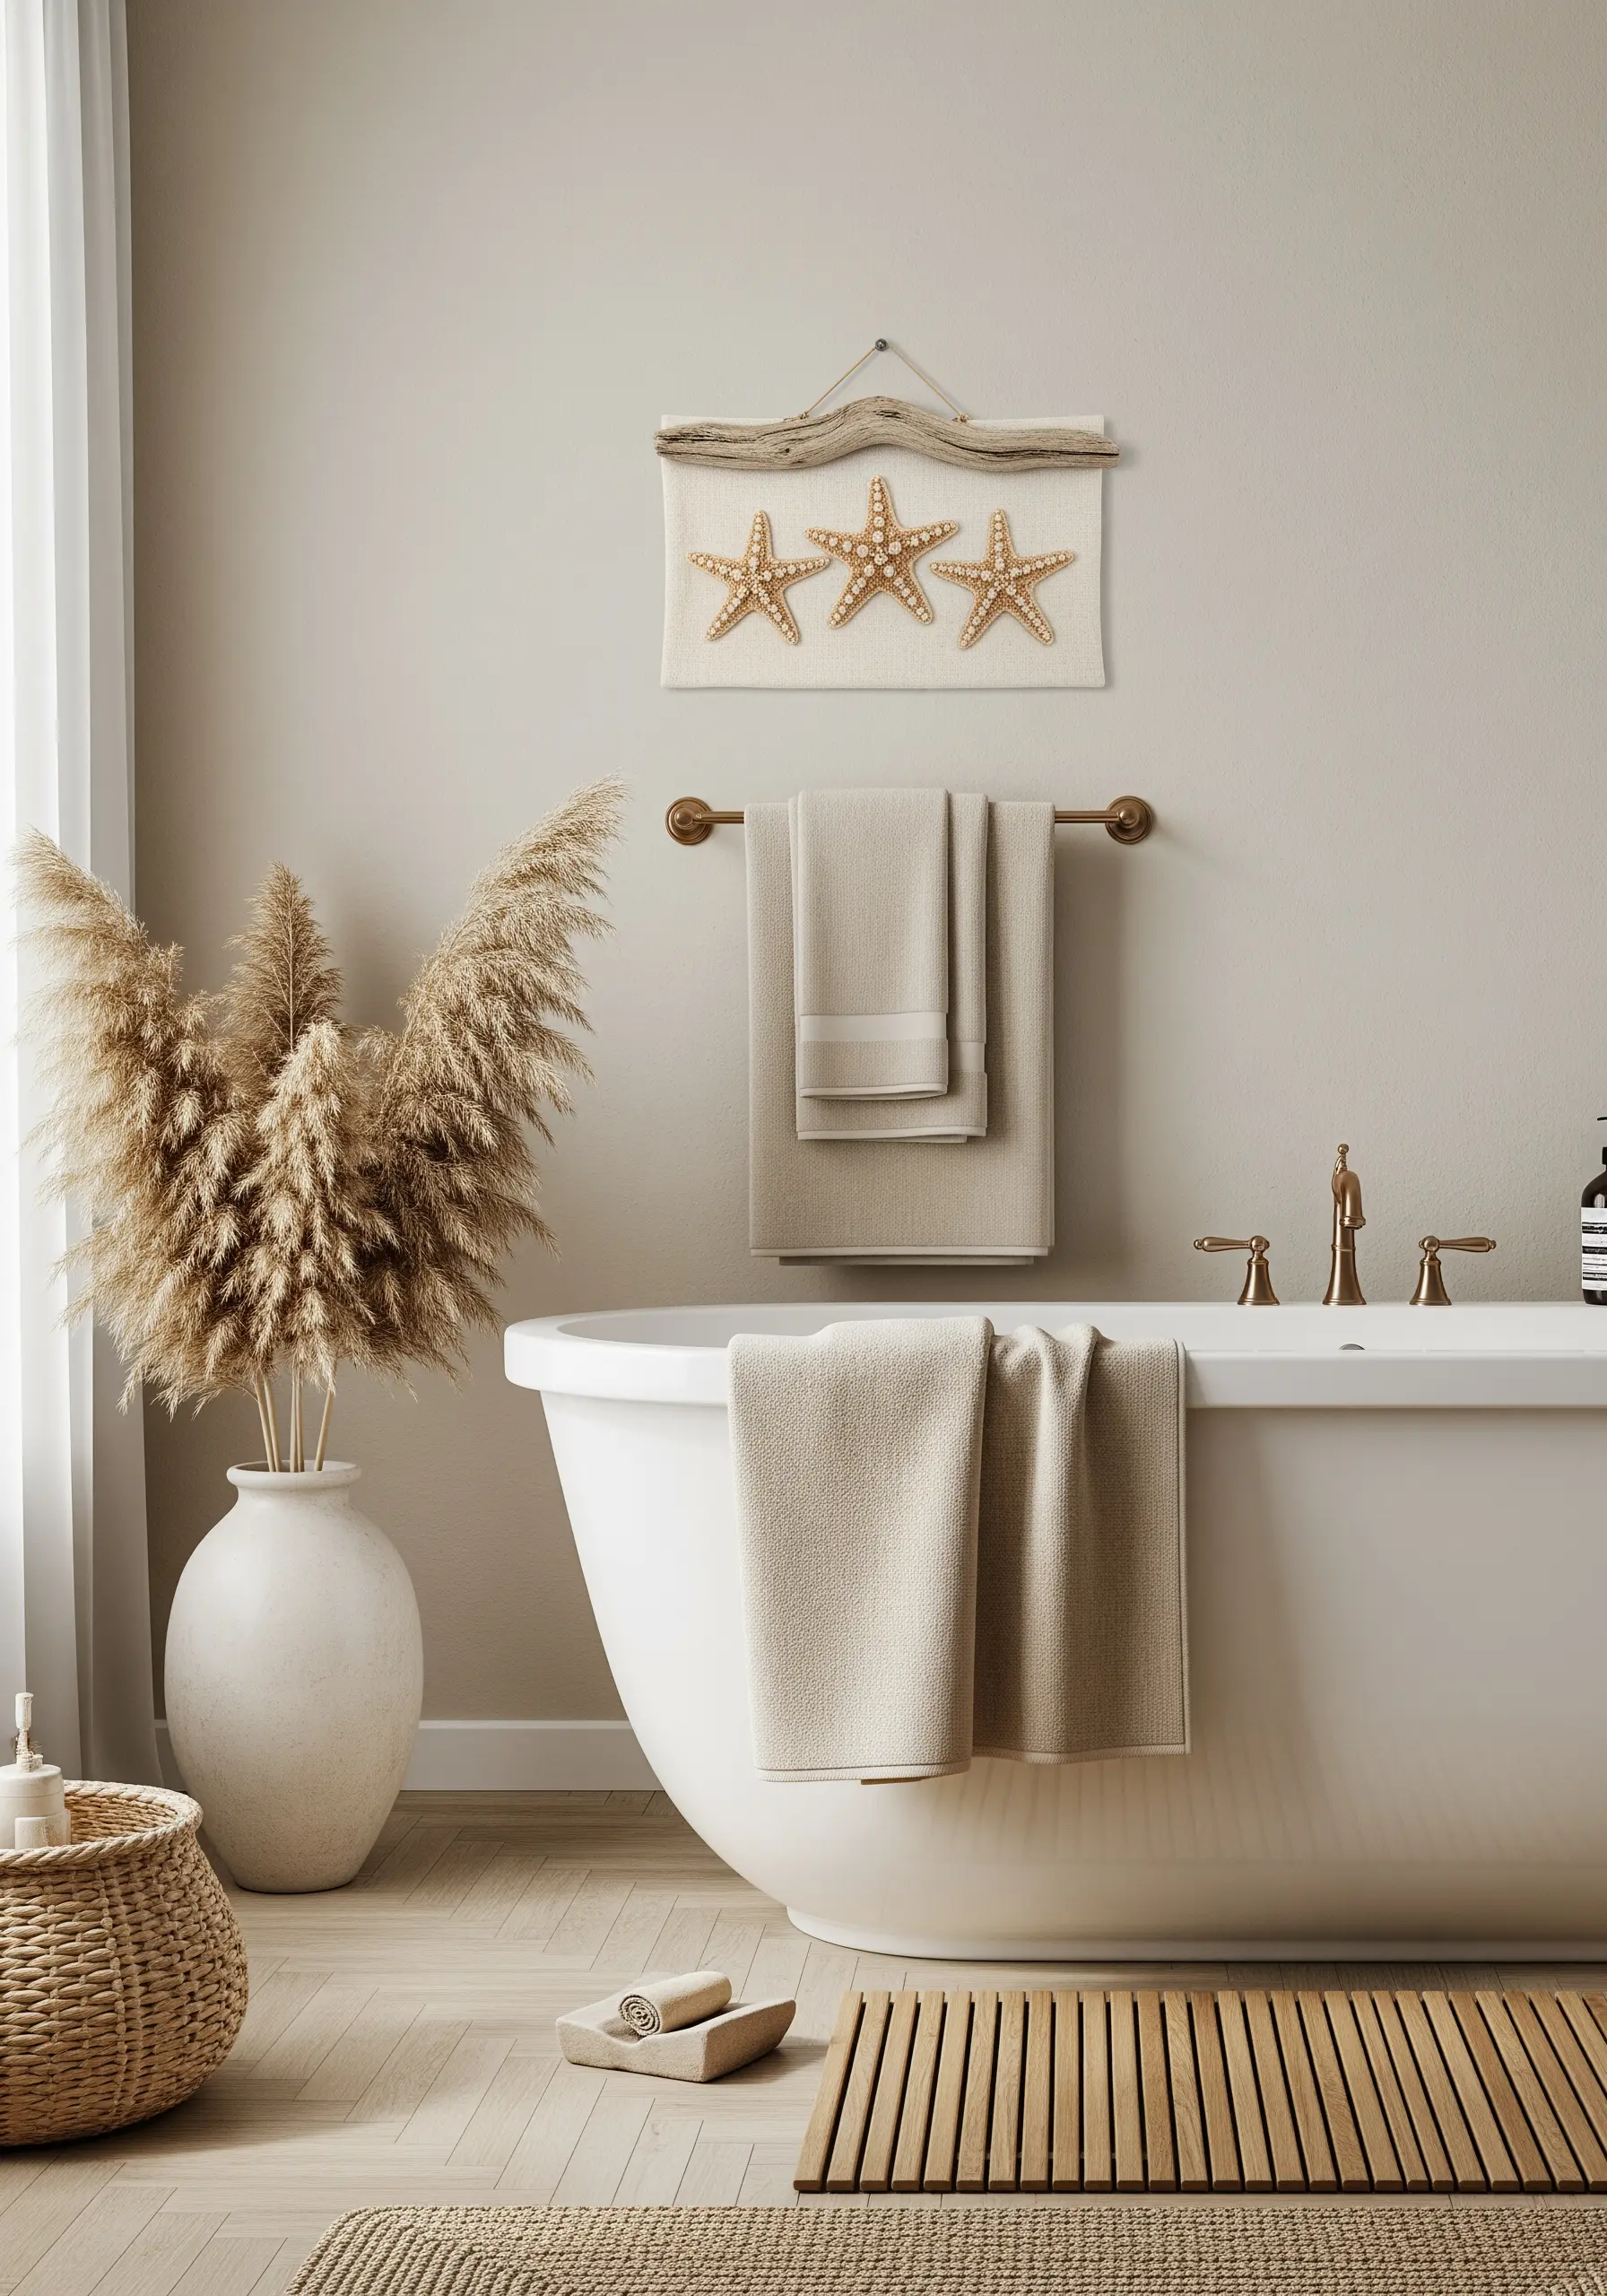
Create a deeply tactile, beach-inspired piece by combining embroidery with real-world objects.
Lightly tack genuine or realistic faux starfish onto a sturdy canvas backdrop using a strong, clear-drying glue.
Then, add subtle embroidered details around them, like scattered seed stitches in a sandy color or delicate backstitched waves in a pale blue.
This is a wonderful entry into creating abstract mixed media embroidery ideas using fabric scraps and found treasures.
14. Capturing Light: A Message in a Bottle
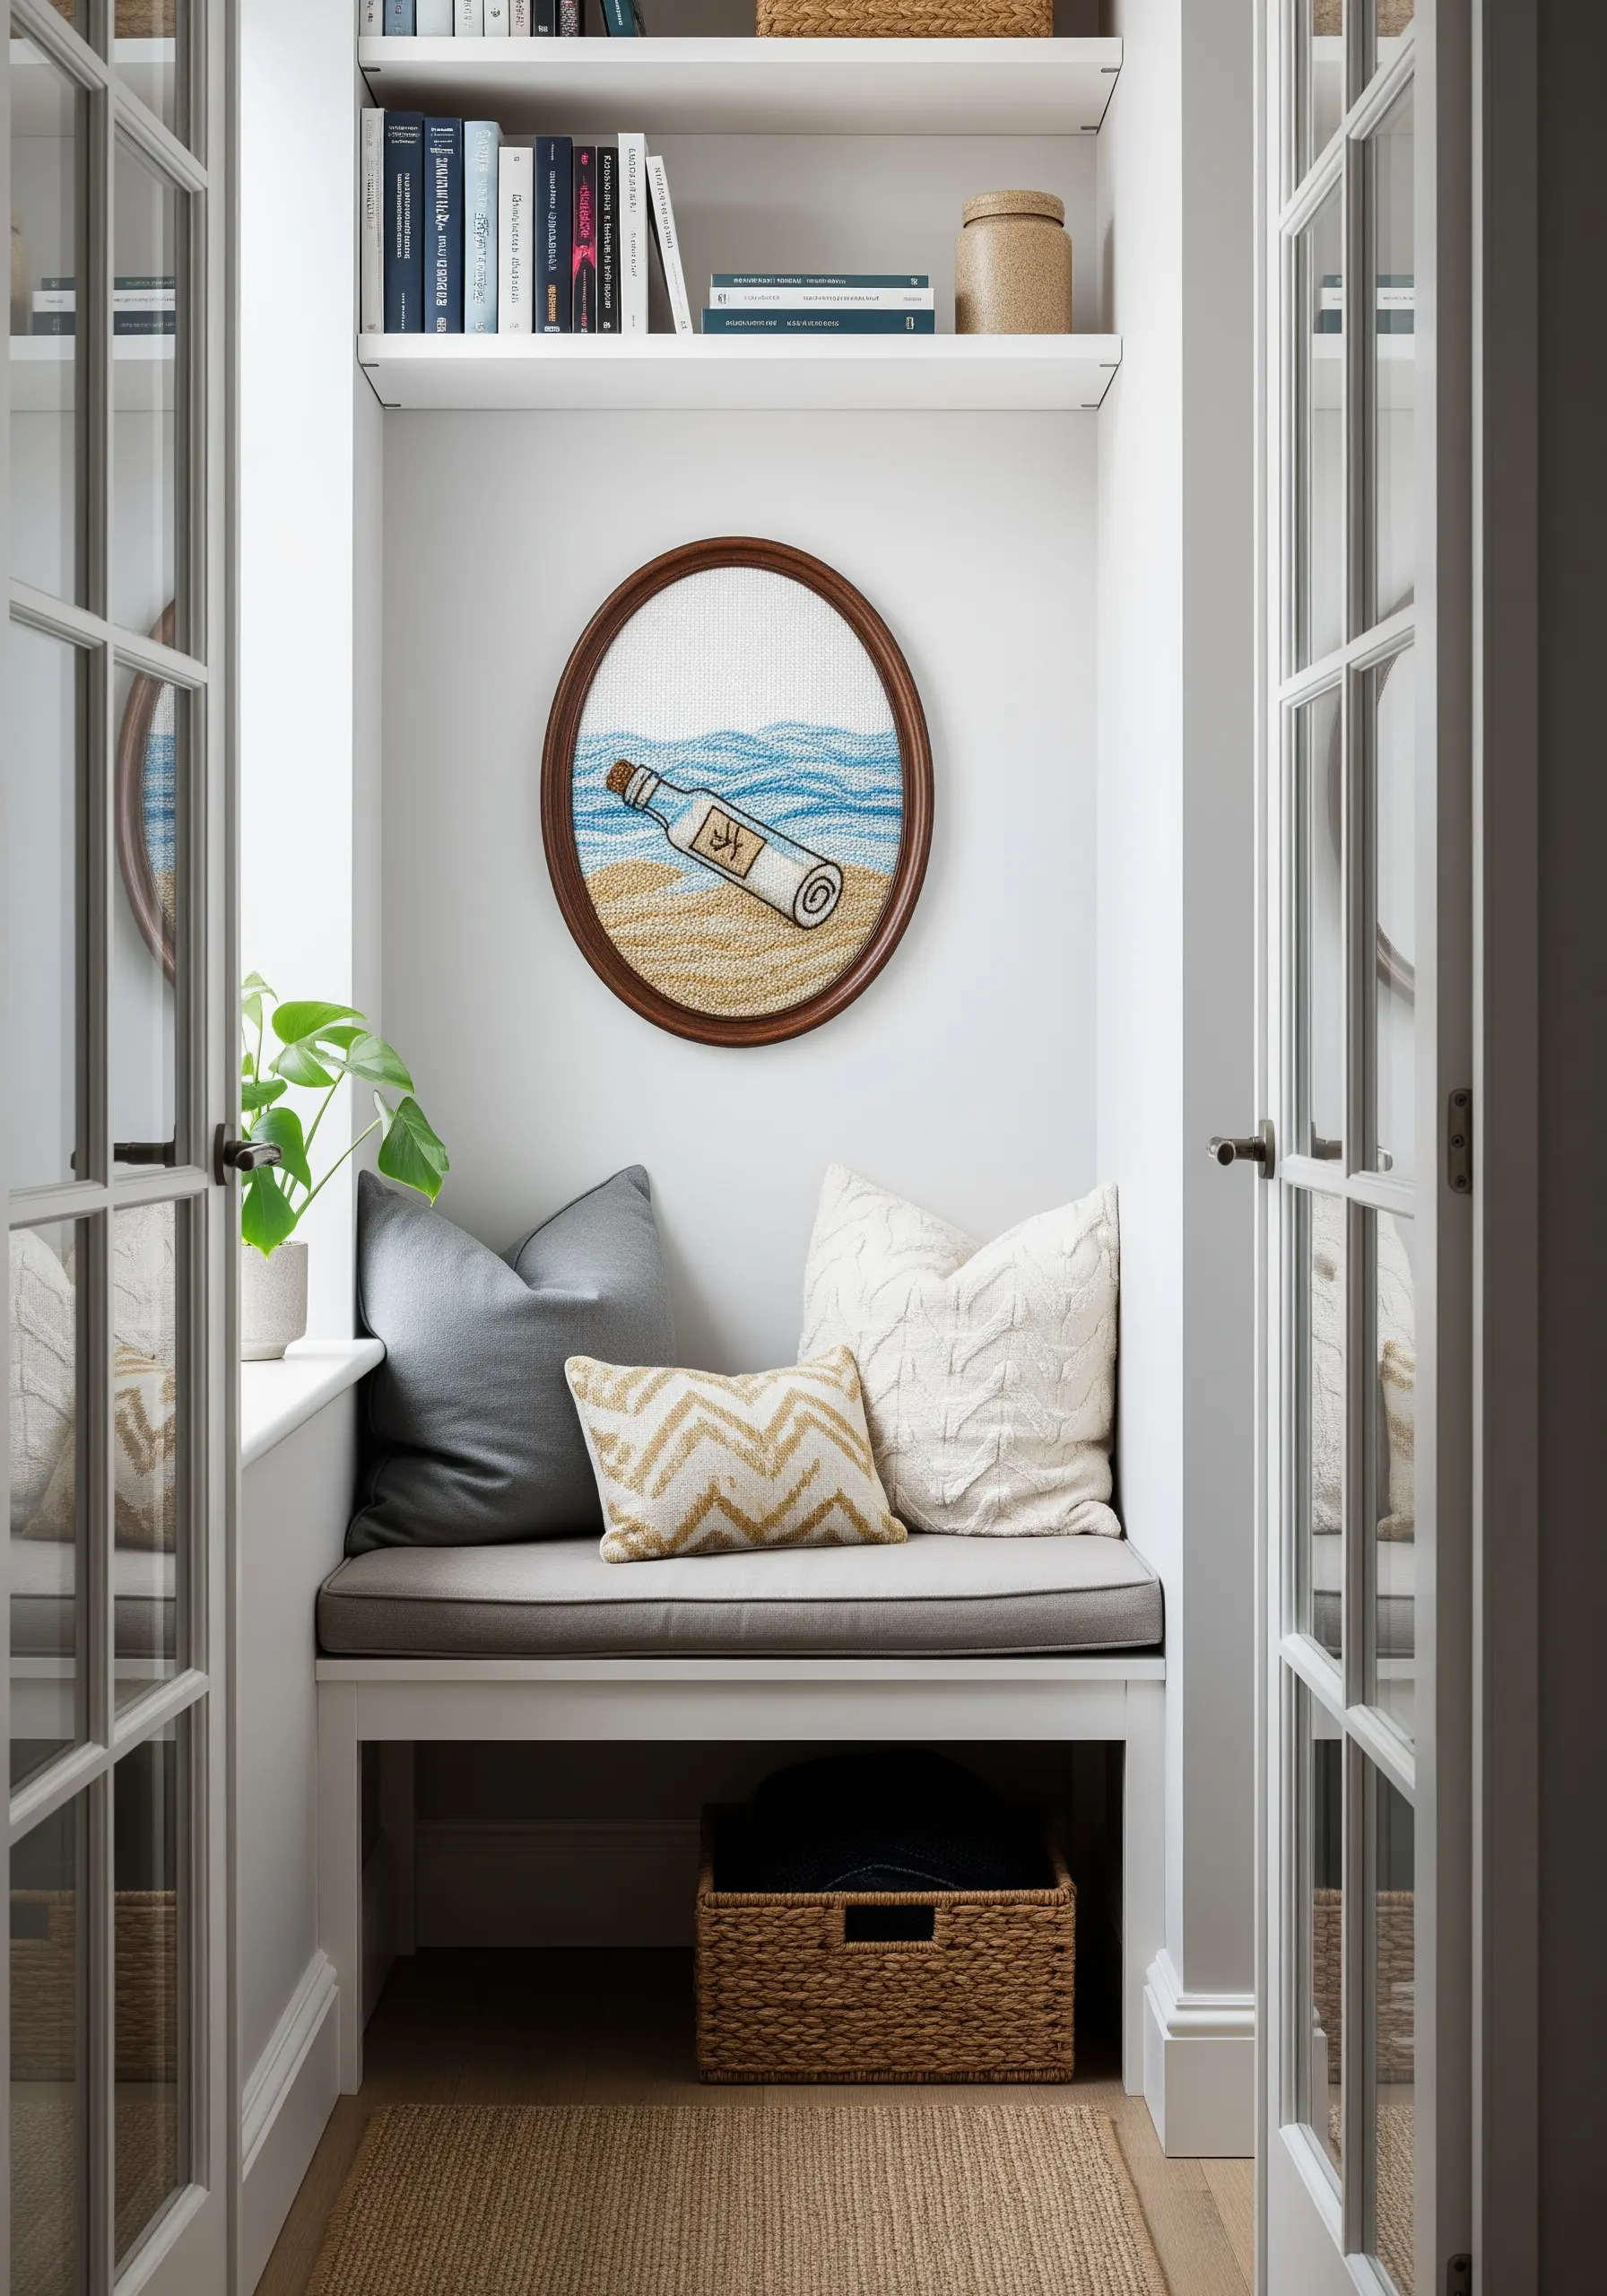
To suggest the transparency of glass, use stitch density to your advantage.
Outline the bottle with a light grey or blue backstitch, then fill the shape with sparsely spaced seed stitches using just a single strand of thread.
For the sand, create a complete contrast with a dense field of French knots in various beige and gold tones.
This technique elevates simple stitching into a more sophisticated creative collage art idea that uses thread to tell a story.
15. An Embellished Sand Dollar with Beadwork

Elevate a simple shape by incorporating the subtle shimmer of bead embroidery.
First, stitch the sand dollar’s central pattern with a dark backstitch to create clear outlines for your sections.
Then, using a beading needle and matching thread, fill the sections with tiny white or cream seed beads, attaching one or two at a time for a secure finish.
The surrounding French knots add a soft, matte texture that makes the beaded center truly stand out and turns the hoop into an embroidery craft that makes every fabric piece special.
16. Architectural Abstraction: The Pier
Recreate the feeling of an architectural form by simplifying it into its essential lines and shapes.
Use a stem stitch or a whipped backstitch to ensure your lines are smooth, solid, and have a consistent weight.
The overlapping satin-stitched blocks of blue add color and ground the delicate framework of the pier, preventing it from feeling sparse.
It’s a modern, artistic take on creating line art travel adventure symbols for your wall.
17. A Vibrant Underwater Panorama
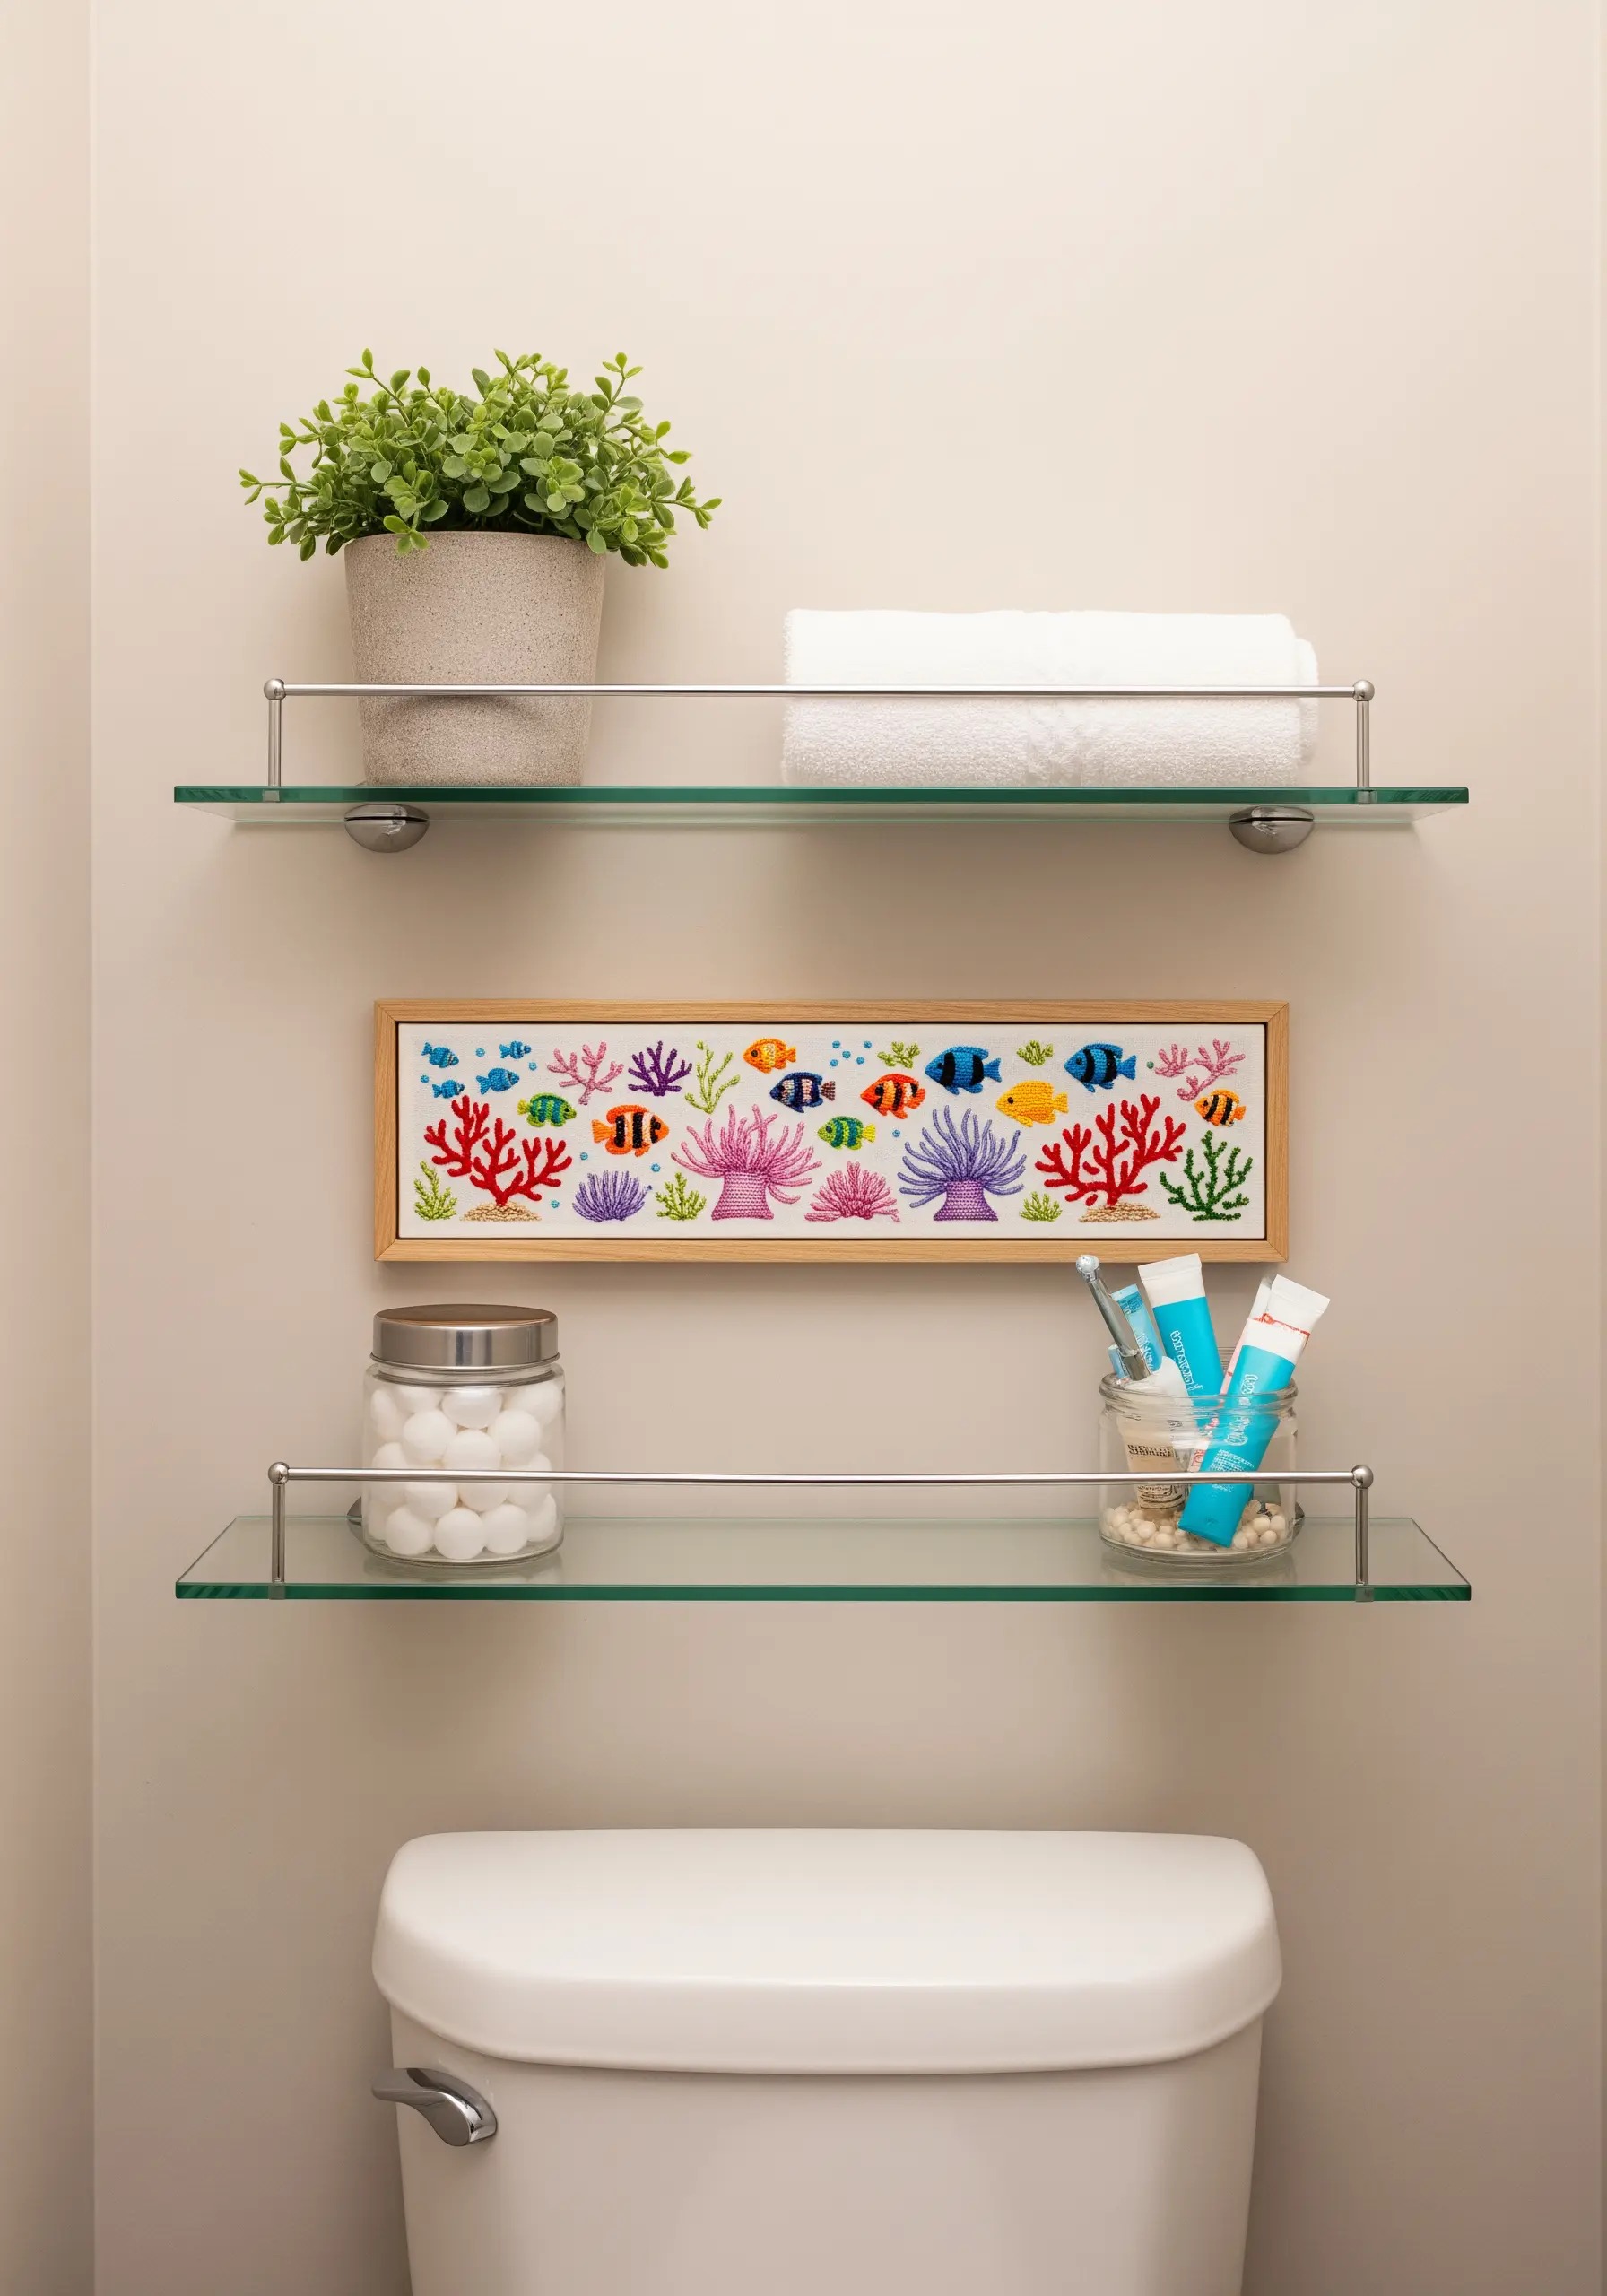
To achieve the lush, vibrant look of a coral reef, think in terms of density and color.
Use small, tight satin stitches for the fish and a lively mix of French knots and detached chain stitches for the various coral forms.
The key is to minimize the amount of visible background fabric; let the colorful motifs overlap and crowd each other.
This creates an energetic scene, much like the cartoon-style embroidery ideas for kids’ wear that feel playful.
18. Lunar Reflections on Water

To capture the shimmering reflection of moonlight, you need a thread with sheen, like a silver metallic or a silky rayon floss.
Work long, horizontal straight stitches across the water, varying their length and density—more concentrated directly under the moon and sparser towards the edges.
For the moon, a dense field of French knots in white and pale grey gives it a cratered texture.
This technique helps create magical ombre effects with light instead of color.
19. The Dimensional Octopus
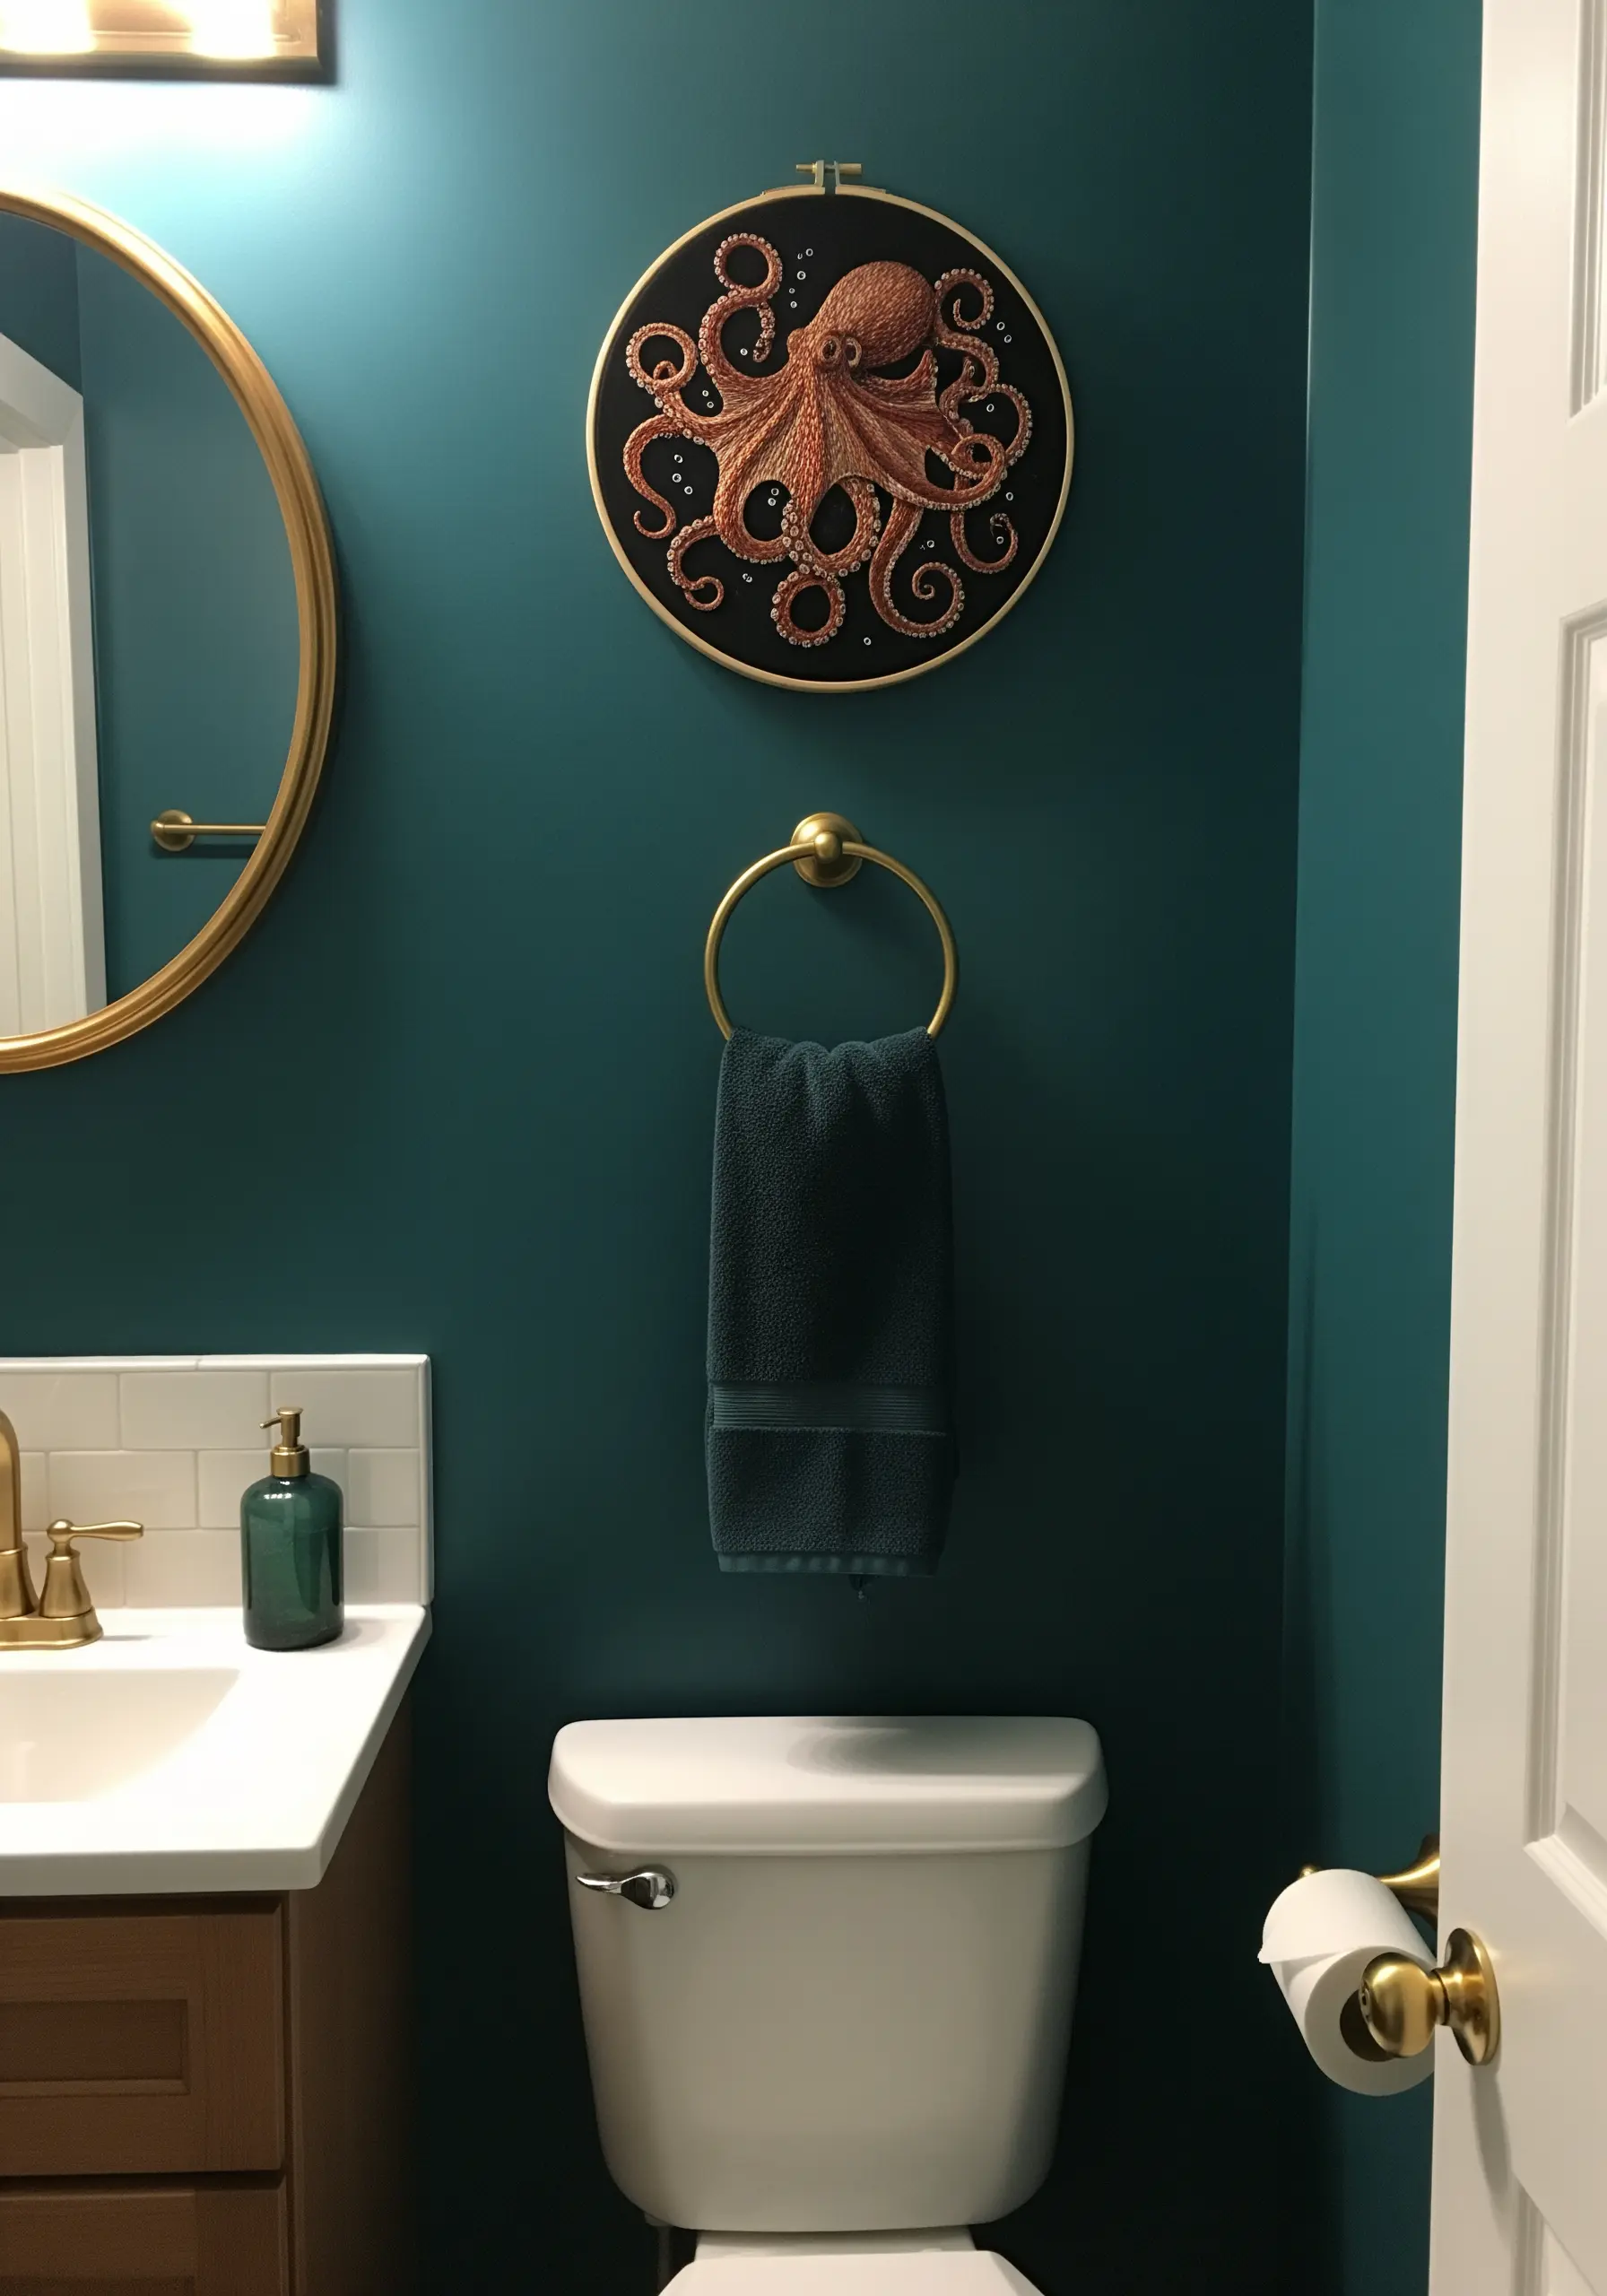
Bring a magnificent creature like an octopus to life with the technique of padded satin stitch.
First, create a base layer of padding stitches (simple straight stitches) within the outline of the octopus’s body and tentacles.
Then, cover this padding with your final satin stitches, worked in the opposite direction.
This raises the motif from the fabric for a stunning, sculptural quality, making it one of those handmade embroidery projects to give as thoughtful birthday gifts.
20. An Ascending Seaweed Tapestry
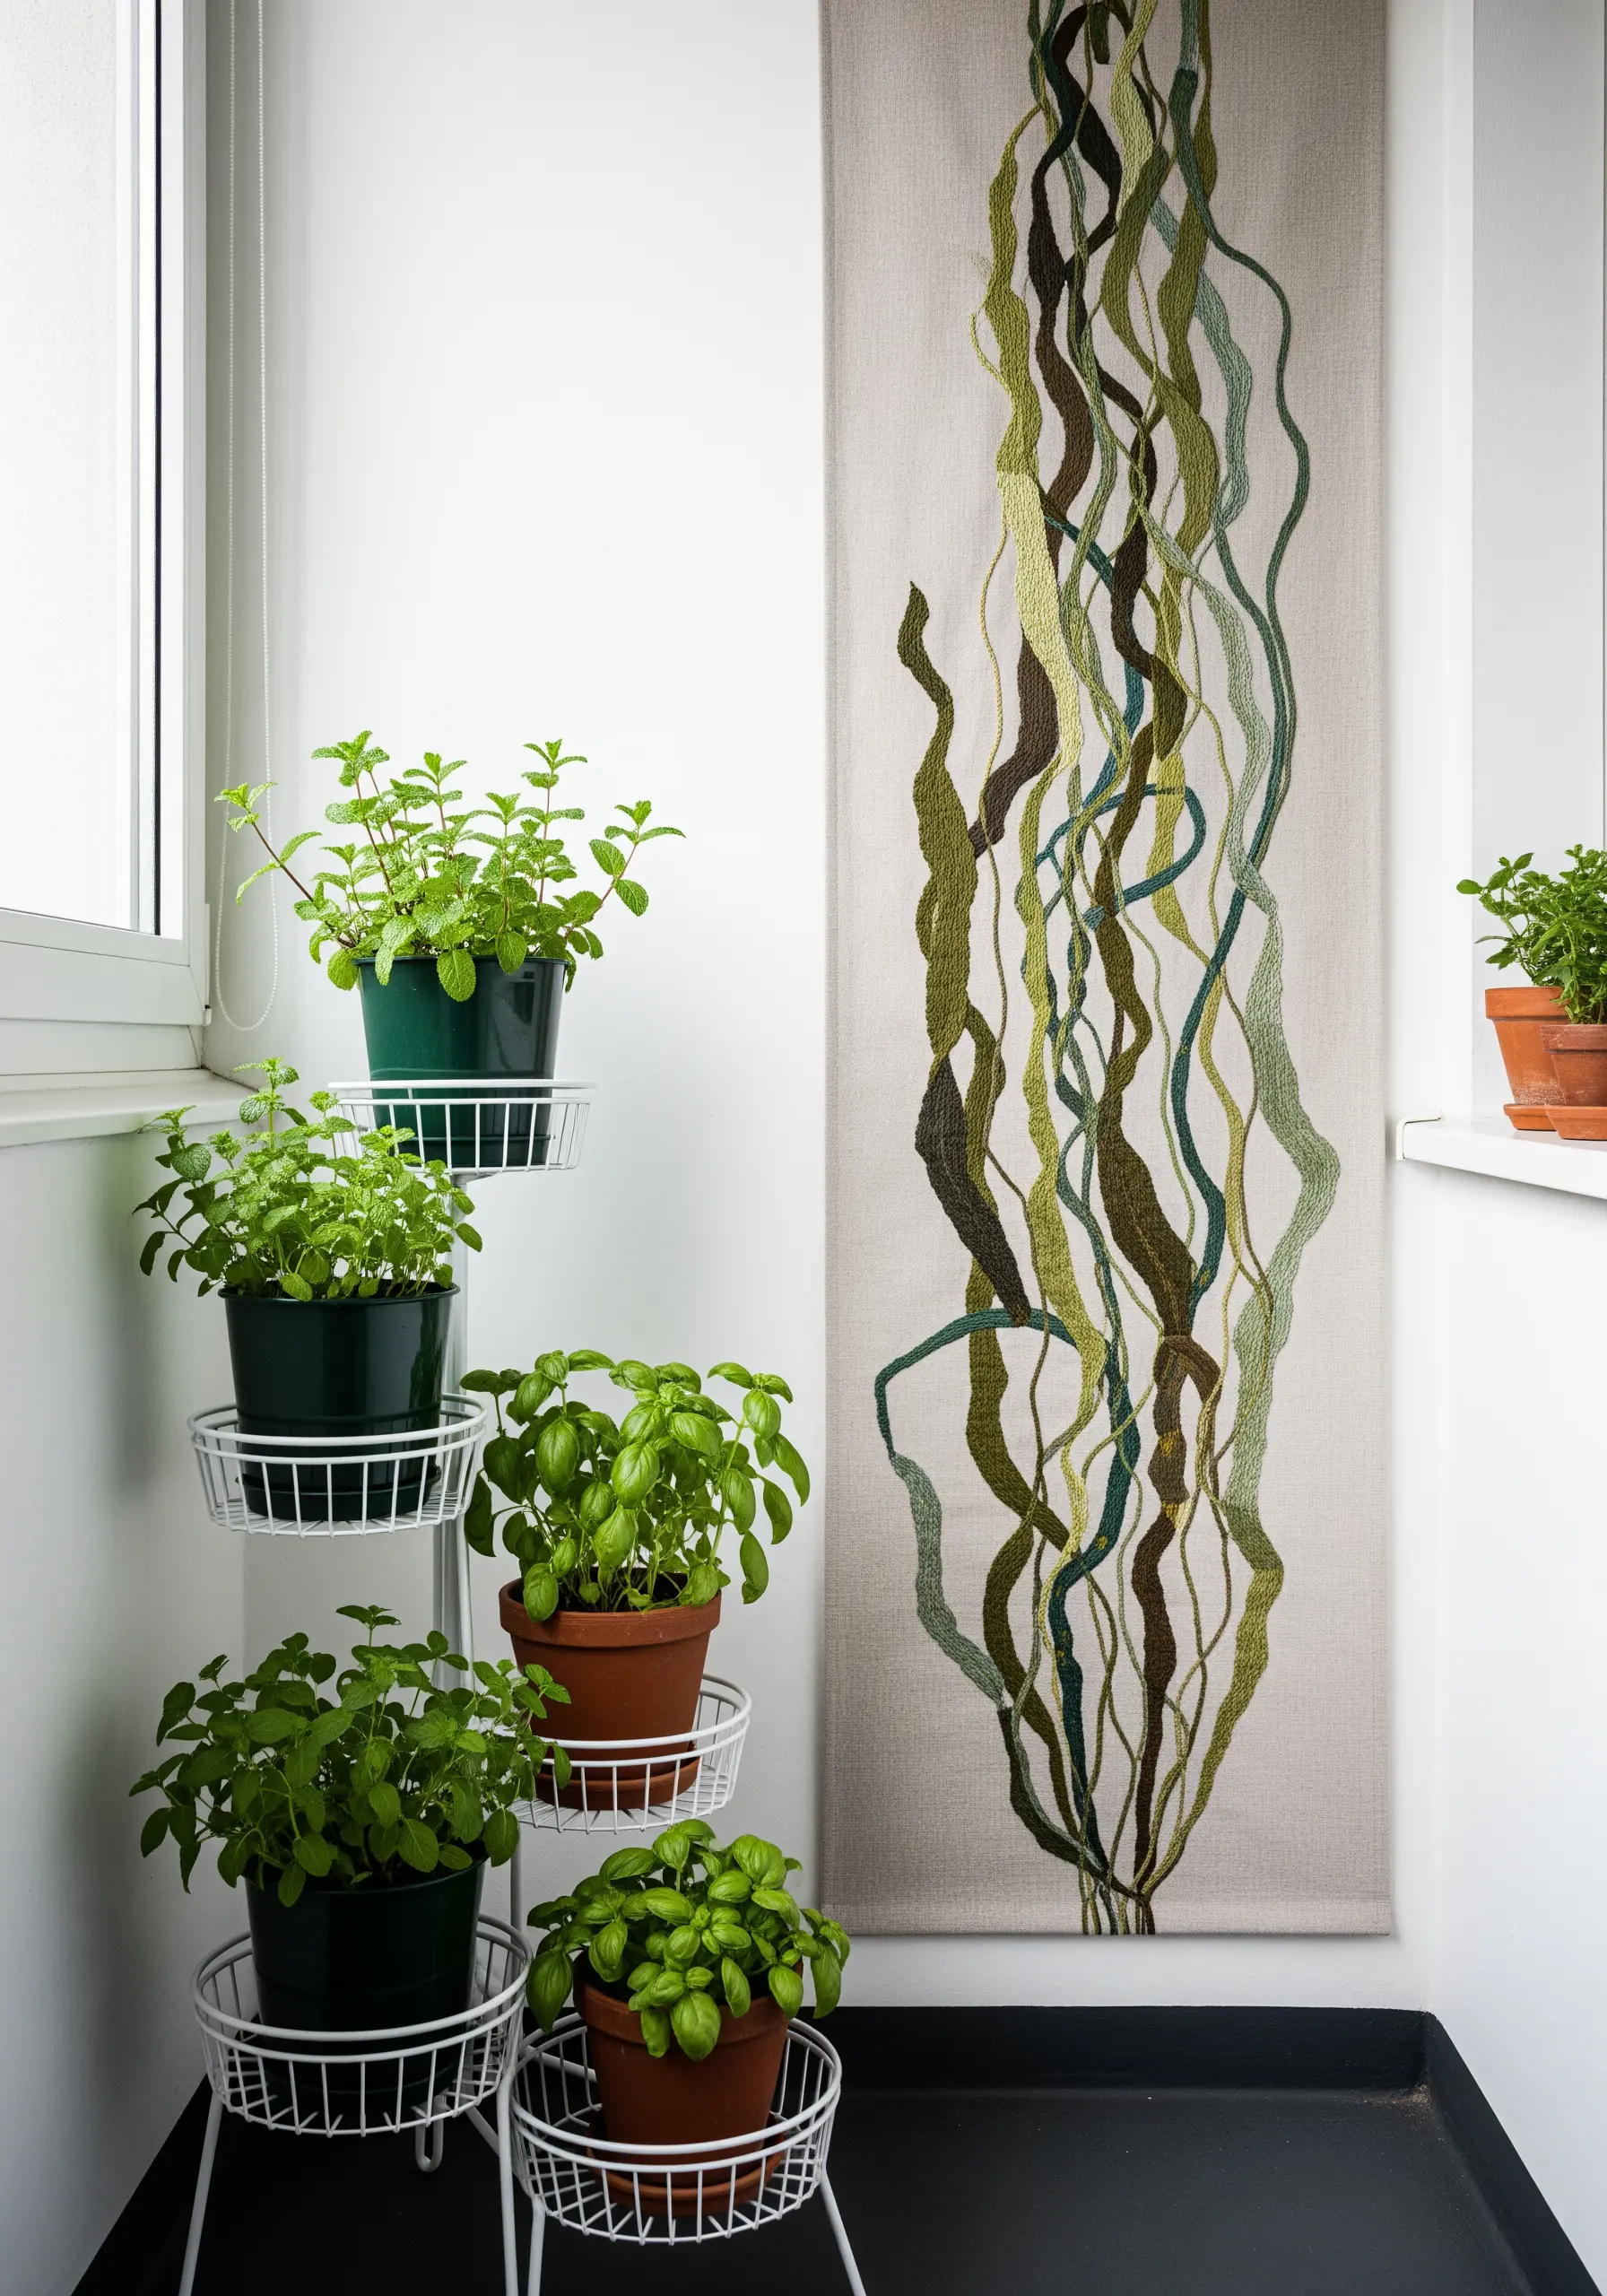
For a long, vertical piece, use your stitches to guide the viewer’s eye upwards, creating a sense of growth and movement.
Combine stem stitch and long, flowing straight stitches to form the undulating seaweed strands.
For a natural, organic color effect, blend different shades of green and brown within a single strand by switching threads partway through a line.
It’s one of those beautiful handmade embroidery touches that make every room feel natural and alive.
21. The Swirling Shoal in Motion
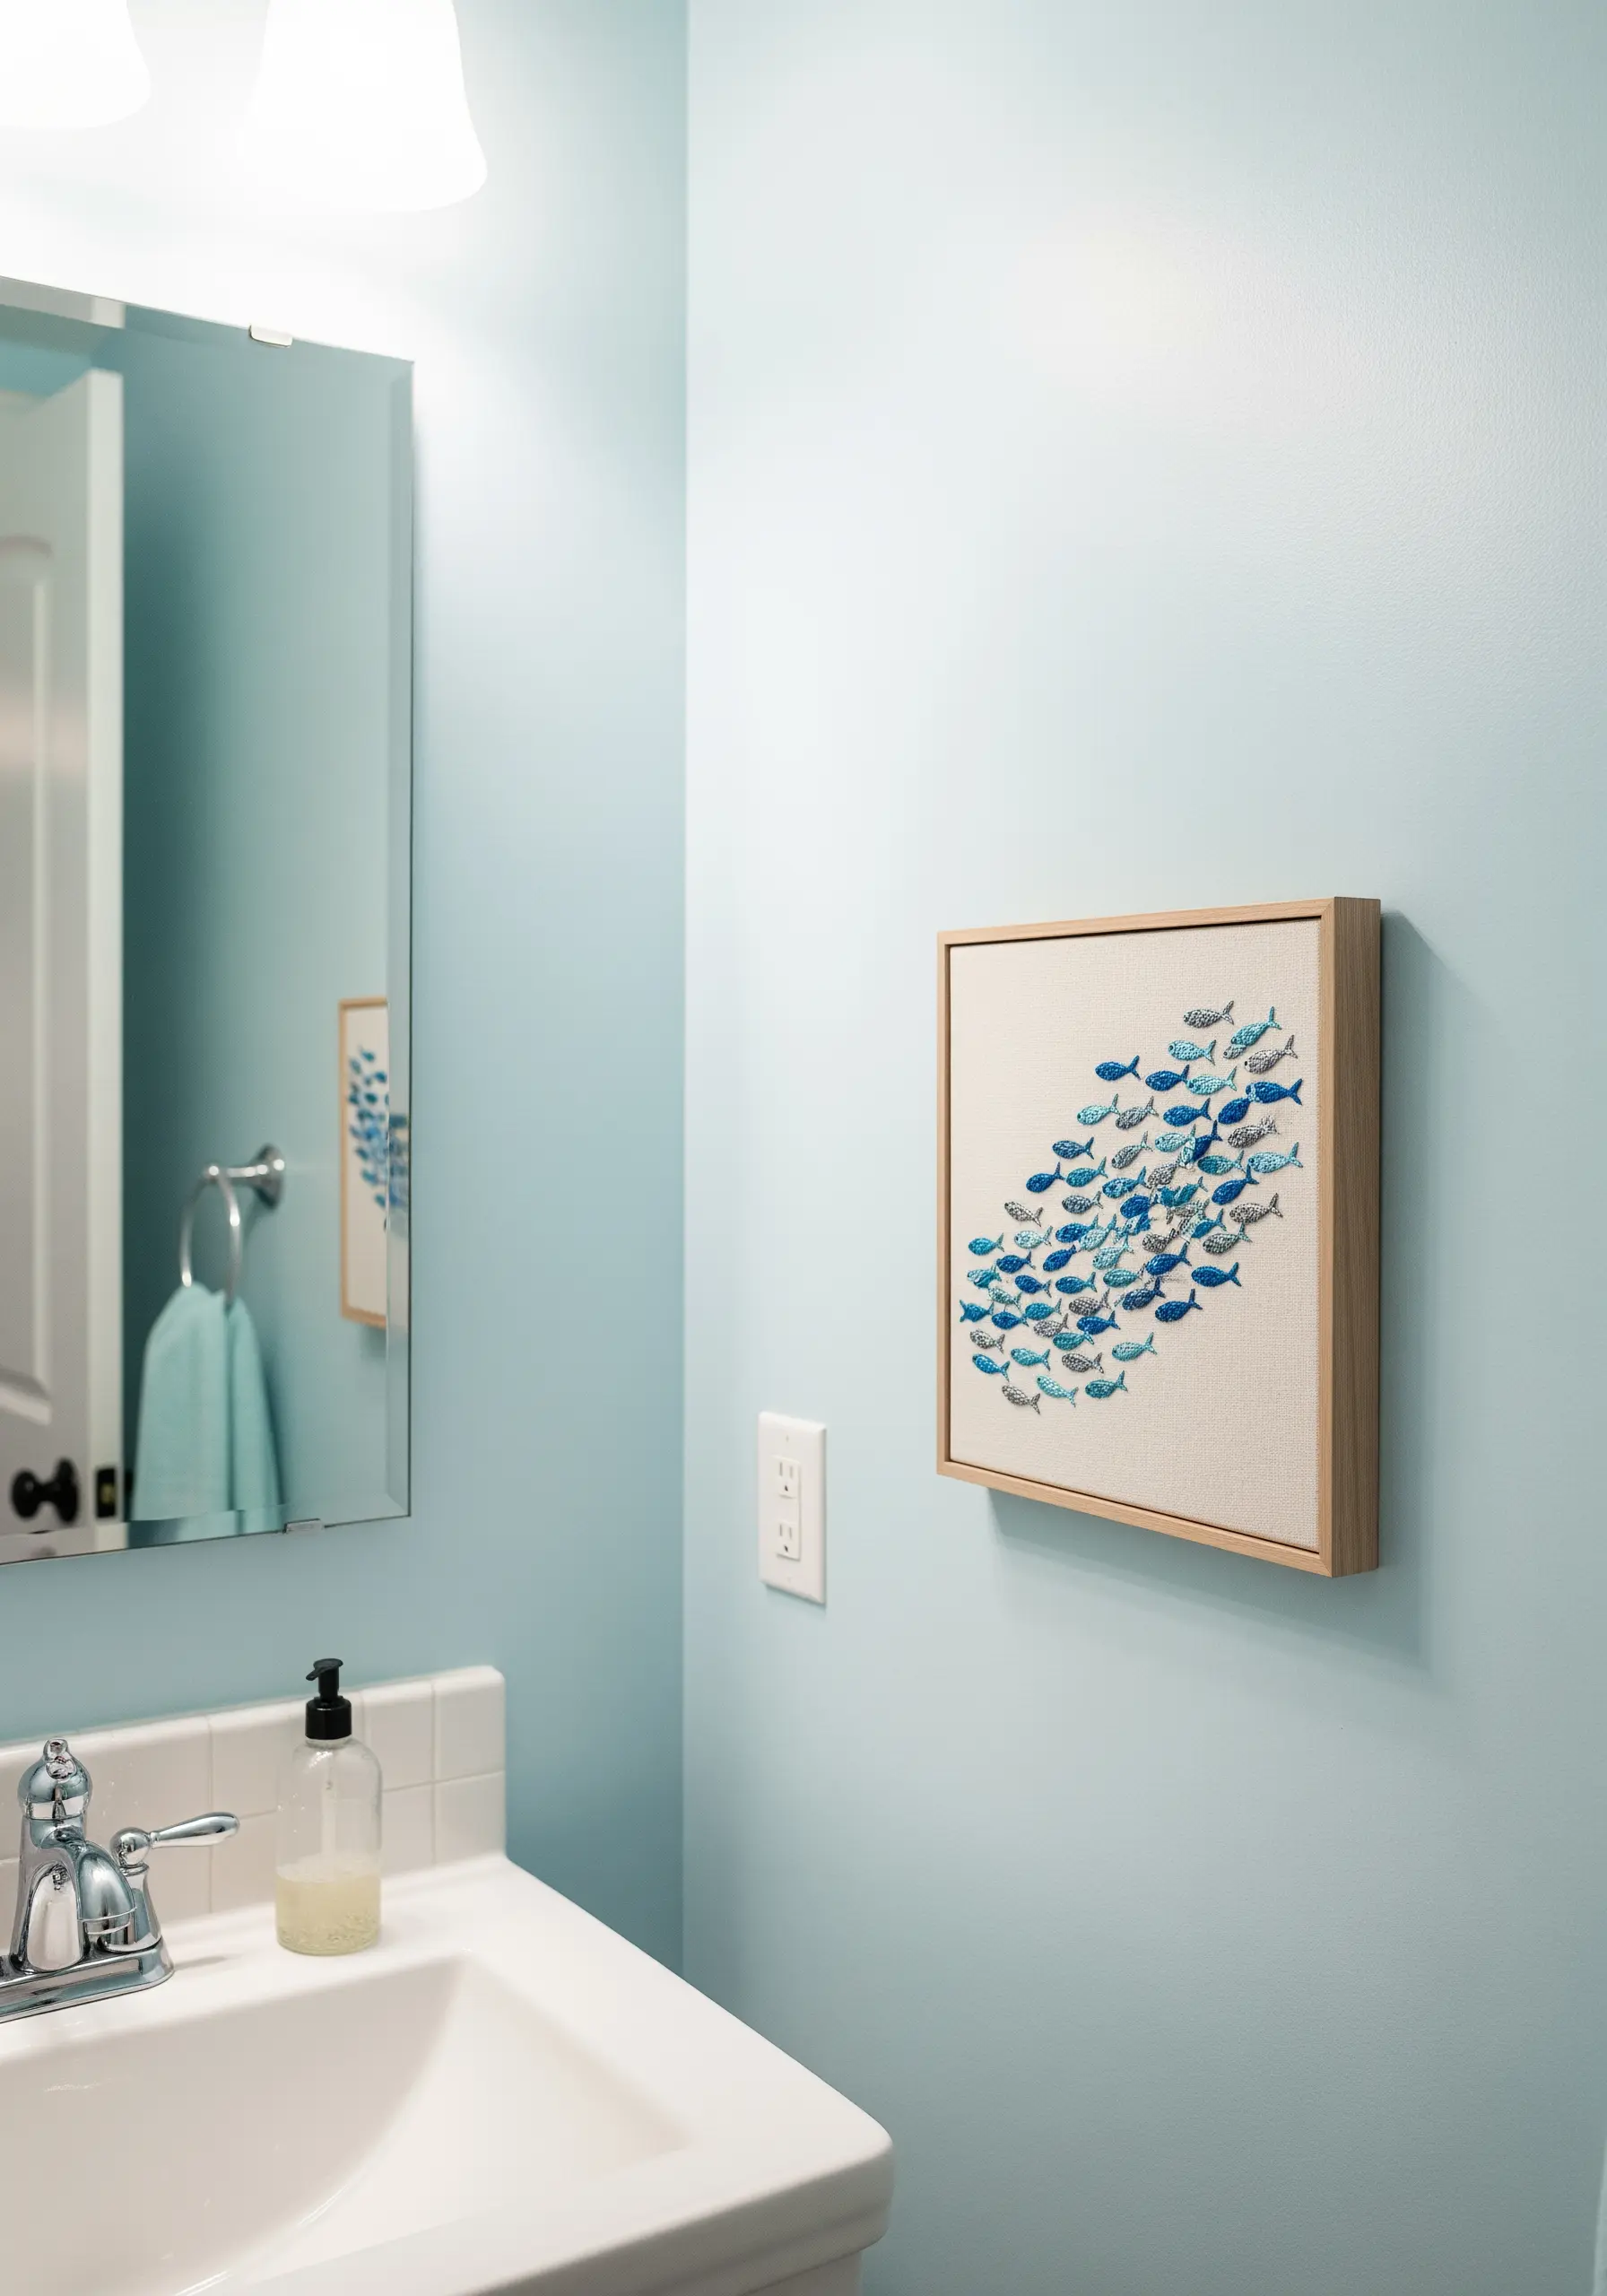
The illusion of movement in this piece comes entirely from repetition and shared direction.
Stitch each fish using just a few simple satin stitches for the body and a single stitch for the tail.
Vary the shades of blue, grey, and silver slightly from fish to fish to add subtle depth.
Most importantly, arrange them all in a dynamic, flowing curve, transforming them from individual motifs into a single, energetic entity.
It’s proof that stitched details that make plain walls pop don’t have to be large.
22. A Pop of Classic Beach Color
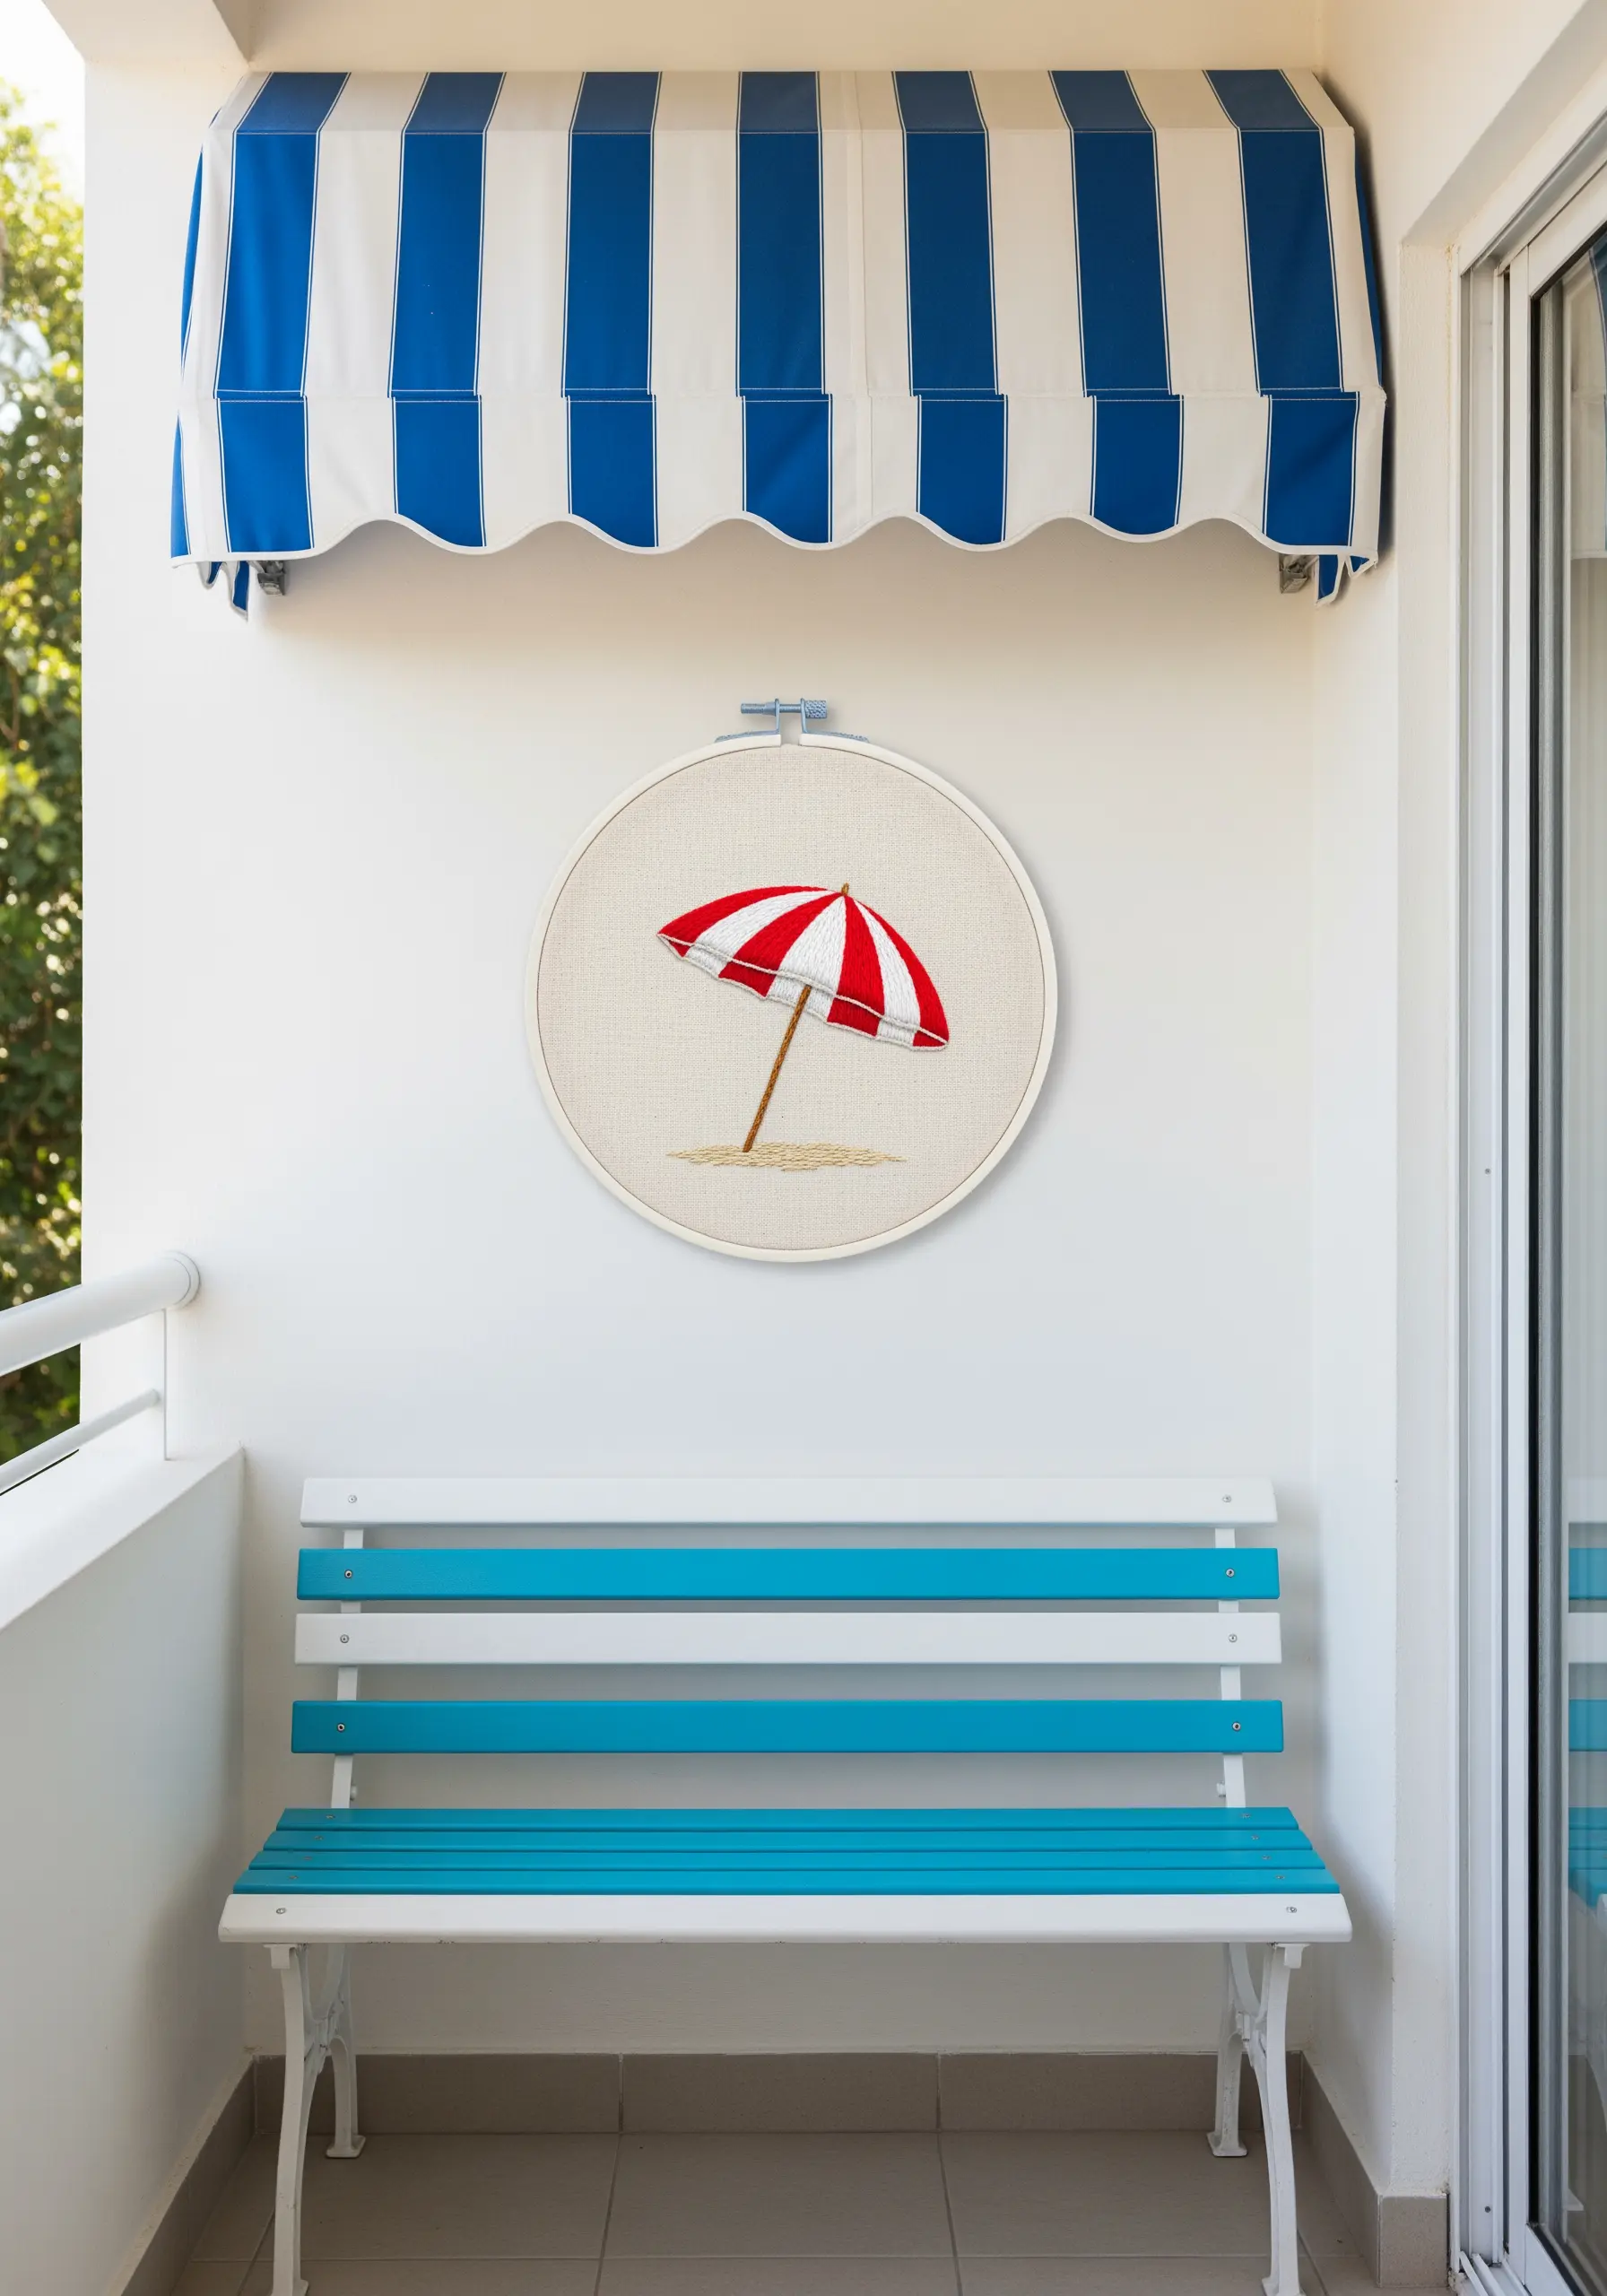
For crisp, satisfying stripes like those on a beach umbrella, stitch direction is everything.
Ensure your satin stitches all lie perfectly parallel within each red and white segment for a clean, graphic look.
Create the sandy texture below by scattering French knots and seed stitches in a few different shades of beige and tan.
The contrast between the smooth umbrella and the textured ground makes both elements more impactful, like well-designed minimal festive motifs.
23. Bioluminescent Beauty with Specialty Threads
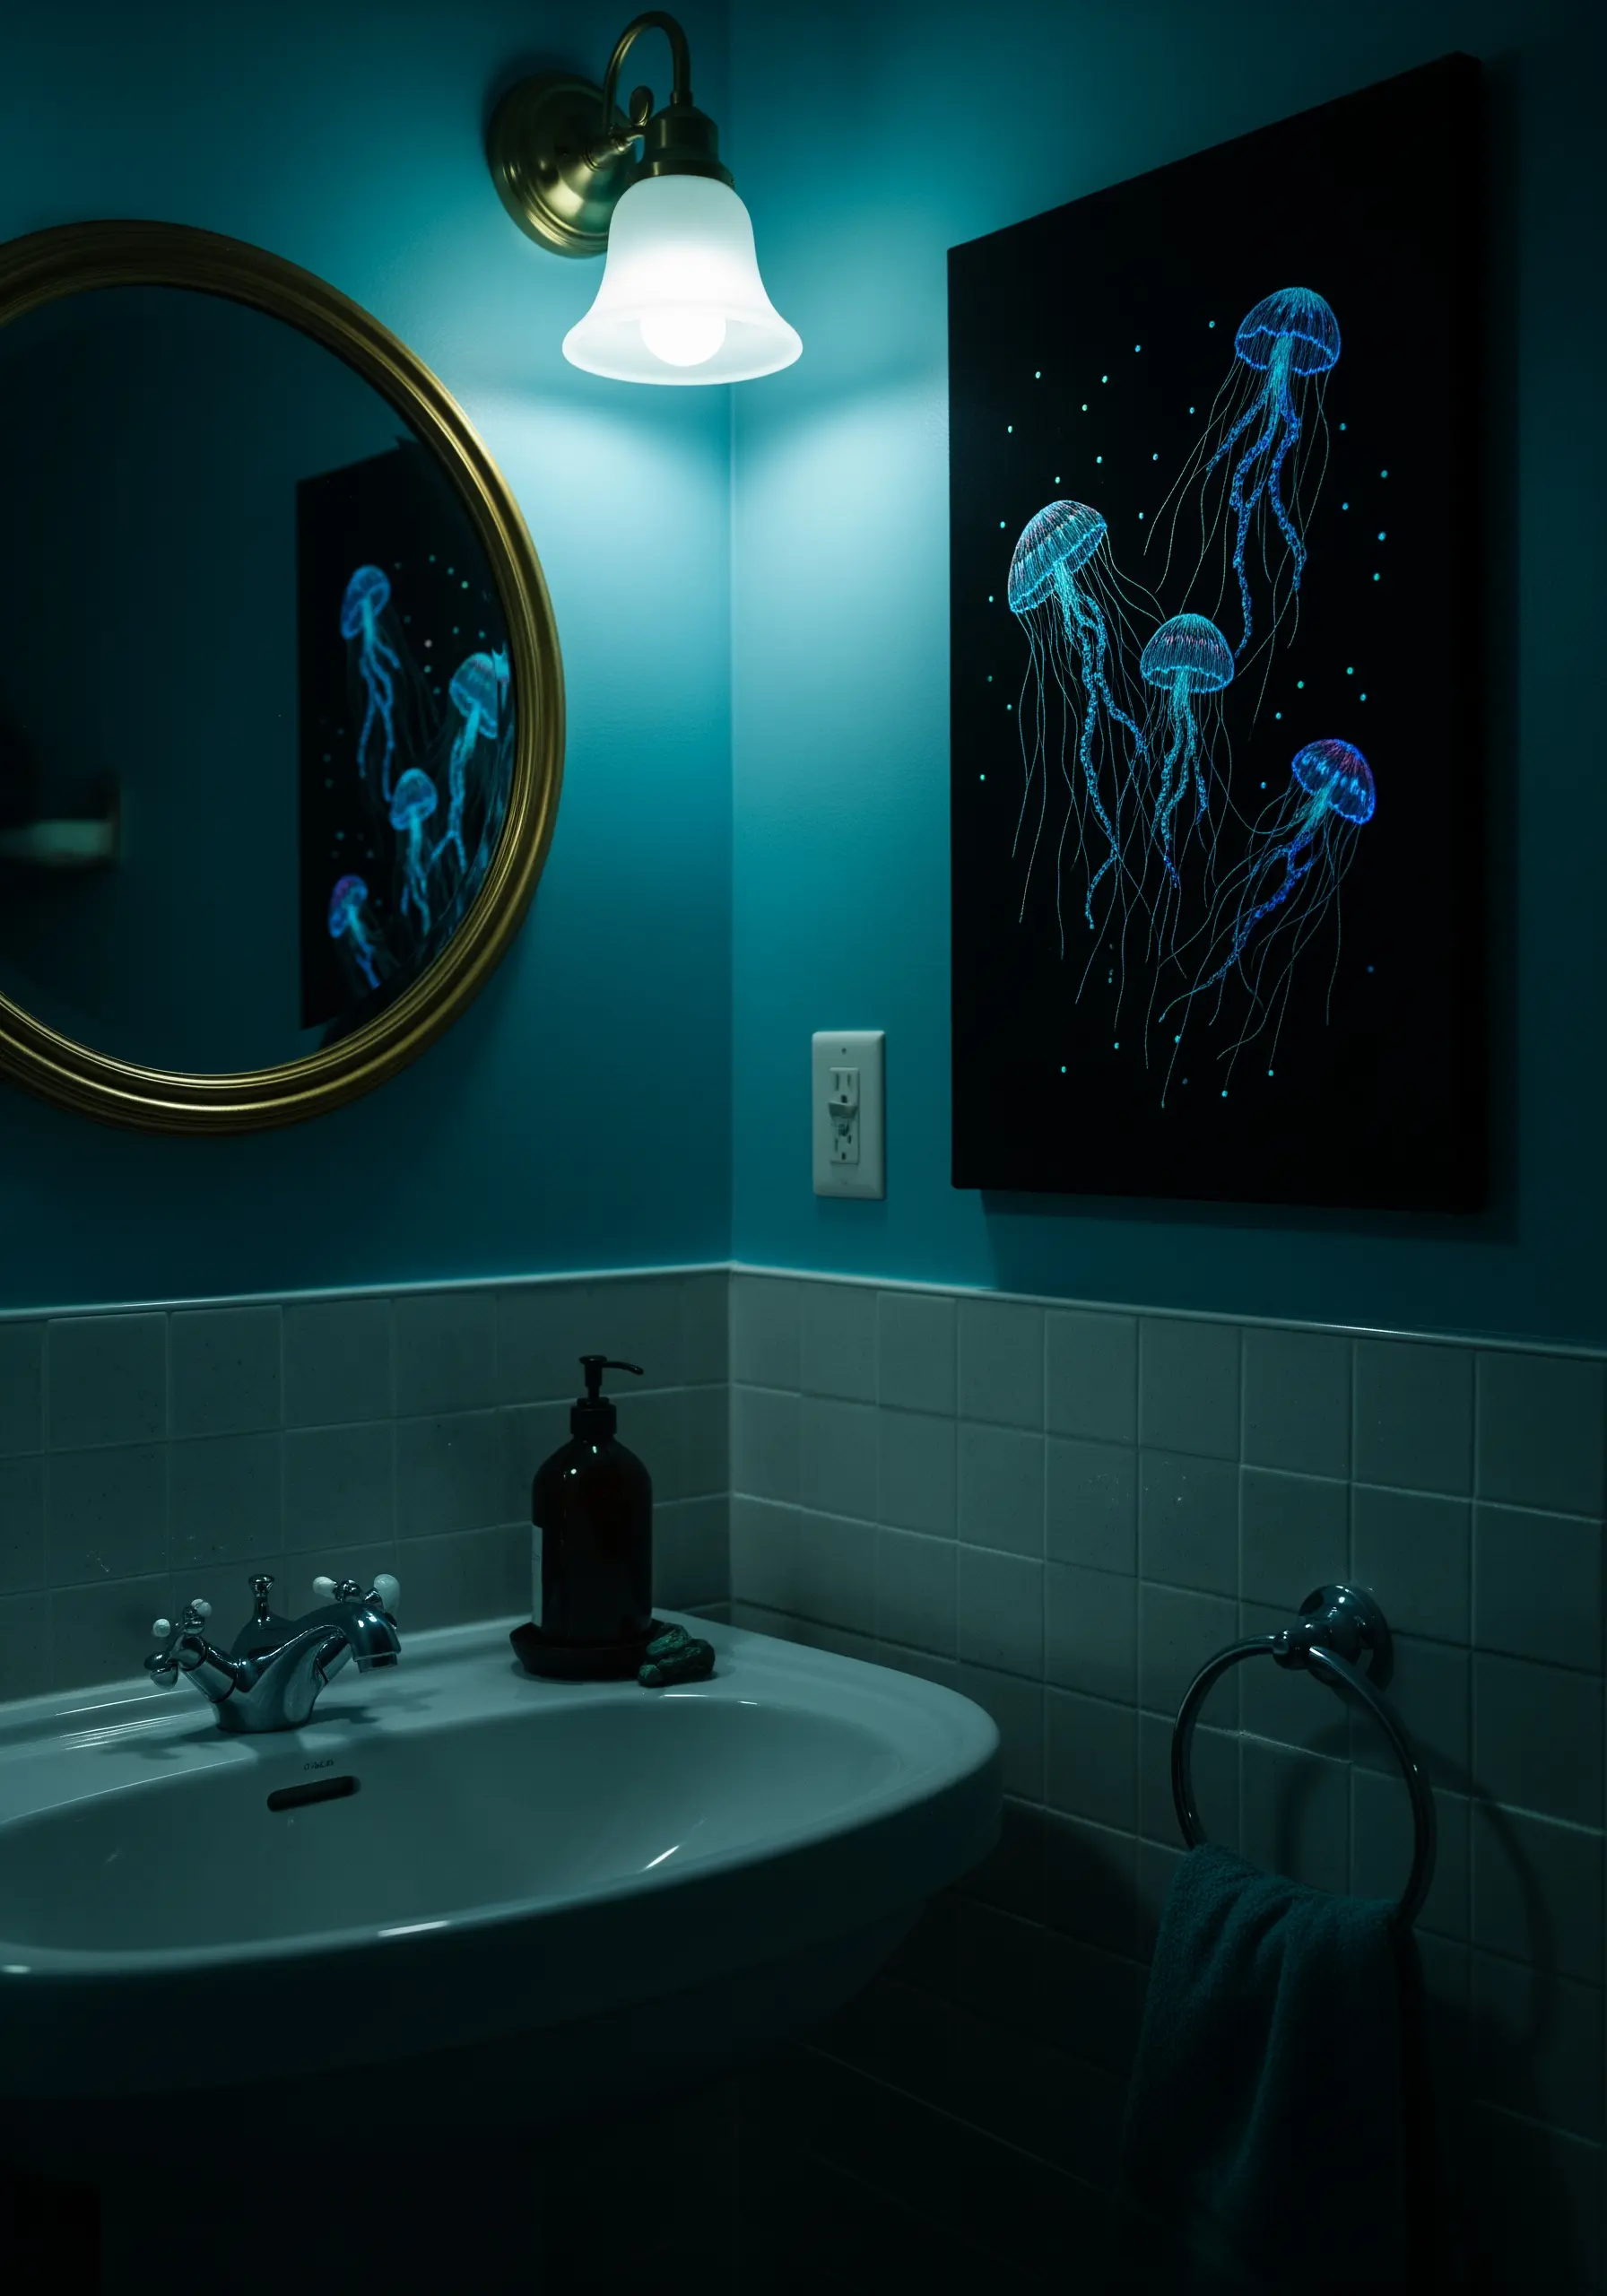
Create a design with a secret: use glow-in-the-dark embroidery floss for a magical effect.
Stitch your jellyfish using delicate backstitches for the bell and long, trailing straight stitches for the tentacles.
The thread “charges” in daylight or artificial light and will then emit a soft glow in the dark, creating a surprising, bioluminescent moment in a dimly lit space.
It’s one of those aesthetic embroidery ideas that translates perfectly to home decor.
24. The Expressive Elegance of a Single Line
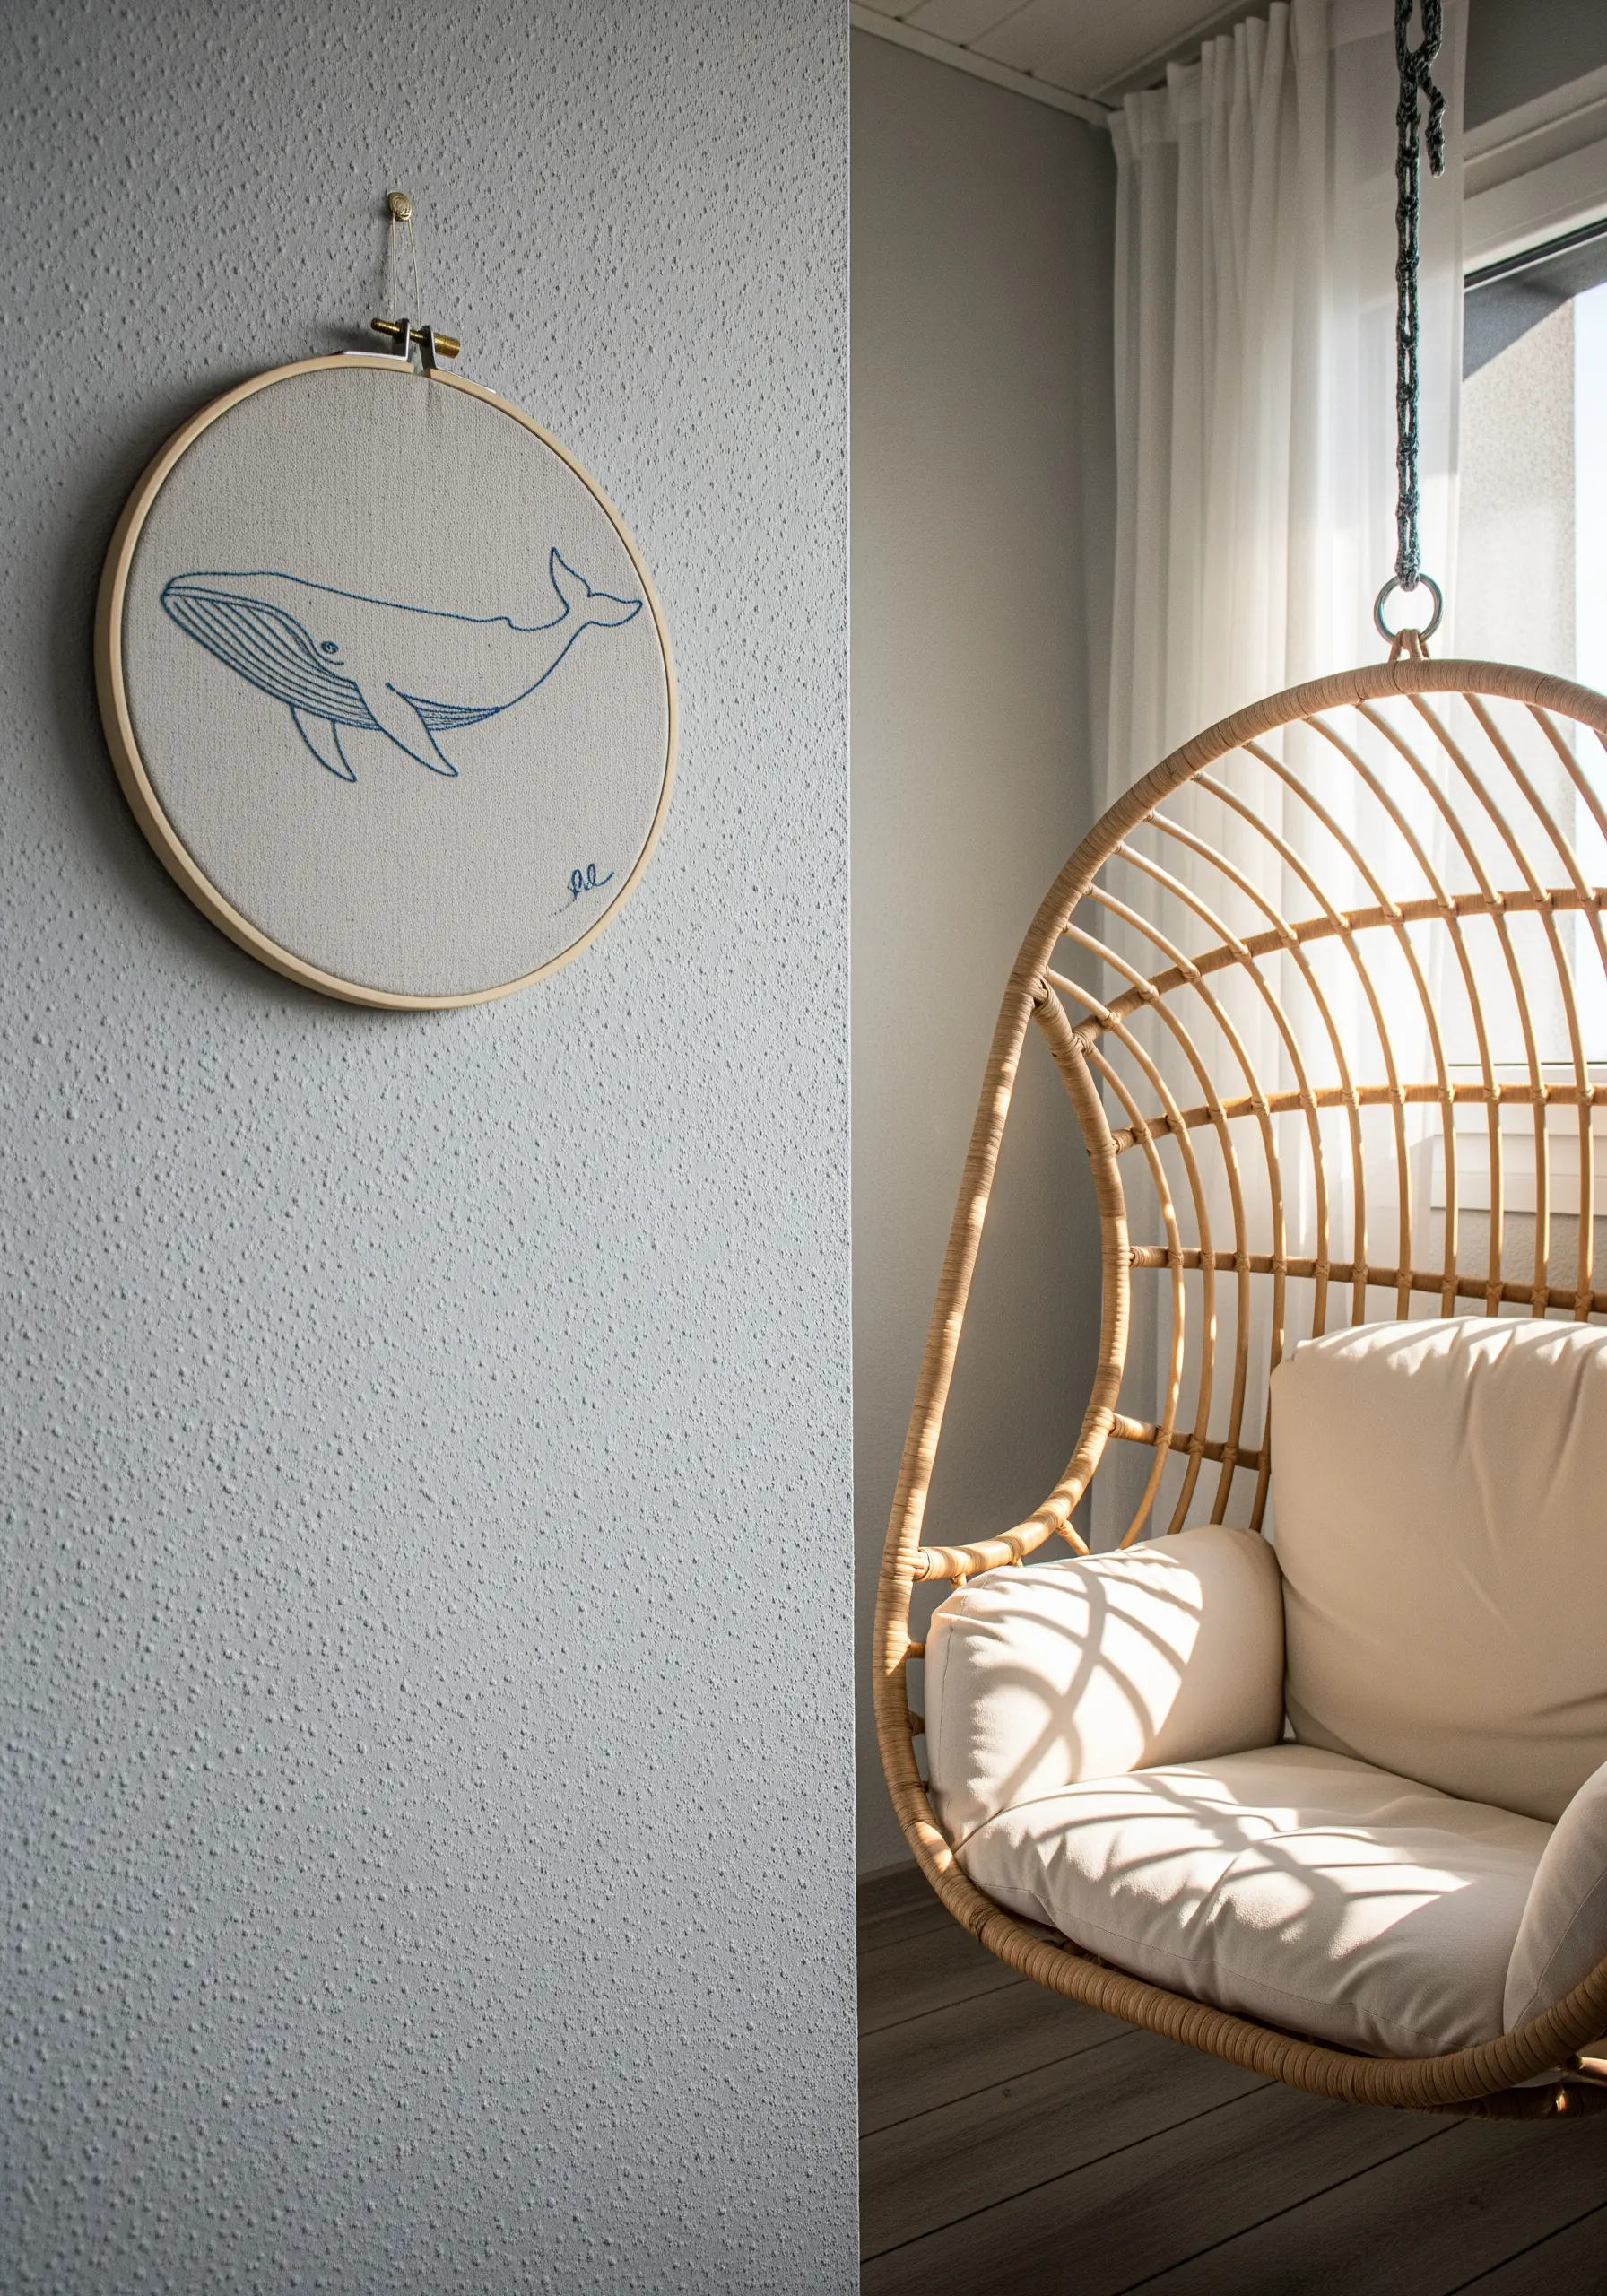
This design is a masterclass in minimalism, proving that you don’t need dense stitching for powerful impact.
A single, continuous line created with a whipped backstitch or a stem stitch can convey form, weight, and movement beautifully.
Use three to four strands of floss to give the line enough presence to stand on its own against the fabric.
The beauty is in the simplicity and the graceful curve of the whale’s form, a principle that ensures even tiny embroidery patterns feel significant.
25. Character Stitching: The Cheerful Crab

When you’re stitching characters, the eyes are the key to their personality.
Use a clean satin stitch for the whites and a bold, centered French knot for the pupil to create a lively and focused expression.
For the body, consider a slightly less perfect fill—like a field of short seed stitches—to give it a more organic, textured feel than a perfectly smooth satin stitch.
This approach draws on embroidery projects inspired by textures you’d find on a nature walk.
26. Illuminating the Beacon with String Art
Combine the soft texture of embroidery with the sharp, graphic lines of string art for a dramatic effect.
First, embroider the lighthouse itself using simple backstitch and satin stitch.
Then, stitch a series of small, evenly spaced anchor stitches on the fabric where you want the light beams to end.
Finally, run a single, long strand of bright yellow thread from the lighthouse lantern out to these anchor points, creating striking, graphic rays of light.
This technique modernizes holiday themed string art patterns for year-round display.
27. Dynamic Duo: Leaping Dolphins
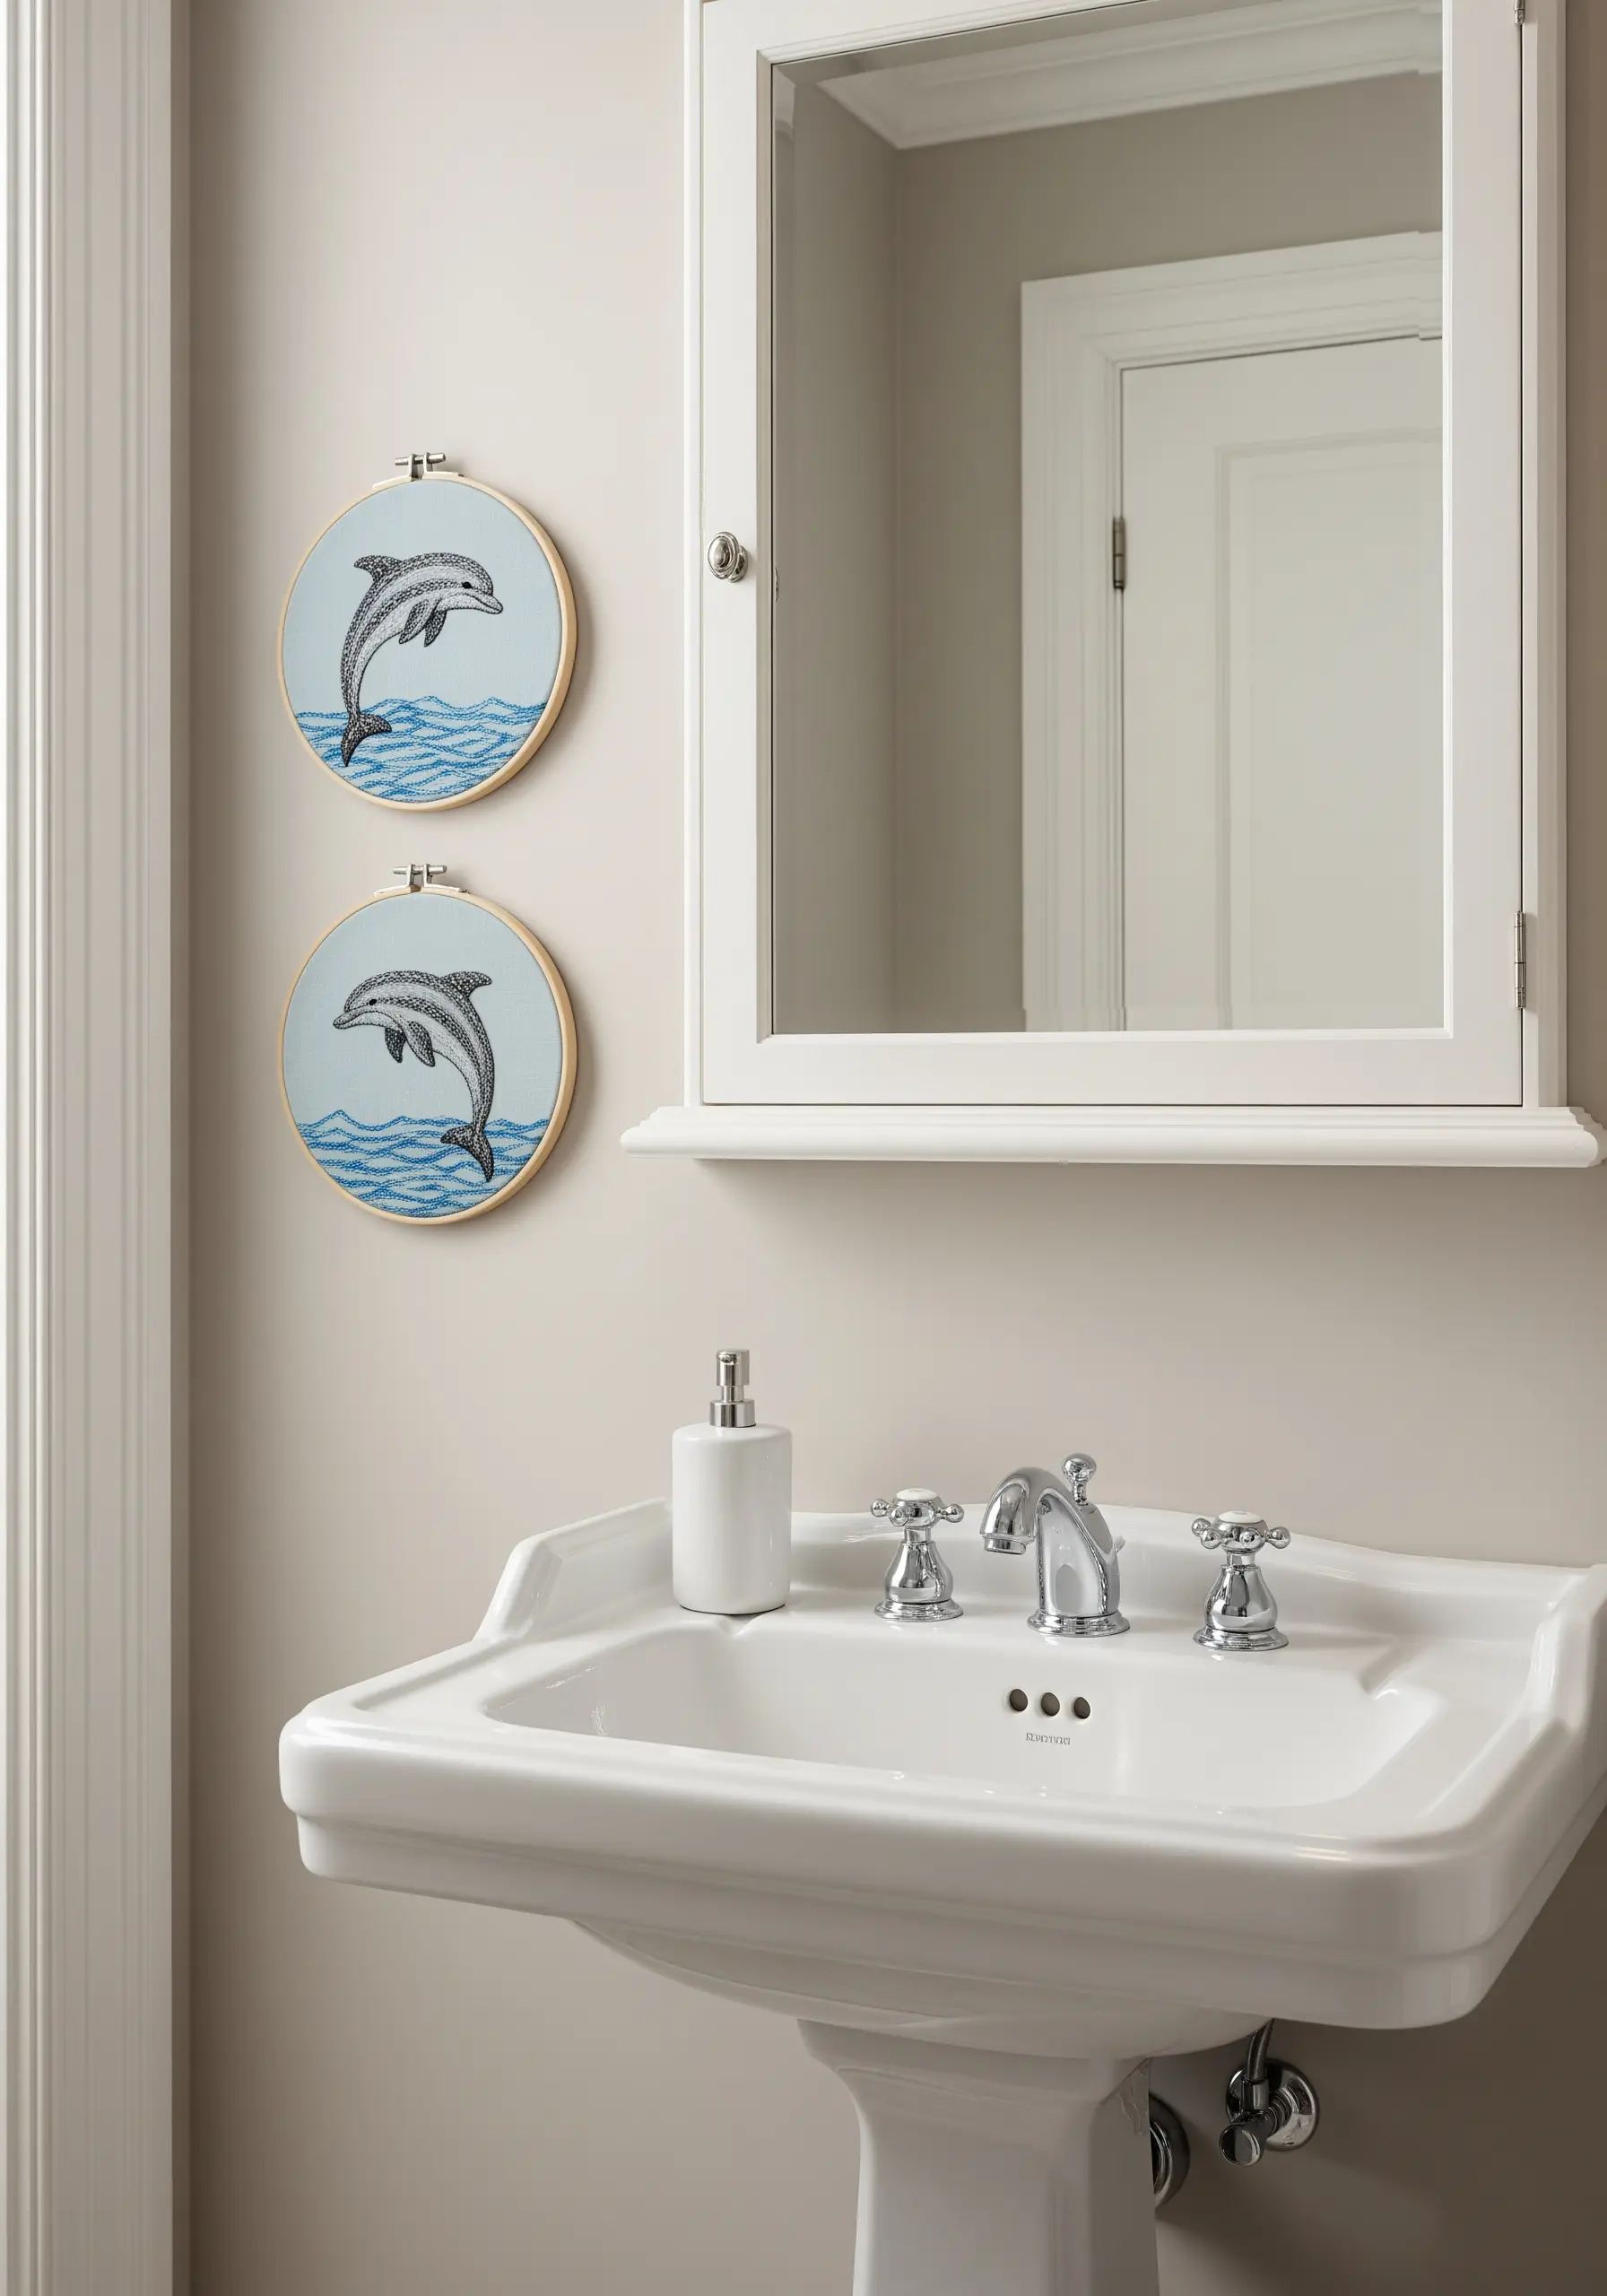
To give the dolphins’ skin a sleek, wet appearance, choose a thread with a natural sheen, like cotton perle or a single strand of rayon floss, and use a smooth satin stitch.
For the water, use a variegated blue thread in a simple backstitch, arranged in wavy, energetic lines.
The variegated thread does the color-blending work for you, creating effortless depth and movement that looks far more complex than it is to stitch.
It’s an easy way to achieve the ombre petal effects that look magical, but for water.
28. Stitching the Sound of the Coast
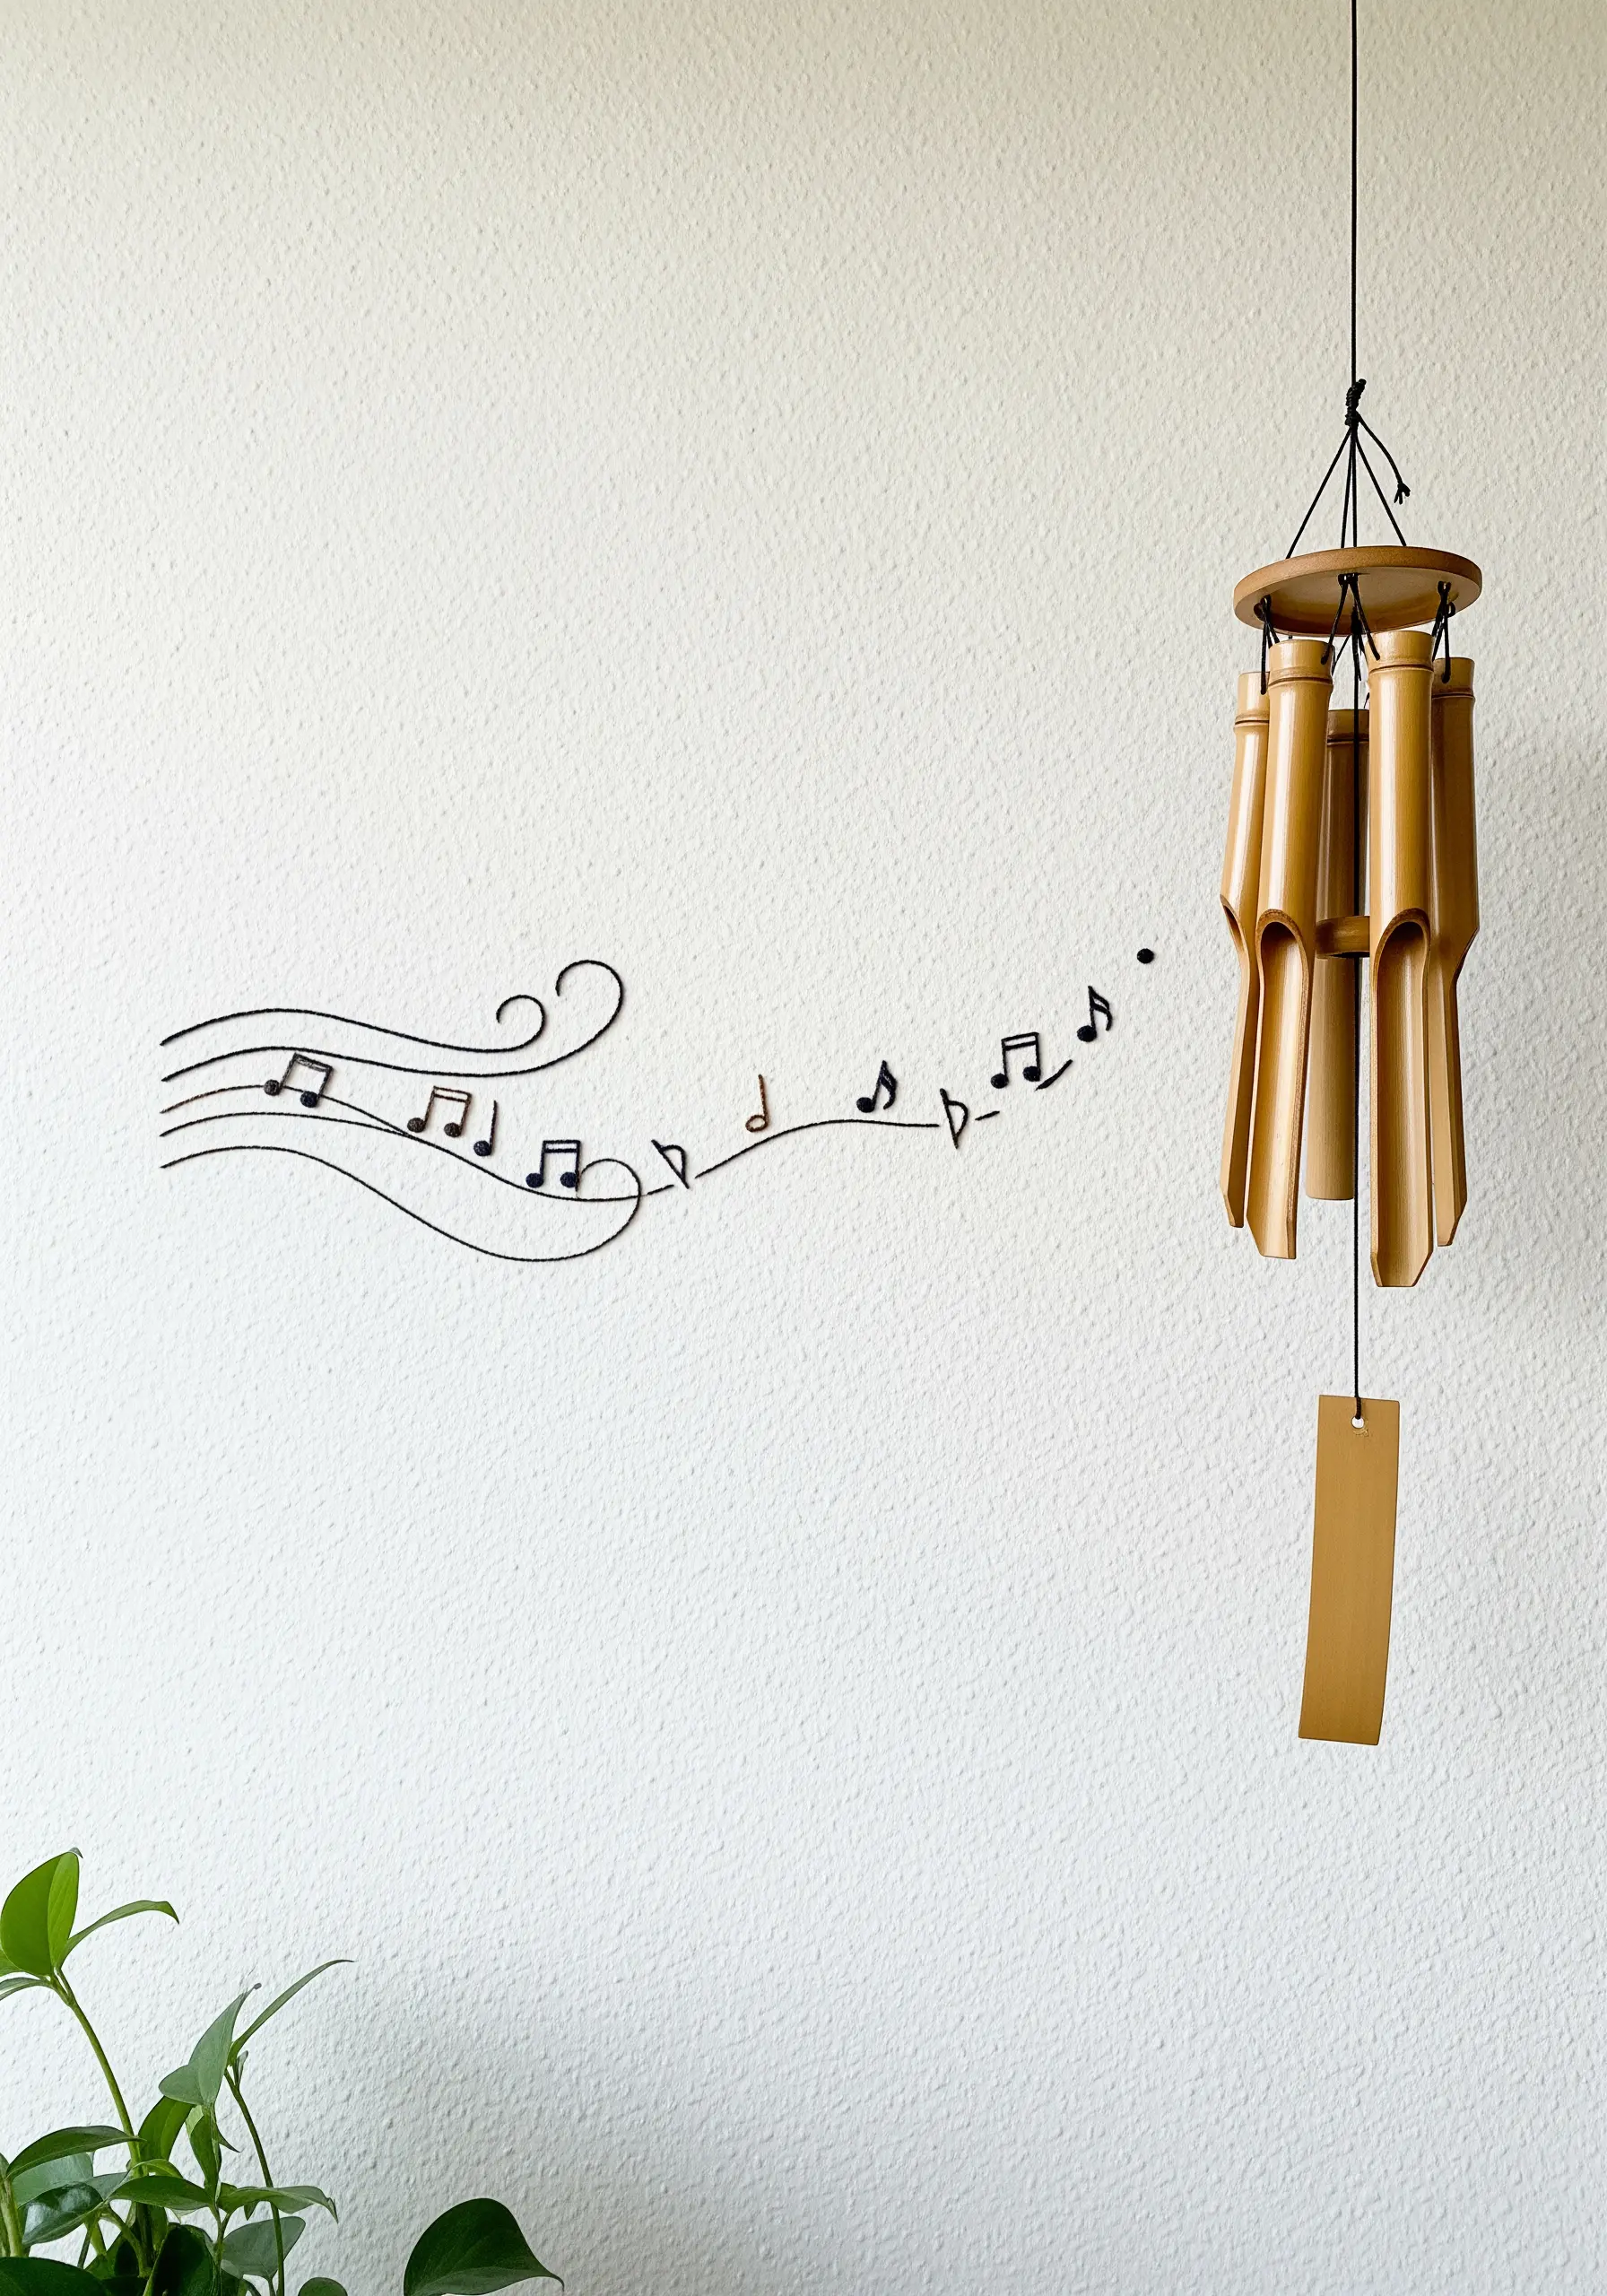
Represent an invisible concept like sound by translating it into abstract, flowing line work on your wall.
Use a delicate backstitch or stem stitch to create the musical staff, letting the line meander organically.
The notes themselves can be tiny satin stitch ovals or single French knots.
This conceptual approach connects a physical object to an imagined sensory experience, making it perfect for mindful stitching and zen decor.
29. A Sea Glass Mosaic with Thread
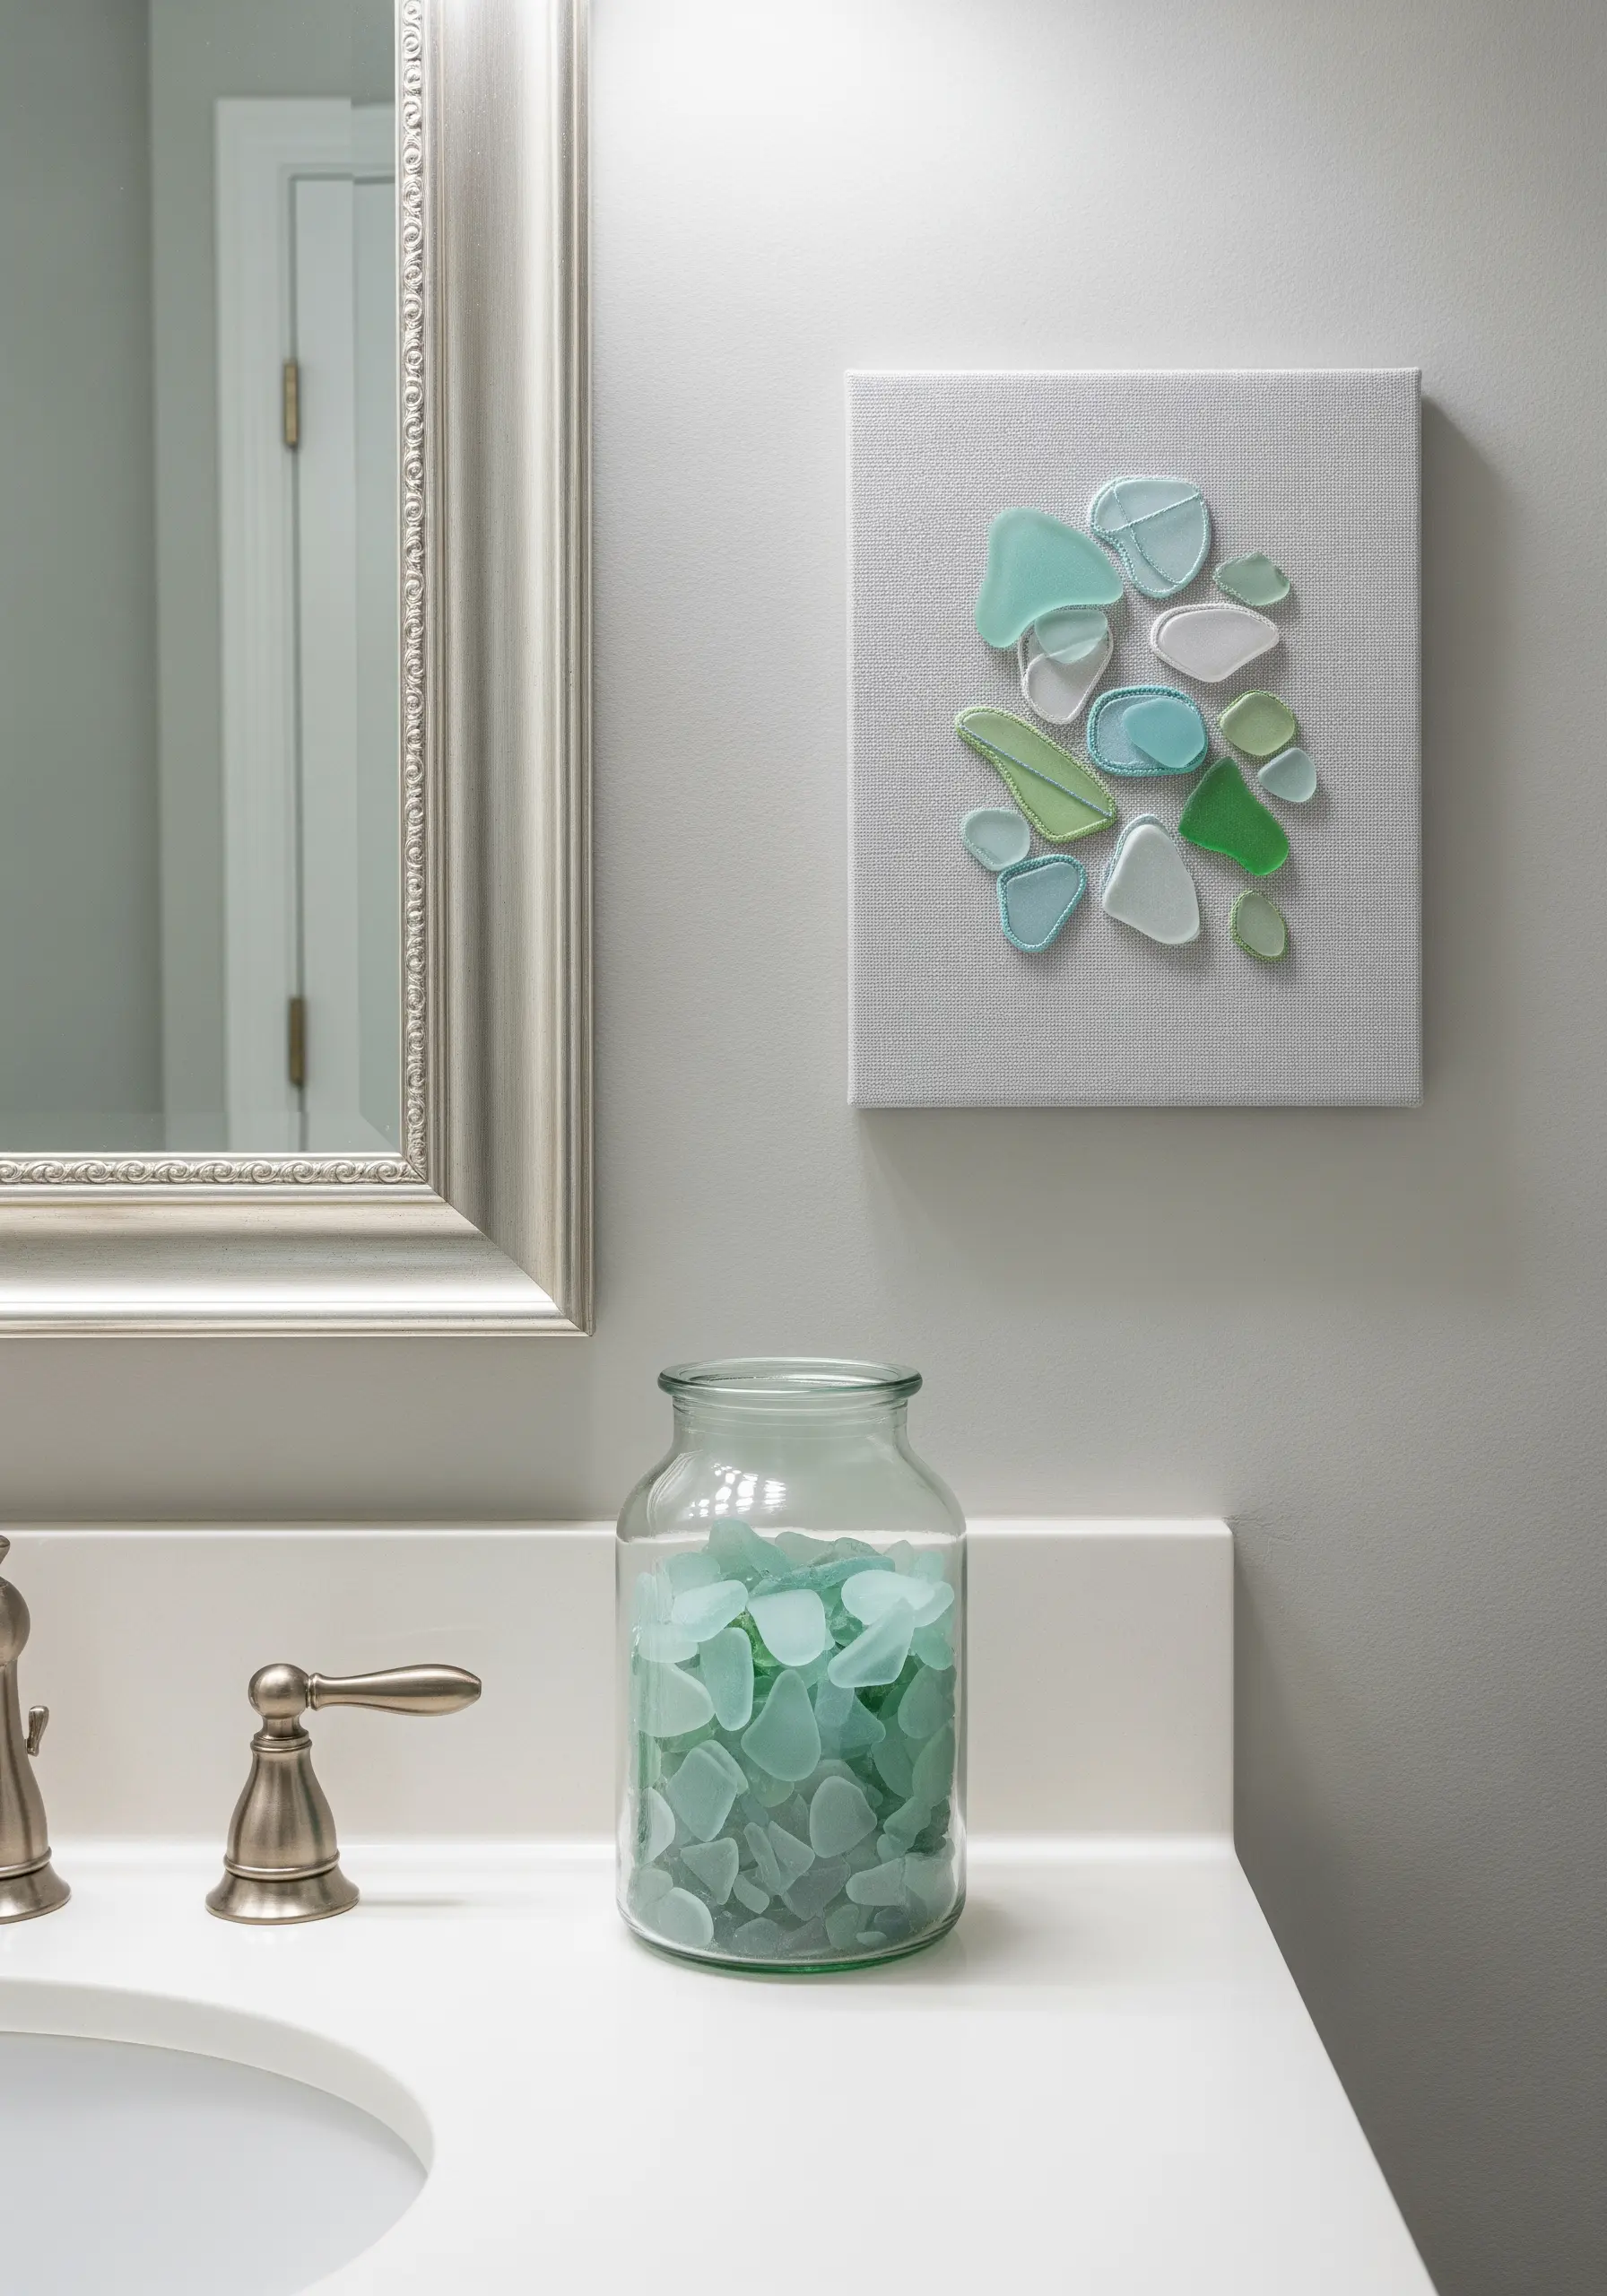
This technique celebrates the beauty of found objects, elevating them with the softness of thread.
Arrange real or faux sea glass pieces on your canvas and secure them with a strong, clear-drying fabric glue.
Then, use a single strand of white or silver floss to outline each unique shape with a simple backstitch.
The thread provides definition and creates a cohesive, mosaic-like effect, much like the process for inspiring pressed flower art projects.
30. A Quiet Story of the Sea

You can create a powerful sense of depth and perspective simply by varying your thread weight.
Use a thicker thread, like all six strands of floss or even a cotton perle, for foreground elements like the book’s binding and the seagull.
For the ‘printed’ sea and sky on the book’s pages, switch to a much finer thread—just one or two strands.
This subtle shift pulls the viewer’s focus forward, creating an immersive scene reminiscent of combining paper layers with subtle embroidery.
31. The Minimalist Marlin Accent
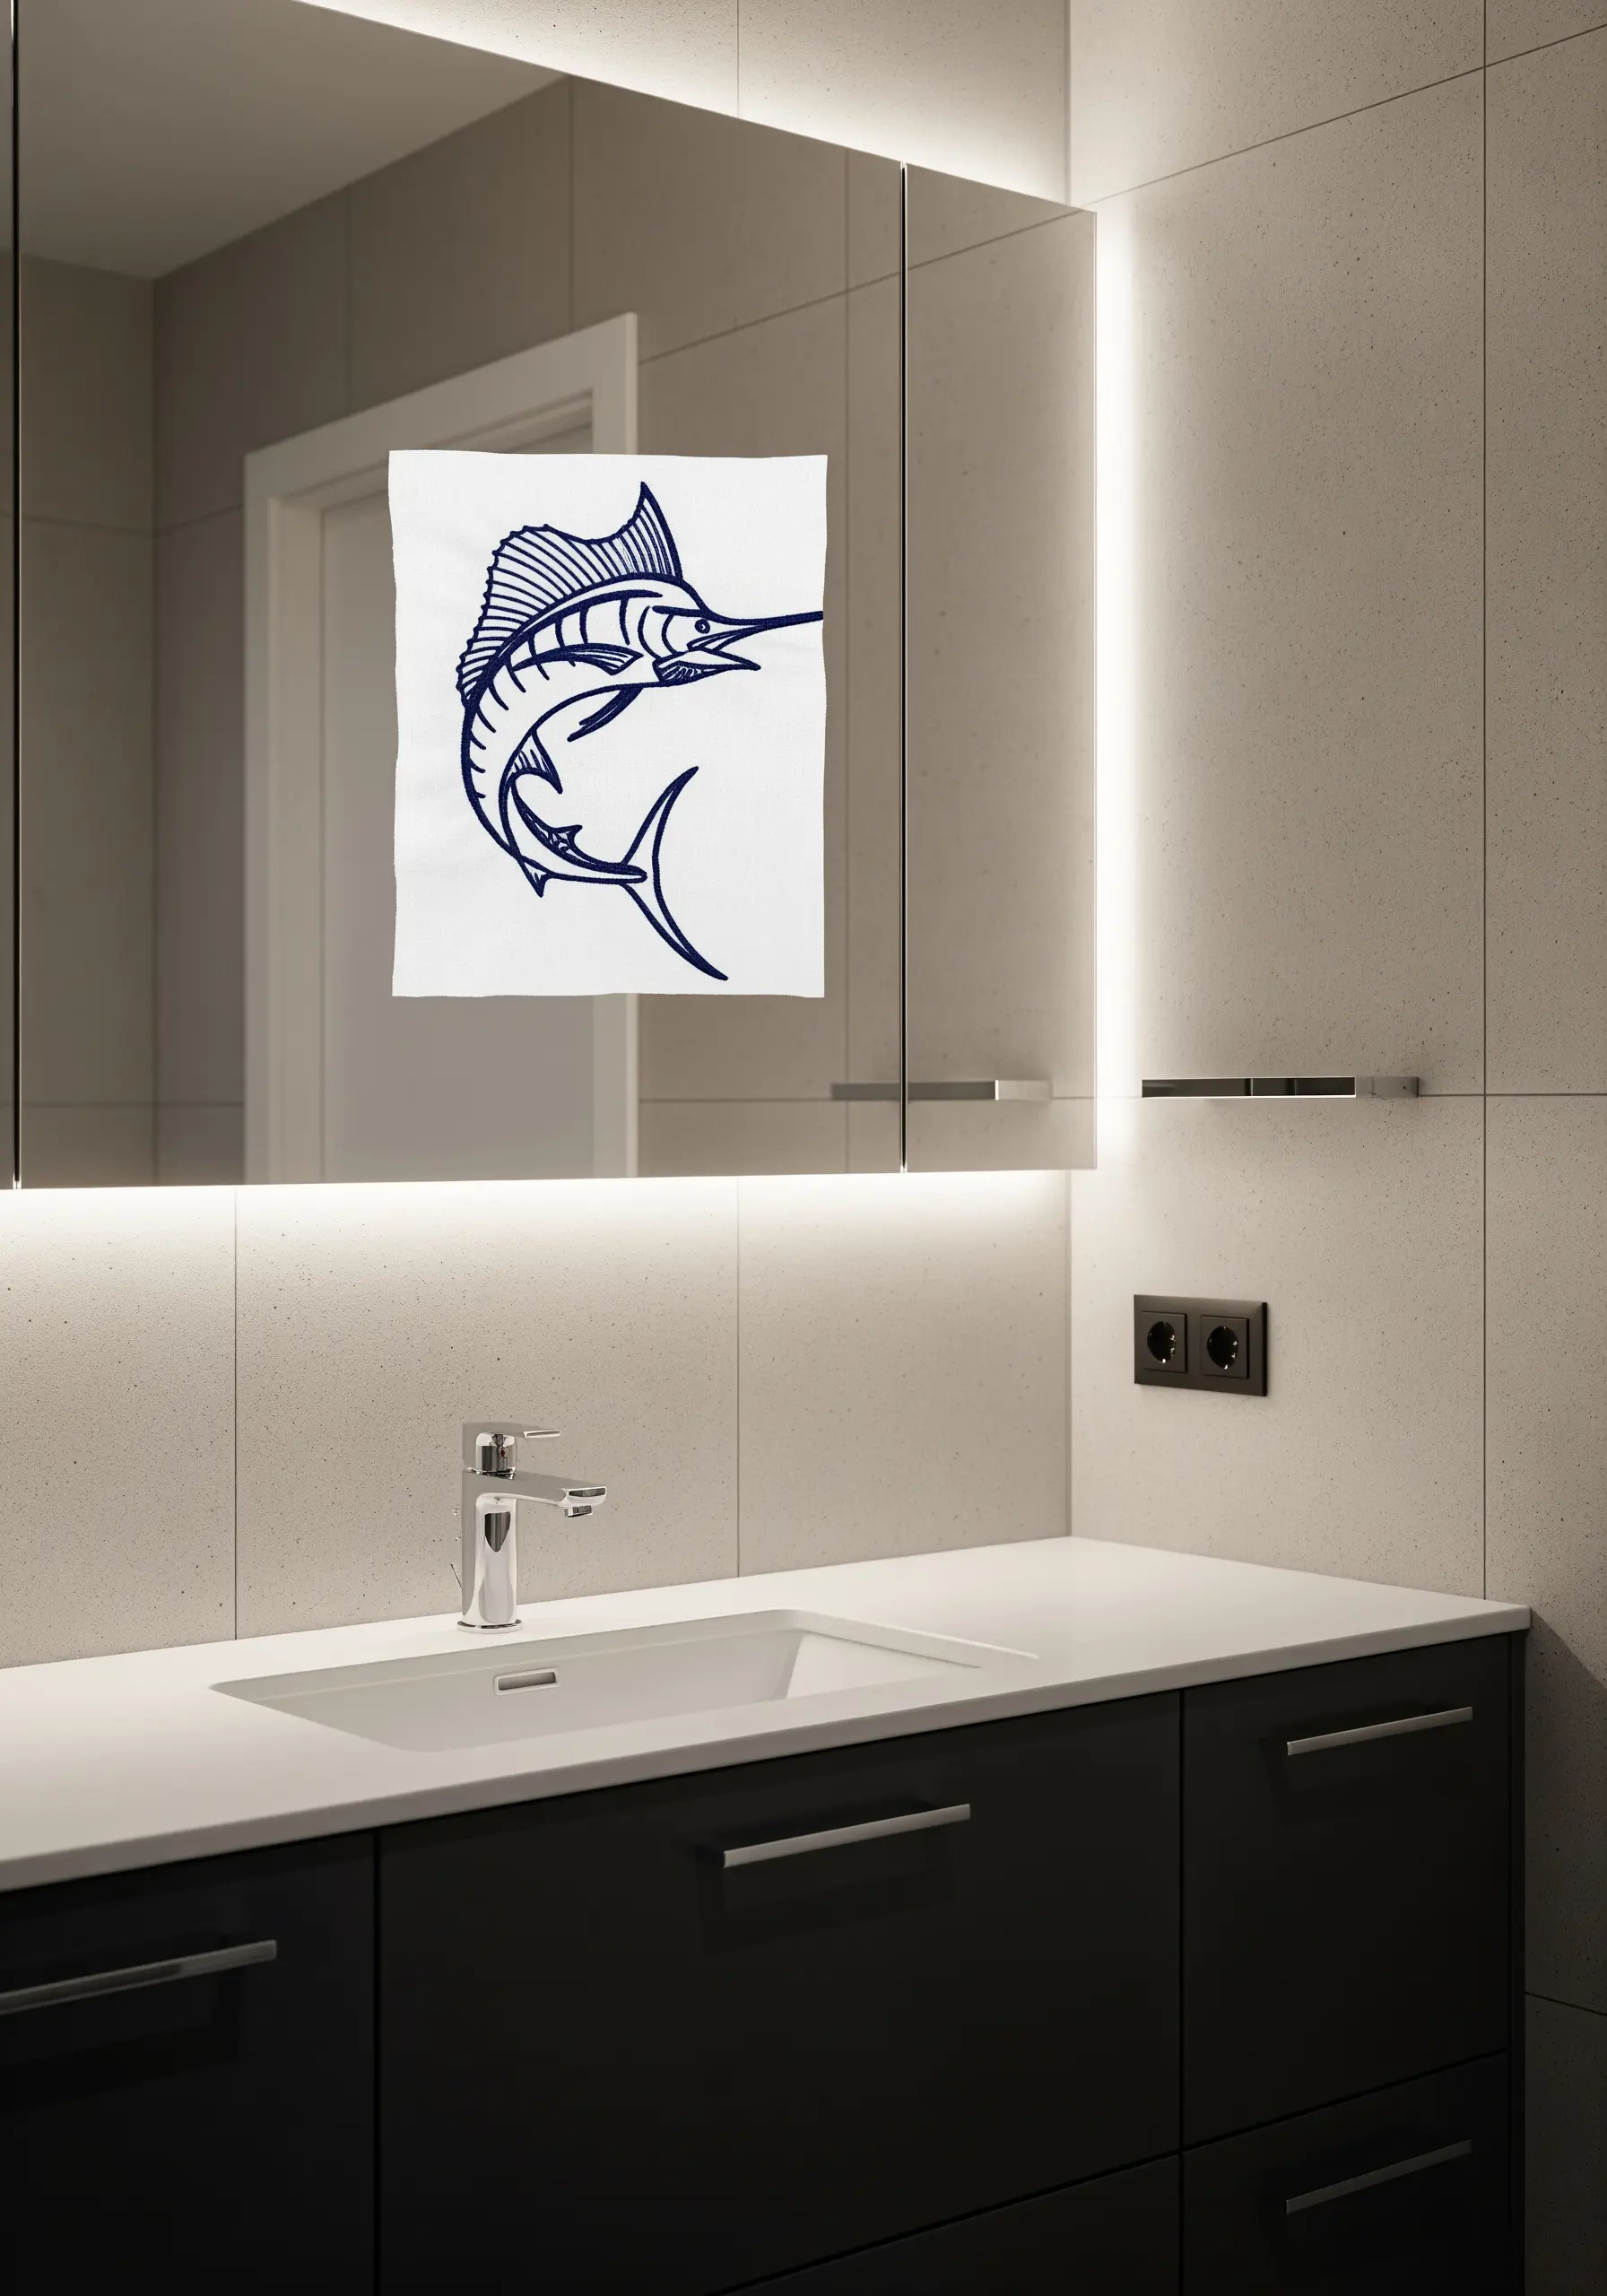
A bold, single-color line drawing can make a powerful and sophisticated statement in your decor.
To achieve those sharp, clean lines, use a stem stitch, which creates a solid, rope-like line perfect for strong outlines.
The real artistry here is in the unexpected placement—applying the embroidery to a guest towel or another functional object adds a touch of bespoke luxury, much like transforming table runners into luxe spring centerpieces.
32. Painting a Sunset with Satin Stitch

Create a painterly, impressionistic sunset using only horizontal satin stitches as your ‘brushstrokes’.
Lay down bold blocks of color for the sky and water, letting the edges meet and blend imperfectly.
Choose threads with a high sheen, like rayon or silk, to capture the reflective quality of light on water at dusk.
The magic is in the bold strokes of color and the texture created by the dense, glossy threads, creating a warmth that feels as good as our embroidered throws and blankets.
33. Interactive Embroidery: The Anchor Cord

Add a playful and unexpected element to your embroidery by breaking the boundary of the hoop.
After stitching your anchor, securely attach a long piece of cord or thick yarn to the top loop.
Let this cord hang down and attach it to a light pull, a window blind, or simply let it trail down the wall as a design element.
This turns a simple piece of decor into one of those mini handmade objects that bring life to any tabletop… or wall.
34. Coastal Cocktails: A Thematic Blend
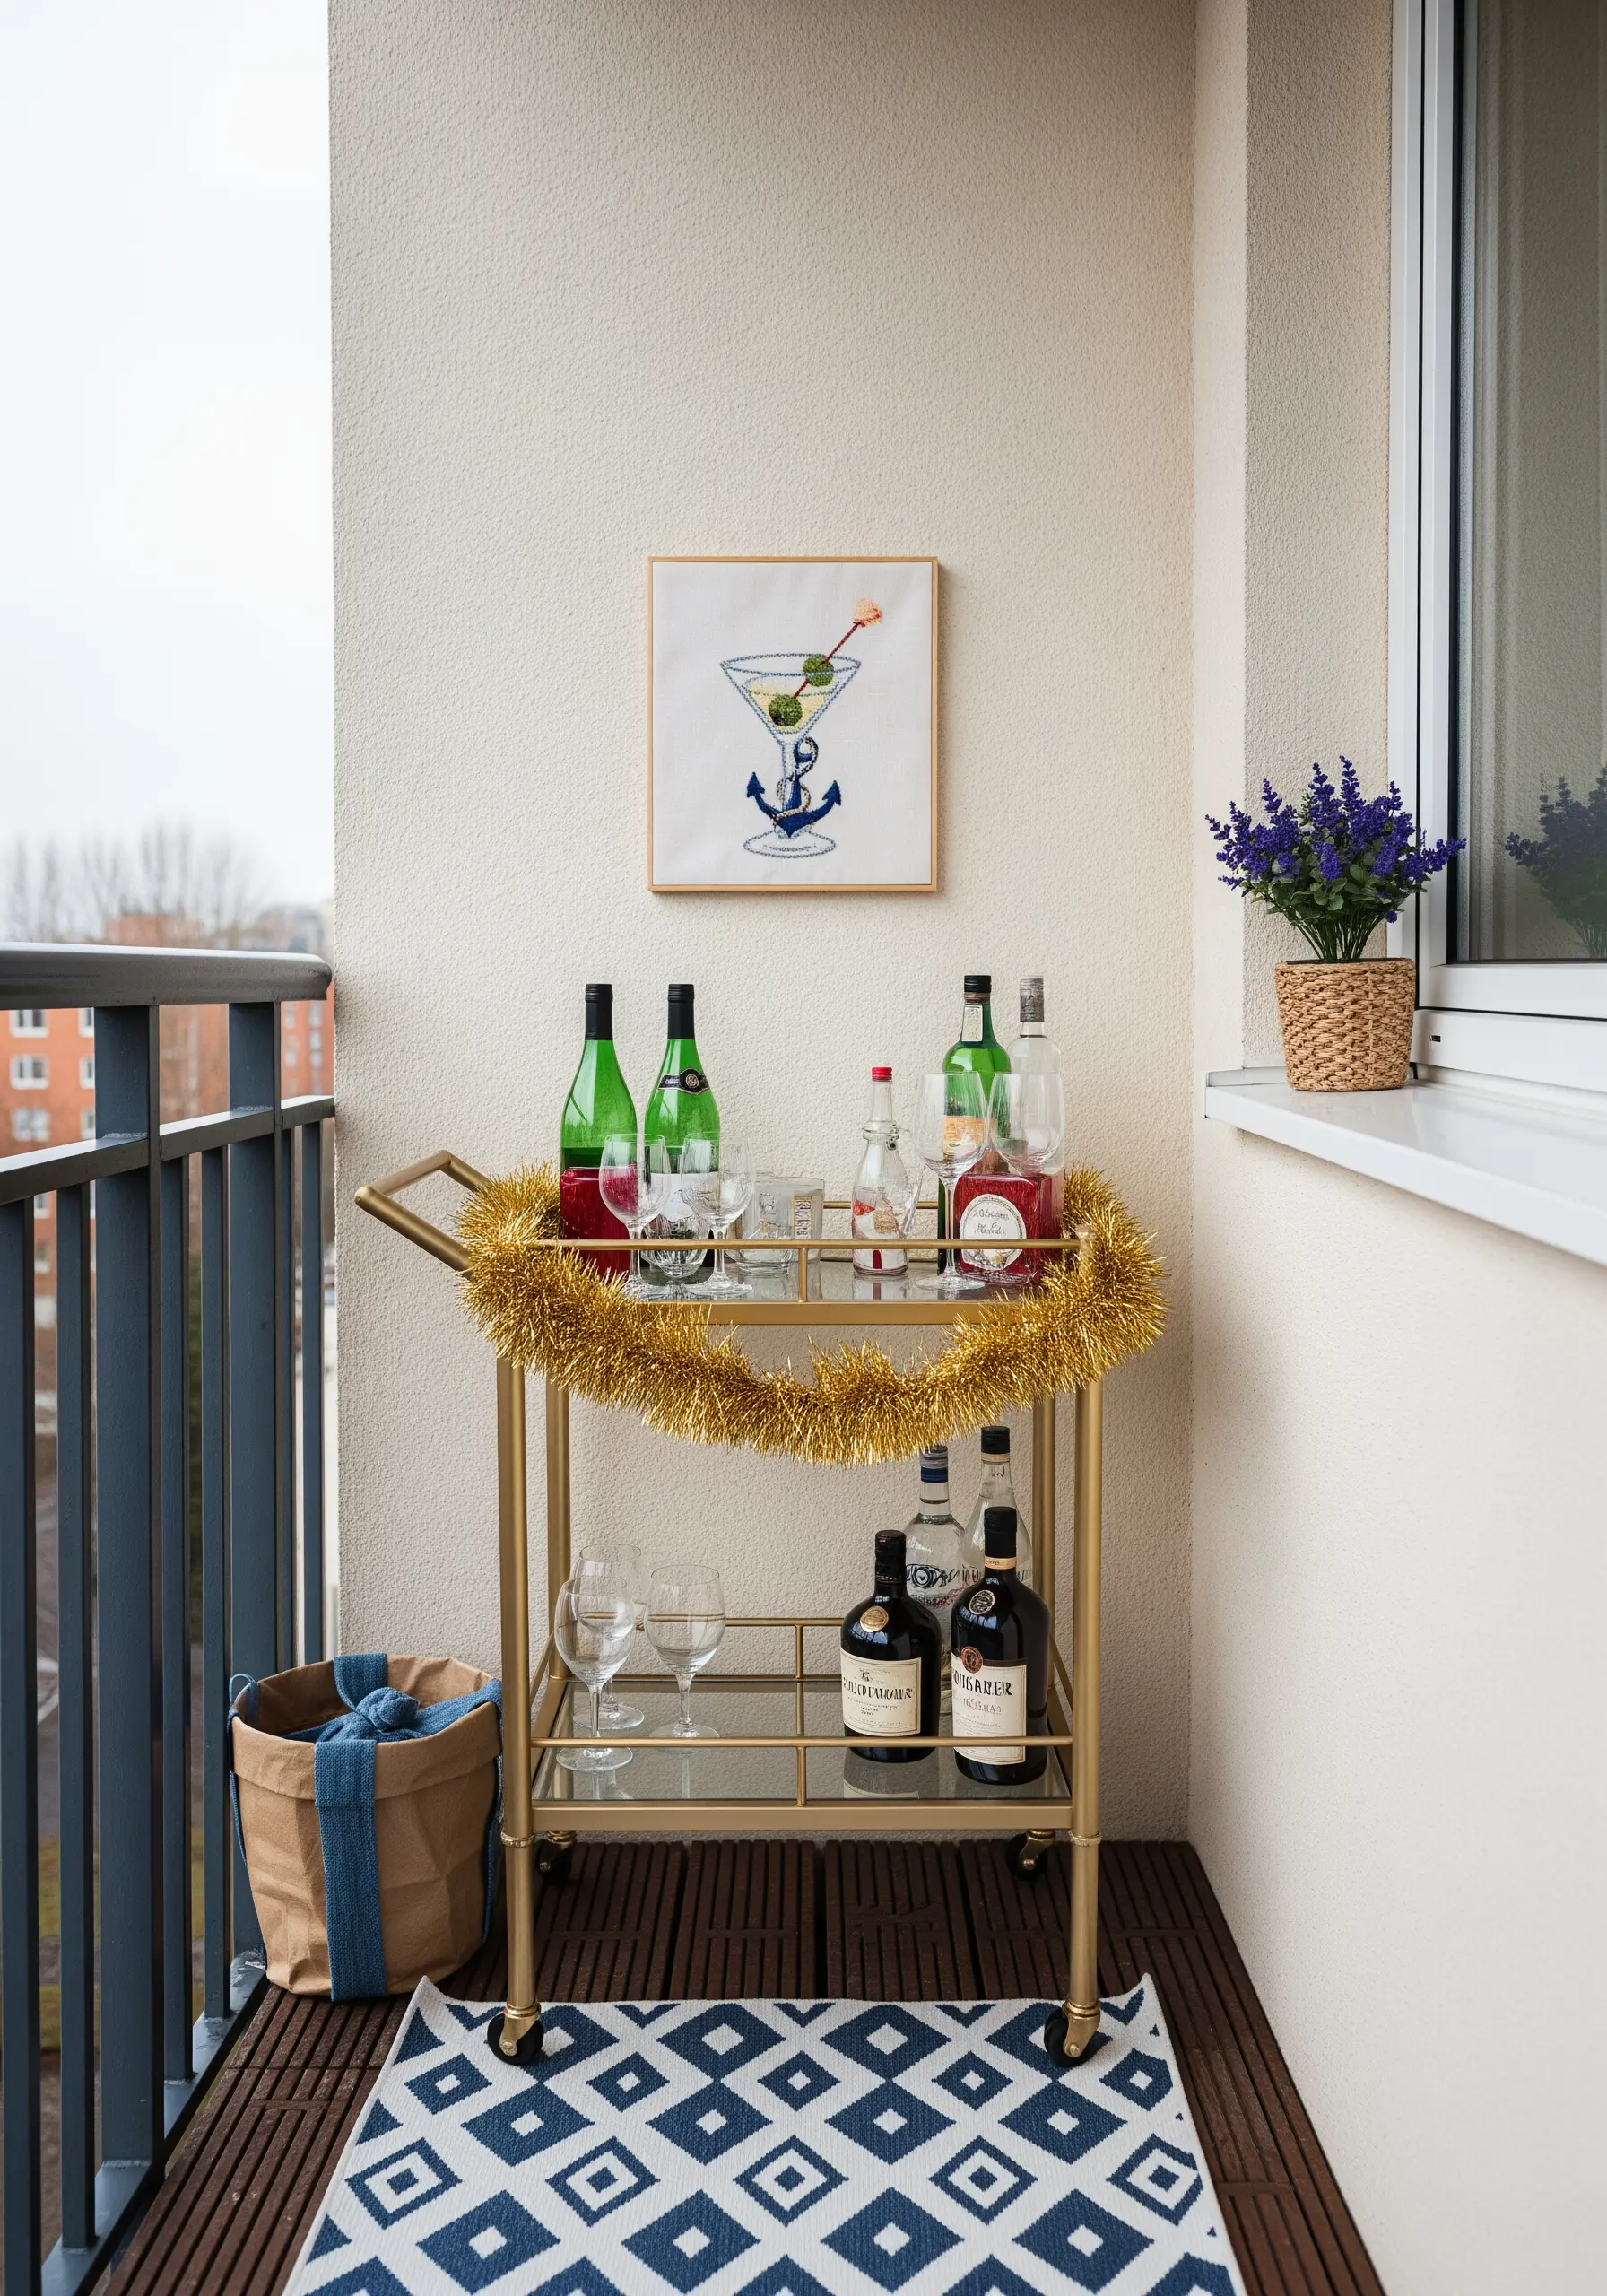
Create a clever and personal piece by combining unexpected motifs to tell a new story.
Embroider a classic martini glass using clean backstitches for the outline, but replace the traditional olive with a tiny, satin-stitched anchor.
This kind of thematic mashup is witty, personal, and a guaranteed conversation starter.
It brings a boho-embroidery-patterns sense of fun and freedom to a classic coastal theme.
35. Nautical Signals in a Perfect Grid
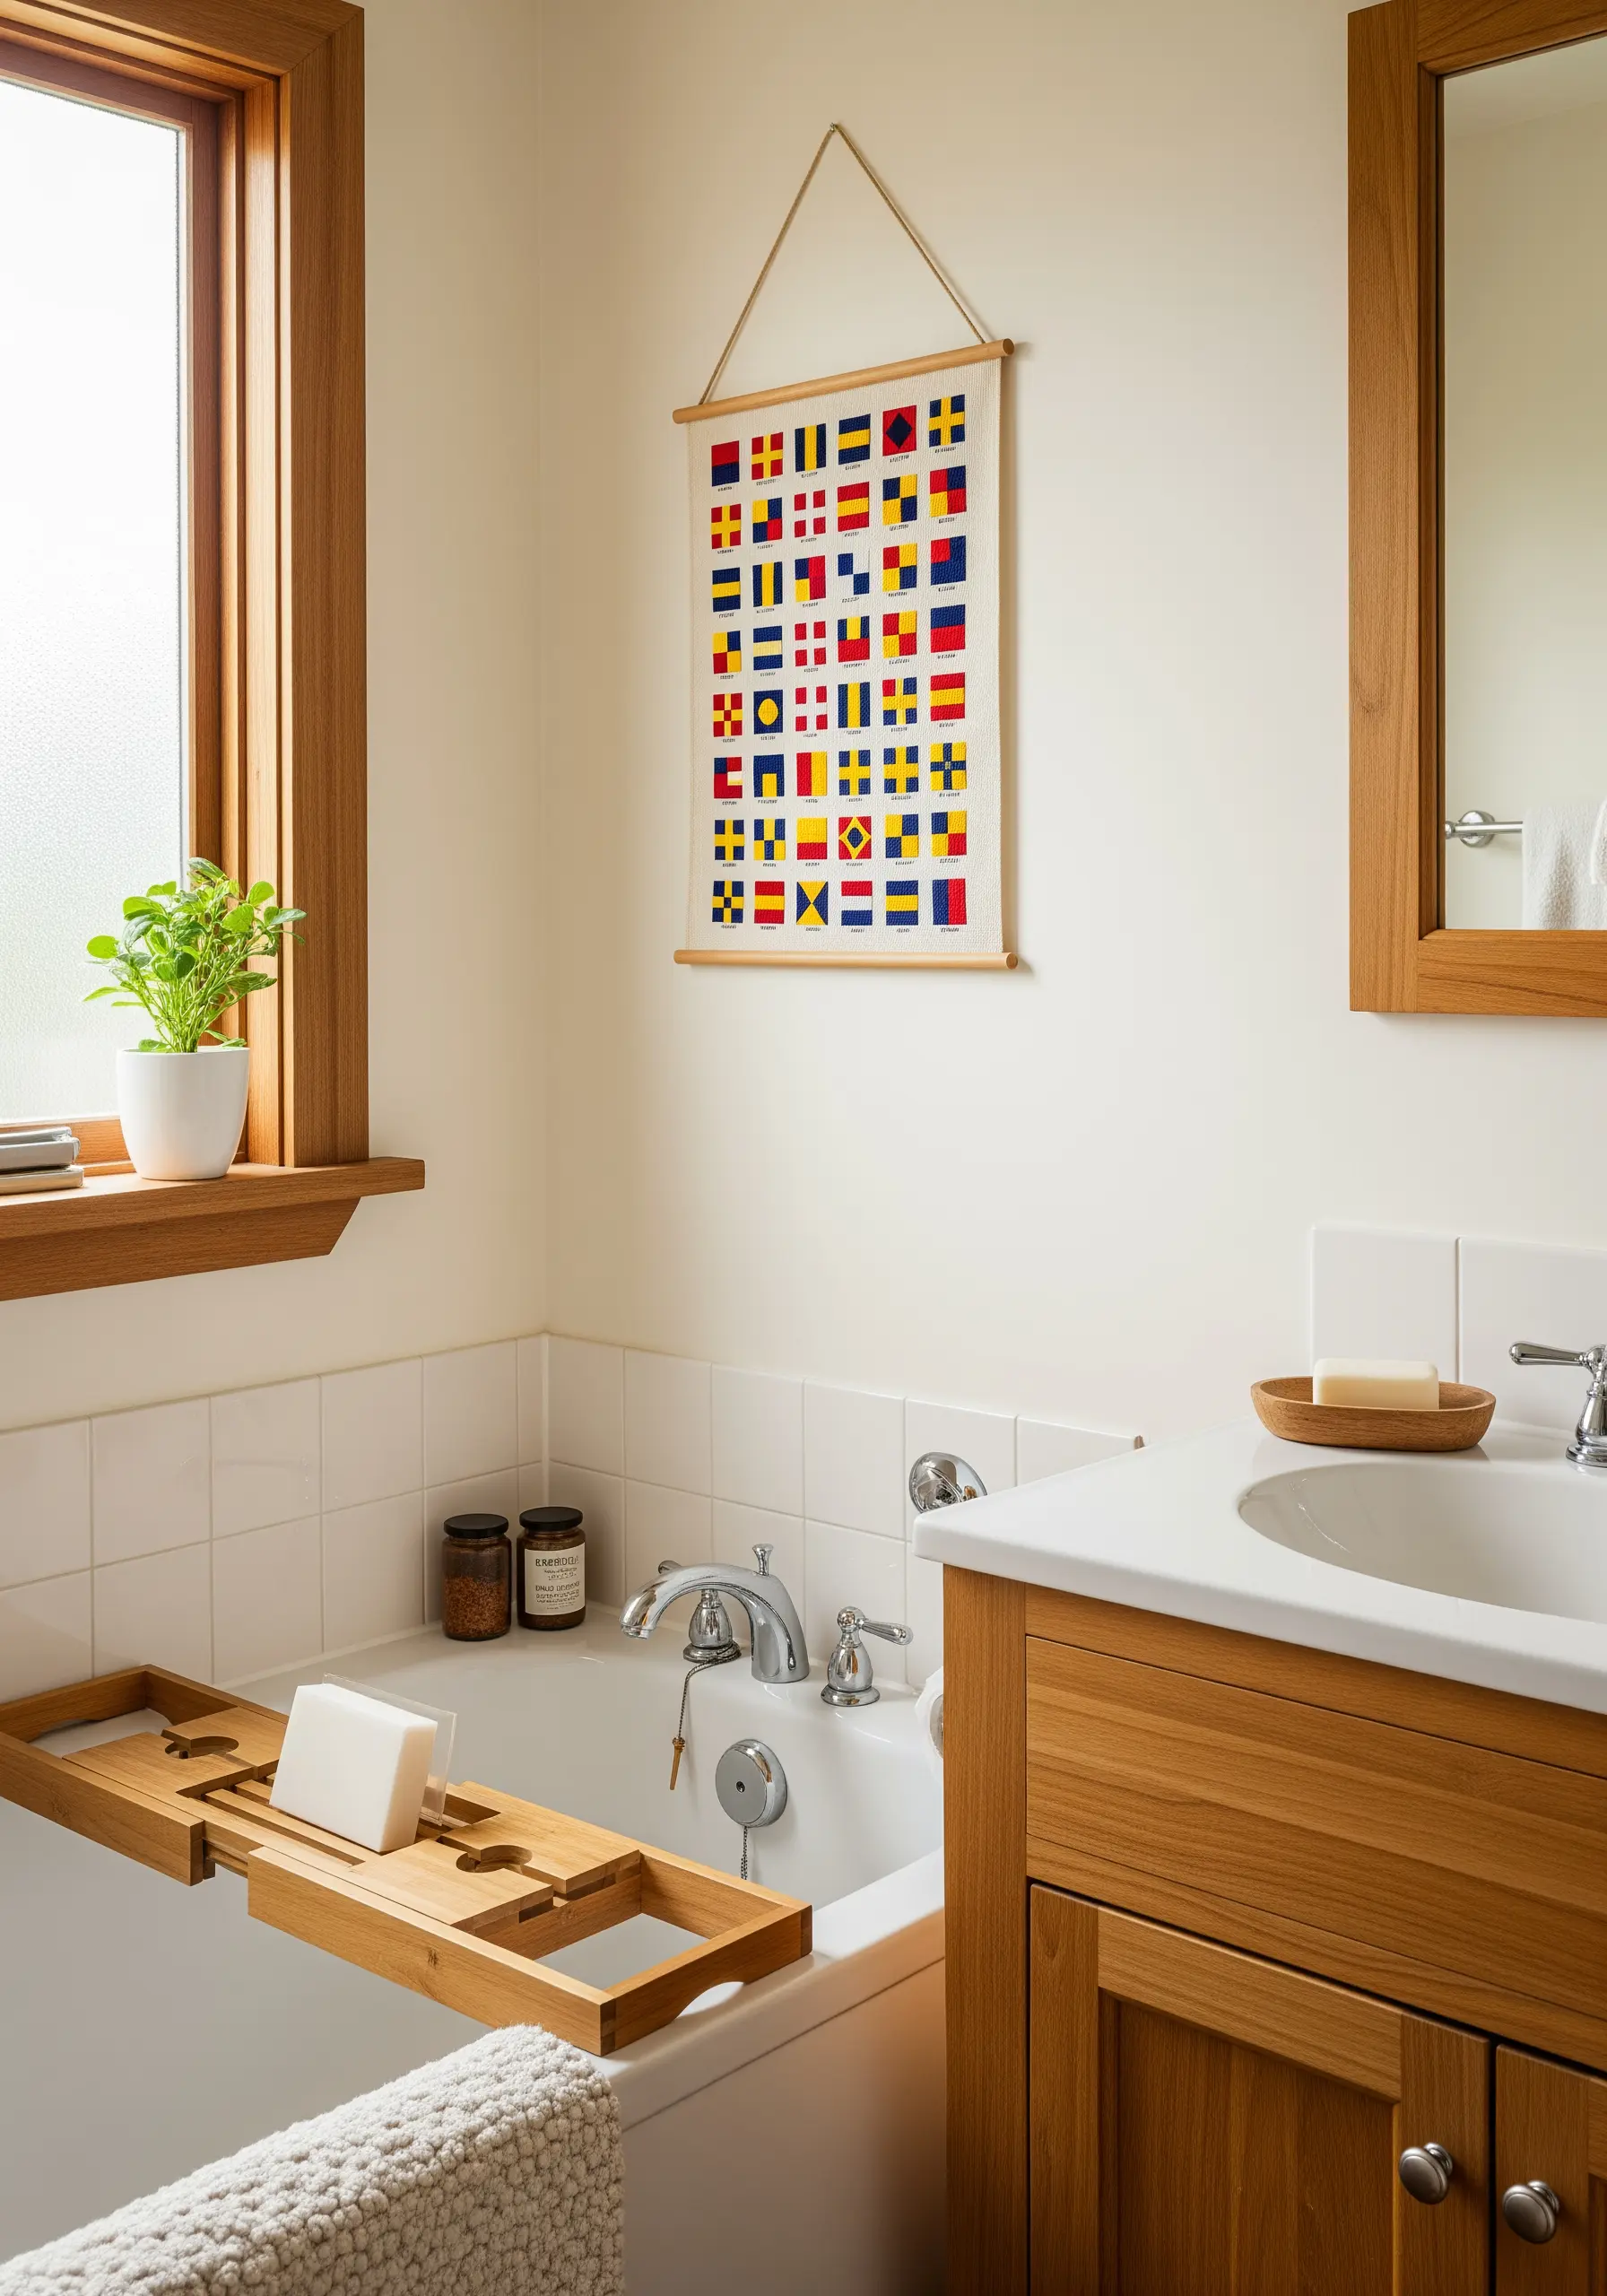
For any design built on a precise grid, accuracy is your primary goal.
You can achieve this sharp look with either fabric appliqué or dense satin stitch.
If you choose satin stitch, first draw a light, perfect grid on your fabric with a water-soluble marker.
Use bold, primary colors and ensure each block of color is stitched in the same direction to create a uniform, clean finish, similar to the precision needed for yarn wall art projects inspired by geometric patterns.
36. The Embroidered Treasure Map
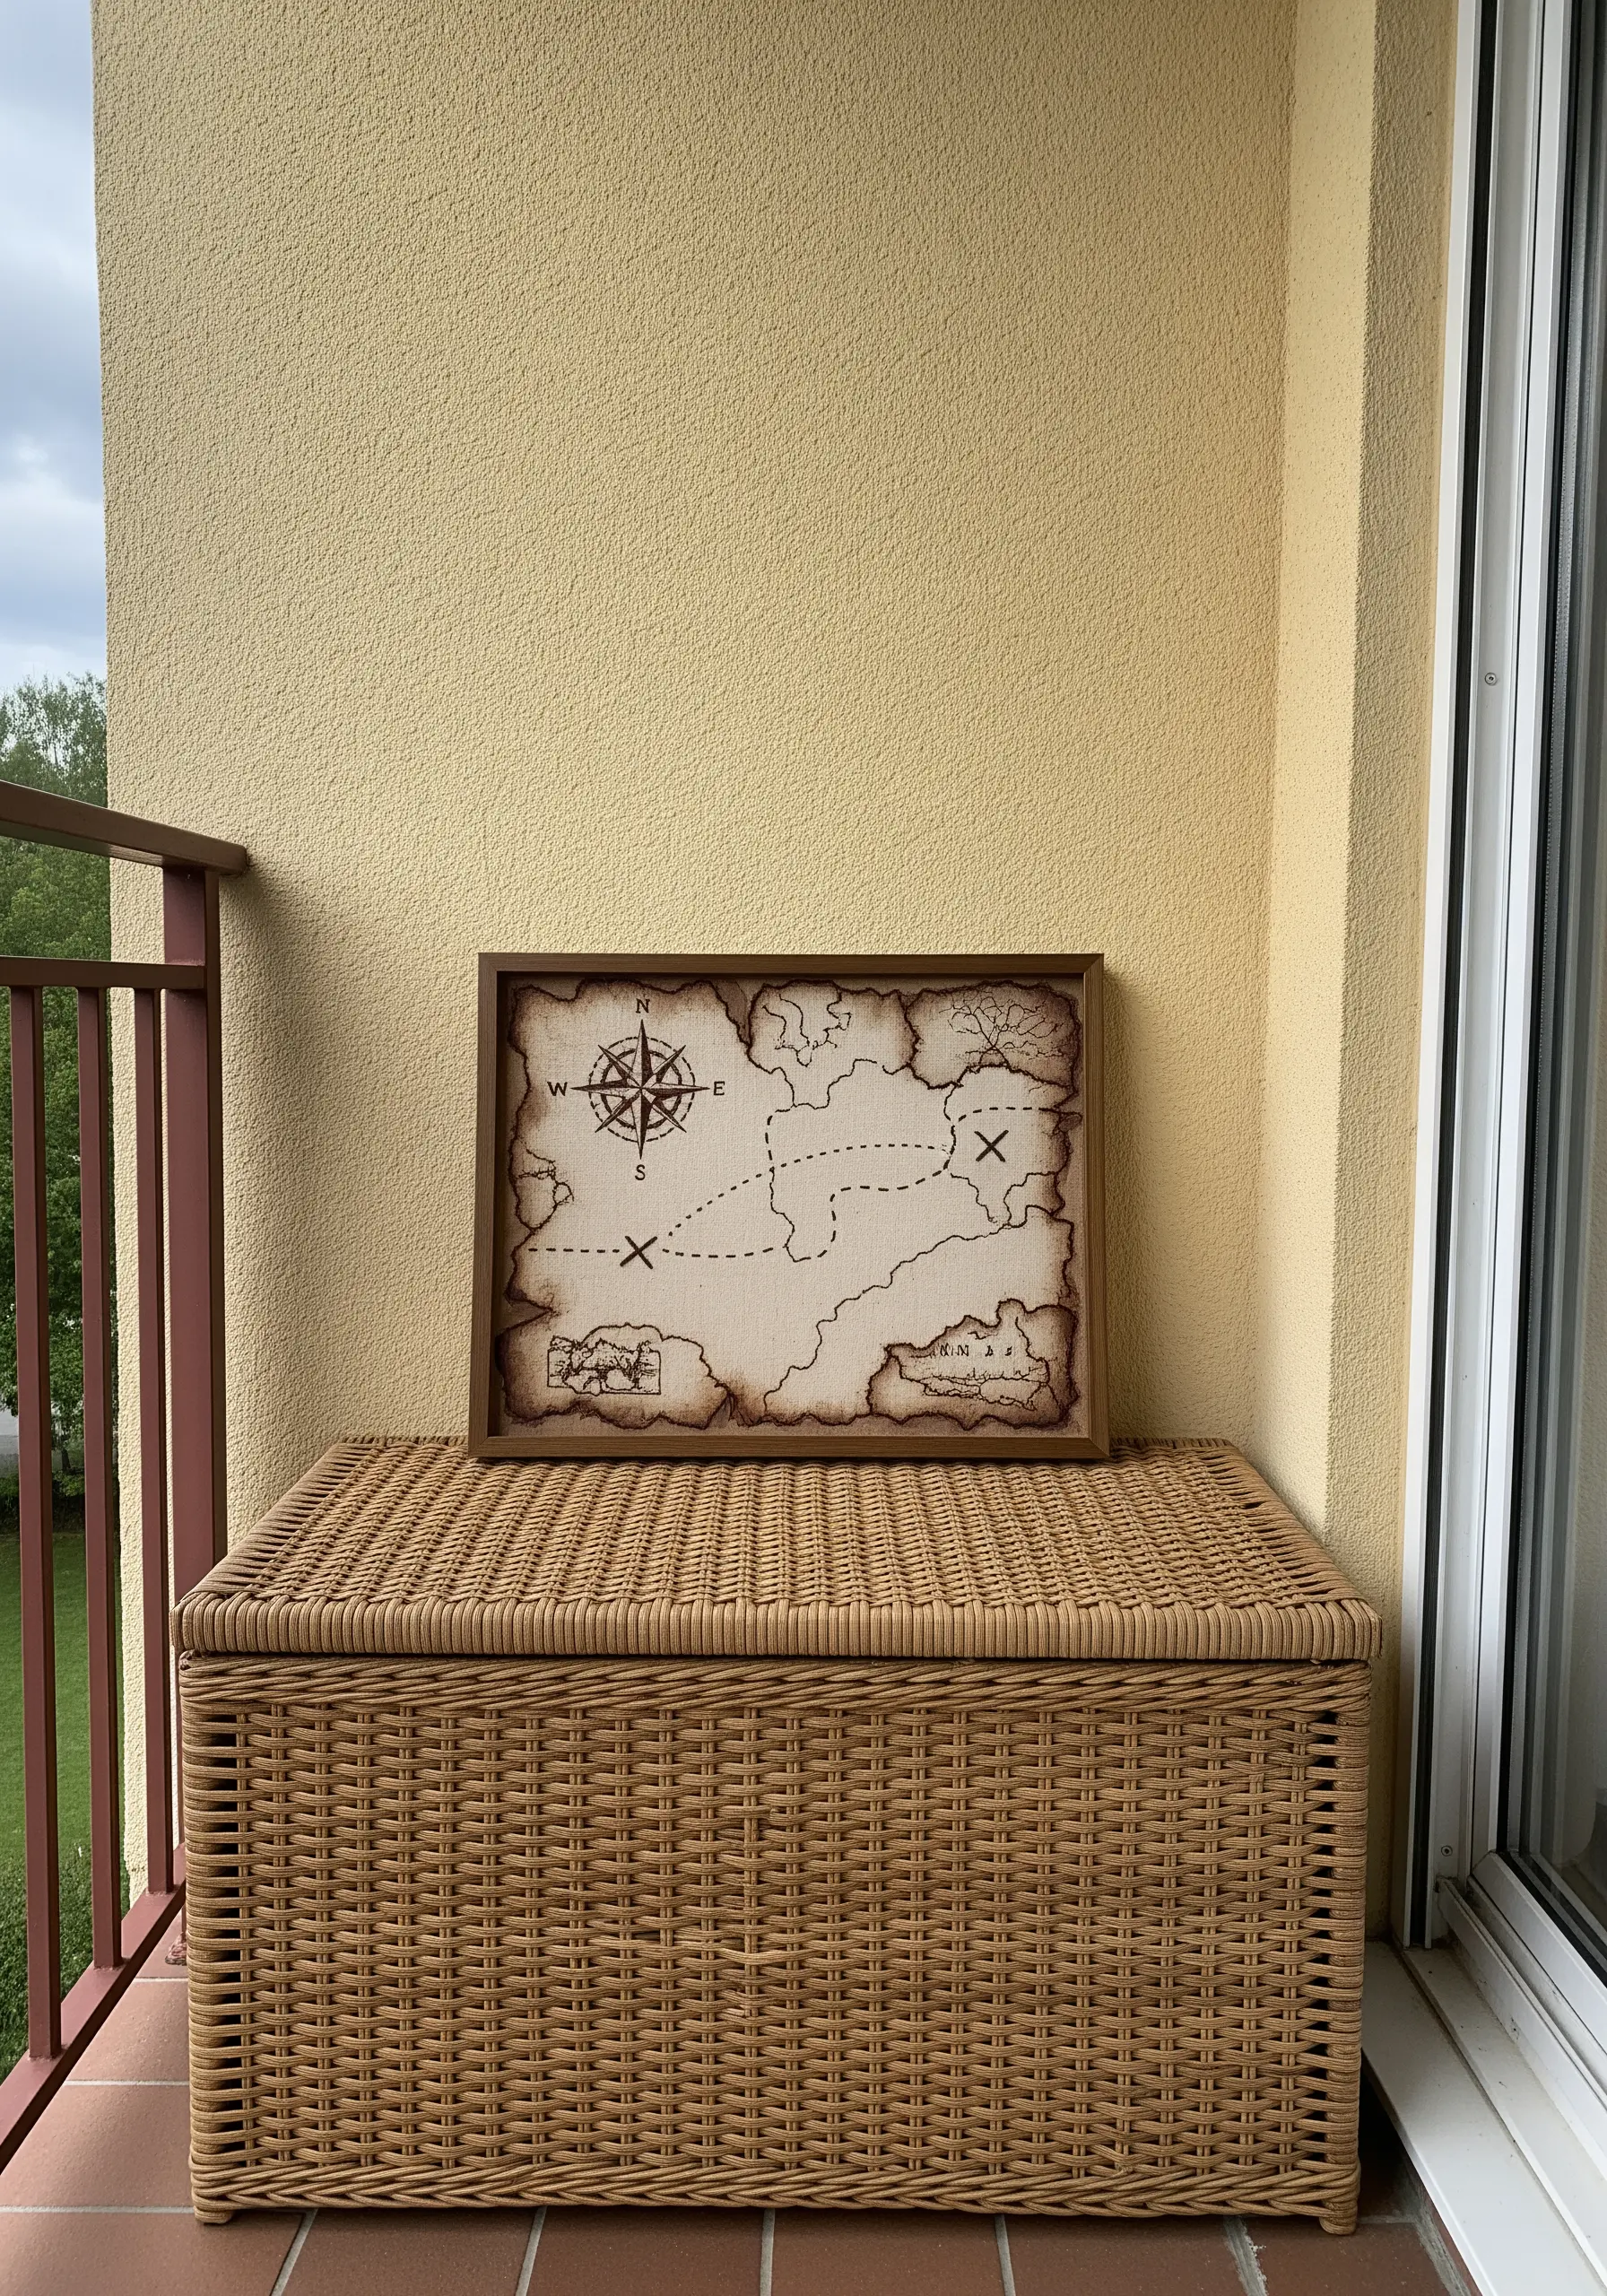
Give your embroidered map an aged, authentic feel with a few simple techniques before you even start stitching.
Stain your fabric with strongly brewed tea or coffee to give it a warm, parchment-like color and texture.
Then, use a simple, slightly uneven backstitch in a dark brown thread to create the map’s outlines.
This approach gives it the feel of an artifact and pairs beautifully with paper art designs that pair beautifully with nature-inspired embroidery.