Have you ever finished an embroidery project, only to feel it’s missing that final touch—that bit of polish that transforms it from a craft into a piece of art for your walls? You have the skill, the patience, and the love for the process, but bridging that gap can feel elusive.
The secret isn’t about mastering impossibly complex stitches or buying expensive materials. Instead, it’s about intention. It’s in the deliberate choice of fabric, the subtle shift in thread weight, the thoughtful composition, and the final act of framing your work with the respect it deserves.
Think of this as your guide to making your stitches speak with more clarity and confidence. Here, you’ll find ways to refine your technique and presentation, allowing you to create pieces that not only fill your apartment with beauty but also deeply reflect your personal style. It’s time to turn your passion into art that truly feels like home.
1. Create a Serene Triptych with Botanical Motifs

To achieve this calm, cohesive look, choose a high-quality linen or even-weave cotton as your base for all three pieces.
Use a single color palette for your leaves, varying the shades subtly to suggest light and shadow without overwhelming the minimalist aesthetic.
For the delicate veins, use a single strand of floss and a whipped backstitch to create a raised, clean line.
The real elevation comes from the matching wooden frames and identical mounting, which transforms individual embroideries into a unified art installation.
This is one of the best handmade embroidery touches that make every room feel natural and curated.
2. Sculpt with Thread Using Abstract Couching
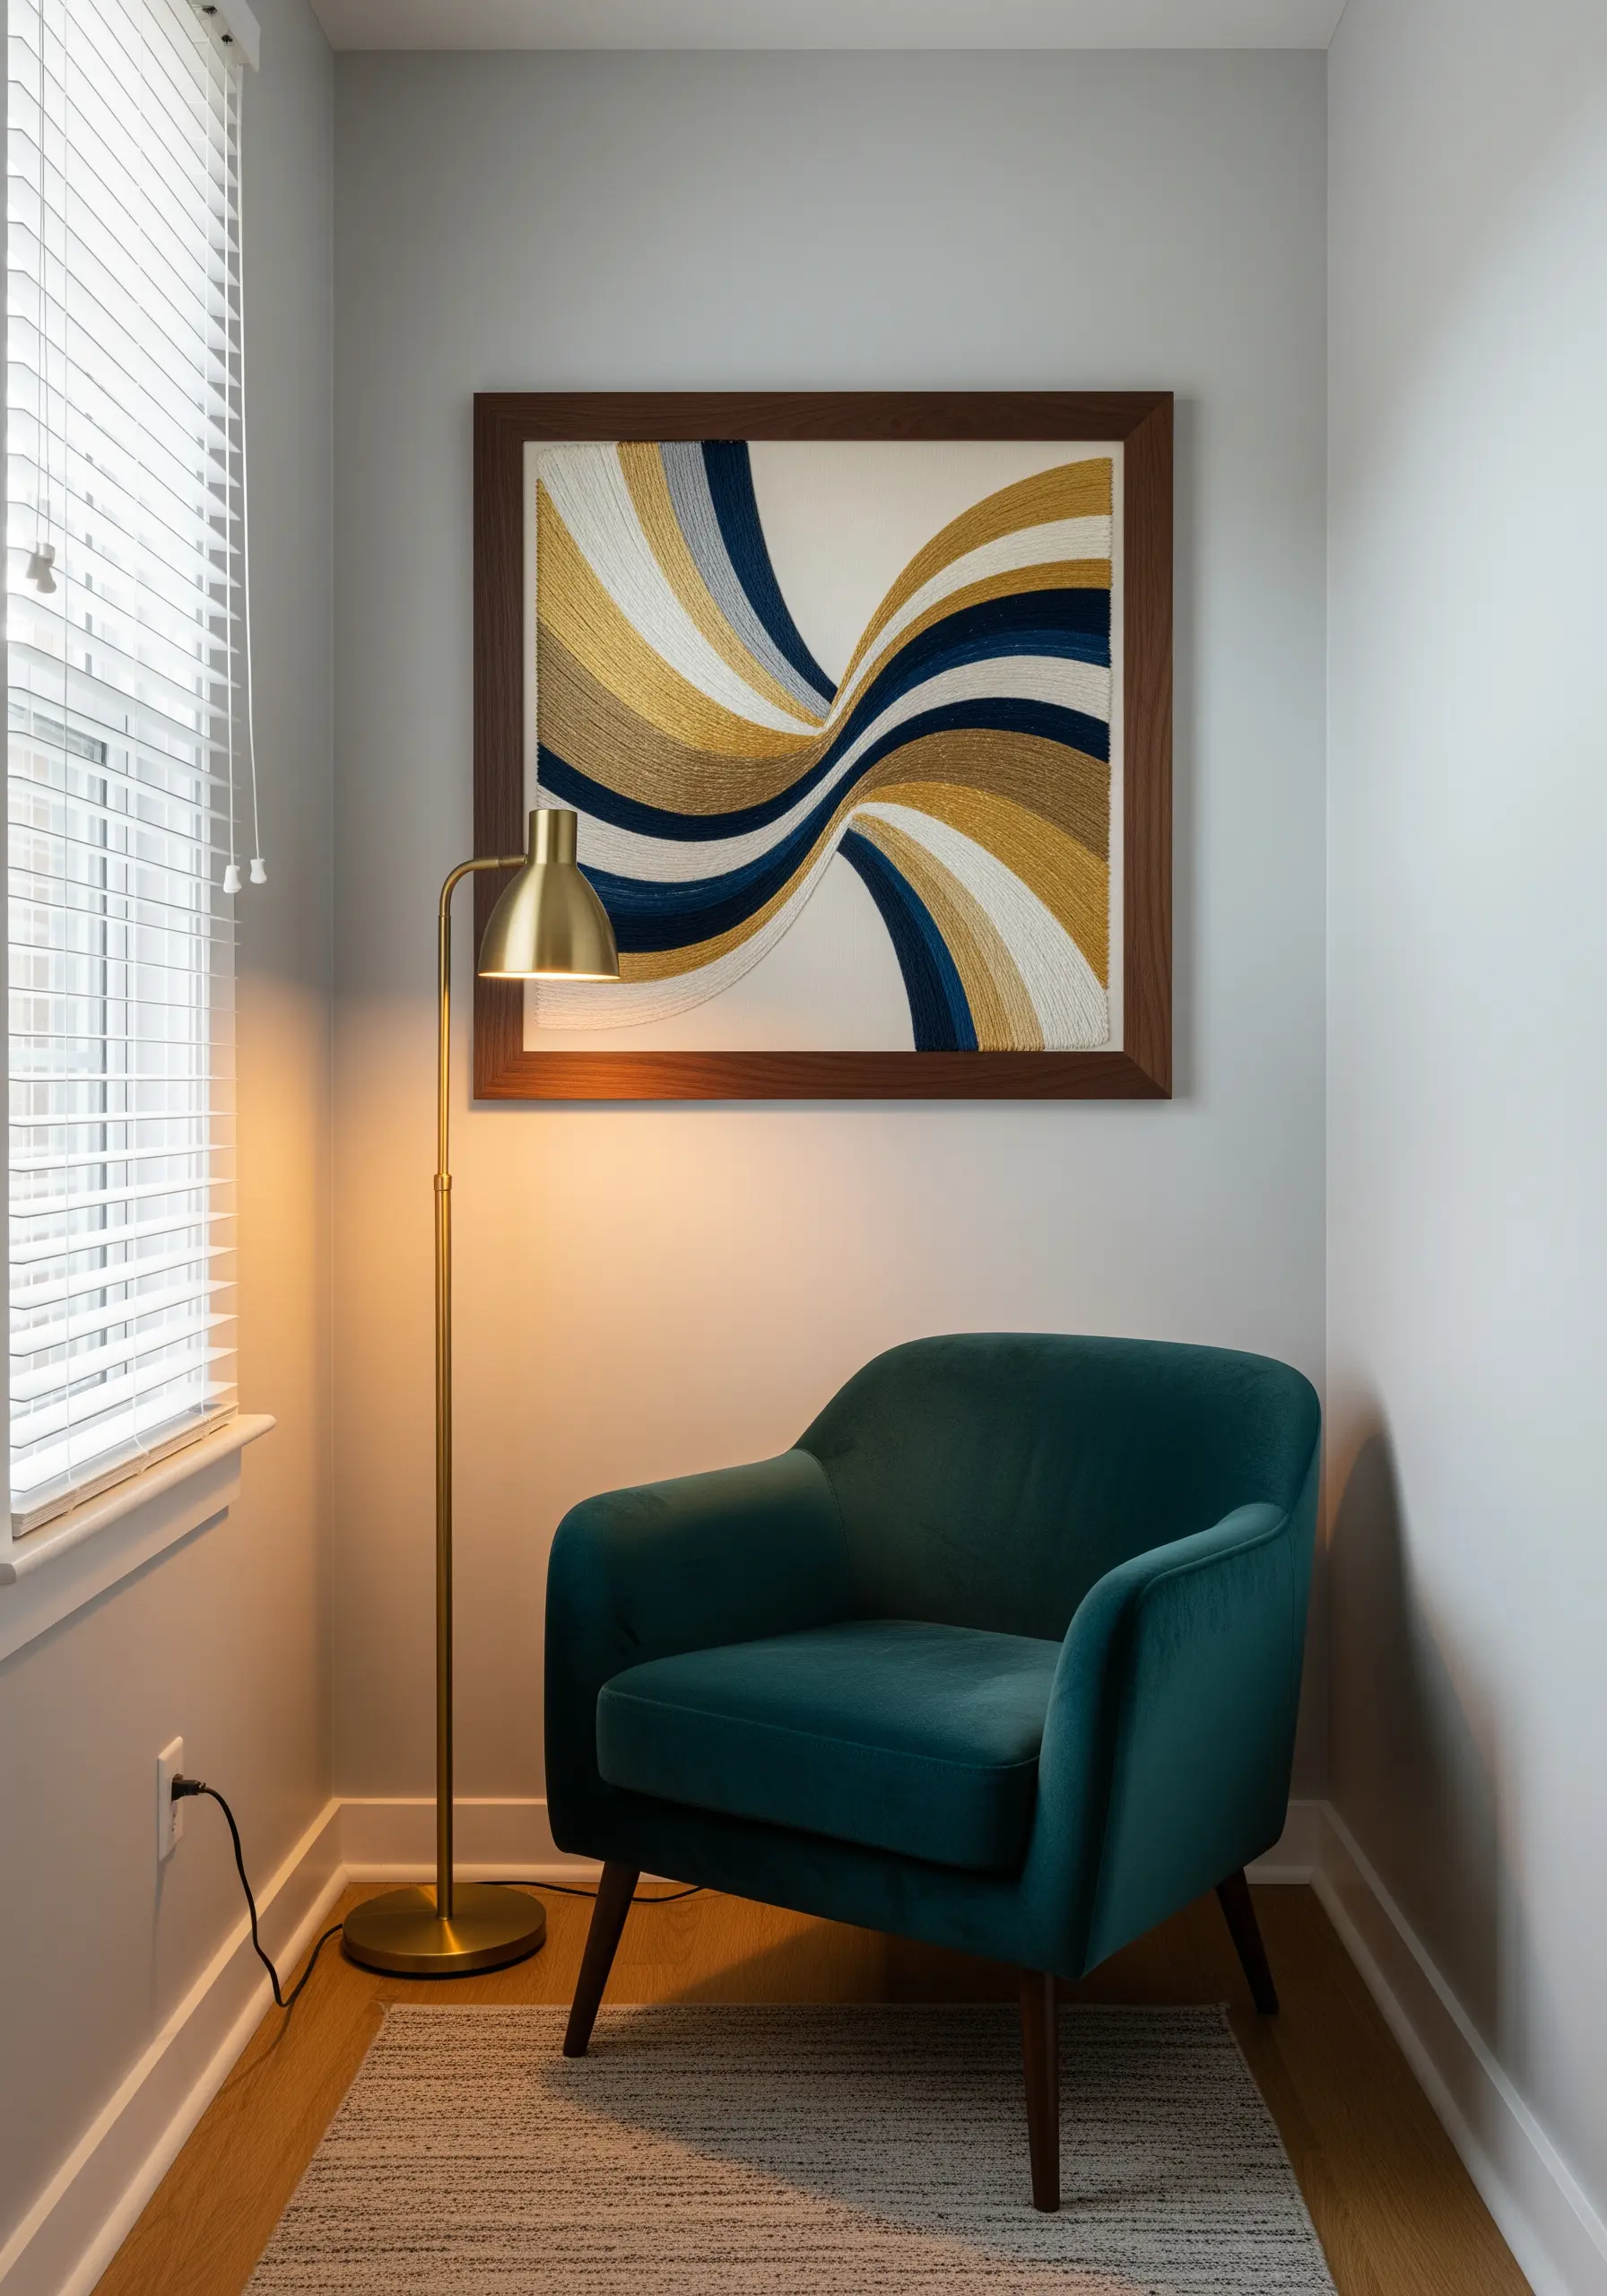
This dynamic piece relies on the couching stitch, where you lay down thick yarns or bundles of floss and tack them in place with a thinner, contrasting thread.
Map your curves with a heat-erasable pen first to ensure the flow is fluid and balanced across the canvas.
Introduce a metallic thread for one of your couched lines; this small touch catches the light and adds a layer of luxury without dominating the design.
The negative space is just as important as the stitched area, so allow the fabric to breathe, creating a visual resting point.
3. Curate a Cohesive Gallery with Geometric Hoops
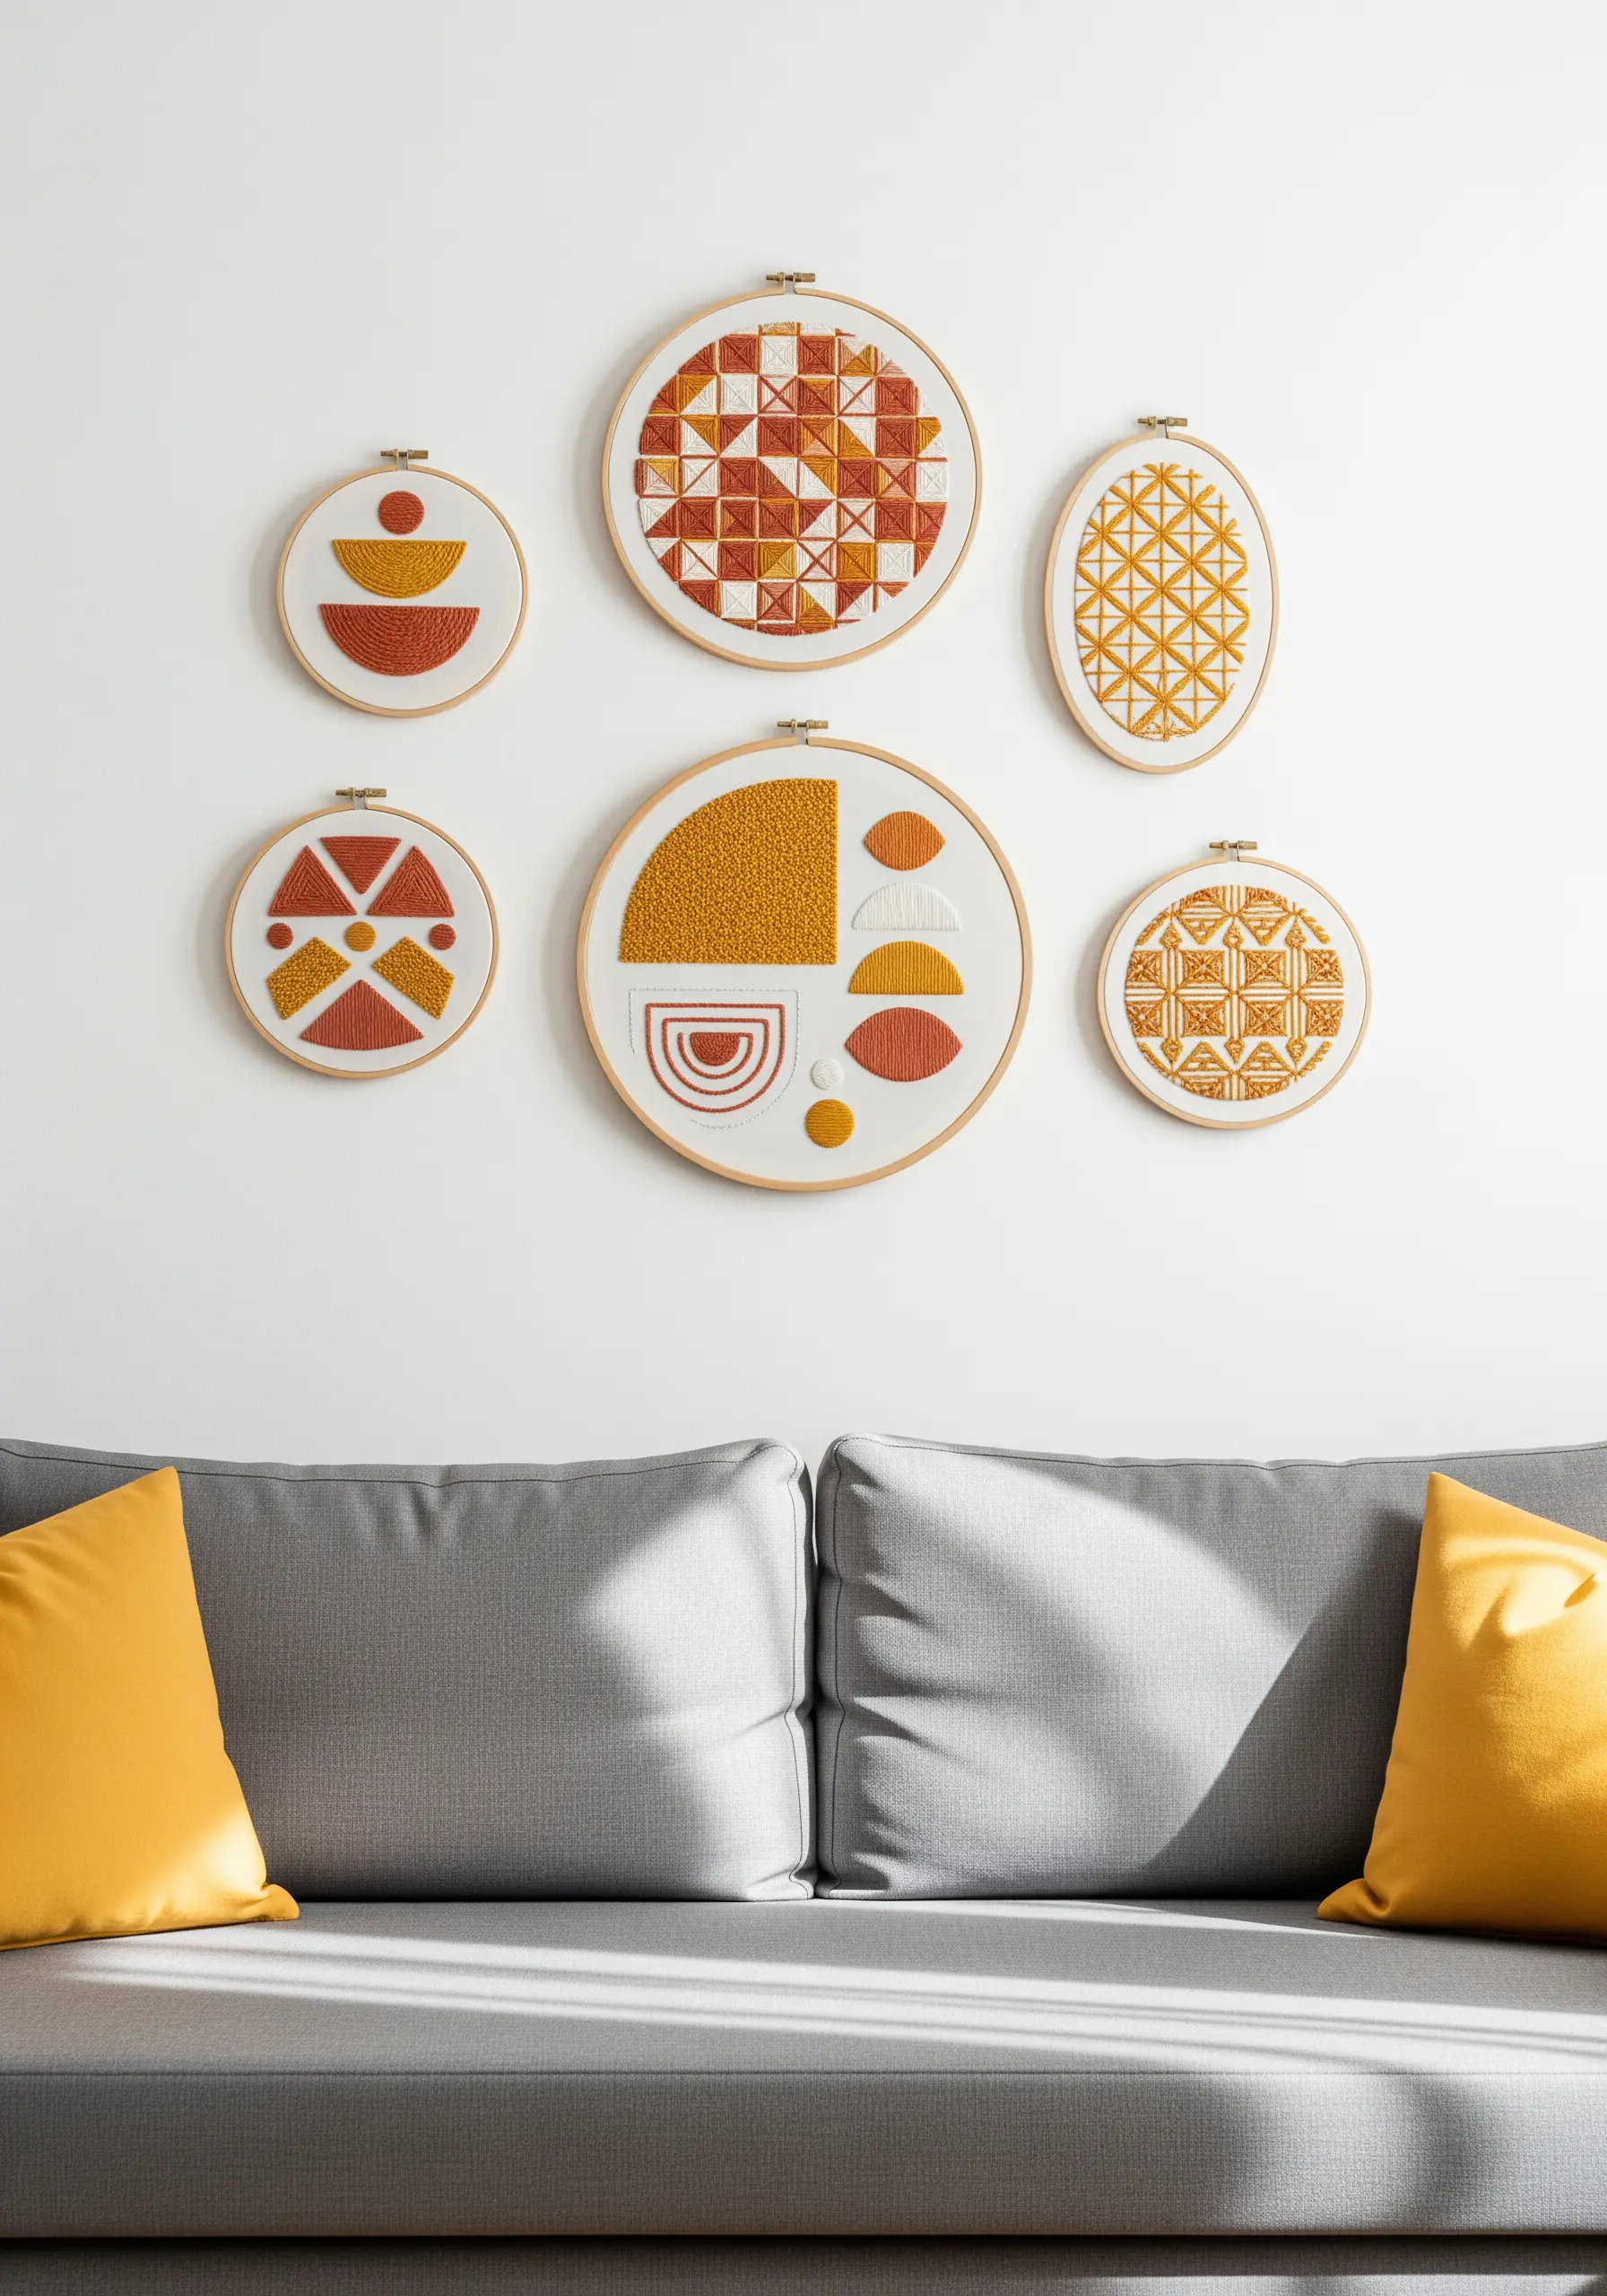
Build a stunning gallery wall by unifying disparate patterns with a strict, warm color palette—think terracotta, ochre, and cream.
Combine different stitch textures within a single hoop; pair dense satin-stitched blocks with delicate running stitch grids to create visual interest.
Use French knots to fill smaller shapes, adding a bubbly, tactile dimension that contrasts beautifully with flat stitches.
Arrange your hoops in an organic cluster, mixing sizes and orientations to create a dynamic but balanced display that feels collected over time.
These minimal DIY embroidery pieces perfect for a gallery wall prove that consistency in color is key.
4. Paint a Landscape with Long-and-Short Stitch
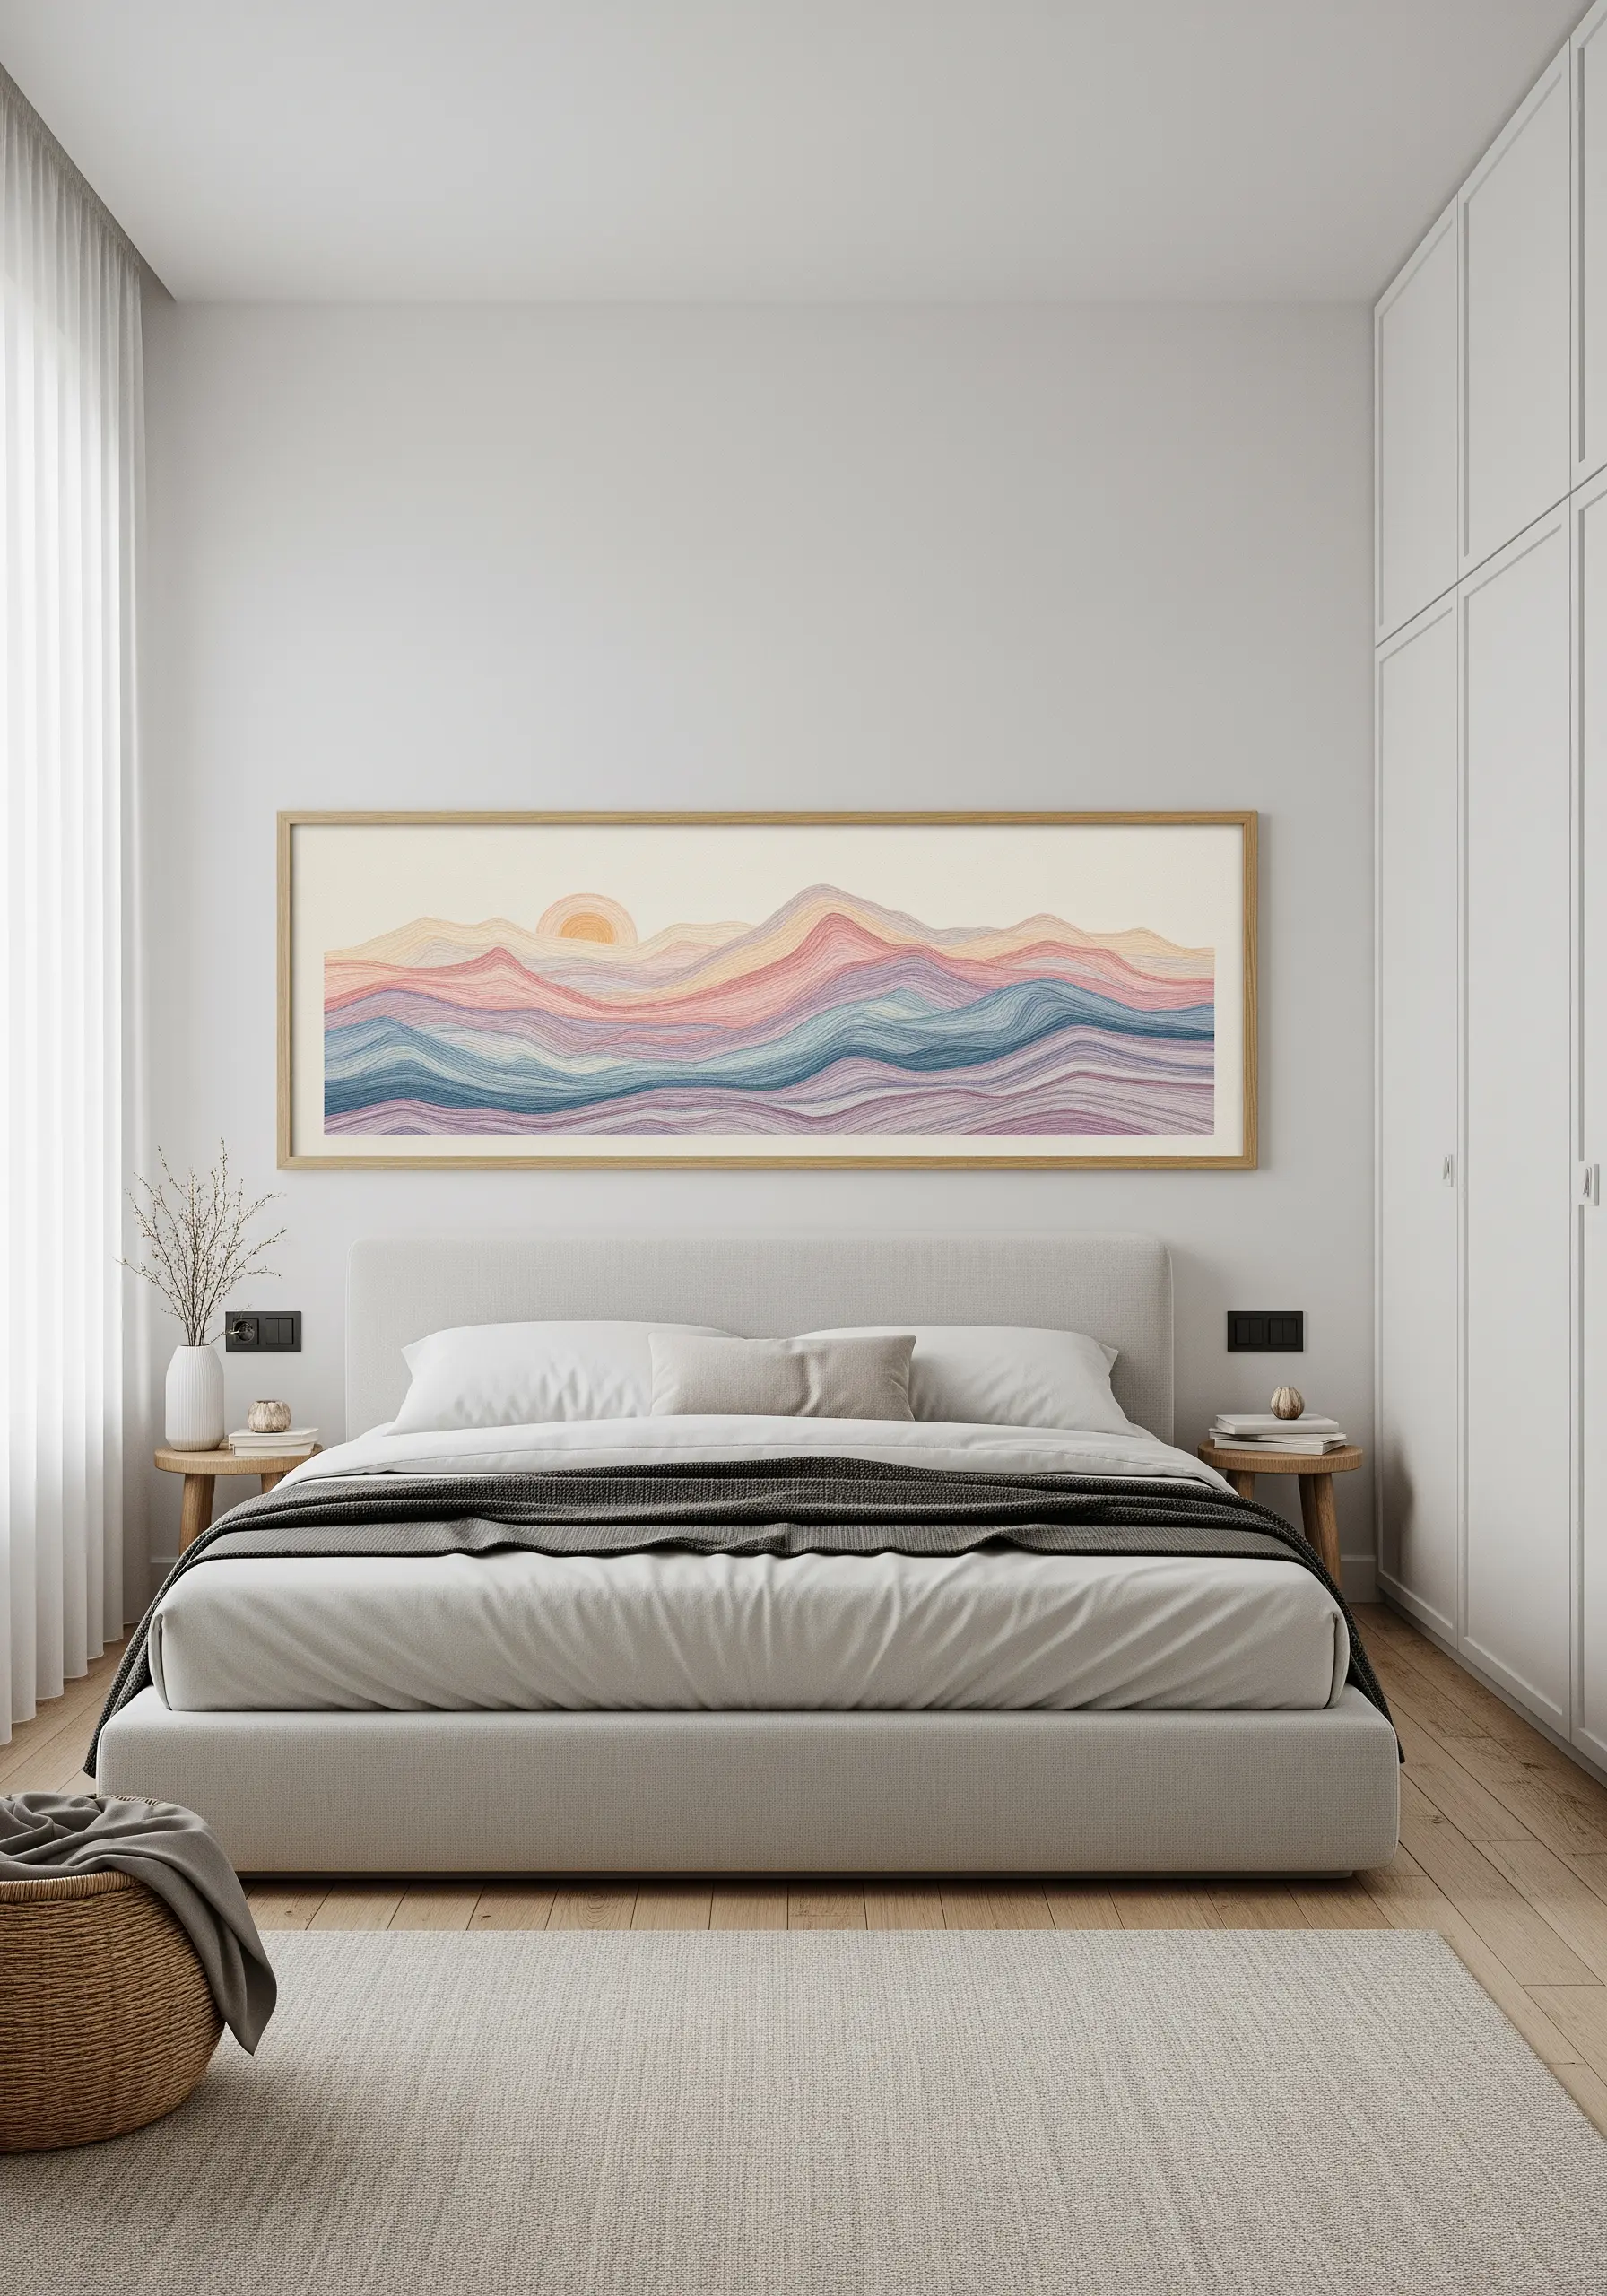
Recreate the soft, blended effect of a watercolor painting using the long-and-short stitch, also known as thread painting.
Work with a single strand of floss at a time, allowing you to blend adjacent colors seamlessly and create subtle gradients.
Choose a panoramic frame to emphasize the expansive nature of a landscape, drawing the viewer’s eye across the scene.
Don’t aim for perfect lines; the slight irregularities in your stitches will mimic the organic textures of mountains and clouds, adding realism and depth.
You can create beautiful string art landscape scenes that embroidery lovers will want to hang in every room.
5. Frame Bold Color-Blocking for a Modern Nook

Embrace the power of pure color with geometric blocks filled entirely with satin stitch.
To achieve a perfectly smooth, solid fill, first outline each shape with a split stitch; this creates a raised edge that helps guide your satin stitches and keeps them neat.
Use a high-quality, six-strand cotton floss and don’t separate the threads—the thickness will help you fill the space faster and create a bold, graphic look.
Framing these small, vibrant pieces in simple black frames gives them the presence of modern art prints.
6. Add Depth to Florals with Layered Stitches
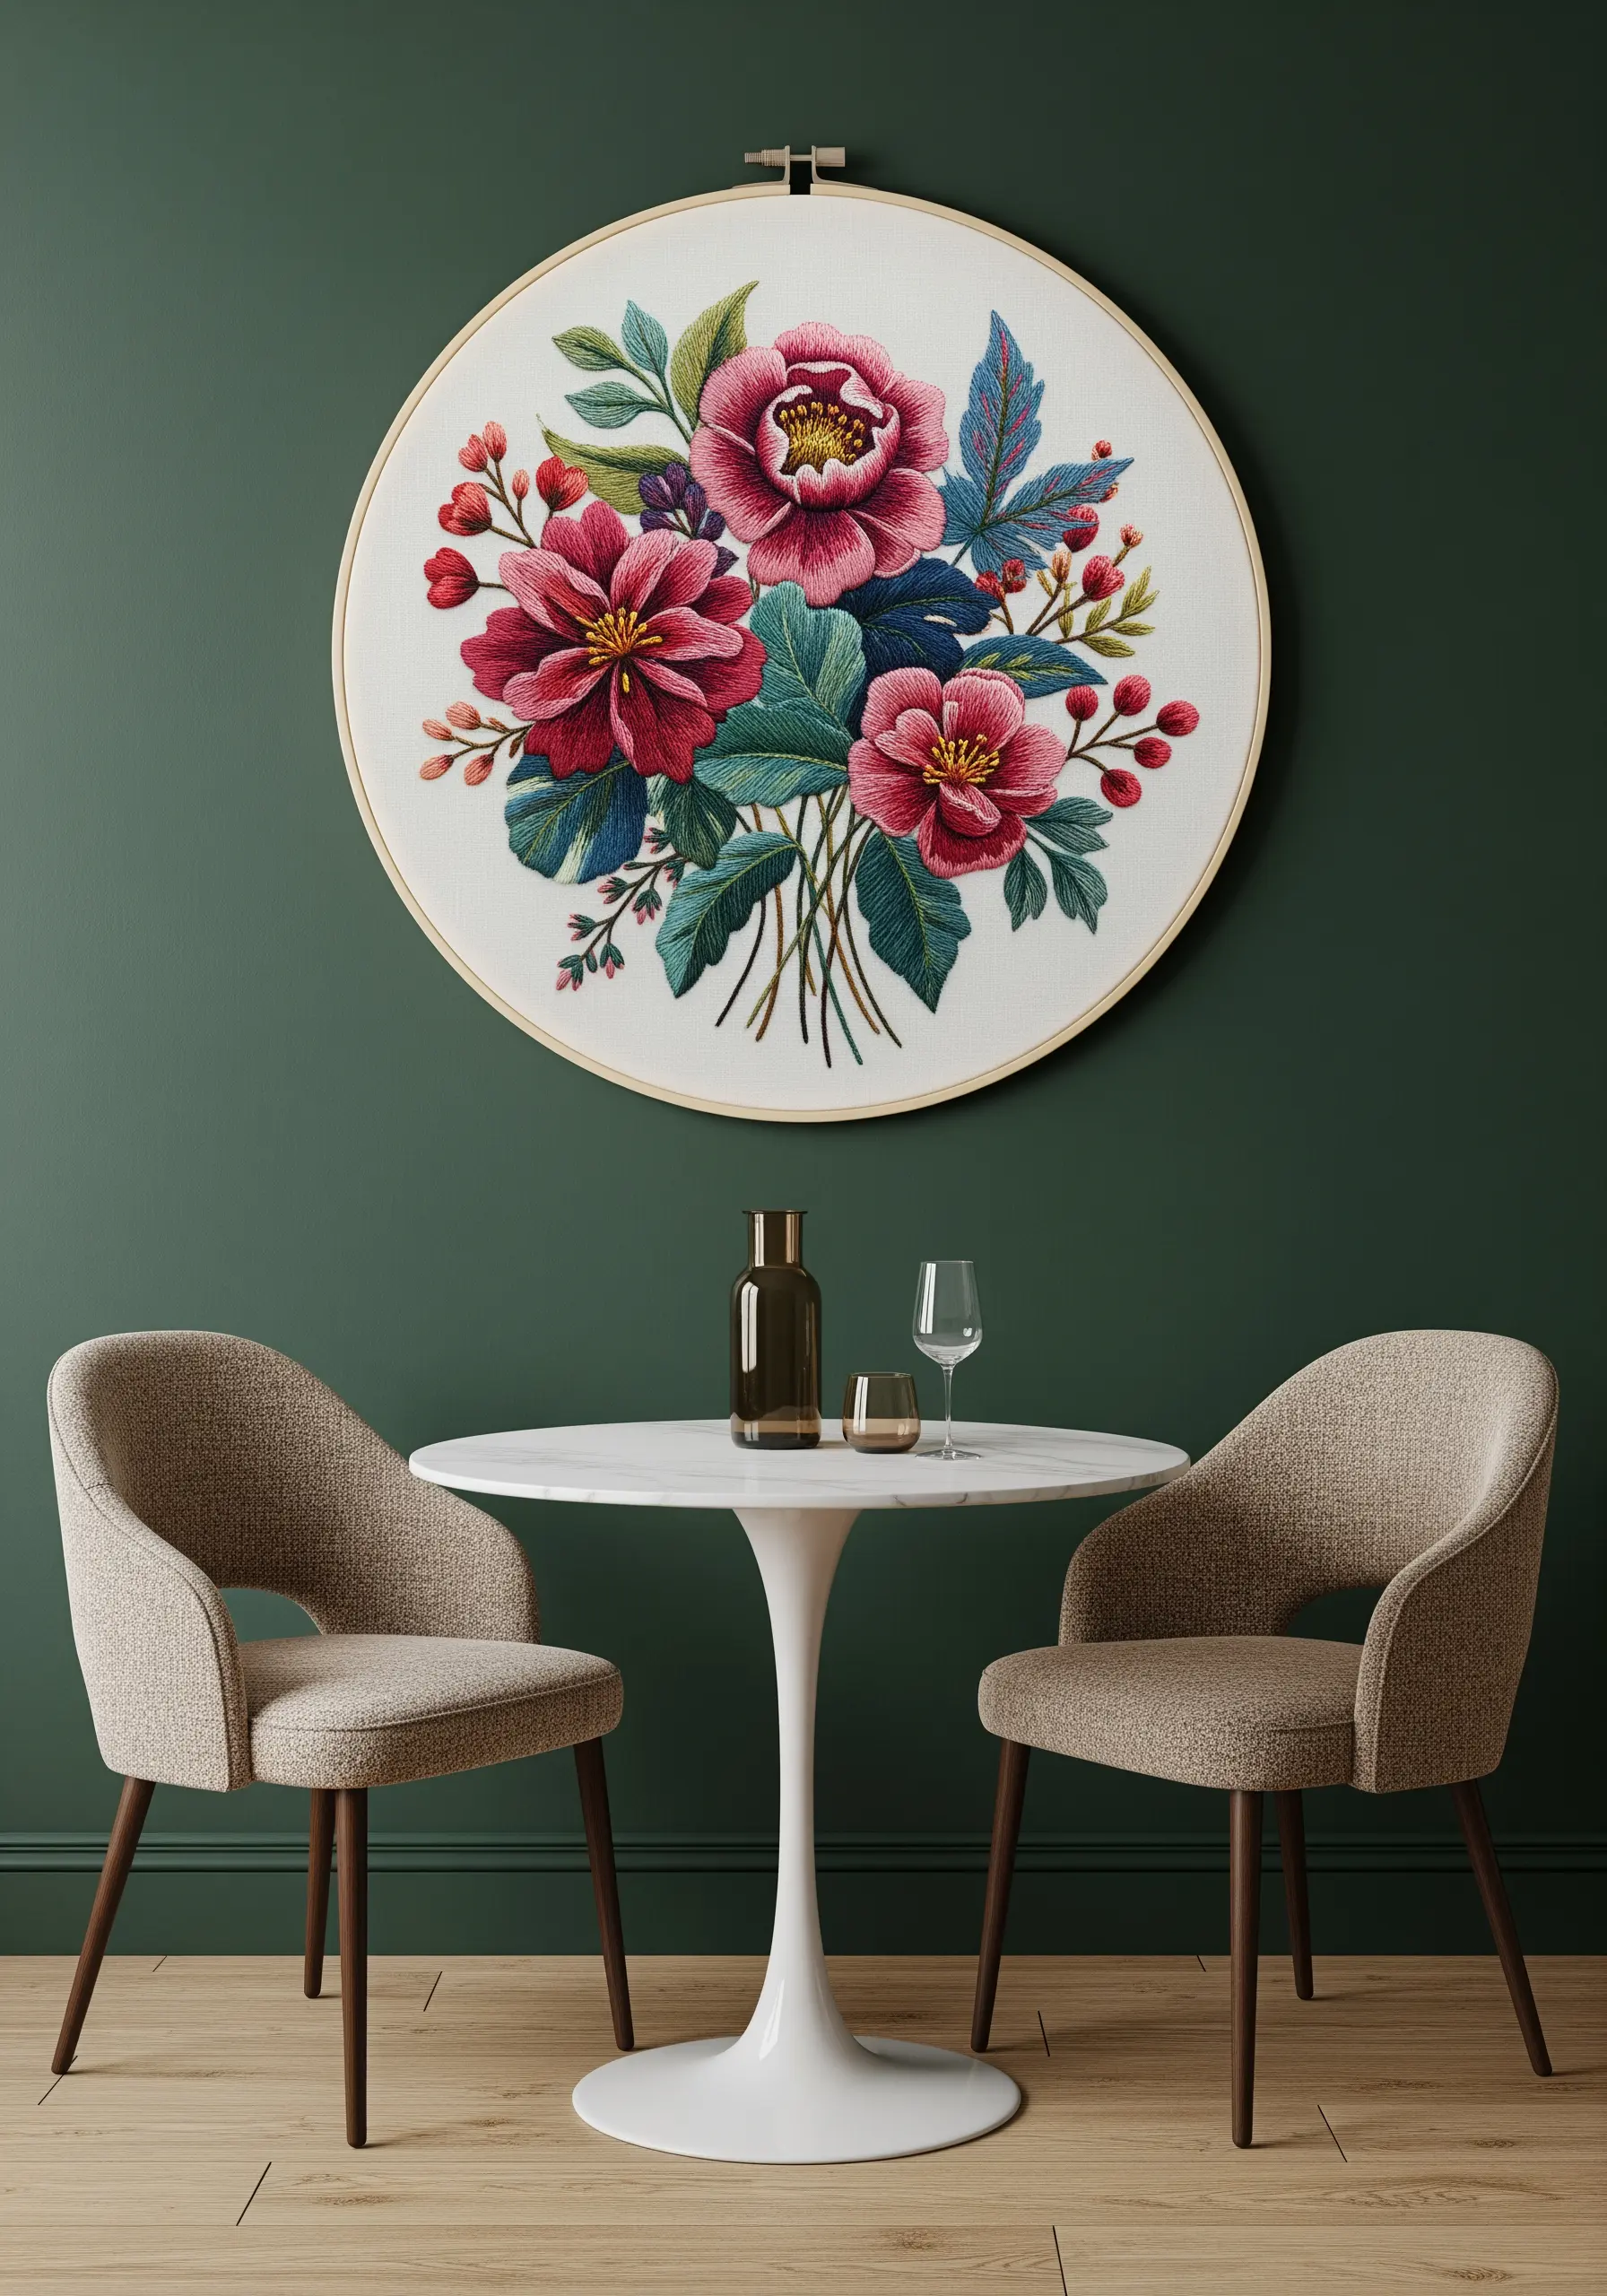
Move beyond simple outlines and give your flowers realistic dimension by layering different stitches.
Use long-and-short stitch for the petals, blending two or three shades to create a gradient that suggests curves and form.
For the flower centers, use a dense cluster of French knots in a contrasting color, adding a pop of texture that draws the eye inward.
An oversized hoop acts as a modern frame, allowing the intricate bouquet to become a significant focal point in any room.
These are the kinds of abstract floral embroidery hoops that look like fine art.
7. Master the Elegance of Monochrome Line Work
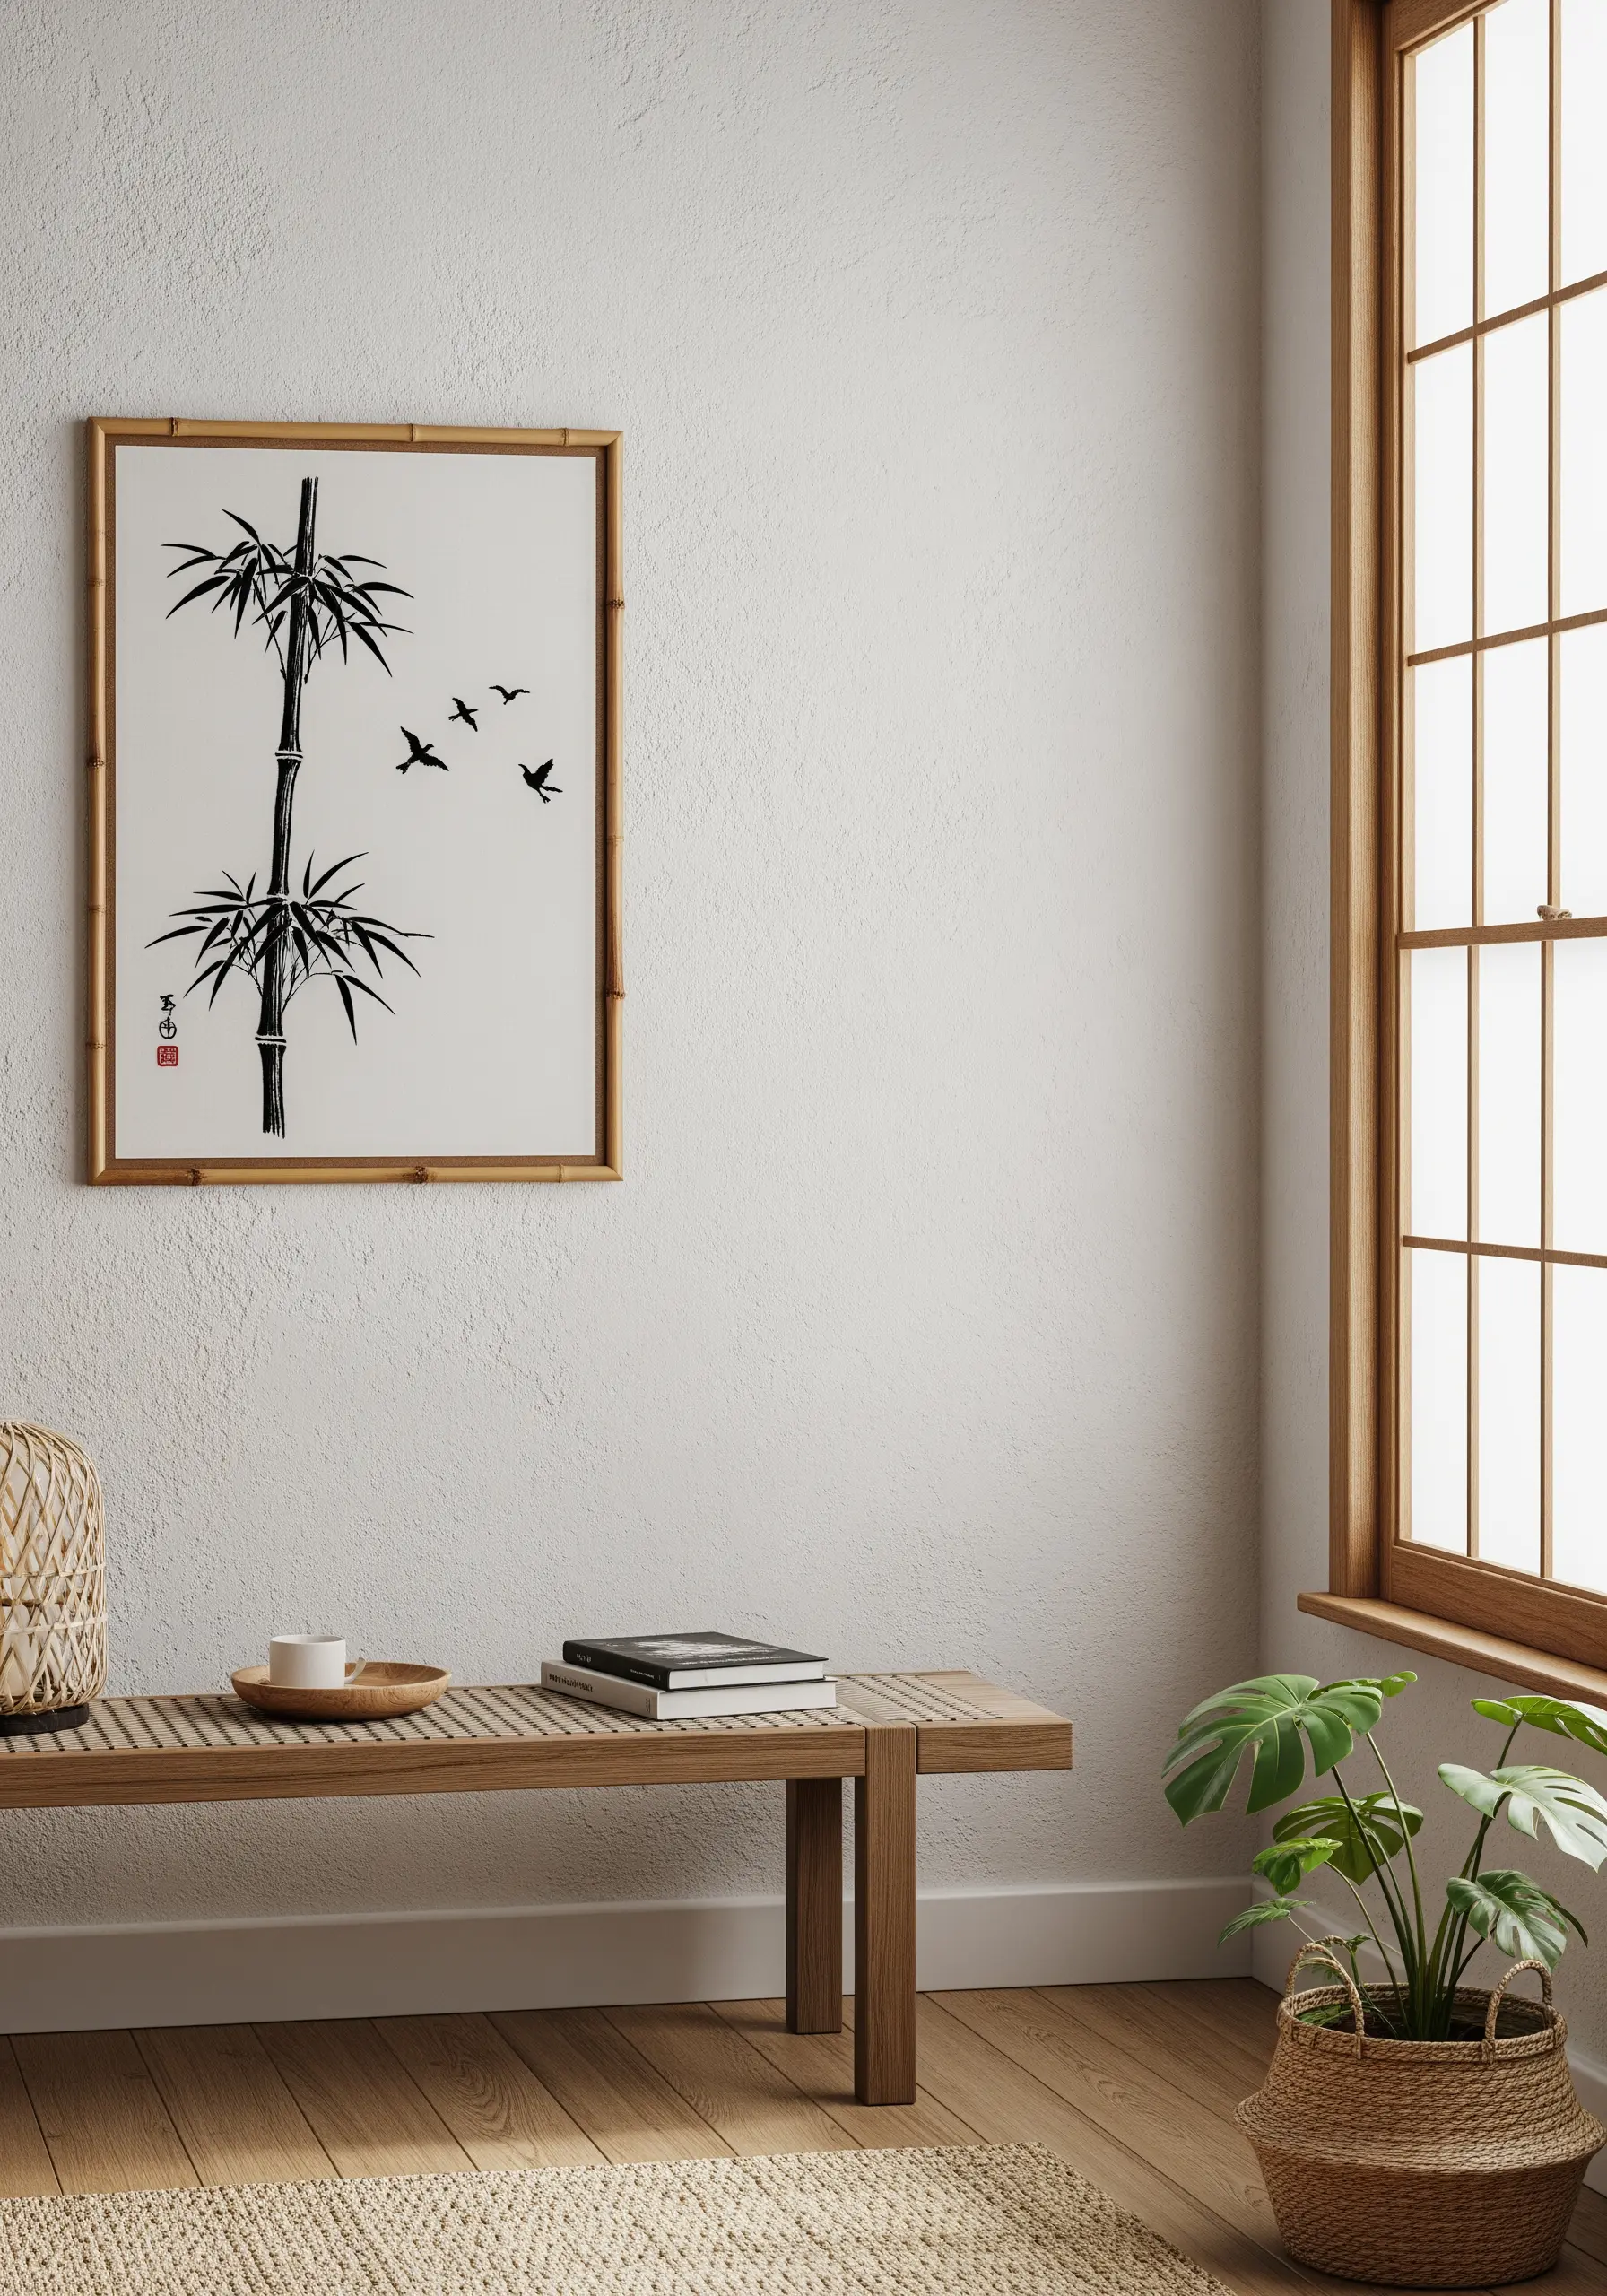
Capture the essence of Japanese ink wash painting (Sumi-e) by using only black thread on a light, textured fabric.
Vary your stitch weight to create visual hierarchy. Use a thicker thread (3-4 strands) for the main bamboo stalks and a single, delicate strand for the fine leaves and flying birds.
Employ a stem stitch or split stitch for clean, continuous lines that mimic the strokes of a calligraphy brush.
A simple bamboo-style frame enhances the theme and completes the minimalist, tranquil aesthetic.
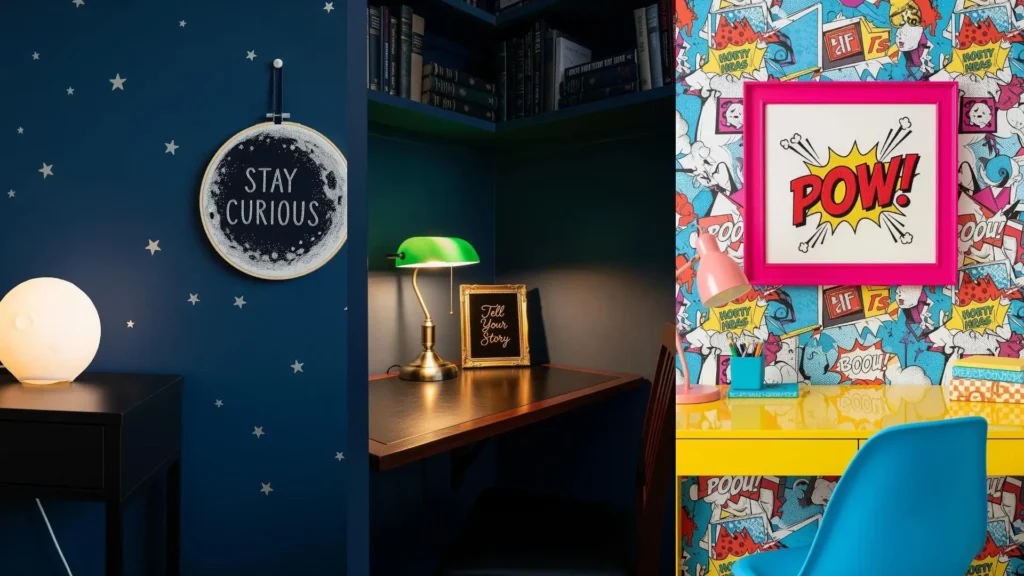
8. Illuminate a Celestial Gallery Wall
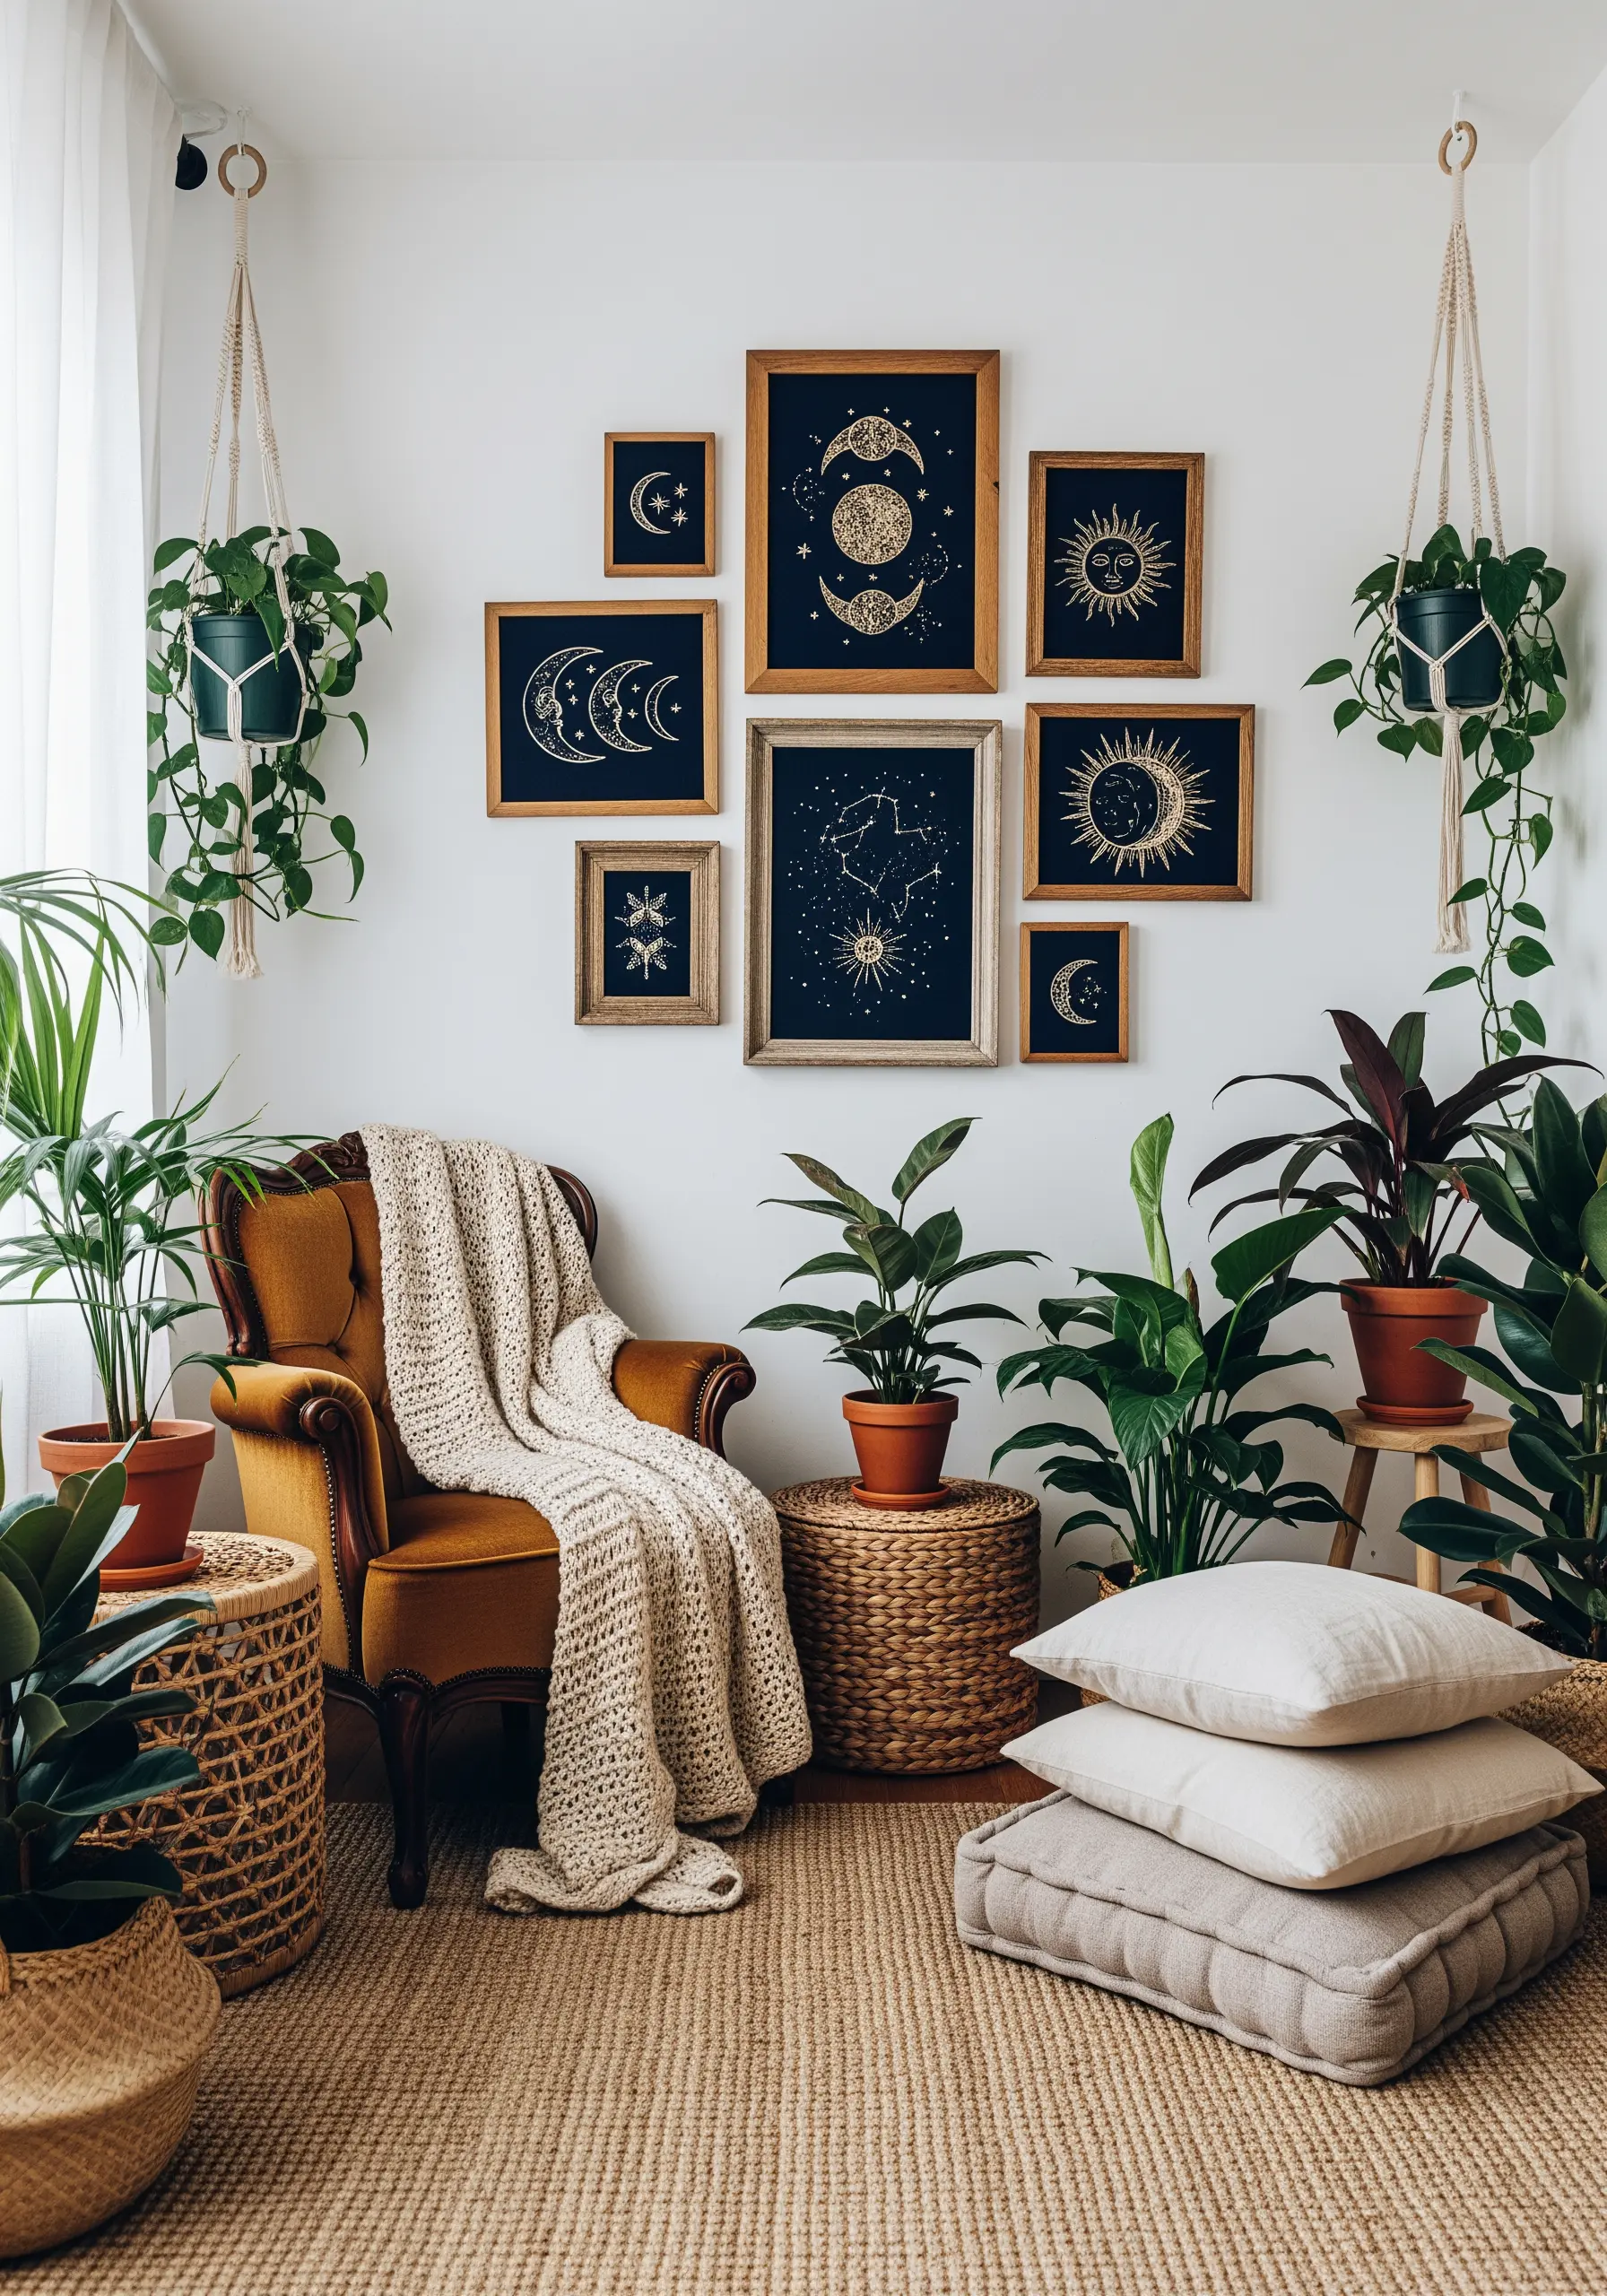
Create a celestial theme by stitching cosmic motifs on dark navy or black fabric, making your threads appear to glow.
Use a metallic gold or silver thread for your main designs; it’s trickier to work with, so use shorter lengths to avoid tangling and a needle with a larger eye.
Incorporate seed beads or tiny sequins to represent stars, adding a subtle sparkle that catches the light differently than thread.
Mix and match ornate and simple wooden frames to give your celestial gallery a curated, eclectic feel that adds warmth to your space.
These minimal sky moon designs to add soft cosmic vibes are perfect for this.
9. Evoke Art Deco Glamour with Radiating Lines
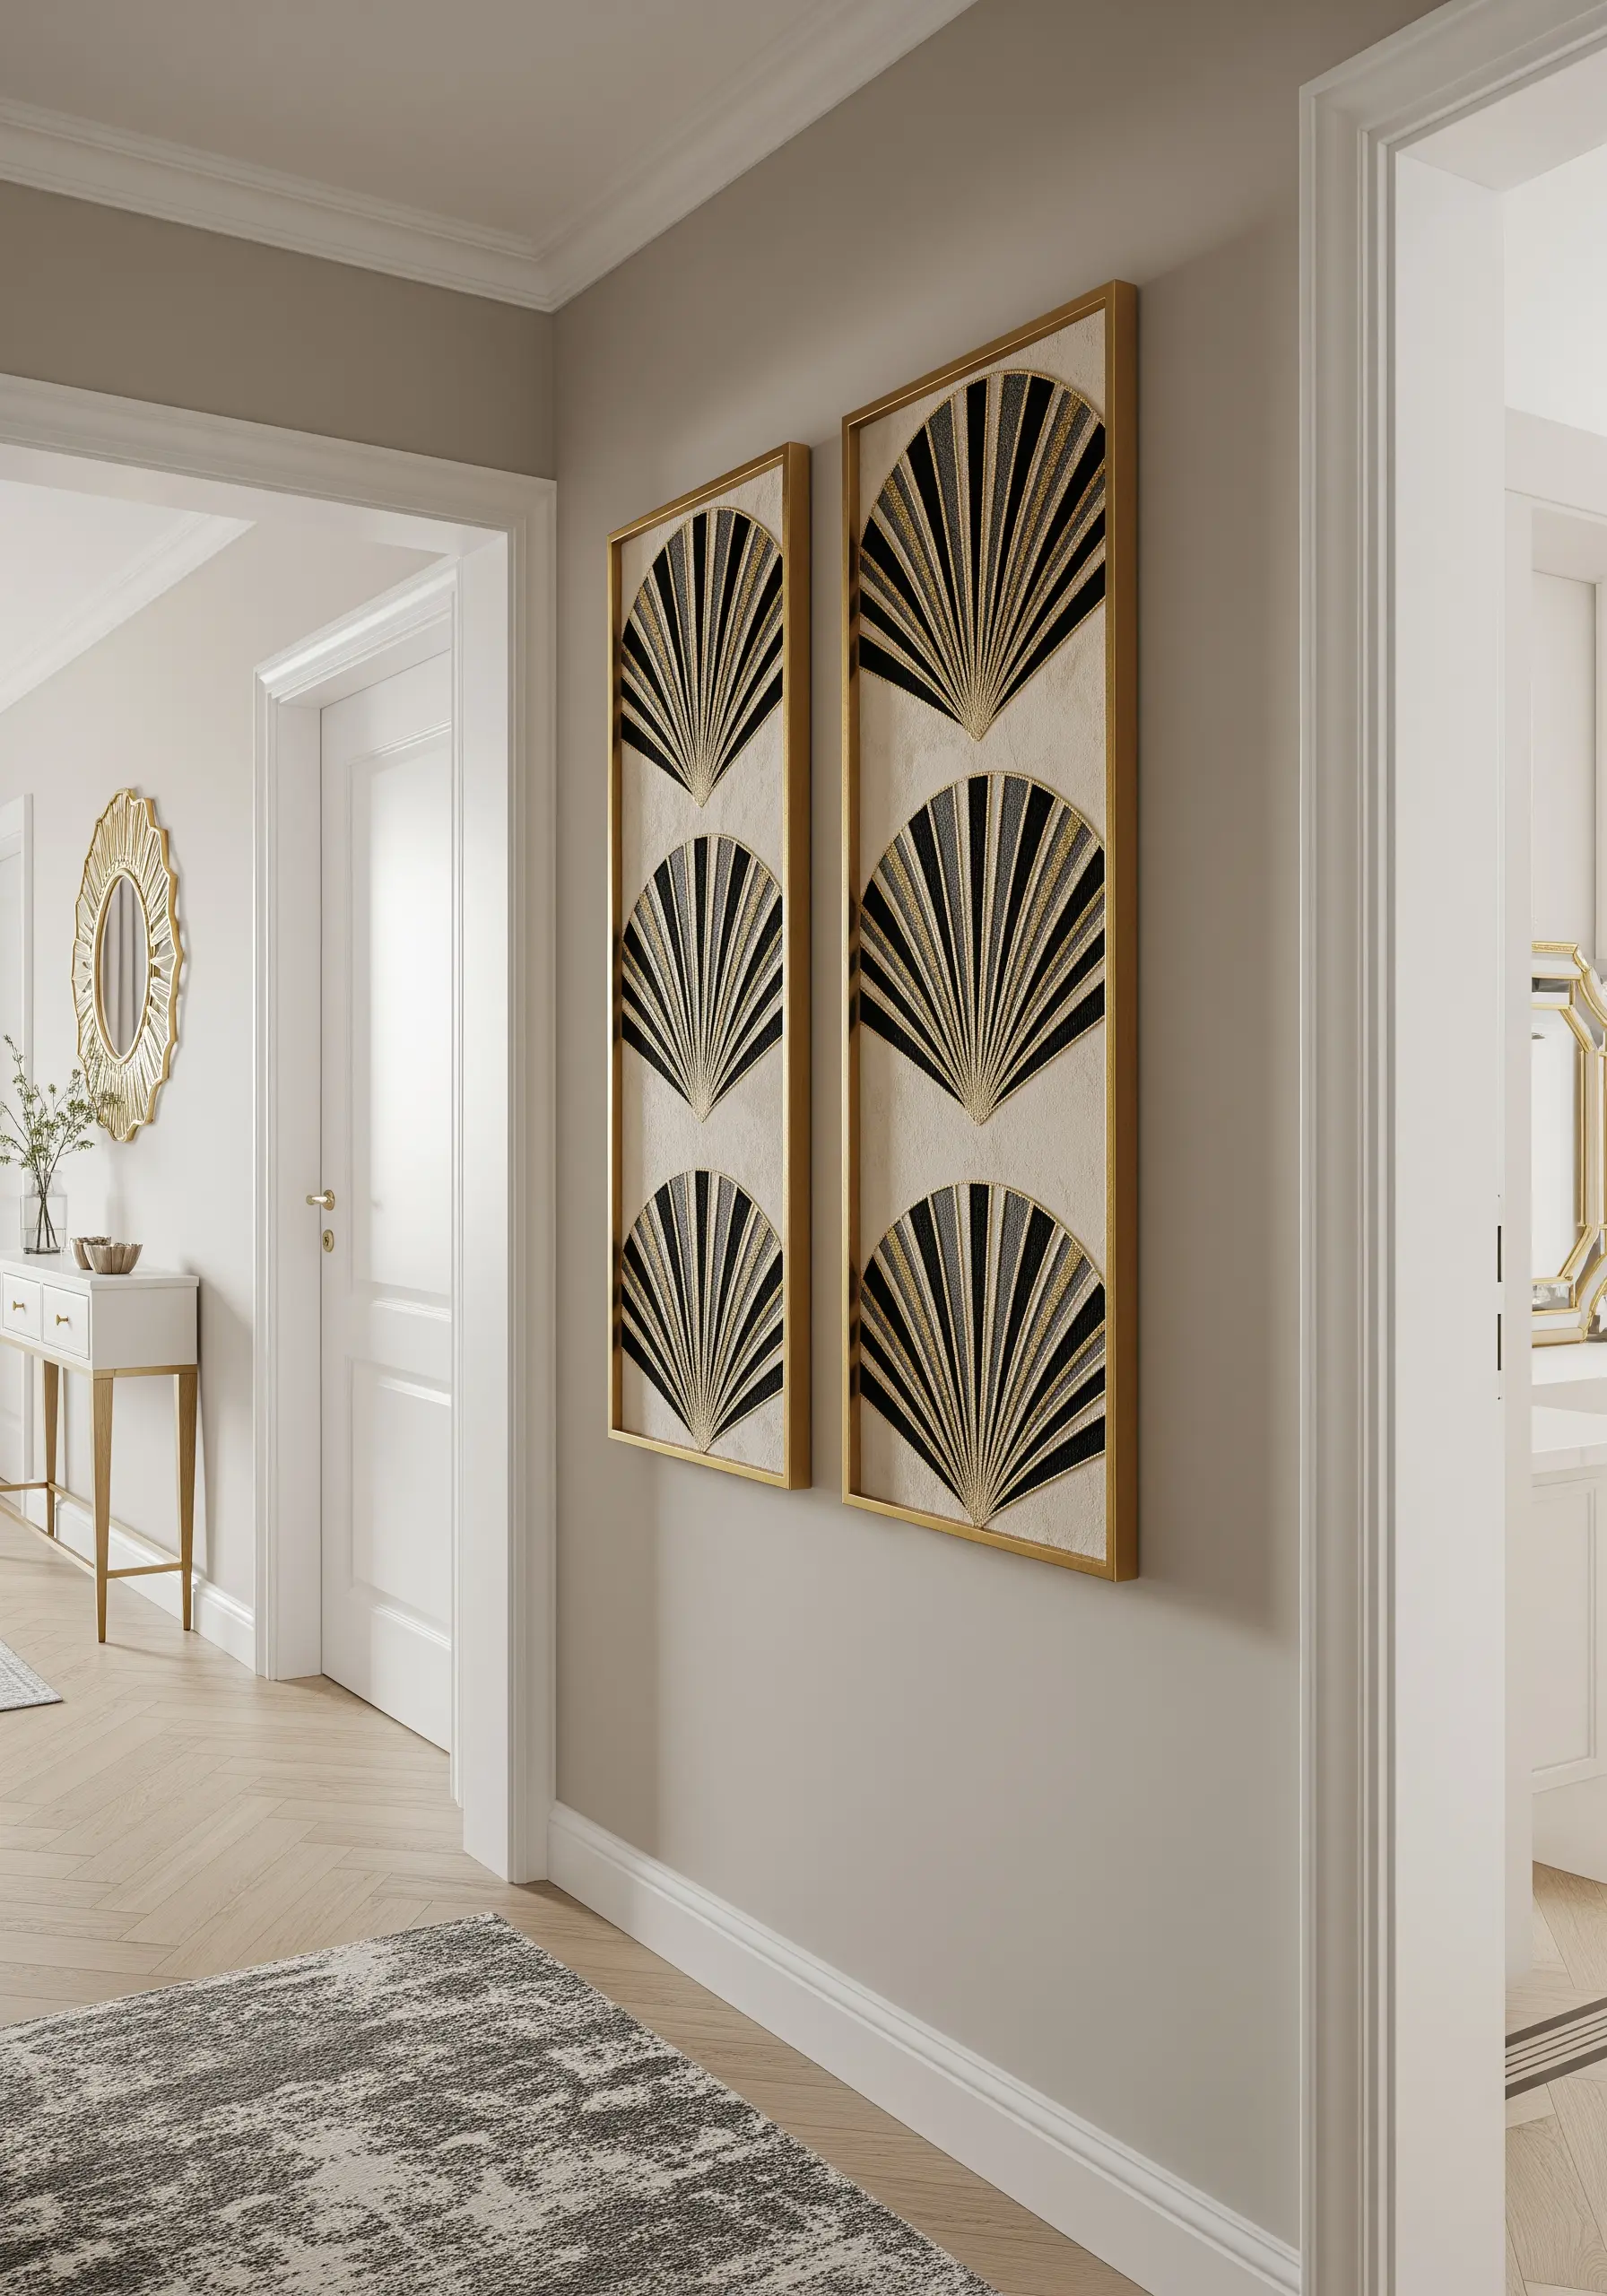
Achieve this striking Art Deco effect by using a simple straight stitch, radiating from a central point or baseline.
The key to success is precise stitch placement. Use a ruler and a fabric marker to draw your guidelines before you begin stitching to ensure every line is perfectly angled.
Combine matte black thread with a shimmering gold metallic thread to create a sophisticated contrast that defines the Art Deco style.
Framing these as a diptych in tall, narrow frames emphasizes the verticality and elegance of the fan-like motifs.
10. Embrace Mid-Century Modern with Bold Shapes and Texture
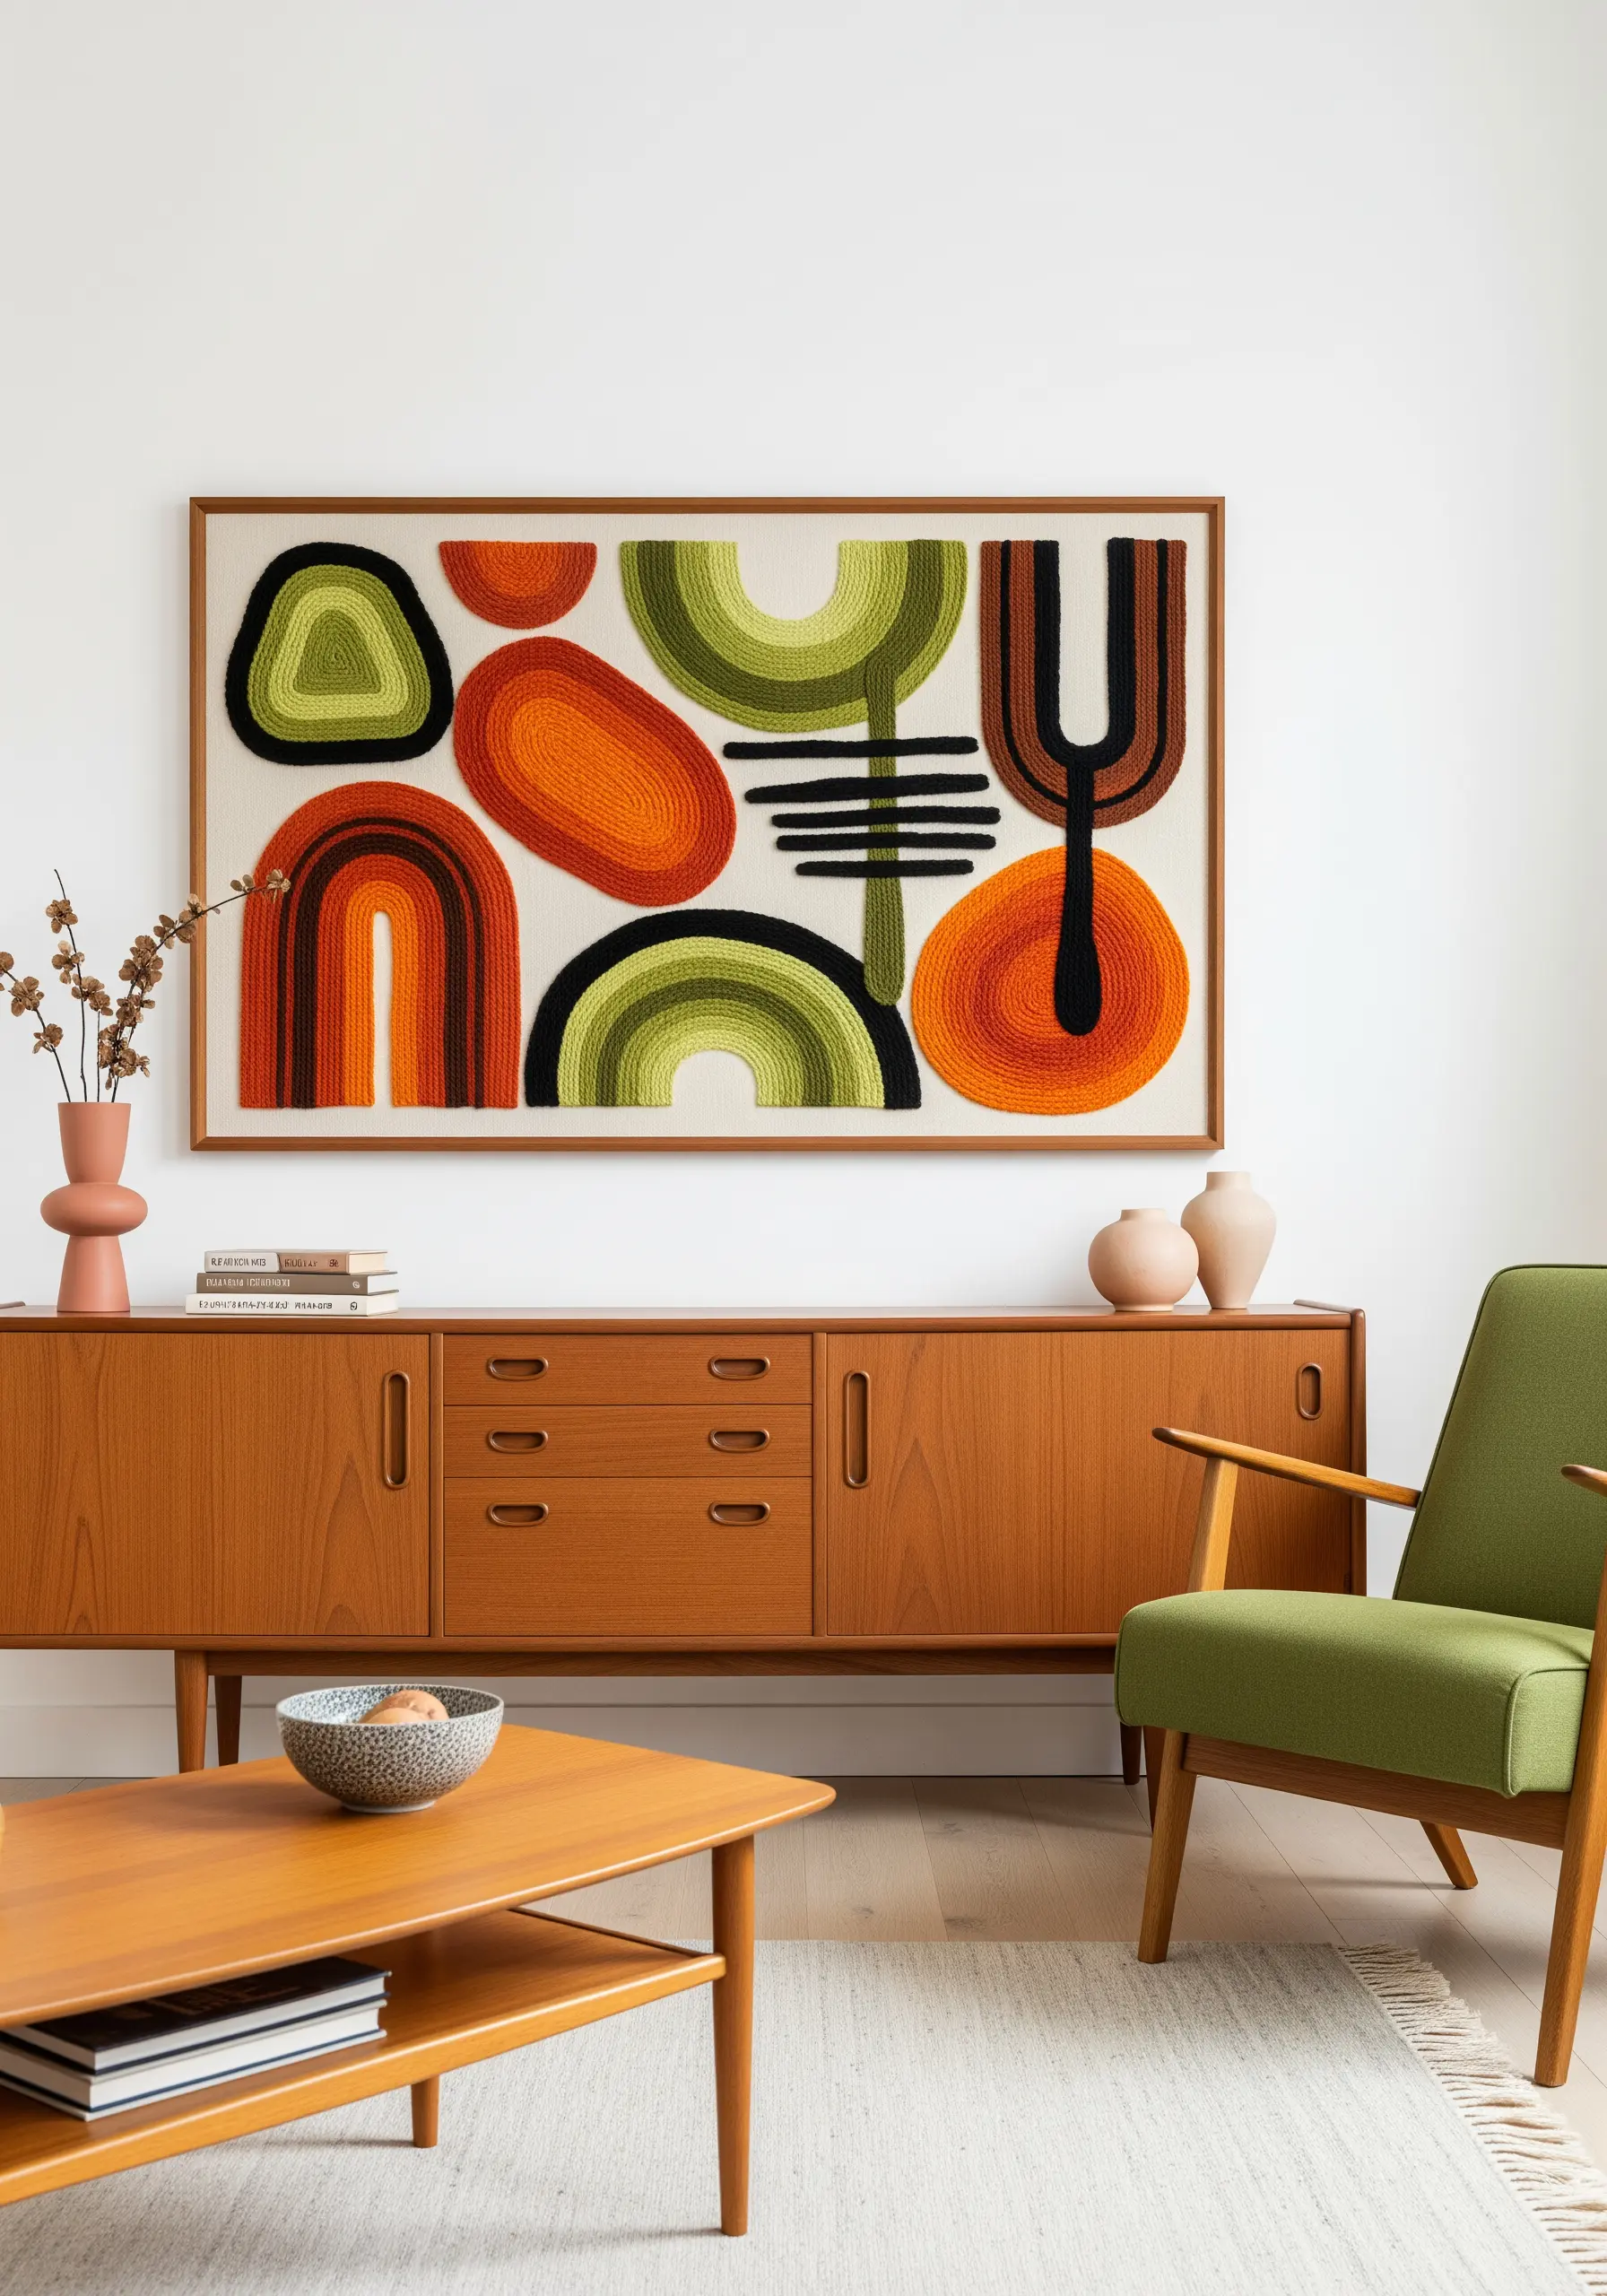
Channel a mid-century vibe by focusing on organic, abstract shapes and a retro color palette of avocado green, harvest gold, and burnt orange.
This style, often called punch needle or rug hooking, uses a special tool to create dense loops of yarn, resulting in a highly textural, plush surface.
Define your bold shapes by outlining them first with a single line of black yarn; this creates a crisp edge that makes the colors pop, much like a cartoon cel.
A wide, simple wood frame complements the handcrafted, vintage feel of the artwork.
11. Stitch Whimsical Characters with Appliqué

Create these charming, graphic fruit characters by combining embroidery with felt appliqué.
Cut your main fruit shapes from colored felt and secure them to your background fabric with a simple running stitch or a neat blanket stitch around the edge.
Add the expressive details—eyes, mouths, and rosy cheeks—with simple embroidery stitches like French knots and backstitch directly onto the felt.
Arranging four of these cartoon-style embroidery ideas in a simple grid with white frames creates a cheerful, modern display for a kitchen or playroom.
12. Capture the Motion of Water with Color Grading
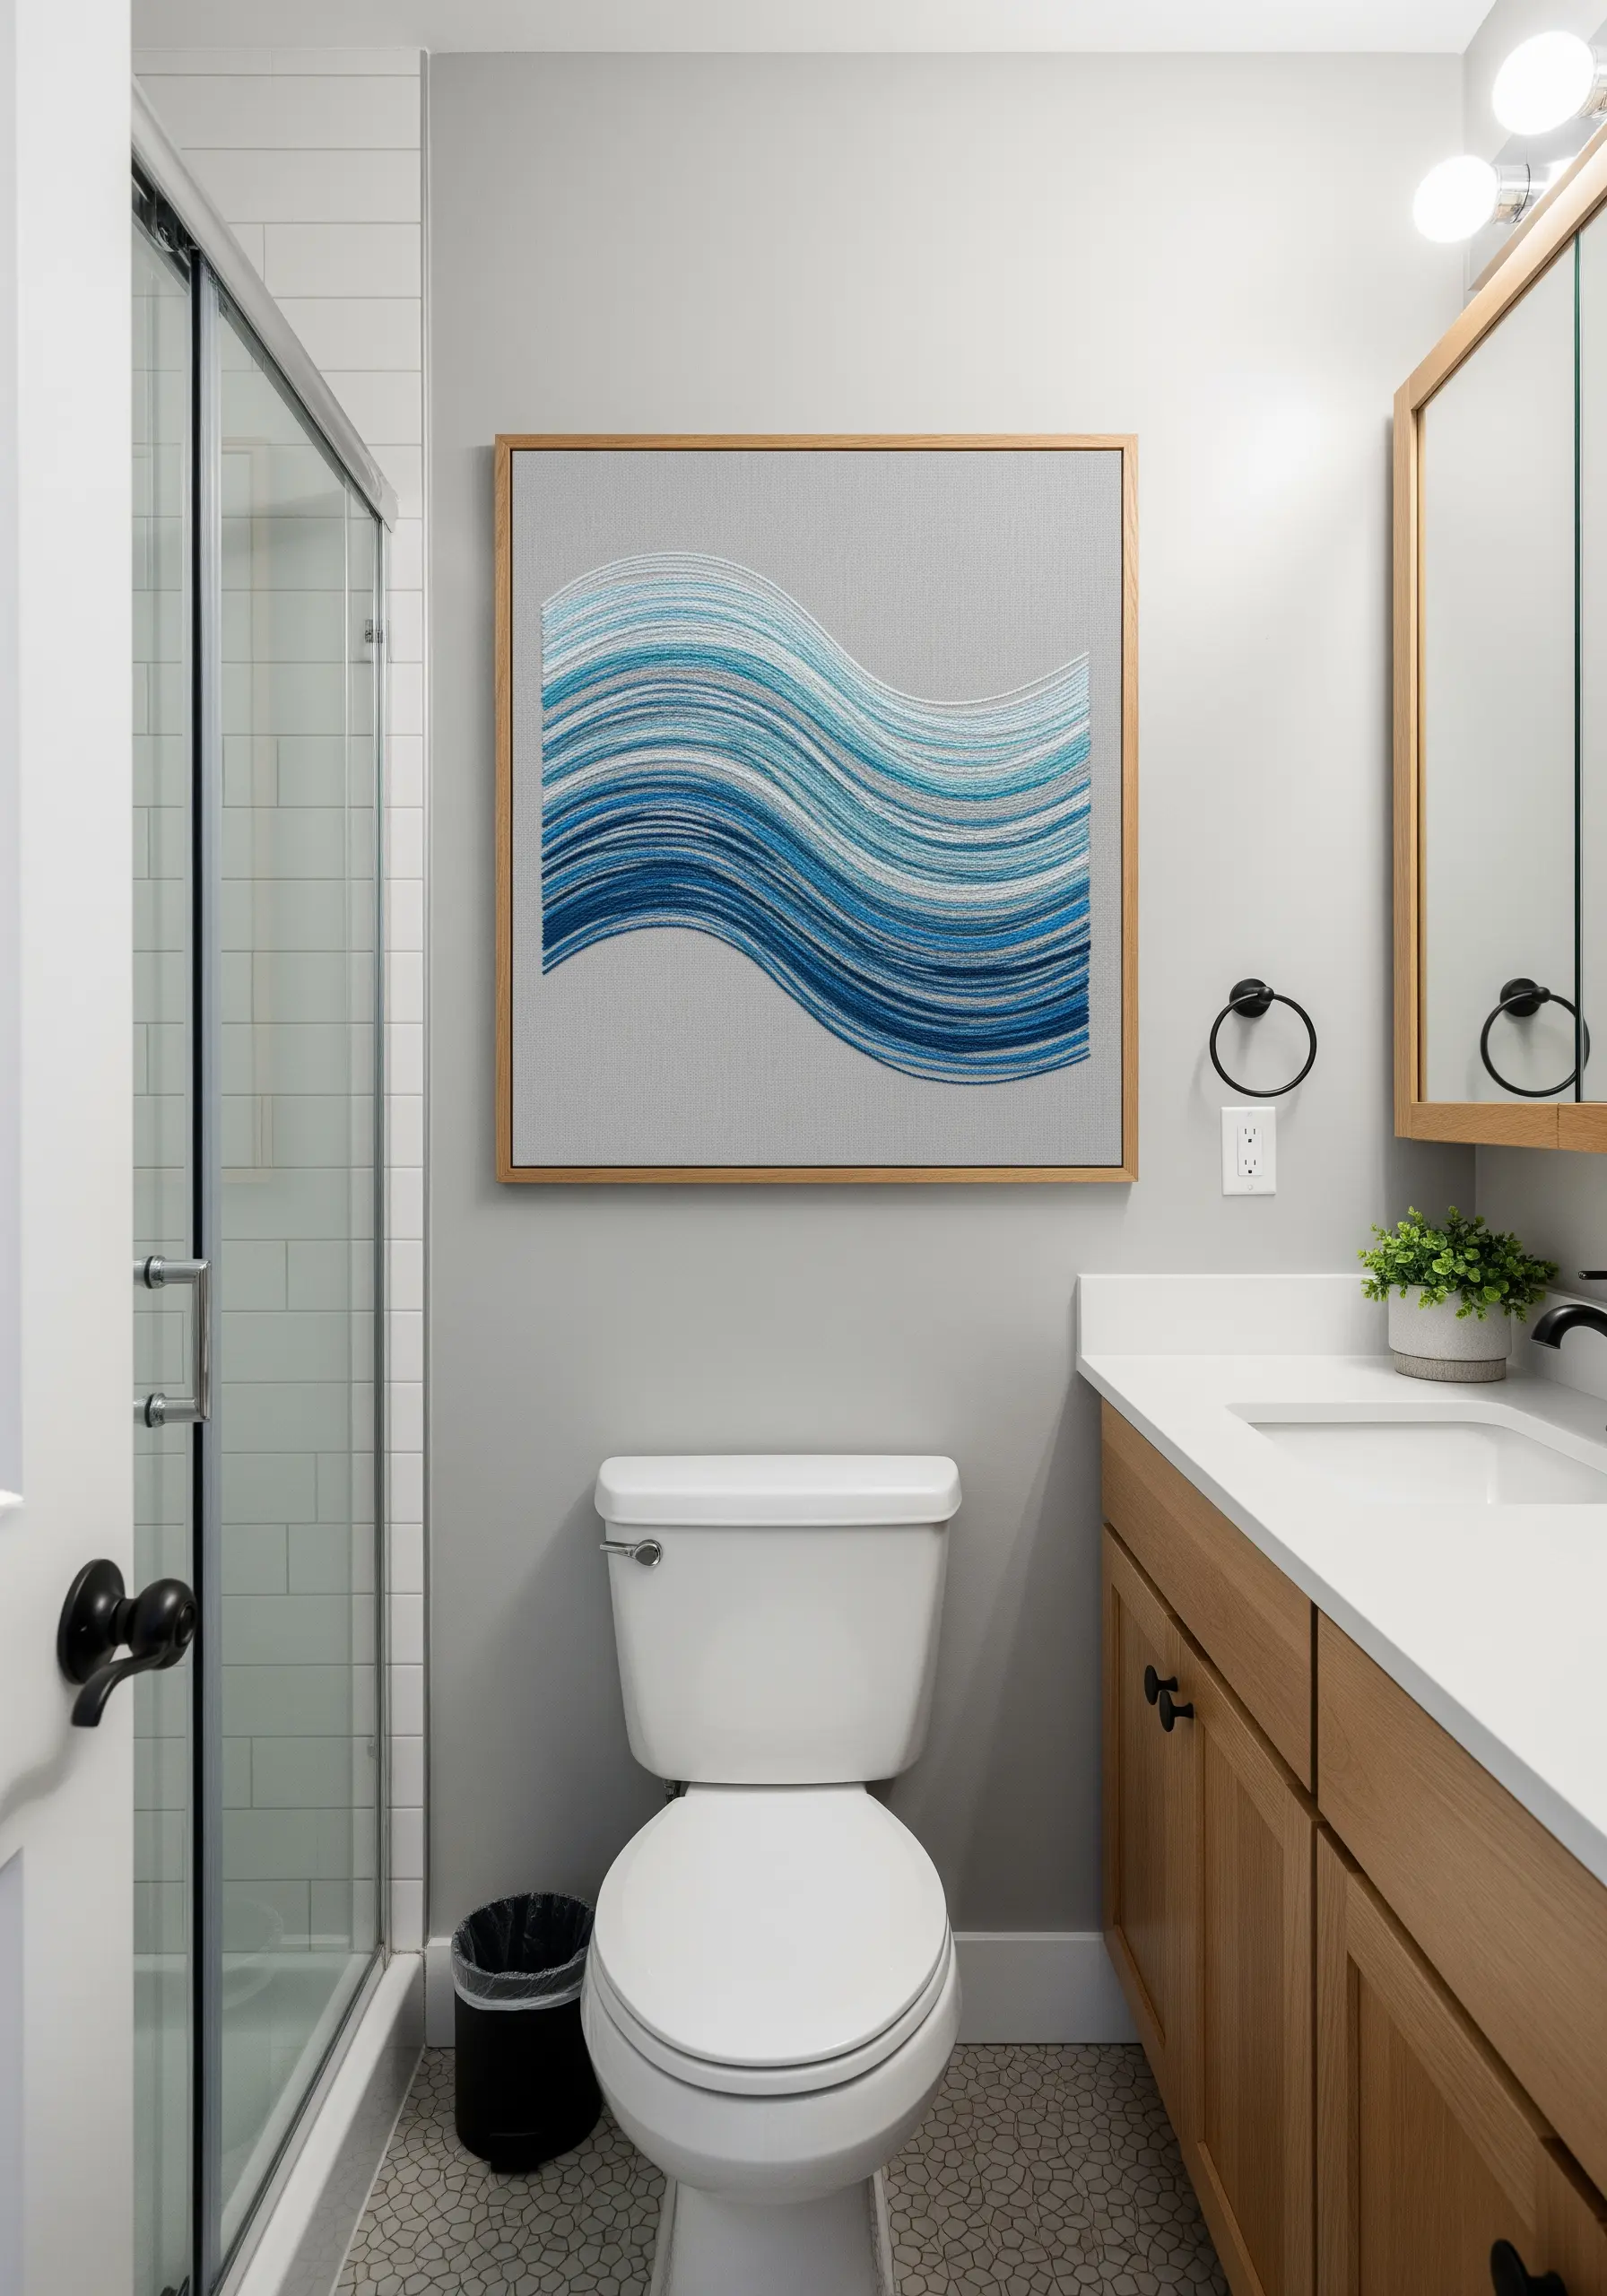
Simulate the movement of ocean waves by stitching horizontal lines in a carefully planned color gradient.
Select at least five to seven shades of blue, from deep navy to pale aqua, and arrange them to create a smooth transition.
Use a simple backstitch for each line, keeping the stitch length consistent to create a uniform, pixelated texture.
The gentle, organic curve of the entire shape is crucial; sketch it onto your fabric first to ensure it flows naturally before you begin the meticulous process of filling it in.
13. Create Moody Drama with Thread on Black Fabric

Stitching on black fabric instantly adds depth and drama, making your thread colors appear more vibrant and luminous.
To create the iridescent effect of the raven’s feathers, use thread painting with single strands of floss in shades of dark blue, purple, and charcoal grey alongside black.
A single, bold stitch—like the red French knot for the eye—becomes an incredibly powerful focal point against the dark background.
Choose an ornate, gilded frame to contrast with the modern feel of the embroidery, elevating it to the level of a classical oil painting.
14. Build a Tapestry of Abstract Textures

Go beyond traditional stitches and think in terms of pure texture by combining various yarn weights and techniques.
Use chunky yarn to create dense French knots and looped stitches (turkey work) for a plush, 3D effect.
Incorporate areas of weaving by creating a simple warp with vertical threads and weaving different colored yarns through them.
Let some threads hang loose or create long, cascading straight stitches to add movement and an element of raw, untamed energy.
These are the mixed-fiber projects that look like gallery art but are DIY.
15. Sculpt a Neutral Landscape with Roving and Yarn
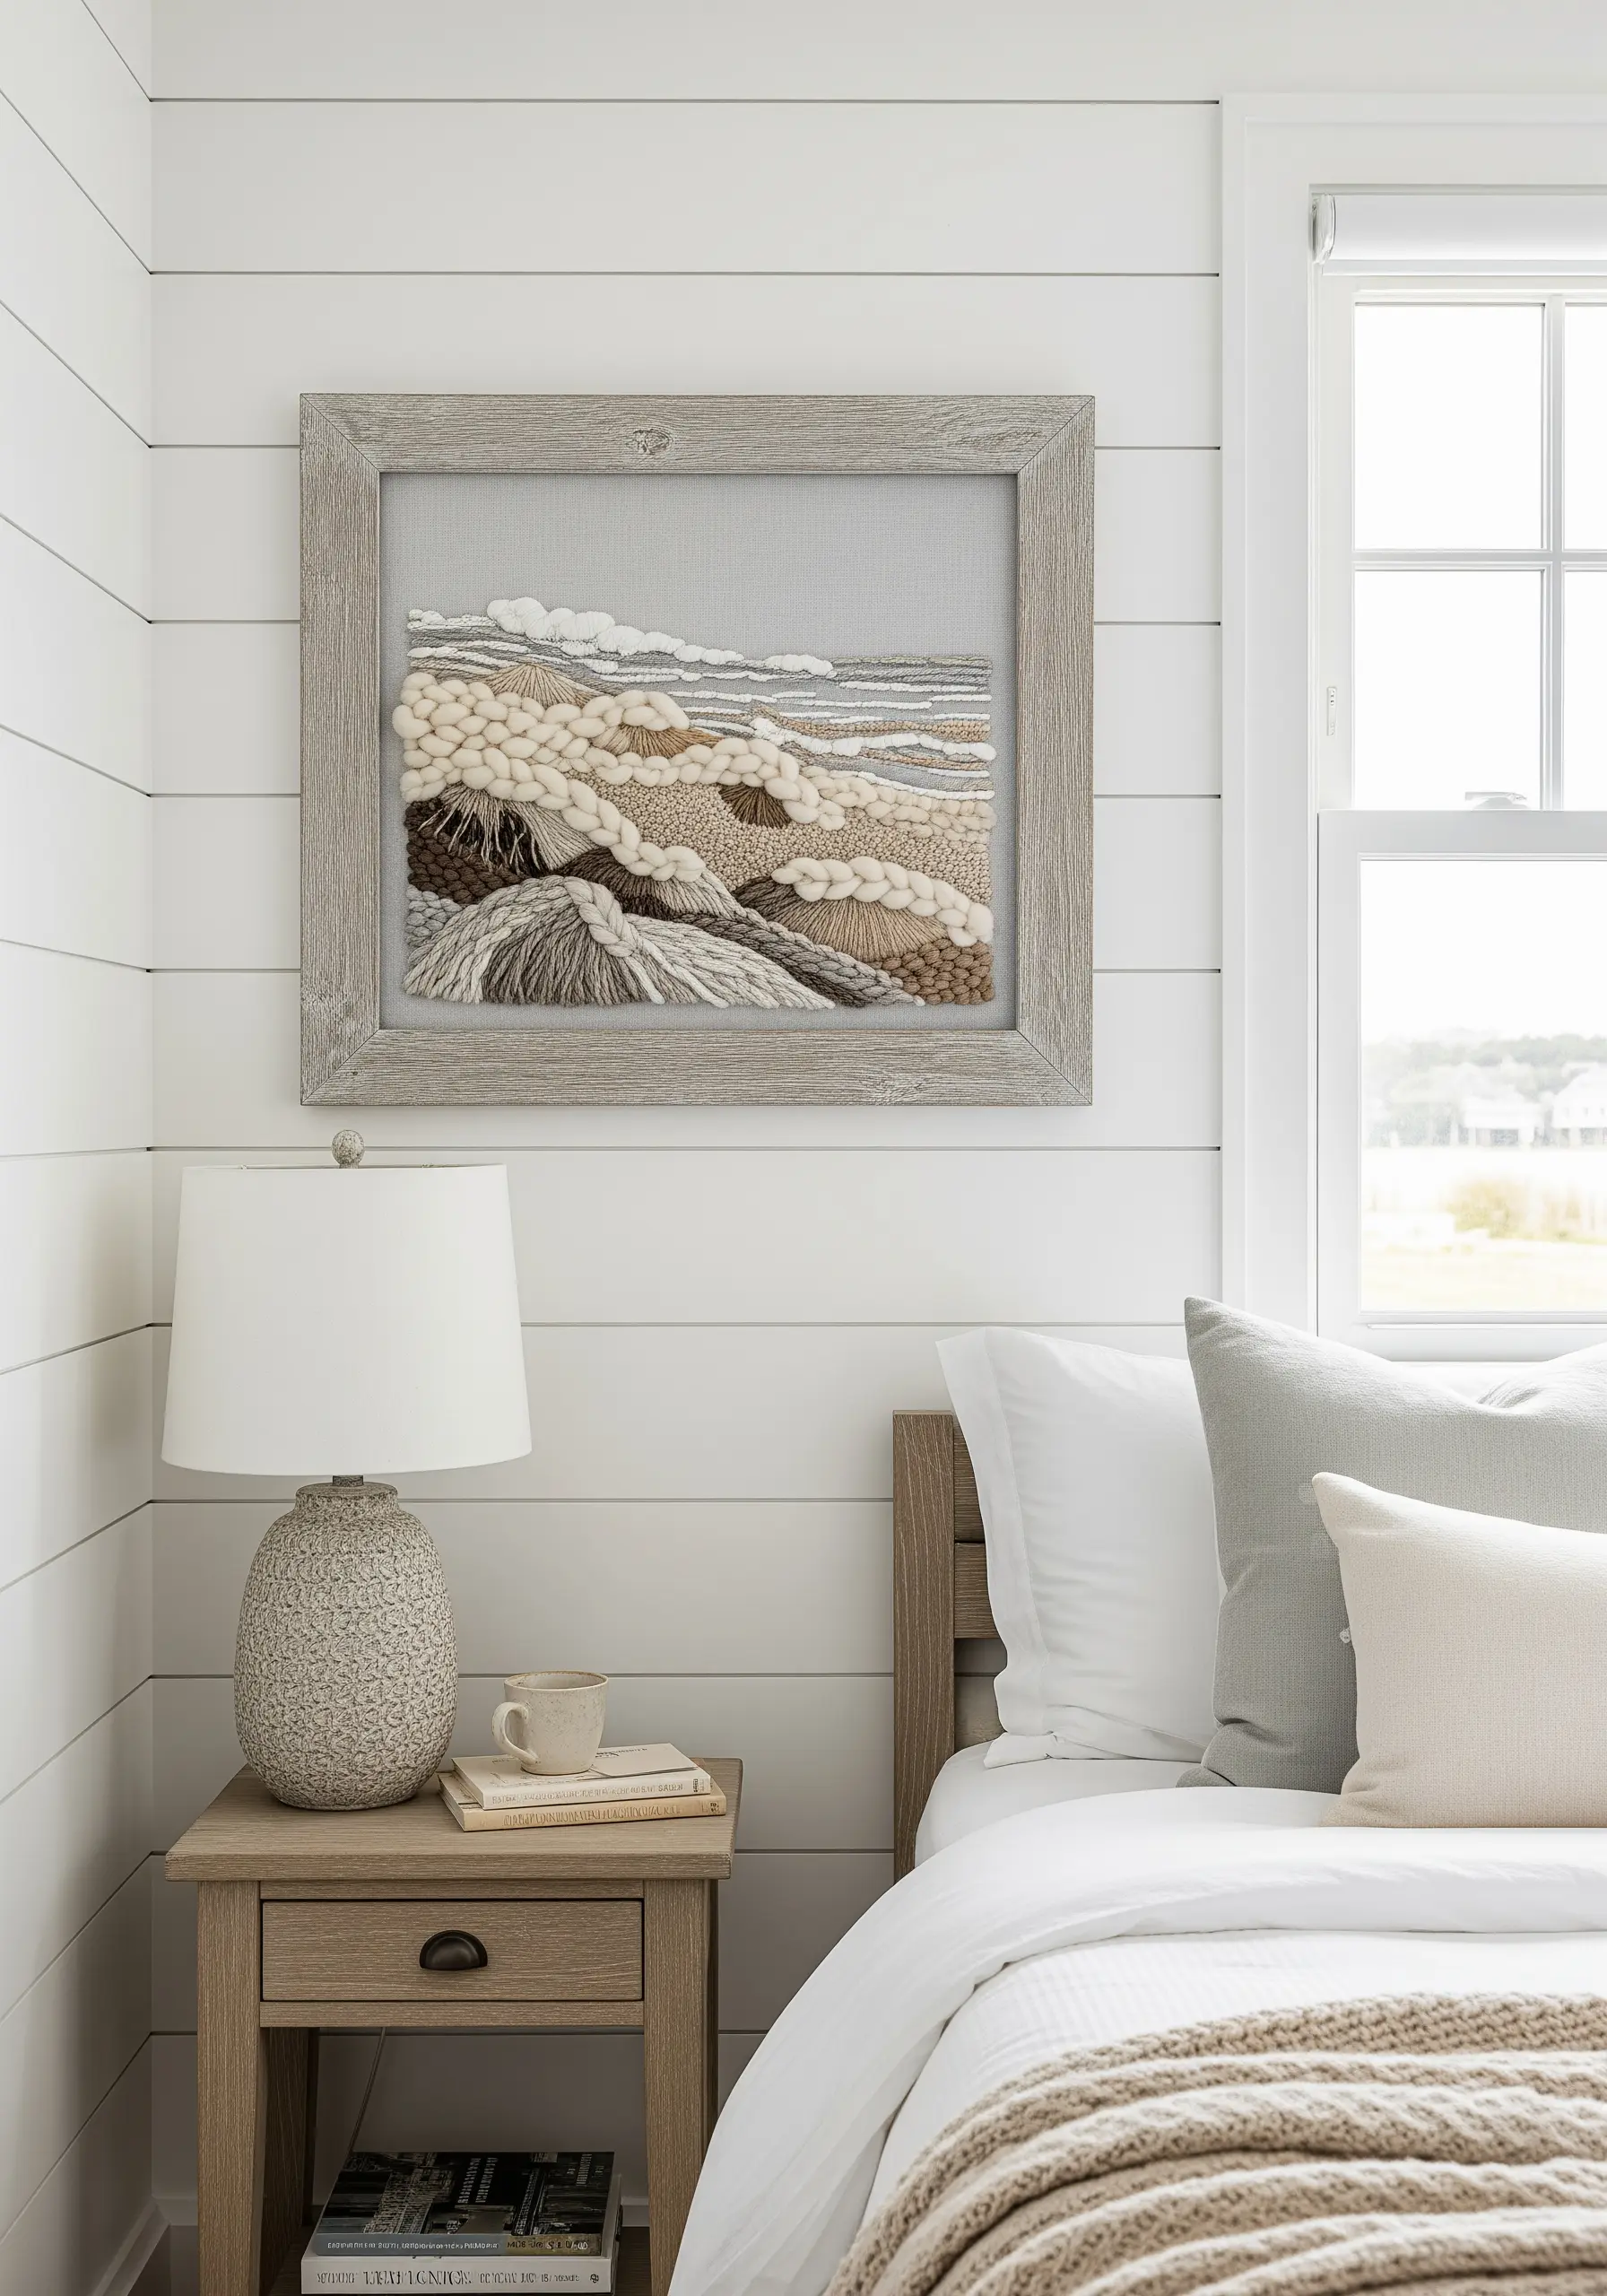
Create a tactile, topographical map by using thick wool roving and chunky yarns in a neutral palette.
Couch the thick roving onto the fabric to form the soft, rolling shapes of clouds and hills, tacking it down with a matching, thinner thread.
Use coiled circles of yarn and dense clusters of French knots to suggest rocky textures or fields, varying the height and density for a naturalistic feel.
A weathered grey frame complements the organic, earthy tones of the fibers, making it a perfect piece for a serene, nature-inspired space.
It’s one of those embroidery projects inspired by textures you’d find on a nature walk.
16. Reinterpret Modern Art with Satin Stitch Blocks
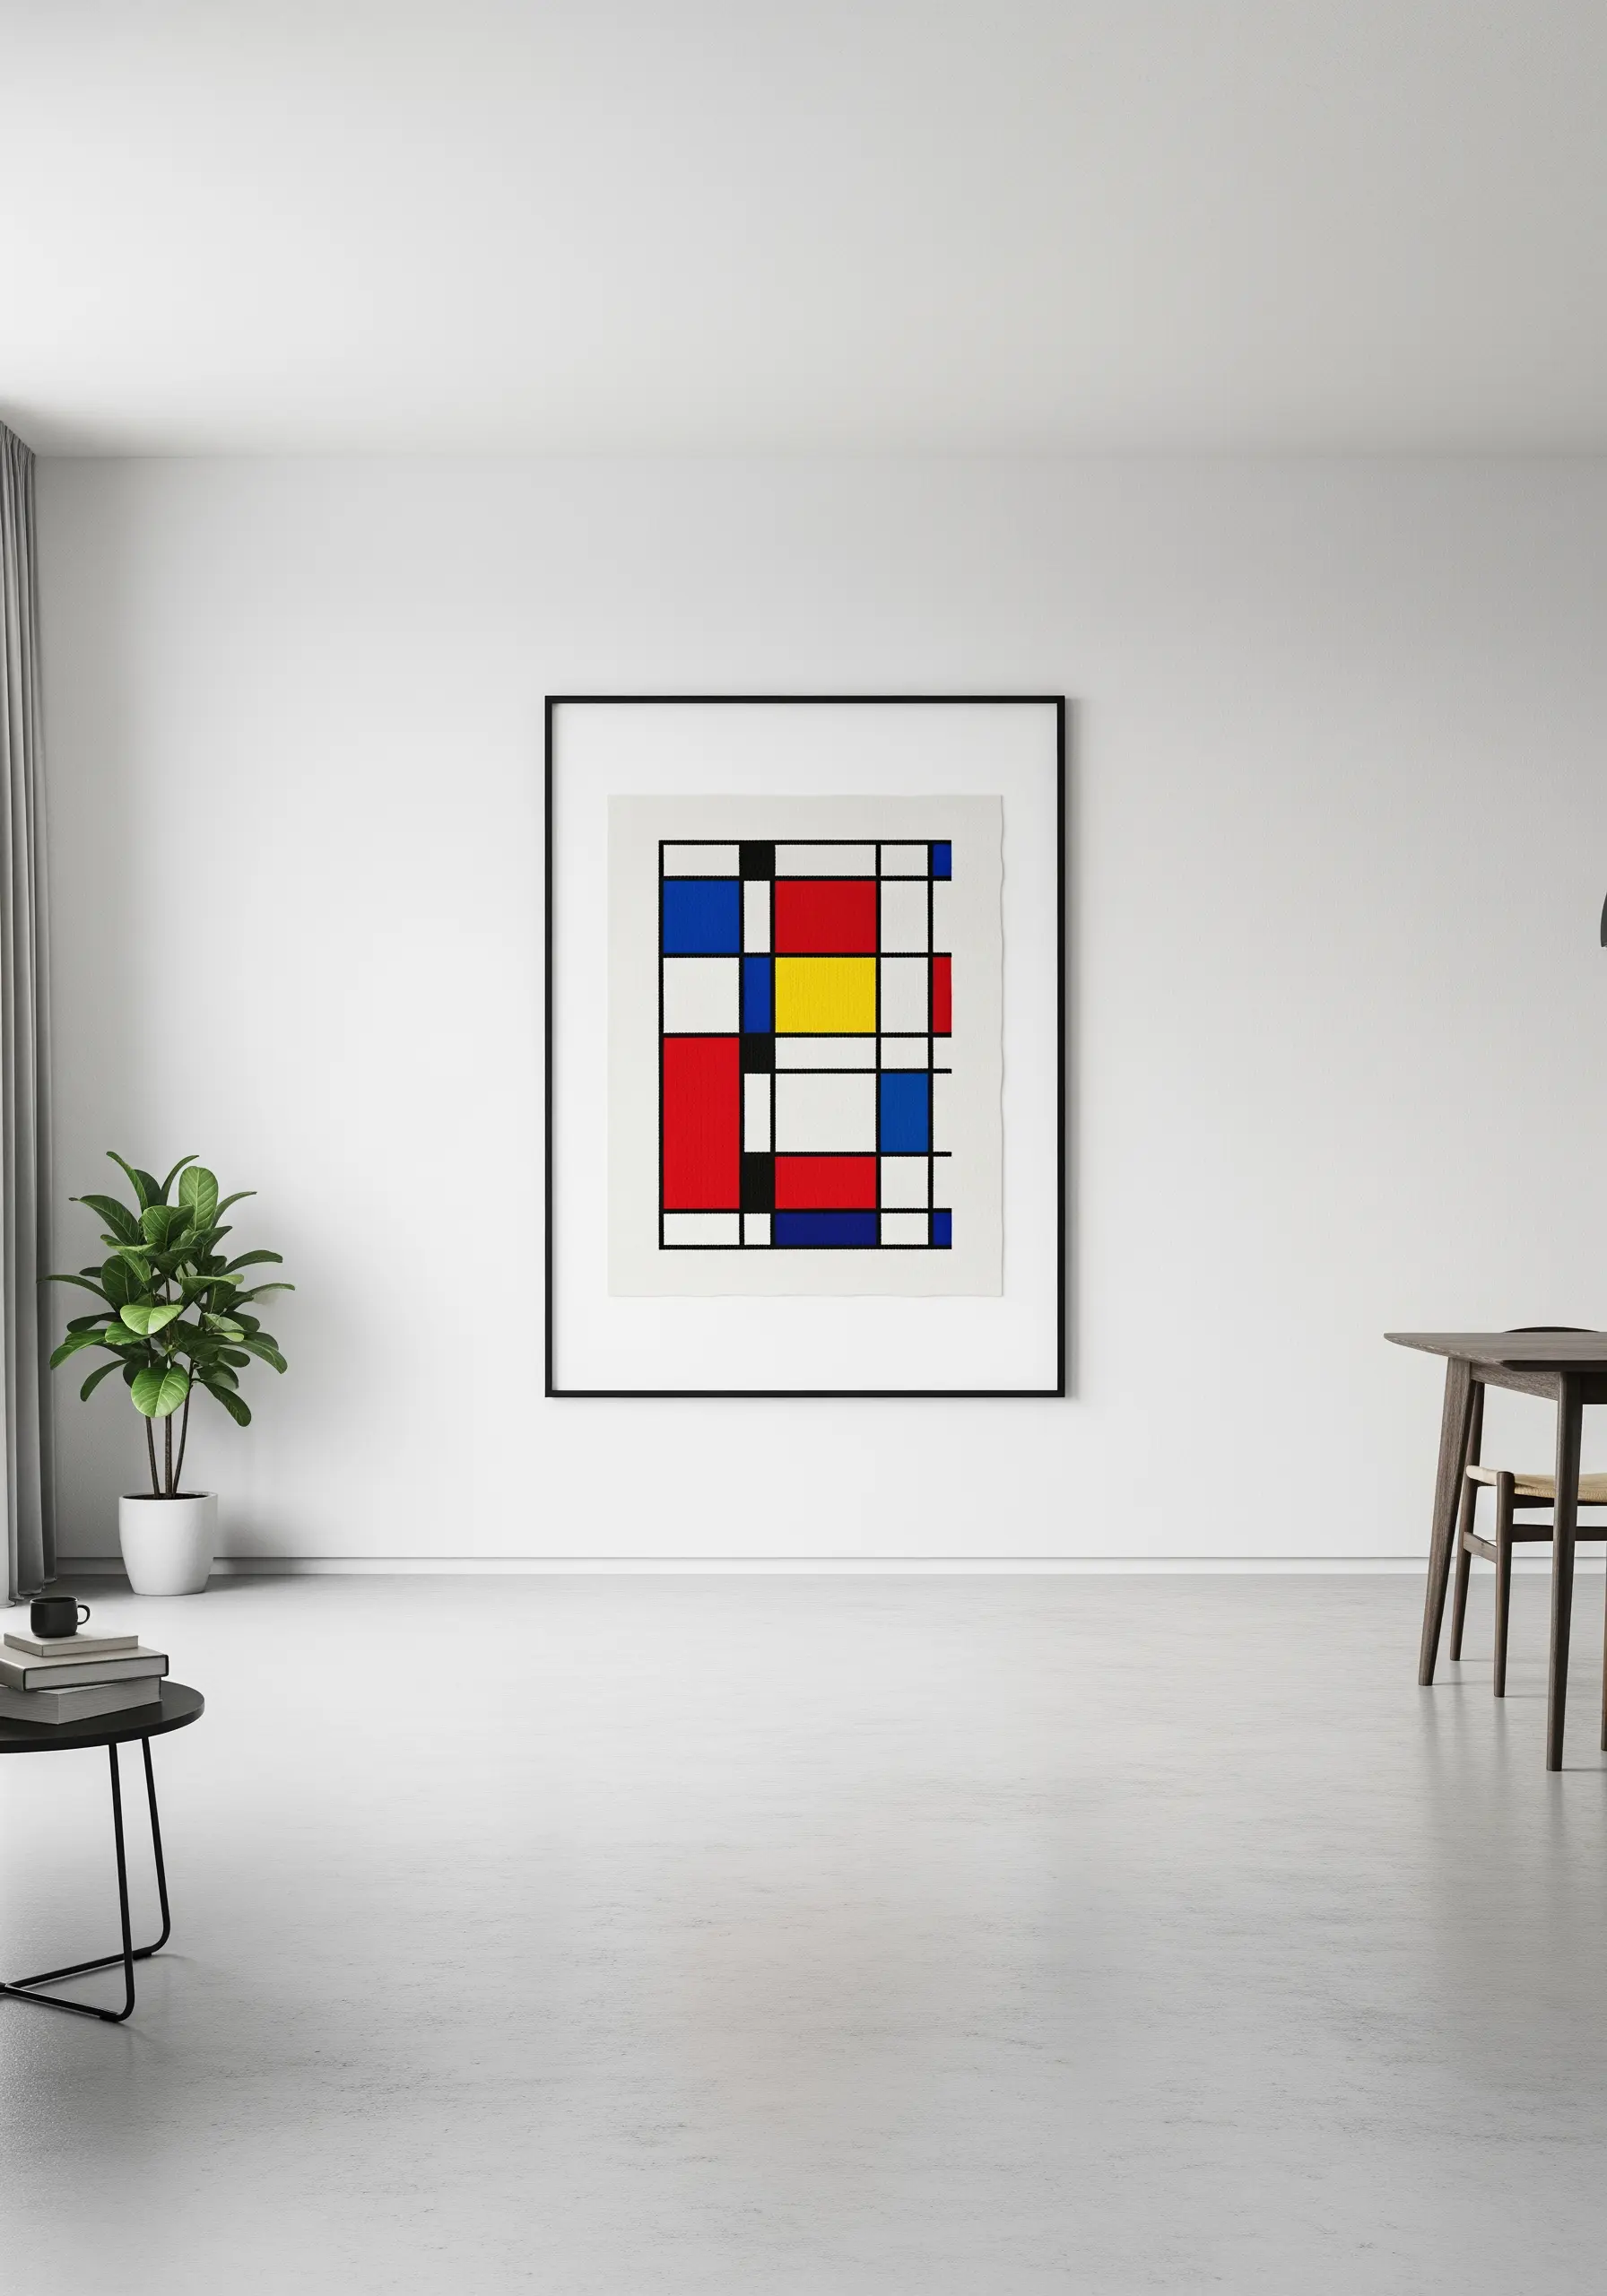
Pay homage to masters like Piet Mondrian by translating their iconic geometric compositions into thread.
The key to this minimalist style is precision. Use a fine-tipped, water-soluble marker and a ruler to draw your grid perfectly onto the fabric before stitching.
Outline each block with a thin black backstitch to create the signature bold lines of De Stijl art.
Fill the color blocks with flawlessly smooth satin stitch, ensuring all your stitches lie flat and in the same direction for a clean, graphic finish.
17. Tell a Story with Minimalist Line Art

Capture the expressive quality of a single-line drawing using a simple backstitch or stem stitch.
Use a dark, high-contrast thread (like black on white) to ensure your lines are crisp and clear, making the design instantly legible from a distance.
The beauty of this style is its simplicity; resist the urge to add color or shading, as the power lies in the purity of the line itself.
Displaying these single-line face profiles that create gallery-style hoop art in simple wooden hoops keeps the focus on the artwork’s clean, modern feel.
18. Design a Dreamy Nursery Scene with Muted Tones

Create a gentle, calming atmosphere for a nursery by using a soft, muted color palette of dusty blues, beiges, and greys.
Combine simple satin stitch for the solid areas of the balloons and hills with delicate backstitch for the finer details like baskets and airplane wings.
Use a single strand of a slightly darker grey for the cloud outlines to give them soft definition without creating harsh lines.
A natural wood frame warms up the cool tones in the embroidery, making the piece feel cozy and inviting. These are perfect embroidered nursery decor ideas for small apartments.
19. Emulate Botanical Illustrations with Fine Stitches

Channel the elegance of vintage botanical prints by stitching delicate florals on a natural linen background.
Use a fine split stitch or stem stitch for the outlines and stems, ensuring your lines are smooth and graceful.
Fill the petals with a fishbone stitch to create a natural-looking central vein and a gentle sense of direction and shape.
Add a touch of authenticity by stitching the plant’s botanical name in a simple, cursive script beneath the illustration, using a single strand of thread.
20. Stitch an Architectural Skyline with Geometric Fills
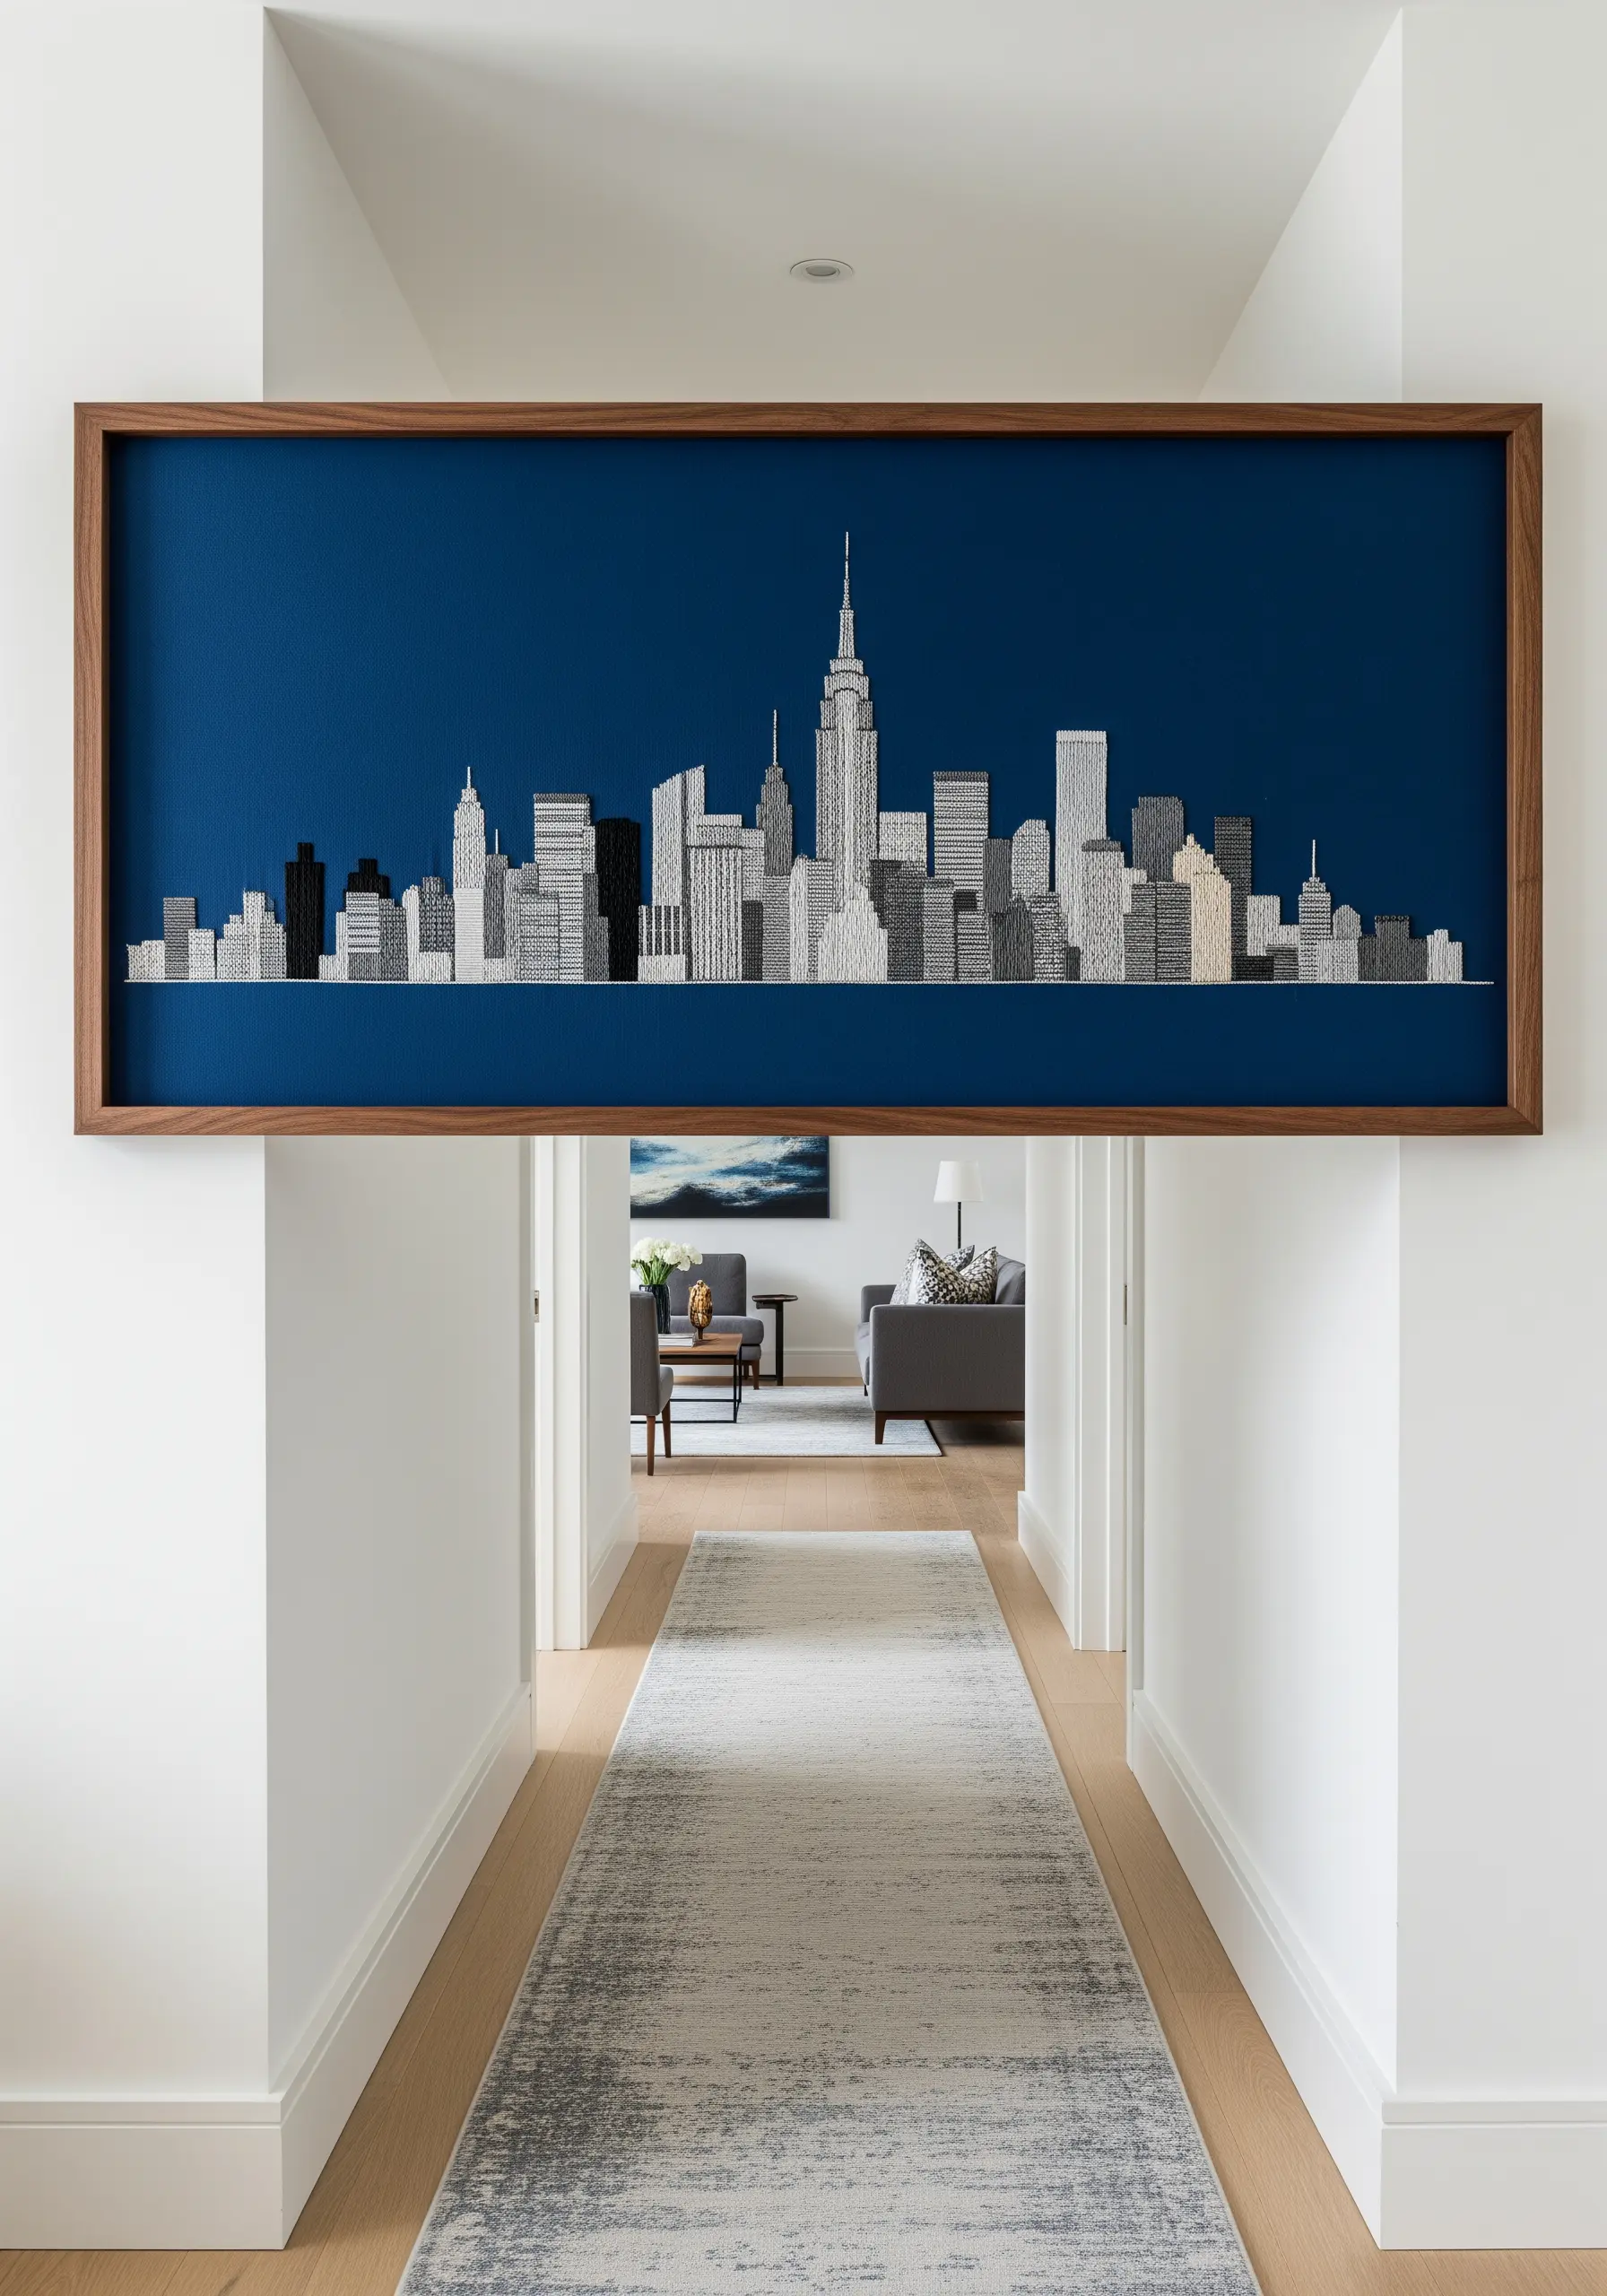
Capture the energy of a city skyline by reducing buildings to their basic geometric shapes.
Instead of using a simple satin stitch, fill each building with a different directional or textured pattern—like vertical straight stitches, horizontal bars, or cross-hatching.
This variety creates the illusion of different building materials, windows, and shadows, adding immense visual interest and depth to a monochrome palette.
Stitch on a bold, colored fabric like this deep blue to make the neutral cityscape pop and to suggest a dramatic night or twilight sky.
These embroidered city skyline wall decor for travelers make a statement.
21. Find Your Zen with a Stitched Mandala
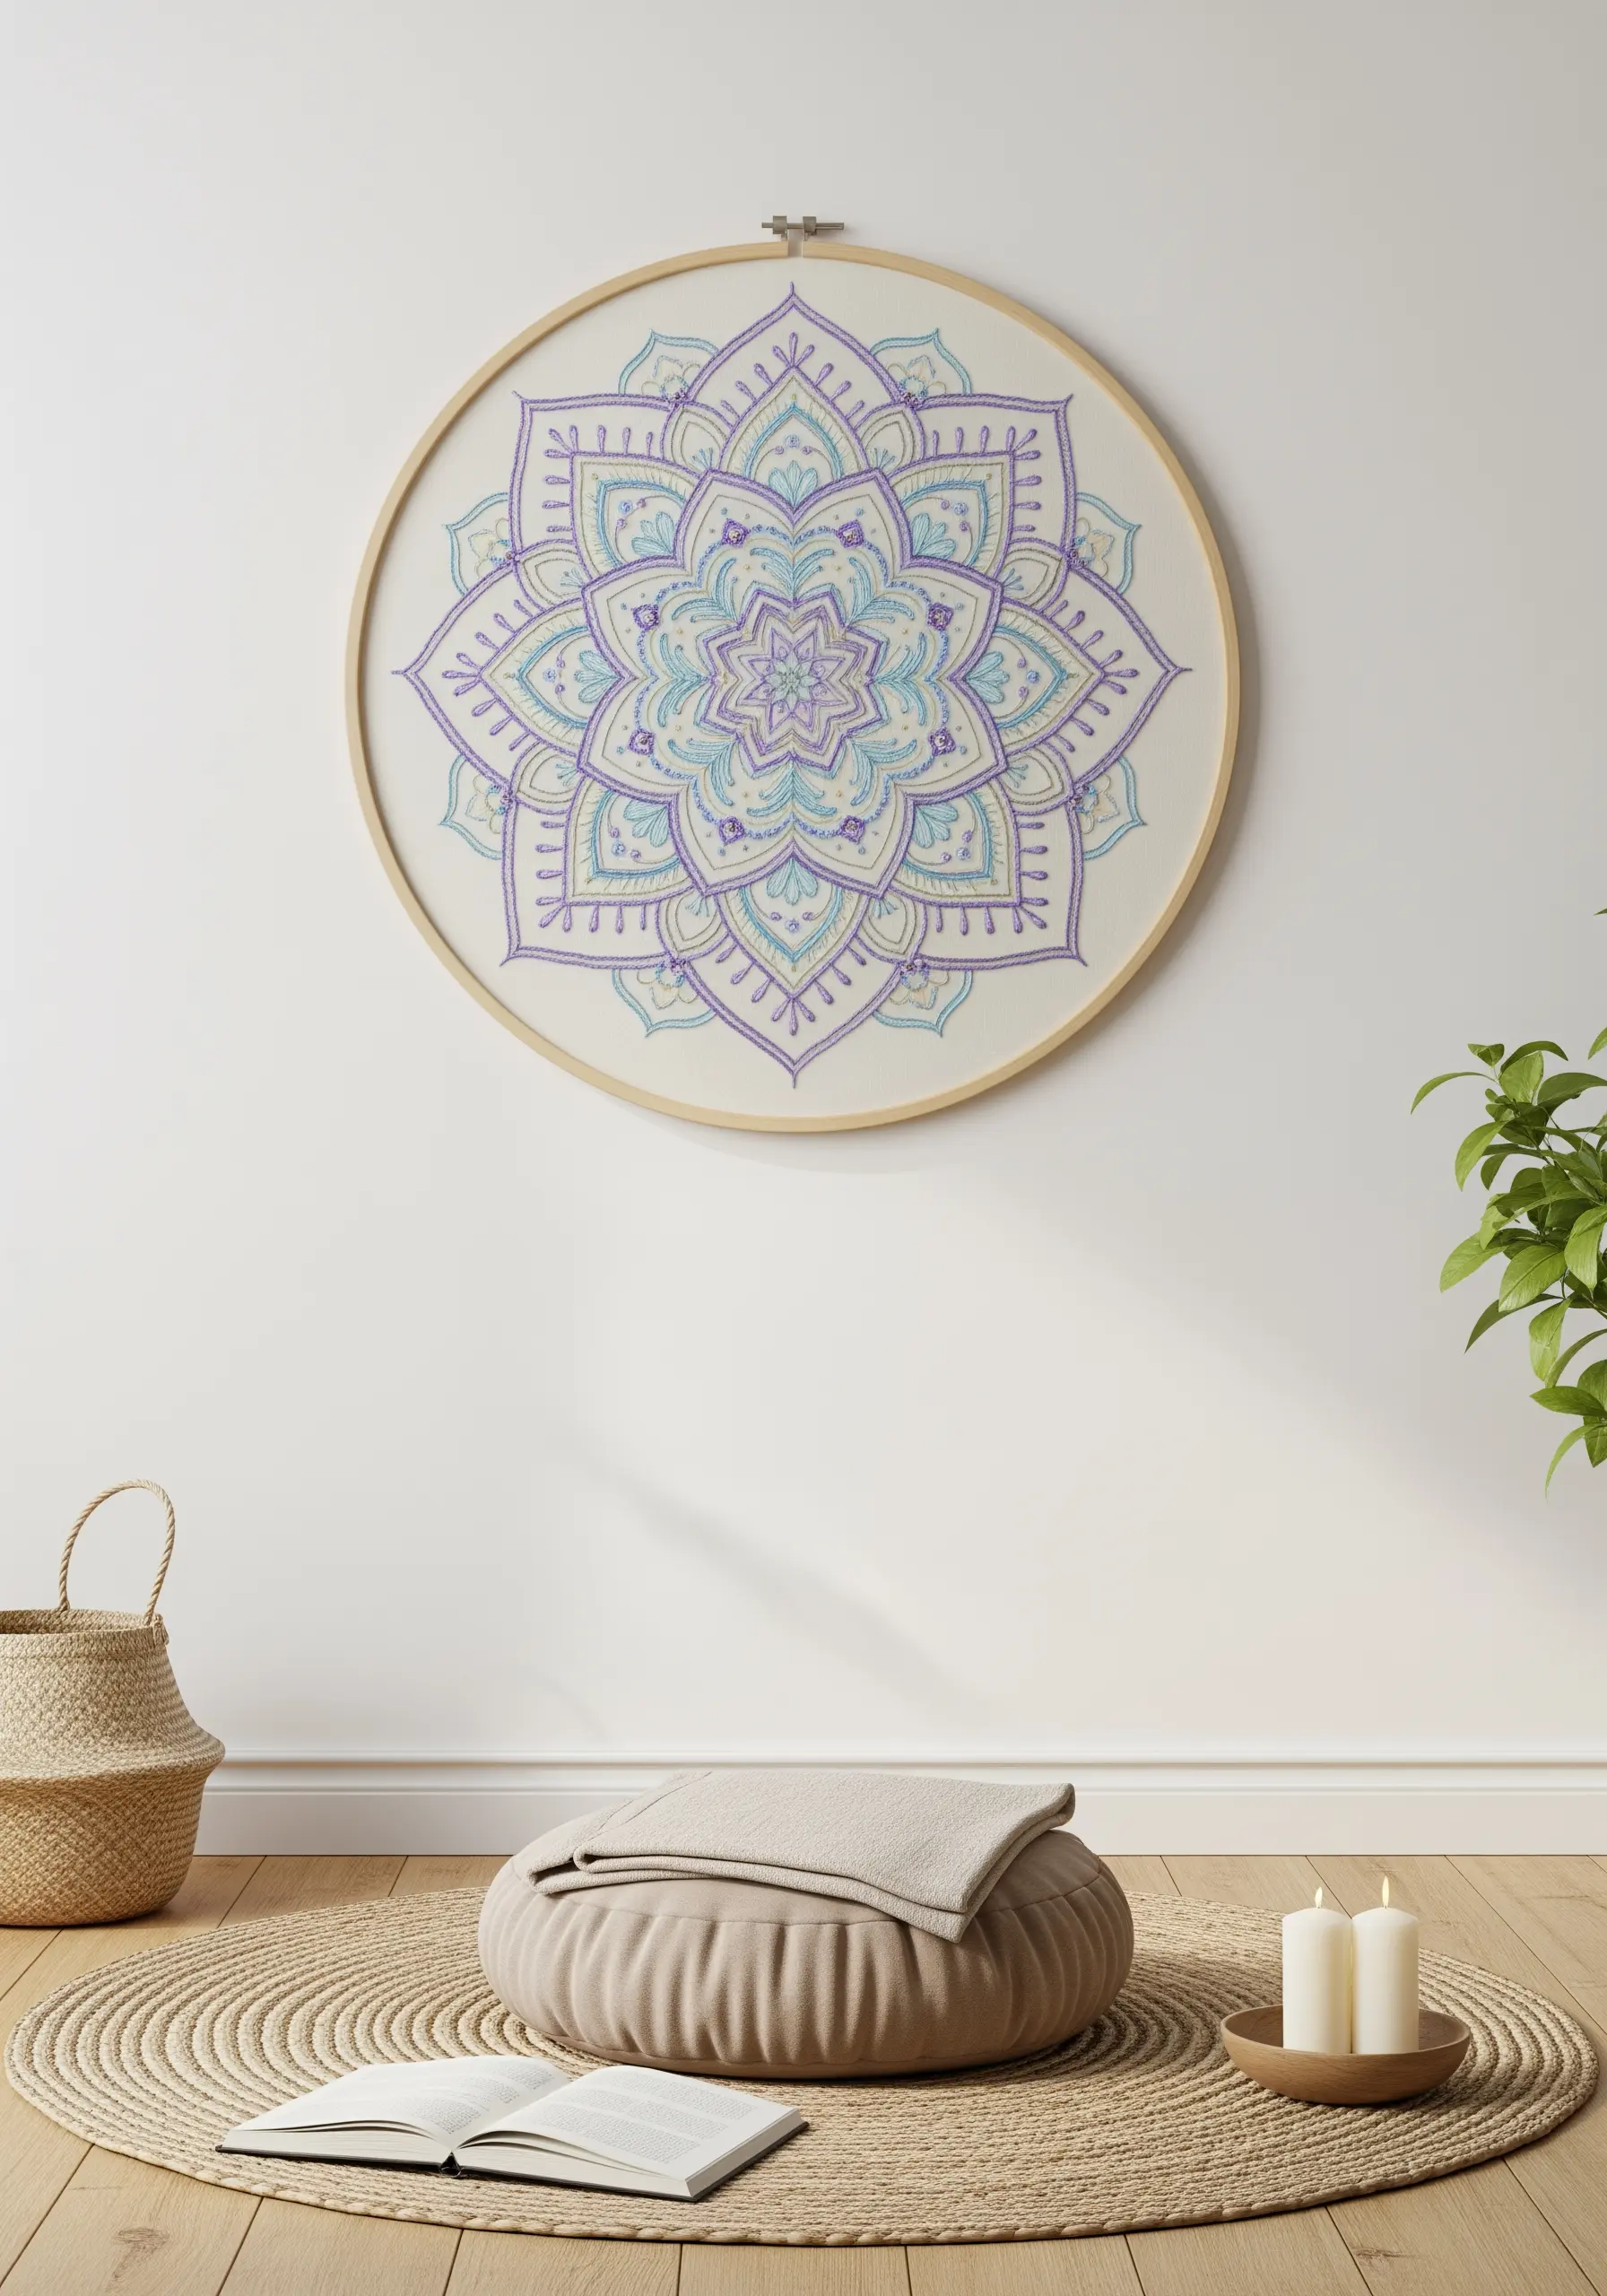
Turn your stitching into a meditative practice by creating a large-scale mandala.
The repetitive nature of the patterns allows you to relax into a stitching rhythm. Use a simple backstitch for all the linework to maintain a sense of delicate consistency.
Choose a calming, analogous color scheme, like these shades of lilac and turquoise, to enhance the tranquil mood of the piece.
An oversized hoop serves as the perfect frame, honoring the circular, sacred geometry of the mandala design. These embroidered mandala wall art designs are perfect for this.
22. Translate Woven Patterns into Stitched Art
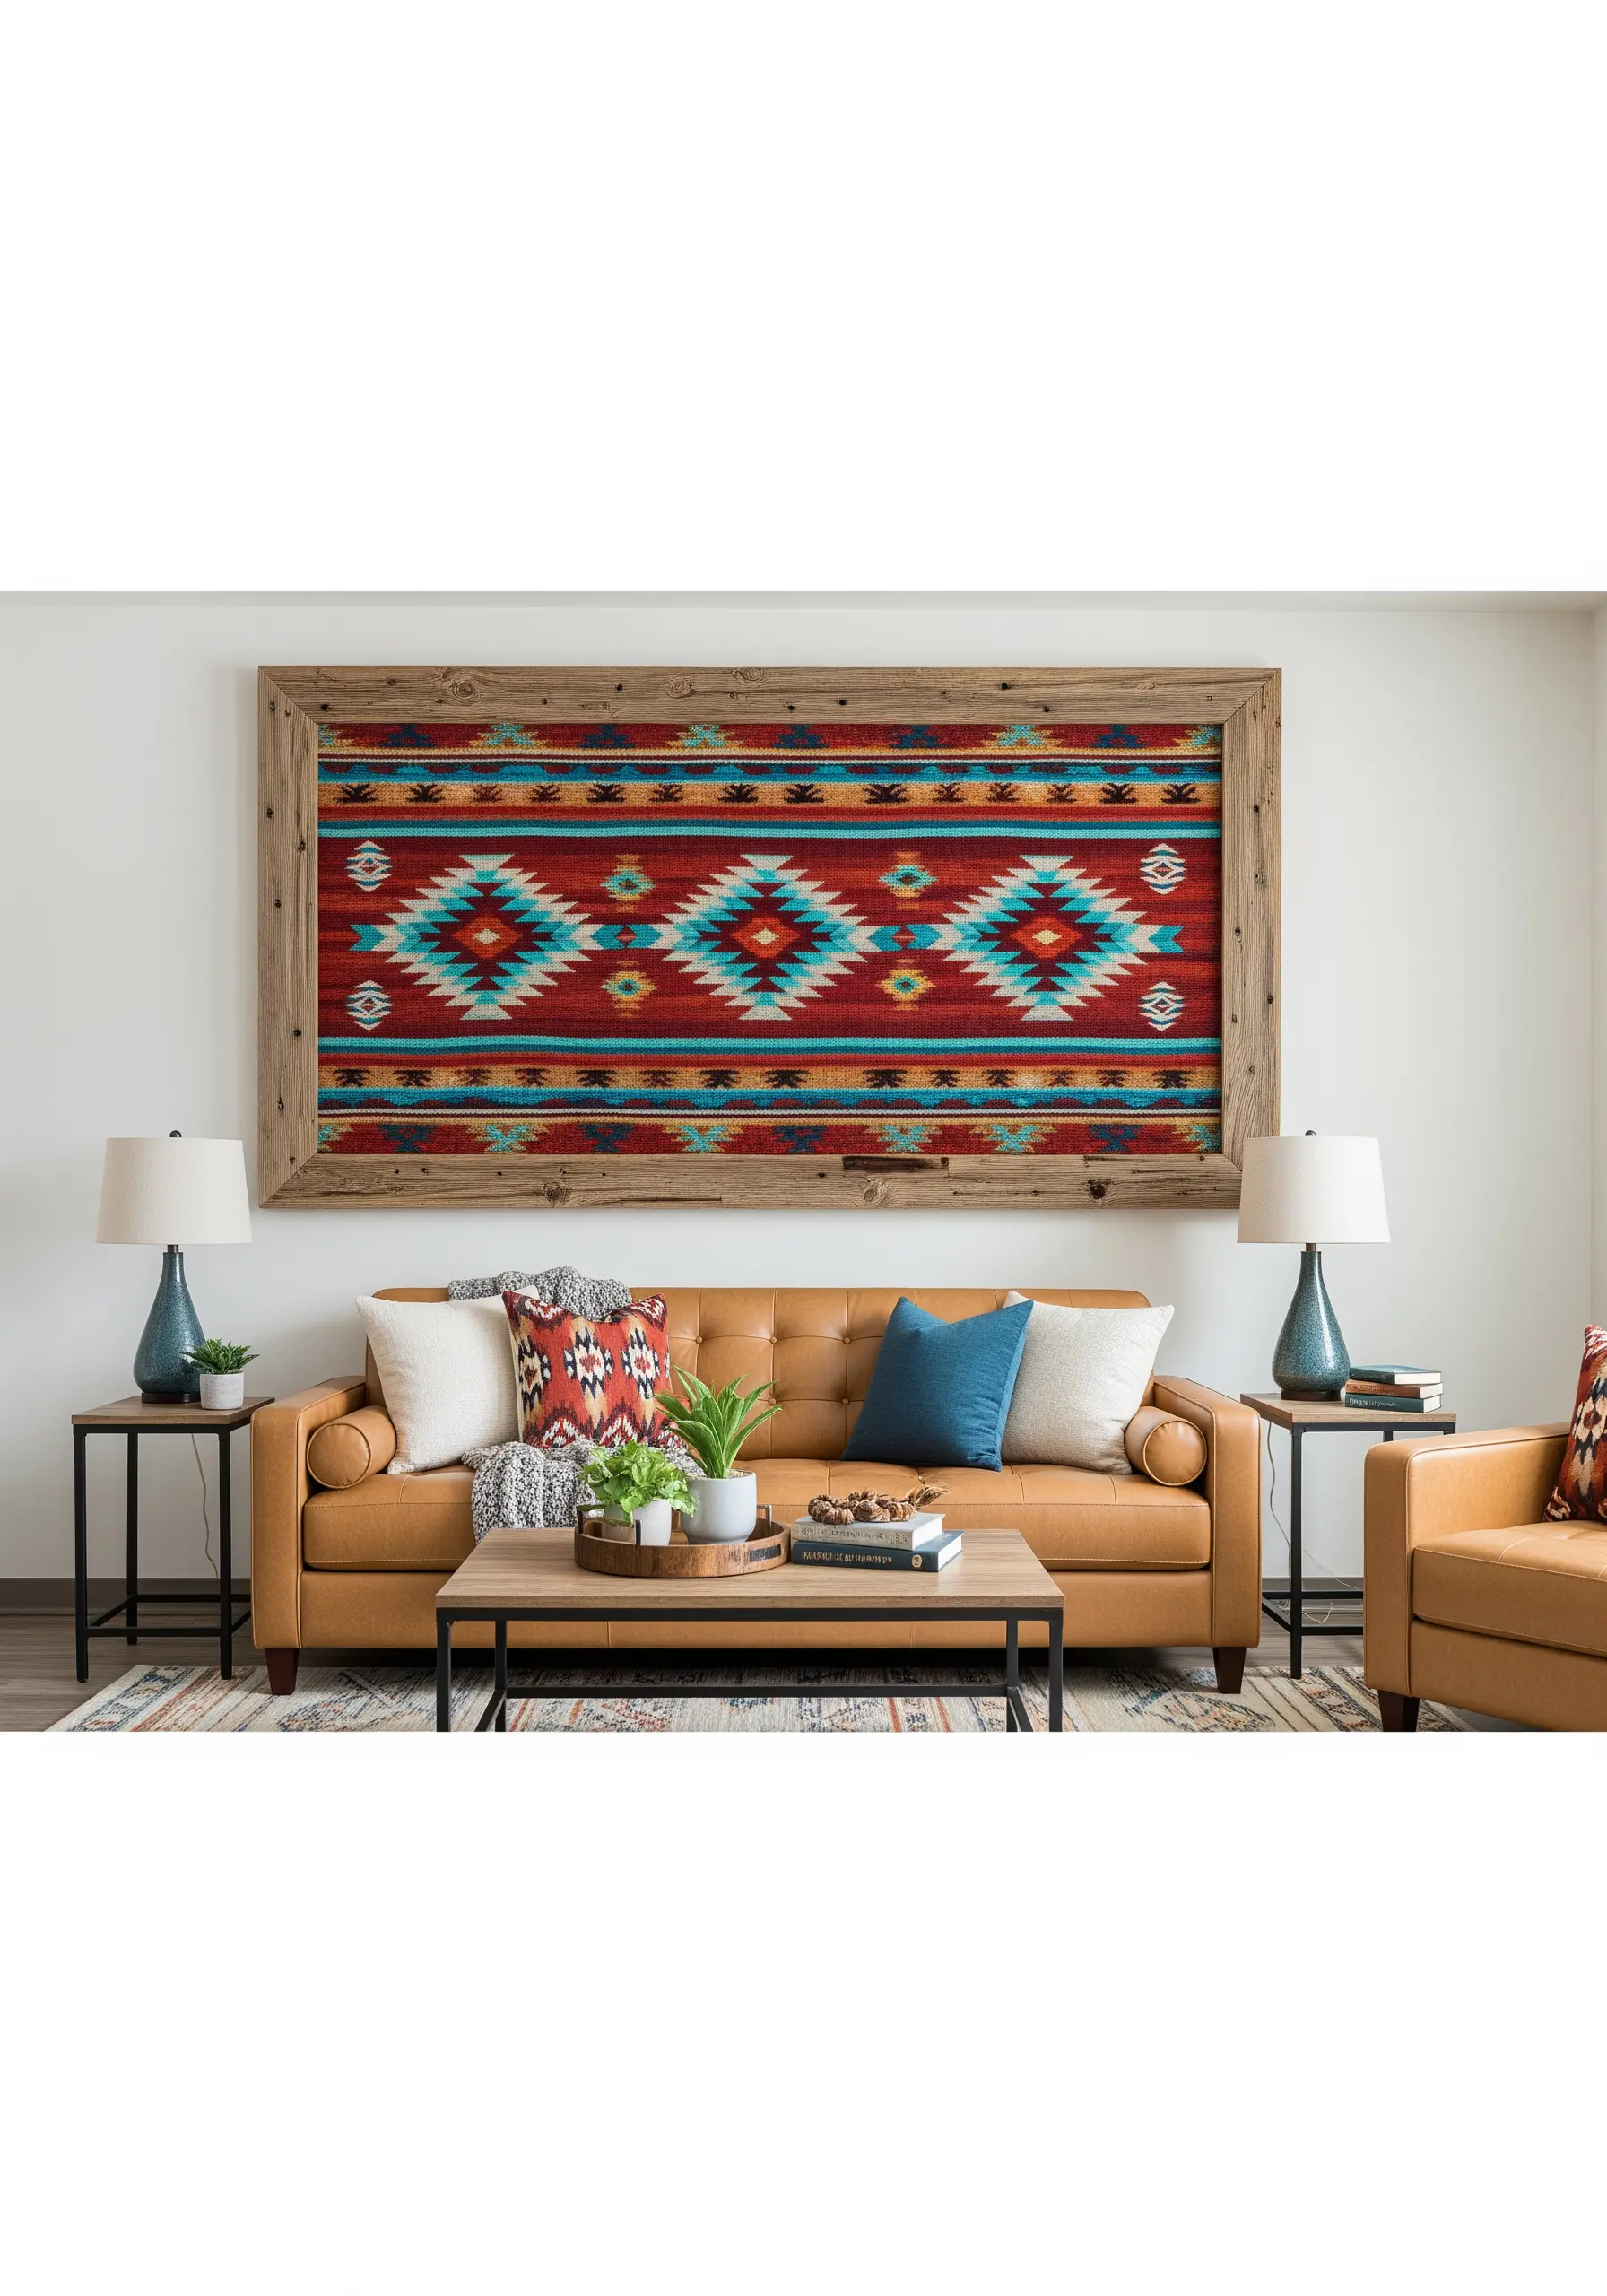
Recreate the look of a traditional woven textile, like a Navajo rug, using embroidery stitches.
Use a long satin stitch or even a brick stitch to fill in the geometric shapes, mimicking the way threads interlock in weaving.
The key to success is a precise pattern transfer. Carefully draw your entire grid and all the diamond and triangle motifs onto your fabric before you begin.
Mounting the finished piece in a rustic, reclaimed wood frame enhances the Southwestern aesthetic and gives the embroidery a substantial presence.
23. Capture Iridescence with Strategic Color Blending

To embroider something with an iridescent sheen, like a peacock feather, you need to master the art of subtle color blending.
Use single strands of floss and the long-and-short stitch technique, placing stitches of different colors (blues, greens, teals) next to each other randomly rather than in smooth gradients.
This scattered placement tricks the eye into seeing a shimmering, color-shifting effect as it moves.
For the central ‘eye’ of the feather, use concentric circles of satin stitch in bold, contrasting colors like copper and cobalt blue to make it the undeniable focal point.
24. Embrace Wabi-Sabi with Raw Edges and Bold Stitches
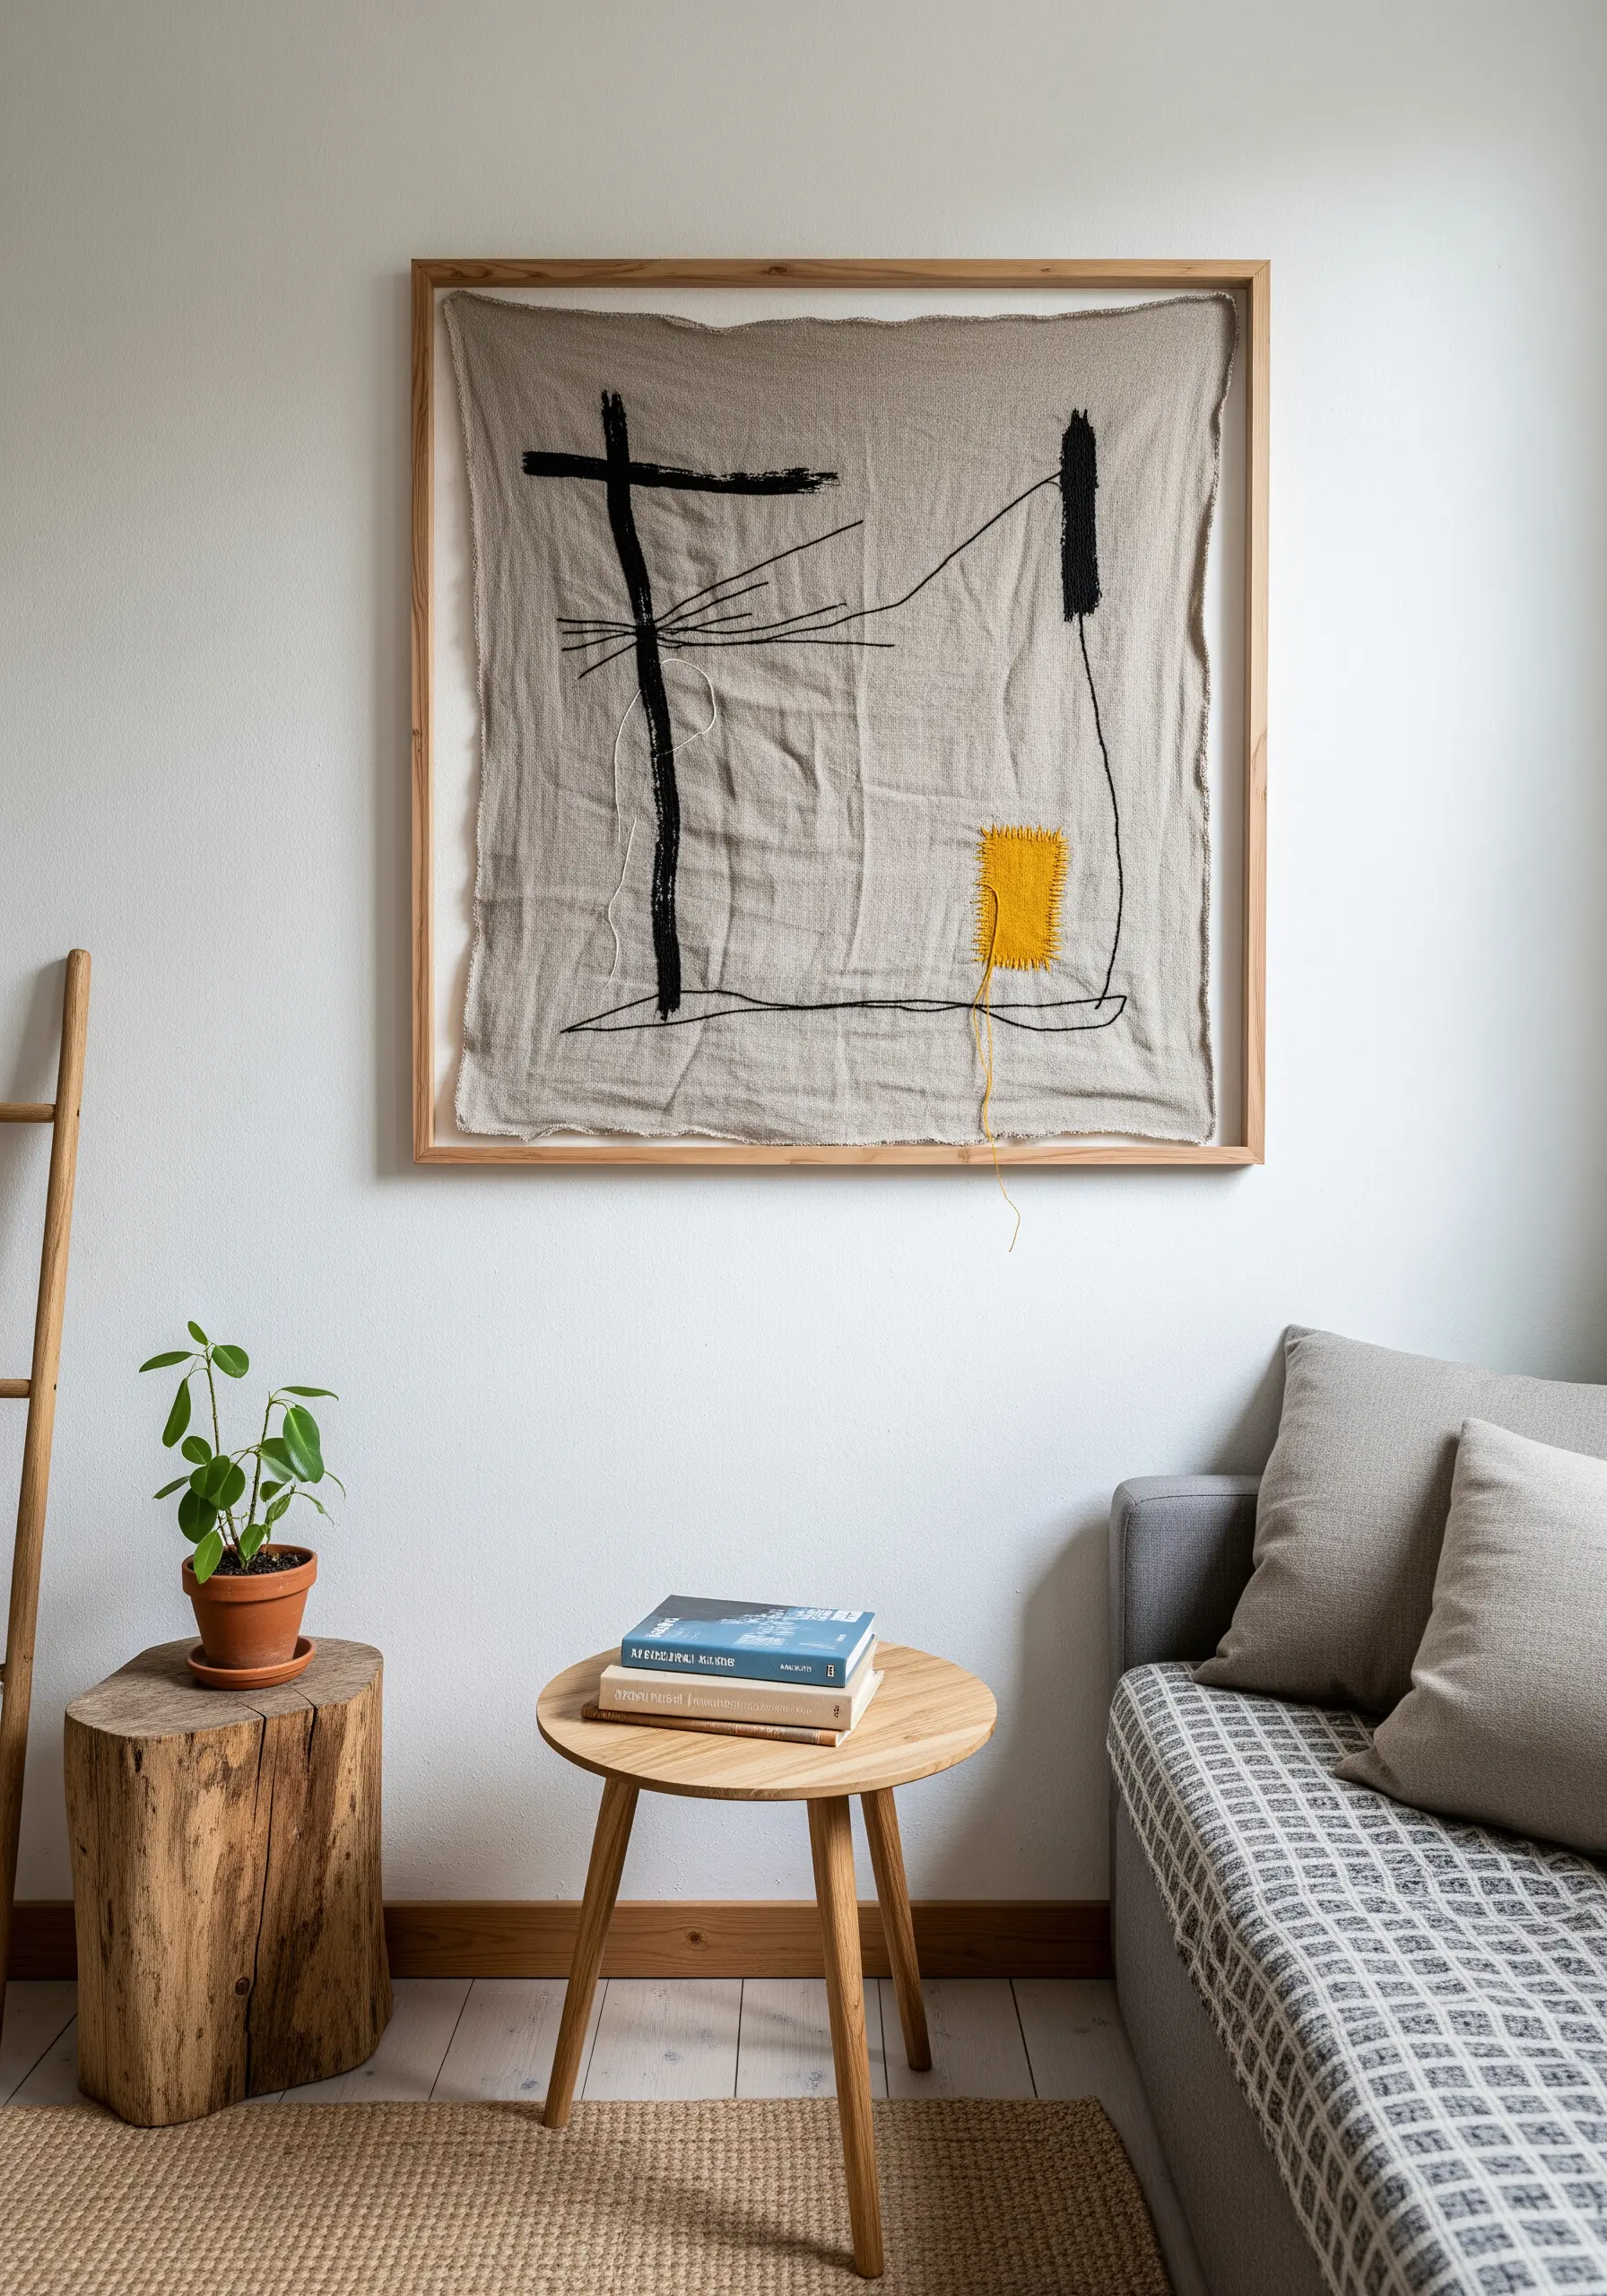
Challenge the idea of perfection by creating a piece that celebrates raw, organic beauty.
Use a loosely woven, natural linen and leave the edges frayed and untrimmed. Mount the fabric loosely in a shadowbox-style frame so it can drape and fold naturally.
Use thick black yarn or roving to create bold, expressive, almost primal marks that contrast with the delicate fabric.
A single, unexpected block of color, applied with a simple darning stitch, adds a touch of modern artistry and thoughtful imperfection.
These are the organic embroidery designs perfect for minimalist decor lovers.