

You already know the stitches. But what if the secret to elevating your work isn’t learning a new, complex technique, but rather rethinking the one thing that makes embroidery so special: texture?
Texture is more than just a stitch choice. It’s the weight of your thread, the density of your knots, and the way different fibers play against each other. It’s the decision to leave a space open or to fill it with plush, touchable stitches. It’s what transforms a simple design into a piece of art that invites you to look closer, and then to reach out and touch.
Here, you’ll find ideas that focus on capturing the honest, cozy textures of the natural world. These are not about perfection, but about intention—helping you create decor that not only looks beautiful but feels grounded, warm, and uniquely yours.
1. Render Lush Moss with Layered French Knots

To capture the plush, velvety texture of a mossy forest floor, rely on densely packed French knots.
Work in clusters using several shades of green and ochre simultaneously to create natural-looking depth and variation.
Vary the size of your knots by adjusting thread tension or the number of wraps around your needle—tighter, smaller knots for shaded areas and larger, looser knots for highlights.
Contrast the soft moss with smooth, defined tree roots and branches using a disciplined satin stitch or couched thicker threads, making the texture difference the star of your piece.
2. Add Sculptural Dimension with Yarn Couching
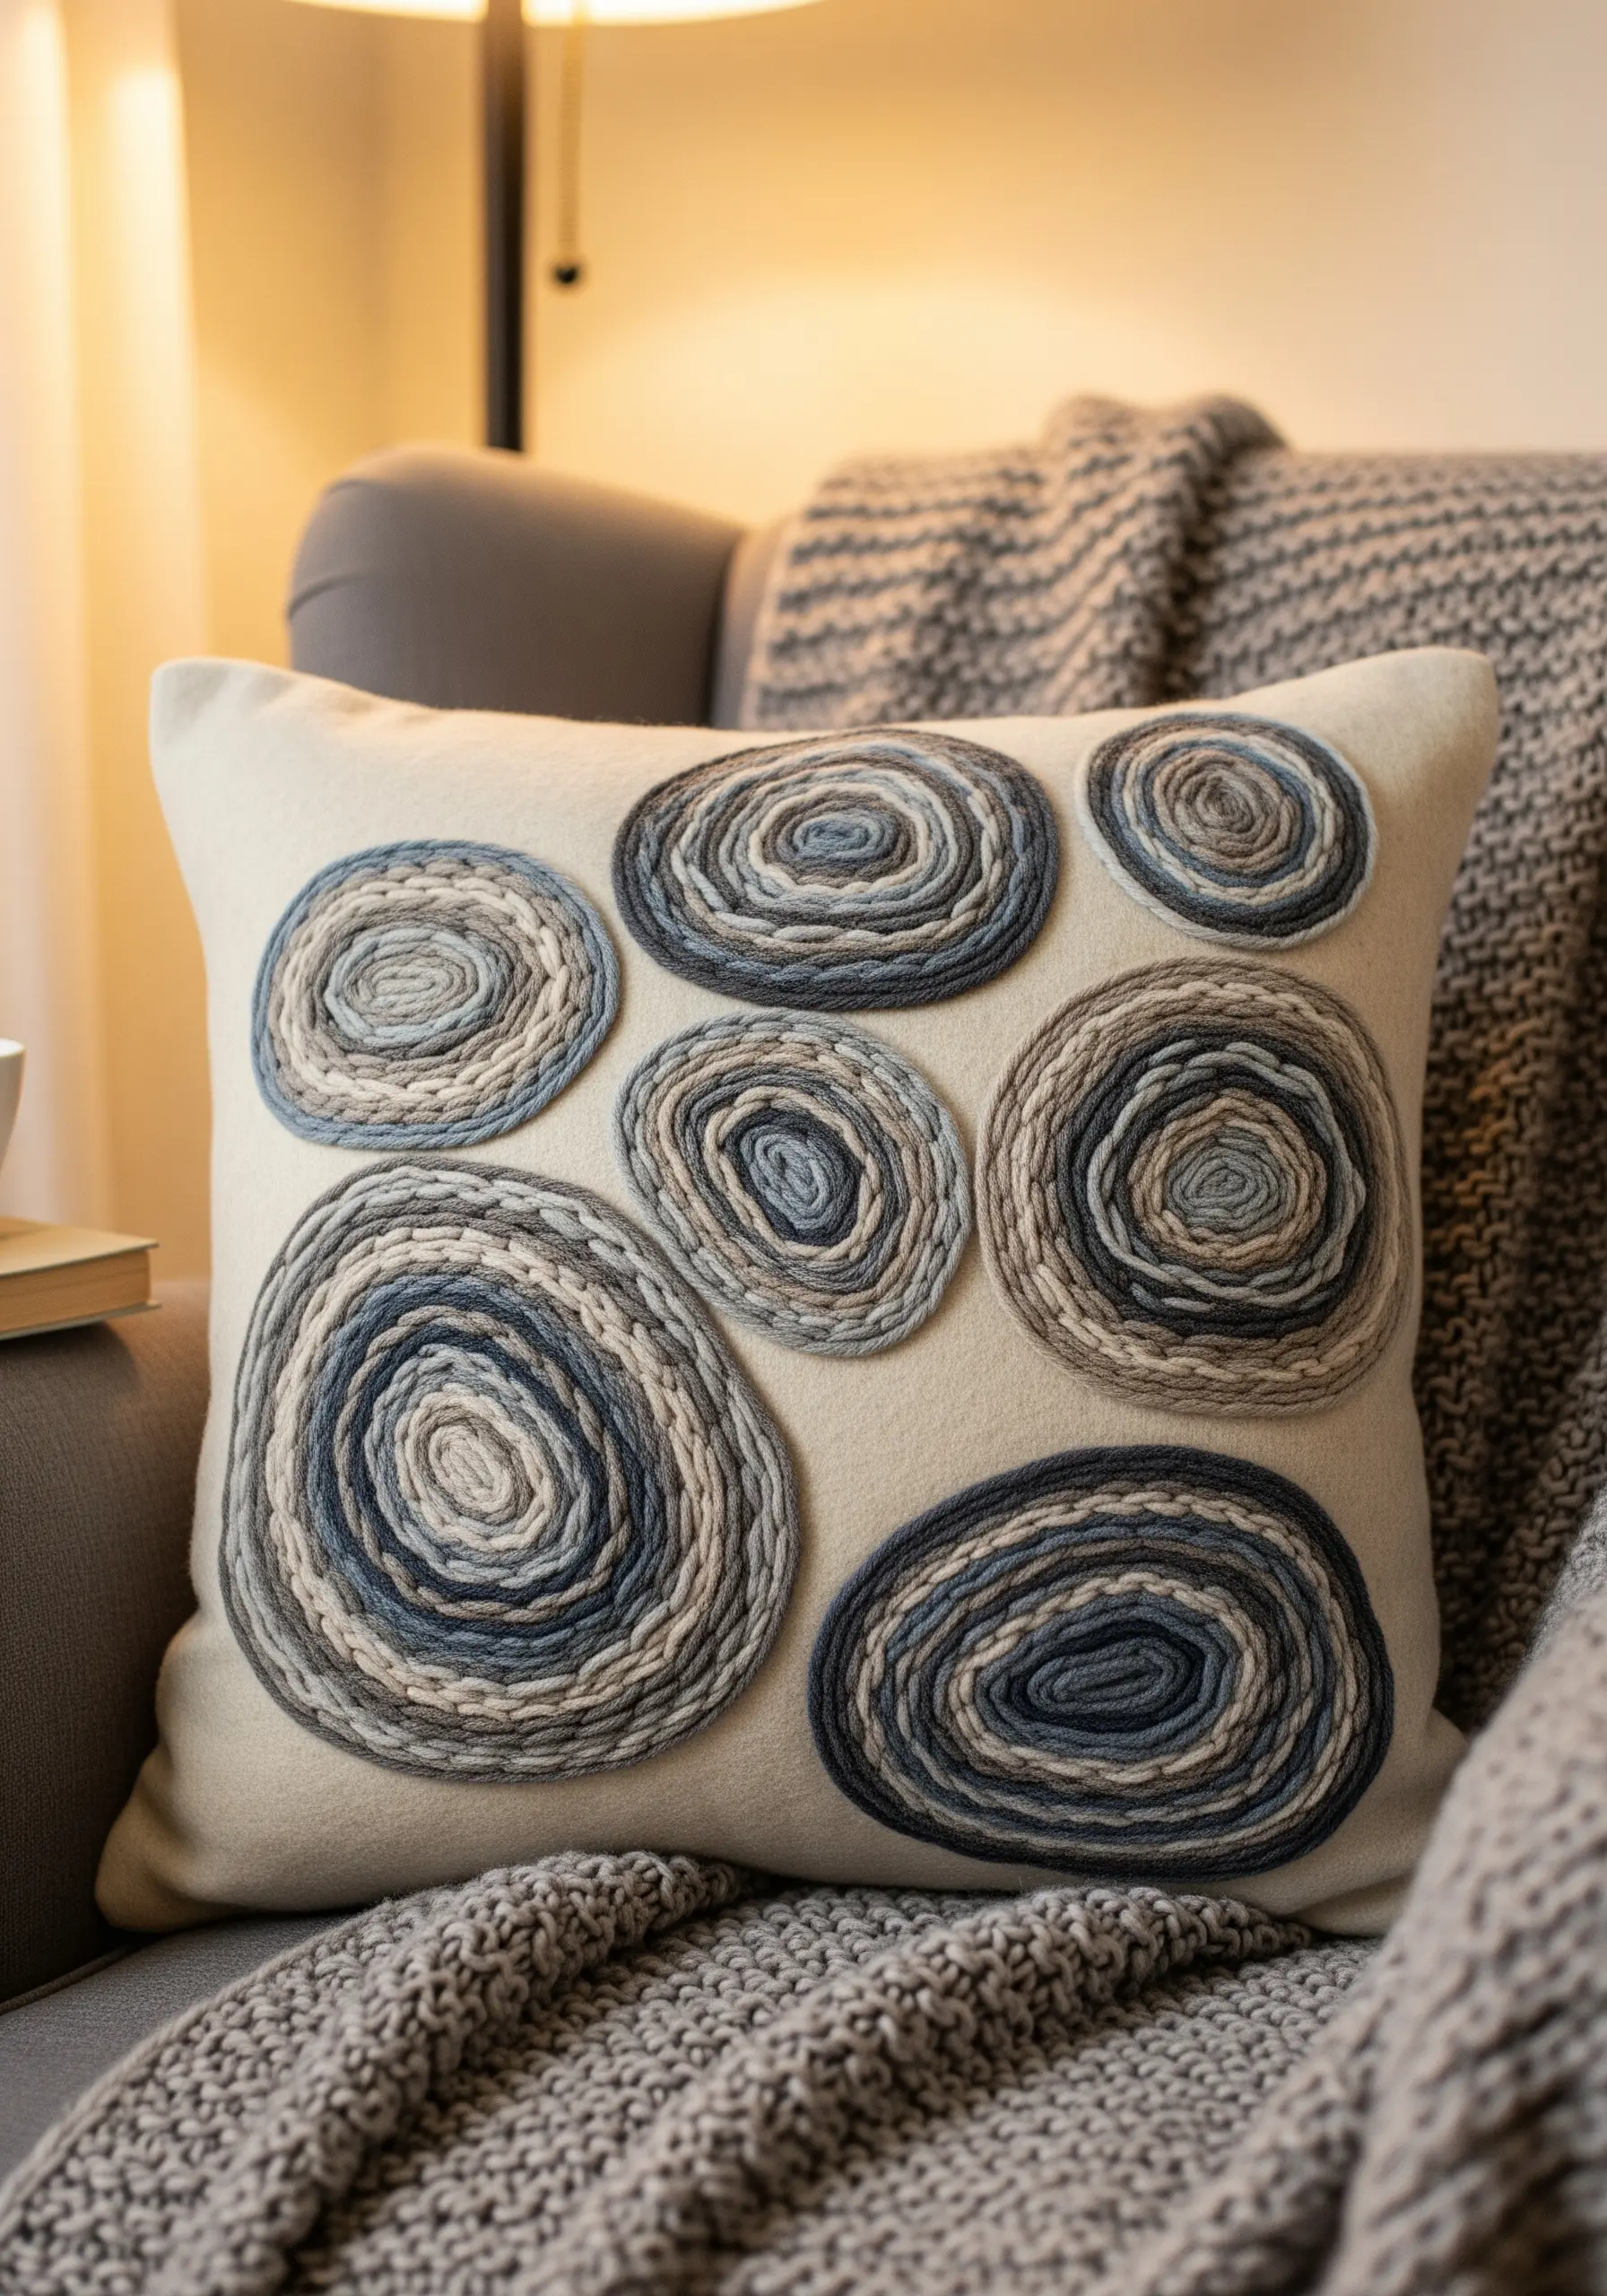
For bold, touchable texture on home decor like pillows, couching is your most effective technique.
Instead of filling shapes with thousands of stitches, simply lay down thick yarn or roving in your desired pattern and tack it in place with a thinner, matching thread.
Arrange different weights and colors of yarn into organic, concentric circles to create a design that is both modern and incredibly cozy.
This method works best on sturdy fabrics like felt, canvas, or thick linen that can support the weight of the yarn without puckering.
3. Weave Threads Directly into Natural Elements
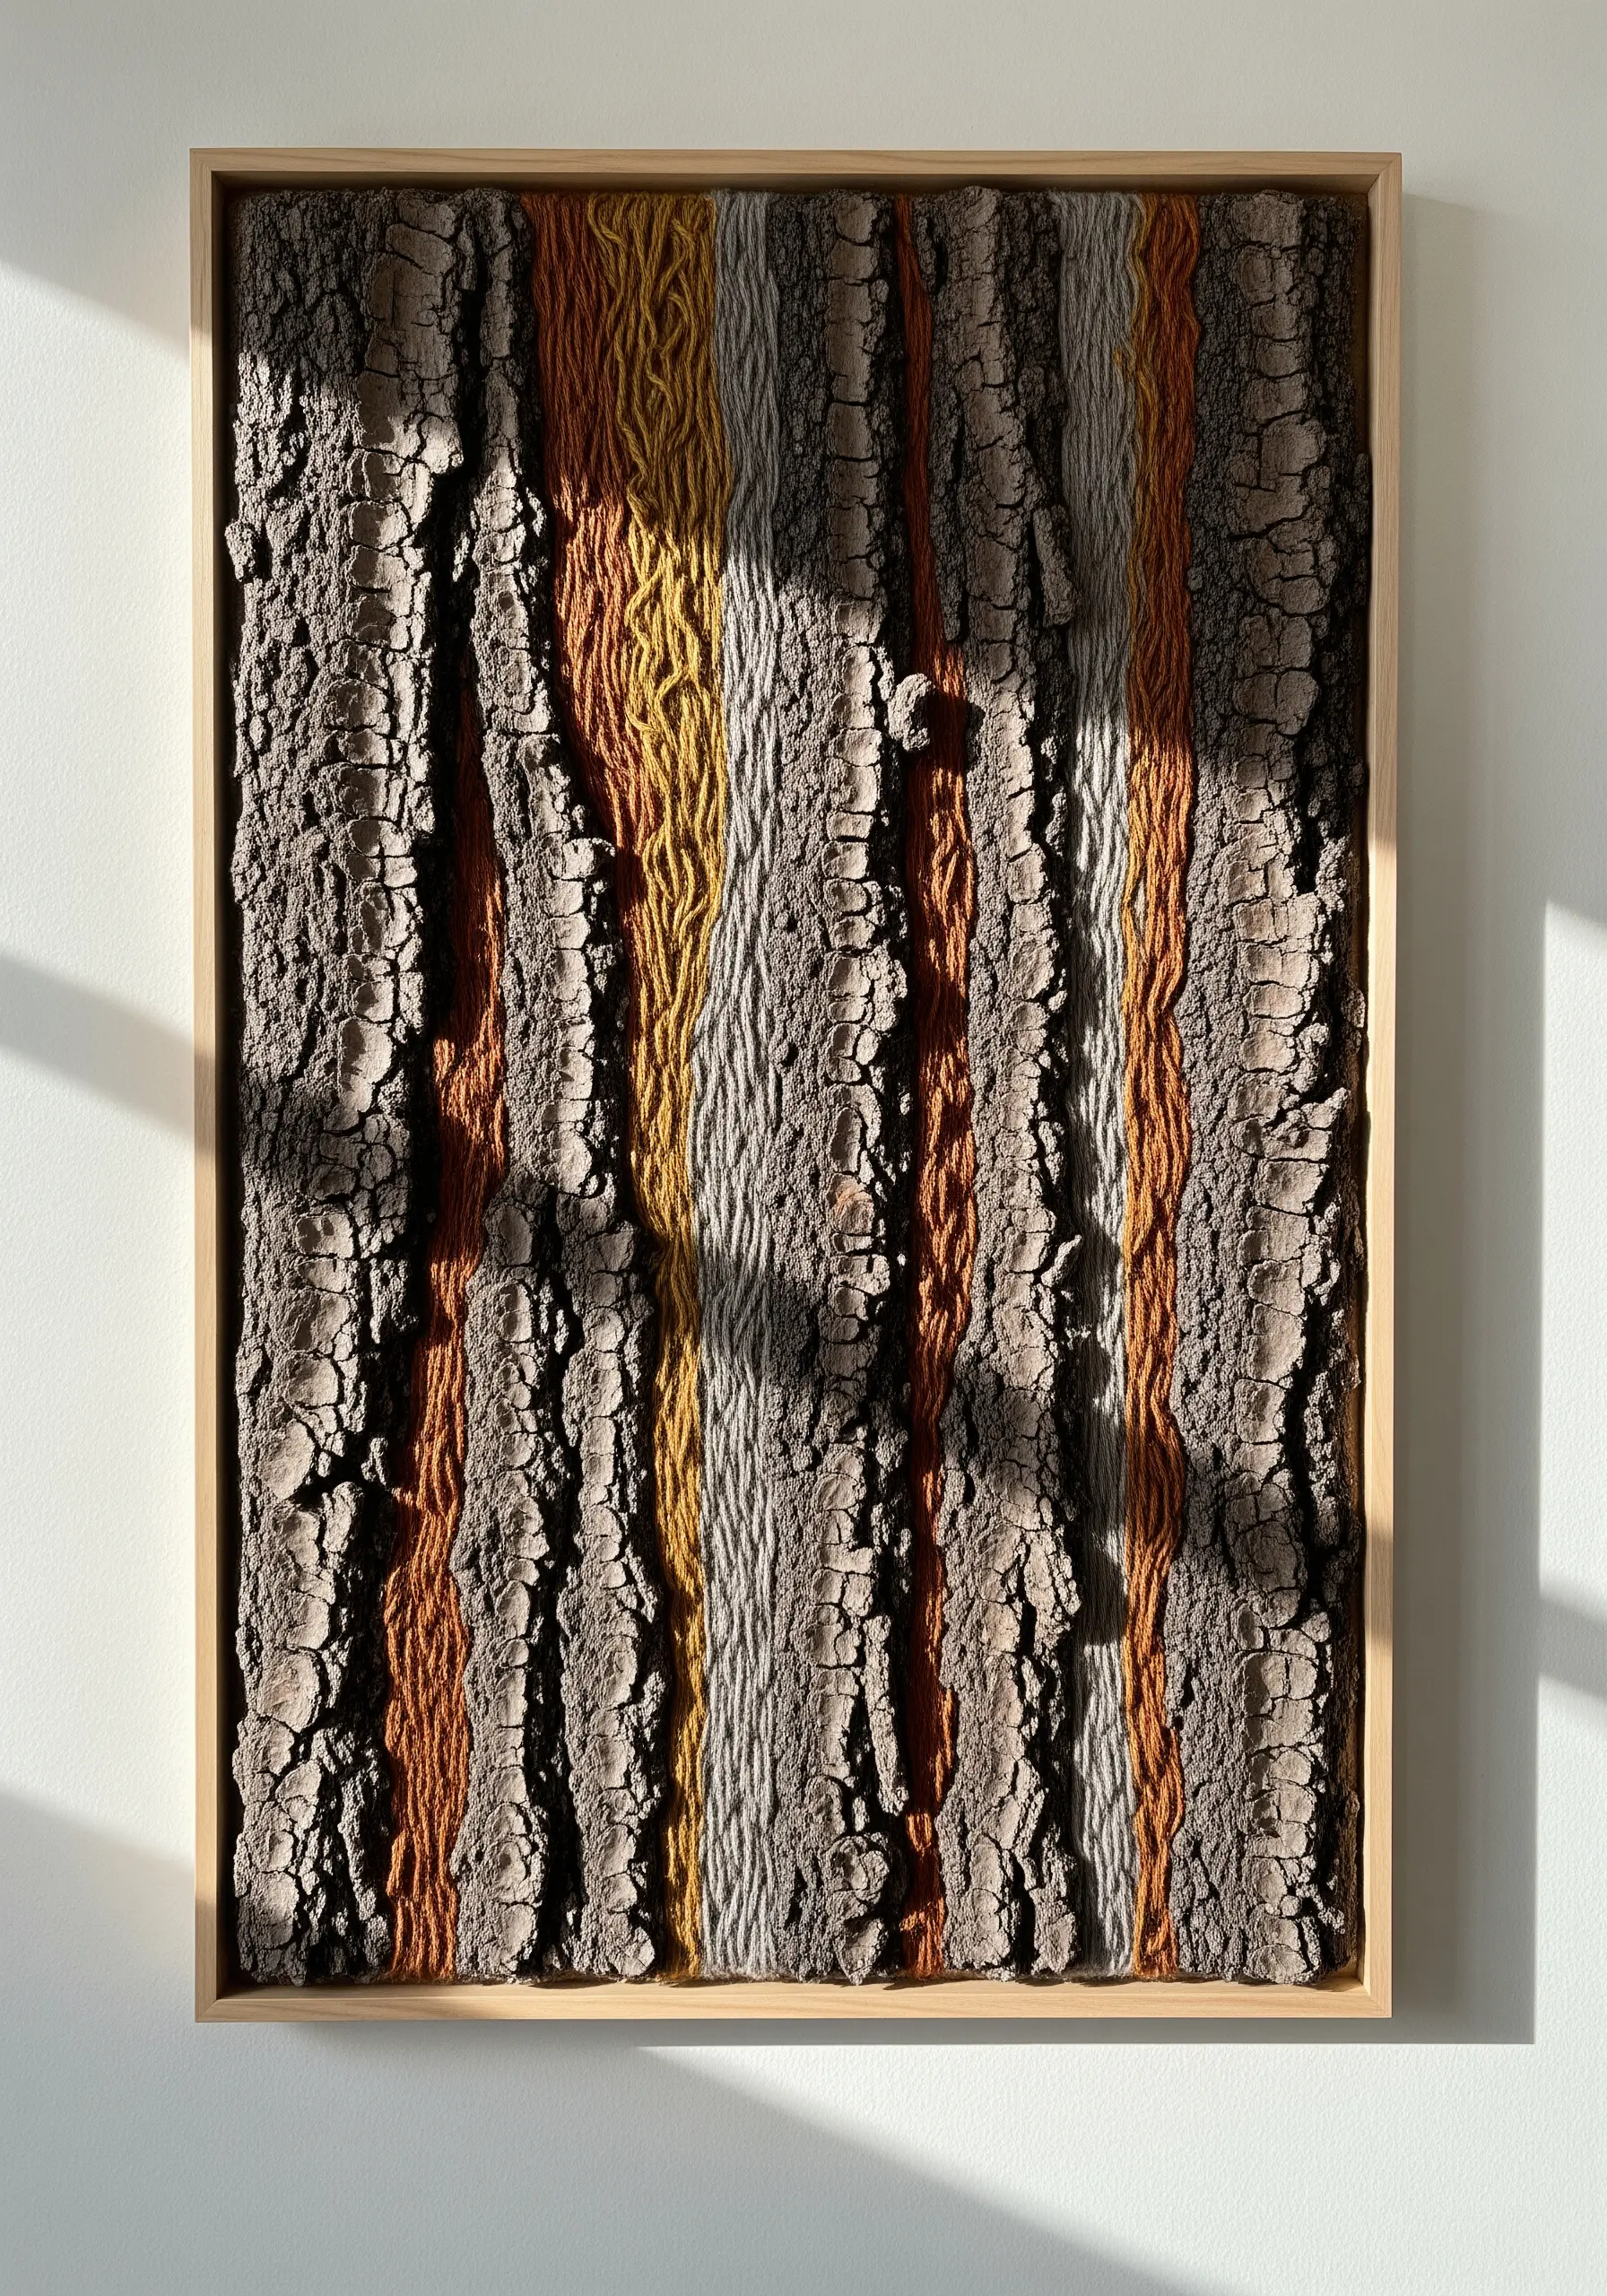
Go beyond fabric and use found natural objects like tree bark as your canvas for a truly unique piece of wall art.
Select pieces of bark with interesting grooves and textures, then carefully wrap or weave yarn through the natural crevices.
Choose yarn colors that either complement or boldly contrast with the bark’s inherent tones—think ochre, rust, and sage against deep brown.
This mixed-media approach celebrates the raw texture of the wood itself, making it an integral part of your finished artwork.
4. Build 3D Forms with Stumpwork Techniques
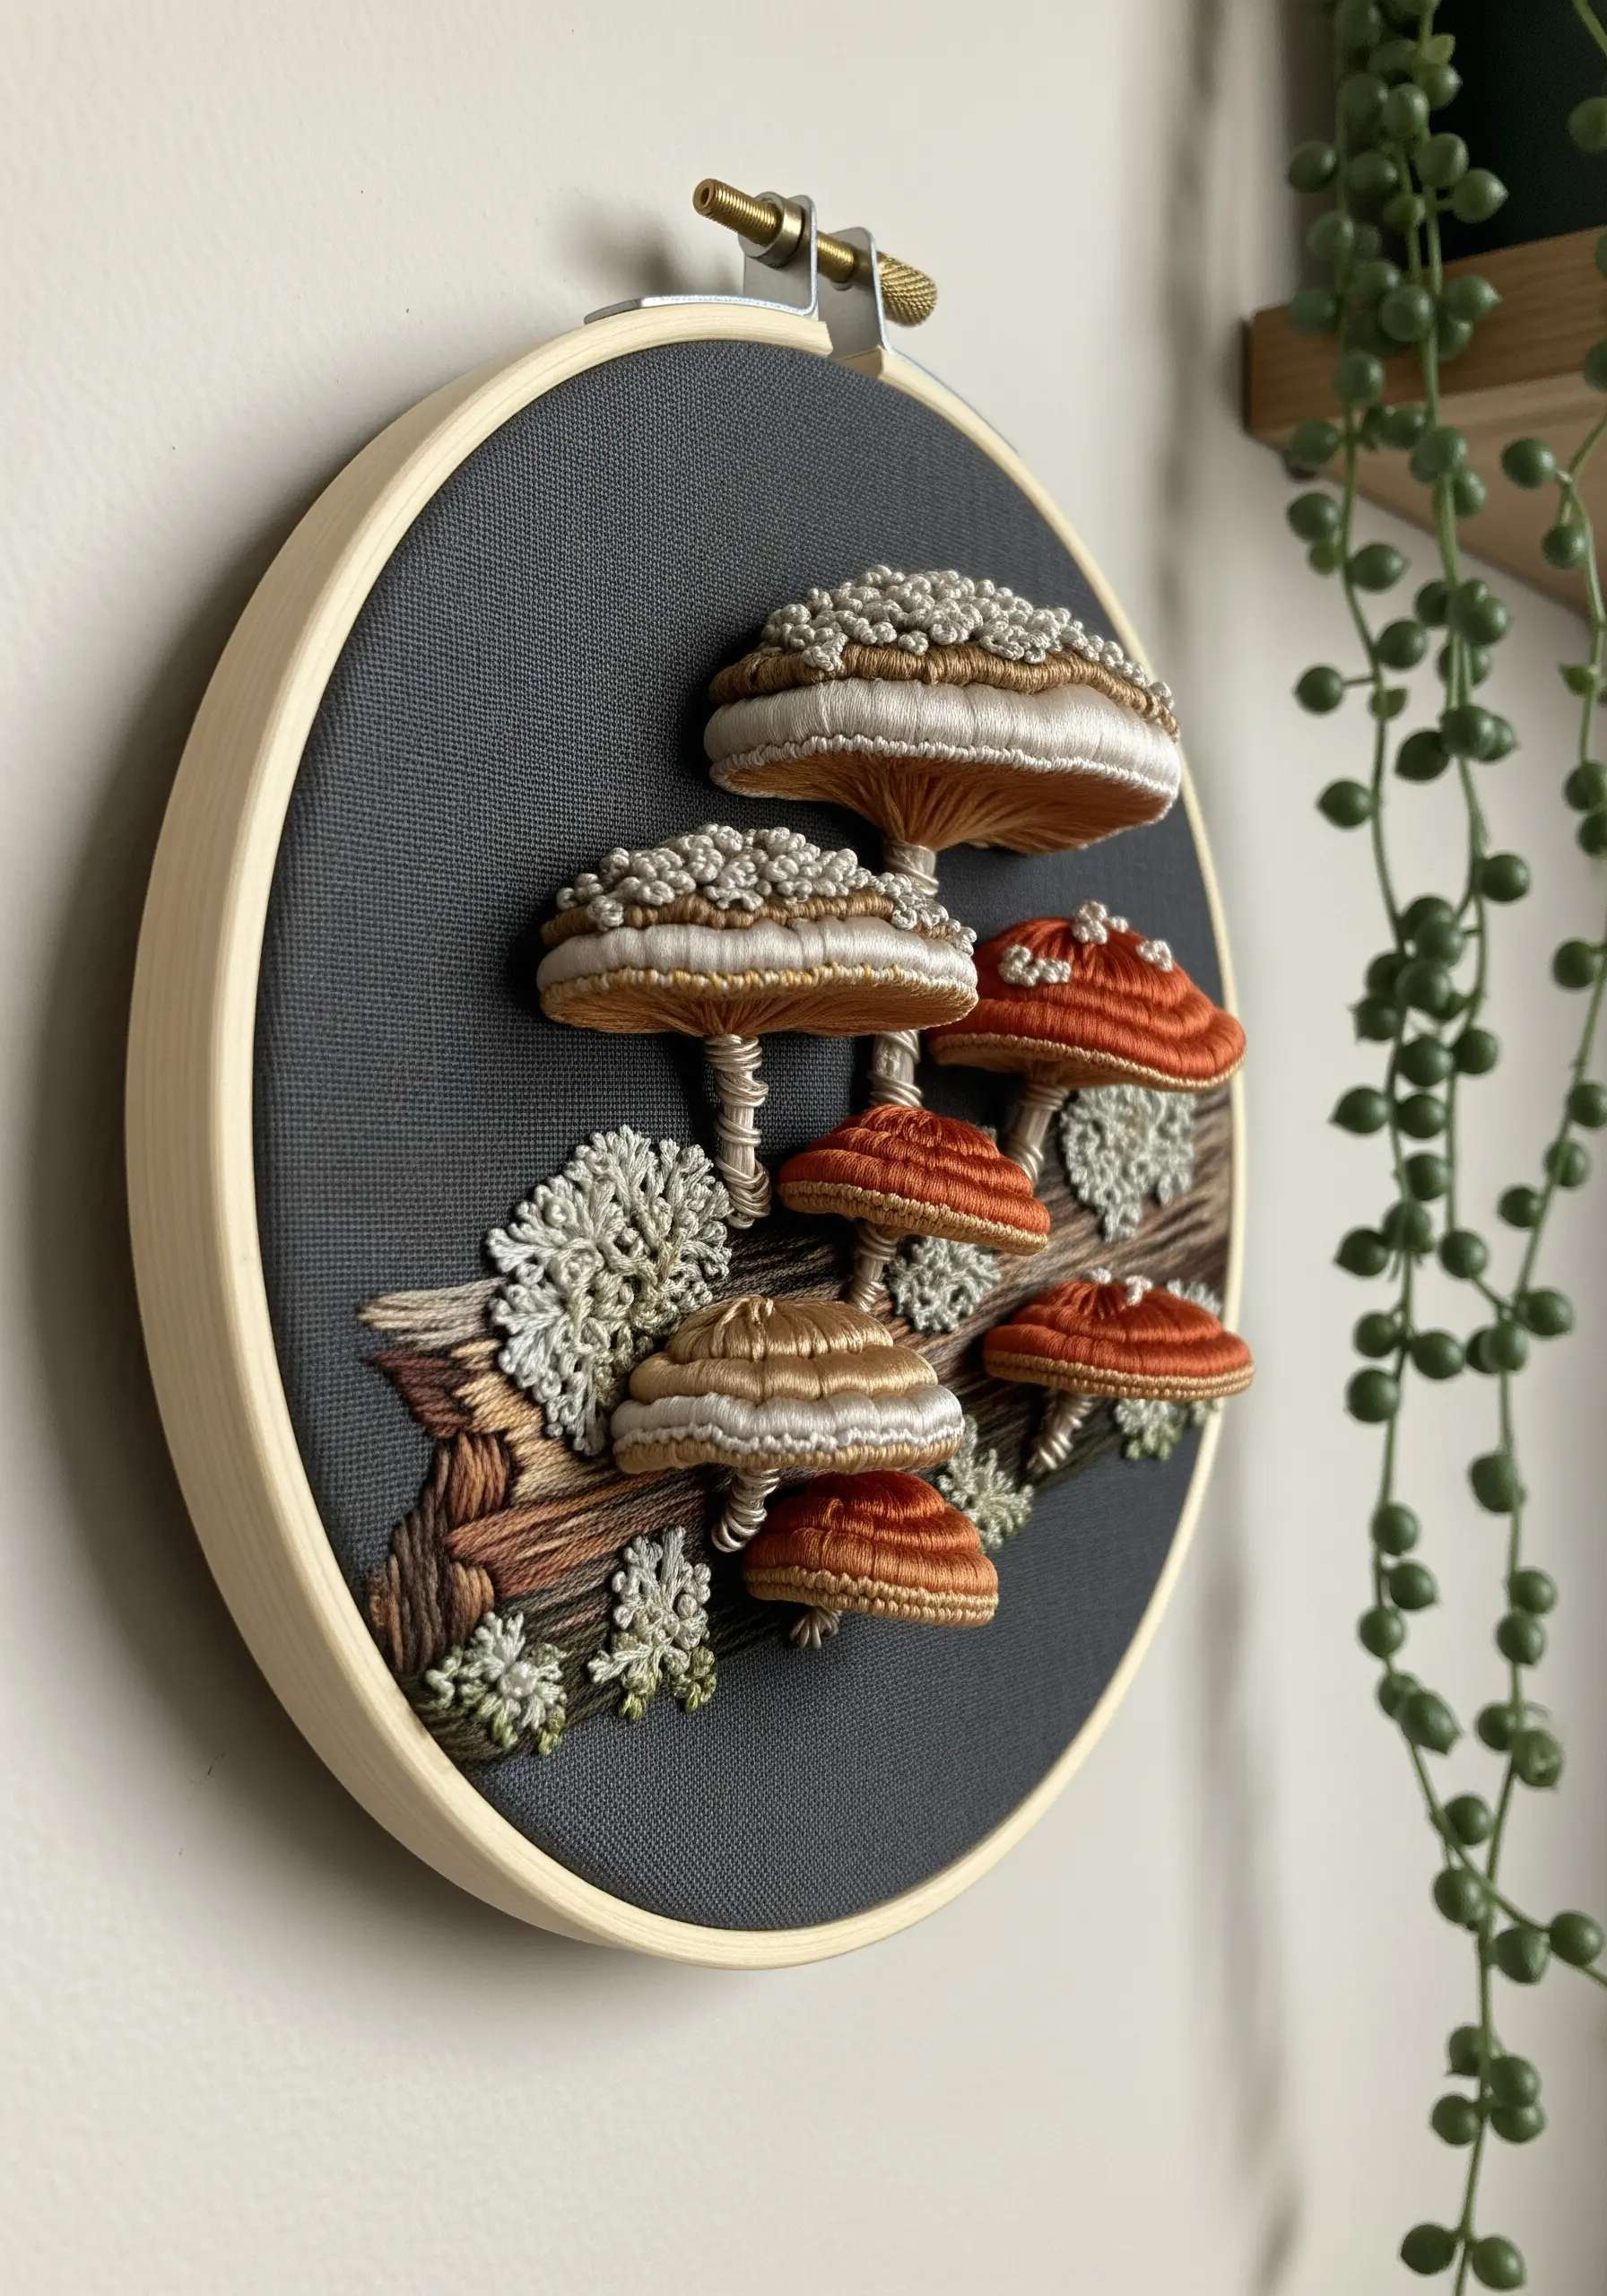
To make elements like mushrooms literally pop from the fabric, explore the fundamentals of stumpwork.
Create the mushroom caps separately by embroidering over a small piece of felt padding or a delicate wire frame, then stitch them onto your main fabric.
Use dense French knots or seed stitches for the textured top surface and long, vertical satin stitches underneath to suggest gills.
This technique adds sculptural depth and realism, transforming a flat image into a tactile object.
5. Mimic a Coastline with Mixed-Fiber Layering
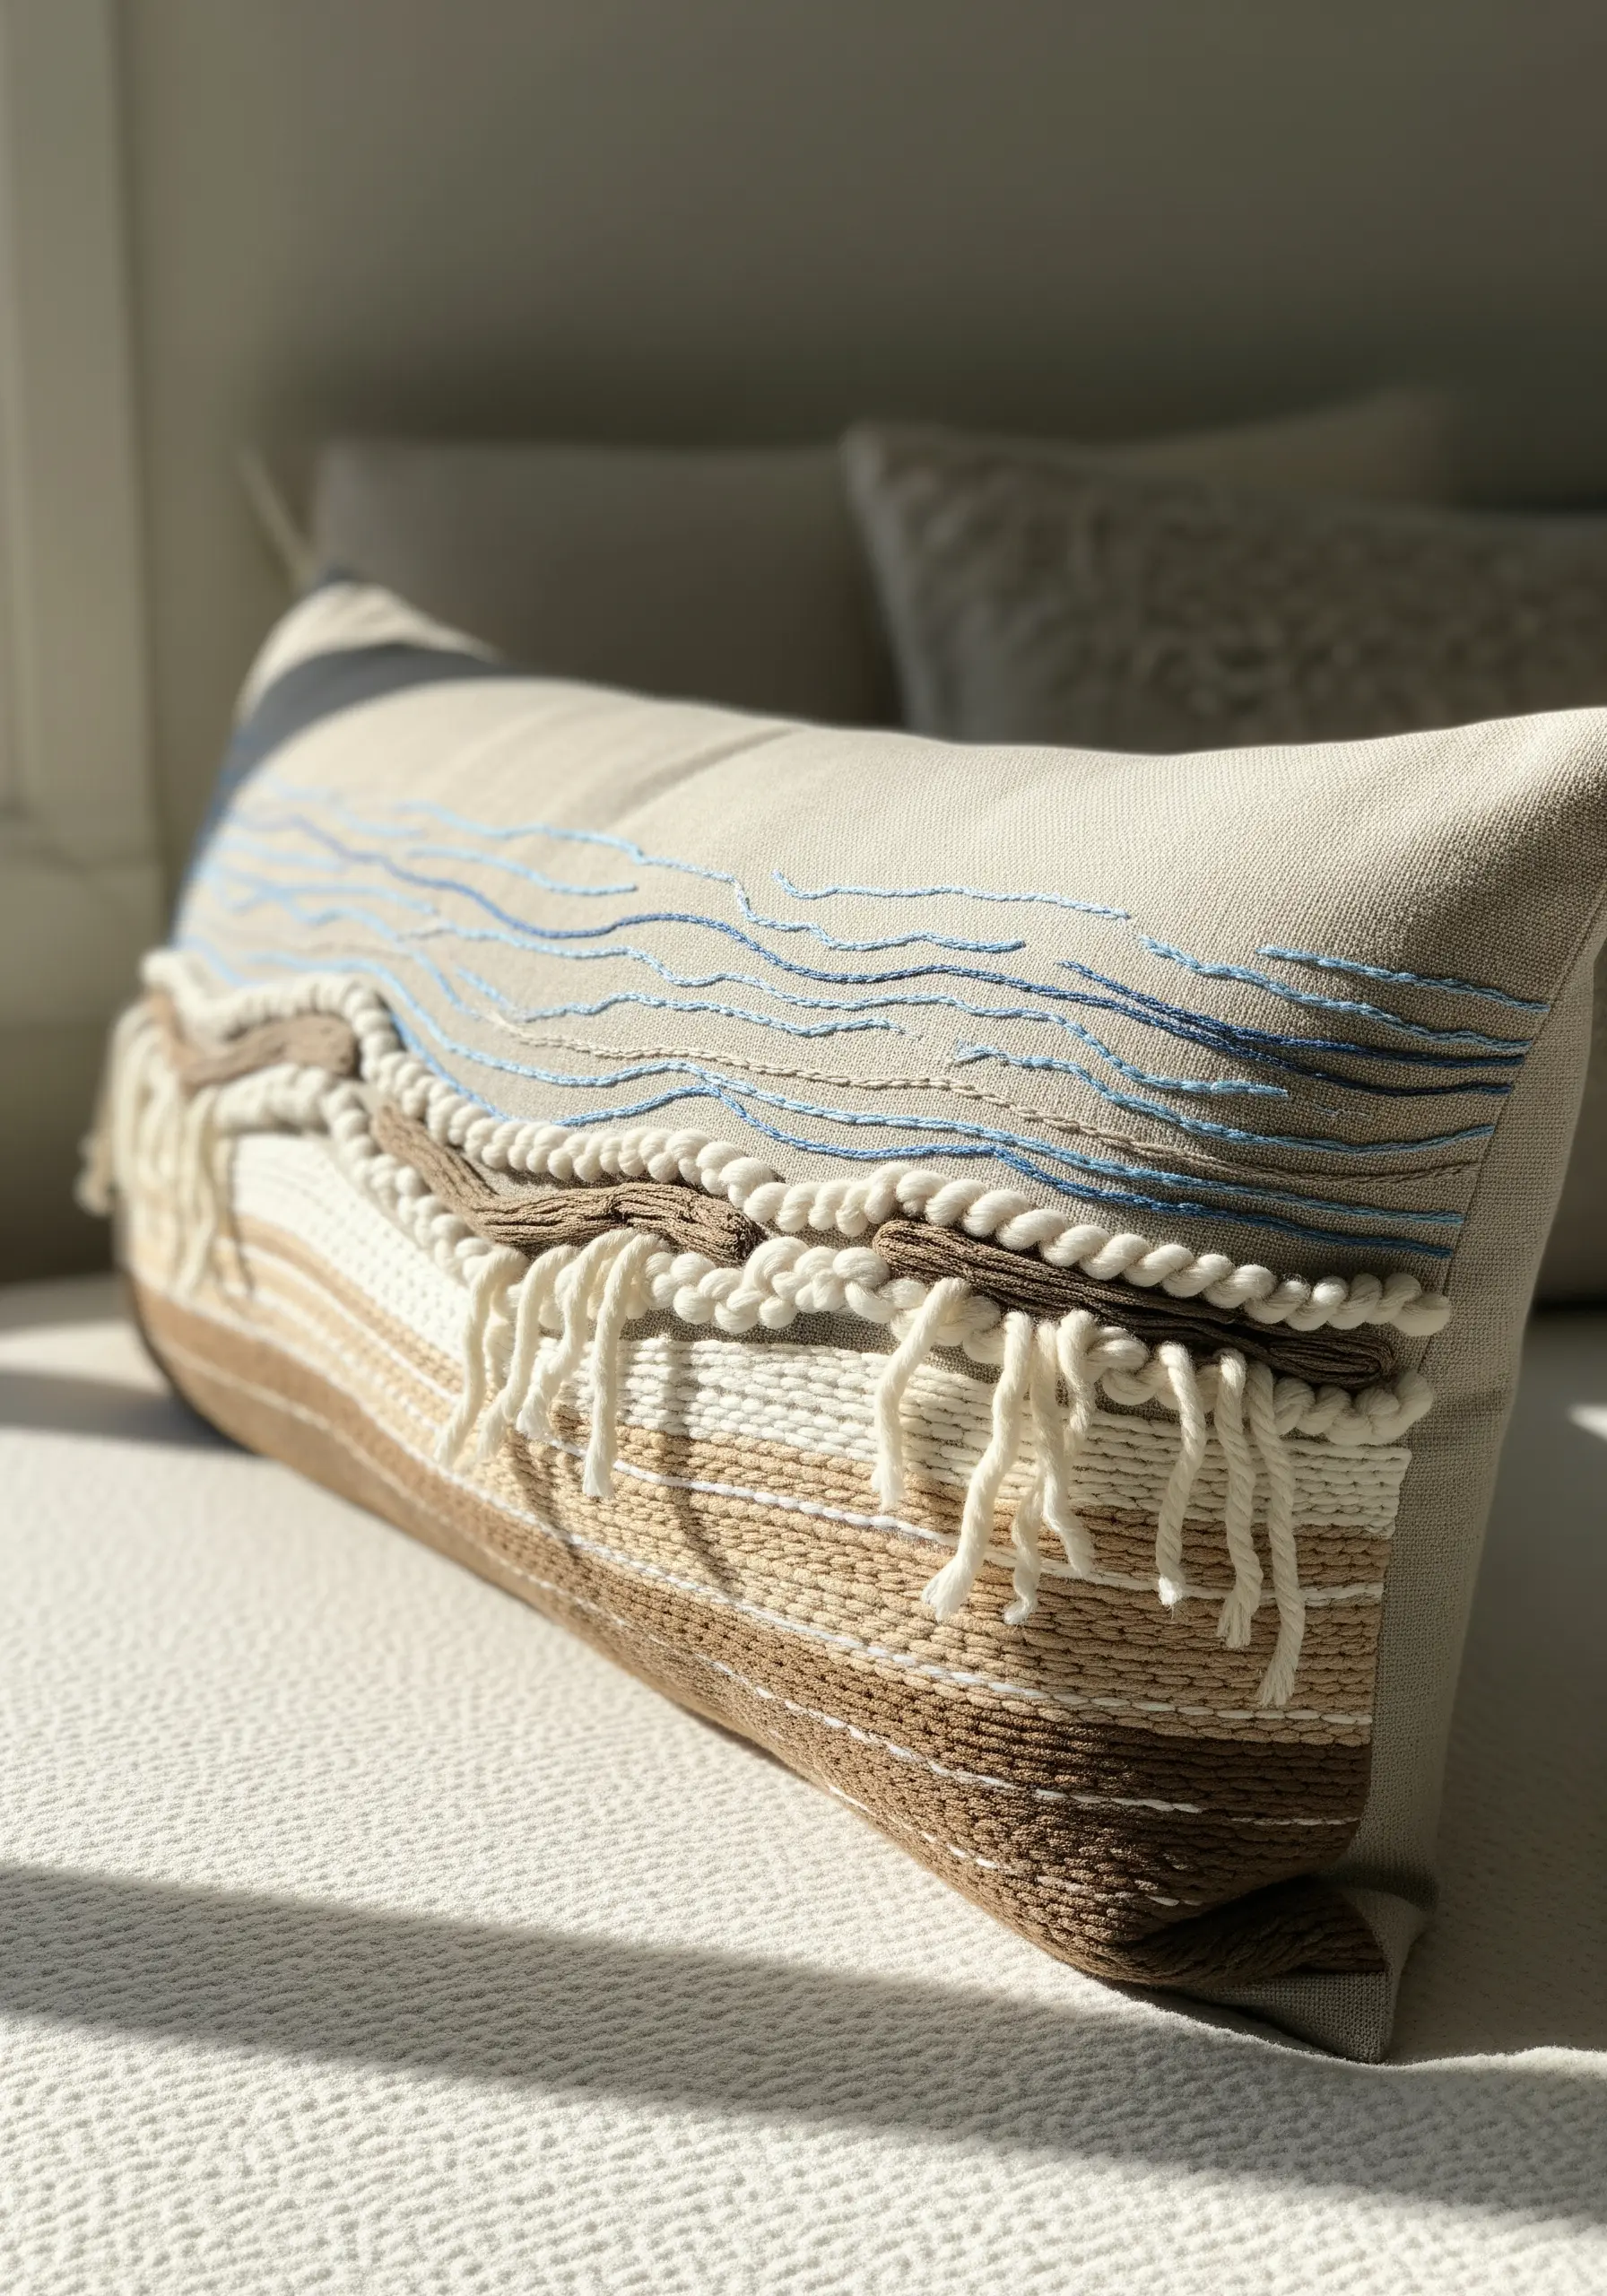
Evoke the feeling of a landscape by combining different textile techniques in one cohesive piece.
For a coastal scene, create the sandy shore by weaving thick, neutral yarns or fabric strips directly onto your base.
Incorporate couched, twisted cords and short, fringed tassels to represent the texture of seafoam and driftwood.
Finish with simple, wavy running stitches in shades of blue to suggest the motion of water, allowing the layered textures to tell a story.
6. Capture Arid Earth with Padded Satin Stitch
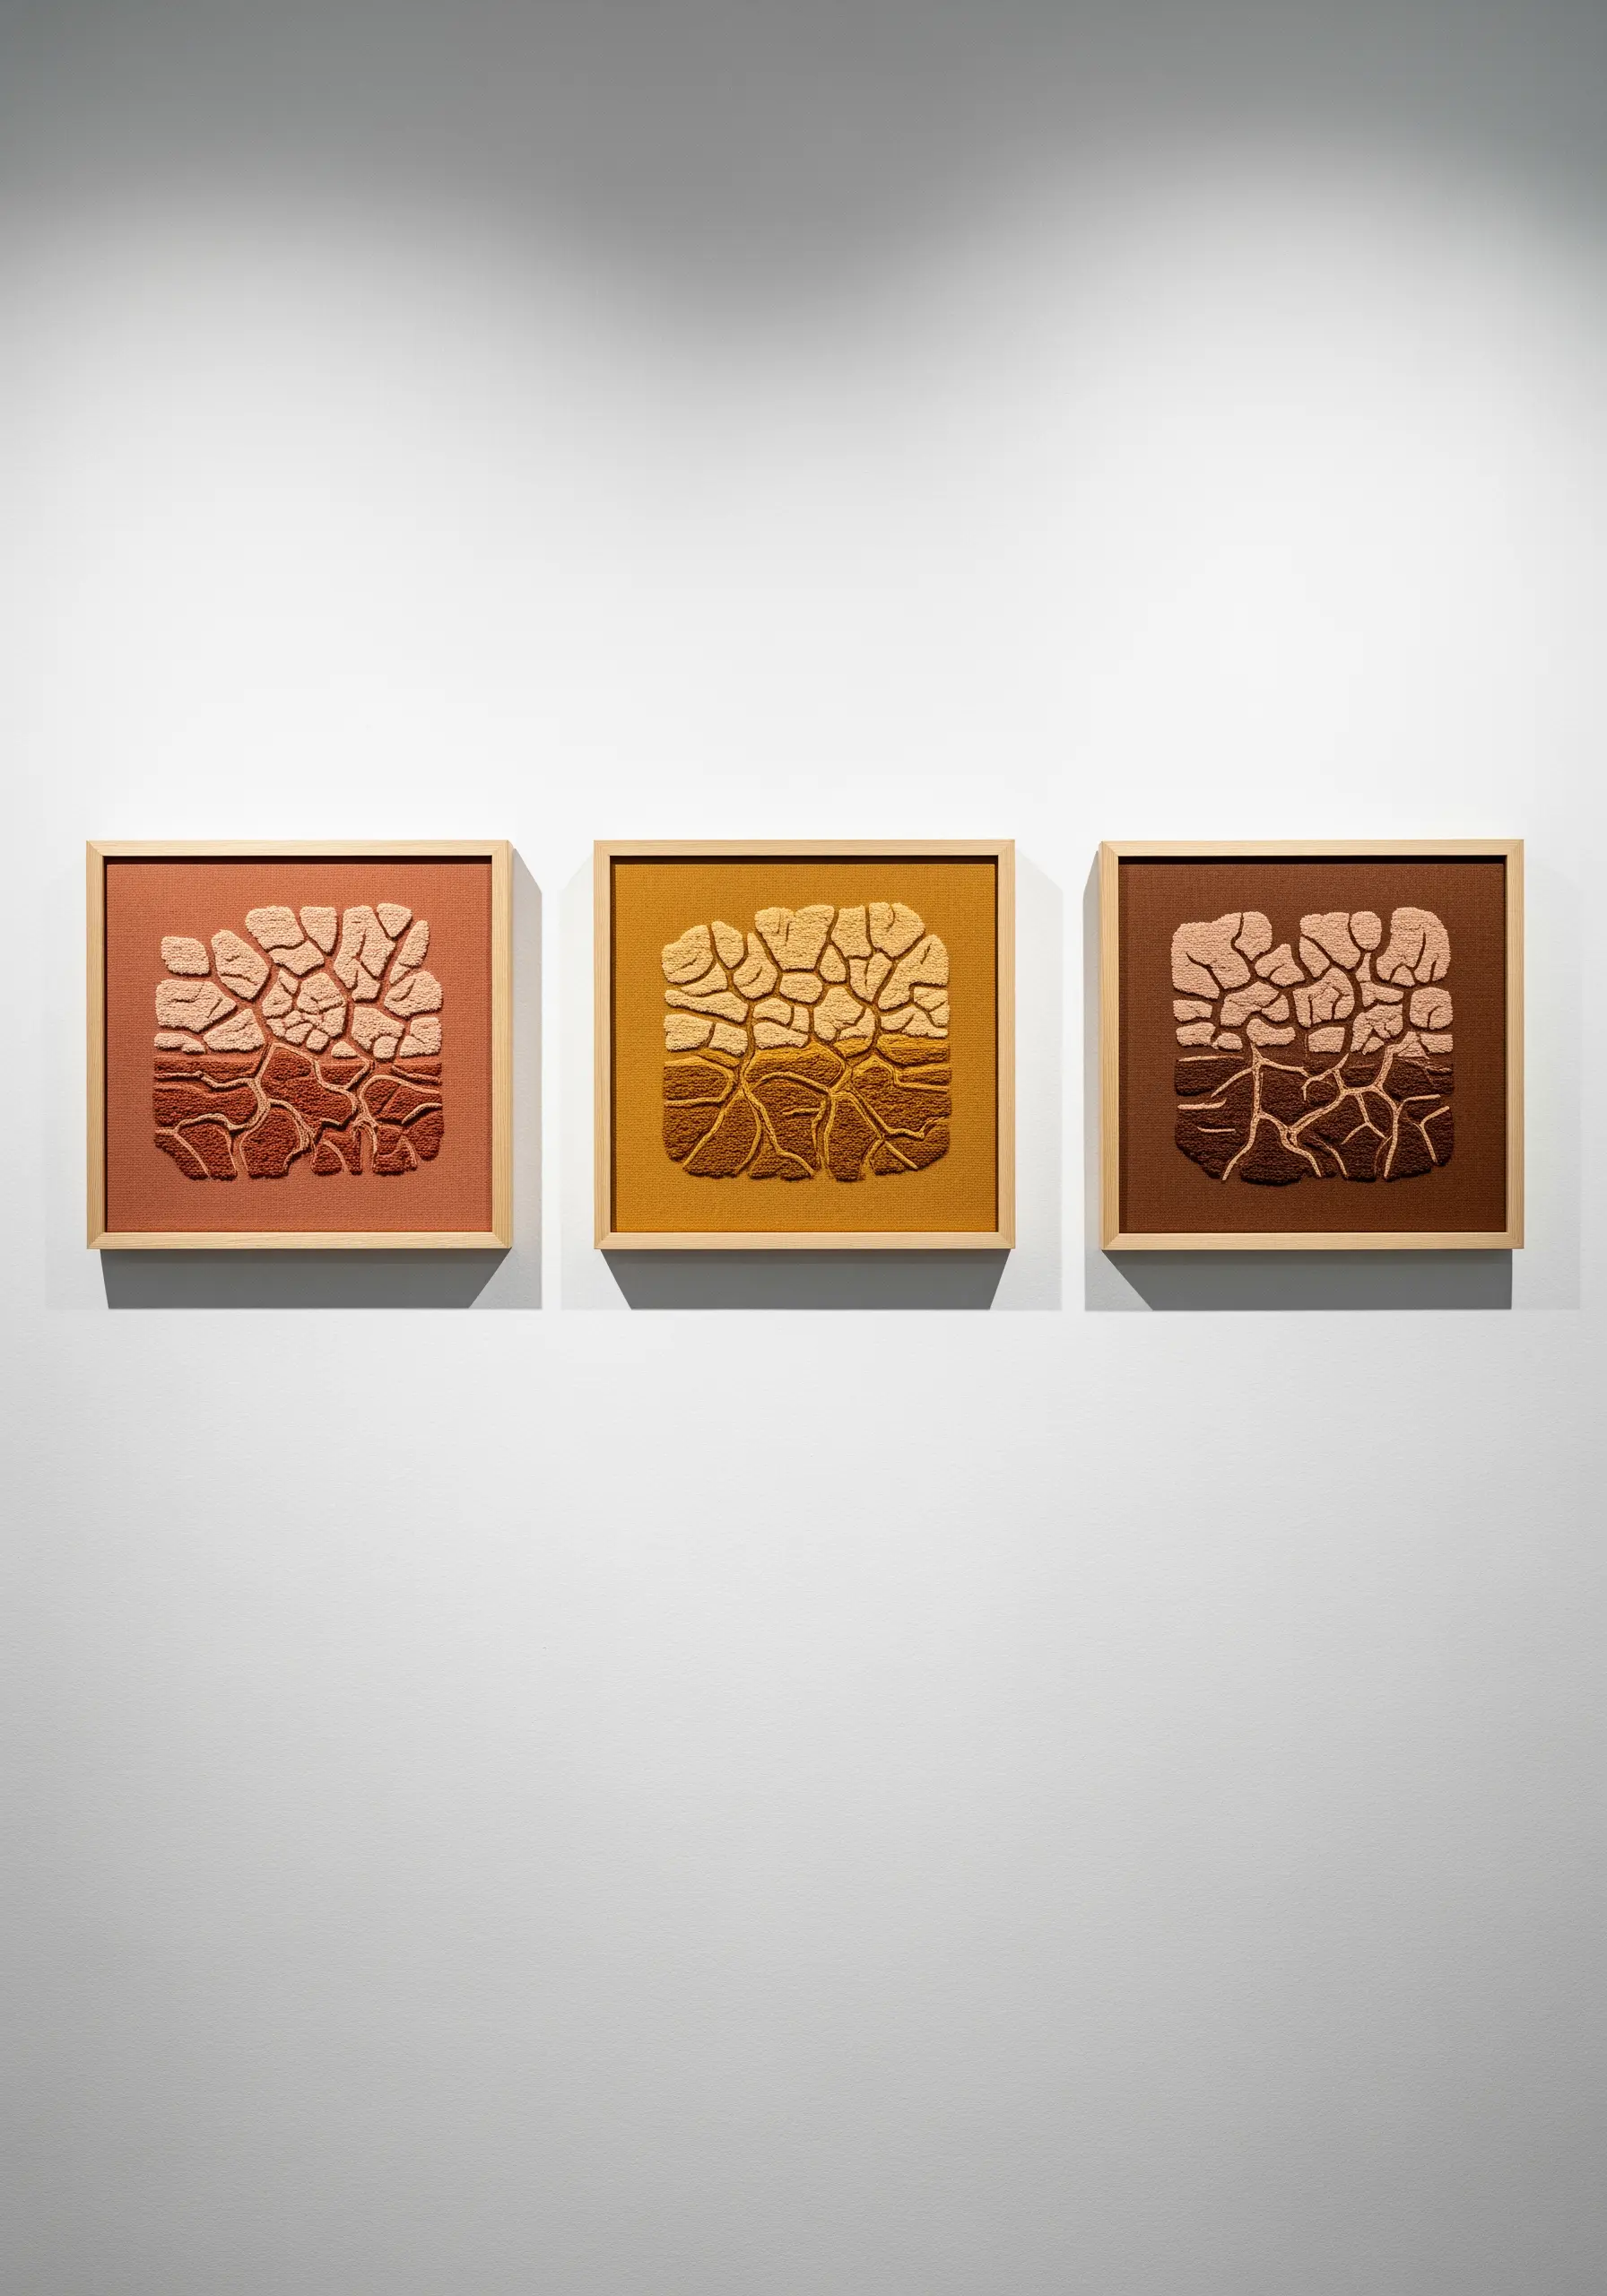
To recreate the raised, cracked pattern of dry earth, use padded satin stitch for a subtle three-dimensional effect.
First, establish the pattern of cracks with a simple backstitch outline.
Then, fill the shapes between the cracks with dense satin stitches, working over a base layer of seed stitches to give them just enough lift.
Working within a tight, tonal color palette—like terracotta, ochre, and sienna—enhances the organic, geological feel of the design.
7. Illustrate Botanicals with Open Fill Stitches
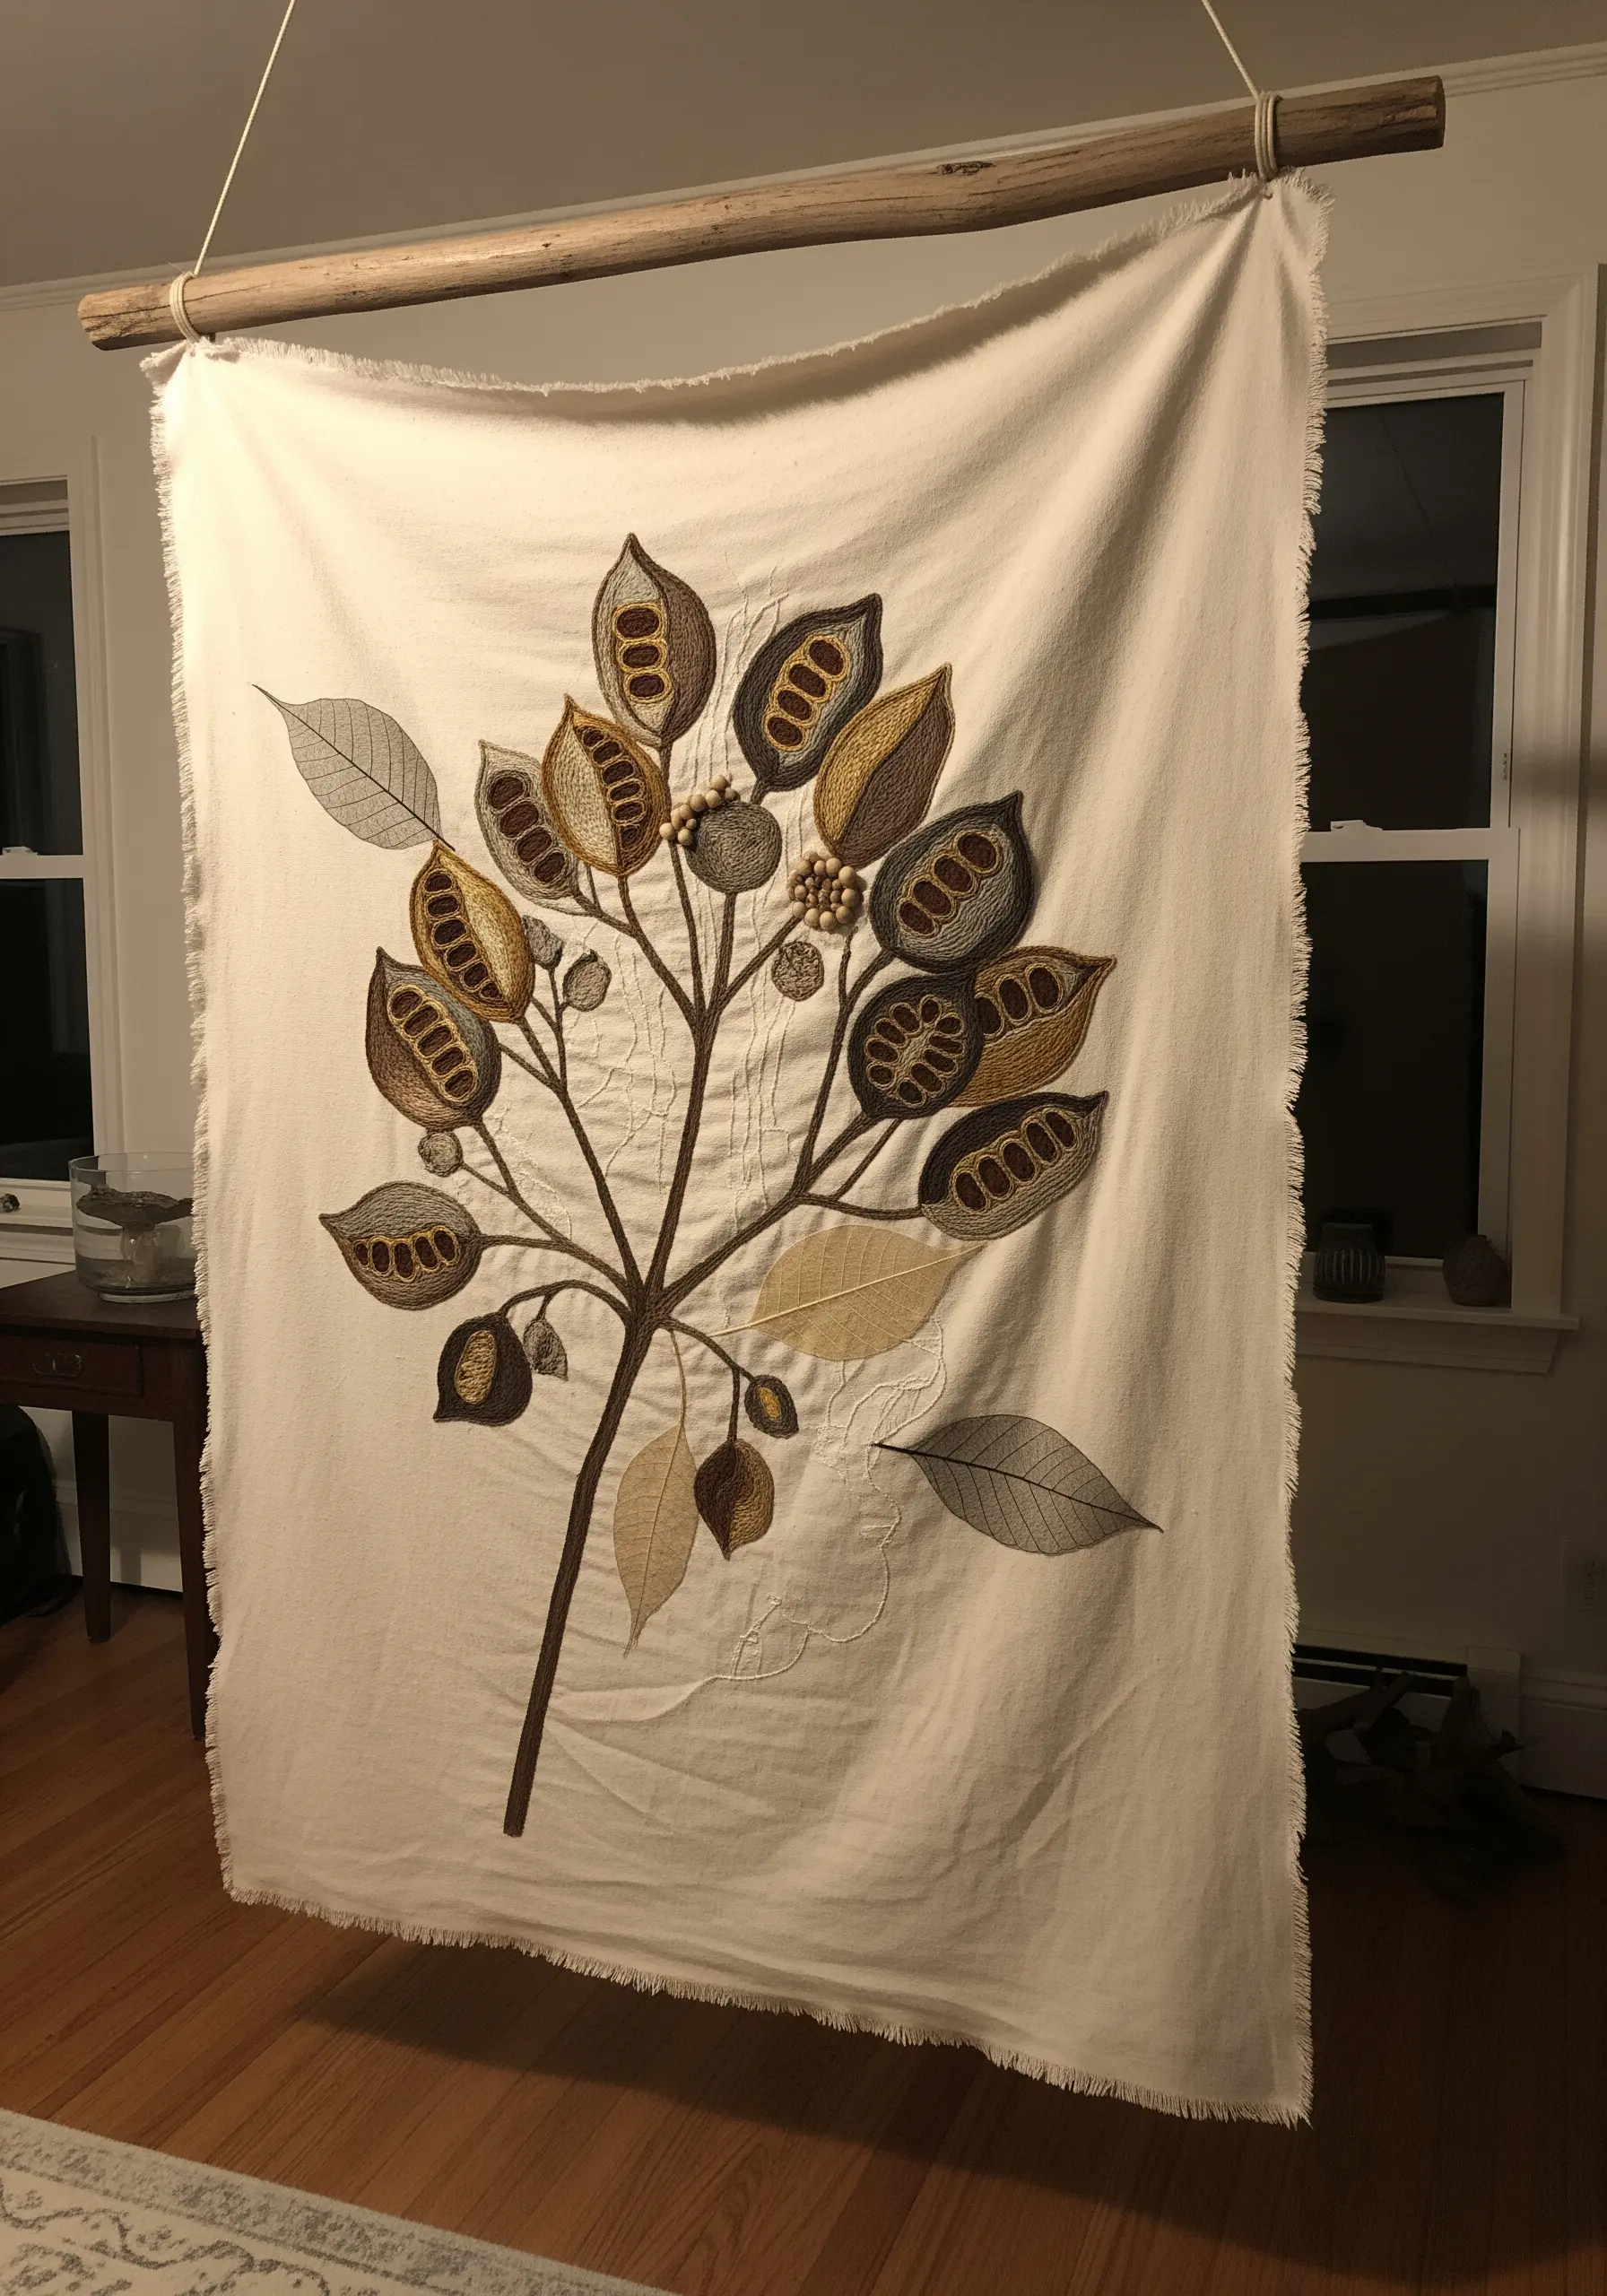
For large-scale pieces like wall hangings, dense fill stitches can make the fabric heavy and stiff.
Instead, use open fill techniques like seed stitch, spaced-out satin stitches, or random straight stitches to create texture inside your motifs.
This approach allows the base fabric to show through, adding lightness and integrating the design with the textile.
Contrast these textured areas with fine, delicate outlines in backstitch for a balanced and professional-looking composition.
8. Sprinkle Delicate Detail with Clustered Knots
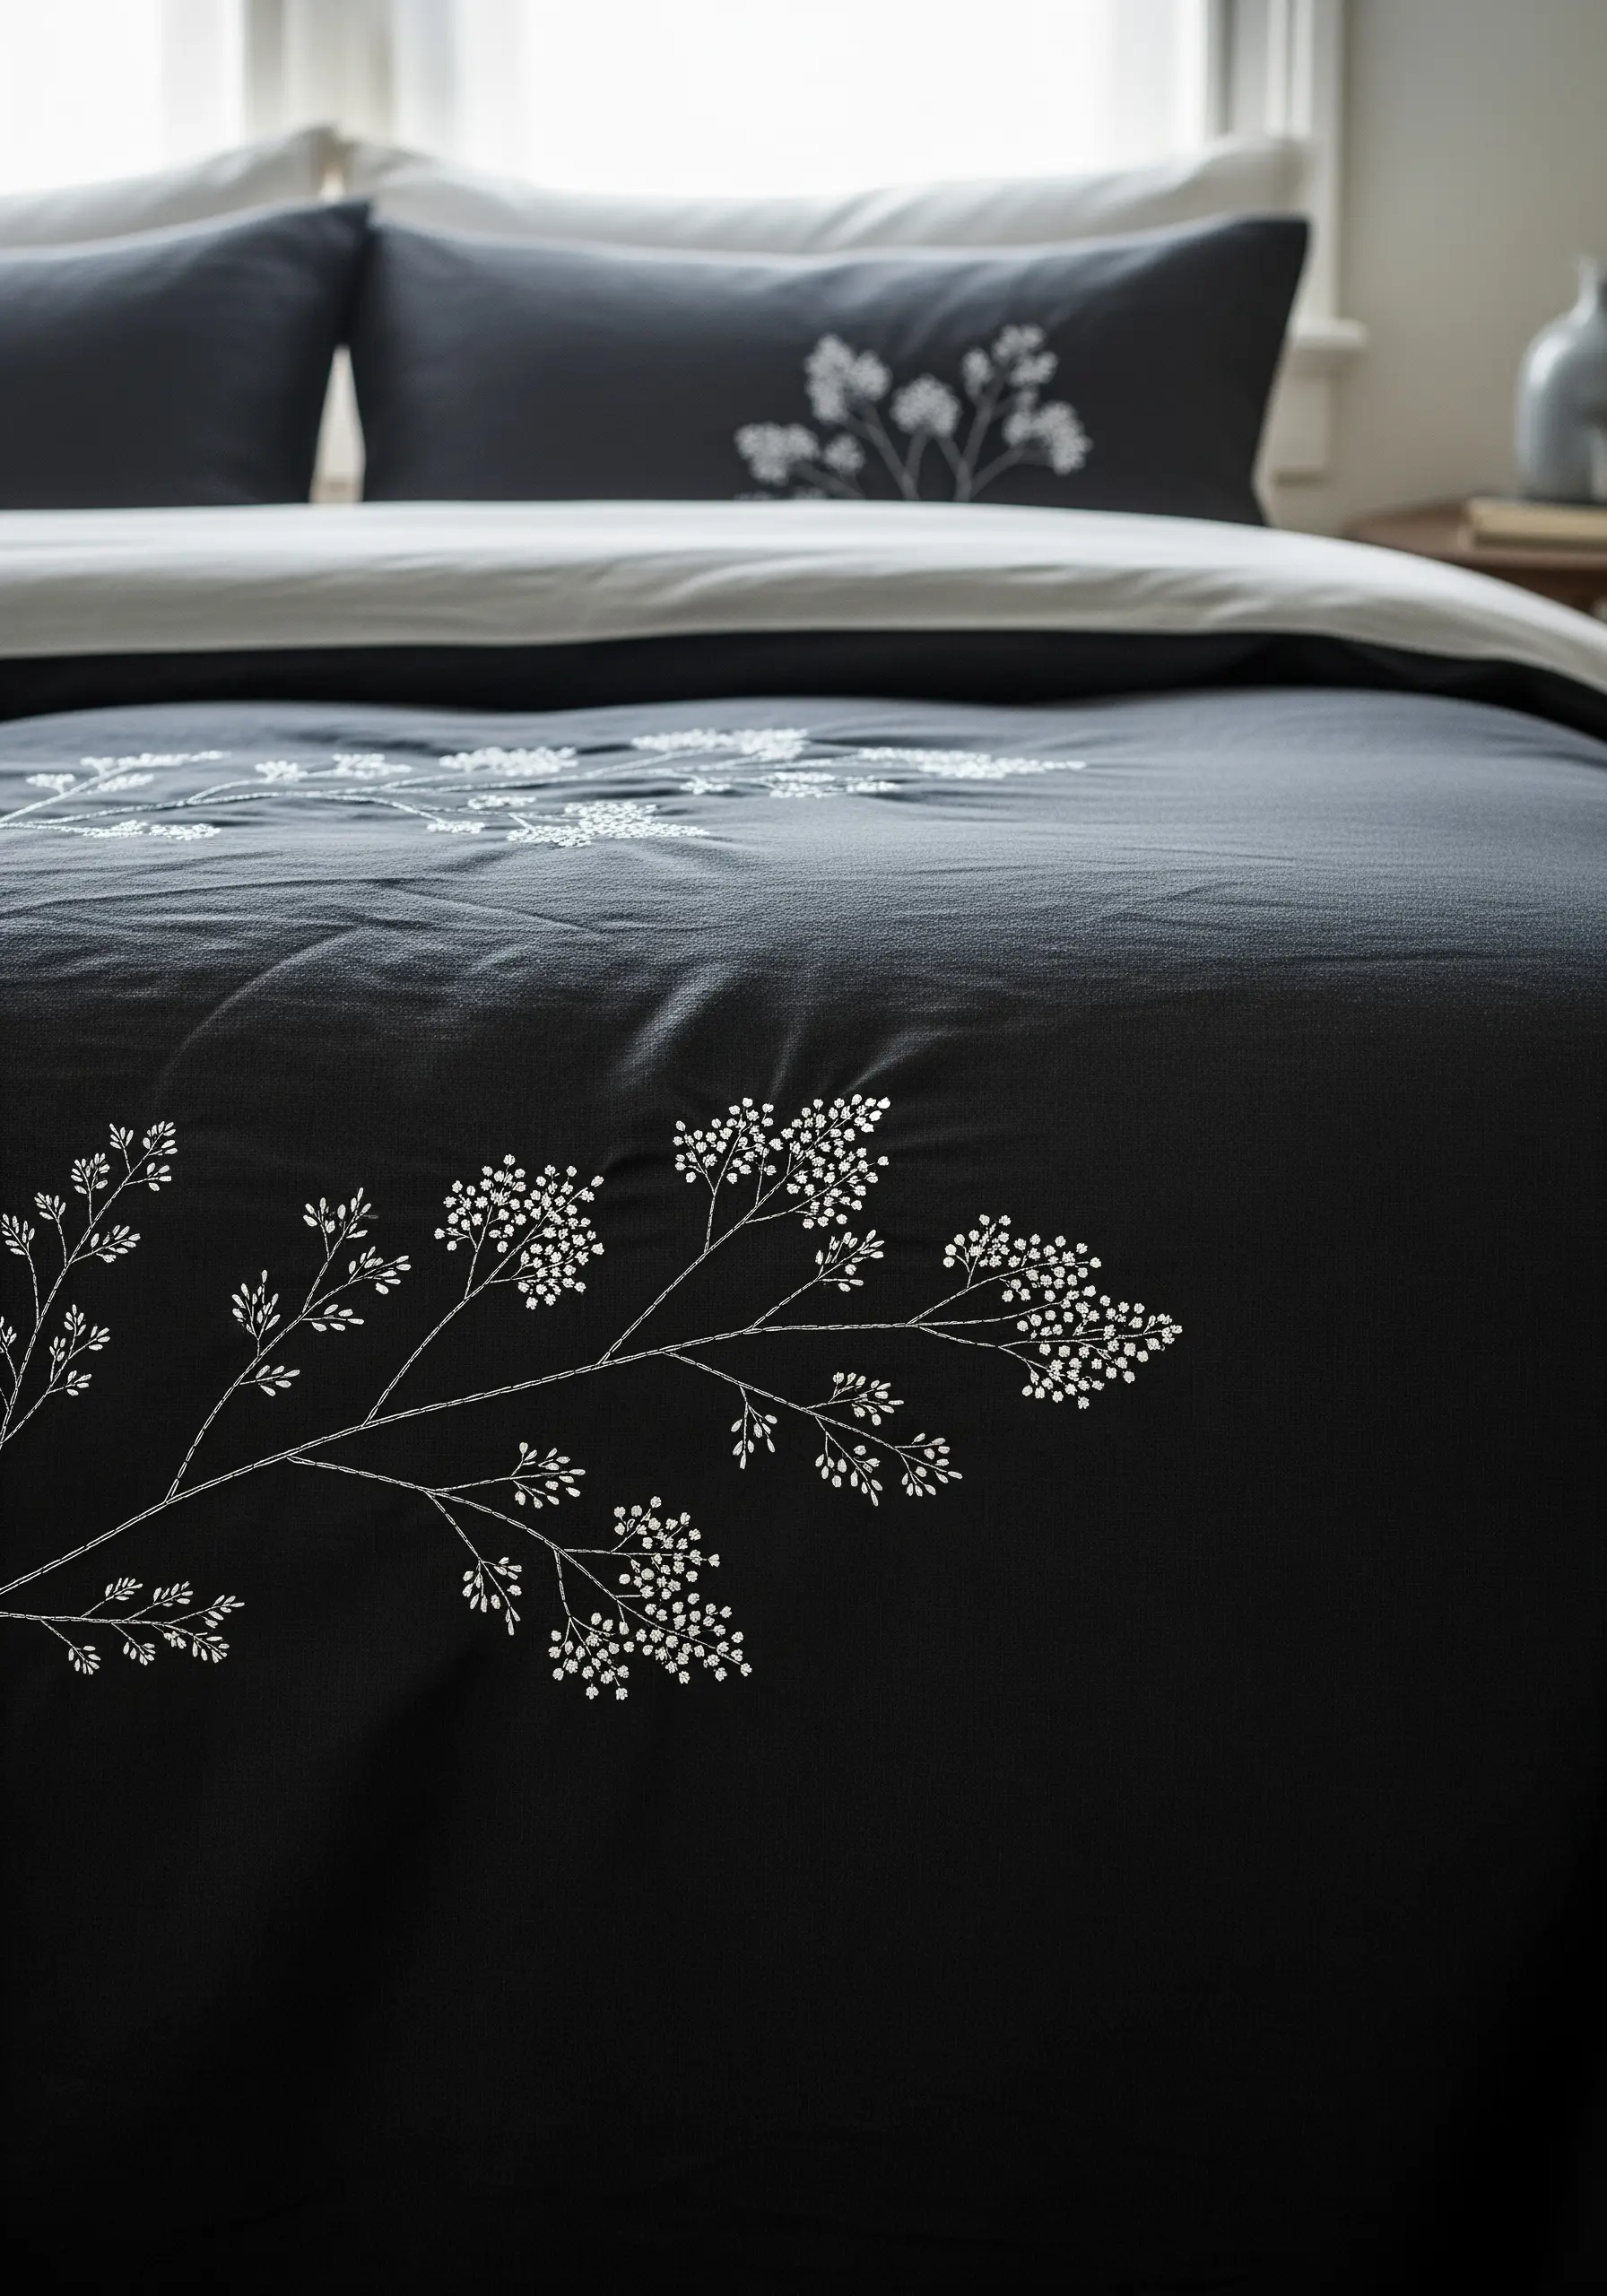
Recreate the airy look of baby’s breath or Queen Anne’s lace by clustering tiny French knots at the tips of fine, branching stems.
Work your stems first using a single strand of thread and a delicate stem stitch.
Then, add the knots, varying their placement slightly to avoid a perfectly uniform look. Using a single high-contrast color, like white on charcoal, creates a modern, graphic statement that remains beautifully delicate.
This technique is perfect for adding a touch of elegance to large textiles like duvet covers or curtains.
9. Replicate Birch Bark with Weaving and Stitch
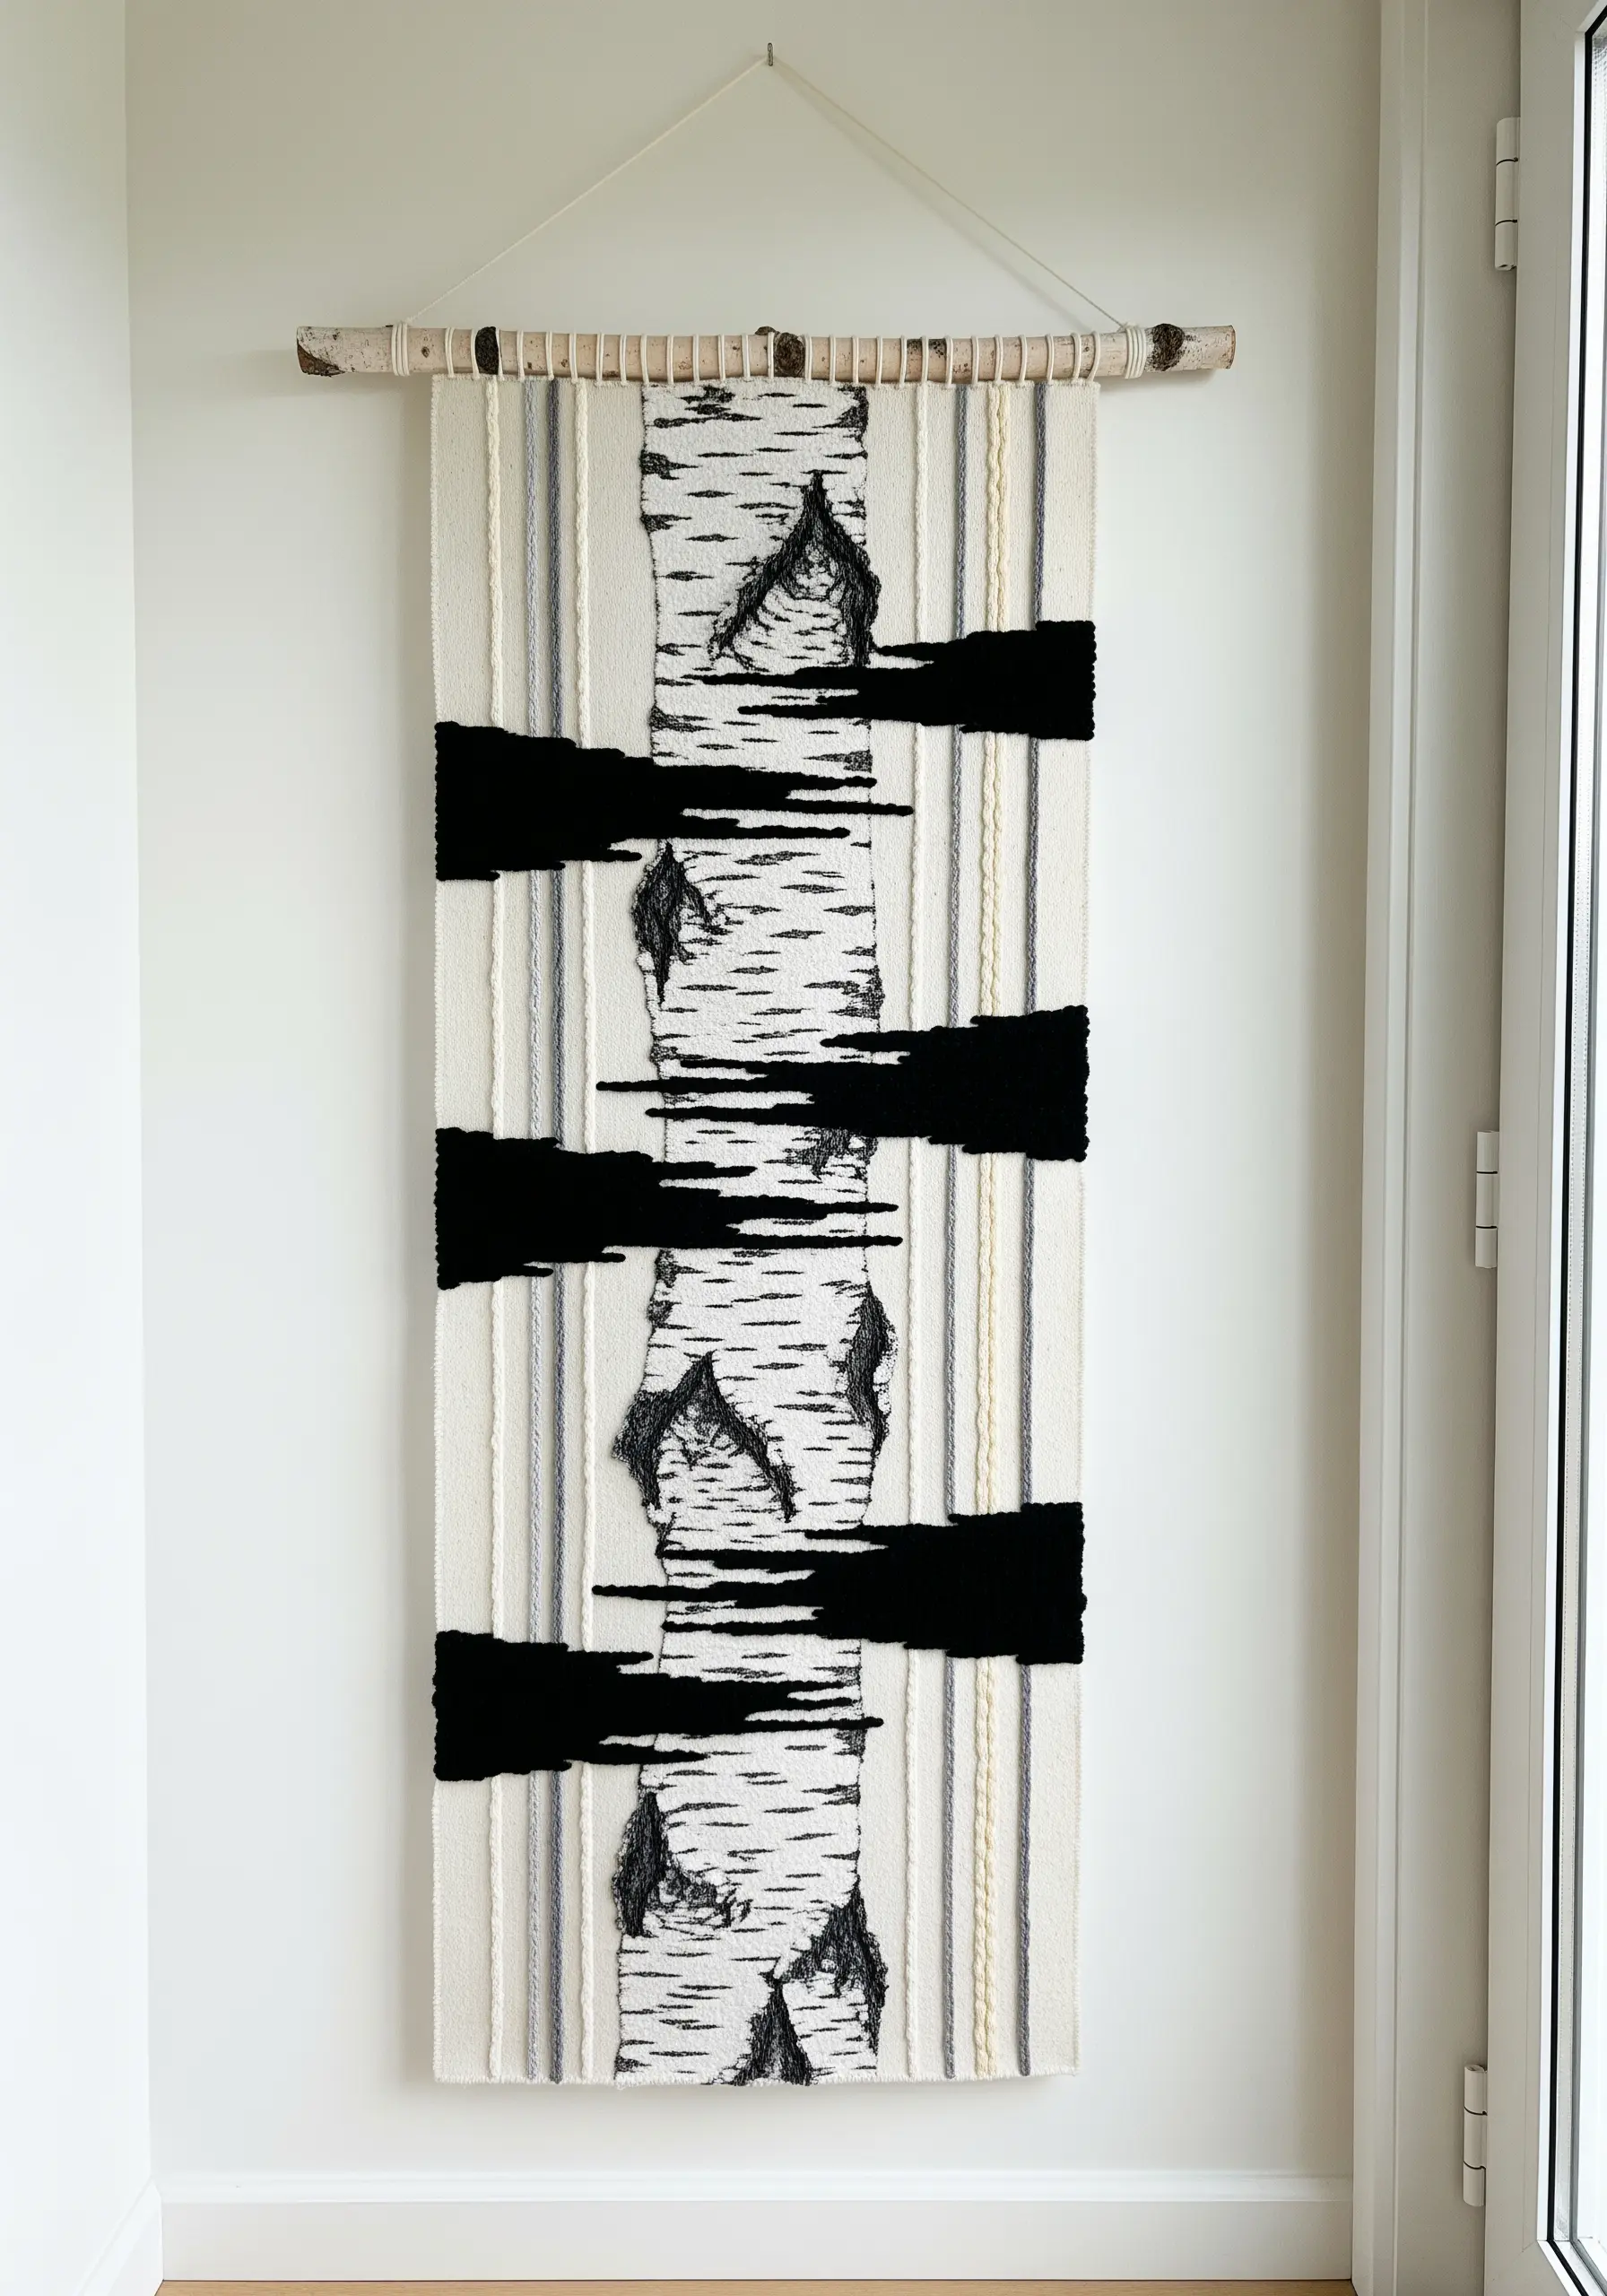
Capture the unique texture of birch bark by combining fiber techniques.
Start by creating a woven base with off-white and pale grey yarns to mimic the tree’s primary color and grain.
Then, using black embroidery floss, stitch the characteristic dark knots and horizontal lines directly onto the woven surface.
For even more texture, incorporate patches of pile stitches, like turkey work, to create abstract shapes that contrast with the flat weave.
10. Create High-Impact Waves on Chunky Knits

Apply embroidery principles to a larger scale by using chunky yarn as your thread on a knitted or crocheted surface.
Using a large tapestry needle, you can add bold designs to blankets and pillows in a fraction of the time.
Use a chunky chain stitch to create the crisp lines of seafoam, and fill in the body of the waves by weaving or couching different colors of yarn directly onto the knitted base.
This technique adds dramatic, graphic texture that is both visible from across the room and wonderfully cozy to the touch.
11. Layer Fabric and Stitch for Geological Depth

Build a rich, stratified landscape by combining fabric appliqué with minimal hand stitching.
Start by cutting and layering strips of textured fabrics like wool felt or linen to represent layers of earth or stone.
Once your fabric base is arranged, secure the layers and add detail with decorative running stitches, seed stitches, or backstitches.
This method allows you to cover a large area with color and texture quickly, using thread as a final, defining detail.
12. Give Gradient Leaves a Crisp, Graphic Finish
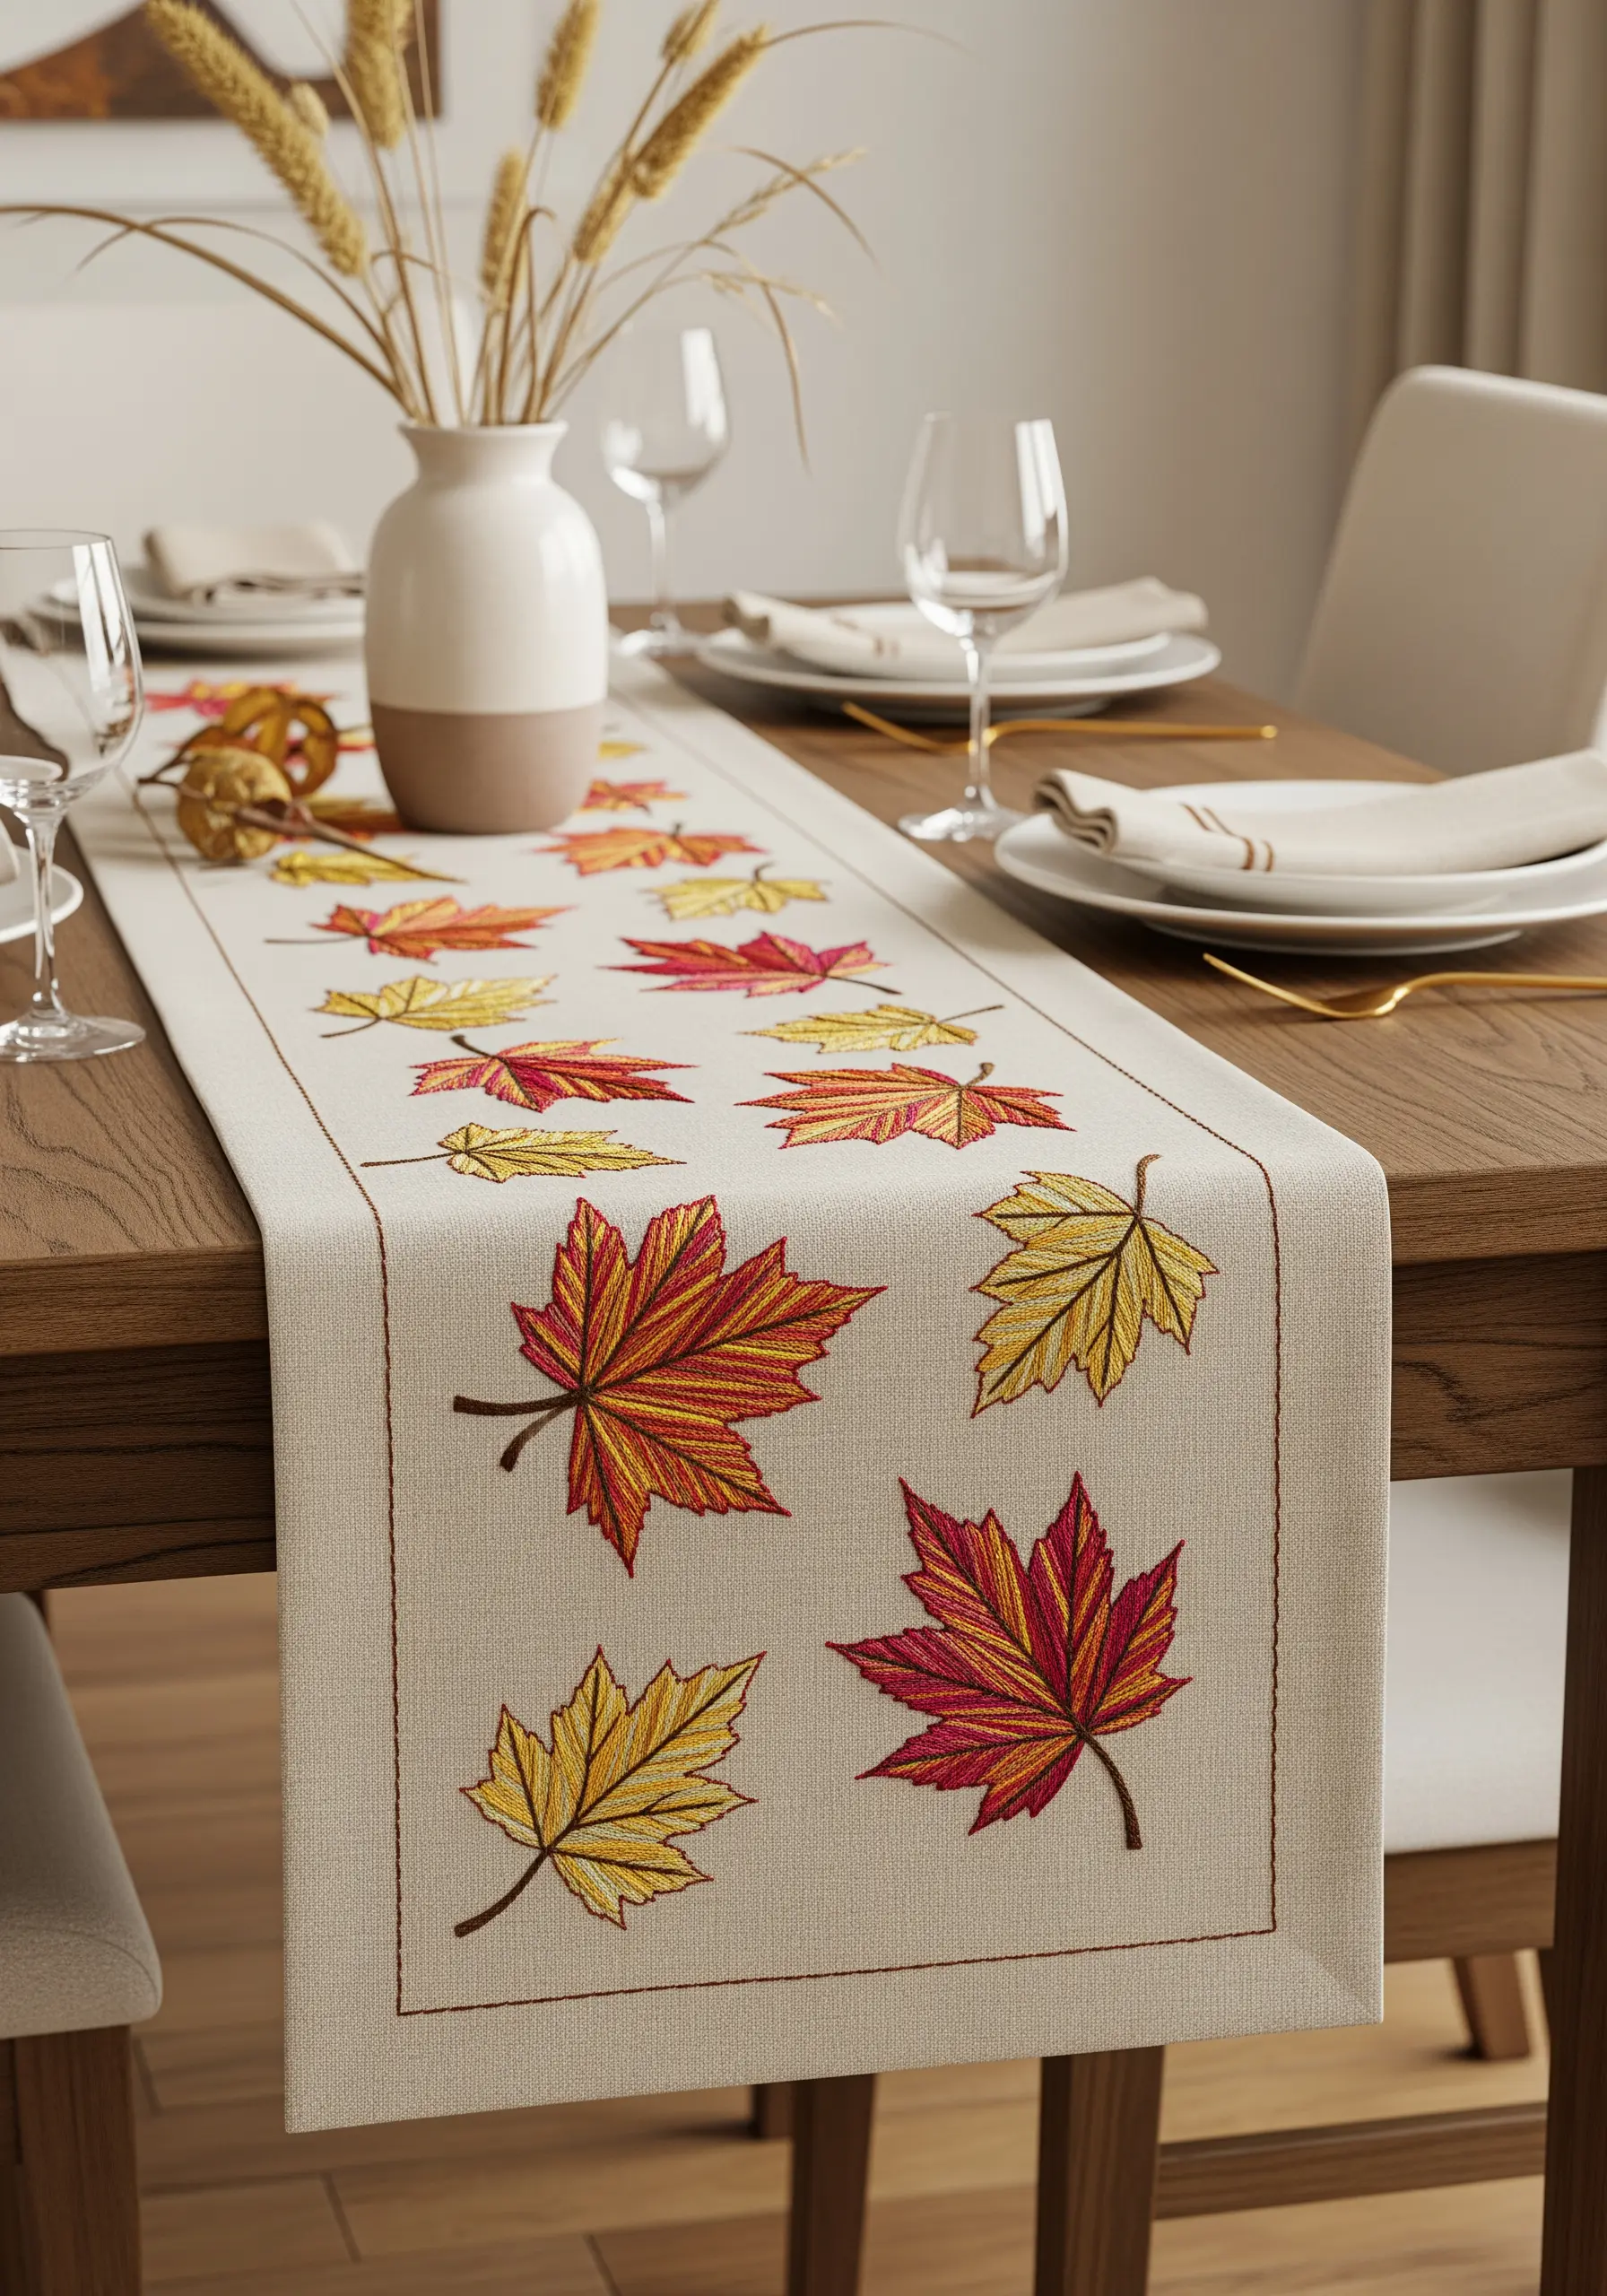
When working with blended colors in leaf motifs, a strong outline is essential to prevent the shapes from looking undefined.
Fill the body of your leaves using a long-and-short stitch to create smooth, natural-looking color transitions.
Once the fill is complete, outline the entire leaf and its central veins with a sharp backstitch or stem stitch in a darker, contrasting color.
This simple step adds structure and definition, making your botanicals look polished and intentional.
13. Weave Geometric Patterns for Structured Texture
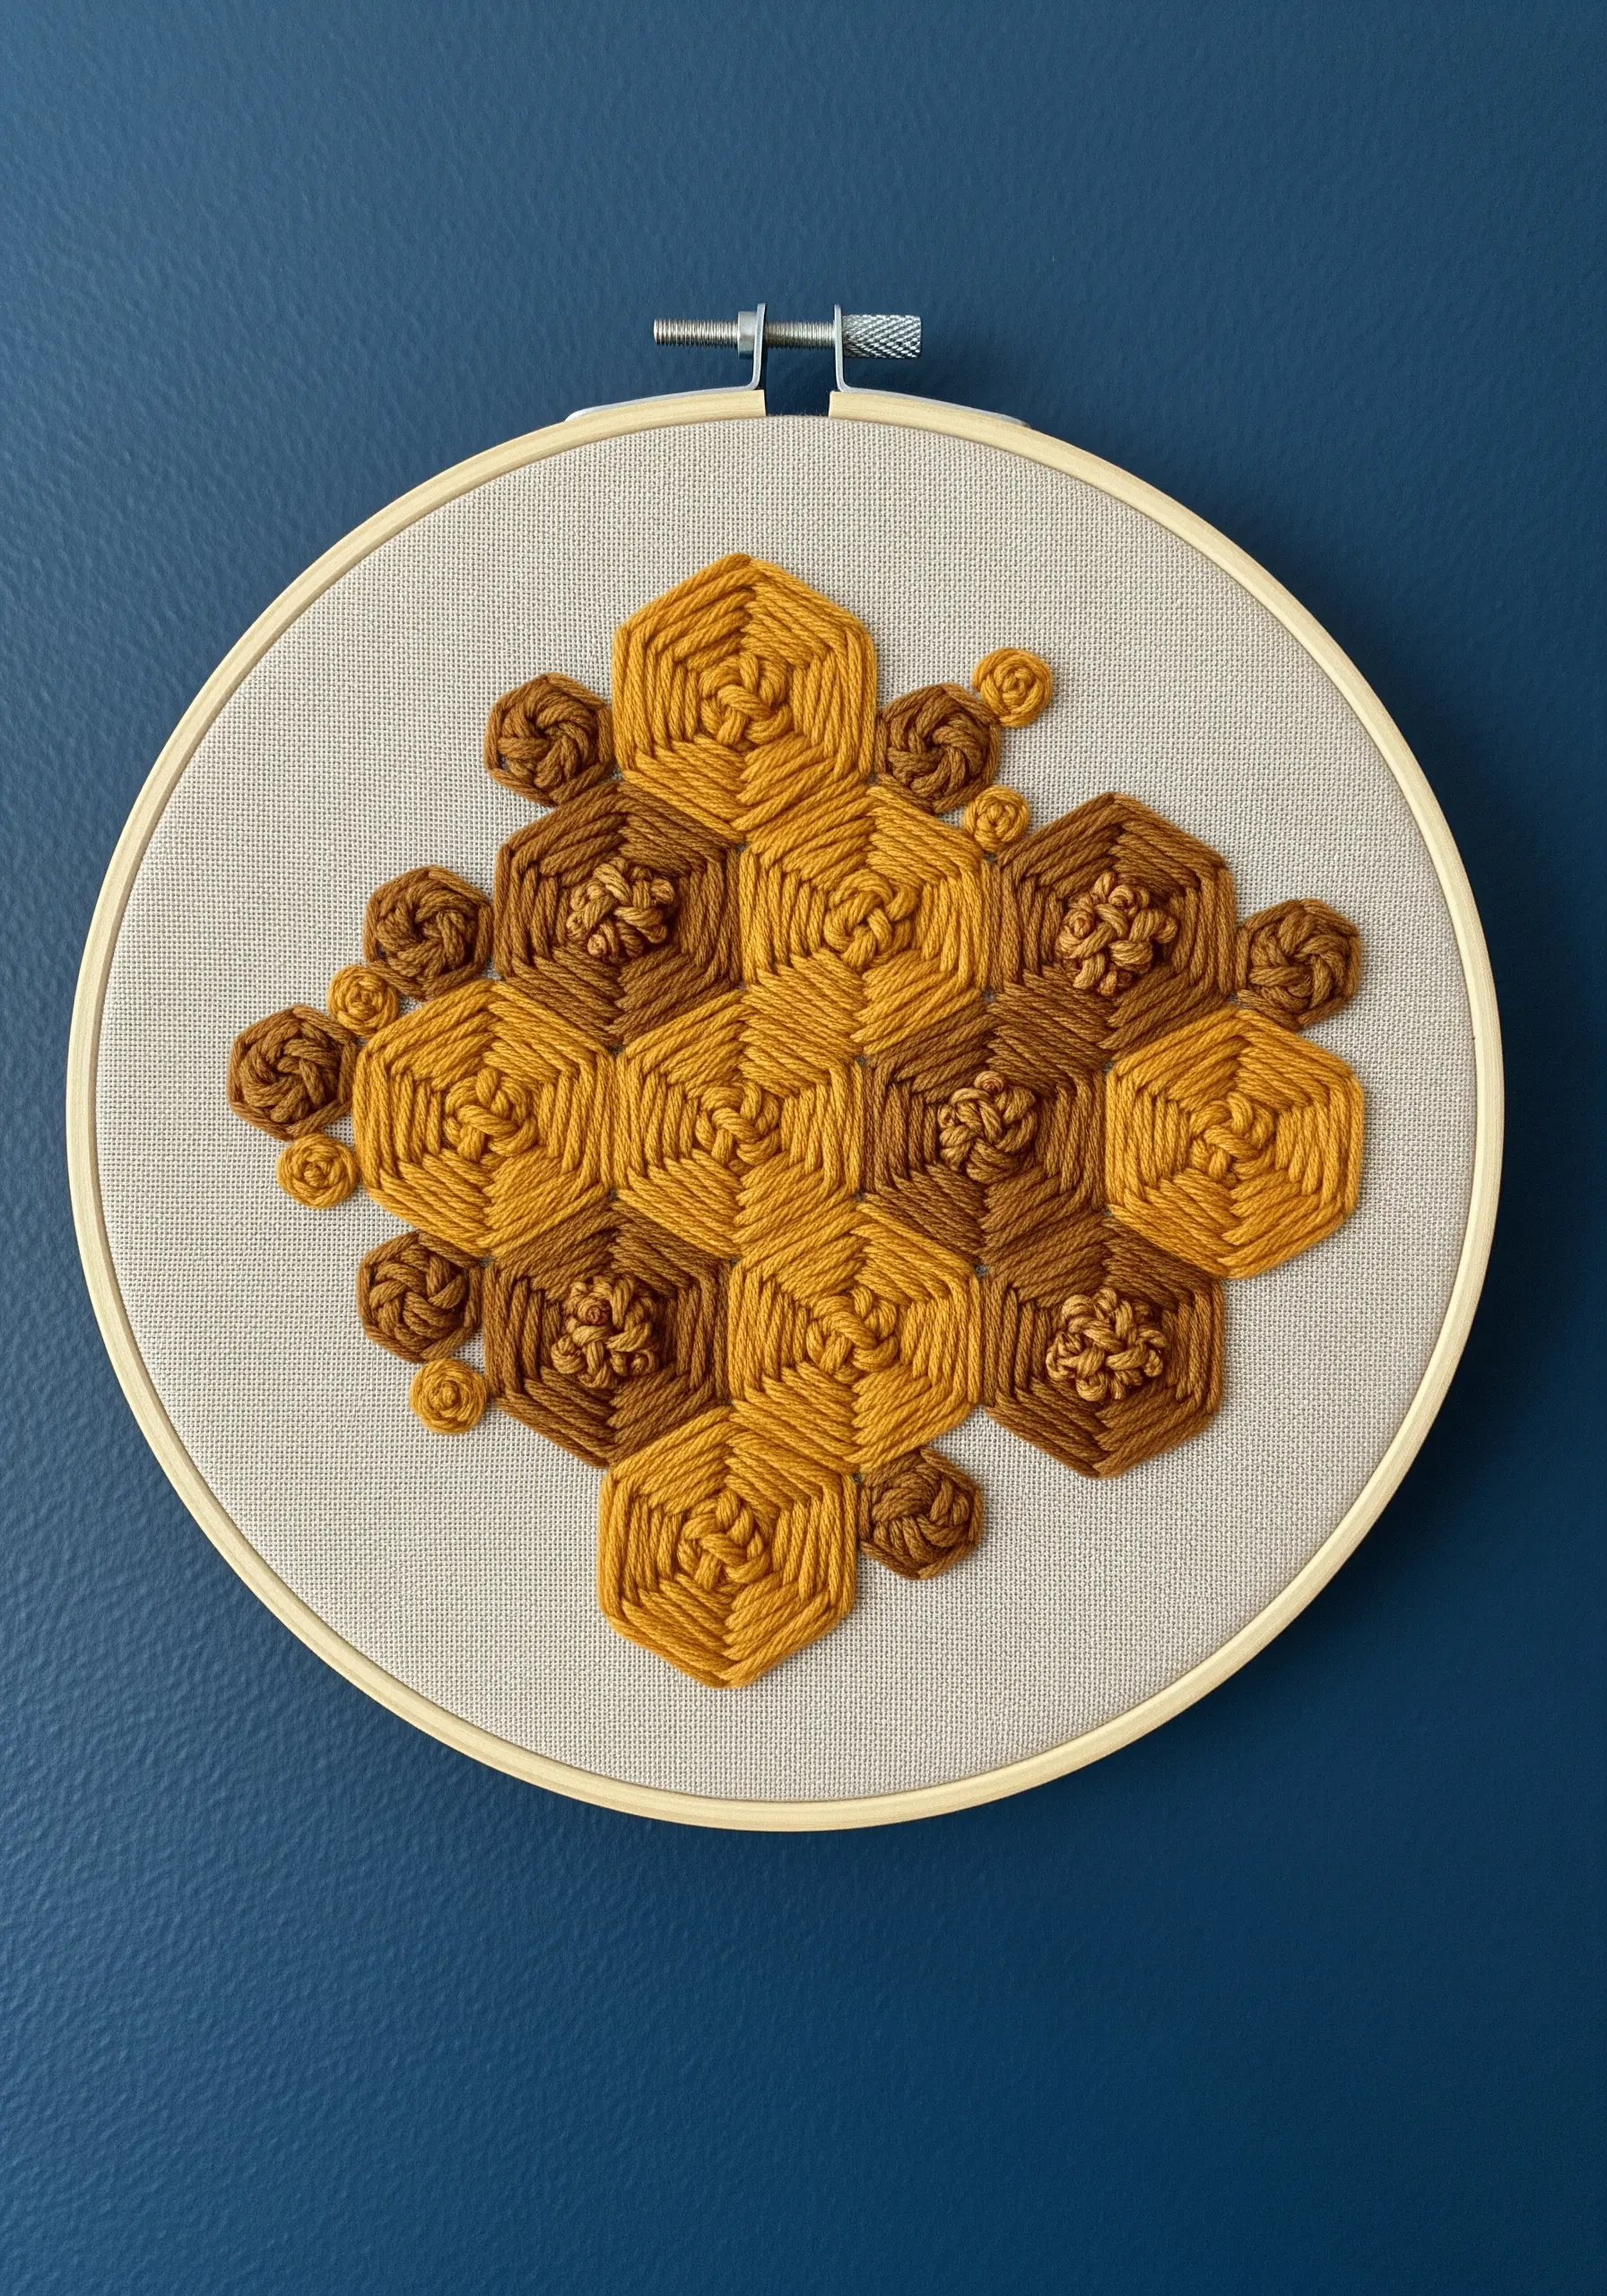
Create a stunning honeycomb effect by adapting the woven wheel stitch into a hexagonal shape.
First, create a foundation of straight stitches, like the spokes of a wheel, in the shape of a hexagon.
Then, weave your working thread over and under these spokes without piercing the fabric until the shape is filled.
Alternate these woven shapes with clusters of soft French knots to create a beautiful interplay between structured and organic textures.
14. Achieve Soft Realism with Directional Satin Stitch
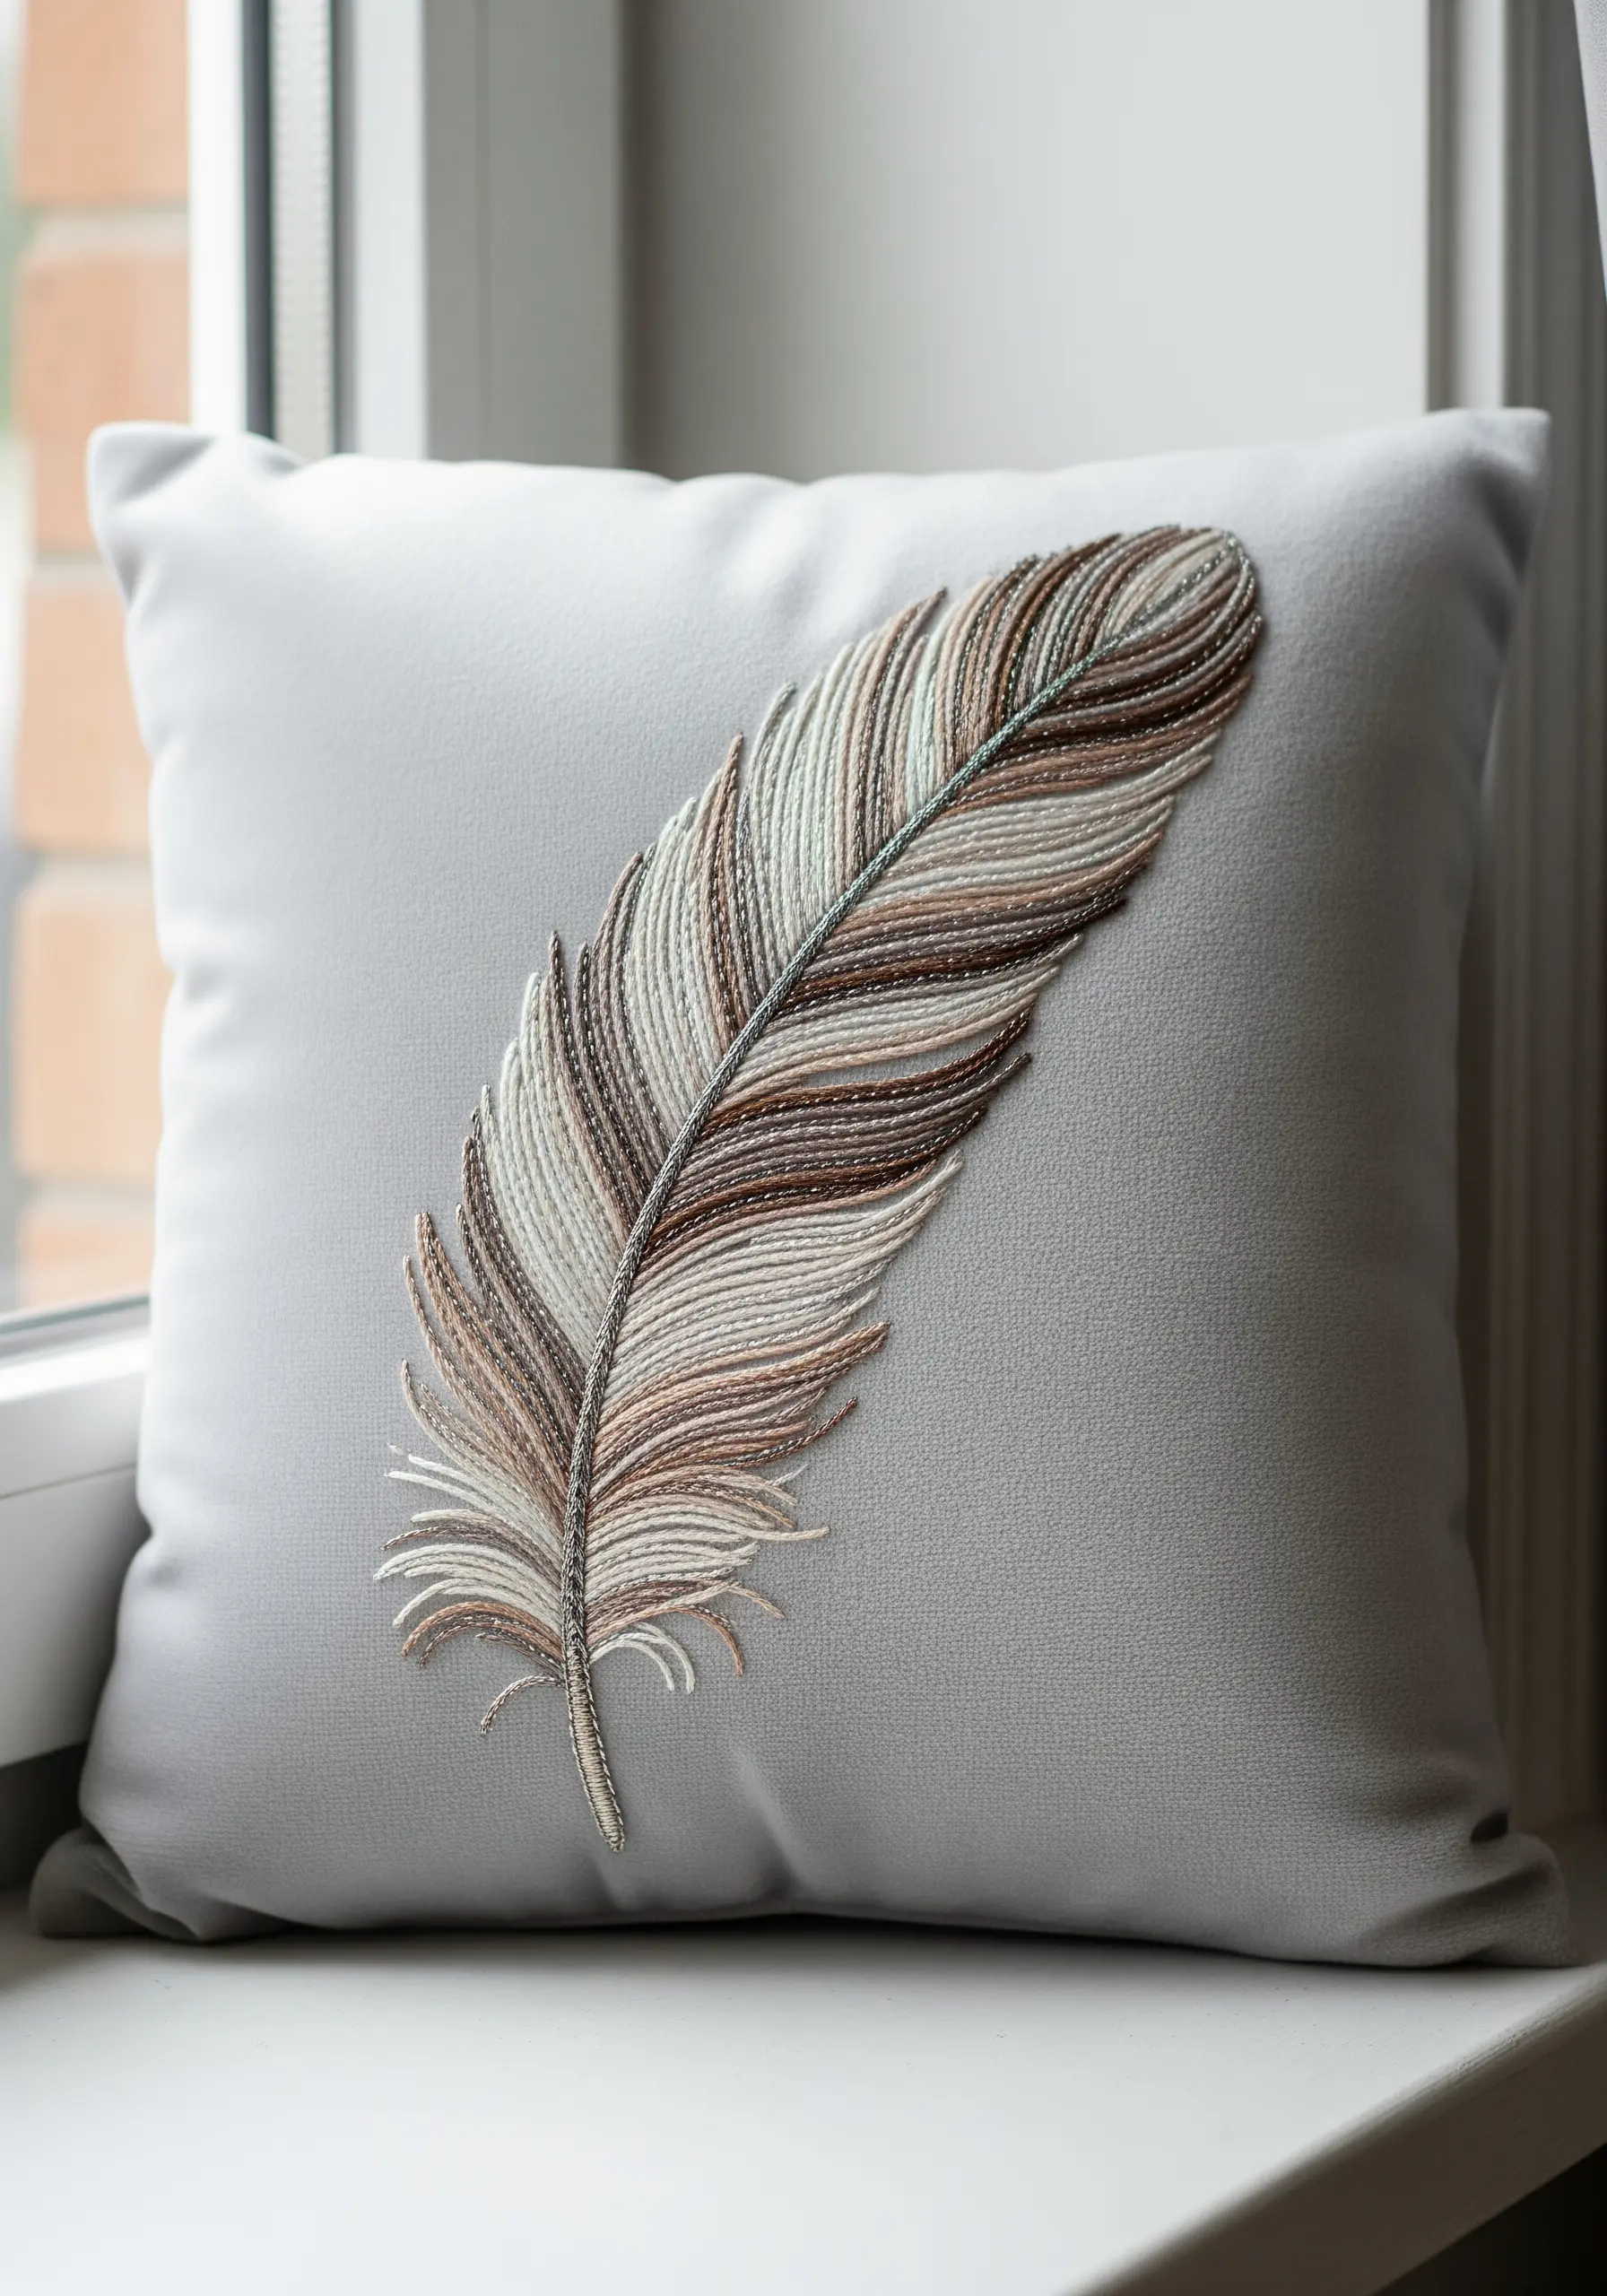
The secret to a realistic embroidered feather lies entirely in the direction of your stitches.
Using a satin stitch, work your stitches outward from the central quill at a slight angle, perfectly mimicking the natural direction of a feather’s barbs.
To create subtle color shifts, use two different shades of thread in your needle at once or lay single strands of different colors side-by-side.
This meticulous control over stitch placement is what creates the illusion of softness and light.
15. Construct a Pinecone with Layered, Padded Scales
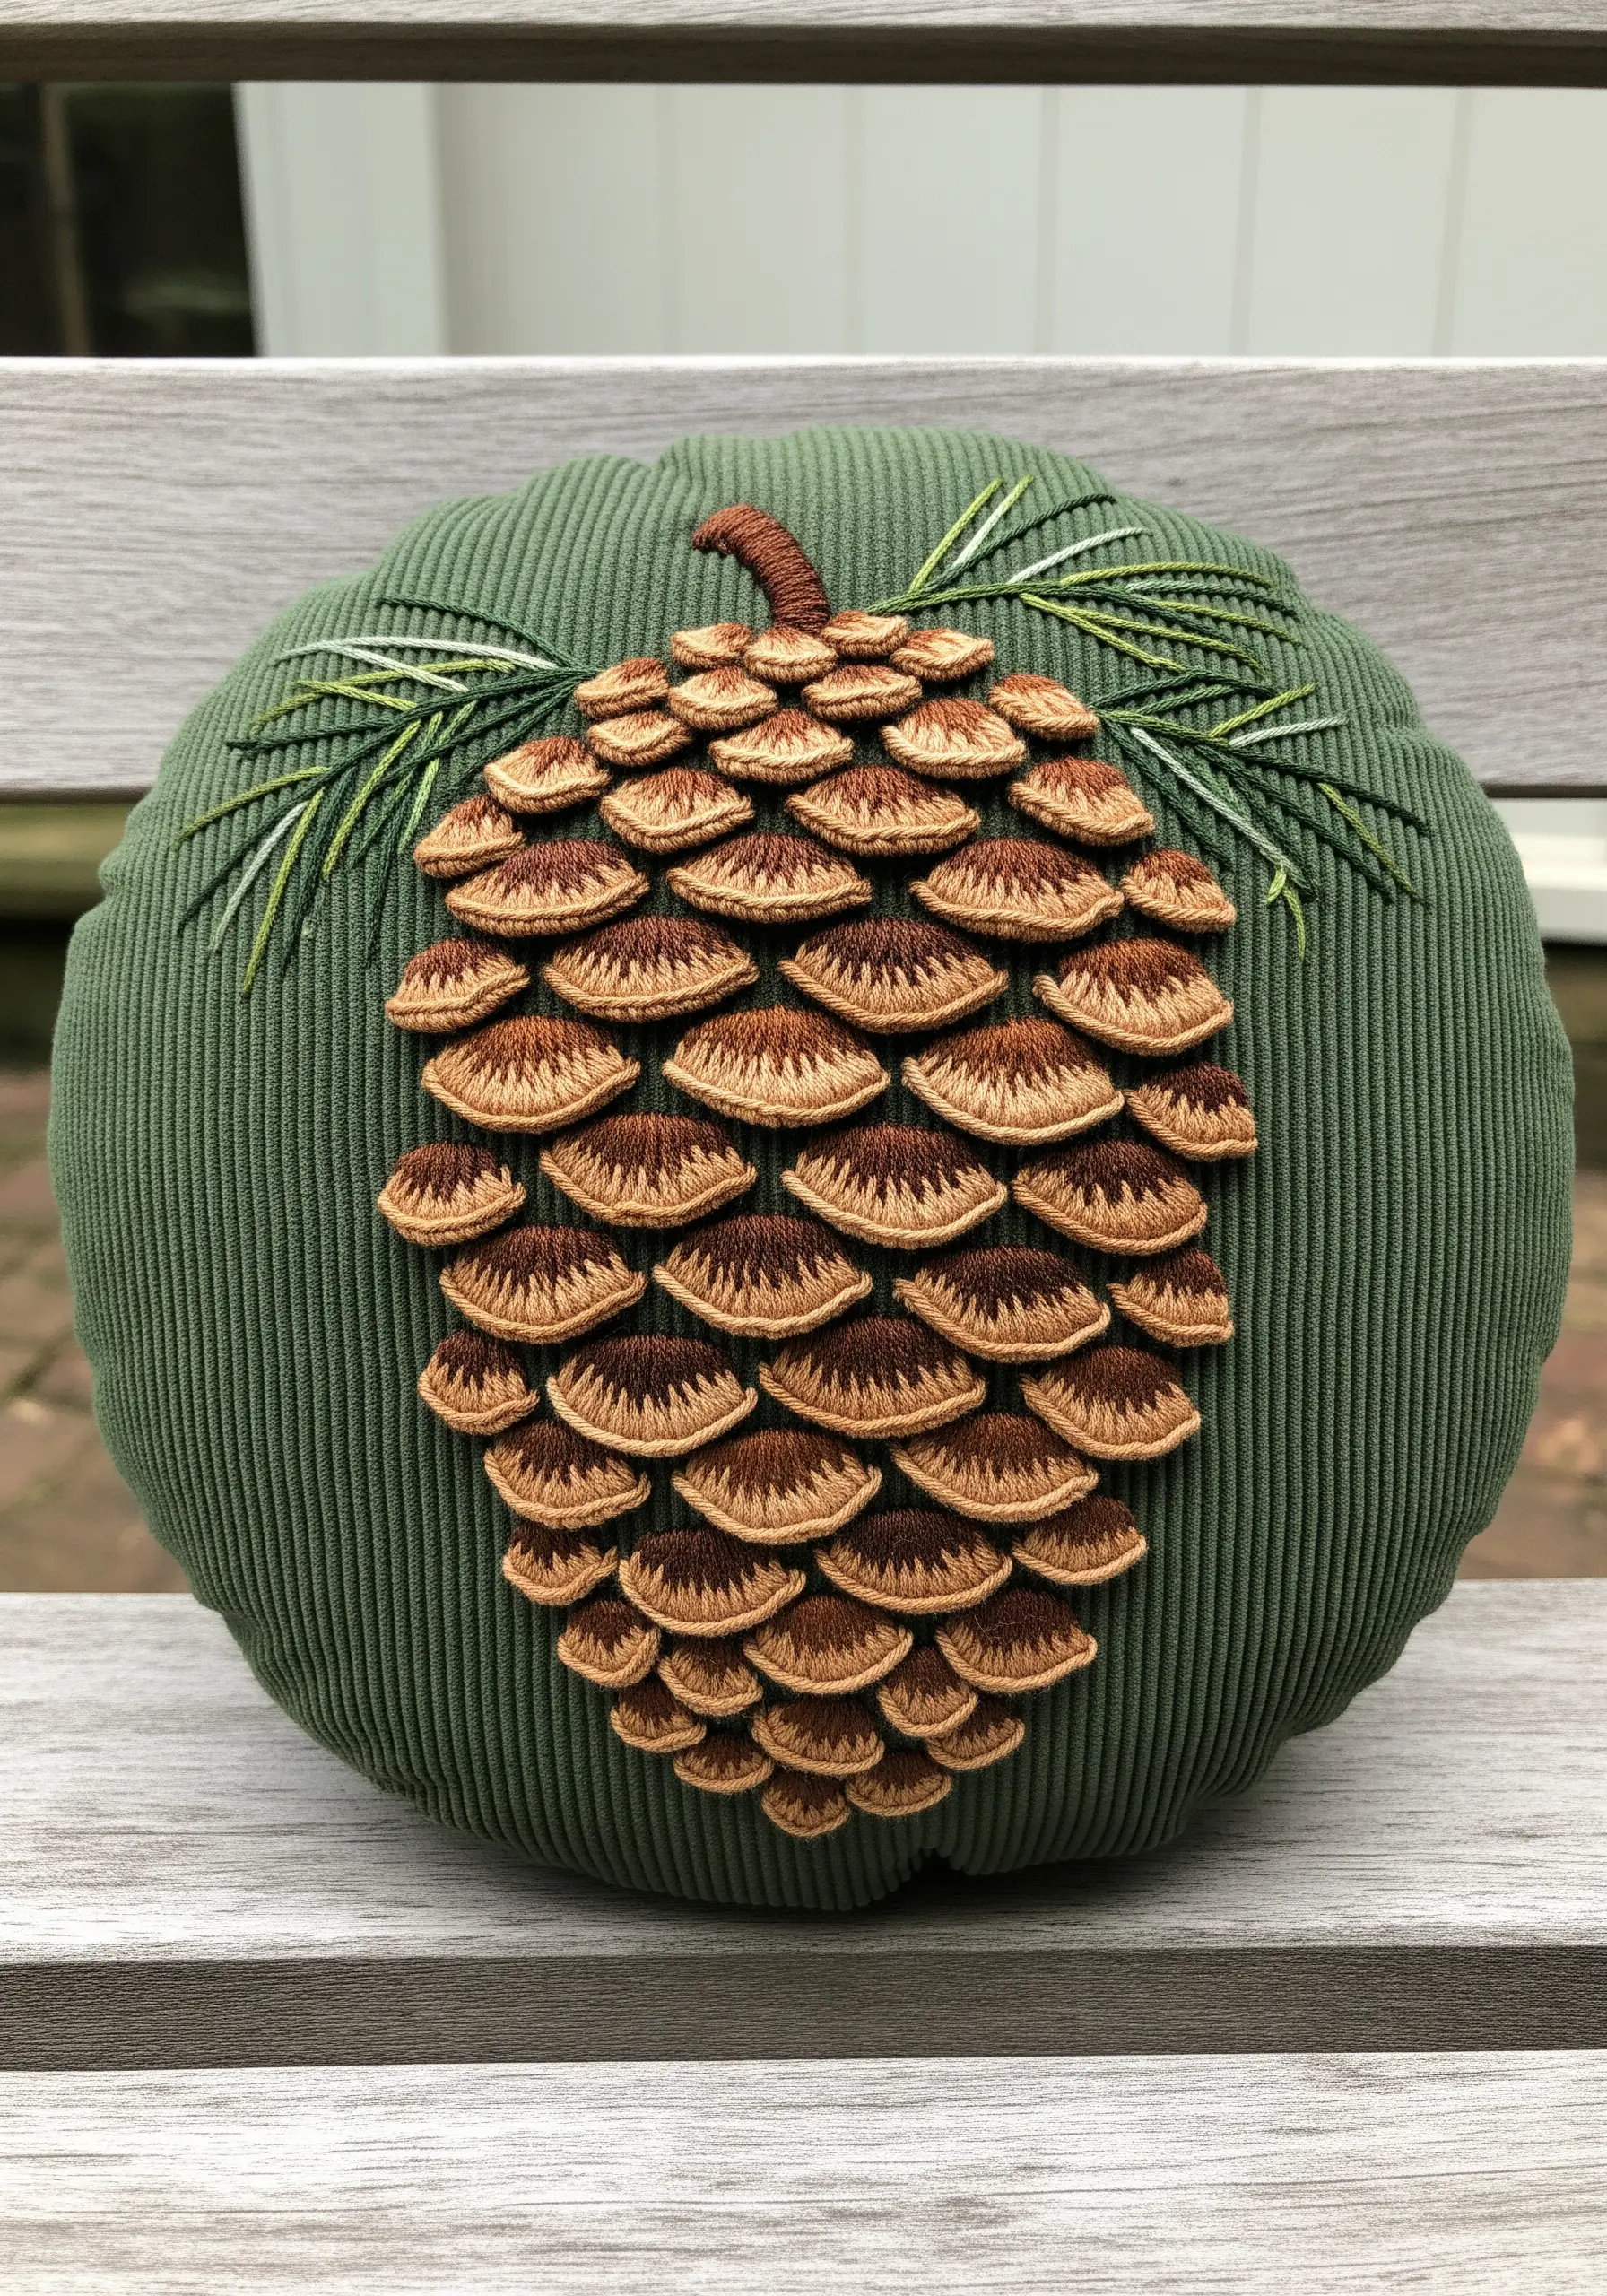
Build a convincingly three-dimensional pinecone by stitching and layering each scale individually.
Cut tiny, scale-shaped pieces of felt and use them as padding, covering each one with a neat satin stitch.
Begin stitching the bottom row of scales first, then work your way up, overlapping each new row slightly over the one below it.
This methodical layering is what creates the impressive depth and sculptural quality, especially when stitched on a contrasting textured fabric like corduroy.
16. Contrast Plush and Sleek Stitches for Cattails
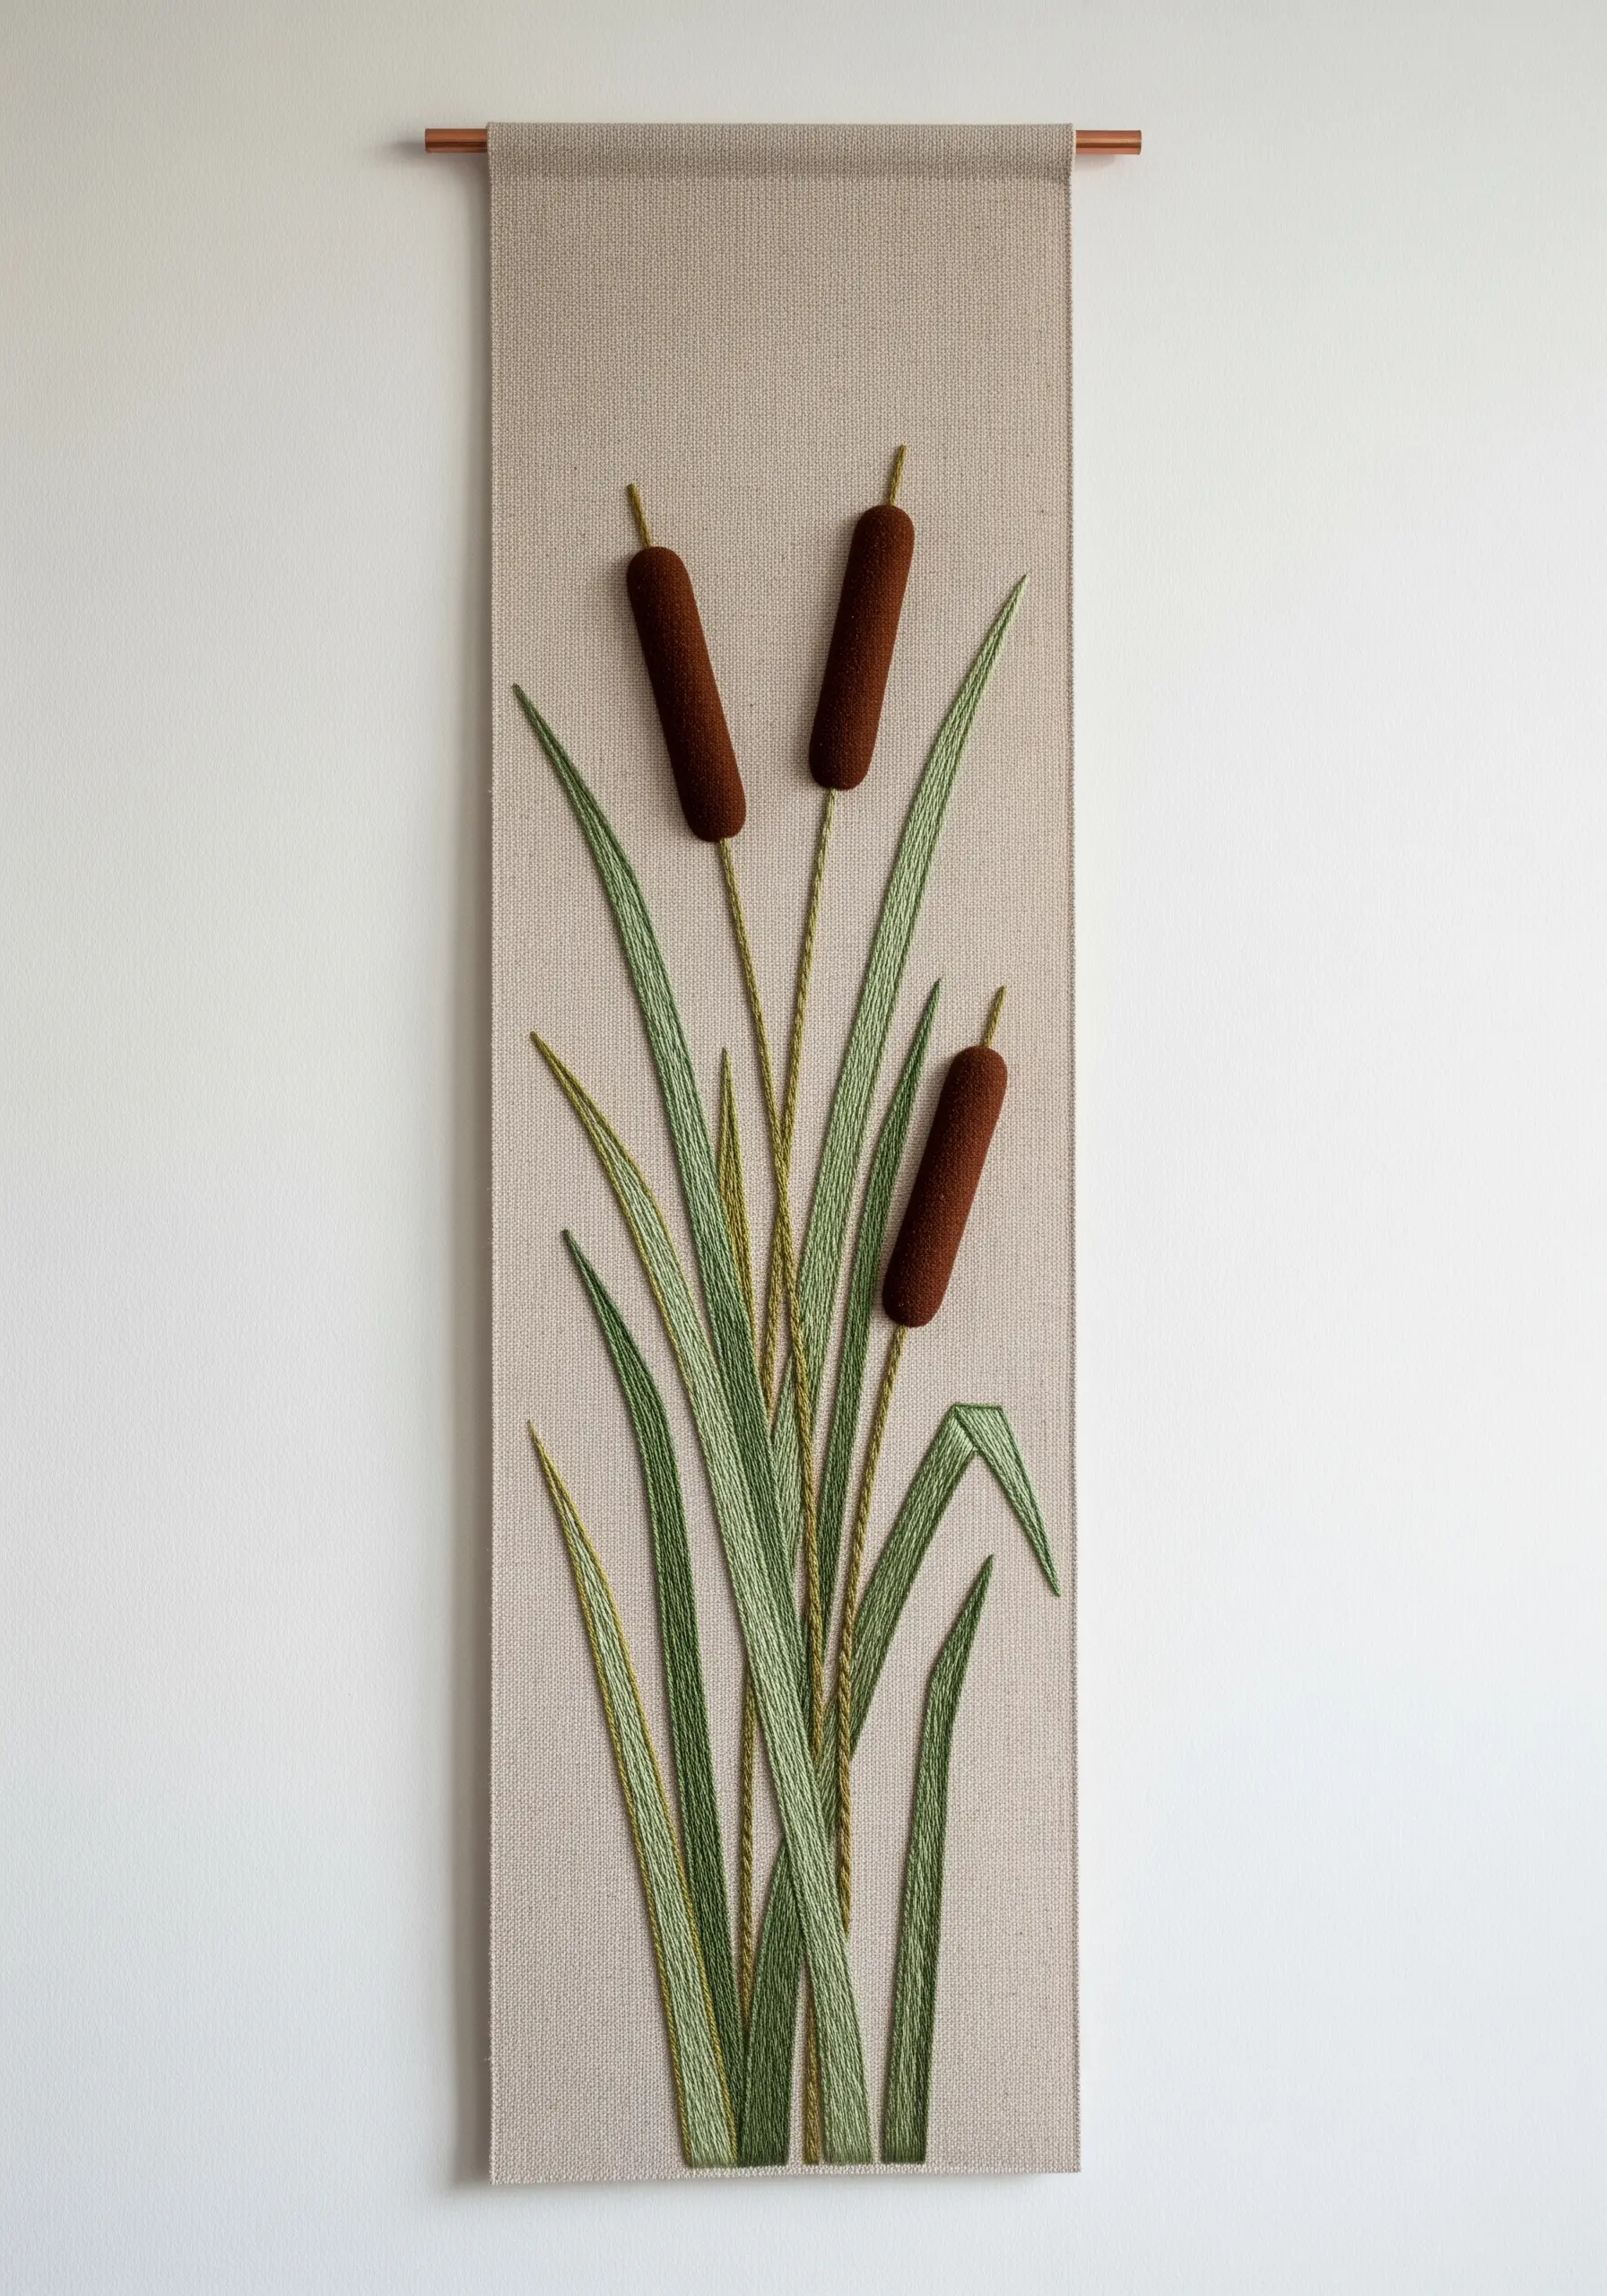
Make your nature motifs more dynamic by pairing stitches with opposing textures.
For the fuzzy head of a cattail, use a pile stitch like turkey work, leaving the loops dense and trimming them short for a velvety finish.
For the long, slender leaves and stems, use a perfectly smooth, flat satin stitch.
This deliberate contrast between plush and sleek textures is what brings the piece to life, making it interesting from both a distance and up close.
17. Recreate Agate Rings with Contoured Line Work
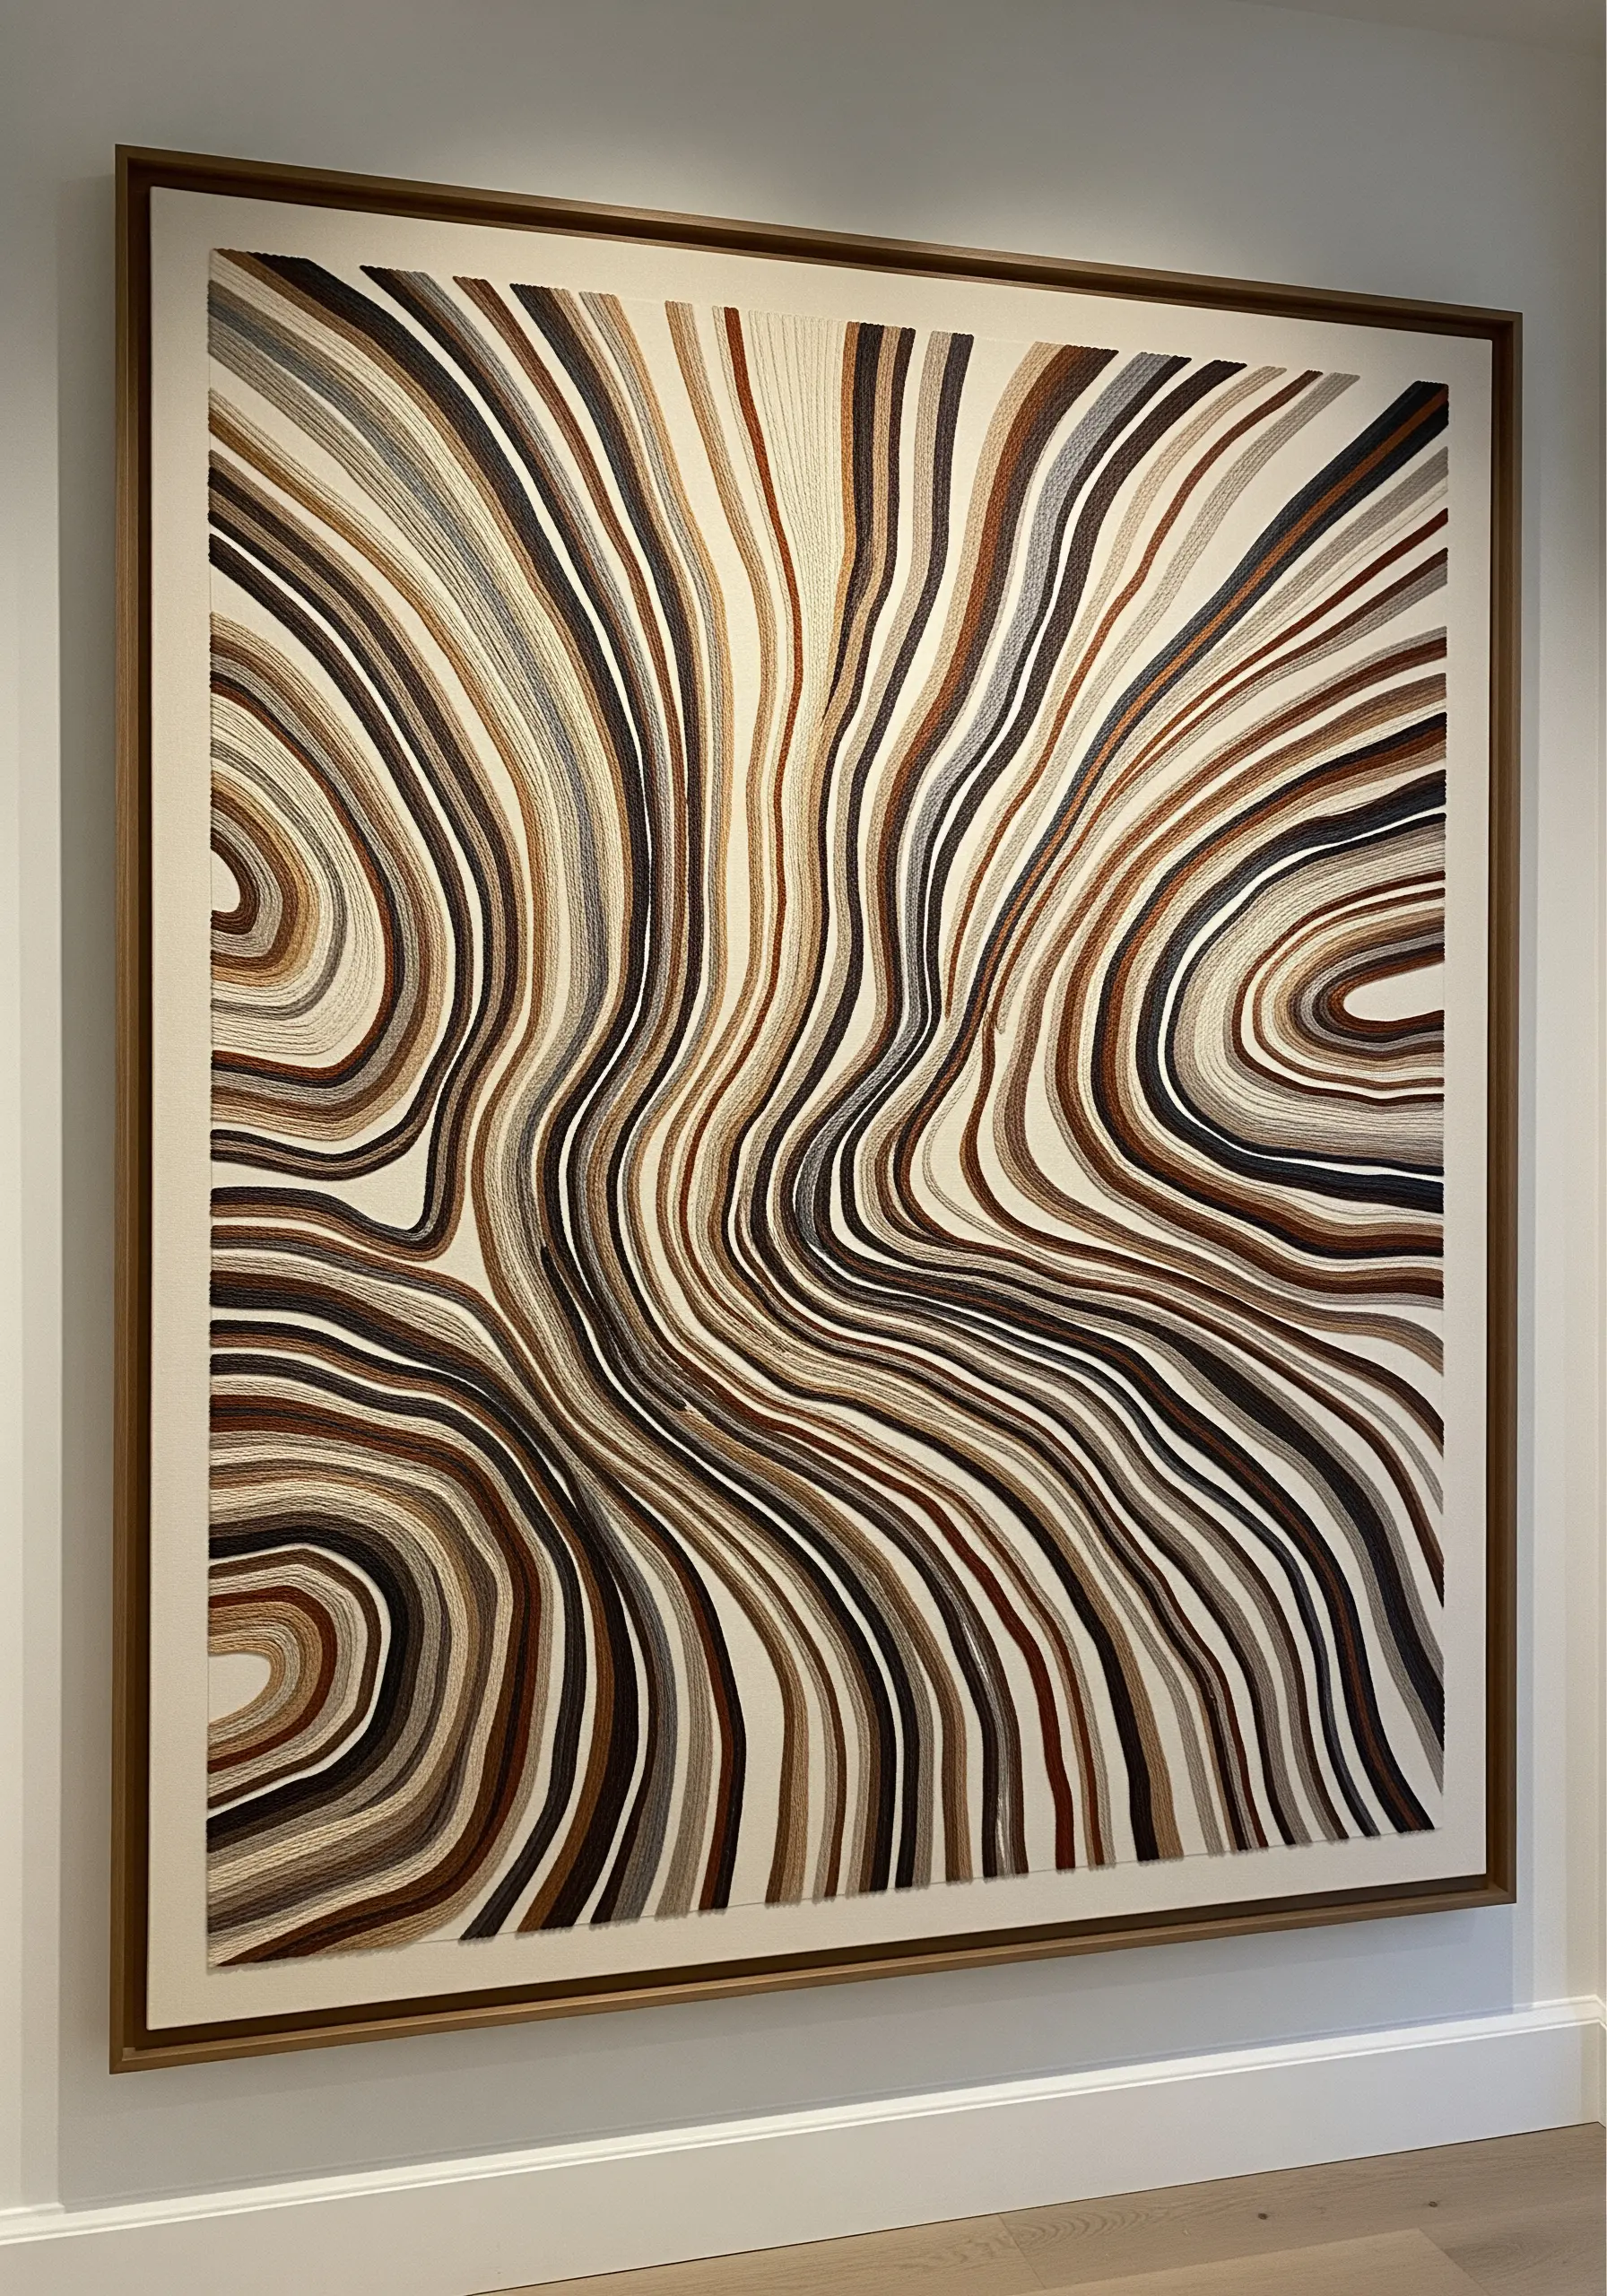
Capture the organic, flowing patterns of a polished agate slice using dense, concentric lines of stitching.
Choose a simple but controlled line stitch, like stem stitch or split stitch, to ensure your curves are smooth.
Follow the natural, irregular shapes of the stone, switching your thread color to replicate the distinct bands.
This meditative technique turns simple lines into a complex and mesmerizing piece of abstract framed embroidery.
18. Build a Textured Lavender Field with Mixed Knots
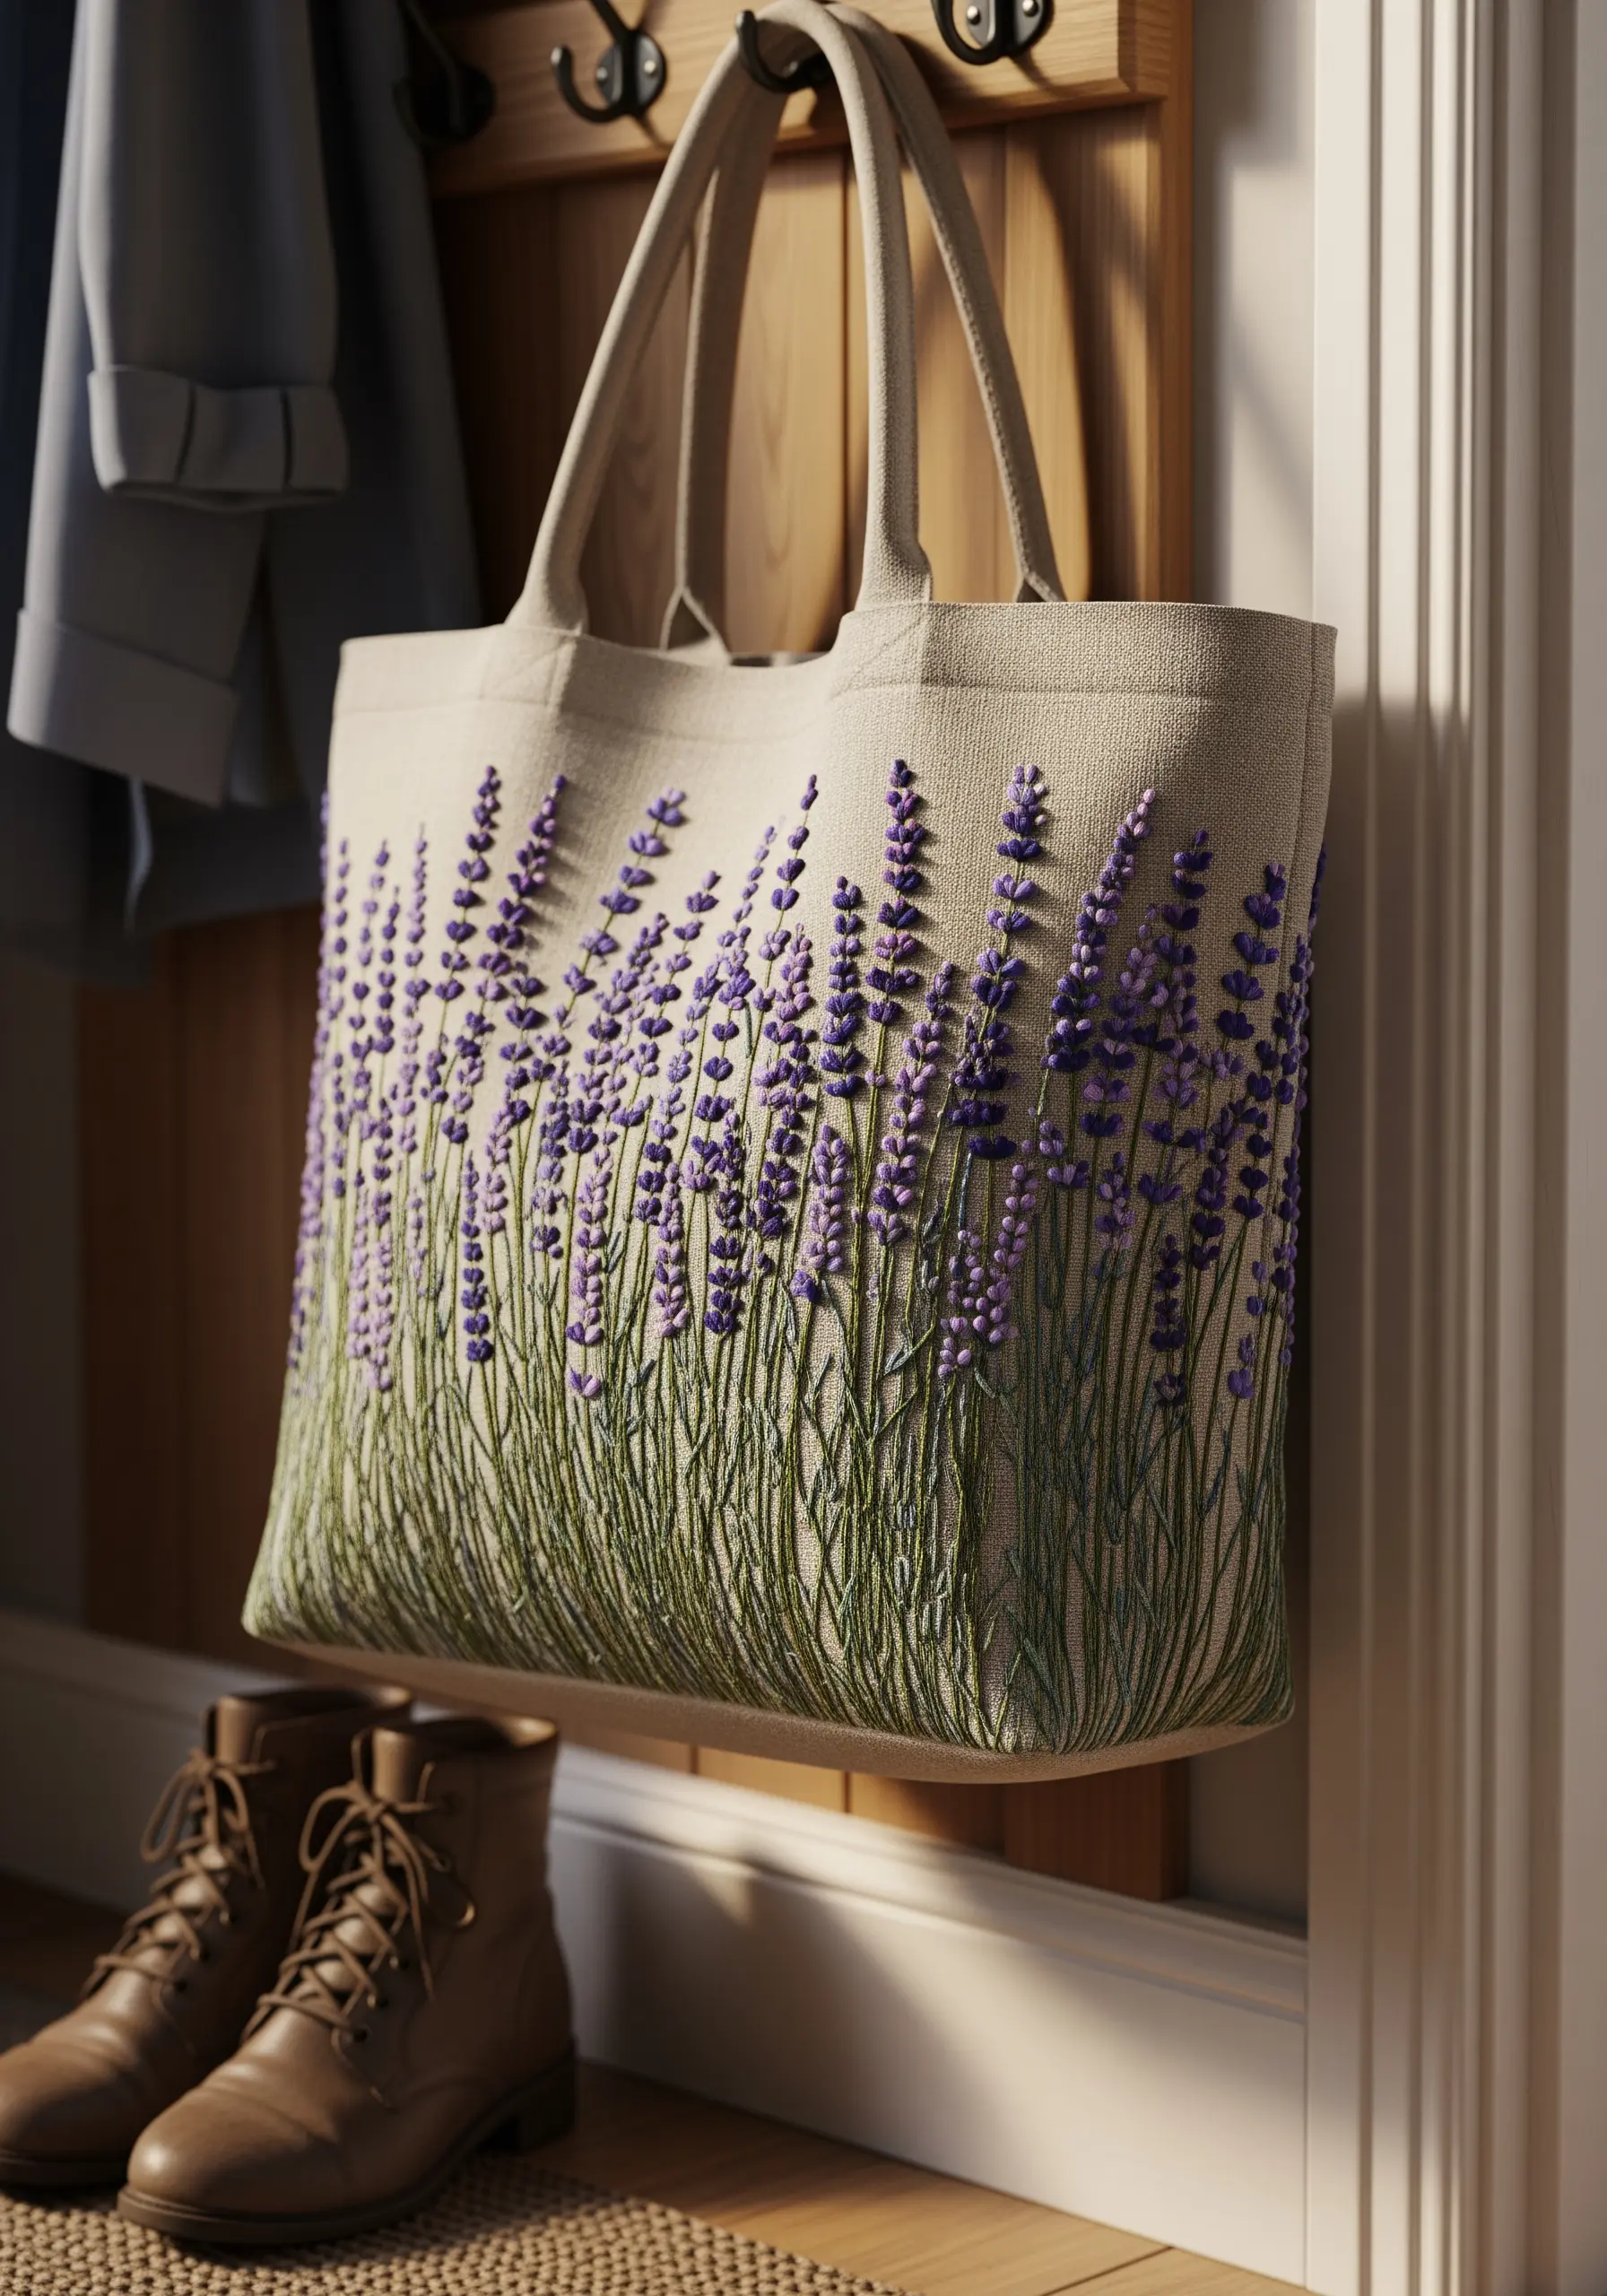
To give a field of lavender a lush, dimensional appearance, layer several different stitches.
Start with simple straight stitches or a fine stem stitch for the green stalks, creating a dense base.
For the purple blossoms, combine French knots with longer bullion knots. This variation in shape and size mimics the structure of a real lavender sprig.
By layering these stitches, you create a rich texture that has depth, movement, and a truly immersive quality.
19. Construct a Bird’s Nest with Unconventional Fibers
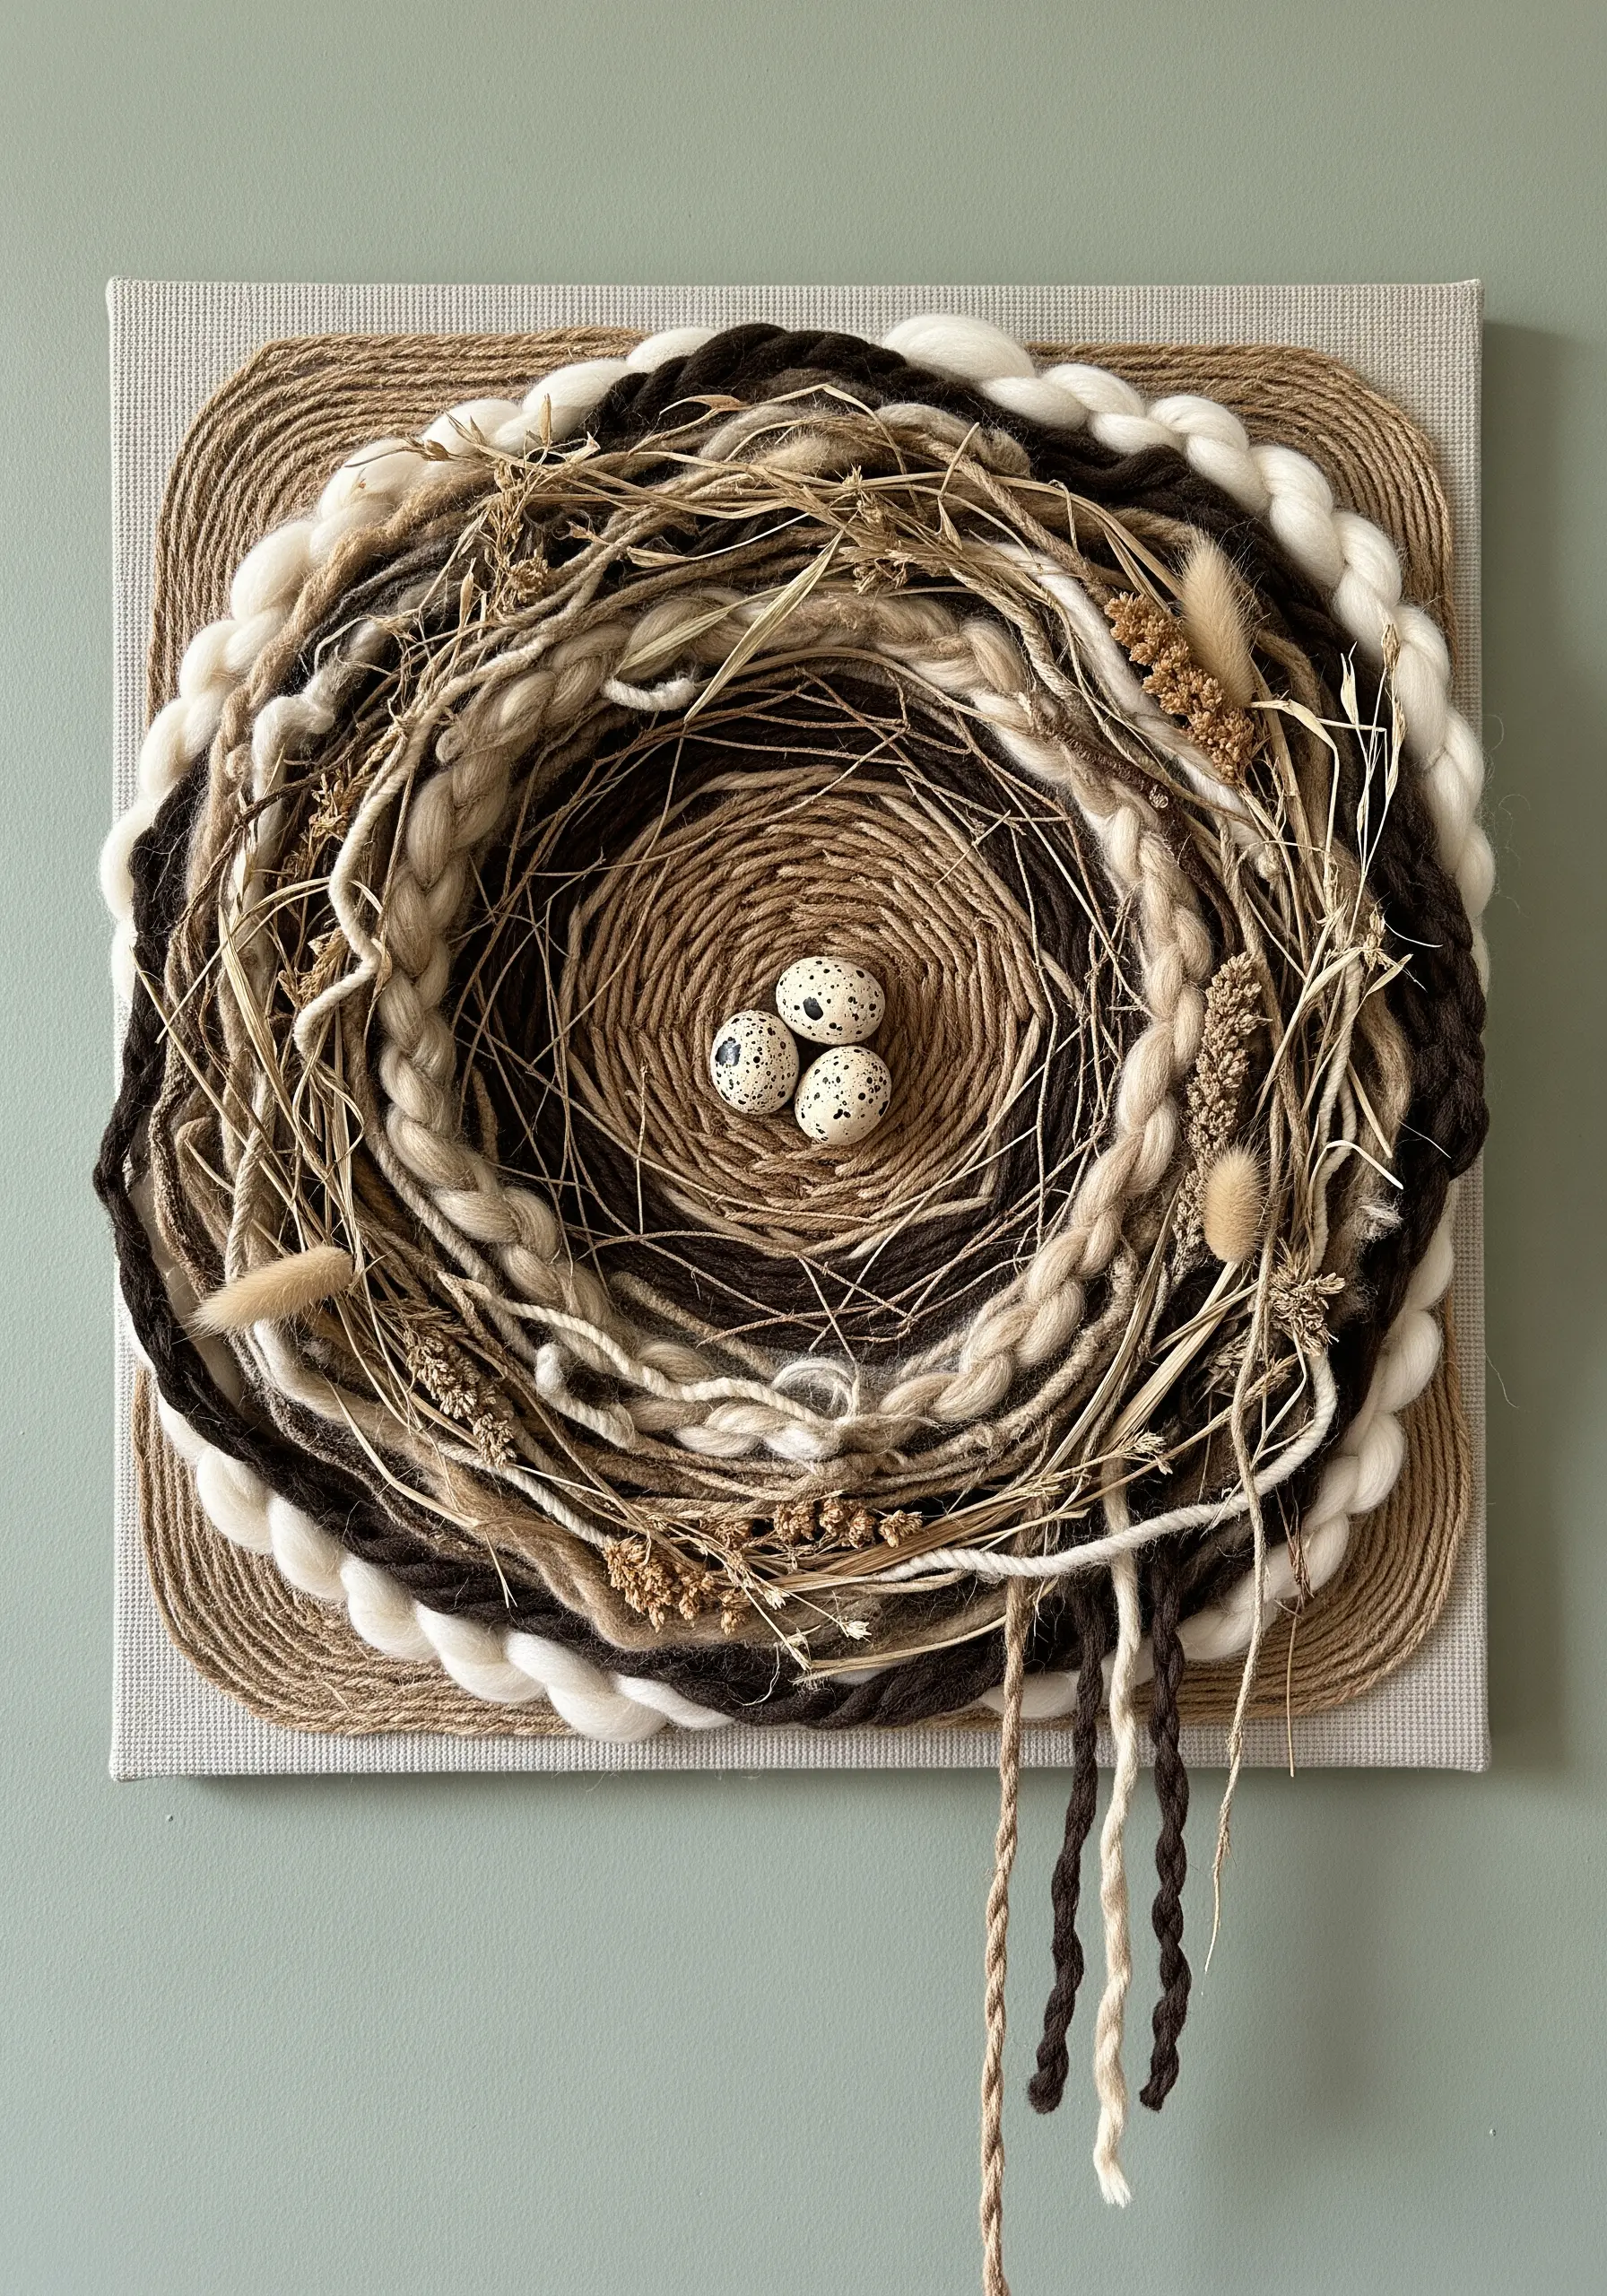
For an authentically rustic texture, incorporate materials beyond embroidery floss.
Create a bird’s nest by couching down a mix of chunky wool yarn, natural twine, raffia, and even wisps of dried grass.
Work in a circular, layered fashion, allowing the different fibers to tangle and overlap organically.
This mixed-fiber art approach results in a piece that is wonderfully tactile and captures the beautiful, controlled chaos of nature.


