

A denim jacket is more than just a piece of clothing; it’s a canvas waiting for your story. And color-blocking is one of the most powerful ways to tell it—with intention, clarity, and boldness.
Forget random patches or scattered motifs for a moment. Think like a designer. Color-blocking allows you to work with the jacket’s structure, using its seams and panels to frame your art. It’s about creating clean lines, striking compositions, and a piece that feels cohesive and complete.
In these patterns, you’ll discover how to use appliqué for large fields of color, how stitch direction can create movement, and how a limited palette can make an even stronger statement. This is your chance to transform a classic garment into a wearable piece of modern art.
1. Frame Your Design with Satin Appliqué

For large-scale color blocks, use fabric appliqué instead of filling the entire area with thread.
First, cut your fabric panels to shape and secure them with a lightweight fusible web to prevent shifting.
Then, frame each panel with a clean, dense satin stitch border.
This method saves an incredible amount of time and thread while creating perfectly crisp edges.
Adding a metallic thread, like the silver here, introduces a luxe, retro finish that catches the light.
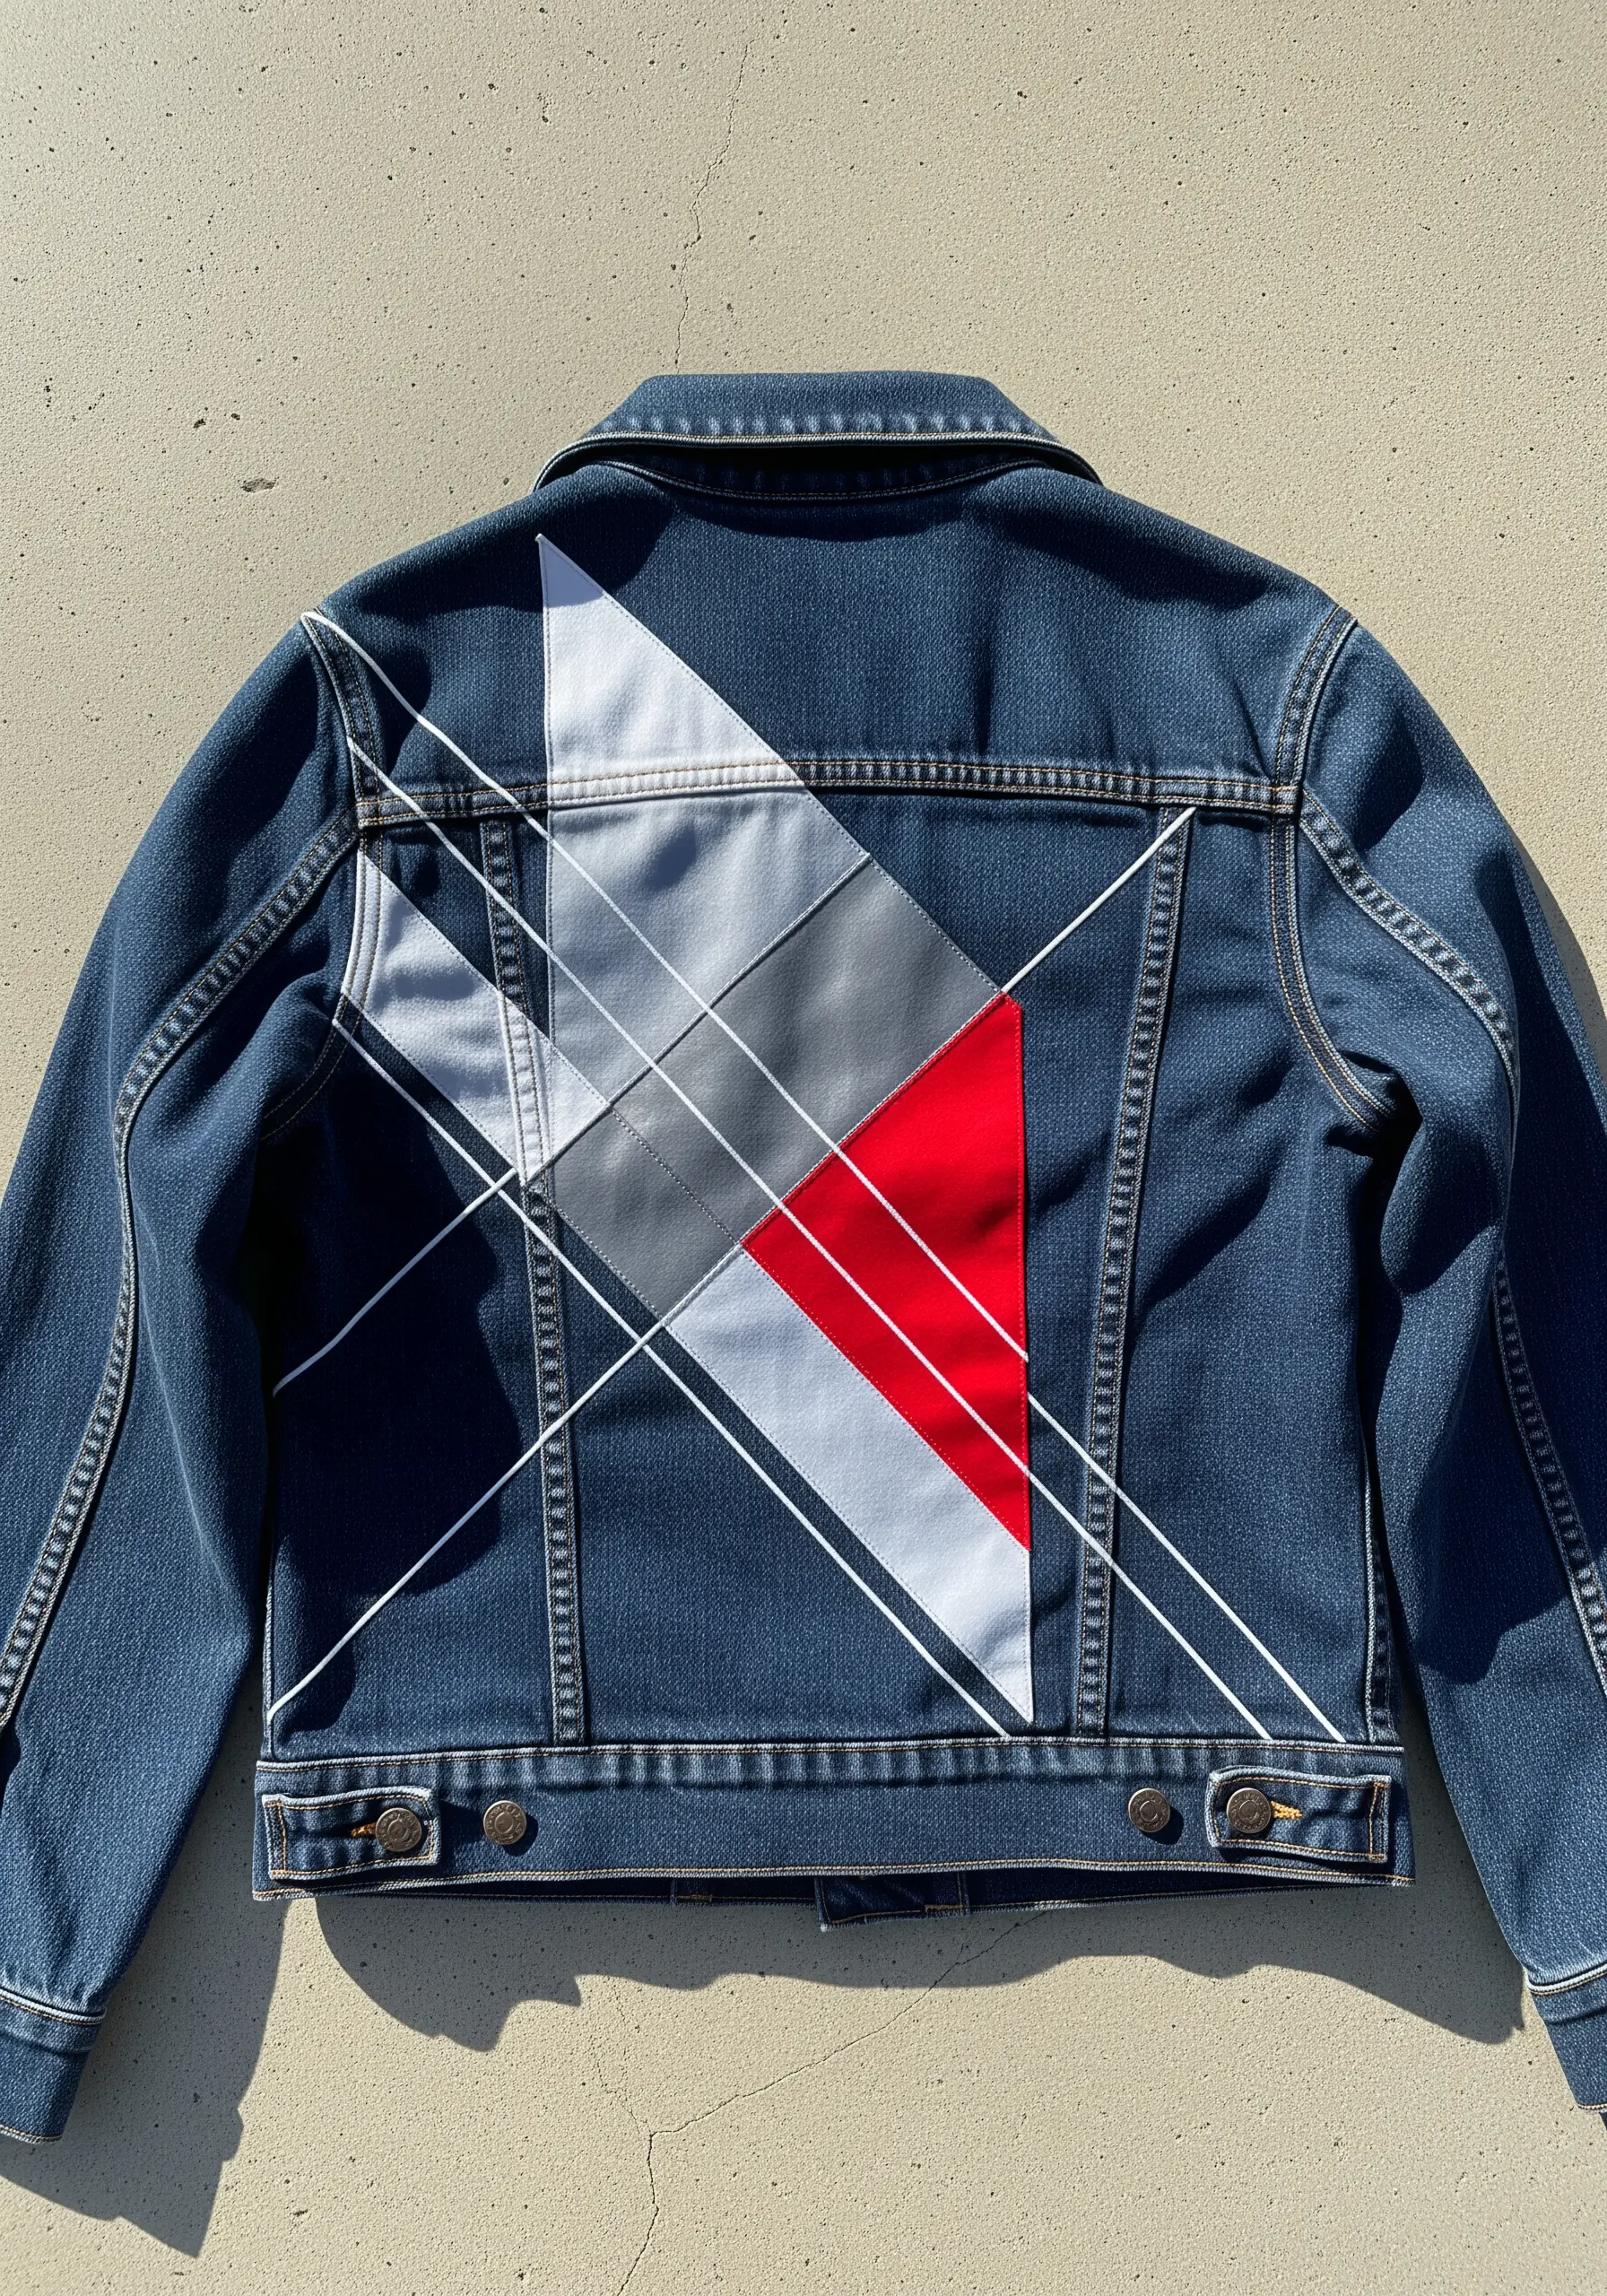
2. Create Depth with Layered Geometric Shapes
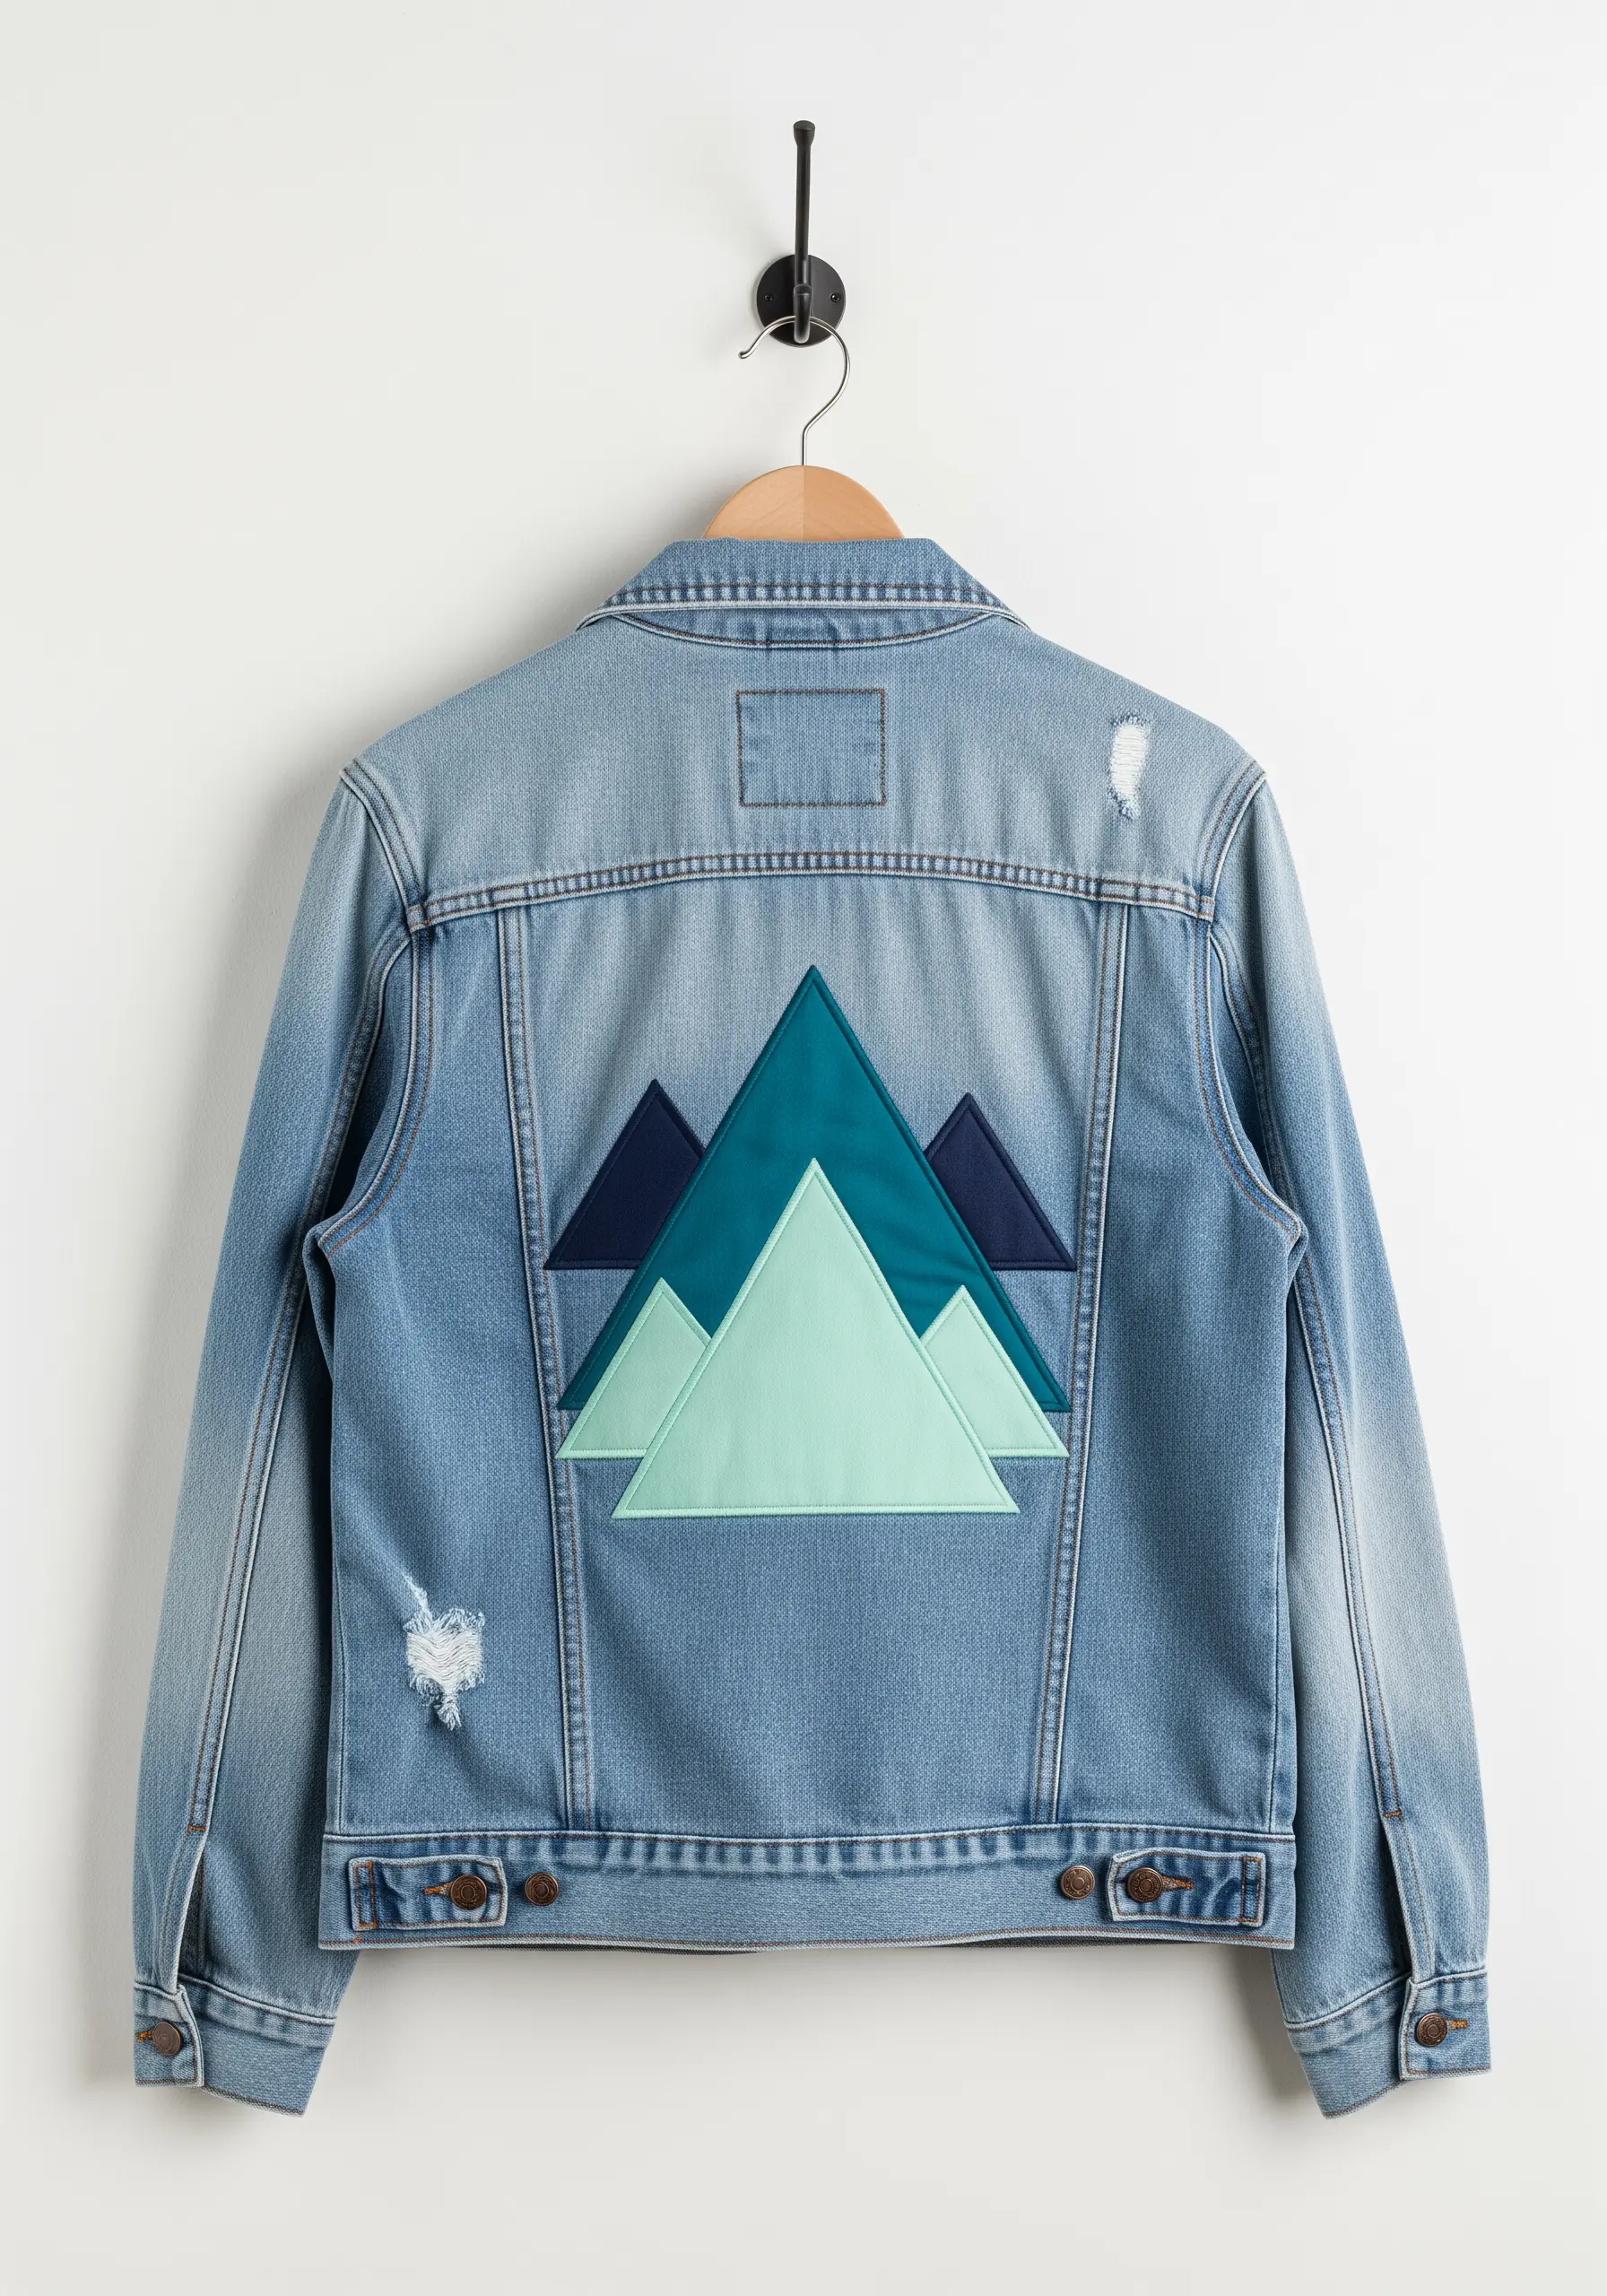
You can suggest perspective and depth by layering appliqué shapes in tonal shades of the same color.
The overlapping triangles create a clear illusion of foreground, mid-ground, and background without complex shading.
To achieve those sharp, professional-looking corners, slow down your stitching and pivot with the needle down at each point.
The bright mint green pops against the darker teal and denim, making the entire composition feel dynamic.
3. Master the Directional Satin Stitch
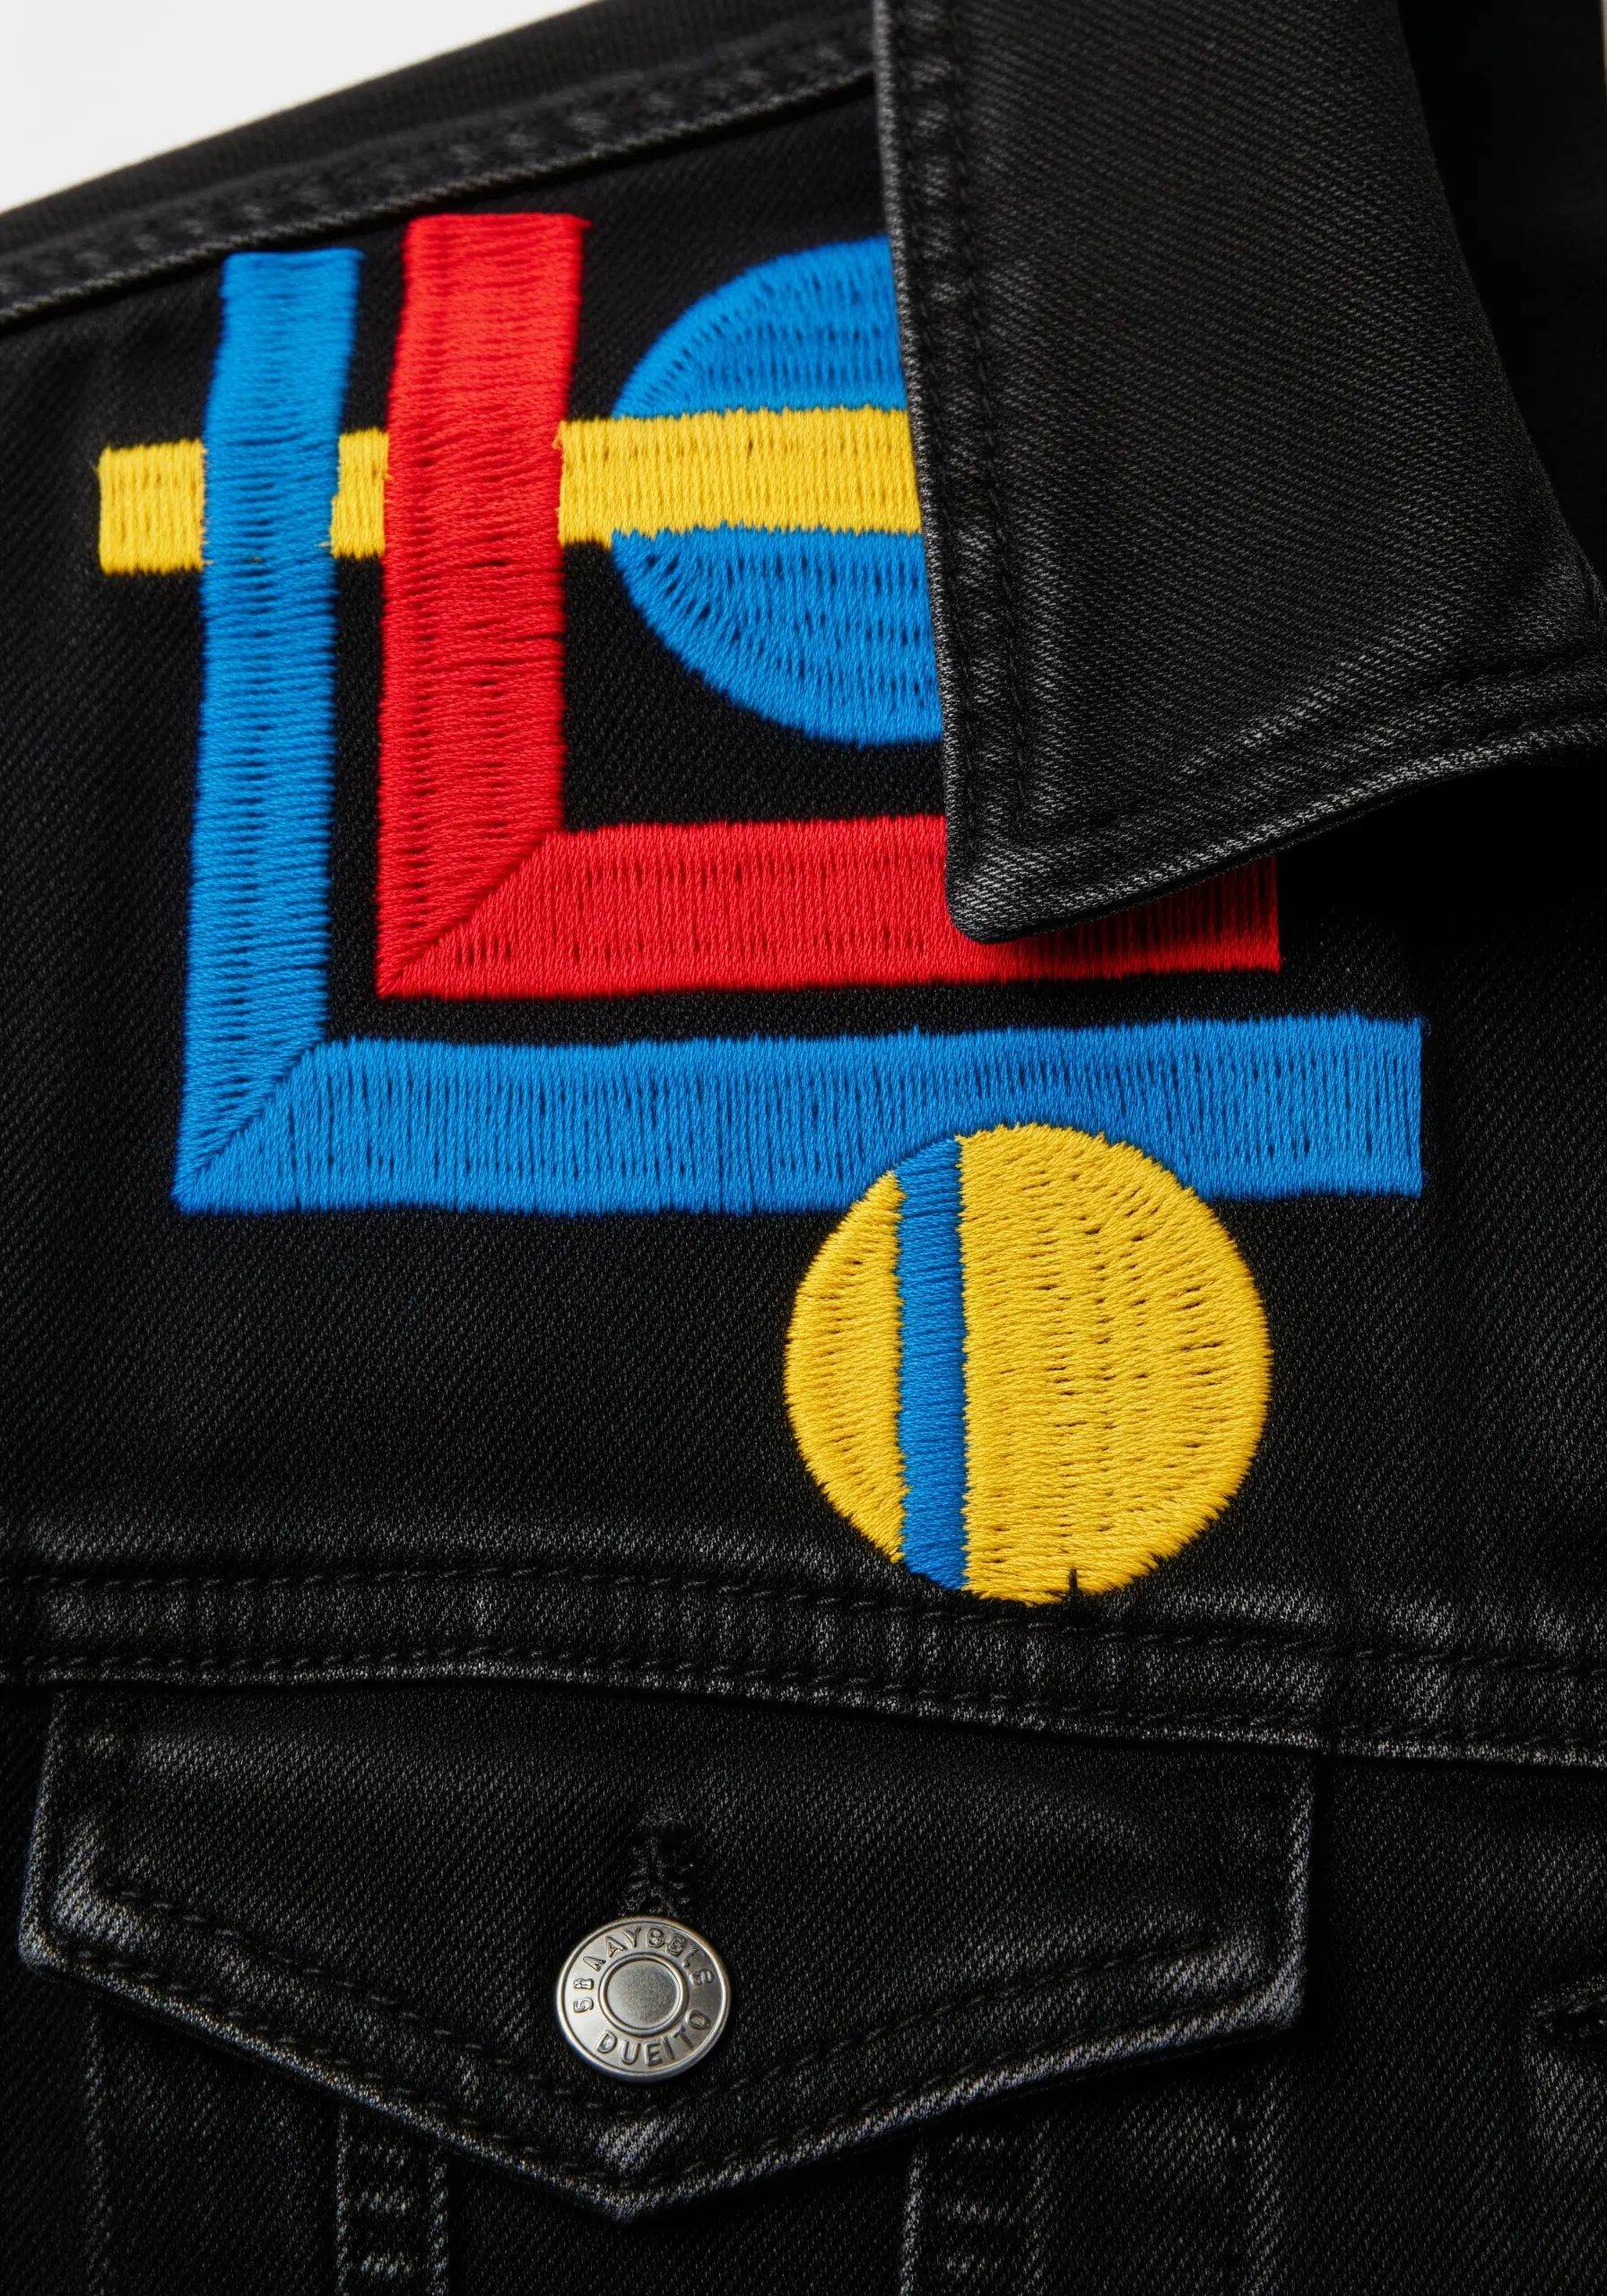
In abstract work, the direction of your satin stitch is a powerful design tool.
Instead of keeping all stitches parallel, allow them to follow the curves and angles of each shape.
This simple adjustment creates a subtle sense of movement and dimension, turning flat color blocks into something more sculptural.
Notice how the vertical stitches in the yellow circle provide a smart contrast to the horizontal blue sections.
4. Define Soft Shapes with a Contrasting Outline
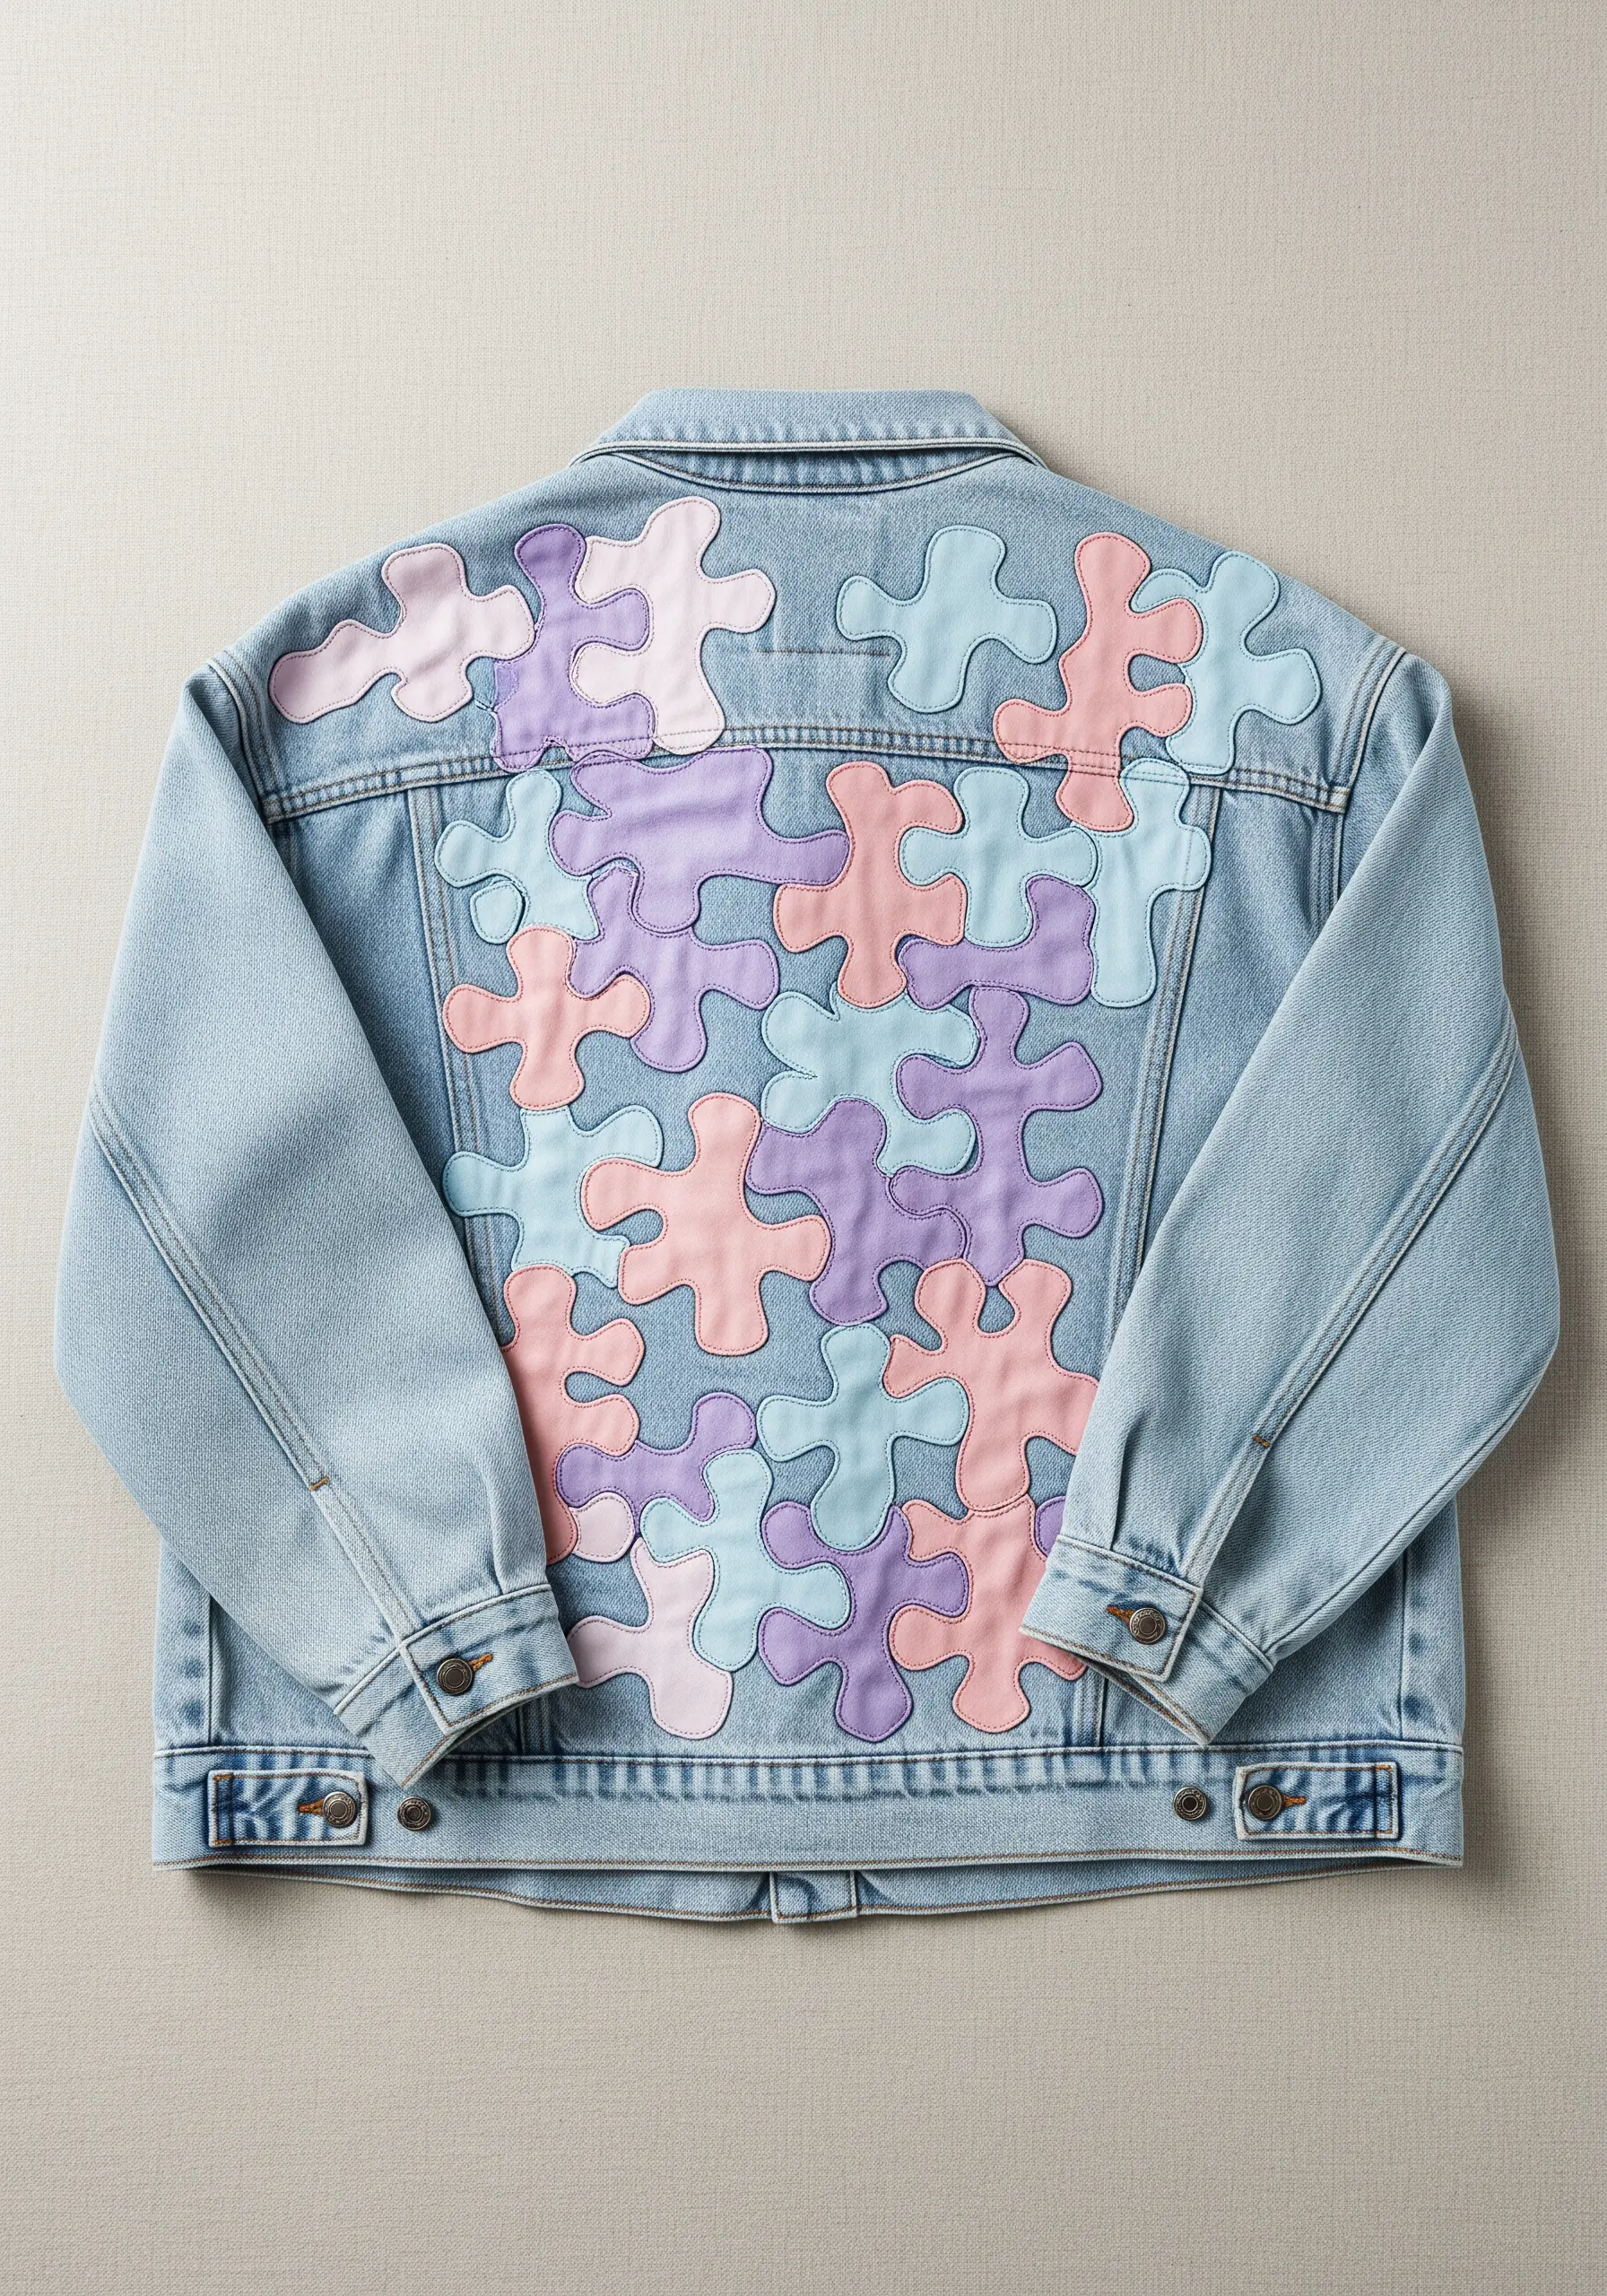
When using pastel appliqué on light-colored denim, the shapes can sometimes lose their definition.
To prevent this, add a clean outline in a slightly darker, contrasting color.
A simple backstitch or stem stitch provides enough definition to make the forms pop while also perfectly securing the fabric edges.
It’s a simple step that gives the finished piece a polished, graphic quality.
5. Explore Tone-on-Tone with Fabric Sheen

Create a sophisticated monochrome design by combining fabrics with different sheens.
Place matte, satin, and semi-gloss materials side-by-side in shades of grey, white, and black.
The way light reflects off each surface generates visual interest without adding more color.
This is a powerful technique for achieving a high-end, minimalist look that feels both subtle and dramatic.
6. Build Texture with Coiled Thread Couching
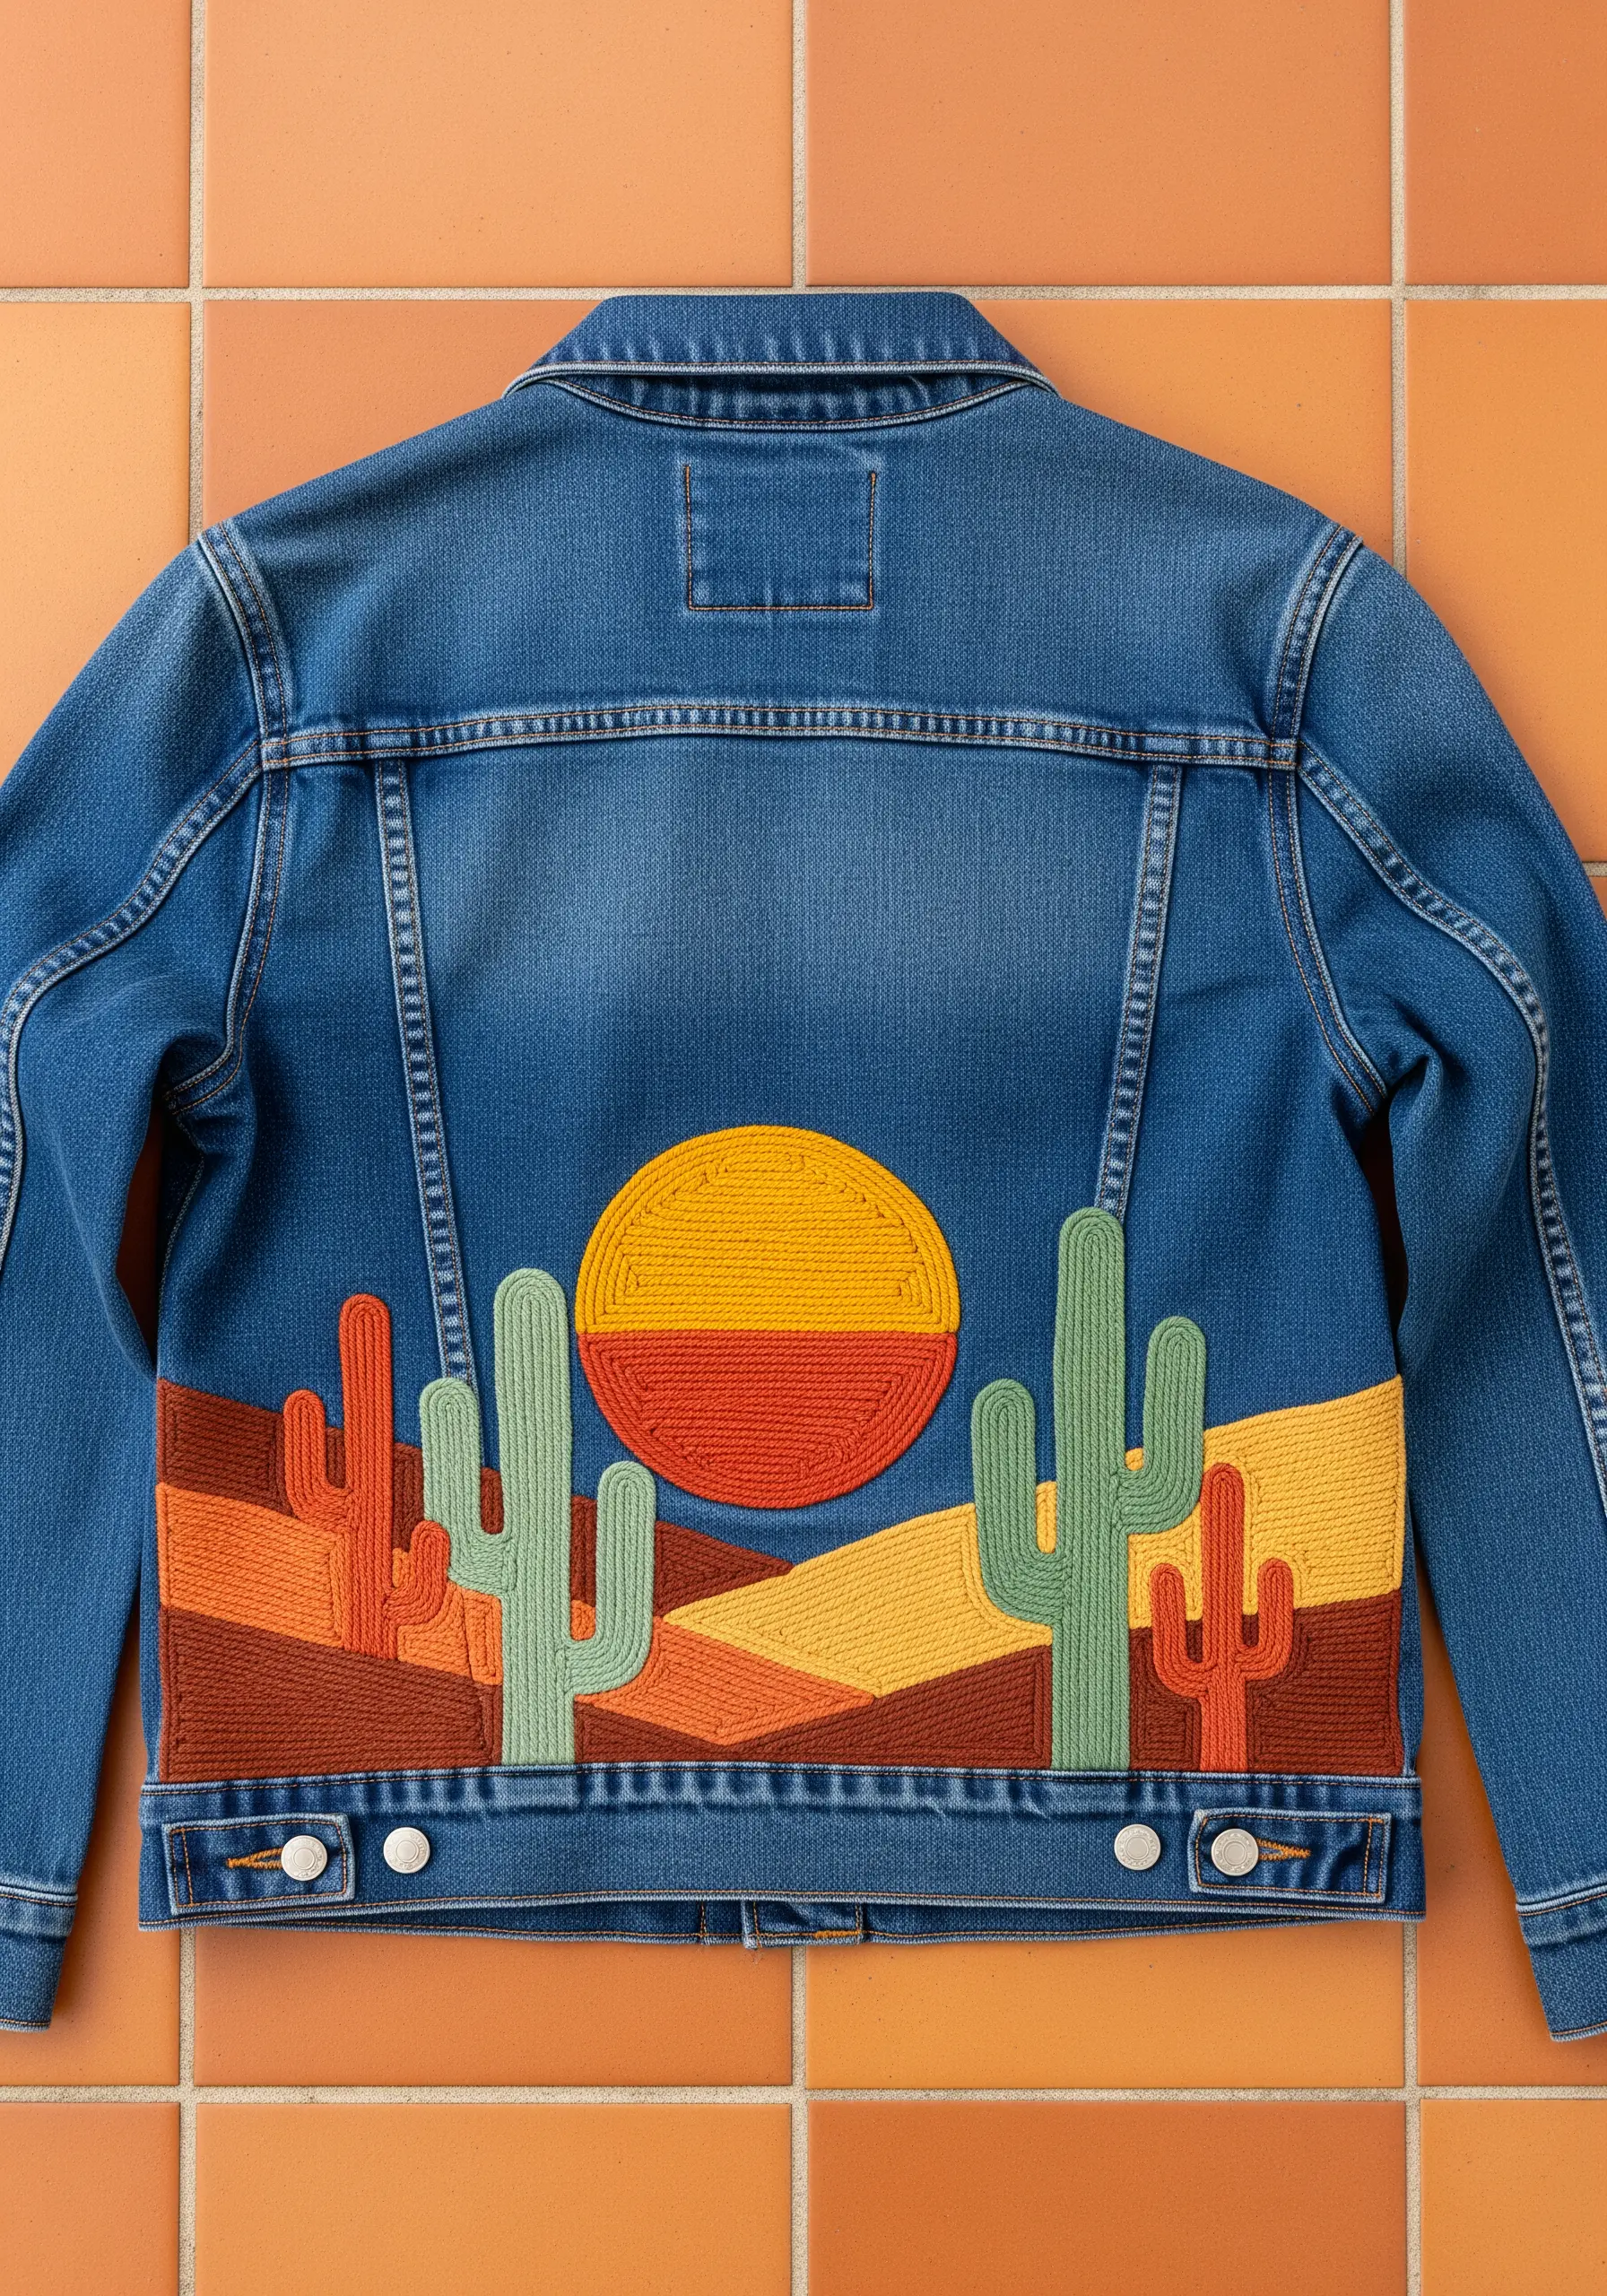
Instead of filling large shapes with traditional satin stitch, try couching thick yarn or multiple strands of floss.
Simply lay down your yarn in the desired pattern—like a spiral or rows—and tack it down with small, perpendicular stitches in a matching thread.
This method builds incredible texture quickly and is perfect for capturing nature’s textures, like the sun and hills in a desert landscape.
7. Maximize Contrast with Neon on Black Denim
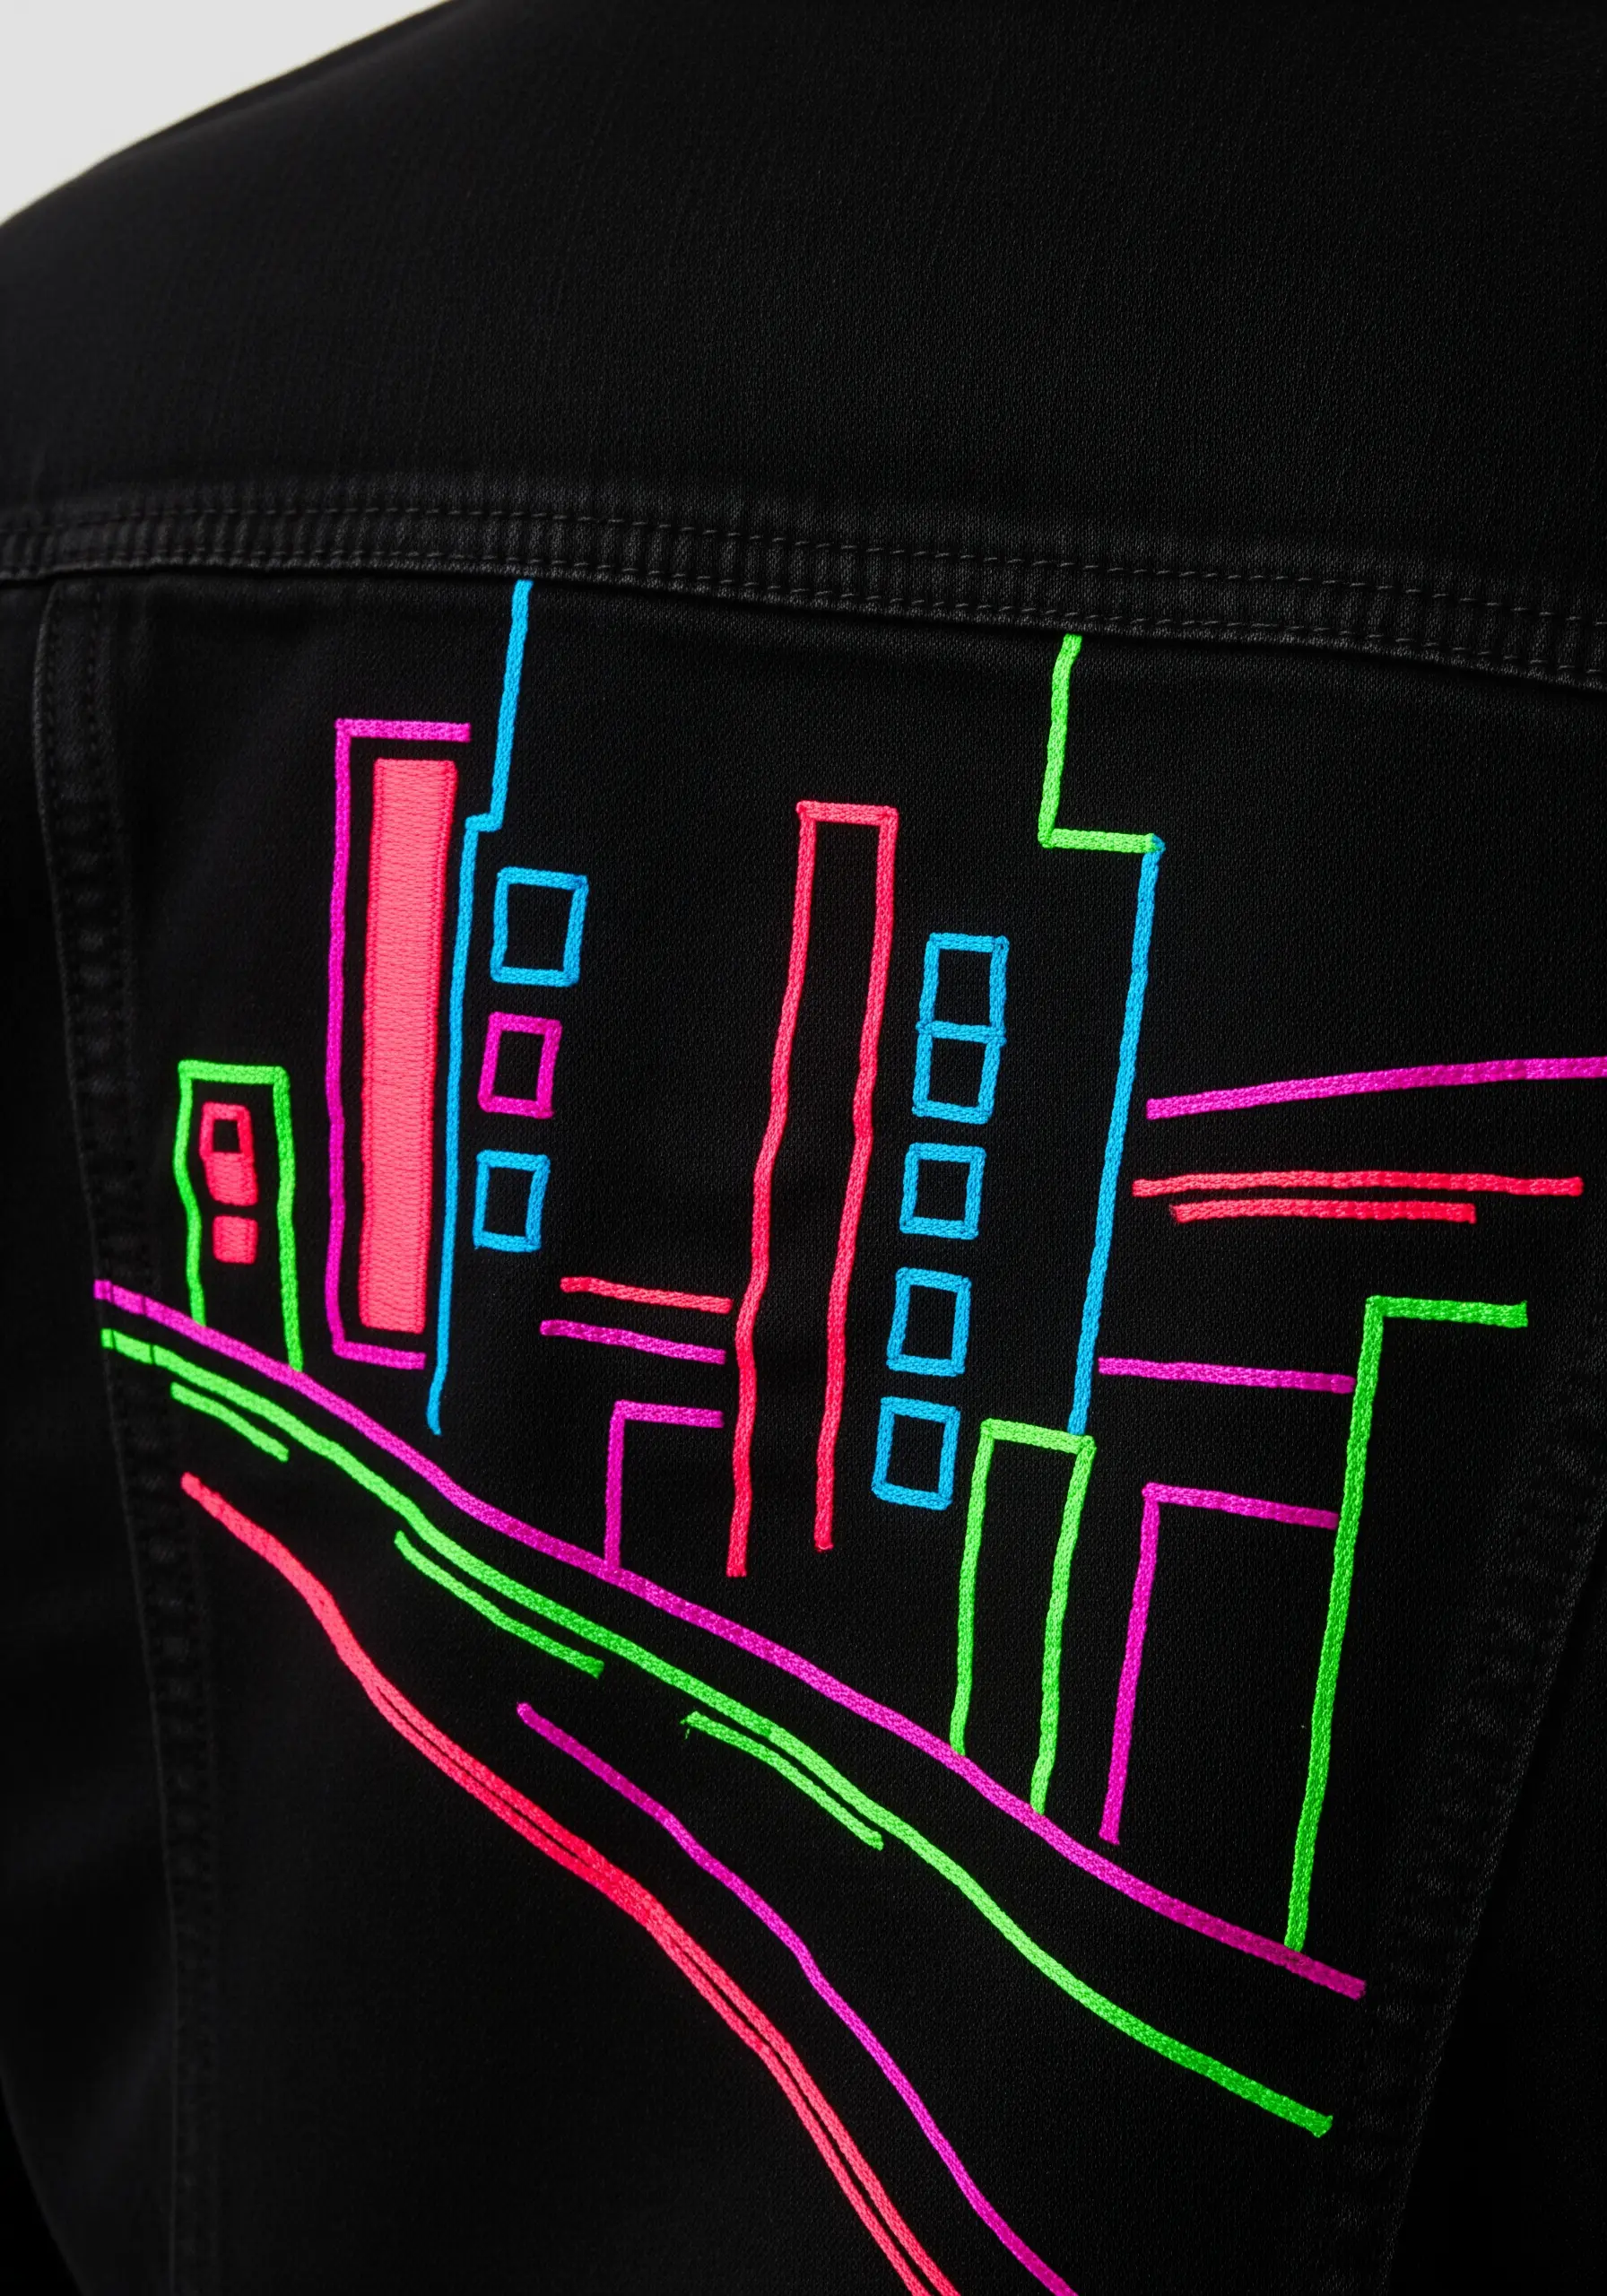
To make neon threads truly electrify on dark fabric, you need to give them a bright base.
First, stitch your design using a layer of white thread.
Then, stitch directly over the white with your chosen neon color.
This under-stitching prevents the dark denim from dulling the thread’s vibrancy, creating a genuine glowing effect that a single layer can’t achieve.
8. Add Dimension with Padded Appliqué
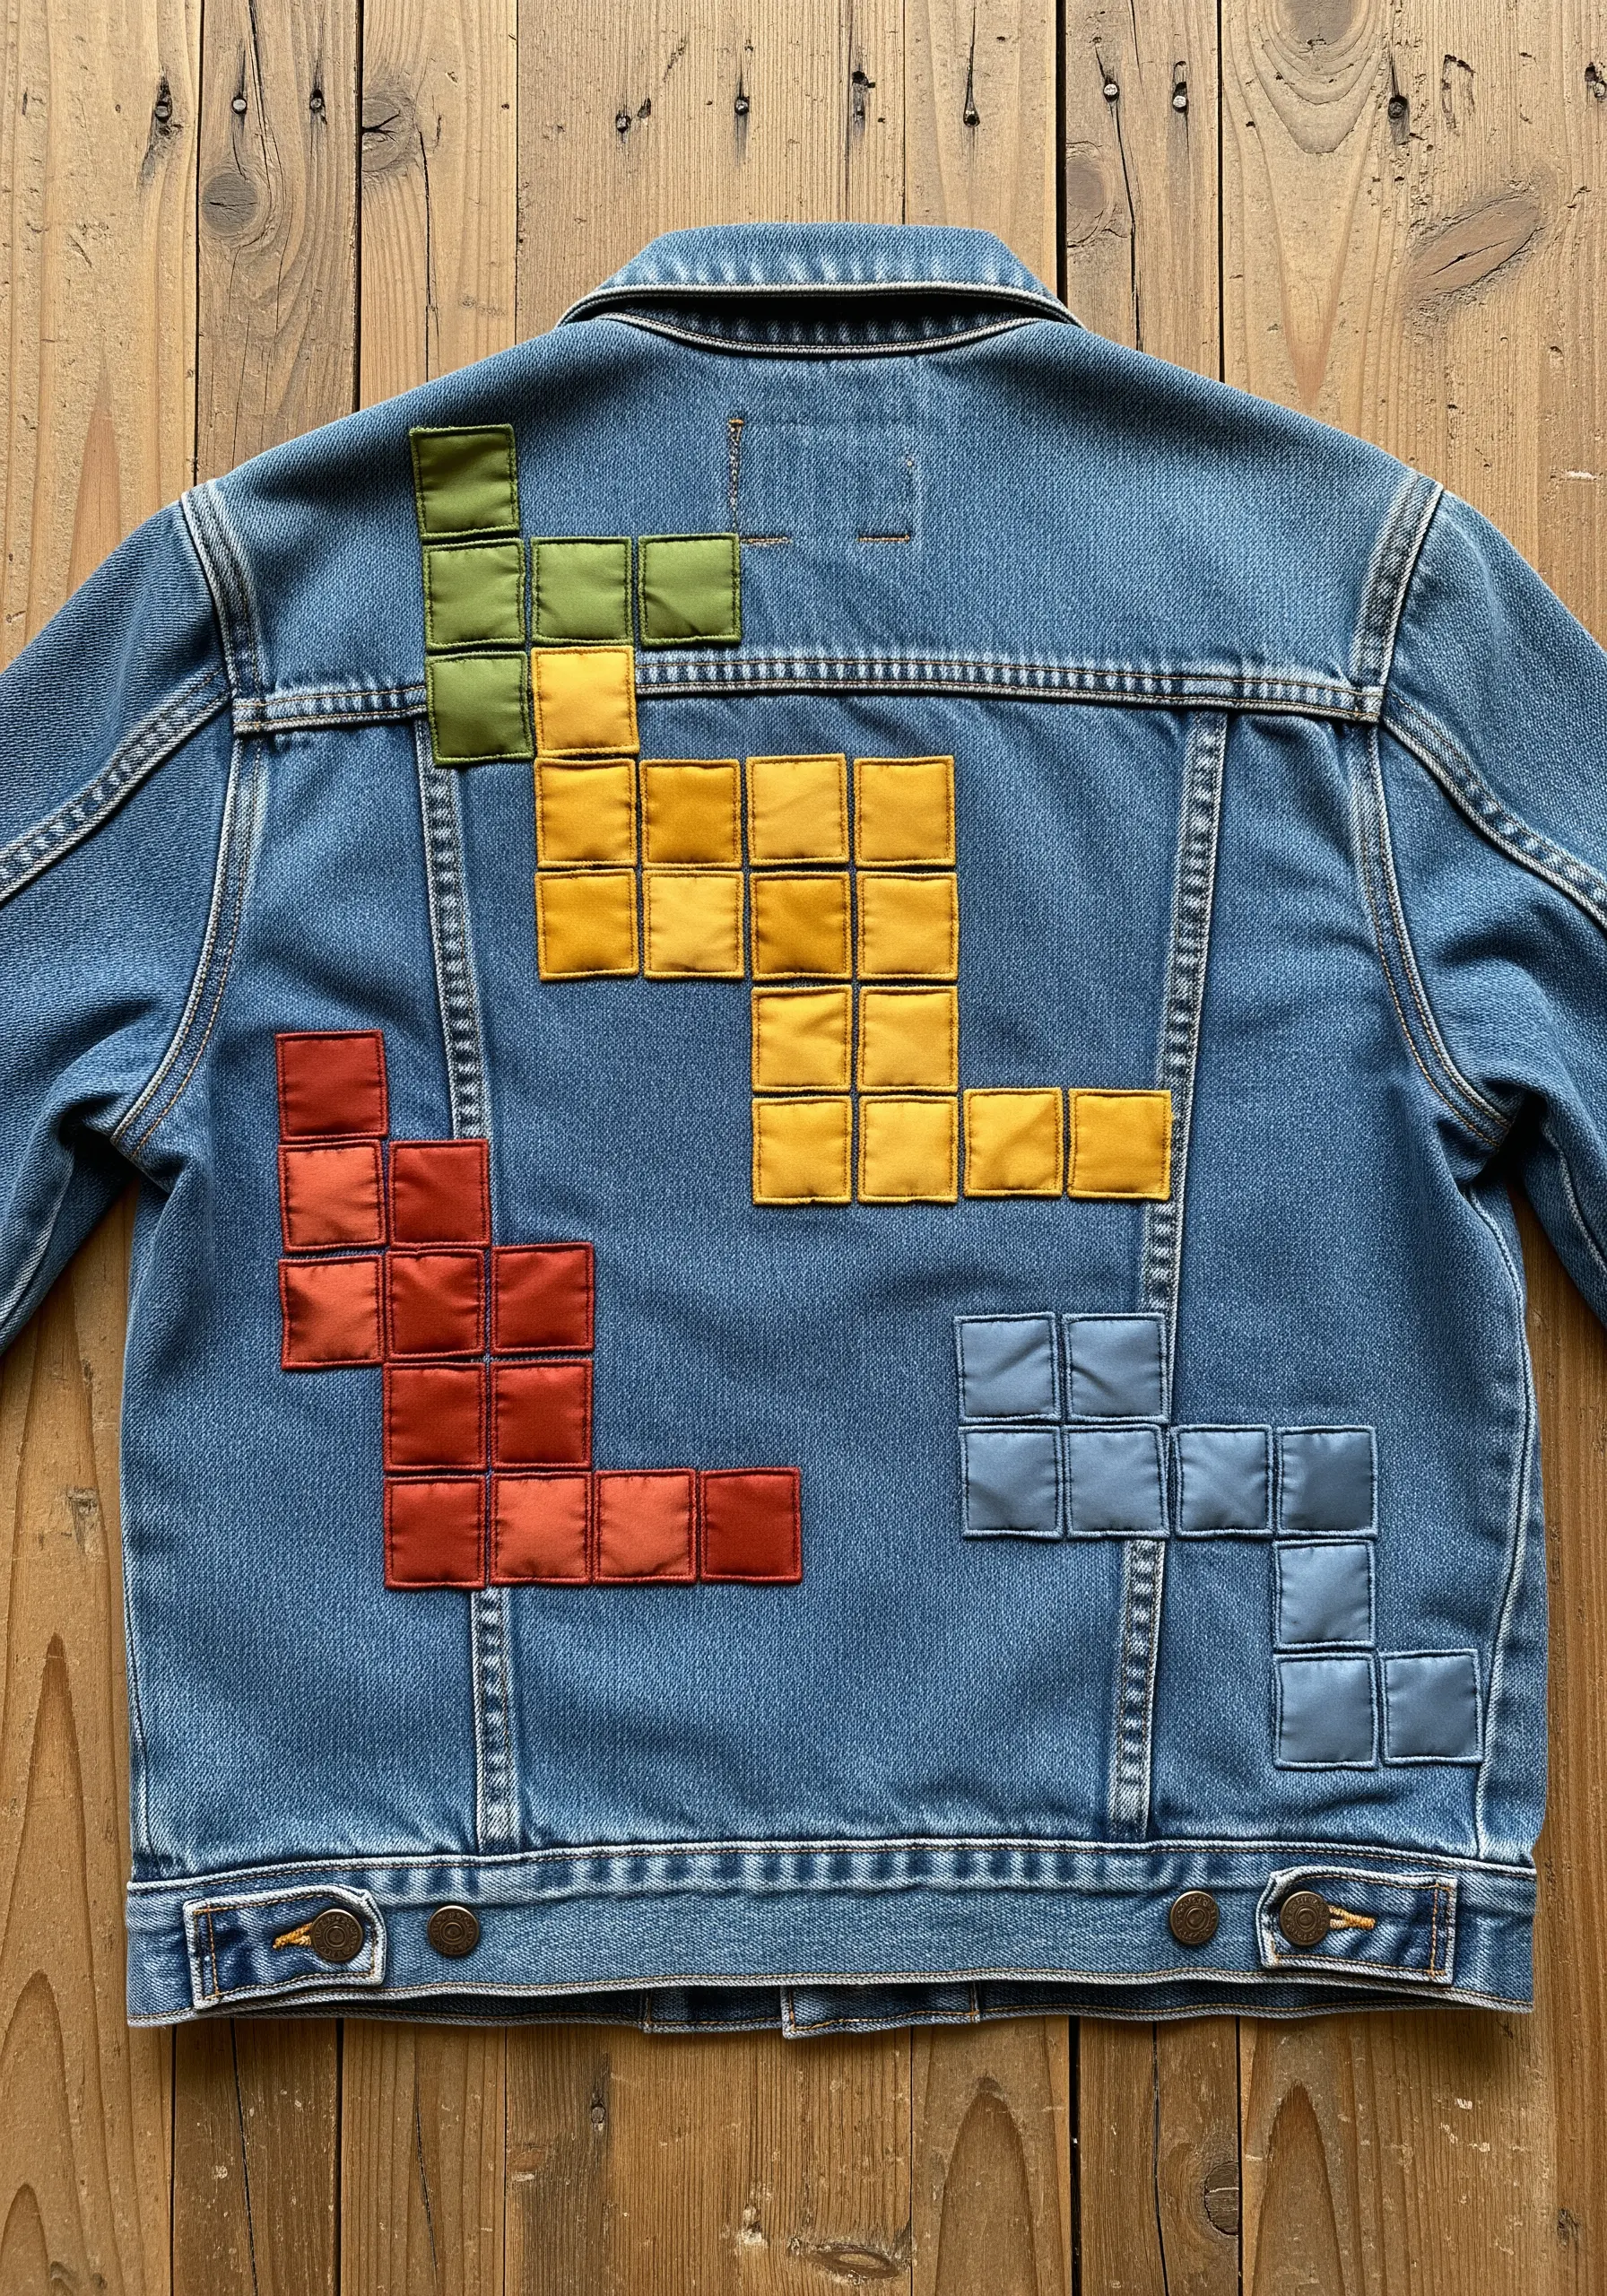
Give your appliqué a soft, three-dimensional effect by placing a thin layer of batting or felt underneath each fabric piece.
Before stitching the edges down, simply tuck the batting inside.
This creates a subtle, quilted look that adds tactile interest and makes simple geometric shapes feel more substantial and playful.
9. Create Flow with Analogous Color Gradients

For a harmonious and fluid gradient, select analogous colors—shades that sit next to each other on the color wheel.
Arranging these tones in wavy fabric panels creates a beautiful sense of movement and visual calm.
To ensure your appliqué pieces fit together seamlessly, trace your pattern onto a fusible web before cutting each fabric panel.
10. Integrate Your Design with Garment Seams
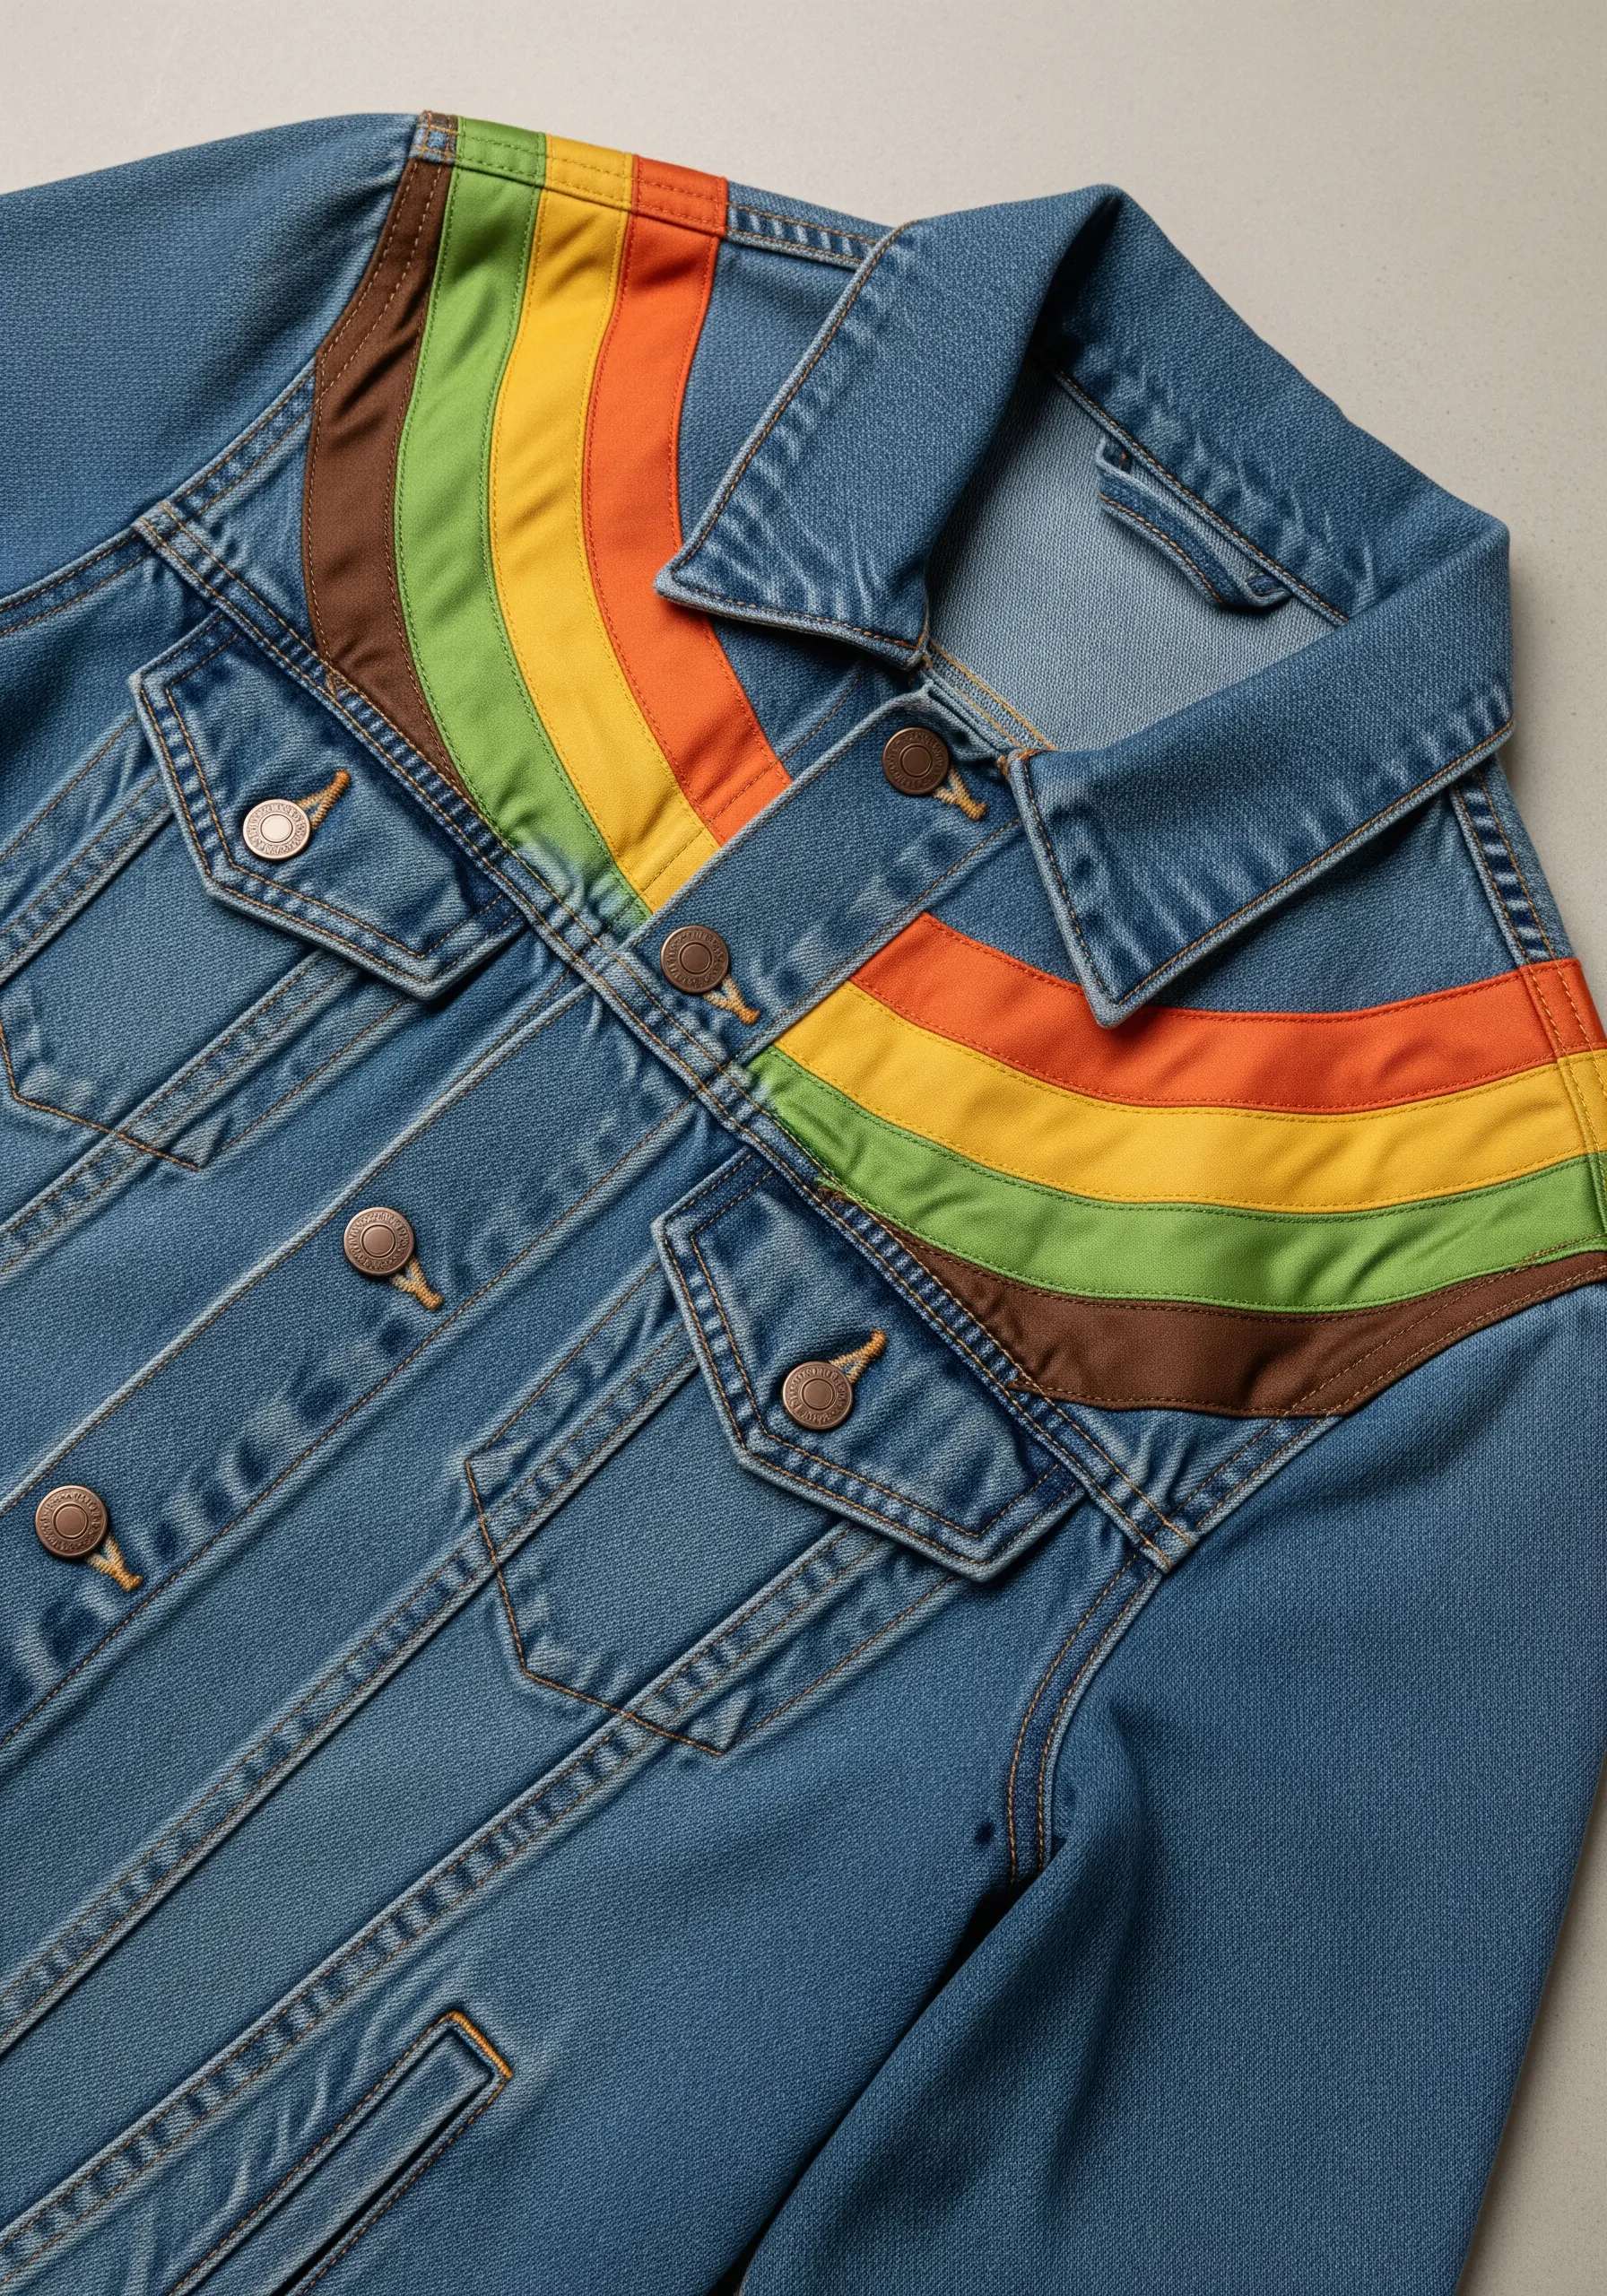
Make your embroidery feel like part of the jacket’s original design by aligning it with existing seams.
Placing these retro-inspired stripes along the shoulder yoke integrates the motif into the garment’s structure.
This simple placement choice makes the embellishment look intentional and custom-fitted rather than like an add-on.
11. Compose a Minimalist Motif for Small Spaces
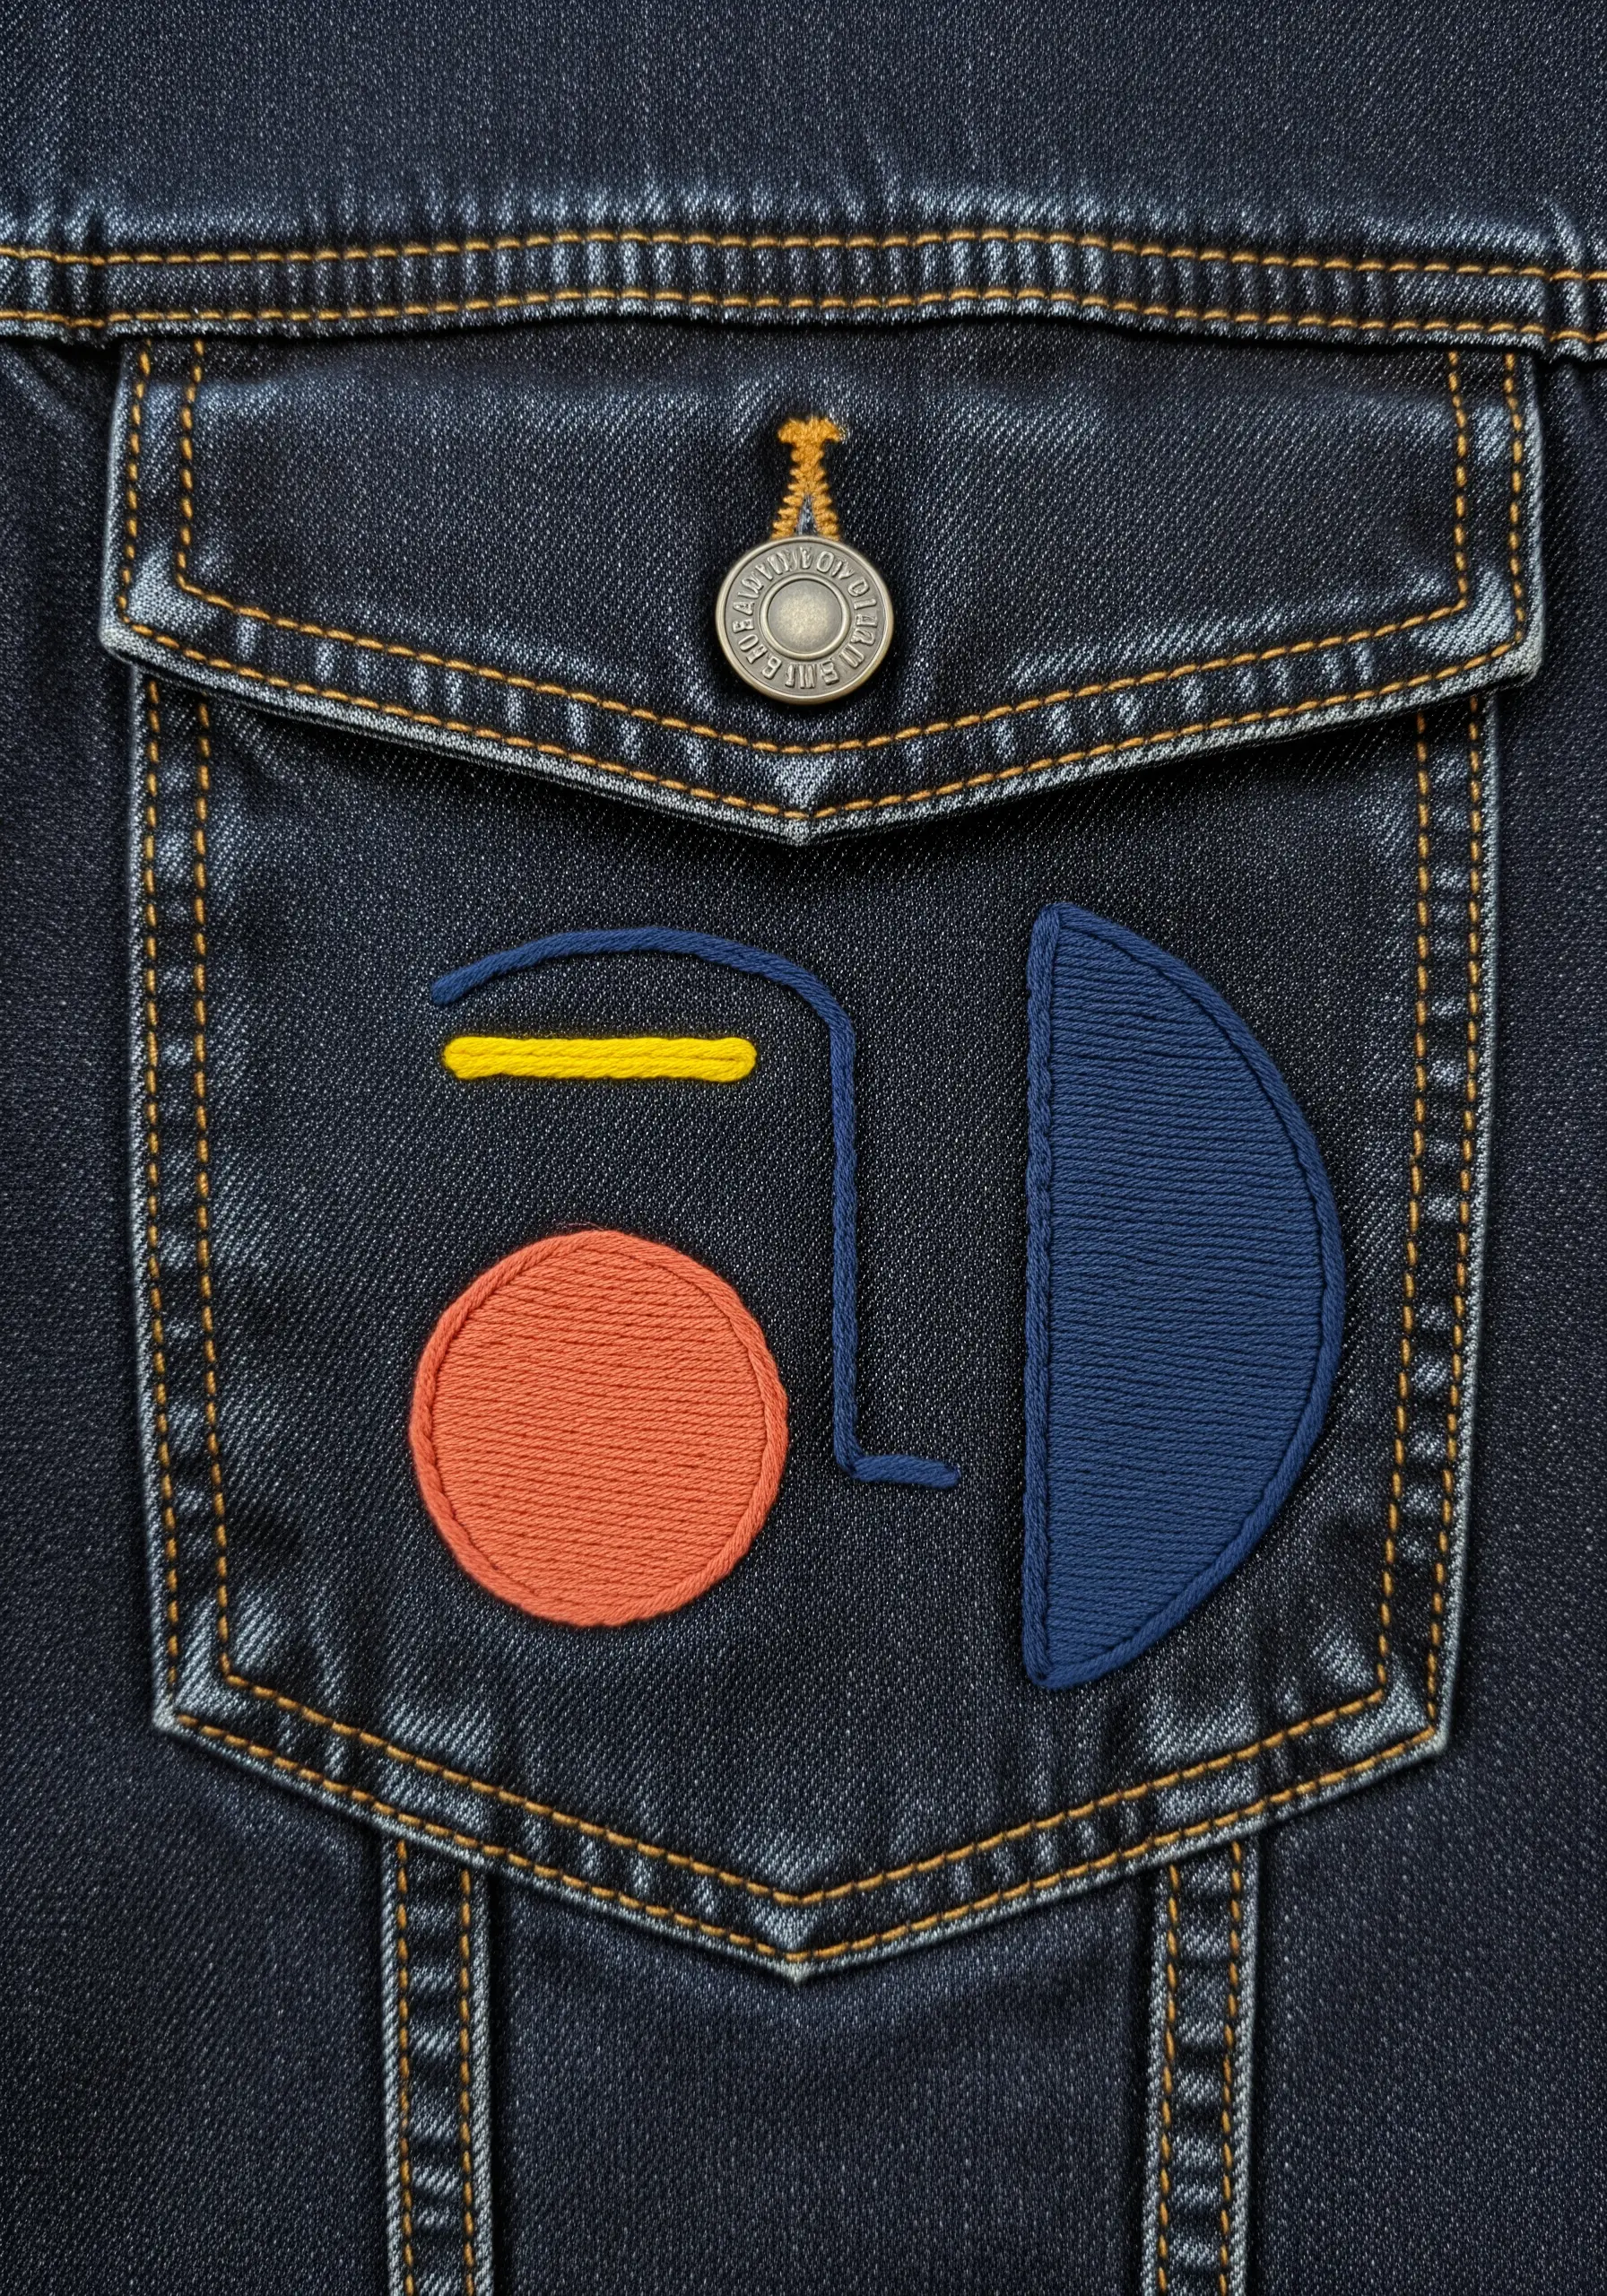
Small areas like pockets offer the perfect canvas for thoughtful, minimal embroidery patterns.
Create visual interest by balancing solidly filled shapes with clean line work.
Use a dense satin stitch for the filled elements and a crisp, single-strand backstitch for the lines.
This contrast between solid and void creates a sophisticated, balanced composition that feels complete.
12. Use Negative Space as a Design Element

In a busy appliqué composition, the space between the fabric pieces is just as important as the pieces themselves.
Allow the dark denim to show through as negative space, creating a fractured, mosaic-like pattern.
This technique breaks up the composition and adds another layer of visual interest.
The strategic use of metallic silver fabric adds bright highlights that punctuate the design.
13. Unify a Design with Graphic Overlays
After applying your main color blocks, you can unify the entire composition by stitching graphic lines over the top.
Use a thick, contrasting thread and a bold chain stitch or whipped backstitch to ensure the lines stand out.
This technique adds a final layer of complexity and visually ties all the separate geometric shapes together into a cohesive whole.
14. Create a Terrazzo Effect with Irregular Shapes

You can achieve a modern terrazzo look by filling a space with small, randomly placed satin stitch shapes.
Vary the size, color, and orientation of each embroidered “chip” to create an organic, scattered pattern.
This is a wonderfully forgiving technique for beginners, as slight imperfections are part of its charm.
It’s a perfect way to create art pieces that capture the magic of imperfection.
15. Achieve Precision with a Quadrant Layout
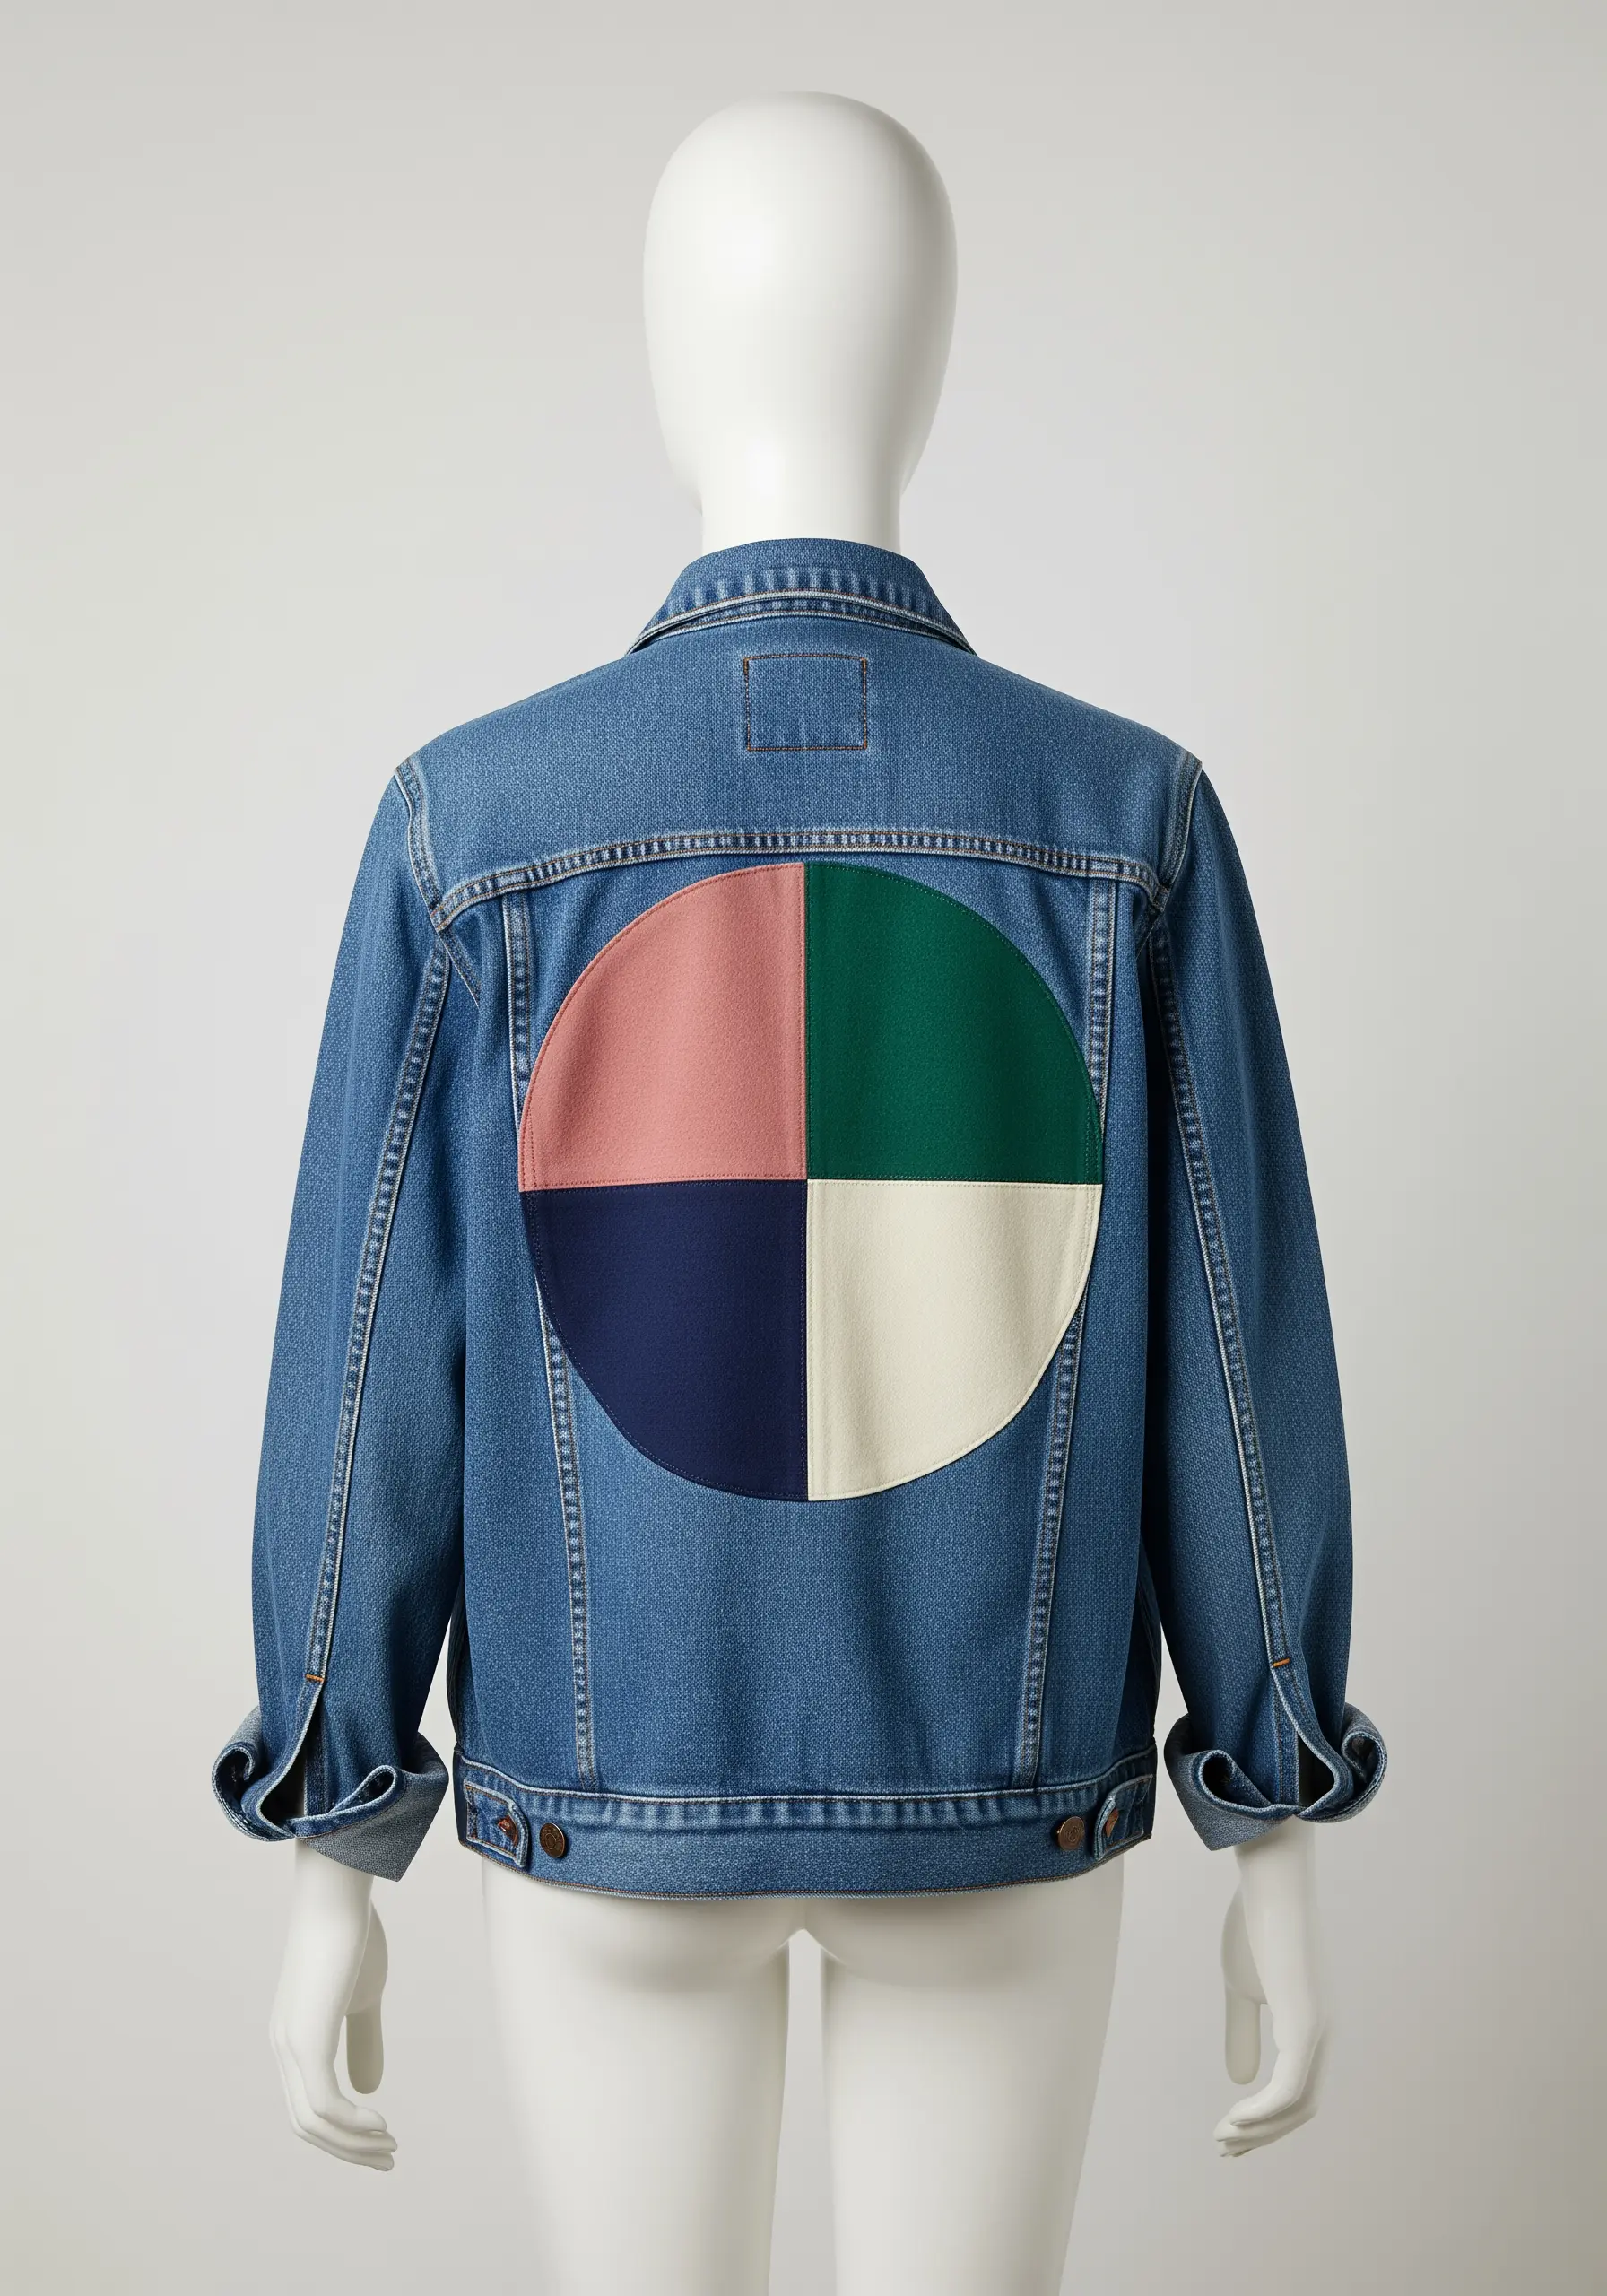
For perfectly balanced circular designs, divide your pattern into quadrants before you begin.
You can use fabric appliqué for this, ensuring each piece is cut with precision for a tight fit.
Stitching a clean backstitch or chain stitch along the dividing lines will create a sharp, graphic separation between the colors, enhancing the geometric purity of the design.
16. Map a Color Gradient with a Mosaic Grid
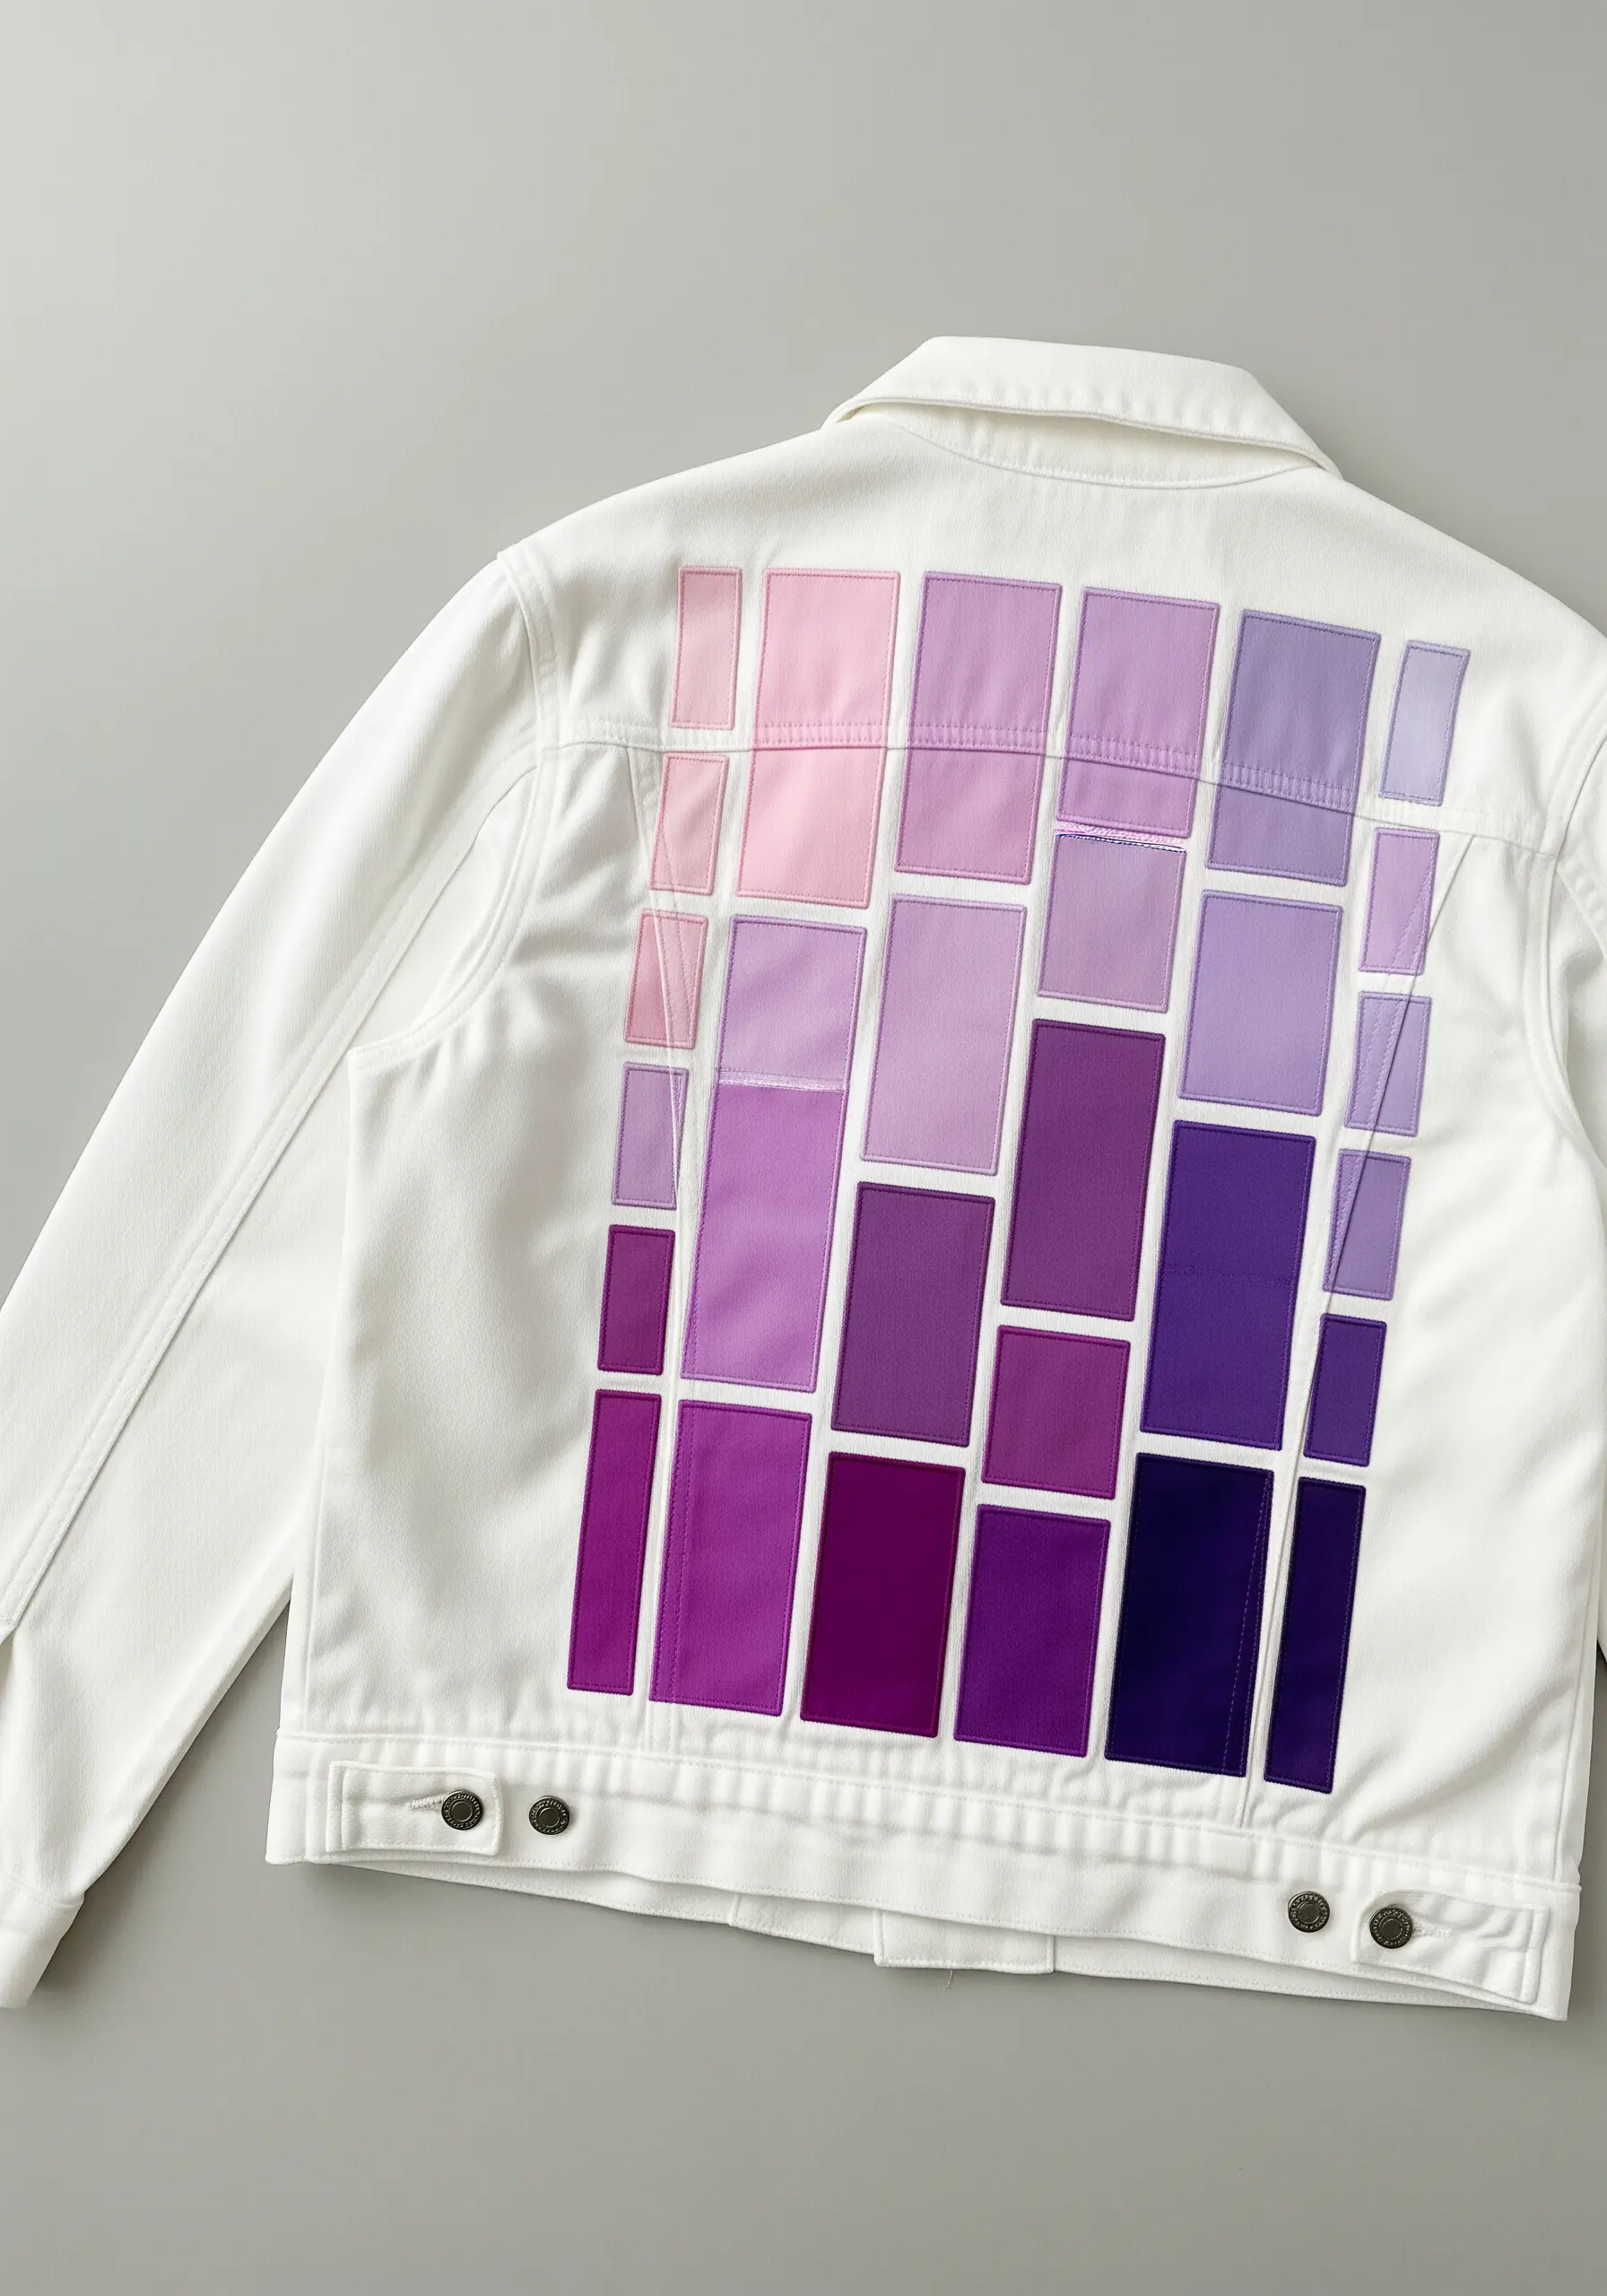
To create a sophisticated gradient with a modern twist, arrange fabric appliqué pieces in a grid that moves from light to dark.
This “pixelated” method gives the color transition a structured, architectural feel.
Outline each rectangle with a matching thread color to define the grid subtly, without distracting from the overall gradient effect.
17. Use Radiating Lines for Dramatic Effect
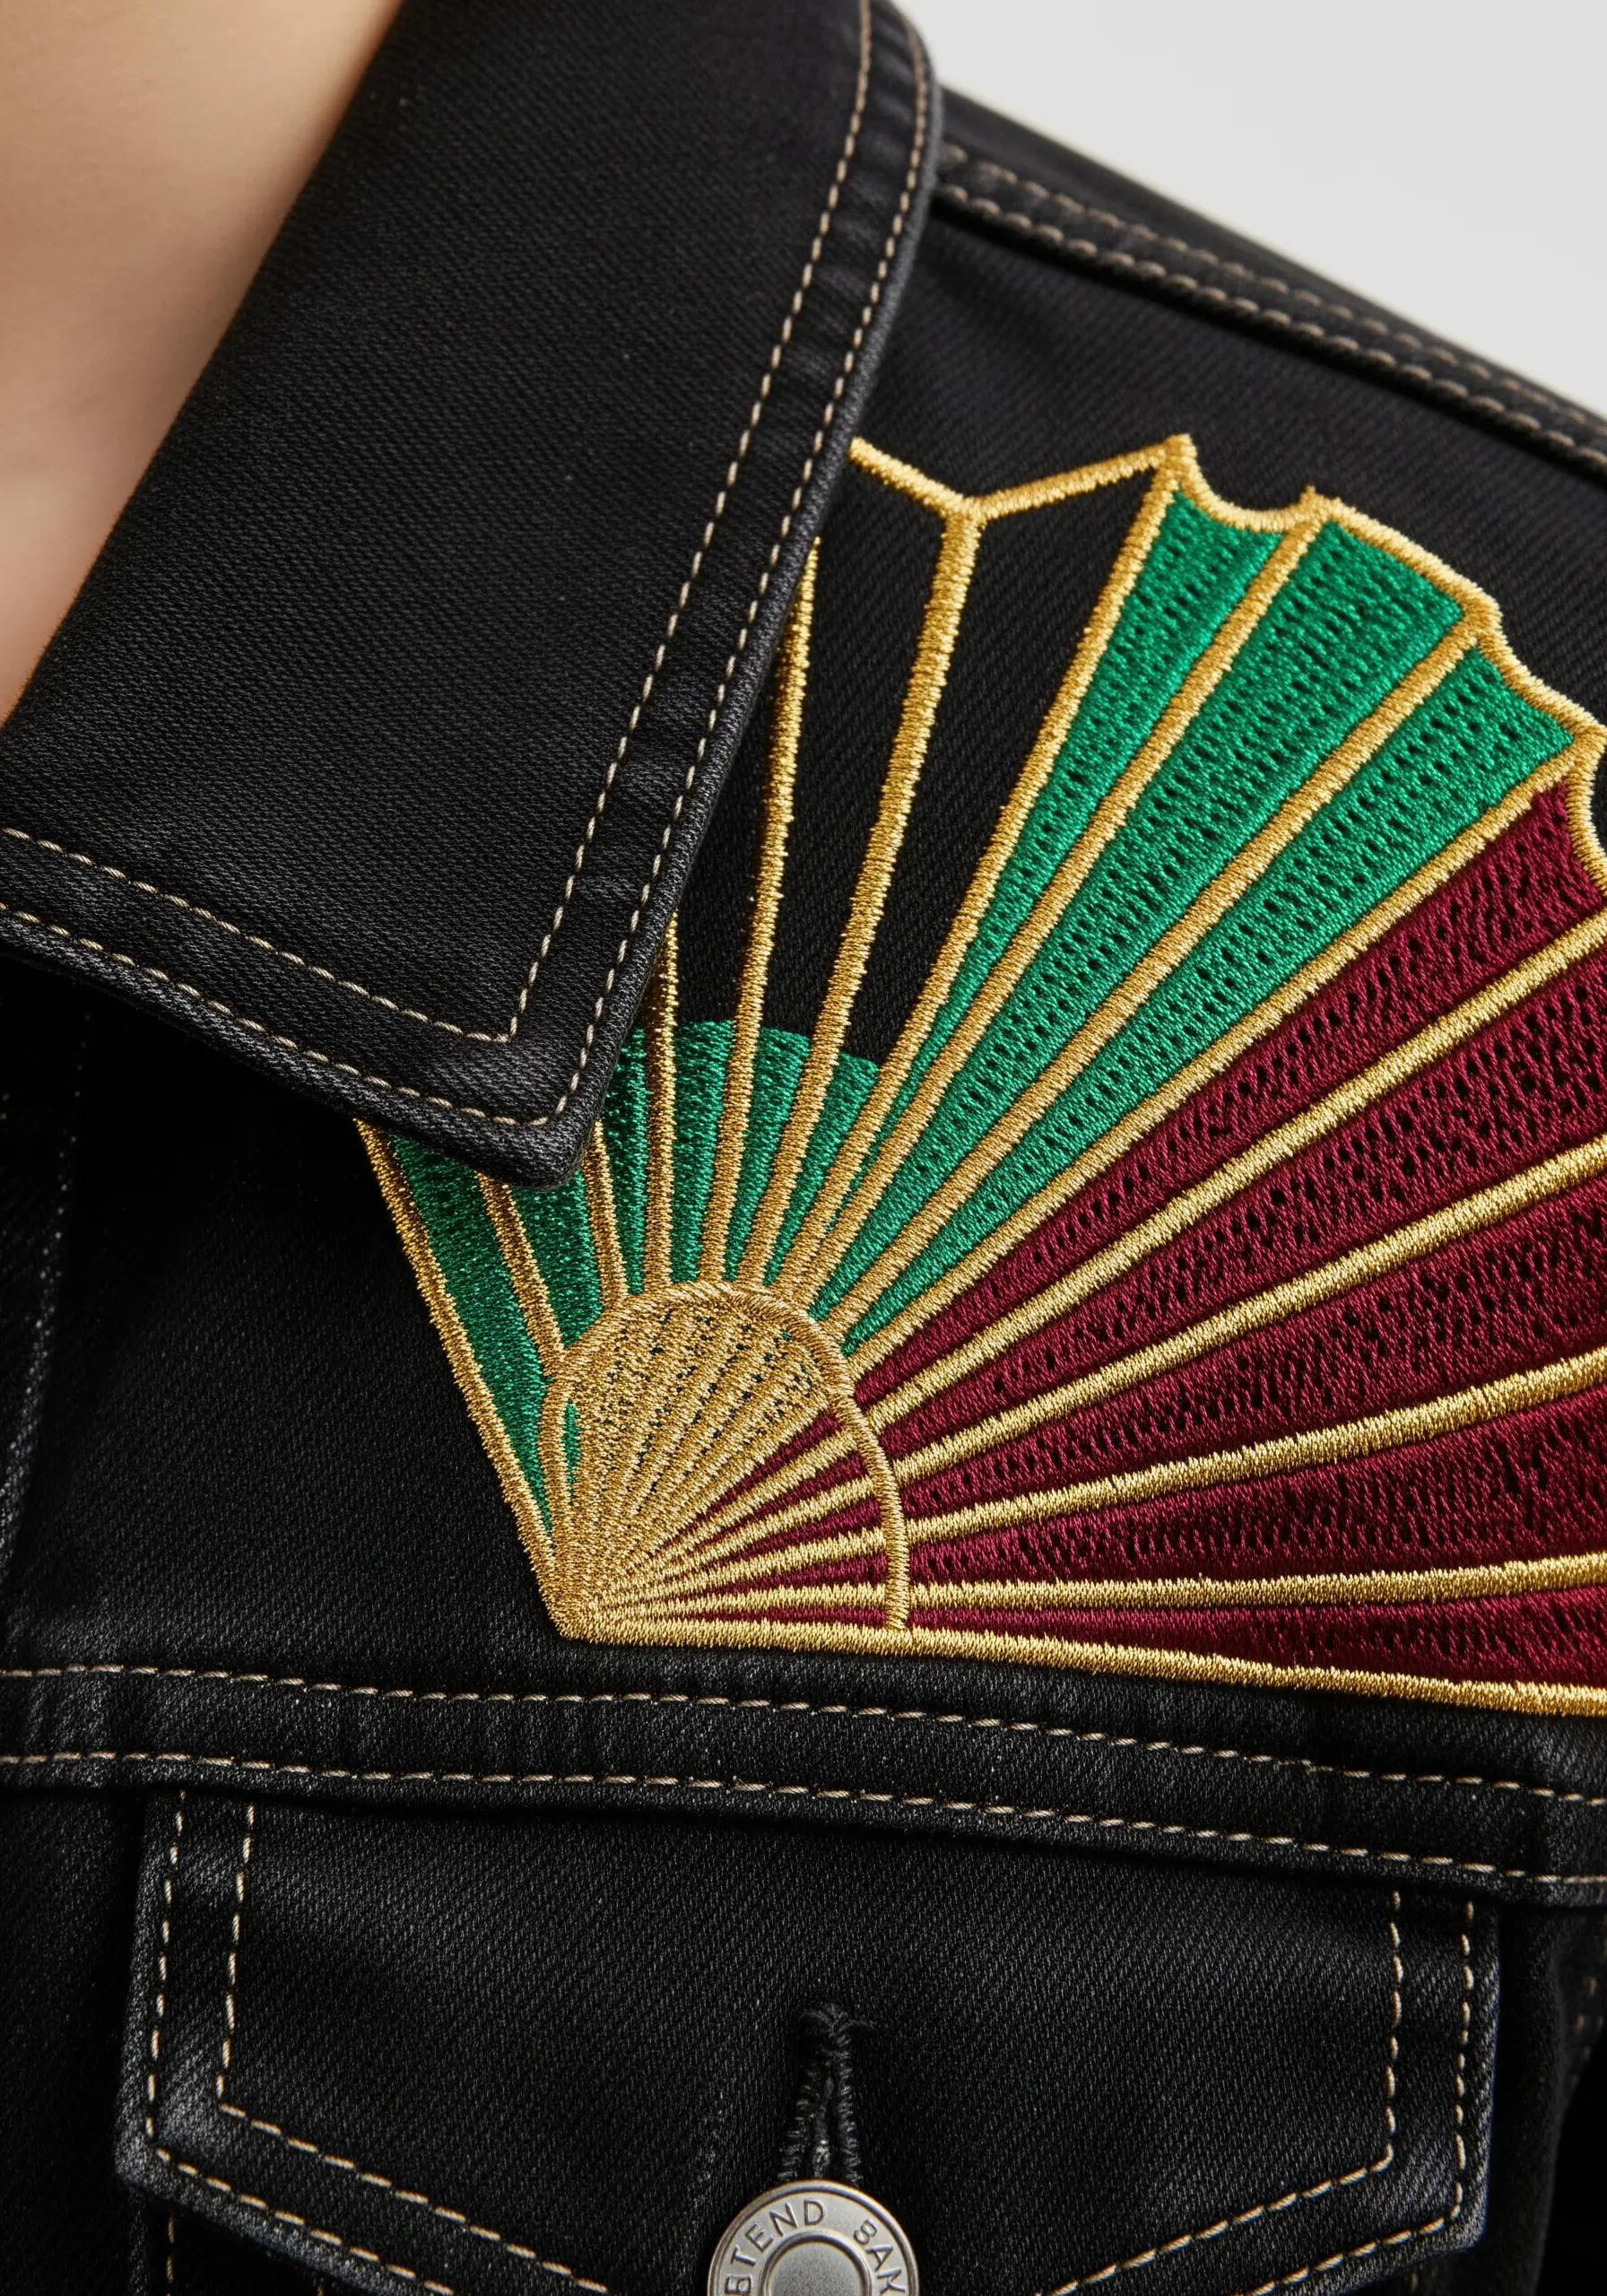
Instantly create focus and drama by using satin stitches that radiate from a central point.
For the sharpest definition, use a single strand of metallic thread for the outlines separating each color section.
The visual contrast between the densely filled satin stitch segments and the delicate, shimmering outlines creates a beautiful sense of depth and elegance.
18. Play with Scale and Repetition

Instead of a single, central motif, try repeating a simple shape in varying orientations and colors.
This creates an energetic, all-over pattern that transforms the entire back panel of the jacket.
Using fabric appliqué for the large white areas and dense satin stitch for the colorful segments is an efficient way to combine techniques for maximum impact.
19. Introduce Texture with Fleece or Felt Appliqué

Move beyond standard cotton and satin by incorporating unexpected textures like fleece, felt, or even fine-wale corduroy into your appliqué.
The soft, matte finish of these materials adds a cozy warmth and contrasts beautifully with the rugged twill of the denim.
This is an easy way to add tactile depth to a minimalist chevron design.
20. Define Sections with Raised Satin Stitch Edges

To achieve a clean, almost three-dimensional look, outline each color block with a raised satin stitch border.
You can replicate this machine-embroidered effect by hand with a padded satin stitch.
First, create a foundation of split stitches along the outline, then work your satin stitch over it.
This simple preparation gives each section a defined, beveled edge that makes the colors pop.
21. Create Harmony with an Earth-Tone Palette
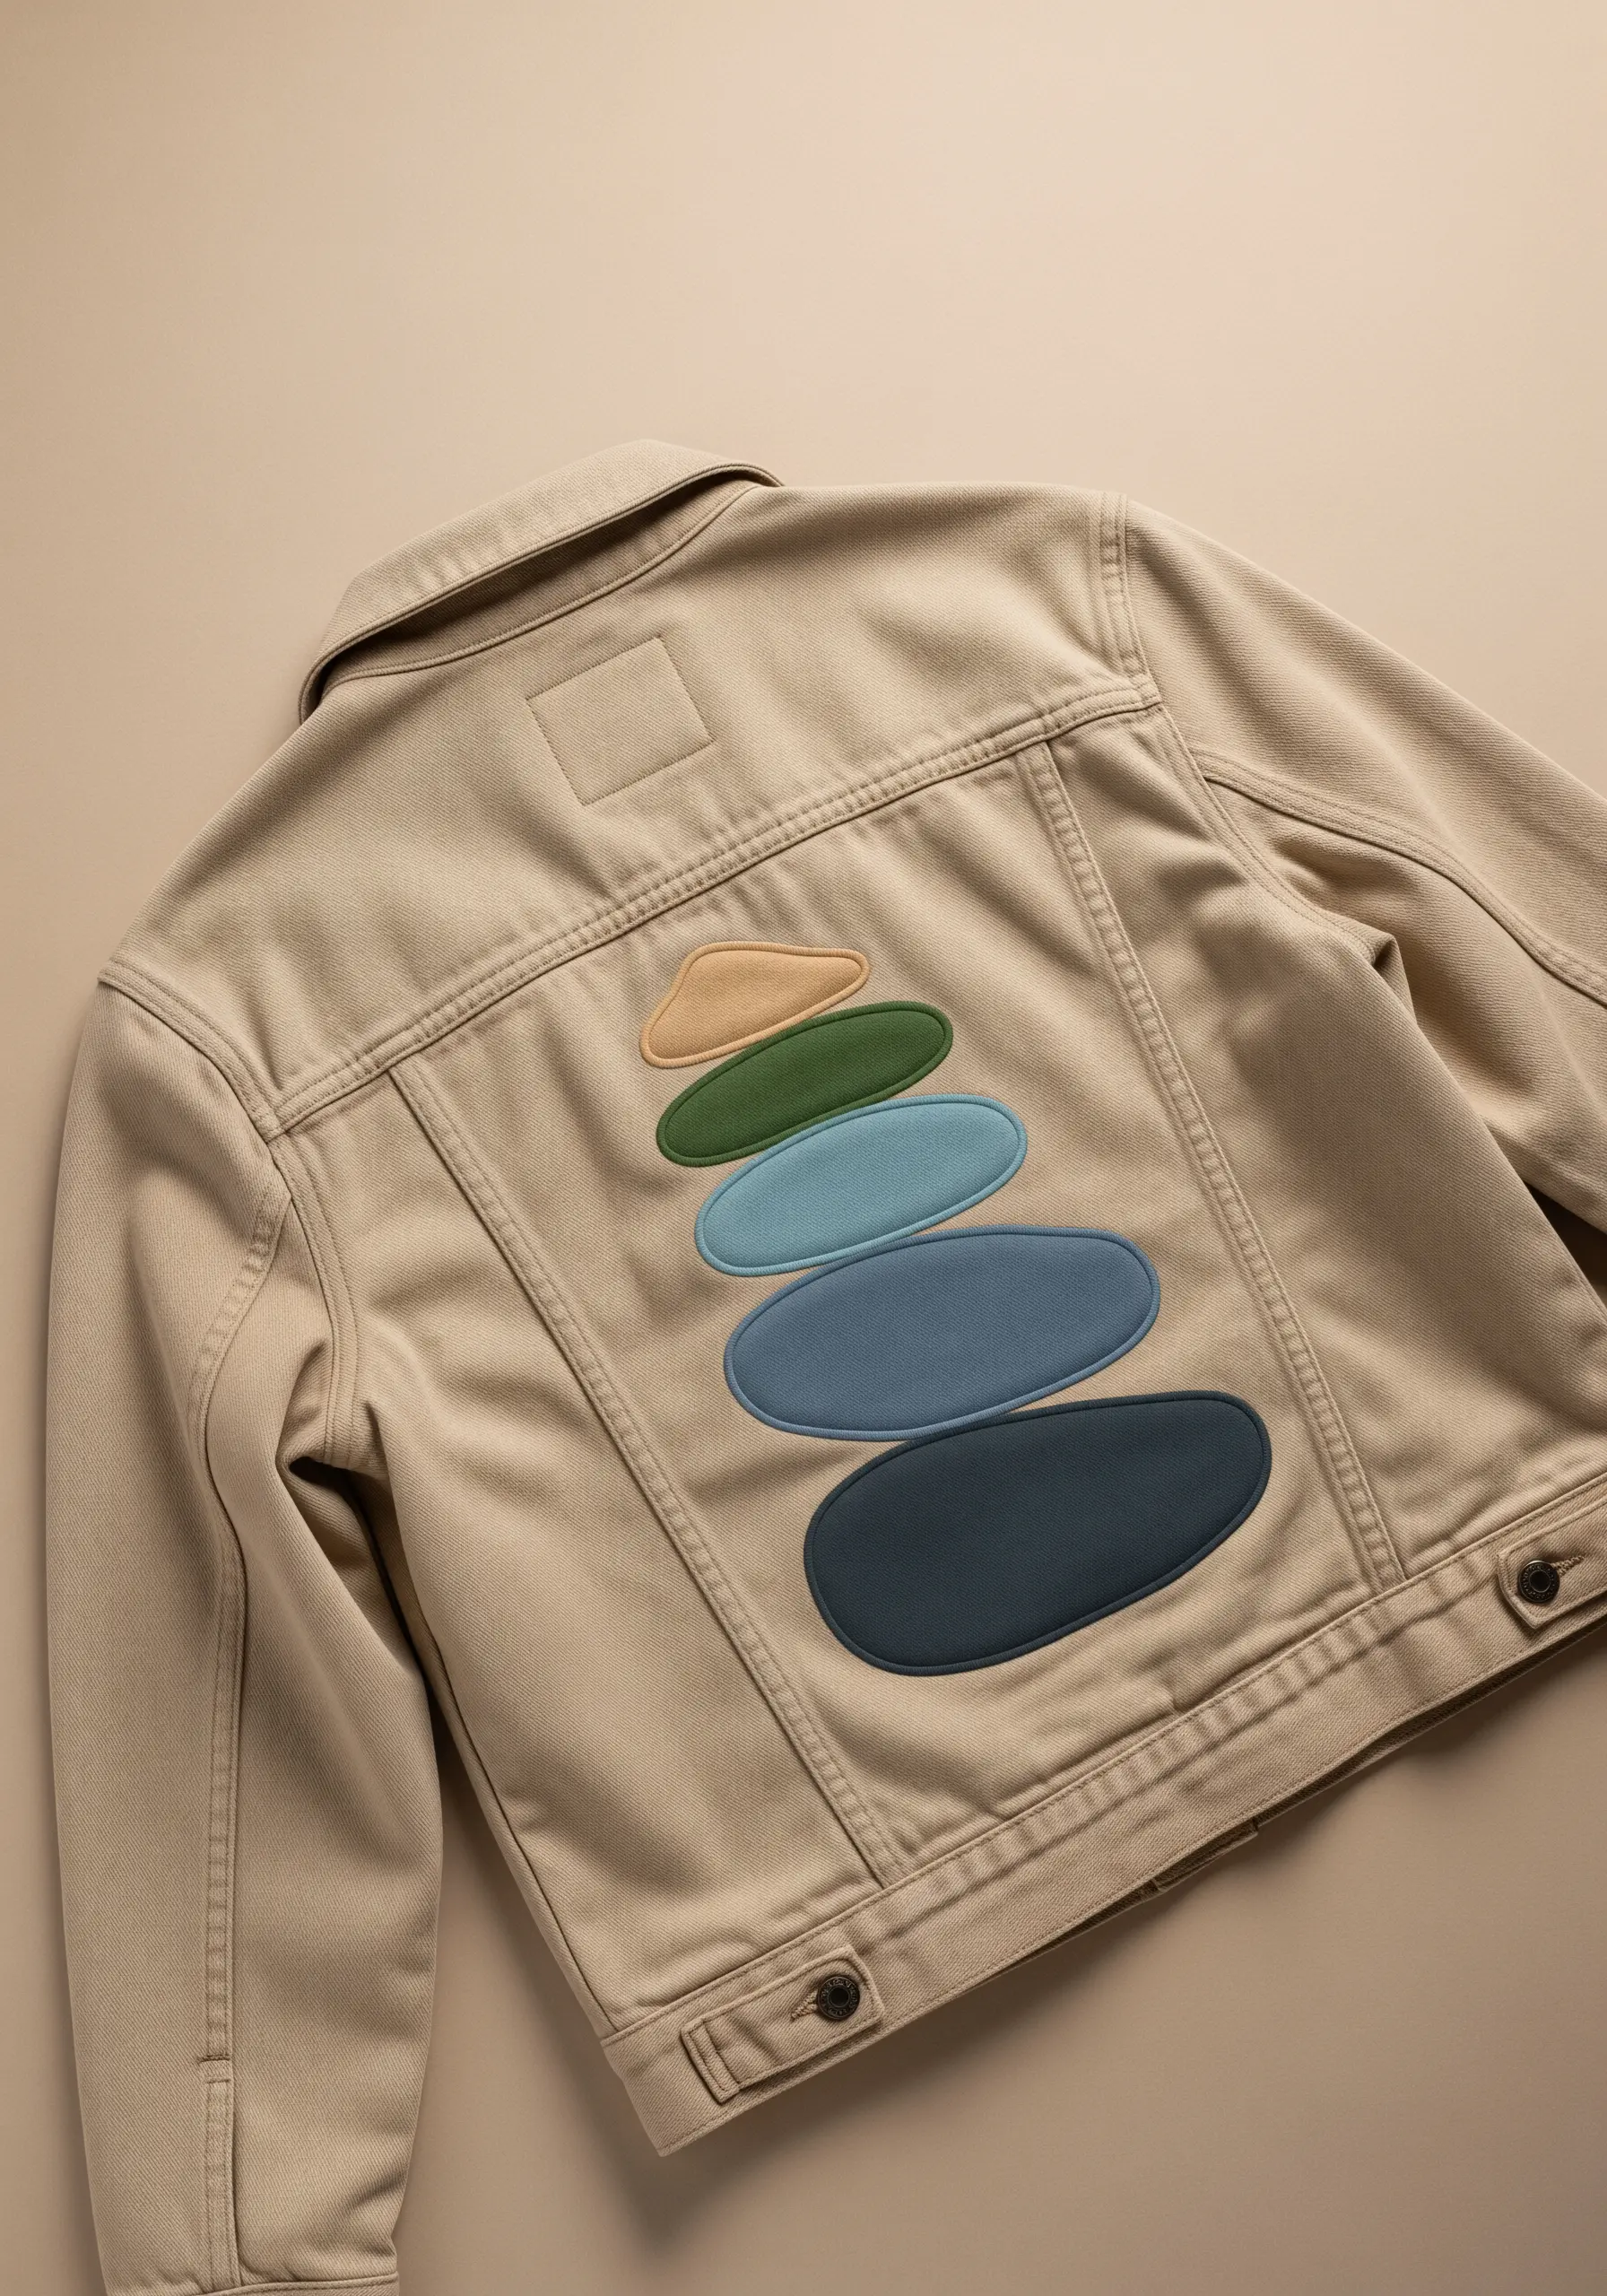
An earthy color palette of muted blues, greens, terracotta, and ochre creates an instantly calming and organic feel.
For these stacked stone shapes, use a dense, smooth satin stitch to fill each one.
To keep the edges of your curved appliqué perfectly clean, carefully clip small notches into the seam allowance before folding it under and securing it with a whip stitch.
22. Recreate a Collage Effect with Raw-Edge Appliqué
Embrace a deconstructed, artistic aesthetic by using raw-edge appliqué.
Instead of meticulously folding the edges under, allow them to fray slightly for added texture.
Secure the fabric pieces with a simple running stitch placed just inside the edge.
This technique brilliantly mimics the look of torn paper and is a perfect match for abstract fabric collage embroidery ideas.
23. Blend Satin Stitch and Long-and-Short Stitch

For a design that combines both hard lines and soft blends, use a mix of fill stitches.
Employ a classic, dense satin stitch for the solid sun and the sharp, graphic lines in the water.
For the softer gradient in the sky, transition from orange to cyan using a long-and-short stitch.
This allows you to create a subtle, painted effect where the colors gently merge.
24. Build a Mosaic with Geometric Patchwork
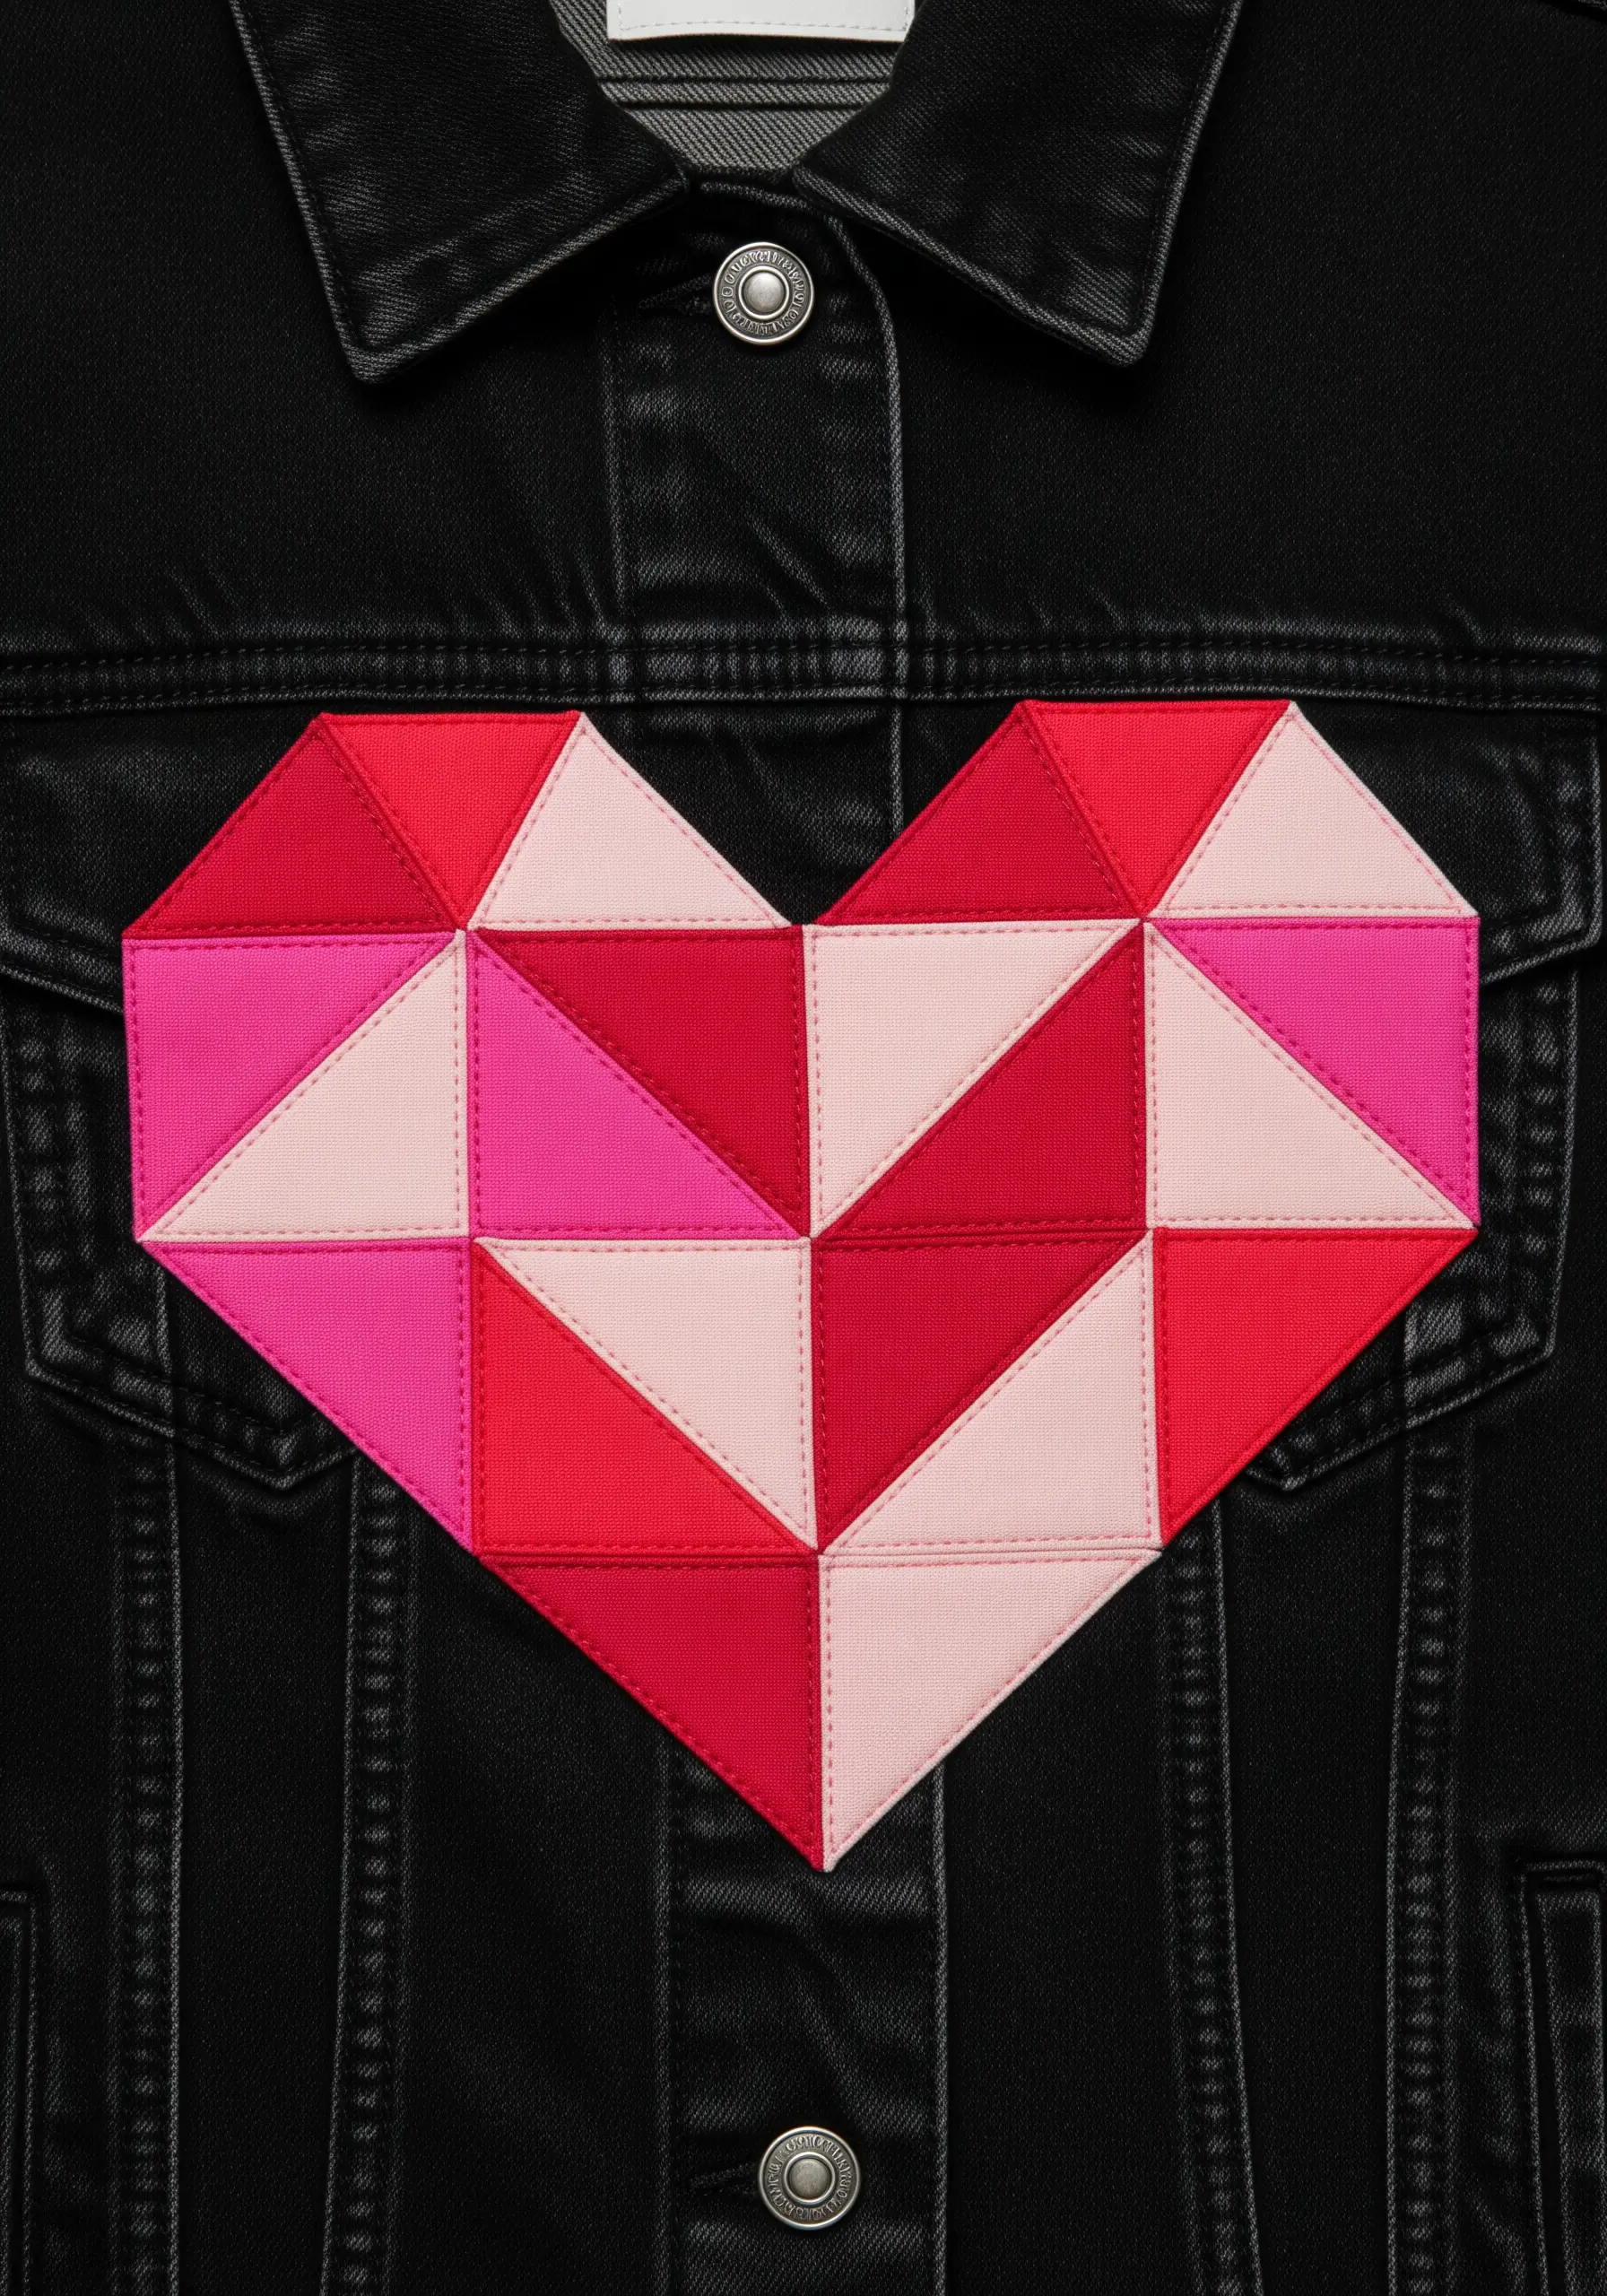
You can create a surprisingly complex design by piecing together simple geometric shapes like triangles.
This fabric patchwork technique lets you build intricate color patterns without any complex stitching.
To ensure sharp points and prevent stretching, iron a lightweight fusible interfacing onto the back of your fabric pieces before cutting and sewing.
25. Make a Statement with Asymmetrical Color Blocking
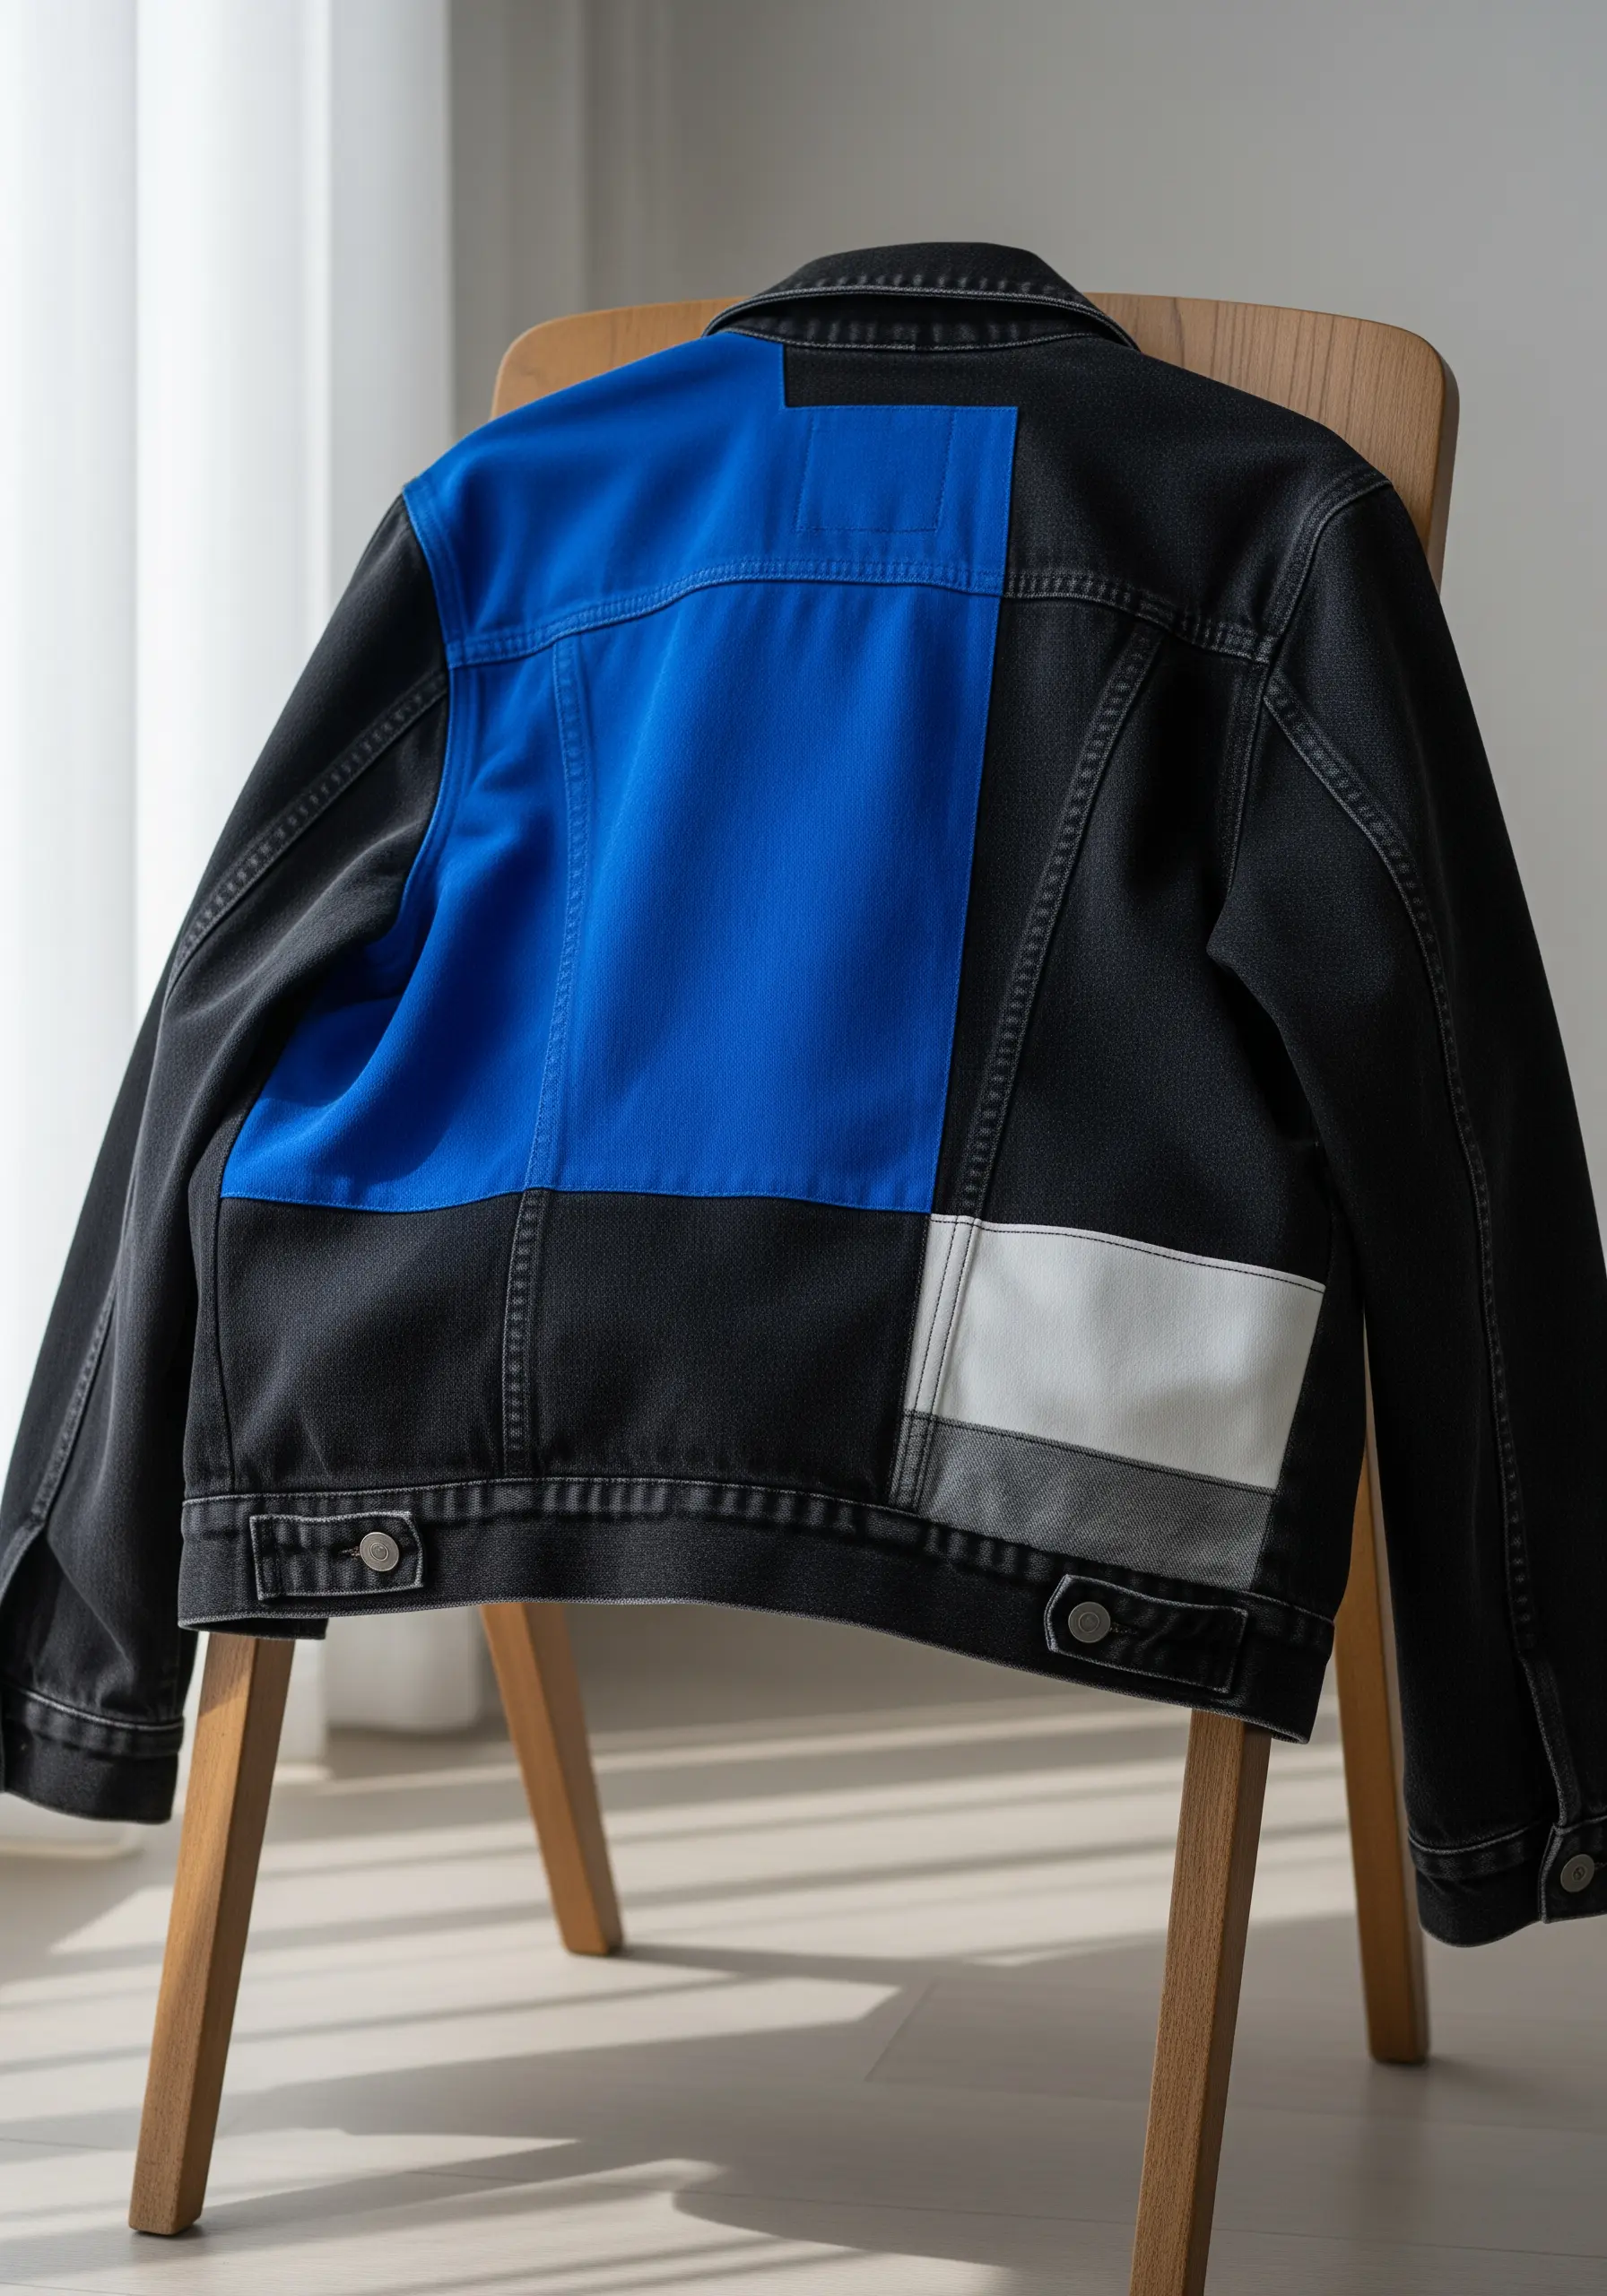
Challenge traditional design rules by embracing an asymmetrical layout.
Placing a large, bold color block deliberately off-center creates immediate visual tension and a modern, artistic sensibility.
Keep the shapes simple—rectangles and squares work best—to allow the unconventional color placement to be the true focus of the piece.
26. Create Movement with Overlapping Organic Shapes
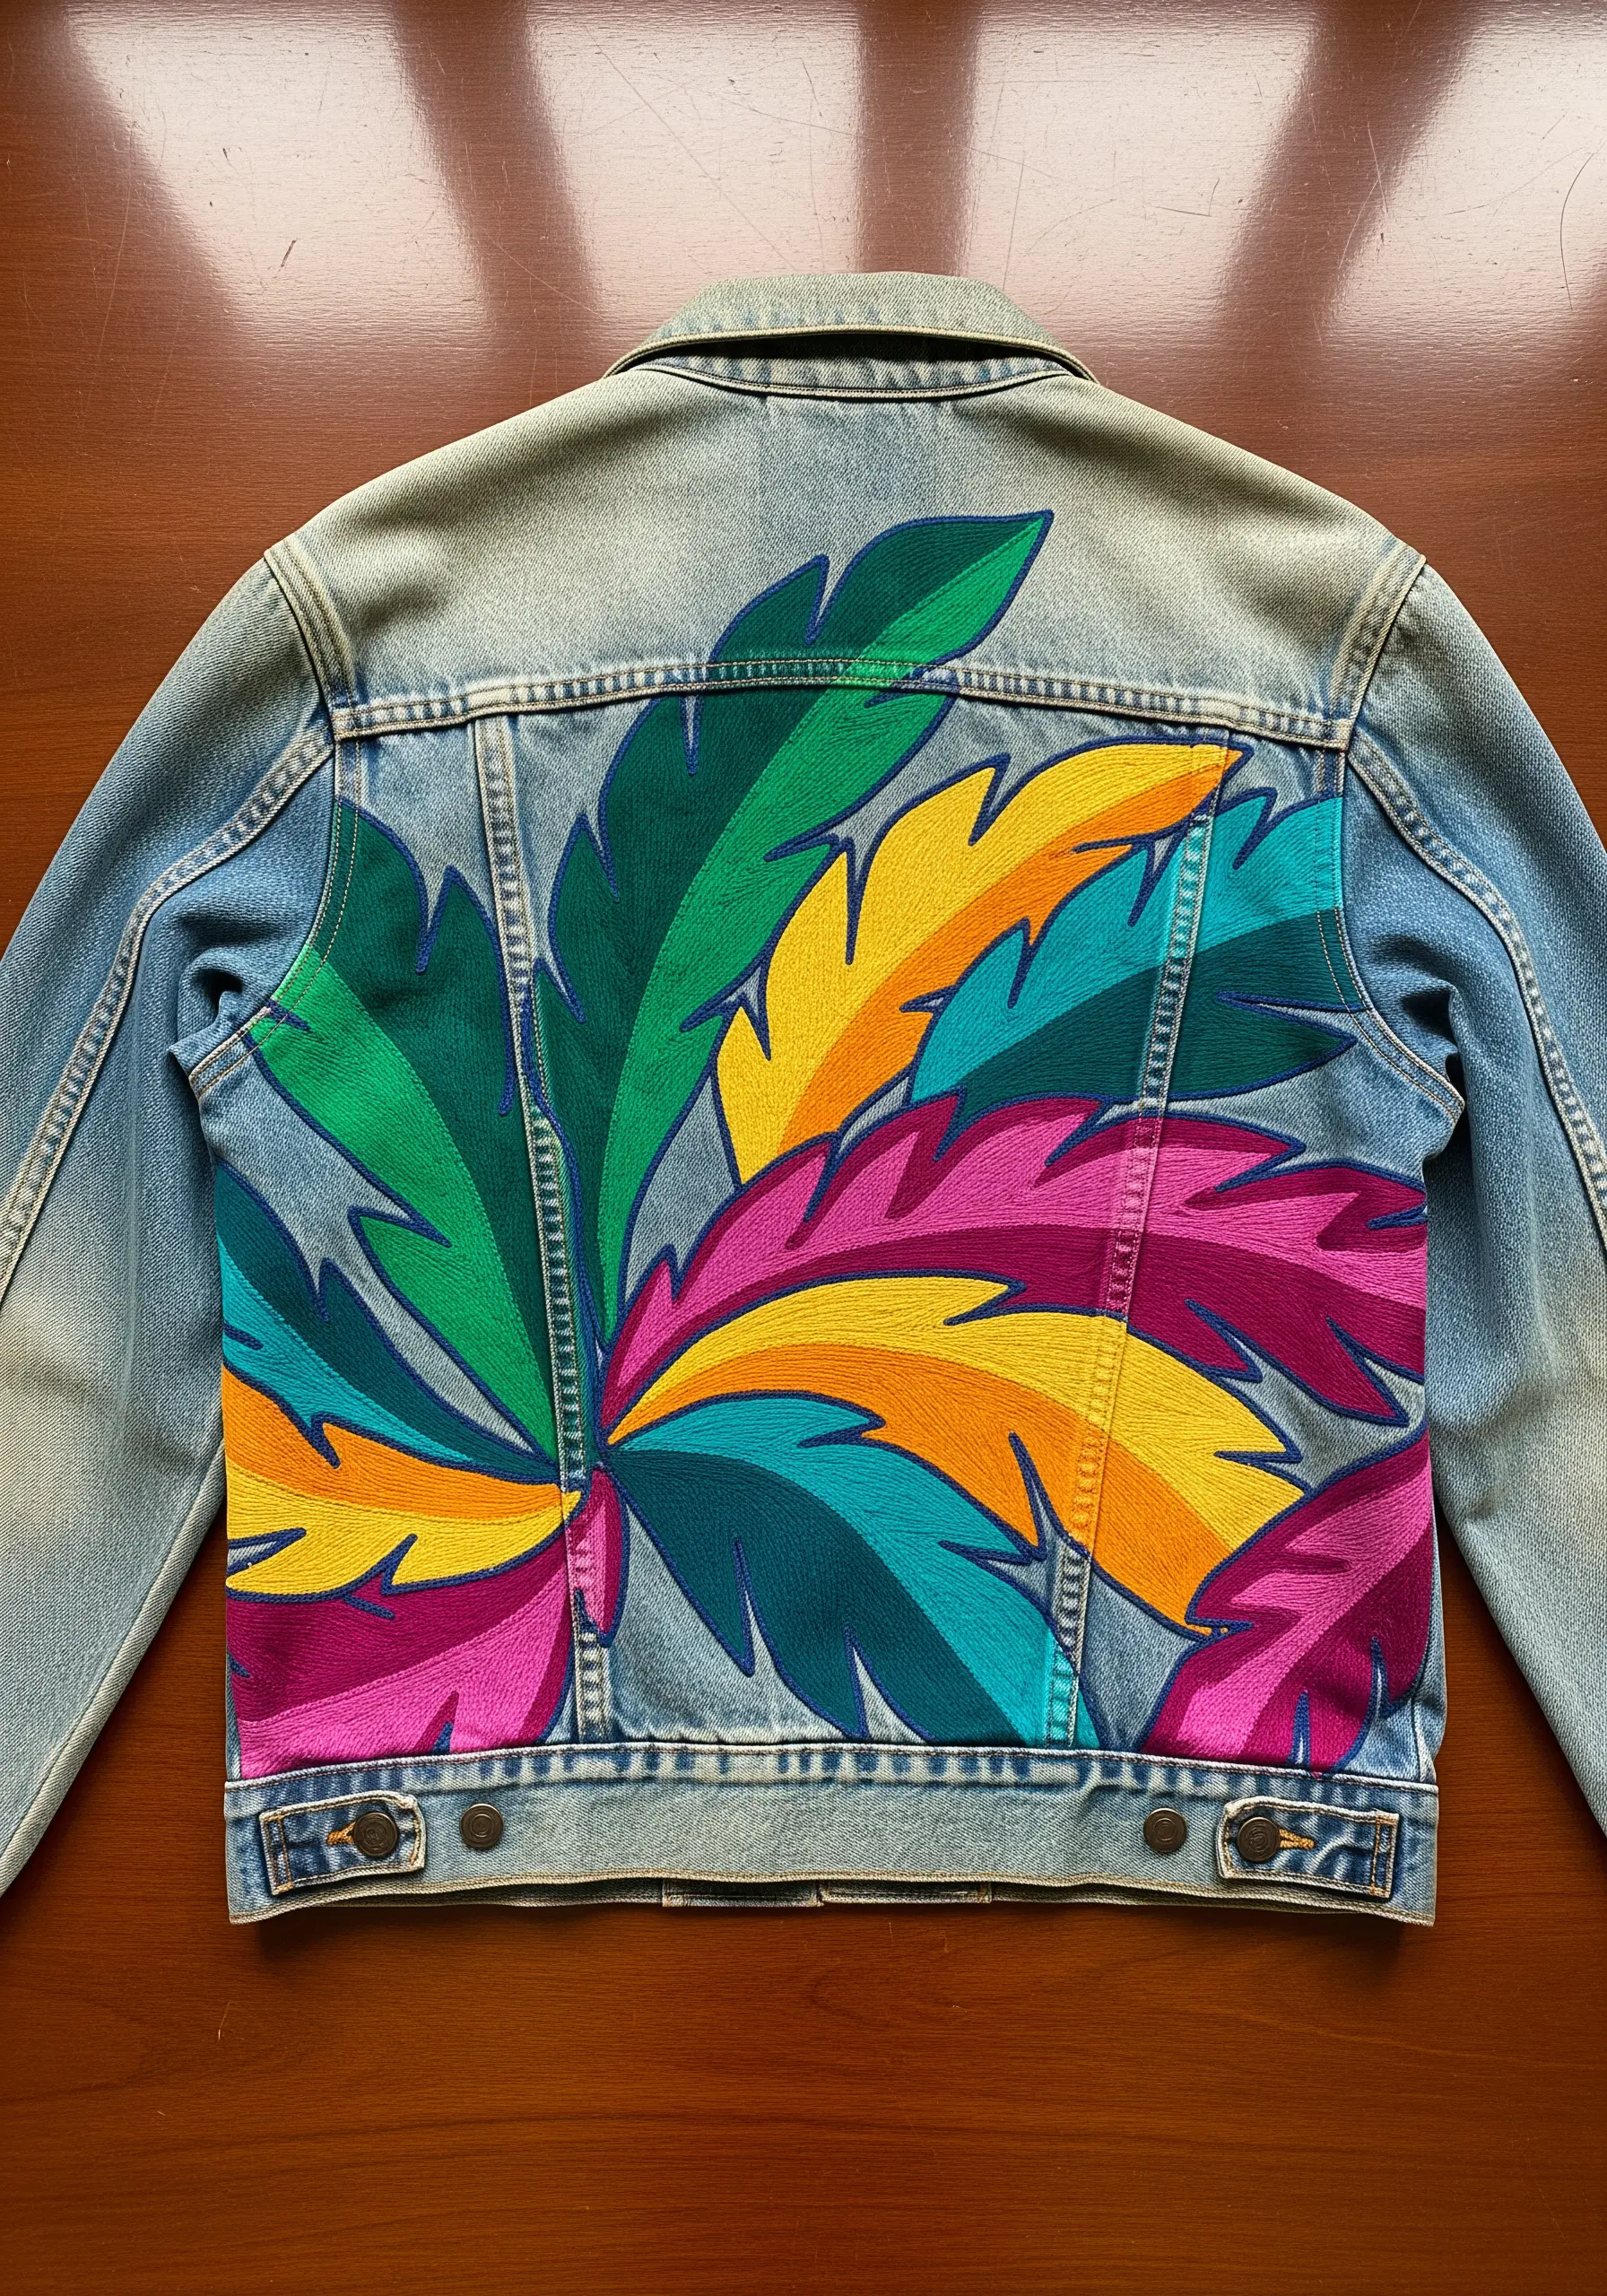
Arrange your leaf shapes so they overlap and appear to grow from a central point, creating a sense of vibrant, energetic movement.
Enhance this effect with a directional satin stitch, angling your stitches to follow the natural curve of each leaf.
This small adjustment will make your botanical patch ideas feel much more alive and dynamic.
27. Define Shapes with a Thick, Contrasting Border
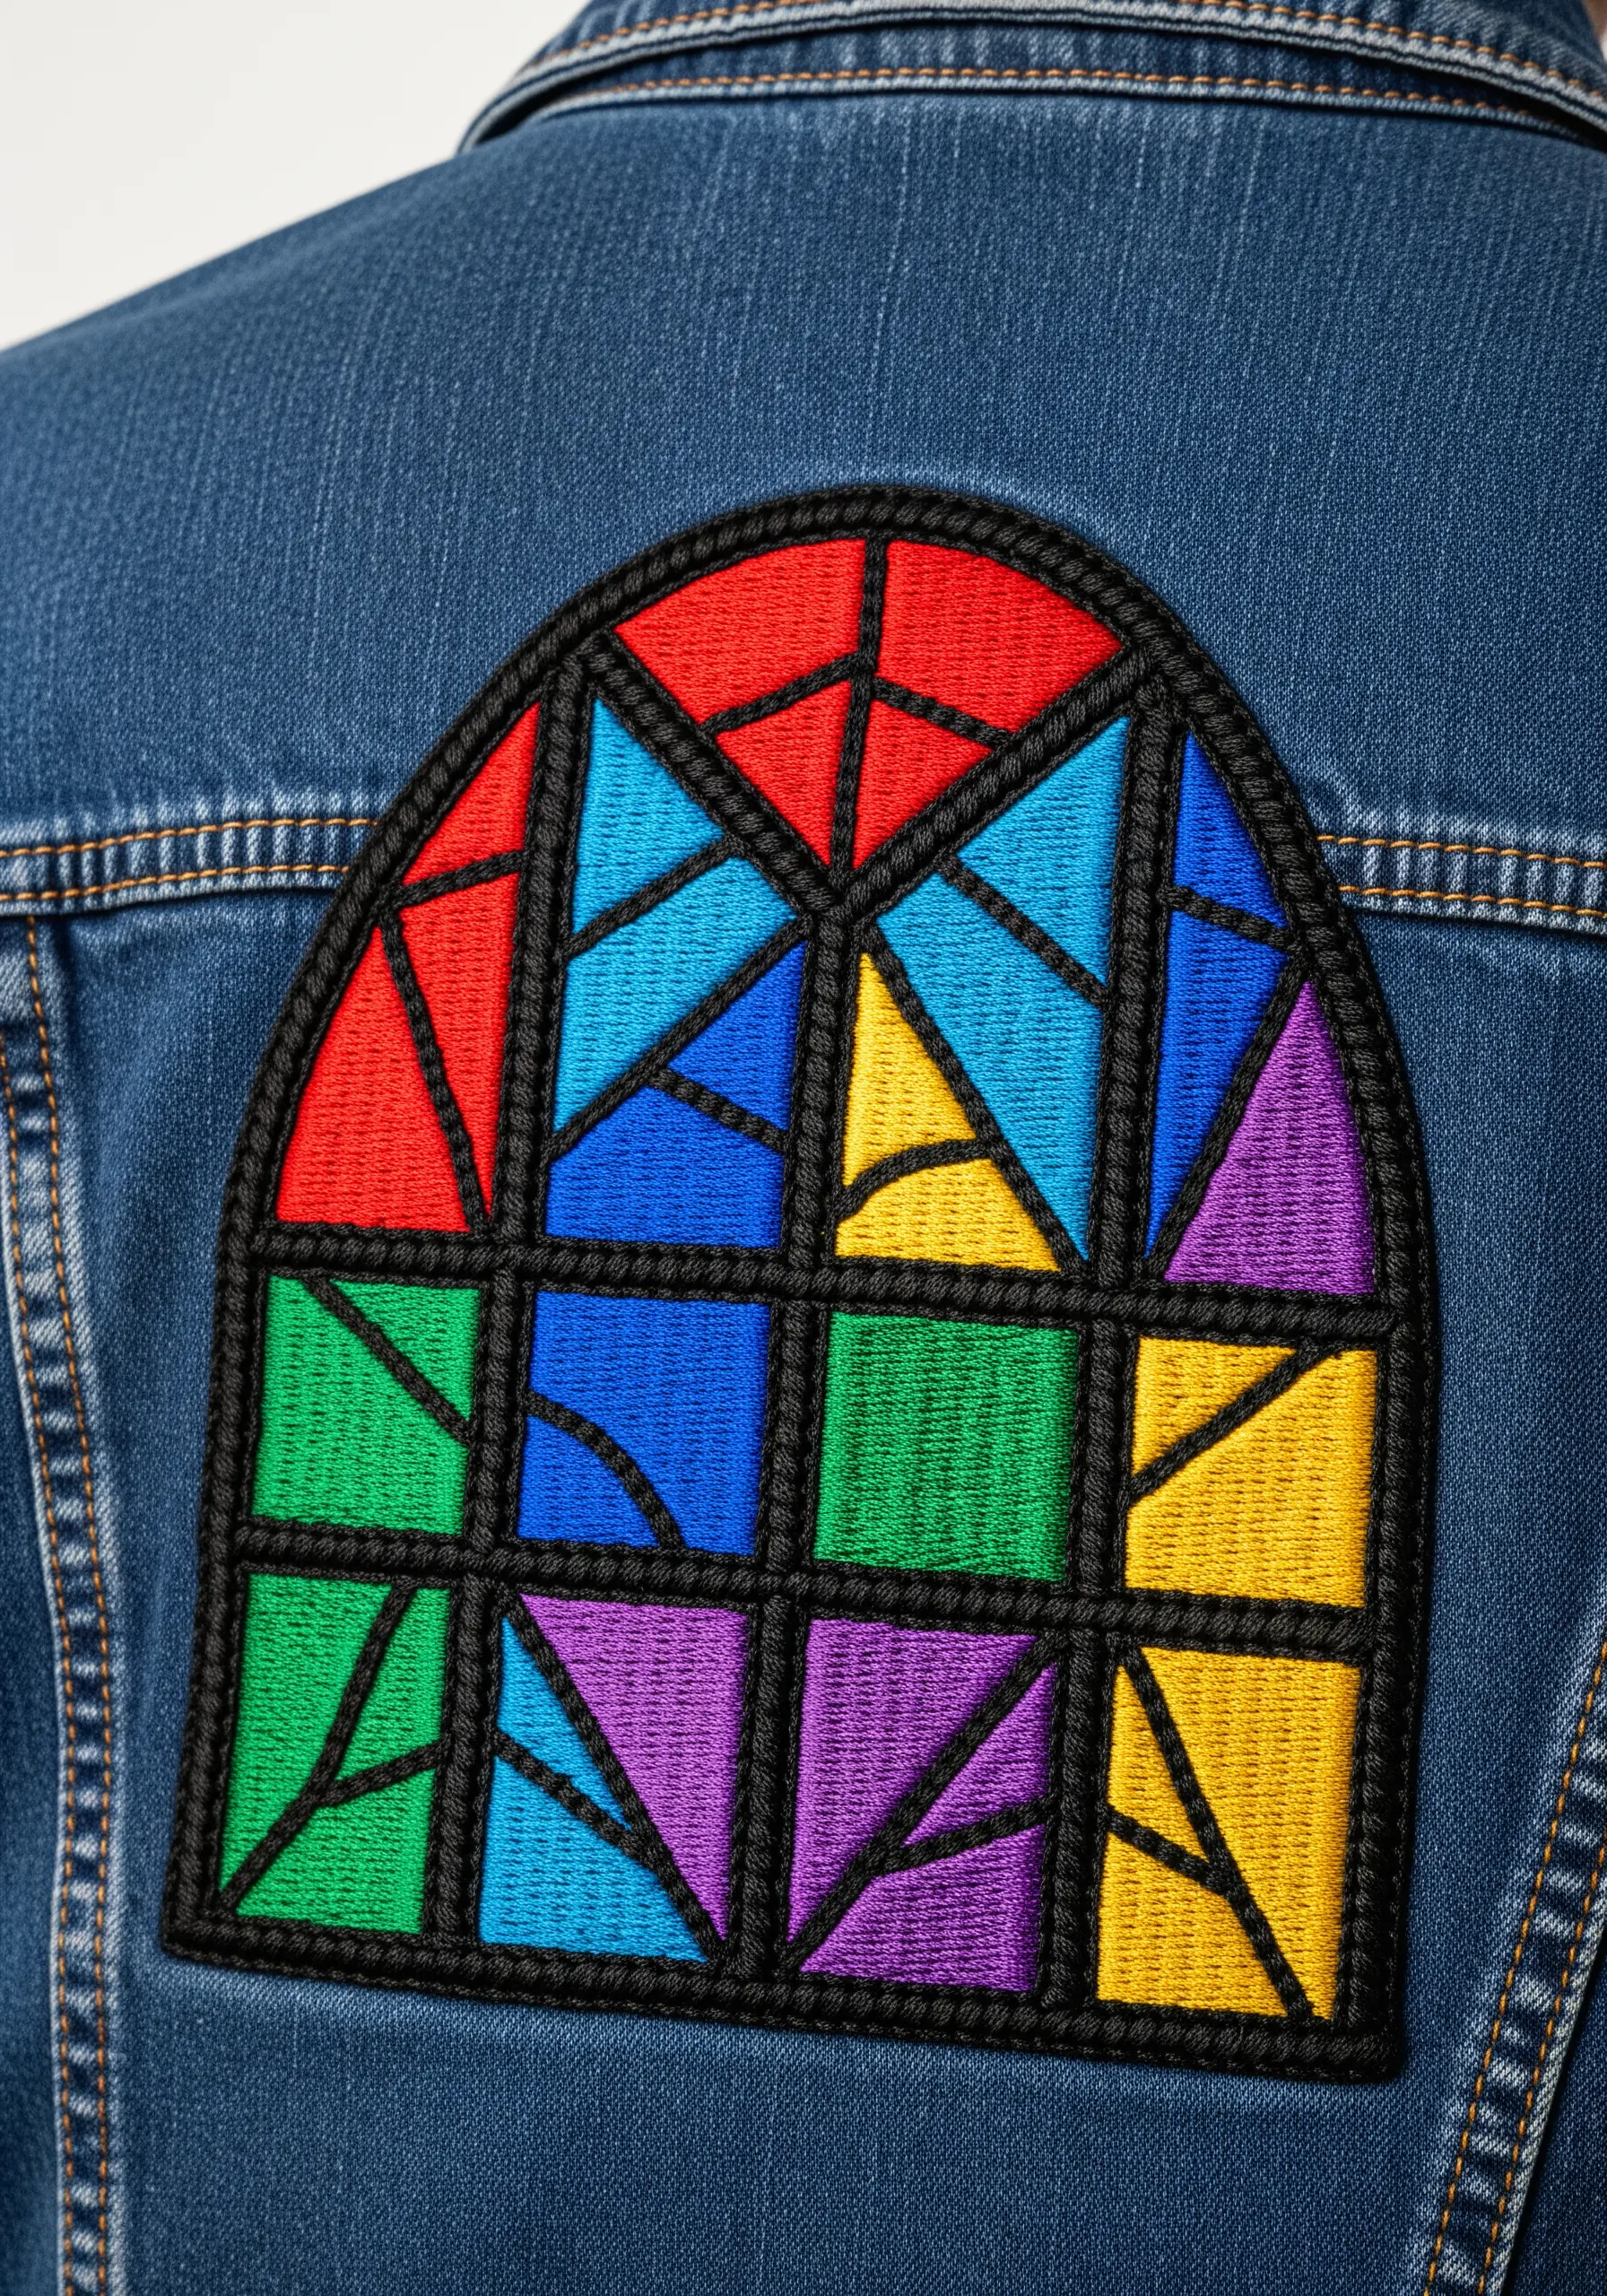
To replicate the classic look of stained glass, use a heavy, dark border around your vibrant color blocks.
A thick chain stitch or a couched cord in black creates the perfect “leading” effect.
This strong outline technique makes the colors within each section appear more luminous and contained, enhancing their individual brilliance.
28. Arrange Organic Shapes for a Balanced Composition

When working with irregular, organic shapes, achieving visual balance is key.
Distribute the different colors and sizes across the jacket’s back panel to create a pleasing, non-symmetrical arrangement that doesn’t feel lopsided.
To perfect your layout, cut paper templates of your shapes and move them around on the jacket before committing to the final placement.
29. Embrace a Glitchy Aesthetic with Pixel Motifs
Build a pixelated design using small, square satin stitches as your building blocks.
To create a modern “glitch” effect, intentionally misalign some of the blocks or introduce unexpected pops of contrasting color along the edges.
This design cleverly plays with digital aesthetics, turning precise, traditional stitches into a representation of controlled chaos.
30. Curate a Collection of Mid-Century Motifs
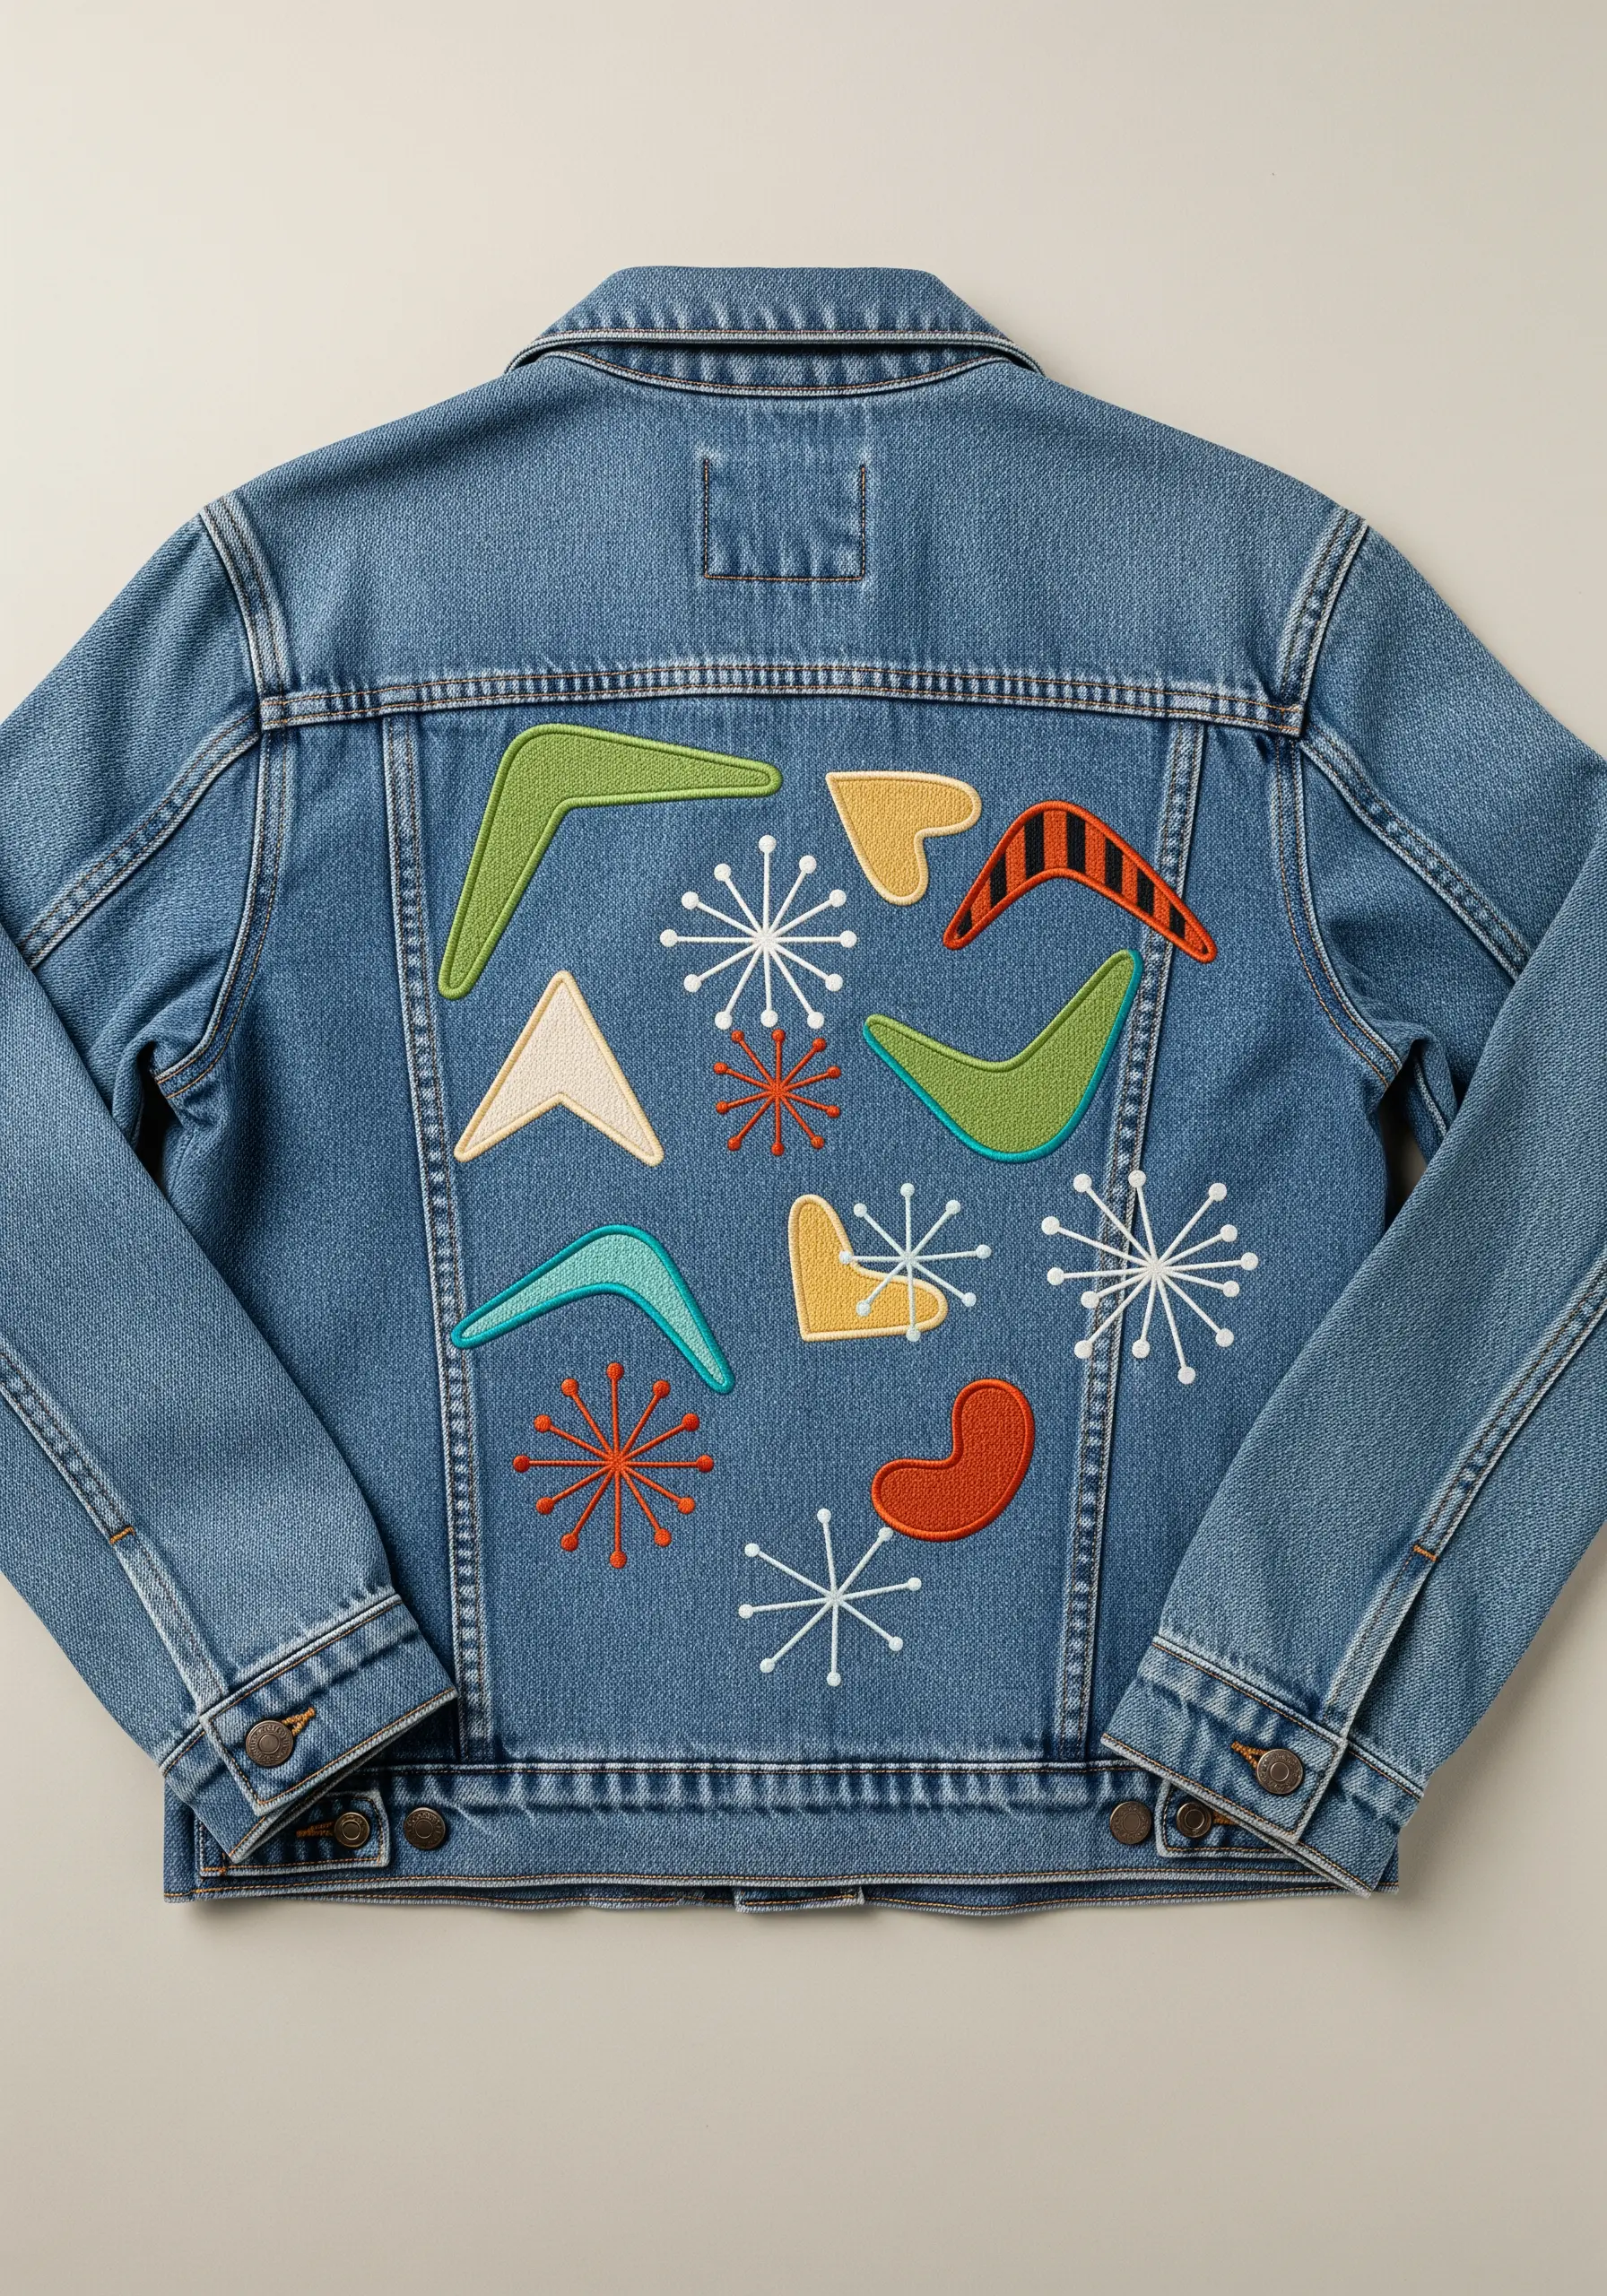
Create a playful, scattered pattern using a collection of classic mid-century modern shapes like boomerangs, amoebas, and starbursts.
For the starbursts, use a simple radiating straight stitch.
For the appliqué boomerangs, use a neat whip stitch to secure the edges for a clean, retro finish.
This thoughtful combination of techniques adds authentic detail to the nostalgic design.
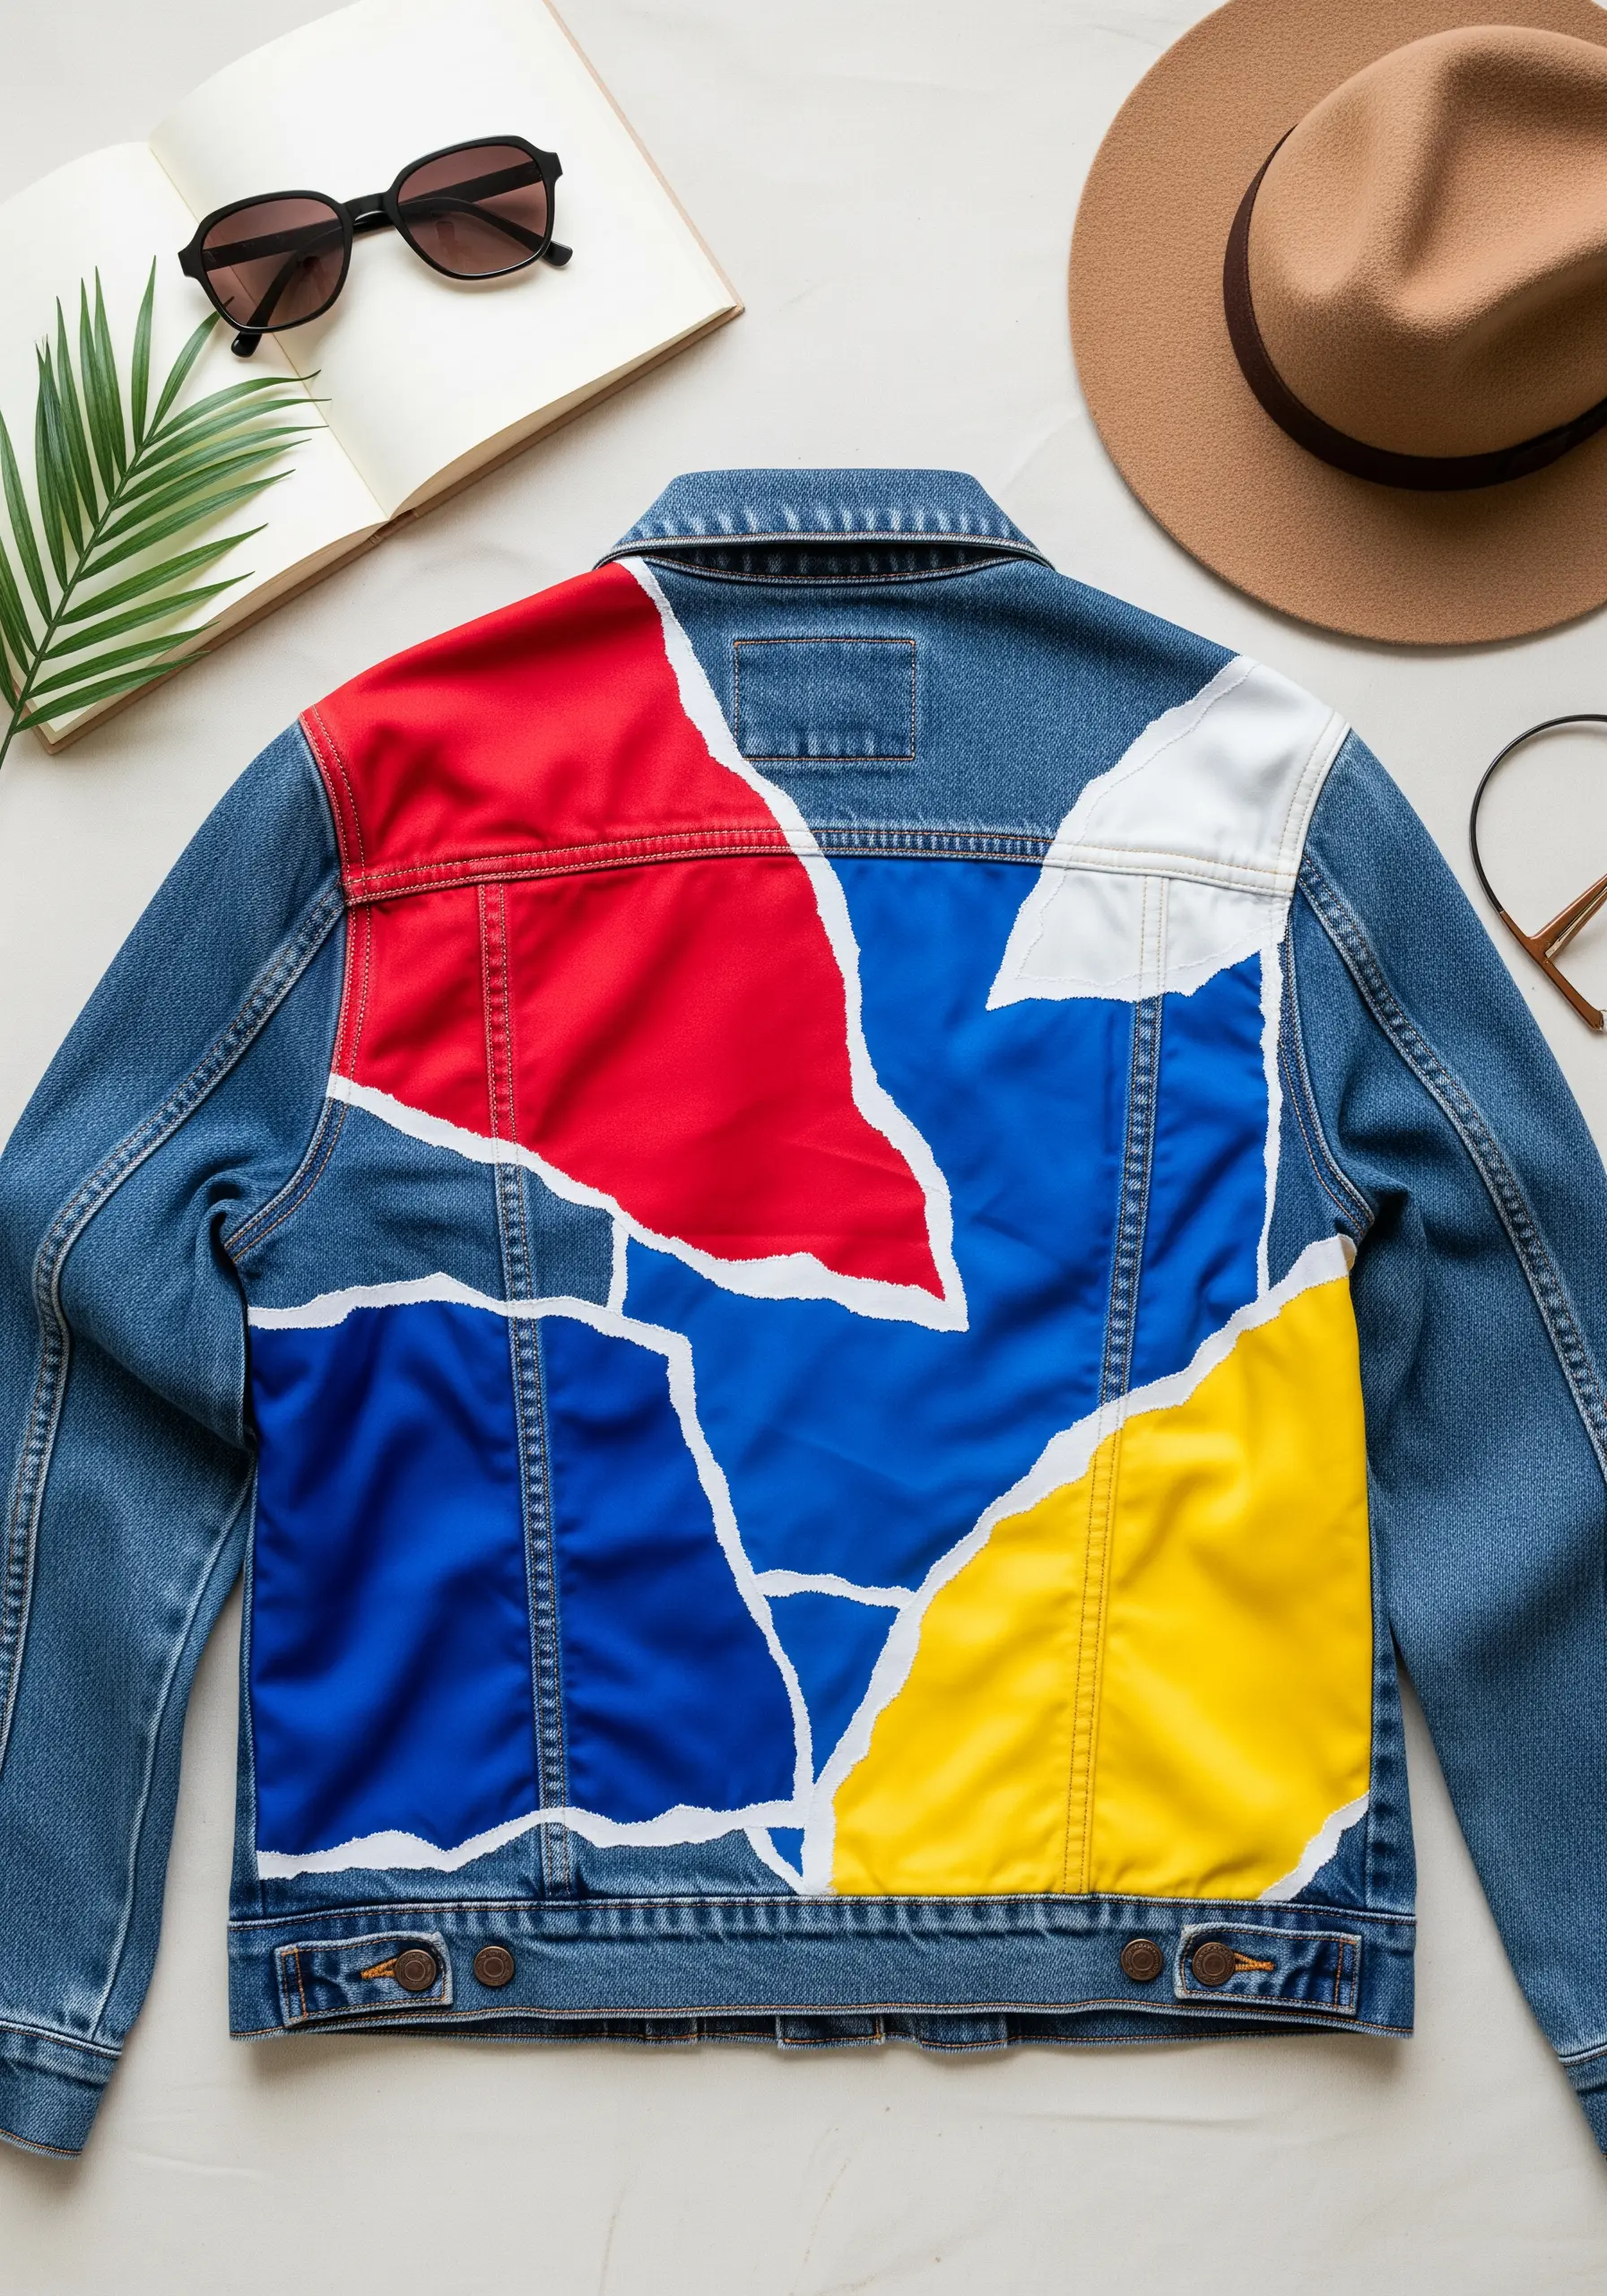
31. Create Tension with Complementary Colors

For a design that truly commands attention, pair complementary colors like this vibrant orange and electric blue.
Because they sit directly opposite each other on the color wheel, they create the strongest possible visual contrast.
Use them in large, simple shapes and let the powerful color interaction do all the work.
This is boldness in its purest form.
32. Evoke Softness with a Pastel Landscape
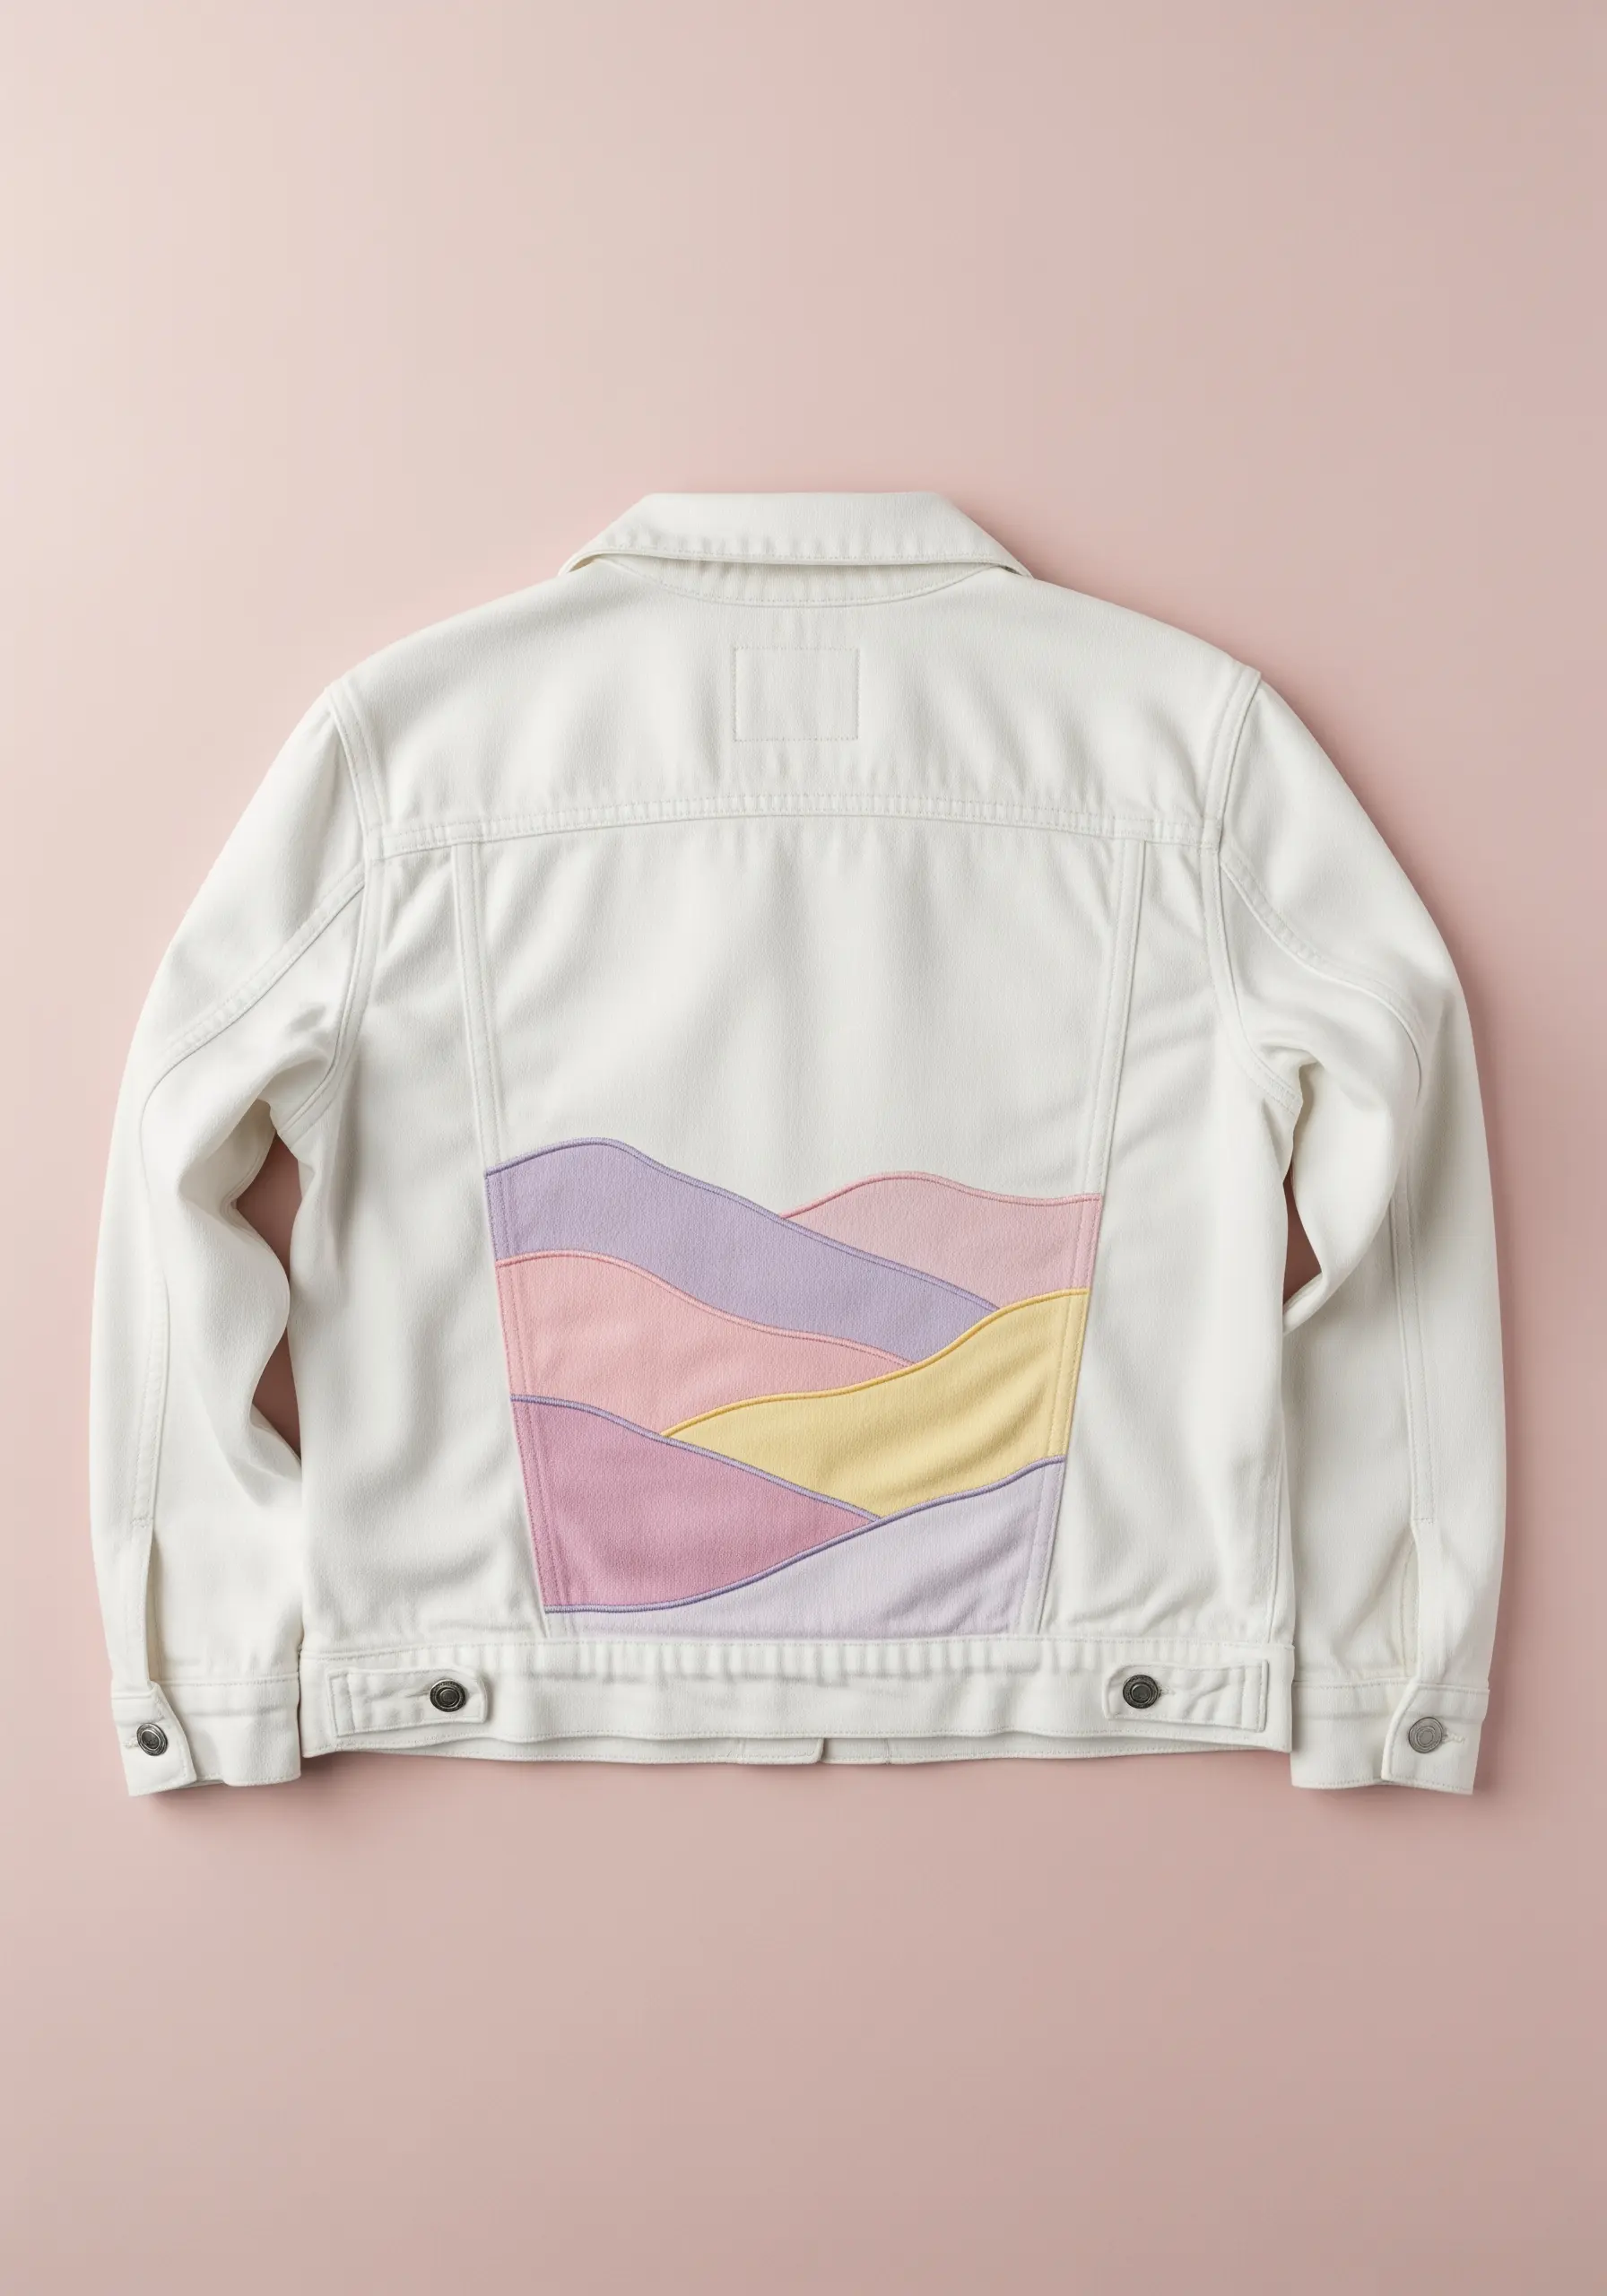
Use a curated palette of soft pastel fabrics to create a dreamy, rolling landscape on your jacket.
The gentle curves and muted tones work especially well on light-colored or white denim.
To define each hill, use a subtle split stitch outline in a shade just slightly darker than the fabric itself.
This approach to abstract thread landscapes evokes a dreamy, emotional quality.
33. Pay Homage with Iconic Pop Culture Patches

Turn your jacket into a canvas for personal nostalgia by creating embroidered patches of iconic symbols.
To get the perfect shape for recognizable characters or logos, use a water-soluble stabilizer.
You can print your design directly onto it, stick it to your fabric, stitch right through it, and then simply wash it away for flawless, accurate results.
34. Elongate with Vertical Stripe Paneling
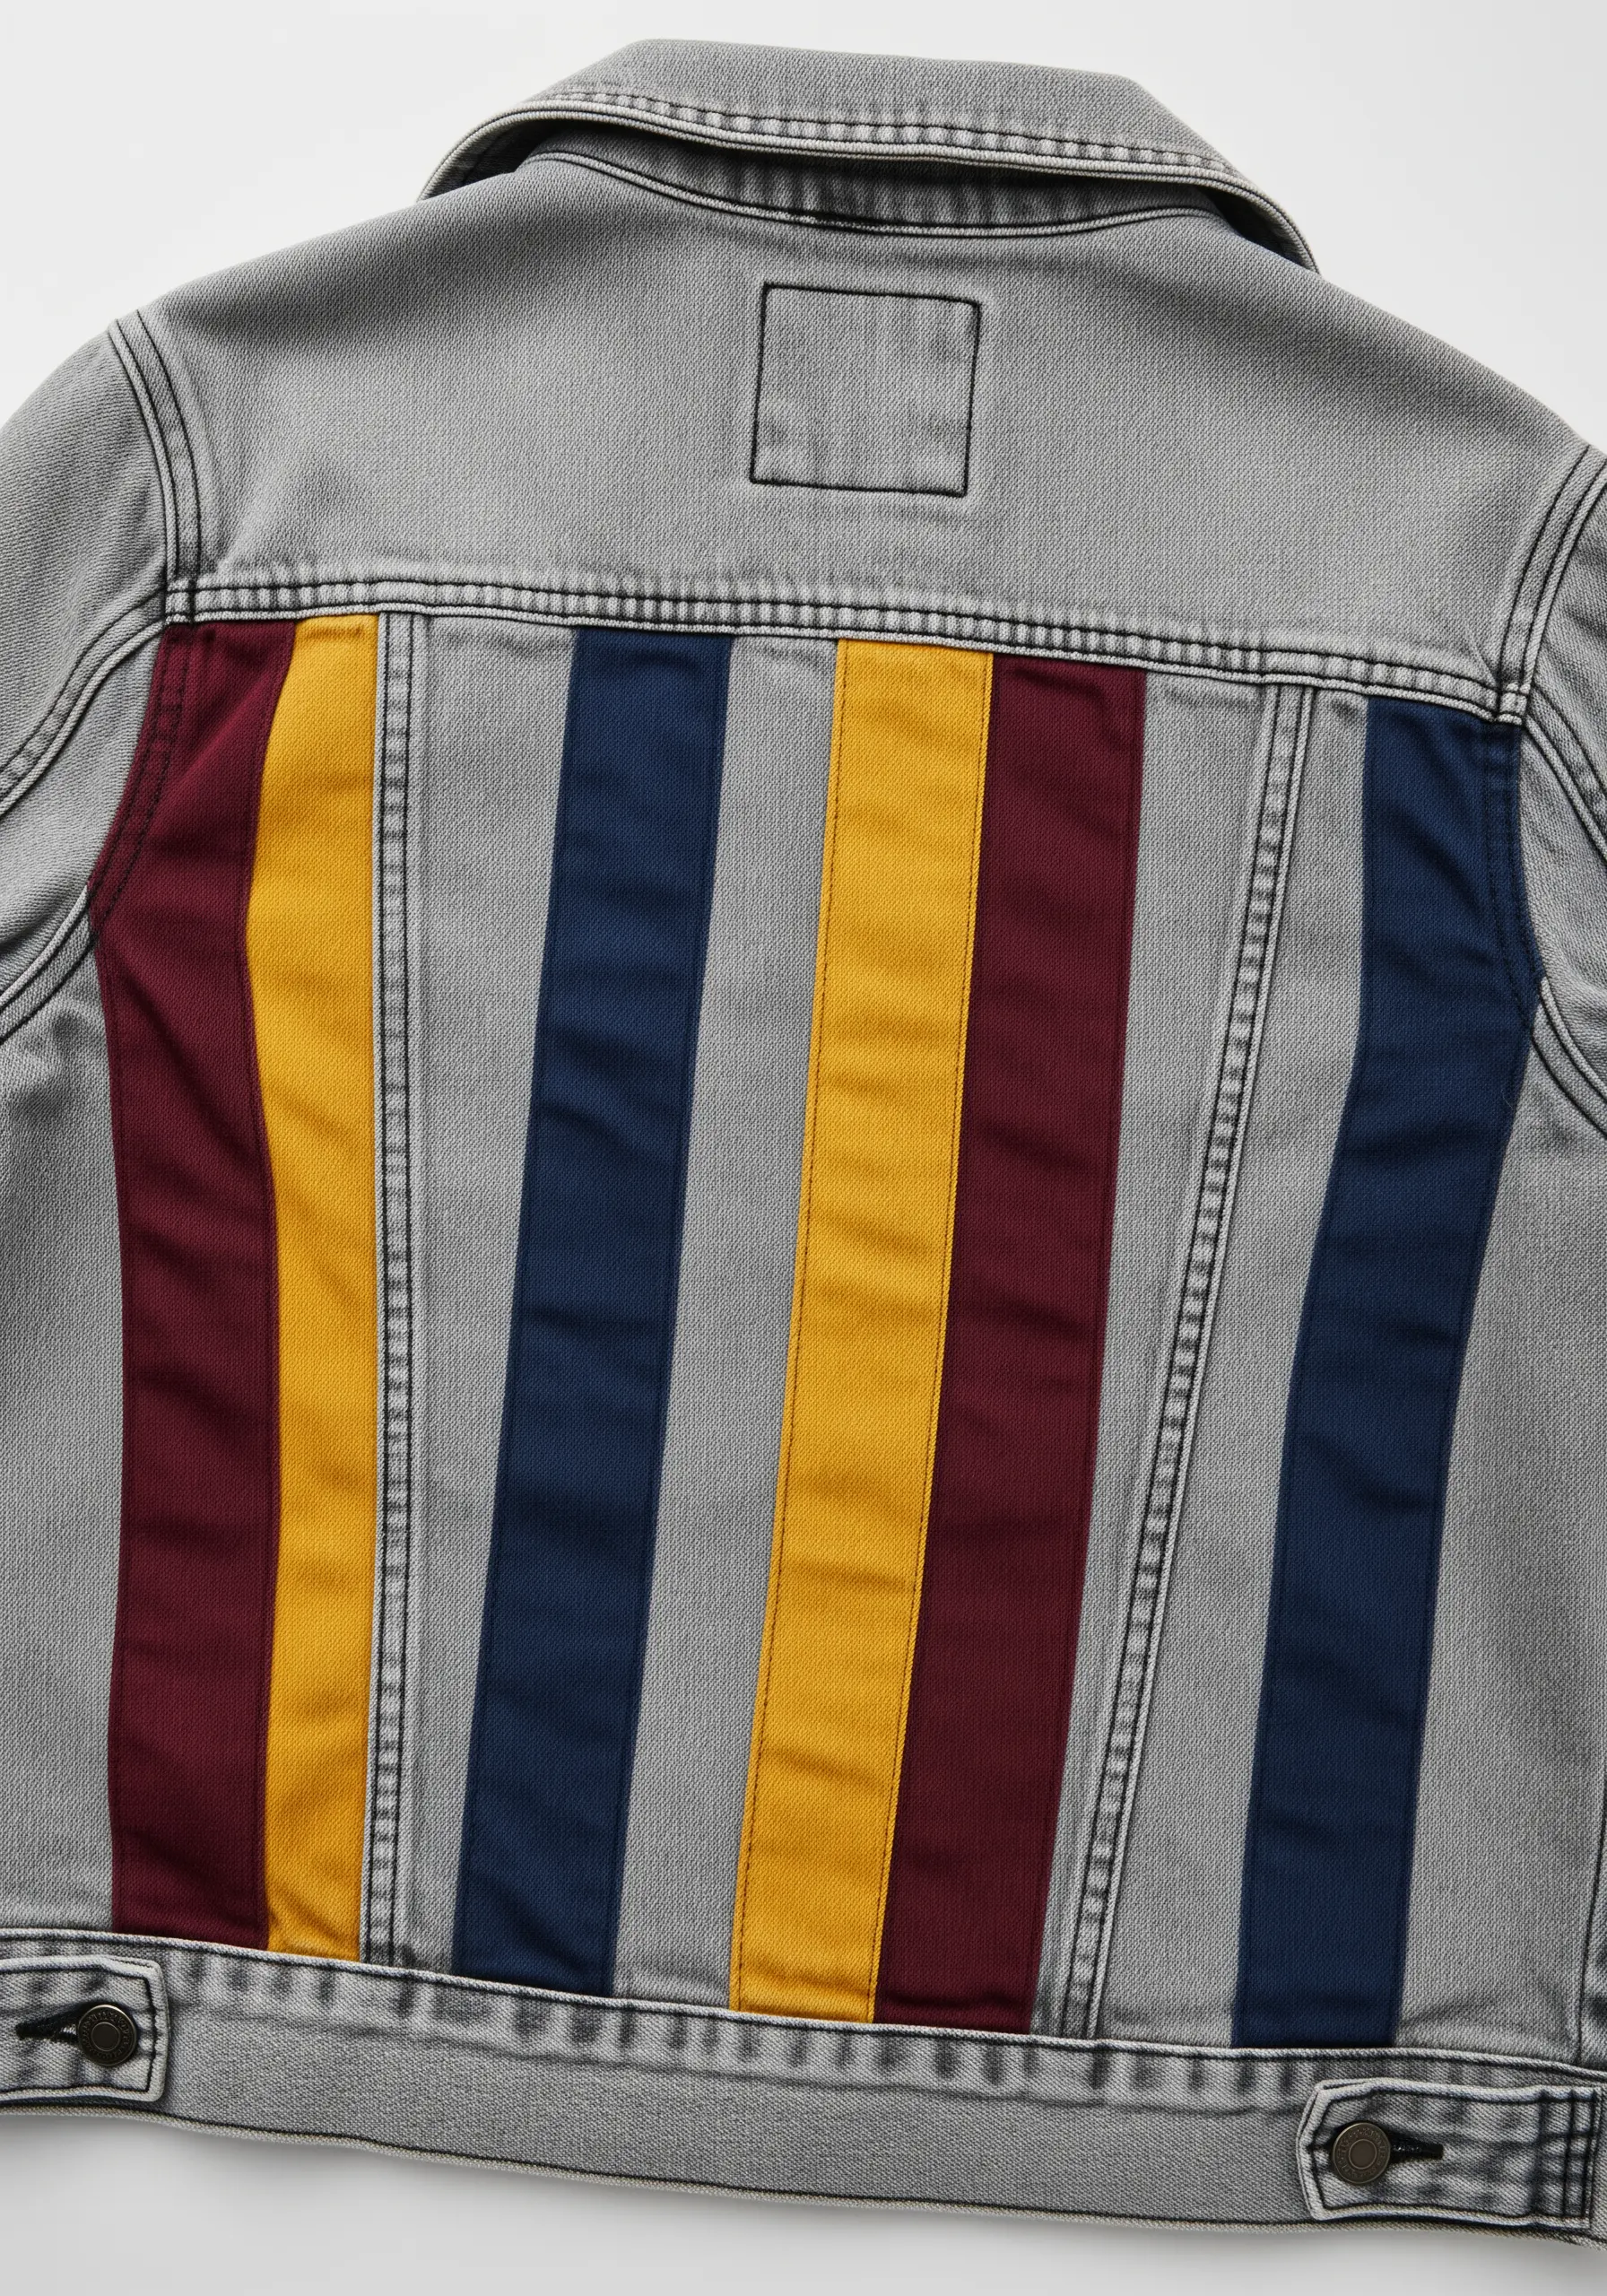
Using vertical stripes of fabric is a powerful design choice that can visually alter the shape of the jacket itself.
The long, clean lines draw the eye upward, creating a slimming and elongating effect.
Choose colors that contrast strongly with the denim but harmonize with each other for a cohesive, tailored look that feels both bold and intentional.
35. Deconstruct a Familiar Shape for an Abstract Twist
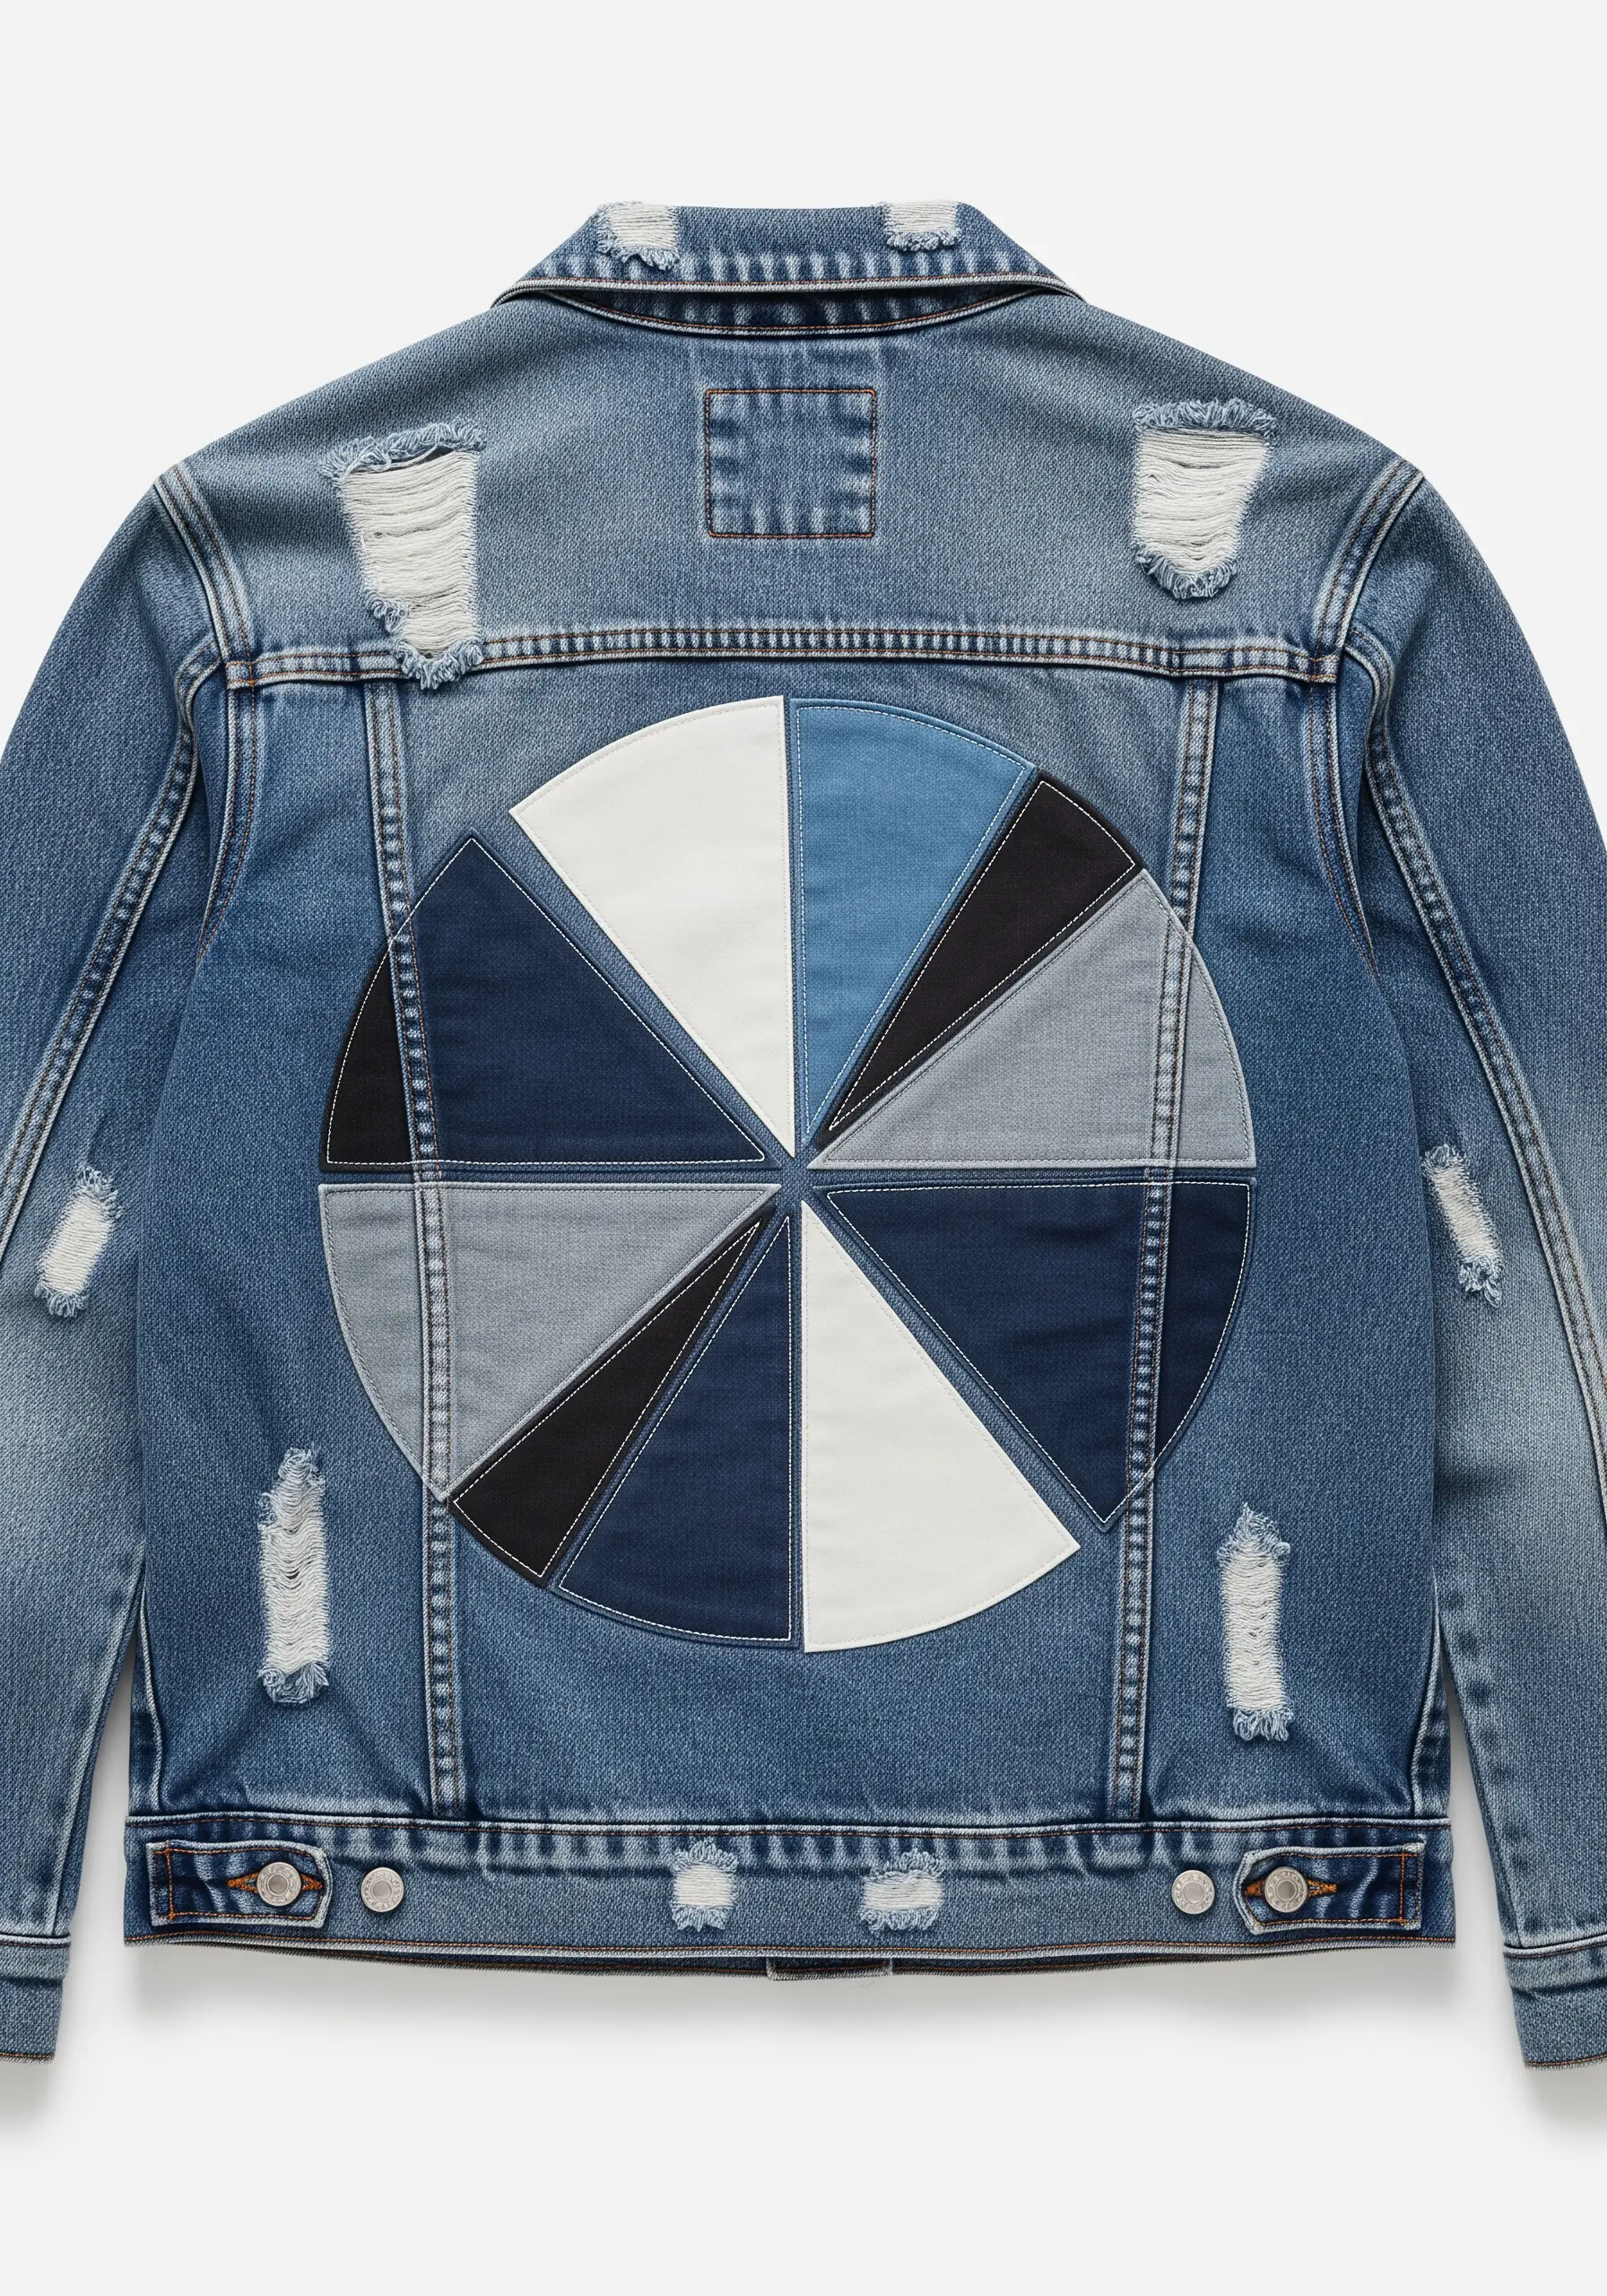
Take a common graphic, like a pie chart, and reinvent it with unexpected materials for an artistic statement.
In this piece, different washes and textures of denim are used instead of bright colors.
This deconstruction adds an element of surprise and sophistication, turning a simple, familiar shape into a piece of abstract textile art that invites a closer look.


