
It’s easy to feel that creating beautiful embroidery takes weeks, but the truth is, a single afternoon is all you need to make something with polish and heart. The secret isn’t more time—it’s more intention.
The difference between a good piece and a great one often comes down to small, thoughtful choices. It’s in the way you layer a stitch for dimension, the contrast you create between a thick texture and a fine line, or the specific direction you angle your threads to catch the light.
Think of these projects not just as patterns to follow, but as invitations to experiment. Each finished hoop is a chance to build your confidence and refine your eye, proving that you can create stunning, expressive art, one quick stitch at a time.
1. Master Plush Texture with French Knots
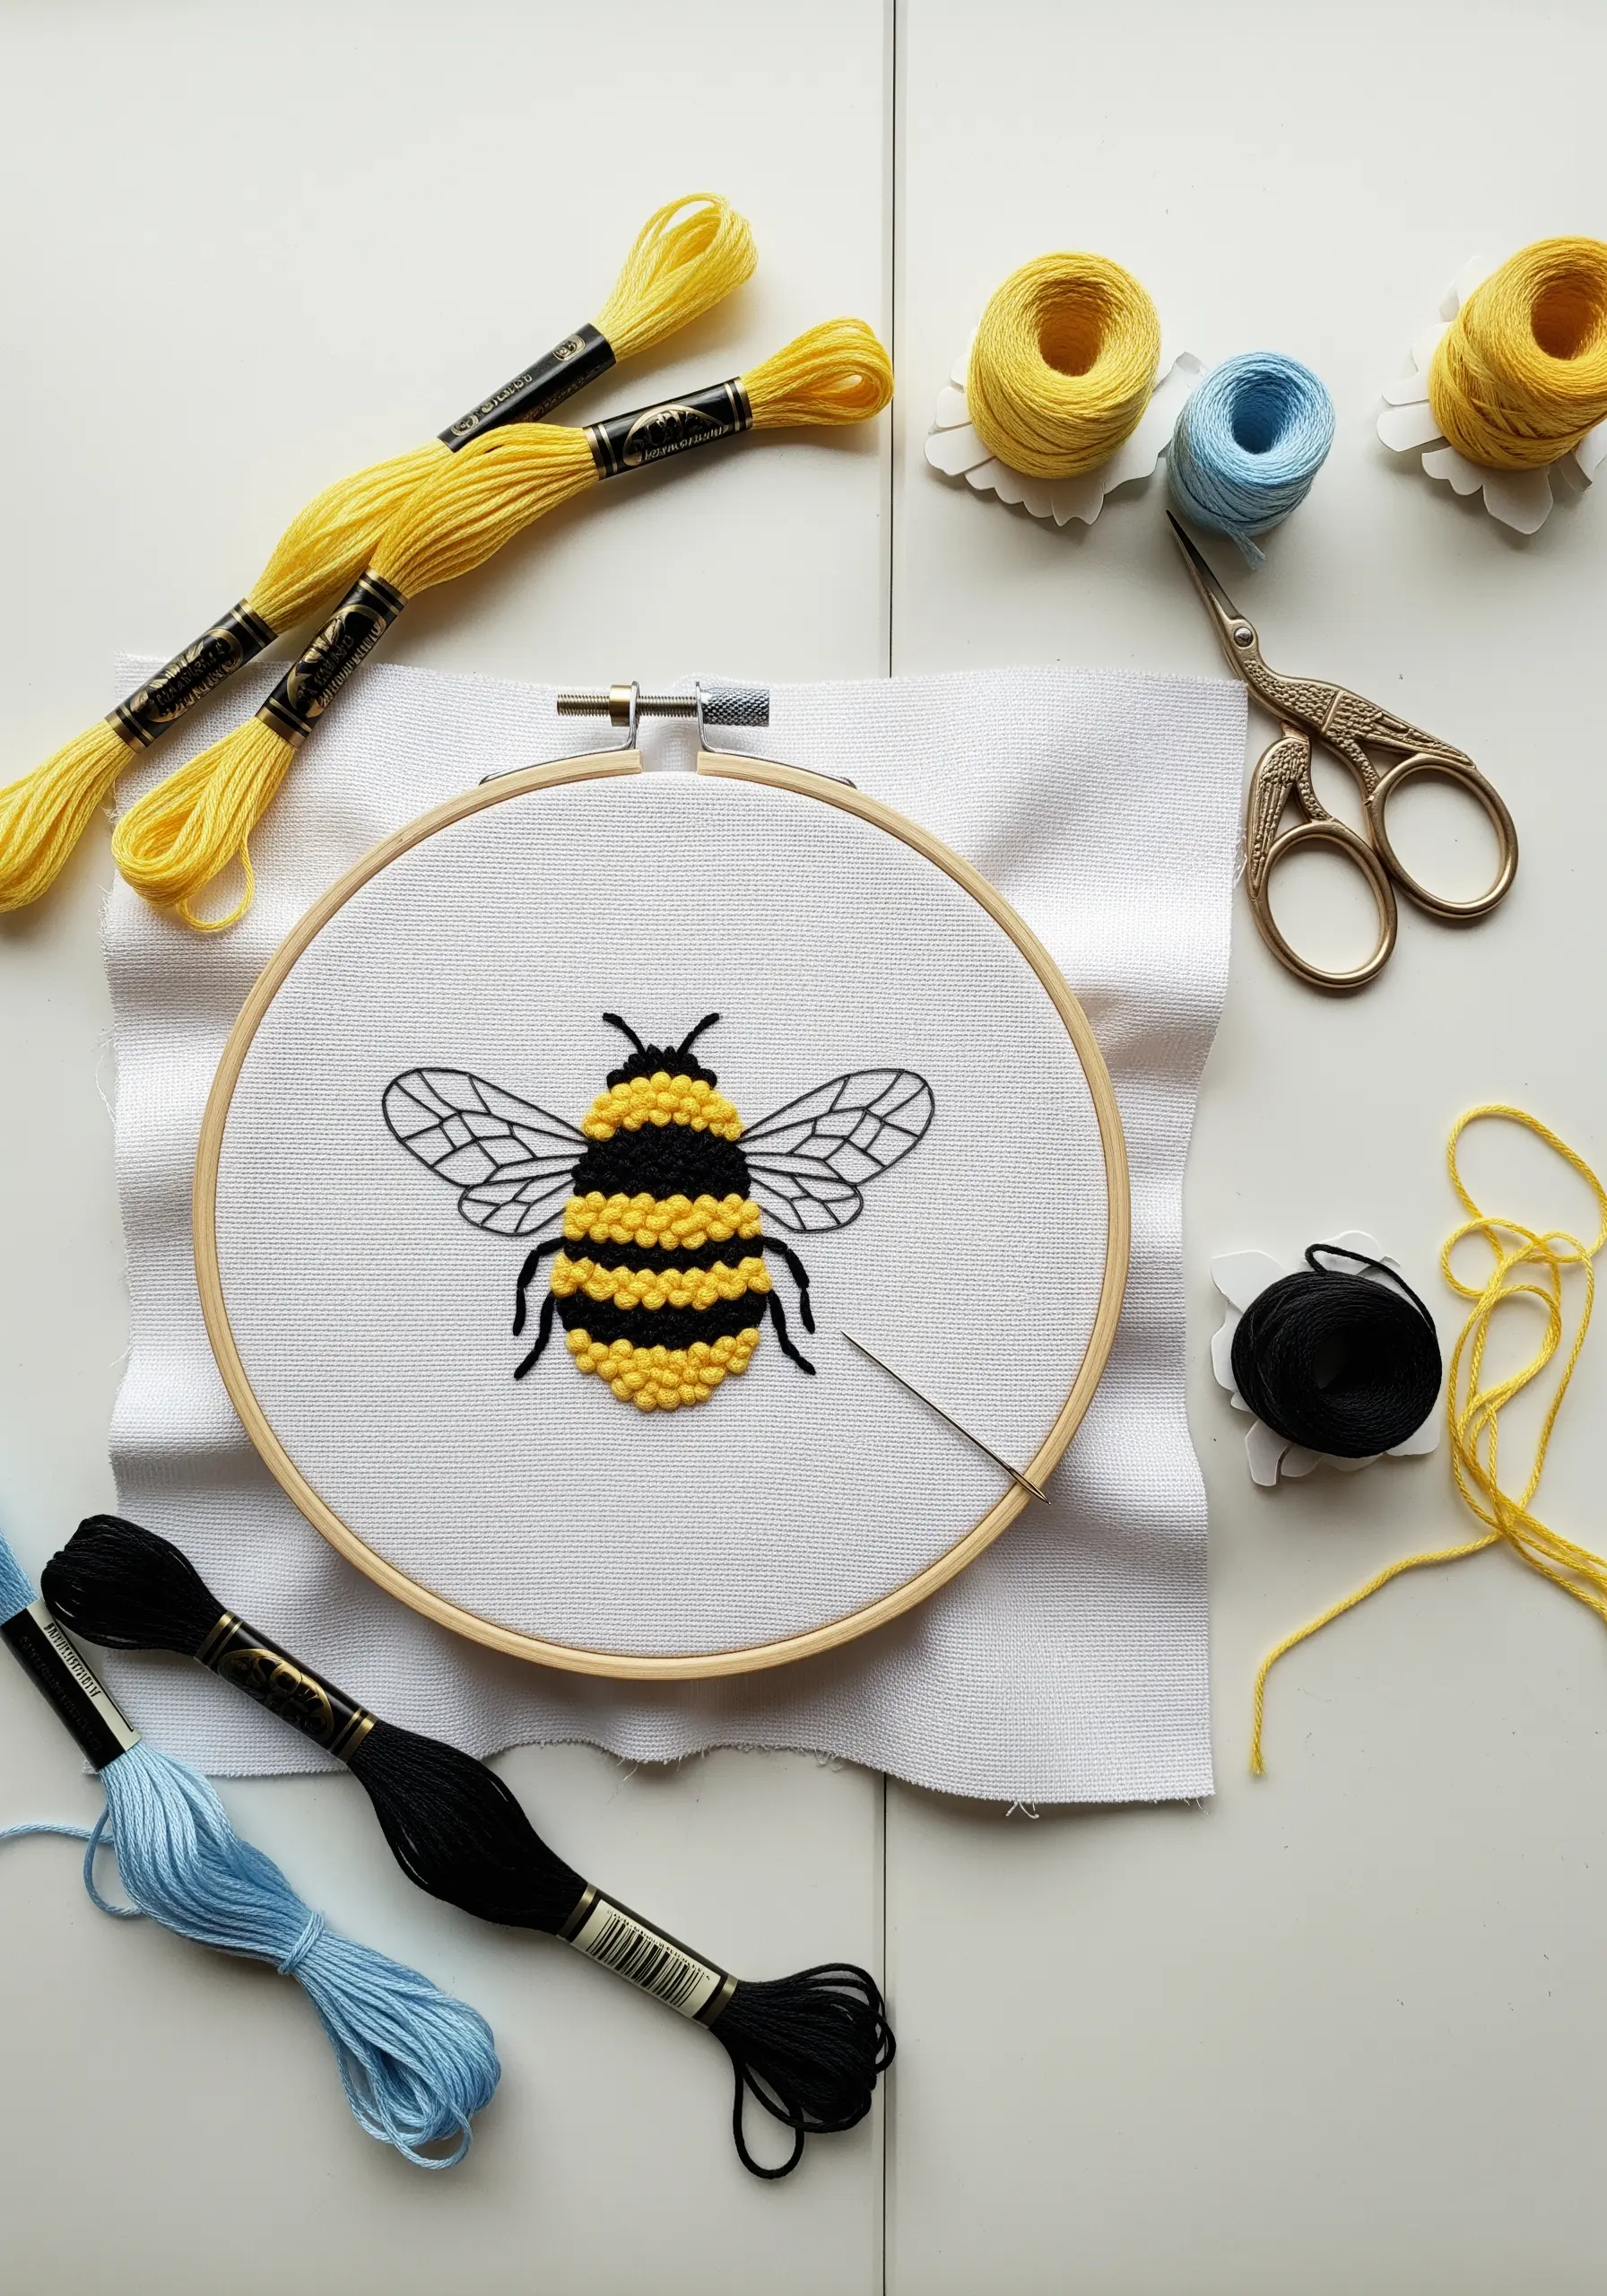
Instead of filling a shape with flat satin stitch, use densely packed French knots to create a plush, three-dimensional surface.
For the bee’s body, use all six strands of floss to make your knots full and substantial, giving it a fuzzy, tactile quality.
To keep the knots uniform, wrap the thread around the needle the same number of times for each stitch—twice is perfect for creating a tight, consistent bobble.
Contrast this heavy texture with a delicate backstitch outline for the wings, using only one or two strands. This distinction is what makes the design feel balanced and professional.
2. Create Graphic Pop with Cross-Stitch Fills
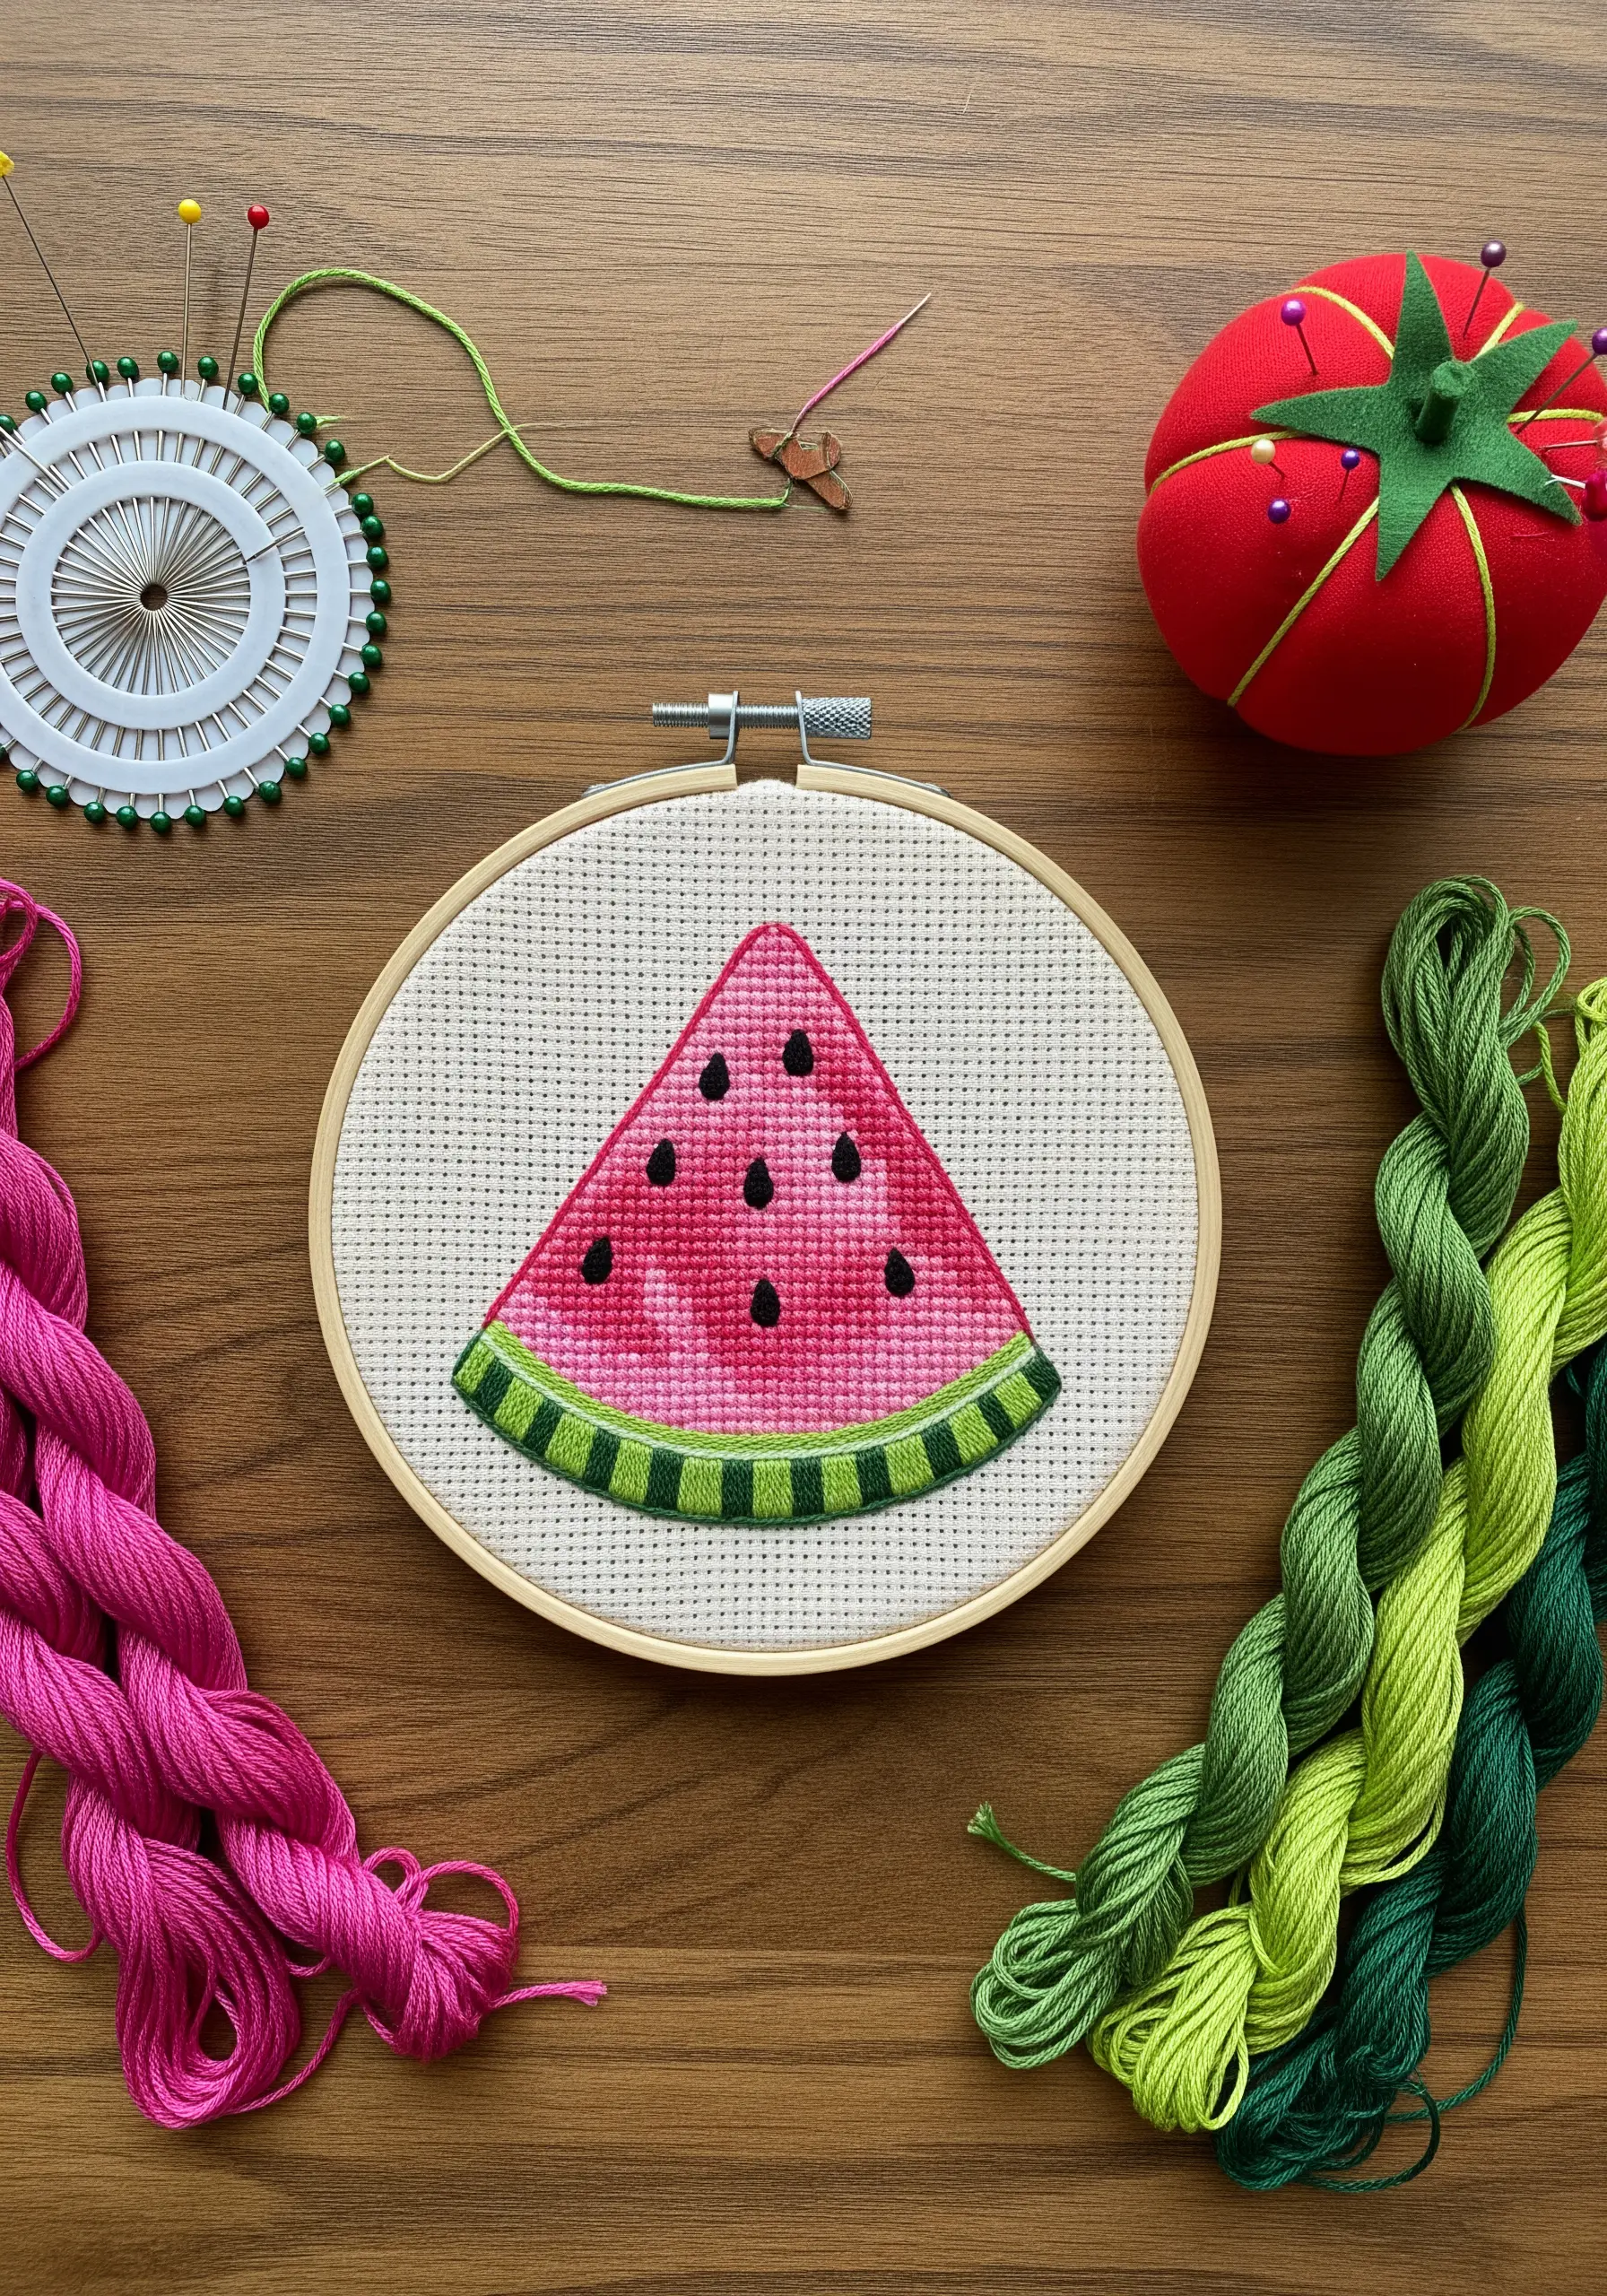
For a clean, graphic style on Aida cloth, use cross-stitch as a fill instead of satin stitch.
This technique gives your work a charming, slightly pixelated look that is perfect for simple fruit and geometric motifs.
To ensure your stitches look neat, always cross them in the same direction—for example, make sure the top leg of every ‘X’ is angled the same way.
Outlining the shape with a sharp backstitch provides a clean border that makes the colors pop and tidies up the edges, giving you a polished finish.
This is one of the best small hoop embroidery tricks to make simple stitches look professional.
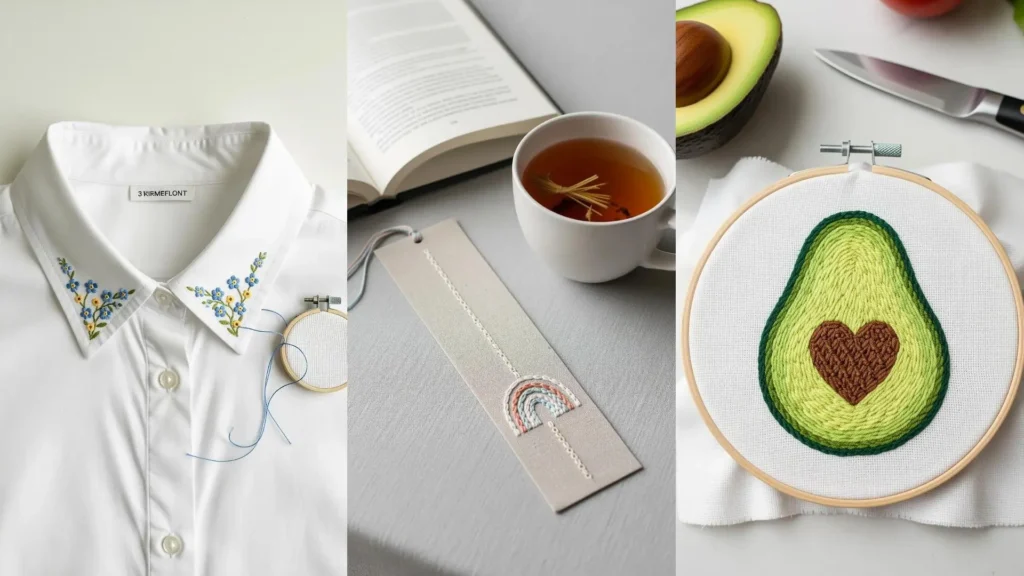
3. Elevate Paper Goods with Delicate Stitches
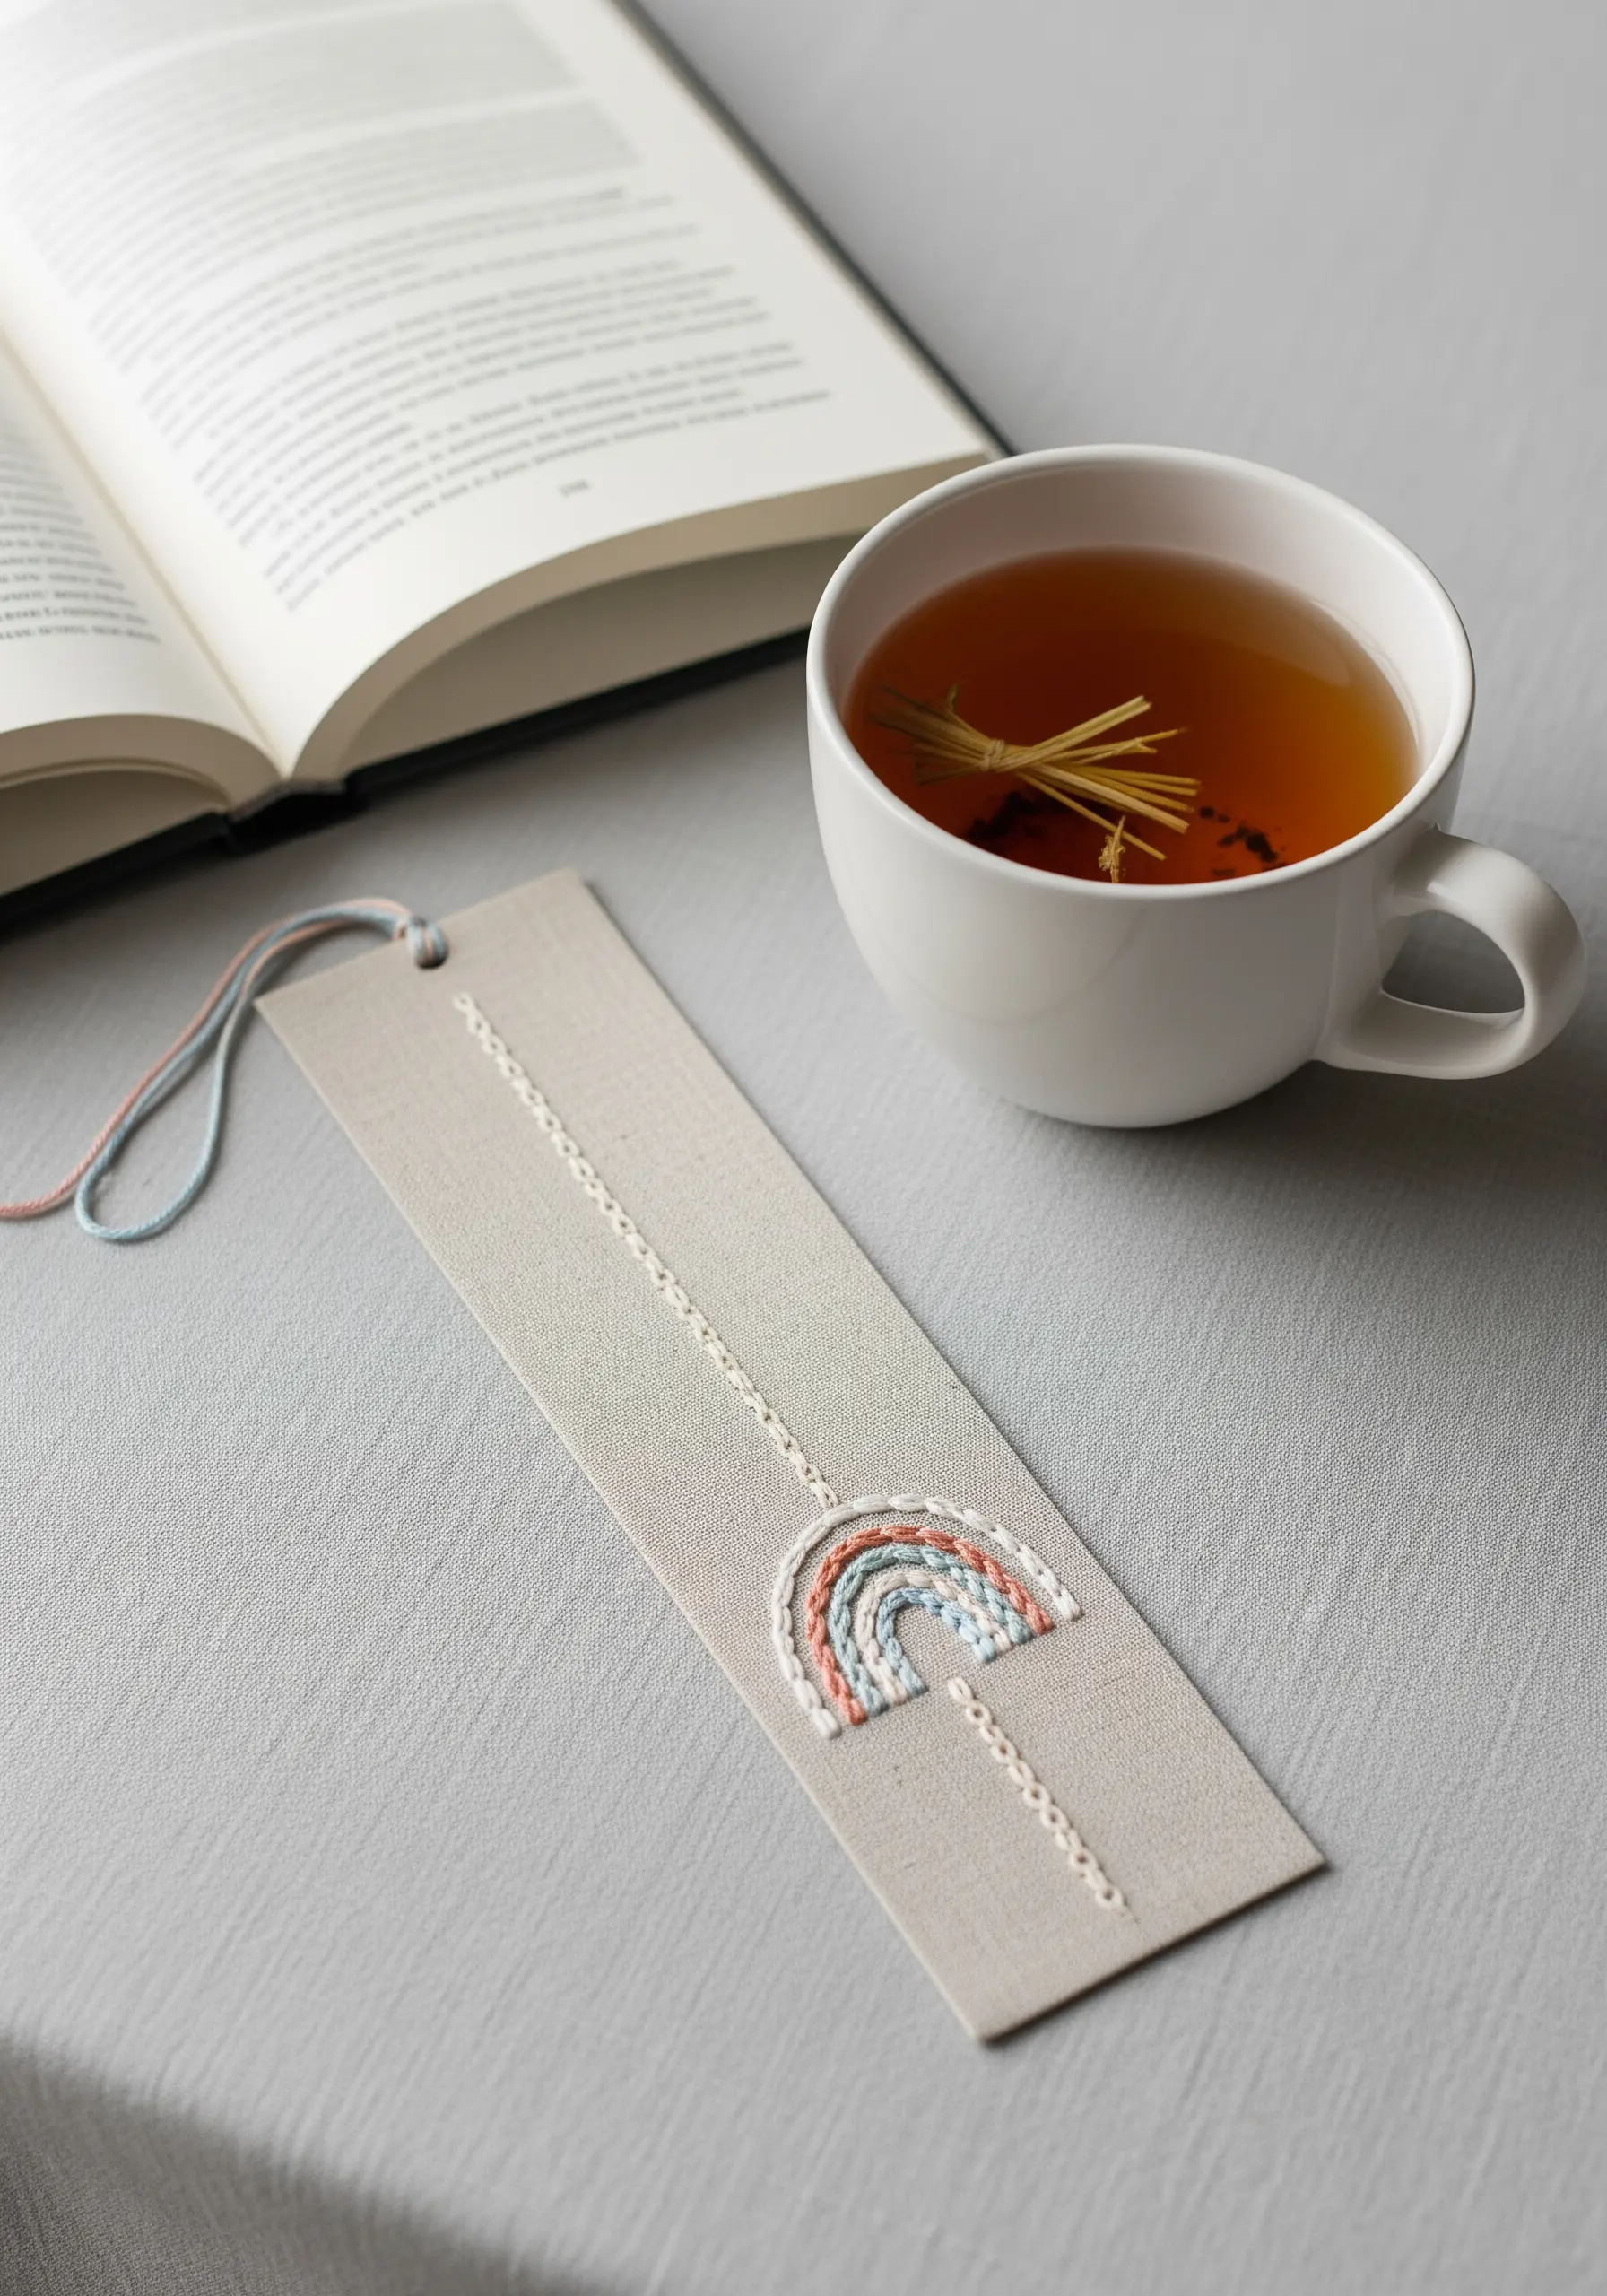
Transform a simple cardstock bookmark into a treasured keepsake with minimal stitching.
Before you begin, pierce your stitching holes with a needle or awl to prevent the paper from tearing as you pull the thread through.
Use a simple chain stitch or couching for the rainbow’s arcs; these stitches sit neatly on the surface and add texture without creating bulk.
Choose a fine thread, like a single strand of floss or sewing thread, as thicker threads can damage the paper. This is a perfect way to explore embroidery on paper.
4. Achieve Seamless Fills with Felt Appliqué
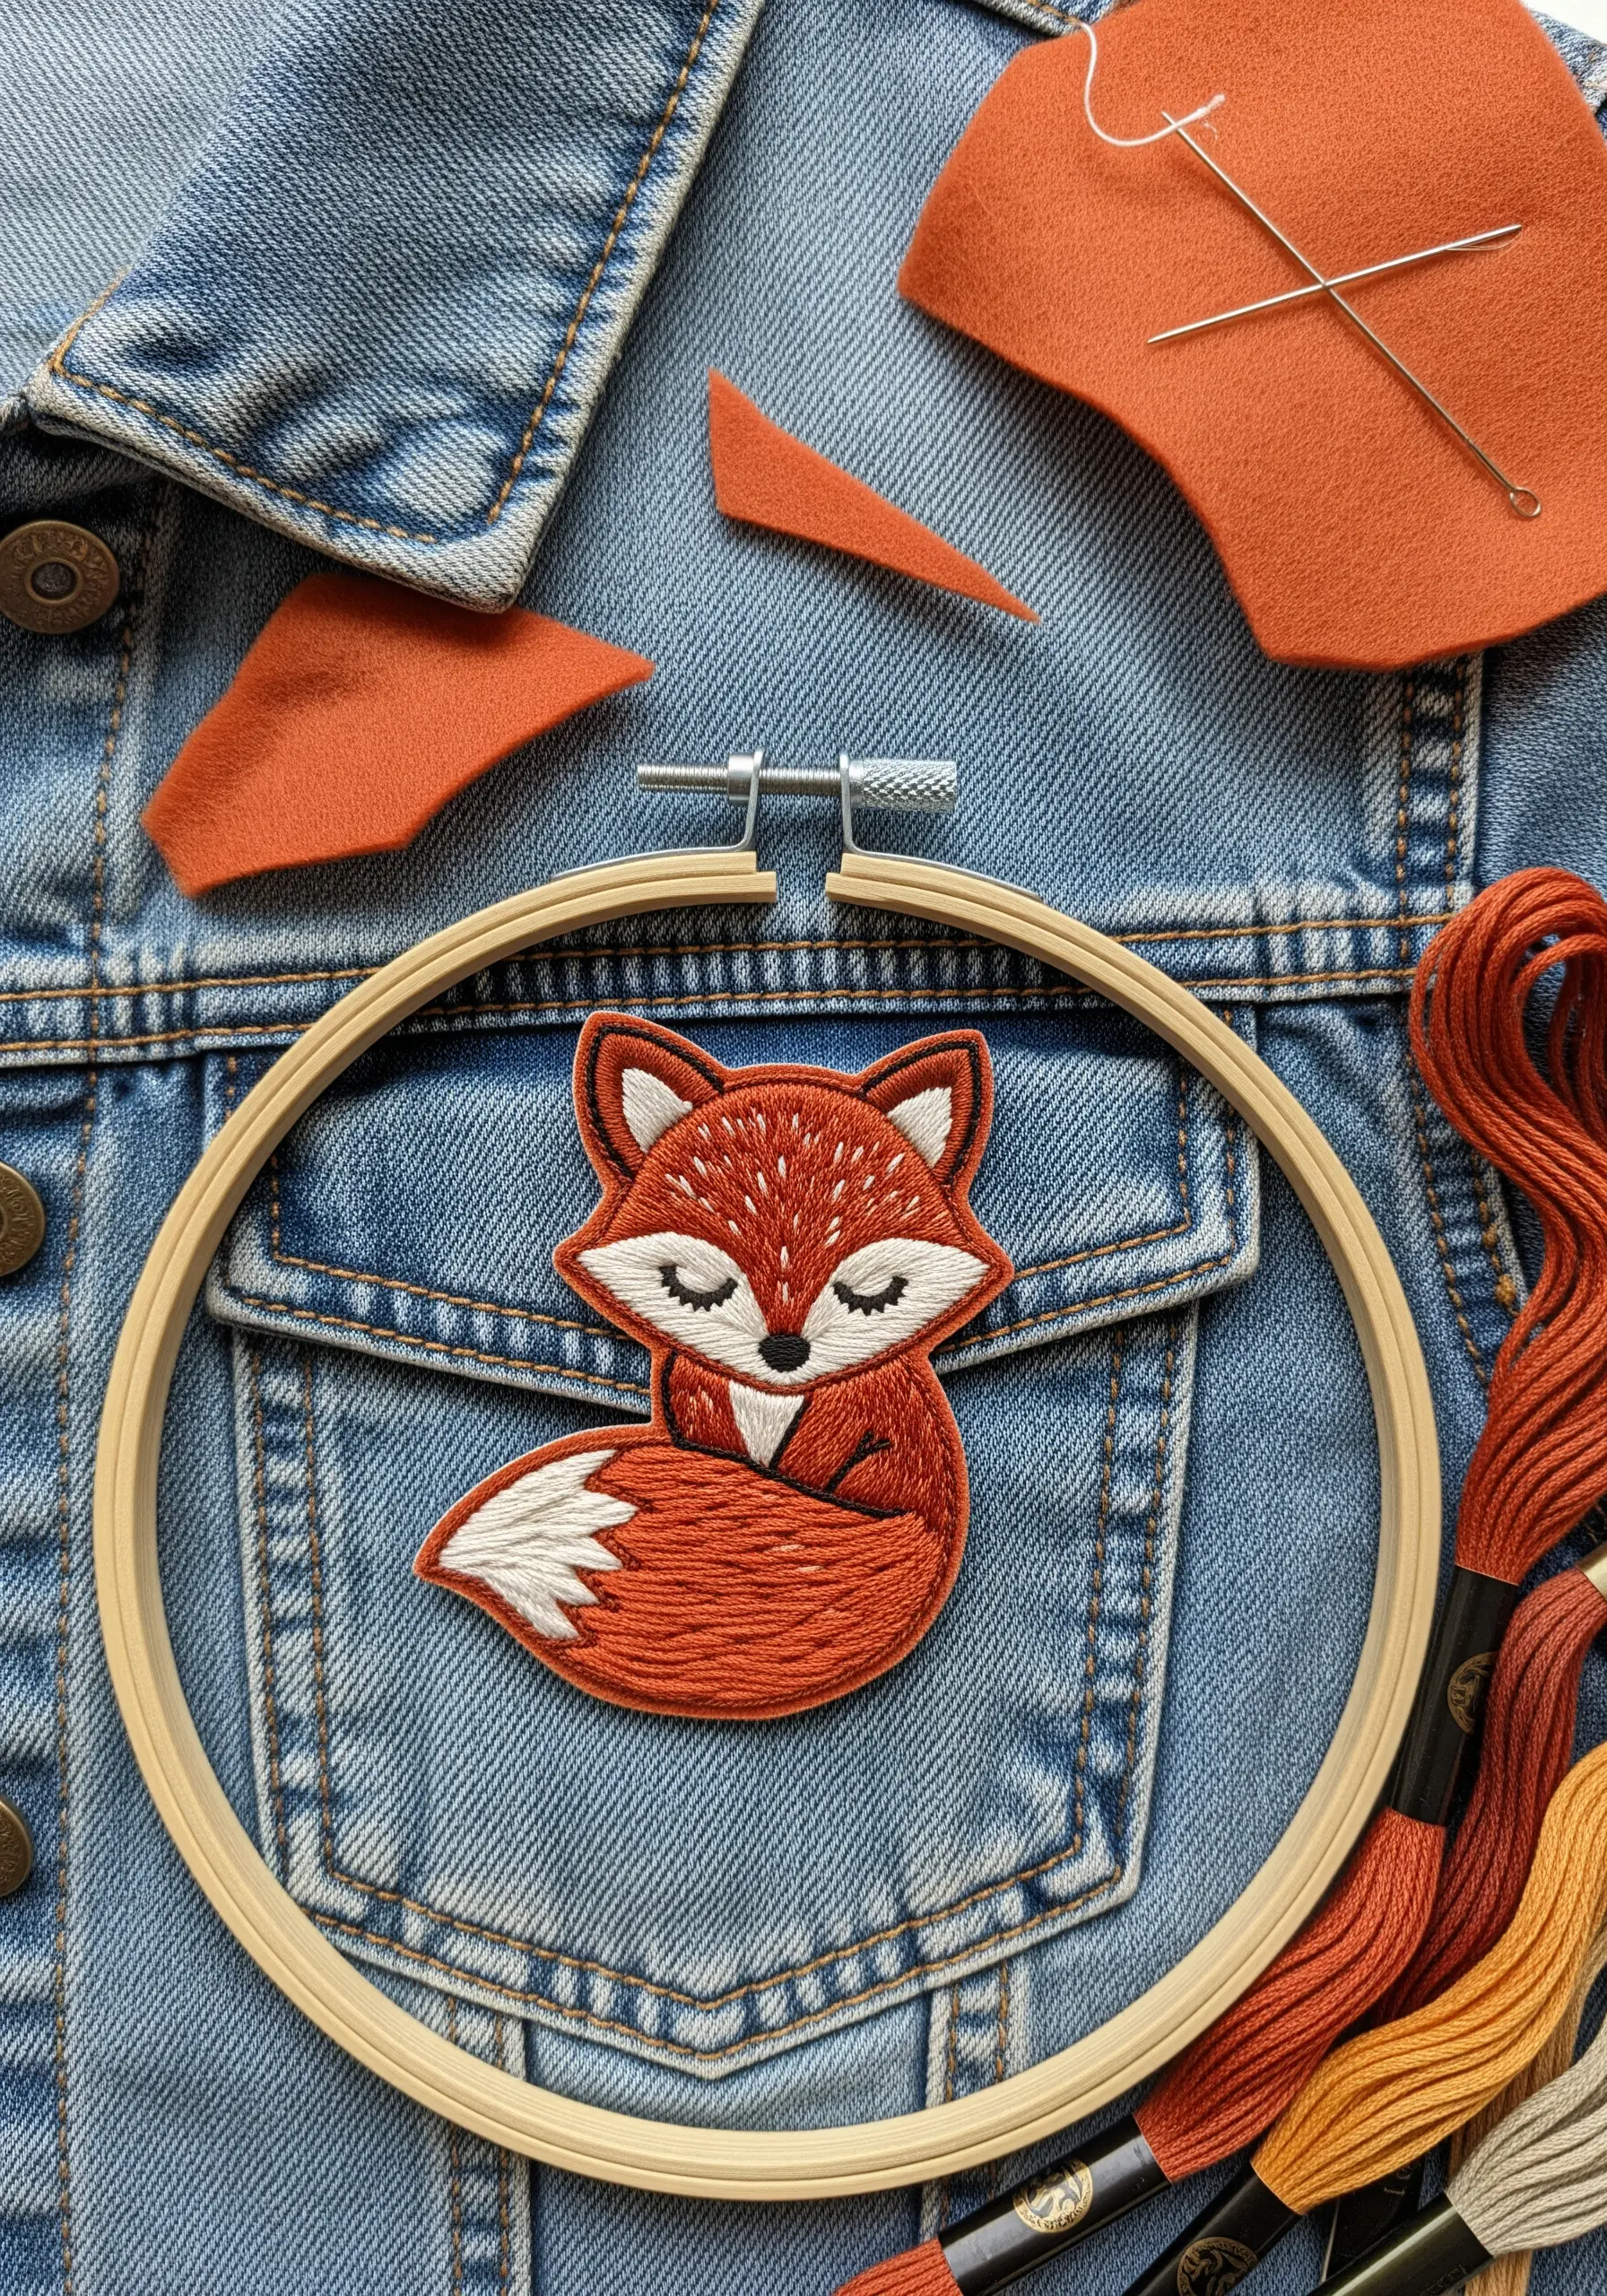
For a flawless, dense fill on a patch, combine embroidery with a felt appliqué base.
Cut your felt shape slightly smaller than the final design outline. Secure it to your fabric with a few small anchoring stitches.
Then, use long-and-short stitch to cover the felt completely, allowing your stitches to extend just beyond its edge. This creates a smooth, slightly padded surface that looks incredibly professional.
This technique is fantastic when you want to personalize your denim jacket with adorable forest animal embroidery ideas.
5. Add Luminous Texture with Metallic Thread
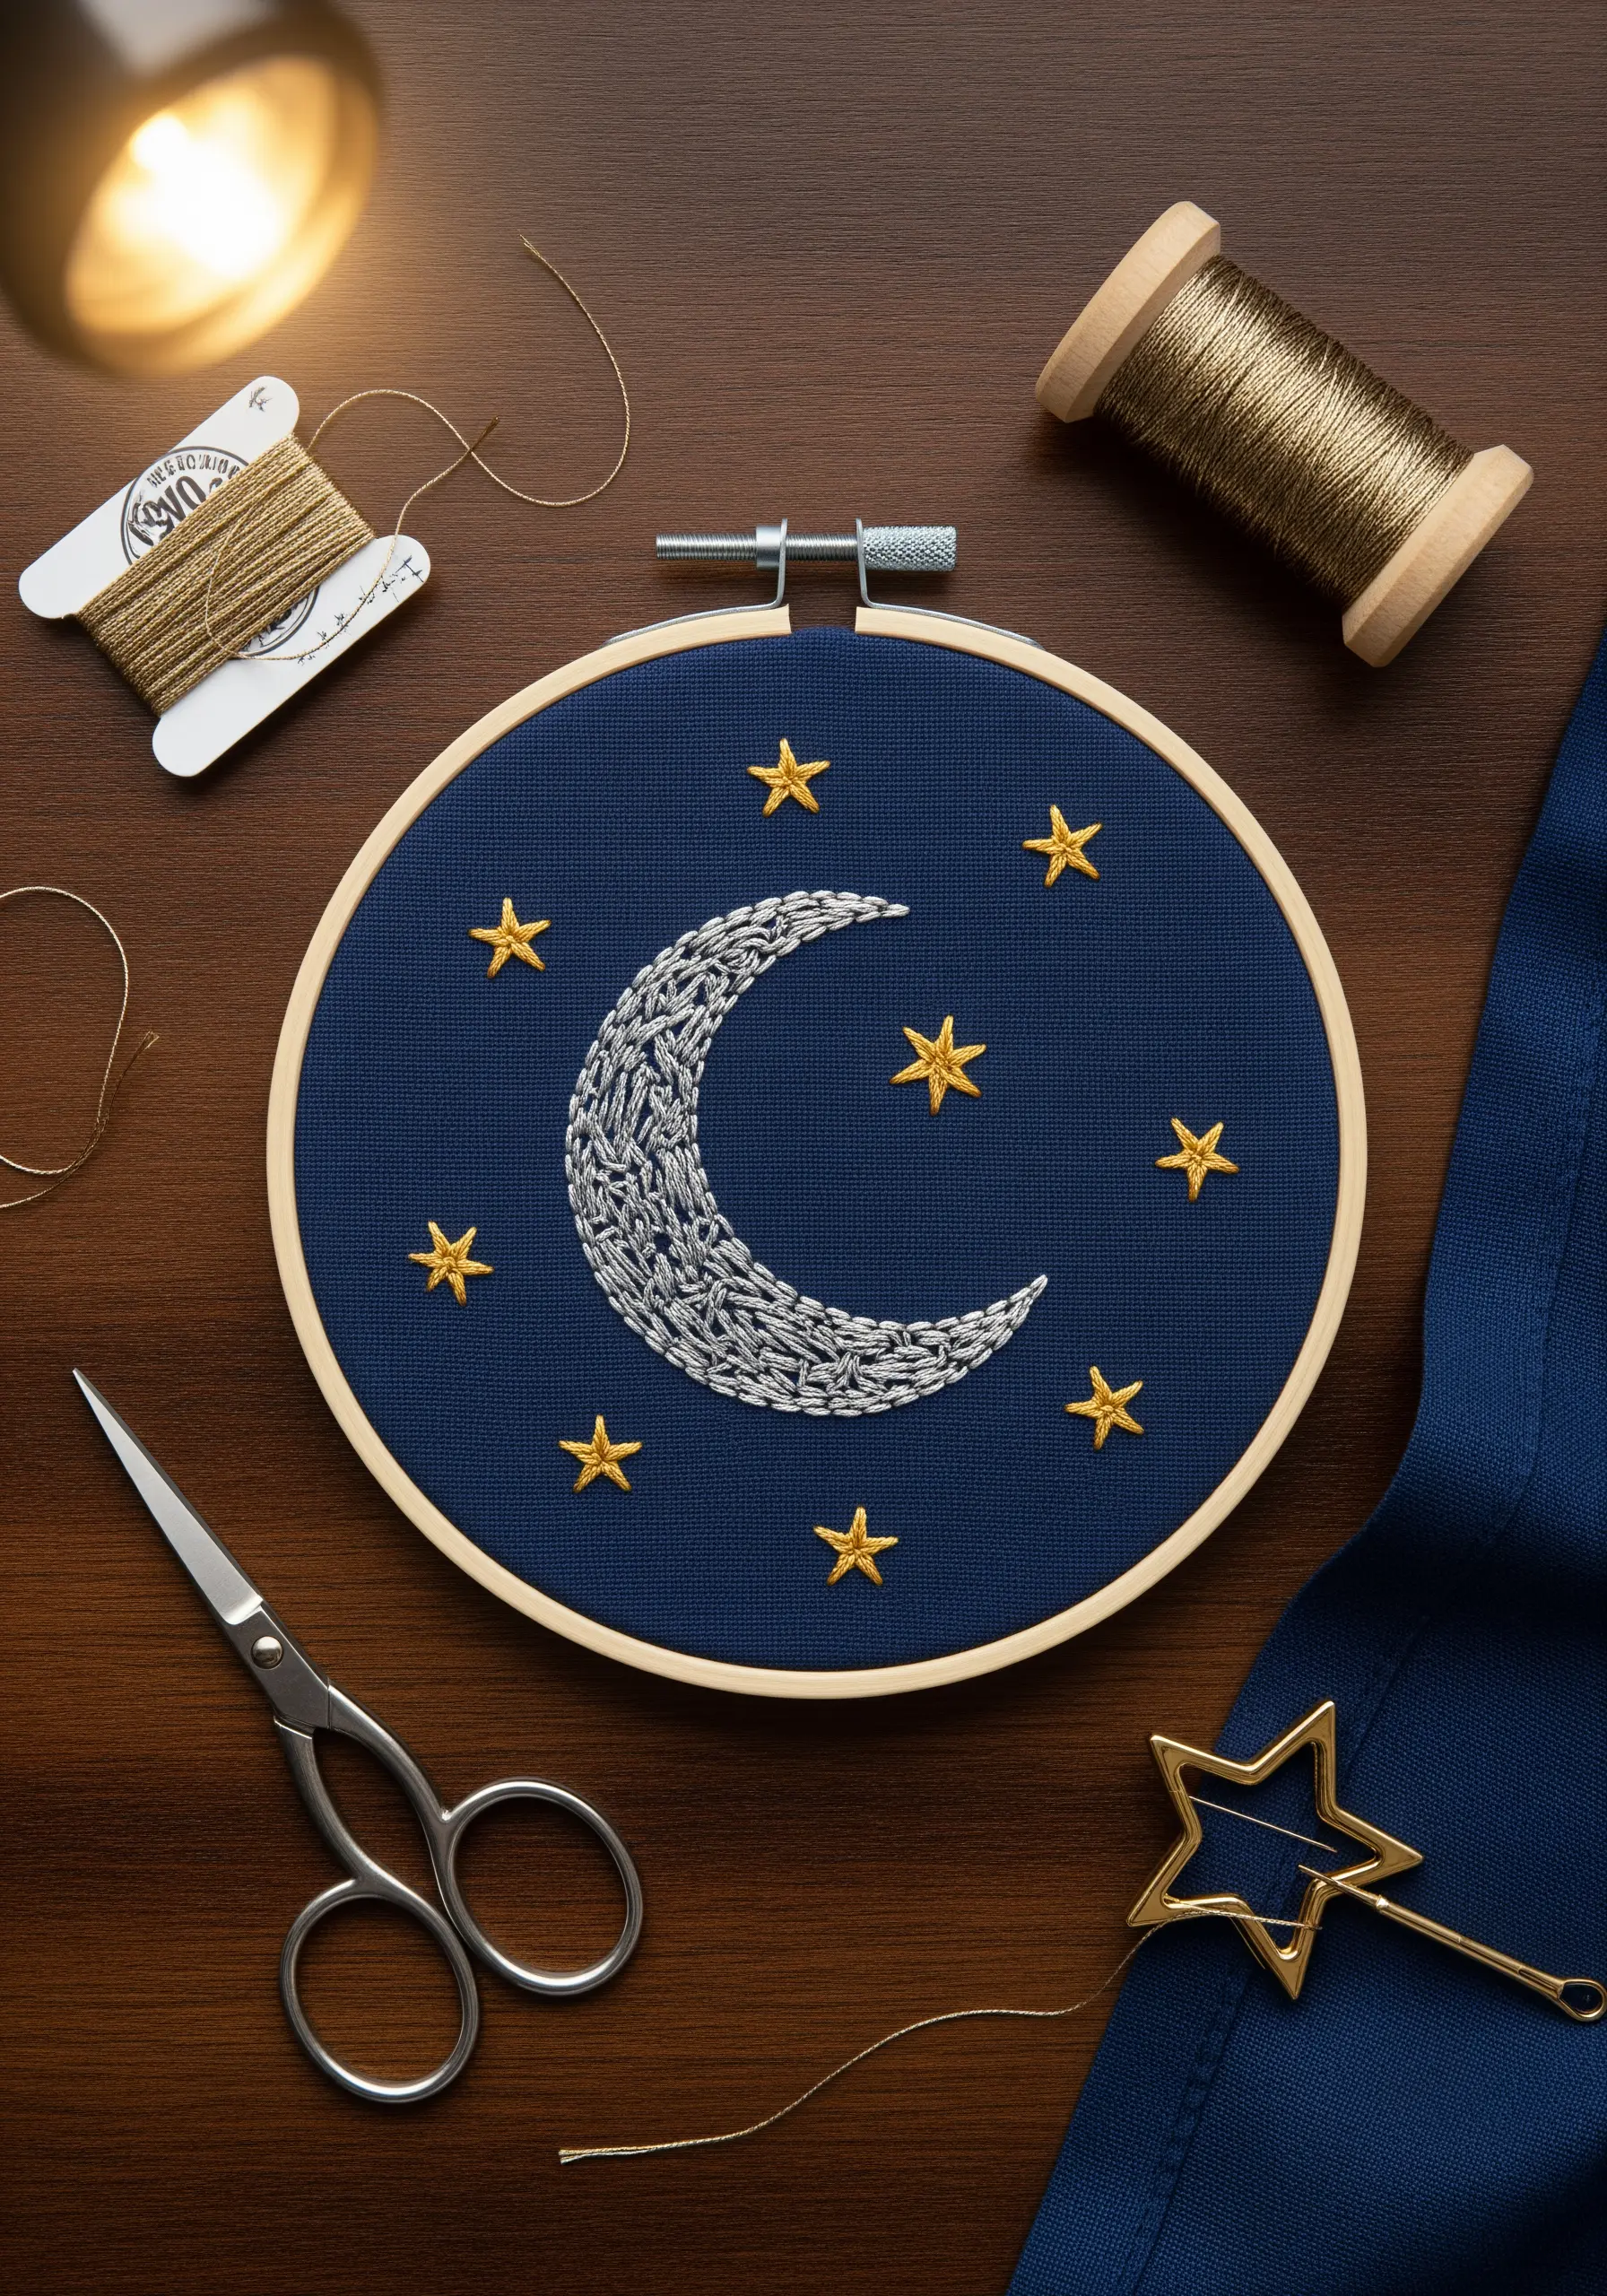
Create a shimmering, textured moon by filling the crescent shape with a collage of straight stitches, seed stitches, and French knots.
Instead of orderly rows, place your stitches in random directions and lengths to mimic the varied, cratered surface of the moon.
Use a silver or pale gold metallic thread against a dark navy fabric for maximum contrast and celestial glow.
A thread conditioner like beeswax can prevent metallic floss from snagging and fraying, making your stitching experience much smoother. It’s a key technique for celestial micro-embroidery.
6. Sculpt 3D Succulents with Layered Stitches
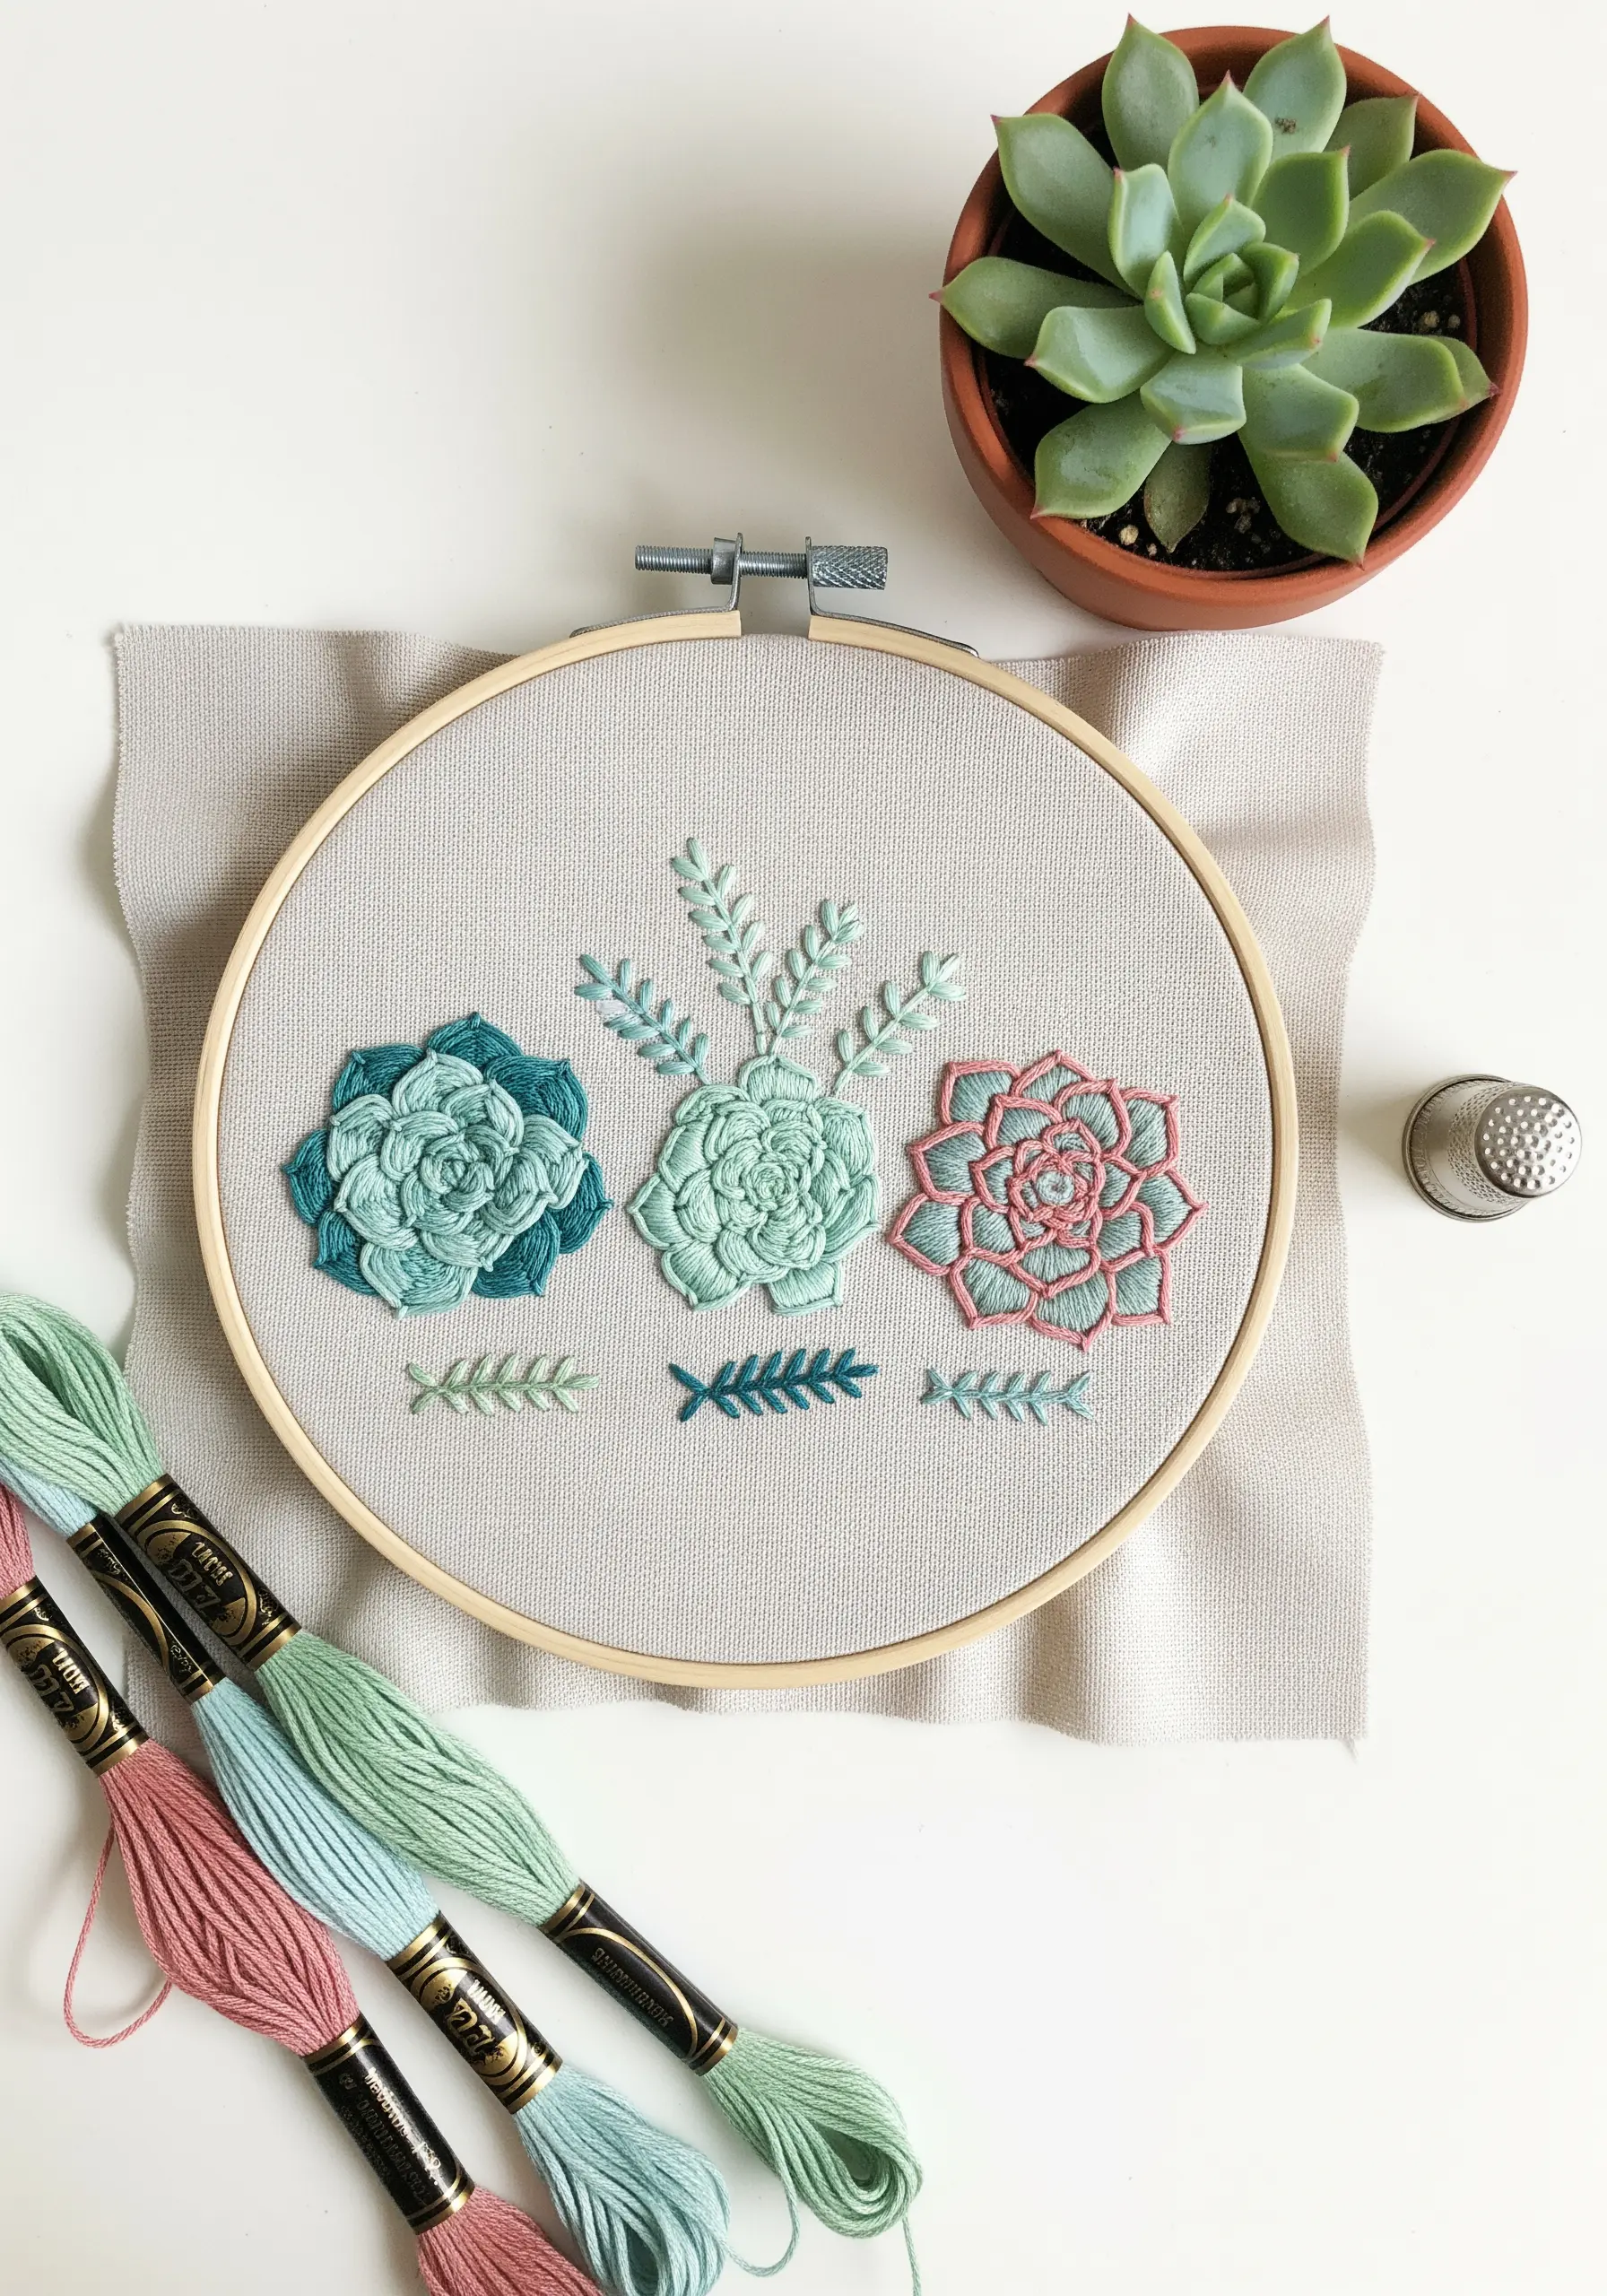
To build dimensional succulent petals, work from the outside in using woven wheel stitches or layered cast-on stitches.
Start with the outer layer of petals. Once complete, begin the next layer inside, slightly overlapping the first. This creates a natural-looking depth and shadow.
Use a slightly lighter shade of thread for the inner layers to mimic how light hits the center of the plant.
This approach allows you to create full, plush petals without relying on bulky threads, giving your botanicals a delicate, realistic structure.
7. Weave a Floral Monogram with Tiny Stitches
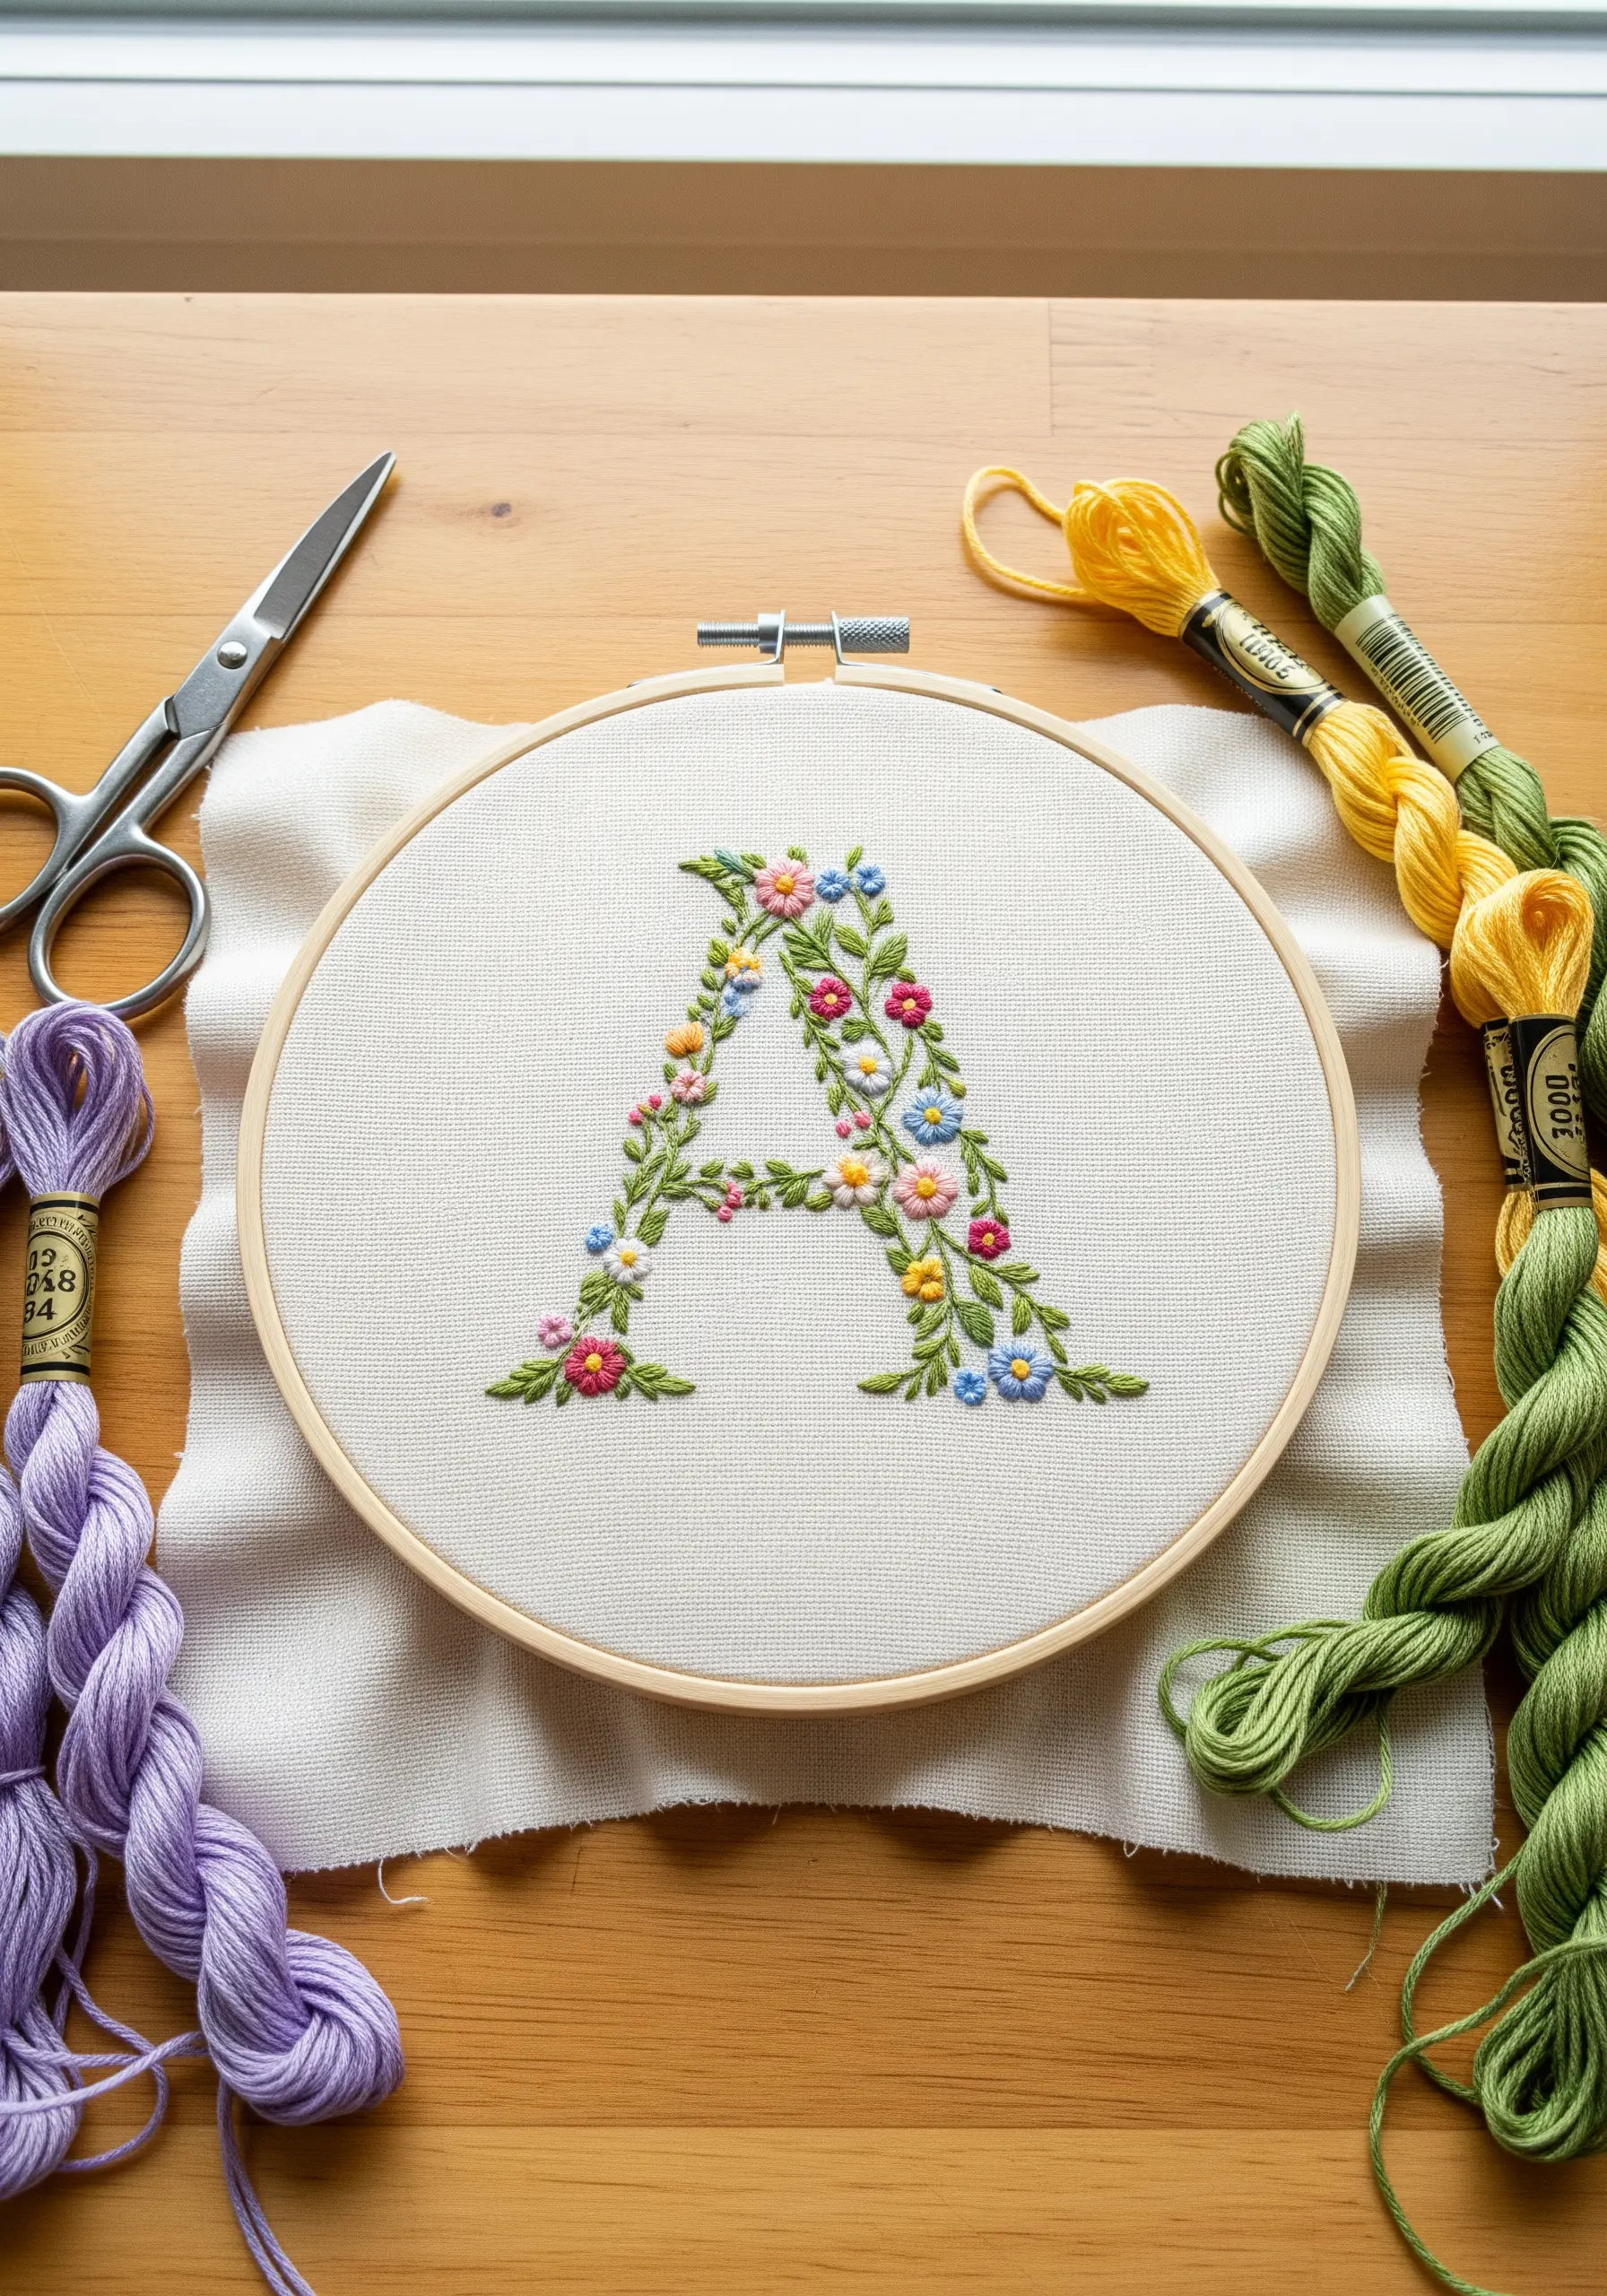
Create a delicate, garden-like initial by filling the letter’s shape with a variety of tiny floral stitches.
Use French knots for flower centers, lazy daisy stitches for petals, and simple straight stitches for leaves and stems.
Vary the size and color of your flowers to create a natural, meadow-like feel. This prevents the design from looking too repetitive.
These detailed botanical monogram embroidery ideas transform a simple letter into a personal piece of art.
8. Add Playful Dimension with Scattered Knots
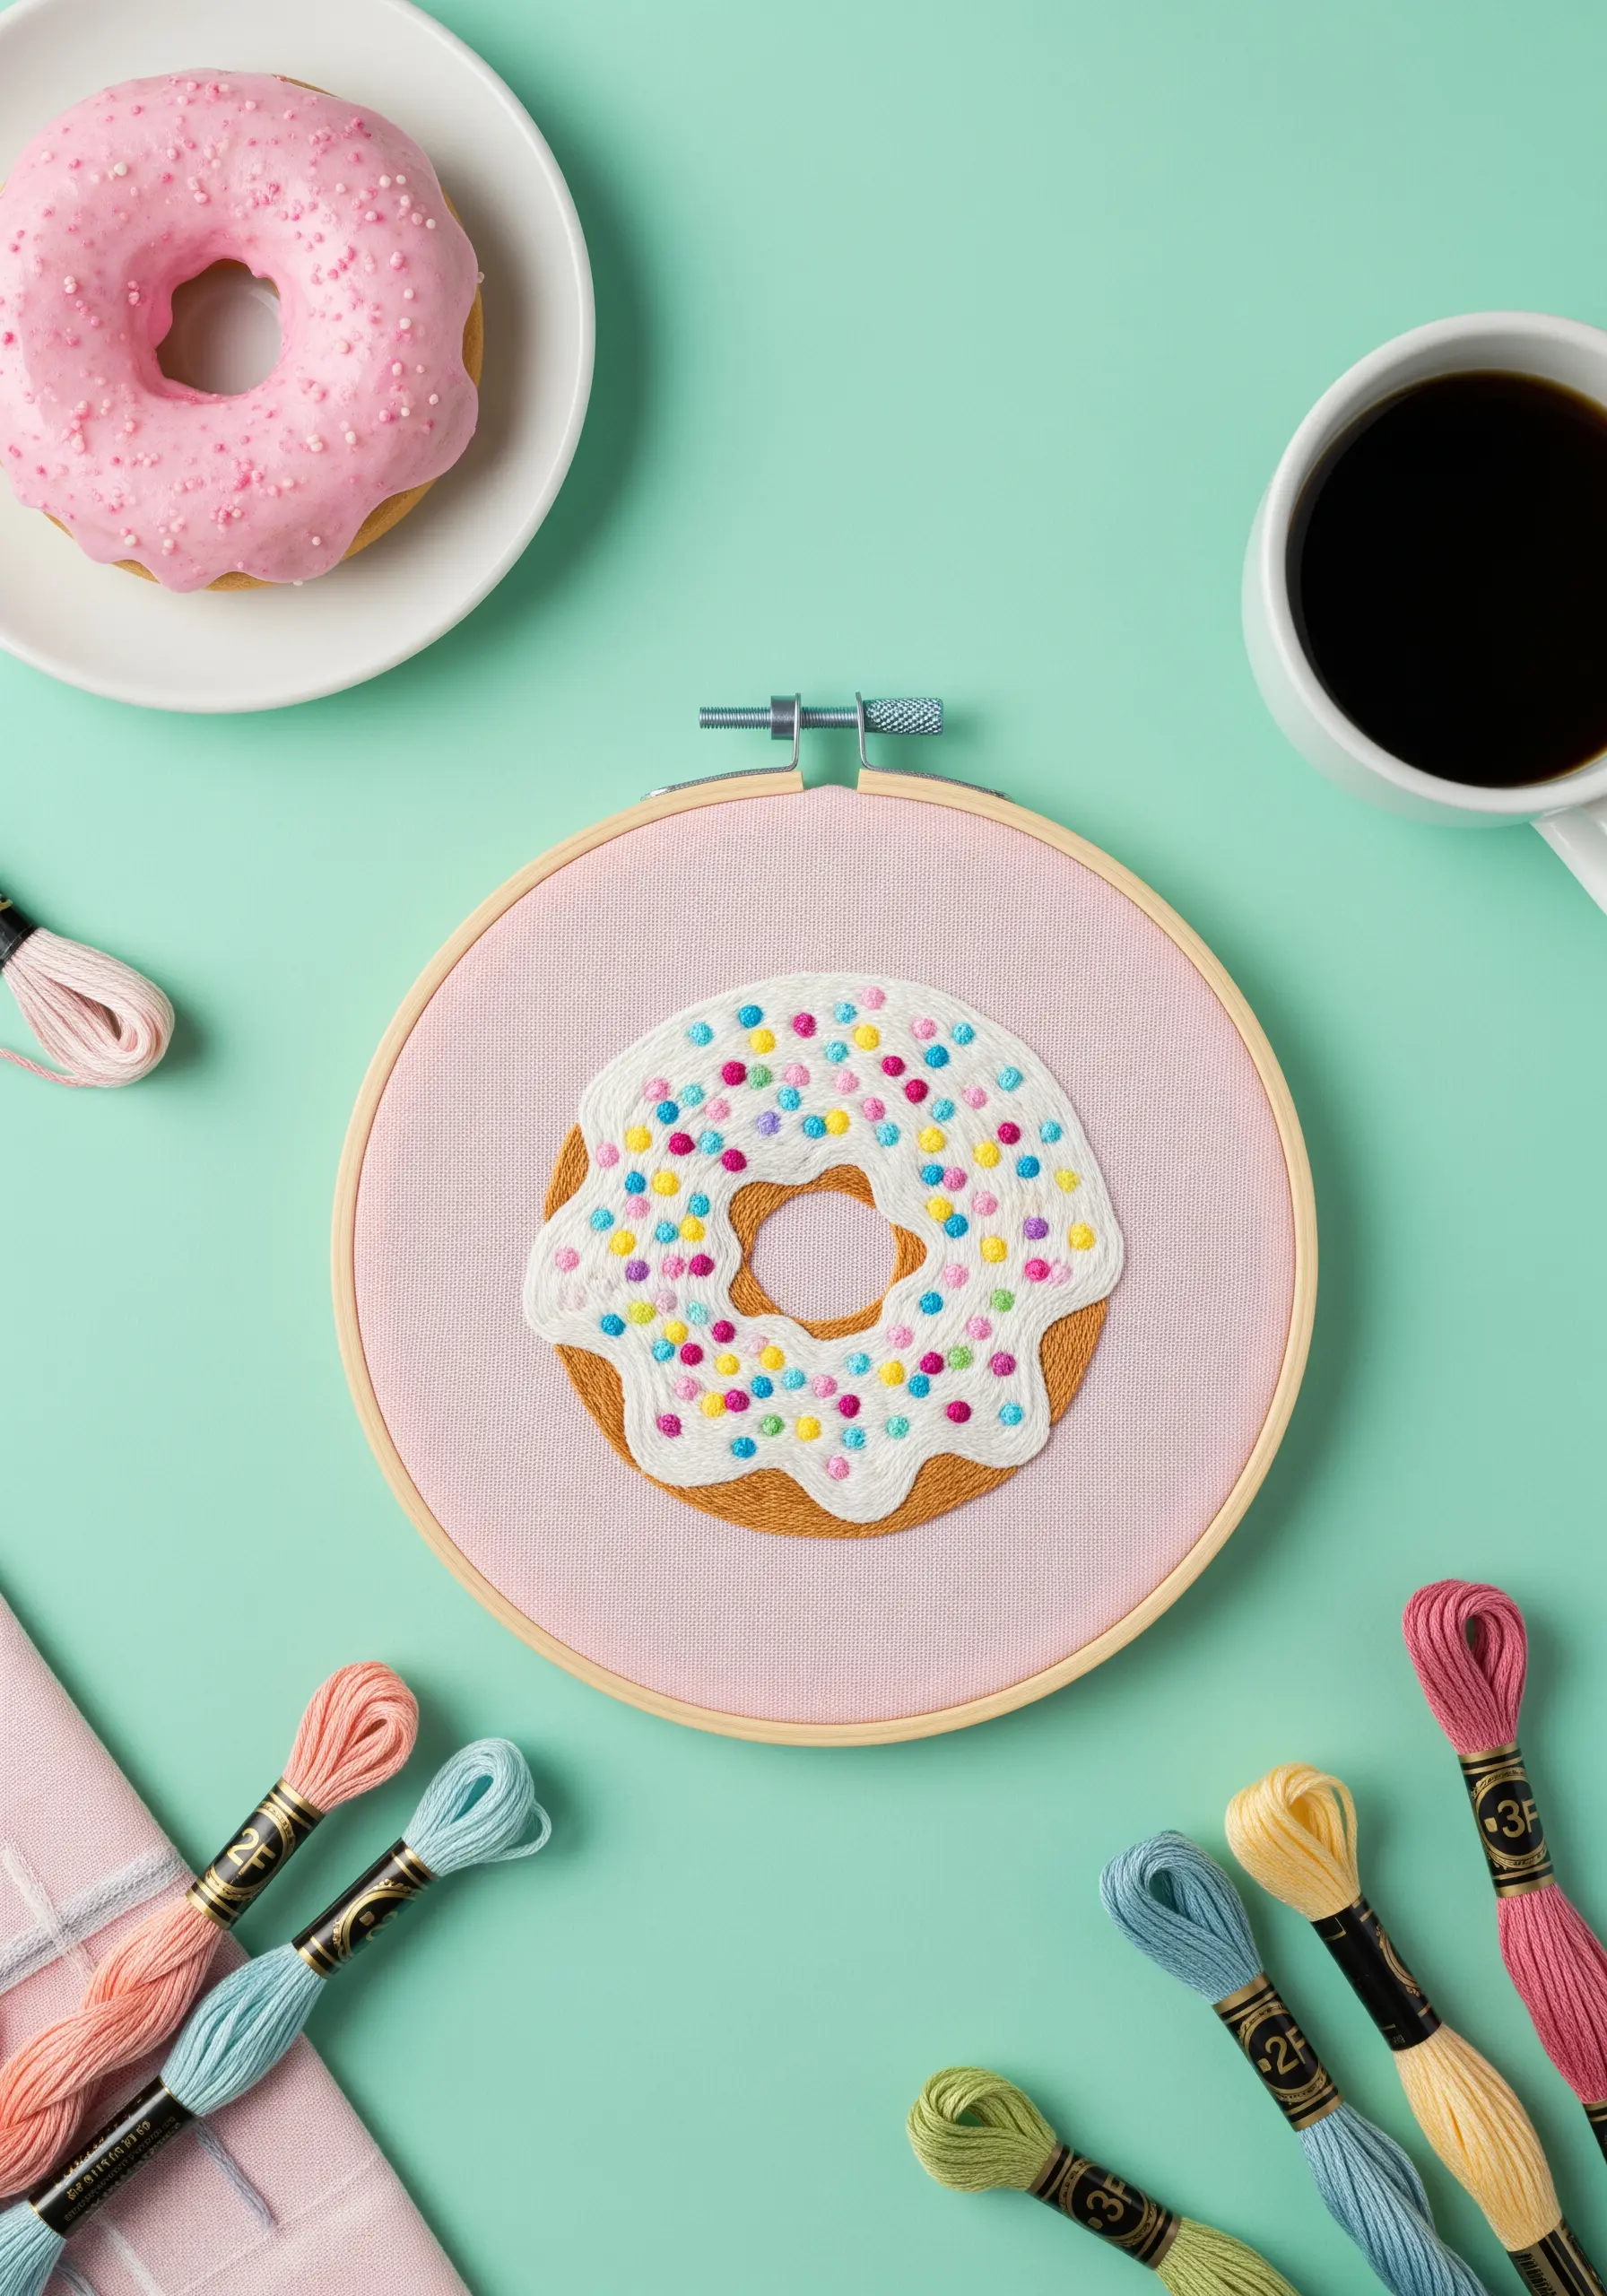
To create the look of sprinkles on an embroidered donut, use a combination of French knots and straight stitches.
Scatter multi-colored French knots across the icing for a classic round sprinkle effect. Use single, short straight stitches for long sprinkles.
Stitch the knots first, then fill in the surrounding icing area with satin stitch. This helps the knots sit on top of the surface, making them pop.
This project is a perfect way to experiment with dessert and tea theme table linen motifs in a fun, modern way.
9. Define Shapes with Color Blocking
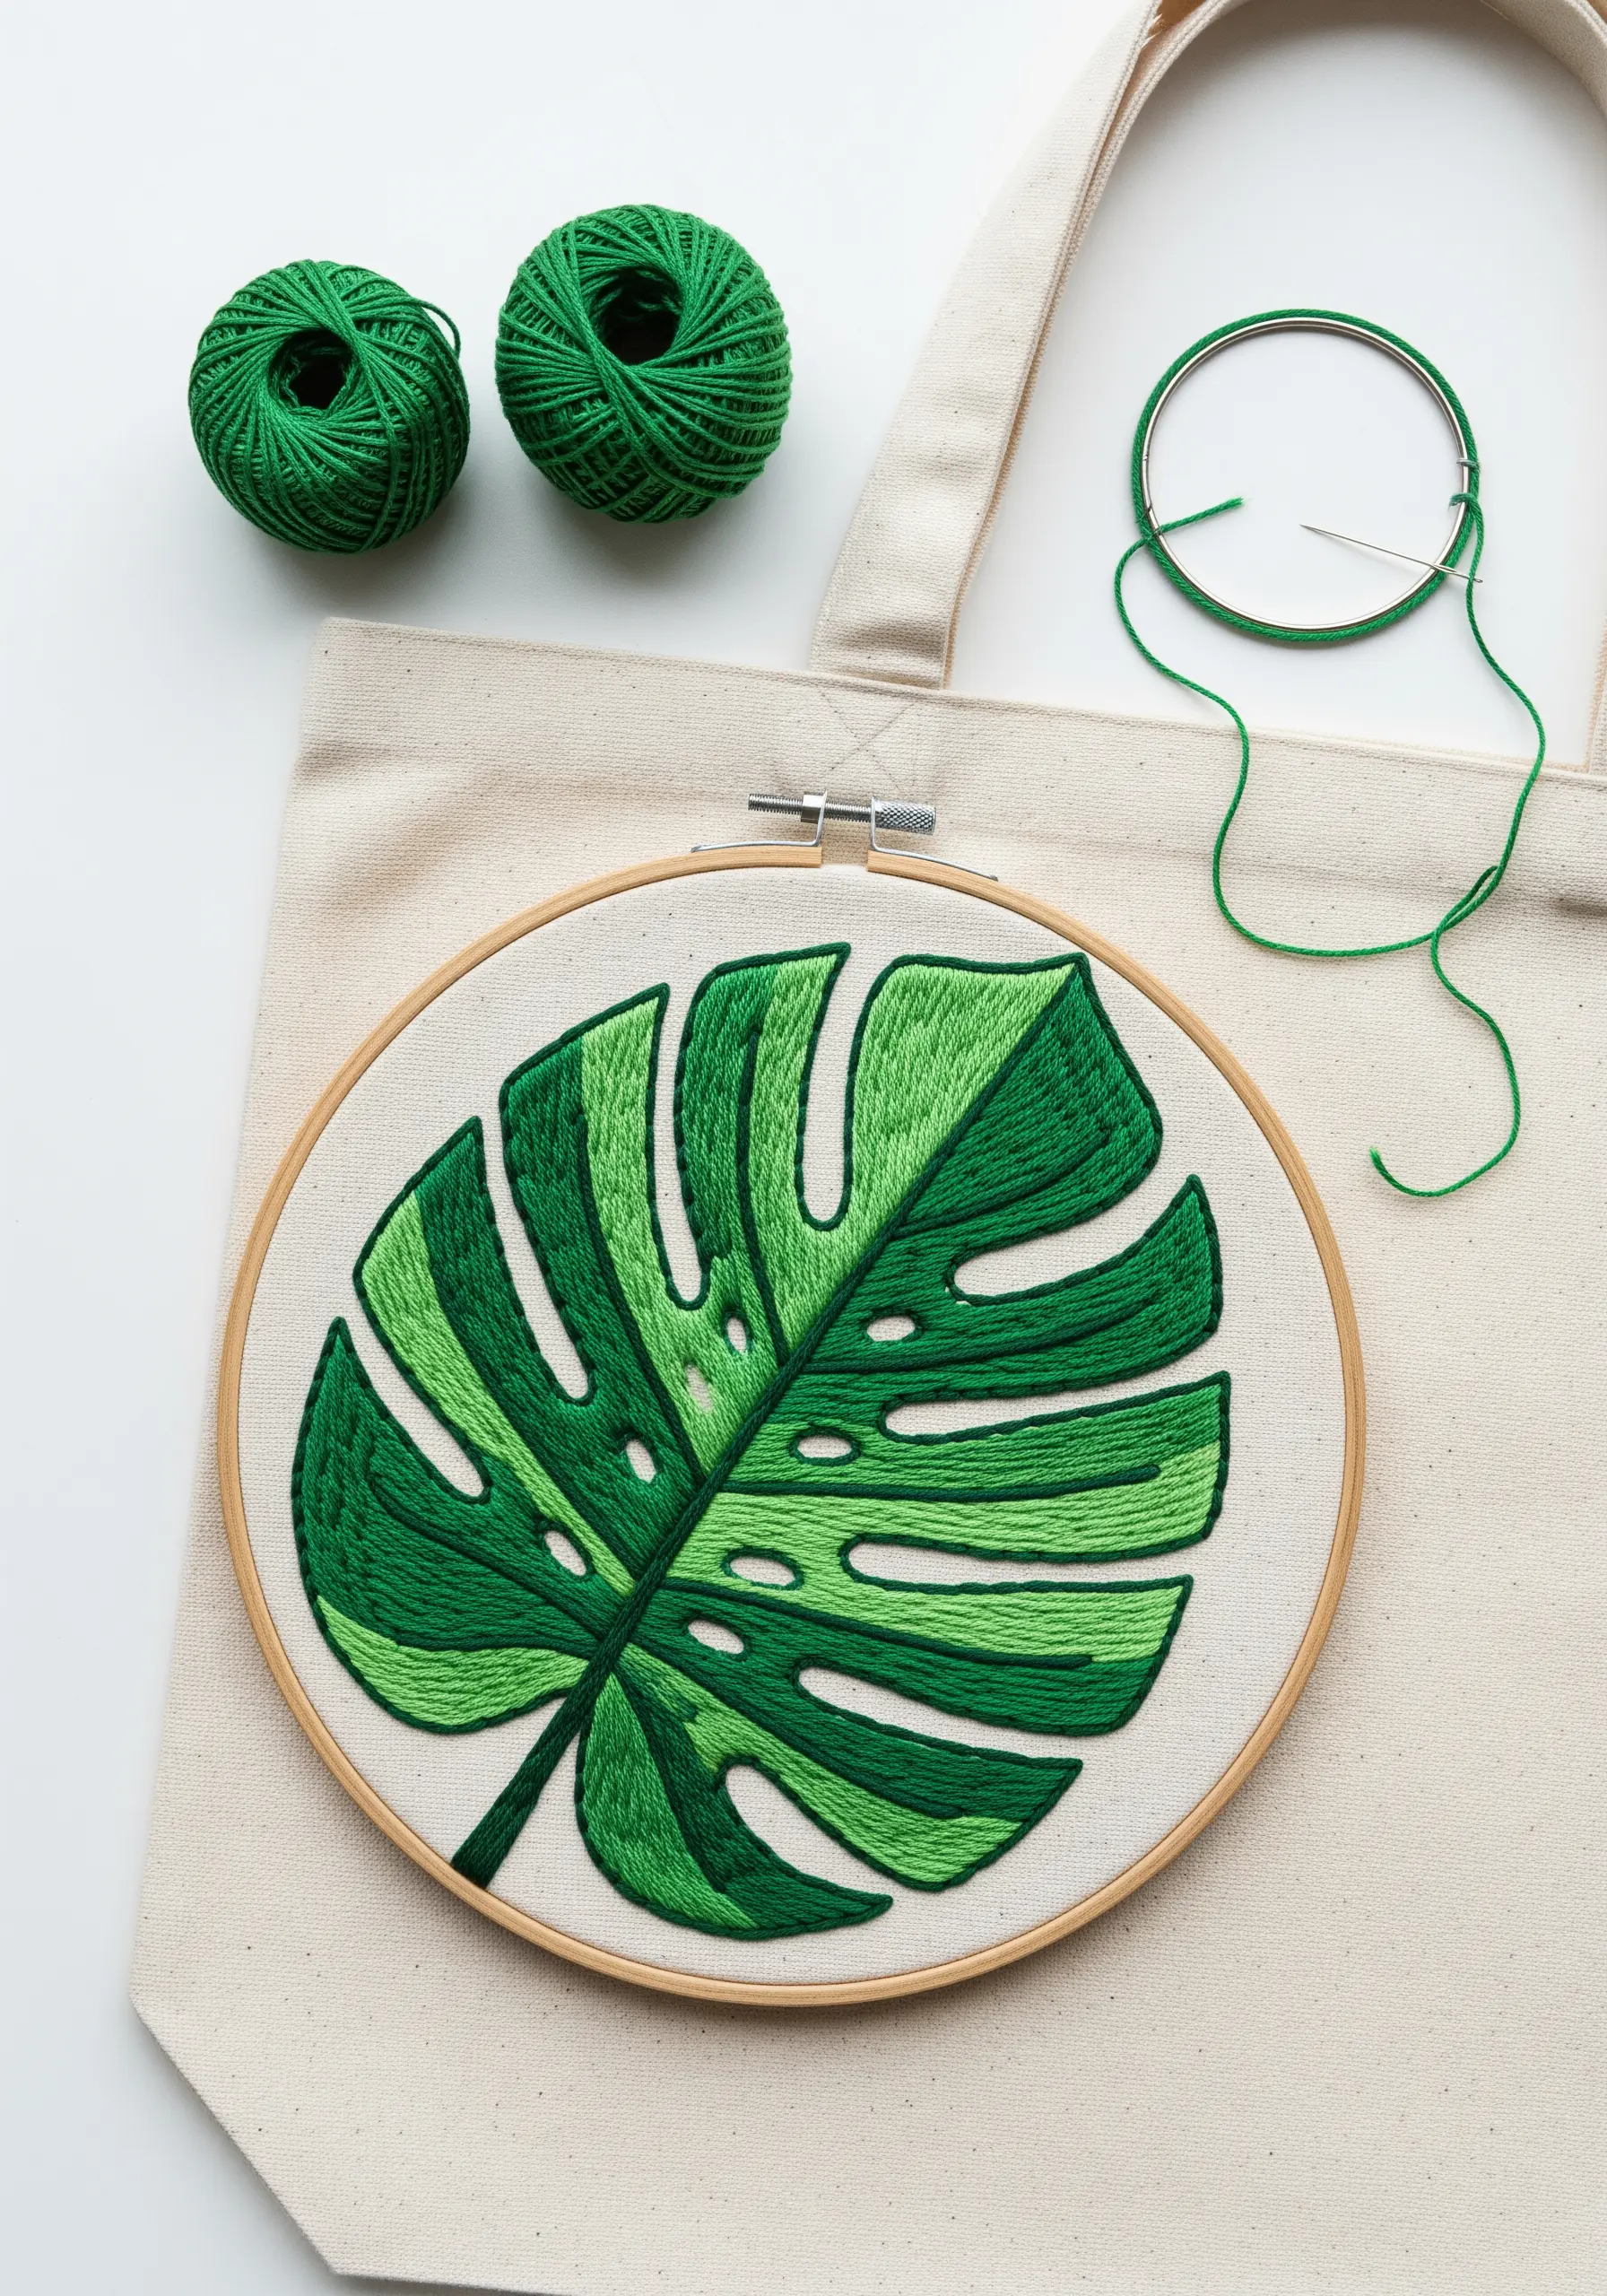
For a bold, graphic monstera leaf, use color blocking with satin stitch instead of intricate shading.
Divide the leaf into distinct sections and assign a different shade of green to each one. This creates a modern, stylized look.
Keep your satin stitches parallel within each section, but change their direction from one section to the next. This subtle shift in angle will catch the light differently and add sophisticated visual interest.
This technique is central to many modern houseplant embroidery motifs you can stitch on a tote bag or wall art.
10. Create Quick Patches with Satin Stitch
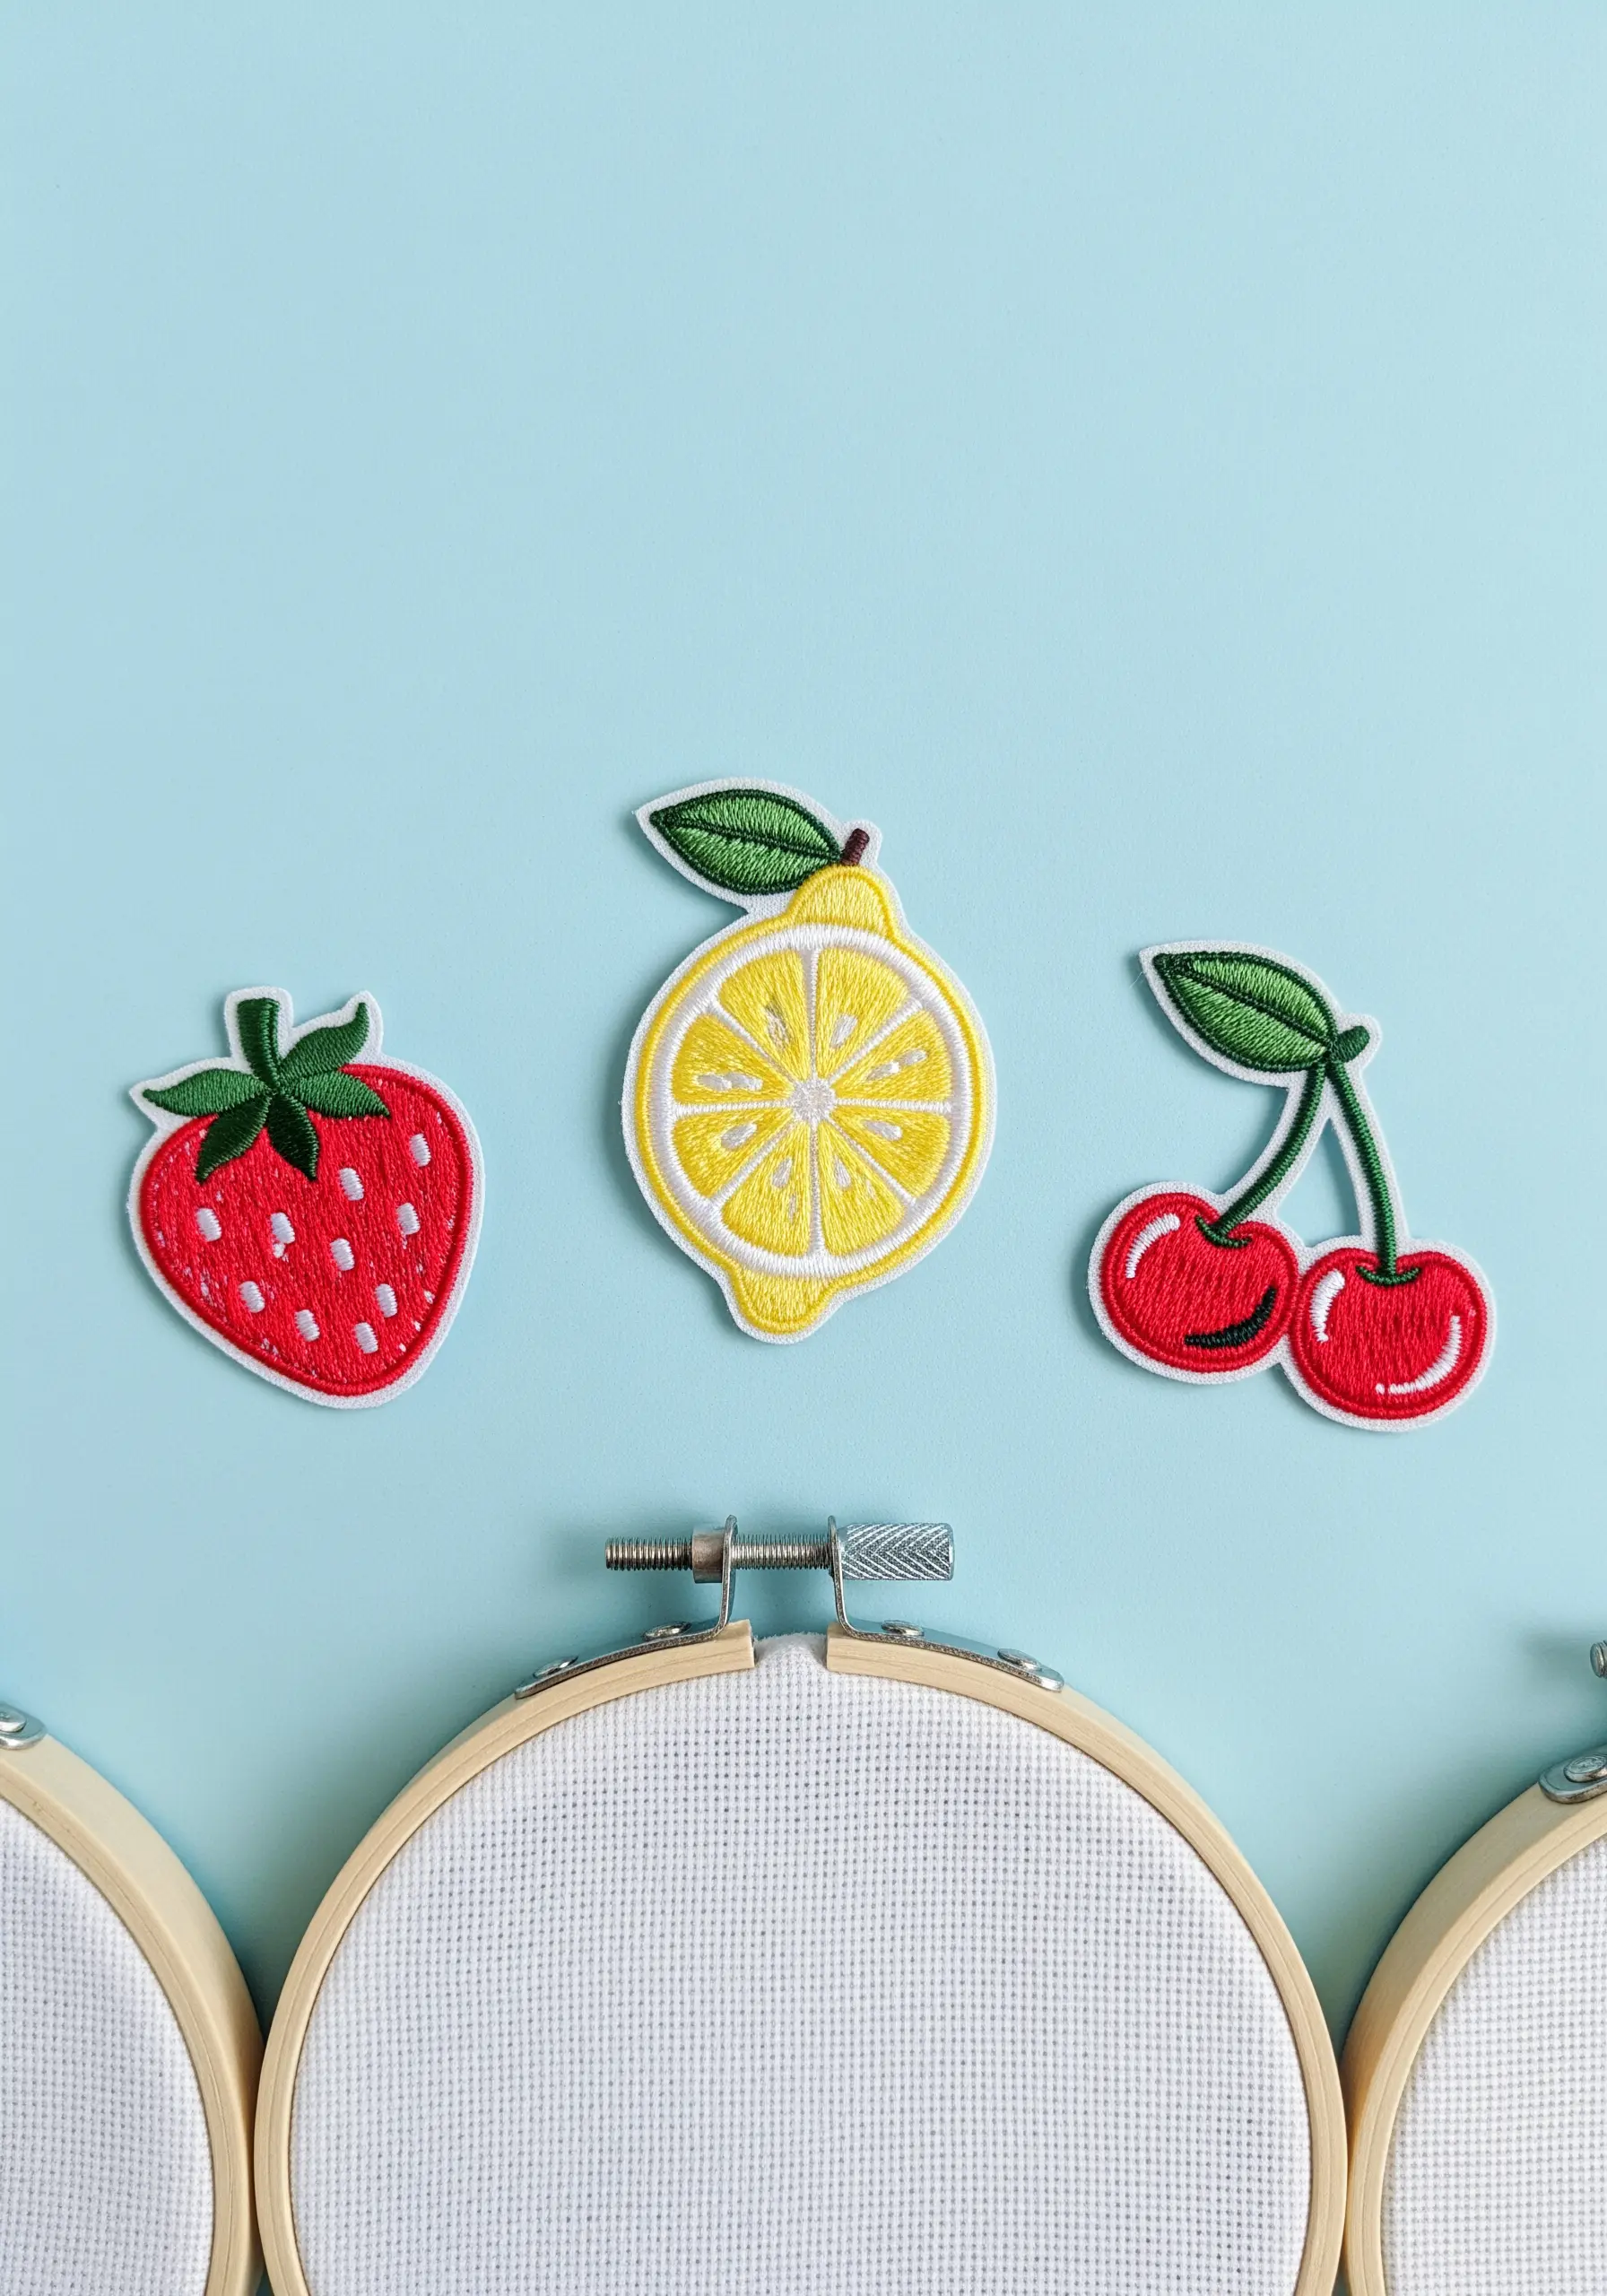
Make a set of durable, vibrant patches using a dense satin stitch on a sturdy fabric like felt or canvas.
To create a clean, raised border, outline your design with a split stitch first. Then, lay your satin stitches over it, covering the outline completely.
After stitching, carefully cut out the shape, leaving a small fabric margin. You can then fold this margin under and secure it with fabric glue or iron-on adhesive.
Minimal fruit and plant motifs are perfect for this technique, adding a custom touch to any garment.
11. Stitch a Geometric Design with Thread Painting
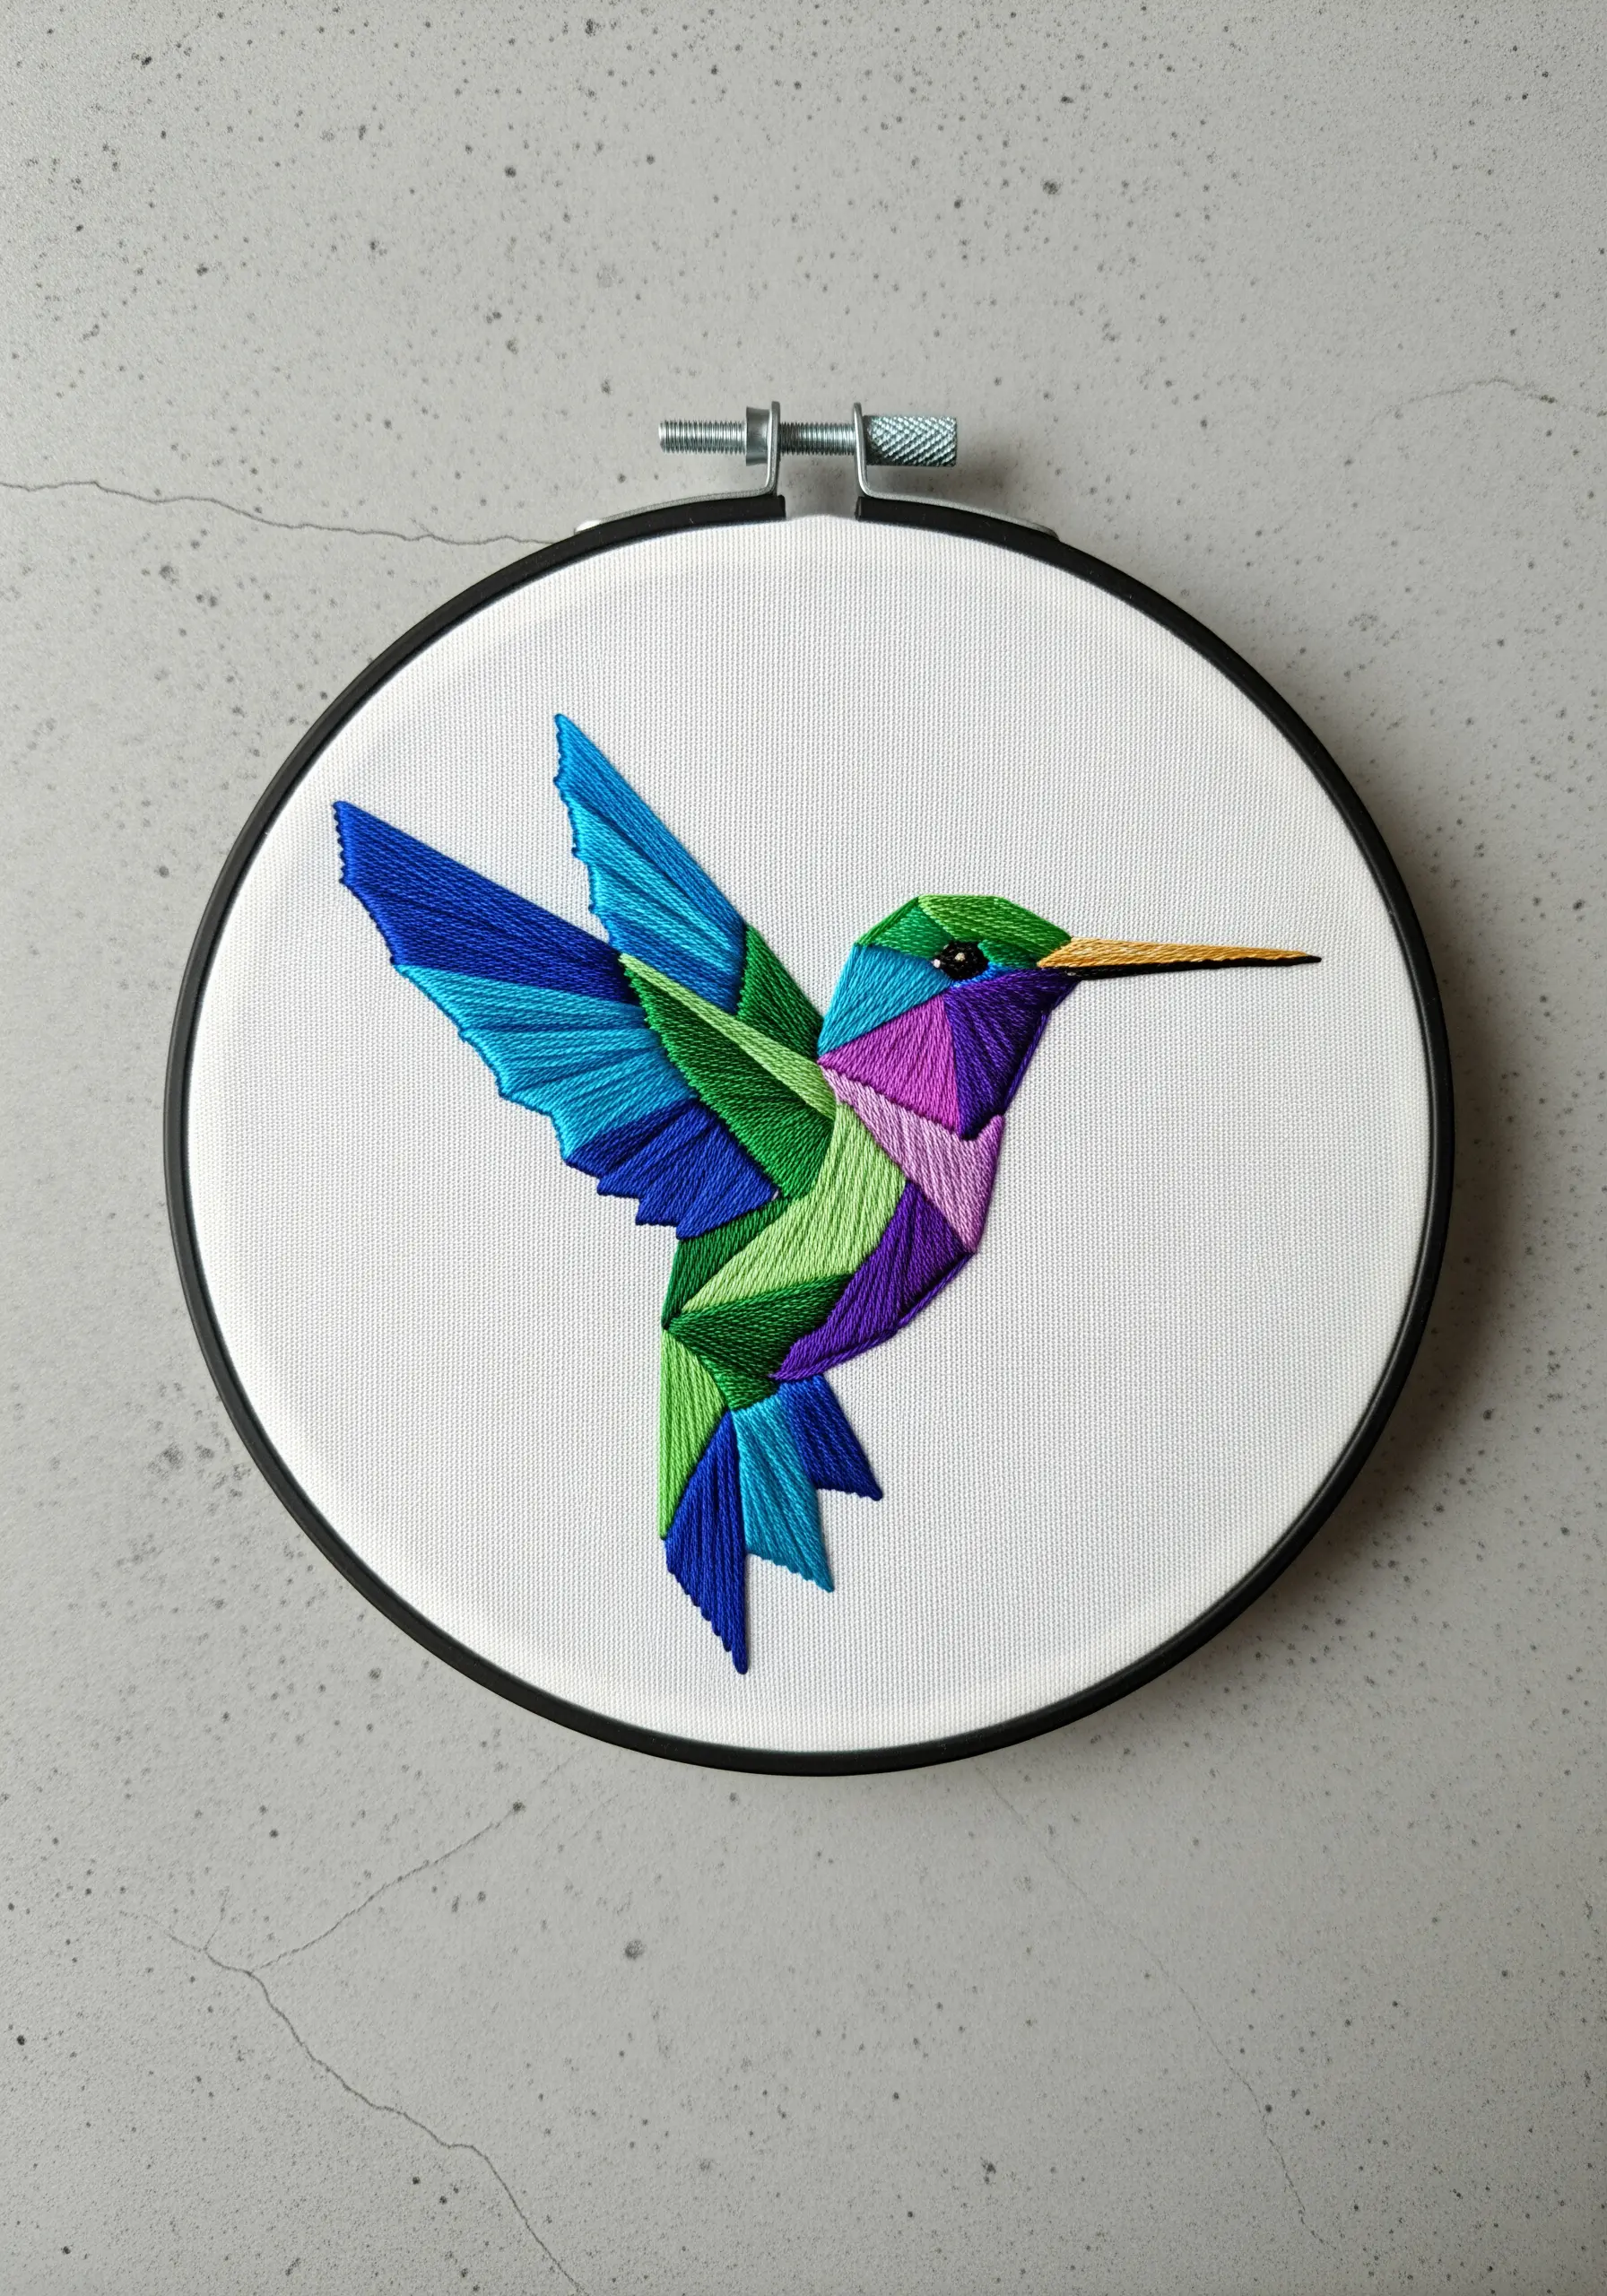
To achieve this sharp, faceted look, divide your subject into small geometric shapes and fill each one with satin stitch.
Vary the direction of your satin stitches in adjacent shapes. This causes the light to reflect differently, creating the illusion of planes and angles.
Use a single strand of floss to blend colors seamlessly within each small section, creating subtle gradients that enhance the three-dimensional effect.
This method combines the precision of geometry with the softness of abstract color blend stitch ideas for a stunning result.
12. Suggest Form with Delicate Outline Stitches
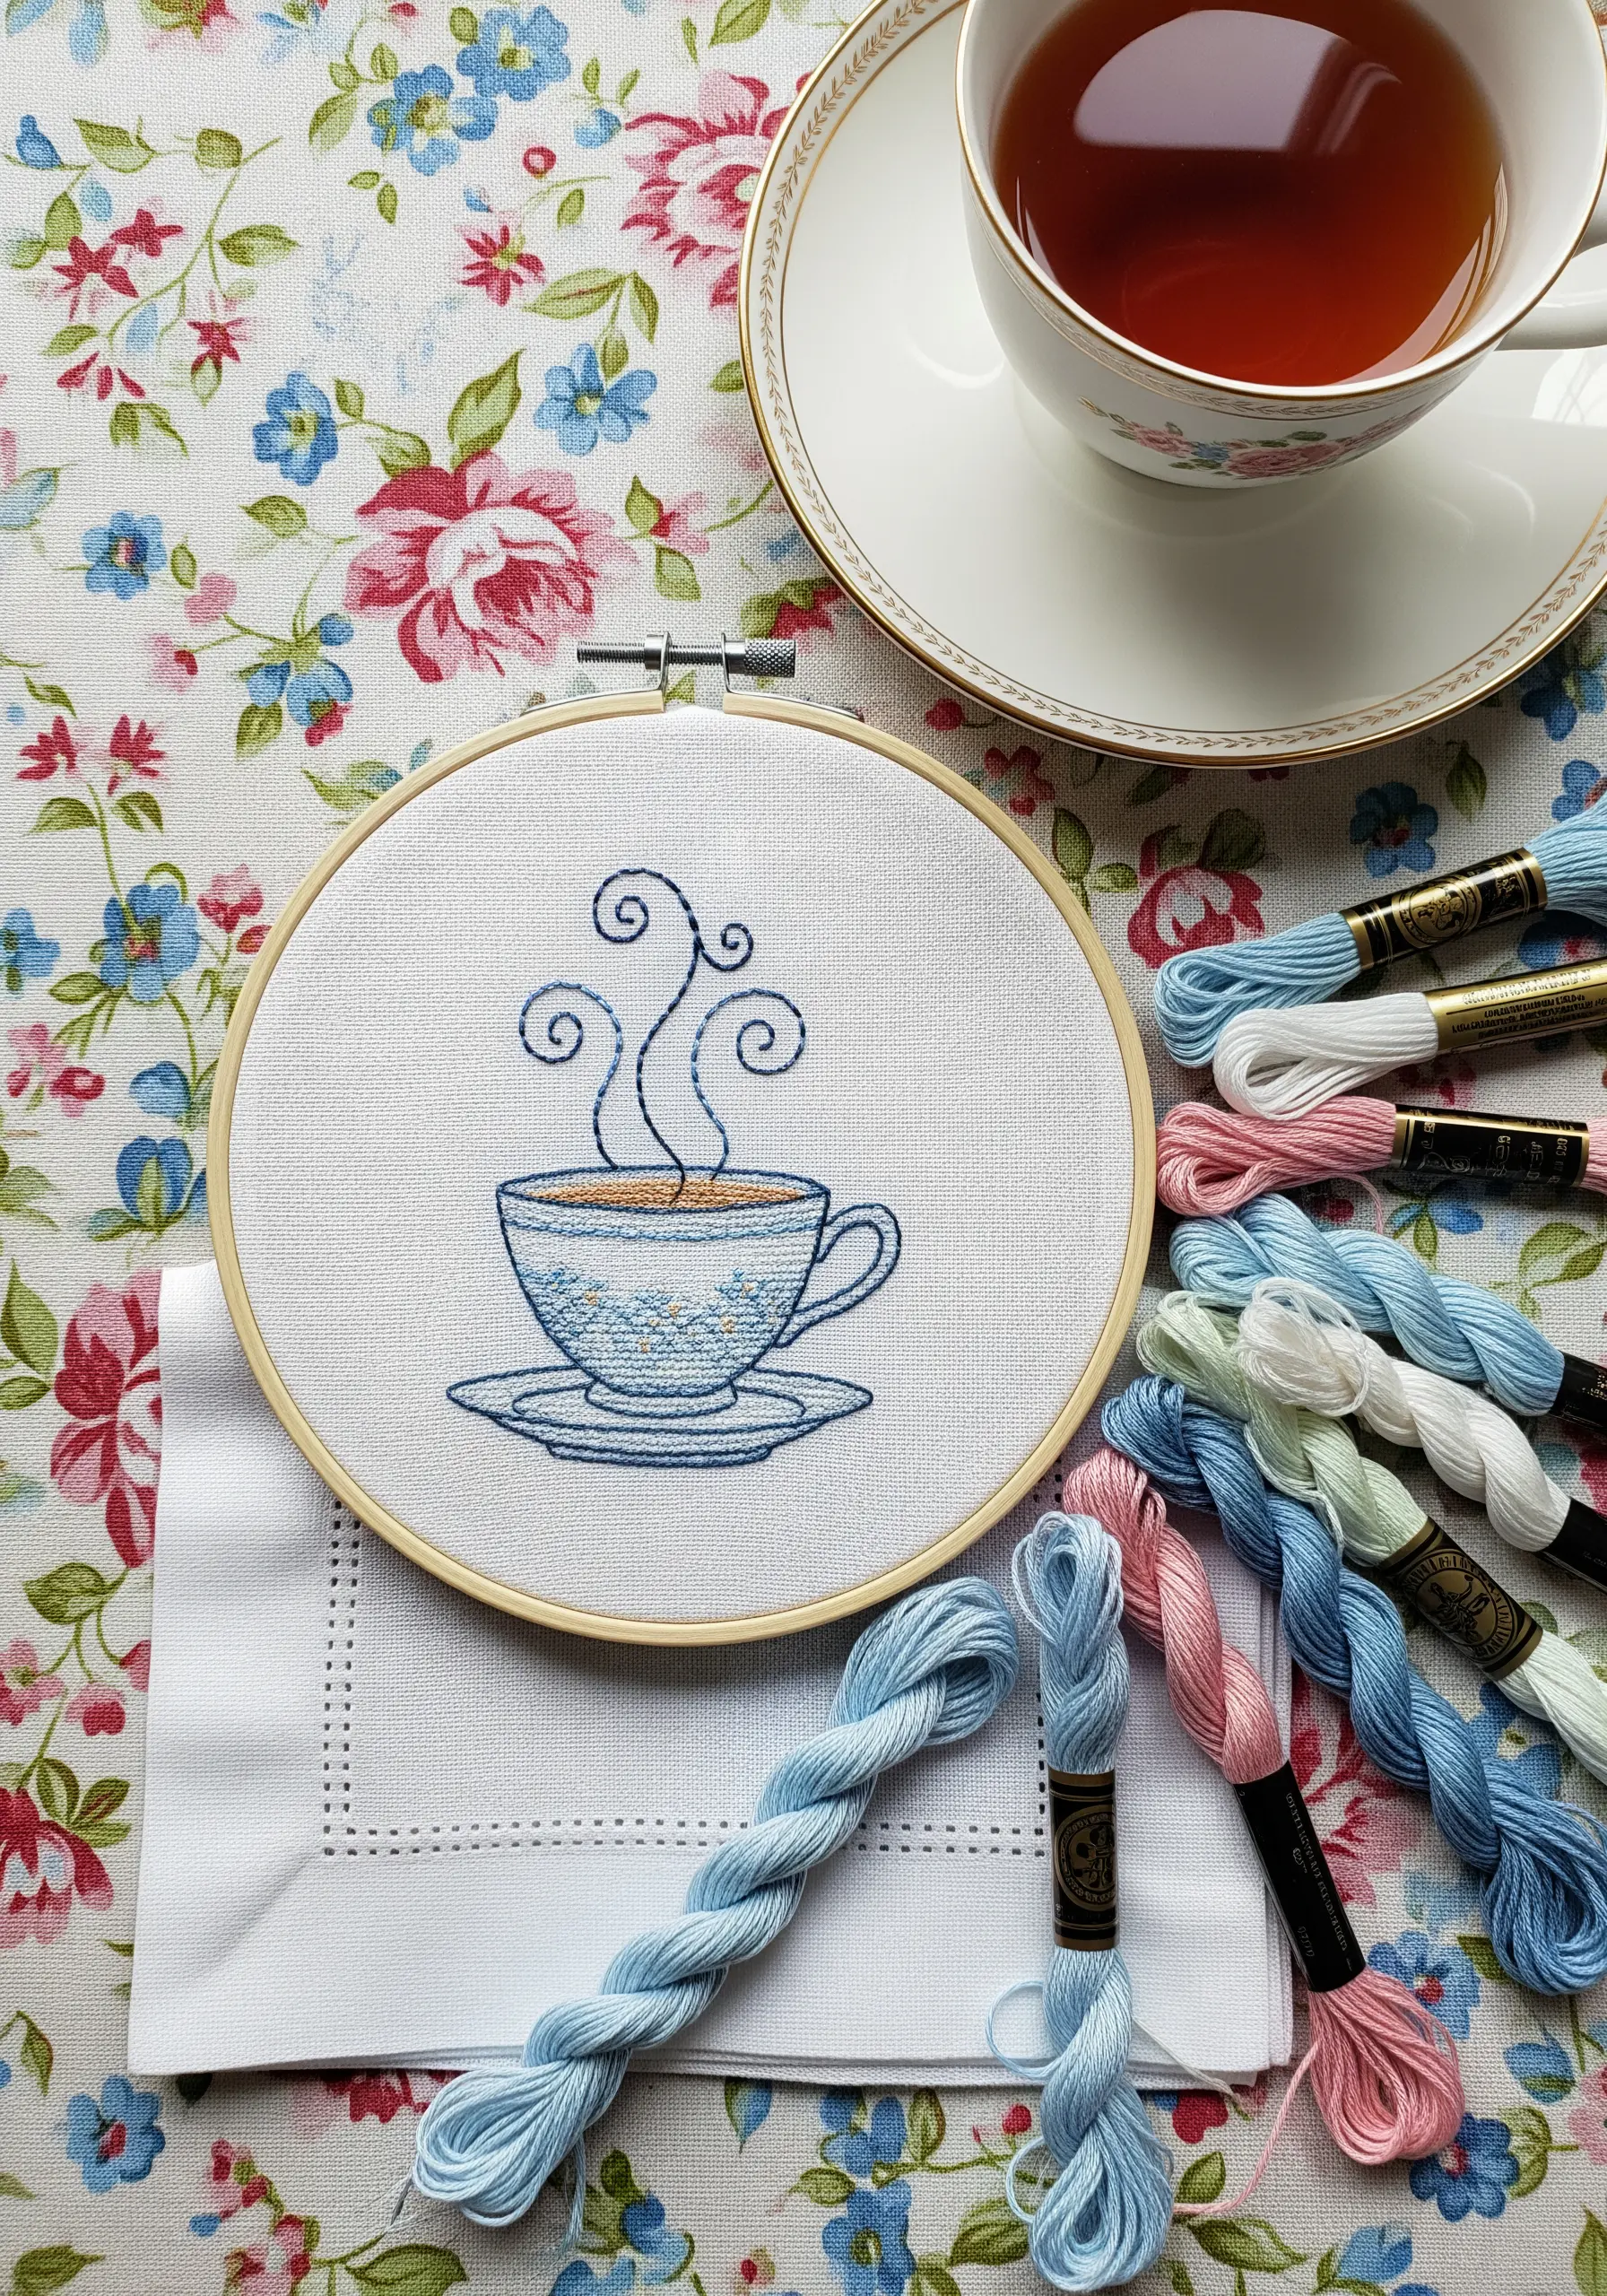
You don’t need to fill a shape to give it life. A simple outline using backstitch or stem stitch can create an elegant, minimalist design.
To add subtle texture and shading, vary the density of your stitches. Use tiny, overlapping backstitches in areas you want to appear darker or more solid.
For the steam, use a looser, more curved stitch like a whipped backstitch to convey a sense of movement and lightness.
These are the kinds of minimal embroidery patterns that look harder than they are, relying on precision rather than complexity.
13. Build Texture in Botanicals with Granitos Stitch
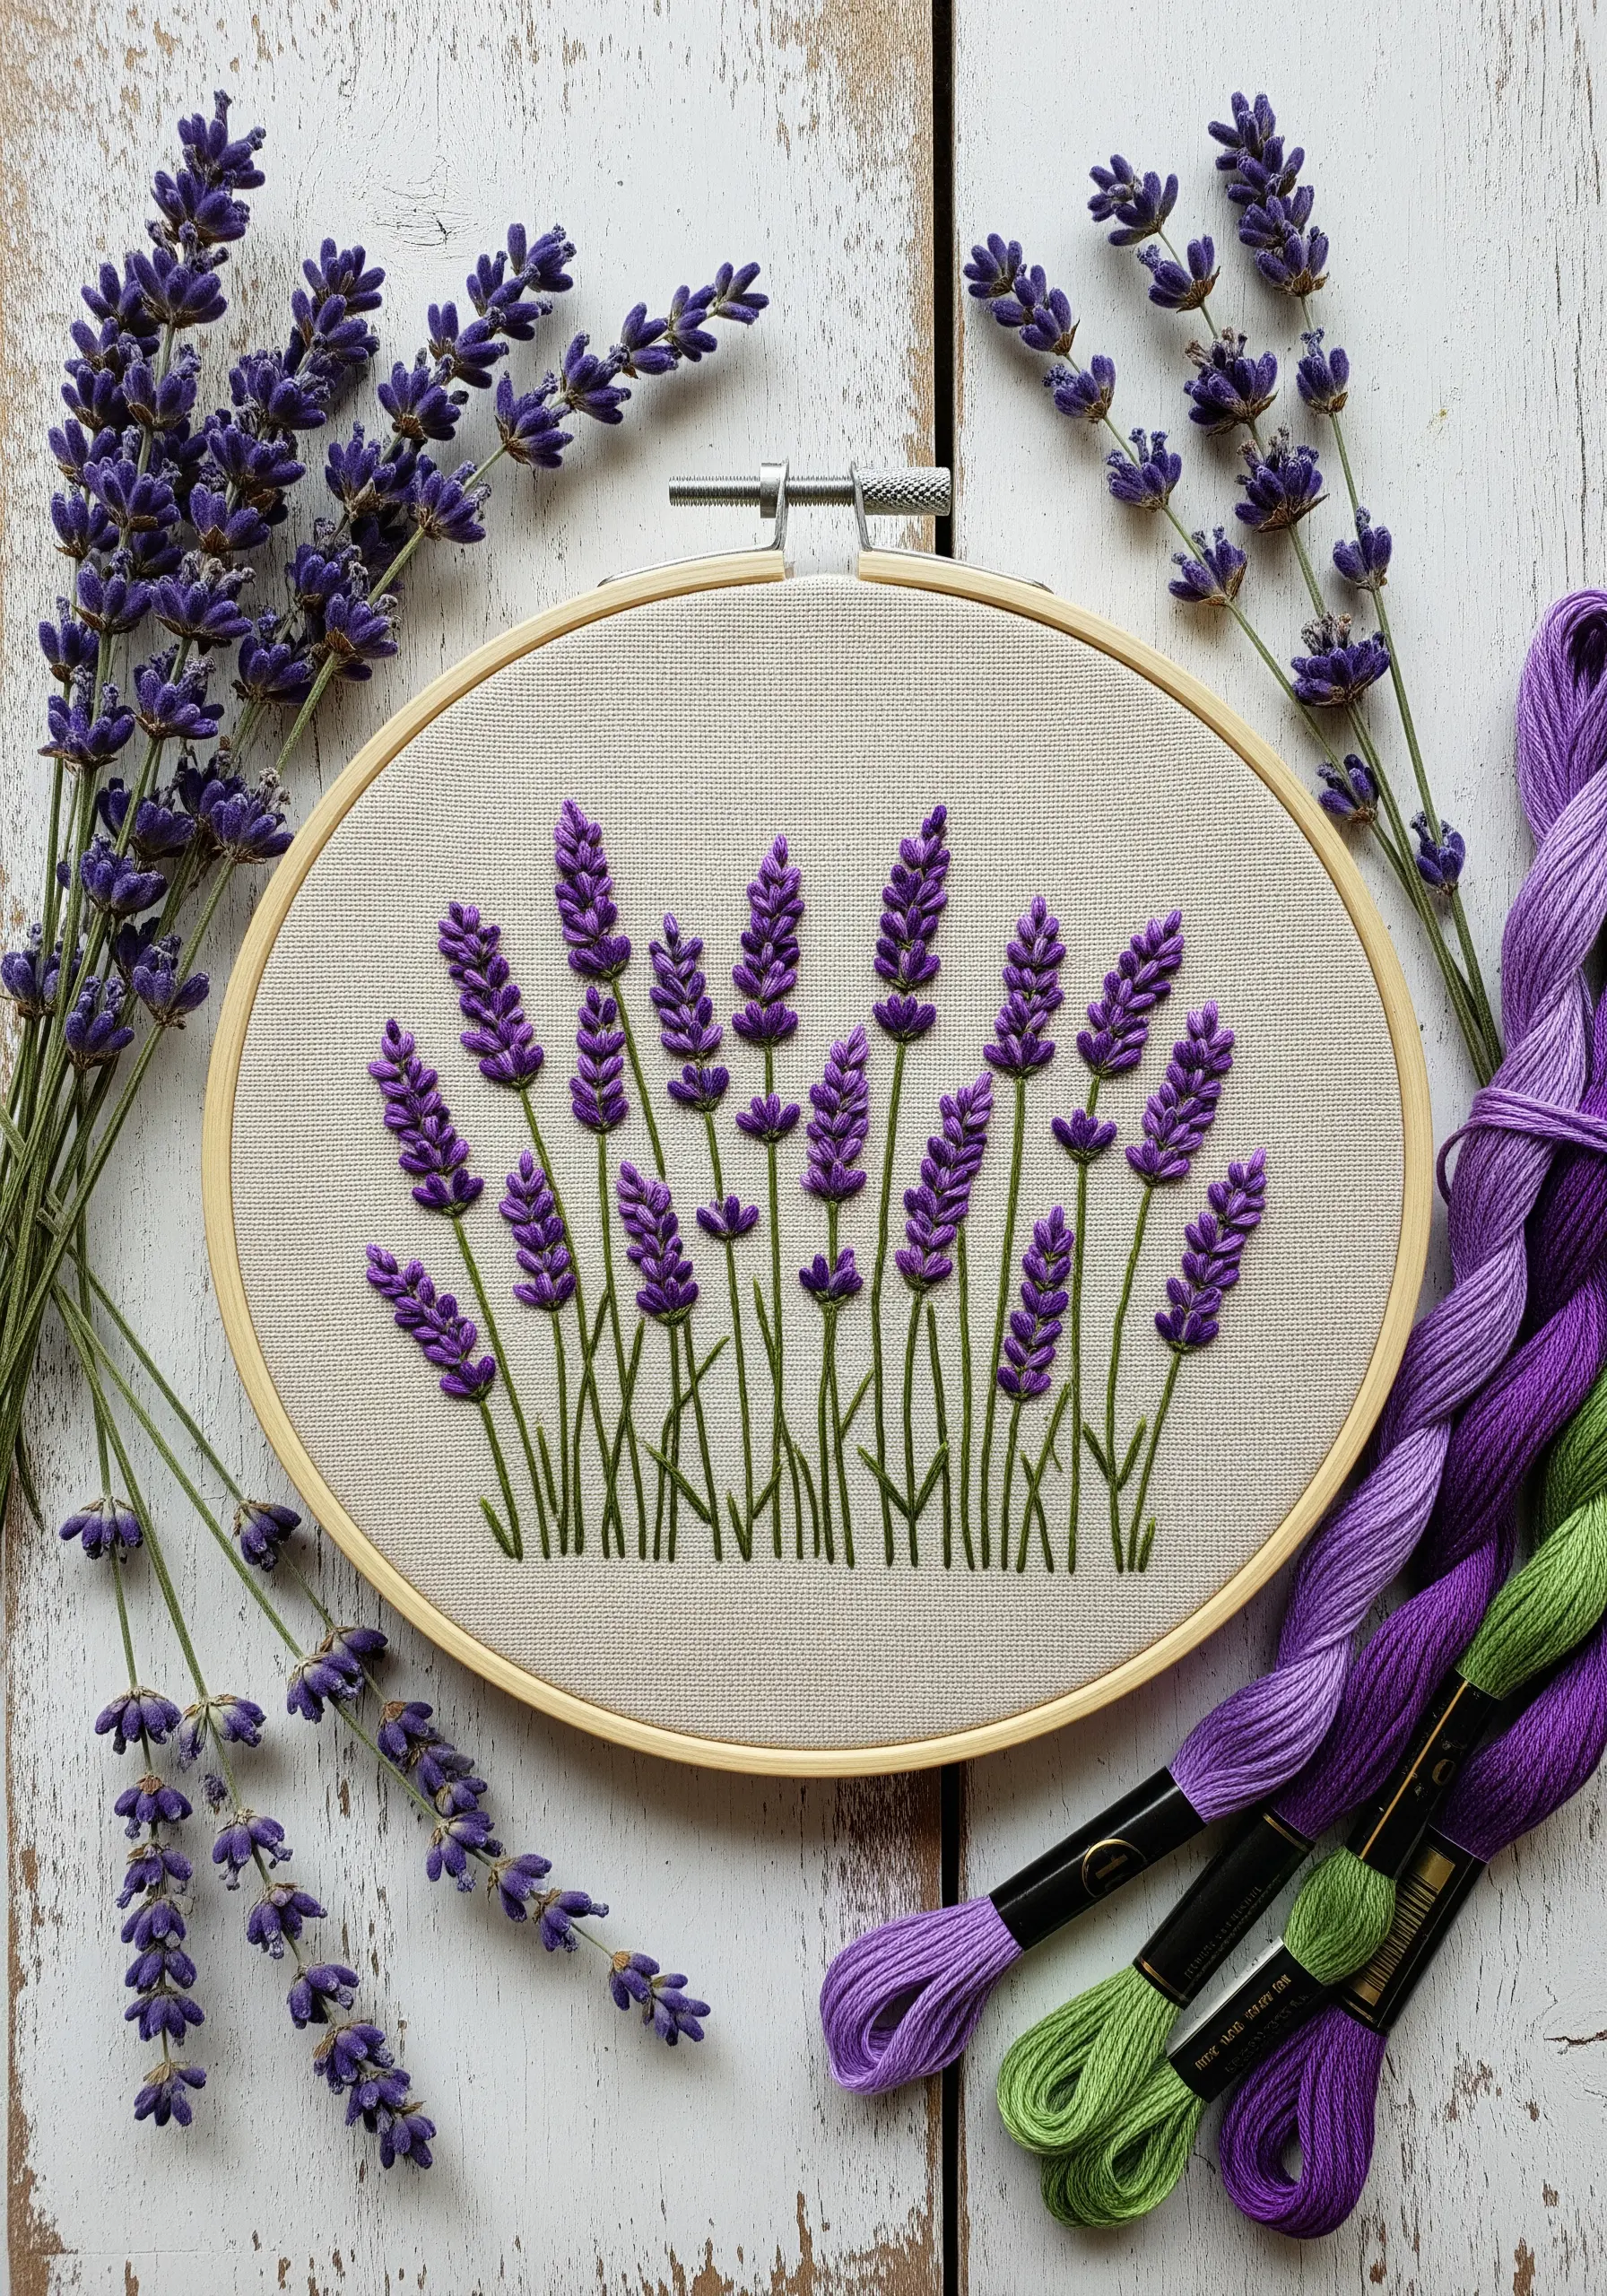
To create the puffy, textured florets of a lavender sprig, use the granitos stitch.
This stitch involves wrapping thread around two parallel straight stitches, building up a raised, oval-shaped nub that perfectly mimics a lavender bud.
Work your granitos stitches in a staggered pattern up the stem to create a natural-looking flower spike. Using two or three shades of purple will add realistic depth.
Medicinal herb embroidery designs like this are a beautiful way to bring nature indoors.
14. Achieve Polished Edges with Whipped Backstitch
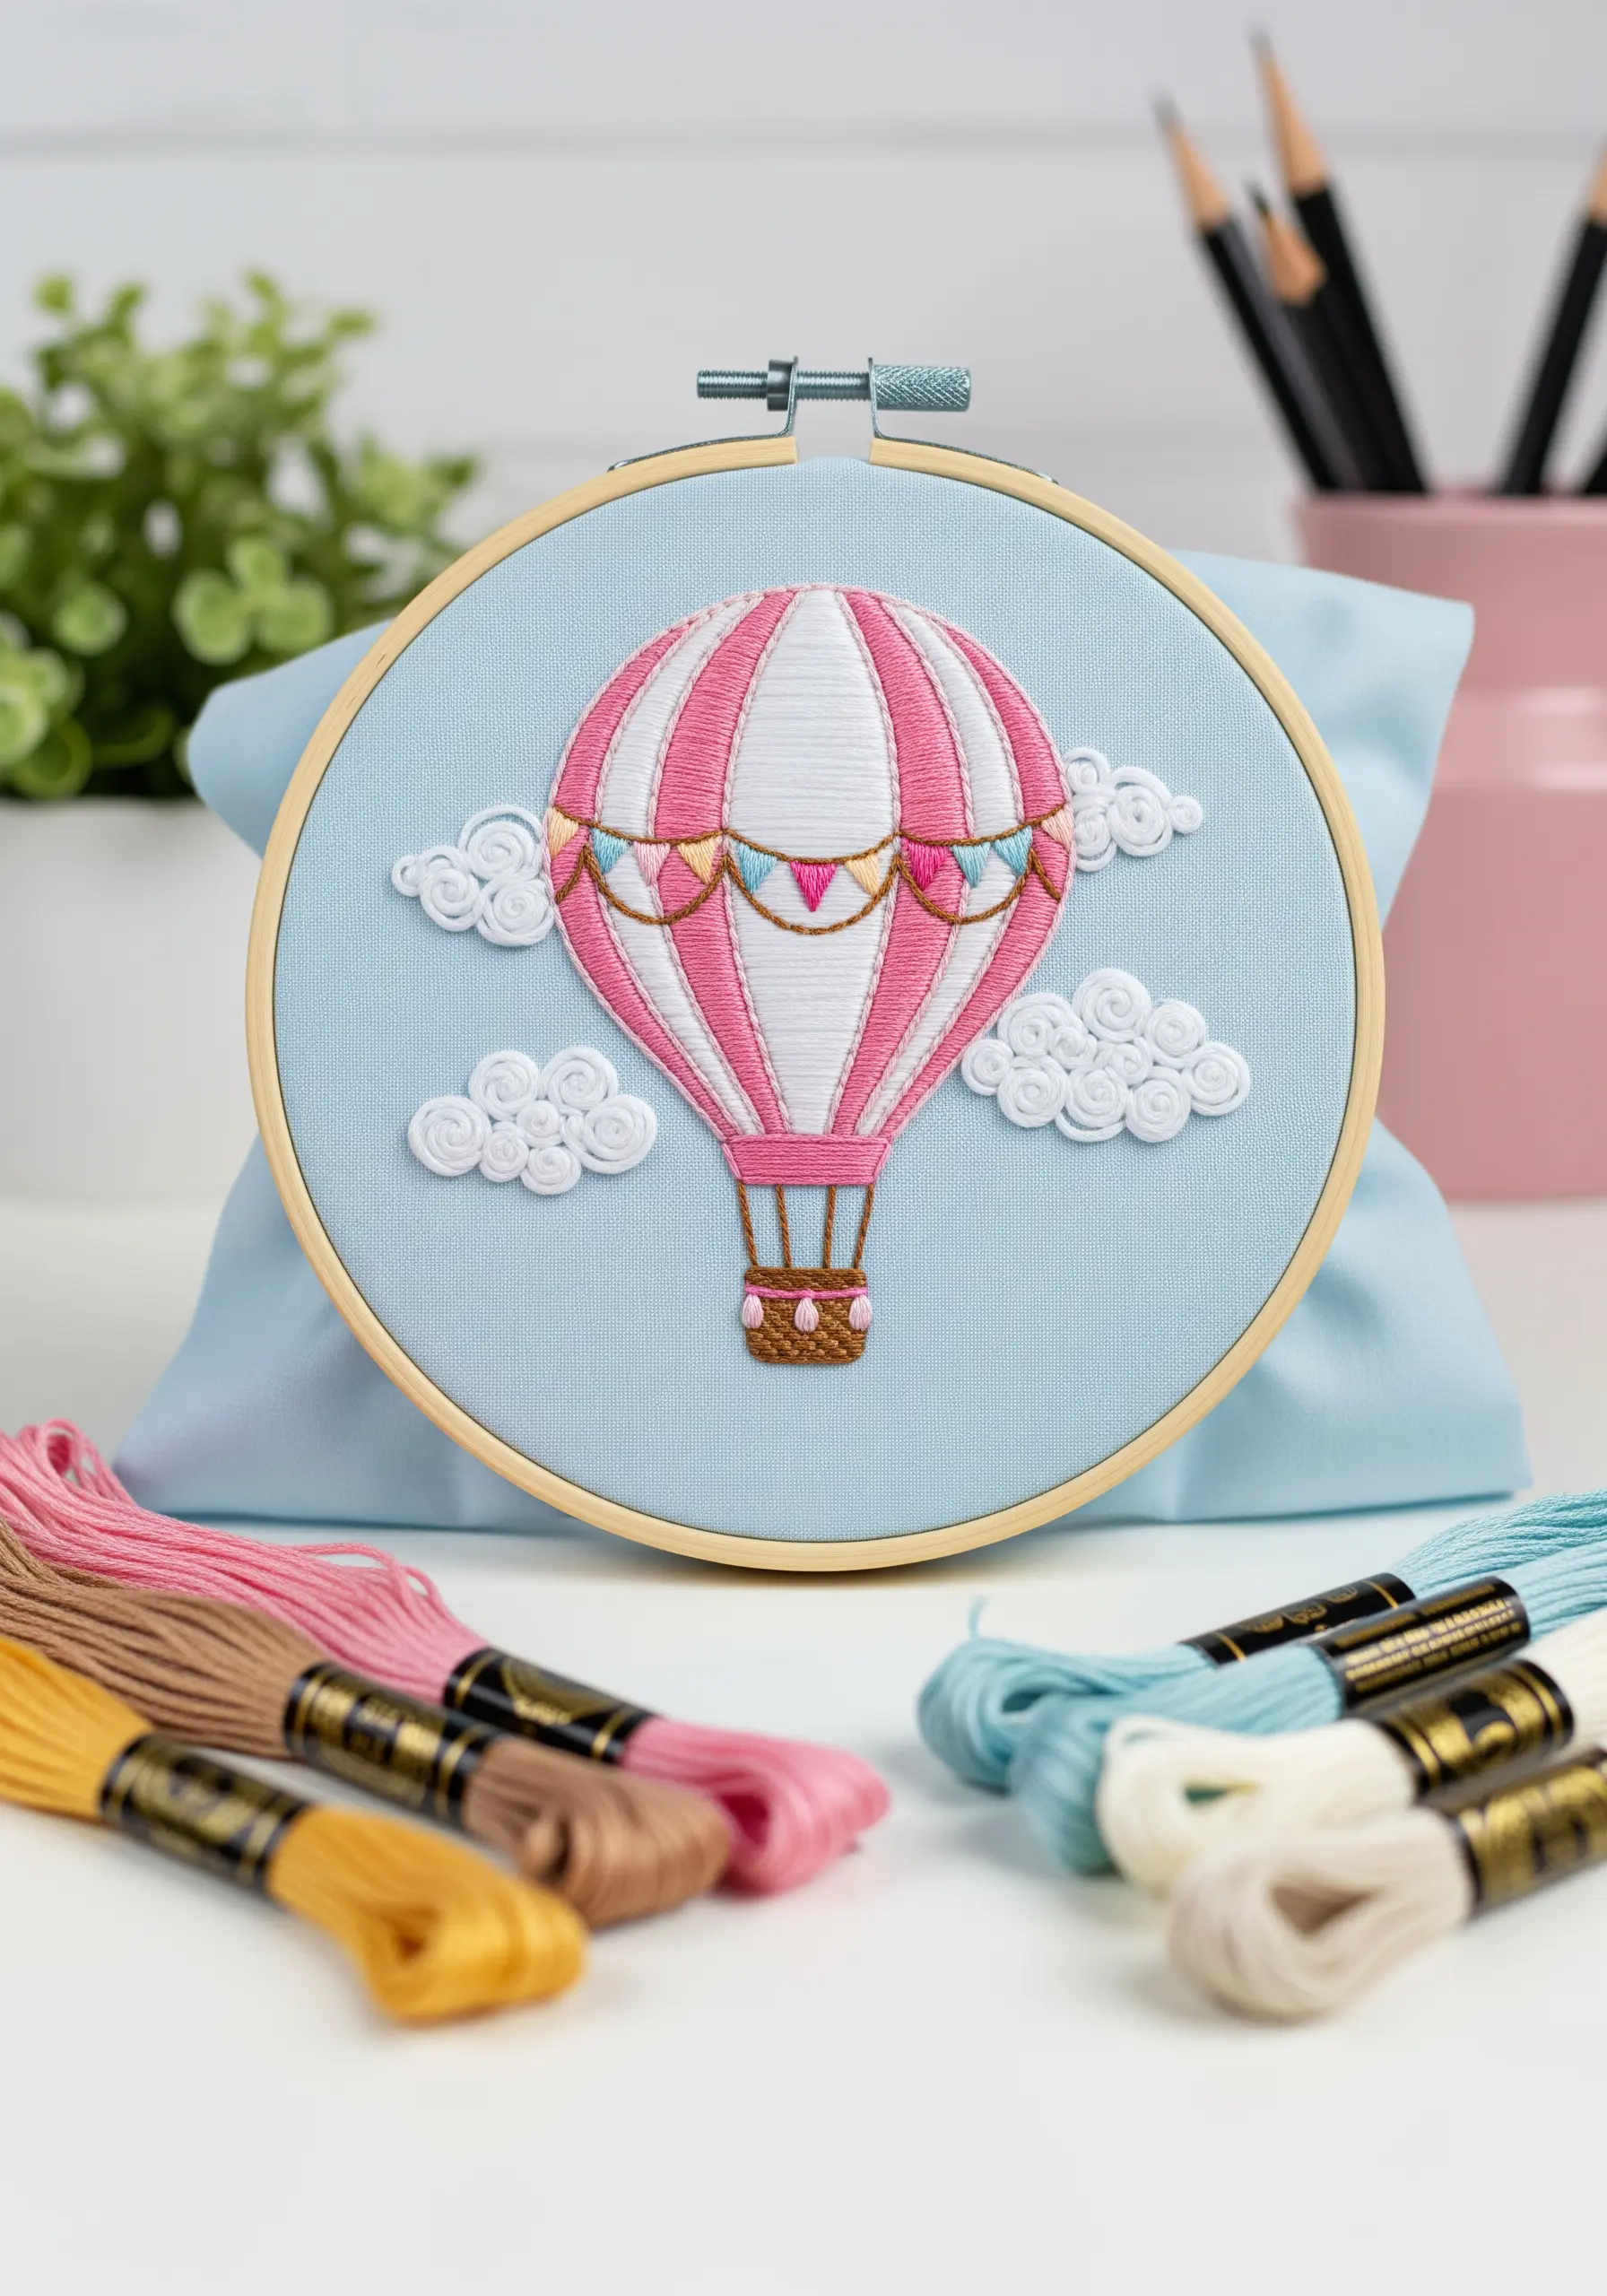
For perfectly smooth, rope-like outlines on the hot air balloon, use a whipped backstitch.
First, create a standard backstitch line. Then, using a second thread (it can be the same or a contrasting color), whip it around each backstitch without piercing the fabric.
This technique covers the gaps inherent in backstitch, resulting in a solid, raised line that looks incredibly clean—ideal for defining shapes and adding decorative details.
The puffy clouds are made with clusters of French knots, providing a soft texture that contrasts with the balloon’s sharp lines.
15. Paint a Landscape with Directional Satin Stitch
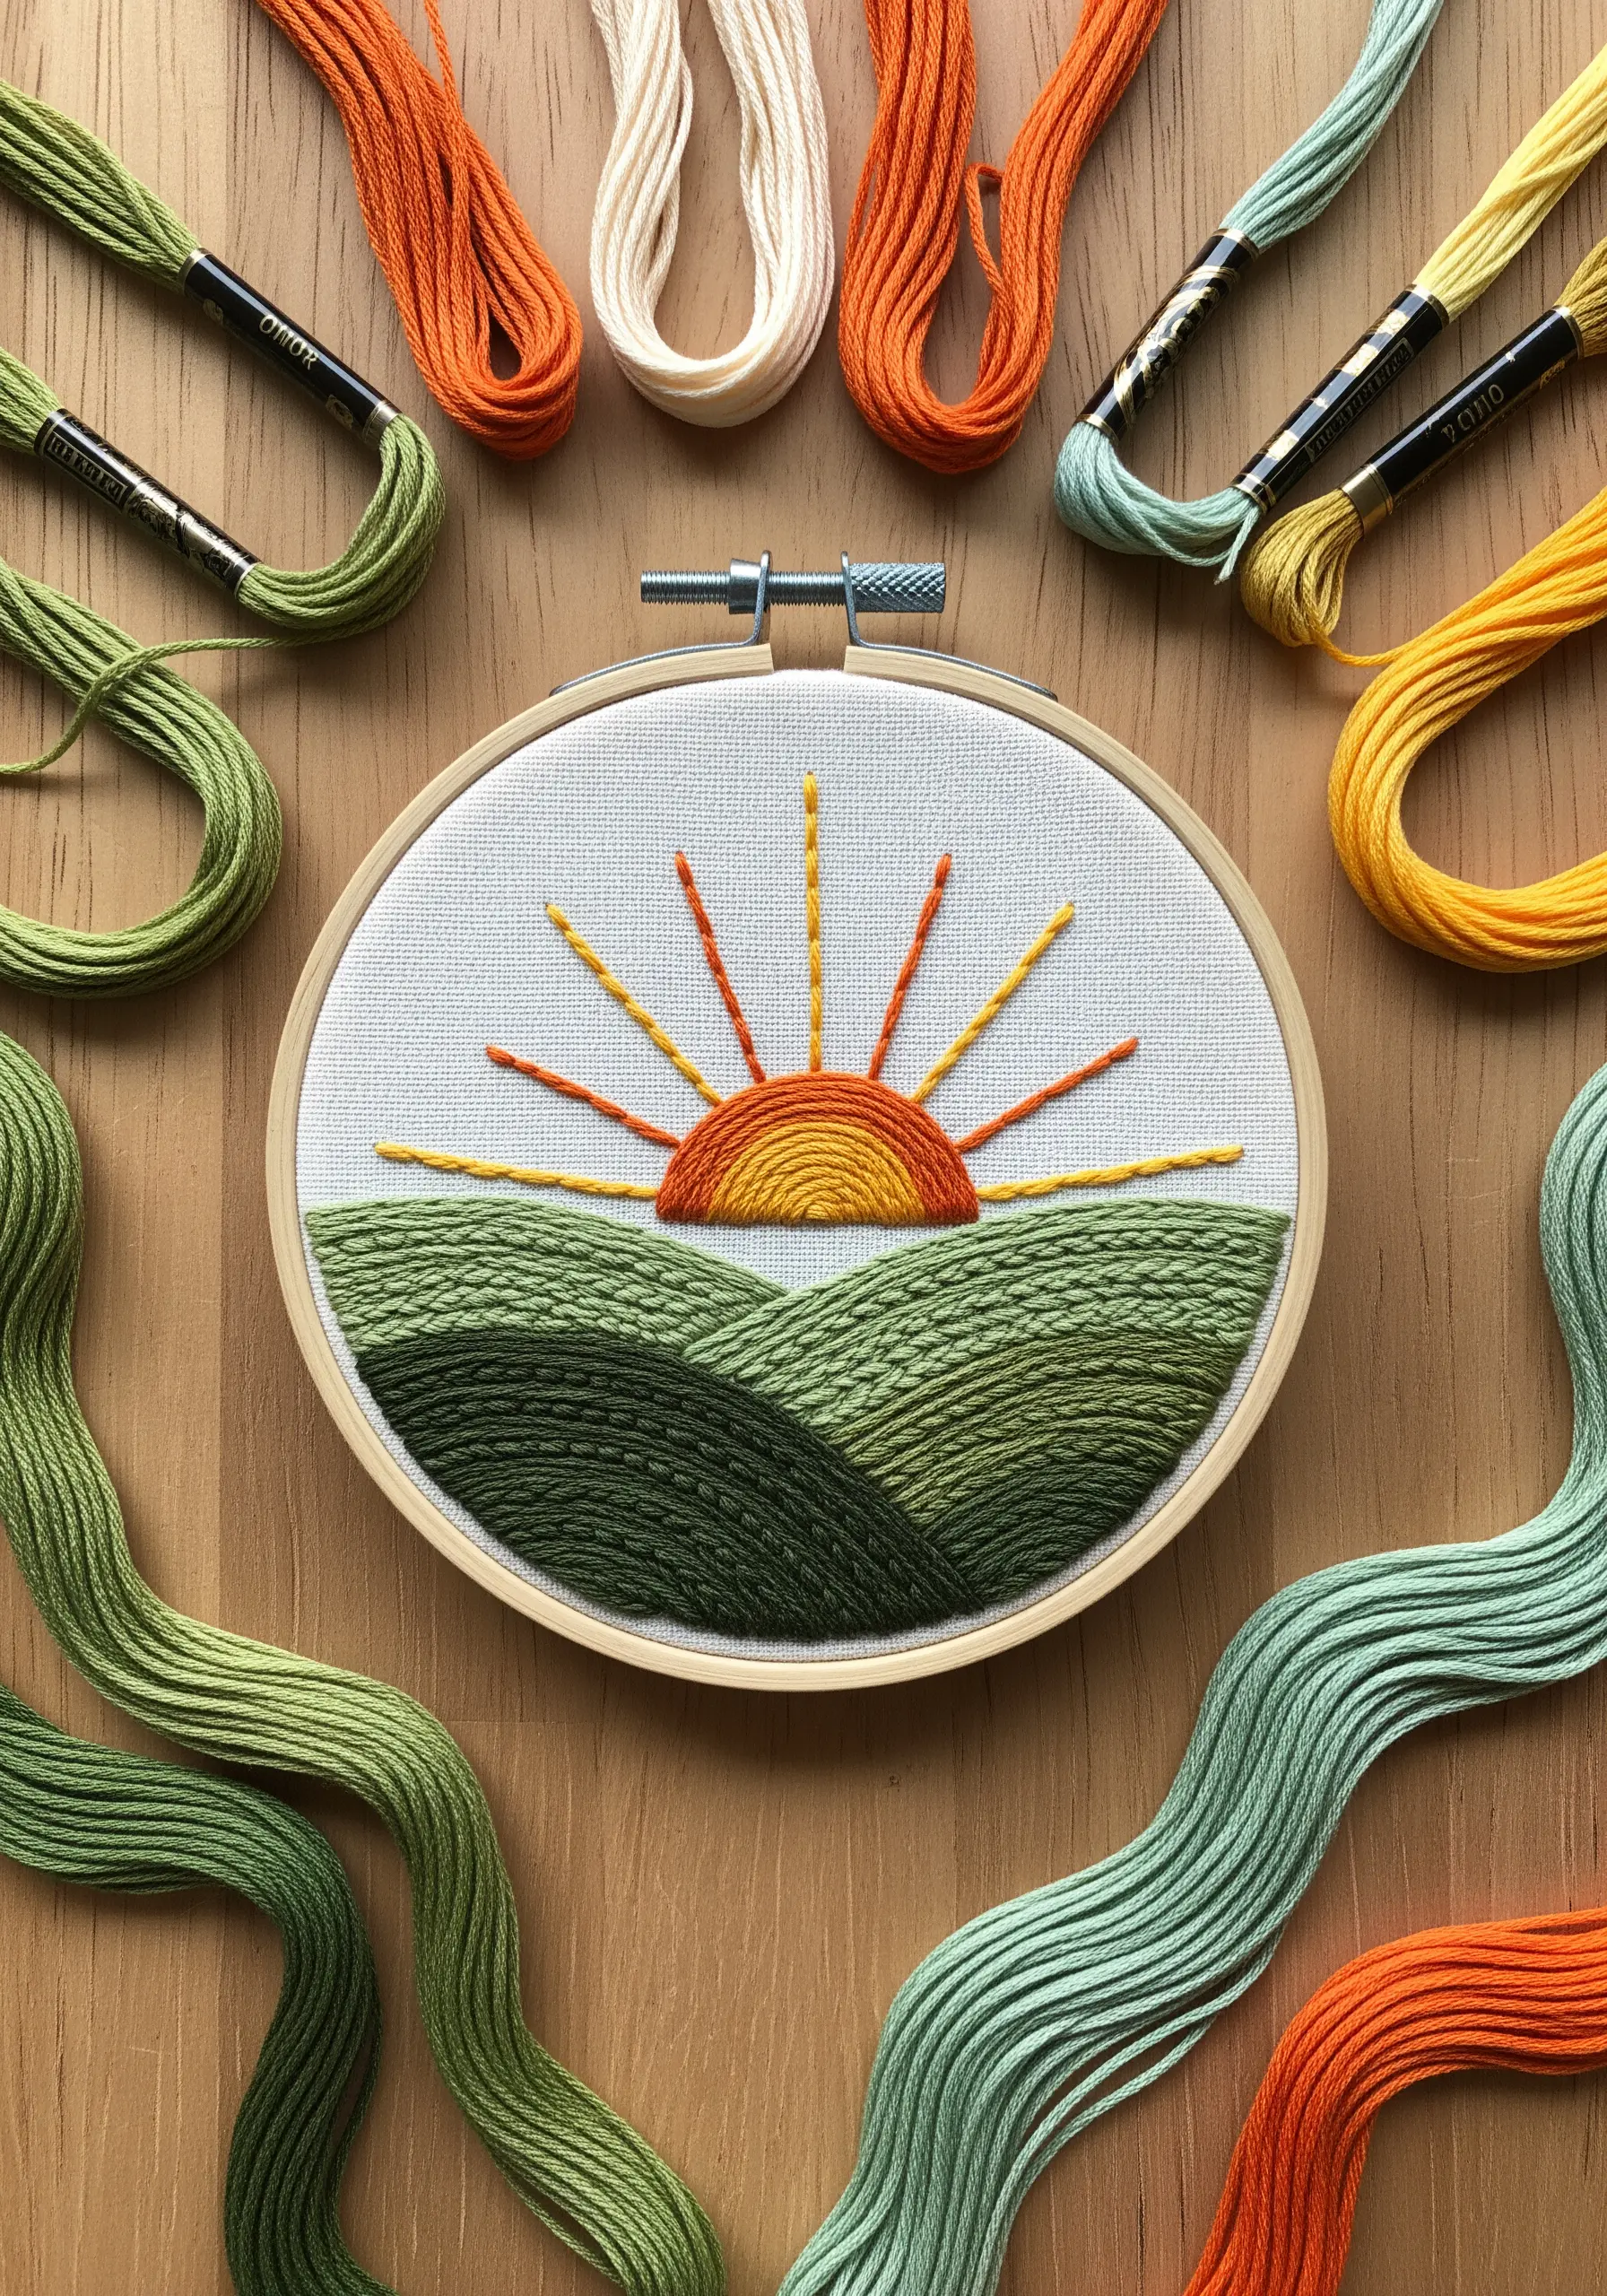
Create rolling hills and a radiant sun by paying close attention to the direction of your satin stitches.
For the hills, angle your stitches to follow the curves of the landscape. This enhances the sense of depth and movement.
For the sun, stitch a semi-circle with horizontal satin stitches, then radiate long straight stitches outwards for the sun’s rays.
This project proves that even simple small hoop landscape designs can feel dynamic and artistic through thoughtful stitch placement.
16. Embroider on Apparel with a Stabilizer
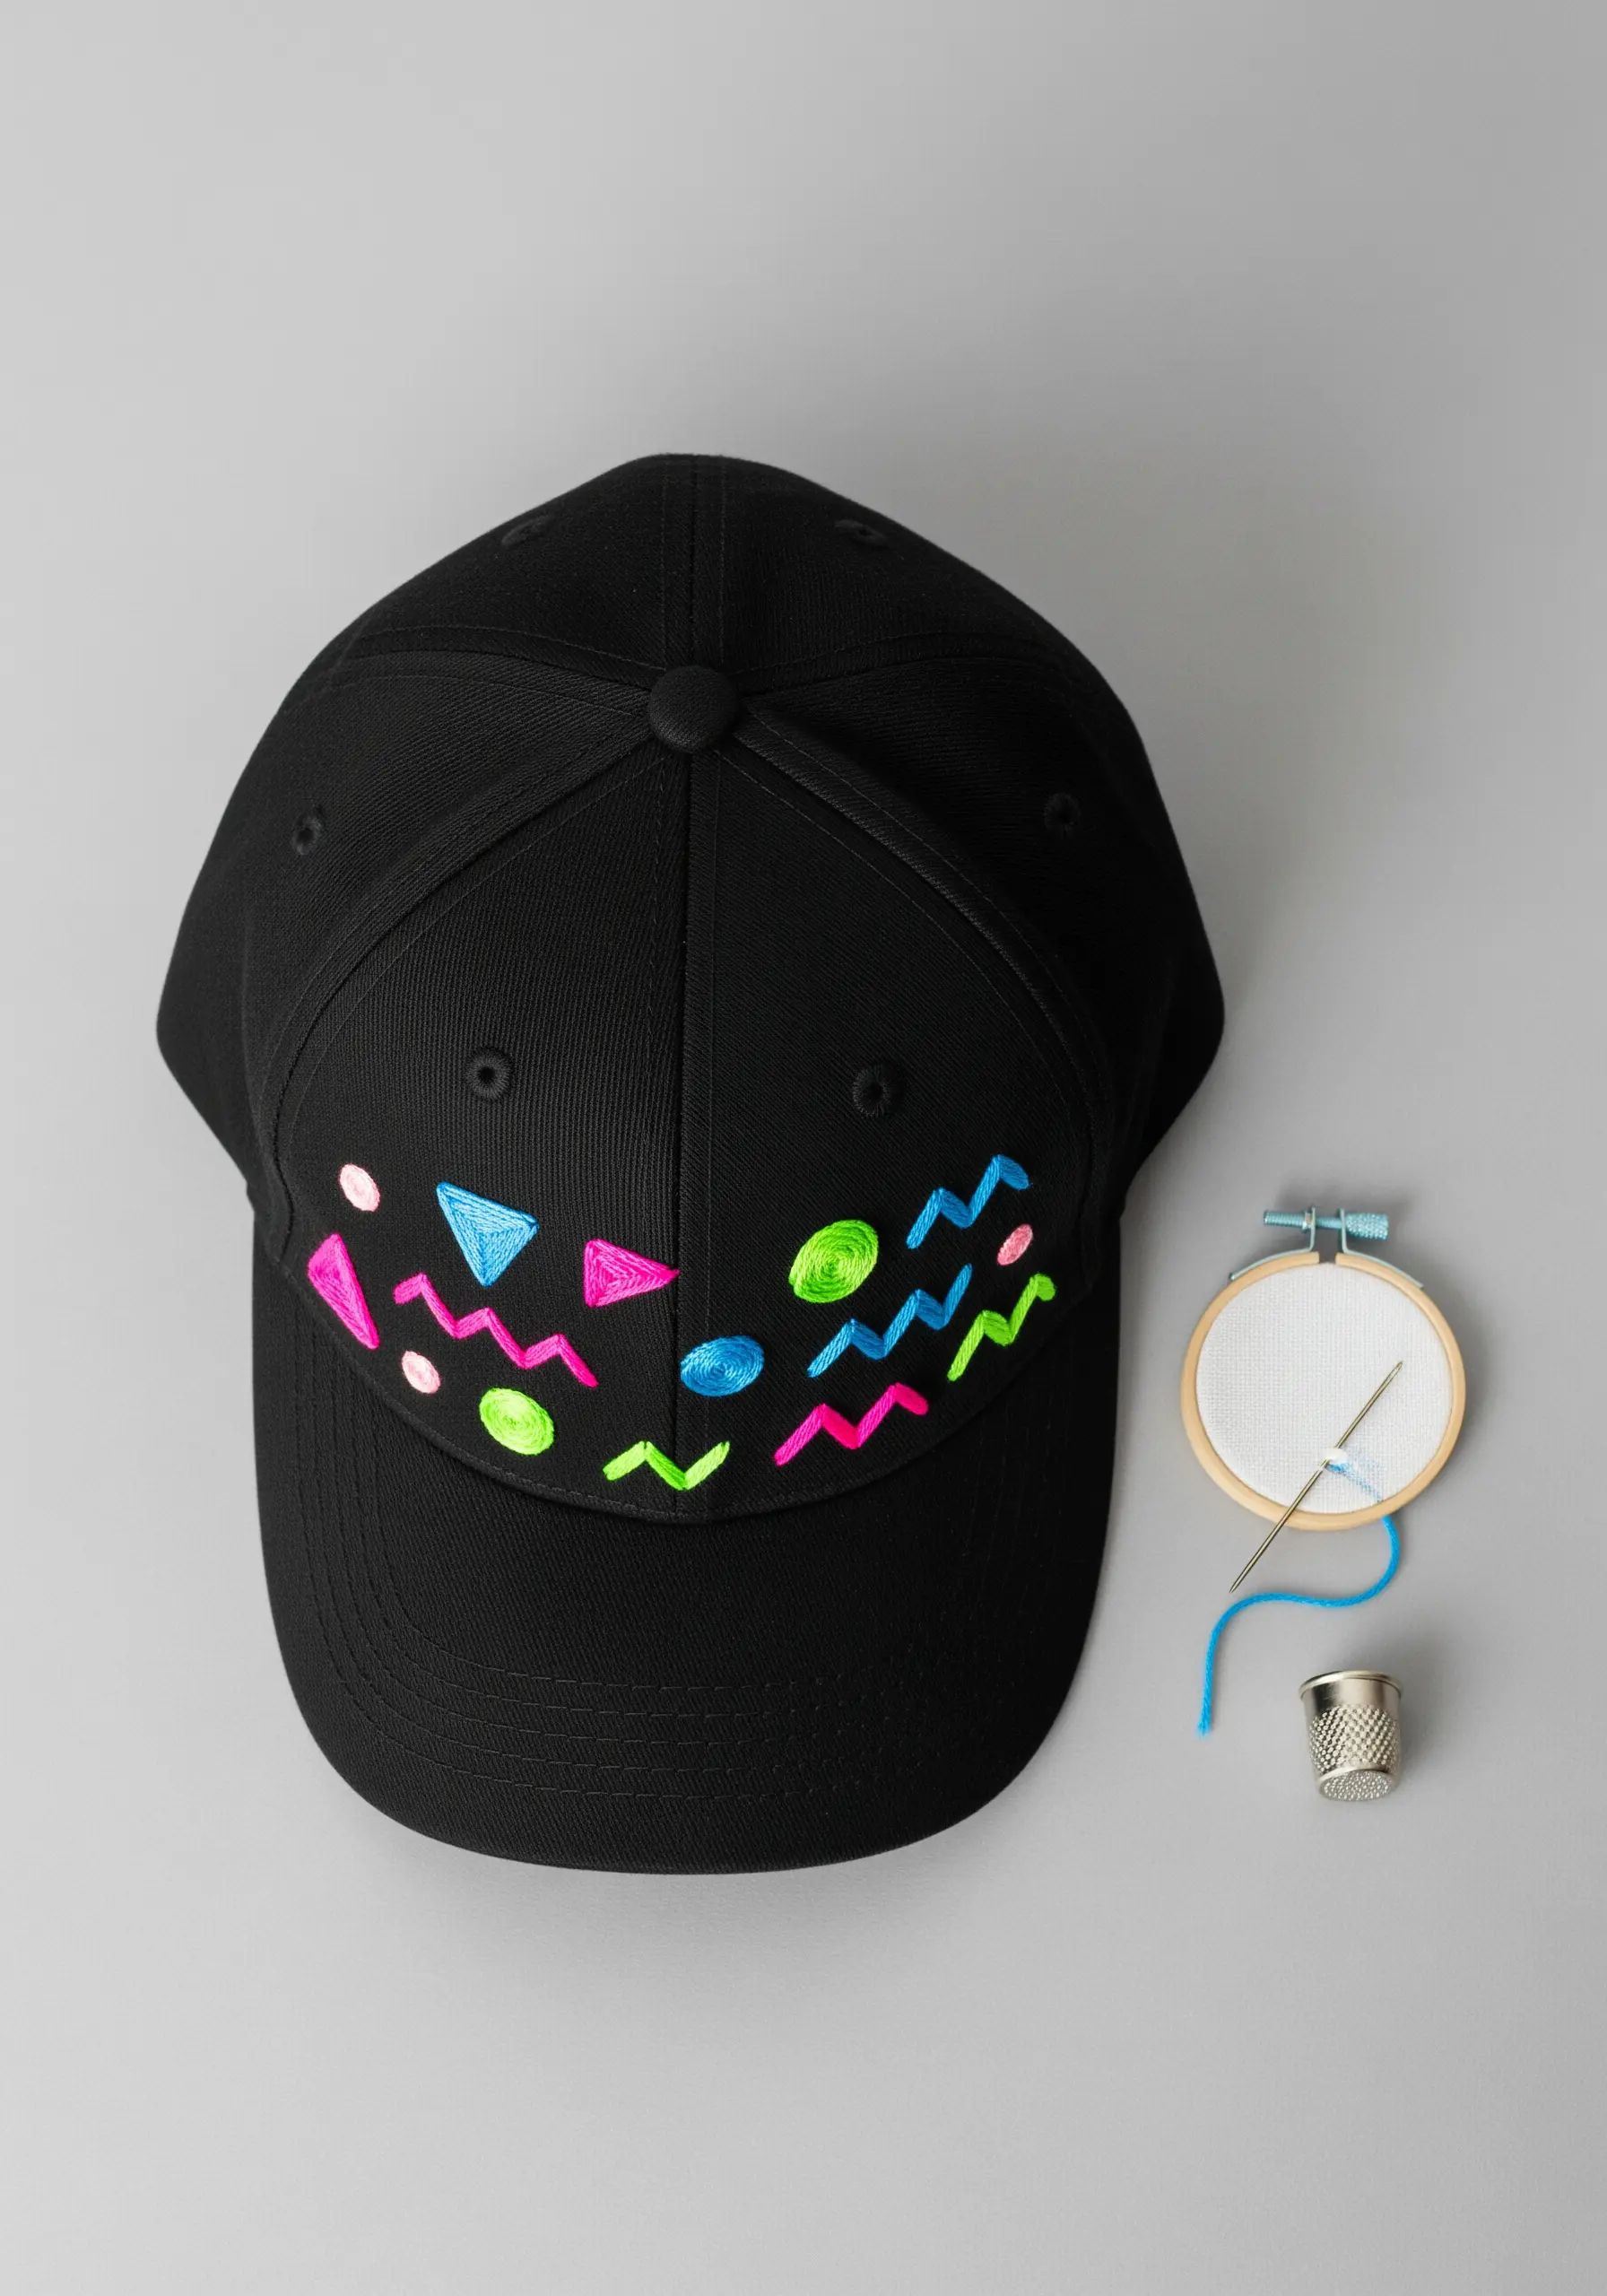
To add bold, graphic shapes to a baseball cap or other stretchy apparel, use a stabilizer.
A stick-and-stitch stabilizer allows you to print or draw your design, adhere it to the fabric, and stitch directly through it. When you’re done, it dissolves in water, leaving only your clean stitches.
This prevents the fabric from puckering and keeps your satin stitches smooth and even, which is crucial on non-traditional surfaces like hats.
Use neon or brightly colored thread to make abstract shapes pop against a dark background.
17. Create Contour Effects with Echo Stitching
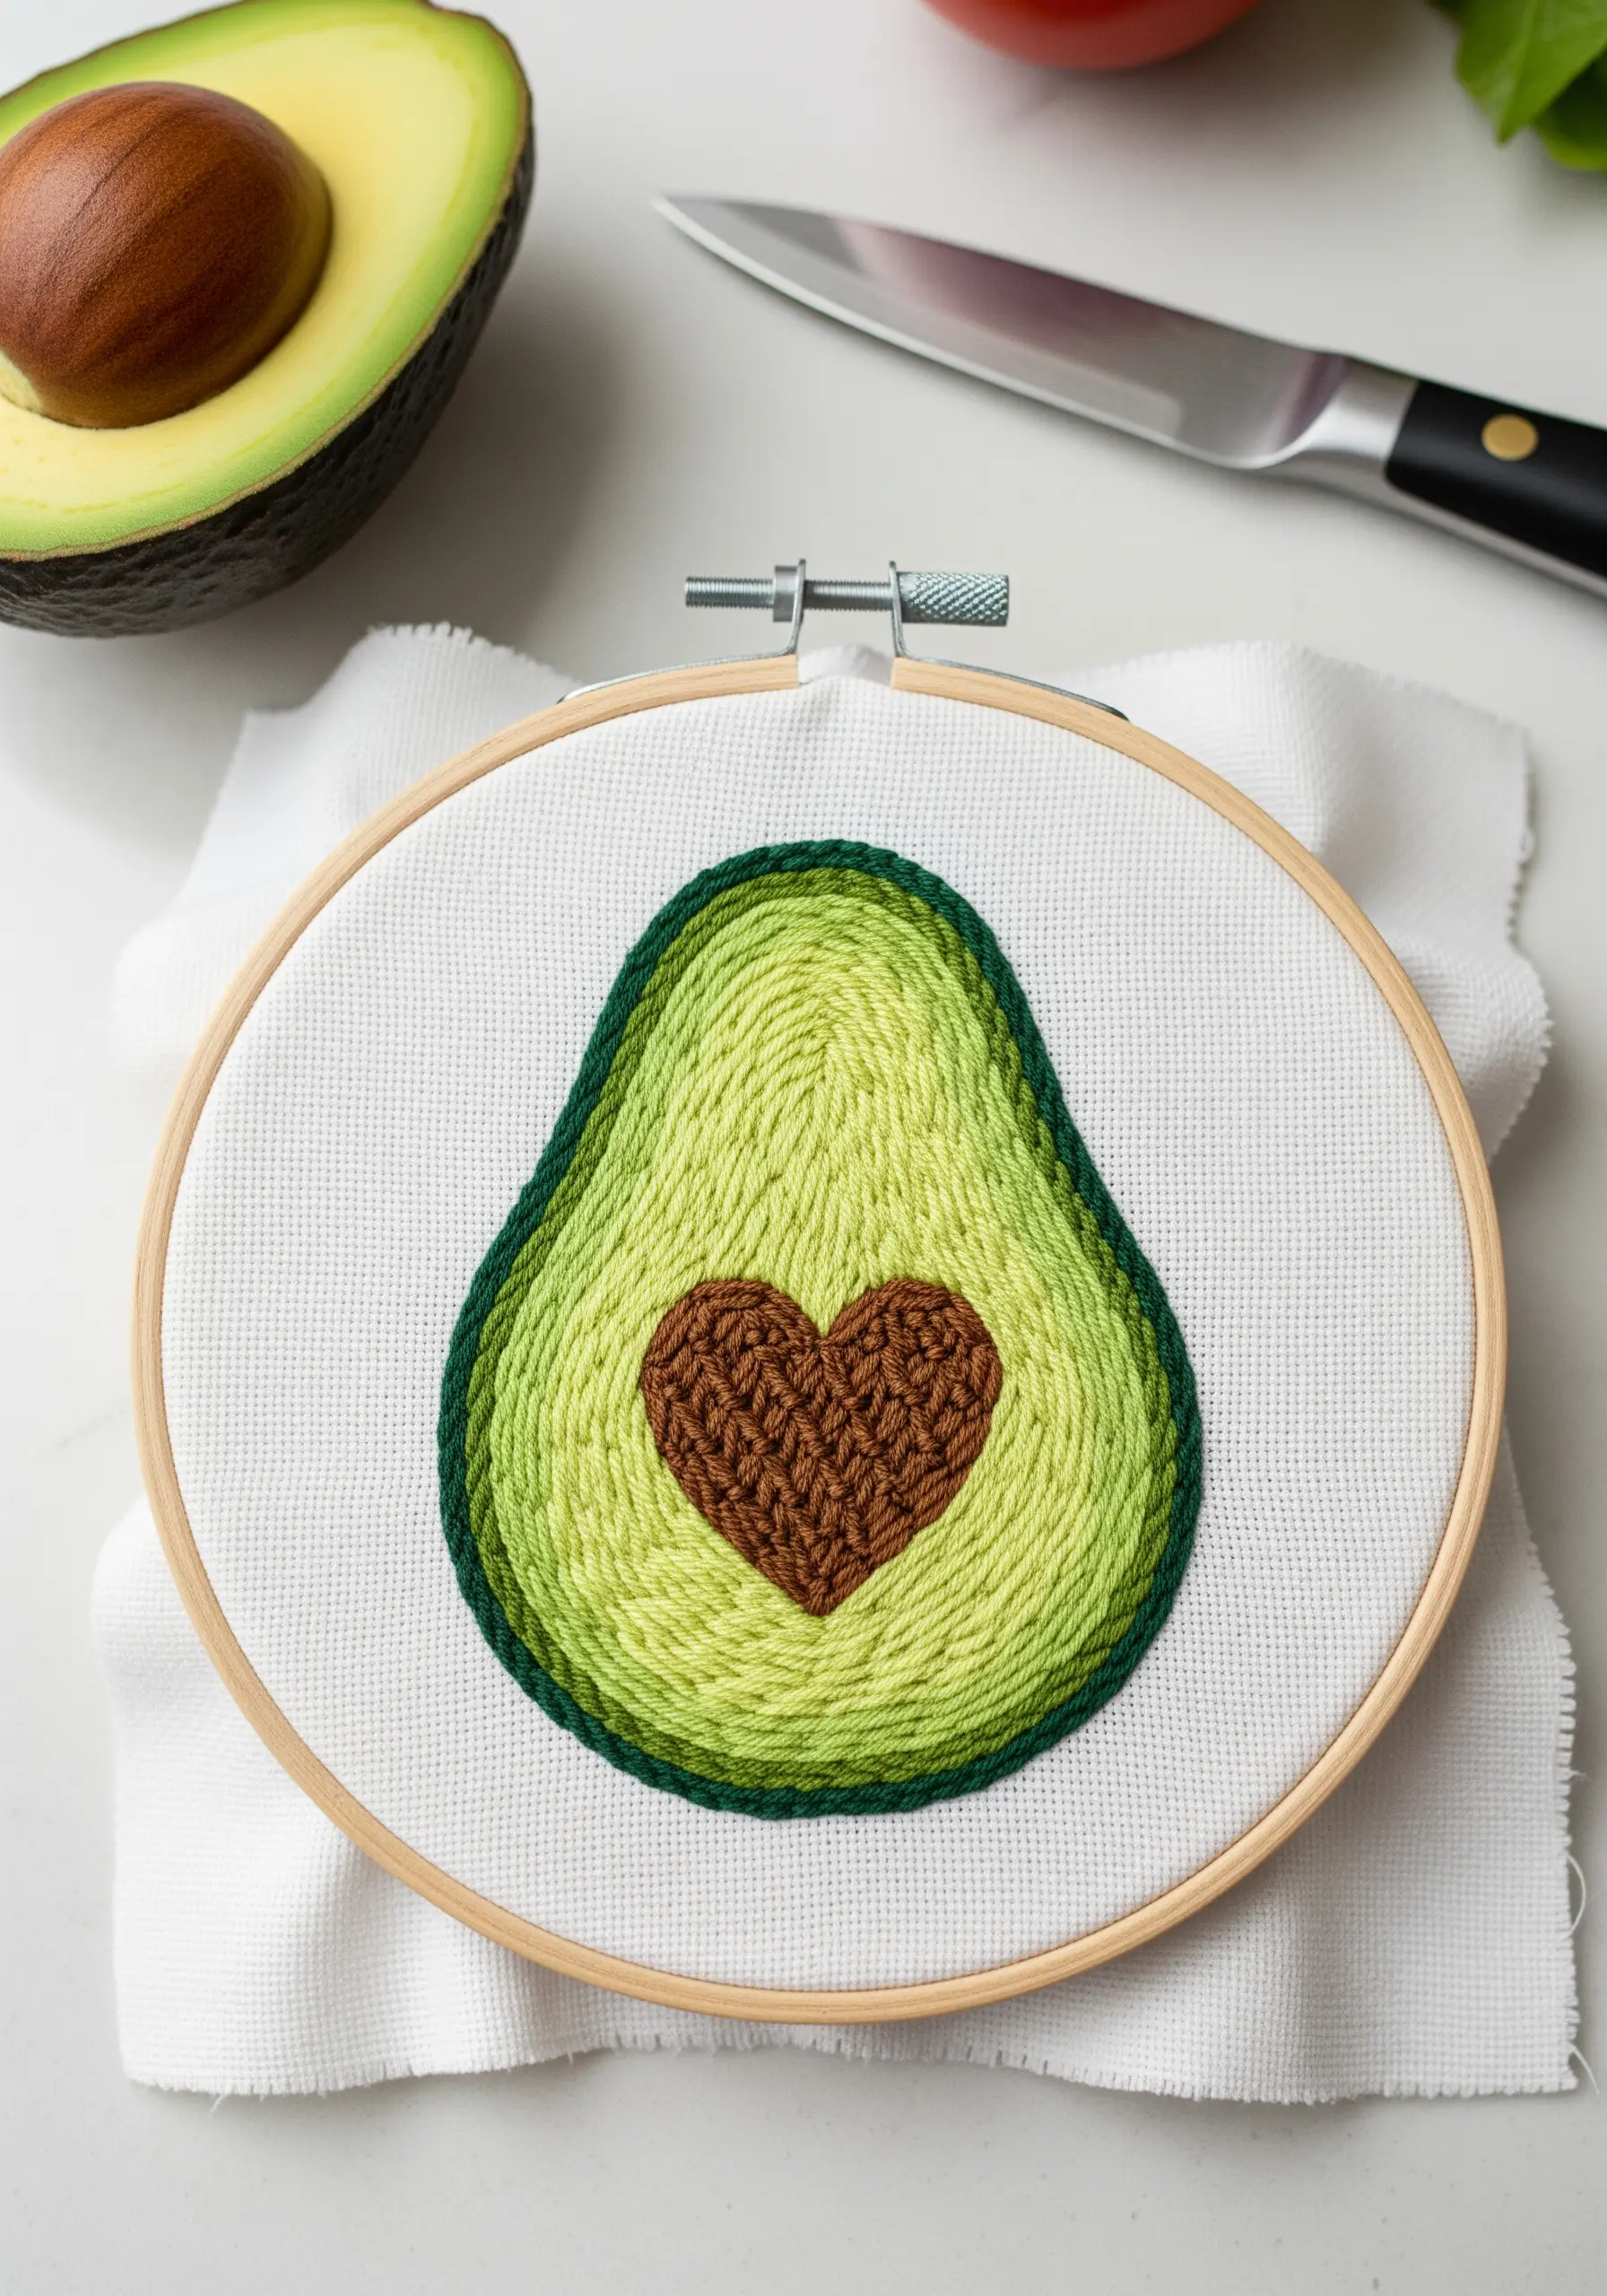
To give this avocado a modern, contoured look, outline the central shape with concentric rows of stem stitch or split stitch.
Start by stitching the heart-shaped pit. Then, using different shades of green, stitch echoing rows around it until you reach the dark green rind.
This technique, known as echo stitching, creates a visual rhythm and depth that is far more interesting than a simple flat fill.
It’s a perfect project for using up scraps of similar-colored floss and one of the most charming tiny hoop embroidery projects that sell fast at local craft markets.
18. Make Stars That Glow with Specialty Thread
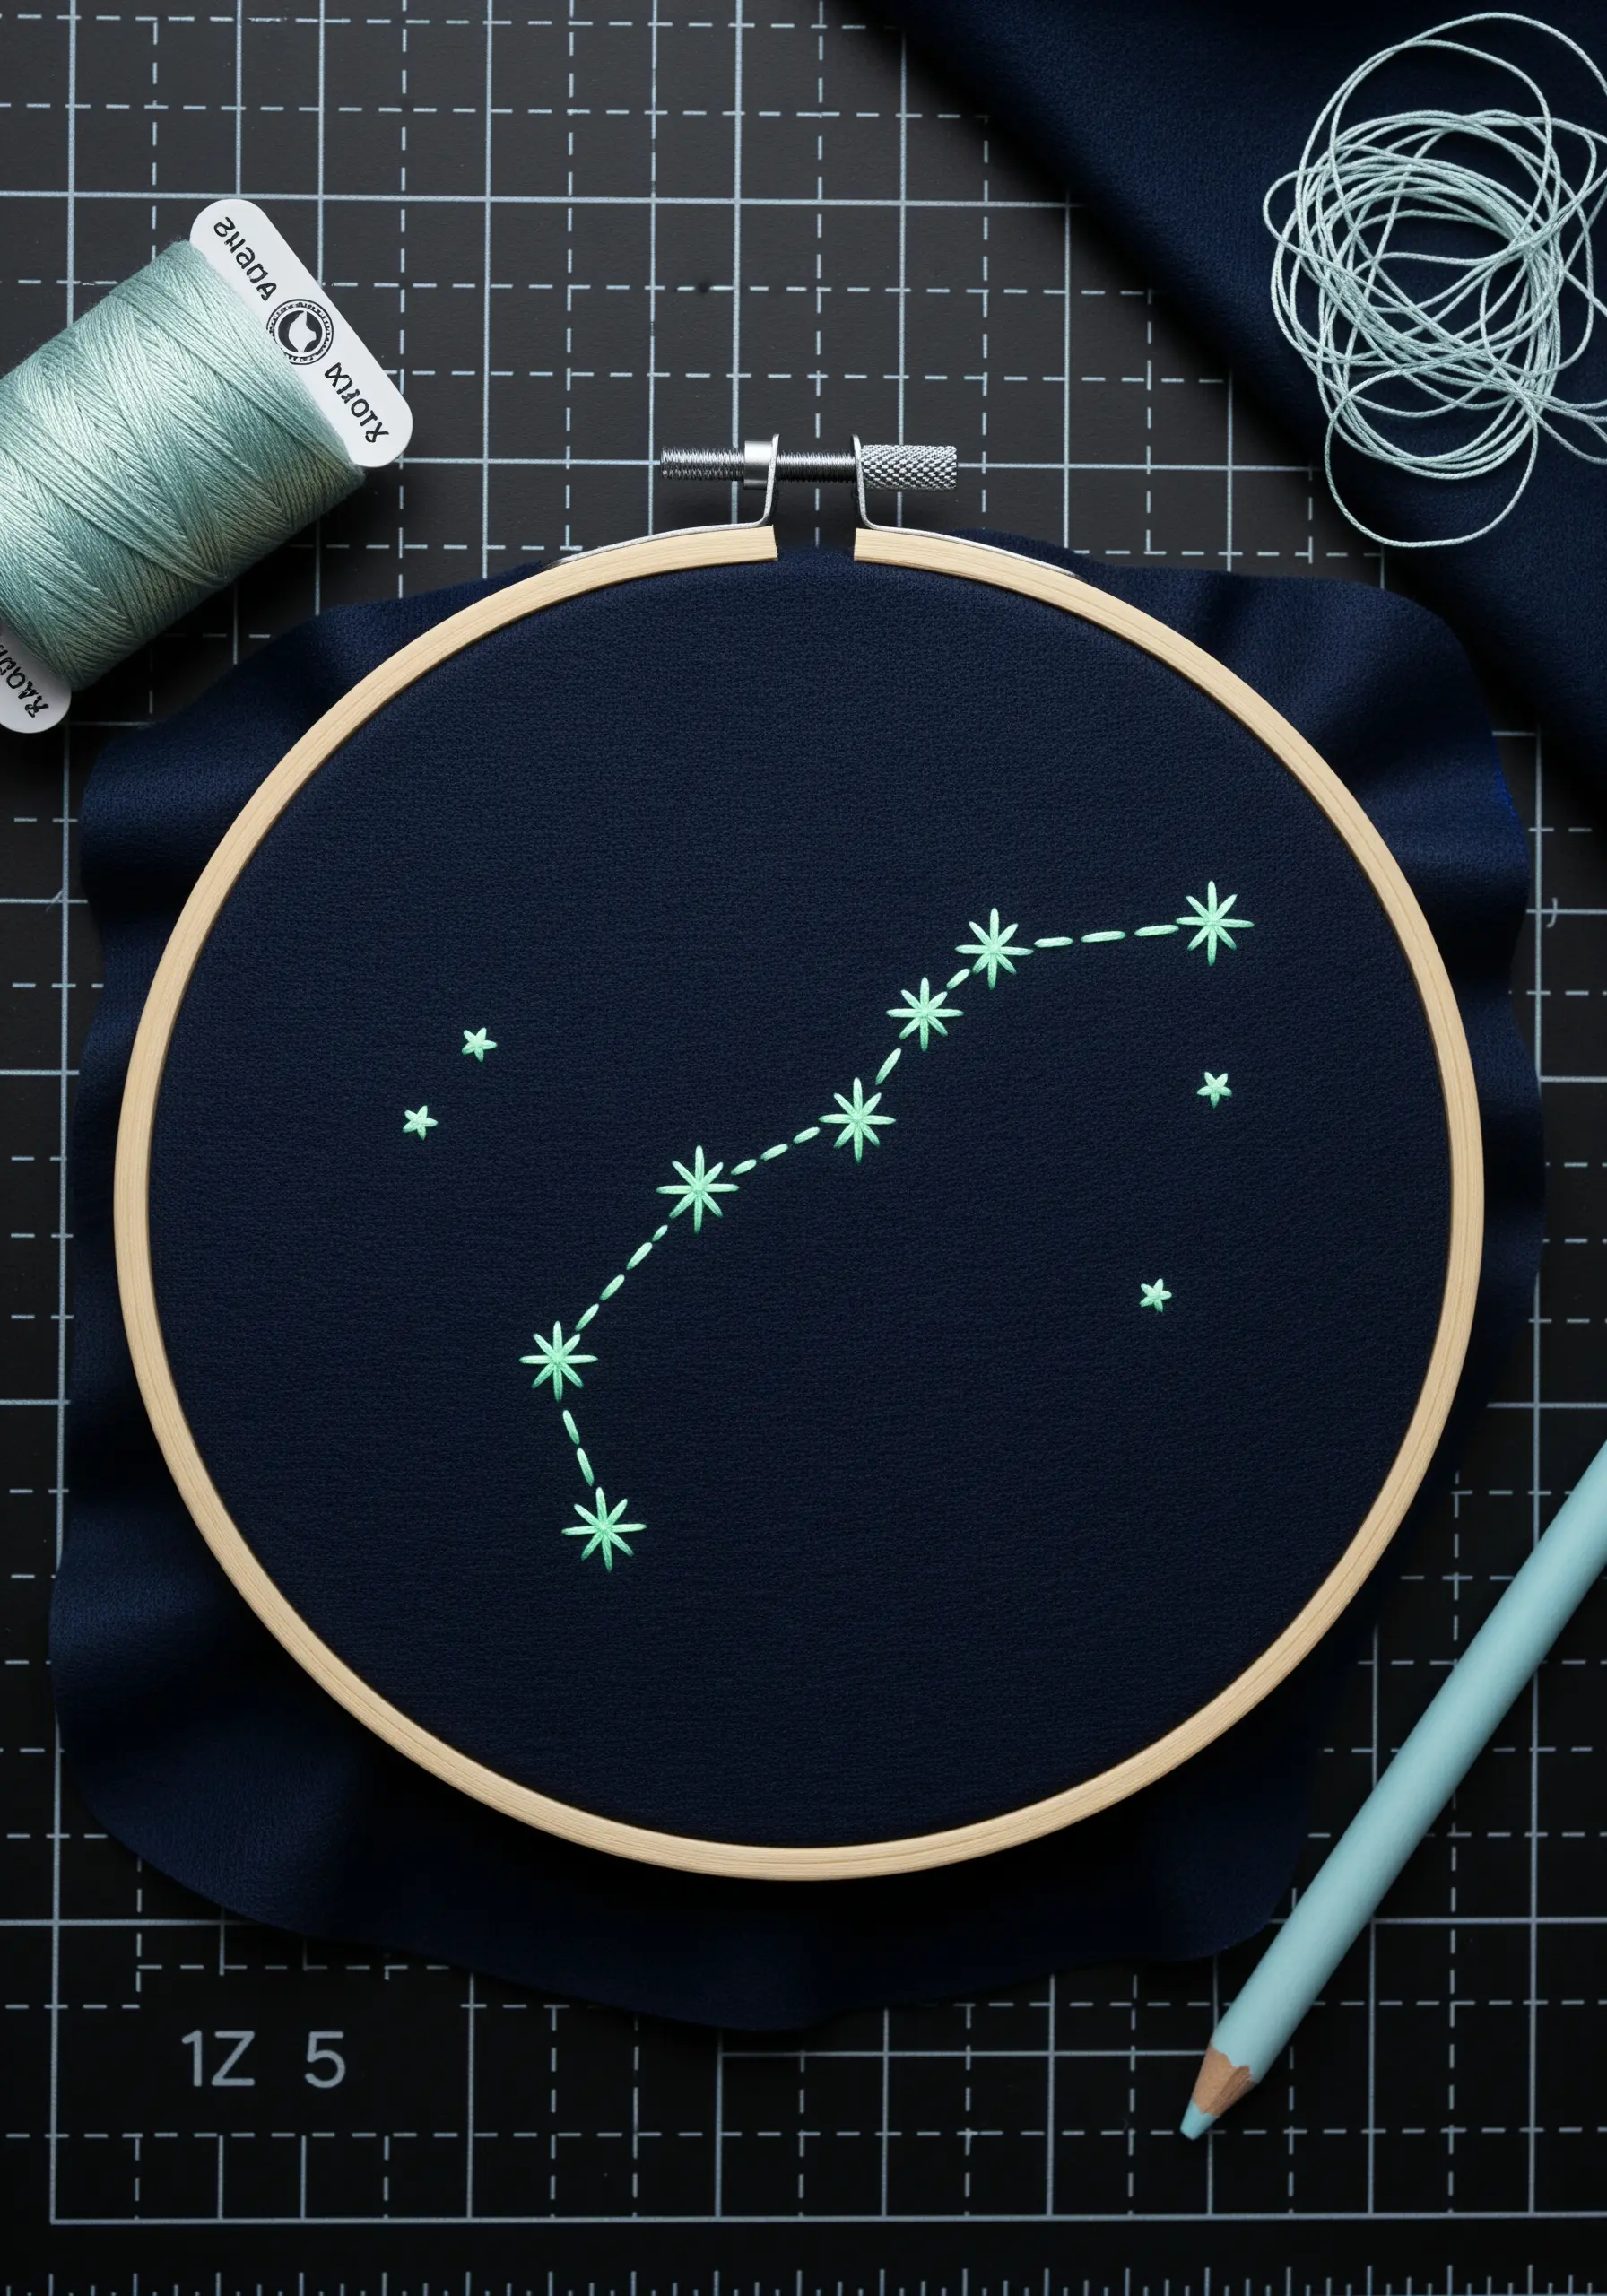
For a design that truly shines, stitch your constellation with glow-in-the-dark embroidery floss.
To make the stars pop, use a star stitch or a small cluster of straight stitches. This gives them more presence than a simple French knot.
Stitch on a dark, tightly woven fabric like cotton twill or poplin to create a night-sky effect and prevent the backing from showing through.
After stitching, ‘charge’ the thread by holding it under a bright light for a few minutes to ensure a brilliant glow.
19. Weave with Yarn for Bold, Fast Texture
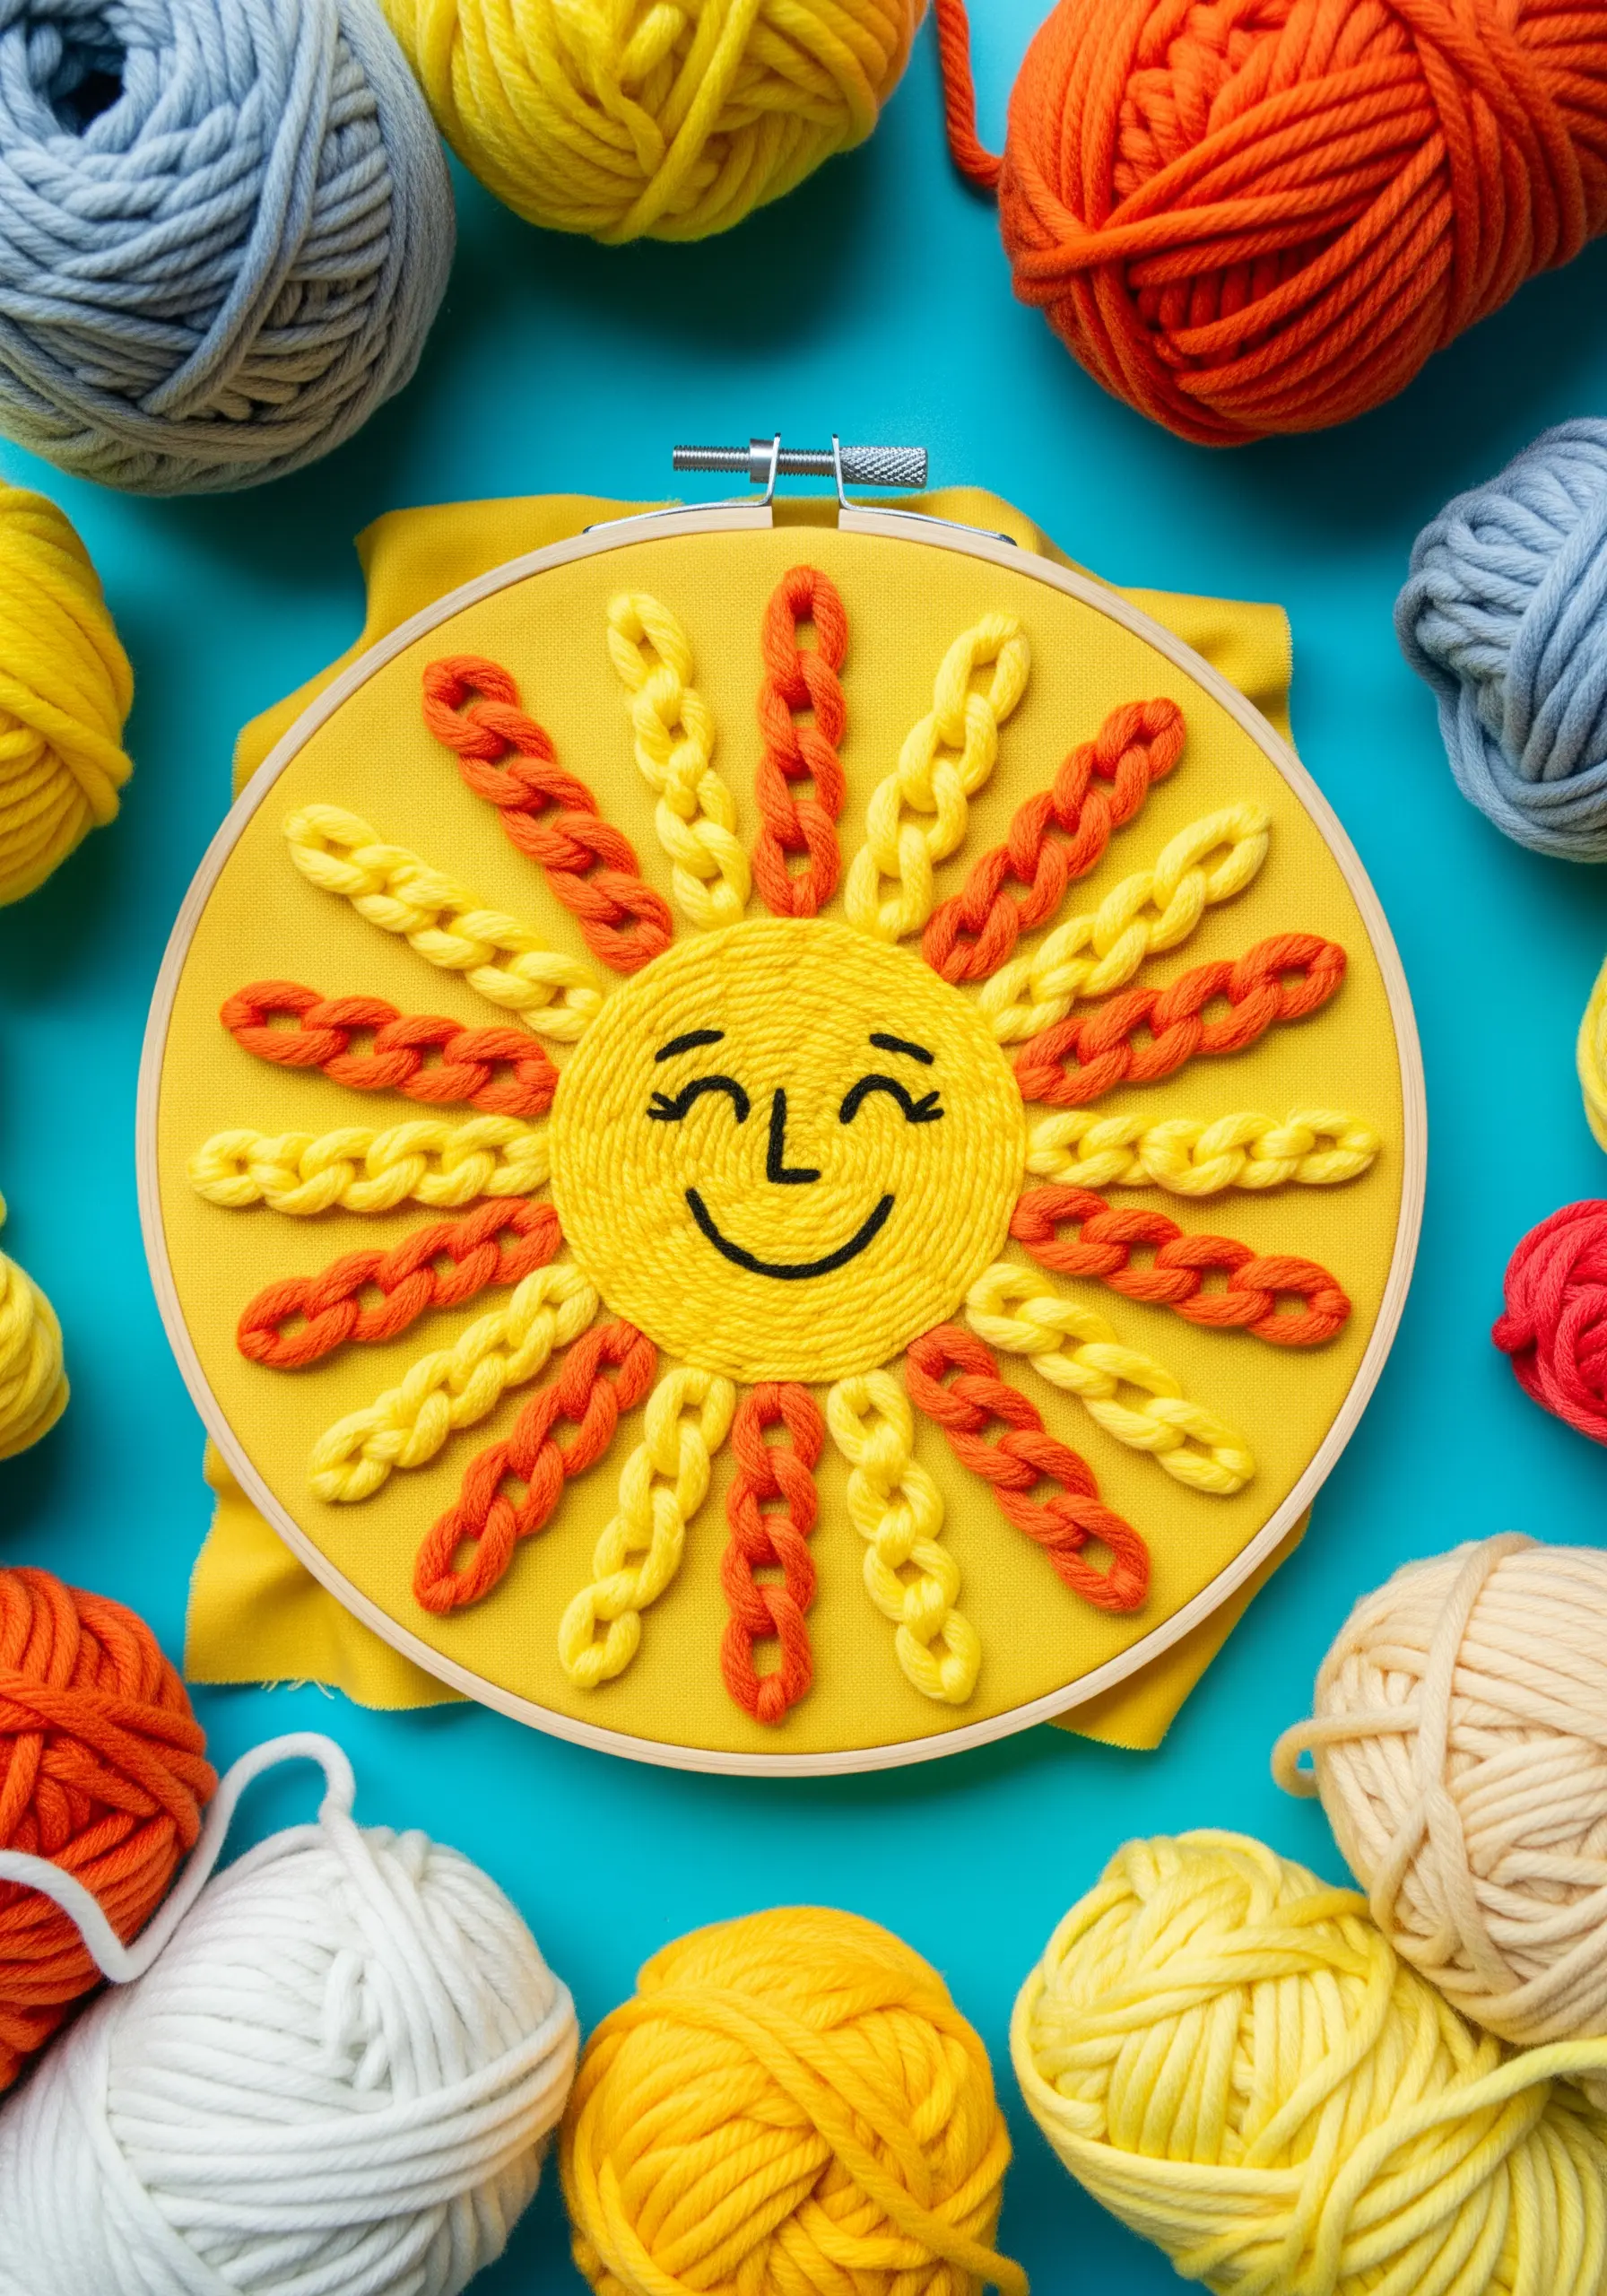
For projects that need to be finished quickly, switch from floss to yarn to cover more area with each stitch.
The sun’s rays are created with a detached chain stitch, which forms a teardrop loop perfect for chunky textures.
Use a needle with a large eye and a blunt tip, like a tapestry needle, to avoid splitting the yarn or damaging the fabric.
This is one of the most playful and colorful yarn wall art ideas, perfect for a child’s room or a cheerful accent piece.
20. Add Subtle Elegance to a Shirt Collar
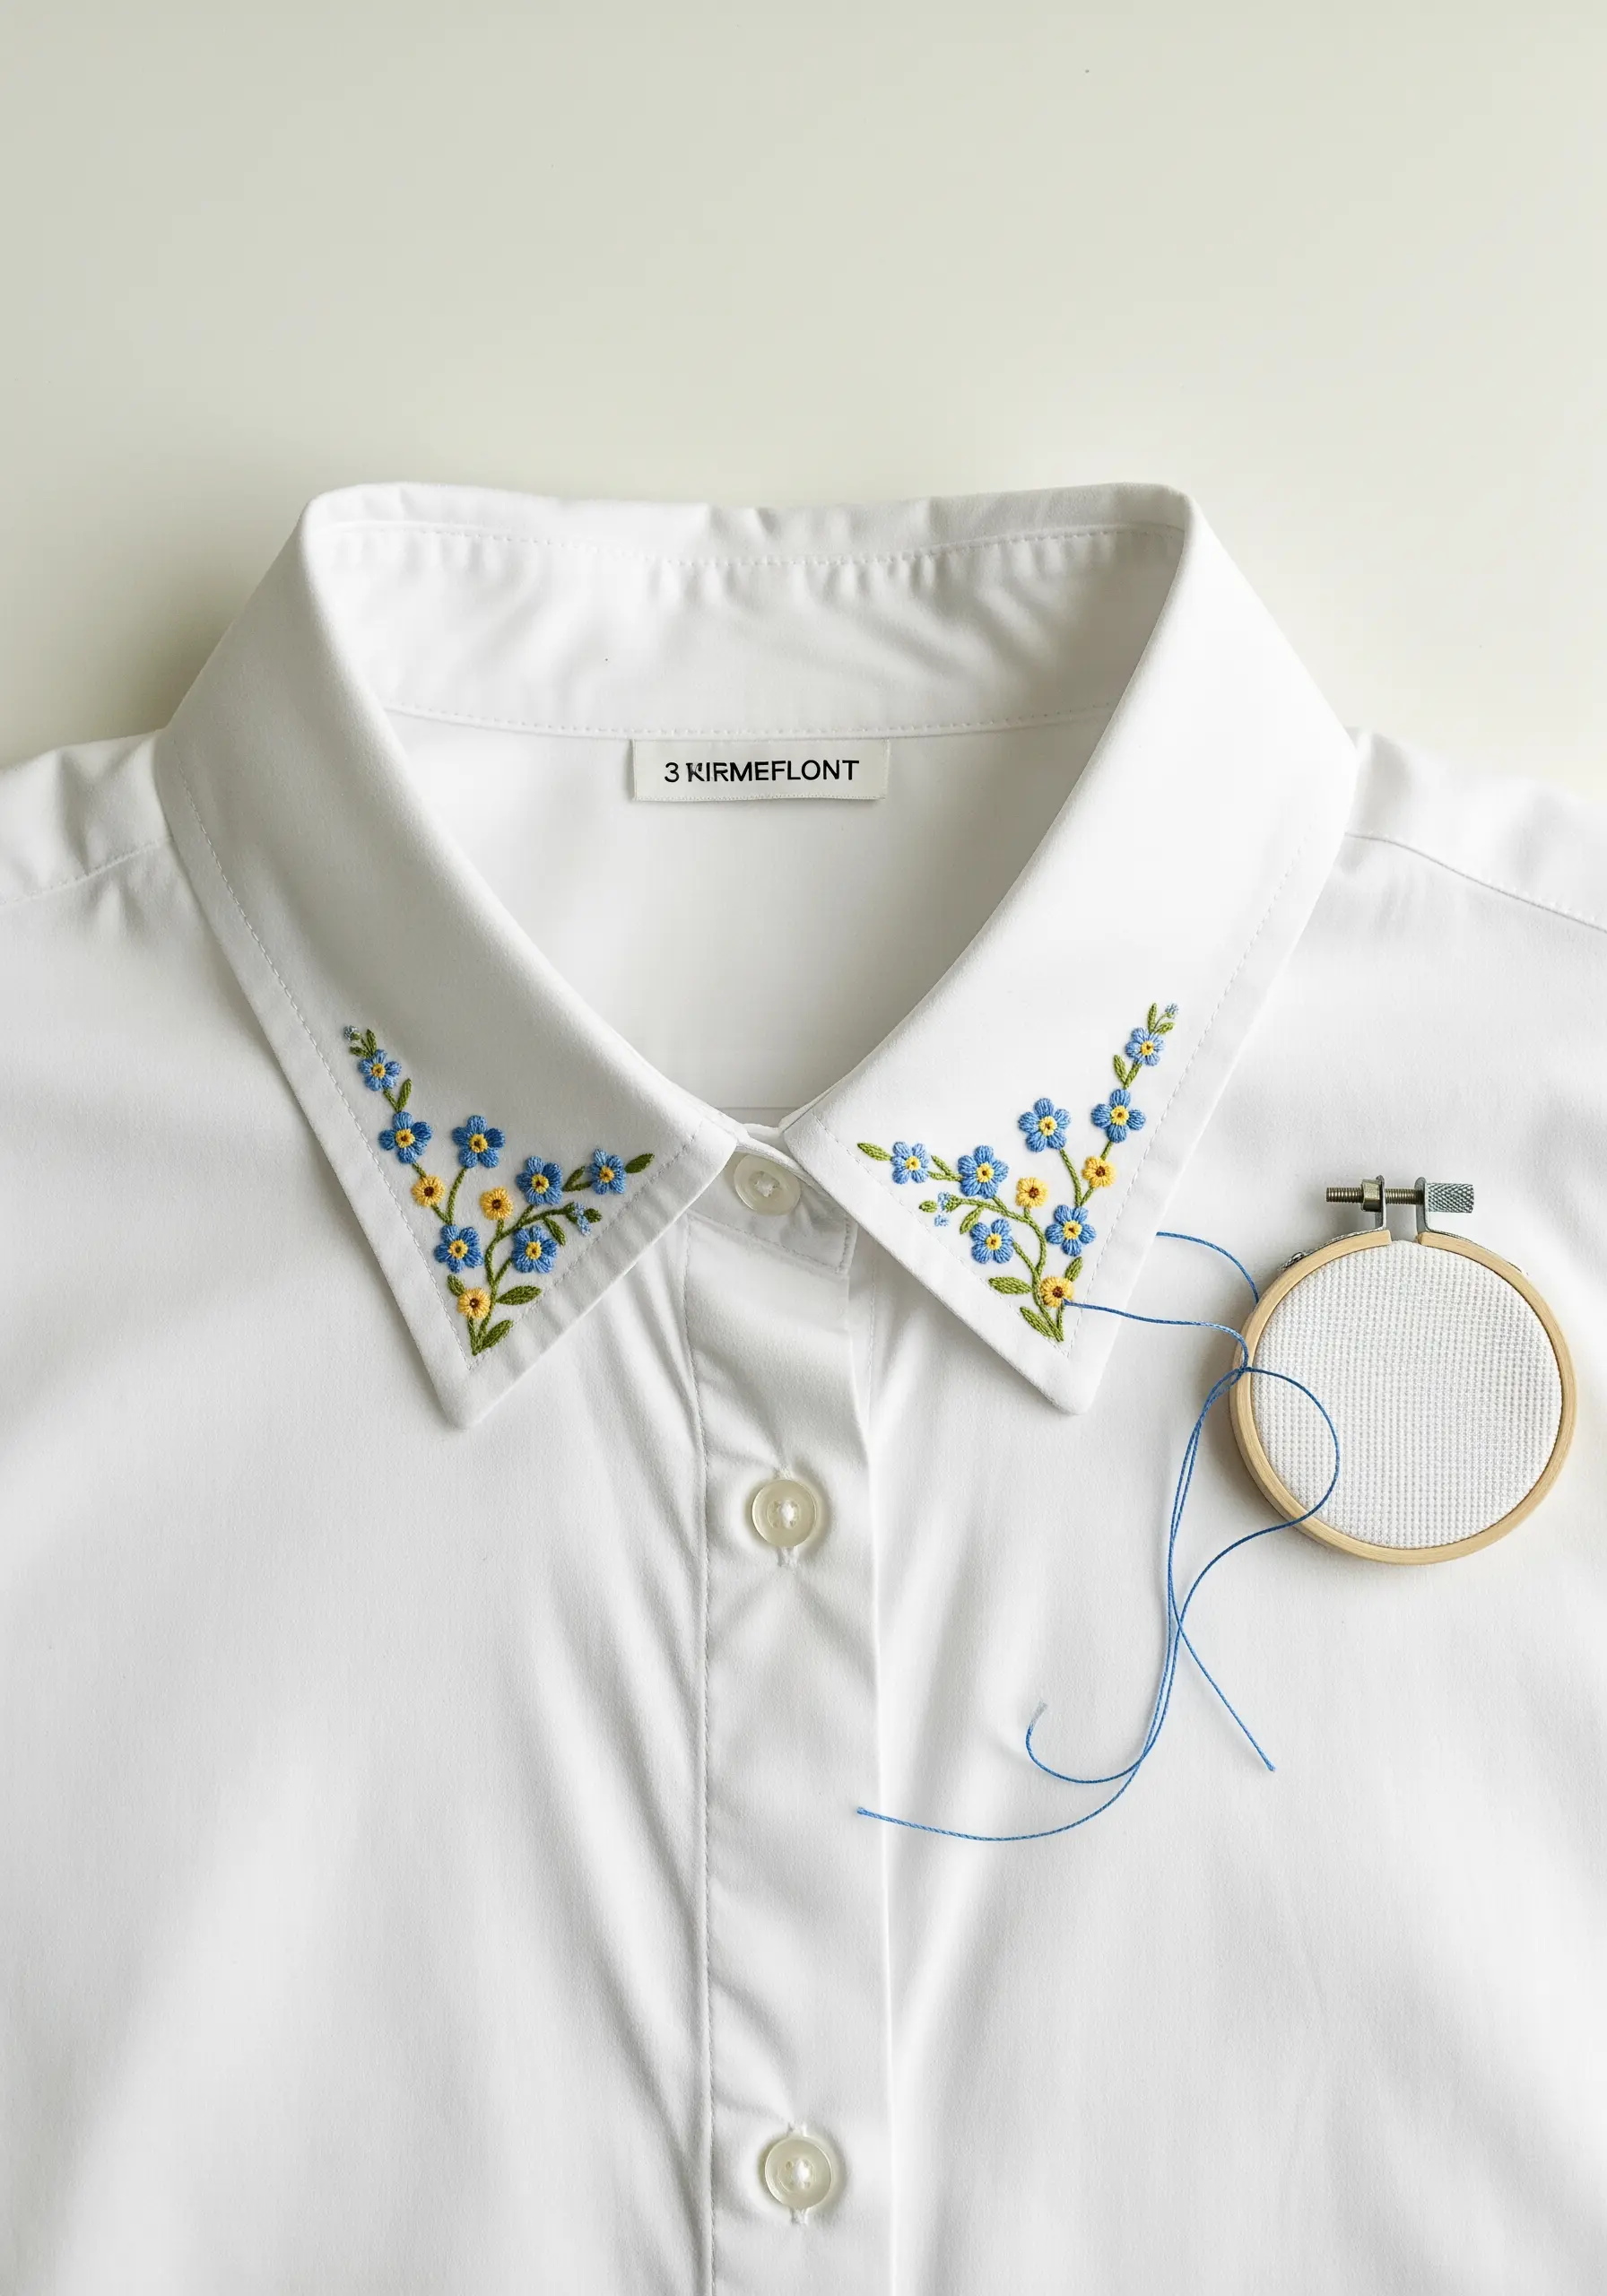
Elevate a simple white shirt by adding a delicate botanical spray to the collar points.
Use a lightweight fusible interfacing on the back of the collar before stitching. This stabilizes the fabric, preventing puckering and ensuring your stitches remain smooth, even after washing.
Choose a simple color palette and use just two or three strands of floss to keep the design refined and not overpowering.
This is one of my favorite tiny floral embroidery ideas for pocket corners and collars—a small detail that makes a huge impact.
21. Craft a Felt Keychain with Looped Stitches
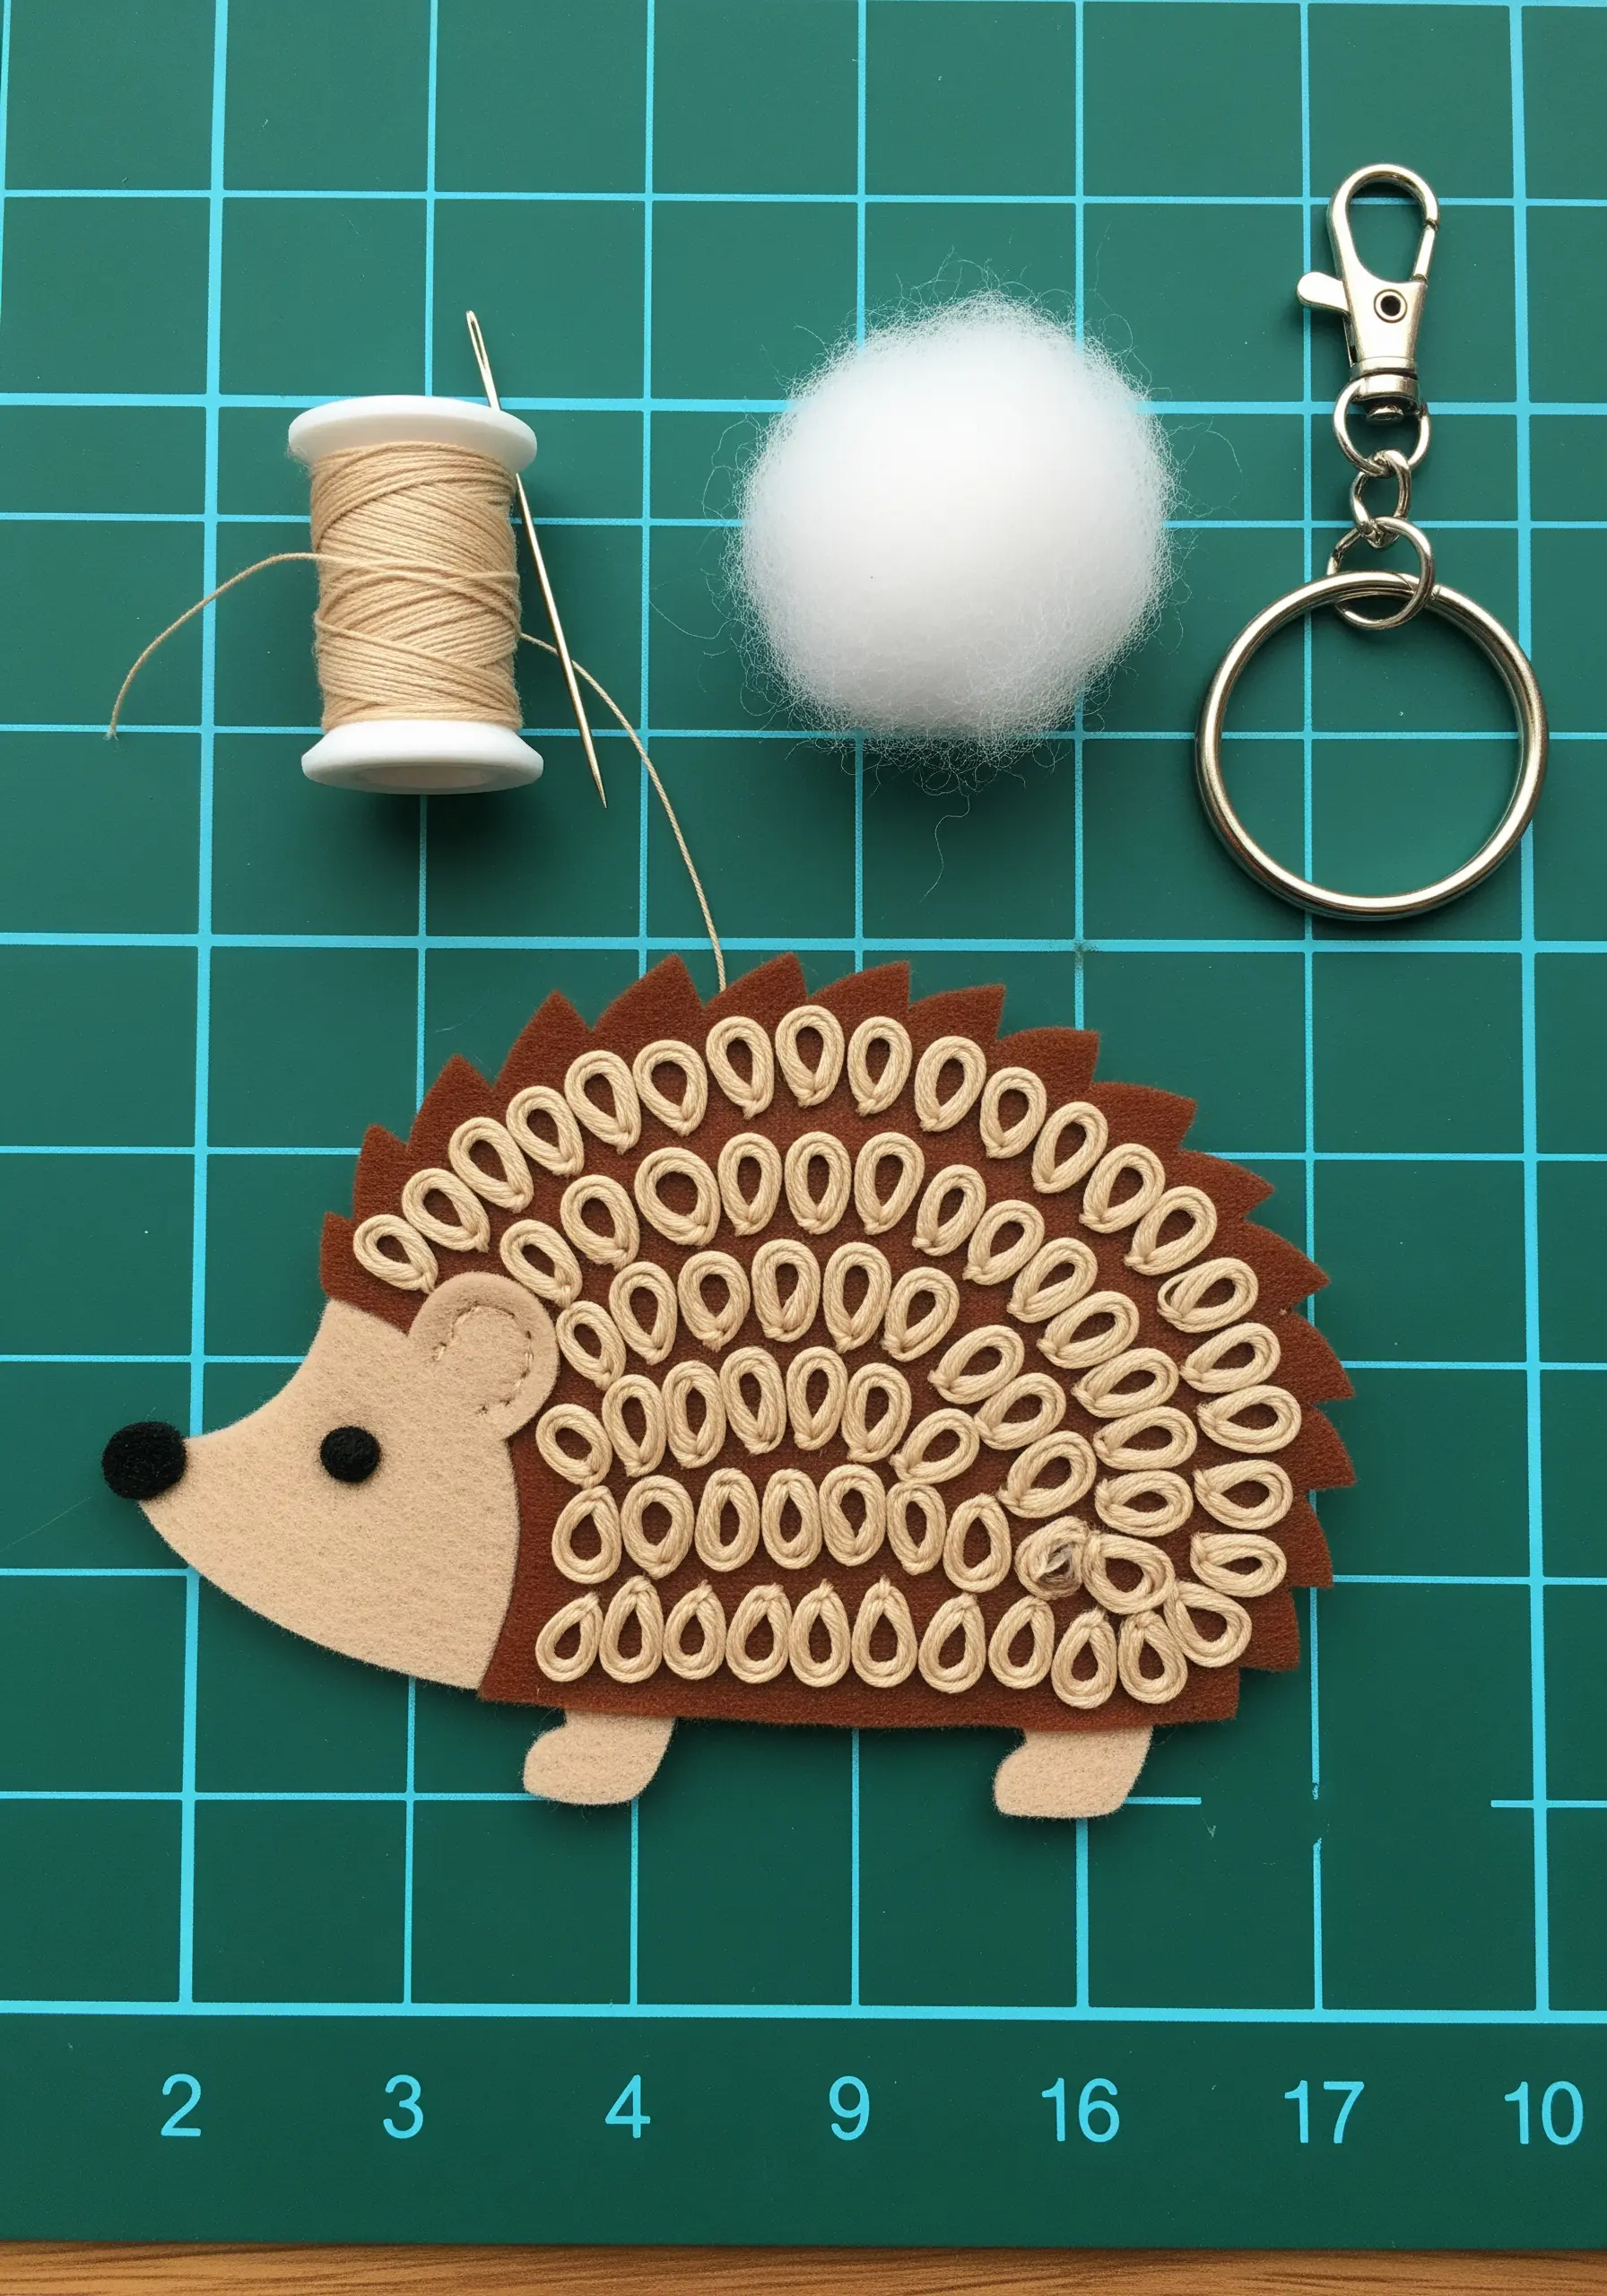
Create a charming hedgehog keychain by layering felt pieces and adding textural spines with detached chain stitches.
Cut out two identical body shapes from felt. On one piece, stitch rows of detached chain stitches (lazy daisies) to create the looped texture of the spines.
Place the second felt piece behind the first and use a blanket stitch around the edge to sew them together, leaving a small opening to add a bit of stuffing for a plush effect.
These hand-stitched aesthetic projects make perfect handmade gifts.
22. Achieve Realism with Thread Painting
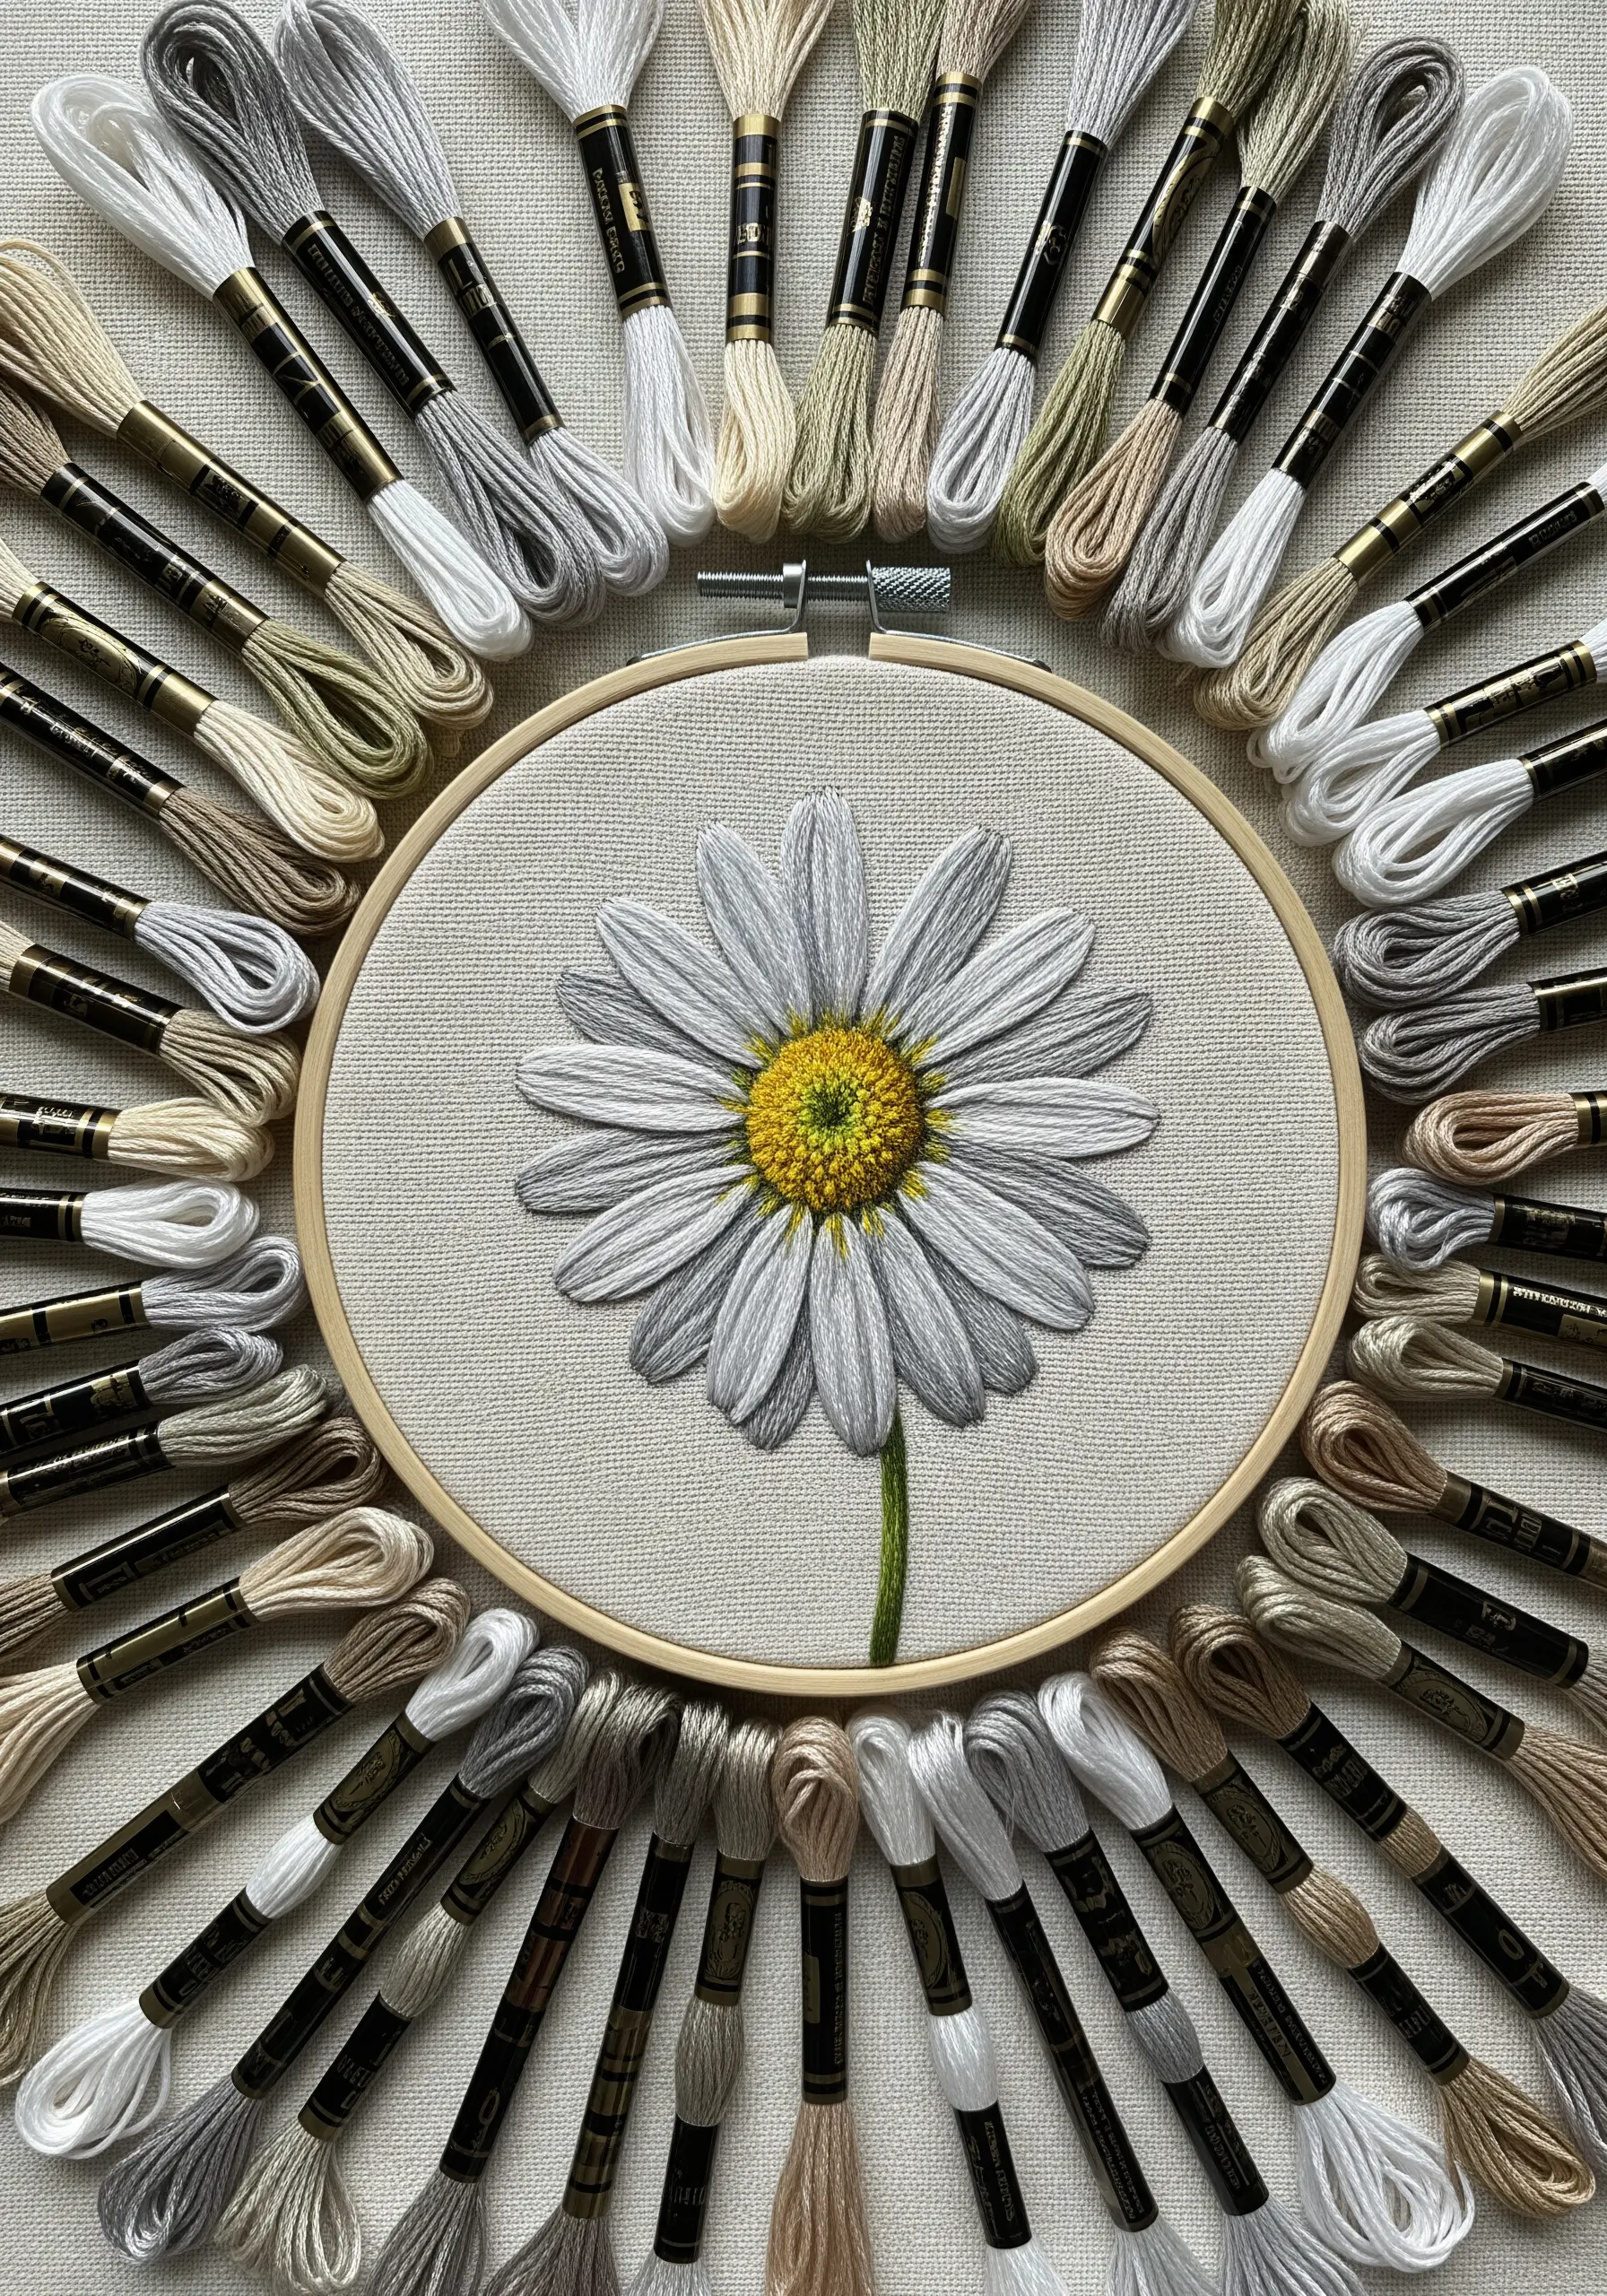
To create a photorealistic daisy, use the long-and-short stitch technique, also known as thread painting.
Work with a single strand of floss and blend multiple shades of white, gray, and off-white to create highlights and shadows on the petals.
Keep your stitches directional, following the natural curve and growth of each petal. This is the key to achieving a lifelike appearance.
For the center, a dense collection of French knots in yellow and green provides the perfect textural contrast. It’s a great application of daisy gradient petal techniques.
23. Create 3D Effects with Woven Picot Stitch
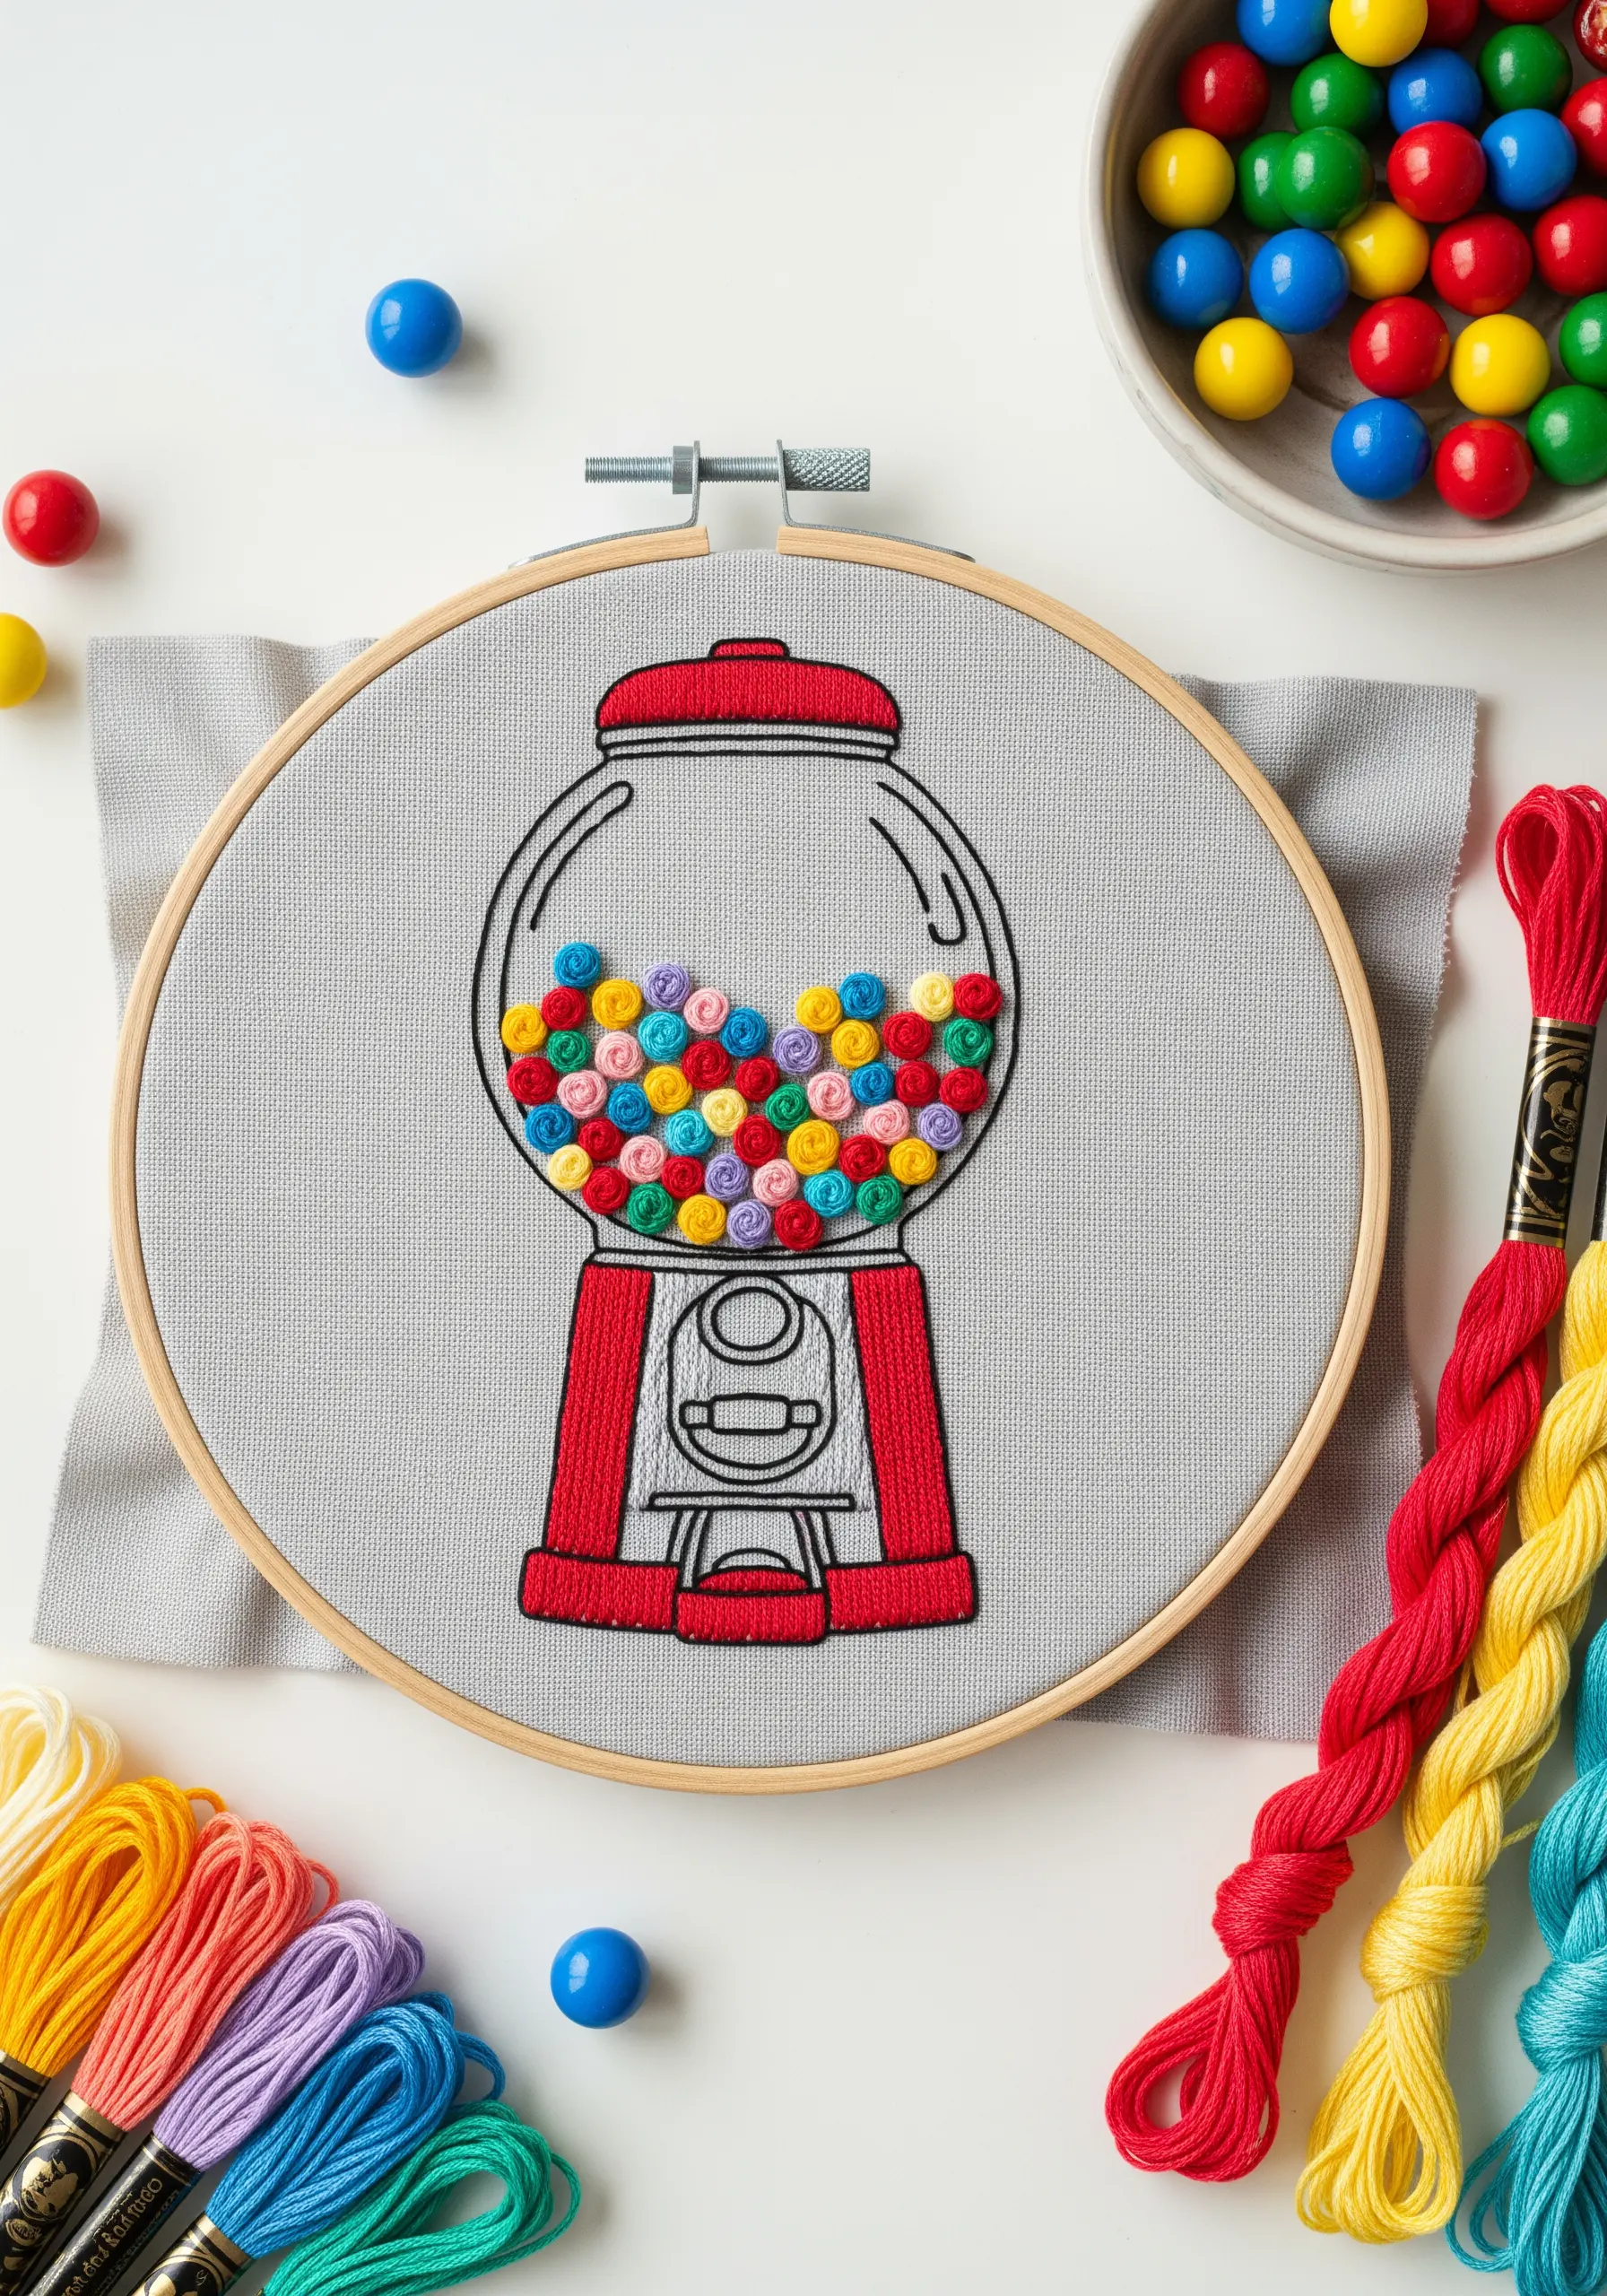
To make the gumballs in this design truly pop, use a raised stitch like the woven picot.
This stitch creates a small, three-dimensional bud that stands up from the fabric. You create a triangular foundation of three small stitches and then weave your thread through them to build up the shape.
By using bright, varied colors and clustering the stitches closely together, you can create a playful, tactile pile of gumballs that invites touch.
These kinds of whimsical embroidery ideas are perfect for adding a touch of fun to your hoop art.
24. Add Character with Simple Linework
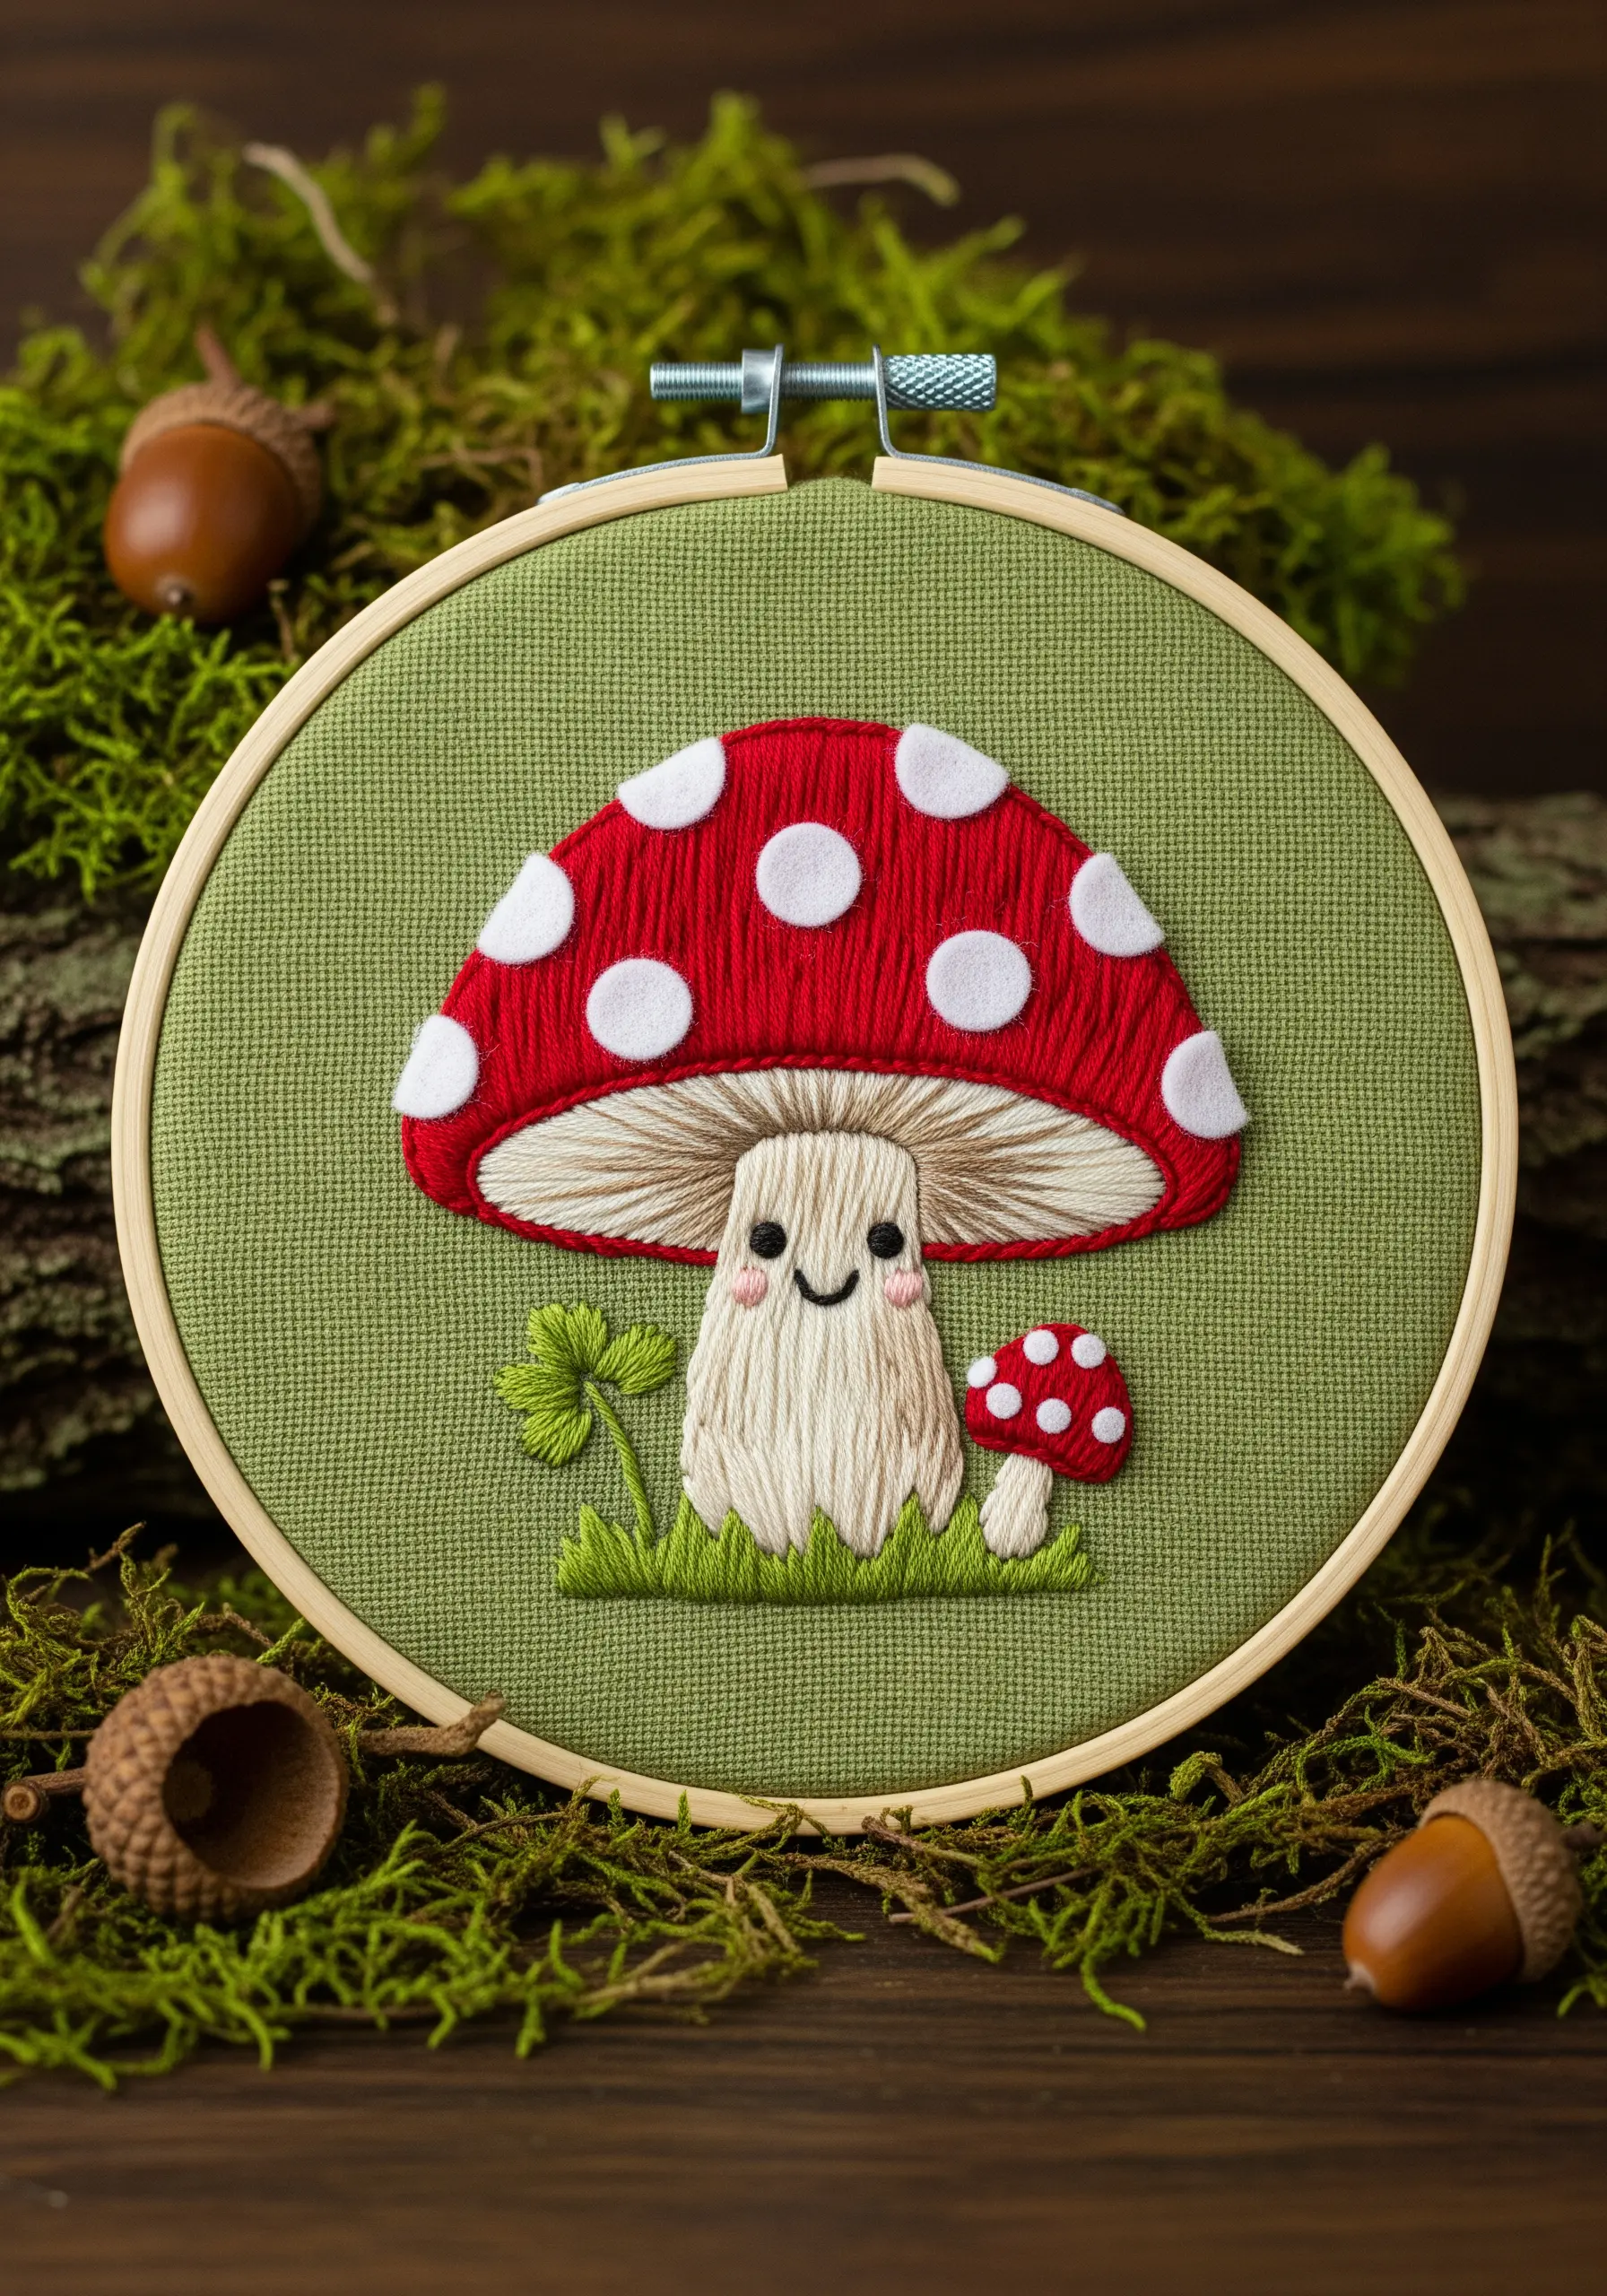
A few strategically placed stitches are all you need to give a simple motif a charming personality.
For the mushroom’s face, use a simple backstitch for the smiling mouth and two small straight stitches or French knots for the eyes.
To ensure the face is expressive, use a darker thread color, like black or dark brown, for maximum contrast against the lighter mushroom stem.
Cottage garden embroidery themes come to life with these small, character-defining details.
25. Embellish Linens with Botanical Motifs
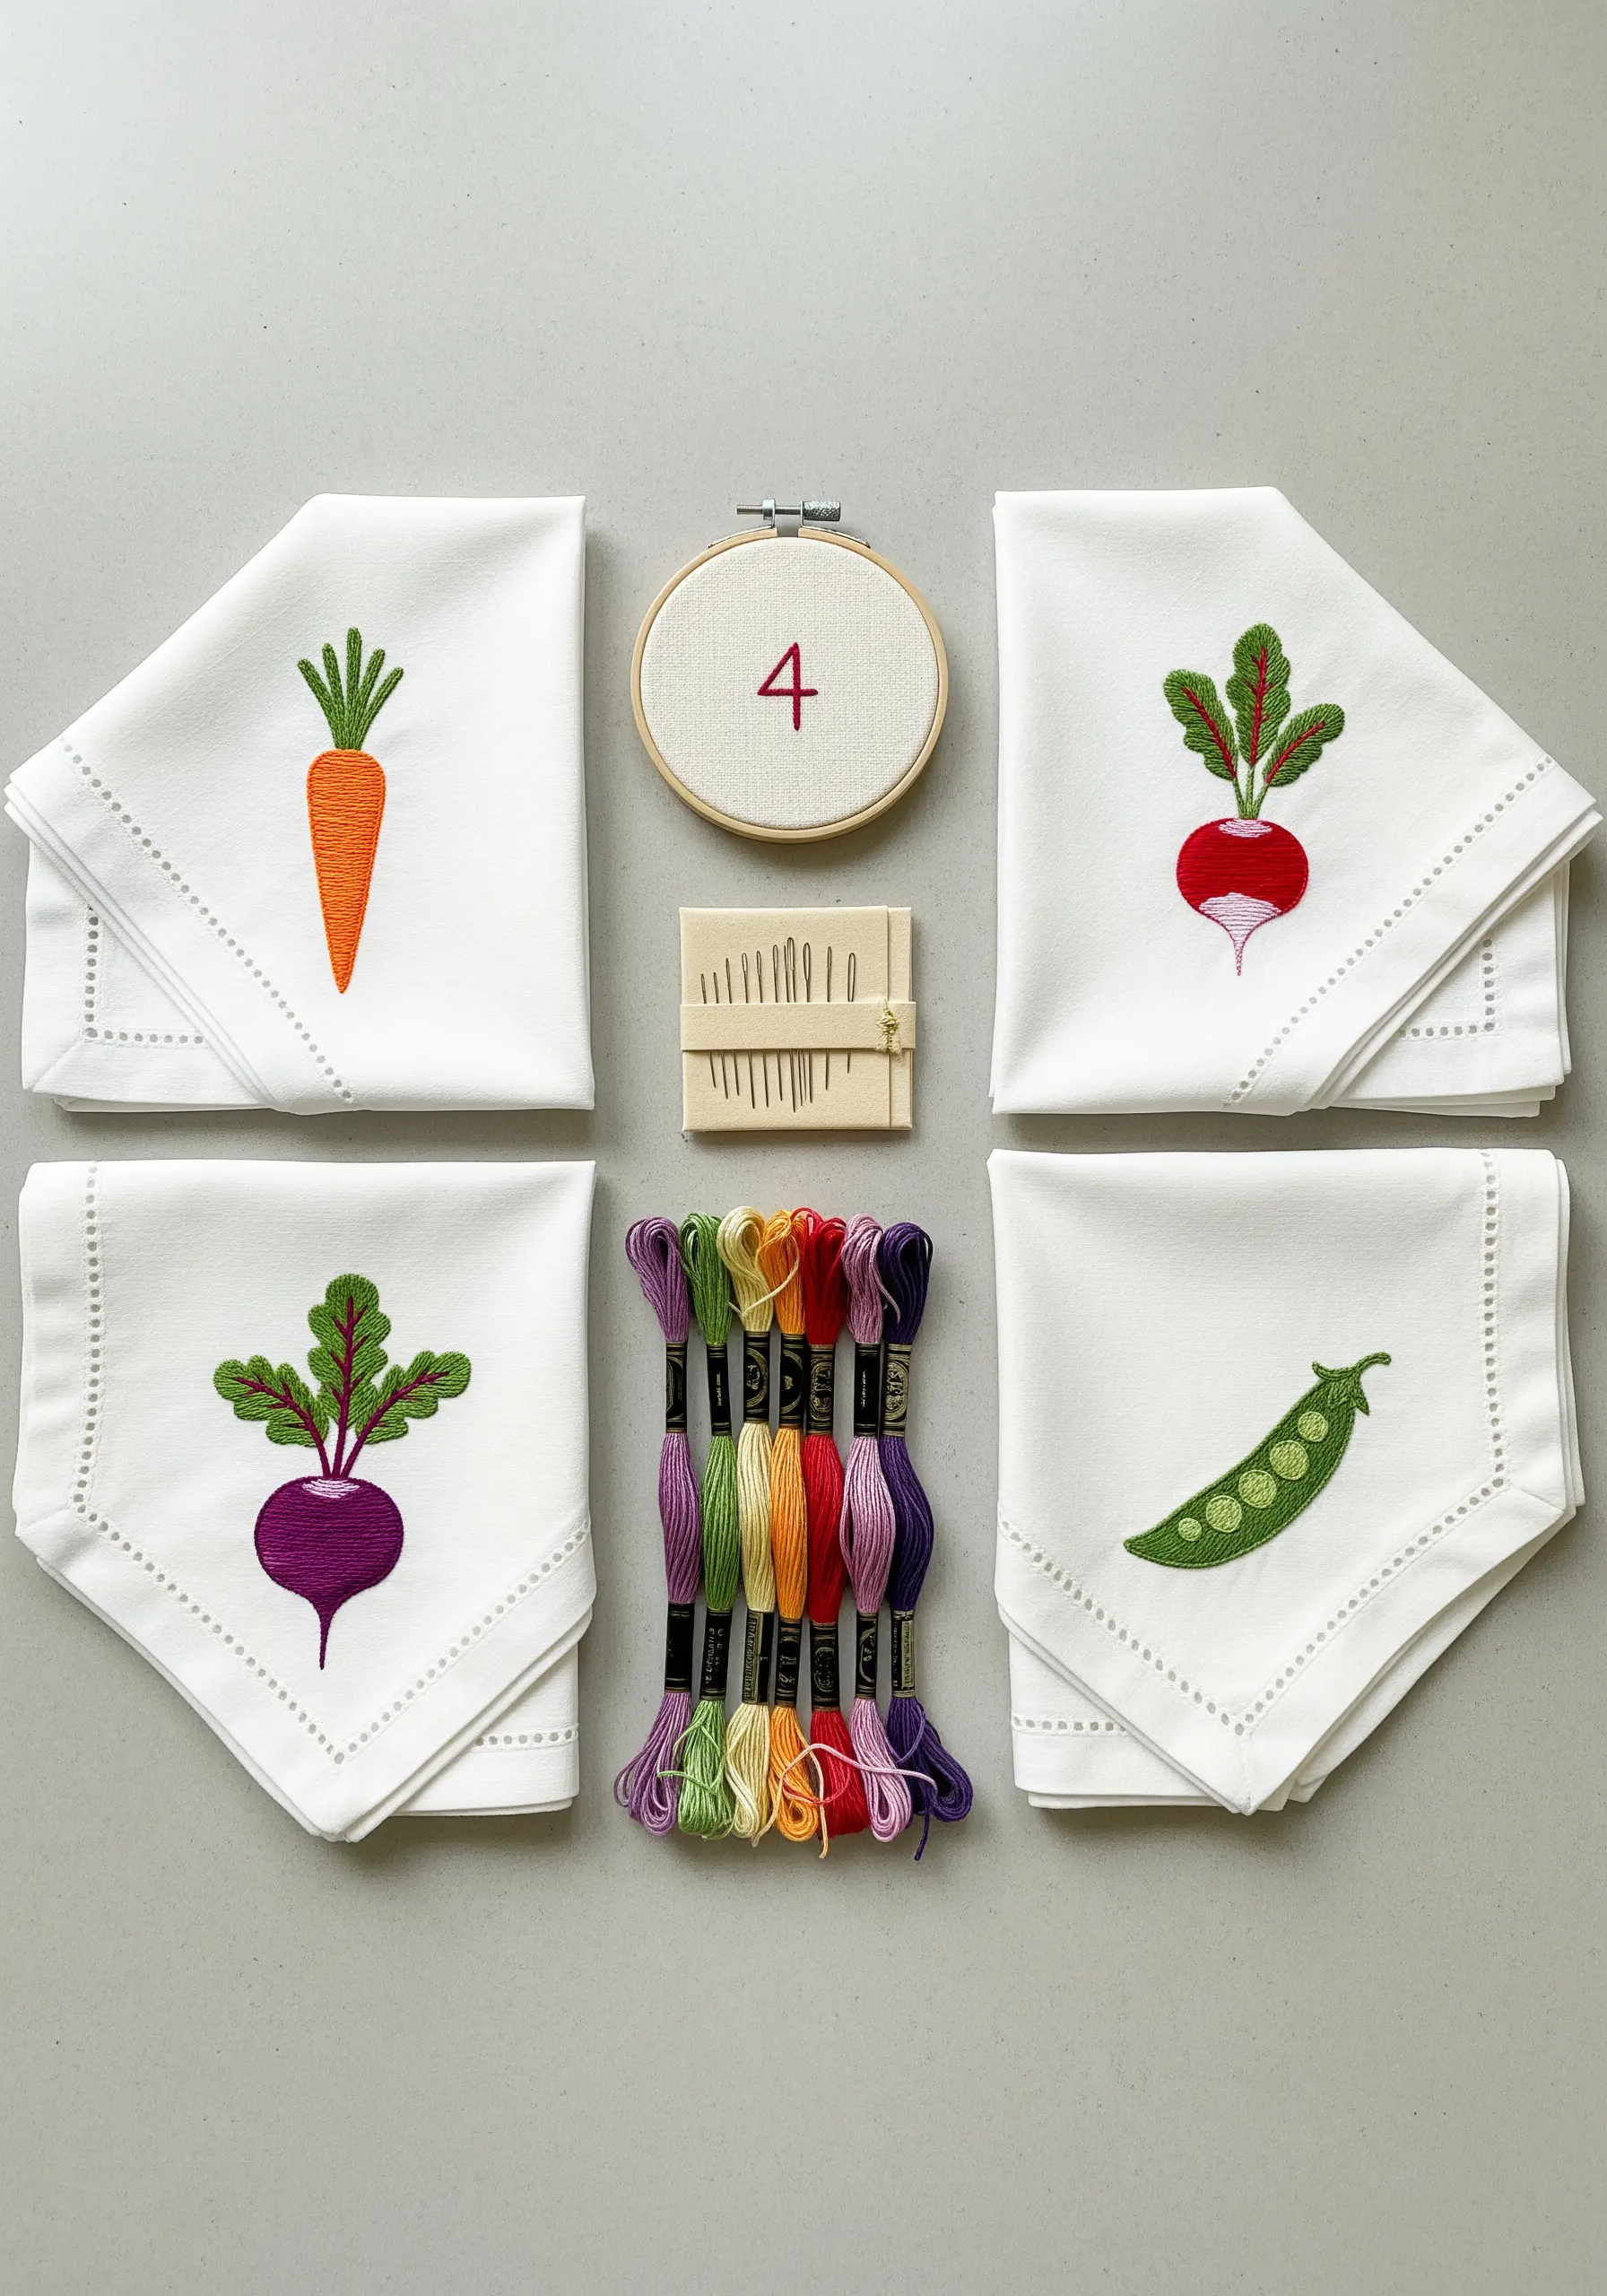
Transform a set of simple napkins into a charming collection by embroidering a different vegetable on each one.
Use a satin stitch for the main body of the vegetables and a stem stitch or backstitch for the leafy tops and details.
Choose a high-quality linen or cotton napkin, as natural fibers hold stitches beautifully and stand up well to washing.
These table linen embroidery motifs are a wonderful way to add a personalized, handmade touch to your dining room.


