
You have a pile of fabric scraps, an old linen shirt, or a plain cushion cover, and you see its potential. But how do you transform it into something that feels intentional, modern, and truly beautiful? The answer lies not in complex patterns, but in the thoughtful application of simple stitches.
This collection is your guide to looking at botanical embroidery differently. Forget filling every space with color. Instead, you’ll learn to use a single, bold line to create impact, or how a cluster of knots can build realistic texture. You will see how the choice of fabric isn’t just a background, but an active part of your design.
Here, you will find 32 ways to turn recycled materials into eco-chic decor. Each idea is a quiet lesson in composition, texture, and restraint. Let this be the moment you stop just stitching, and start designing with thread.
1. Master the Bold Chain Stitch Outline
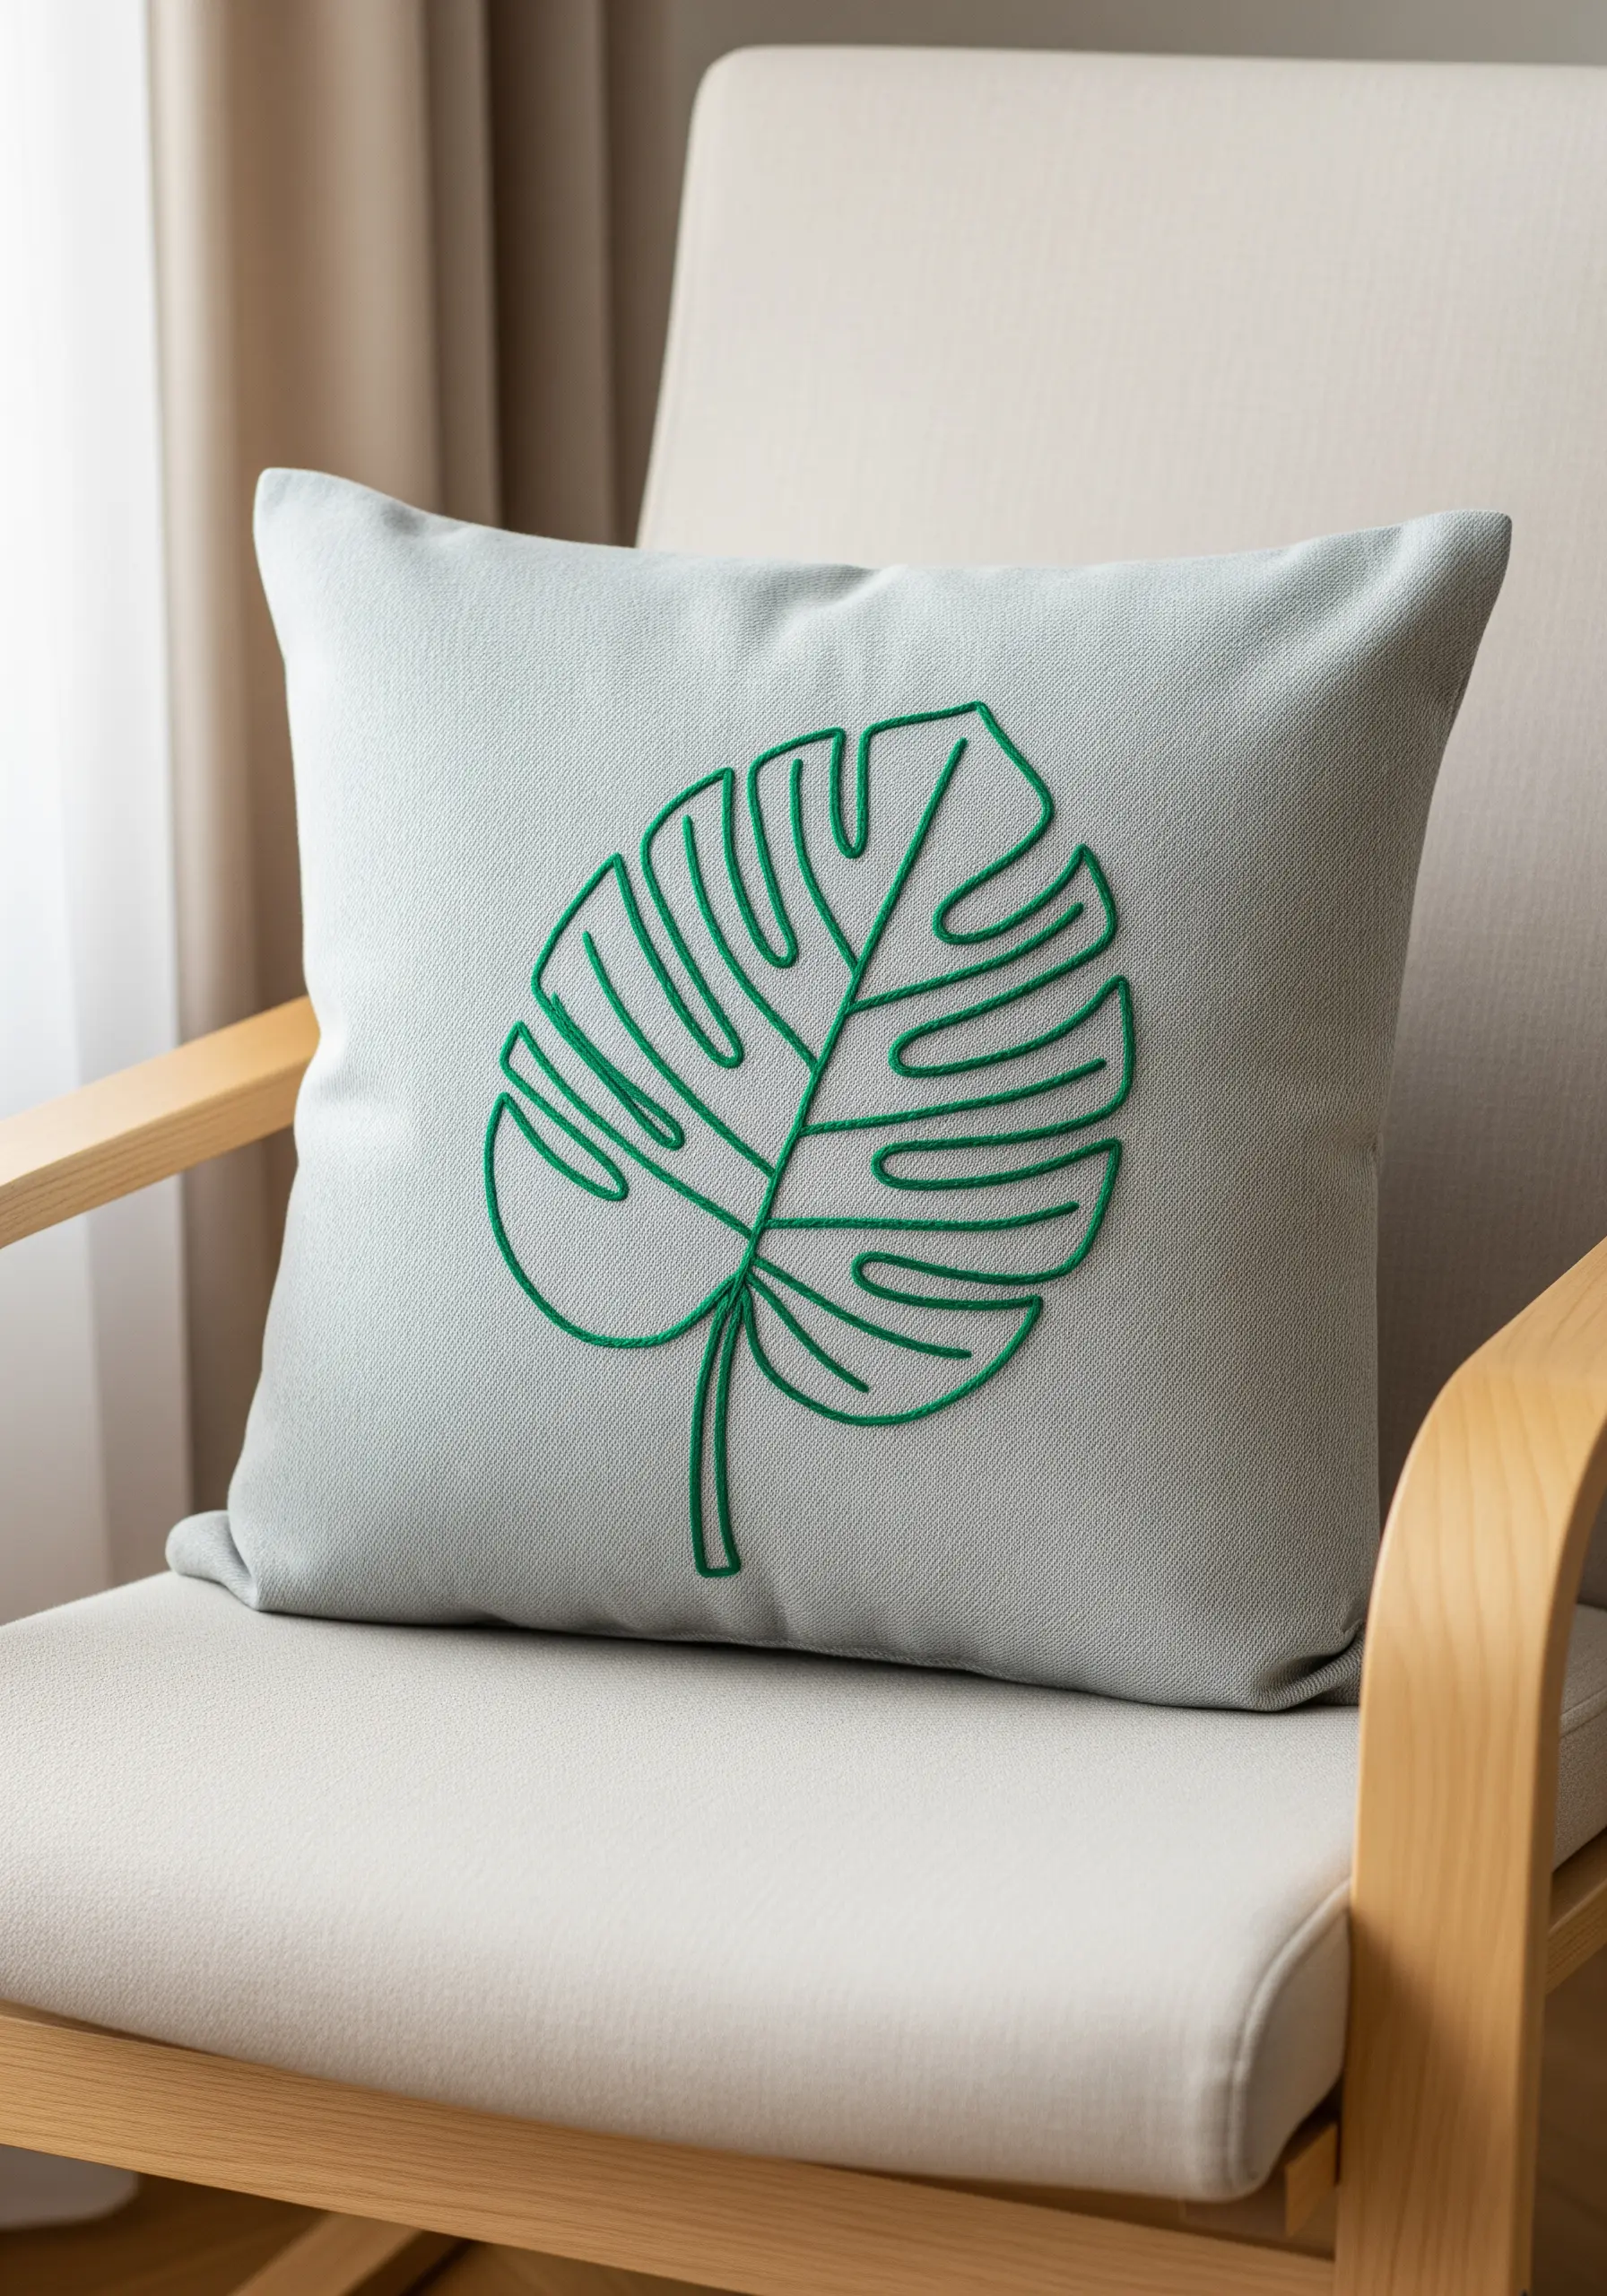
To achieve this clean, graphic Monstera leaf, use a chain stitch instead of a backstitch.
The interlocking loops of the chain stitch create a thicker, more defined line that stands out beautifully on home textiles like cushion covers.
Use all six strands of your embroidery floss for maximum impact, ensuring your stitches are small and even around the curves to maintain a smooth silhouette.
This technique turns a simple line drawing into one of many perfect hand-stitched cushion borders or centerpieces.
2. Create Realistic Texture with French Knots
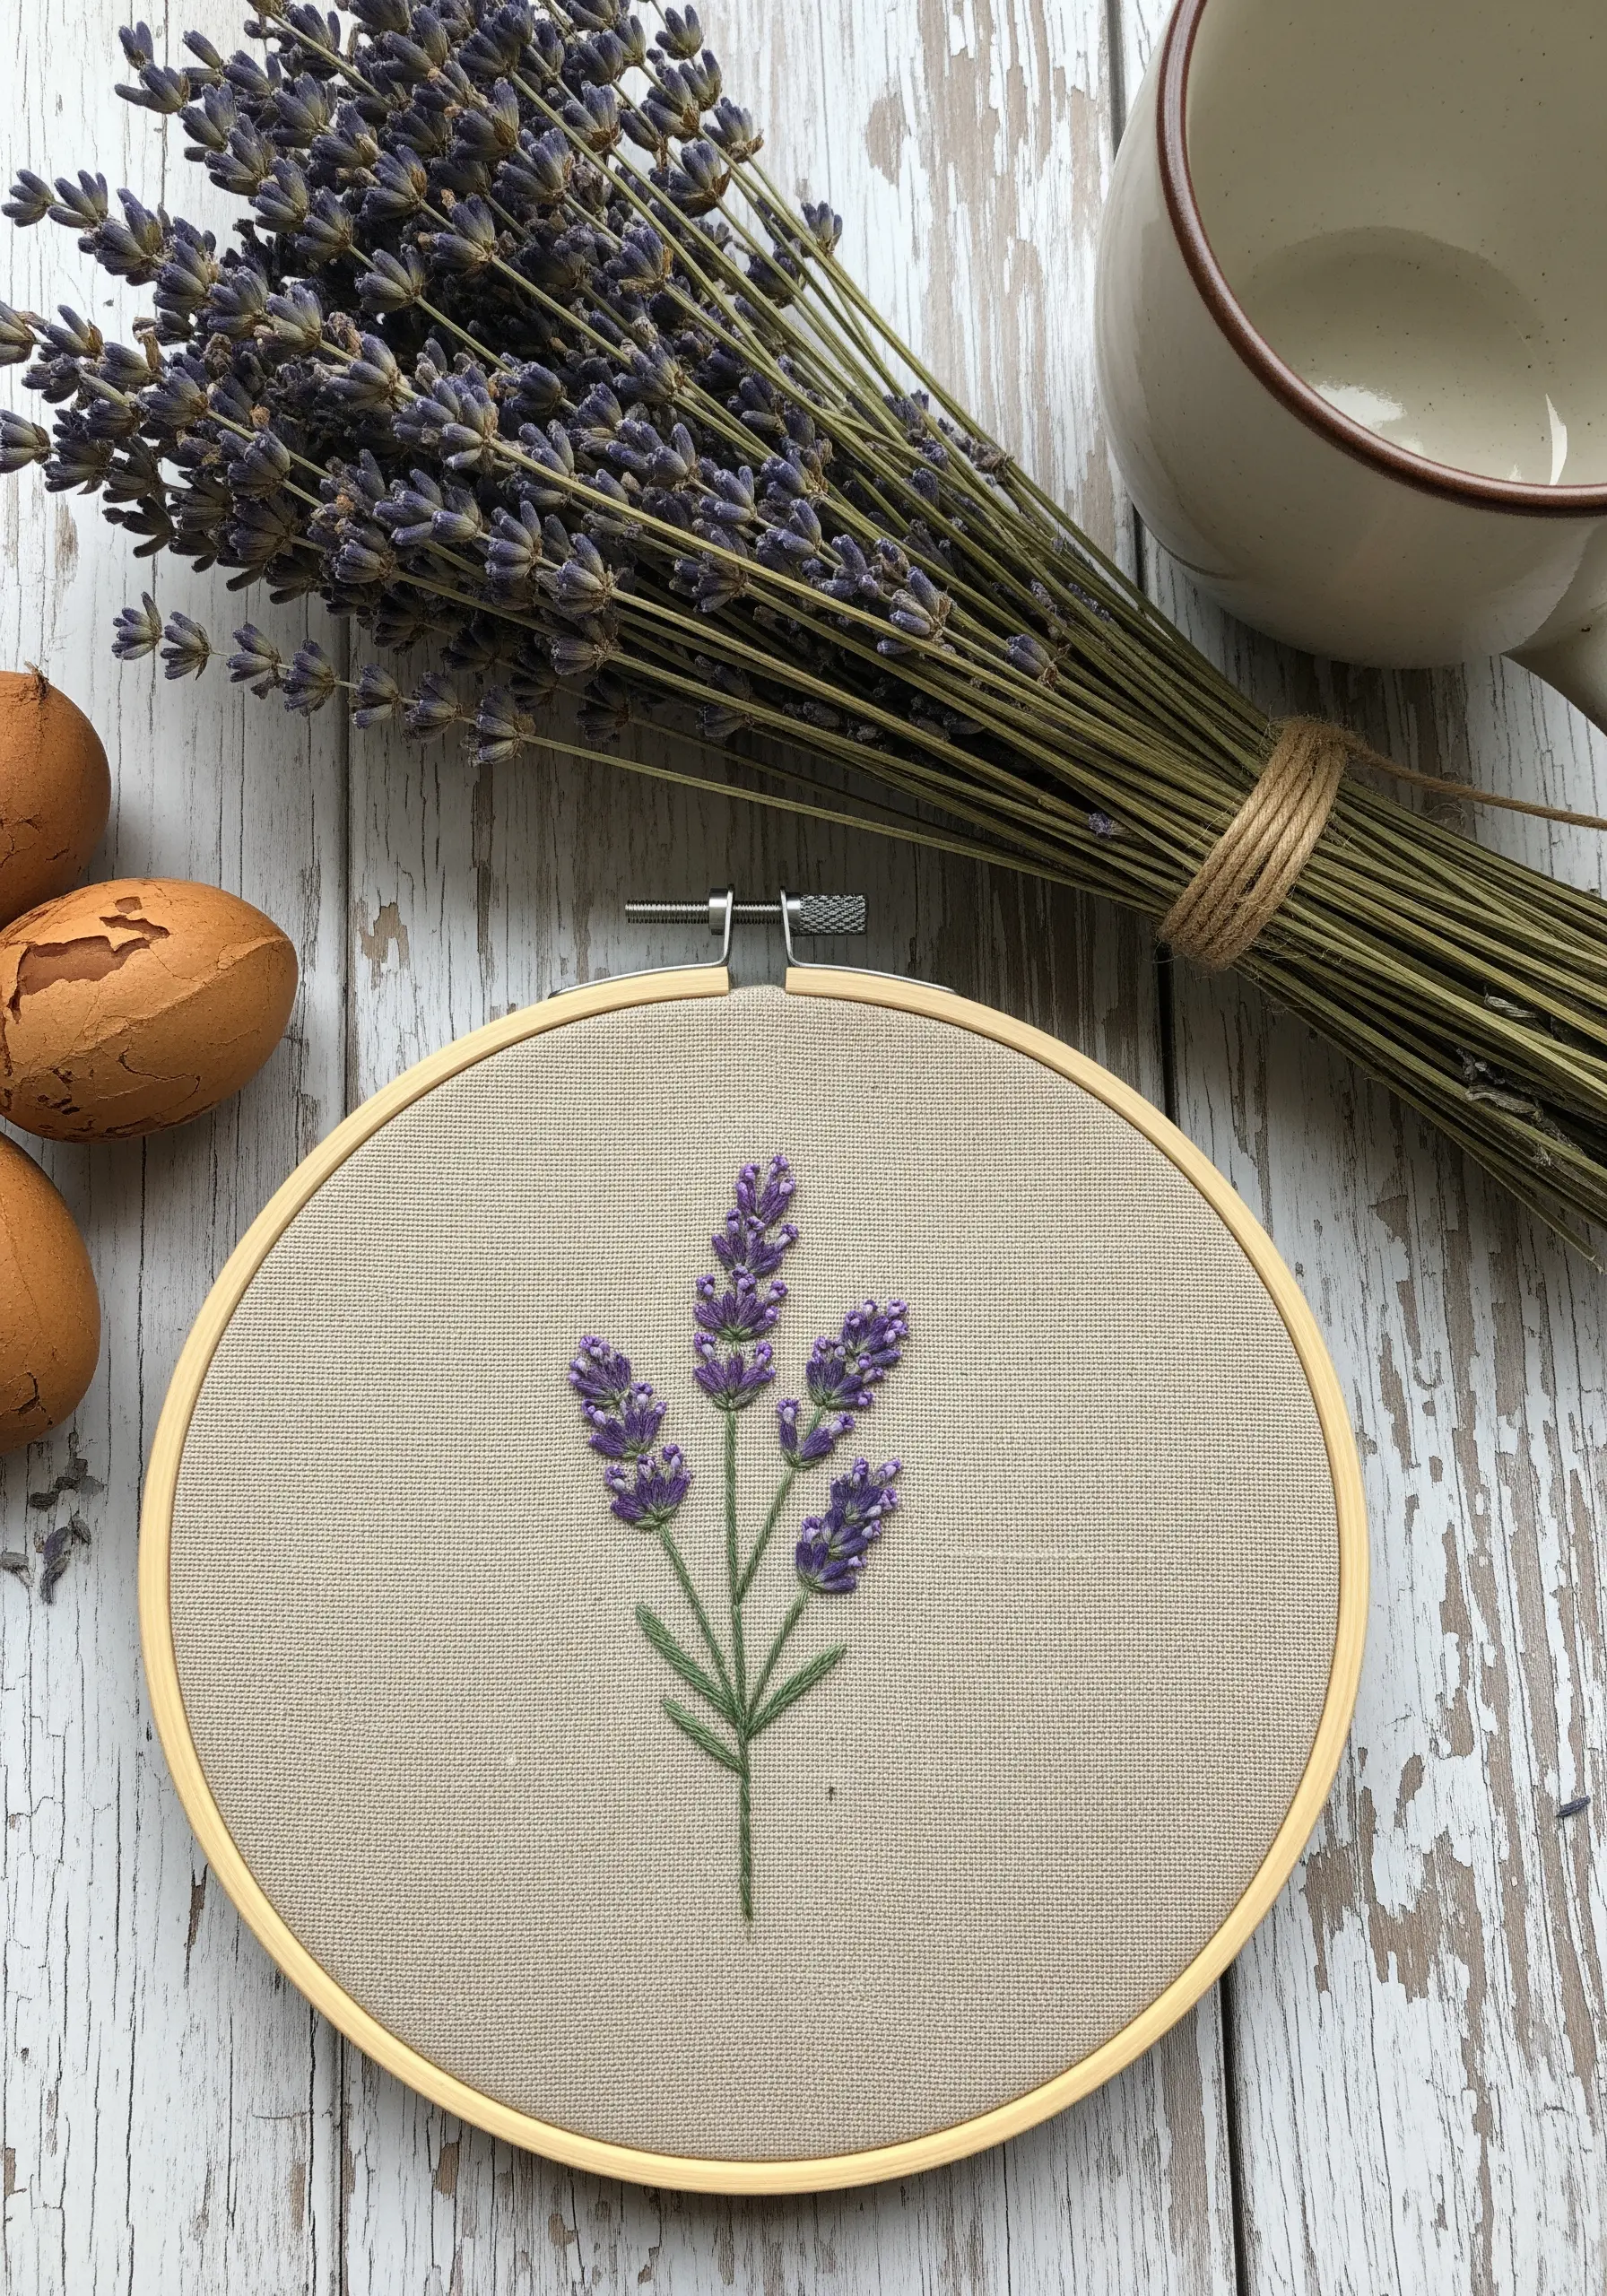
Give your lavender sprigs a lifelike, bumpy texture by using French knots for the blossoms.
Cluster them tightly at the top of each bud, varying the number of wraps around your needle (one or two) to create subtle differences in size.
Combine this with a delicate stem stitch in a contrasting green for the stalks. Using two strands for the stems and three for the knots creates a balanced composition.
This is one of the most effective delicate lavender stitch ideas for adding a touch of nature to your hoop art.
3. Achieve a Painterly Effect with Satin Stitch Blocks
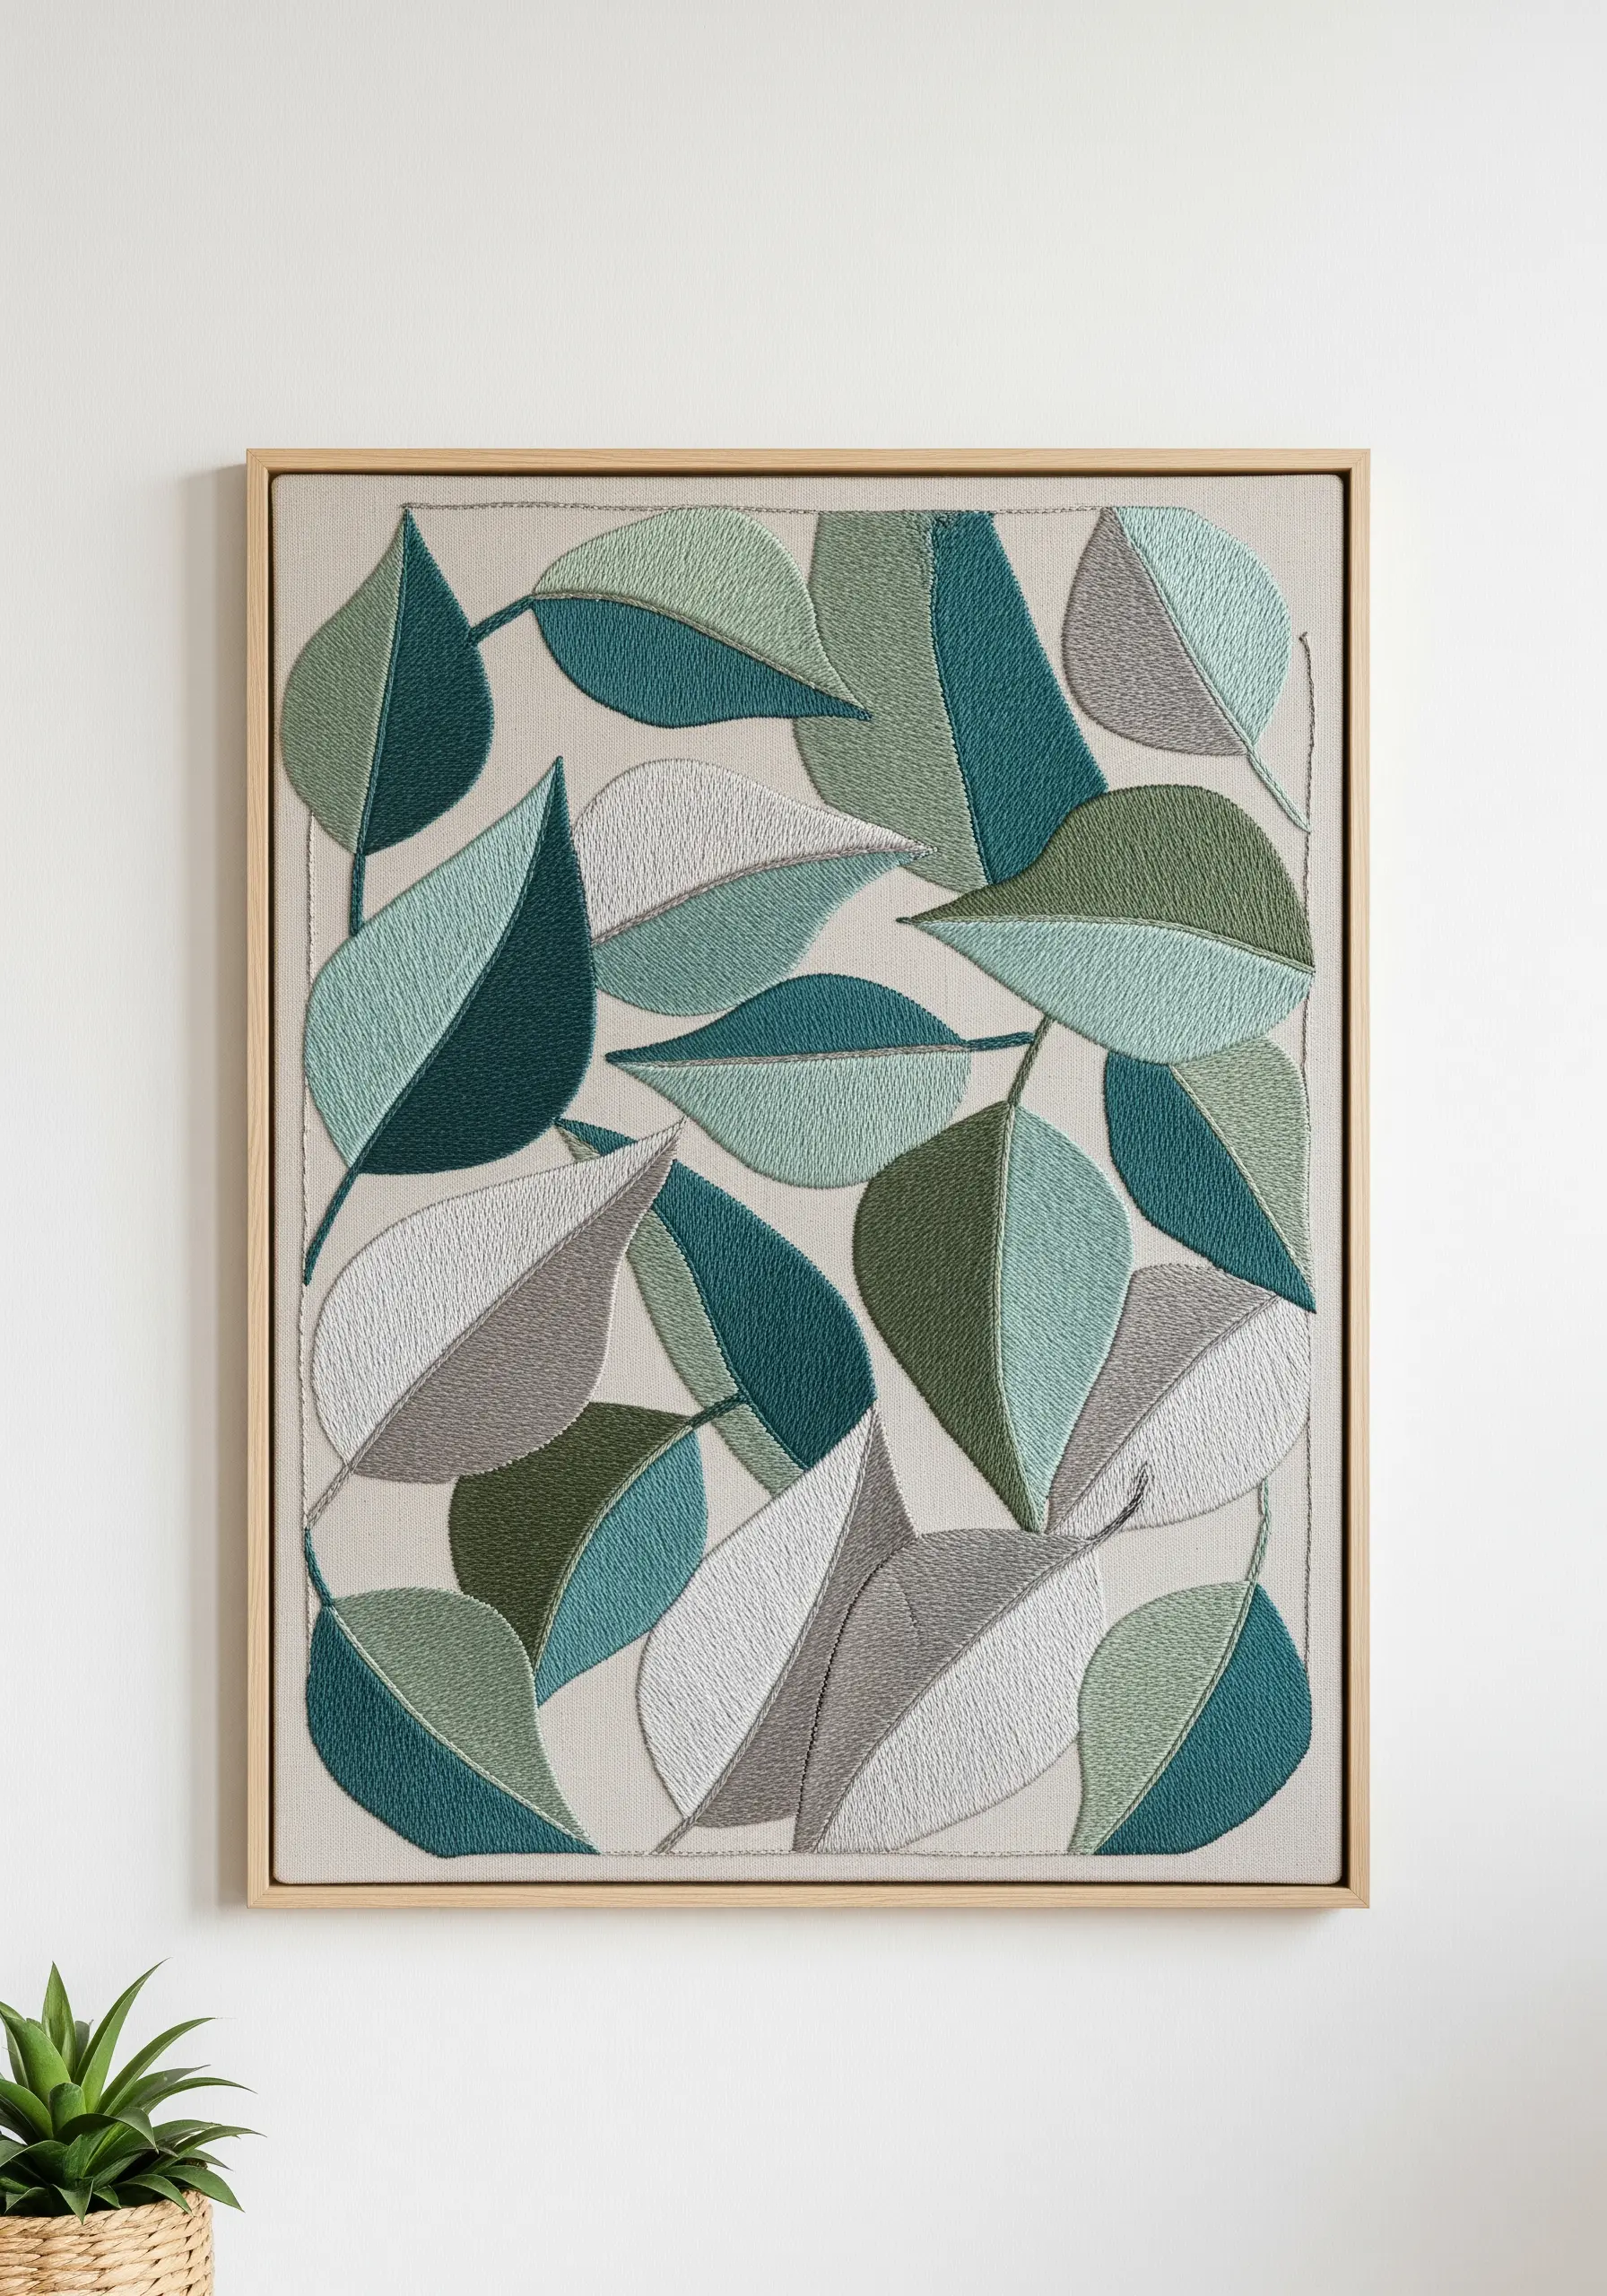
Transform a simple leaf pattern into a modern art piece by filling each shape with directional satin stitch.
Vary the angle of your stitches in adjacent leaves to catch the light differently, creating a subtle, shimmering mosaic effect.
Choose a calming, analogous color palette—like sage, teal, and moss green—to maintain harmony while still providing visual interest.
Stretching the finished piece over a canvas frame elevates it from a simple embroidery to one of many impressive, large-scale embroidery projects suitable for any wall.
4. Convey Movement with Deliberate Stitch Placement
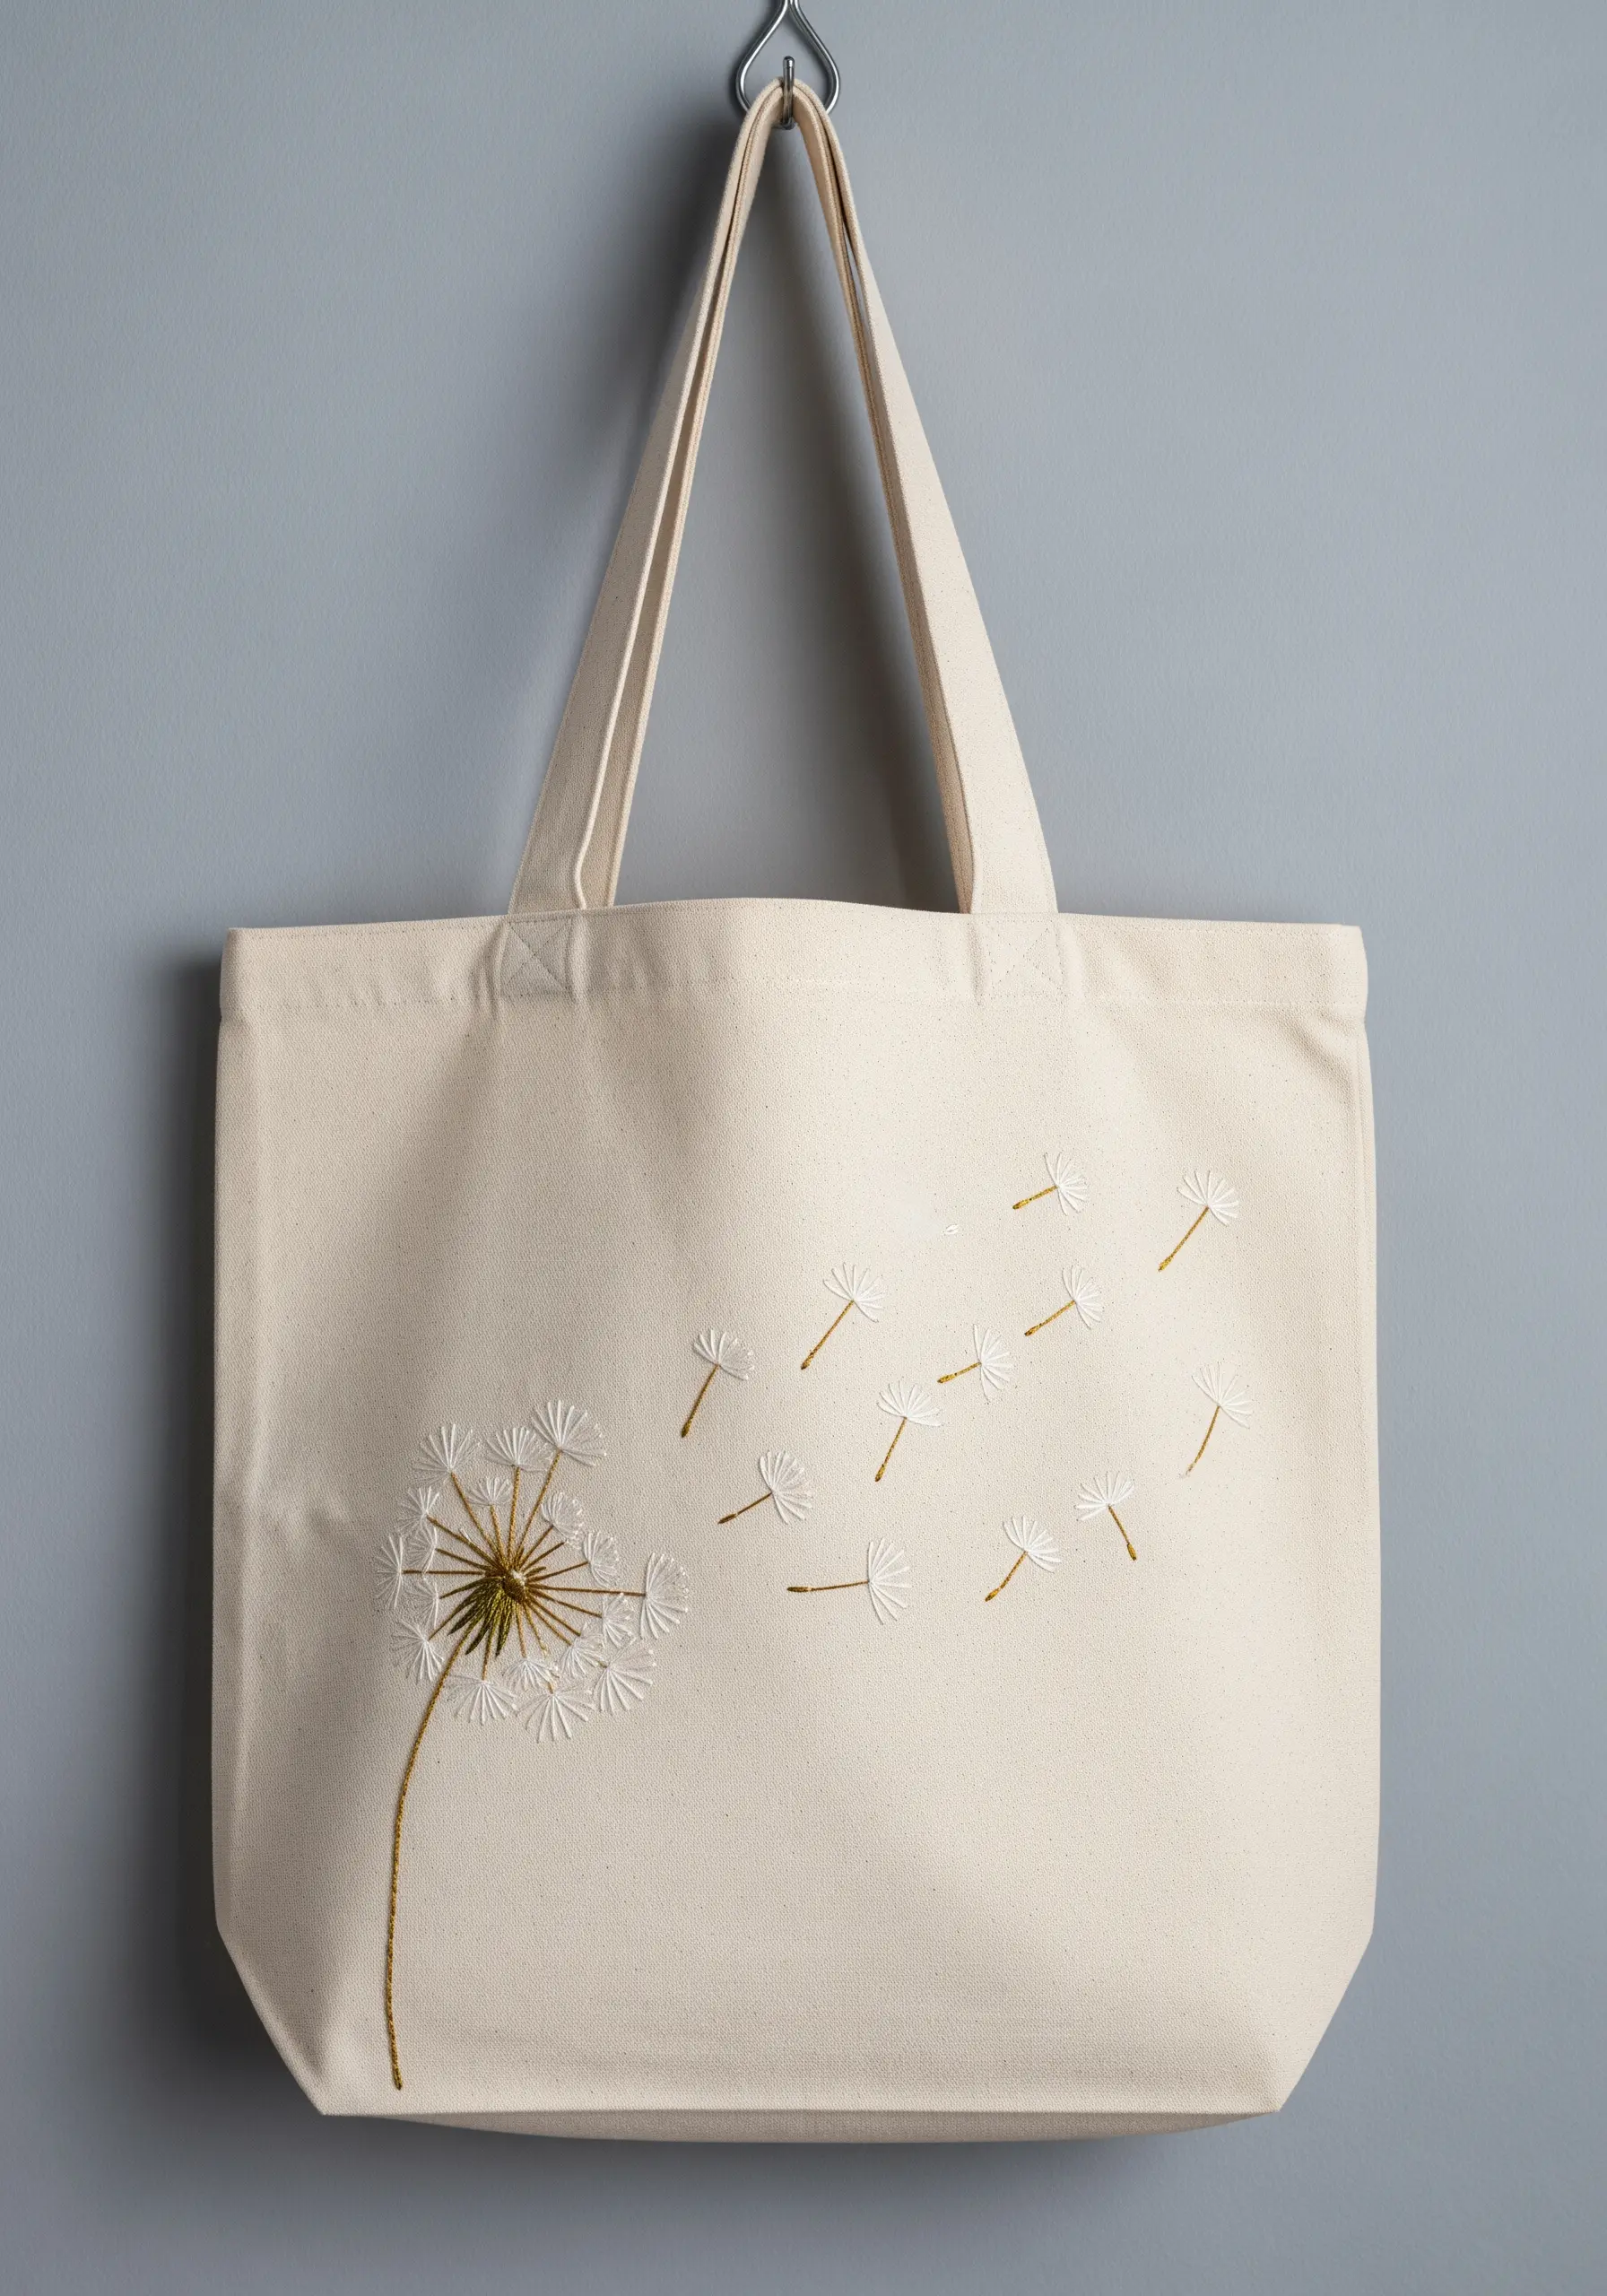
Capture the weightless quality of dandelion seeds by using single-strand floss and detached chain stitches.
Stitch the seeds at varying distances and angles from the main flower head to create a realistic sense of being carried by the wind.
For the dandelion head, combine a textured center of French knots with fine, radiating straight stitches to suggest delicacy.
This approach elevates simple minimalist line-art embroidery patterns into dynamic, storytelling vignettes on tote bags or apparel.
5. Use Negative Space to Define Your Motif
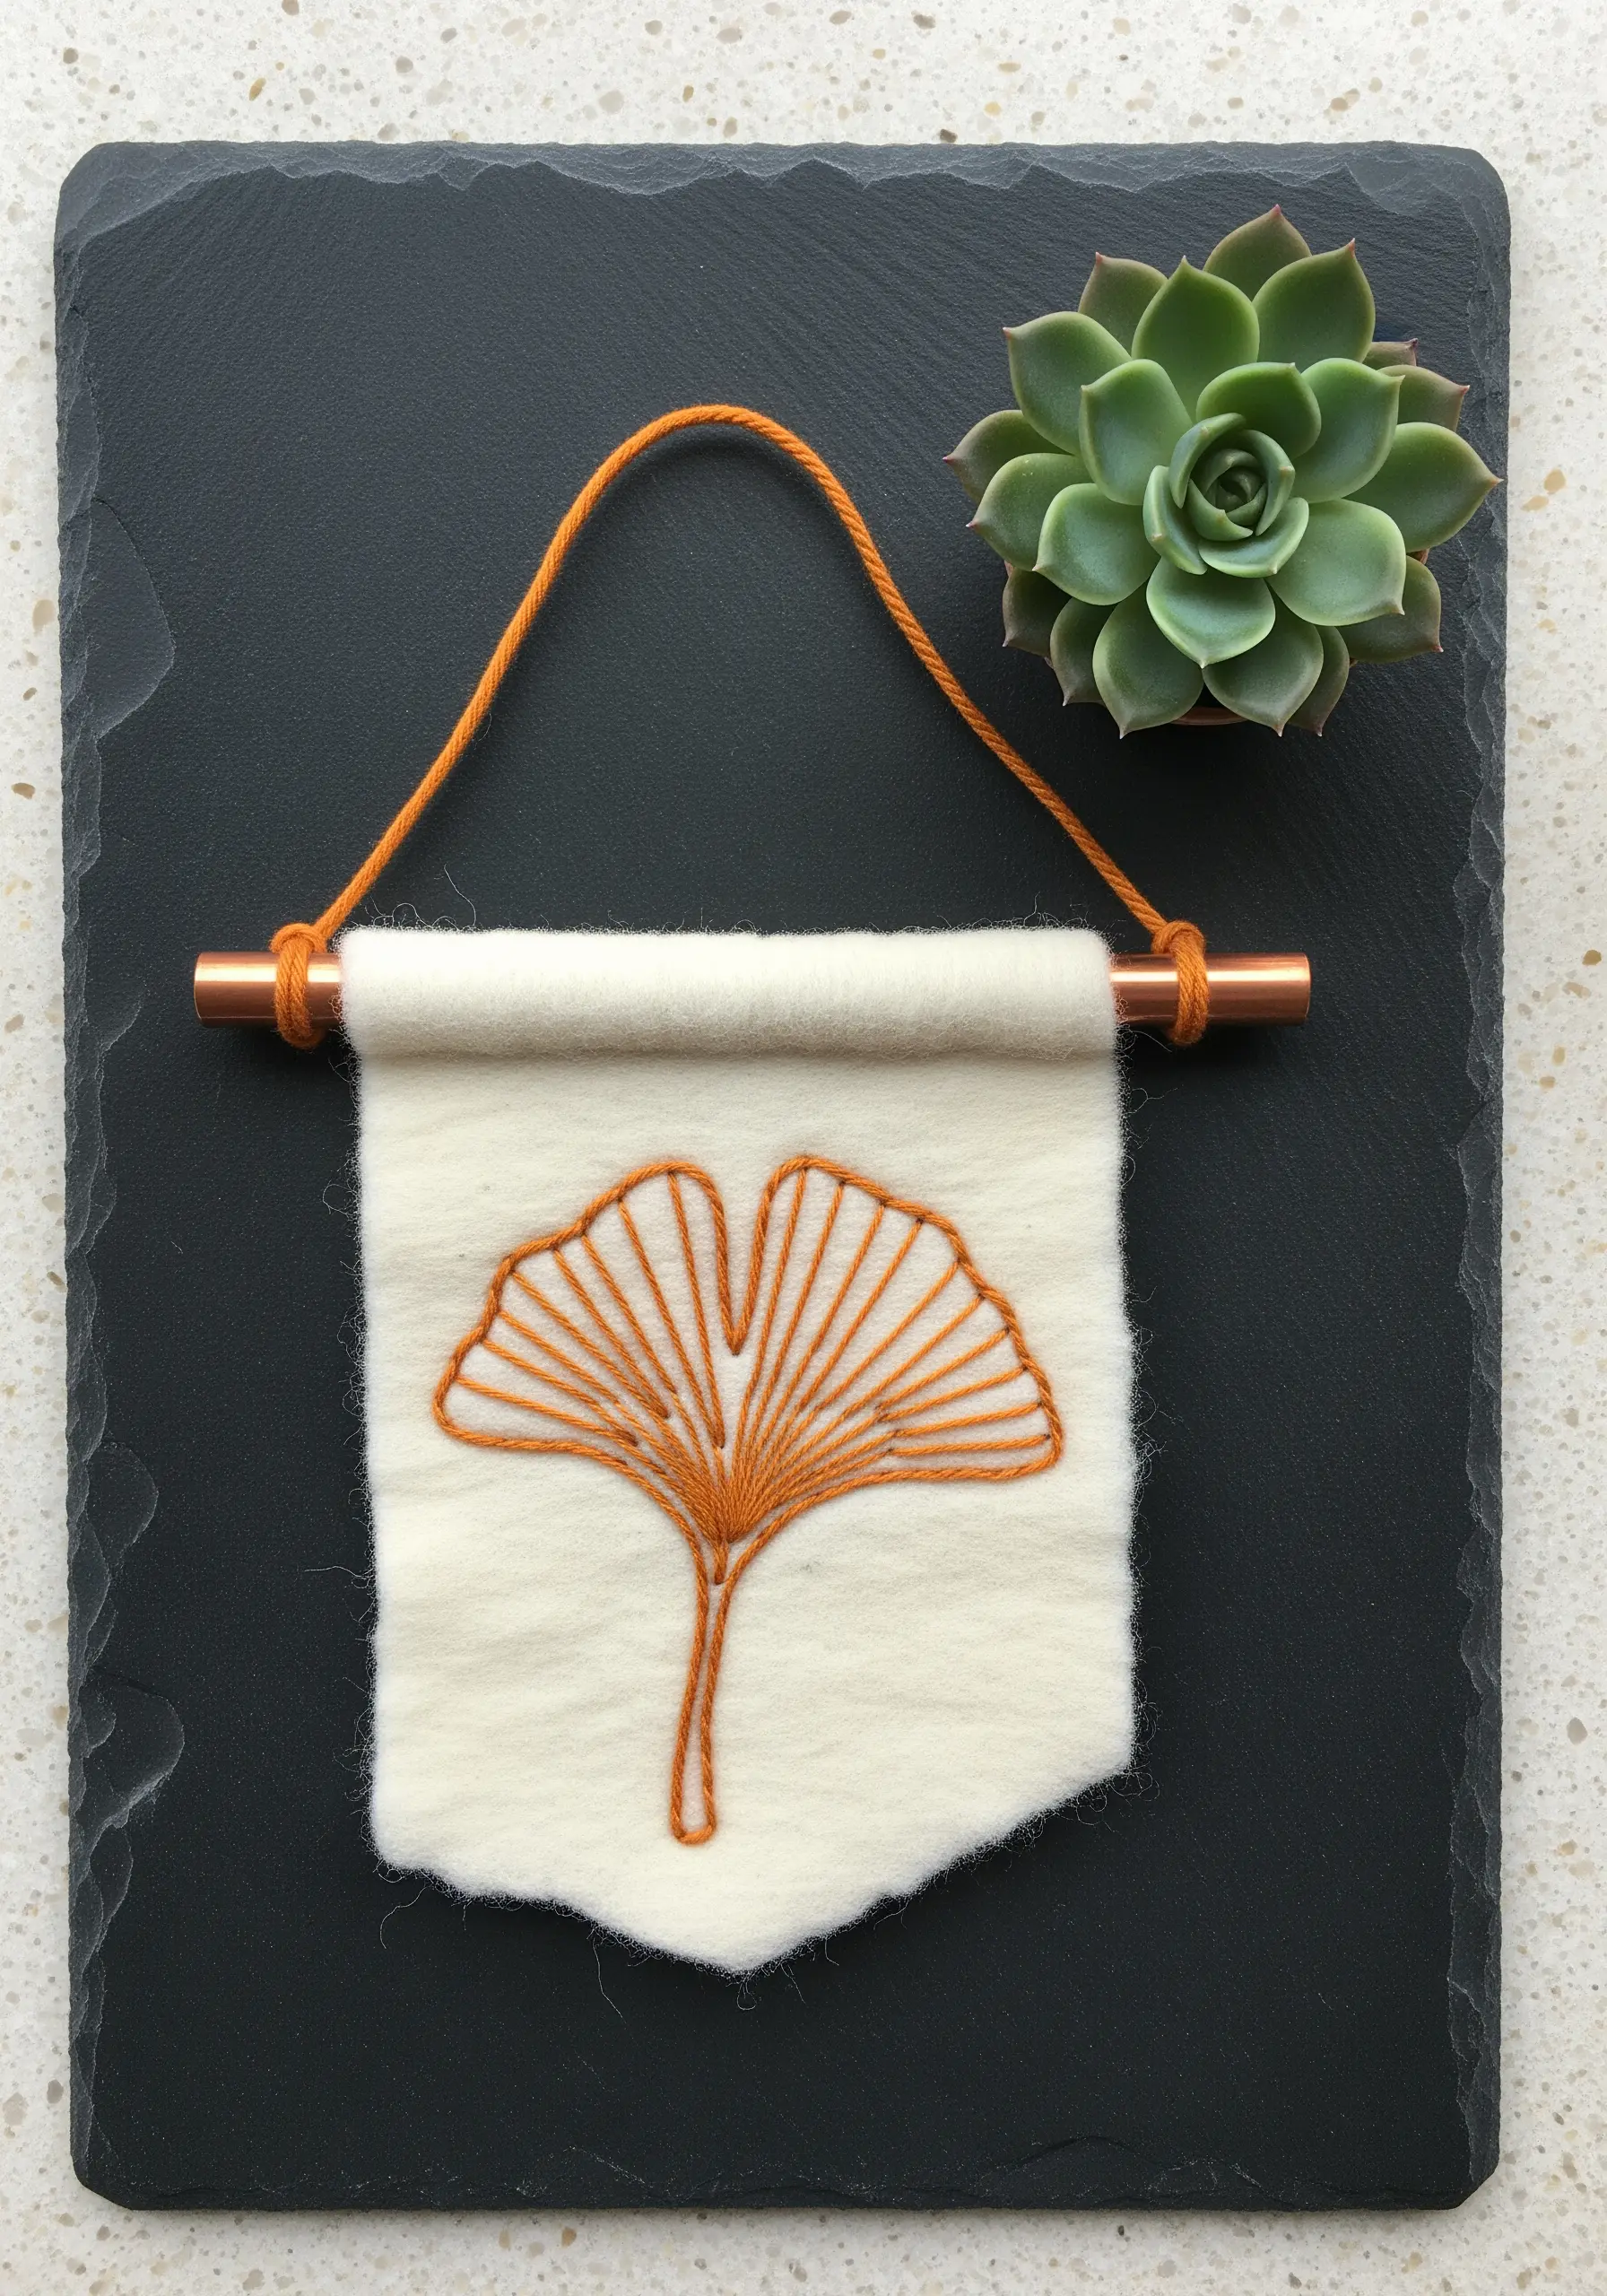
On a textured fabric like wool felt, a simple outline can have more impact than a fully filled design.
Stitch this ginkgo leaf using long, radiating backstitches that converge at the stem, allowing the fabric’s texture to become part of the artwork.
The space between the stitches is just as important as the thread itself, creating a design that feels both delicate and strong.
This concept is central to many minimalist yarn wall art techniques, where simplicity creates sophistication.
6. Unify a Collection with Color and Fabric
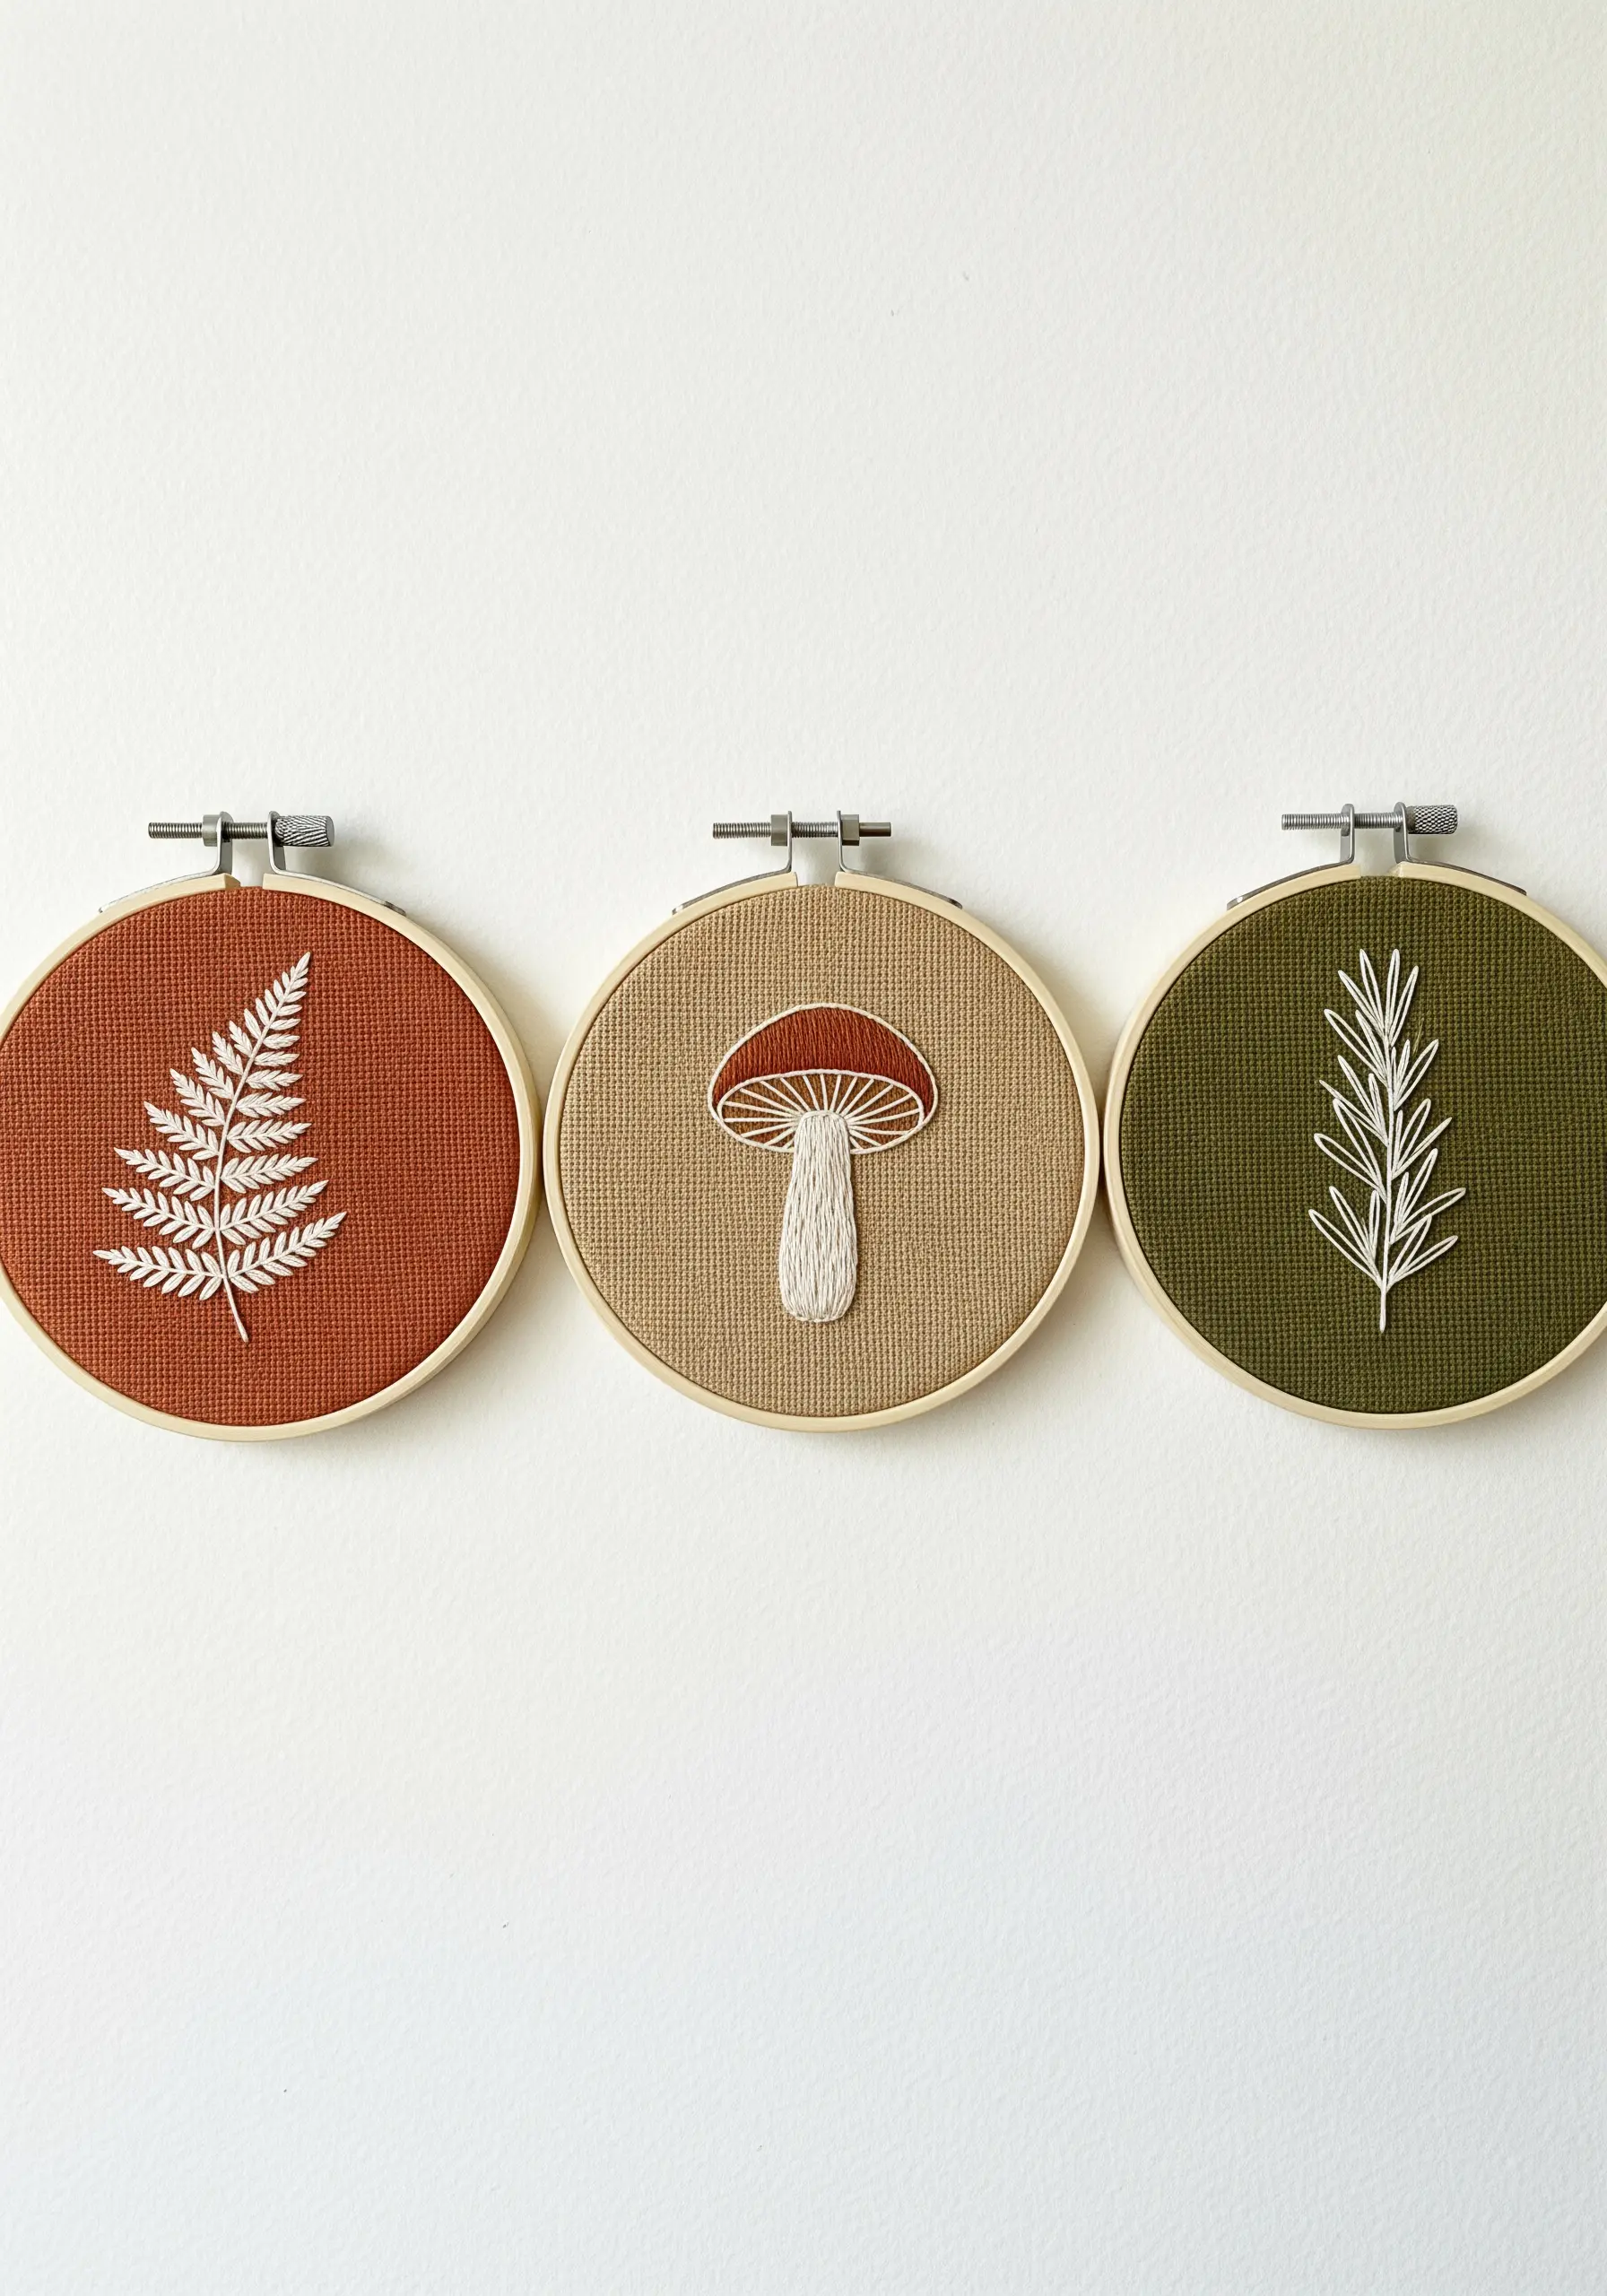
To create a cohesive trio of botanical hoops, limit your palette and use complementary background fabrics.
Here, earthy tones of rust, beige, and olive green provide a foundation that makes the simple white and tan threads pop.
Stitch each design—fern, mushroom, and rosemary—with clean, simple stitches like backstitch and satin stitch to maintain a consistent aesthetic.
Displaying them together turns individual pieces into a curated set of minimalist embroidery hoops.
7. Design an Elegant, Continuous Vine
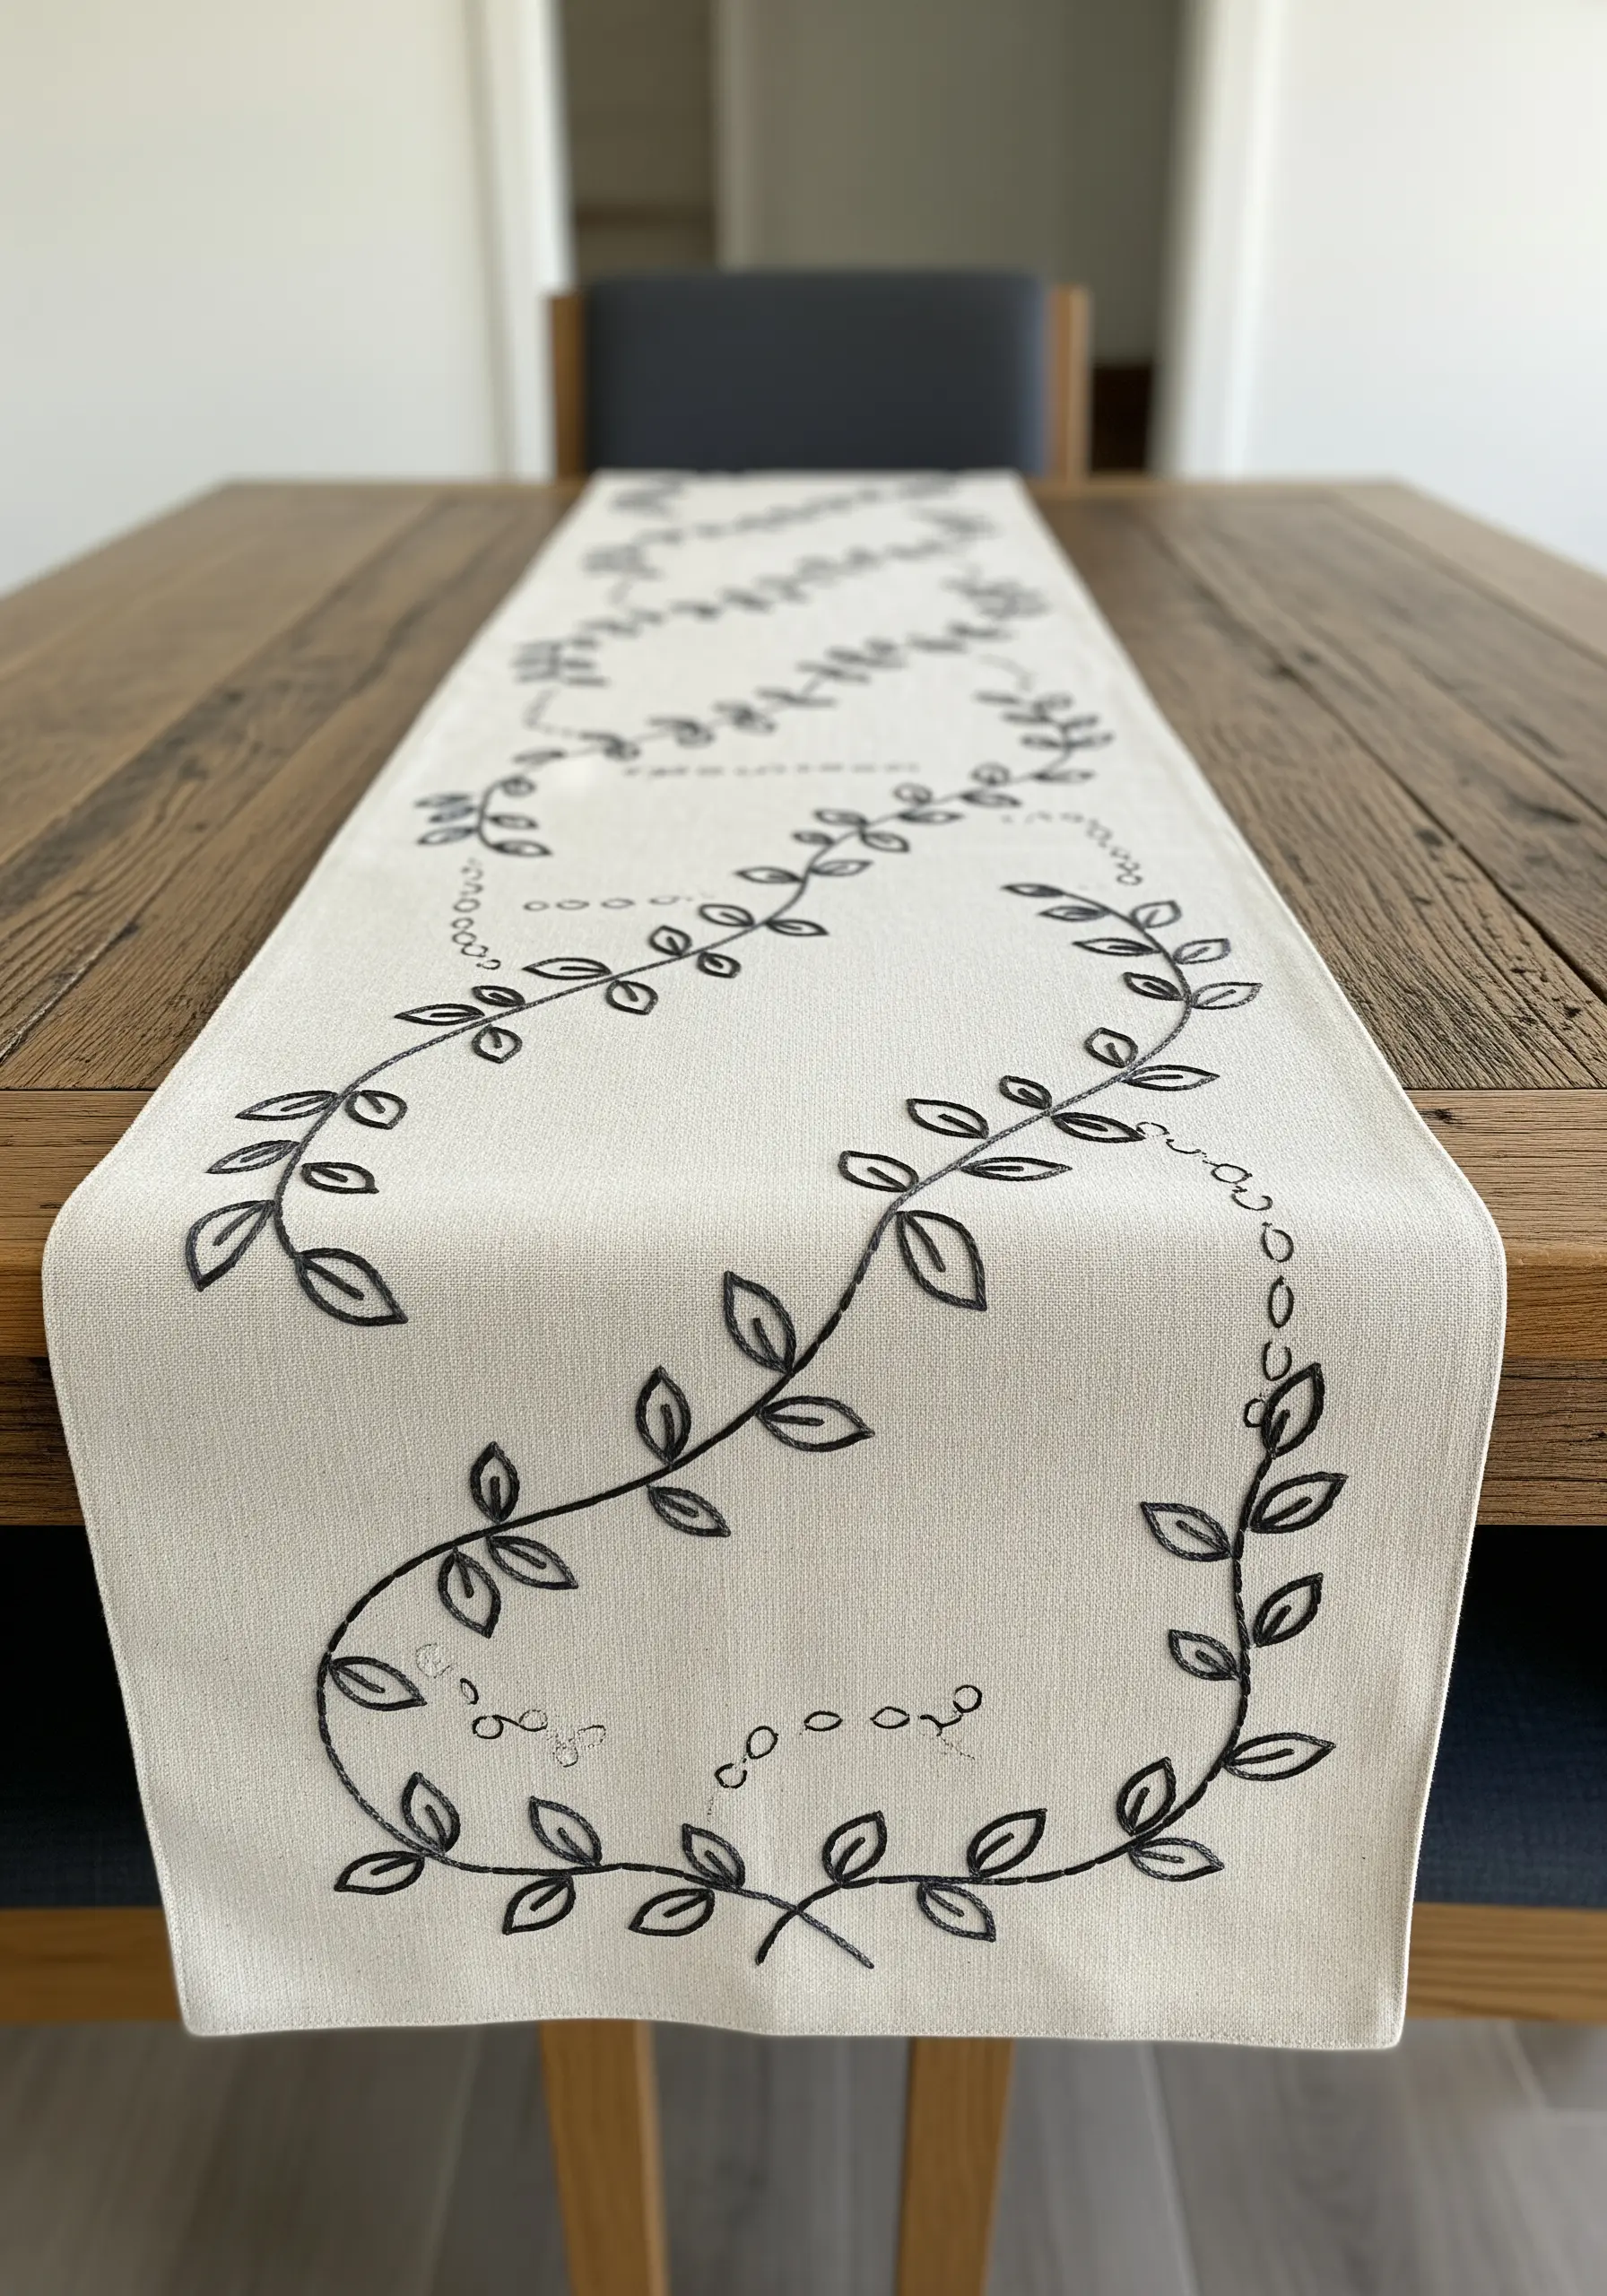
For a long surface like a table runner, a meandering vine creates beautiful visual flow.
Use a simple stem stitch or backstitch in a dark, contrasting thread to draw the main vine, ensuring the curves are smooth and organic.
Vary the pattern by alternating between filled leaves (satin stitch) and simple outlines to prevent the design from feeling too repetitive.
This is one of the most timeless hand-stitched table runner embroidery designs you can create.
8. Master Miniature Florals on Felt
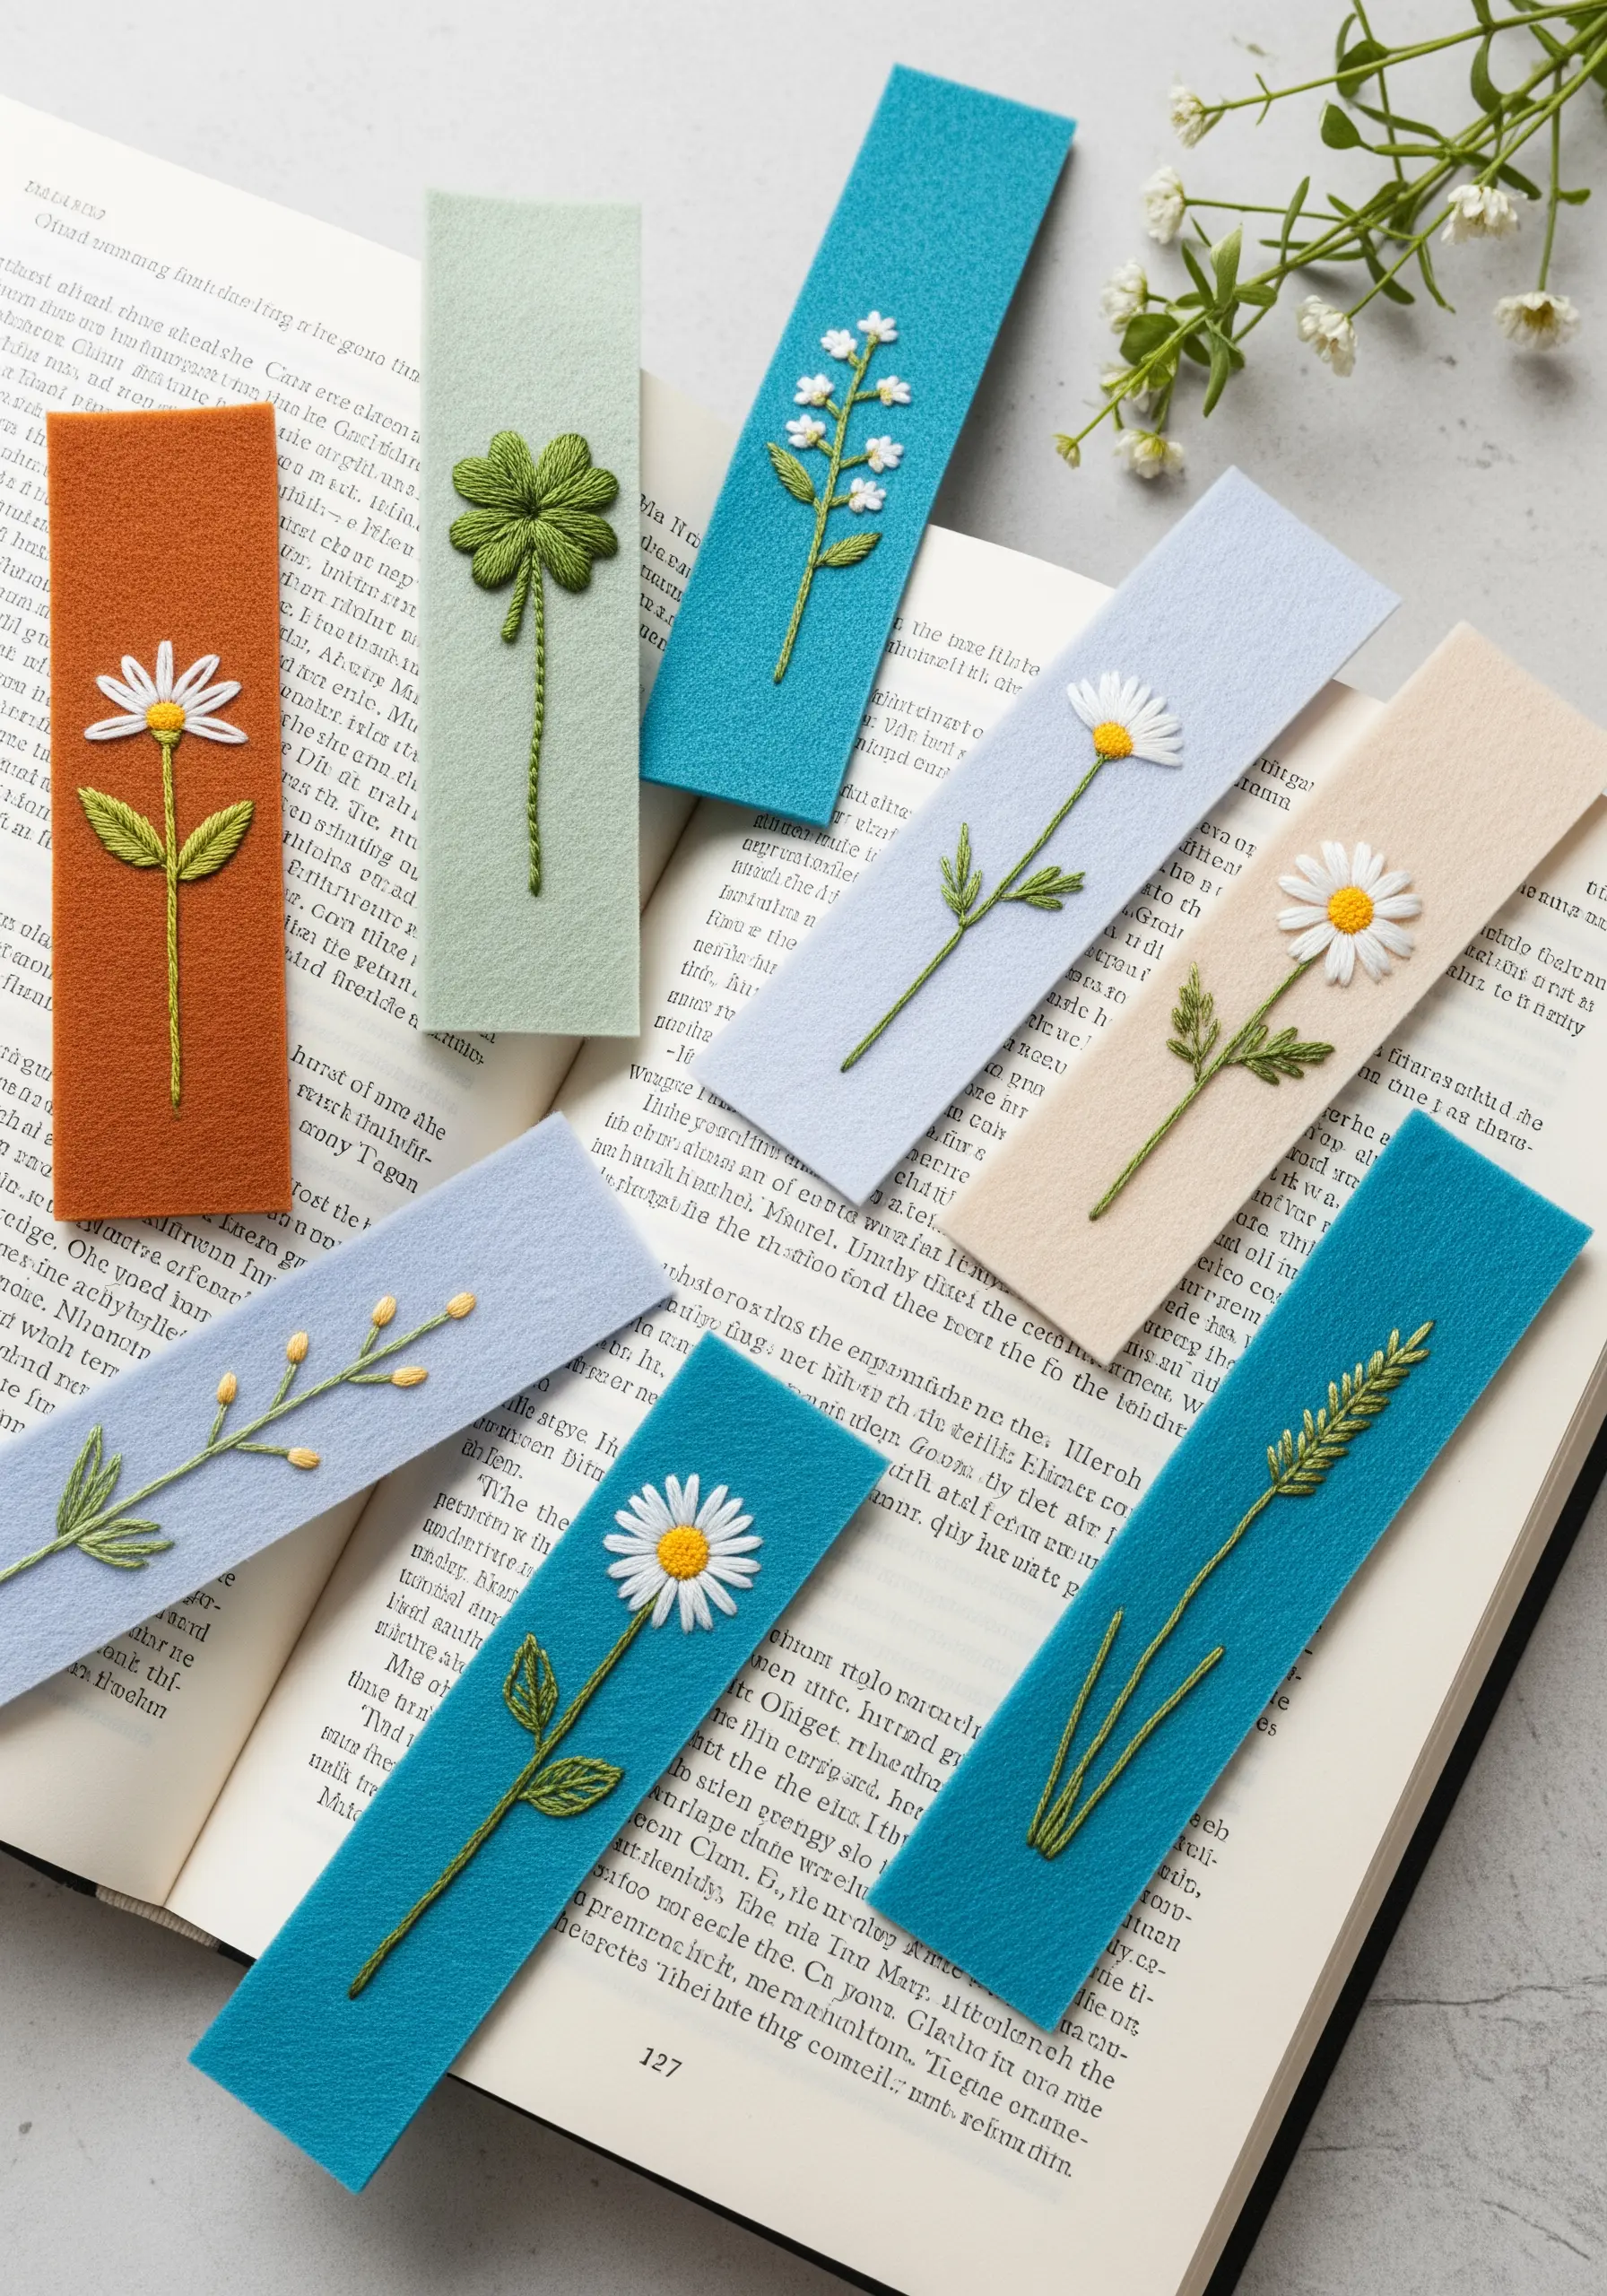
Stitching on felt offers a stable, non-fraying base perfect for small projects like bookmarks.
Use basic stitches to create high-impact botanicals: lazy daisy stitch for petals, French knots for centers, and stem stitch for the stalks.
A sharp needle is key to piercing the dense felt cleanly. The vibrant thread against a solid-colored background makes these tiny designs stand out.
These DIY cozy embroidery bookmarks are a perfect way to use up small fabric scraps.
9. Create Contrast with Metallic Threads on Dark Fabric
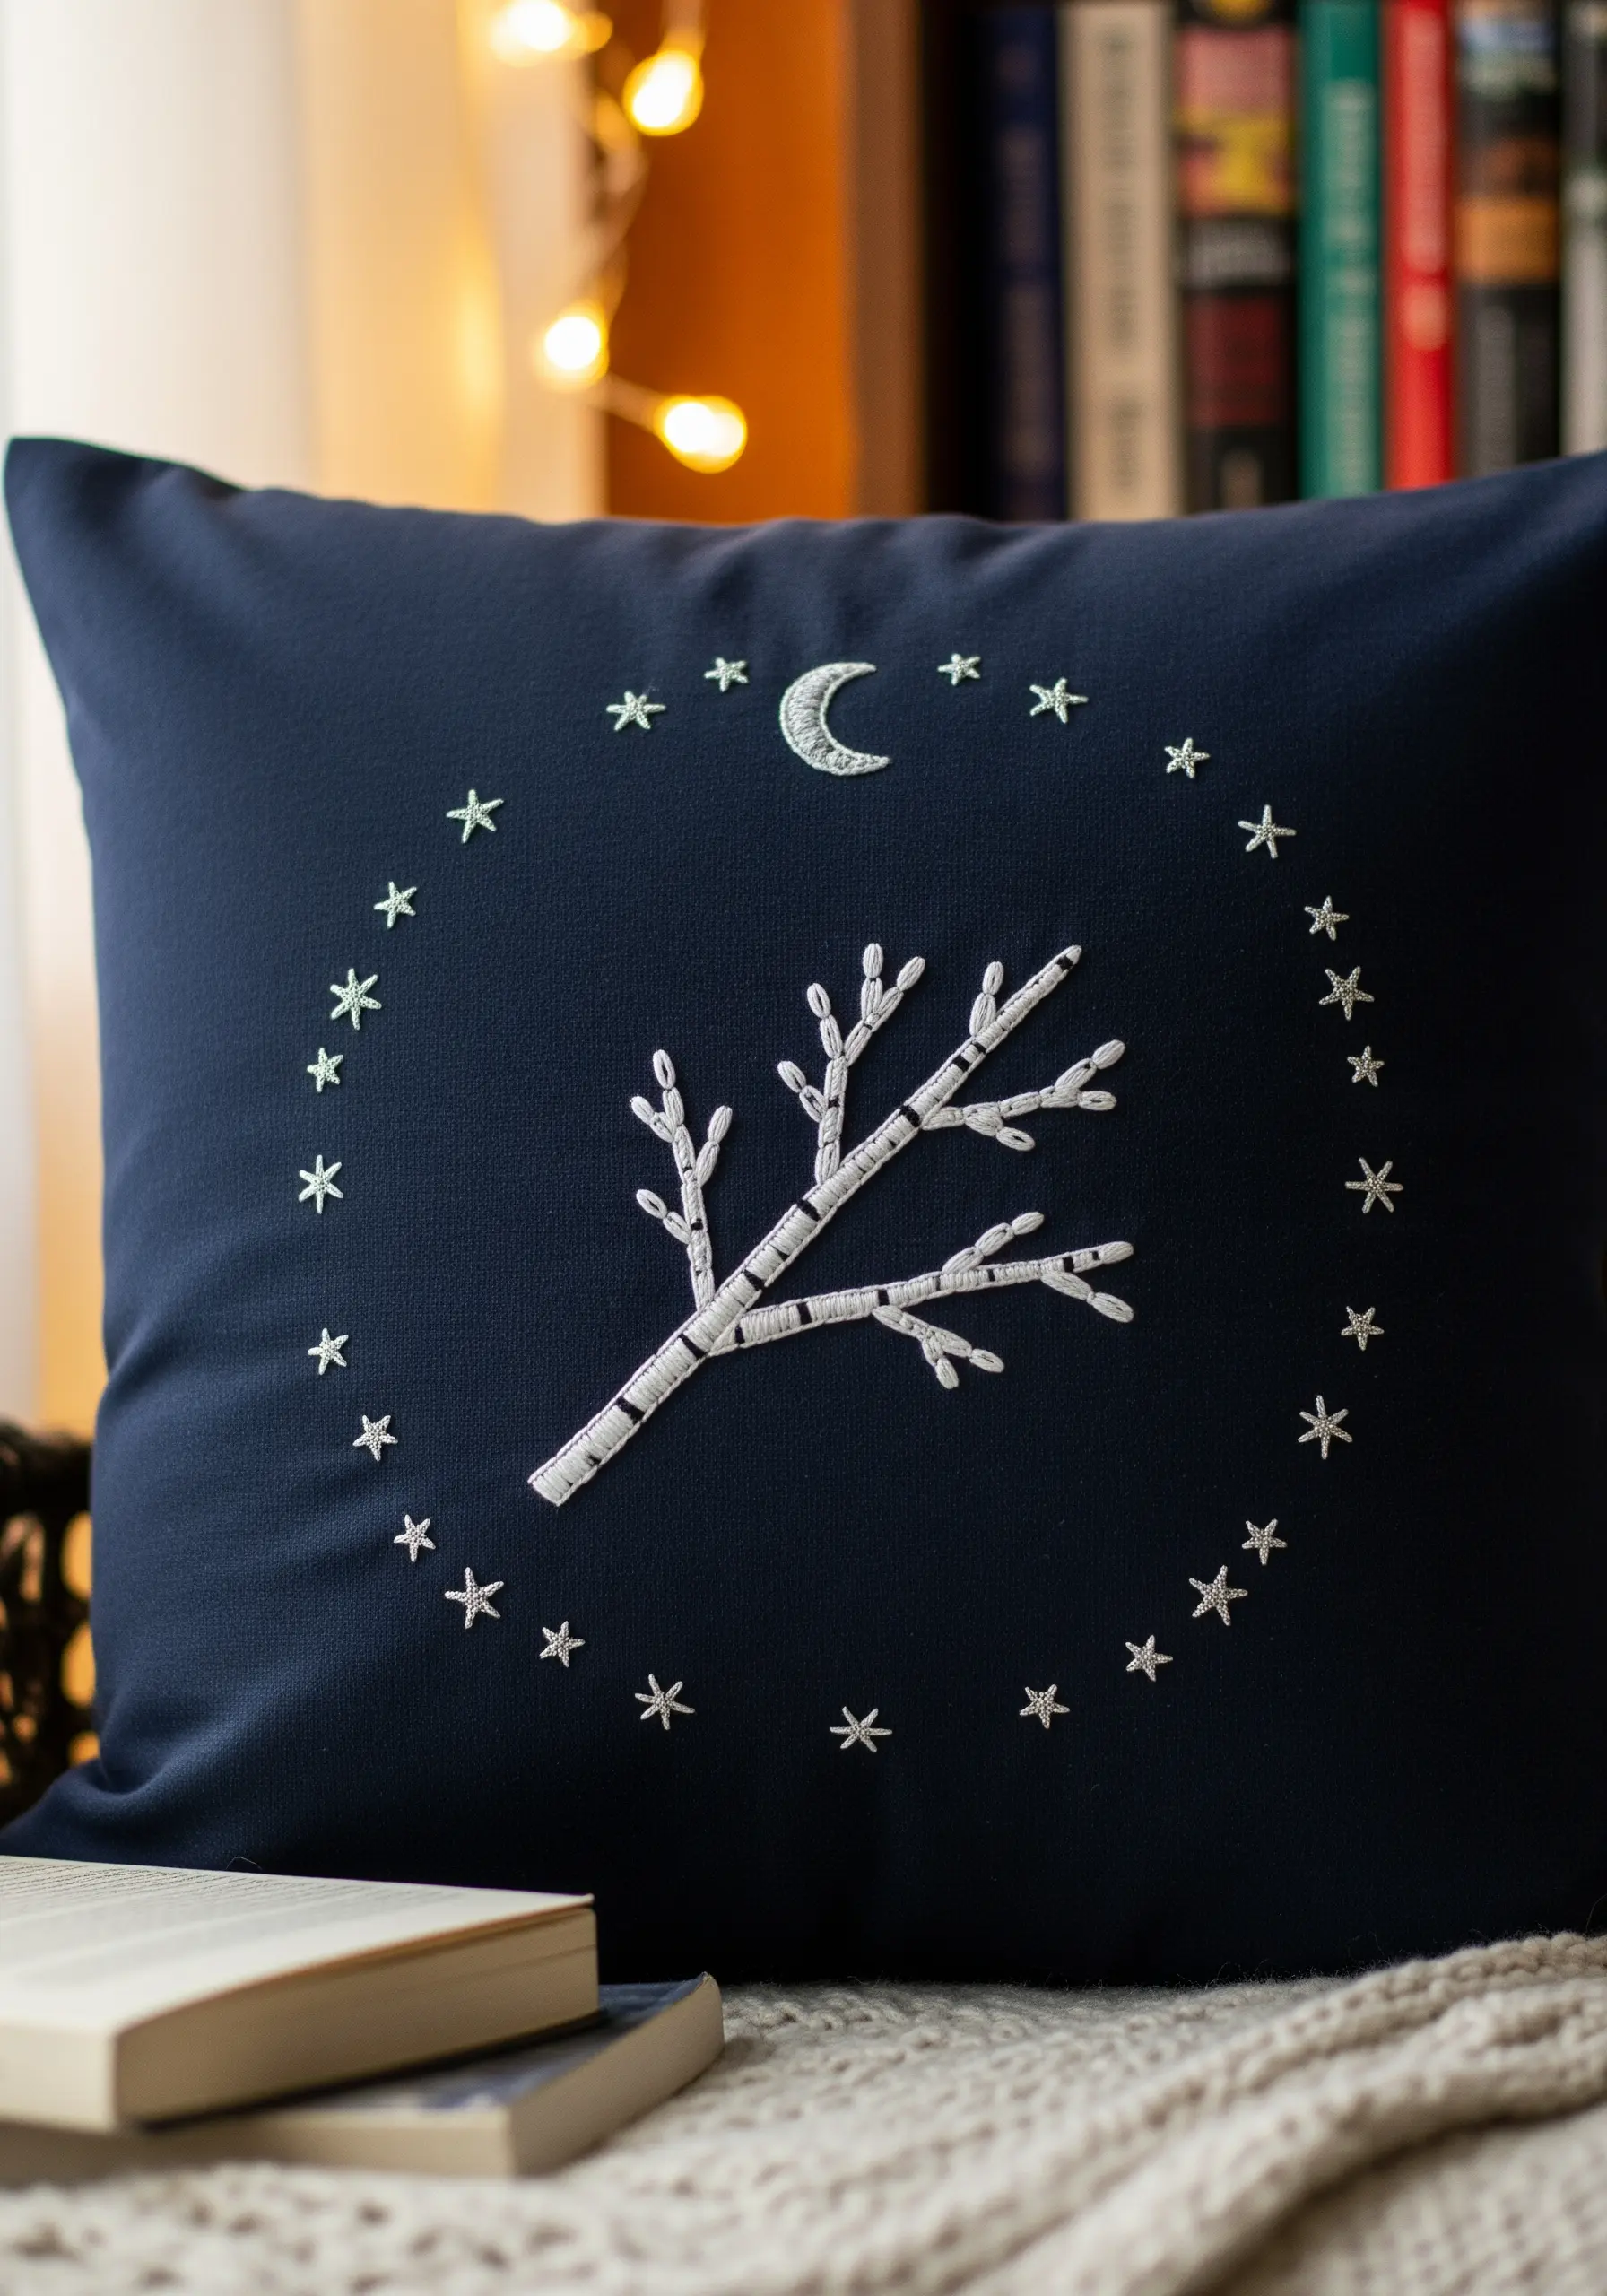
Make your design glow by stitching on a dark, recycled fabric with a high-contrast thread.
Use a silver metallic floss for the moon and stars to create a celestial shimmer that catches the light.
For the birch branch, stitch a solid satin stitch base in white, then add a few tiny, horizontal straight stitches in black to mimic the texture of the bark.
This technique is perfect for tiny night sky embroidery designs that feel magical and serene.
10. Build a Sculptural Garden with Varied Stitches
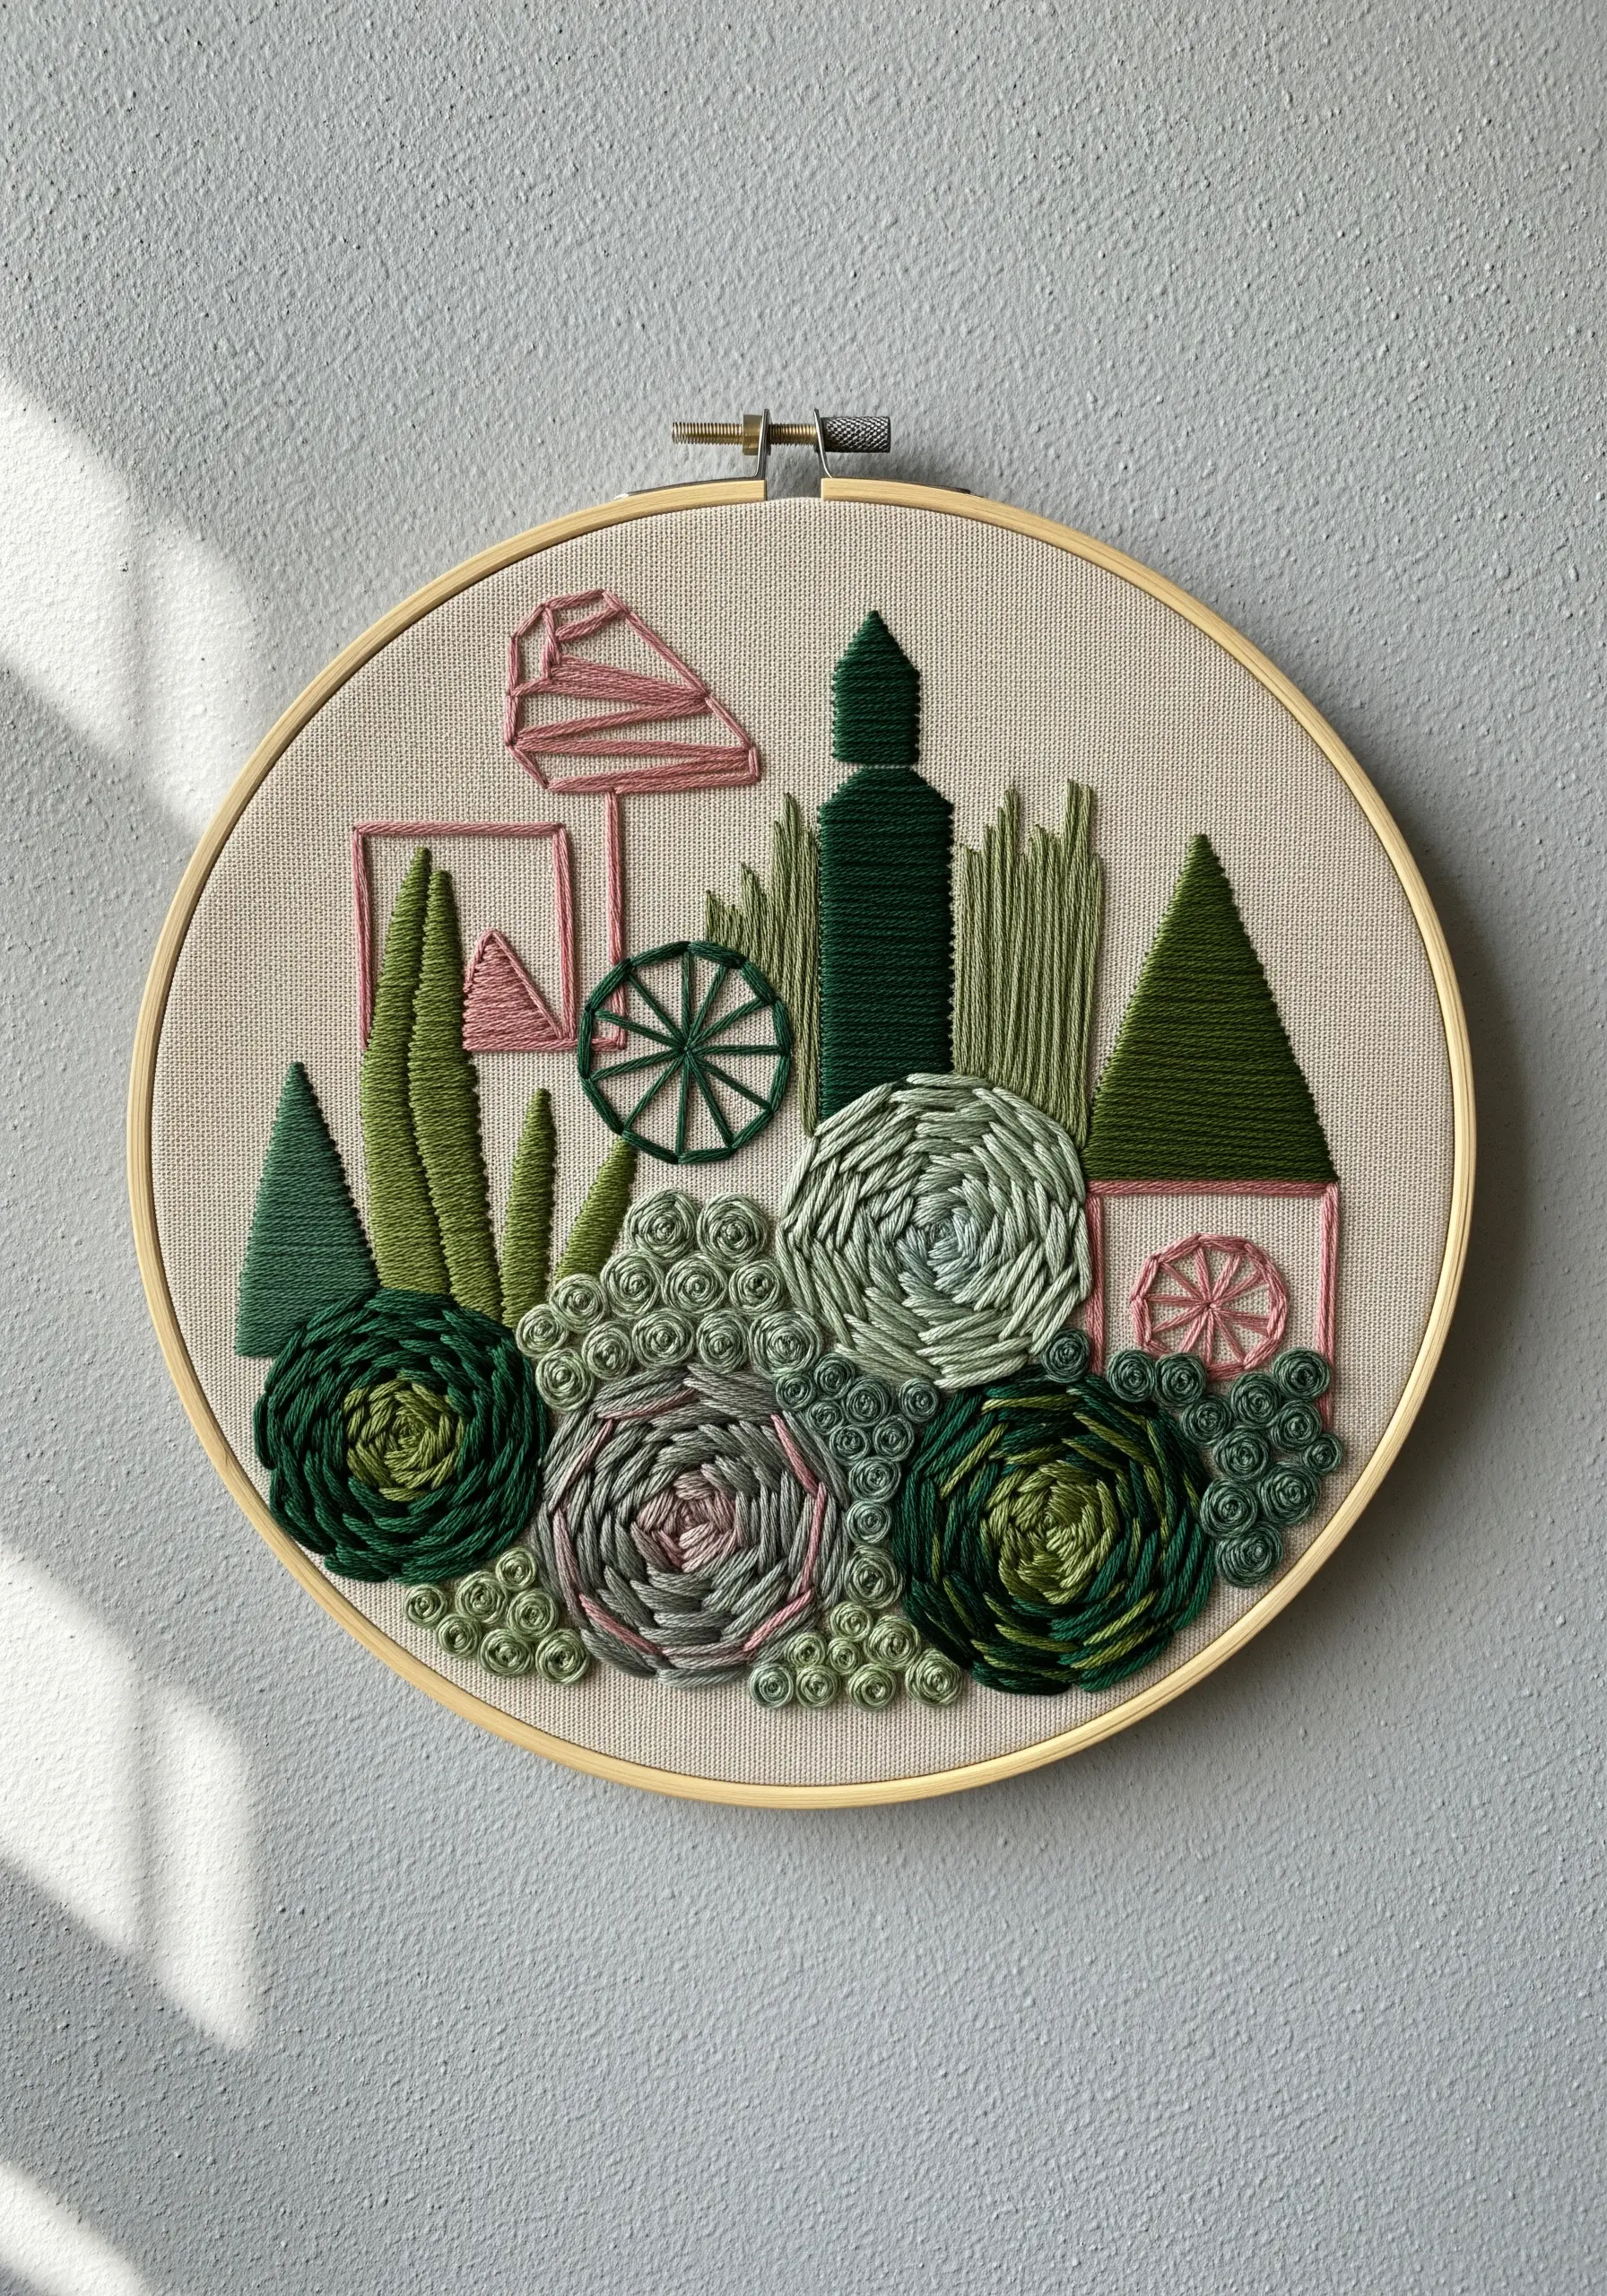
Move beyond flat stitches and build a tactile, three-dimensional landscape in your hoop.
Combine thick woven wheel stitches for roses, padded satin stitch for geometric shapes, and dense French knots for ground cover.
Using different weights of thread, from standard six-strand floss to thicker perle cotton or yarn, will enhance the sculptural effect.
These textured abstract thread embroidery ideas turn a simple hoop into a piece of fiber art.
11. Use Line Weight to Create Depth and Shadow
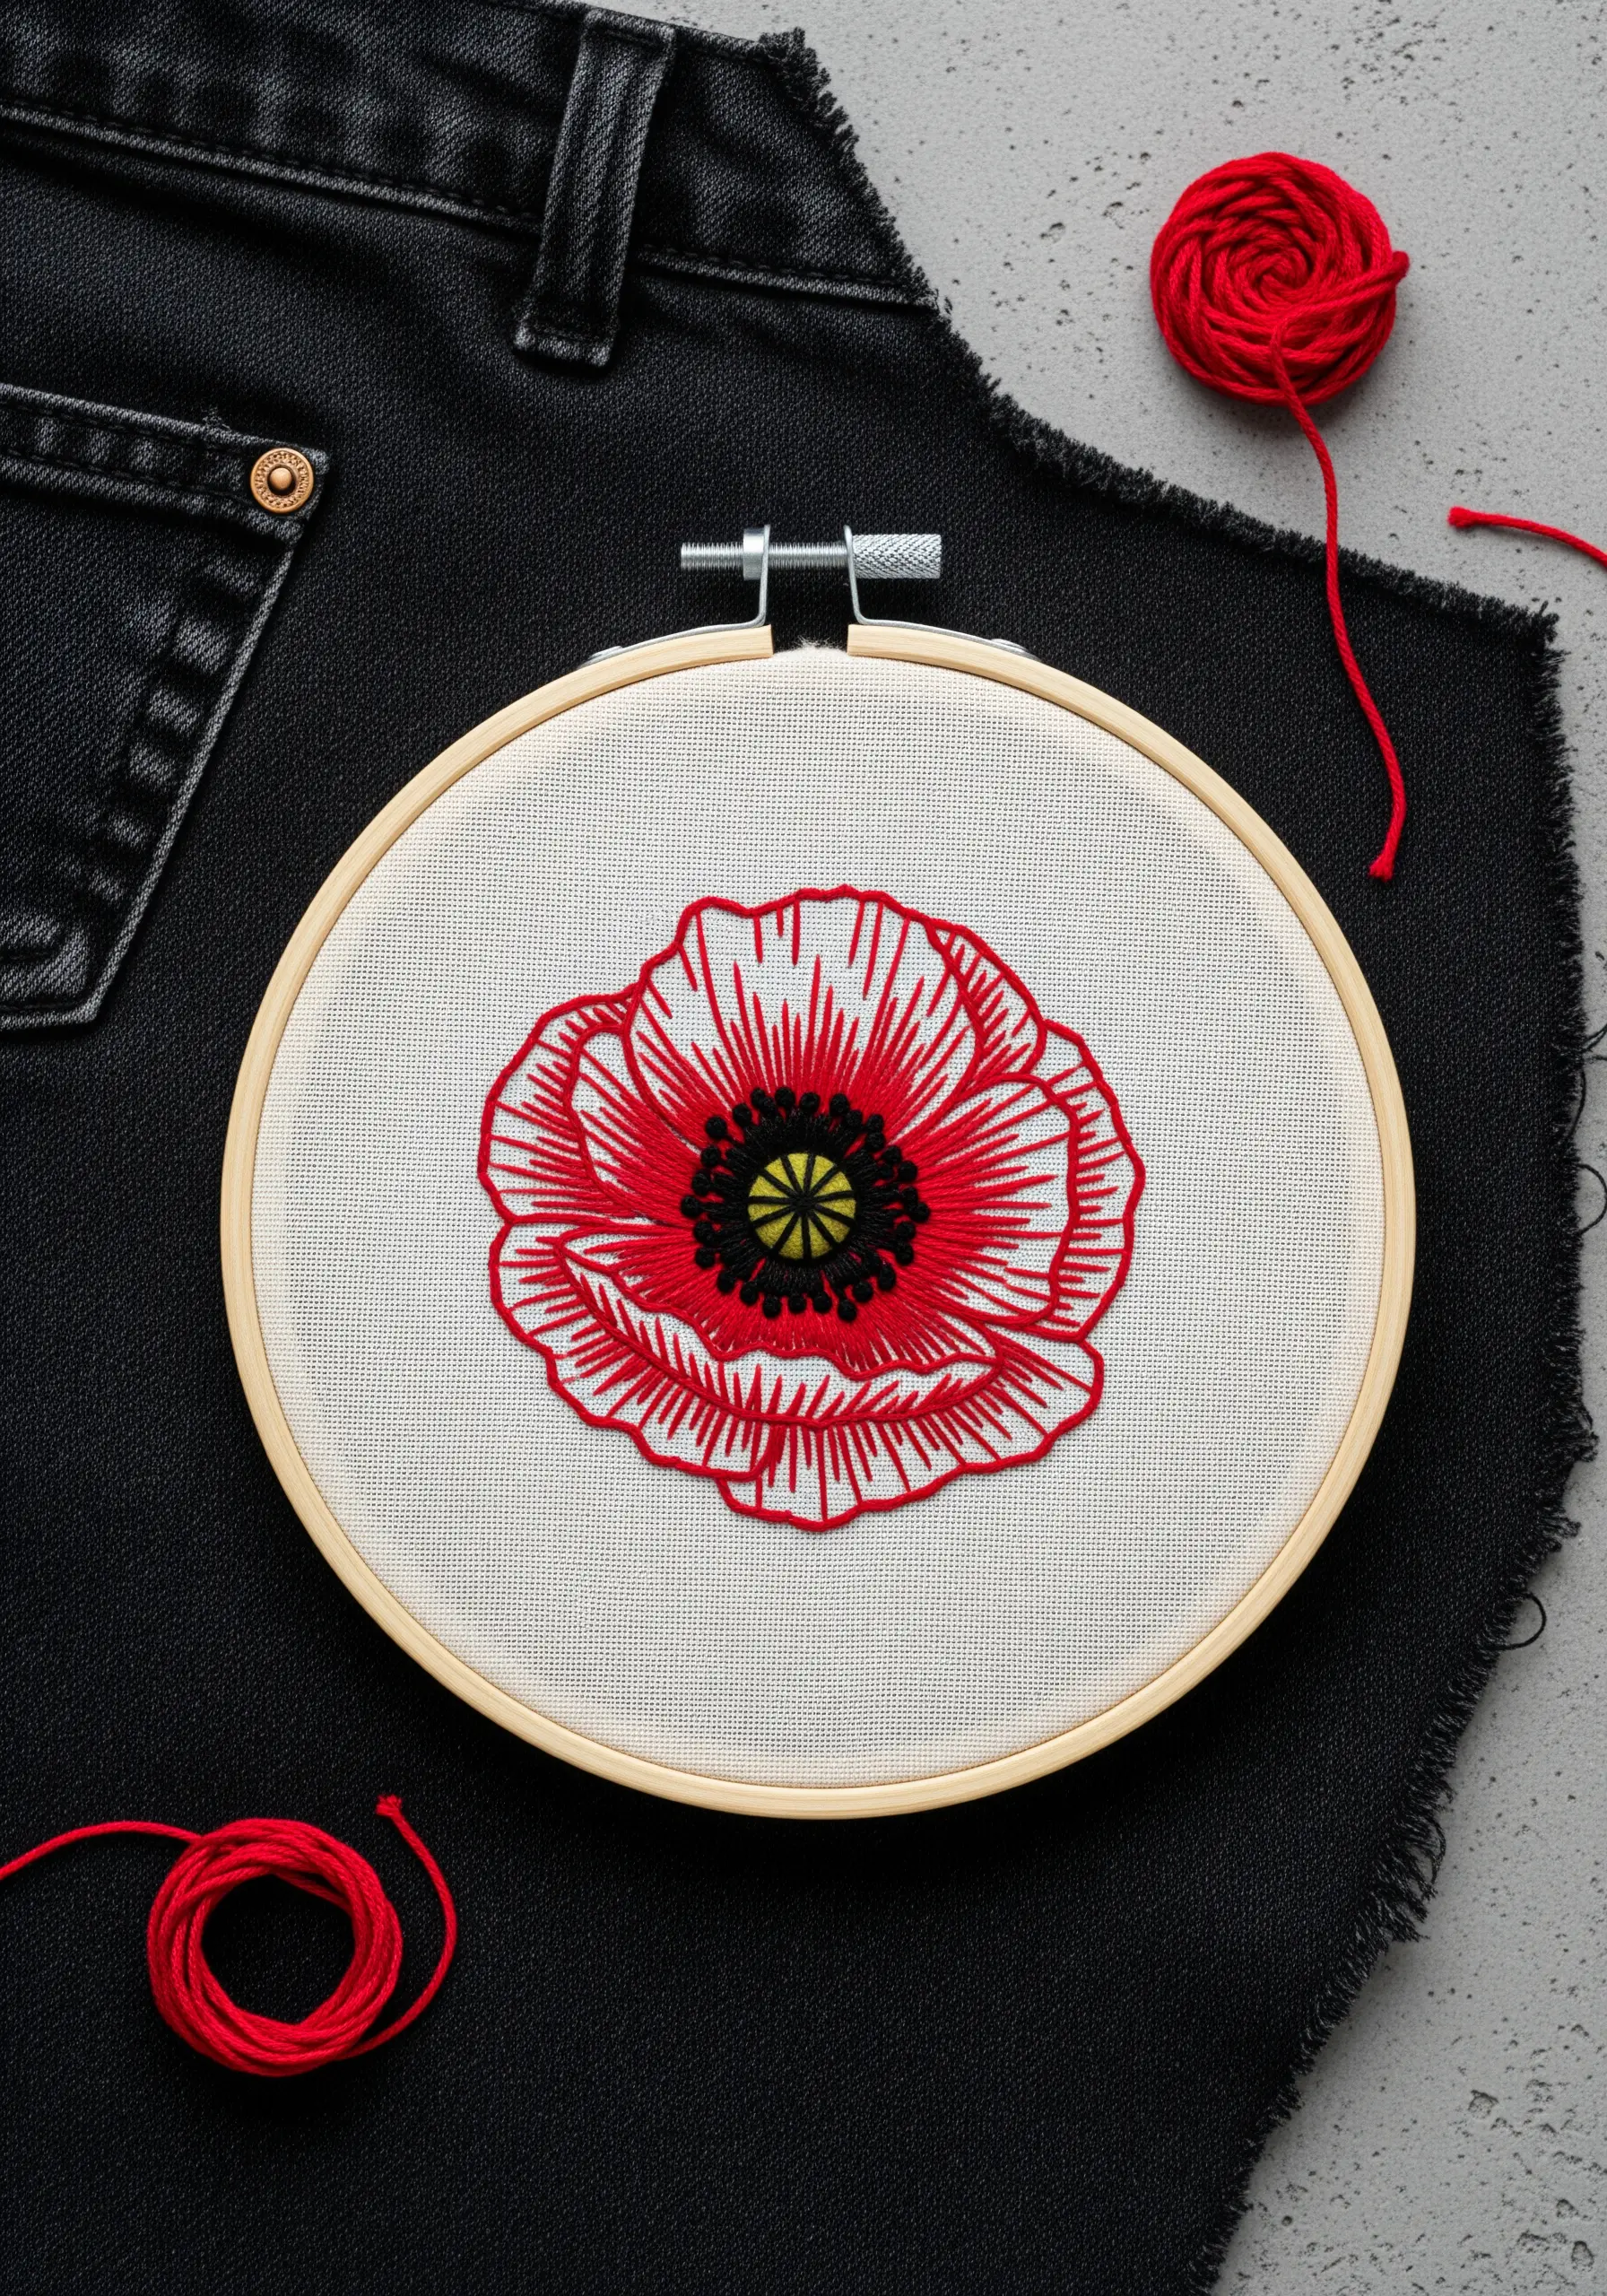
You don’t need full color to create a dramatic floral. This poppy uses only line work to imply shape and shadow.
Vary the density of your straight stitches: cluster them closer together in areas that would be in shadow, like the flower’s center and under the petal folds.
This thread-painting technique gives the illustration a dynamic, hand-drawn quality that feels both modern and intricate.
It’s a powerful way to make monochrome thread designs feel rich and complex.
12. Frame a Garment with Symmetrical Motifs
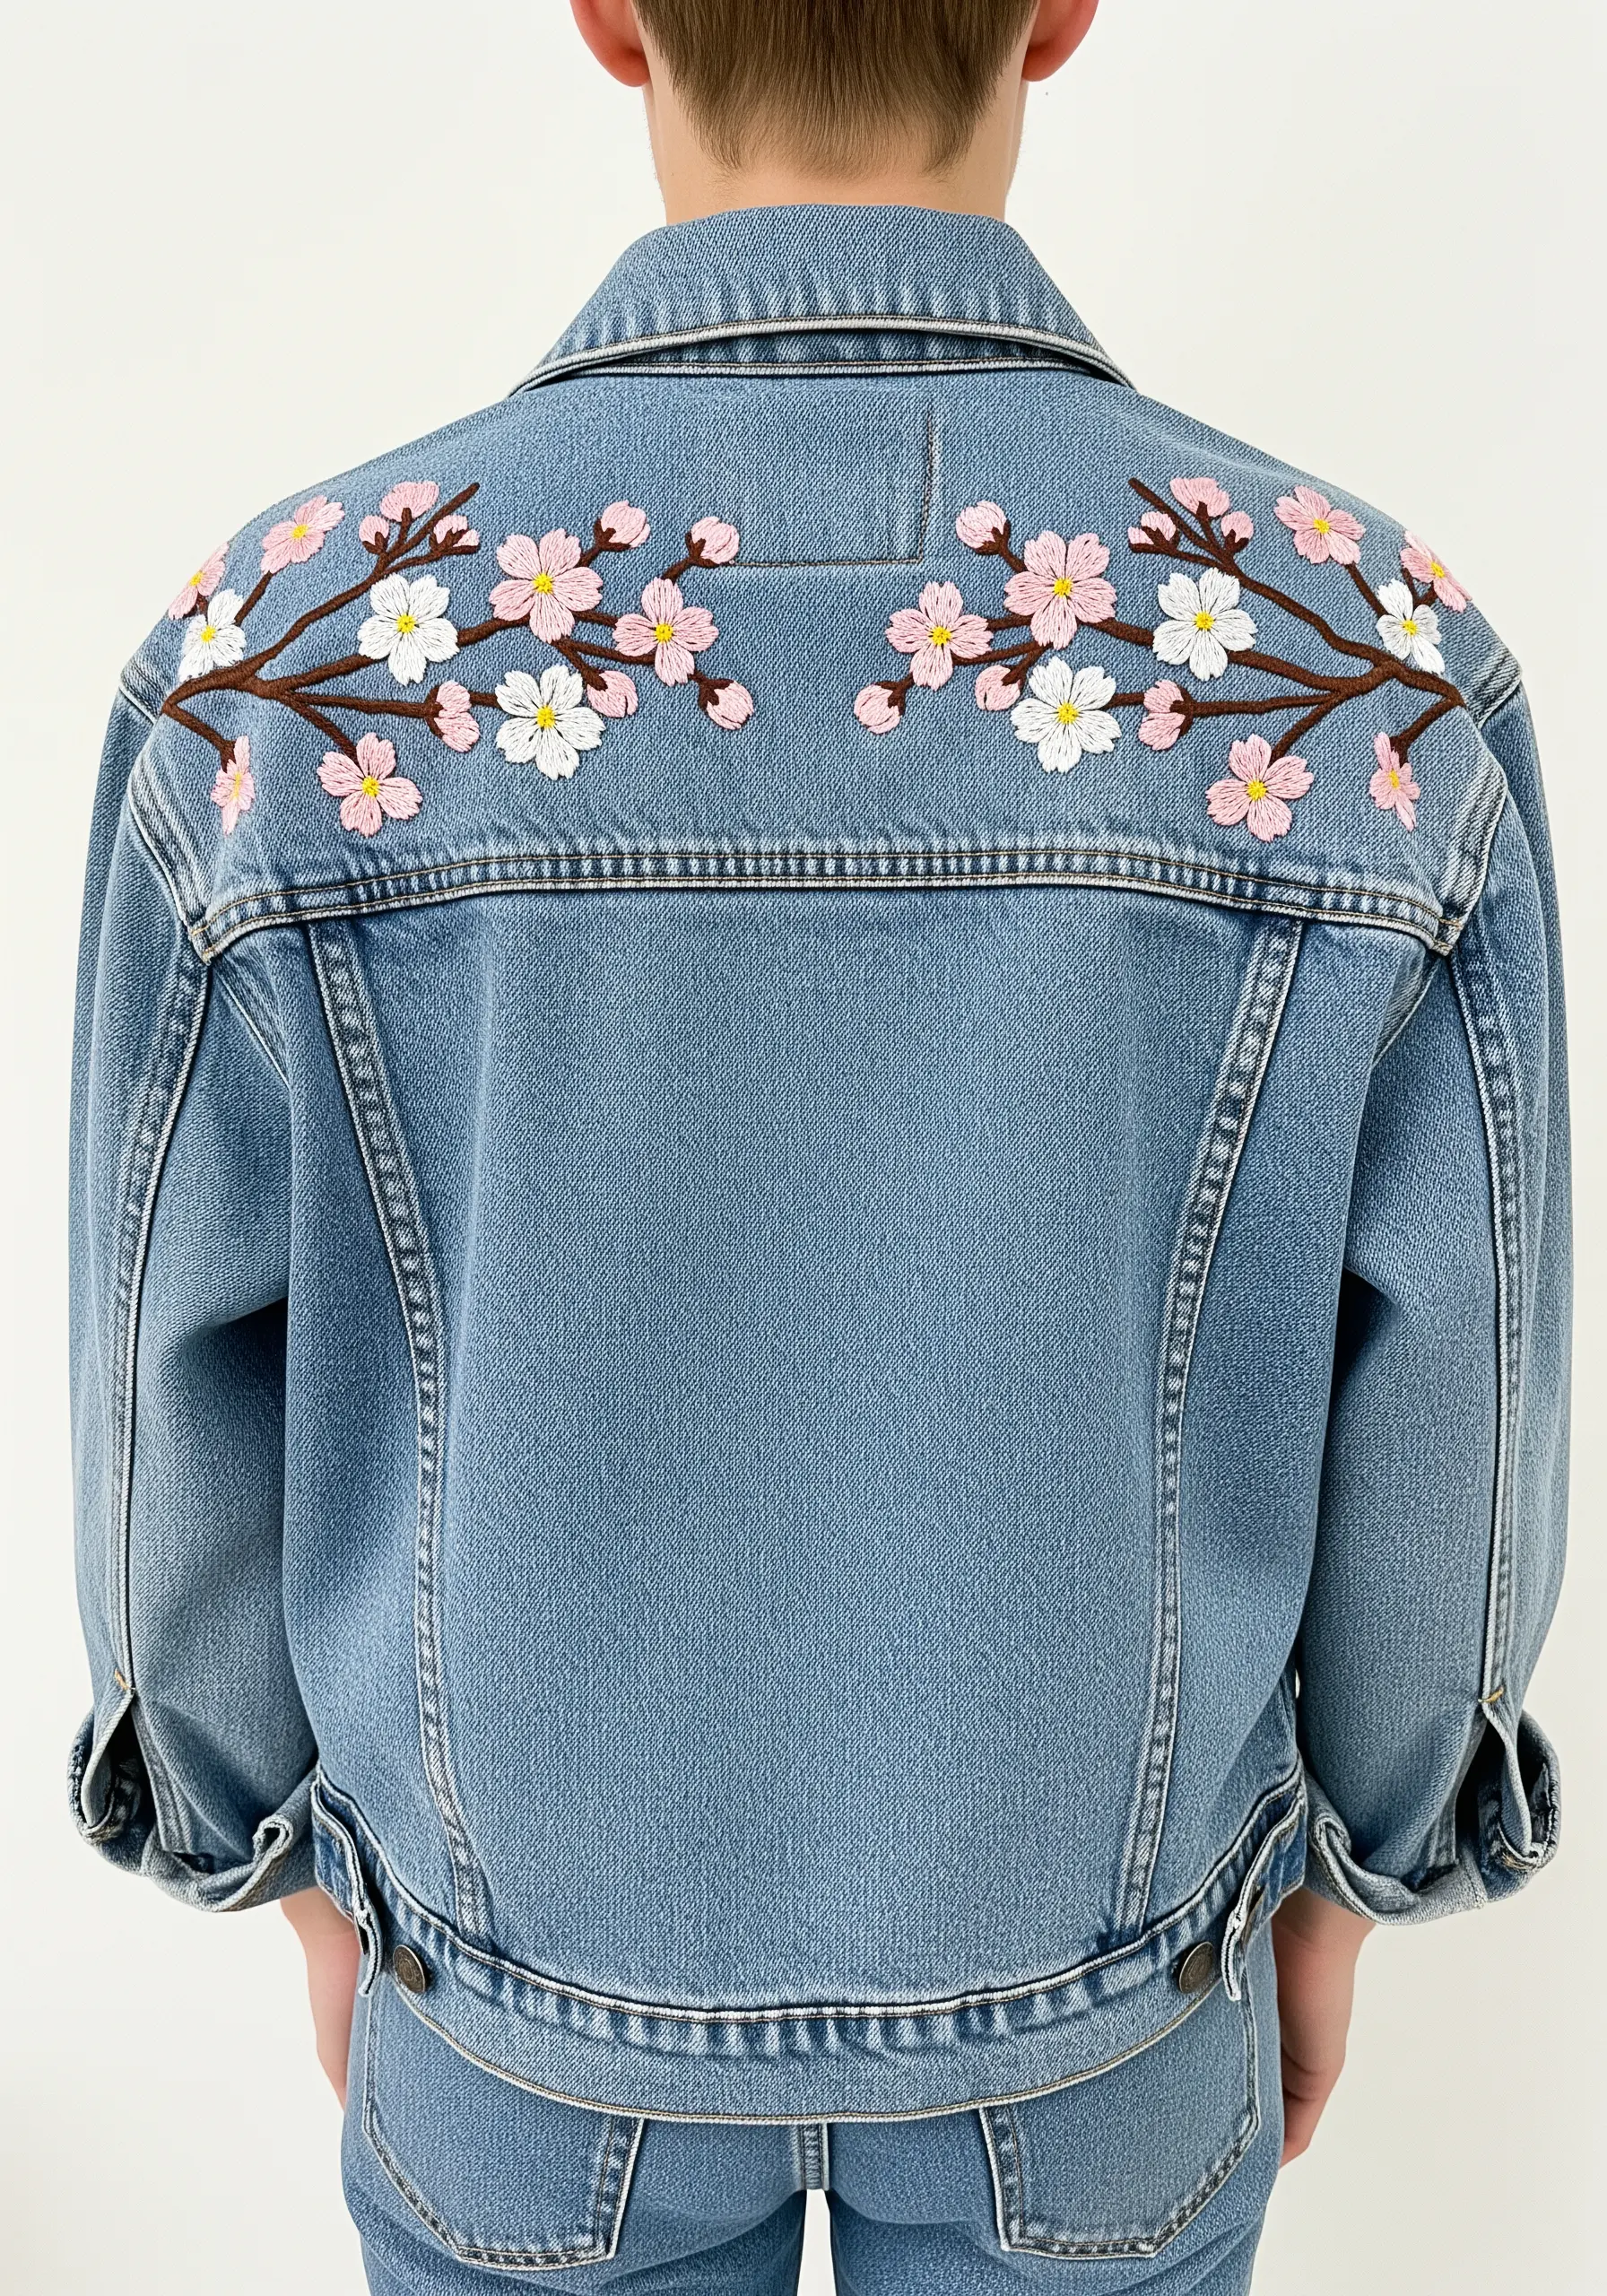
When embellishing apparel, consider the garment’s construction. Placing these cherry blossom branches across the back yoke creates a beautiful, intentional frame.
Use a tear-away stabilizer on the inside of the jacket to support your stitches on the thick denim fabric.
Simple satin stitches for the flowers and a textured stem stitch for the branches provide a clean finish that is durable enough for wearable art.
These are classic vintage-inspired denim jacket embroidery motifs with a modern, balanced layout.
13. Add Functional Elegance to Kitchen Linens
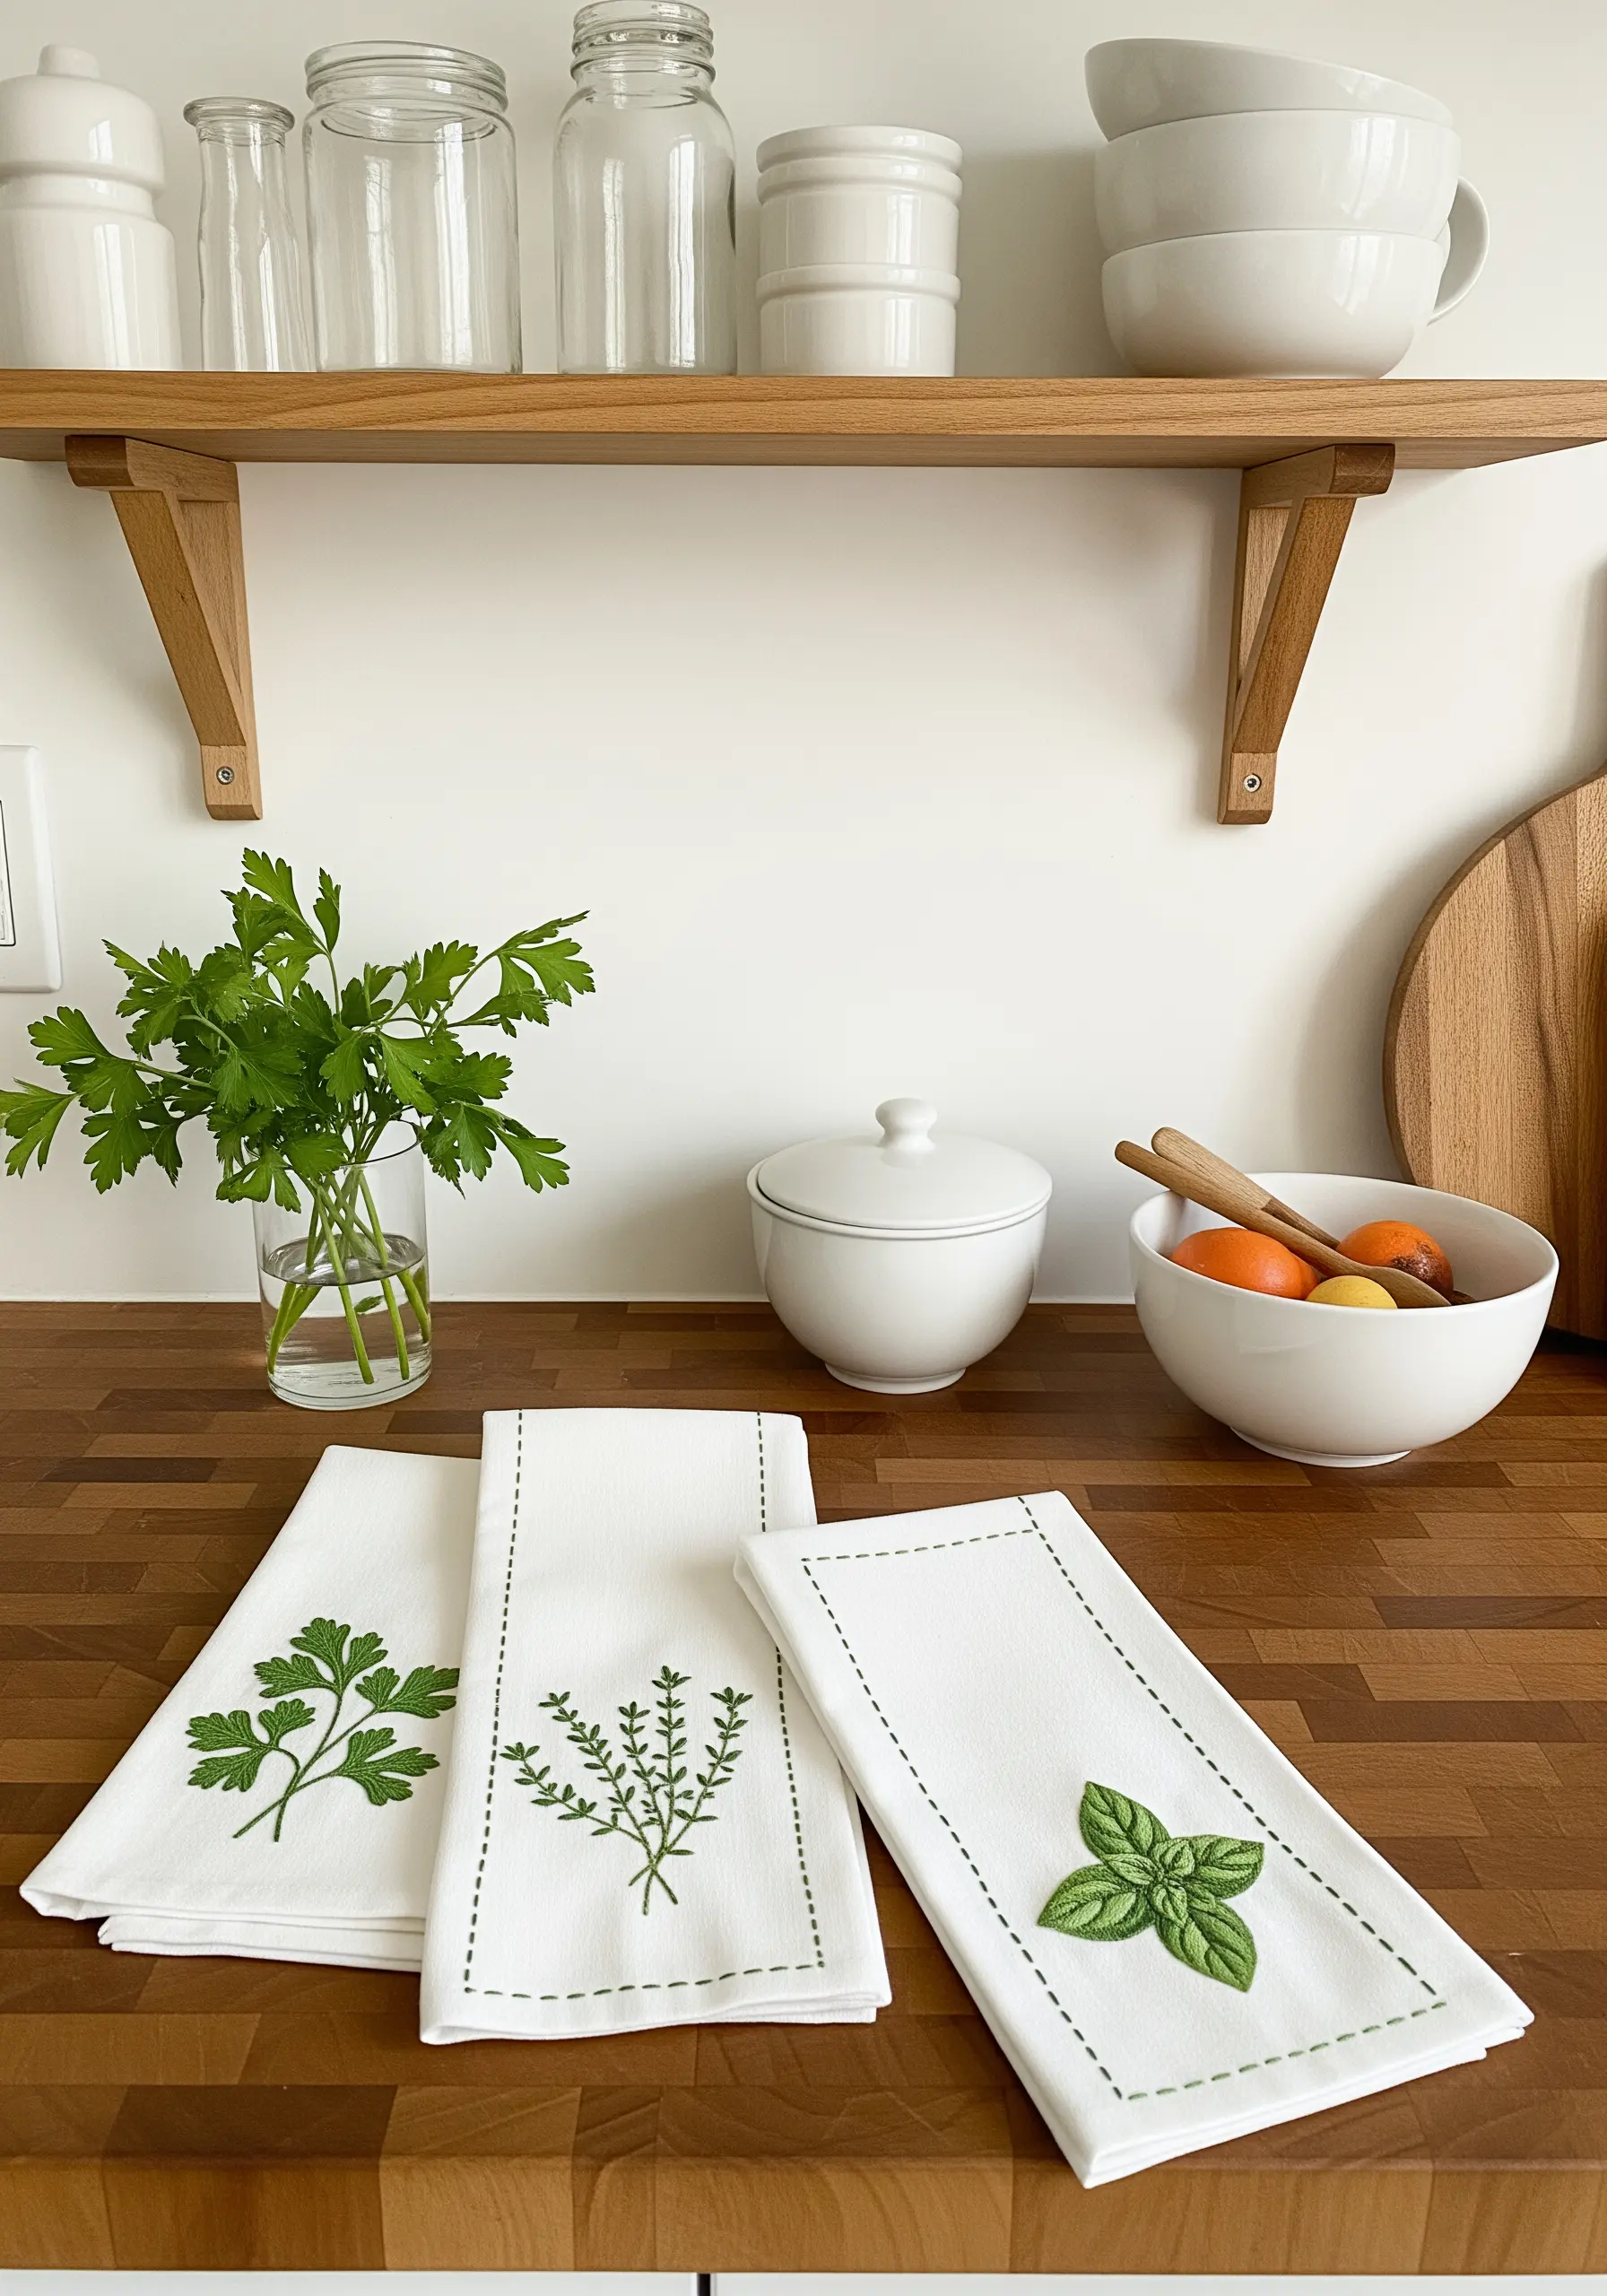
Elevate simple kitchen towels with classic herb motifs. To ensure they remain beautiful after washing, use high-quality, colorfast cotton floss.
Combine different stitches for variety: a dense fishbone stitch for the parsley leaves, long straight stitches for the thyme, and a padded satin stitch for the basil.
A simple running stitch border adds a final, polished touch that unifies the set, turning them into lovely minimal fruit & botanical embroidery patterns for the home.
14. Create a Serene Mobile with Tone-on-Tone Stitching
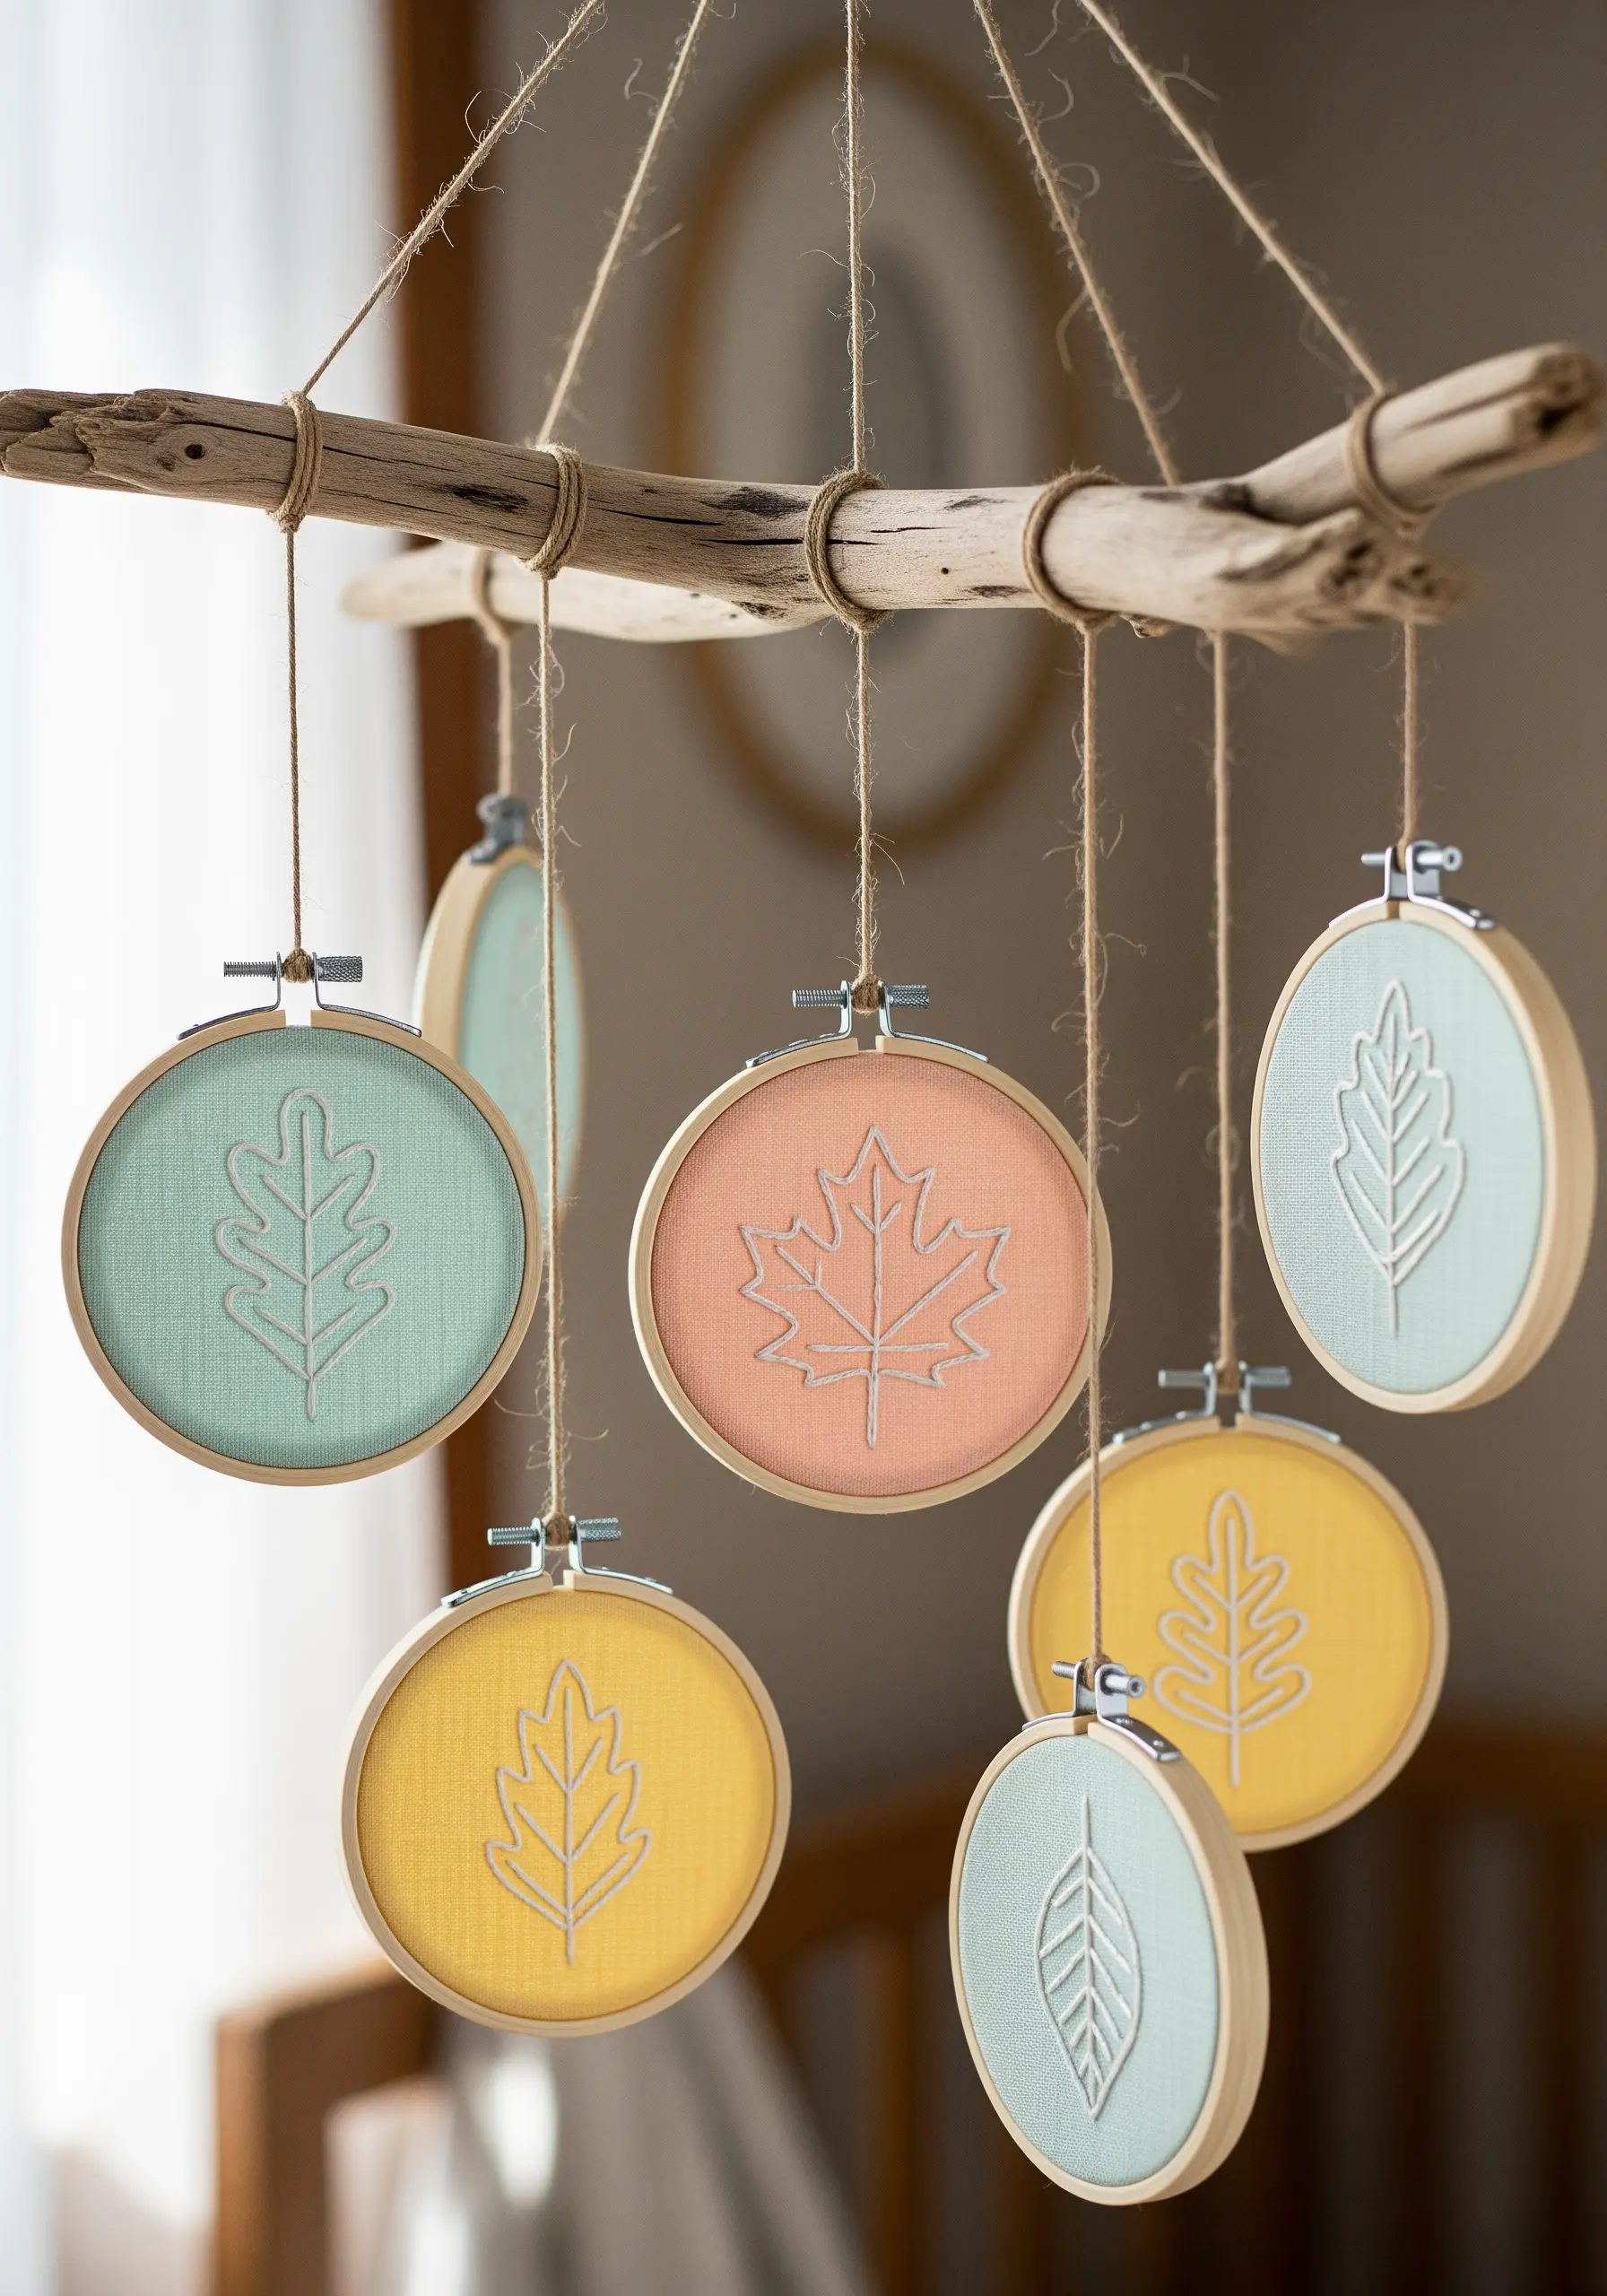
For a soft, gentle aesthetic perfect for a nursery or quiet corner, use a tone-on-tone color palette.
Choose pastel-colored linen or cotton fabrics and stitch your leaf outlines in a thread that is only a few shades lighter or darker.
A simple backstitch or stem stitch is all you need to create these clean, recognizable silhouettes.
This calming approach is perfect for nursery-friendly string art and embroidery projects that soothe rather than shout.
15. Stitch Vibrant, Practical Art for Your Table
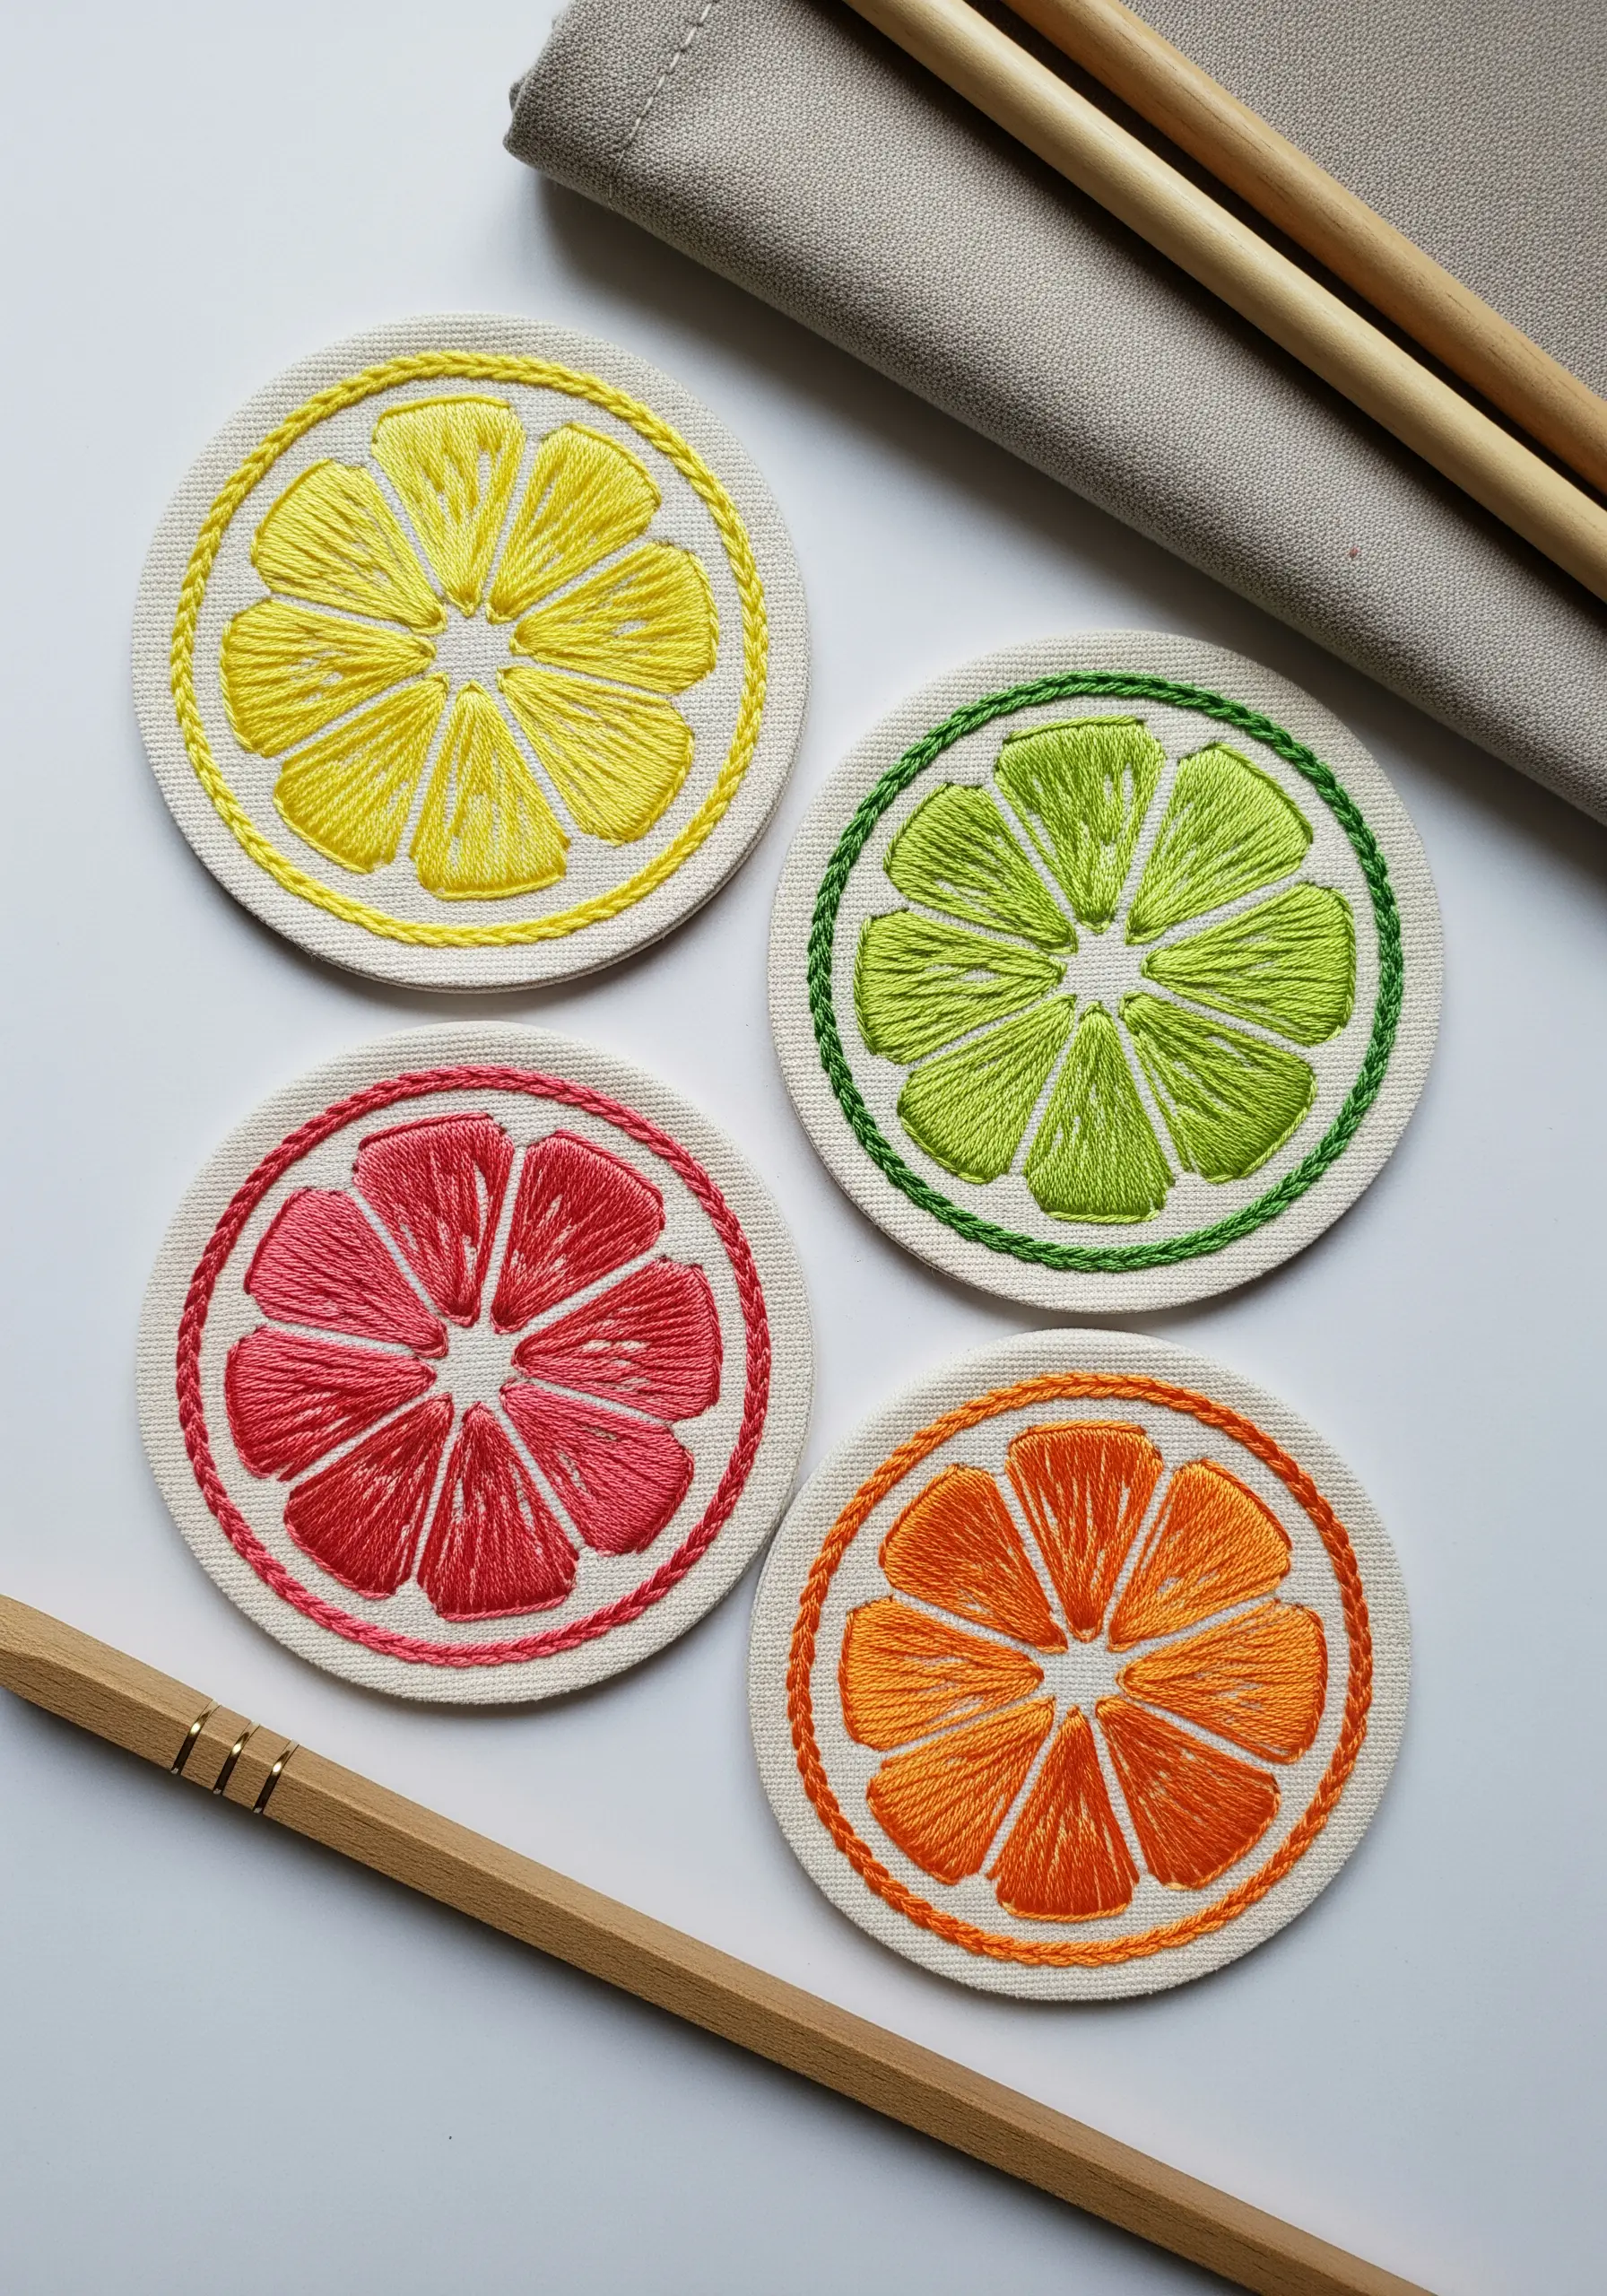
Turn recycled canvas scraps into a set of cheerful citrus coasters. Use a tight, neat satin stitch for the fruit segments to create a solid block of color.
To ensure the edges are durable and clean, finish each coaster with a whipped backstitch or a tight buttonhole stitch.
Choose bright, zesty colors like lemon yellow, lime green, and grapefruit pink for a set that is both fun and functional.
These coasters are wonderful simple embroidery accents to refresh your coffee table.
16. Blend Embroidery and Sculpture for Dramatic Effect
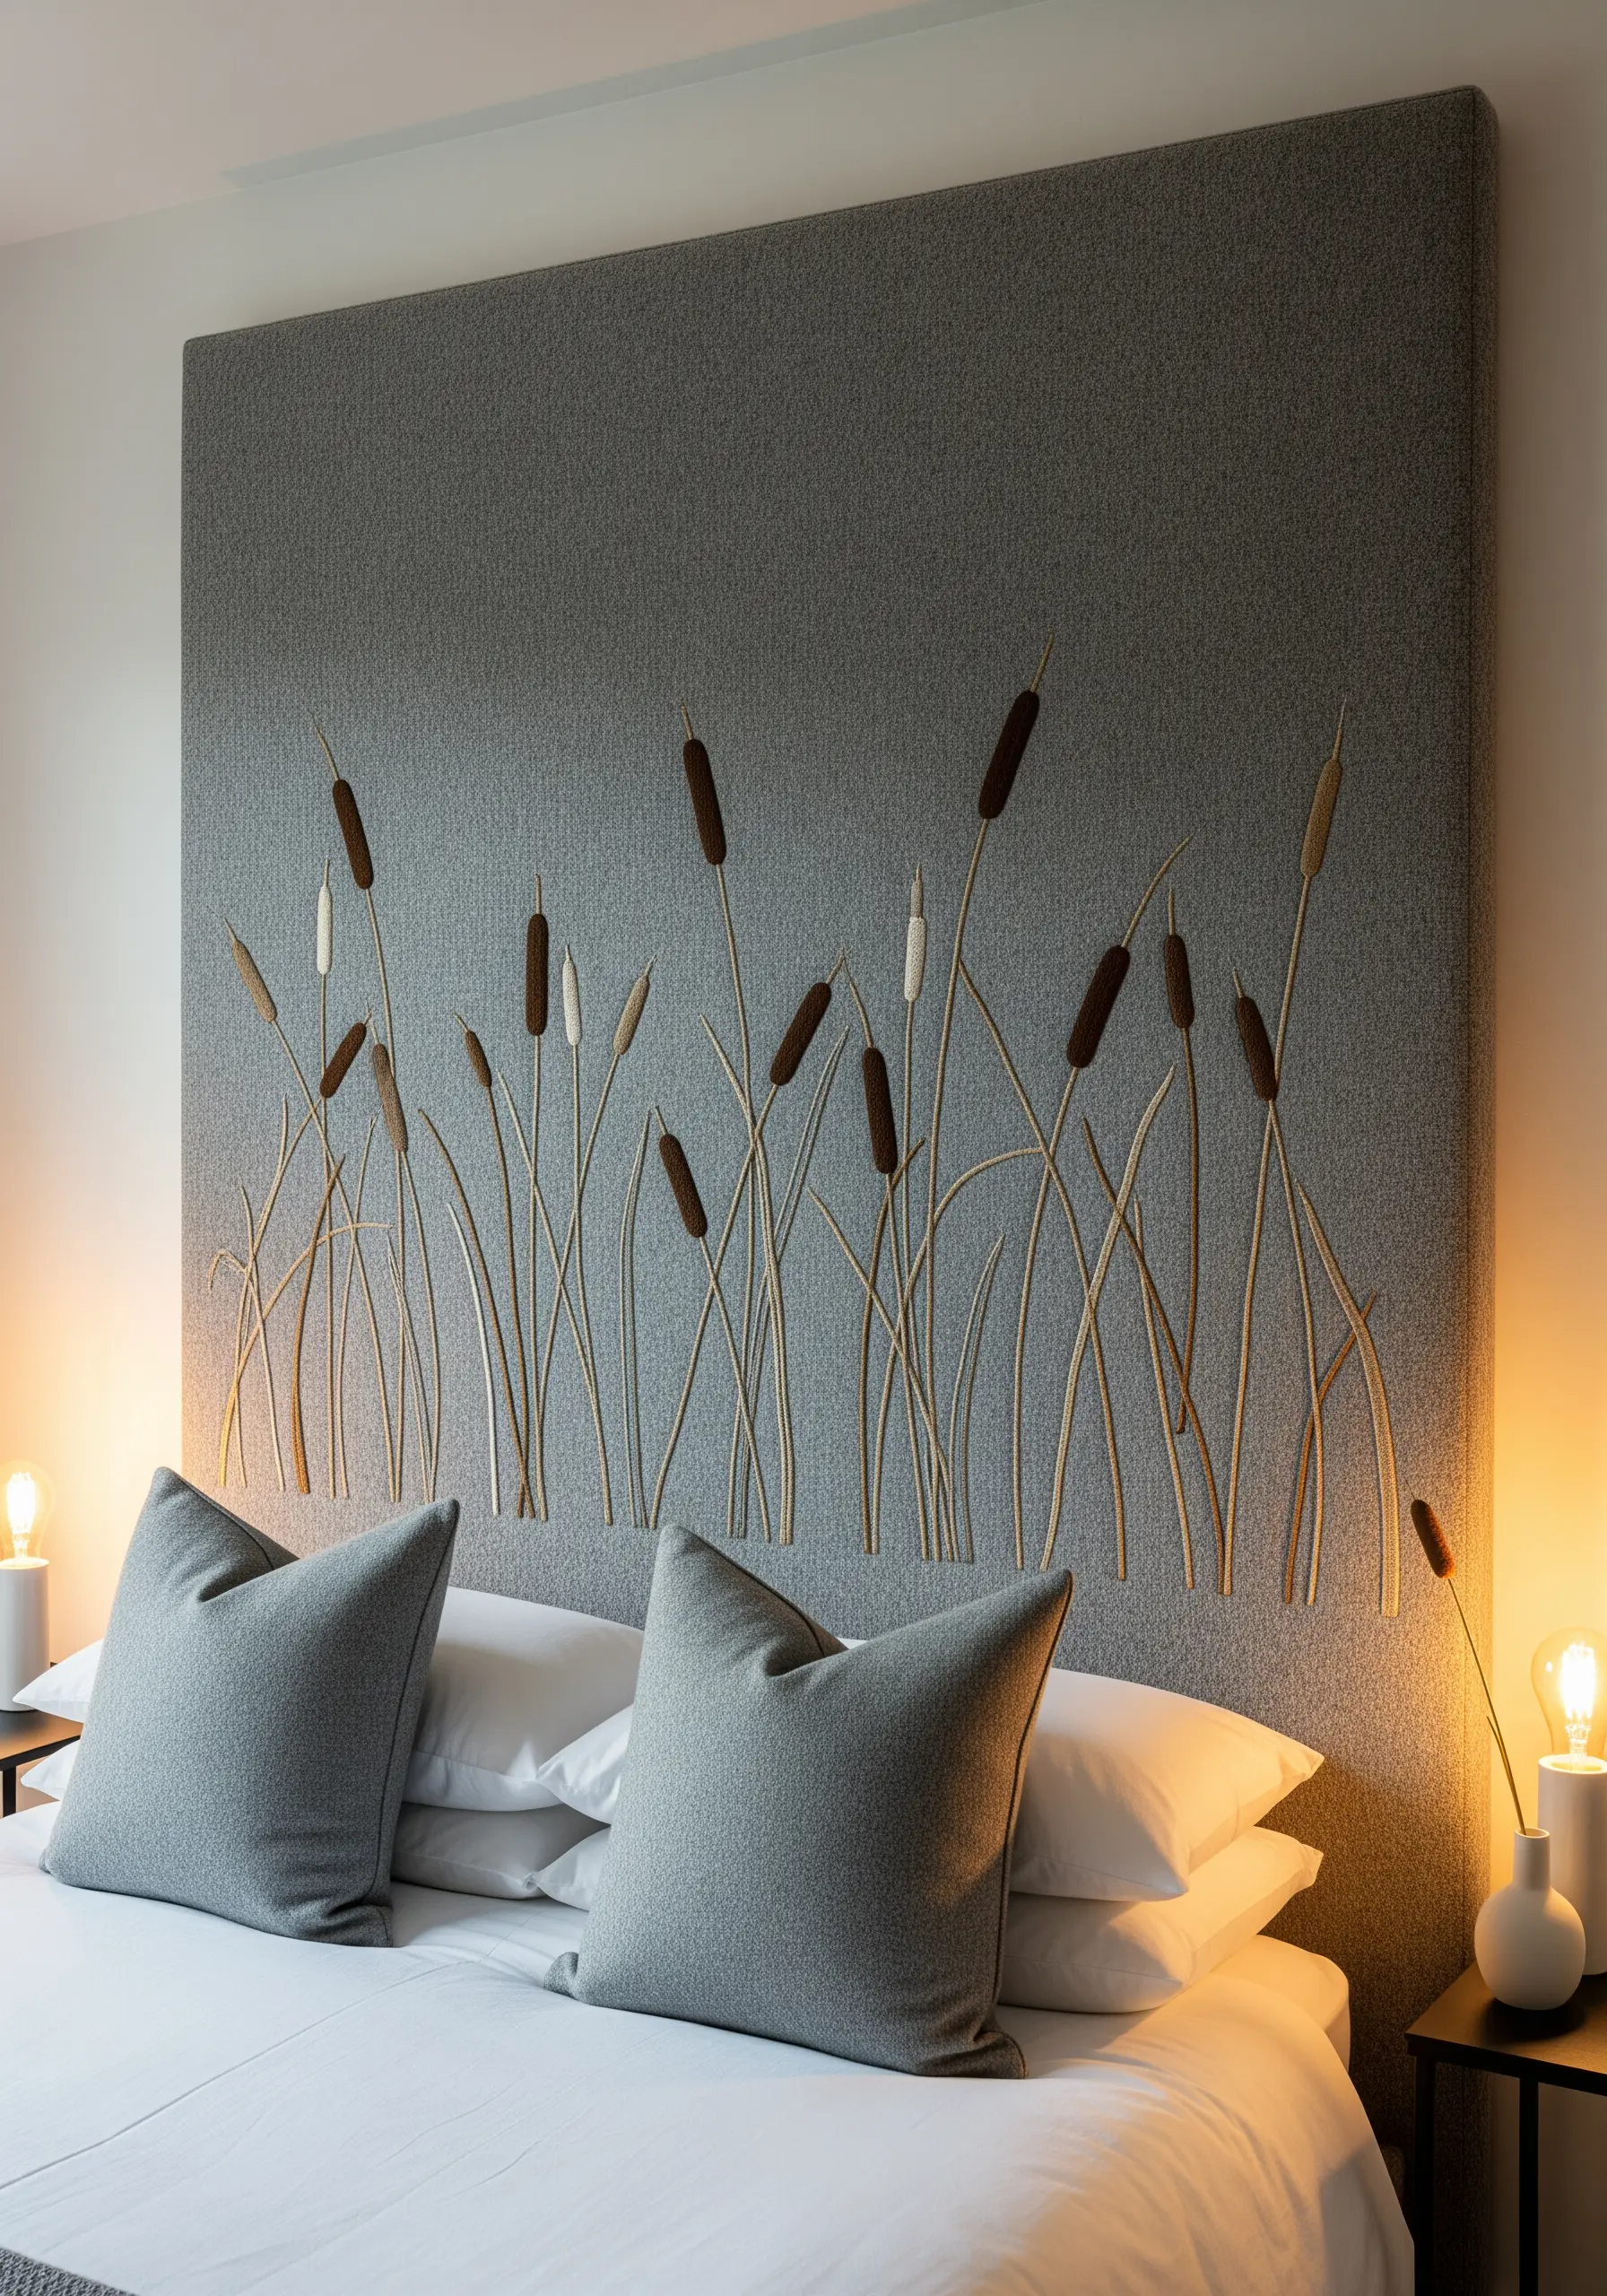
Elevate your wall art by incorporating three-dimensional elements into your stitching.
Embroider the long, graceful stems of the cattails directly onto a fabric-covered headboard or canvas using a simple backstitch or couched yarn.
For the fluffy cattail heads, create small, sculpted forms from felt or wrapped yarn and stitch them securely in place.
This mixed-media approach results in unexpected fiber art installations that have incredible depth and texture.
17. Achieve Hyperrealism with Thread Painting
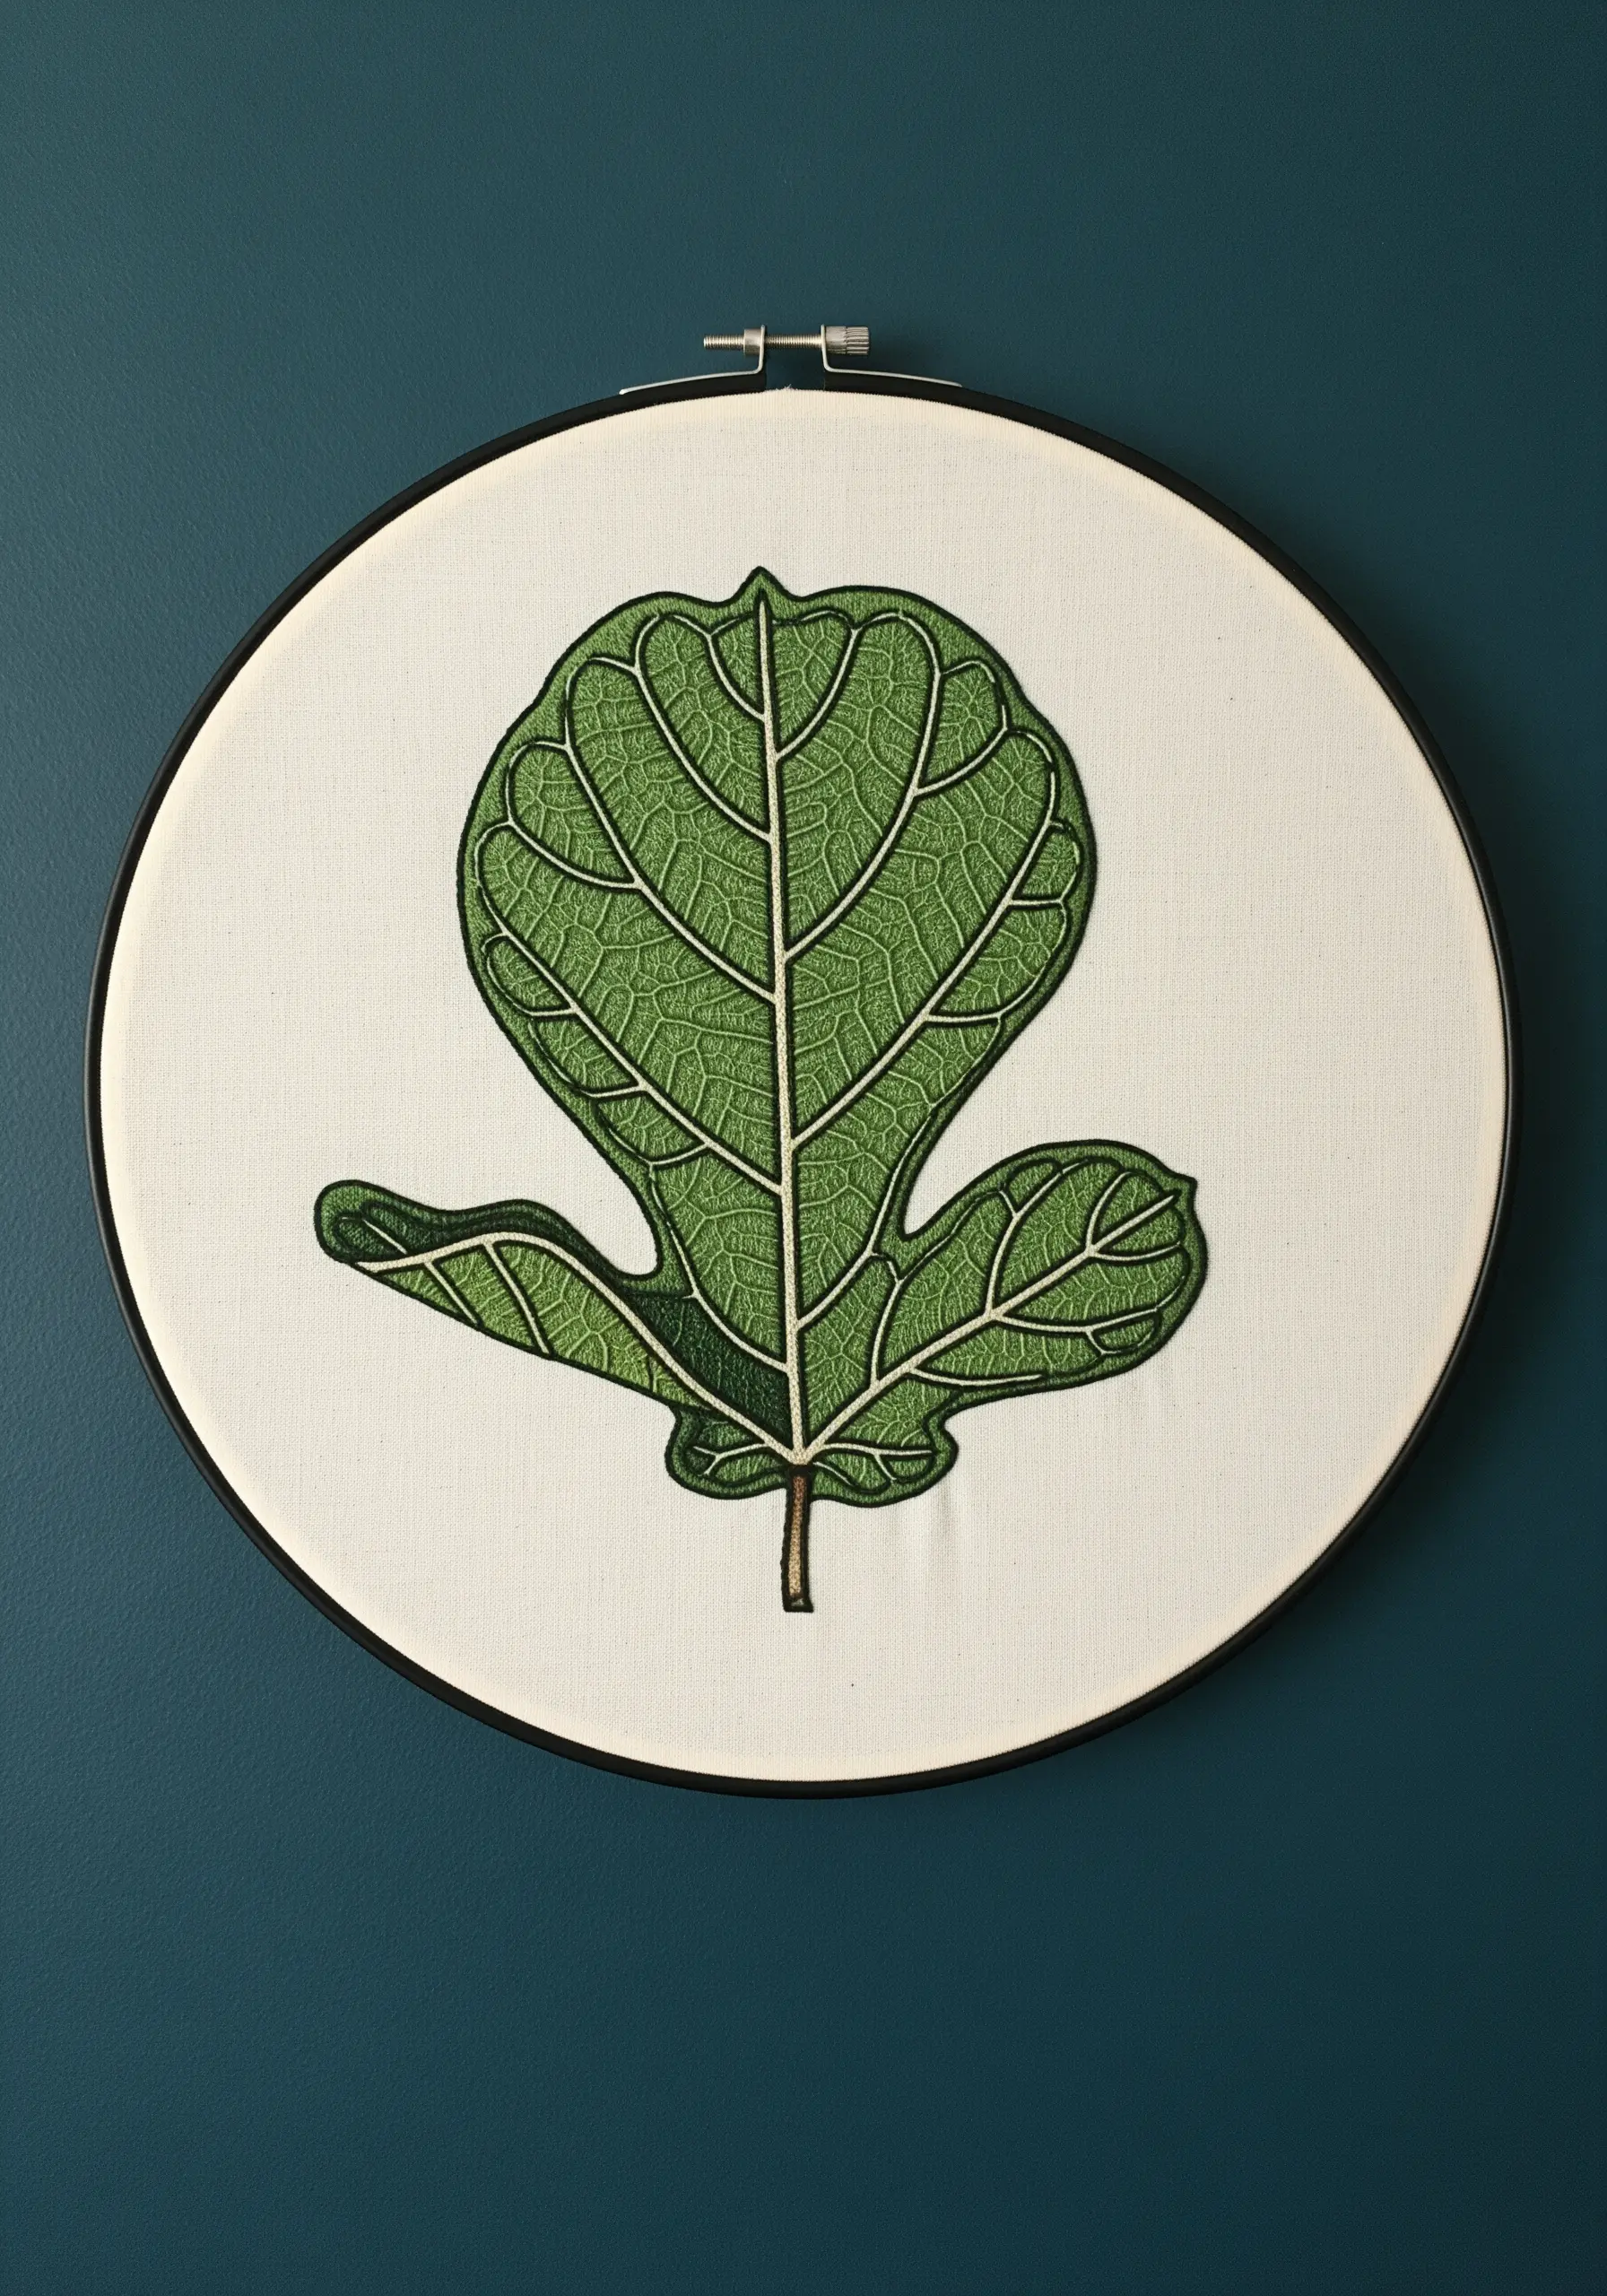
To capture the intricate detail of a fiddle leaf fig, use the long-and-short stitch technique.
Work with two or three similar shades of green floss, blending them together to create soft gradients that mimic how light hits the leaf’s surface.
Keep your stitches directional, following the natural lines of the veins for a realistic effect.
Mastering ways to layer leaf stitching for three-dimensional botanical texture will fundamentally change your botanical embroidery.
18. Embrace the Texture of Recycled Denim
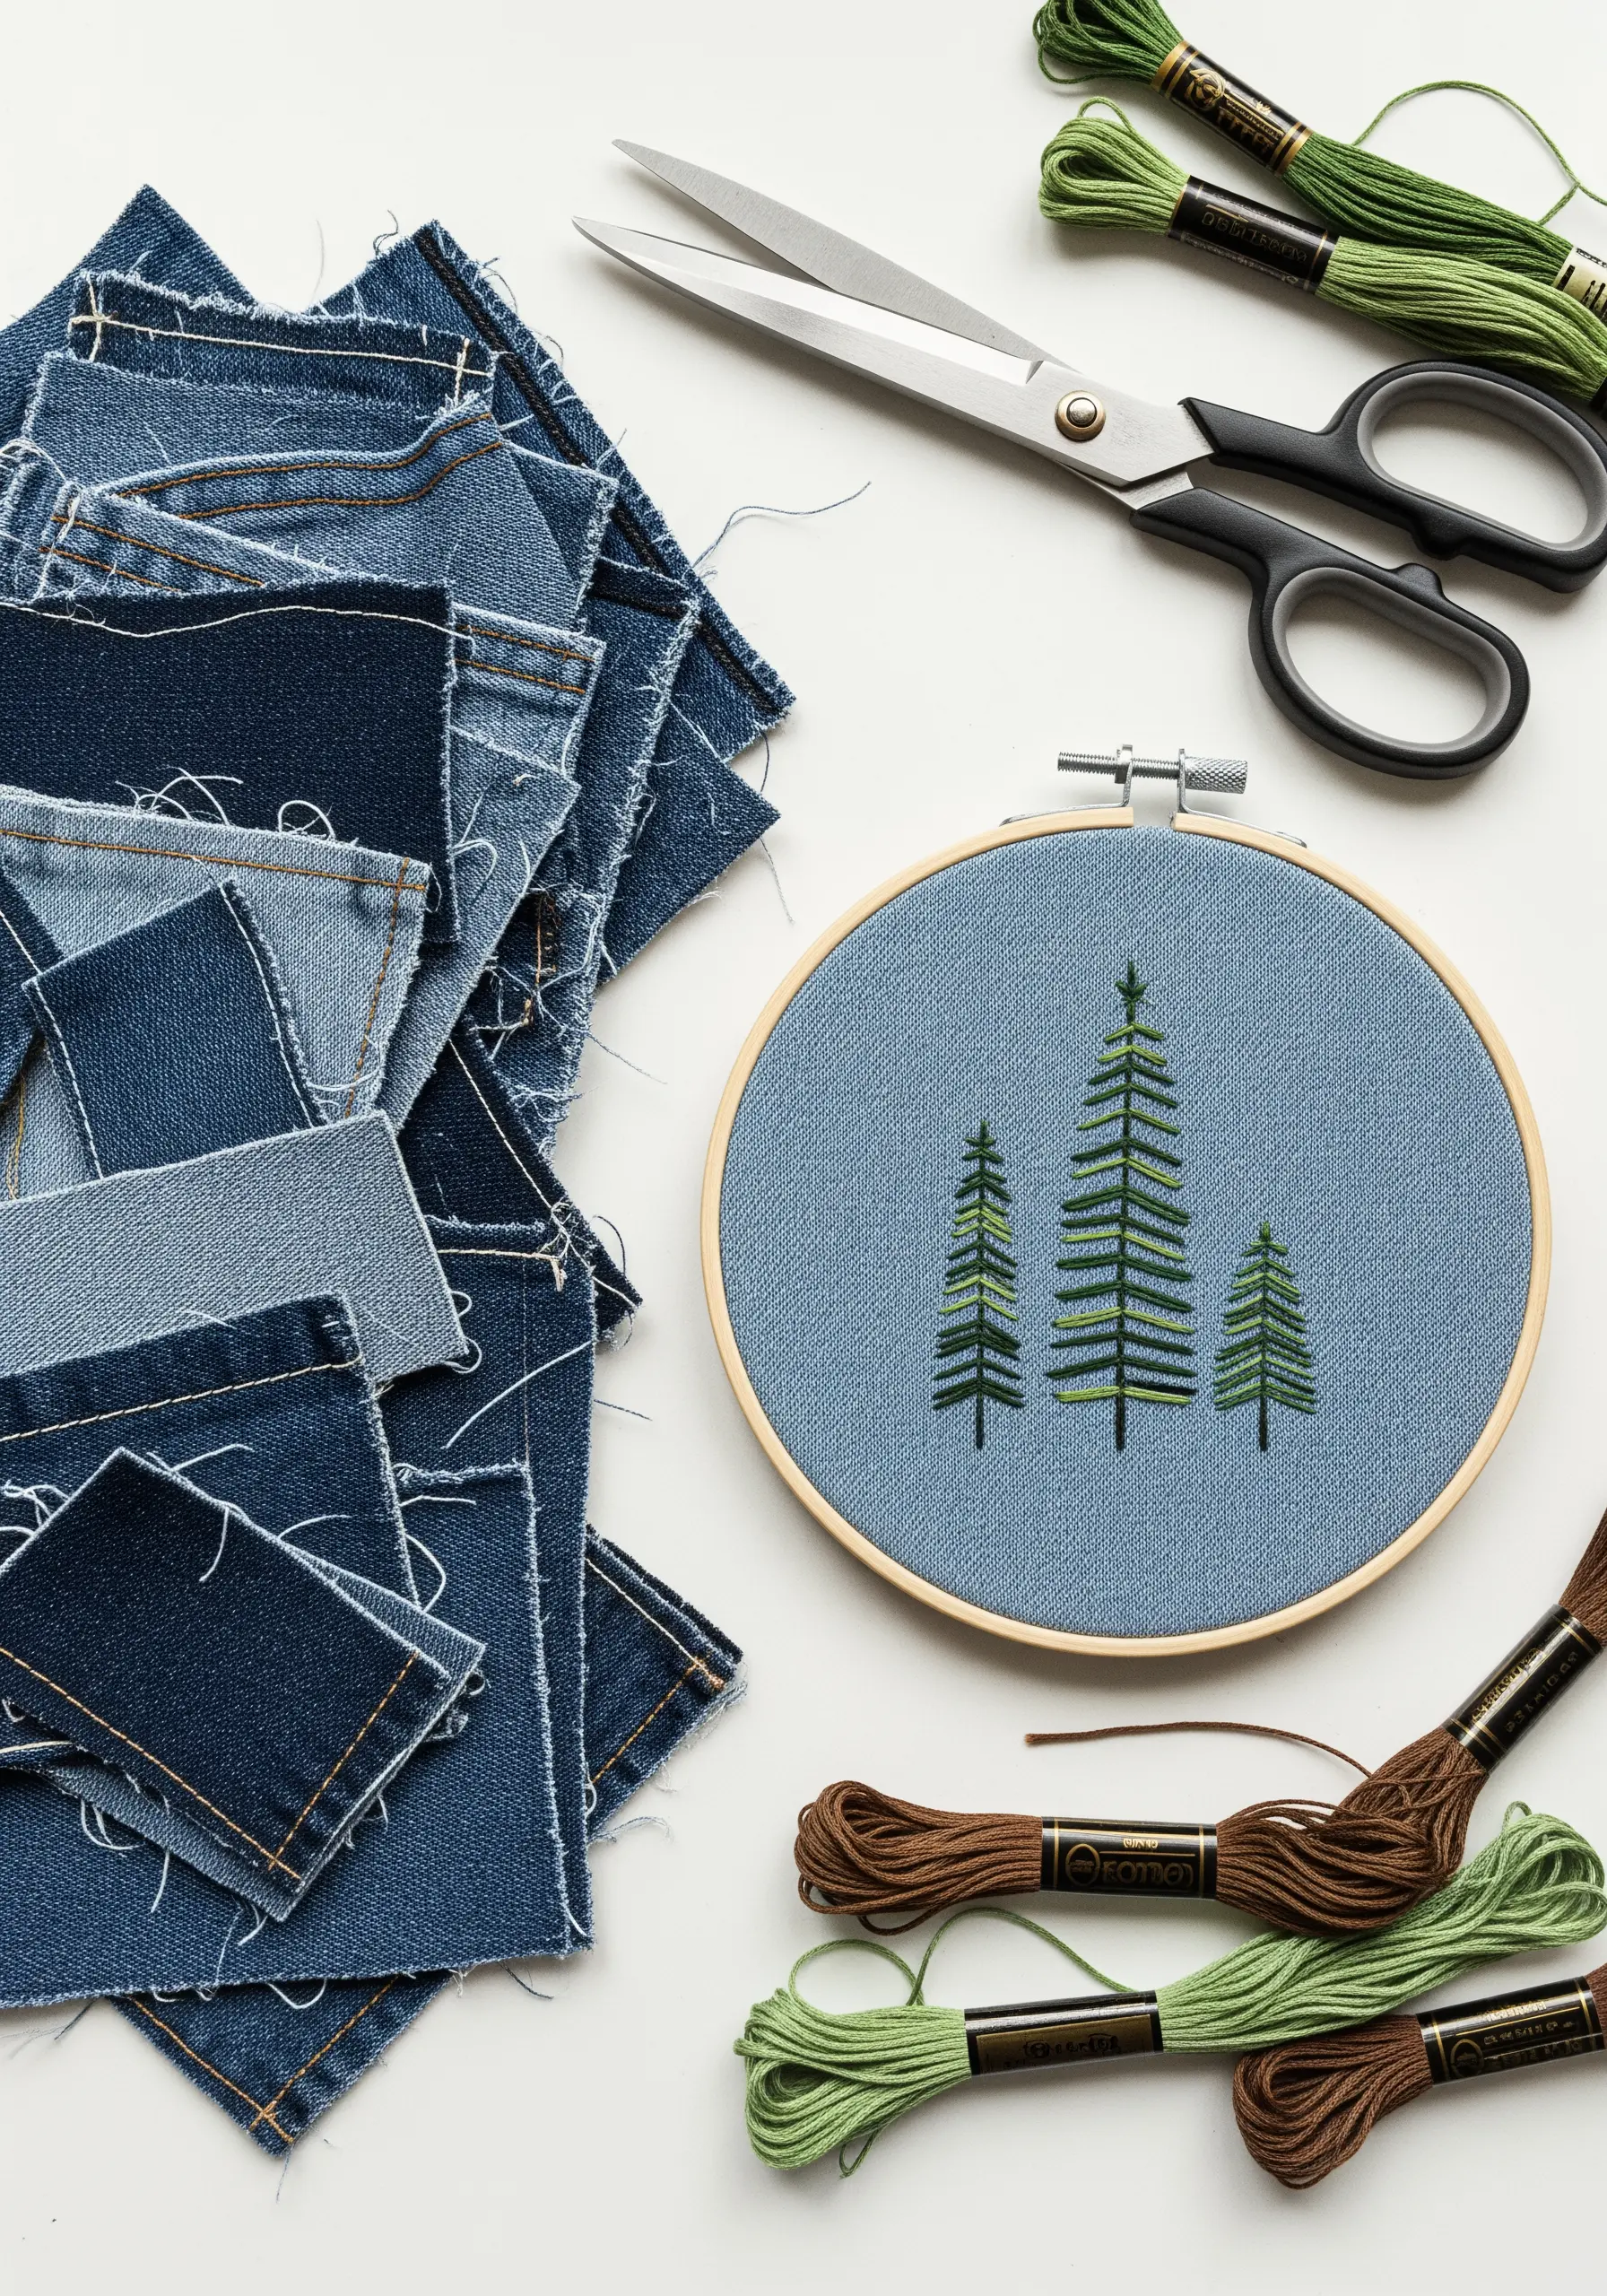
Give old jeans a new life by using the fabric as your canvas. The natural twill weave of denim adds instant texture and character to your work.
Stitch a simple trio of pine trees using basic backstitch for the trunks and radiating straight stitches for the branches.
Using a few different shades of green will add depth and prevent the design from looking flat.
This is one of the easiest upcycled fabric wall art projects you can try.
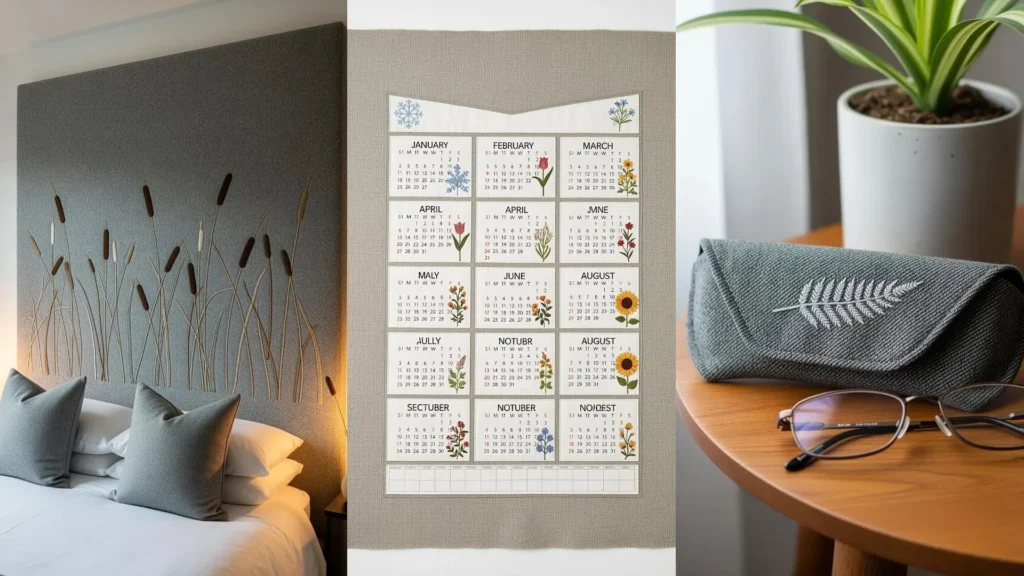
19. Create an Heirloom with a Botanical Calendar
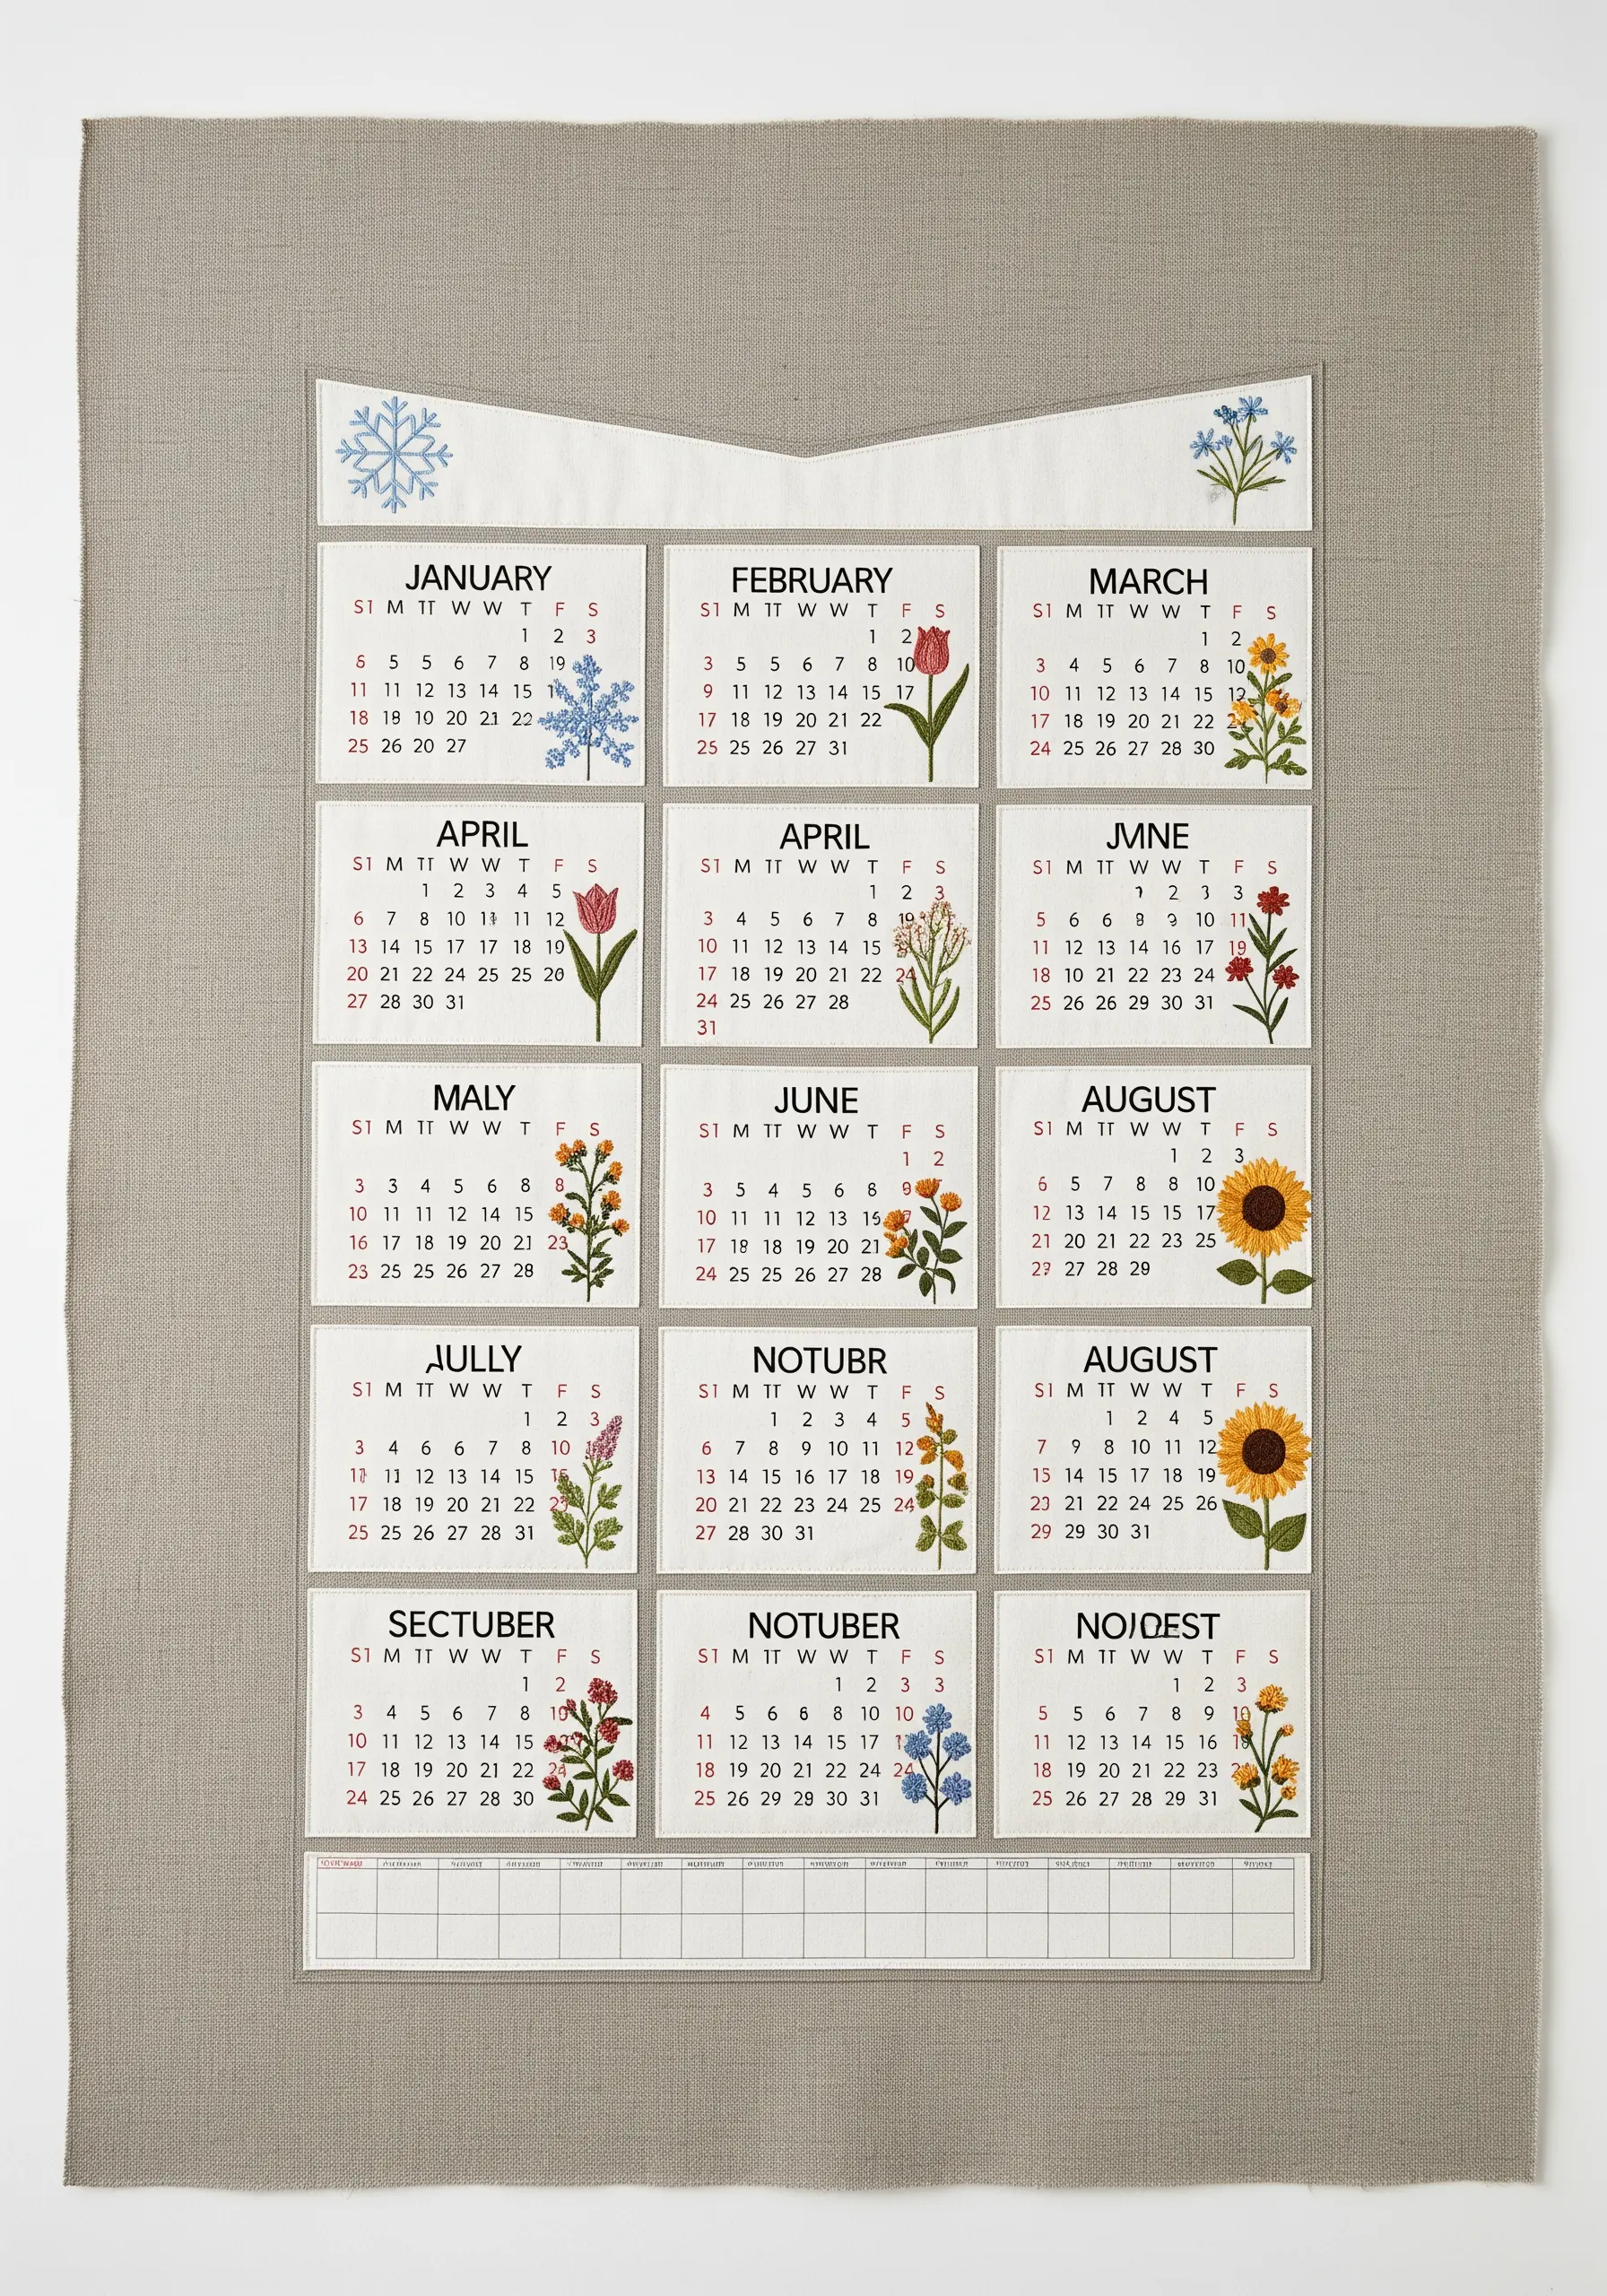
Combine embroidery with a practical purpose by creating a perpetual fabric calendar.
Stitch a different tiny botanical for each month on small, individual fabric panels, allowing you to use up precious scraps.
Use single-strand floss to achieve the fine detail needed for these miniature flowers. Once complete, appliqué the panels onto a larger linen backing.
These functional seasonal embroidery wall decor ideas become cherished annual traditions.
20. Go Bold with High-Texture Stitches and Yarn
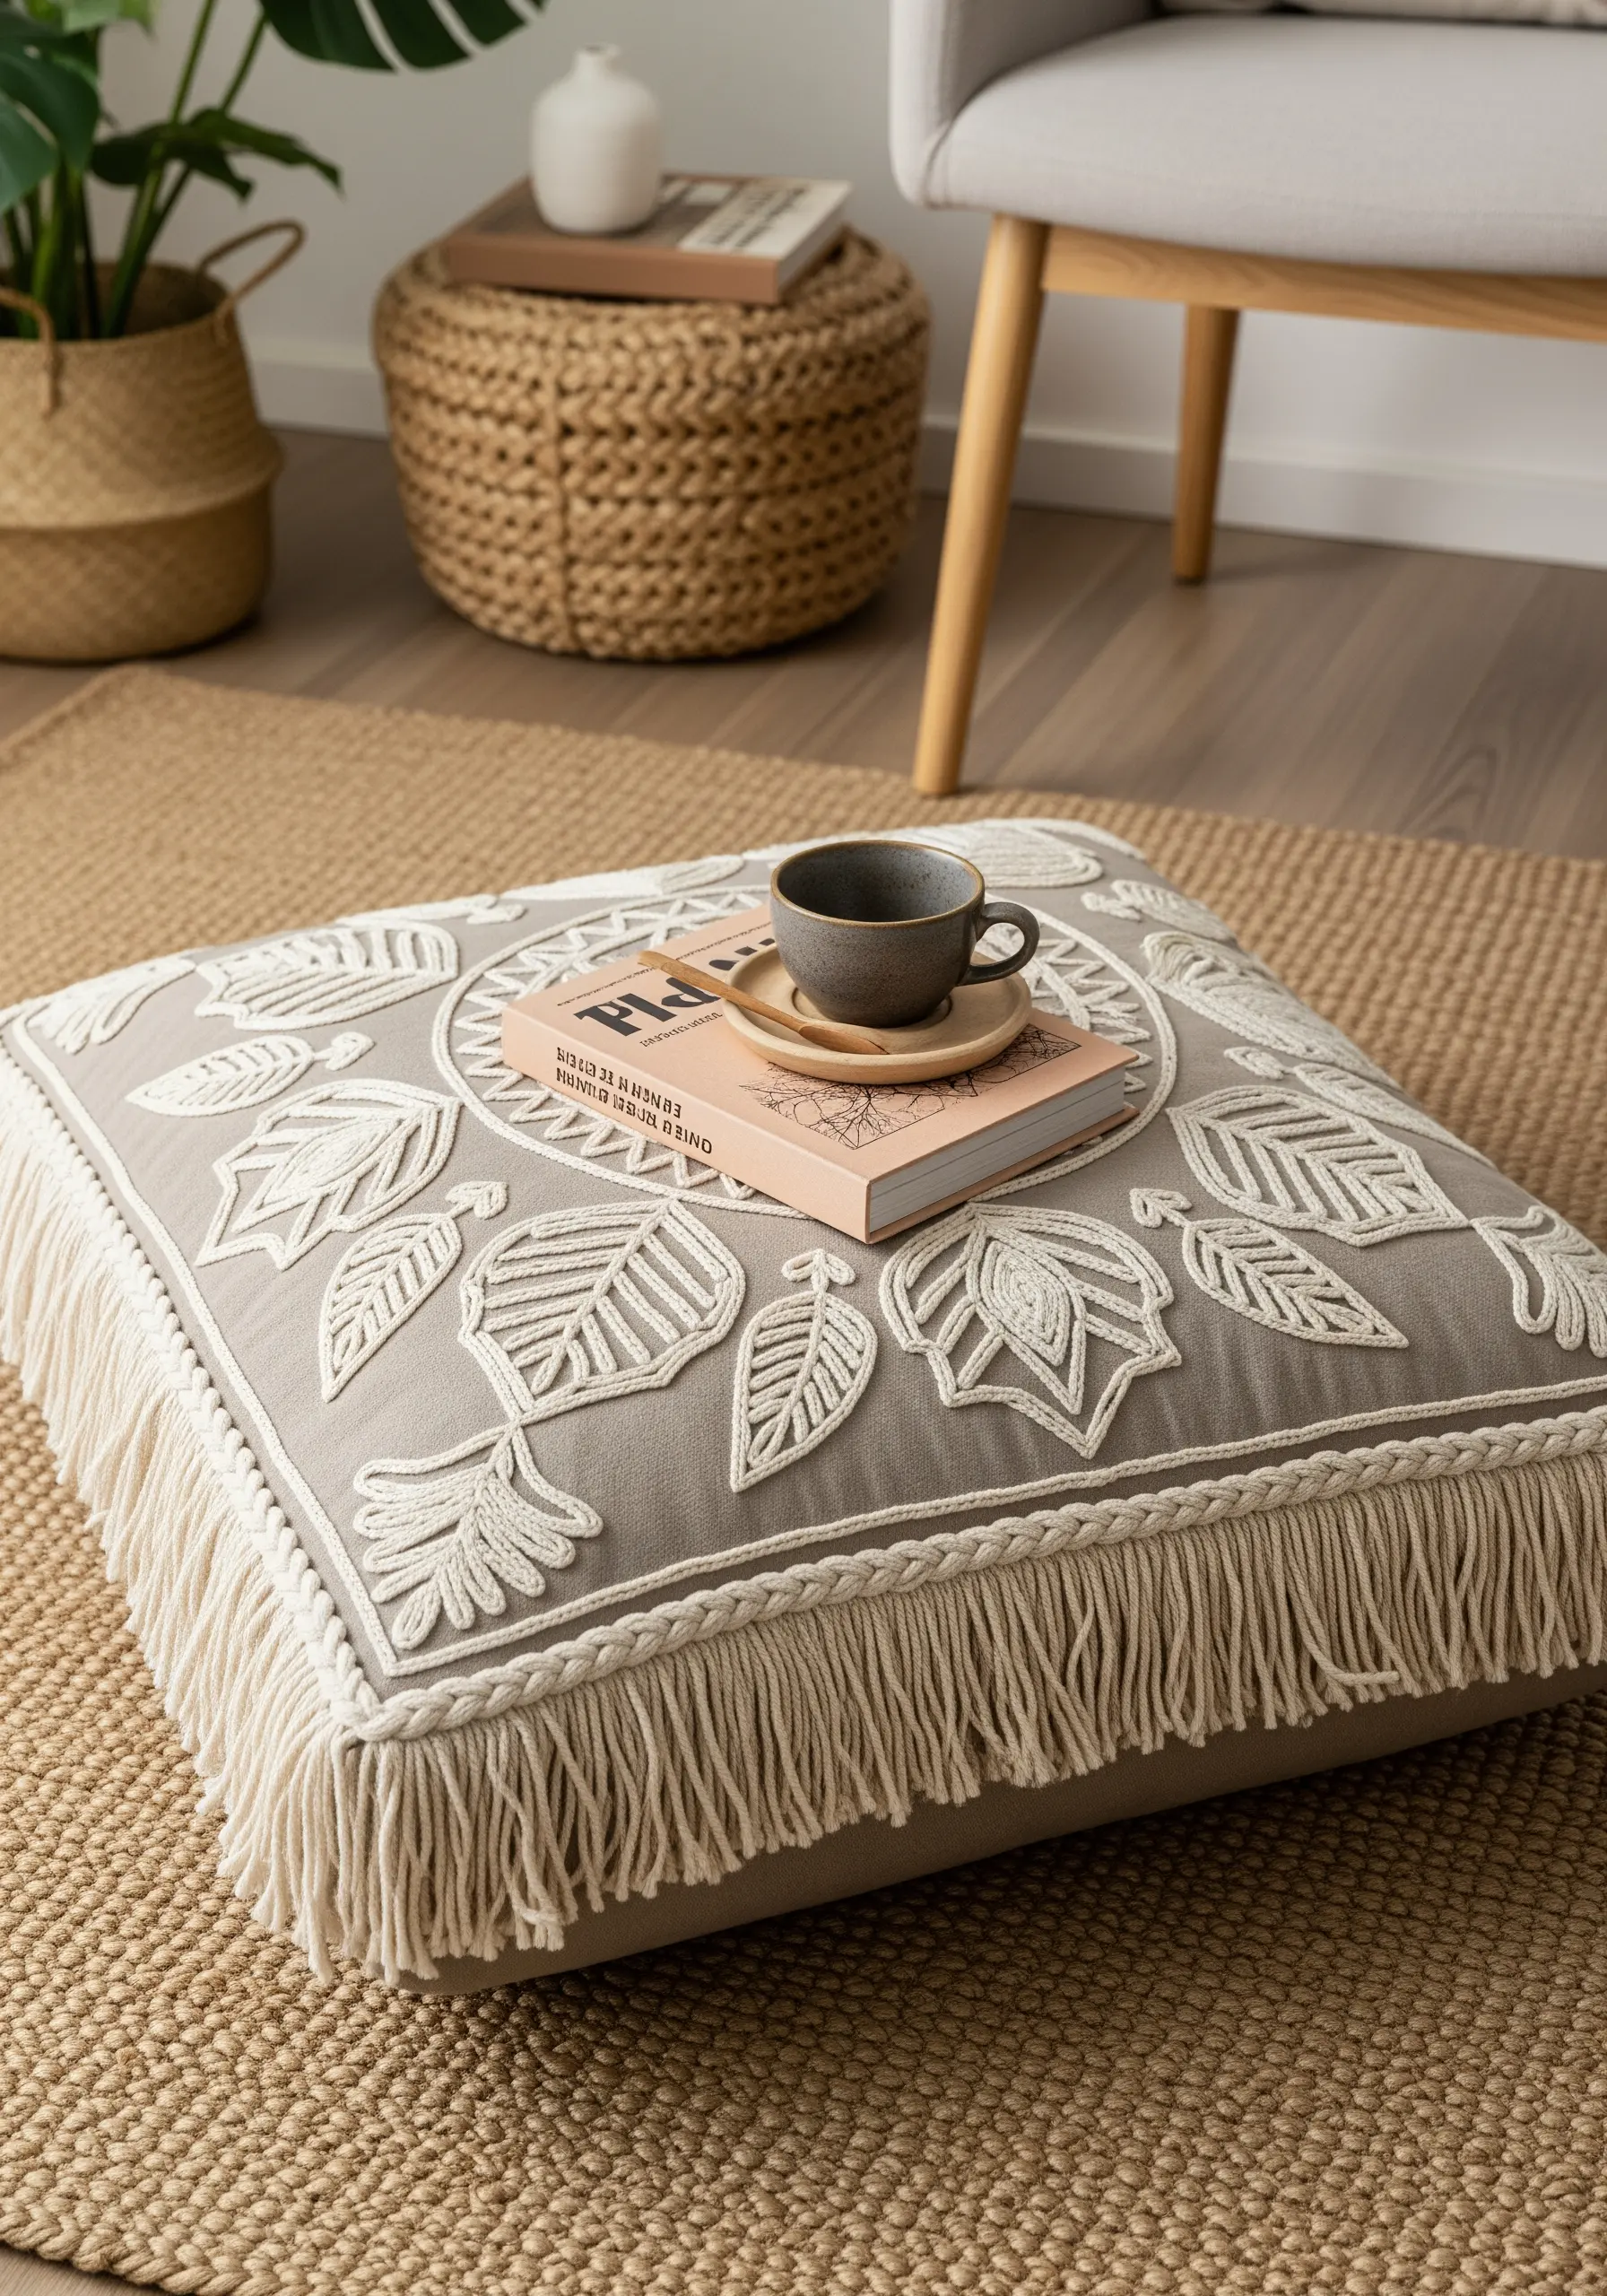
Make a statement on a large floor cushion by using thick thread or yarn instead of standard floss.
Outline your botanical motifs with a chunky chain stitch or couching stitch to create a bold, raised line that you can see and feel.
The combination of thick stitches and a plush fringe border creates a luxurious, tactile piece of decor.
This is one of those bold bohemian floral embroidery ideas that defines a room’s aesthetic.
21. Add Delicate Embellishment to Textured Surfaces
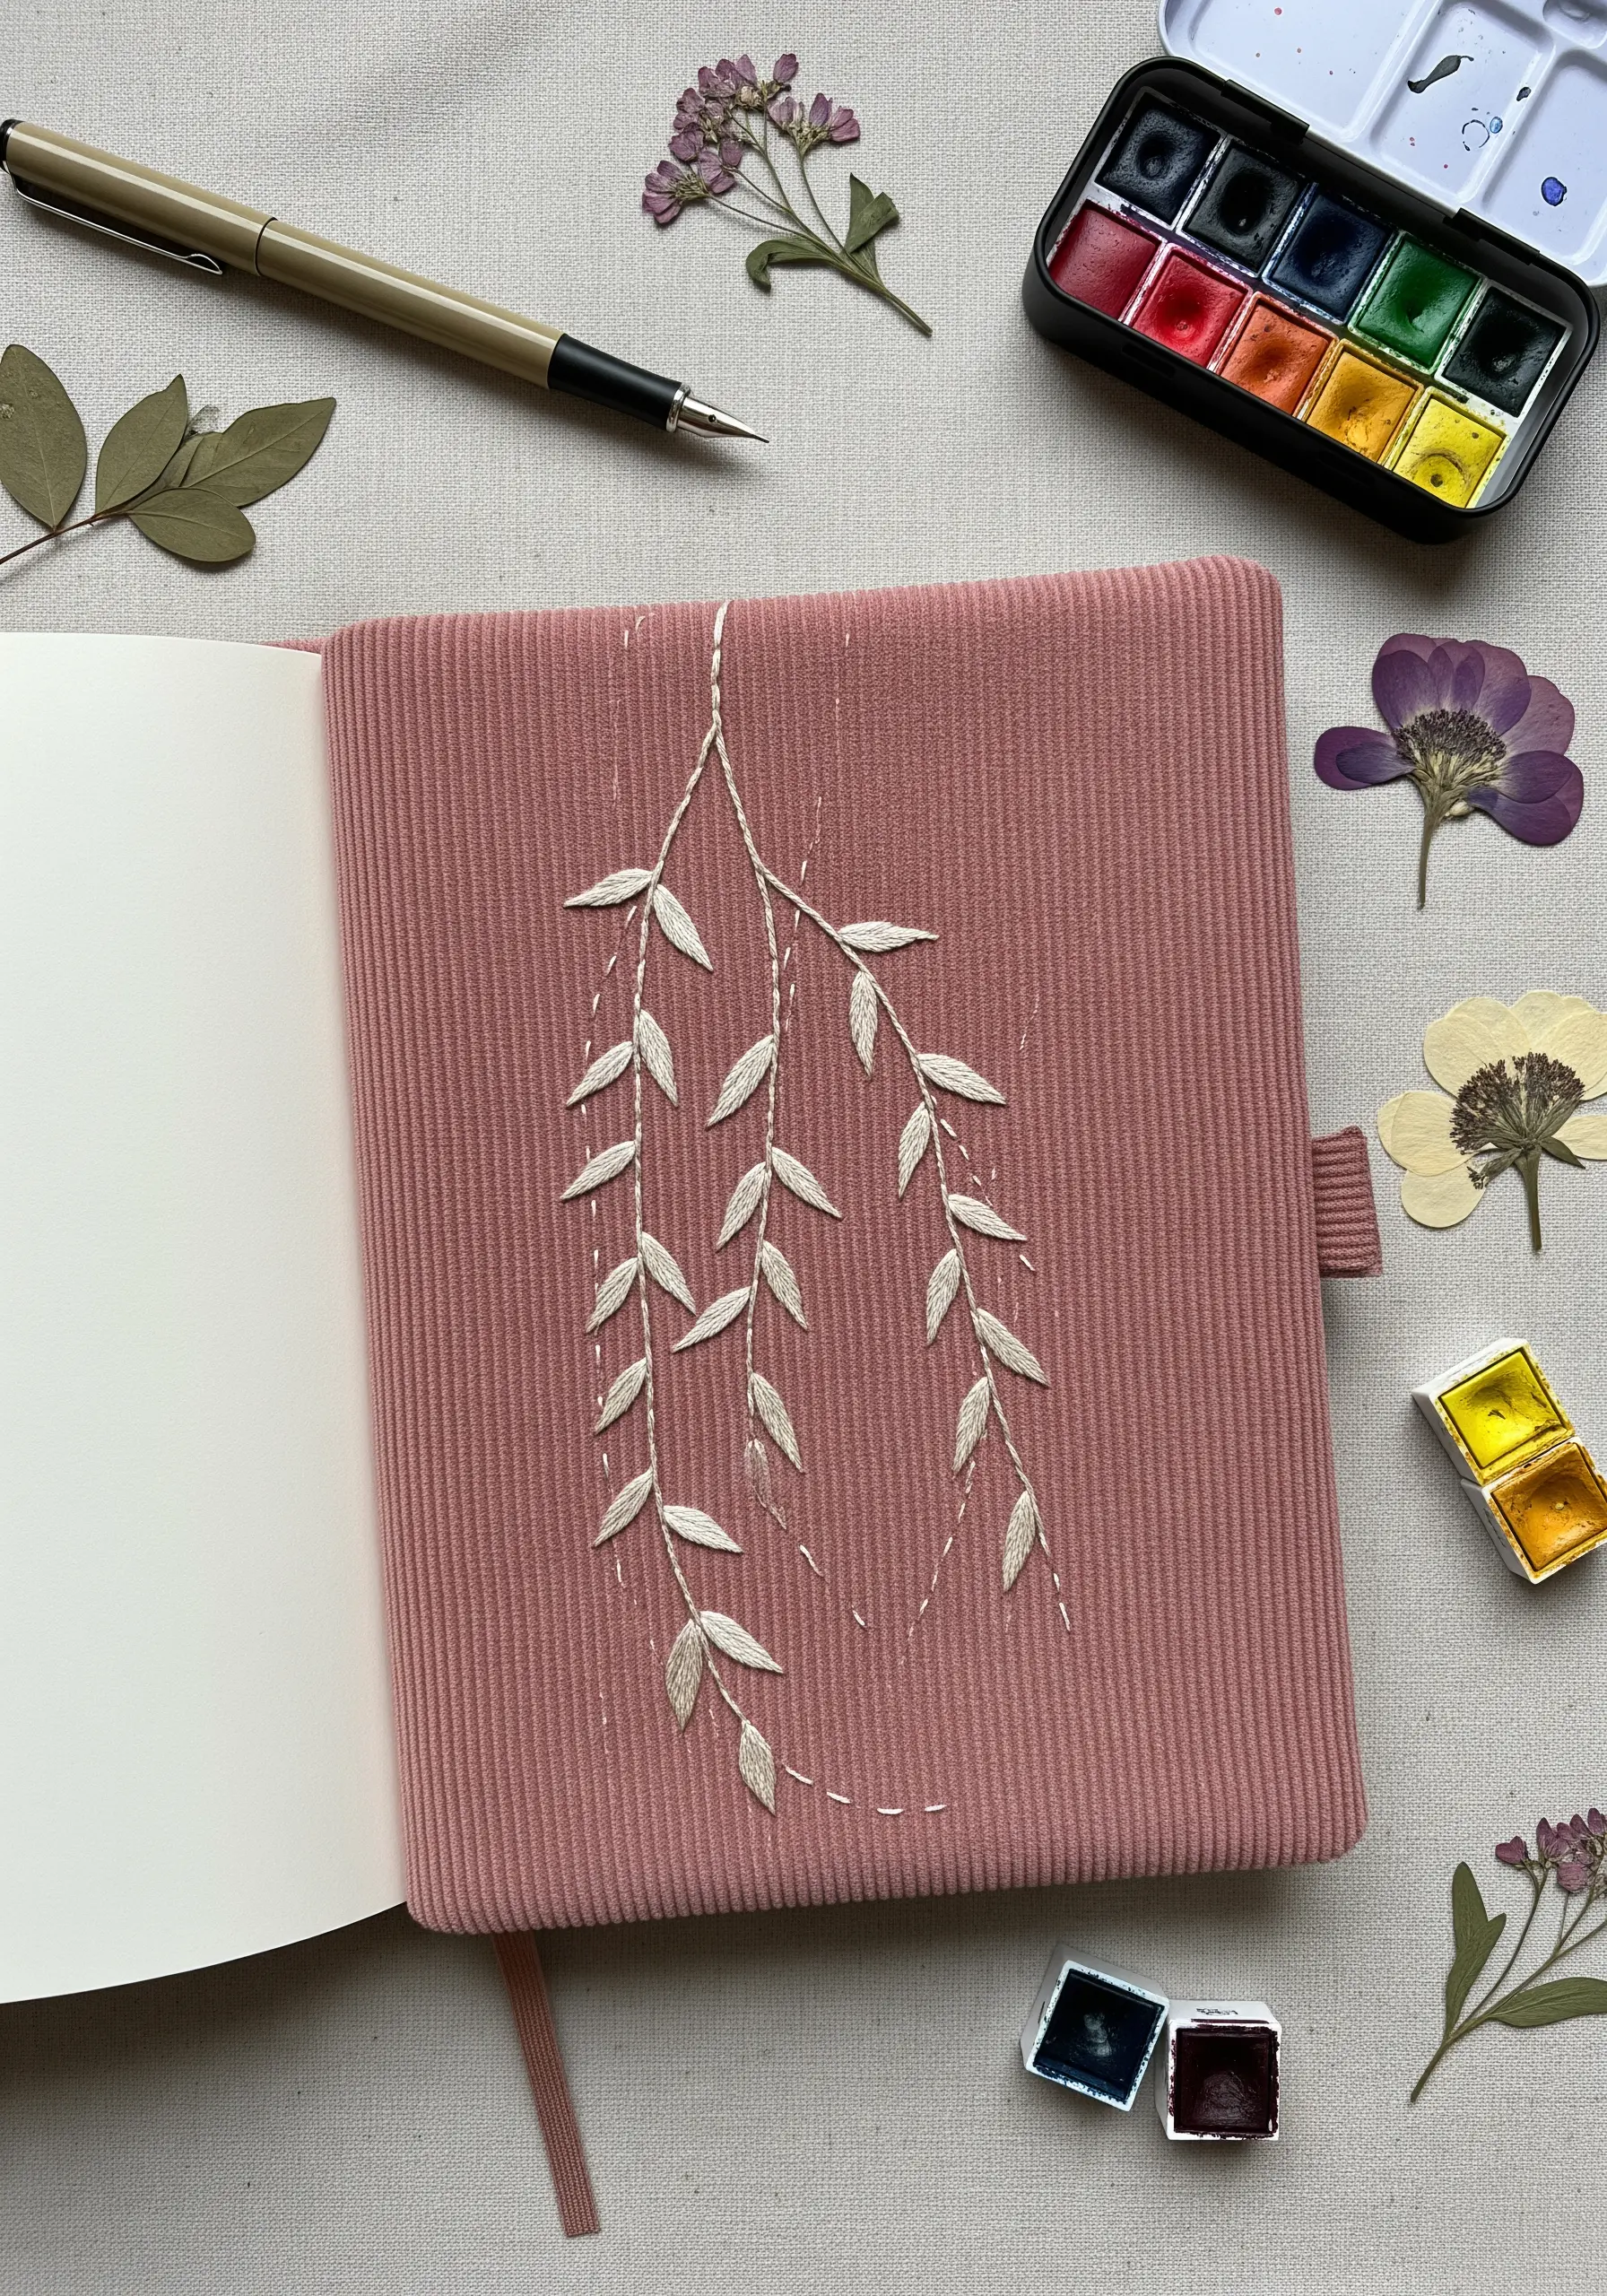
Don’t be afraid to stitch on unconventional materials like a corduroy journal cover.
Choose a simple, elegant design like a weeping willow branch, which won’t compete with the fabric’s texture.
Use a fishbone stitch for the leaves to give them a defined center spine, and a simple backstitch for the delicate, trailing branches.
These are the kinds of quick-stitch inspirations to beautify your notebooks and make them uniquely yours.
22. Recreate Painterly Details with Thread
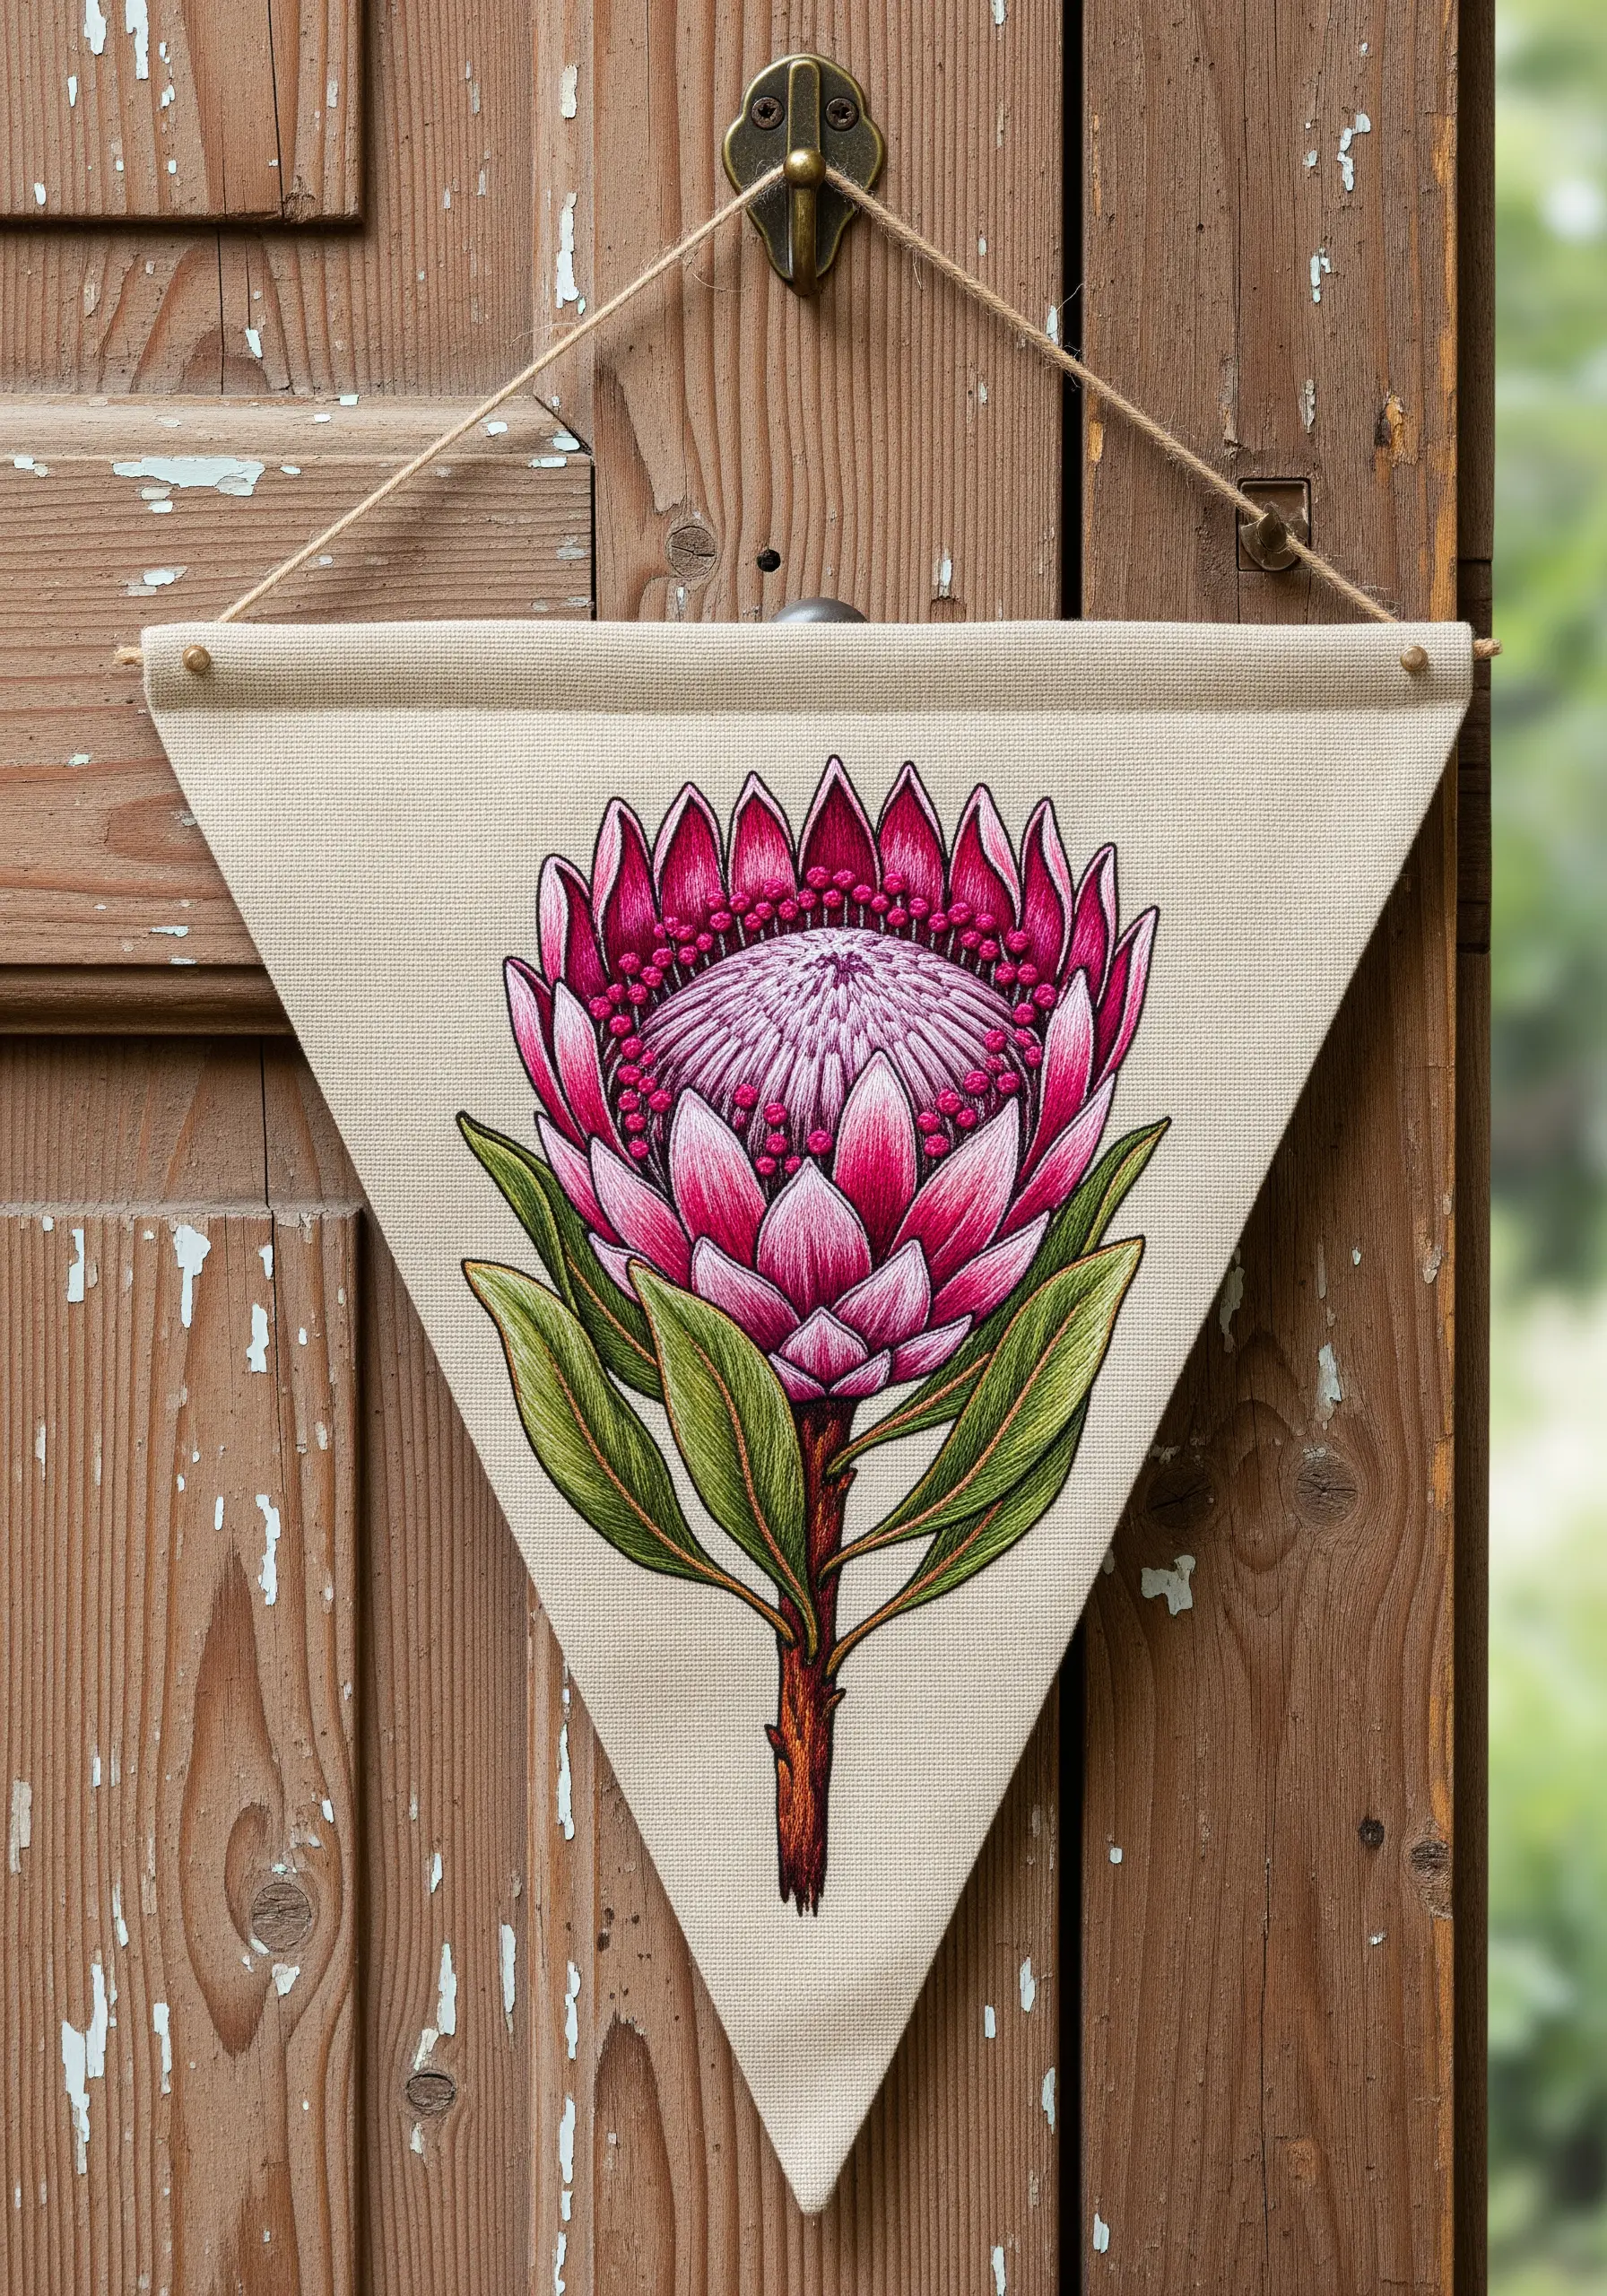
To capture the complex beauty of a protea flower, think like a painter and use your thread to blend colors.
Employ long-and-short stitch for the pink petals, allowing different shades to merge softly into one another.
For the dense center, use a combination of satin stitch and French knots to create a highly textured, dimensional effect.
When finished, these become statement-size embroidered textile hangings worthy of a gallery.
23. Frame Functional Decor with a Simple Motif
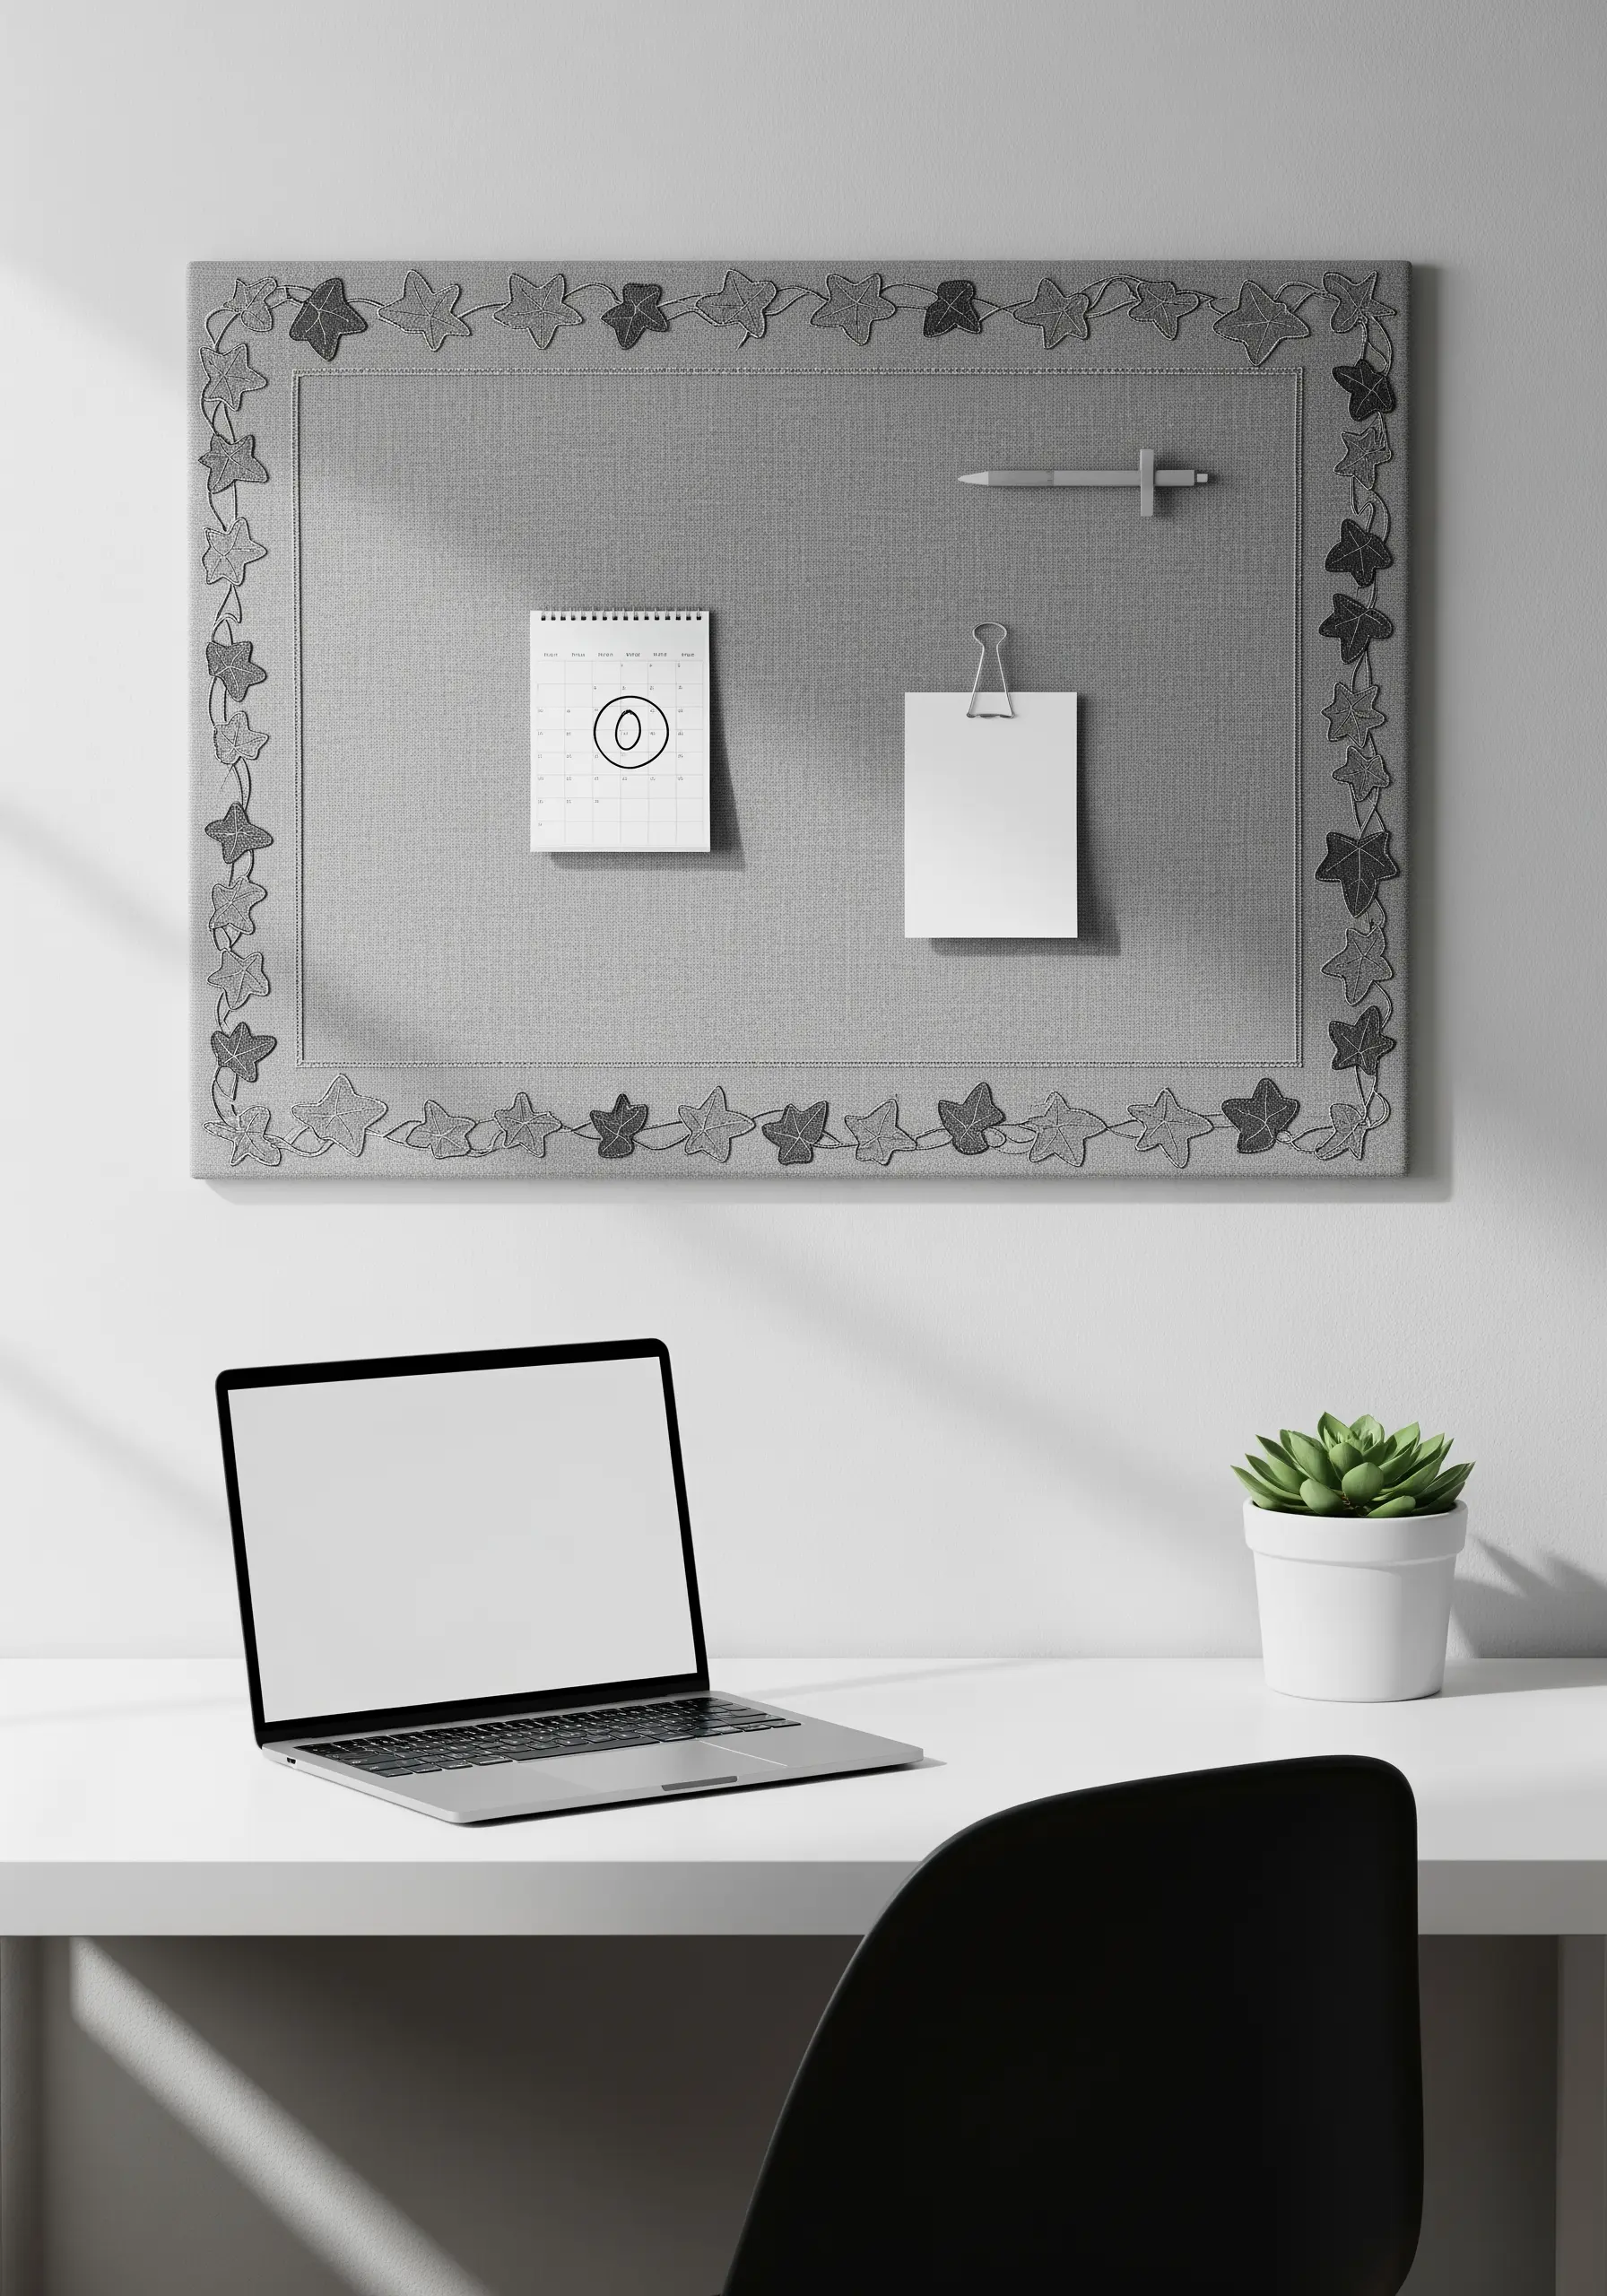
Turn a plain fabric pinboard into a piece of custom decor by adding an embroidered border.
A repeating leaf or vine motif stitched in a tone-on-tone palette adds sophistication without being distracting.
Use a simple lazy daisy stitch for the leaves and a small straight stitch to connect them. This creates a delicate, rhythmic pattern around the edge.
It’s one of many subtle embroidery designs that add character without clutter to your workspace.
24. Capture a Landscape with Minimalist Stitches
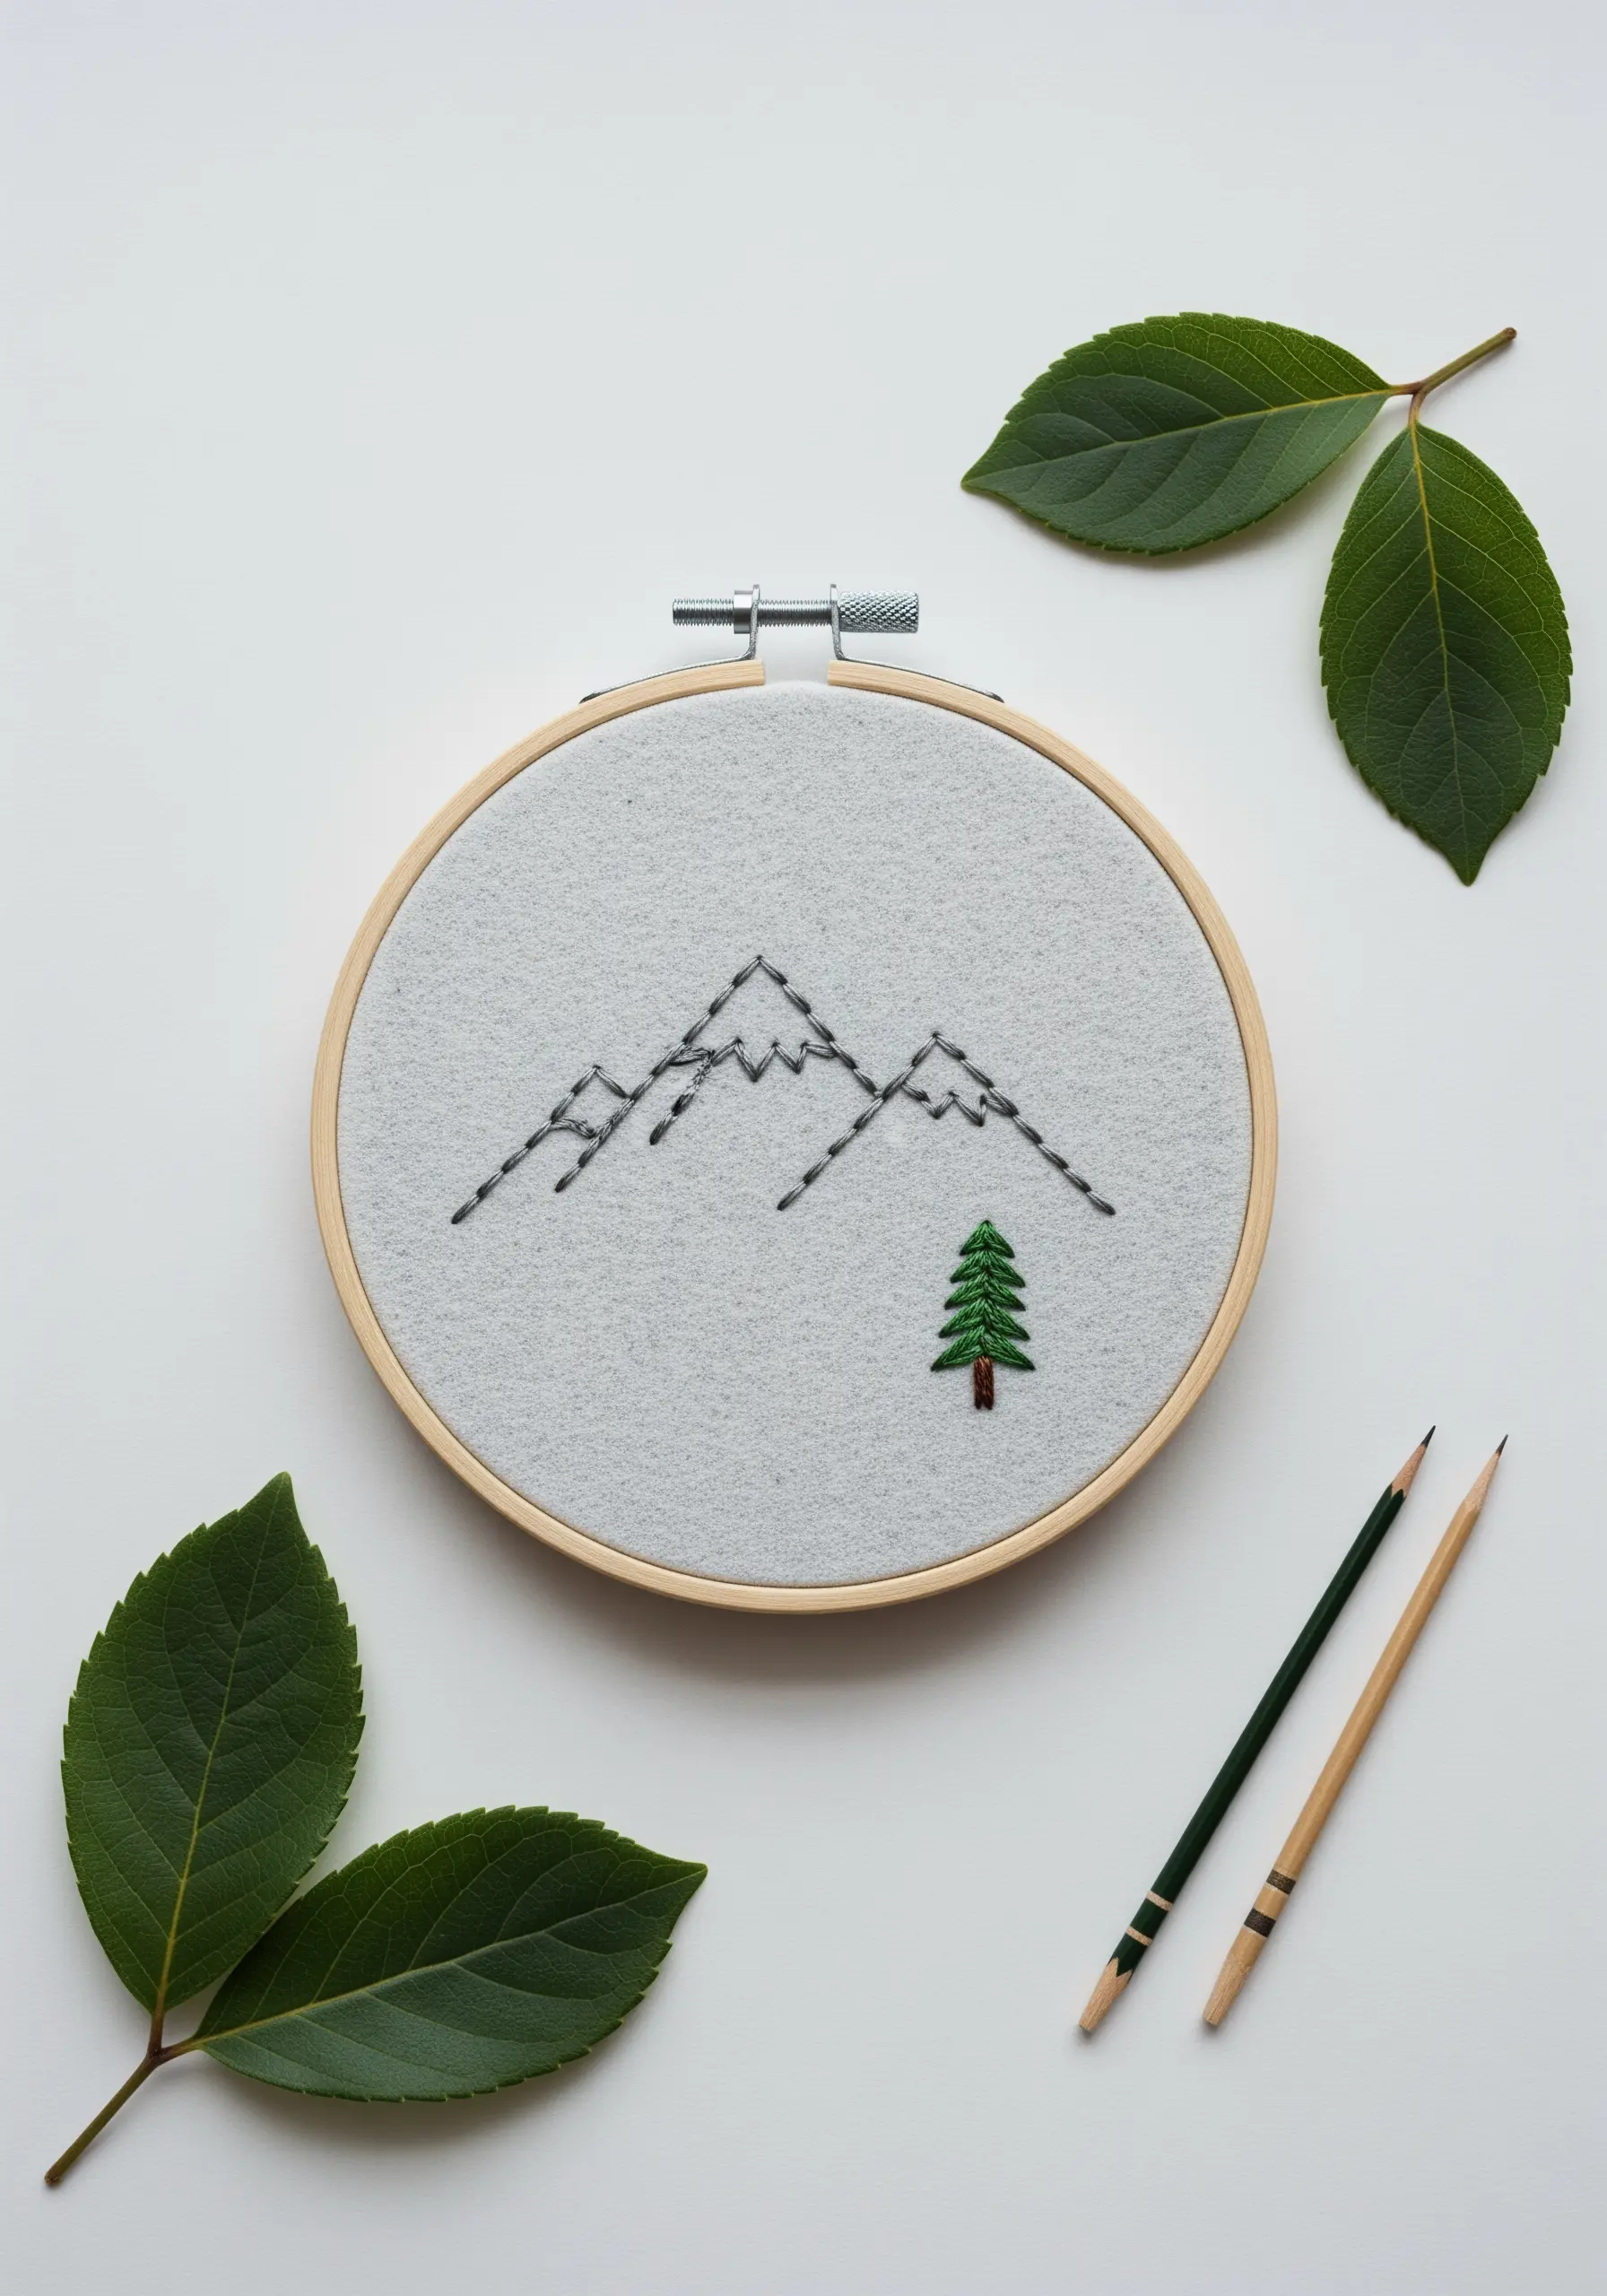
You can evoke the grandeur of a mountain range with just a few carefully placed stitches.
Use a simple backstitch for the mountain outlines, varying the stitch length to create a jagged, rocky texture.
Adding a single, small tree stitched with satin stitch provides a pop of color and a sense of scale, anchoring the entire composition.
Even beginners can master these mountain landscape thread painting techniques with just one or two basic stitches.
25. Embellish Everyday Objects with Botanical Details
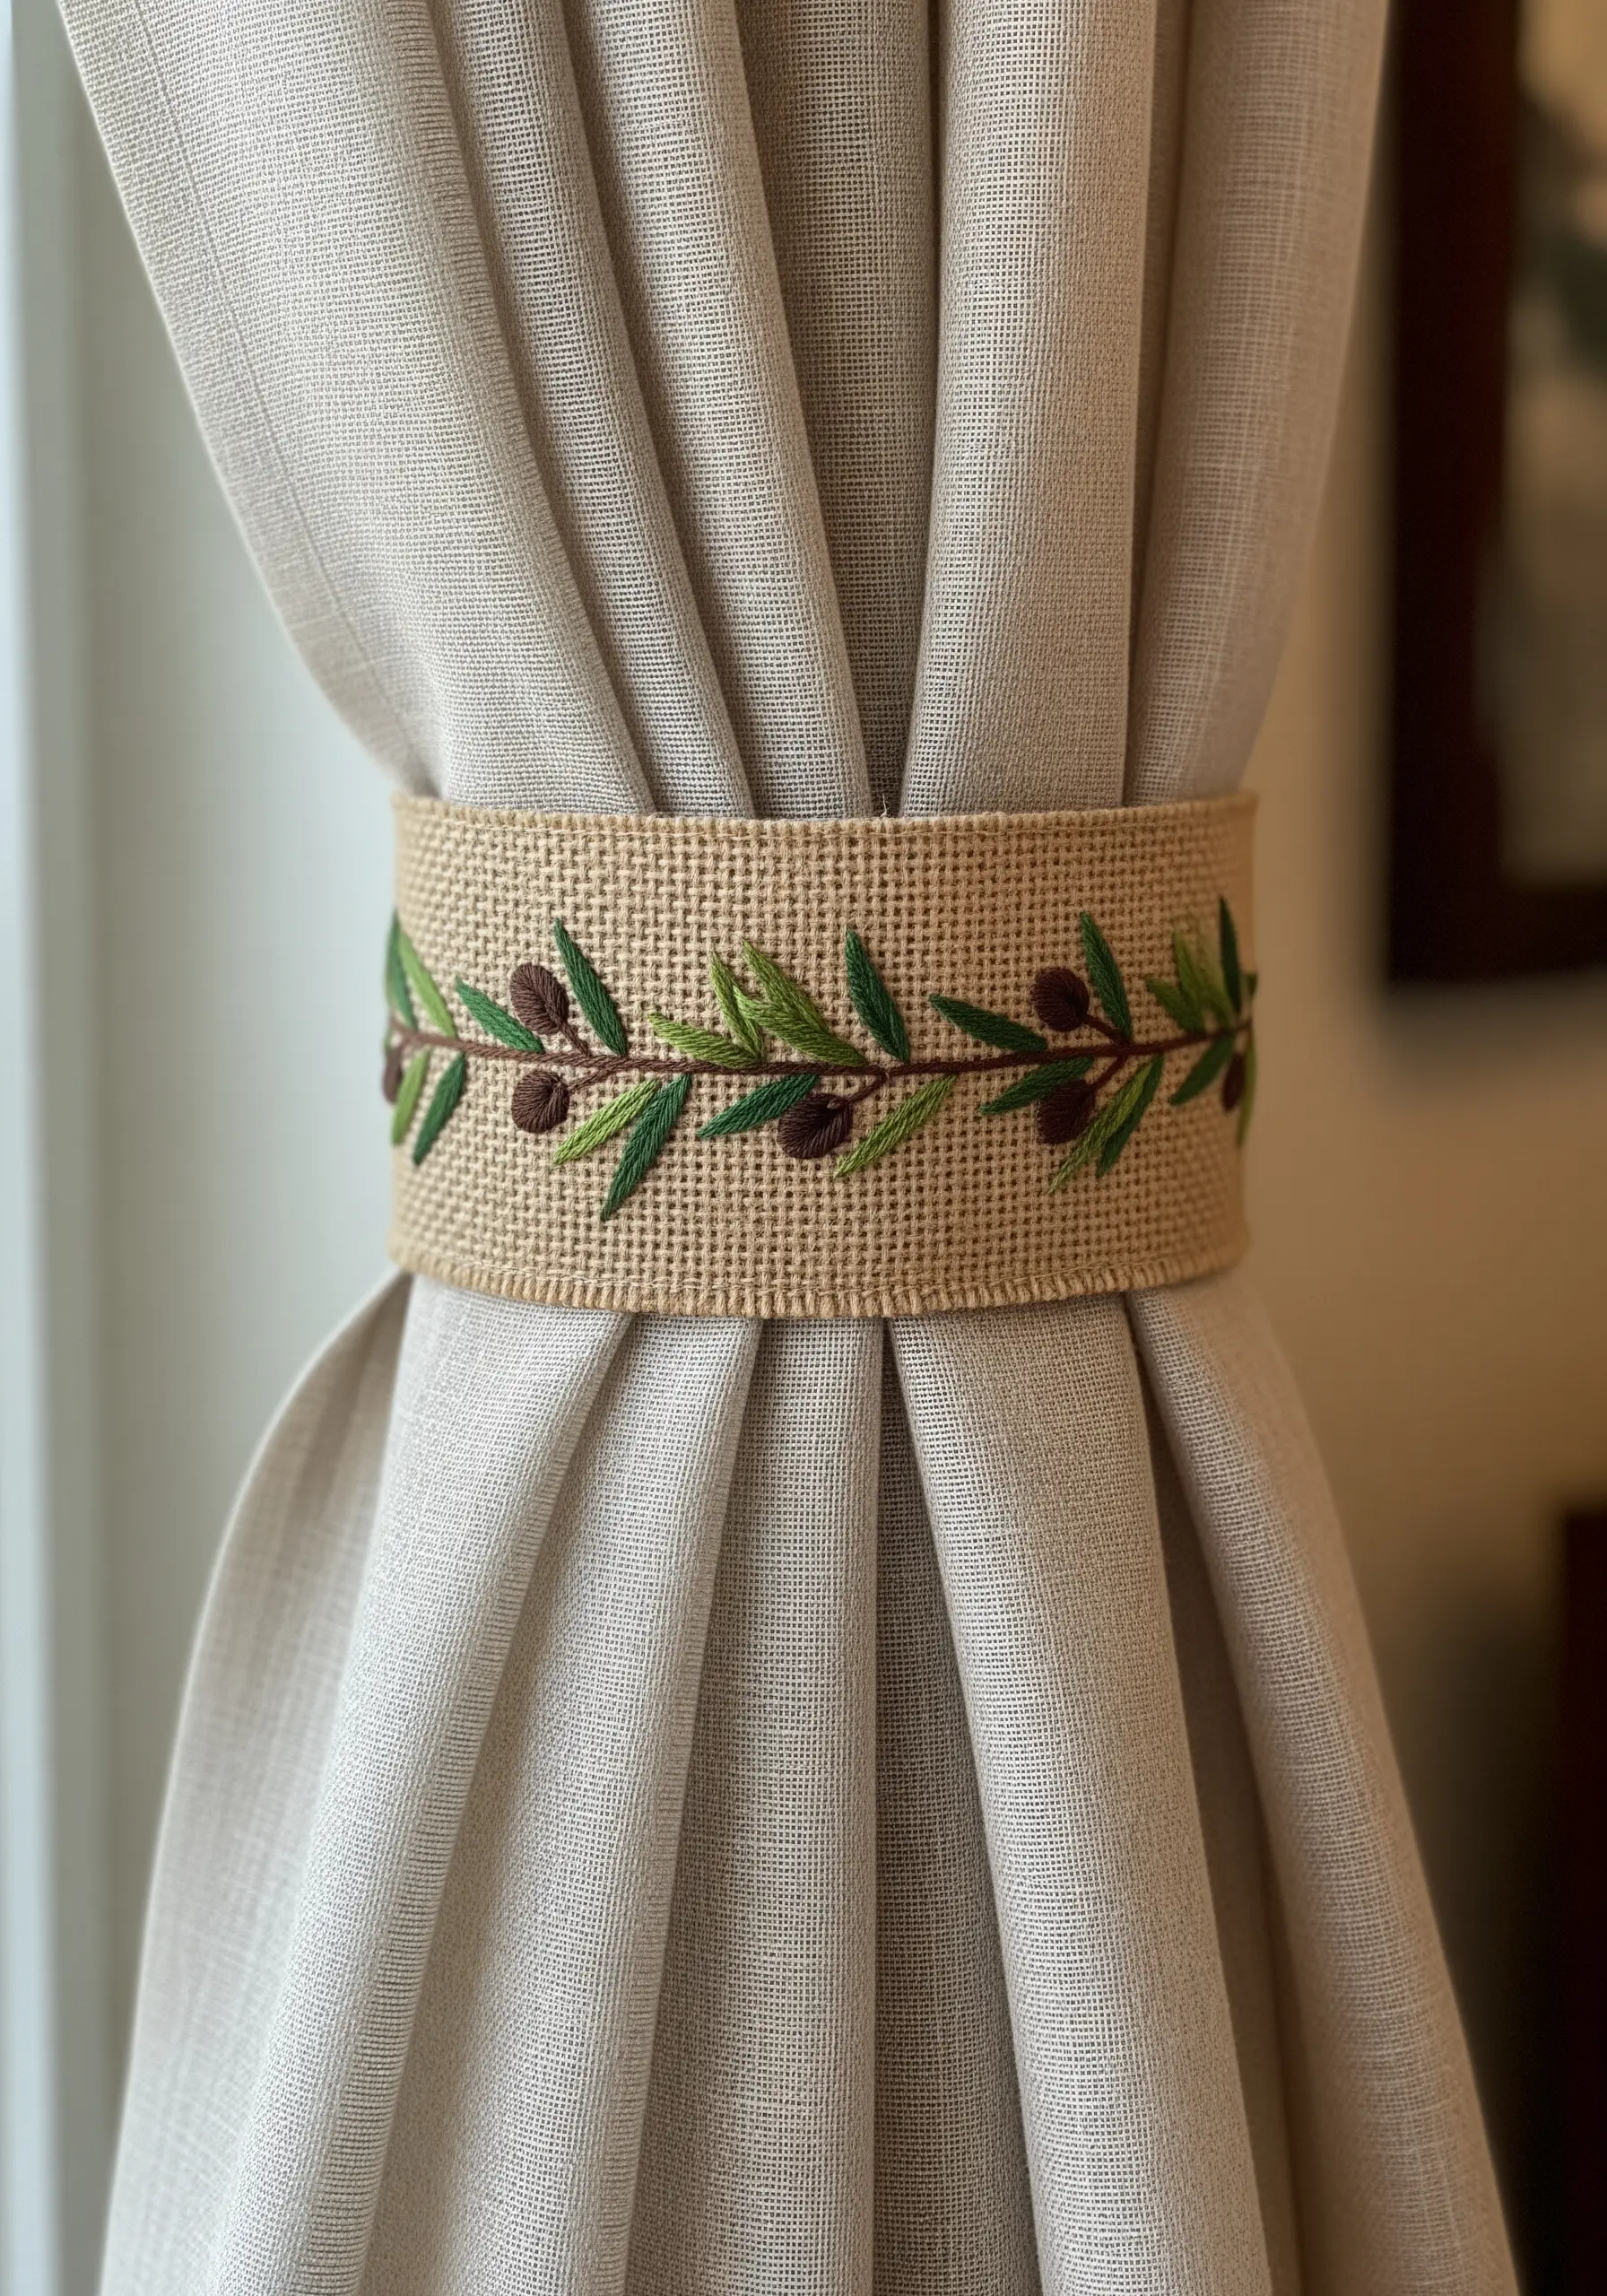
Transform a simple curtain tie-back into a beautiful decor accent with an olive branch motif.
Stitching on a coarse fabric like burlap requires a sturdy needle and slightly thicker floss. Use a fishbone stitch for the leaves to create a central vein and realistic shape.
A few well-placed French knots or satin-stitched ovals serve as the olives, completing the design.
This is a perfect example of how botanical border designs can be adapted for any textile in your home.
26. Illuminate Your Embroidery with Integrated LEDs
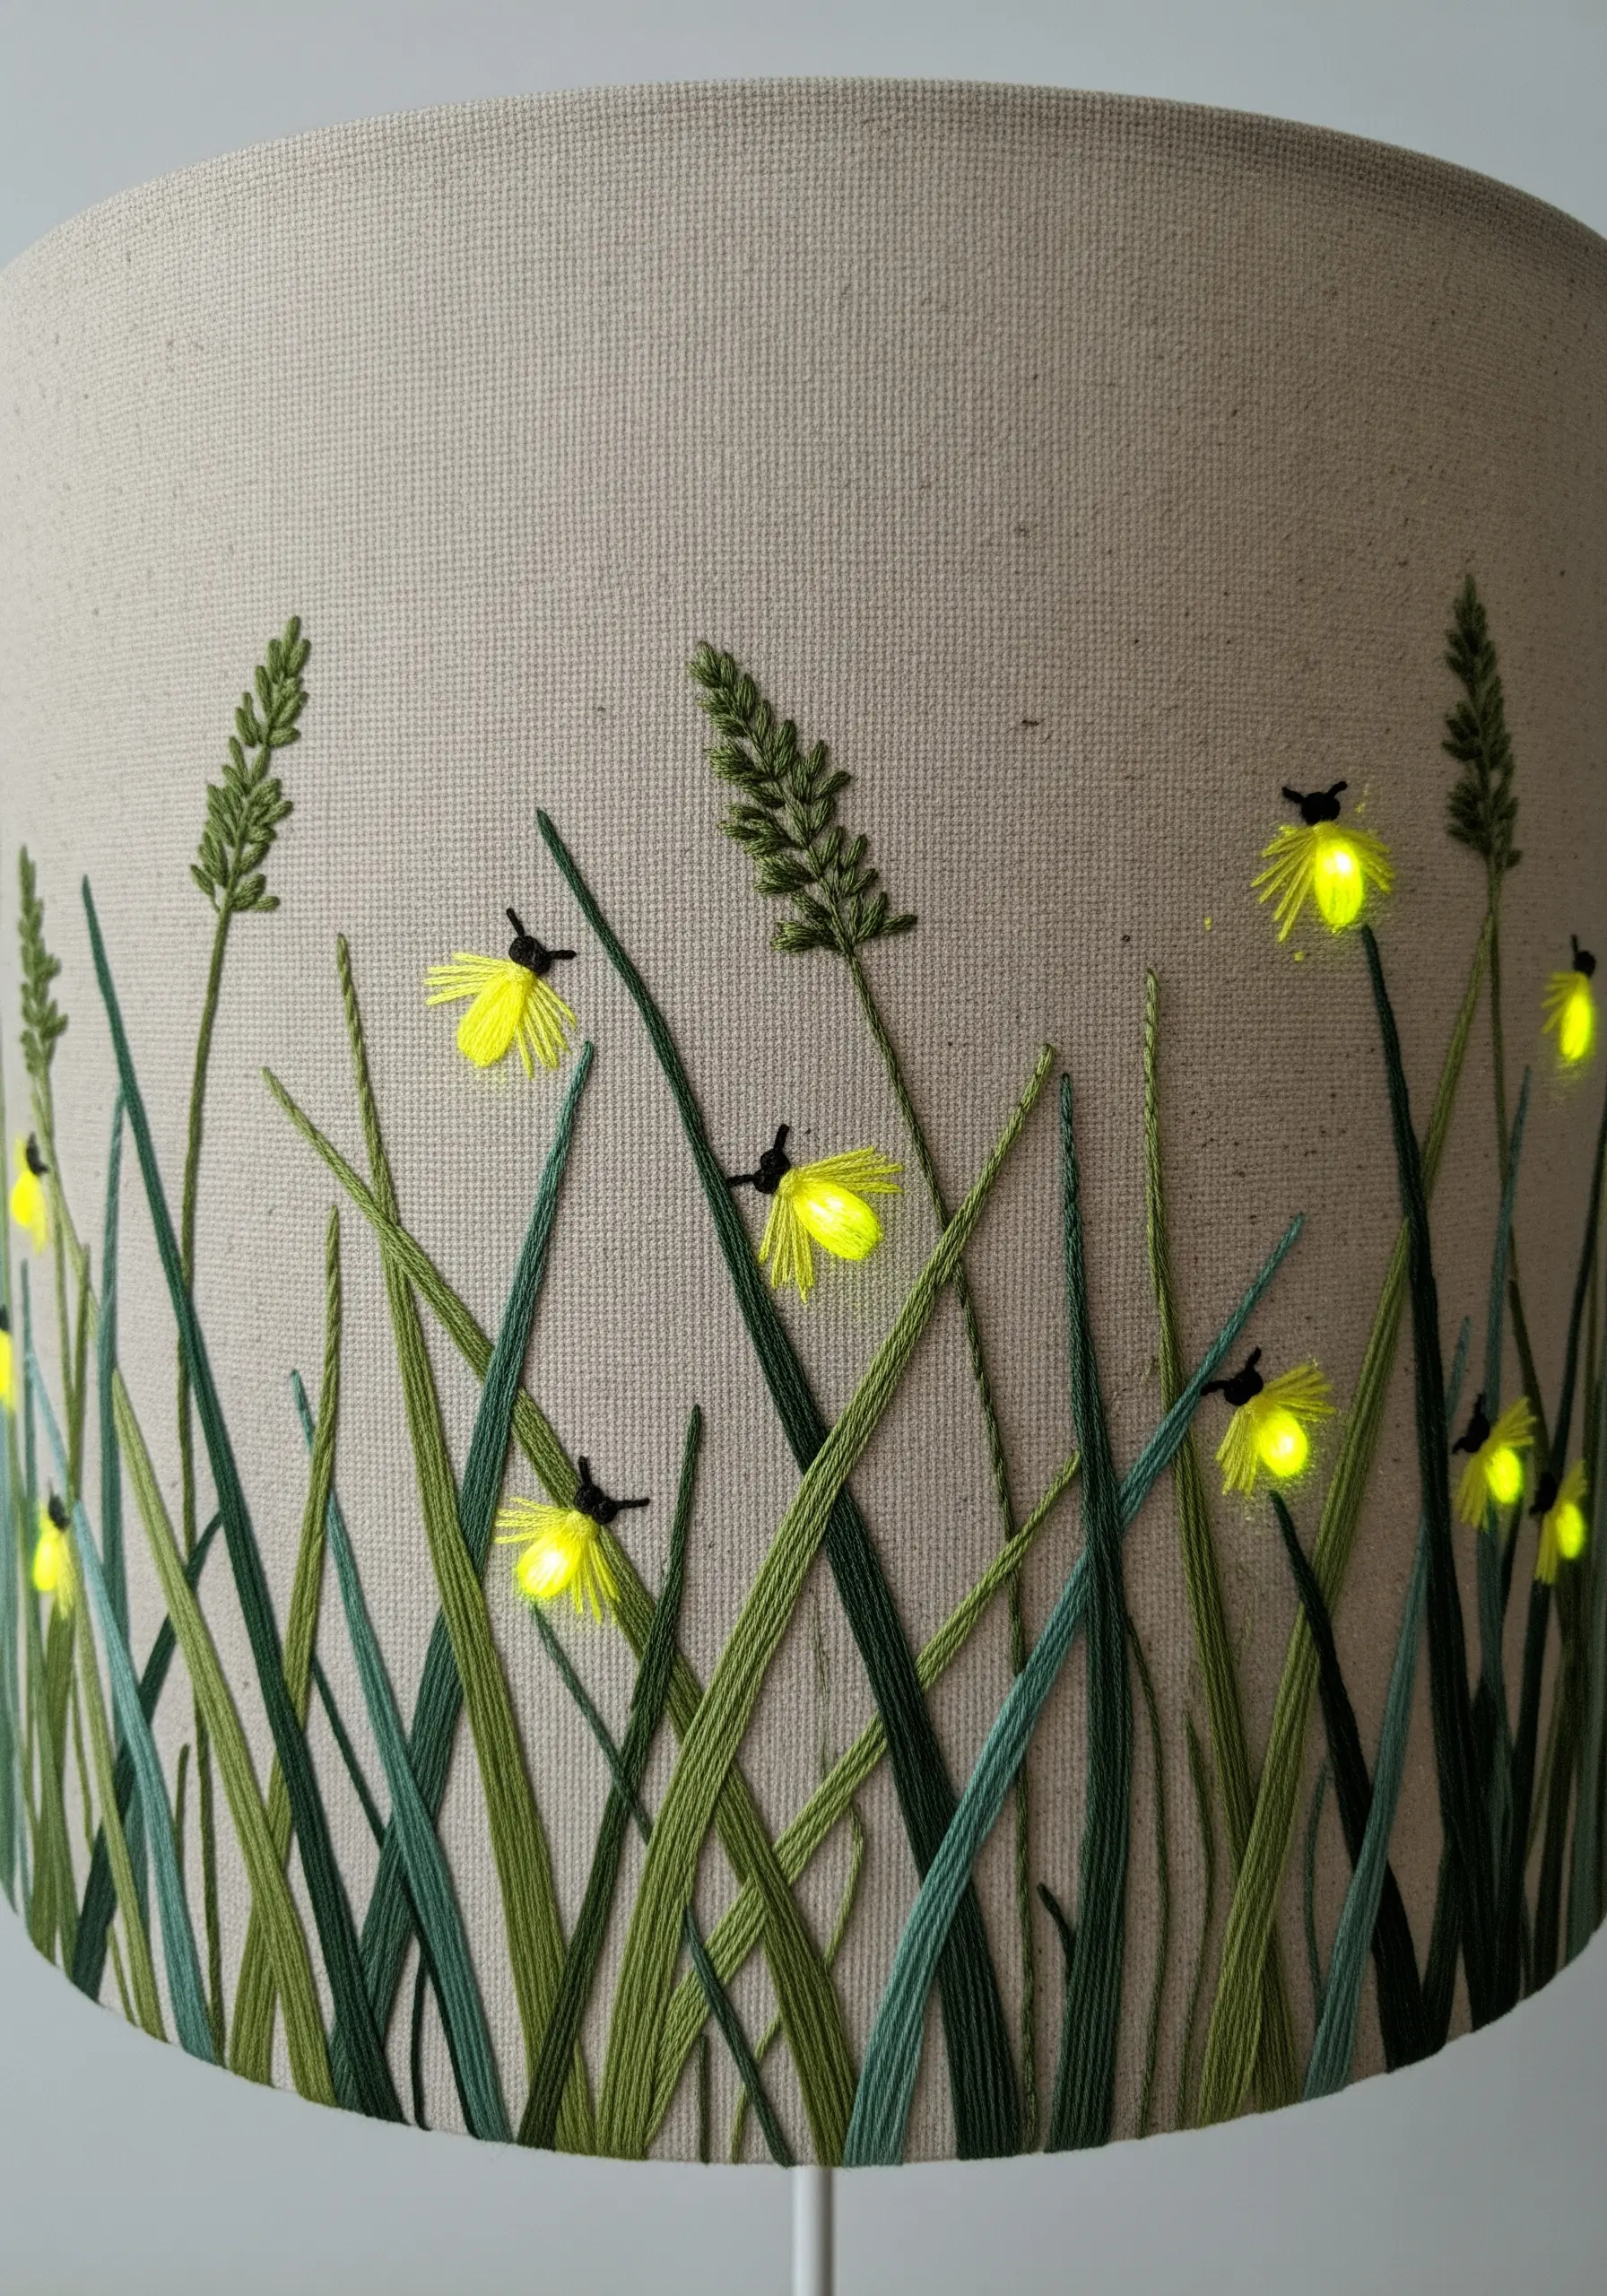
Create a truly magical piece by combining embroidery with light.
Stitch a field of grass using various shades of green and simple straight stitches. For the fireflies, use a vibrant yellow floss and a satin stitch.
The secret is to carefully embed tiny, battery-powered LED ‘fairy’ lights from behind, poking them through the center of each firefly.
This is one of the most inventive mixed-media contemporary embroidery designs, turning a lampshade into an interactive art piece.
27. Embrace the Elegance of Continuous Line Art
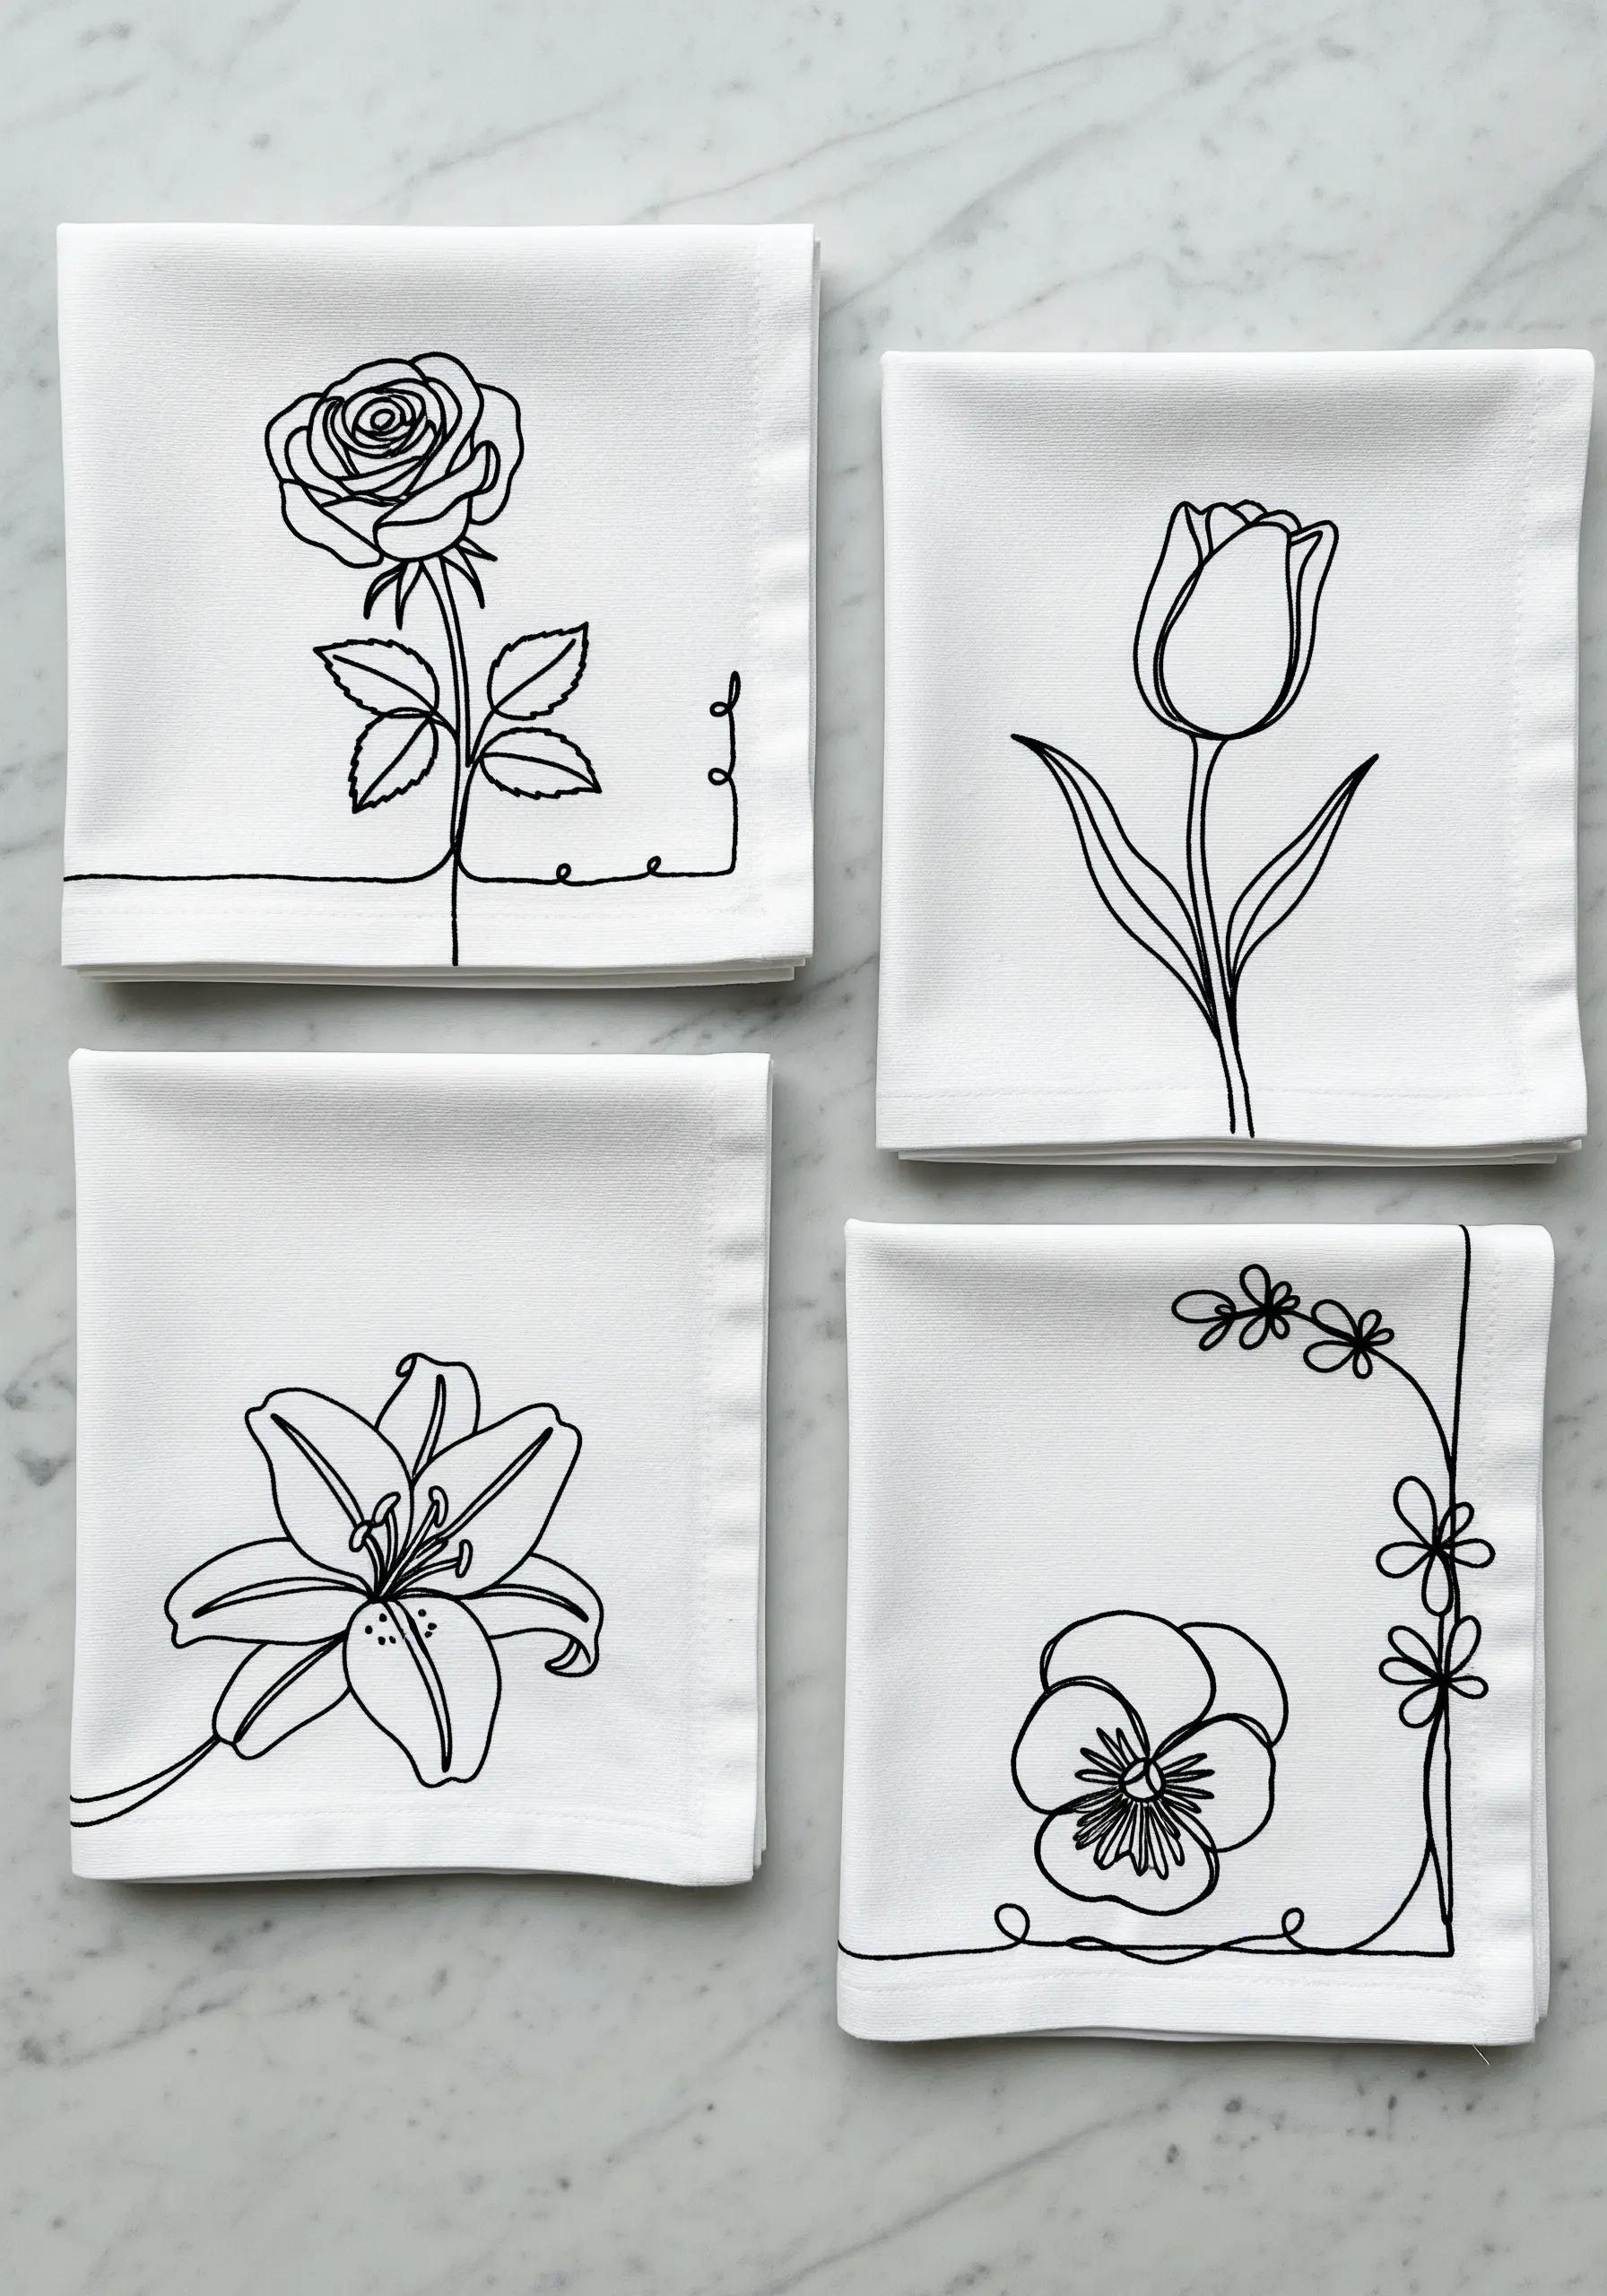
Challenge yourself to create a design that never breaks its line. This technique requires careful planning but results in a fluid, modern aesthetic.
Lightly trace your pattern onto the fabric first, then use a smooth, consistent stem stitch or whipped backstitch to follow the path.
The beauty of this style lies in its simplicity and the graceful movement of a single, unbroken thread.
You can adapt many simple line art & word/symbol embroidery ideas to this captivating continuous-line format.
28. Combine Appliqué and Embroidery for a Graphic Look
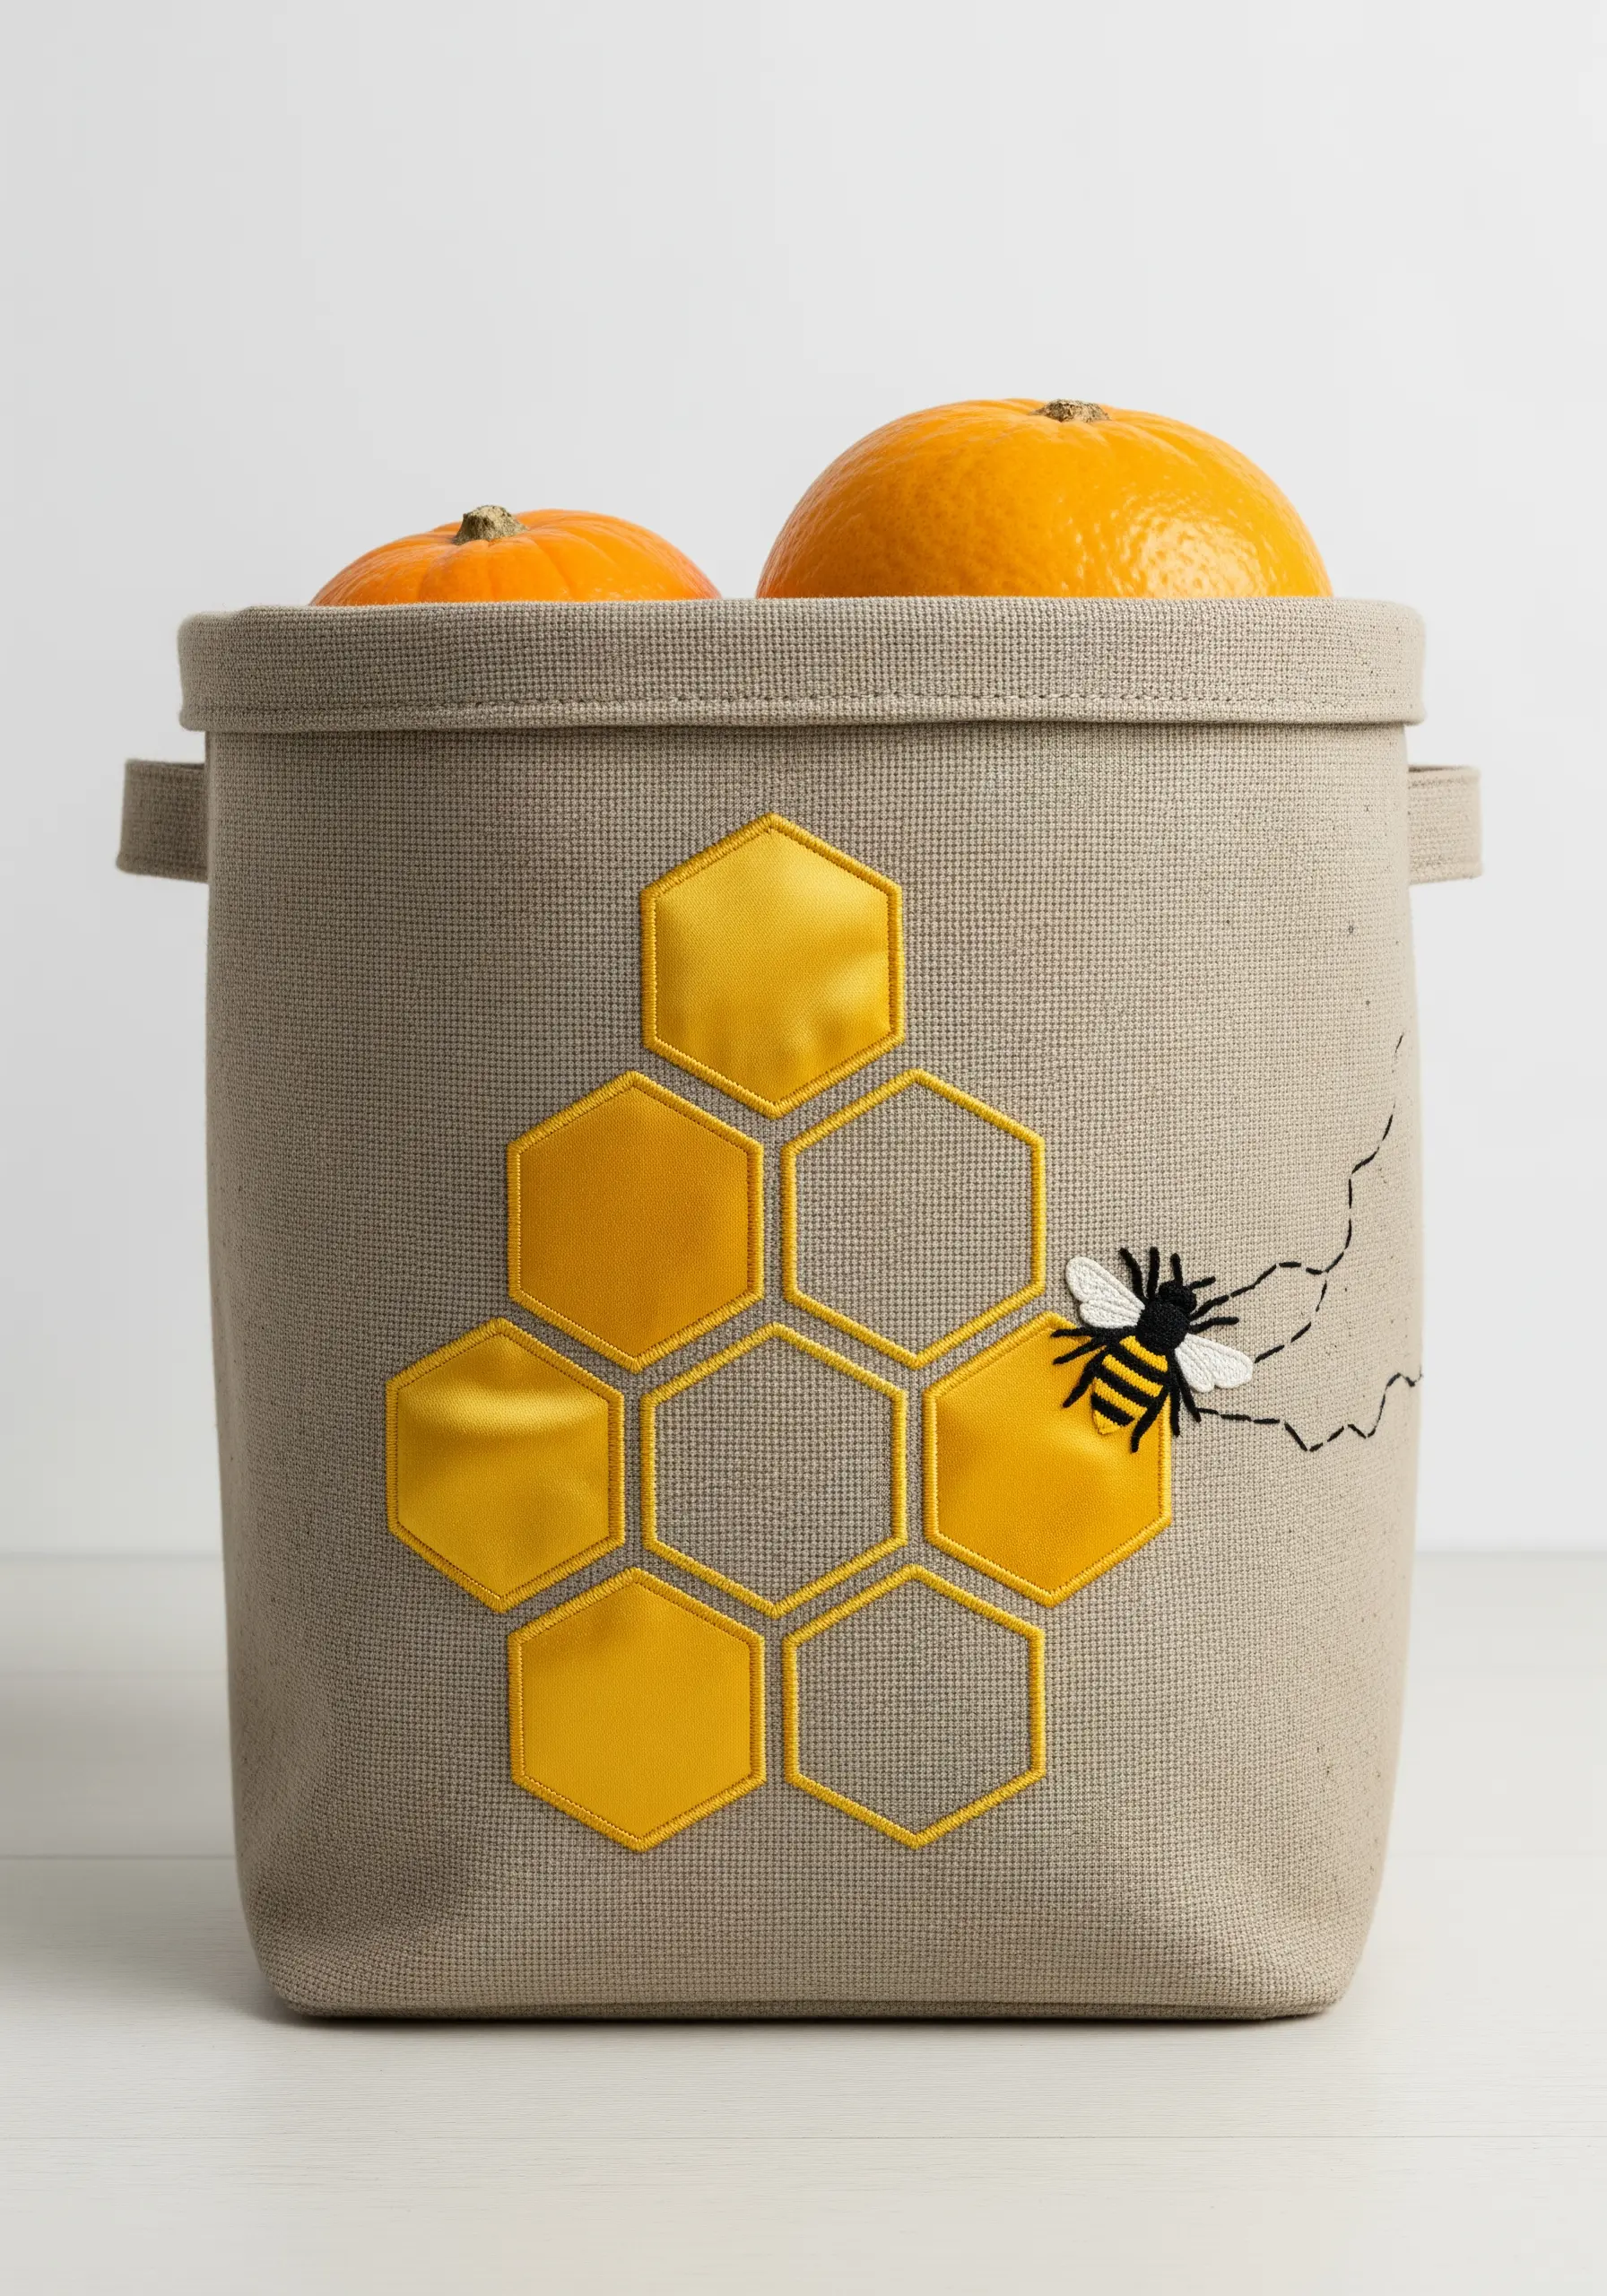
For a bold, color-blocked design, use fabric appliqué as your base. Cut honeycomb shapes from a vibrant yellow recycled fabric.
Secure them to your base material using an iron-on fusible web for crisp edges. Then, outline each shape with a neat backstitch or chain stitch in a contrasting thread.
This method allows you to cover large areas with color quickly and efficiently, leaving you free to add smaller embroidered details like the bee.
Mastering these fabric collage embroidery layouts opens up a world of graphic possibility.
29. Create a Cascading Floral Wall Hanging
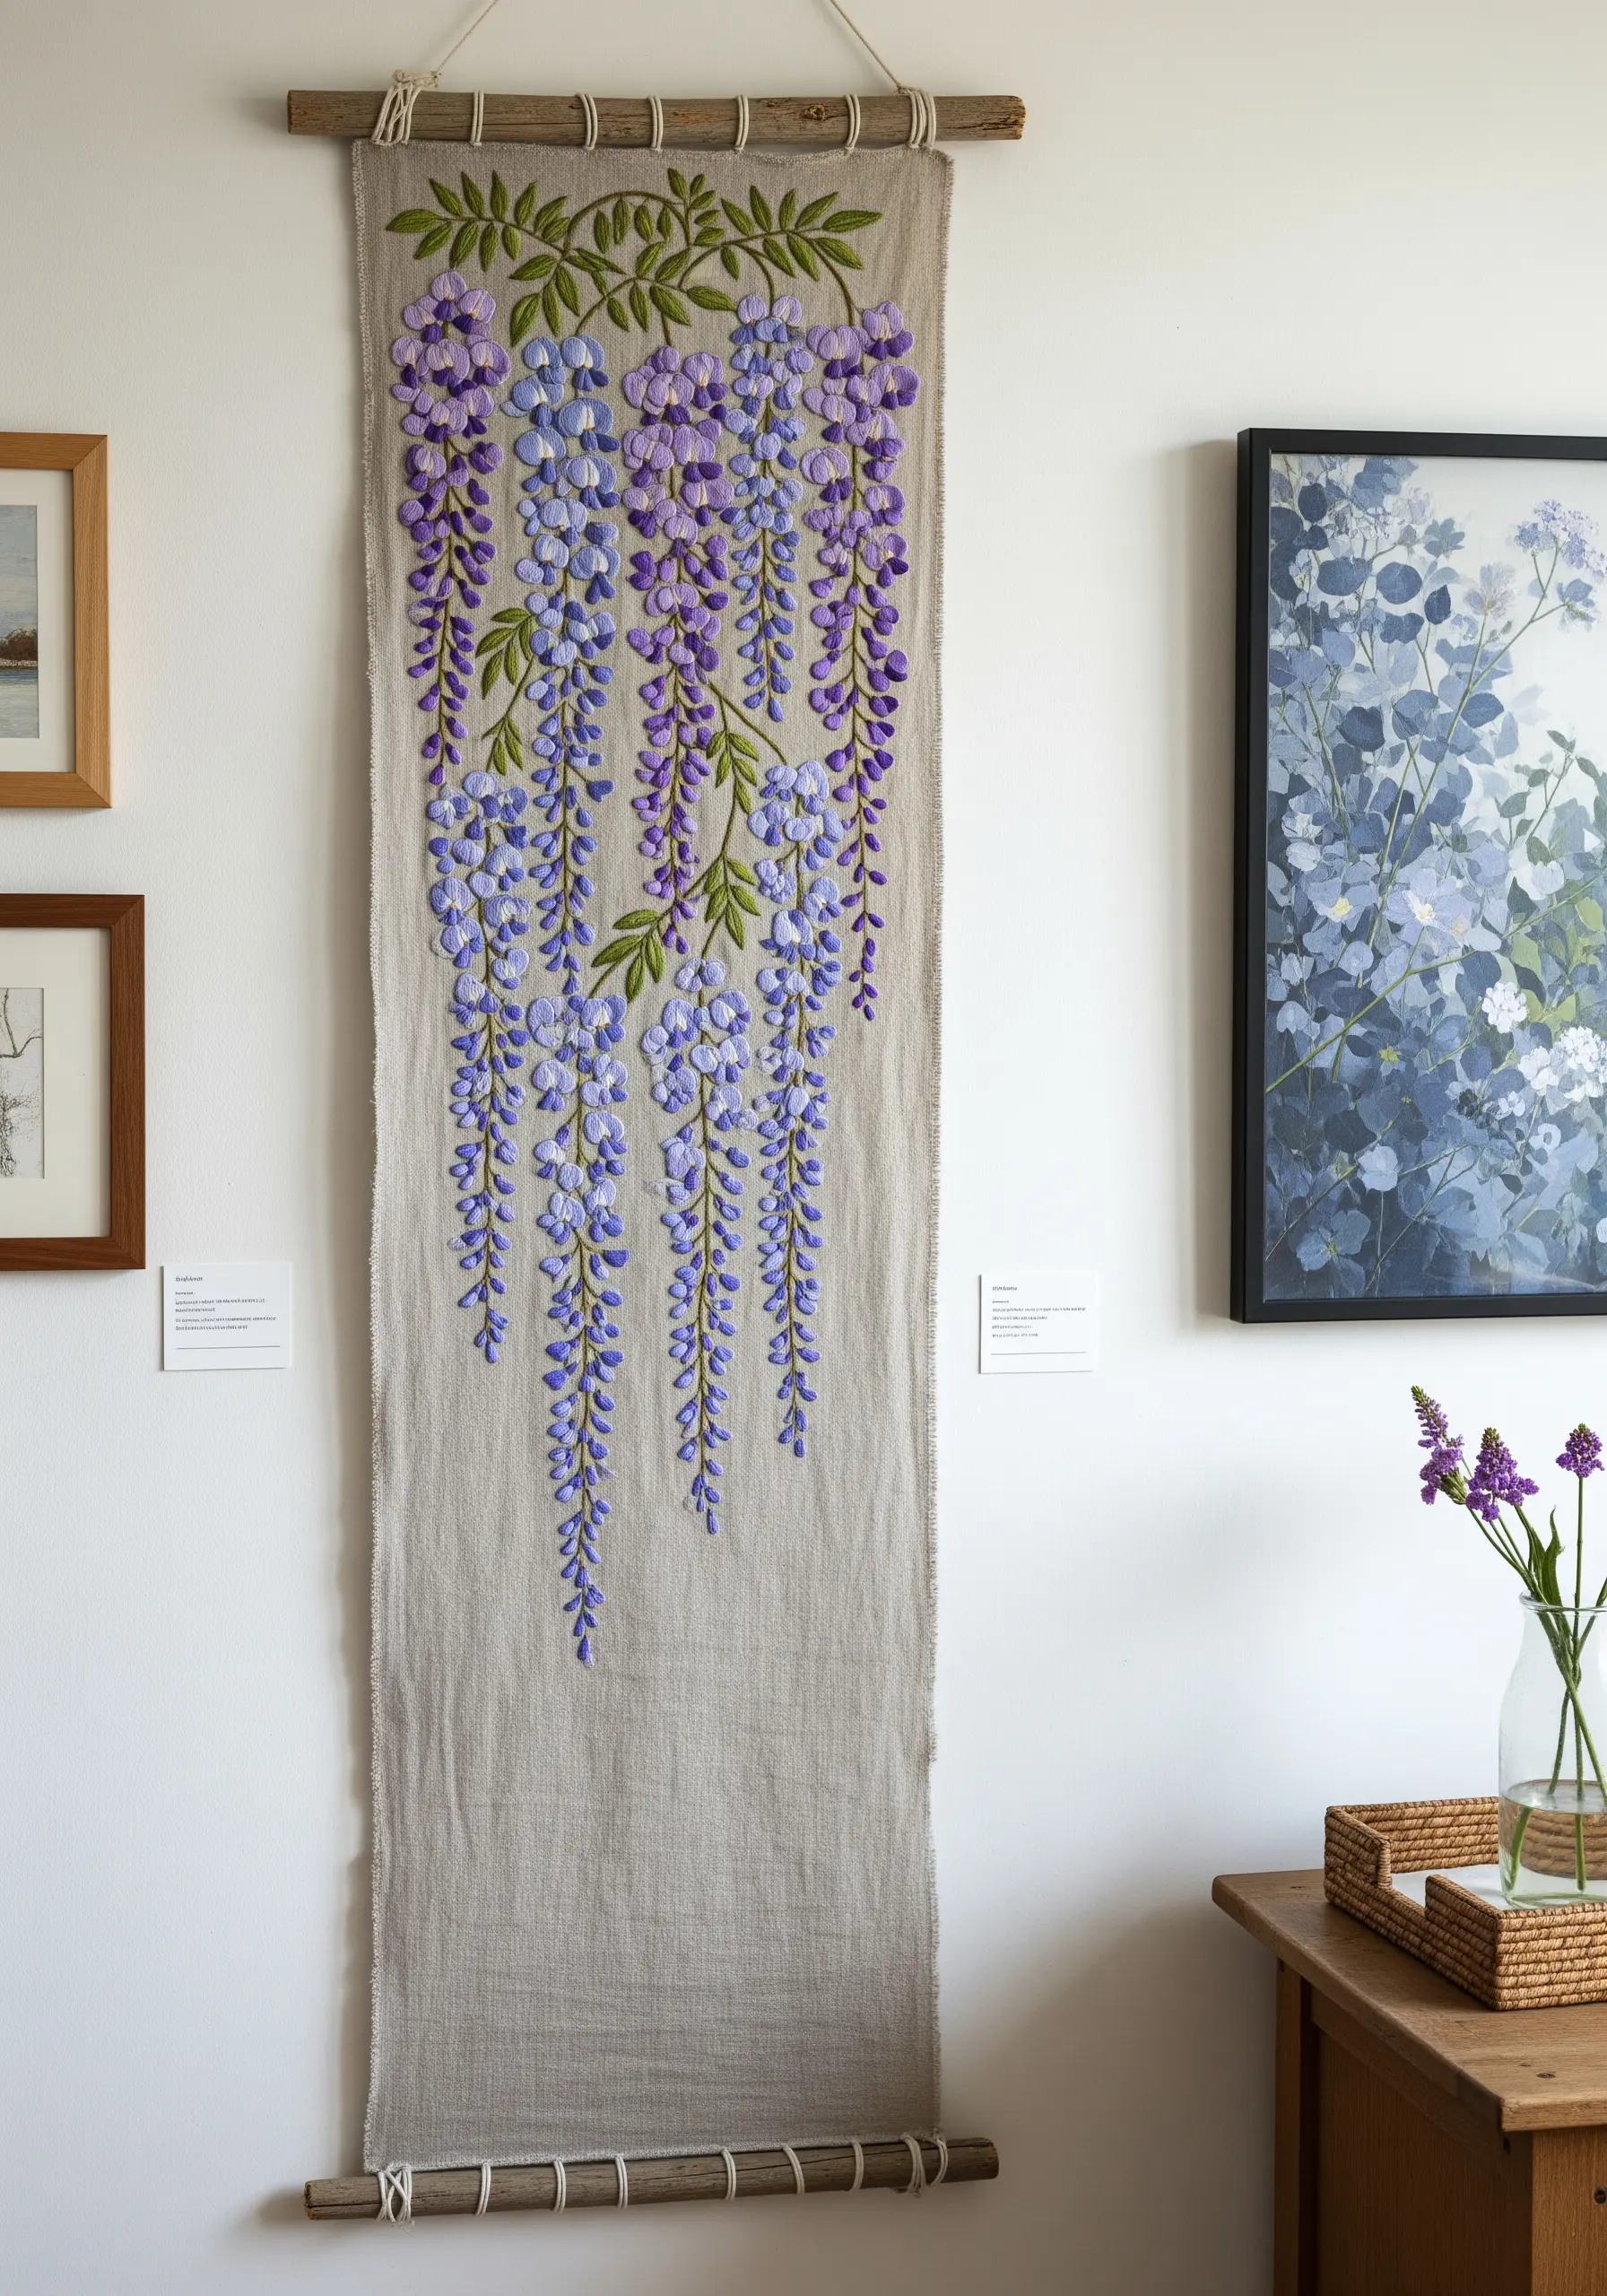
To capture the draped, heavy blossoms of wisteria, focus on creating texture and a sense of weight.
Use bullion knots or clusters of French knots in shades of purple, lavender, and blue. Group them densely at the top of each strand and let them become sparser toward the bottom.
Stitch on a long, narrow piece of linen and weight the bottom with a wooden dowel to ensure it hangs straight.
These are the kinds of stunning embroidered wall hangings that become family heirlooms.
30. Add a Personal Touch to Everyday Accessories
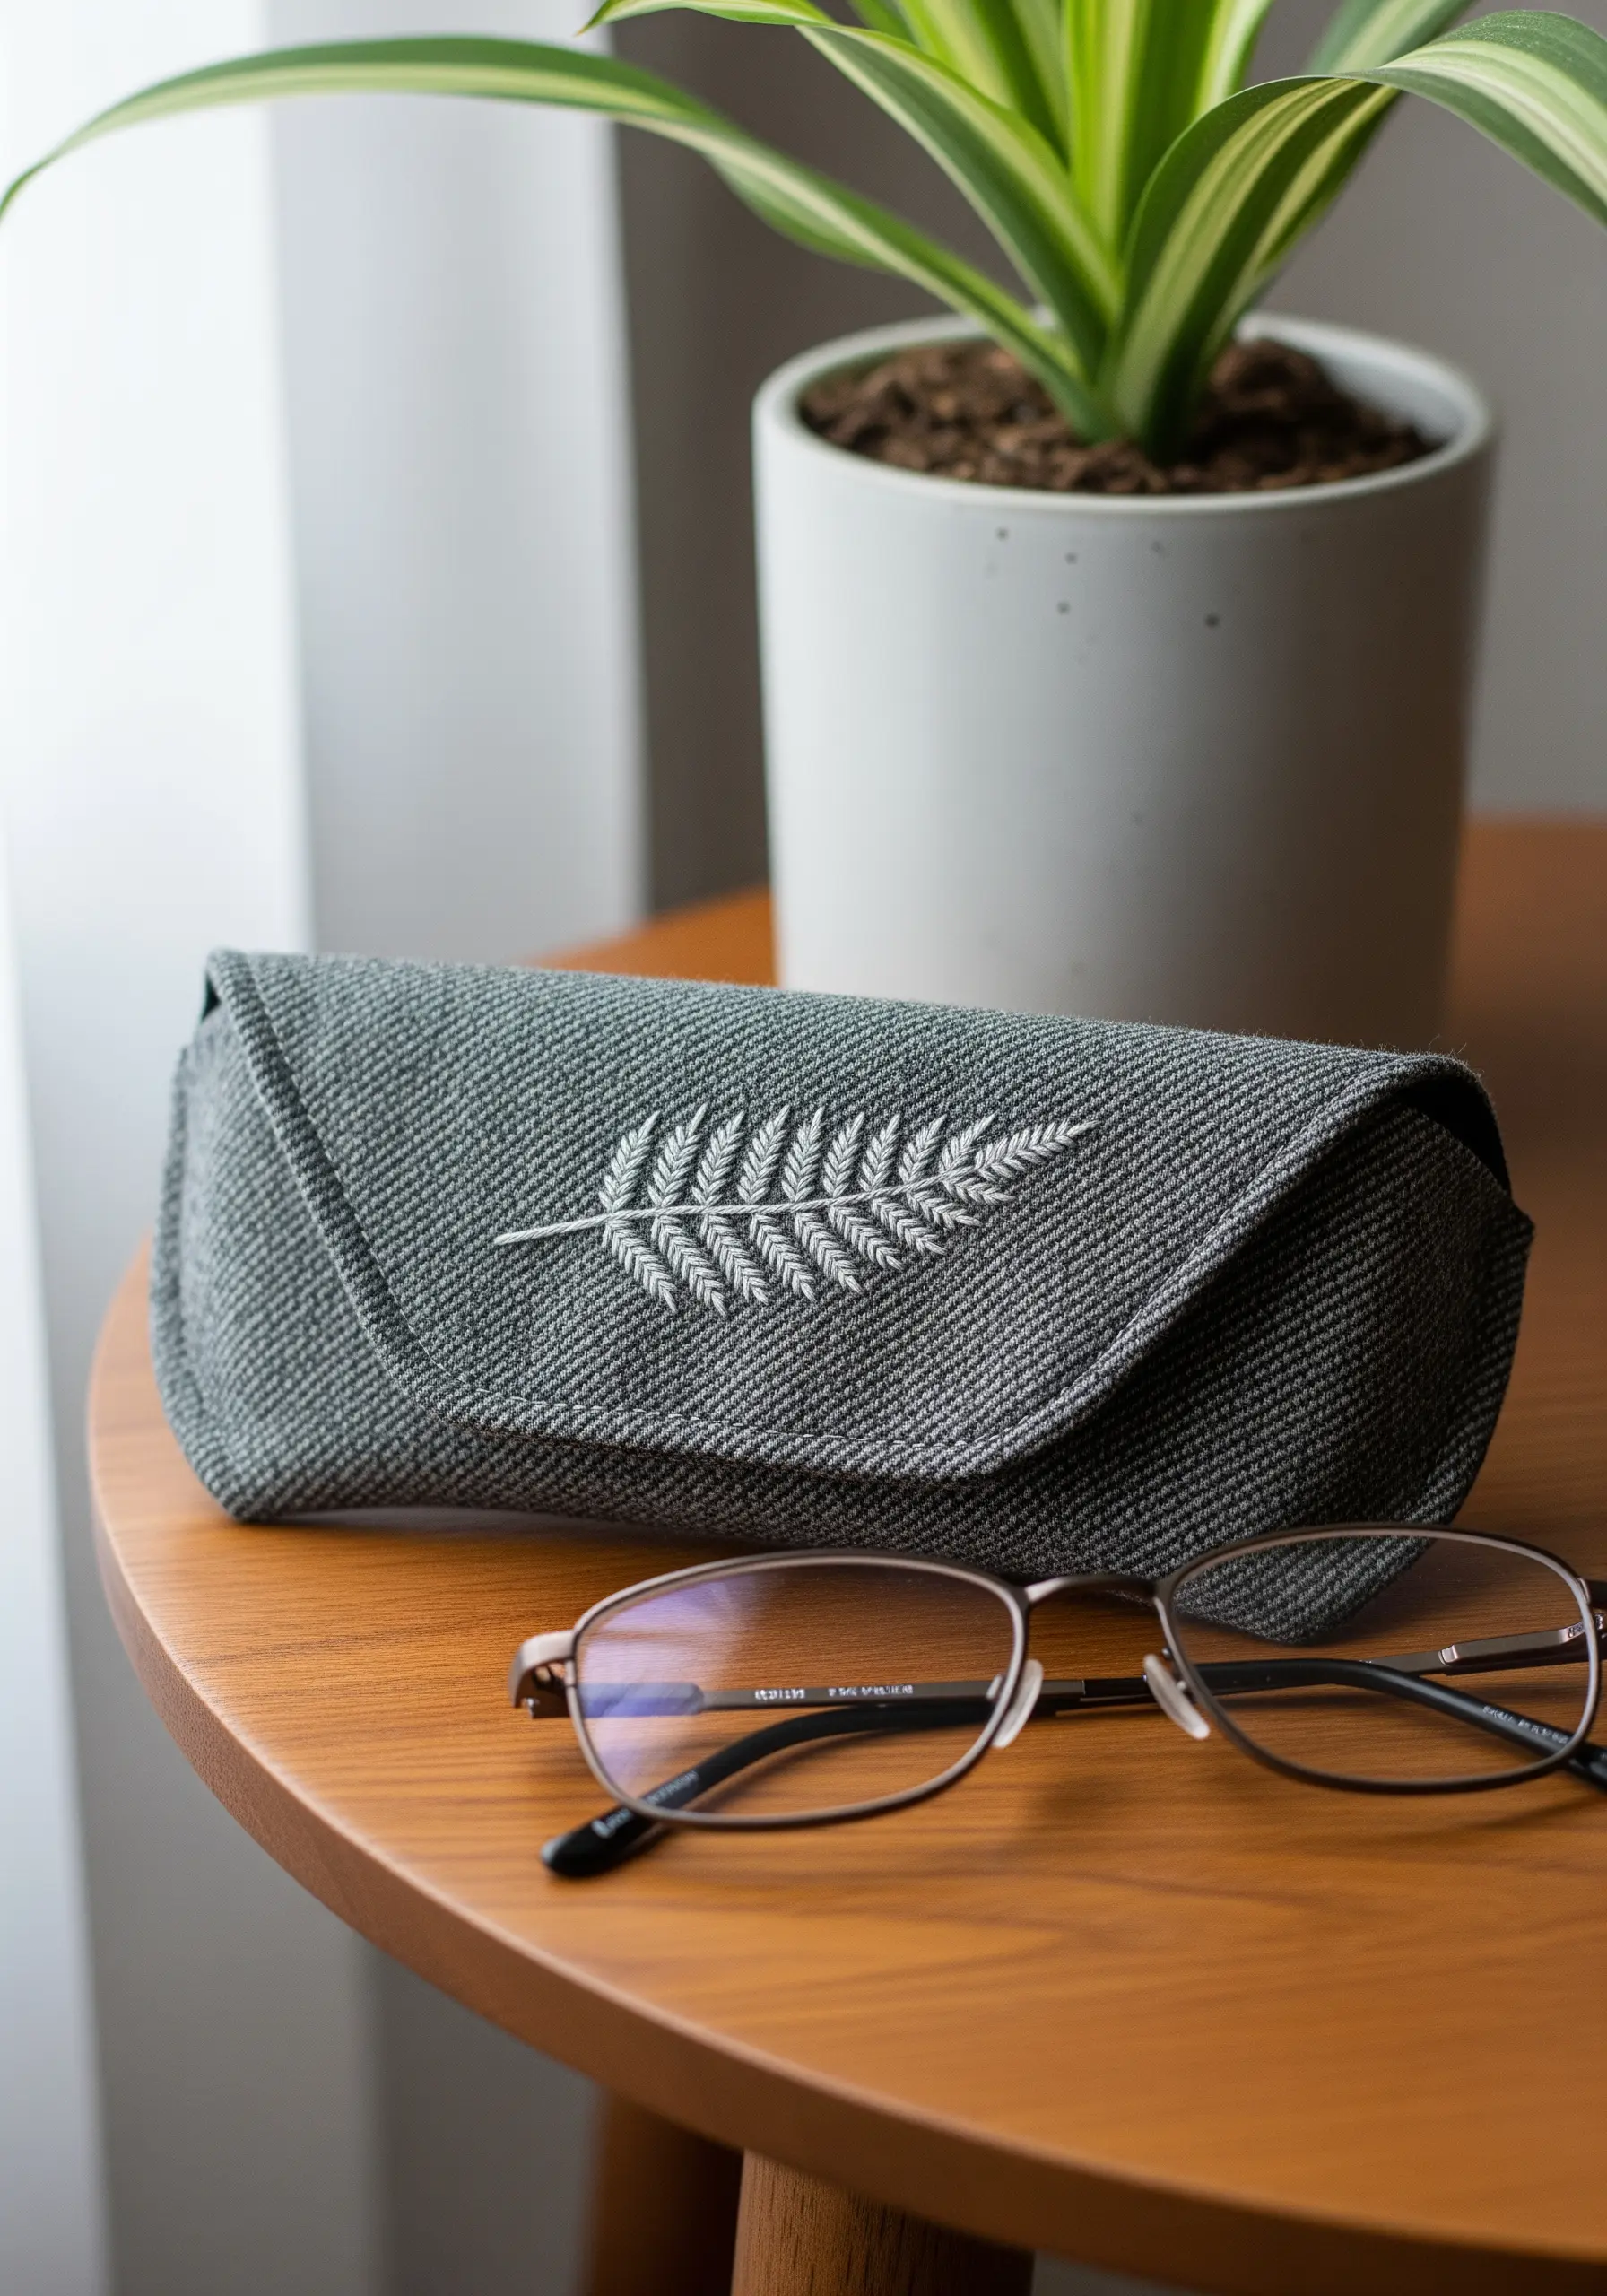
Even the smallest items, like an eyeglass case, can be transformed with a touch of embroidery.
Choose a high-contrast thread to make your design stand out against the base fabric. On this dark, textured case, a bright white thread creates a striking effect.
A fishbone stitch is the perfect choice for a fern, as it naturally creates the central stem and angled fronds in one fluid motion.
These tiny secret embroidery ideas add a layer of personal meaning to functional objects.
31. Capture Harvest Textures with a Wheat Sheaf Wreath
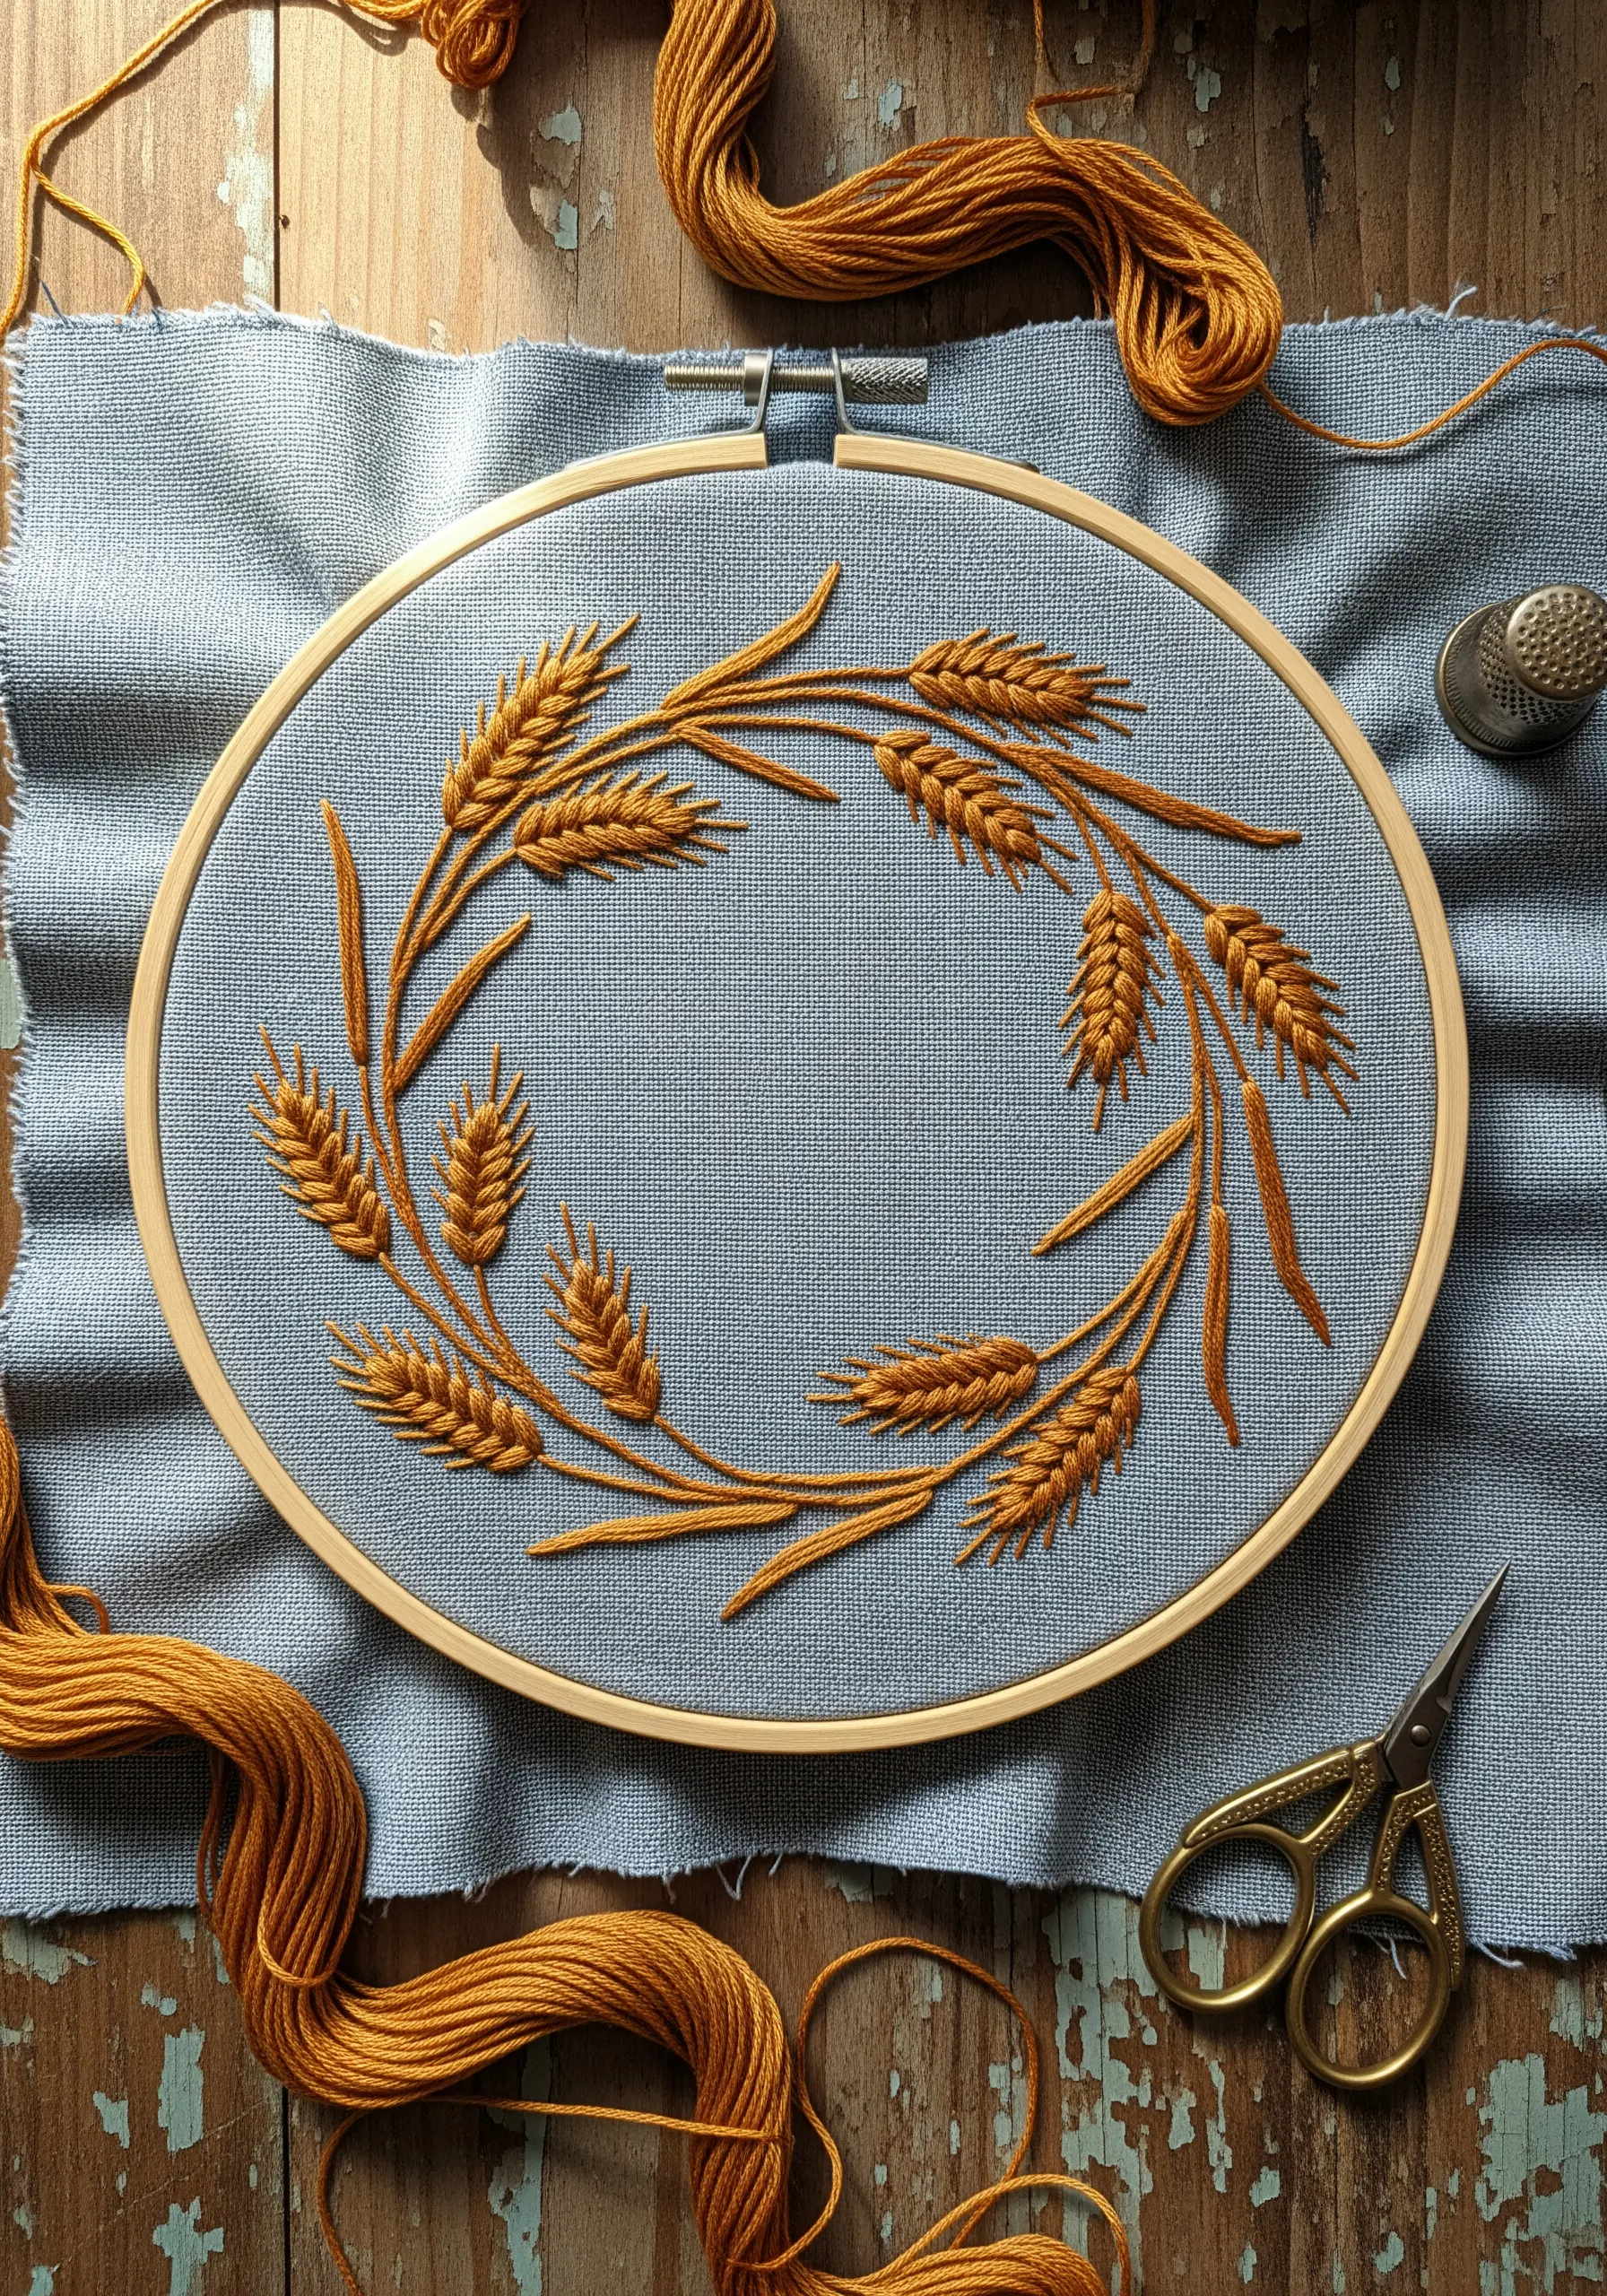
Evoke the feeling of a golden harvest by stitching a wreath of wheat. Use a warm, ochre-colored thread on a cool-toned linen for beautiful color contrast.
The fishbone stitch is ideal for creating the individual heads of wheat, giving them texture and a defined shape.
Arrange the stalks in a gentle curve to form the wreath, overlapping them slightly for a more natural, abundant look.
This project is a perfect way to explore earthy texture embroidery patterns that celebrate the seasons.
32. Define a Shape with Negative Space Stitching
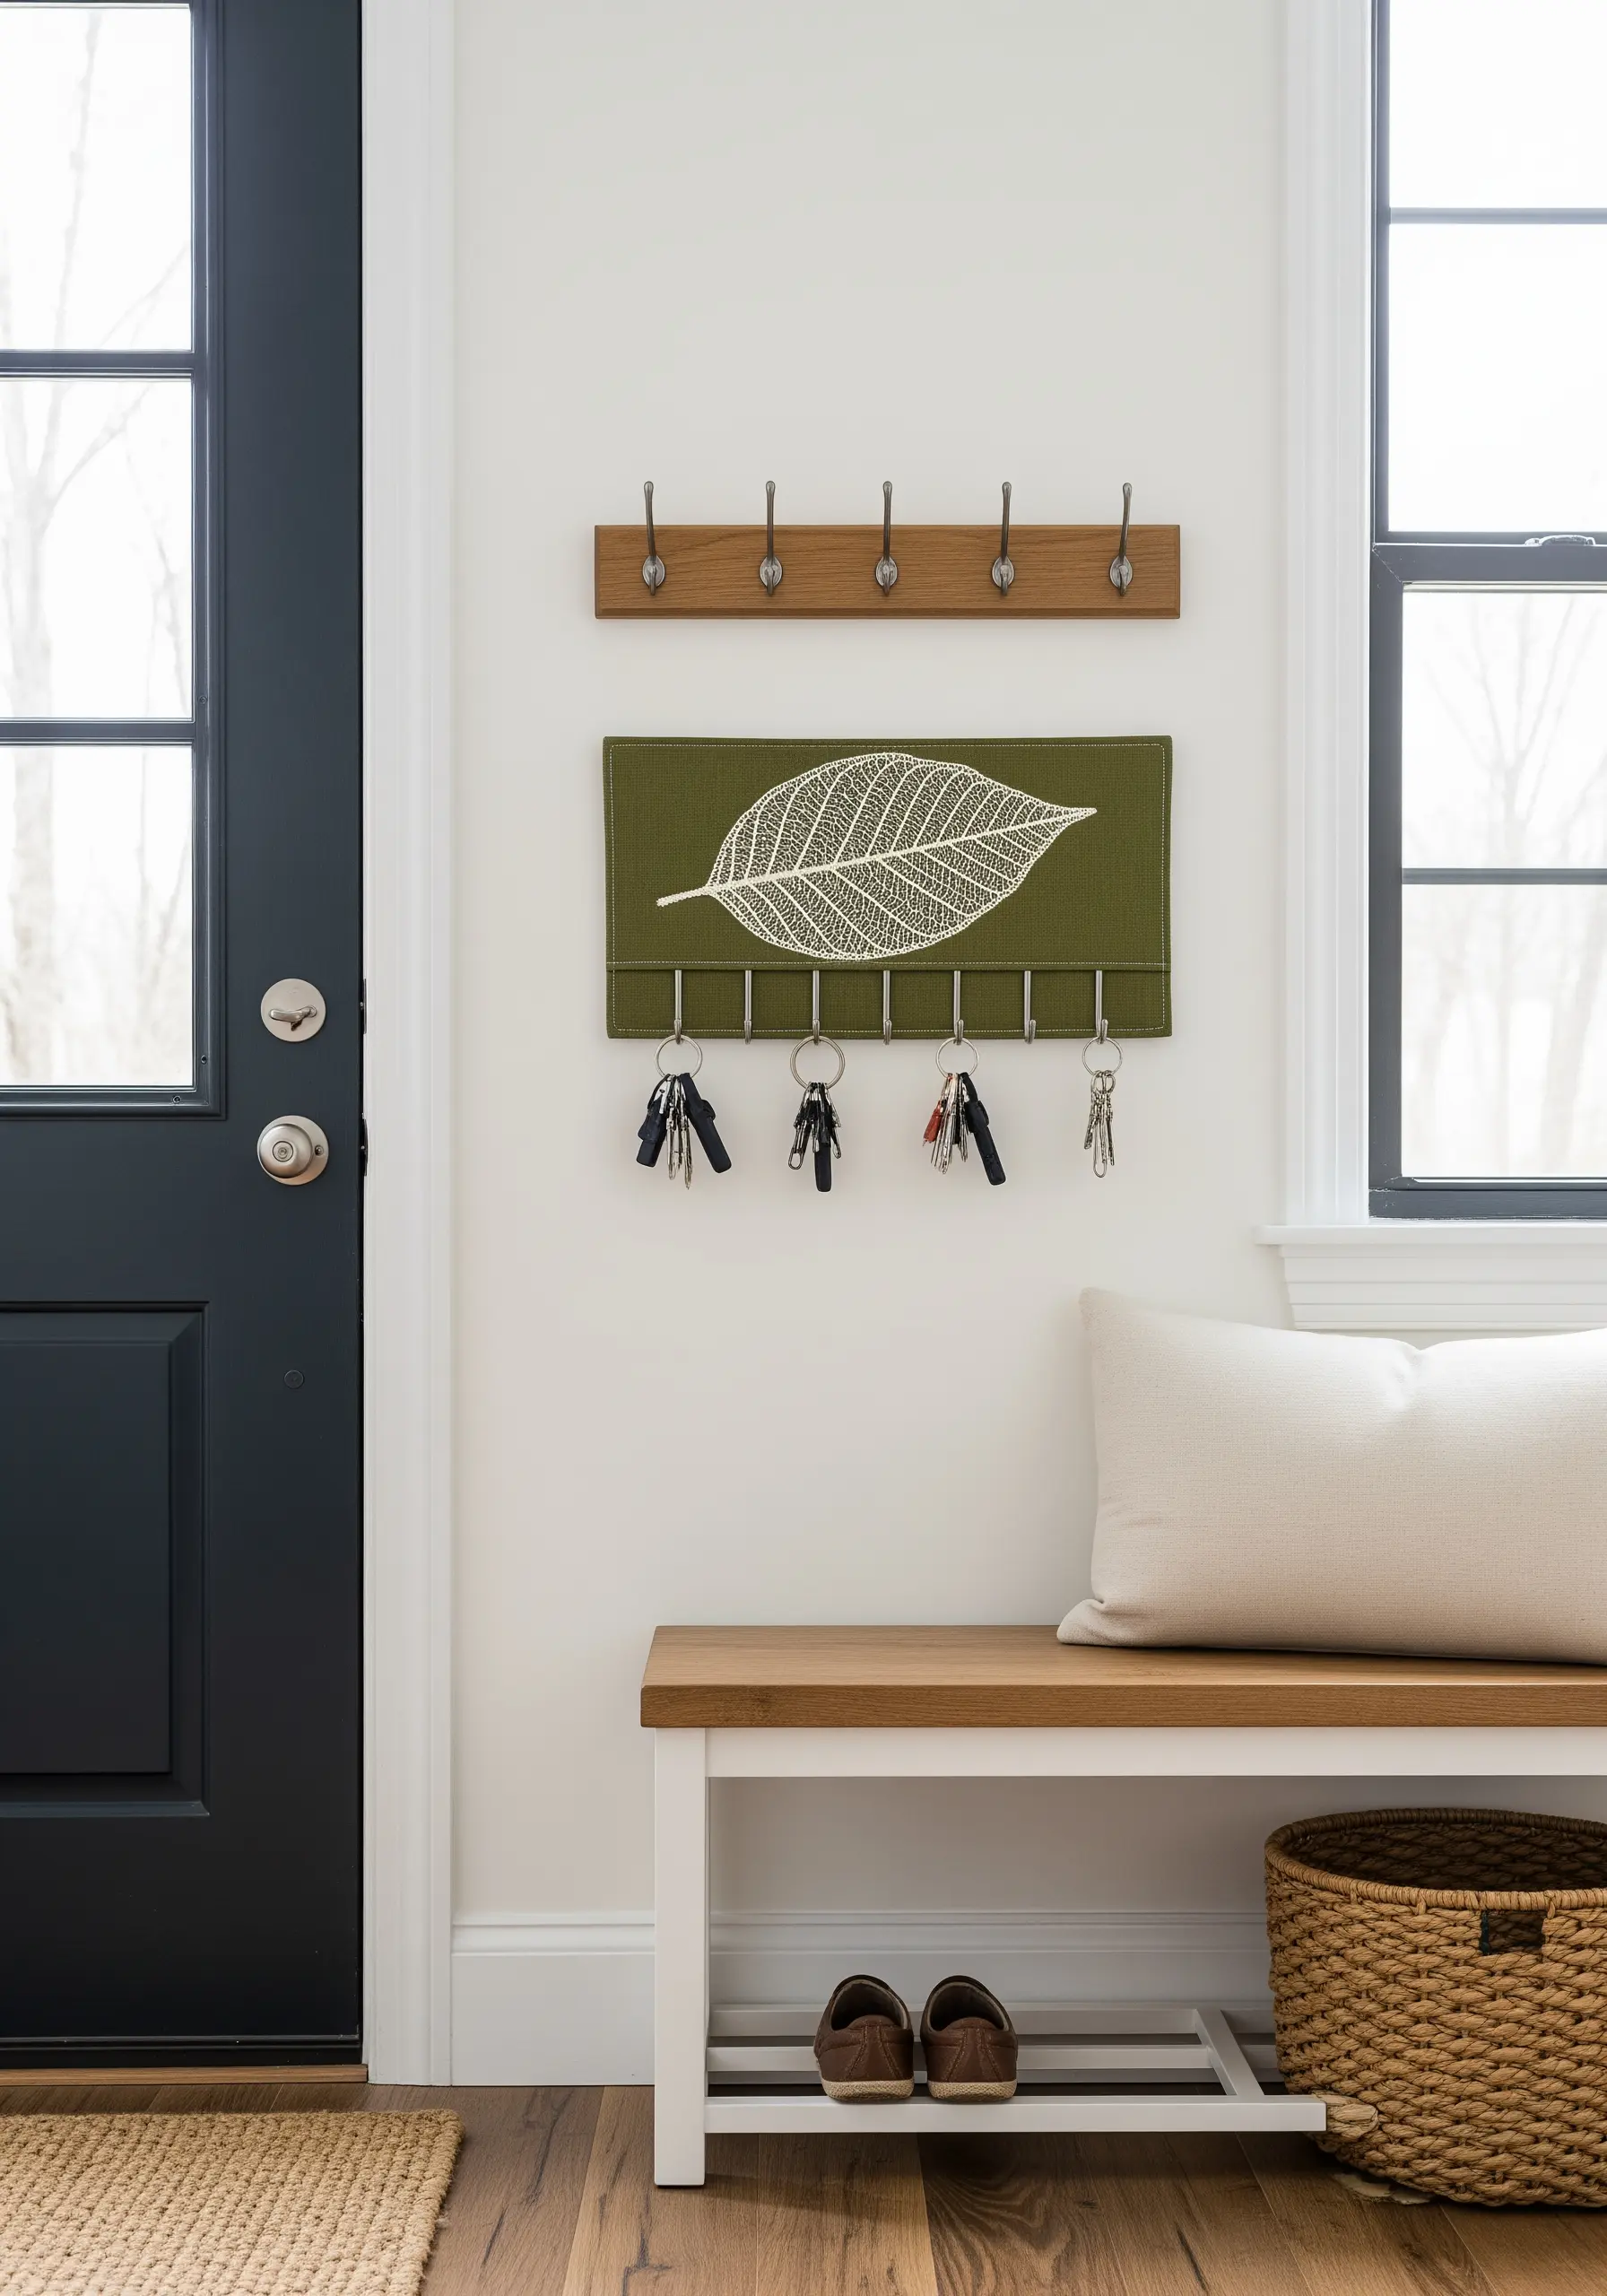
Instead of embroidering the object itself, stitch the background to make the main motif appear.
For this leaf skeleton, the delicate veins are outlined with a simple backstitch. The real work is in filling the area *around* the leaf with a dense seed stitch or tiny straight stitches.
This technique creates a stunning visual effect where the unstitched fabric becomes the focal point.
These are the minimal embroidery accents that completely upgrade your entryway with artistic flair.


