
Perhaps you’ve mastered the satin stitch and your French knots are perfect, but you feel a desire to push your embroidery into a new, more expressive space. You don’t need to abandon your needle and thread—you simply need to invite new materials to the conversation.
This is where mixed media comes in, not as a complication, but as an opportunity. It’s about seeing thread as more than just a tool for filling shapes on fabric. It can be a line that defines a watercolor wash, a structural element that binds a collage, or a sculptural form that rises from a painted canvas.
Each technique that follows is an invitation to play with texture, depth, and narrative. You’ll find ways to combine the softness of fiber with the crispness of paper, the fluidity of paint, and the fragility of nature itself. These ideas are accessible, designed to expand your creative toolkit and help you create work that is uniquely, intentionally yours.
1. Stitching Constellations on a Watercolor Galaxy

Begin by creating a soft, blended galaxy on heavy watercolor paper and allow it to dry completely before you introduce any thread.
Use a sharp, fine needle to pre-pierce your paper from the back, which prevents tearing and creates clean entry points for your stitches.
For delicate star paths, use a single strand of metallic or silver thread with a simple backstitch.
To add emphasis, couch small star-shaped beads or sequins at key points in your constellation, securing them with a tiny, nearly invisible stitch.
This contrast between the fluid watercolor and the precise, shimmering thread creates a captivating sense of depth and magic, turning paper into a piece of celestial micro-embroidery.
2. Sculptural Thread Couching on Painted Canvas
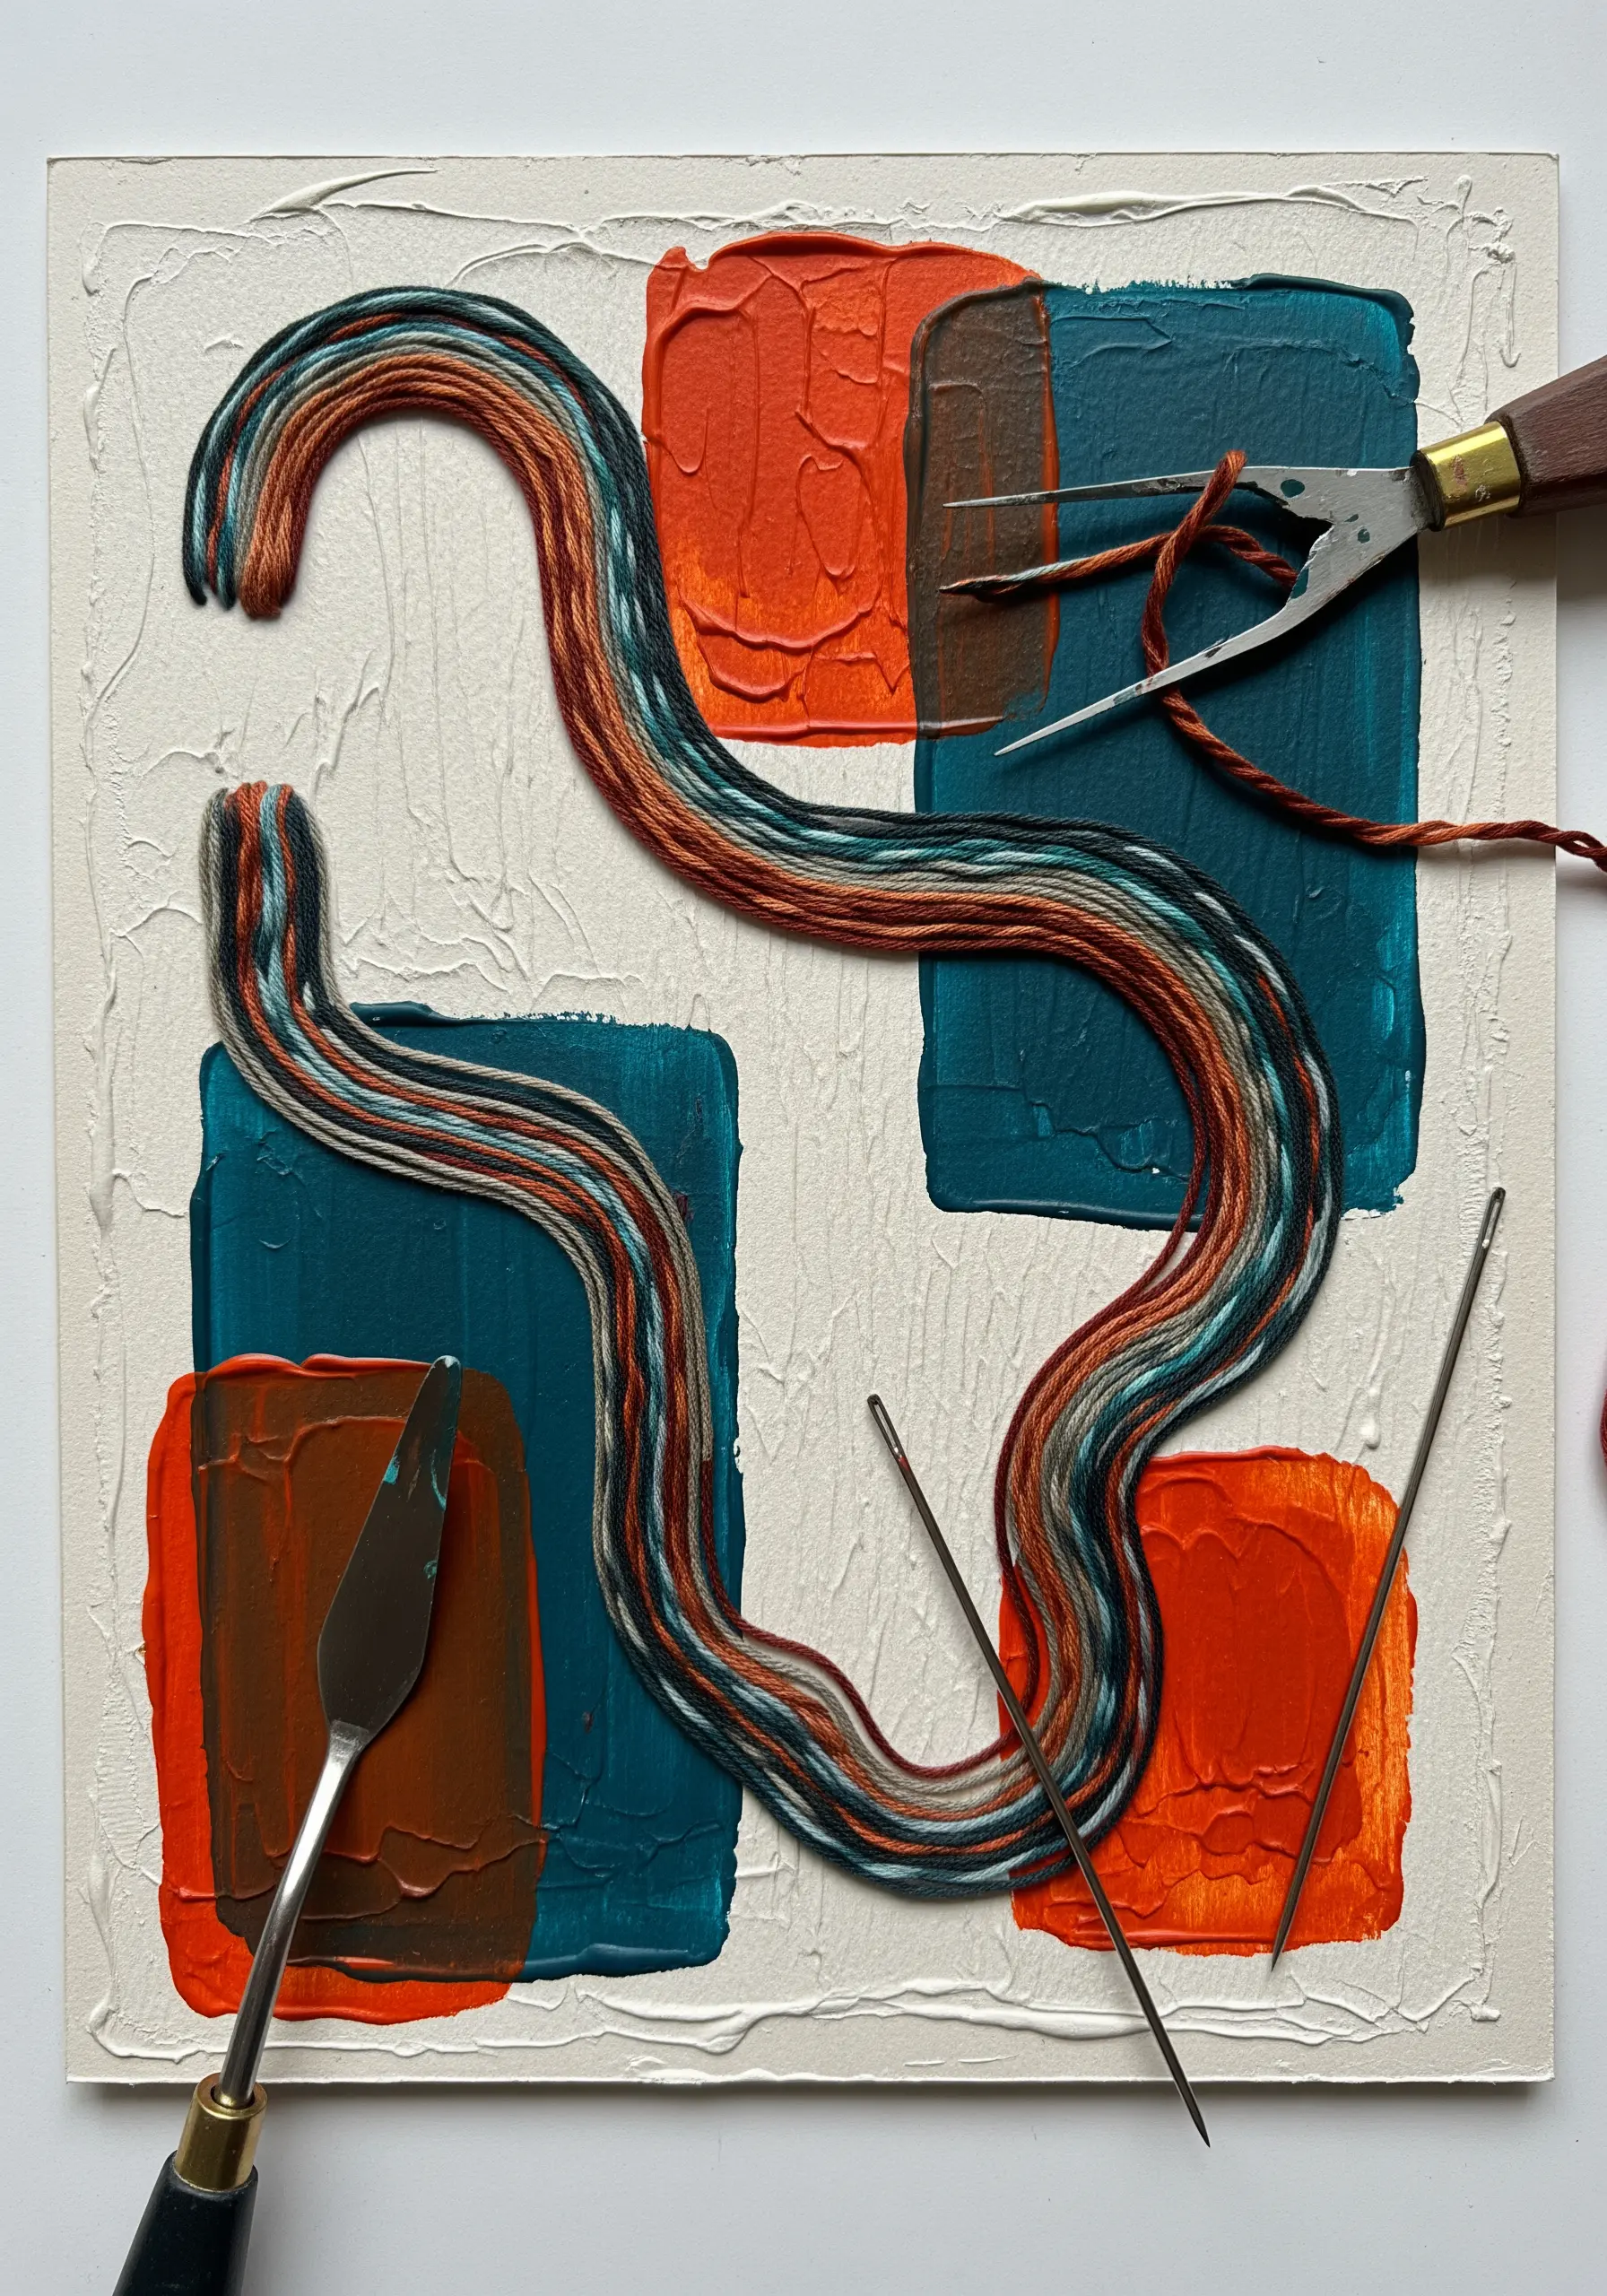
To create a dynamic, high-texture surface, first apply thick, impasto-style blocks of acrylic paint to your canvas and let them dry fully.
Instead of stitching through the canvas, you will lay a thick bundle of variegated embroidery floss on the surface, following a fluid path.
Using a single, strong strand of a coordinating color, tack the bundle down with small, evenly spaced couching stitches.
This technique allows the thread to retain its full volume and sheen, turning it into a bold, three-dimensional line that flows over the painted texture below.
3. Framing Pressed Botanicals with Delicate Stitches
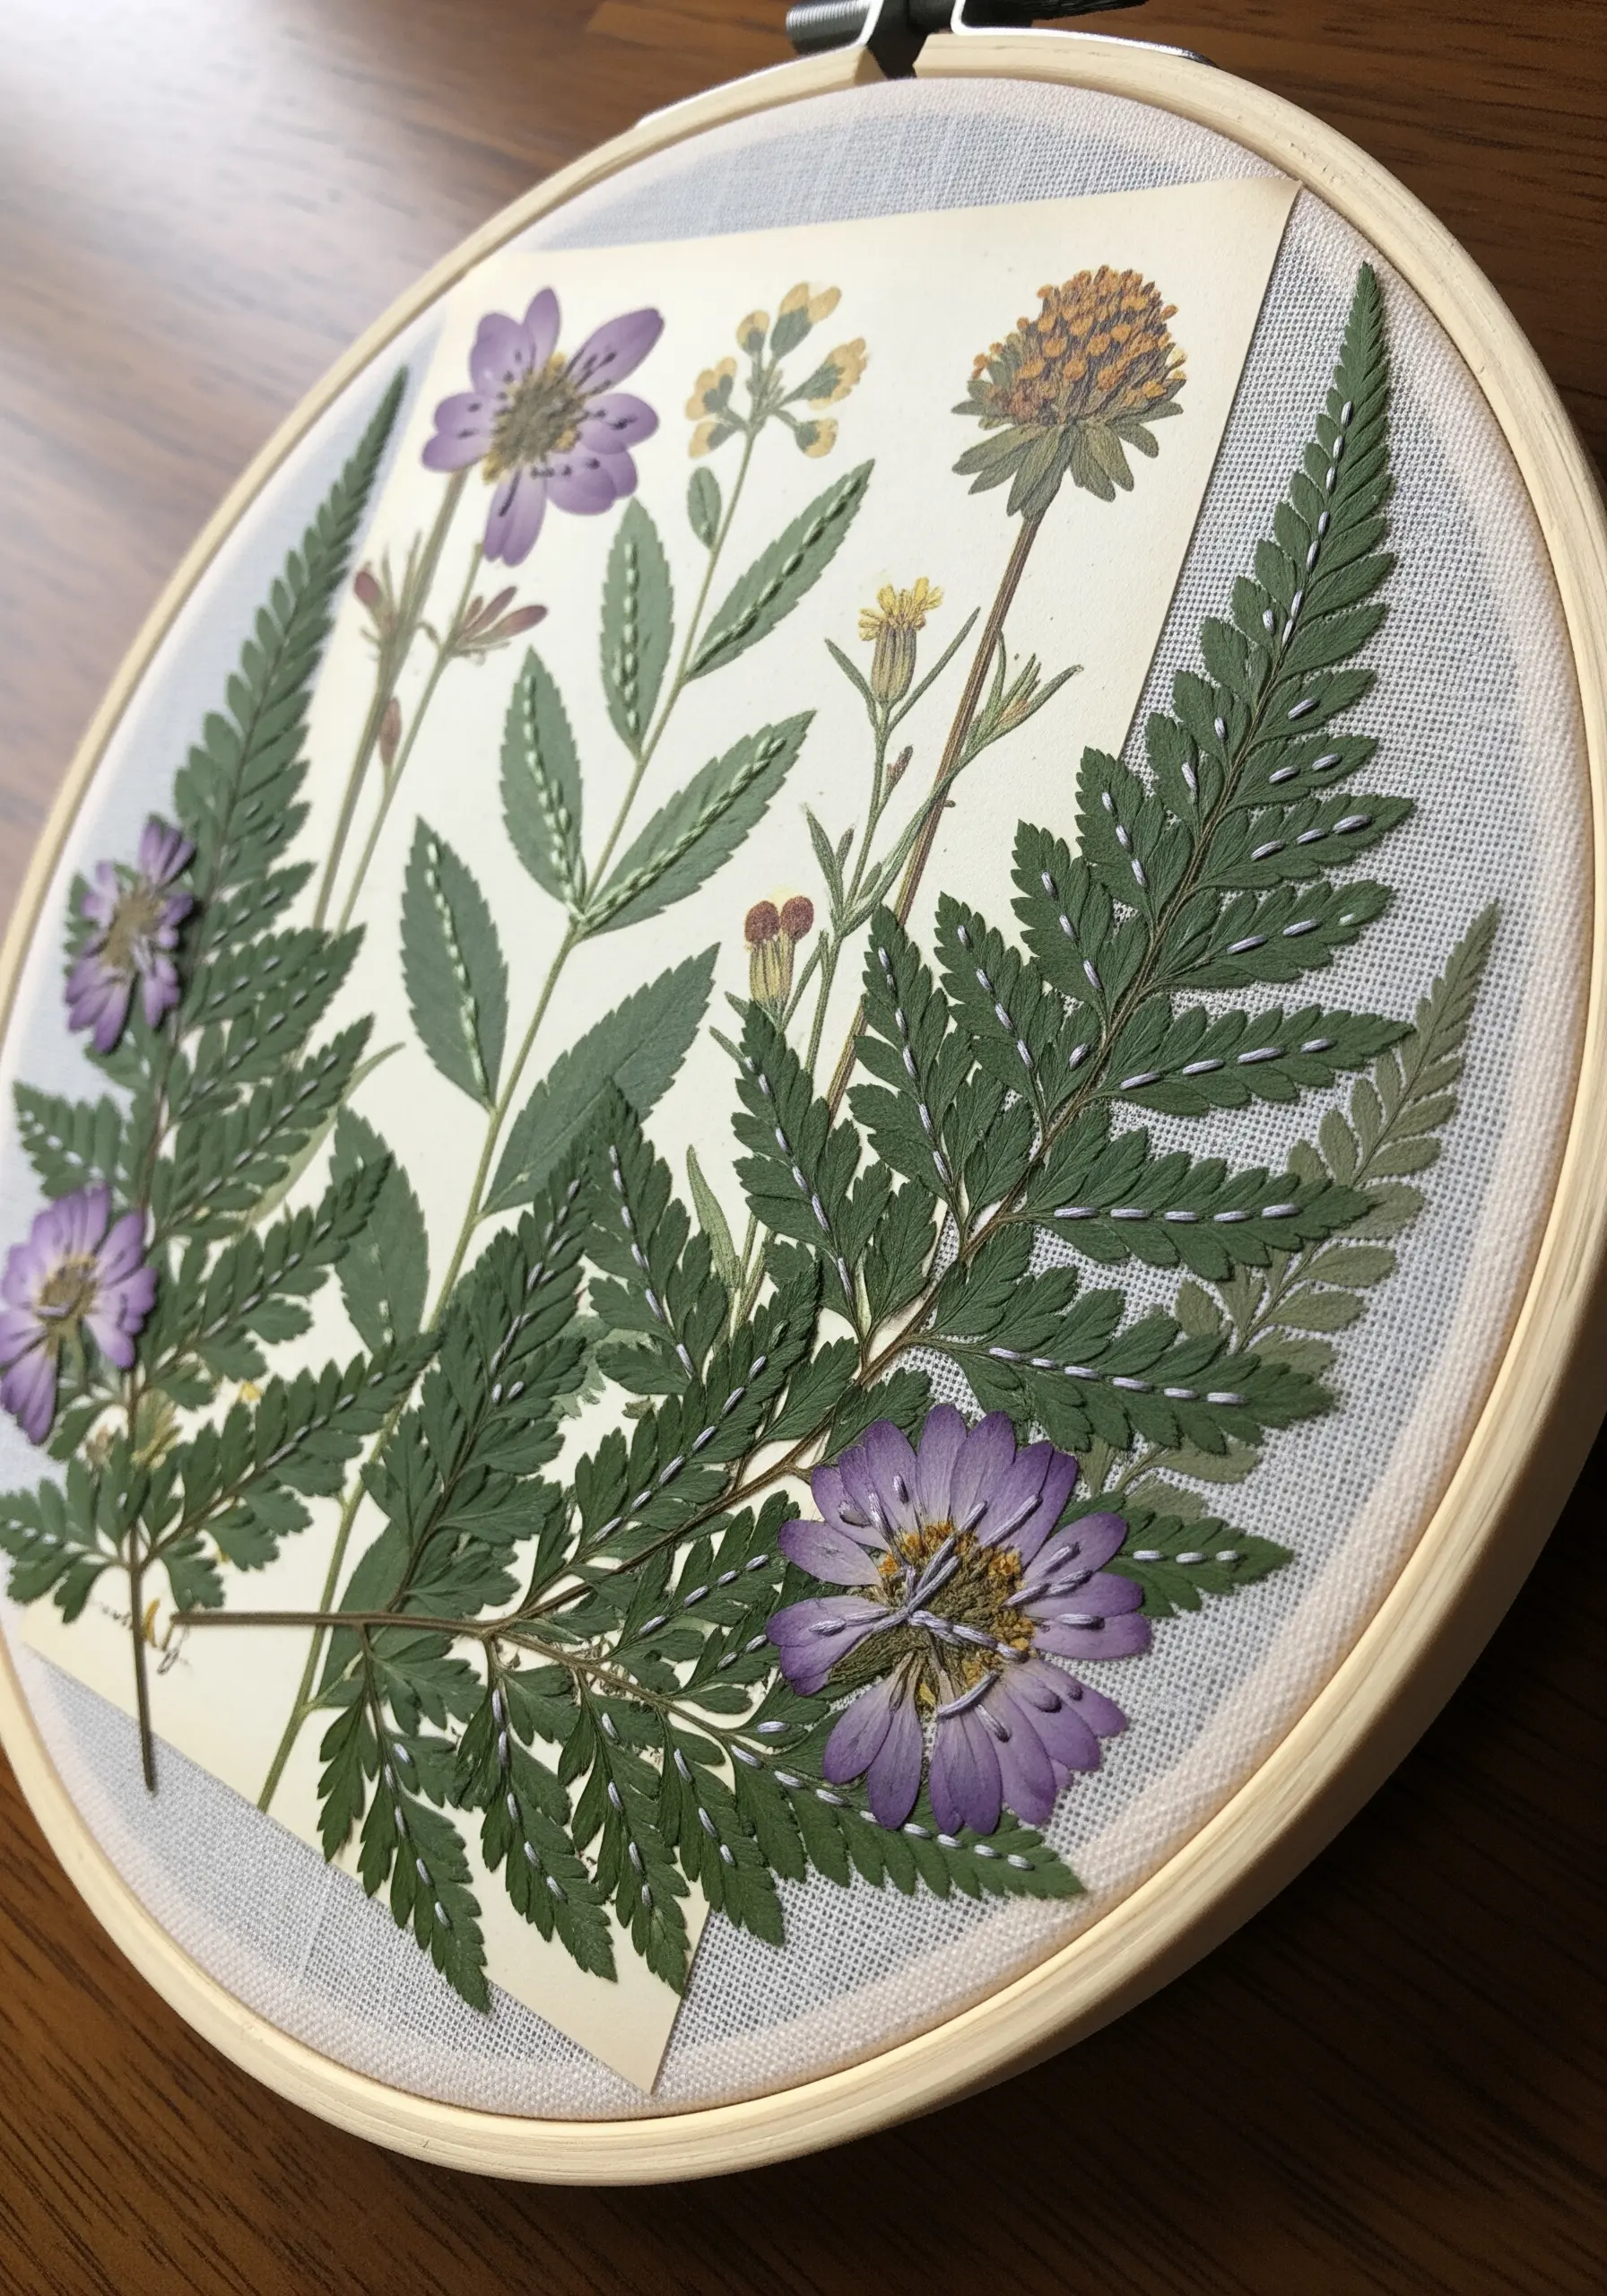
Preserve the fragility of pressed flowers by mounting them on a sheer fabric like organza or tulle, which creates a beautiful floating effect.
For stability, you can place a piece of archival paper behind the botanical arrangement before stitching.
Use a single strand of thread that matches the color of the stem or leaf you are securing.
Make tiny, strategically placed tacking stitches to hold the specimen in place without distracting from its natural form.
This method of creating pressed flower embroidery designs ensures your botanicals are secure yet appear to be suspended in air.
4. Architectural Thread Wrapping for Geometric Art
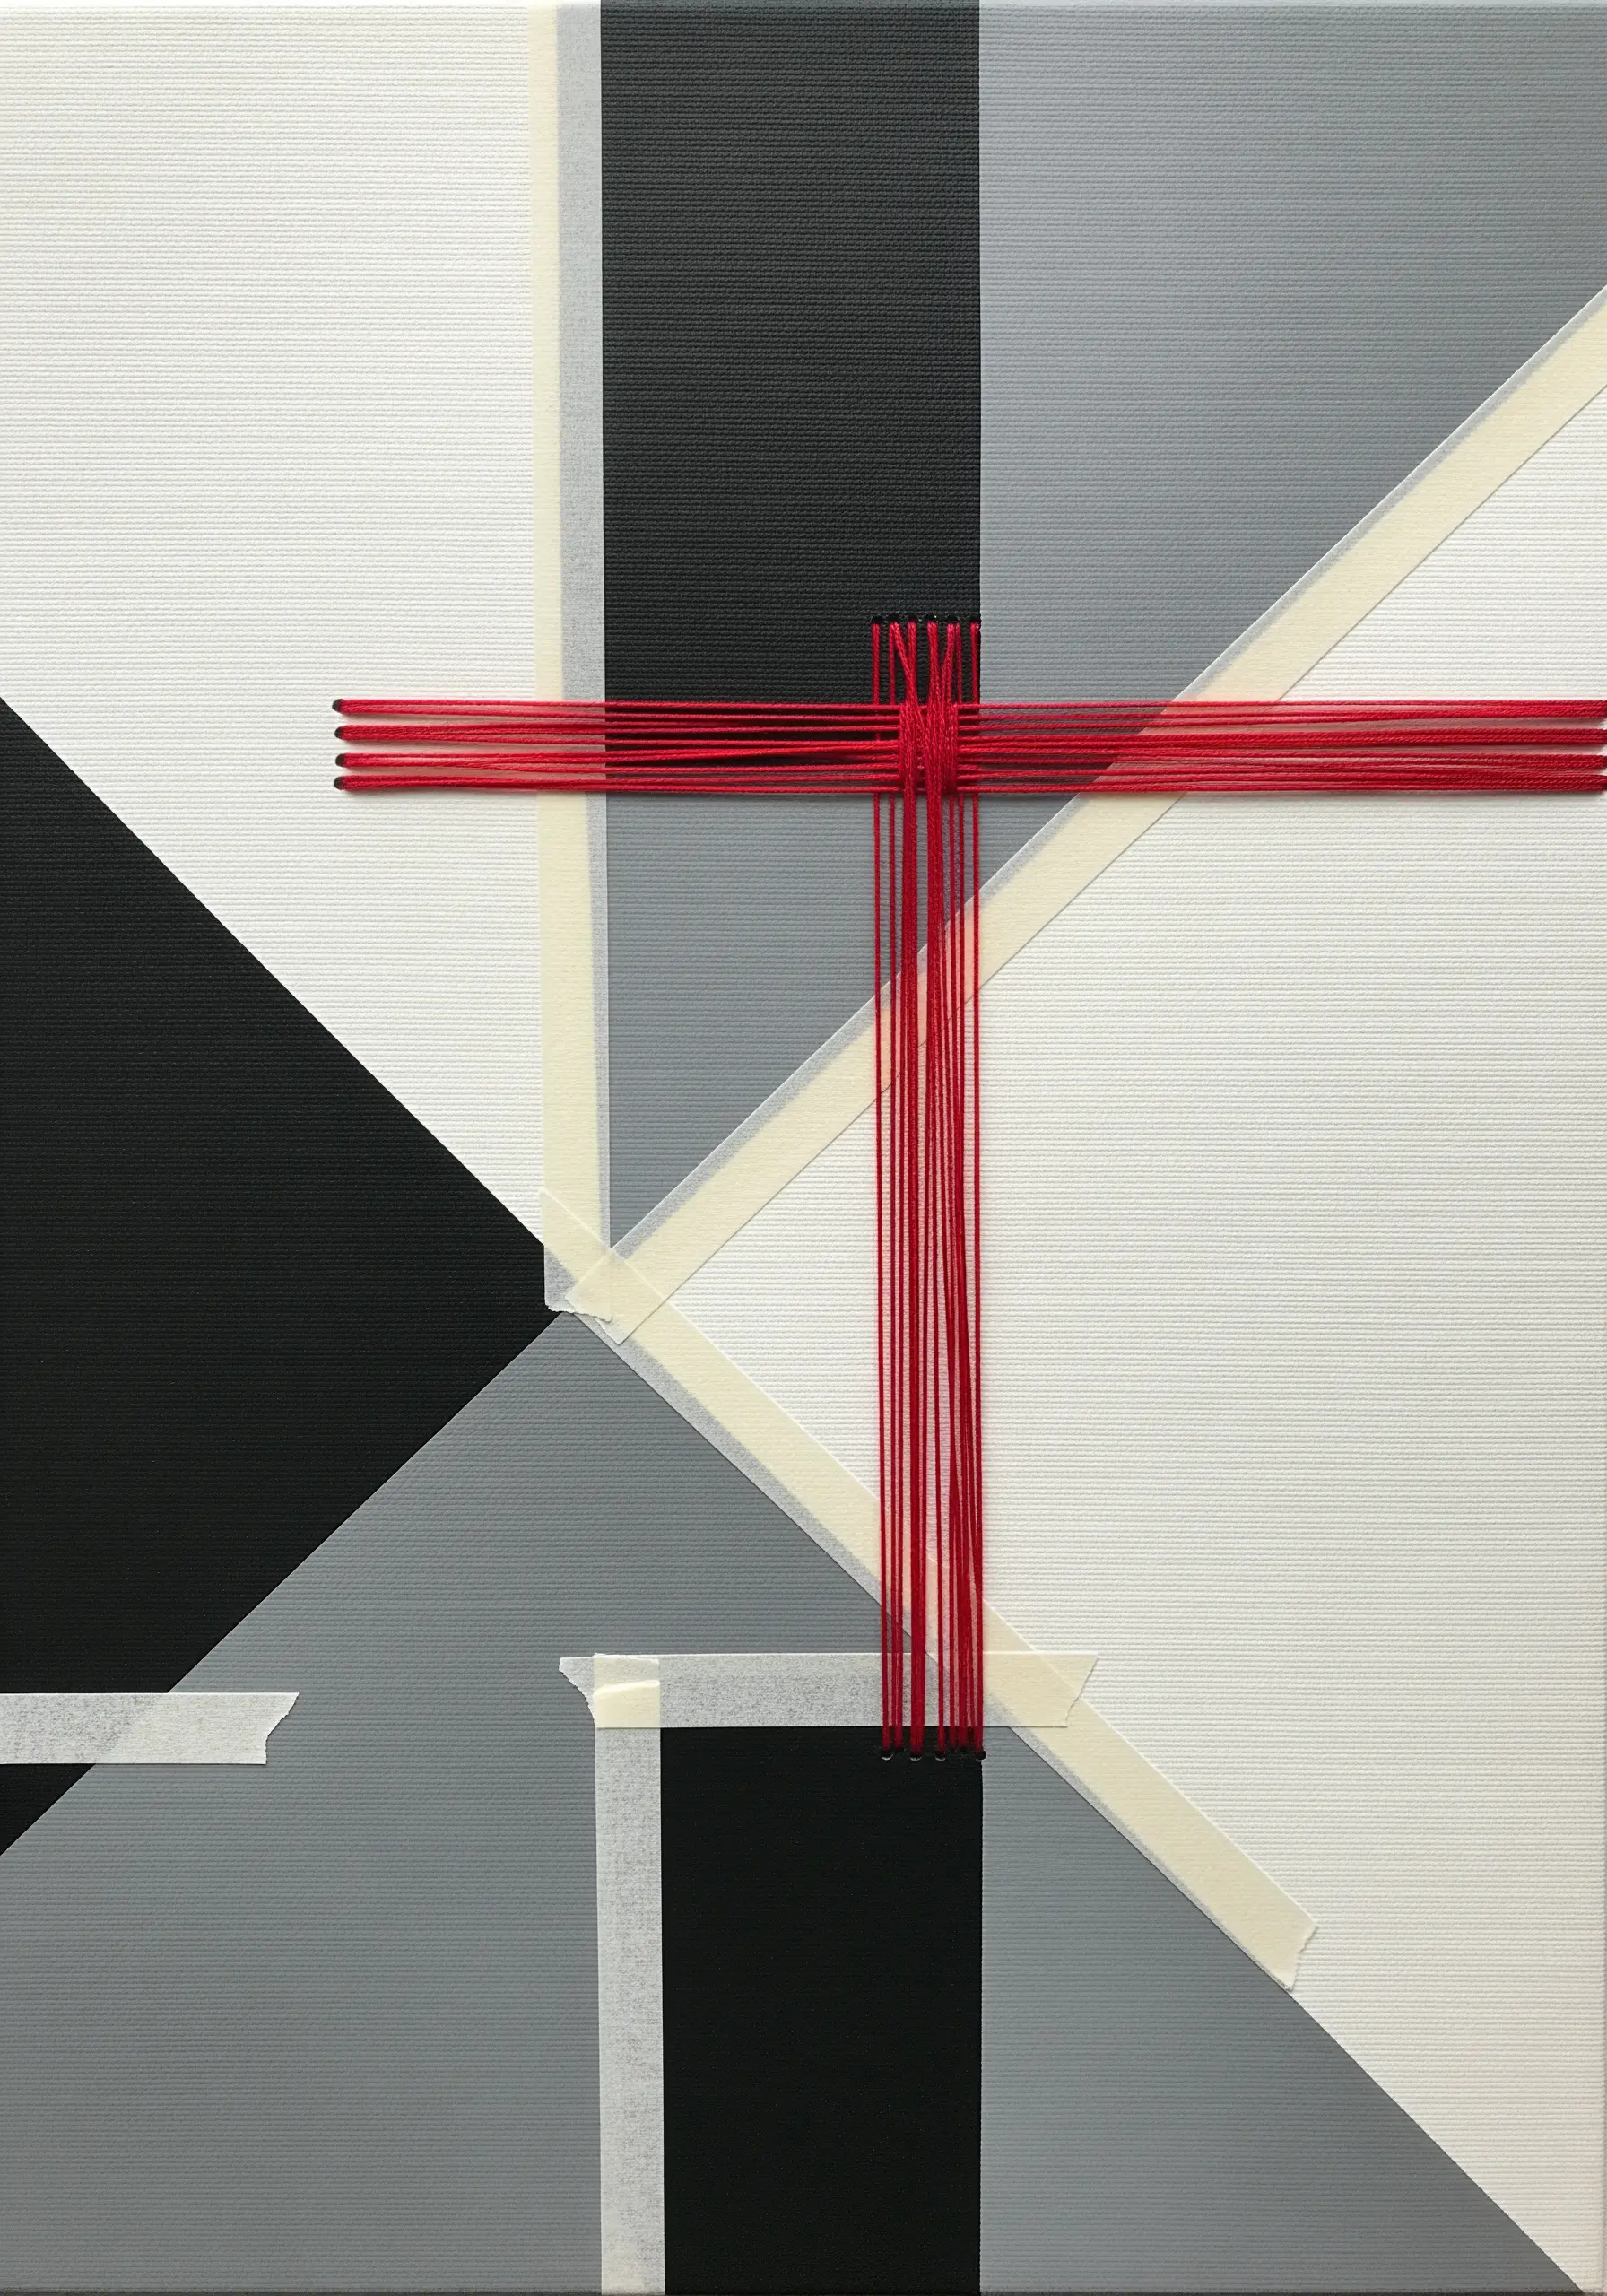
Transform a simple painted canvas into a graphic statement piece using thread and tension.
Begin by painting a bold, geometric composition with clean lines on a stretched canvas.
Instead of puncturing the surface, wrap embroidery floss tightly around the canvas frame, creating taut, intersecting lines that travel across the front.
Secure the thread ends on the back of the stretcher bars with tape or a staple.
This technique creates a striking interplay between the flat, painted shapes and the raised, vibrant texture of the thread.
5. Weaving Dimensional Centers on Stamped Cards
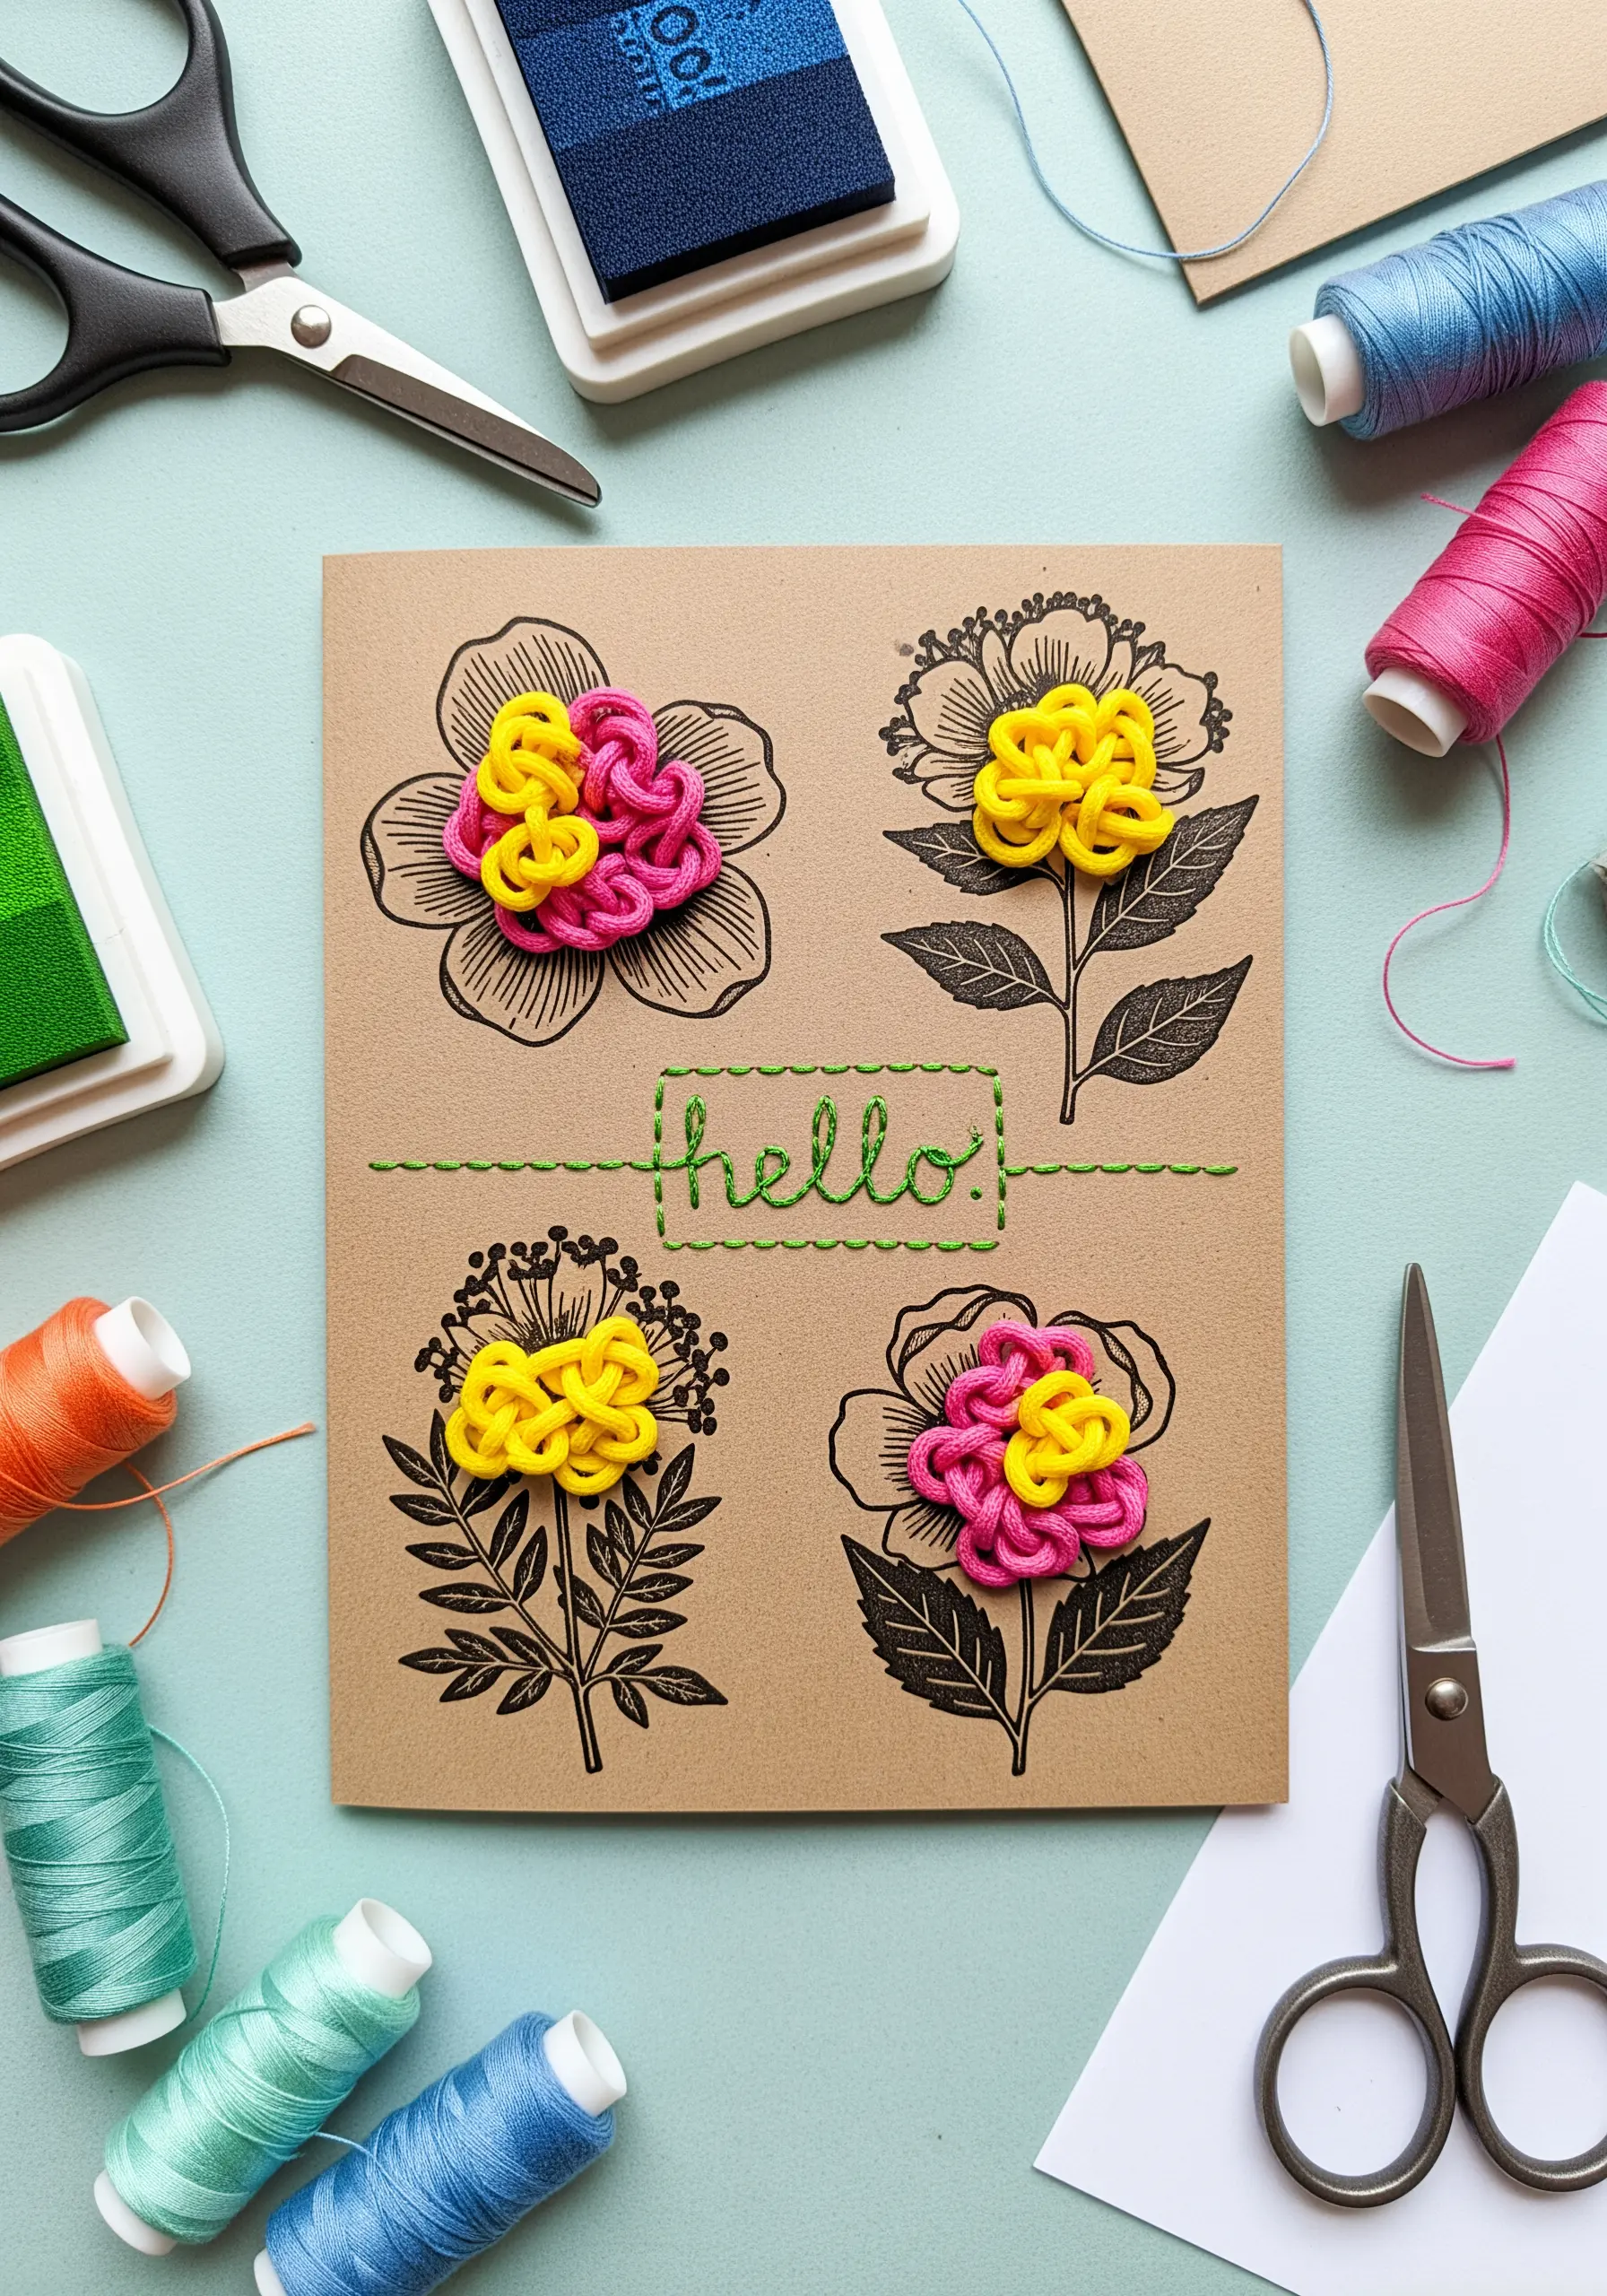
Add a surprising pop of 3D texture to handmade cards by combining rubber stamps with a simple weaving technique.
After stamping your floral design onto heavy cardstock, use a pin to pre-punch holes for your foundation stitches.
Create a series of straight stitches across the flower’s center, like the spokes of a wheel.
Then, using a blunt tapestry needle, weave a contrasting color of floss over and under these spokes until the center is full.
These DIY embroidered mixed-media cards feel incredibly special and handcrafted.
6. Embroidering New Narratives onto Vintage Photographs
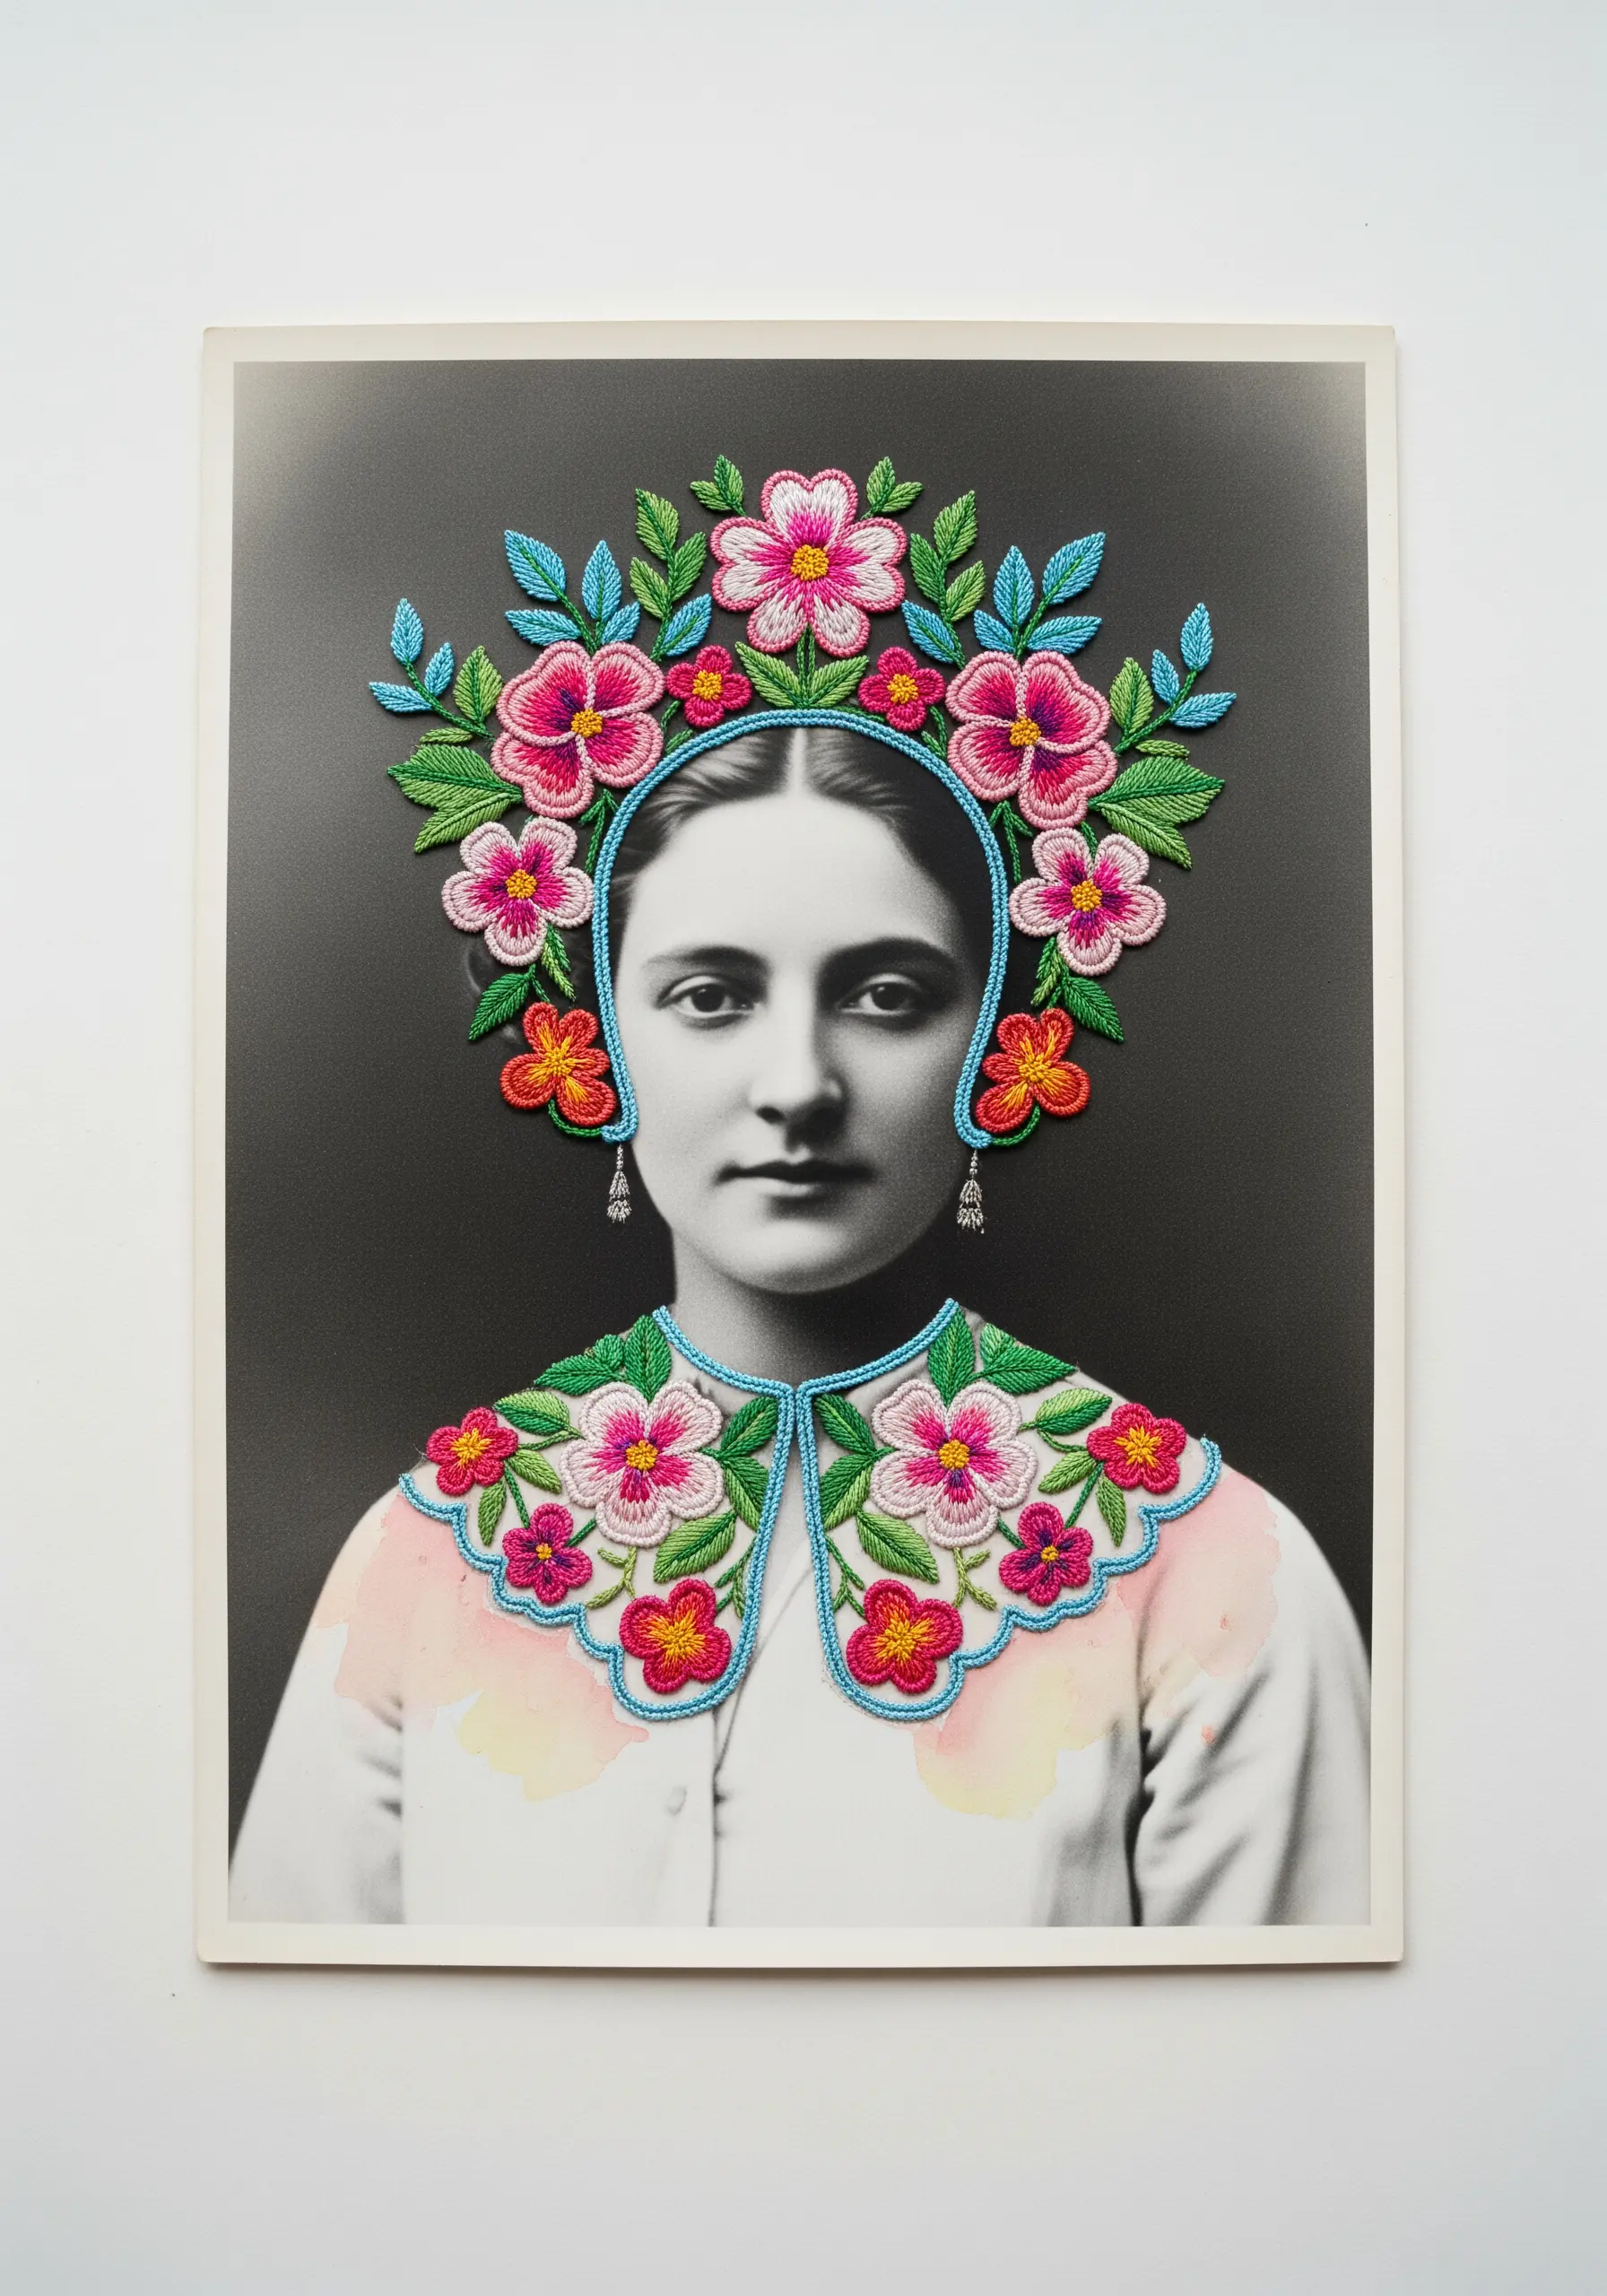
Breathe new life into antique portraits by stitching directly onto high-quality reproductions printed on matte photo paper.
Use a very fine needle to gently pierce the paper, always working from the inside of a shape outward to prevent buckling.
Employ satin stitch to create smooth, solid petals and French knots for rich, textural flower centers.
The vivid color and texture of the thread against the monochrome photograph creates a surreal and beautiful contrast, completely altering the portrait’s original story.
7. Minimalist Collage with Ink, Gold, and Thread
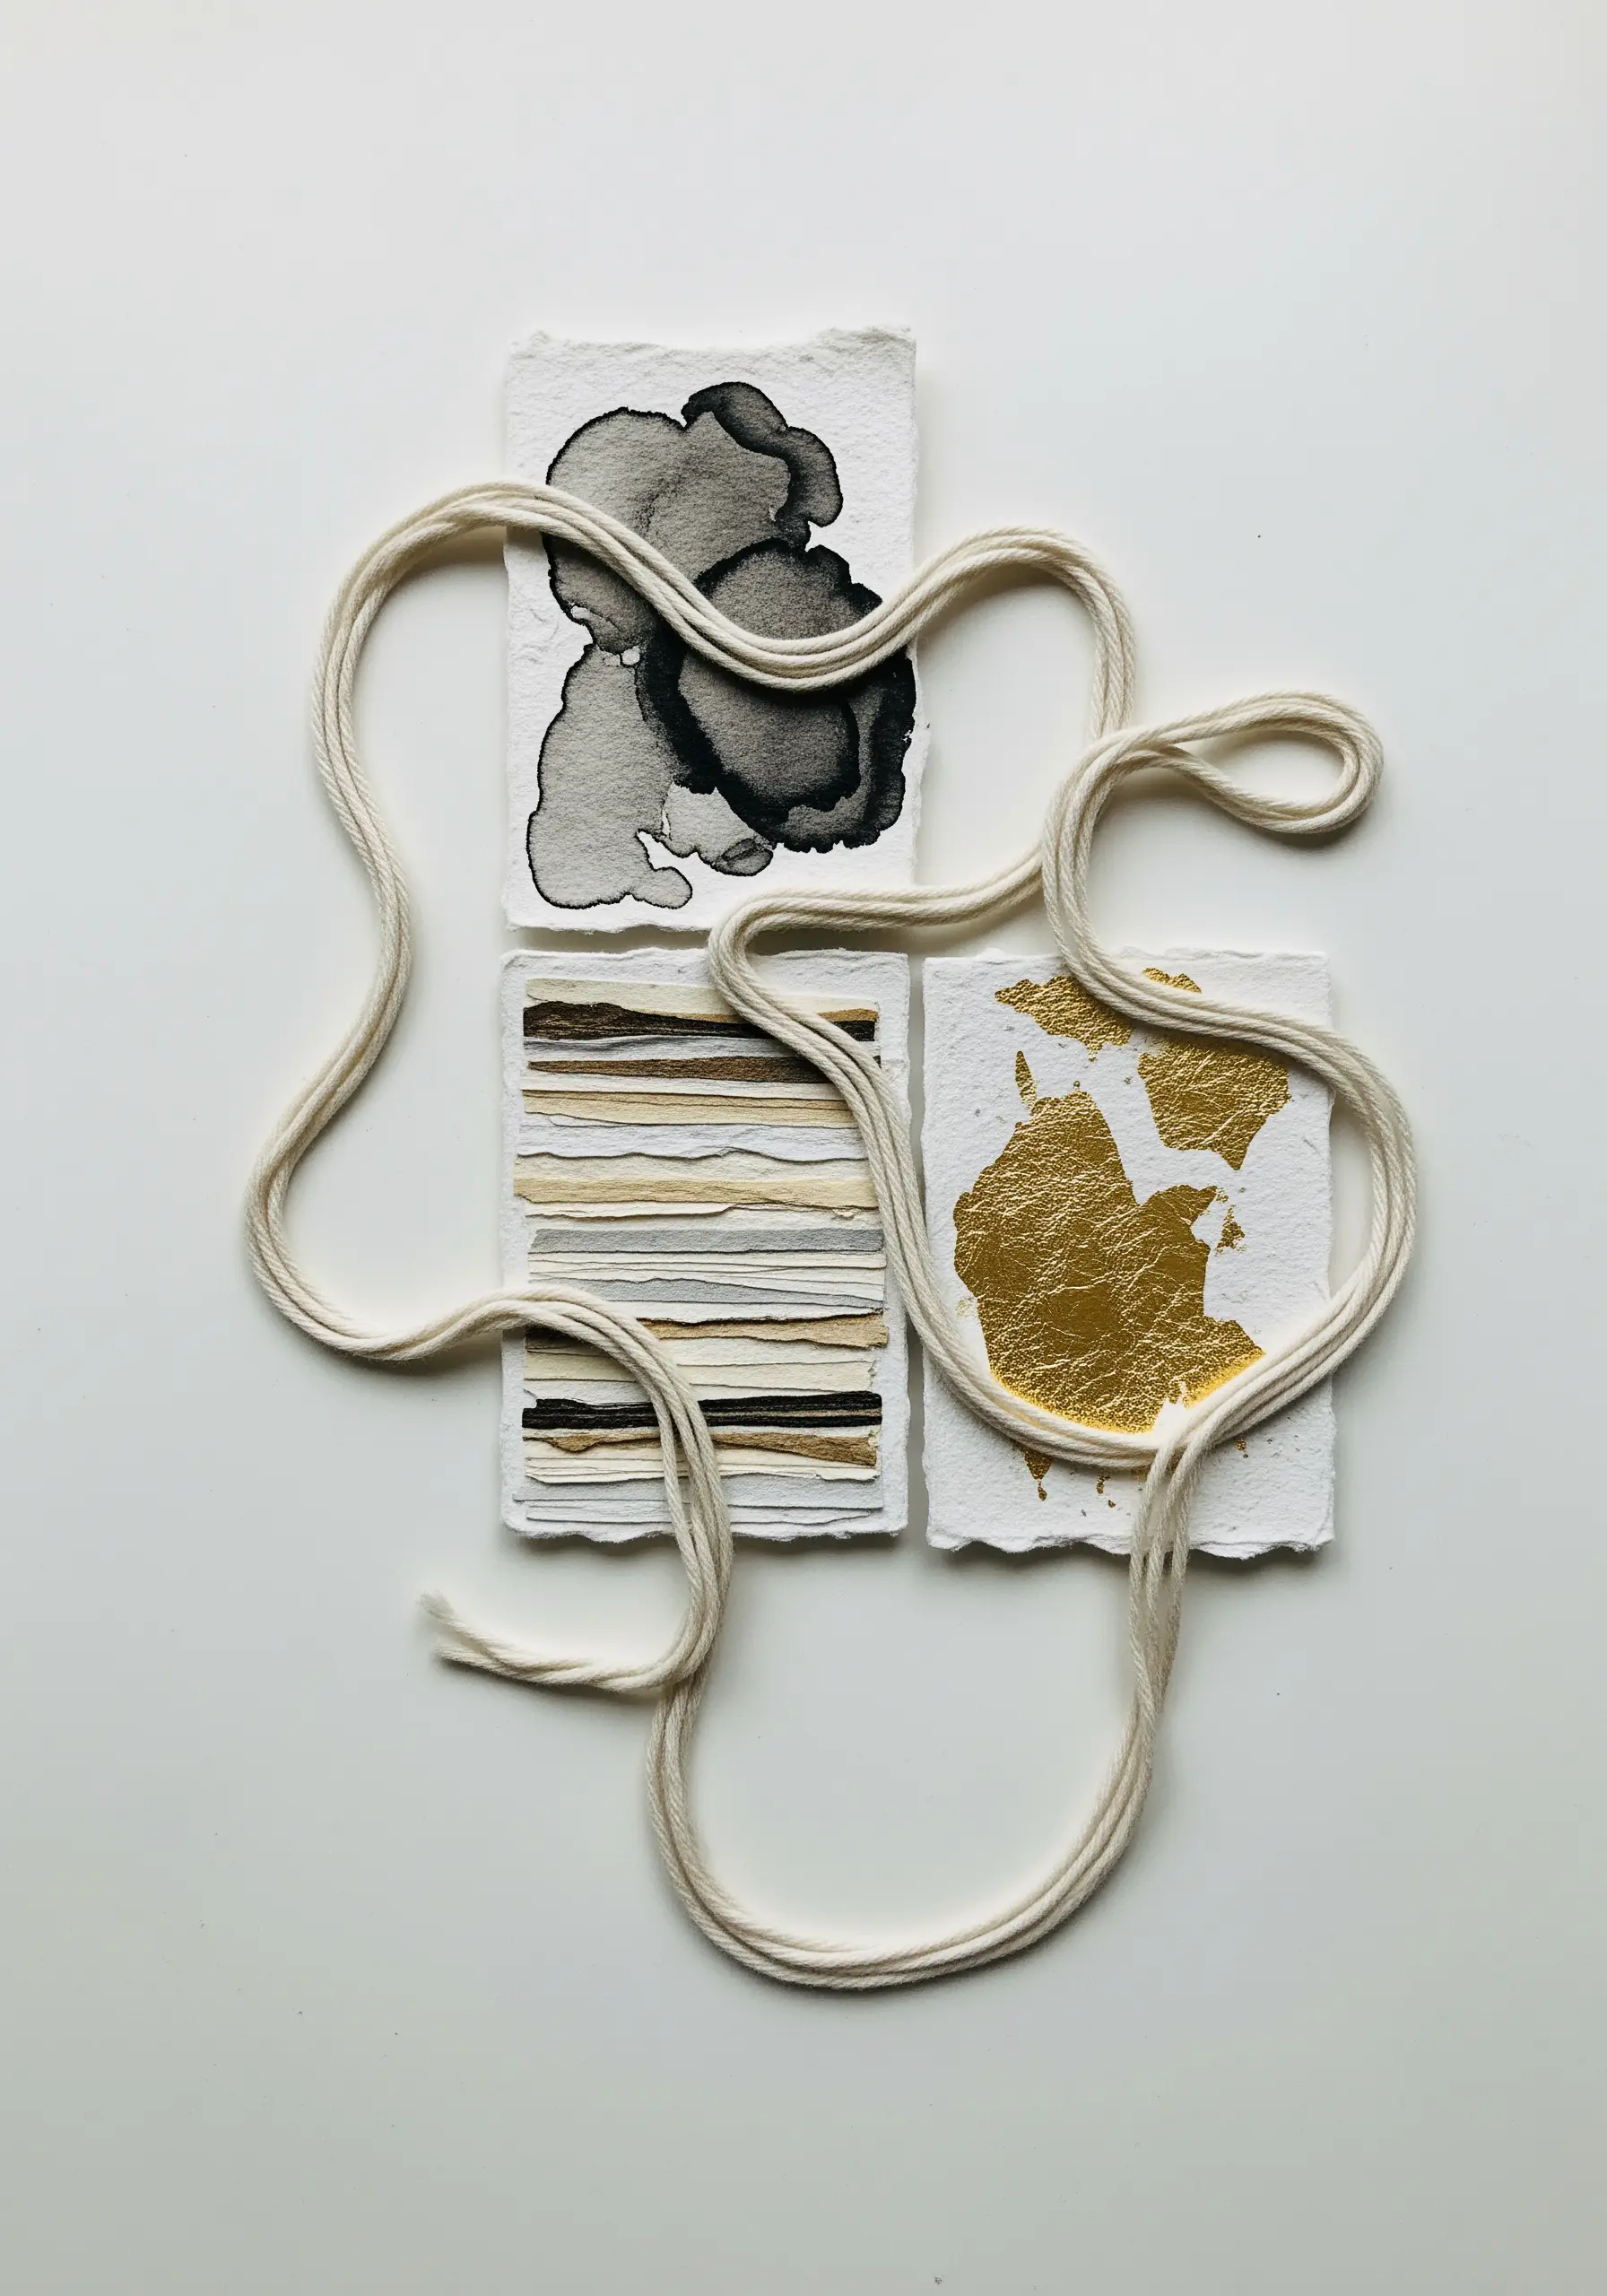
Create sophisticated miniature artworks by focusing on the interplay of textures.
On small swatches of handmade or watercolor paper, experiment with ink washes, touches of gold leaf, and single lines of thread.
Instead of intricate embroidery, try couching or wrapping a neutral, textural cord across the paper’s surface.
This approach allows each material—the absorbent paper, the fluid ink, the metallic leaf, and the soft fiber—to speak for itself, resulting in minimalist embroidery DIYs with quiet elegance.
8. Integrating Thread into Woven Paper Compositions
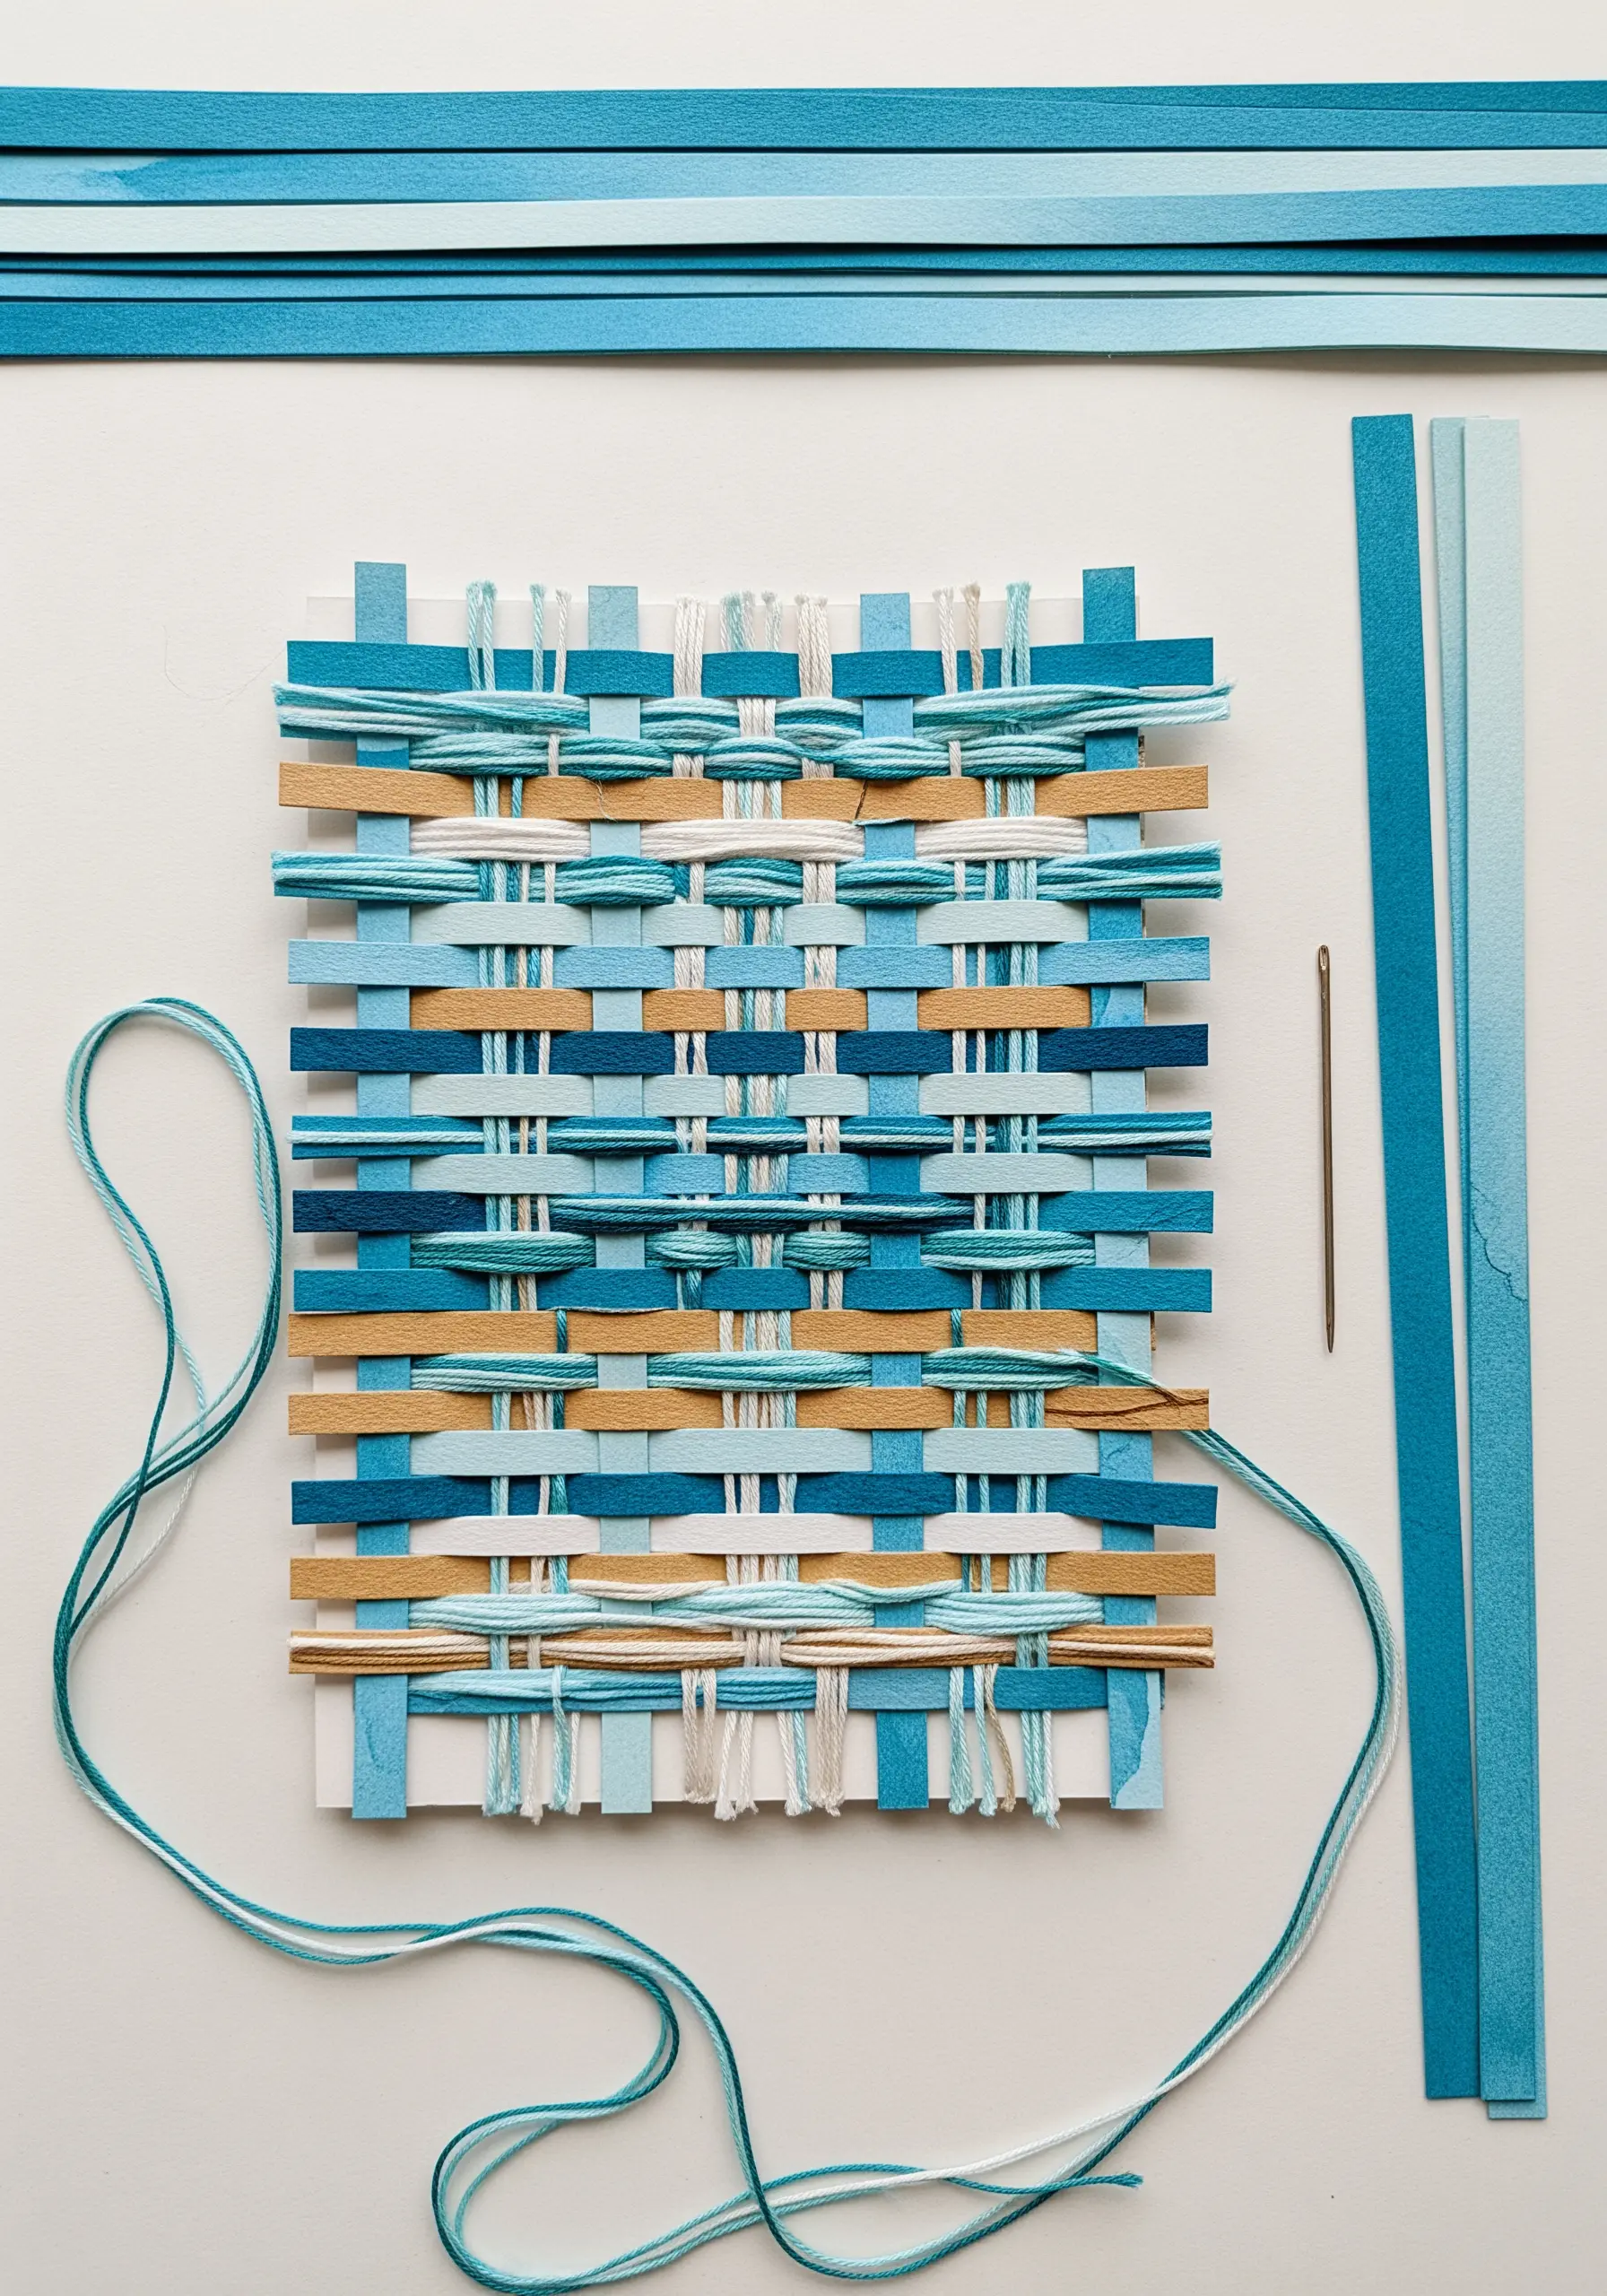
Add a subtle, organic element to paper weaving by introducing thread into the structure.
As you build your warp and weft with paper strips, occasionally substitute a paper strip for a bundle of embroidery floss or a single strand of thick yarn.
Alternatively, you can add running stitches or other linear marks after the weaving is complete, introducing a new layer of detail.
This technique creates a beautifully integrated surface where the textures of paper and fiber become one.
9. Creating a Stitched Journal of Fabric and Paper
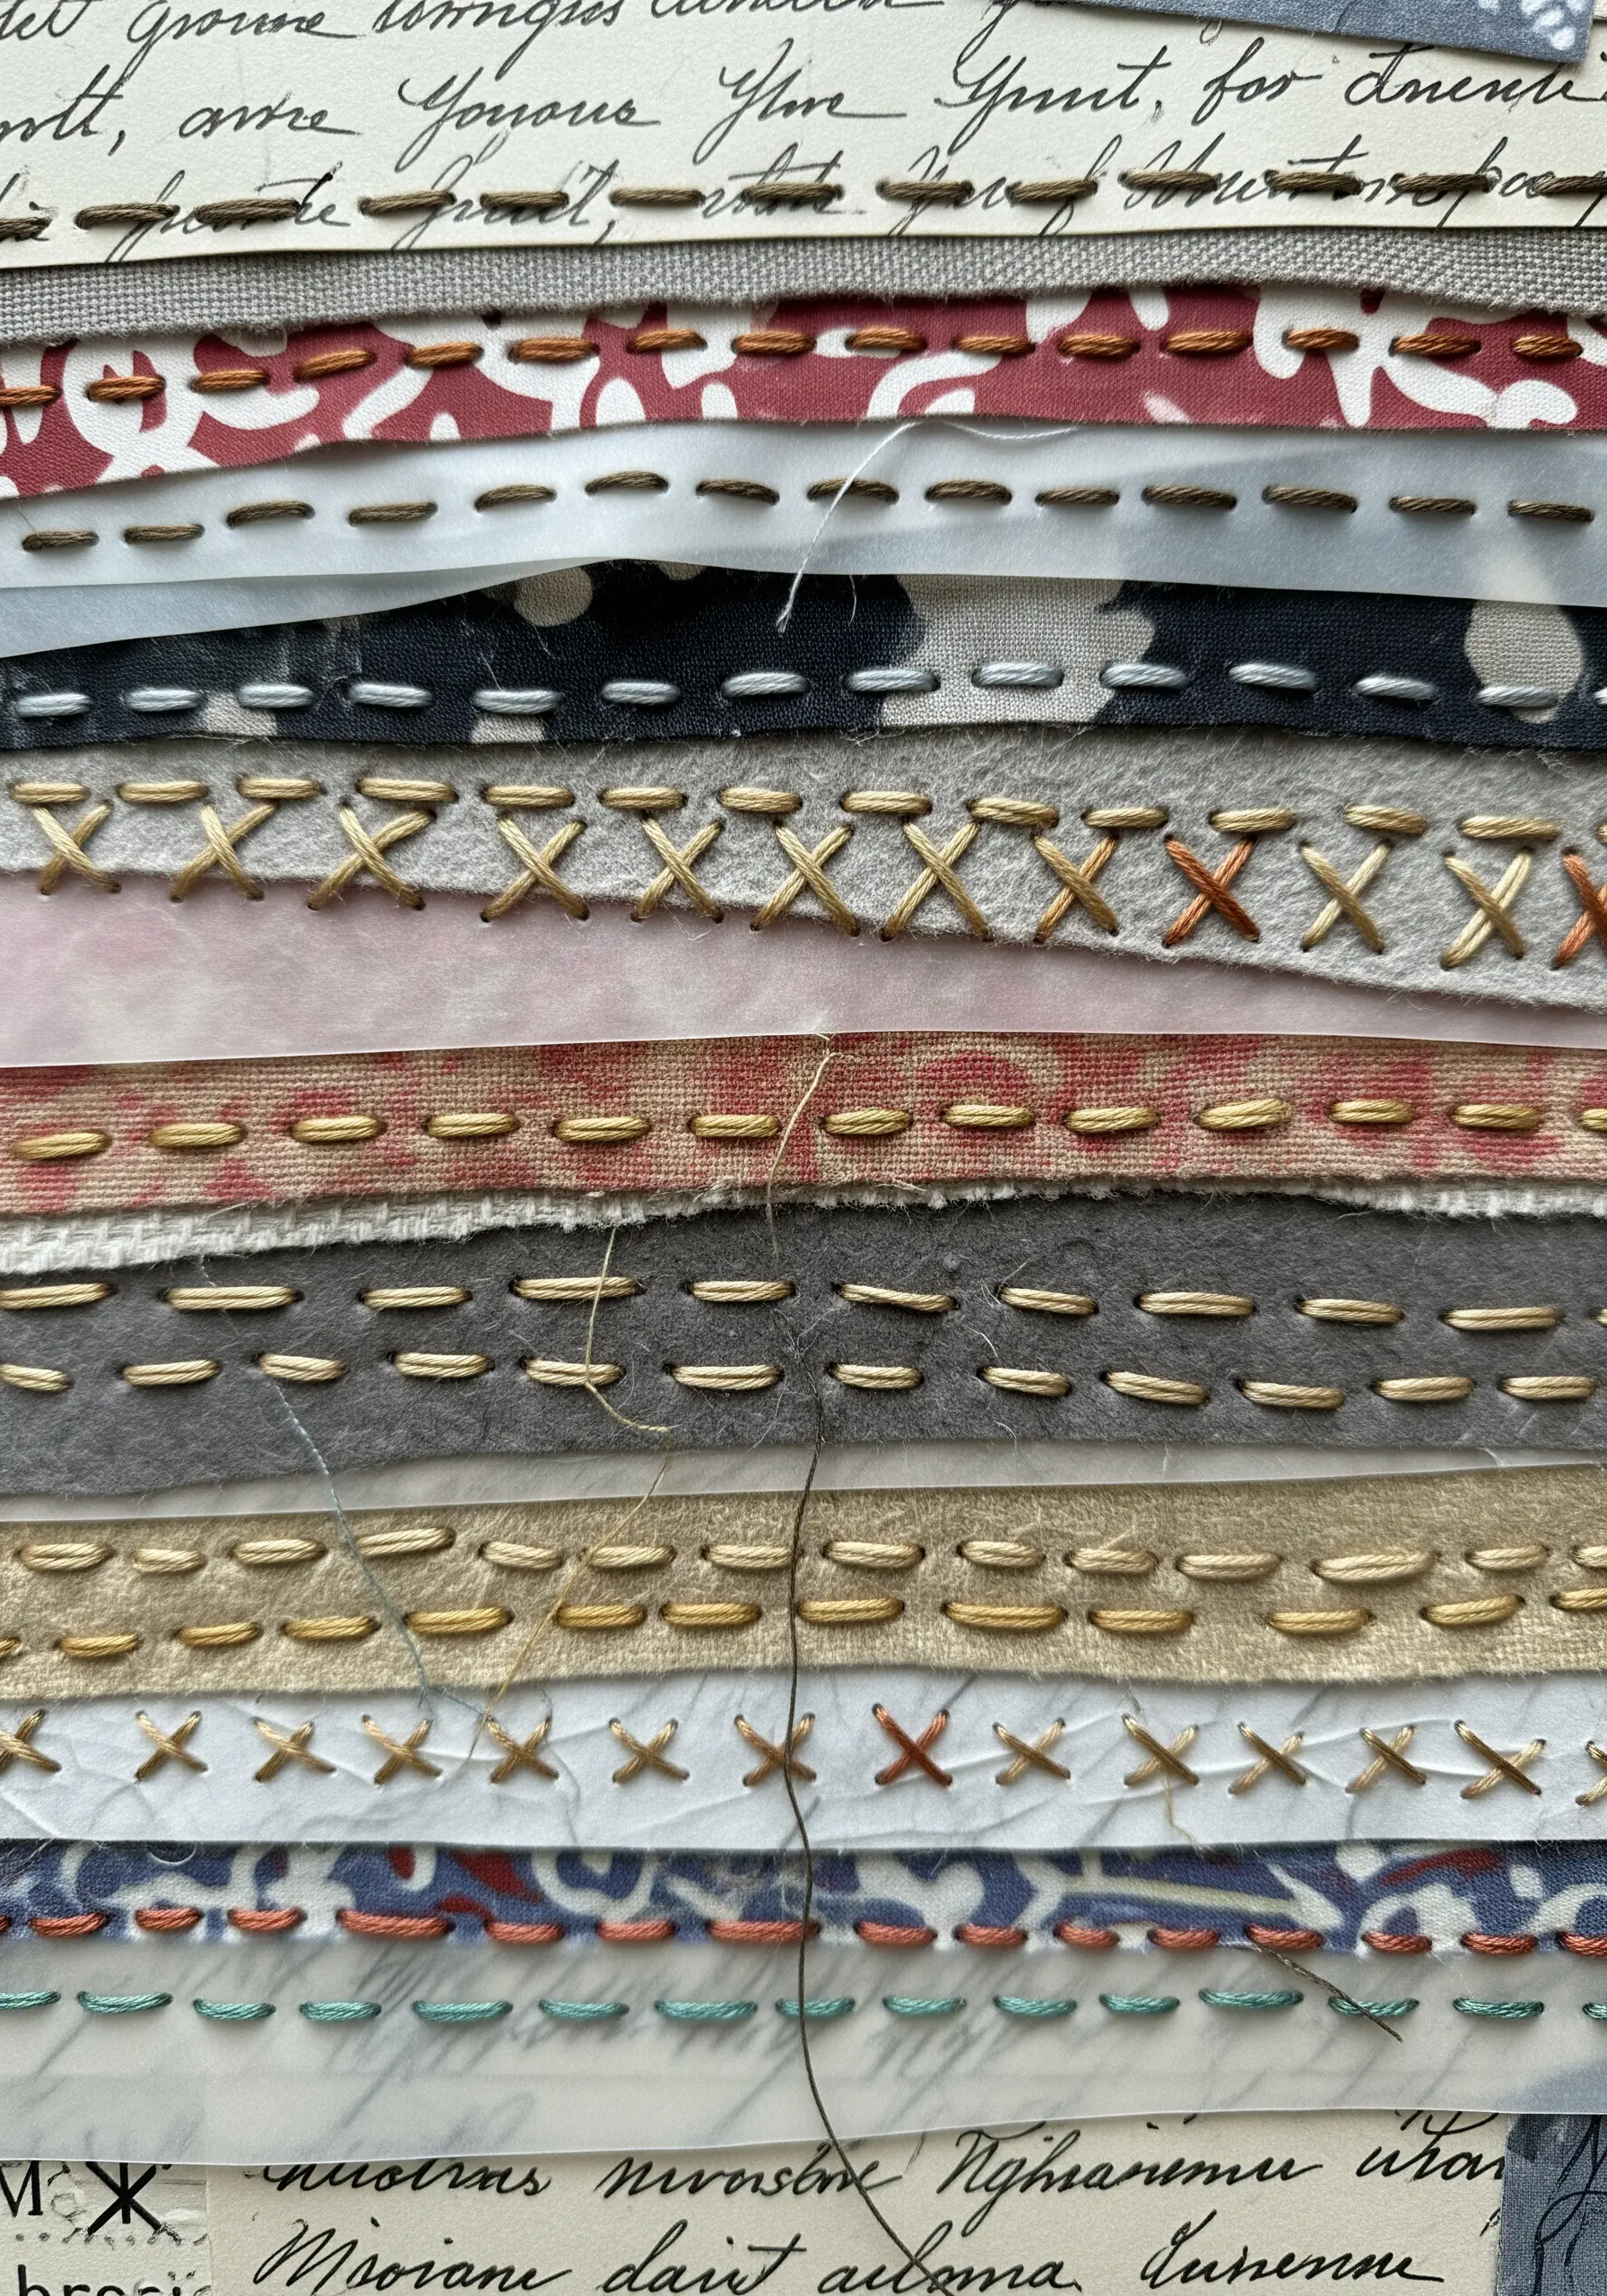
Compile a visual diary by layering meaningful scraps of fabric, handwritten notes, and patterned papers.
Unify these disparate elements using simple, utilitarian stitches like running stitch or cross stitch.
The thread here serves a dual purpose: it physically binds the layers and creates a cohesive visual rhythm across the collage.
This is a wonderful way to practice mindful stitching while creating a deeply personal piece of fabric collage embroidery.
10. Kintsugi-Inspired Stitching on Crackle Paste
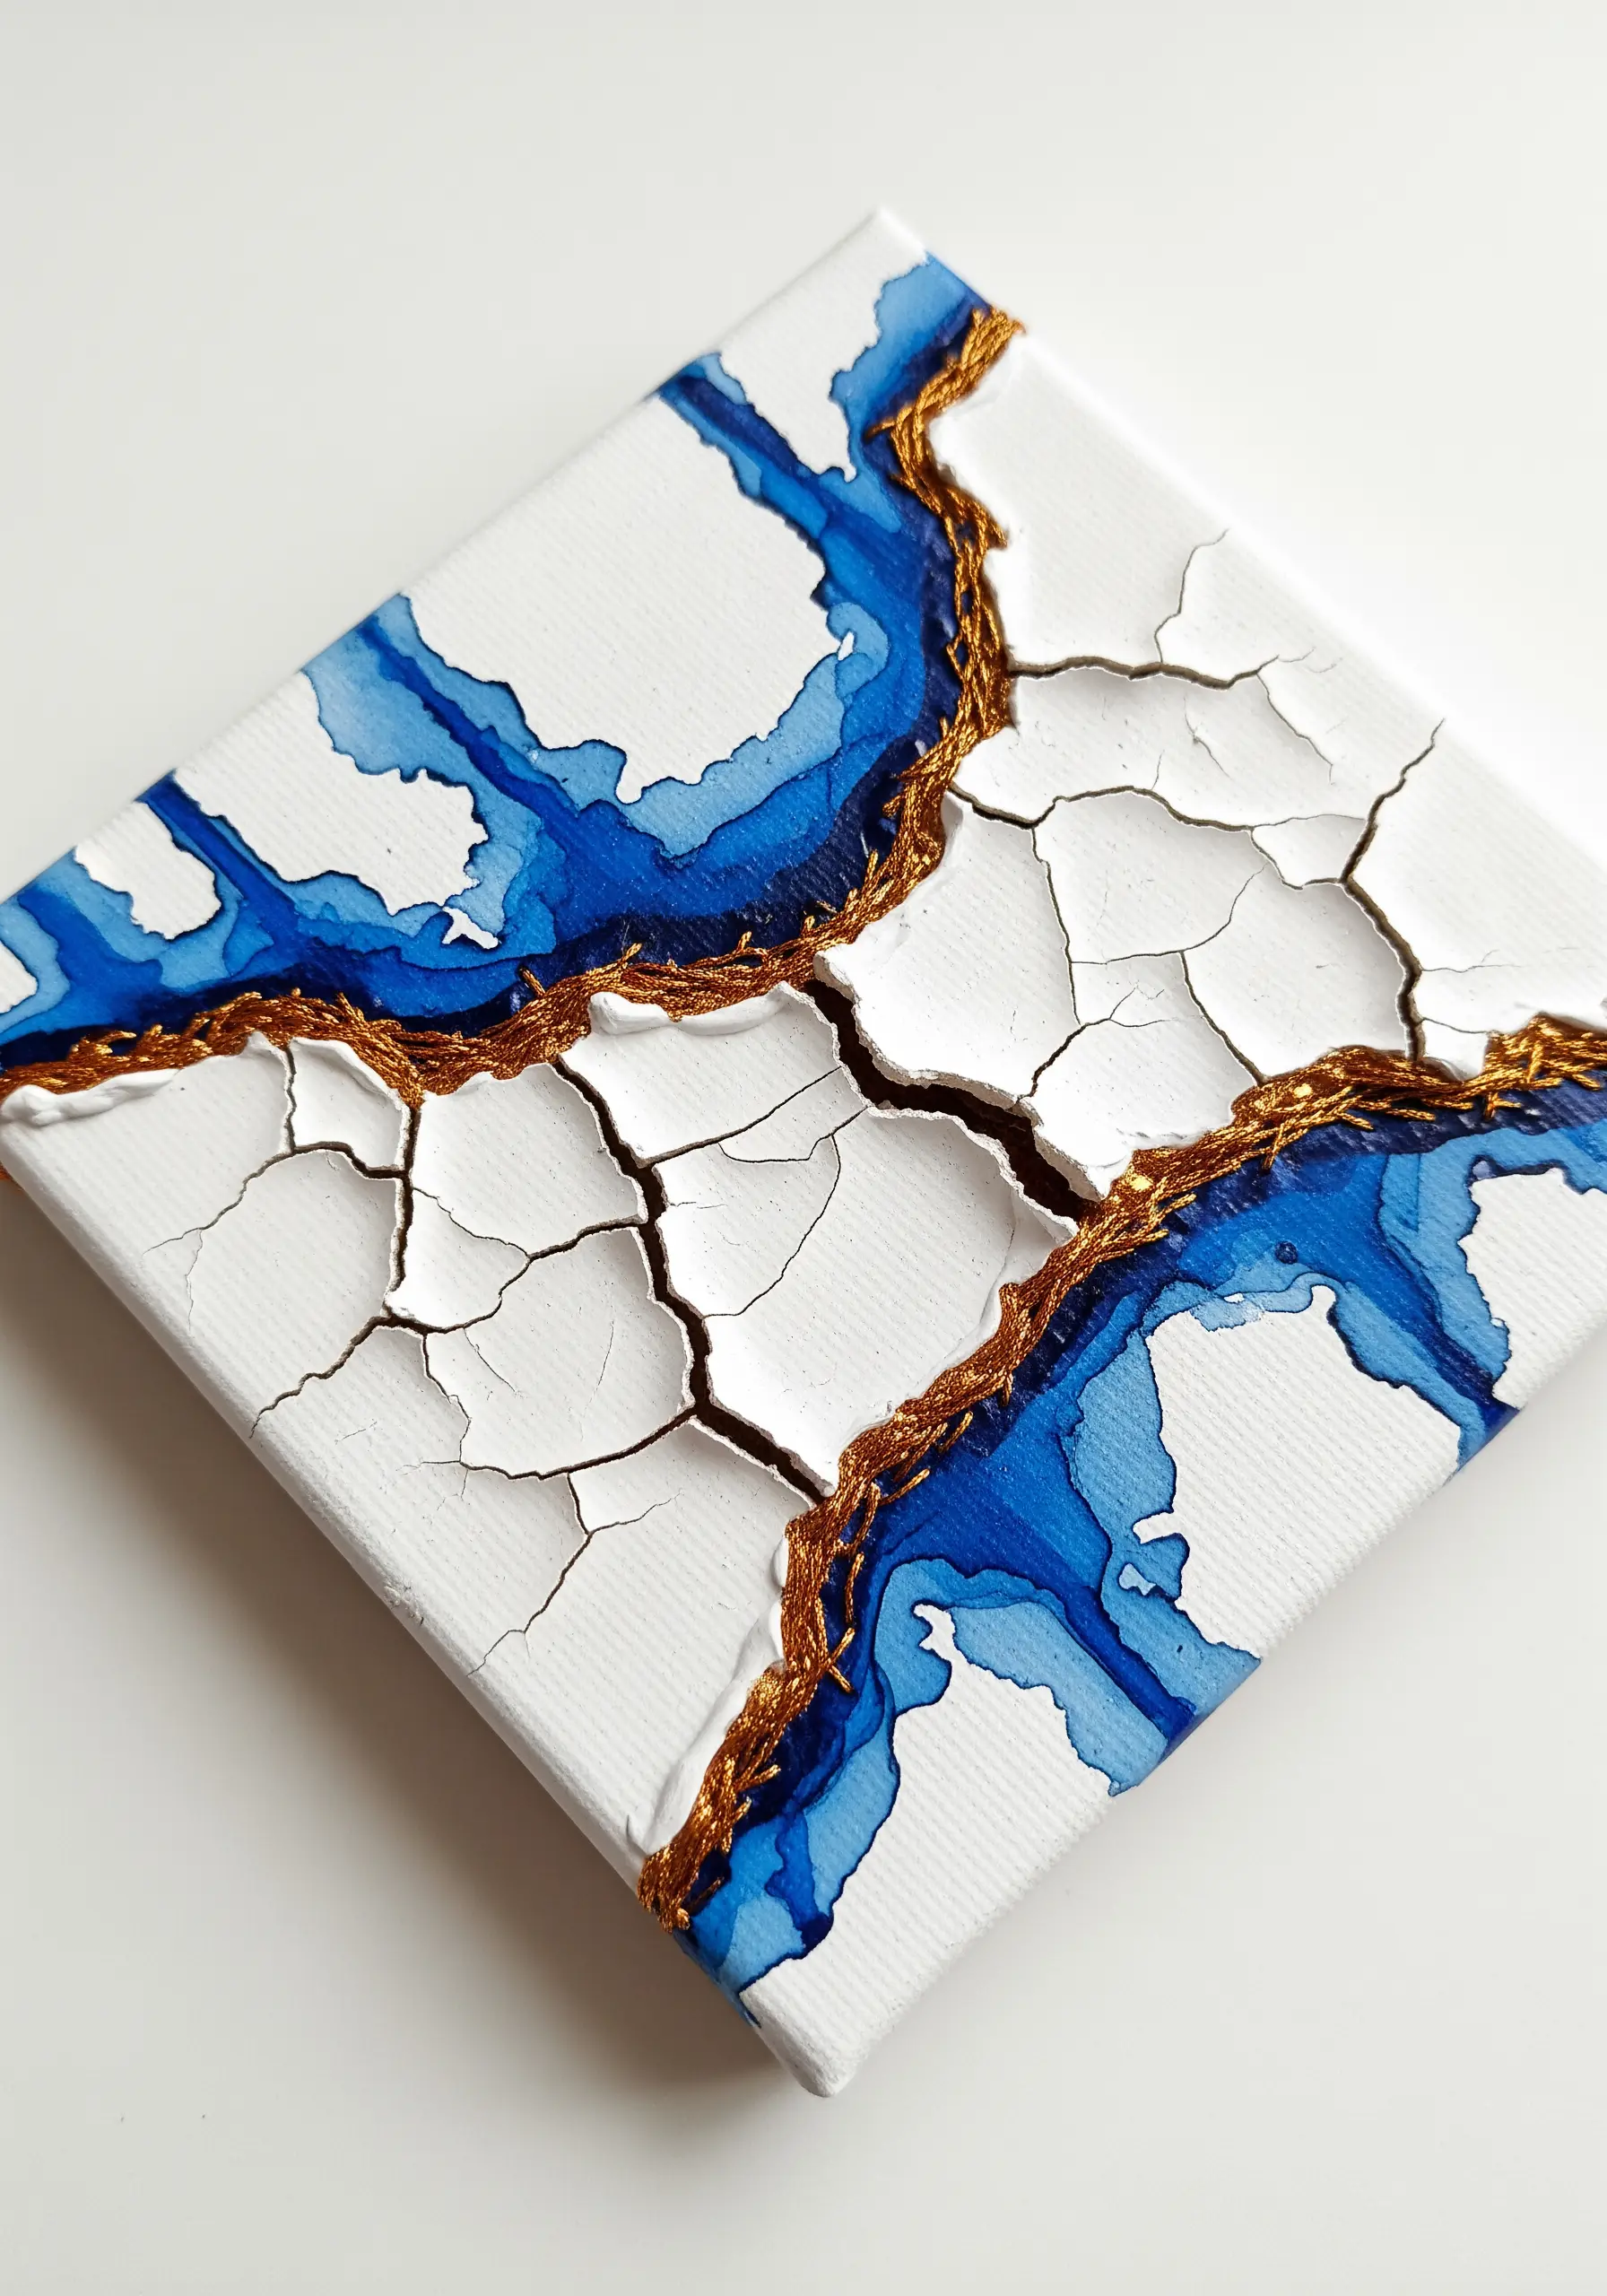
Embrace the philosophy of finding beauty in imperfection with this Kintsugi-inspired technique.
Apply a thick layer of crackle paste to a small canvas or board and allow it to dry and crack organically.
Using a fine needle and a luminous metallic thread, carefully stitch along the fissures, tracing the random patterns.
The shimmering gold thread transforms the cracks from flaws into the central, celebrated feature of the artwork.
11. Tracing Cartographic Journeys with Thread
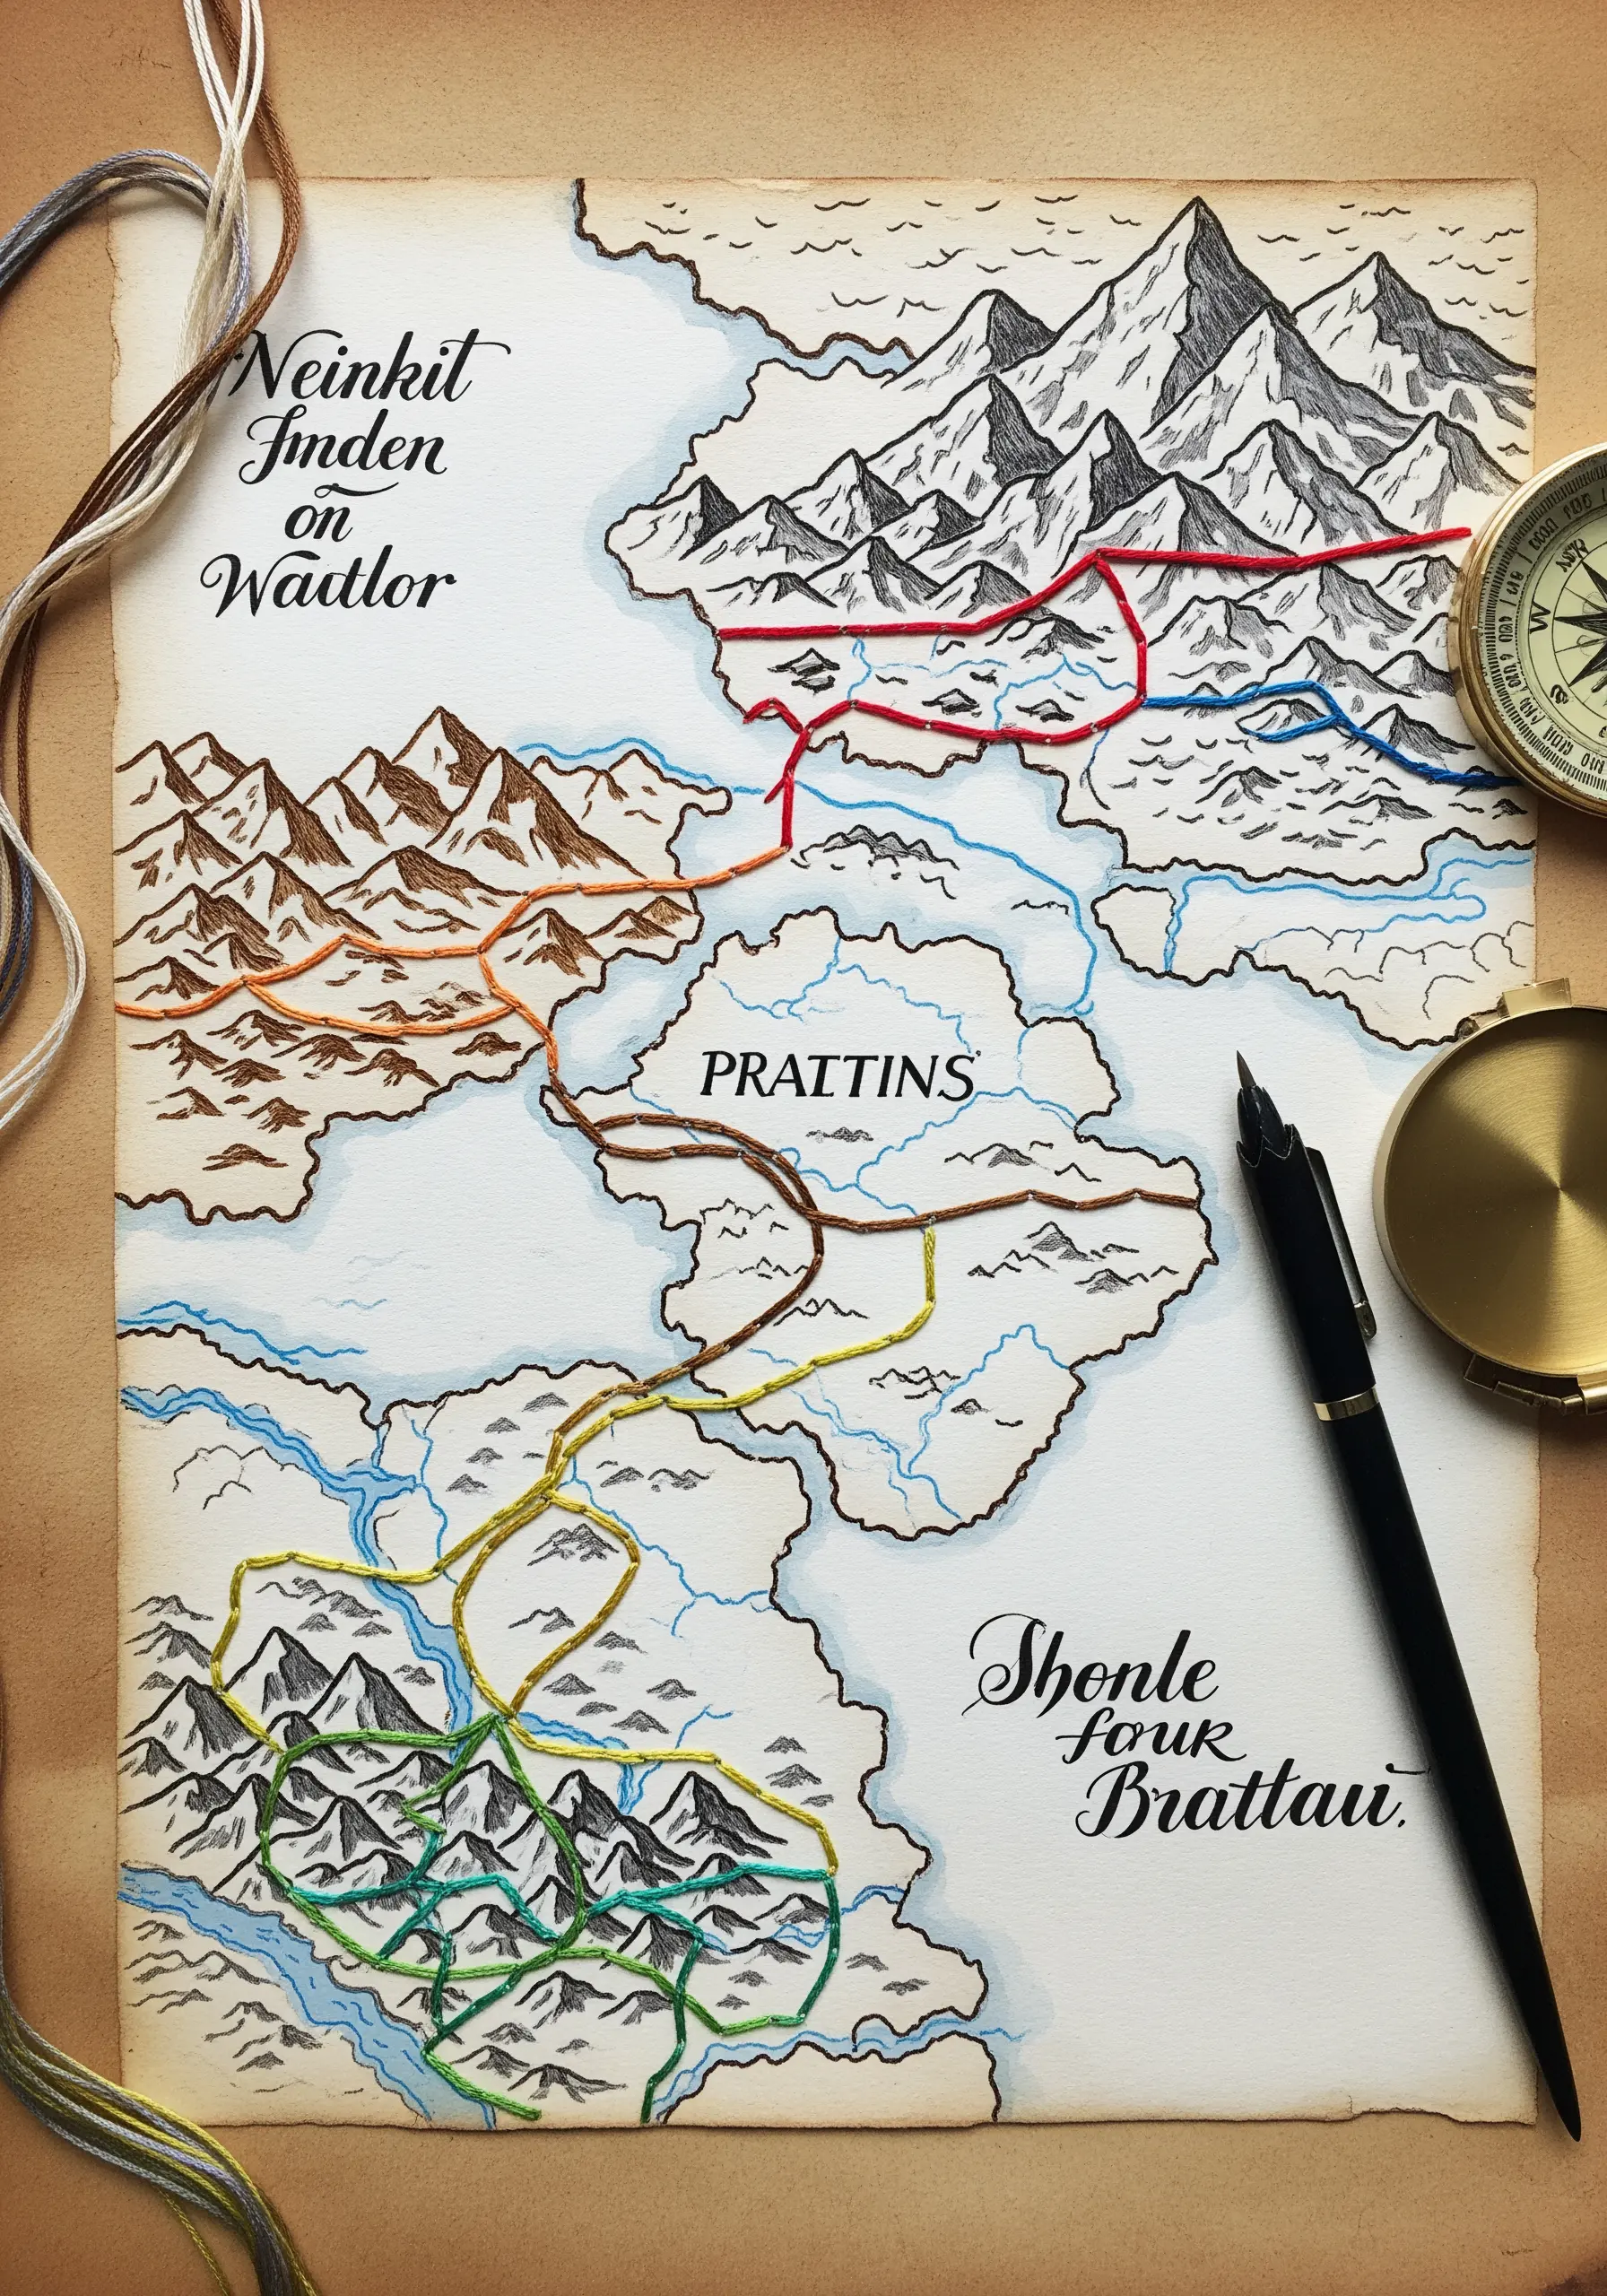
Add a tactile, narrative layer to any map by embroidering significant routes or borders.
Whether on a printed fantasy map or a vintage road map, use a simple backstitch or stem stitch to trace paths that are meaningful to you.
You can use different colors to denote different journeys or types of terrain, creating a personal legend.
The raised texture of the thread makes the map’s lines tangible, transforming a flat image into an interactive story of place and memory.
12. Embroidering on Watercolor-Washed Tags
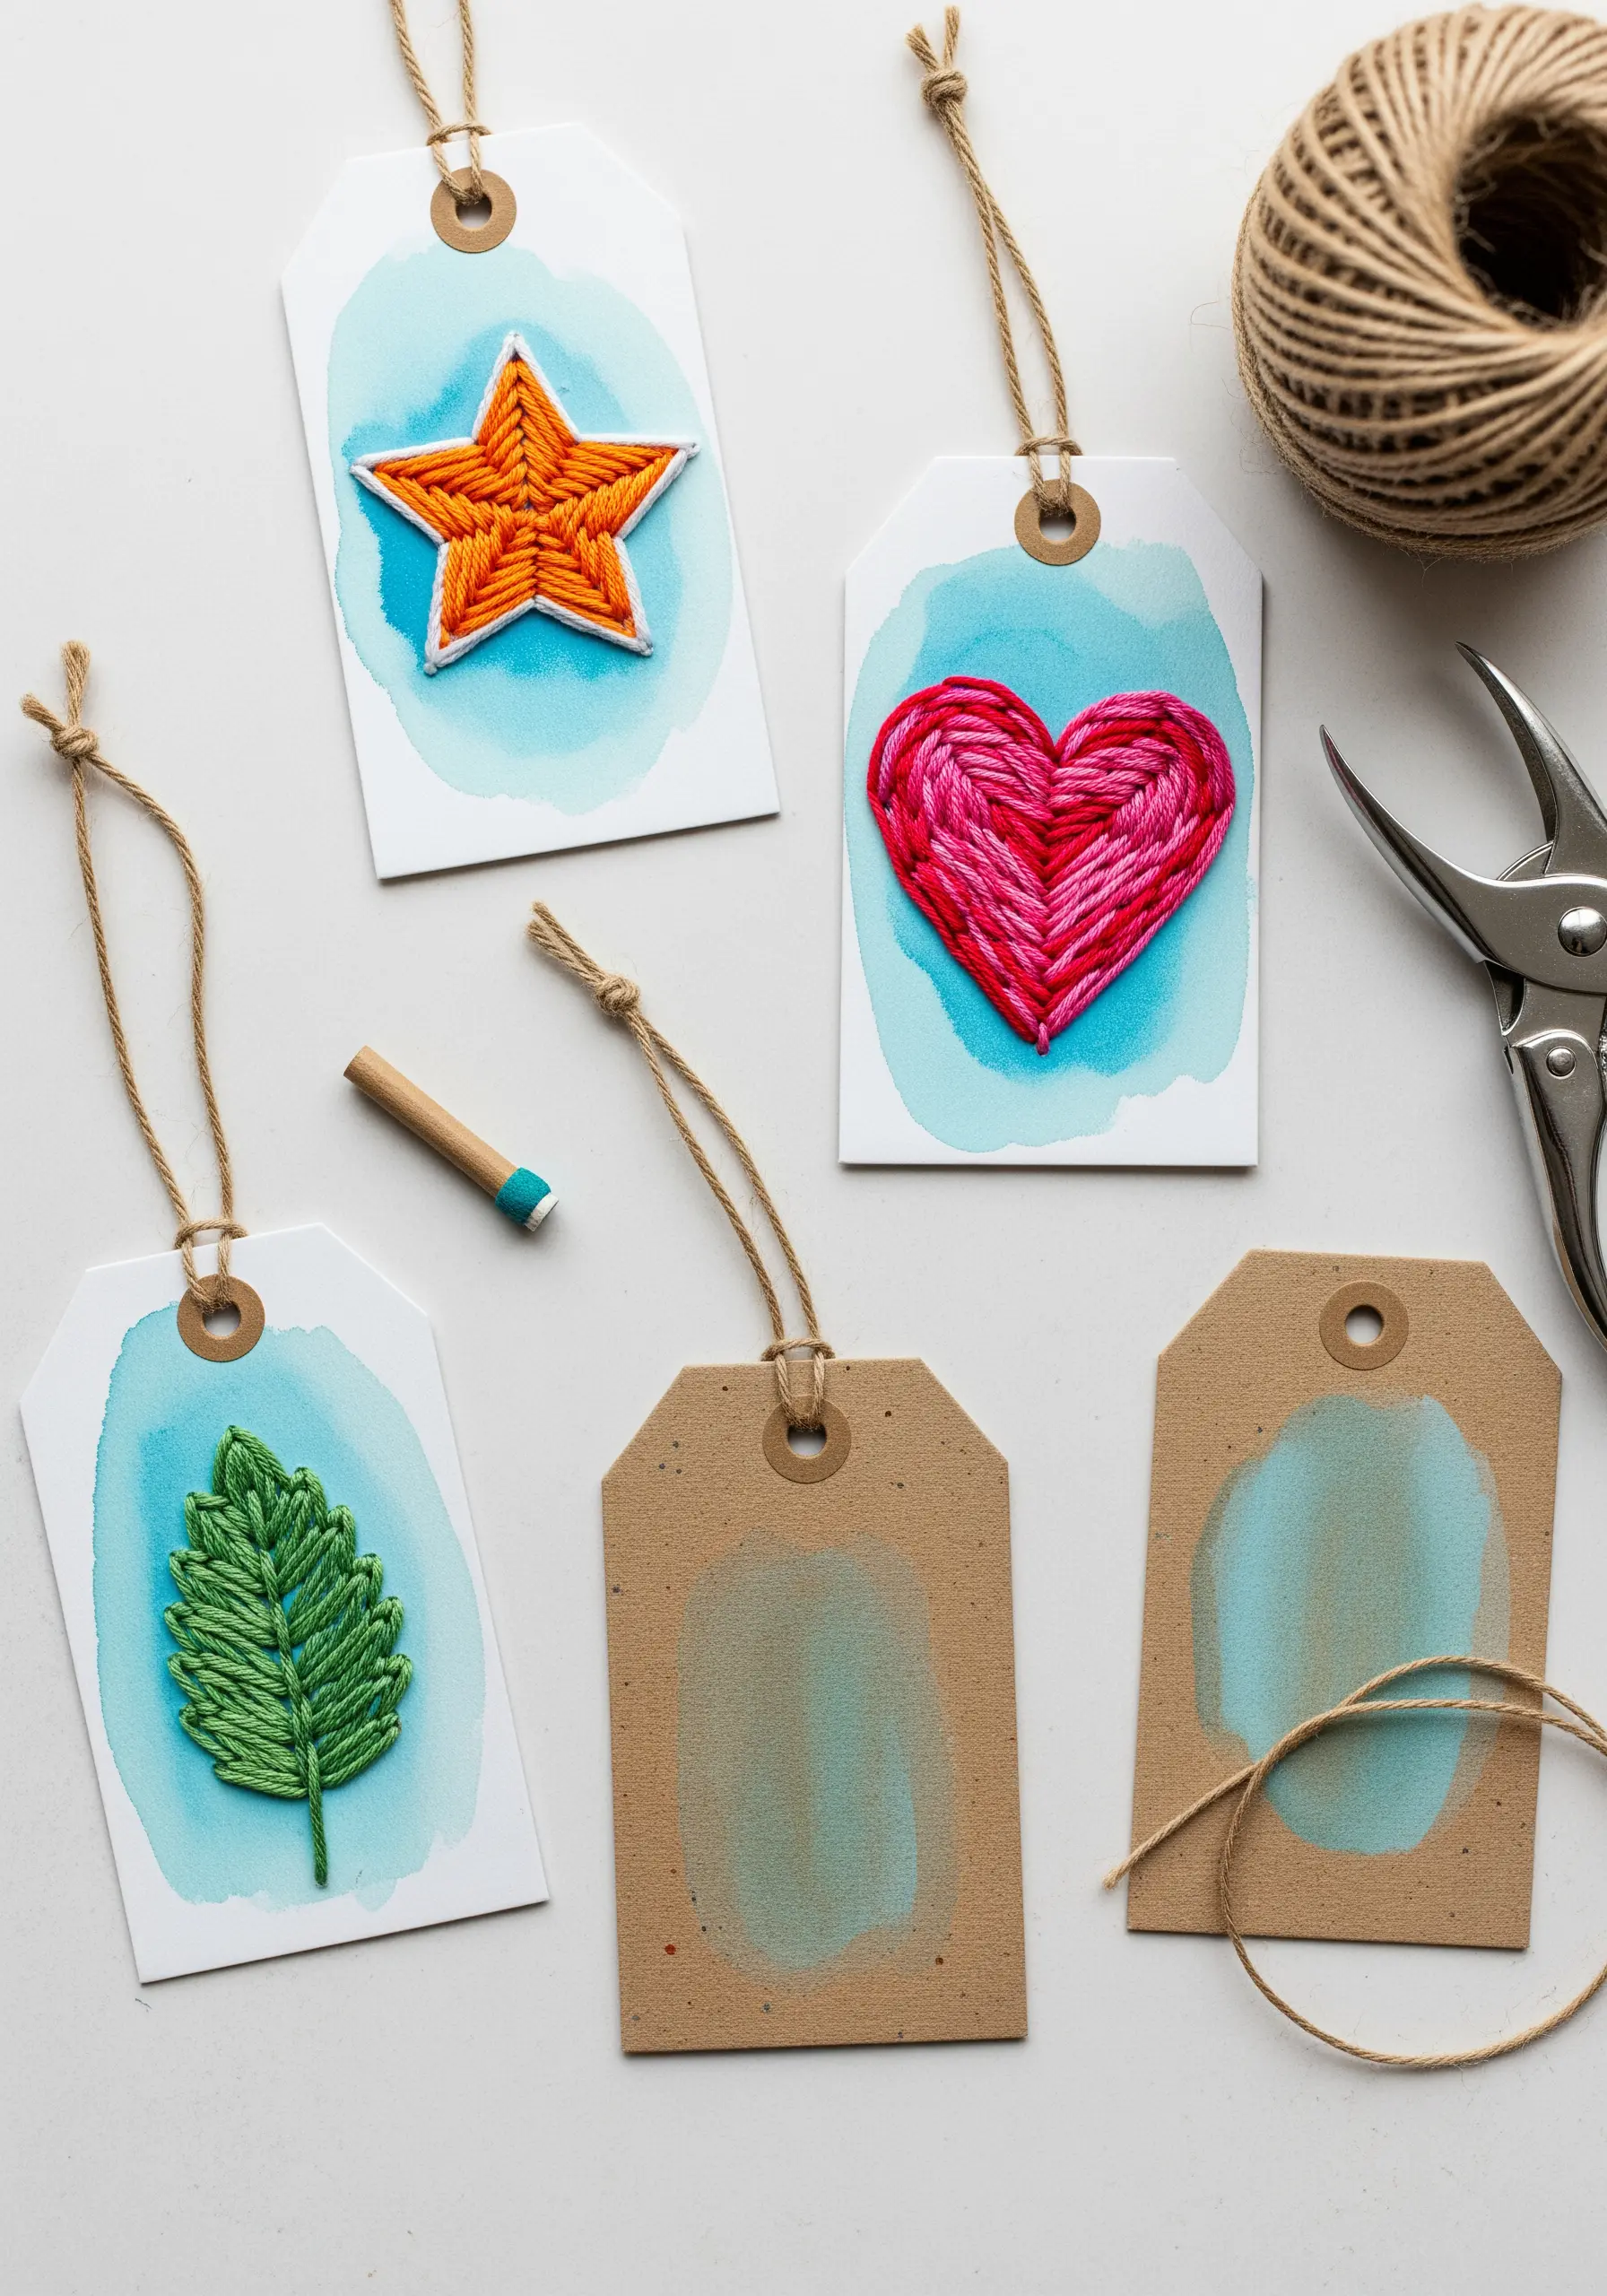
Create beautiful, dimensional motifs by setting crisp embroidery against a soft watercolor background.
Apply a simple wash of color to a piece of heavy cardstock and let it dry completely.
Lightly sketch your design and pre-punch the stitch holes with a pin to ensure the paper doesn’t tear.
Fill the shape using a dense satin stitch; the thread will stand out vividly against the dreamy, atmospheric color wash, creating a stunning effect for gift tags or bookmarks.
13. Dimensional Lettering in a Mixed-Media Art Journal

Give your words physical presence by stitching them with a padded satin stitch.
First, work your lettering on a separate piece of fabric. Create a foundation by outlining the letters in split stitch, then fill the interior with small seed stitches.
Finally, cover the entire letter with smooth, even satin stitches that travel horizontally.
This padding creates a raised, 3D effect. You can then mount the finished embroidered piece onto a journal page already layered with paint and paper collage.
14. Building Perspective with Thread in a Shadow Box
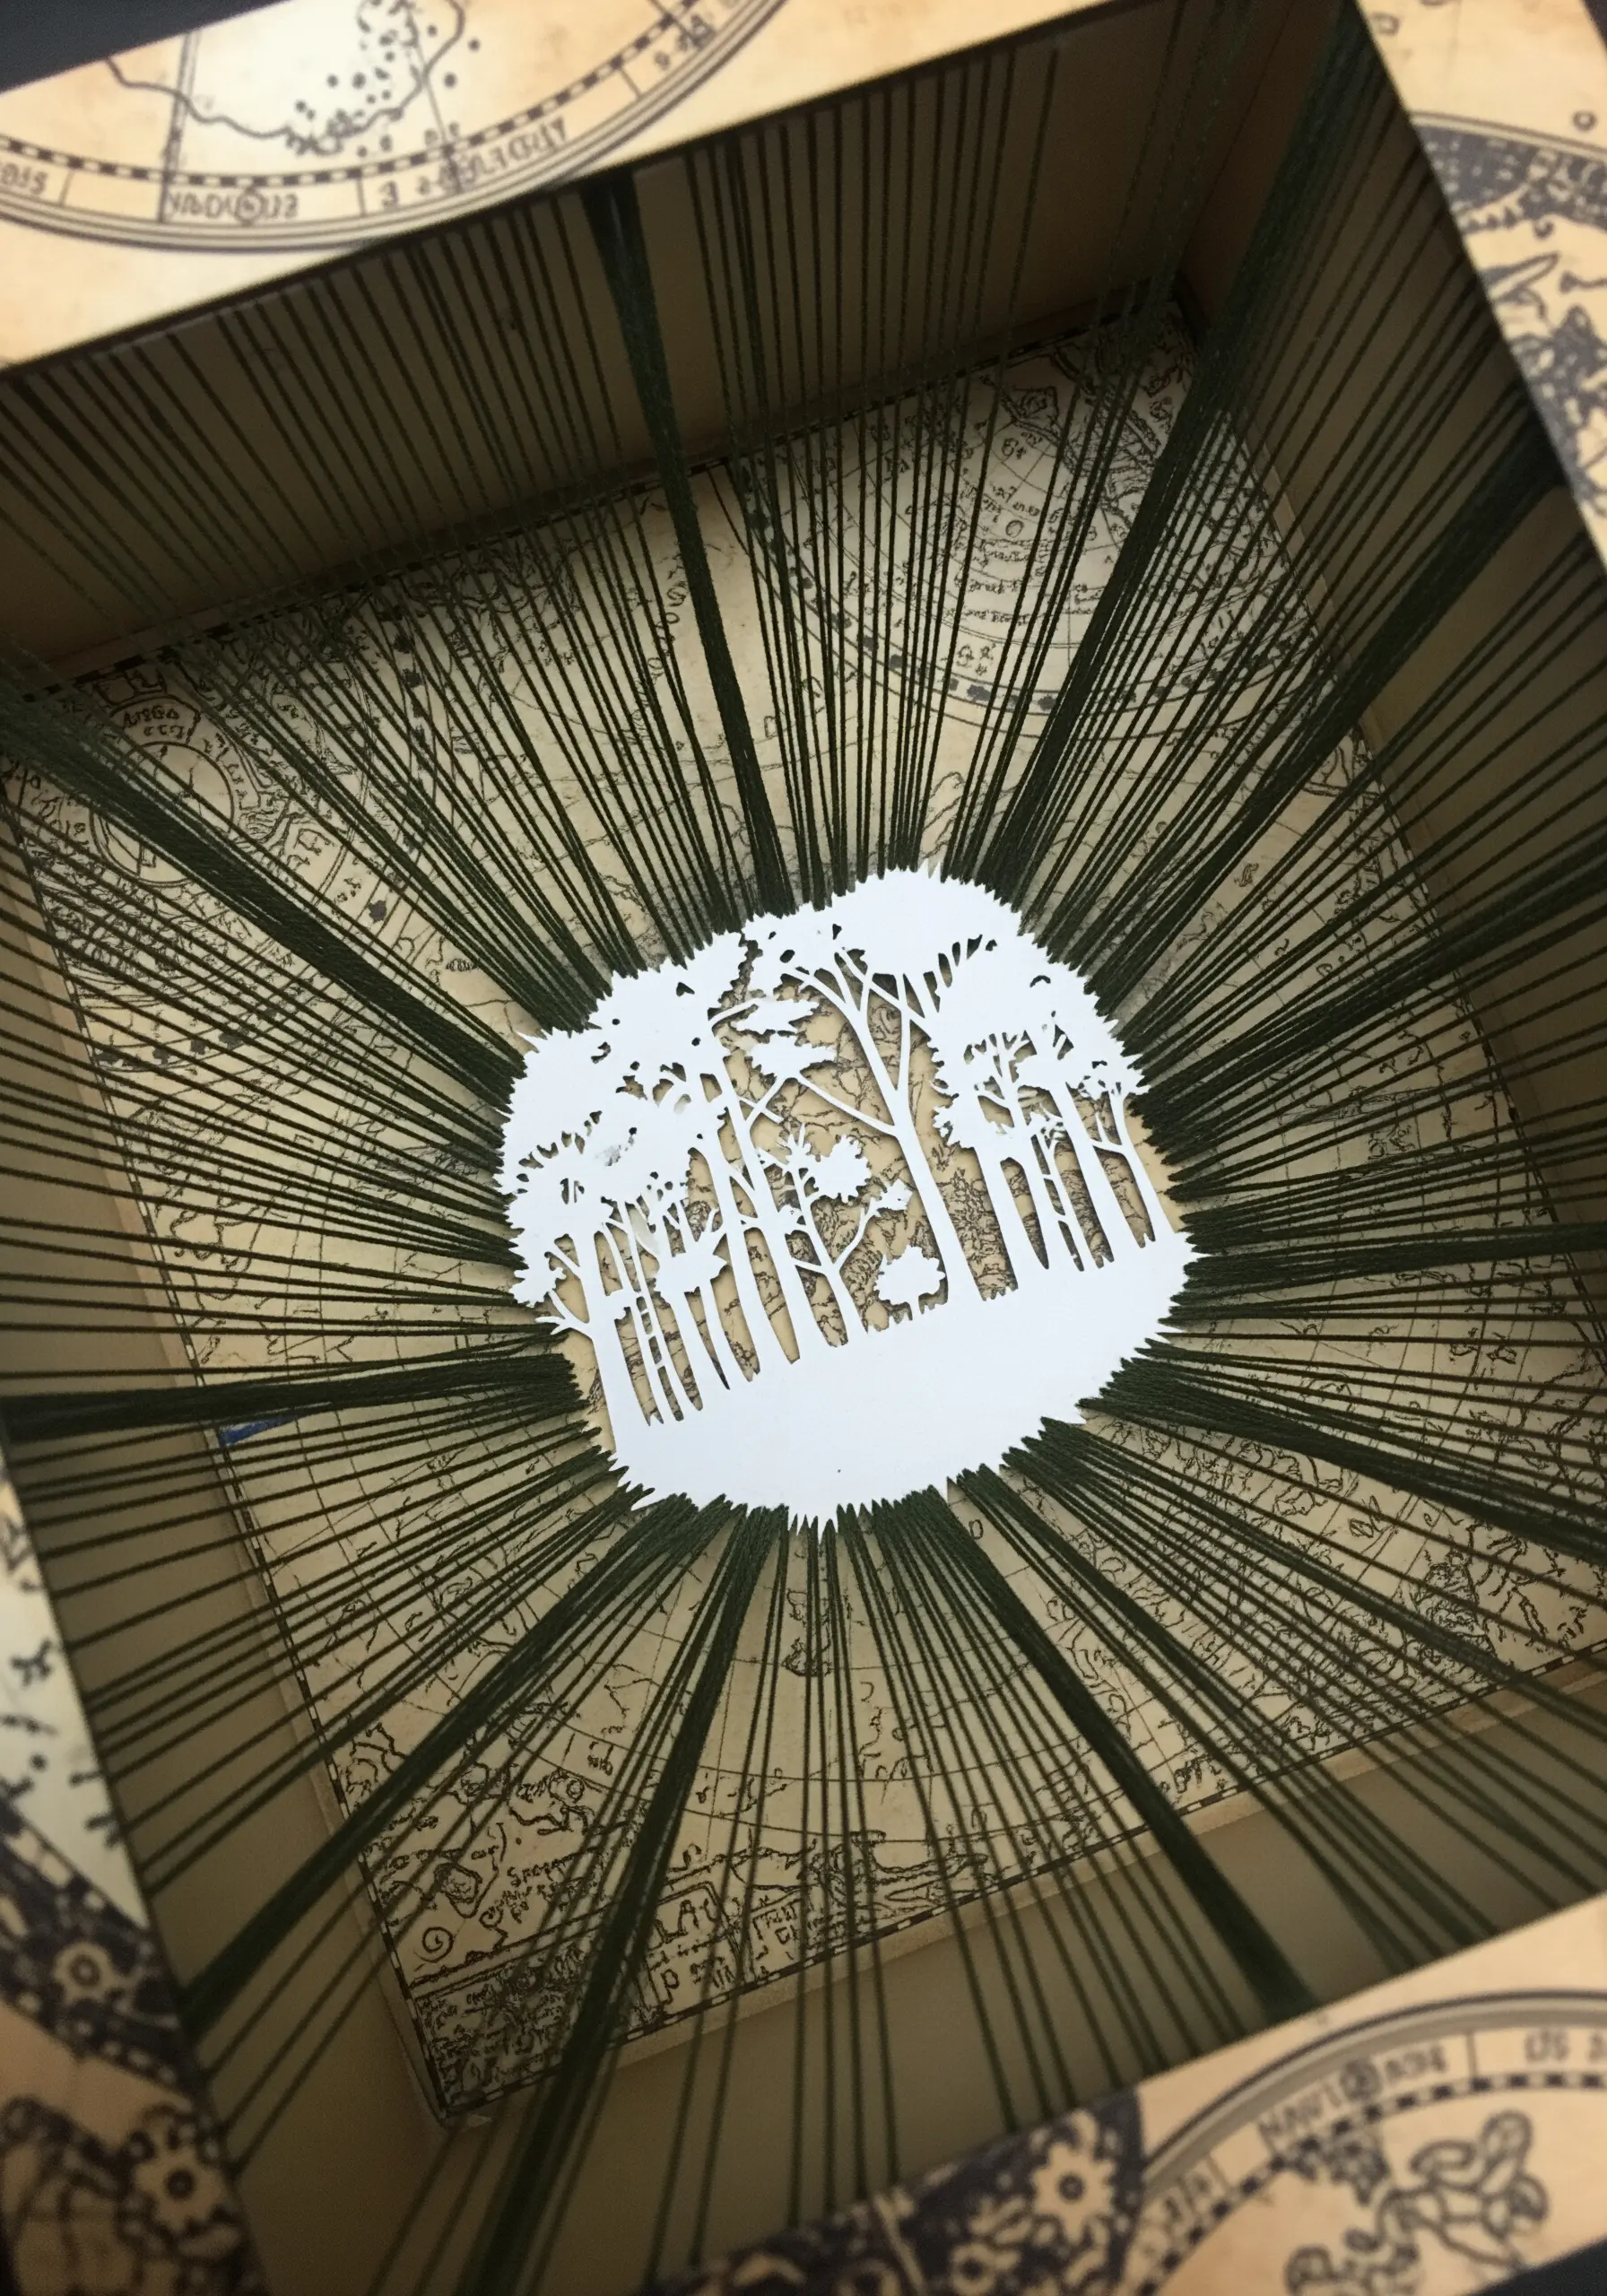
Use embroidery thread as an architectural element to create a dramatic sense of depth and perspective.
Inside a deep frame or shadow box, place a central focal point, like a papercut silhouette.
Stretch threads from points around the silhouette to the outer edges of the frame, creating taut, radiating lines.
This transforms simple thread into a powerful tool for suggesting light, energy, and movement within a three-dimensional space. It’s one of many paper art DIYs that elevate thread beyond simple stitching.
15. Expressive Drawing with Free-Motion Stitching
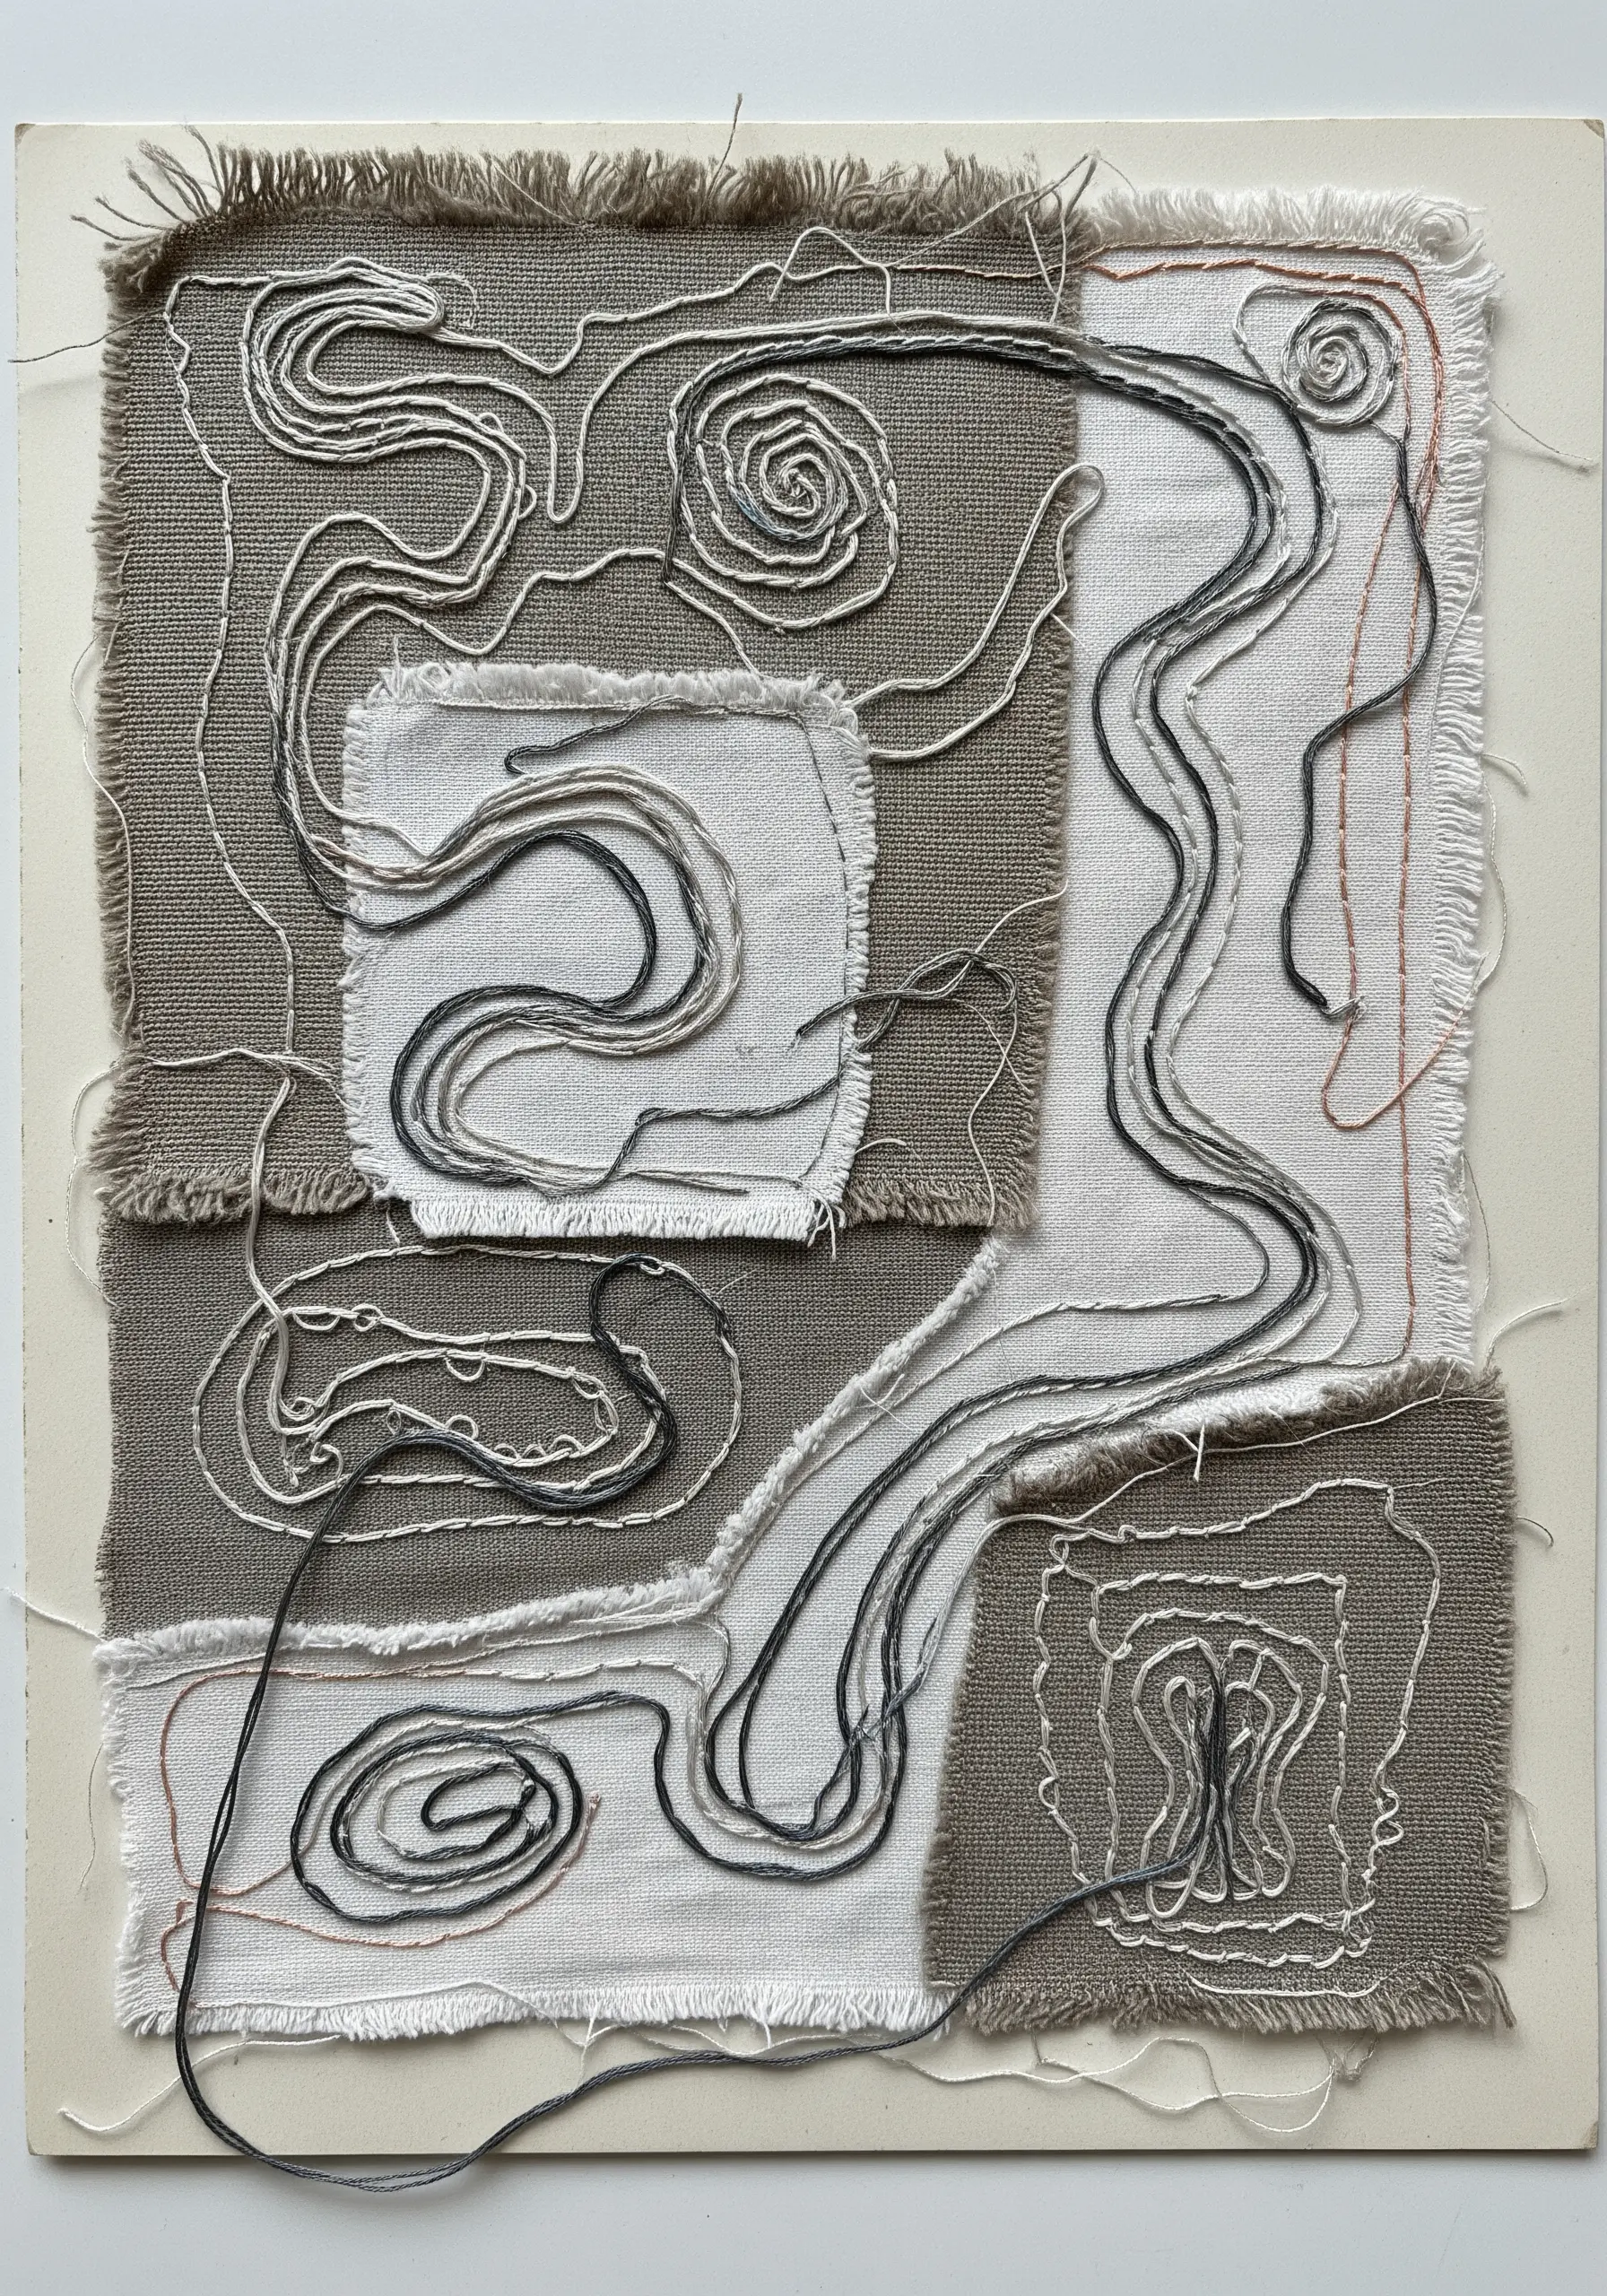
Use your sewing machine not just for seams, but as an expressive drawing tool.
Layer scraps of neutral-toned fabric, drop the feed dogs on your machine, and attach a darning or free-motion embroidery foot.
Guide the fabric freely under the needle to ‘draw’ with thread, creating fluid, gestural lines that also serve to quilt the layers together.
This technique turns thread into an intuitive, painterly line, perfect for abstract compositions.
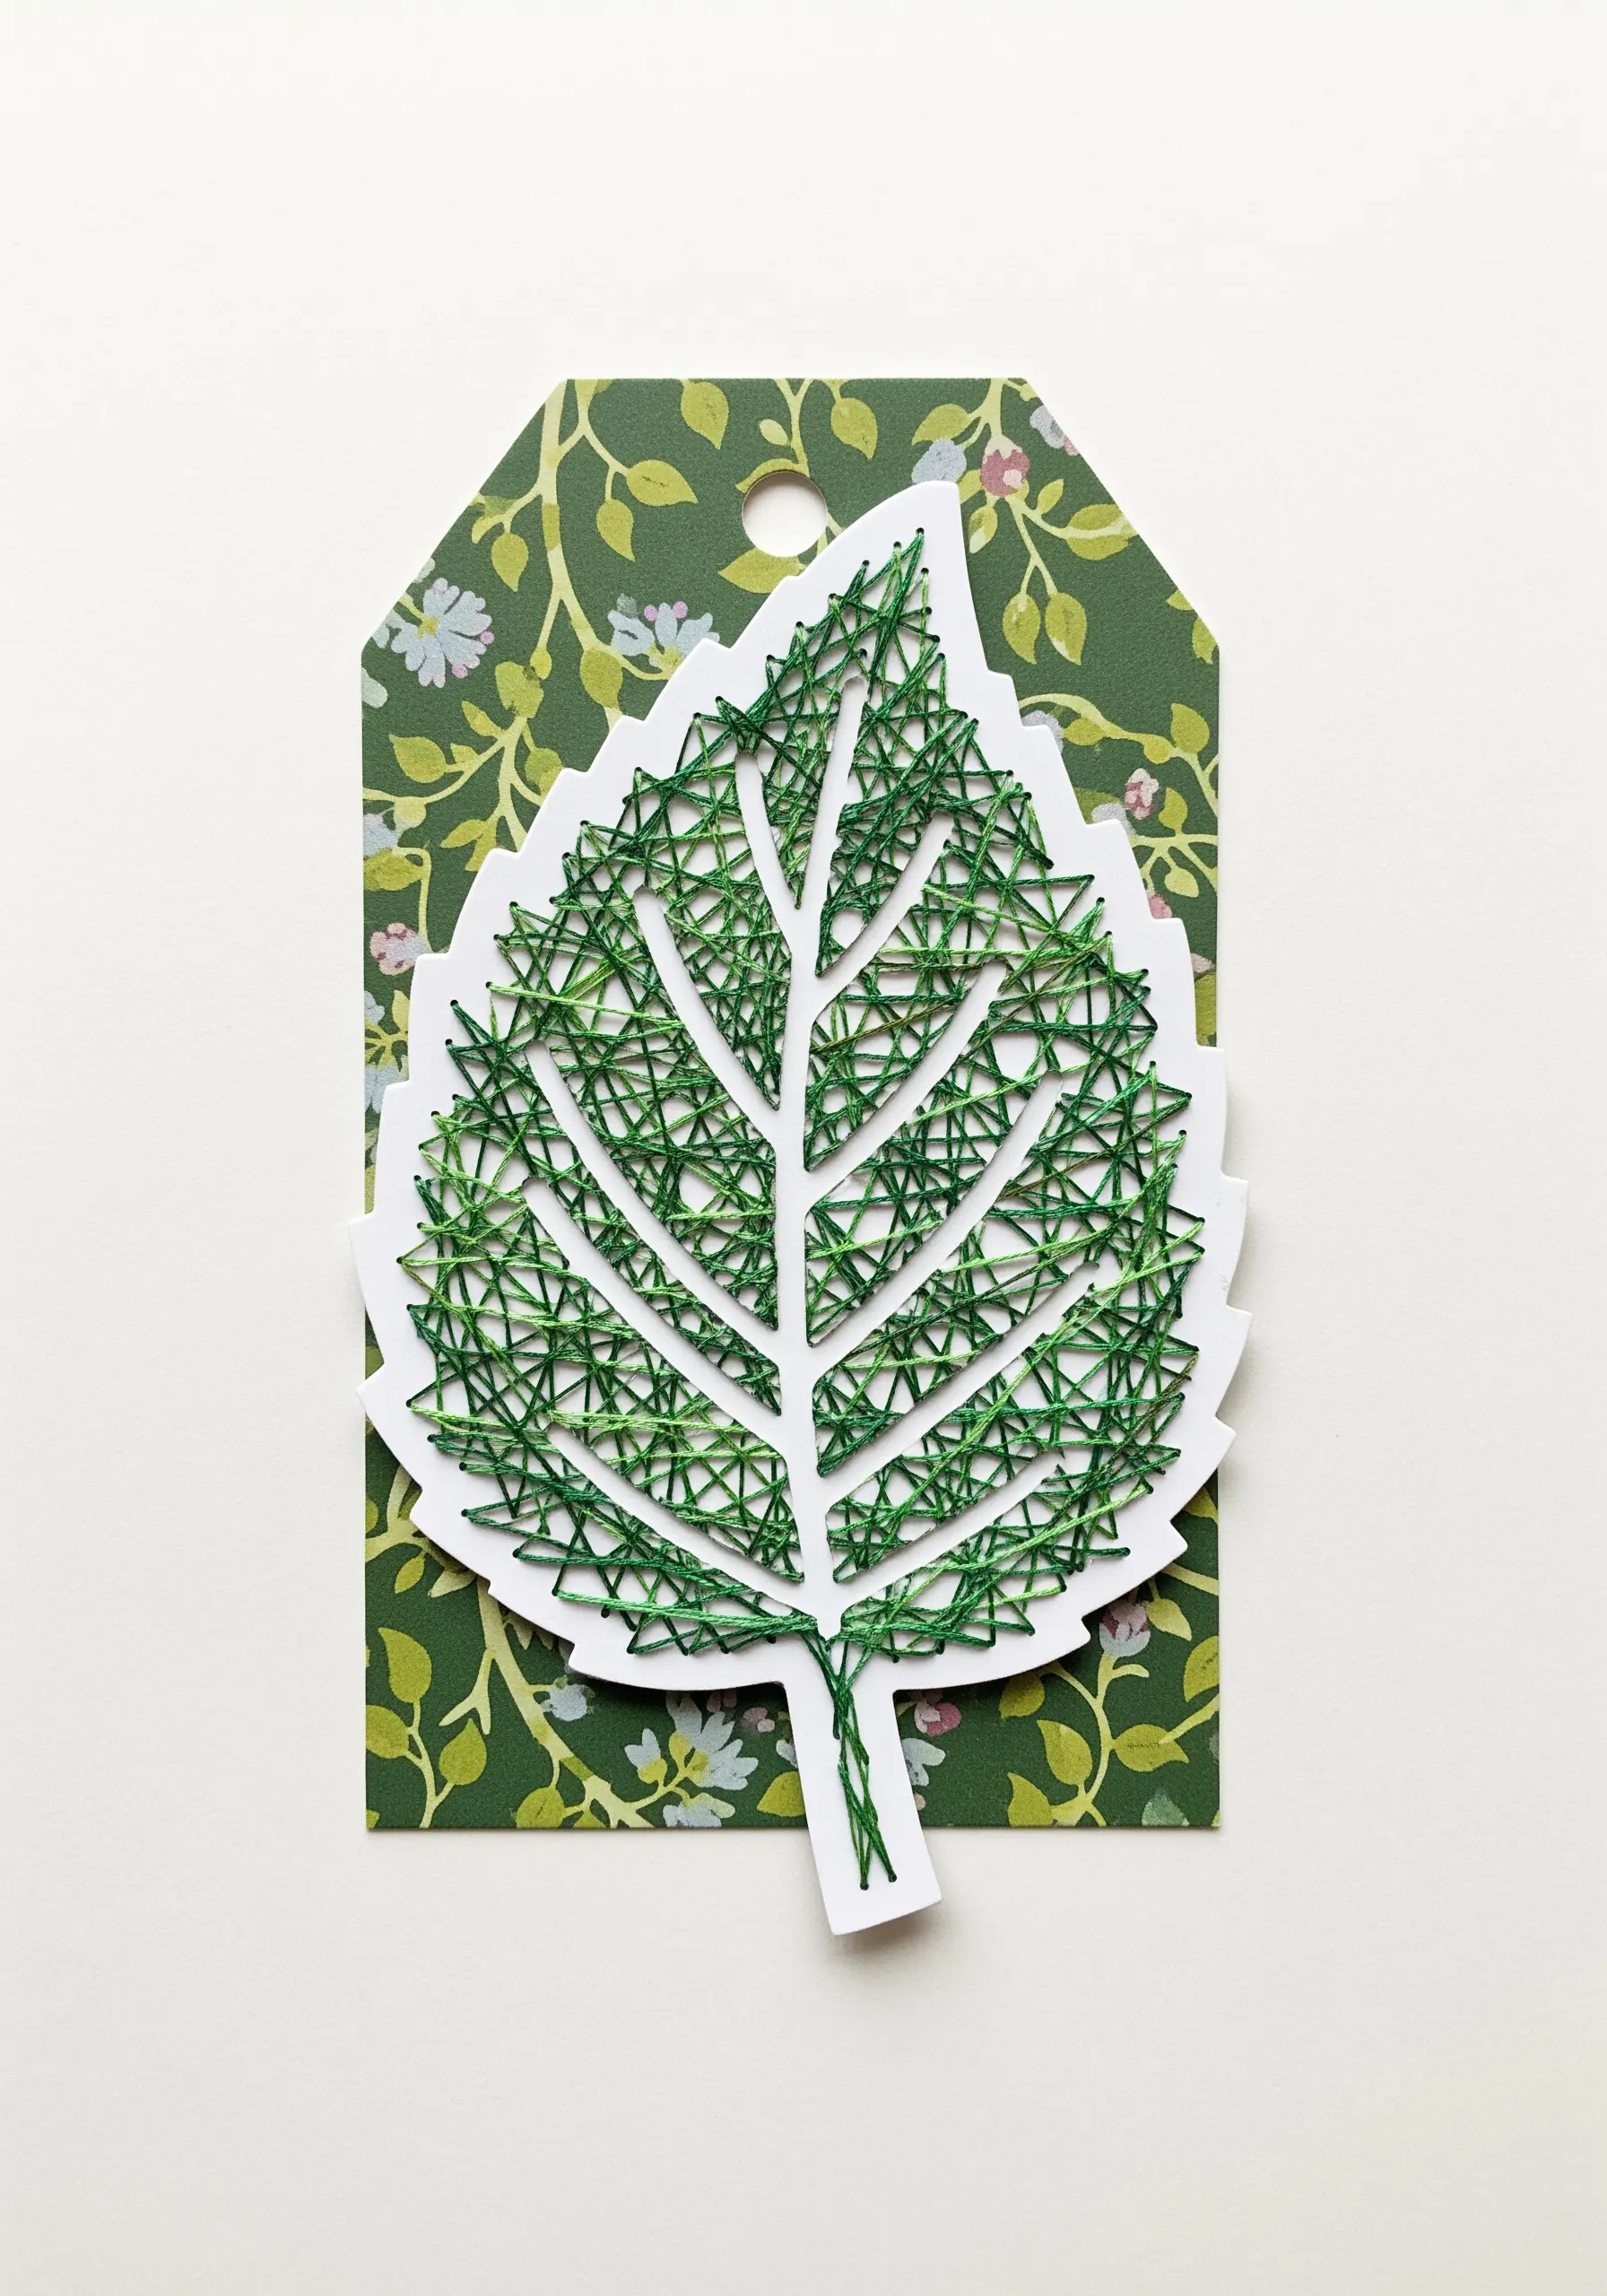
16. Weaving Delicate Mandalas on Skeleton Leaves
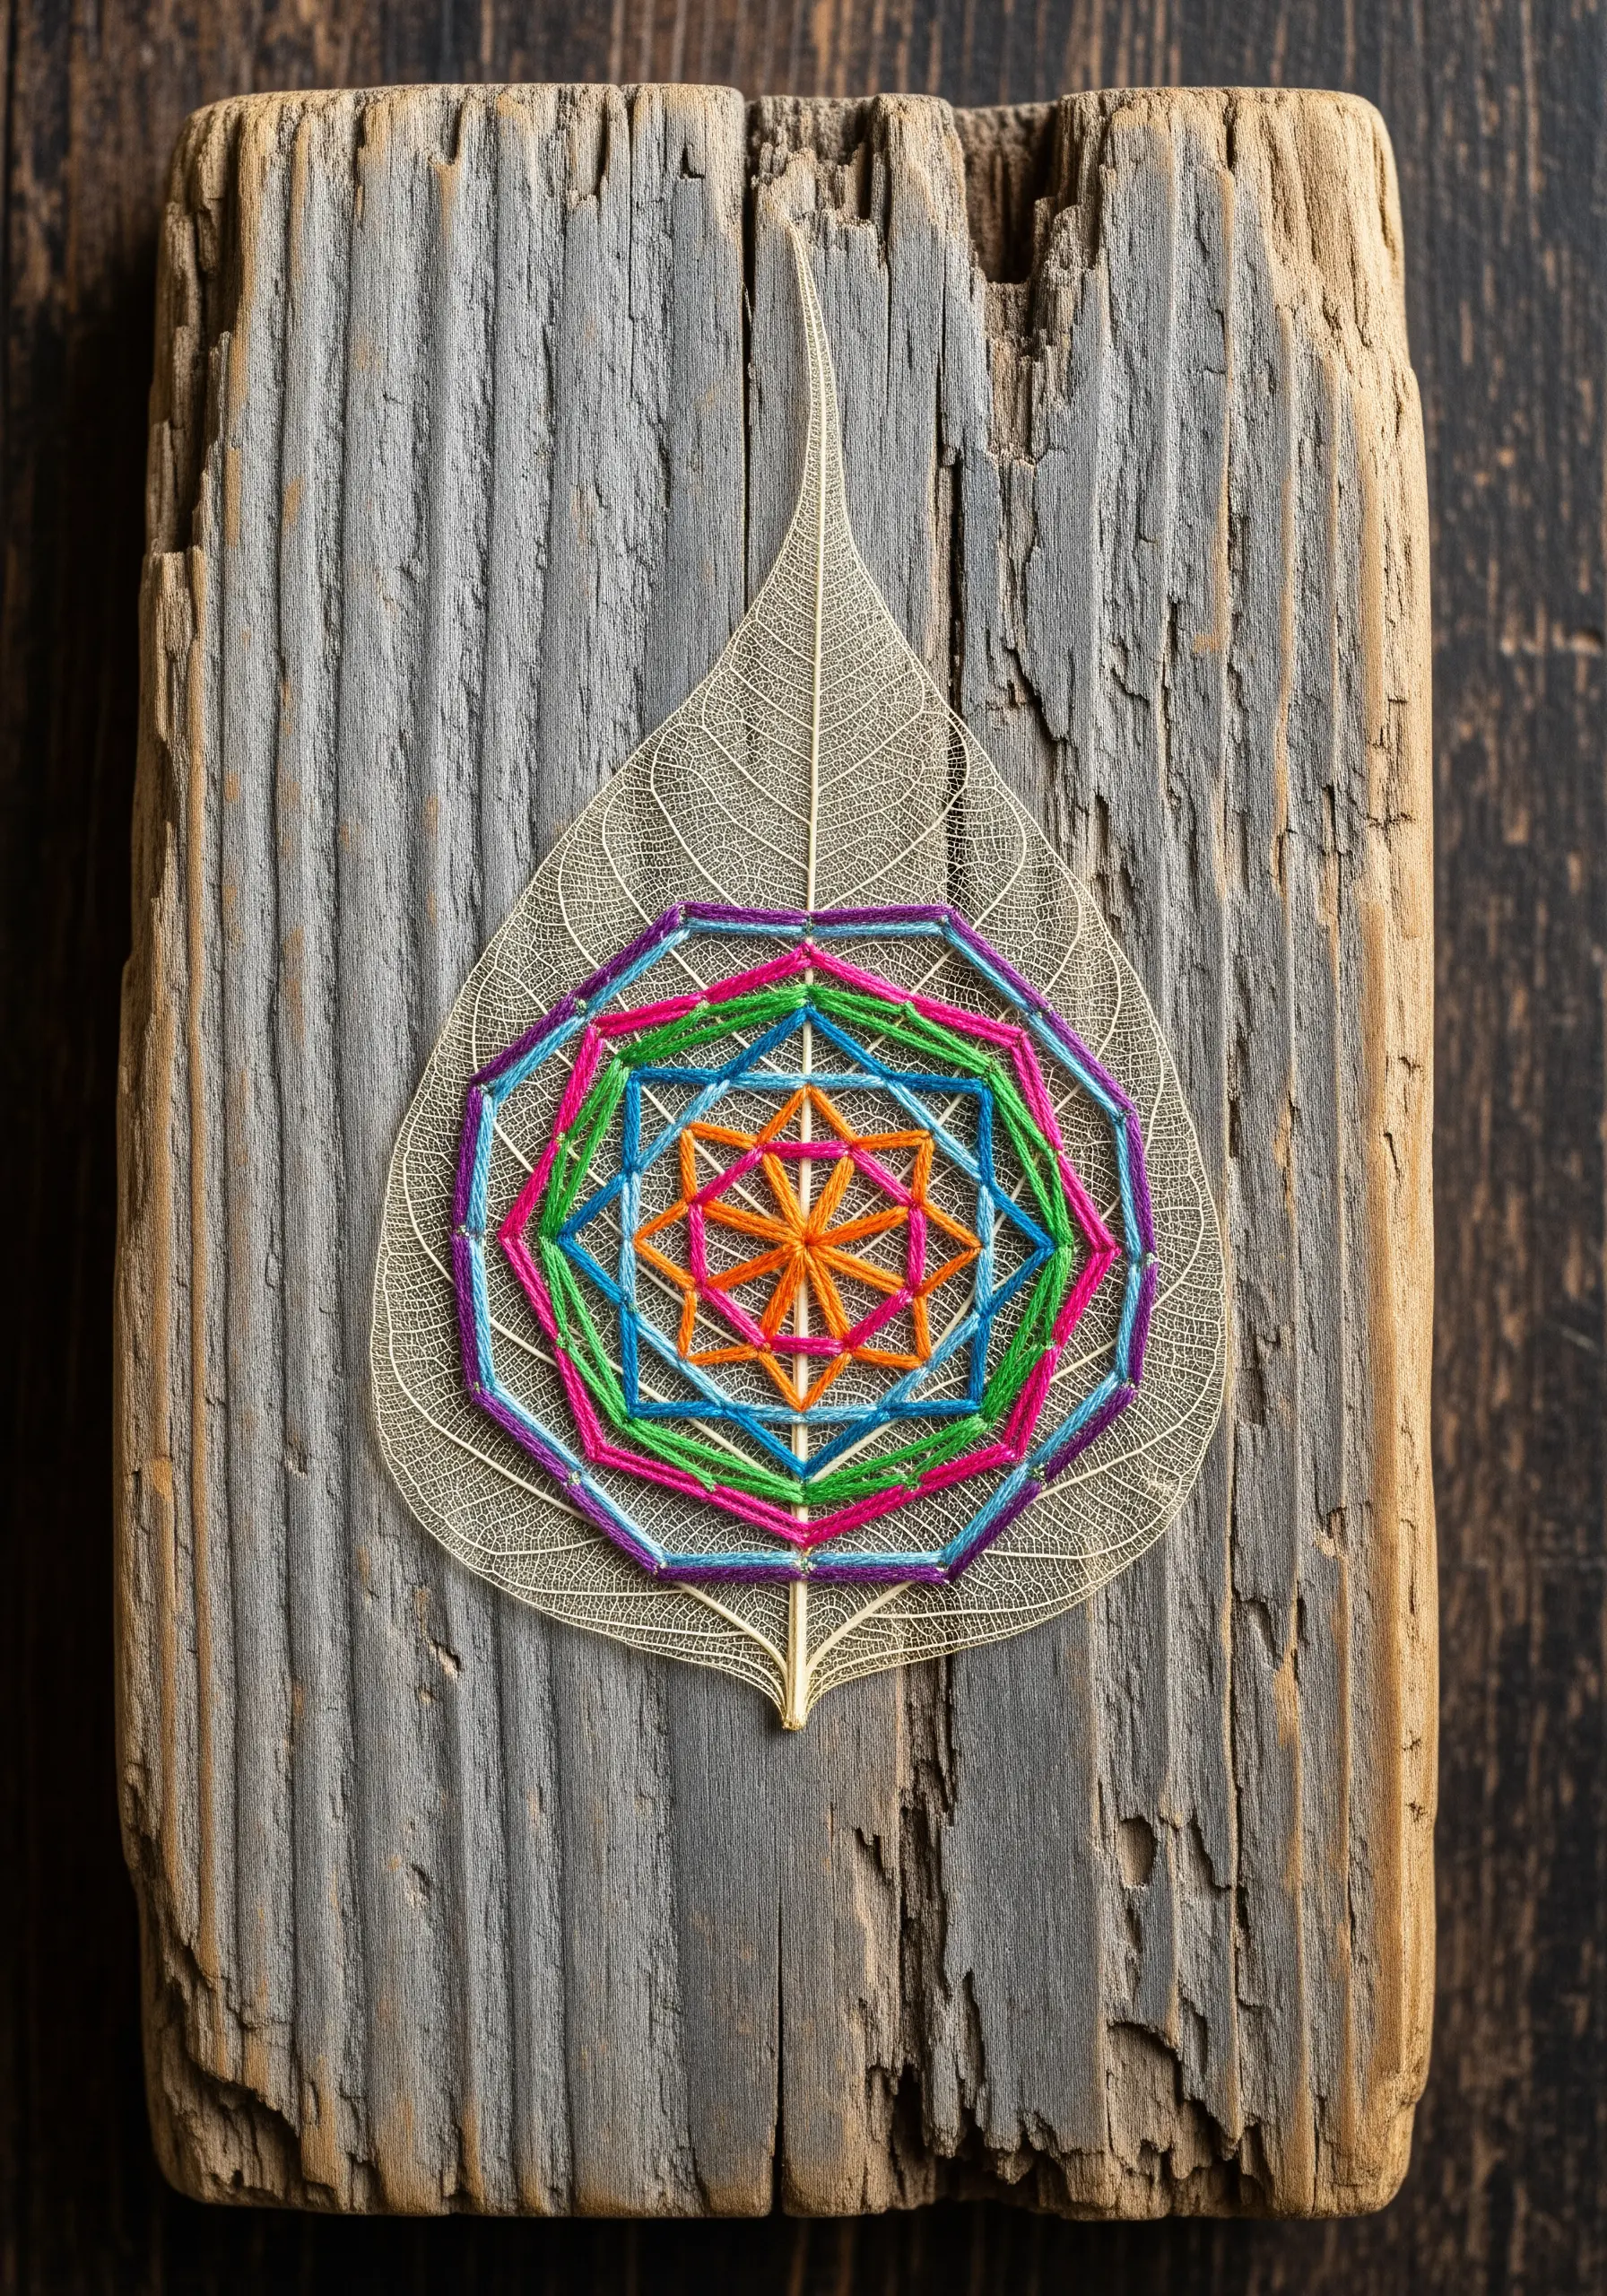
When working on an incredibly fragile surface like a skeleton leaf, you must adapt your technique.
Instead of piercing the leaf, use its natural structure as your loom.
Gently weave a fine, single strand of embroidery floss in and out of the delicate veins with a tapestry needle.
This approach is more about lacing and wrapping than traditional stitching, honoring the leaf’s structure while creating a stunning, ethereal design.
17. Adding Refined Texture with Thread Wrapping
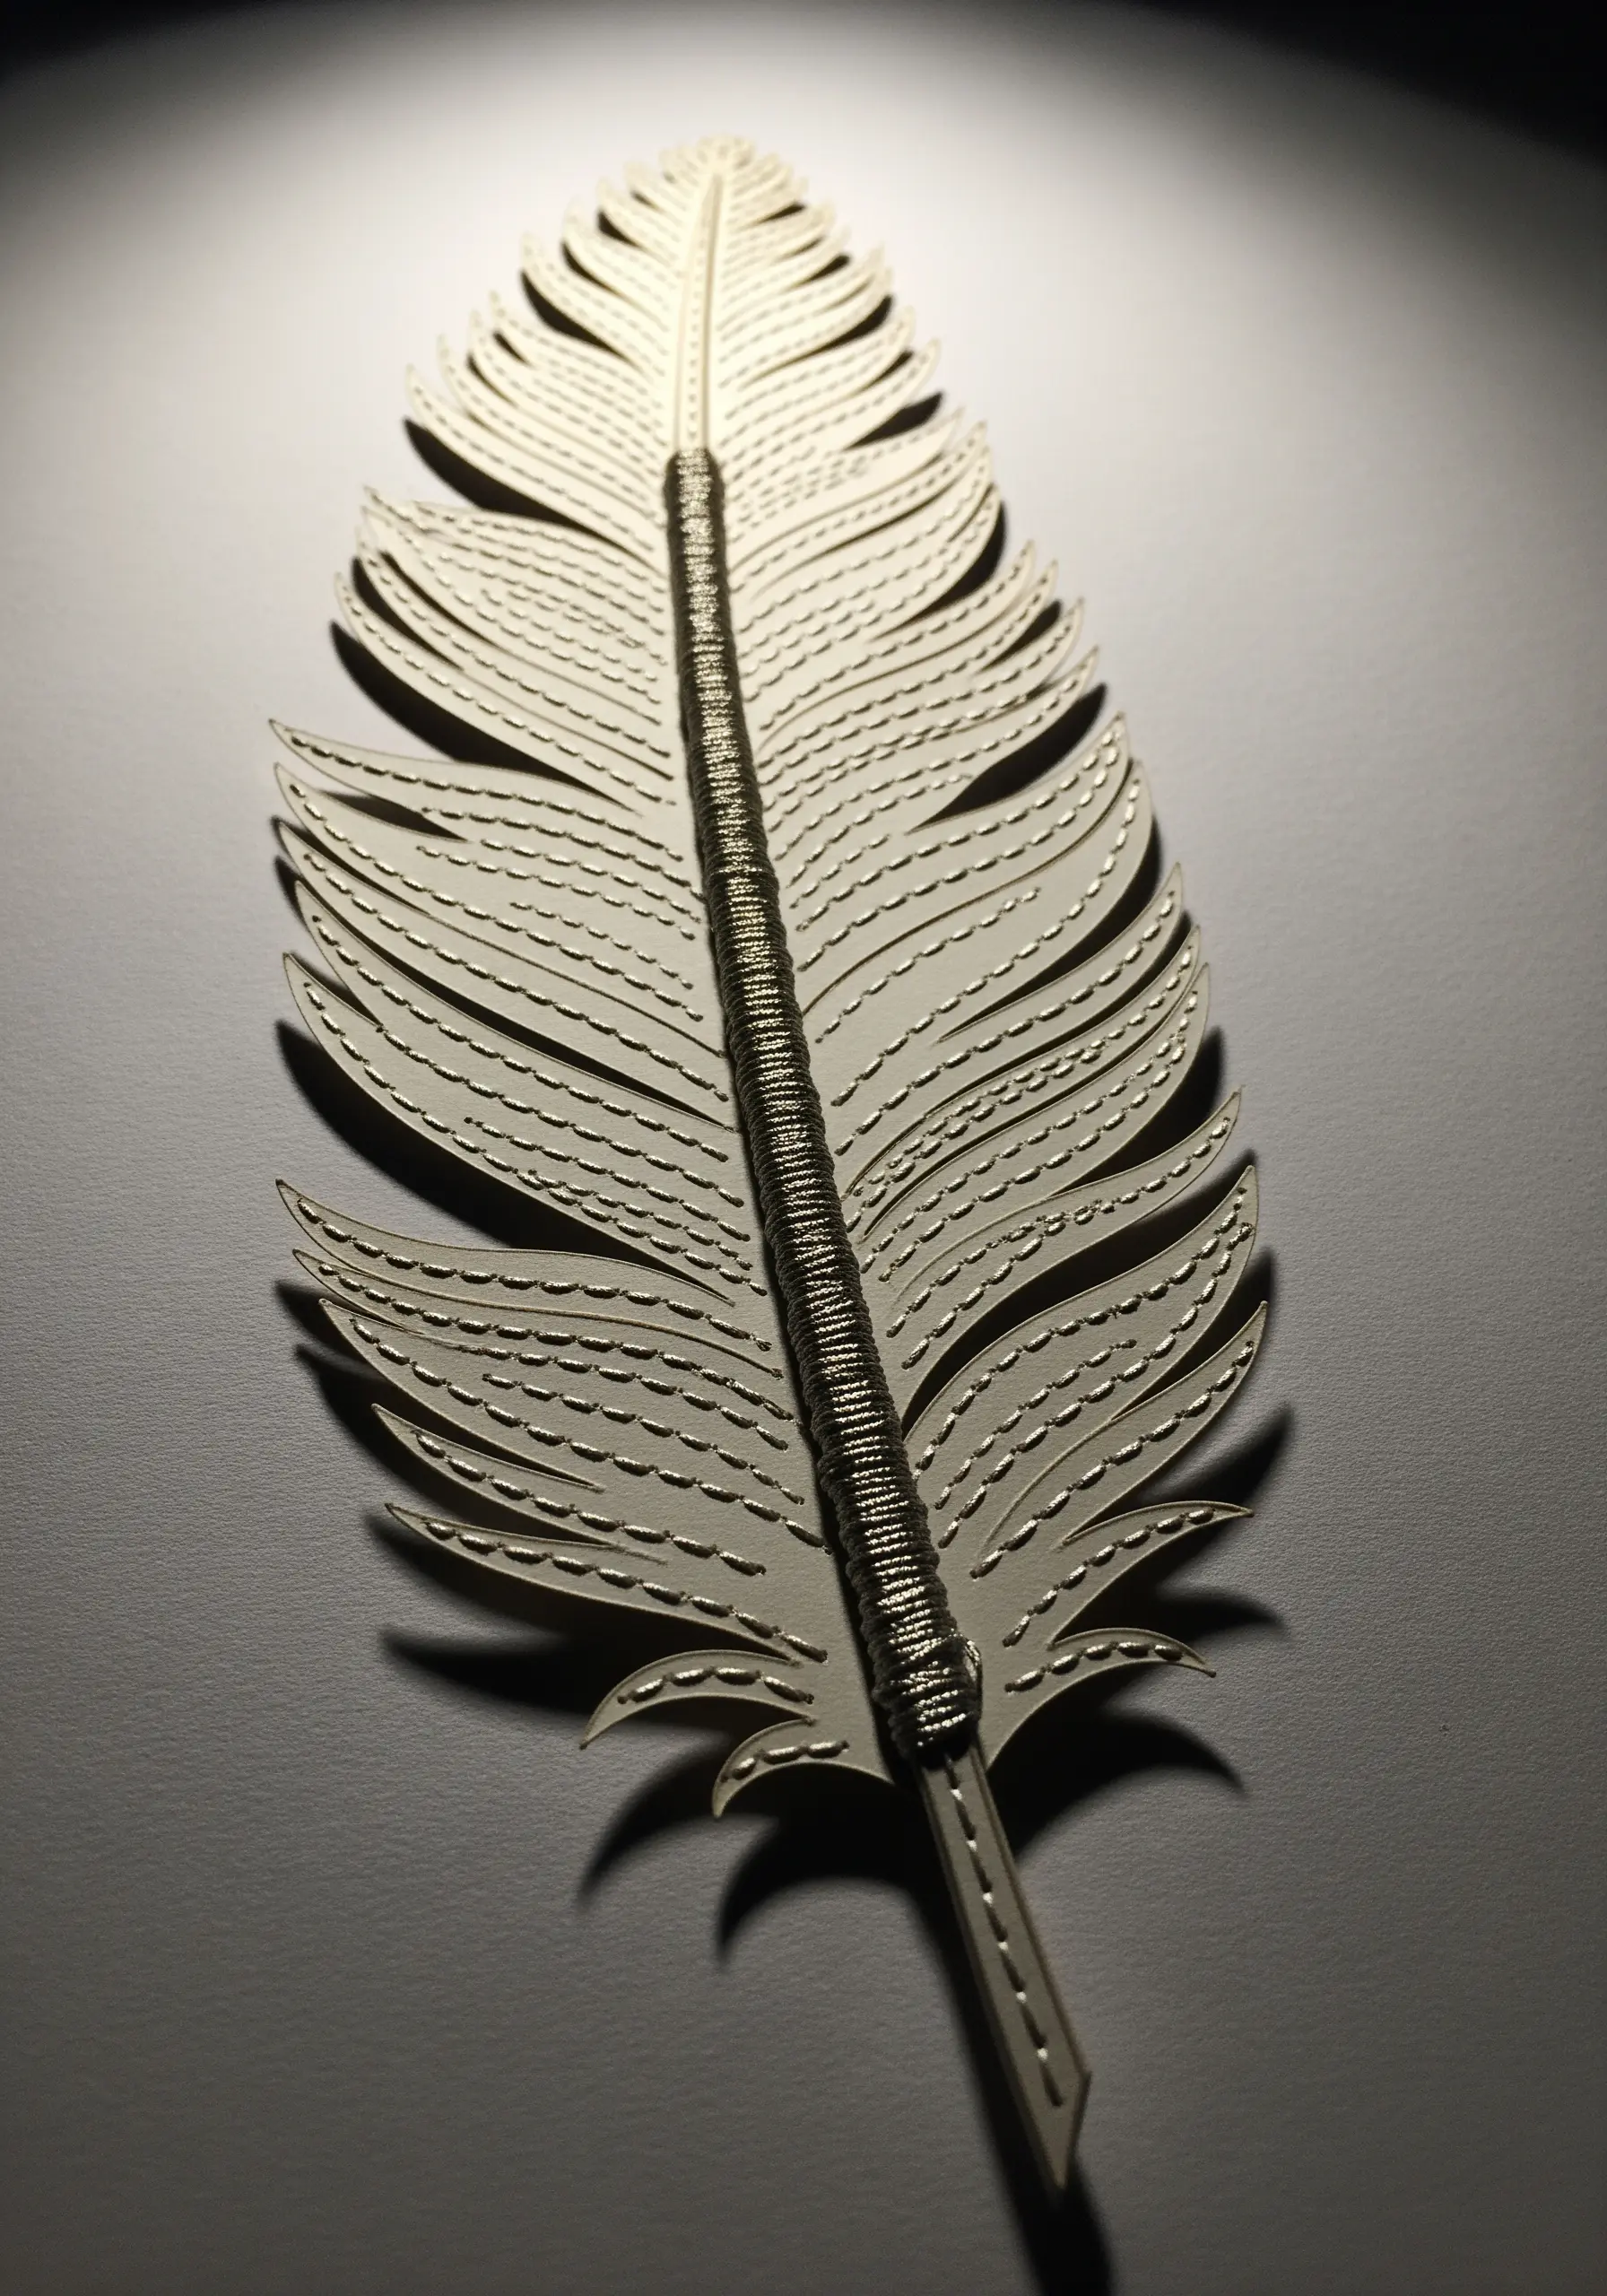
Introduce a sophisticated point of contrast to paper art with the simple technique of thread wrapping.
On a detailed papercut piece, select one element—like the quill of a feather or the stem of a flower—to highlight.
Tightly and neatly wrap it with a smooth, lustrous thread, such as silk or metallic floss.
This minimal addition provides a powerful textural and dimensional shift without any stitching at all. Secure the ends discreetly on the back with a tiny dot of archival glue.
18. Transforming Book Spines with Decorative Binding
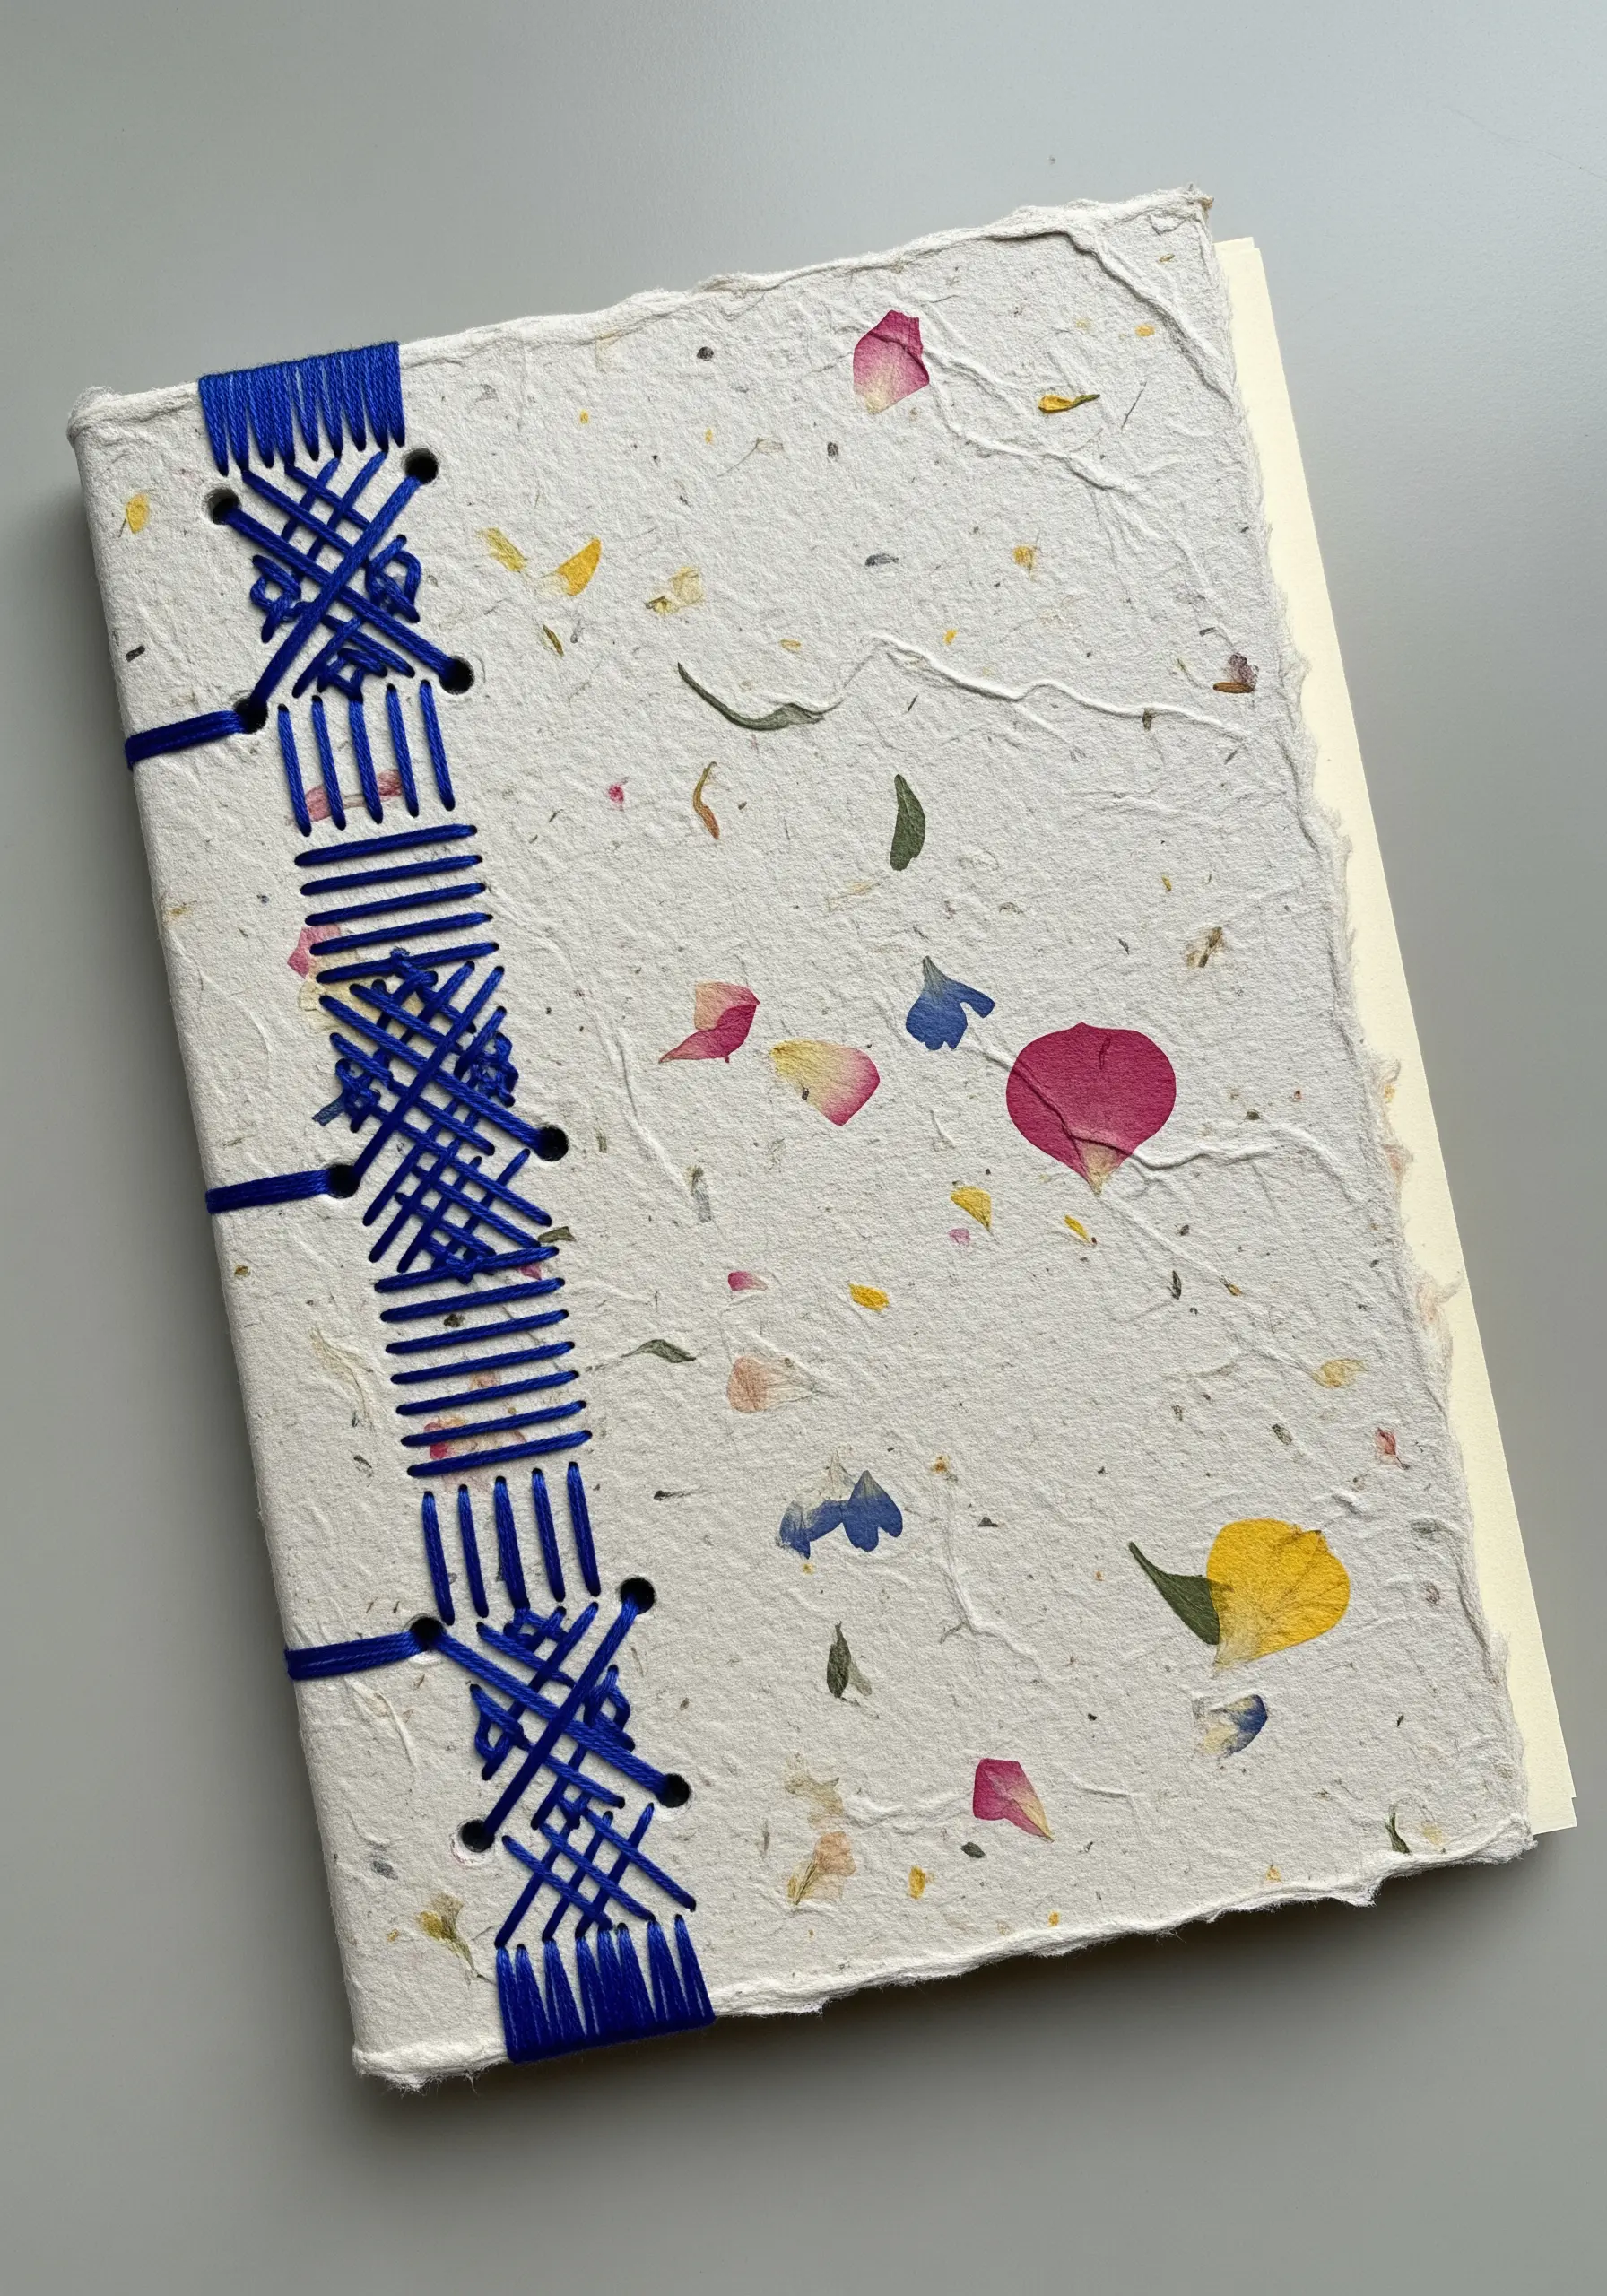
Elevate handmade journals by choosing a bookbinding method where the stitching is a celebrated feature.
Techniques like the Coptic stitch or Japanese stab binding are not only structurally sound but also create beautiful, intricate patterns along the spine.
Use a strong, contrasting thread like waxed linen or pearl cotton to make the functional binding the primary decorative element of your book.
The finished object becomes a testament to the beauty of functional craft.
19. Creating Sculptural Thread Hair on Portraits
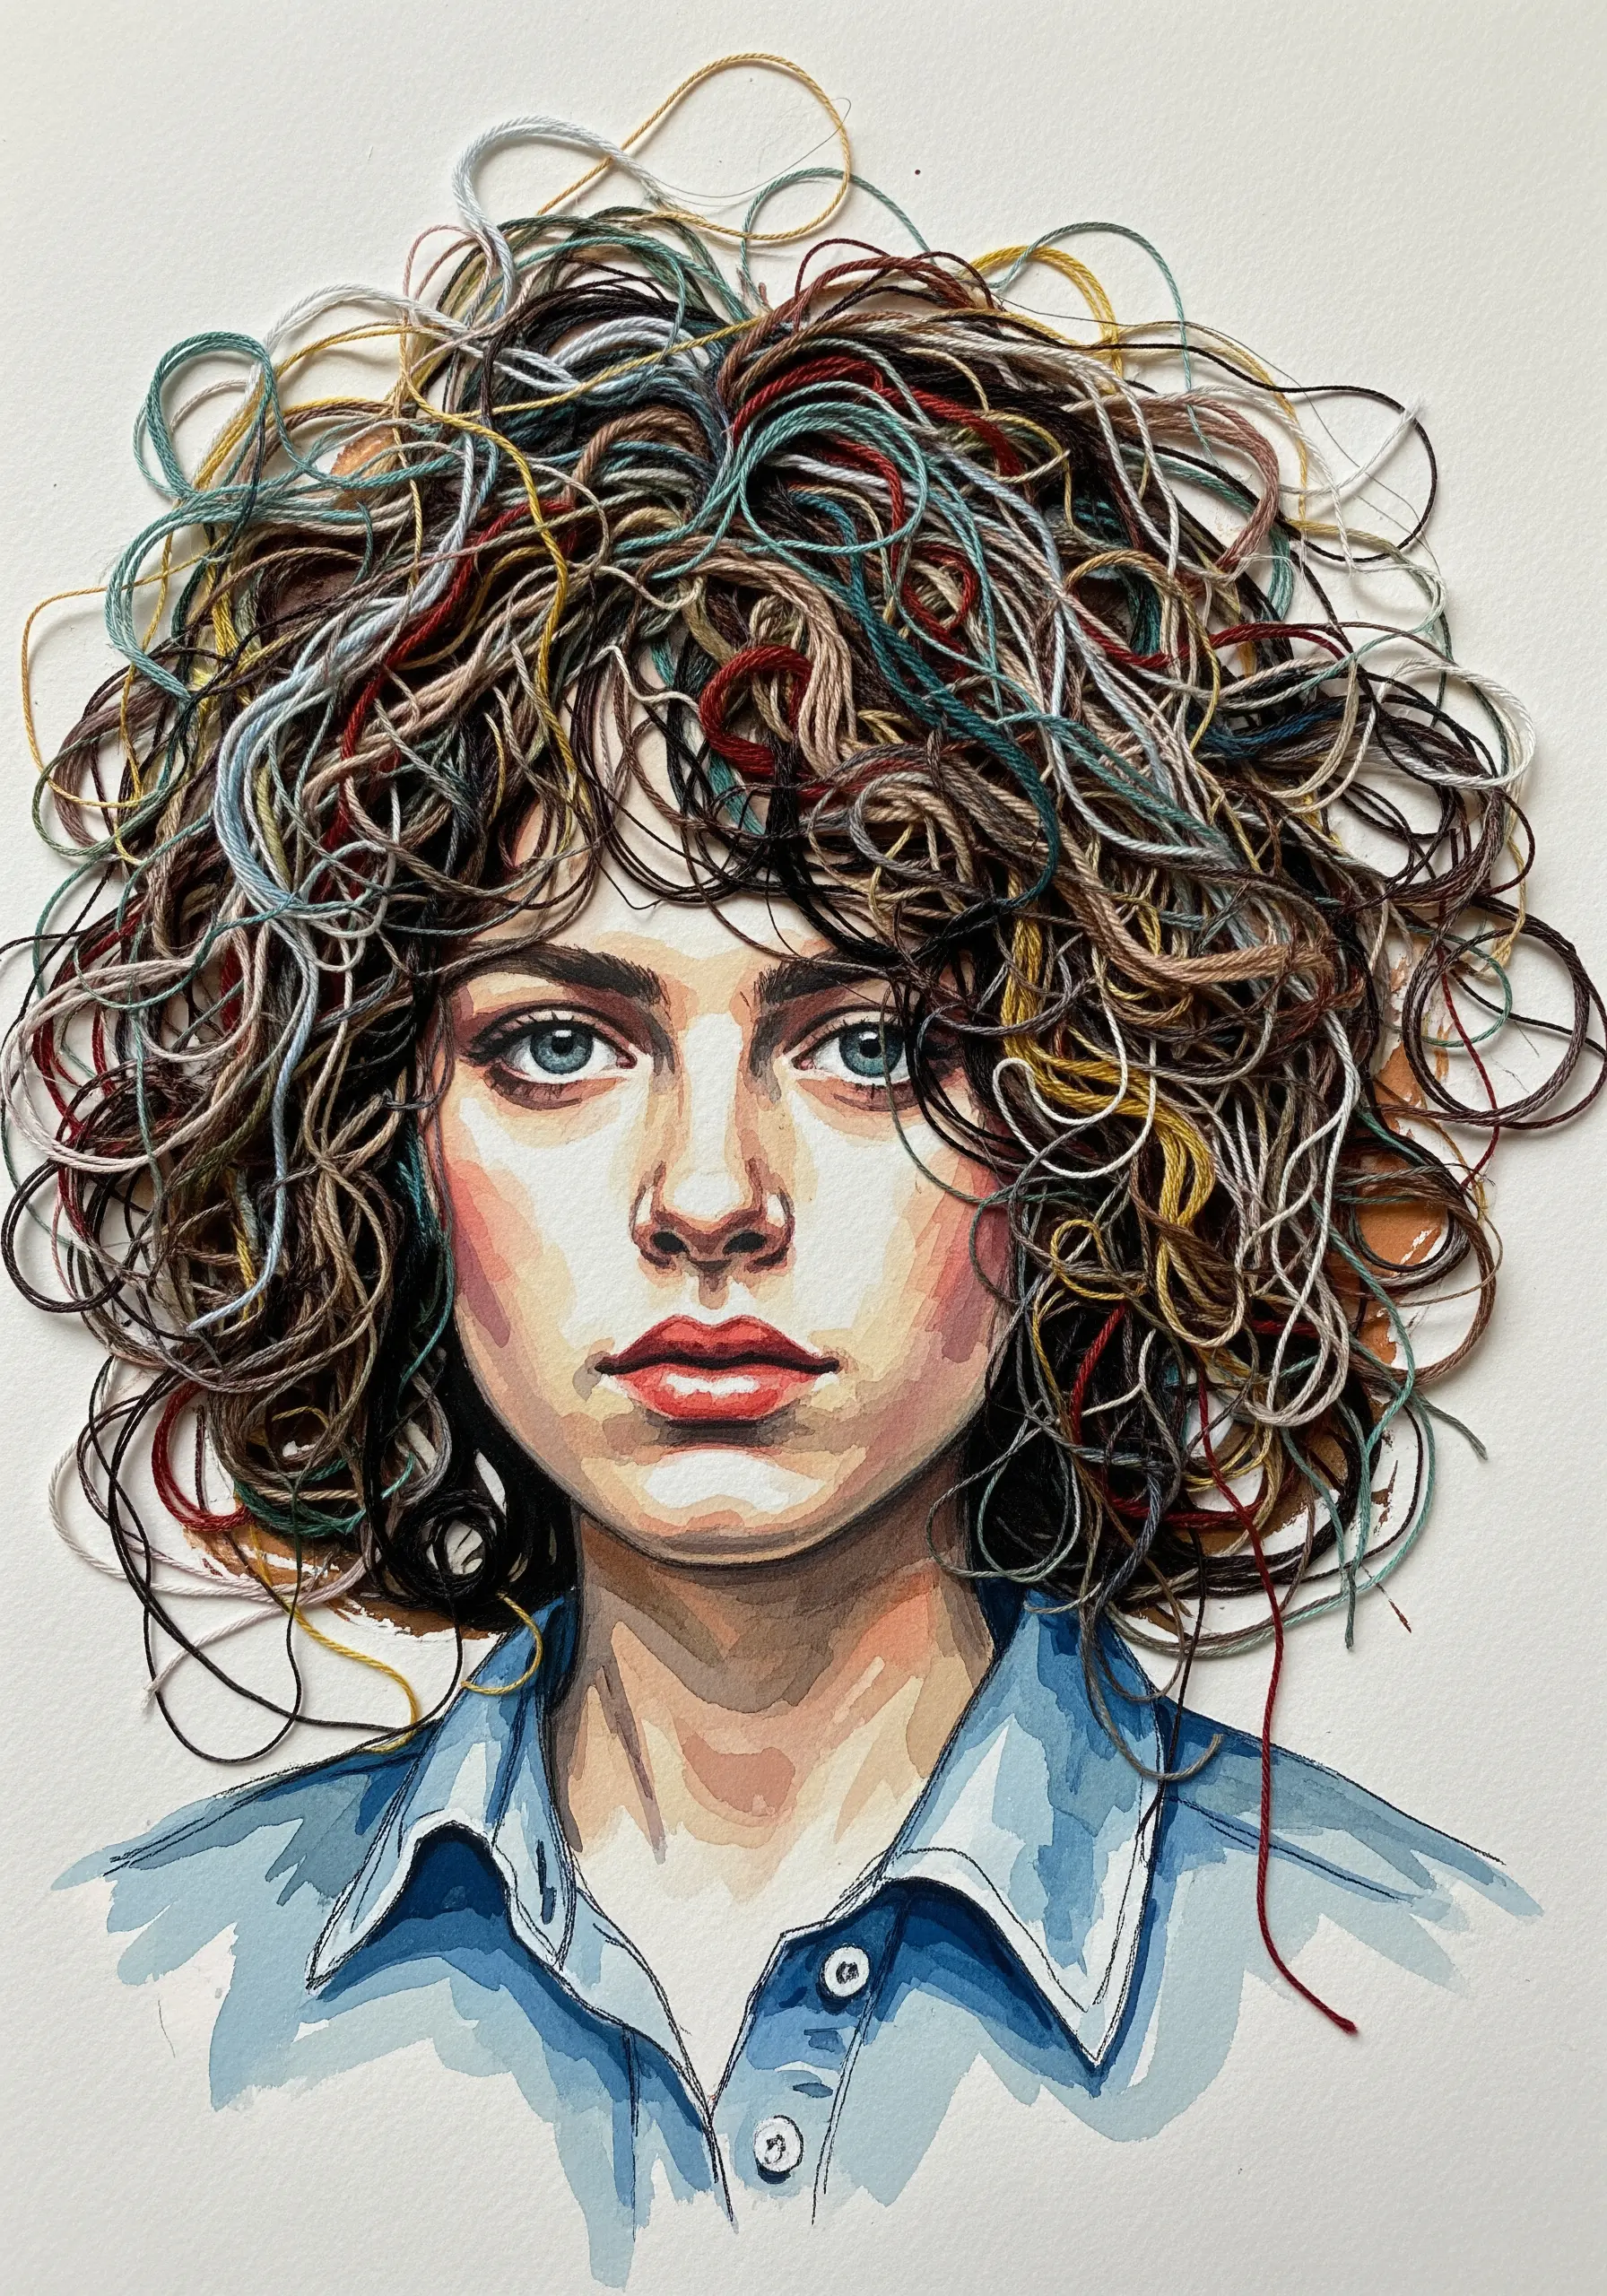
Add breathtaking dimension and realism to a painted portrait by rendering the hair in thread.
Once your watercolor or ink portrait on heavy paper is dry, begin adding loose stitches where the hair should be.
Use a mix of thread types, colors, and thicknesses, and avoid pulling them taut. Allow the threads to loop, curl, and layer to build up natural volume and movement.
This method brilliantly bridges the gap between a 2D image and a 3D object, resulting in unforgettable hand-stitched portrait wall art ideas.
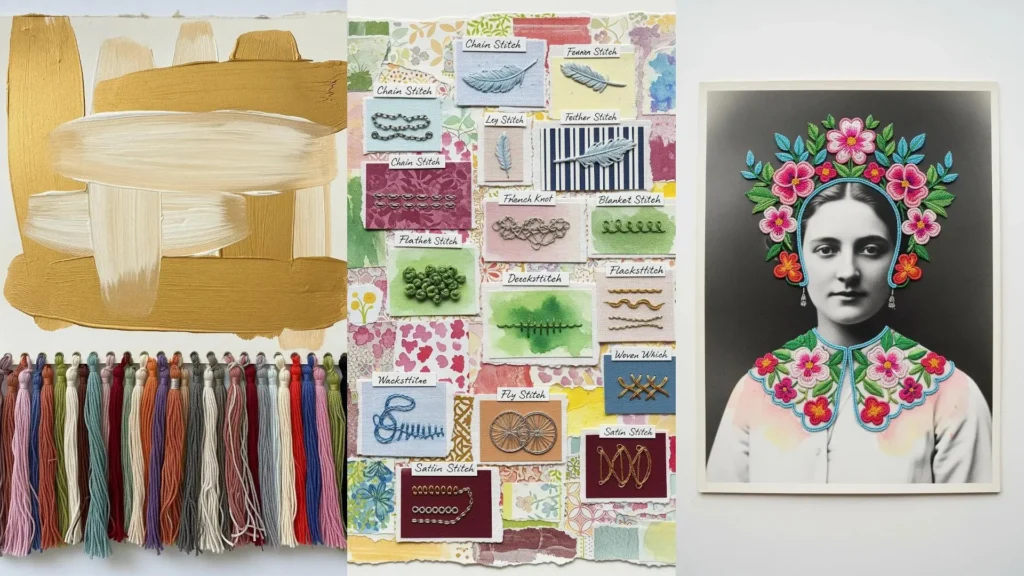
20. Curating a Mixed-Media Stitch Encyclopedia
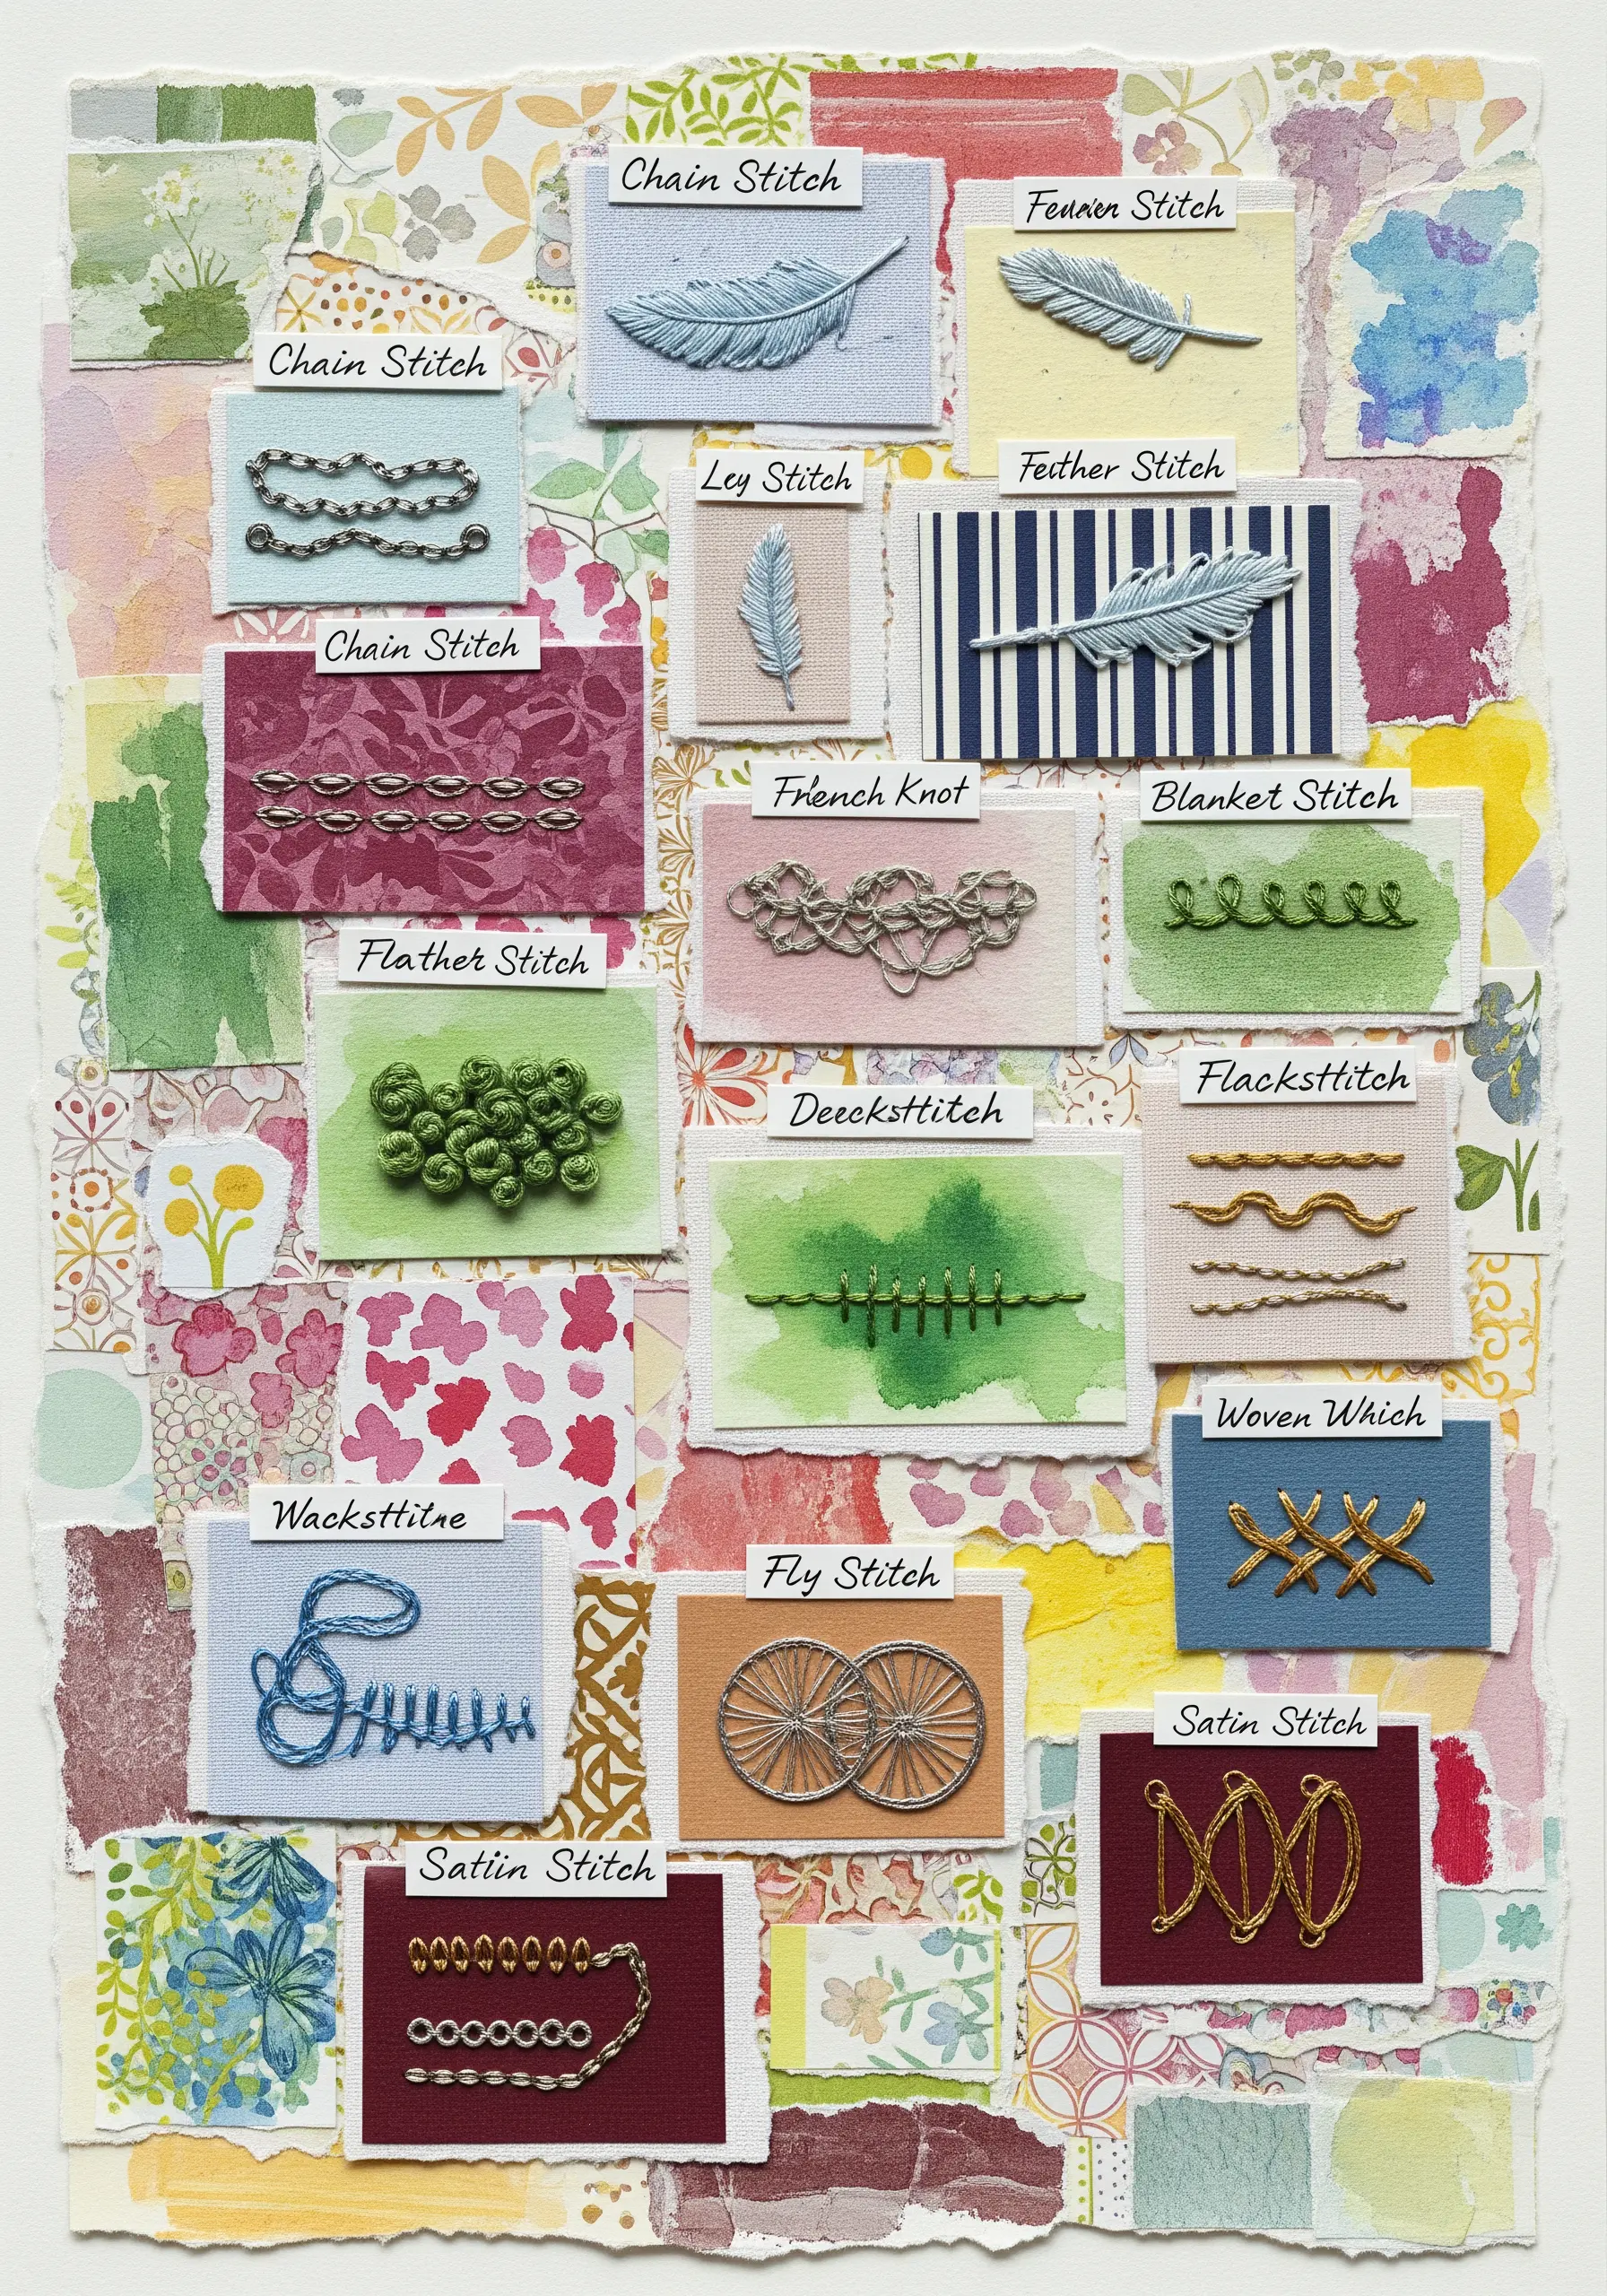
Elevate your stitch sampler from a practice cloth to a finished piece of art.
Work your individual stitch examples on small, separate scraps of fabric.
Then, arrange and mount these swatches onto a larger, collaged background made from painted papers, maps, or book pages.
Add small, typed labels to identify each stitch.
This approach turns your stitch library into a curated, decorative piece that is both beautiful and educational.
21. Letting Alcohol Ink Guide Your Stitches
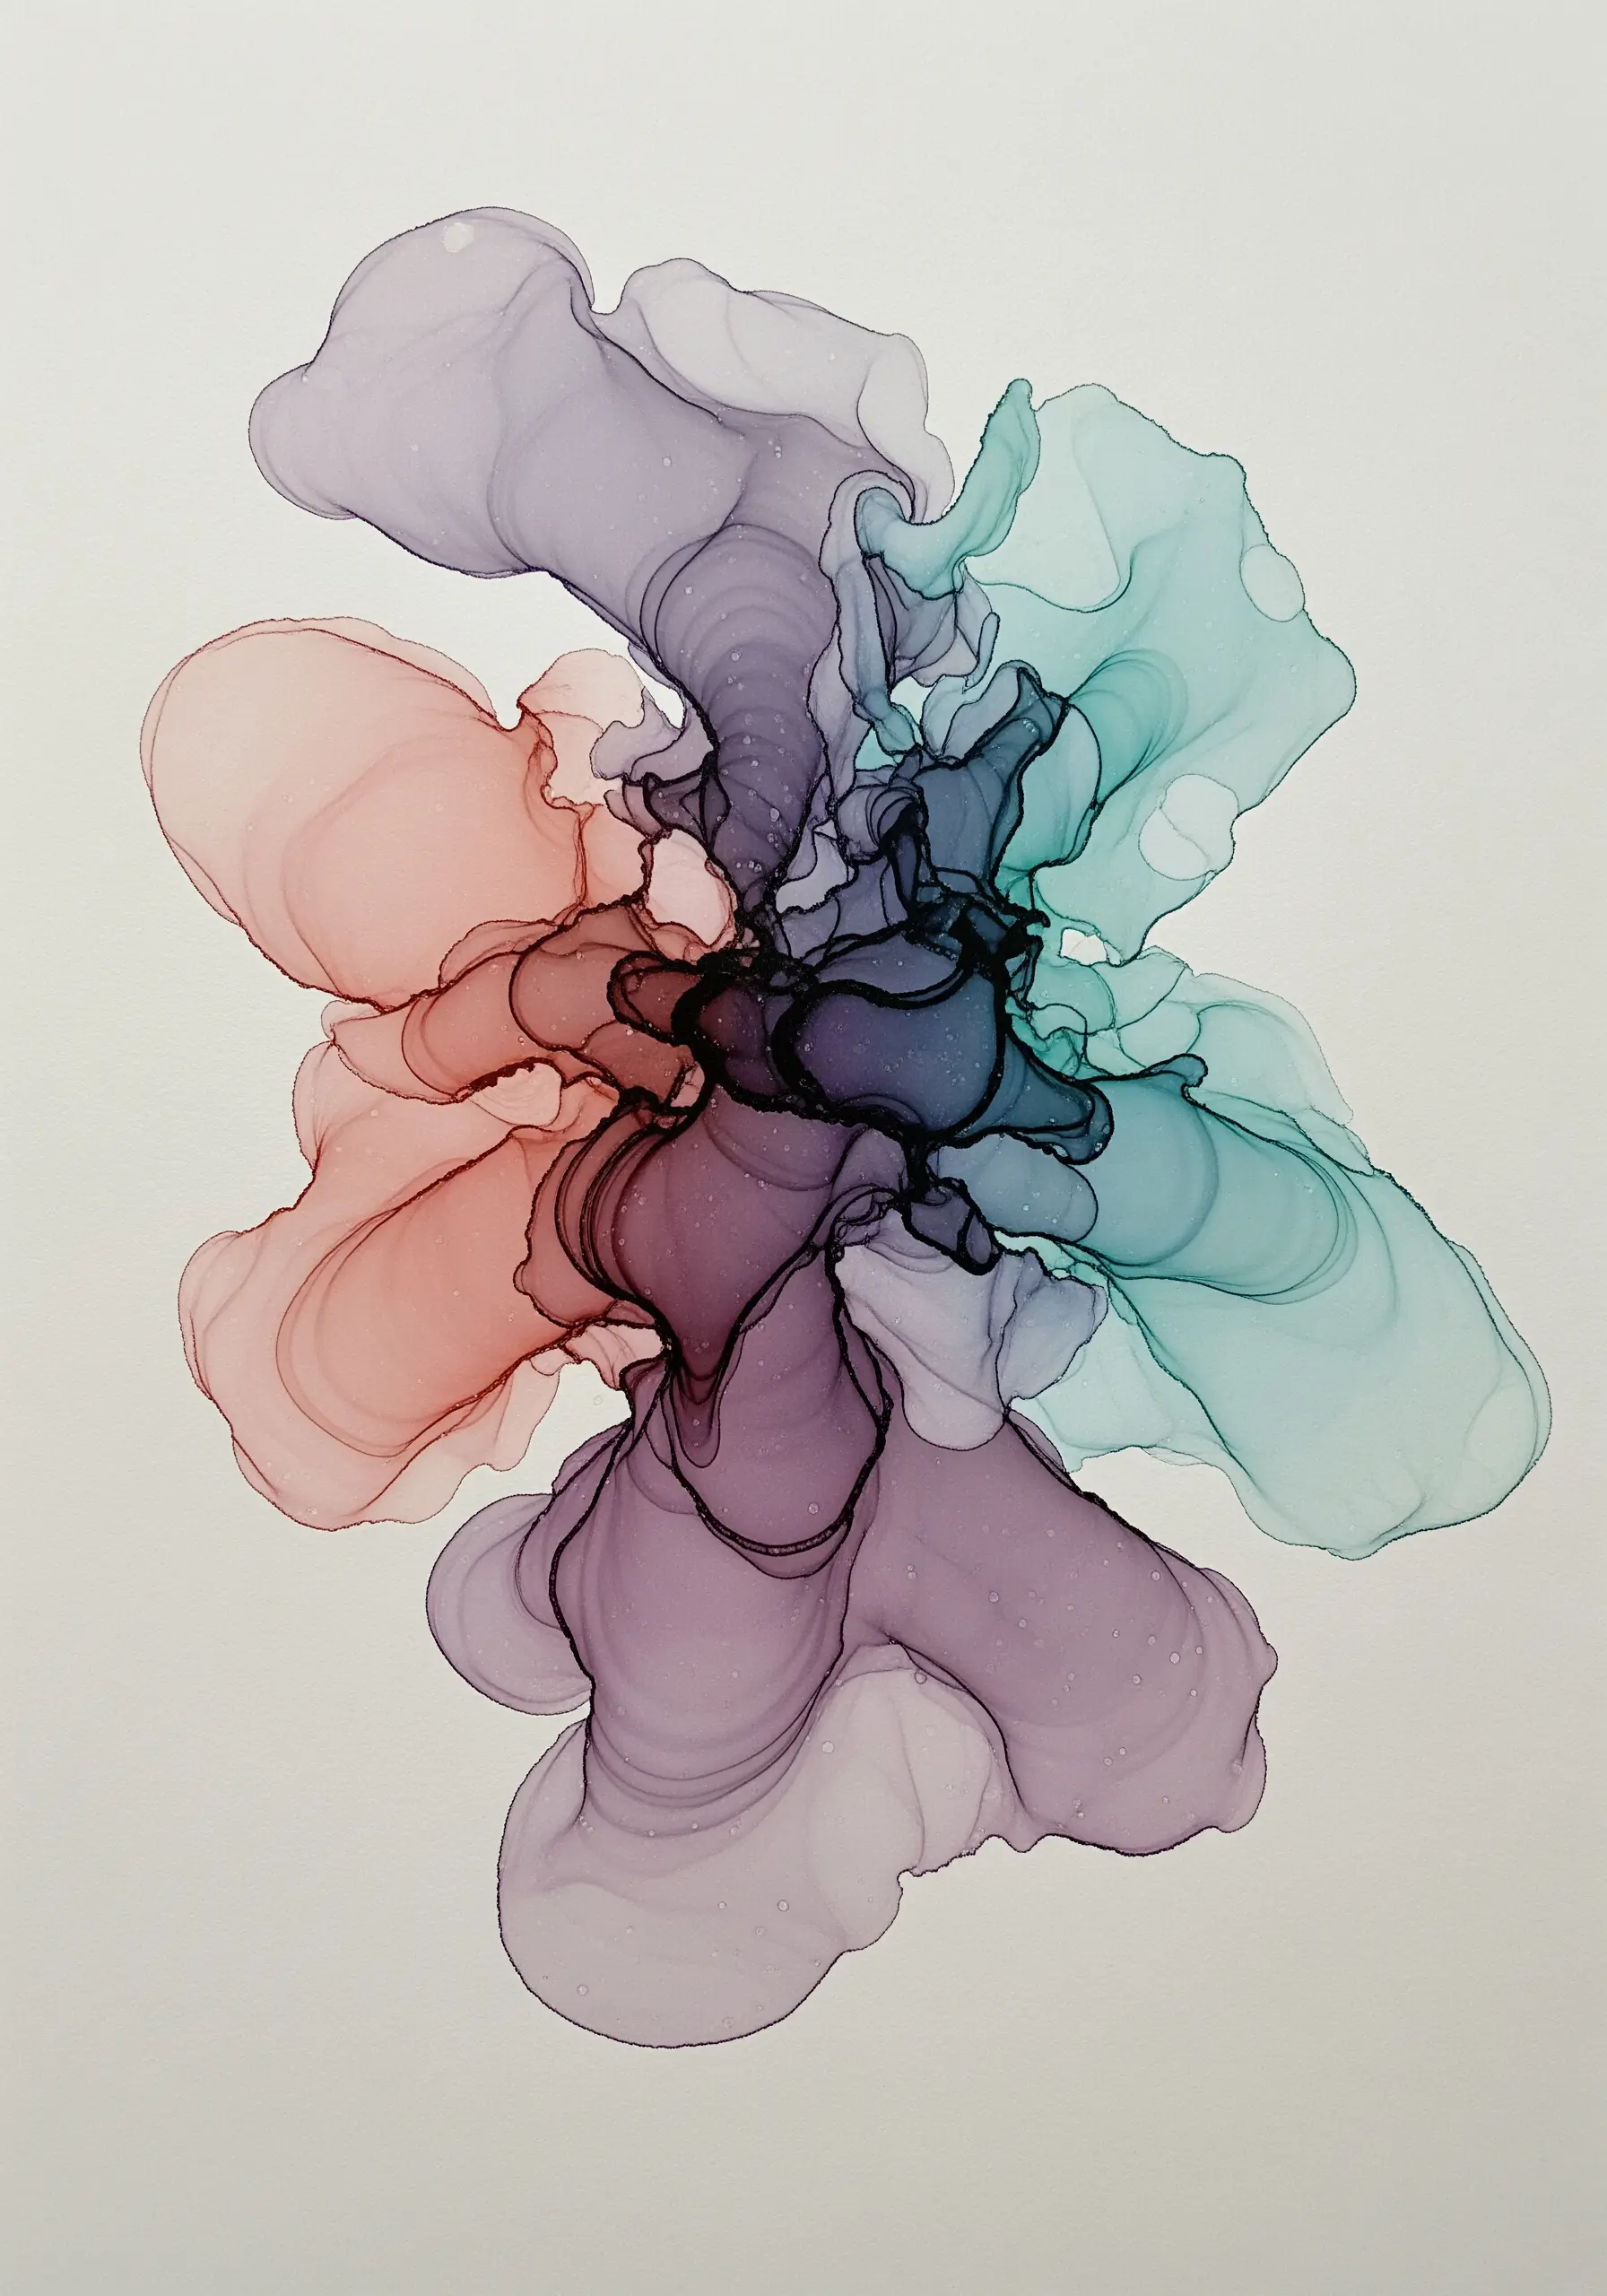
Use the unpredictable, organic forms of alcohol ink as a map for your embroidery.
Allow the inks to bloom and blend on waterproof paper or a gessoed panel. Once completely dry, study the patterns that have formed.
Use the delicate, hard edges of the ink pools as your guide, tracing them with a fine backstitch or filling entire areas of color with tiny seed stitches.
Your thread will bring a grounding structure to the ink’s beautiful, fluid chaos.
22. Stitching Beaded Rain from Paper Clouds
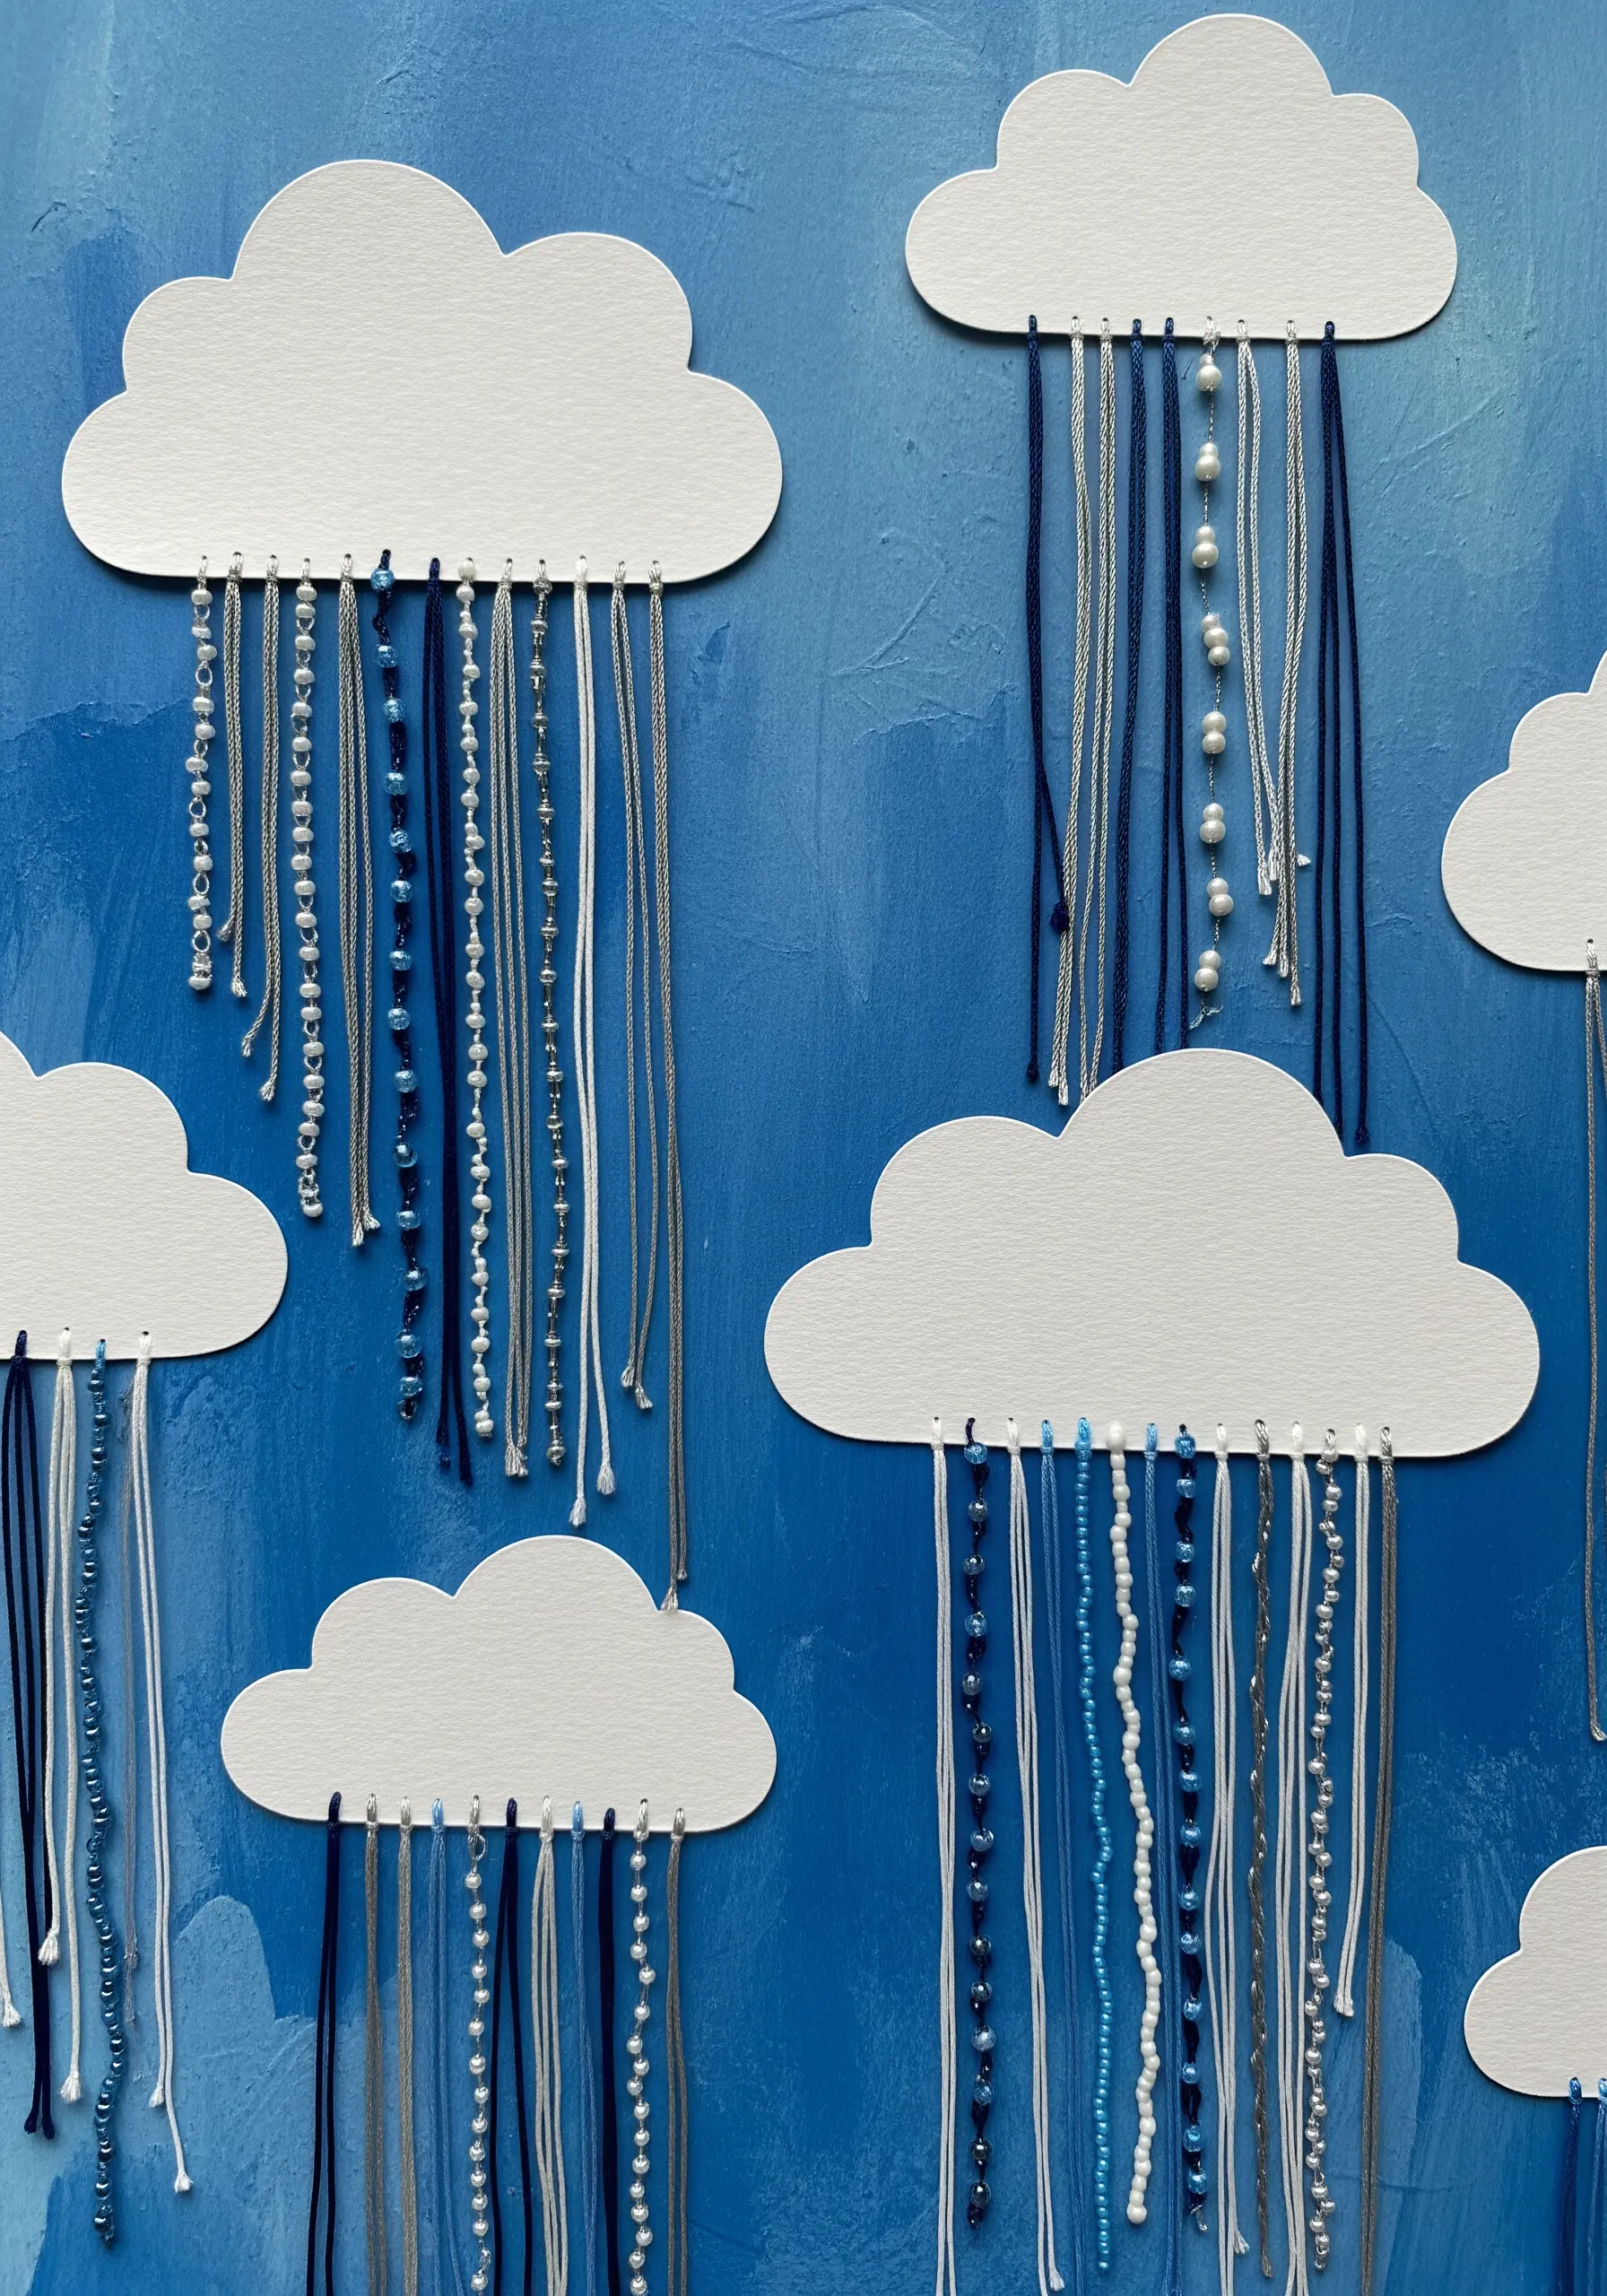
Create whimsical, kinetic art by combining papercraft, thread, and beads.
Cut your main shapes from sturdy cardstock and use a needle or small punch to create a row of holes along the bottom edge.
Using a single thread for each drop, string on beads in patterns, securing them with knots.
The thread acts as a flexible, durable structure for your beadwork, allowing you to create beautiful cascades of color and light that move with the slightest breeze.
23. Edging Decoupage with a Blanket Stitch Finish
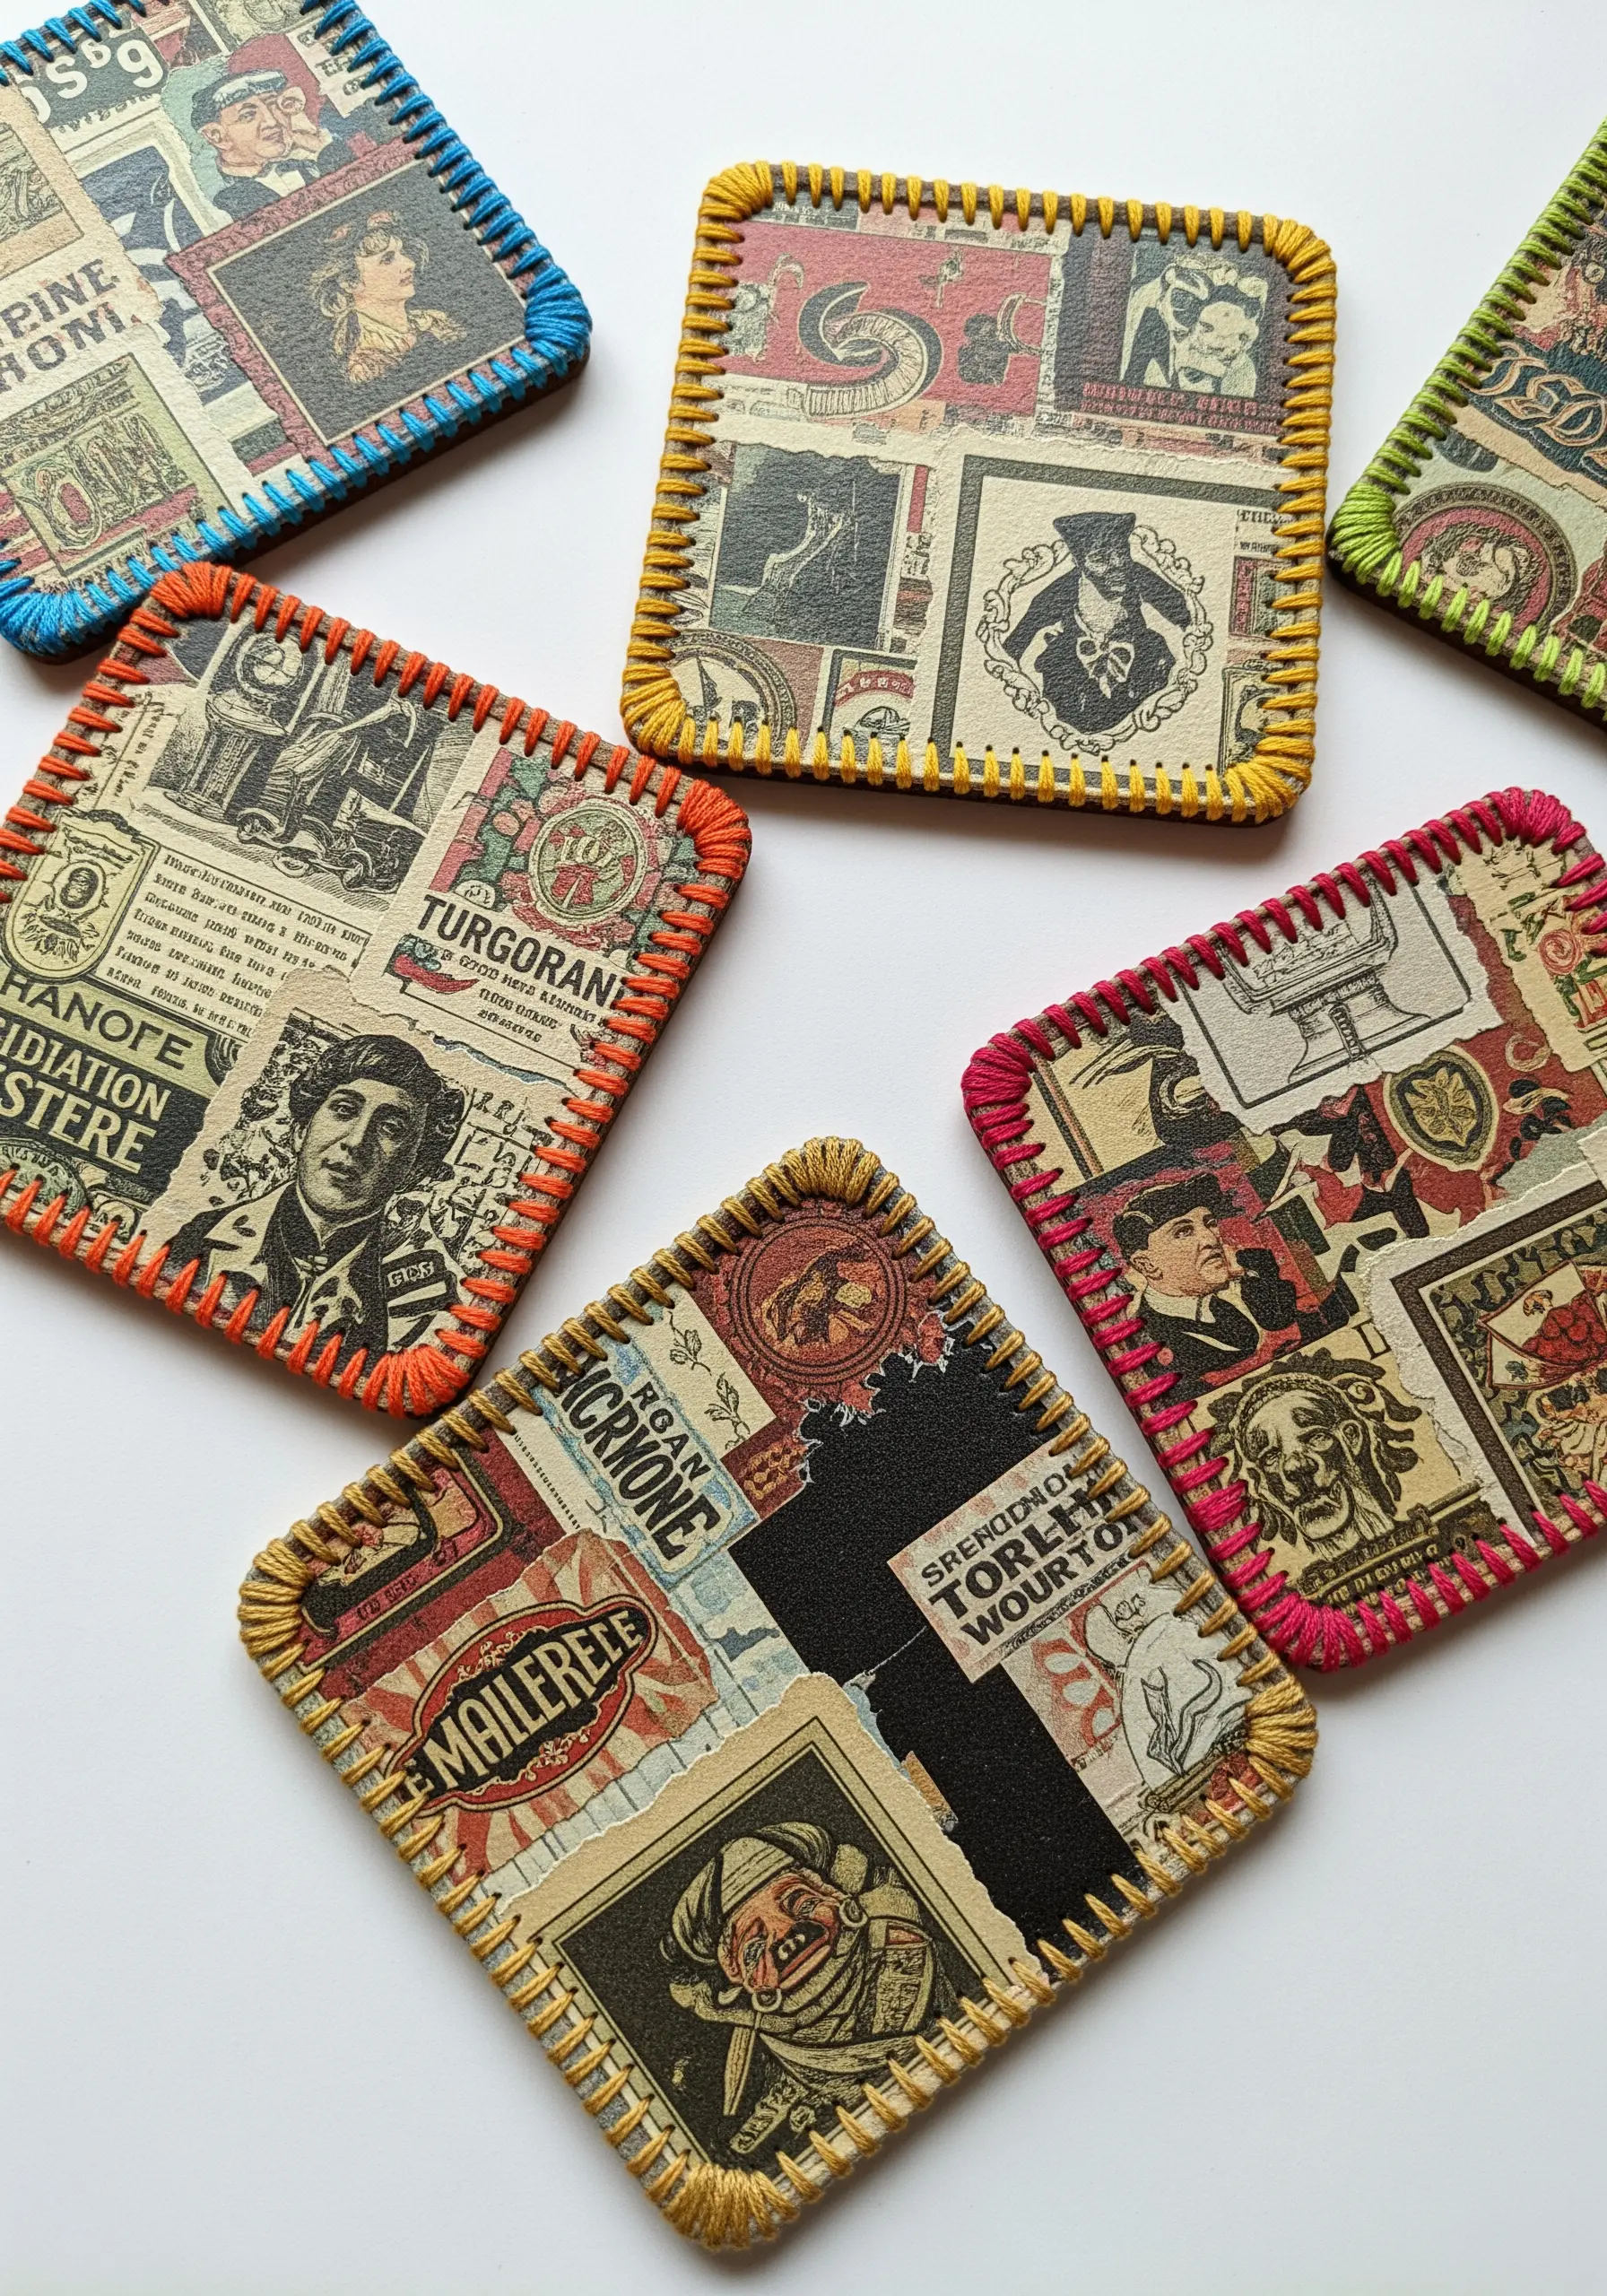
Give your decoupage projects a polished, handcrafted feel by adding a stitched border.
After you have applied and sealed your paper collage onto a surface like wood or chipboard, use an awl to punch evenly spaced holes around the perimeter.
Then, work a neat blanket stitch around the entire edge using a durable thread like pearl cotton.
This not only adds a lovely decorative touch but also reinforces the paper’s edges, preventing them from lifting over time.
24. Weaving Geometric Mandalas with Thread and Pins
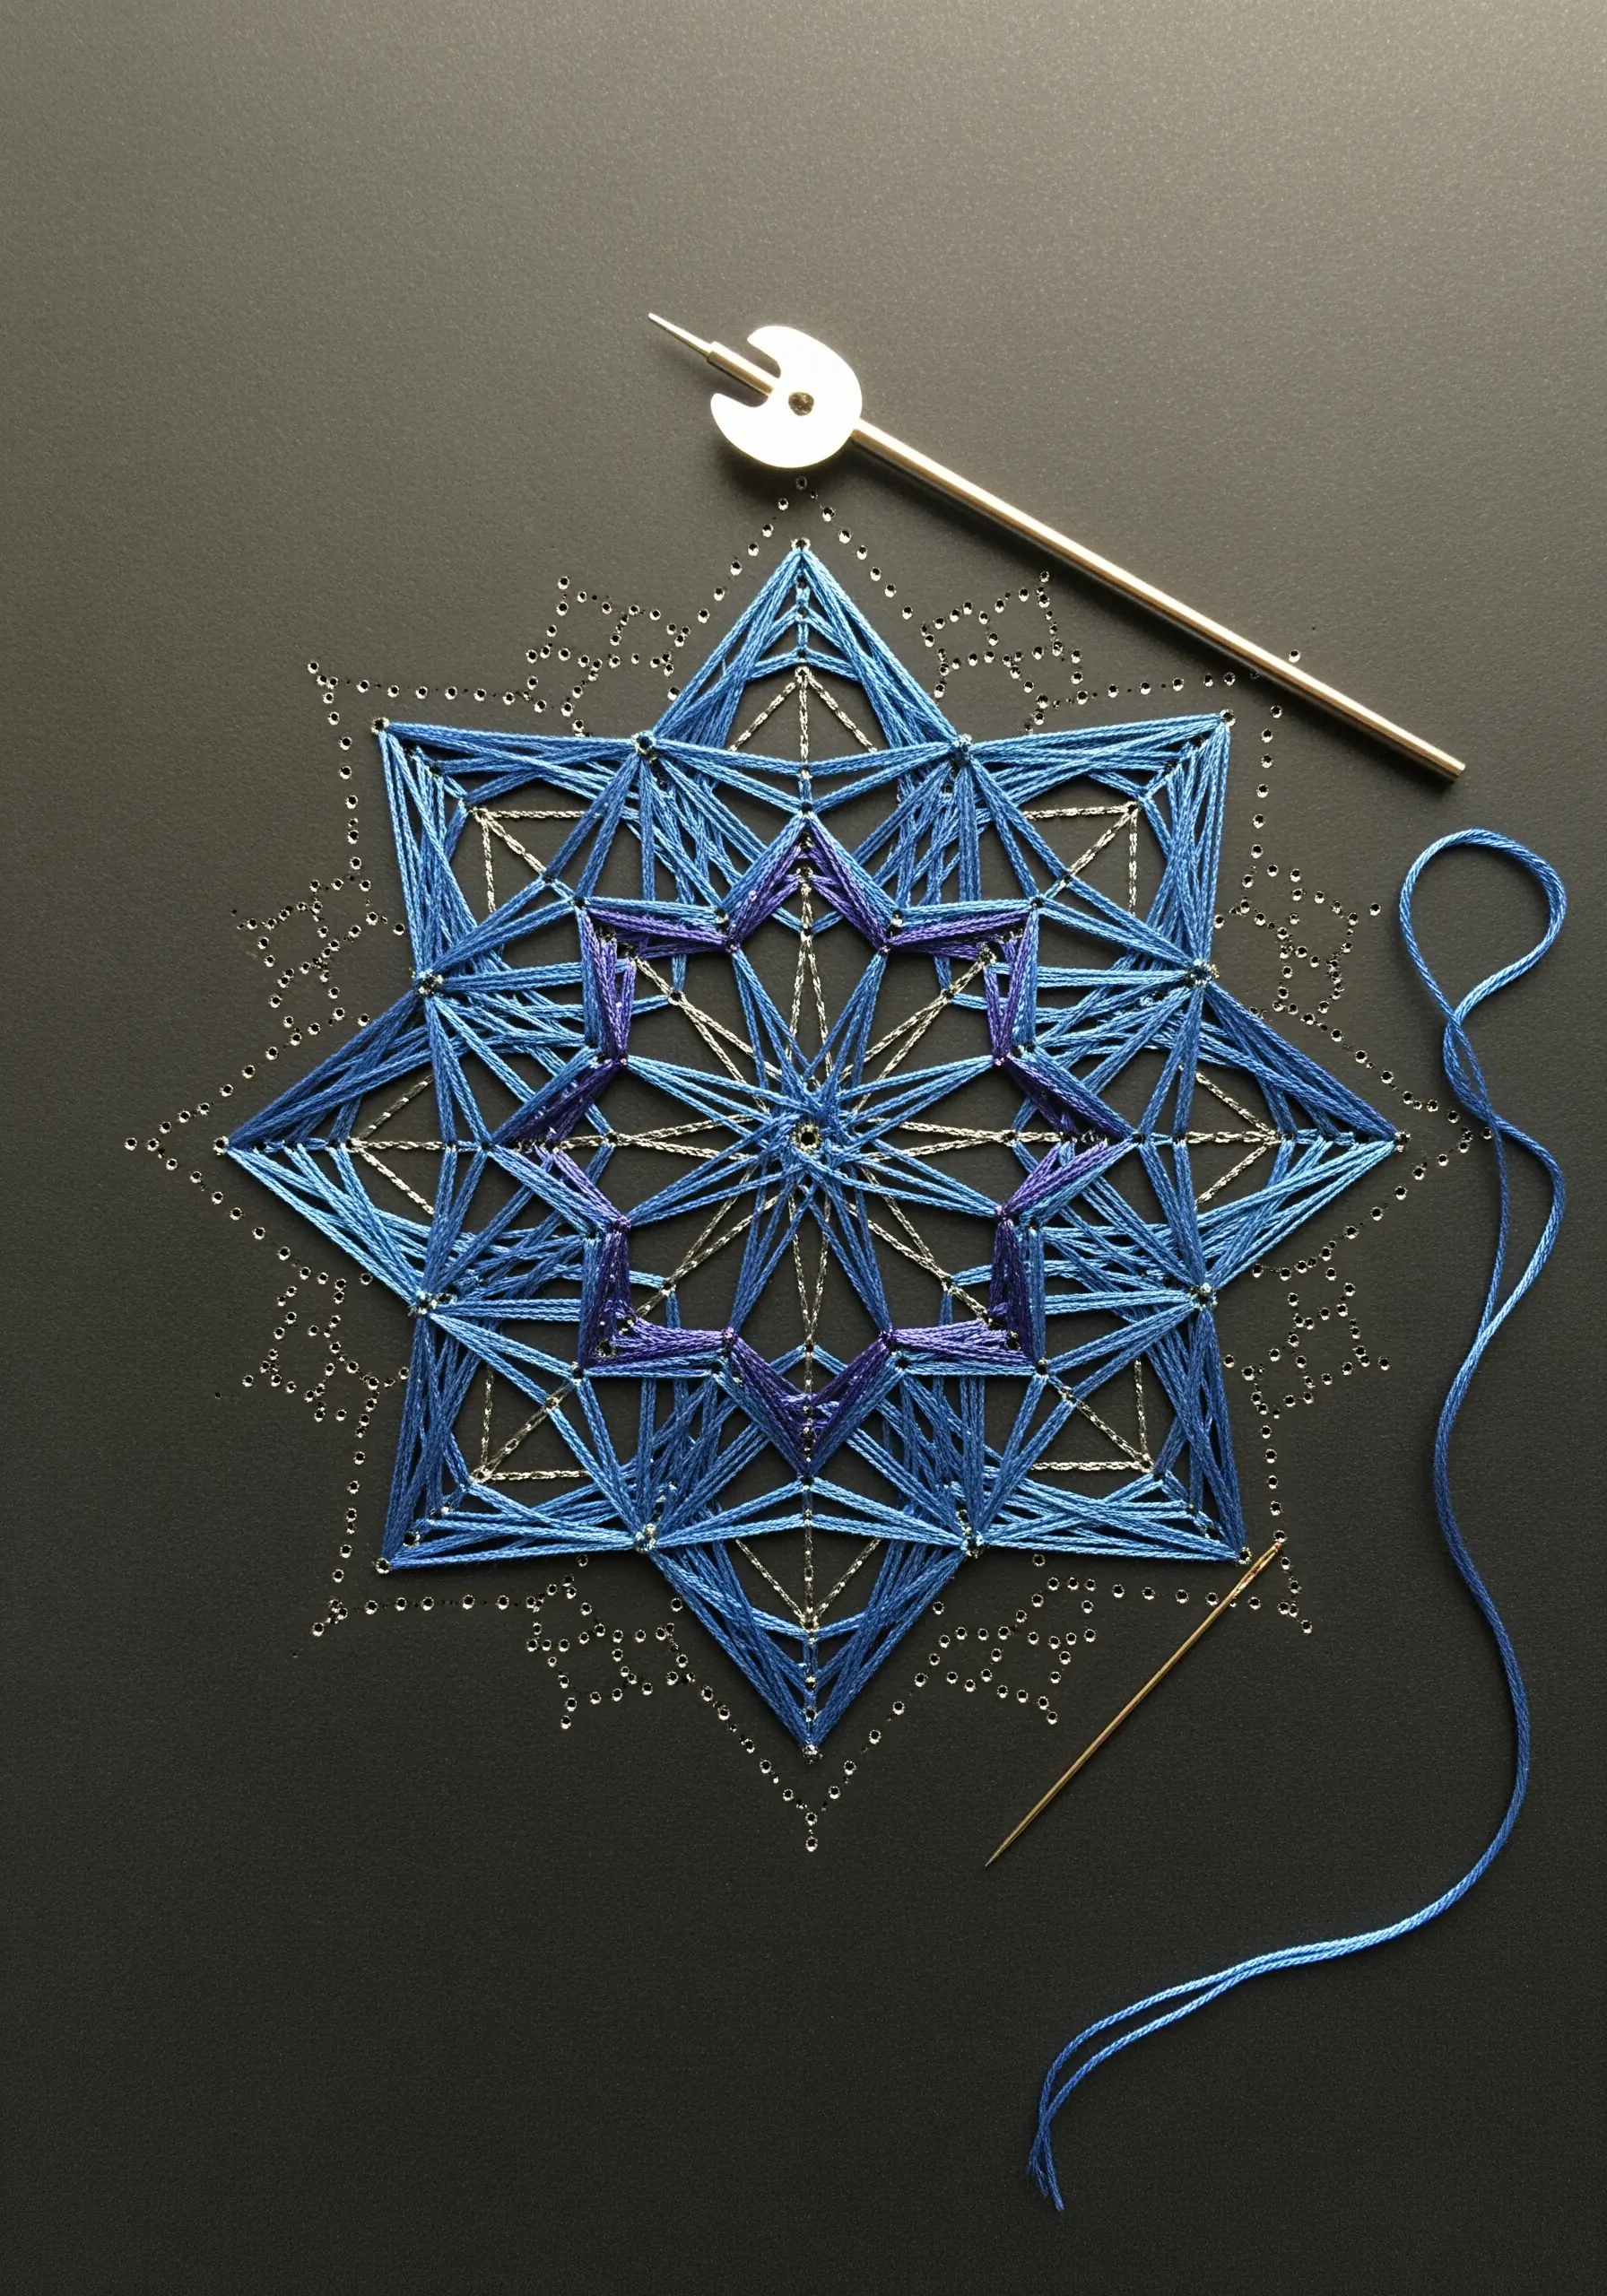
Explore the meditative art of string art by creating intricate, symmetrical designs without a single knot.
On a firm base like cork or painted wood, arrange pins in a geometric pattern.
Then, simply wrap your thread from pin to pin, layering colors and building up complex patterns from the intersecting straight lines.
The magic of this technique lies in its precision and reliance on tension, allowing you to create stunningly complex visuals from a very simple process.
25. Embroidering on Paper with Flawless Fills
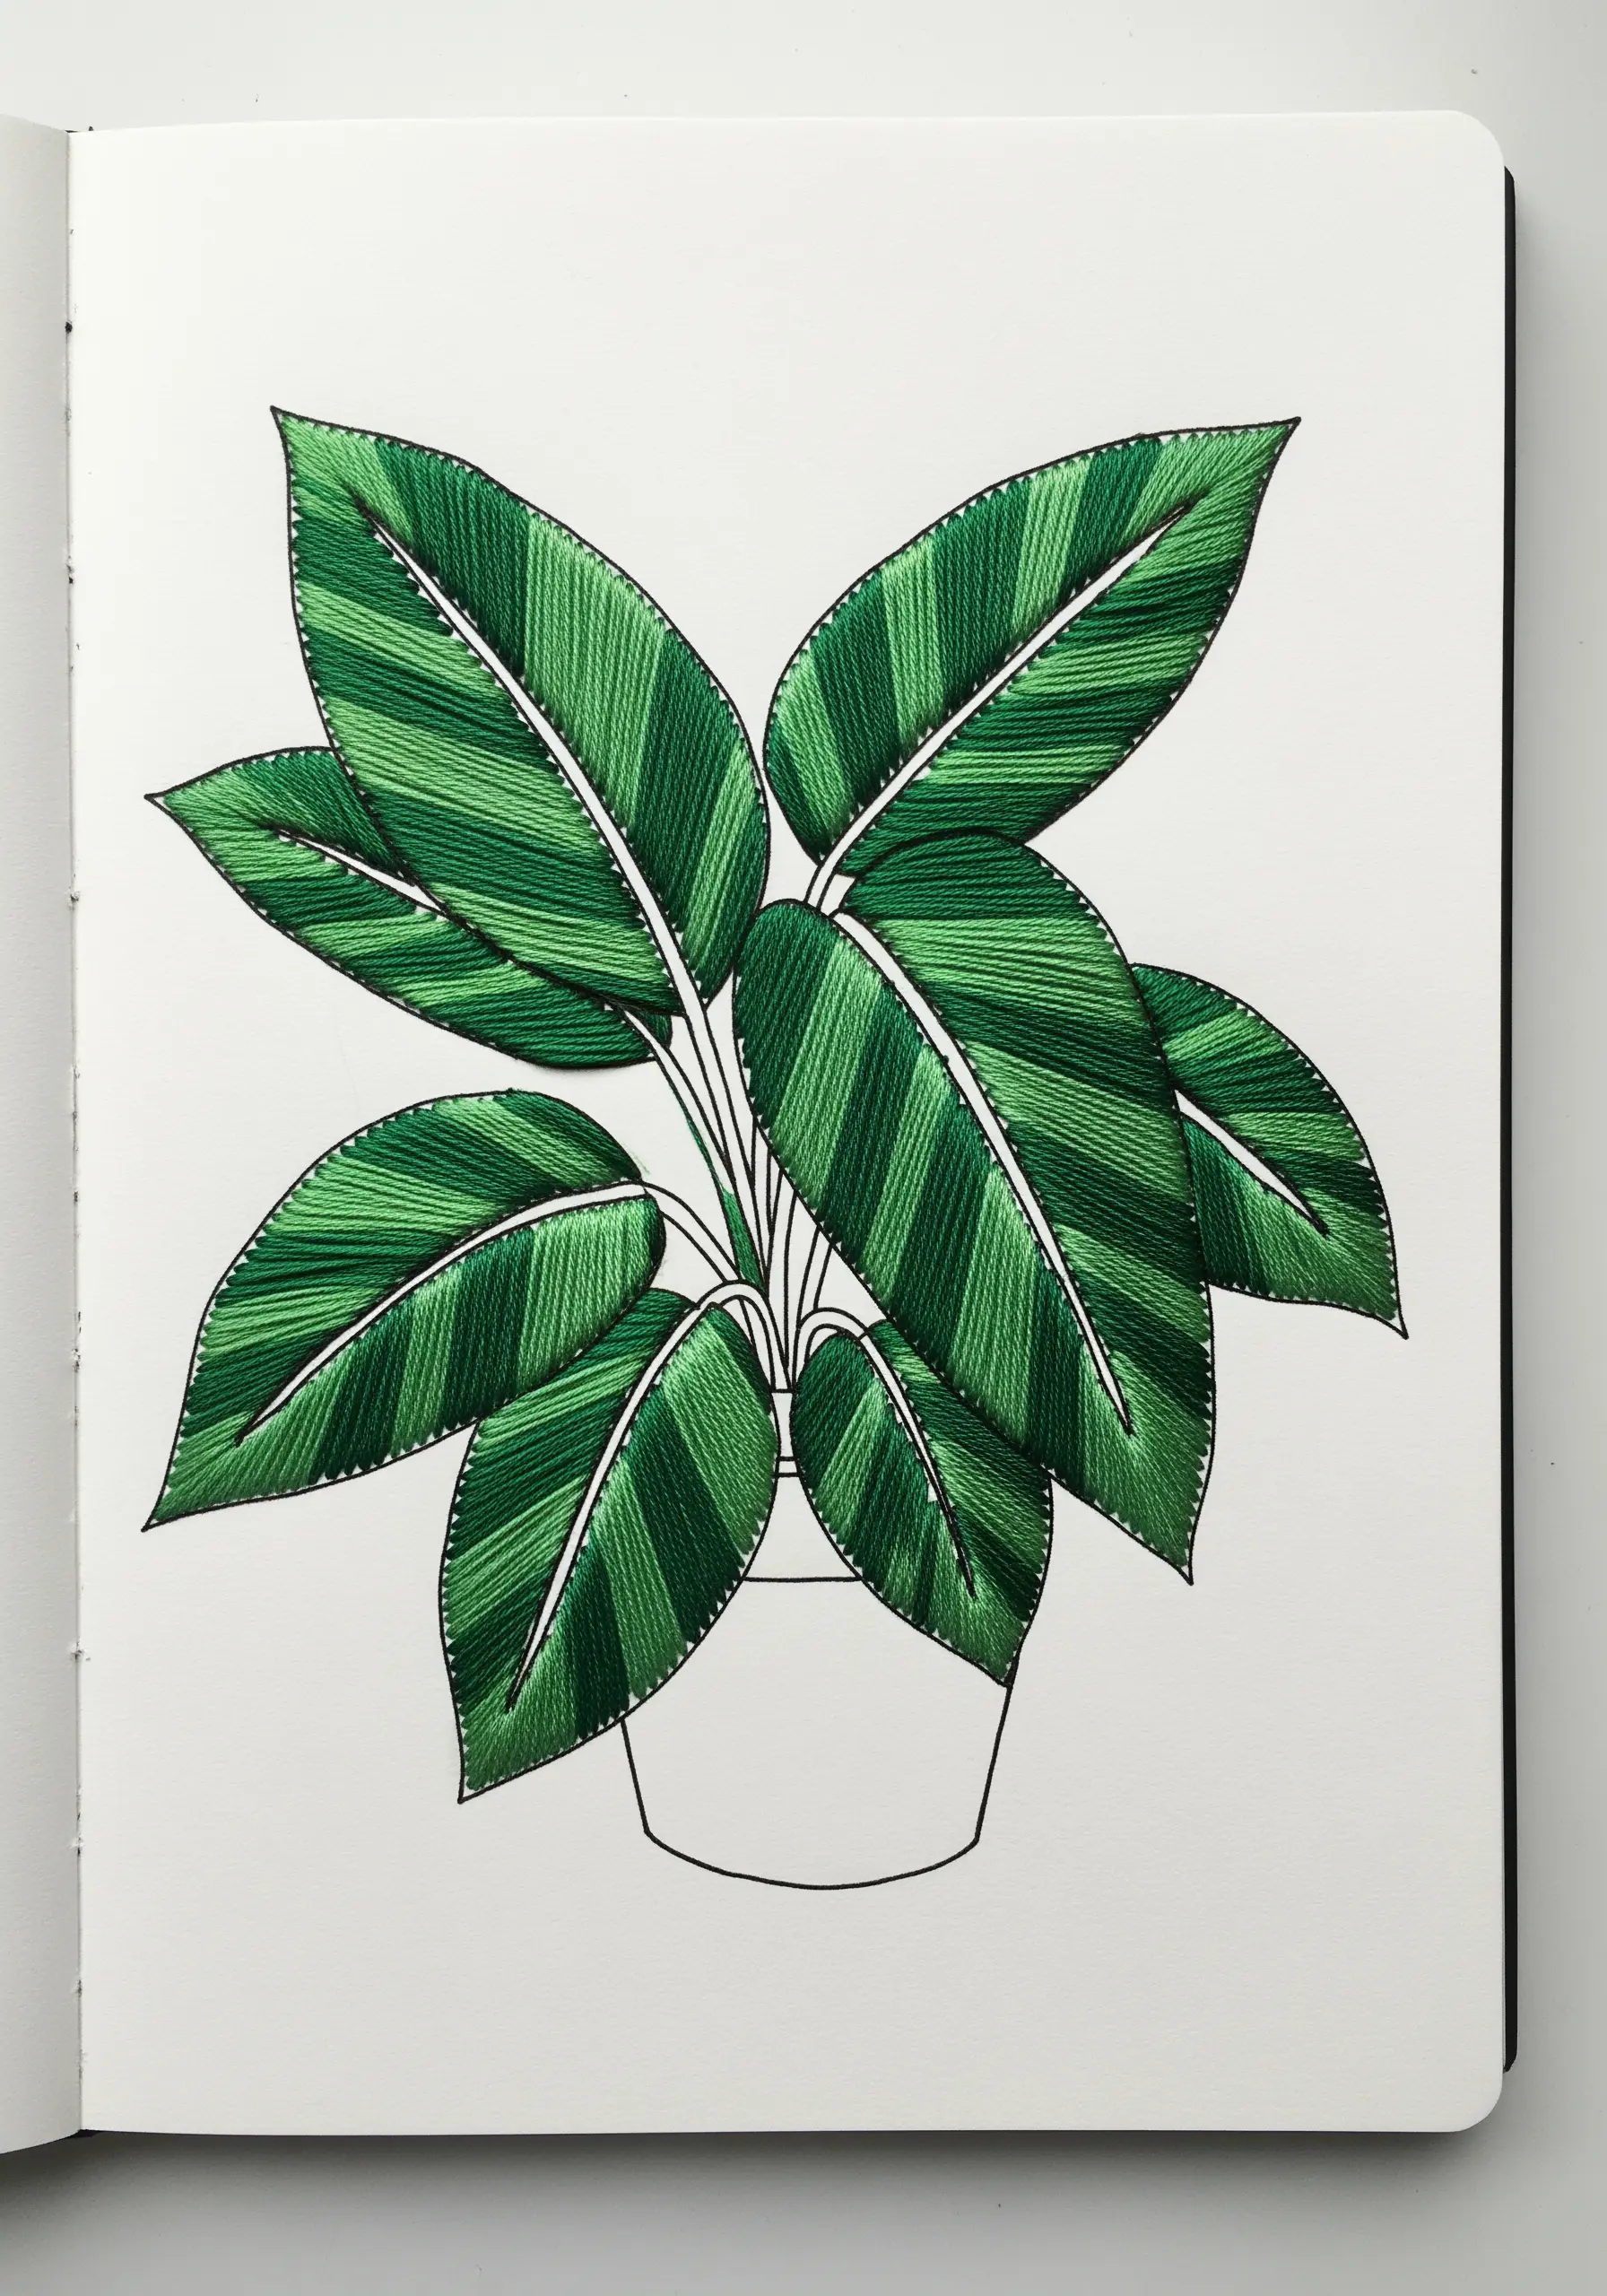
The secret to successful embroidery on paper is careful preparation.
Before you make a single stitch, use a pin to pre-pierce every hole your needle will pass through. This prevents the paper from tearing and gives you a clean guide.
For filling shapes, use a long-and-short stitch rather than a satin stitch. It distributes the thread’s tension more evenly, preventing the paper from warping or buckling under the strain. These paper embroidery projects look incredibly refined when done with care.
26. Adding Machine-Stitched Definition to Watercolor Art
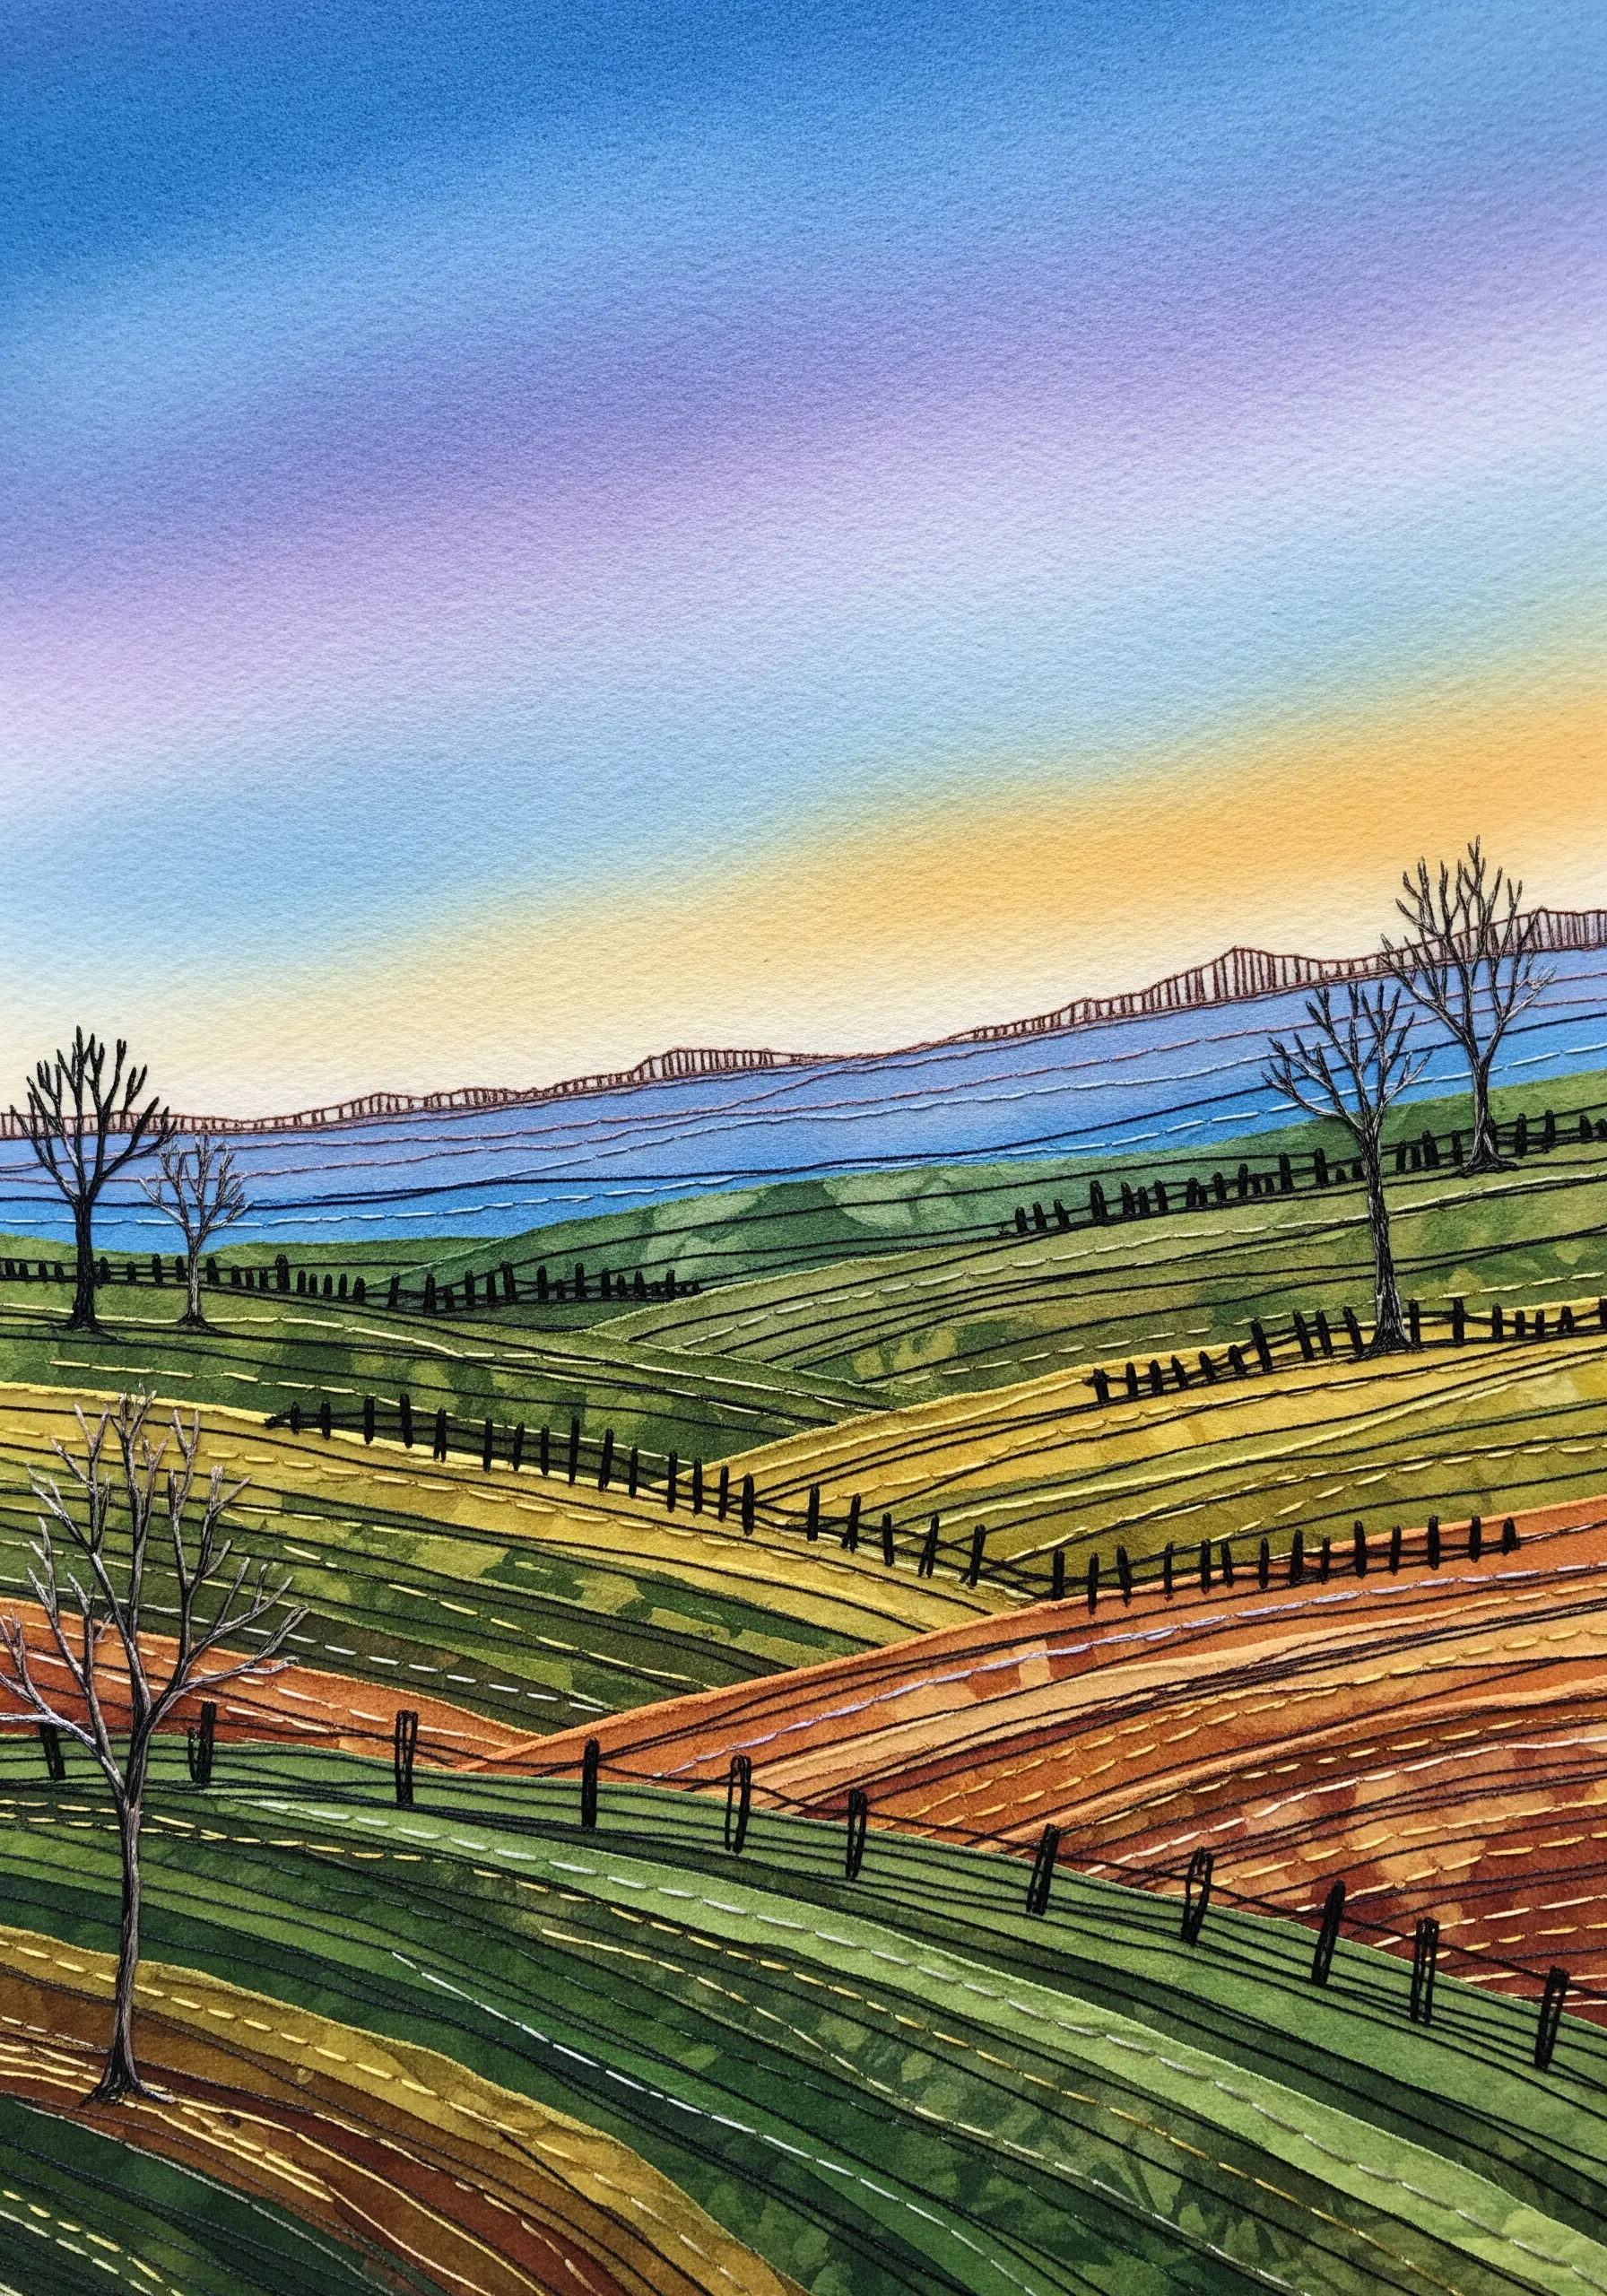
Introduce a sharp, graphic element to the softness of a watercolor painting using your sewing machine.
Ensure your painting on heavy, high-quality watercolor paper is completely dry before taking it to your machine.
Using a straight stitch, you can add details like fence lines, distant trees, or contour lines on hills.
The precise, mechanical line of the stitching creates a beautiful and dynamic contrast with the fluid, hand-painted washes of color.
27. Creating Lace-Like Effects with Miniature String Art
You can achieve the intricate look of string art on a small scale, perfect for cards, tags, or art journal pages.
On heavy cardstock, punch holes around the outline of a simple shape.
Then, using a single strand of embroidery floss, begin connecting the holes in either a random or a planned geometric pattern.
The interplay between the thread and the negative space creates a delicate, lace-like effect that feels much more complex than it is to create.
28. Finishing an Abstract Painting with a Tassel Fringe
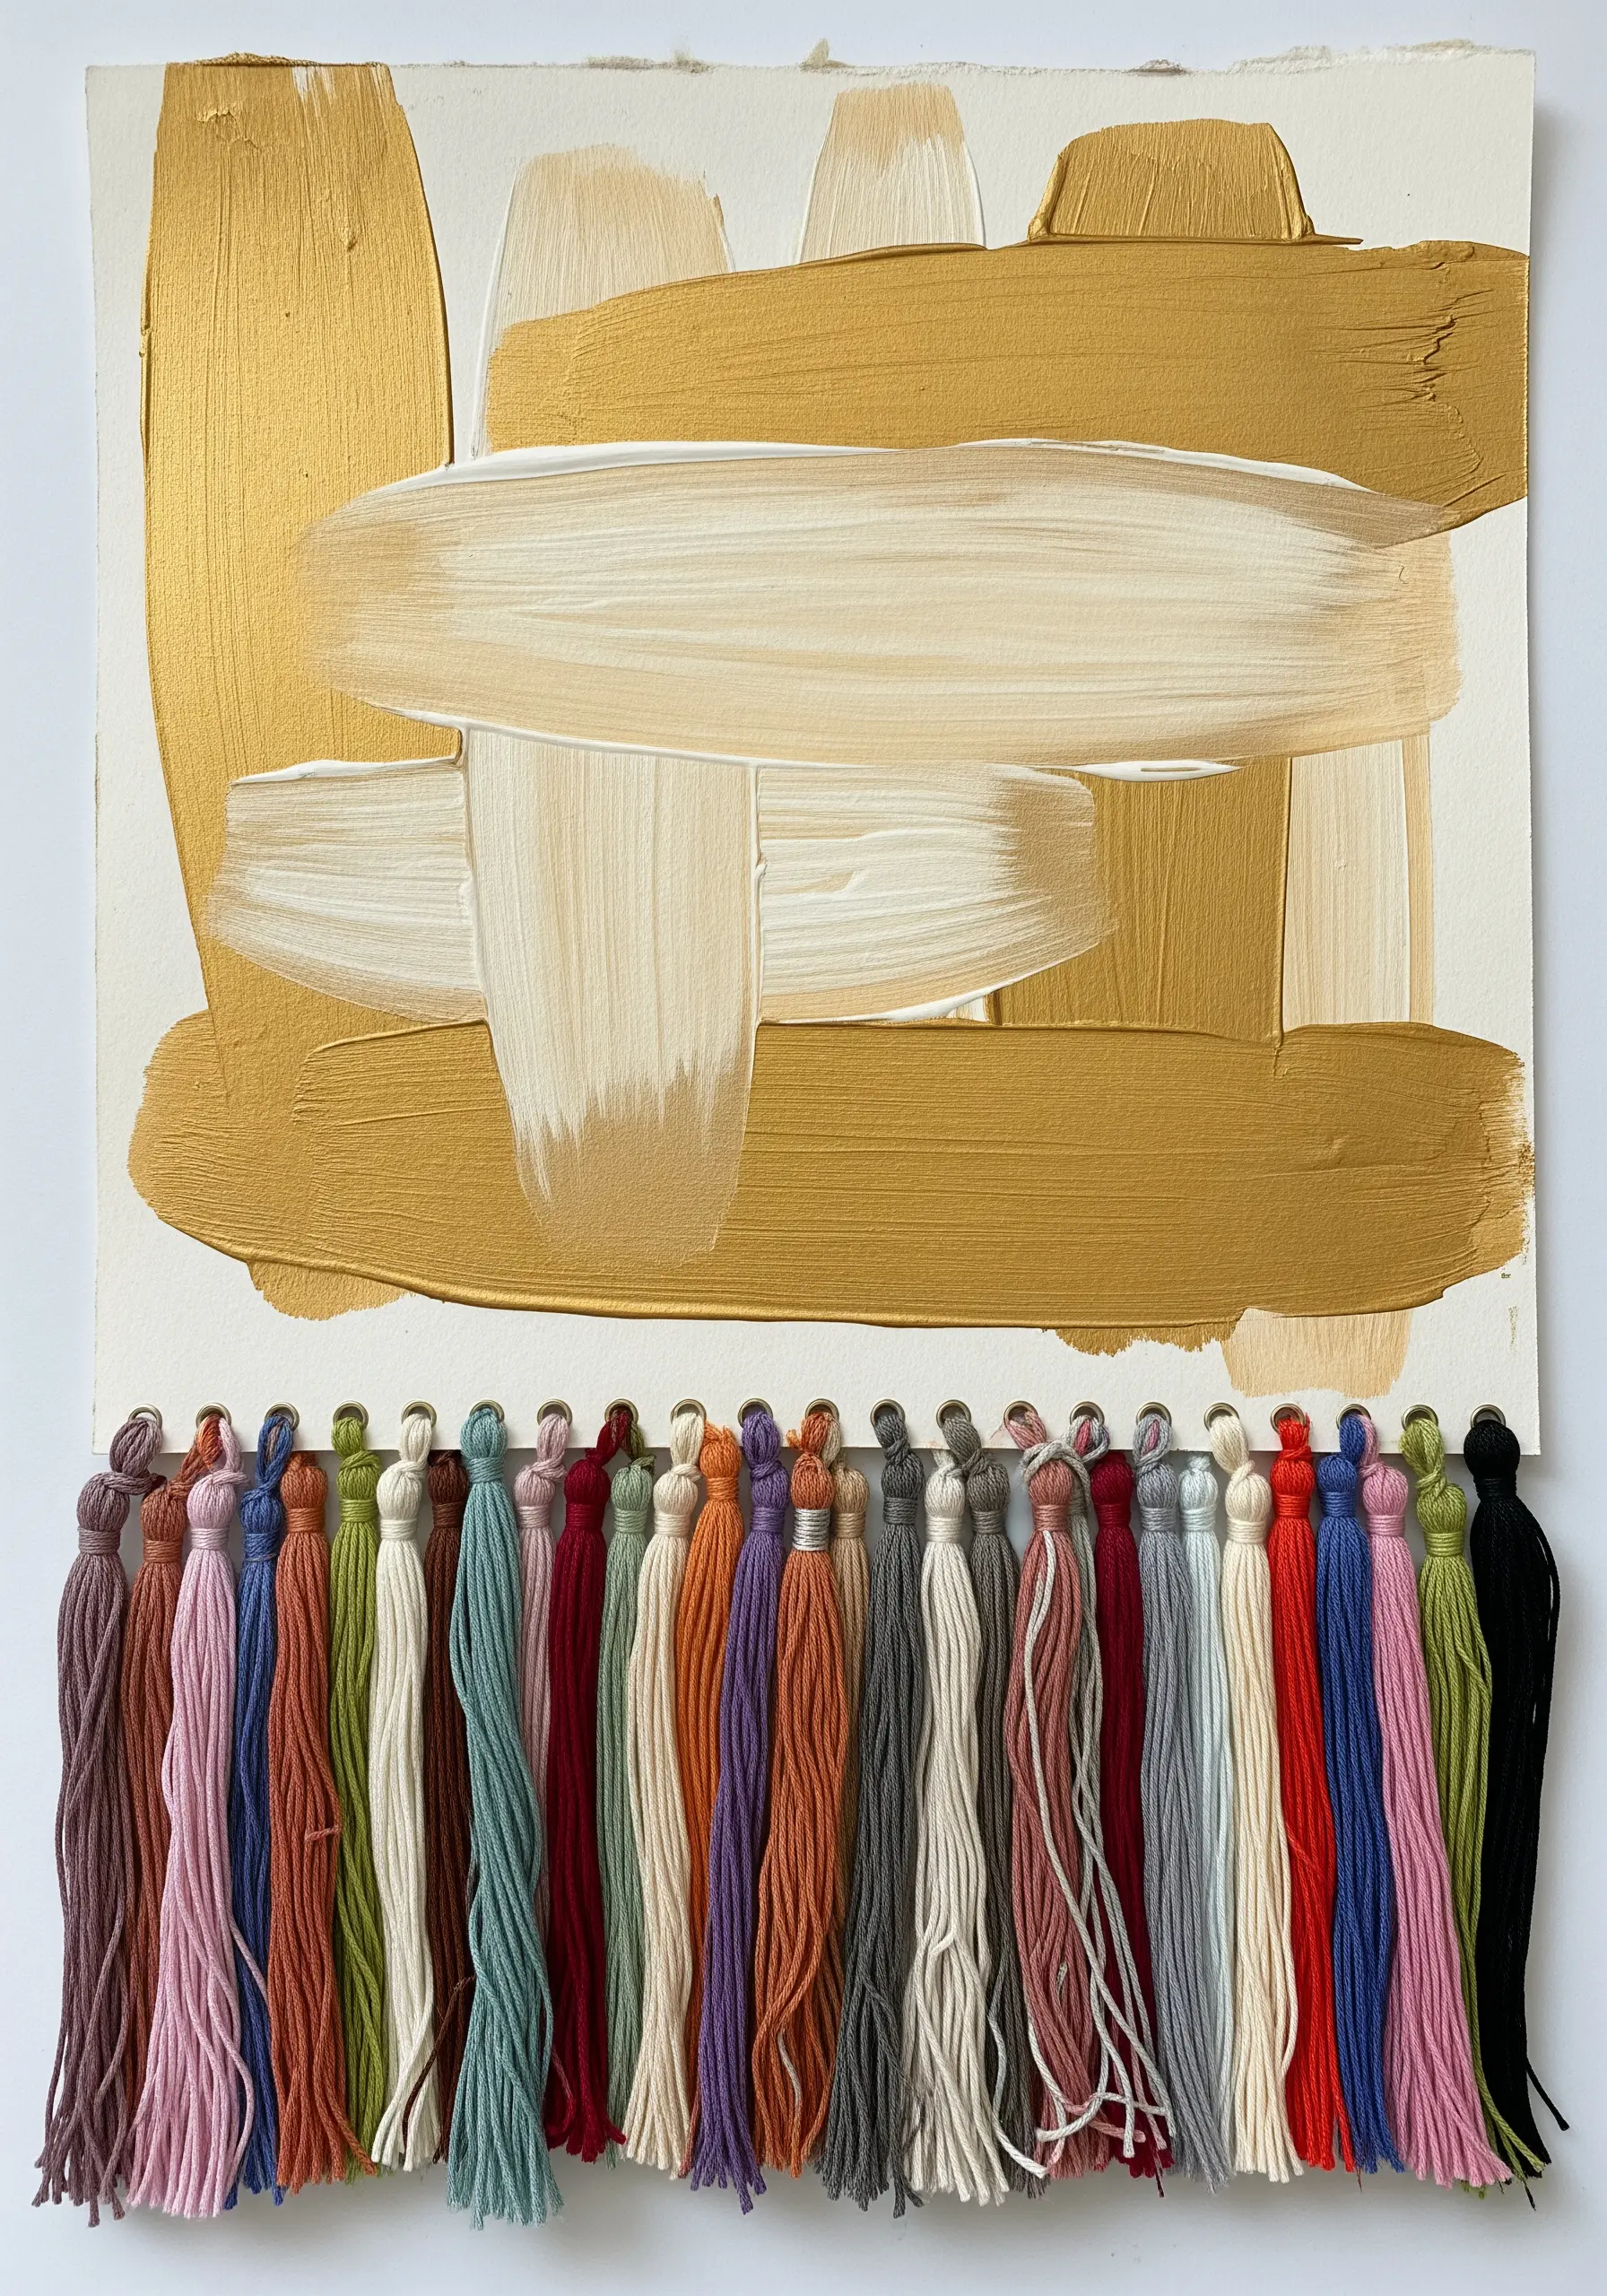
Allow your artwork to move beyond the confines of the canvas by adding a soft, textural border.
Once your abstract painting is dry, punch a series of evenly spaced holes along the bottom edge.
Create a collection of simple tassels using embroidery floss that complements your painting’s color palette.
Securely loop one tassel through each hole, creating a playful fringe that adds movement, dimension, and a tactile finish to your piece.
29. Mounting a Collage with Structural Stitches
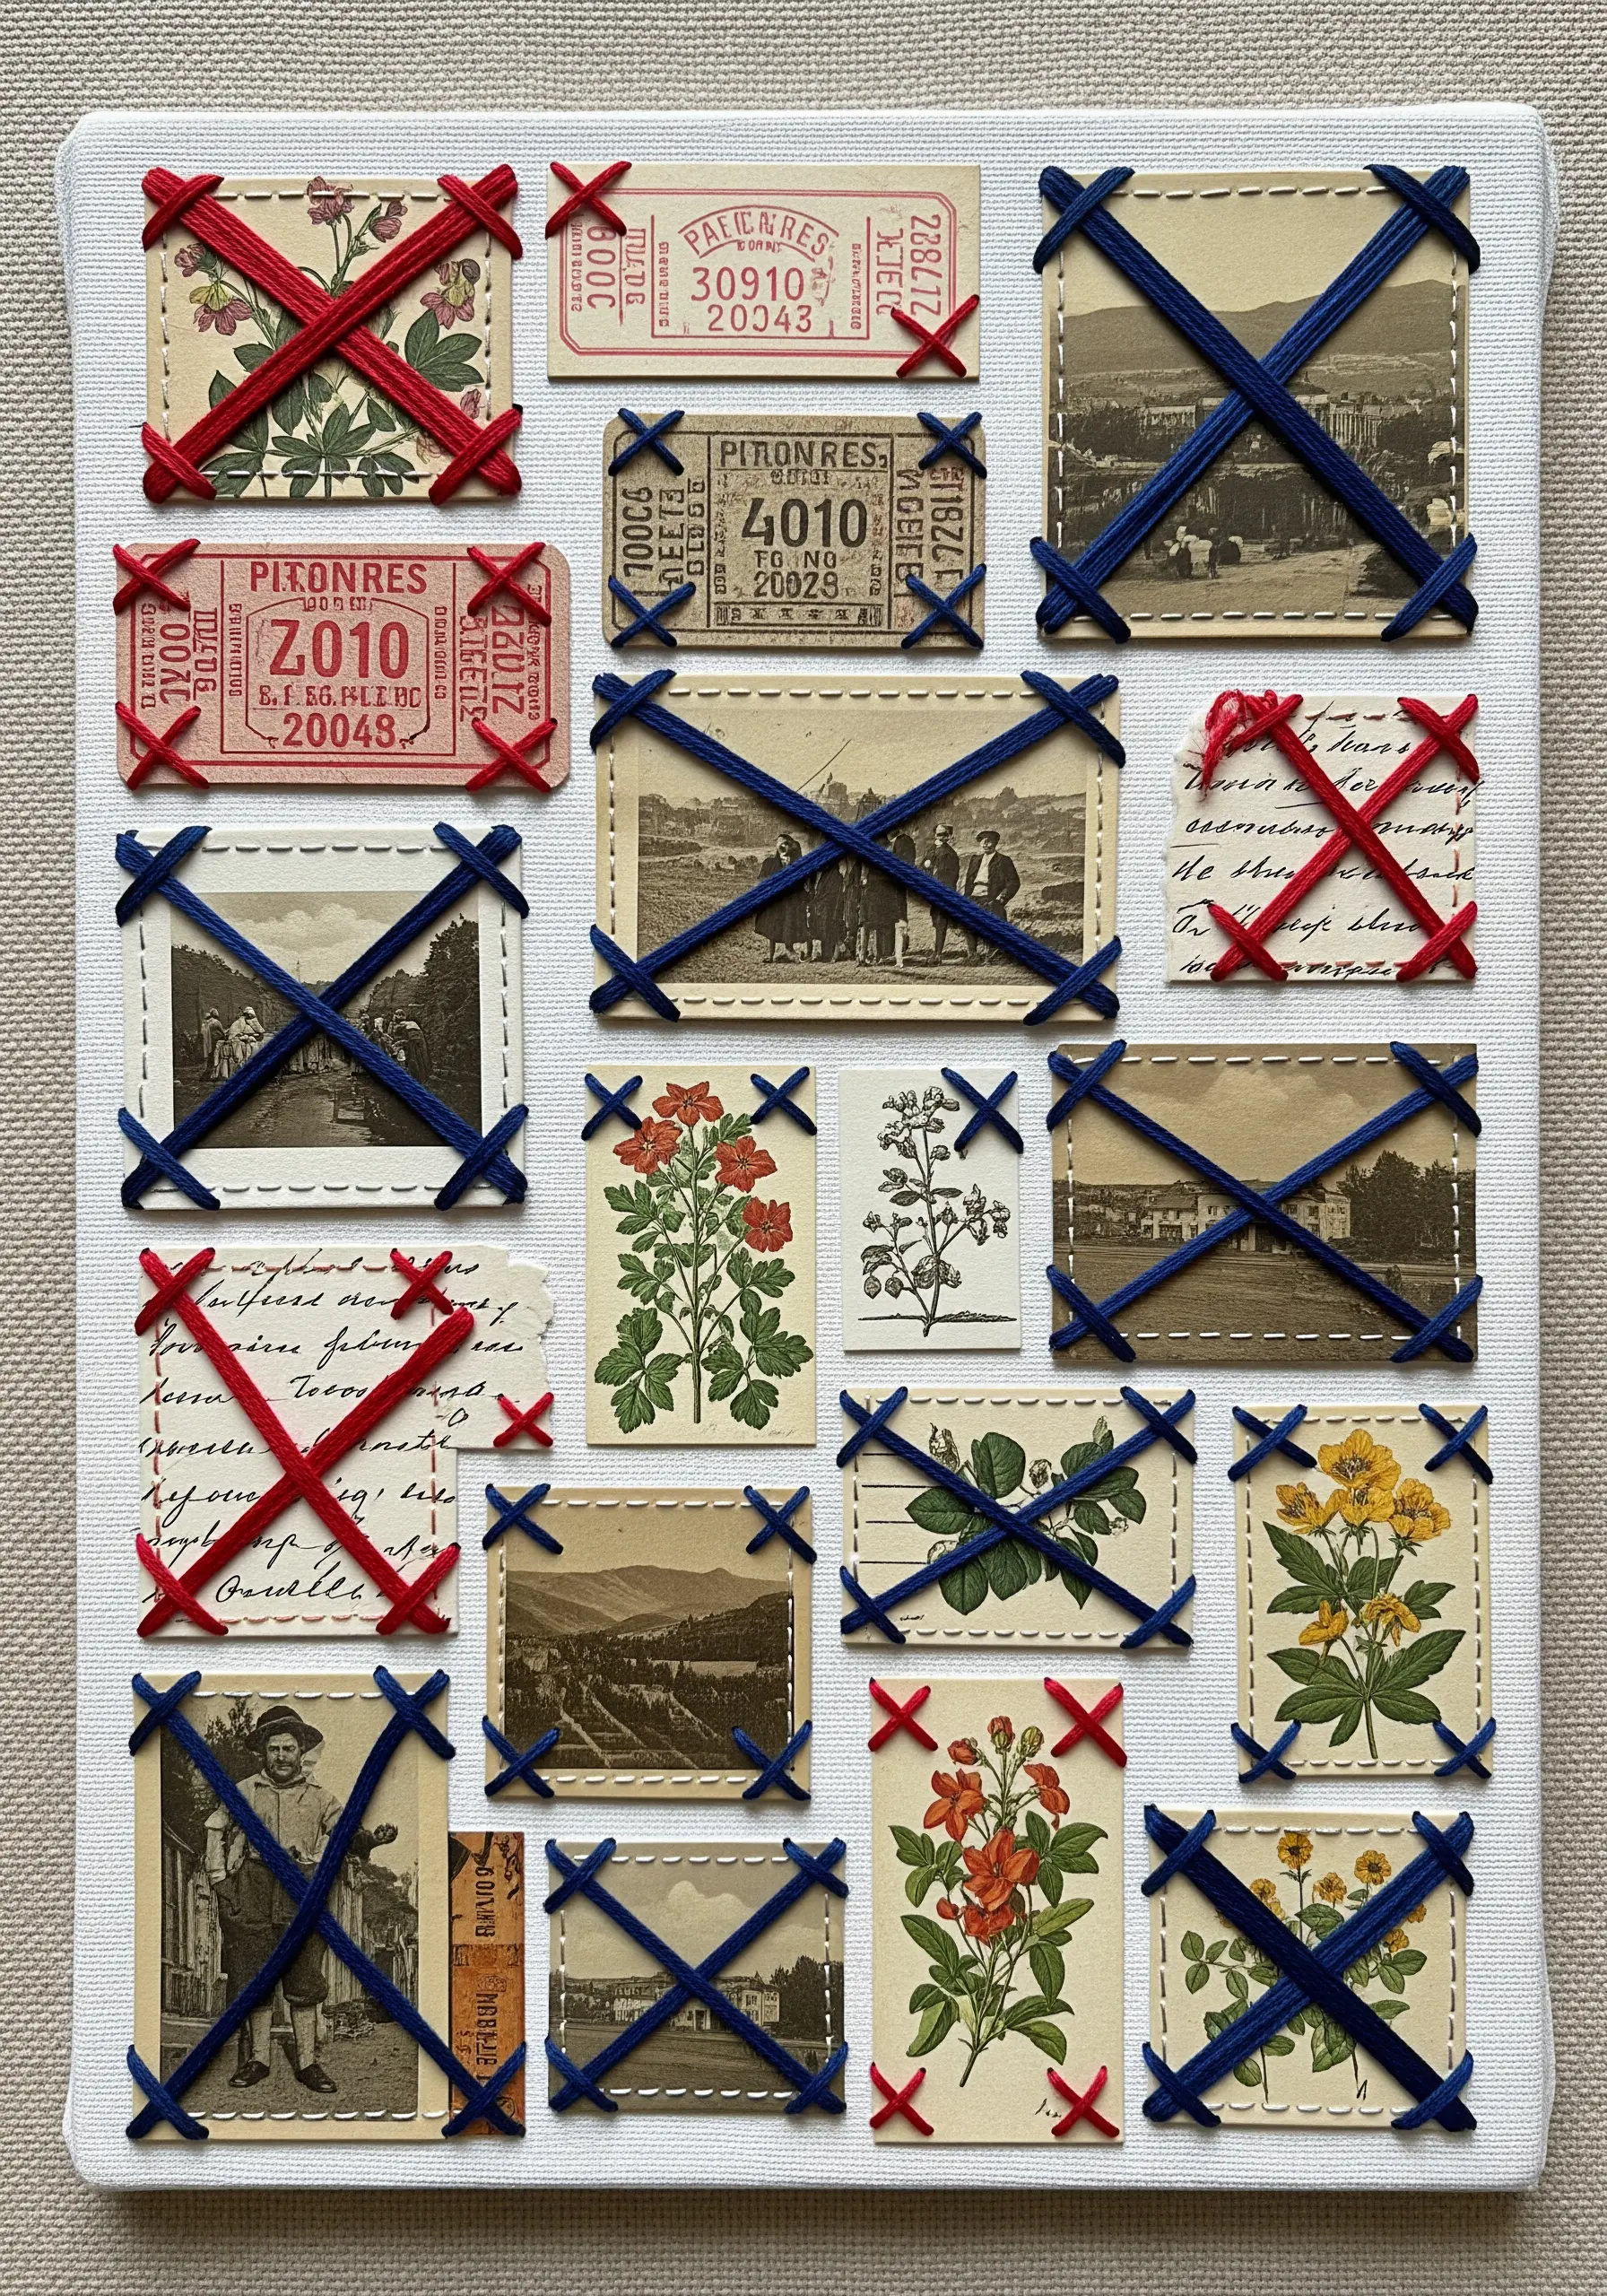
Turn your thread into a functional and aesthetic framing device for a paper collage.
Arrange your collection of ephemera—vintage photographs, tickets, letters—on a stretched canvas or fabric background.
Instead of using glue, secure each corner of the paper items with bold, graphic stitches, like large ‘X’ shapes or simple corner brackets.
This method not only holds everything in place but also creates a cohesive visual language that unifies the entire composition with an intentional, handcrafted look.


