
That 70s aesthetic has a warmth and personality that feels so right for today’s interiors. But instead of simply buying a retro print, you can infuse that groovy, free-spirited energy into your home in a much more personal way—with a needle and thread.
These pillow designs are more than just patterns; they are studies in texture, color, and form. They invite you to explore techniques like plush punch needle, bold yarn couching, and intricate thread painting. You’ll see how a simple change in stitch direction or a surprising mix of materials can transform a flat design into a tactile piece of art.
Let this be your guide to creating decor that doesn’t just look good, but feels authentic. Choose a design that speaks to you, embrace the rich, earthy color palettes, and allow yourself to play. Your stitches will tell a story, bringing a soulful, handcrafted vibe back into your living space.
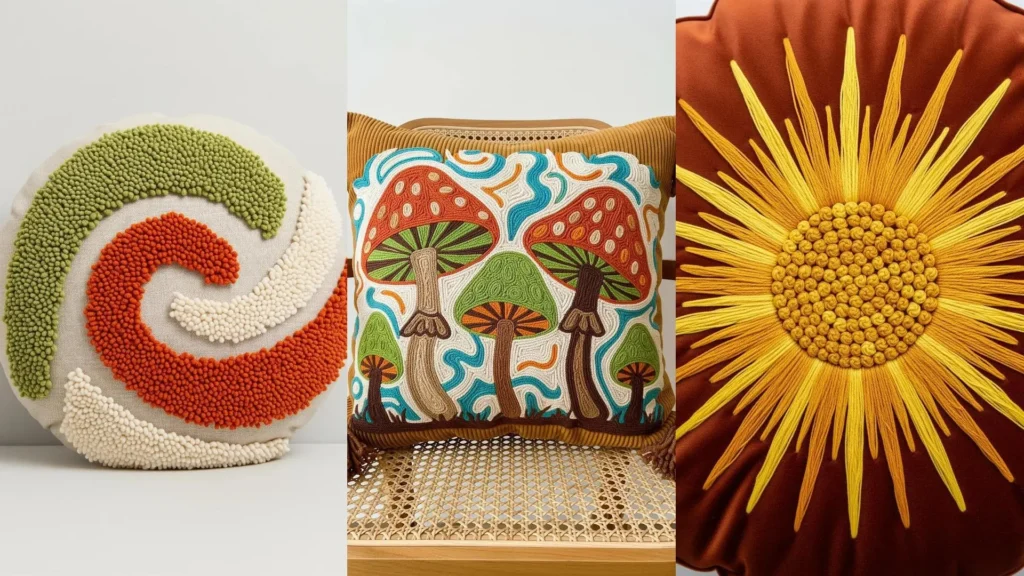
1. Master Psychedelic Couching for Bold Outlines
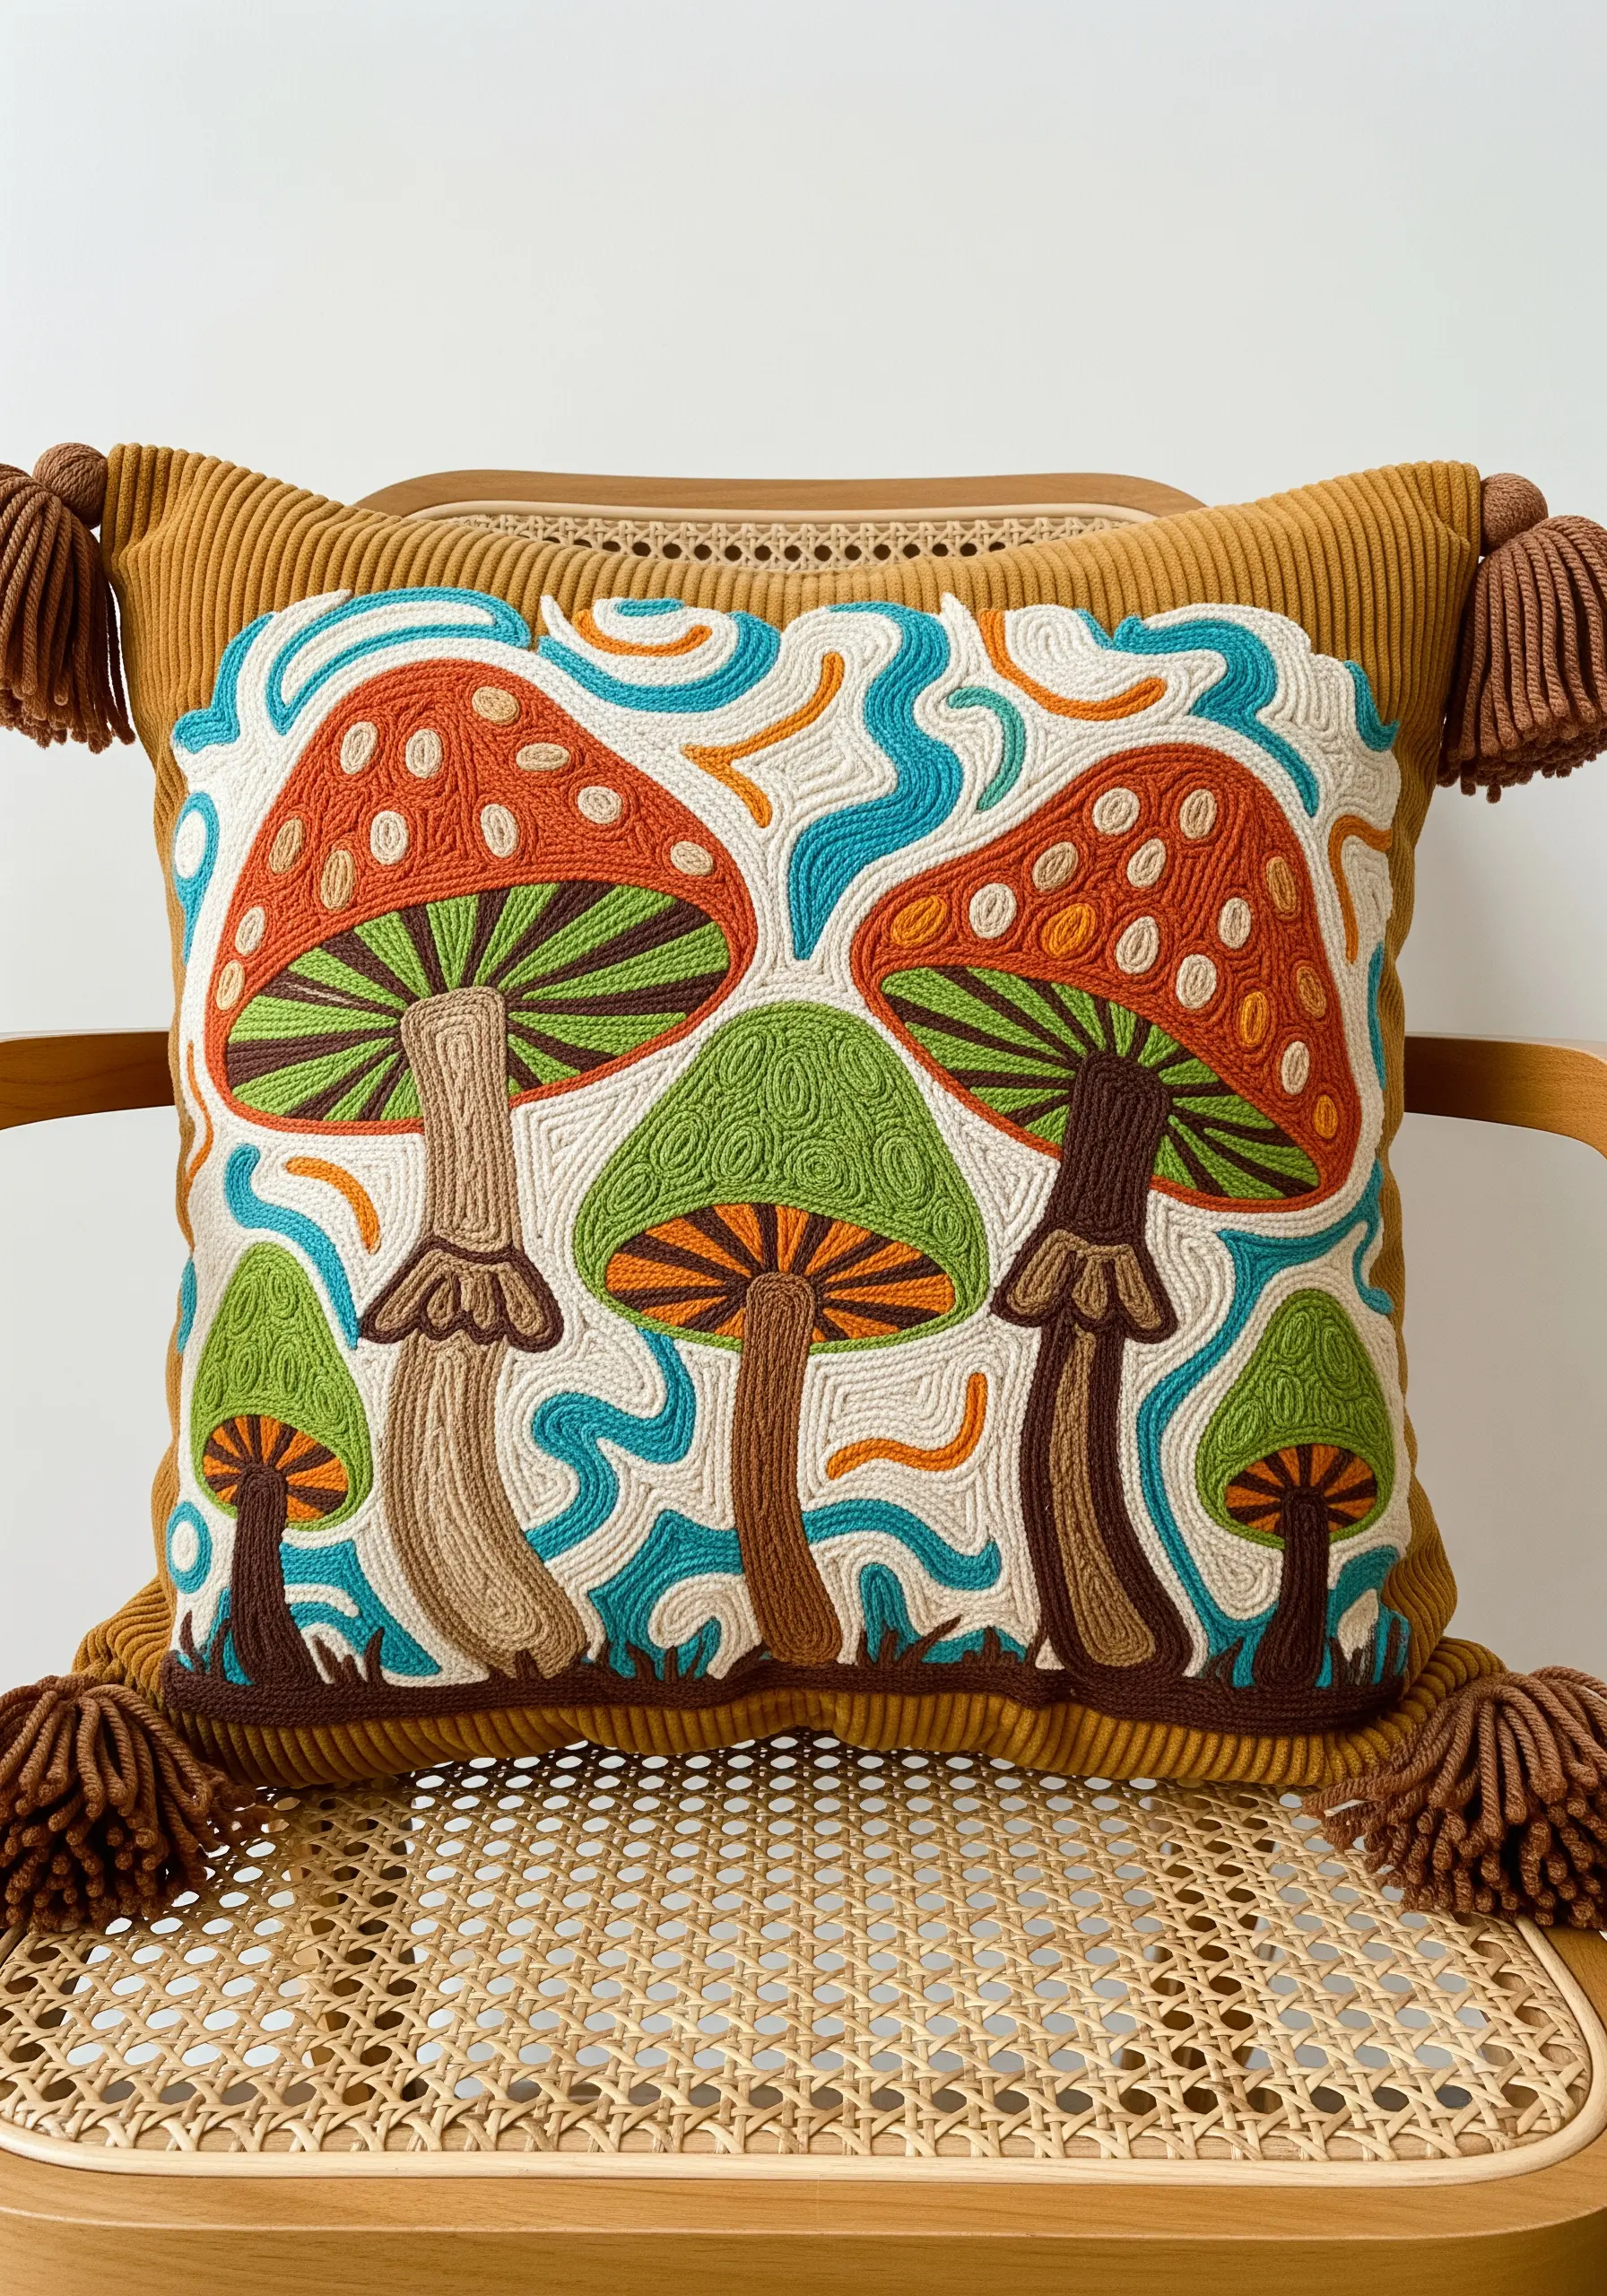
To achieve that clean, graphic 70s look, use couching to define your shapes before you even think about filling them.
Lay down a thick cord or several strands of embroidery floss along your pattern lines, then use a second, thinner thread to tack it down with small, perpendicular stitches.
This technique creates a bold, raised outline that neatly separates your color-blocked satin stitch fills, giving your mushrooms that classic psychedelic poster art feel.
For the fill itself, vary the direction of your satin stitches within each section to create a sense of movement and catch the light from different angles.
2. Create Radiating Gradients with Strategic Straight Stitches
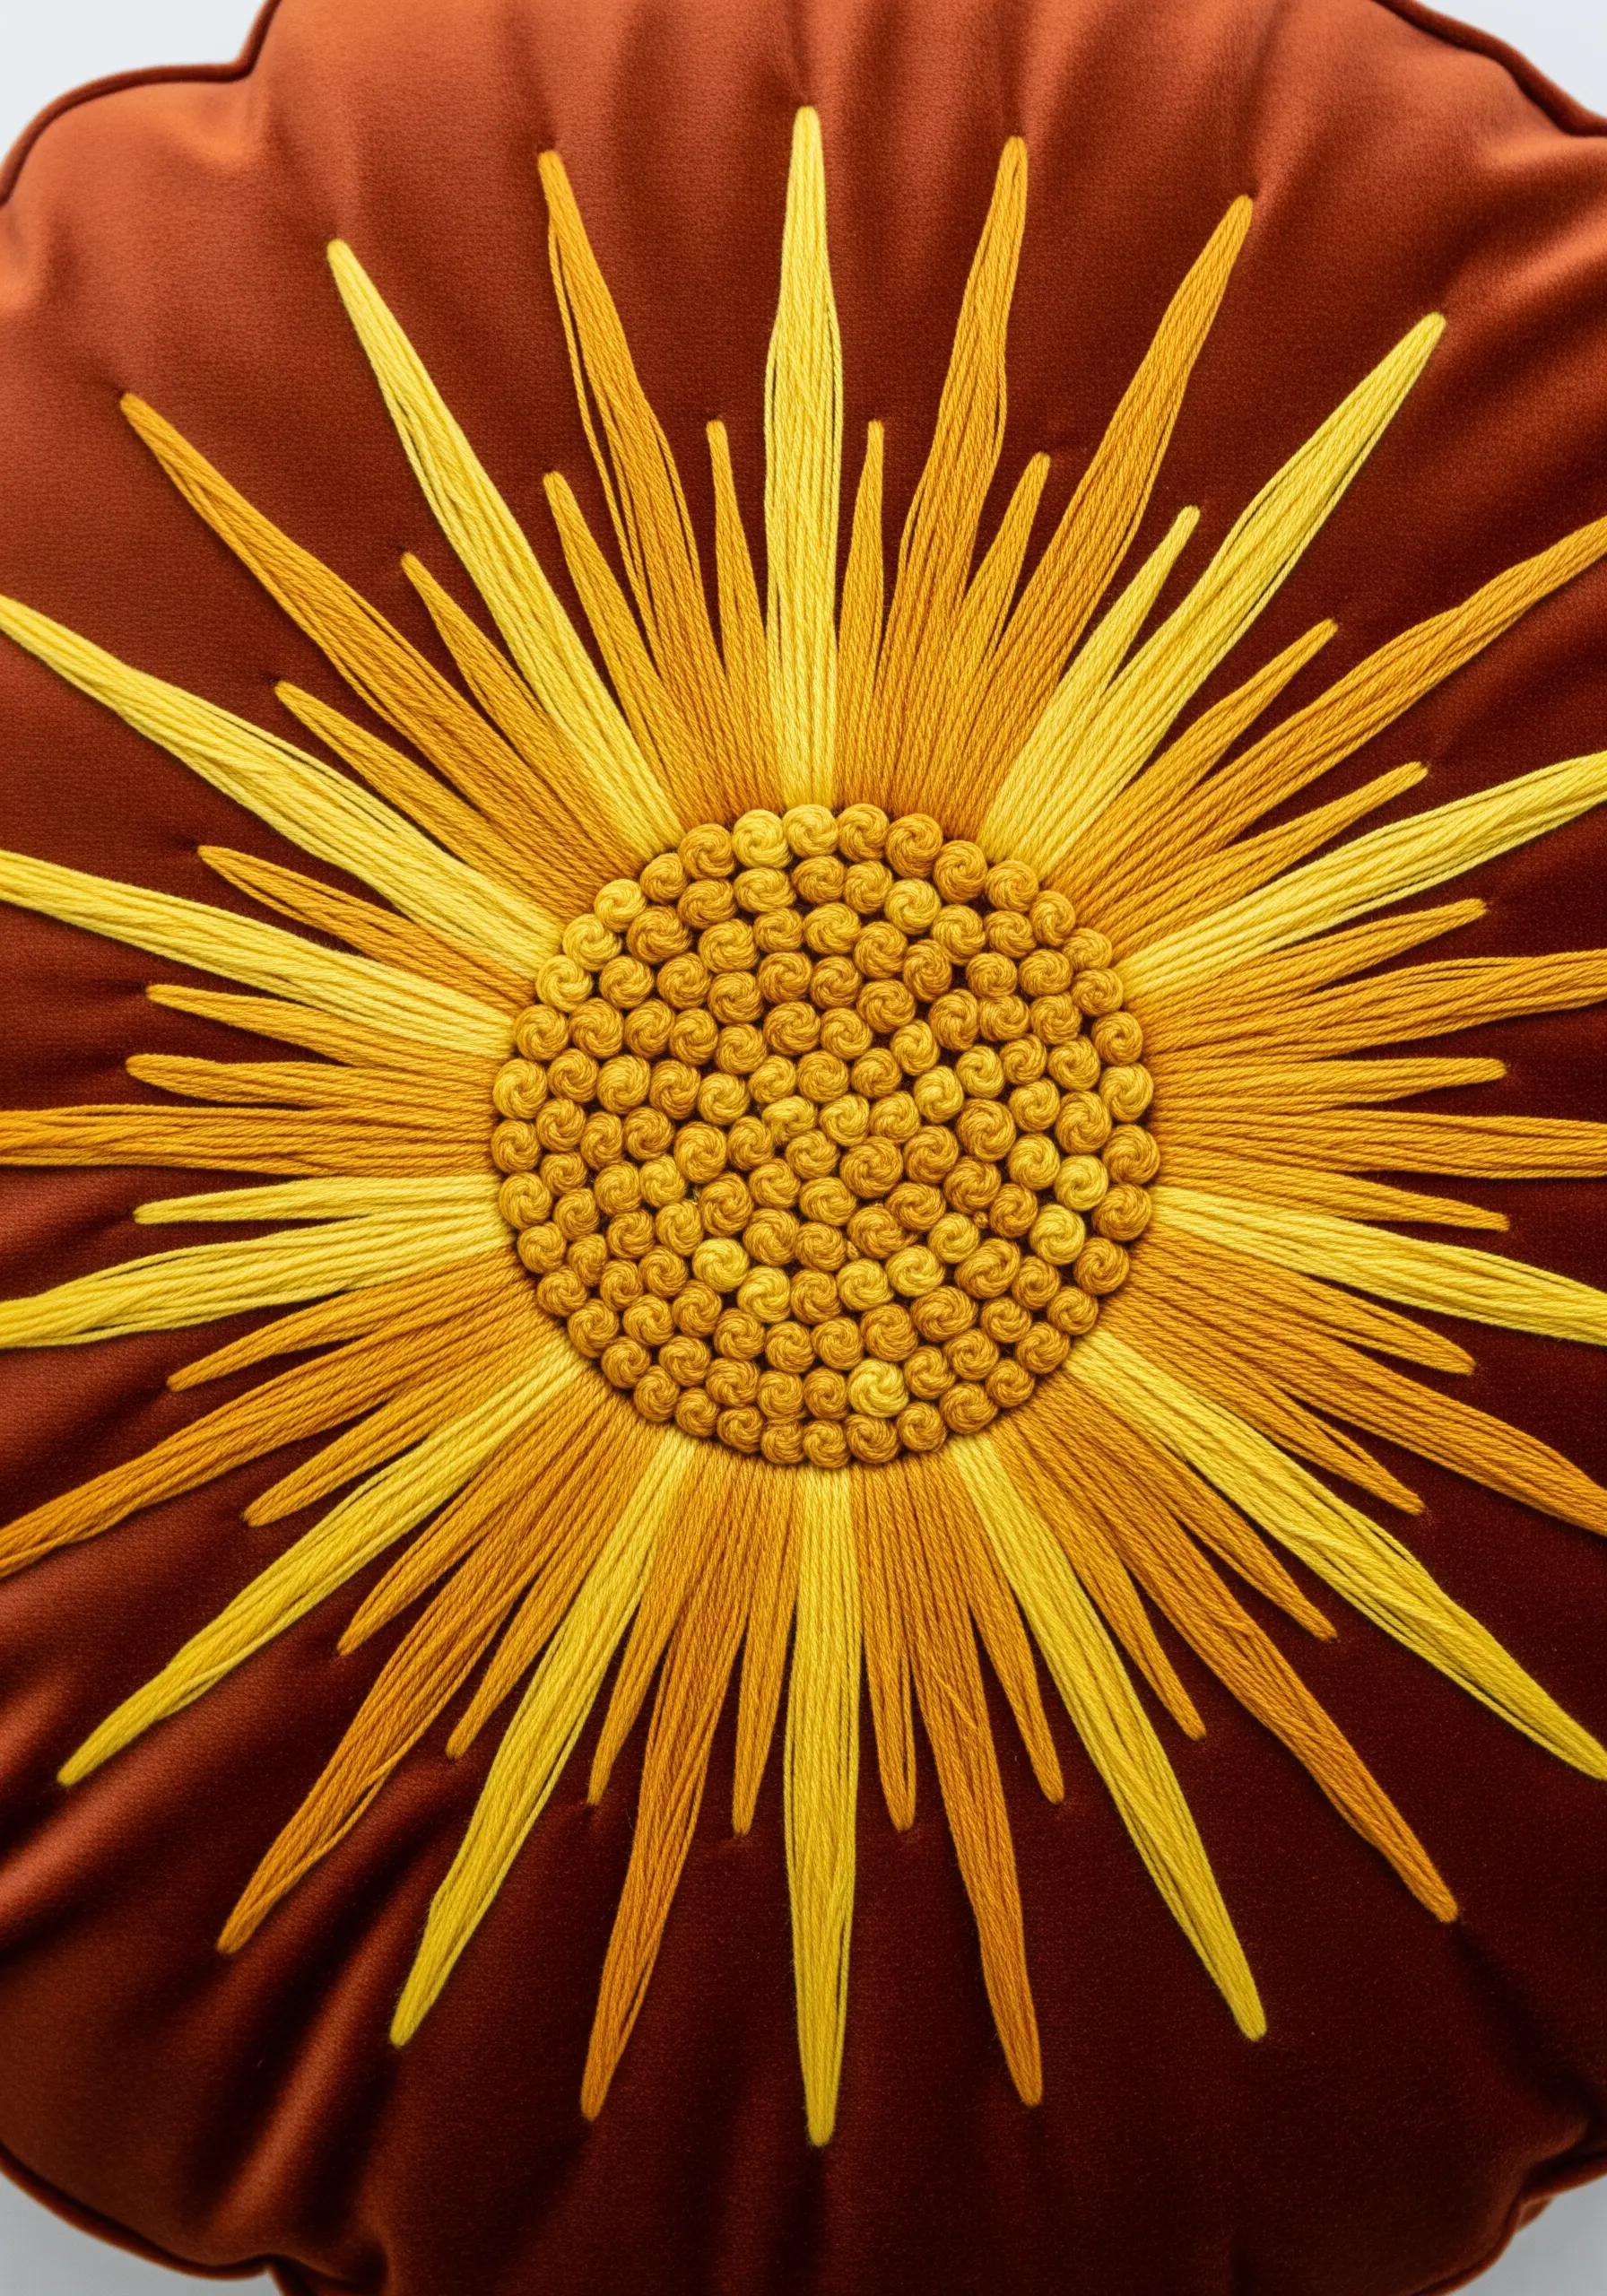
Capture the energy of a retro sunburst by using nothing more than the simple straight stitch, arranged with intention.
Select three or four adjacent shades in a single color family—like mustard, gold, and lemon yellow—and work them in radiating lines from the center outwards.
The key to a professional finish is maintaining consistent tension; your stitches should lie flat against the velvet without puckering it.
For the center, fill the space with tightly packed French knots to create a dense, bobbled texture that contrasts beautifully with the smooth, sleek rays.
3. Achieve Rhythmic Flow with Whipped Chain Stitch
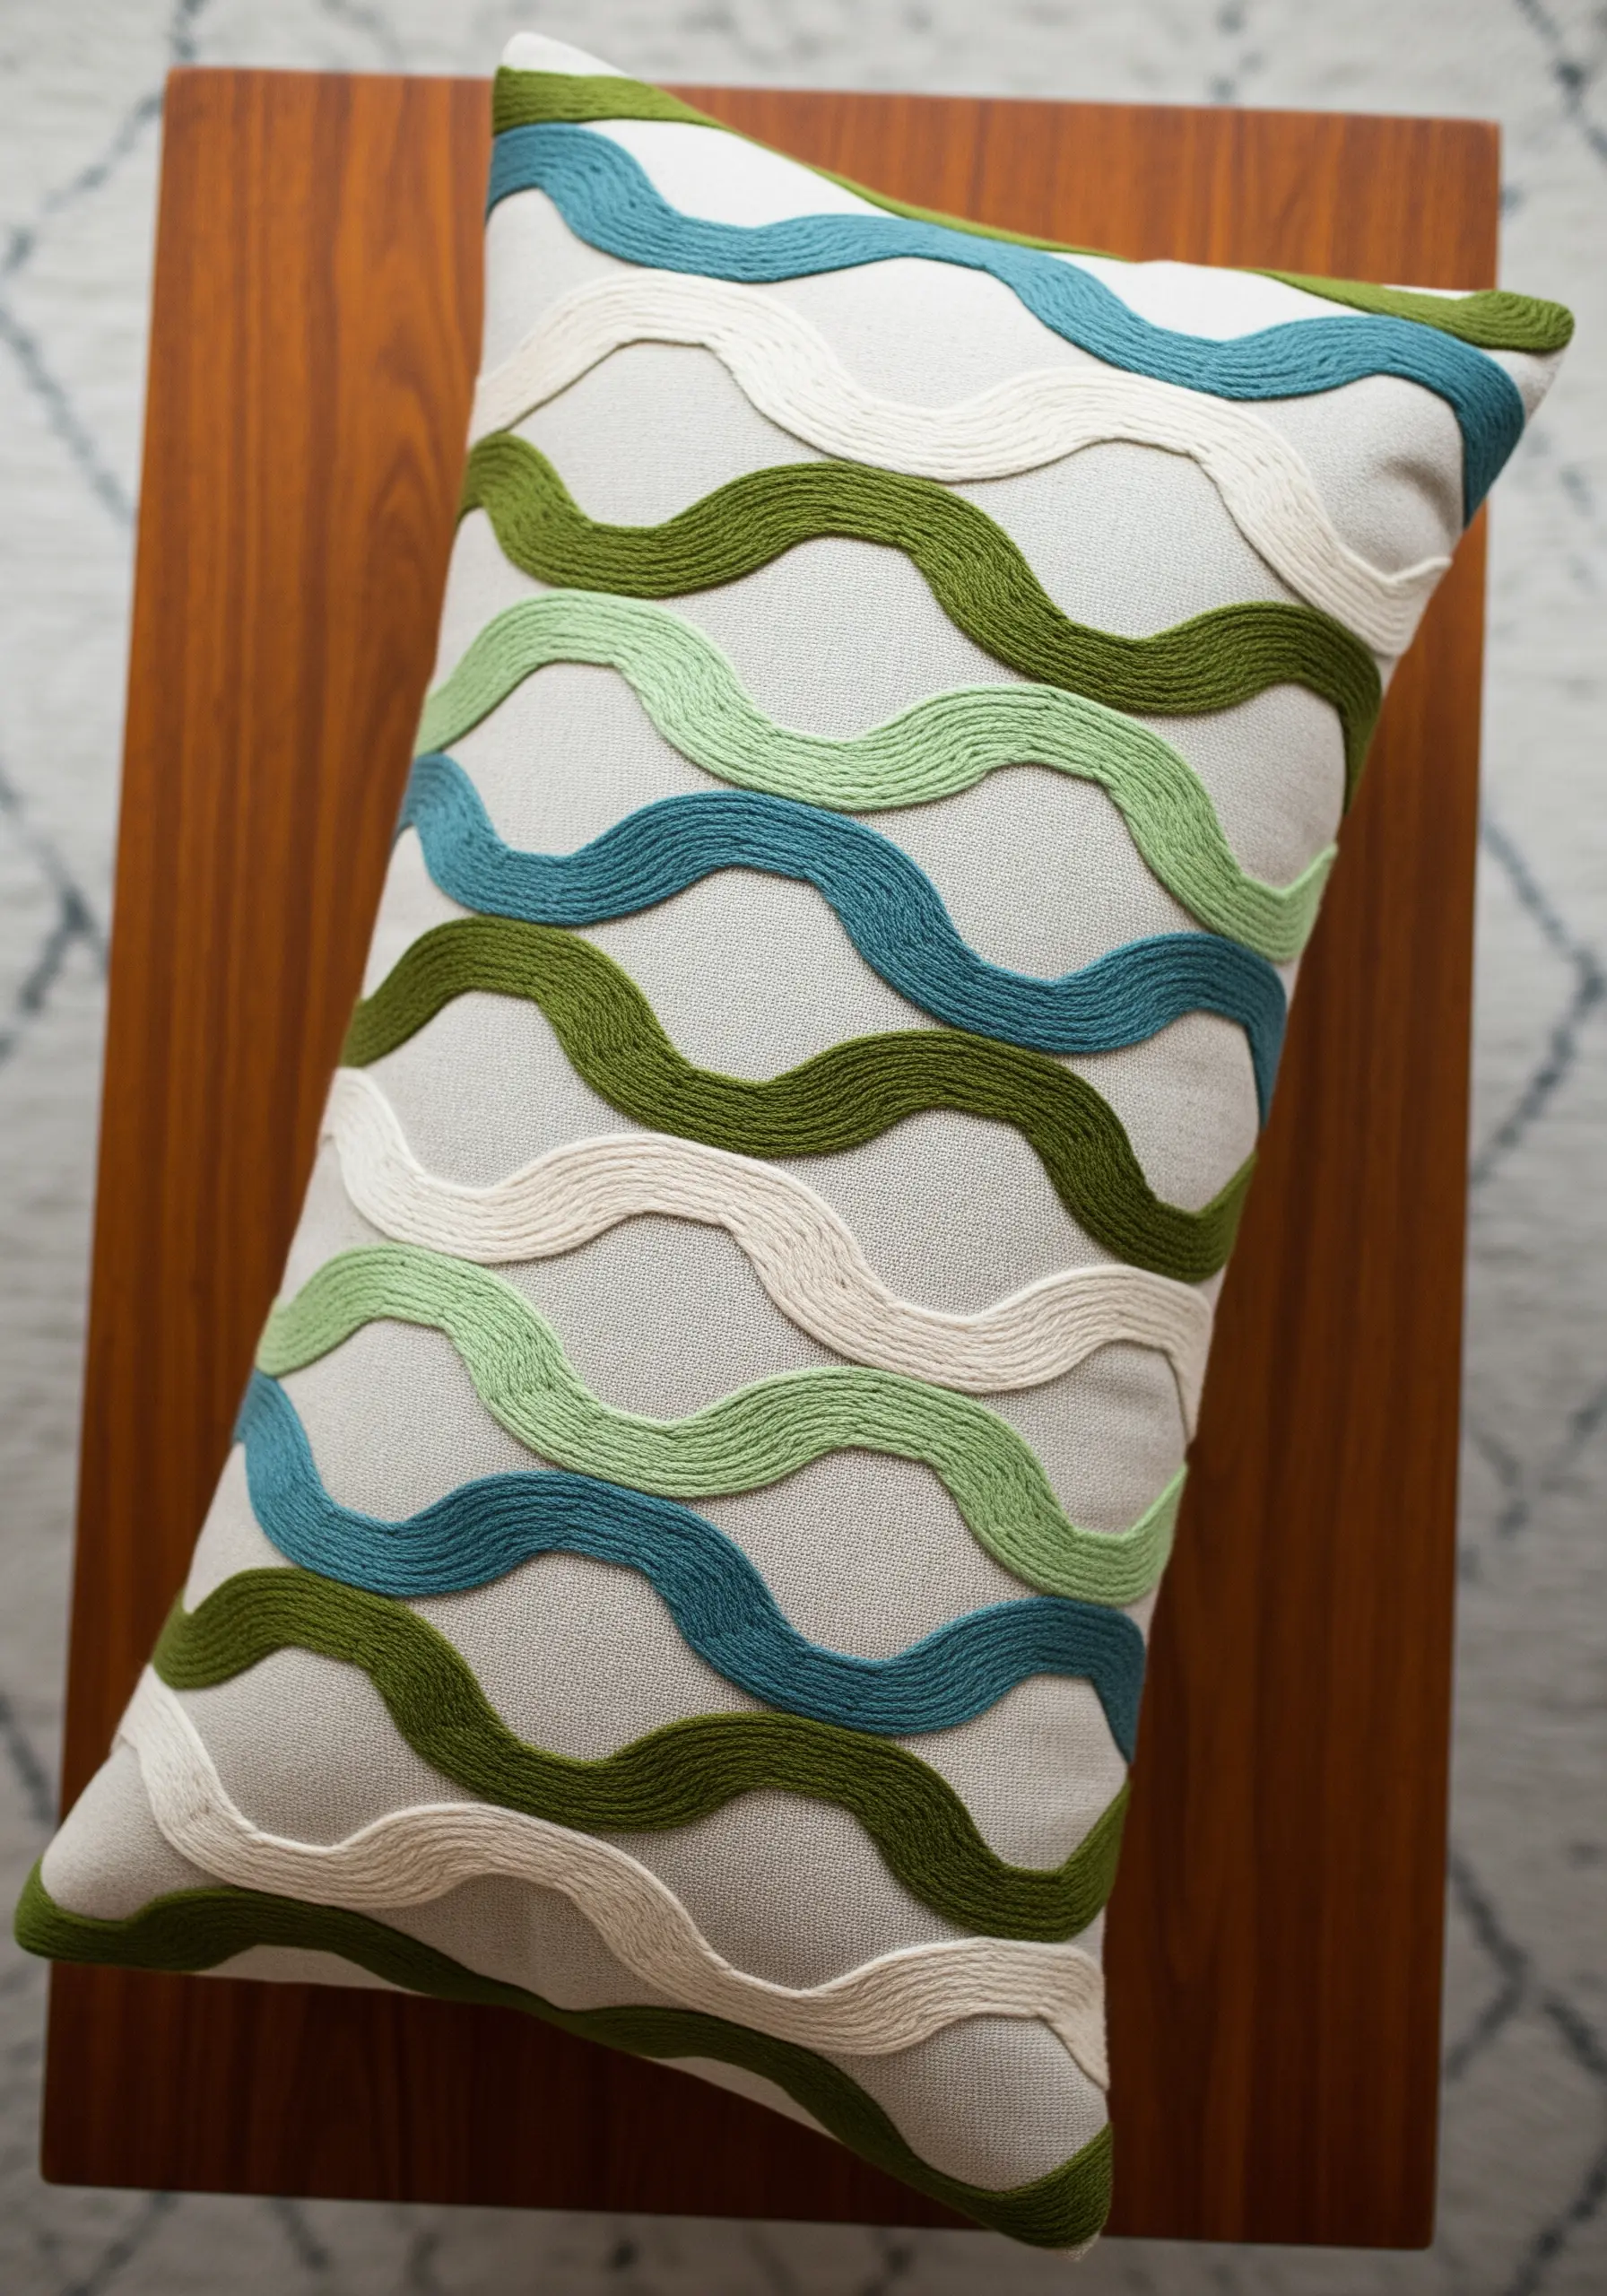
Give your wavy patterns a smooth, rope-like finish by elevating a basic chain stitch with a whipping technique.
First, lay down a foundation of standard chain stitches along your curved lines.
Next, take a second thread—either in the same color for subtlety or a contrasting one for a pop—and pass it under each link of the chain without piercing the fabric.
This method covers the segmented look of a plain chain stitch, resulting in a continuous, raised line that flows effortlessly across the pillow.
4. Use Punch Needle for Plush, High-Impact Rainbows
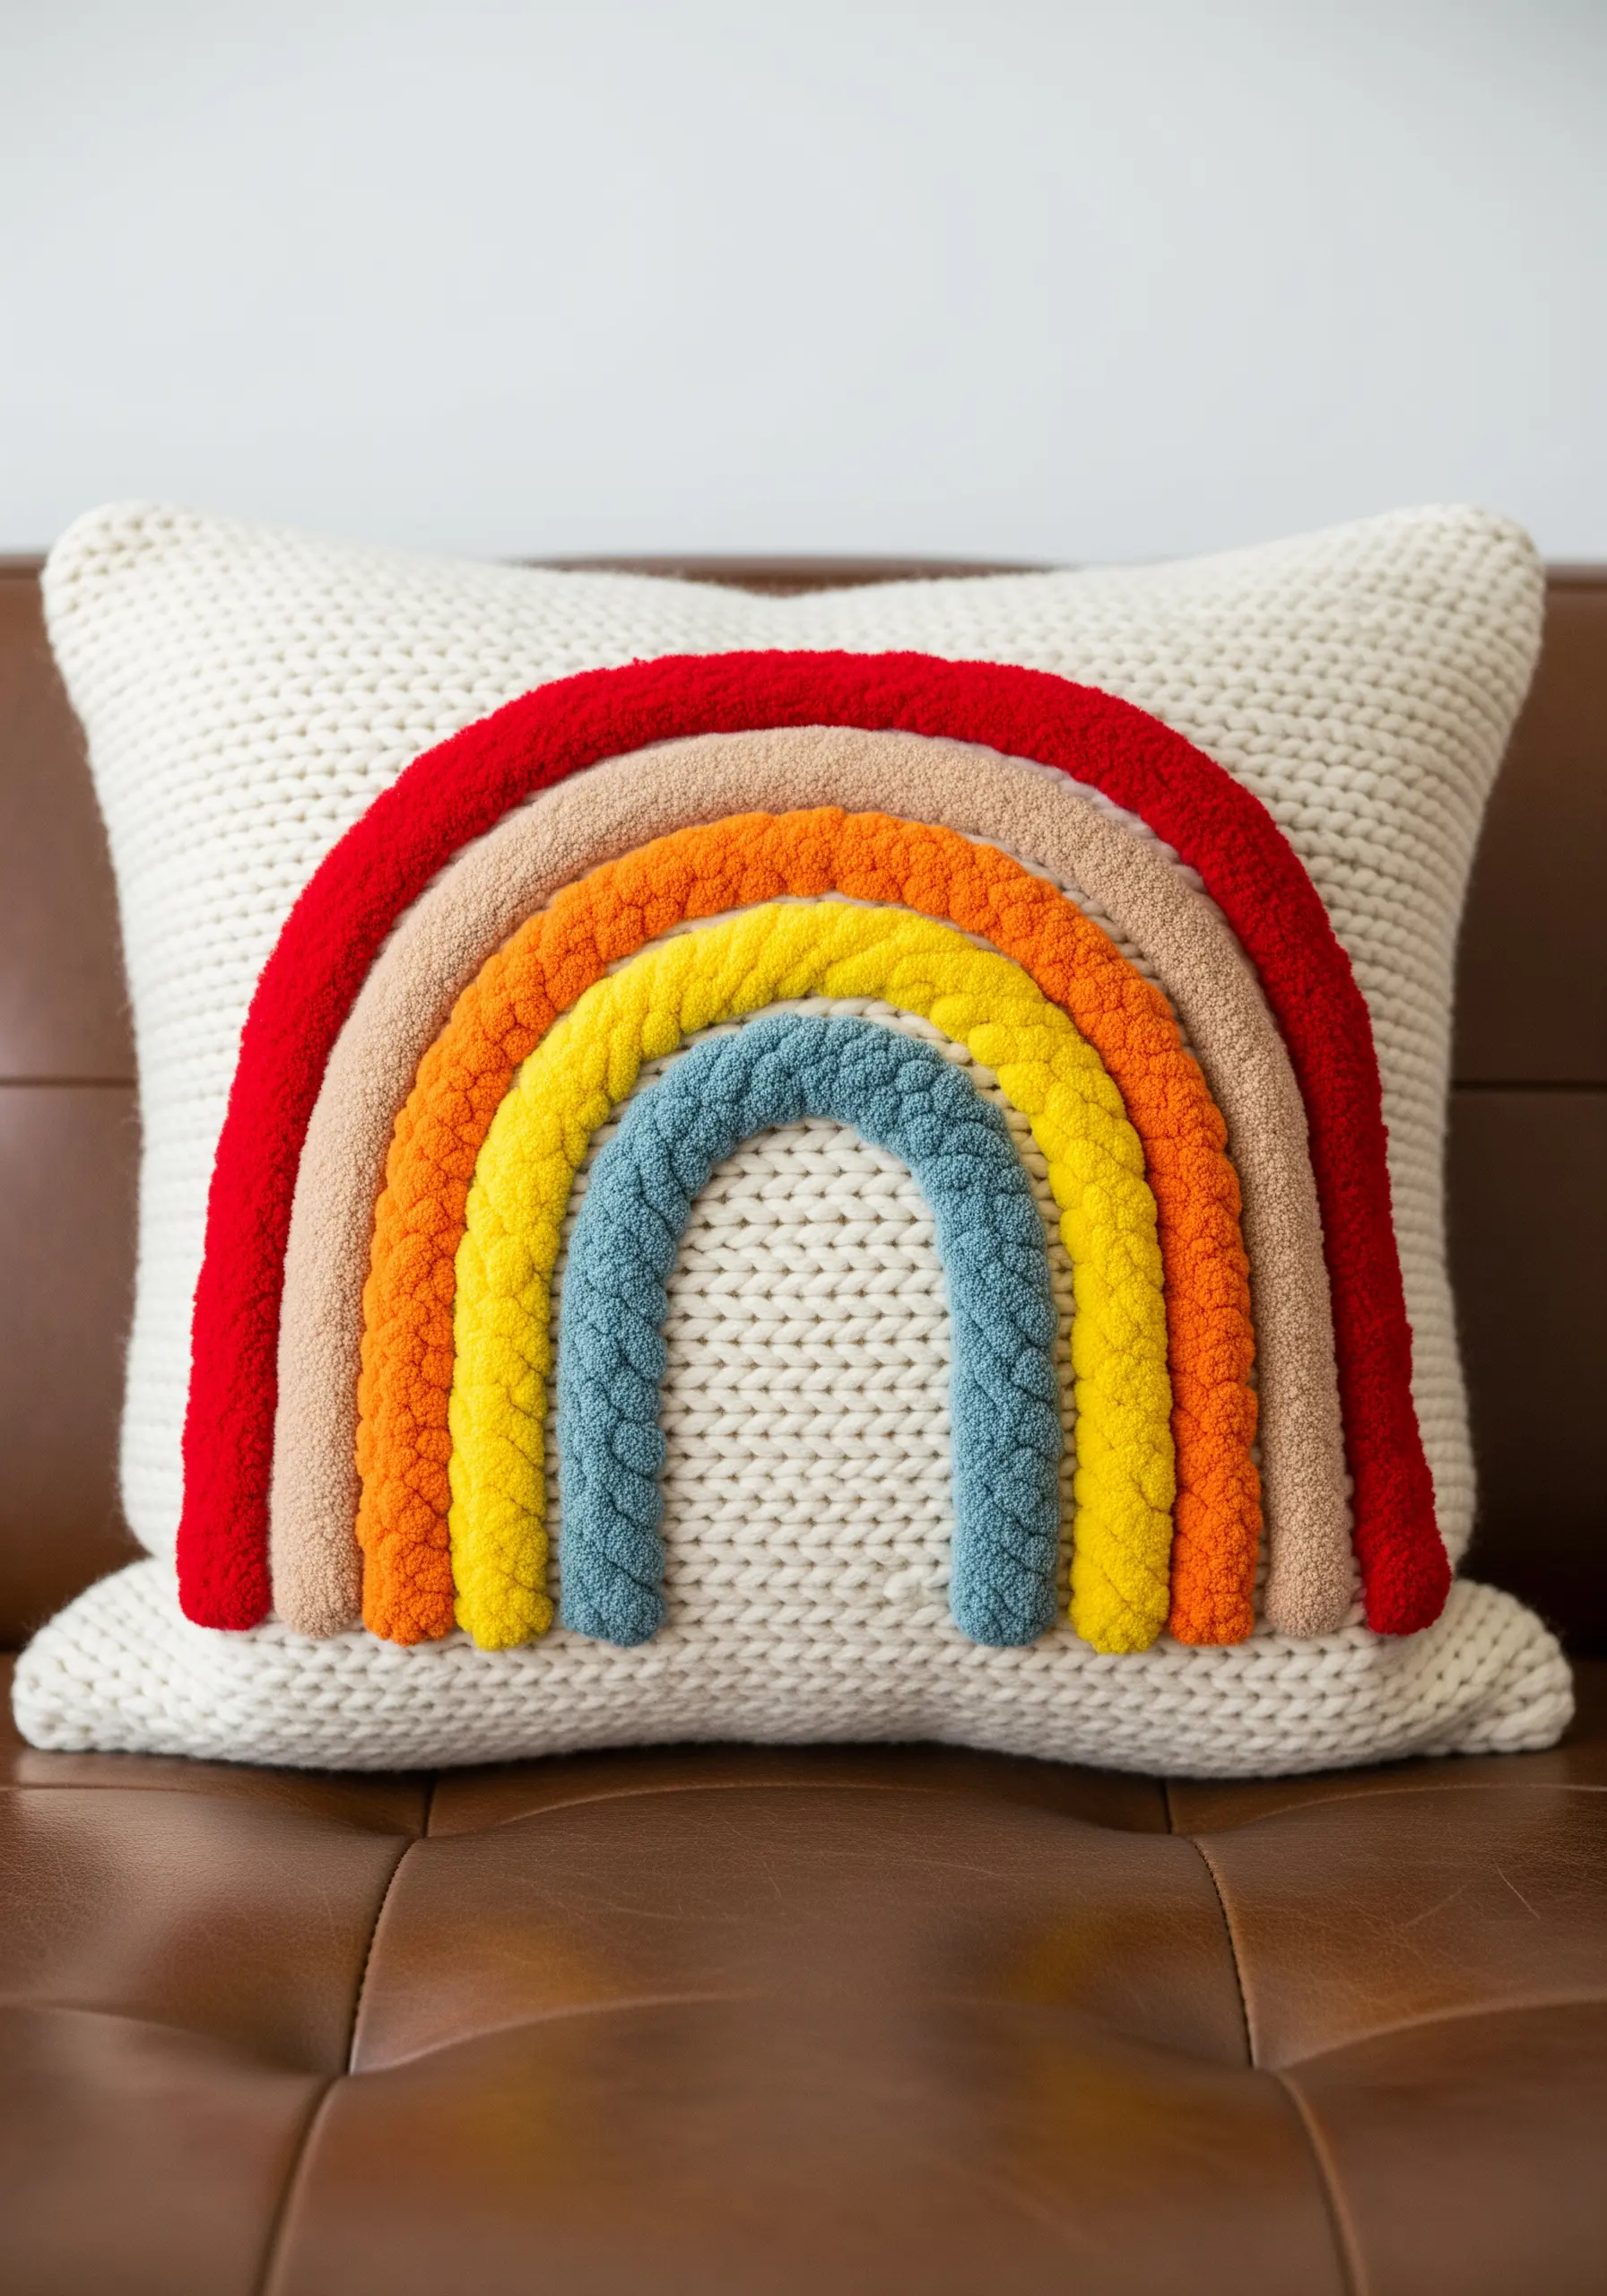
For that ultra-soft, chunky texture, put down the embroidery floss and pick up a punch needle and some thick, plush yarn.
This technique allows you to create dense loops of yarn that result in a high-pile, almost carpet-like finish that’s incredibly tactile.
To replicate this look, choose a chunky chenille or wool yarn and work on a loosely woven fabric base, like monk’s cloth, before constructing your pillow.
It’s a surprisingly fast way to fill large color blocks and achieve a bold, cozy statement piece.
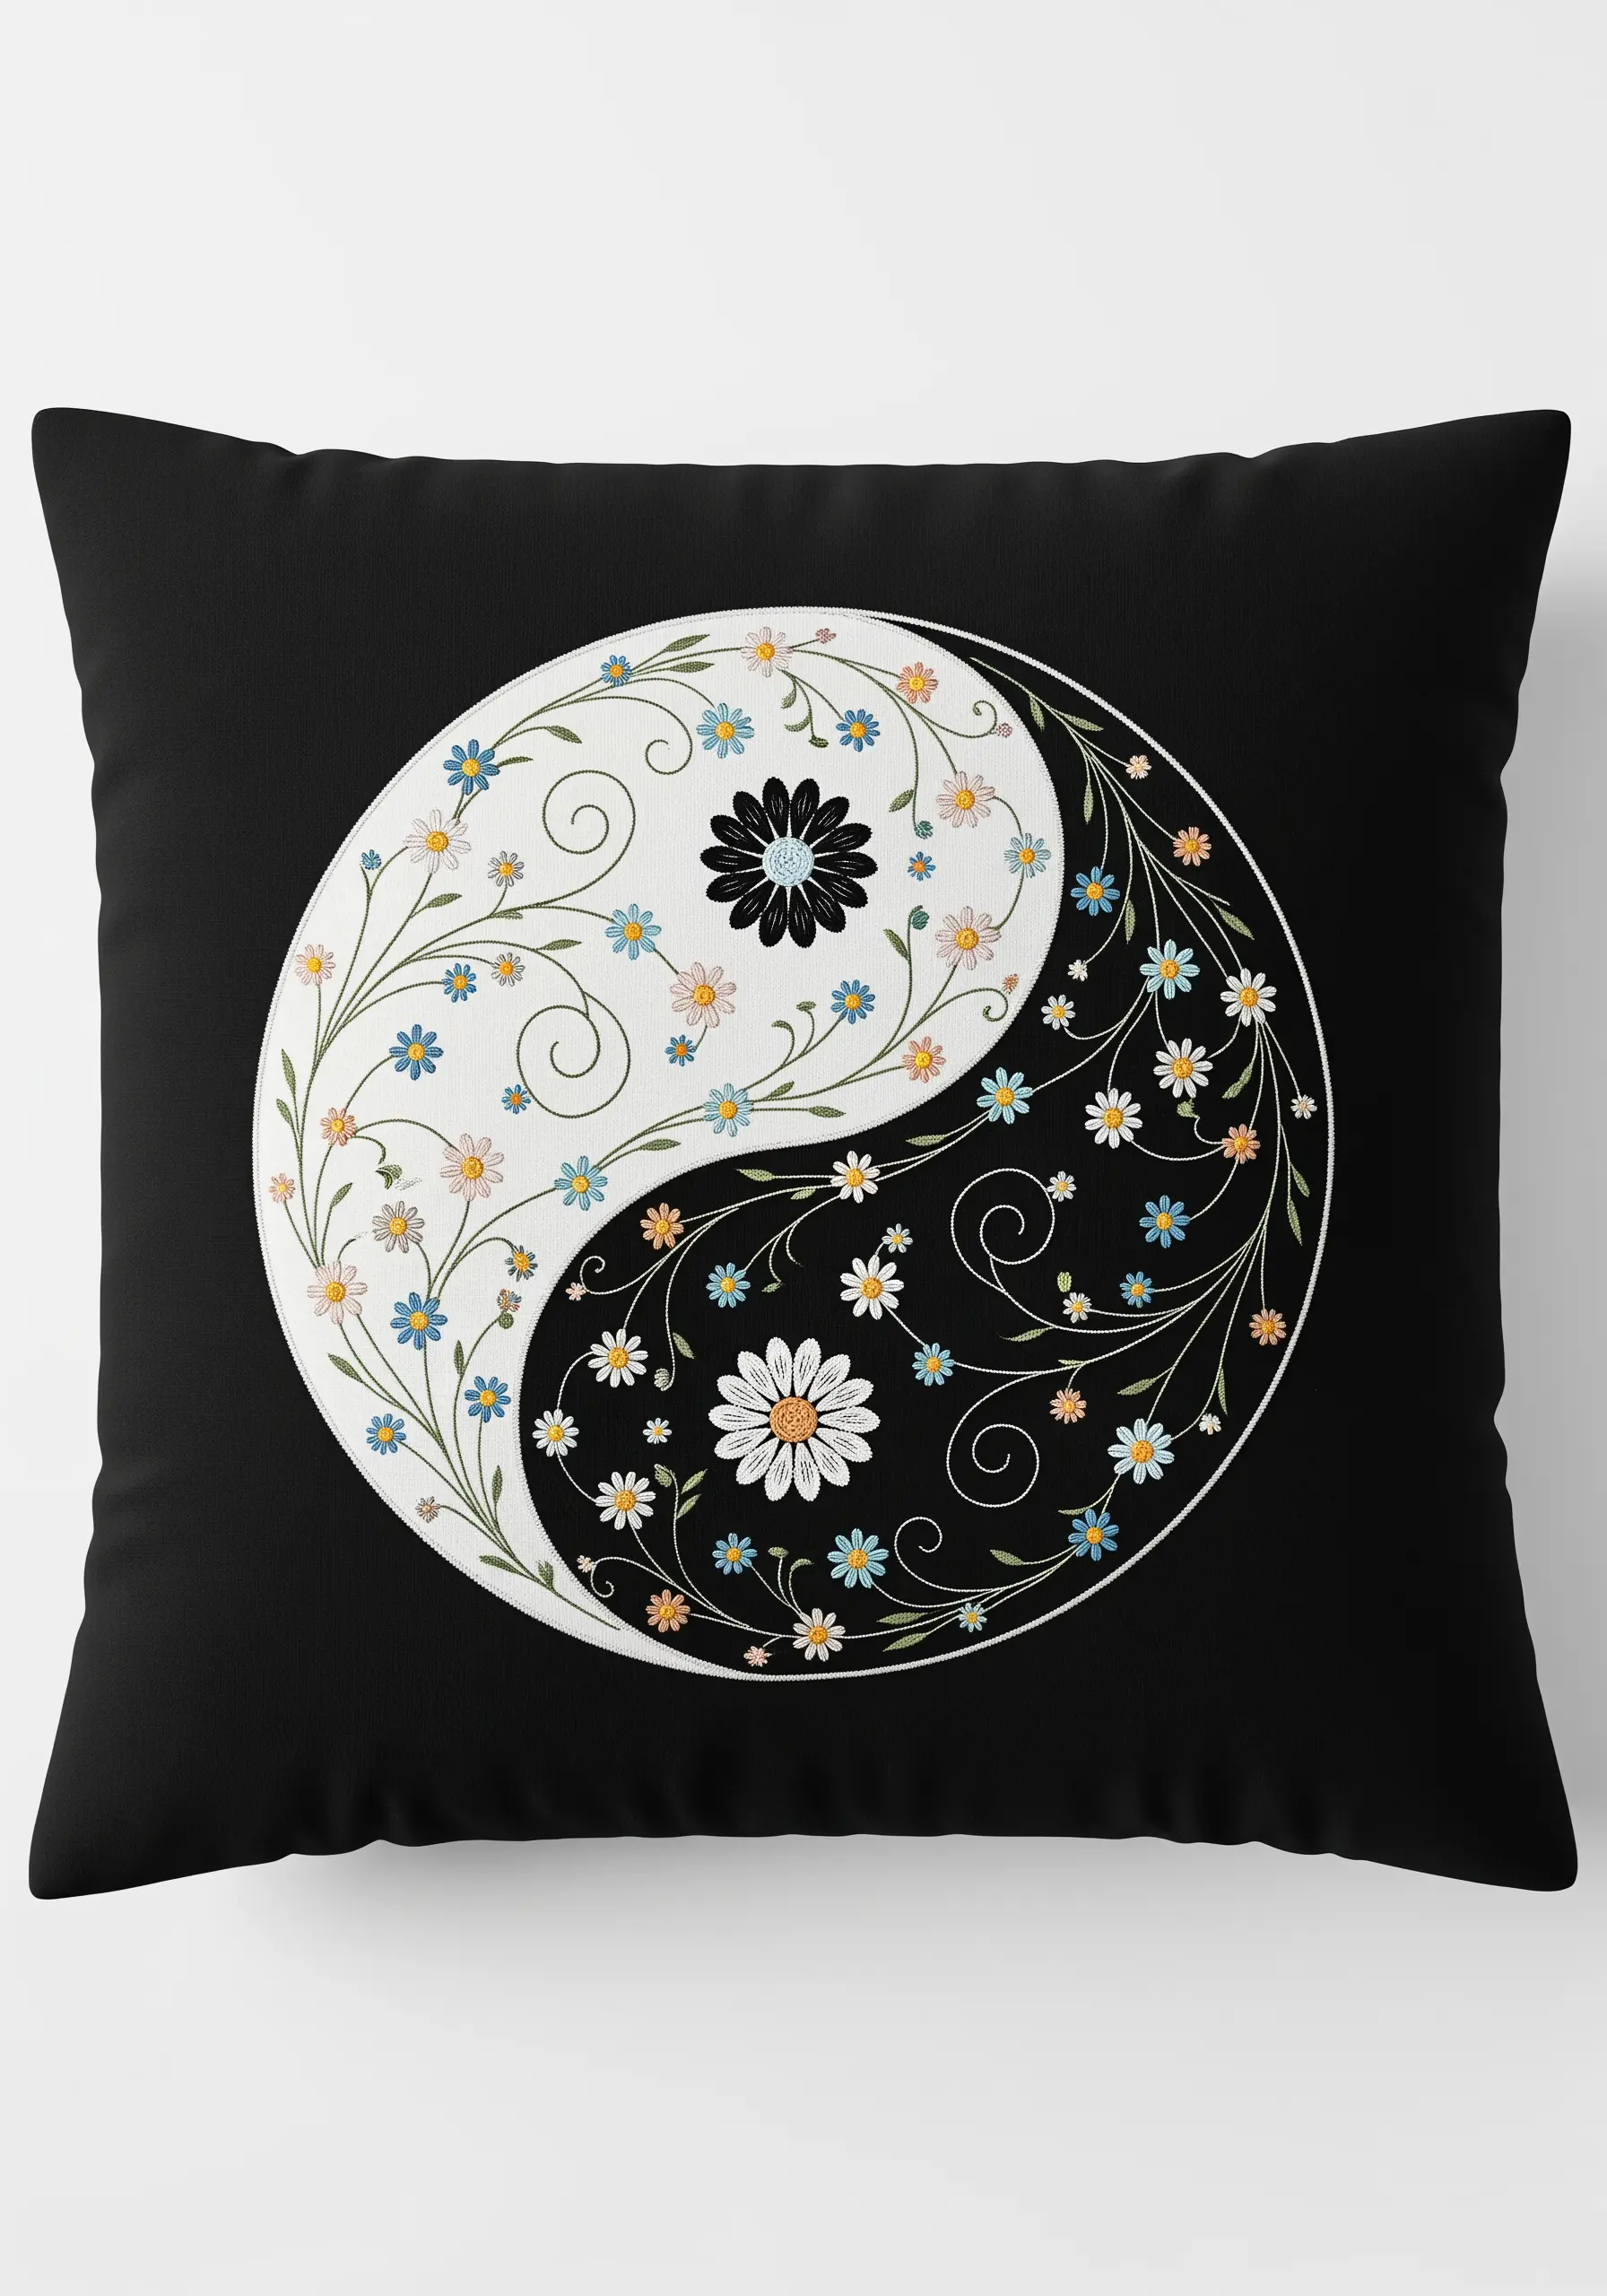
5. Combine Satin Stitch and French Knots for Floral Dimension
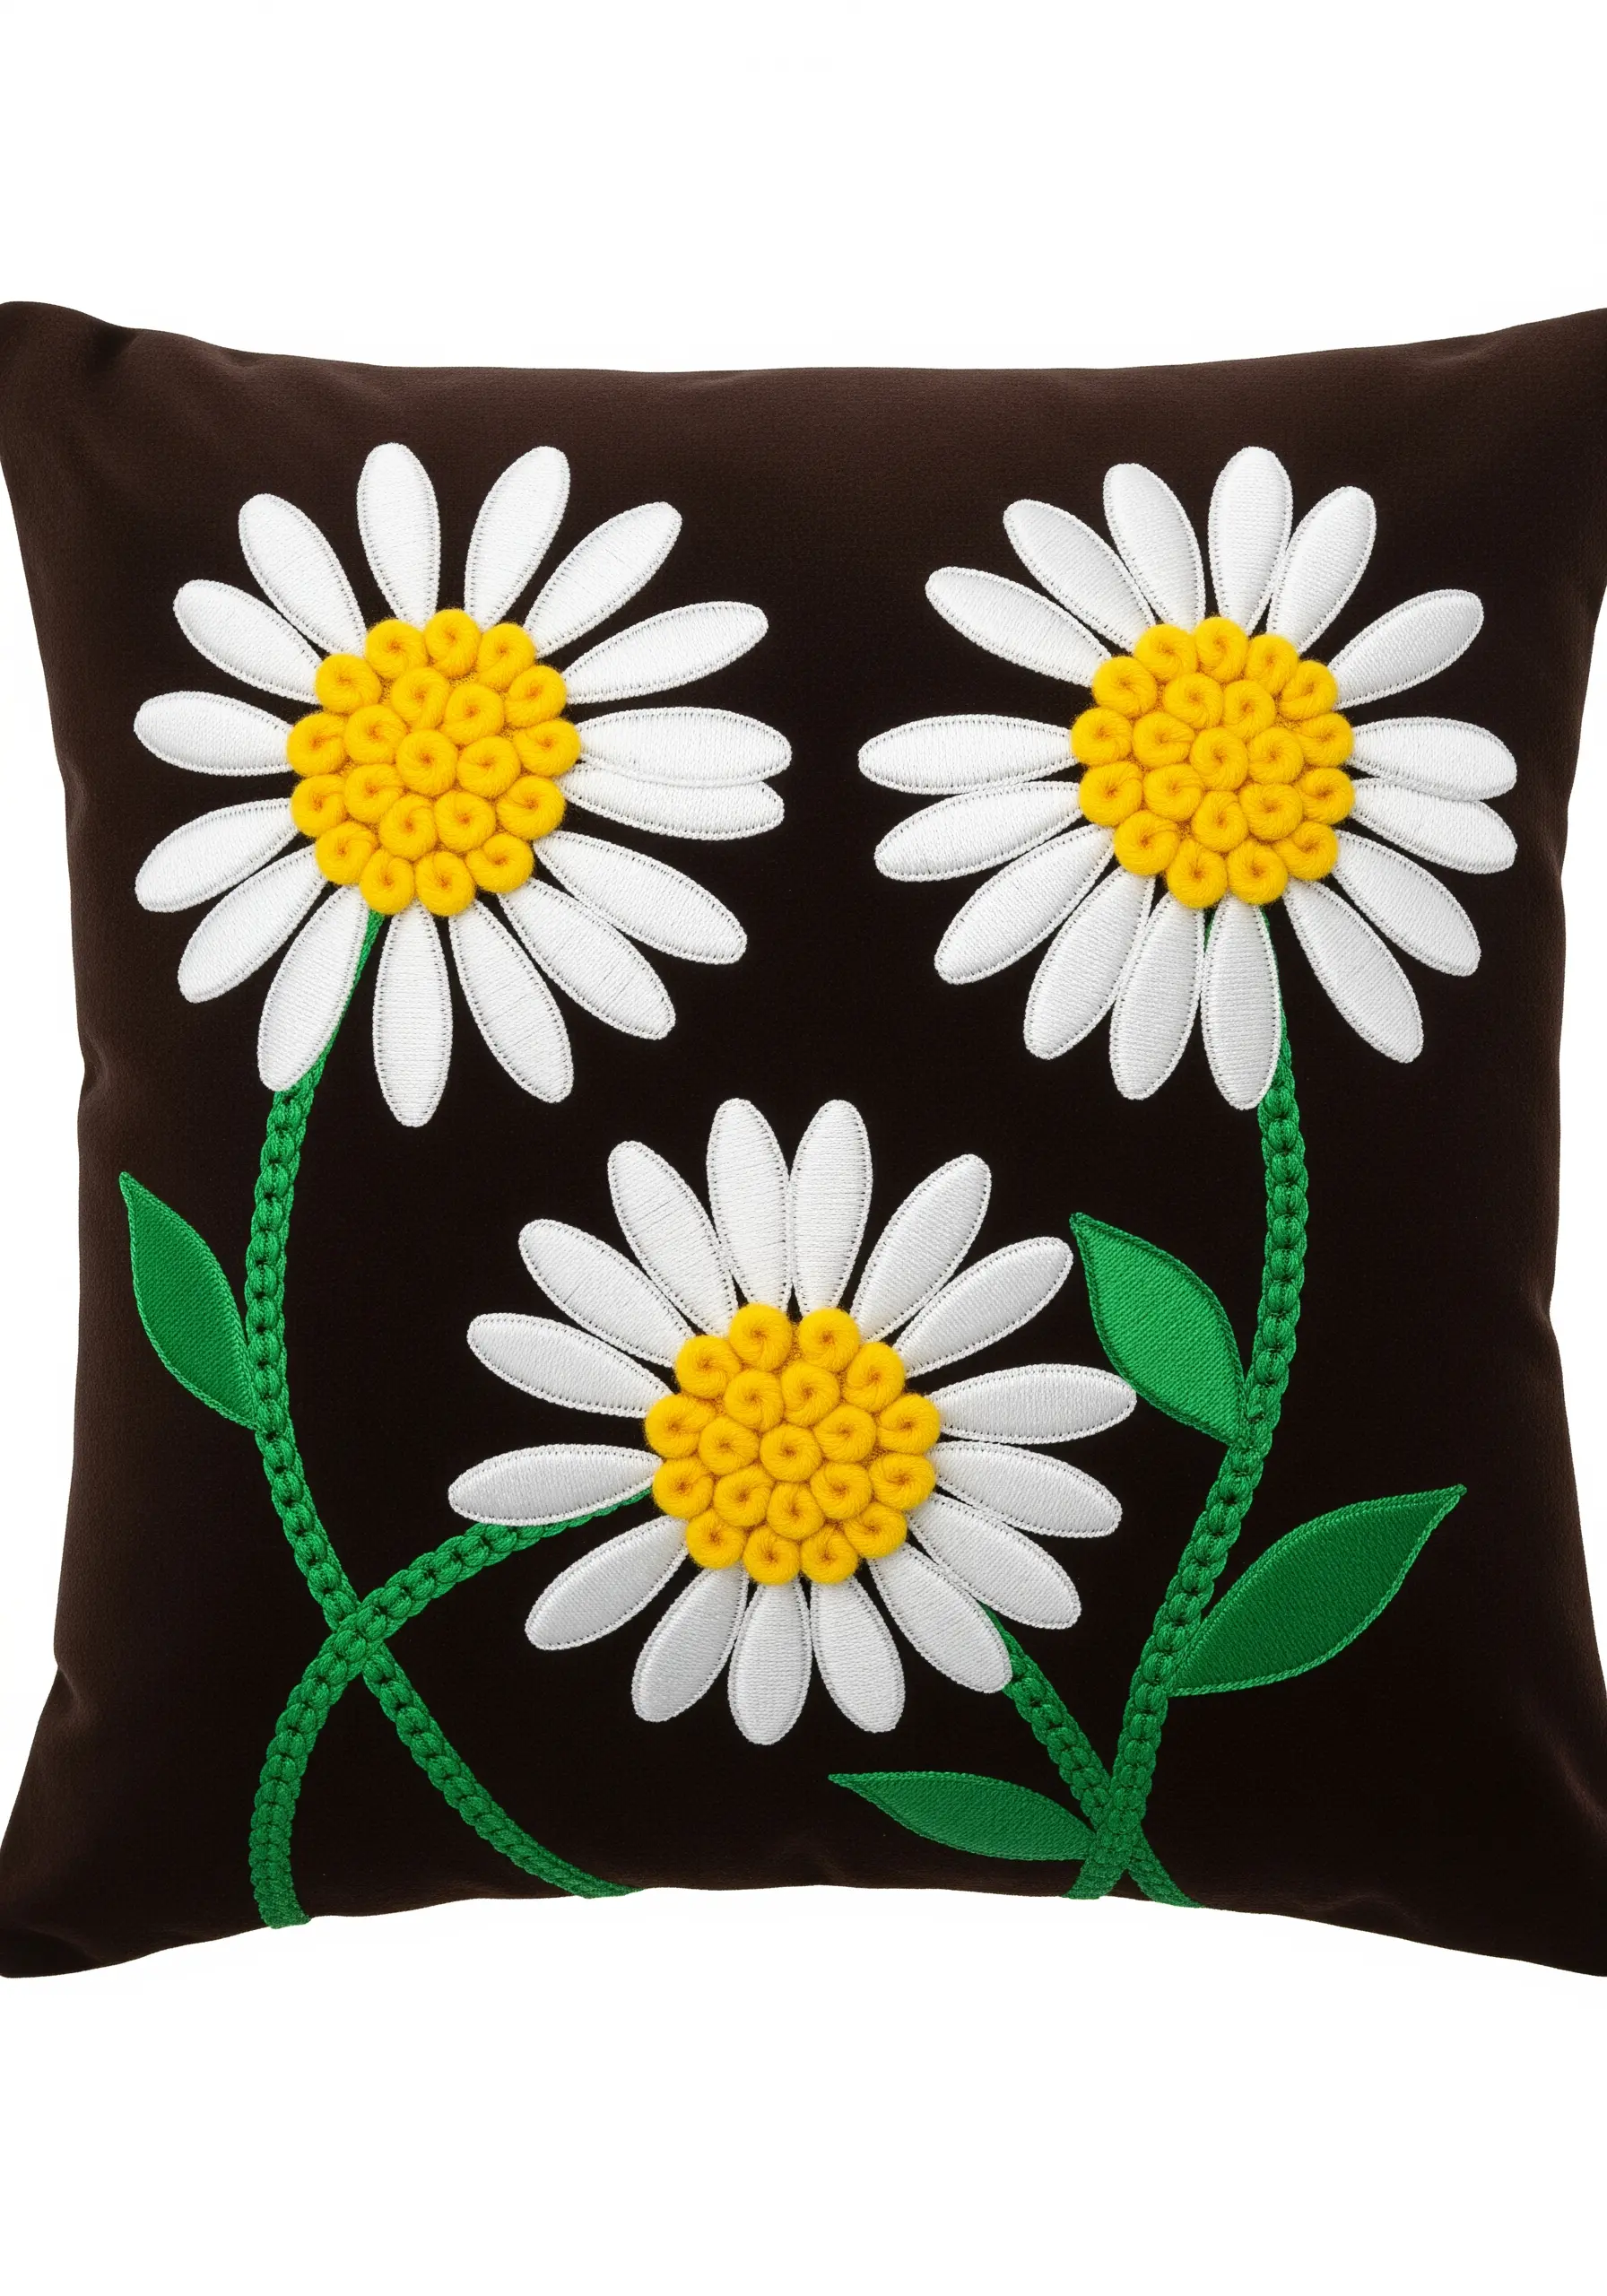
Make your retro daisies pop from the dark fabric by creating a strong contrast in textures.
Use a smooth, perfectly aligned satin stitch for the white petals, ensuring each stitch lies flush against the next for a seamless fill.
For the flower’s center, switch to French knots, packing them tightly to build a raised, bumpy surface that mimics a real daisy’s texture.
For the stems, opt for a braided chain stitch; its woven appearance provides more substance and visual weight than a simple stem stitch, completing the graphic look.
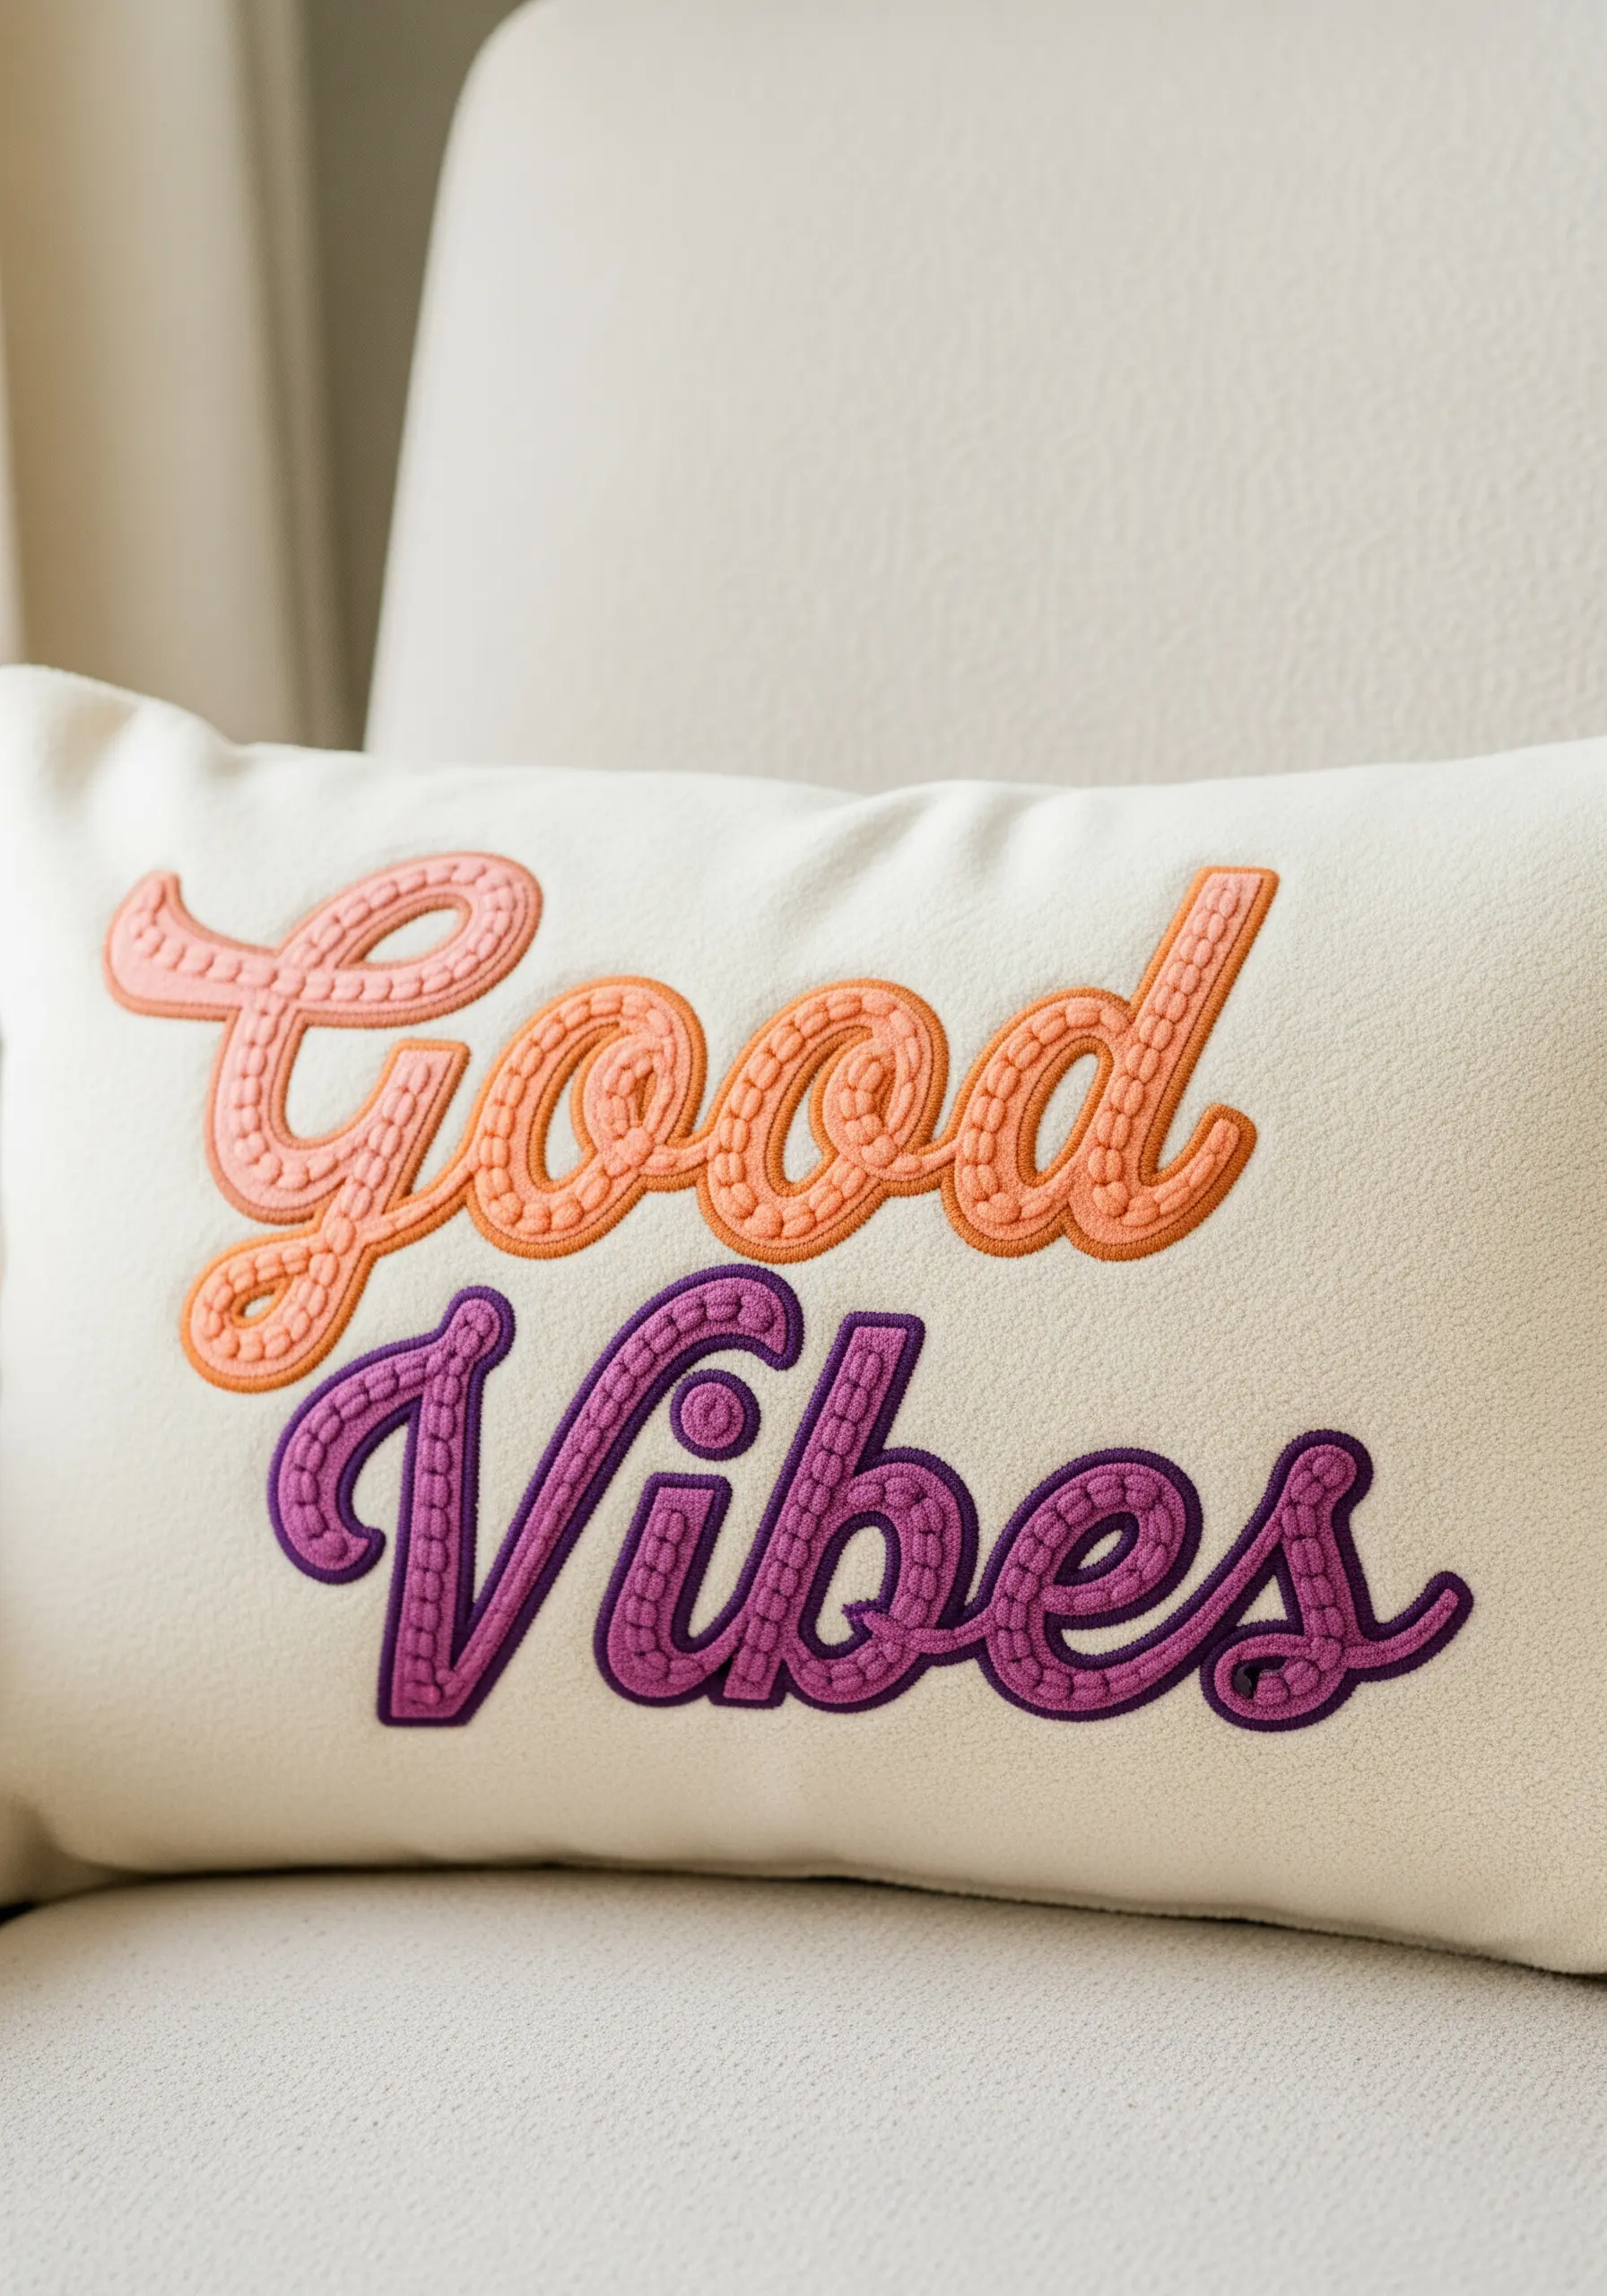
6. Layer Satin Stitch for Retro Bubble Lettering
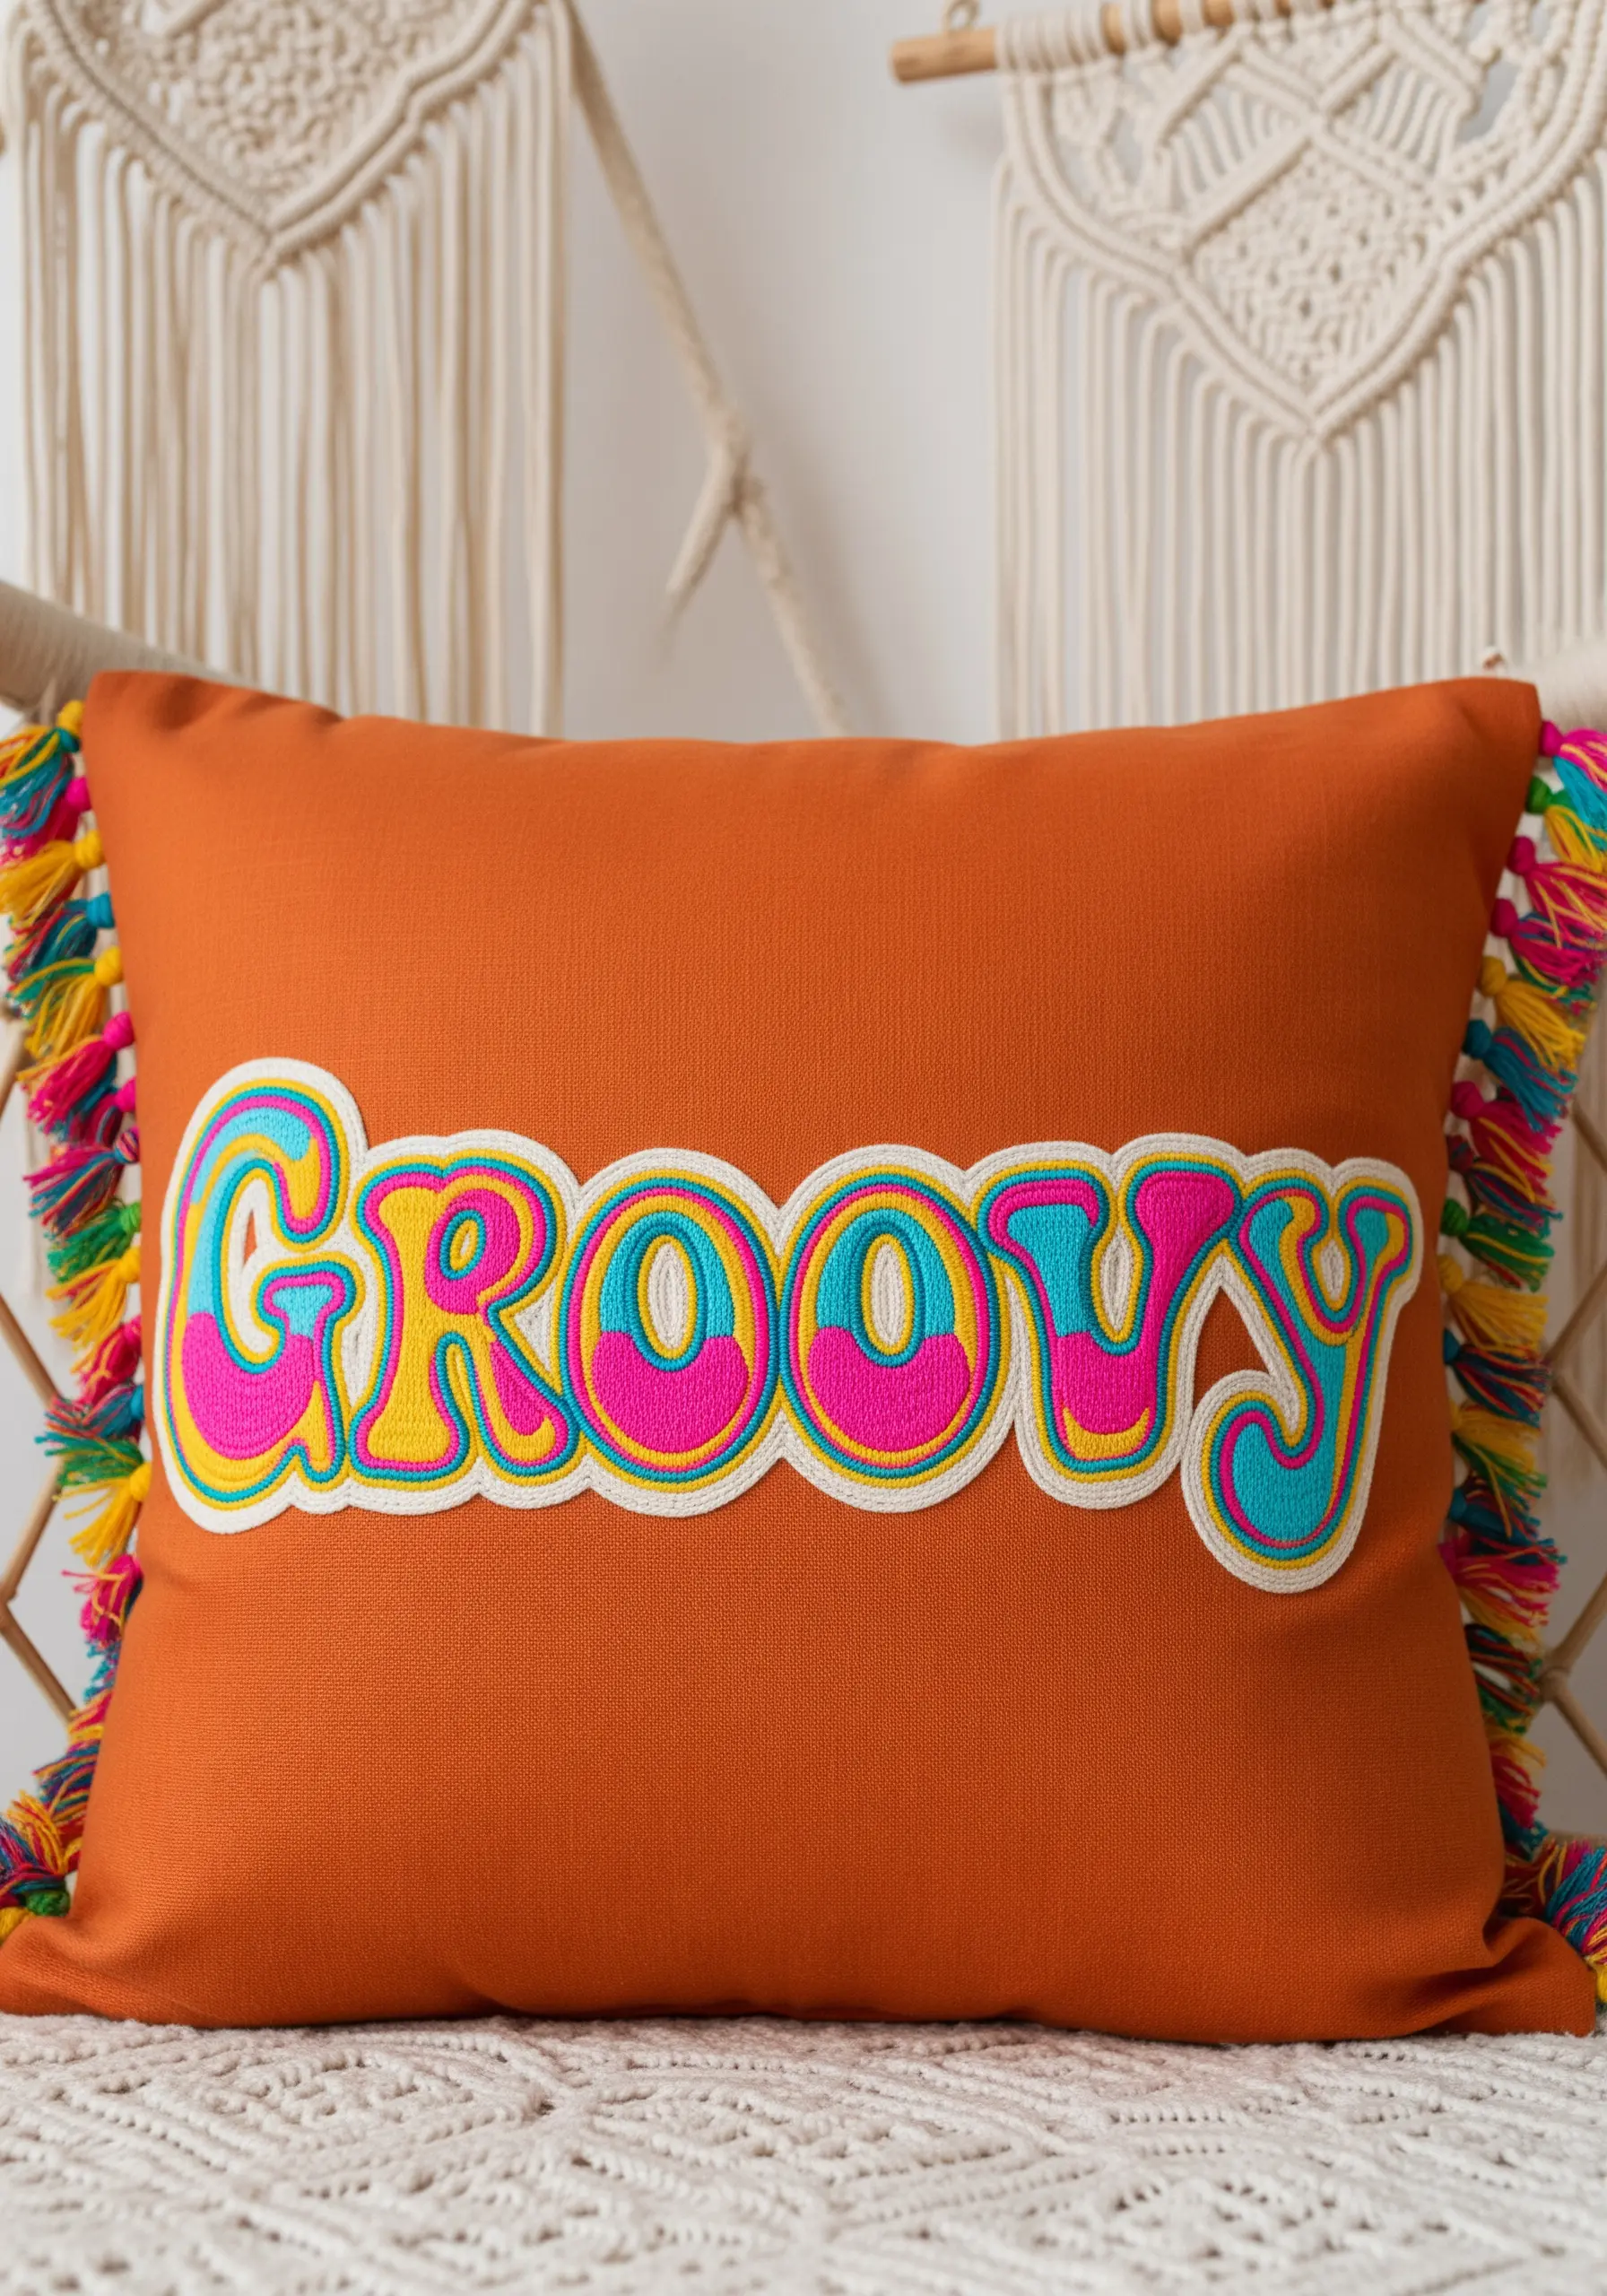
Create that iconic 70s bubble-letter effect by thinking in layers, almost like creating a digital design with thread.
Start by filling the main letter shapes with a vibrant satin stitch. Once that layer is complete, stitch a smaller, inset shape directly on top in a contrasting color.
The final, crucial step is to outline the entire word with a thick, clean border, like a whipped backstitch or a thin line of couching.
This technique builds dimension and makes your inspirational quote embroidery look crisp and intentional.
7. Define Forms with Directional Satin Stitch
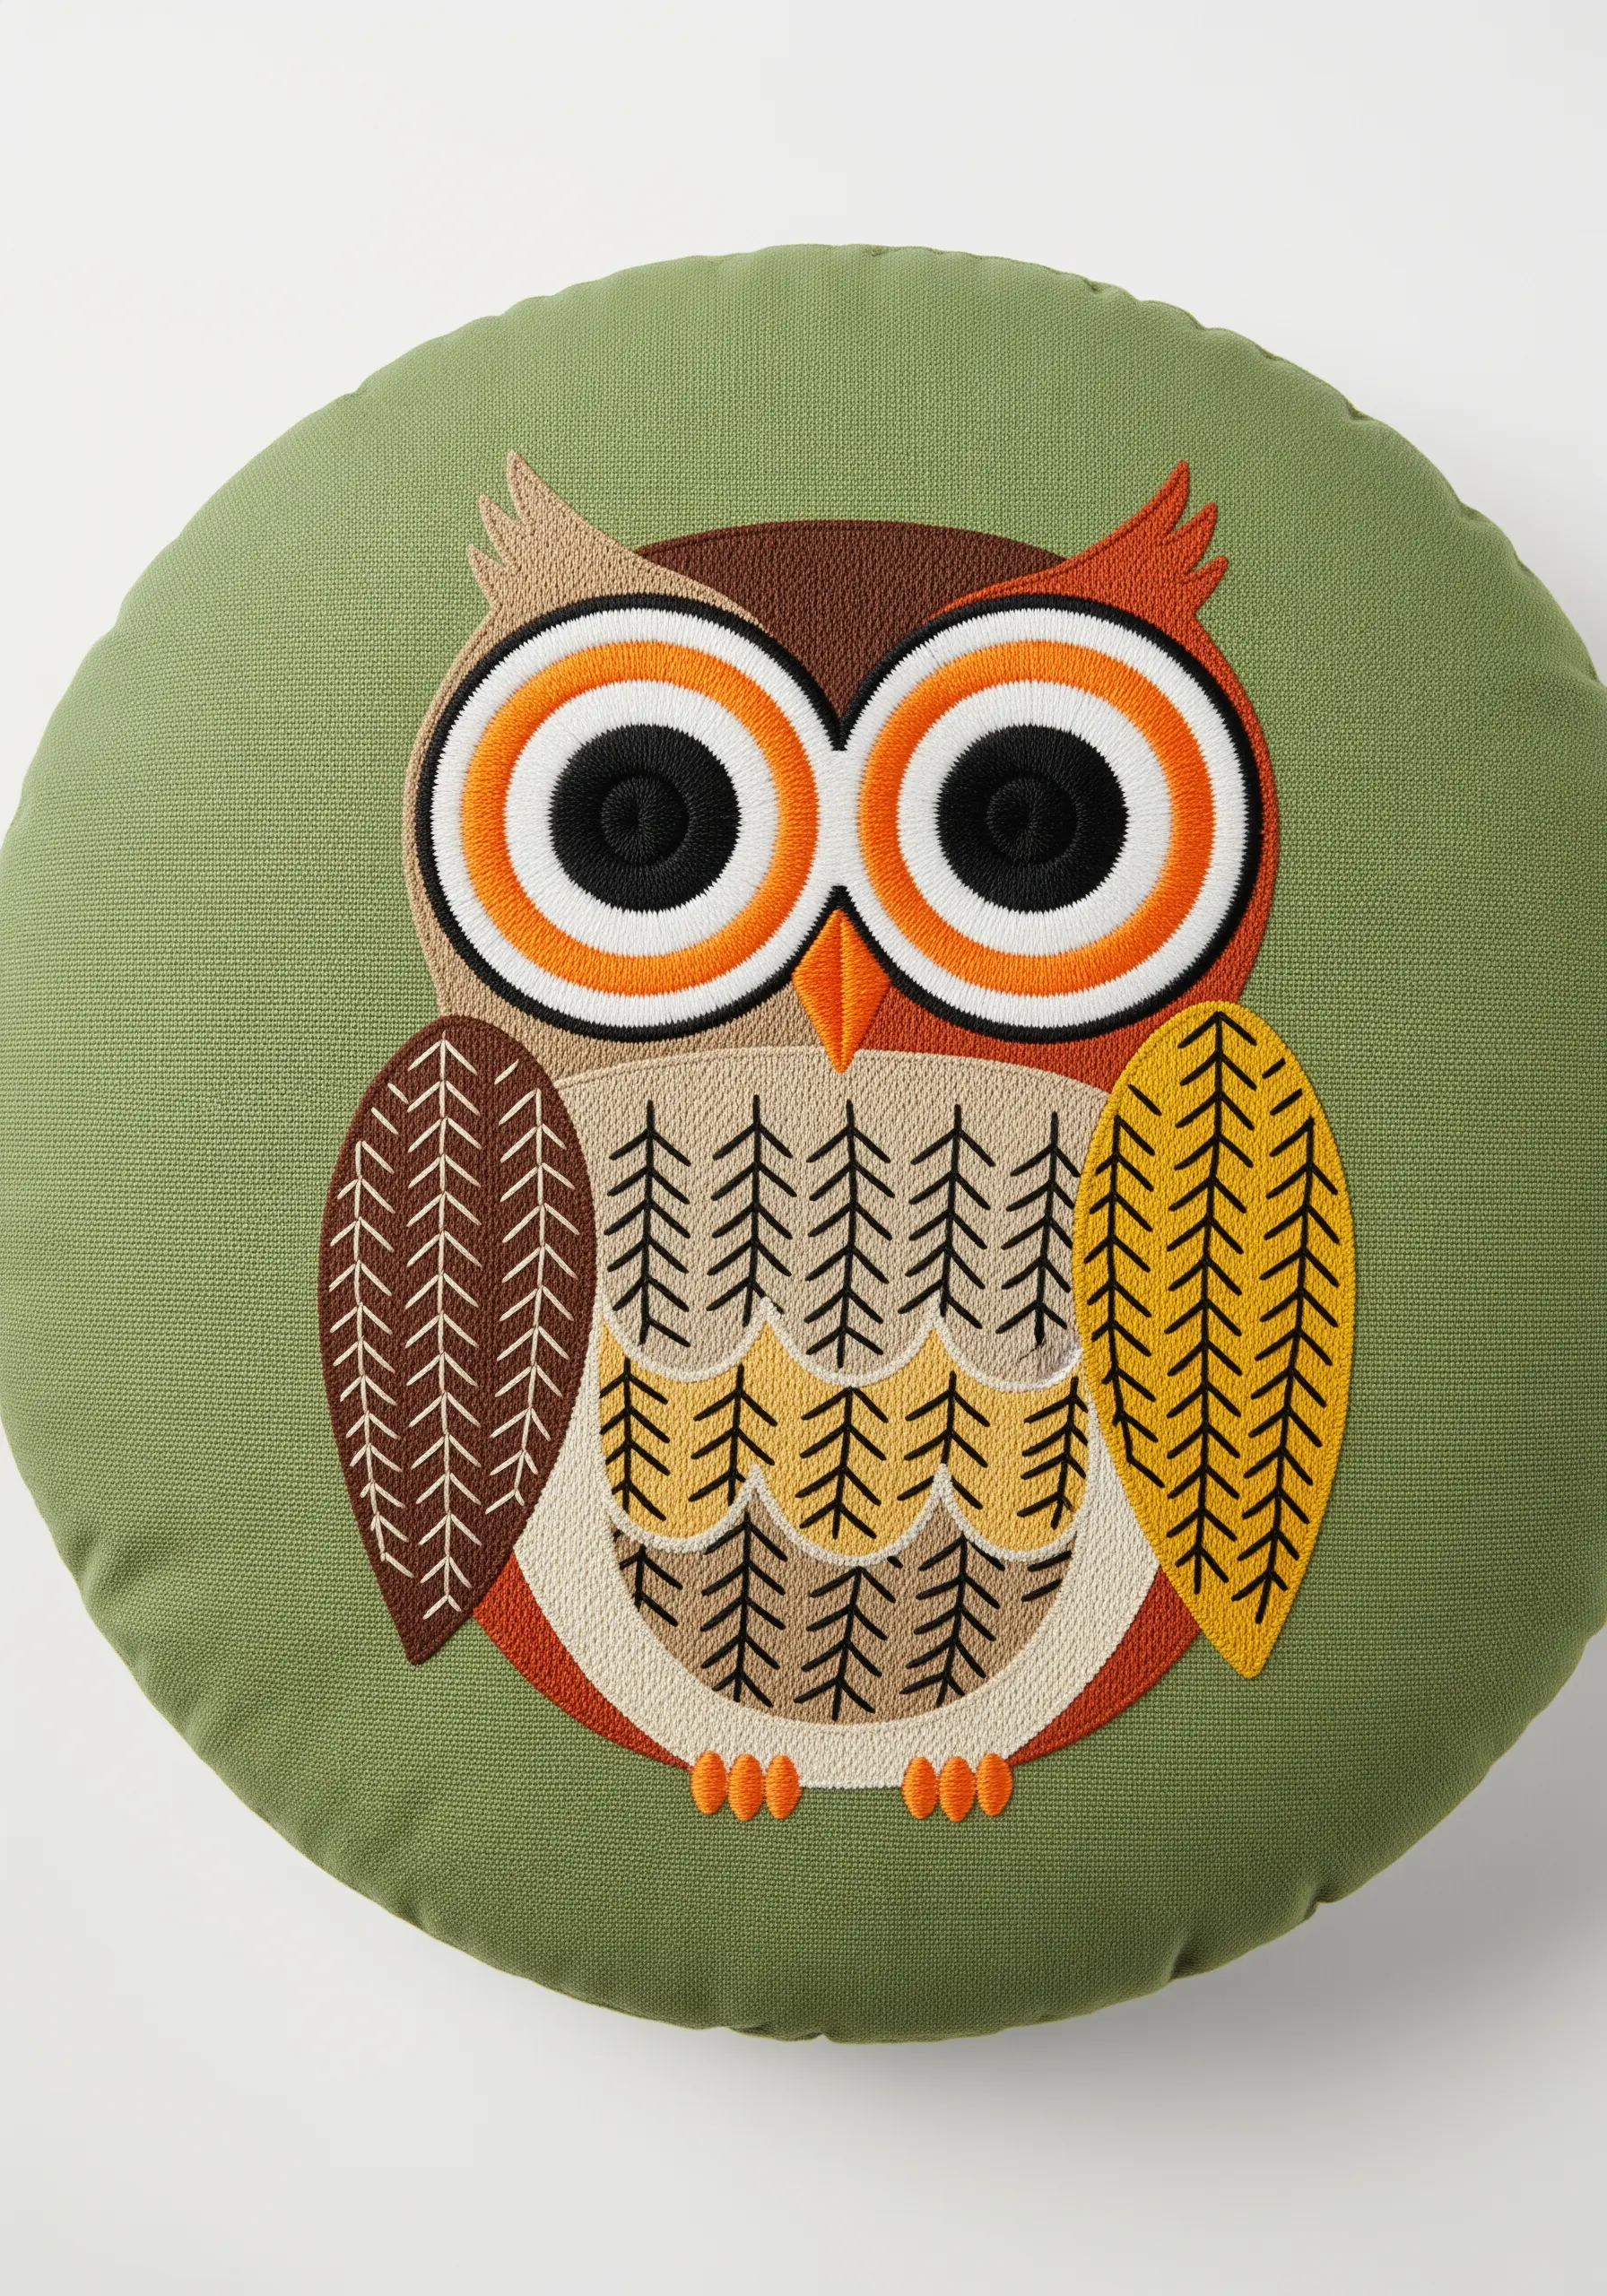
Elevate a simple character motif by using the direction of your stitches as a design tool.
Instead of filling each section with a uniform, horizontal satin stitch, angle your stitches to follow the contours of the shape.
Notice how the wing feathers are suggested by diagonal stitches, while the chest pattern is created with short vertical ones.
This technique, known as directional fill, adds texture, form, and a sophisticated finish without requiring any complex stitches. Outline each shape with a split stitch first for perfectly sharp edges.
8. Blend Appliqué and Embroidery for Nostalgic Scenes
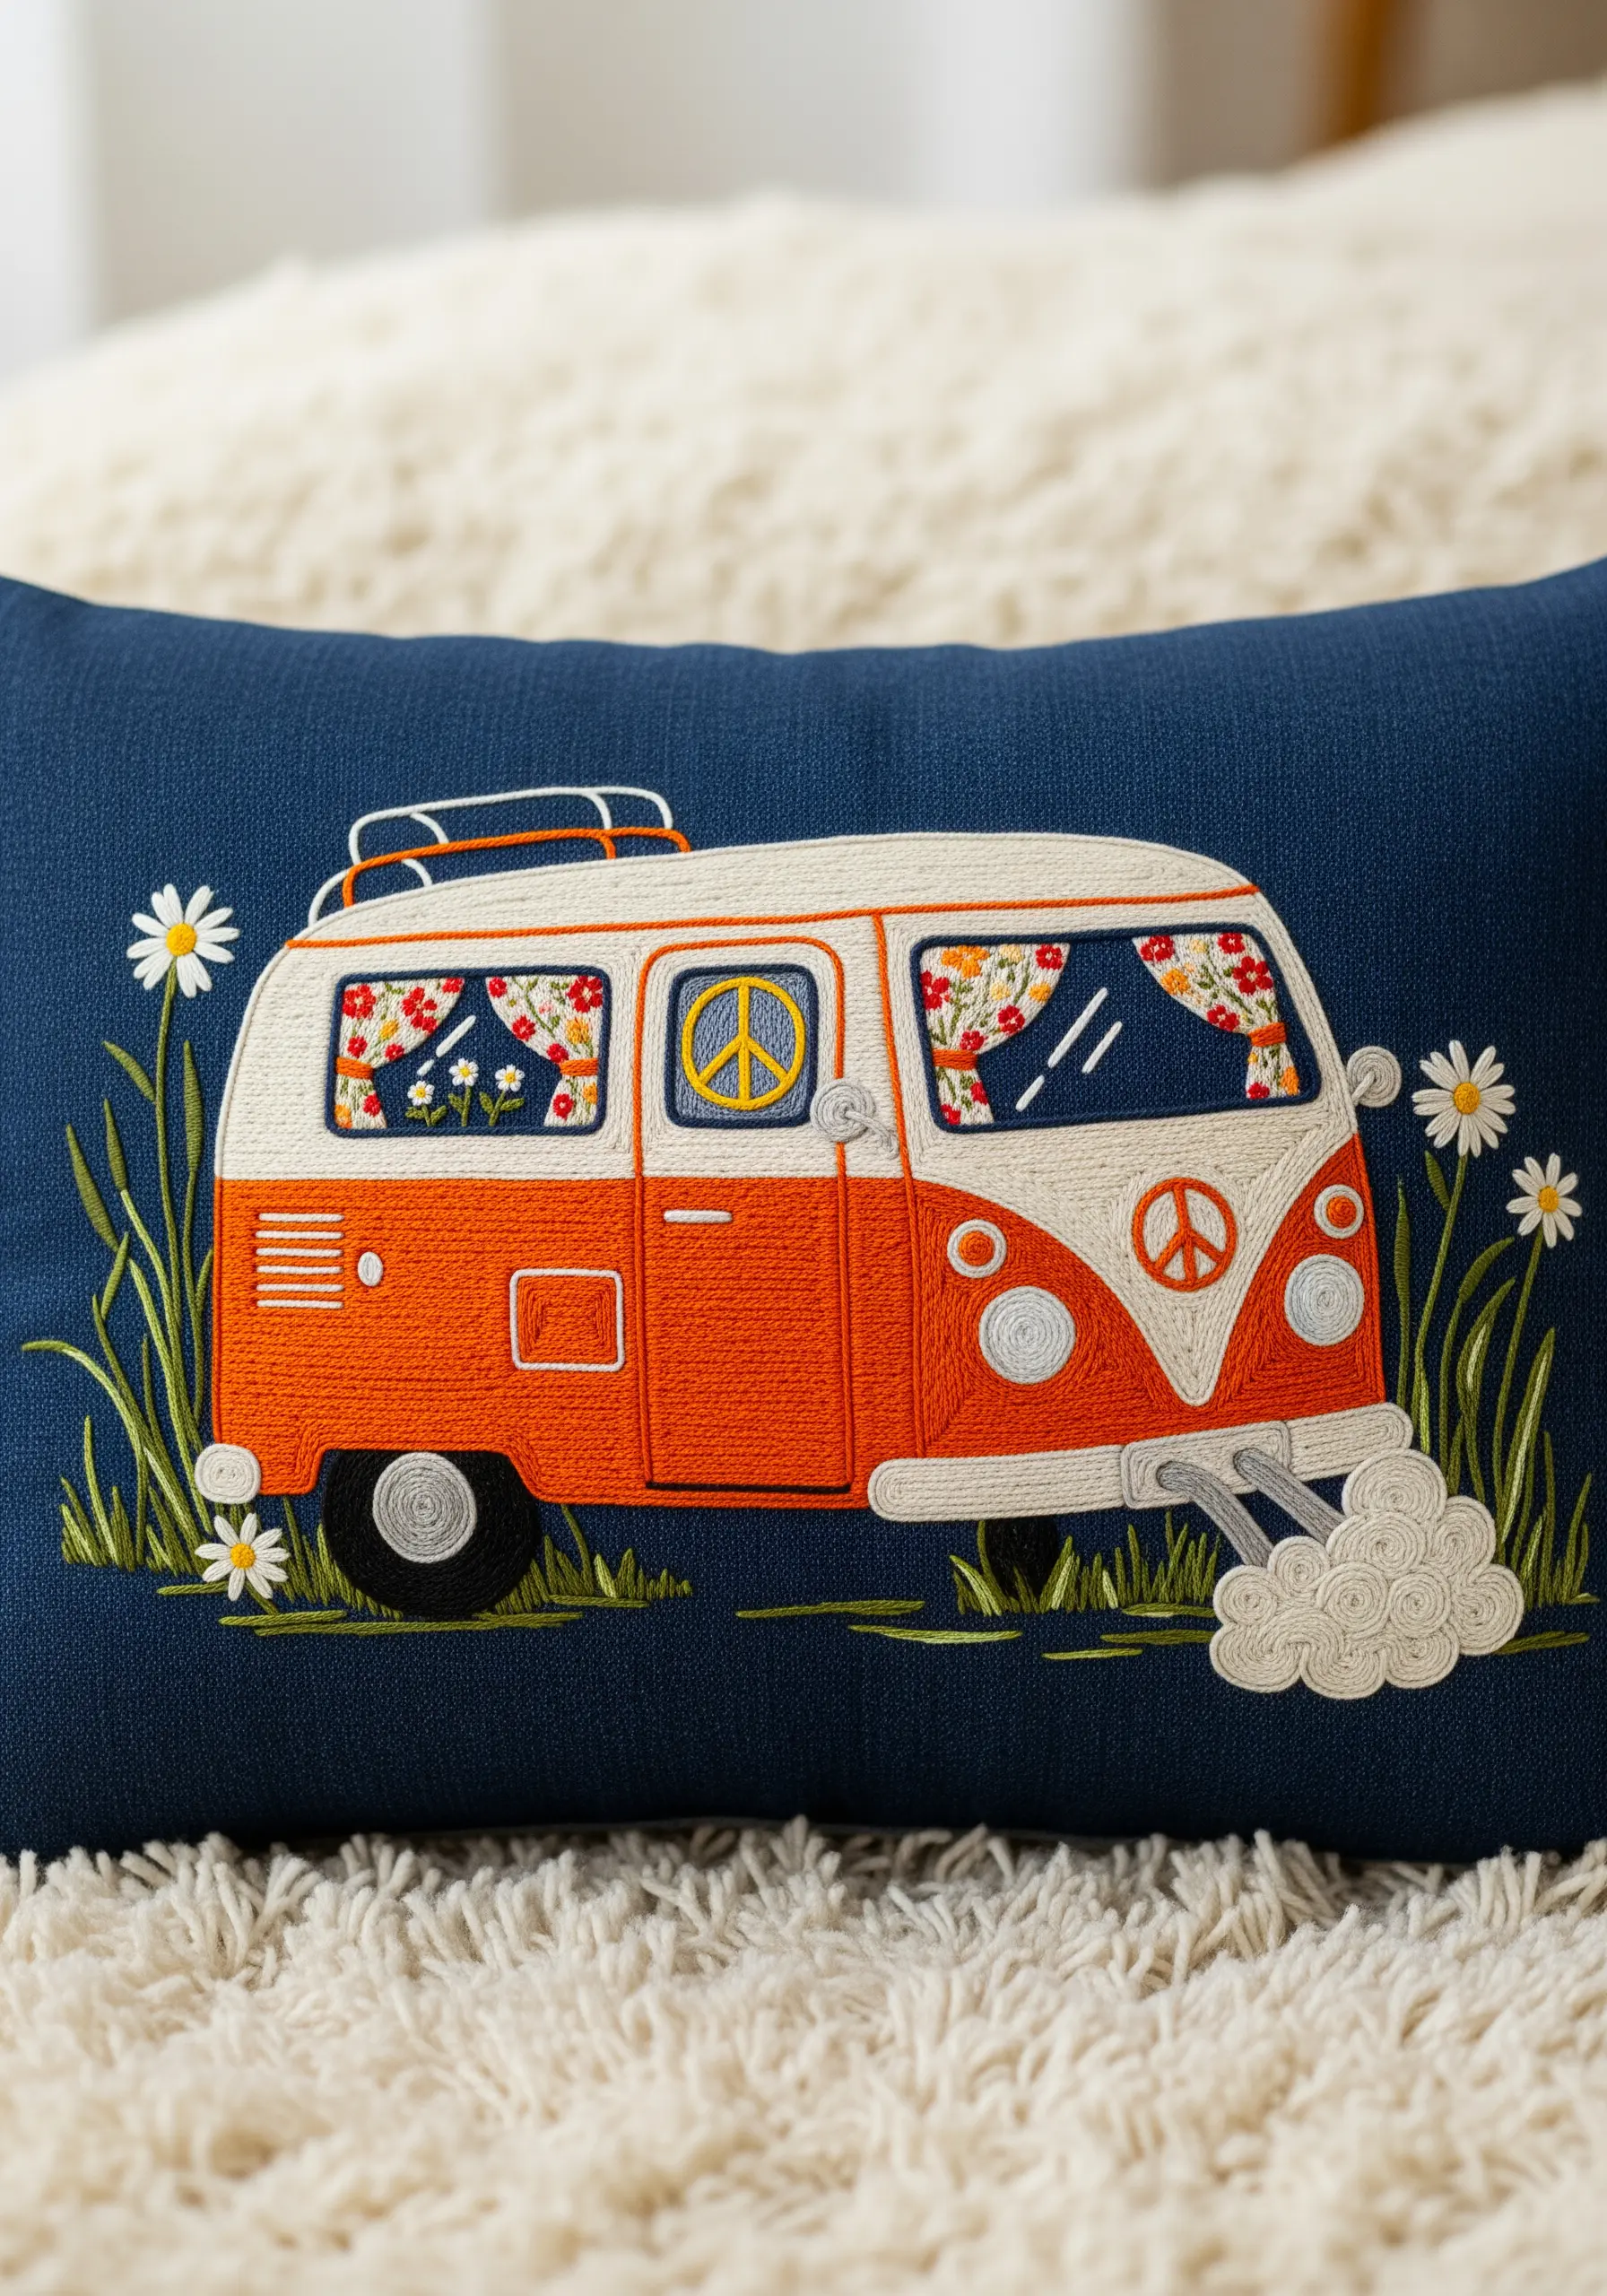
Introduce an element of surprise and authenticity by mixing fabric appliqué with your thread work.
For a design like this, find a small piece of vintage-inspired floral fabric for the van’s curtains. Carefully cut it to shape and secure it to your base fabric with a neat blanket stitch or a hidden hem stitch.
Then, embroider the rest of the scene around it. This mixed-media approach adds a layer of storytelling and texture that pure embroidery alone can’t replicate.
9. Build Intricate Mandalas with Layered Stitches
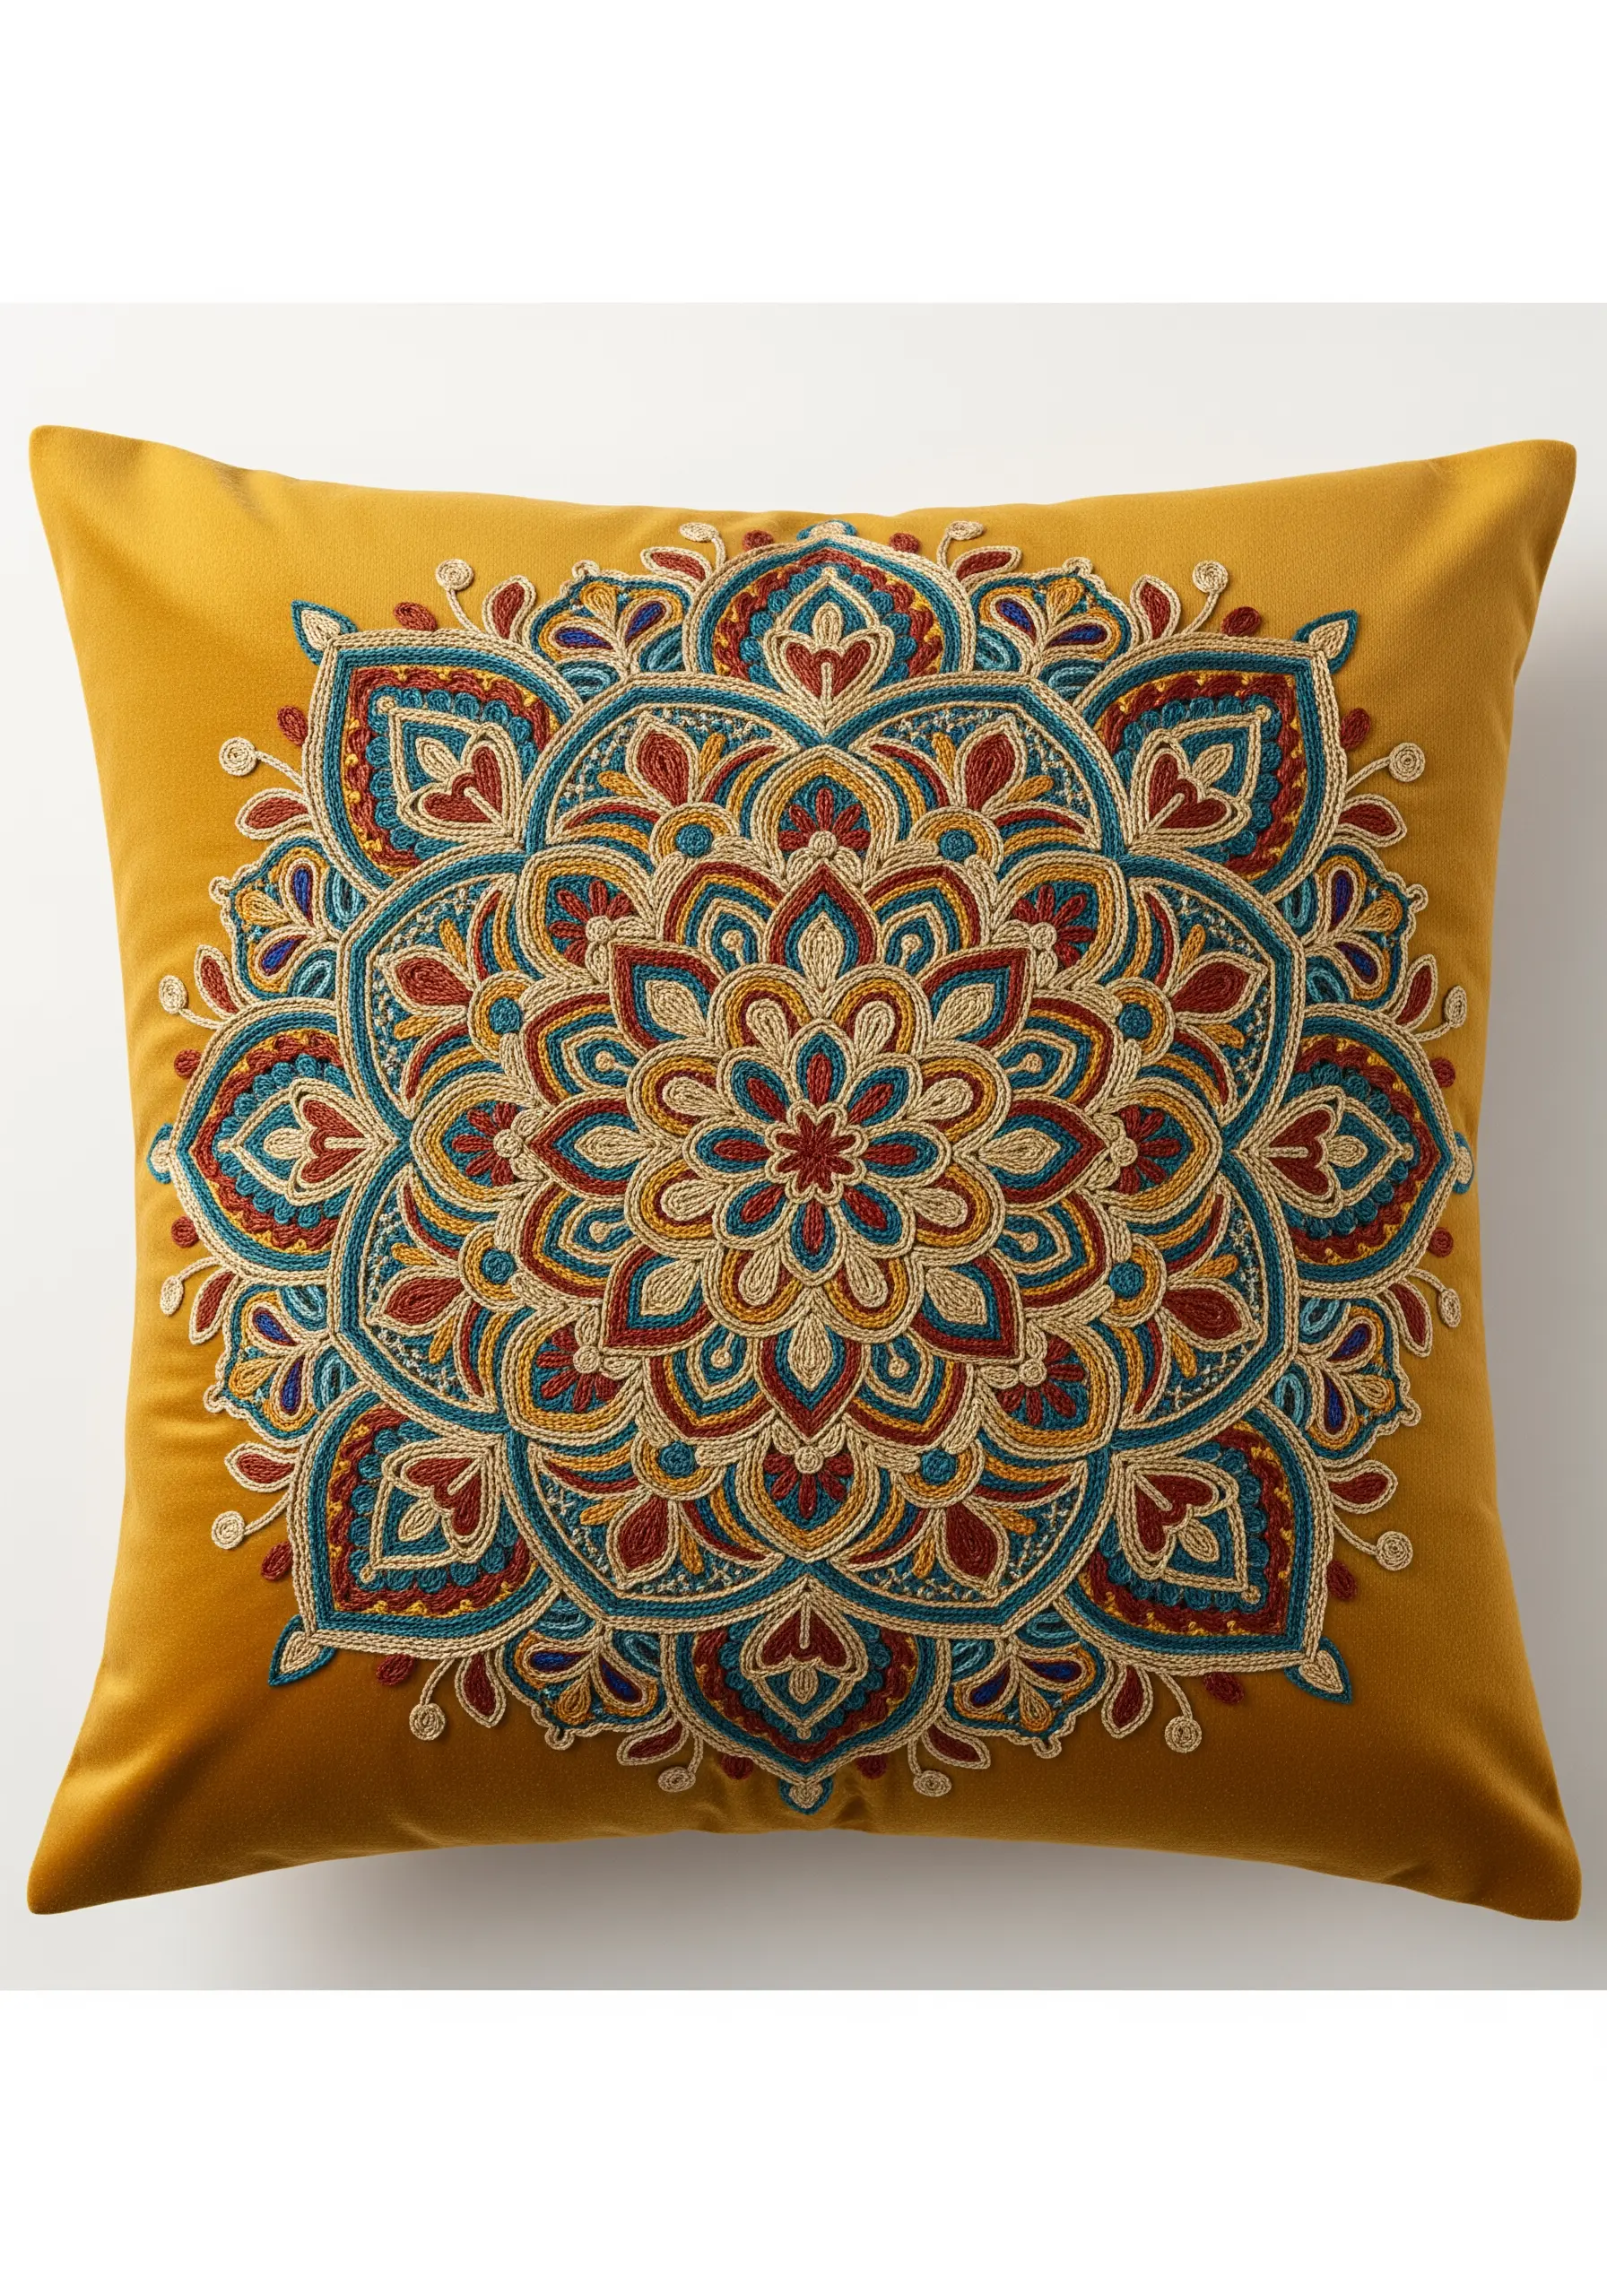
A successful embroidered mandala relies on a rich variety of textures to keep the eye moving.
Plan your design in layers, working from the center out. Use a combination of stitches to differentiate each ring of the pattern: satin stitch for bold fields of color, chain stitch for clean outlines, and French knots for dotted accents.
To add a touch of luxe 70s glamour, incorporate a fine metallic thread for select outlines. It will catch the light and give your design a subtle, captivating shimmer.
10. Sculpt with Yarn Couching for Graphic Swirls
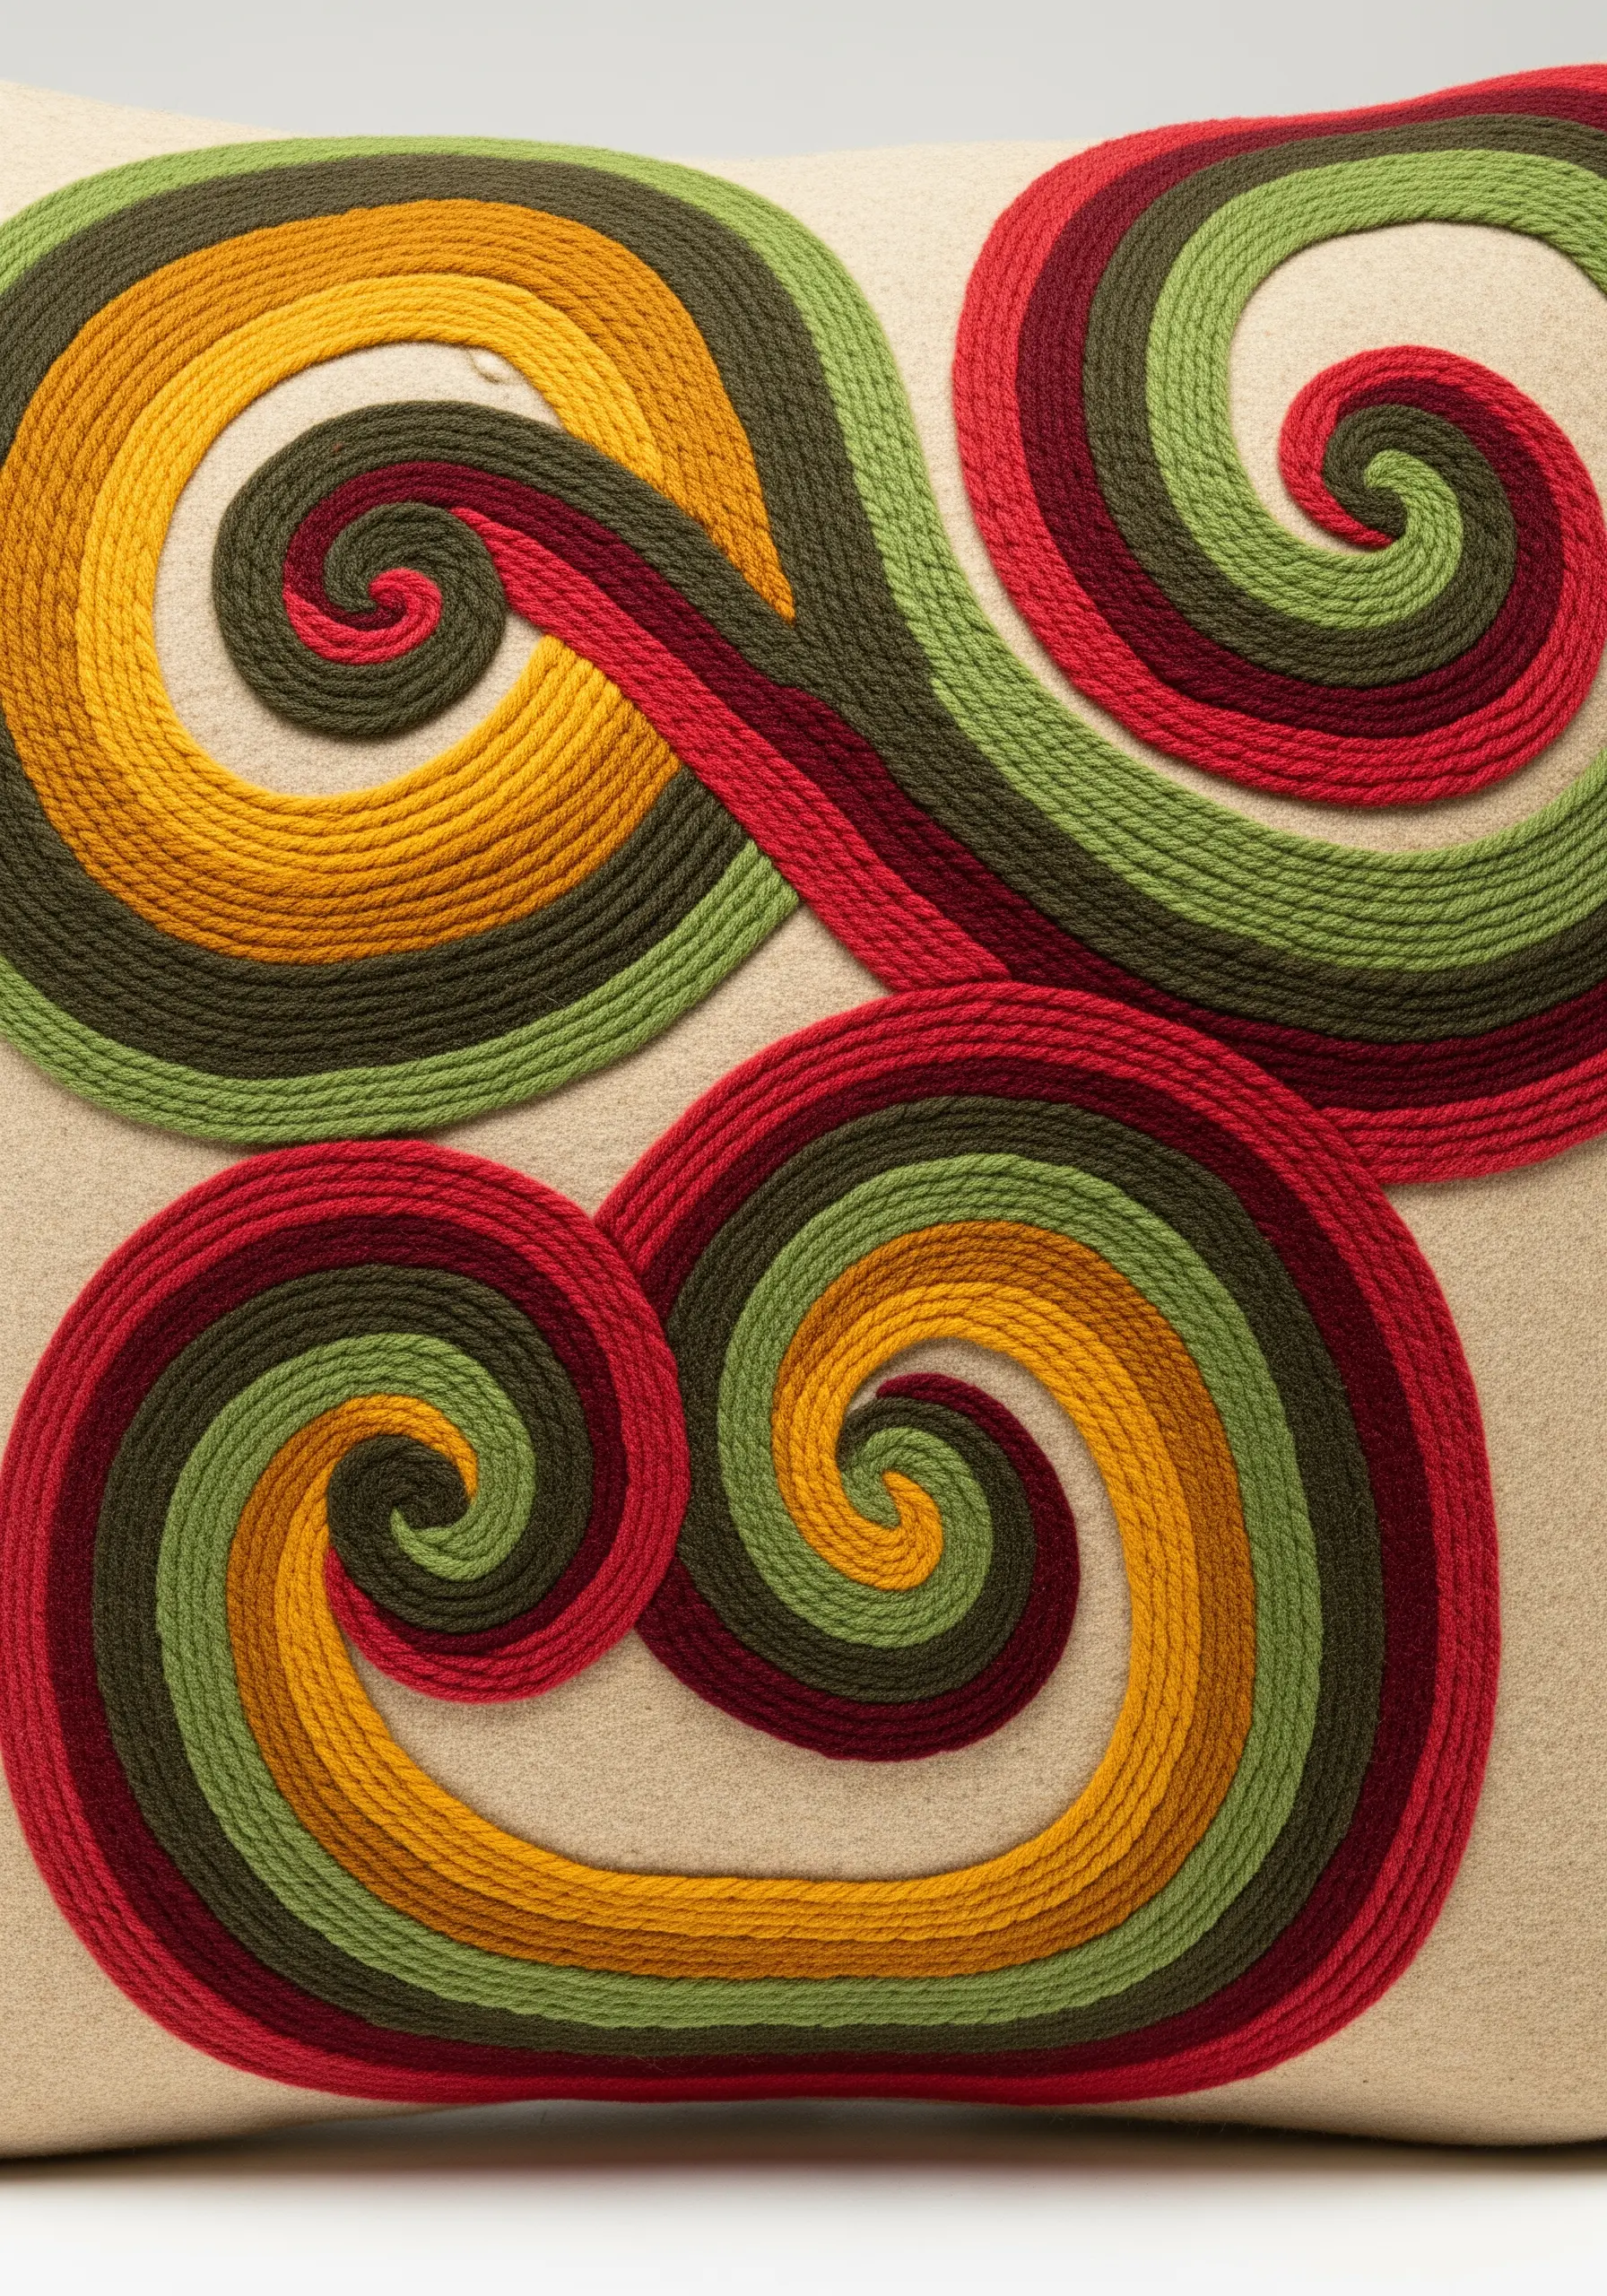
To create these bold, continuous swirls, think of your yarn as a line you are drawing with and your thread as the ink that holds it in place.
This is yarn couching on a grand scale. Lay down multiple strands of thick yarn side-by-side, following your swirl pattern.
Using a single strand of matching embroidery floss, make small, evenly spaced tacking stitches across the yarn to secure it to the pillow fabric.
The visual impact comes entirely from the color and thickness of the yarn itself, creating a powerfully graphic and modern yarn wall art effect.
11. Unify Patchwork with Bold Blanket Stitches
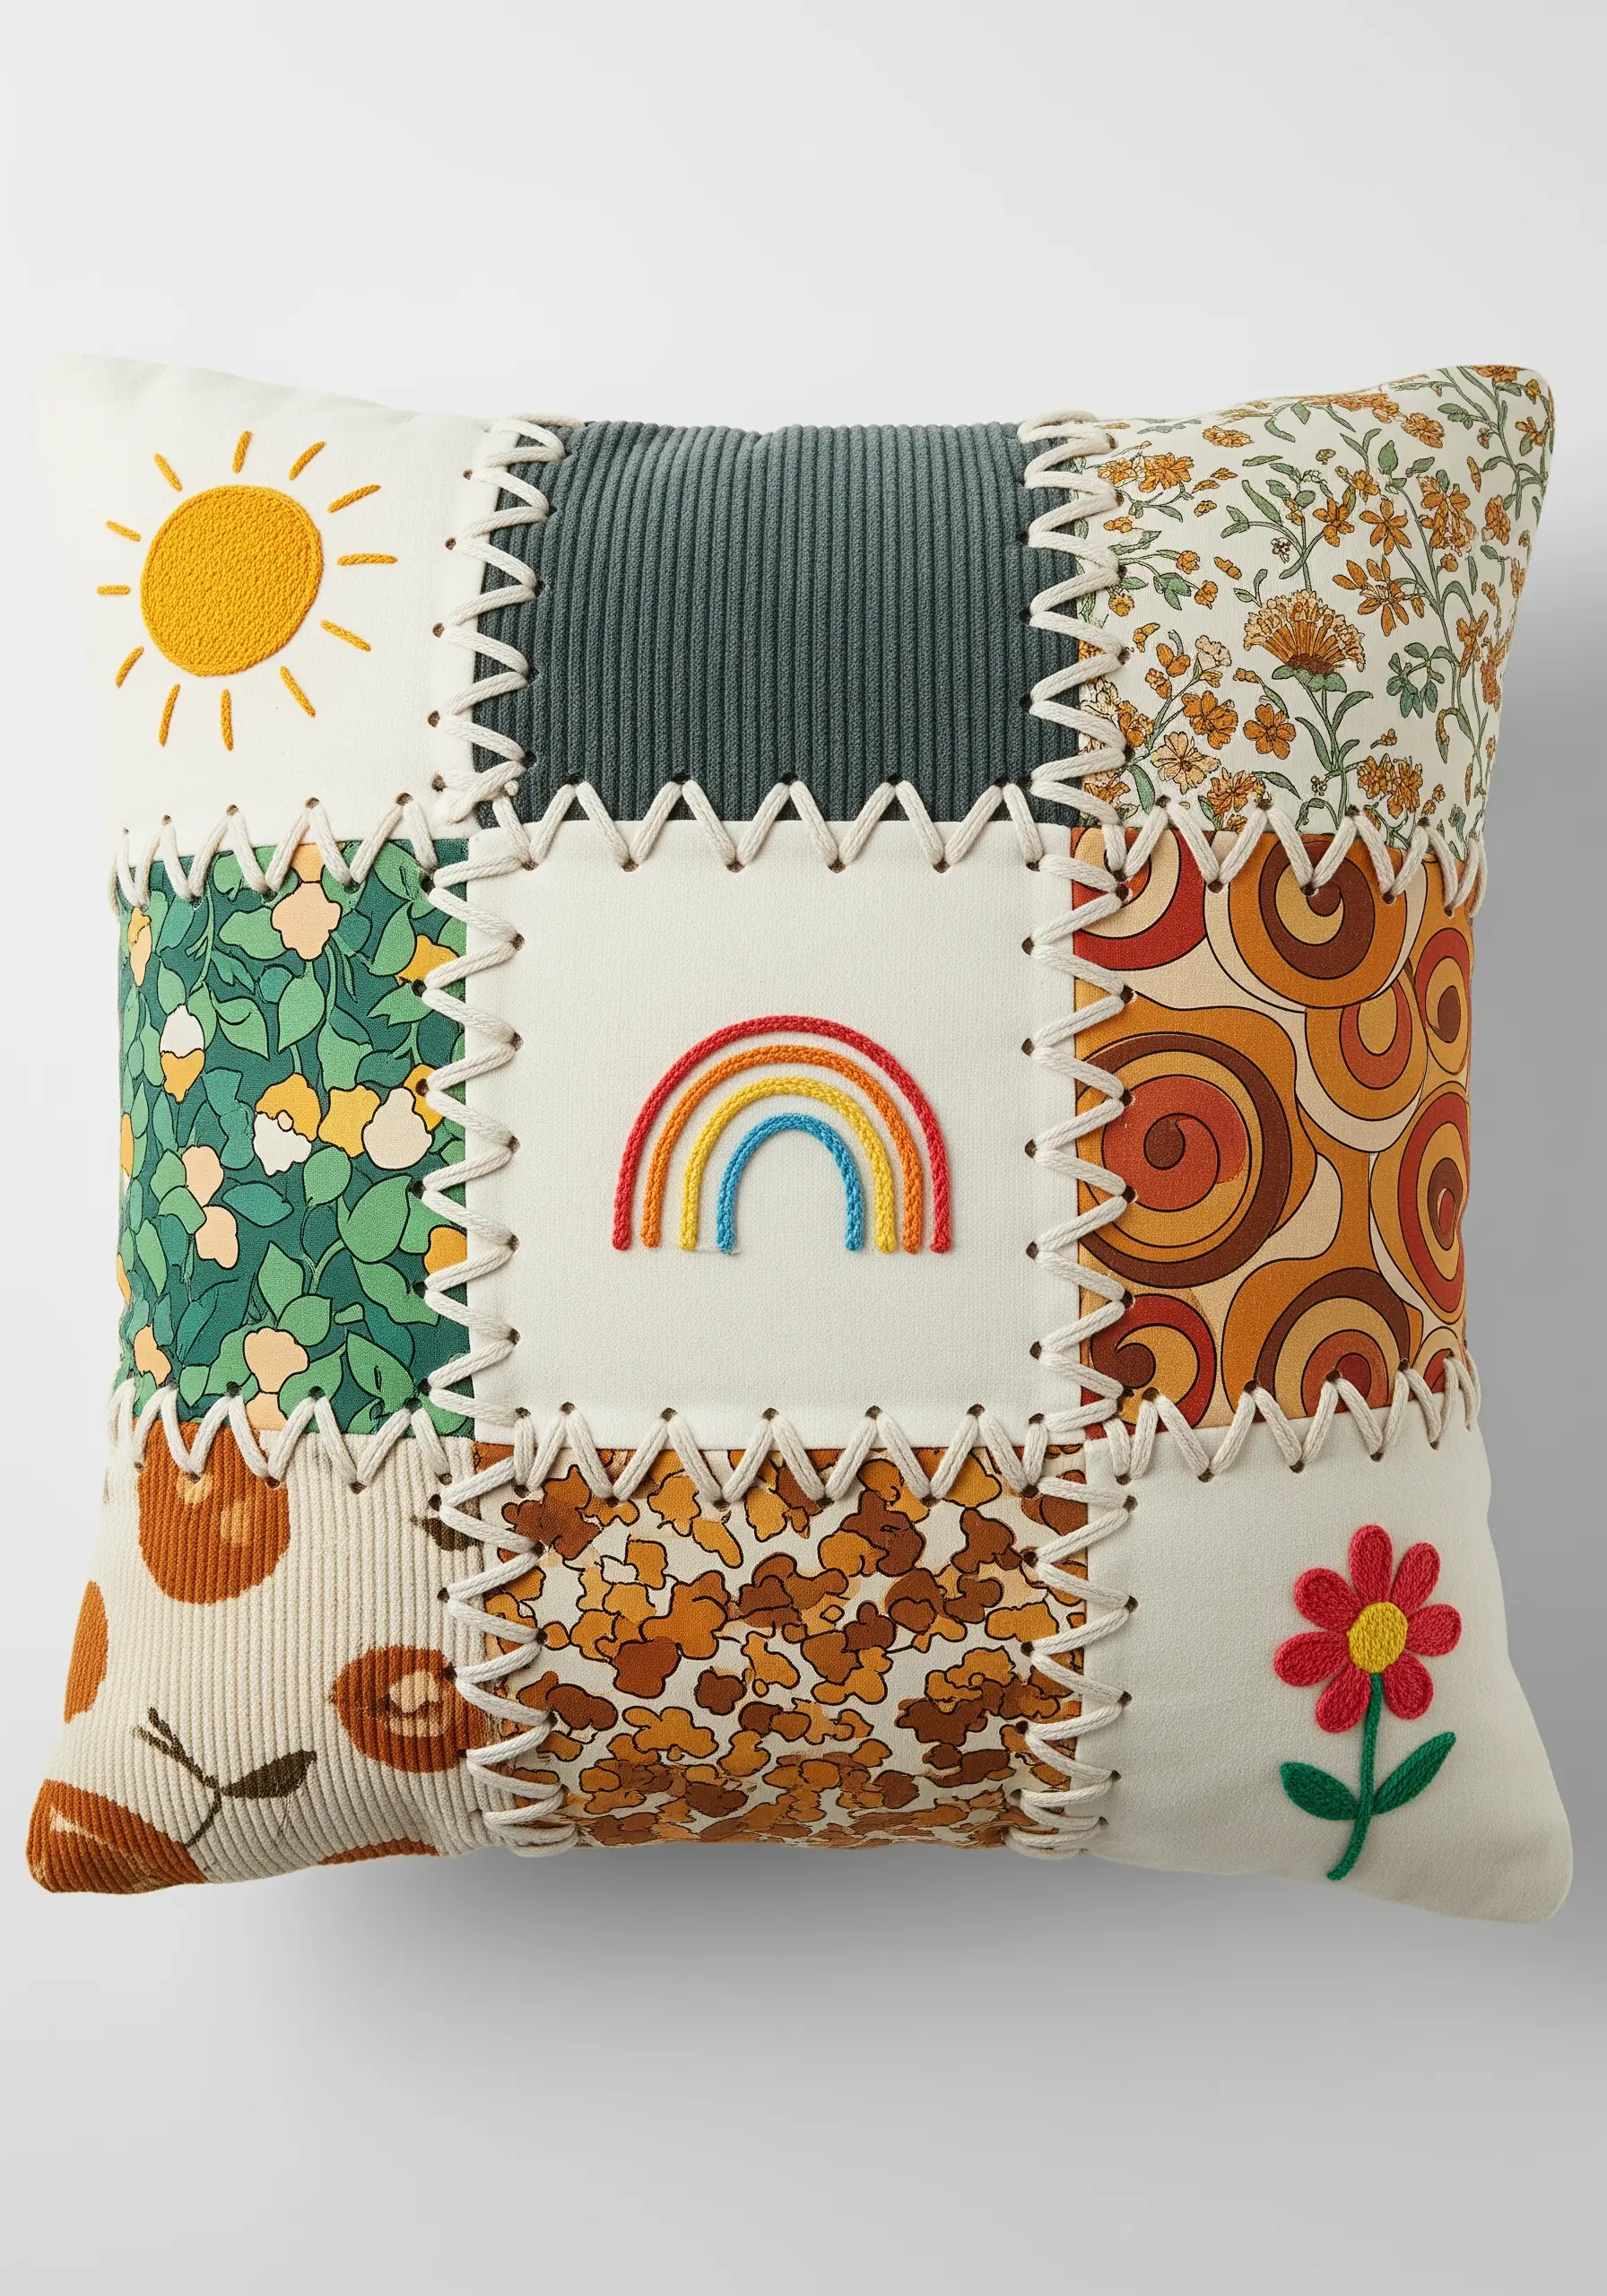
When combining patchwork with embroidery, make the seams a deliberate part of the design.
Instead of hiding your stitches, use a thick, contrasting thread—like an off-white perle cotton—and a large, open blanket stitch to join your fabric squares.
This visible mending approach not only secures the pieces but also adds a rustic, handcrafted charm that is quintessentially 70s.
Embroider simple motifs like suns, rainbows, and flowers onto some of the plain squares before you stitch them all together for a personalized touch.
12. Create a Textured Sun with Braided and Coiled Stitches

Give your sun motif a playful personality by combining multiple textural stitches.
For the rays, use a plaited braid stitch or a heavy, raised chain stitch to create a woven, three-dimensional effect. Alternate two or three shades of yellow and orange to give them more depth.
The face can be defined with a simple backstitch for clarity. For the central circle, coil a thick strand of yarn into a spiral and couch it down, adding yet another layer of texture to this cheerful design.
13. Design Graphic Patterns with Directional Fill Stitch
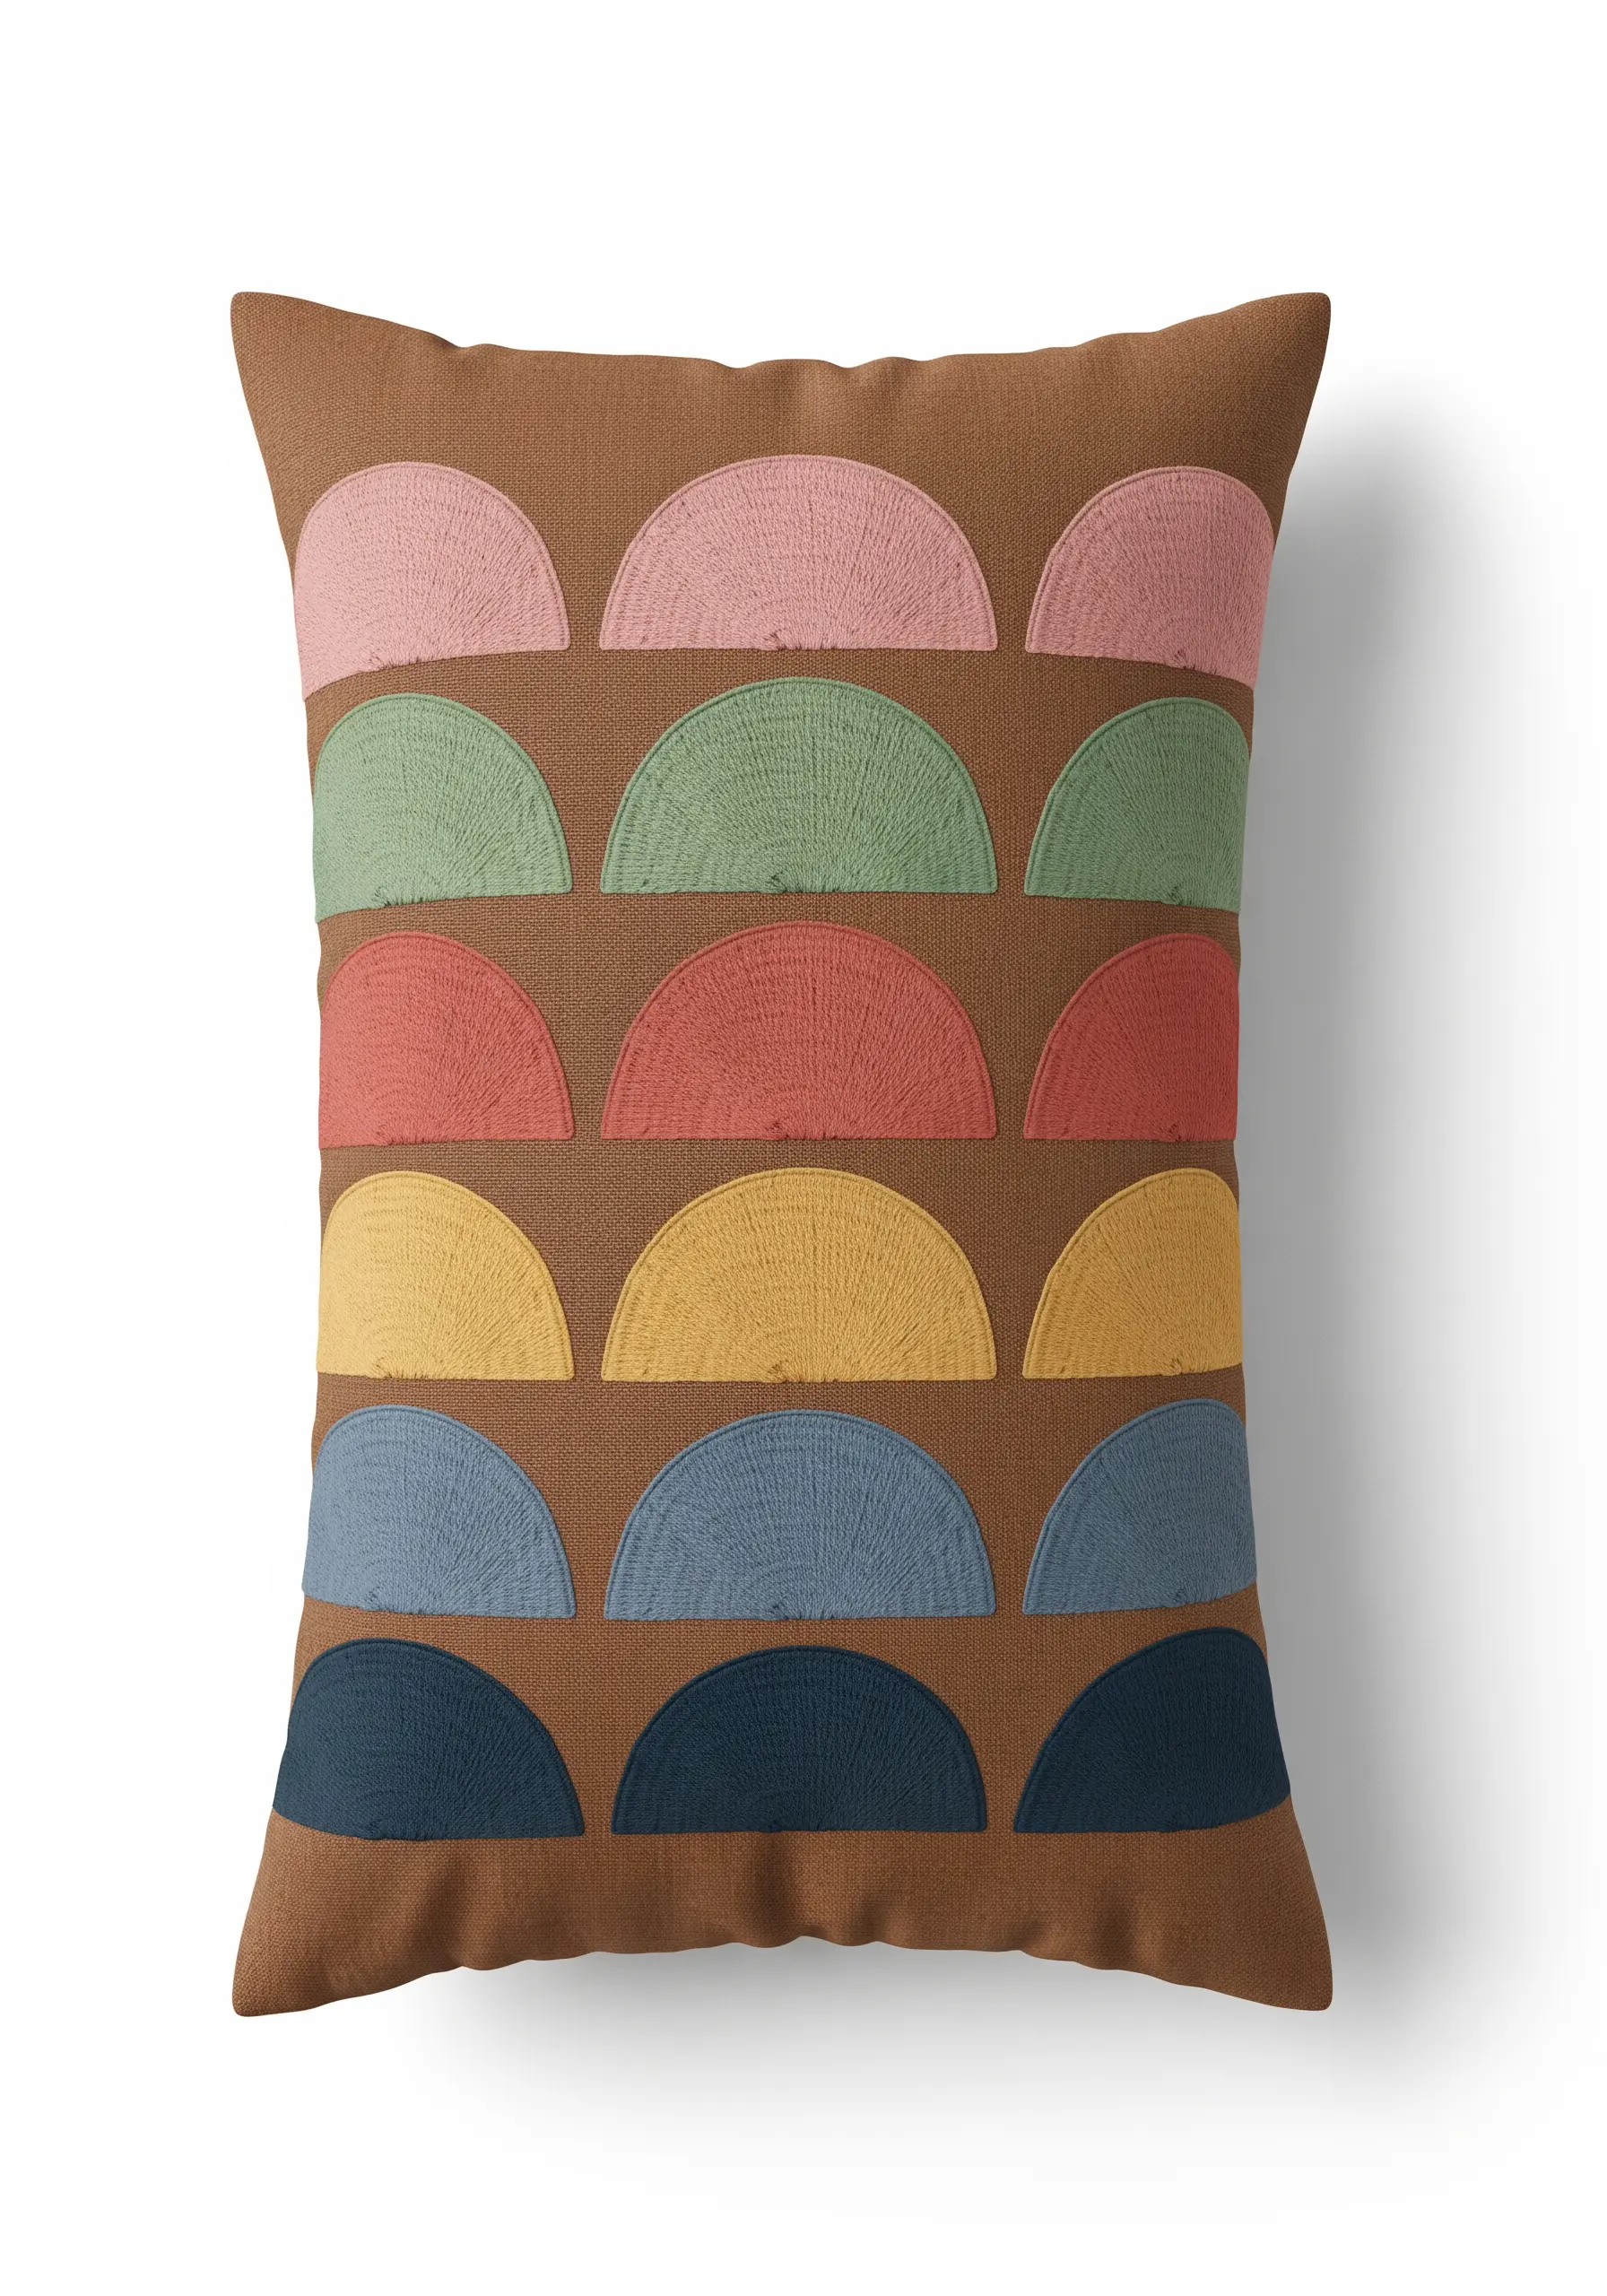
Turn simple semi-circles into a sophisticated, repeating pattern by focusing on the direction of your fill stitches.
Fill each shape with a dense satin stitch or long-and-short stitch, but instead of keeping the stitches horizontal, angle them to radiate from the flat edge of the semi-circle outwards.
This simple adjustment creates a subtle play of light and texture, giving the flat shapes a fan-like appearance and a sense of dimension.
Using a muted, earthy color palette completes the retro mid-century modern aesthetic.
14. Carve Clean Swirls with High-Density Punch Needle
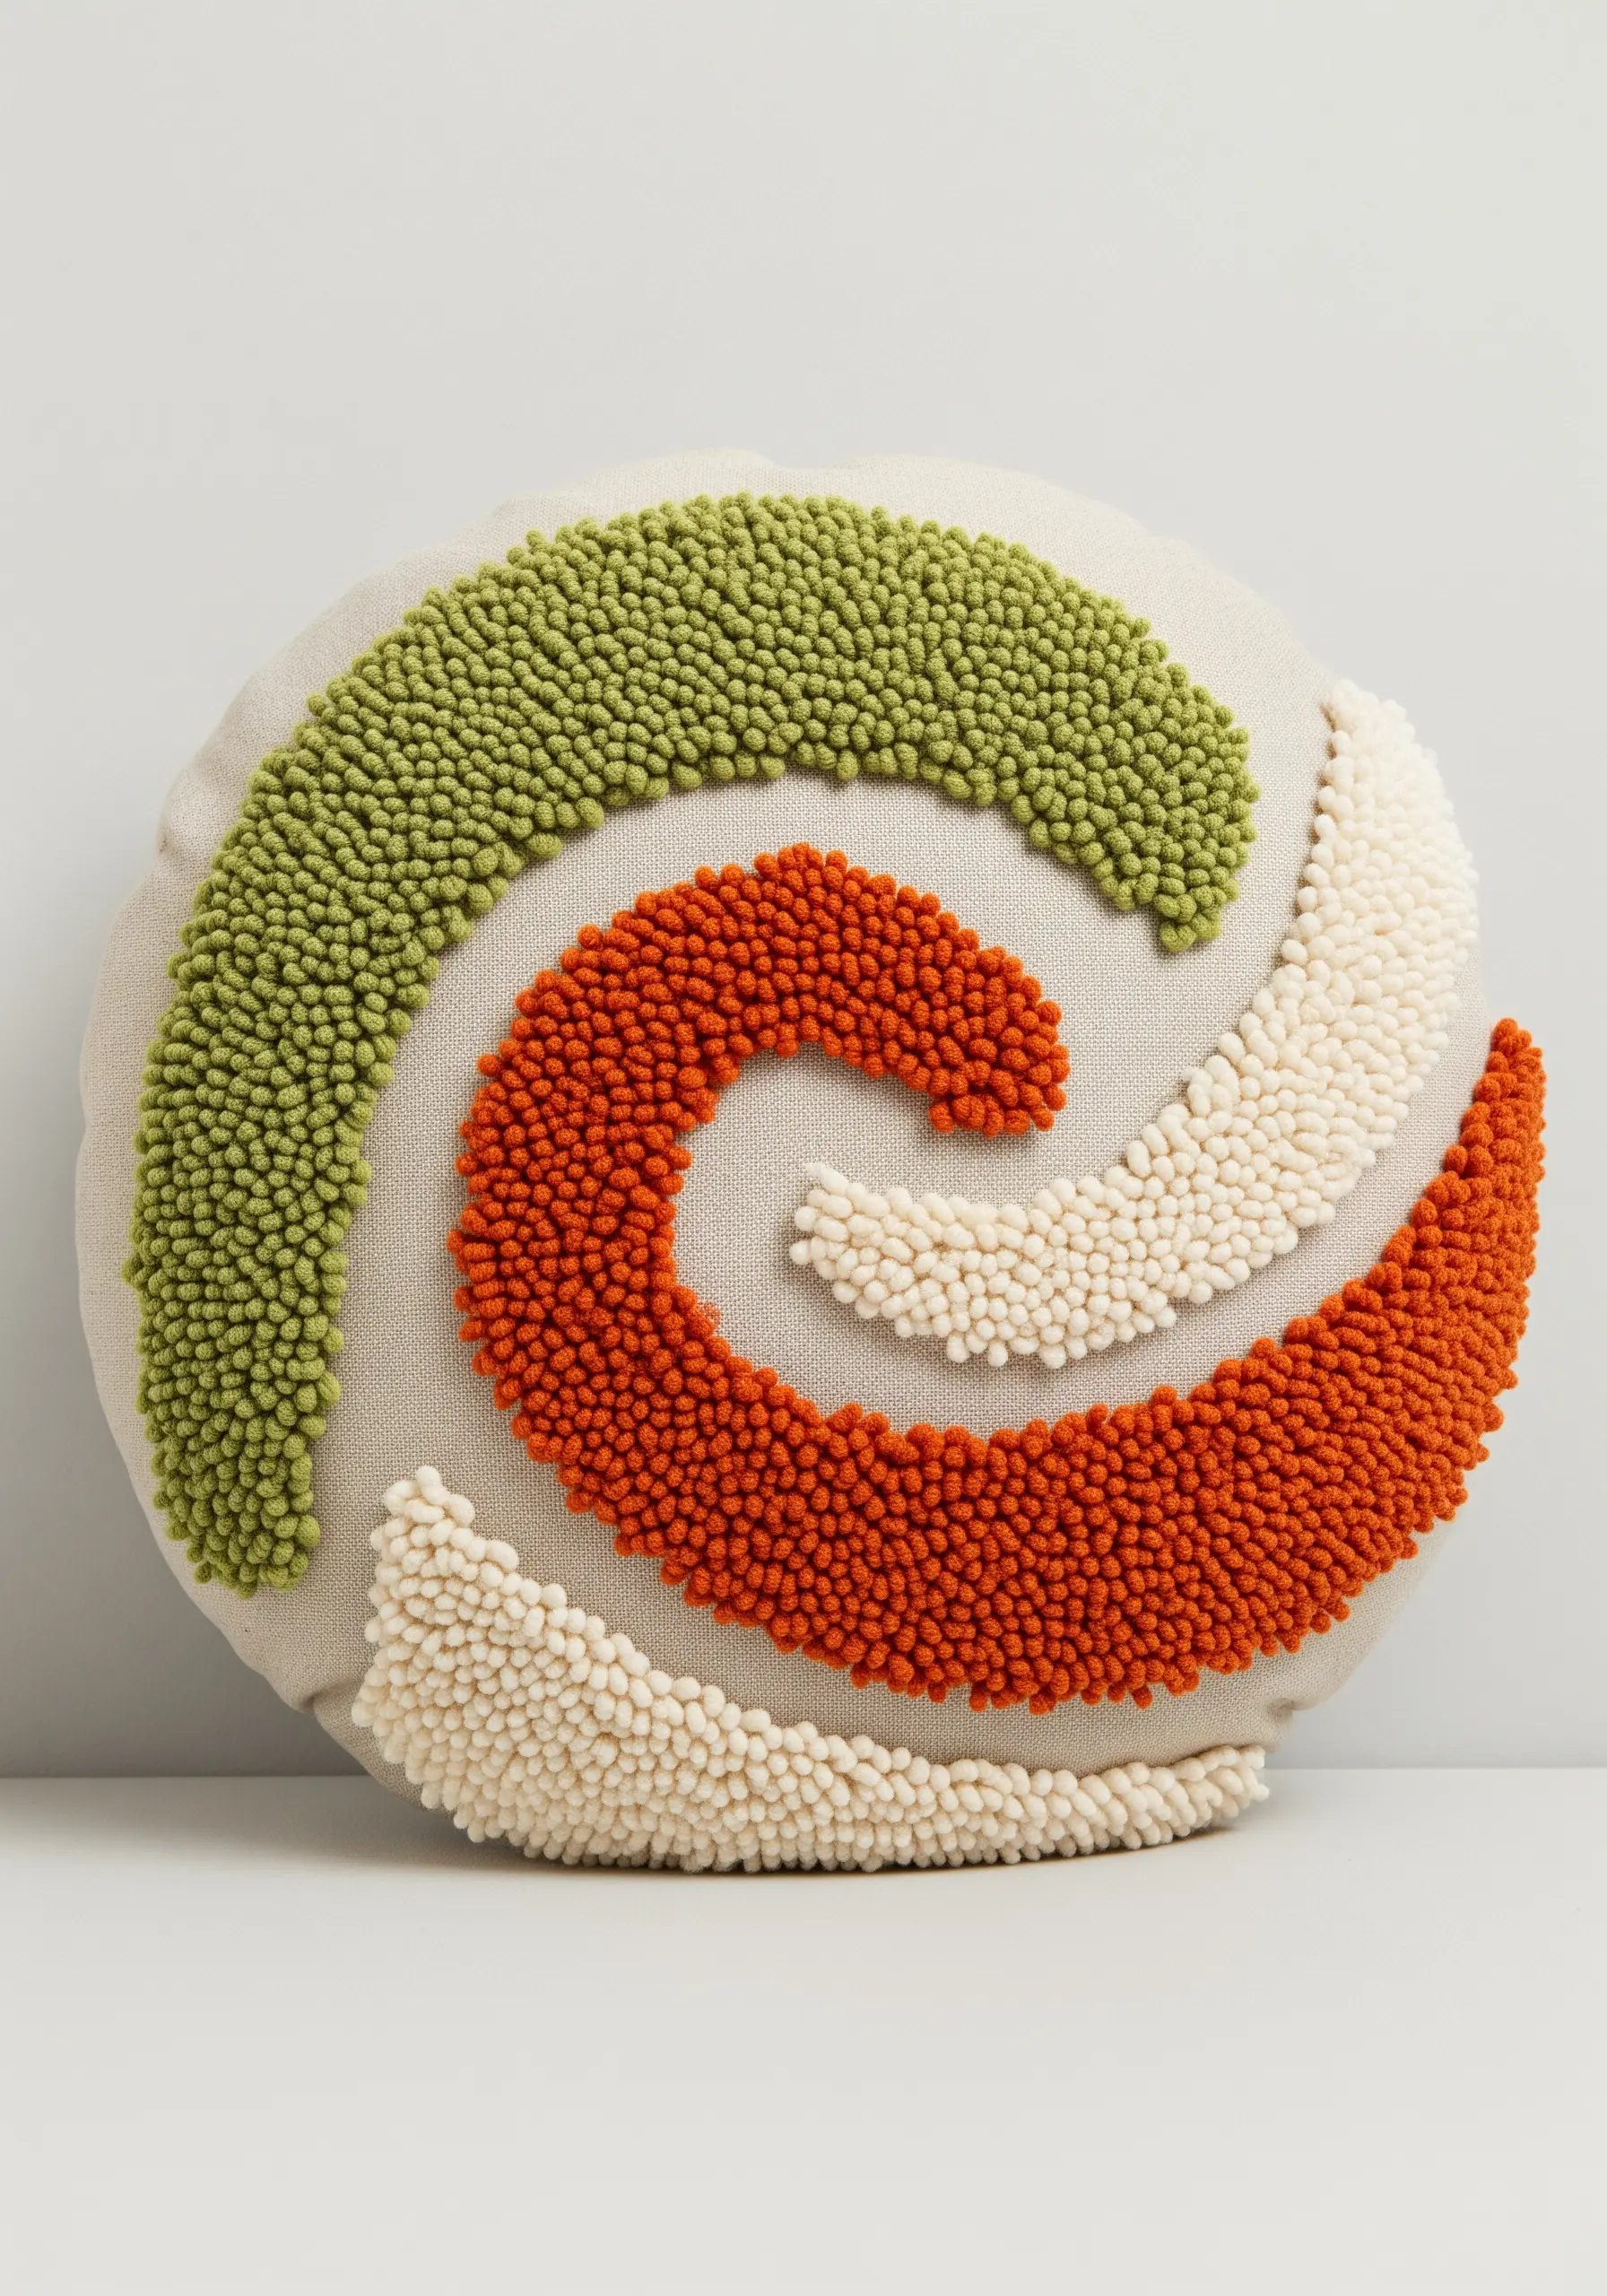
The key to achieving crisp, defined shapes with punch needle is density and consistency.
To create these clean, graphic swirls, you must pack your loops tightly together, ensuring there are no gaps where the backing fabric can show through.
Work one color section at a time, outlining the shape first and then filling it in. Use a consistent loop height throughout the project for a uniform, professional-looking pile. The result is a design that feels both plush and sculptural.
15. Elevate Paisley with Metallic Thread Outlines
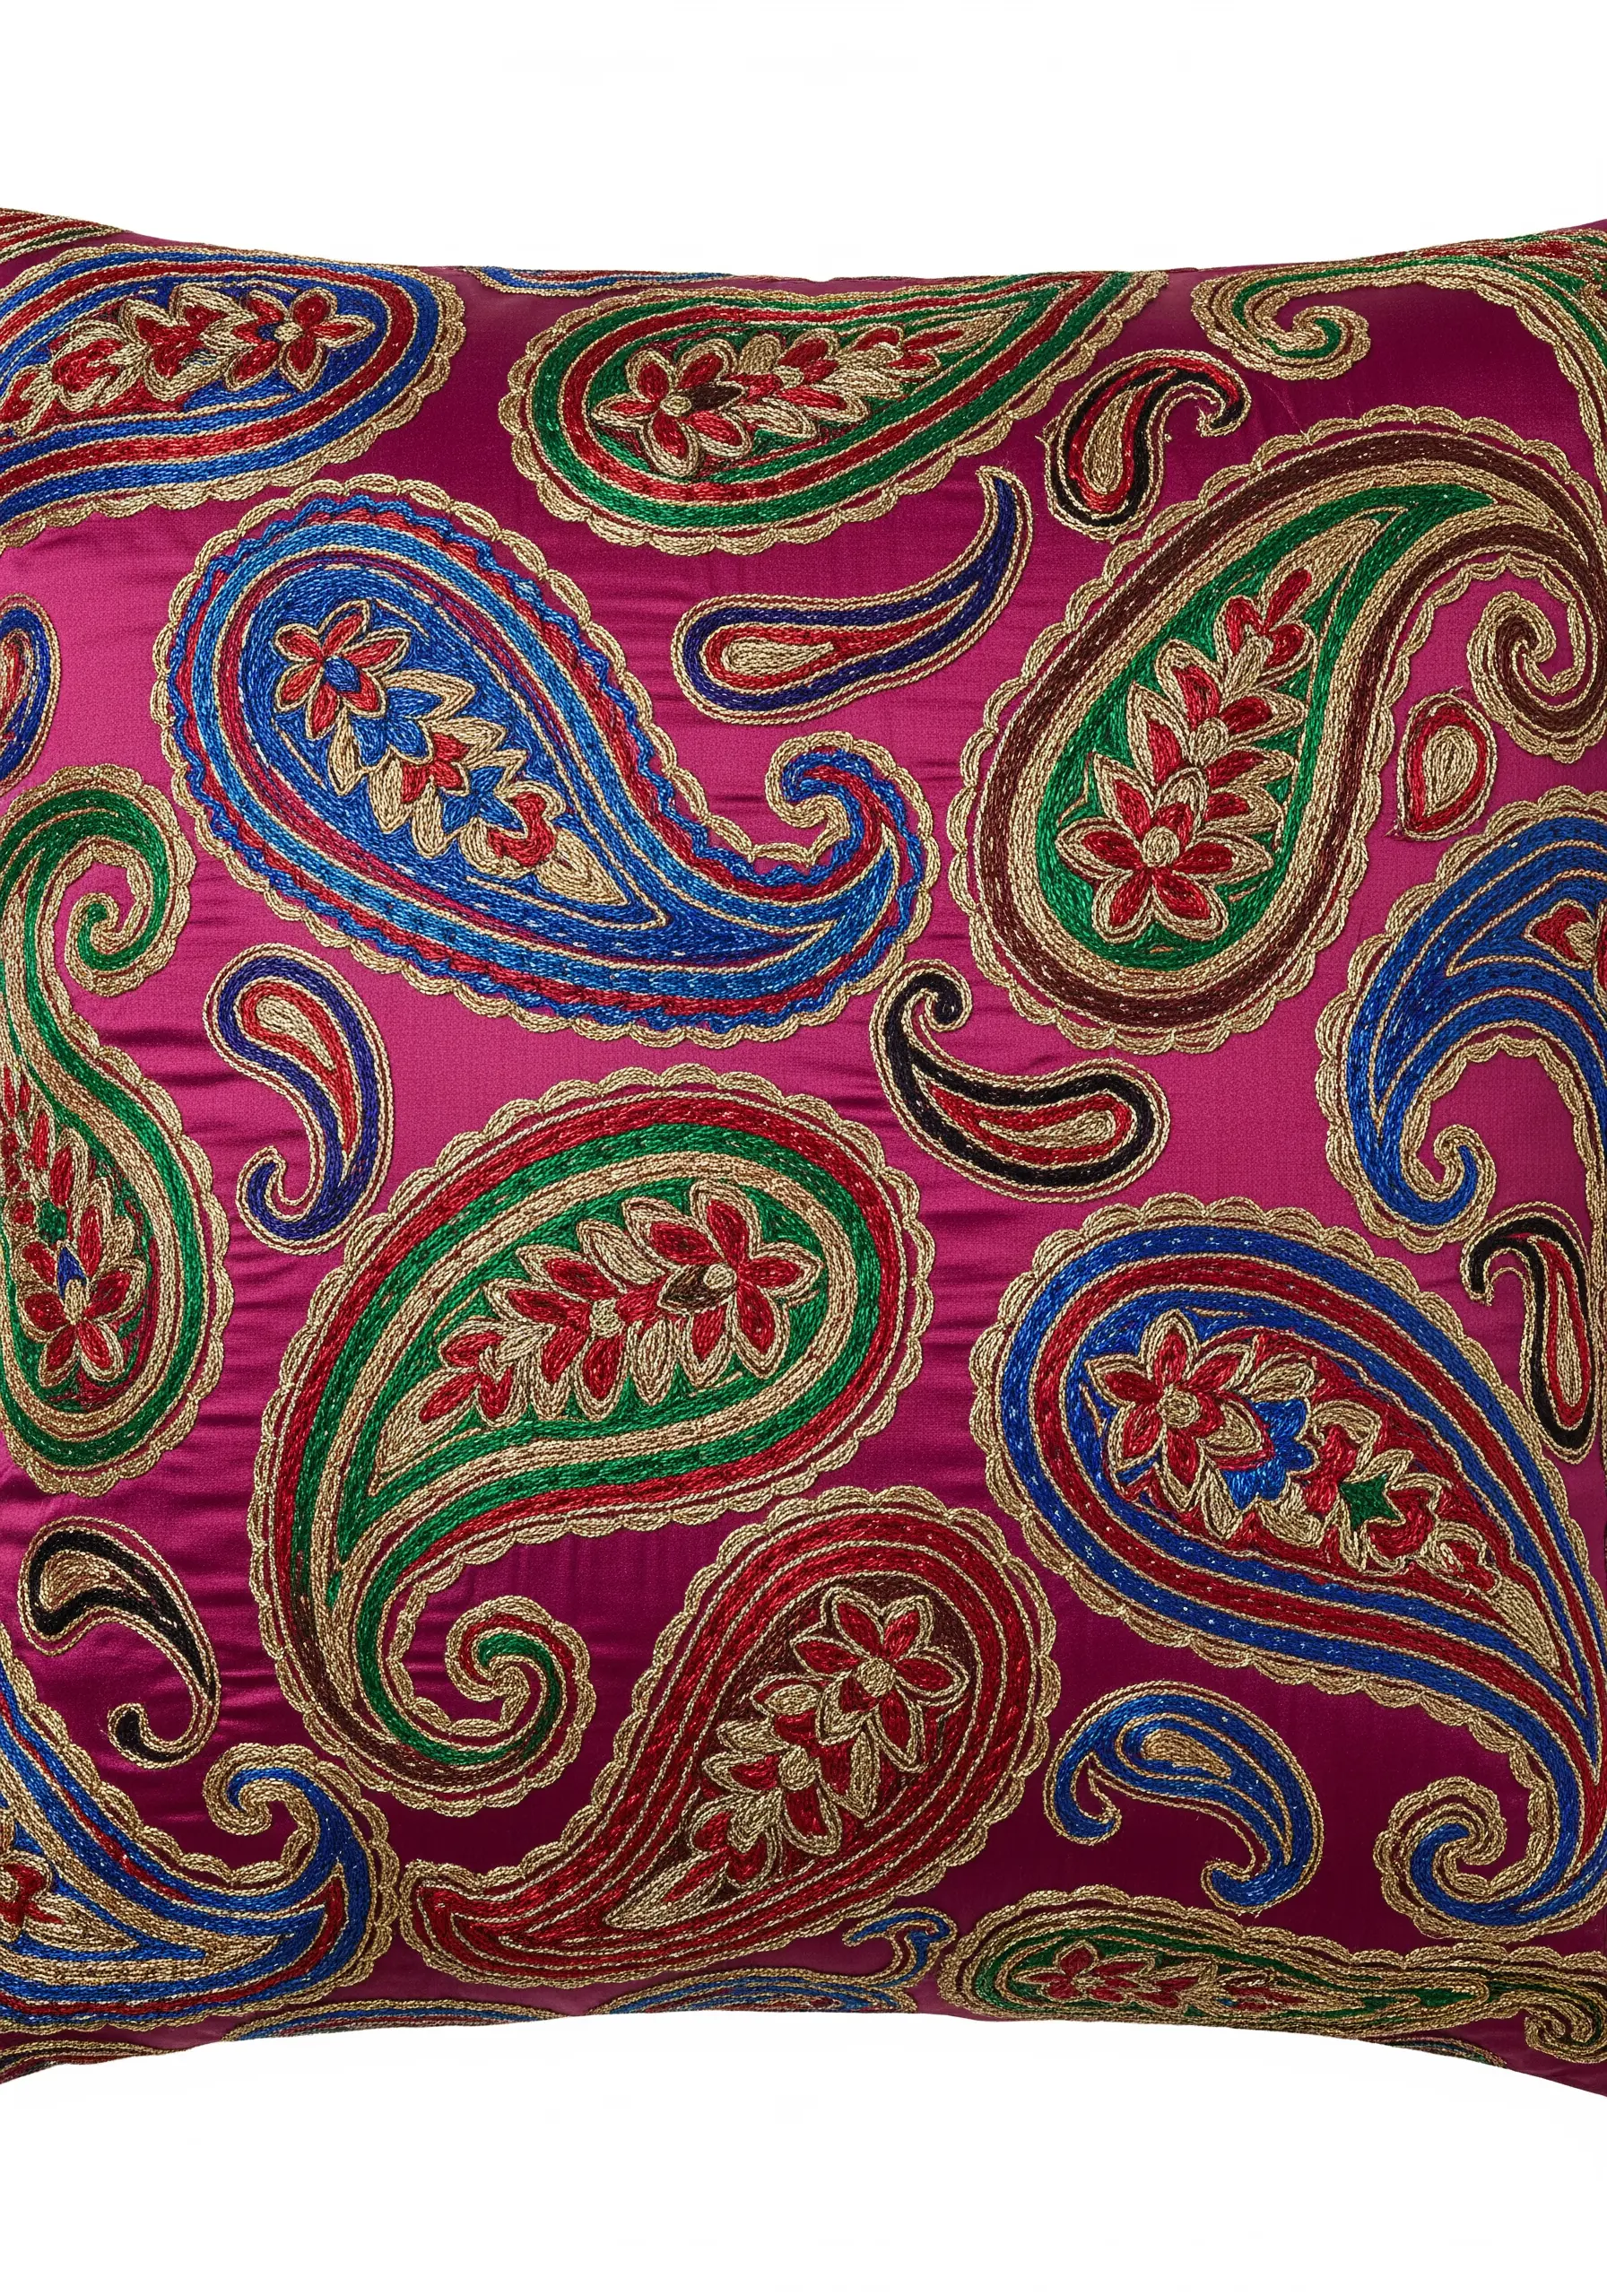
Transform a traditional paisley pattern into a piece of 70s glam by strategically adding metallic thread.
After filling in each colorful section of the paisley motif with a smooth satin stitch, go back and outline every shape with a fine gold metallic thread.
Use a simple backstitch or couching for the outlines. This small addition acts like a frame for each color, adding sharp definition and a luxurious shimmer that catches the light beautifully.
Pro tip: Use a shorter length of metallic thread than you normally would to prevent it from tangling and fraying as you stitch.
16. Block Shapes with Impeccable Satin Stitch
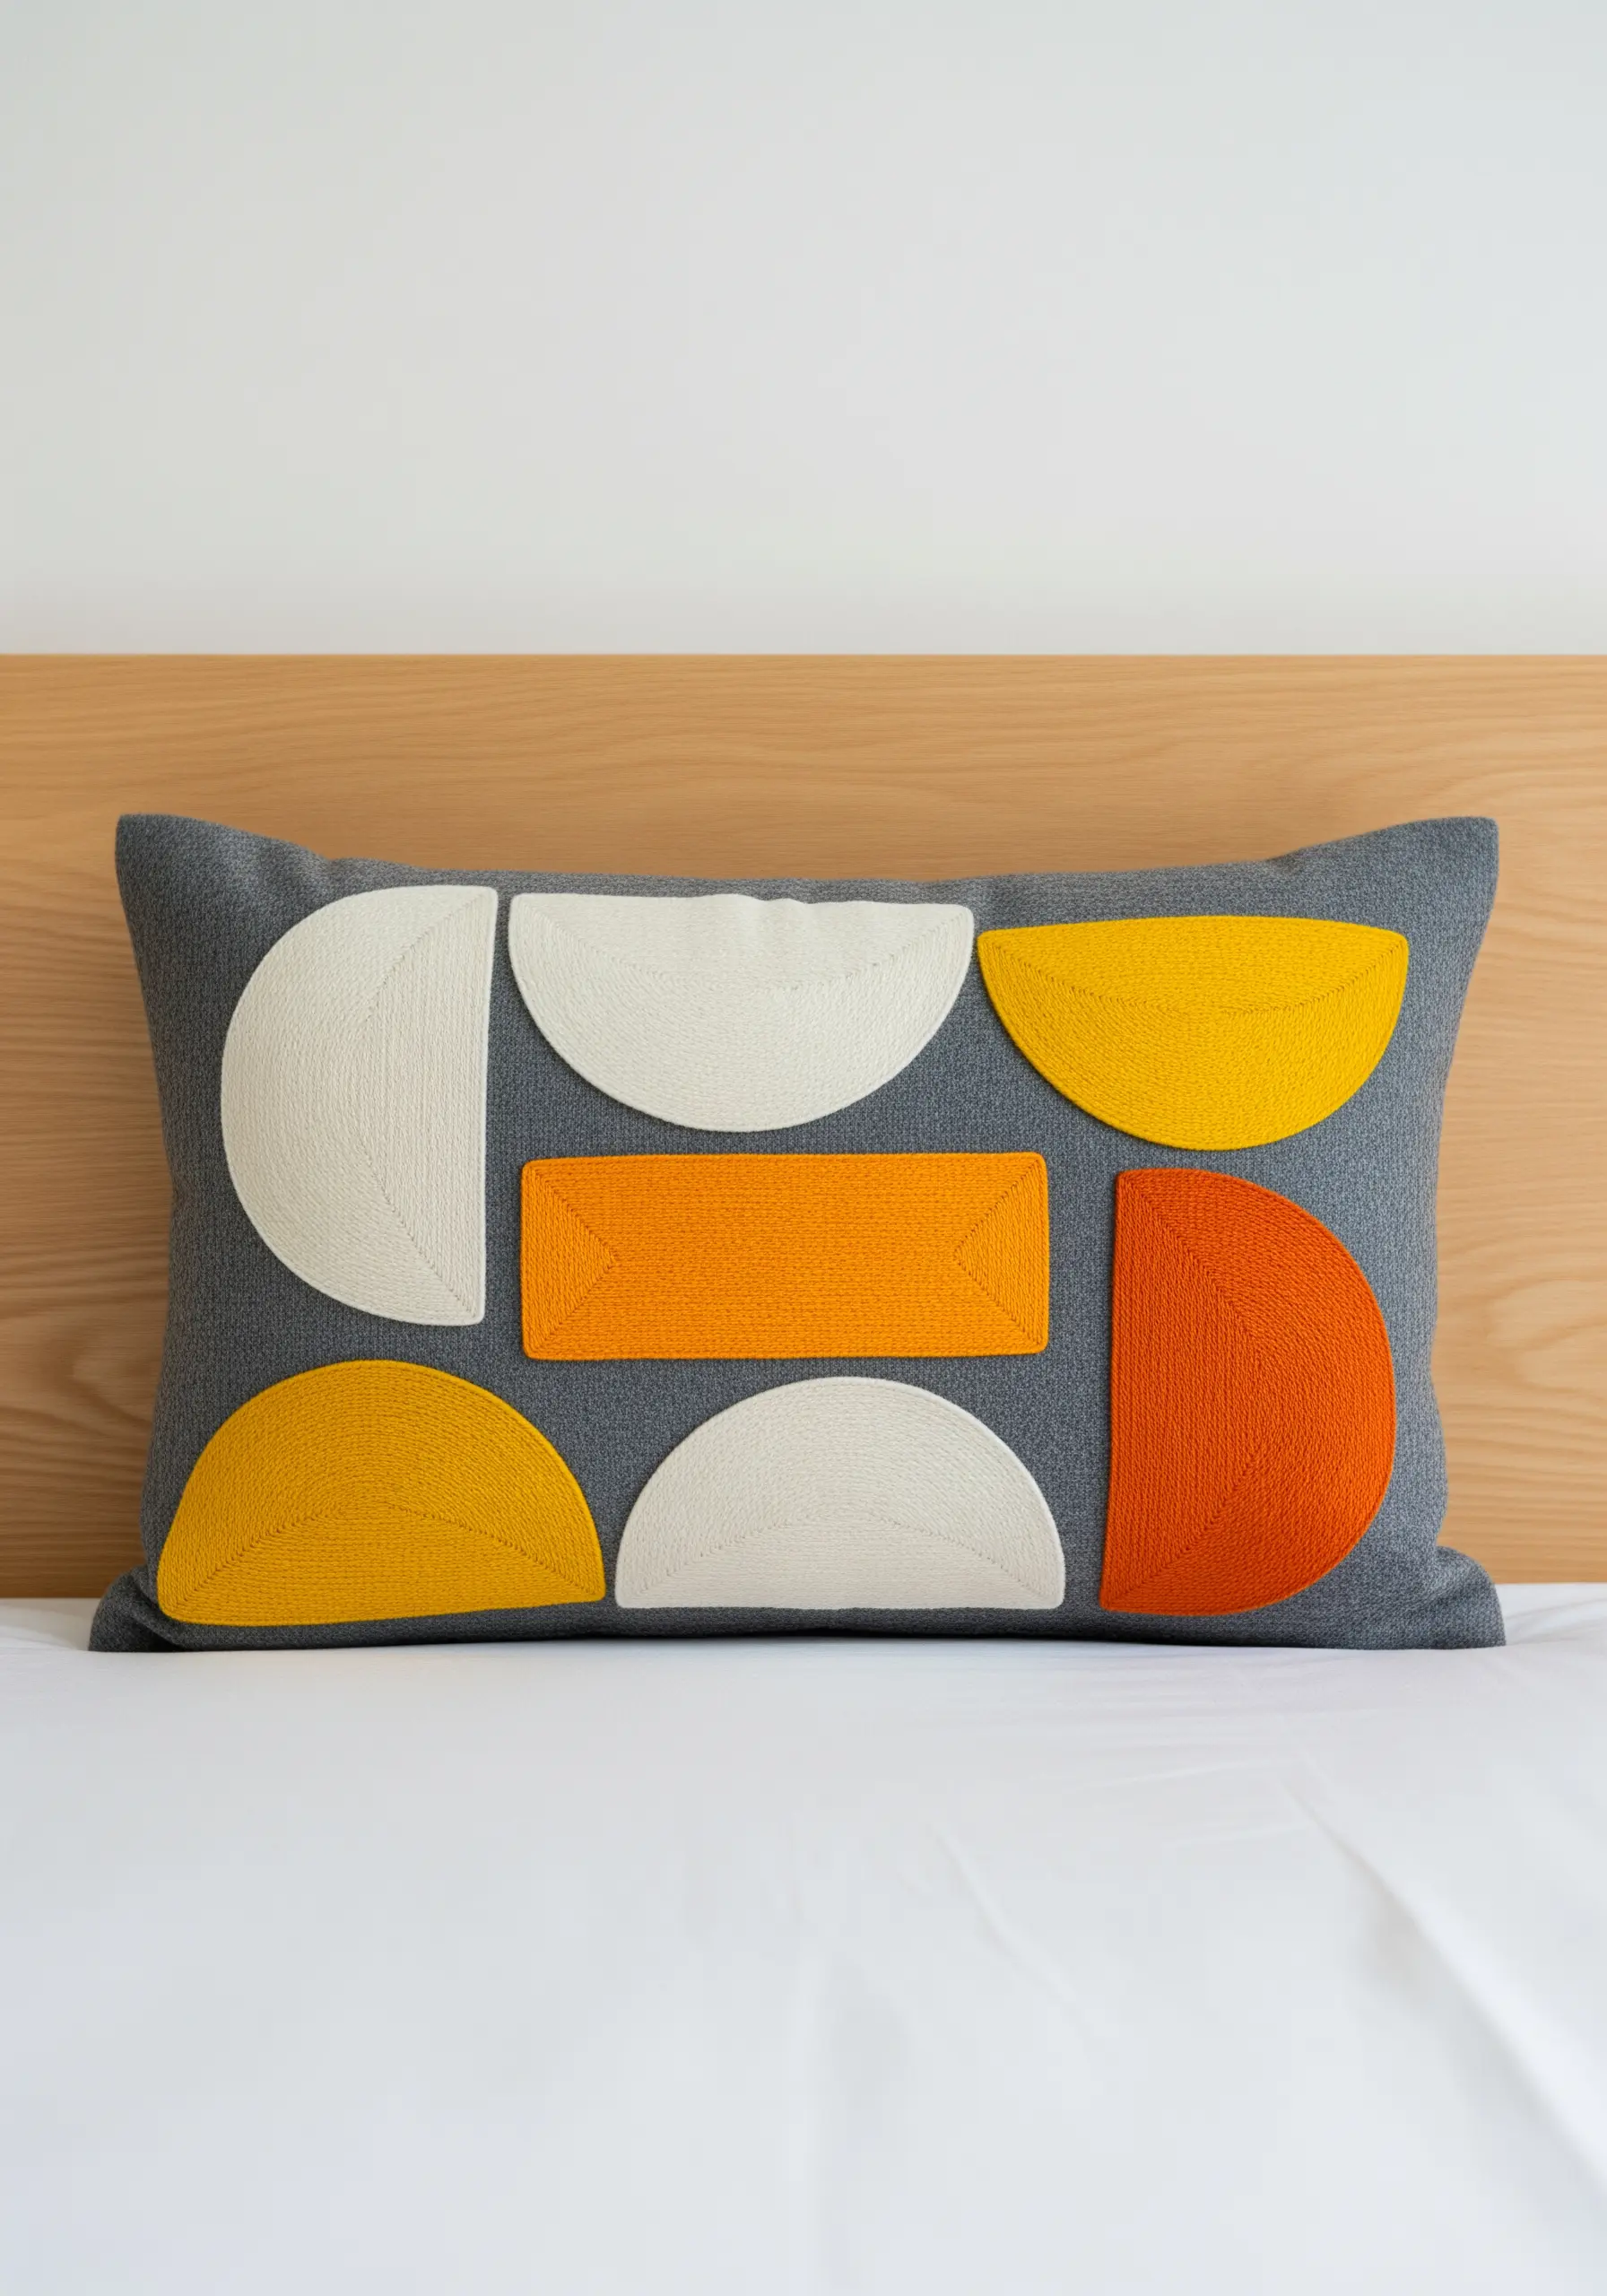
For a minimalist geometric design, flawless execution is everything. The goal is a surface so smooth it almost looks like a print.
To achieve this, first outline each shape with a split stitch. This creates a slightly raised, stable border that acts as a guide and prevents your fill stitches from straying.
Then, fill the shape with satin stitches, using a single strand of floss and ensuring every stitch lies perfectly parallel to the last. This meticulous approach is what makes minimal embroidery wall designs look so refined.
17. Create Contrast Using Negative Space and Tiny Florals
This design is a powerful lesson in balance. The visual impact comes from the stark contrast between the densely filled and empty spaces.
To create the floral side, scatter tiny flowers organically within the shape. Use single lazy daisy stitches for petals and small French knots for the centers.
Don’t overcrowd them; the beauty lies in allowing the background fabric to breathe. This thoughtful use of negative space is a sophisticated technique for creating compositions that feel both intricate and uncluttered.
18. Add Tactile Dimension with Raised Chain Stitch Bands
Give your embroidered lettering a unique, bumpy texture by using a raised chain stitch band fill.
Instead of a flat satin stitch, you work rows of this highly textured stitch to fill the letters. It’s created by making a foundation of straight stitches (like ladder rungs) and then working chain stitches over them without piercing the fabric.
This technique results in a raised, almost beaded effect that is incredibly tactile and adds a playful, 3D quality to your words.
19. Achieve Realistic Wings with Thread Painting
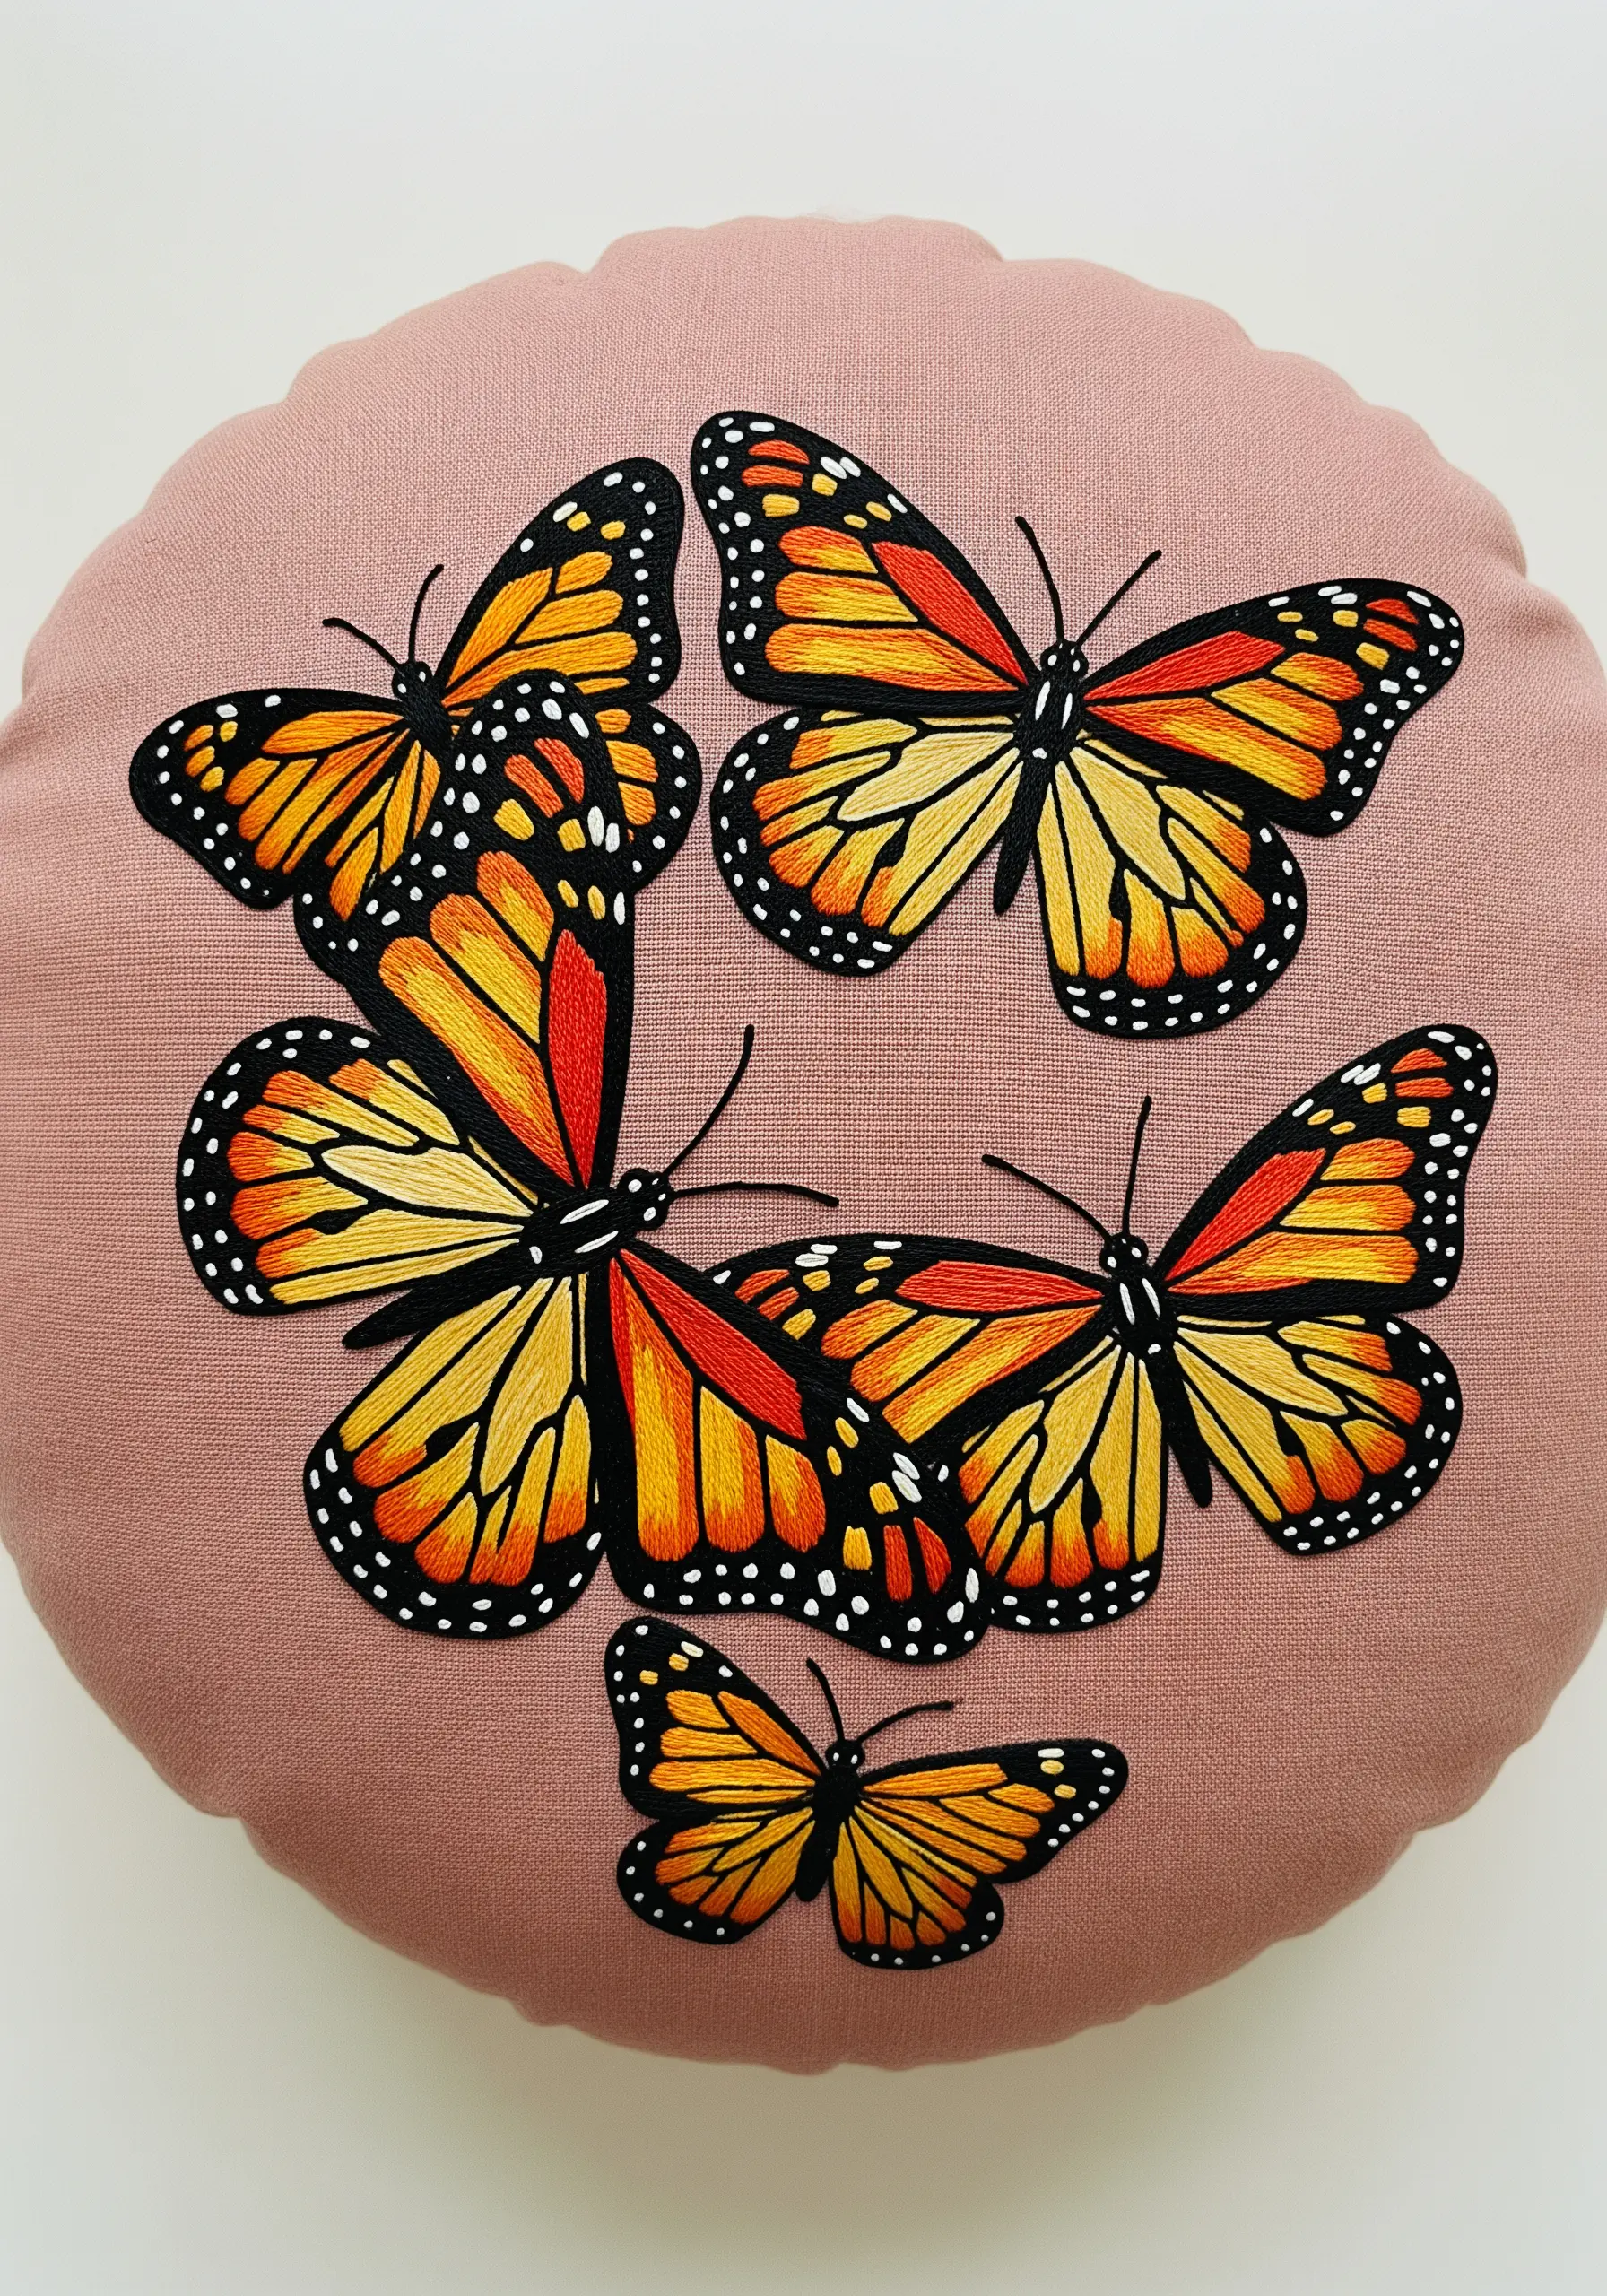
To capture the delicate color gradients of monarch wings, you’ll need to use a thread painting technique.
This involves using the long-and-short stitch with single strands of floss to seamlessly blend different colors. Work with several shades of orange, yellow, and red, using your needle to place stitches just as a painter would use a brush.
Complete the color blending first. Then, stitch the sharp black outlines and white dots last using a precise backstitch to define the patterns and make the colors pop.
20. Illustrate a Landscape with Dense Straight Stitches
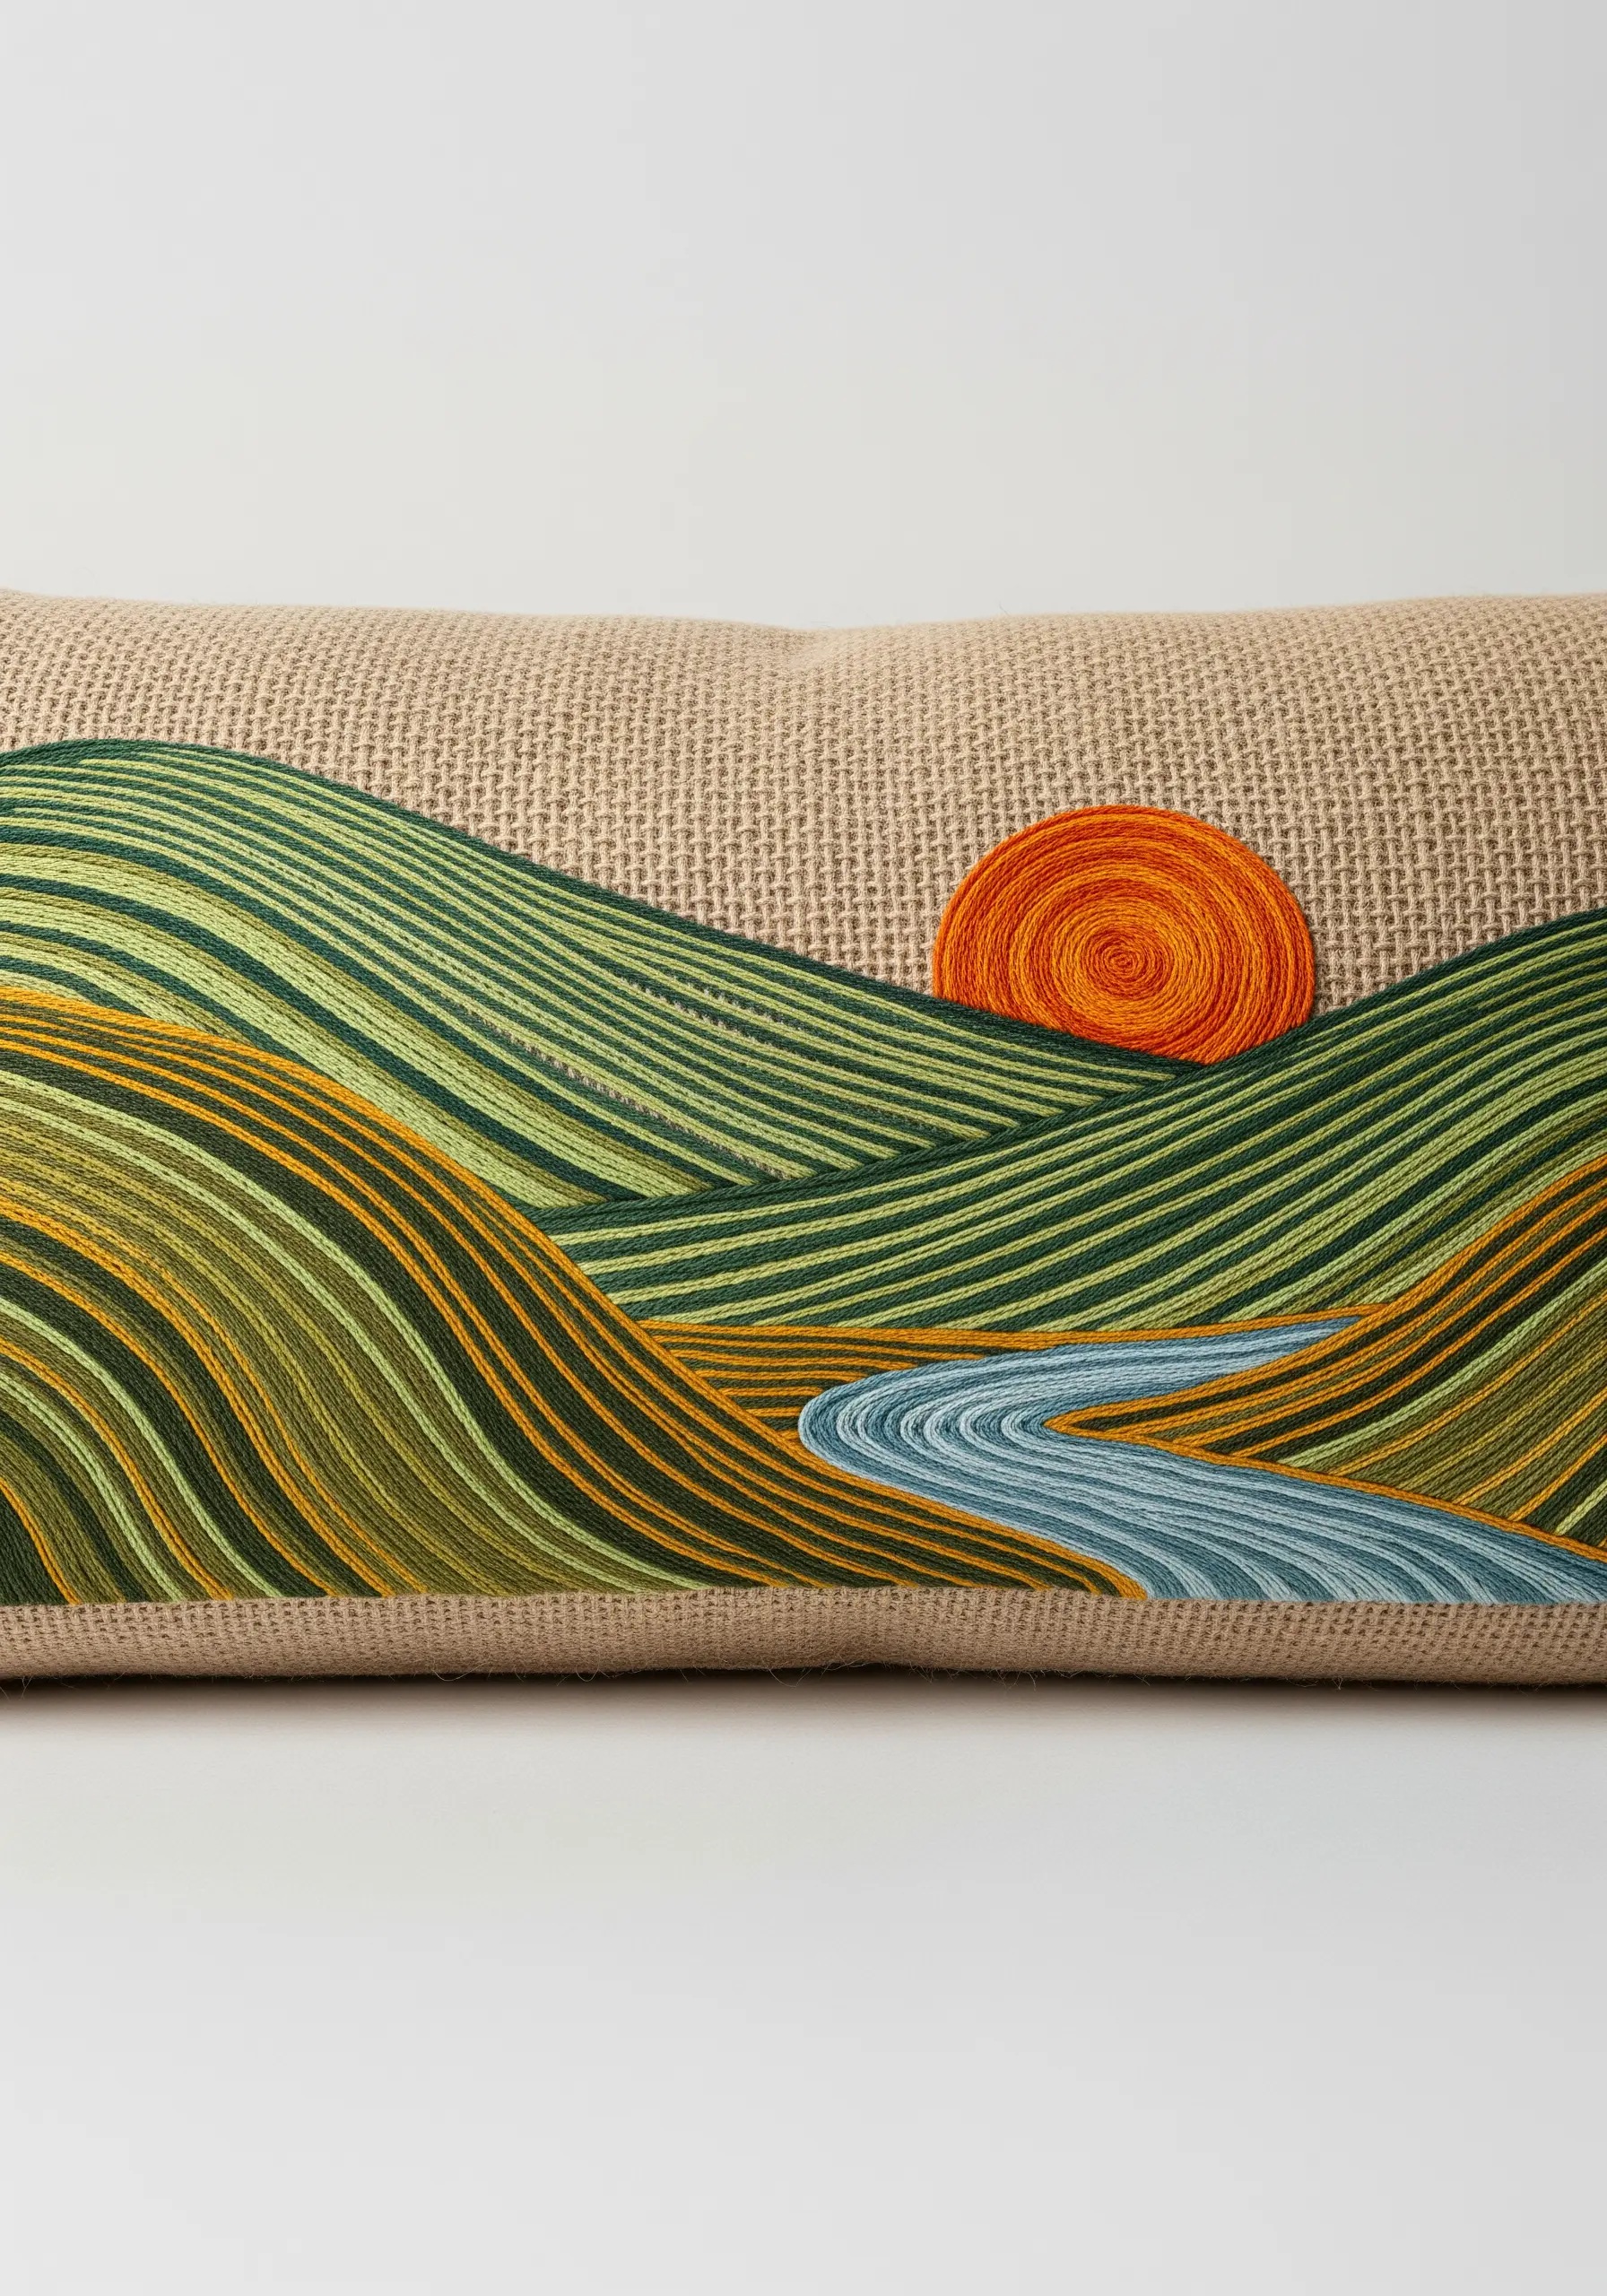
You can ‘paint’ an entire landscape using just one simple stitch. The key is to use your thread like strokes of color.
Create the rolling hills by filling the space with long, dense straight stitches placed close together. Layer different shades of green, olive, and gold to create depth and the illusion of light hitting the hills.
The coarse weave of the burlap-like fabric adds to the rustic, earthy aesthetic. Finish with a coiled and couched sun for a focal point with contrasting texture.


