

Embroidery can be more than a hobby; it can be a quiet practice that shapes the feeling of a room. The wall hangings you create are not just decorations—they are slow-stitched reminders to breathe, to find calm, and to appreciate the beauty of a single, well-placed thread.
Forget perfectionism and the pressure to create complex masterpieces. Instead, I want you to focus on intention. Consider how a different stitch can change a texture, how a single strand of silk can catch the light, or how leaving a part of the fabric bare can make a composition feel more modern and balanced.
Here, you’ll find techniques that offer visible, tangible improvements to your work. Each idea is a starting point, an invitation to see your needle and thread not just as tools, but as instruments for creating pockets of serenity in your own home.
1. Master the Large-Scale Landscape
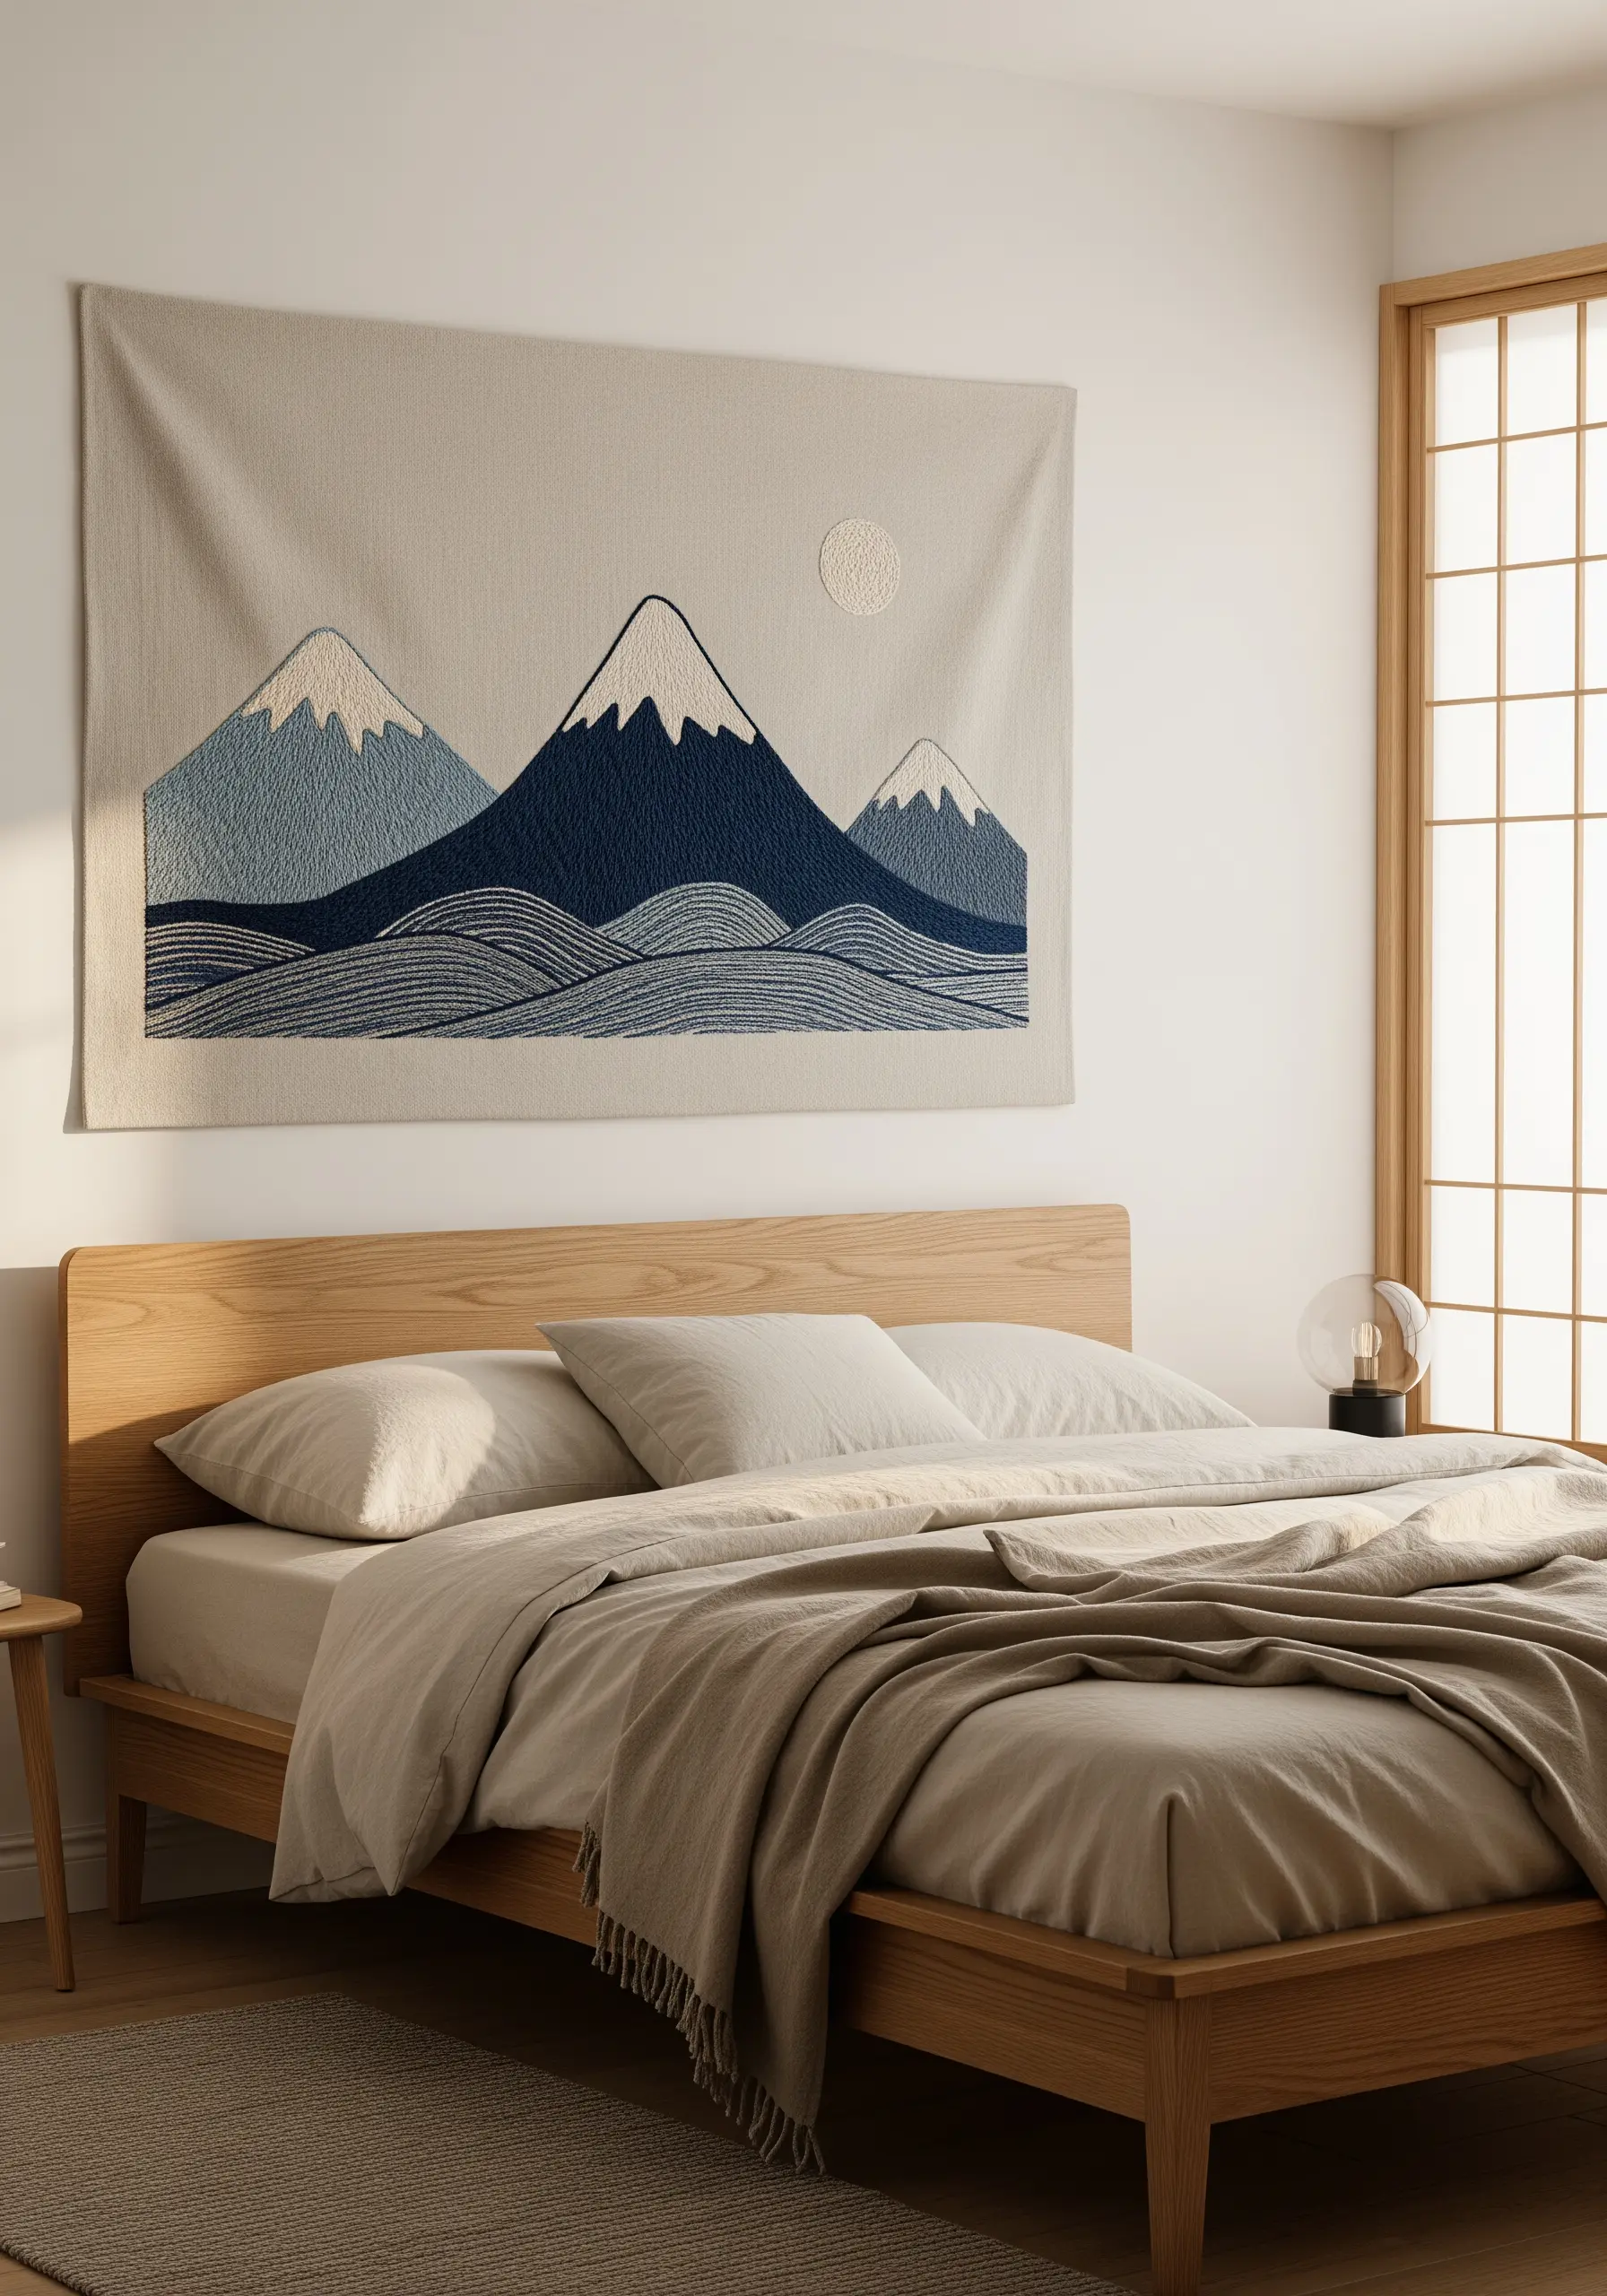
To create a large, serene landscape, focus on dense fill stitches that form solid blocks of color.
Use a long-and-short stitch instead of satin stitch for large areas to prevent thread from snagging and create subtle texture.
For the water, alternate the direction of your stitches in wavy lines to mimic the movement of the sea, which adds depth and realism.
Choose a heavyweight linen or cotton canvas that can support the thread’s weight without puckering, ensuring your final piece hangs flat and looks professional.
This technique turns a simple illustration into statement-size embroidered textile hangings that anchor a room with quiet authority.
2. Use Negative Space as a Design Element
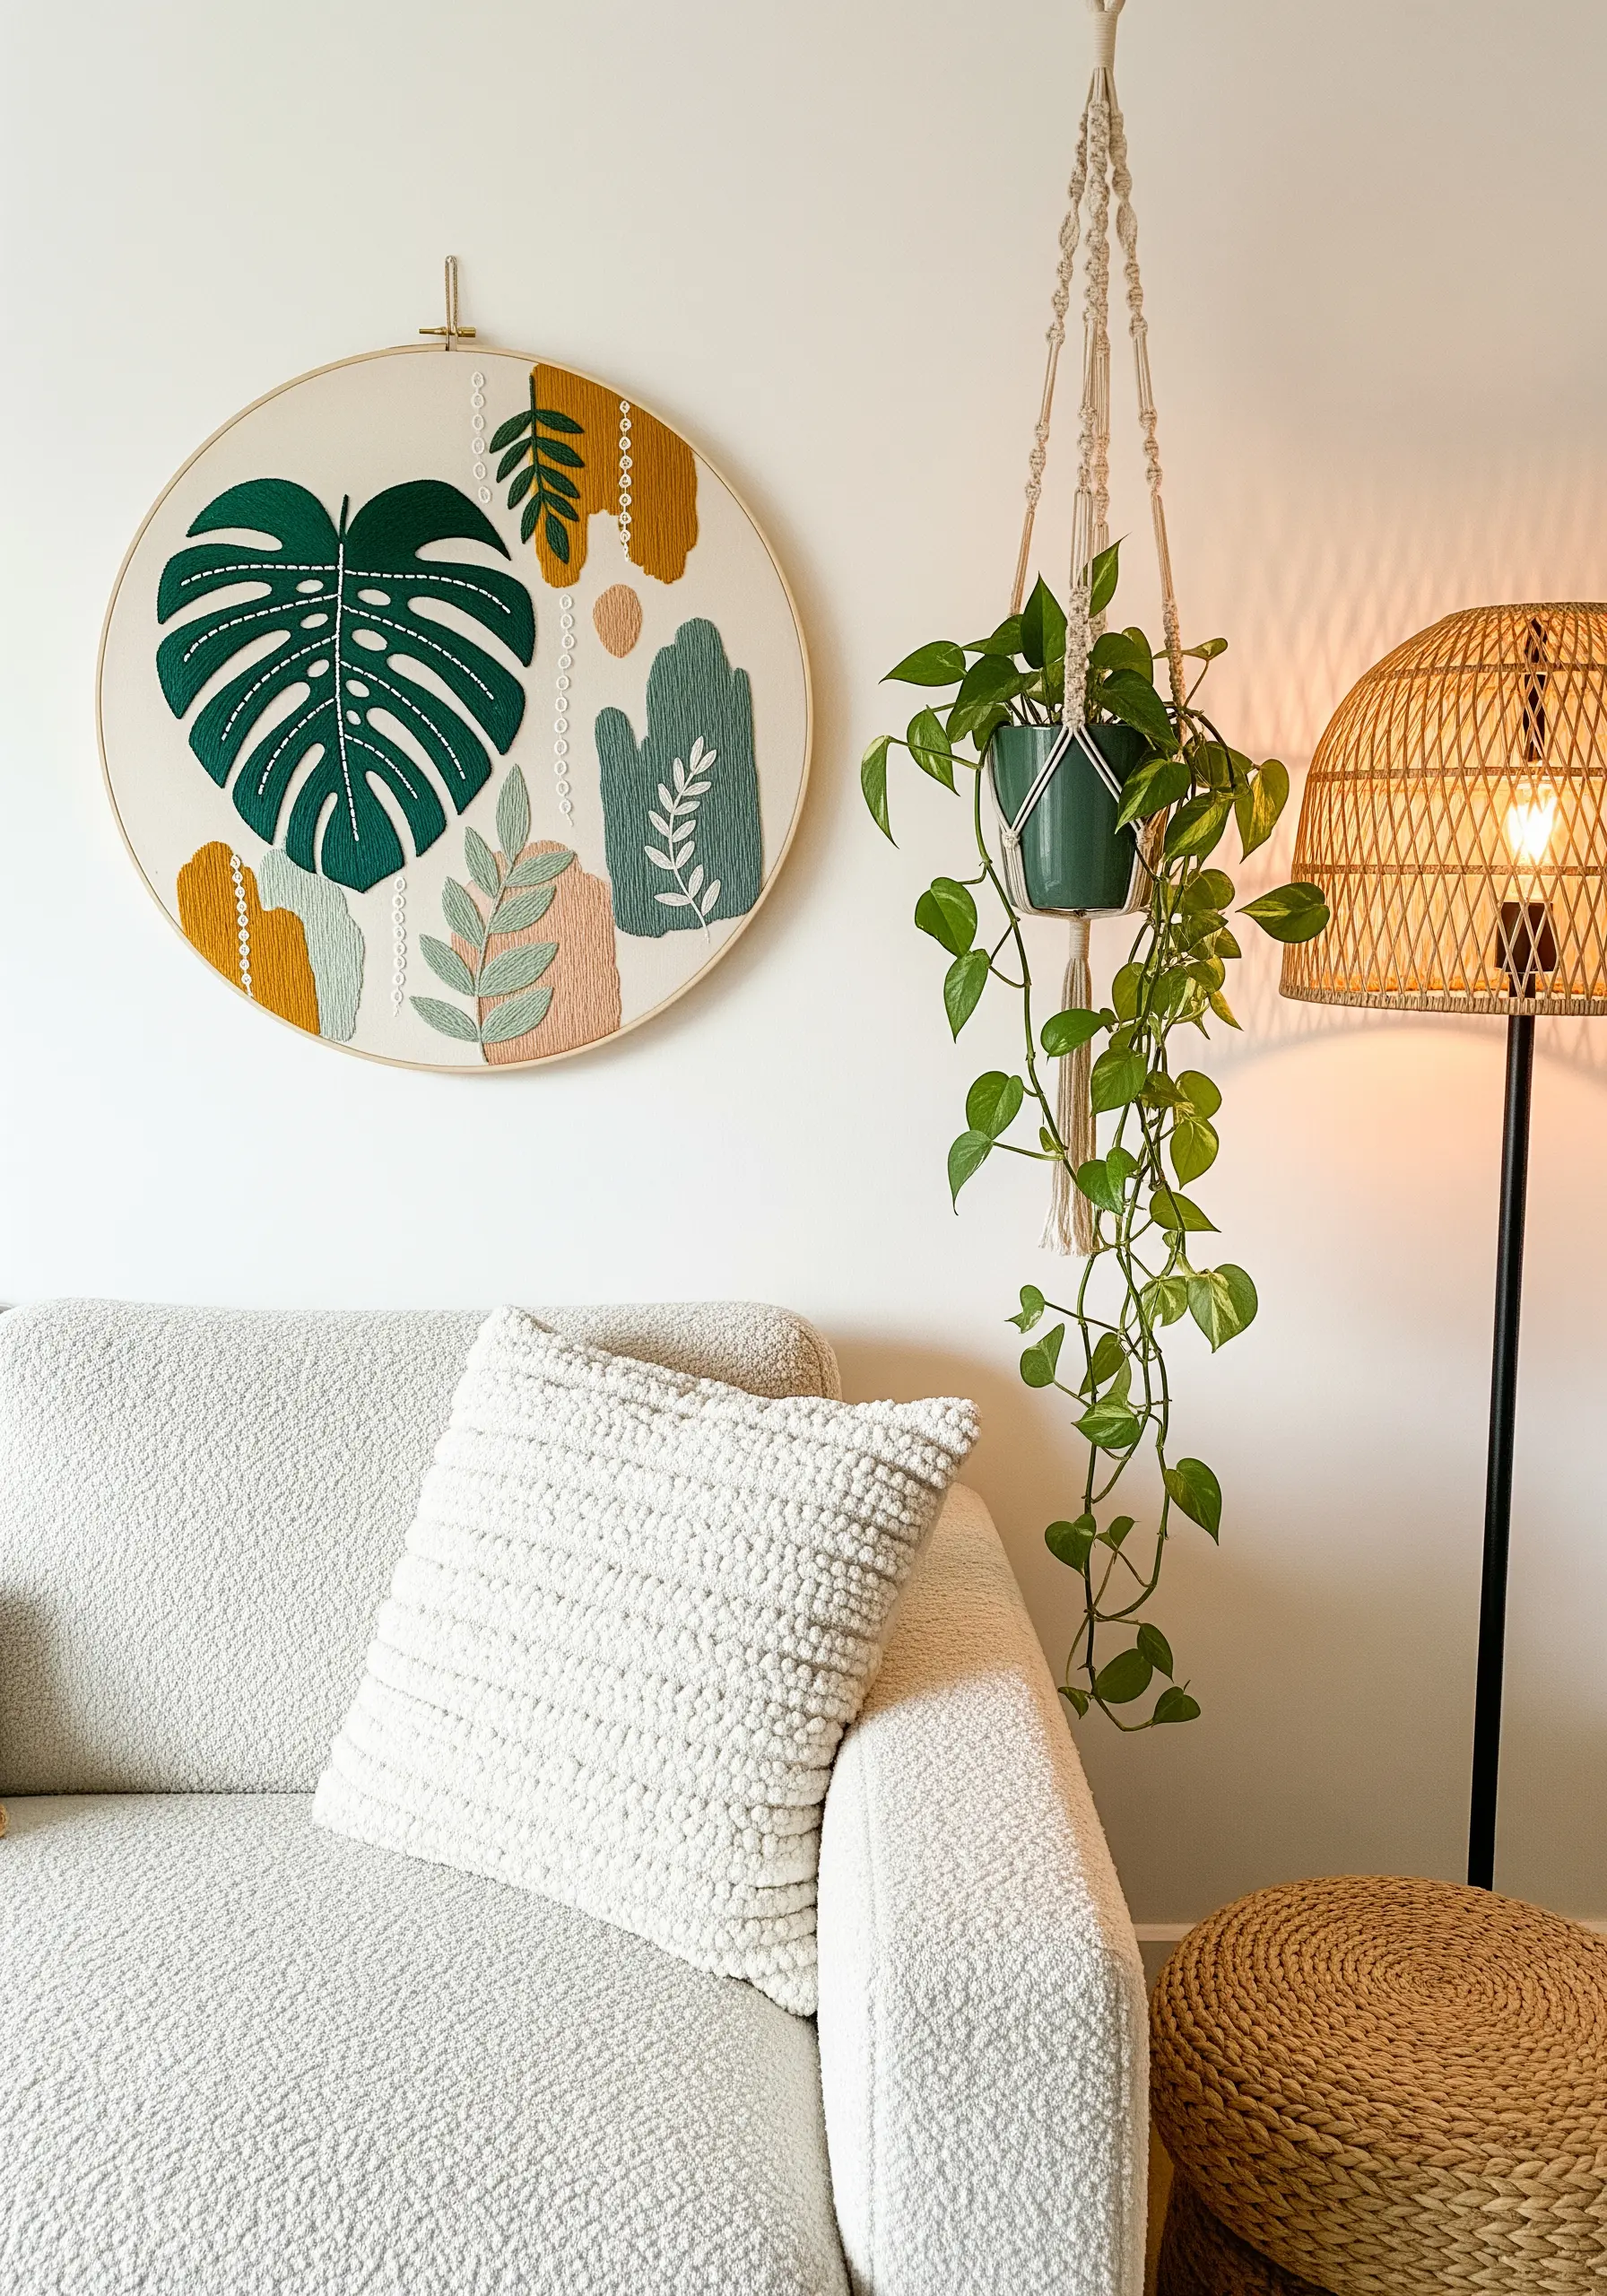
Create a modern, graphic composition by deliberately leaving areas of your fabric unstitched.
Use bold, flat satin stitches for the leaves and abstract shapes, ensuring your stitch direction is consistent within each section for a clean, polished finish.
The contrast between the dense, colorful embroidery and the raw fabric creates visual balance and keeps the design from feeling too heavy.
This use of negative space is a powerful tool that makes your work feel intentional and contemporary.
3. Create Lunar Texture with French Knots
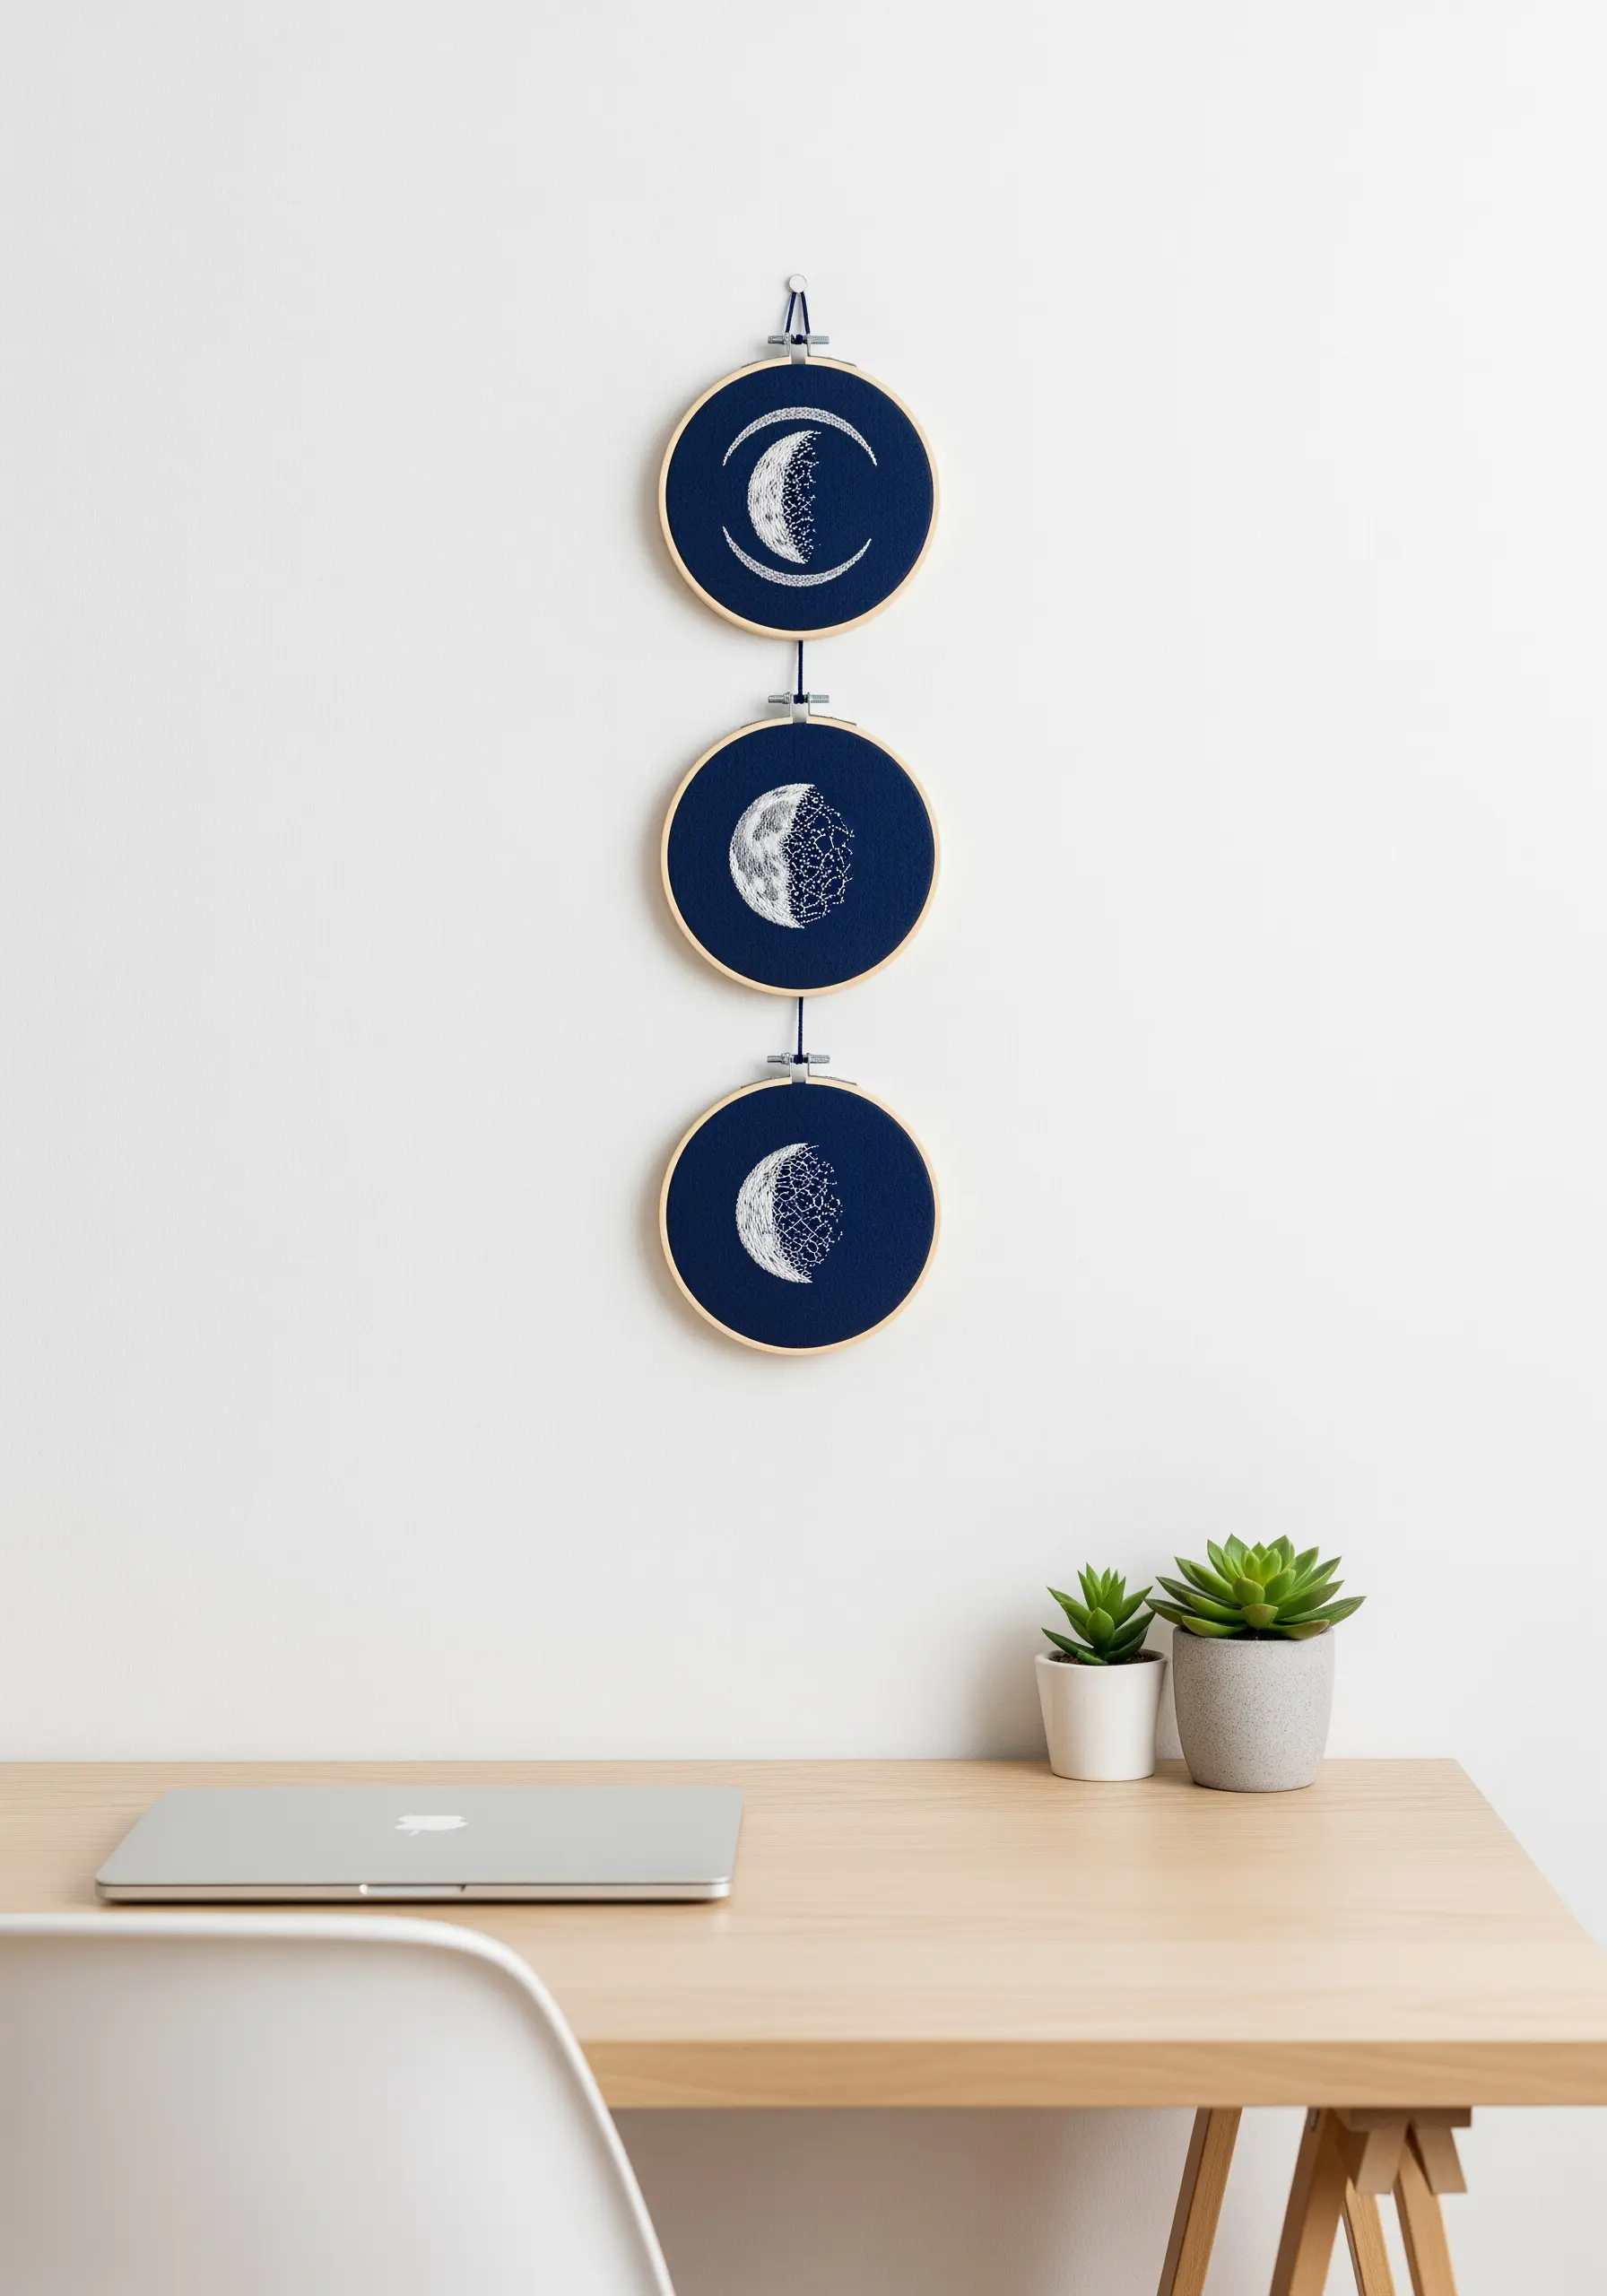
To give your celestial designs realistic texture, move beyond simple satin stitch.
Fill the moon’s surface with tightly packed French knots using a single strand of white or silver thread to create a detailed, stippled effect that mimics craters.
For the surrounding stars, scatter single French knots randomly, varying the number of wraps around your needle to create stars of different sizes and brightness.
Stitching on a dark navy or black linen makes the white thread pop, enhancing the design’s cosmic feel and aligning with embroidery color palettes that promote calm.
4. Stitch Movement with Purposeful Gaps
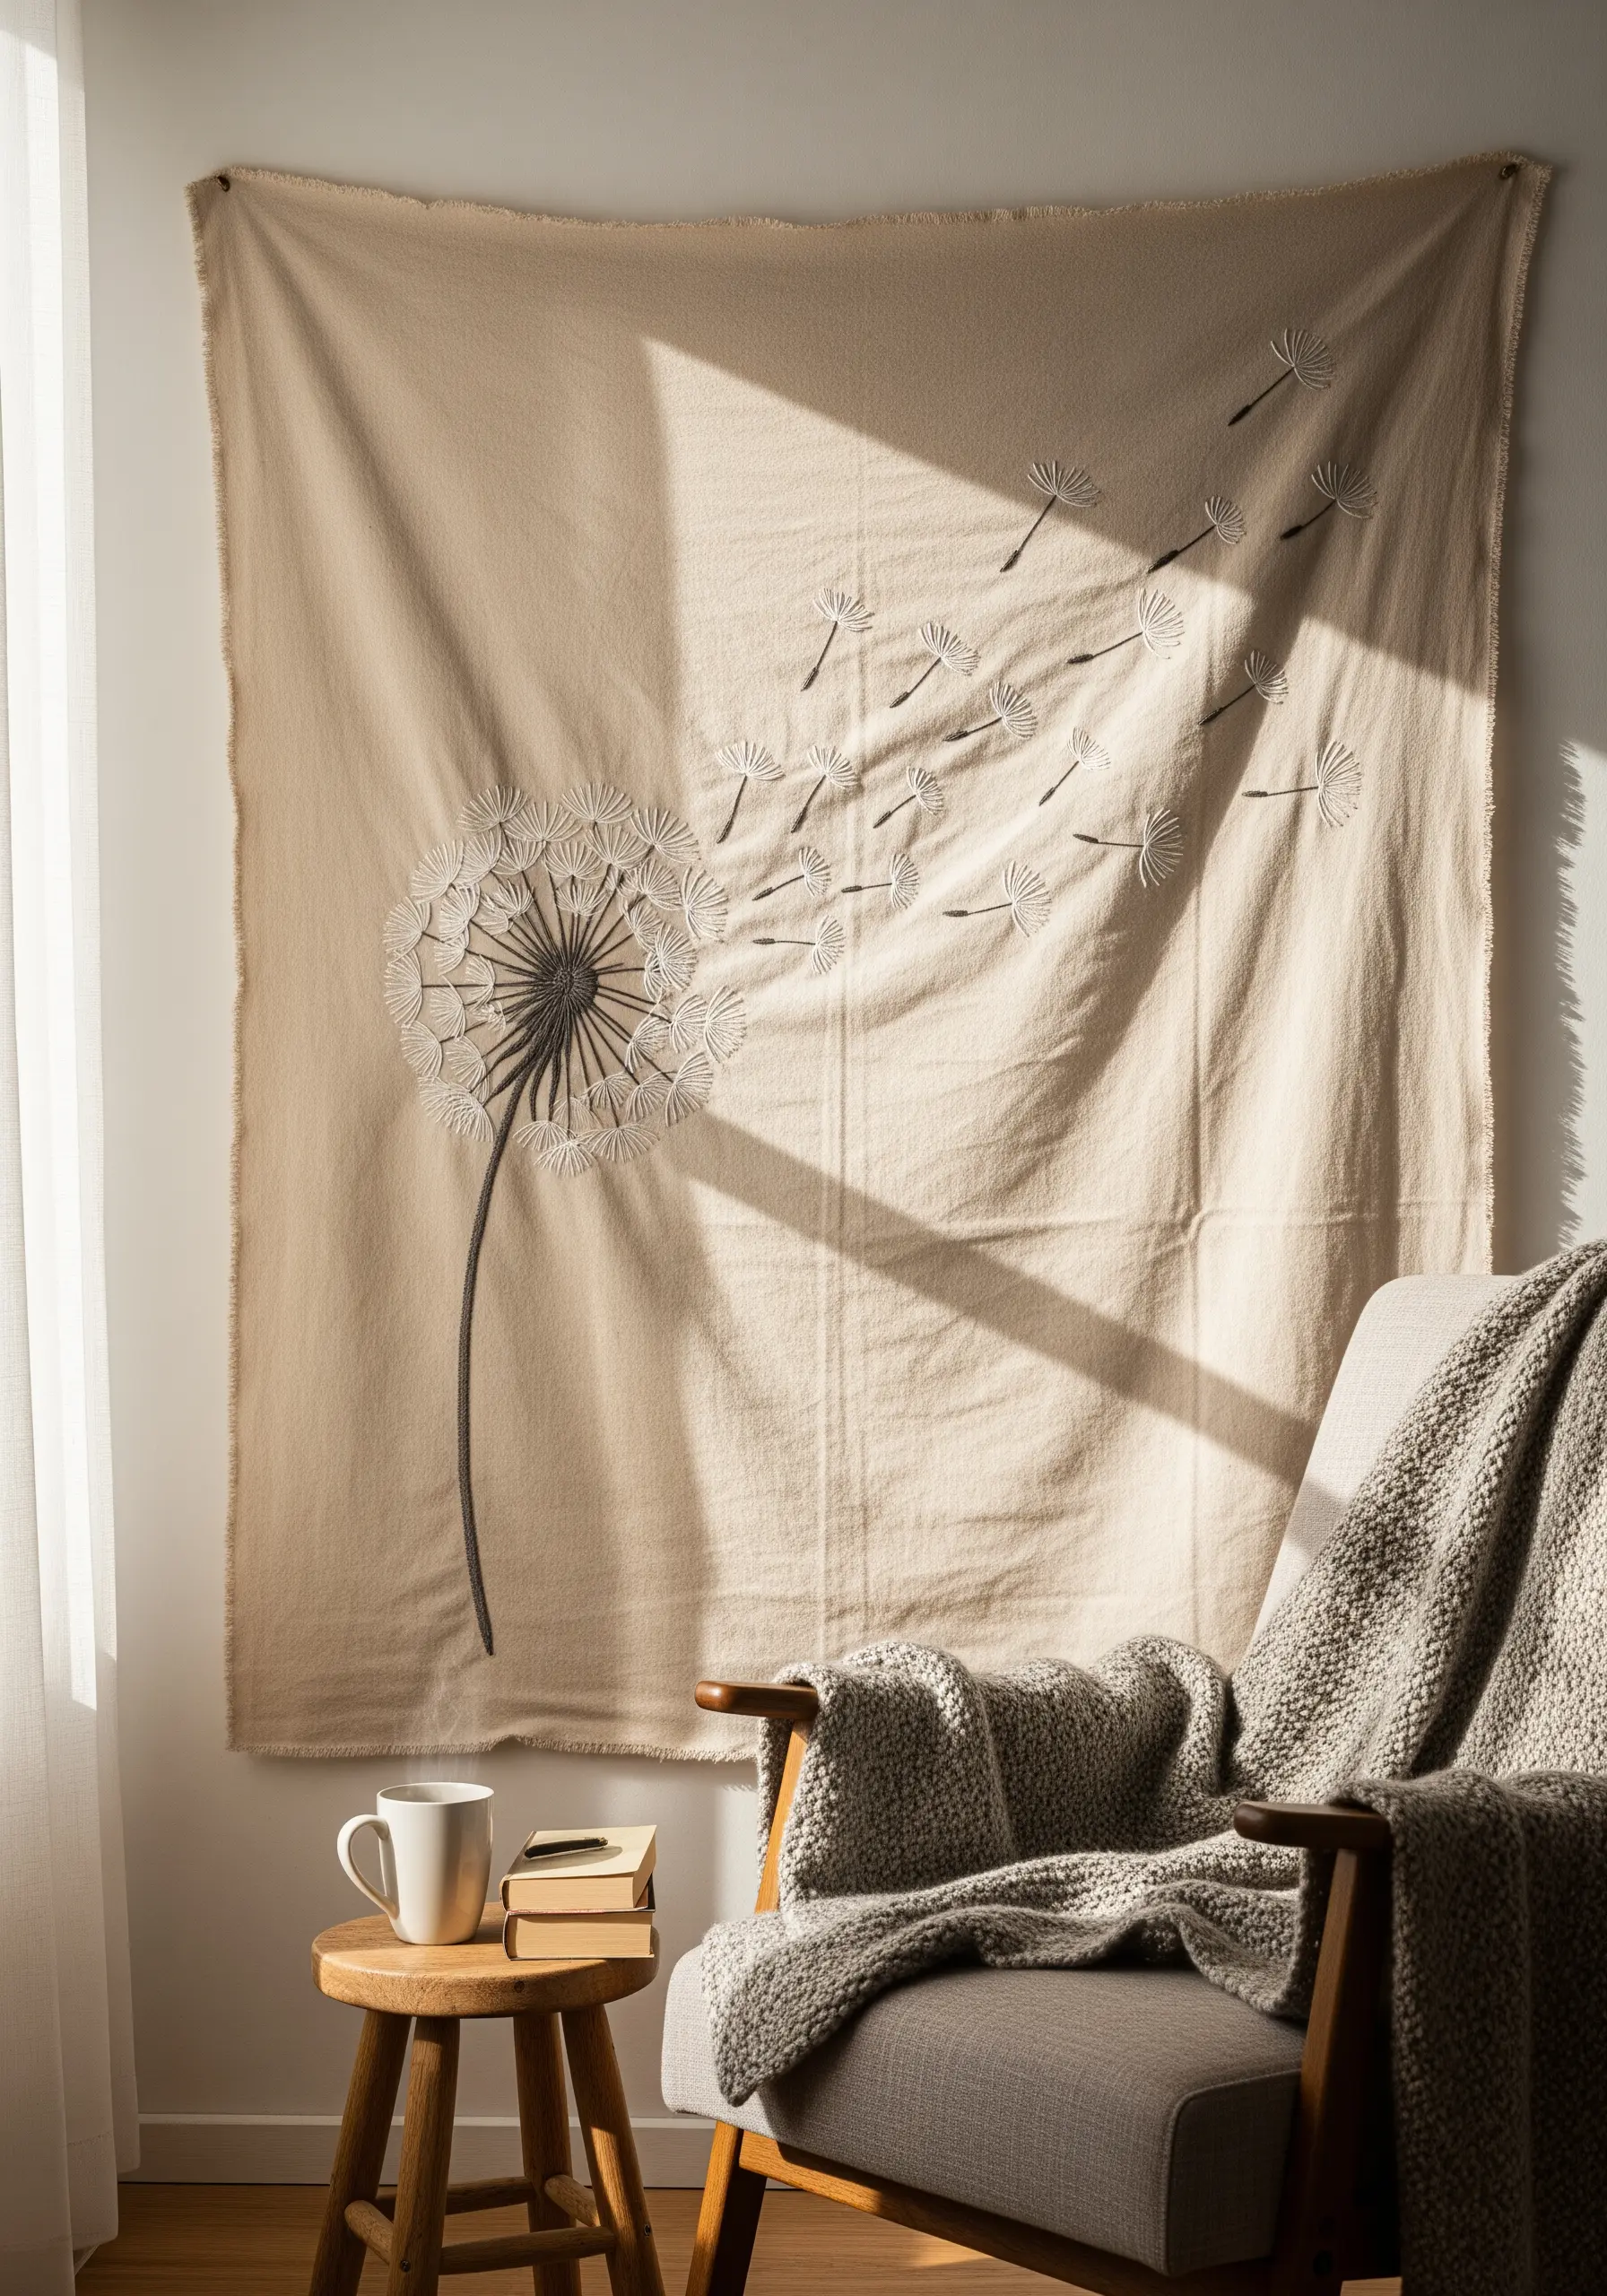
To capture the delicate movement of dandelion seeds drifting in the wind, focus on the space between your stitches.
Use a simple straight stitch or detached fly stitch for each individual seed, pointing them in a gentle upward arc to create a sense of airflow.
The key is not to overcrowd them; the empty space around each seed is what makes the composition feel light and airy.
This thoughtful placement turns a simple motif into one of the most elegant contemporary stitch designs, telling a story of gentle transition.
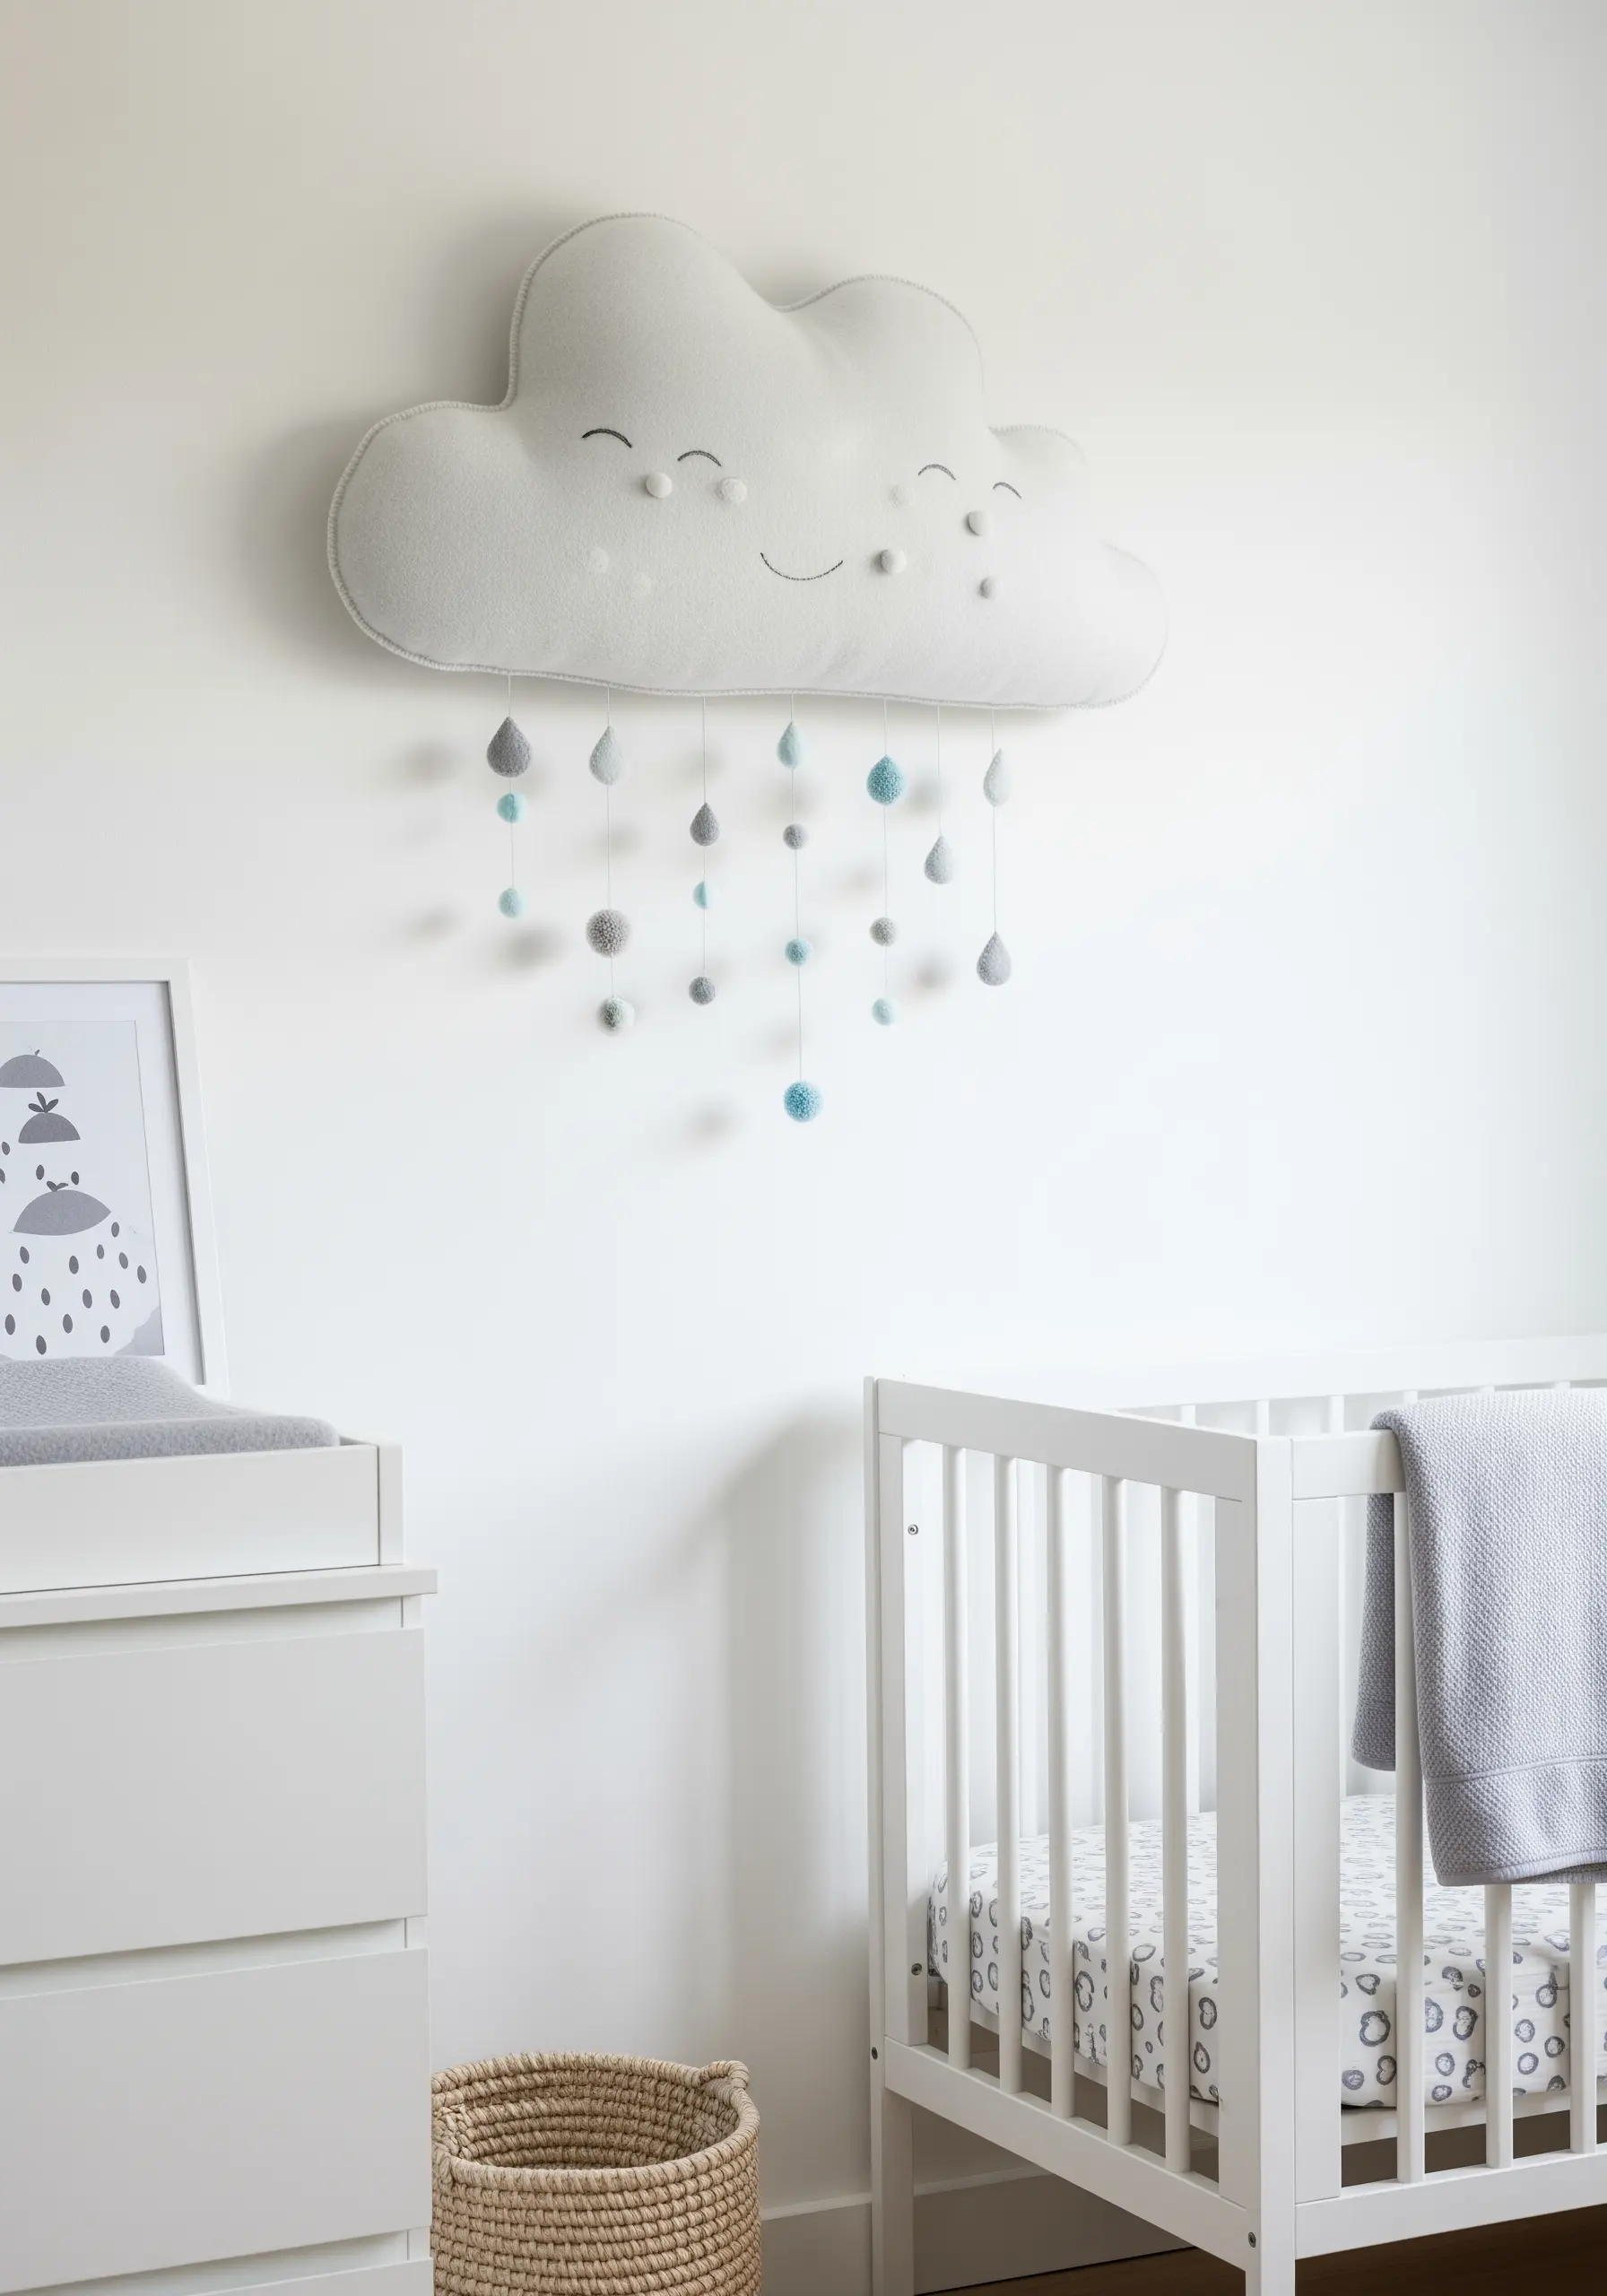
5. Build Soft, Tactile Clouds with Turkey Work
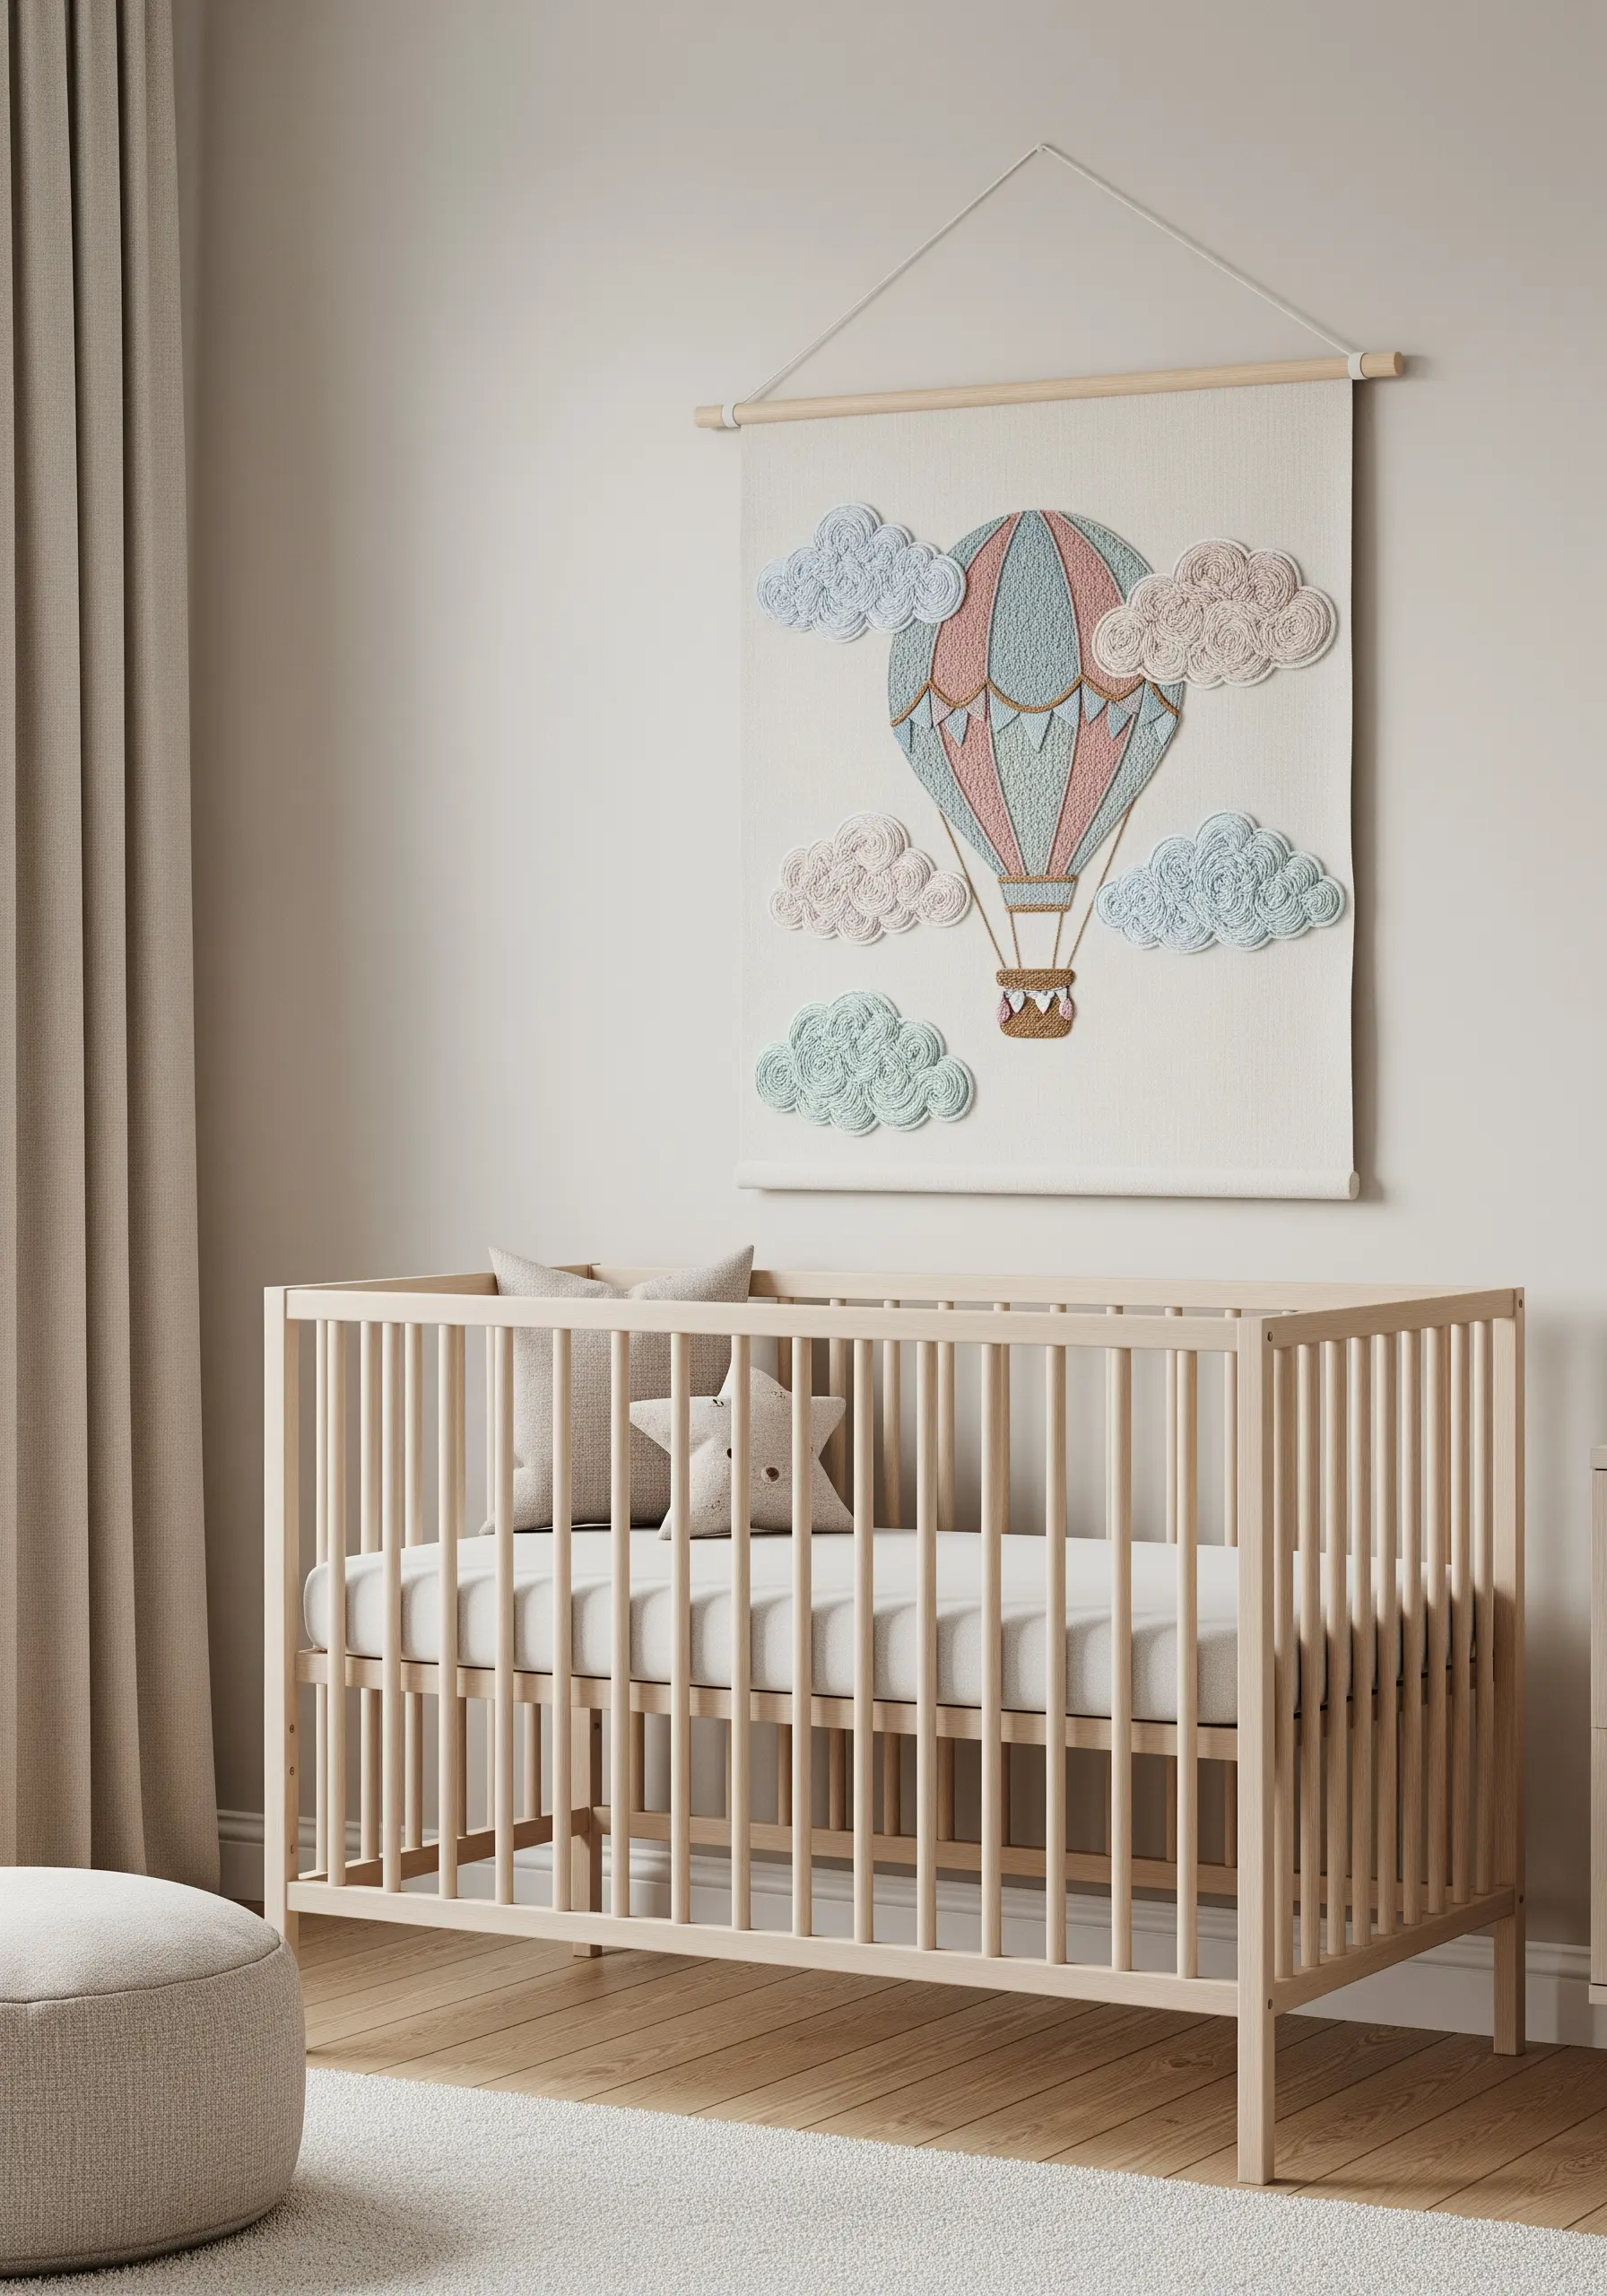
For nursery decor, texture is everything. Create plush, 3D clouds using the Turkey work stitch (also known as the looped stitch).
Work rows of loops close together, then trim the tops to your desired height to create a soft, fluffy surface that invites touch.
Use a soft, matte cotton thread in pastel shades to enhance the gentle, dreamy quality of the design.
This technique is perfect for adding sensory detail to whimsical floral embroidery ideas for kids’ clothing and nursery decor, making them truly special.
6. Sculpt with Yarn for Bold Abstraction
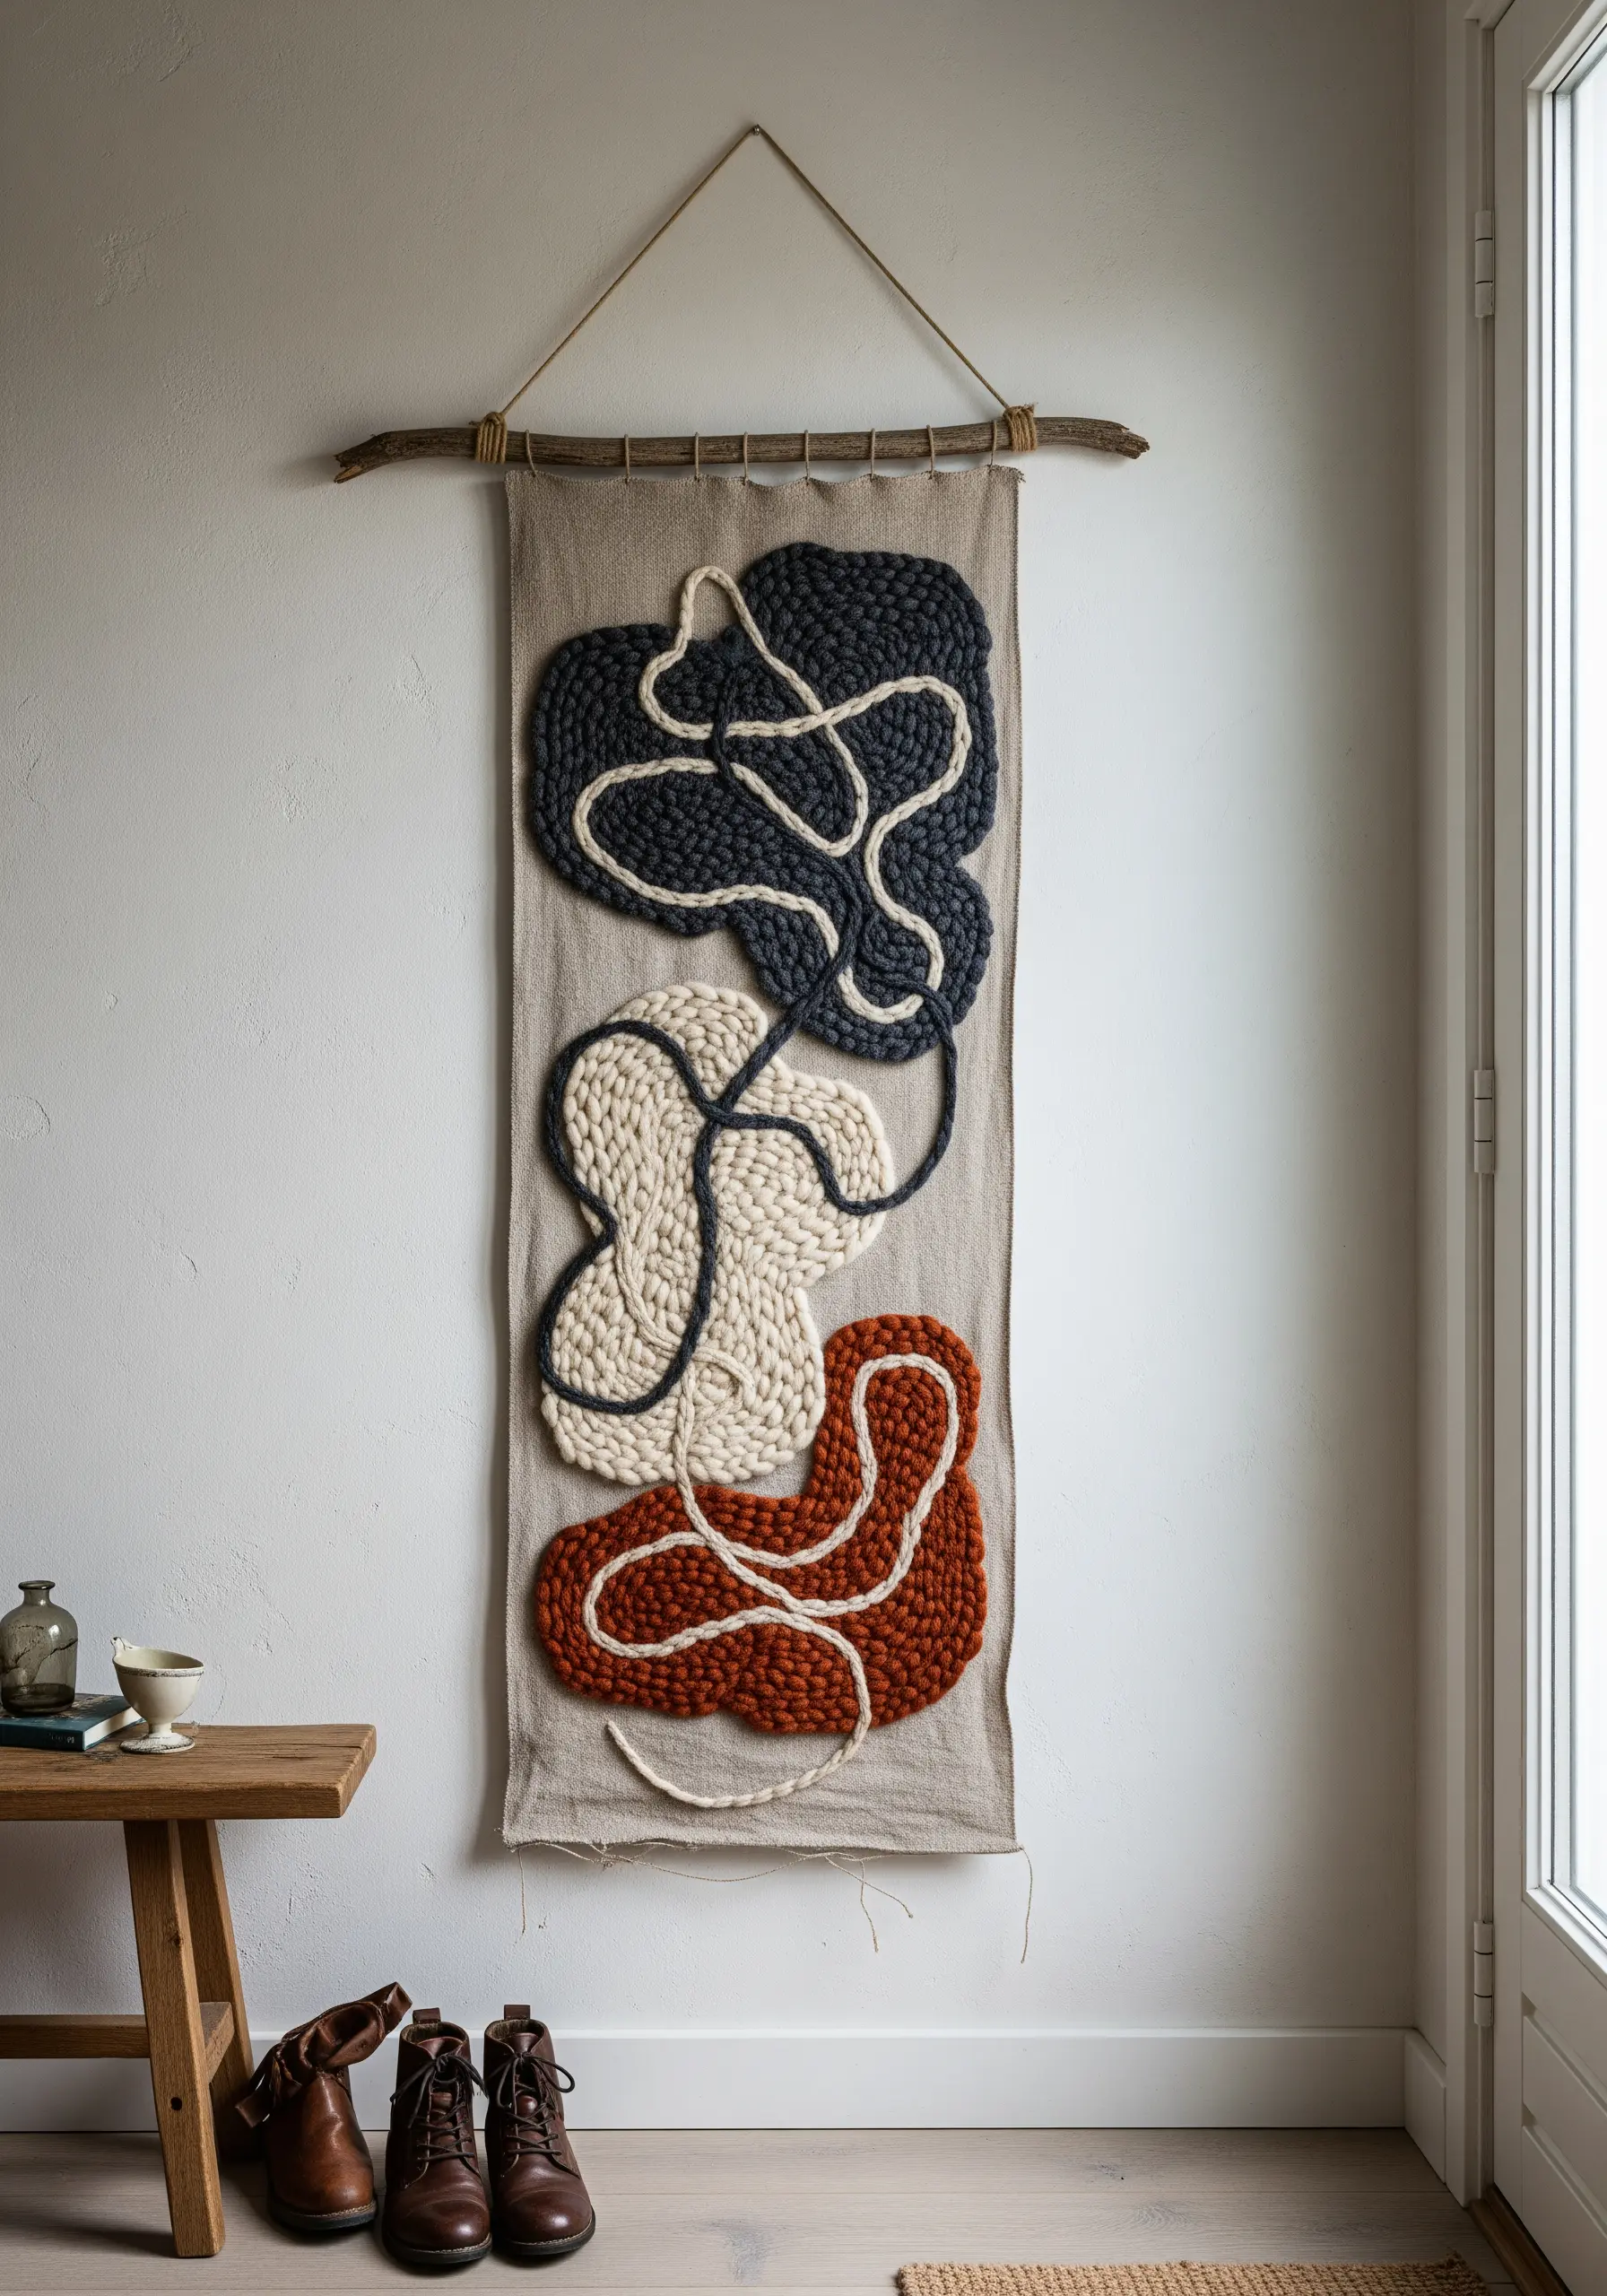
When standard embroidery floss feels too delicate, switch to thick yarn or wool roving to make a powerful statement.
Use a couching stitch—laying the thick yarn on the fabric and securing it with smaller, spaced-out stitches of a matching thread—to create bold, organic lines.
This method allows you to build texture and dimension quickly, turning your fabric into a canvas for sculptural forms.
It’s one of the most effective ways to create mixed-fiber wall hangings that feel both rustic and modern.
7. Weave Geometric Calm with Thread
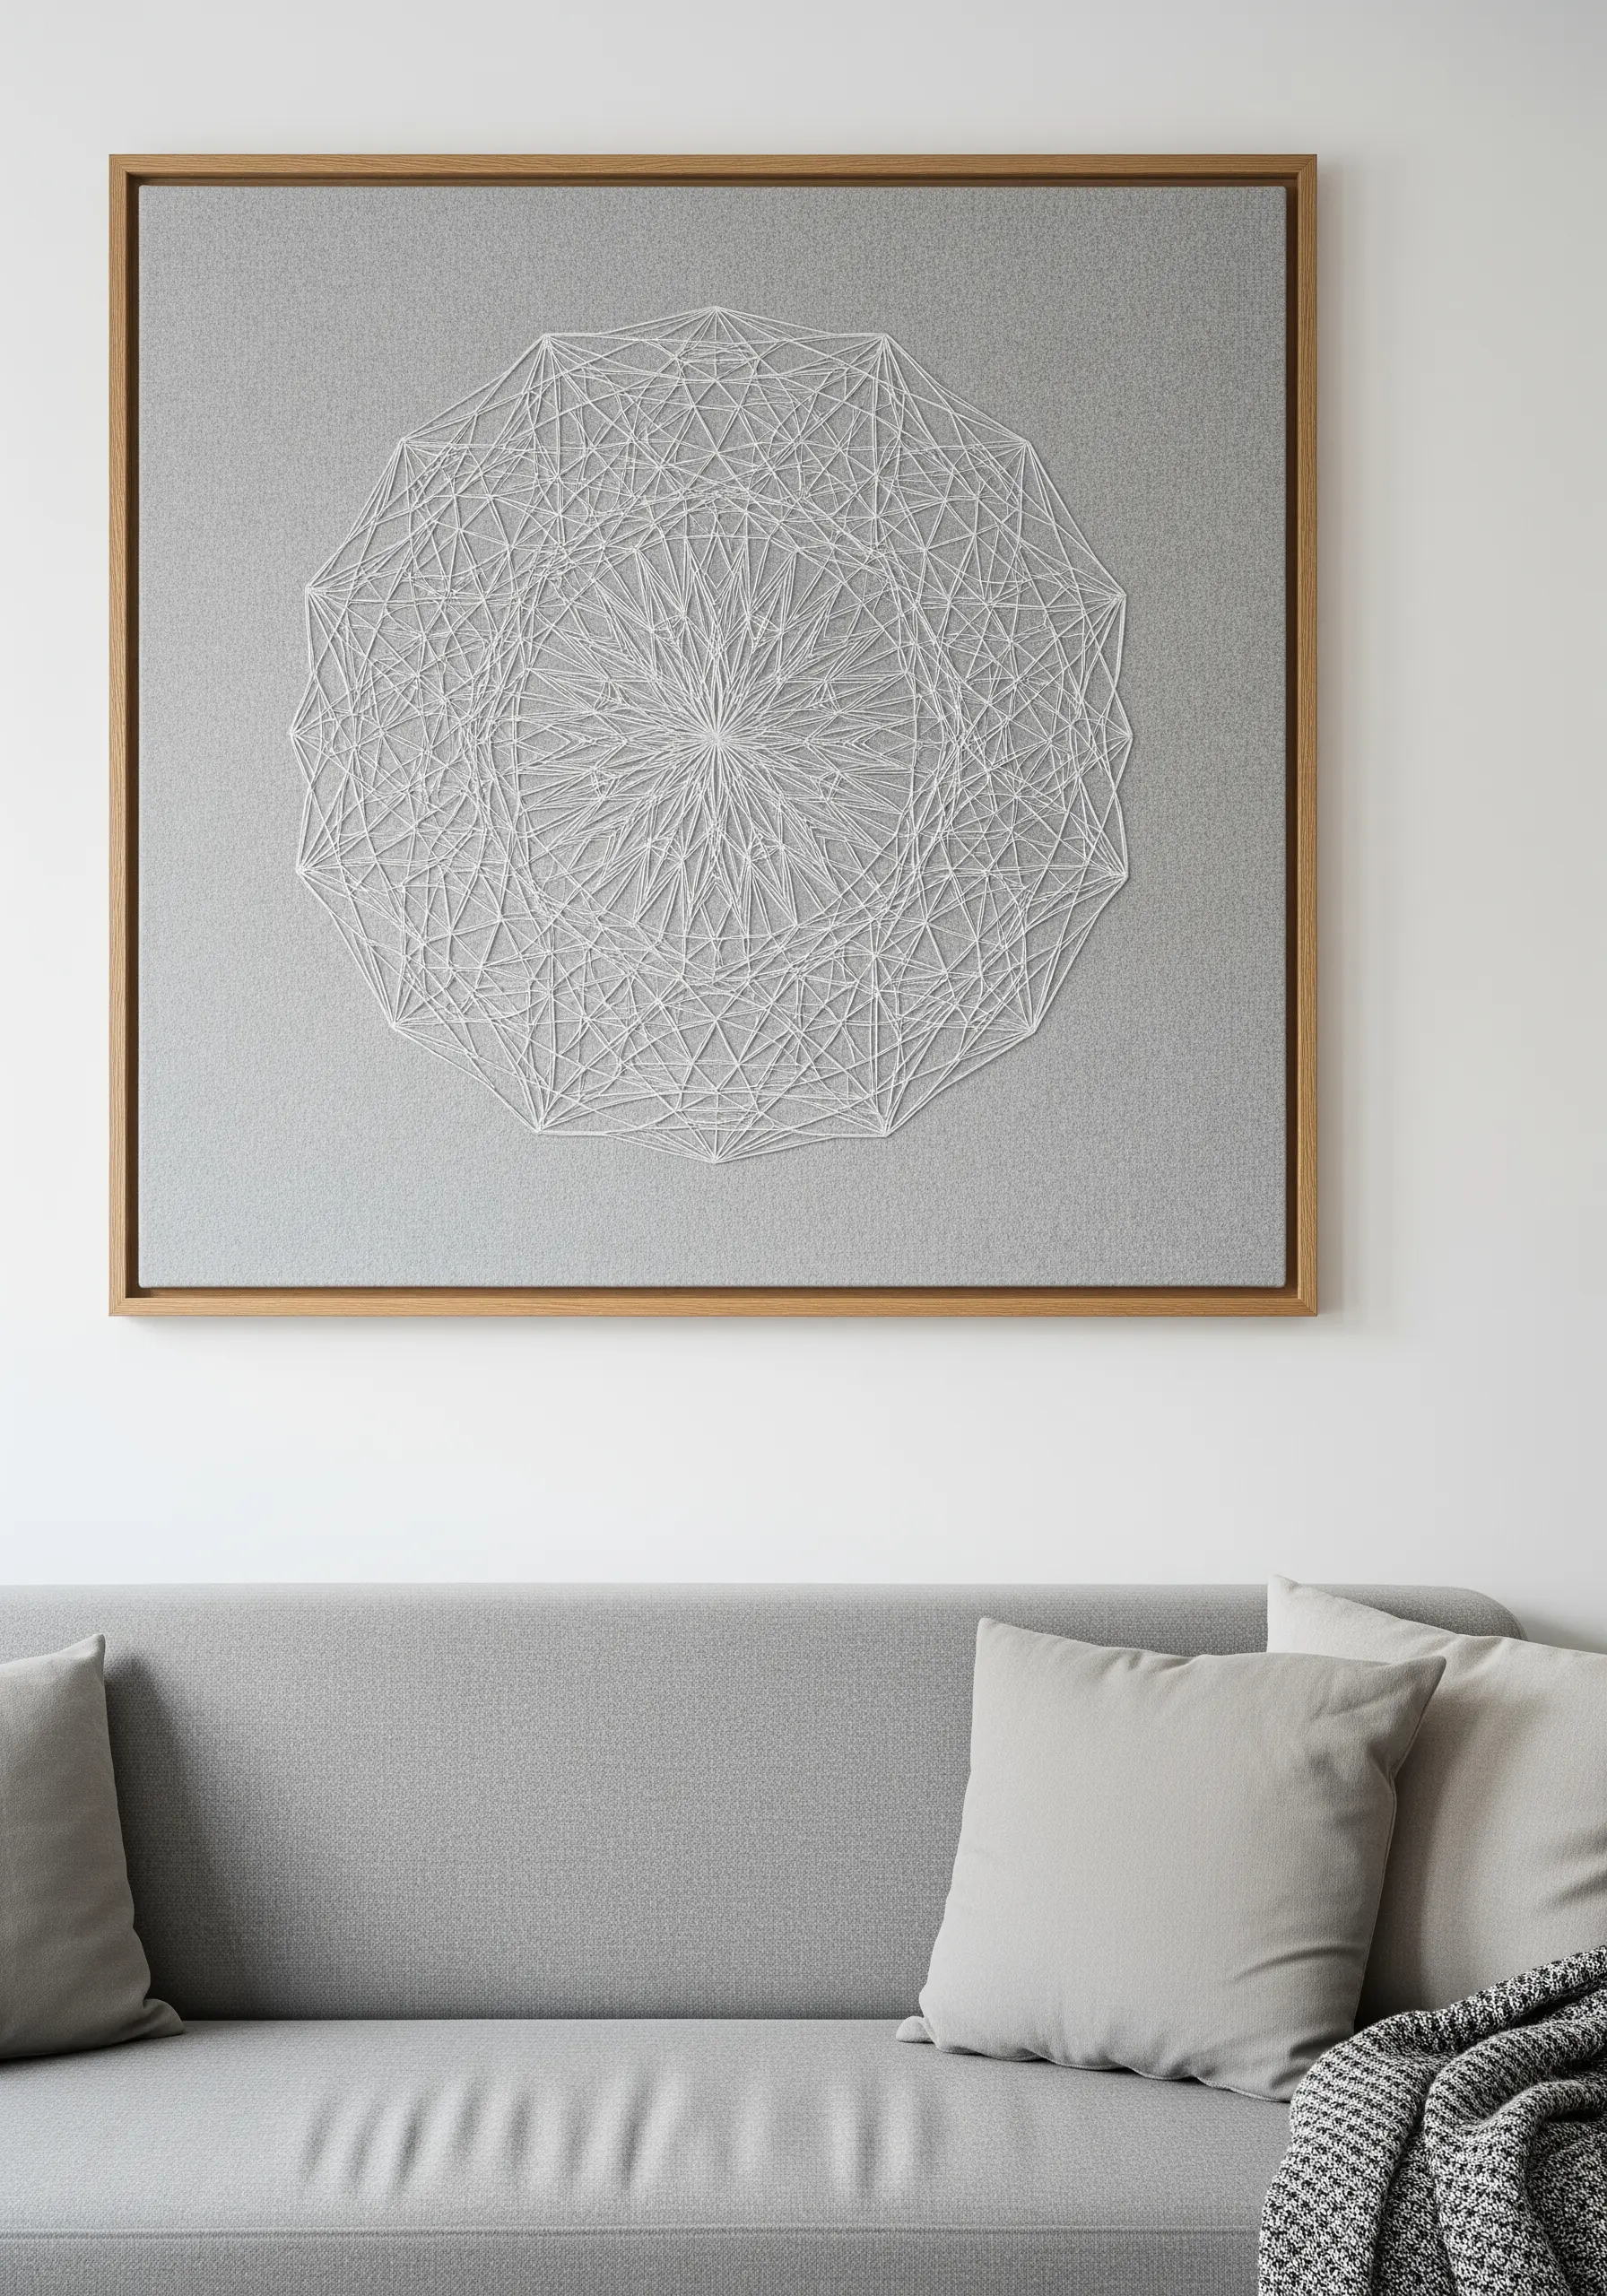
This is not traditional embroidery but a form of string art on fabric, creating a mandala-like effect that is both precise and meditative.
Stretch your fabric tightly in a frame and use pins or a temporary stitch to mark your geometric points along the perimeter.
Wrap a single, continuous thread between these points, layering lines to build up intricate patterns. The tension of the thread is what holds the design in place.
This technique results in stunning geometric embroidered wall decor ideas that embody harmony and precision.
8. Paint with Thread to Capture Water’s Motion
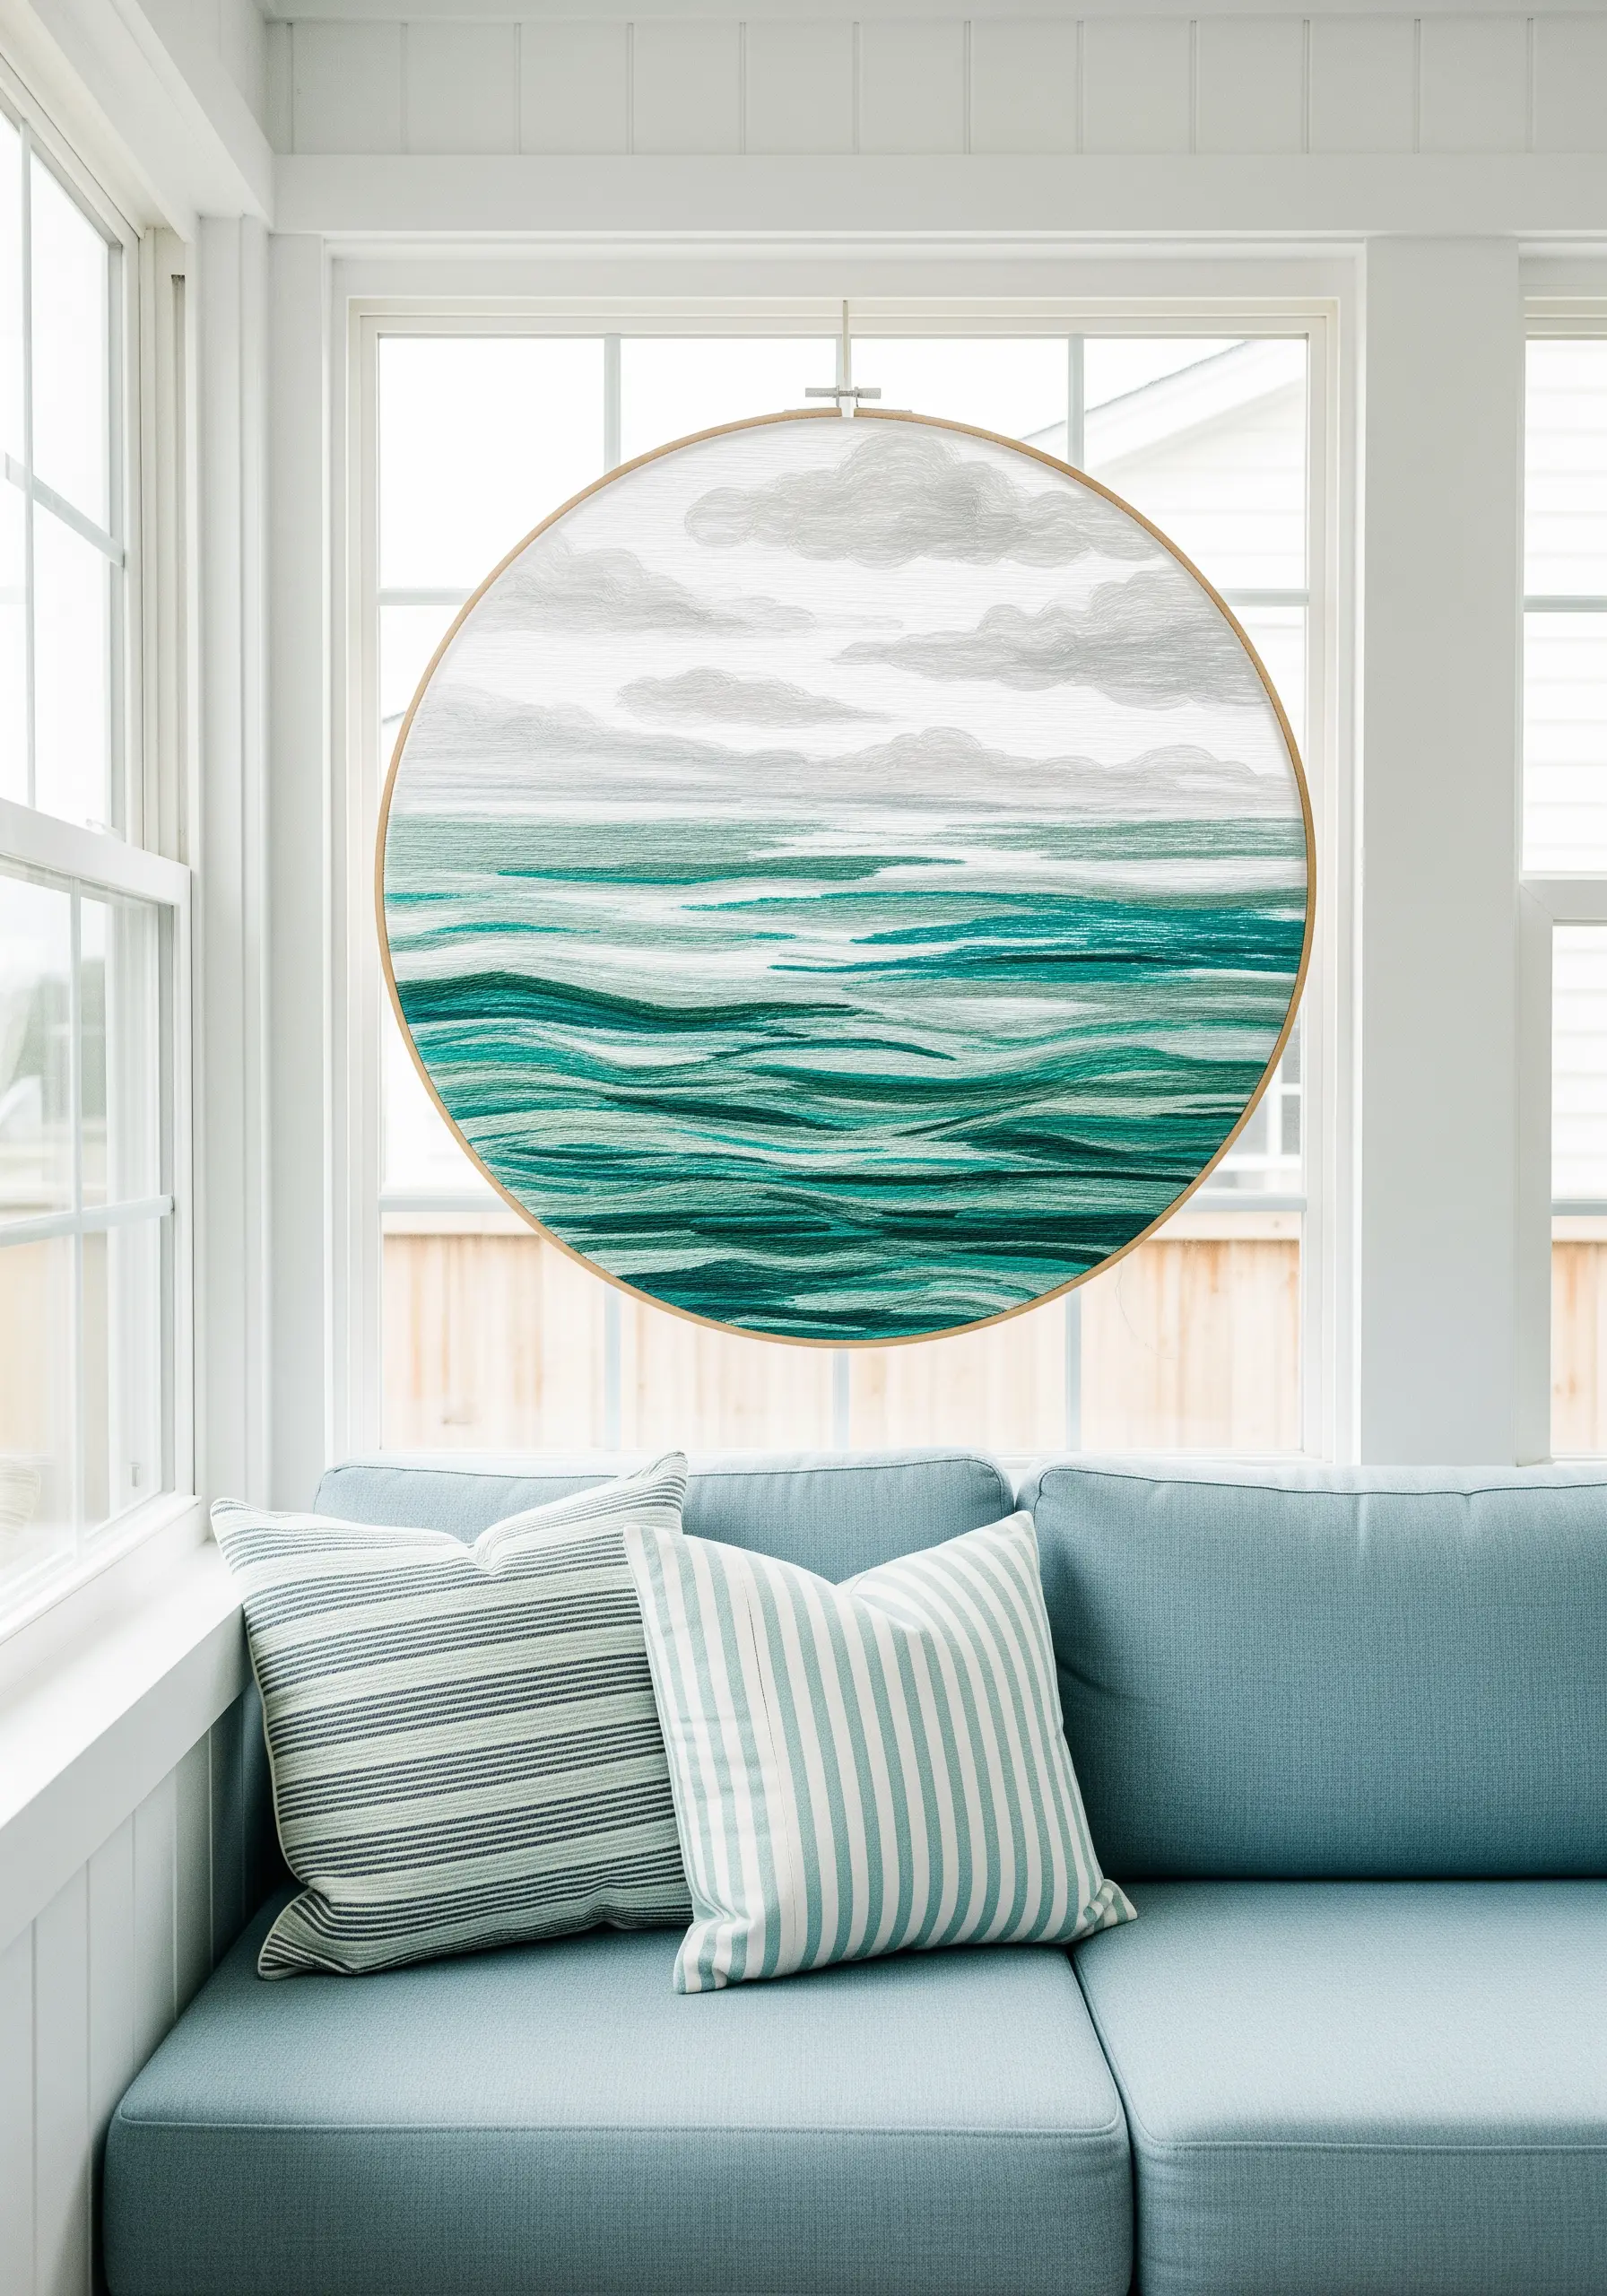
To create a realistic seascape, think like a painter and use your needle as a brush.
Employ the long-and-short stitch with at least four or five shades of the same color family (e.g., teals, deep greens, and seafoam) to blend tones seamlessly.
Vary the direction and length of your stitches to follow the flow of the waves, which creates the illusion of light reflecting on moving water.
Mastering this form of thread painting allows you to capture the dynamic energy of nature in your work.
9. Achieve Elegance with Refined Line Art
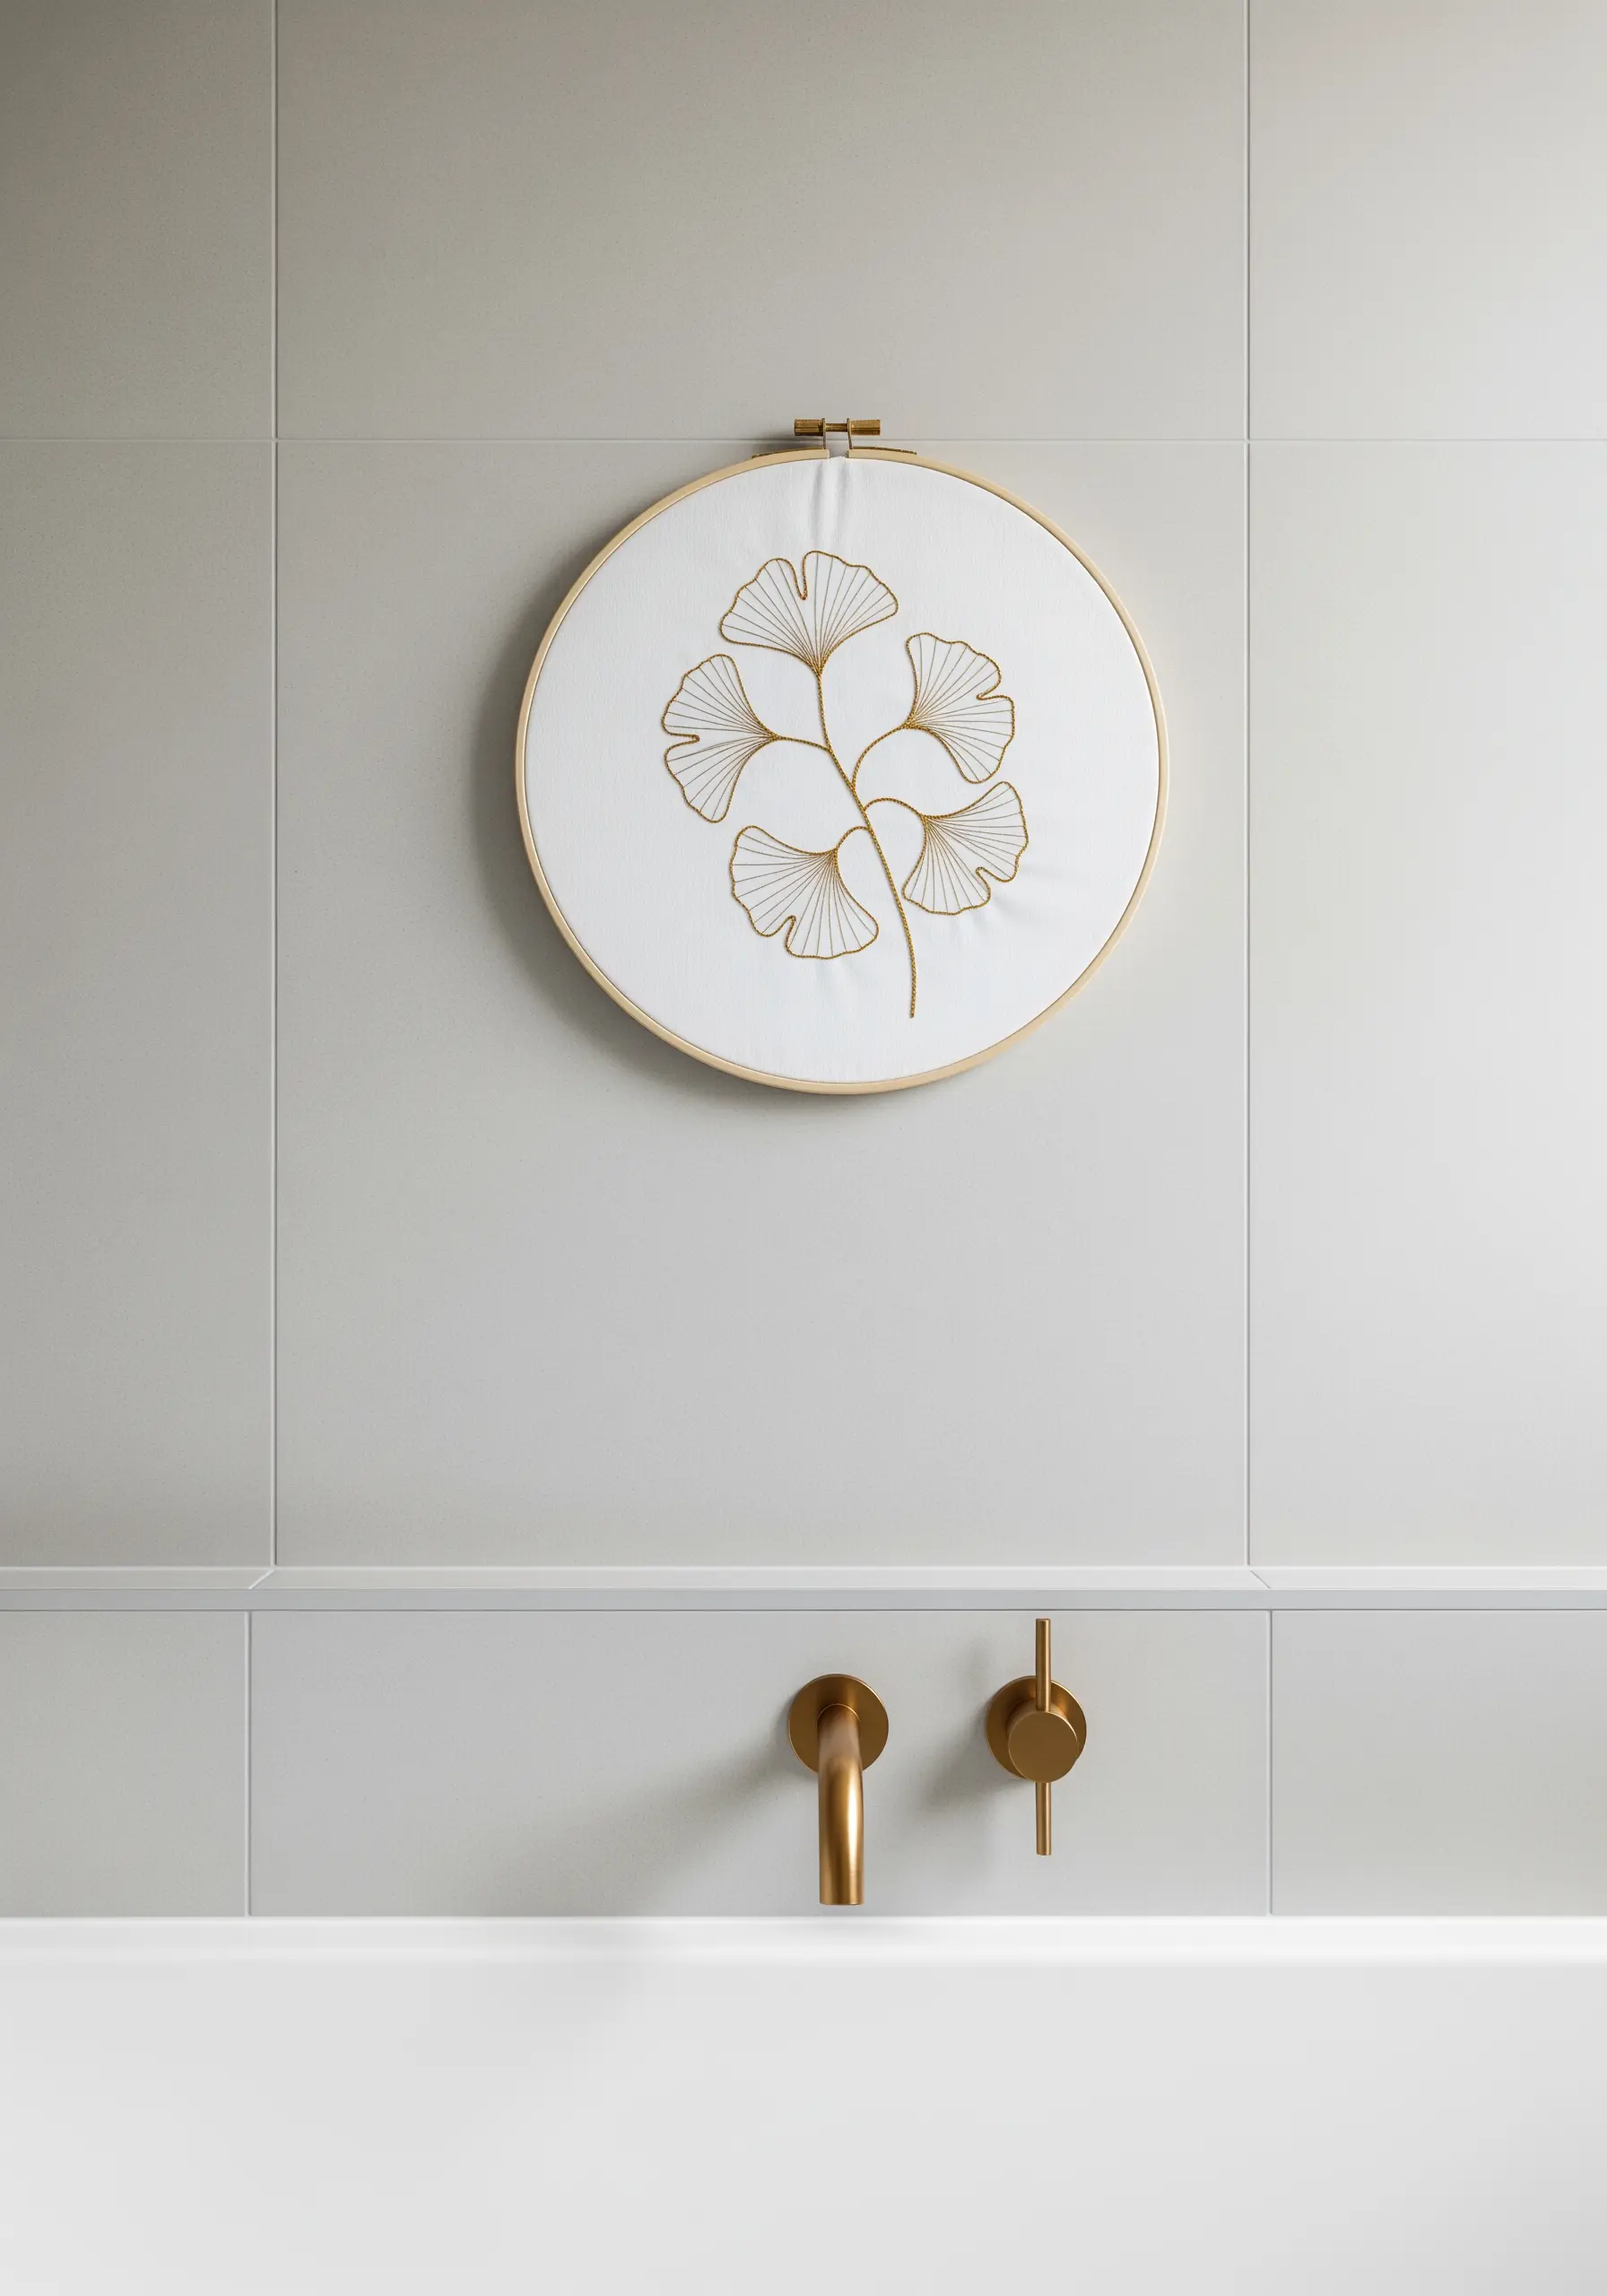
Sometimes, the most calming designs are the simplest. To achieve this level of effortless elegance, focus on the quality of your line.
Use a whipped backstitch for a smooth, uninterrupted outline that has more presence than a standard backstitch.
Choosing a single strand of metallic or silk thread on a crisp white linen elevates the design from a simple sketch to a piece of art.
This approach is perfect for minimalist line art nature embroidery that feels both modern and timeless.
10. Build a Meadow by Varying Stitch Textures
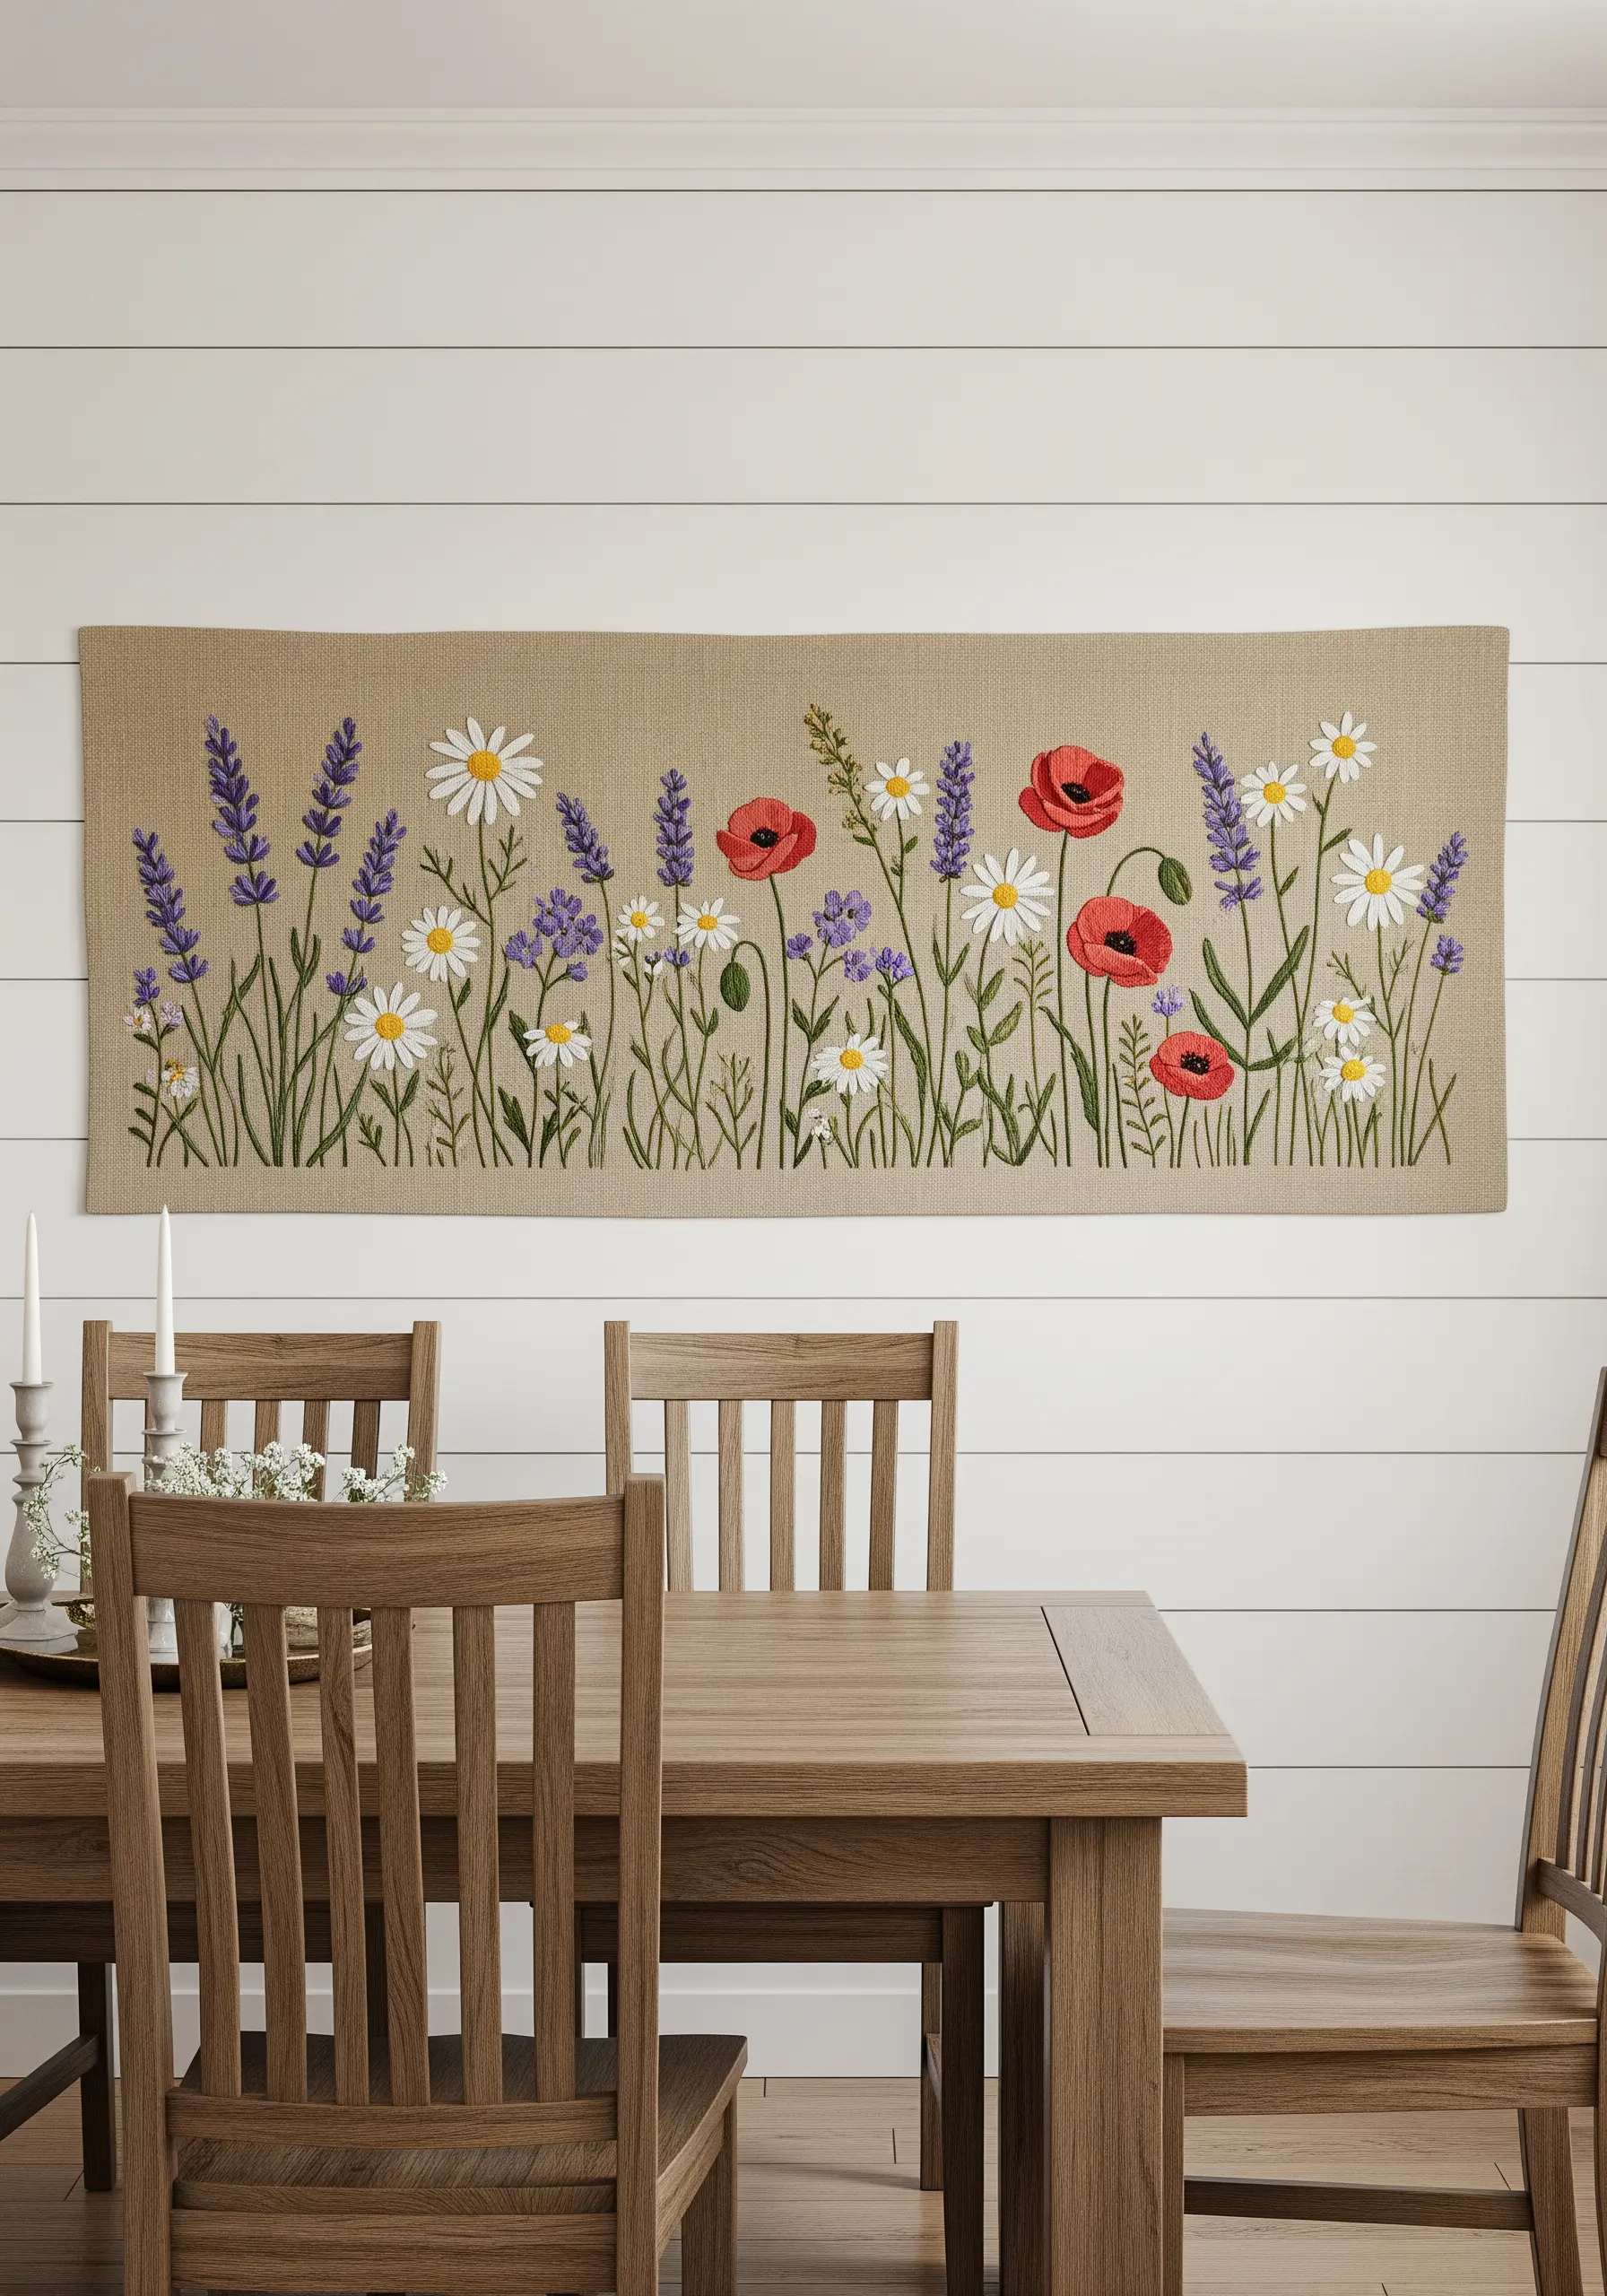
To prevent a dense floral scene from looking flat, assign a different stitch or texture to each type of flower.
Use lazy daisy stitches for daisy petals, bullion knots for lavender buds, and clusters of French knots for smaller filler flowers.
This variety in texture makes each element distinct and adds a rich, tactile dimension to the overall piece.
Choosing from wildflower thread palettes with natural variation will enhance the lifelike feel of your meadow.
11. Create Radiance with Directional Satin Stitch

To make a central motif appear to glow from within, the direction of your satin stitches is critical.
For each petal, angle your stitches to radiate from the center outwards, following the natural curve of the shape.
This technique ensures that light reflects off the threads uniformly, creating a beautiful, consistent sheen that draws the eye.
Using a high-lustre thread, such as silk or rayon, will amplify this luminous effect, making it ideal for modern thread mandala ideas and spiritual motifs.
12. Capture Botanical Details with Specific Stitches
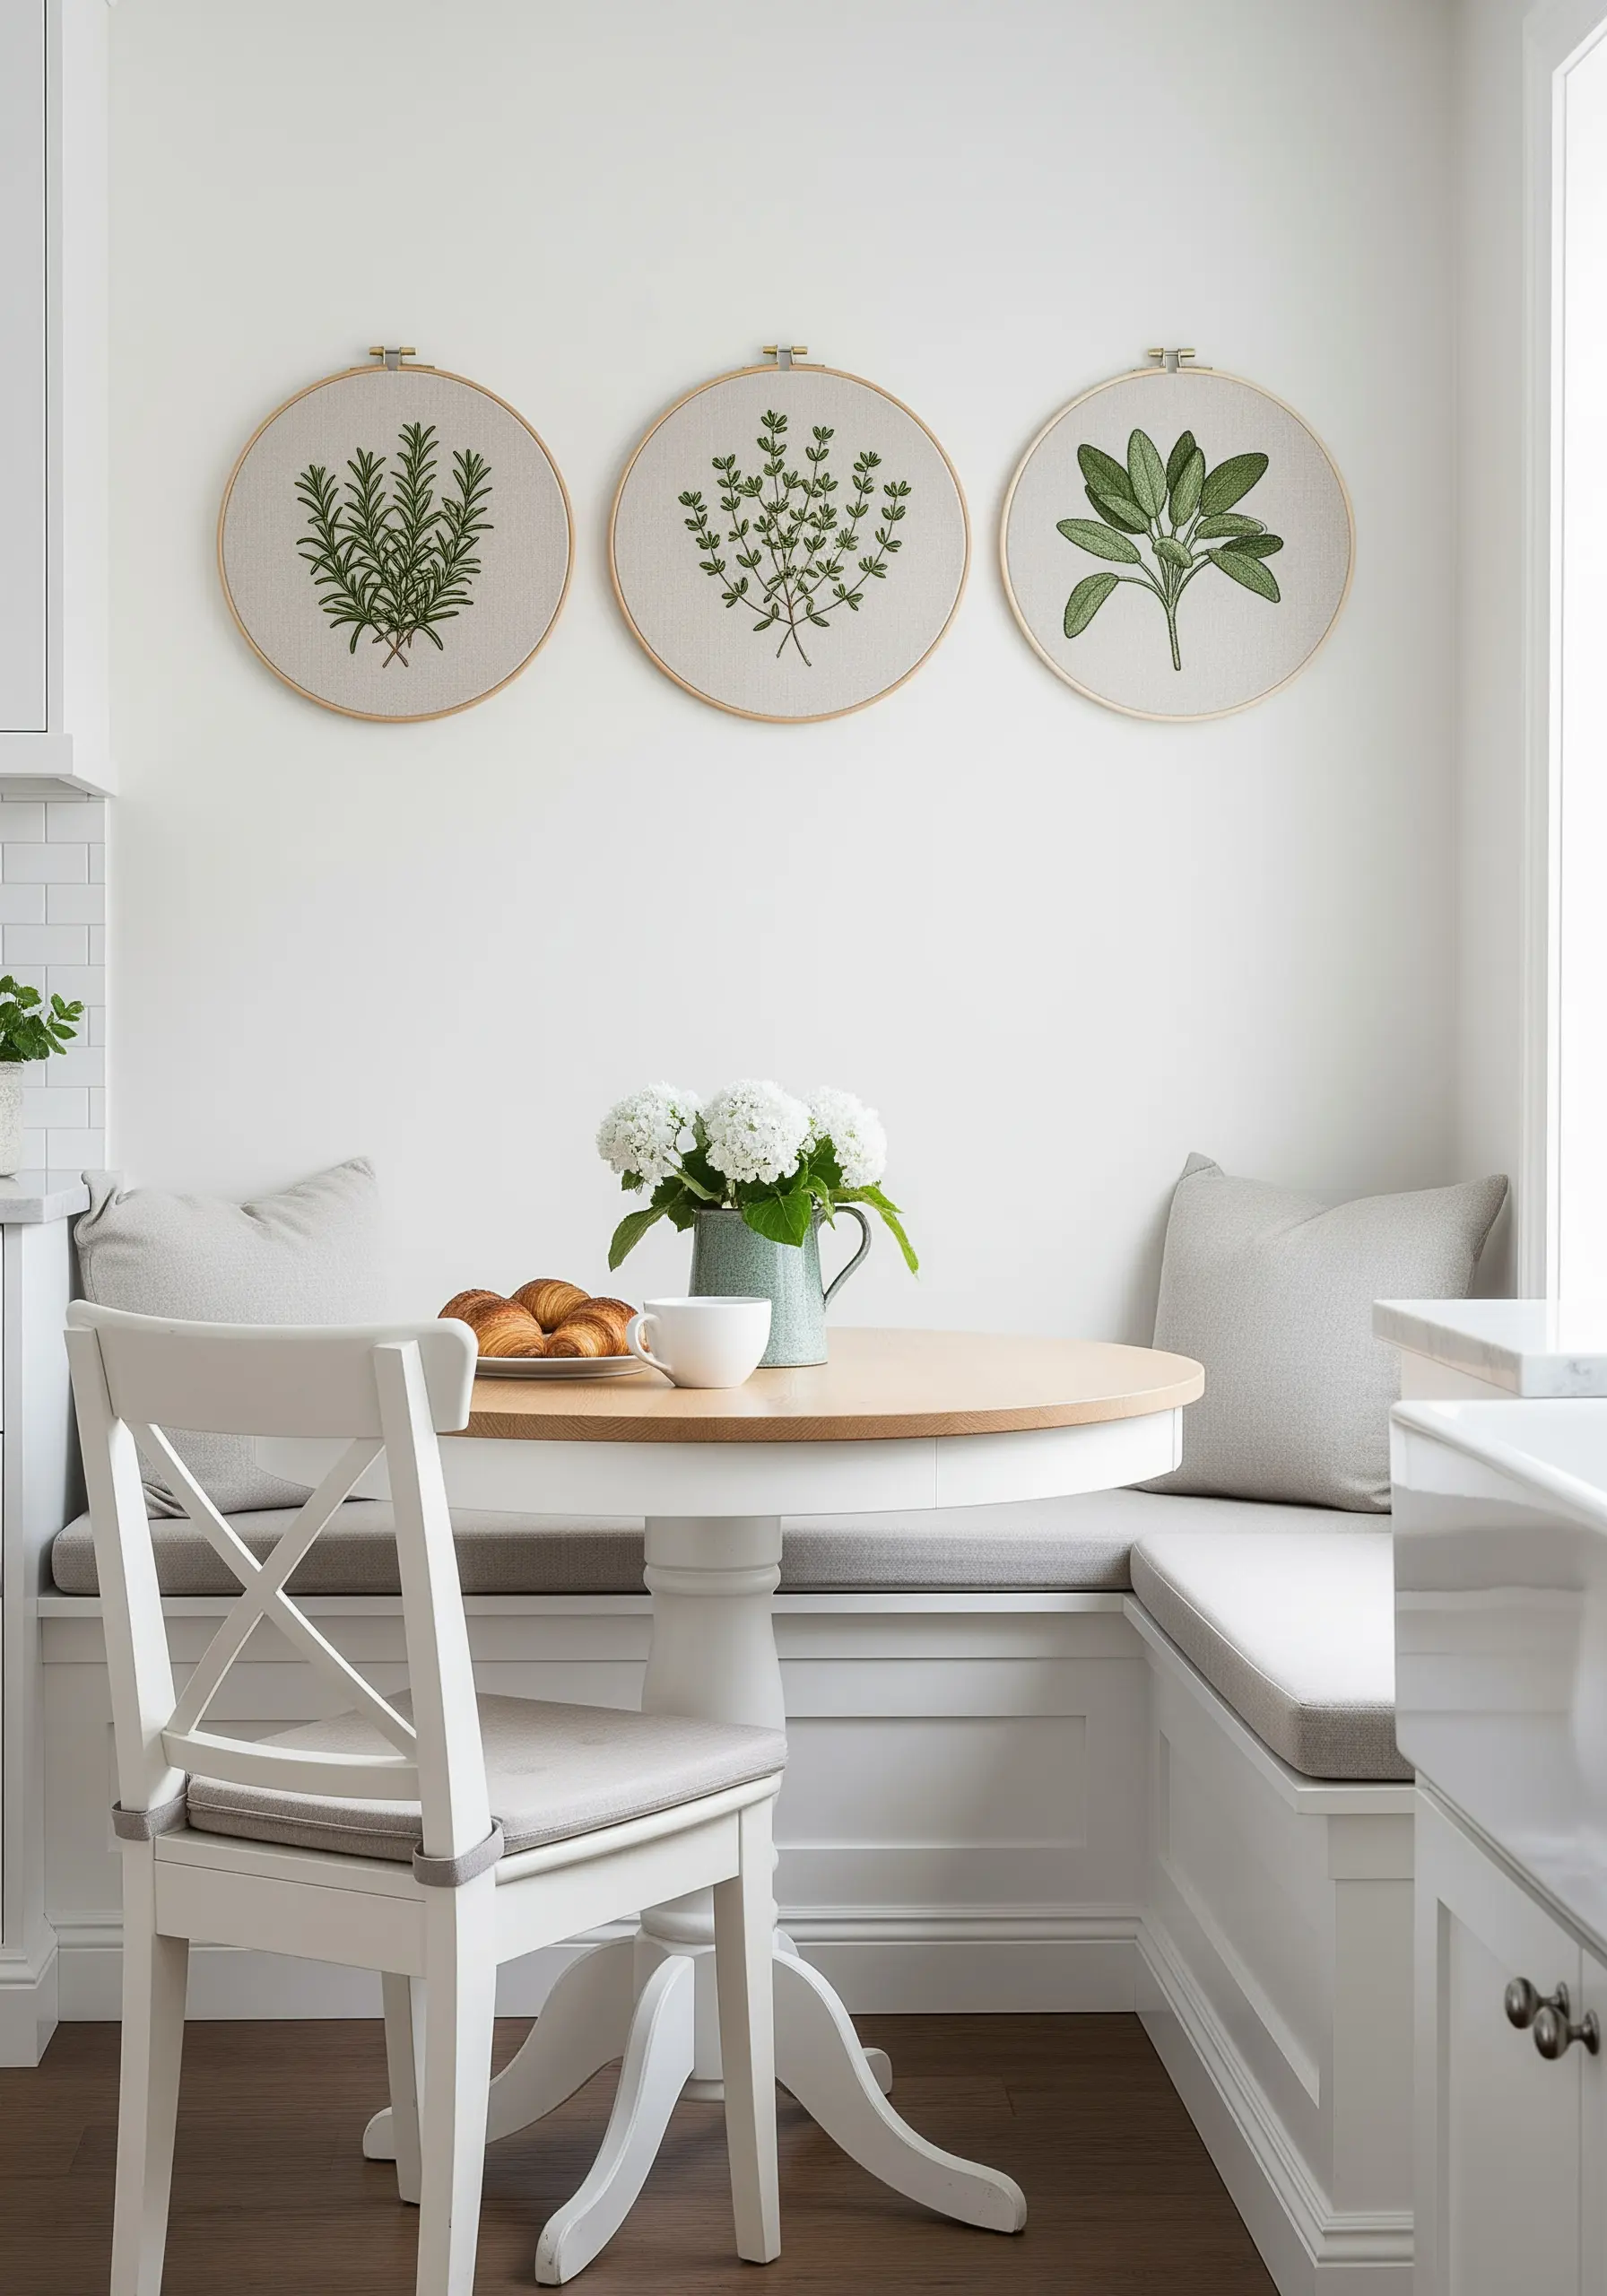
To embroider realistic herbs, choose stitches that mimic the plant’s natural texture and growth pattern.
For rosemary, use short, sharp straight stitches angled upwards from the stem to replicate its needle-like leaves.
For thyme or sage, use single detached chain stitches (lazy daisies) for the individual leaves to create their soft, rounded shape.
Mastering these small leaf vein details and shapes is what makes botanical embroidery so convincing and beautiful.
13. Paint with Texture Using Punch Needle
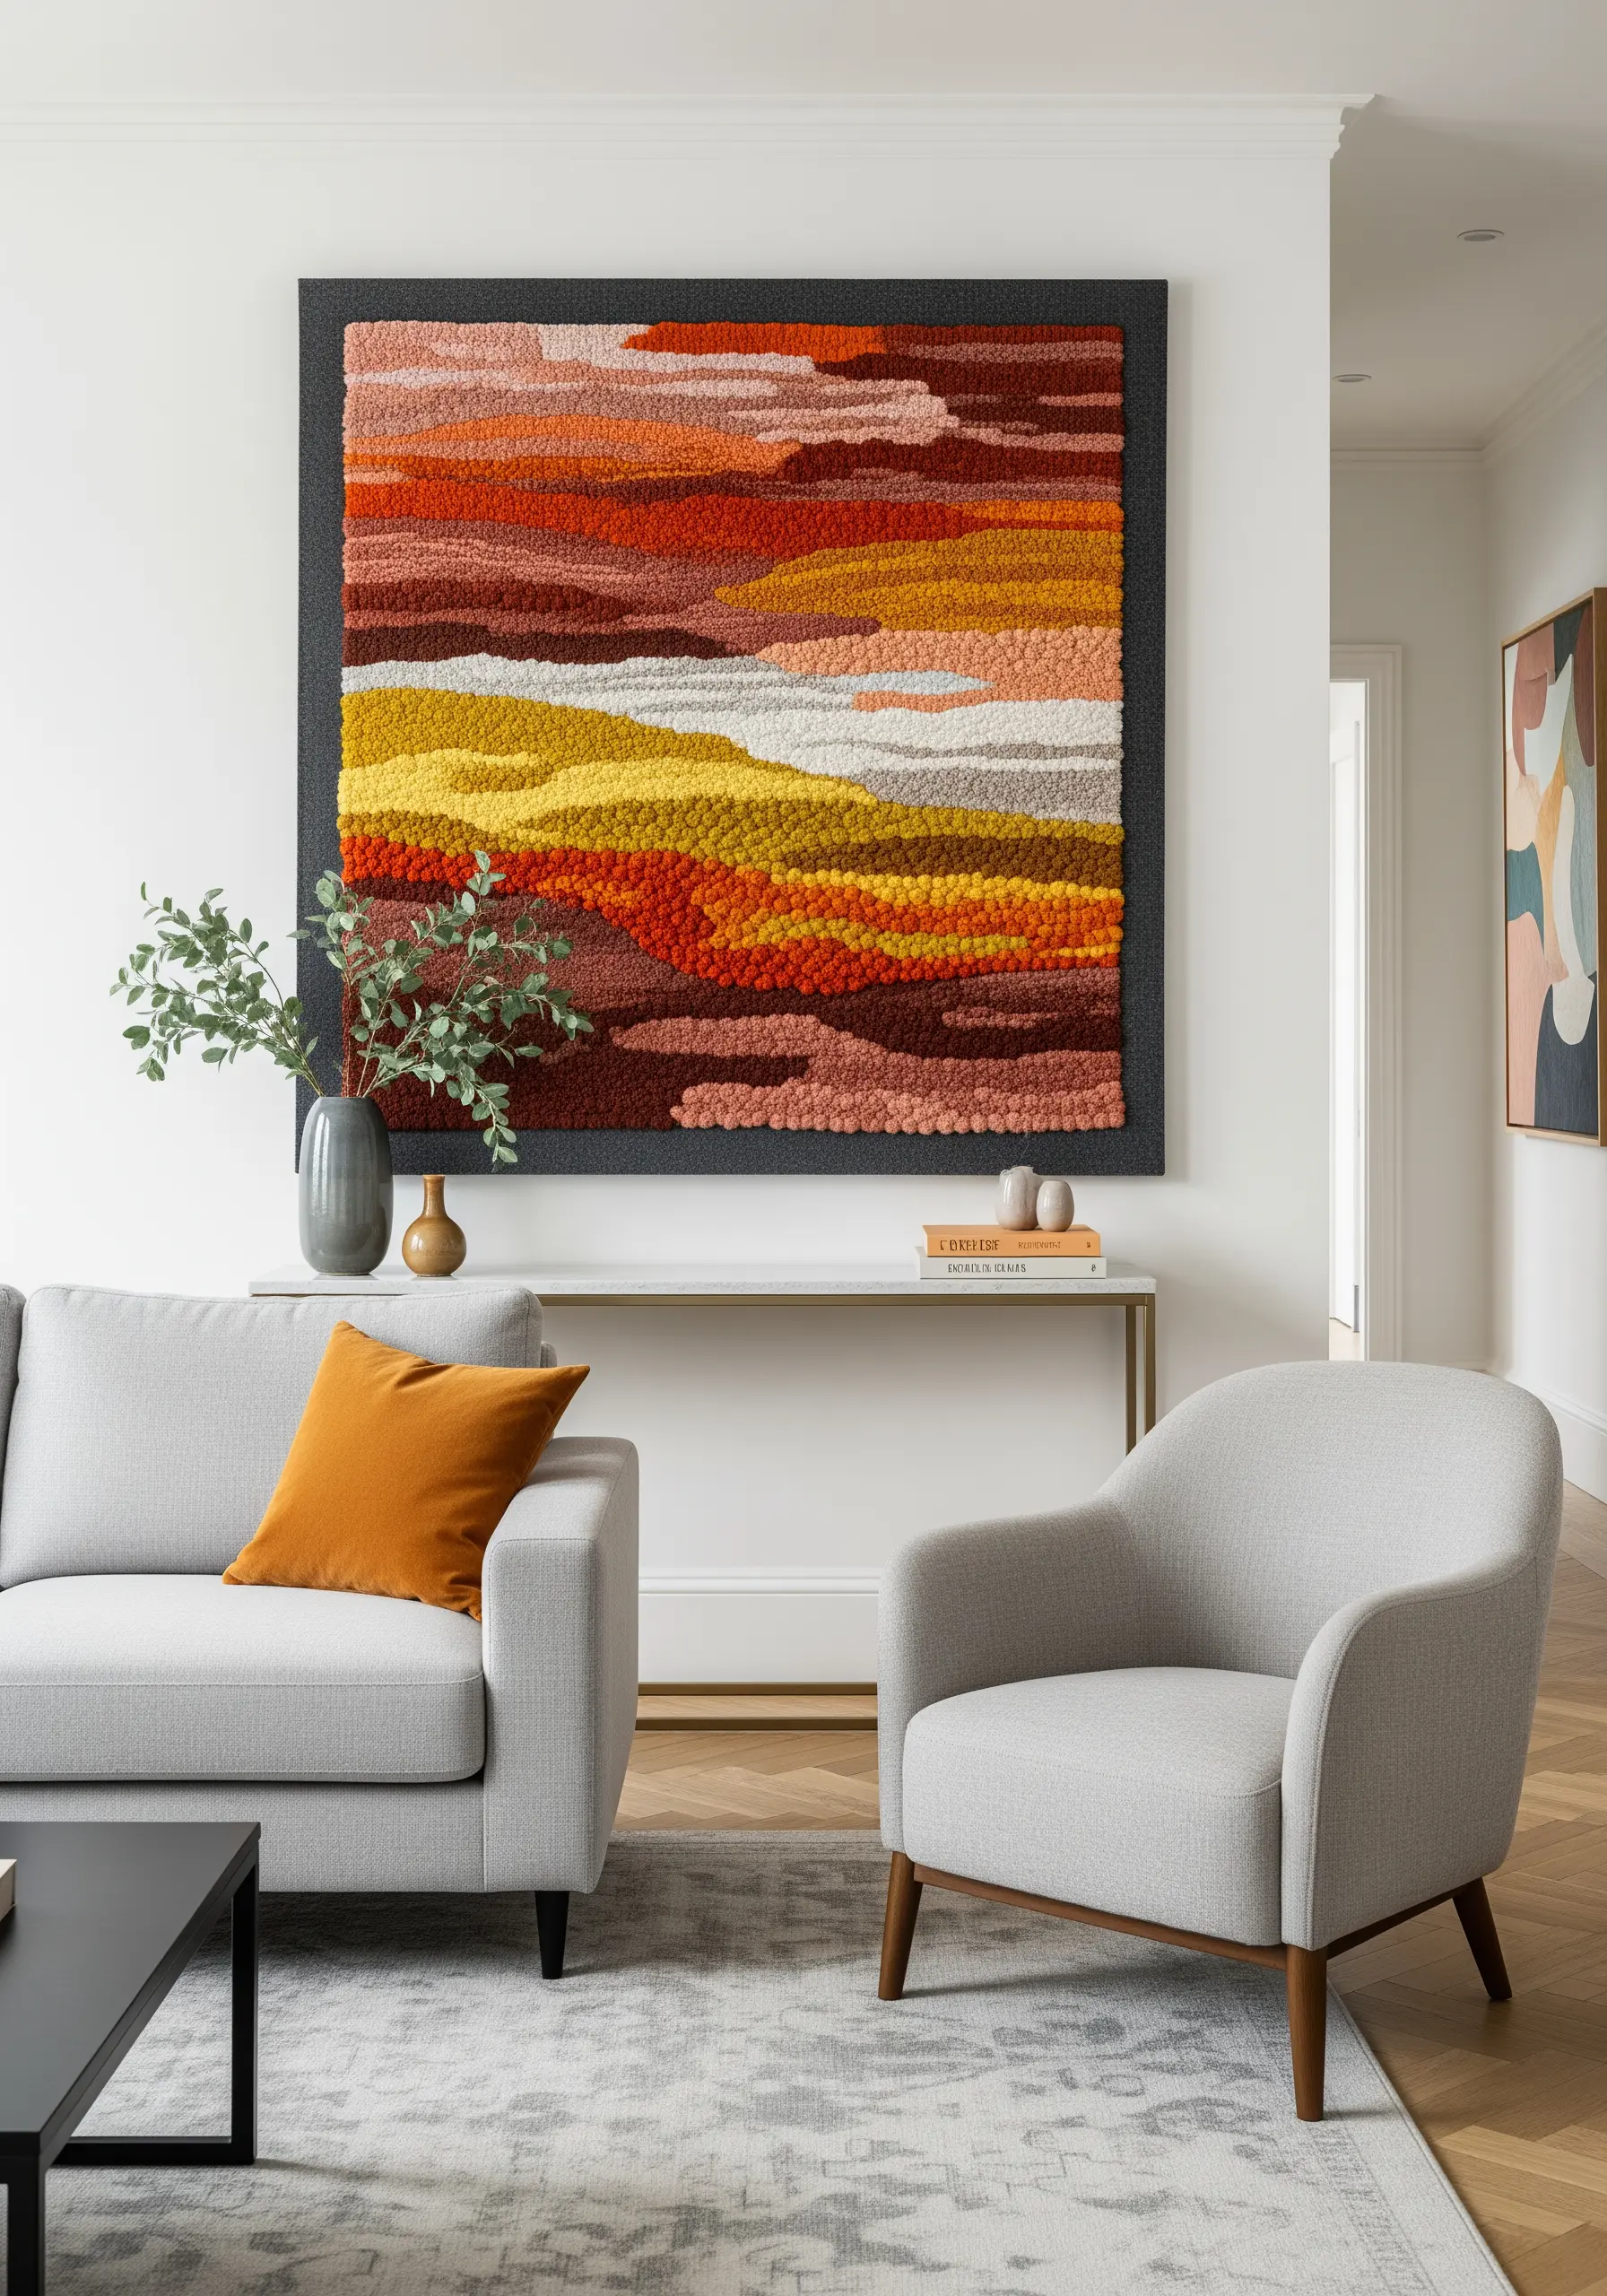
Punch needle embroidery allows you to create broad swathes of color and texture with incredible speed and impact.
Instead of blending threads, you can blend textures. Alternate sections of flat stitches (the ‘back’ side of punch needle) with looped stitches (the ‘front’ side) to create contrast.
You can also vary the height of your loops by adjusting your needle settings, which builds a sculptural, contoured landscape.
Explore these techniques to create abstract yarn wall art ideas that have immense tactile appeal.
14. Embroider on Sheer Fabric for a Floating Effect
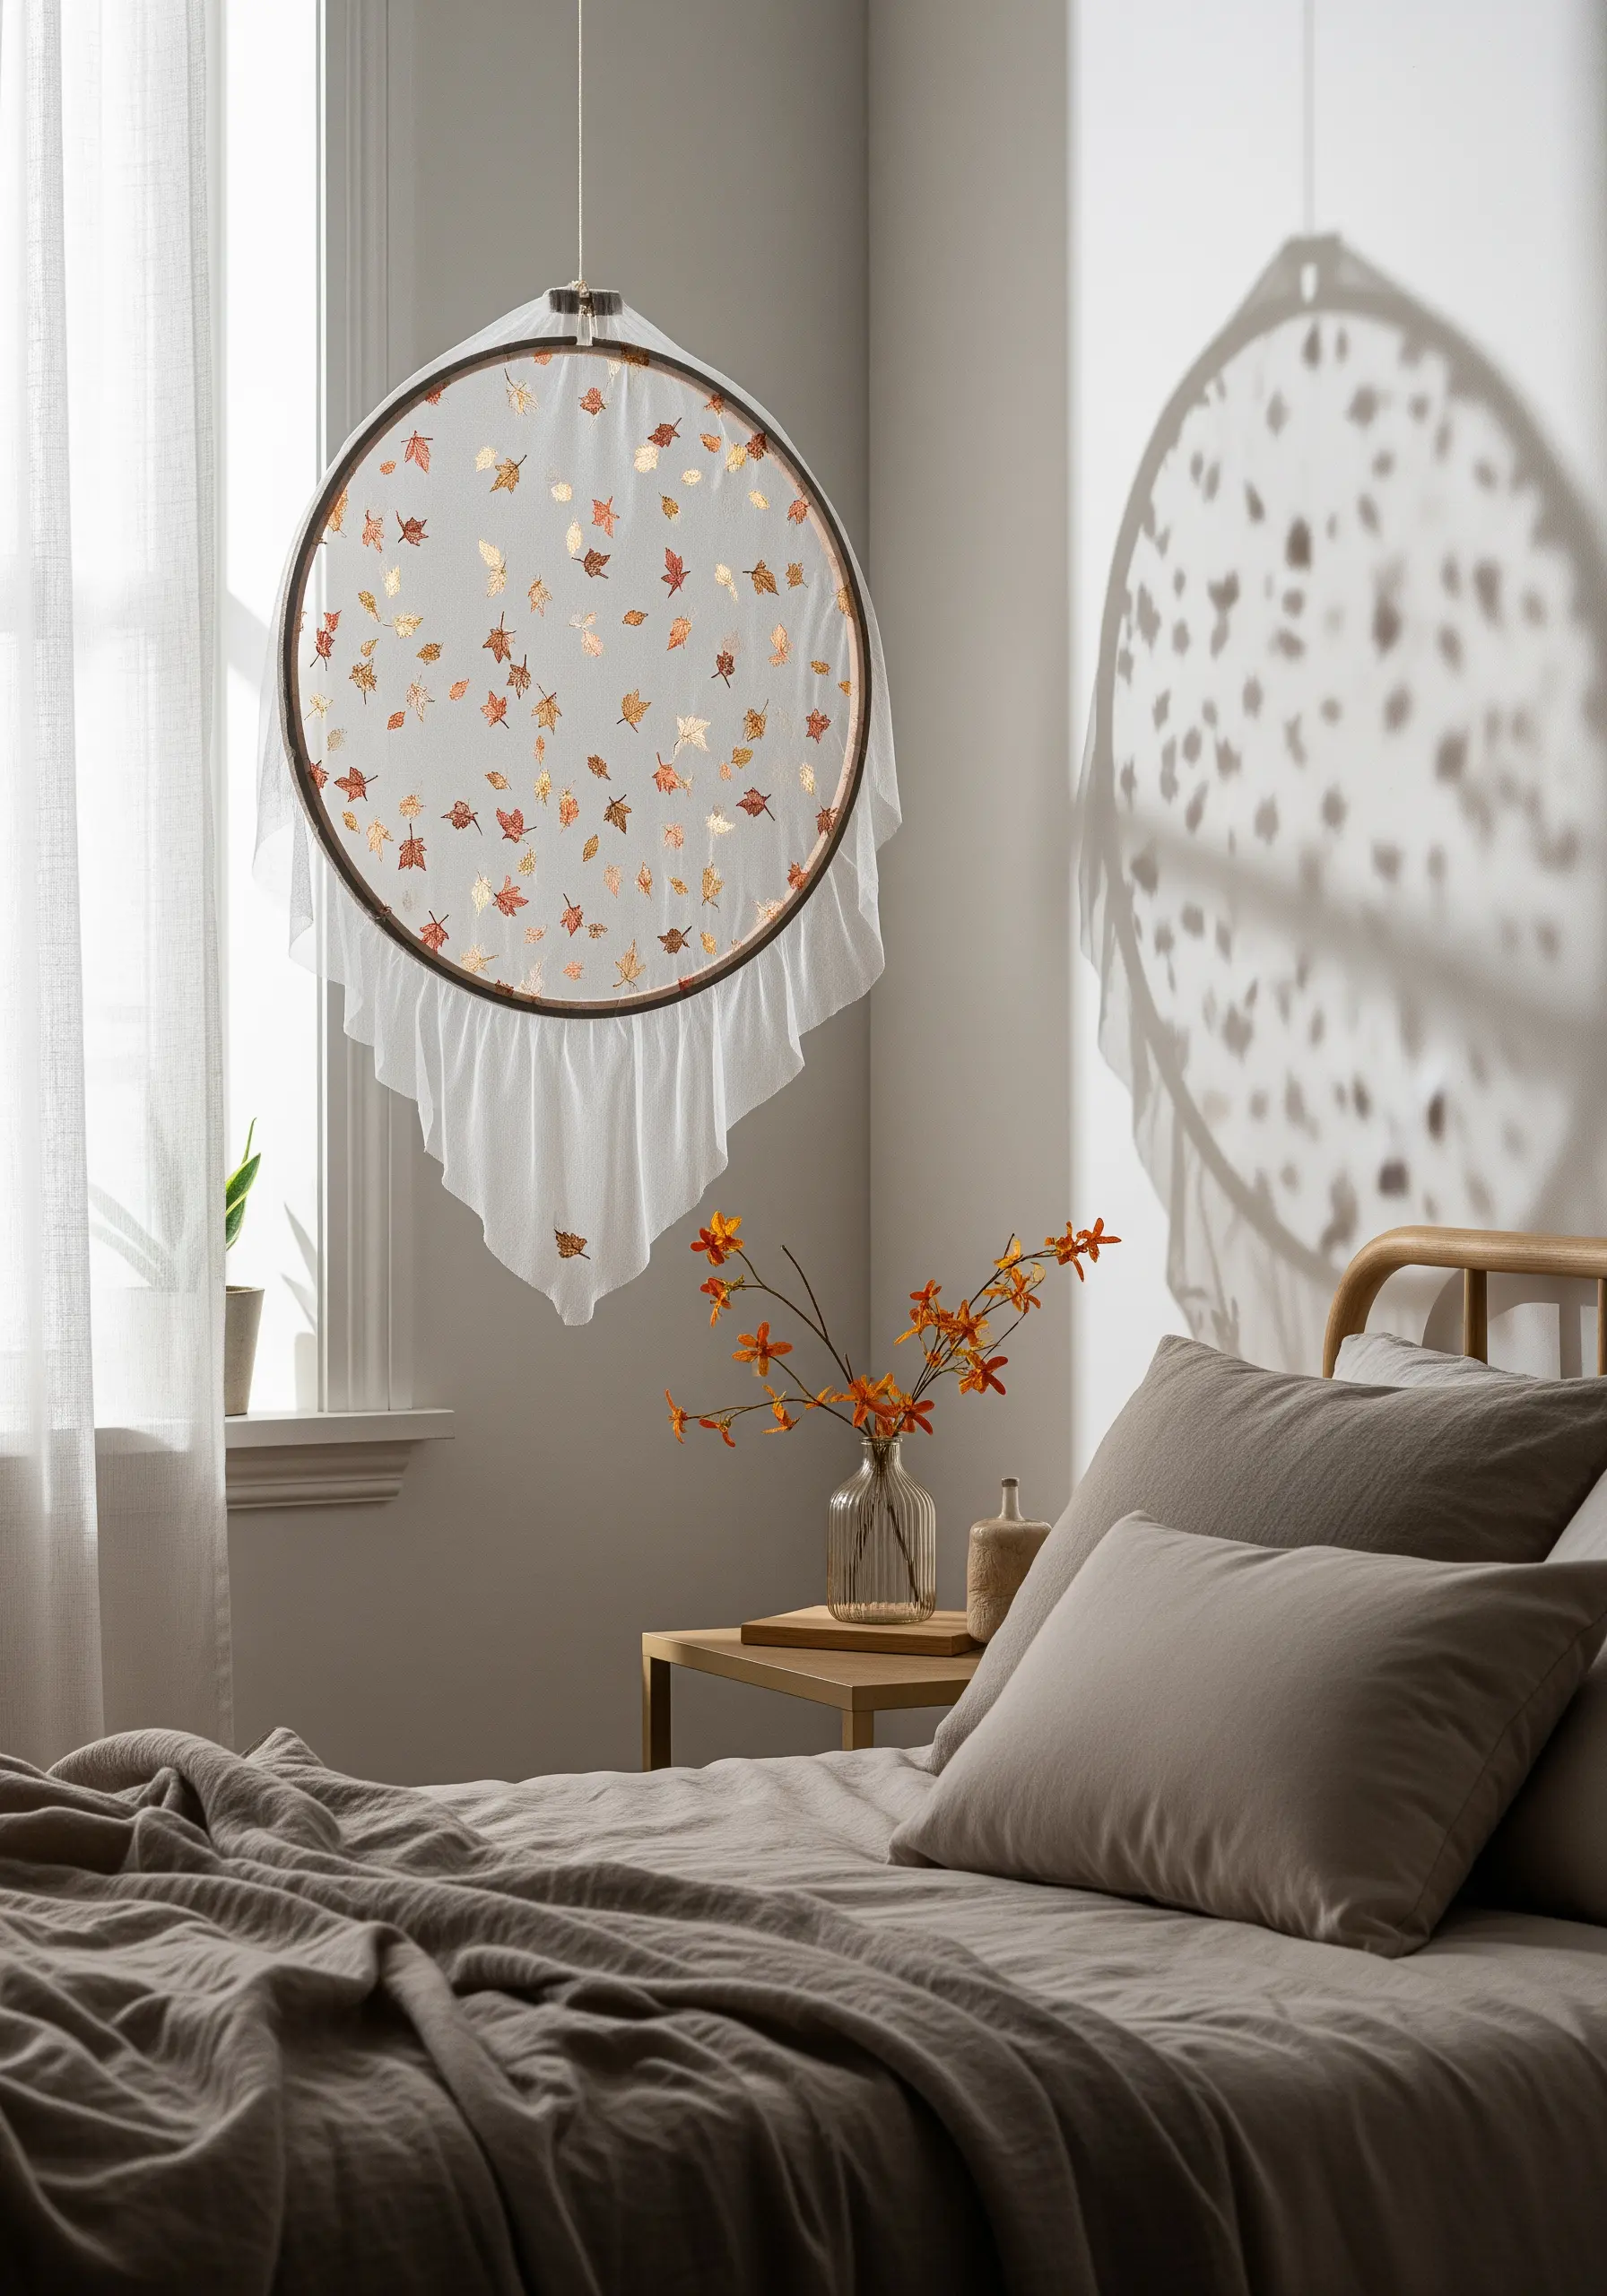
Stitching on a transparent fabric like organza or tulle creates a magical, ethereal quality, making your motifs appear to float in mid-air.
Always use a stabilizer (a water-soluble one is ideal) behind the fabric while you stitch to provide support and prevent puckering. Once you’re done, the stabilizer dissolves away, leaving just your delicate embroidery.
This technique is perfect for creating light-catching window hangings or even embroidery hoop room divider ideas.
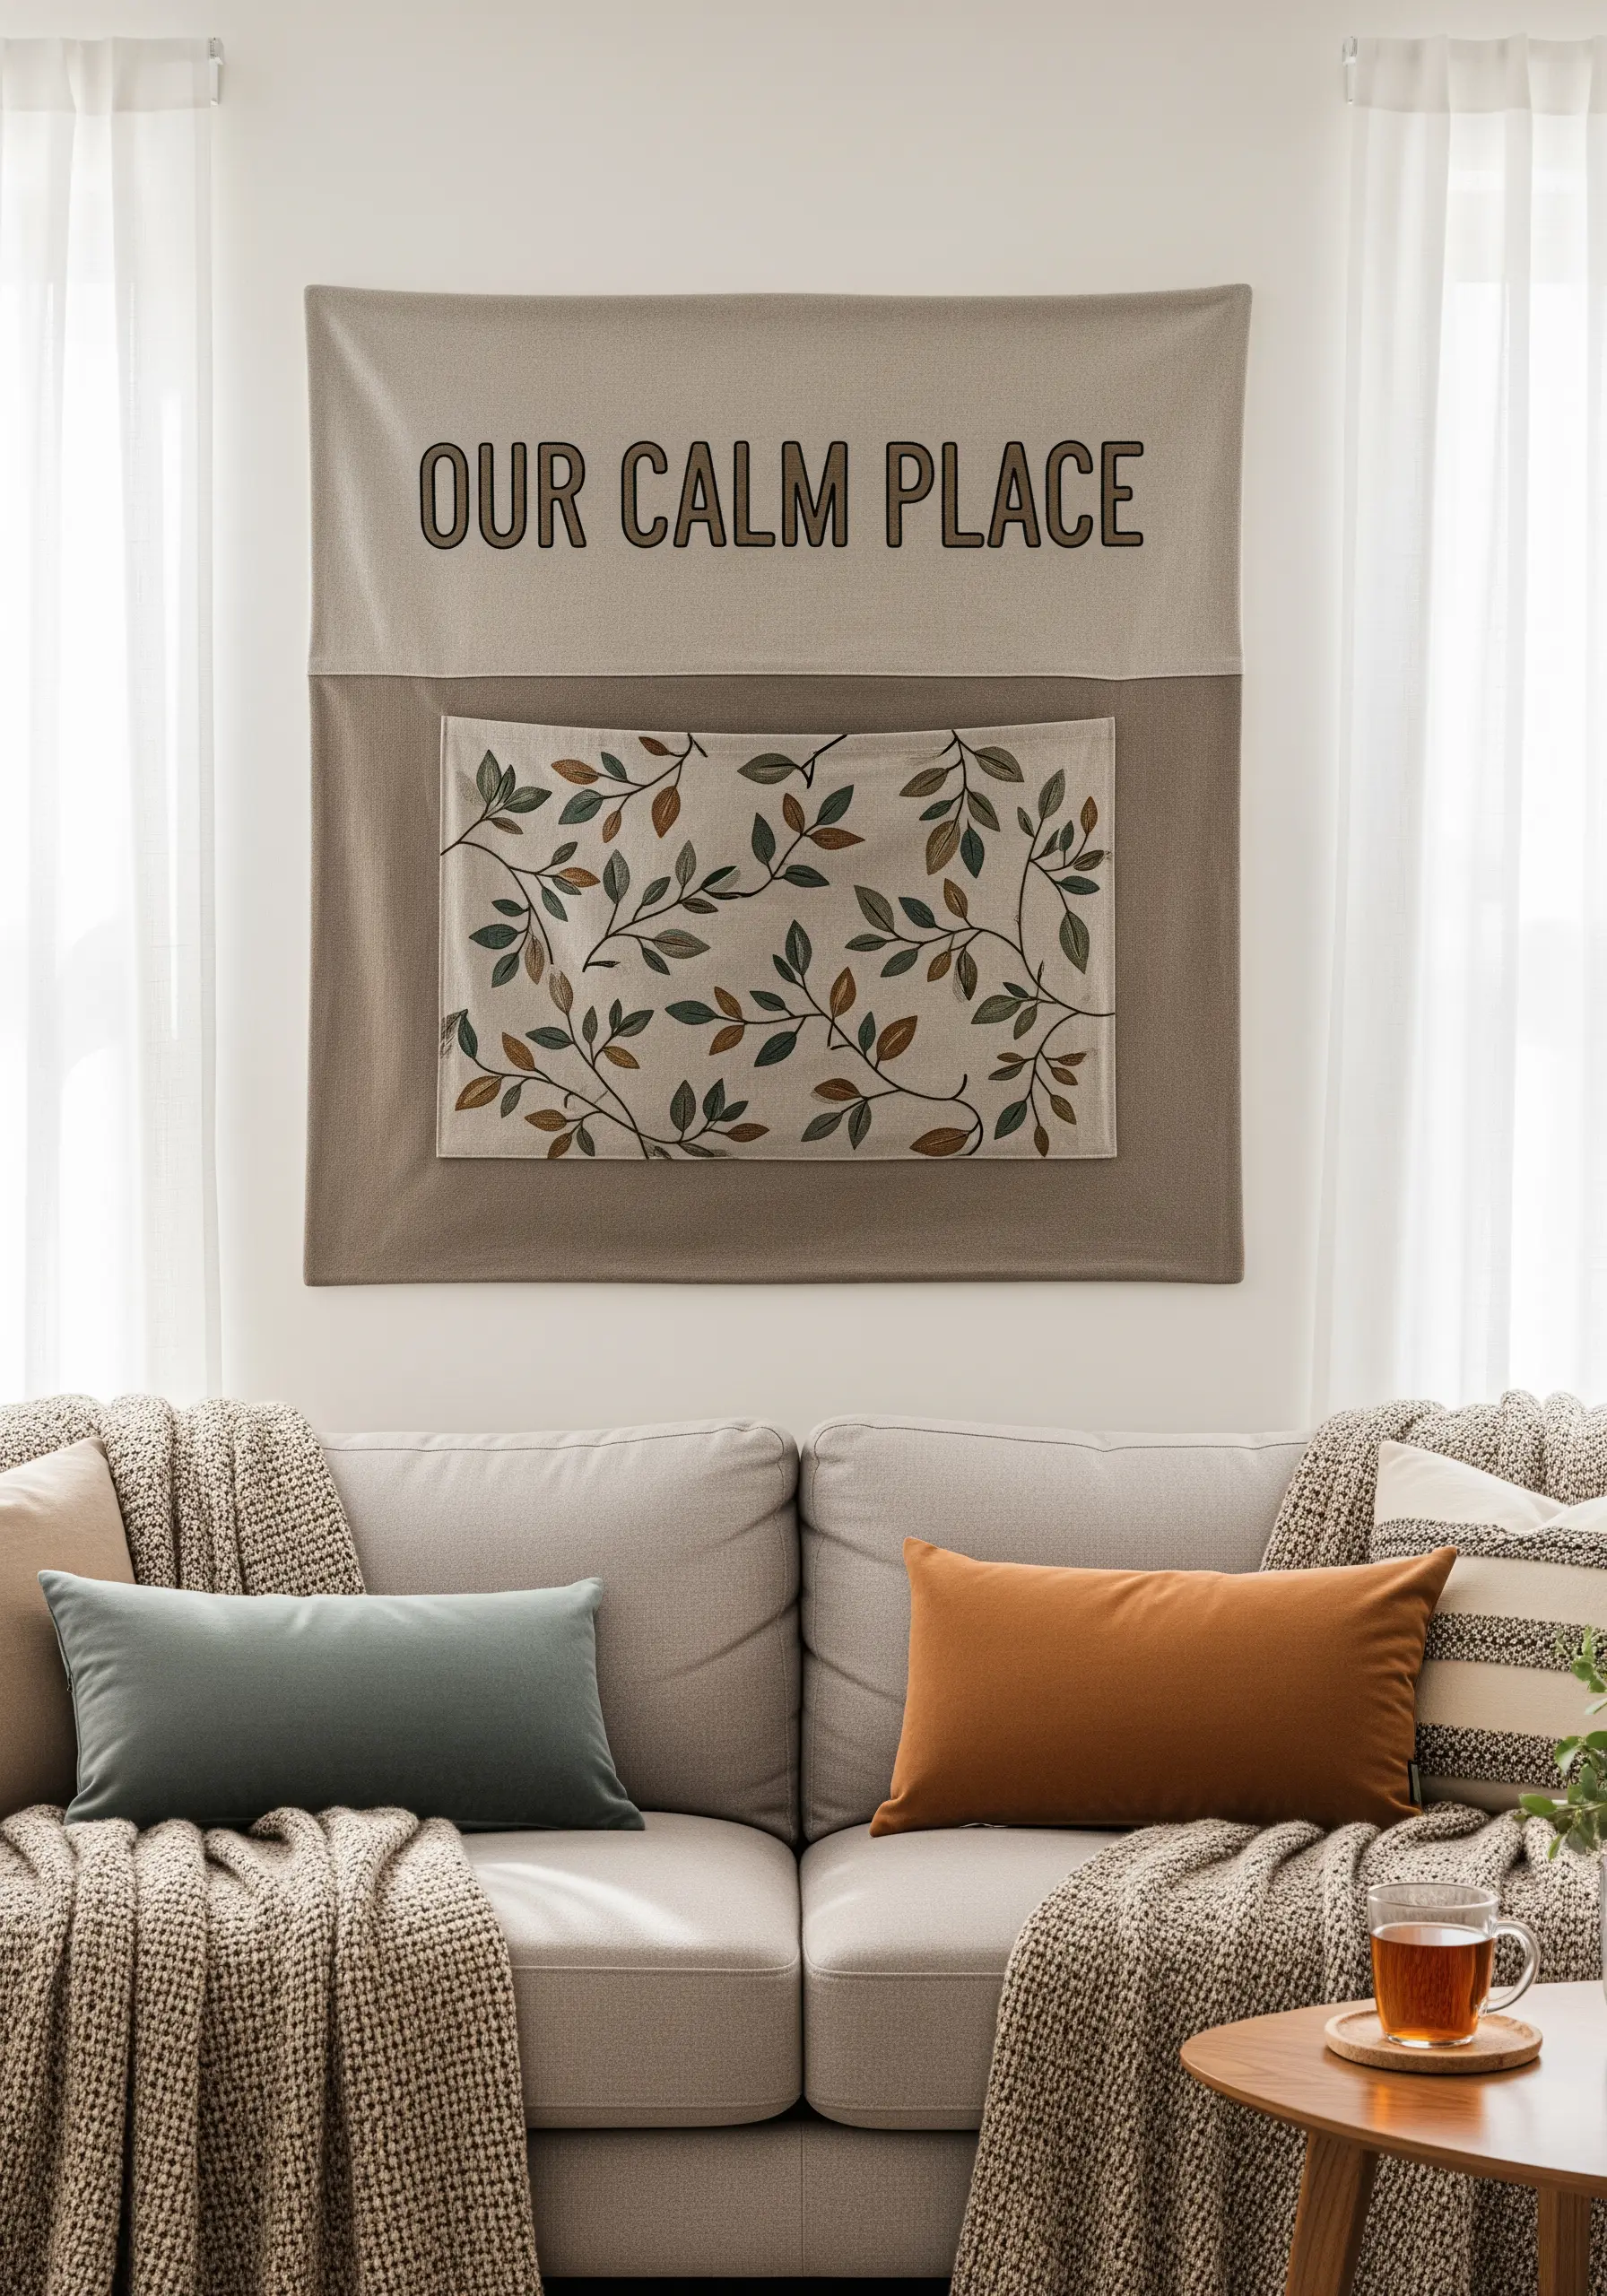
15. Elevate Lettering with Padded Satin Stitch
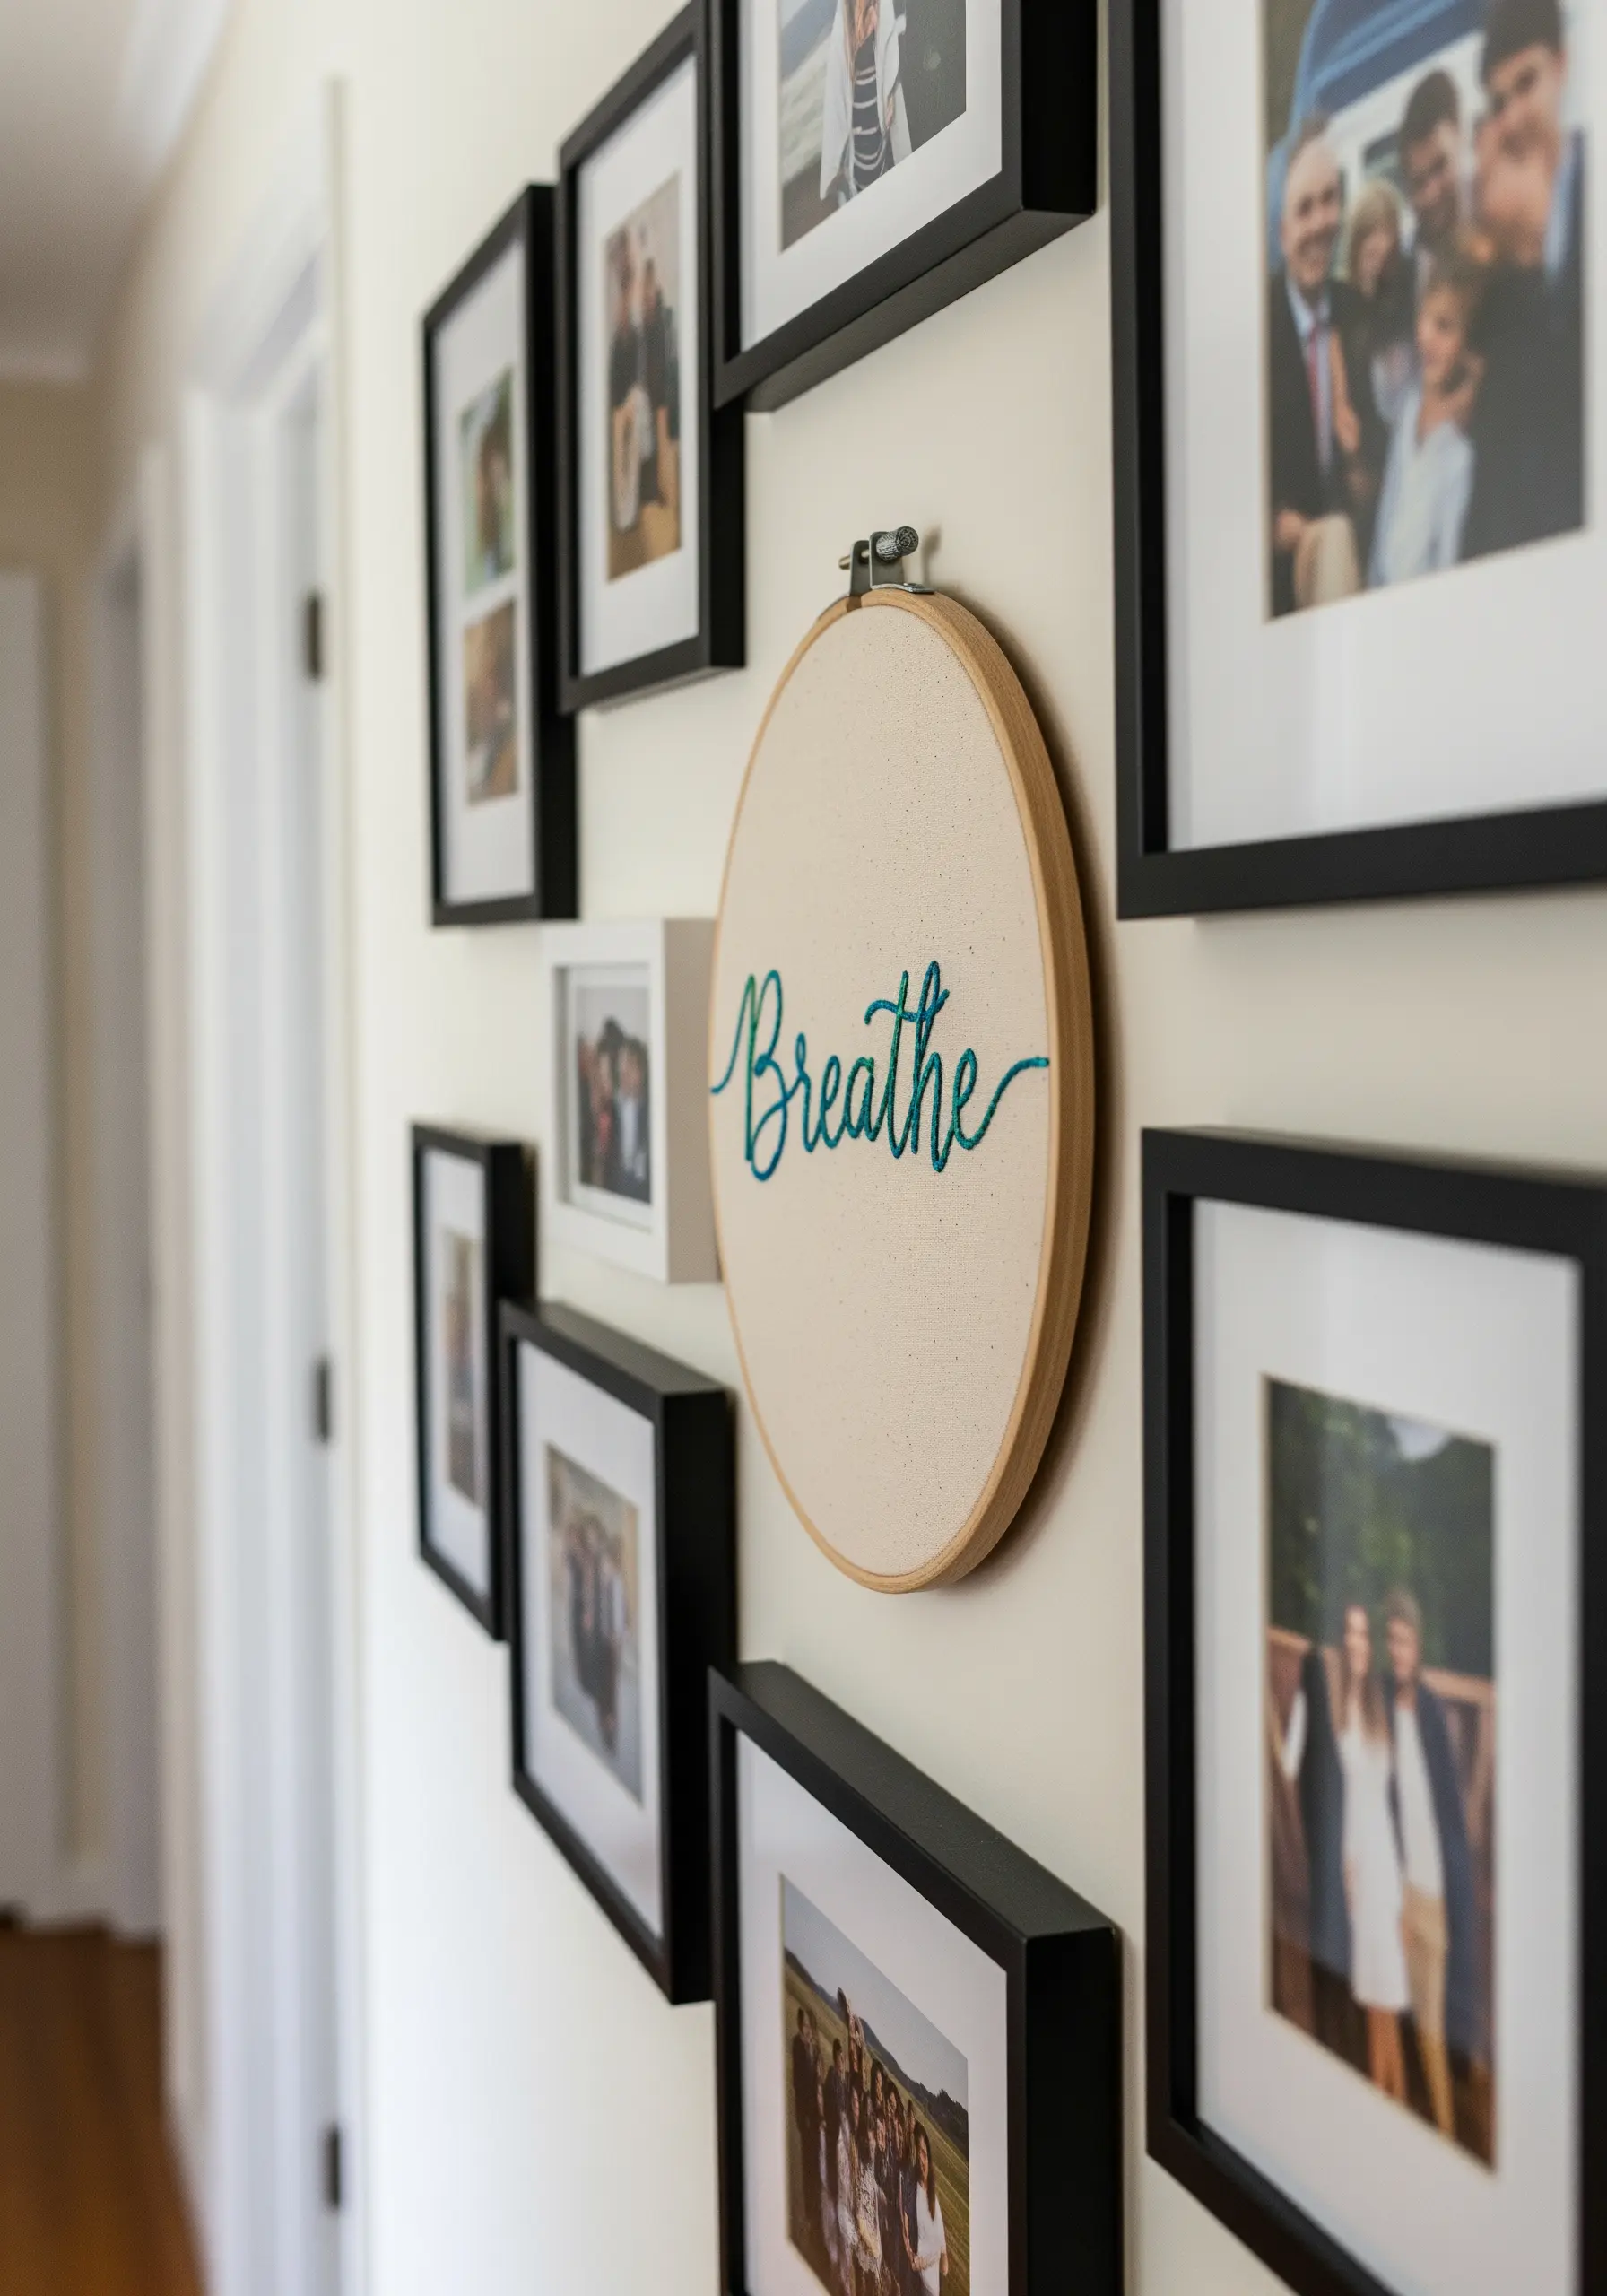
To make embroidered text look exceptionally smooth and professional, give it dimension with padding.
First, outline your letters using a split stitch. Then, fill the inside of the letters with a base layer of small, horizontal straight stitches.
Finally, cover this padding with your final satin stitch, worked vertically. This underlayer raises the satin stitch, giving it a clean, rounded, and dimensional finish.
It’s the secret to creating beautiful minimal typography quotes that truly stand out.
16. Map the Stars with Delicate Line Work
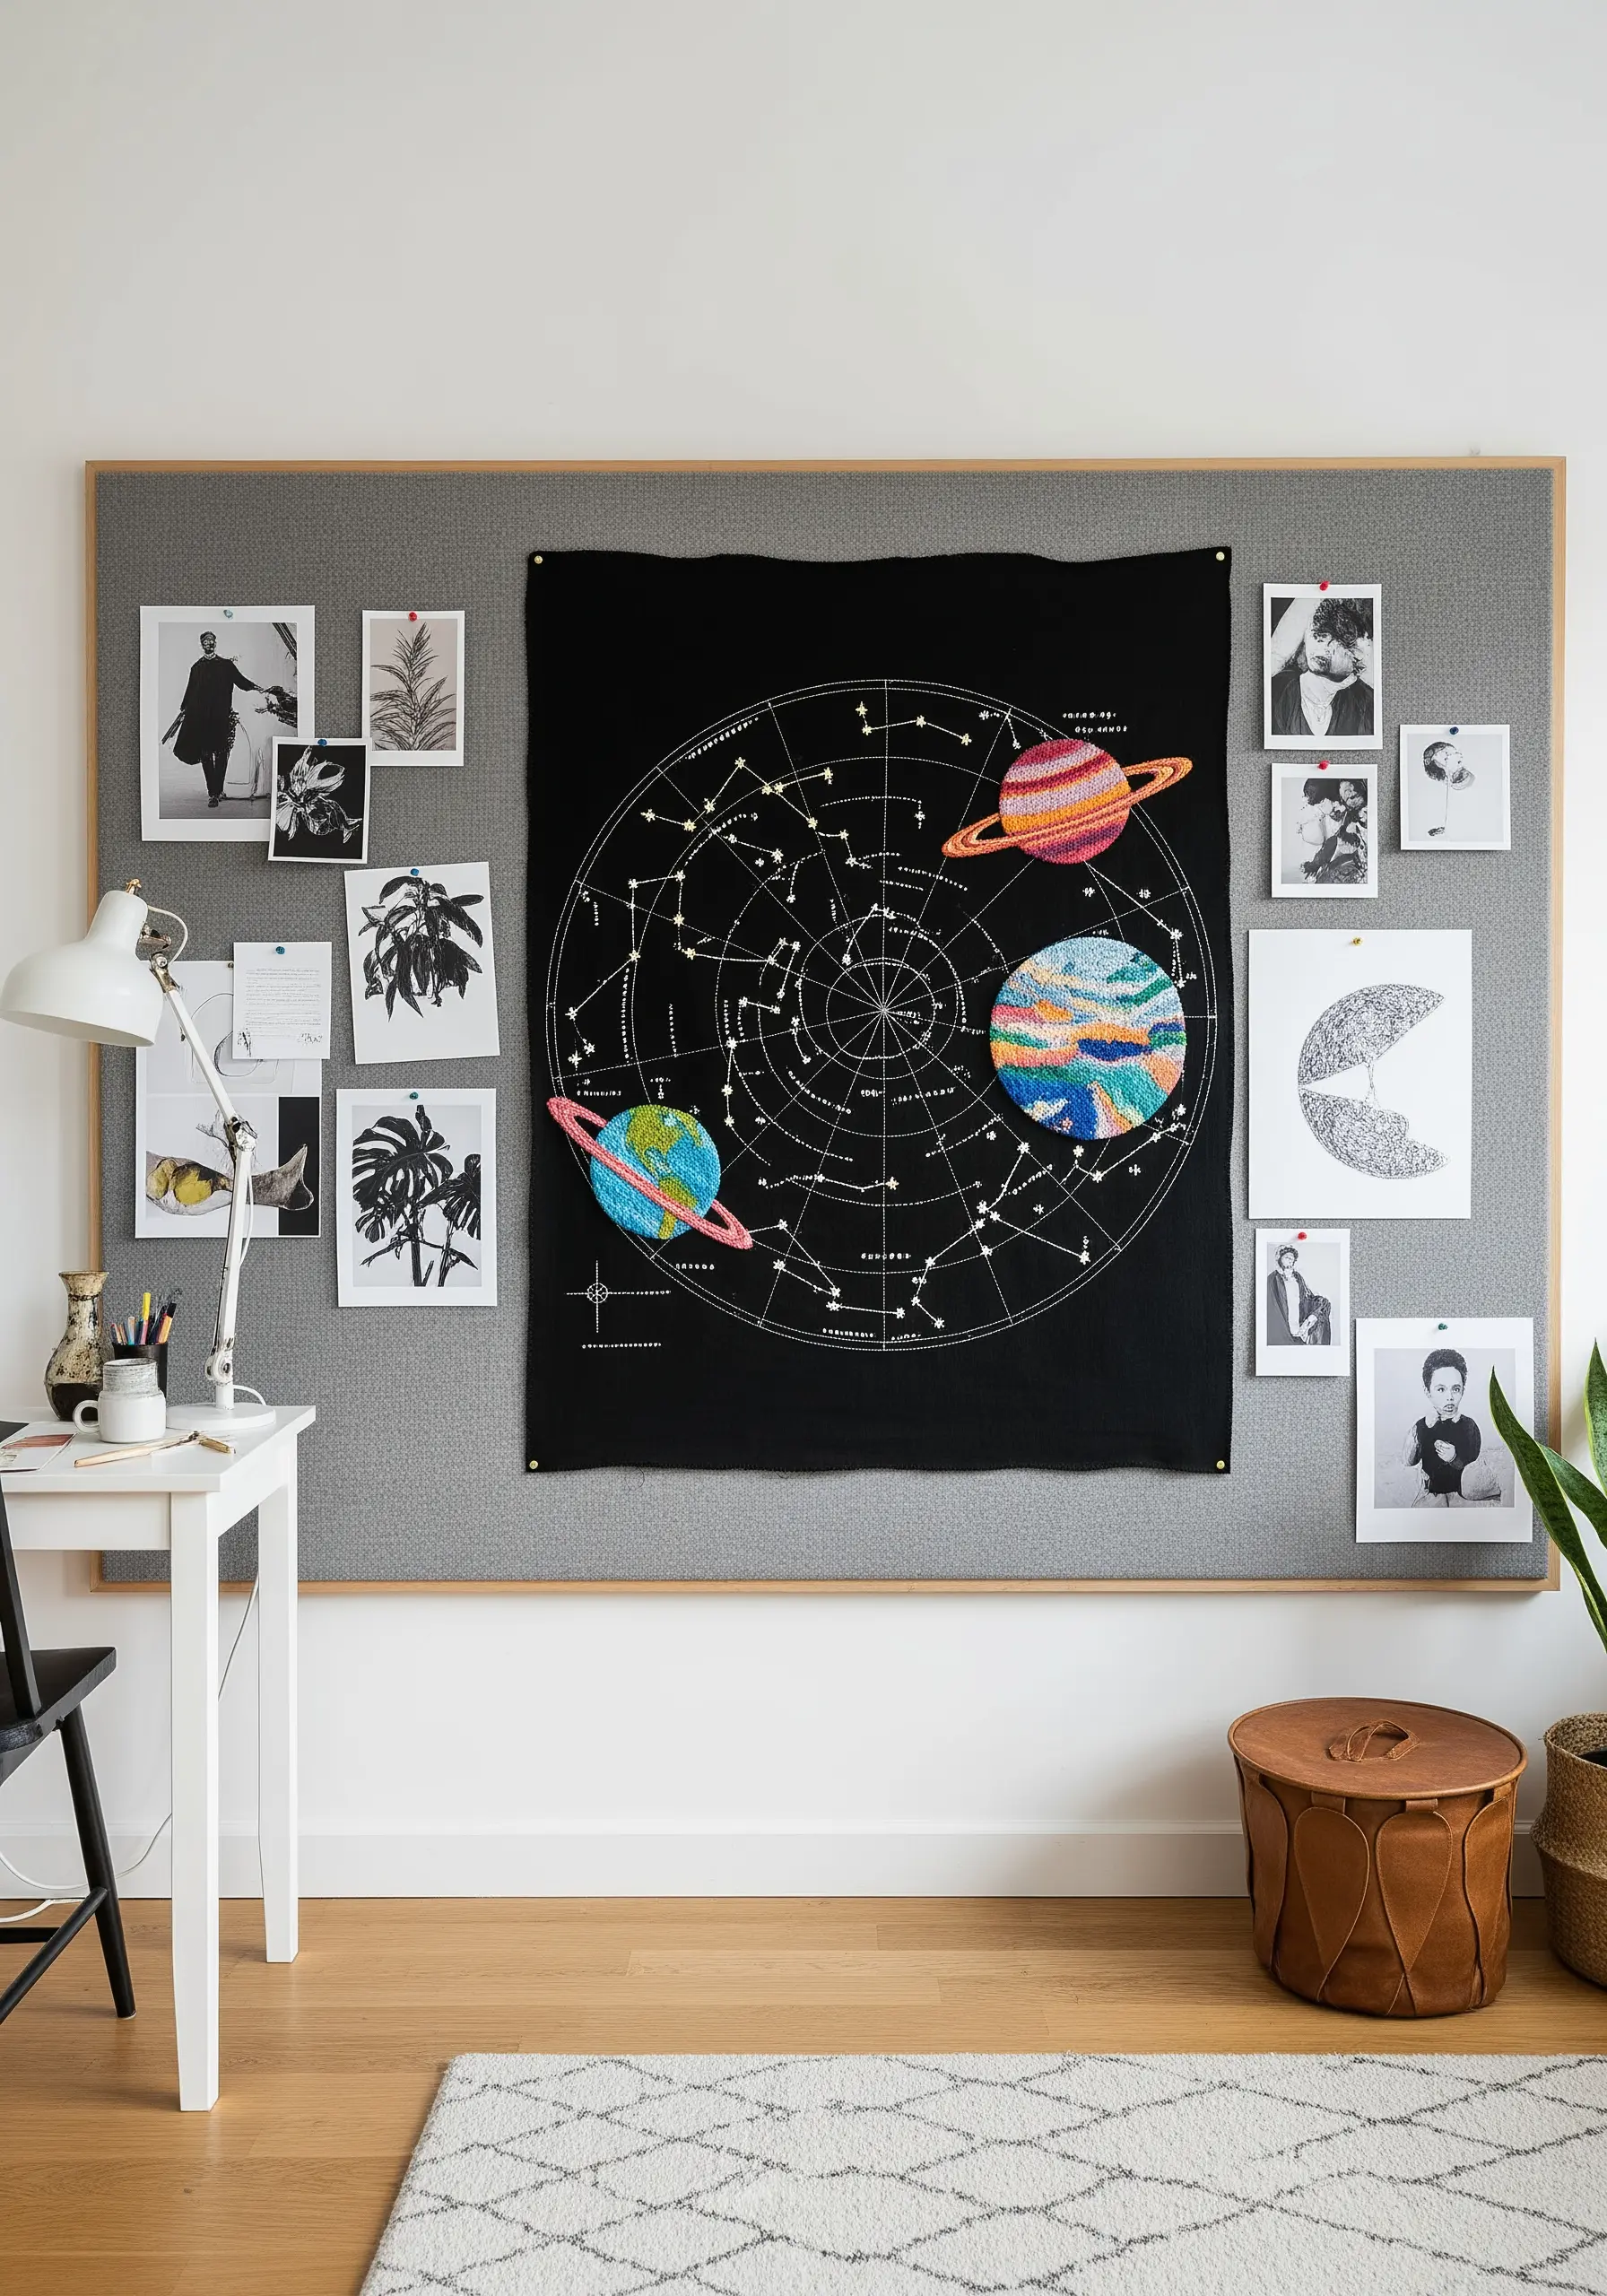
When creating intricate designs like a star chart, clarity is key. Use a single strand of a contrasting thread (white on black is classic) for the finest possible line.
A simple backstitch will give you the precision needed for the constellation lines without adding bulk.
For the planets or larger stars, introduce color and texture with satin stitch or dense French knots to make them focal points within the delicate web of lines.
This approach can turn simple lines into mesmerizing wall art.
17. Create Atmospheric Perspective with Thread
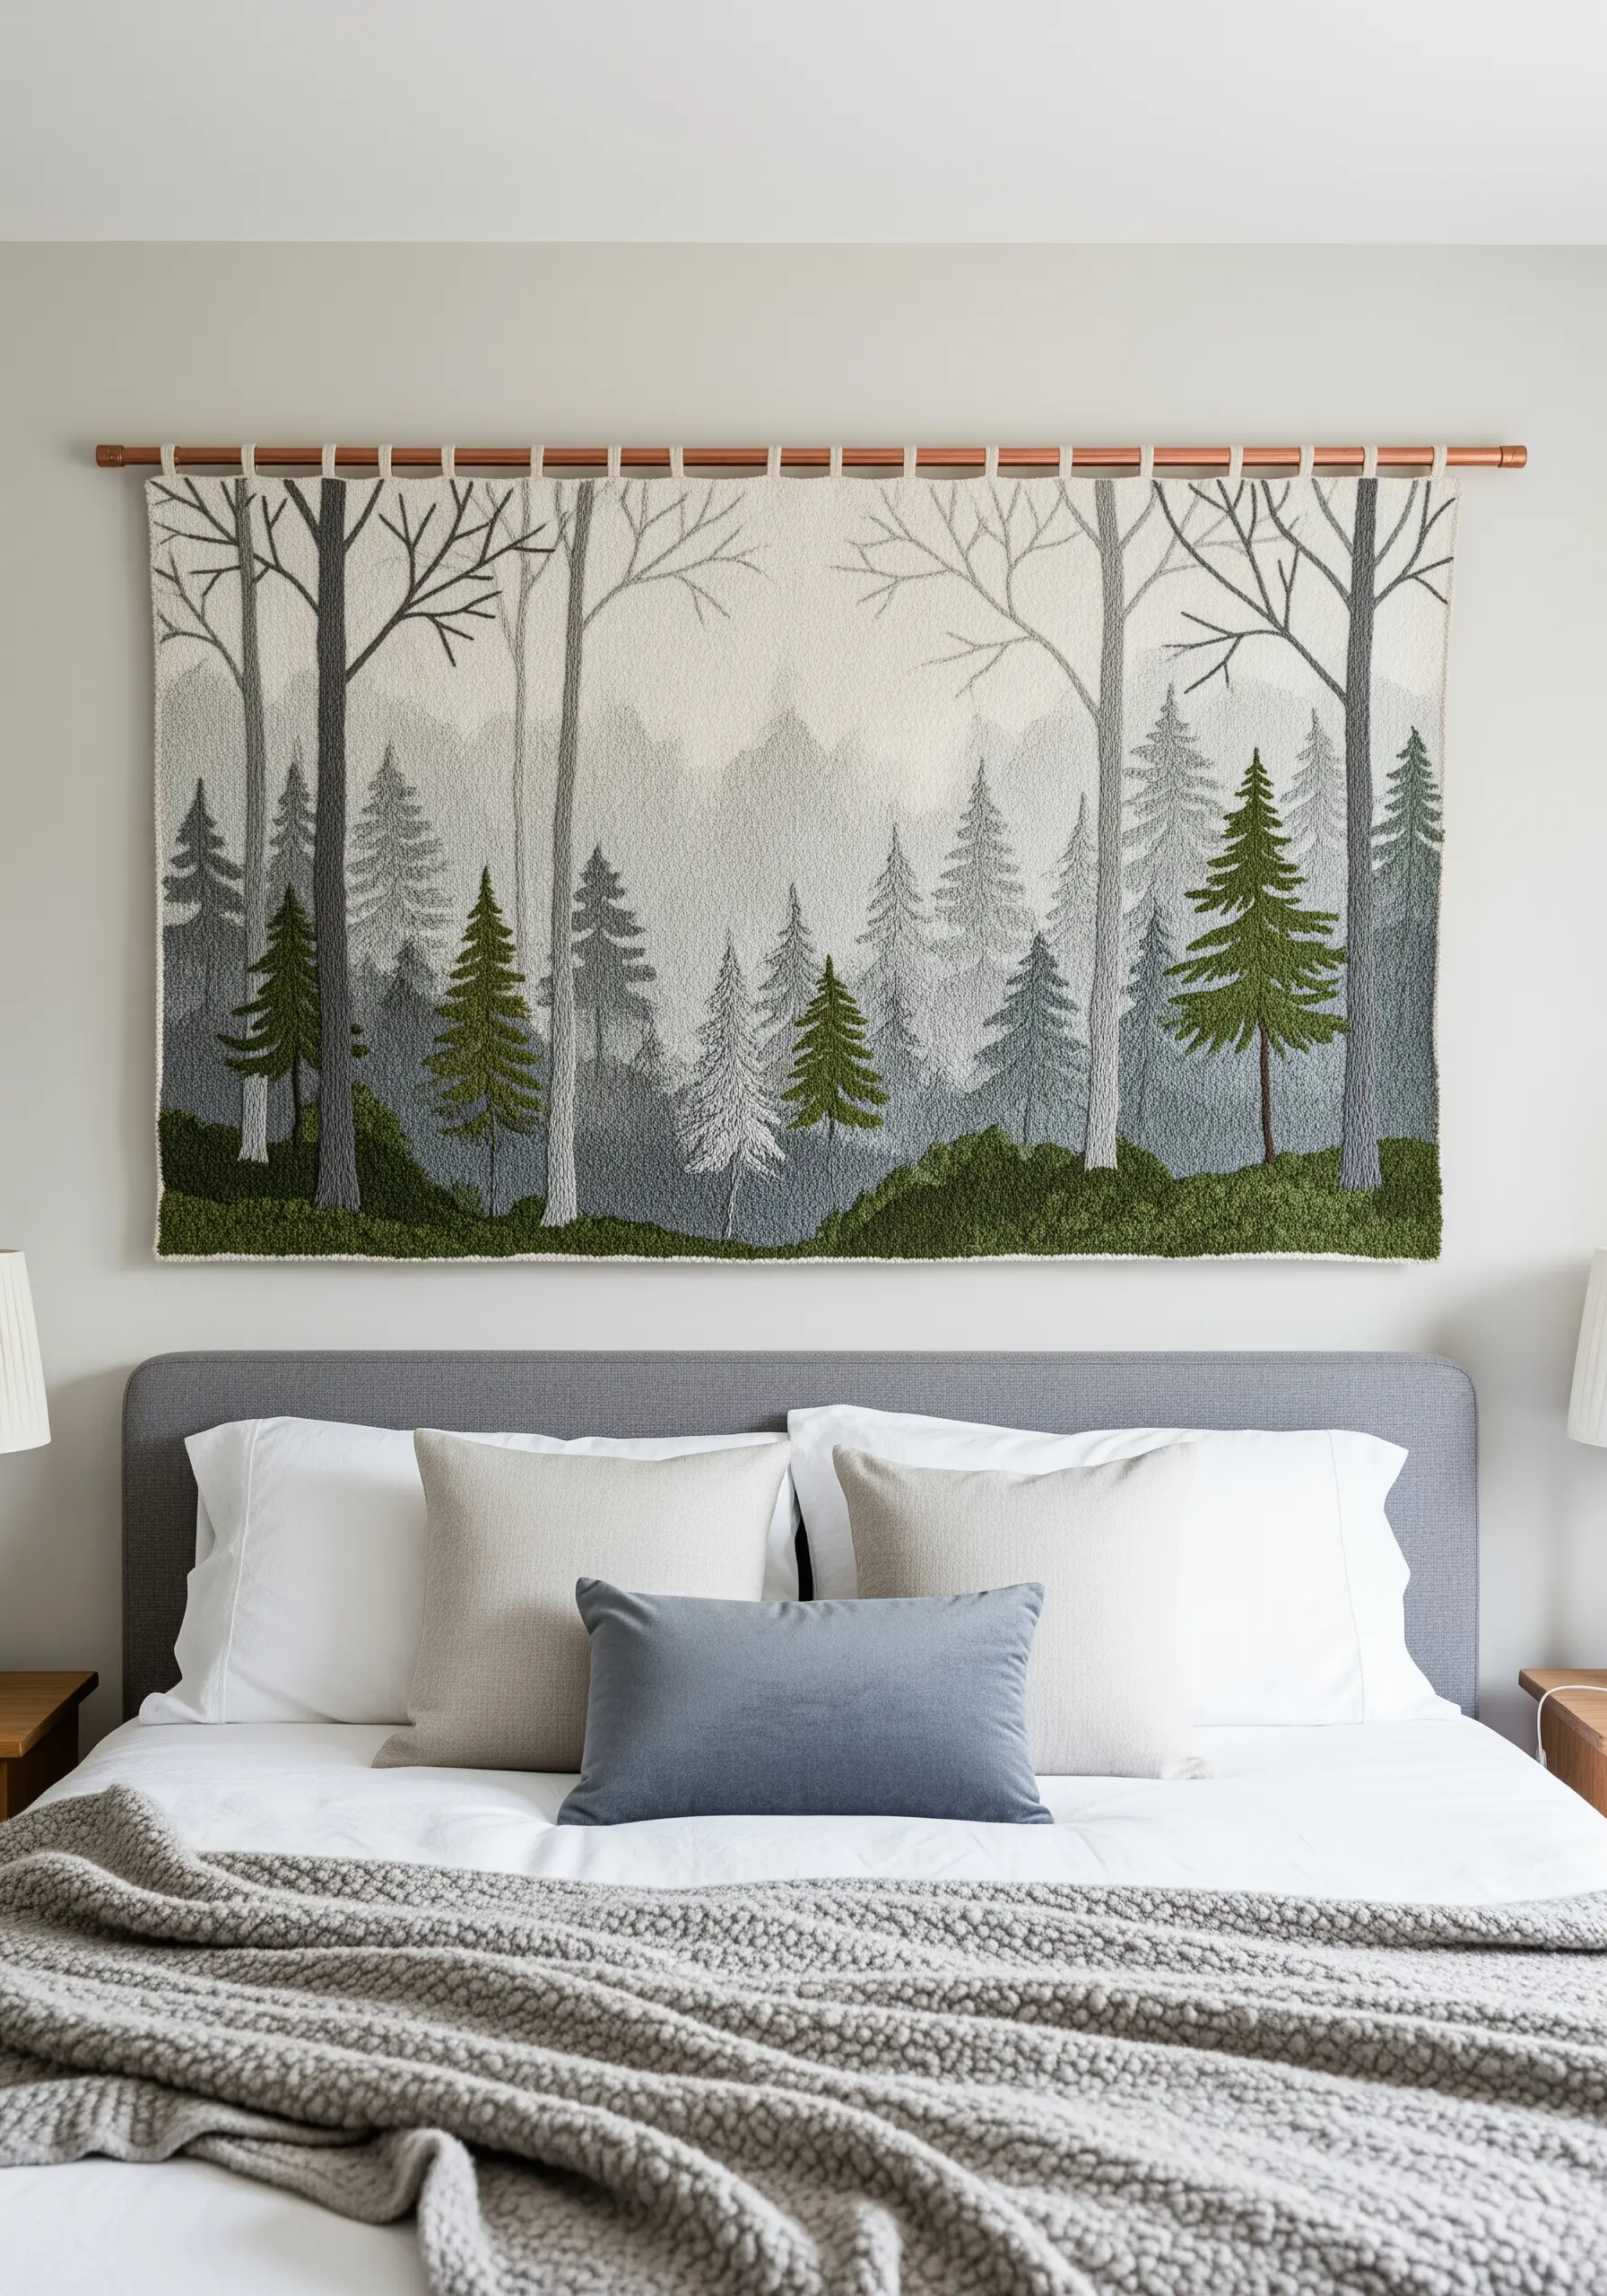
To give your landscape a sense of depth and misty atmosphere, vary the weight and density of your stitching.
For trees in the distance, use fewer strands of floss (just one or two) and a sparser fill stitch, like seed stitch. This makes them appear faded and far away.
For trees in the foreground, use more strands (three or four) and a denser stitch, like French knots or satin stitch, to make them look sharper and closer.
This technique is essential for successful nature-inspired embroidery wall decor projects.
18. Combine Appliqué and Embroidery for Clean Layers
For a multi-layered design with crisp text, stitch the elements on separate pieces of fabric first, then apply them to your main background.
Embroider your lettering on a smaller panel, trim it neatly, and then stitch it onto the larger wall hanging using a simple running stitch around the edge.
This appliqué technique ensures your lettering is perfectly spaced and free of puckers, giving you a clean, professional result that is much easier to control than stitching directly onto a large canvas. It’s a great method for contemporary typography stitch designs.
19. Fuse Embroidery with Macrame for a Boho Finish
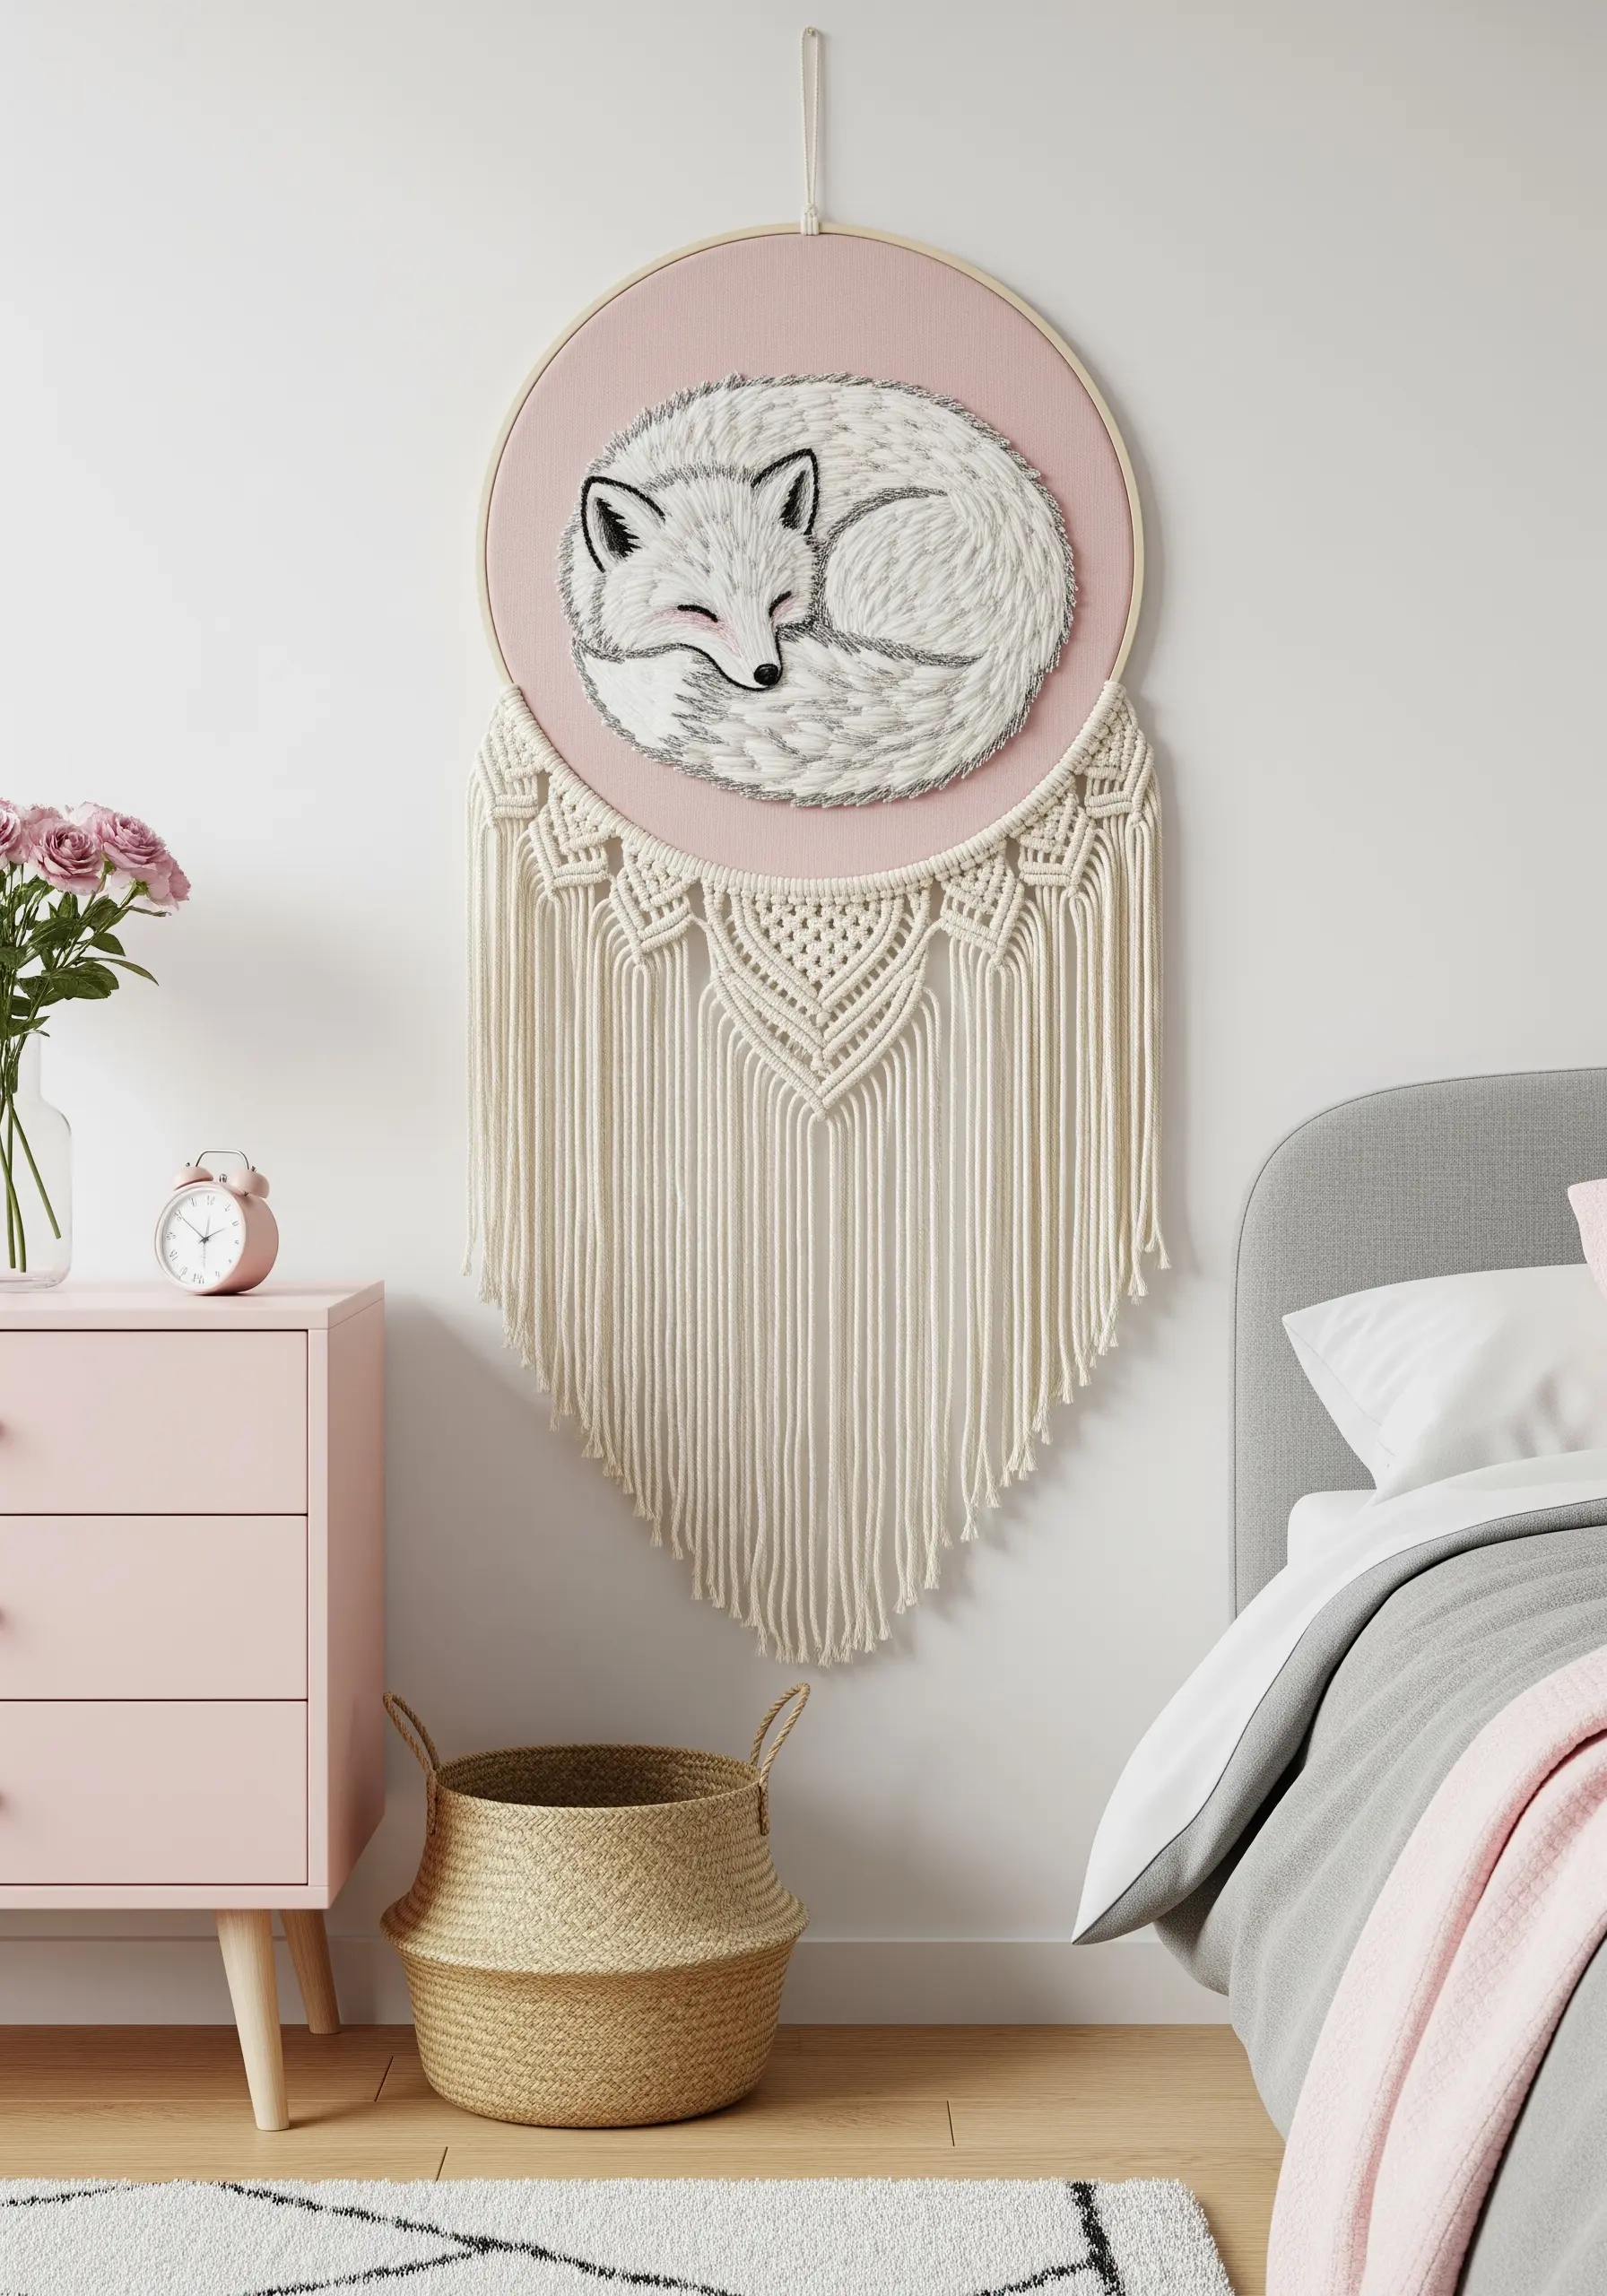
Elevate a simple hoop by transforming it into a mixed-media piece. Once your embroidery is complete, use the bottom half of the hoop as an anchor for macrame.
Attach cords directly to the wood using a Lark’s Head knot and create a simple pattern of square knots to form a decorative tail.
This combination of delicate needlework and rustic knotting creates a beautiful textural contrast and a professional finish for adorable forest animal embroidery ideas.
20. Achieve a Painterly Look with Thread Blending

To create the shimmering, translucent quality of fish scales, you must blend your colors seamlessly.
Use the long-and-short stitch, but take it a step further: in your needle, combine one strand of a light color with one strand of a darker color.
Stitching with this mixed-color thread creates an immediate, subtle gradient that looks incredibly natural and painterly.
This is one of the most effective abstract color-blend stitch ideas that make your art look almost painted, adding sophisticated depth to any subject.
21. Suggest Detail with Minimalist Stitches
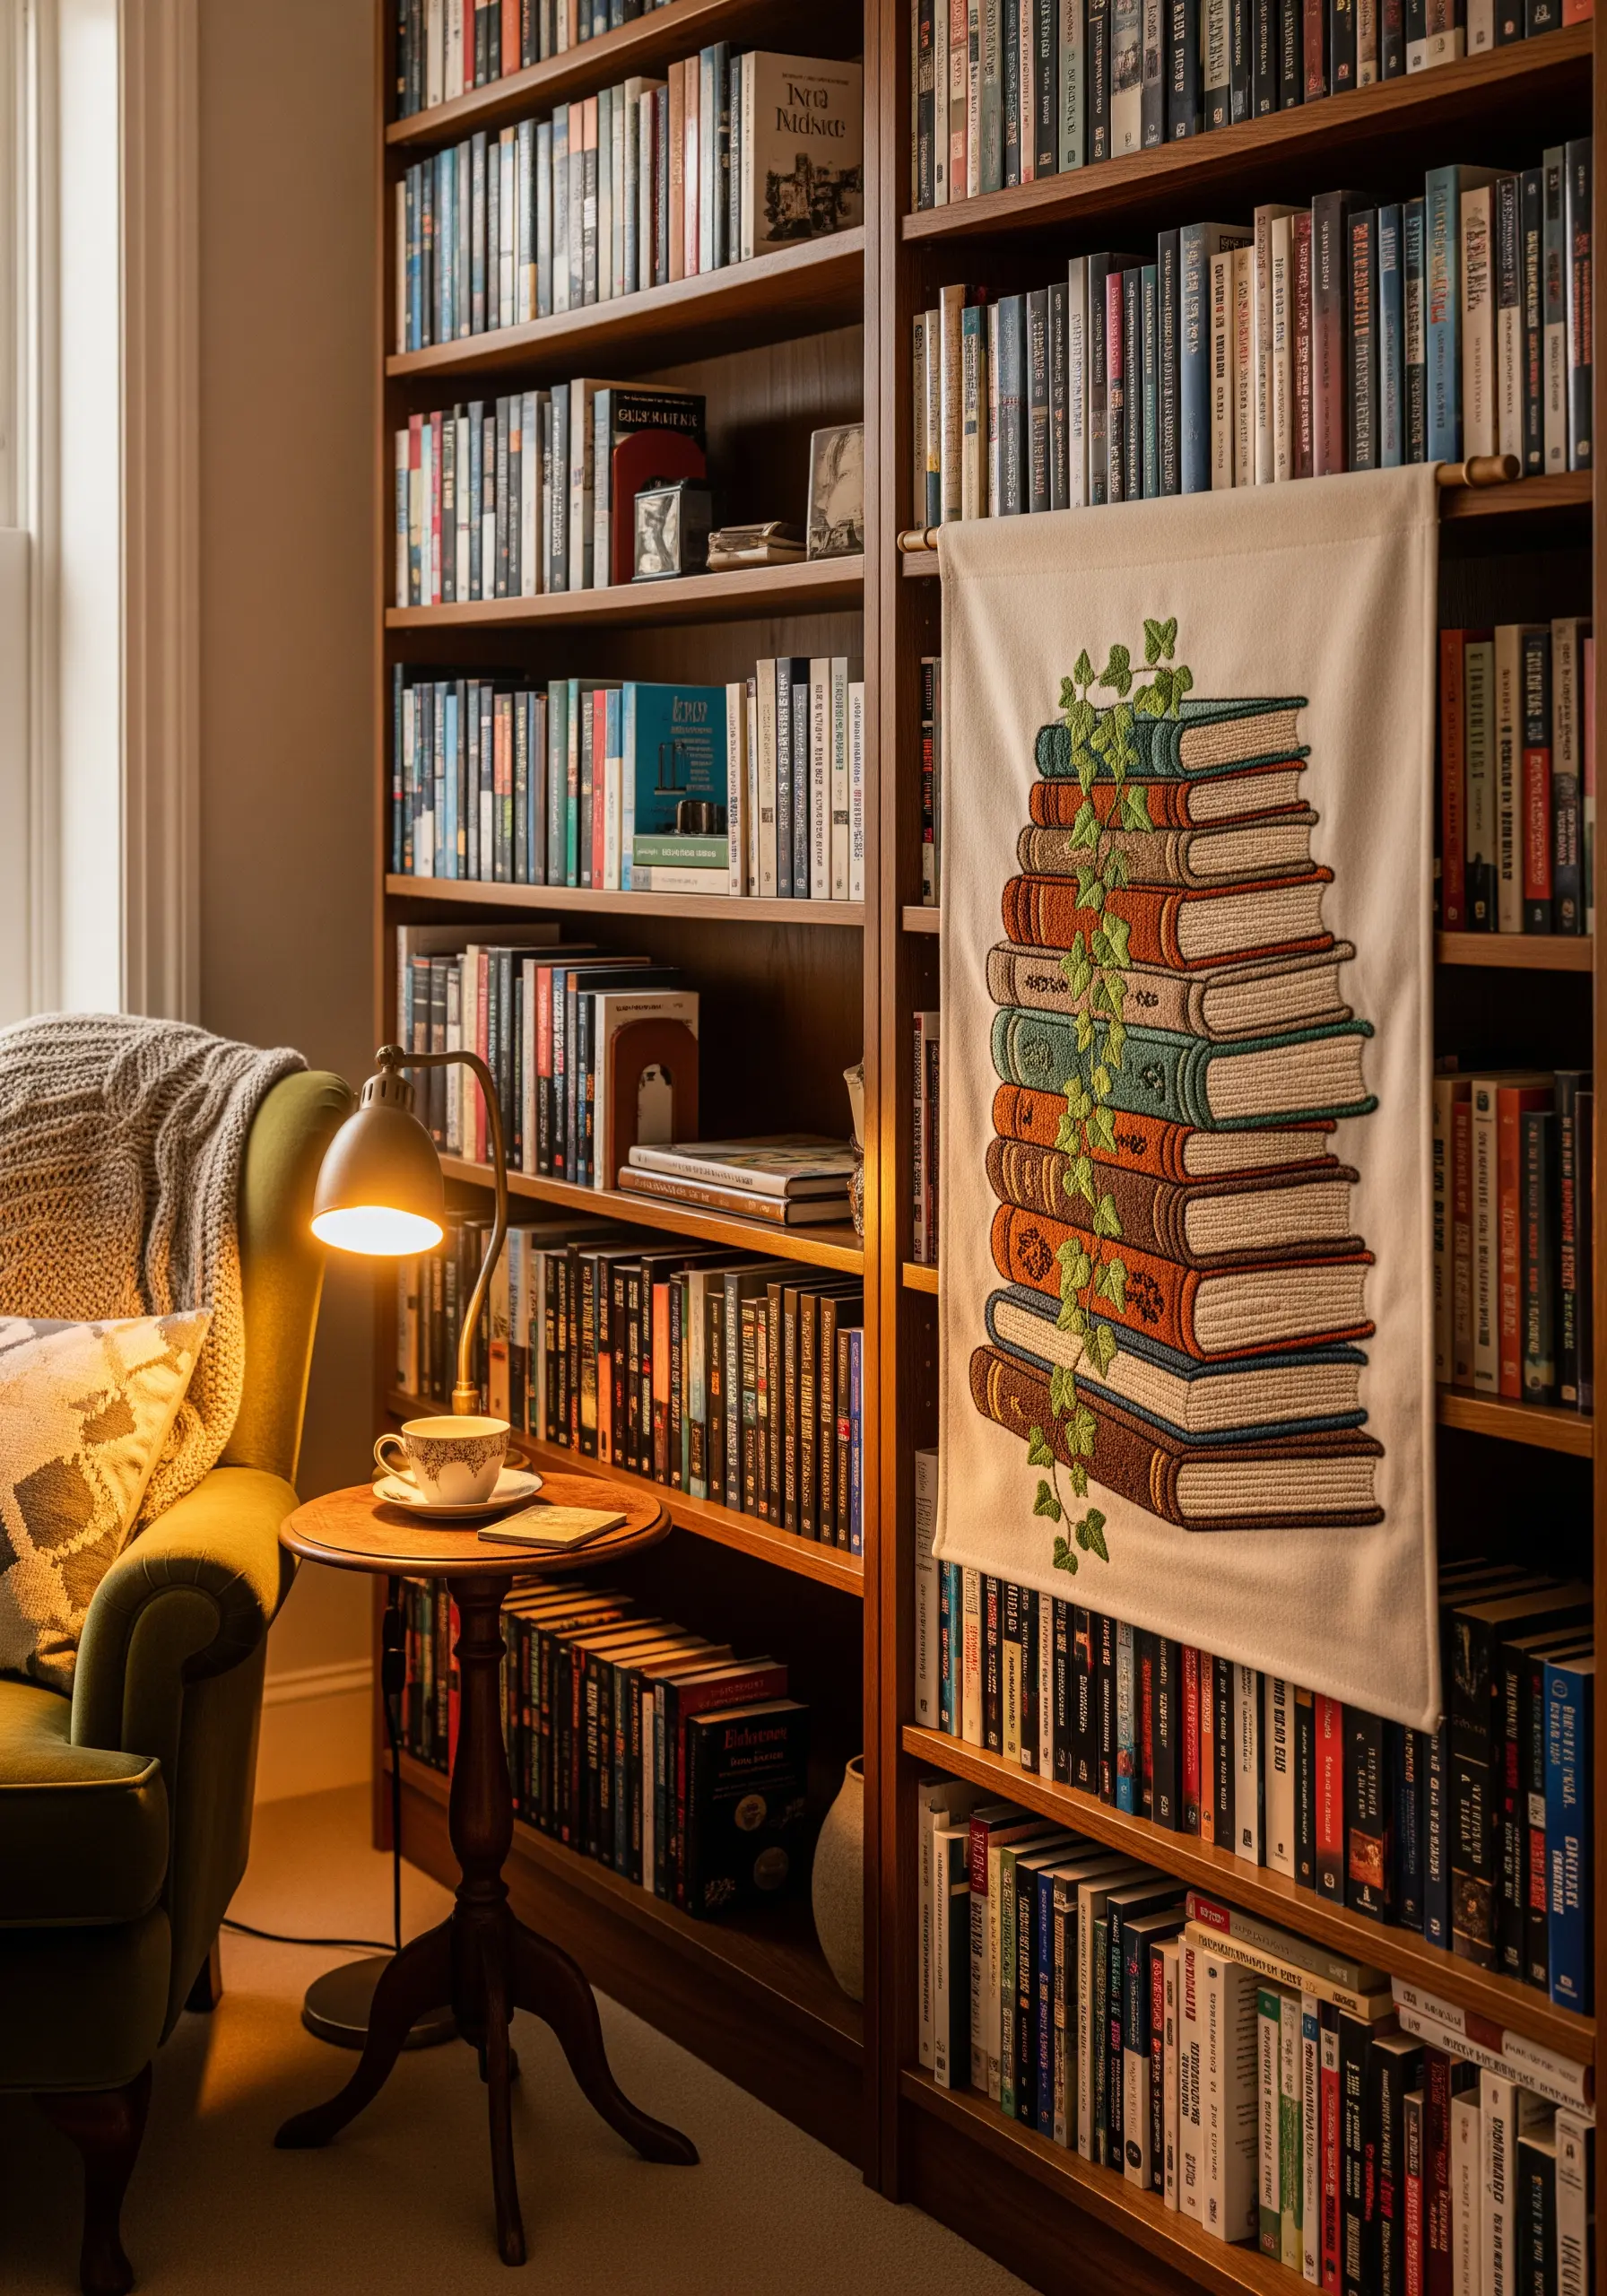
You don’t need to stitch every single detail to create a recognizable object. Often, suggestion is more powerful.
For the stack of books, use a simple running stitch in a contrasting color to indicate the edges of the pages. This is enough for the viewer’s eye to fill in the rest.
A simple stem stitch outline for the book covers provides definition without overwhelming the design.
This minimalist approach is perfect for creating cute & cozy hoop art patterns to warm up your home without adding visual clutter.
22. Embrace Simplicity with Zen Line Art
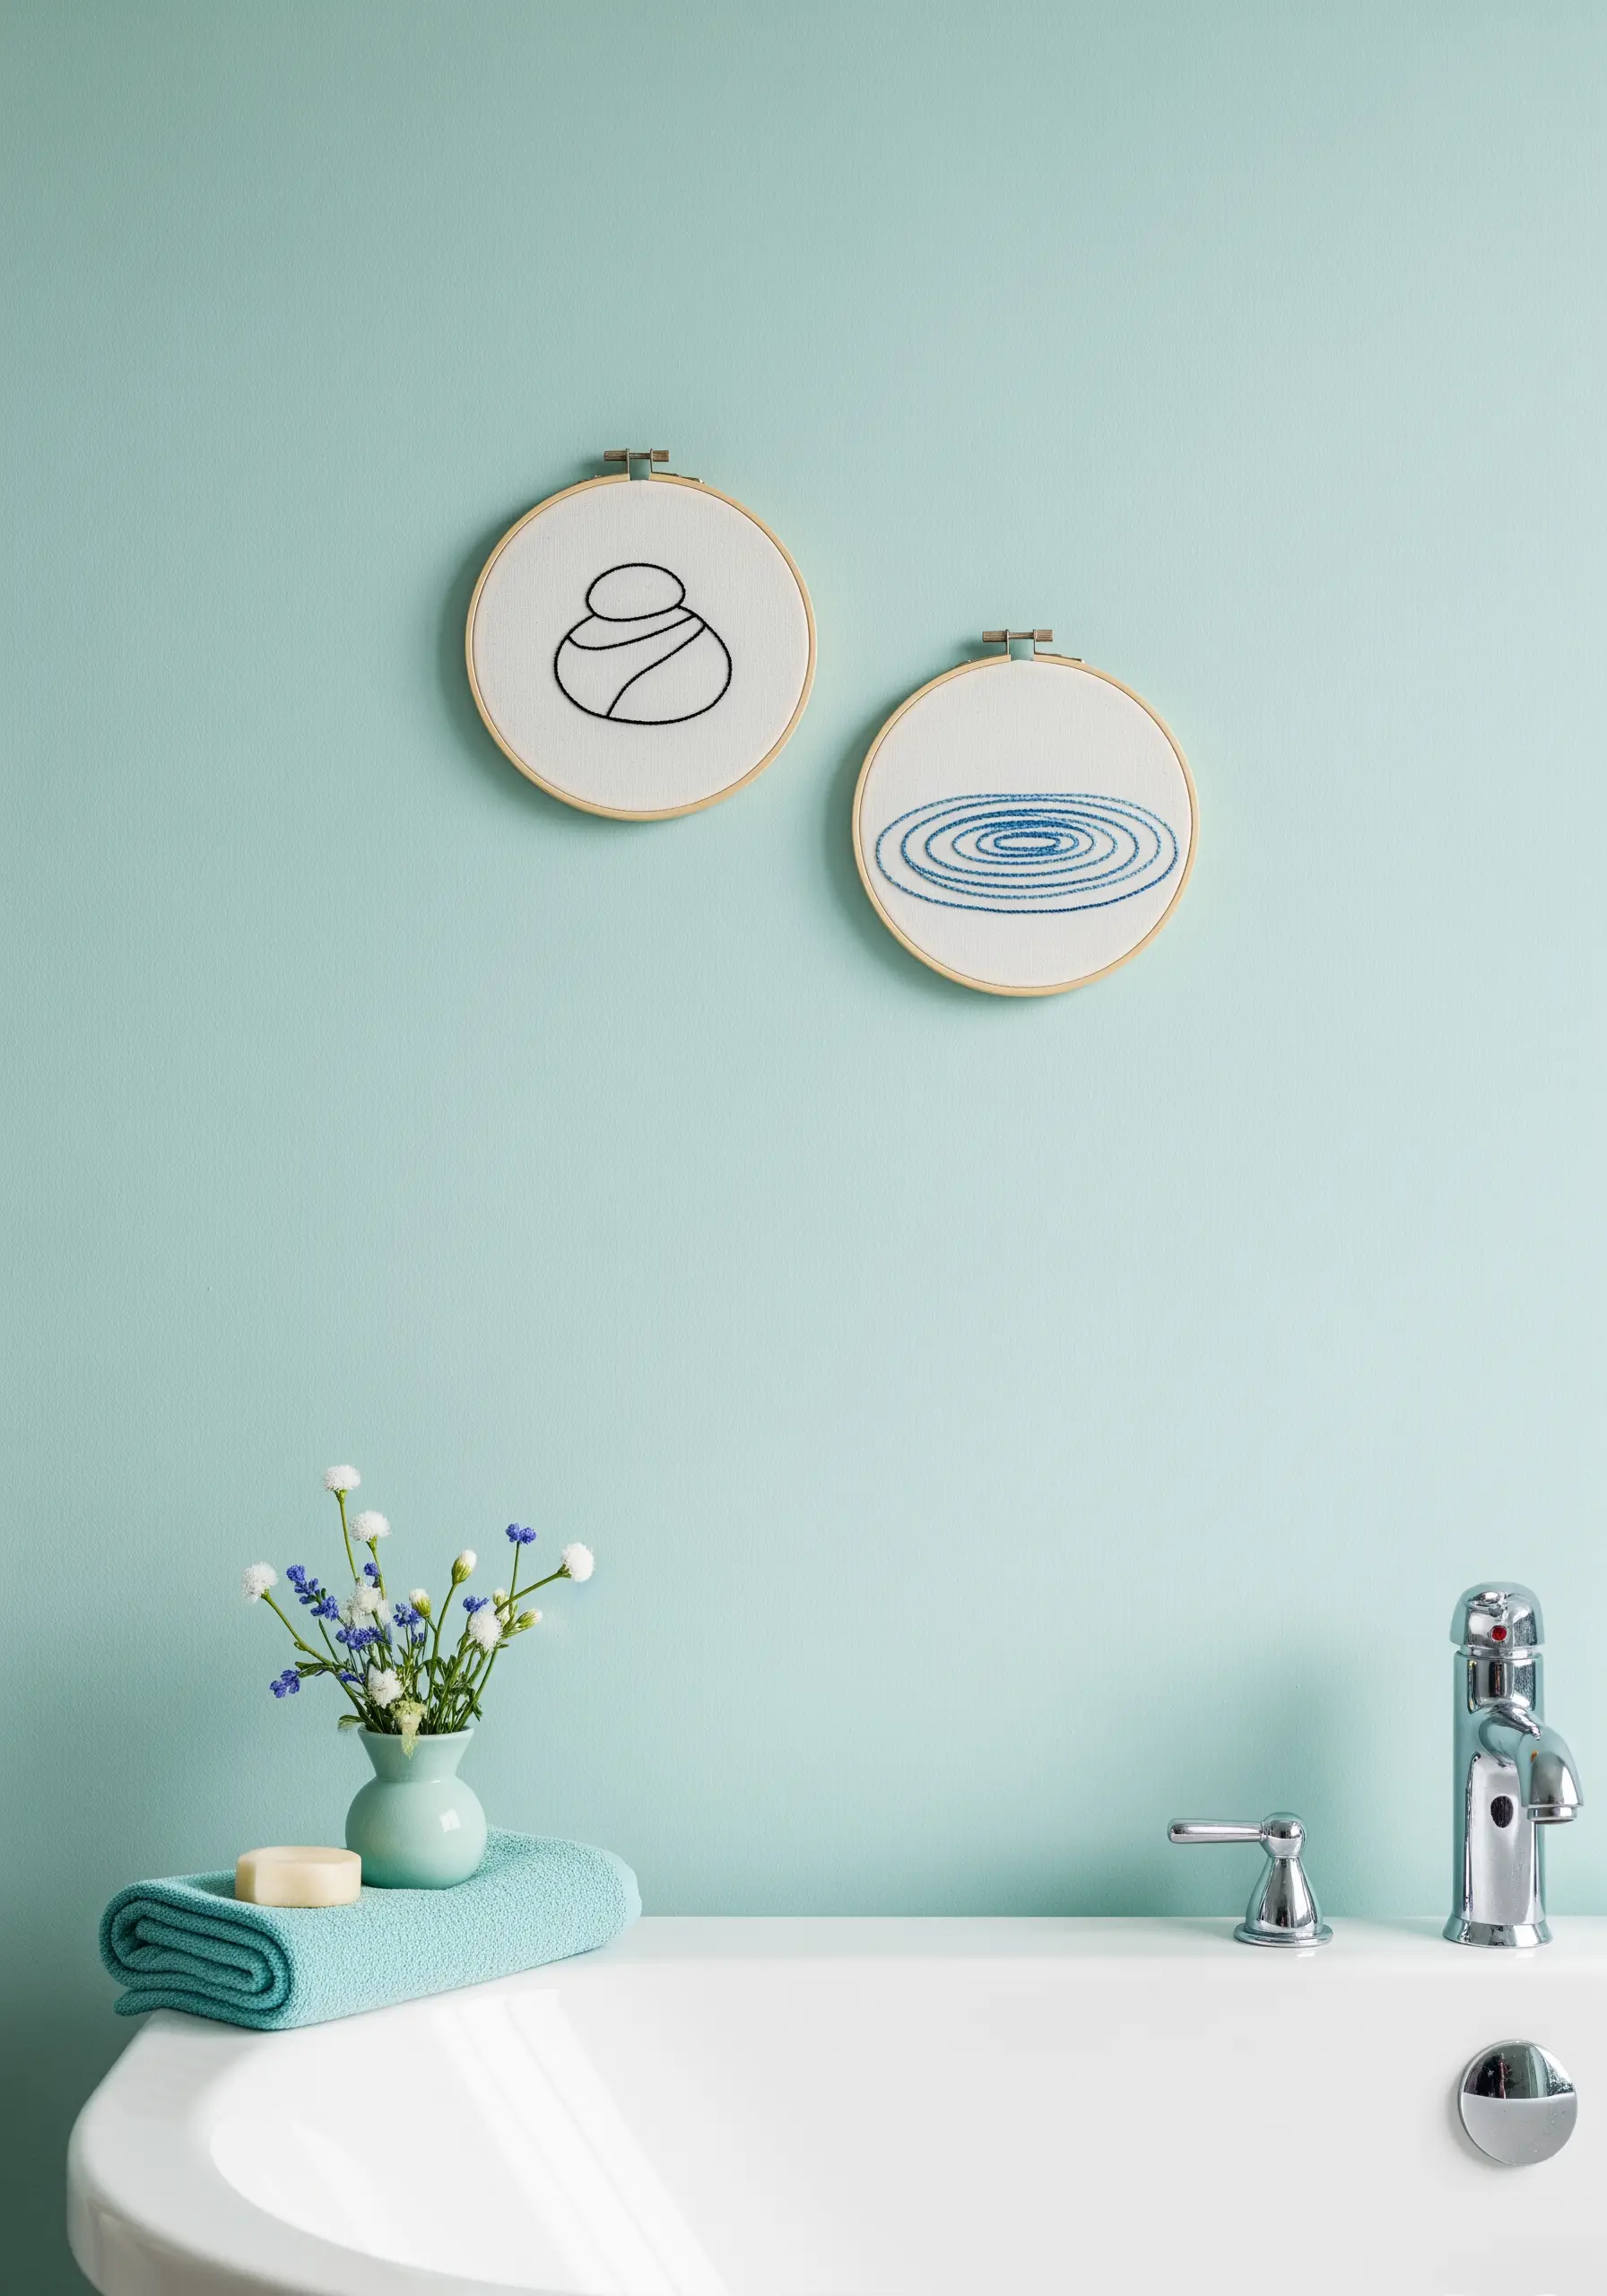
The essence of a calming design often lies in its simplicity. To capture this, focus on a single, clean line to define your shapes.
Use a stem stitch or a whipped backstitch with three strands of black floss to create a bold but elegant outline for the Zen stones and water ripples.
The unstitched white fabric is a critical part of the composition, representing stillness and quiet.
These minimal embroidery wall designs prove that less is often more when it comes to creating a peaceful atmosphere.
23. Create Soft Sculptures with Felt and Thread
Move beyond the hoop and create three-dimensional, soft-sculpture wall art using felt.
Cut two identical cloud shapes from soft felt fabric. On one piece, embroider a simple, sweet face using backstitch for the eyes and mouth.
Place the two felt pieces together and stitch around the edge with a blanket stitch, leaving a small gap to fill with soft batting before closing it completely.
This turns your stitching into a plush object, perfect for tiny animal embroidery sketches that add whimsy to tight kids’ room walls and nurseries.
24. Use Sheer Fabric to Interact with Light

Create a wall hanging that changes with the light of day by stitching on a sheer fabric like cotton voile or linen gauze.
Embroider your design, like these cherry blossoms, using delicate stitches that won’t weigh down the lightweight fabric. French knots and small straight stitches are ideal.
When hung in a window, the light will filter through the sheer fabric, illuminating your stitches and casting a gentle, colored shadow into the room.
It’s a beautiful way to think about embroidered curtain & blind ideas as dynamic art pieces.


