
You have the threads, the fabrics, the needles. You have the skills. But sometimes, you stand before your materials and feel a creative block, unsure how to combine them into something that feels truly new, something that feels like *you*.
The secret isn’t always learning a more complicated stitch; it’s about making bolder choices with your materials. It’s about the intentional contrast between rough and smooth, matte and shiny, thick and thin. When you mix fibers, you’re not creating chaos—you’re orchestrating a conversation between textures.
In these ideas, you’ll see how combining different fibers, from wool roving to metallic leather, can transform a traditional technique into a modern work of art. This is your permission to break the rules, to see your stash with fresh eyes, and to create pieces that are not only beautiful but also deeply, satisfyingly tactile.
1. Weave Bold Textures into Classic Macrame
Start with a traditional macrame base to establish a familiar structure and rhythm.
Instead of sticking to one cord type, introduce a contrasting element like a thick, unspun merino wool roving.
Braid this softer fiber loosely and weave it horizontally through your knots, creating a sculptural focal point that interrupts the vertical lines.
This deliberate contrast between the tight, defined knots and the plush, soft wool adds immediate visual depth and a contemporary feel.
For a final modern touch, integrate unexpected materials like iridescent fabric strips, which catch the light and add a surprising shimmer.
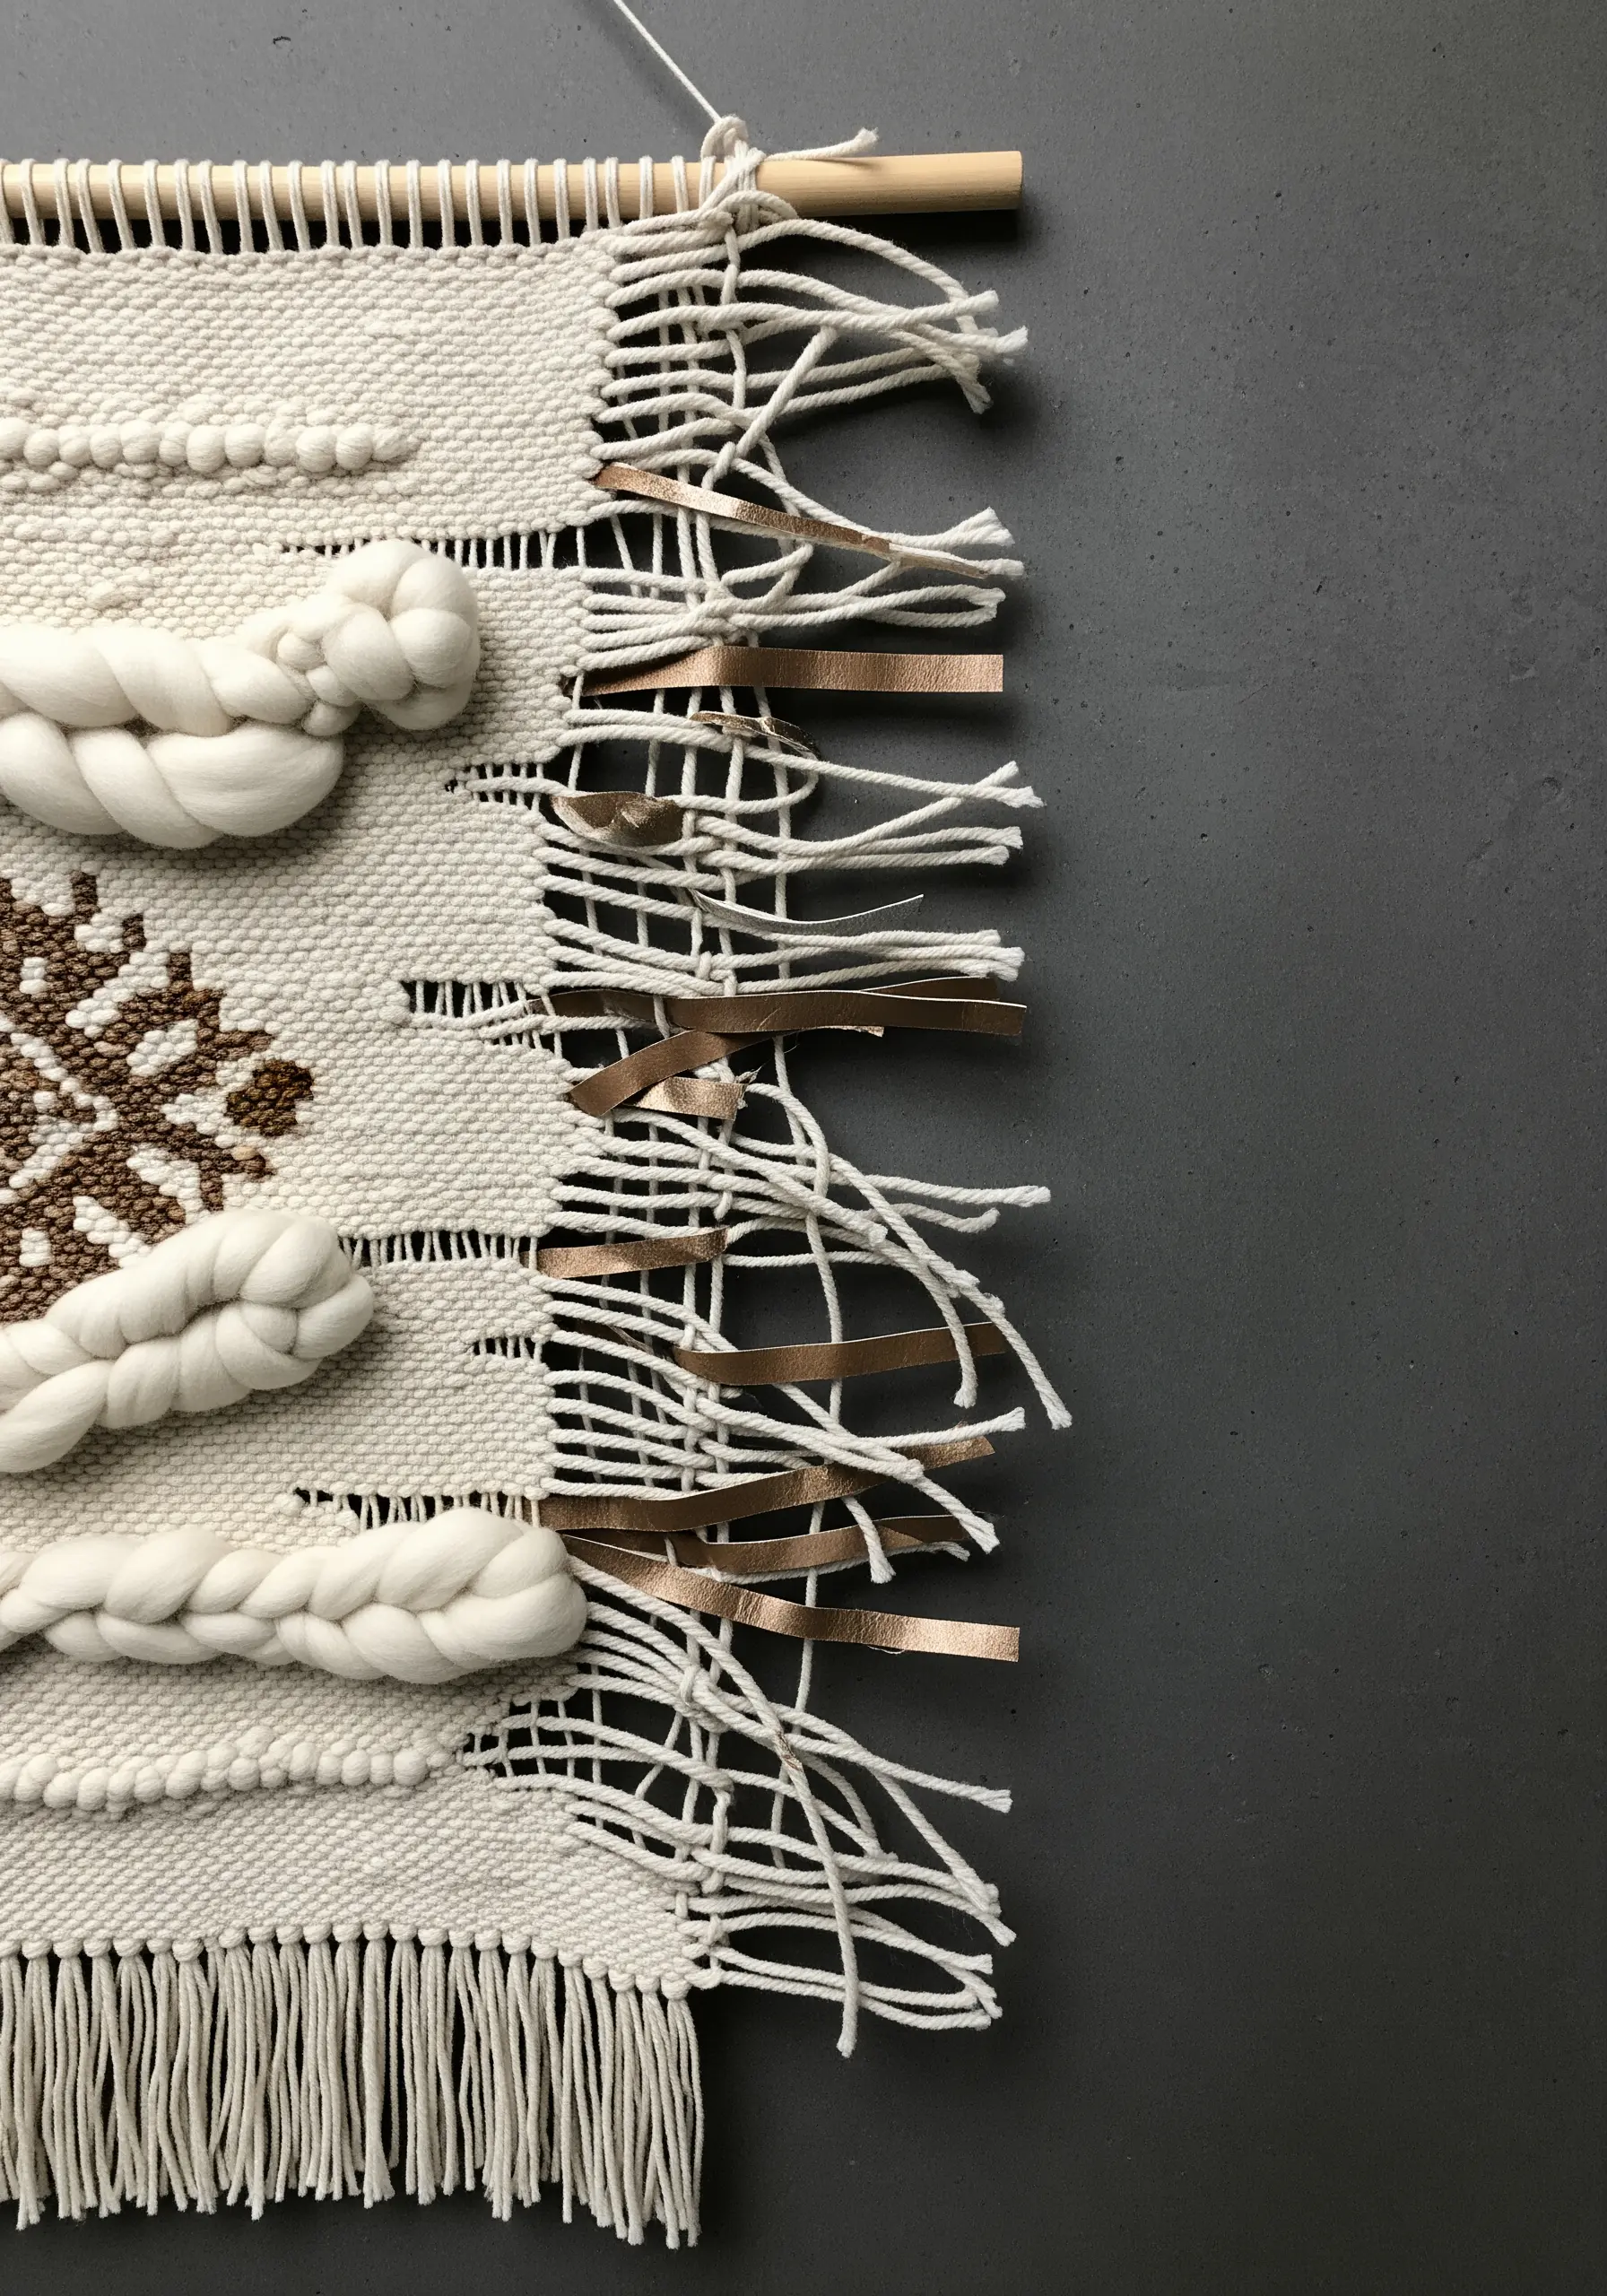
2. Frame Your Weaving with Delicate Metallics

When working with chunky, soft fibers like wool roving, you can create a beautiful tension by adding a delicate, structural element.
Use a thin metallic thread as a secondary, free-floating warp, stretching it across your primary woven sections after they are complete.
This not only adds a subtle shimmer but also acts as a visual cage, highlighting the plushness of the wool it contains.
Let the metallic thread drape loosely over some areas to create a sense of organic movement, turning your abstract thread landscapes into something both grounded and ethereal.
3. Sculpt Dimension with Varied Loop Heights
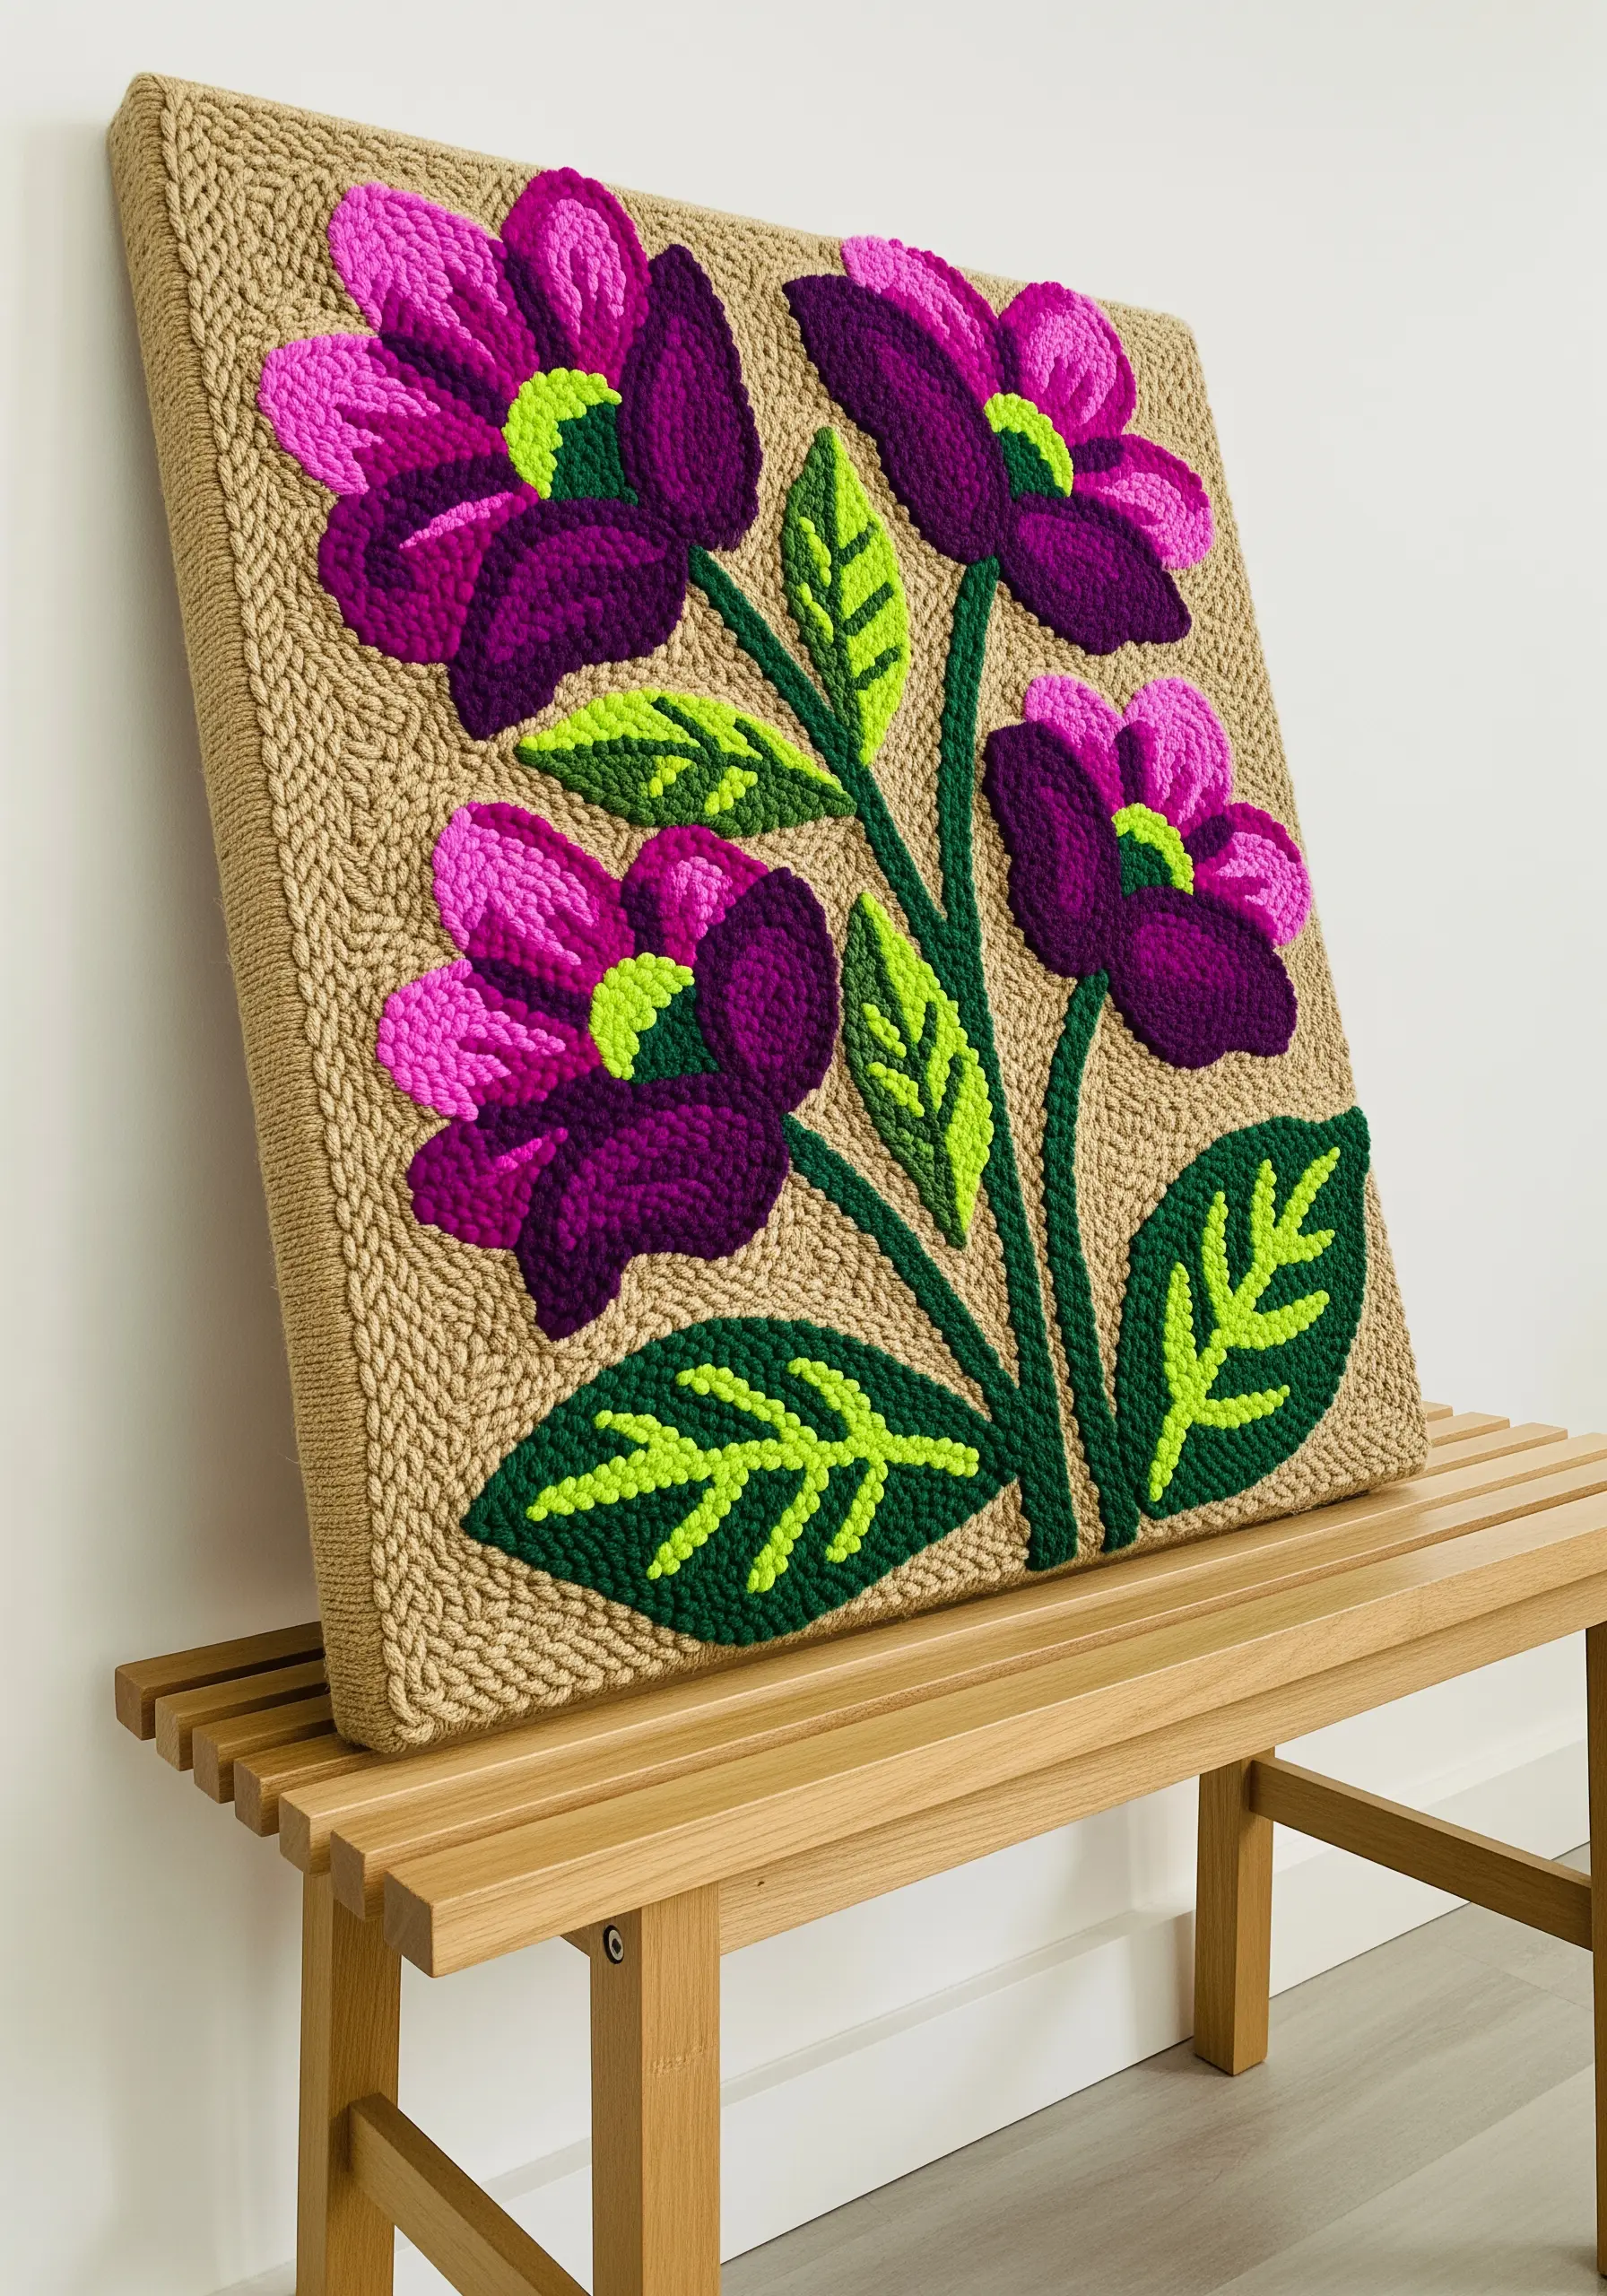
To make your punch needle florals pop, think beyond flat color fields and focus on creating tactile dimension.
Use a punch needle with adjustable loop heights, or simply vary your punching depth manually as you work.
Create shorter, tighter loops for the background and leaf outlines to make them recede visually and appear sharper.
Use longer, plusher loops for the main petals to bring them forward, giving them a rich, three-dimensional quality that invites touch.
This sculpting technique turns a simple design into a highly textural piece of art without changing a single color.
4. Juxtapose Natural Forms with Geometric Thread Wraps
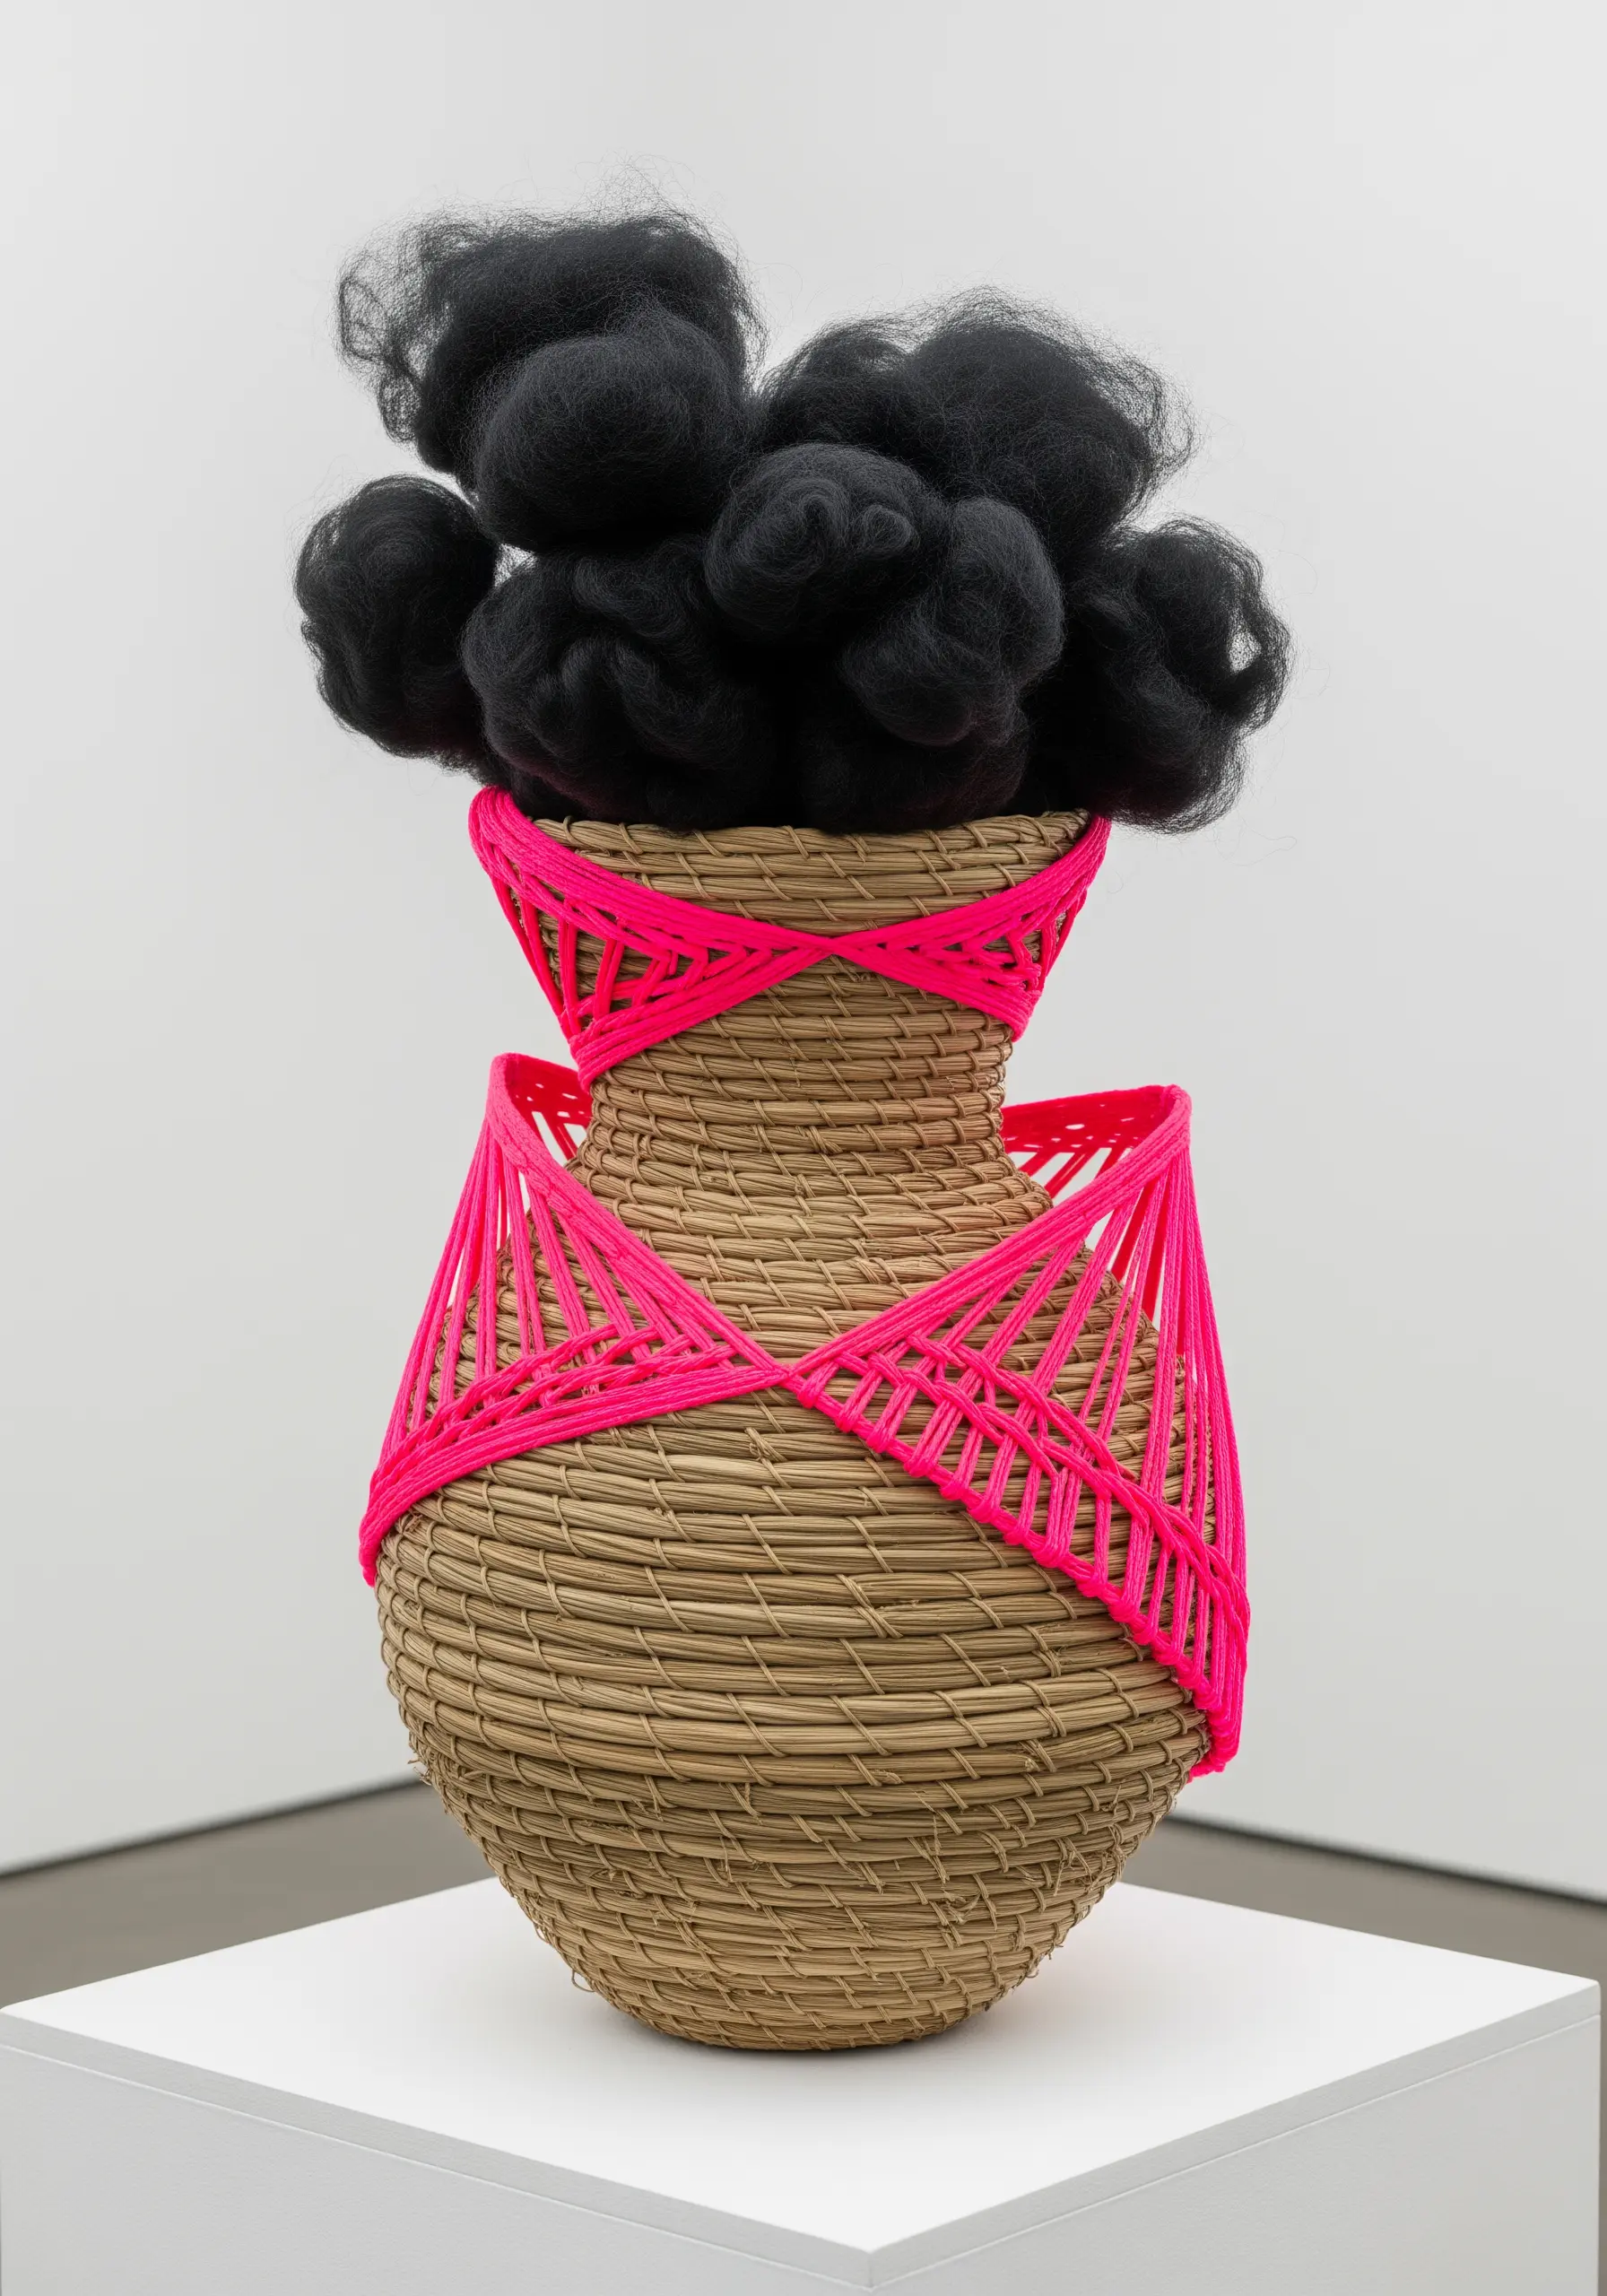
Transform a simple woven object, like a basket, into a piece of modern sculpture with high-contrast thread.
Choose a smooth, synthetic yarn in a bold color—like neon pink—to wrap sections of the basket tightly.
Create sharp, geometric lines that challenge the basket’s soft, organic curves; this tension between material and form is what creates visual excitement.
For a final textural statement, top the piece with a cloud of unspun wool roving, balancing the sharp, graphic lines with something soft and untamed.
5. Create Lifelike Petals with Dimensional Satin Stitch

To prevent your satin stitch petals from looking flat, work them in strategic layers.
Stitch the back petals first, then stitch the front petals directly on top, allowing them to overlap slightly and creating a natural sense of depth.
This technique, a simplified form of padded satin stitch, gives your florals a realistic, sculptural quality.
Use a full six strands of floss for the petals to build volume, then switch to a single strand for the delicate center details to create a clear focal point.
Adding tiny metallic seed stitches as a final touch scatters light and adds a hint of magic.
6. Unify a Quilted Composition with Rhythmic Stitching
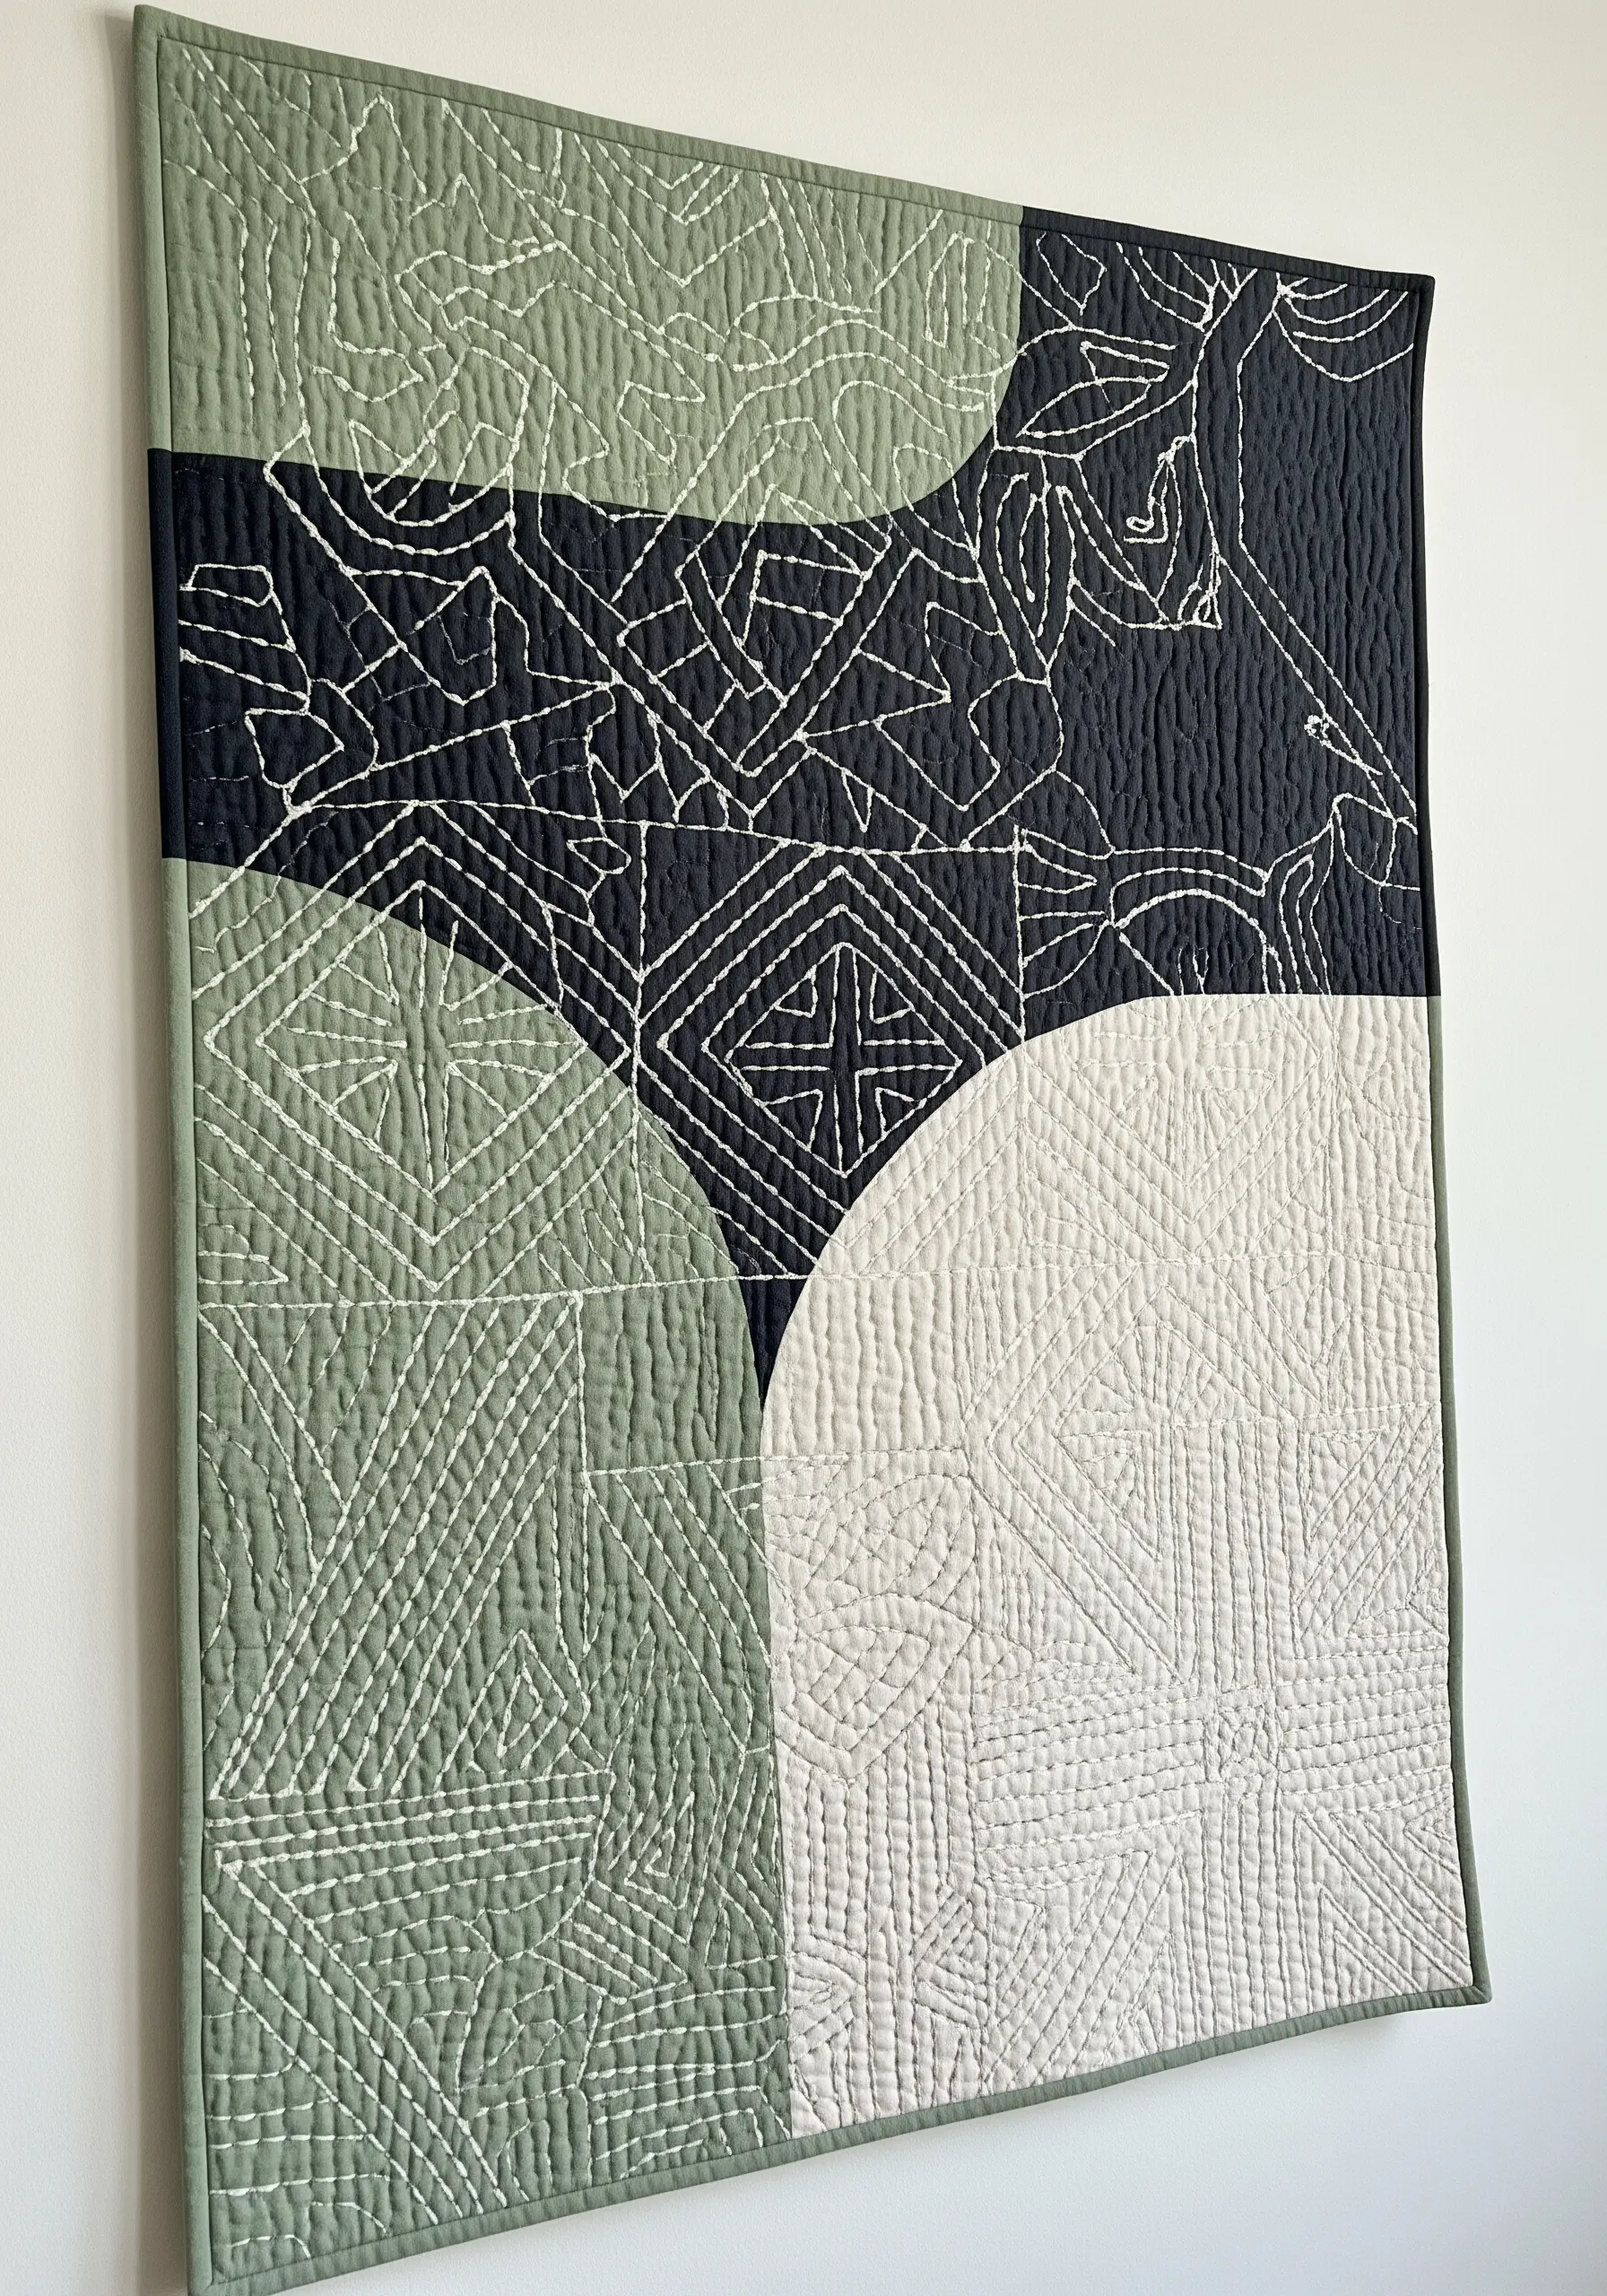
When you’re working with bold, color-blocked fabric, your stitching can be the single element that ties everything together.
Instead of stitching only within each block, use a consistent running stitch across the entire piece, ignoring the fabric boundaries.
This creates a secondary layer of pattern that unifies the composition and adds a handcrafted texture.
Vary the density of the stitches—tighter in some areas, looser in others—to guide the viewer’s eye and create a subtle visual rhythm.
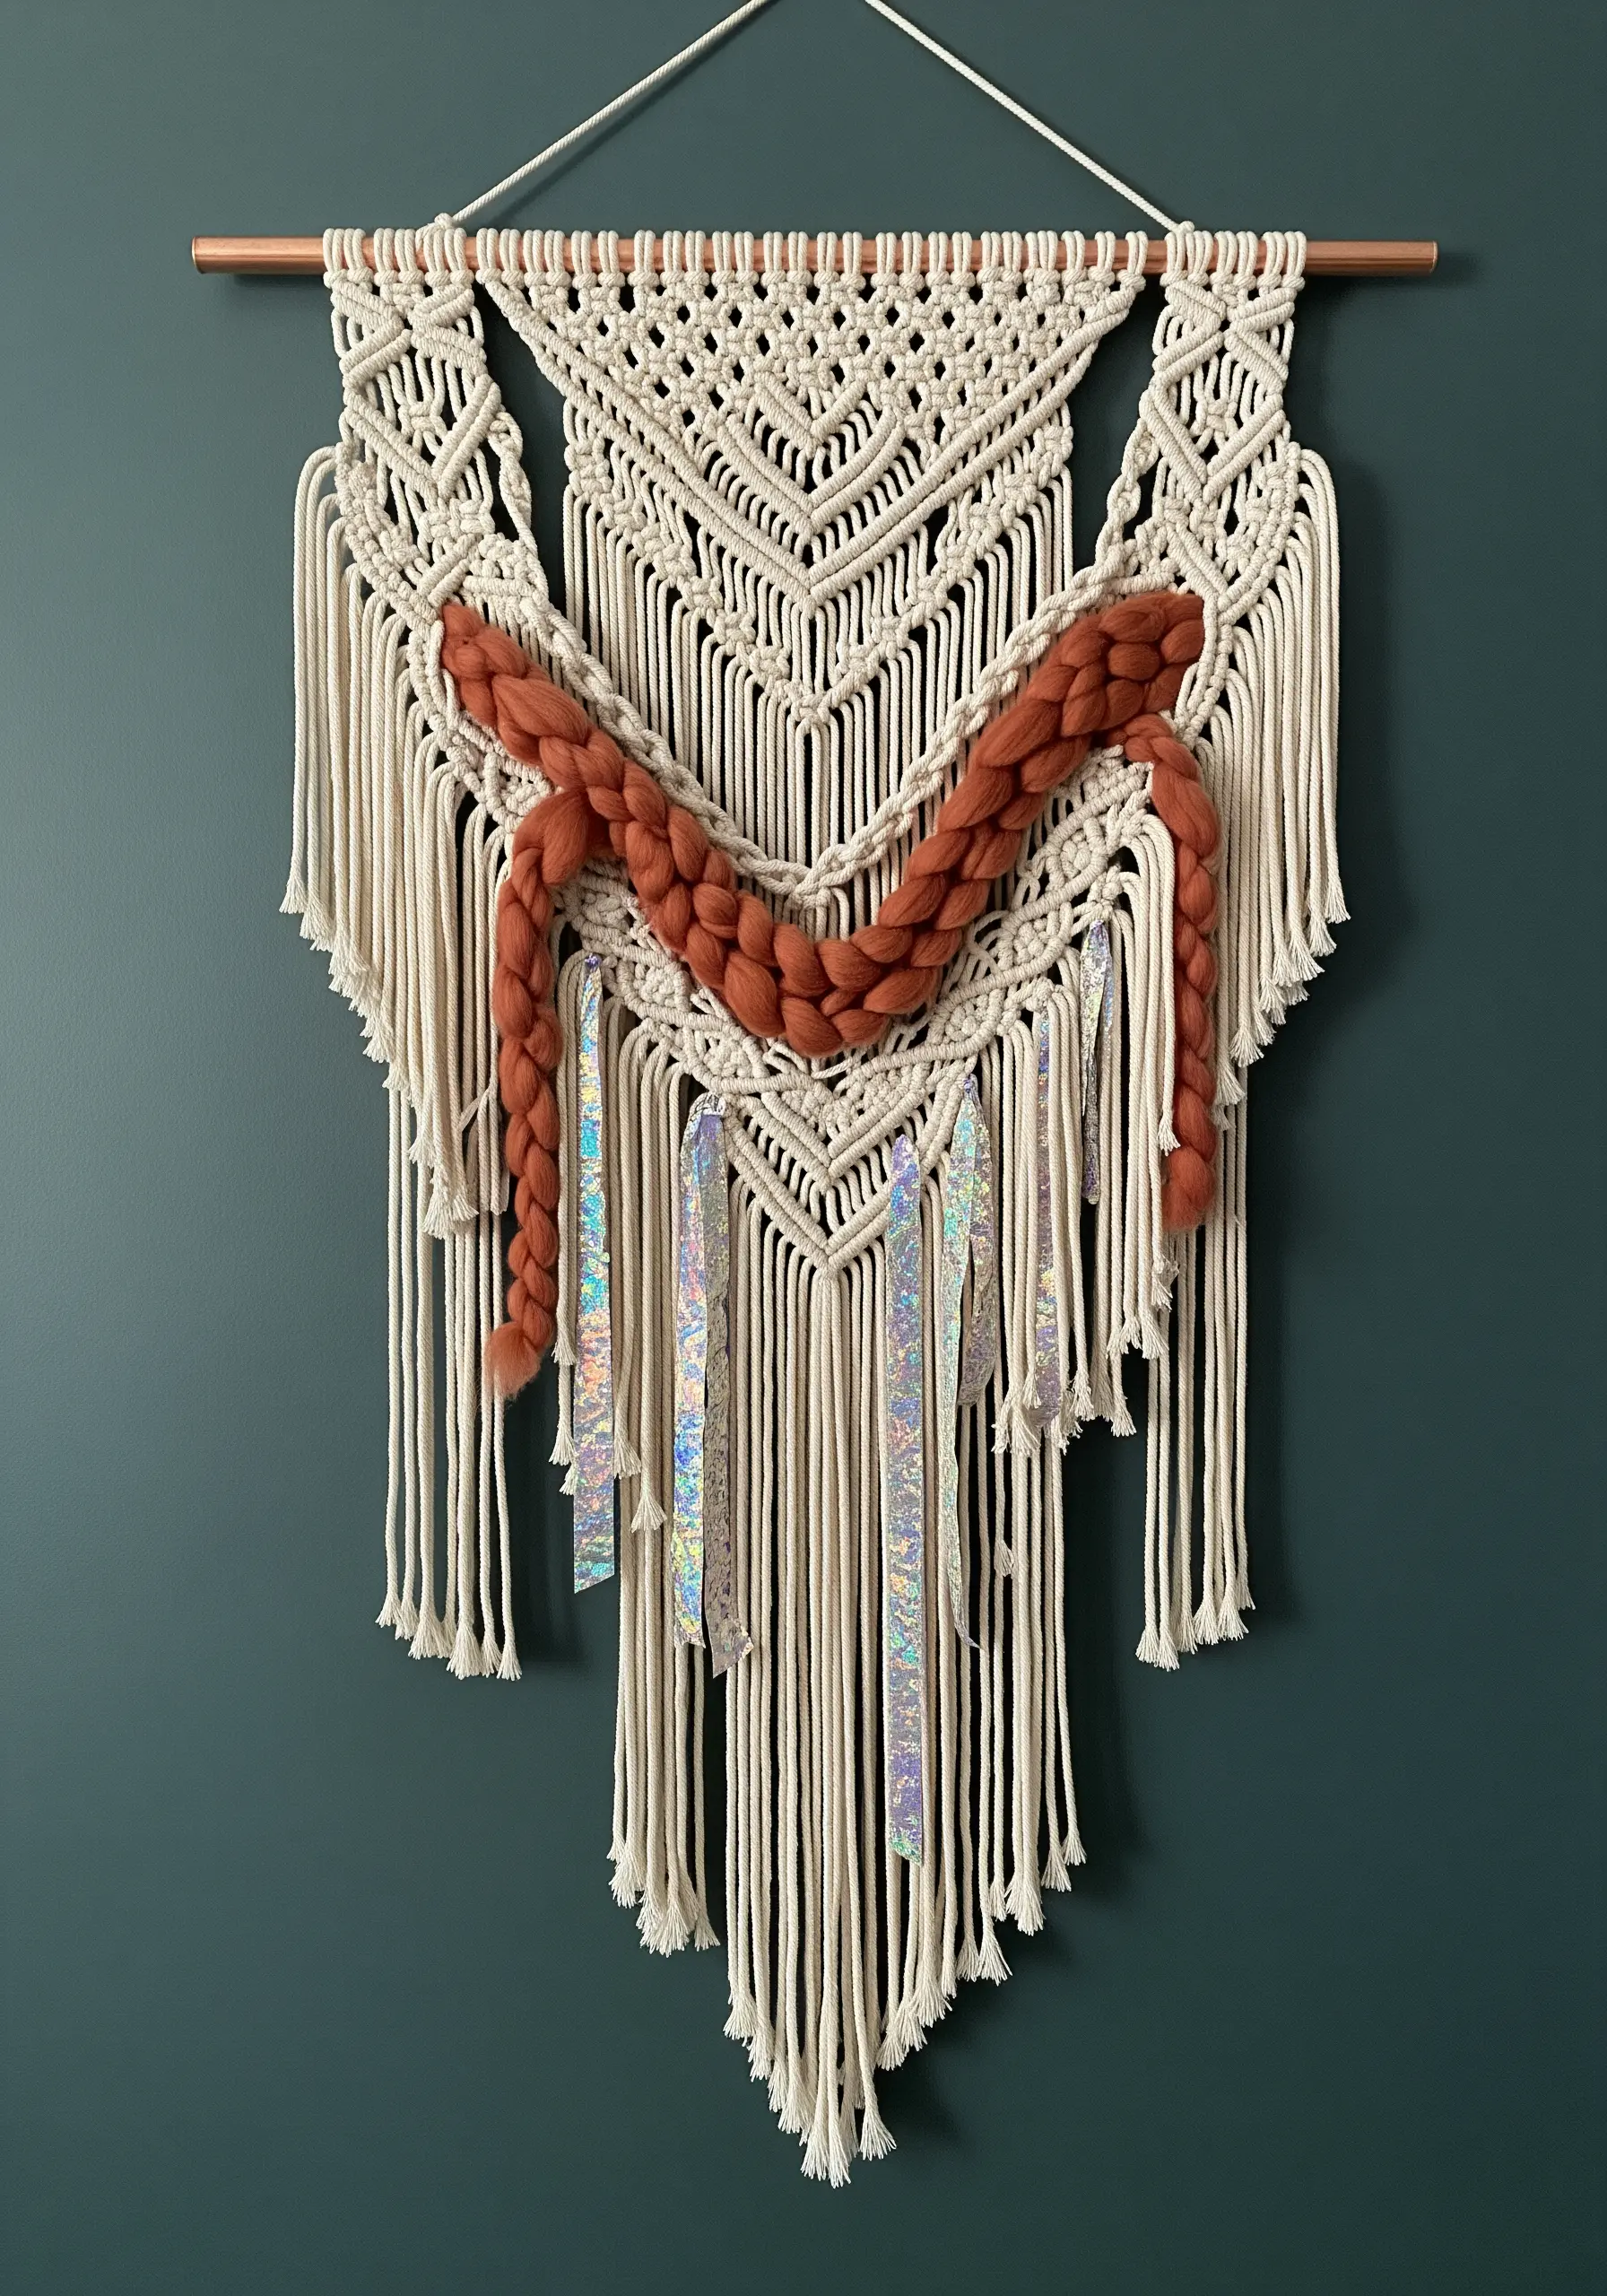
7. Integrate Fabric Scraps for a Bohemian Tapestry
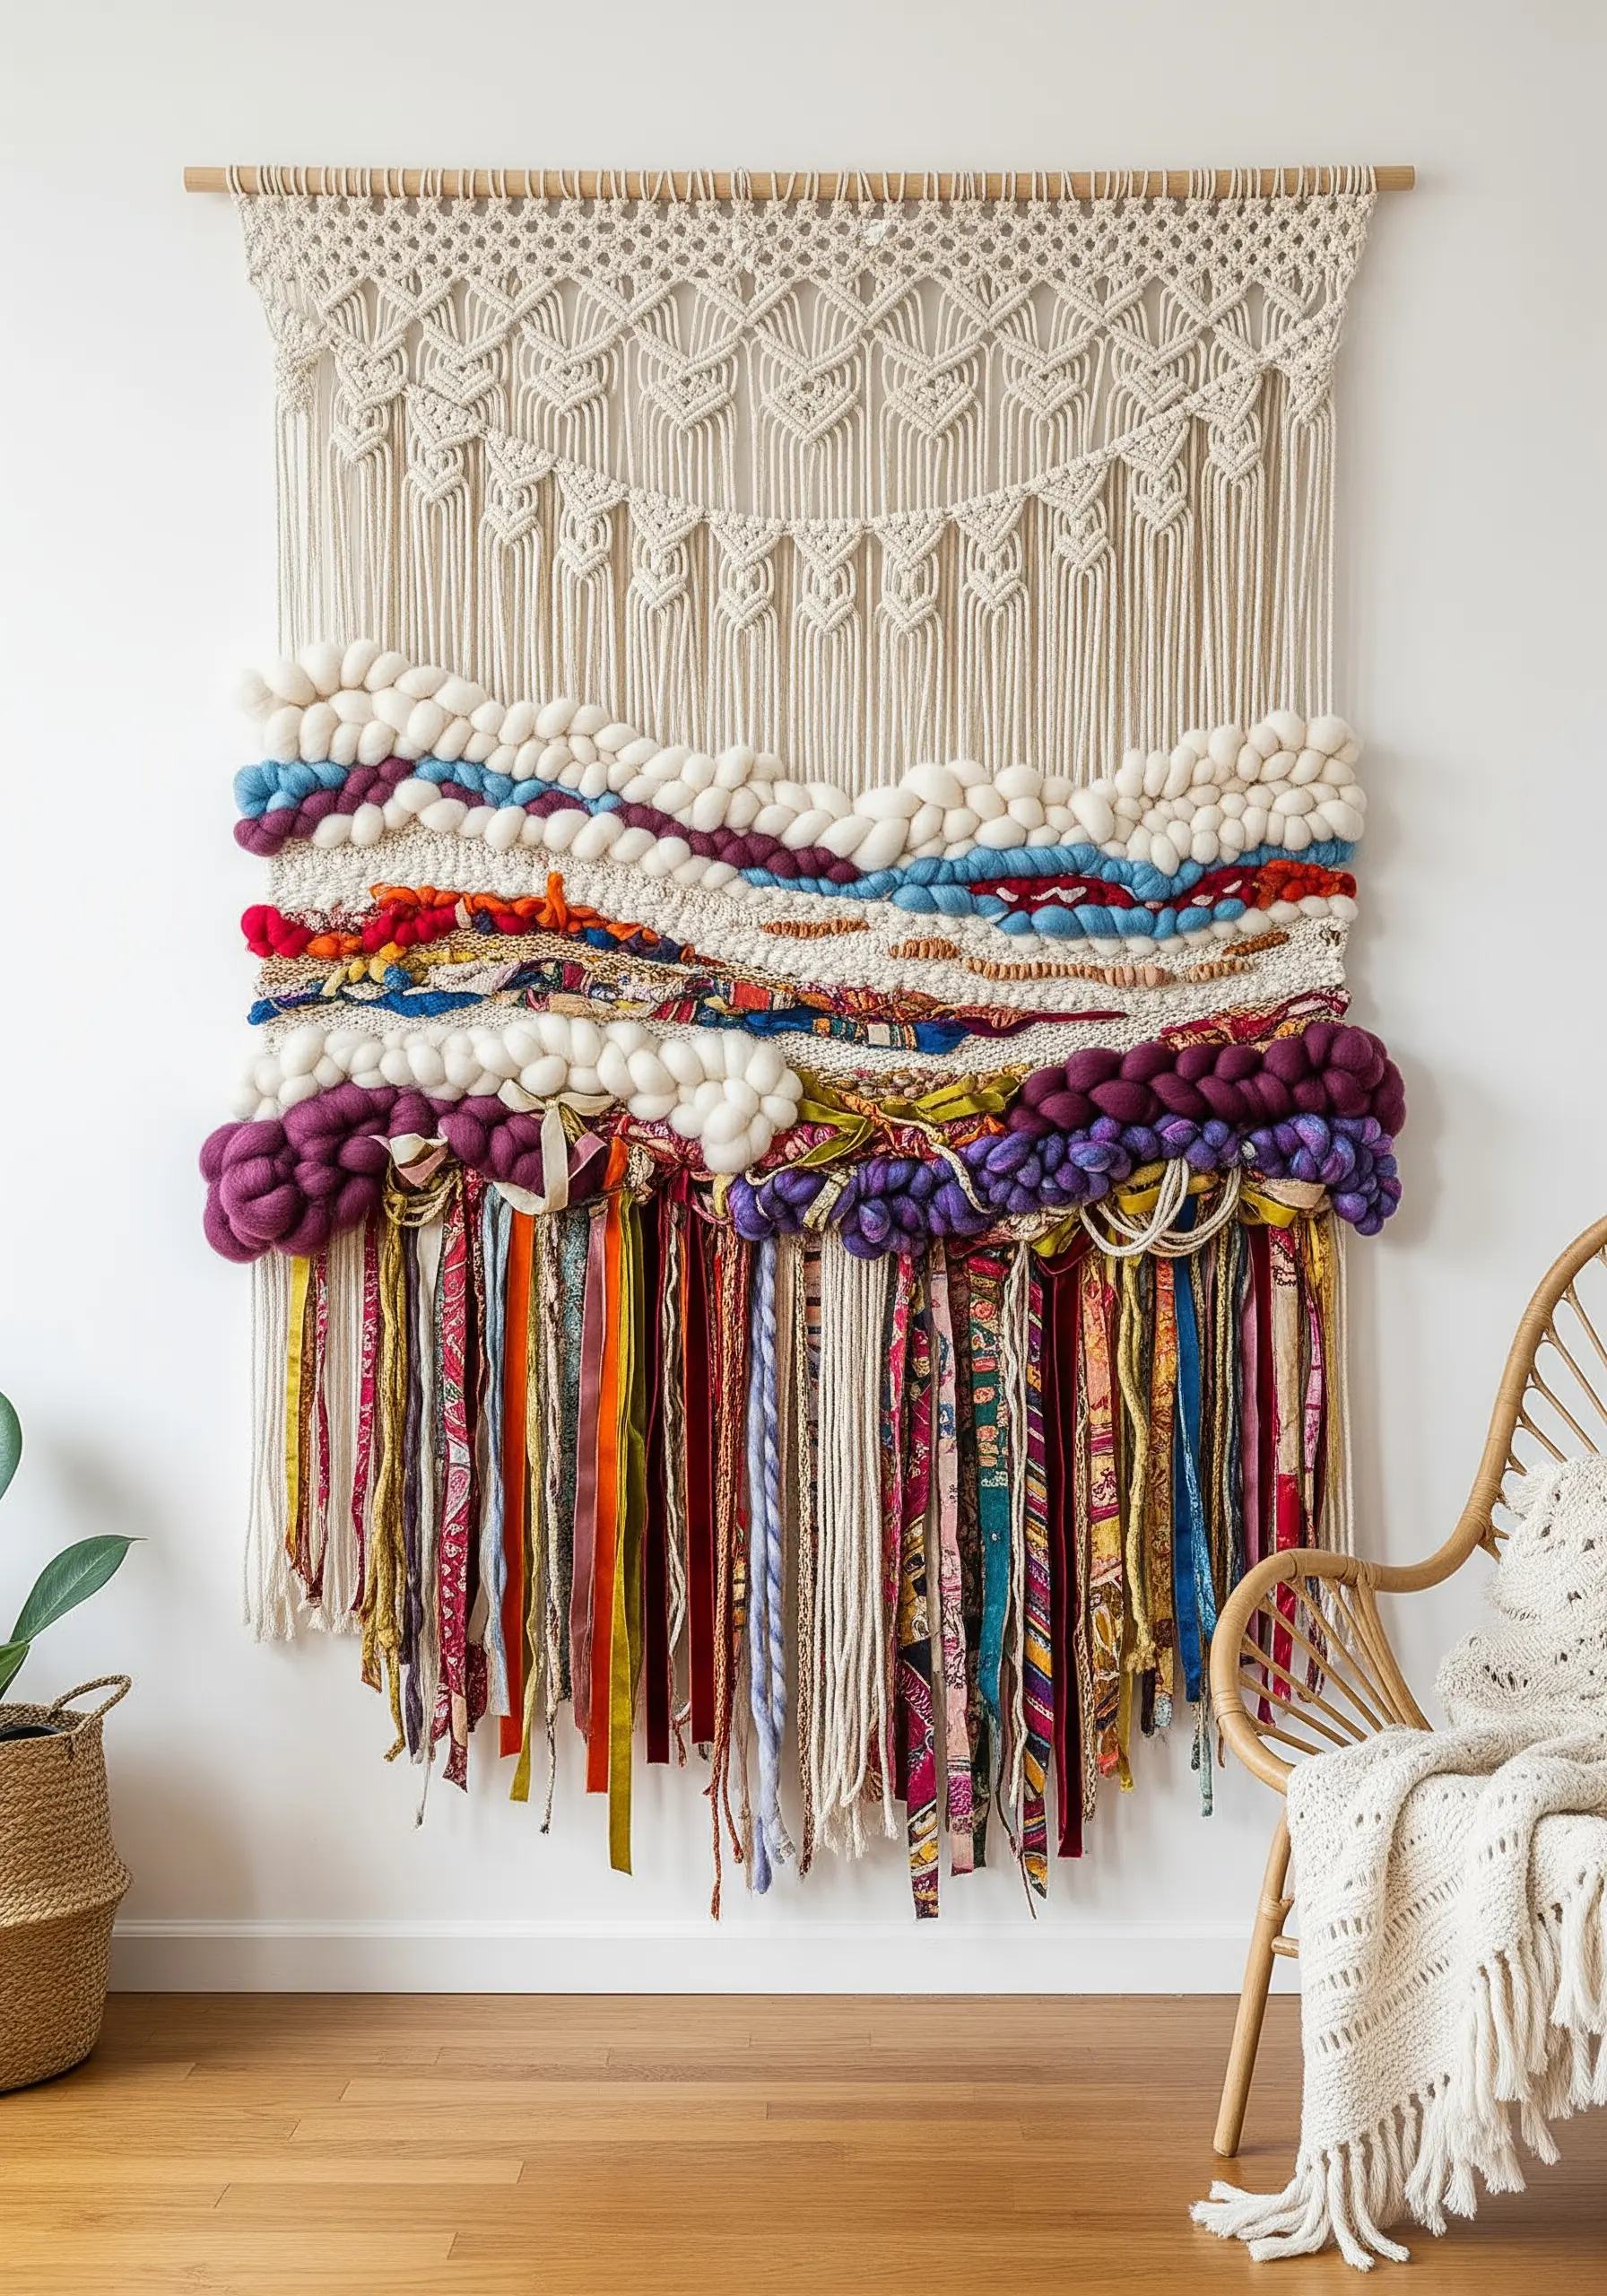
Elevate a basic macrame wall hanging by weaving directly into the hanging cords as if they are a loom’s warp threads.
This is where you can use up your most cherished fabric scraps, silk ribbons, and leftover chunky yarns.
Don’t strive for perfect, even weaving; the goal is to create rich, expressive bands of color and texture.
Incorporate bulky, unspun wool roving to create cloud-like puffs of softness that break up the flatter woven sections, making stunning mixed-fiber wall hangings.
Embrace imperfection and allow the various materials to create a vibrant, story-rich tapestry.
8. Add Luminous Highlights with Angelina Fibers
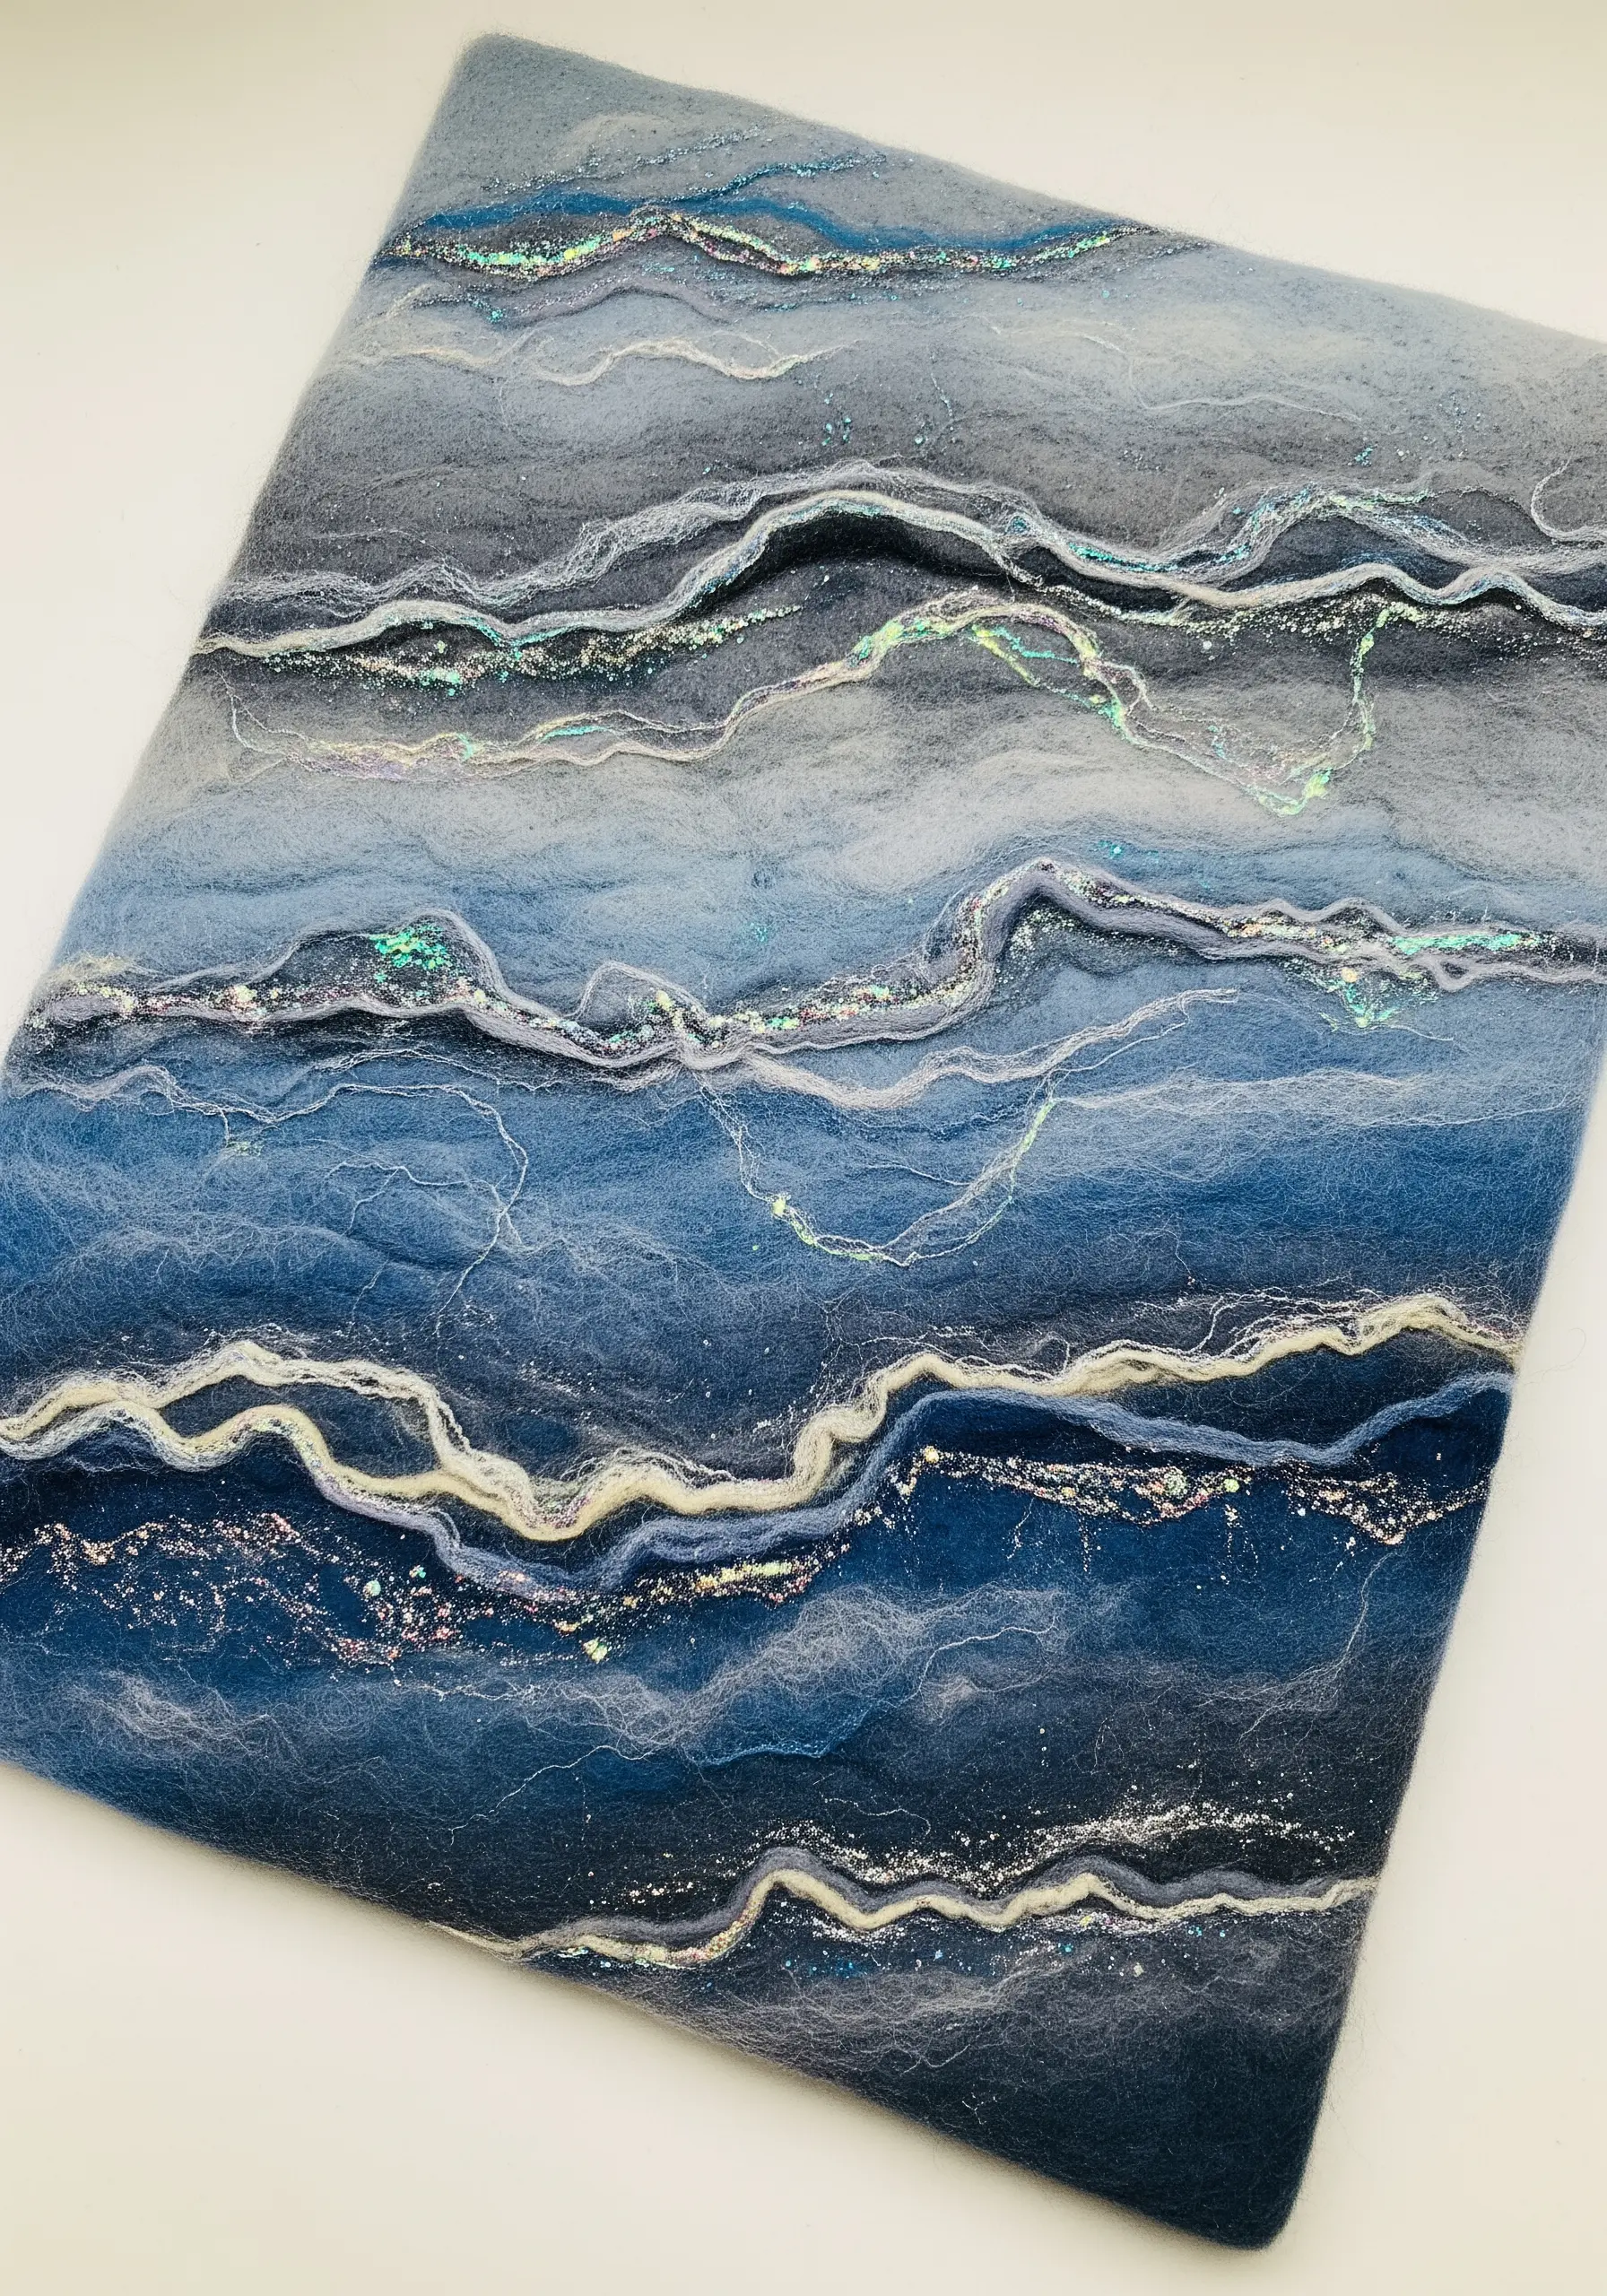
When creating a felted wool piece, you can introduce incredible depth and light with heat-bondable Angelina fibers.
Lay down your base layers of wool roving first to establish the main colors and organic shapes.
Before the final wet-felting stage, sparsely sprinkle iridescent Angelina fibers over the areas you want to highlight.
As you felt, they will fuse into the wool, creating shimmering, vein-like accents that catch the light and add a magical quality.
It’s like painting with light, but for textiles.
9. Modernize a Classic Knit with Color Blocking
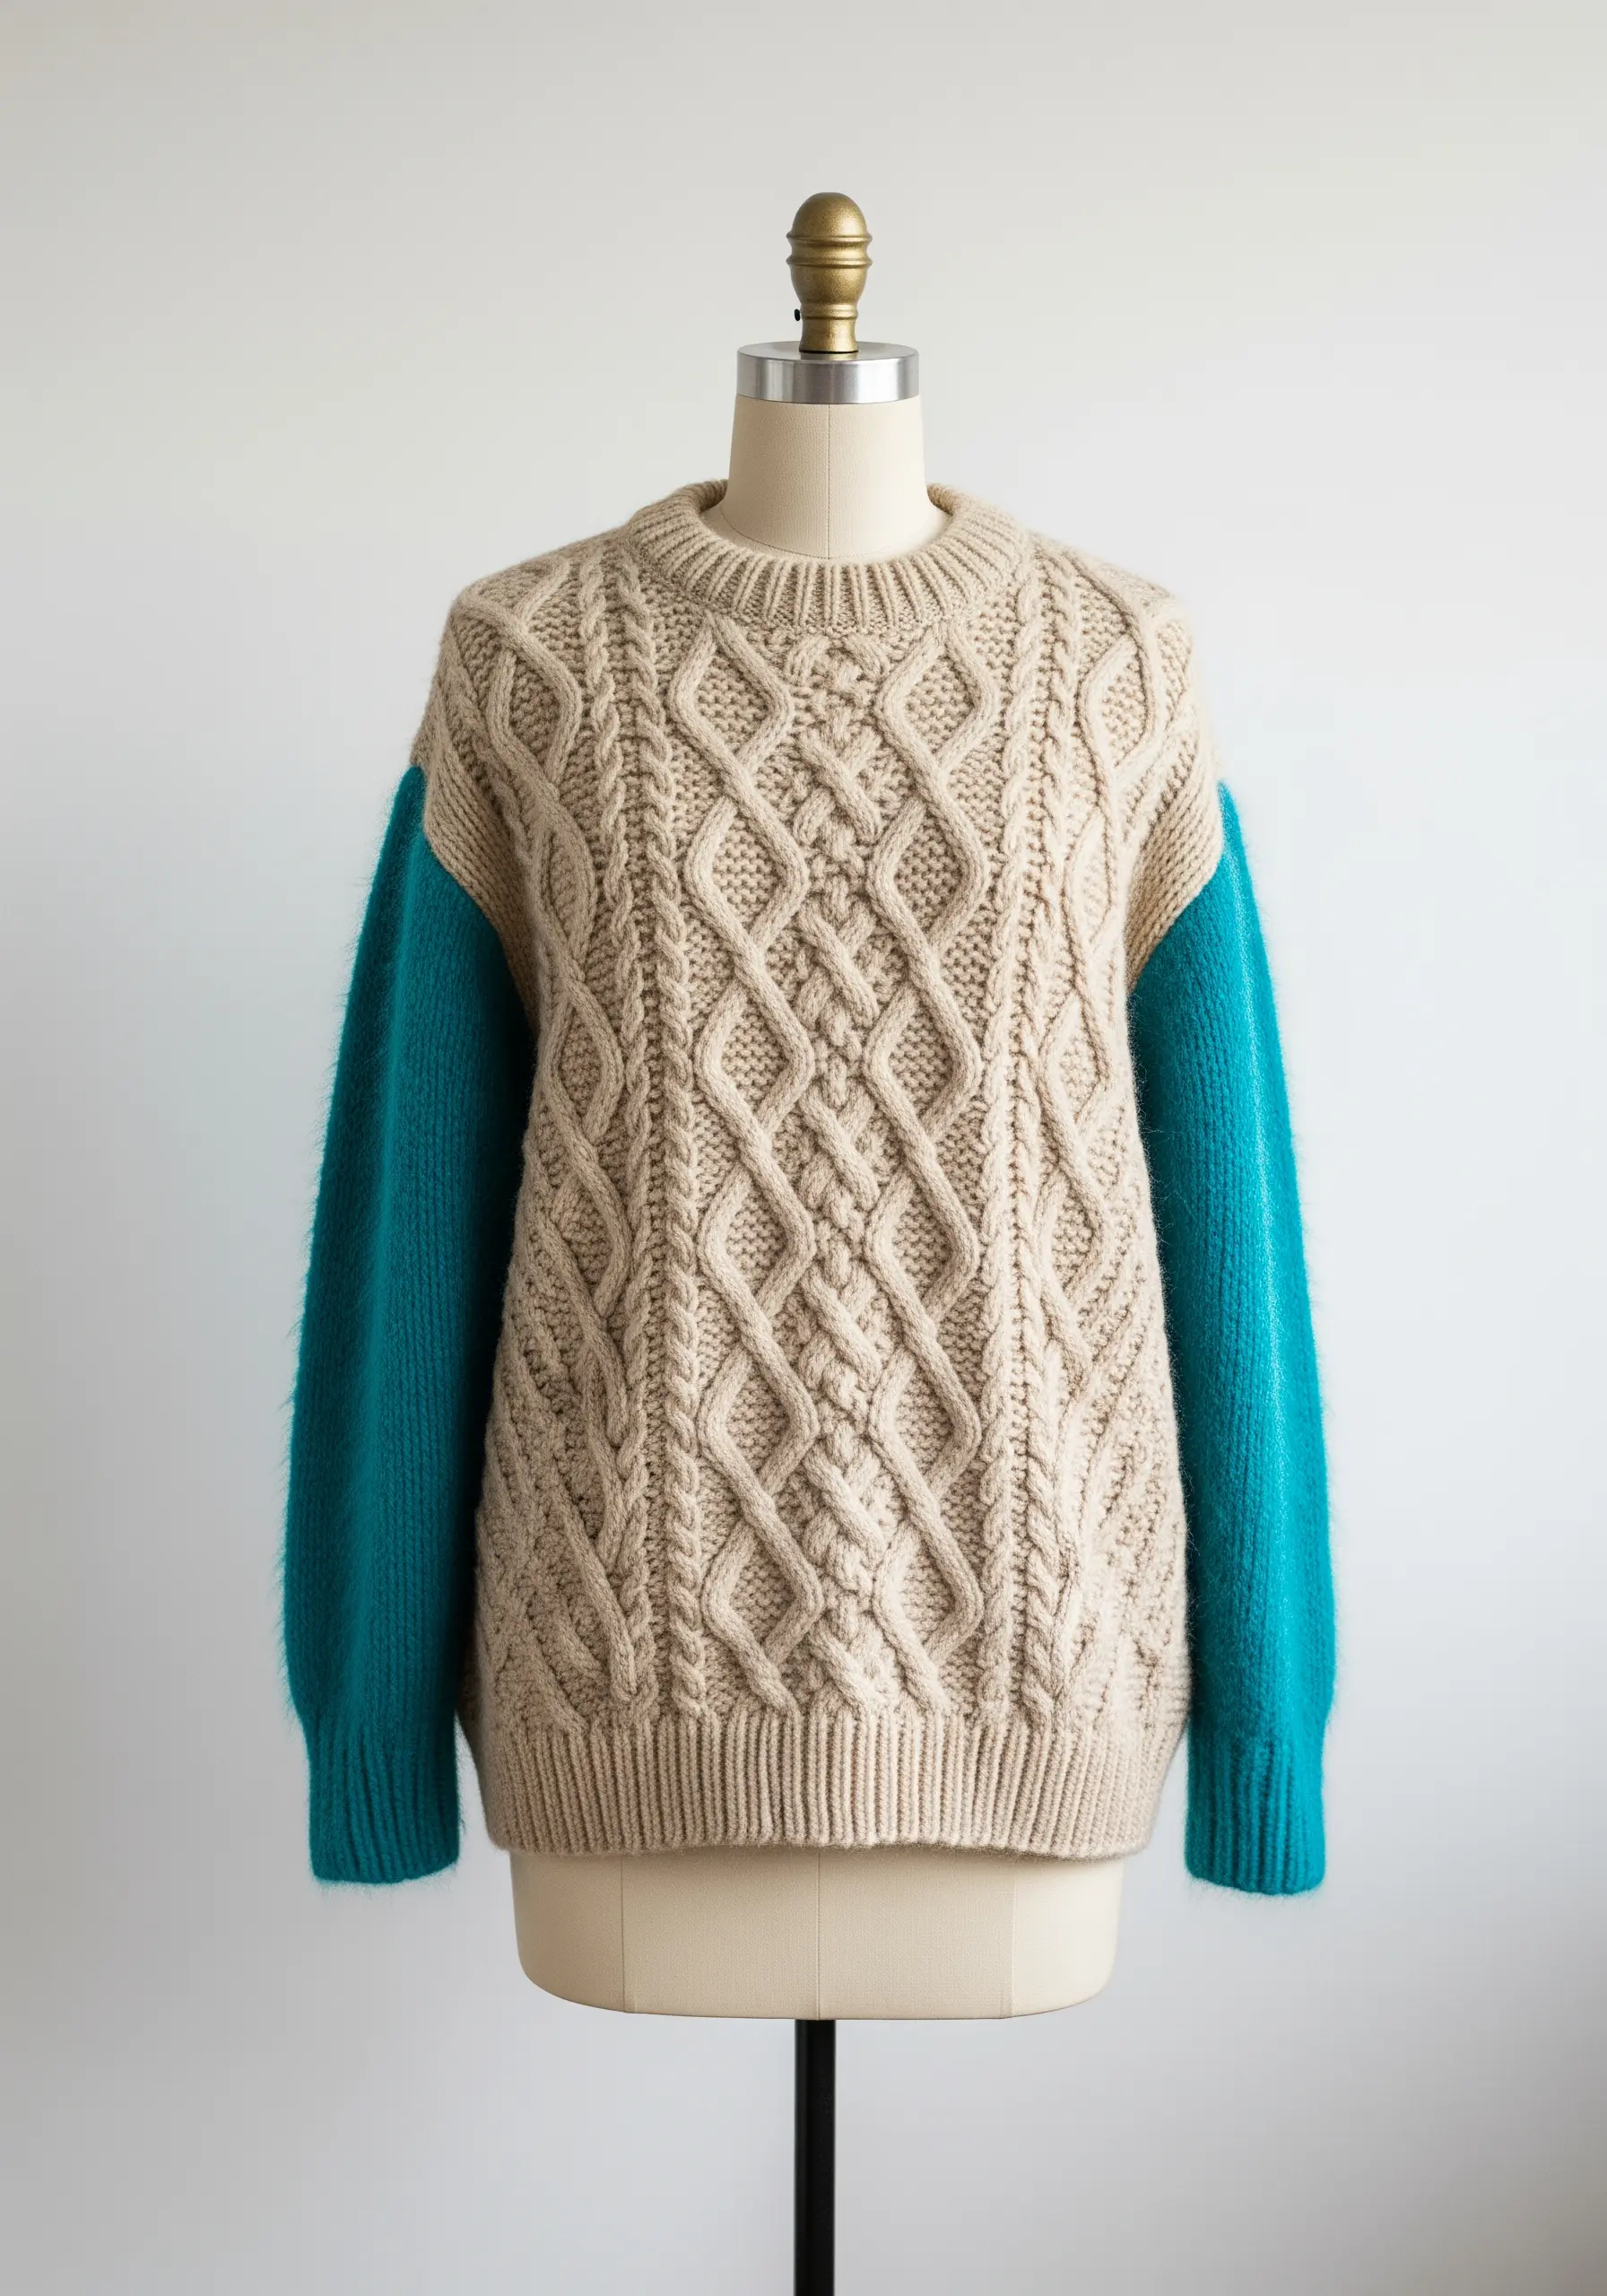
Give a traditional cable-knit piece an instant modern update through bold, simple color blocking.
The key is to keep the shapes graphic and intentional. Instead of intricate colorwork, replace entire sections—like the sleeves or a side panel—with a solid, contrasting color.
This approach respects the intricate texture of the cable knit by allowing it to remain the star, rather than competing with a busy pattern.
Choose a high-saturation color against a neutral base to create a confident statement that feels both timeless and contemporary.
10. Explore Embroidery on Unconventional Surfaces
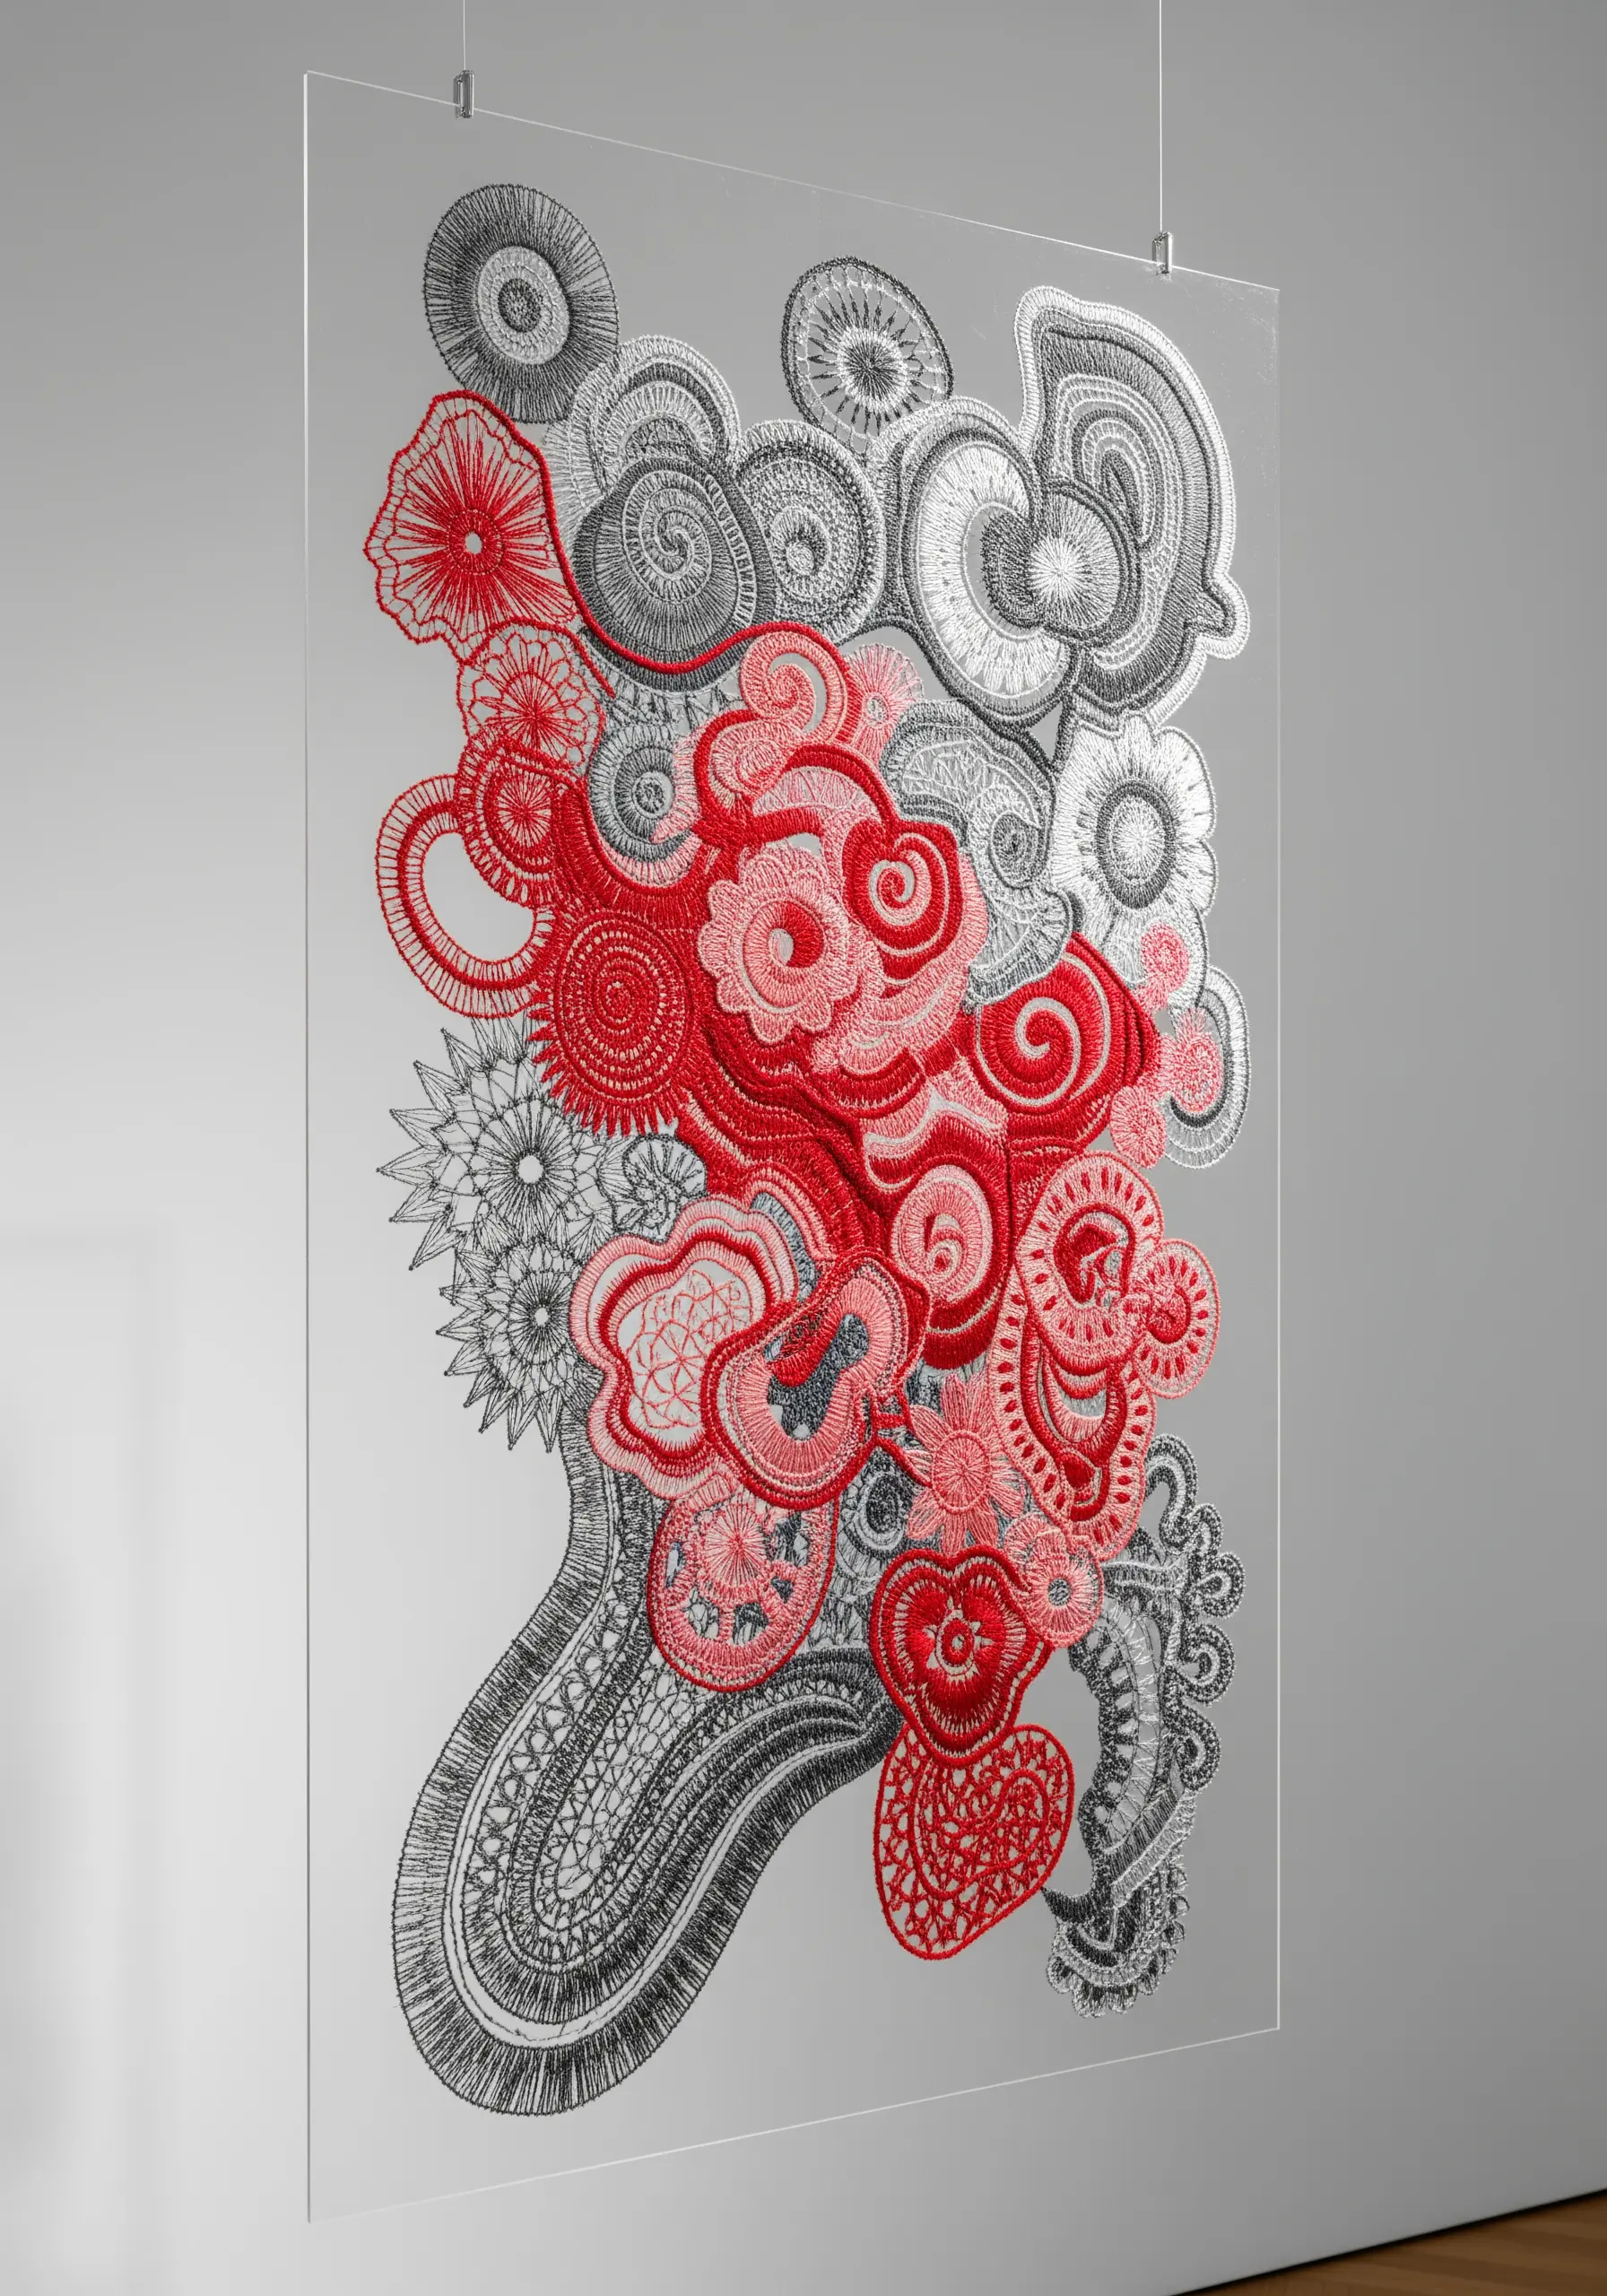
Move your embroidery beyond fabric by working on unexpected materials like clear acrylic or thin wood panels.
You will need to carefully drill tiny holes to serve as your stitching points, so plan your design in advance.
This technique forces you to consider the back of your work as much as the front, as both are visible.
Use the transparency of a material like acrylic to your advantage, creating layered effects and playing with how the threads cast shadows.
The result is a piece that feels like a floating, three-dimensional drawing.
11. Define Form and Function with Thread Wrapping
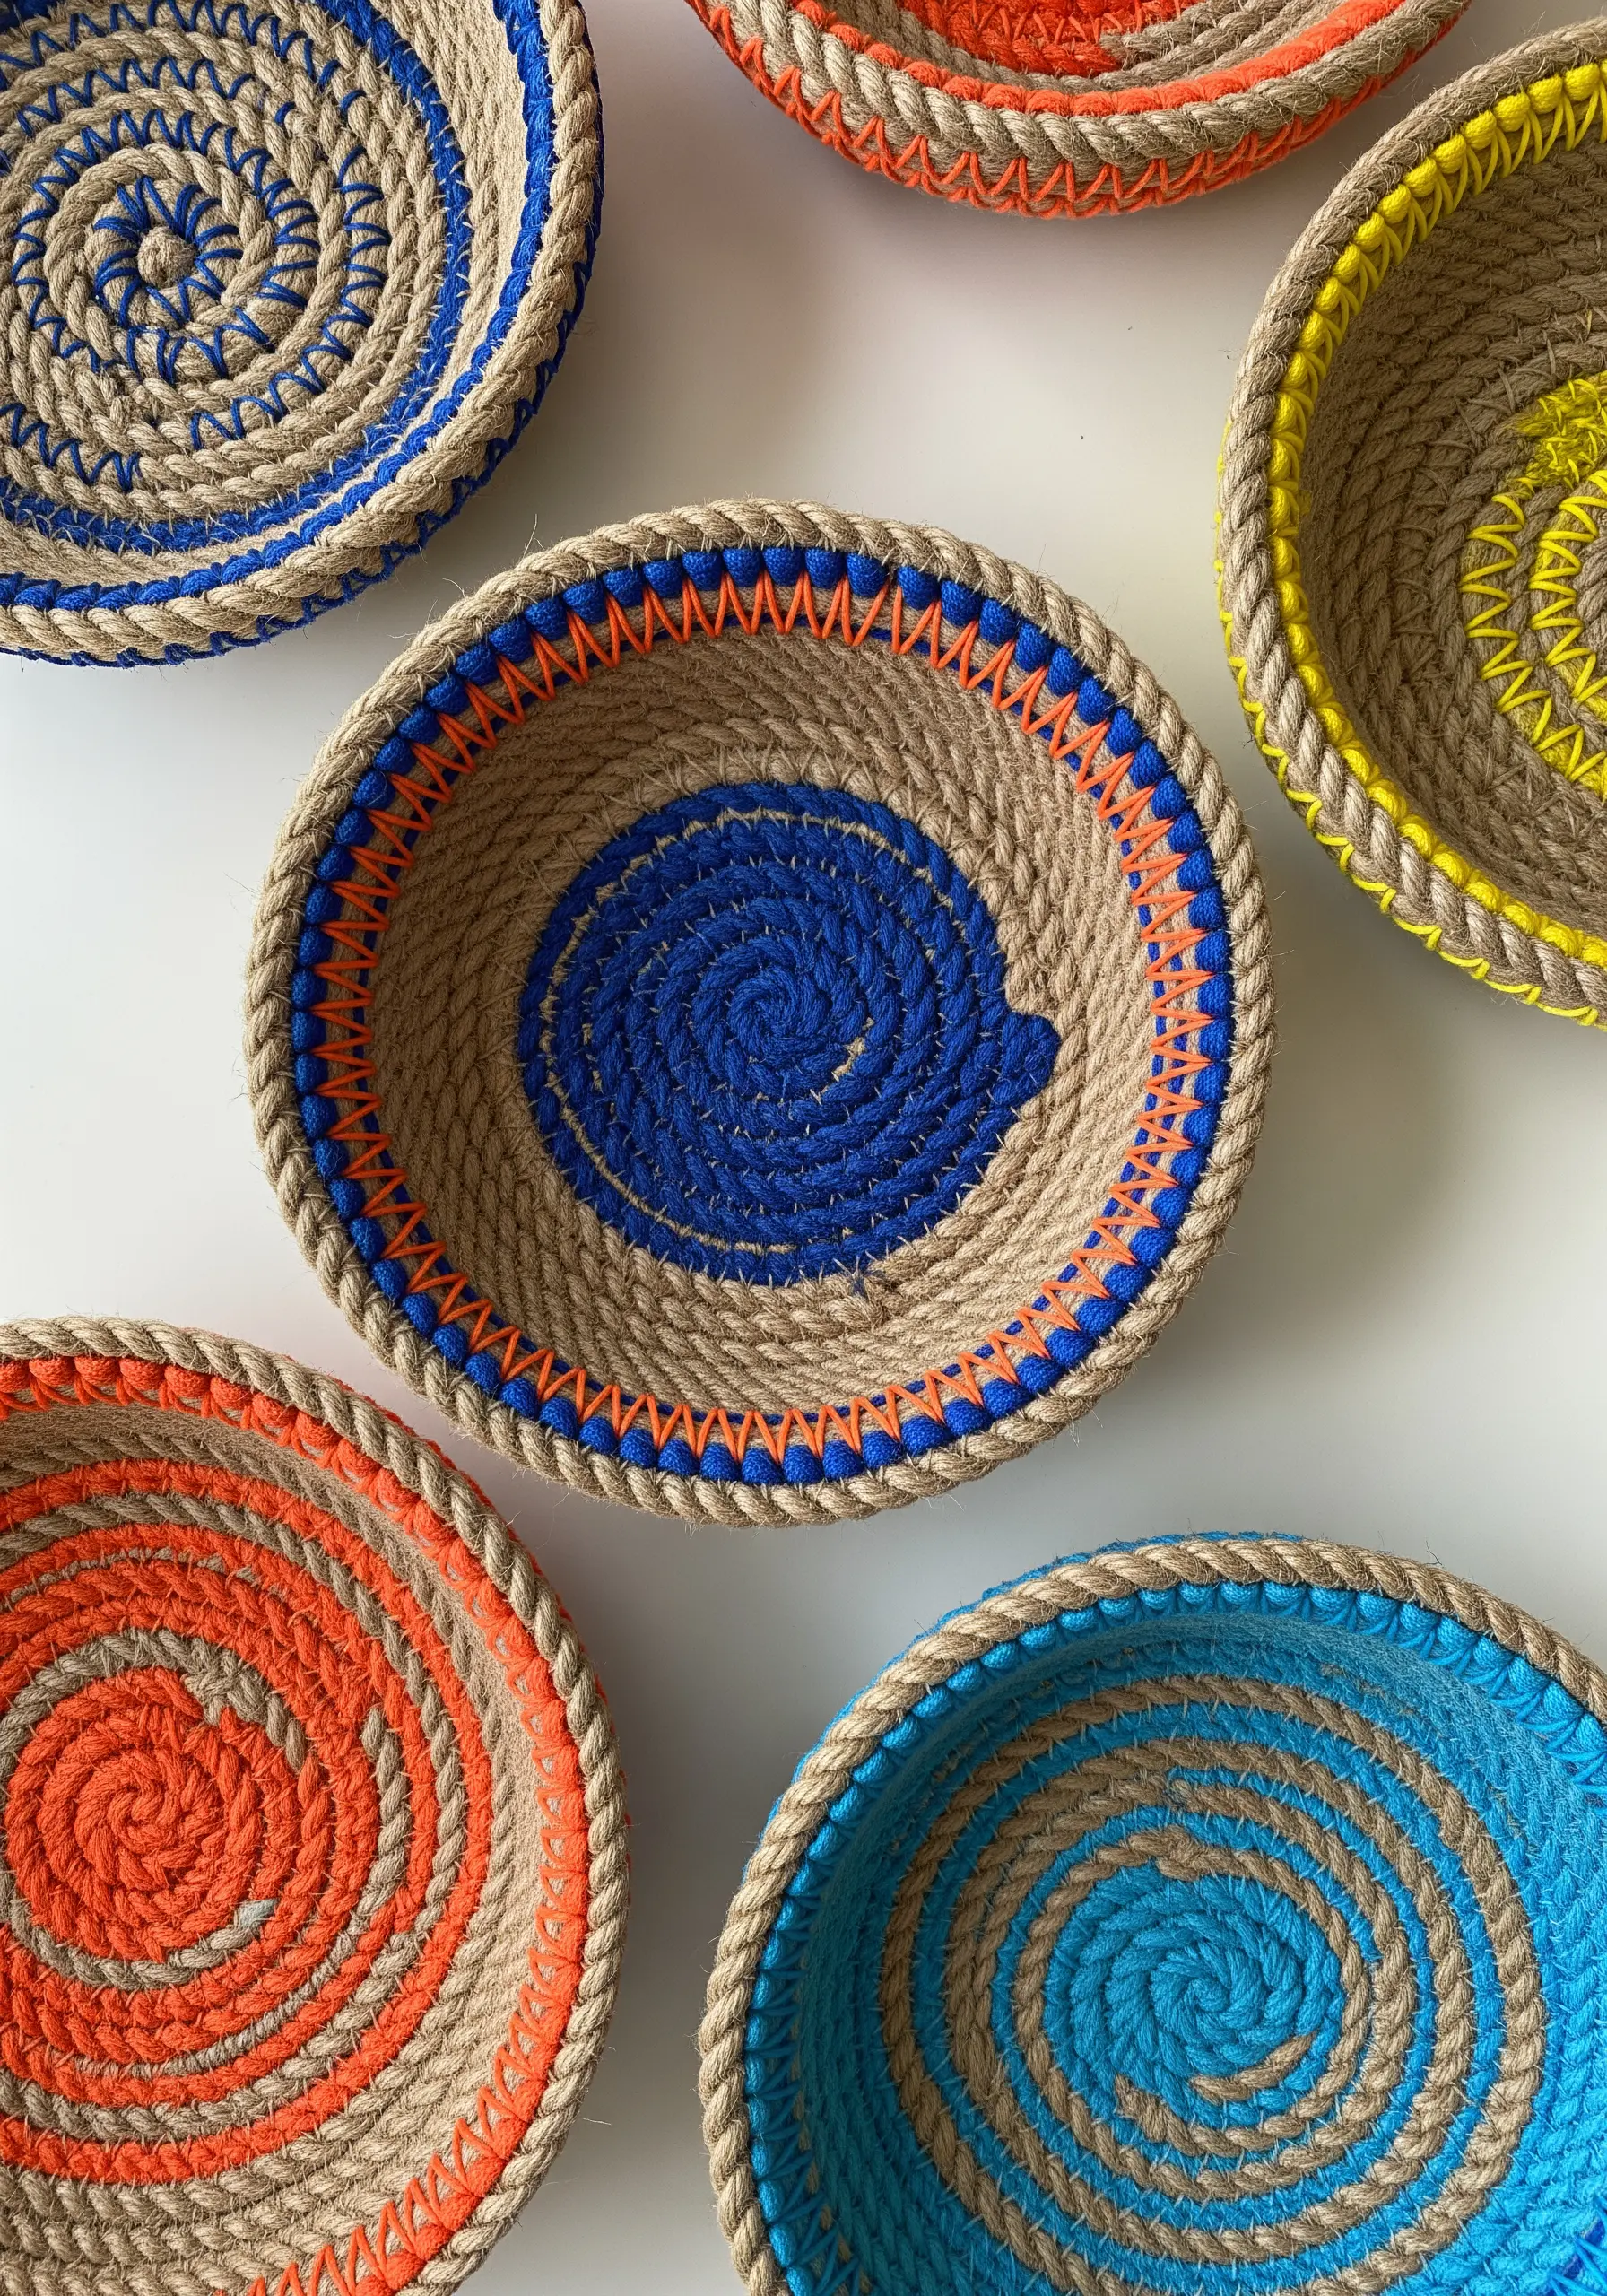
You can create beautiful and sturdy vessels using simple cotton rope and embroidery floss.
As you coil the rope into your desired shape, use a blanket stitch or a simple wrapping technique with floss to bind the layers together.
This is your opportunity to introduce bold color and pattern. Use contrasting floss to create stripes, blocks, or spirals.
The thread isn’t just decorative; it provides the structural integrity for the entire piece, blending pure utility with graphic artistry.
12. Fuse Illustration and Textile with Fabric Appliqué
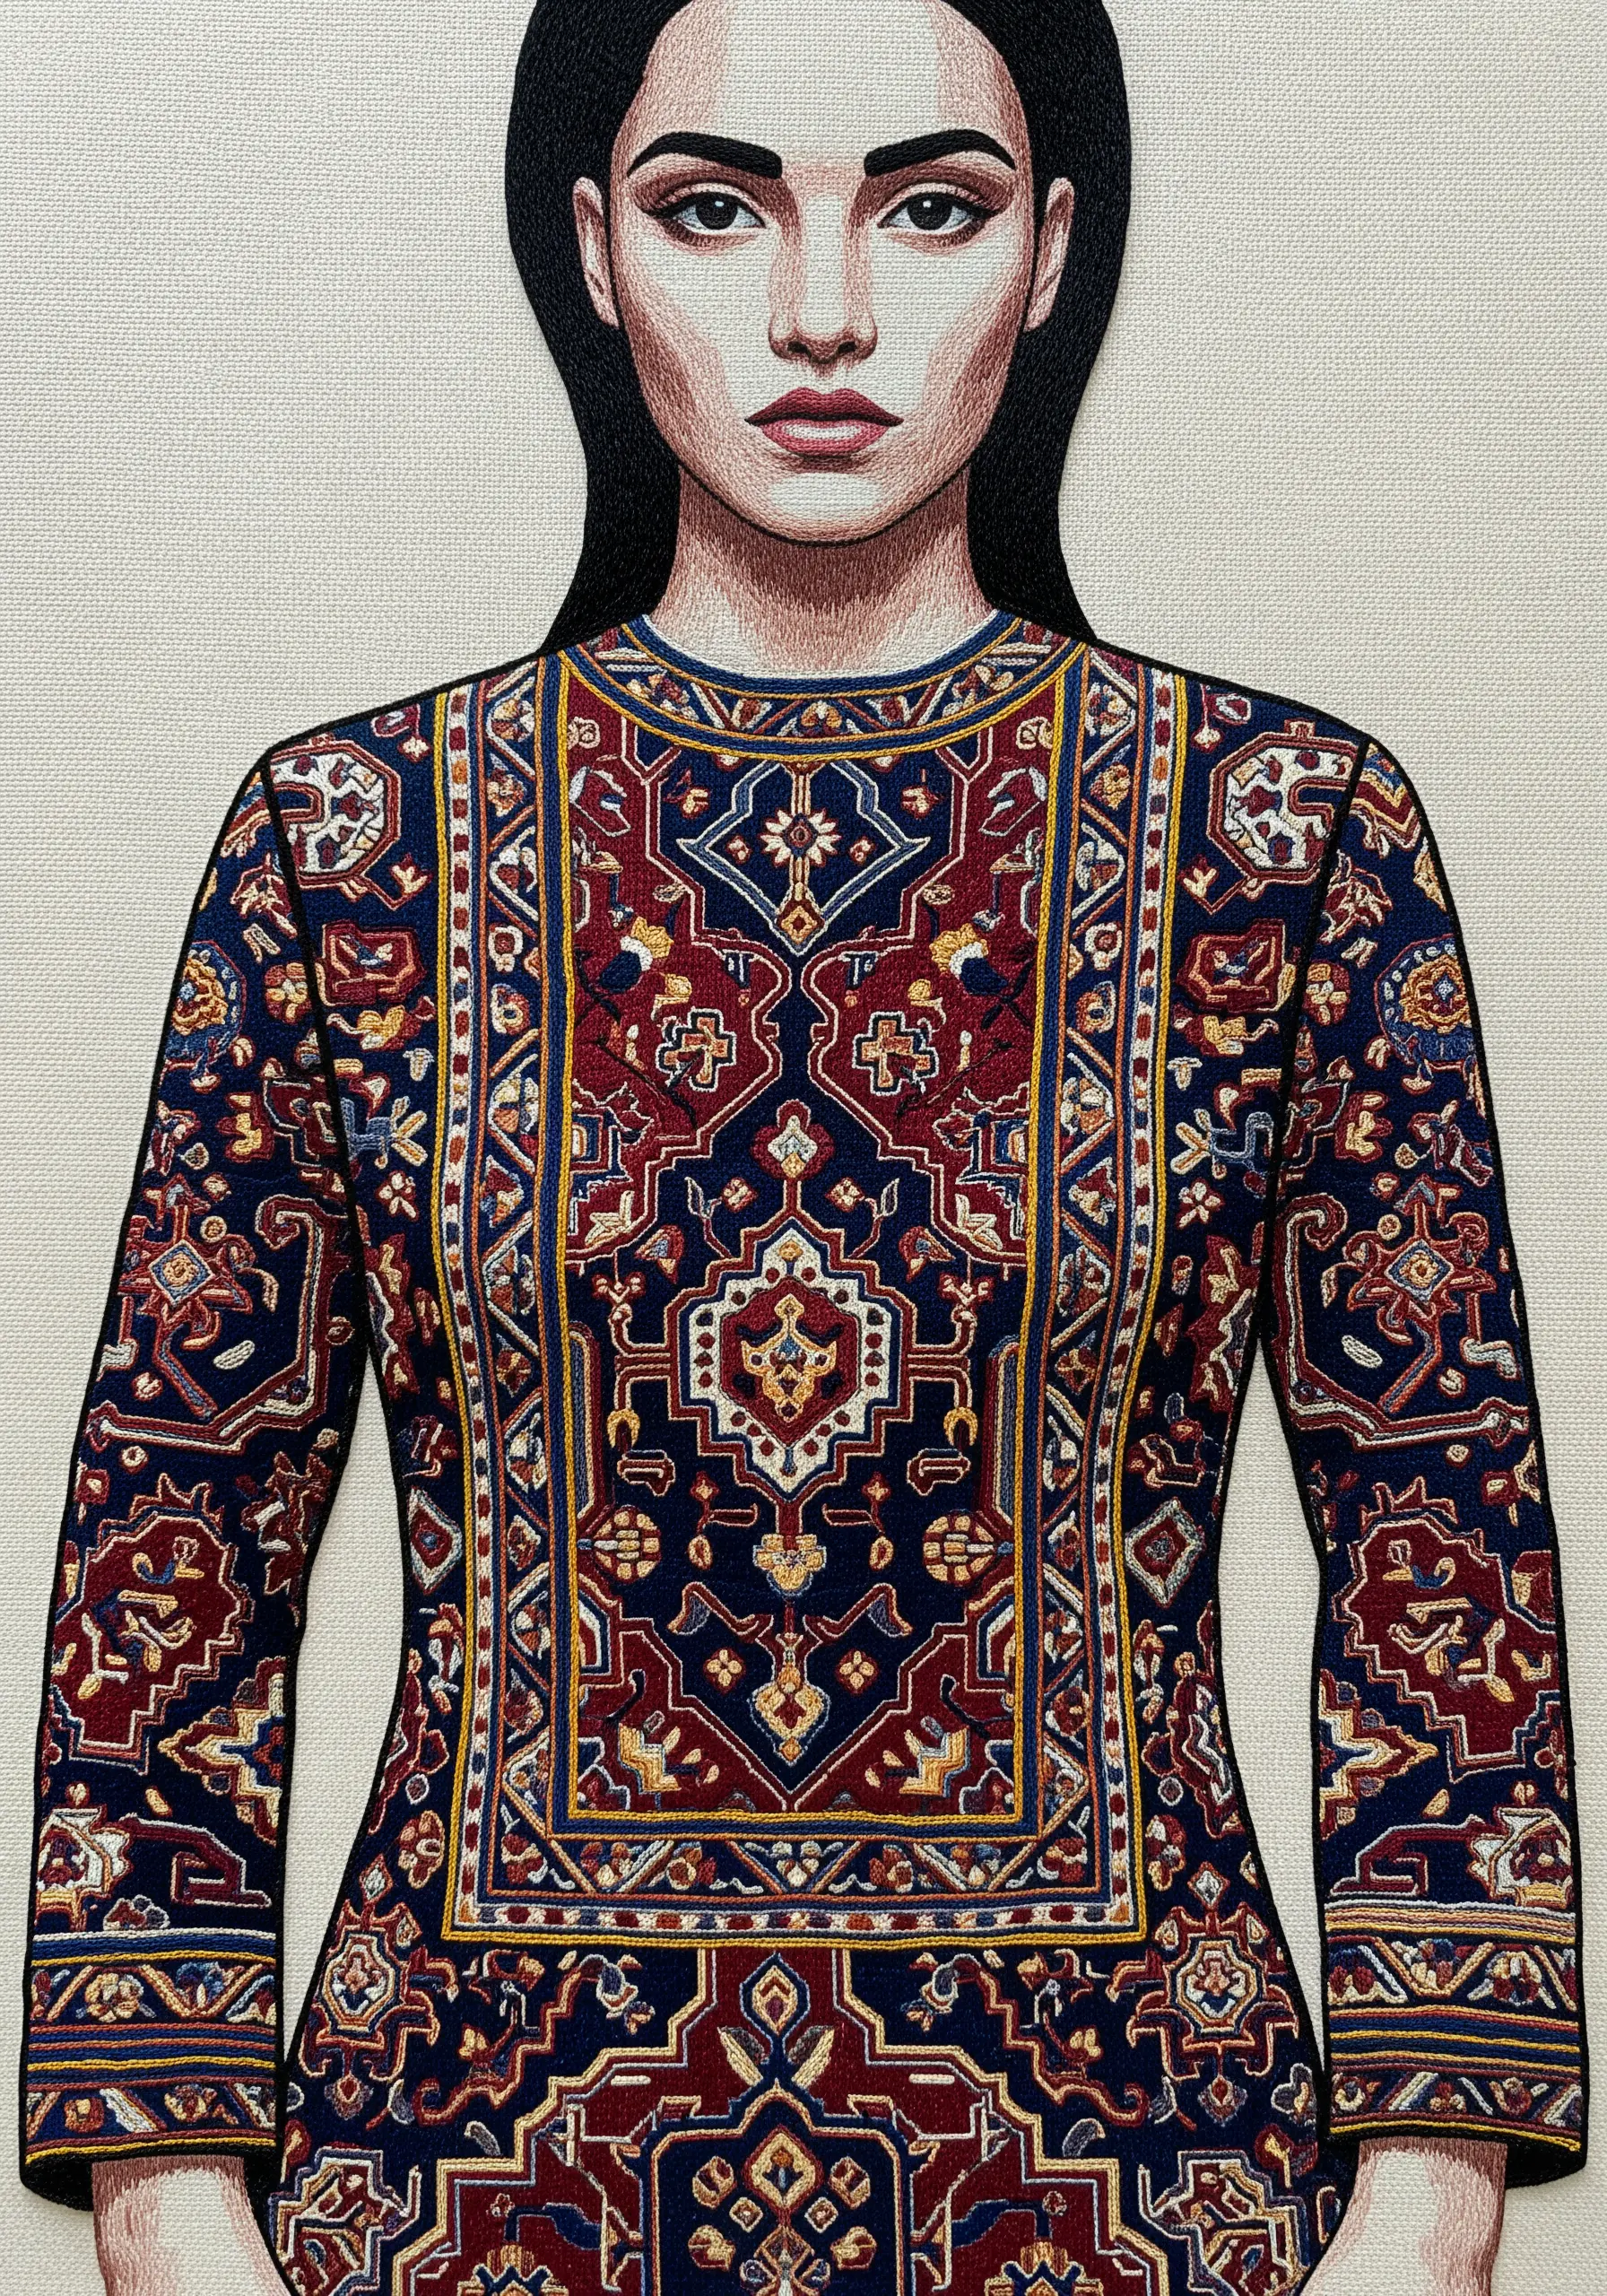
Combine your love for drawing and textiles by creating a powerful mixed-media portrait.
Start by embroidering or drawing the face and hands to establish the person’s form with fine lines.
Then, instead of stitching the clothing, cut the shape from a piece of intricately patterned fabric—like a clipping from a vintage rug or brocade.
Use a fine, nearly invisible appliqué stitch or fabric glue to attach it.
This technique creates a stunning contrast between the delicate, rendered lines and the rich, woven texture of the fabric.
13. Introduce Unexpected Materials for Textural Contrast
To give your weavings a sophisticated, modern edge, mix traditional fibers with unconventional materials.
Incorporate strips of metallic leather alongside soft, unspun wool roving on your loom.
The sleek, reflective quality of the leather creates a sharp, powerful contrast against the matte, plush wool.
This interplay of hard and soft, rustic and refined, is what makes the final piece feel dynamic and unique.
Allow some materials to hang loose at the edges for an unstructured, deconstructed feel.
14. Break the Surface with Sculptural Embellishments
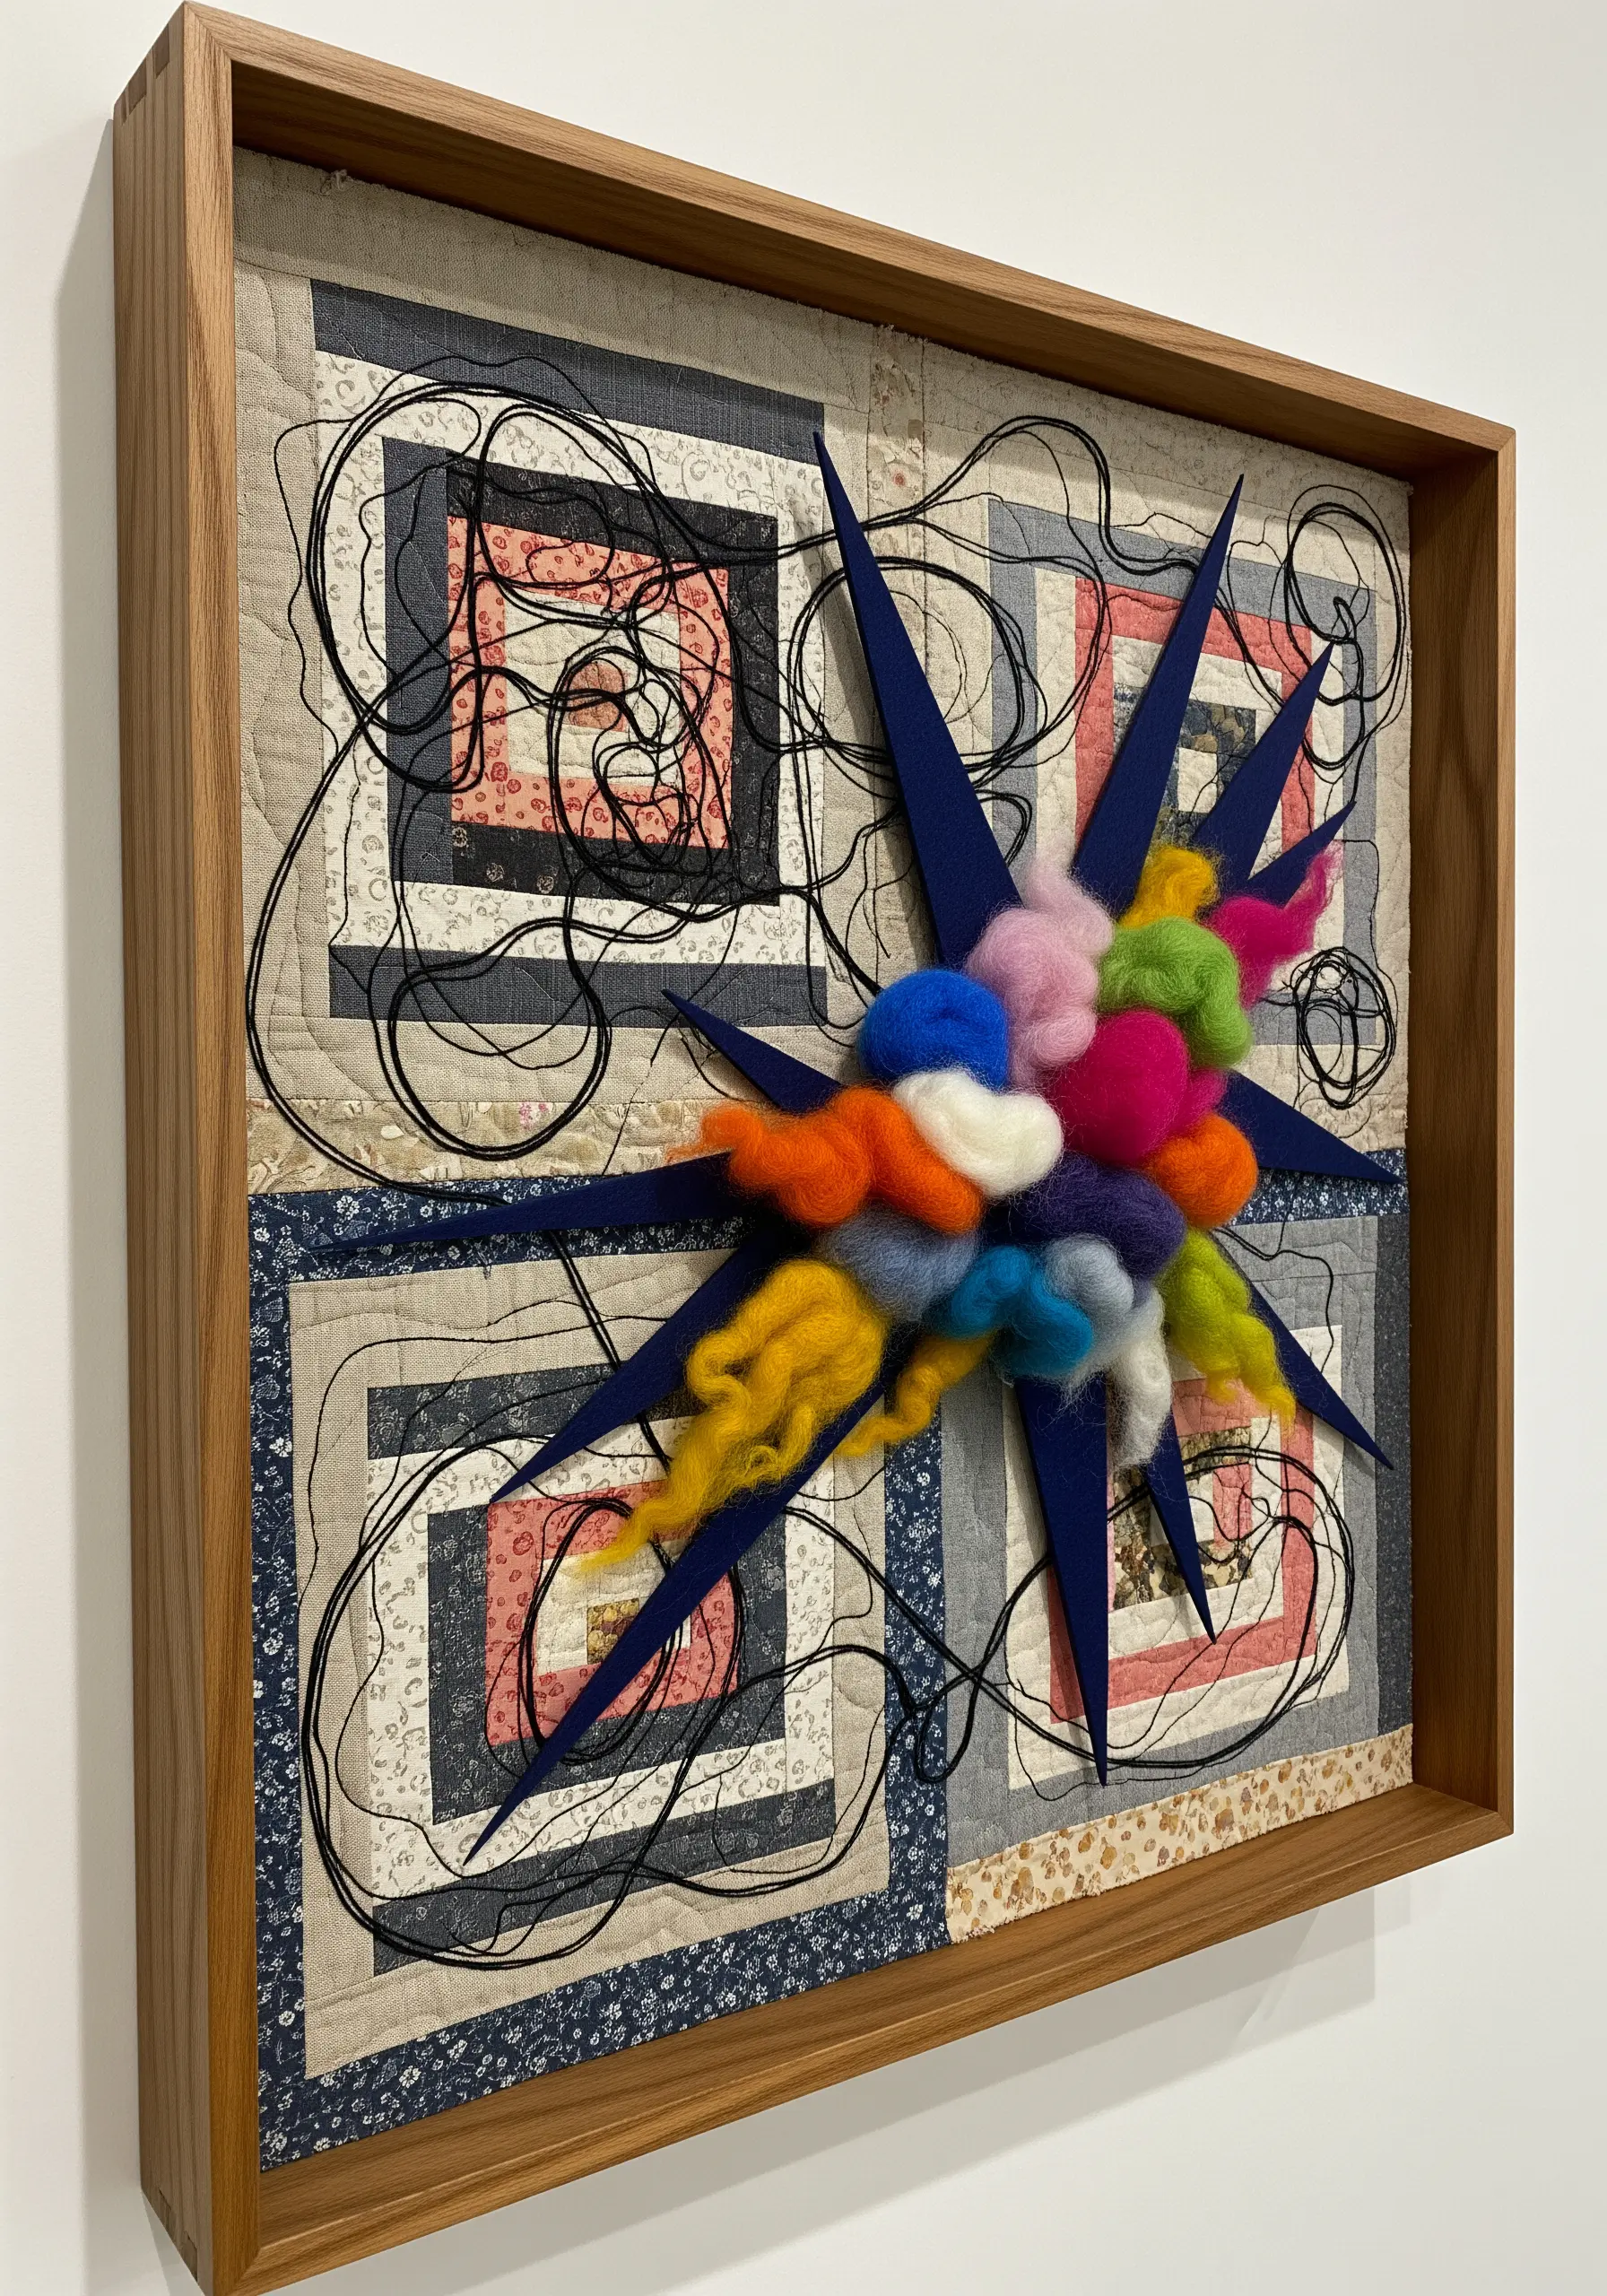
Take a traditional quilt block and treat it as a canvas for three-dimensional, mixed-media art.
After piecing your background, add sculptural elements that literally break the flat plane of the fabric.
You can attach clusters of felted wool balls, sharp fabric spikes, or even found objects for a surprising twist.
Then, use free-motion machine embroidery or expressive hand stitching to add a layer of energetic mark-making that unites the composition.
This approach transforms a quilt from a flat textile into a dynamic mixed-media textile wall hanging.
15. Modernize Latch Hook with Metallics and Geometry
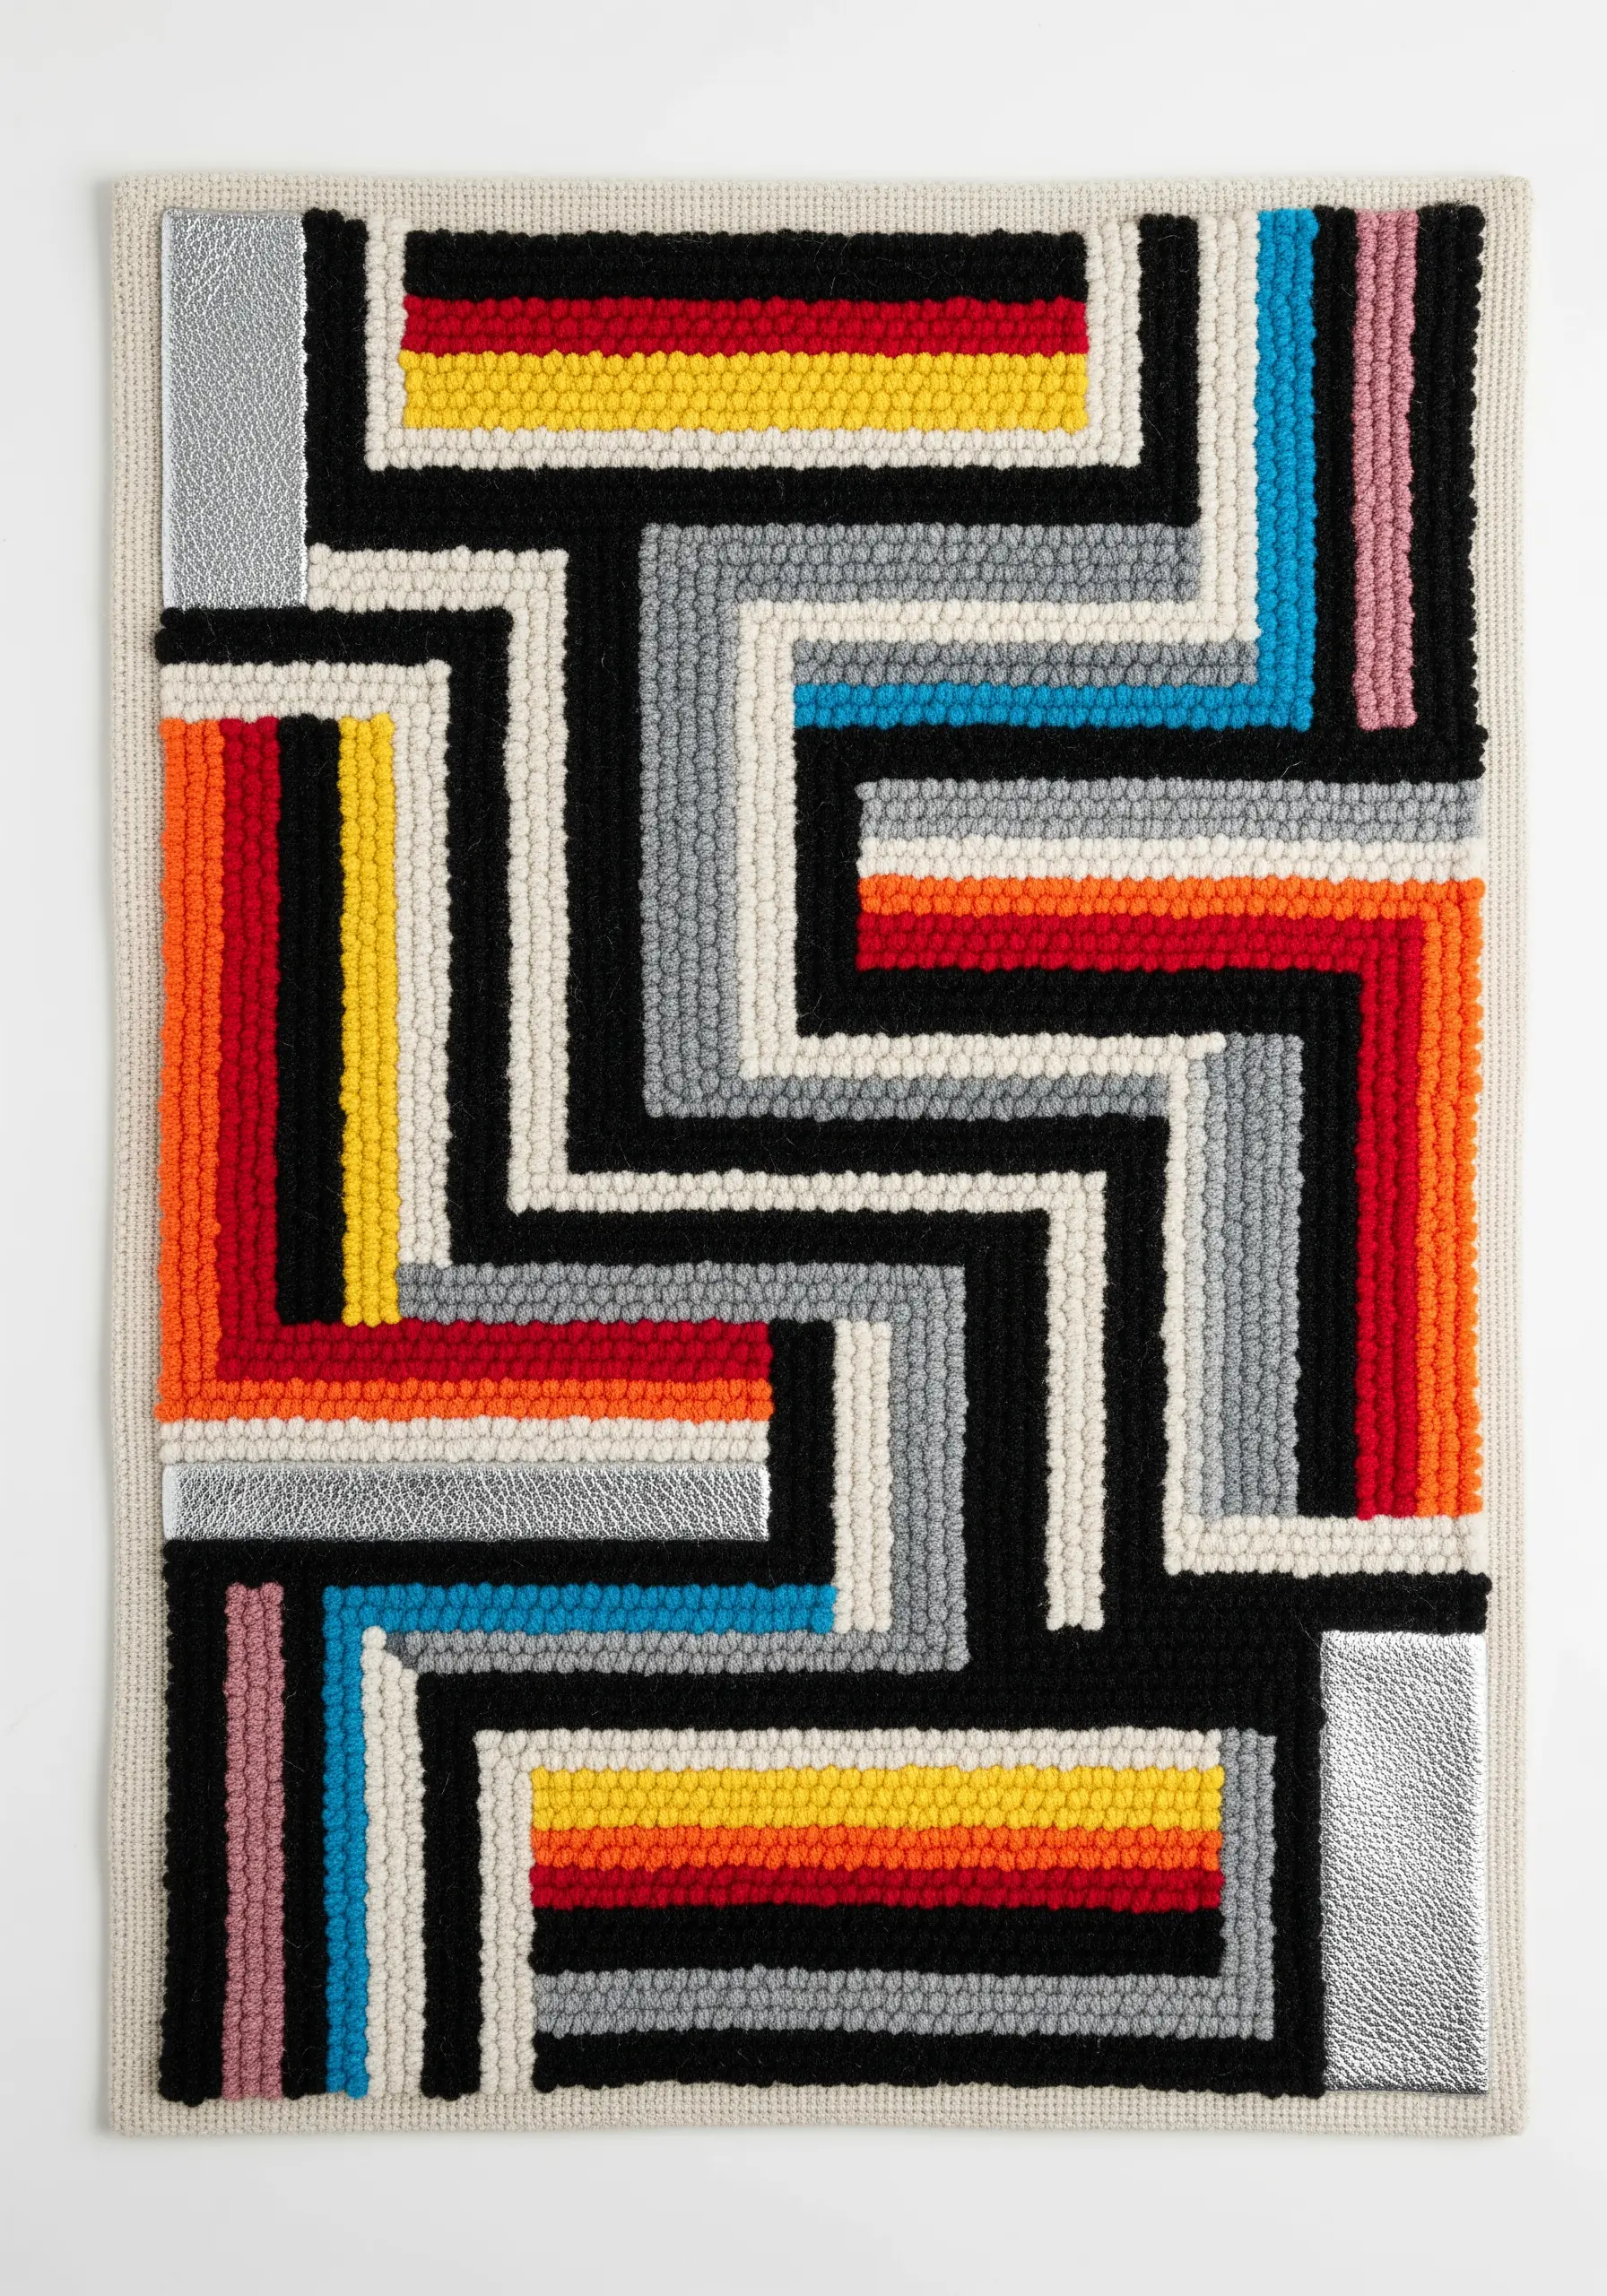
Reimagine latch hook by combining bold, geometric patterns with unexpected, flat materials.
Instead of filling the entire canvas with uniform yarn loops, leave some sections strategically empty or fill them with a contrasting texture.
A flat piece of faux metallic leather provides a smooth, light-reflecting surface that makes the plush yarn seem even more textured.
This use of negative space and mixed materials breaks up the uniformity, turning a traditional craft into a sharp, graphic art piece.
16. Upholster with Improvised Crochet Patchwork
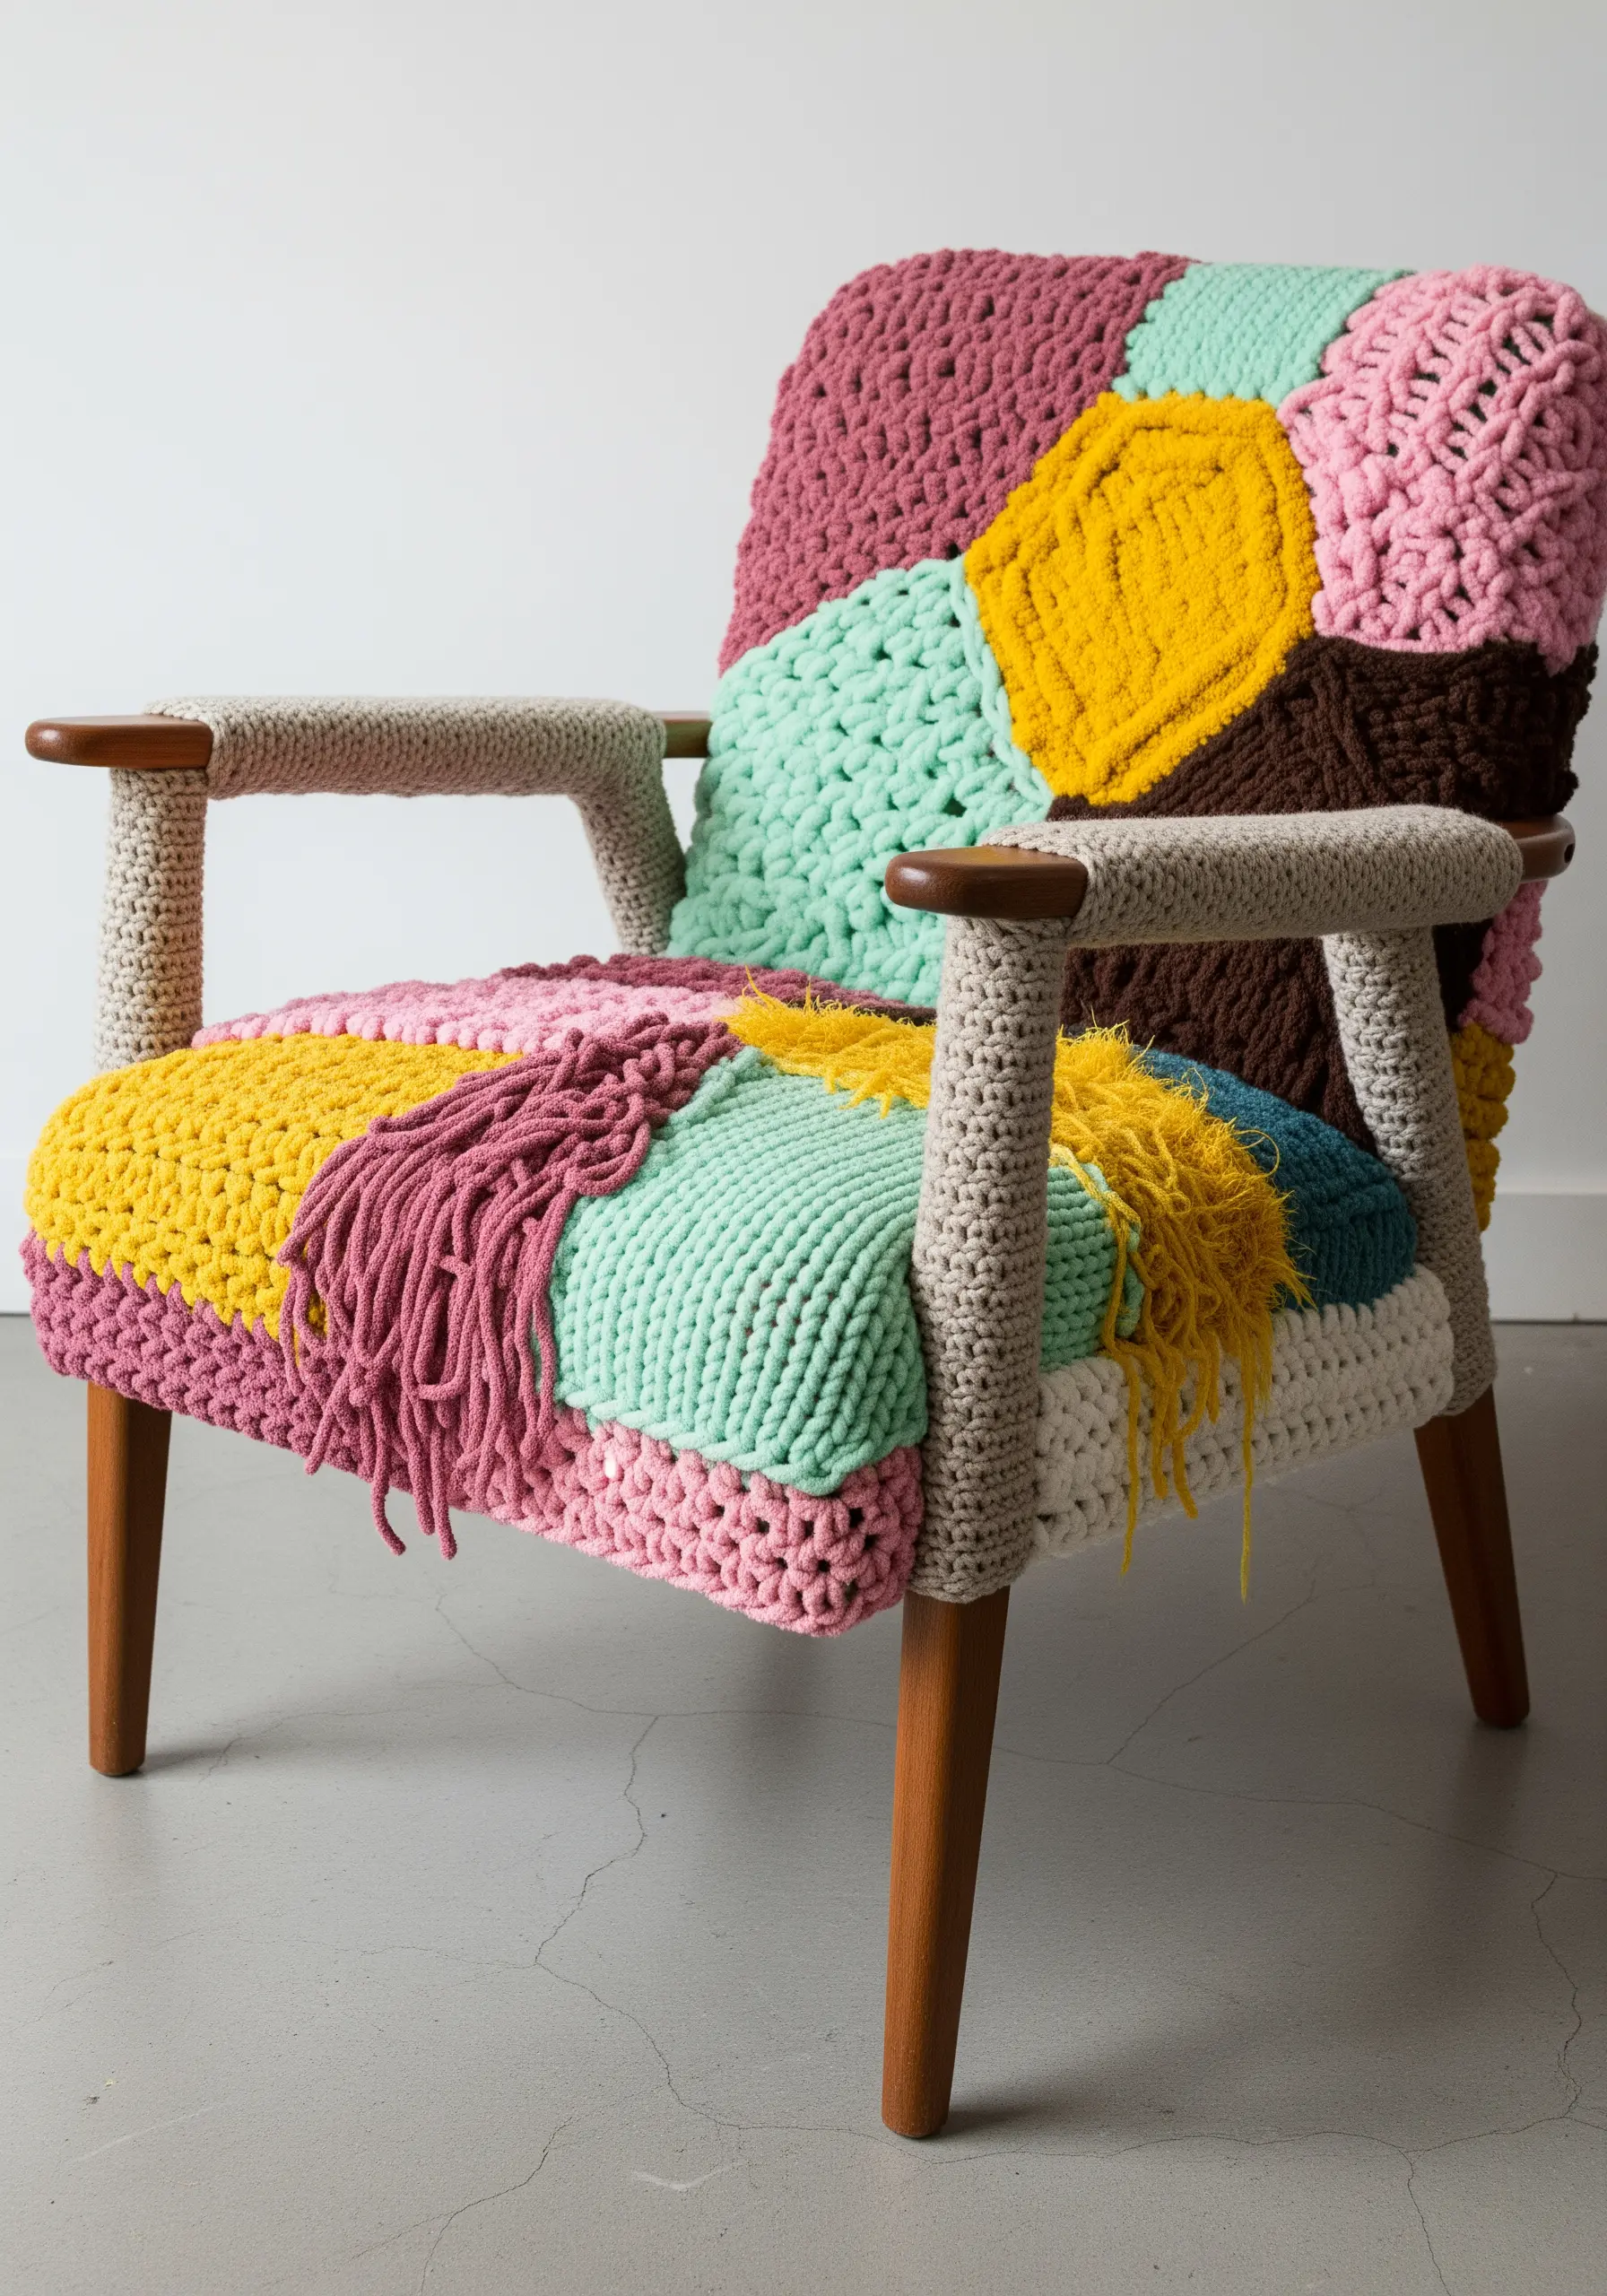
Give a tired piece of furniture a new life with vibrant, freeform crochet.
Instead of working from a strict pattern, create individual crochet patches in various colors, stitches, and sizes.
This “scrappy” approach is perfect for using up leftover yarn and encourages improvisation.
Join the pieces together organically as you go, stitching them directly around the chair’s contours like a puzzle.
The result is a one-of-a-kind piece of functional art that celebrates color, texture, and spontaneity.
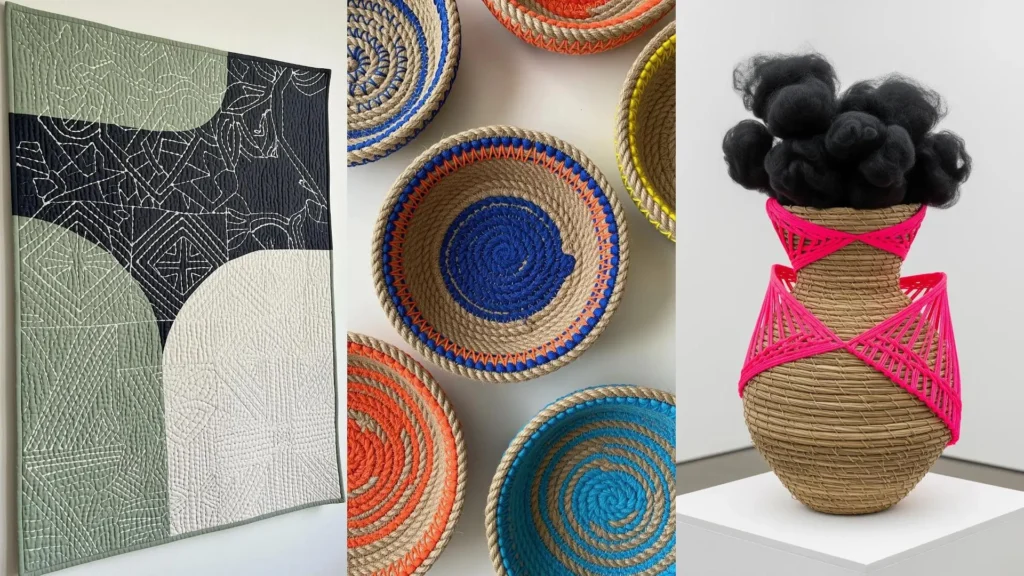
17. Create a Cohesive Series with a Shared Motif
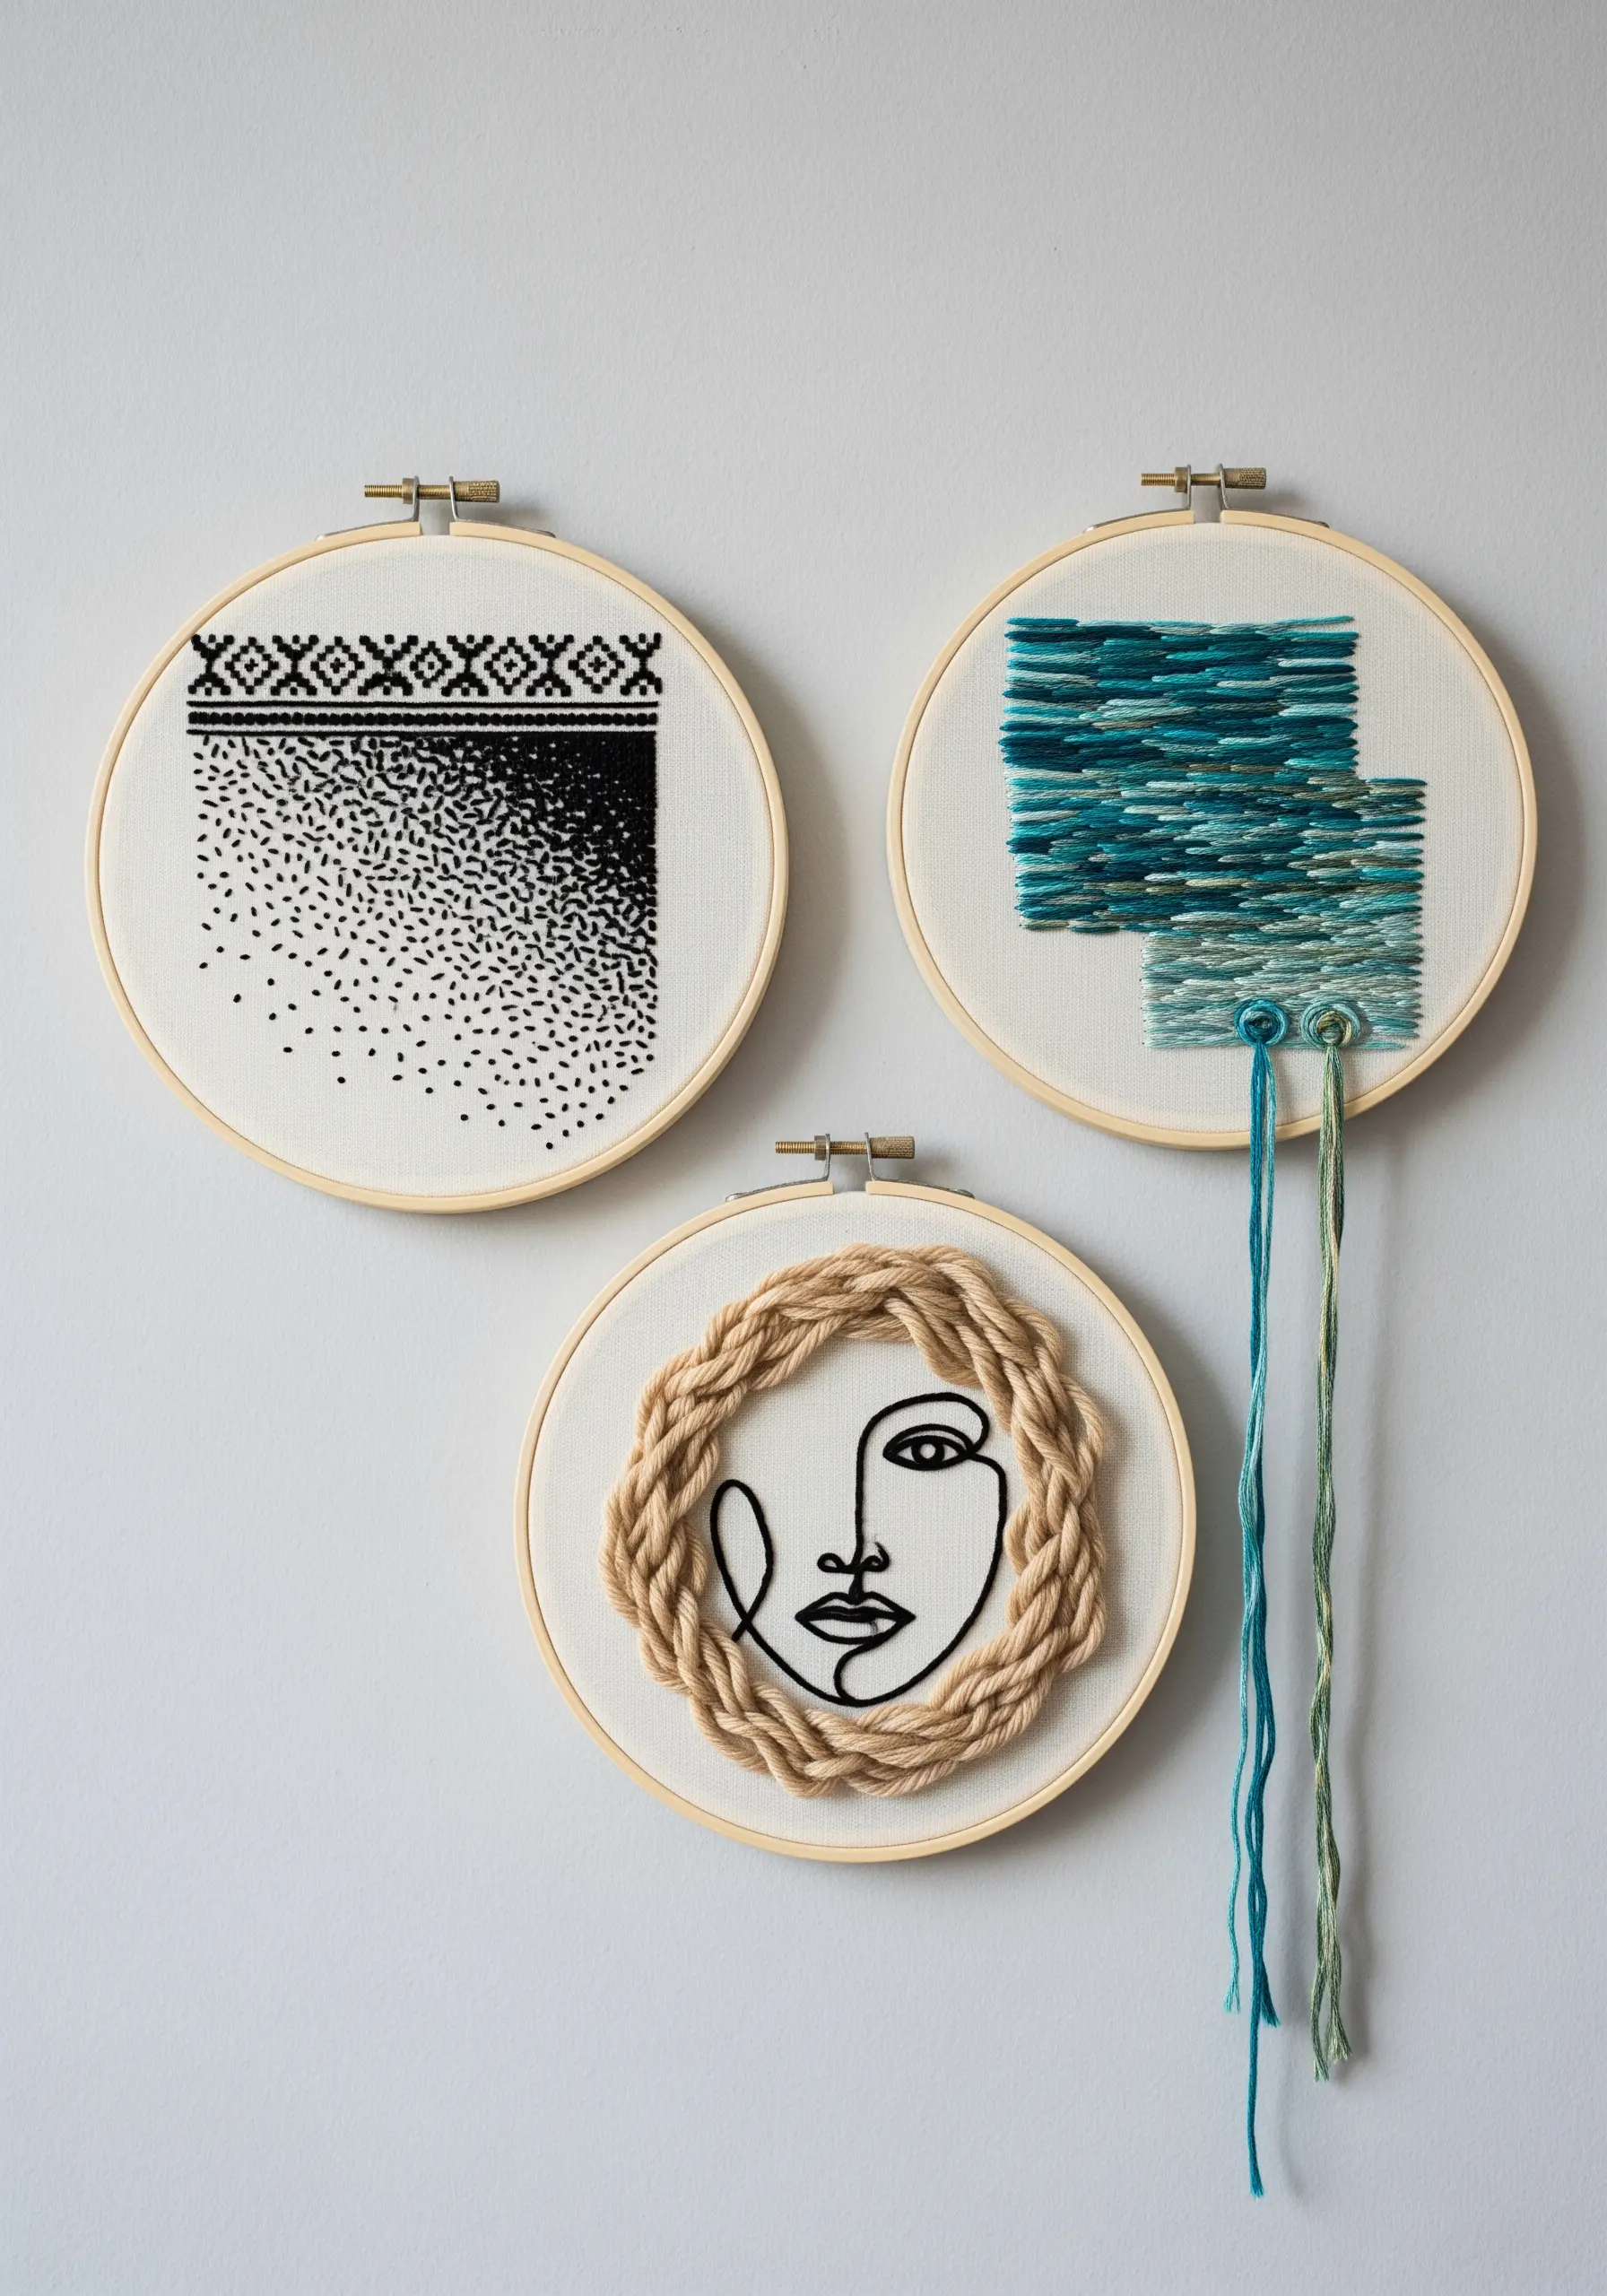
When displaying multiple pieces together, you don’t need them to match perfectly to feel connected.
Instead, create cohesion by exploring a single motif through different materials and techniques.
Here, a simple line-art face is reimagined: once with geometric blackwork, once with blended thread painting, and once with a dimensional rope accent.
This approach allows you to experiment with diverse methods while ensuring the final grouping feels like a deliberate, thoughtful collection, perfect for inspiring hoop art projects.
18. Integrate Hard Elements into Micro-Macrame
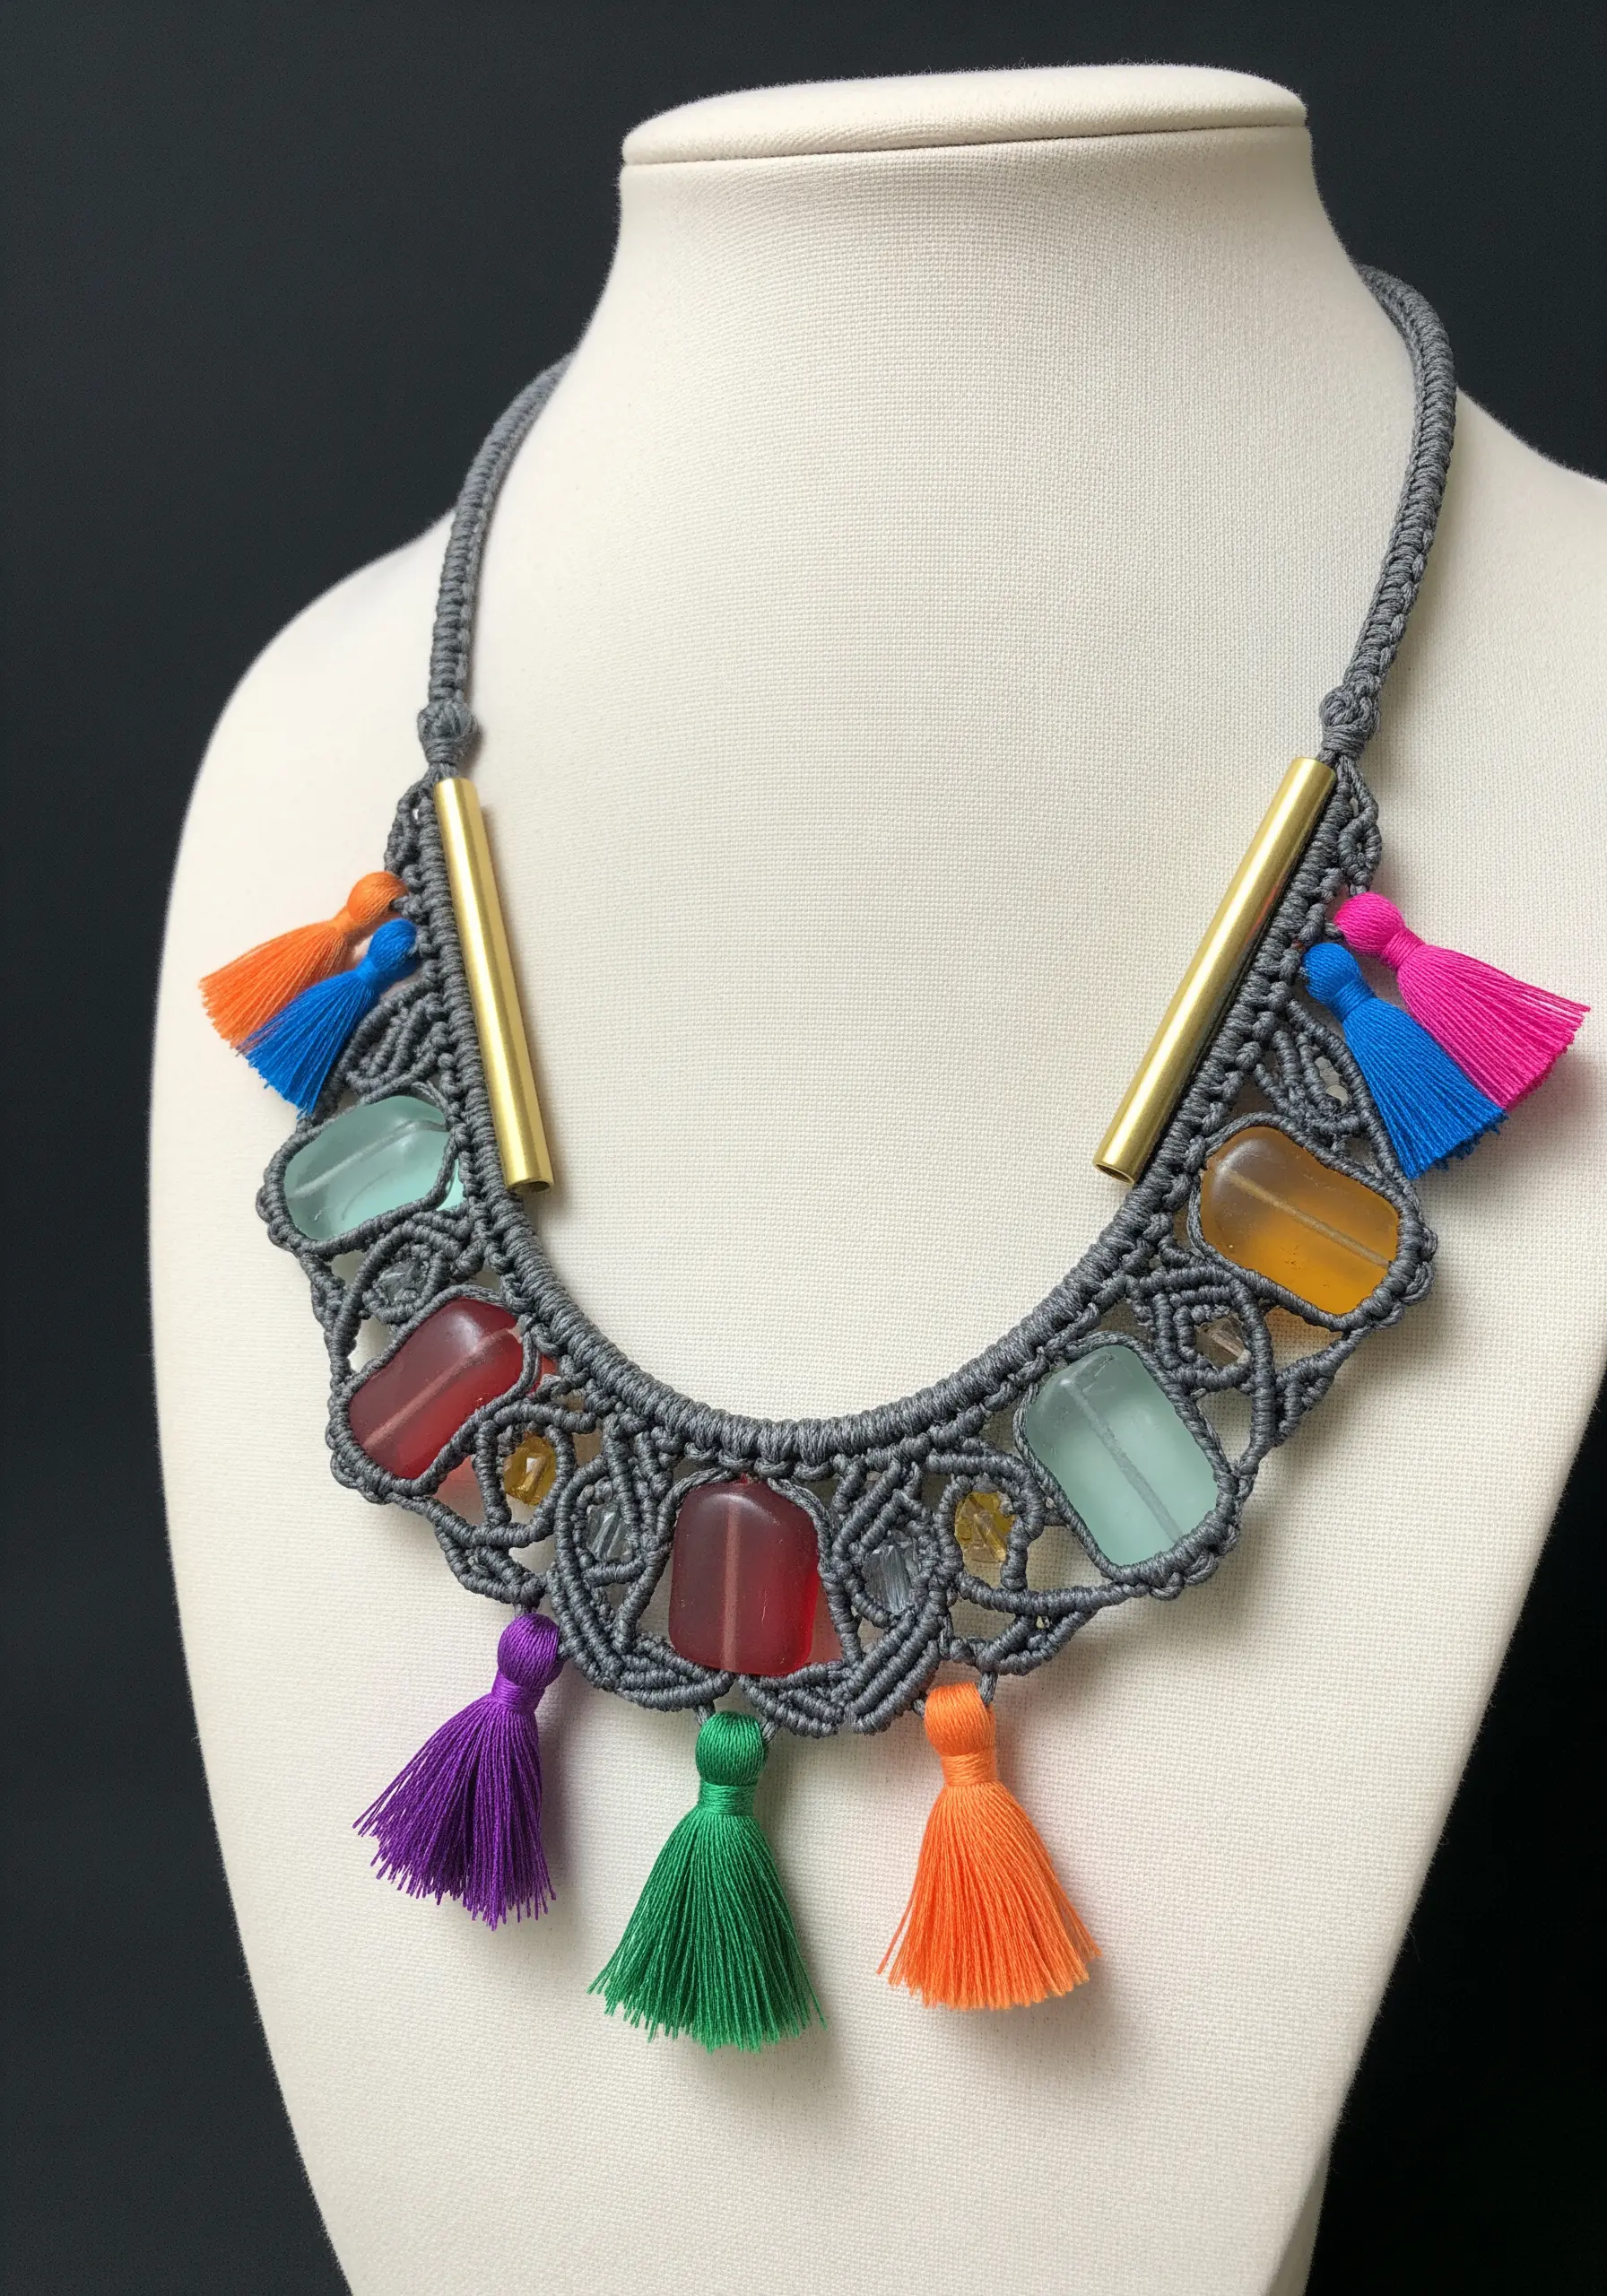
Macrame isn’t just for large-scale wall hangings; it’s a beautiful technique for creating intricate jewelry.
When working on a small scale, use a fine, durable cord, like waxed linen or nylon, for crisp, defined knots.
The key to elevating your design is to integrate non-fiber elements directly into the knotting process.
Plan your design to accommodate beads, stones, or metal tubes, knotting around them to secure them in place.
This provides structure and creates a stunning contrast with the soft thread, turning a simple craft into elegant, wearable art.


