

The most meaningful homes aren’t decorated, they’re collected—filled with small, personal touches that tell a story. You don’t need grand gestures or expensive renovations to make your space feel like your own. Often, the shift is in the details—the things you see and touch every day.
This is where your love for texture and thread comes in. Think beyond the hoop and consider the small surfaces that make up your daily life: a plain light switch, a simple drawer knob, the edge of a linen napkin. These are your canvases.
Here, you’ll find ideas that invite you to look closer and create with intention. Each one is a small, manageable project that makes a quiet but confident statement, transforming your home one thoughtful stitch at a time.
1. Stitch Beyond the Hoop: Functional Art
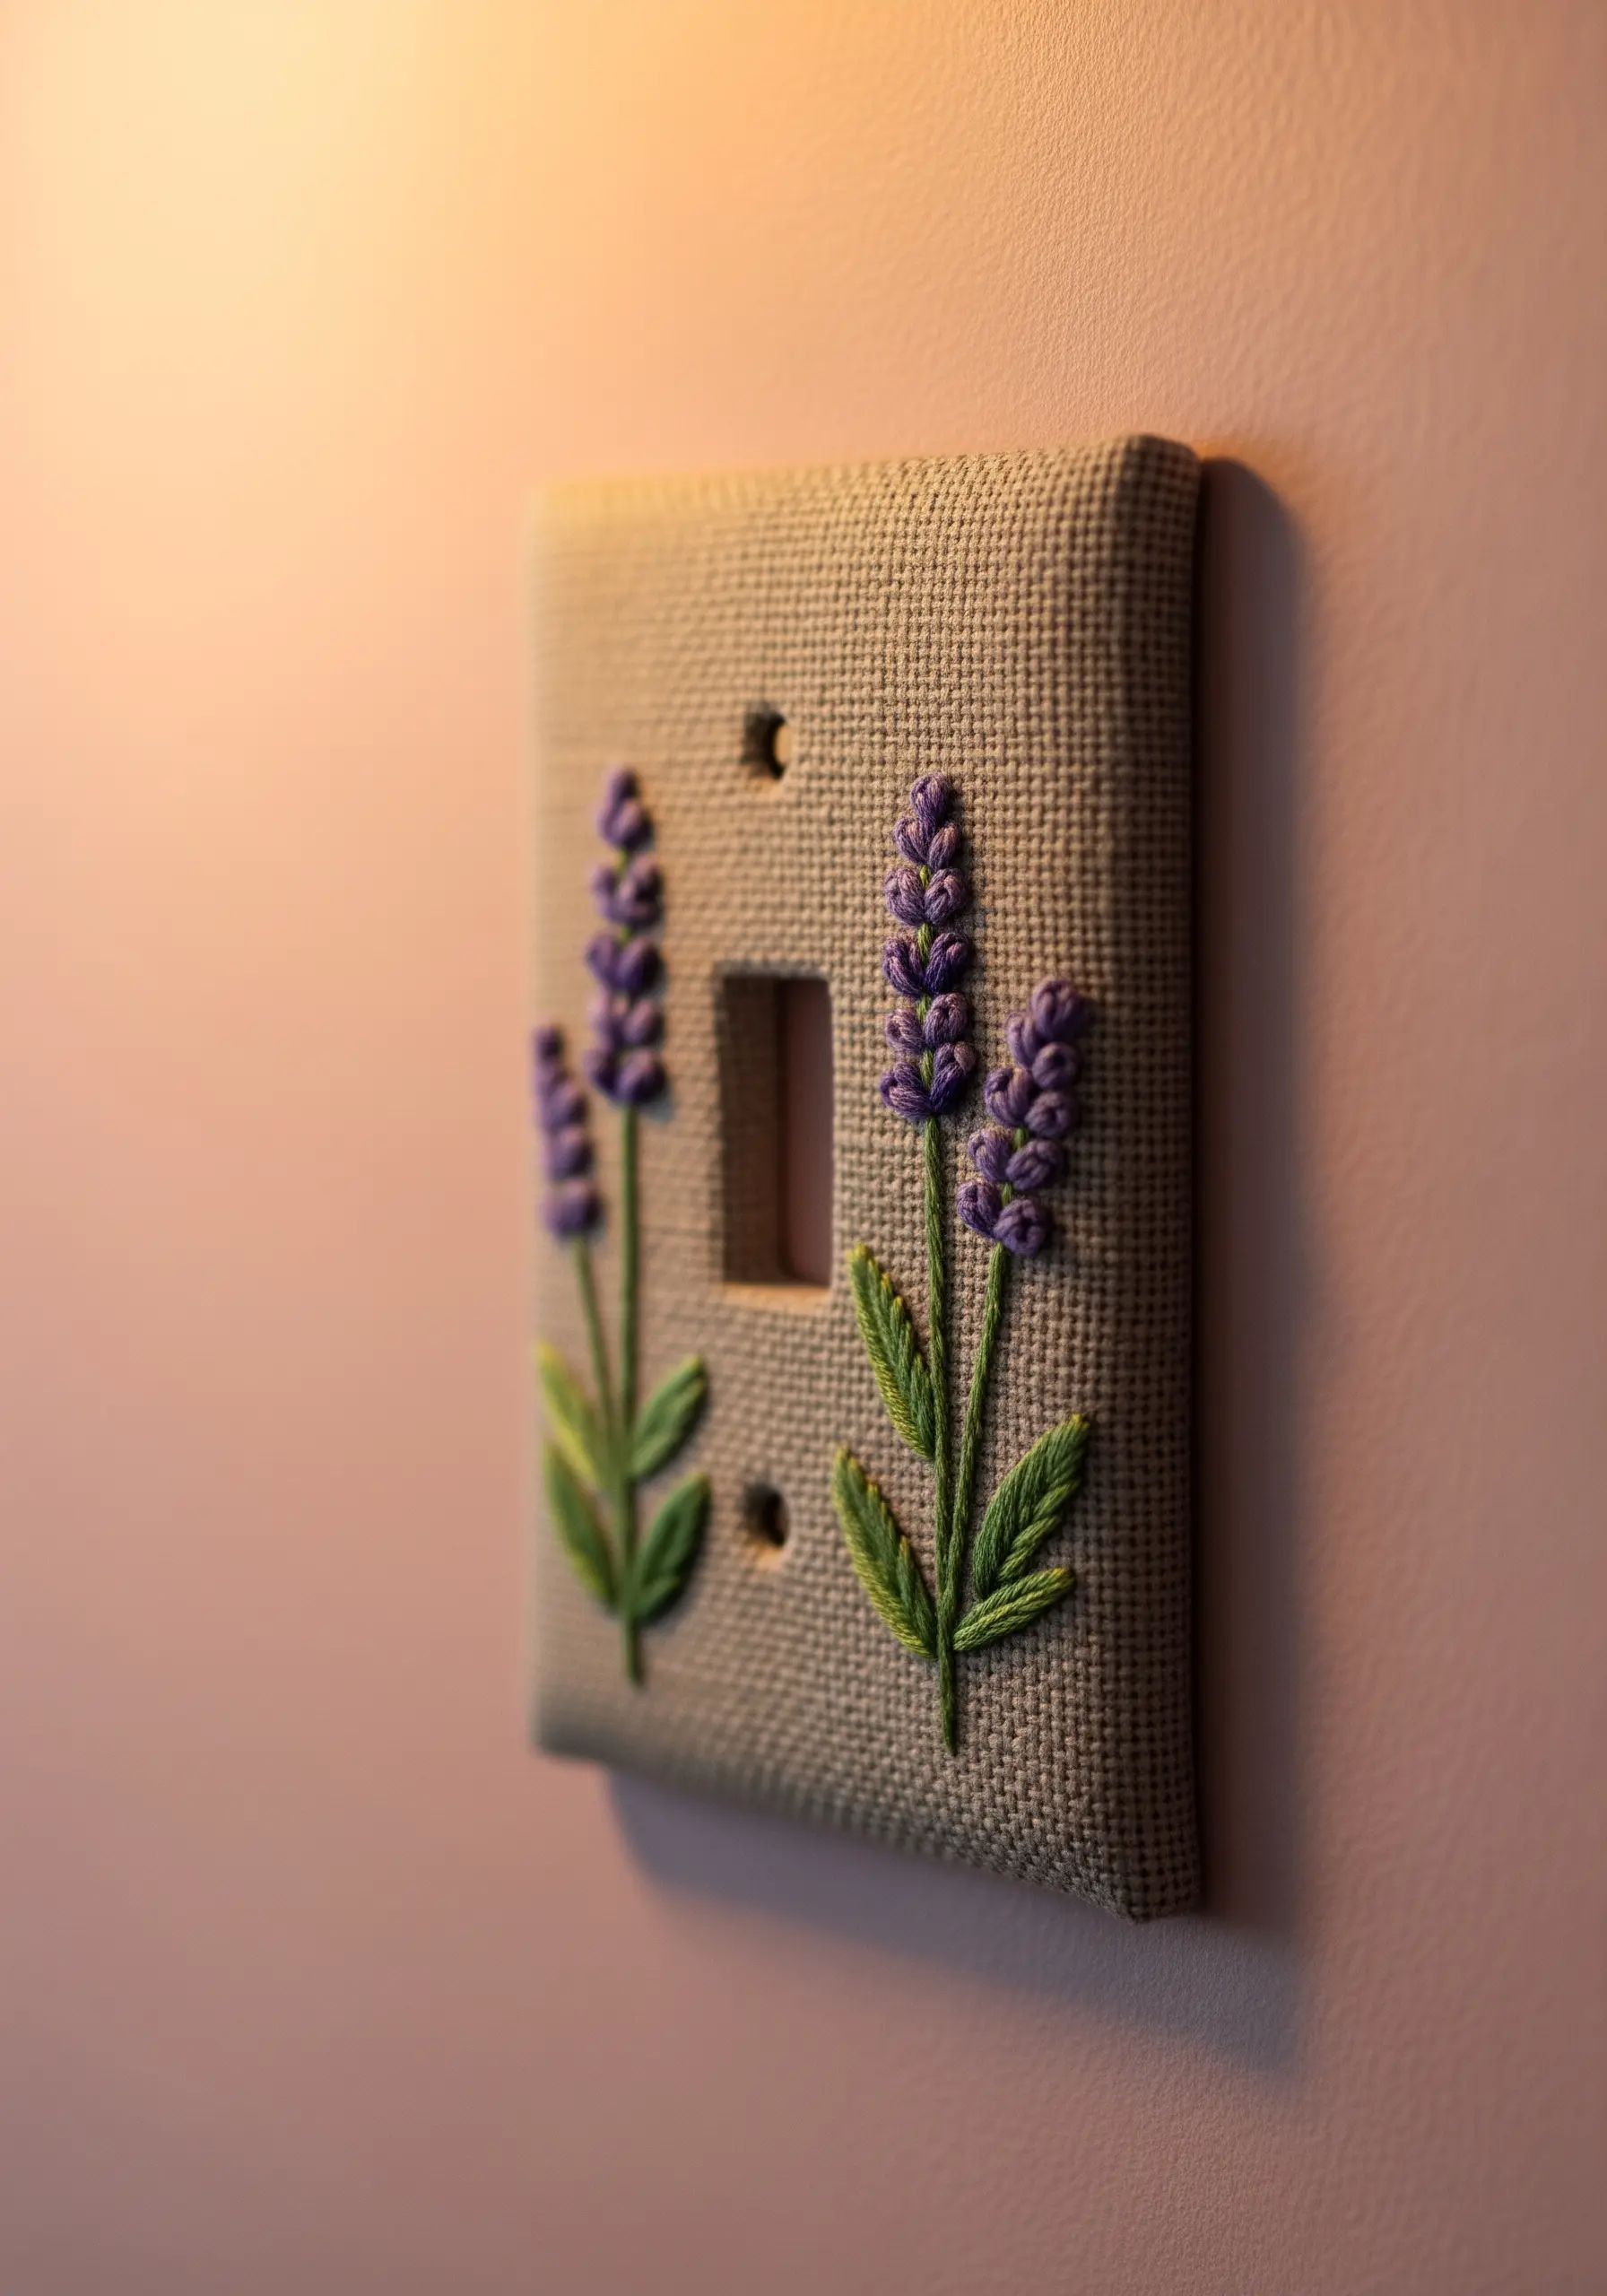
Transform an everyday object by embroidering directly onto fabric meant for wrapping.
Start with a sturdy, even-weave linen and back it with a light fusible interfacing to prevent fraying and add structure.
Use French knots for the lavender buds to create a raised, tactile texture that invites touch.
Once stitched, carefully wrap the fabric around a standard switch plate, securing it tightly on the back with strong craft glue for a seamless, bespoke finish.
2. Inspired Details: From Ceramic to Thread
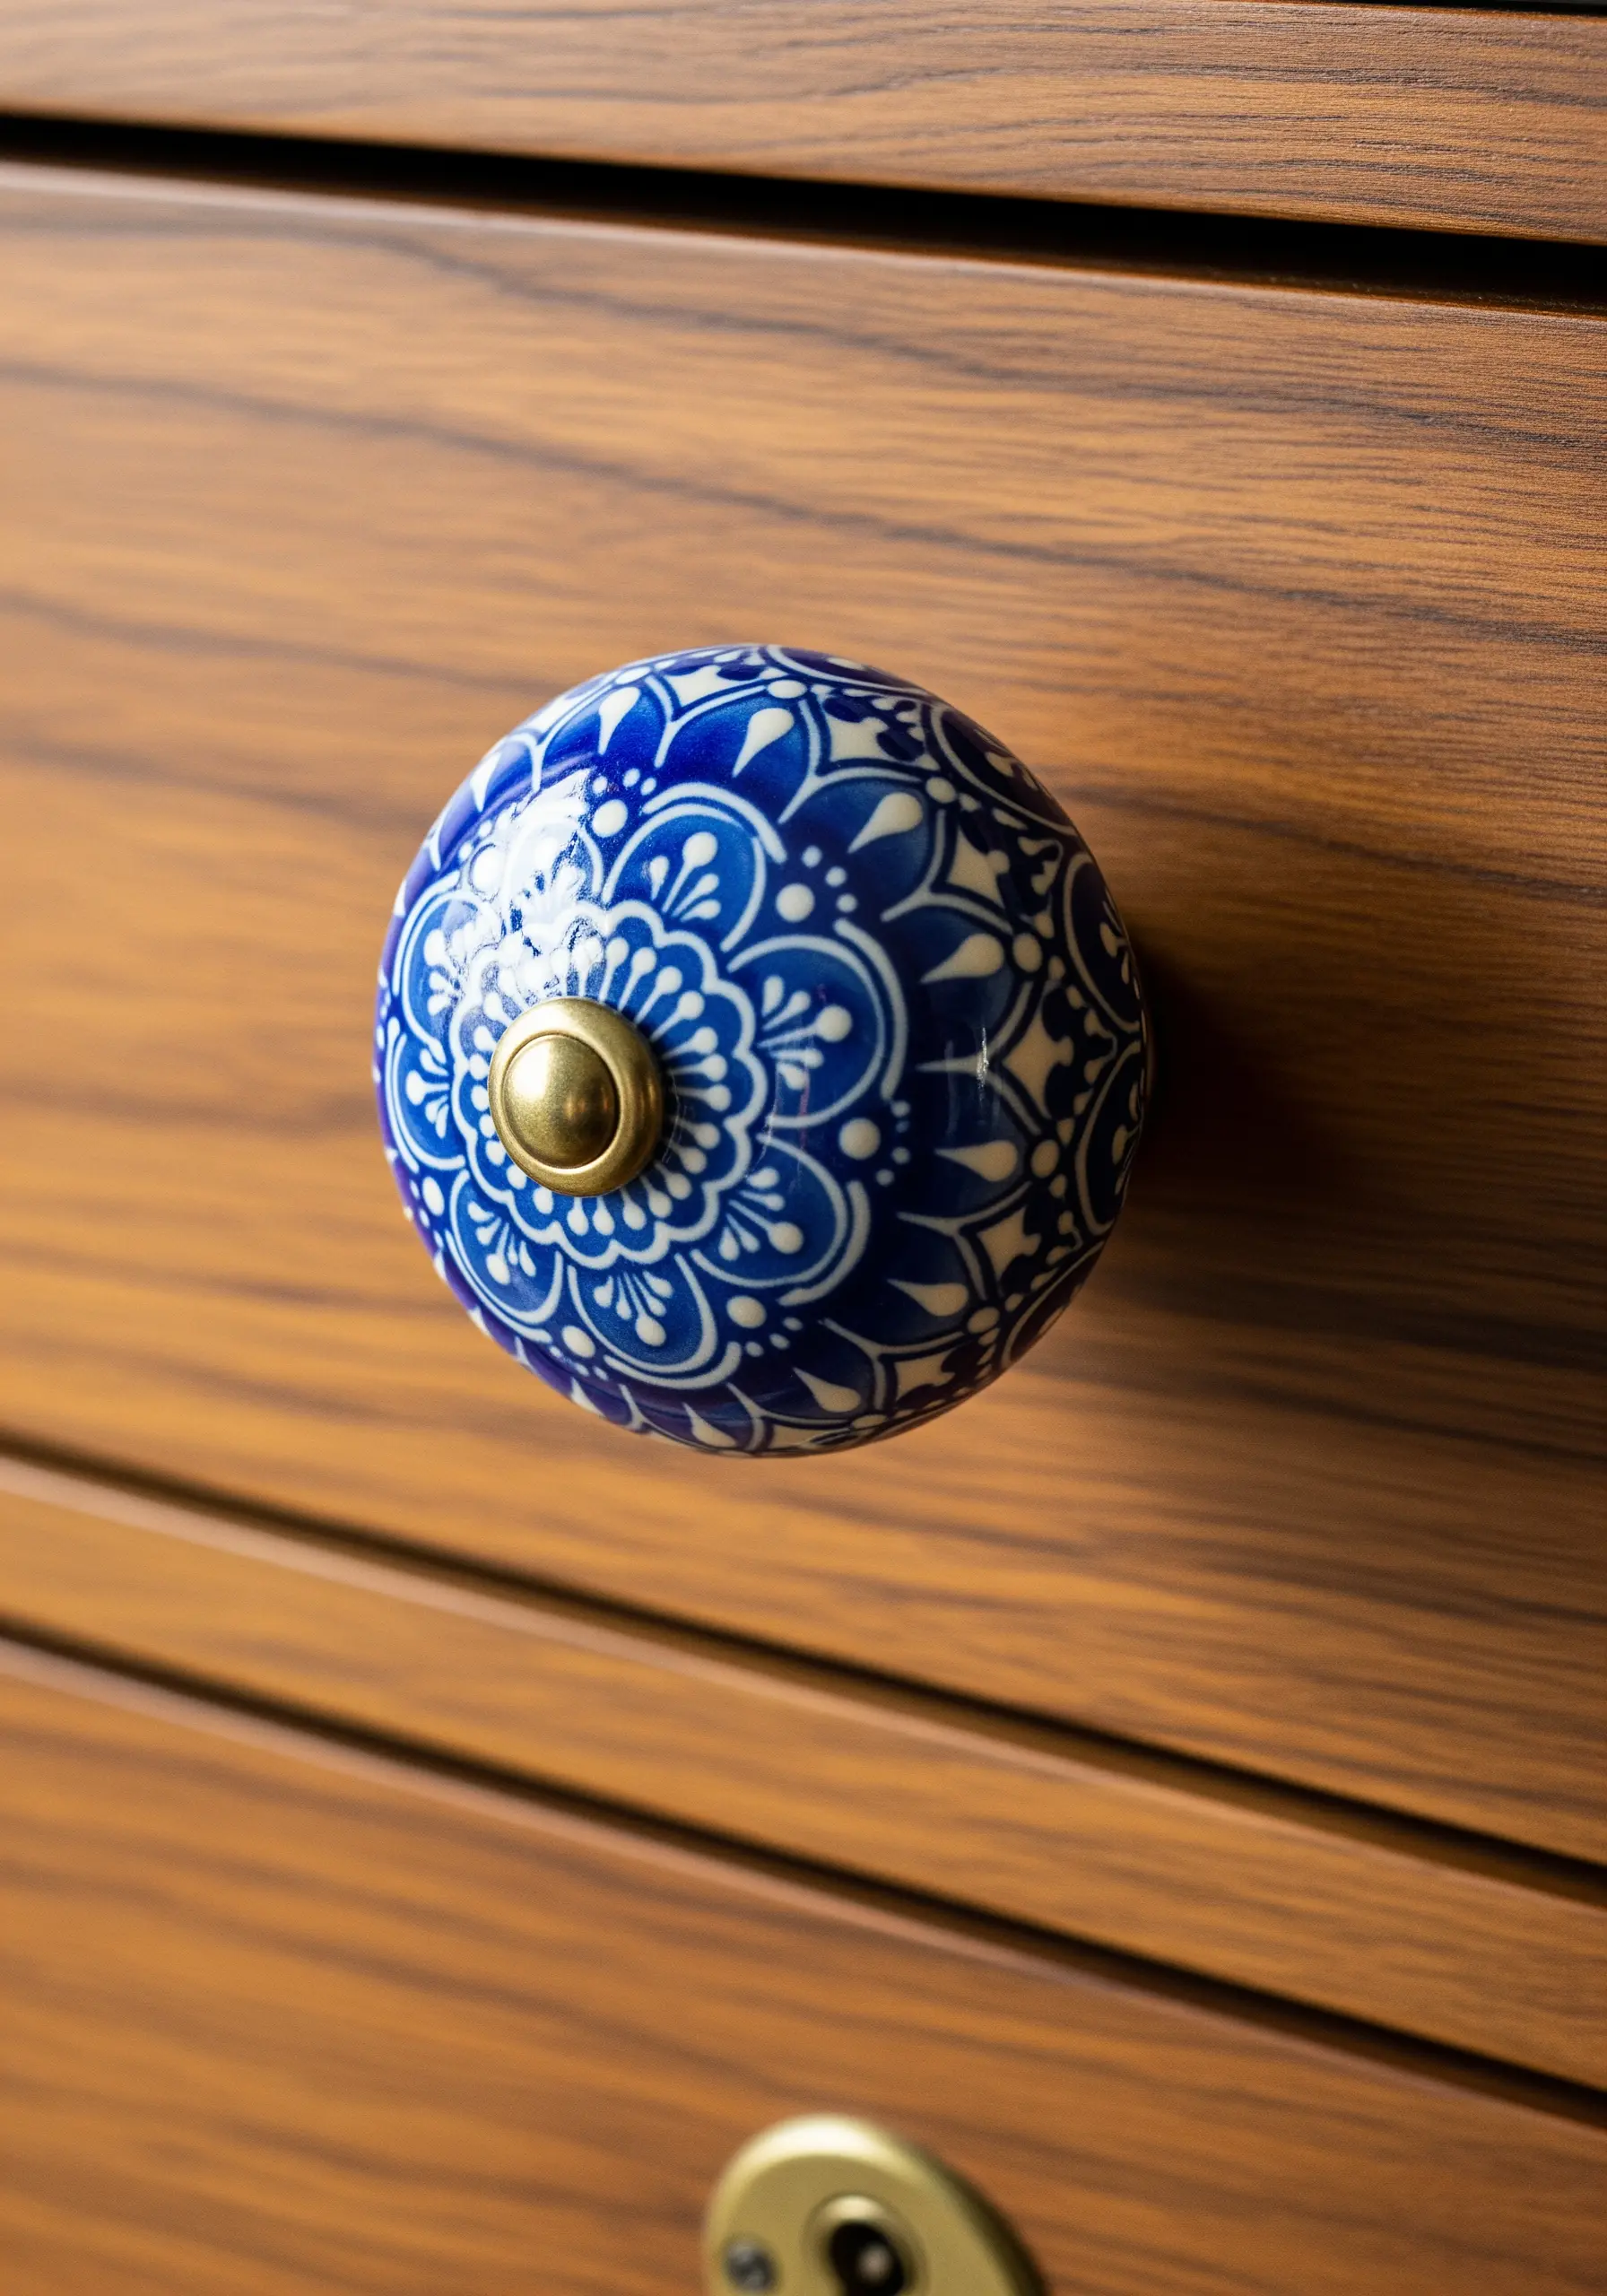
Let the intricate patterns of ceramic hardware inspire your next embroidery project.
Observe how the delicate lines and radial symmetry create a sense of harmony you can translate into a stitched mandala.
Use a single shade of blue on white linen with a fine-weight thread to mimic the painted effect.
Combine a simple backstitch for outlines with tiny seed stitches for fill areas to train your eye to see patterns in the world around you.
3. Embrace Texture with Dimensional Knots
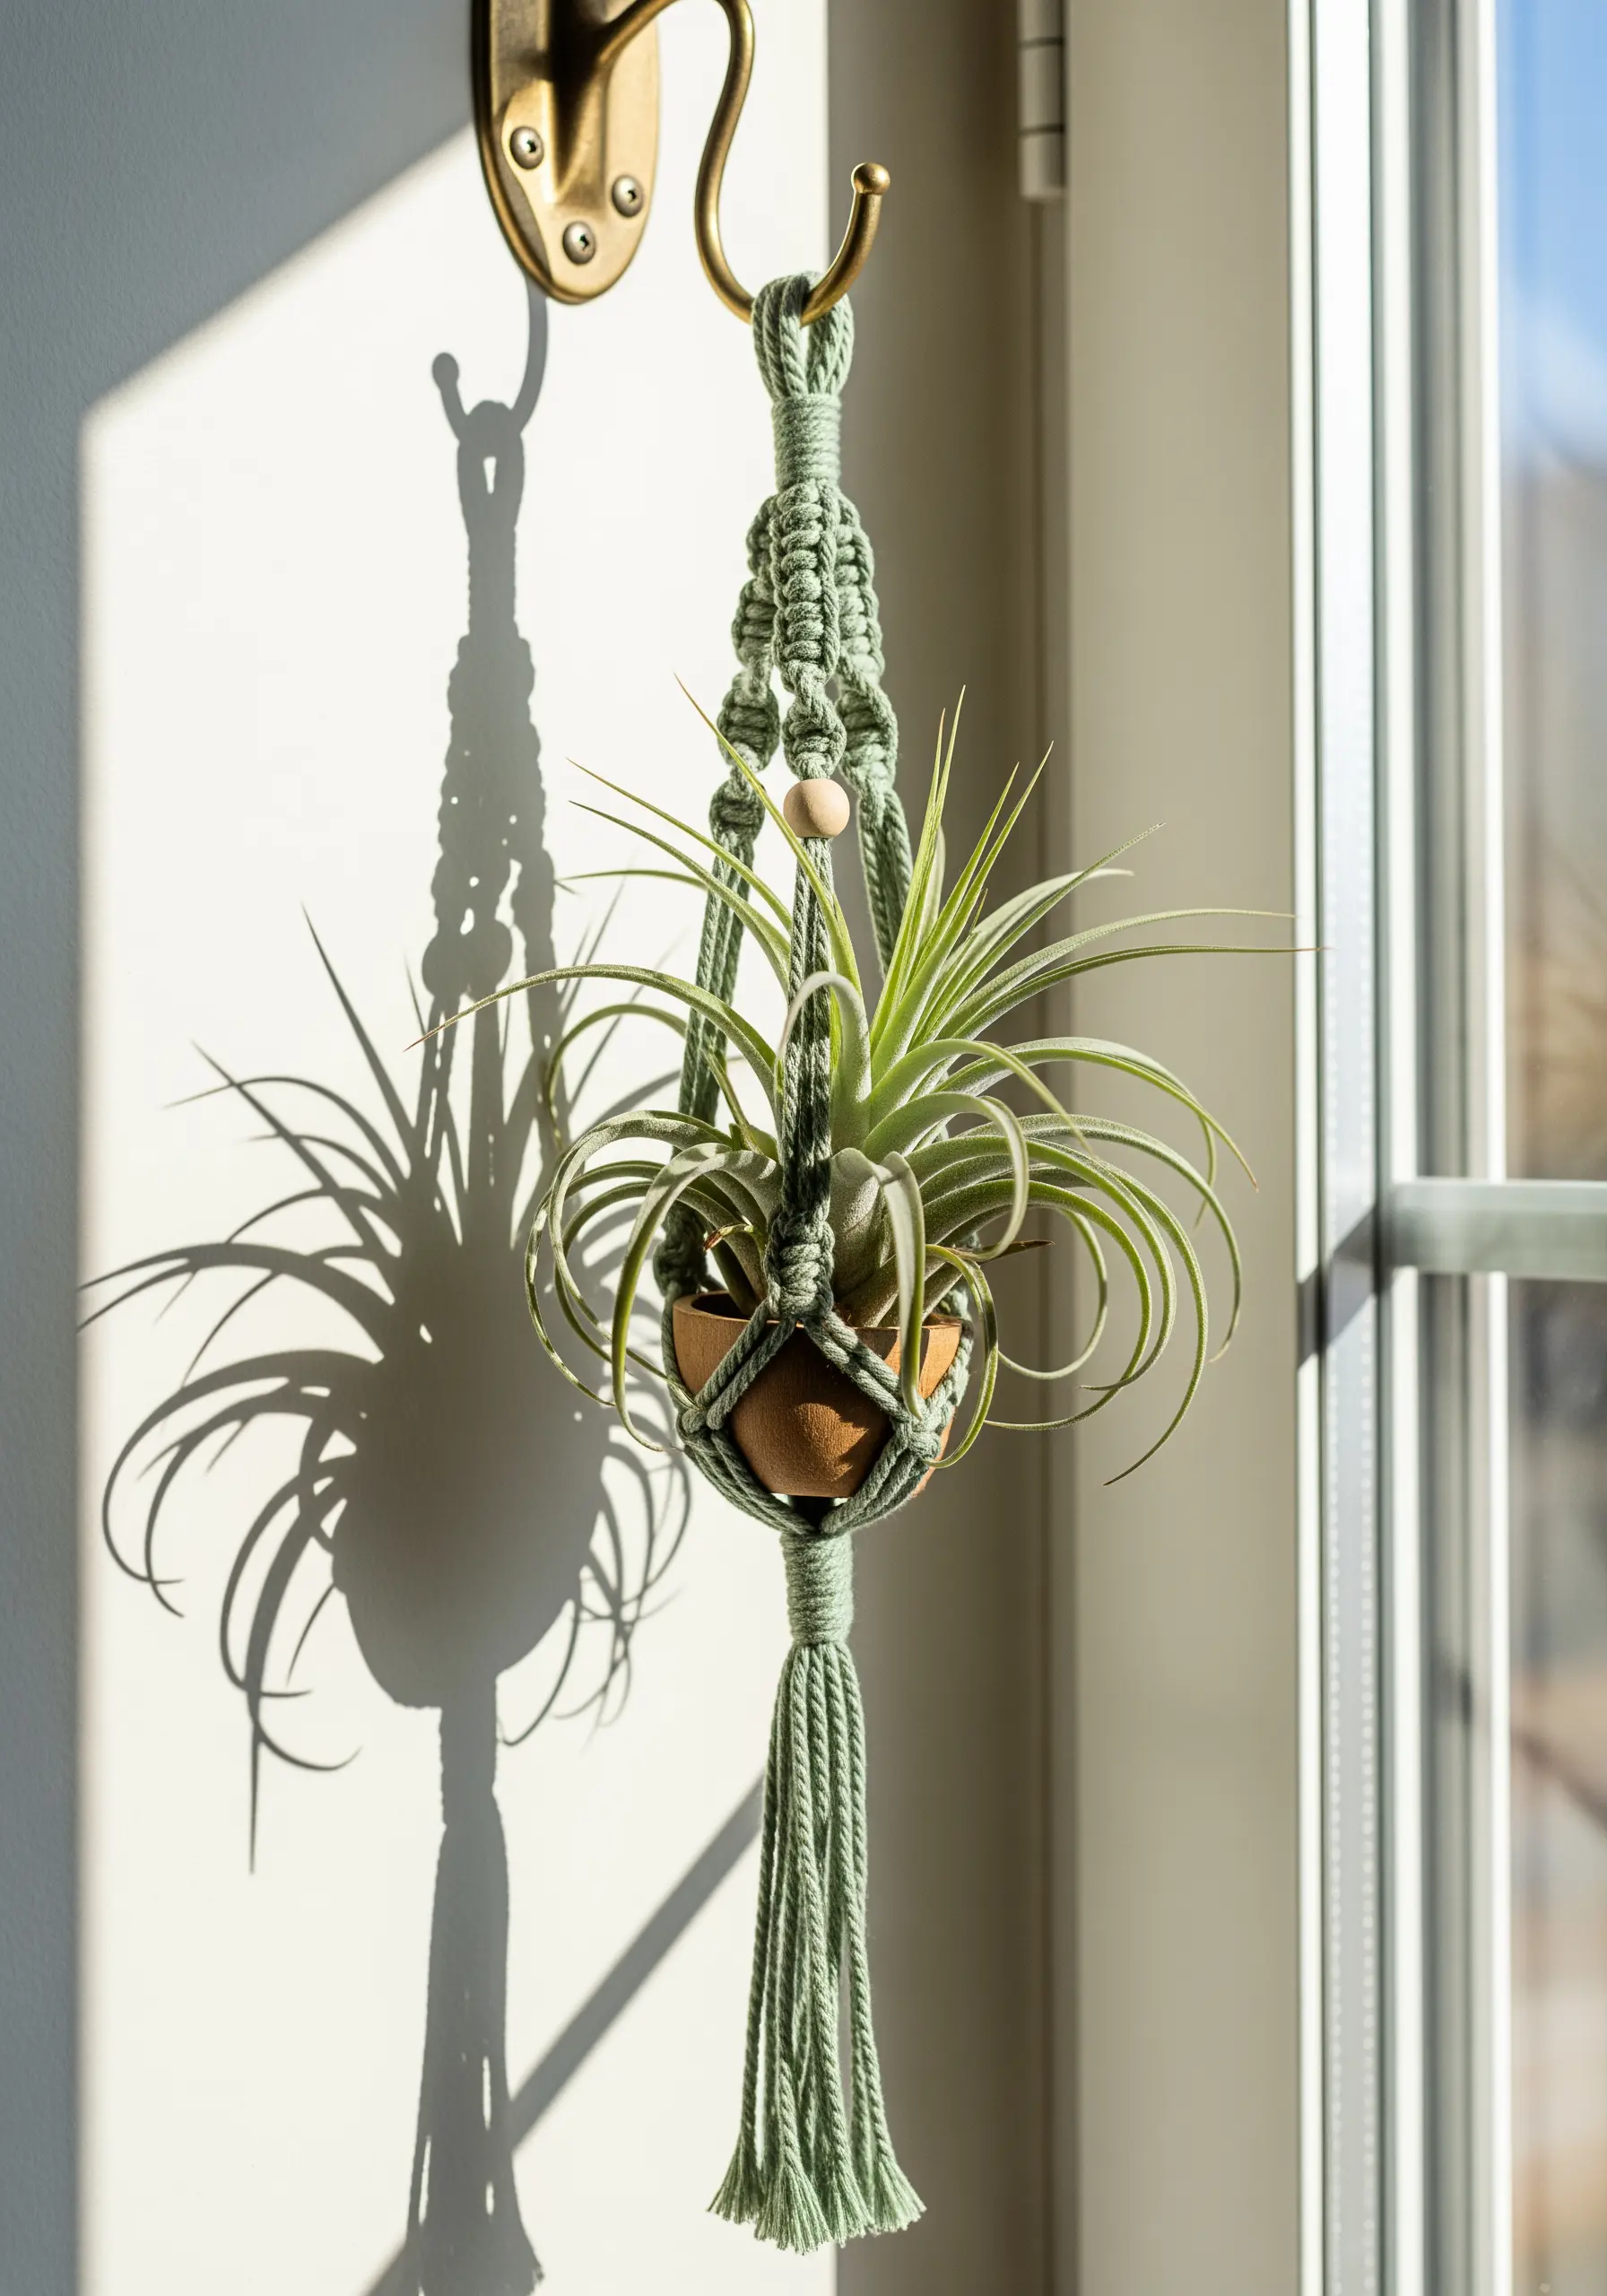
While not embroidery, macrame shares a common language of knots and tension that can elevate your work.
Incorporate macrame-inspired knots, like the square knot or gathering knot, into your embroidery for a three-dimensional effect.
Use thicker yarn or multiple strands of floss to create raised elements in your fiber art.
This technique is perfect for adding boho-soft embroidery textures to wall hangings or cushion covers, giving them a sculptural quality.
4. Translate Glaze and Texture into Thread
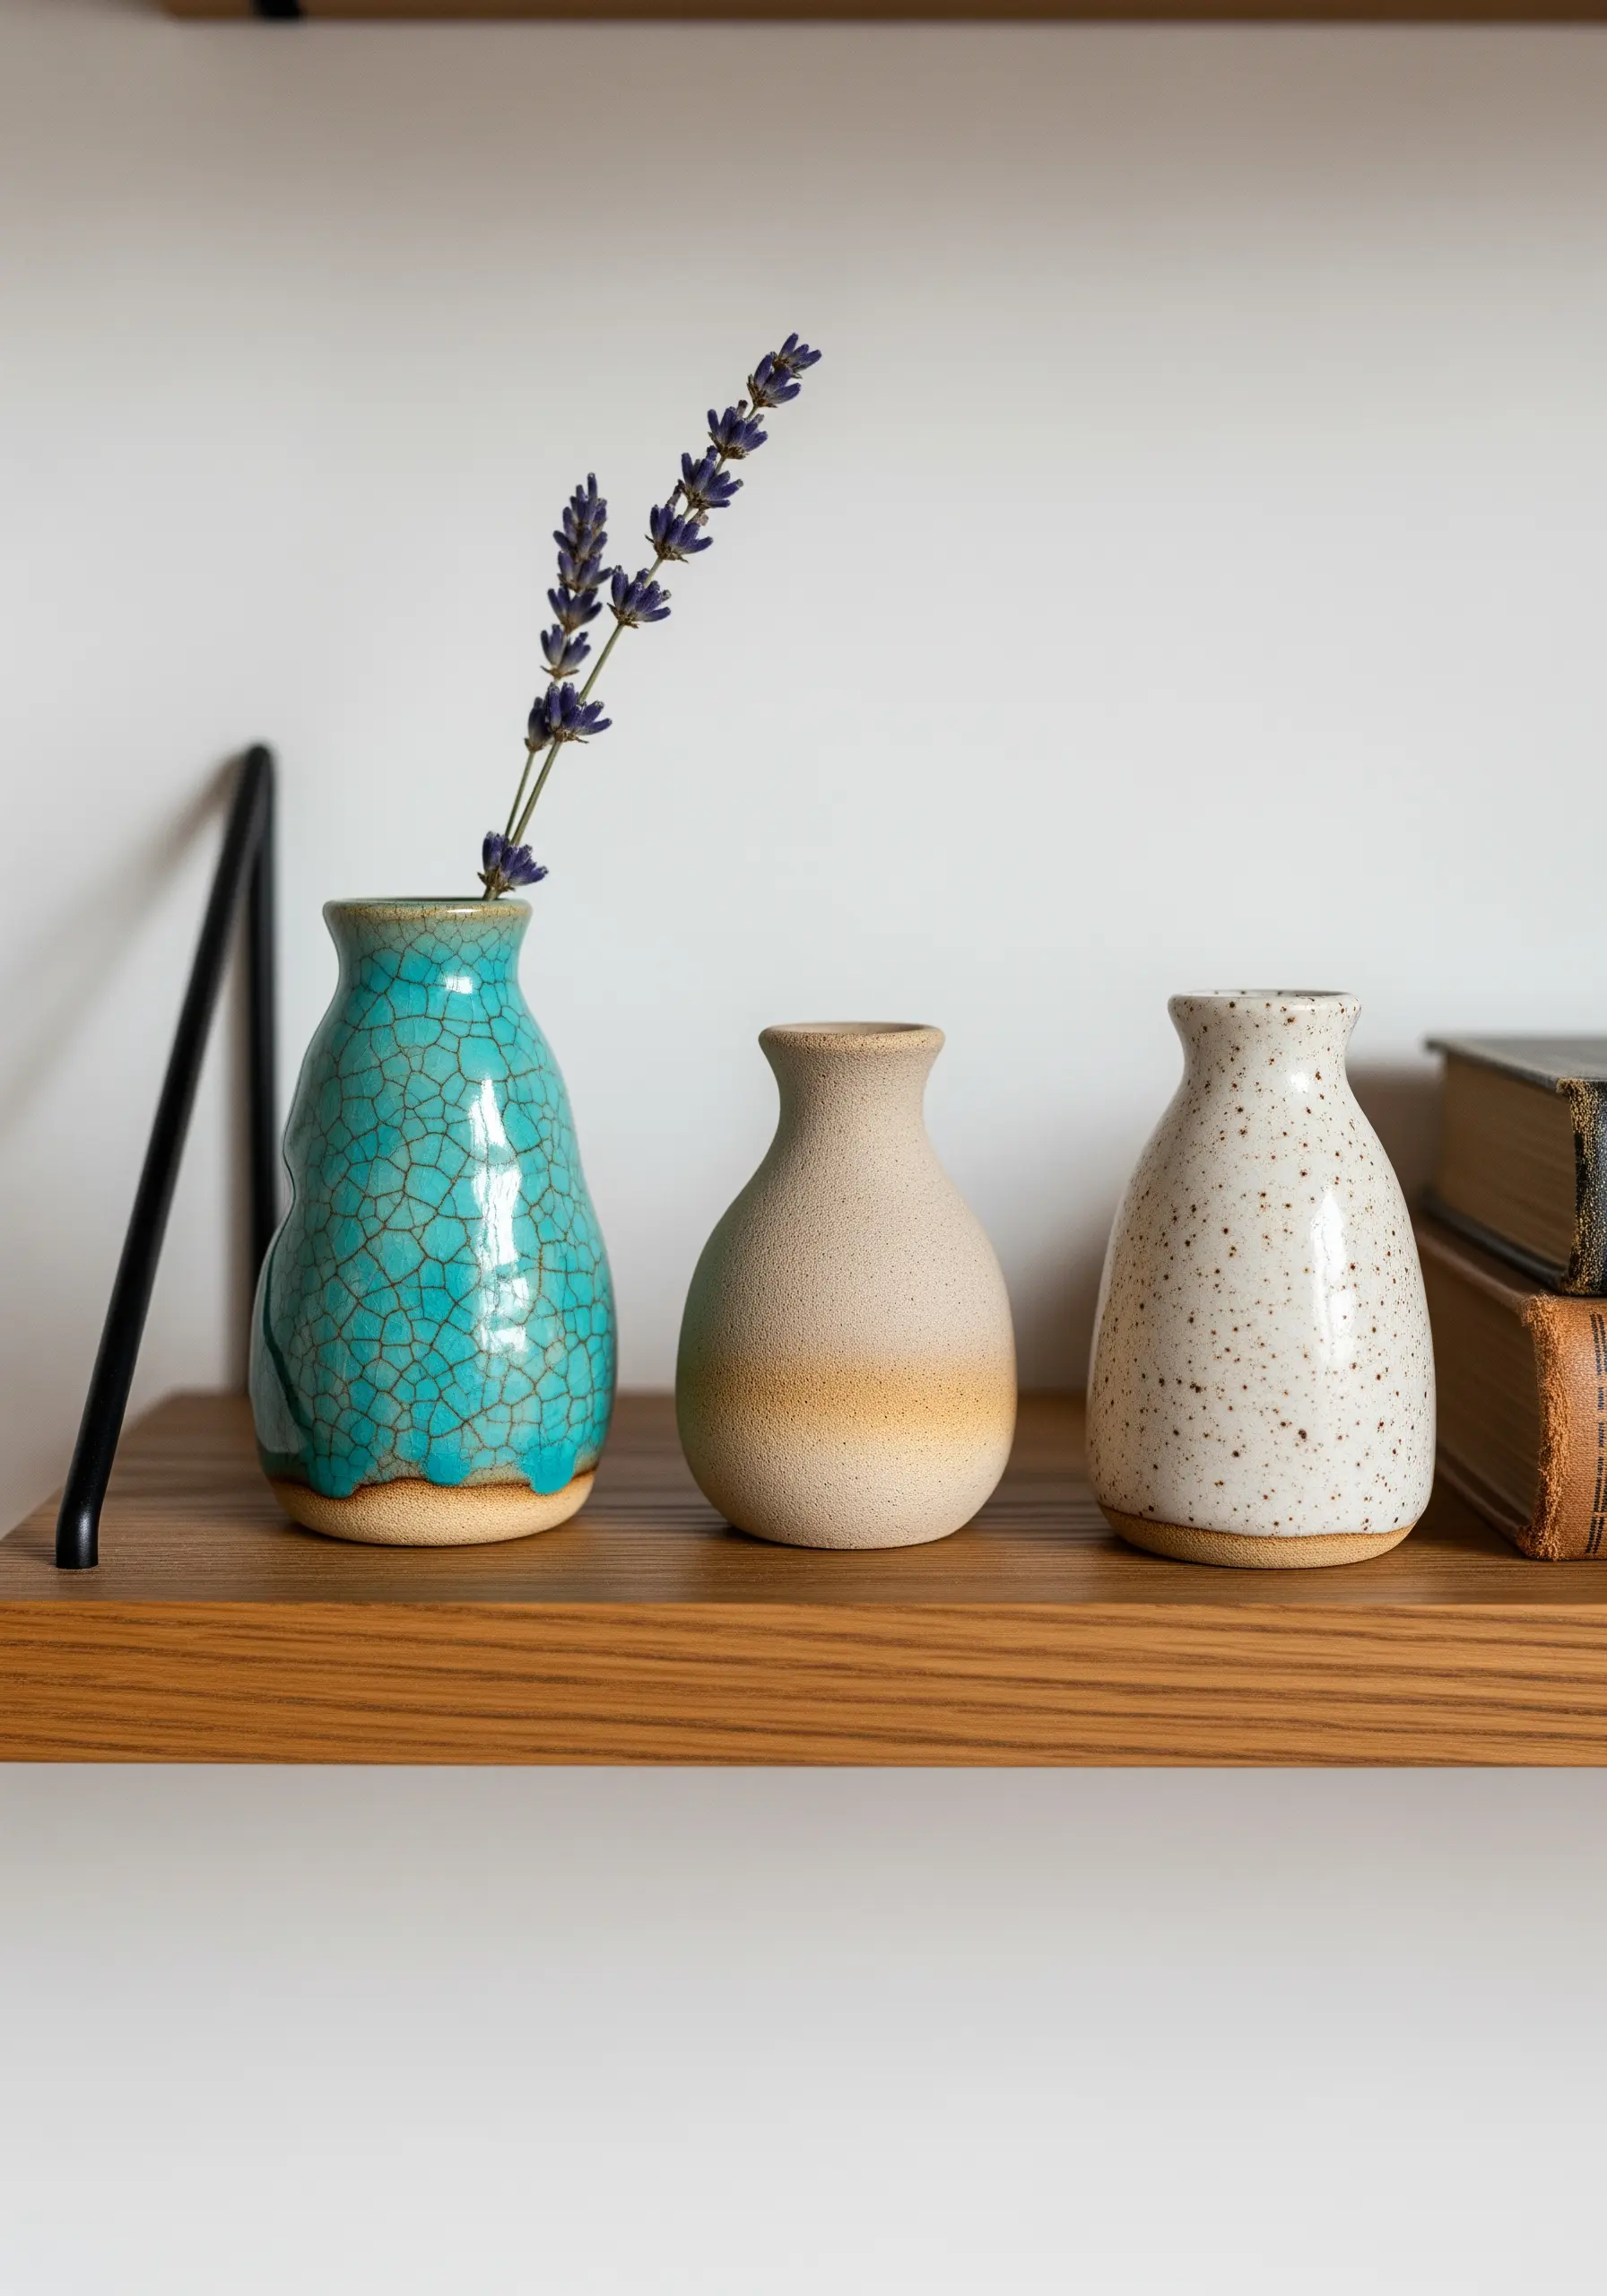
Study the surfaces of artisanal pottery to inform your embroidery palette and stitch choices.
The crackled turquoise glaze can be replicated with a network of fine, irregular backstitches using a variegated thread.
A sandy, speckled texture can be achieved with scattered French knots or seed stitches in neutral tones.
This approach encourages you to look beyond just color and focus on recreating tactile surfaces in your work, leading to more complex and subtle, earthy embroidery designs.
5. Illuminate Designs with Metallic Threads
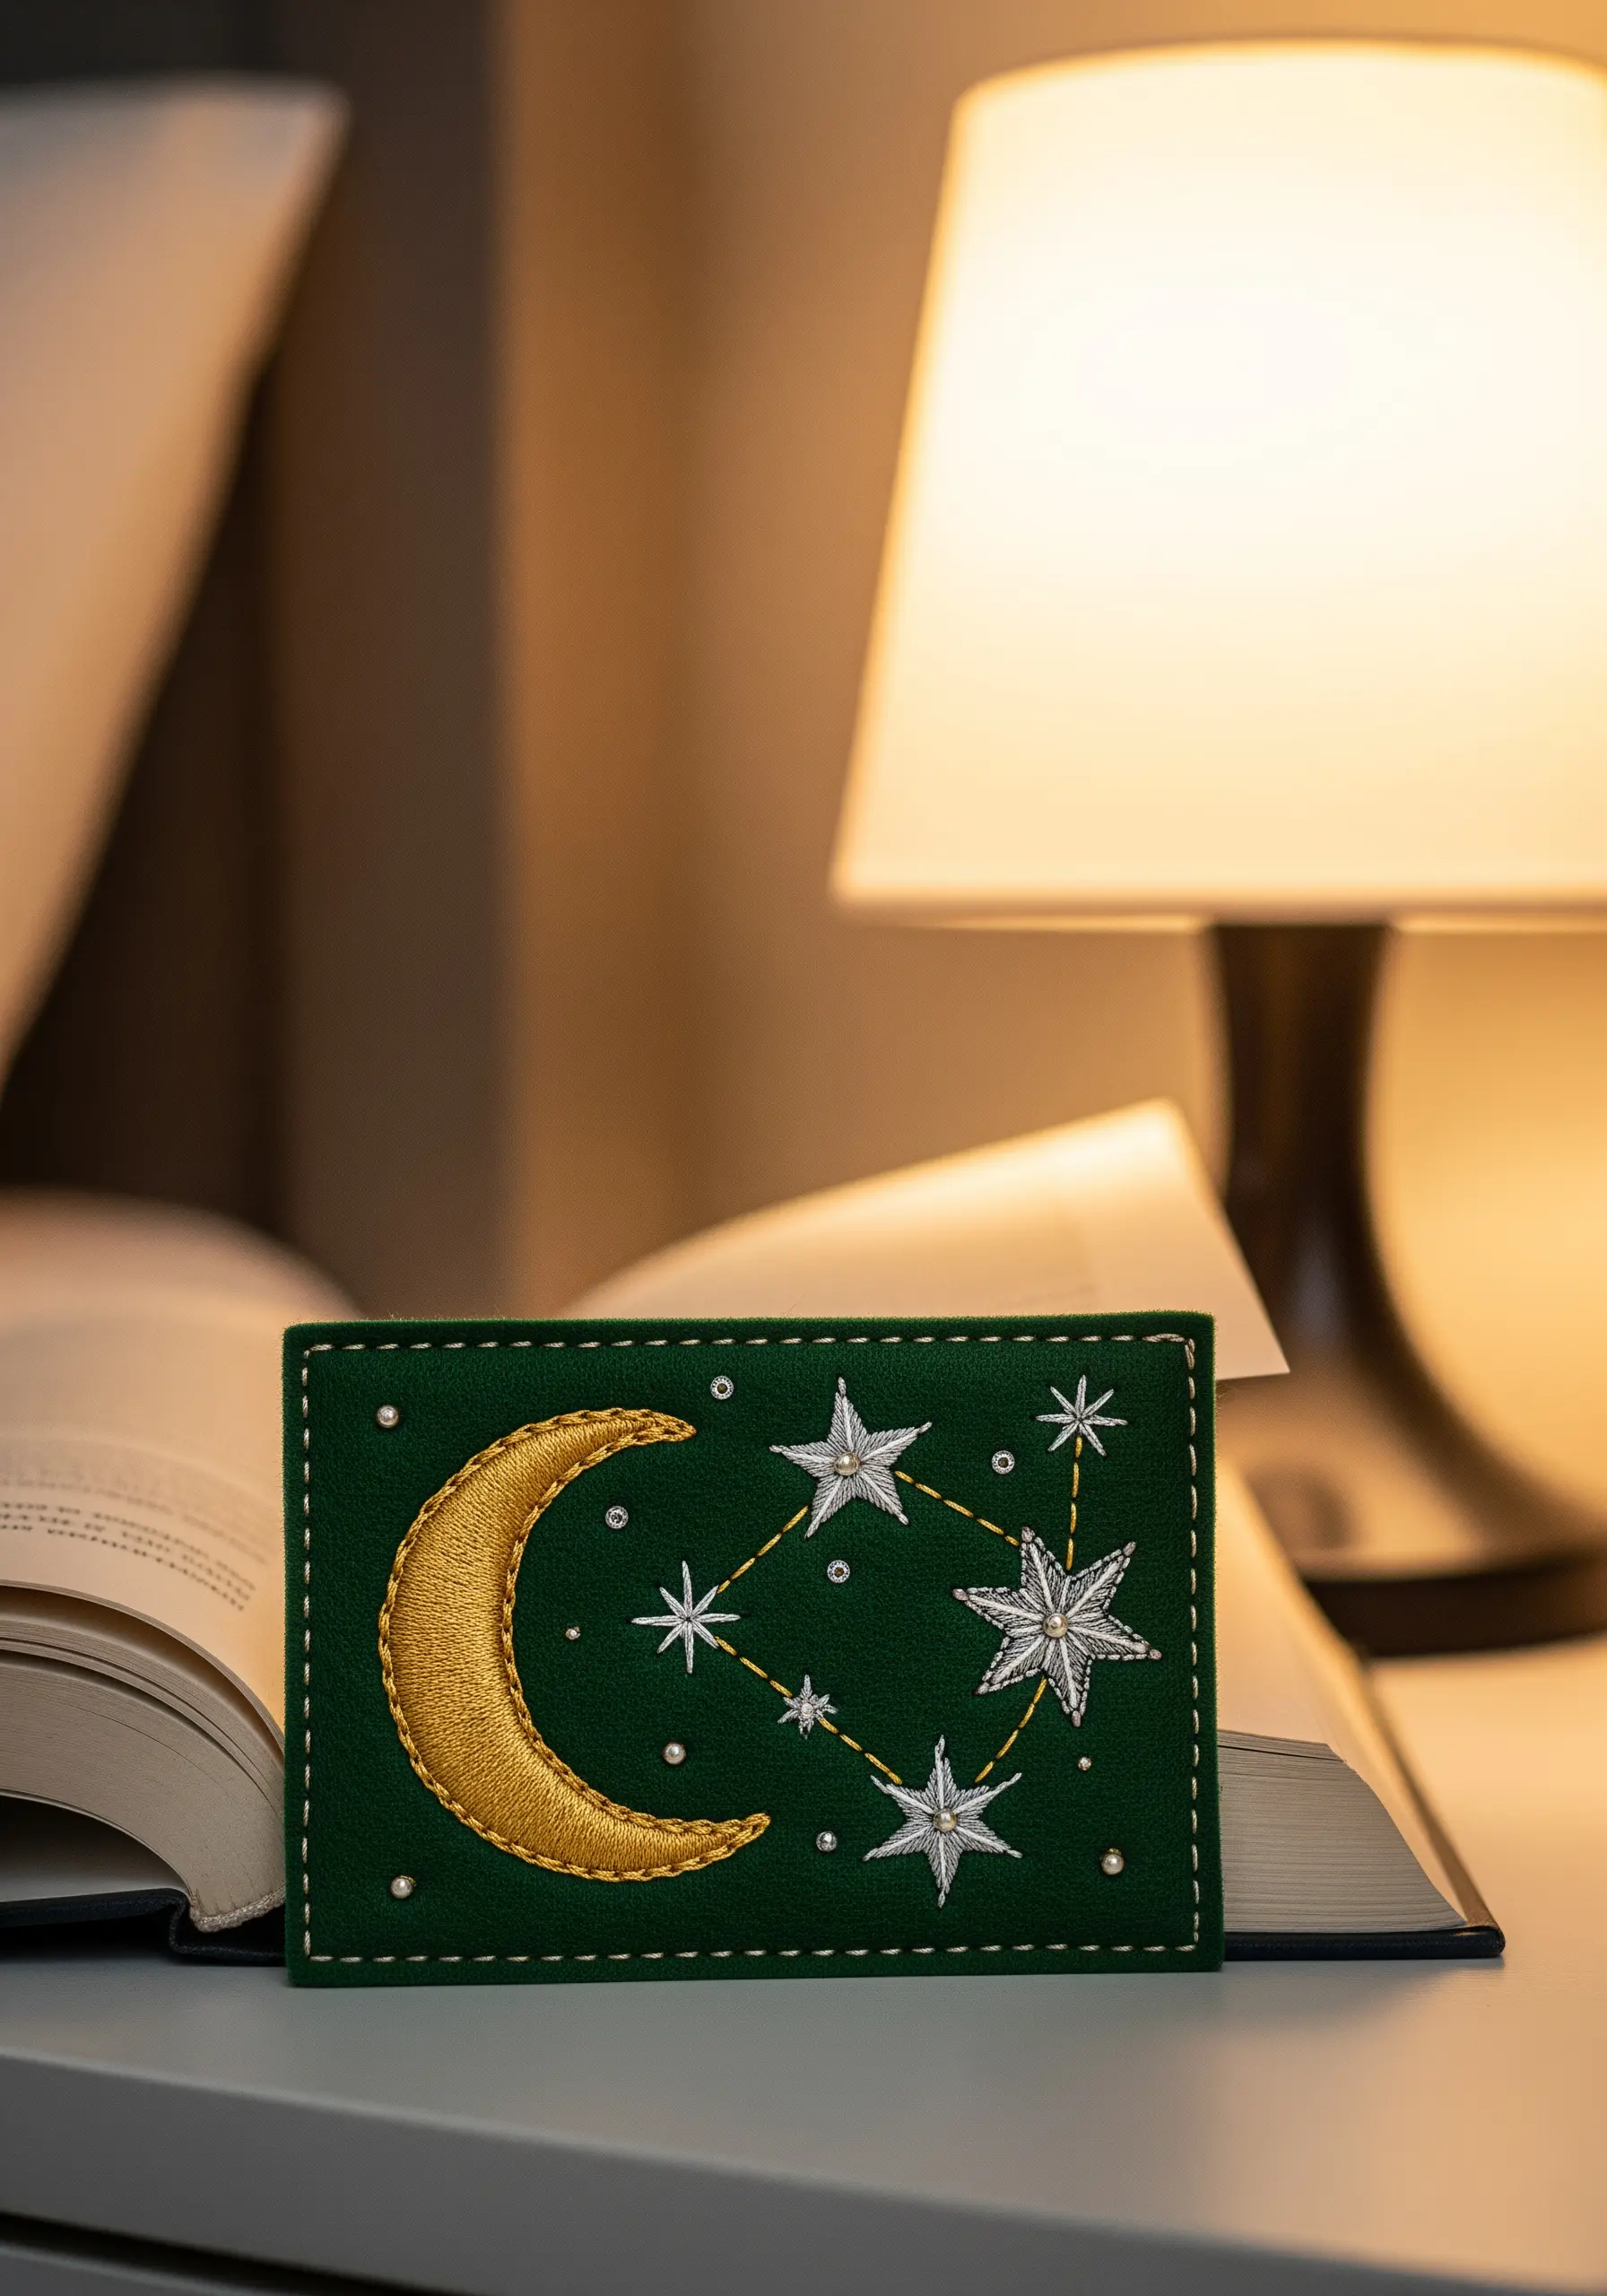
To make celestial motifs truly shine, strategically blend metallic thread with standard cotton floss.
For the moon, use a padded satin stitch with a gold metallic thread to create a raised, light-catching surface that feels substantial.
For the stars, combine a single strand of silver metallic with a white cotton strand; this pairing makes the thread easier to handle and gives a subtle, ethereal shimmer rather than a harsh glitter.
Using a thread conditioner or beeswax will prevent the metallic fibers from tangling and fraying as you stitch.
6. Finish with a Flourish: The Art of the Tassel
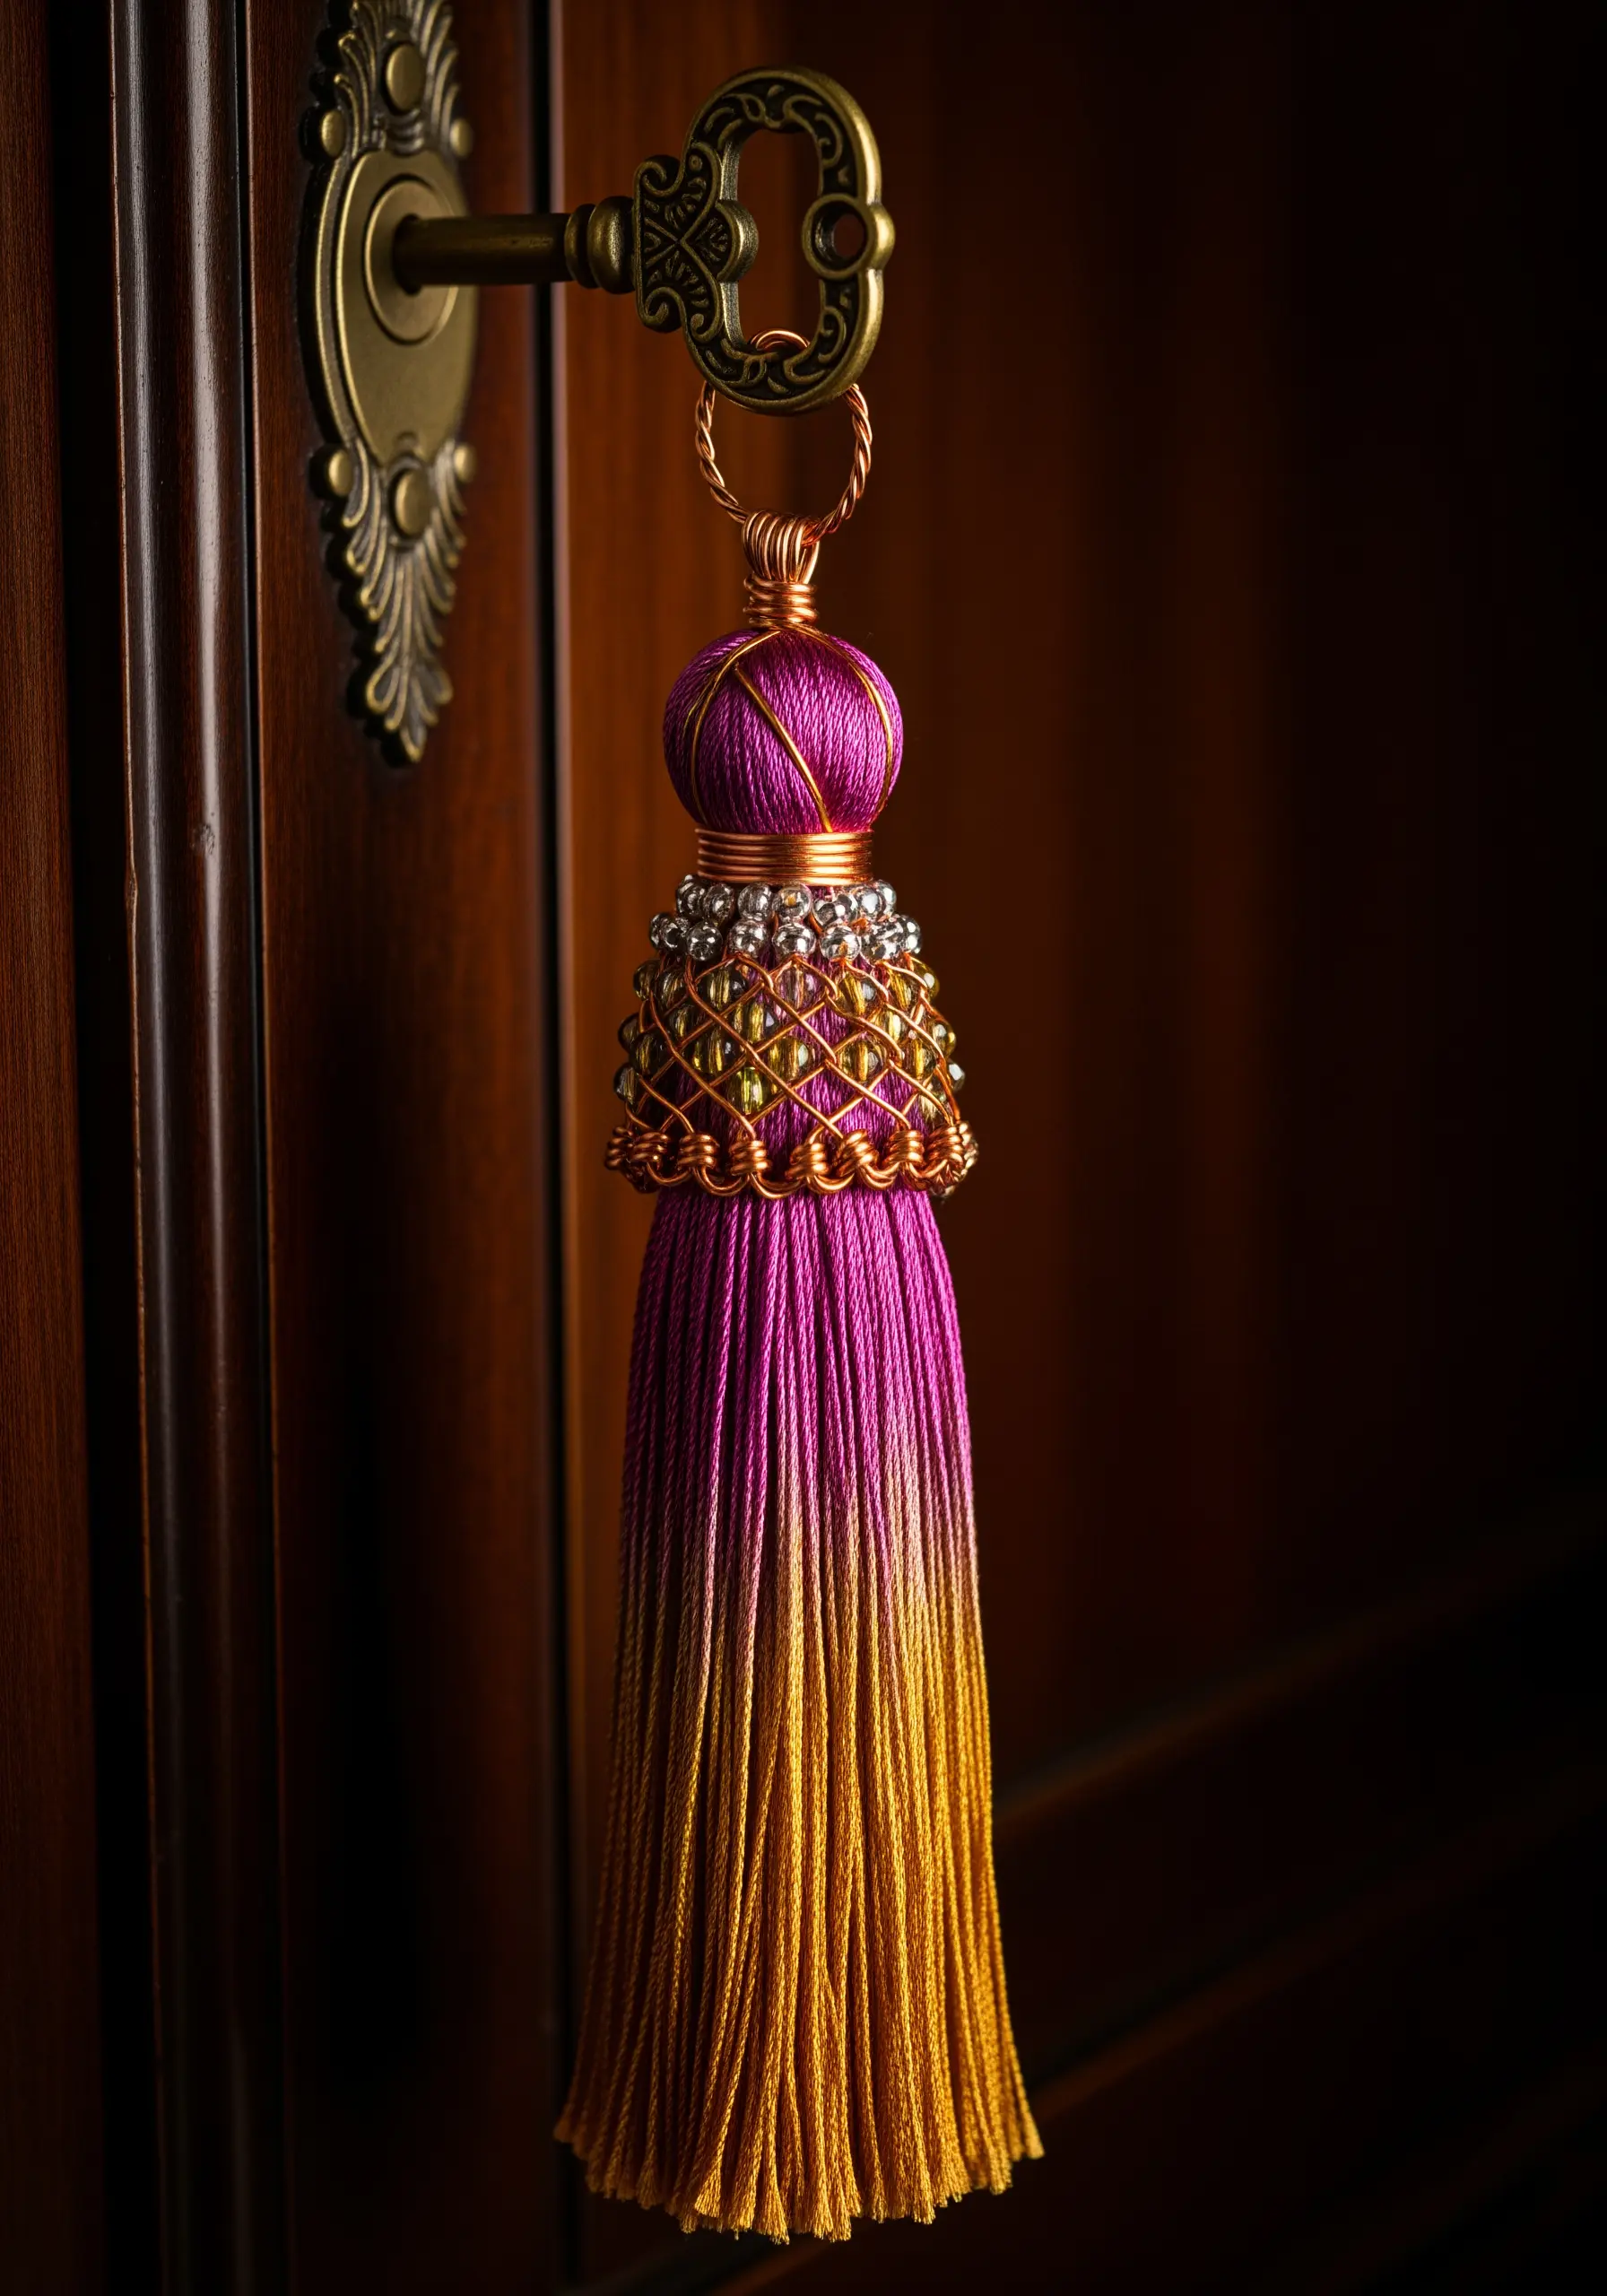
Elevate your finished embroidery pieces, like wall hangings or bookmarks, by adding a custom tassel.
Create your own by wrapping embroidery floss around a piece of cardboard, tying it at the top, and cutting the bottom.
To achieve a beautiful gradient effect, wrap two or three complementary colors simultaneously.
You can even embellish the tassel head with beads or a tightly wrapped metallic thread for a luxurious finish that coordinates perfectly with your stitched art.
7. The Elegance of the Continuous Line
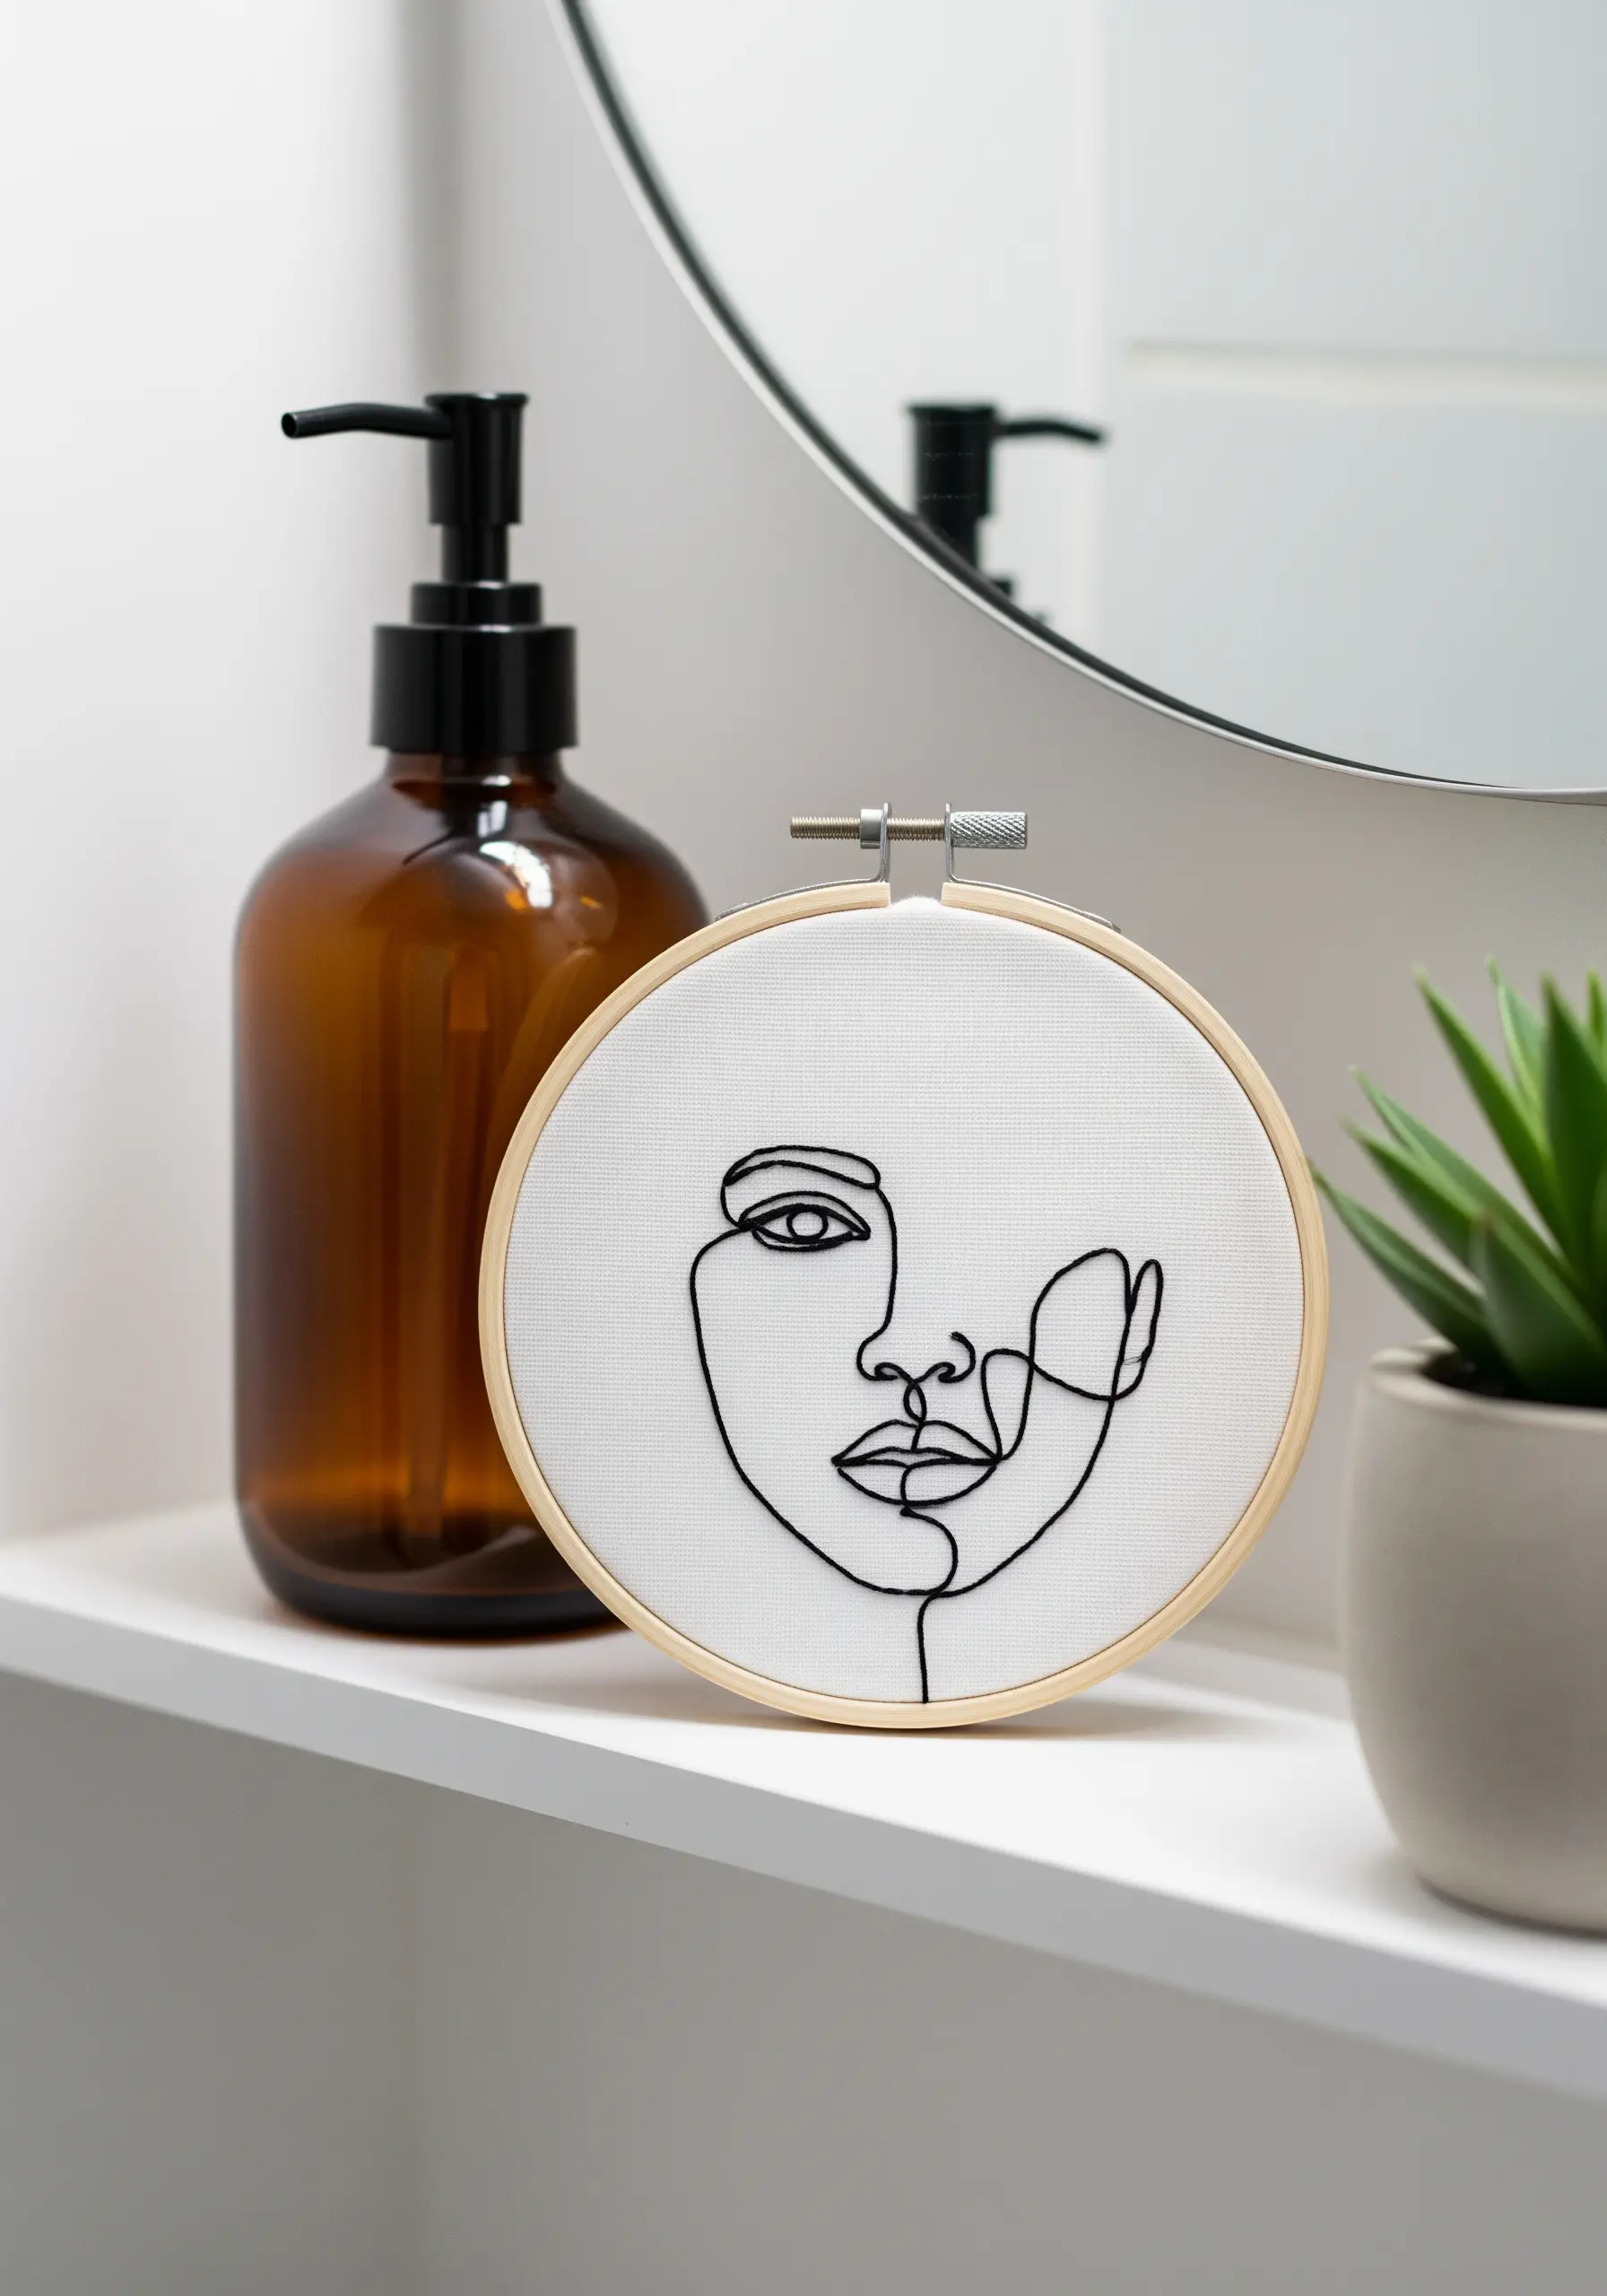
For clean, fluid one-line embroidery wall arts, your stitch choice is paramount.
Instead of a standard backstitch, which can look segmented on curves, use a whipped backstitch or a stem stitch.
A whipped backstitch smooths the line by wrapping a second thread around the base stitches, creating a seamless, cord-like effect.
This technique ensures your curves are graceful and your final piece looks intentional and polished, especially with high-contrast thread.
8. Capture Folk Art Charm in Stitches
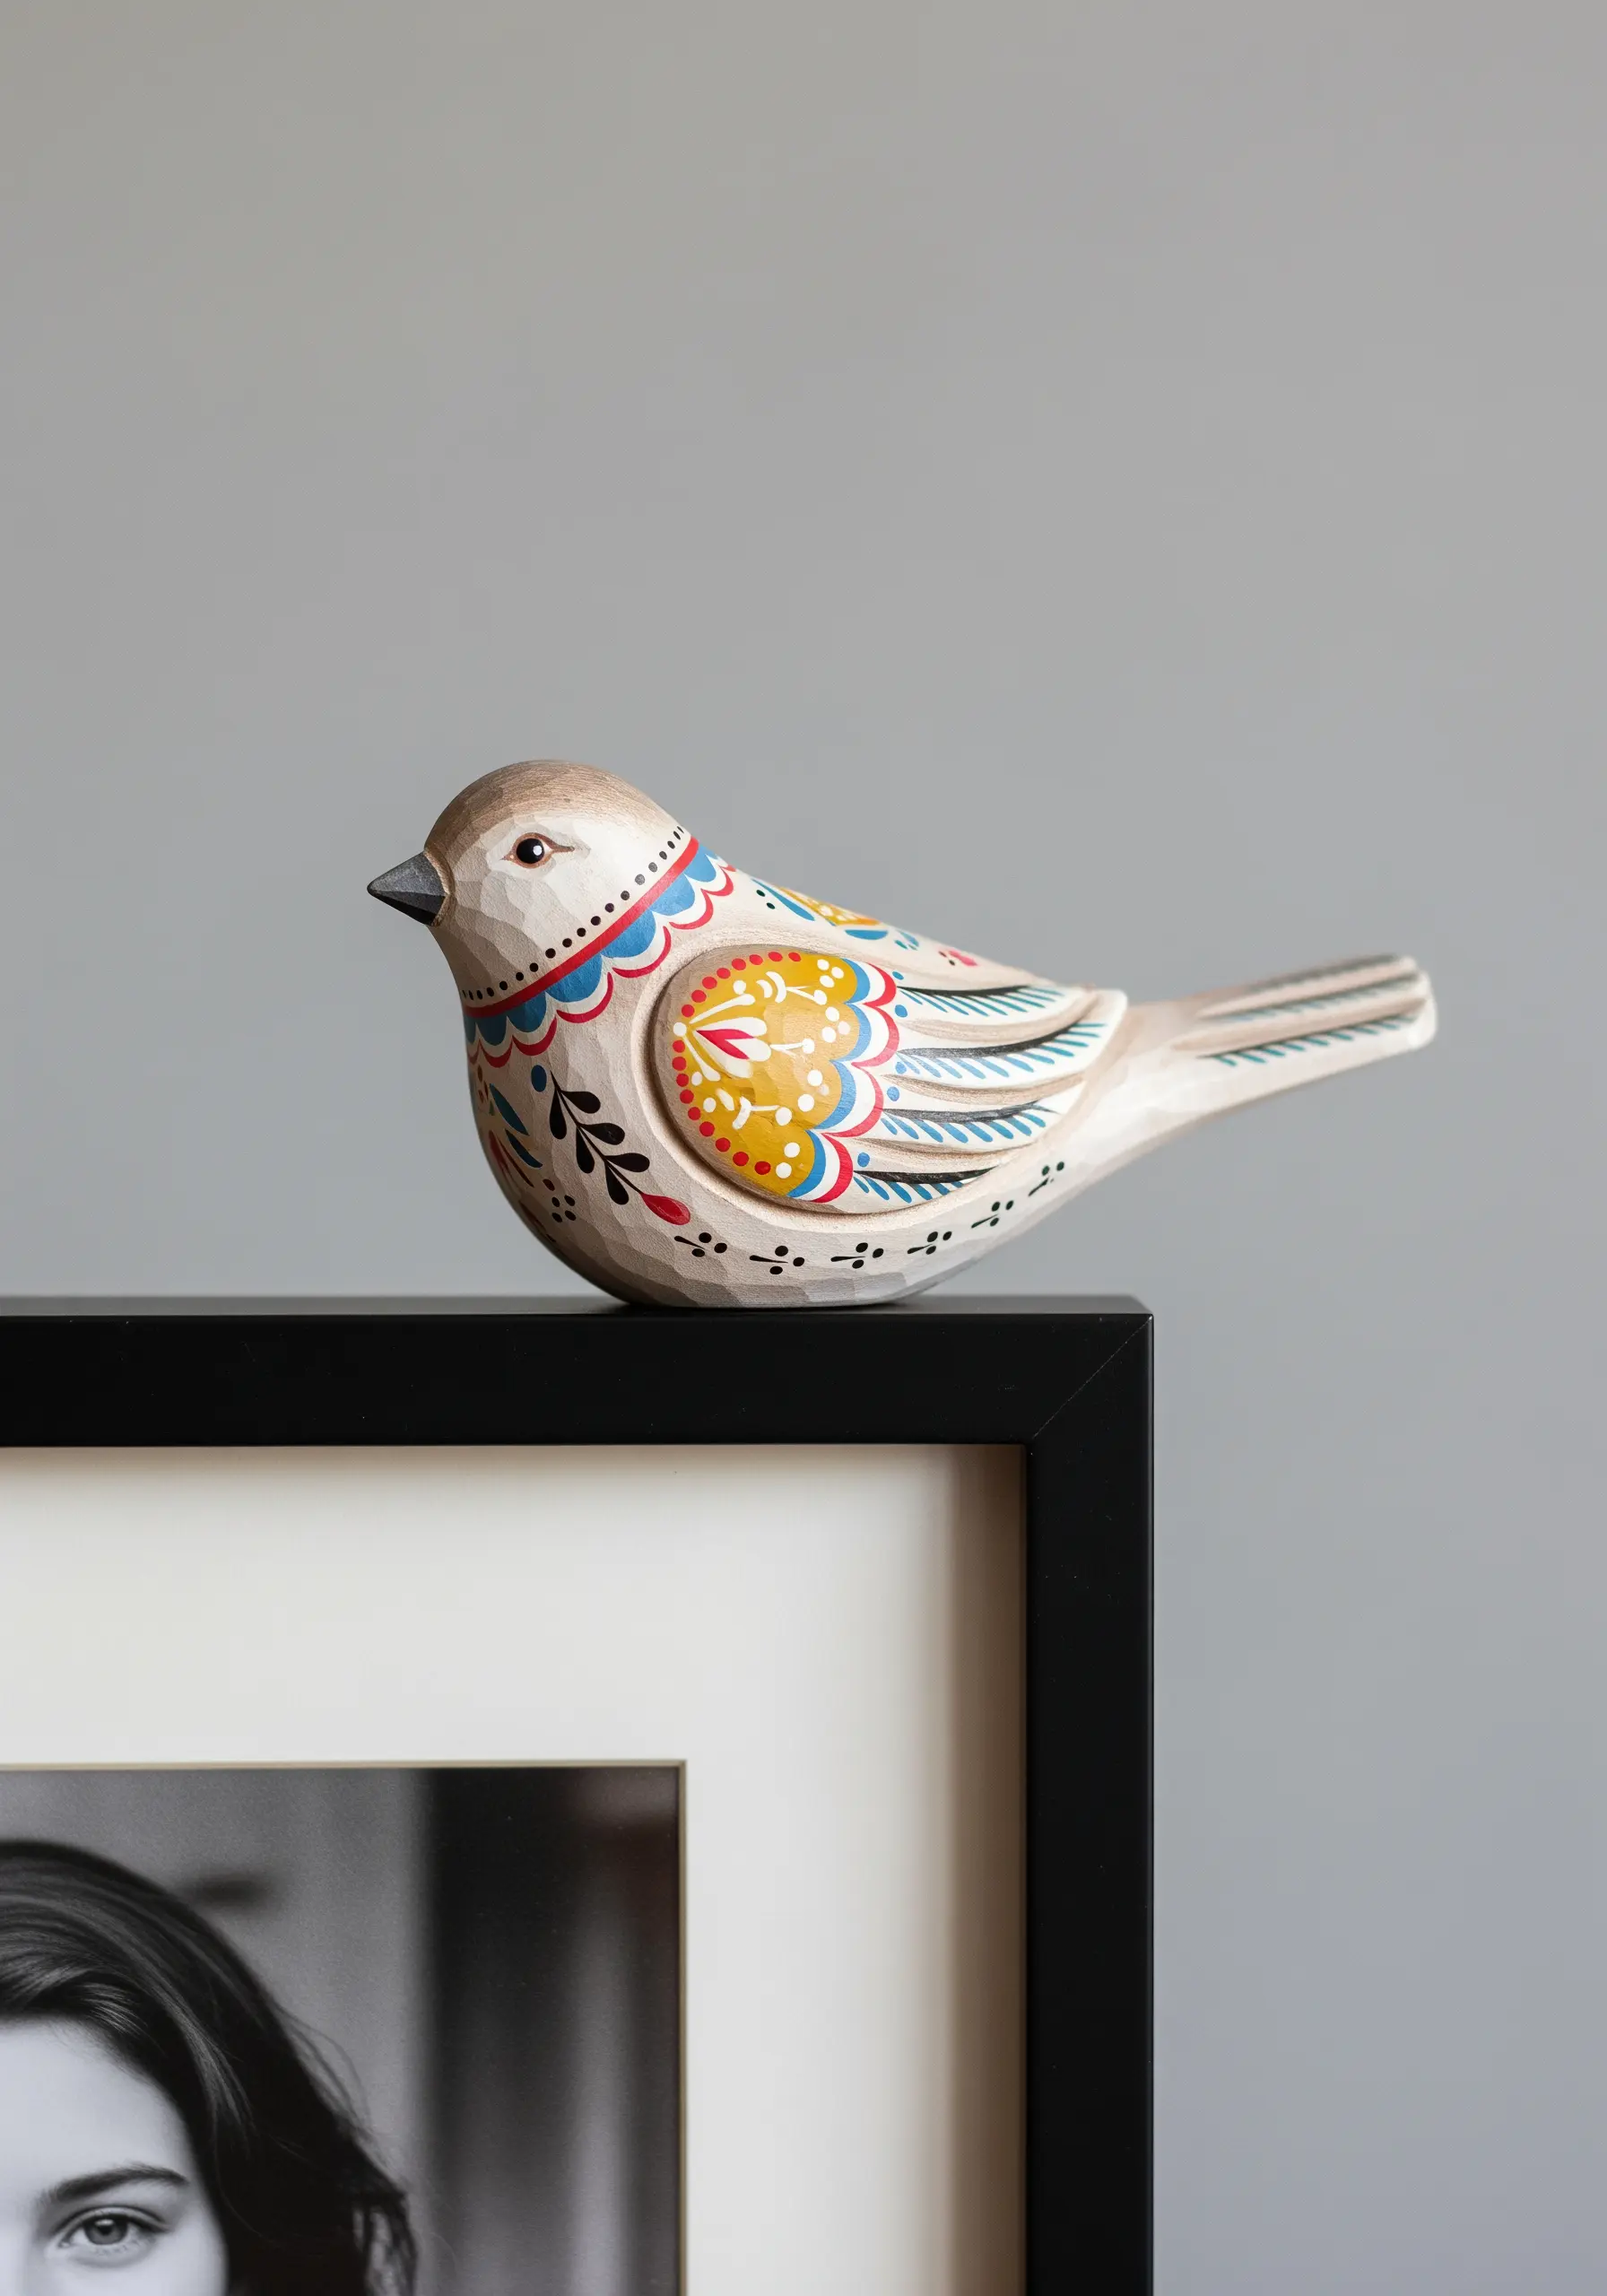
The simple, repeating patterns found in folk art translate beautifully into embroidery.
Replicate this style using fundamental stitches that create graphic impact: use satin stitch for bold blocks of color, French knots for dots and eyes, and detached chain stitches (lazy daisies) for petal and leaf shapes.
This direct and honest approach to decoration is perfect for adding a touch of whimsical, handcrafted charm to everyday items like tea towels or aprons.
9. Preserve Botanicals with Thread and Tulle
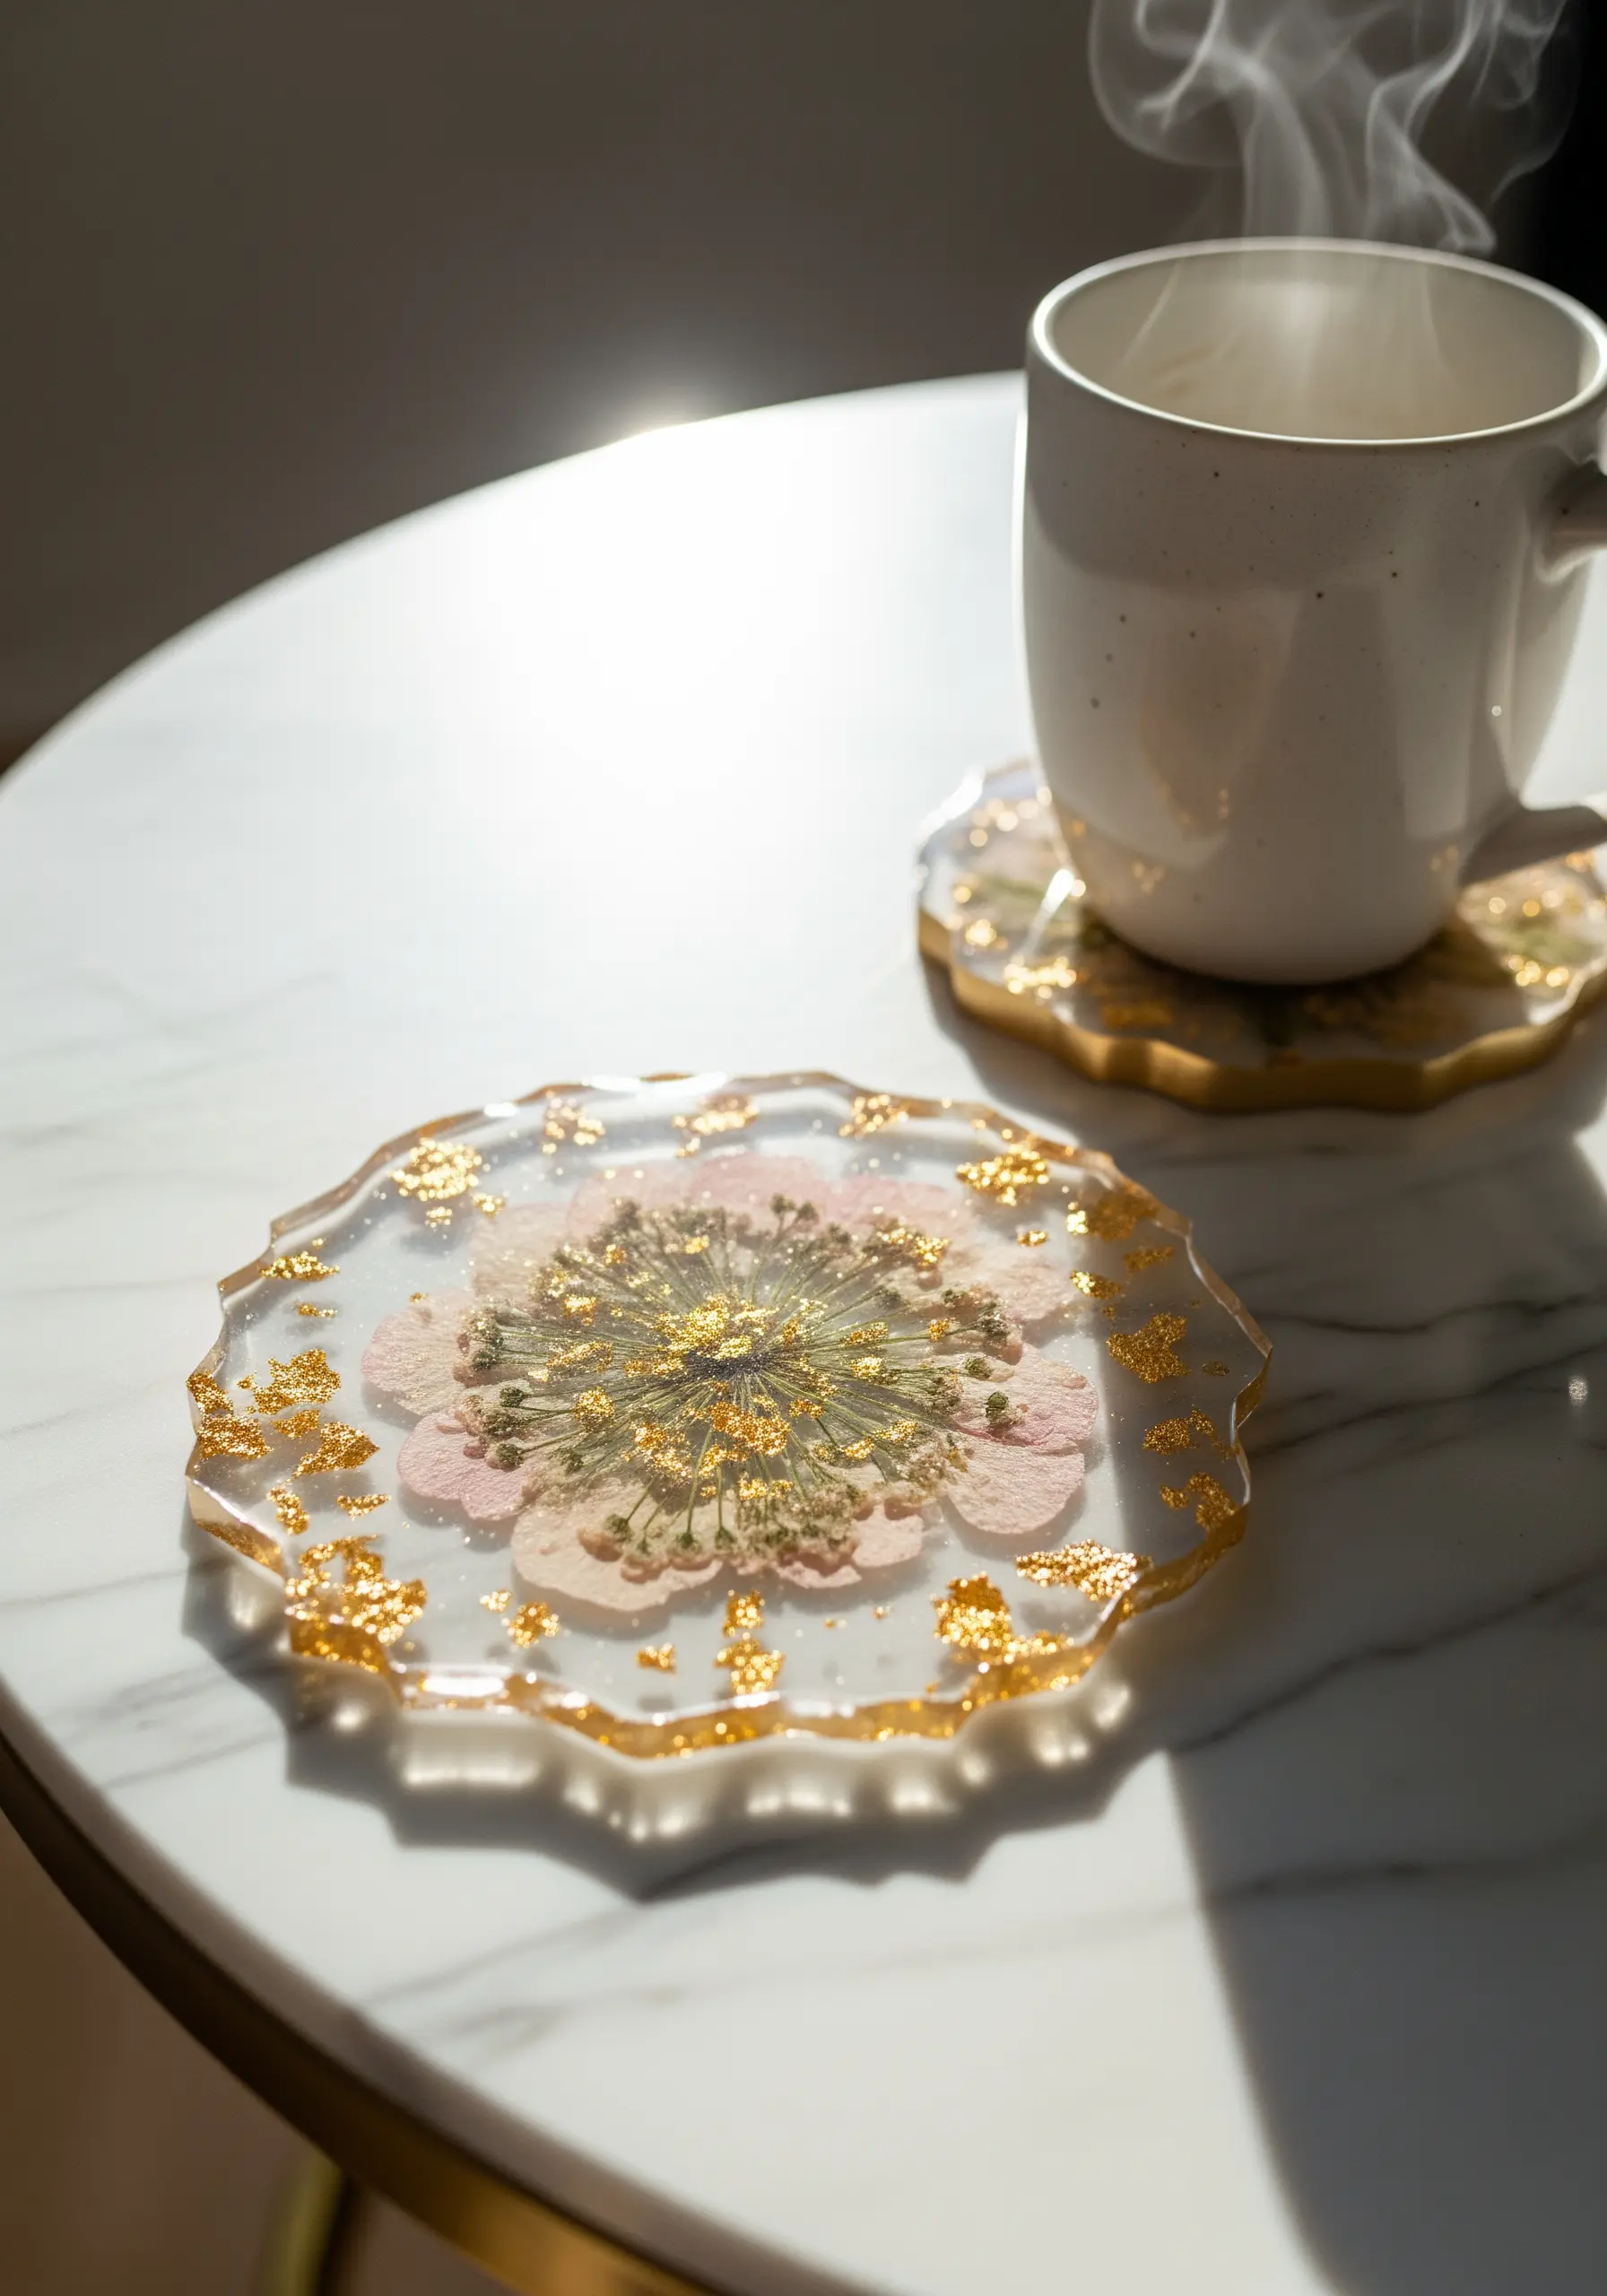
Create the delicate, suspended look of resin art by stitching onto sheer fabric.
Carefully arrange tiny pressed flowers on a layer of tulle or organza stretched tightly in a hoop.
Secure them with nearly invisible couching stitches, using a single strand of thread that matches the botanicals.
You can then add subtle embroidered details, like stems or leaves, to connect the elements, creating an ethereal composition that plays with light and shadow.
10. Stitching with a Metallic Sheen

The warm glow of copper can be replicated in thread to add a sophisticated touch to your textile work.
Choose a copper-colored metallic or satin floss for lettering projects or accents.
To mimic the stamped effect on these markers, use a padded satin stitch to give letters a raised, dimensional quality.
This is particularly effective for stitching monograms or short quotes on dark fabric, creating a piece of decor that feels both modern and timeless.
11. Explore Tactile Art with Punch Needle
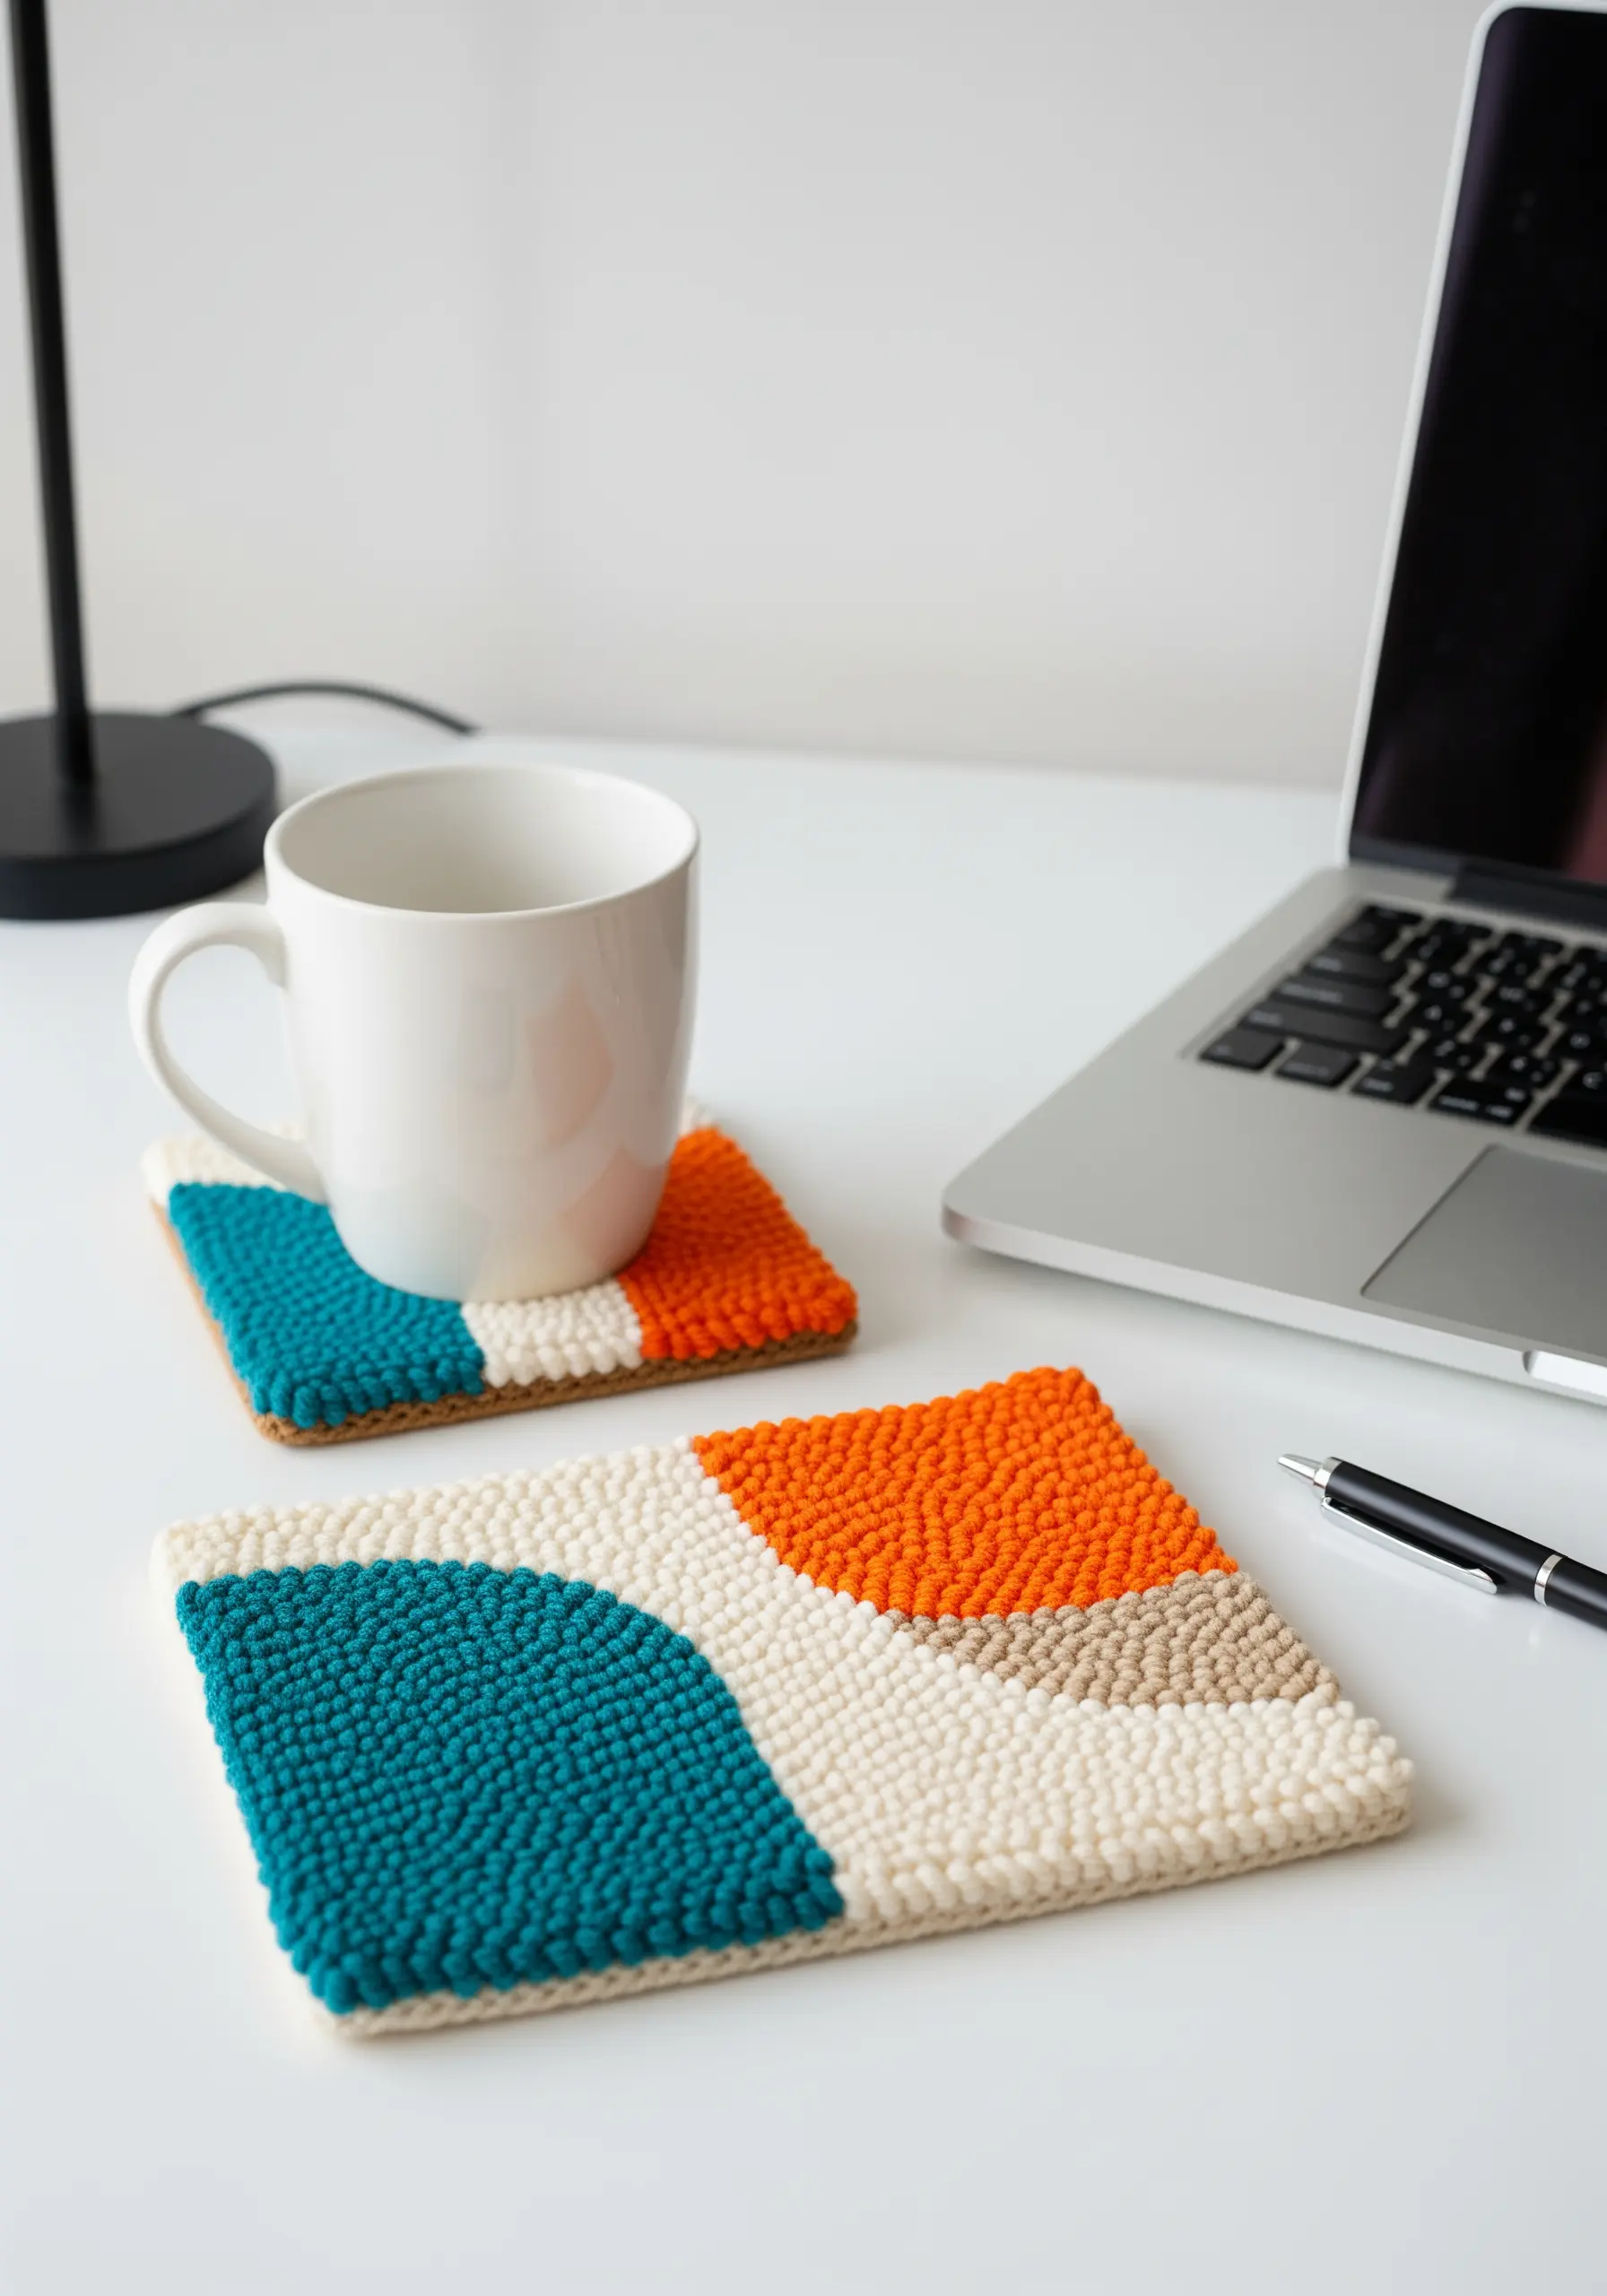
If you love texture but want to cover a larger area quickly, explore punch needle embroidery.
This technique creates dense, plush loops that are perfect for functional items like coasters or decorative wall art.
Play with loop height and yarn weight to create varied textures within a single piece.
The color-blocking patterns seen here are especially effective, creating bold, graphic designs with a deeply satisfying tactile finish.
12. Frame Botanicals with Negative Space

The elegance of a floating frame lies in its deliberate use of negative space—a principle you can apply to your embroidery.
Instead of filling the entire hoop, stitch a single, detailed fern or flower sprig onto a sheer or semi-sheer fabric.
By leaving the surrounding area empty, you draw the viewer’s eye directly to the delicate details of your stitching.
This creates a refined, gallery-worthy piece that feels light and modern, perfect for minimal embroidery wall designs.
13. Embroider on Paper and Book Covers
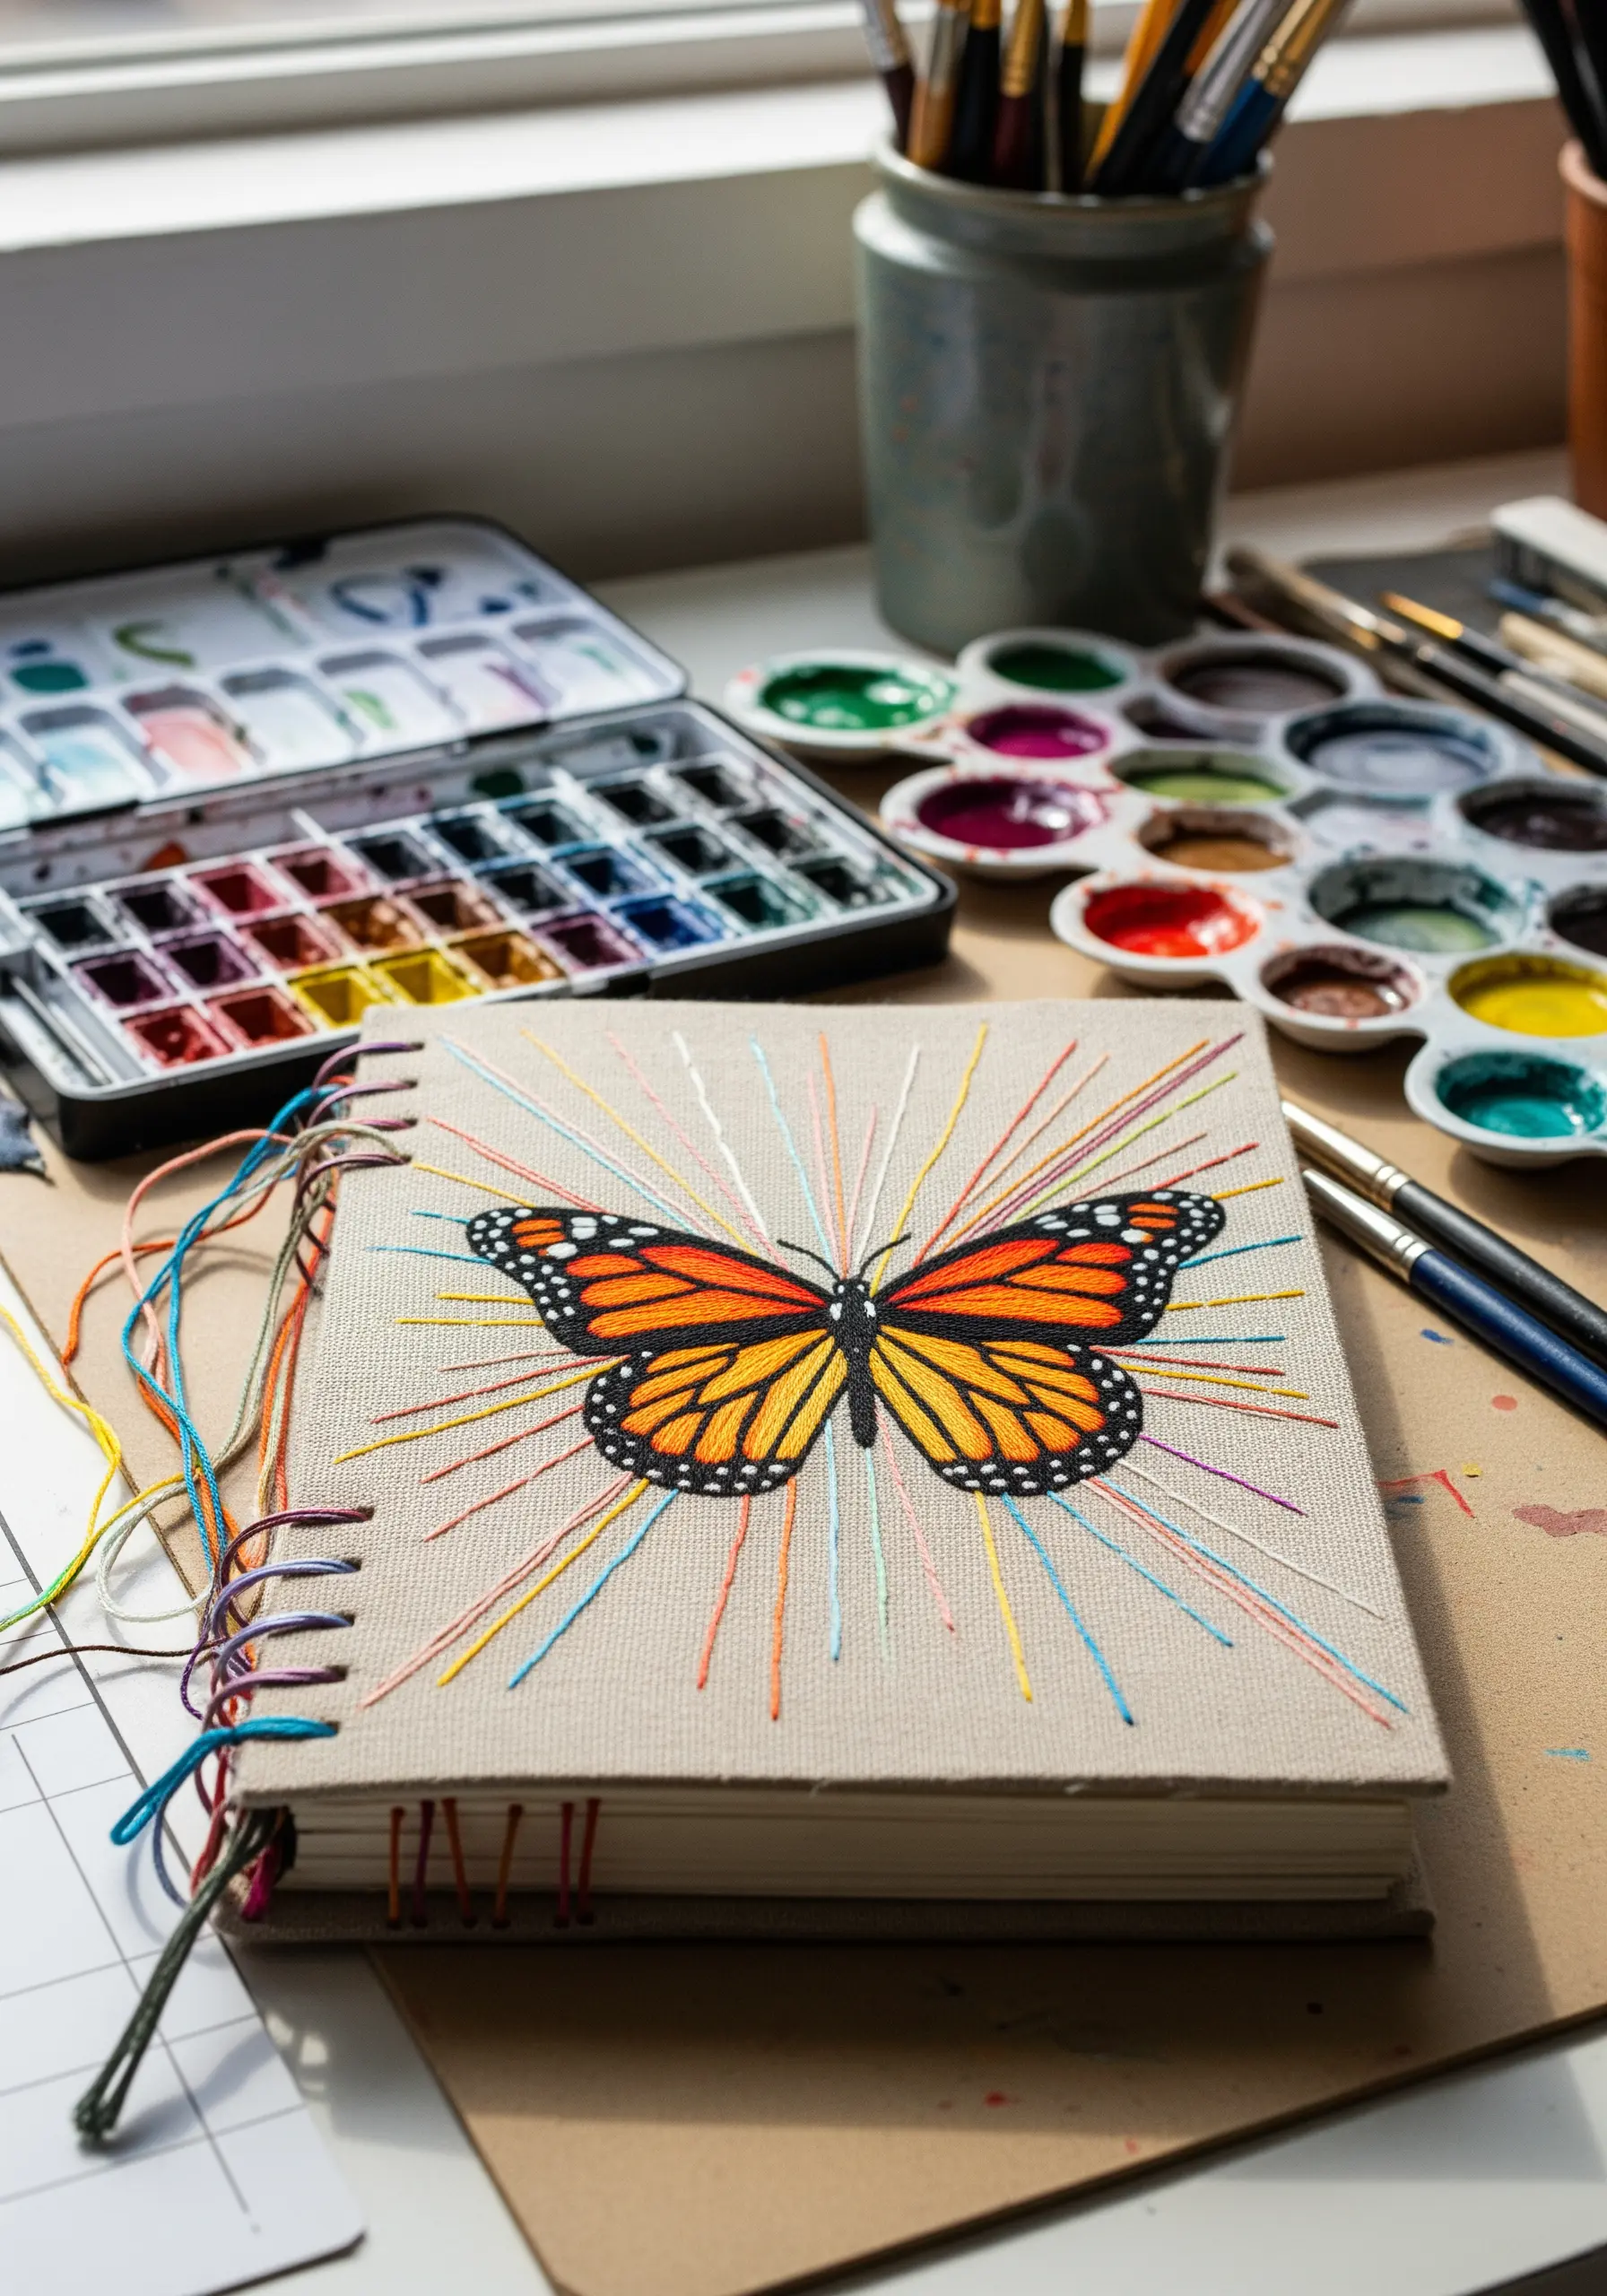
Stitching on a non-fabric surface like a journal cover requires a few key adjustments for a clean result.
First, always pre-pierce your holes along the design lines with a sharp awl or a thick needle to prevent tearing the paper or book cloth.
Use a thimble to protect your fingers when pushing the needle through.
Choose simple designs with longer stitches, like the radiating straight stitches here, to minimize perforations and create beautiful, personalized notebooks and journals.
14. Add Dimension and Weight with Beading

Incorporate beads into your embroidery to add texture, a hint of sparkle, and a pleasing physical weight to finished pieces.
Think about how they can enhance your design—use tiny seed beads to outline a shape, add a single larger bead as the center of a flower, or create a beaded fringe along the bottom of a wall hanging.
Attach them securely with a single strand of thread that matches your fabric, passing through each bead twice to ensure durability.
15. Create Sculptural Shapes with Needle Felting

For truly three-dimensional botanical elements, combine your embroidery with needle felting techniques.
You can create soft, sculptural leaves or petals by shaping wool roving with a felting needle directly on your base fabric or separately.
Attach the finished forms to your fabric with a few anchoring stitches.
This mixed-media approach allows you to build up textures and shapes that would be impossible with thread alone, adding incredible depth to your fiber art installations.
16. Master Asymmetrical Placement on Textiles
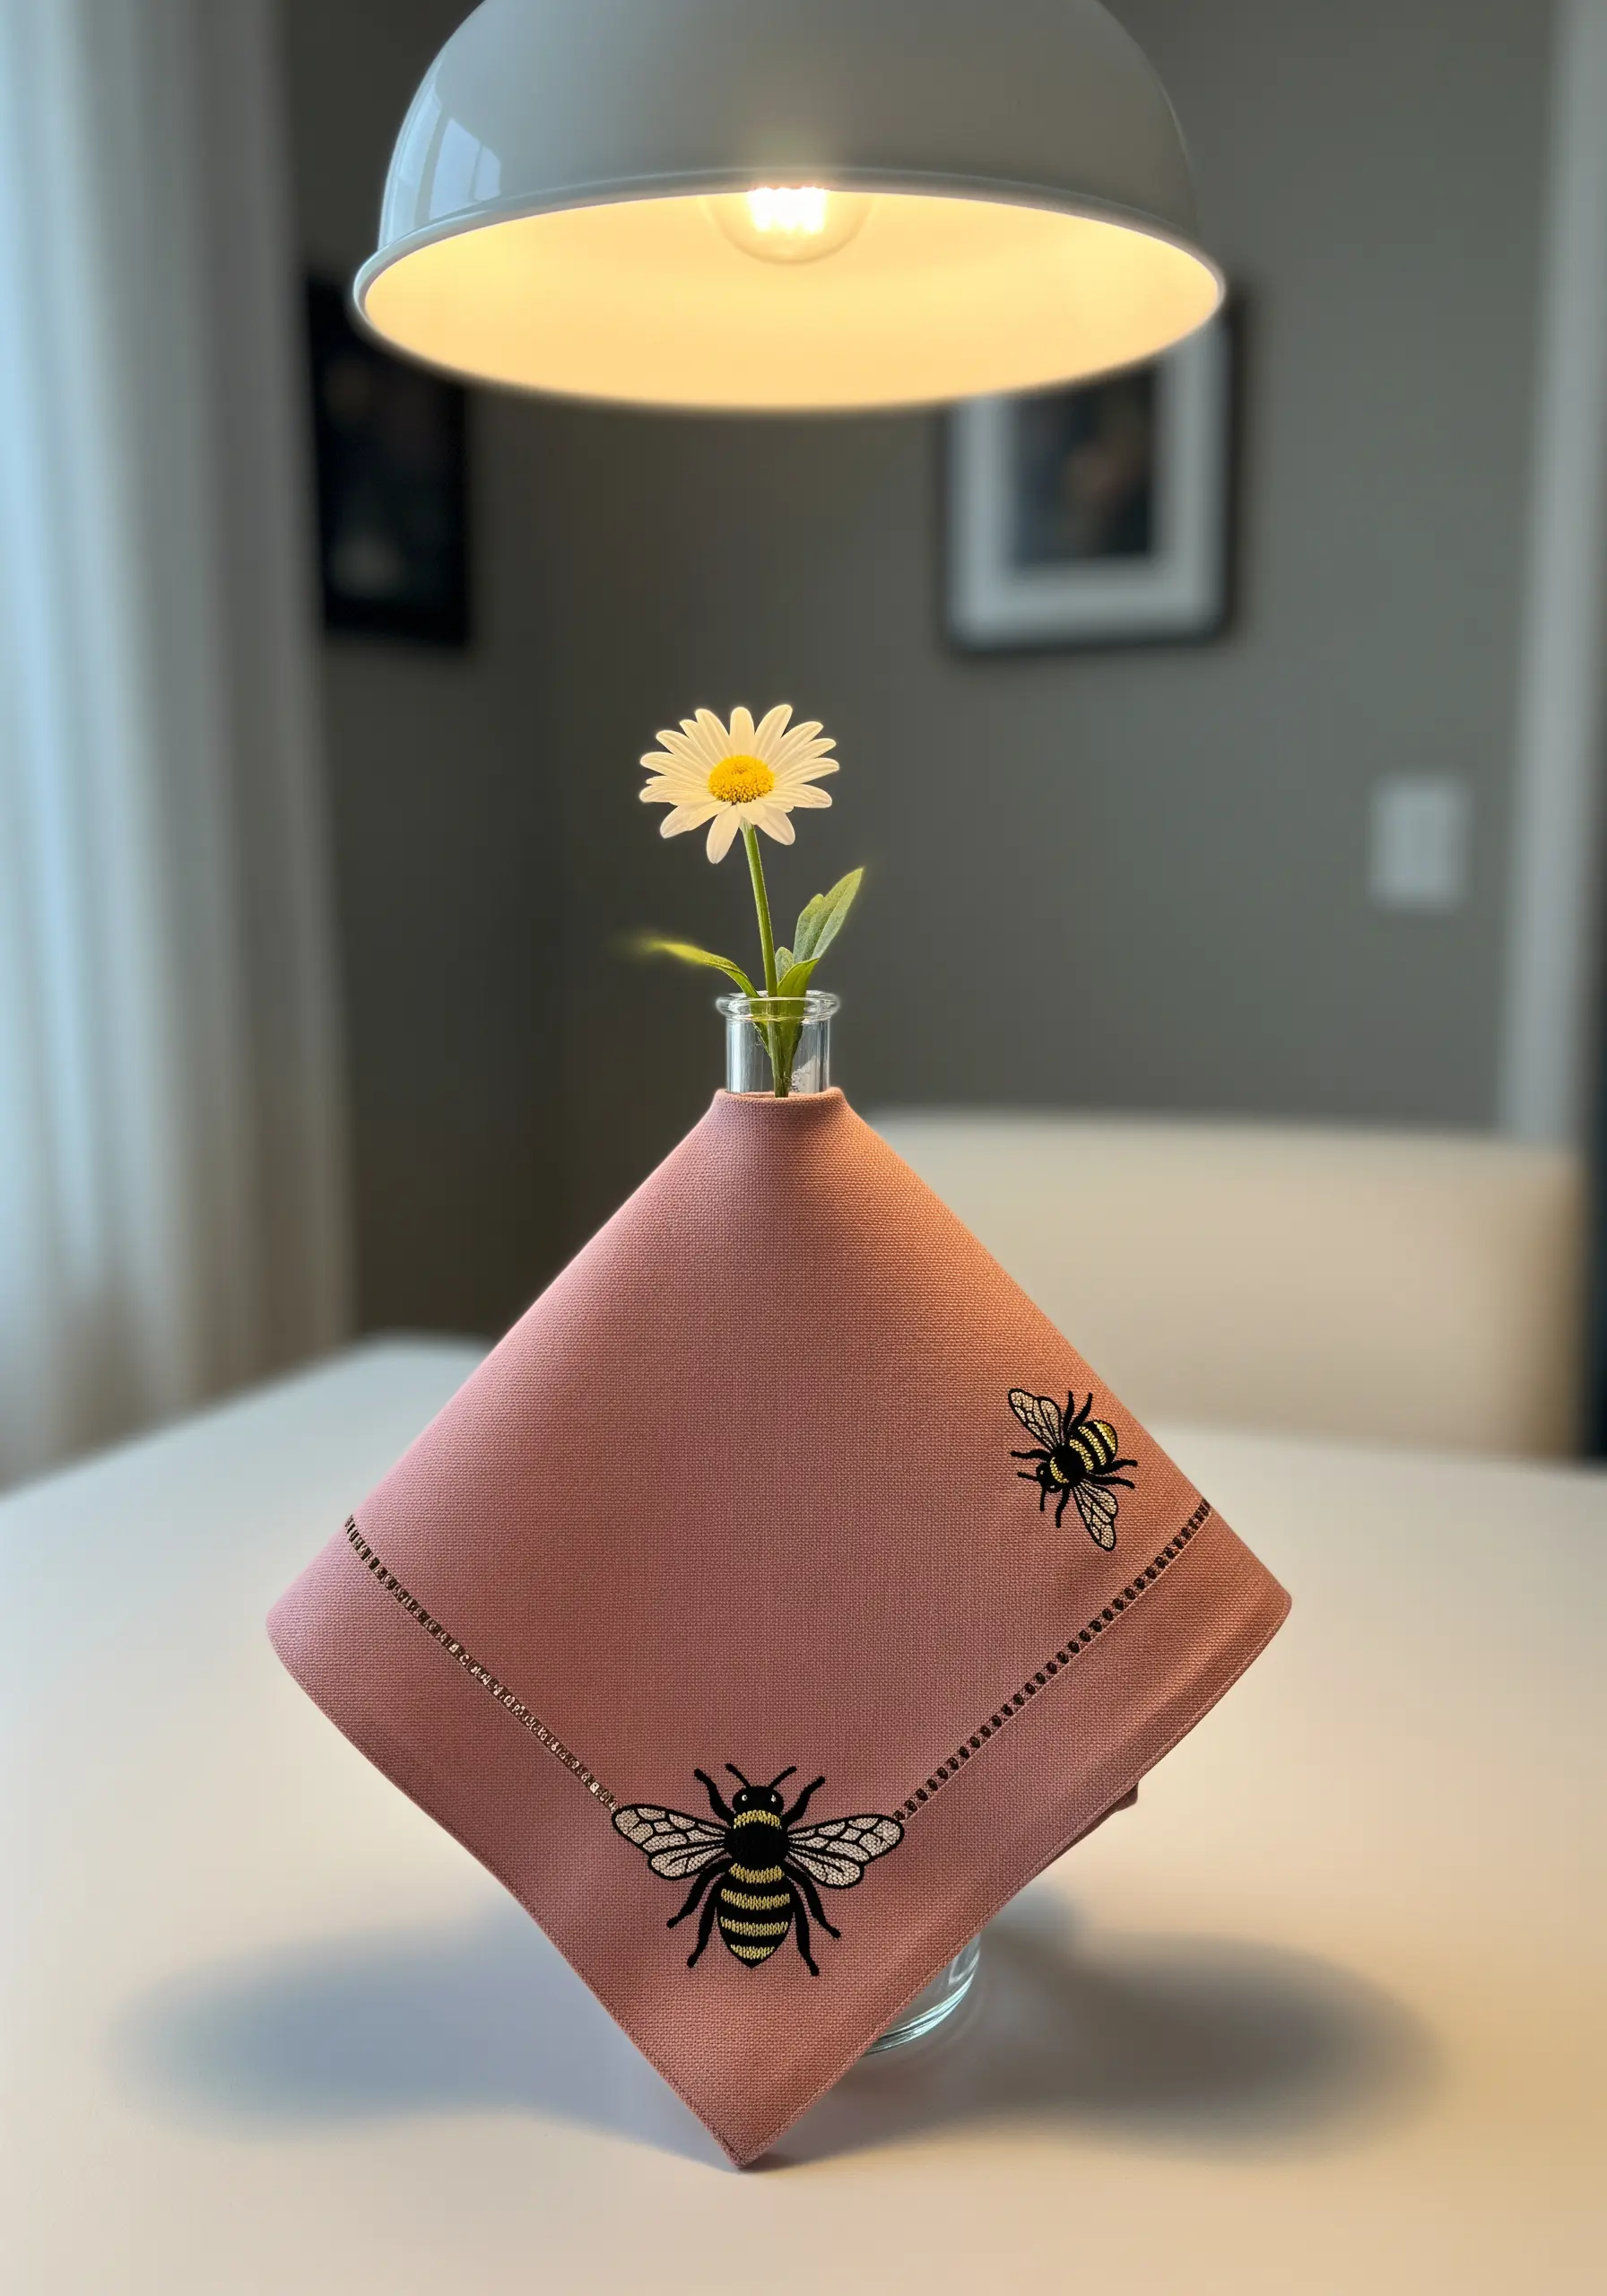
When embellishing home textiles like napkins or tea towels, resist the impulse to perfectly center your design.
An asymmetrical placement, with small motifs placed in opposite corners or along one edge, creates a more dynamic and sophisticated composition.
It allows the design to be visible whether the napkin is folded or in use.
Keep the scale of the embroidery small and detailed to add a touch of bespoke elegance without overwhelming the object, a key principle for beautiful table linen embroidery motifs.
17. Apply the Saddle Stitch to Leather

While you can embroider on soft leather, the clean, strong lines on items like this are often achieved with a traditional leatherworking stitch.
The saddle stitch uses two needles on a single thread, passing through pre-punched holes in opposite directions to create a durable, beautiful seam that lies flat.
You can use this method to attach embroidered patches to leather goods or to create minimalist stitched designs using a thick, waxed thread for a bold, graphic look.
18. Translate Organic Shapes into Stitch Patterns
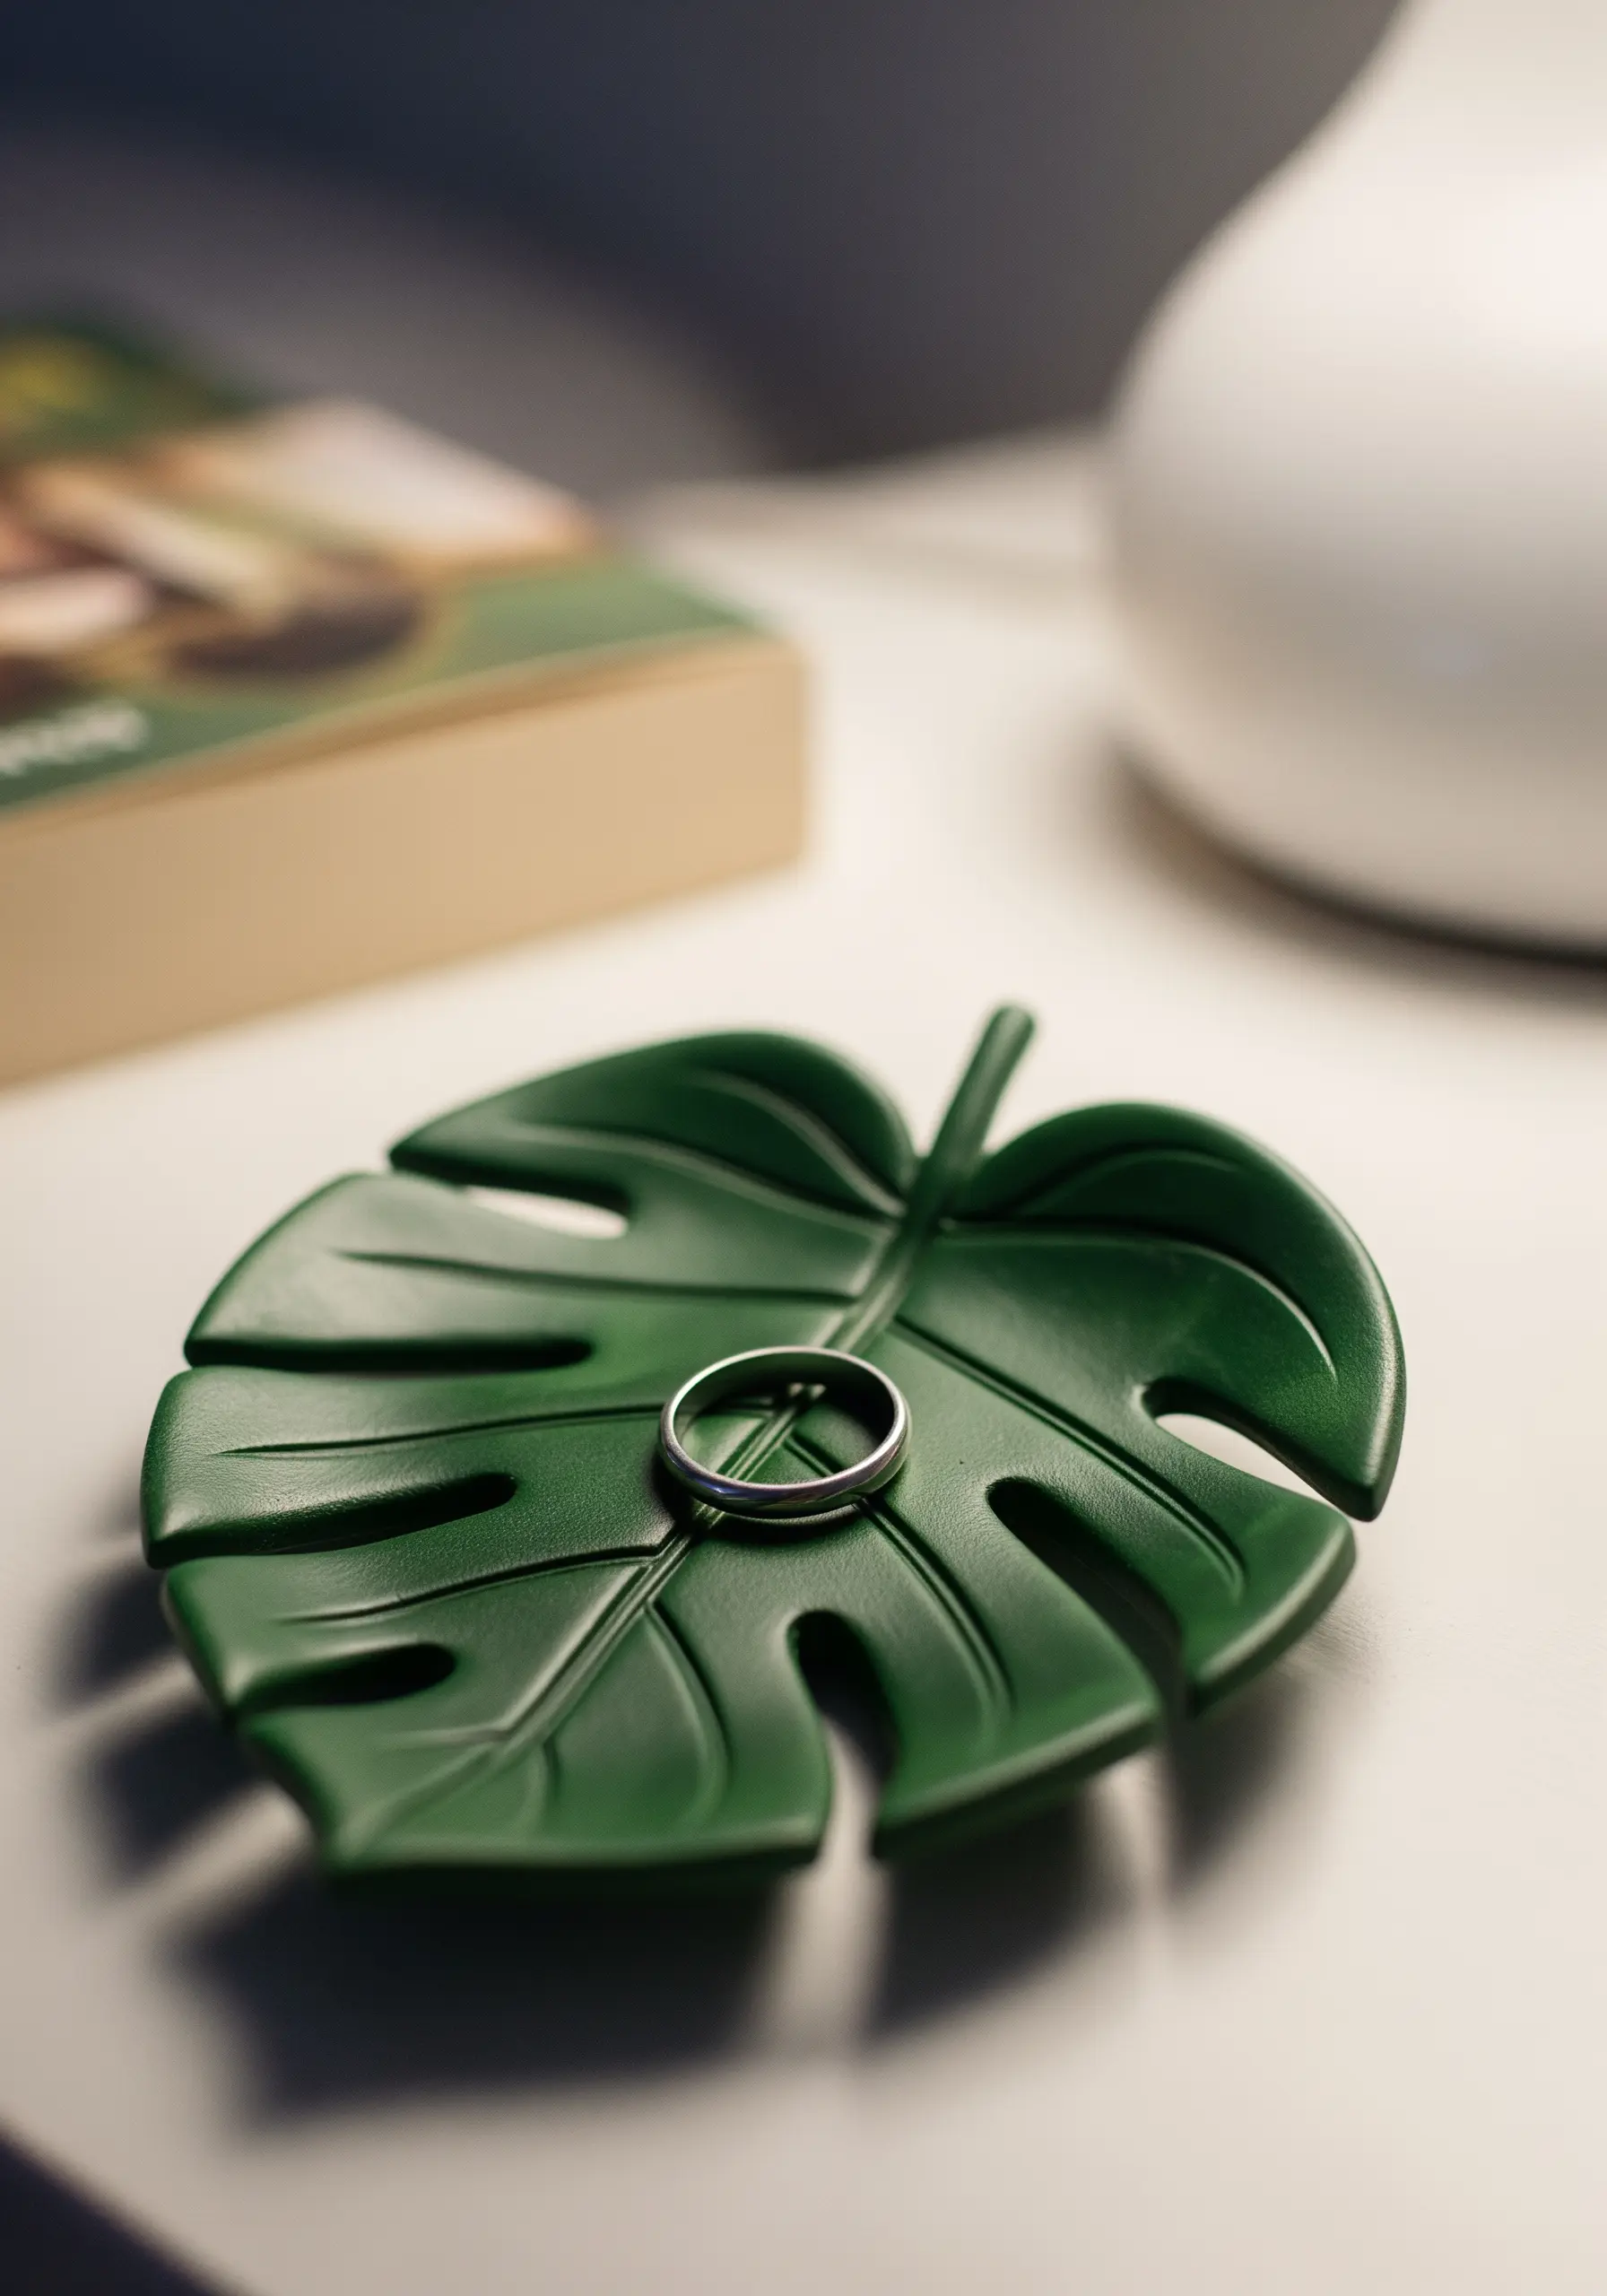
Use the distinct shapes of houseplant leaves as the foundation for a design, not just an outline to fill.
Trace a monstera leaf onto your fabric, then explore different fill stitches to suggest its natural texture.
Use a fishbone stitch for the central vein and angled satin stitches for the leaf planes.
For the characteristic holes (fenestrations), simply leave the fabric bare, using negative space as a design element. This approach creates more artistic leaf shape ideas for embroidering.
19. Achieve Stained Glass Effects in Thread
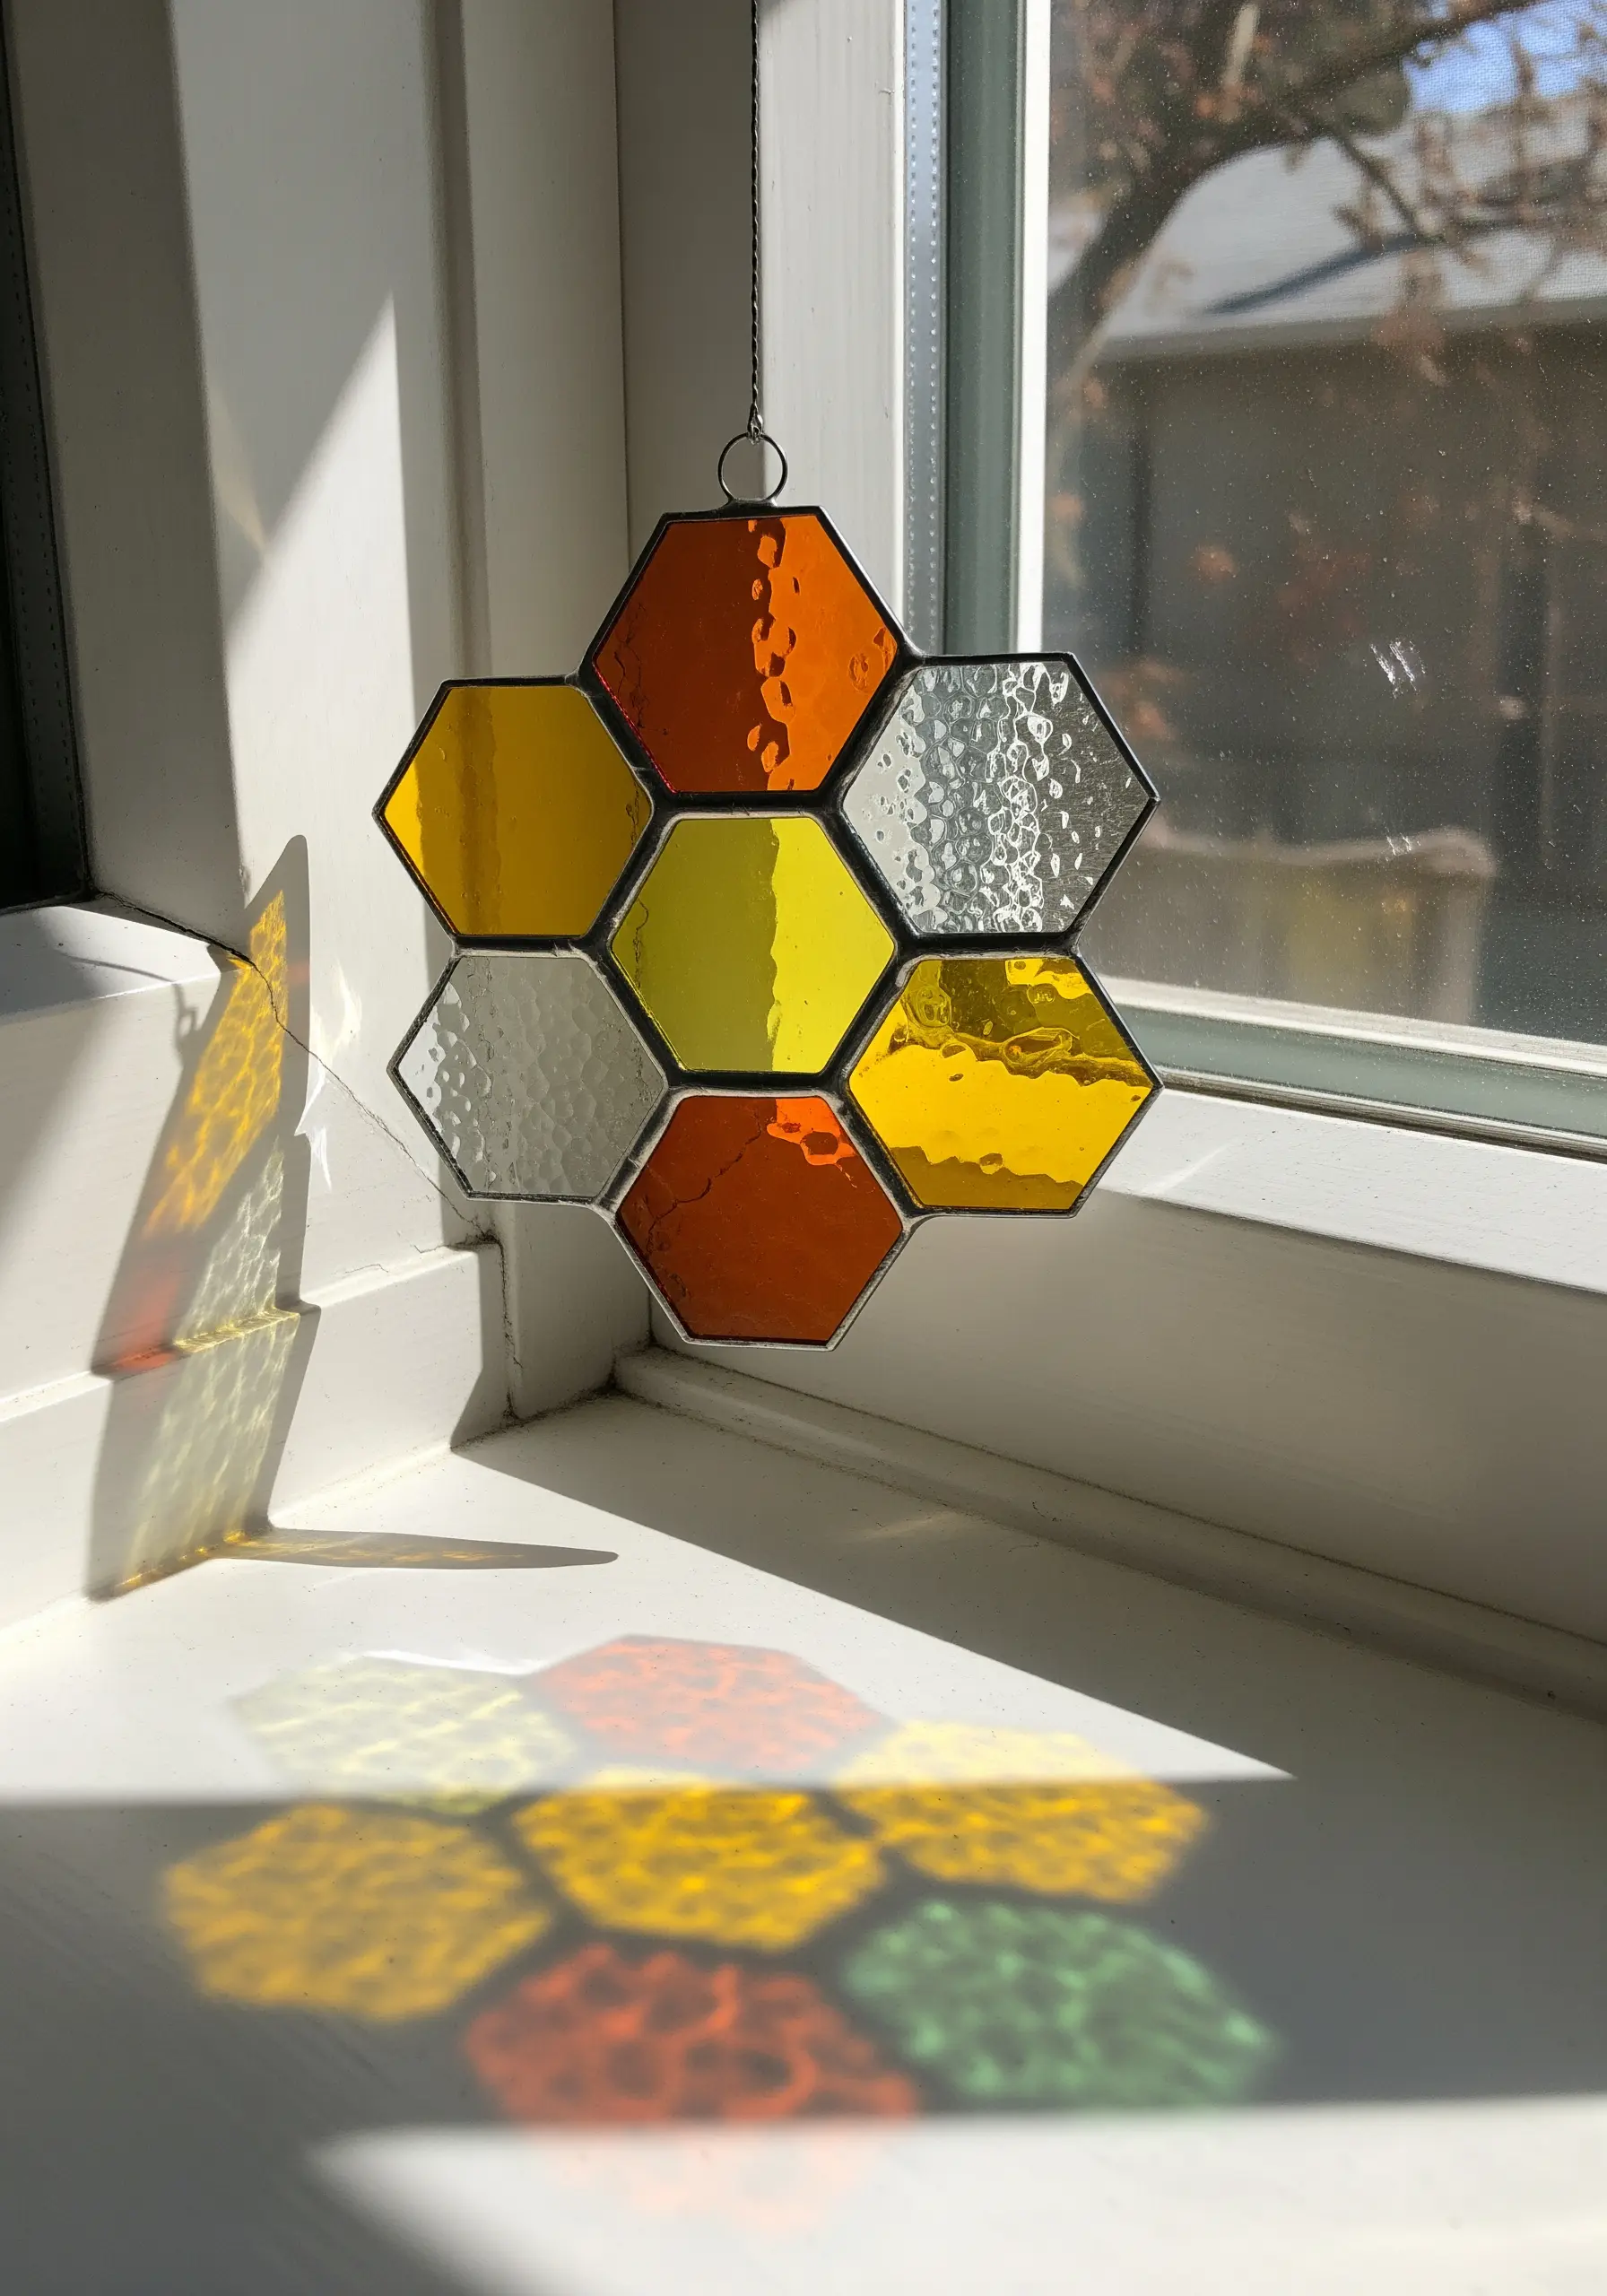
Recreate the luminous look of stained glass by using bold, black outlines and vibrant satin stitch fills.
Trace a geometric pattern onto your fabric and use a thick black thread—or multiple strands—to create the ‘lead lines’ with a stem or whipped backstitch.
Then, fill each segment with jewel-toned floss using a smooth, dense satin stitch.
The key is to keep your fill stitches aligned in the same direction within each shape, creating a smooth, light-reflecting surface that mimics colored glass.
20. Embellish with Geometric Pattern Bands

Instead of a single, central motif, consider adding a simple band of repeating geometric patterns to an object.
This technique, often seen in folk art, can be applied to the cuffs of a shirt, the edge of a pillowcase, or the border of a kitchen towel.
Use a simple backstitch or running stitch to create rows of triangles, zig-zags, or crosses.
This controlled use of pattern adds a thoughtful, handmade detail that feels integrated and intentional rather than just decorative.
21. Stitch a Modern, Fluid Monogram
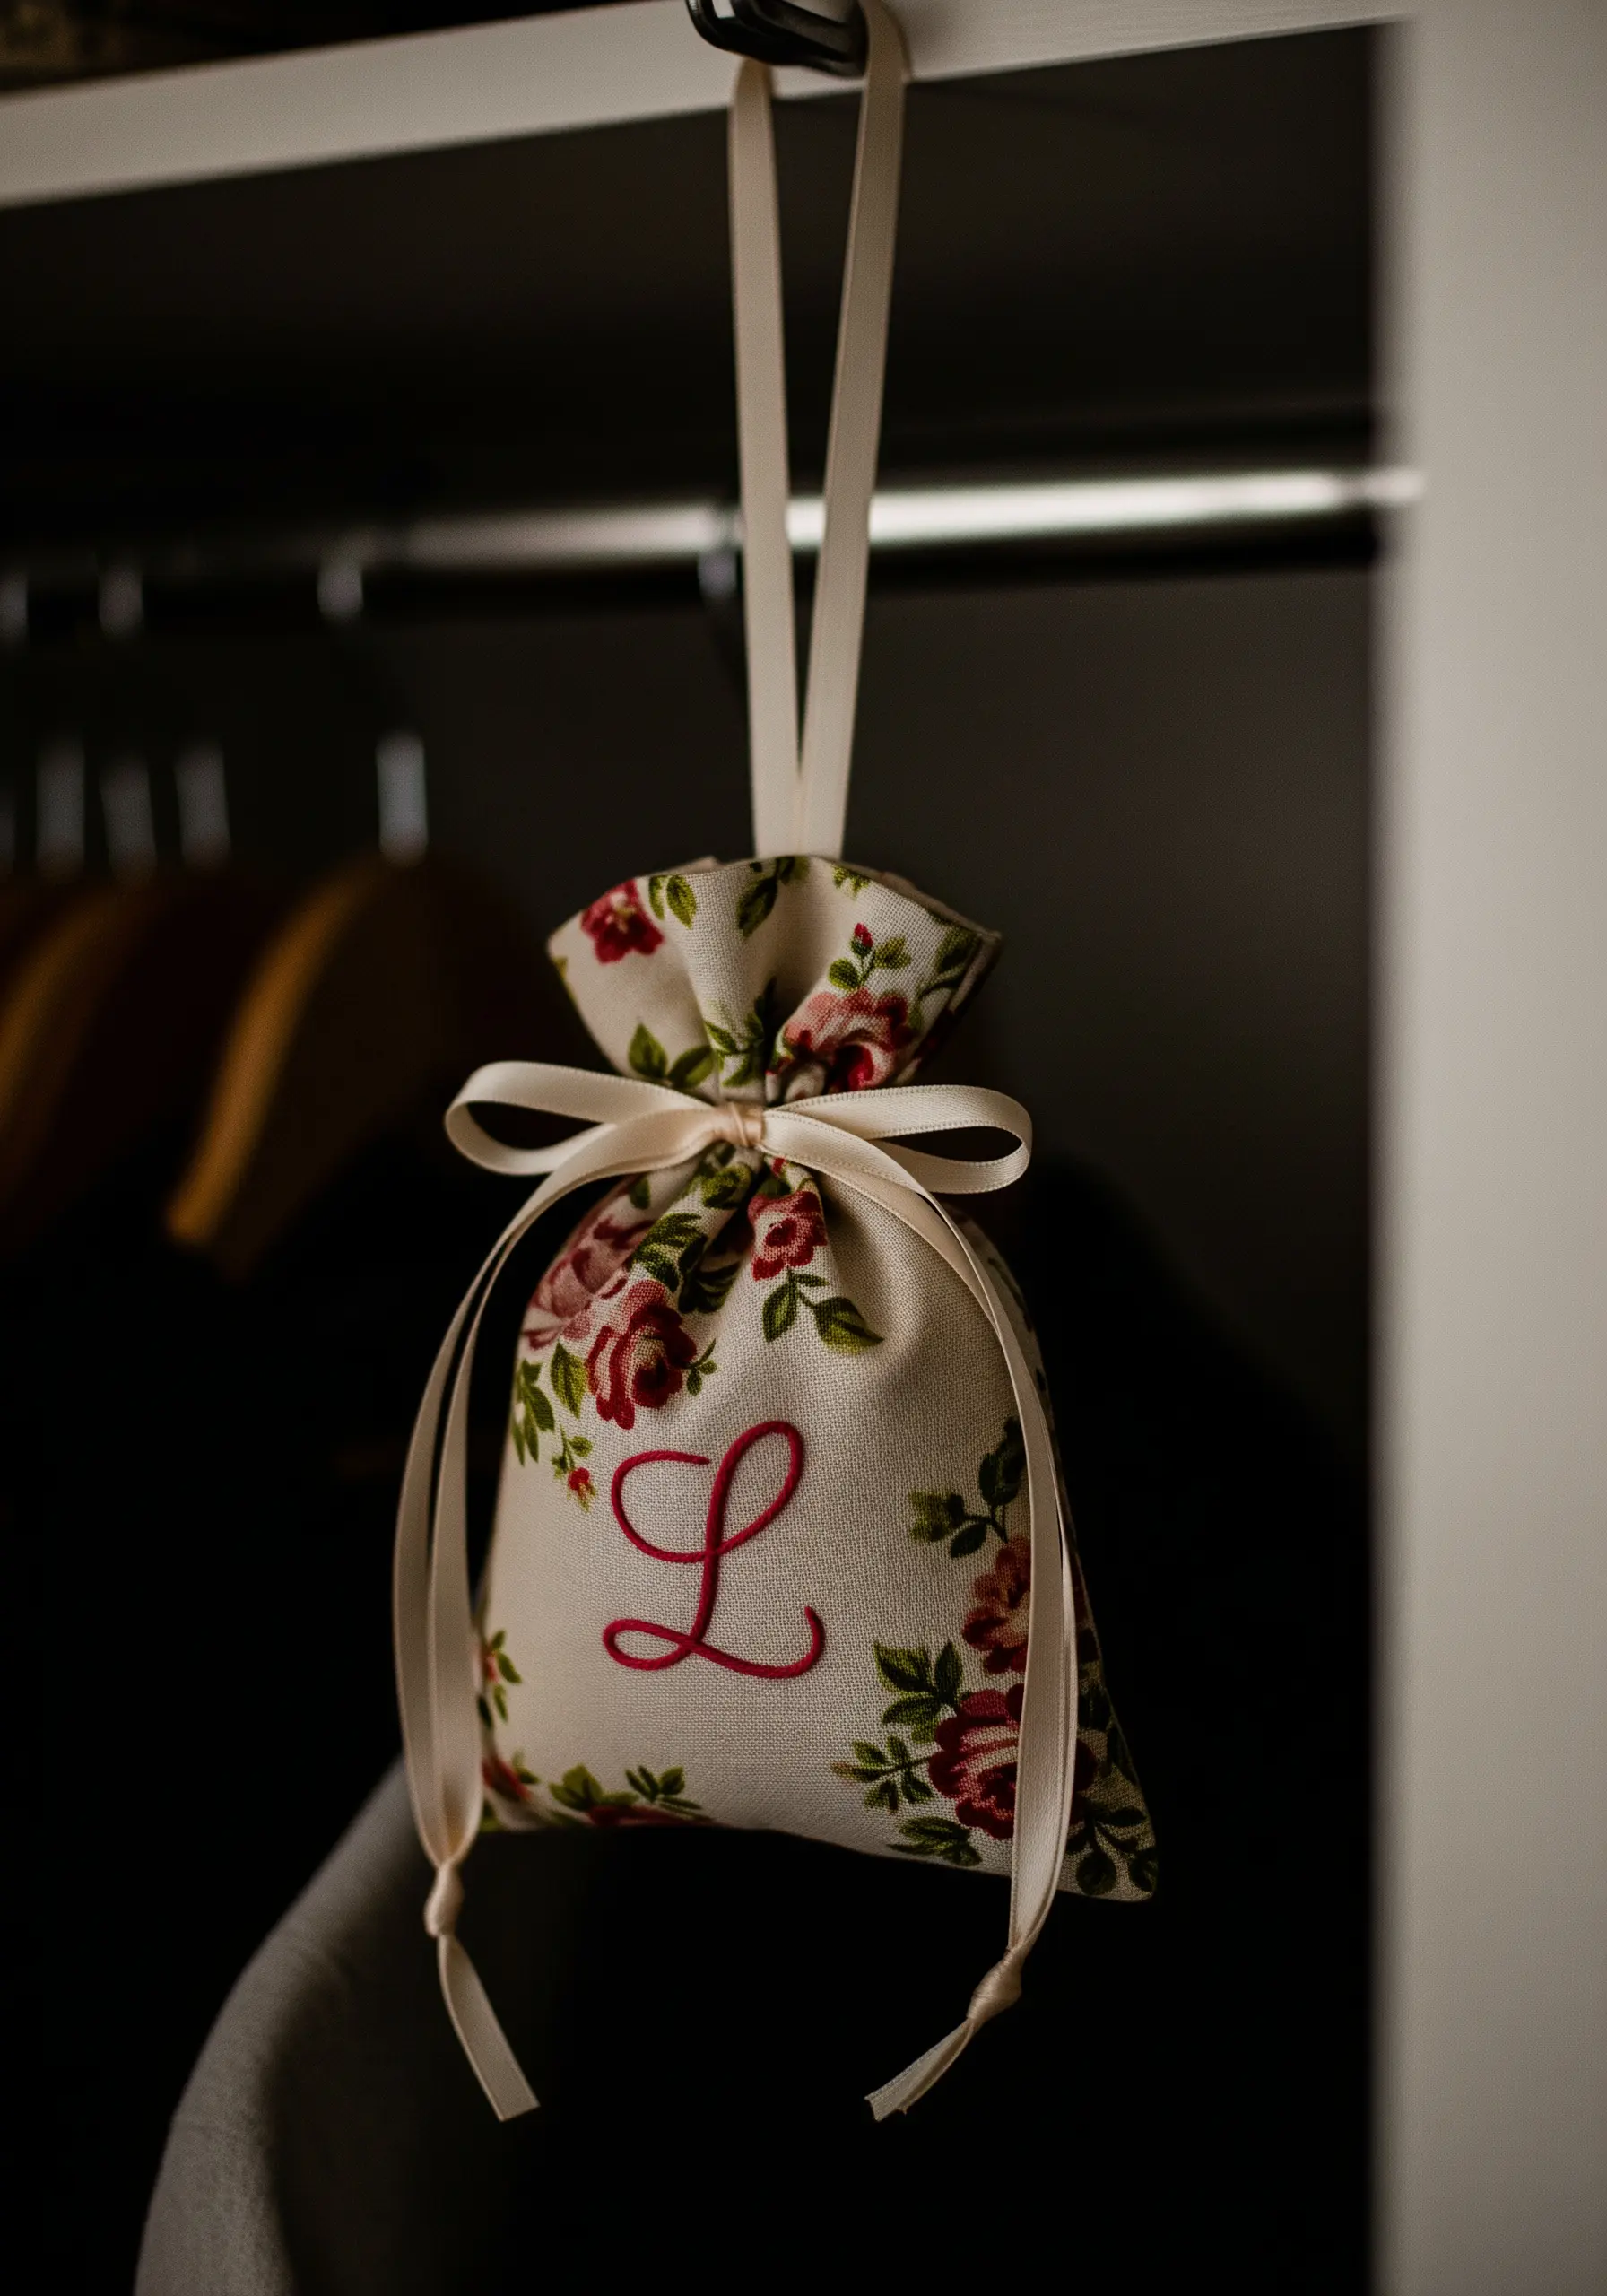
For a contemporary take on a classic monogram, choose a fluid, script-like font and use a contrasting color that pops against the base fabric.
A whipped backstitch or a narrow, clean satin stitch works perfectly to create a raised line that feels both elegant and personal.
By stitching the initial over a patterned fabric, you create a beautiful layered effect that feels cohesive yet distinct.
This small detail instantly transforms a simple item into a thoughtful, personalized gift.
22. Weave Textures into Your Embroidery
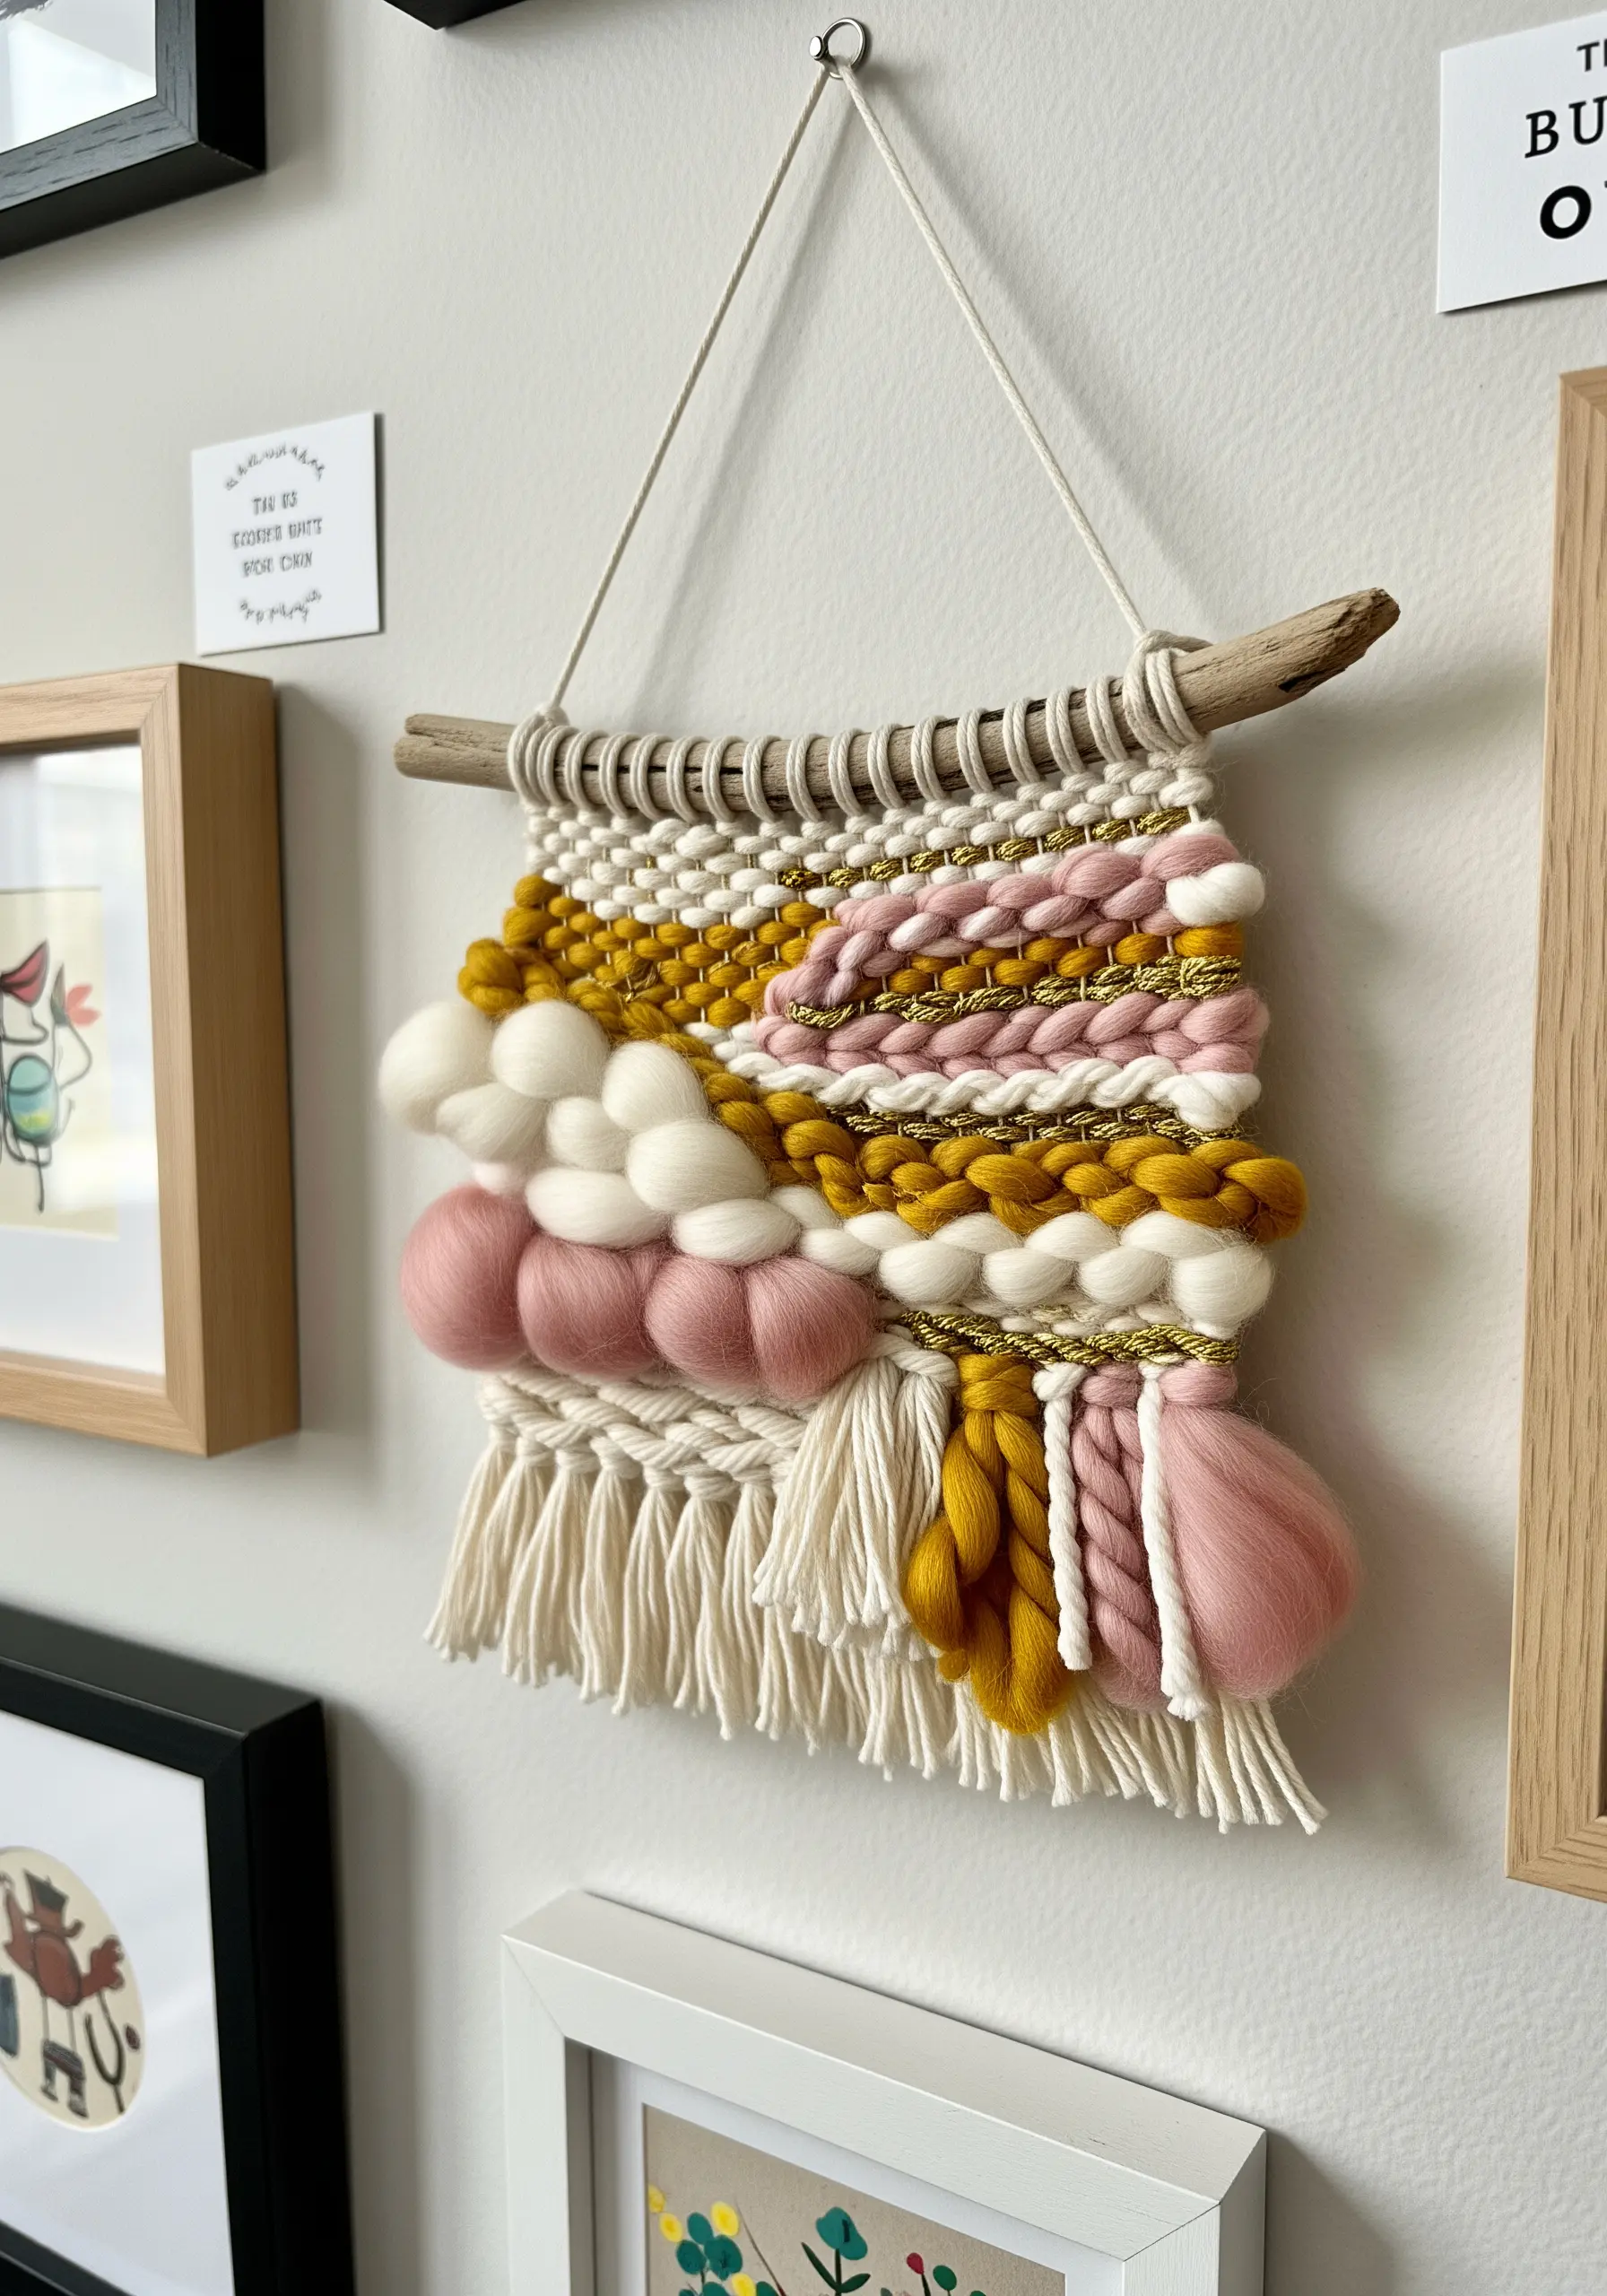
Introduce weaving techniques directly onto your embroidery fabric to create areas of intense, cozy texture.
Create a small woven section by laying down several parallel straight stitches to act as a ‘warp,’ then weave a thicker yarn or wool roving through them with a tapestry needle.
This method is perfect for creating abstract pieces or adding a bold focal point to a larger design.
It beautifully blends two beloved fiber arts into one cohesive, mixed-fiber creation.


