

The pillows you choose for your bedroom aren’t just for comfort—they are quiet canvases waiting for your personal touch. Moving beyond simple patterns is not about mastering dozens of complex stitches, but about learning how a small shift in technique can transform your work from handmade to artful.
Think of your thread less as a simple strand and more as a brushstroke. A change in stitch direction can mimic the softness of fur, a different thread weight can create dramatic texture, and a simple highlight can make a flat shape feel full and alive. These are the details that elevate your embroidery and make it feel intentional and uniquely yours.
Let these ideas be a starting point. Notice how texture, color, and composition work together, and then begin to experiment on your own. Your needle and thread are all you need to stitch a space that feels calm, personal, and full of soft, dreamy details.
1. Render Fur with Directional Satin Stitch
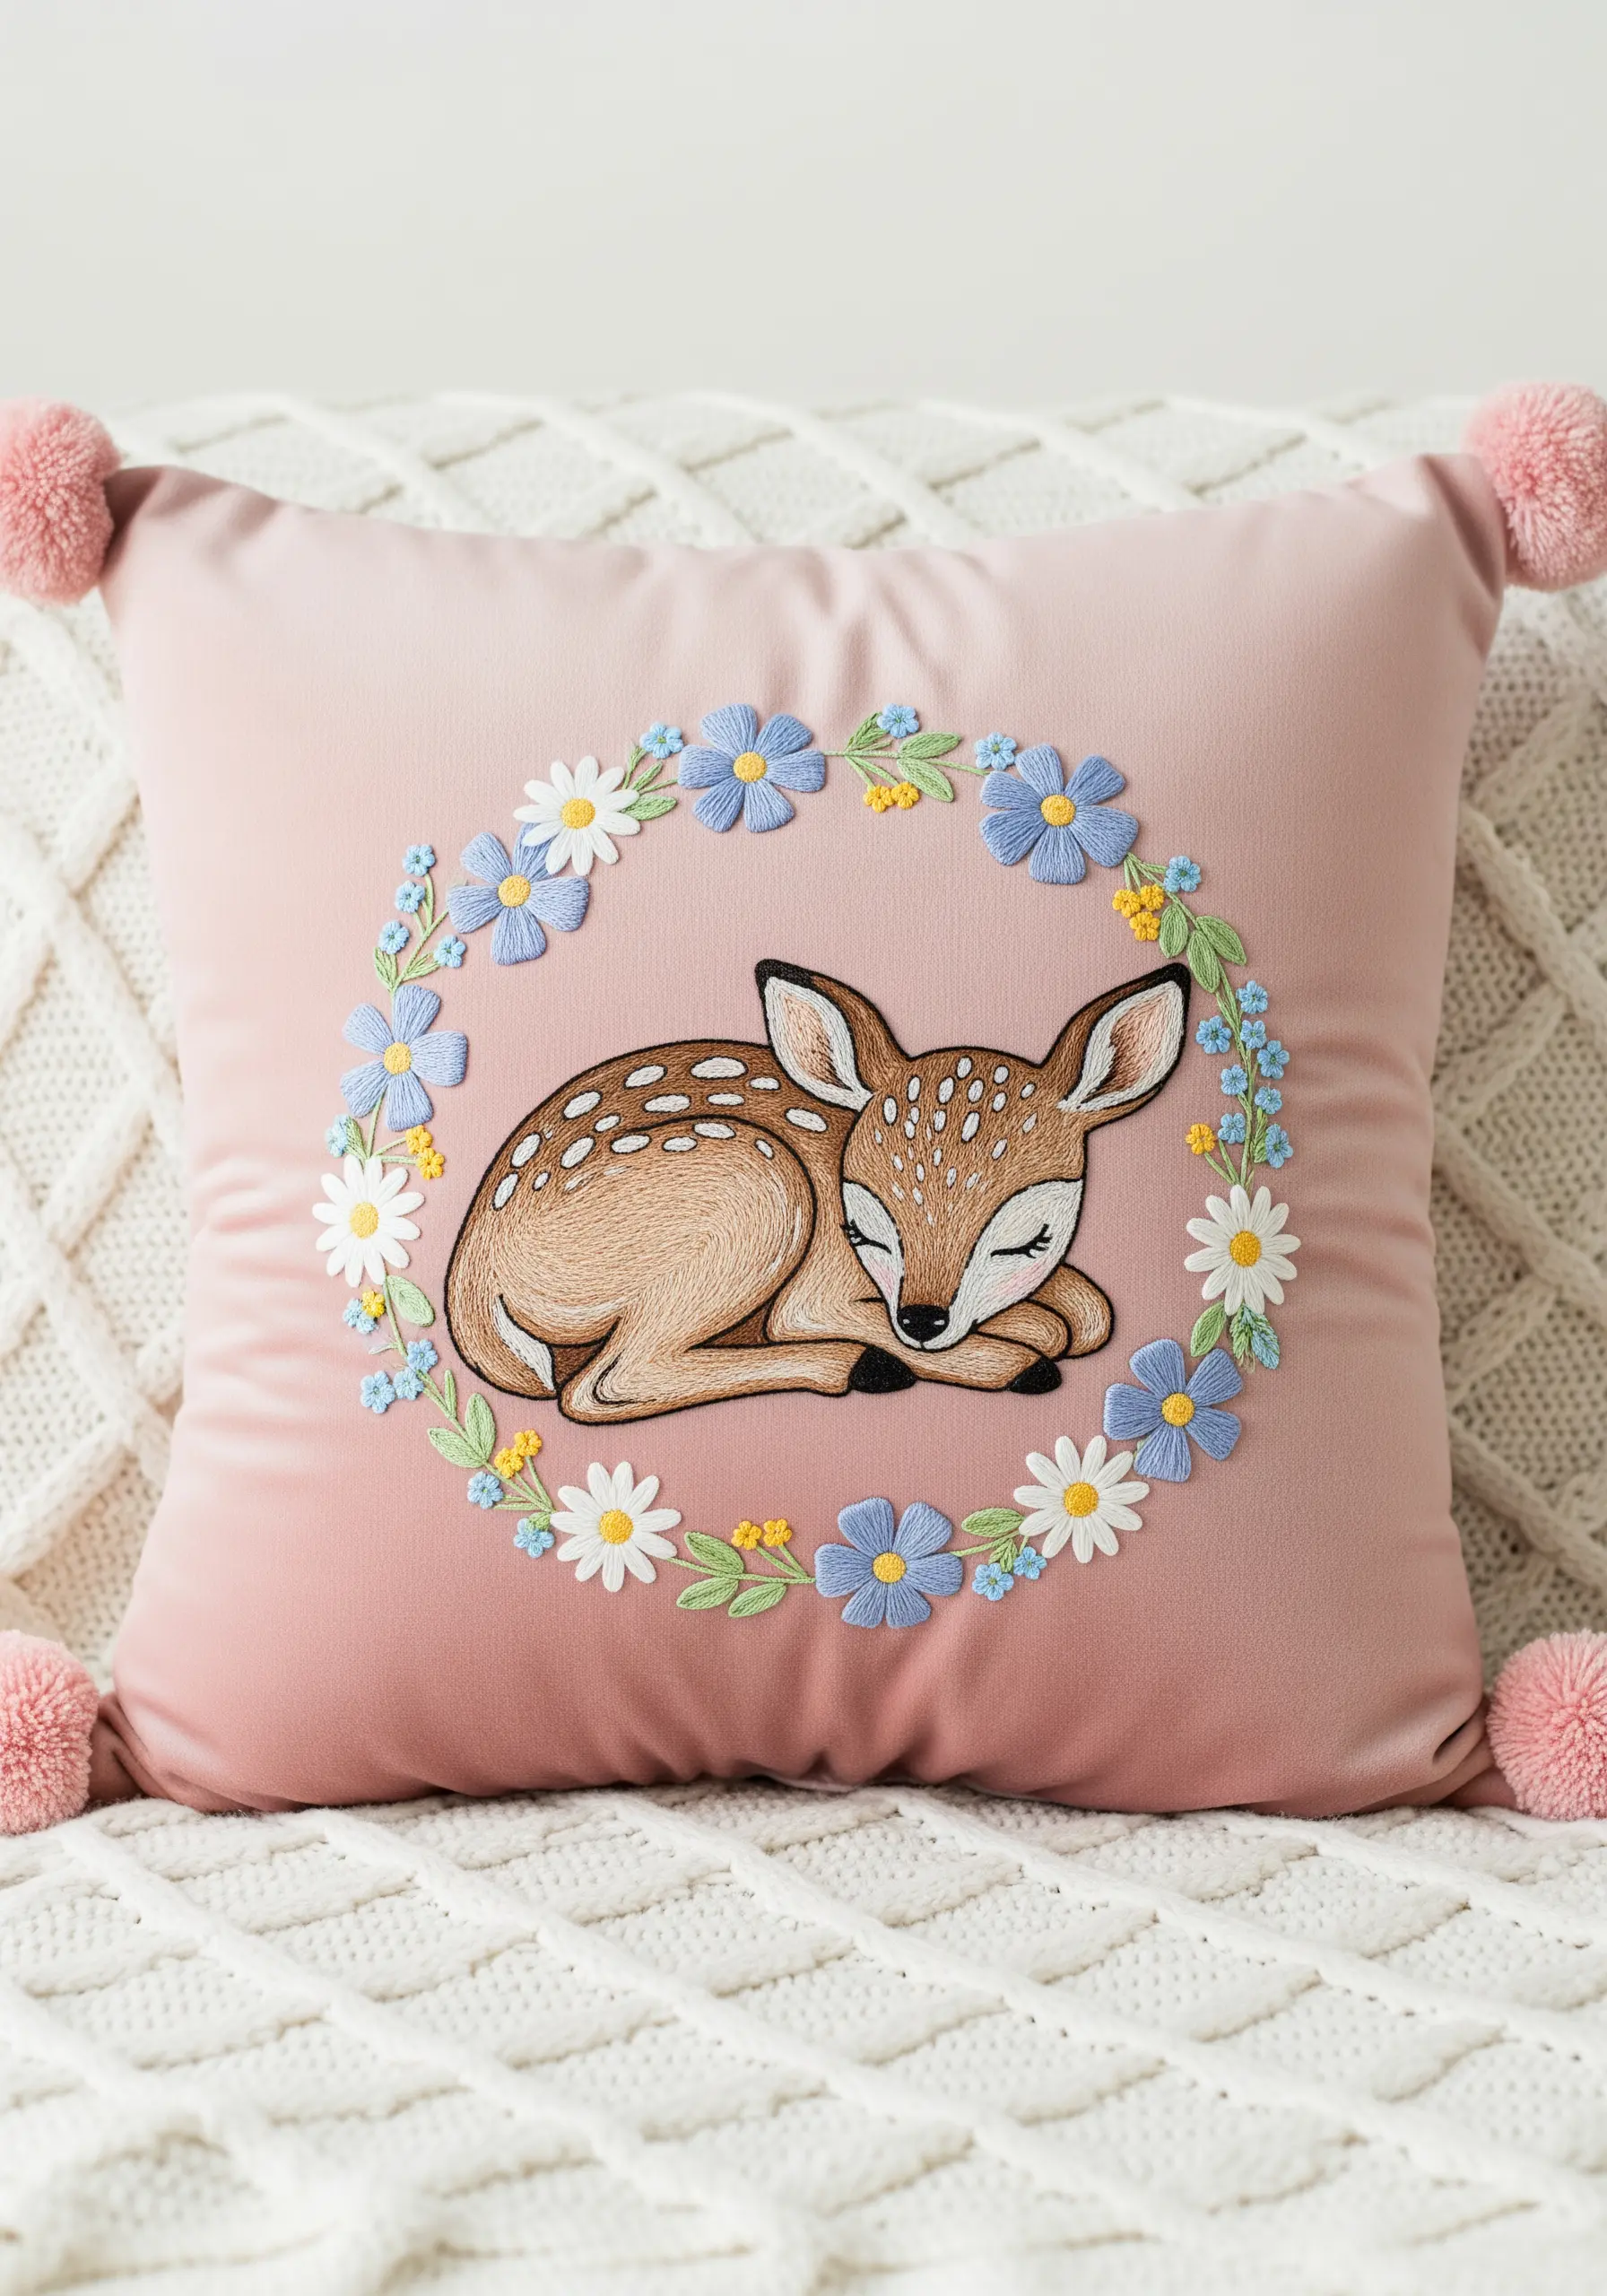
To give your embroidered animals a soft, realistic dimension, think of your satin stitch as a paintbrush.
Instead of filling the fawn’s body with uniform, straight stitches, angle them to follow the natural contours of its muscles and curves.
Use shorter stitches around the face and legs for finer detail, and slightly longer ones along the back to create a smooth, sleek look.
This technique, known as thread painting, turns a flat design into a gentle, touchable sculpture.
2. Create Plush Clouds with Turkey Work
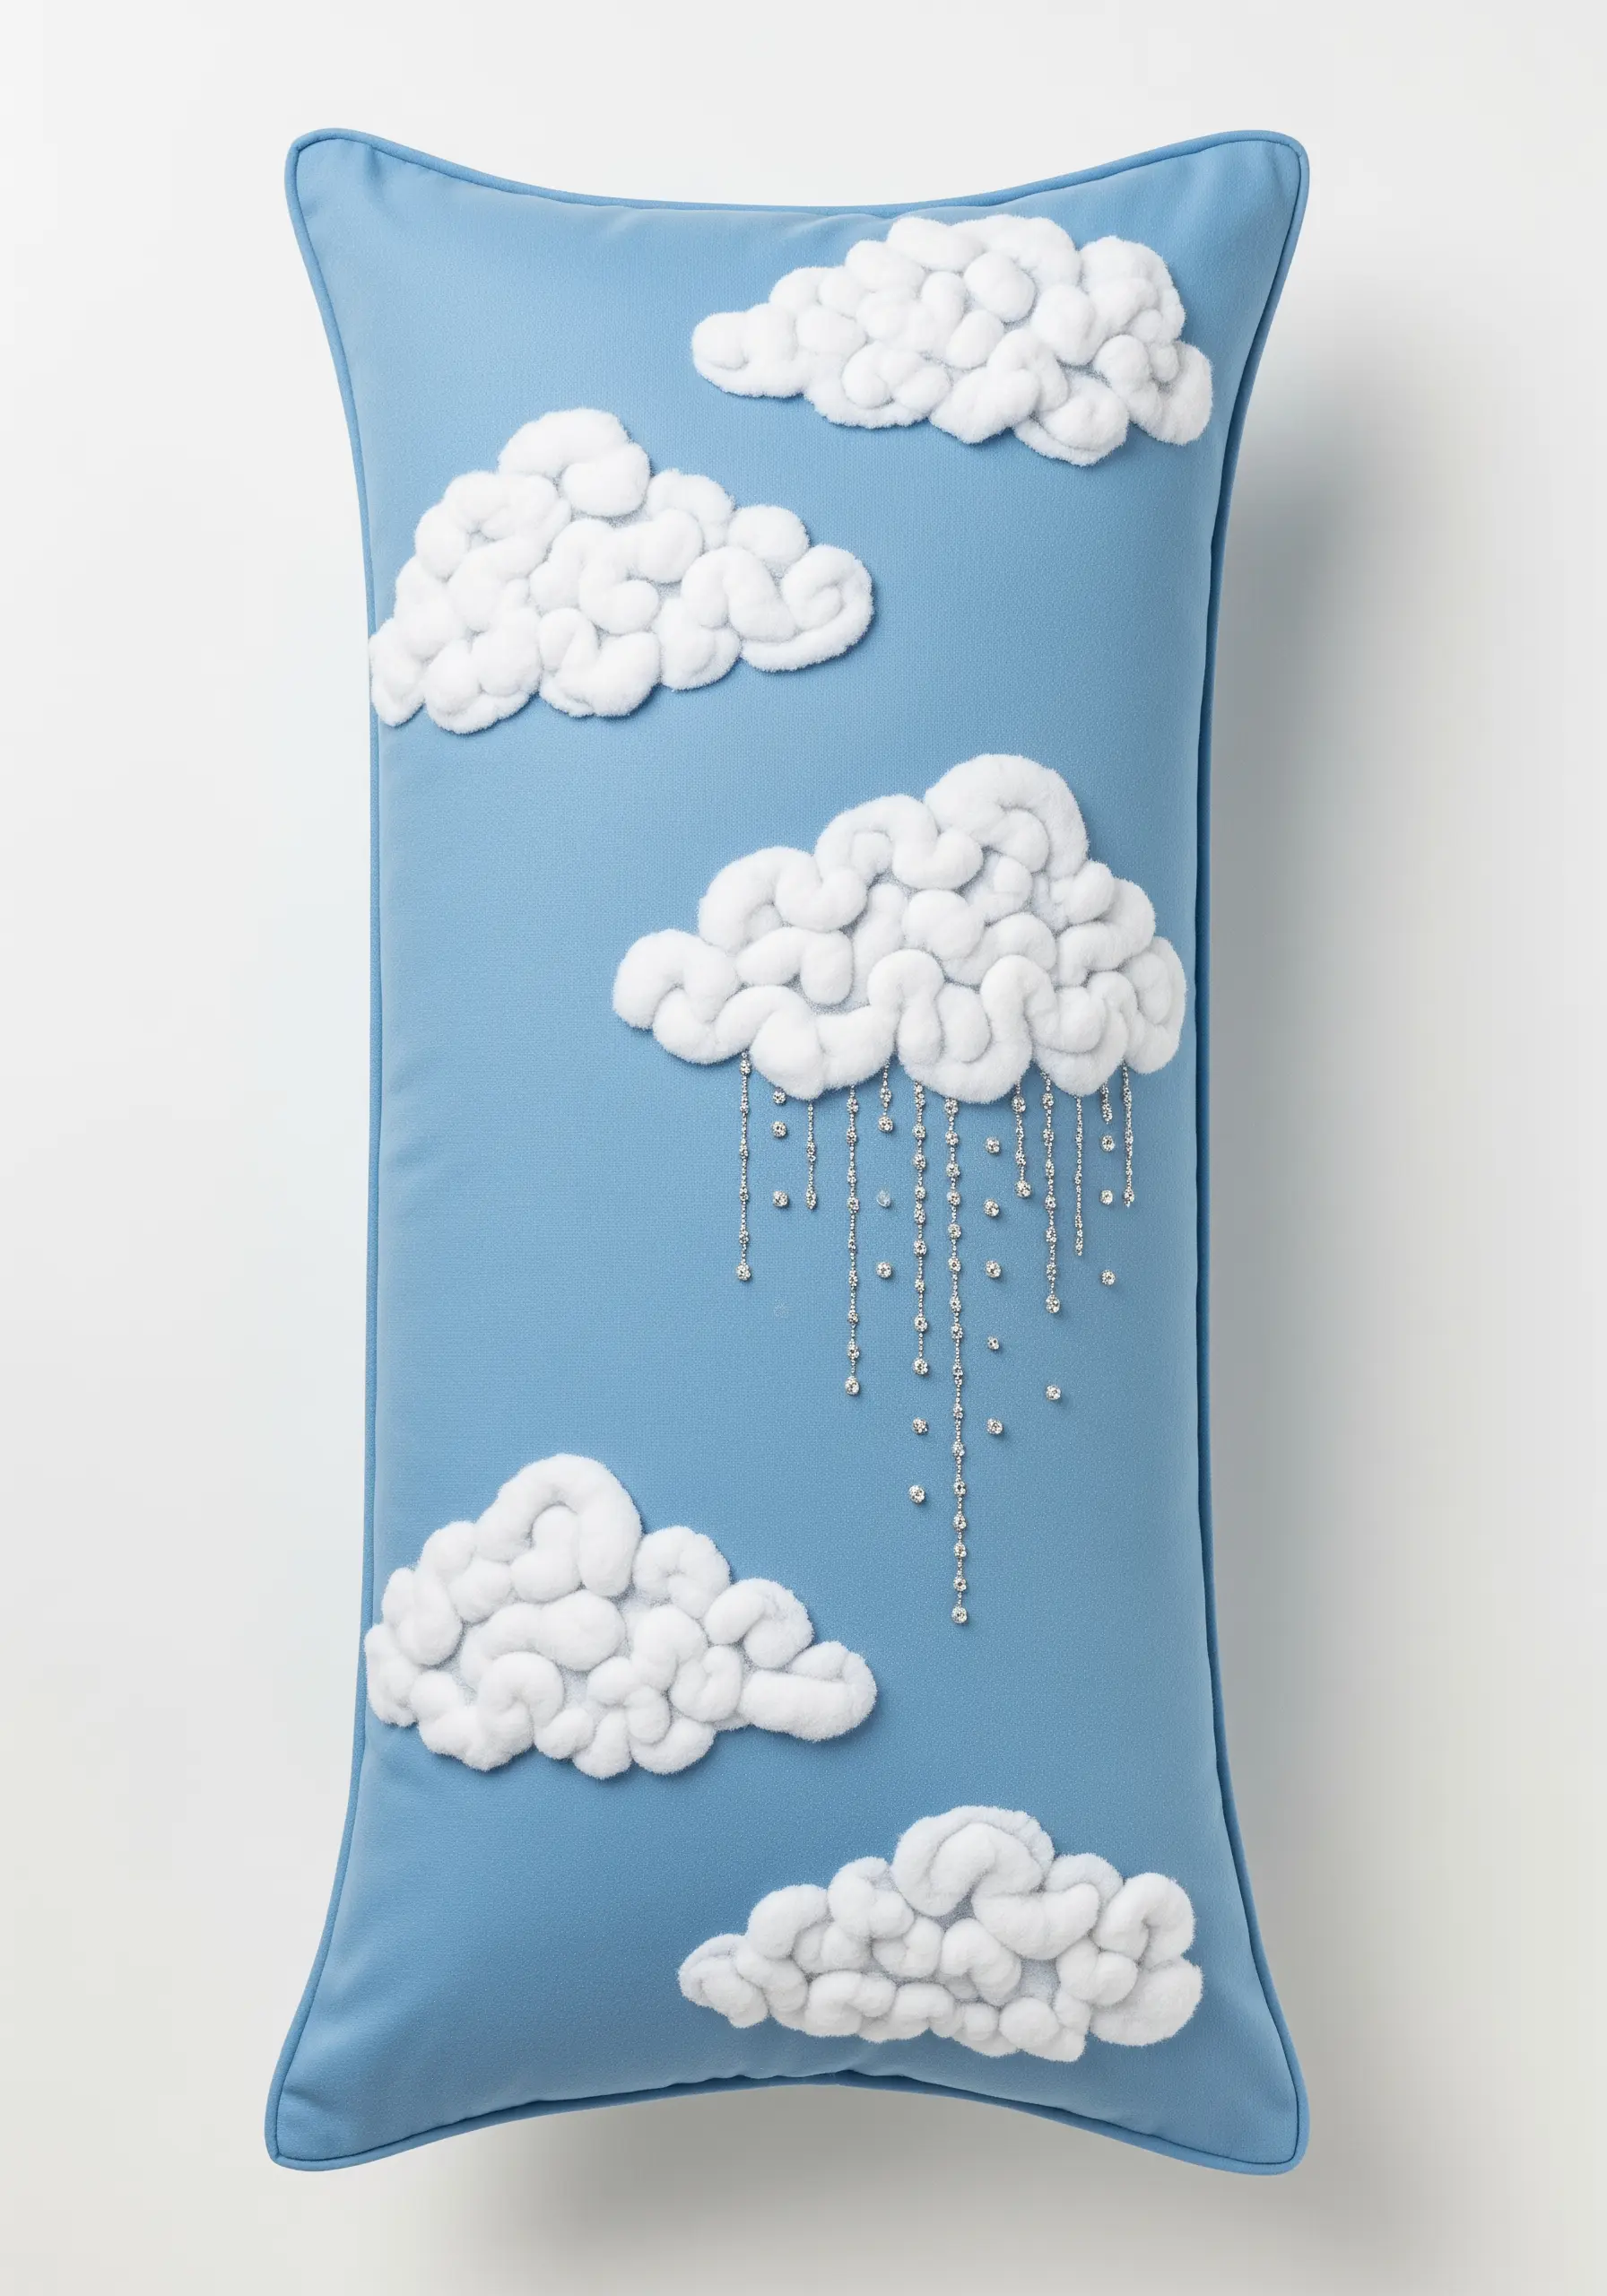
For truly three-dimensional, fluffy clouds, the Turkey work stitch is your best friend.
Create loops with your thread, anchor them, and then snip the tops to create a dense, plush pile that you can trim and shape just like a tiny rug.
To keep the clouds from looking too uniform, vary the density of your loops—tighter for a solid look, looser for a wispier feel.
Contrast this soft texture with delicate, dangling beads to represent rain, adding a touch of sparkle and elegance.
3. Master Delicate Lines with a Single Thread
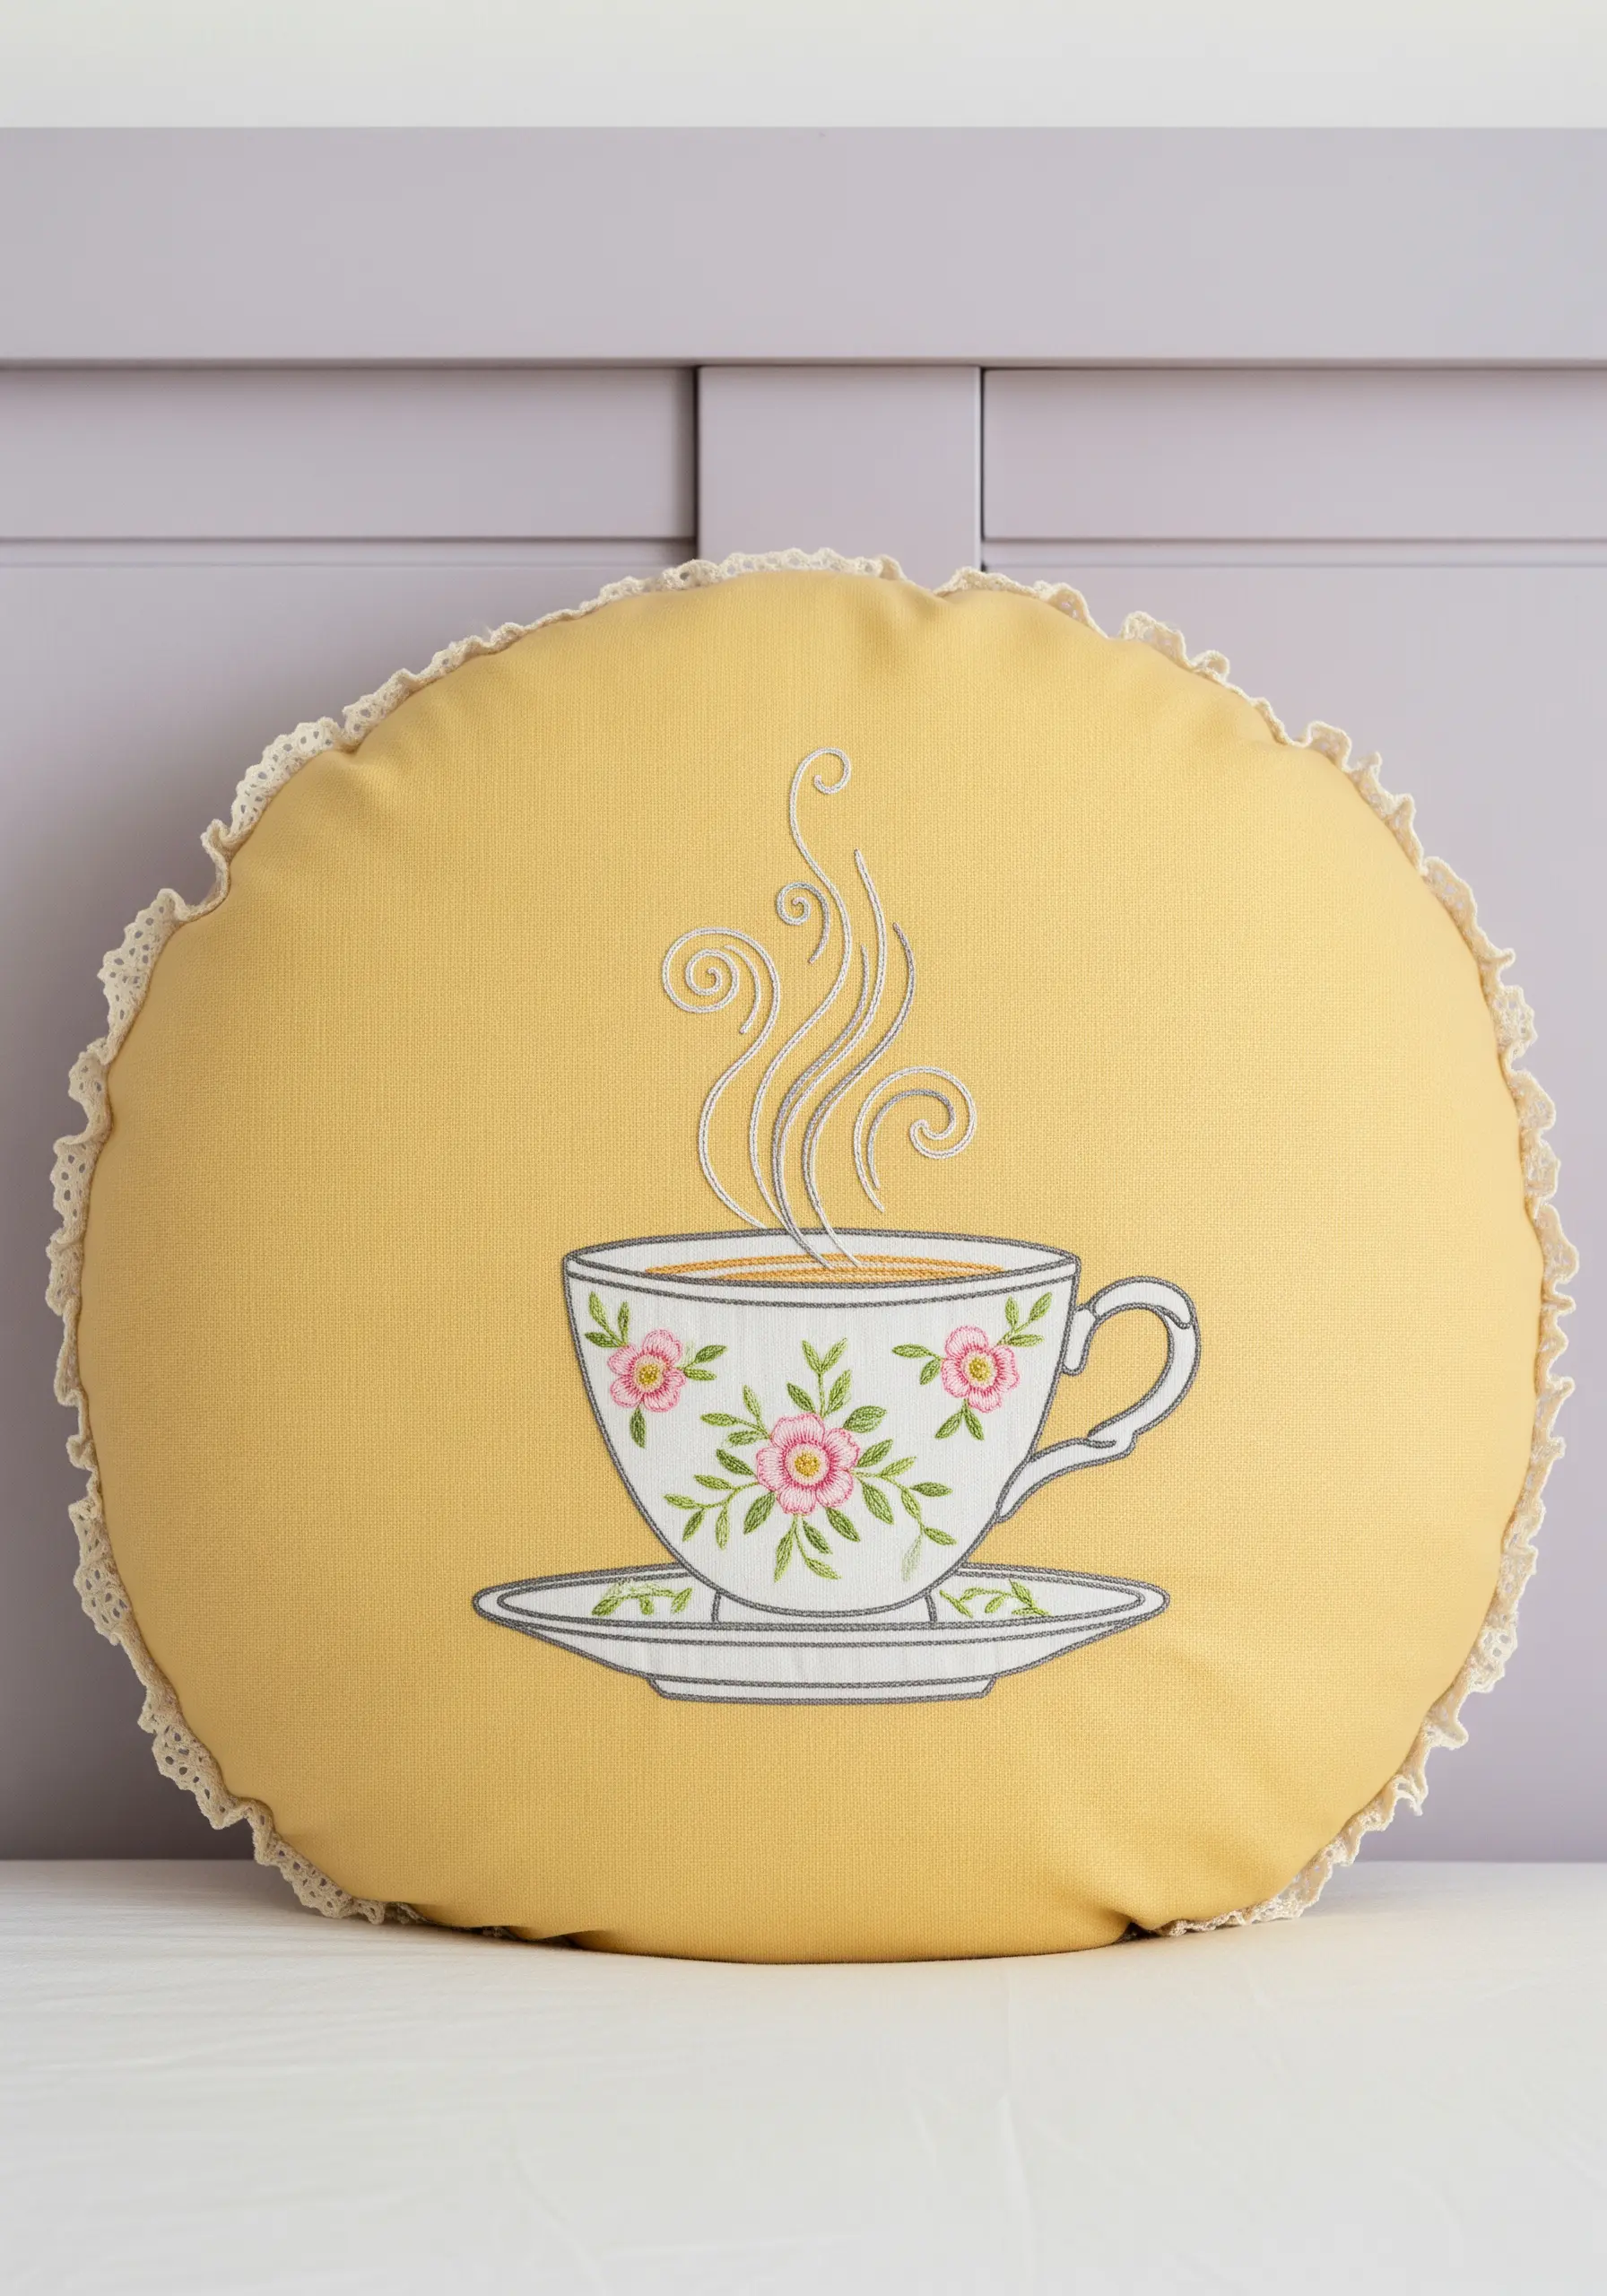
To achieve the delicate, whisper-thin steam rising from this teacup, use only a single strand of six-strand embroidery floss.
Stitch the swirls with a simple backstitch or stem stitch, focusing on maintaining smooth, even curves.
This fine-line approach creates a beautiful contrast against the fuller satin stitch used for the cup’s floral motifs, making the entire design feel balanced and refined.
The technique is perfect for adding subtle motion or elegance to any piece.
4. Imply Movement with Scattered Stitches
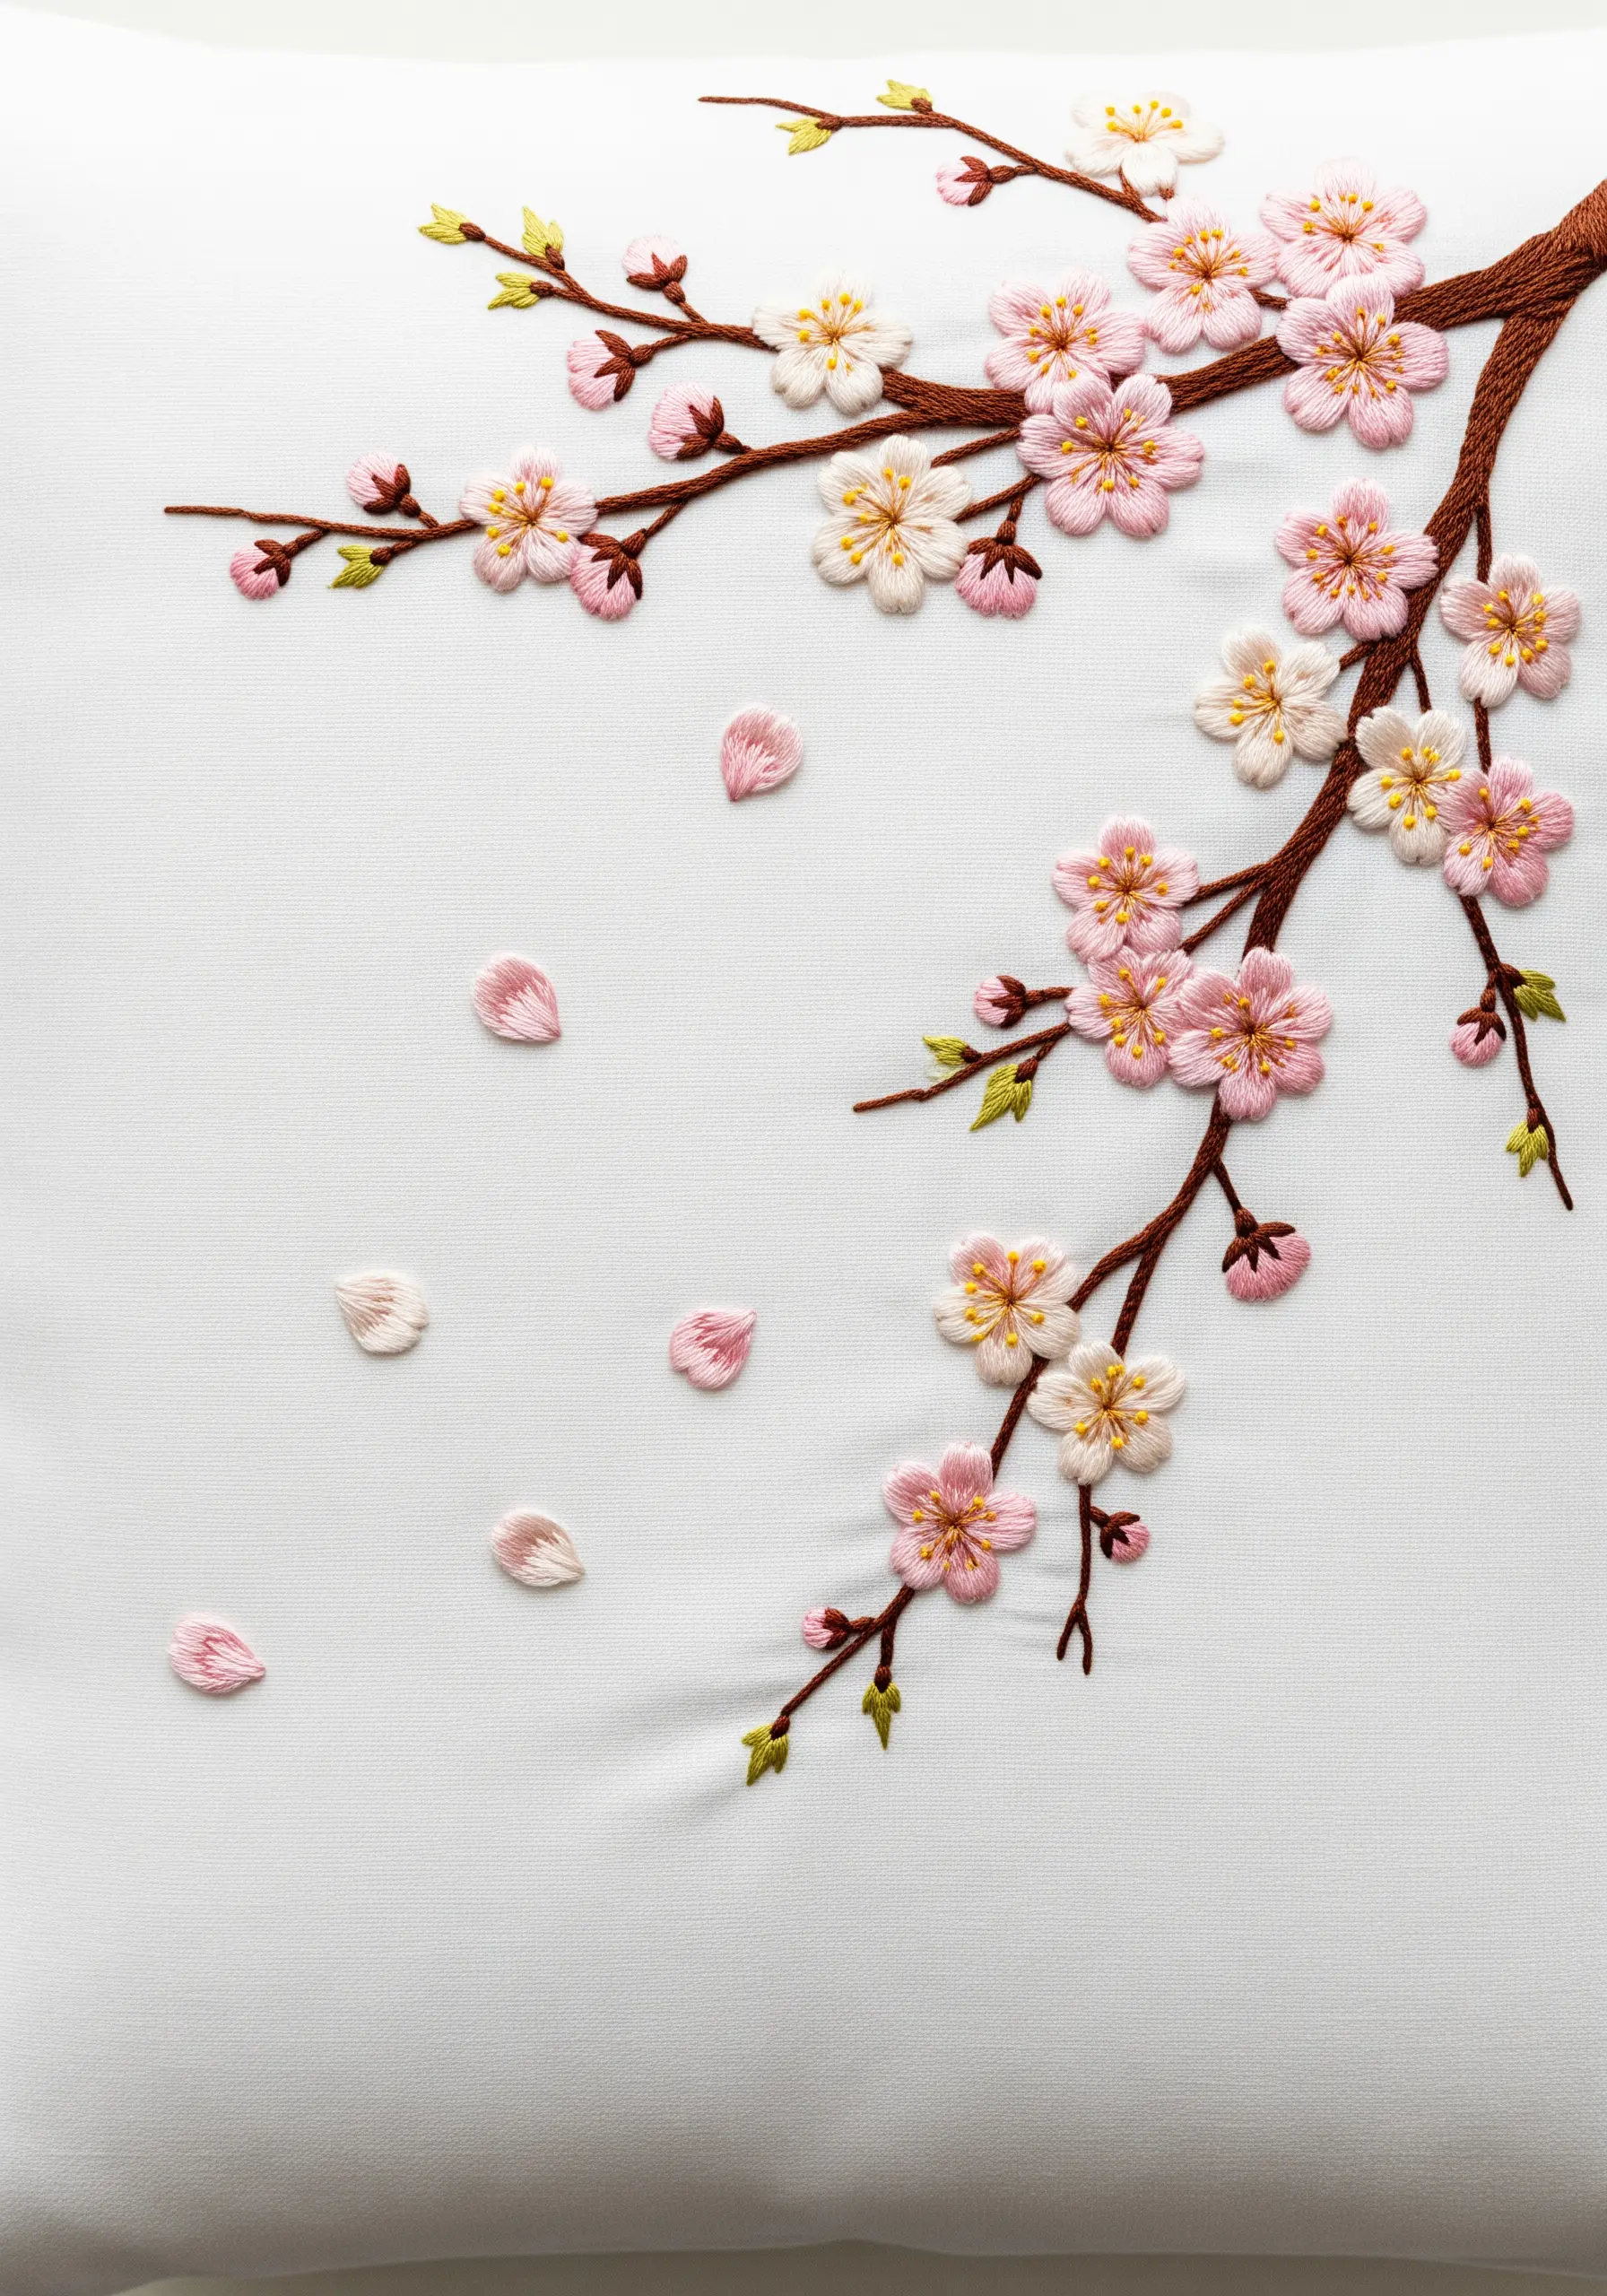
Bring a static cherry blossom branch to life by stitching a few detached petals as if they are drifting down the pillowcase.
Use a single detached chain stitch or a few small, straight stitches for each falling petal, varying their angles and spacing to create a natural, random feel.
This simple compositional trick adds a sense of narrative and gentle movement, transforming the design from a simple portrait into a fleeting moment in time.
For the blossoms on the branch, use gradient color florals with a long-and-short stitch to give them soft, realistic shading.
5. Use Patterned Fill Stitches on Textured Fabric

When working on a fabric with a visible weave, like this waffle-knit pillow, a solid satin stitch can look uneven.
Instead, opt for a patterned fill stitch, such as this lattice or grid work, which complements the fabric’s texture rather than fighting it.
The open nature of the grid allows the pastel threads to create a shimmering, quilt-like effect that feels both modern and handmade.
Outline the final shape with a clean backstitch to give your patterned fill a sharp, defined edge.
6. Add Visual Interest with Varied Fill Techniques
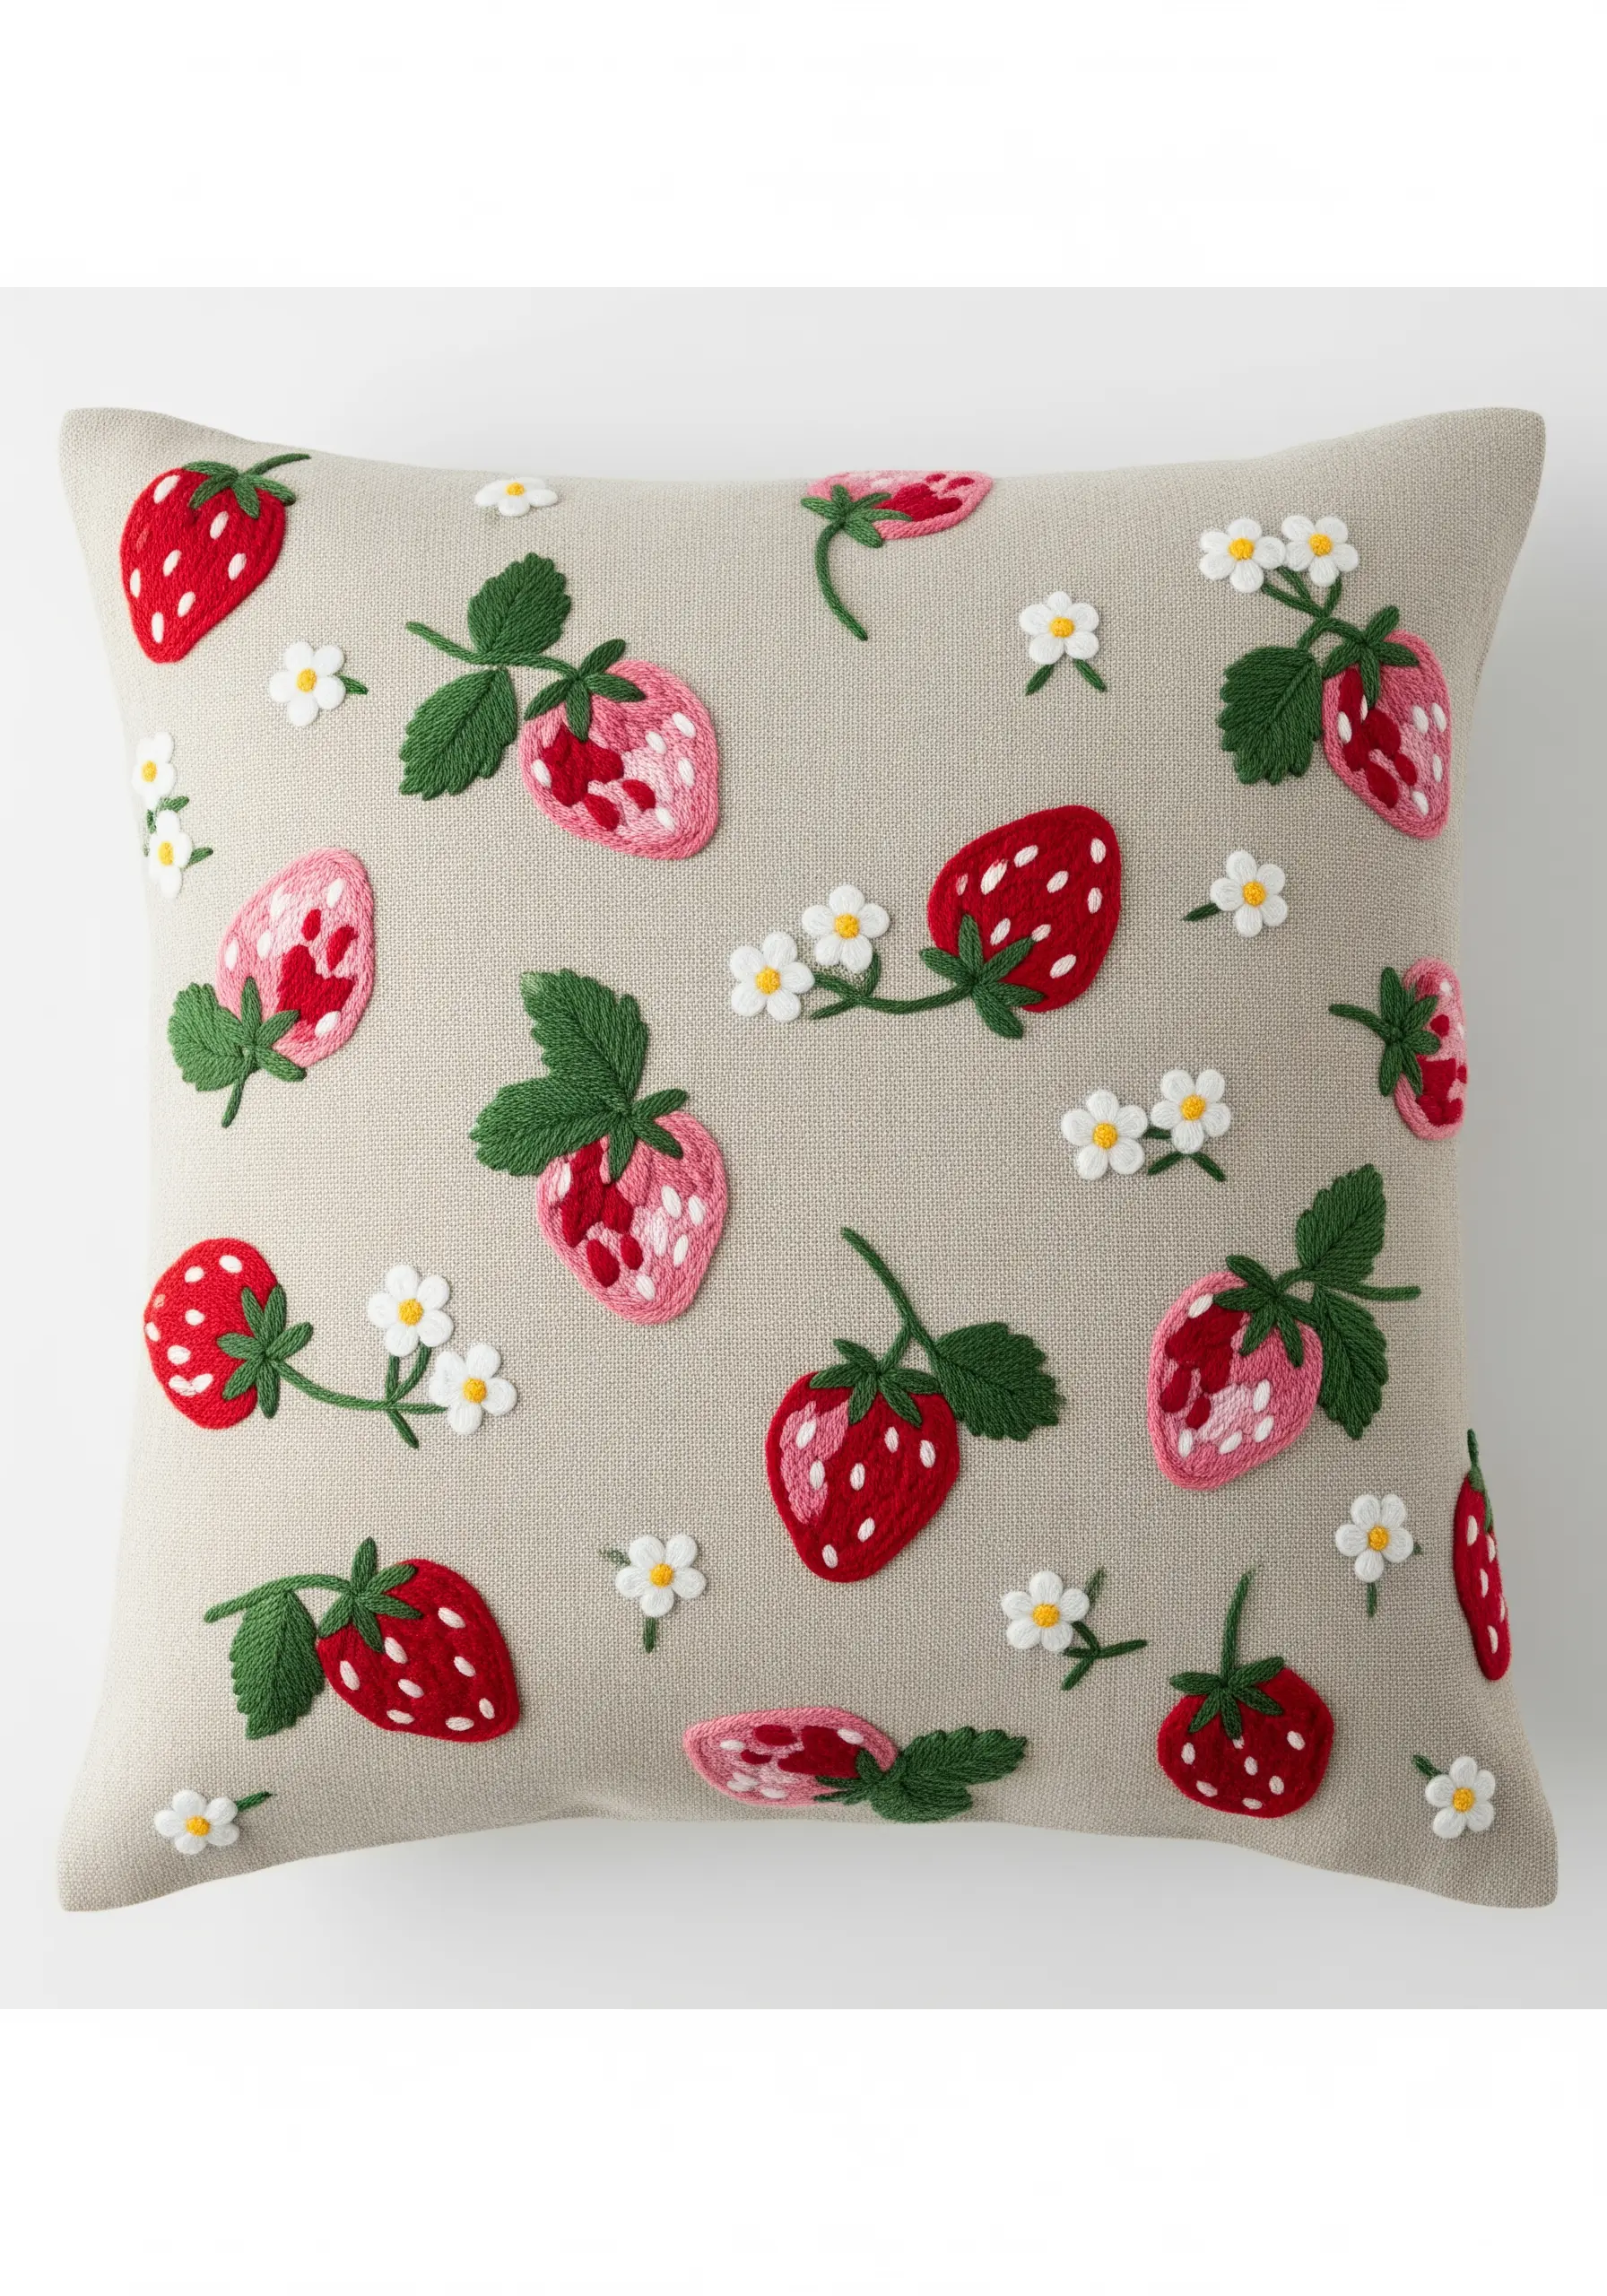
Instead of filling every strawberry with the same stitch, create variety by alternating techniques.
Use a classic satin stitch for some, and for others, try a woven fill—laying down parallel straight stitches and then weaving your thread through them.
This simple change adds a subtle layer of complexity and texture that makes the overall pattern more engaging.
Tiny white seed stitches create the perfect strawberry seeds, while the small lazy daisy flowers provide a soft, repeating motif to balance the design.
7. Elevate Lettering with Padded Satin Stitch
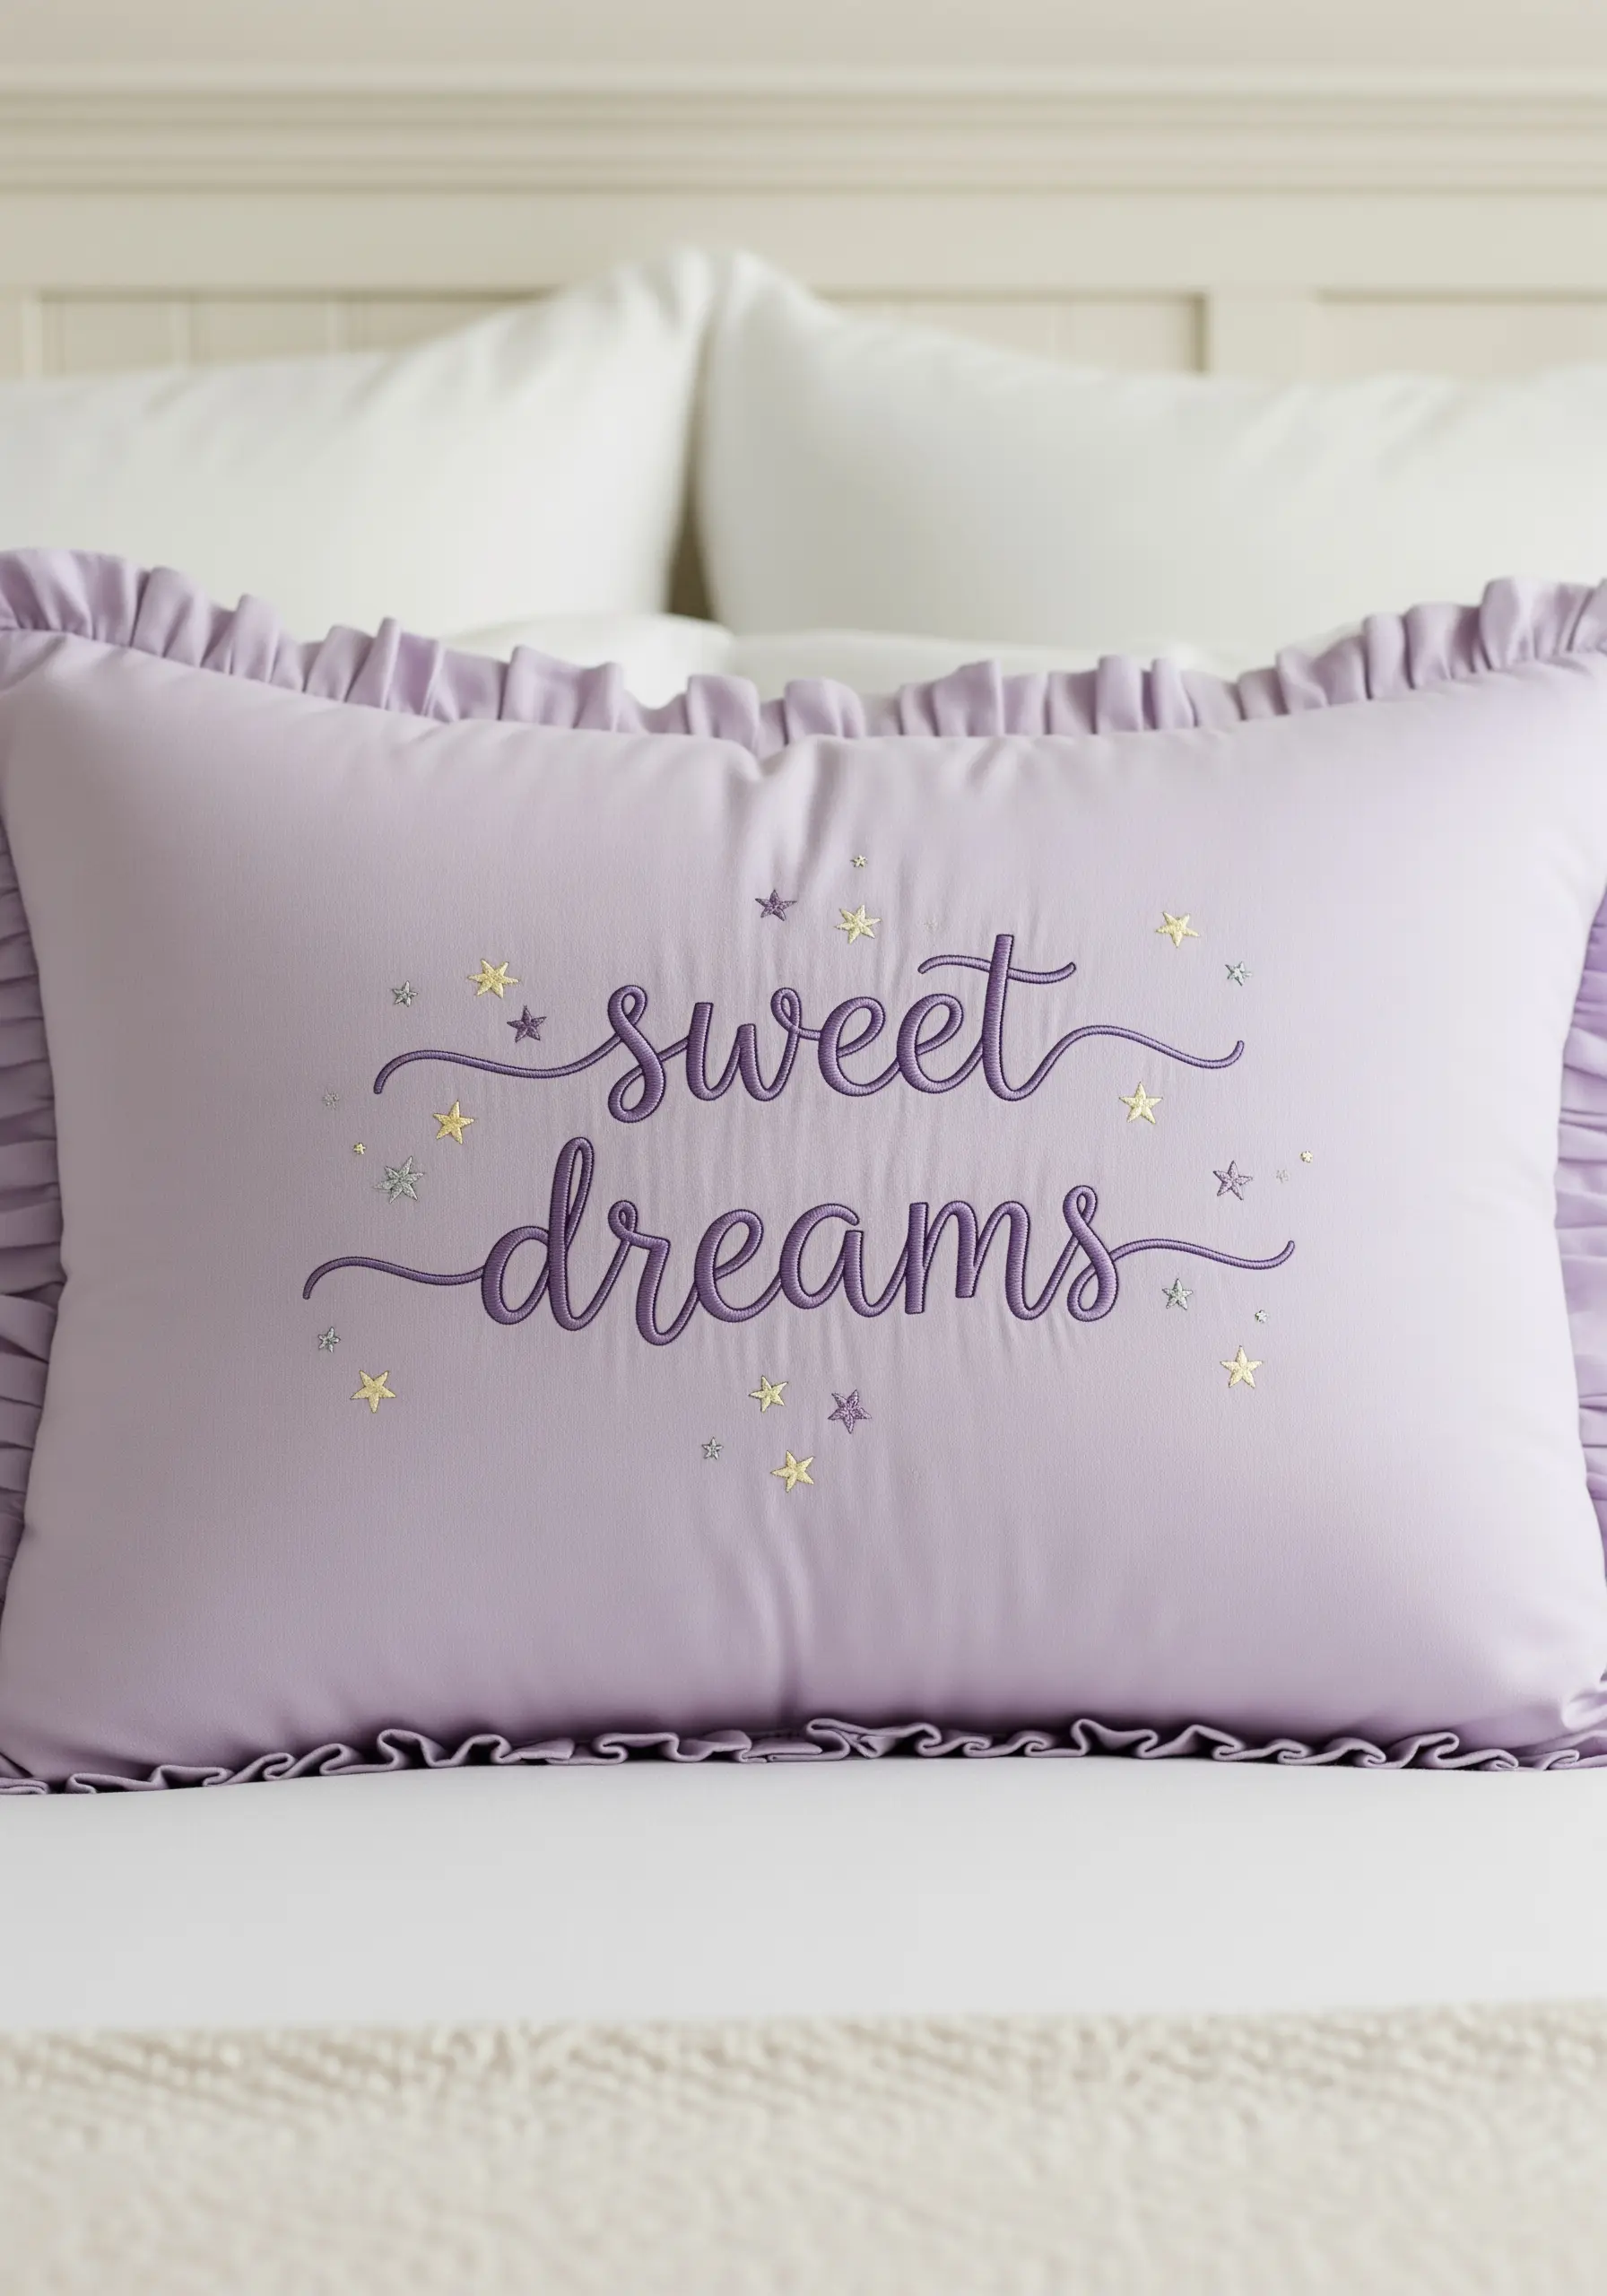
To make your embroidered text pop, use a padded satin stitch for a raised, dimensional effect.
First, stitch a foundation of small running stitches or a split stitch within the outlines of your letters.
Then, cover this padding with smooth, perpendicular satin stitches, ensuring your needle enters and exits just outside the padding to create a clean, rounded edge.
This technique gives script a professional, almost embossed quality that looks incredibly luxurious on soft fabrics.
8. Craft Lustrous Bows with Silk Ribbon
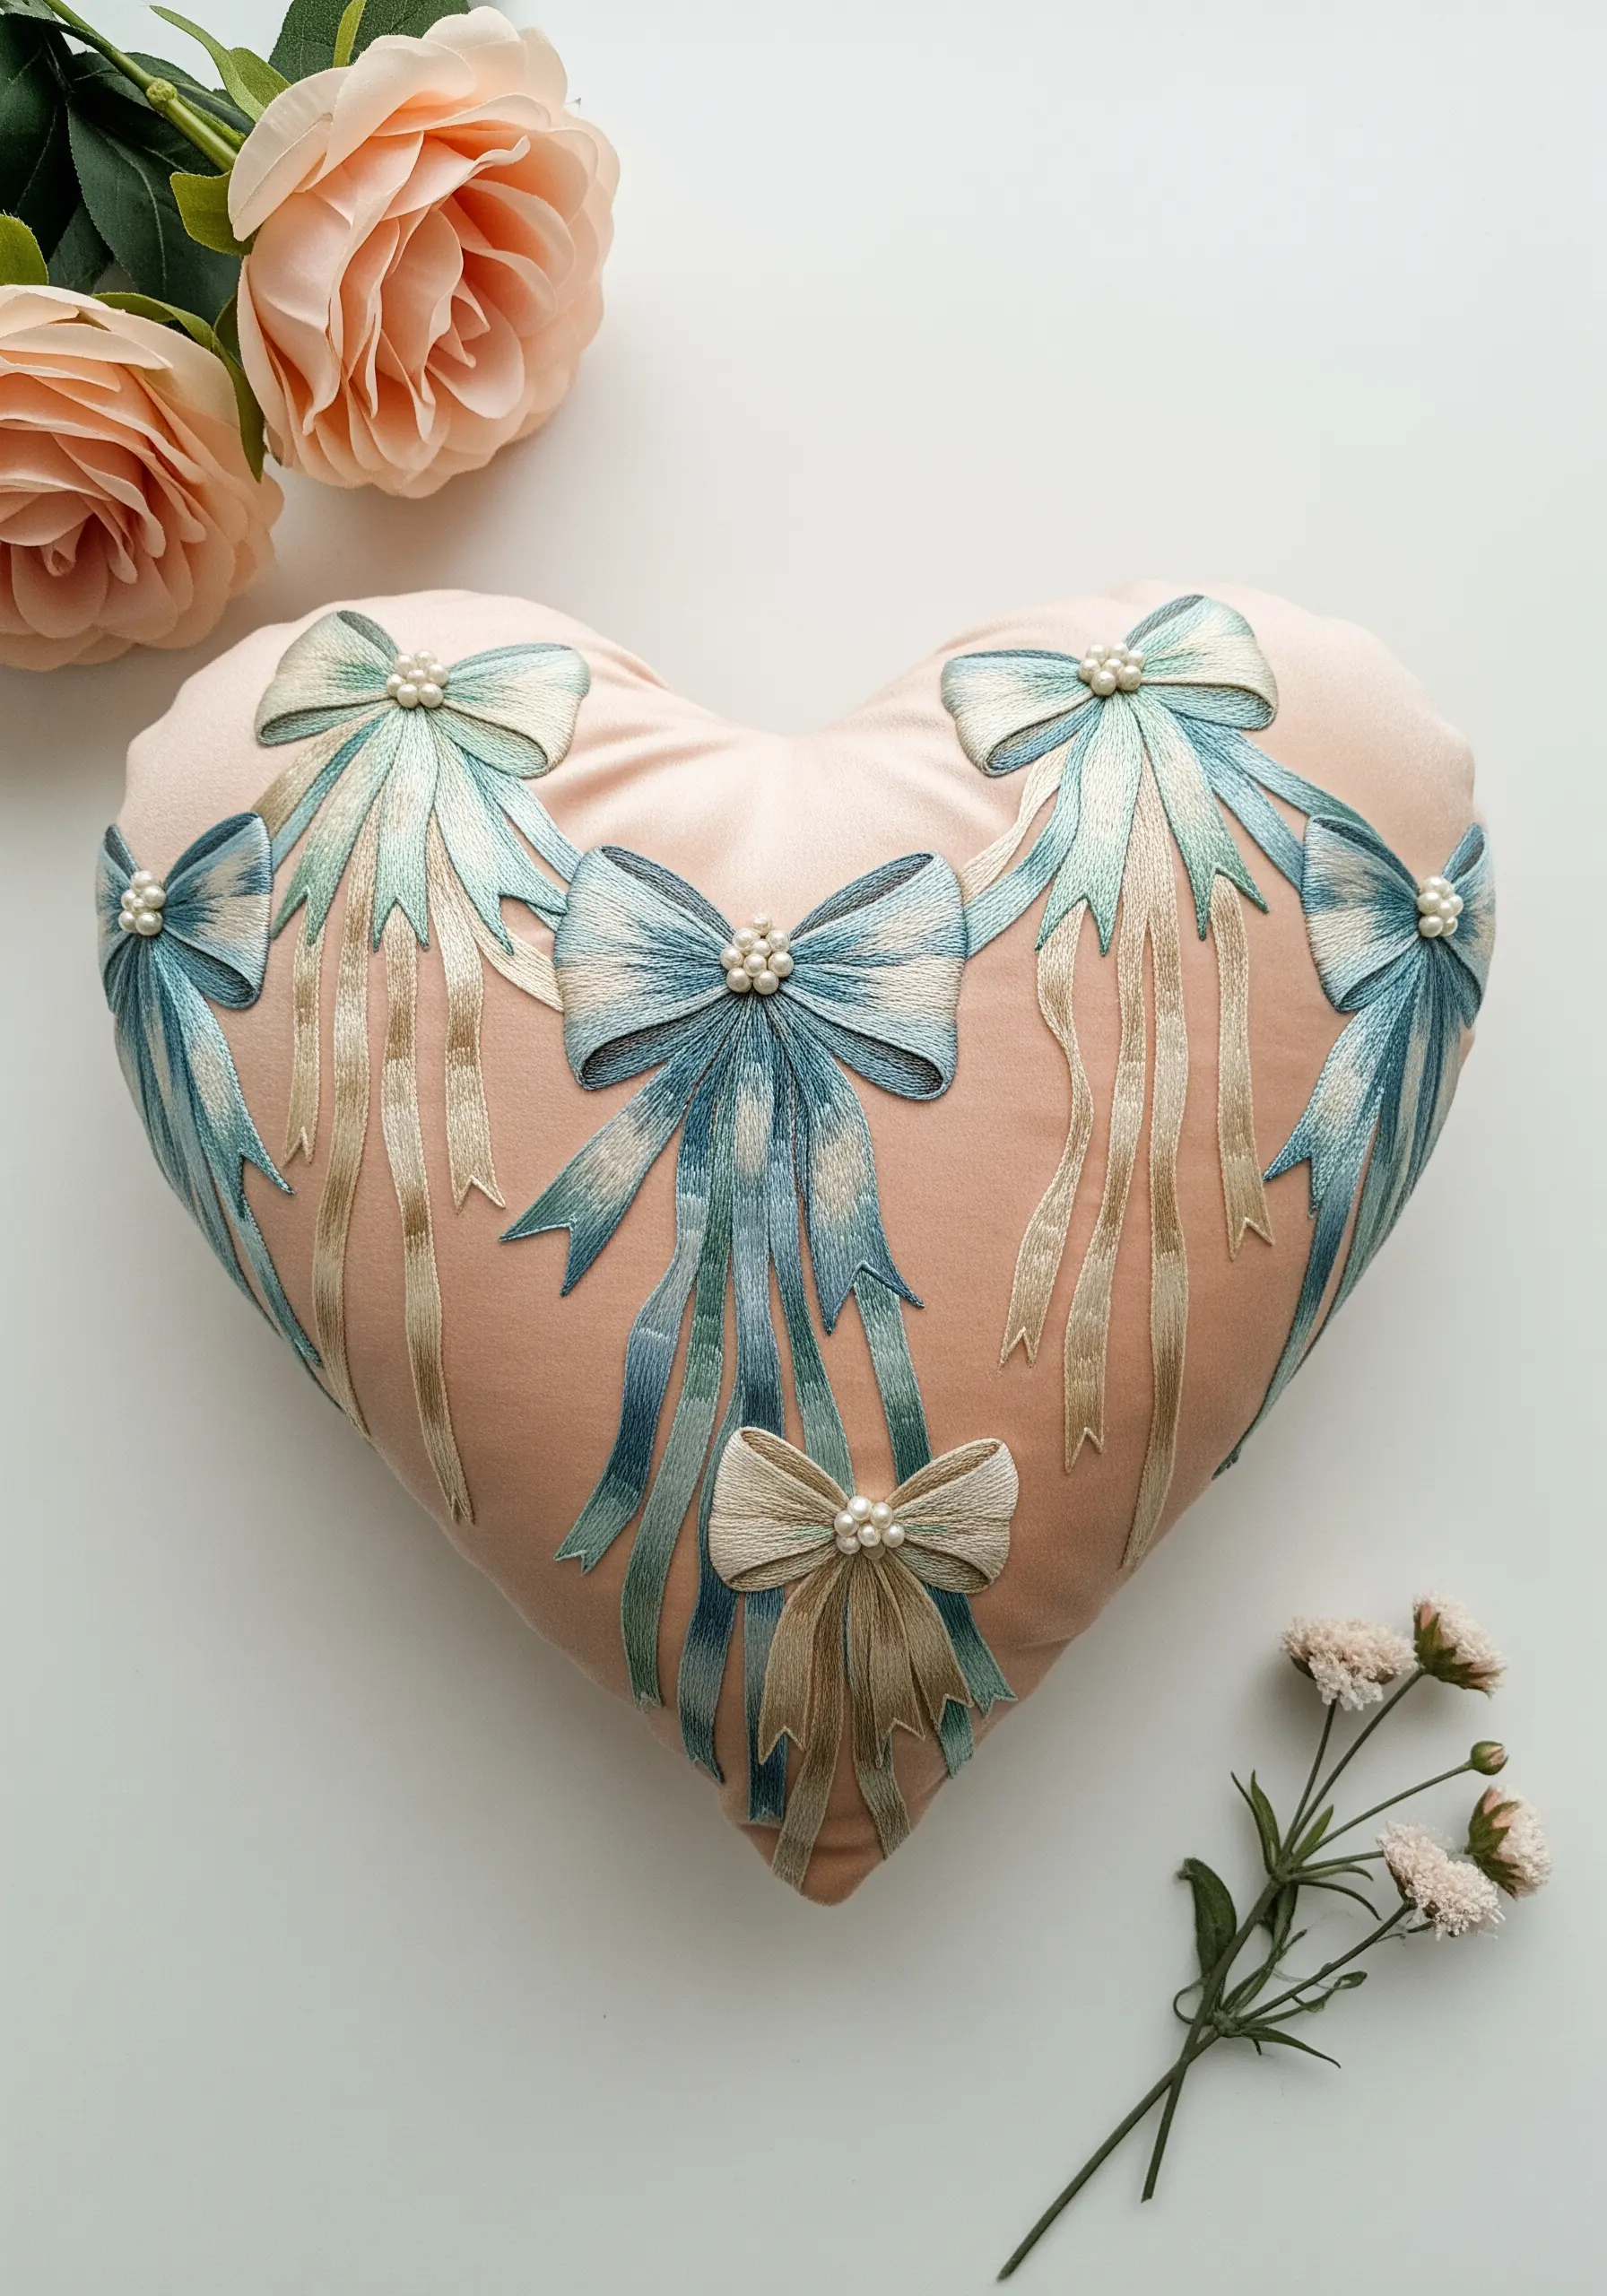
For an opulent, vintage-inspired look, switch from cotton floss to silk ribbon to create these flowing bows.
Use a simple ribbon stitch—bringing the ribbon to the front and piercing it with the needle to create a soft fold—to form the loops of the bow.
Allow the ribbon to twist naturally for the dangling ends to create realistic movement and light-catching texture.
A single pearl bead at the center of each bow provides the perfect finishing touch of timeless elegance.
9. Define Pastel Shapes with Clean Outlines
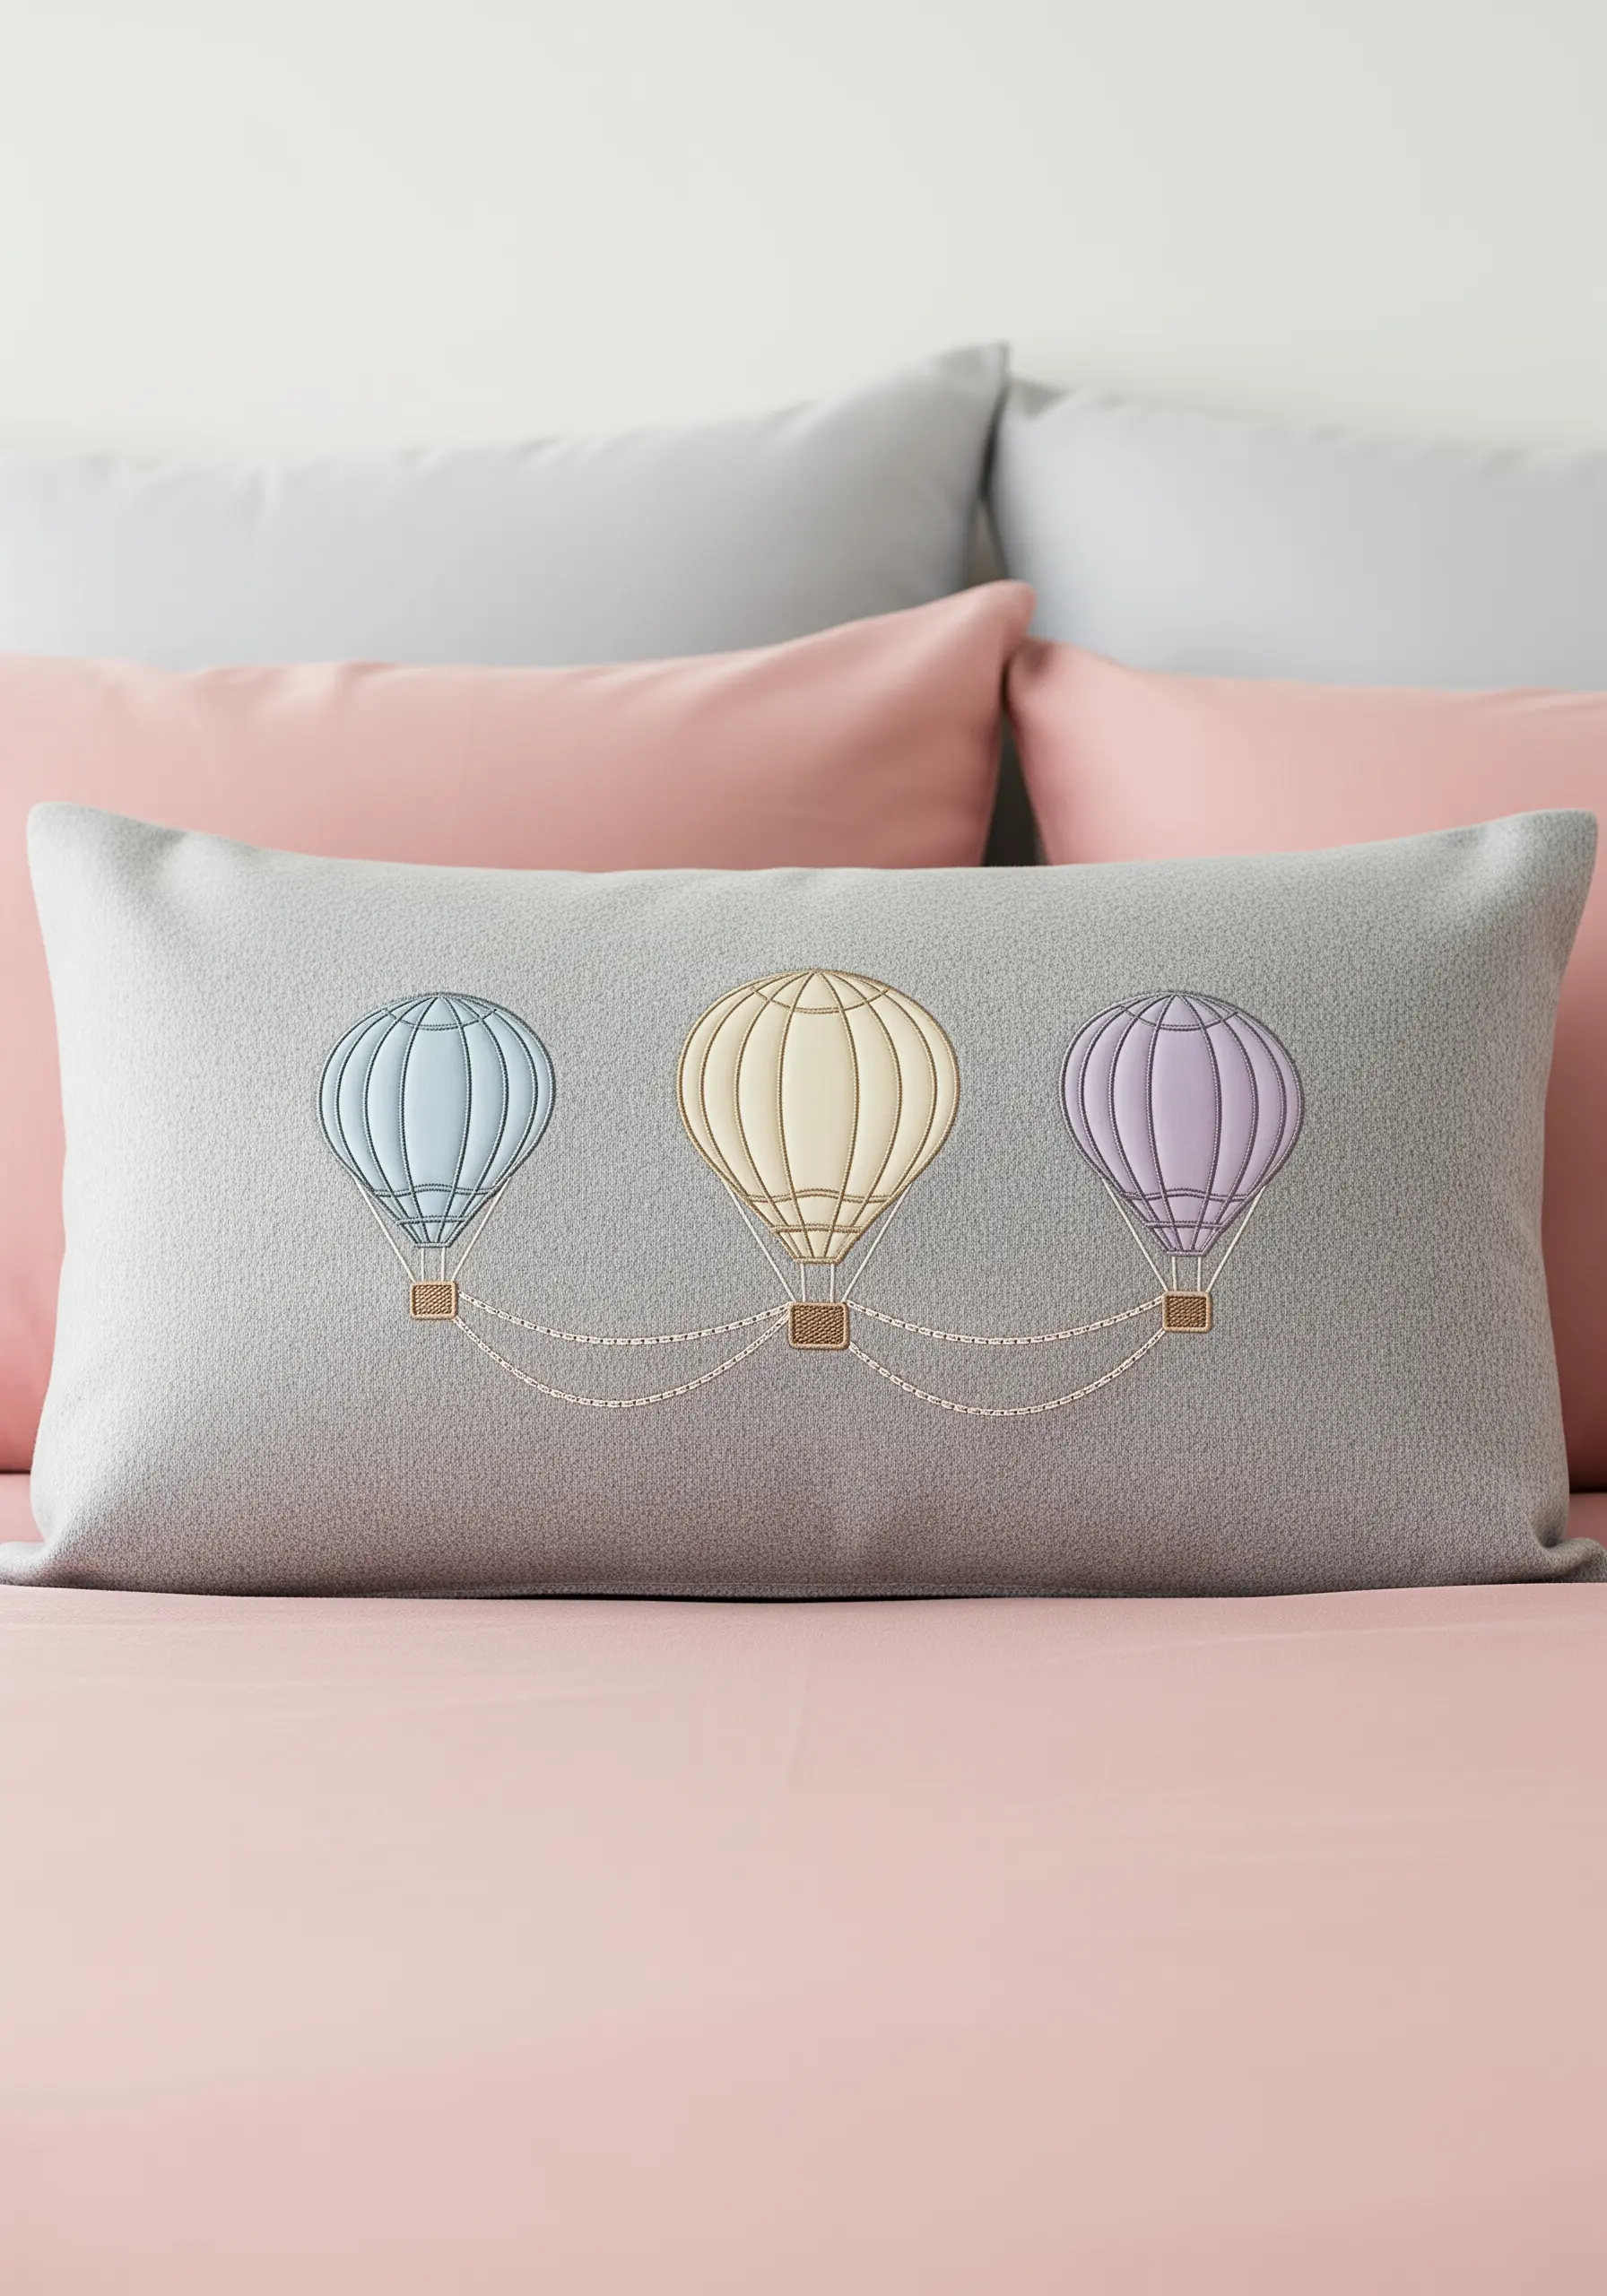
When working with soft, light colors, a clean outline is essential to prevent your design from looking washed out.
Use a darker, neutral shade like grey or taupe and a precise stitch like a split stitch or stem stitch to define the panels of each hot air balloon.
This creates a subtle, graphic quality that contains the pastel fills and makes the entire design look sharp and intentional.
Keep the outlines delicate by using only two strands of floss.
10. Build a Mandala with Open-Work Stitches
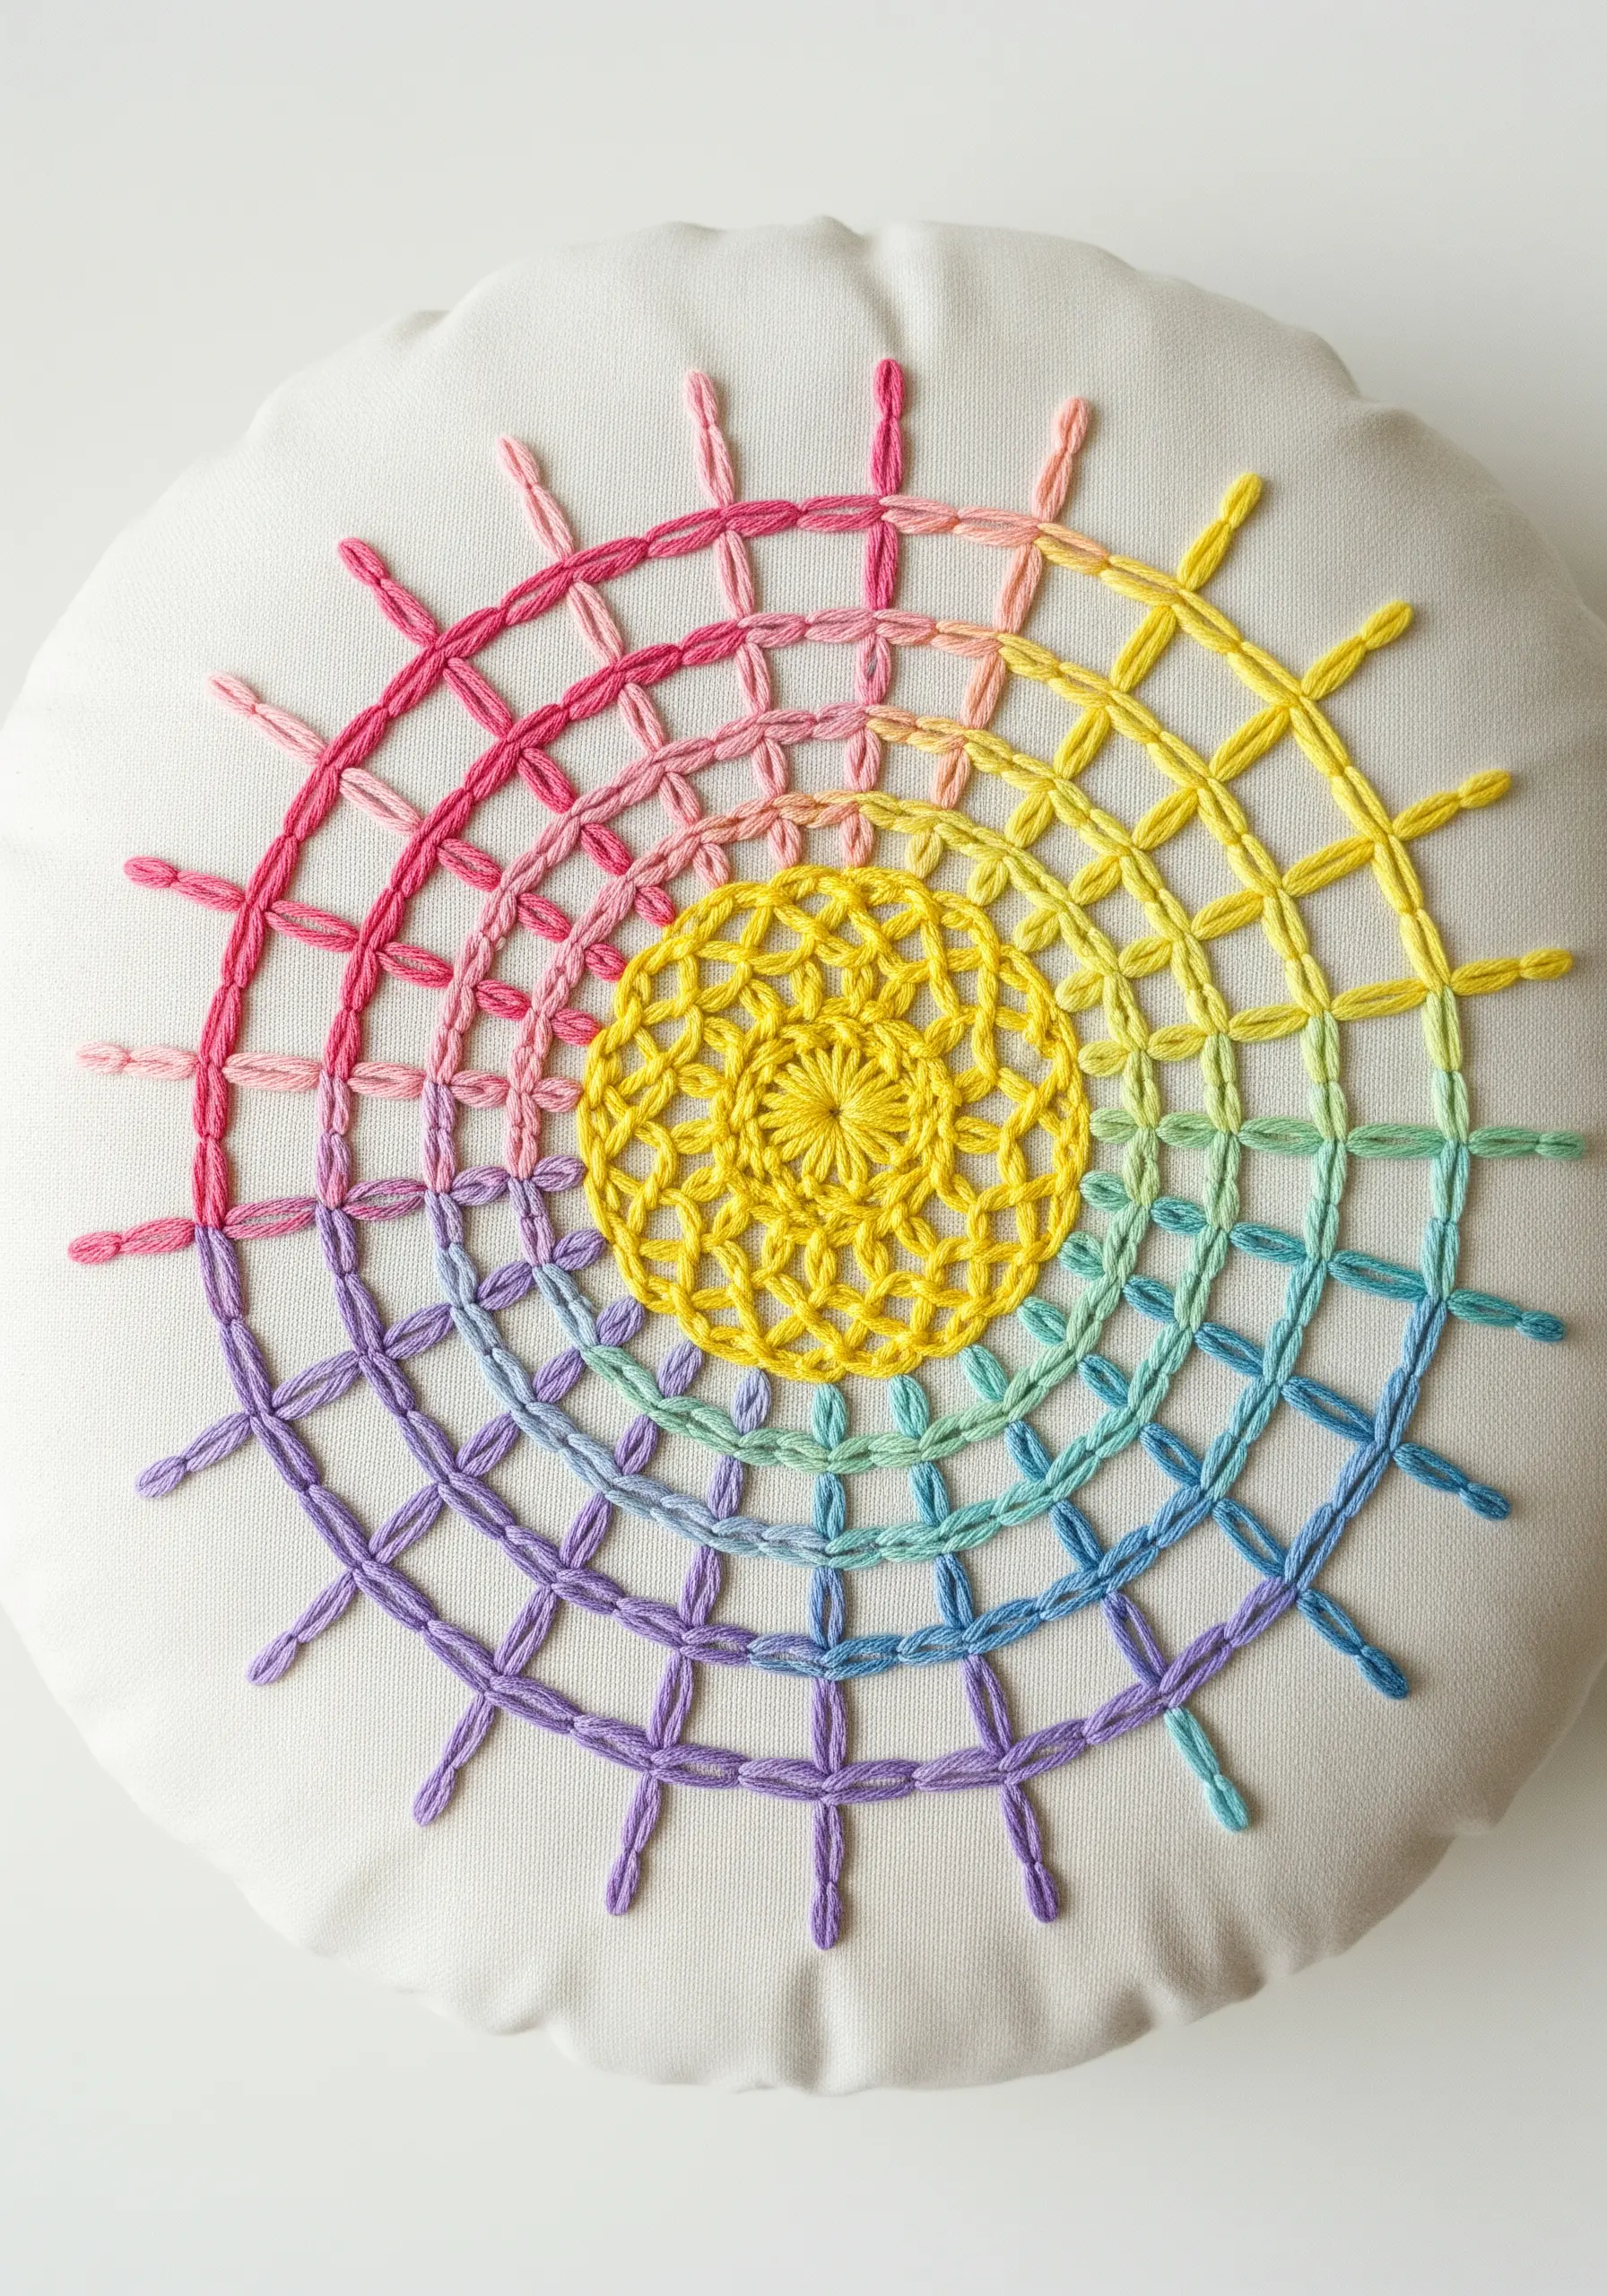
Create a light, airy mandala by using stitches that incorporate negative space.
This design uses a woven wheel stitch at the center, surrounded by radiating spokes made of fly stitches or chain stitches arranged in concentric circles.
The open structure prevents the design from feeling too heavy and allows the base fabric to become part of the art.
This technique is perfect for creating intricate patterns that feel modern and uncluttered.
11. Achieve Realistic Gradients with Thread Painting
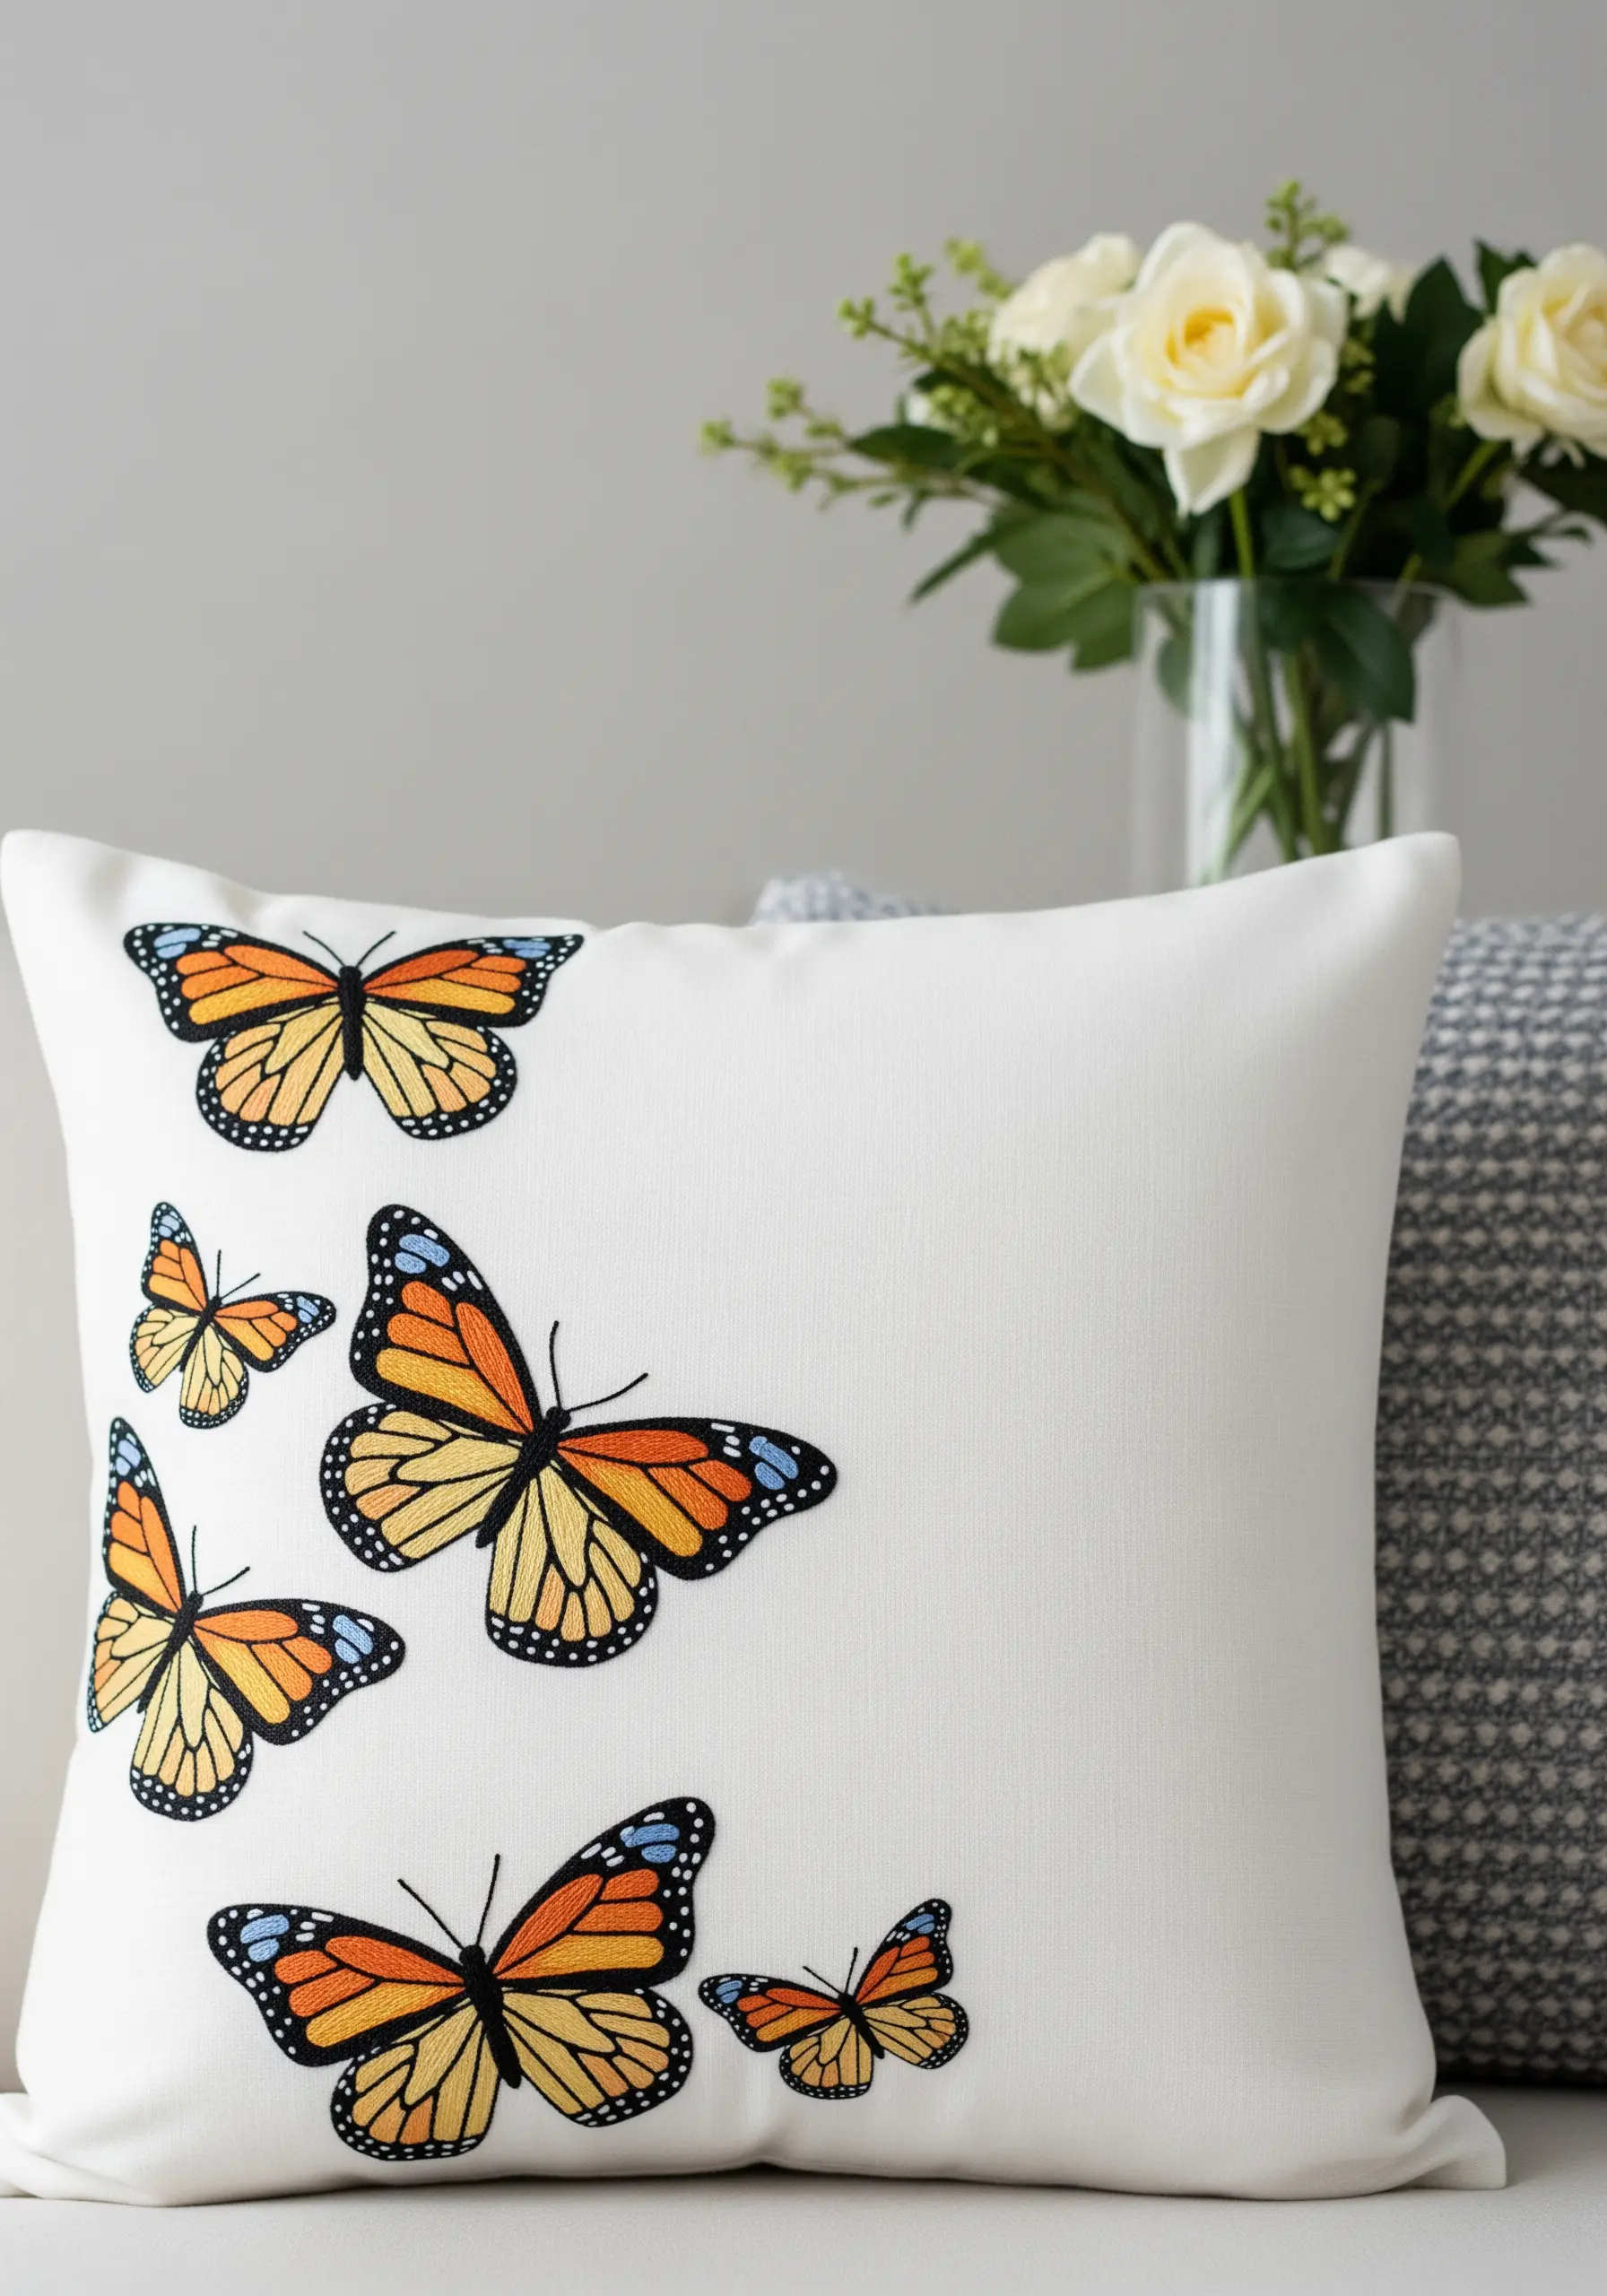
To capture the delicate color transitions in butterfly wings, use the long-and-short stitch technique, also known as thread painting.
Fill a small section with stitches of varying lengths using your first color. Then, bring your second color up through the fabric and stitch back into the first color area, interlocking the stitches seamlessly.
Work with a single strand of floss for the smoothest blend, creating realistic insect embroidery that looks almost like a photograph.
12. Create a Cheerful Field of Lazy Daisies
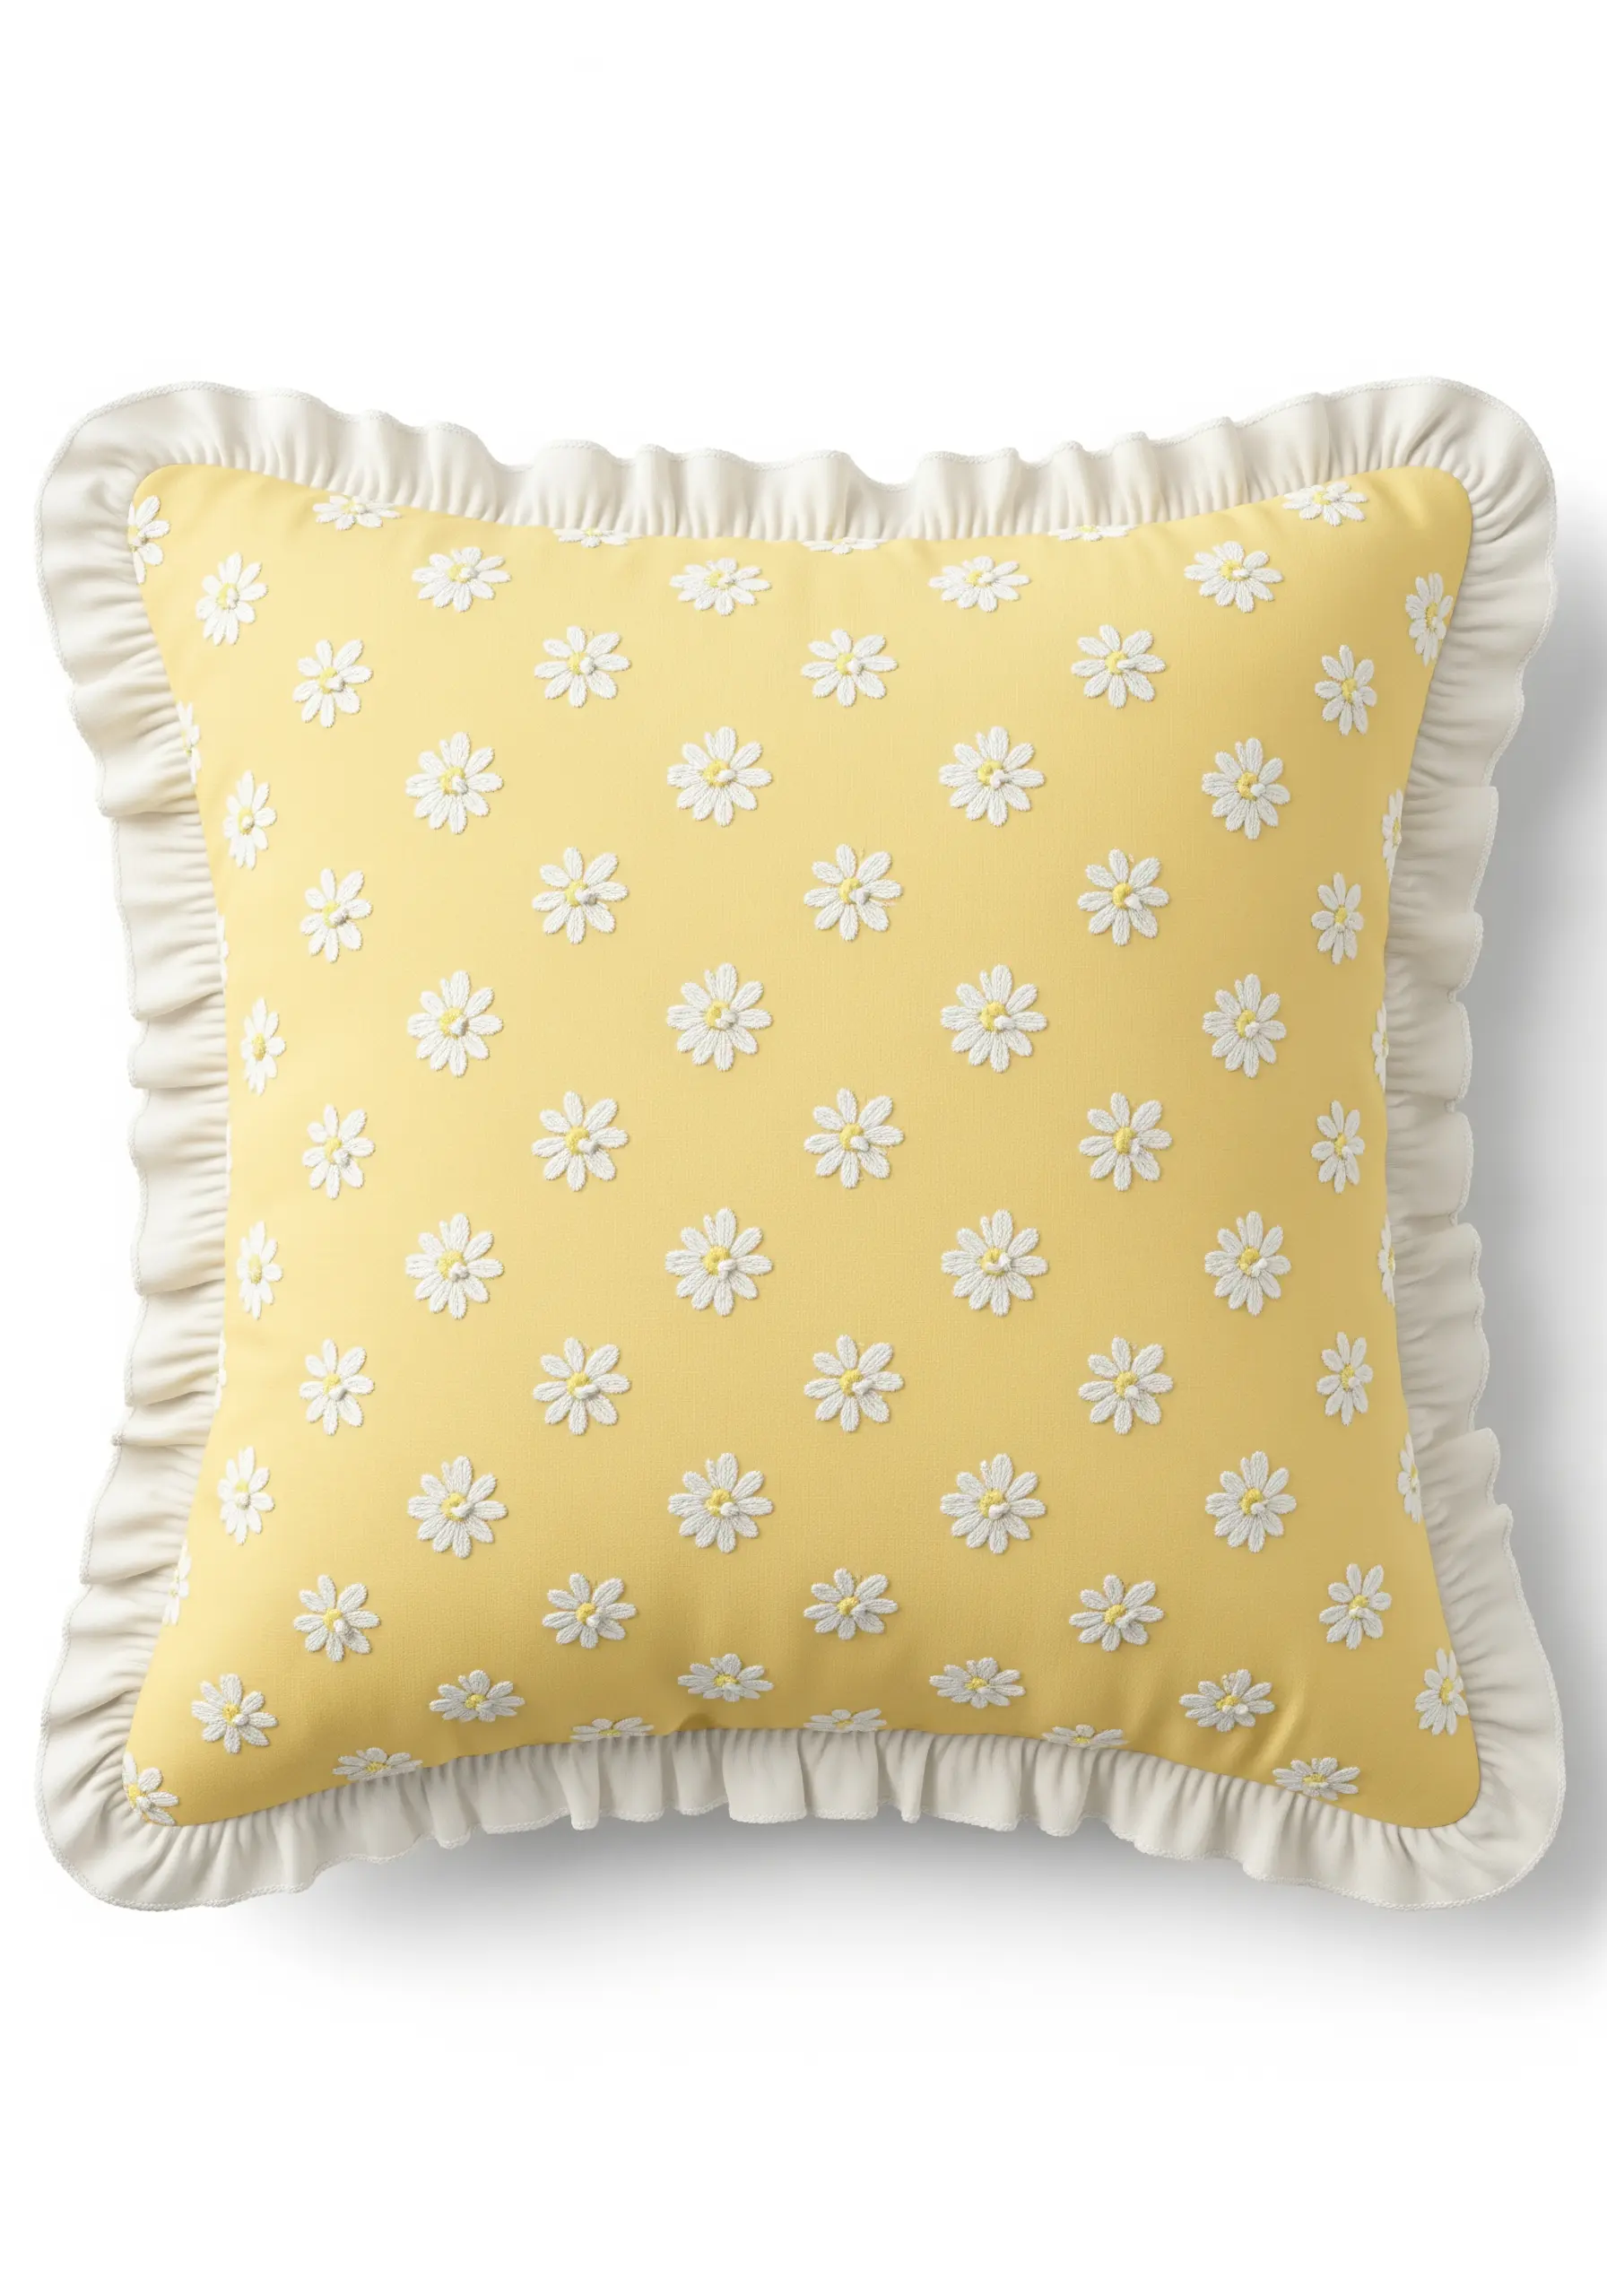
A repeating pattern of simple stitches can have a powerful impact.
Fill your pillow with lazy daisy stitches (detached chain stitch) to form the petals, ensuring each loop is pulled to a similar tension for consistency.
Use a single French knot at the center of each flower for a pop of contrasting color and texture.
This method is a fast, meditative way to cover a large surface with a charming, timeless floral motif.
13. Sculpt Feathers with Directional Stitching
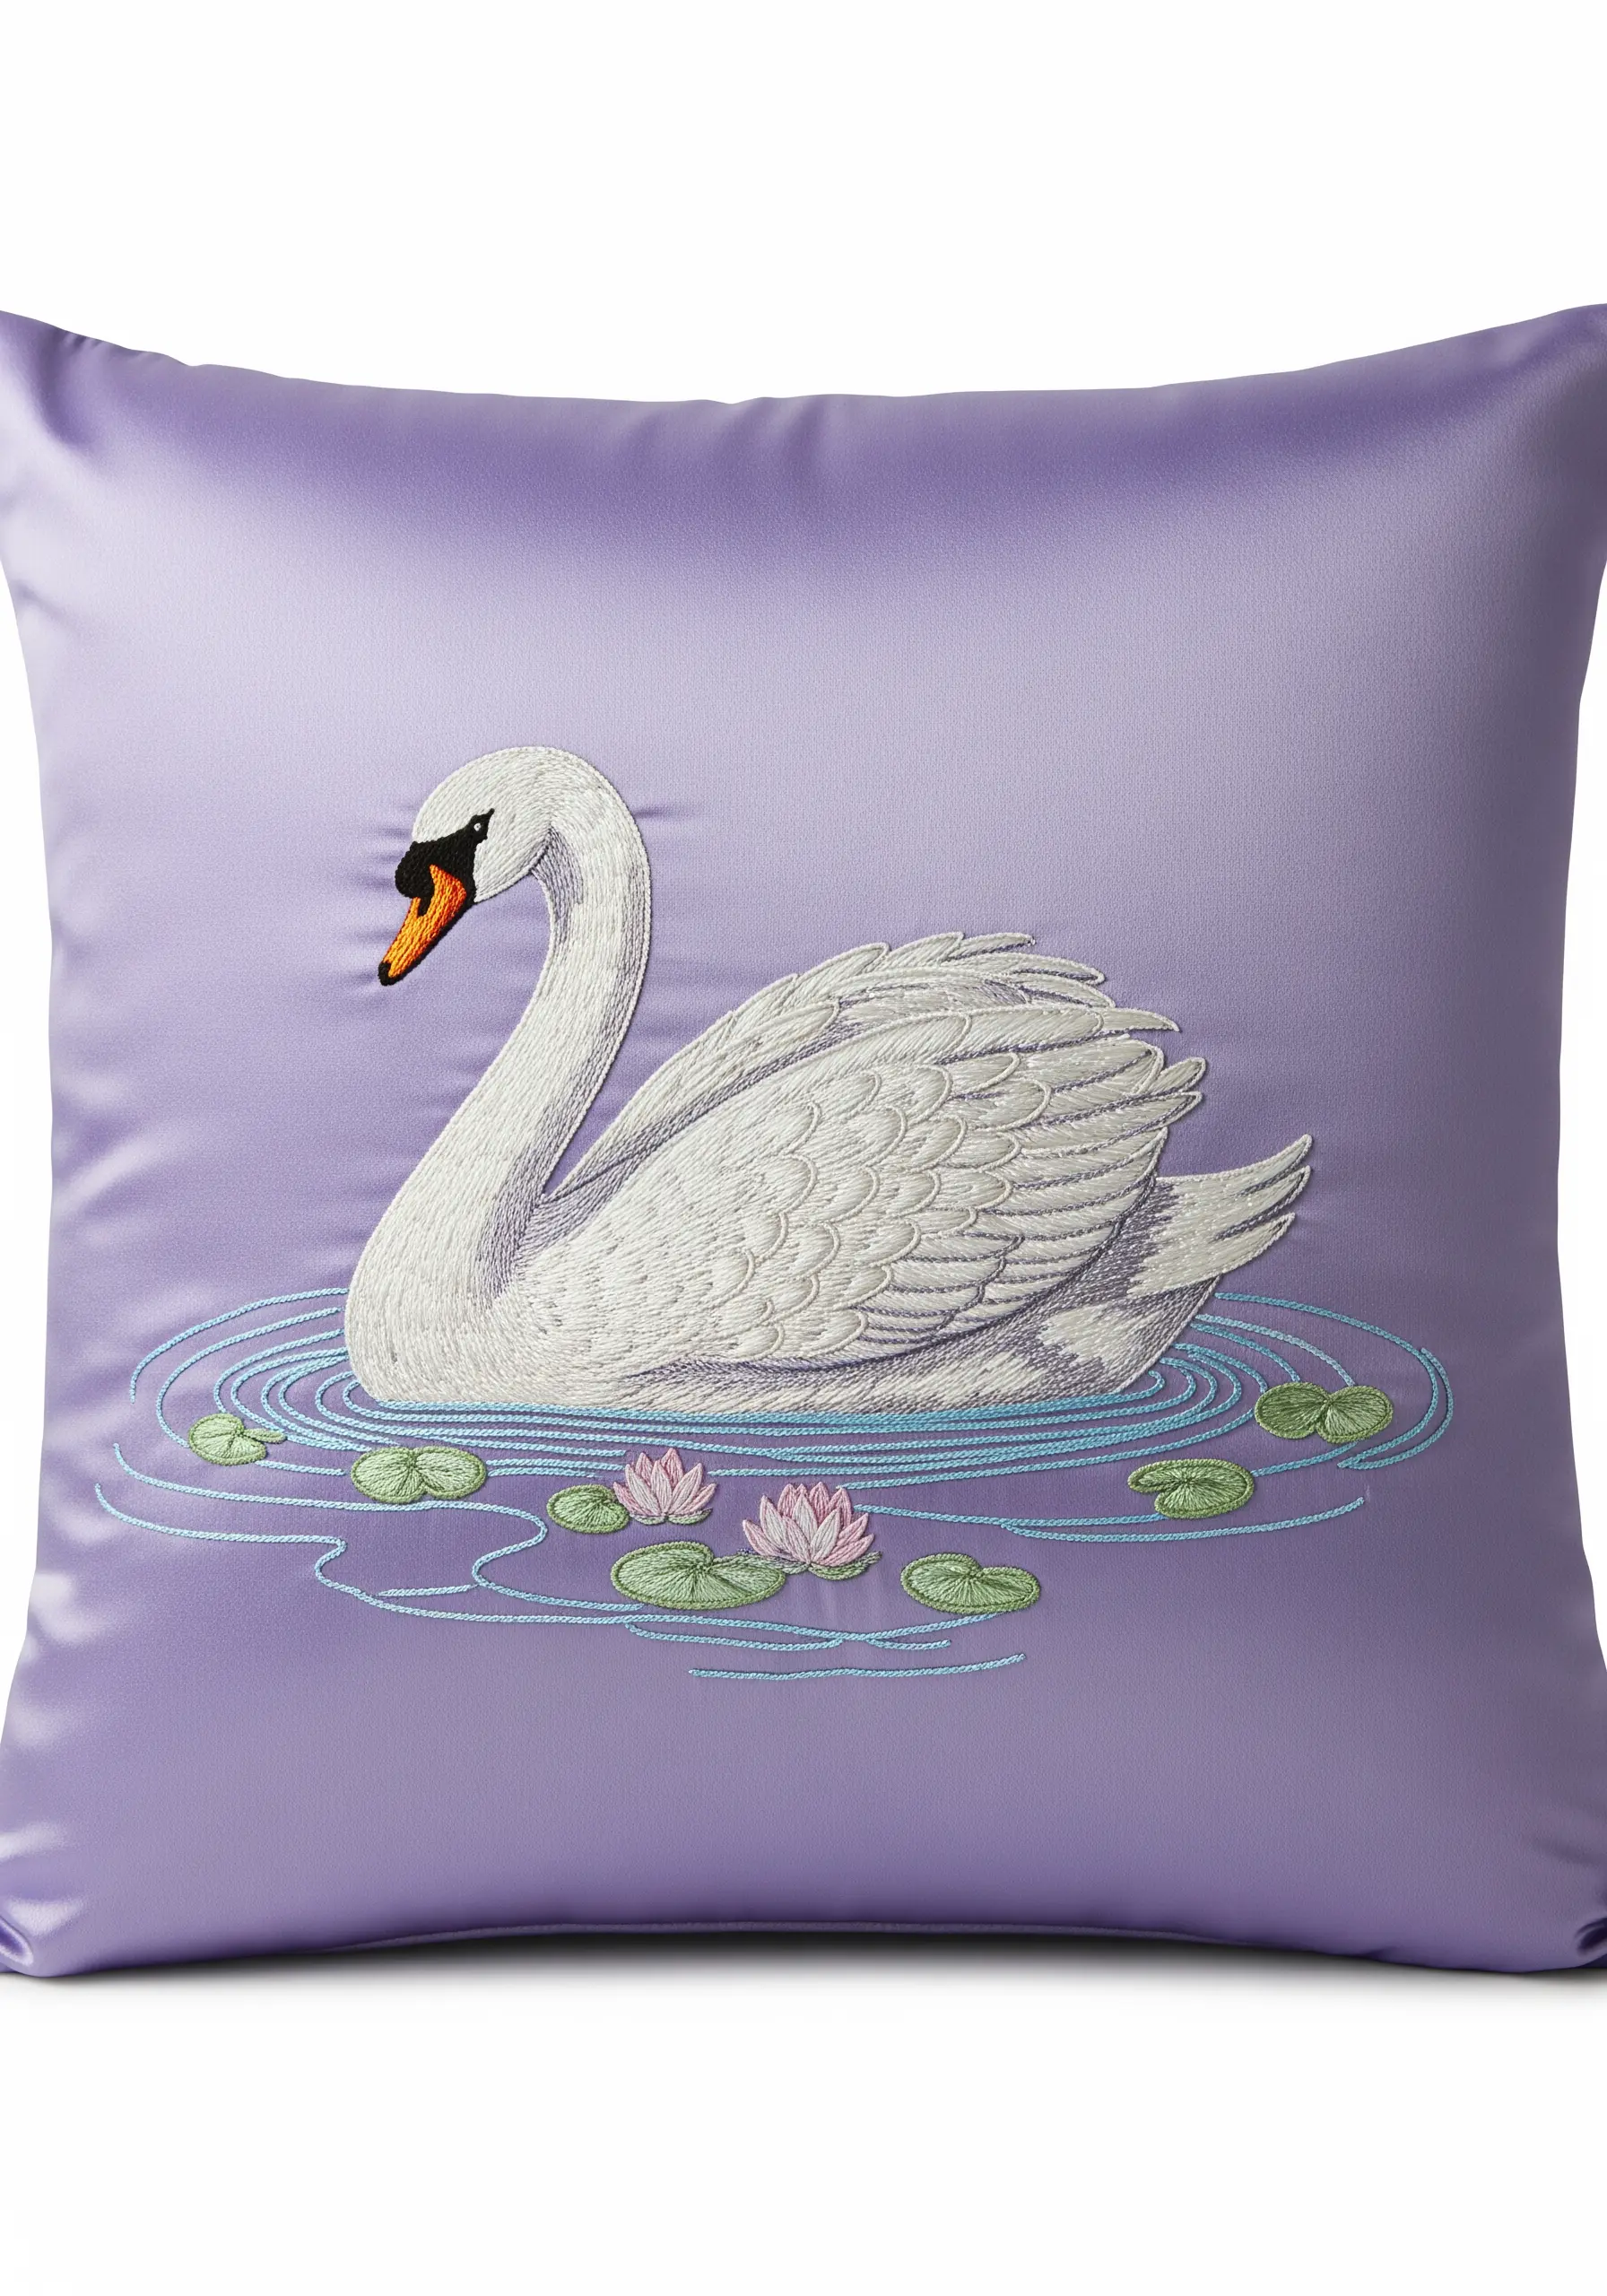
To avoid a flat, lifeless bird, map out the direction of your stitches to mimic the flow of real feathers.
Use layered satin stitches or long-and-short stitches for the larger wing feathers, angling them outwards from the body.
For the smaller, softer feathers on the neck and body, use shorter stitches that follow the swan’s graceful curve.
This intentional placement of each stitch is what creates the illusion of texture, depth, and realism, even with a limited color palette.
14. Map the Stars with Metallic Thread and Beads
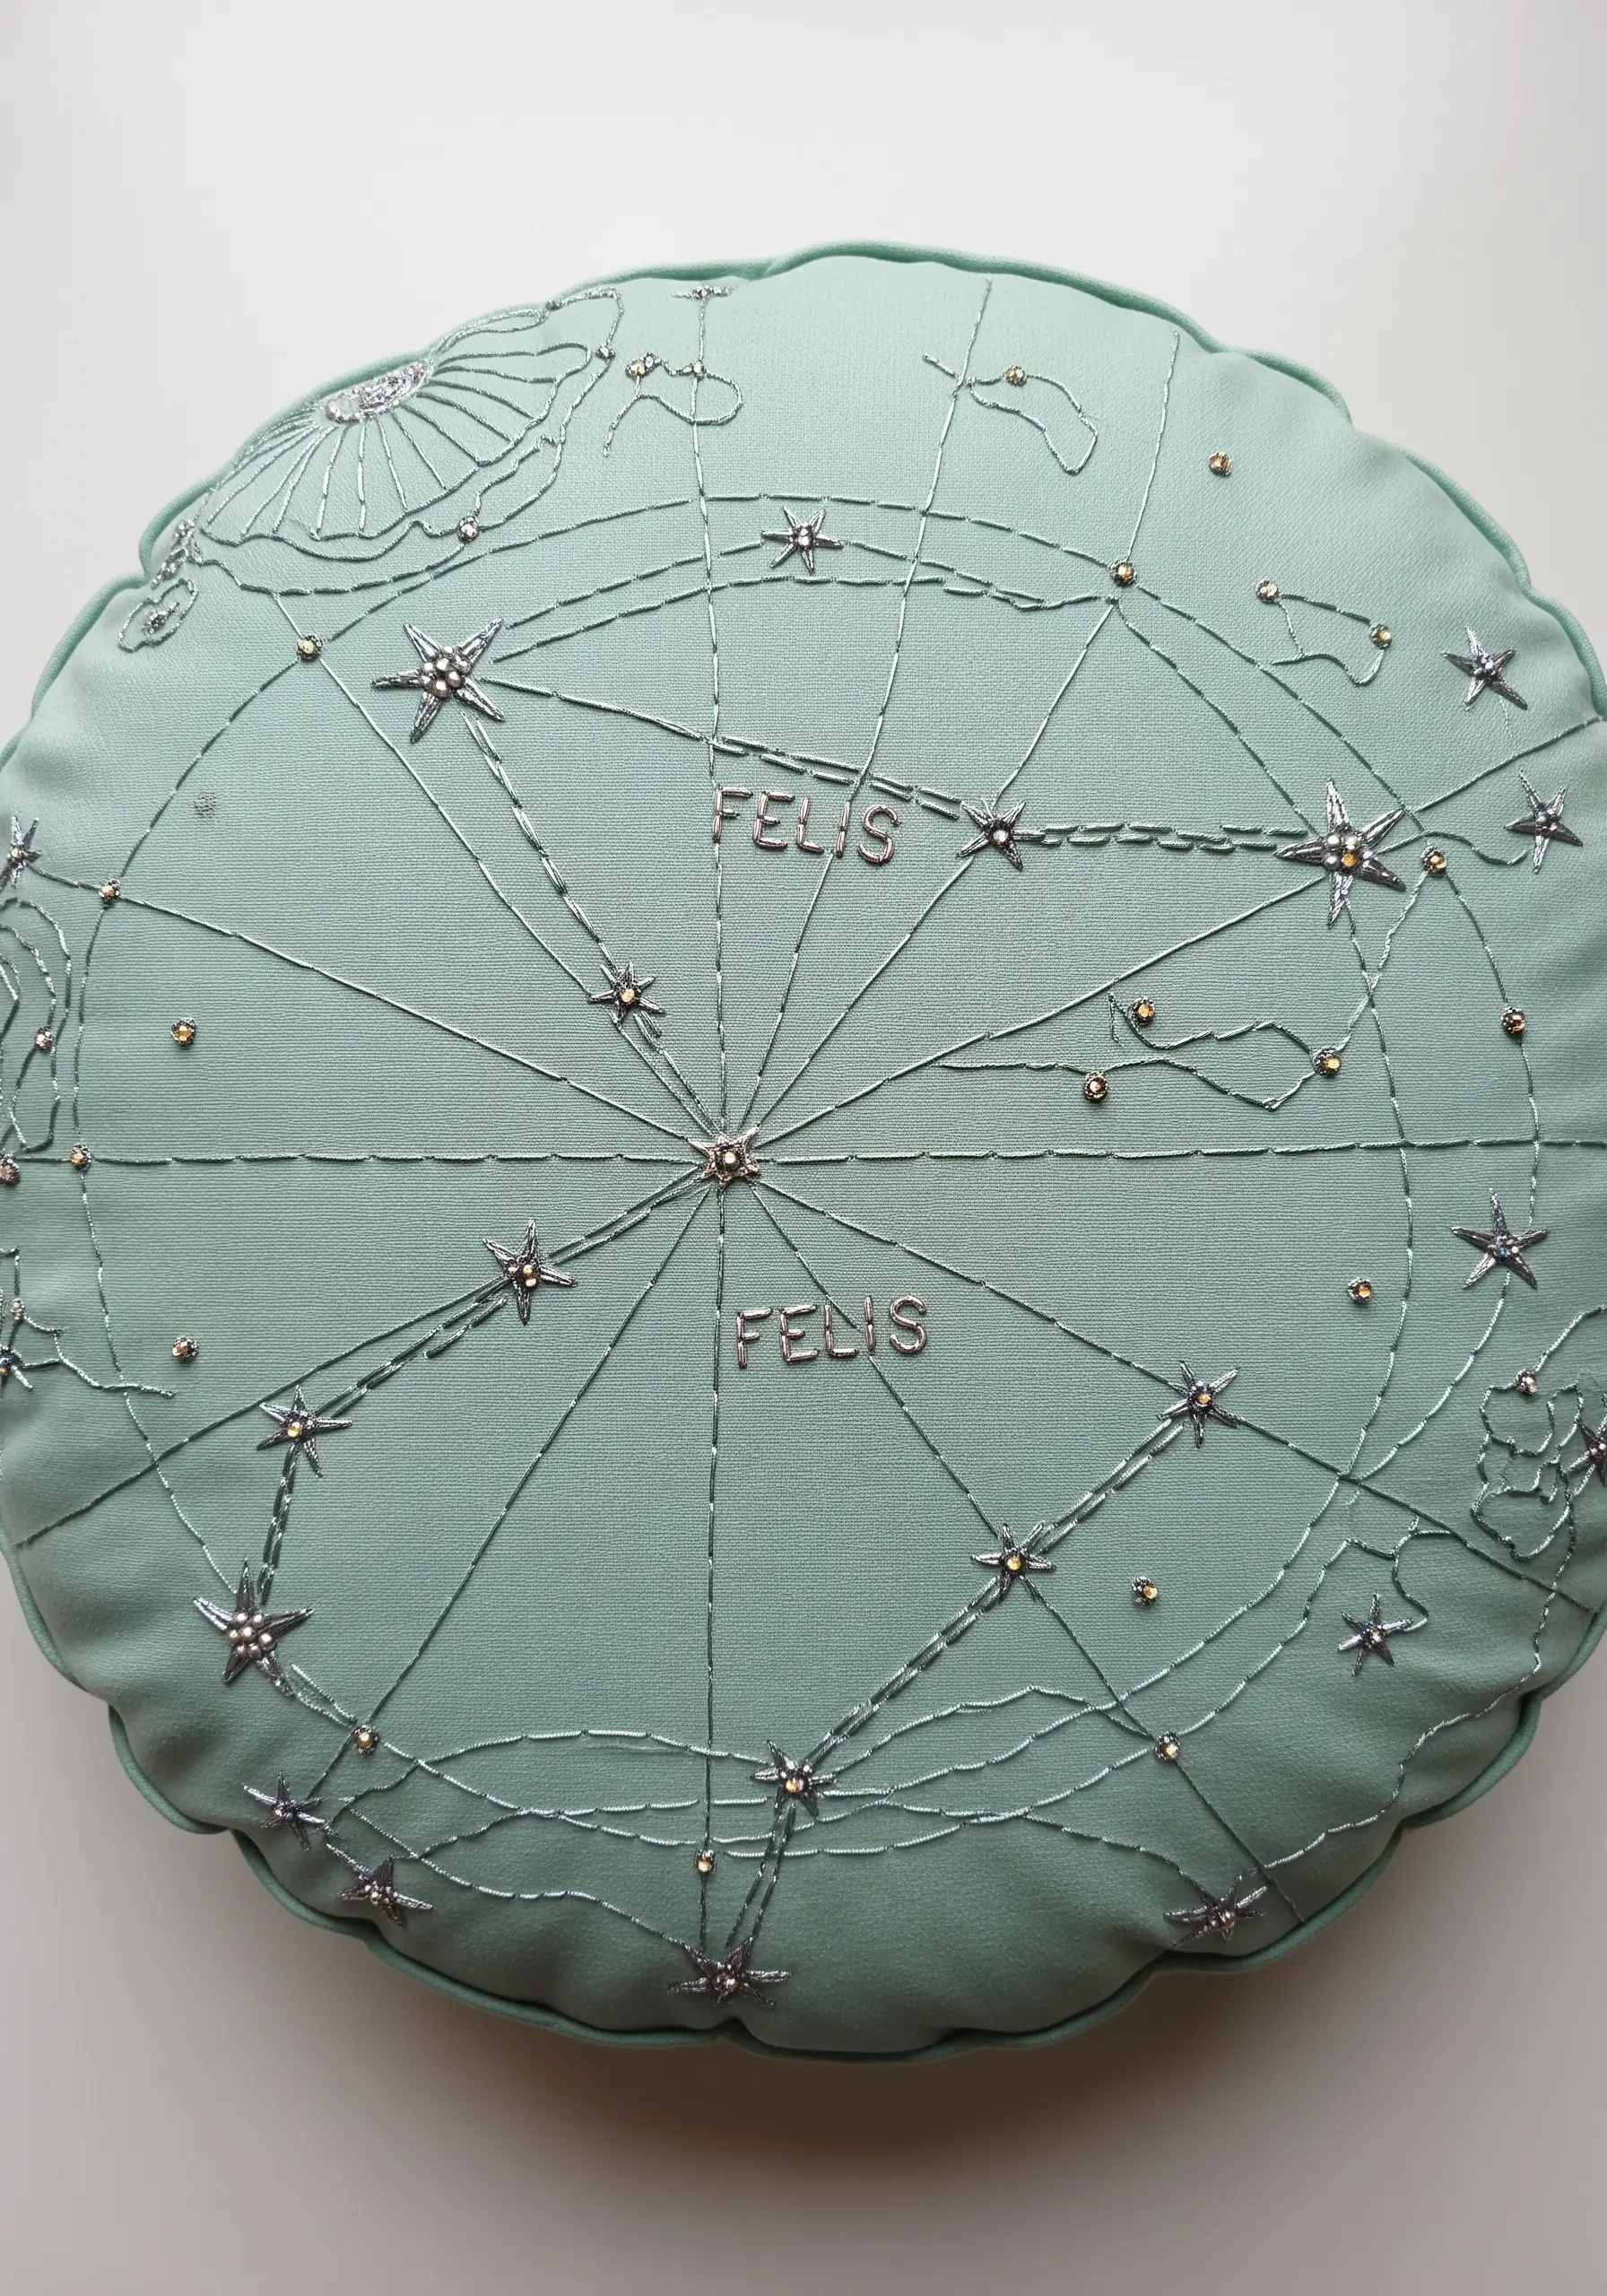
Design your own celestial map using a combination of fine metallic thread and shimmering seed beads.
Use a simple backstitch for the constellation lines, and secure small star-shaped beads or sequins at key intersections for a touch of glamour.
To make metallic thread easier to work with, use shorter lengths and a thread conditioner to prevent tangling and fraying.
This creates a sophisticated, personal design that sparkles as it catches the light.
15. Suggest Texture on a Ribbed Fabric

Embroidering on a textured fabric like corduroy requires a specific approach.
Instead of fighting the ribs, use stitches that work with them. A satin stitch fill, like the one on the atomizer bulb, can be angled to create a contrasting pattern against the fabric’s vertical lines.
For the ‘mist,’ use scattered French knots and star stitches, which sit on top of the fabric’s texture and create a delightful bubbly effect.
This makes the fabric an integral part of your finished artwork.
16. Frame Your Pillow with a Botanical Border

Create an elegant, asymmetrical frame by embroidering a design along two connecting edges of your pillow.
For these lavender stalks, use a combination of straight stitches for the stems and small fishbone or fly stitches for the delicate purple buds.
Tying the composition together with an embroidered ribbon and bow in a contrasting color adds a charming focal point.
This framing technique draws the eye inward and makes the negative space in the center feel intentional and calm.
17. Delineate Layers with Precise Outlines
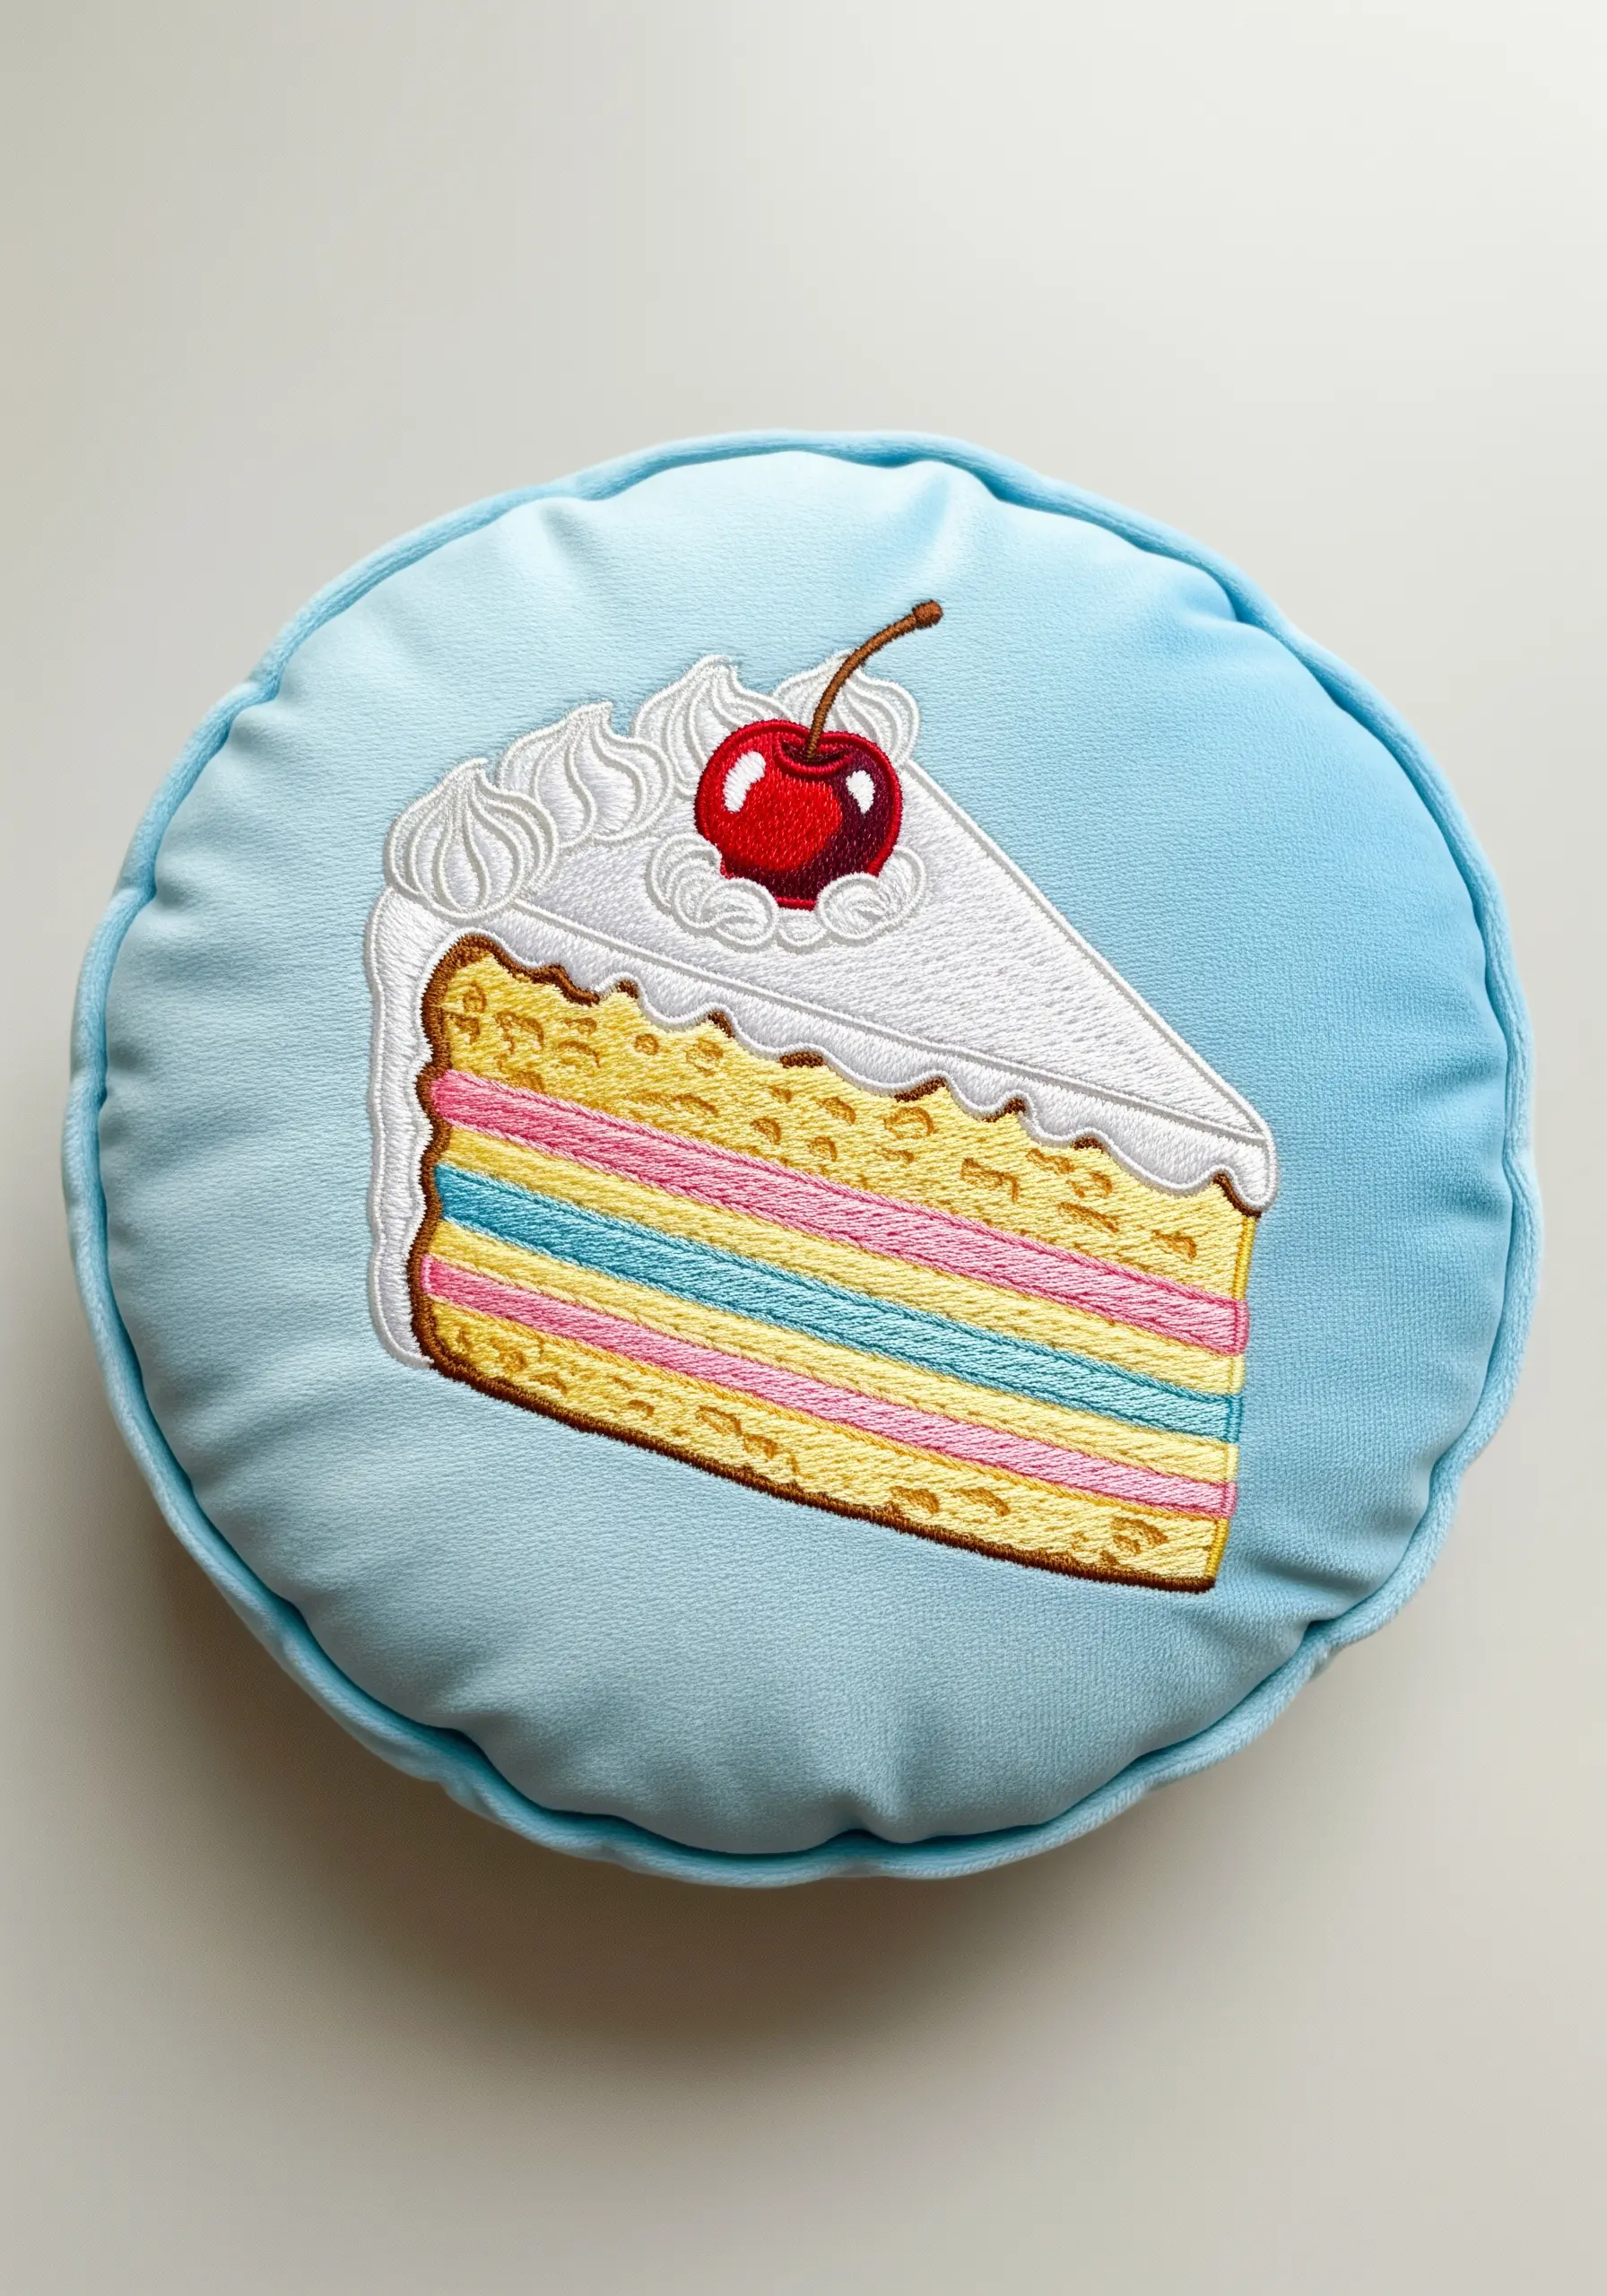
To make the colorful layers of this cake slice look clean and distinct, a precise outline is key.
First, fill each layer with a smooth satin stitch. Then, go back and outline each colored section with a single strand of a darker thread using a split stitch or backstitch.
This technique acts like ink in a cartoon, containing the colors and giving the entire motif a sharp, graphic finish that pops against the soft background.
18. Create Intricate Detail with Minimalist Line Art
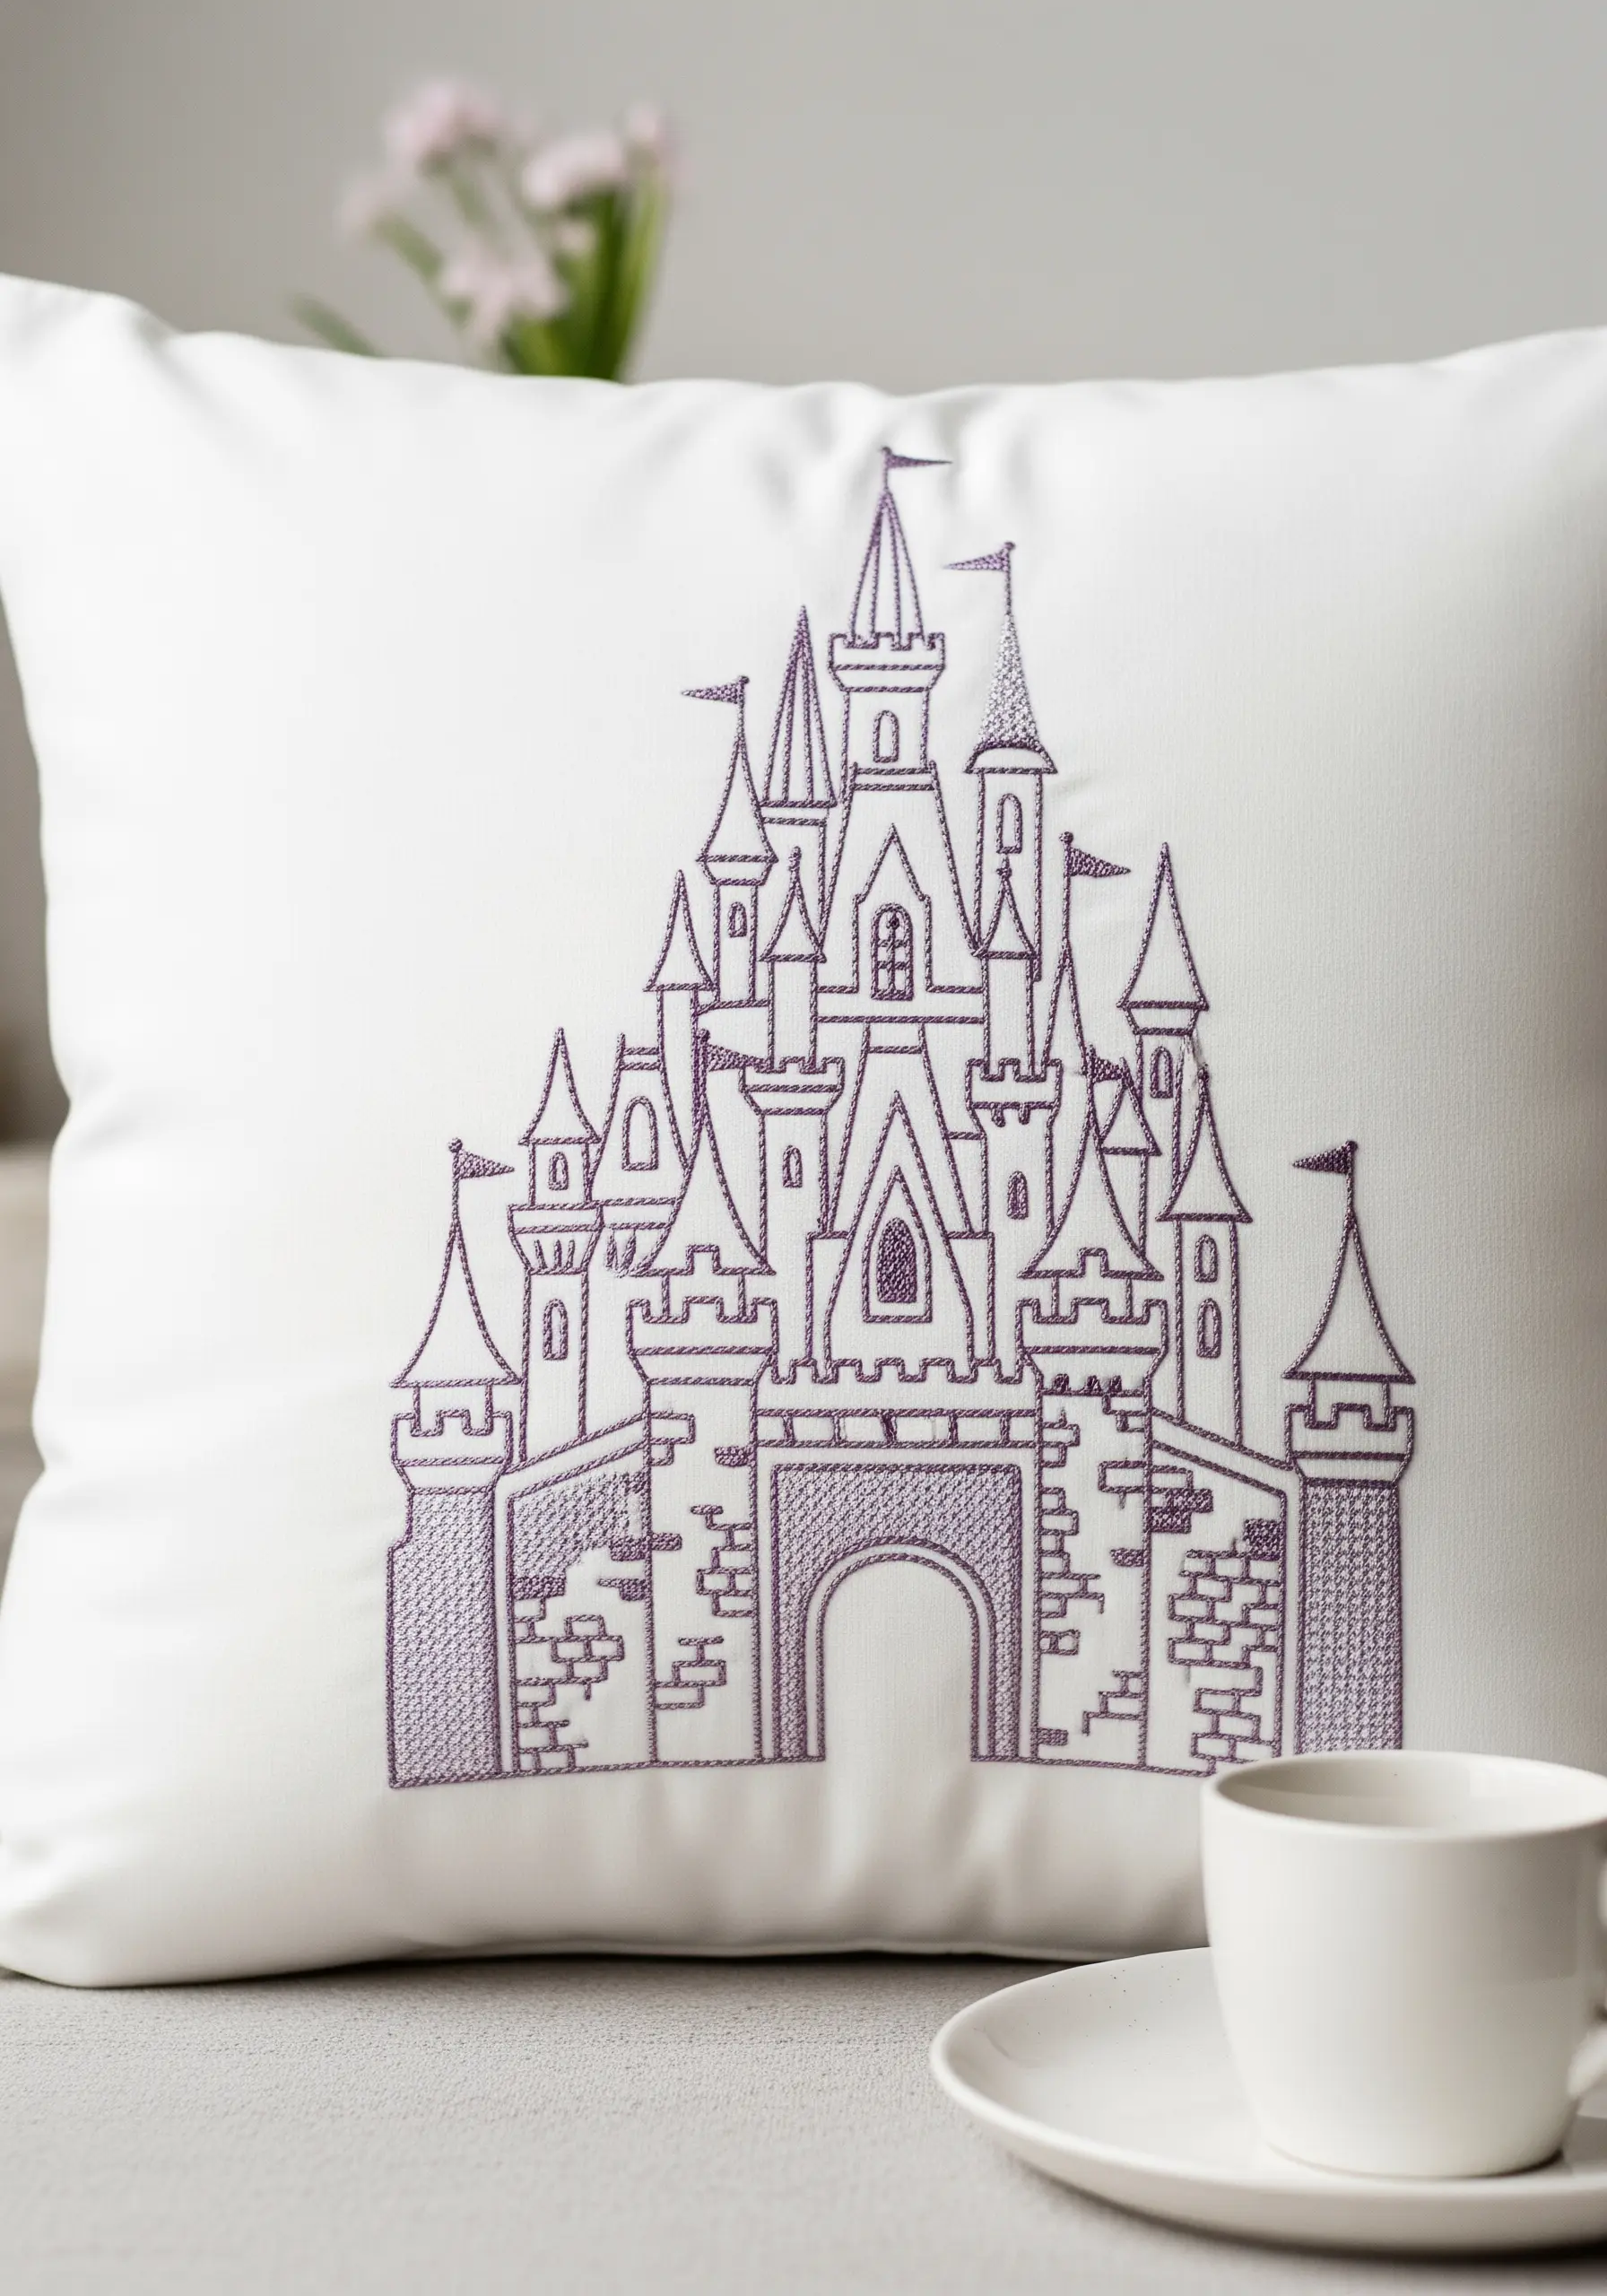
You don’t need dozens of colors to create a captivating design. Minimalist line art can convey immense detail with just a single thread.
For an architectural motif like this castle, choose a simple but sturdy stitch like a backstitch, and focus on keeping your stitch length consistent for clean, uniform lines.
Use a contrasting thread color that stands out against your base fabric to ensure every turret and window is clearly visible.
The result is an elegant, sophisticated design that feels both timeless and modern.
19. Weave Texture with Contrasting Thread Sheens
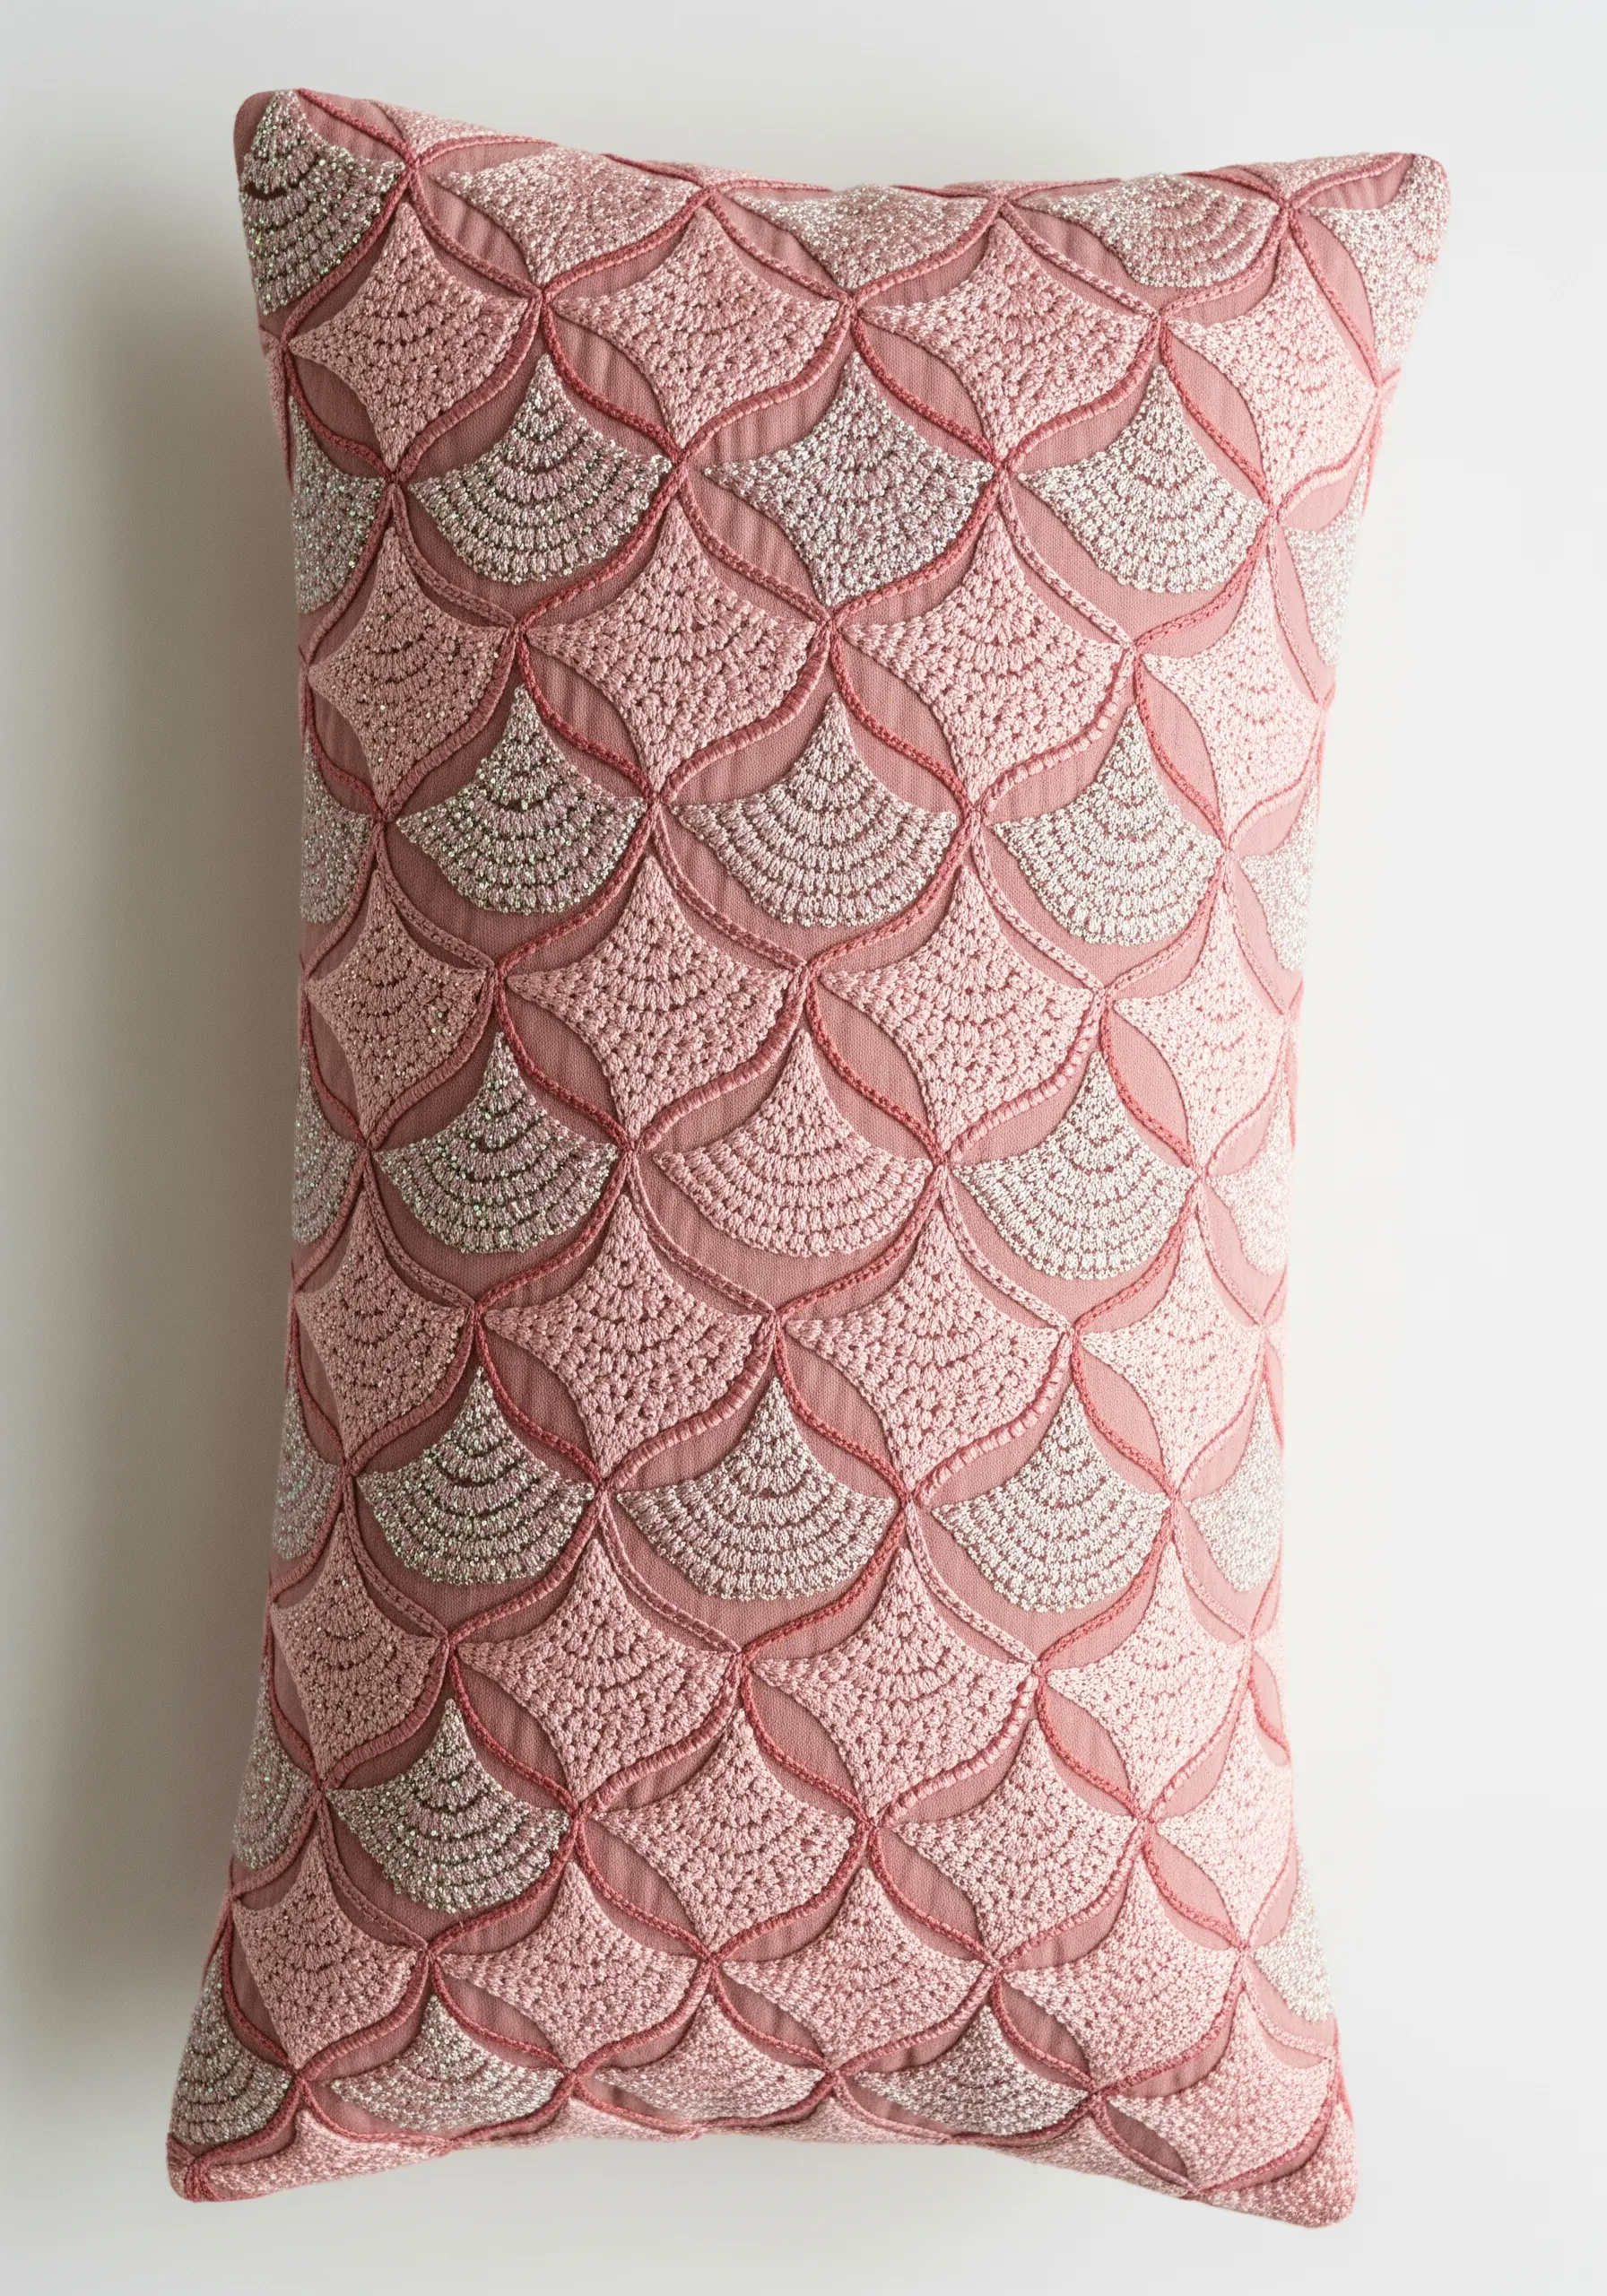
Elevate a simple geometric pattern by using threads with different finishes.
This design combines matte pink cotton floss with a shimmering silver metallic or rayon thread within the same scalloped shapes.
The contrast between the soft, light-absorbing matte thread and the reflective, glossy metallic thread creates a rich, tactile surface that invites touch.
This is a simple way to add a layer of luxury and visual depth to any pattern.
20. Embroider on Faux Fur with a Stabilizer
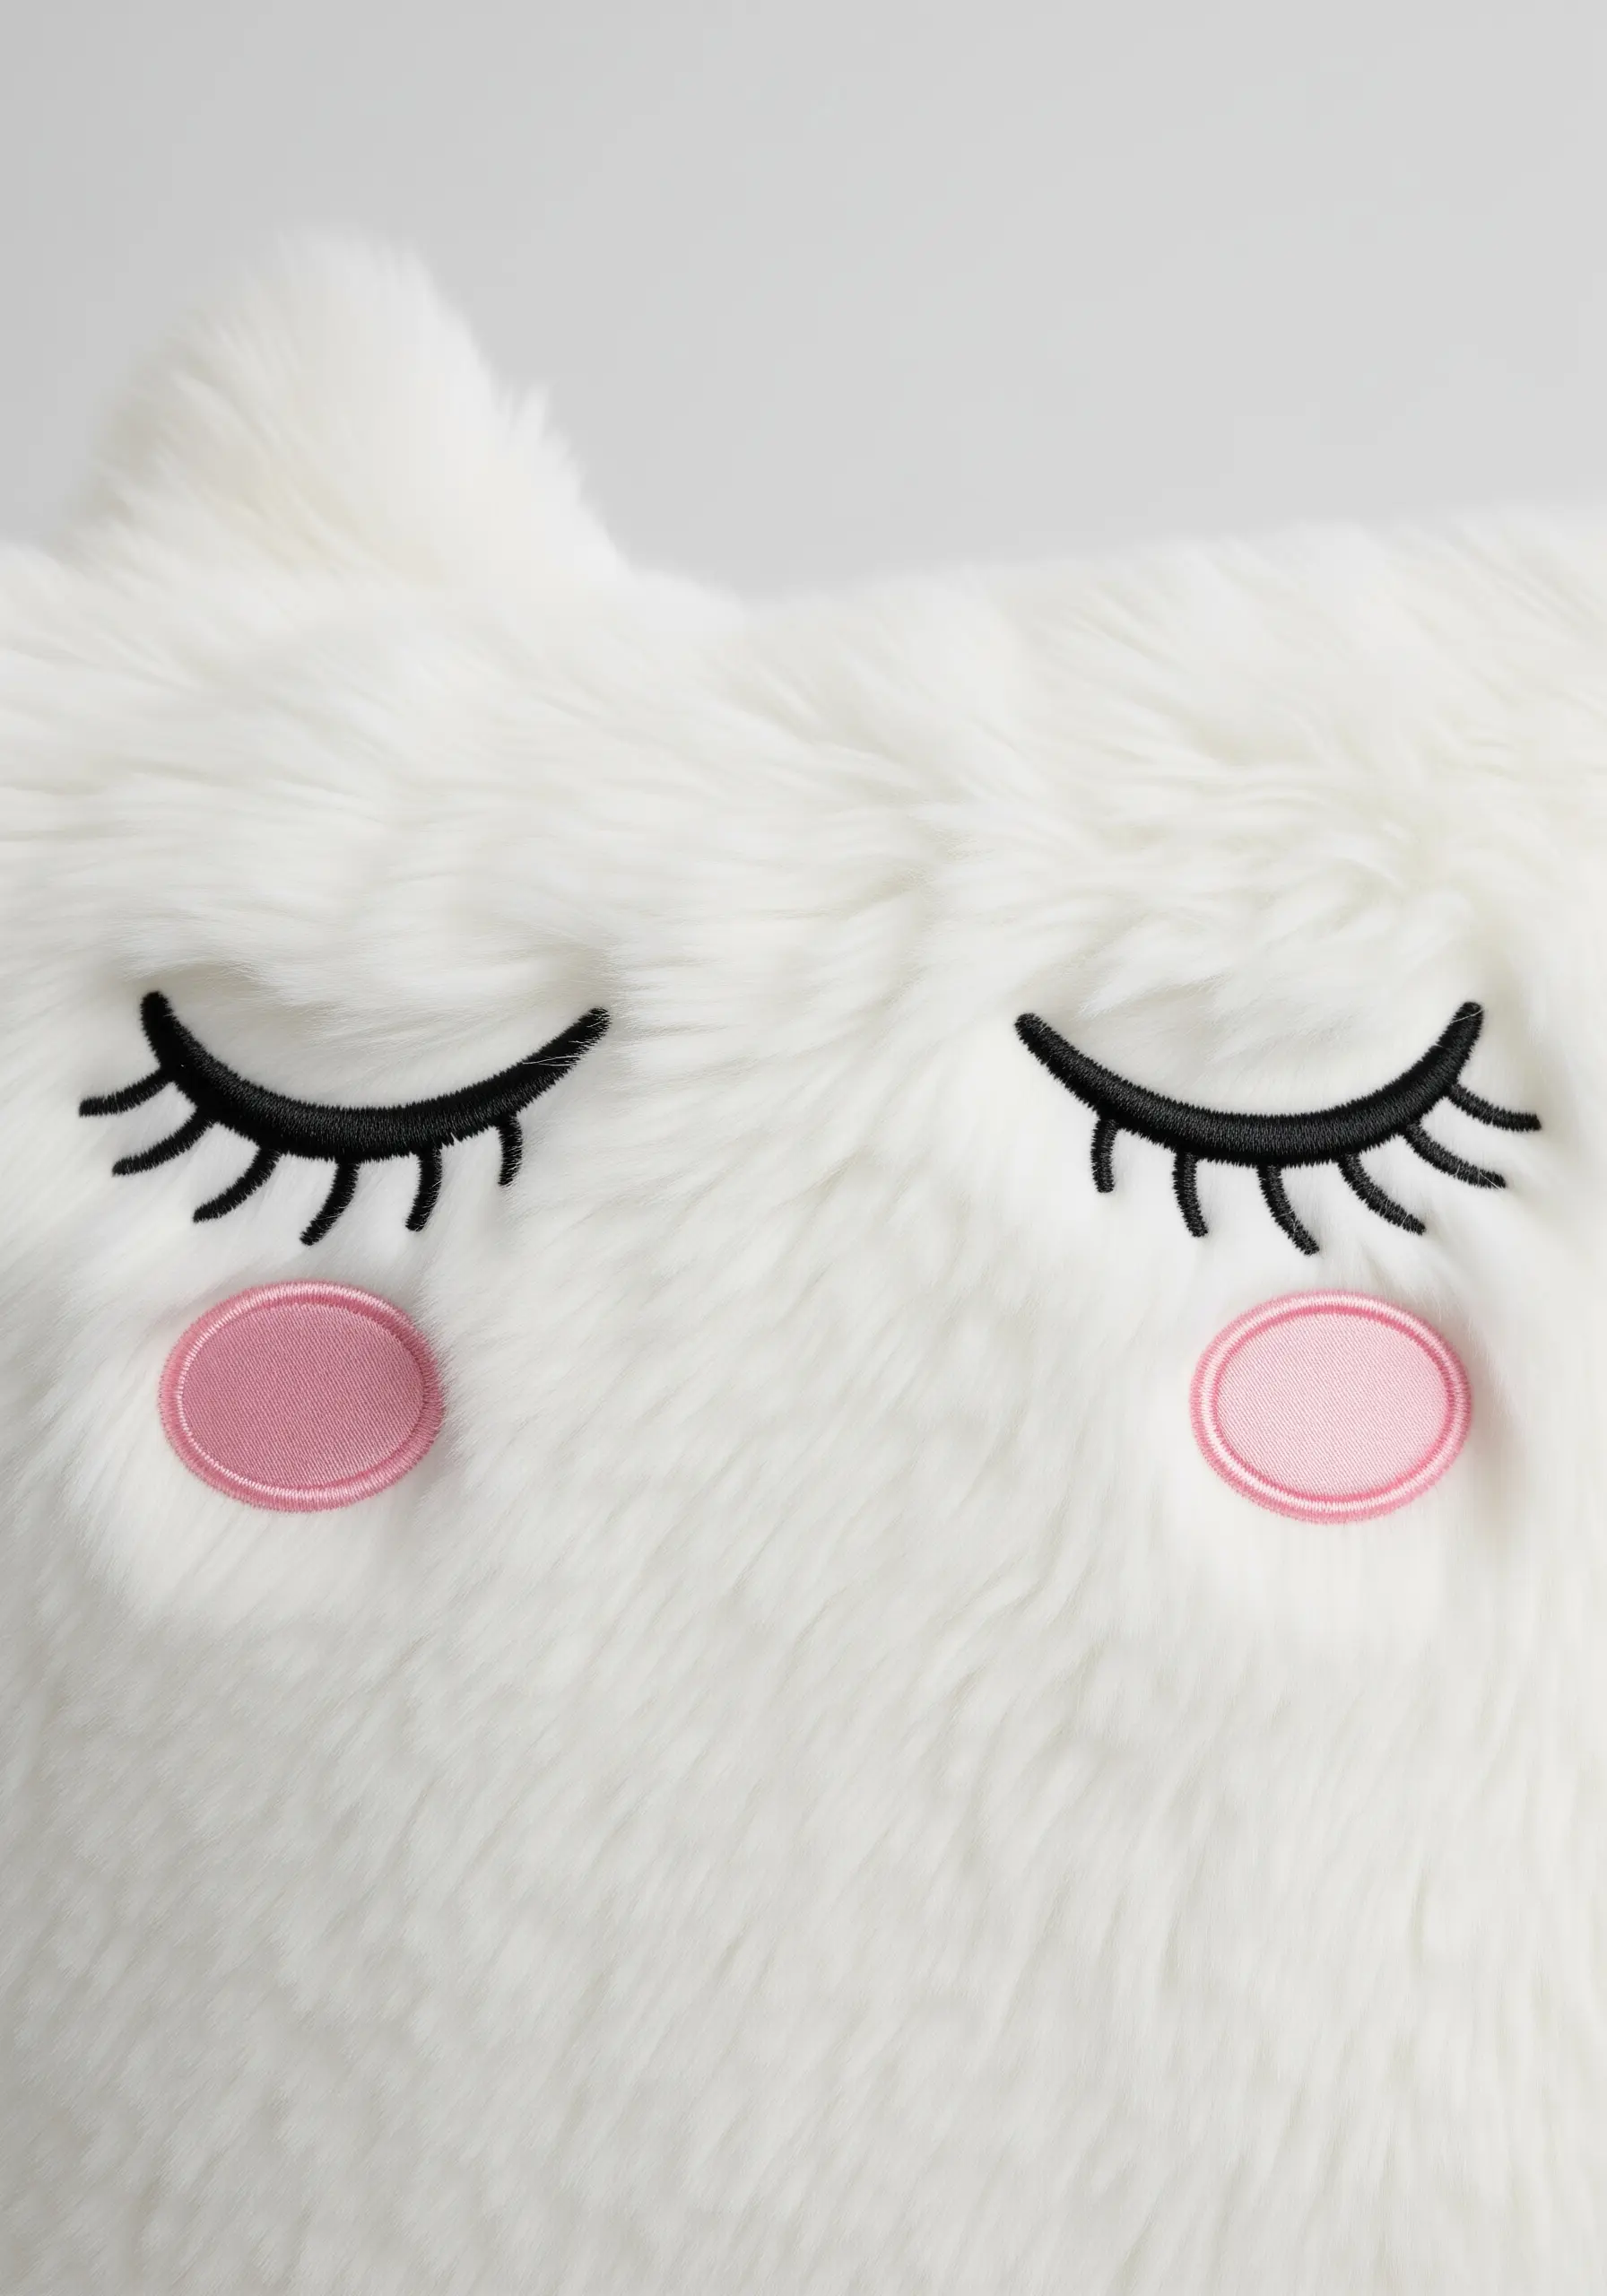
Stitching on a high-pile fabric like faux fur can be challenging, but it creates an irresistibly soft result.
To ensure your stitches don’t get lost in the fluff, place a layer of water-soluble stabilizer over your design area before you begin stitching.
This transparent film will hold the fur down, giving you a smooth surface to work on. Once you’re finished, simply rinse it away with water, and the fur will fluff back up around your clean, crisp embroidery.
21. Paint with Thread for Vibrant, Blended Color
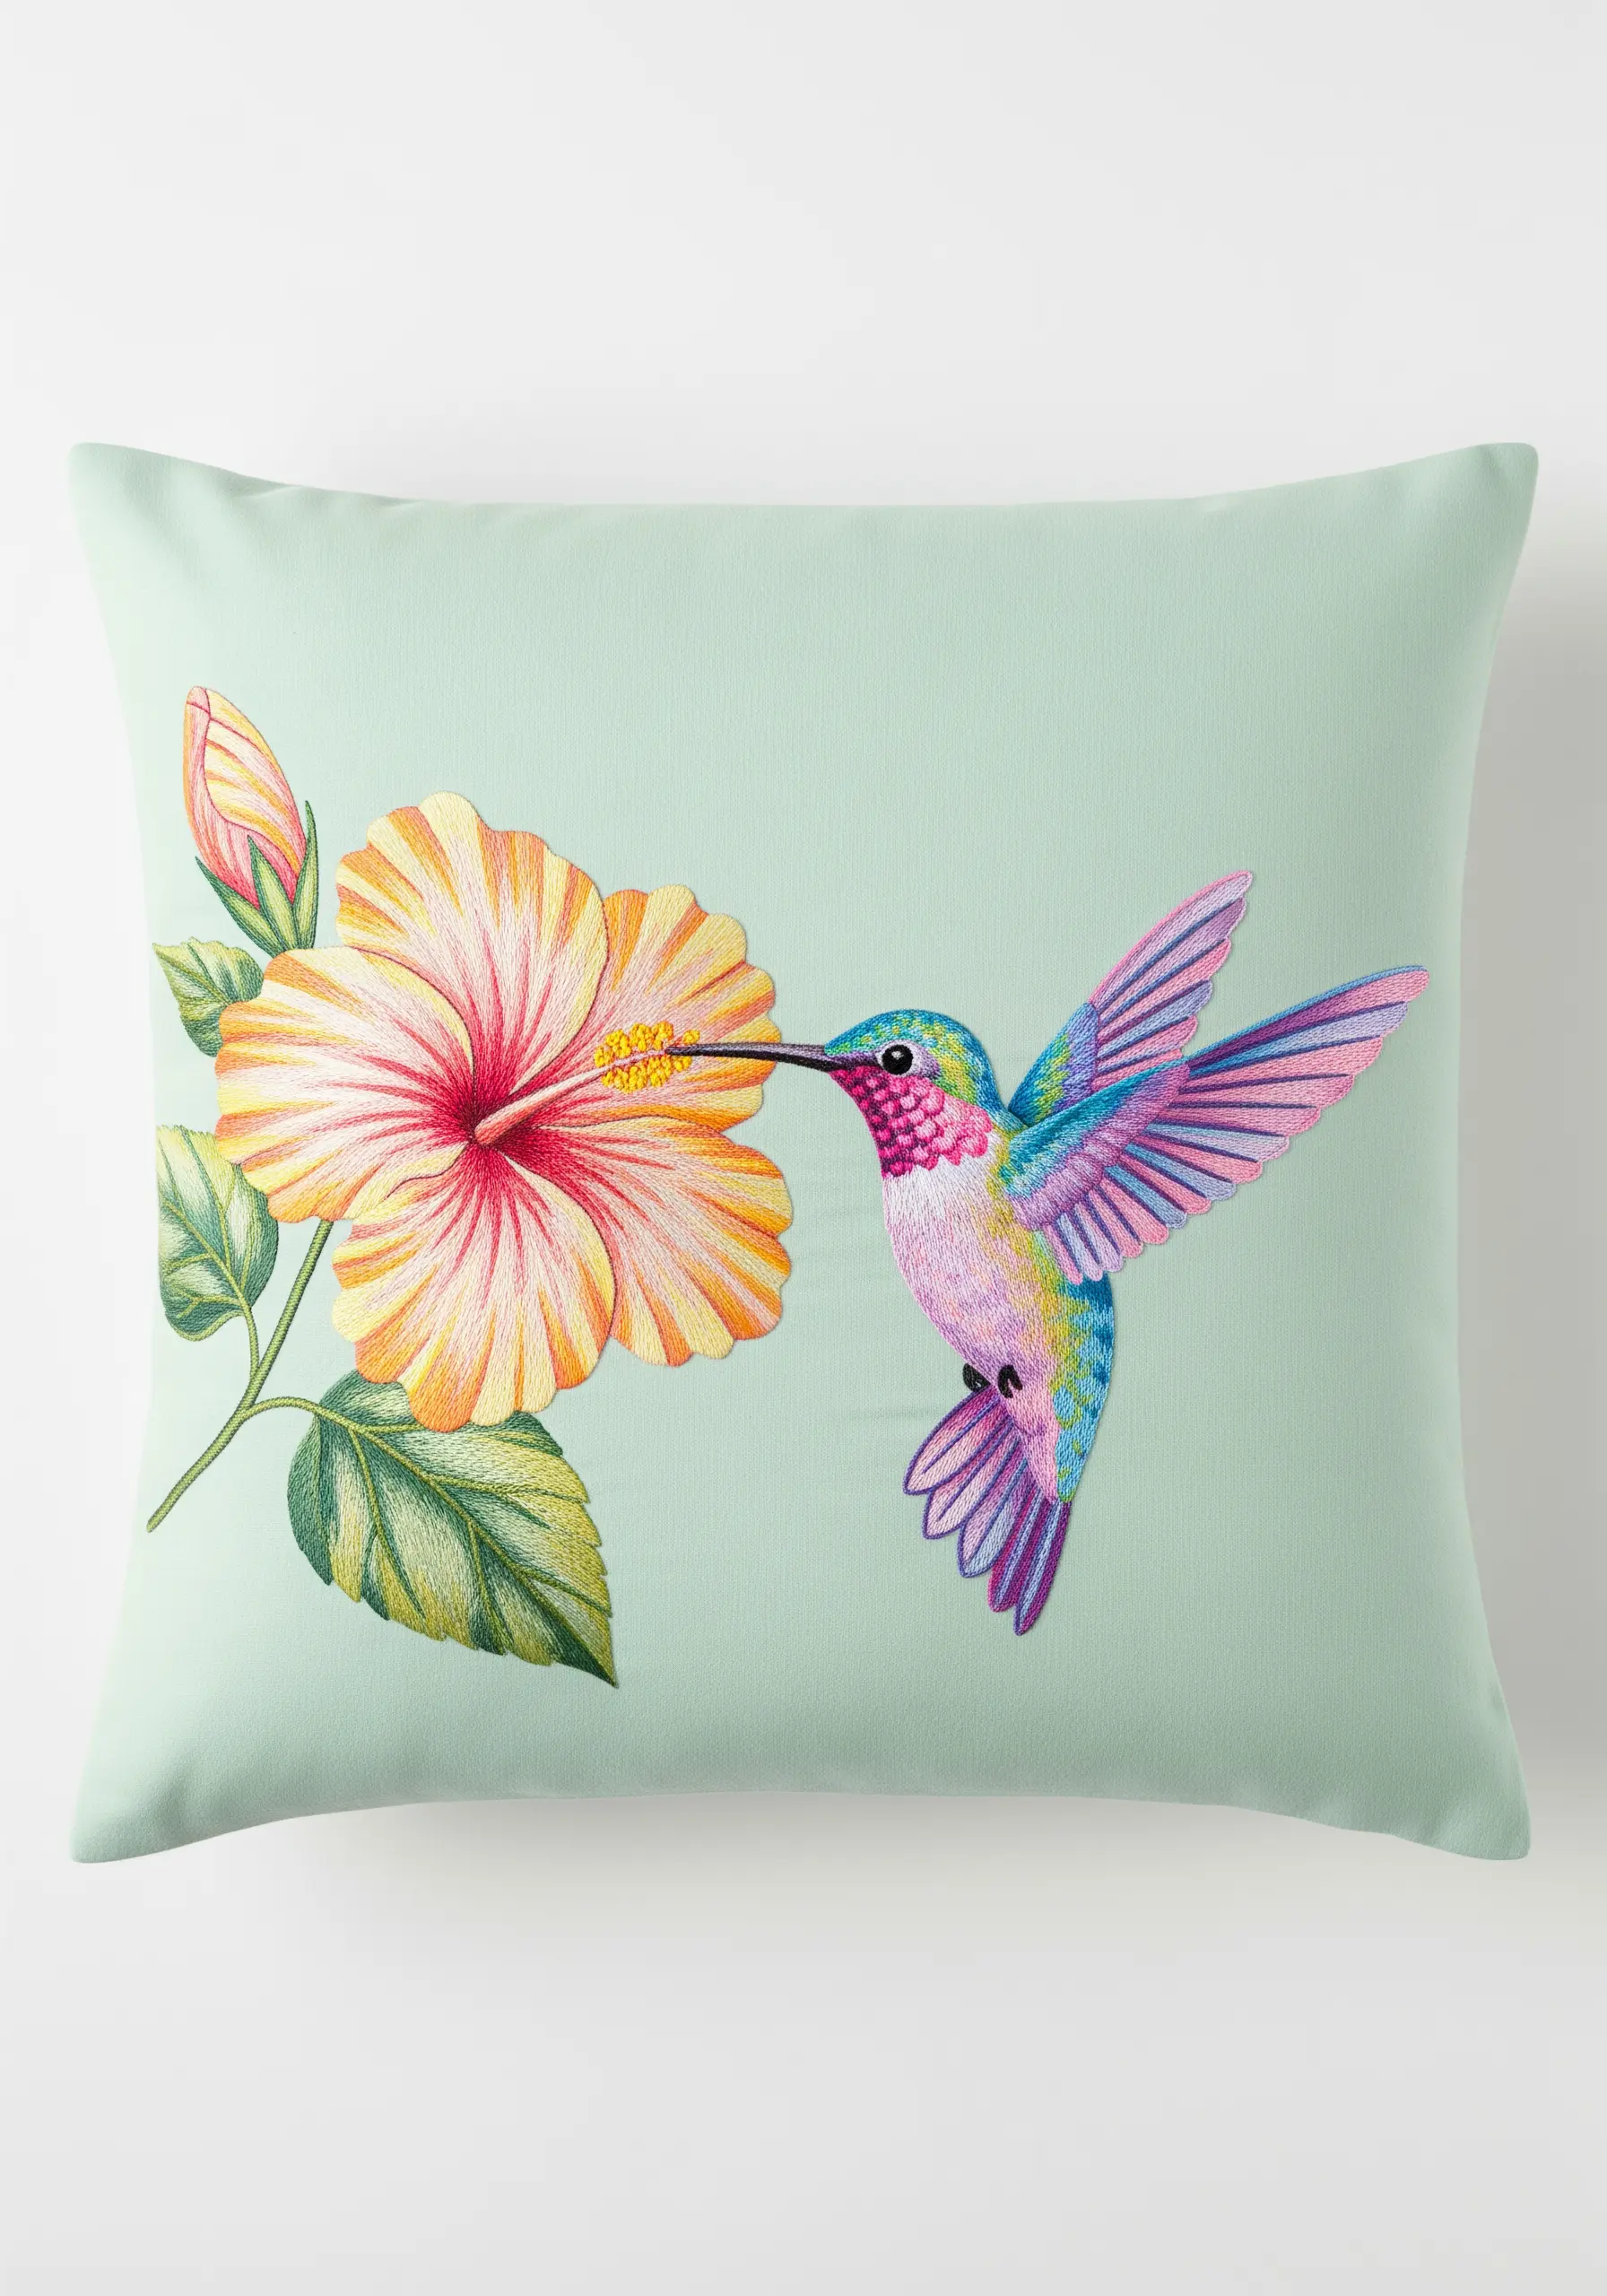
This stunning design showcases the artistry of thread painting, using thread like paint to create seamless gradients.
To replicate this, work with a single strand of embroidery floss and use the long-and-short stitch.
Break the motif into very small sections—like the individual feathers on the hummingbird’s wing—and blend multiple shades of blues, pinks, and purples to create an iridescent effect.
Patience is key, but the result is a breathtakingly realistic piece of tiny hummingbird embroidery art.
22. Use Metallic Thread for Delicate Structures
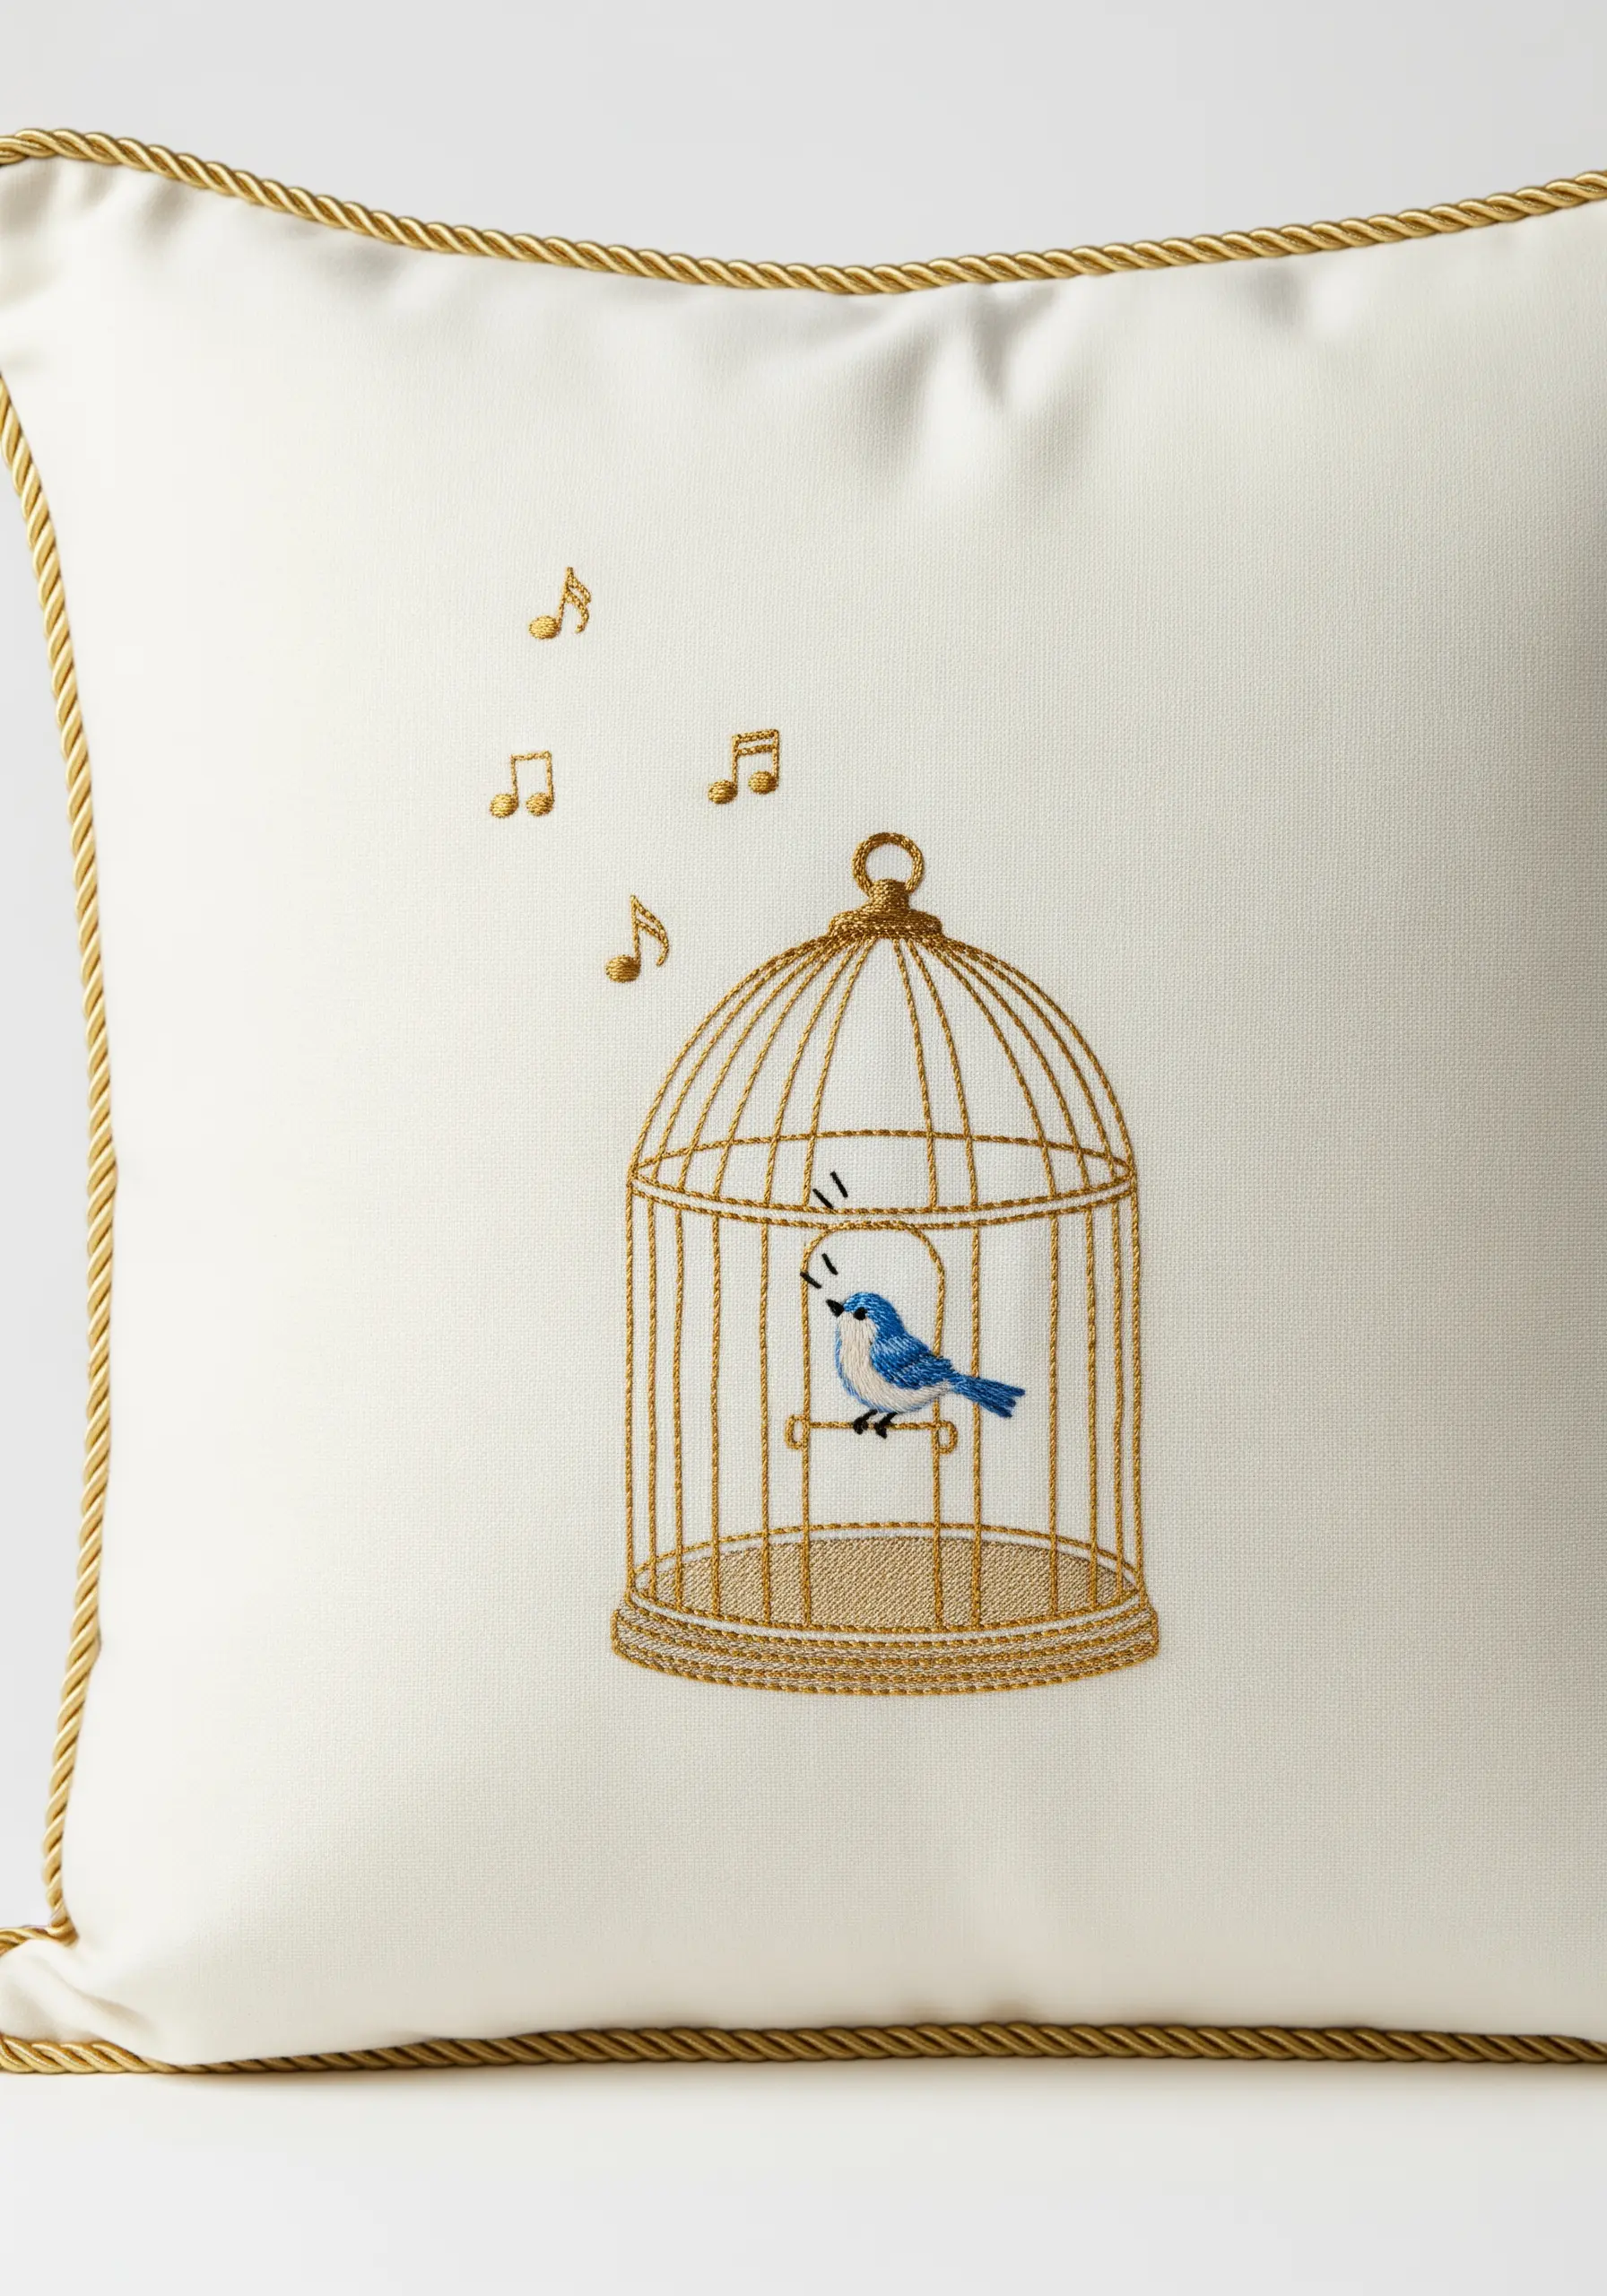
When embroidering fine, linear structures like this birdcage, metallic thread adds a touch of magic and realism.
Choose a smooth, high-quality metallic floss and use a whipped backstitch to create solid, reflective bars.
To prevent the thread from snagging, work with shorter lengths and consider using a needle with a larger eye.
The shimmering cage provides a beautiful textural contrast to the soft, matte cotton used for the little bird inside.
23. Create a Rainbow Mane with Smooth Gradients
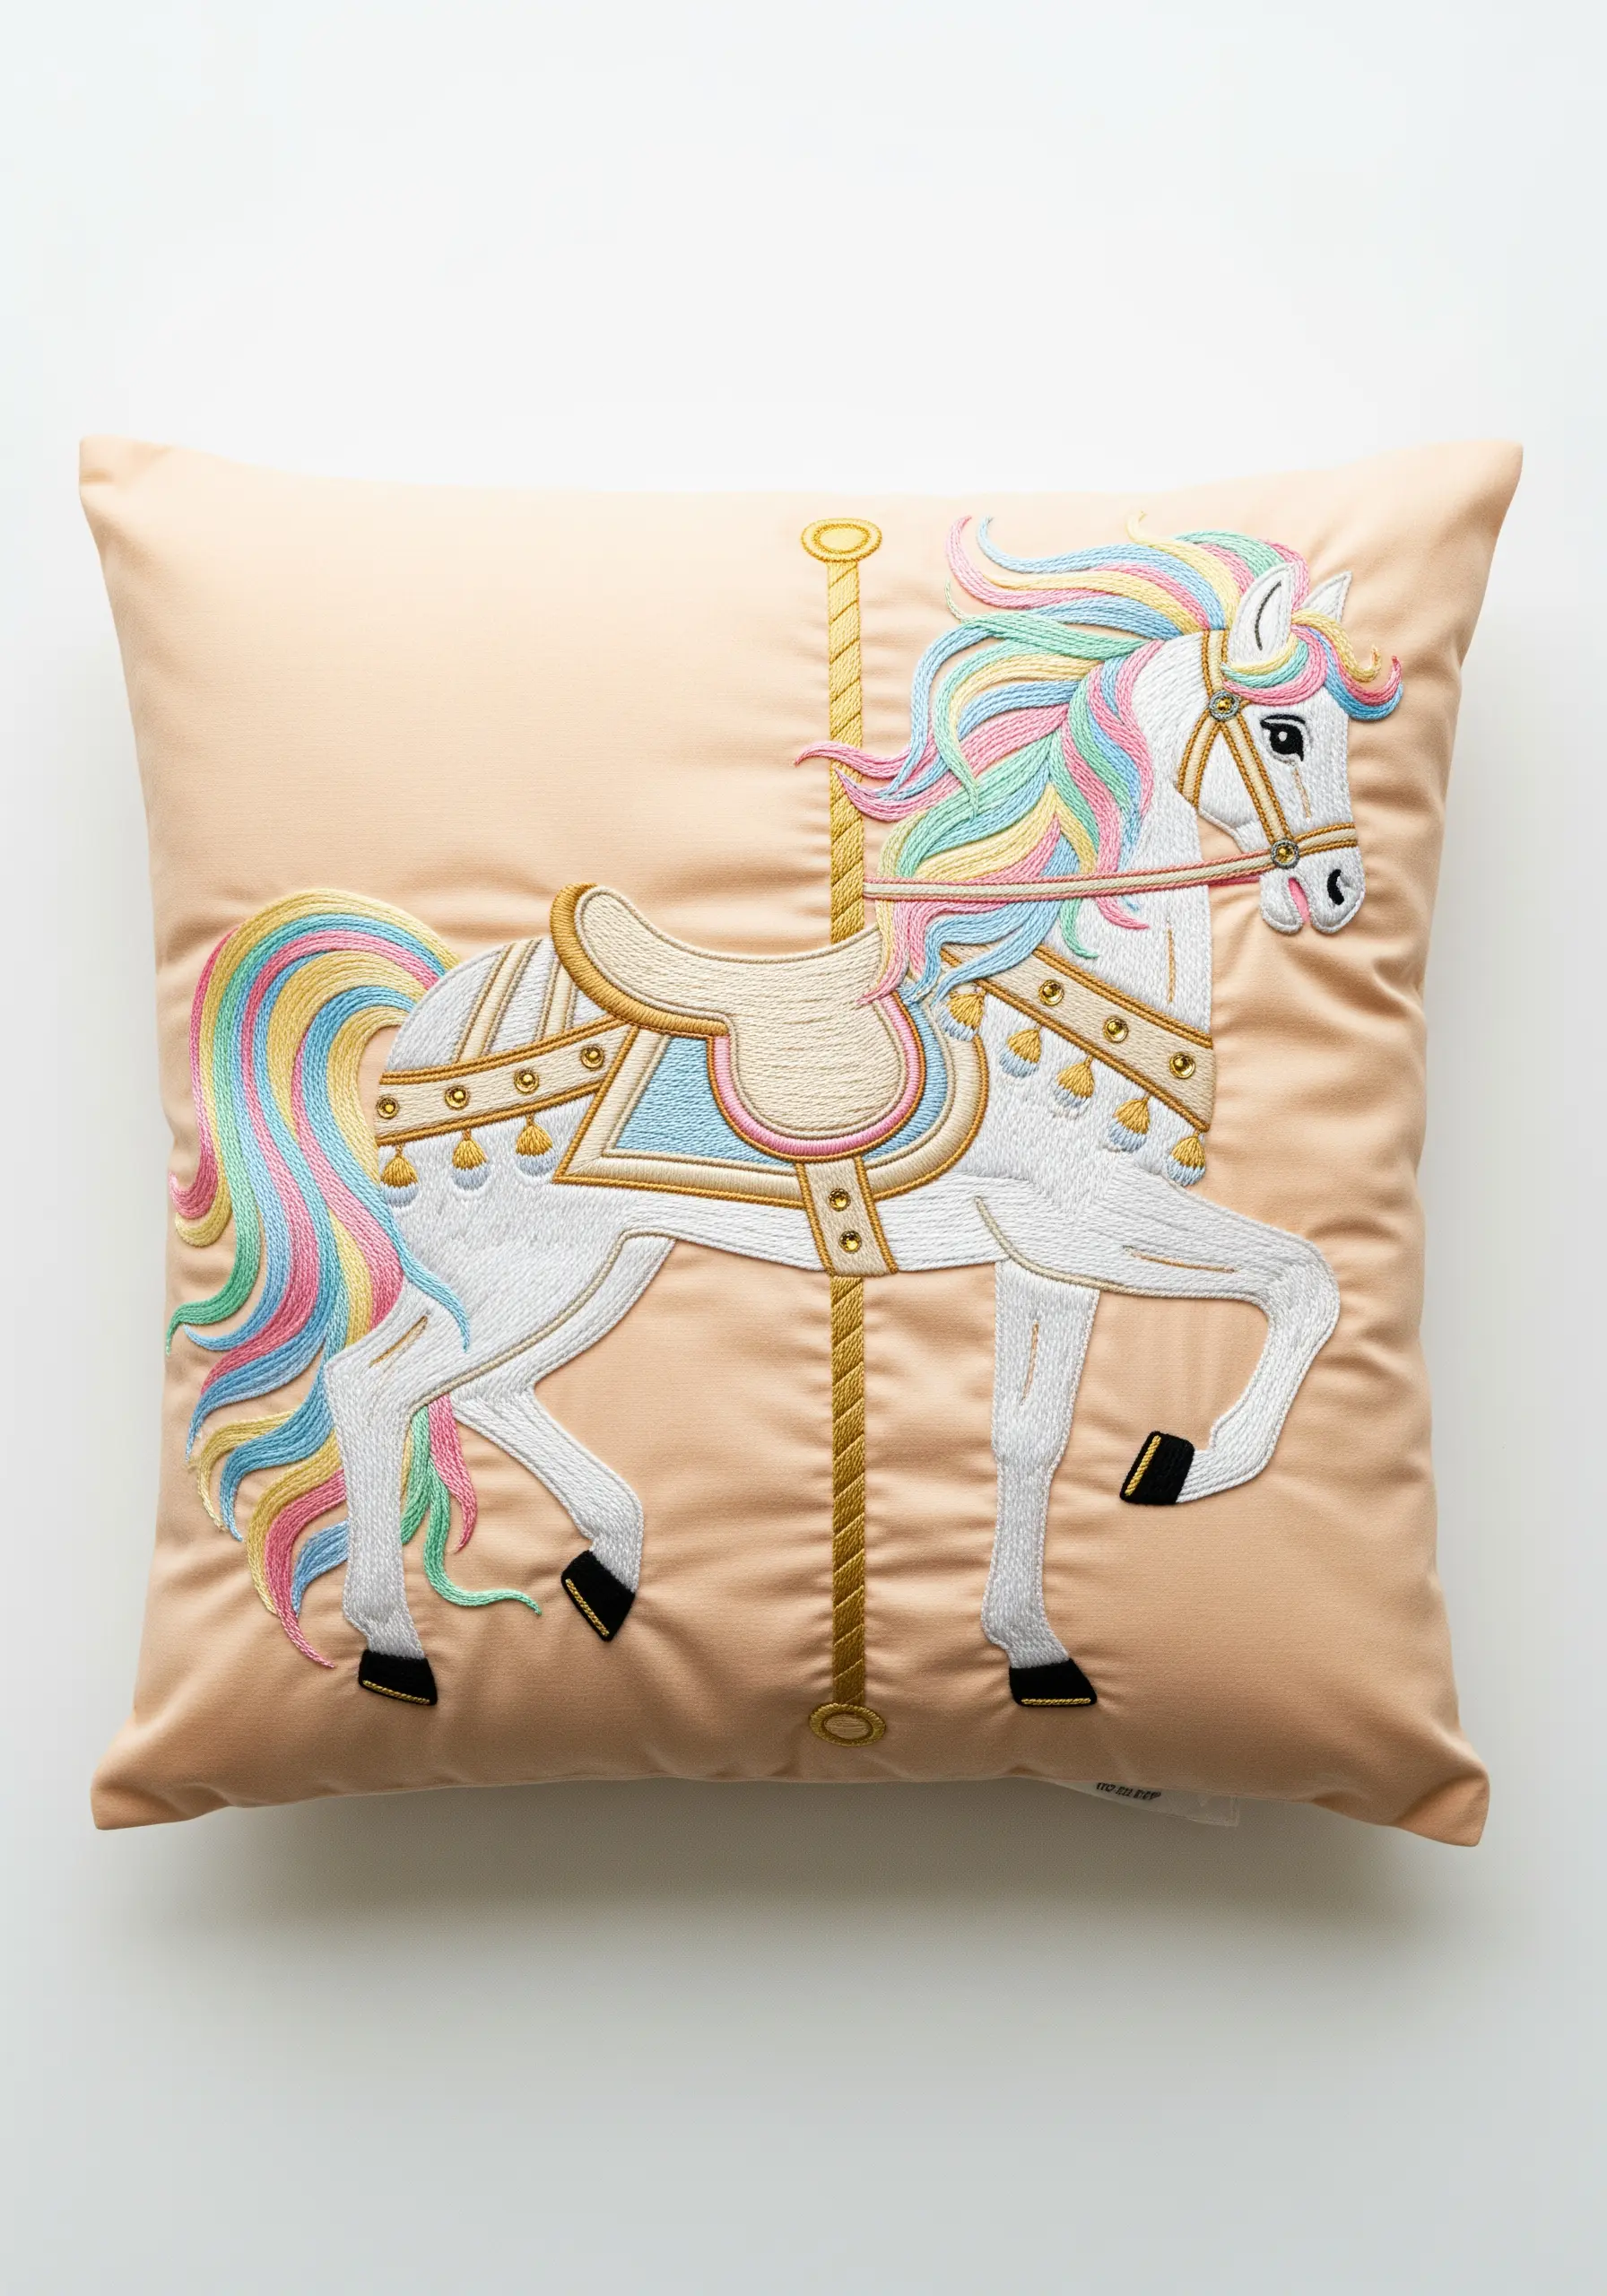
The key to this magical carousel horse is the perfectly blended rainbow mane and tail.
Achieve this effect by using a long-and-short stitch, laying down columns of color that flow into one another.
To keep the colors bright and prevent them from looking muddy, complete one full color section before blending the next one into its edge.
The result is a whimsical, flowing river of color that brings the entire piece to life.
24. Add Soft Dimension with Padded Appliqué
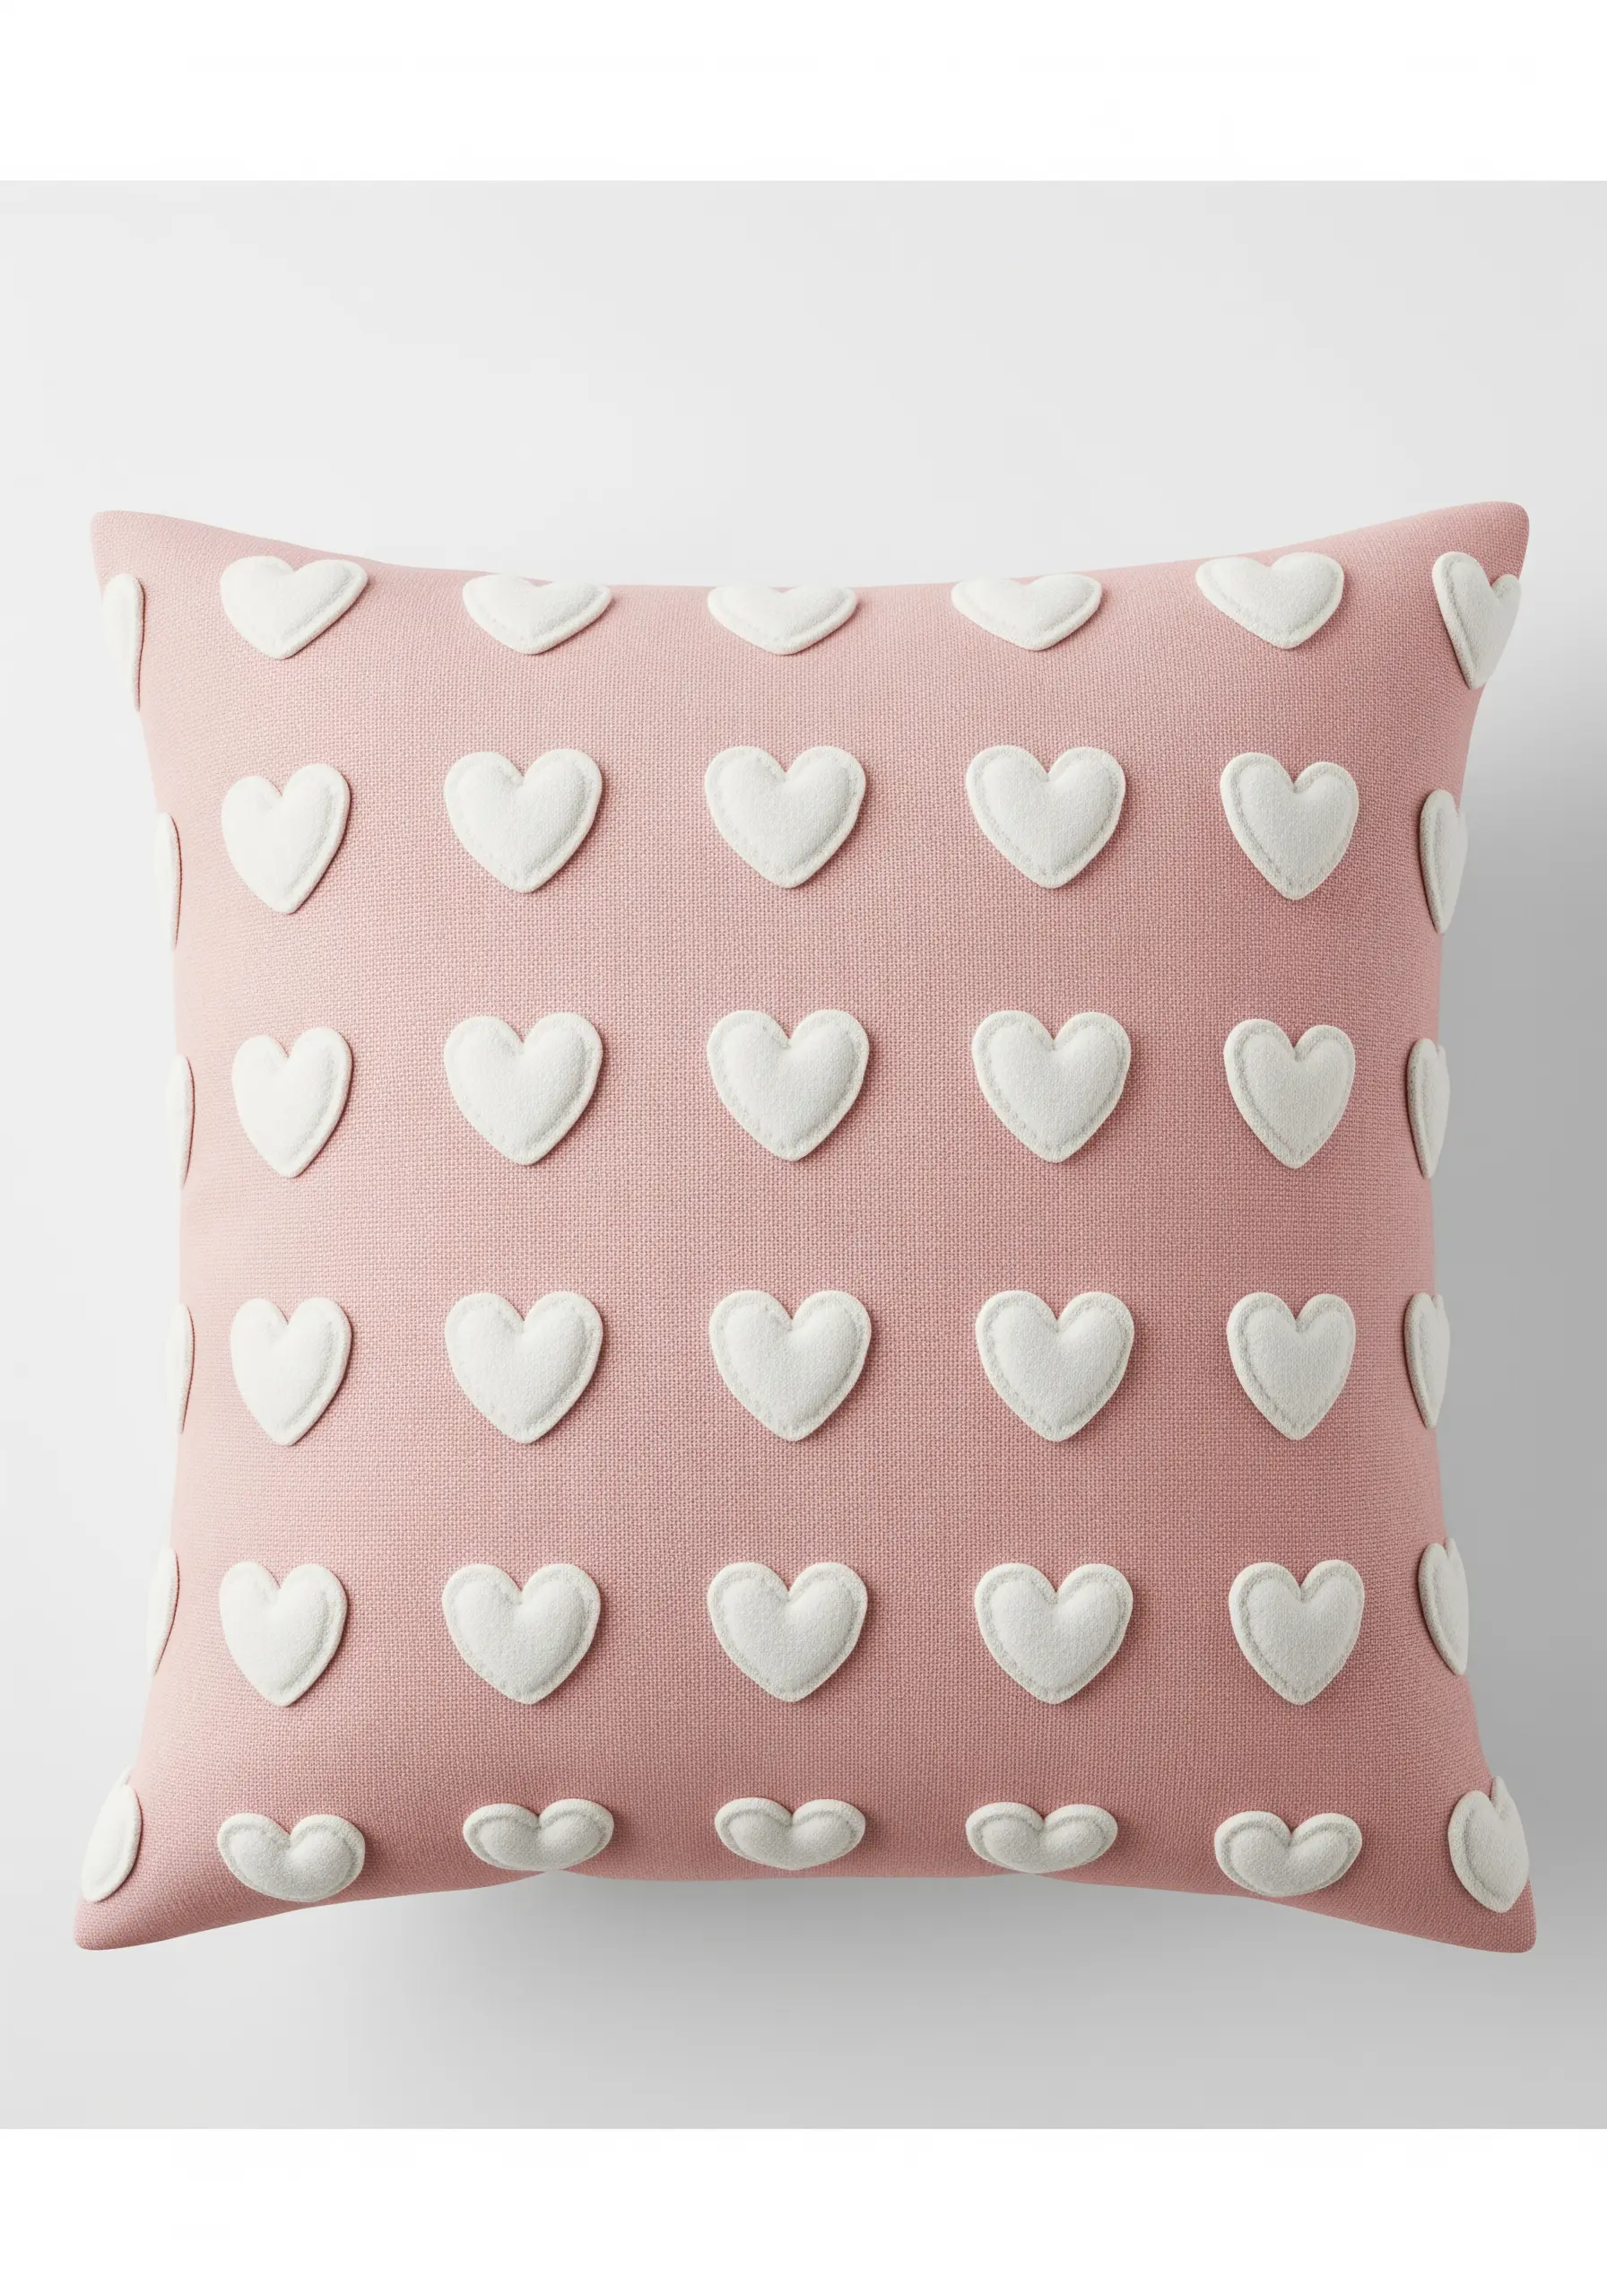
For a soft, pillowy effect, create these hearts using padded appliqué.
Cut two identical heart shapes from a soft fabric like felt or fleece. Place a tiny bit of polyester stuffing between them and stitch them together around the edge with a simple running stitch.
Then, attach the finished padded heart to your pillow using a neat blanket stitch or whip stitch.
This technique creates a delightful 3D texture that’s much faster than filling each shape with embroidery stitches.
25. Imitate Glass and Liquid with Thread
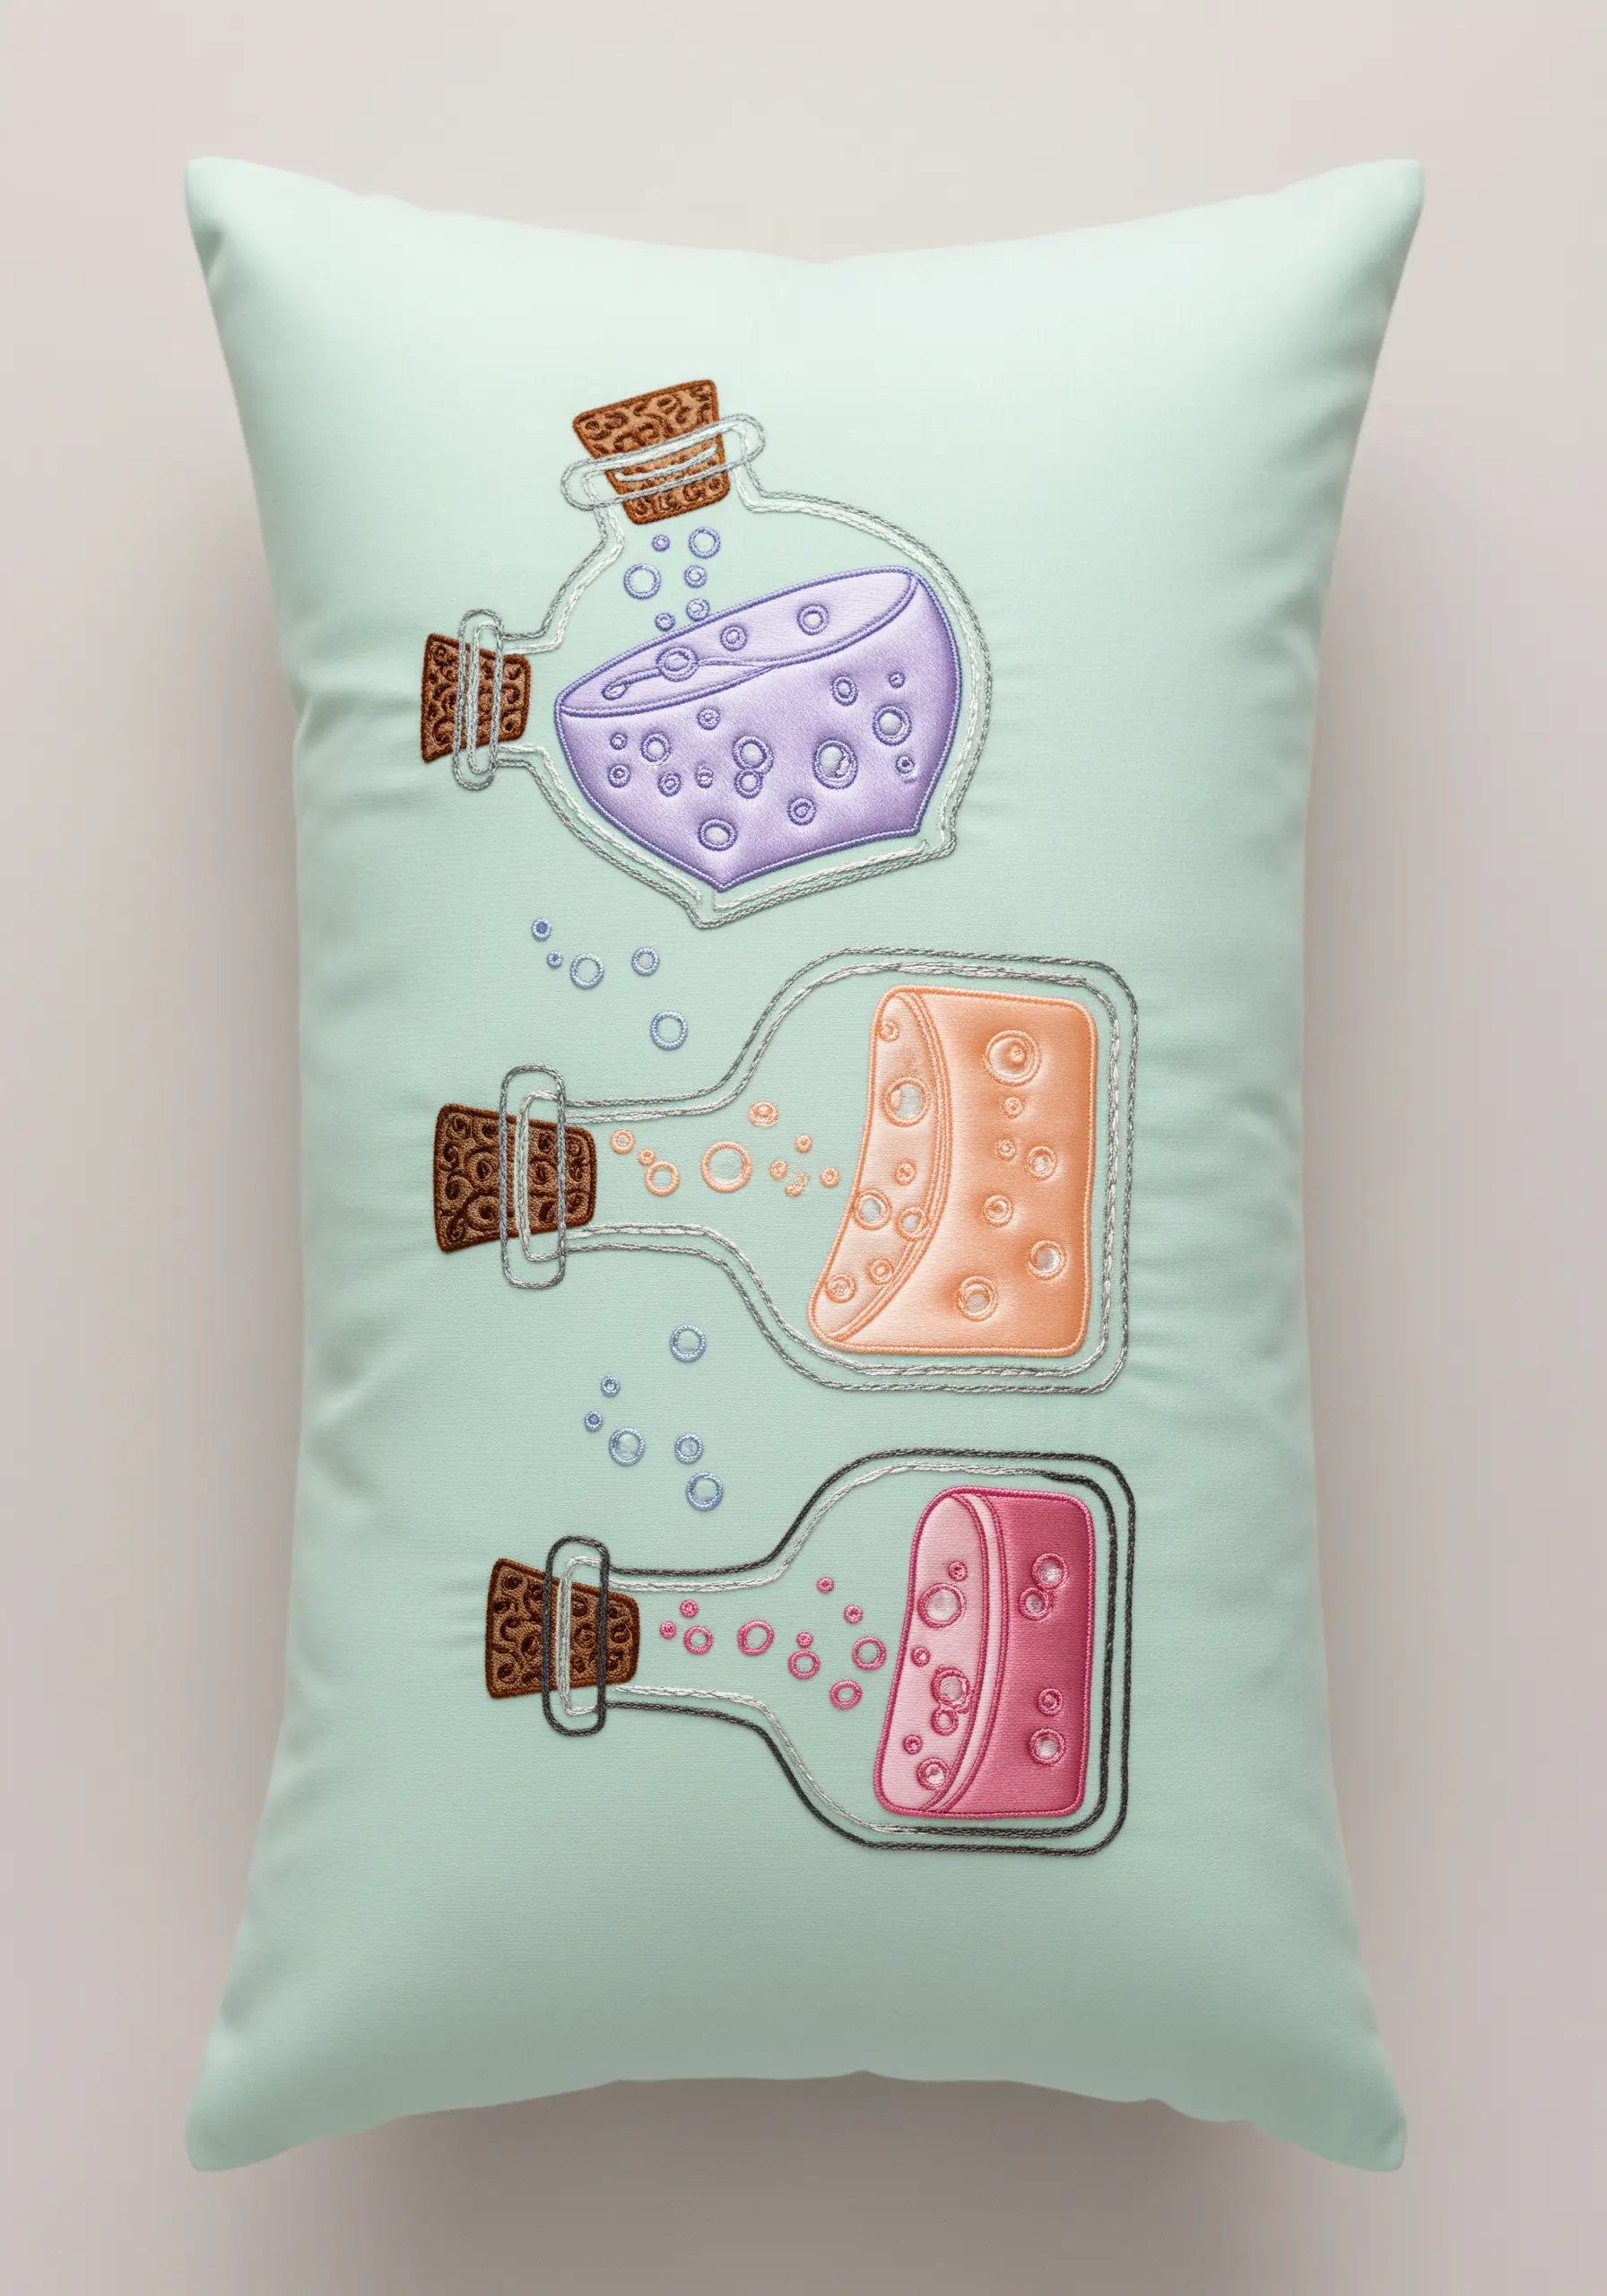
To create the illusion of glass bottles filled with bubbly liquid, clever stitching is all you need.
Use a silver or grey metallic thread for the bottle outlines to suggest a reflective surface.
For the liquid, use a satin stitch in two or three shades of the same color to create a subtle gradient. Scatter French knots or tiny satin stitch circles in white or a lighter shade to represent bubbles, concentrating more at the top.
26. Sculpt with Monochromatic Texture
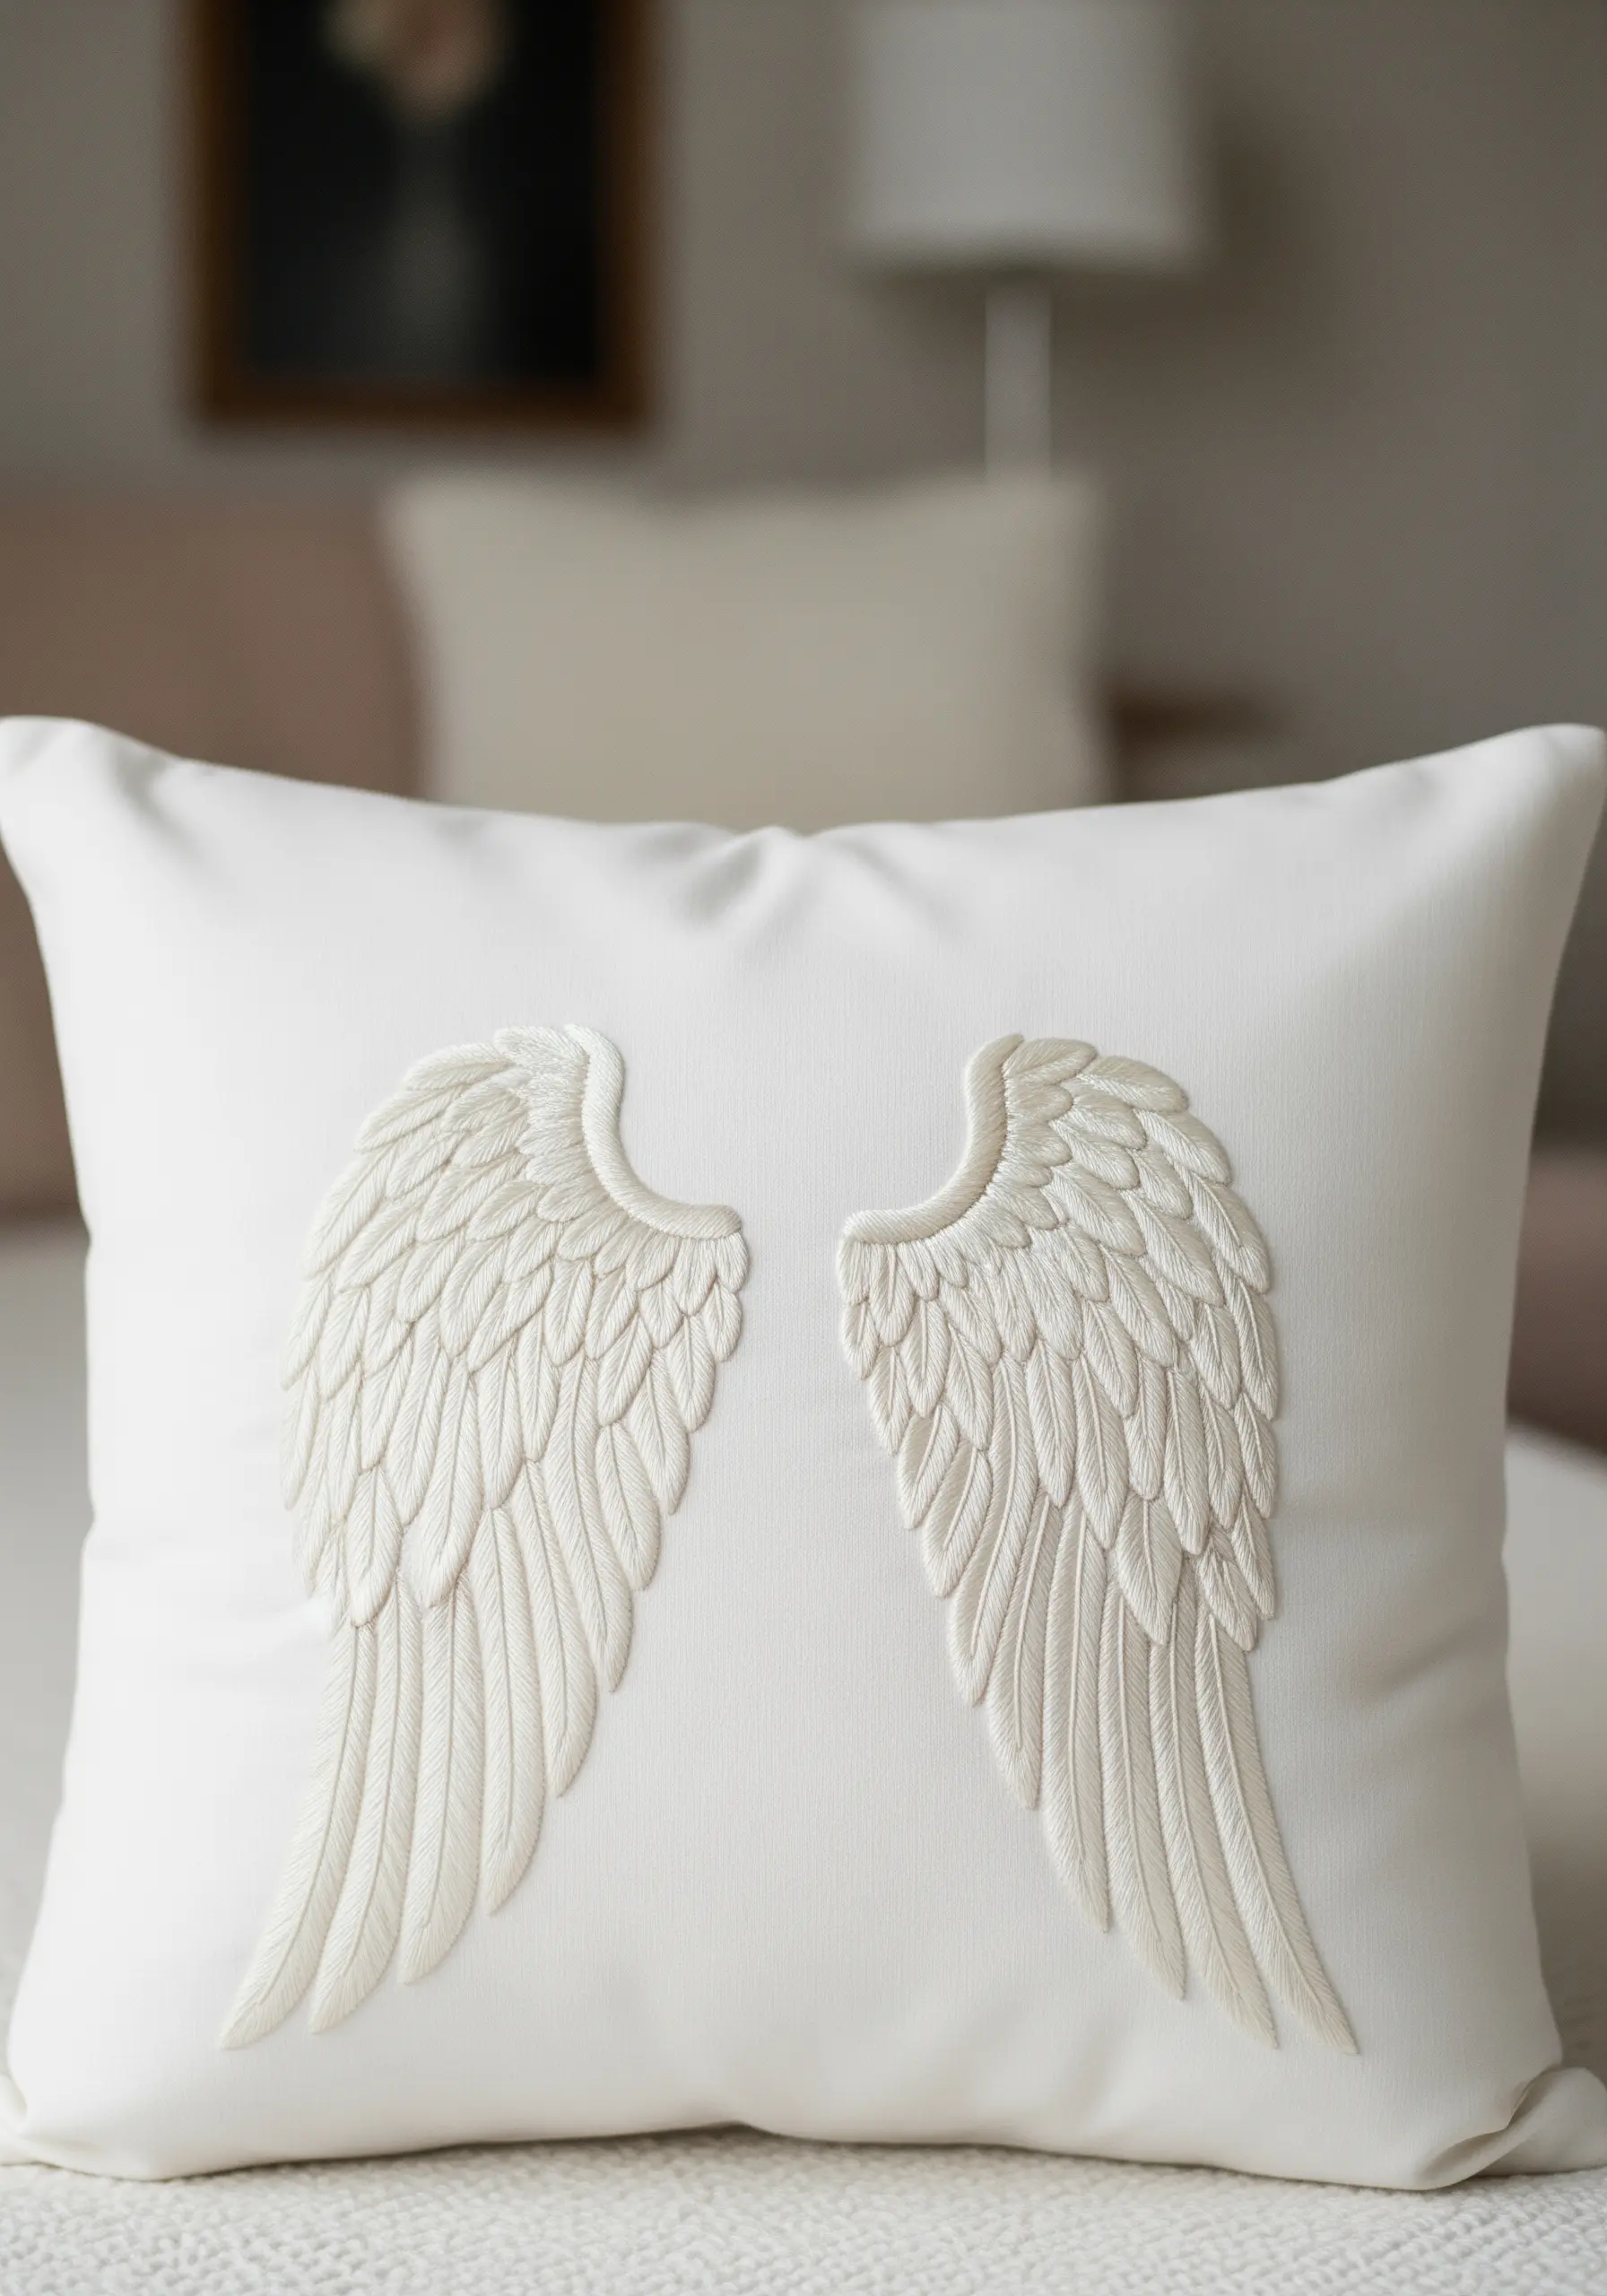
You can create incredible depth and detail using just one color of thread.
These angel wings are sculpted entirely through the direction and layering of stitches. Use a stem stitch or split stitch to outline each feather section first.
Then, fill the sections with angled satin stitches, ensuring the stitches for each feather layer overlap slightly, just like real ones.
This monochromatic approach emphasizes form and texture, resulting in a design that is both subtle and powerful.
27. Create a Woodland Wreath with Varied Stitches
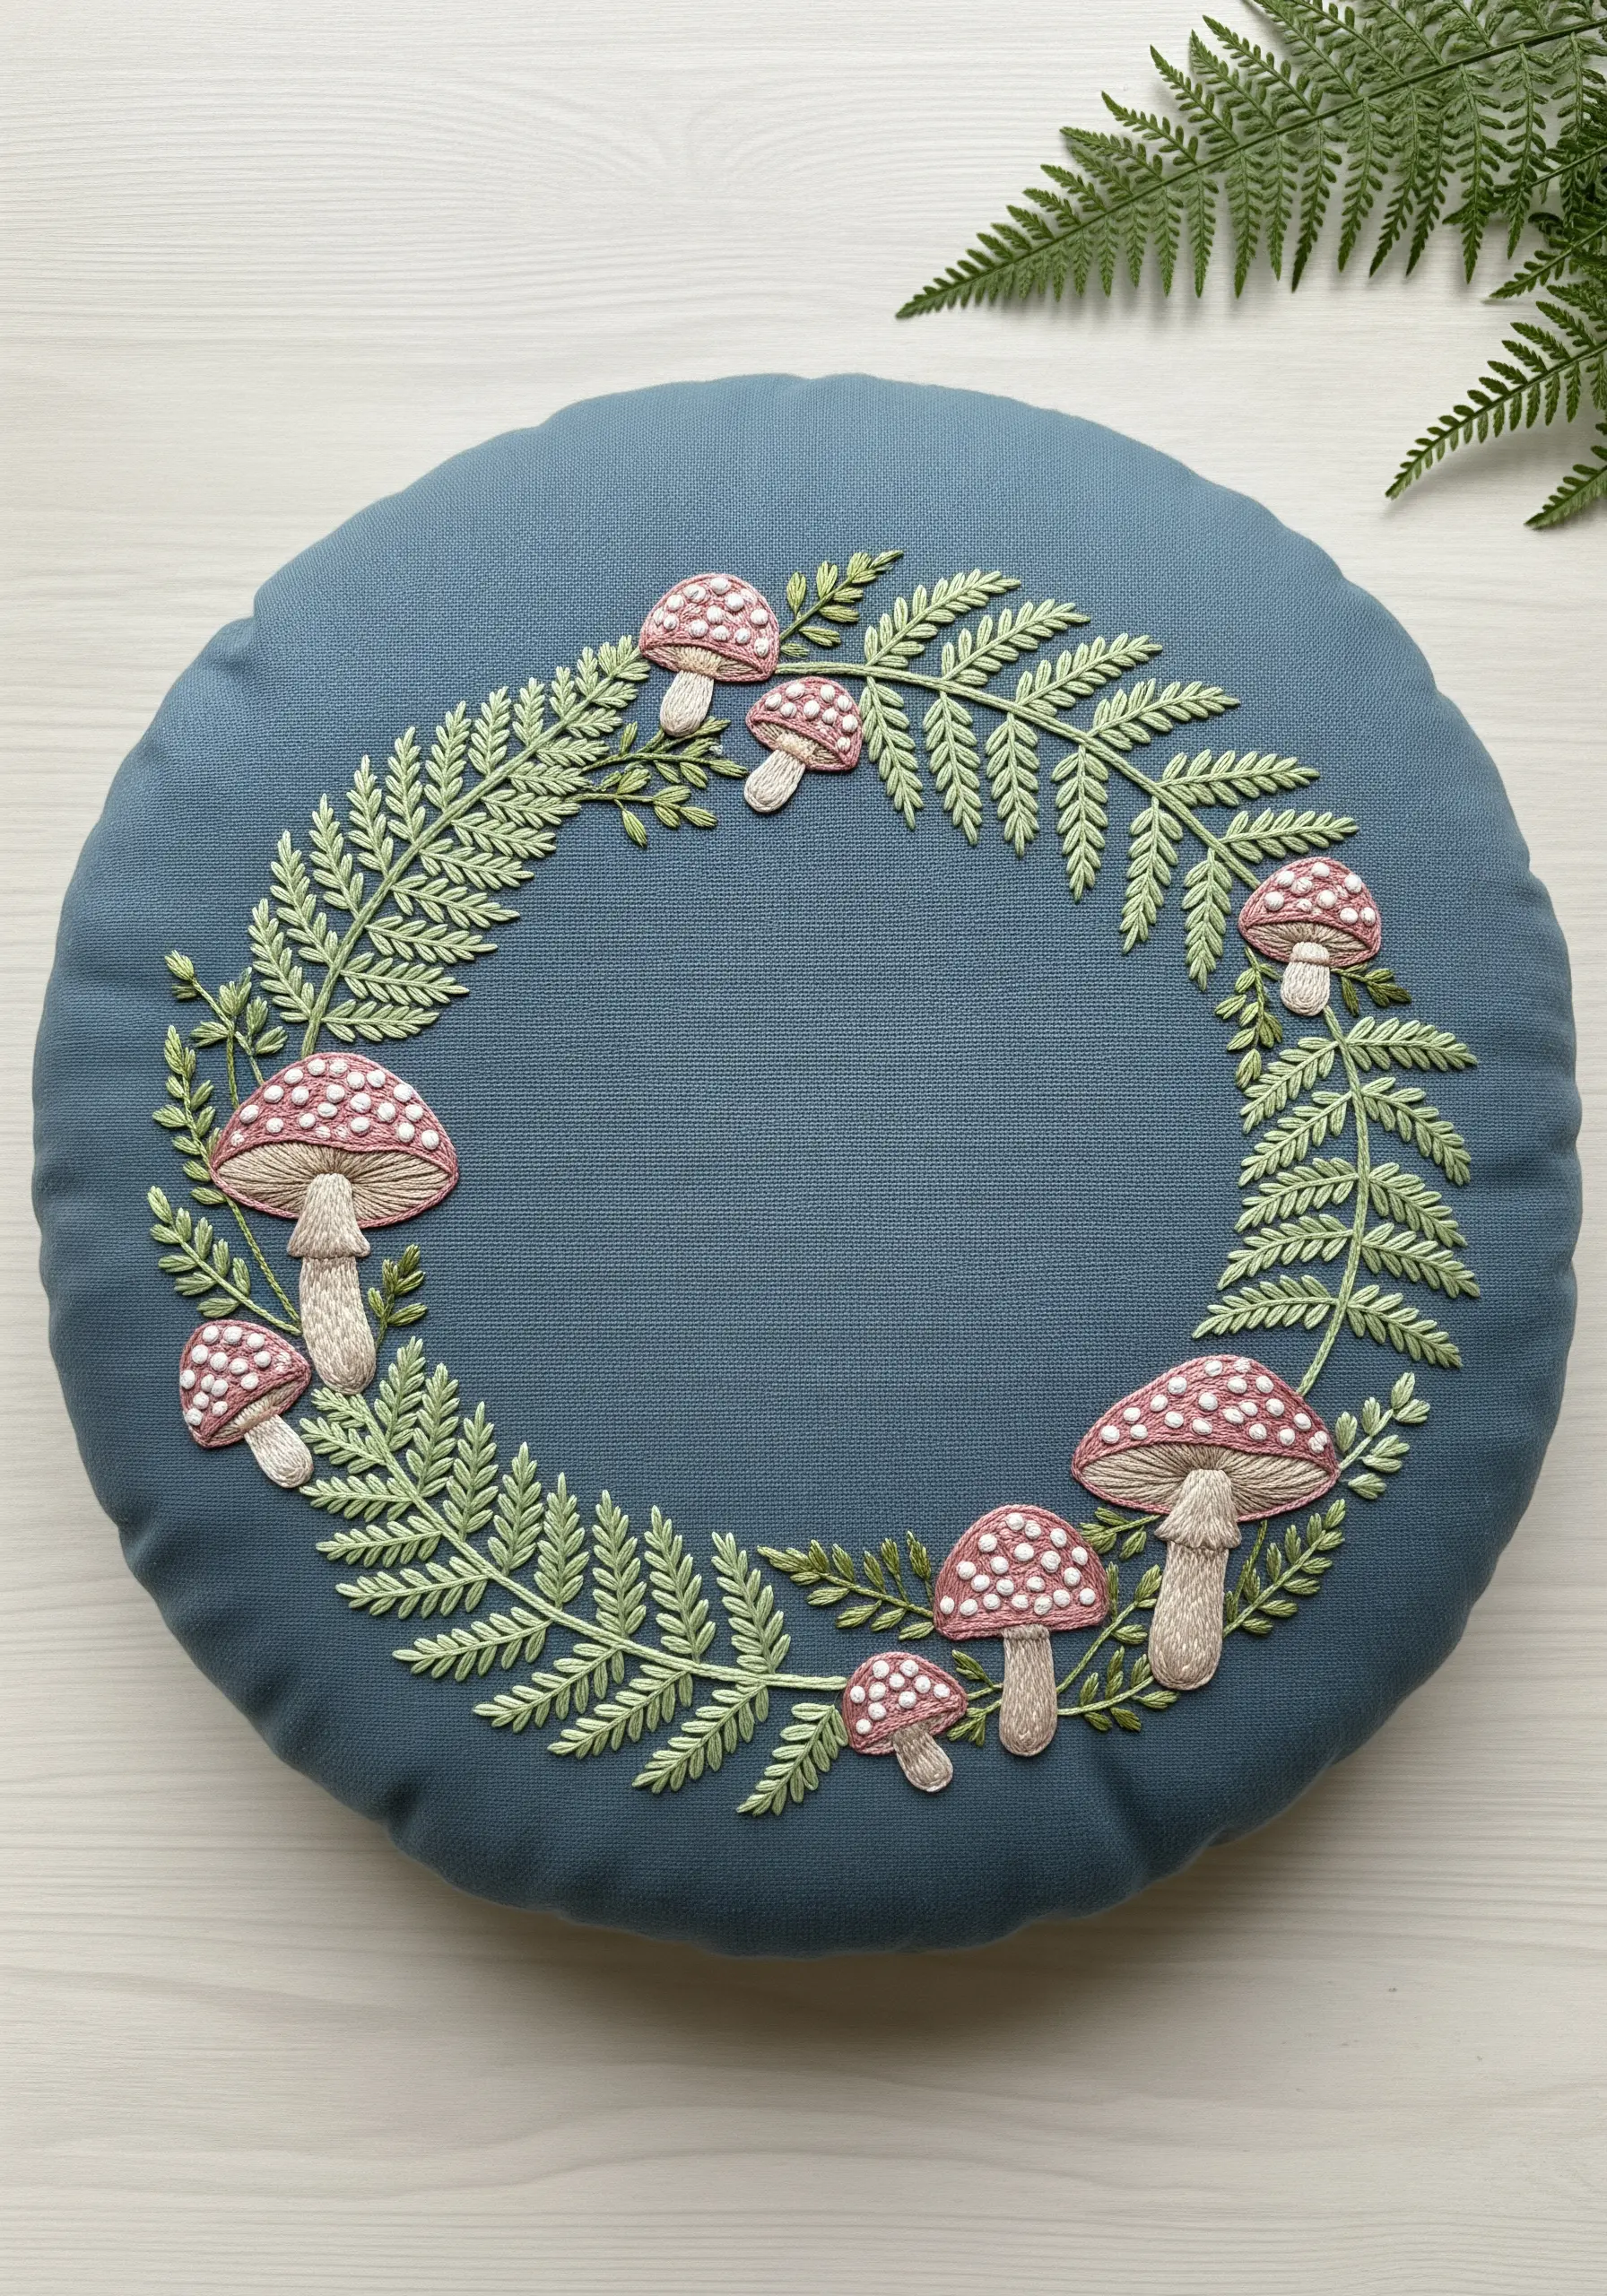
Build a charming woodland wreath by assigning a different stitch to each natural element.
Use a fishbone stitch or fly stitch for the delicate fern fronds to mimic their feathery texture.
For the mushroom caps, employ a padded satin stitch to give them a rounded, 3D shape, and add French knots or straight stitches for the spots.
This combination of stitches adds realistic mushroom texture and visual interest, making the wreath feel like a collected treasure from the forest floor.
28. Add a Glossy Highlight to Satin Stitch
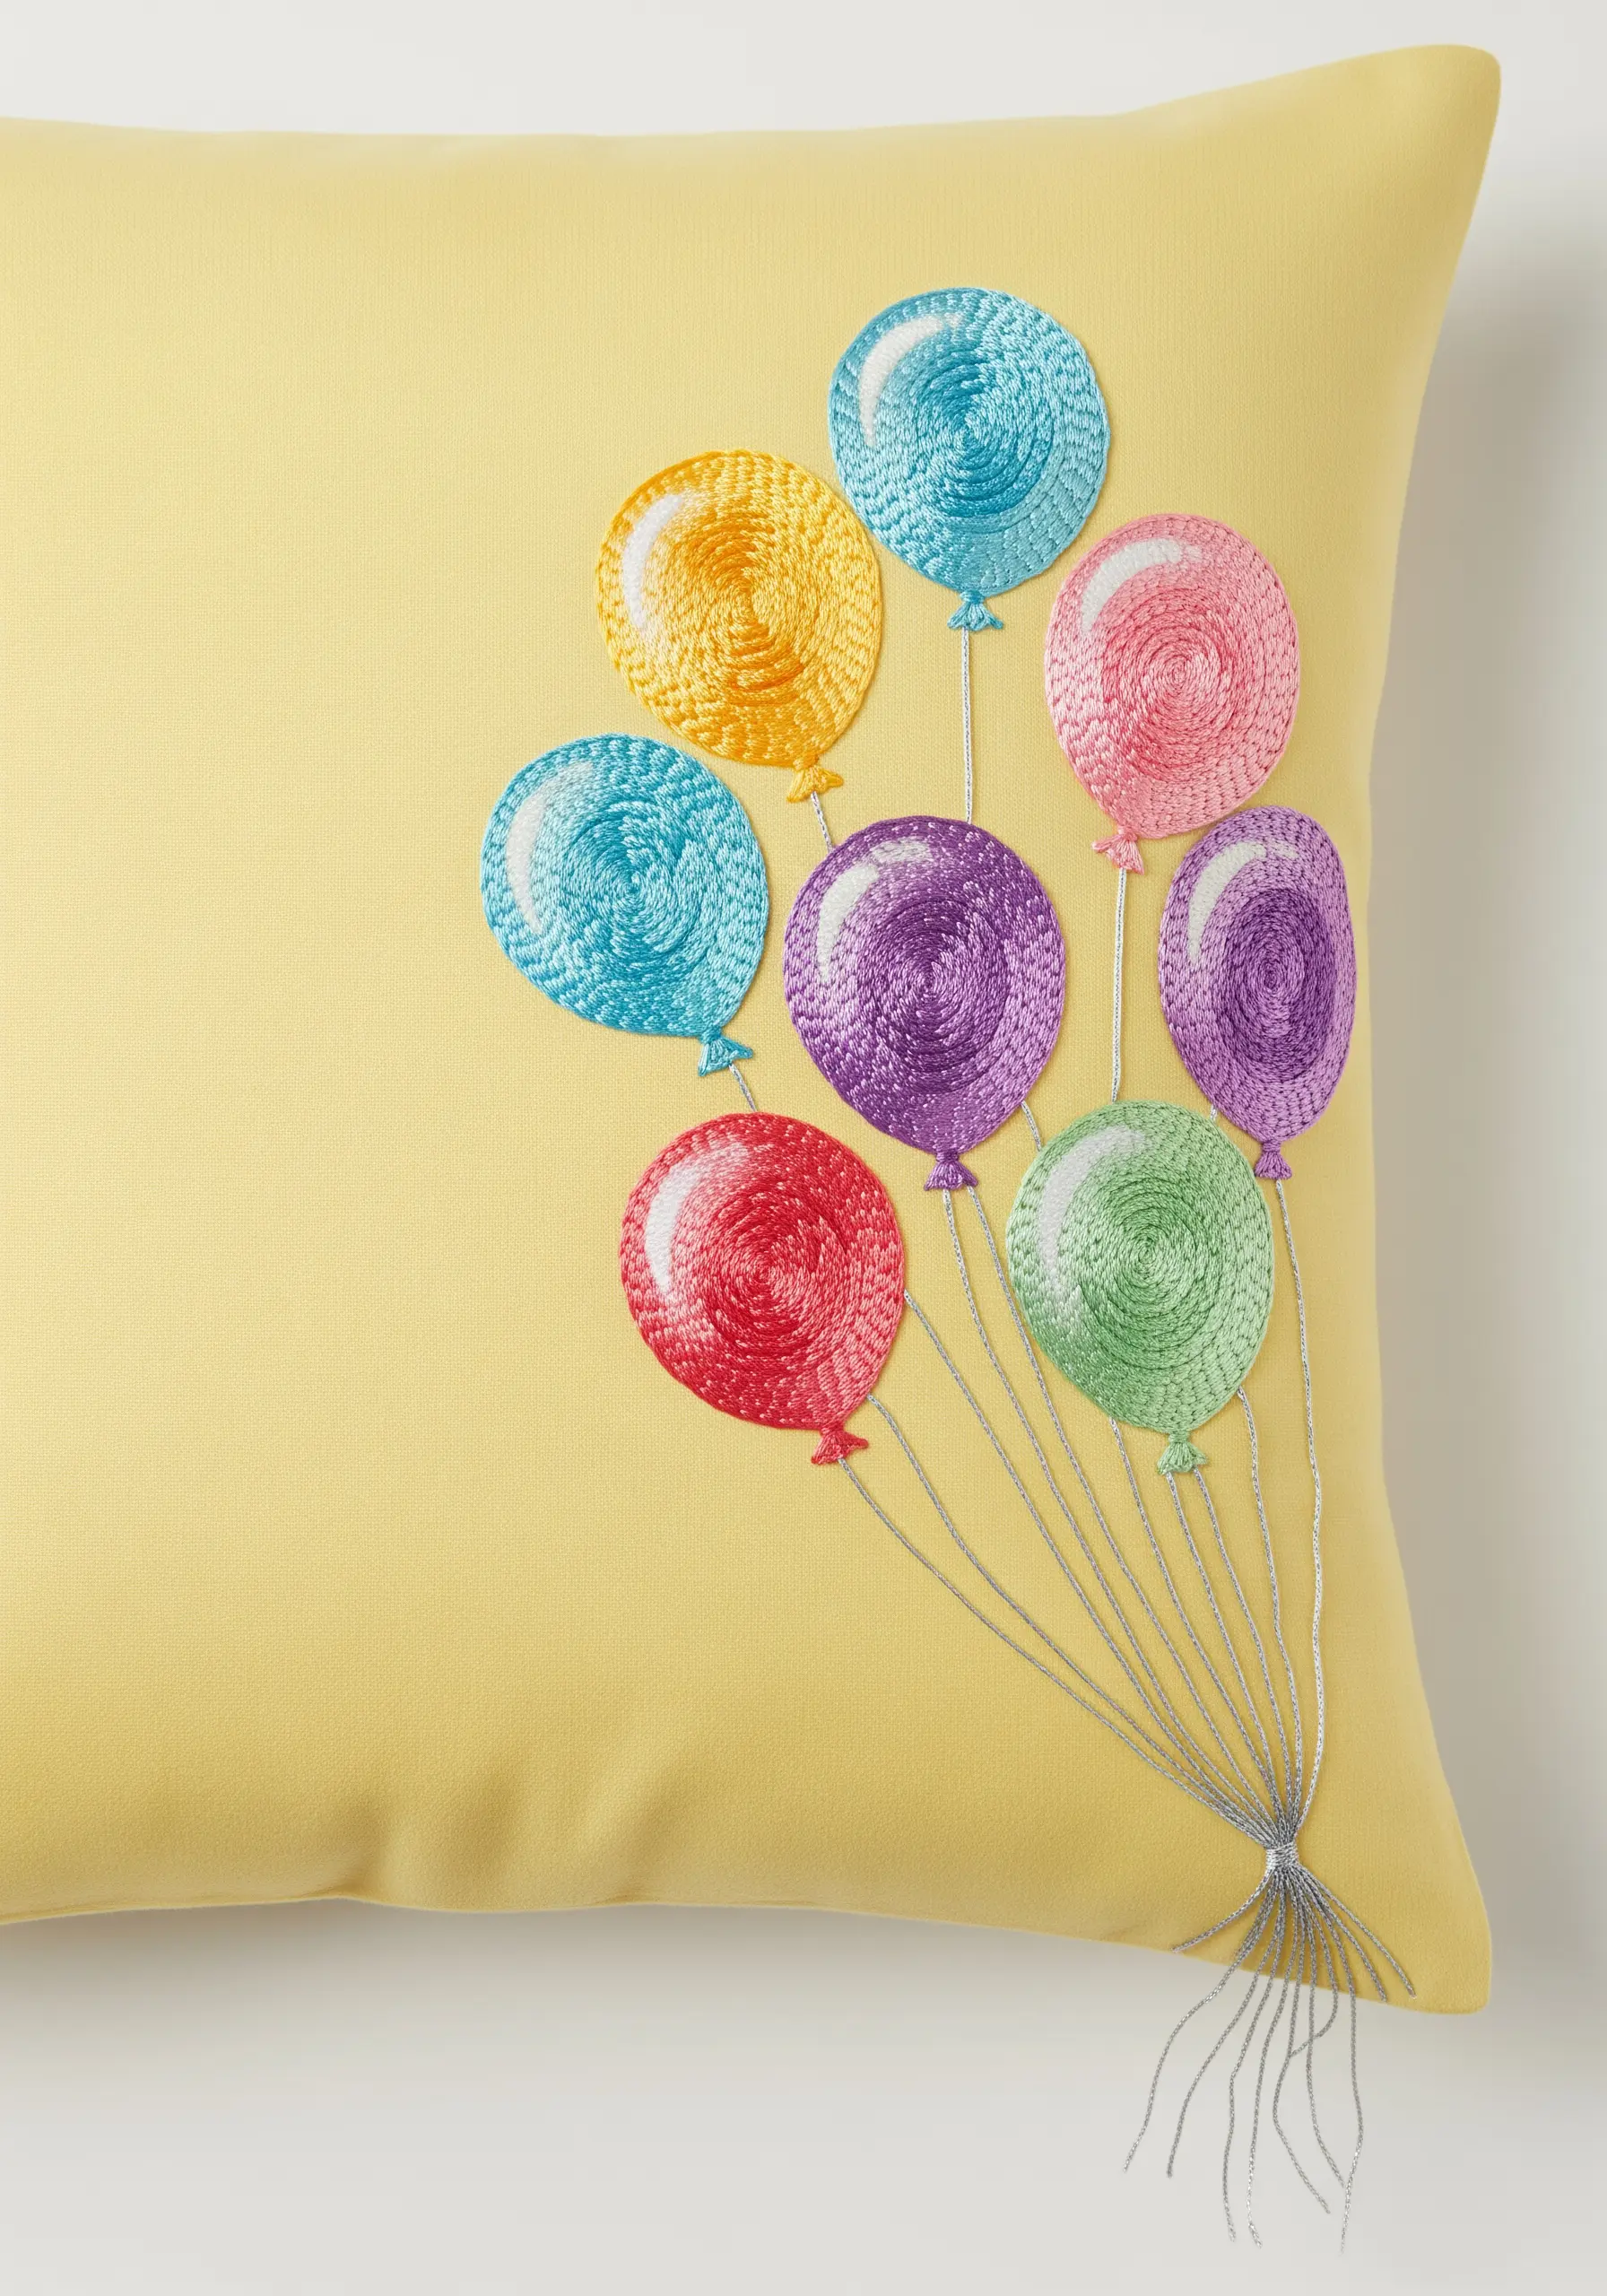
To make your embroidered objects look shiny and three-dimensional, add a simple highlight.
After filling each balloon with a smooth satin stitch, use a single strand of white or a very light grey floss to add a small, curved accent.
Use two or three small, parallel straight stitches to create this highlight, placing it where light would naturally hit the curved surface.
This tiny detail instantly transforms a flat circle into a glossy, inflated balloon.
29. Combine Illustration and Text for a Storybook Feel
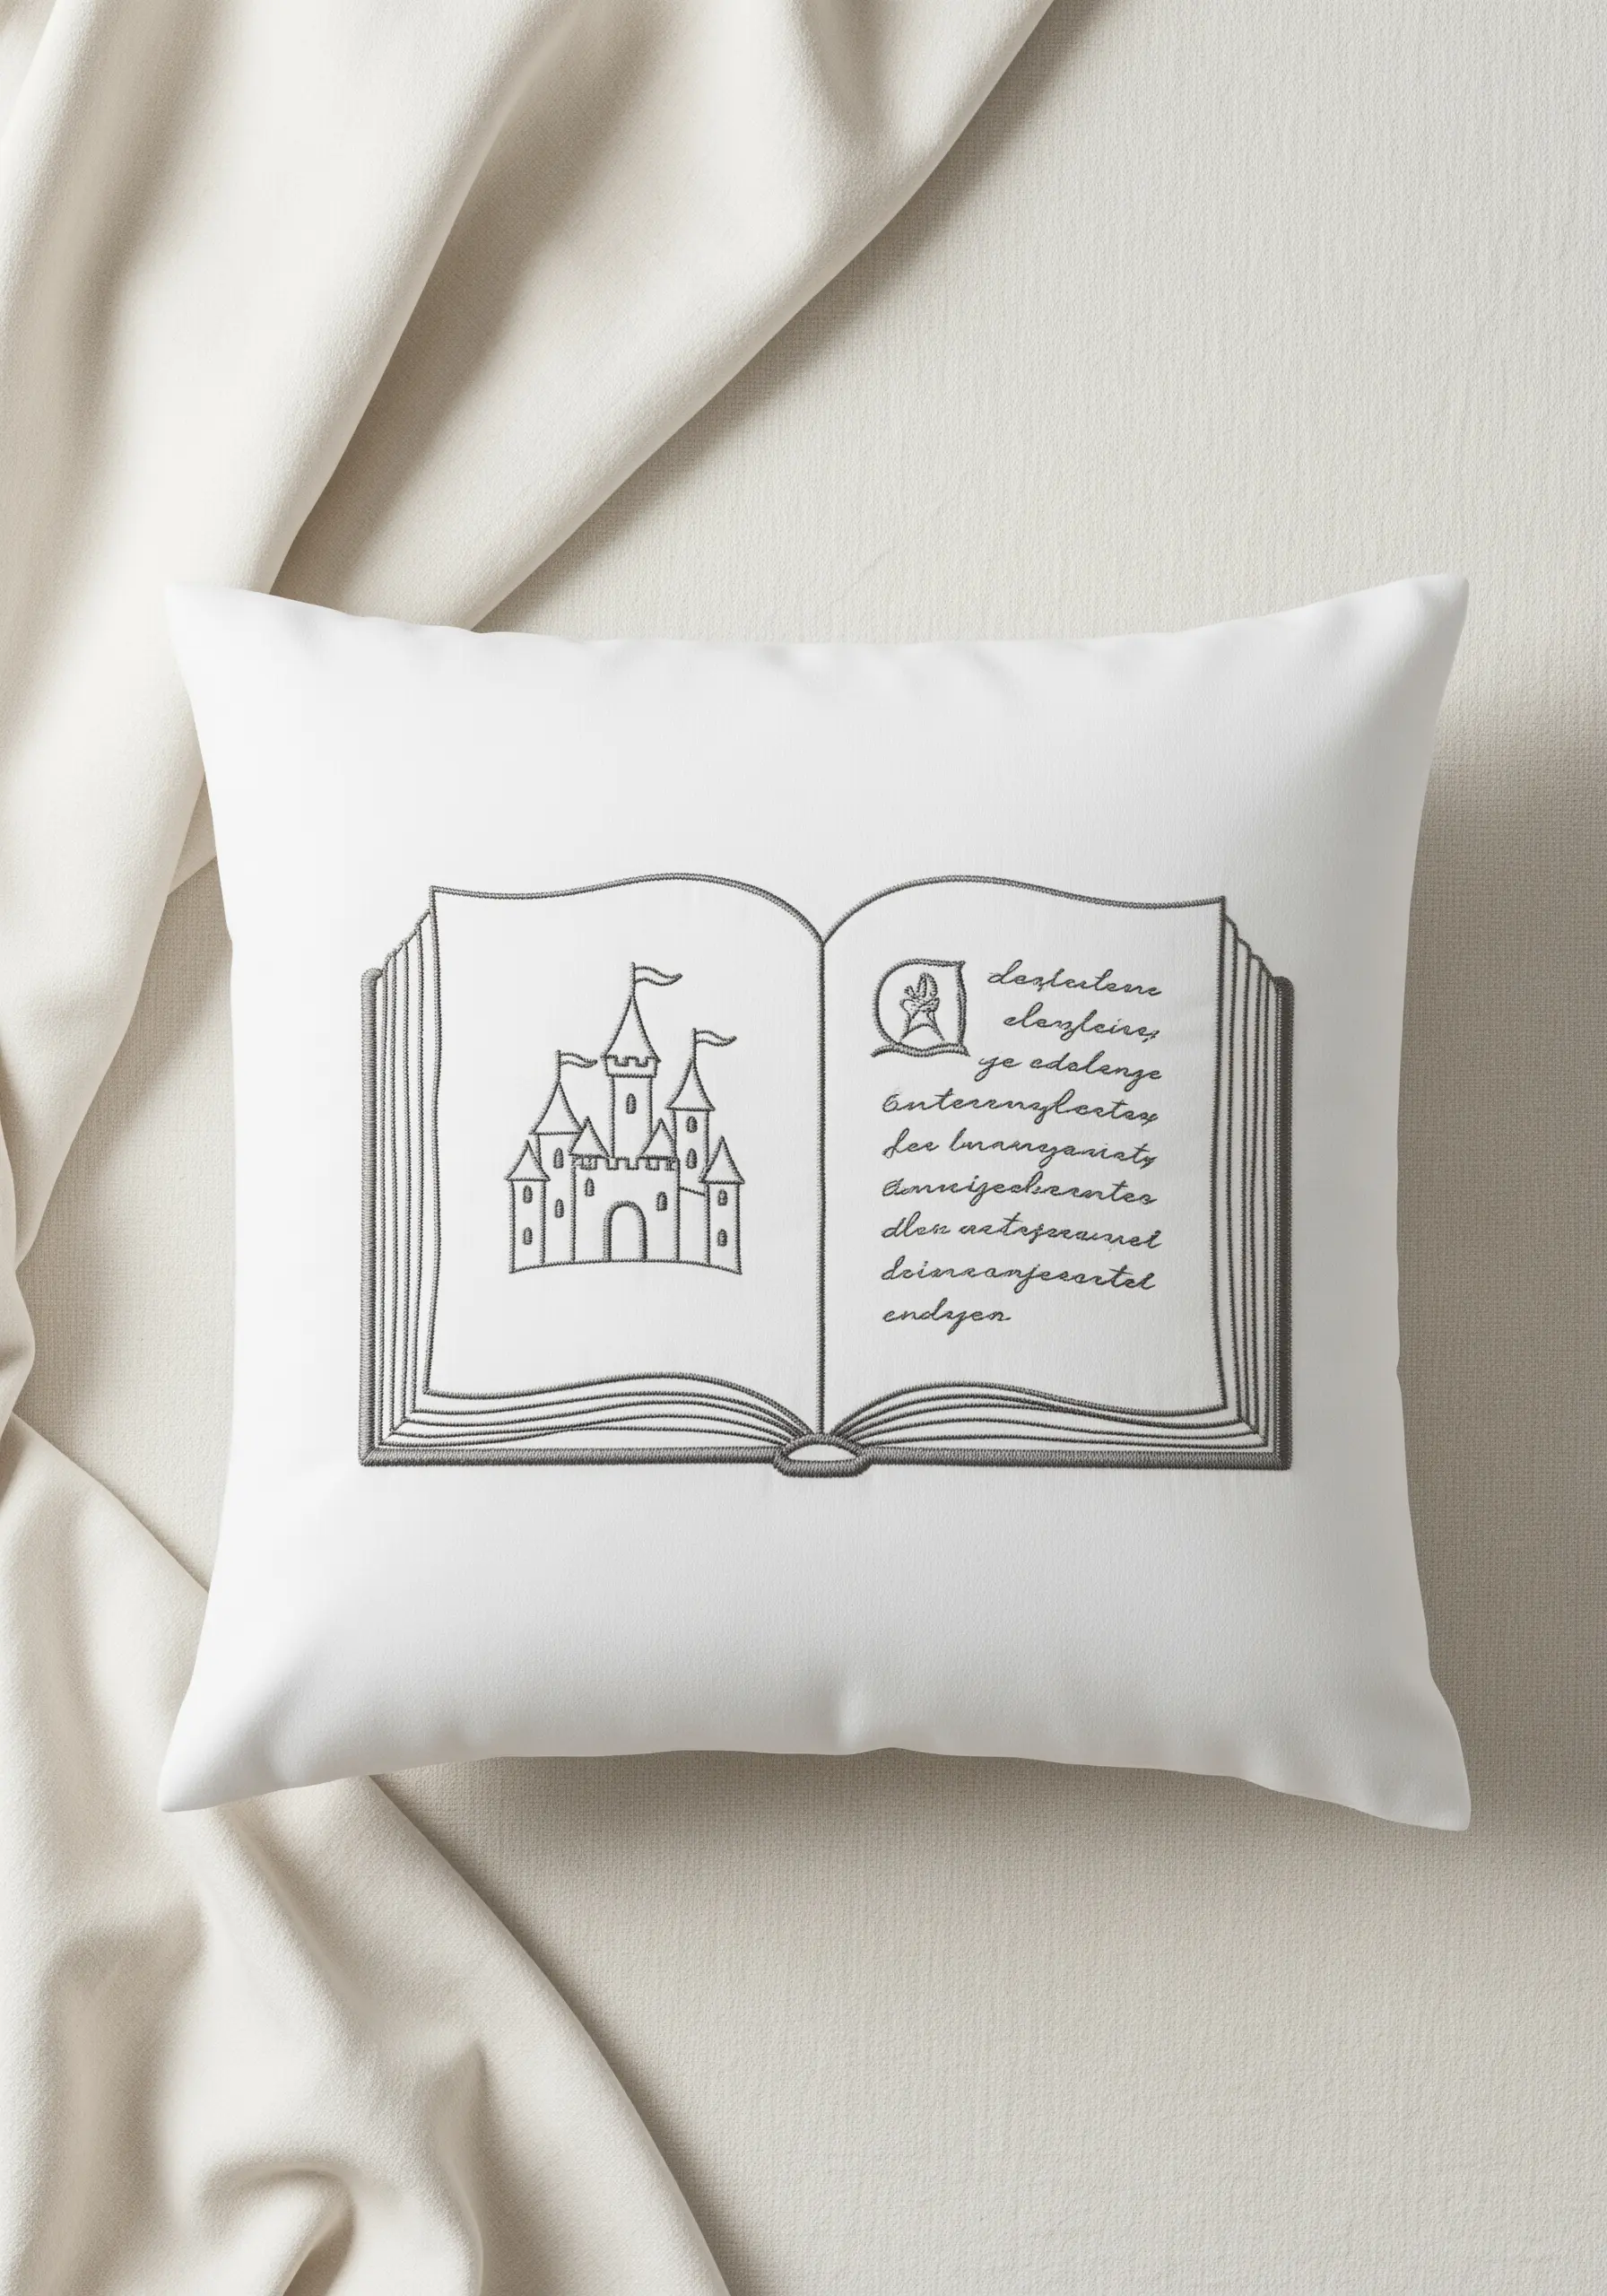
Turn your pillow into a page from a fairytale by combining simple line art with elegant script.
For the text to be legible, it’s crucial to use a very fine thread—a single strand is ideal—and a neat, small backstitch.
Keep the illustrative elements equally delicate to maintain a cohesive, hand-drawn look.
This technique creates a personal, narrative piece that invites you to look closer and read the story.
30. Fill a Space with Colorful French Knots
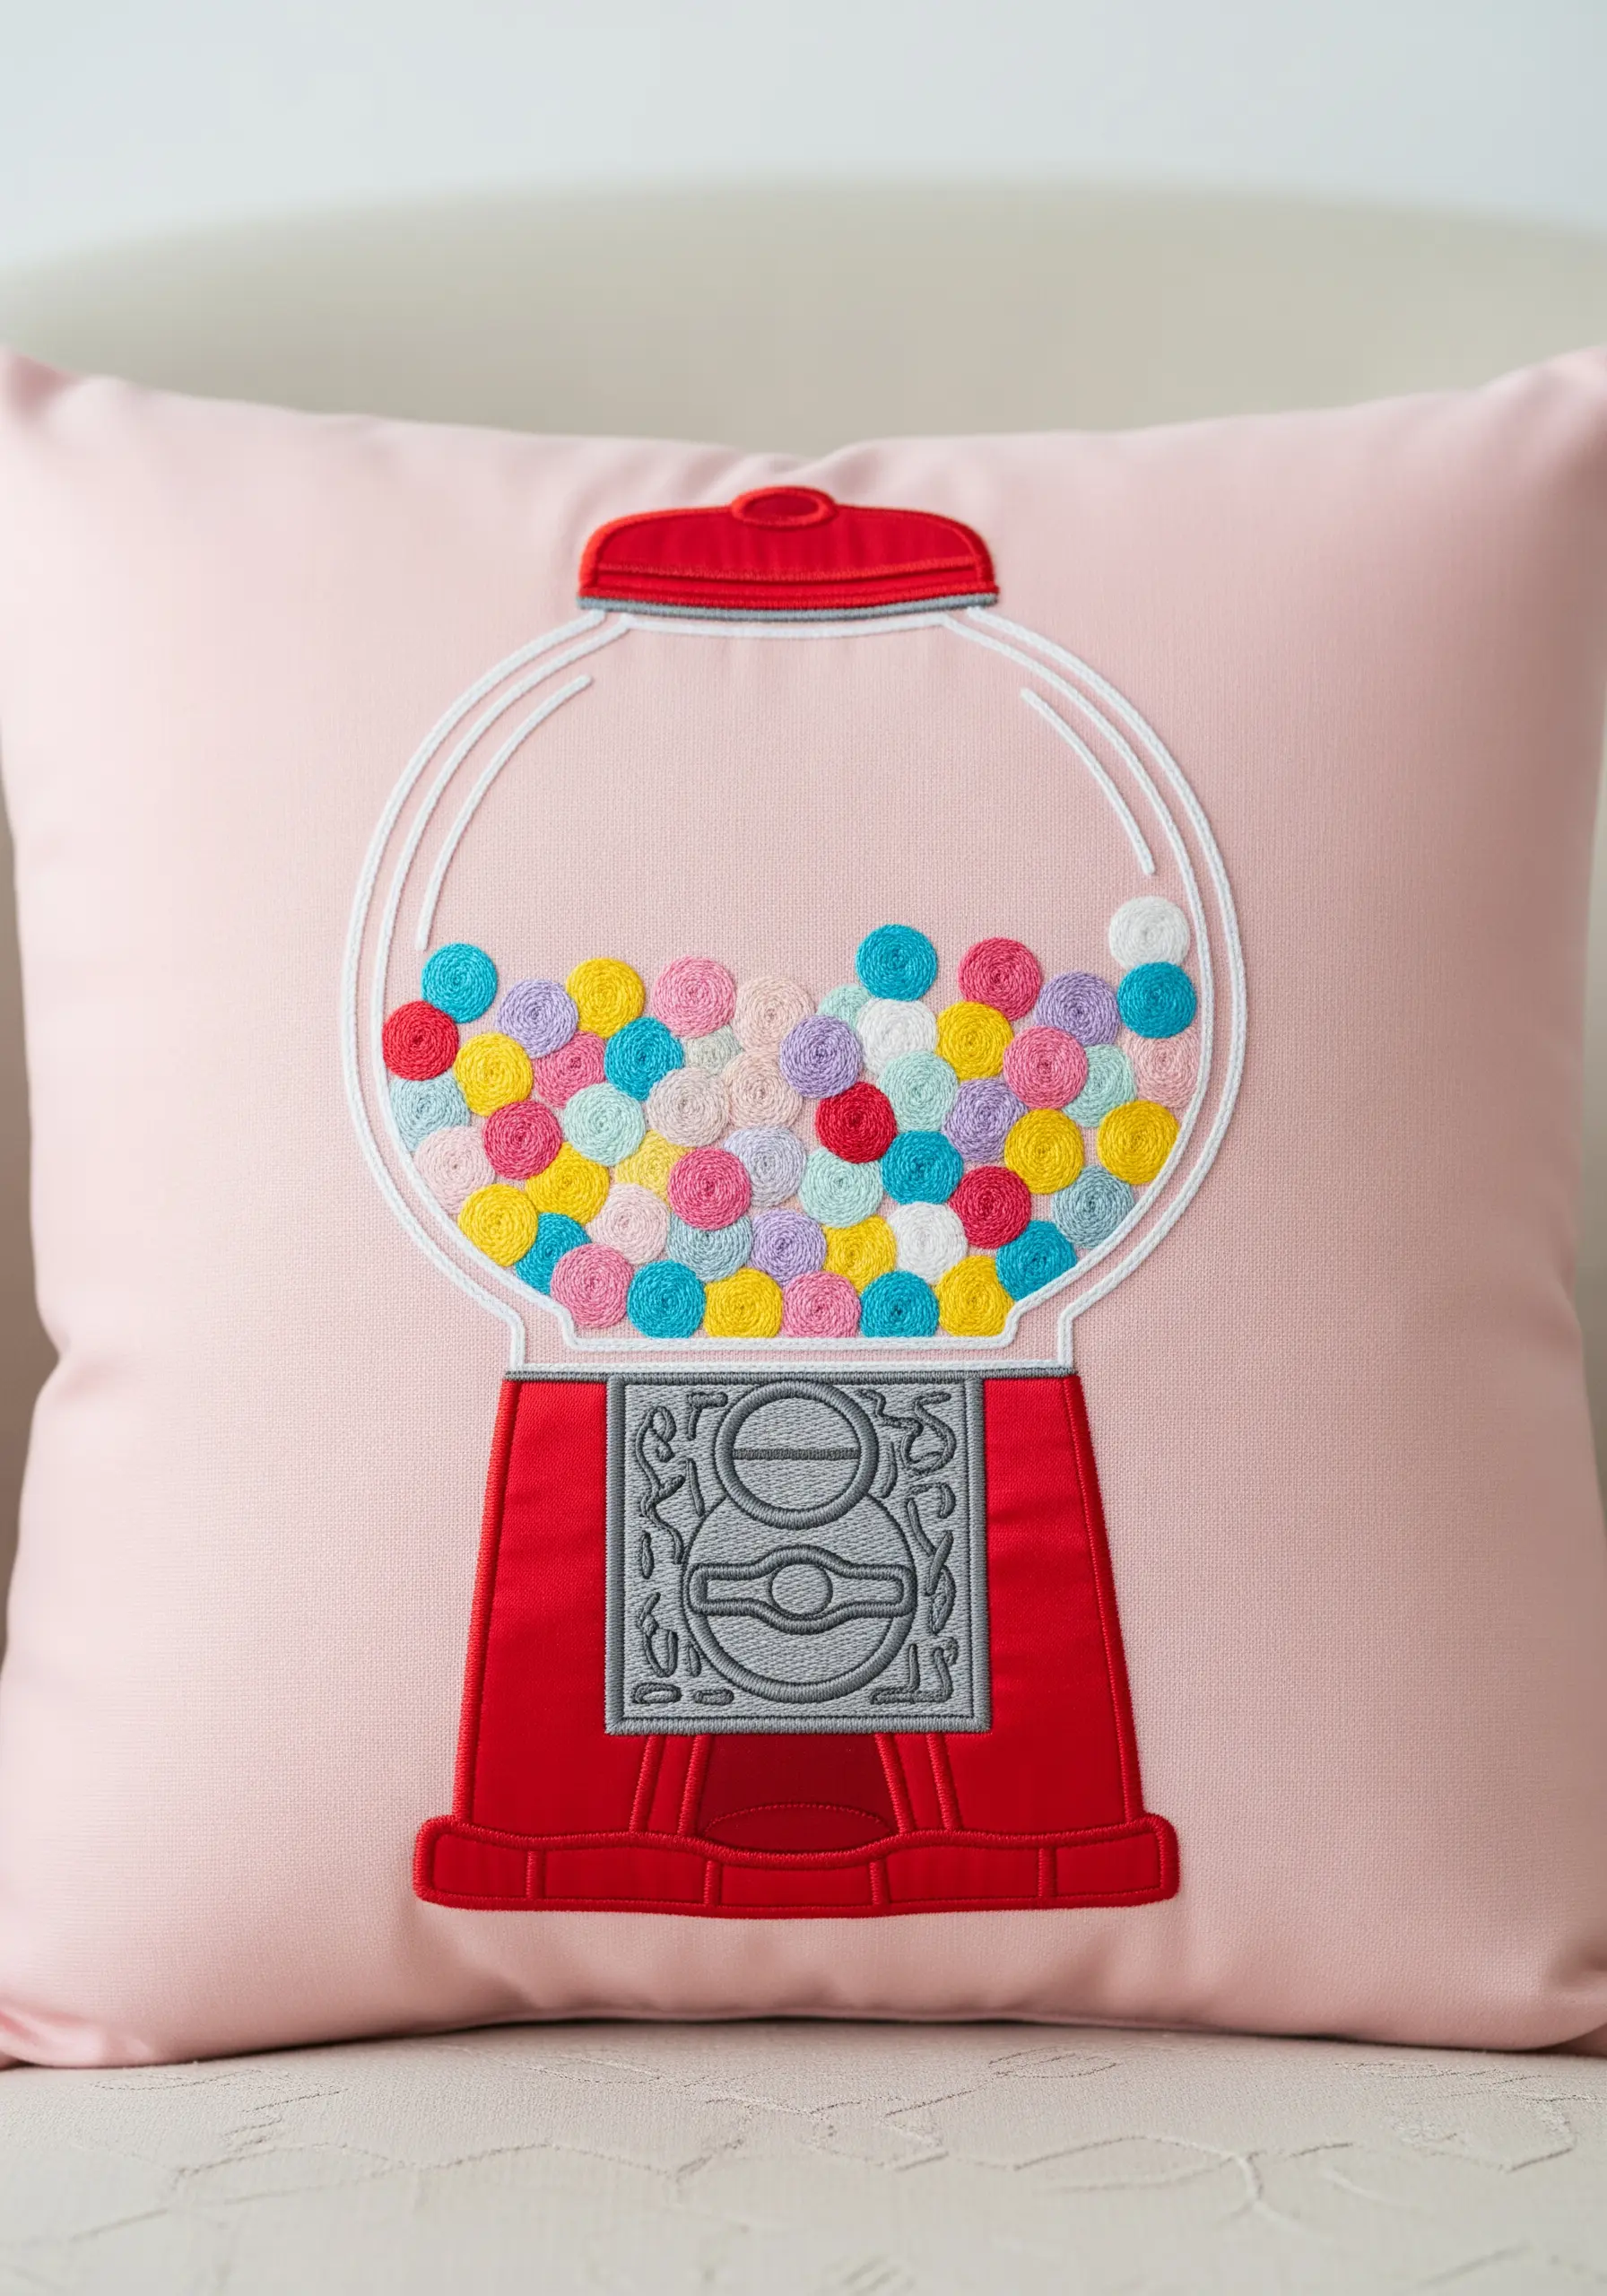
For a playful, candy-like texture, fill a defined area with a dense cluster of French knots.
To create the look of a gumball machine, use a variety of bright, cheerful colors and scatter them randomly.
Vary the number of times you wrap the thread around your needle (once for small knots, twice for larger ones) to create gumballs of different sizes.
This is a fun, forgiving fill stitch that adds wonderful dimension and a pop of joyful color.
31. Make a Statement with Single-Line Art
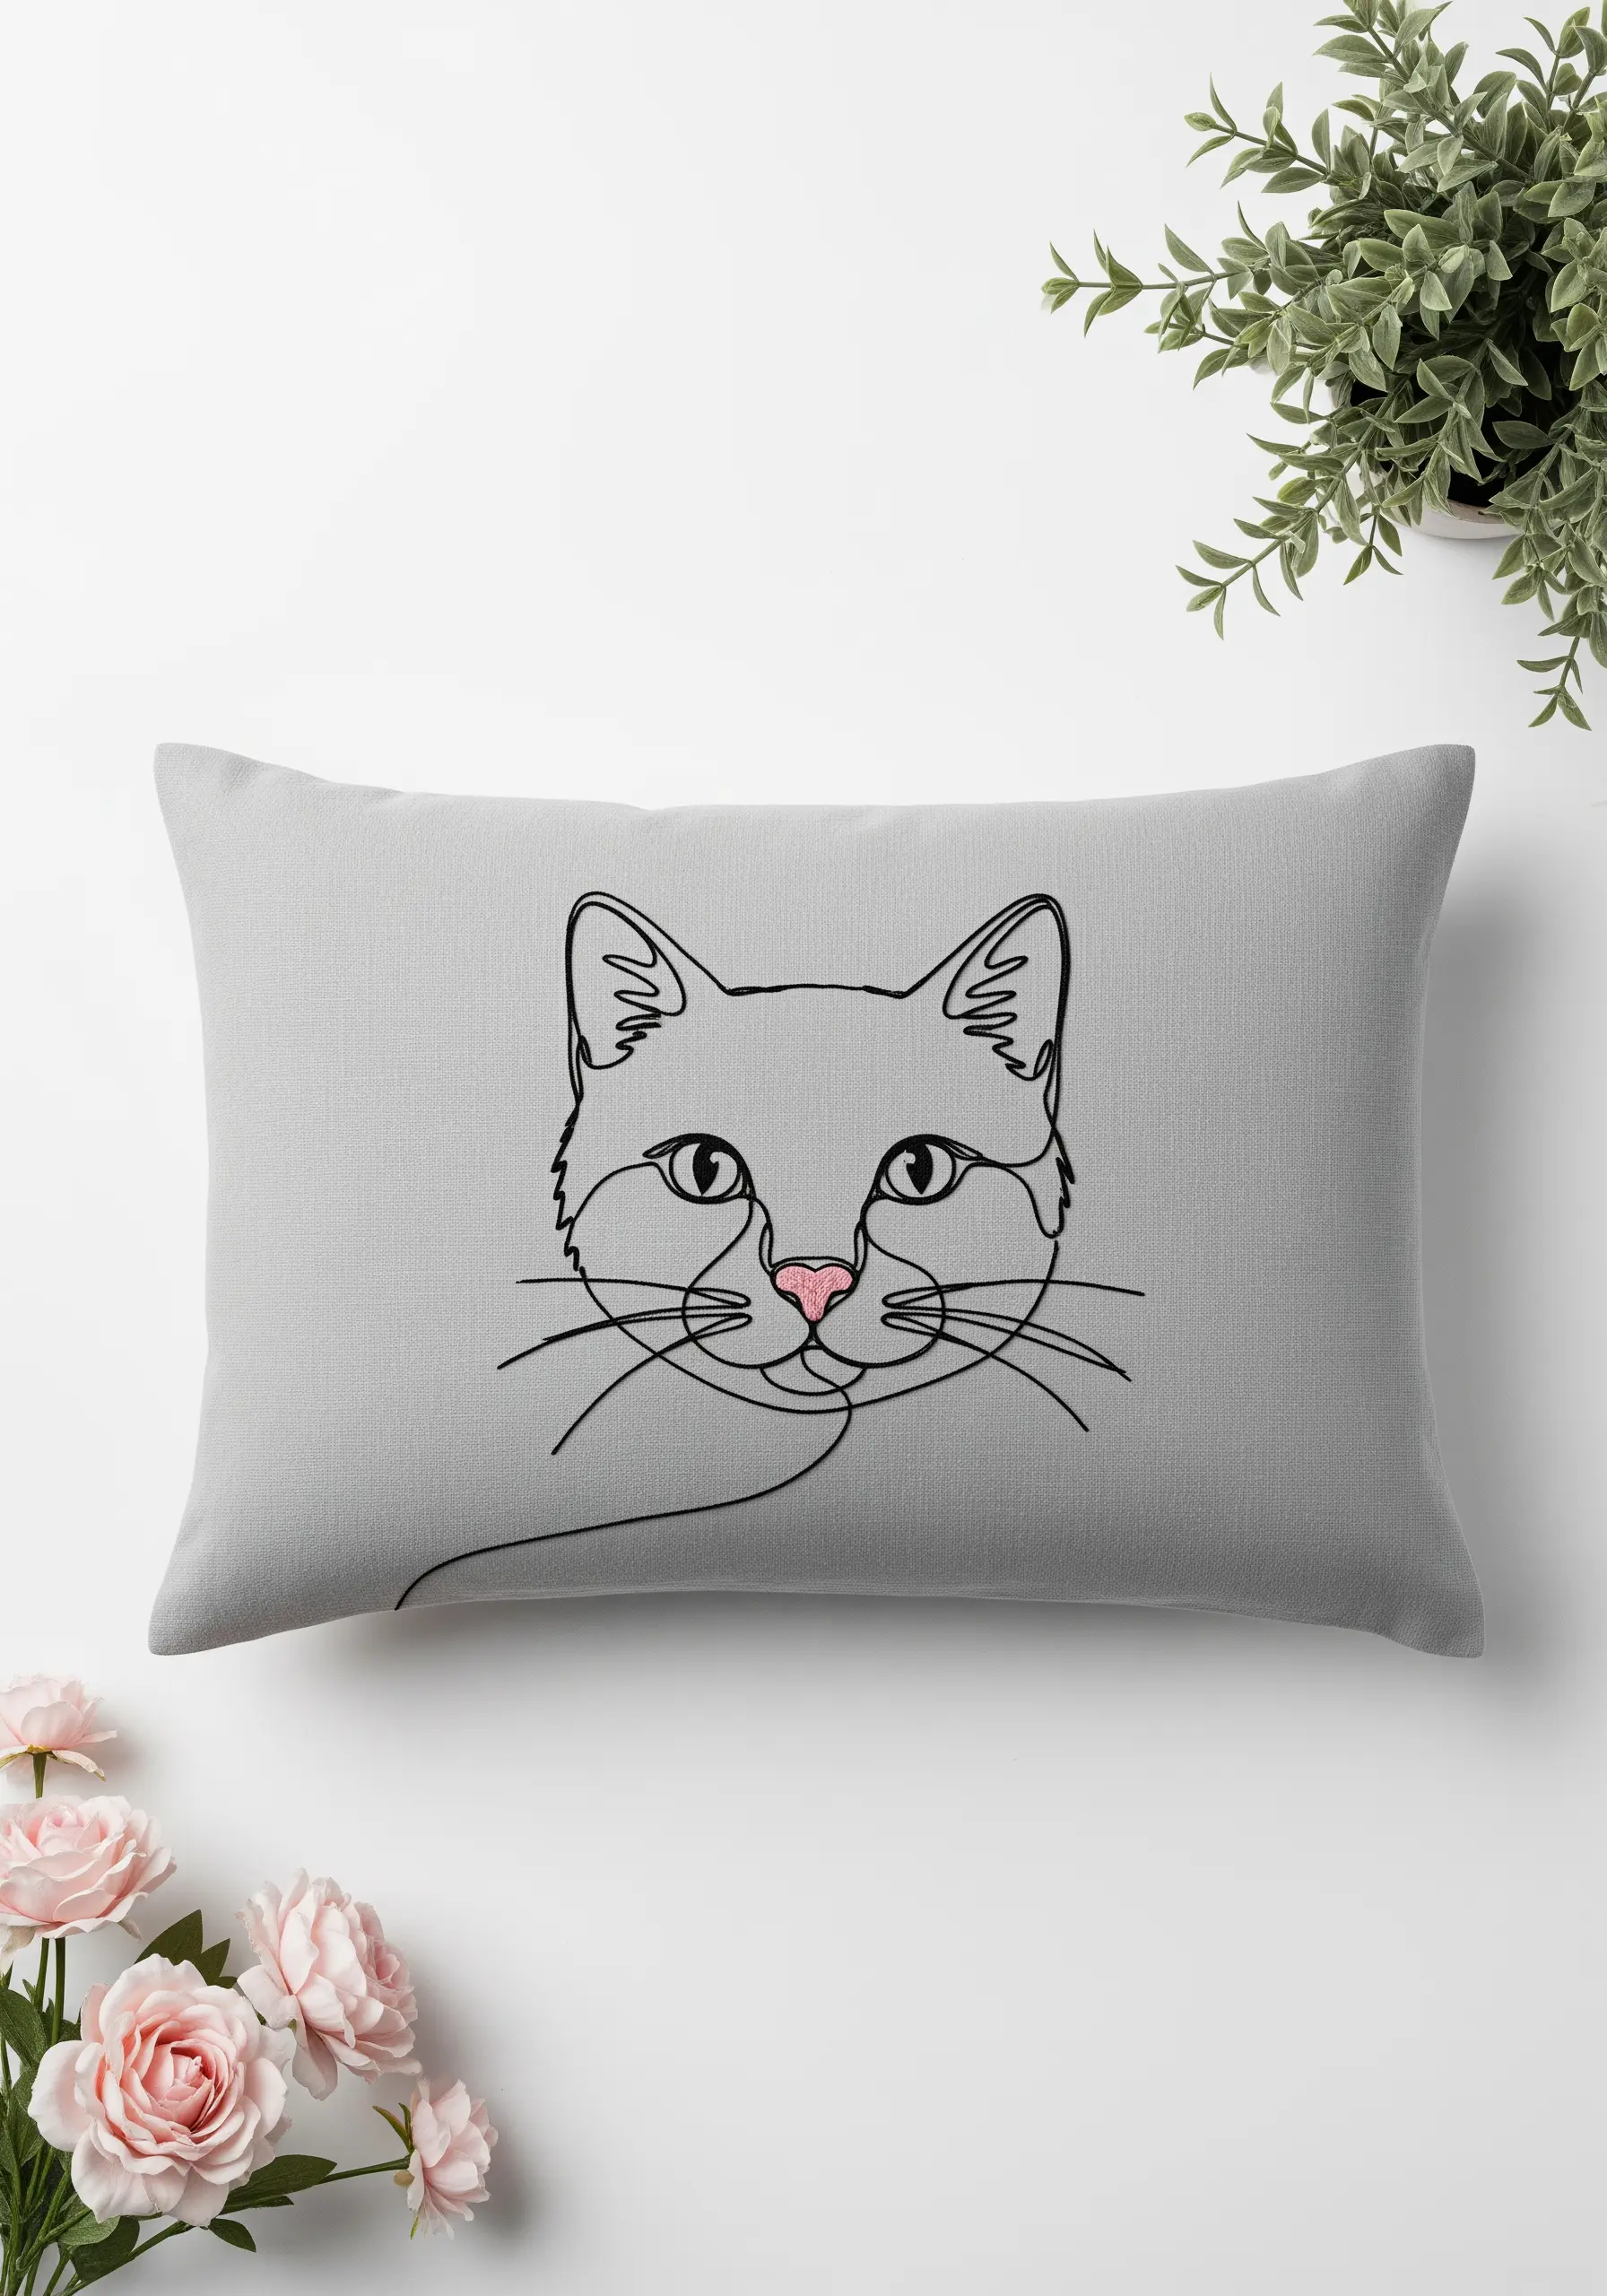
Capture the essence of a subject with the elegant simplicity of single-line art.
The goal is to create the illustration with one continuous, unbroken line. To achieve this in embroidery, plan your stitch path carefully and use a smooth stitch like a whipped backstitch or stem stitch to hide the start and end of each thread.
Adding a single, tiny pop of unexpected color—like the pink nose on this cat—creates a delightful focal point and adds a touch of playful personality to the minimal pet-themed line art.
32. Achieve Photorealism with Advanced Thread Painting

This peony demonstrates the pinnacle of thread painting, creating soft, photorealistic petals through meticulous shading.
To attempt this, you will need multiple shades of each color—from deep magenta to the softest blush pink and white.
Work in sections, following the curve of each petal with your long-and-short stitches.
The key is to use a single strand of floss and make your stitches interlock so seamlessly that no clear line can be seen between the color changes, resulting in a design that looks truly painted on fabric.
33. Weave a Web with Beads and Metallic Thread
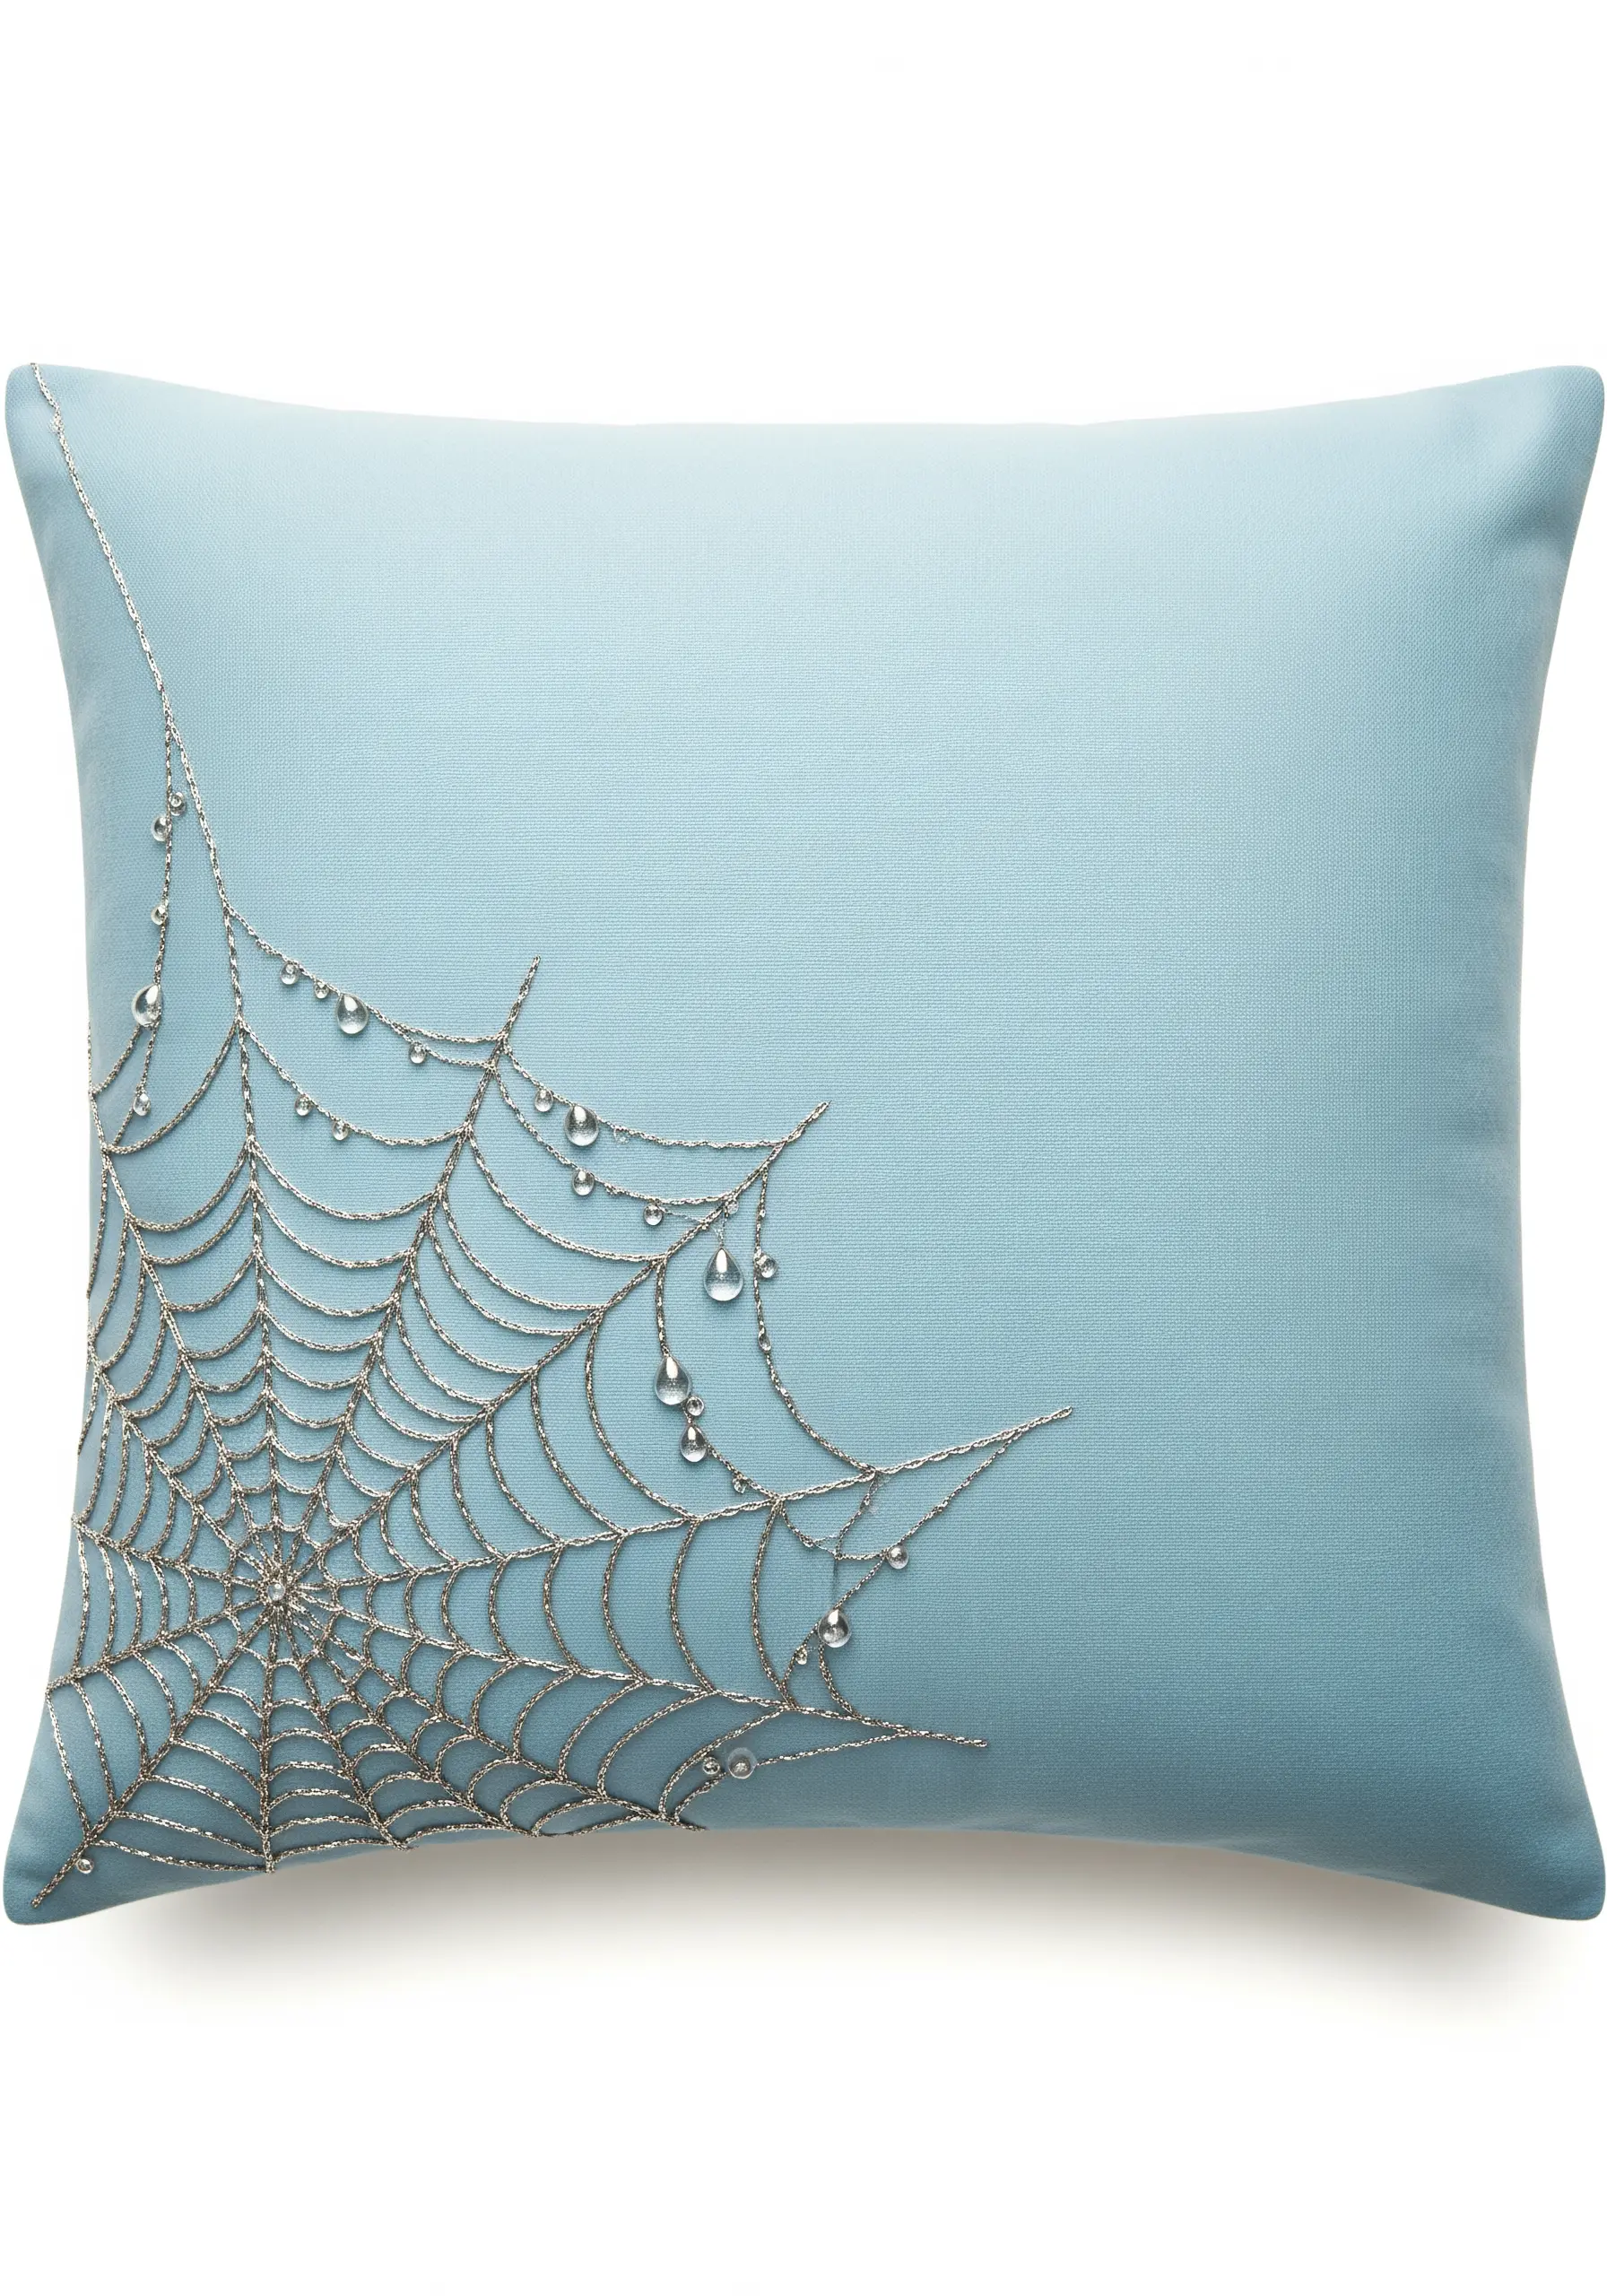
Create a delicate, dew-kissed spiderweb by combining fine metallic thread with strategically placed beads.
Use a simple straight stitch for the radiating lines of the web and a couching stitch—tacking down a long thread with tiny stitches—for the curved sections.
Secure teardrop-shaped or round crystal beads at various points along the web to mimic water droplets.
This creates a design that is both spooky and stunningly beautiful, shimmering delicately in the light.


