

Let’s pause for a moment and look beyond the hoop. You have the stitches, the threads, and the desire, but perhaps you feel a gap between the work you’re creating and the art you envision. You see large-scale installations and wonder how that monumental feeling could possibly translate to the project in your hands.
The secret isn’t about creating something enormous. It’s about shifting your perspective. The same principles that give these installations their power—texture, composition, material contrast, and narrative tension—are entirely accessible to you, right now, with the needle you’re holding.
This collection is your guide to thinking like a fiber artist. We will explore how to build sculptural forms with simple stitches, how to use negative space to make your designs breathe, and how to combine thread with unexpected materials to create work that feels intentional, modern, and deeply personal. It’s time to transform your craft into your art.
1. Sculptural Stitching: Building Form with Line
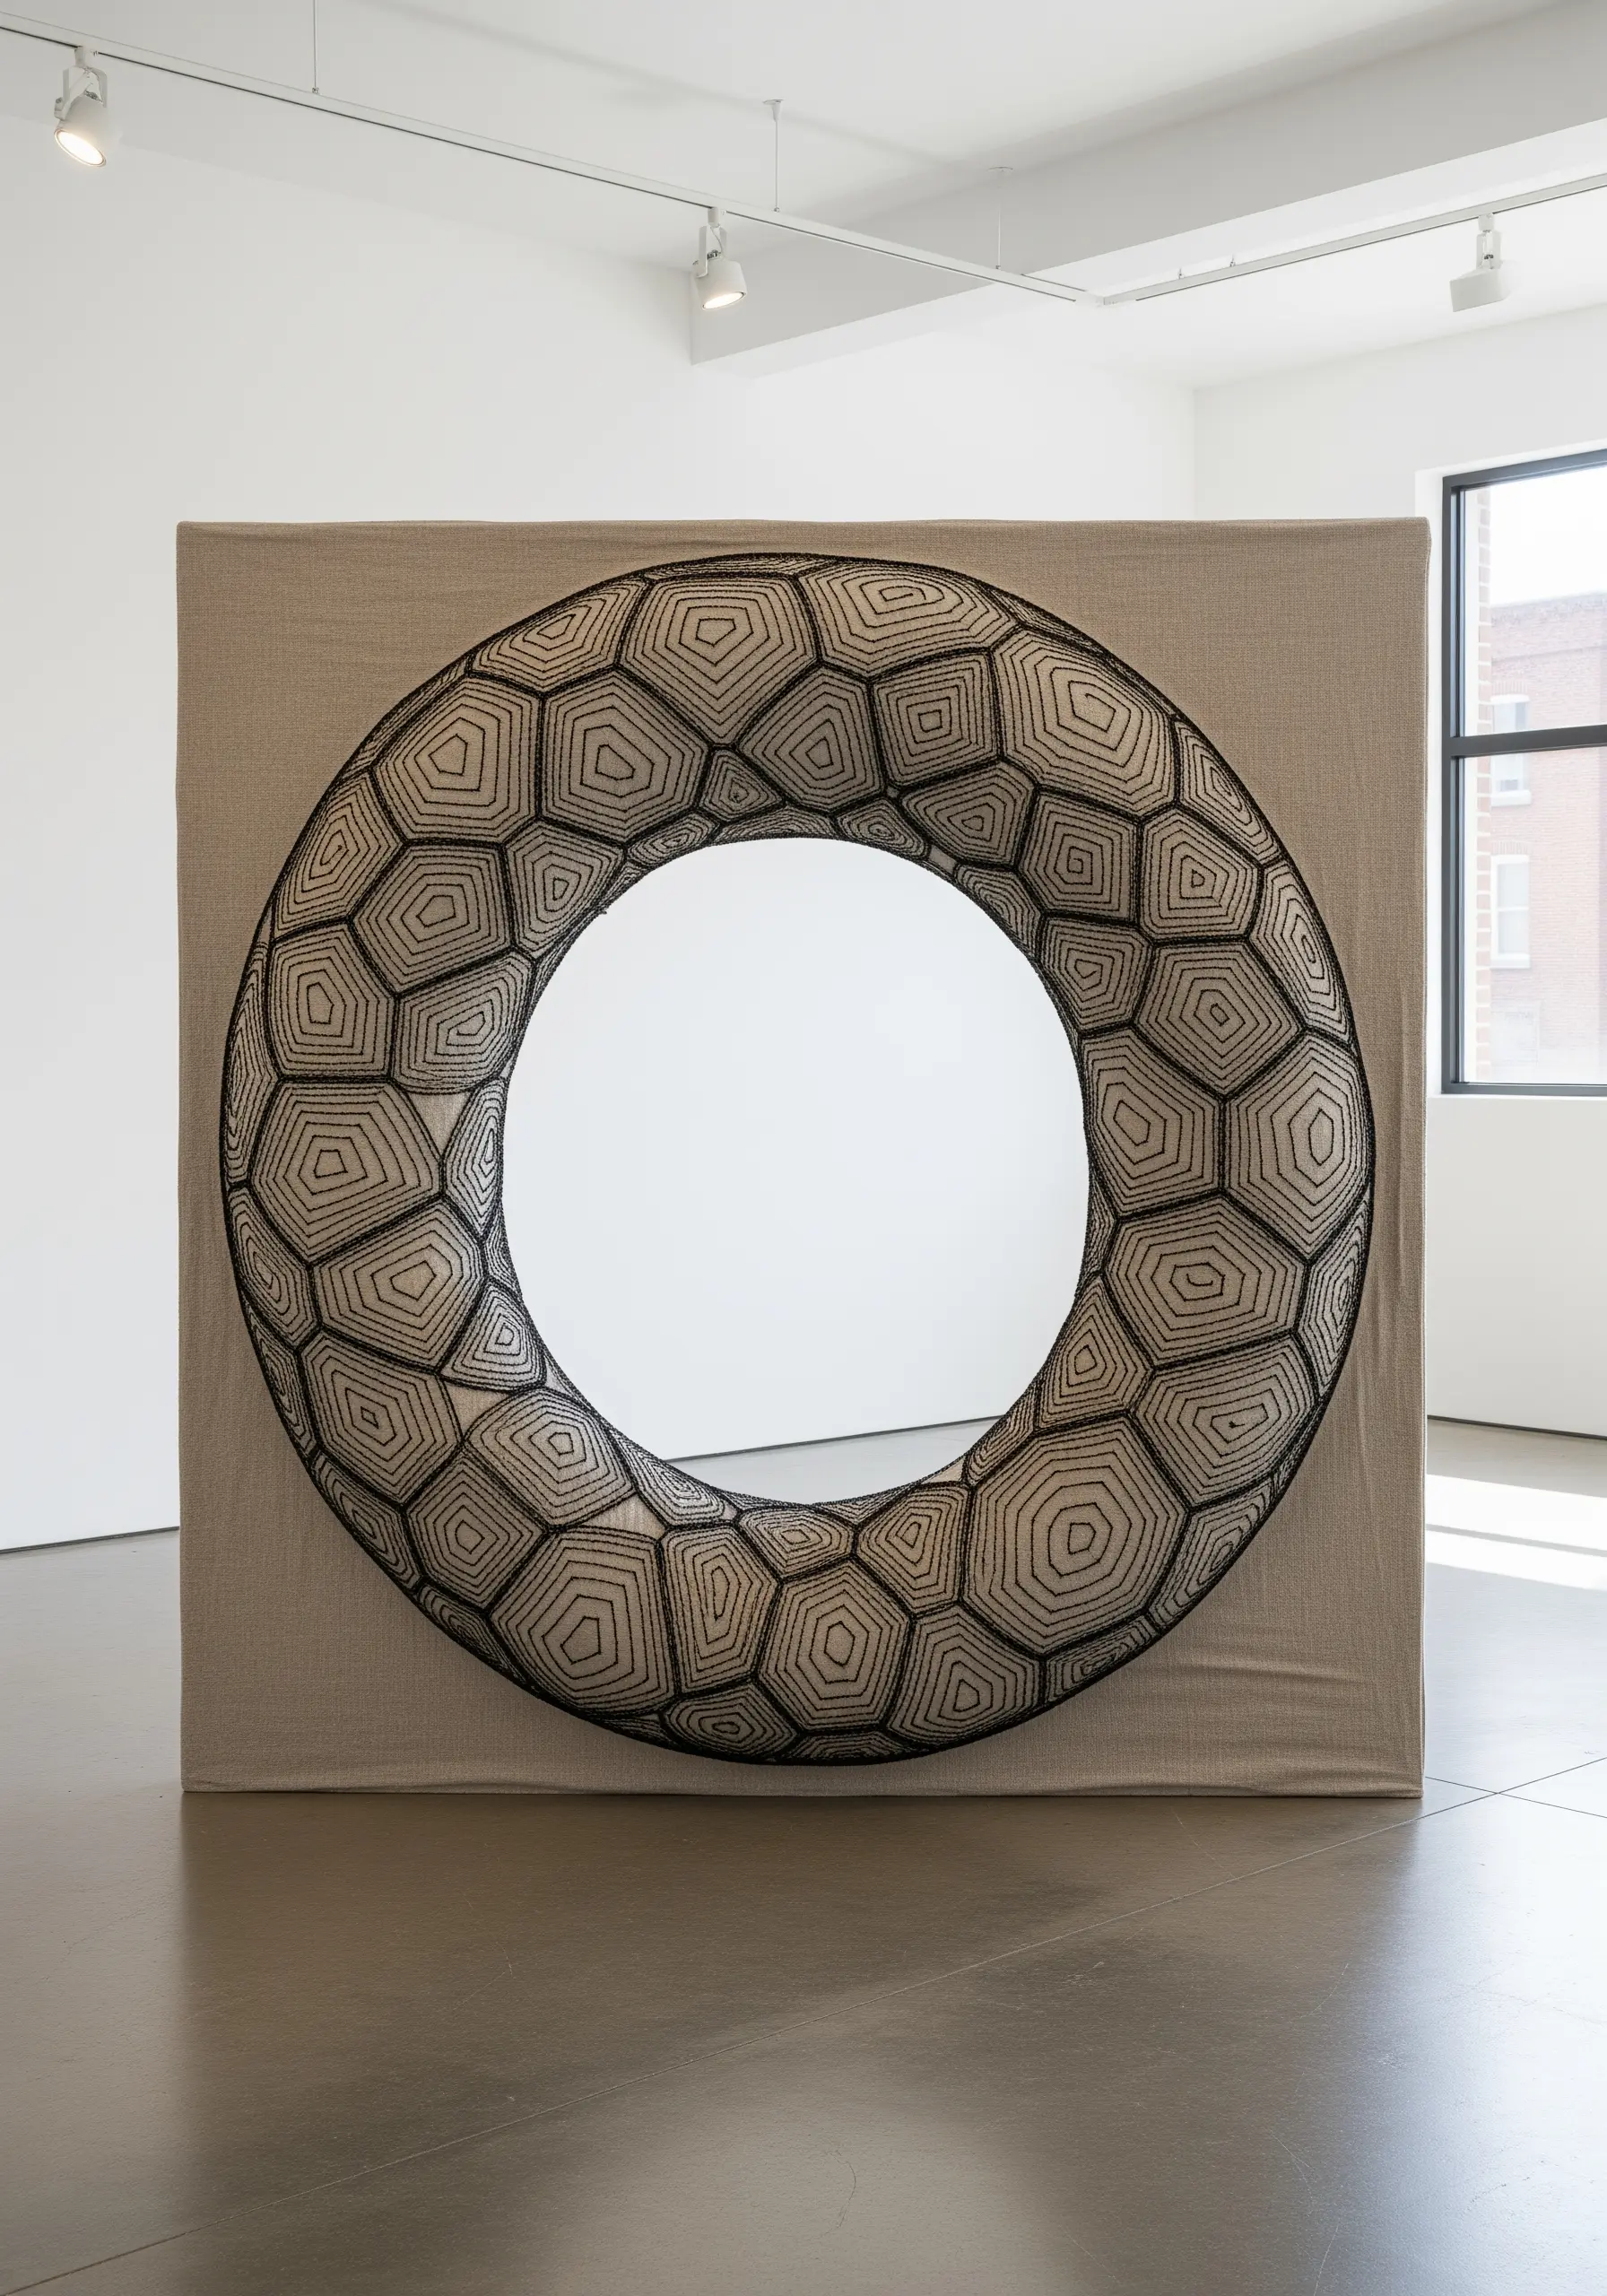
Translate this large-scale illusion into your hoop art by using a single, continuous backstitch or stem stitch to outline a geometric shape.
Fill the interior with parallel lines that follow the form’s contour.
The magic is in the density—placing stitches closer together creates shadow, while wider spacing suggests light, giving a flat surface three-dimensional depth.
Use a high-contrast thread, like black on linen, to maximize the graphic impact and create a powerful optical effect.
2. Celestial Layers: Embroidery on Sheer Fabric
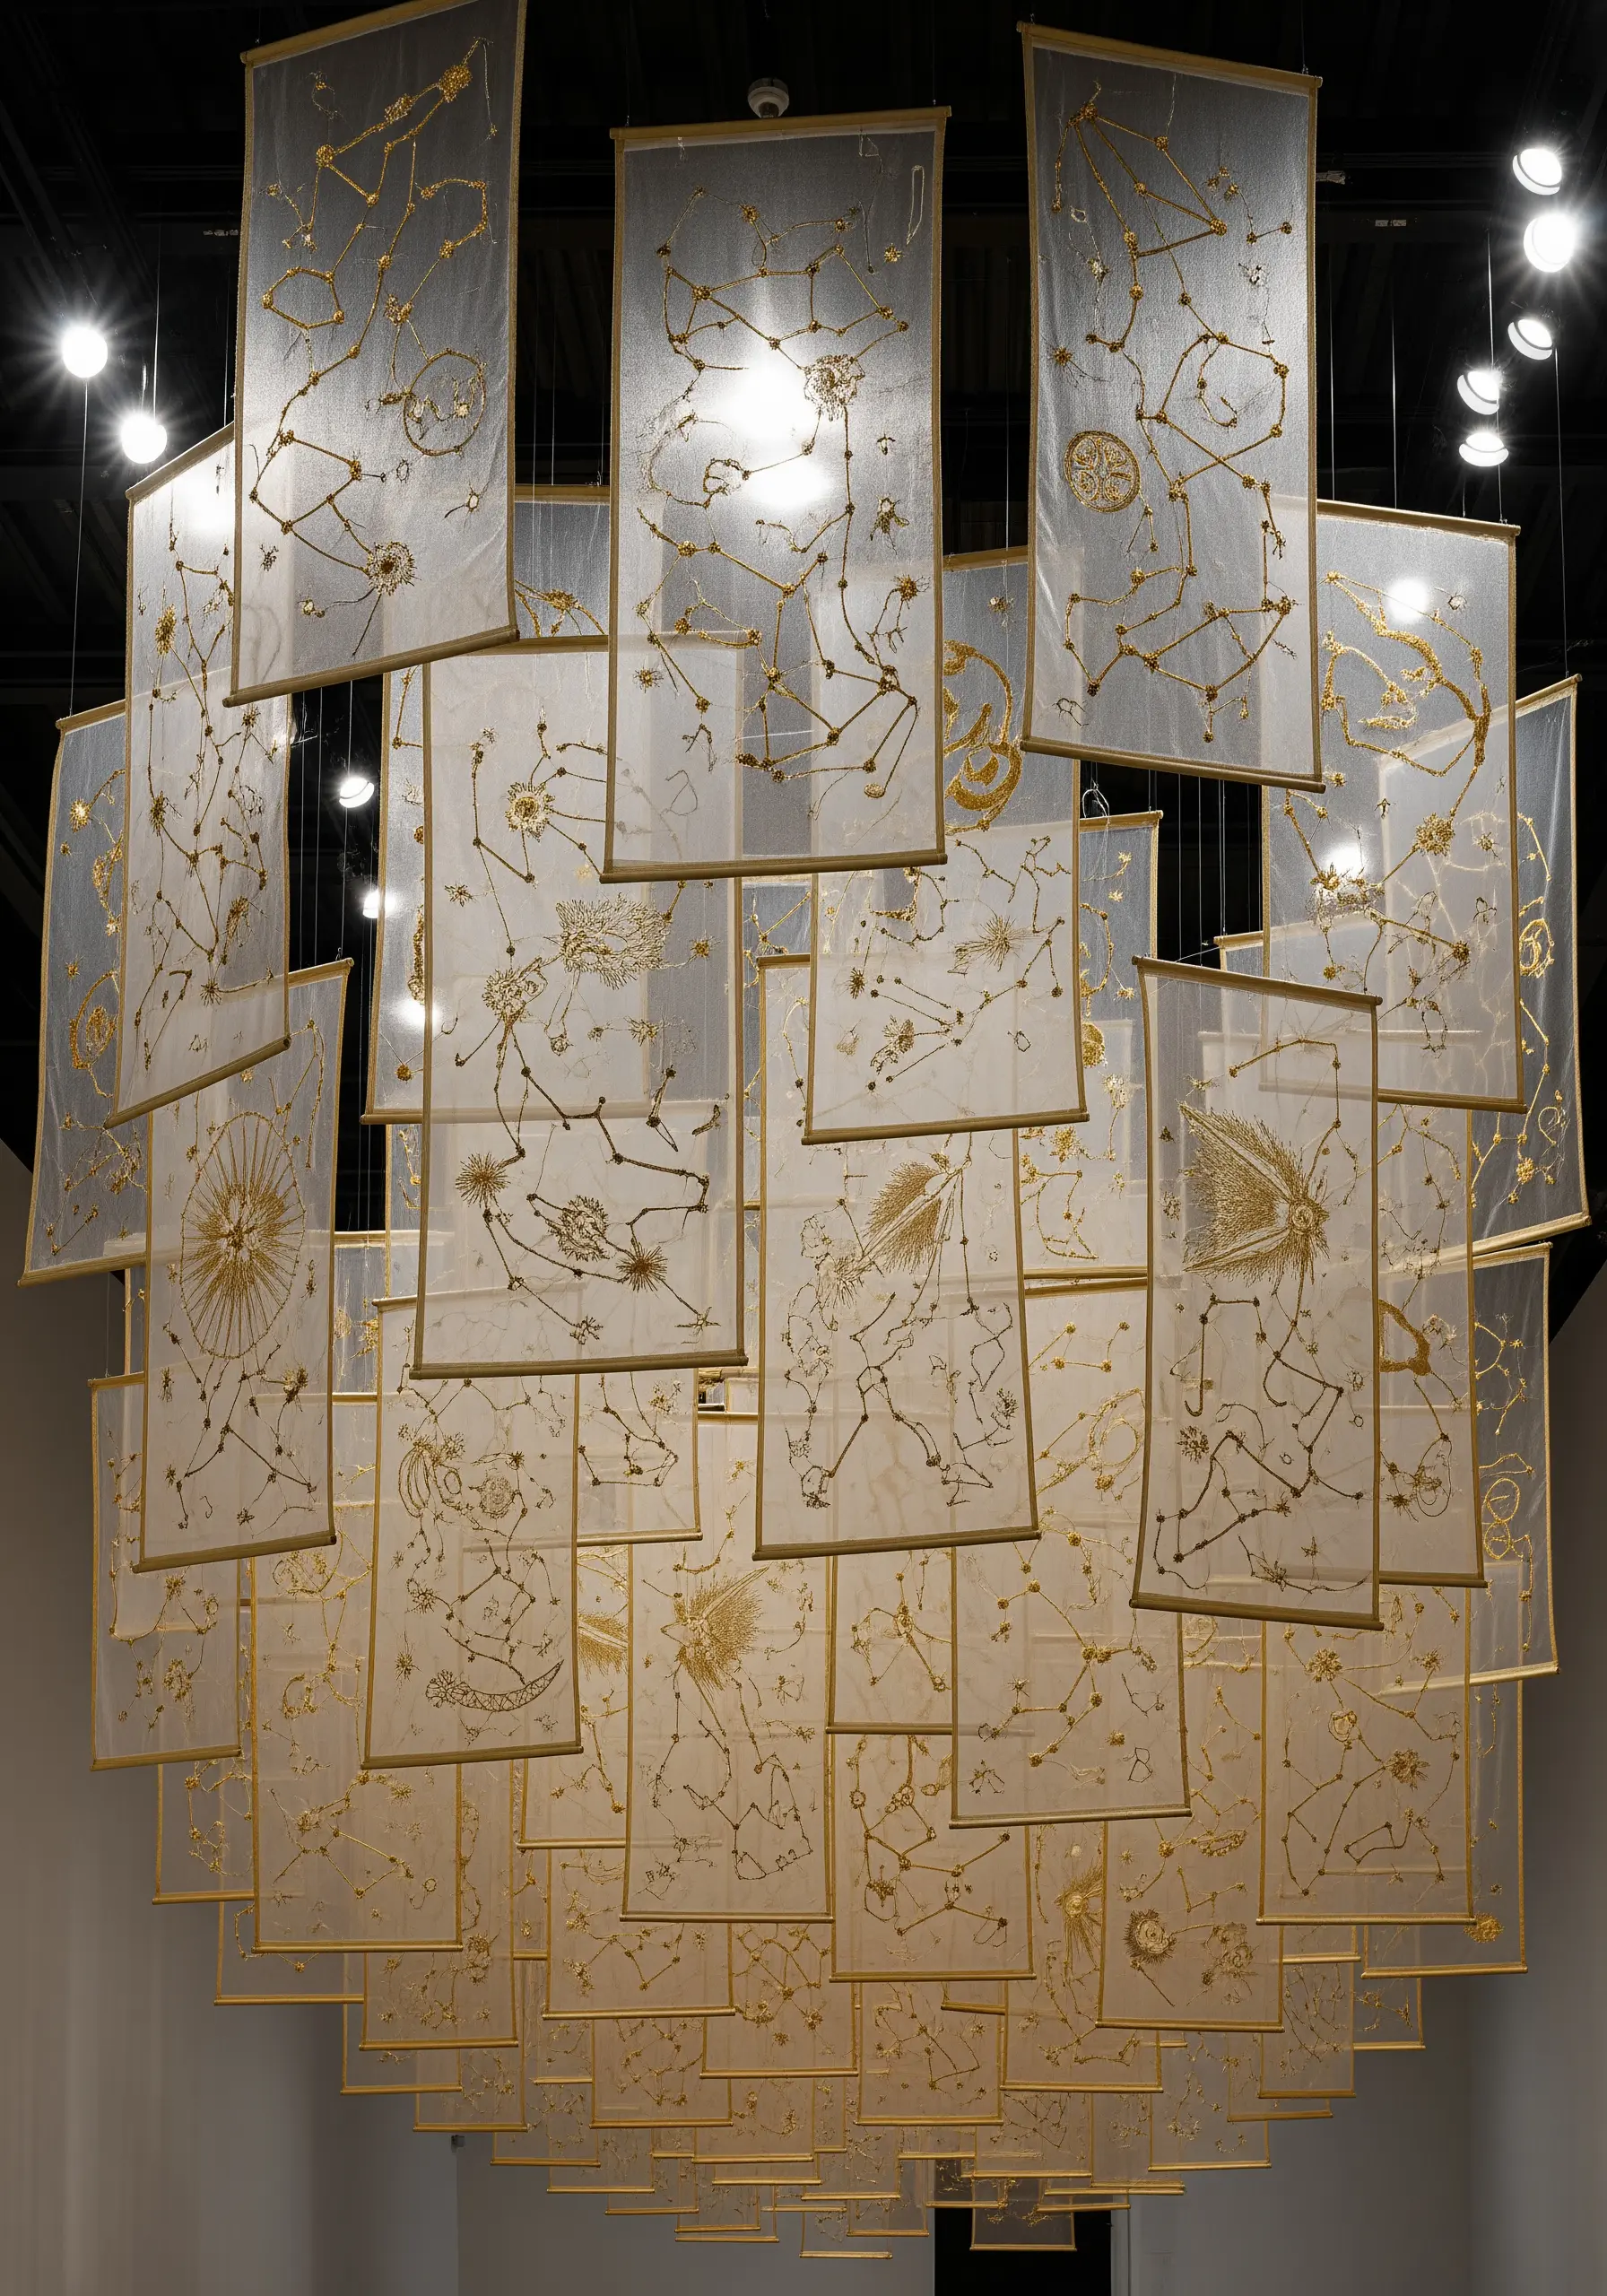
Don’t limit your work to a single surface; experiment by stitching motifs on organza or tulle and layering them in a shadow box frame.
Use a fine metallic thread for luminosity and back it with a stabilizer that tears or washes away, leaving only the stitches.
This creates a floating effect, where each layer adds depth and tells part of a larger story.
The transparency of the fabric becomes as important as the thread itself, allowing light to interact with your design.
3. Architectural Tension: From Room-Scale to Hoop
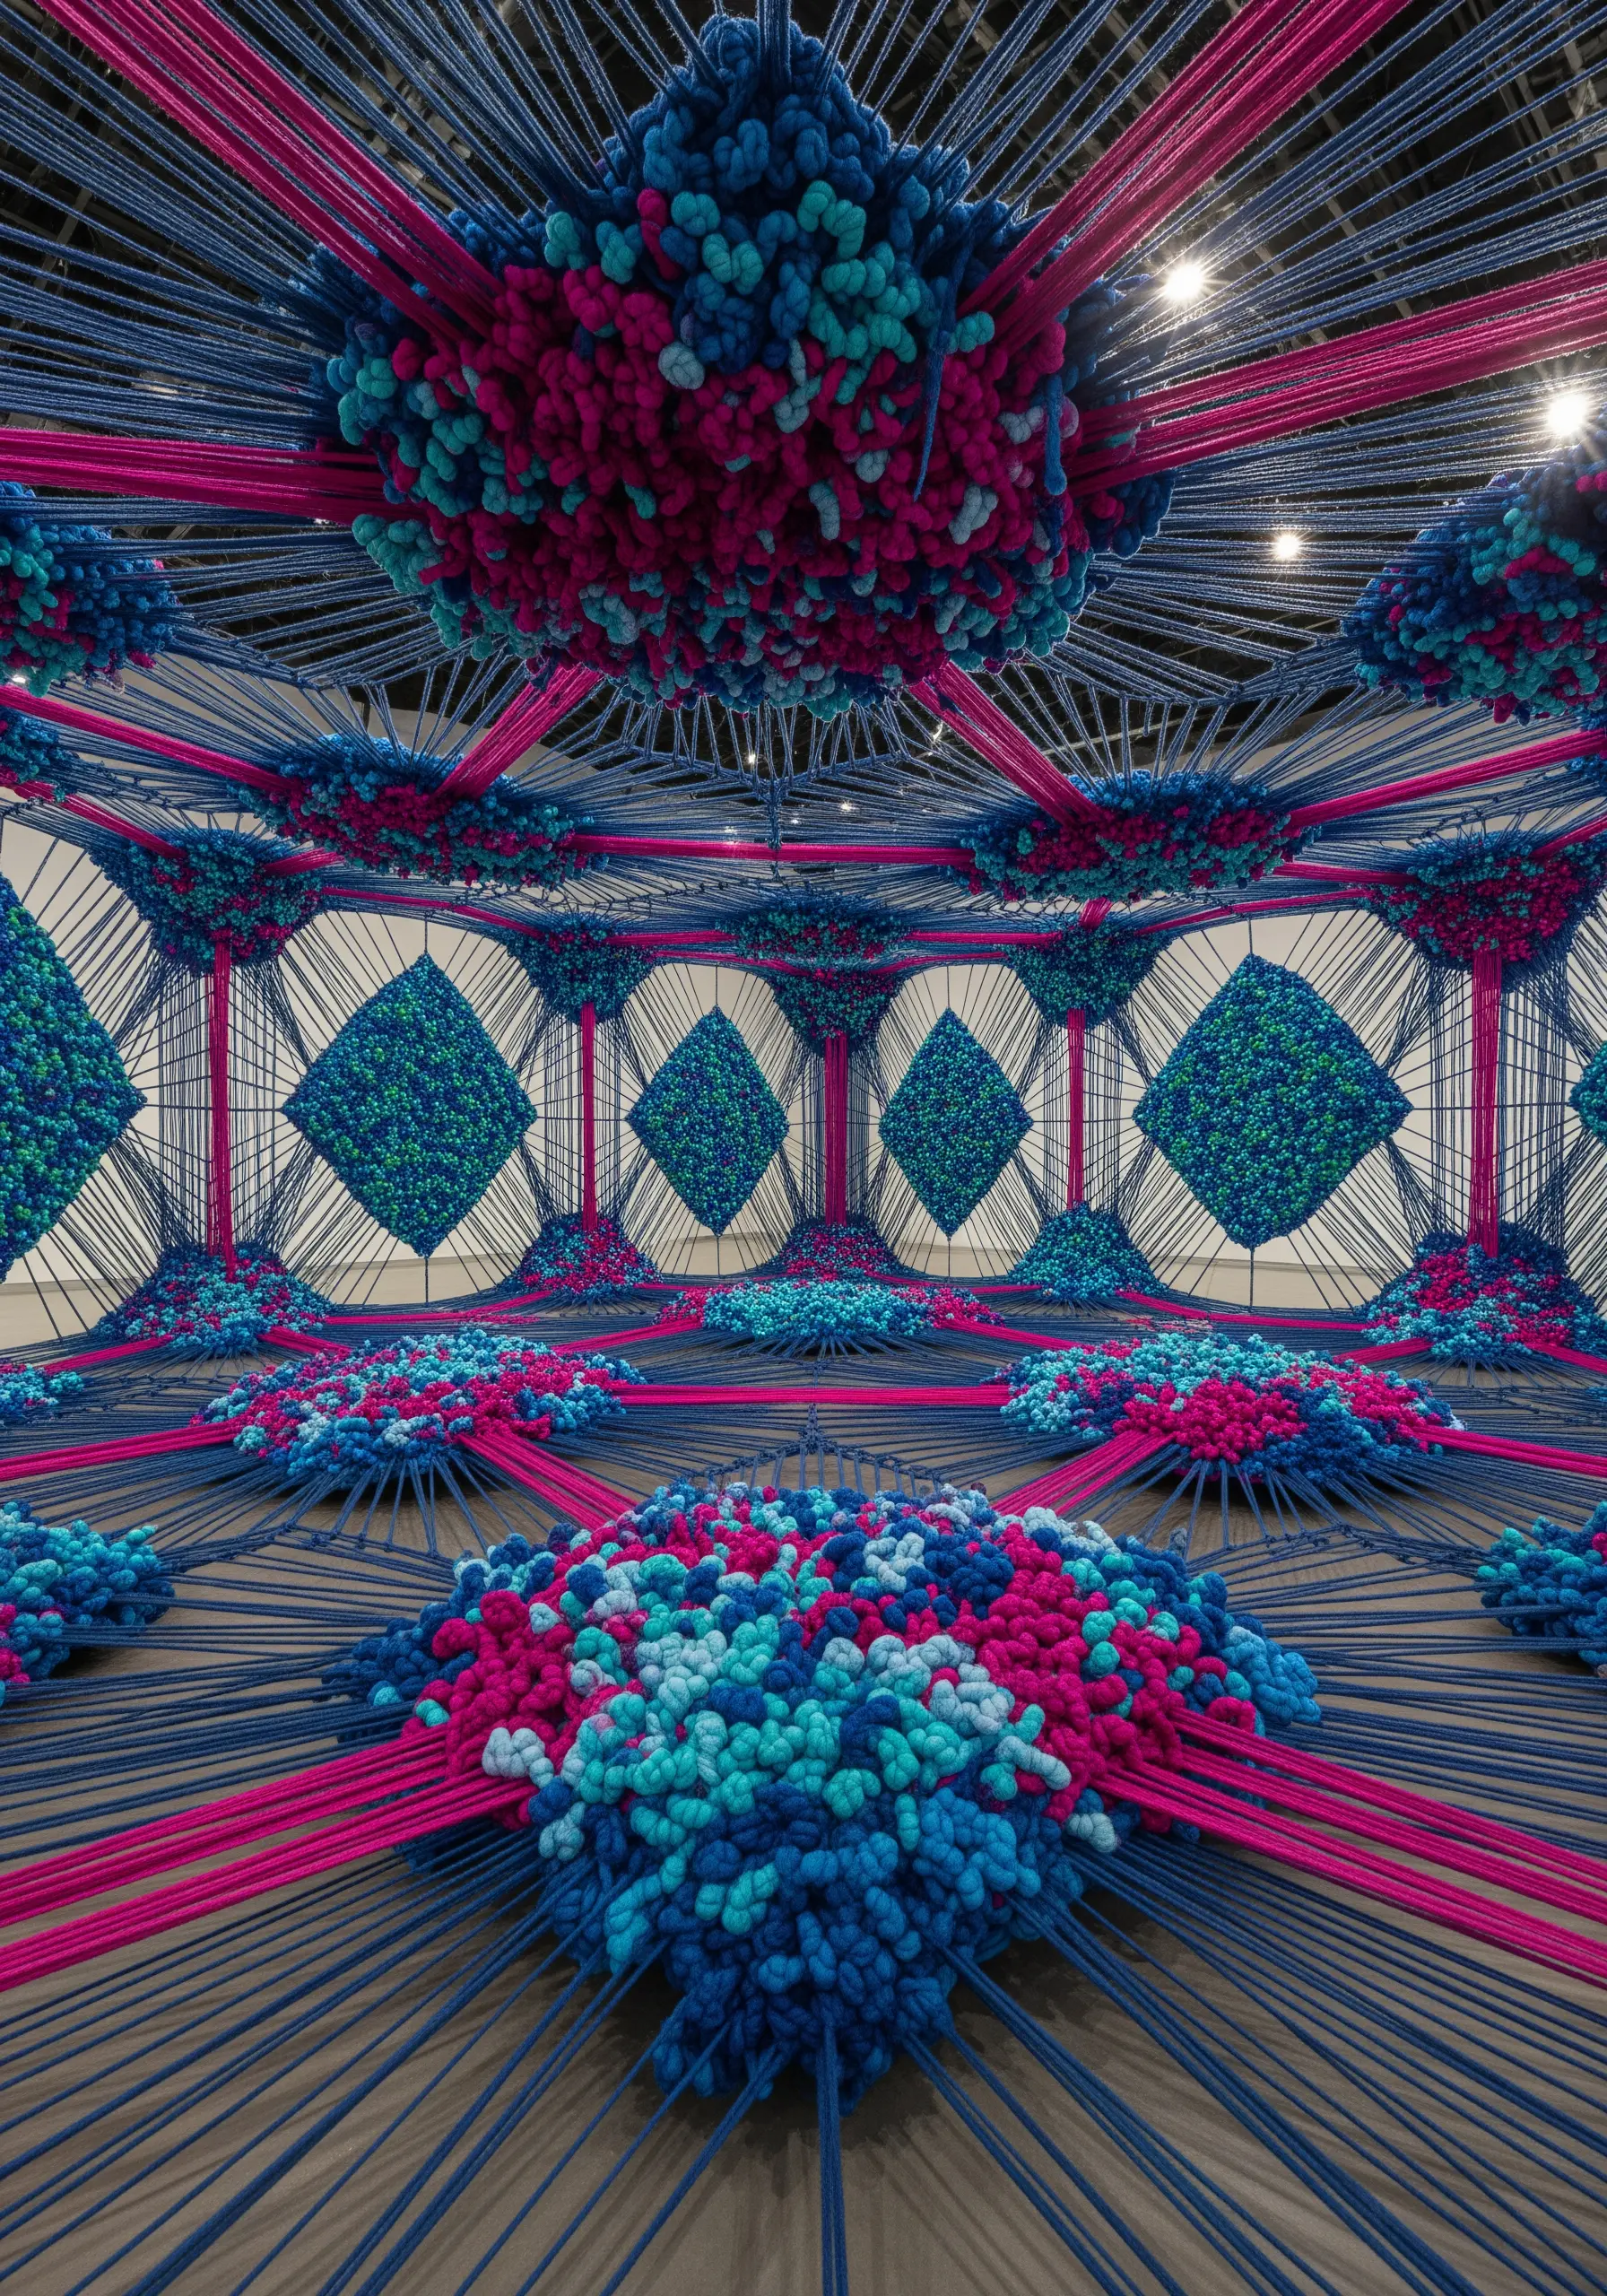
Capture the energy of large-scale yarn installations by creating intentional tension within your hoop.
Stretch threads from one side of the hoop to the other, creating a foundational grid or warp.
At the intersections, or along the lines, add high-texture elements like chunky French knots, woven picot stitches, or couched bundles of yarn.
This technique transforms your hoop from a simple frame into an architectural element where lines and textures interact in space.
4. Painted Canvases, Stitched Lines
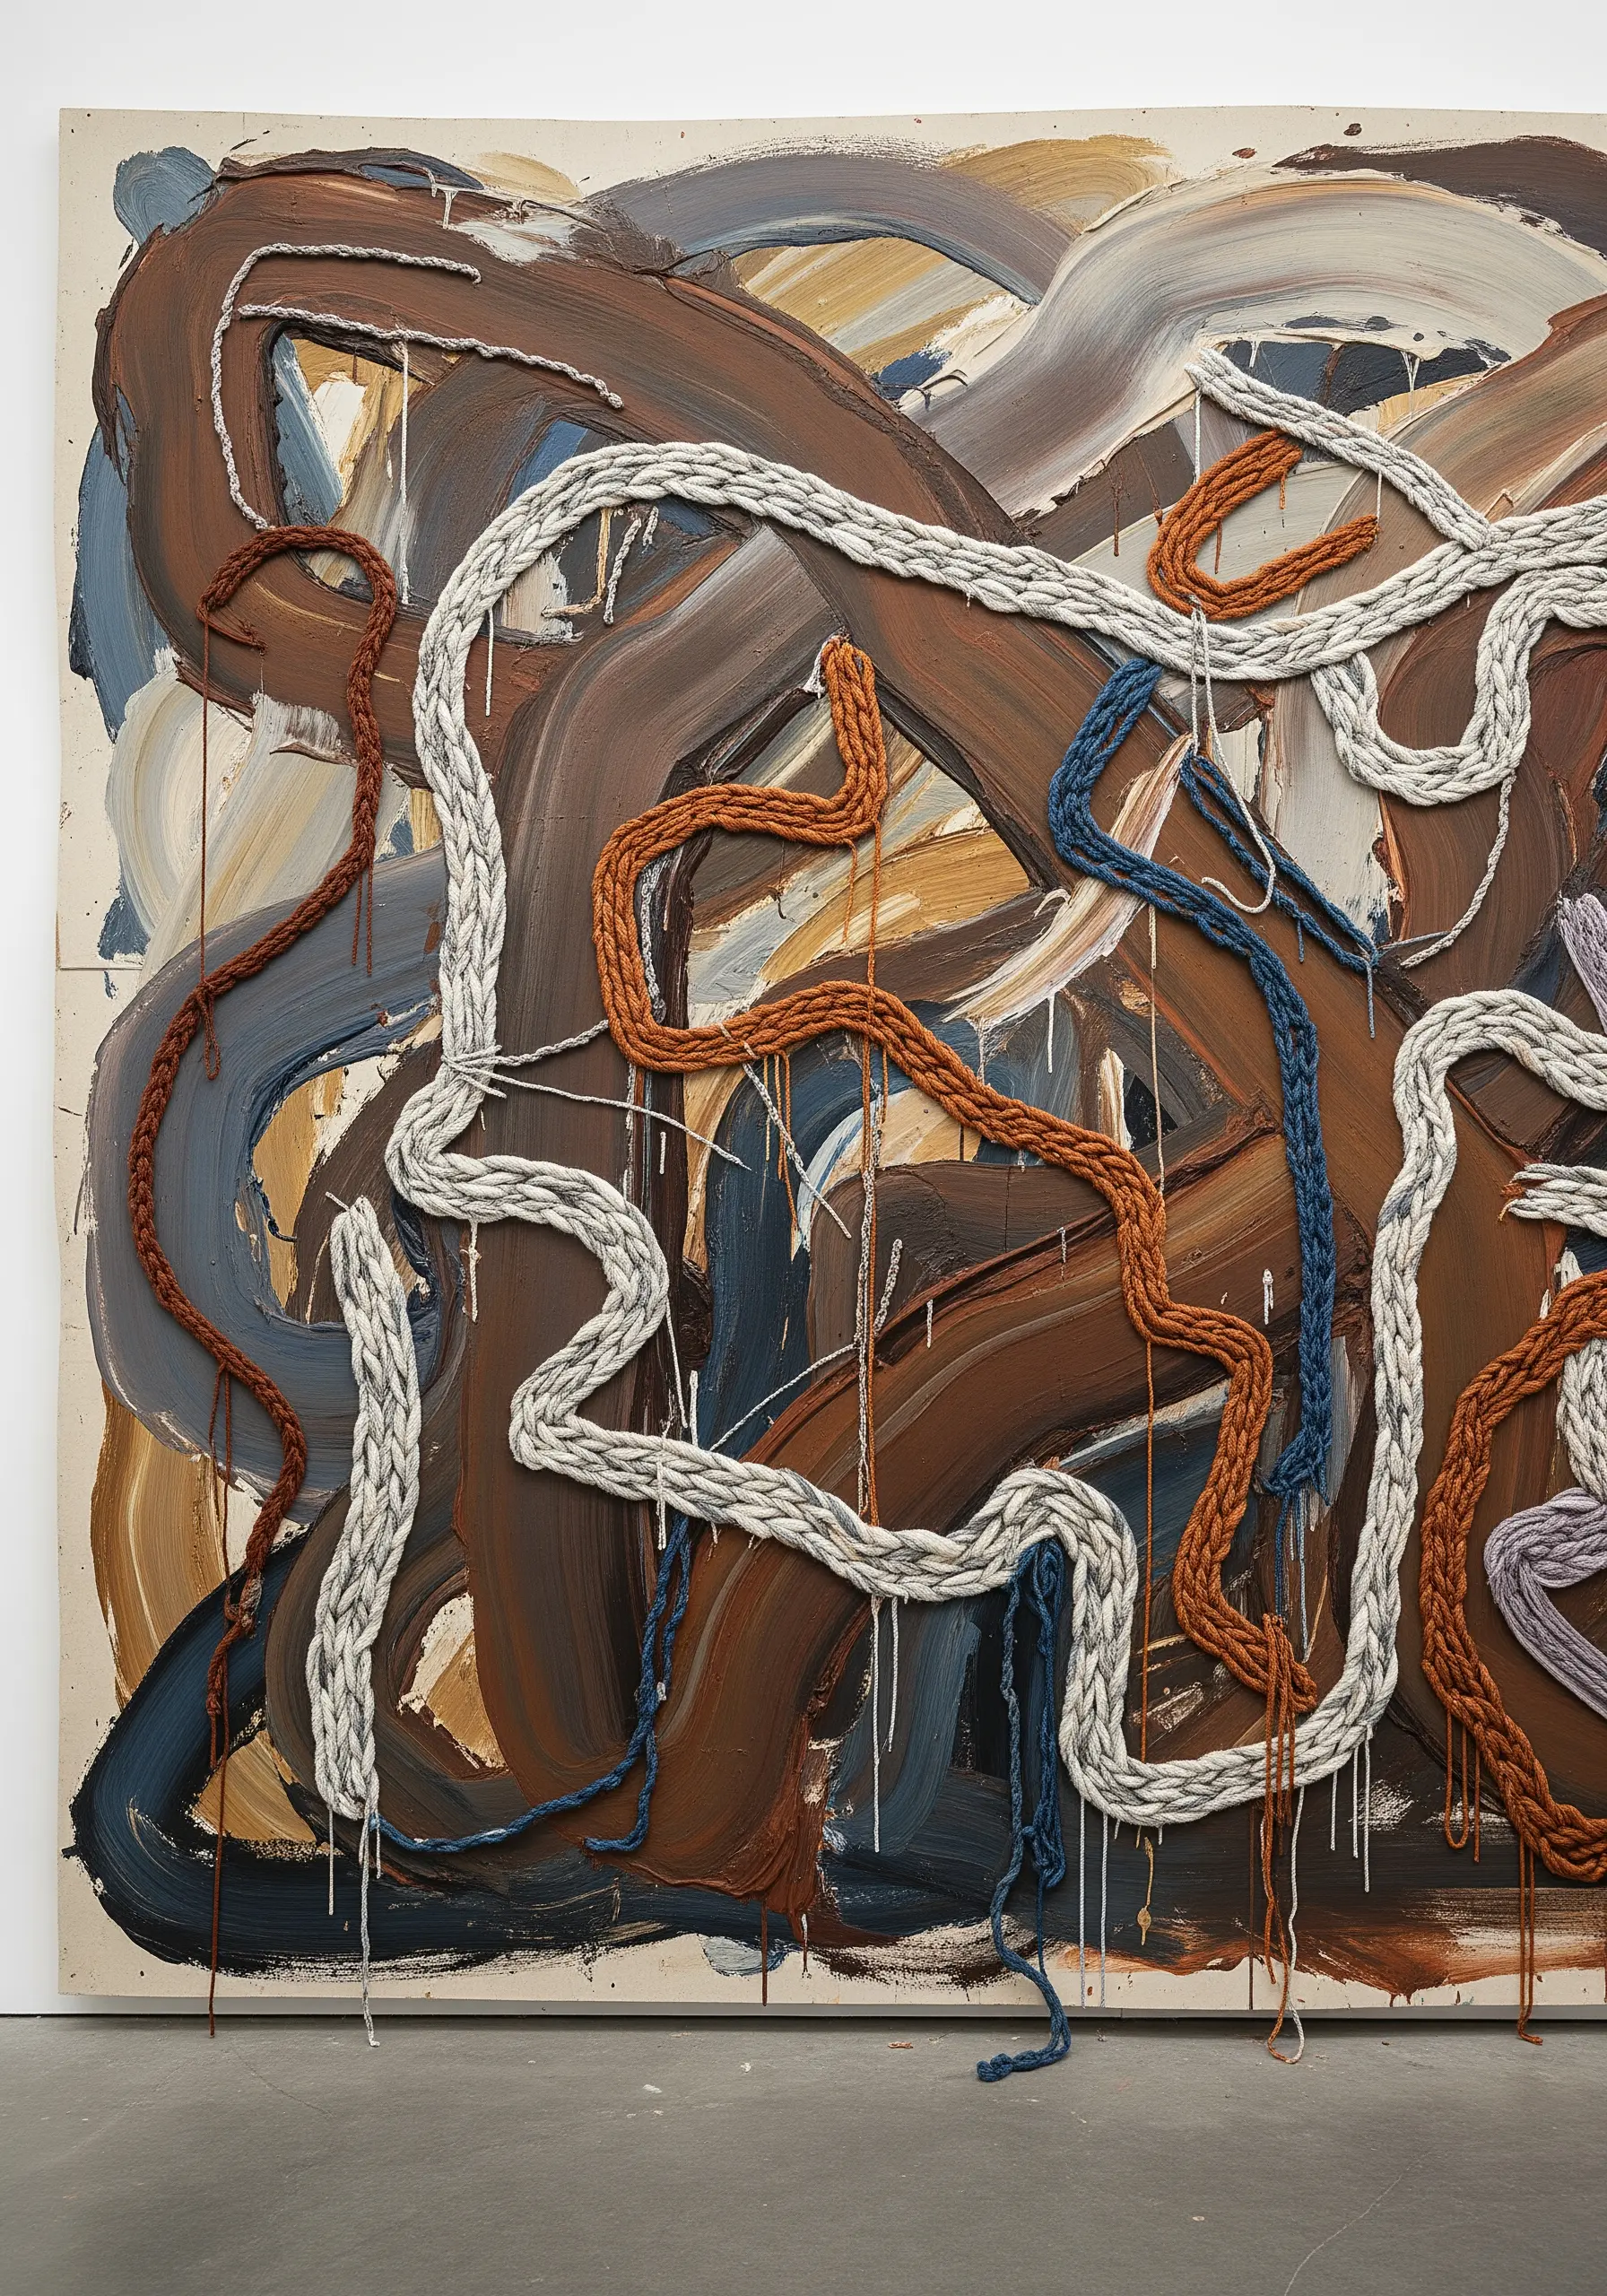
Combine painting and embroidery for an expressive, textural surface that engages multiple senses.
Start by creating an abstract background on canvas with acrylic paint, focusing on movement and color.
Once dry, couch down thick, hand-braided yarns or even knitted i-cords to create bold, sculptural lines that follow or defy the painted strokes.
This adds a tactile dimension that invites touch and transforms the piece from a flat painting into a high-texture fabric collage.
5. Juxtaposition in Texture: Hard Meets Soft
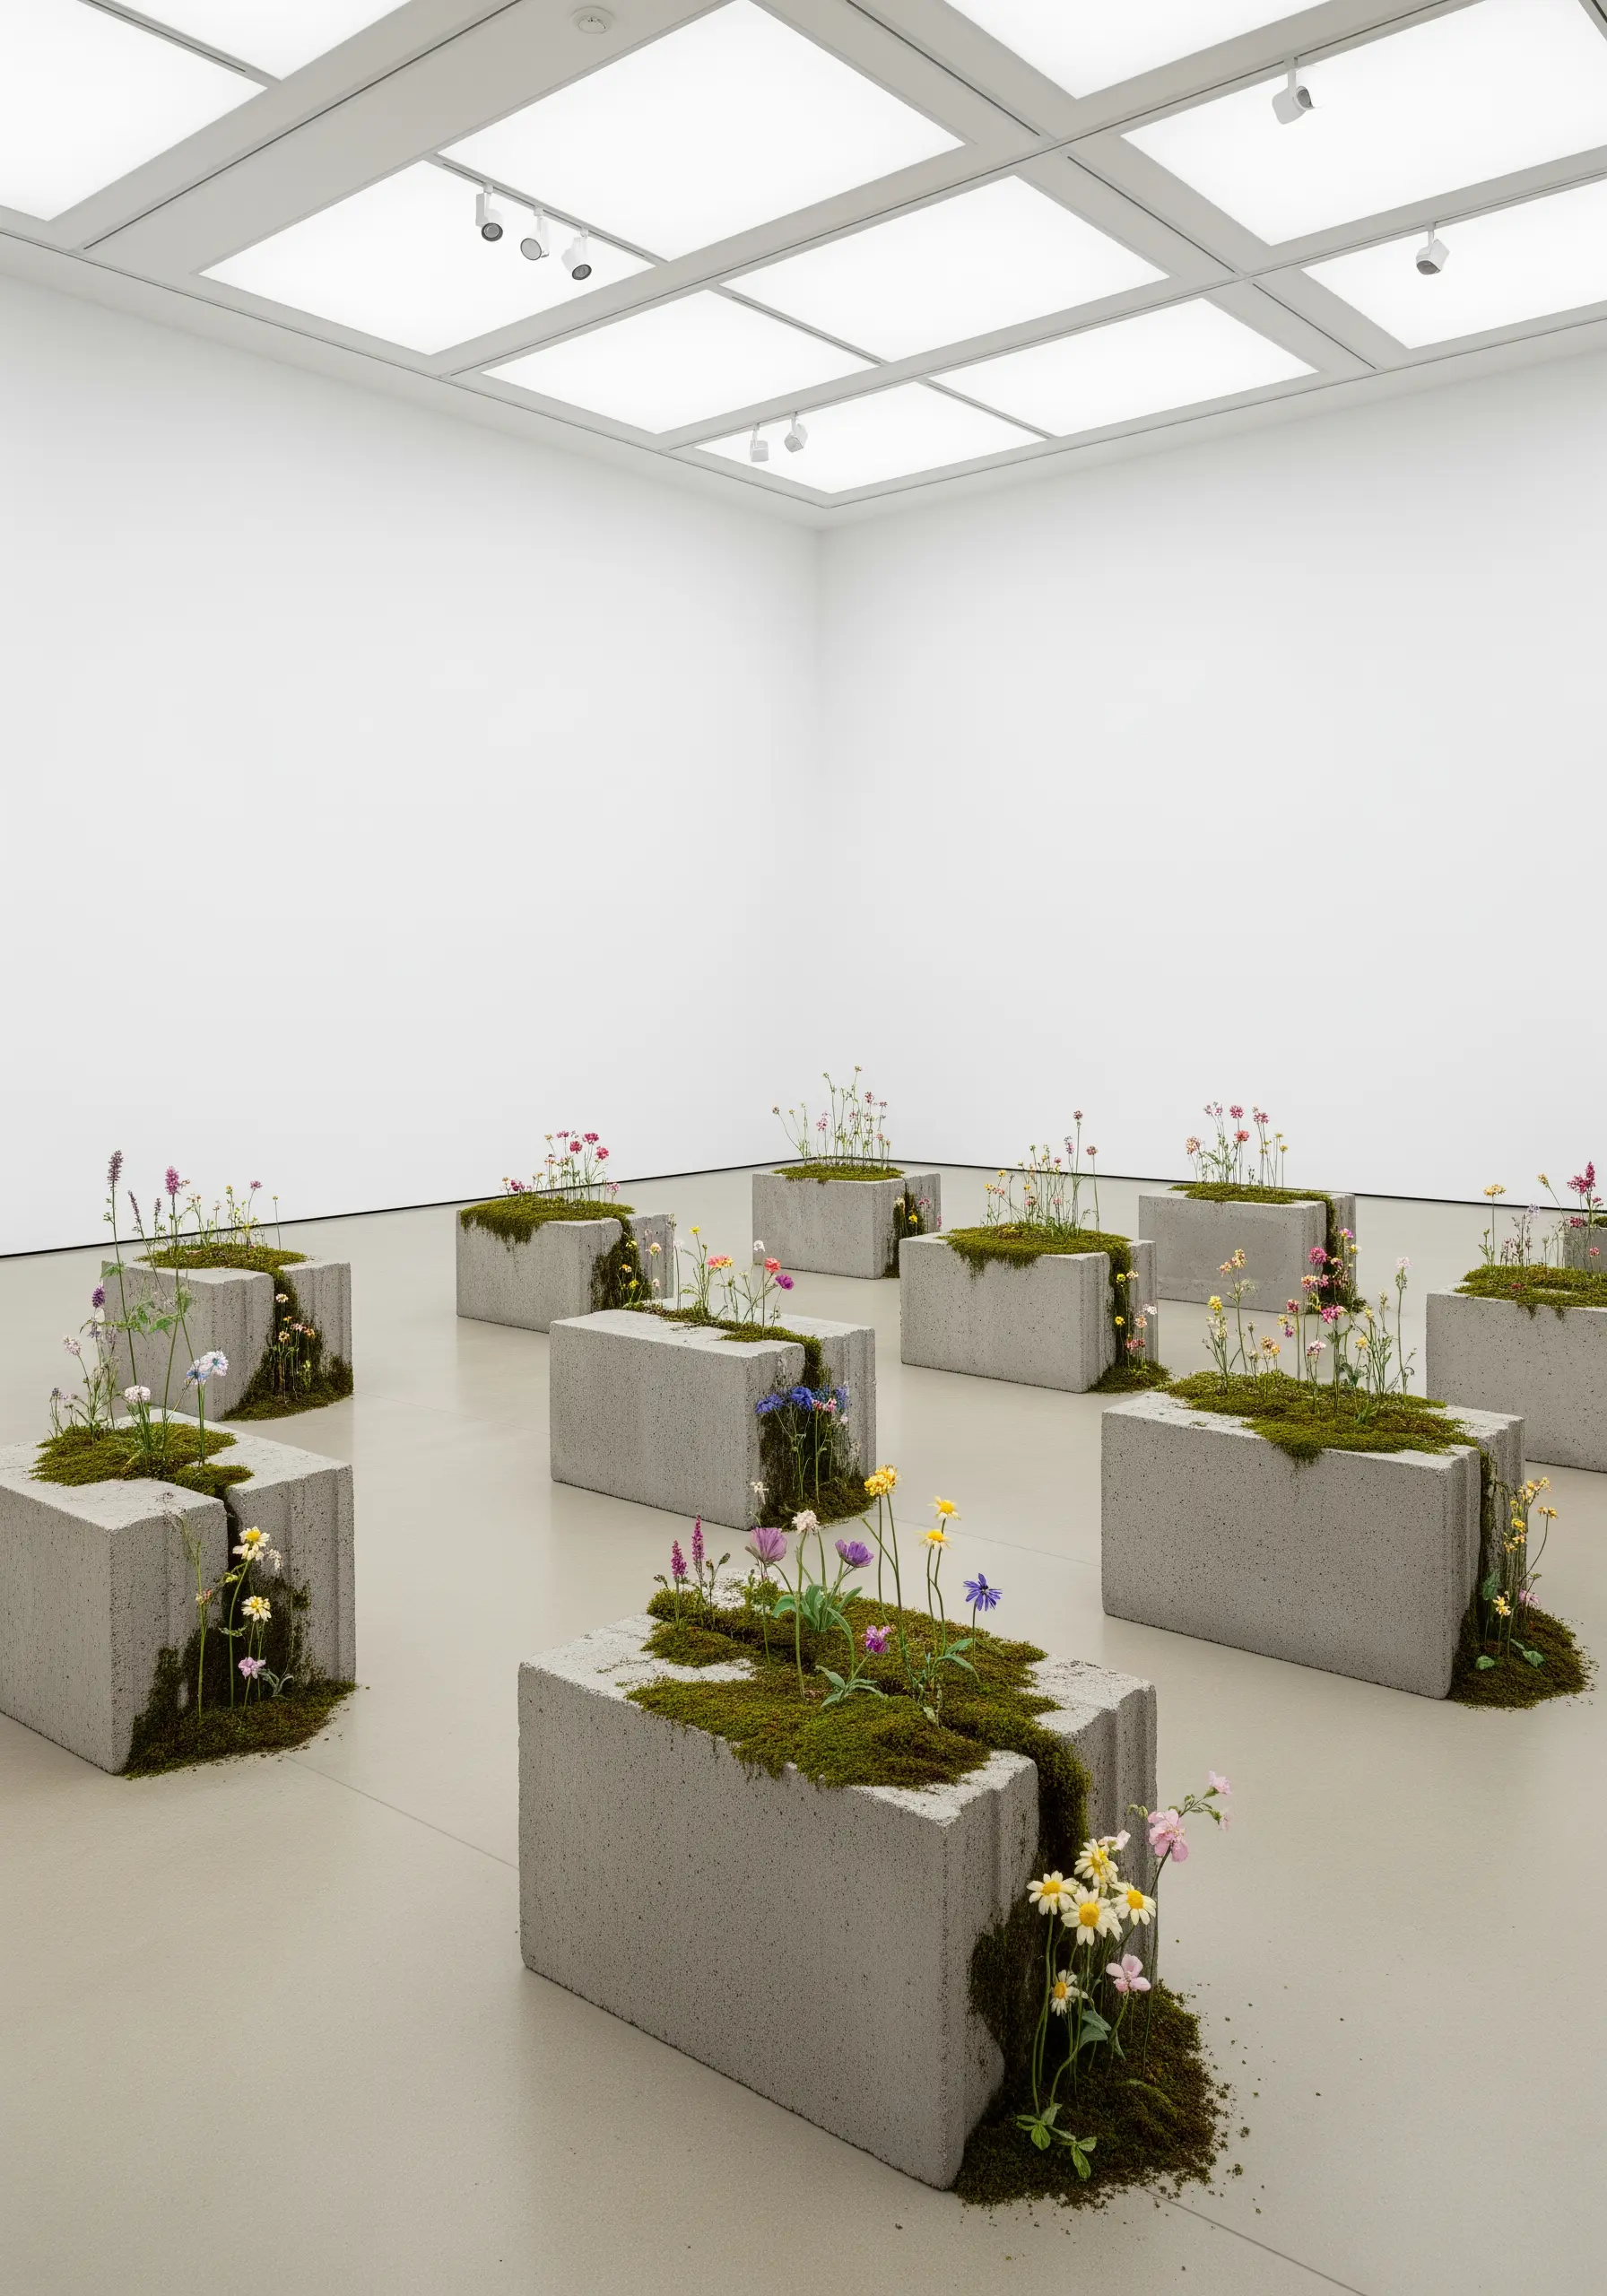
Embody the contrast of industrial and organic materials in your own work for powerful narrative effect.
On a coarse, structured fabric like heavy canvas or denim, create a geometric shape using dense satin stitch in a concrete gray.
Then, allow delicate, organic stitches—like single-strand lazy daisies and French knots in soft pastels—to “grow” from the edges.
This powerful contrast in both texture and form tells a compelling story of nature reclaiming space.
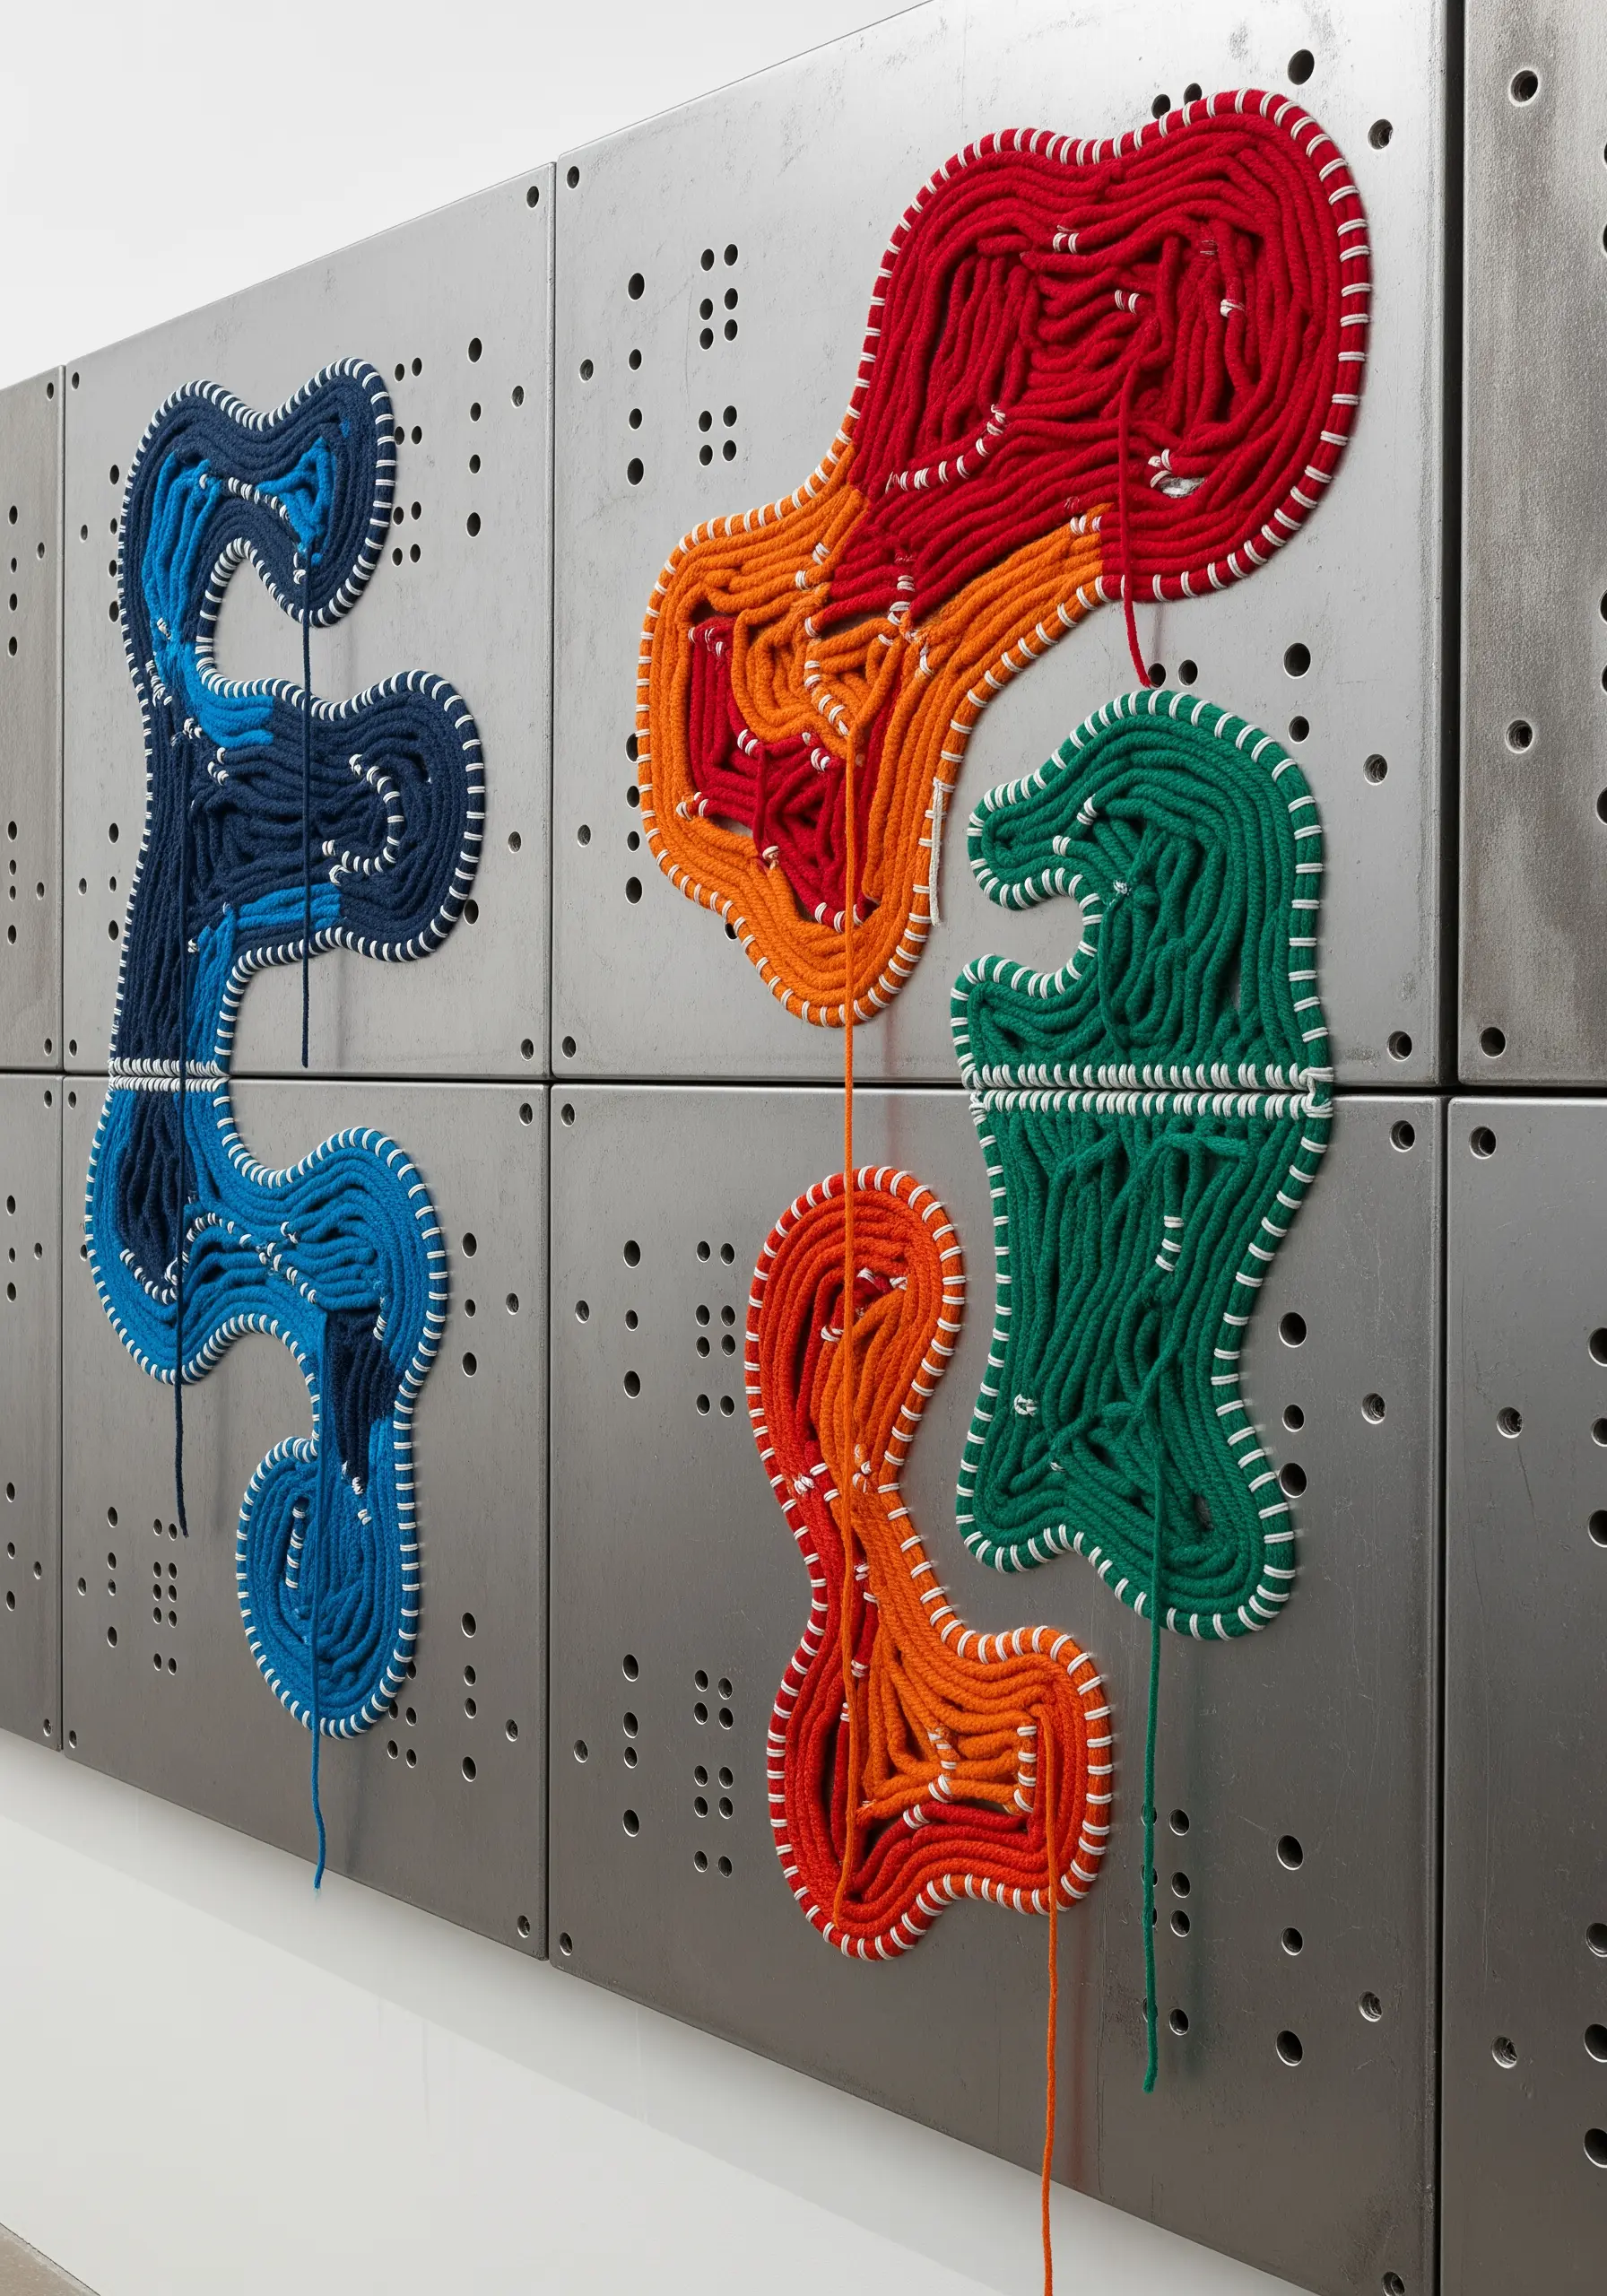
6. Coiling and Wrapping: Sculptural Fiber Forms
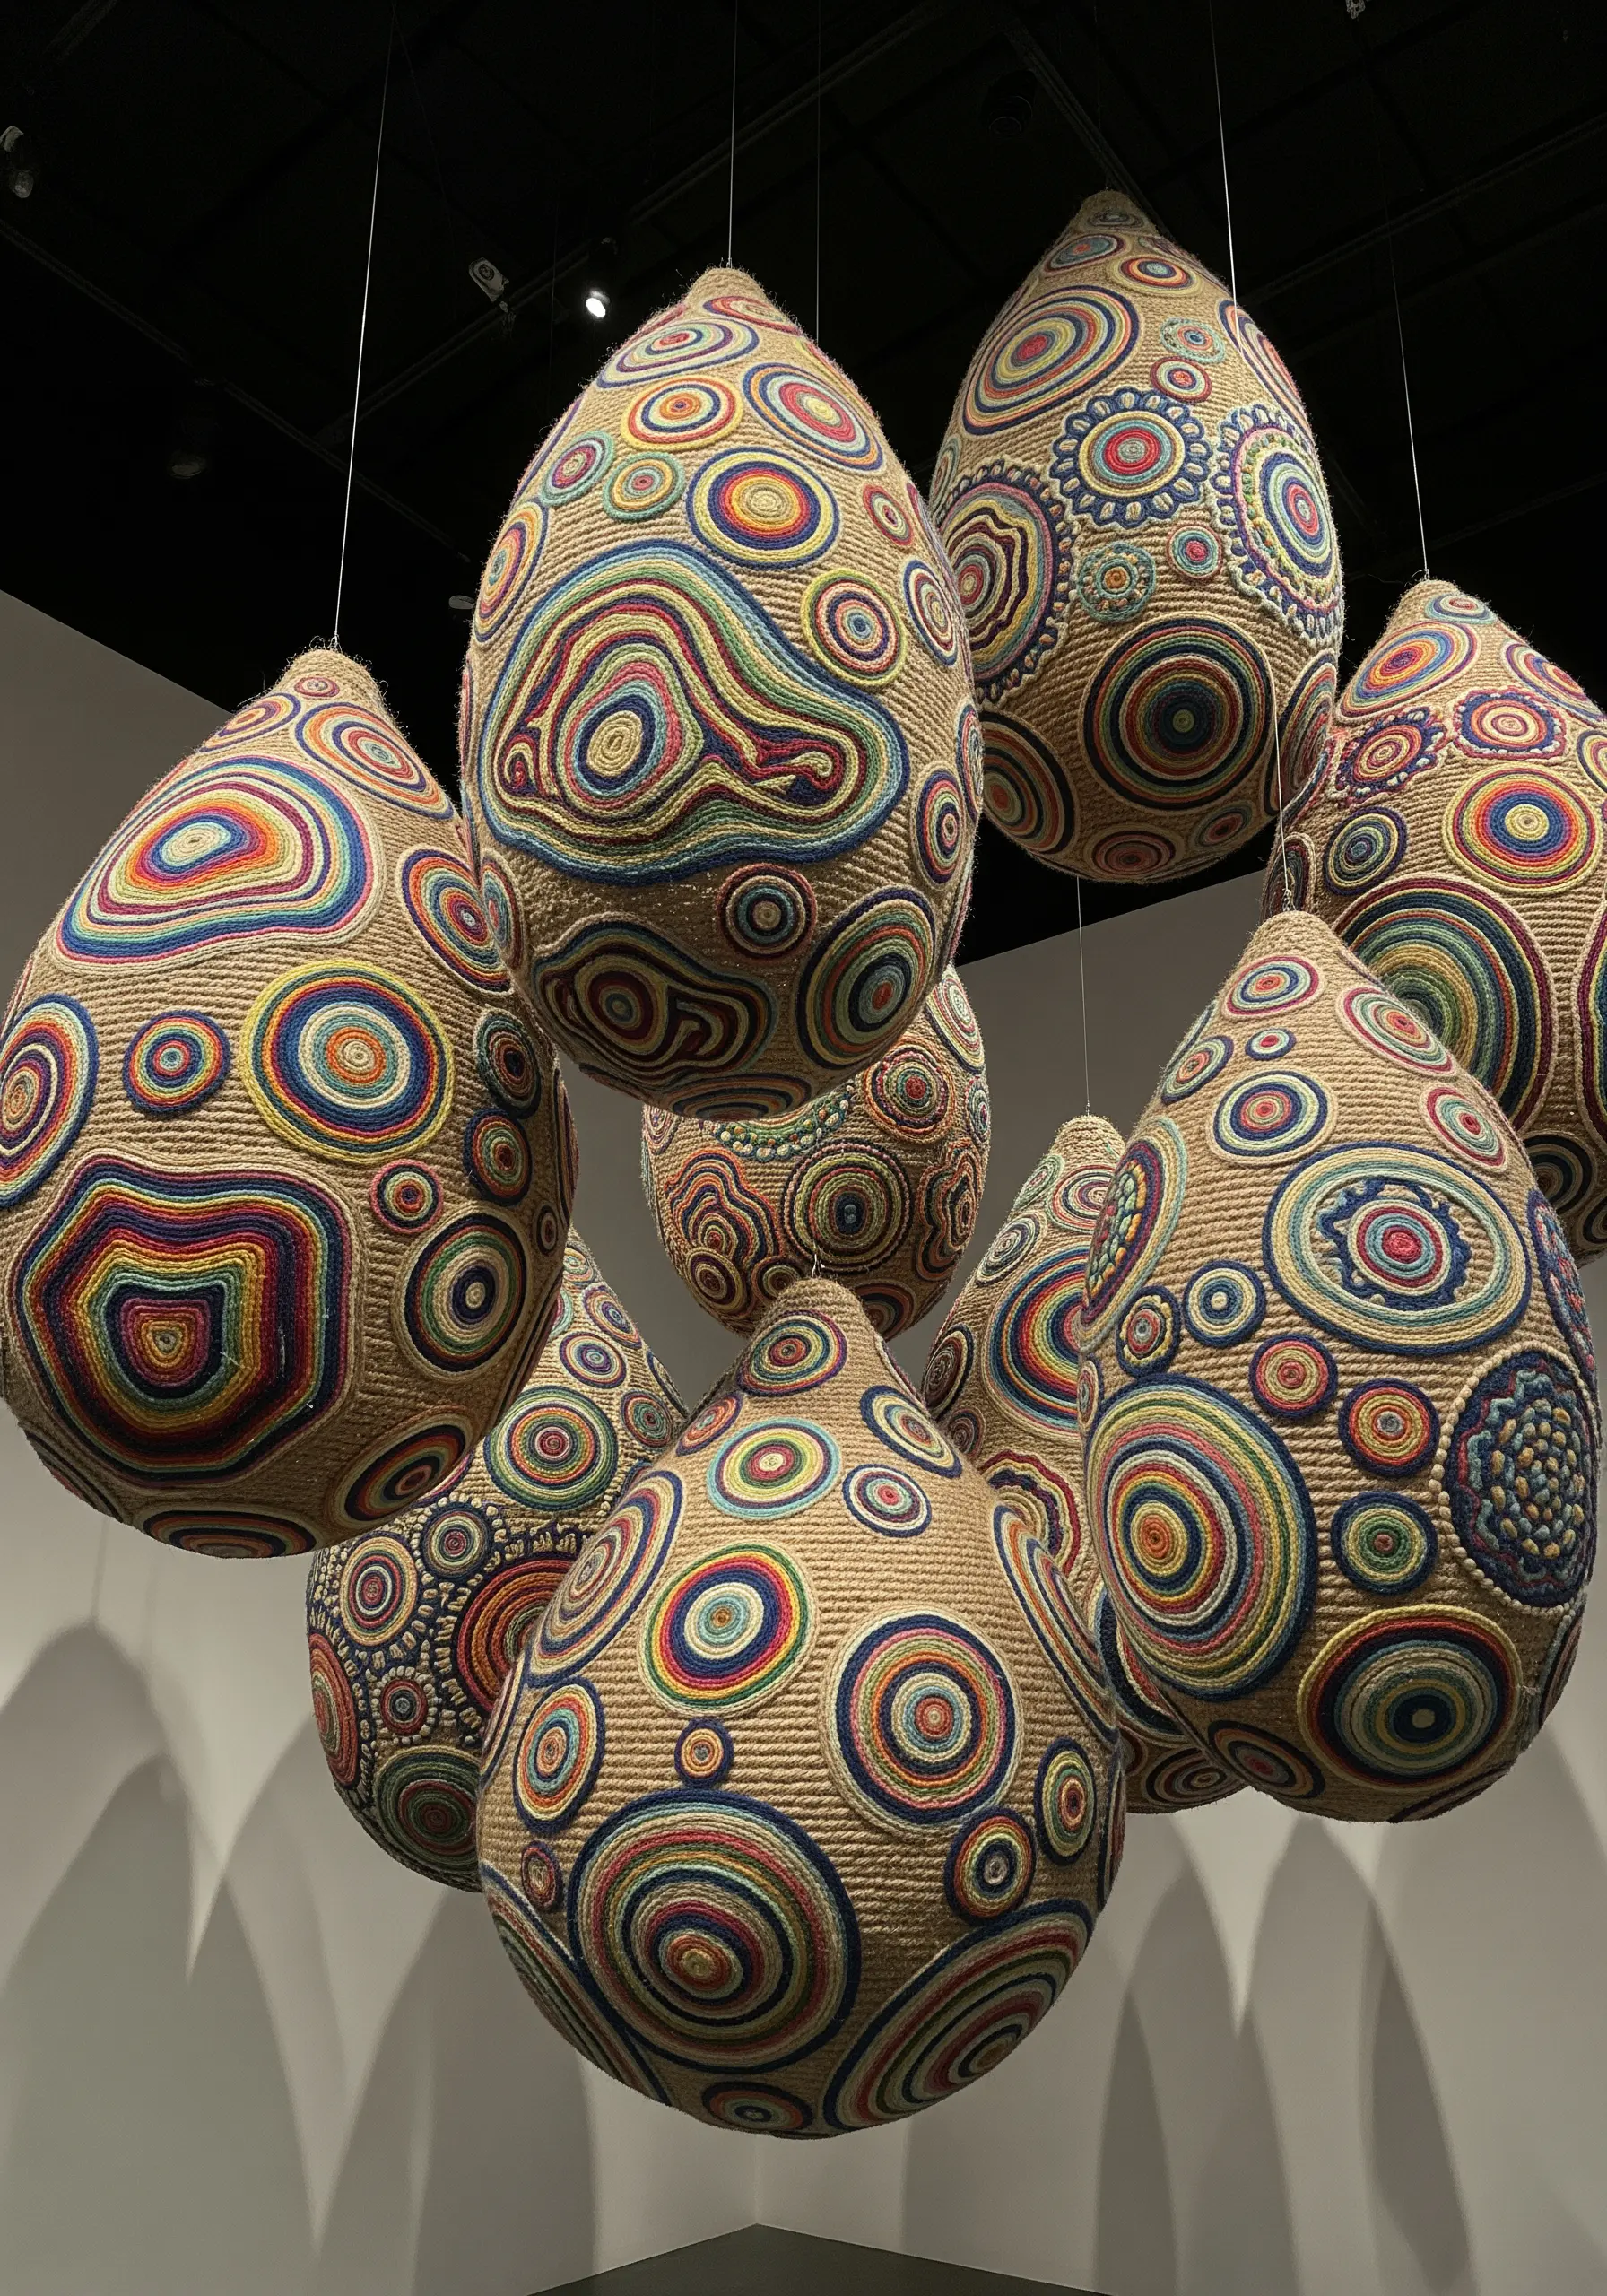
Build three-dimensional objects without a traditional fabric base by borrowing techniques from basketry.
Use a thick cord or rope as your foundation and wrap it tightly with various colors of embroidery floss or yarn.
As you wrap, coil the rope into your desired shape—a bowl, a pod, or an abstract form—and use a needle to stitch the coils together from the back.
This method allows you to create self-supporting stunning fiber art installations on a smaller, more intimate scale.
7. Weaving into the Warp: Digital Glitch Effects
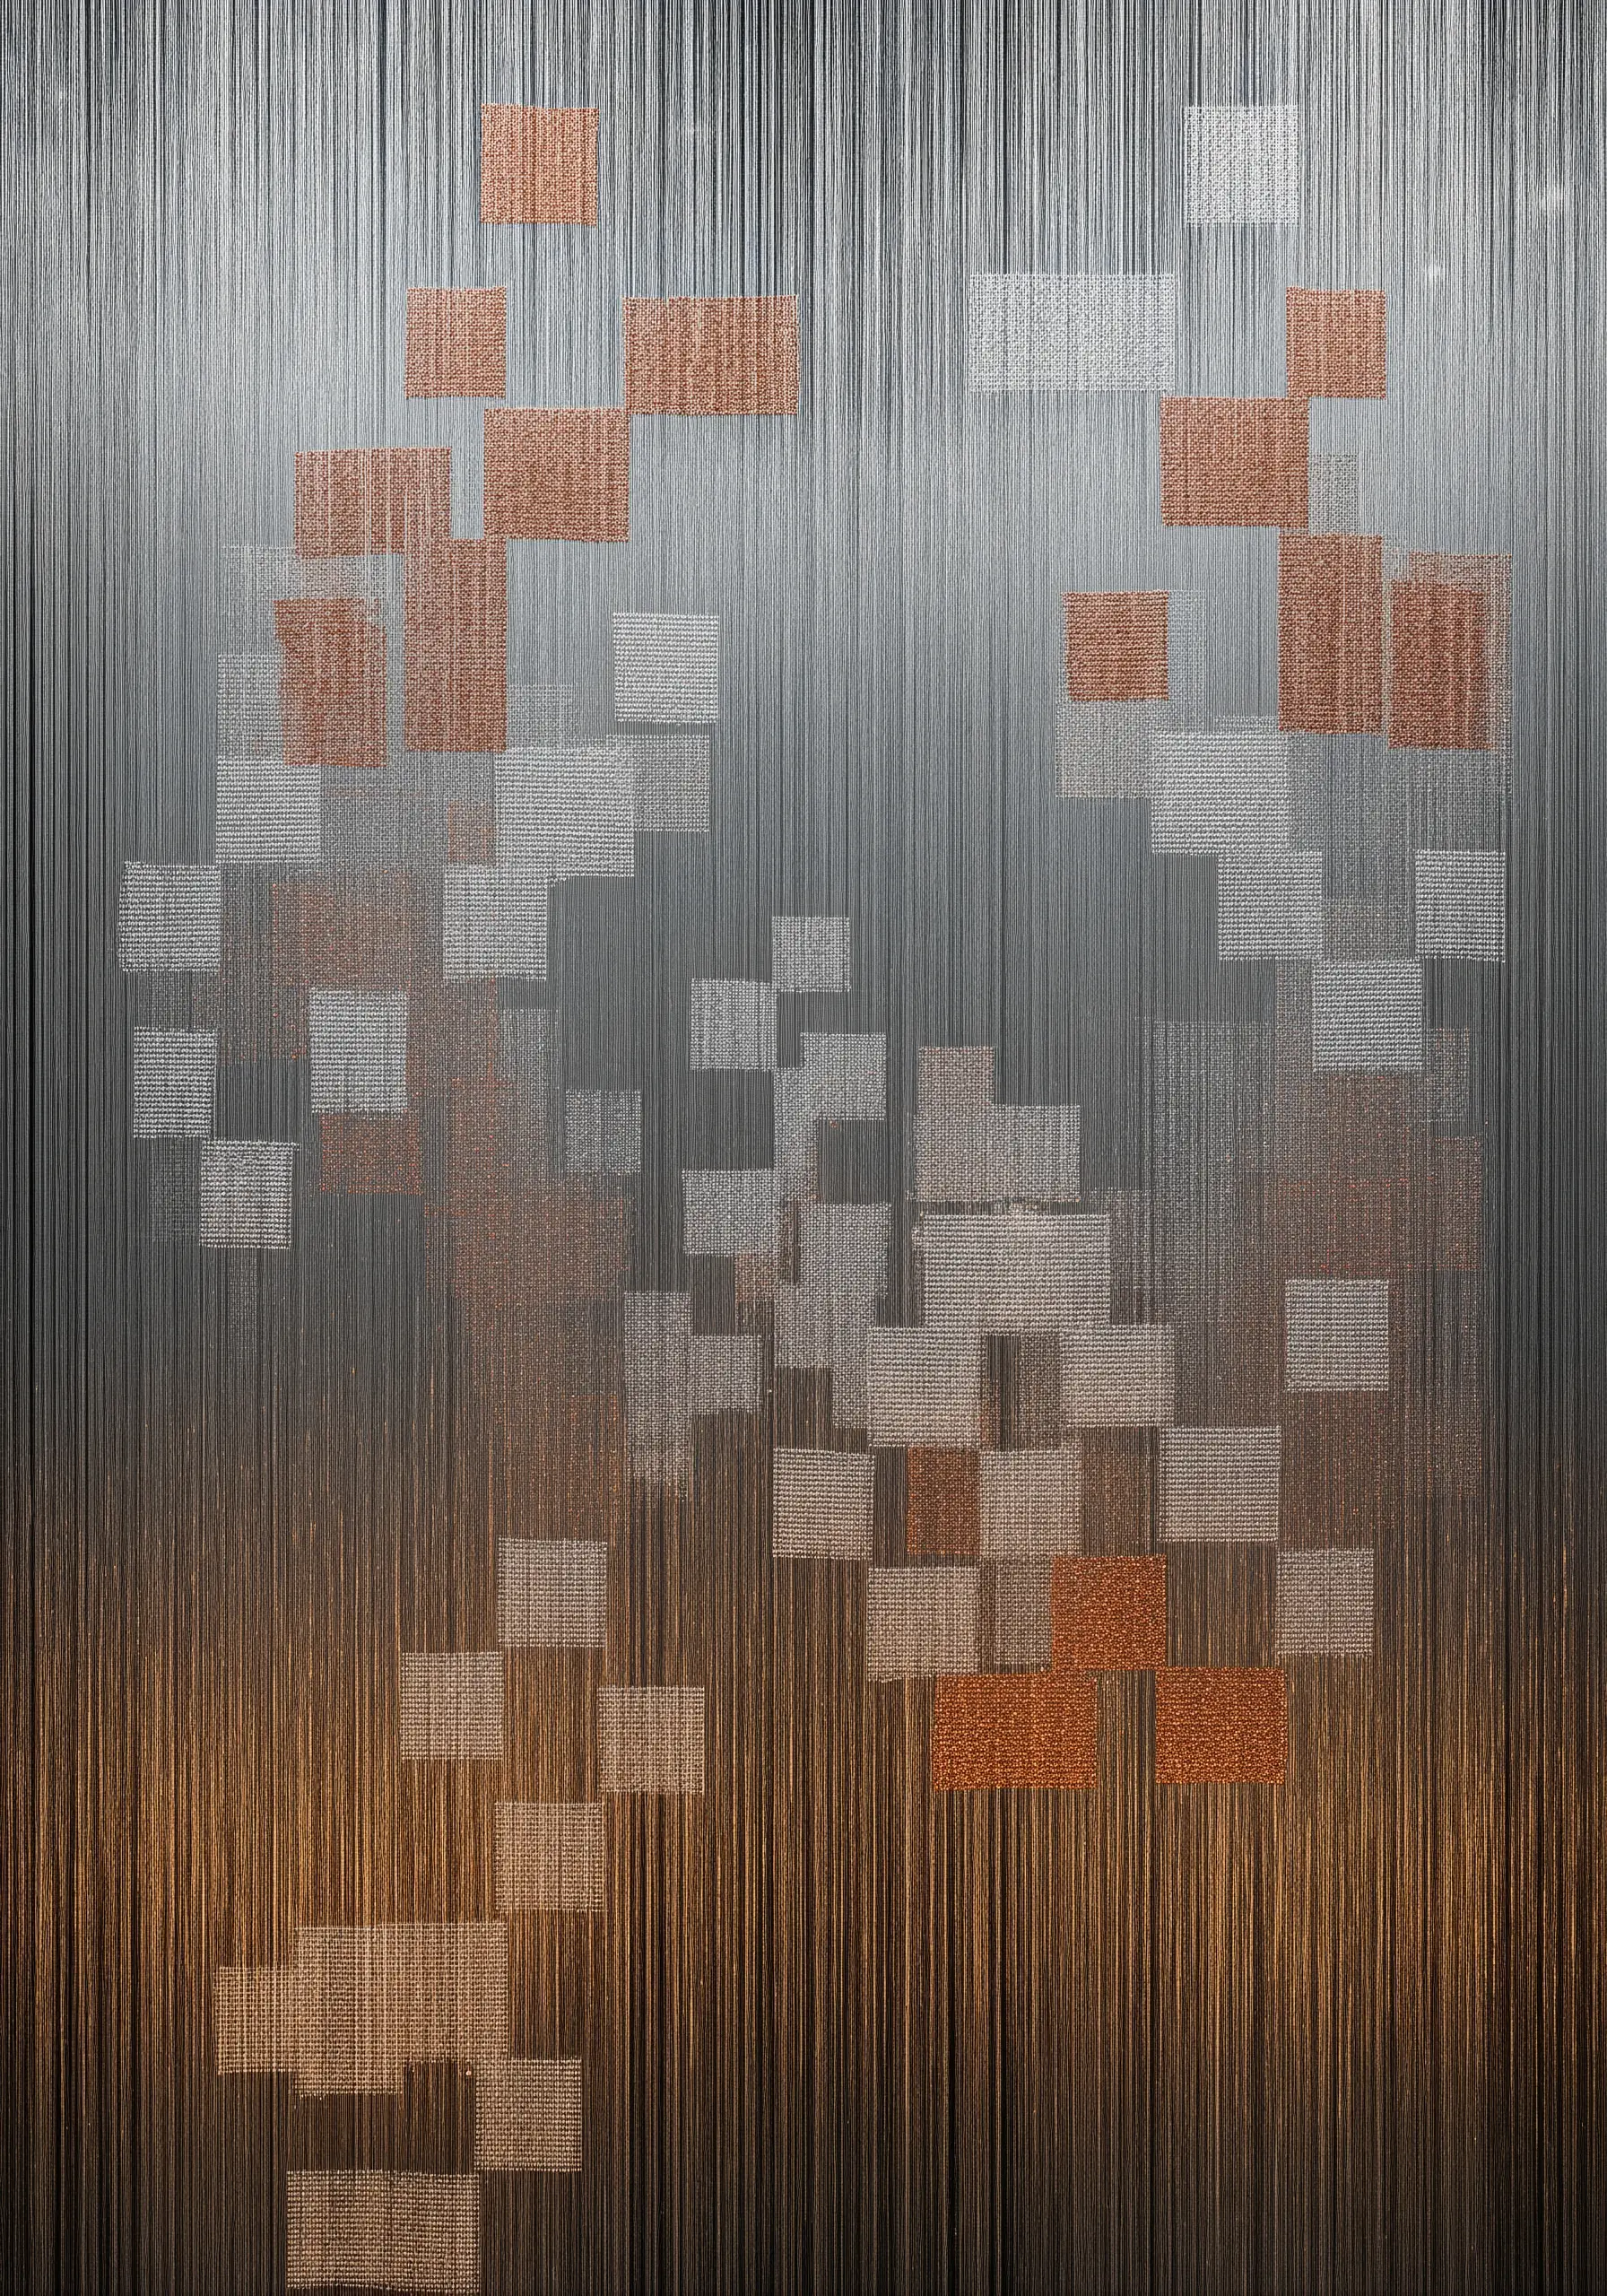
Create a modern, pixelated effect by combining embroidery and weaving in the same piece.
First, fill your hoop or frame with long, parallel vertical stitches to create a “warp.”
Then, use a tapestry needle to weave a contrasting thread horizontally through these stitches.
By varying the woven sections, you can create geometric blocks of color that appear to float or glitch, turning a simple grid into a dynamic composition.
8. Architectural Drafting with Thread

Treat your needle like a drafting pen to create precise, layered compositions with a minimalist aesthetic.
On a dark, high-contrast fabric, use a single strand of white floss and a simple backstitch to build overlapping geometric shapes.
Vary the density of your lines—from sparse outlines to dense cross-hatching—to create a sense of depth, shadow, and transparency.
Grouping multiple hoops allows you to explore variations on a theme, turning simple line work into a sophisticated minimalist embroidery wall art collection.
9. Embroidered Columns: Adorning 3D Surfaces
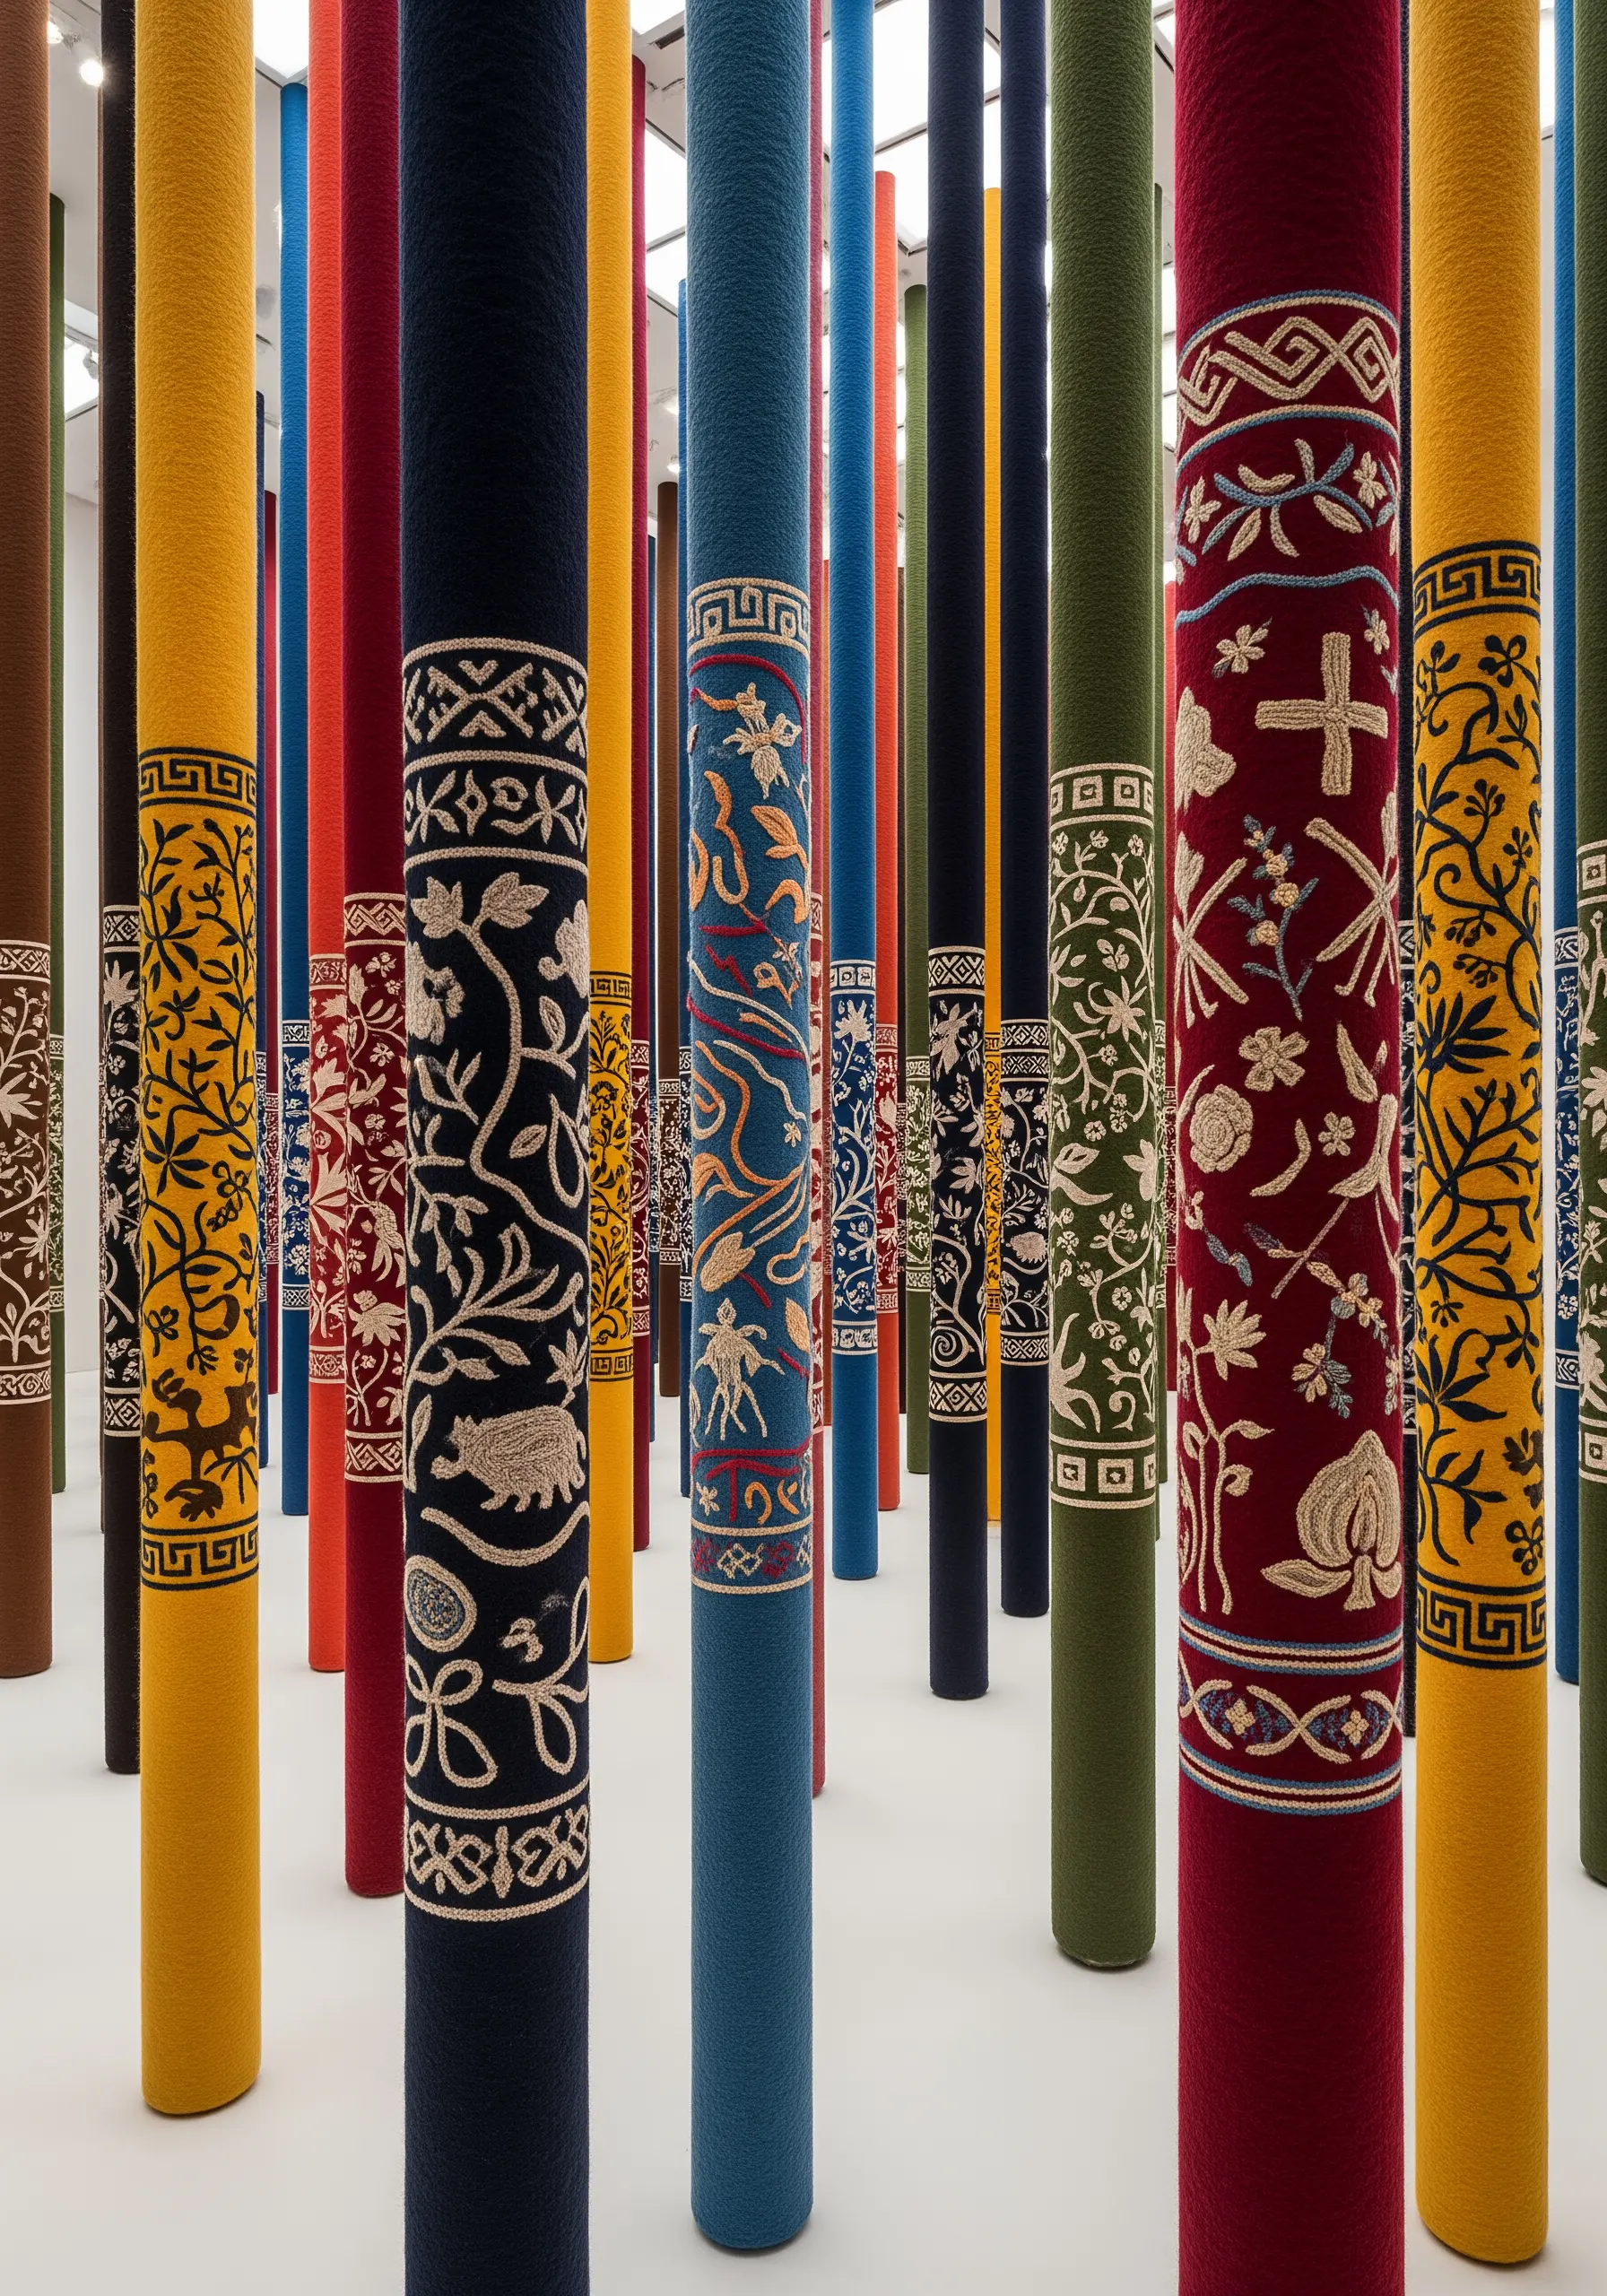
Take your embroidery off the wall by embellishing cylindrical objects with stitched felt.
Wrap a cardboard tube, a plain vase, or even a furniture leg in a piece of high-quality wool felt.
Stitch your design—a narrative floral pattern or a geometric border—onto the felt before securing it.
Use dense stitches like satin stitch and French knots, which hold their form well on a curved surface, to transform a simple object into a decorative sculpture.
10. Mending as Motif: The Art of Visible Repair

Elevate mending from a practical chore to a central design element in your textile work.
Instead of hiding your stitches, make them a celebrated feature.
Use a contrasting, thick thread like sashiko cotton or pearl cotton to join fabric patches with simple, graphic running stitches.
Let the lines of stitches create their own pattern, adding a layer of history and character to any textile.
11. Macroscopic Gradients: Blending with Thread Density

Achieve a smooth, painterly color gradient without the complexity of long-and-short stitch.
Divide your design into horizontal bands and fill each with dense, straight stitches of a single color.
For the transition, create a thin band where you intersperse single stitches of both colors, side by side.
From a distance, the eye will blend them, creating seamless and vibrant contemporary rainbow blend stitches with precise control.
12. Dimensional String Art: Stitching Through Space
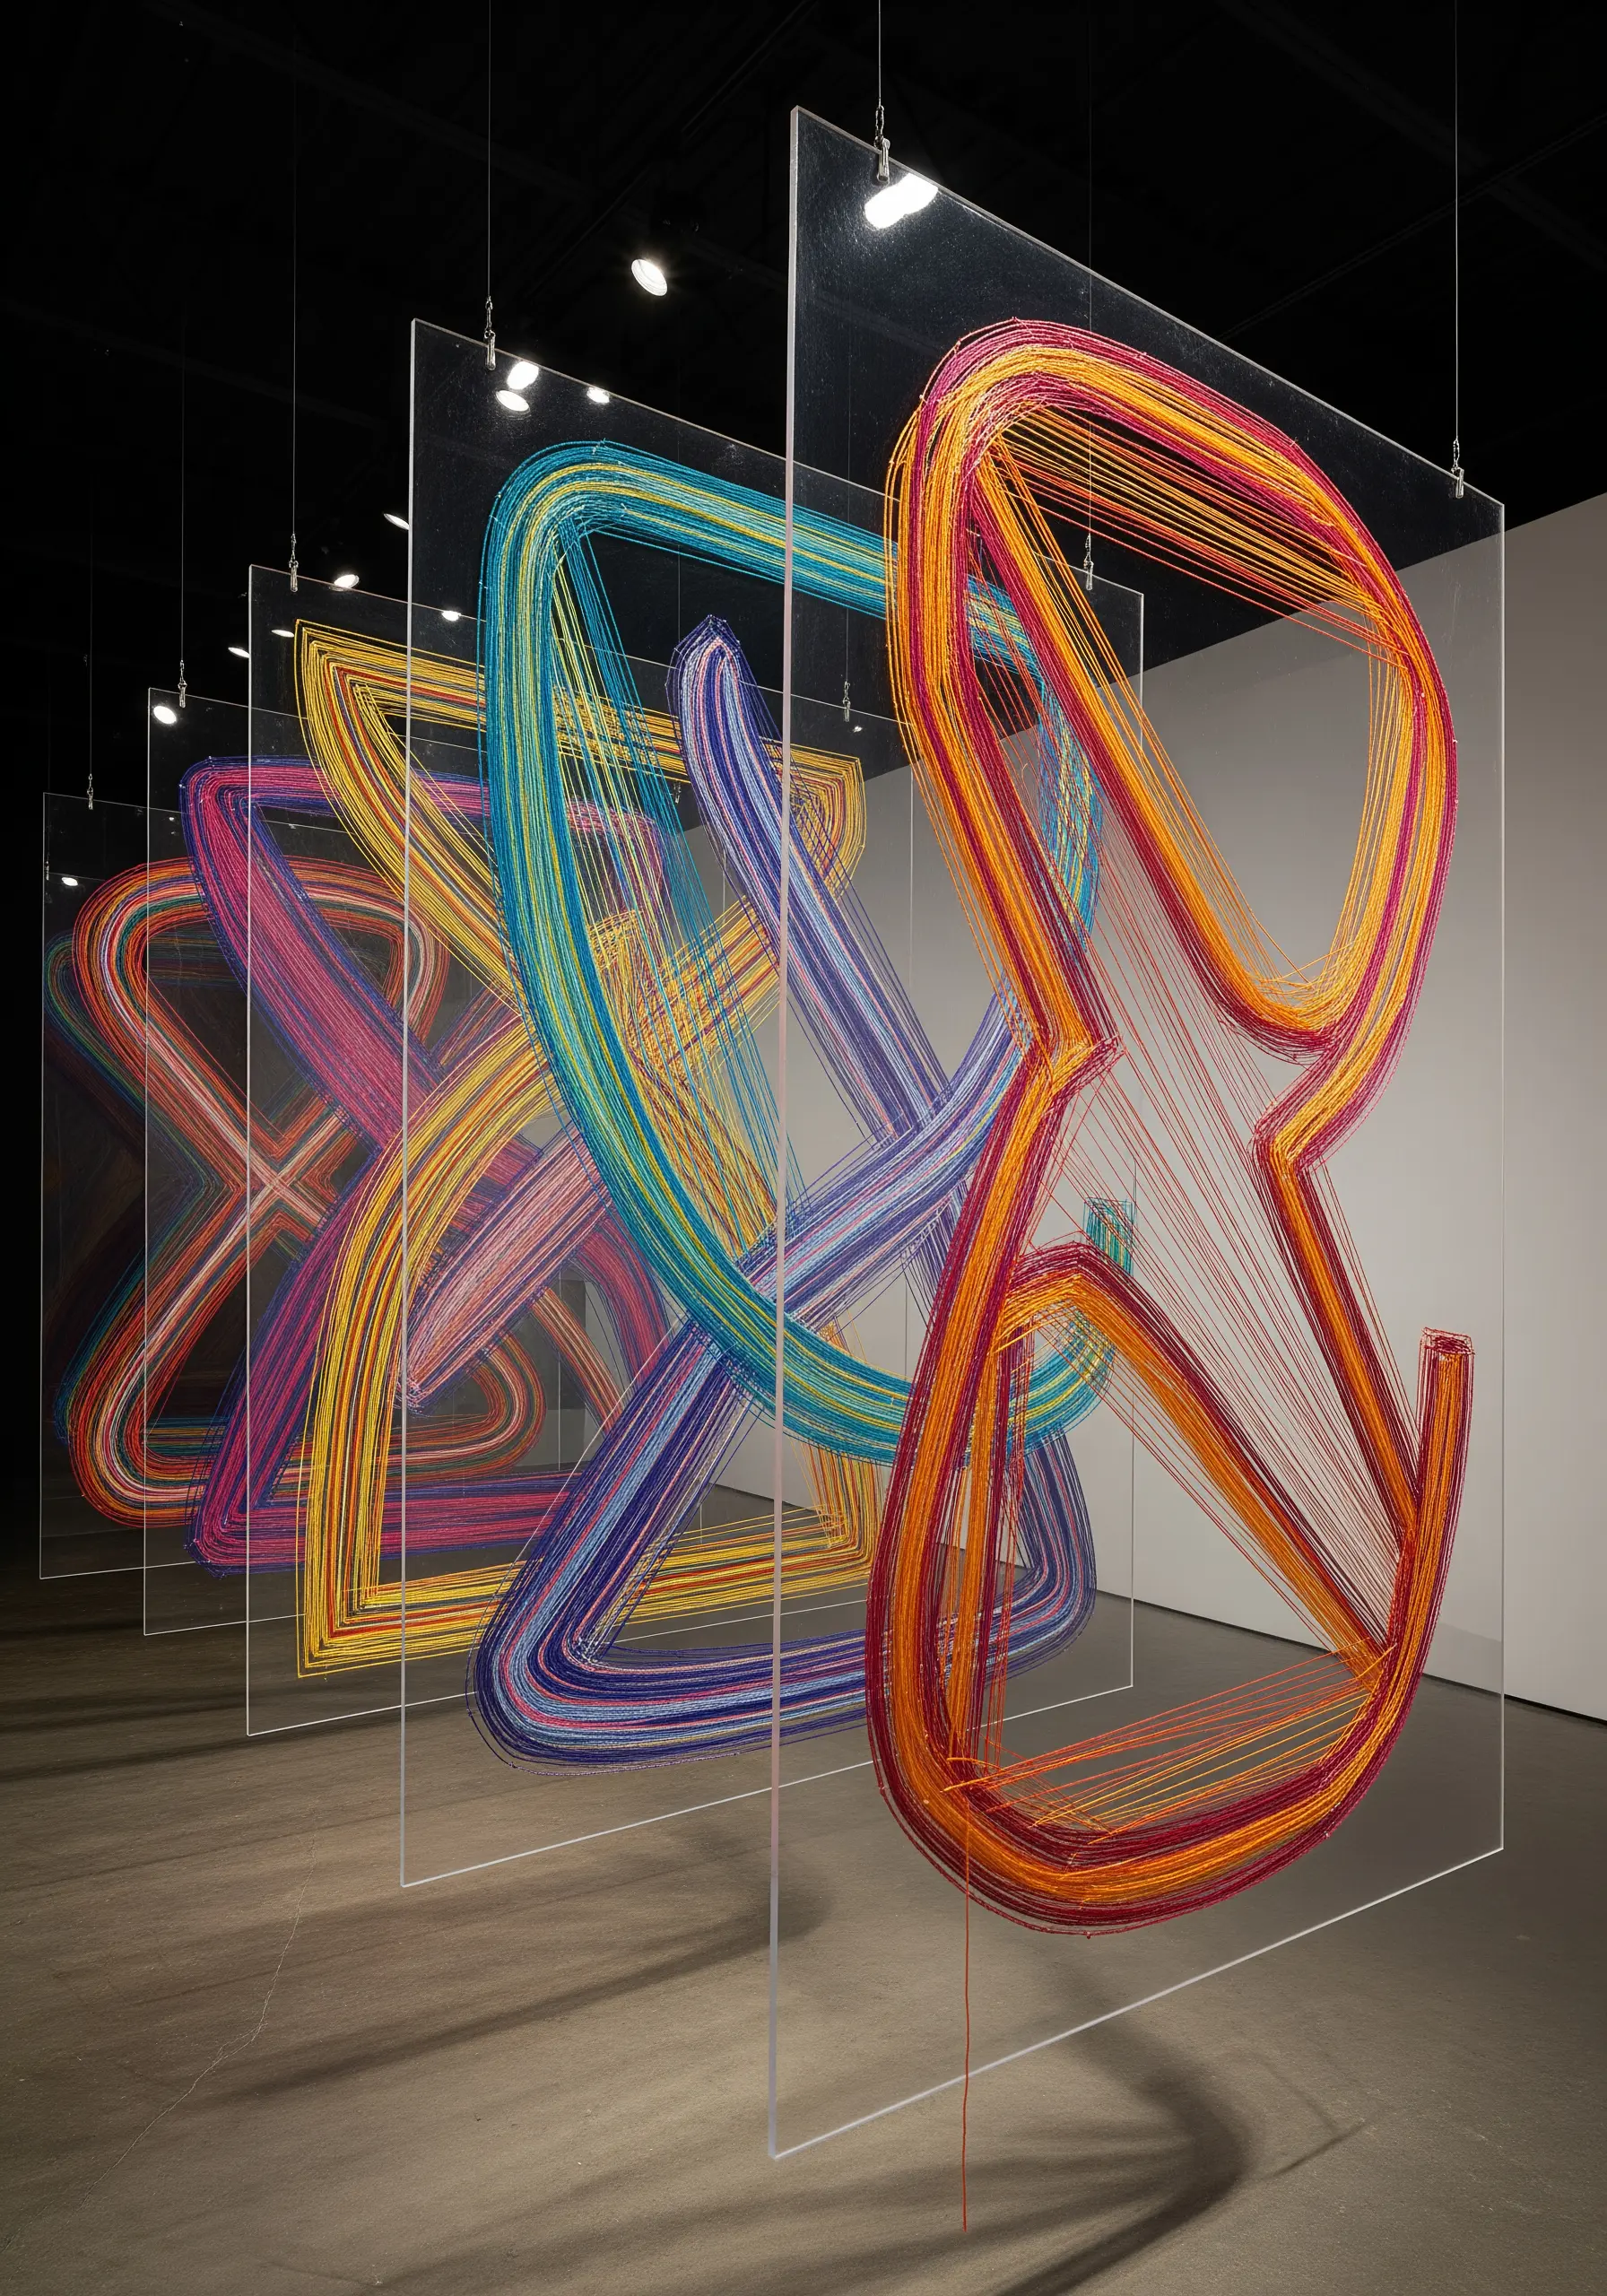
Create true three-dimensional art by stitching between transparent layers rather than on a single surface.
Use acrylic sheets or even old CD cases, drilling small, evenly spaced holes along the edges to serve as anchor points.
Stretch thread between the holes on different panels to build up a layered, sculptural form.
The transparency makes the thread appear to float in mid-air, creating an object that changes with every shift in perspective.
13. The Power of Negative Space in Fiber Art

In your next piece, focus not on what you fill, but on what you strategically leave empty.
Use techniques like drawn thread work or cutwork on a stable linen fabric.
By carefully removing threads or small sections of fabric, you create patterns defined by voids.
This allows light and the background to become part of the composition, resulting in a delicate, airy design that feels both substantial and light.
14. Illuminated Appliqué: Layering with Light
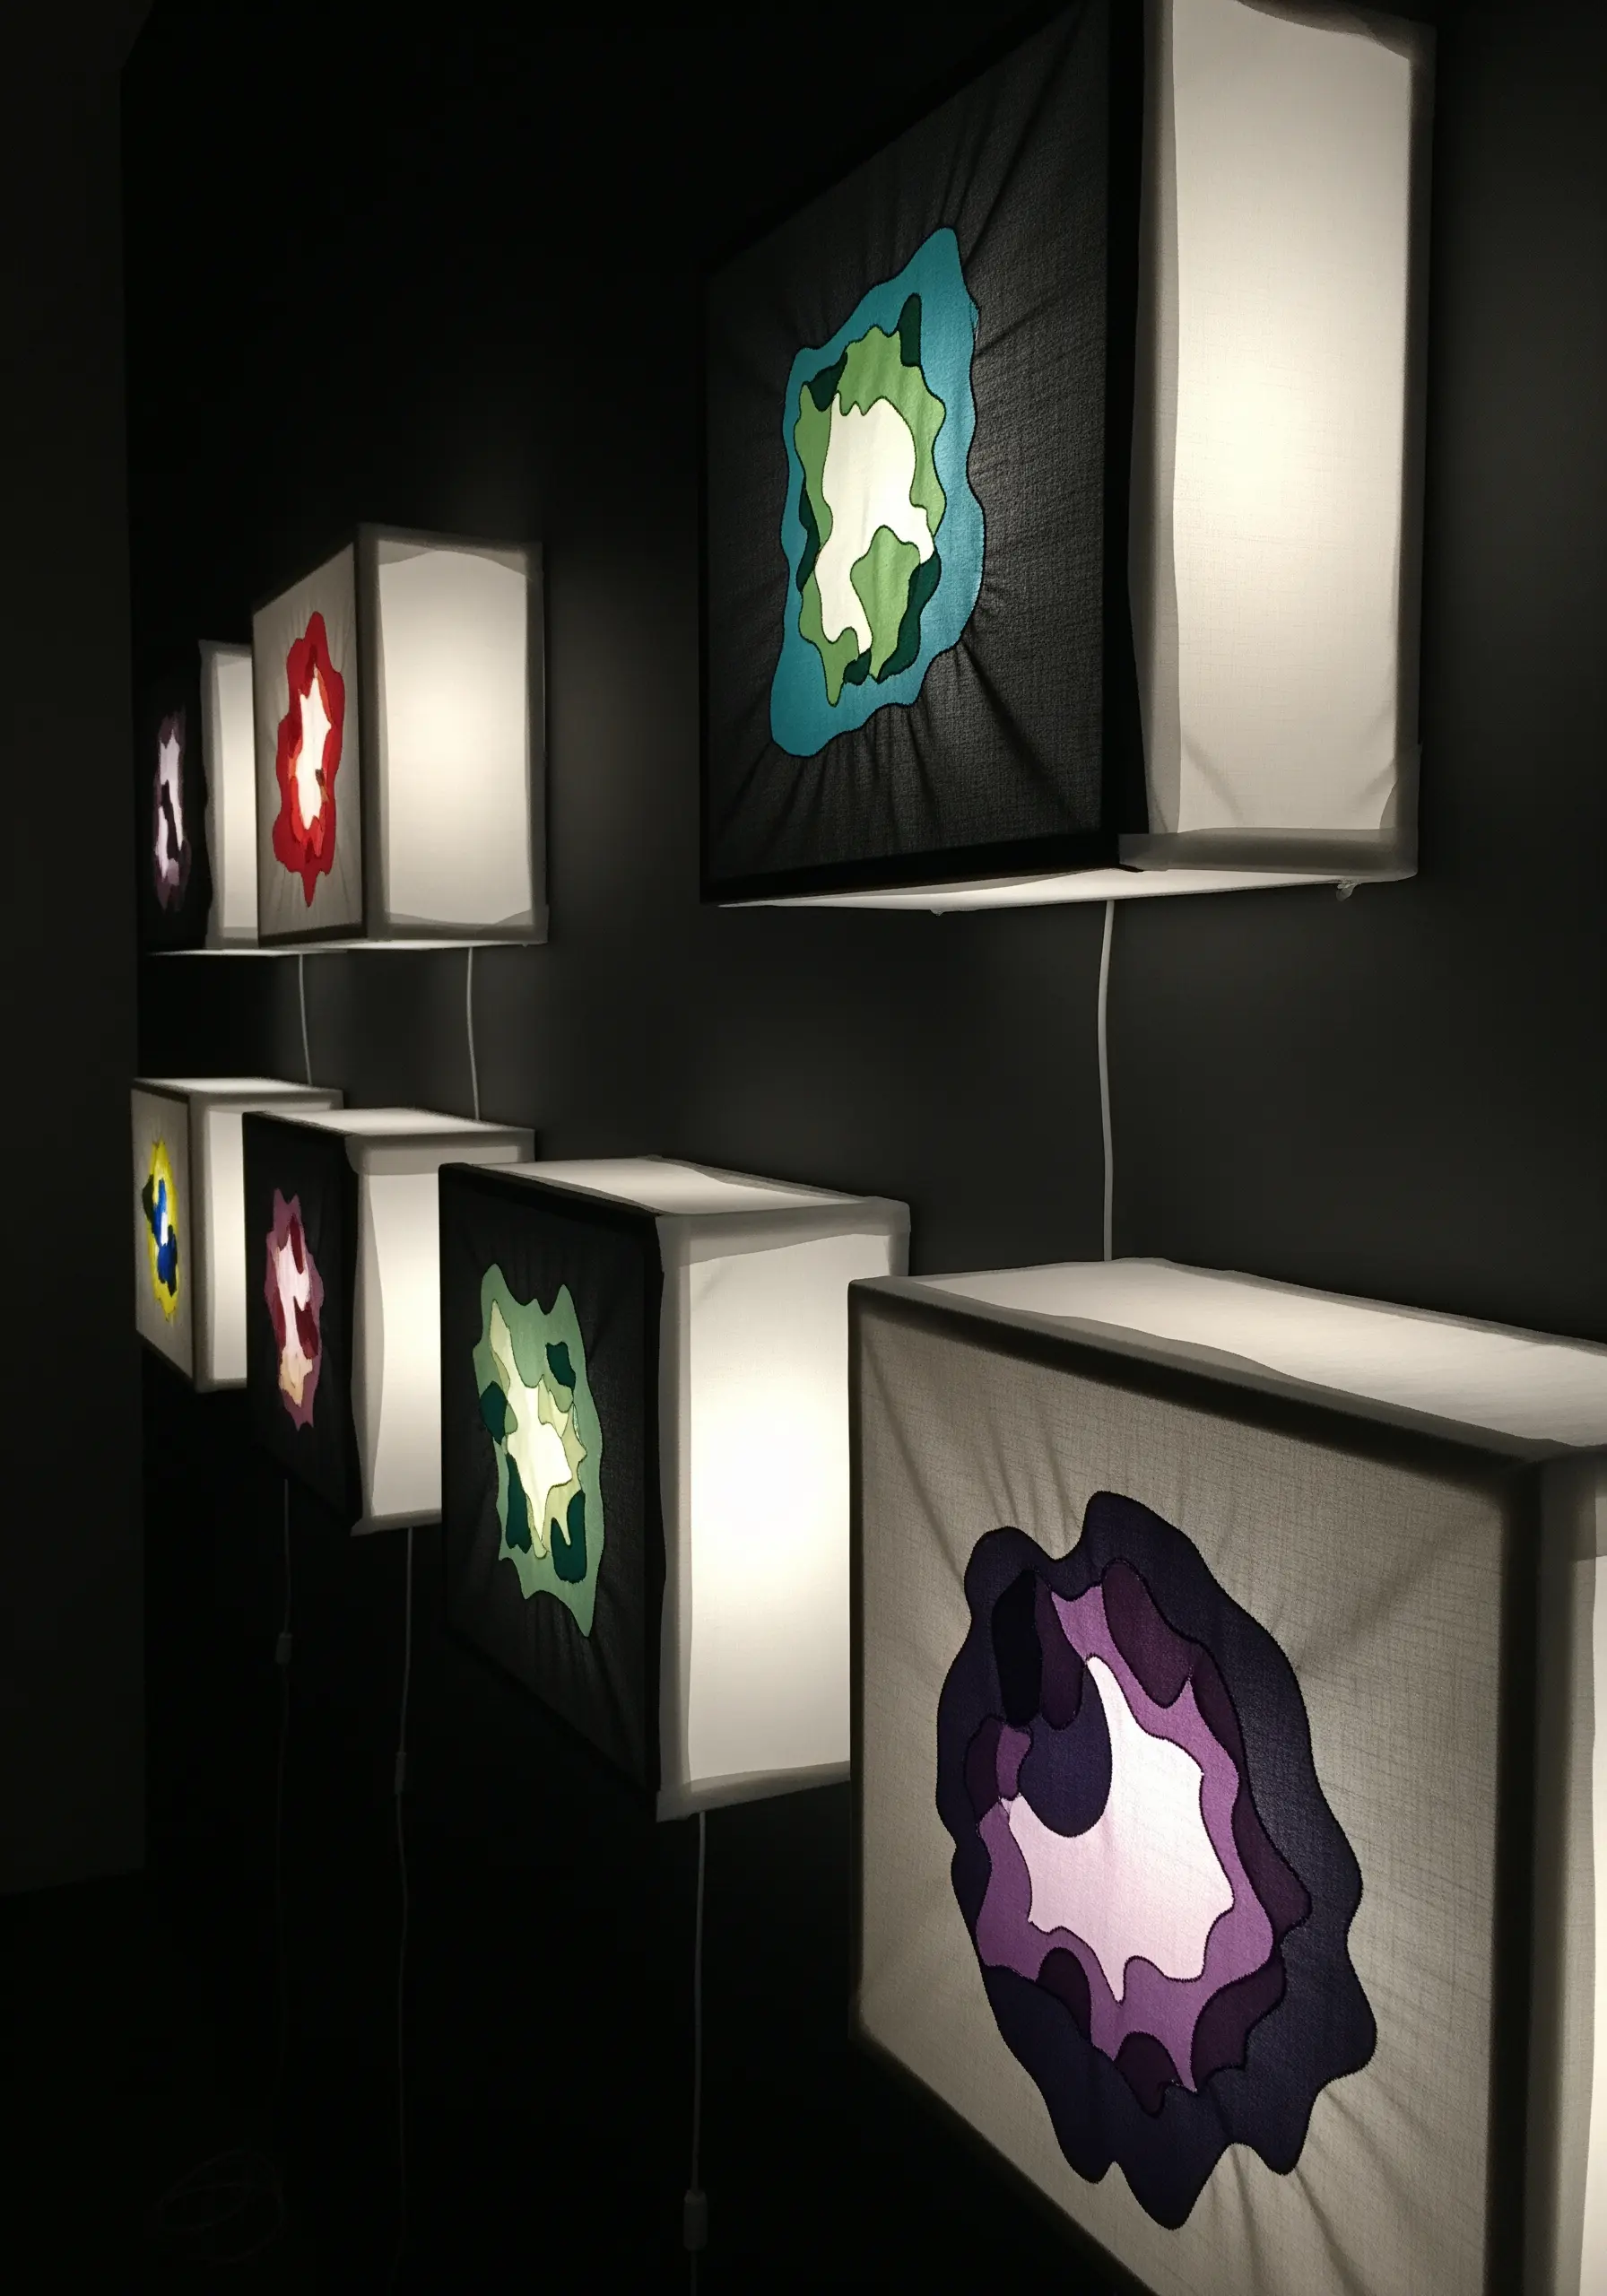
Combine appliqué with a light source to create a stunning focal point for a room.
On a simple wooden frame, stretch a dark, semi-sheer fabric like black linen.
Create your design by layering and stitching down successively smaller shapes of colored fabric, like a topographical map.
Place a small, battery-powered LED light inside the frame; it will diffuse through the layers, creating a soft glow that highlights the depth and color of your work.
15. The Embroidered Mobile: Composing in 3D
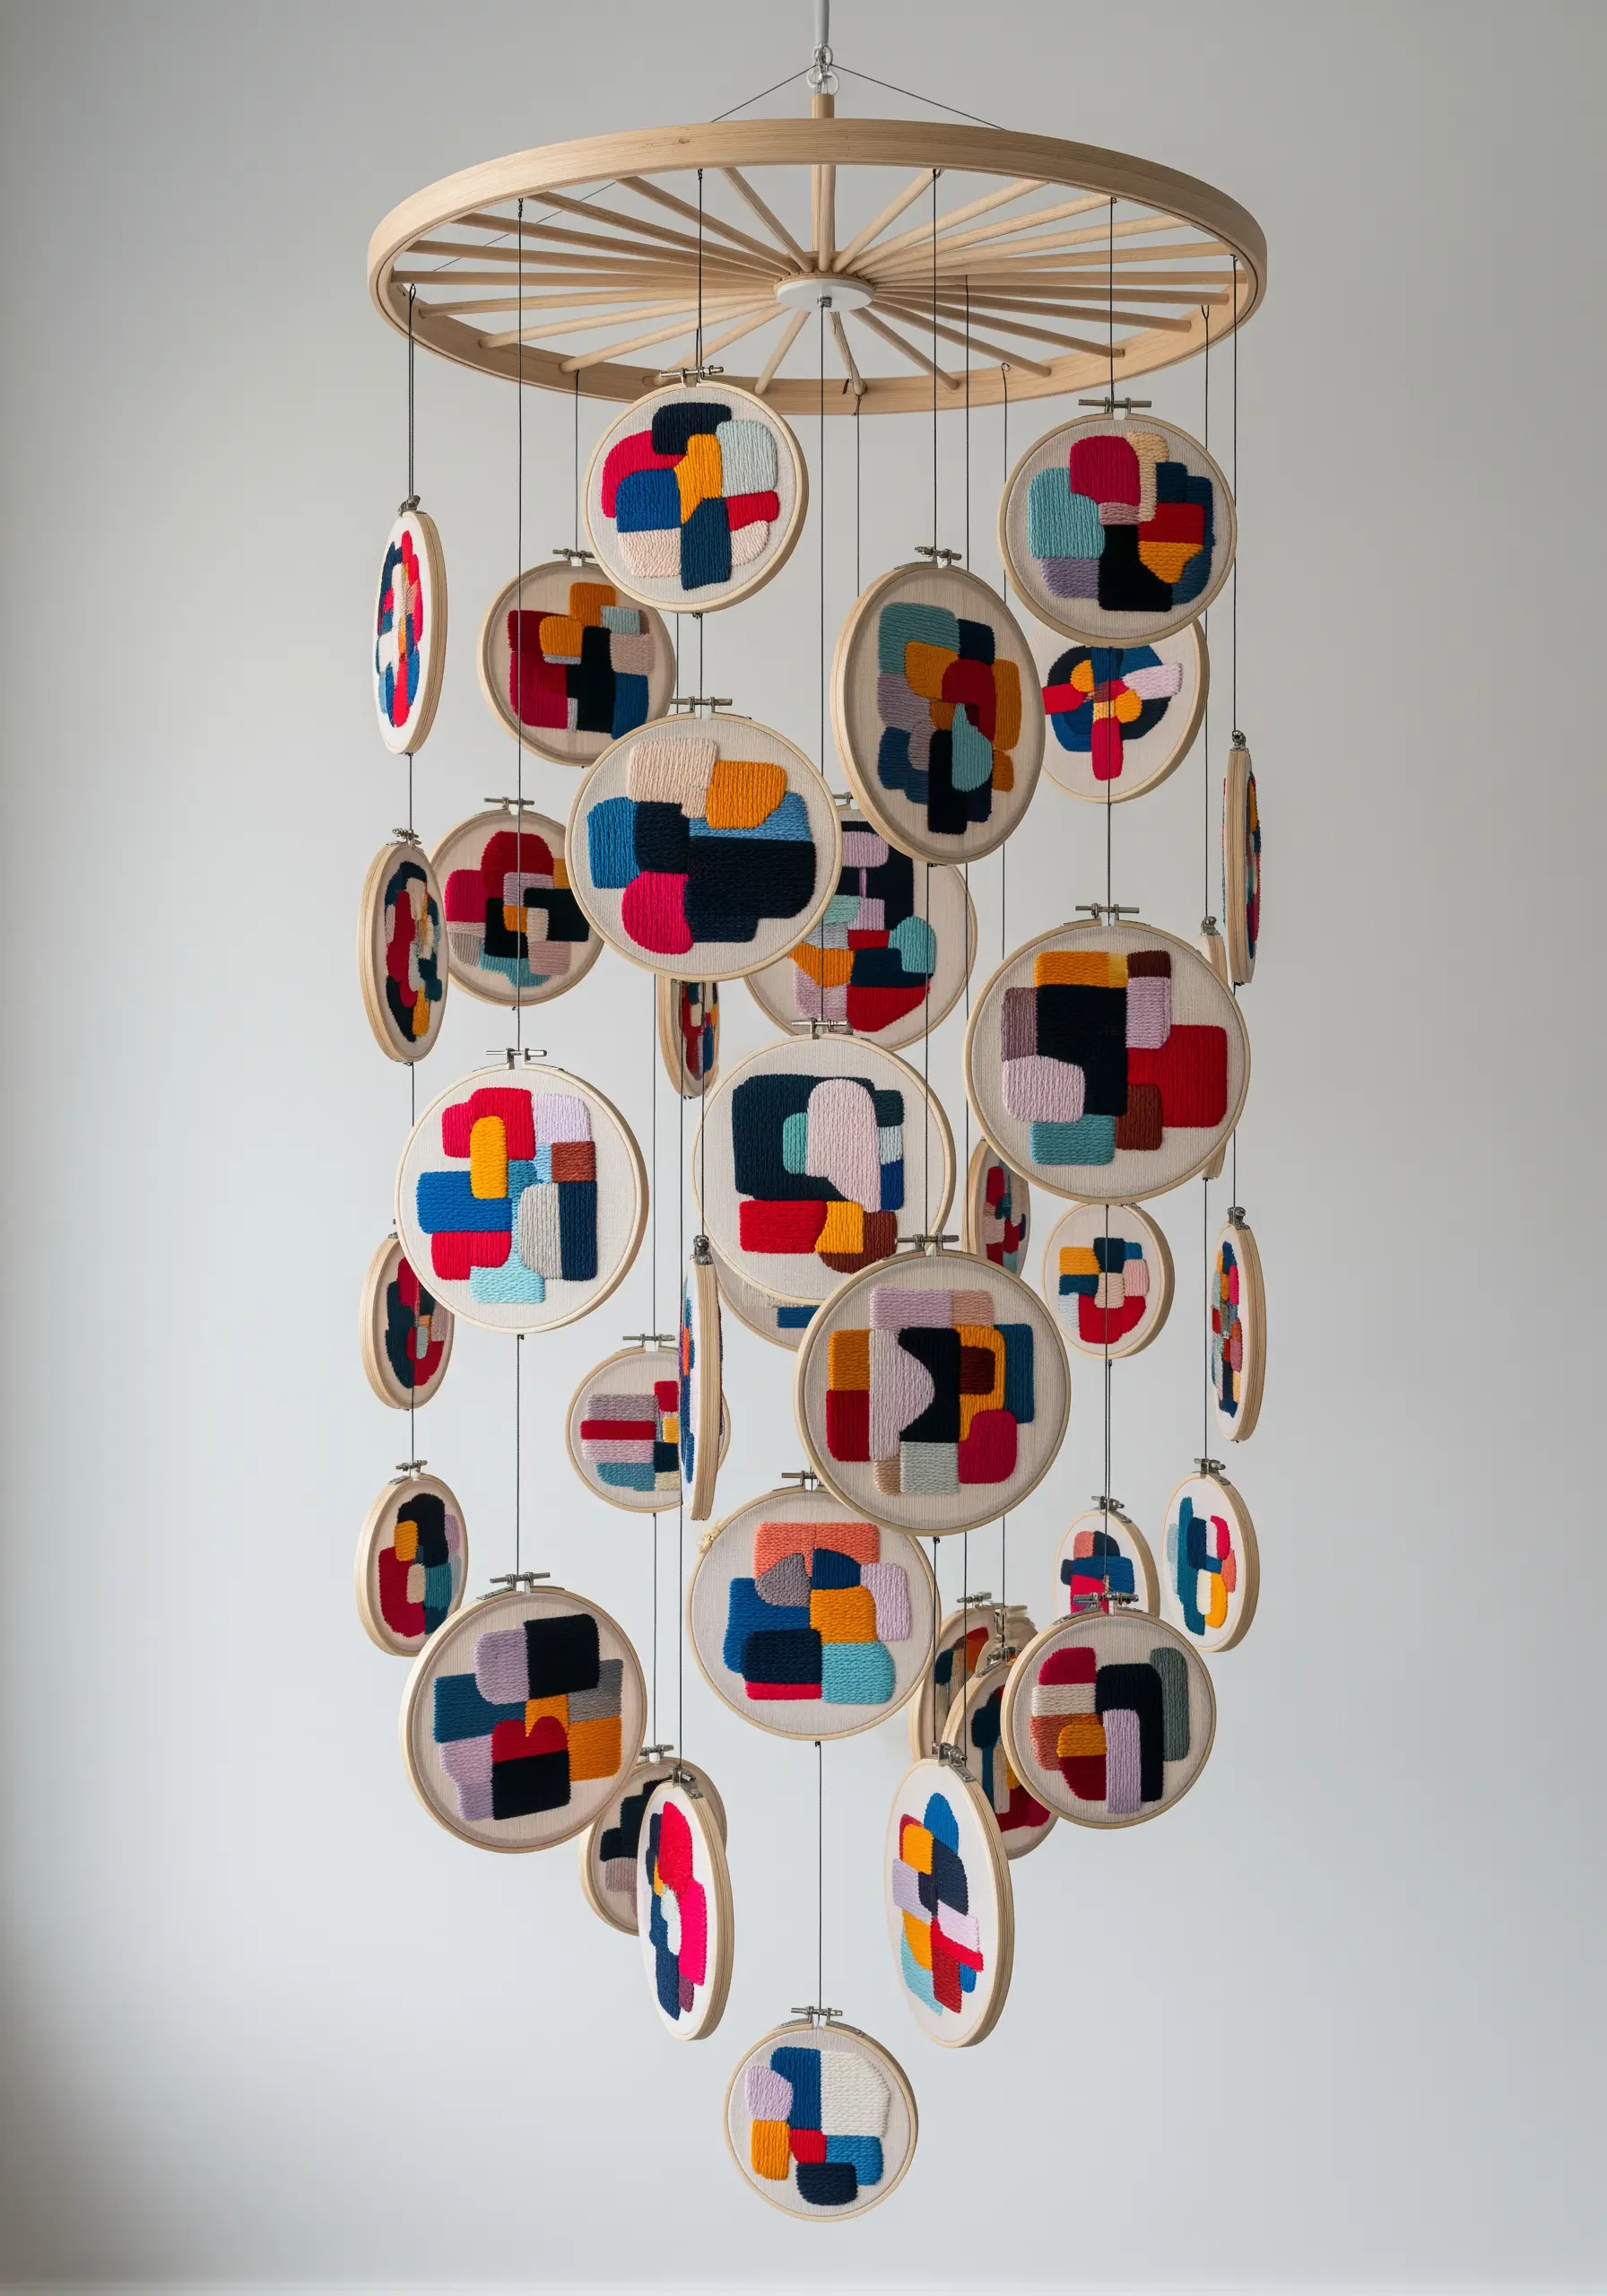
Create a dynamic sculpture by combining multiple small, finished embroidery pieces.
Work a series of related abstract designs—exploring a specific color palette or geometric theme—in several mini hoops.
Once finished, connect them with sturdy thread or fine wire to a central ring or wooden dowel.
This transforms individual hoop wall displays into a single, kinetic piece that gently moves and reveals new compositions.
16. Sculptural Appliqué with Upcycled Textiles
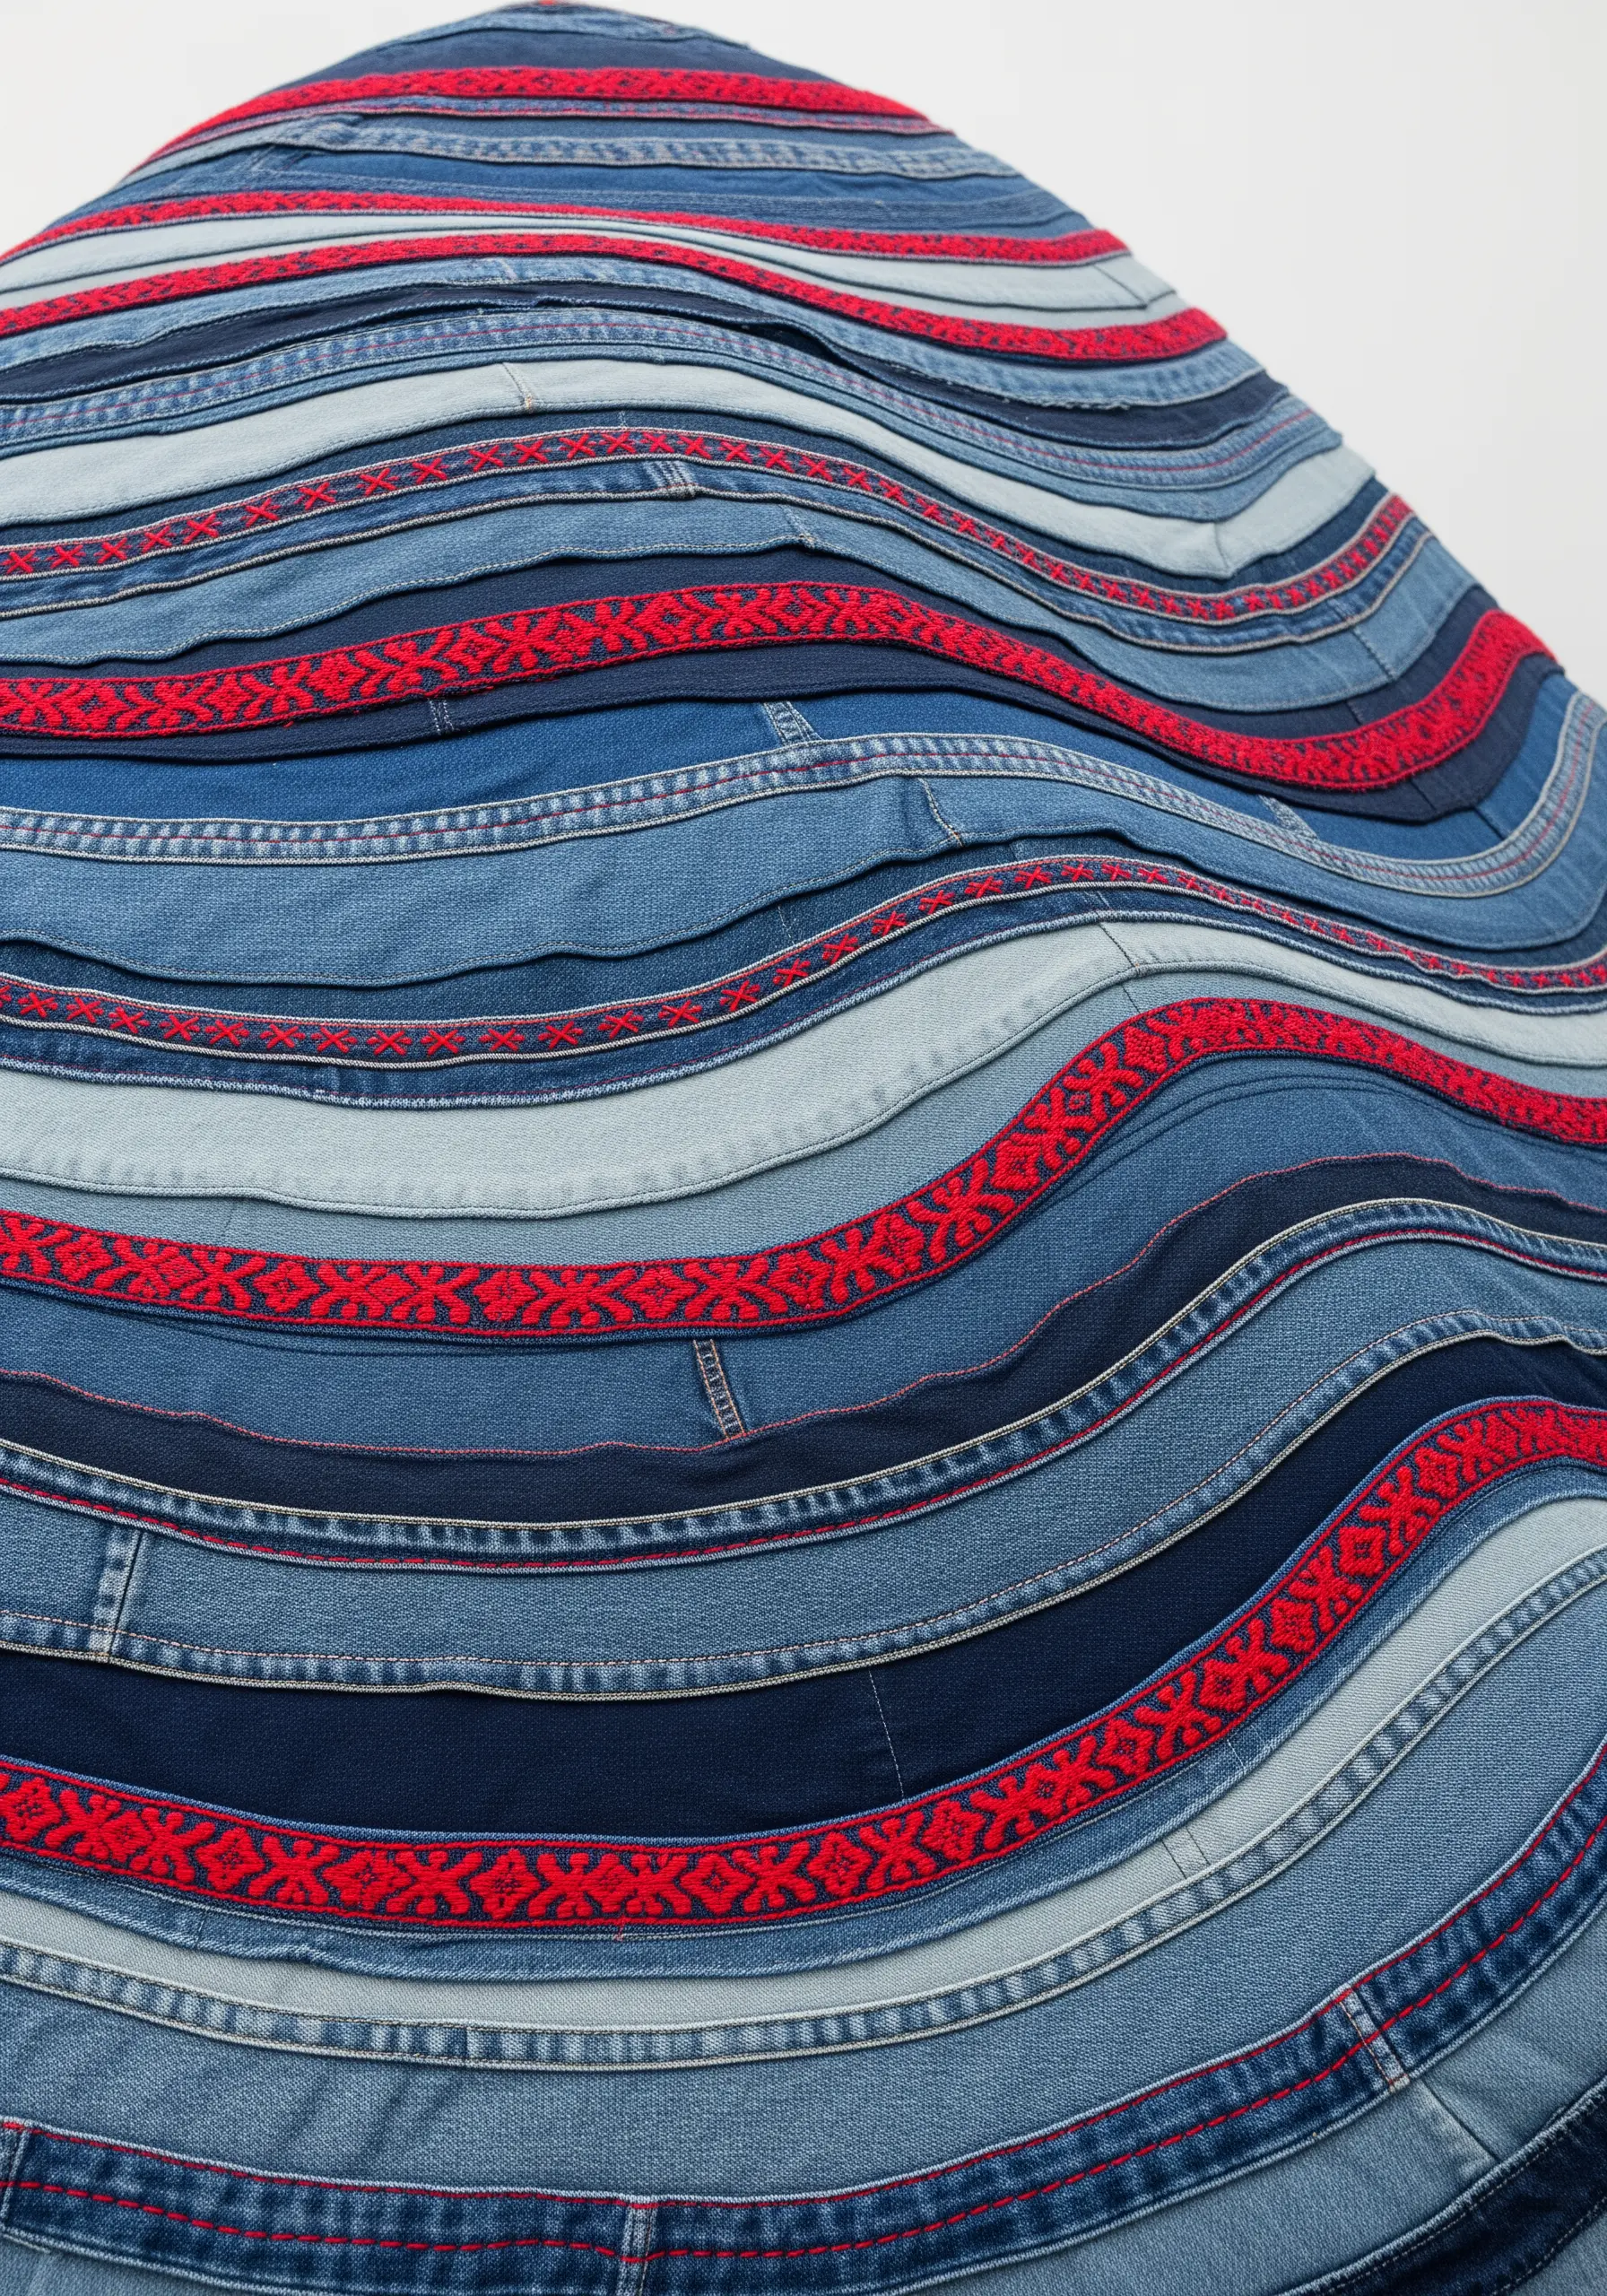
Build rich texture and topographical form using repurposed materials like old denim.
Cut strips from jeans in varying shades of blue and arrange them in wavy layers on a sturdy backing fabric.
Instead of hiding the raw edges, let them fray slightly for added texture and a softer line.
Incorporate a contrasting element, like a strip of patterned ribbon, to guide the eye and add a deliberate pop of color.
17. Contained Chaos: The Art of the Intentional Tangle

Create a powerful focal point by contrasting wild chaos with sharp control.
Within a clearly defined shape—a stitched circle, a square, or a silhouette—fill the space with a dense, chaotic mix of stitches.
Use a variety of thread weights, from fine floss to chunky yarn, and layer tangled straight stitches, loose French knots, and couched loops.
The sharp, clean border makes the wild interior feel intentional and artistic, not messy.
18. Visualizing Sound: Rhythmic Lines on Sheer Fabric
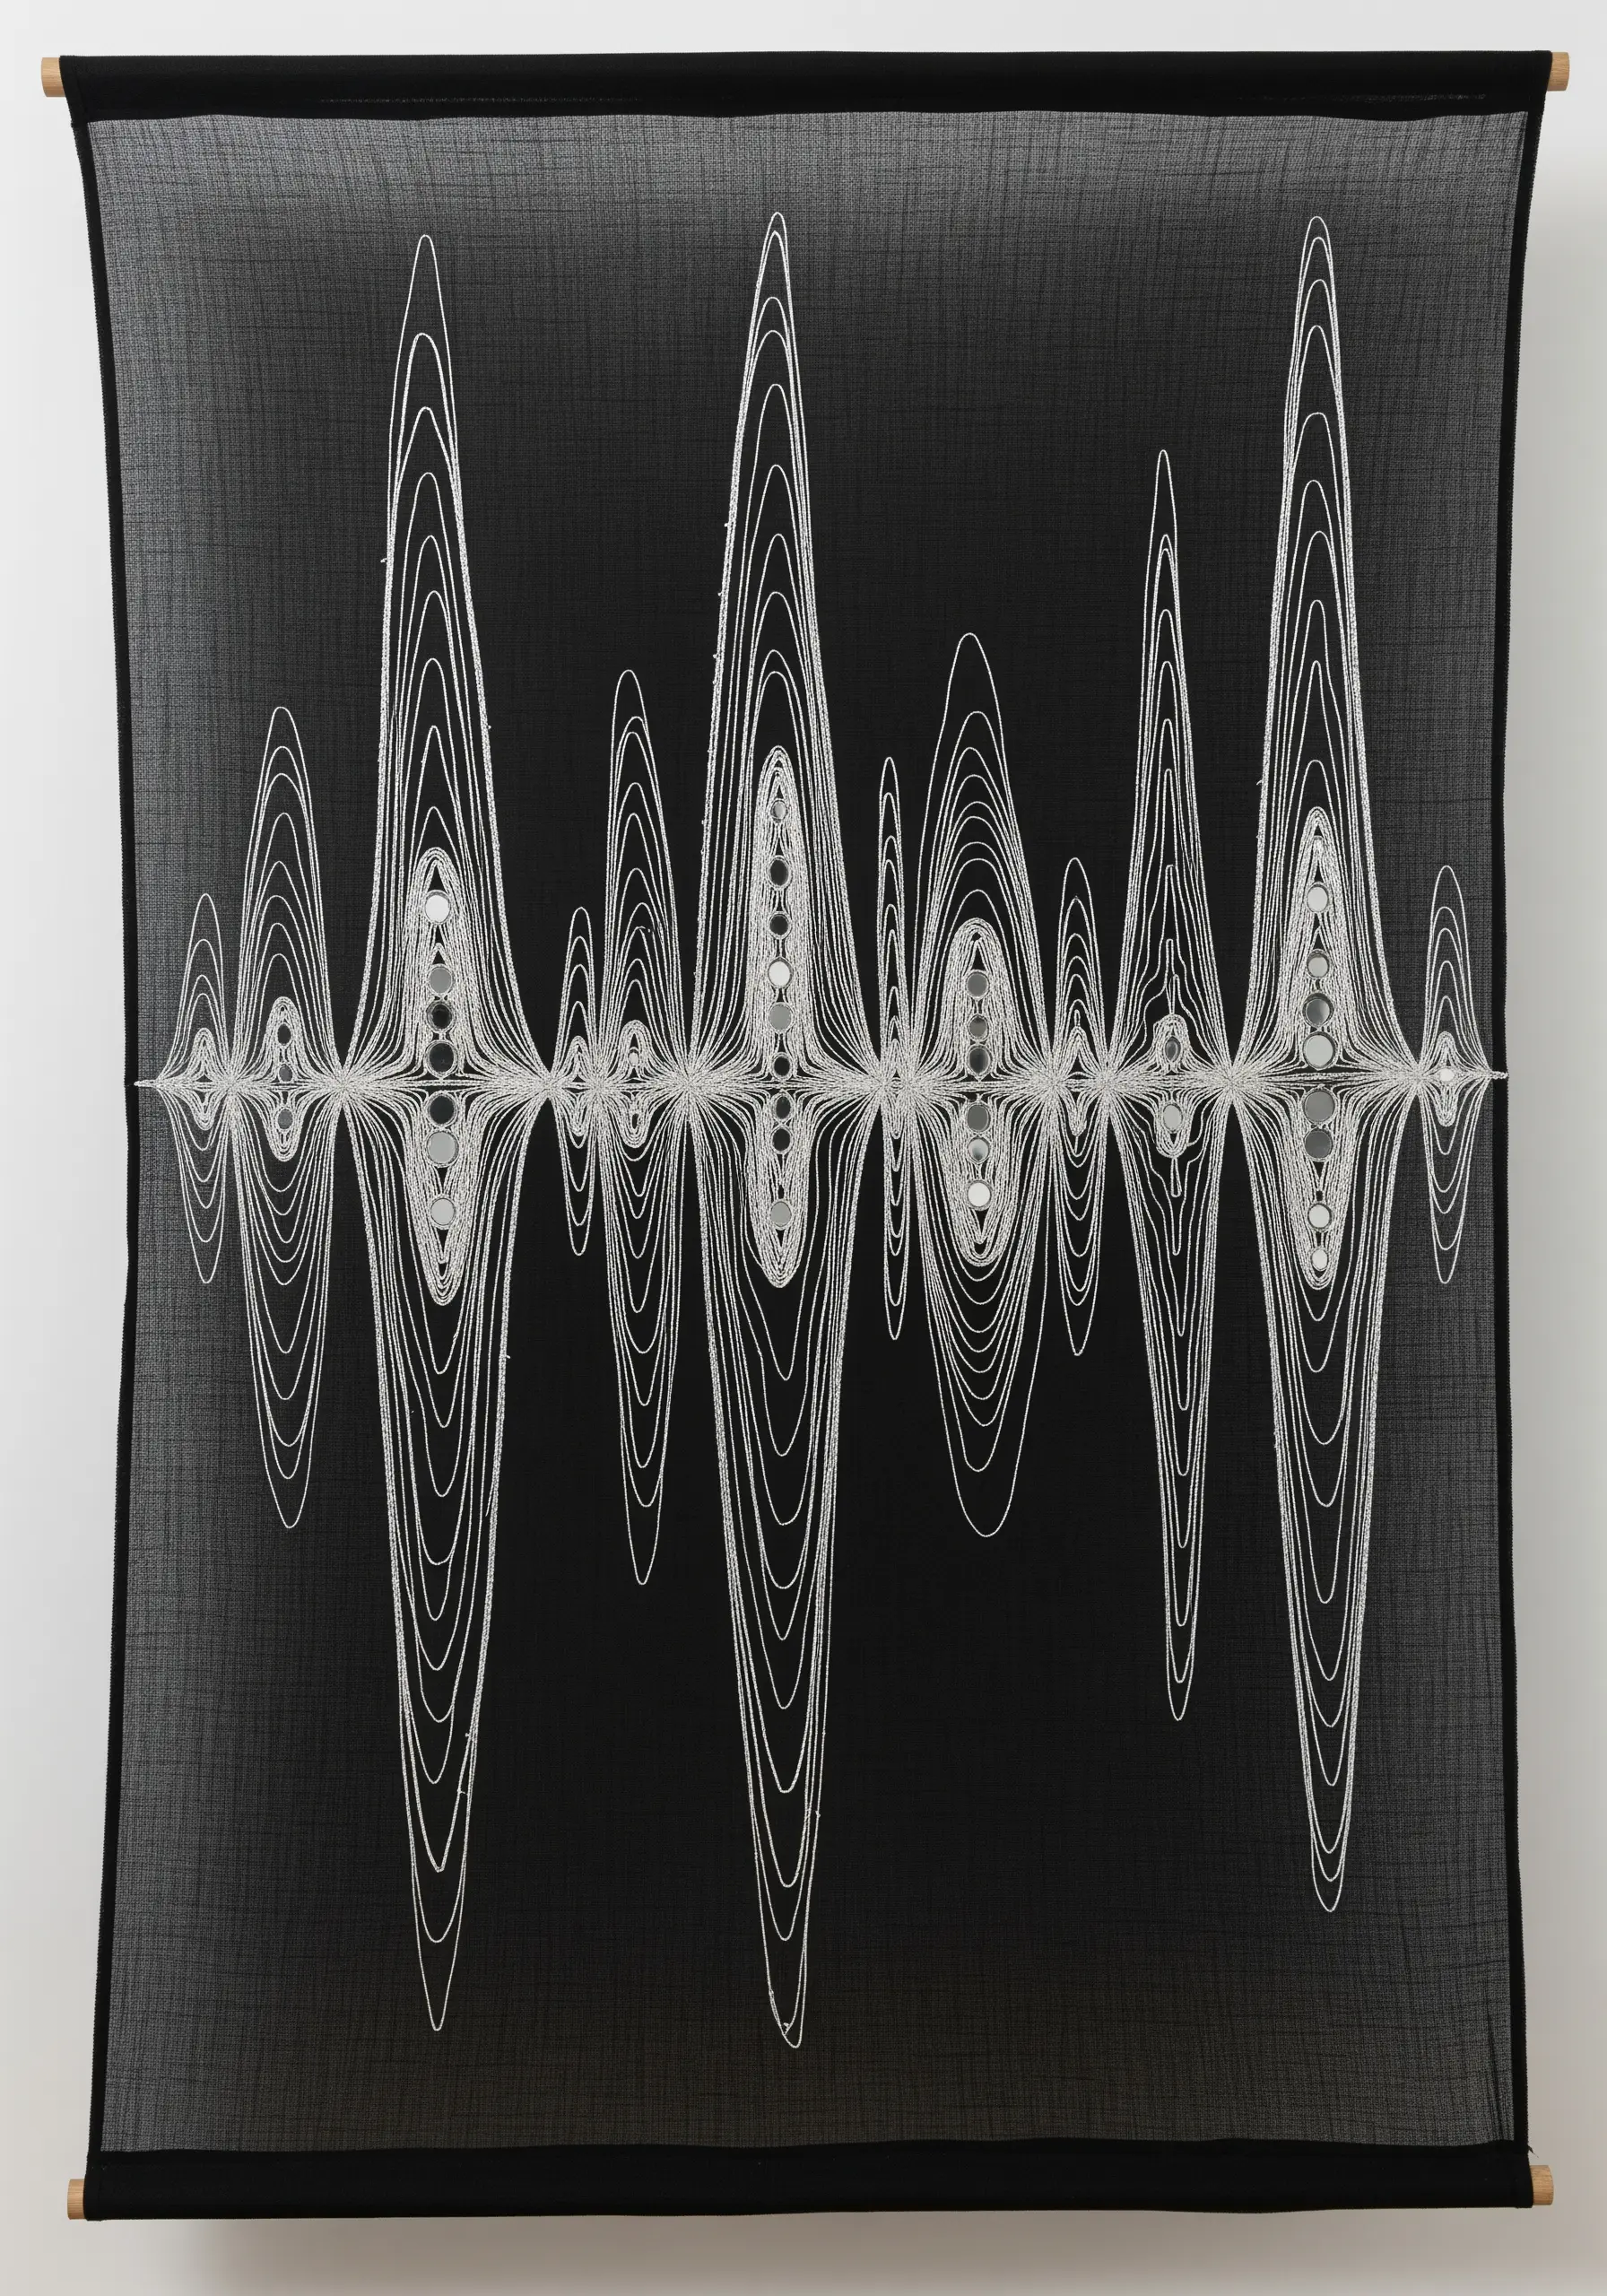
Translate an invisible pattern, like a soundwave or a heartbeat, into a tangible, stitched form.
Choose a high-contrast combination like white thread on black organza for maximum visual impact.
Use a simple backstitch or stem stitch to create clean, continuous lines, focusing on precise repetition and gradual changes in amplitude.
The sheer fabric adds an ethereal quality, making the stitched waveform appear to vibrate in space.
19. The Frame as Fiber Art
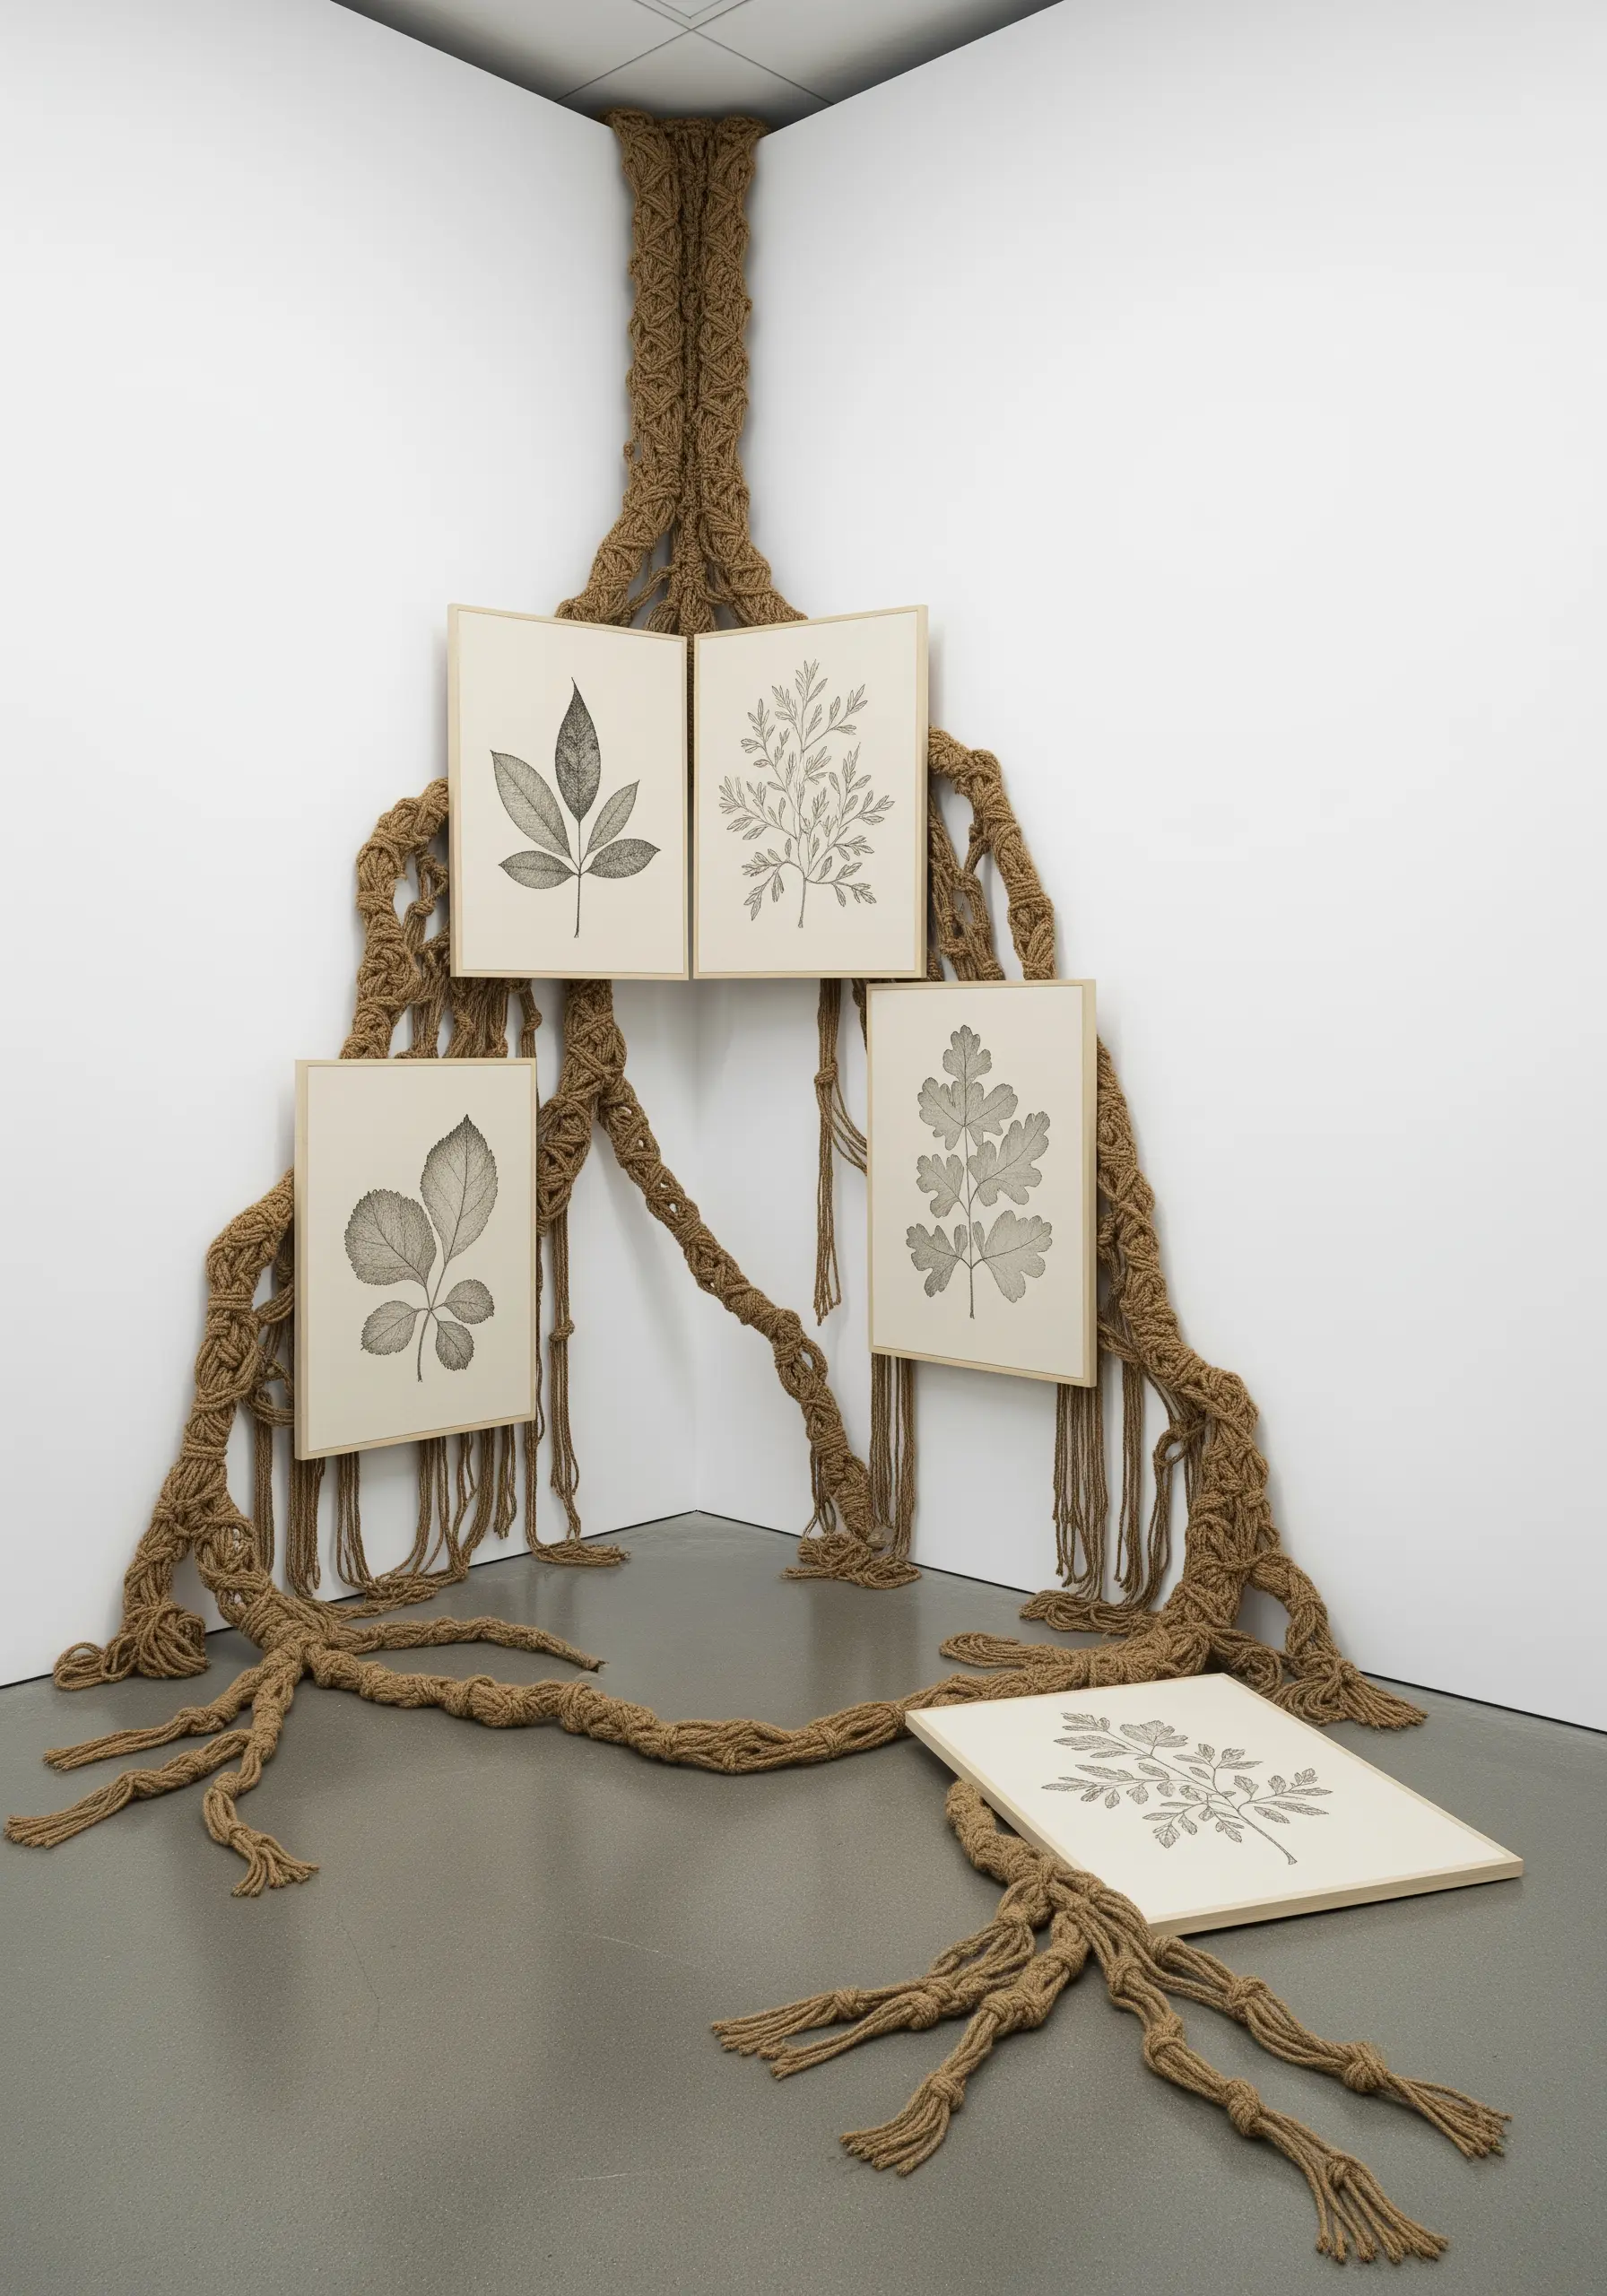
Extend your fiber art beyond the hoop by creating a frame or holder that is itself a work of art.
Use macrame knots or simple braiding with thick jute or cotton rope to create a structure that can hold small framed embroidery patterns, postcards, or dried botanicals.
This approach turns the display mechanism into an integral part of the artwork, creating a cohesive and immersive installation in a corner of your room.
20. Stitching with Light: Neon and UV-Reactive Threads
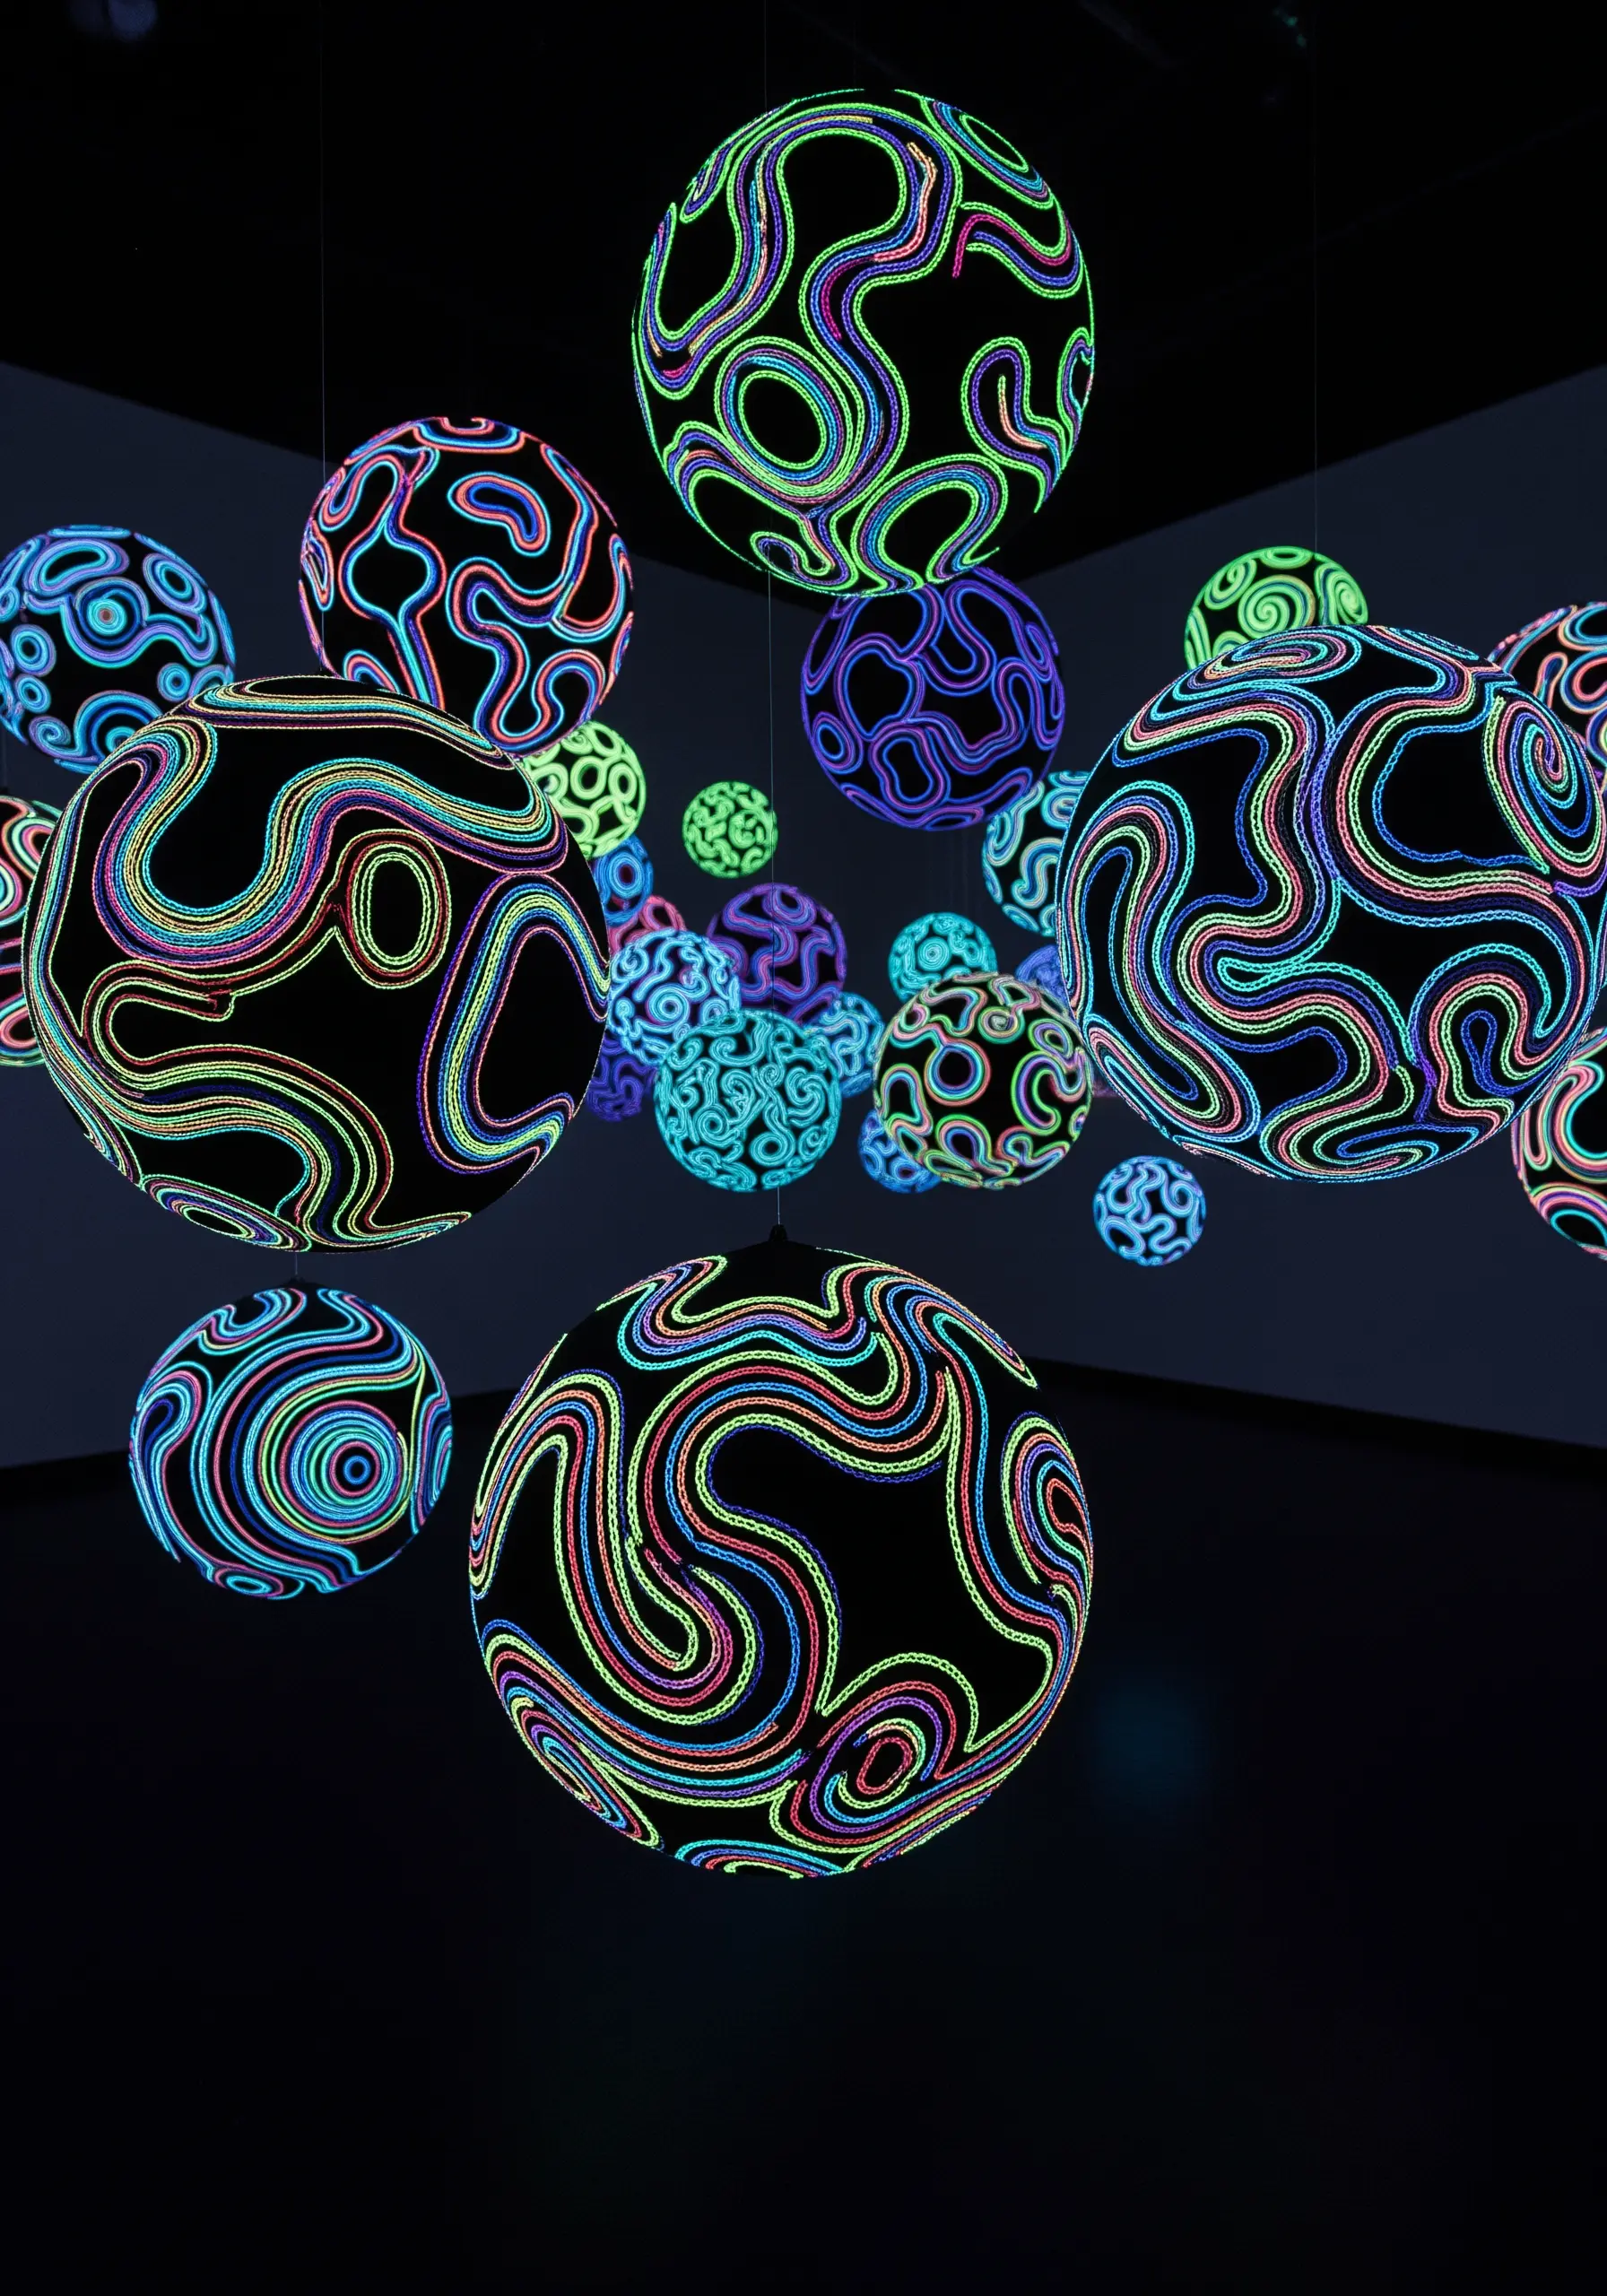
Make your embroidery come alive in the dark by choosing fluorescent or UV-reactive threads.
On a black fabric base, stitch abstract, flowing lines using these specialty threads for a bold daytime look.
Under a blacklight, they glow intensely, revealing a completely different visual experience and a secret, luminous life.
This is perfect for creating fiber art installations that have a hidden dimension.
21. Modular Embroidery: The Stitched Tile Mosaic
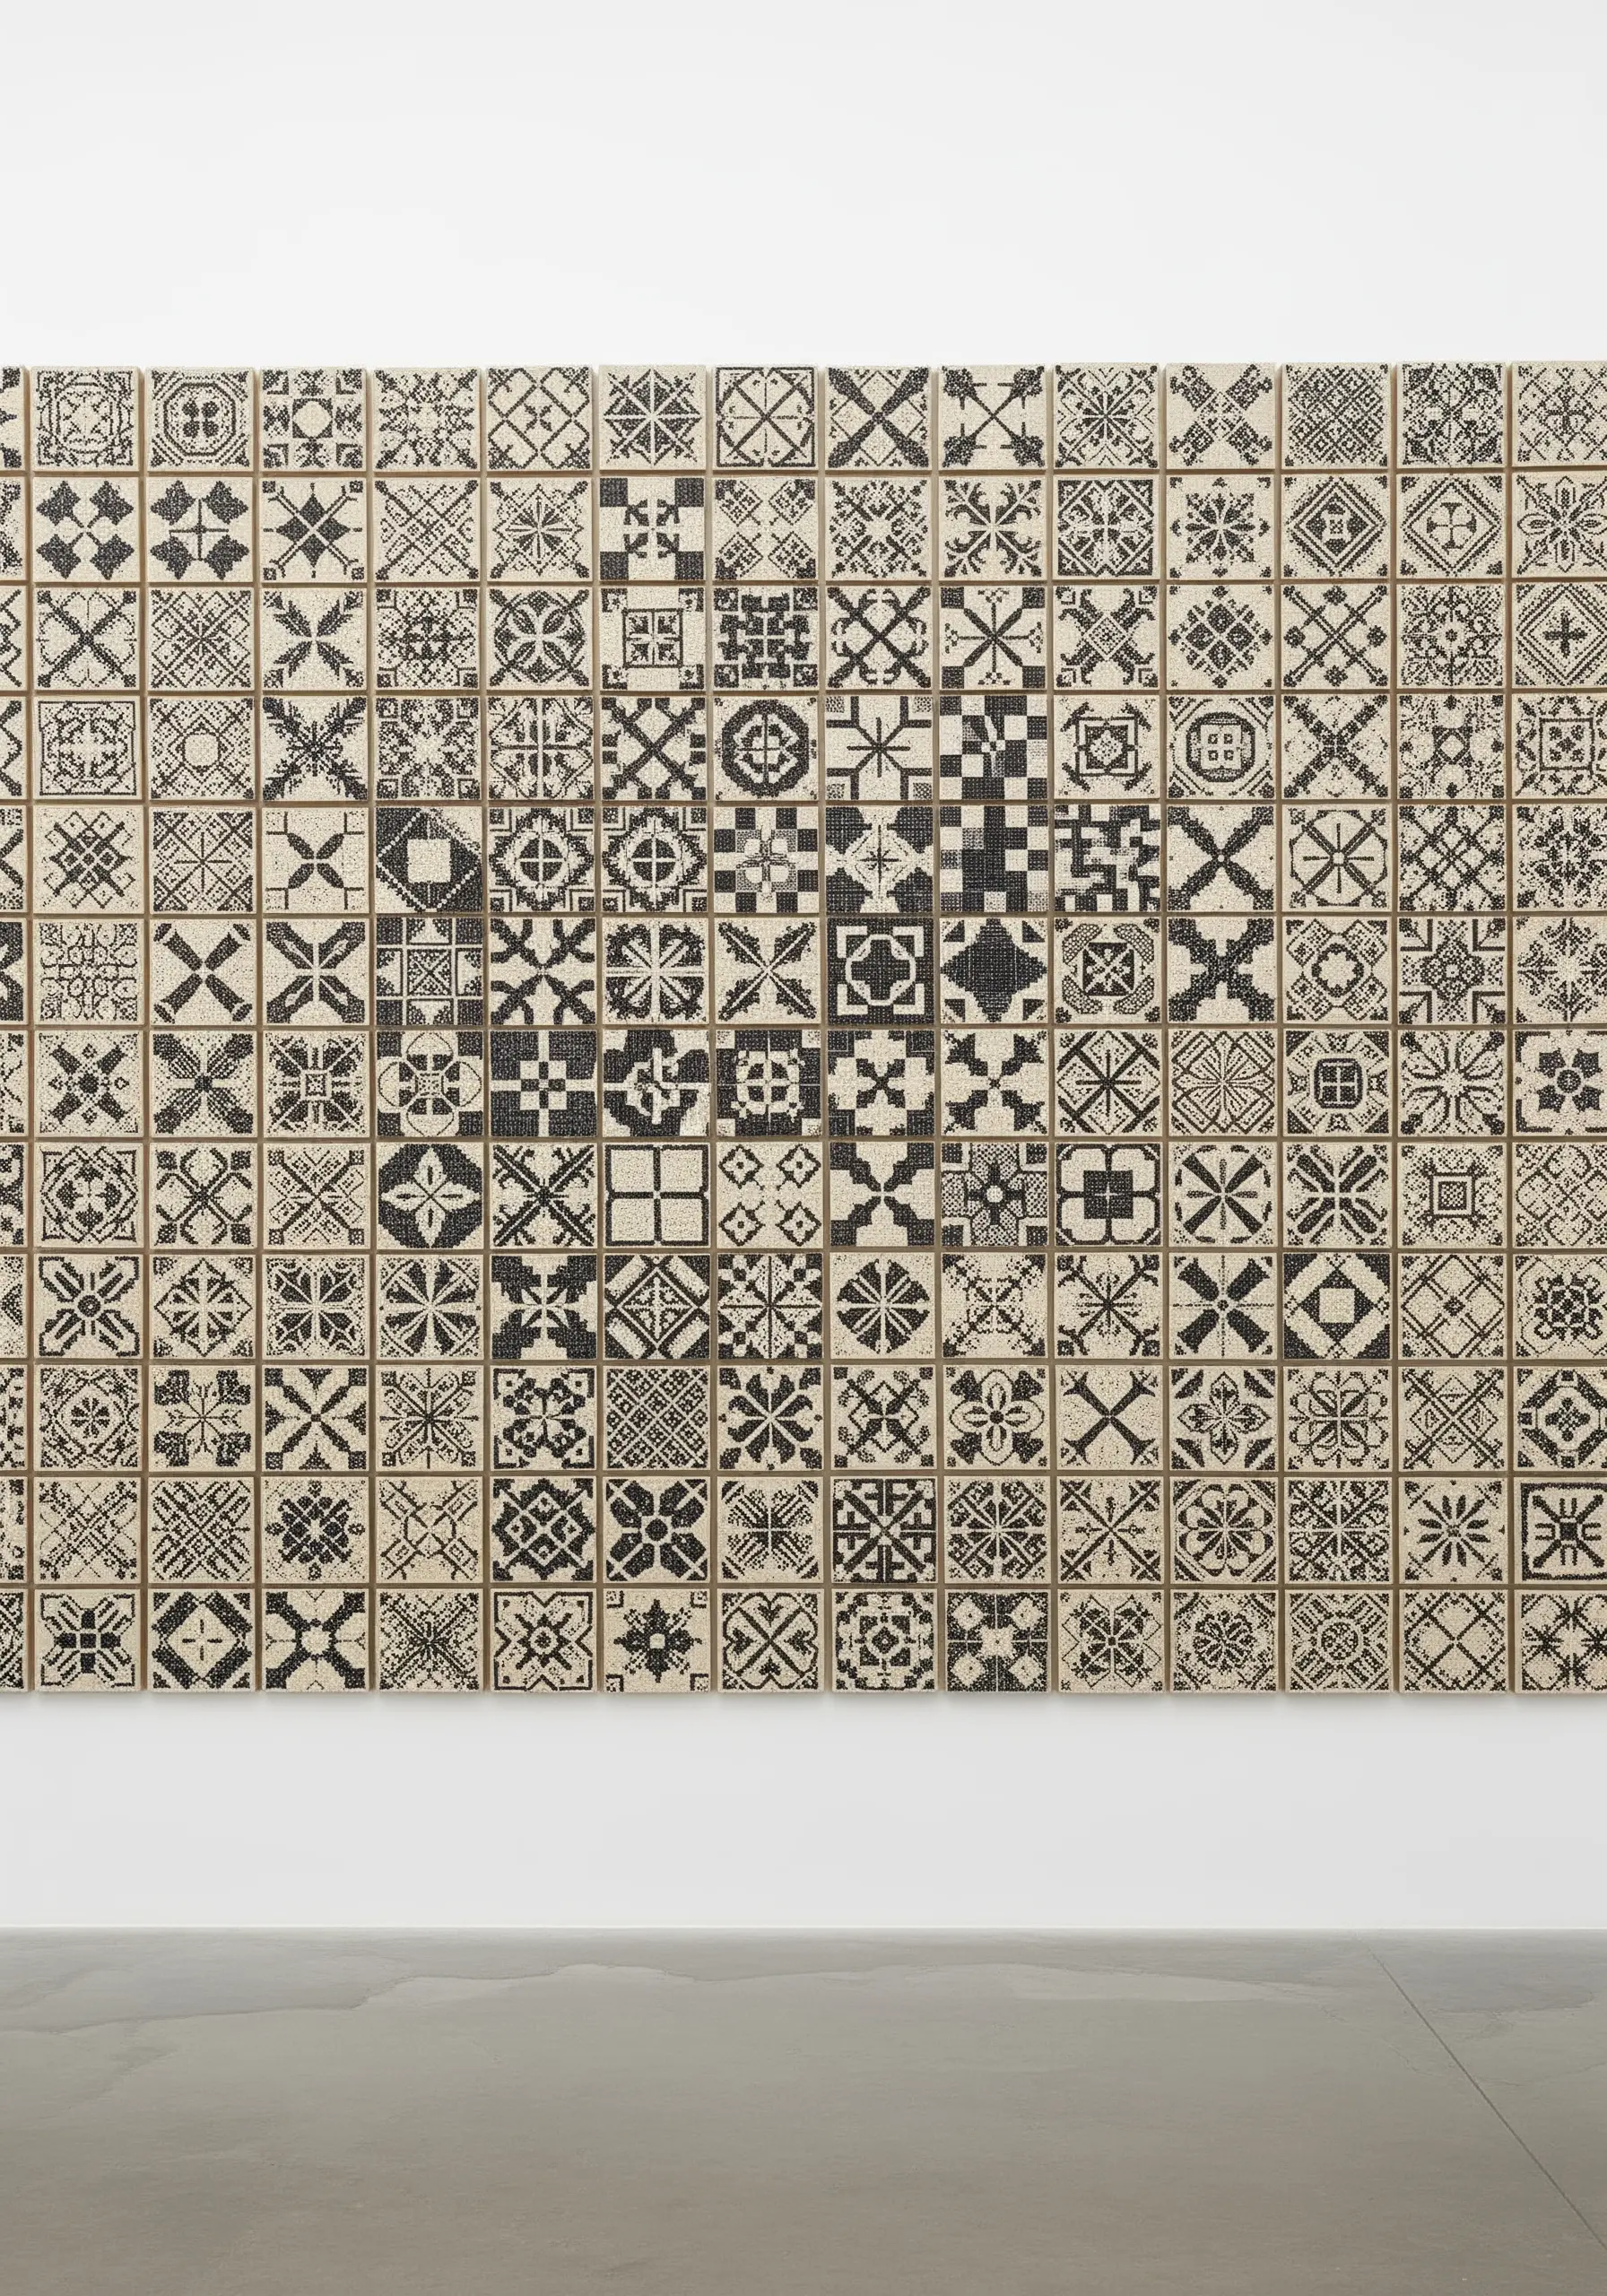
Instead of tackling one massive project, create a larger work from small, manageable pieces.
Cut identical squares of stiff fabric, like canvas, and stitch a different geometric pattern on each one using a limited, cohesive color palette.
Once you have a collection, arrange the embroidered “tiles” into a larger mosaic on a wall or mount them on a single board.
This modular approach is less intimidating and allows for endless creative reconfiguration.
22. Painting with Knots: A Study in Color and Texture
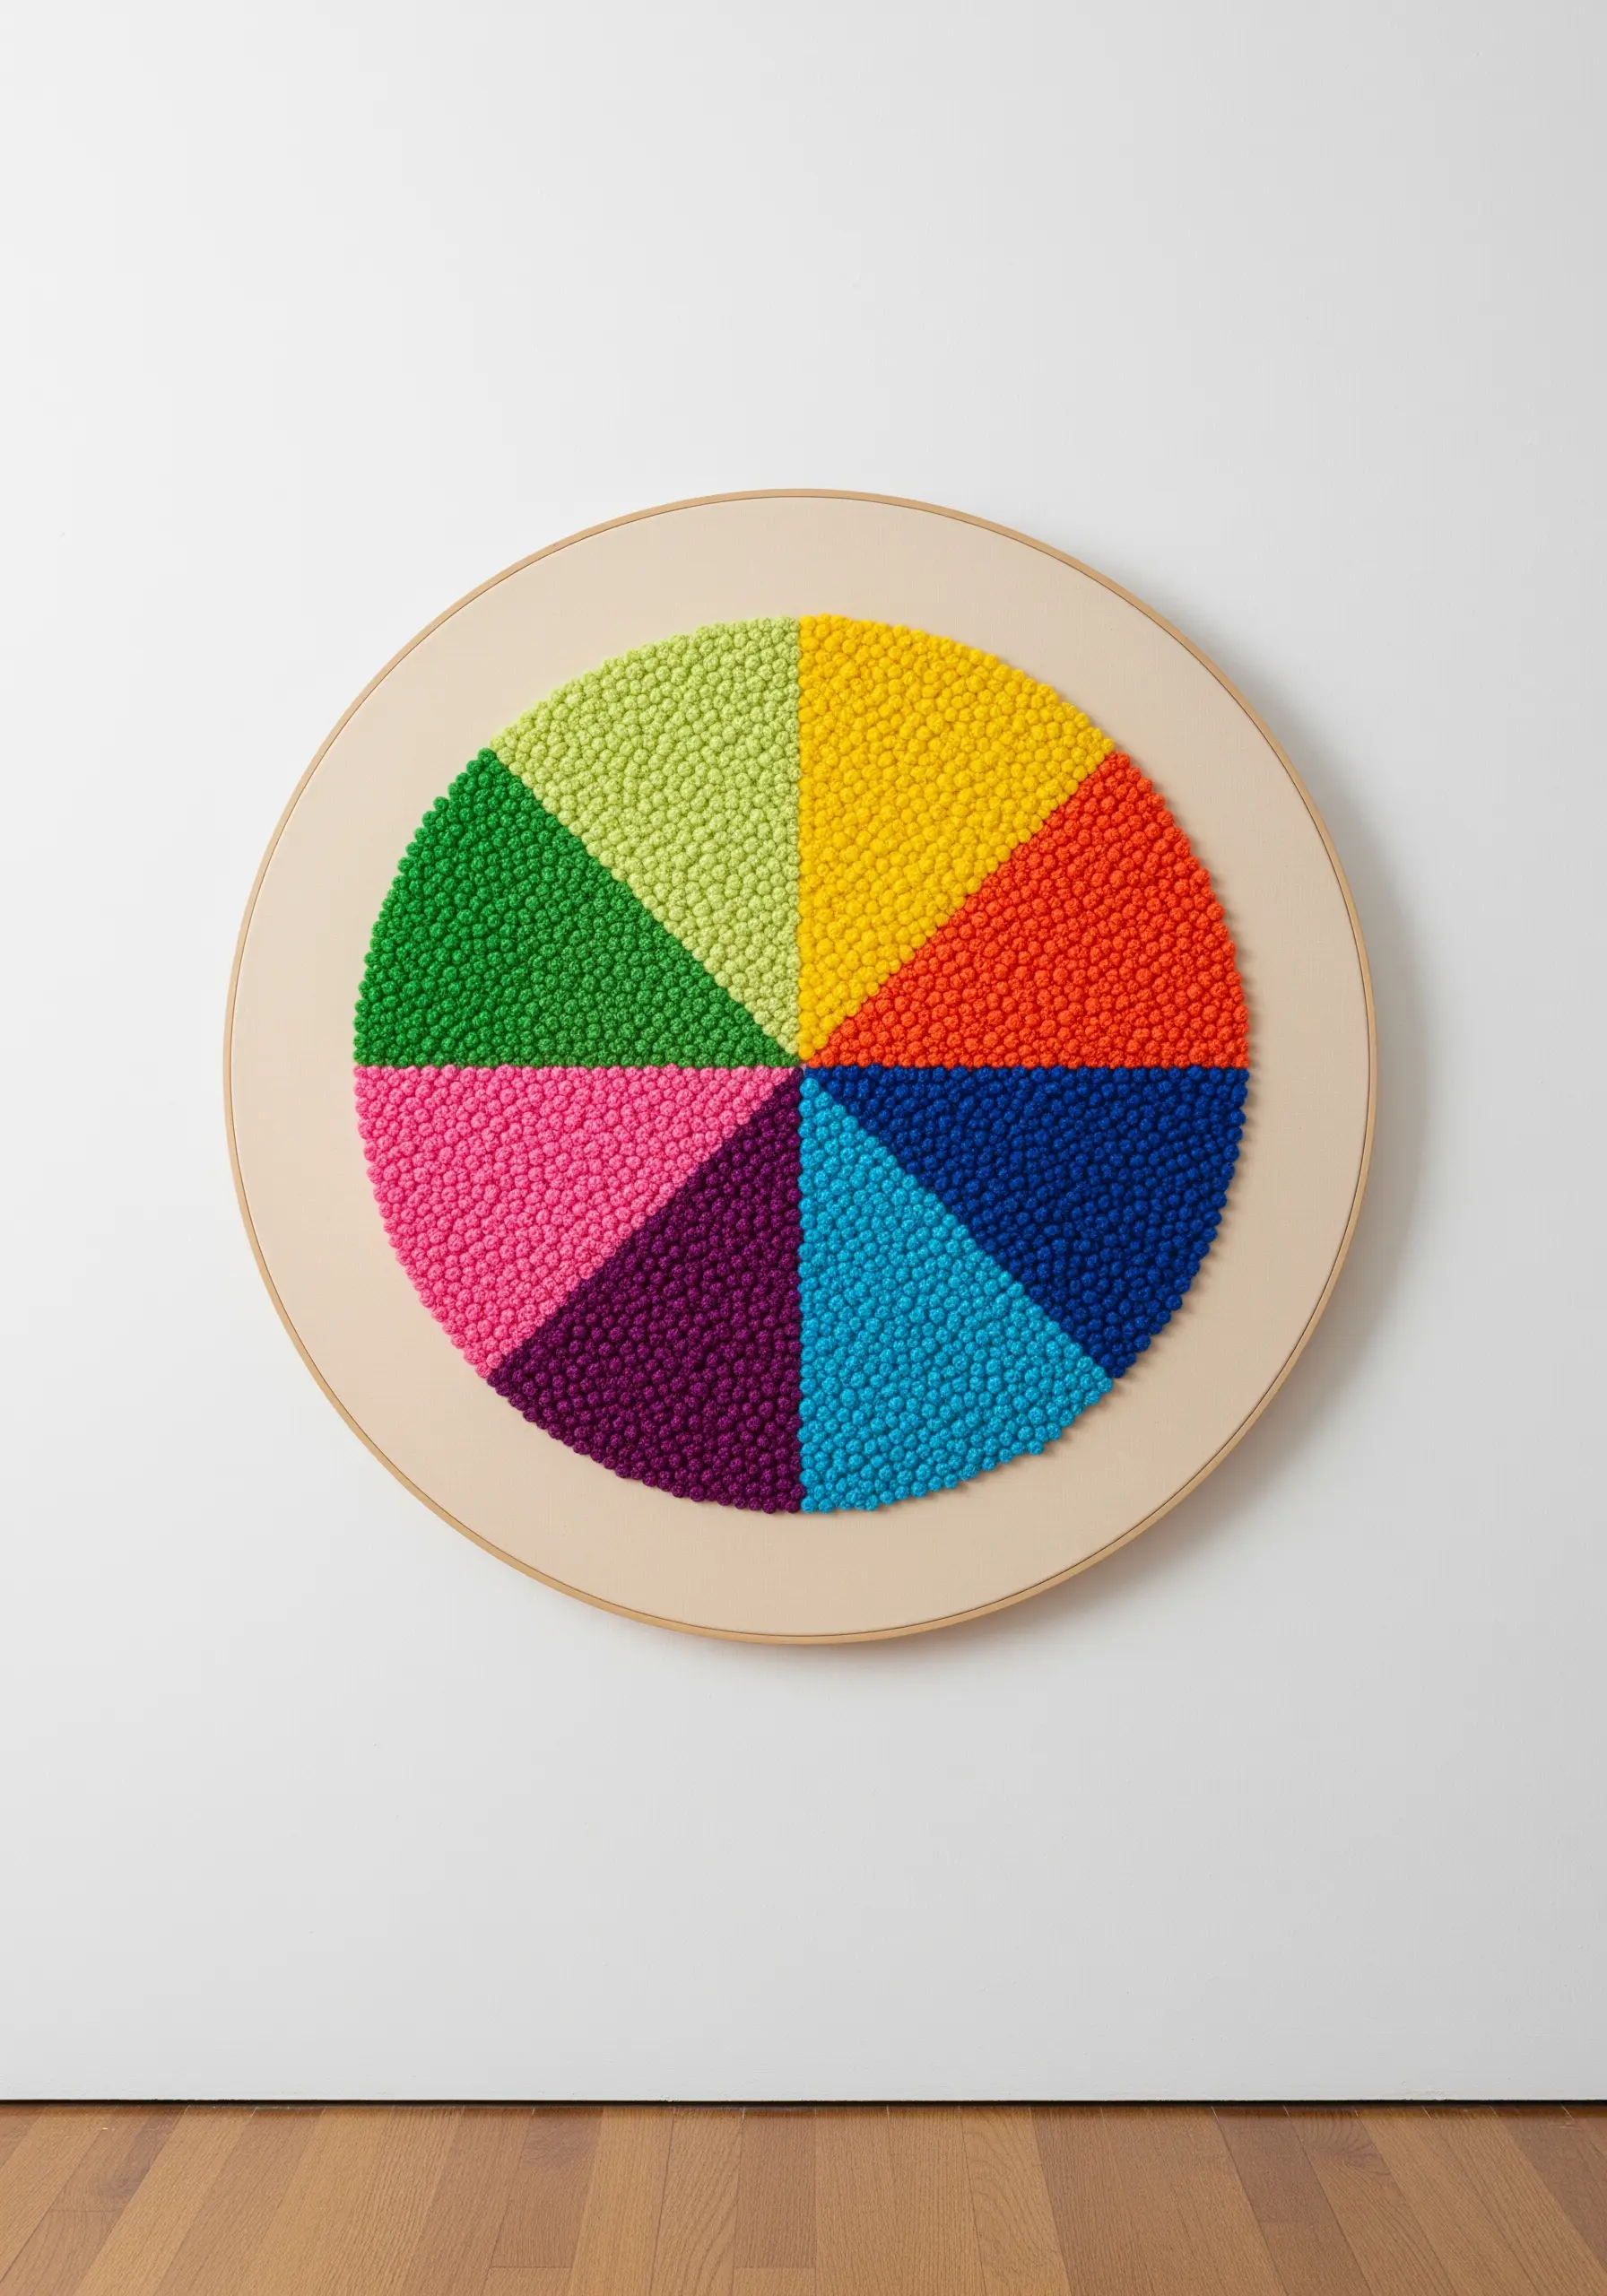
Use a single, highly textural stitch to explore the relationships between colors.
Divide a hoop into wedges like a color wheel and fill each section with dense French knots or colonial knots.
By placing complementary or analogous colors next to each other, you can observe how they interact when rendered in pure texture.
The uniform stitch allows the focus to remain entirely on the power of color and the tactile quality of the surface.
23. Blueprint Stitching: Outlining the Everyday

Turn a simple object into a piece of conceptual art by outlining its essential form.
Choose a plain-colored textile object, like a canvas tote bag or a simple cushion cover.
Using a contrasting thread, such as white on grey, stitch along the seams and primary edges with a simple running stitch or backstitch.
This “blueprint” effect highlights the object’s construction, transforming it from a functional item into a piece of line sculpture.
24. Stitching on Hard Surfaces
Move beyond fabric and explore embroidering on unconventional materials like thin wood, metal, or heavy cardstock.
Use a drill with a fine bit or a sturdy awl to create a grid of holes in your chosen surface.
Use these holes as your stitching points to weave yarn or thick floss, creating bold, graphic patterns.
The tension between the soft fiber and the rigid base creates compelling yarn wall art with a modern edge.
25. Textile Landscapes: Quilting as Sculpture
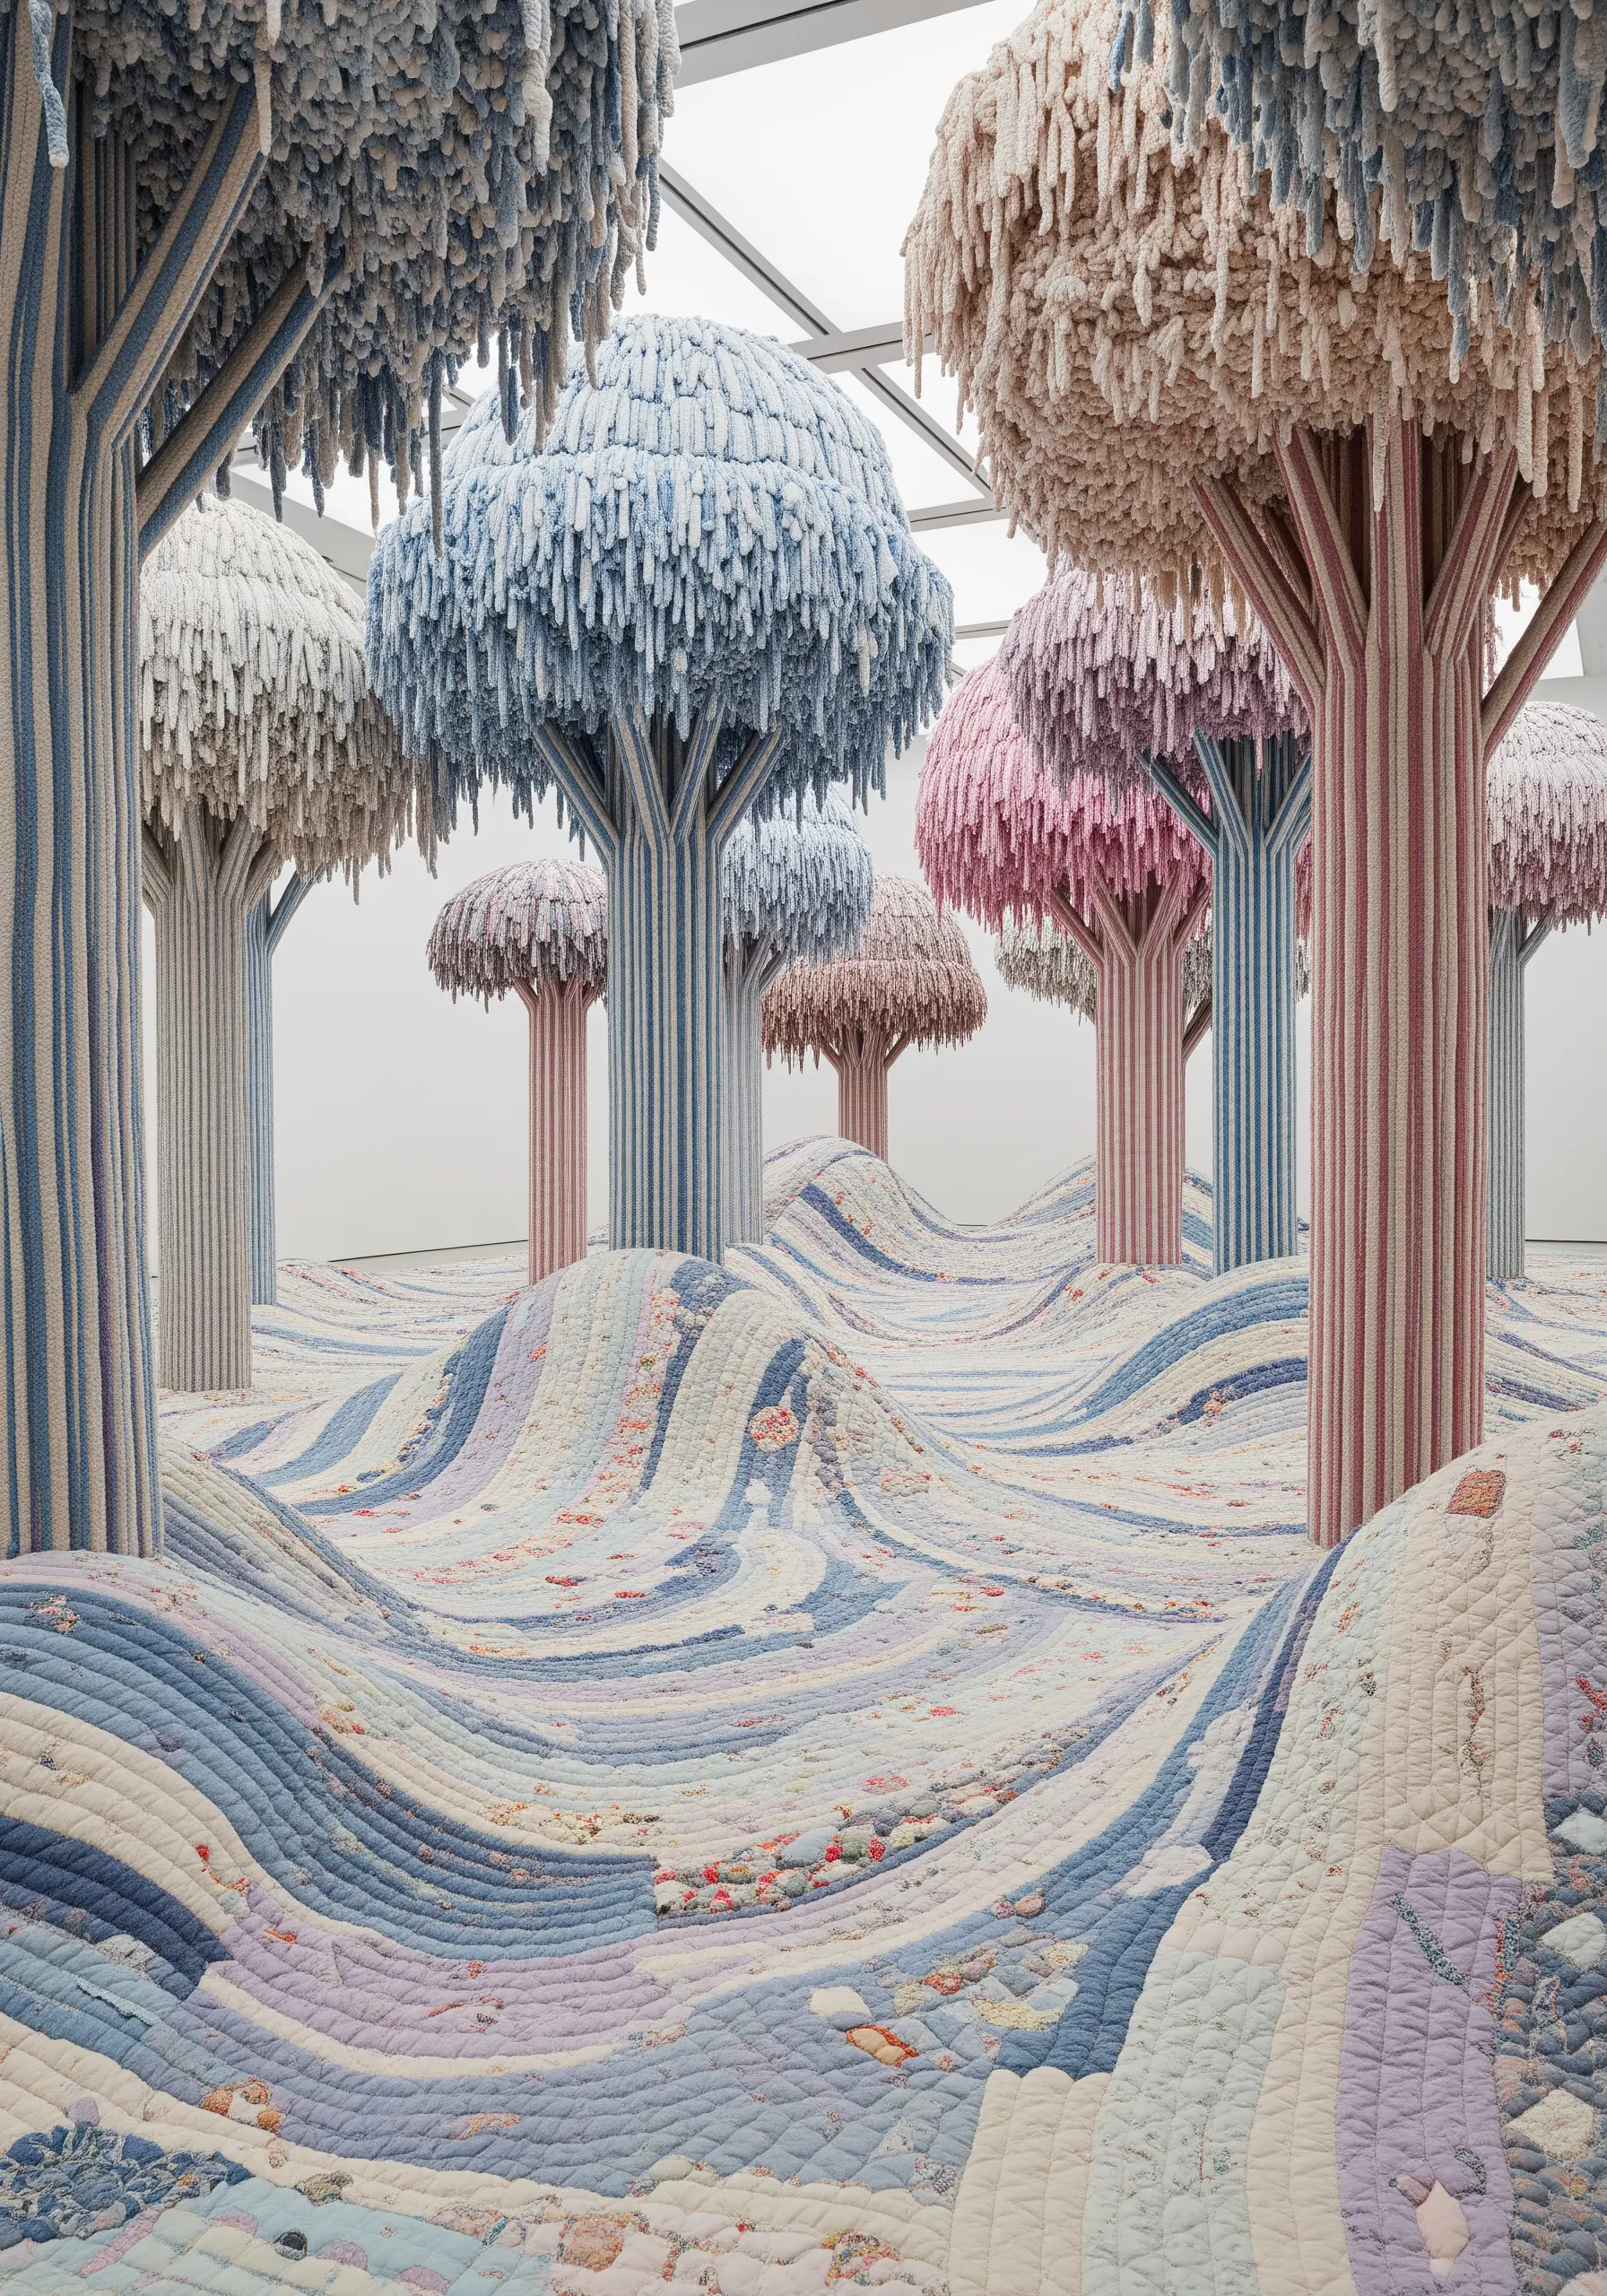
Build three-dimensional landscapes using quilting and soft sculpture techniques.
Create your foundational forms—hills, trees, clouds—by sewing and stuffing fabric shapes.
Use quilting stitches not just to join layers, but to add contour and detail, like the texture of bark on a tree or ripples in water.
This approach combines piecing, appliqué, and quilting to create an immersive, tactile world you can almost step into.
26. Free-Form Lace: Sculpting with Thread and Wire
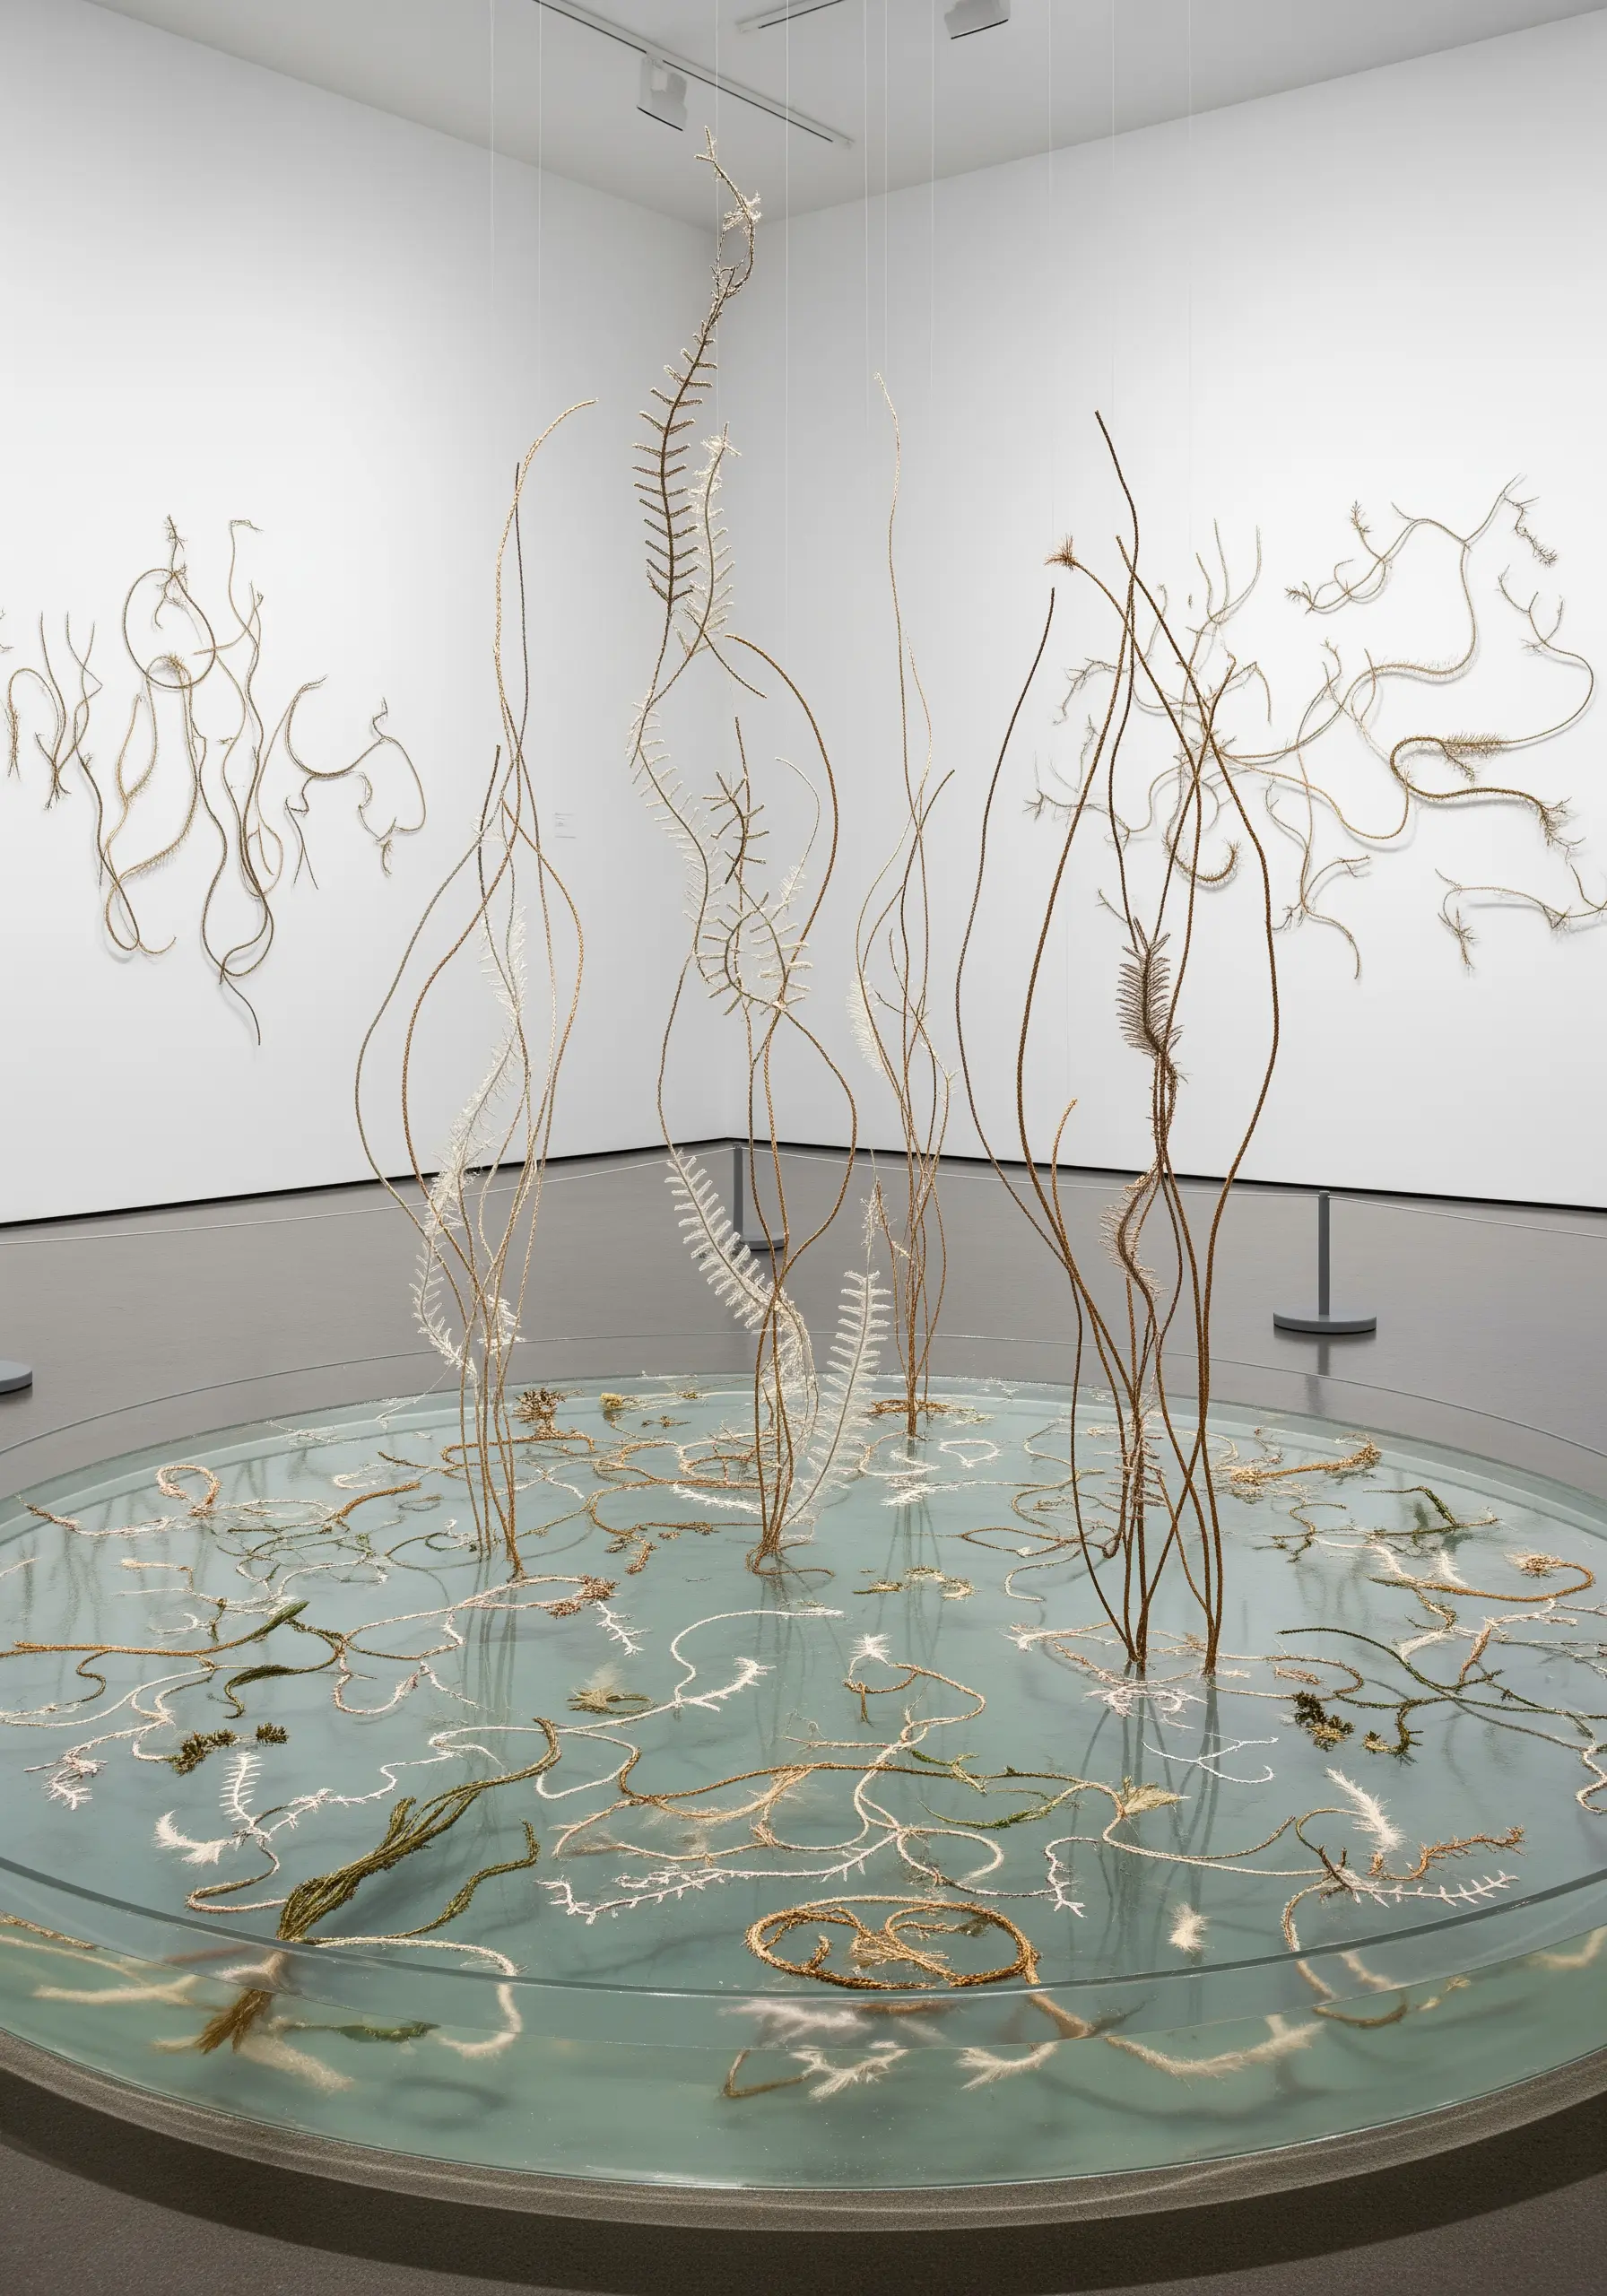
Create delicate, self-supporting sculptures without a fabric base by combining wire and thread.
Bend a fine-gauge wire into your desired organic shape—a leaf skeleton, a coral branch, or an insect wing.
Use this wire as a frame for free-form needle lace, using buttonhole stitches to build up a delicate, web-like structure.
This technique allows you to “draw” in three dimensions, creating ethereal forms that are both strong and fragile.
27. Cartography in Stitches: Mapping Your World

Translate a map—of your city, a favorite journey, or even a fictional place—into a striking piece of wall art.
On a large piece of dark canvas, use a simple backstitch in a contrasting color to trace the roads, rivers, and landmarks.
Vary the number of strands you use to create a visual hierarchy: six strands for major highways, two for side streets.
This turns personal data into a graphic and meaningful travel-inspired string art map.
28. The Lace-Adorned Object: A Material Dialogue
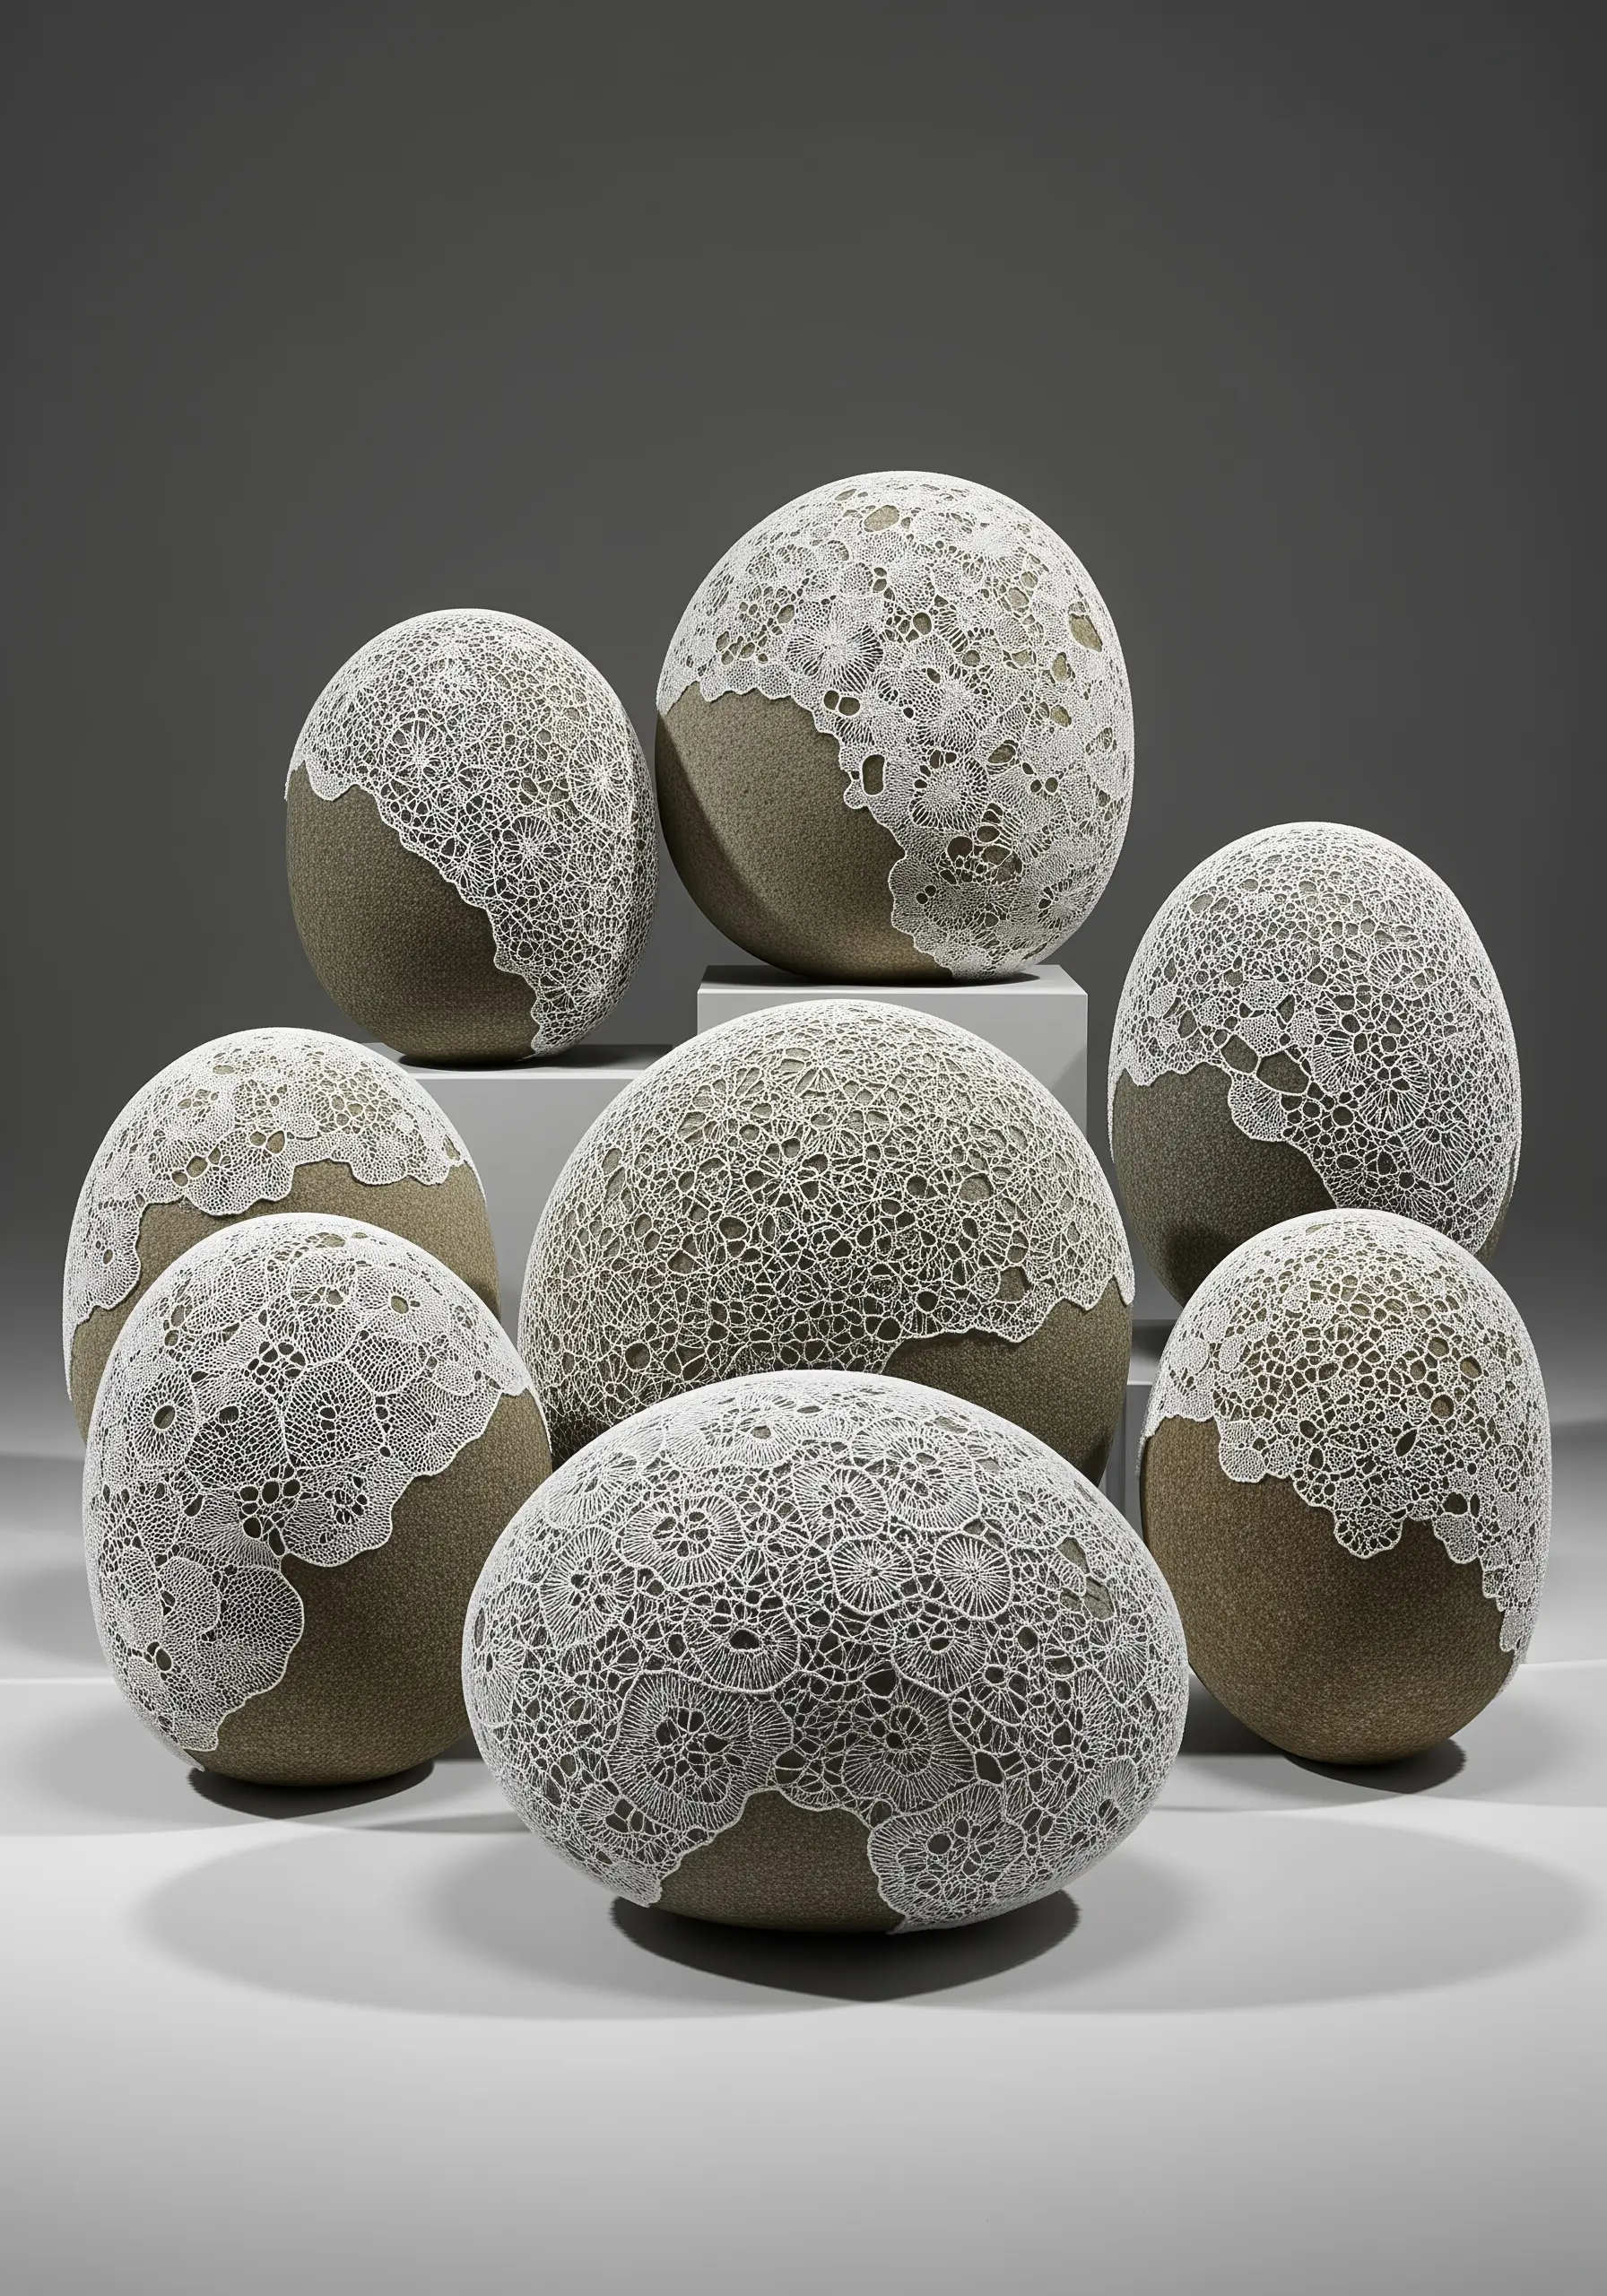
Add an unexpected layer of delicacy and history to a hard, found object.
Choose a smooth stone, a piece of reclaimed ceramic, or a piece of weathered driftwood.
Using a strong adhesive suitable for both fabric and your object, carefully apply a piece of antique lace or a finished piece of cutwork embroidery to its surface.
The intricate texture of the thread against the solid form creates a beautiful and surprising dialogue between materials.


