

Sometimes the key to unlocking your most beautiful work isn’t learning a dozen new, complex stitches. It’s about refining how you use the ones you already know. It’s in the quiet decision to use a single strand of thread instead of two, or changing the angle of your stitches to catch the light just so.
This is where your embroidery transforms. It moves from being a craft you follow to an art you direct. Each idea that follows is an invitation to look closer—at your thread, your fabric, and your own creative instincts.
Let’s explore how small, intentional adjustments can add that personal touch, turning simple materials into pieces that truly resonate, making your space feel more like you.
1. Render Botanical Depth with Directional Stitching
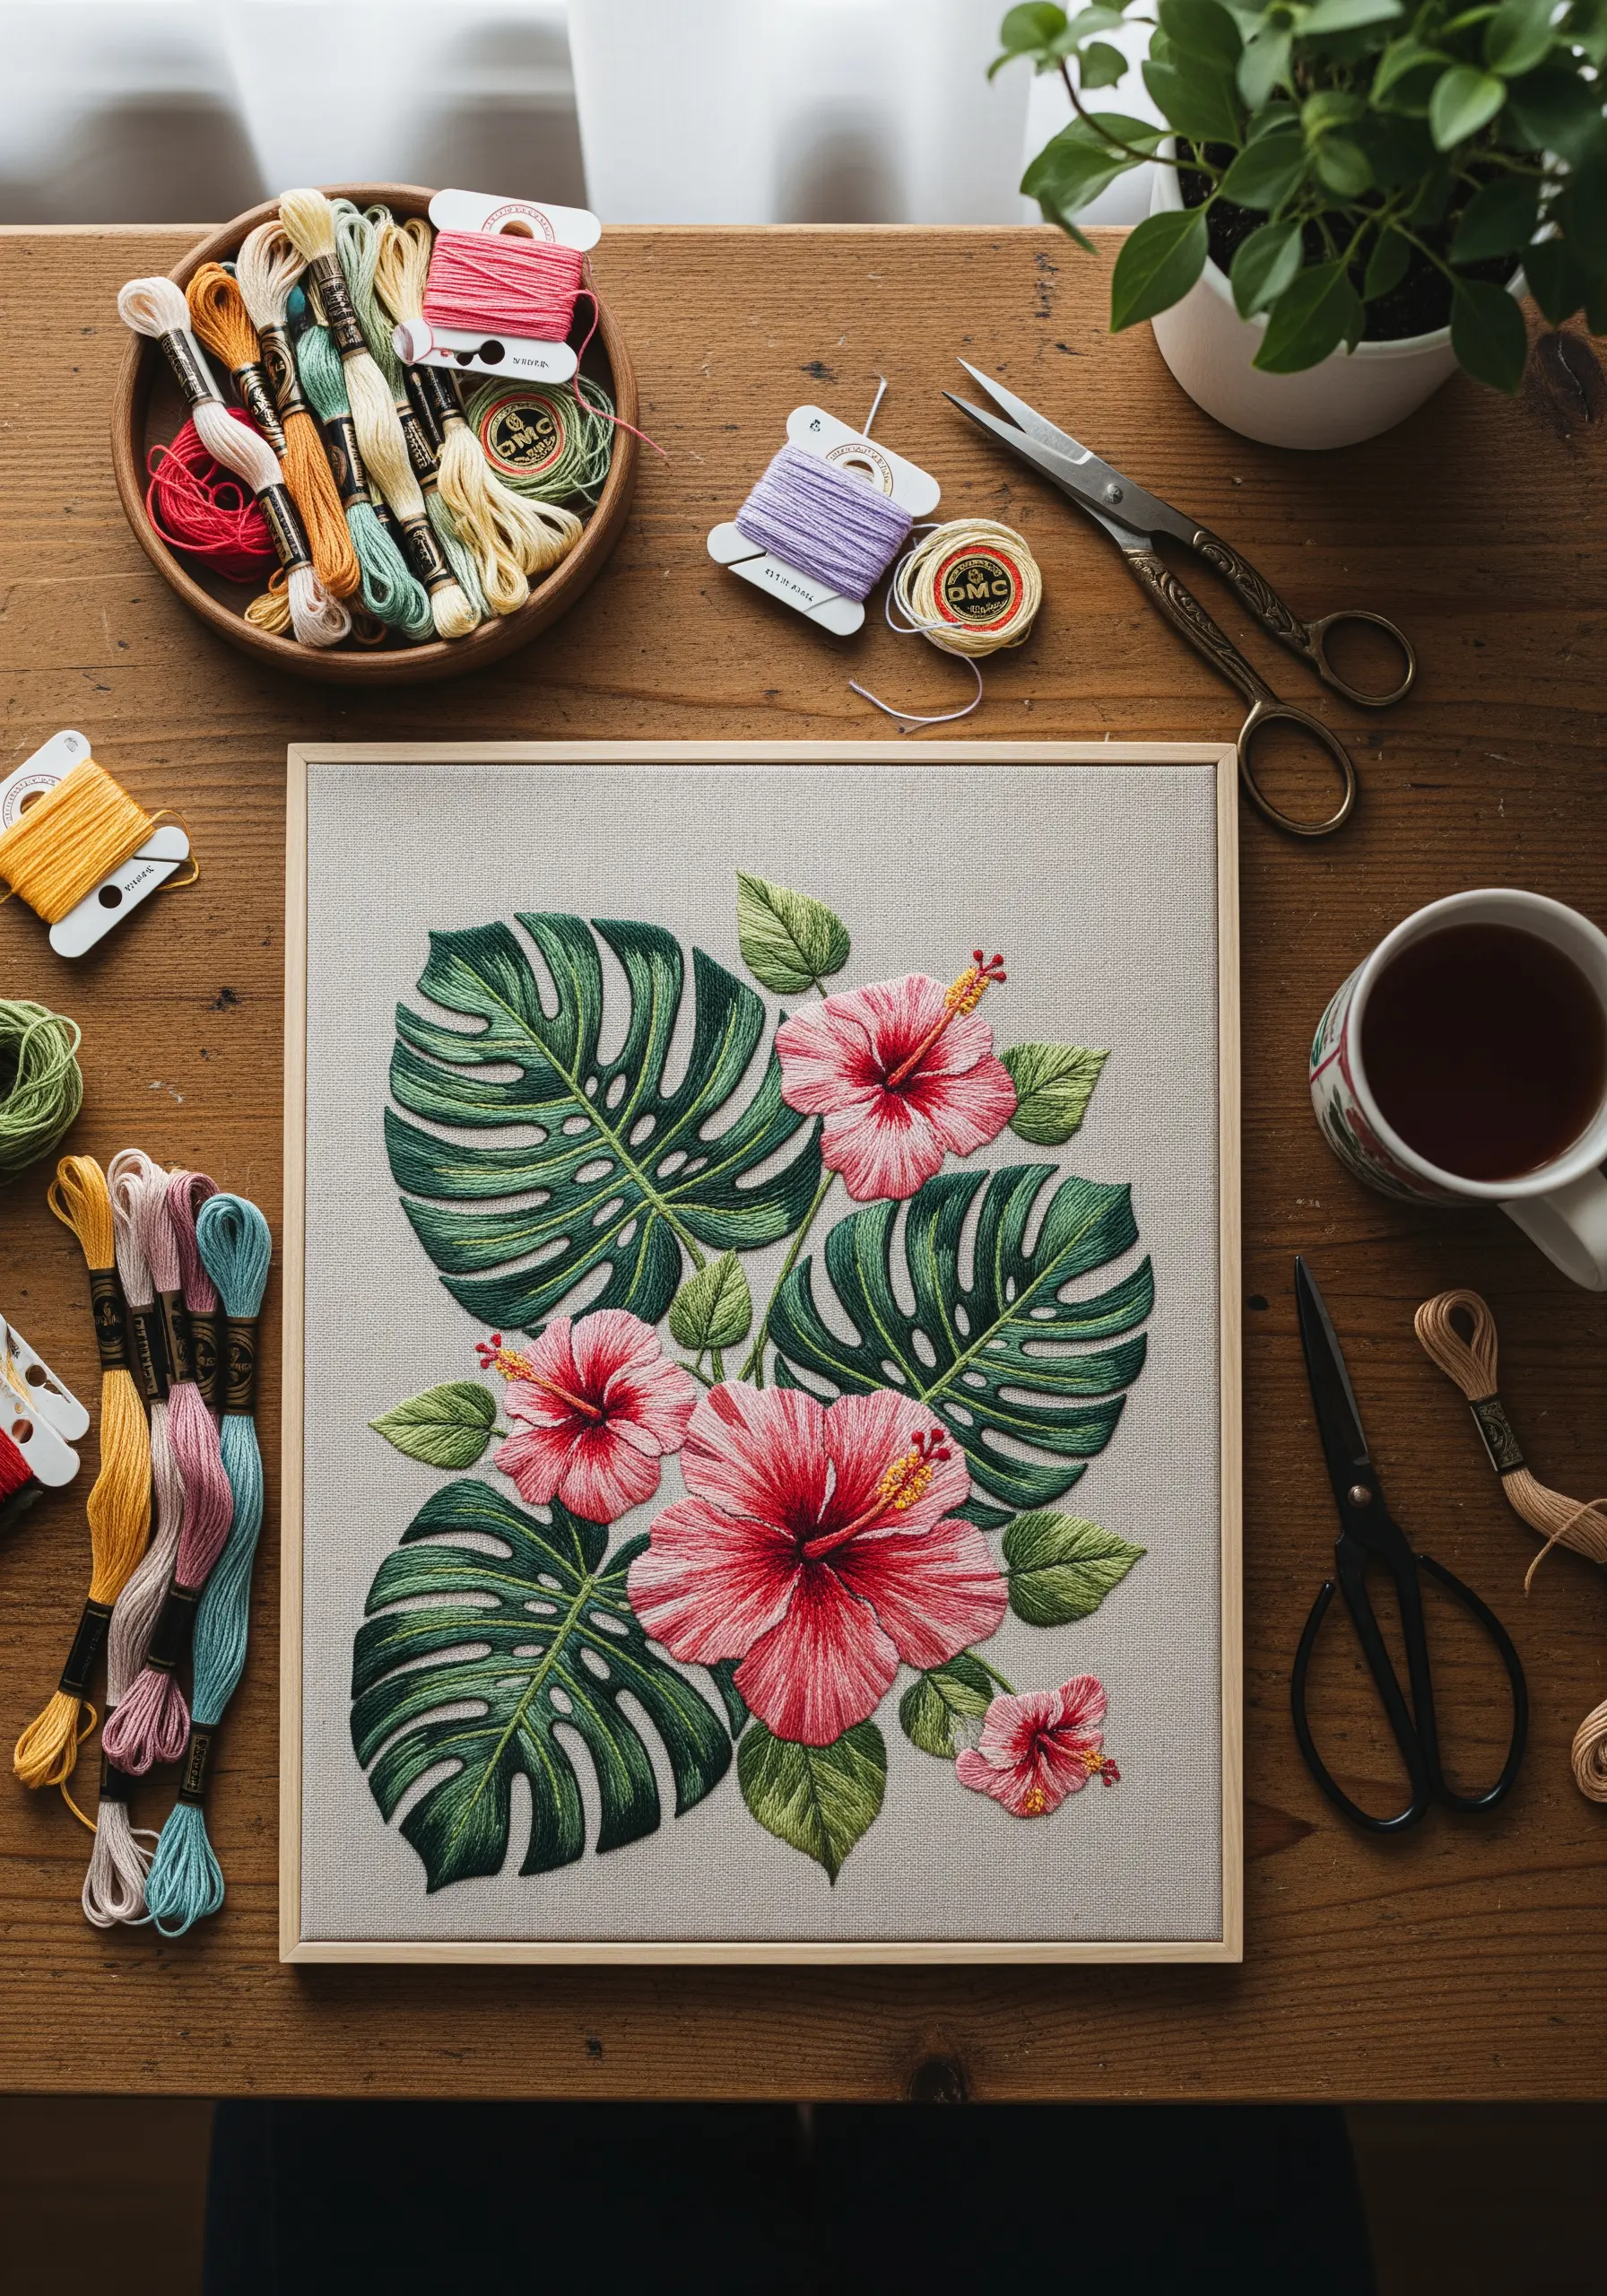
To prevent large botanicals from looking flat, treat your needle like a paintbrush and your thread like strokes of color.
Use a long-and-short stitch, angling your stitches to follow the natural curves and veins of each leaf and petal.
For the Monstera leaves, stitch outwards from the central vein towards the edge, slightly changing the angle for each segment to create realistic dimension.
In the hibiscus petals, use two or three closely related shades of pink and red, blending them with directional stitches that radiate from the flower’s center. This technique creates soft, believable gradients without overcrowding the design.
This thoughtful application of stitch direction is what separates a simple motif from a vibrant, lifelike tropical composition.
2. Combine 3D Stitches with Fine Lettering
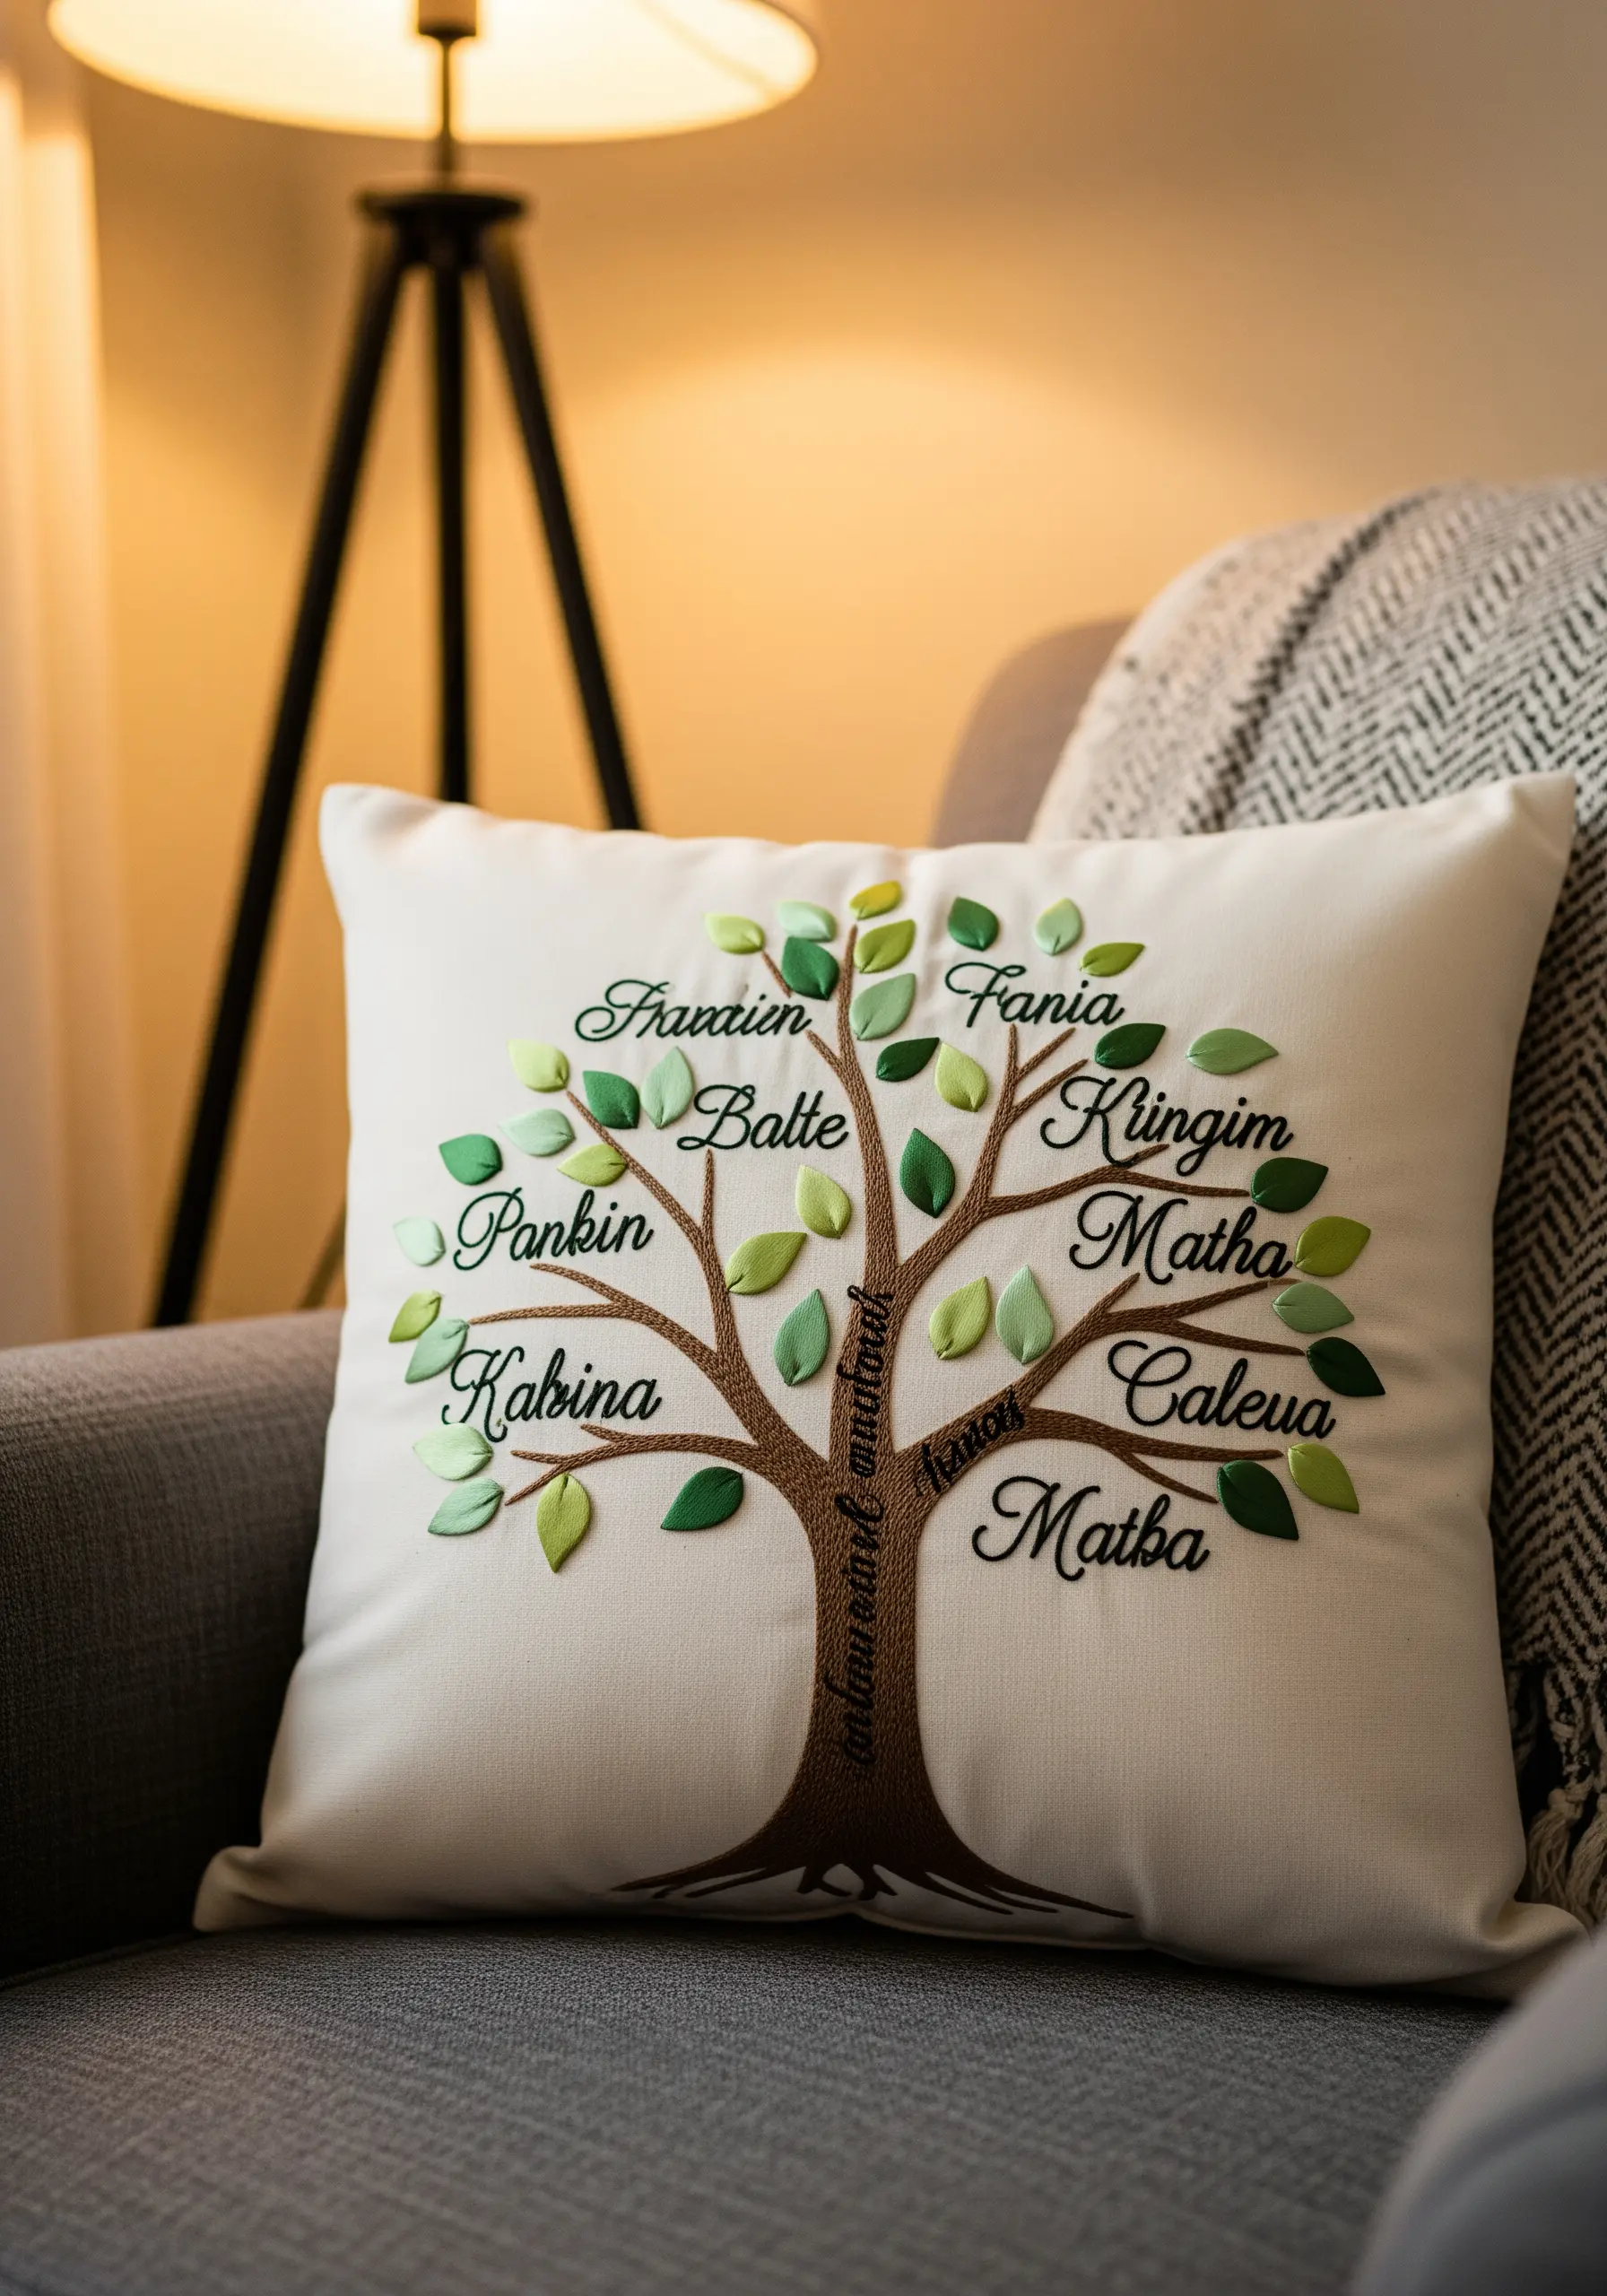
Transform a simple family tree into a tactile heirloom by giving the leaves a three-dimensional quality.
Create individual leaves using a detached buttonhole stitch or a simple fishbone stitch on a separate piece of fabric, then cut them out and tack them onto the pillow with a single stitch at the base.
This allows the leaves to lift slightly, creating subtle shadows and movement.
Contrast this texture with crisp, clear lettering for the names. Use a delicate, single-strand backstitch or split stitch to ensure every name is legible and elegant.
The interplay between the raised leaves and the flat, precise text makes the entire piece dynamic and deeply personal, turning it into one of those thoughtful birthday gifts people treasure.
3. Elevate Linen with Clean Botanical Line Art
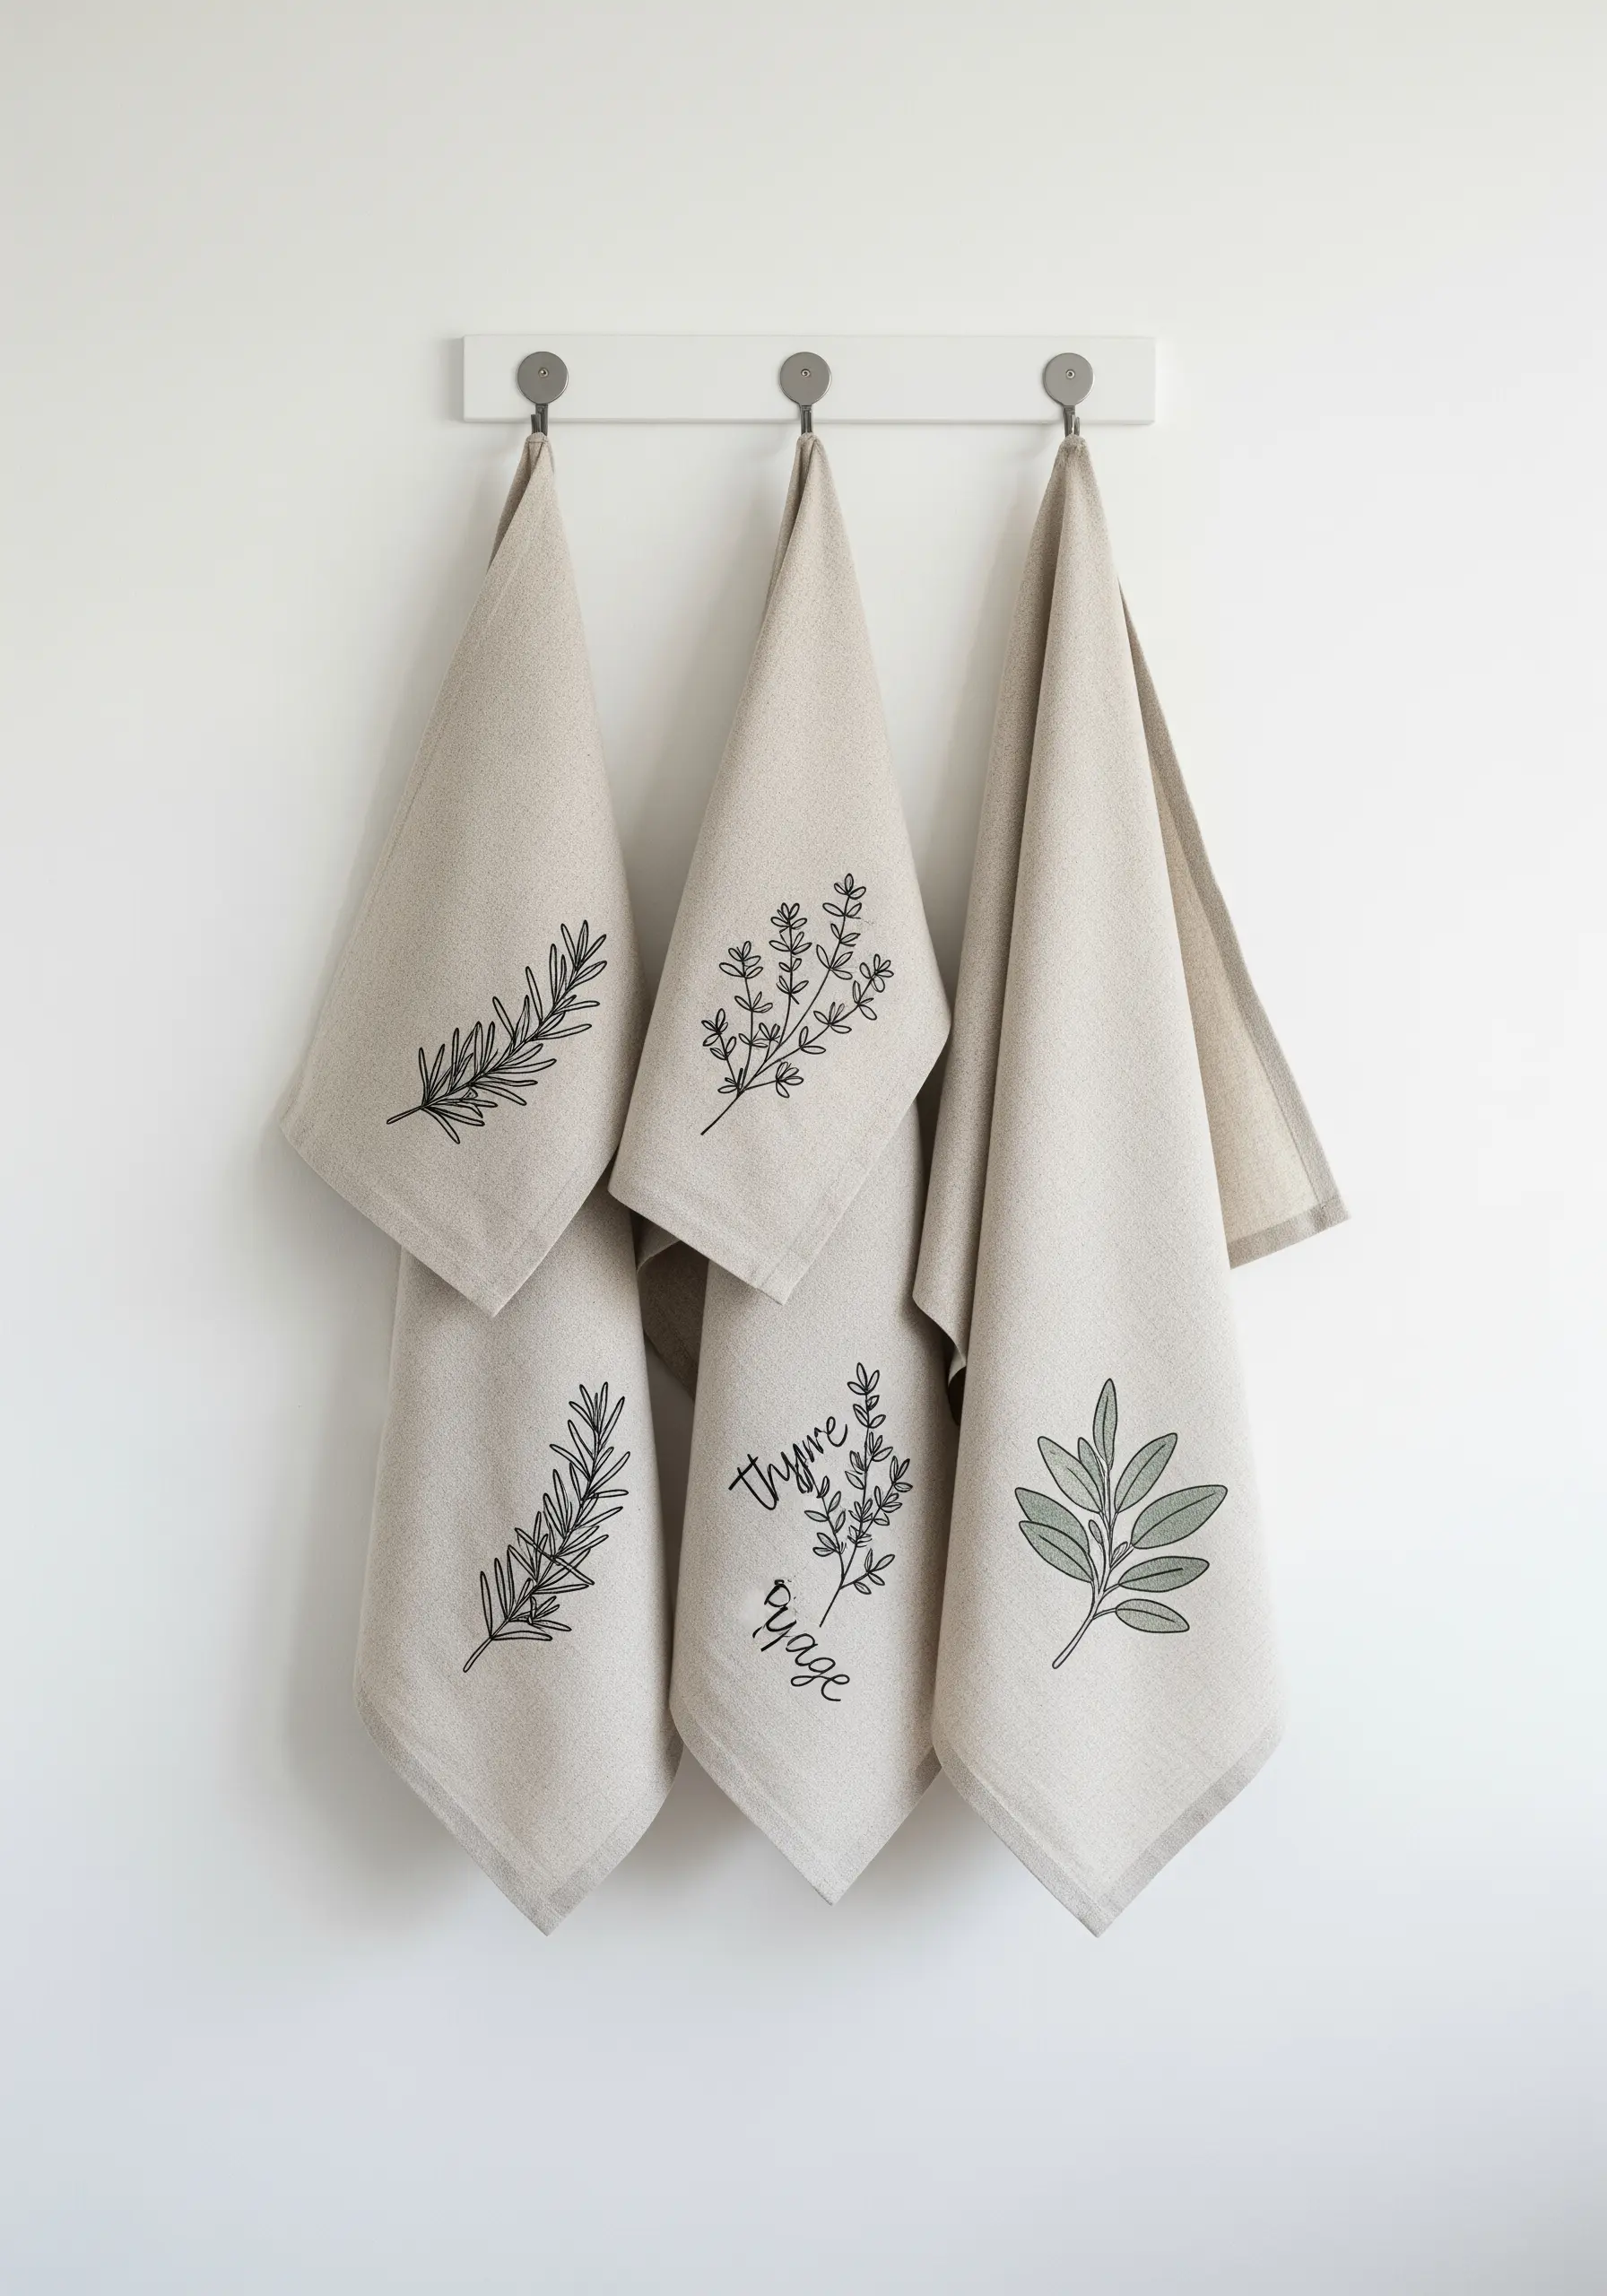
For an understated and modern look on functional items like kitchen towels, focus on the purity of line work.
Choose a high-quality linen or cotton-linen blend; its natural texture provides a sophisticated backdrop that makes simple stitches stand out.
Use a stem stitch or a whipped backstitch for the herb stems and outlines. Both stitches create a smooth, slightly raised line that looks refined and intentional.
Stick to a single, dark color thread (like charcoal grey or deep forest green) to maintain a cohesive, graphic aesthetic across a set of items.
This minimalist approach ensures your embroidery enhances the object without overwhelming it, creating minimal embroidery patterns that feel both rustic and chic.
4. Master Realism with Thread Painting
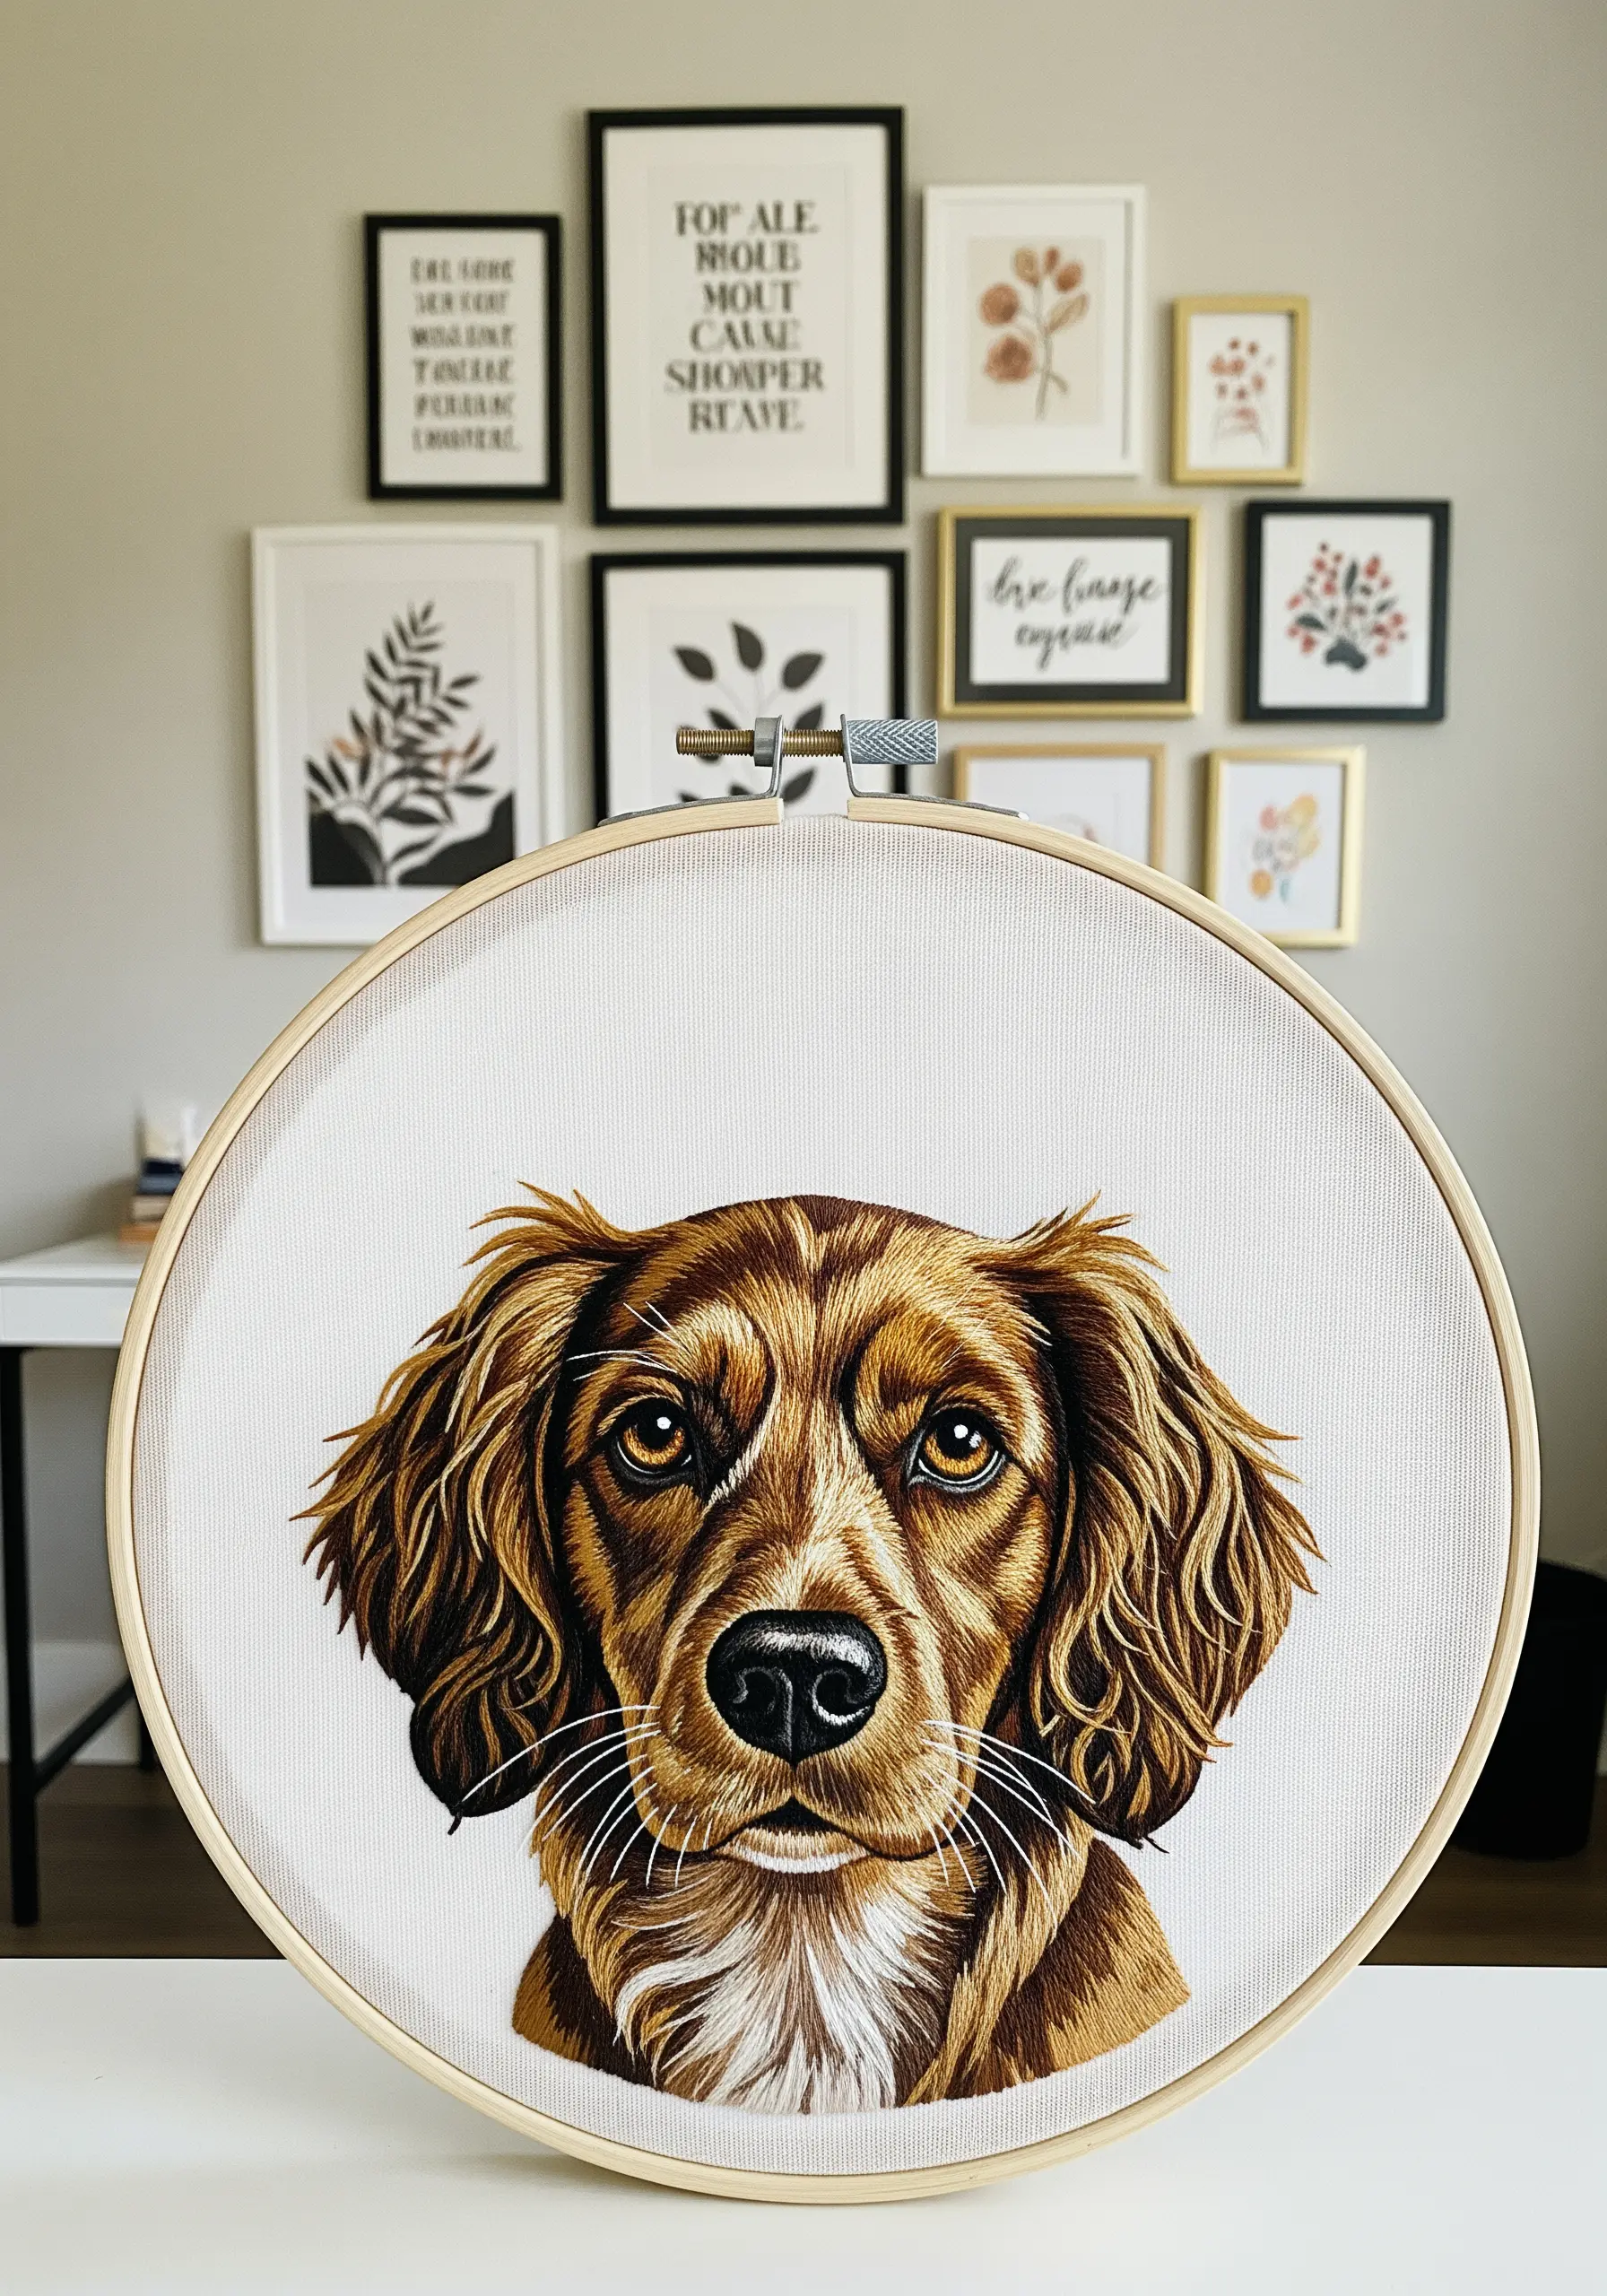
To capture the lifelike quality of a pet portrait, you must think in layers, just like a painter.
Work with a single strand of six-strand floss. This is non-negotiable for blending colors seamlessly and achieving fine detail.
Map out the key areas of light and shadow, and use a long-and-short stitch to lay down a base of mid-tone colors.
Then, build upon that base with lighter shades for highlights and darker ones for shadows, always stitching in the direction of fur growth. This directional stitching is what creates the illusion of texture and form.
For the eyes, a tiny satin stitch in a bright color topped with a single white French knot will give them a realistic, soulful glint. It’s a technique central to all realistic animal embroidery patterns.
5. Stitch on Translucent Surfaces for a Luminous Glow
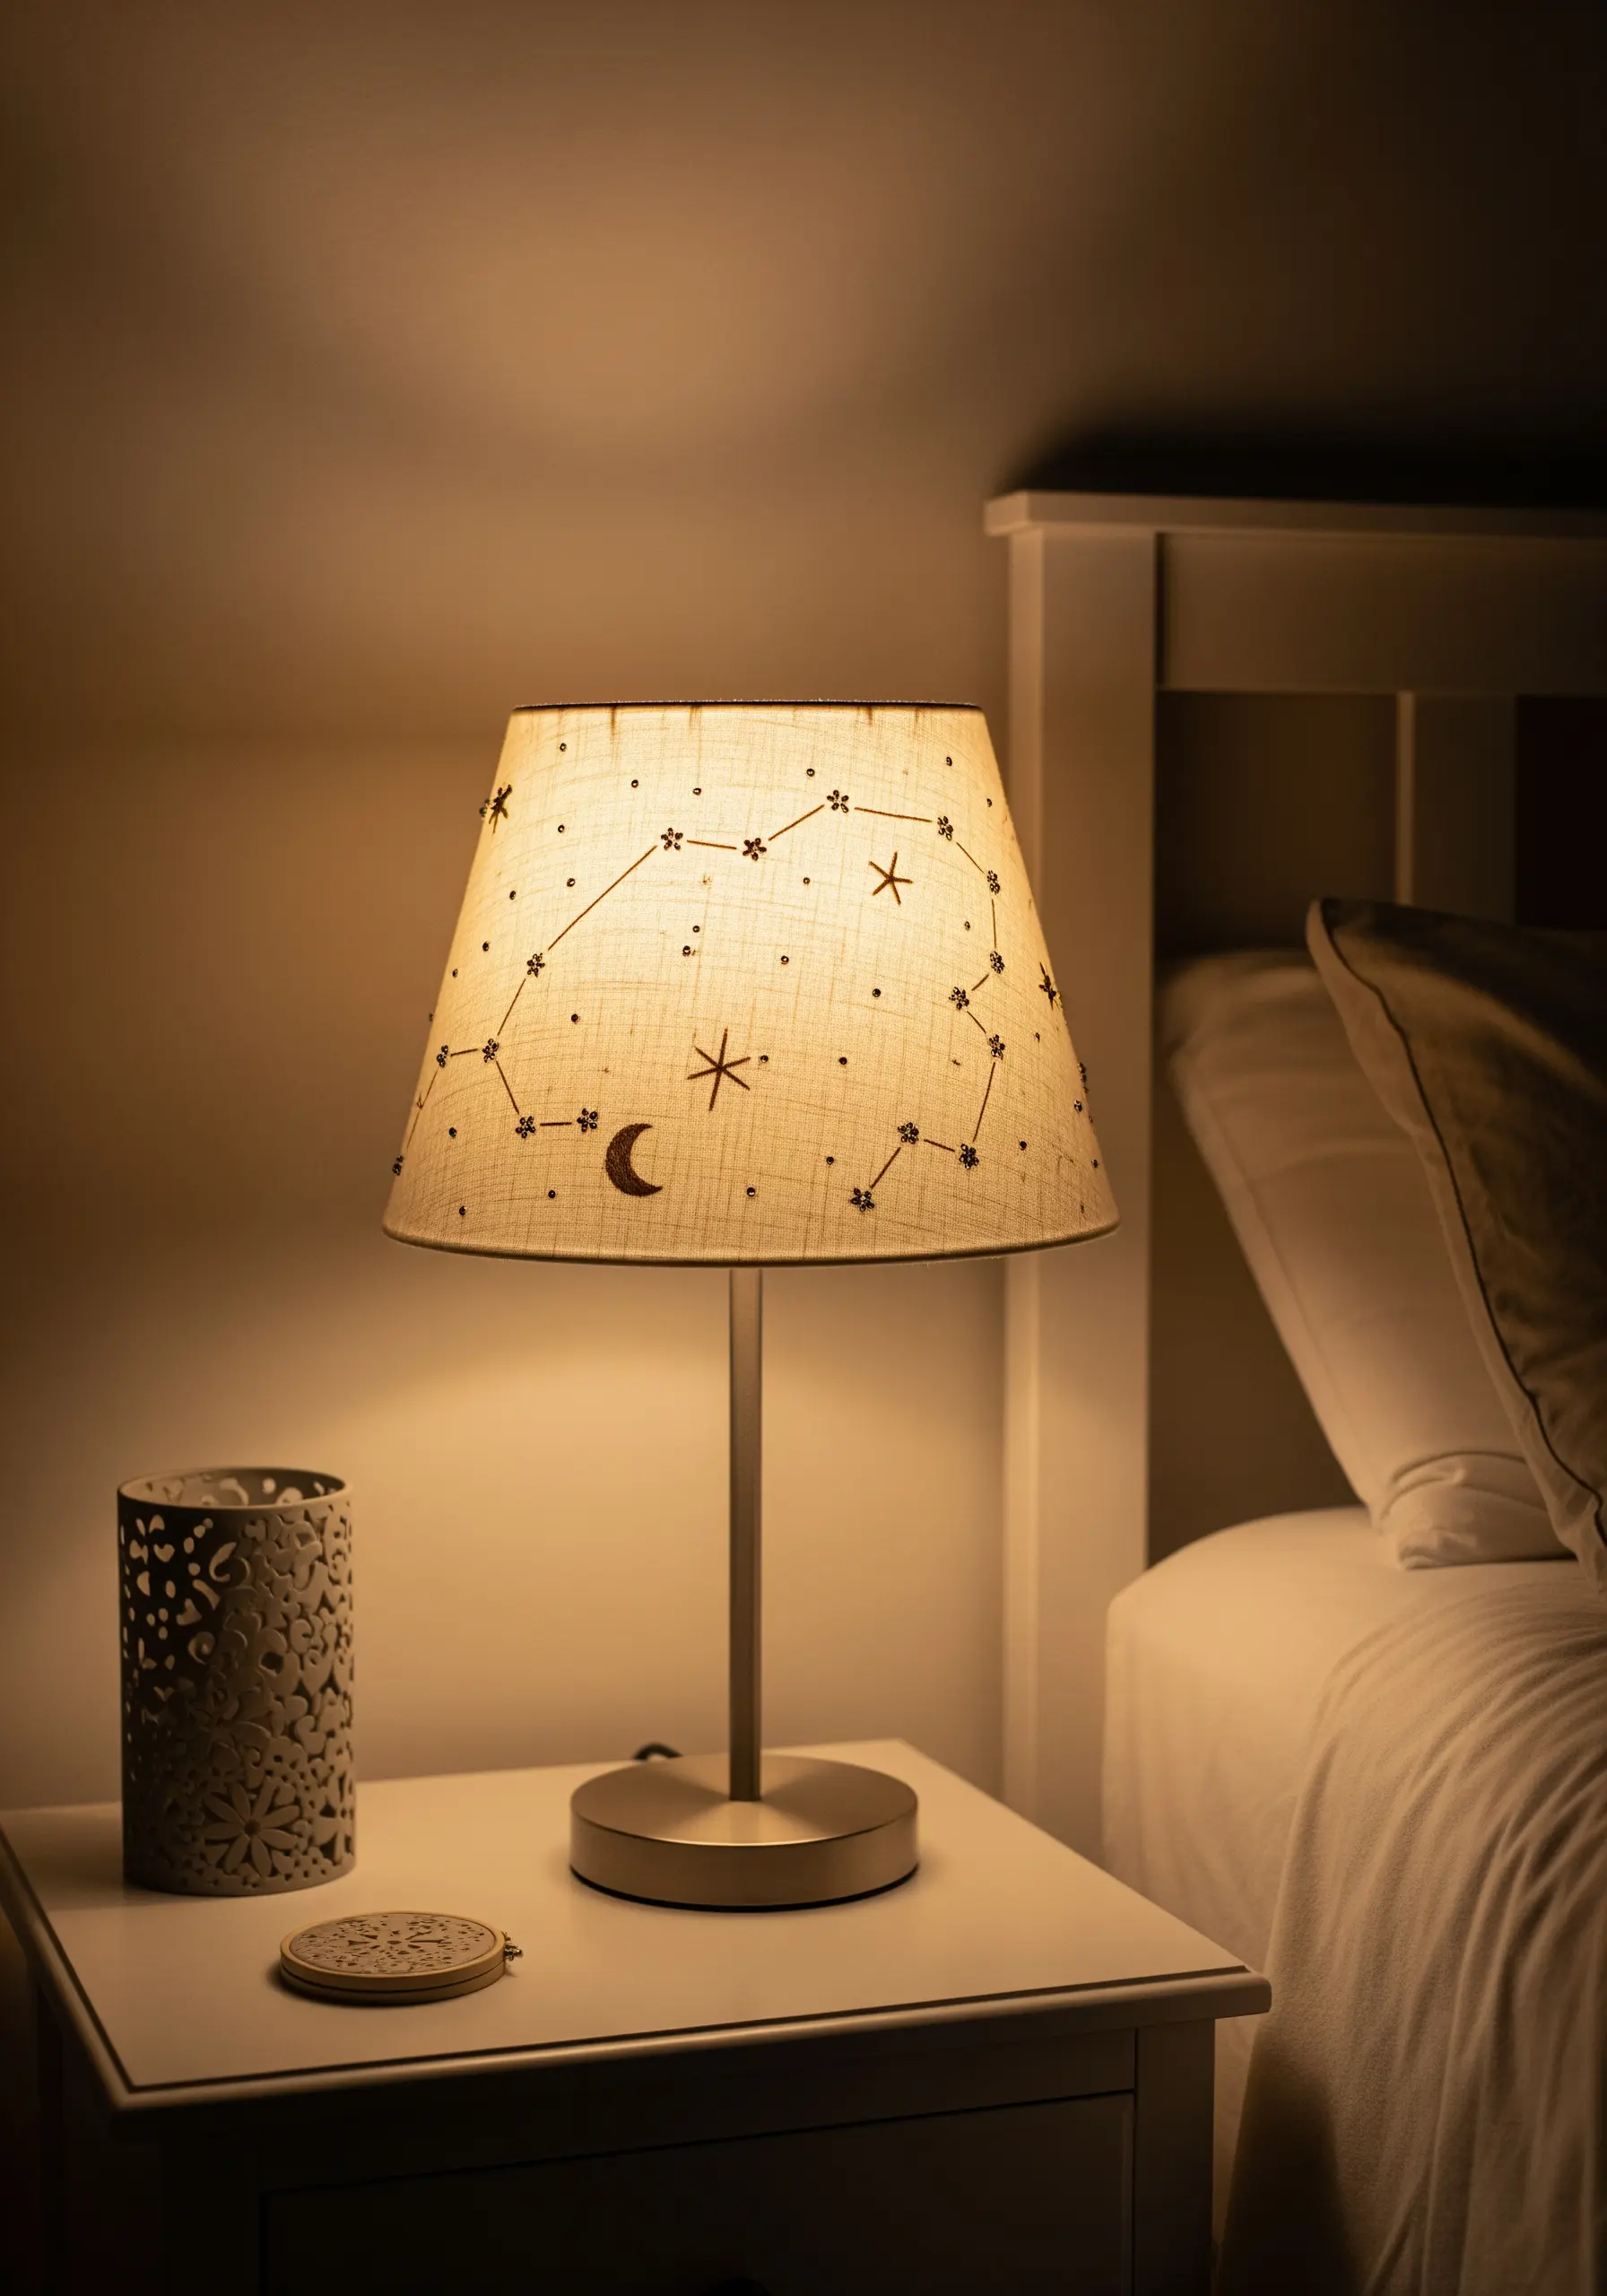
Embroidering a lampshade transforms it from a simple utility item into a piece of ambient art.
Choose a lampshade made from a tightly woven, light-colored fabric like linen or cotton. If the material is thin, use a lightweight, iron-on stabilizer on the inside to prevent puckering.
Opt for simple, open stitches like seed stitch, backstitch, or small star stitches. Dense stitches like satin stitch will block the light, whereas spaced-out motifs allow it to filter through beautifully.
Use a dark thread for a crisp silhouette or a metallic thread to add a magical sparkle when the lamp is turned on, turning your minimal sky designs into a celestial display.
6. Define Small Details on High-Use Items
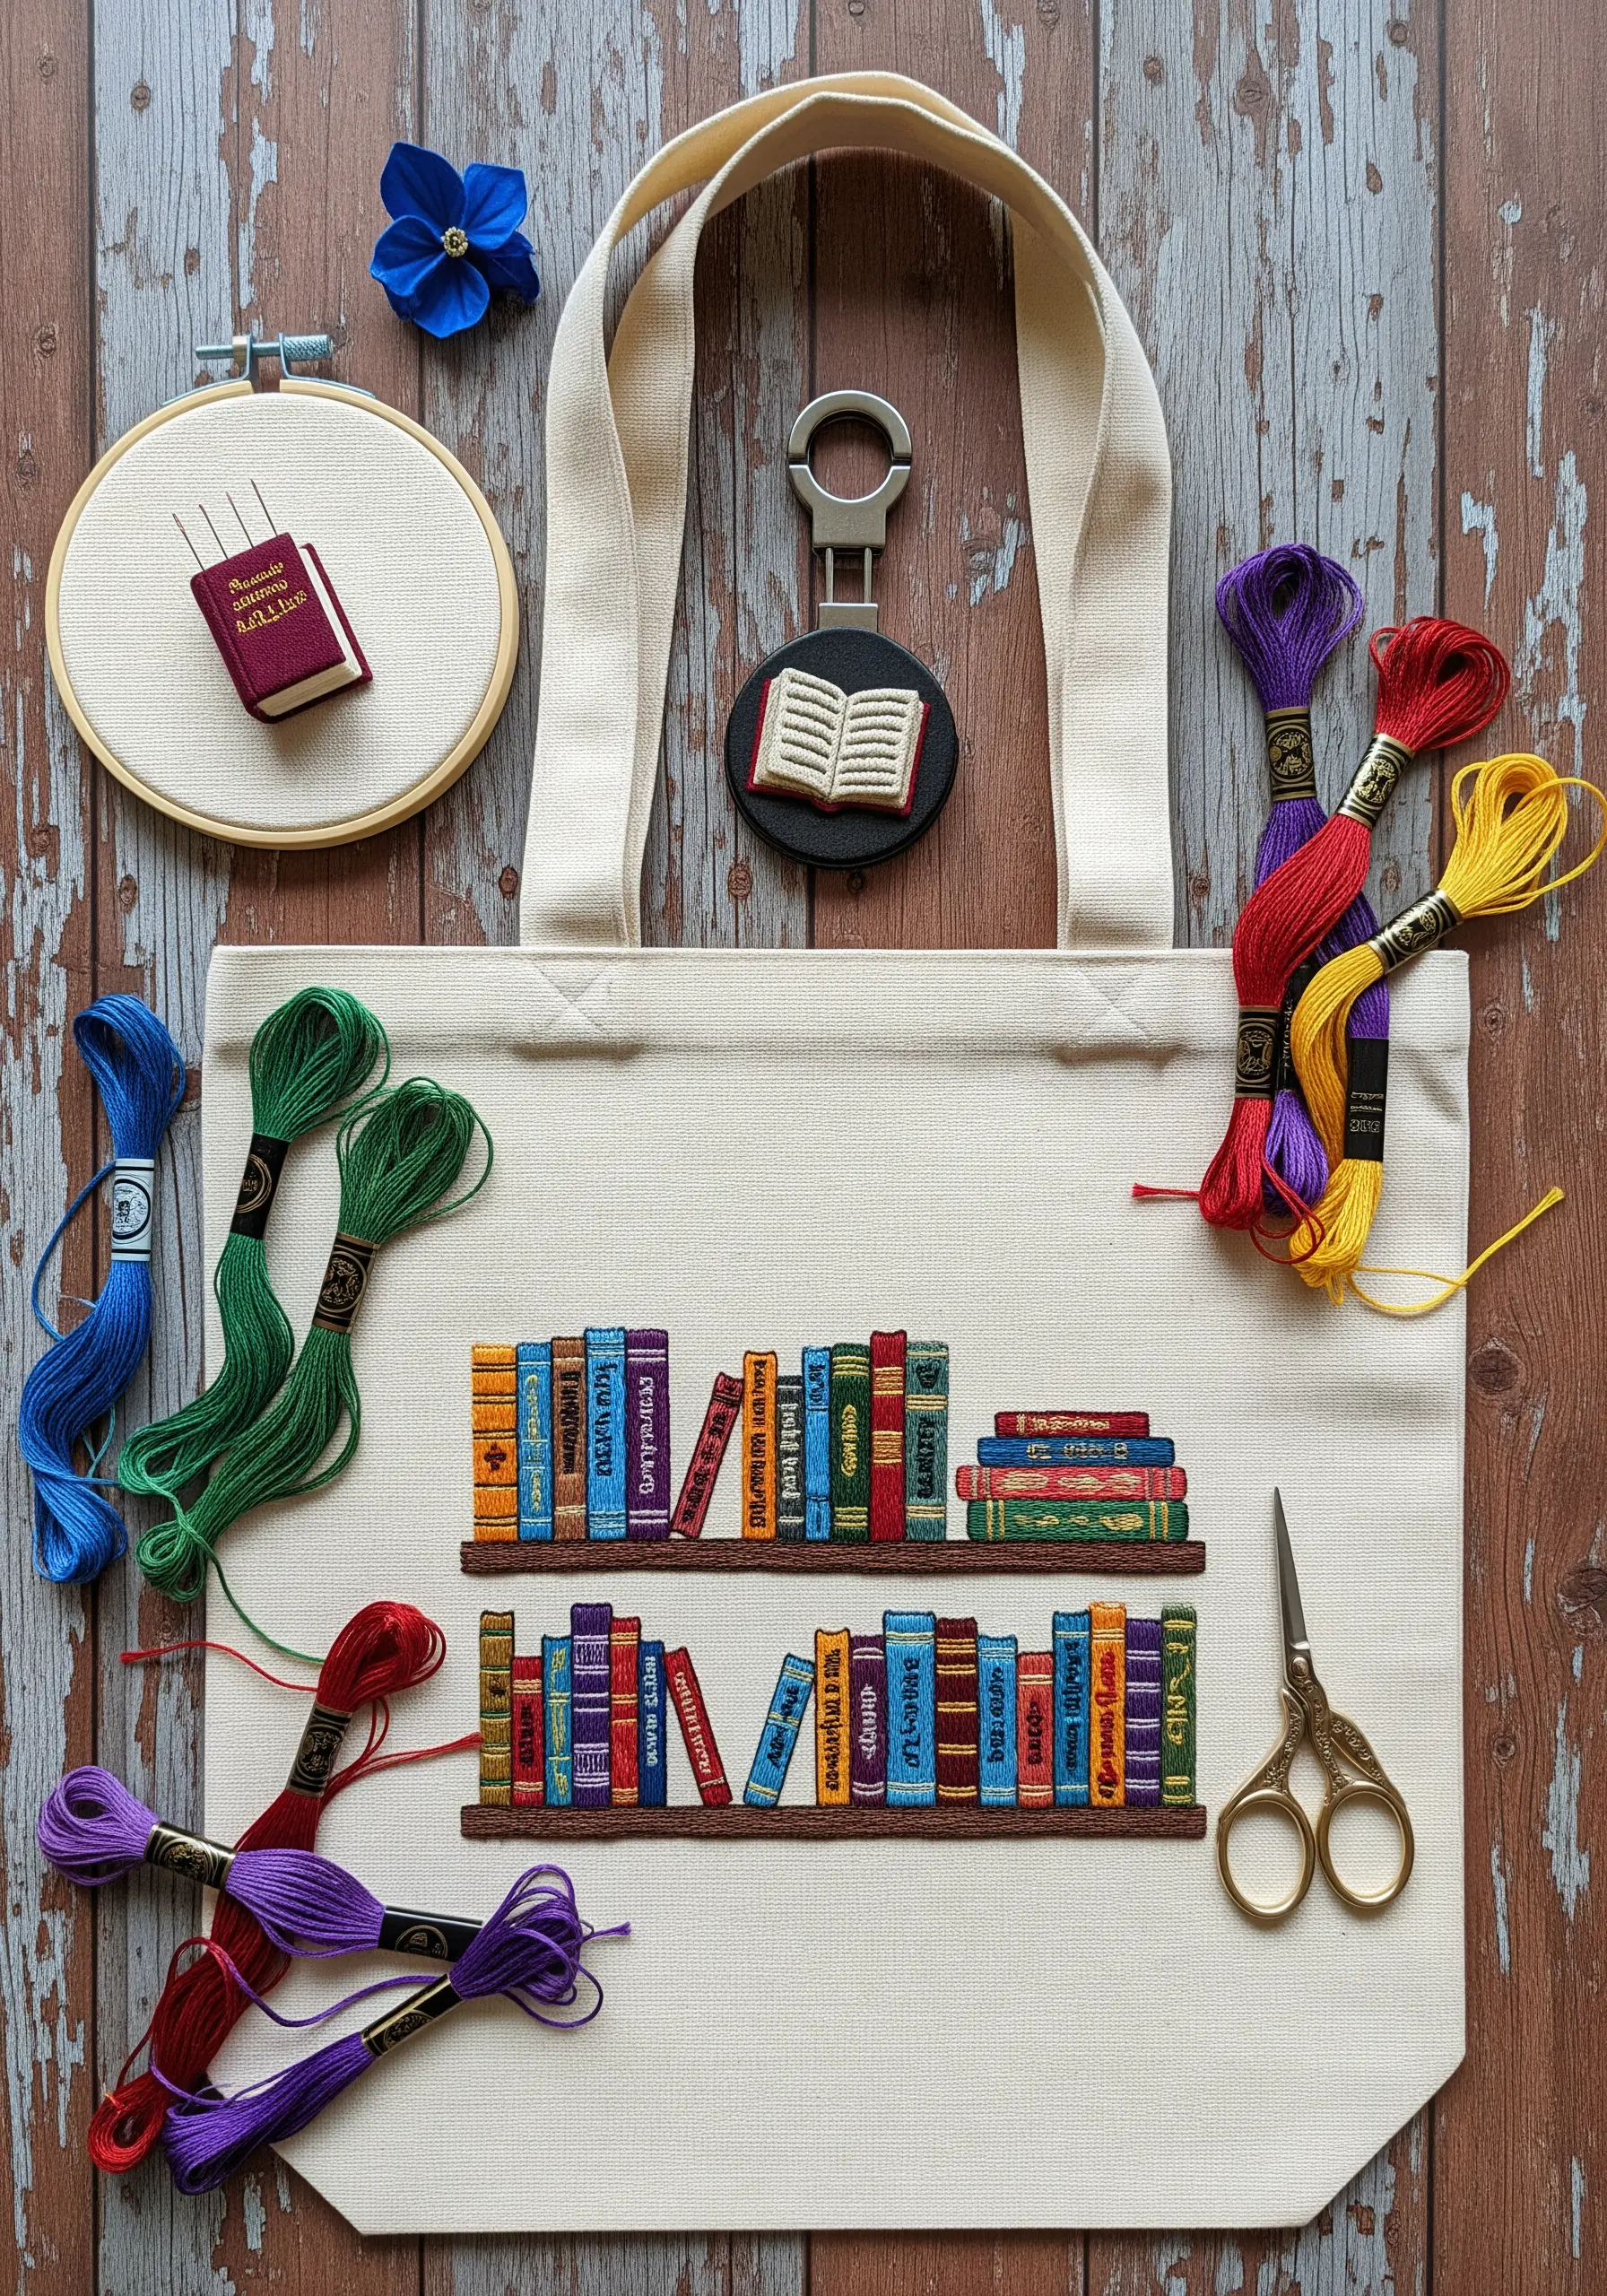
When embroidering detailed designs like bookshelves on a canvas tote bag, clarity is everything.
For the tiny book titles, abandon the backstitch, which can look jagged on small curves. Instead, use a split stitch with a single strand of floss for crisp, readable lettering.
Use a vertical satin stitch for the book spines, changing colors for each book to create a vibrant, varied library. To give the spines a slightly rounded appearance, place a single straight stitch down the center before covering it with your satin stitches.
This padded effect adds a subtle dimension that elevates the entire design, making your tote bag a piece of wearable art.
7. Achieve Monogrammed Luxury with High Contrast
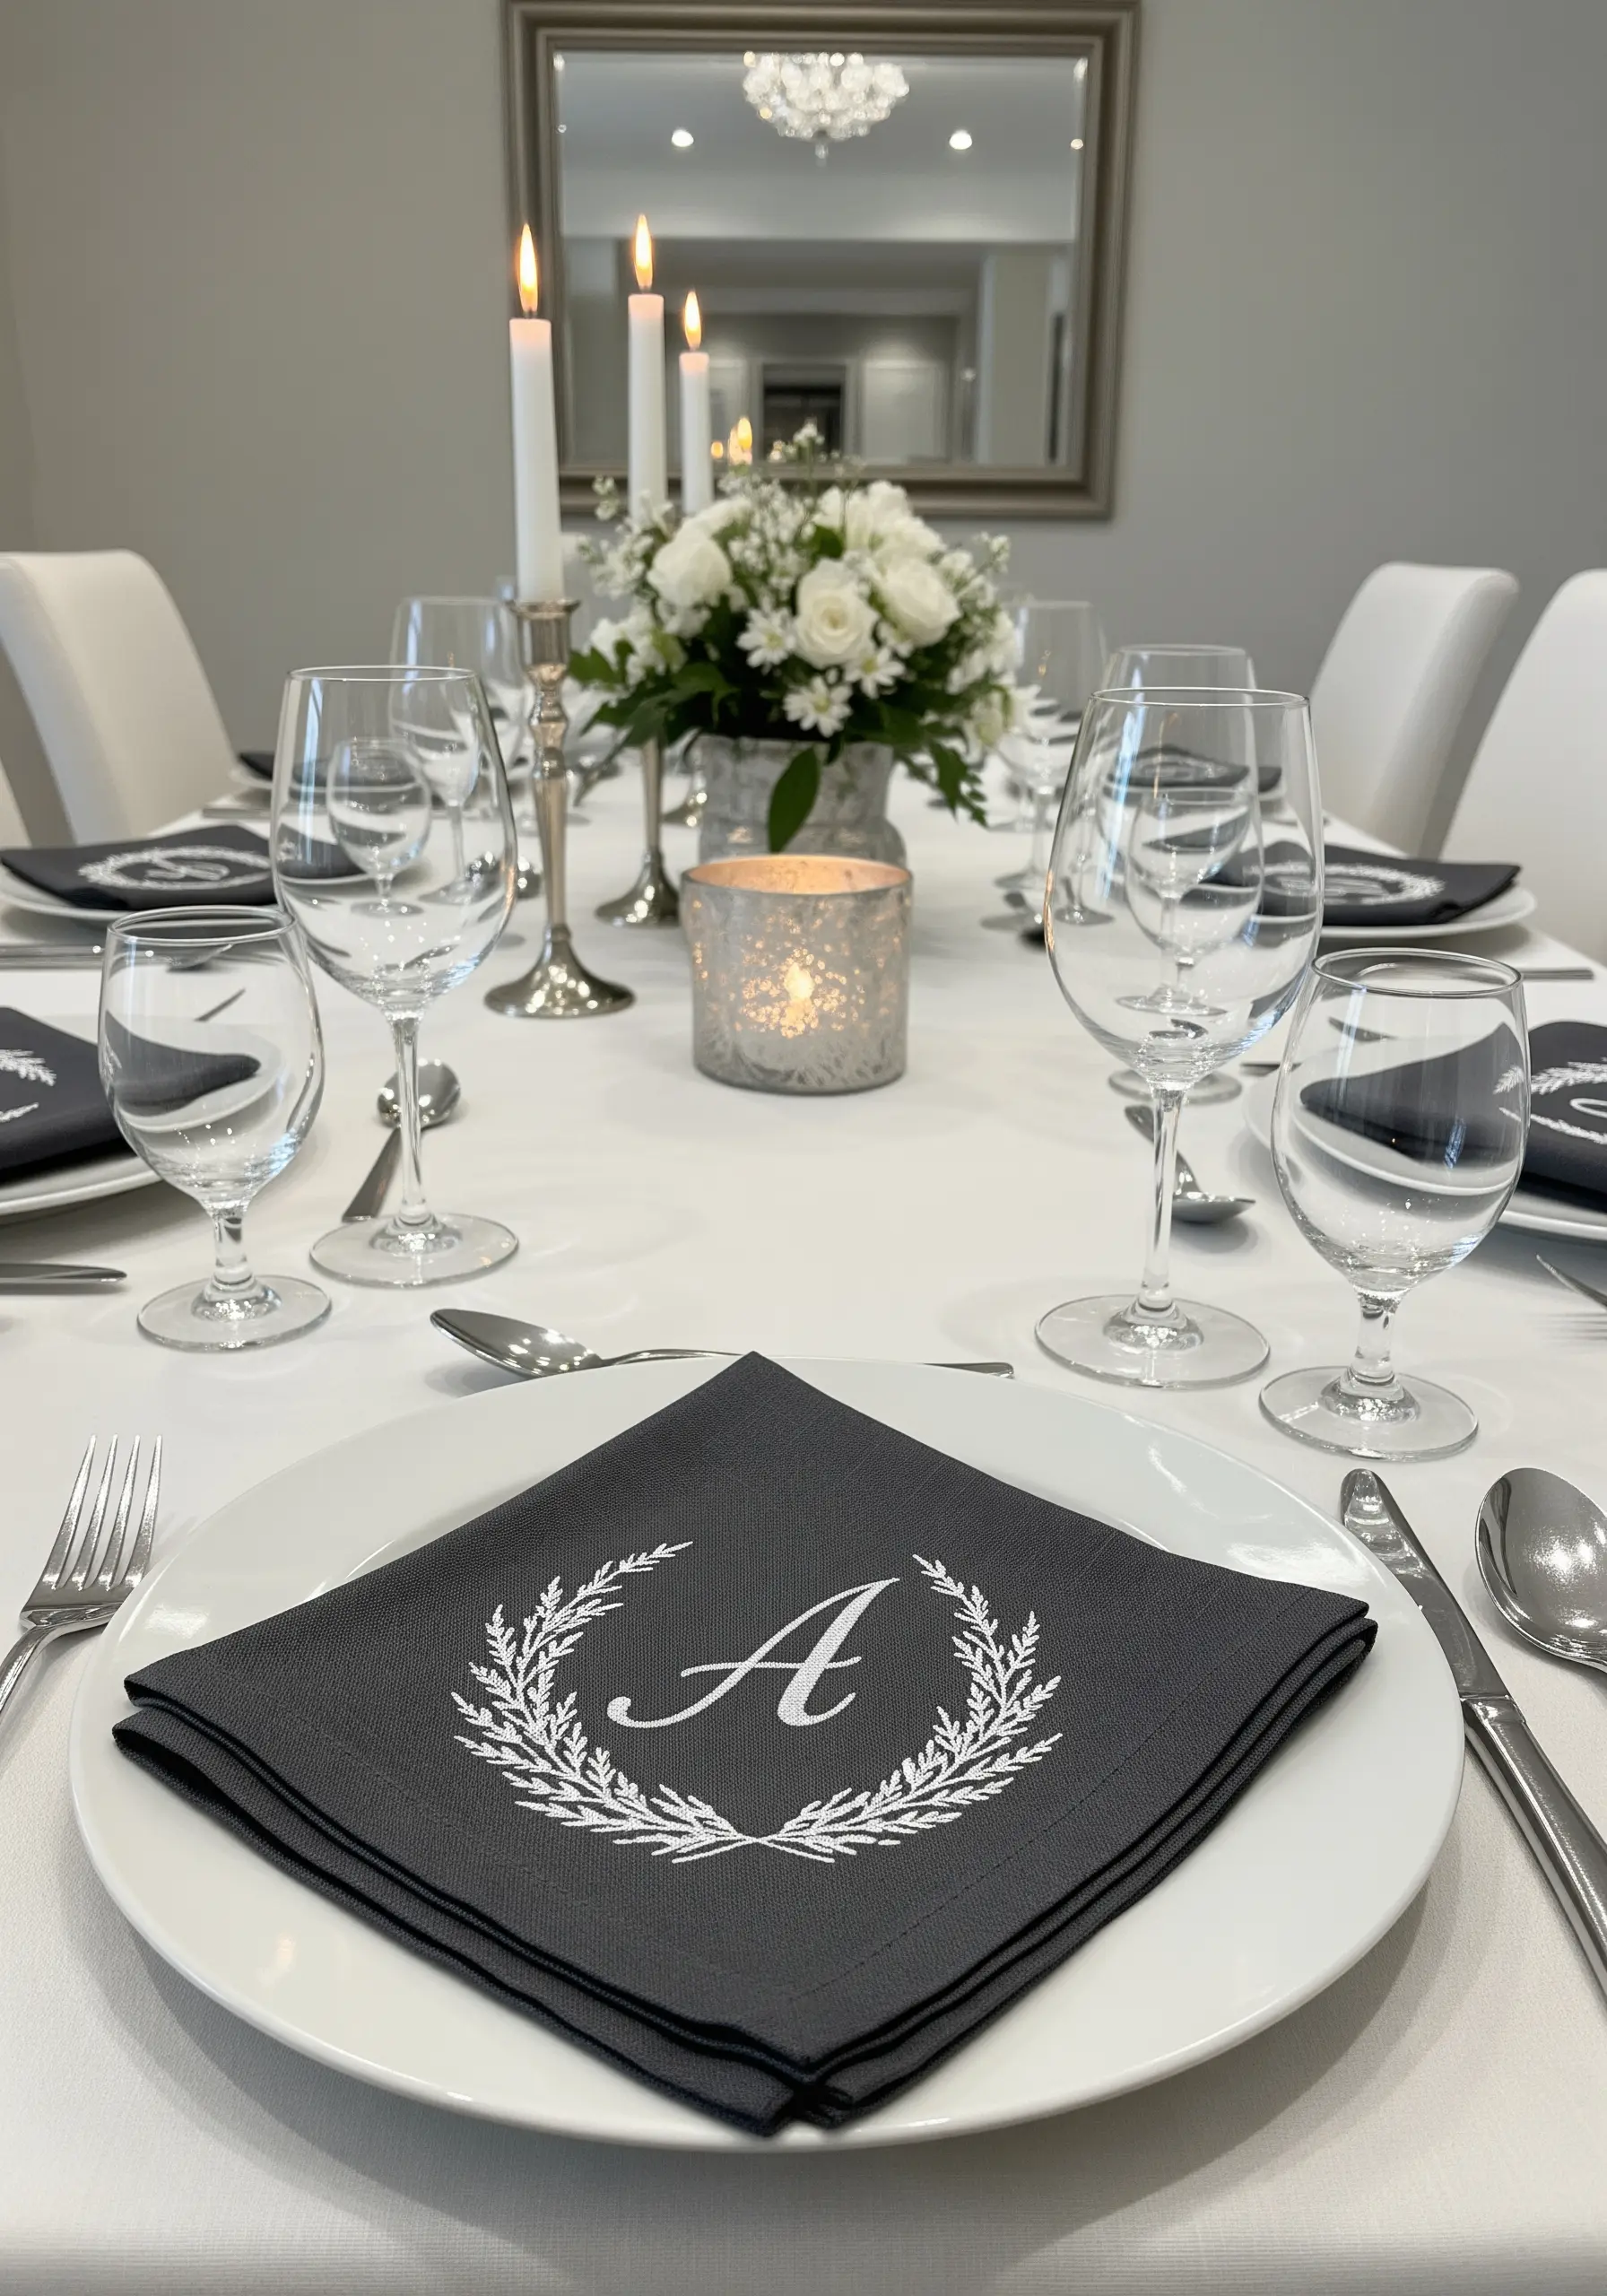
To make a monogram feel truly luxurious, the key is high contrast and flawless execution, not complexity.
Choose a dark, heavyweight fabric like charcoal linen or navy cotton, and pair it with a bright white or silver thread.
This stark contrast immediately draws the eye and gives the design a formal, elegant presence.
Use a satin stitch for the main letter and the wreath, ensuring your stitches are smooth, parallel, and densely packed. To guarantee sharp edges, outline the entire design first with a split stitch; this creates a raised boundary that your satin stitches can tuck against neatly.
It’s a simple adjustment that produces a professionally polished result, perfect for personalizing your space with grace.
8. Paint a Landscape with Blended Fill Stitches
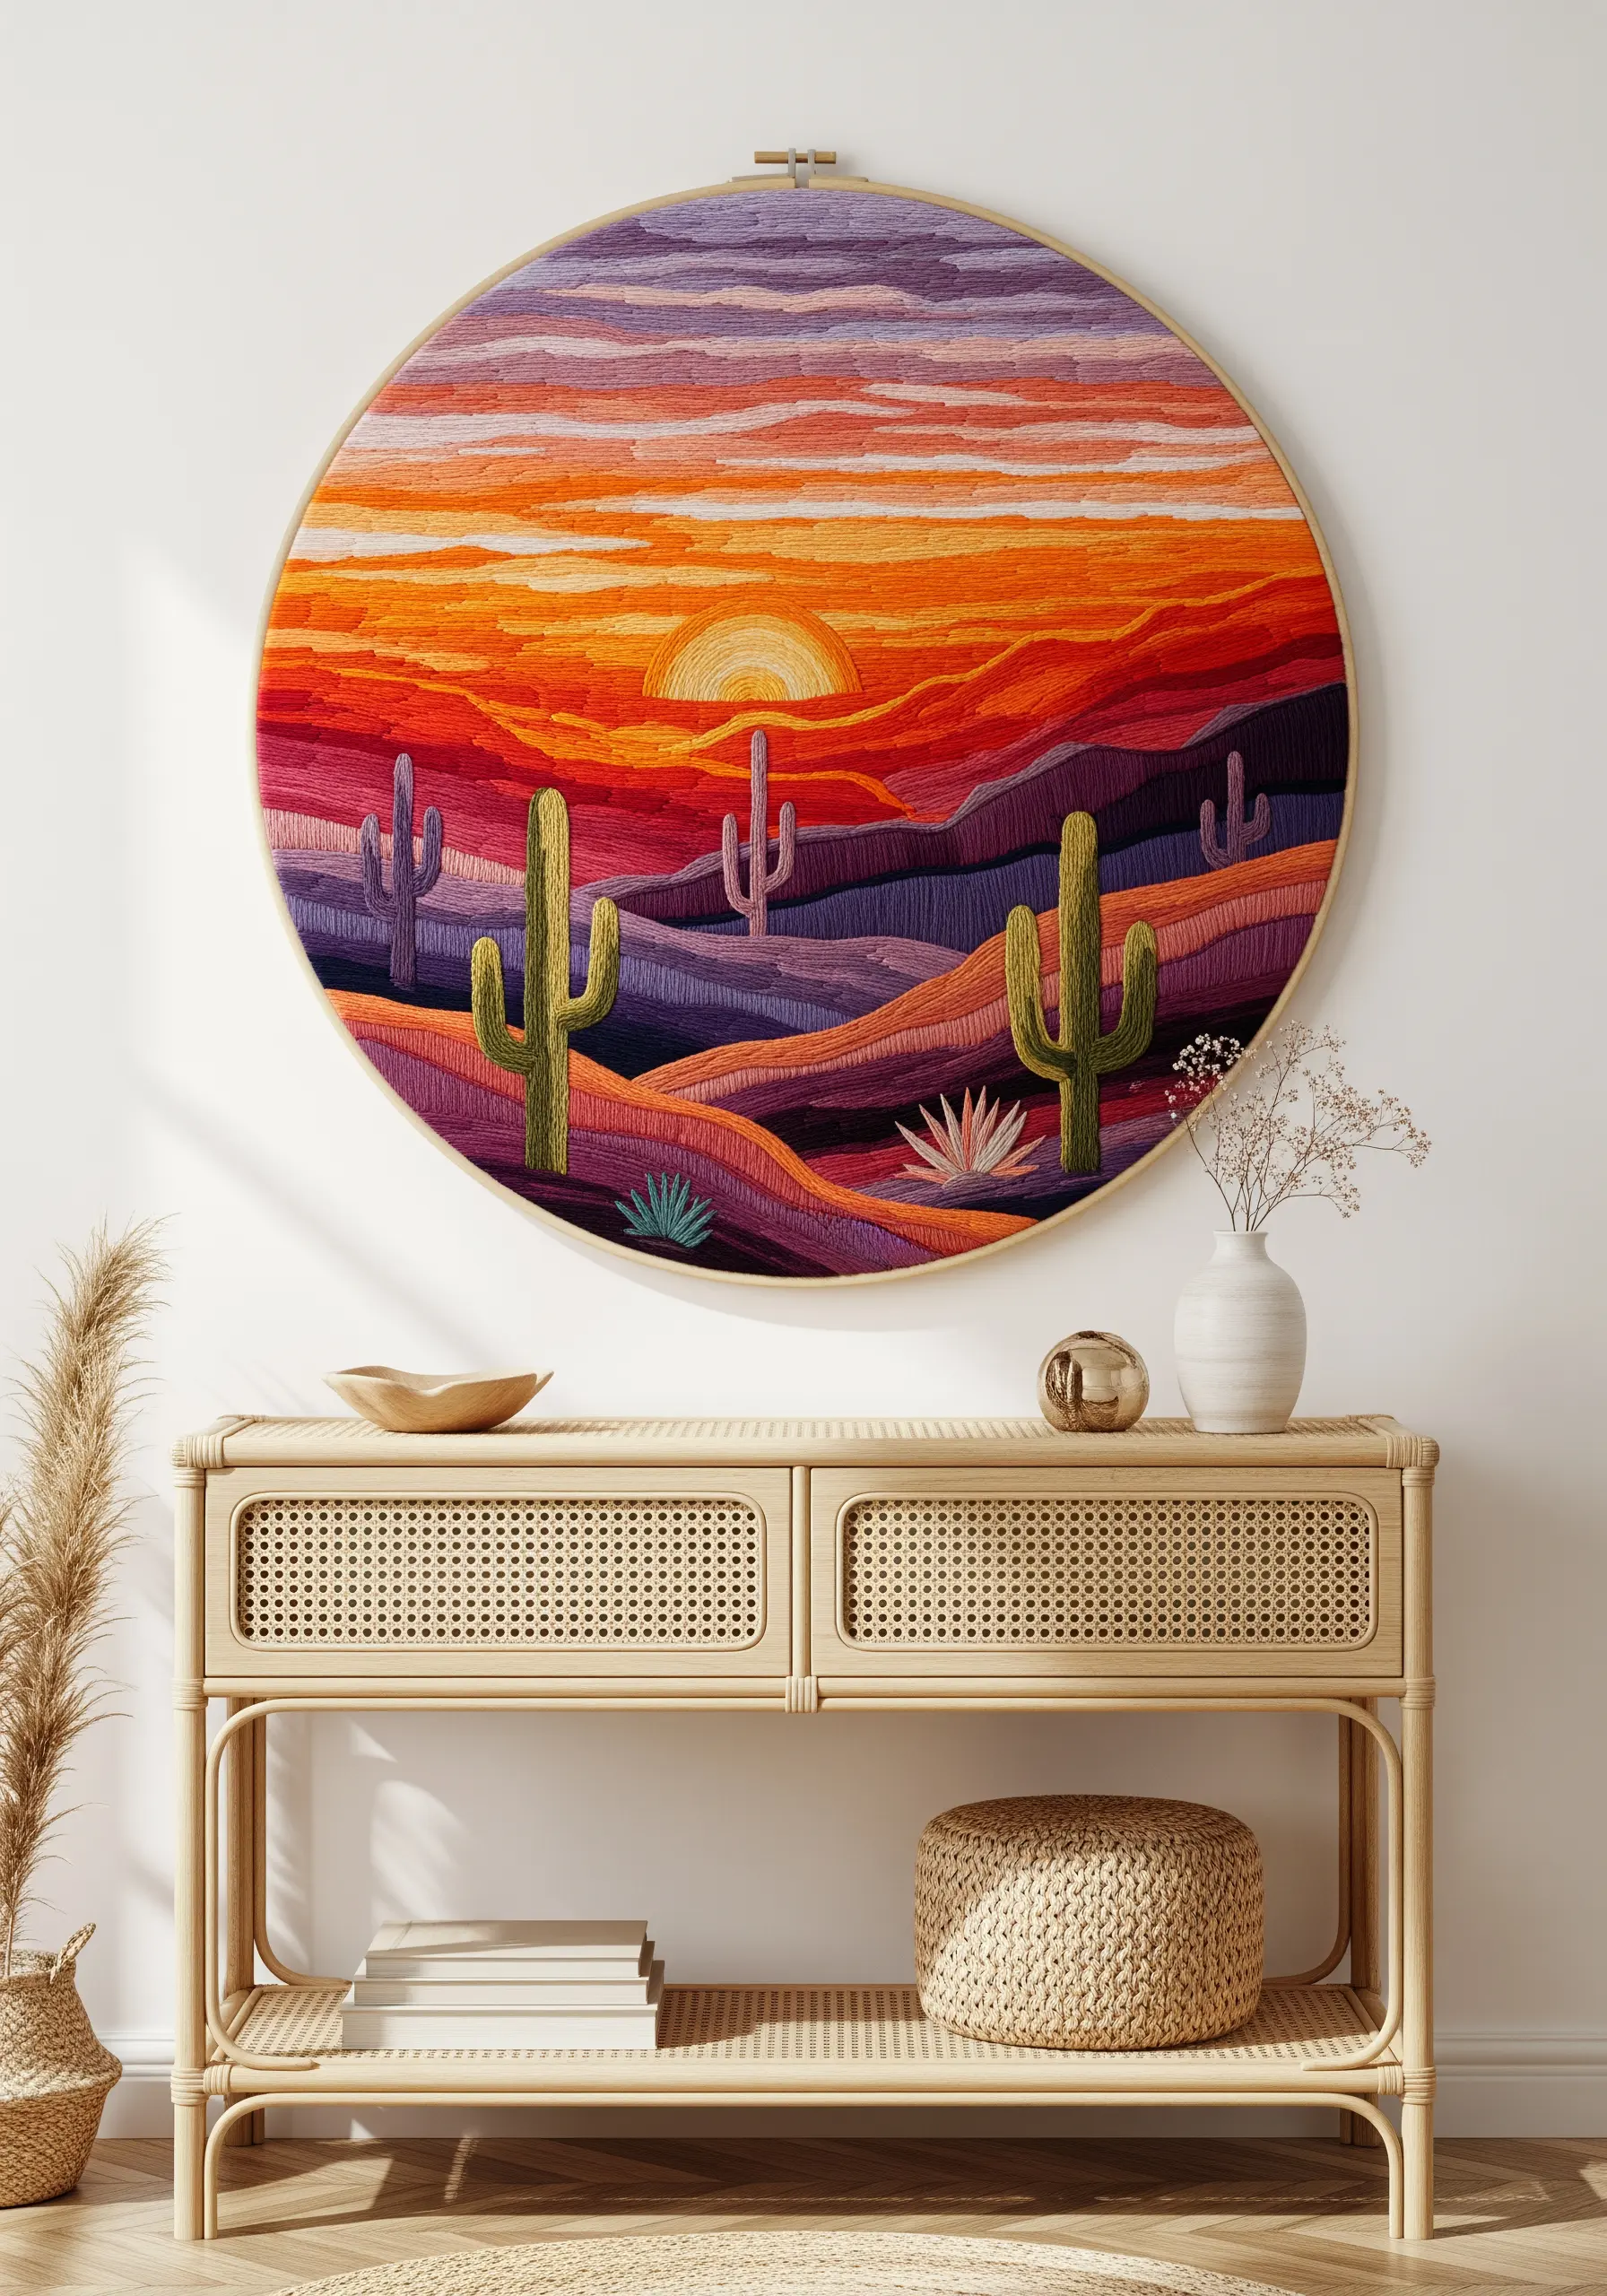
To create an atmospheric landscape, you need to blend colors directly on the fabric.
Divide your design into horizontal bands of color. For the sky, use long-and-short stitch, overlapping your rows of stitches and introducing new colors gradually to create a soft, painterly sunset effect.
For the rolling hills and mountains, use a directional satin stitch. By angling your stitches to follow the slope of each hill, you create a sense of movement and topography.
Don’t be afraid to use unexpected colors like purples and deep pinks for shadows. This adds depth and artistic flair, transforming your hoop into a window onto a vibrant world and creating one-of-a-kind landscape scenes.
9. Embellish Plush Fabrics with Metallics and Beads
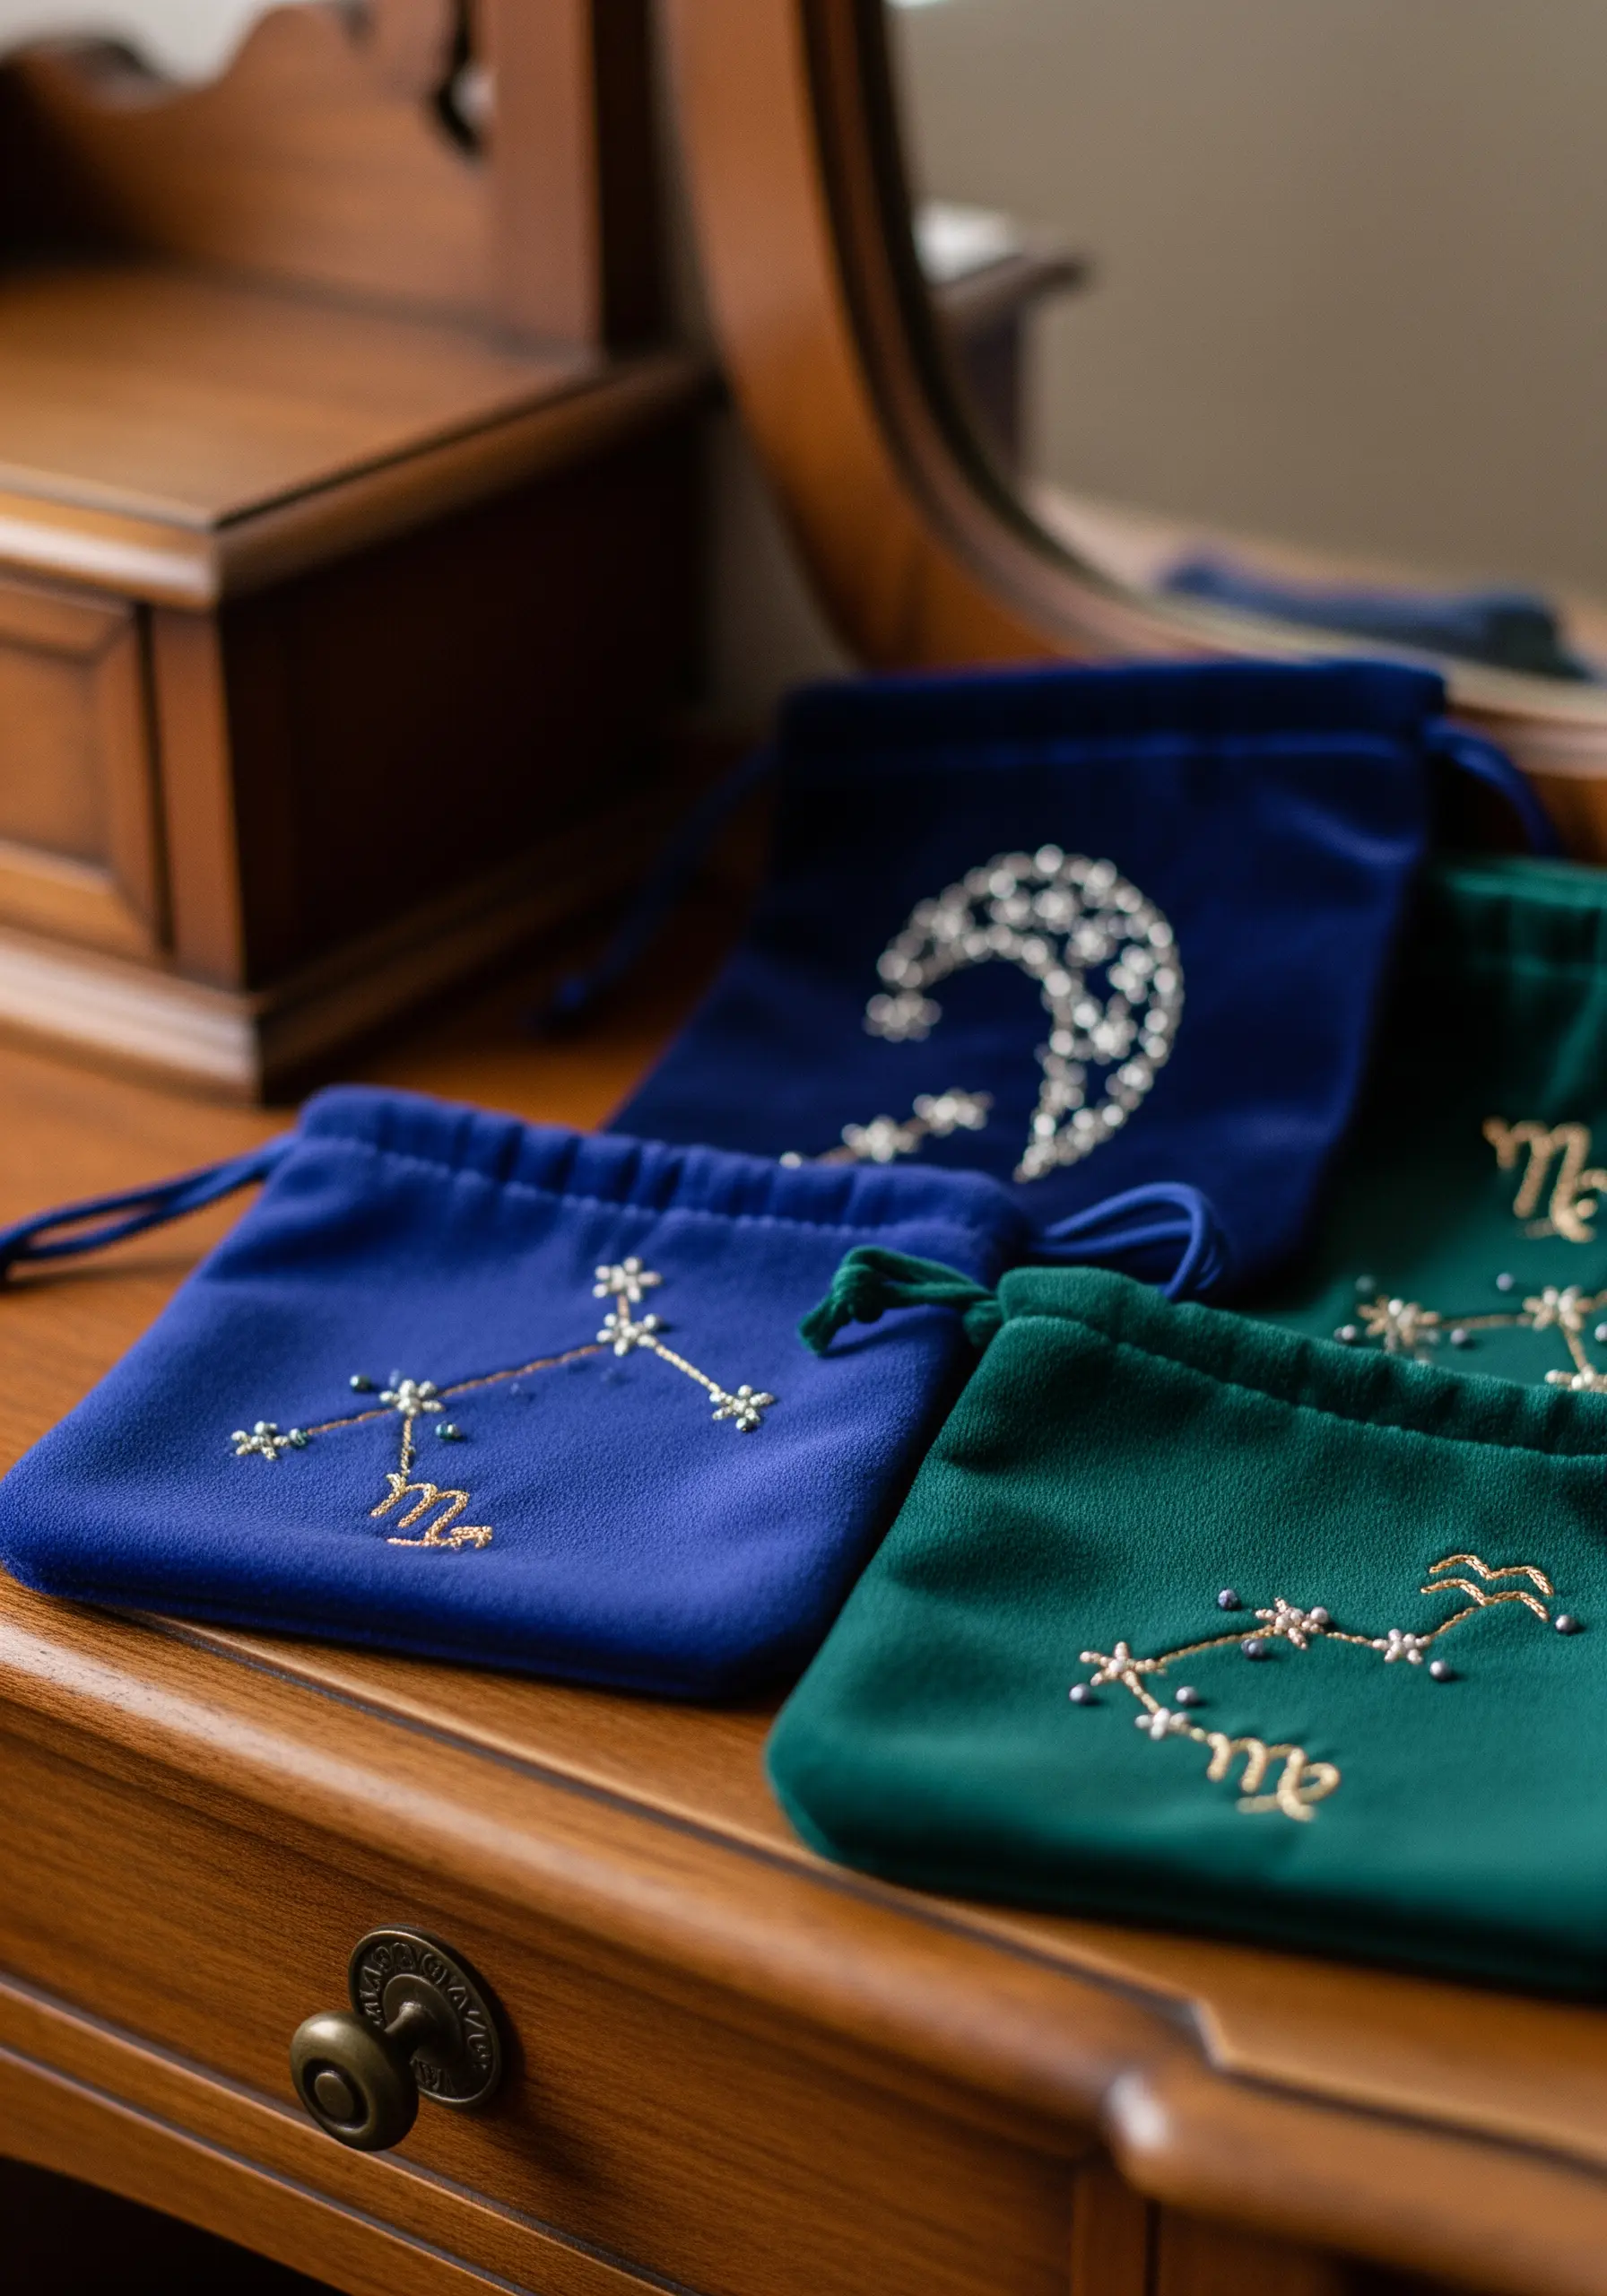
Stitching on a fabric with a deep pile, like velvet, requires a few adjustments for a clean finish.
Always use a stabilizer on the back to prevent the fabric from shifting and stretching. A tear-away or water-soluble stabilizer works perfectly.
Choose simple, graphic designs like constellations, as intricate details can get lost in the fabric’s texture.
Combine metallic thread with small seed beads or crystals. The smooth, reflective surface of the beads contrasts beautifully with the soft, light-absorbing velvet, making your design pop.
Use a simple backstitch for the lines and tack down beads at the points of the stars to create tiny handmade decor ideas with a touch of cosmic luxury.
10. Craft a Welcoming Wreath with Bold Lettering
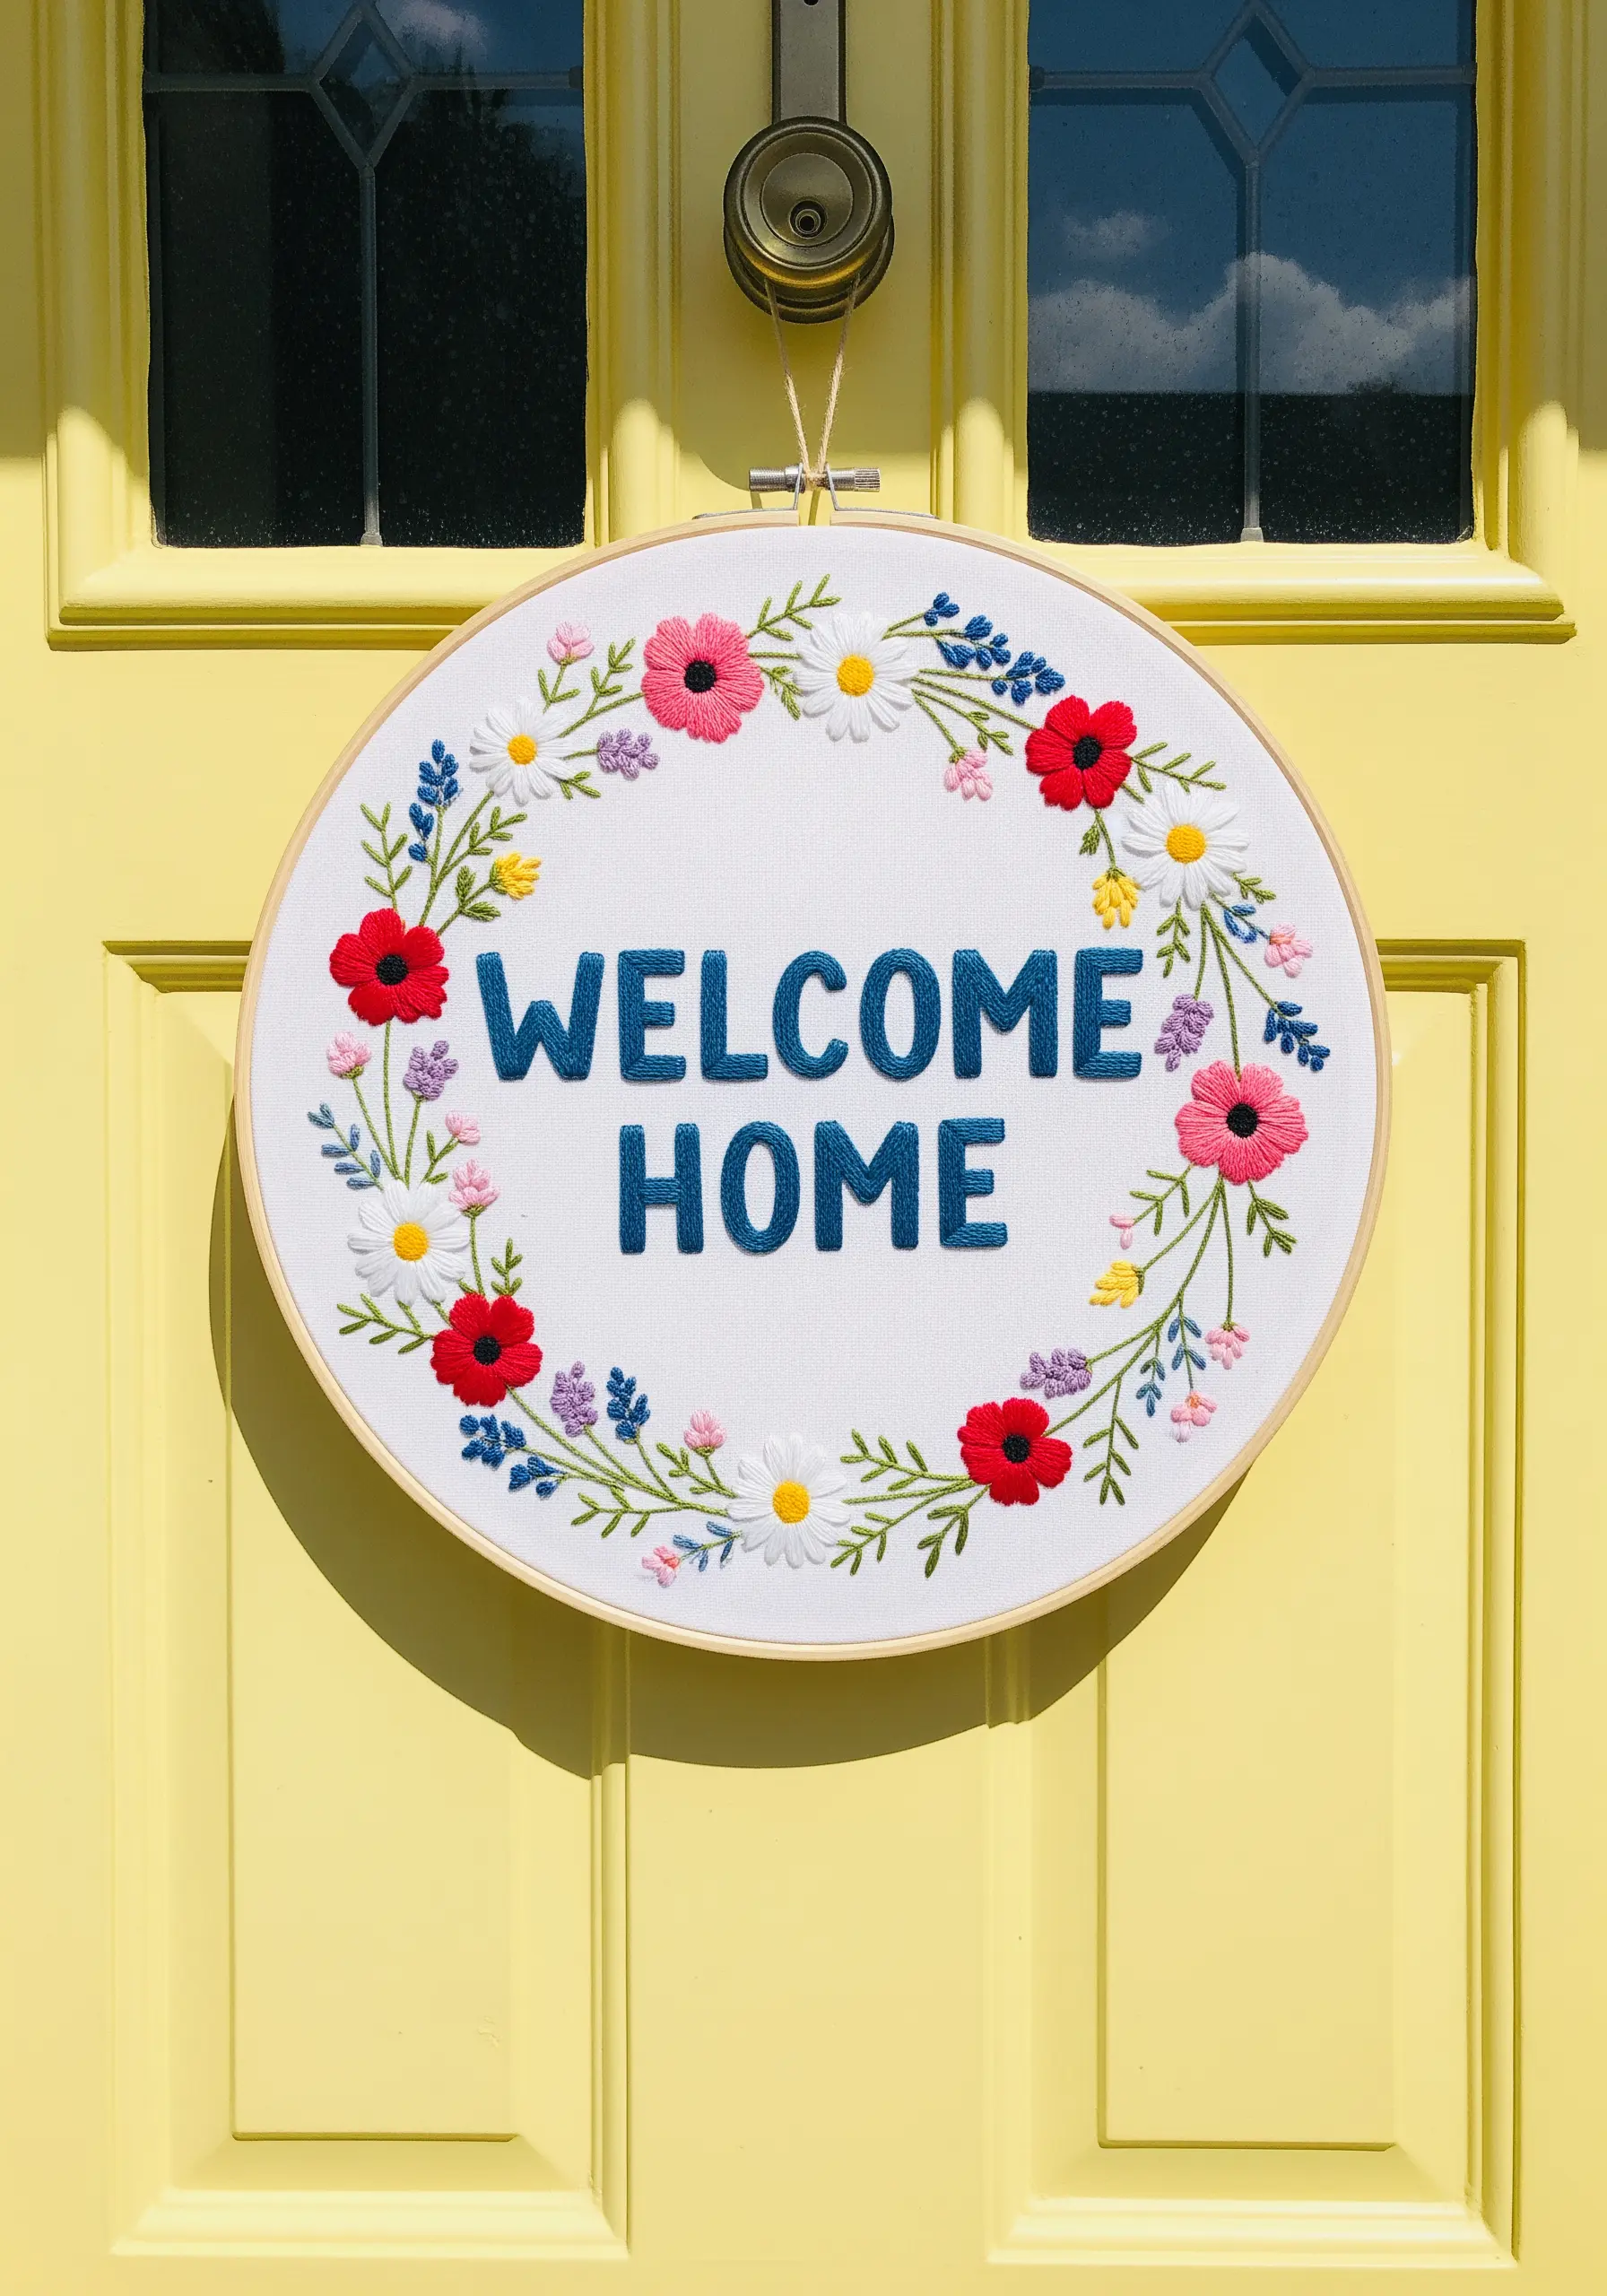
For a piece that will be seen from a distance, like a door hanging, legibility and cheerful color are paramount.
Use a bold, padded satin stitch for the letters. To do this, fill the shape of each letter with horizontal straight stitches, then cover those with vertical satin stitches. This technique makes the text pop right off the fabric.
Surround your message with a simple floral wreath composed of easy, effective stitches.
Lazy daisy stitches make perfect petals, French knots are ideal for flower centers and small filler elements, and fishbone stitch creates beautifully shaped leaves with a central vein.
This combination of bold text and classic floral stitches creates a balanced and inviting piece of hoop art.
11. Tackle Large-Scale Projects with Strategic Motifs
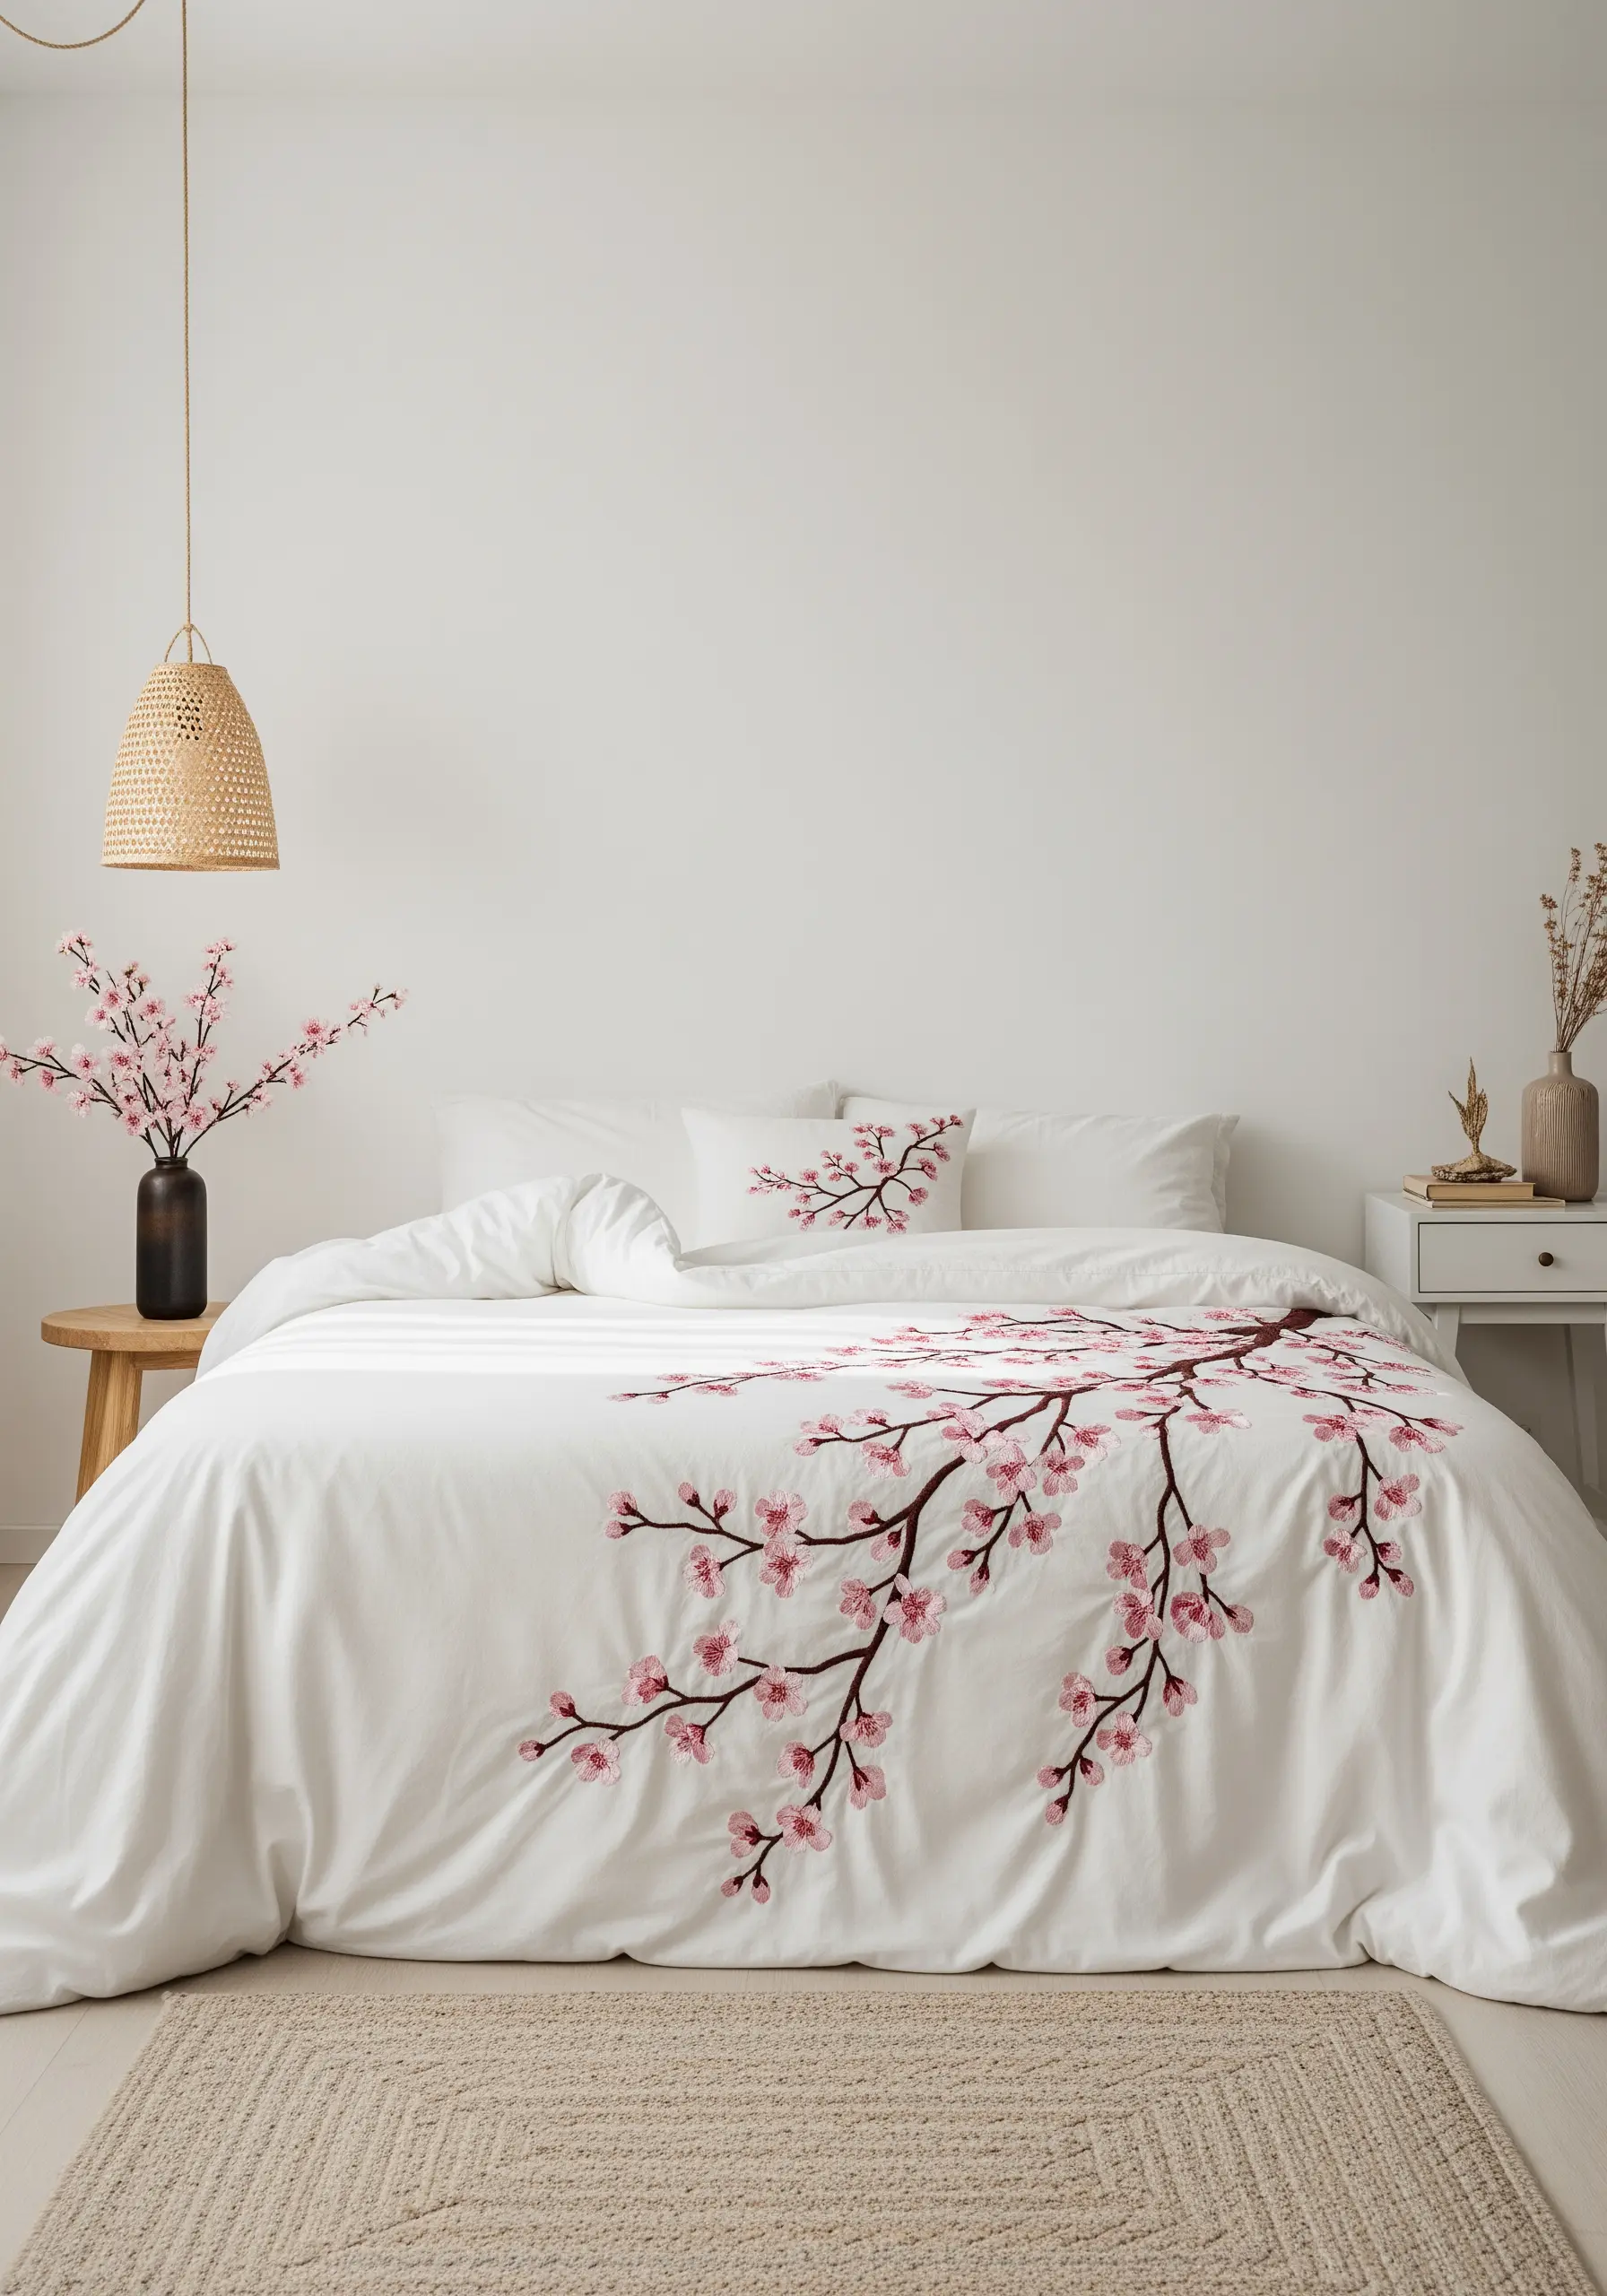
Embroidering on a large surface like a duvet cover feels less intimidating when you approach it as a collection of smaller, connected motifs.
Rather than one massive design, stitch a flowing branch that meanders across the fabric. This allows you to work in manageable sections without needing an enormous hoop.
Use a thick, textural stitch like a whipped backstitch or stem stitch for the branches to give them prominence.
For the blossoms, a few well-placed satin stitches and French knots are all you need. Scatter them organically along the branches, varying their size and density.
This strategic placement creates a graceful, airy design that feels intentional and custom, completely personalizing your bedroom.
12. Achieve Perfect Symmetry on Soft Surfaces

Stitching a precise geometric design like a mandala, especially on a soft felt surface, demands a stable foundation.
Print your pattern onto a stick-and-stitch water-soluble stabilizer. Adhering this directly to the felt provides a perfect template and prevents the fabric from stretching as you work.
Use a consistent number of strands—perhaps three—for the entire design to maintain visual balance.
Focus on uniform stitch length and tension, especially for the satin stitch elements. The beauty of a mandala lies in its flawless repetition and rhythm.
This method of combining a stable pattern with mindful stitching is perfect for mindful weekend projects that result in a stunningly precise piece.
13. Create Bold Graphic Texture with Yarn Couching
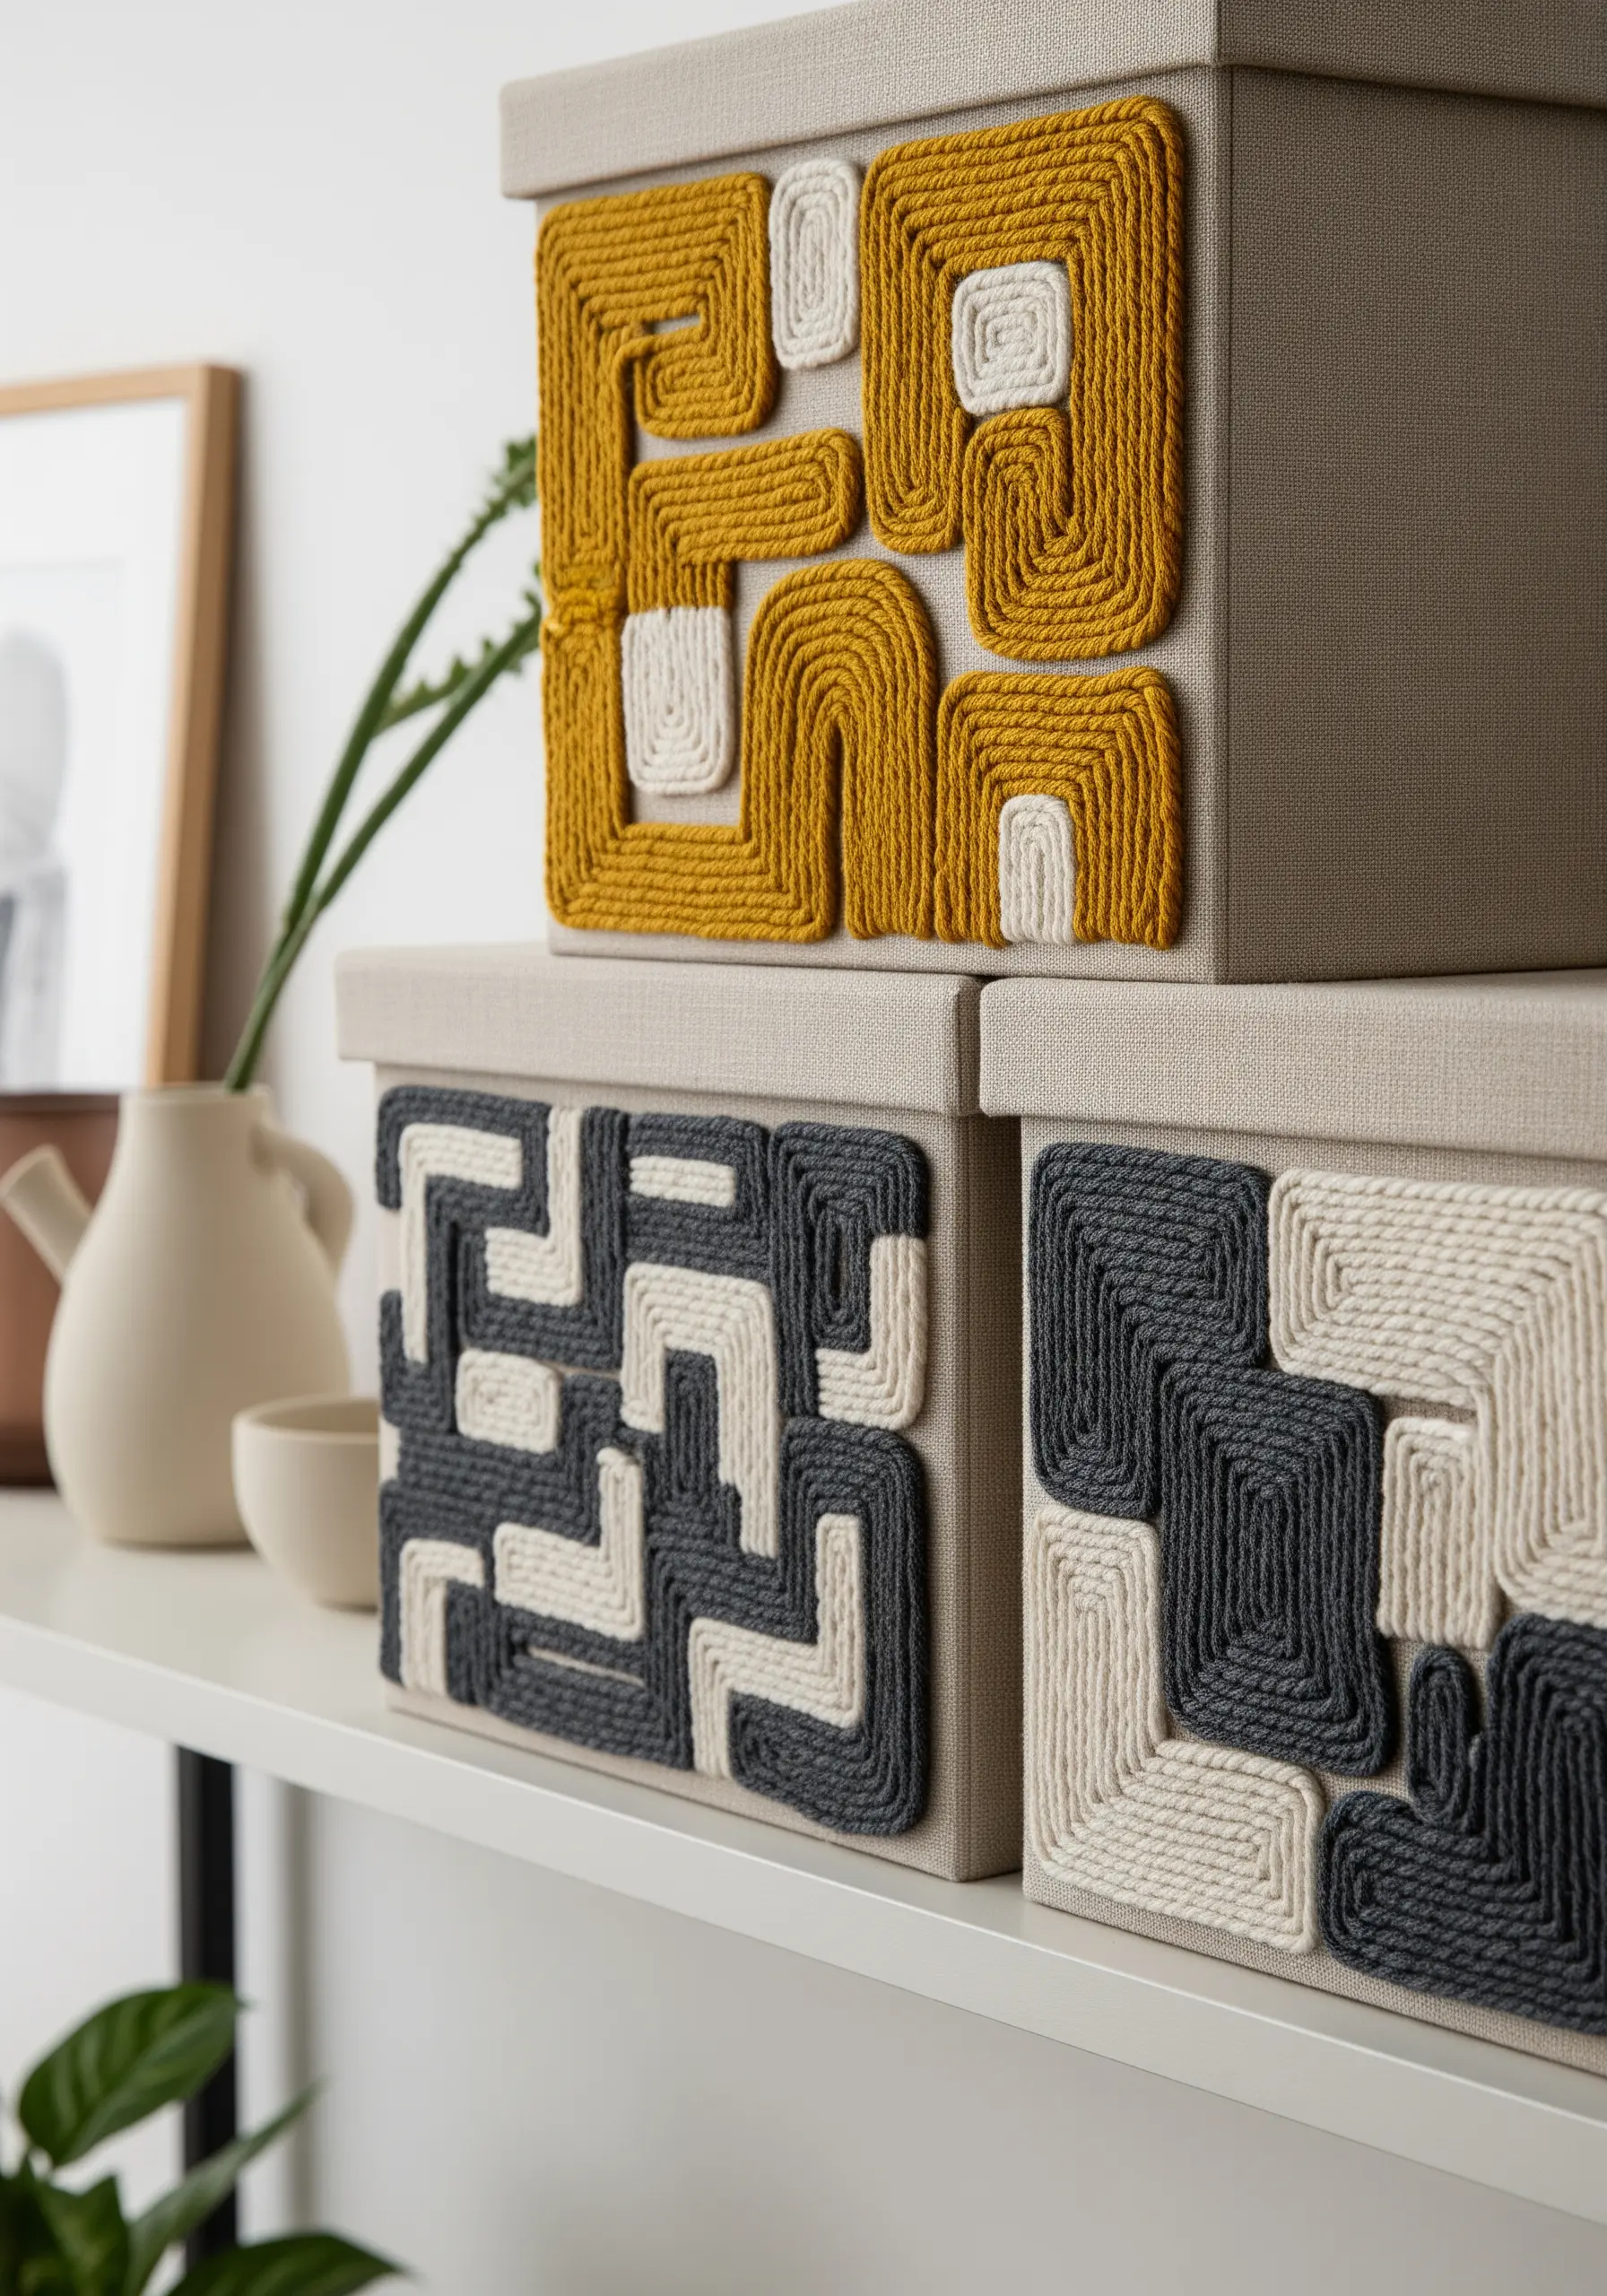
For a high-impact, textural effect on items like storage boxes, move beyond floss and embrace thicker fibers.
This technique, called couching, involves laying down a thick material—like yarn or cord—onto the fabric surface and securing it with small, perpendicular stitches using a thinner thread.
Sketch out a bold, geometric pattern directly onto your surface. Then, simply follow the lines with your yarn, tacking it down every centimeter or so.
Use a matching or contrasting color for the tacking stitches depending on whether you want them to be visible or disappear.
This method is fast, requires minimal precision, and transforms a plain box into a piece of functional geometric art.
14. Build Dimension with Padding and Layered Knots
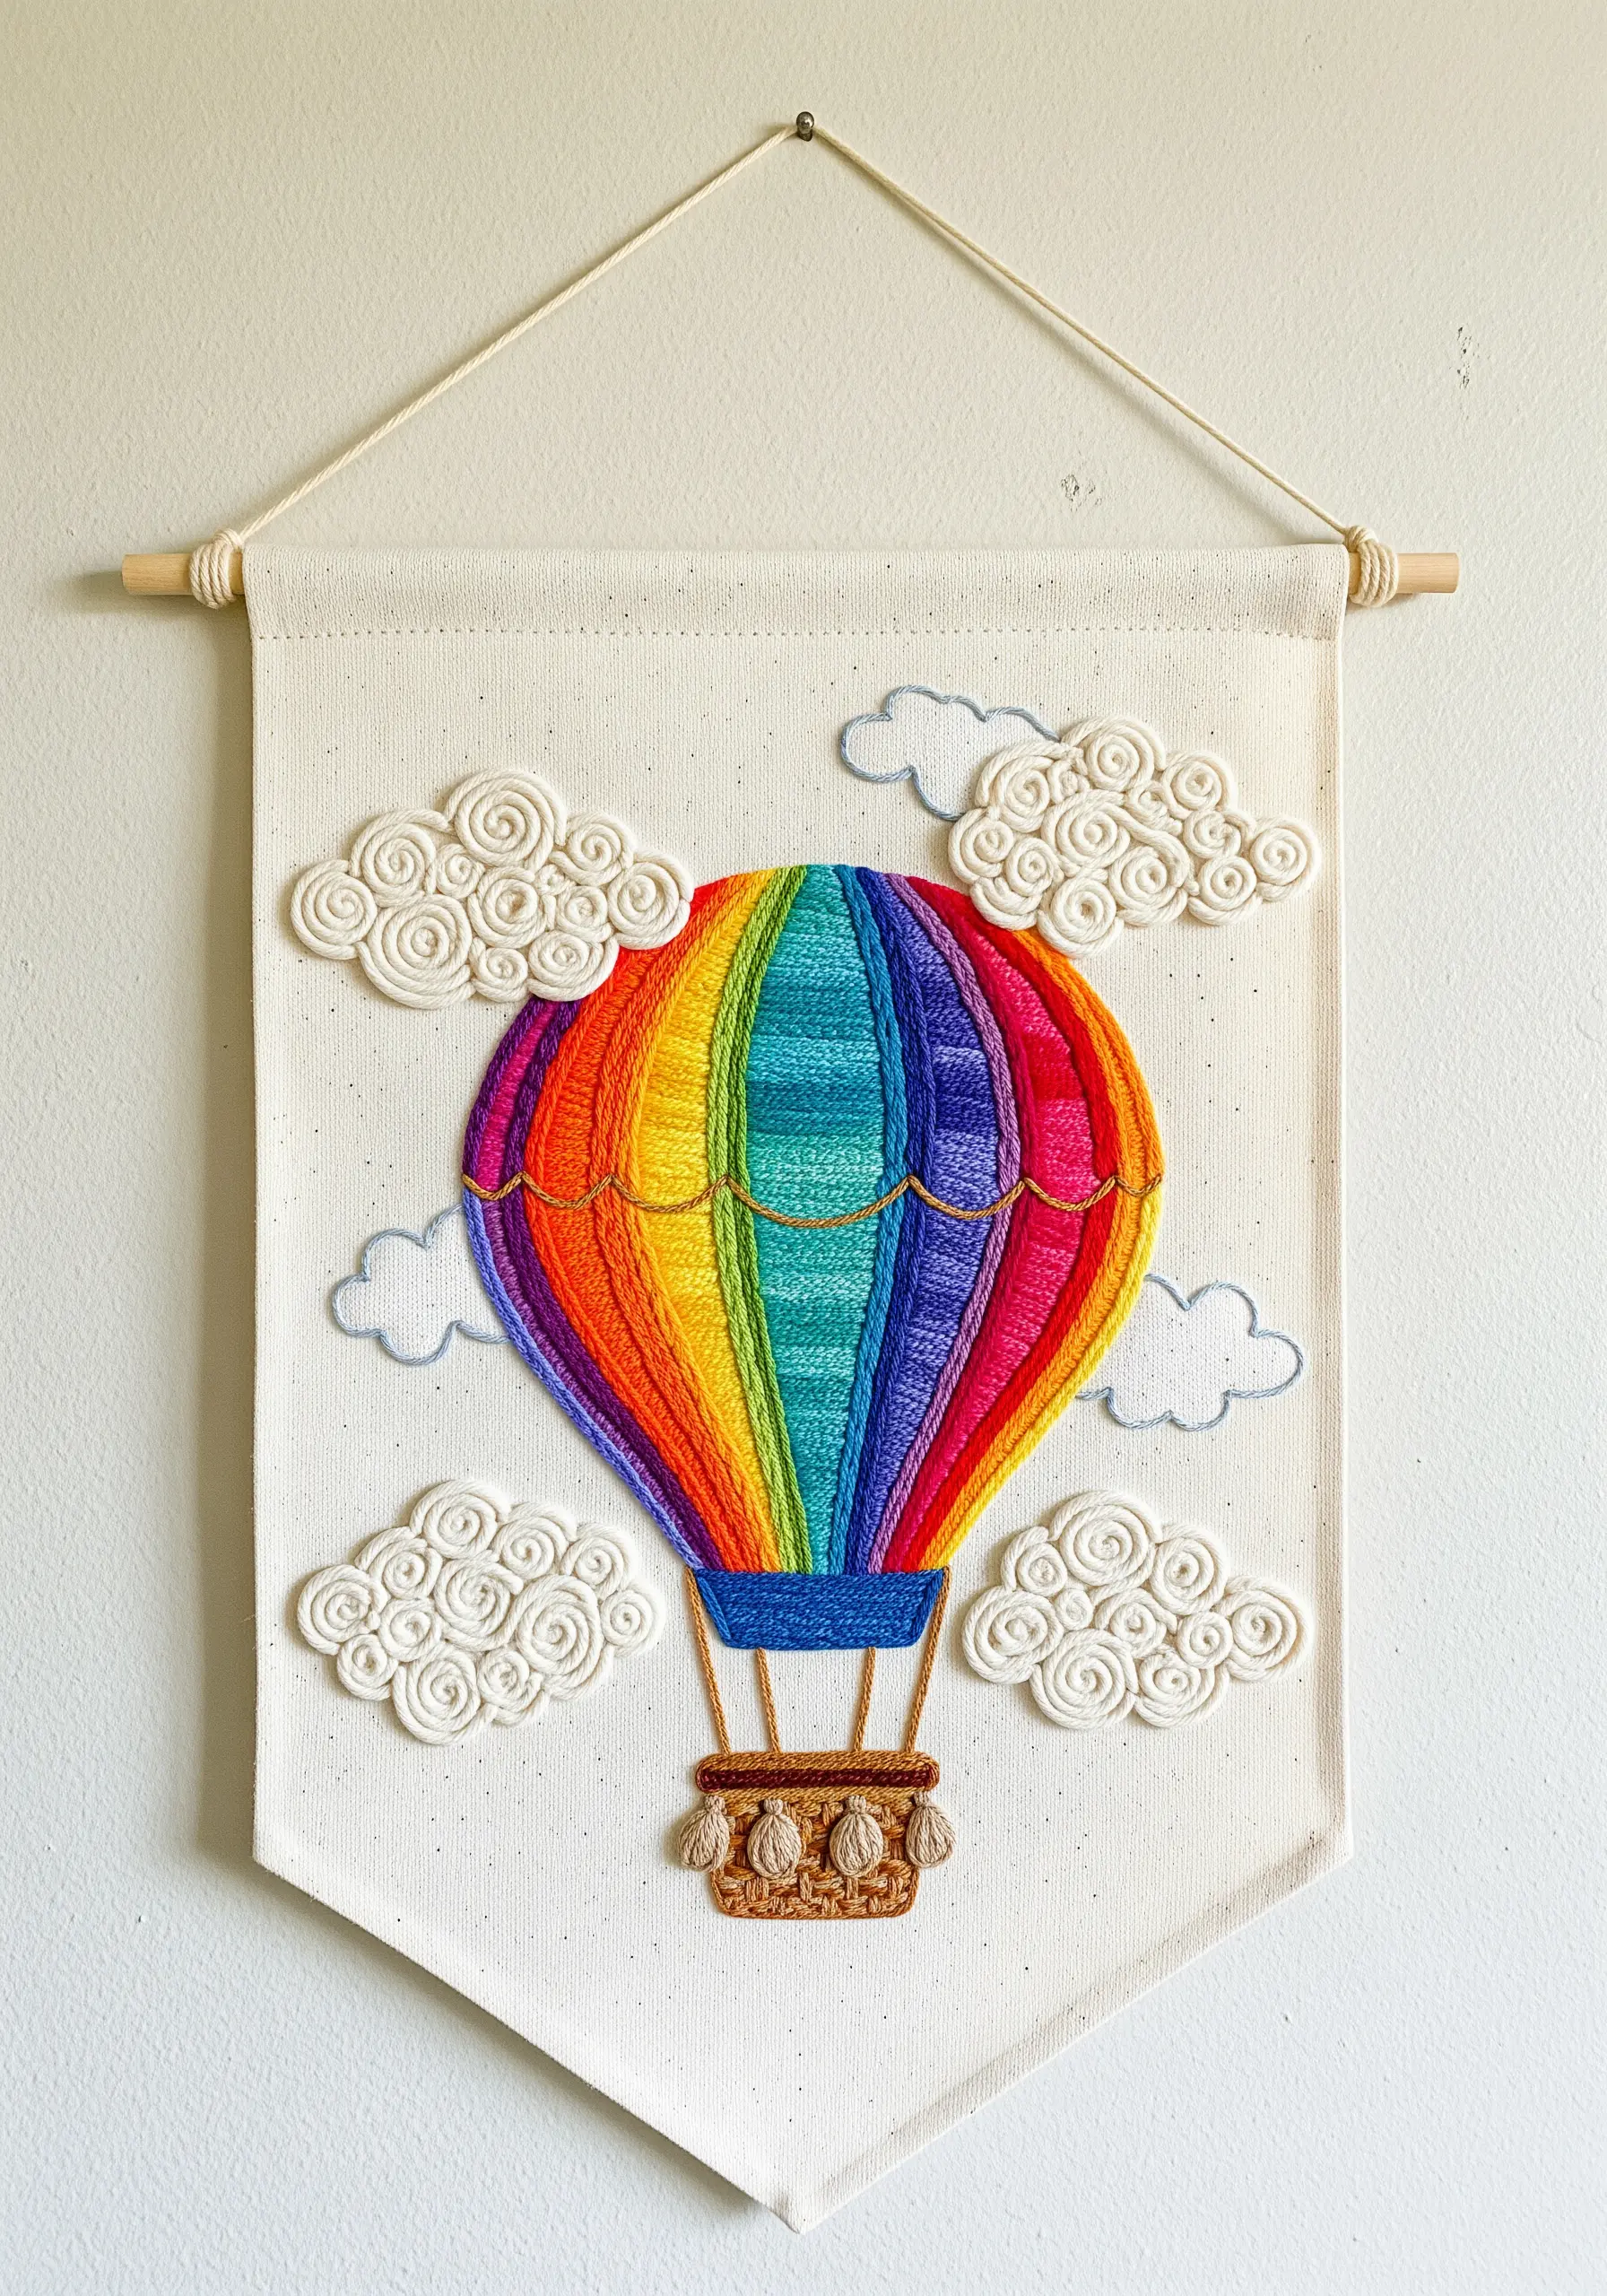
To make elements in your embroidery physically stand out, incorporate techniques that add height and volume.
For the colorful panels of the hot air balloon, use a padded satin stitch. Fill each section with a base of seed stitches before covering it with your final satin stitch. The extra thread underneath pushes the top layer up, creating a pillowy, dimensional effect.
For the clouds, instead of a simple outline, fill them entirely with French knots or bullion knots packed closely together. This creates a fluffy, cartoon-like texture that contrasts beautifully with the smooth balloon.
These tactile details add a playful, whimsical quality perfect for nursery decor.
15. Add Sparkle to Functional Textiles with Embellishments

Bring a touch of magic to an everyday item like a shower curtain by incorporating light-catching elements.
Instead of trying to fill entire motifs with thread, use sequins or beads to create texture and sparkle.
Lightly tack down sequin clusters with a single seed bead in the center to form the fish bodies. This is faster than satin stitch and mimics the shimmering scales of a fish perfectly.
For the coral and bubbles, use a combination of simple backstitch and strategically placed beads. The beads will catch the bathroom light, creating a subtle, dynamic glimmer.
Always use a strong, synthetic thread like nylon for embellishments on items that may get damp. It’s one of the best DIY tricks to transform plain fabric.
16. Embrace Meditative Stitching with Sashiko
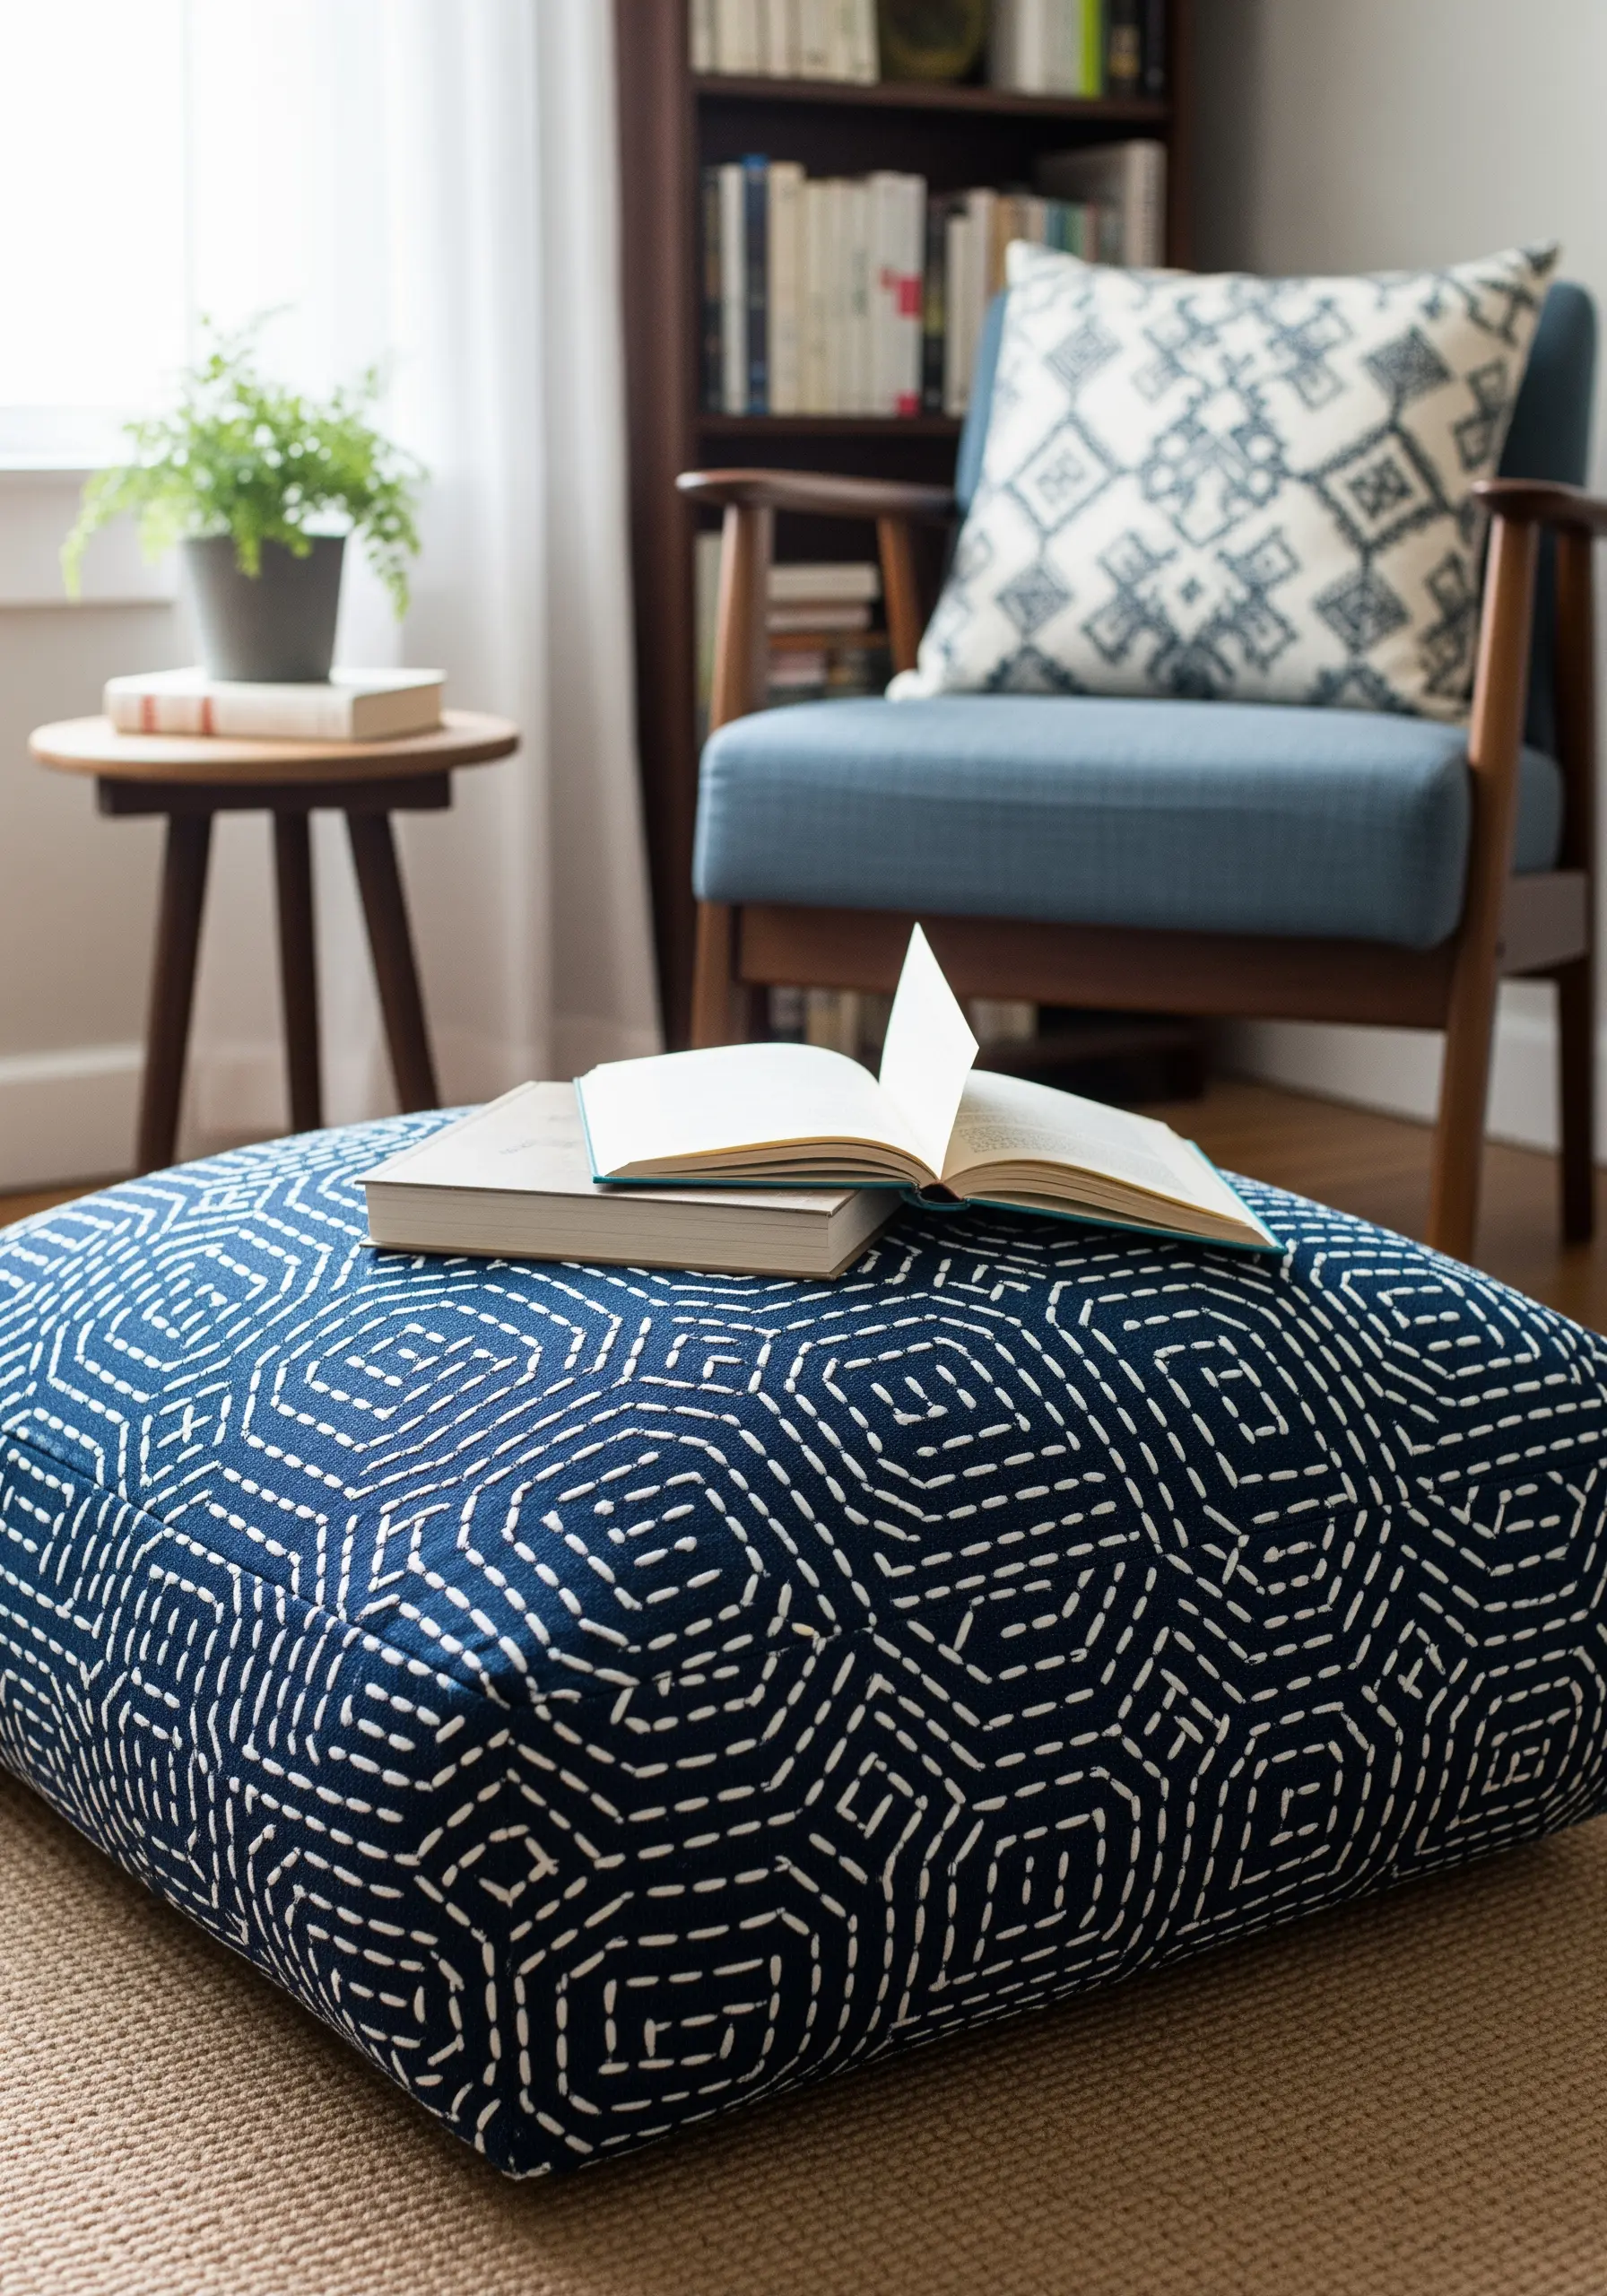
For large surface patterns, like on this floor cushion, Sashiko-style stitching offers a graphic, durable, and deeply calming solution.
The technique is based on a simple running stitch, but the power lies in its precision and rhythm.
Use a specialty Sashiko thread, which is thick, soft, and doesn’t separate, along with a long Sashiko needle. This allows you to load several stitches onto the needle at once for faster, more even results.
Mark your geometric pattern on the fabric with a water-soluble pen, focusing on keeping your stitches as consistent in length as possible. The goal is uniformity, creating a pattern that is both strong and serene.
This method adds handmade touches that make every room feel natural and grounded.
17. Convey Personality Through Pattern and Texture
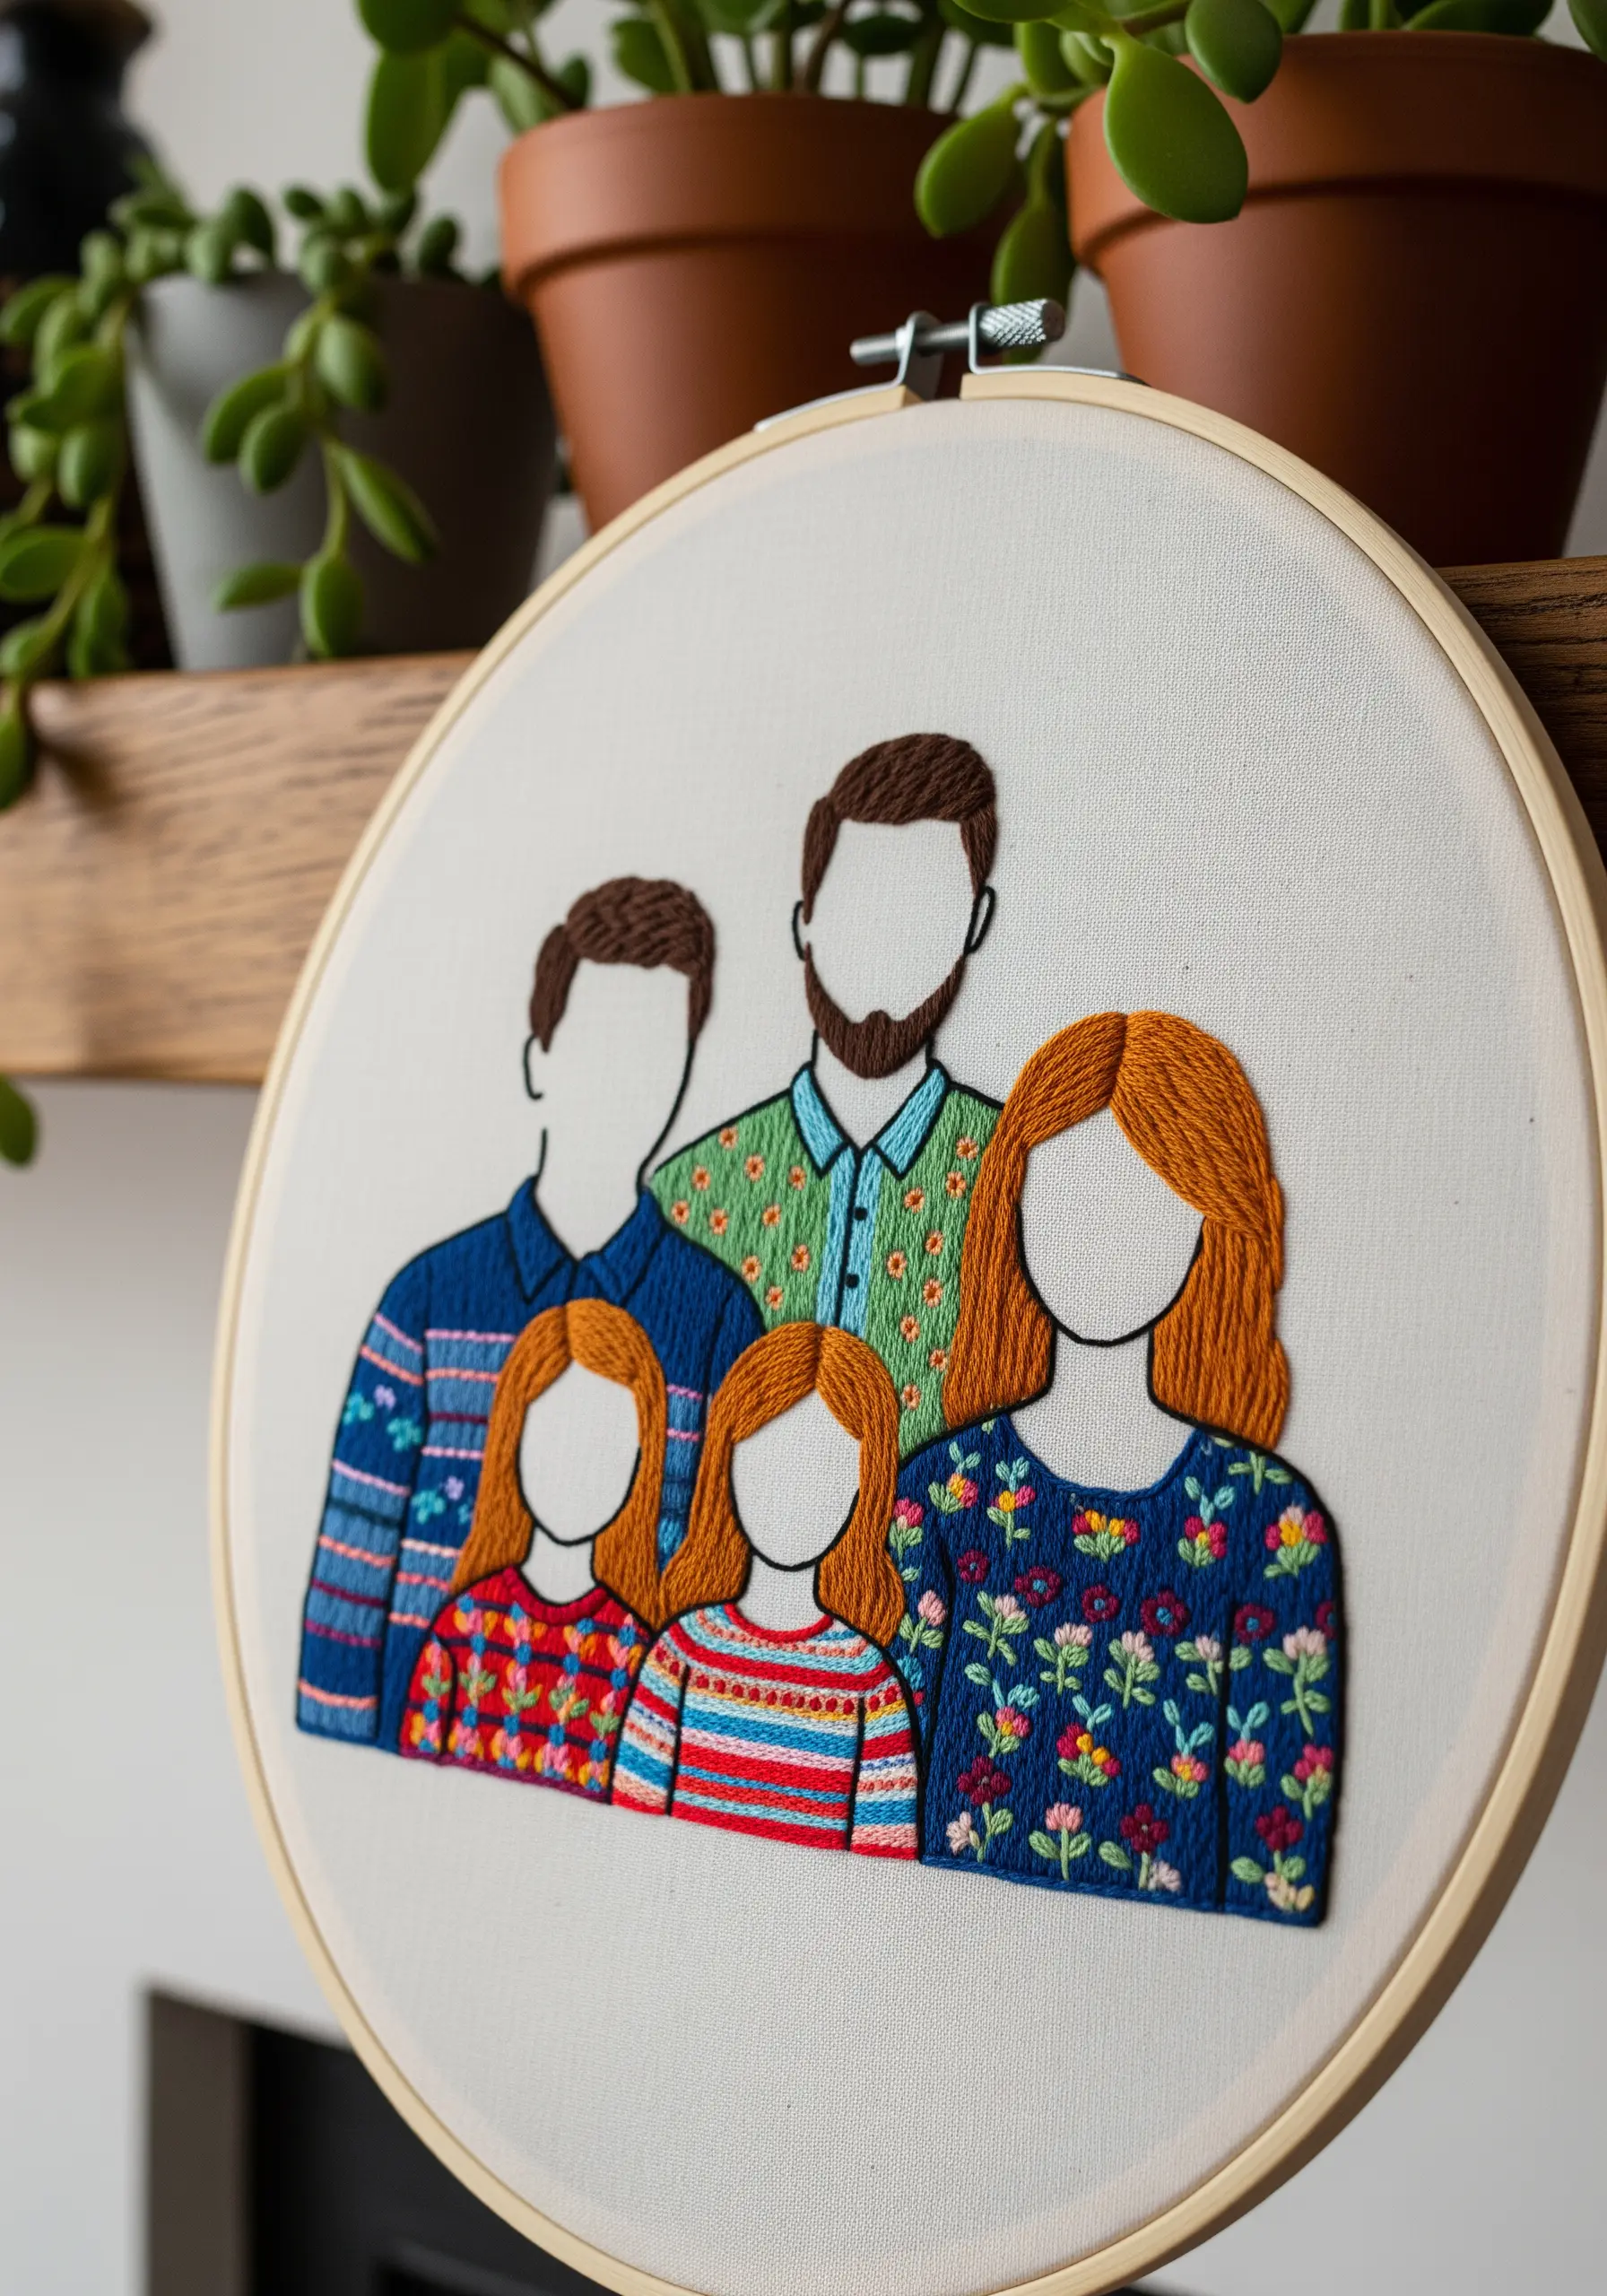
A faceless portrait is a modern way to capture the essence of a family, shifting the focus from likeness to personality.
Assign each person a unique pattern or fill stitch that reflects their character. A dense floral pattern for someone who loves gardening, or a neat geometric fill for a more analytical person.
Vary the stitch direction and texture for each article of clothing to create visual separation and interest.
Use a clean backstitch or split stitch for the outlines to keep the figures defined. The hair can be filled with long, flowing satin stitches to mimic its natural direction and sheen.
This style of portraiture celebrates connection and individuality, creating meaningful emotional decor.
18. Create Juicy Texture with Thoughtful Stitch Choice
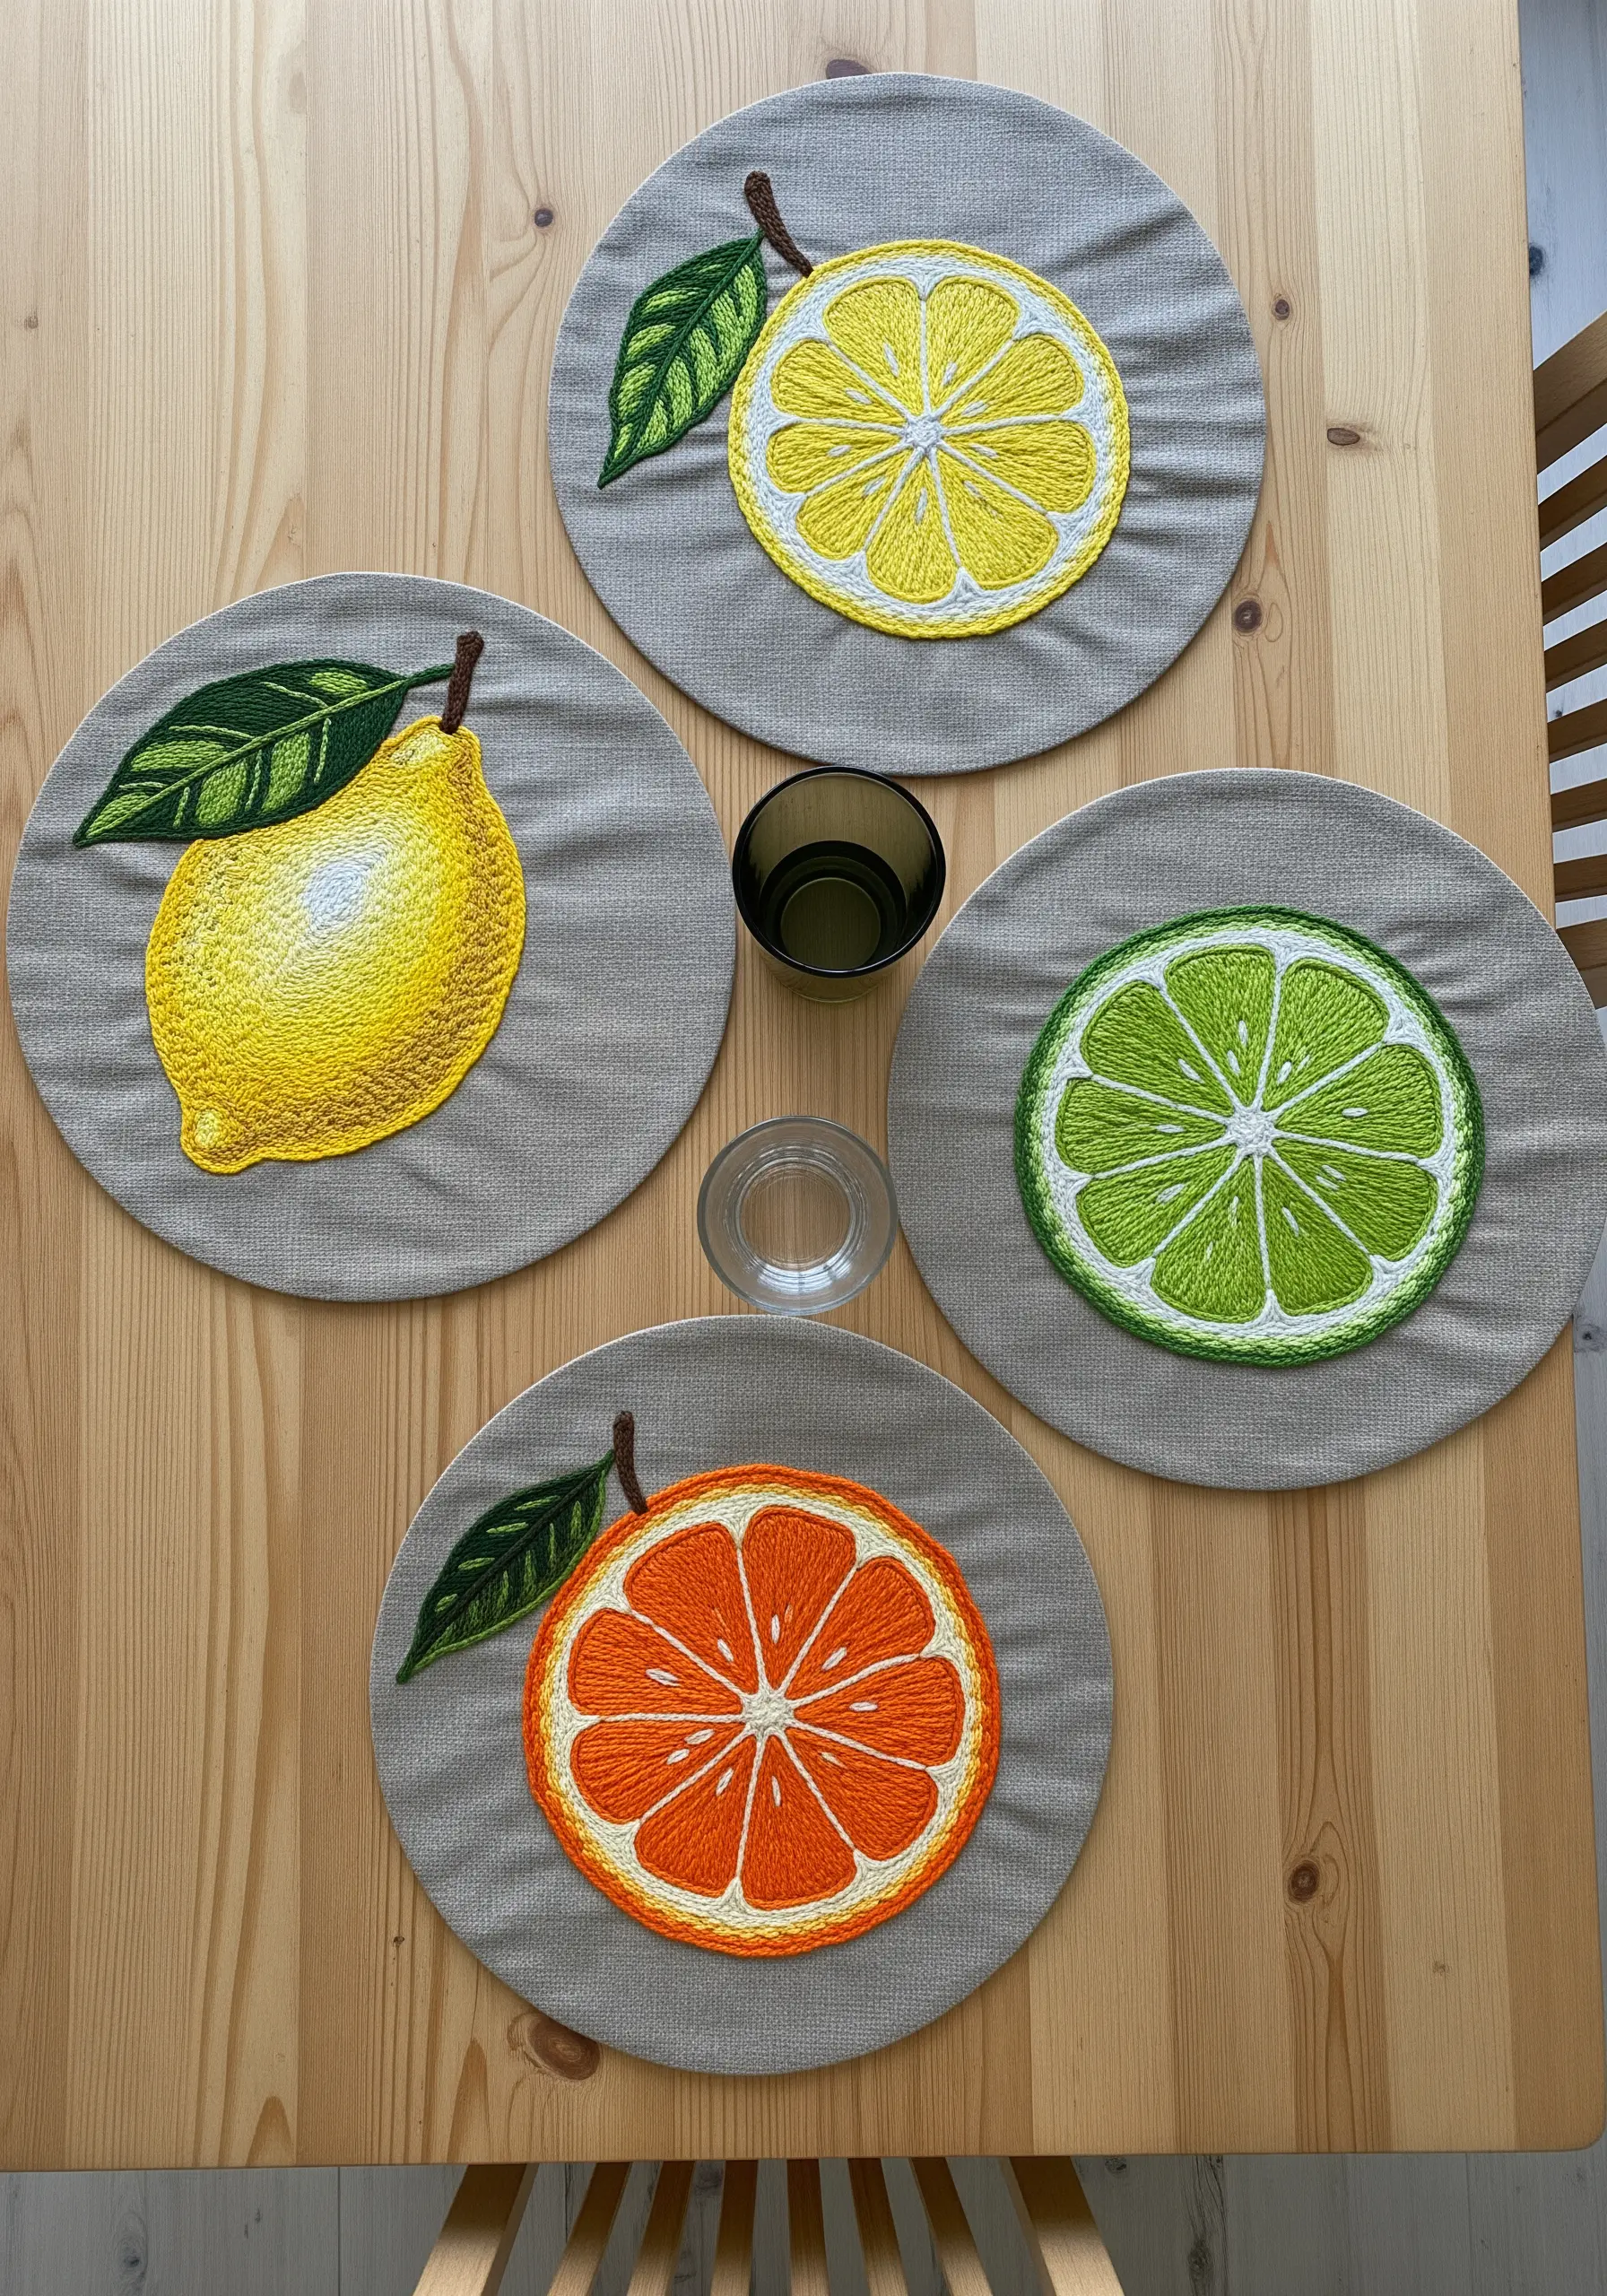
To embroider something that looks good enough to eat, focus on recreating its natural texture.
For the citrus slices, use a long-and-short stitch for the pulp, angling the stitches toward the center. Introducing a slightly lighter shade of the main color will give it a juicy, glistening look.
Define the segments with a simple backstitch in a contrasting white or off-white thread.
For the rind, use a whipped backstitch. The wrapped thread creates a thick, rounded edge that perfectly mimics the texture of citrus peel.
This careful selection of stitches adds a layer of realism that makes these patterns for your everyday essentials a visual delight.
19. Combine Simple Stitches with Everyday Function
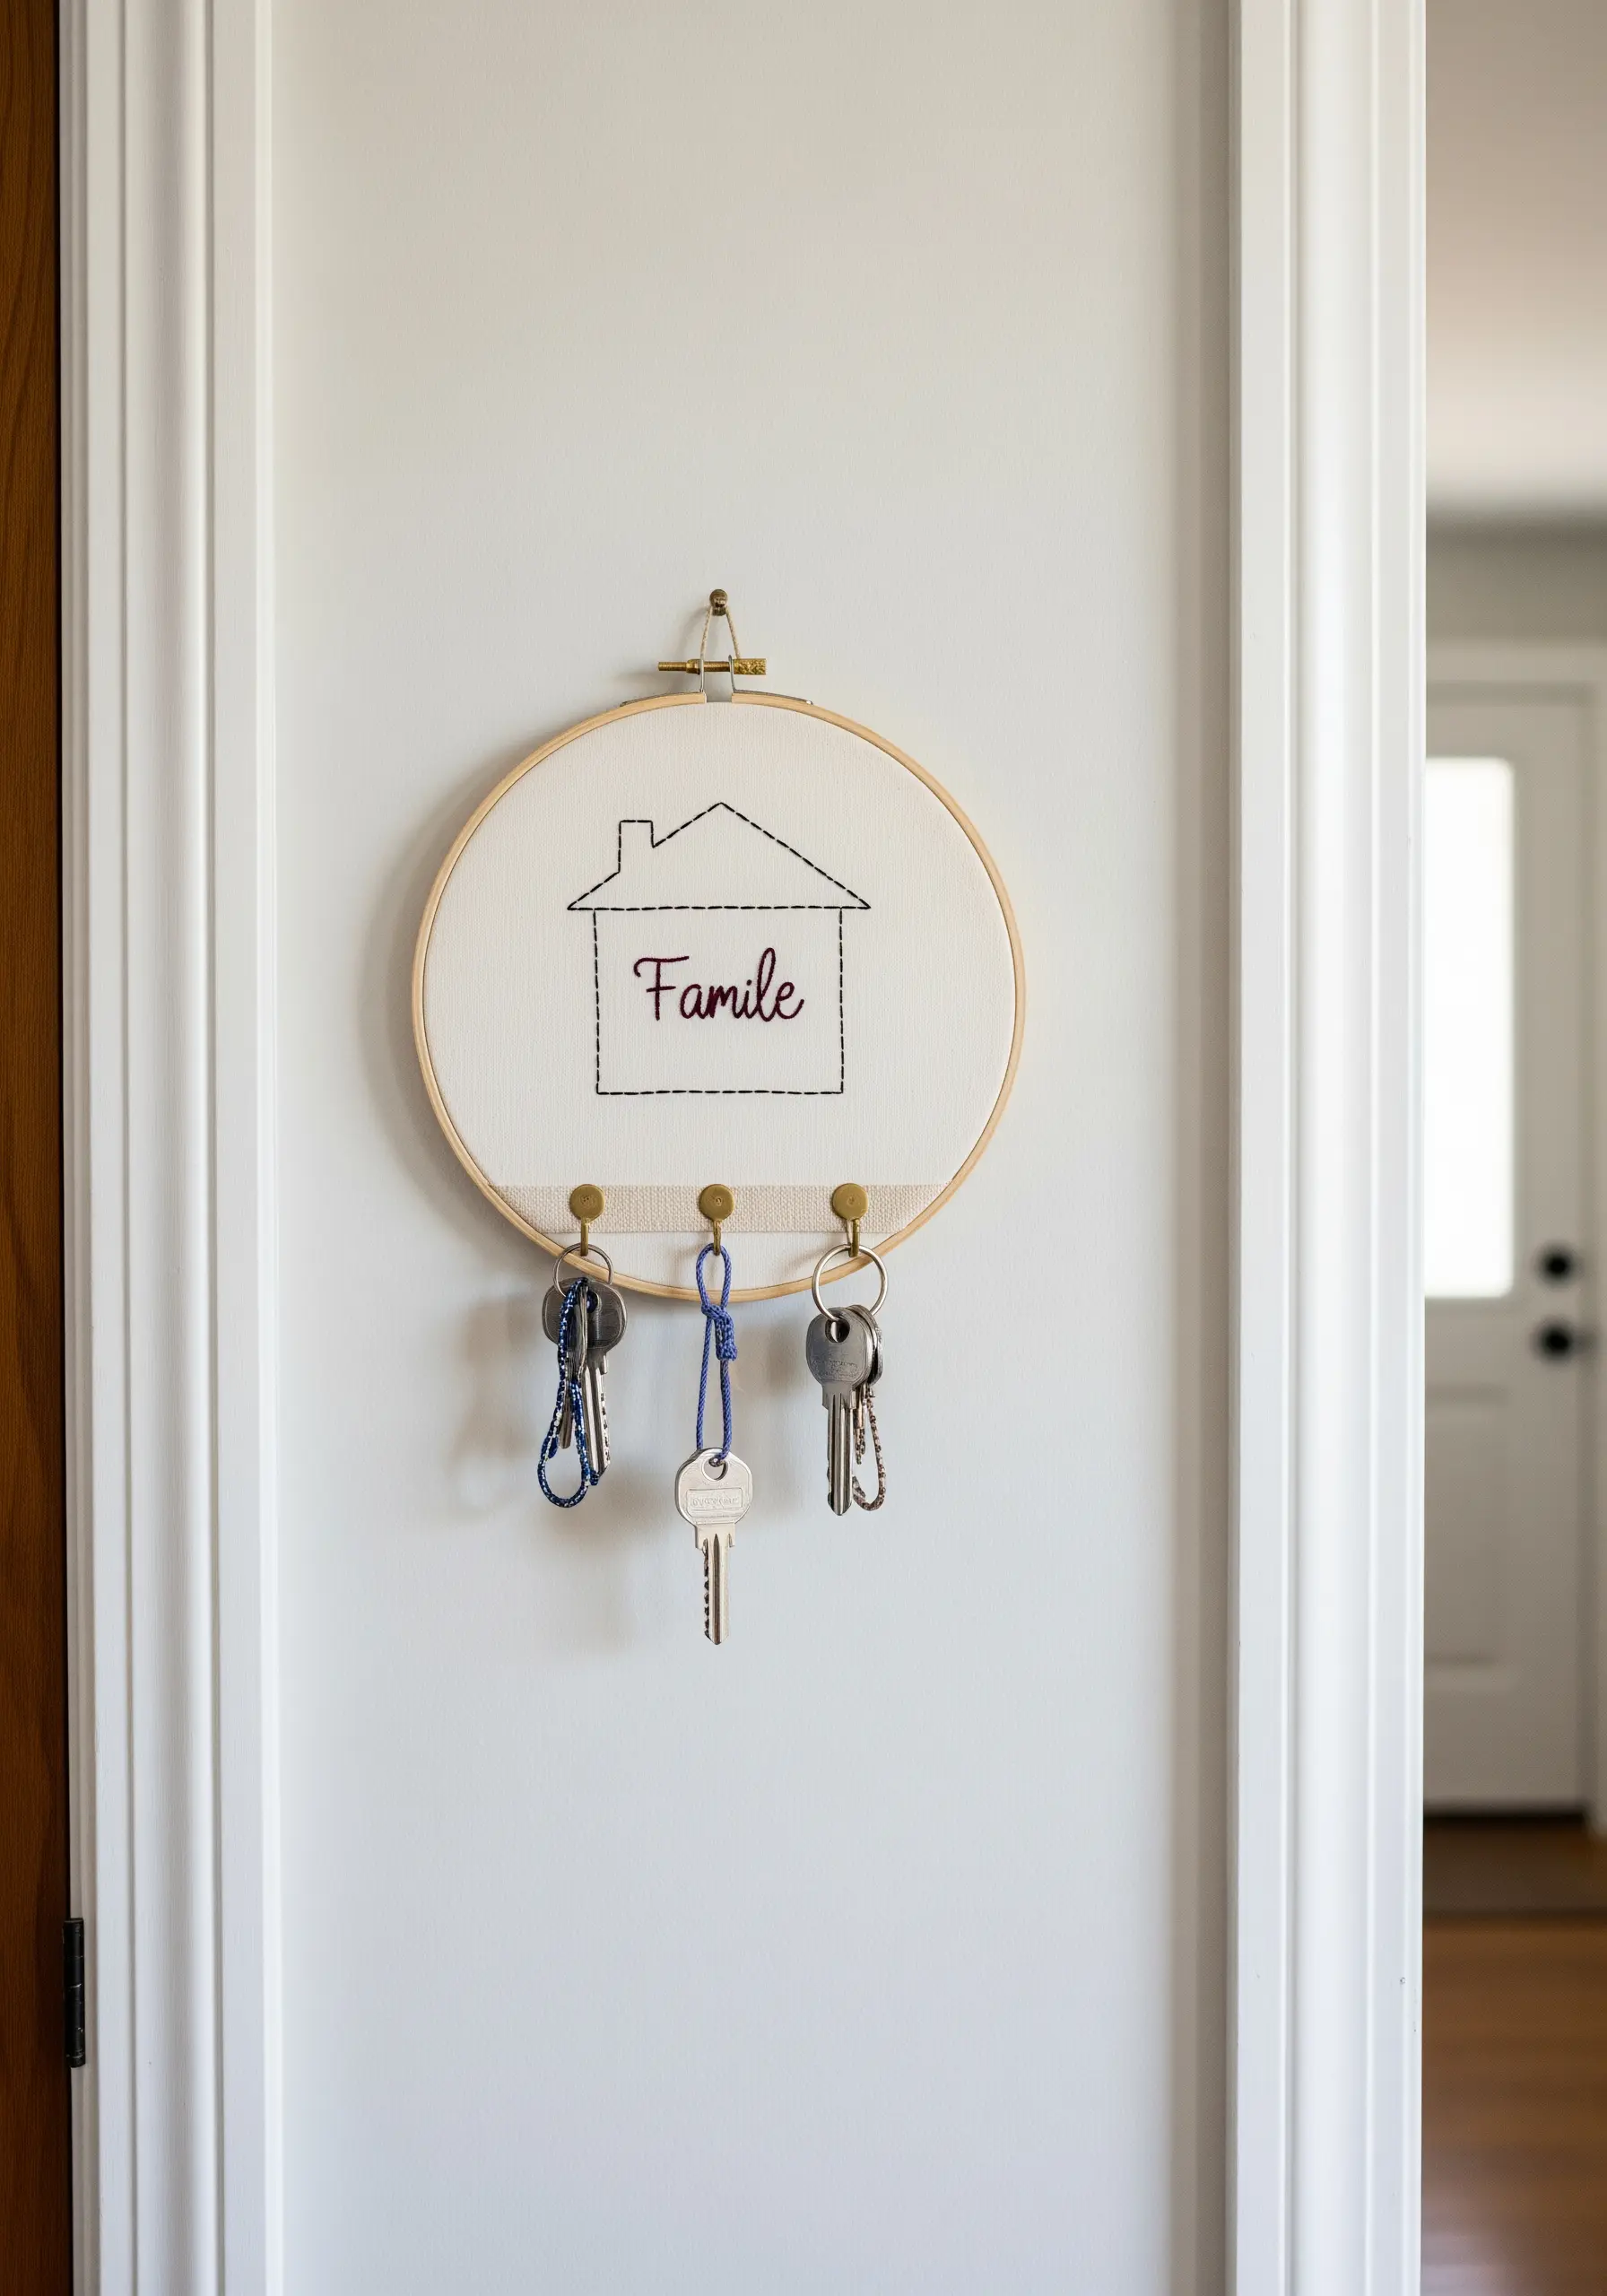
The most satisfying projects are often those that blend beauty with utility.
This key holder uses a basic embroidery hoop as its frame, making it accessible and affordable.
Choose a simple, clean design—like a house outline—and execute it with a neat backstitch. The simplicity of the stitching keeps the focus on its function.
To add the hooks, you can either drill small pilot holes directly through the bottom of the wooden hoop or secure a strip of sturdy ribbon across the back of the hoop and sew the hooks onto it.
This turns a decorative piece into a practical organizer, creating one of those minimal DIY embroidery projects that serve a real purpose in your home.


