
Sometimes, the key to making your embroidery truly sing isn’t about adding more, but about making deliberate choices with what you already have. It’s about understanding the quiet power of contrast—not just in color, but in texture, scale, and density.
You don’t need dozens of new thread colors or complex, frustrating stitches to create work that feels sophisticated and alive. Instead, I want you to think about creating visual tension. What happens when a thick, soft yarn meets a whisper-thin thread? Or when a single, vibrant color cuts through a muted, peaceful background?
These methods are about that intentional dialogue between elements. They are designed to give your work clarity, focus, and a modern edge, transforming simple stitches into compositions that feel both dynamic and deeply considered. Let’s explore how to make every thread count.
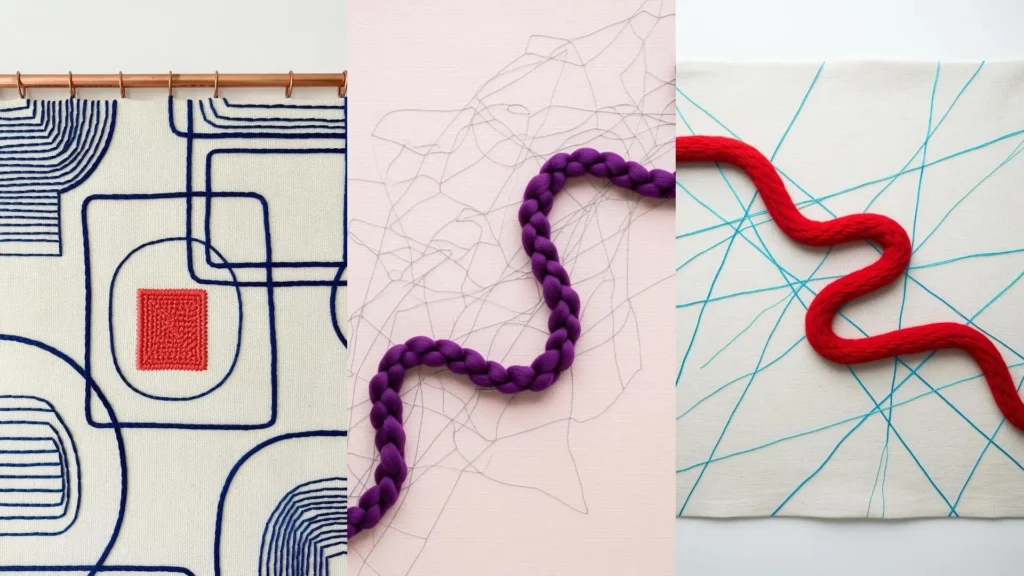
1. Guide the Eye with Dimensional Hierarchy
Create a clear visual path by pairing a thick, sculptural fiber like chunky yarn with a delicate, fine thread.
Use the thick yarn for your primary subject or line, allowing its weight to command immediate attention.
Reserve the fine thread for secondary, atmospheric details—think echoes, grids, or chaotic lines that add depth without competing for focus.
This contrast in scale works because our eyes naturally gravitate toward the element with the most mass, making the composition feel both intentional and dynamic.
This is one of the most effective abstract thread flow patterns for creating movement and a clear focal point.
2. Amplify Light with Radiating Stitches on Dark Felt
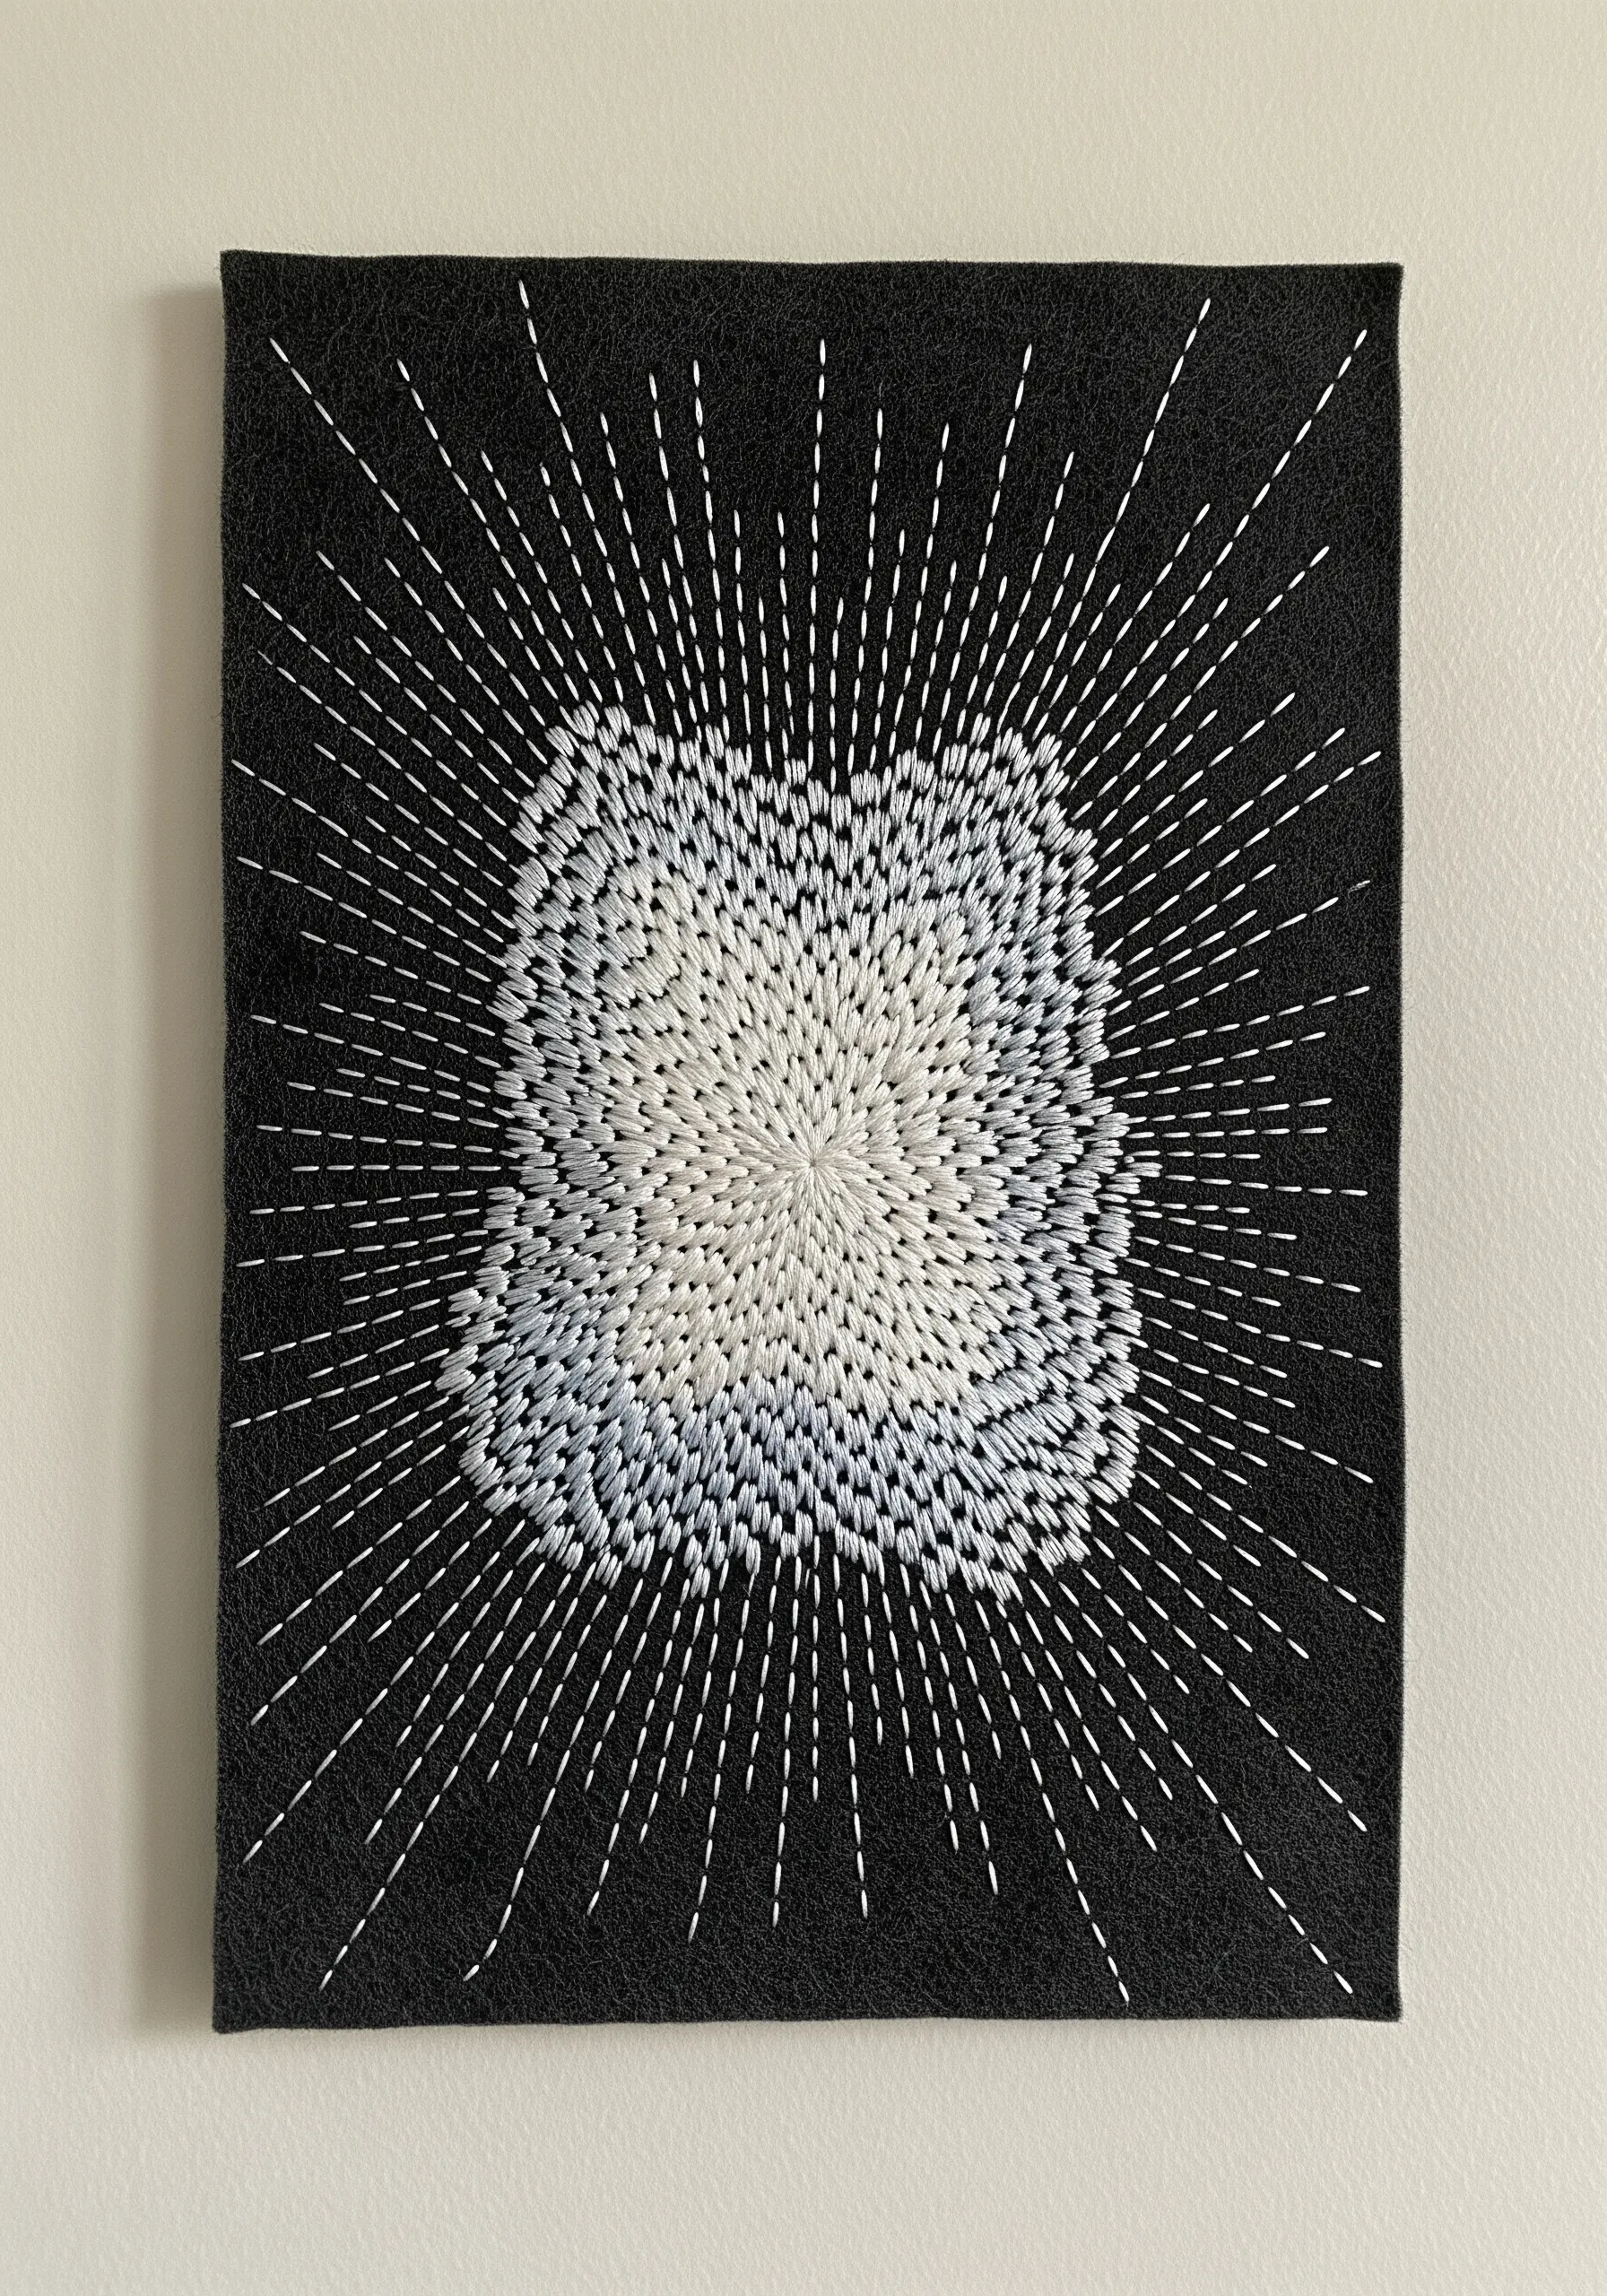
Make light-colored threads vibrate with intensity by stitching them onto a dark, light-absorbing fabric like black felt or wool.
Felt’s soft, matte surface prevents glare and makes even a single strand of white or silver floss appear exceptionally bright.
Arrange your stitches in a radial pattern, emanating from a central point. This technique pulls the viewer’s eye inward, creating a sense of energy and light.
By varying the stitch length—shorter near the center, longer at the edges—you can create a powerful illusion of a glowing core, making it one of those minimalist embroidery art pieces that feels incredibly luxe.
3. Create Tension by Juxtaposing Weave and Knots
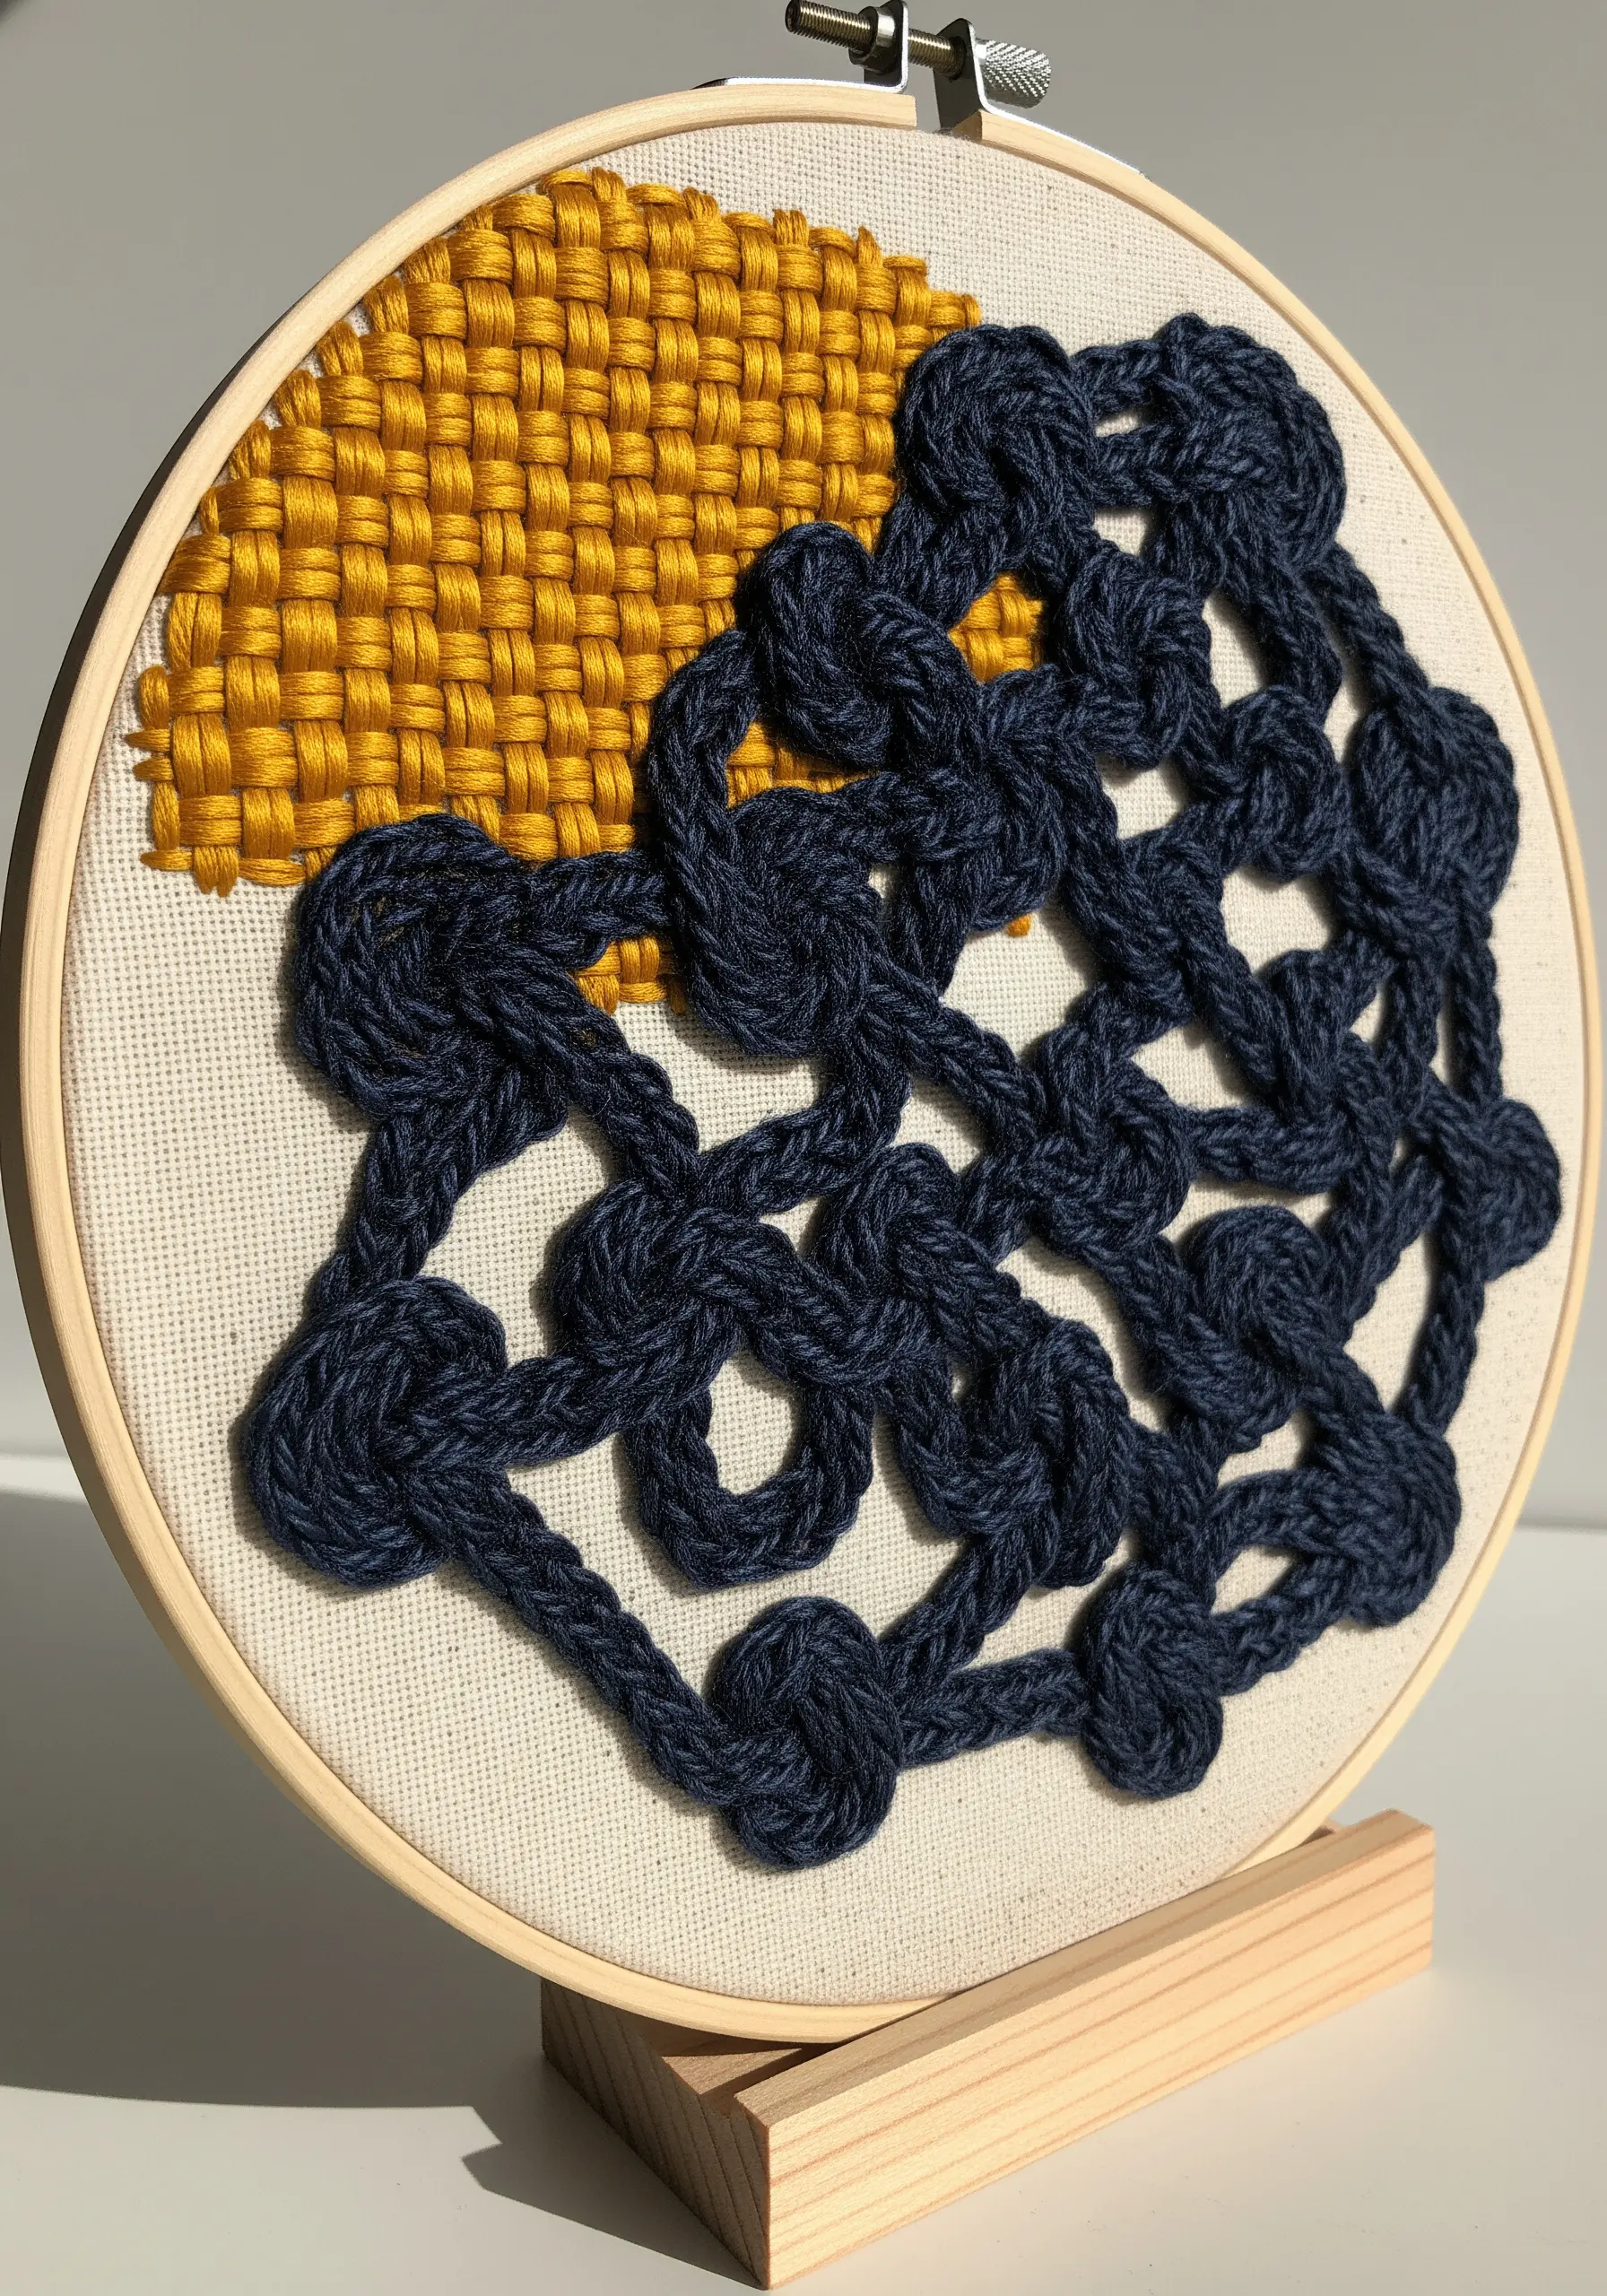
Combine two opposing techniques in a single hoop to build textural and visual contrast.
Pair the flat, graphic structure of a woven section with the dimensional, organic form of knotted stitches like the bullion or French knot.
Use a single, bold color for your woven area to create a solid block of texture that acts as an anchor.
Then, allow a contrasting color in a knotted, looping pattern to flow over and around it, suggesting two different energies interacting within the same space.
This method is perfect for creating eye-catching mixed fiber wall hangings with a strong sense of story.
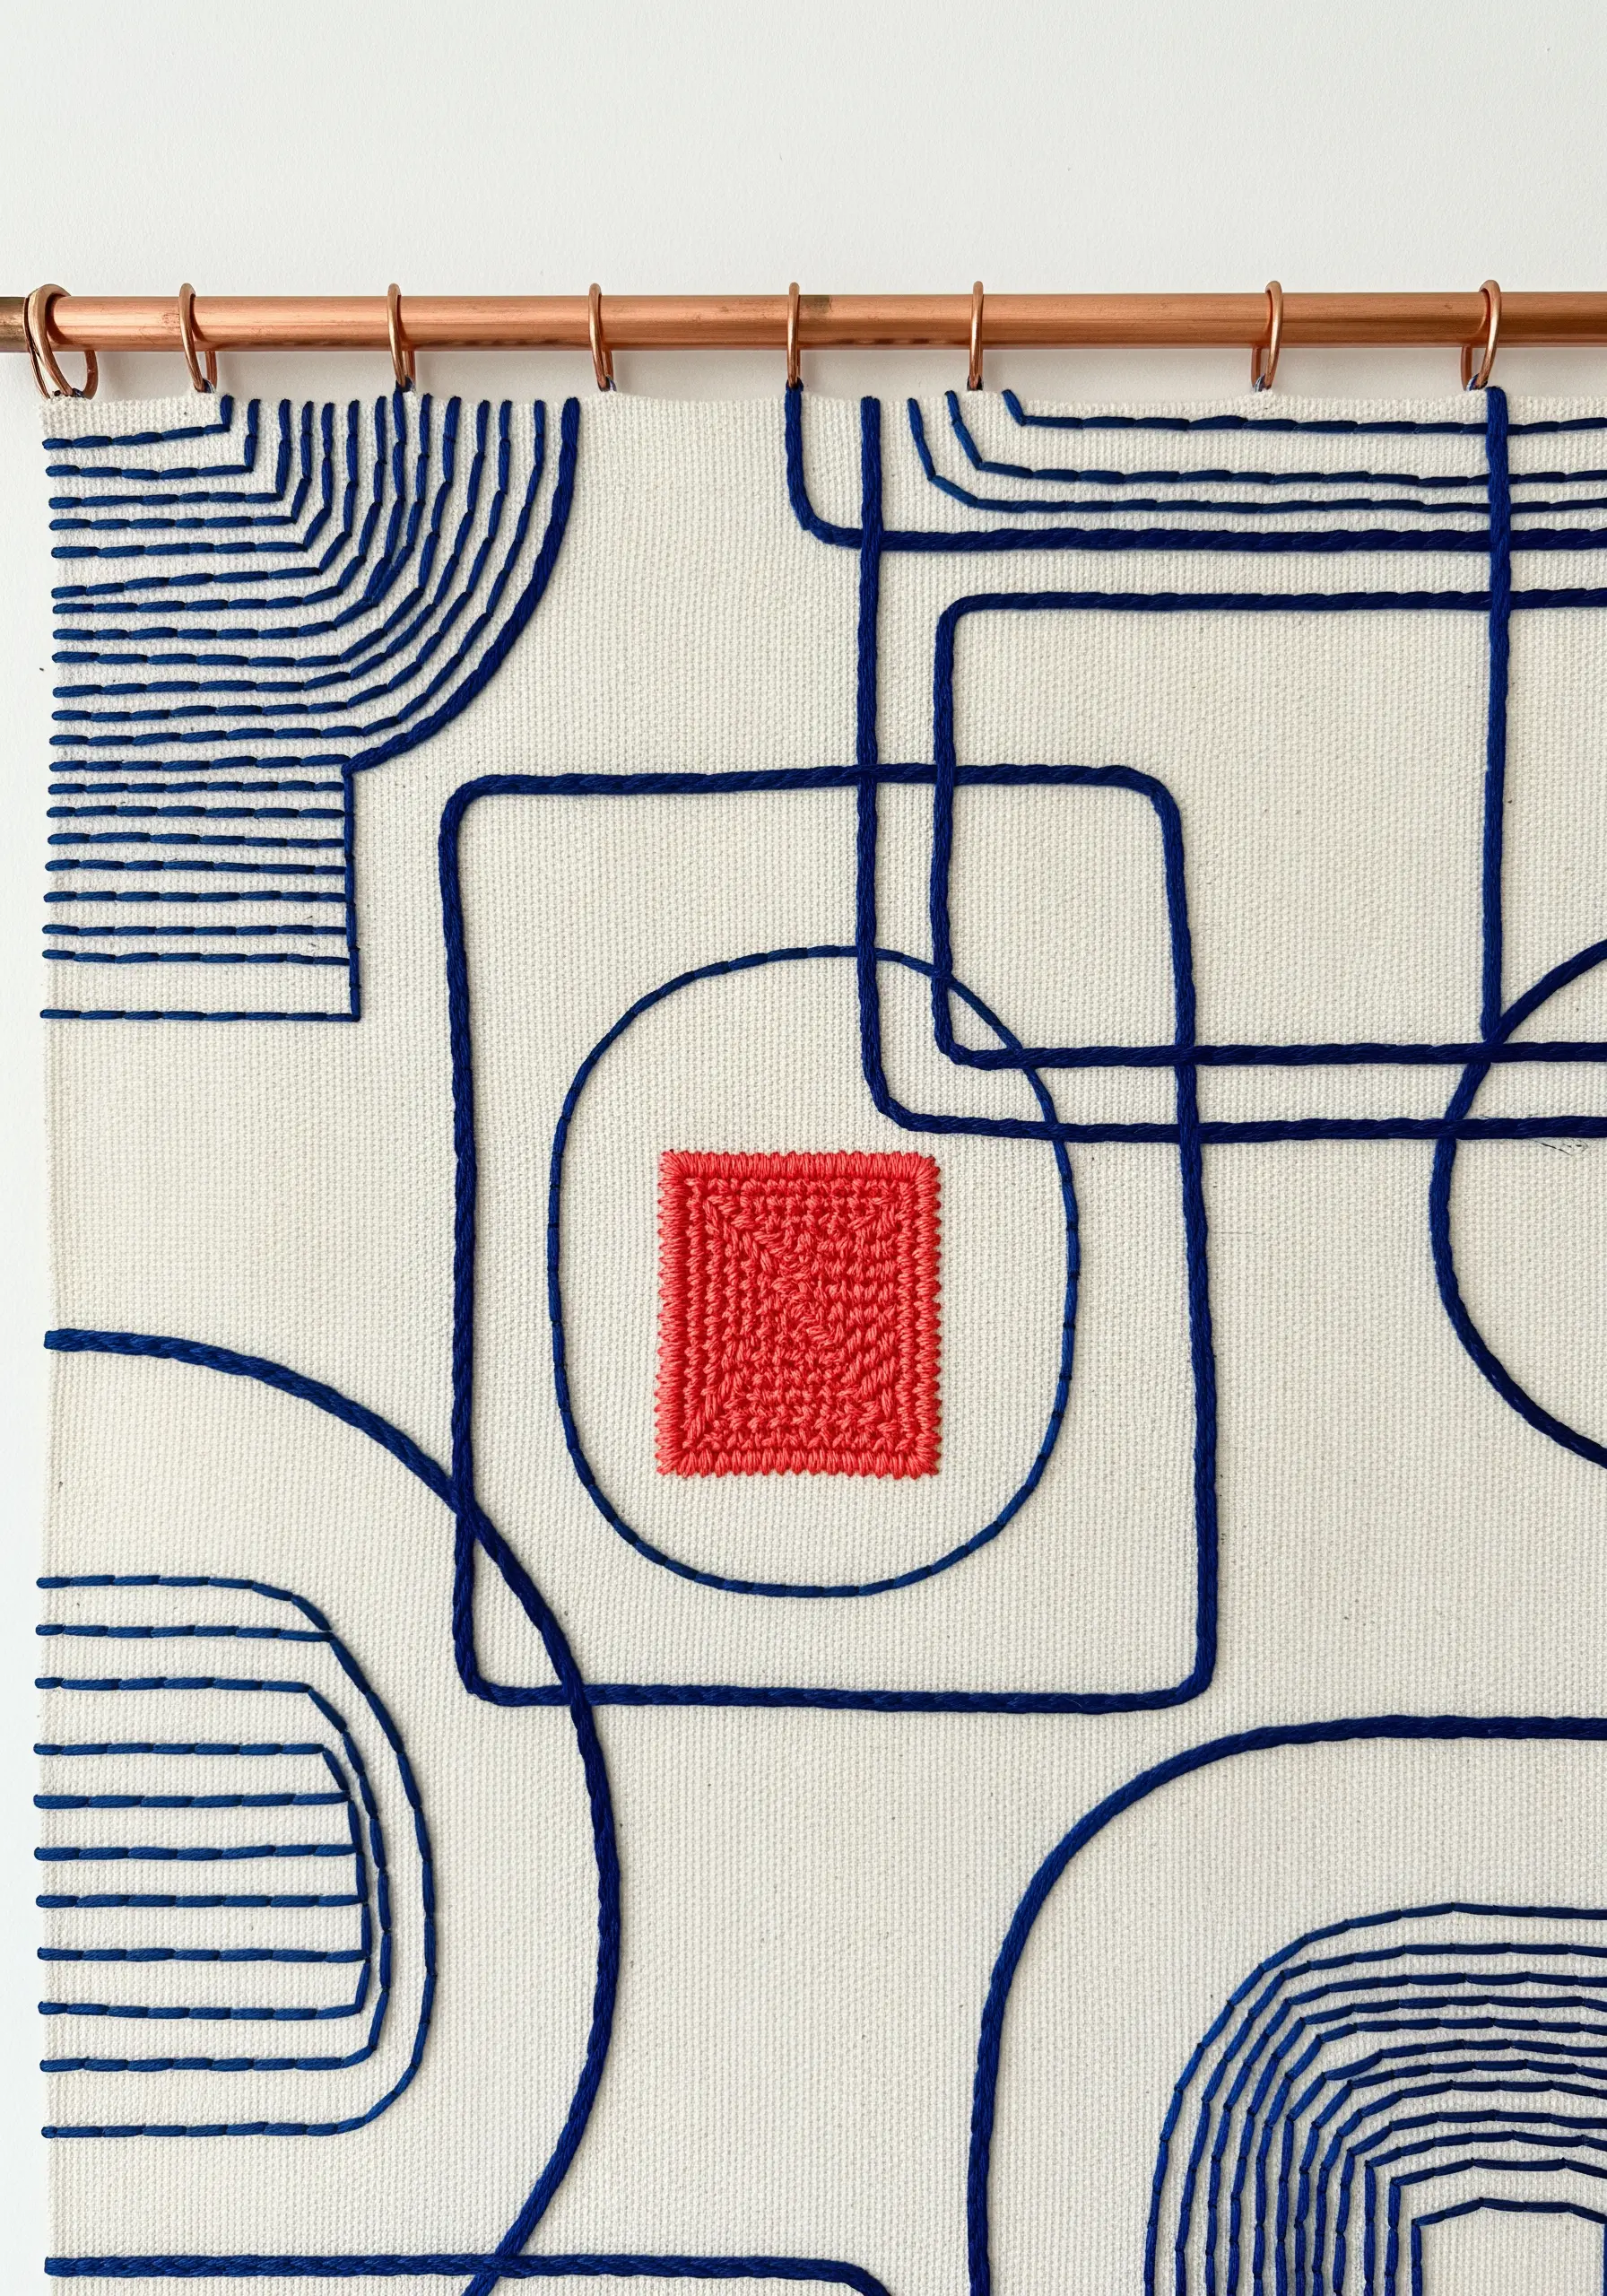
4. Anchor a Composition with Sculptural Knots
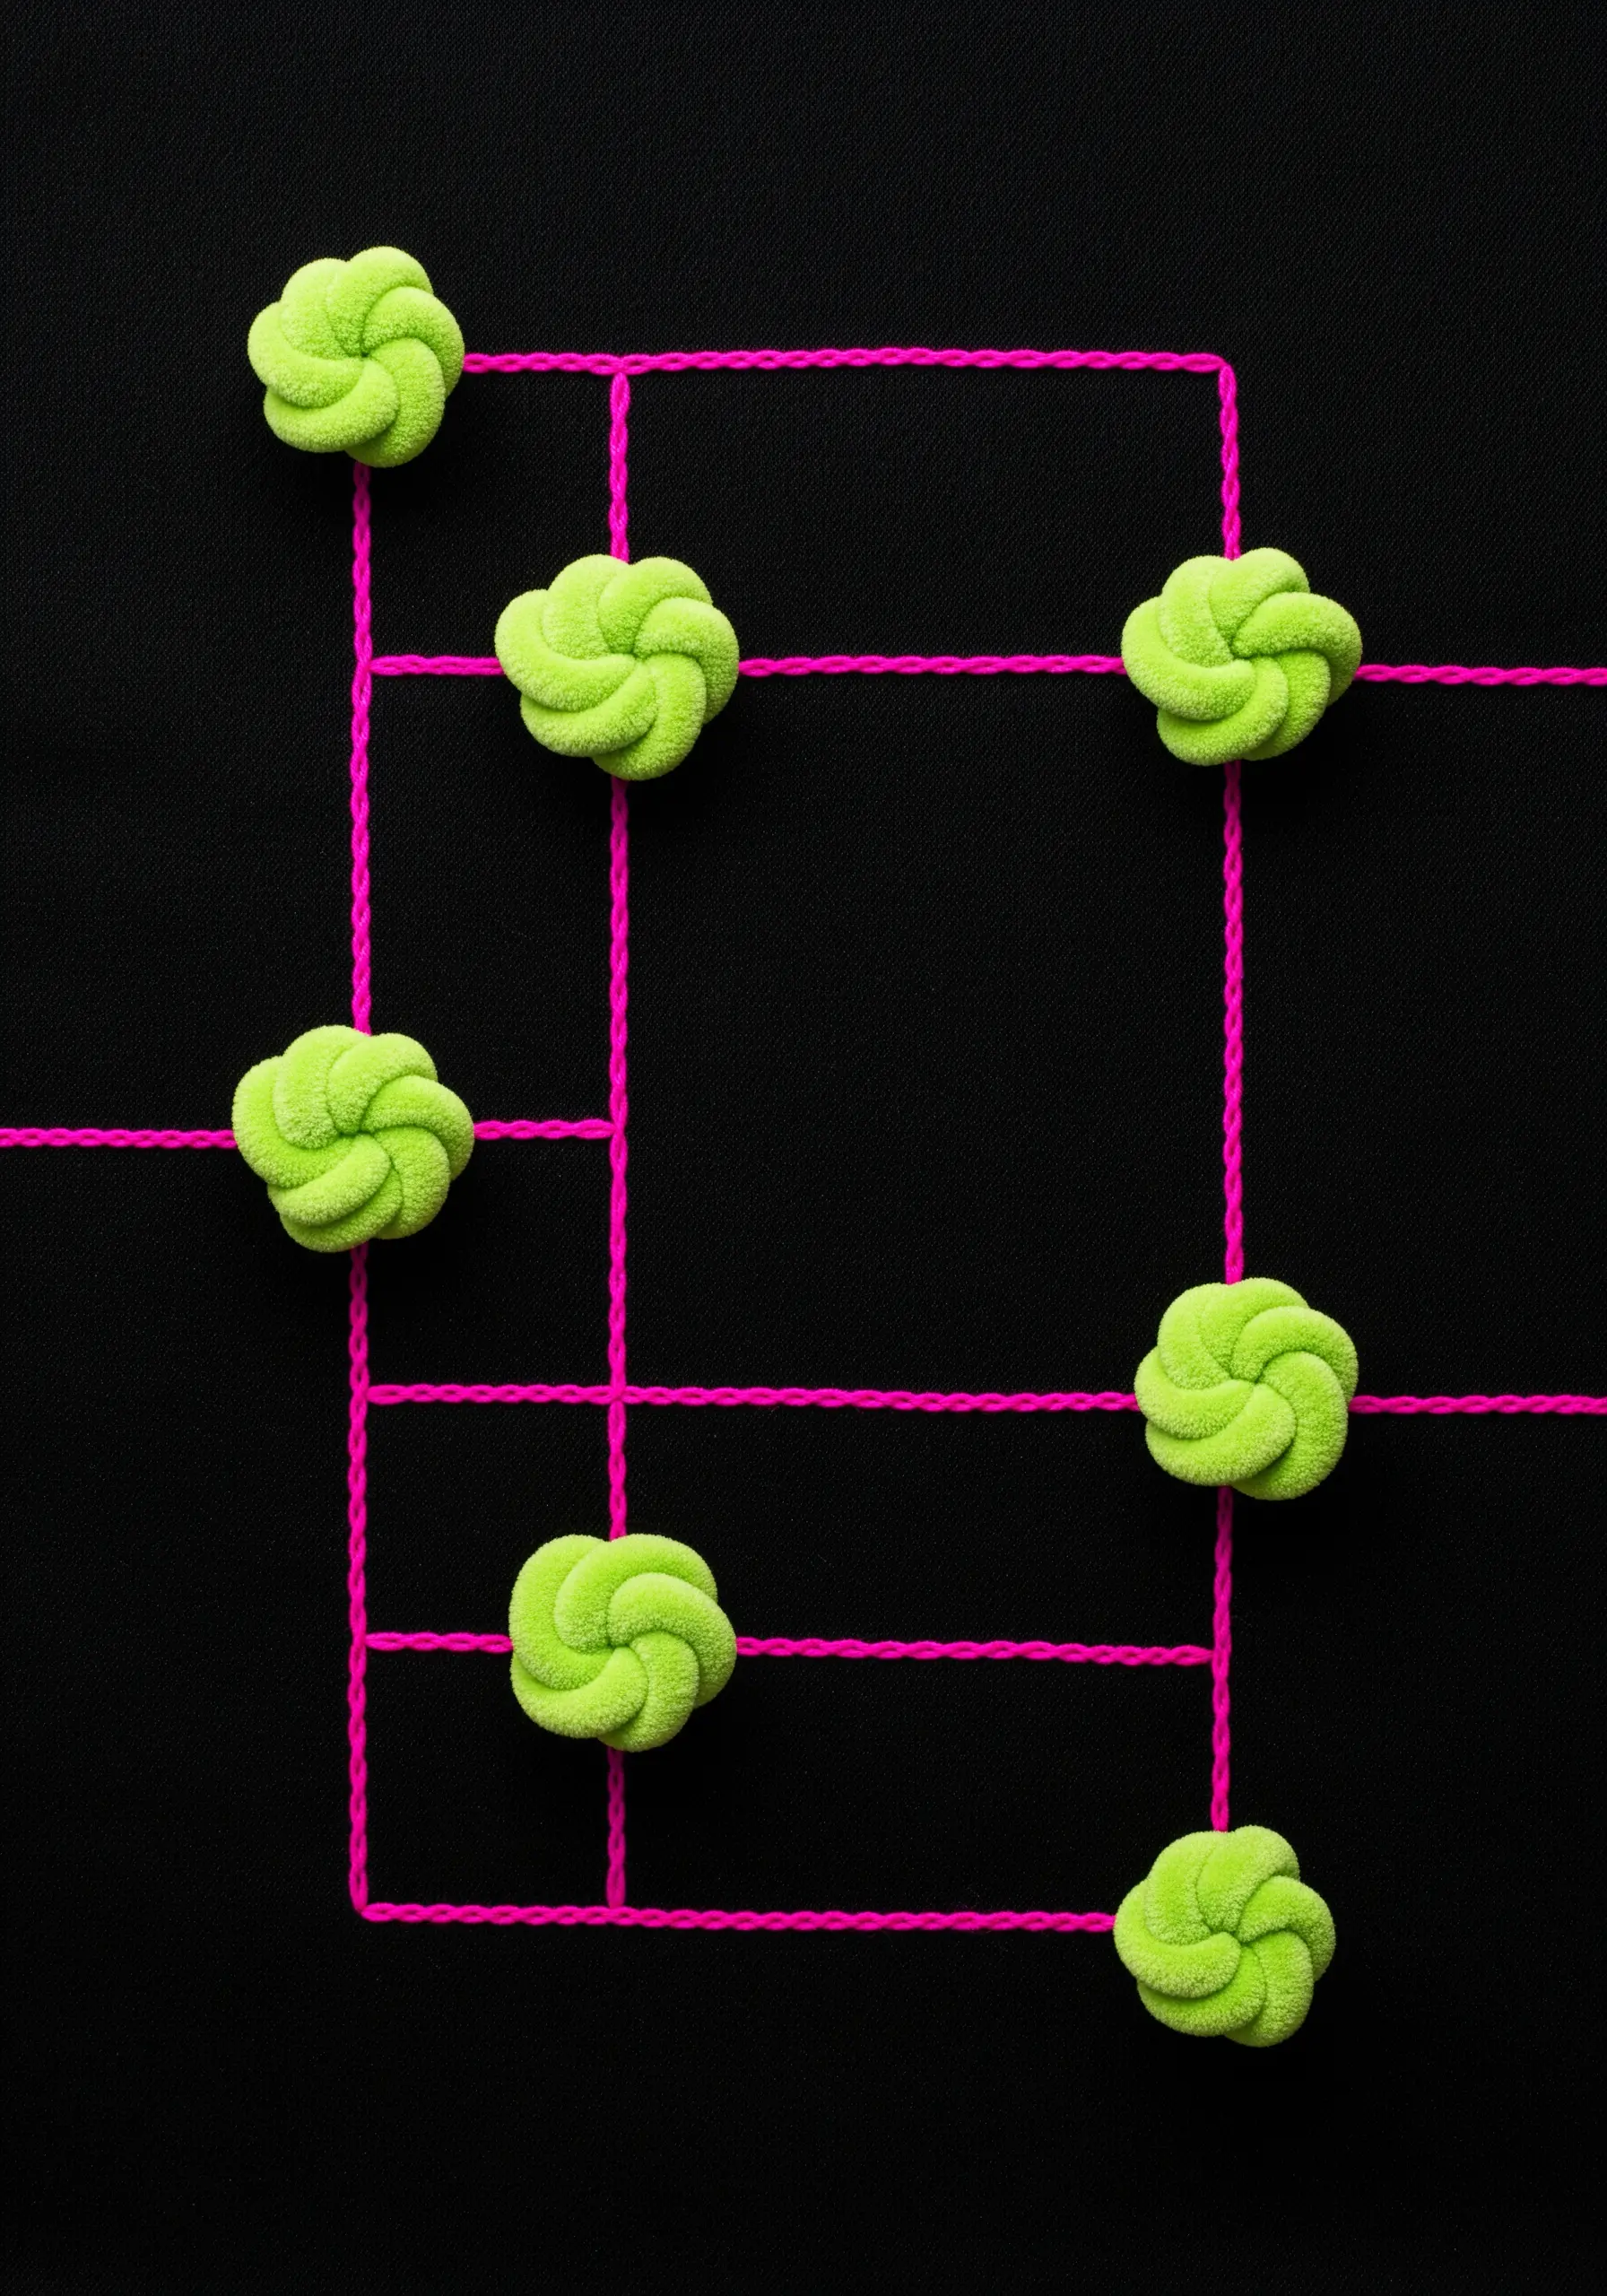
Elevate simple lines by using large, dimensional knots as focal points within your composition.
First, lay down a clean, graphic grid or pathway using a simple stitch like a whipped backstitch or stem stitch in a vibrant color.
Then, create prominent, textural knots—such as the Chinese button knot—using a contrasting, thick cord or yarn.
Placing these sculptural elements at the intersections of your linear design creates visual ‘stops’ that ground the entire piece, preventing the eye from simply gliding off the fabric.
This turns a simple line drawing into a tactile, map-like work of art.
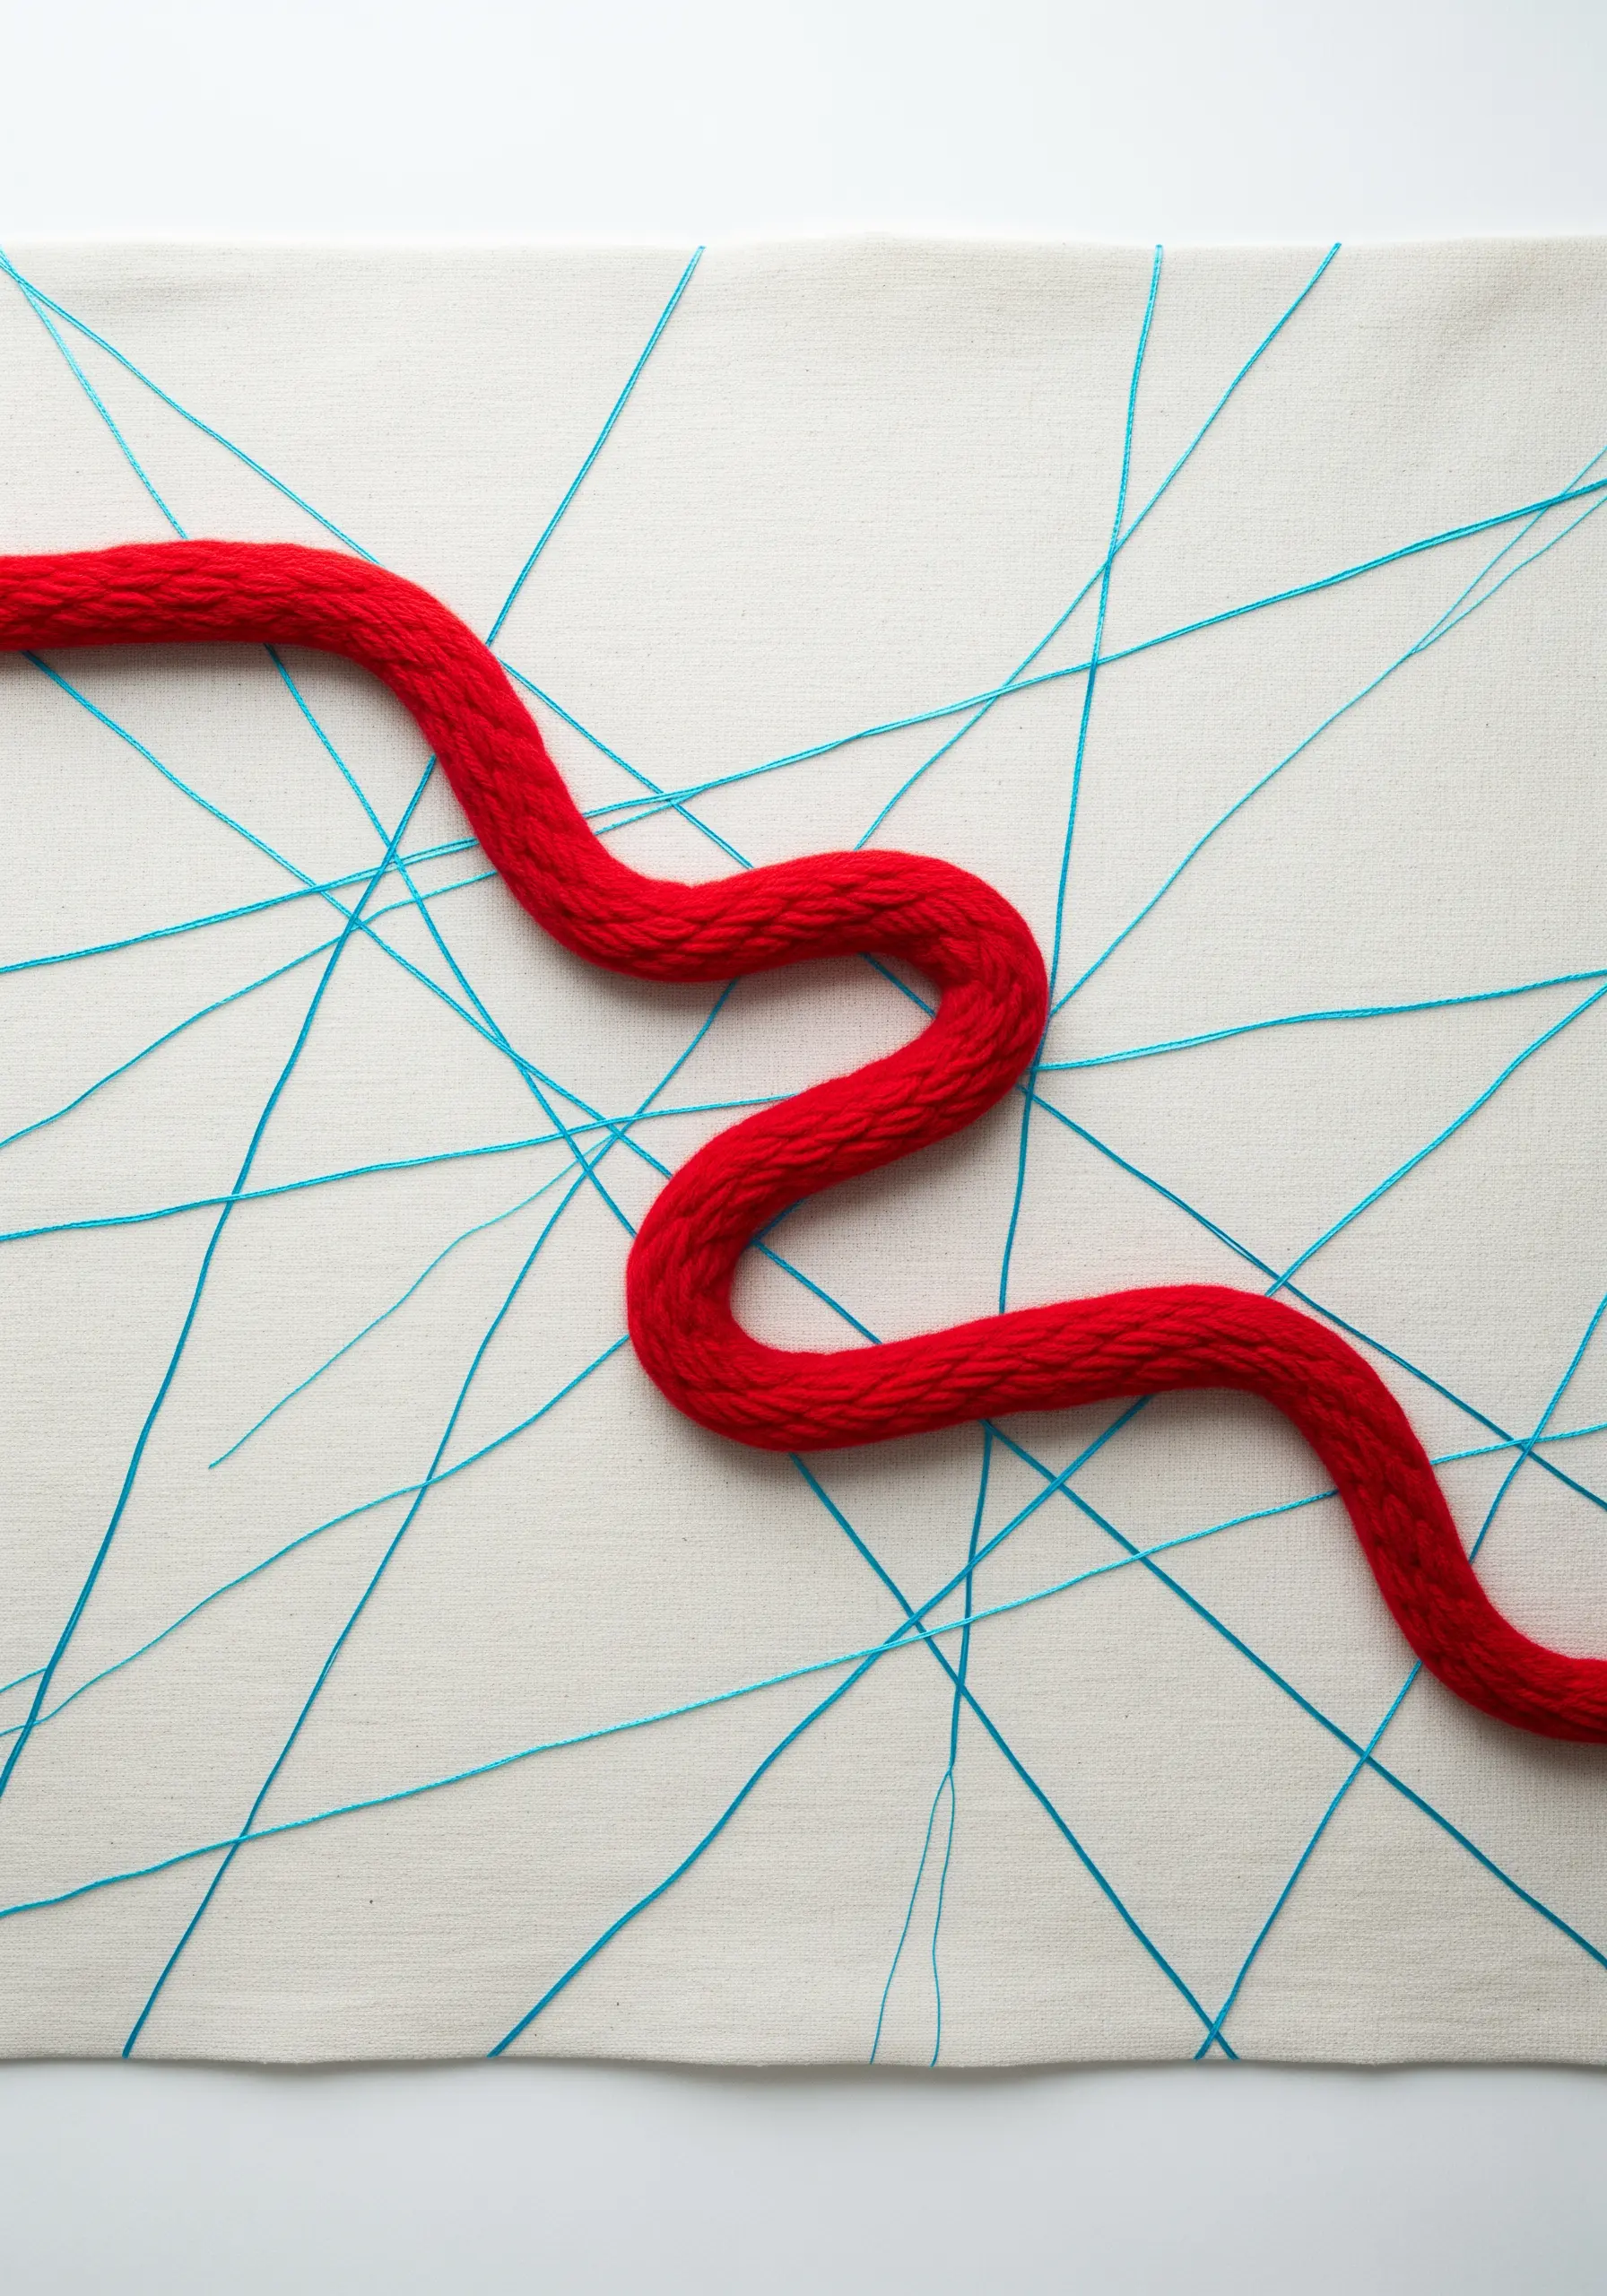
5. Carve a Path Through a Variegated Ground
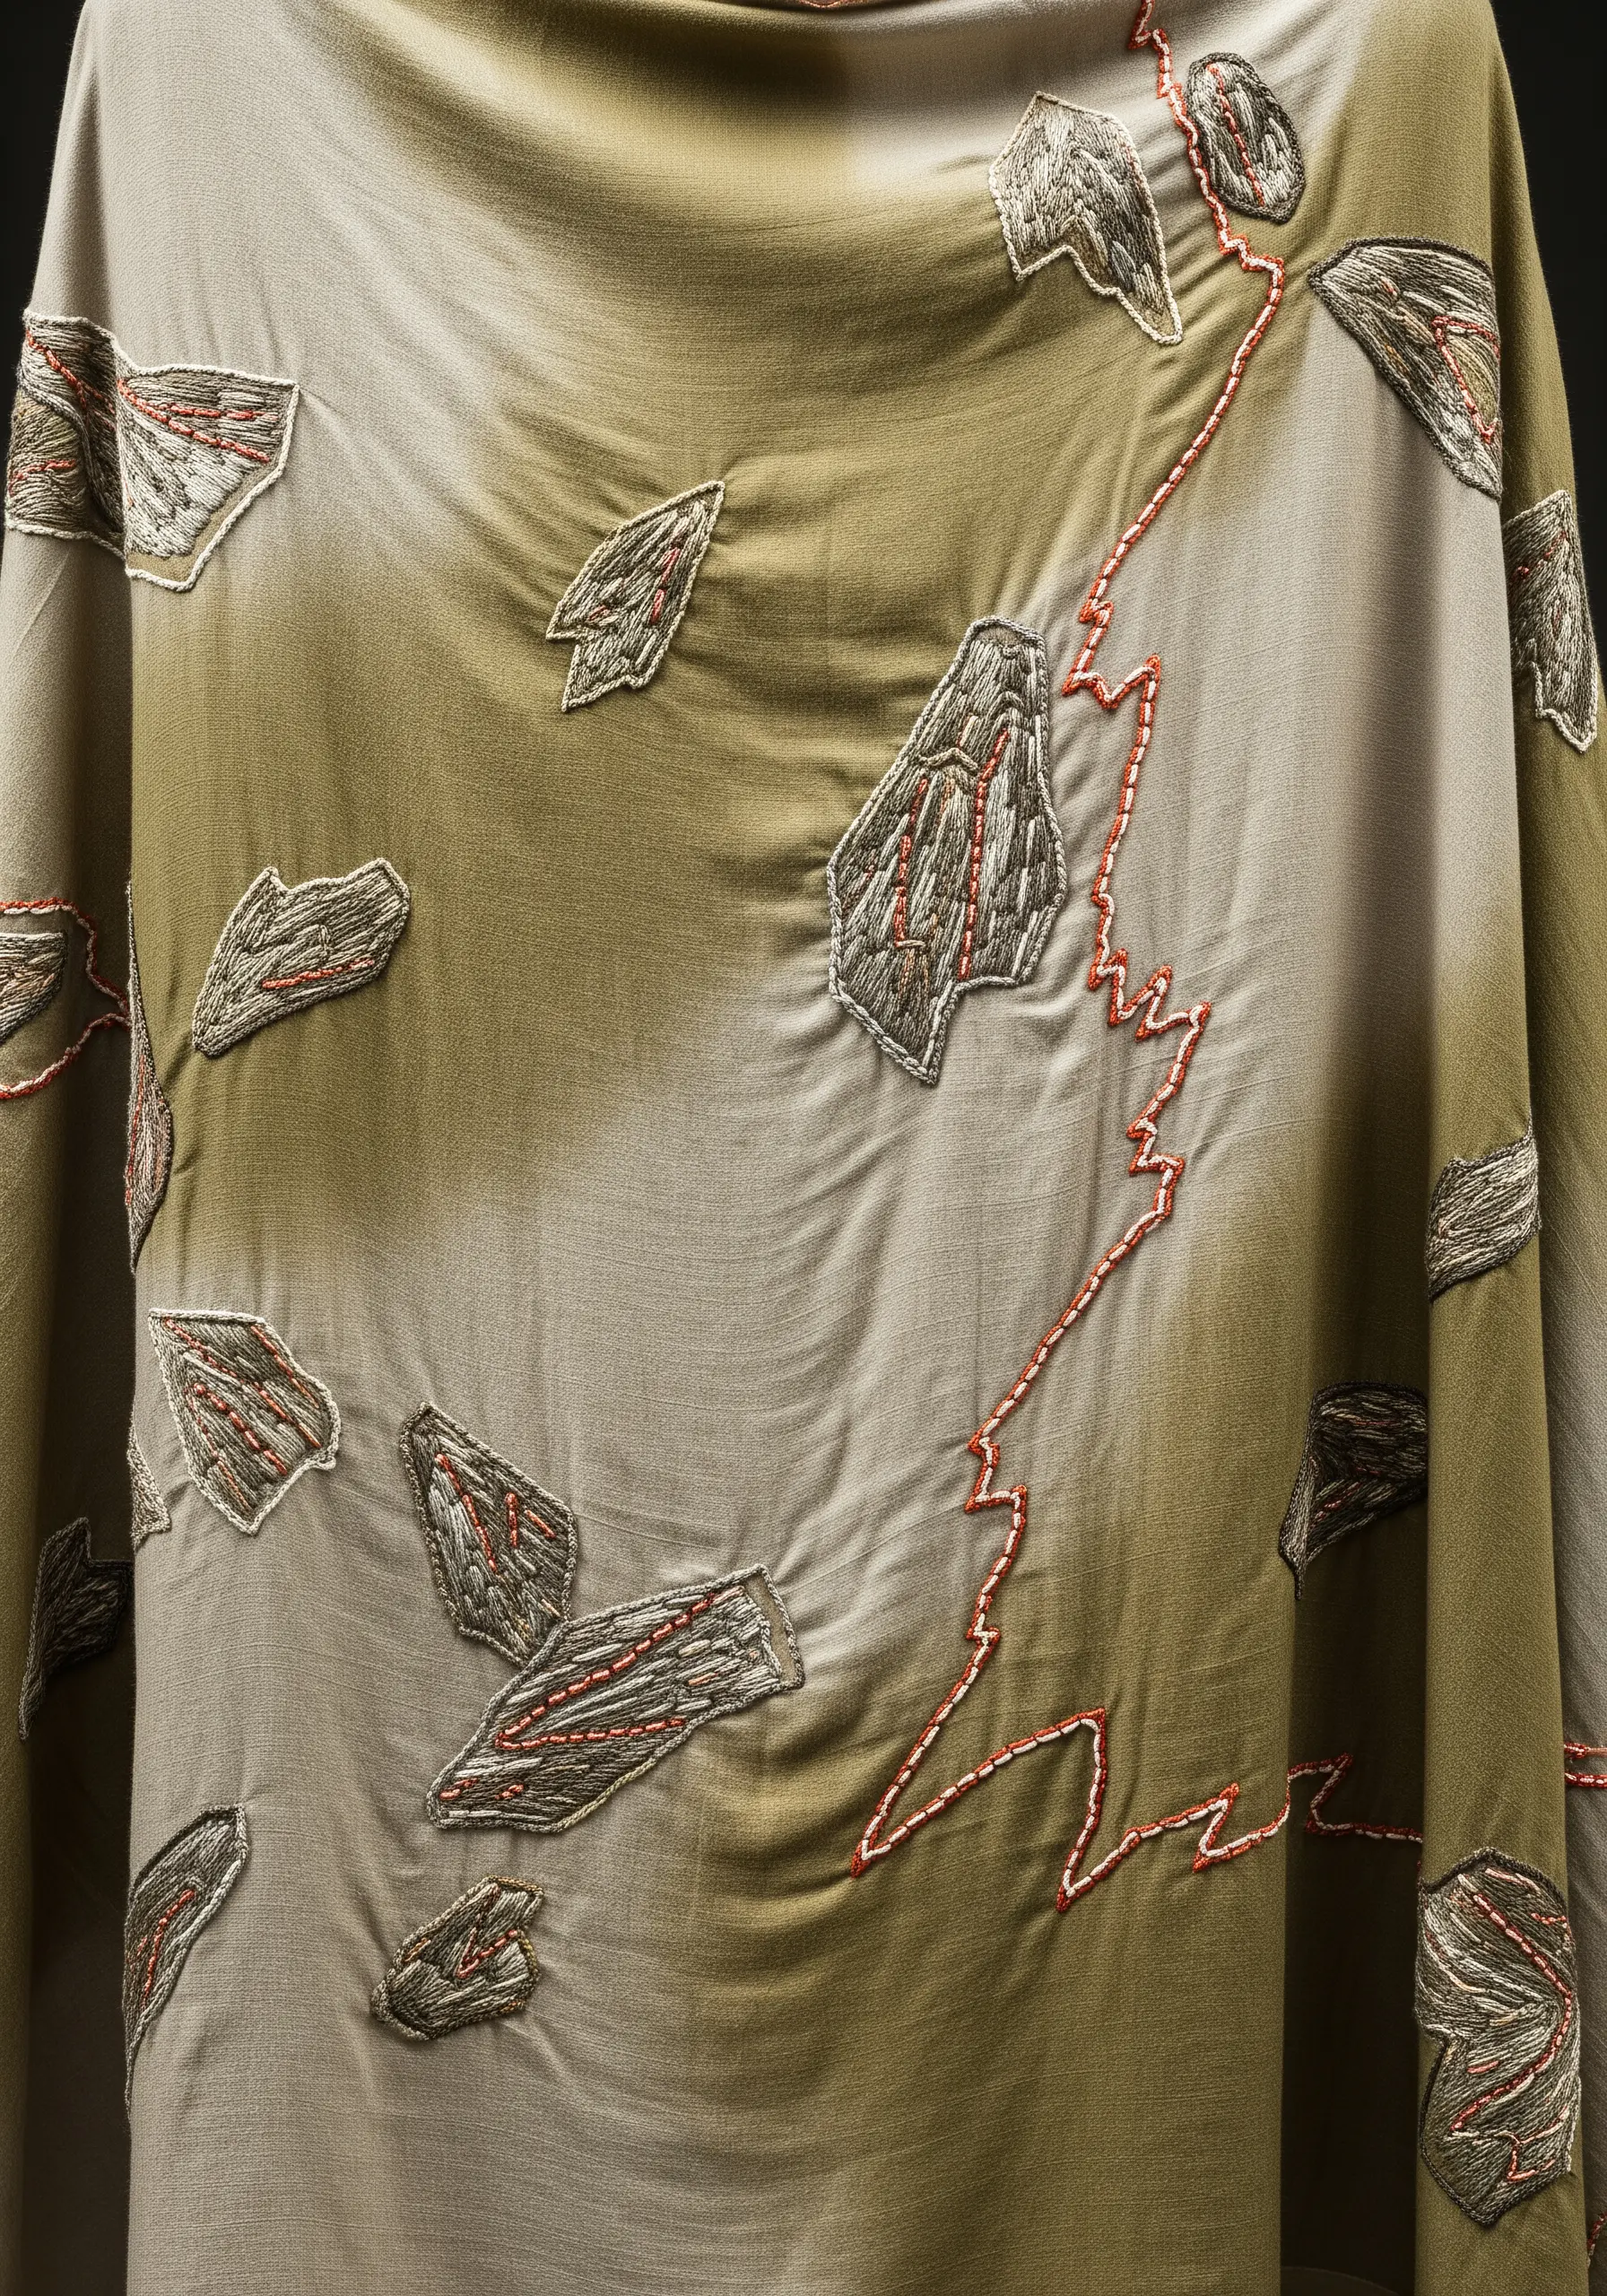
When working on a patterned, dyed, or inconsistent fabric, use thread to create order and definition.
Scatter abstract shapes stitched with a neutral color across the surface, allowing them to blend subtly with the background variations.
Then, introduce a single, sharp line of a high-contrast color—like a vibrant red or orange—and stitch it meandering through the other elements.
This technique creates a ‘path’ for the eye to follow, unifying the scattered motifs and bringing intentional focus to an otherwise chaotic background.
6. Isolate Stitch Clusters for Bursts of Color
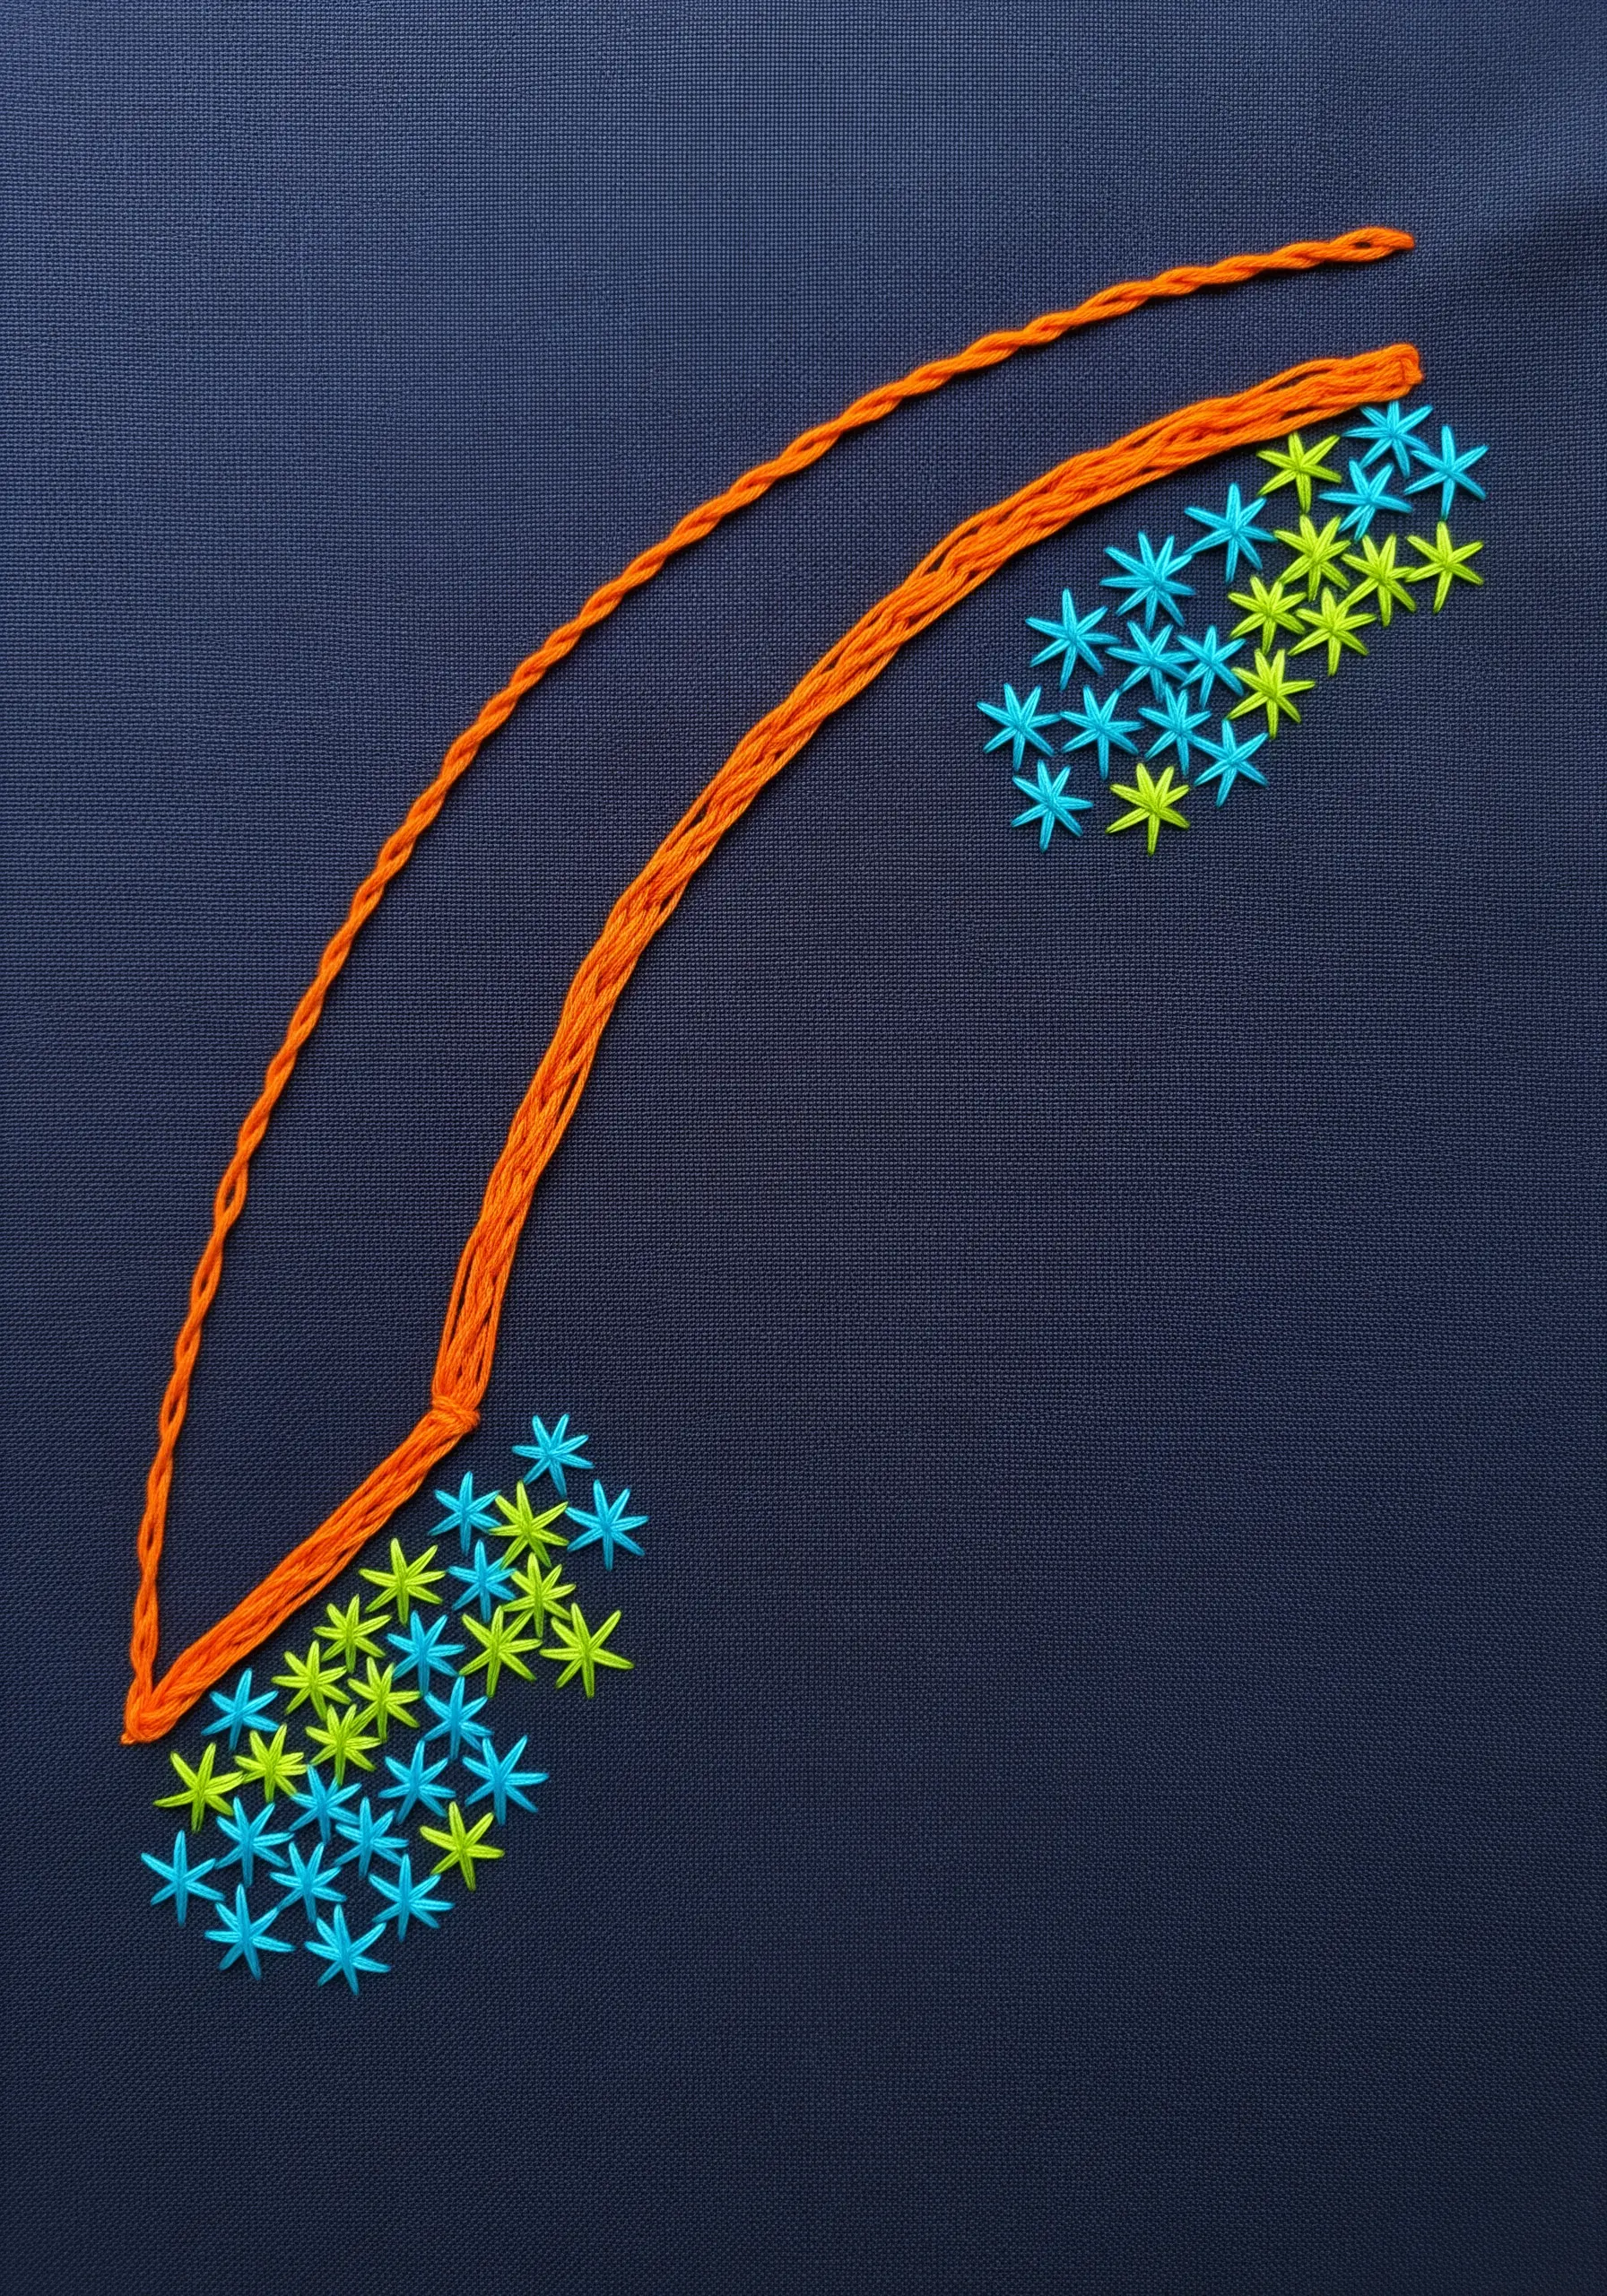
Instead of filling a large area, concentrate your color into small, dense clusters of a decorative stitch.
Choose a simple but impactful stitch, like the star stitch or detached chain stitch, and work it repeatedly in a tight grouping.
Place these clusters against a dark, solid background to maximize their chromatic intensity.
This approach allows you to use incredibly bright, neon, or complementary colors without overwhelming the composition, creating pockets of energy that feel both deliberate and joyful.
You can even blend two vibrant colors within a single cluster for a subtle gradient effect.
7. Employ Extreme Fiber Weight Contrast
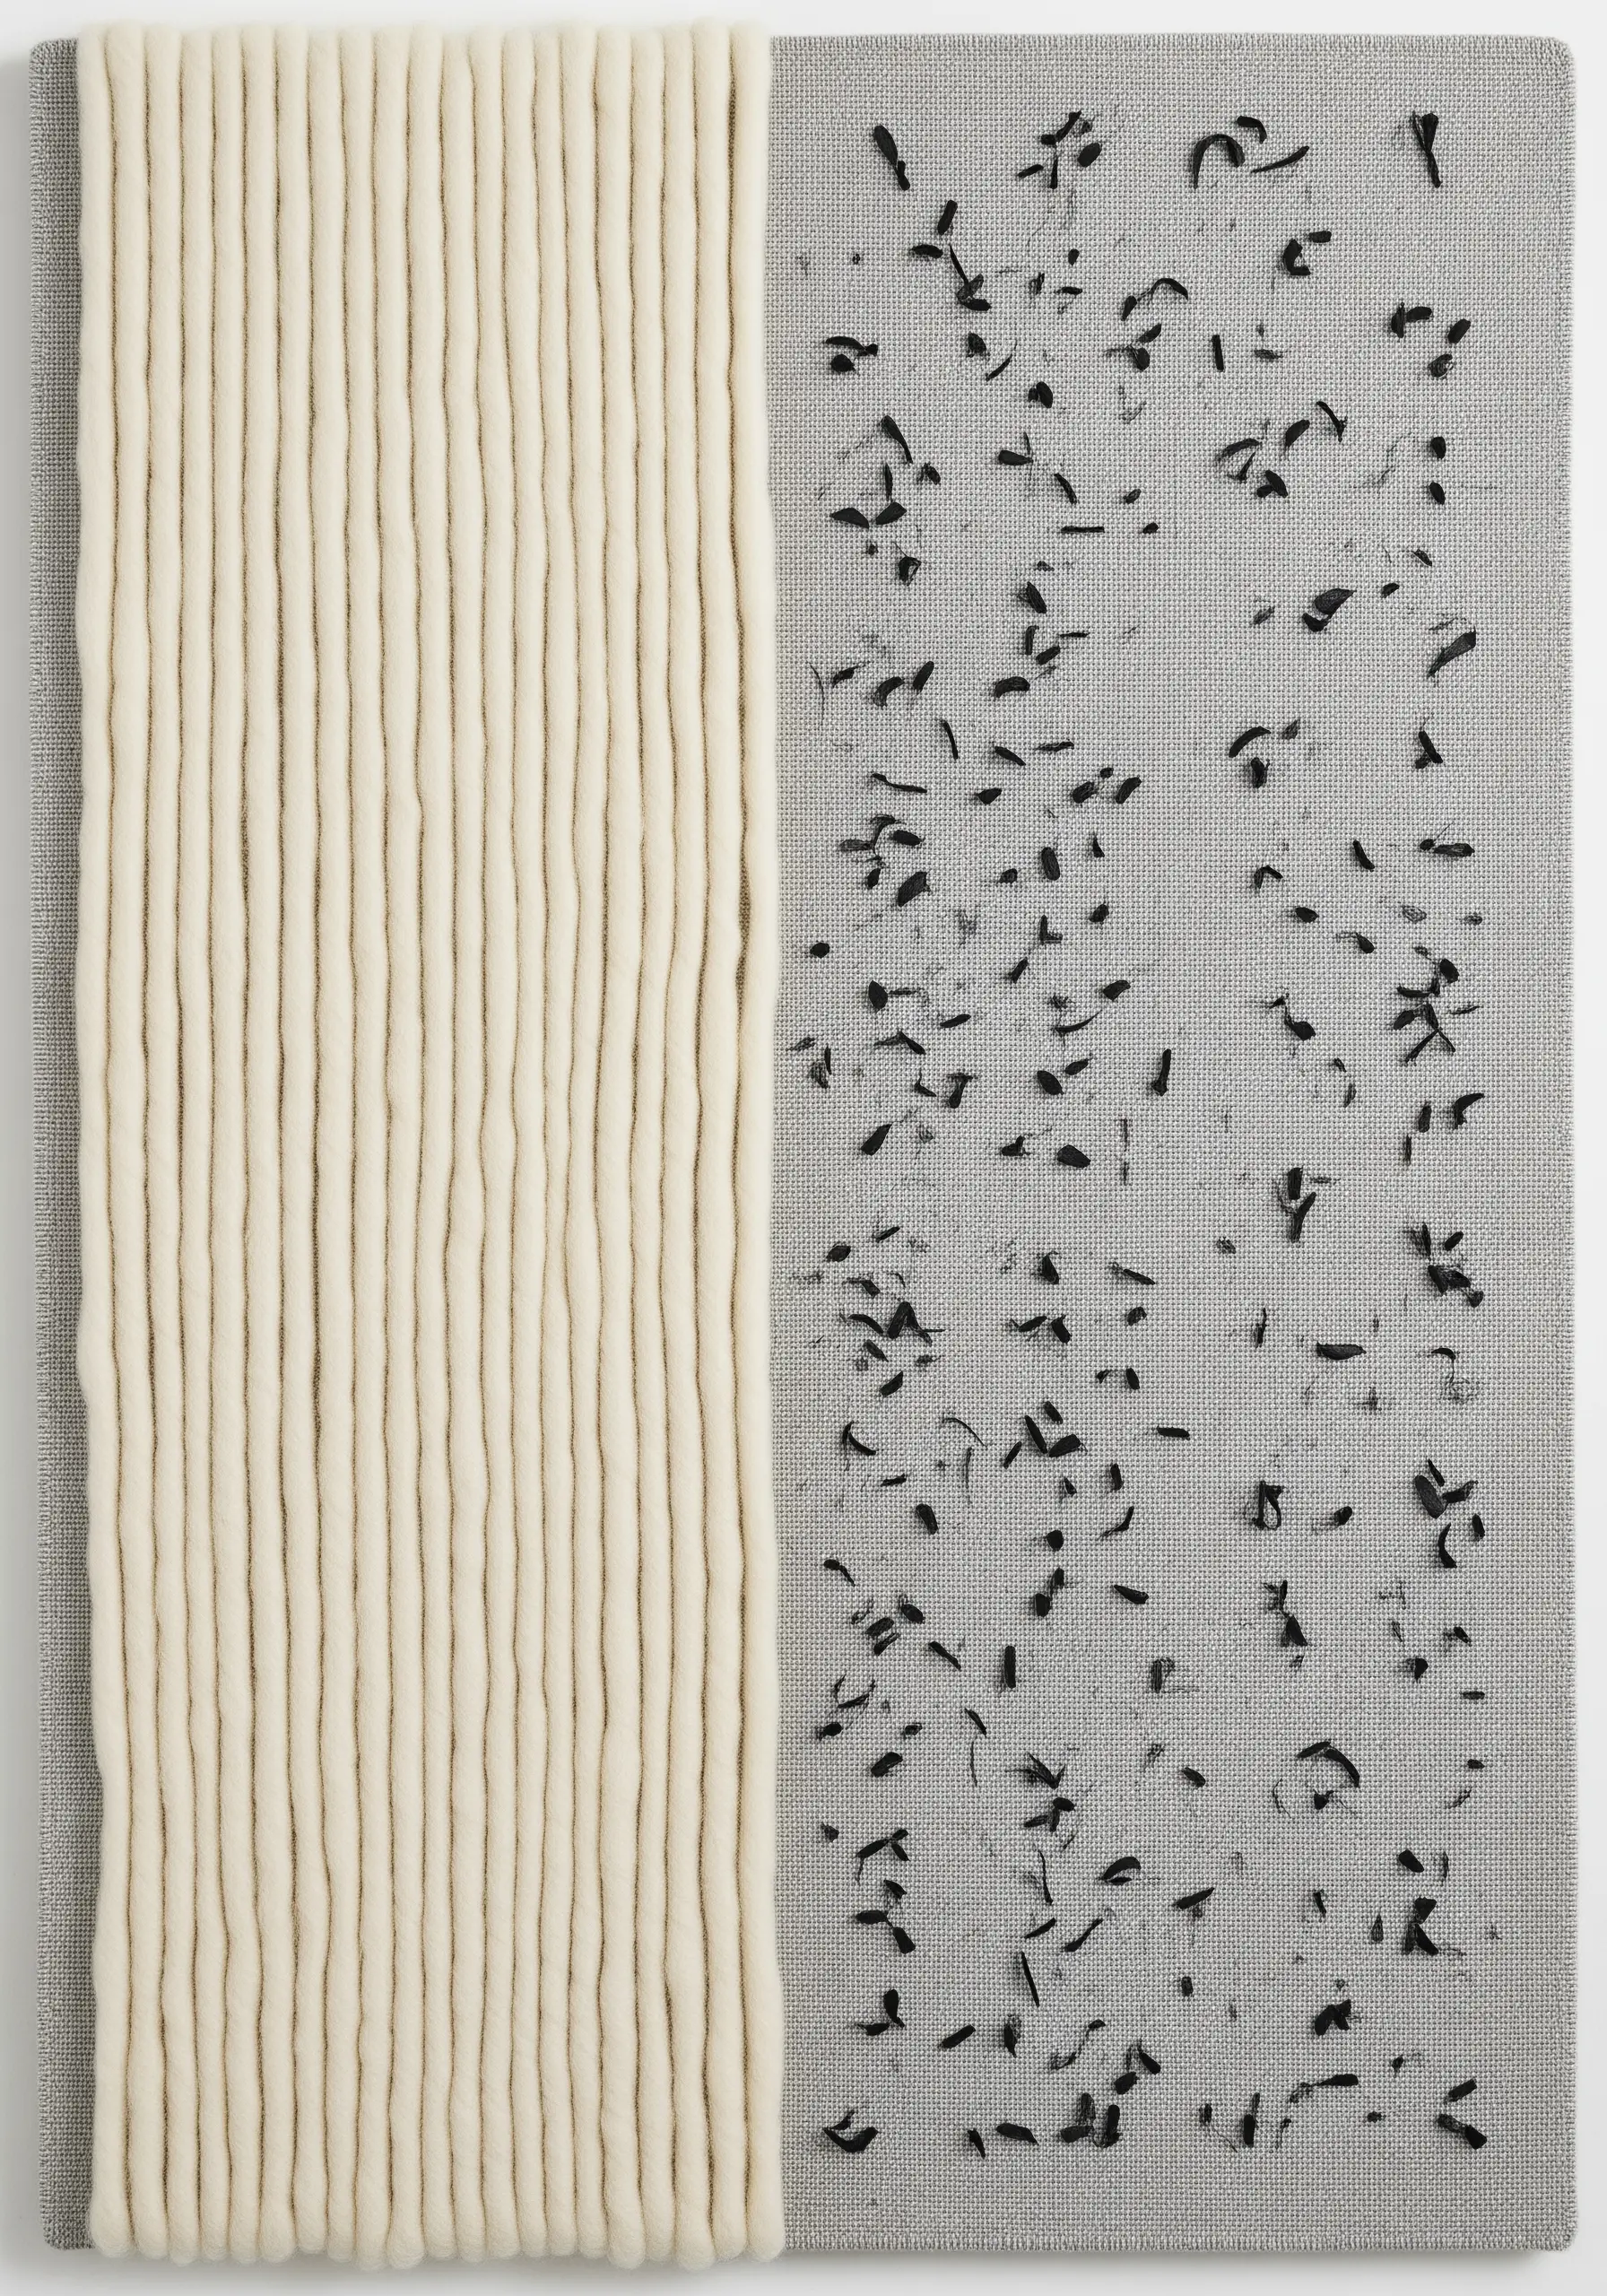
Create a dramatic and modern statement by pairing unspun wool roving or super-chunky yarn with delicate, confetti-like seed stitches.
Lay down the thick fibers first, securing them with couching stitches, to form a bold, dominant block of texture.
Then, use a single strand of floss in a high-contrast color to scatter tiny, irregular stitches across the remaining fabric.
This radical difference in scale and texture creates a powerful visual dialogue between softness and sharpness, solidity and fragmentation, making it one of the most effective bold yarn wall art patterns available.
8. Braid Threads for a Sculptural Focal Line
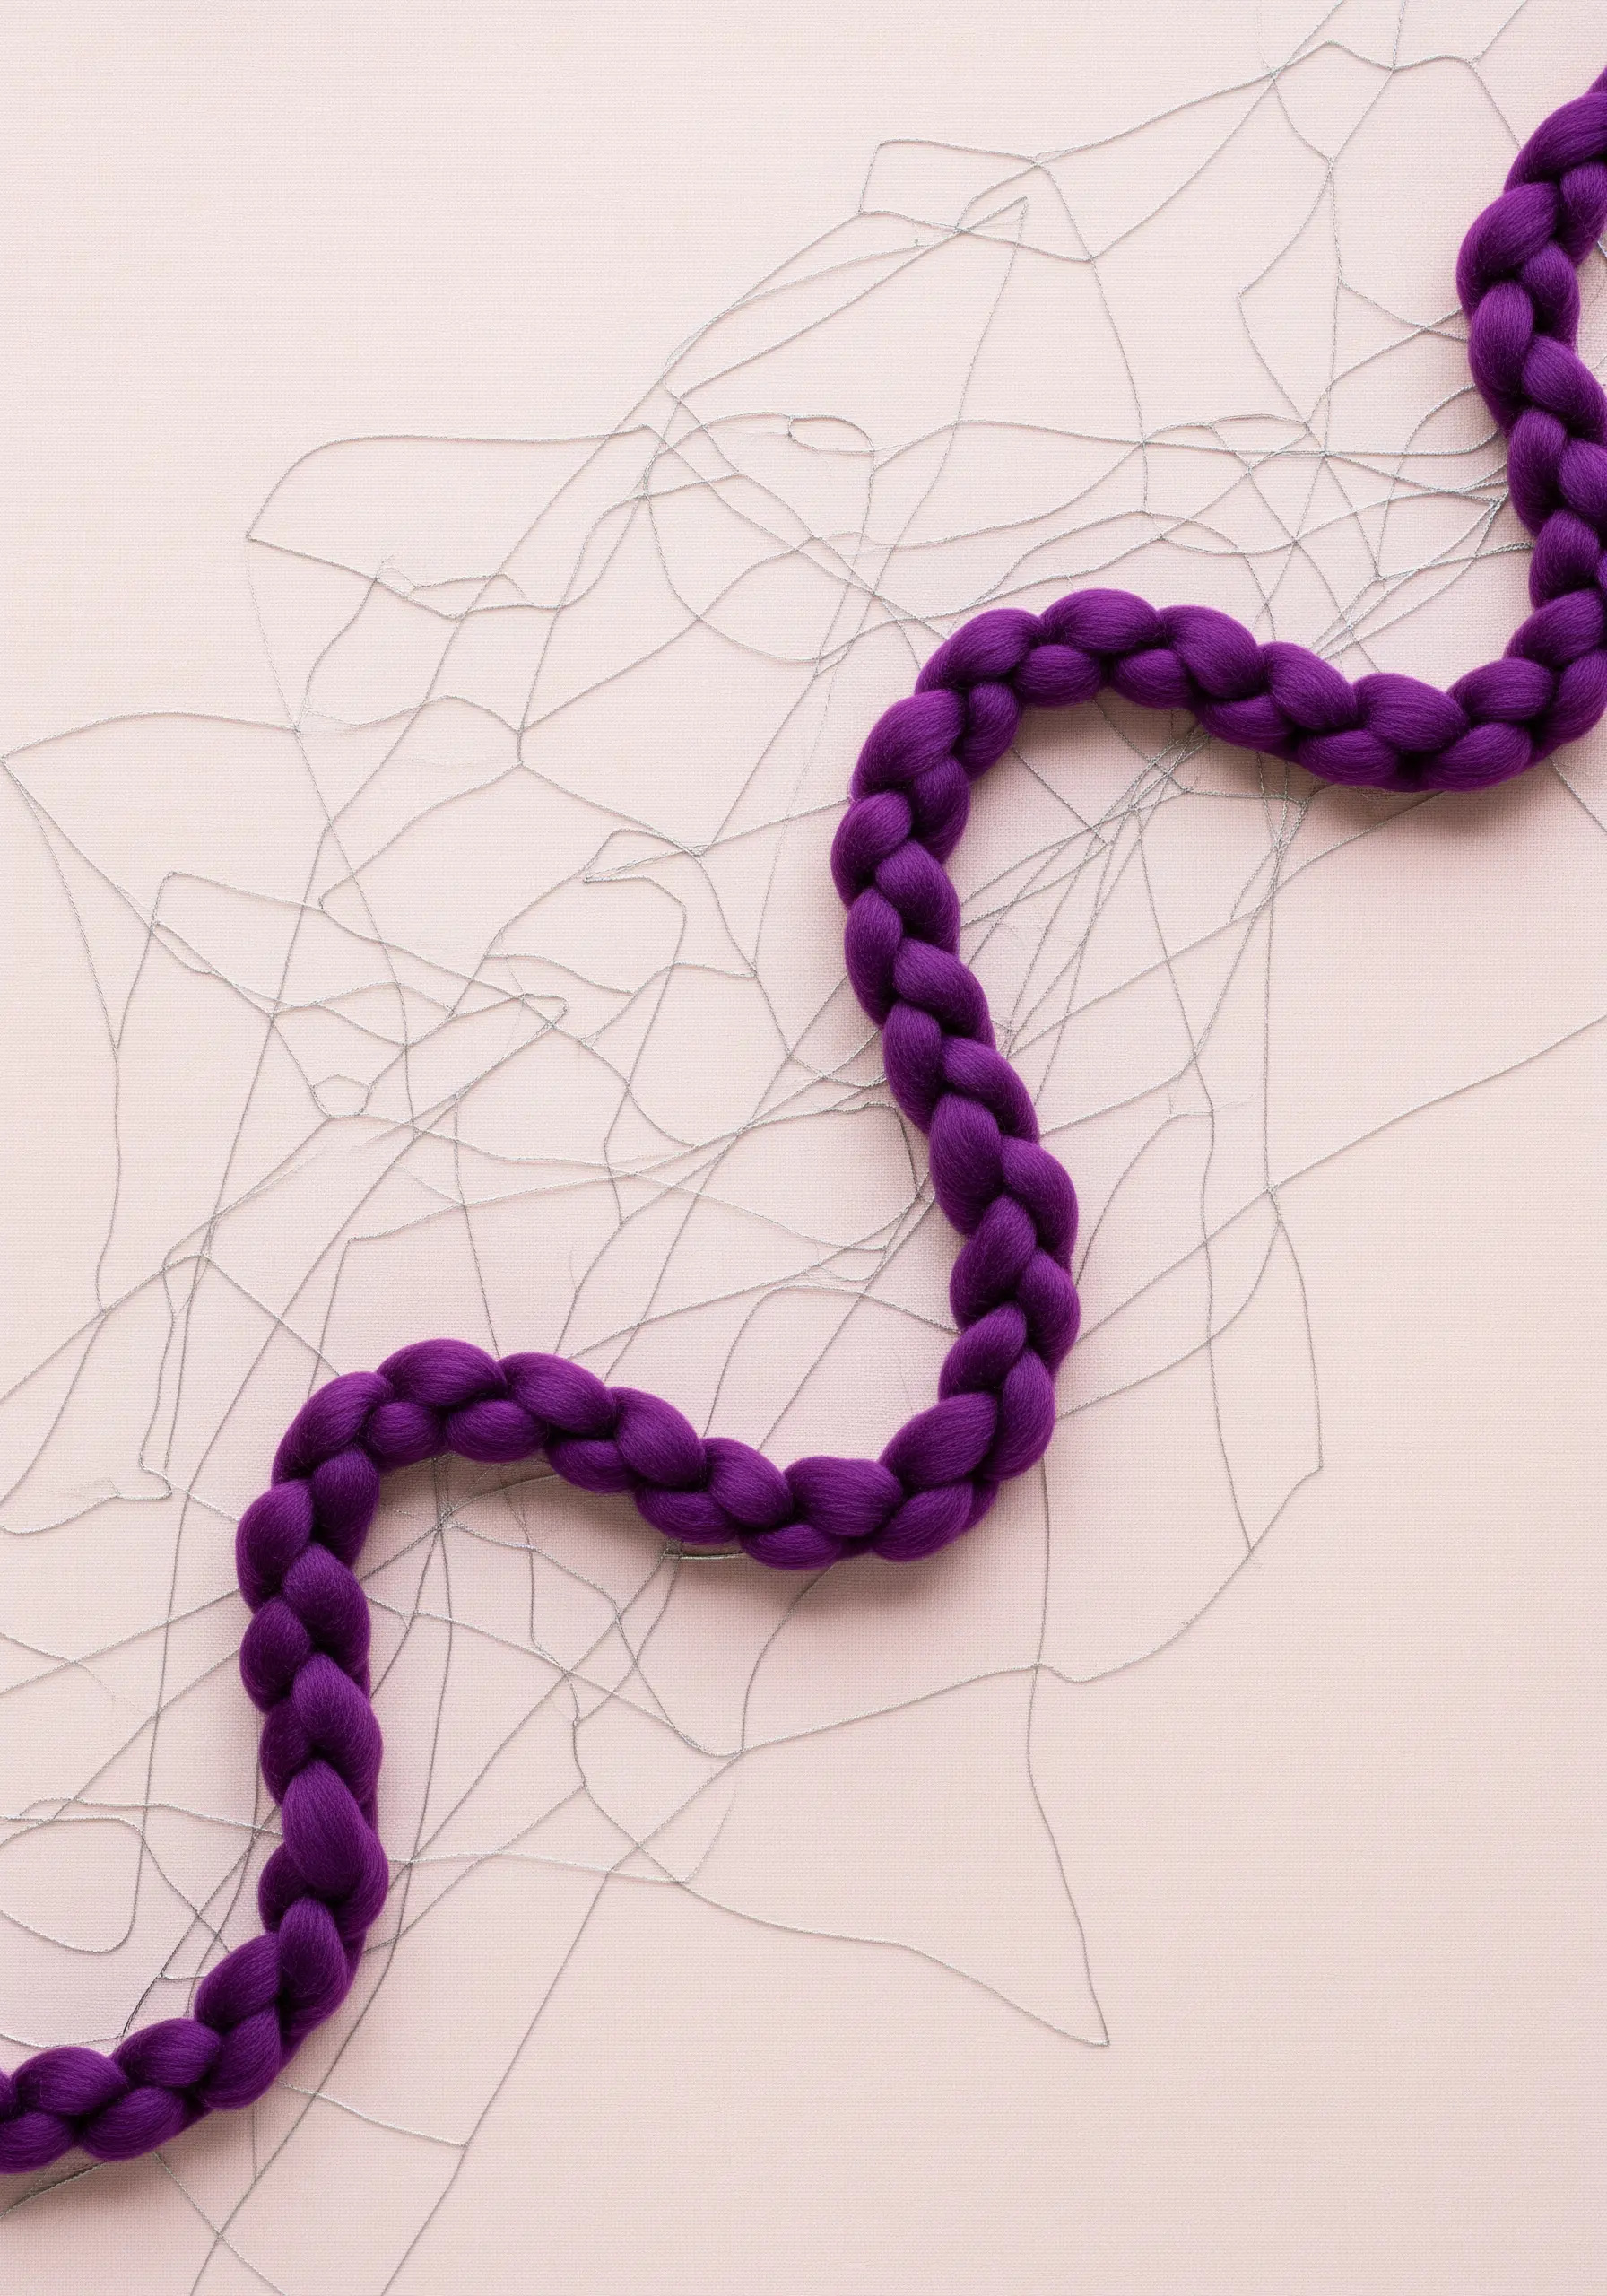
Give a simple line more substance and visual weight by braiding your thread before you stitch with it.
Take multiple strands of embroidery floss—six, twelve, or even more—and braid them tightly together to create a custom rope.
Use this braided cord for your main design element, securing it to the fabric with couching stitches.
Contrast this thick, textured line with a background of sparse, single-strand stitches that recede visually, ensuring your braided path remains the undisputed focal point.
9. Use Density Isolation for a Singular Pop
In an open, linear composition, use a single block of dense fill-stitching to create an unexpected and compelling focal point.
Develop your primary design using minimalist lines and curves, keeping the majority of the fabric visible.
Then, choose one small, defined area within the design and fill it completely with a dense stitch like the basketweave or satin stitch.
Using a bold, contrasting color for this filled section instantly draws the eye, anchoring the entire piece and balancing the surrounding negative space. It’s a key technique for geometric stitch wall patterns that feel modern and clean.
10. Interrupt Organic Flow with a Graphic Element
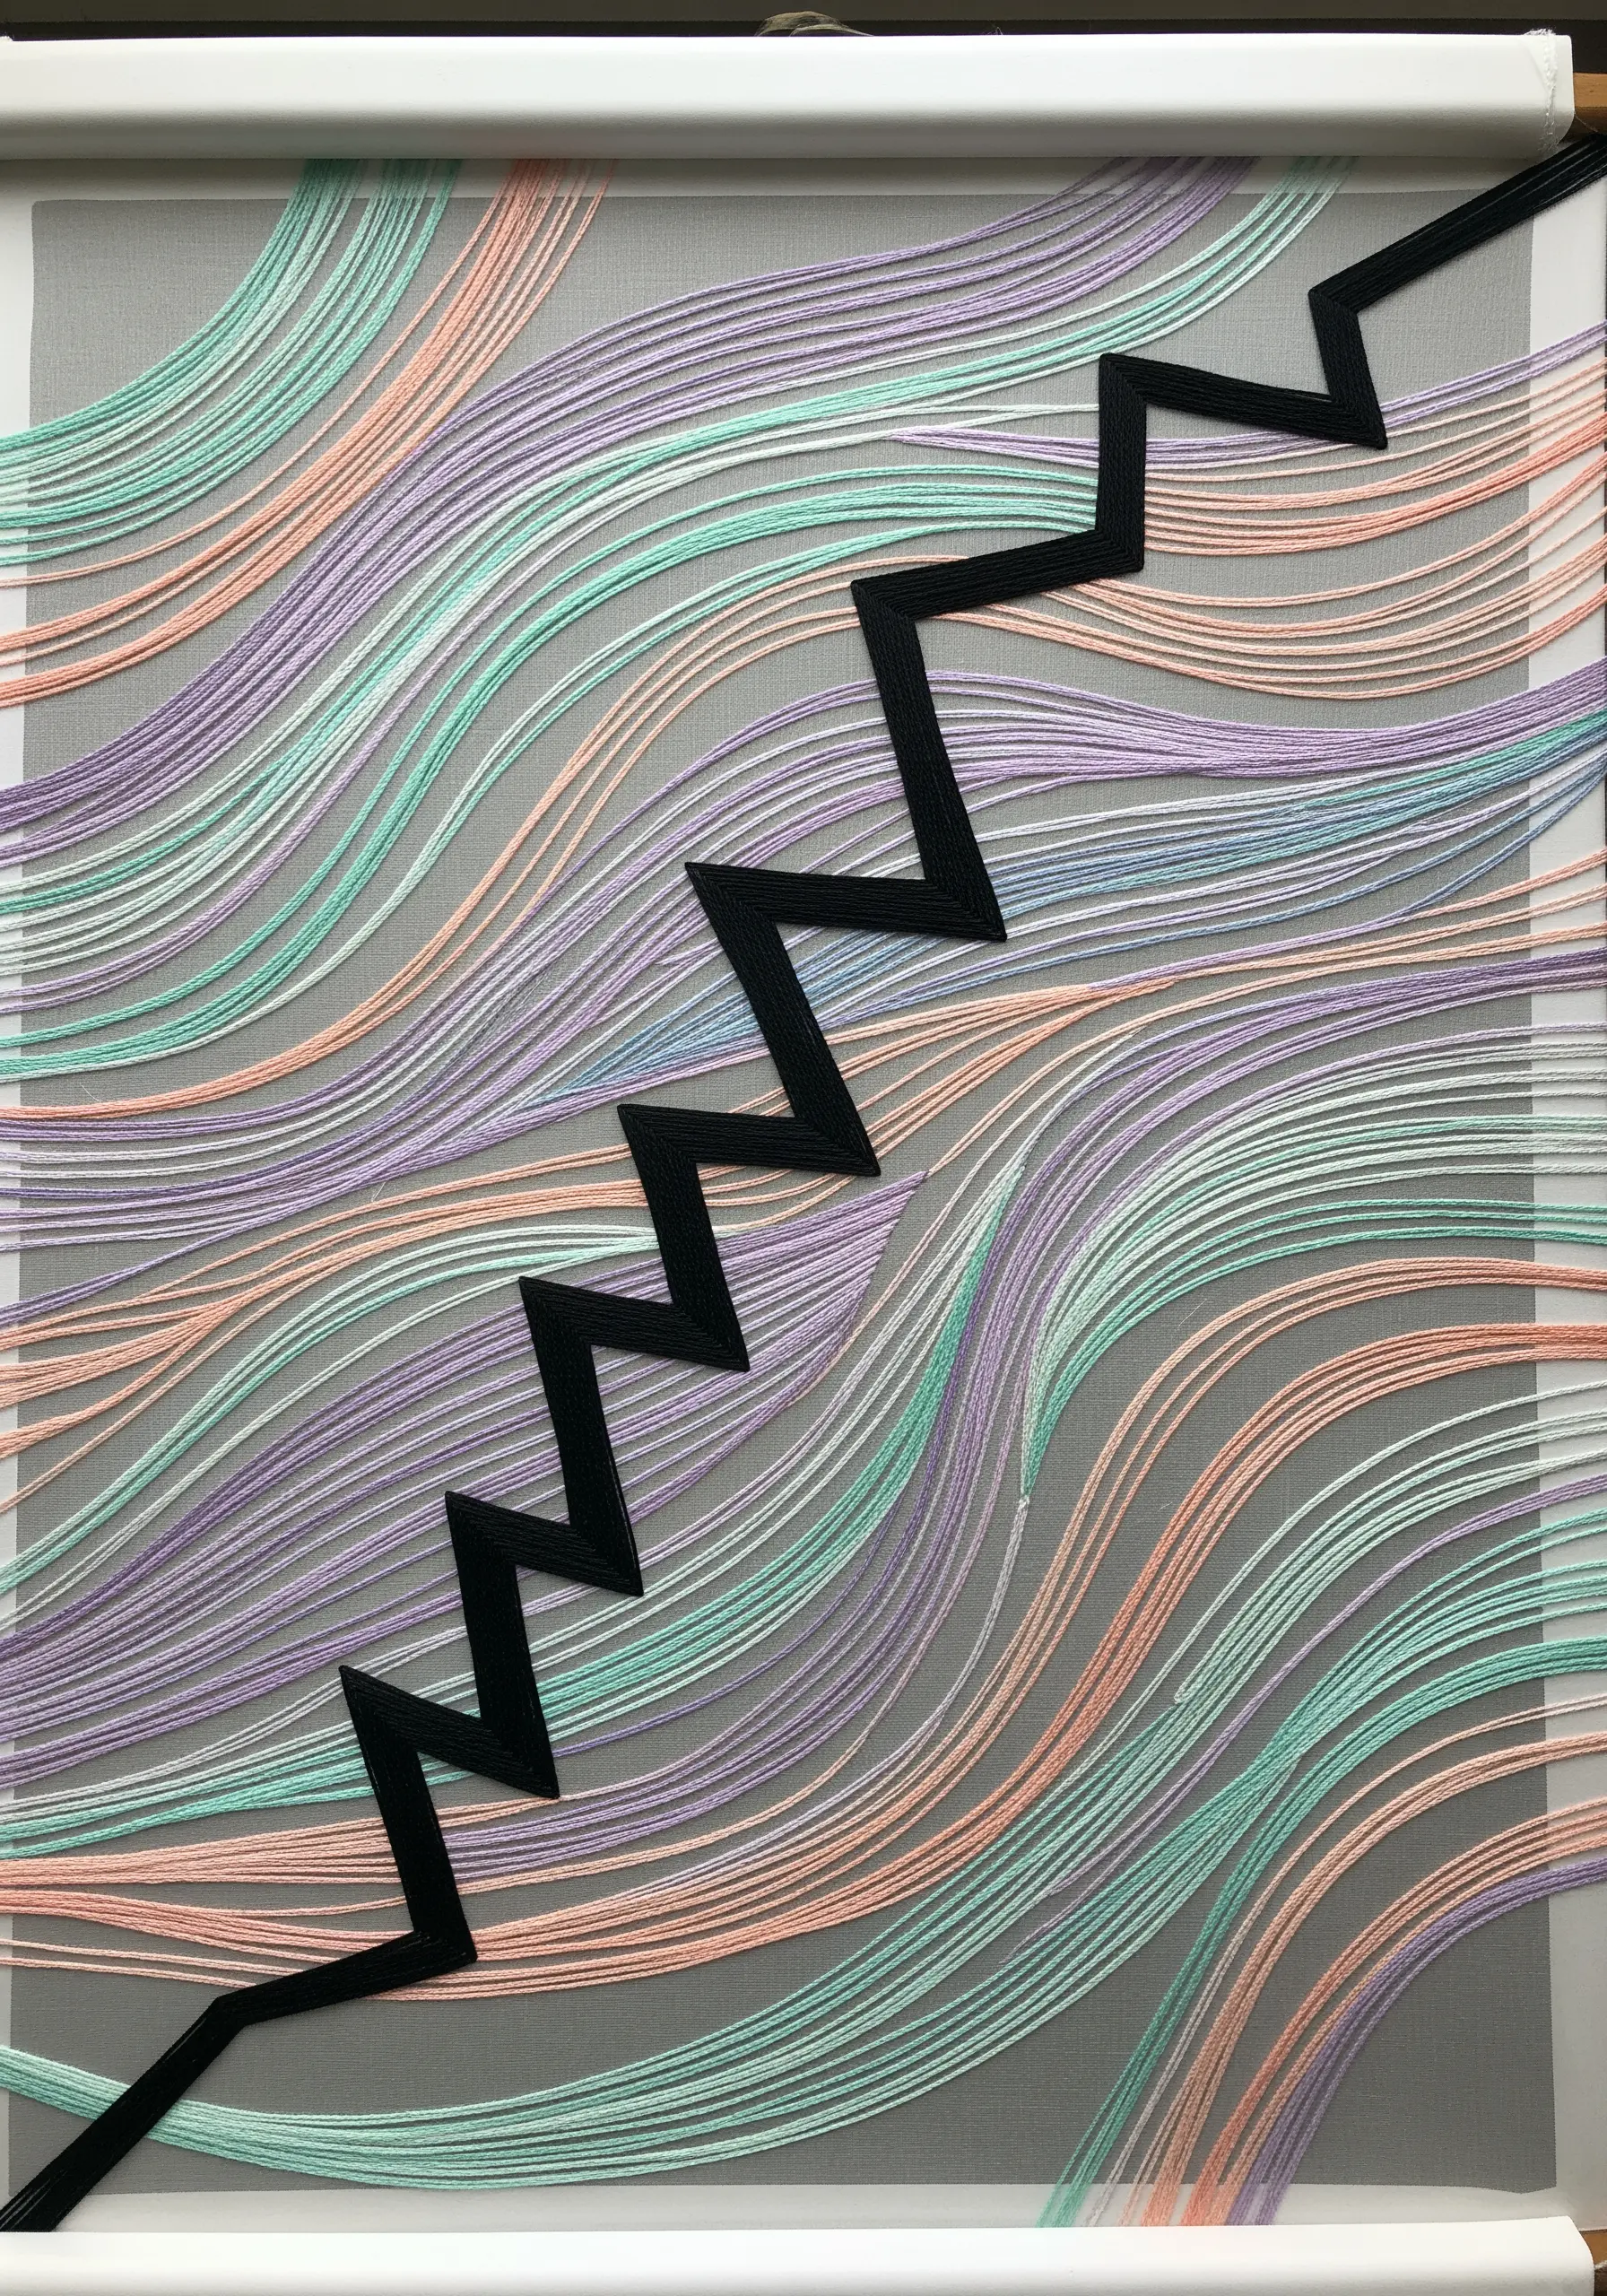
Create visual tension by introducing a sharp, angular element that cuts directly through a soft, flowing background.
First, establish a field of gentle, undulating lines using soft, blended colors. This creates a sense of calm and movement.
Next, use a completely different material, like a stiff ribbon or a strip of black fabric, and couch it across your soft background in a rigid, geometric shape—like a zig-zag or a straight line.
This interruption breaks the harmony in an intentional way, adding an edgy, graphic quality that makes the entire piece more dynamic and thought-provoking. It’s an advanced way to approach color blending thread patterns.
11. Define Abstract Shapes with Stitch Texture
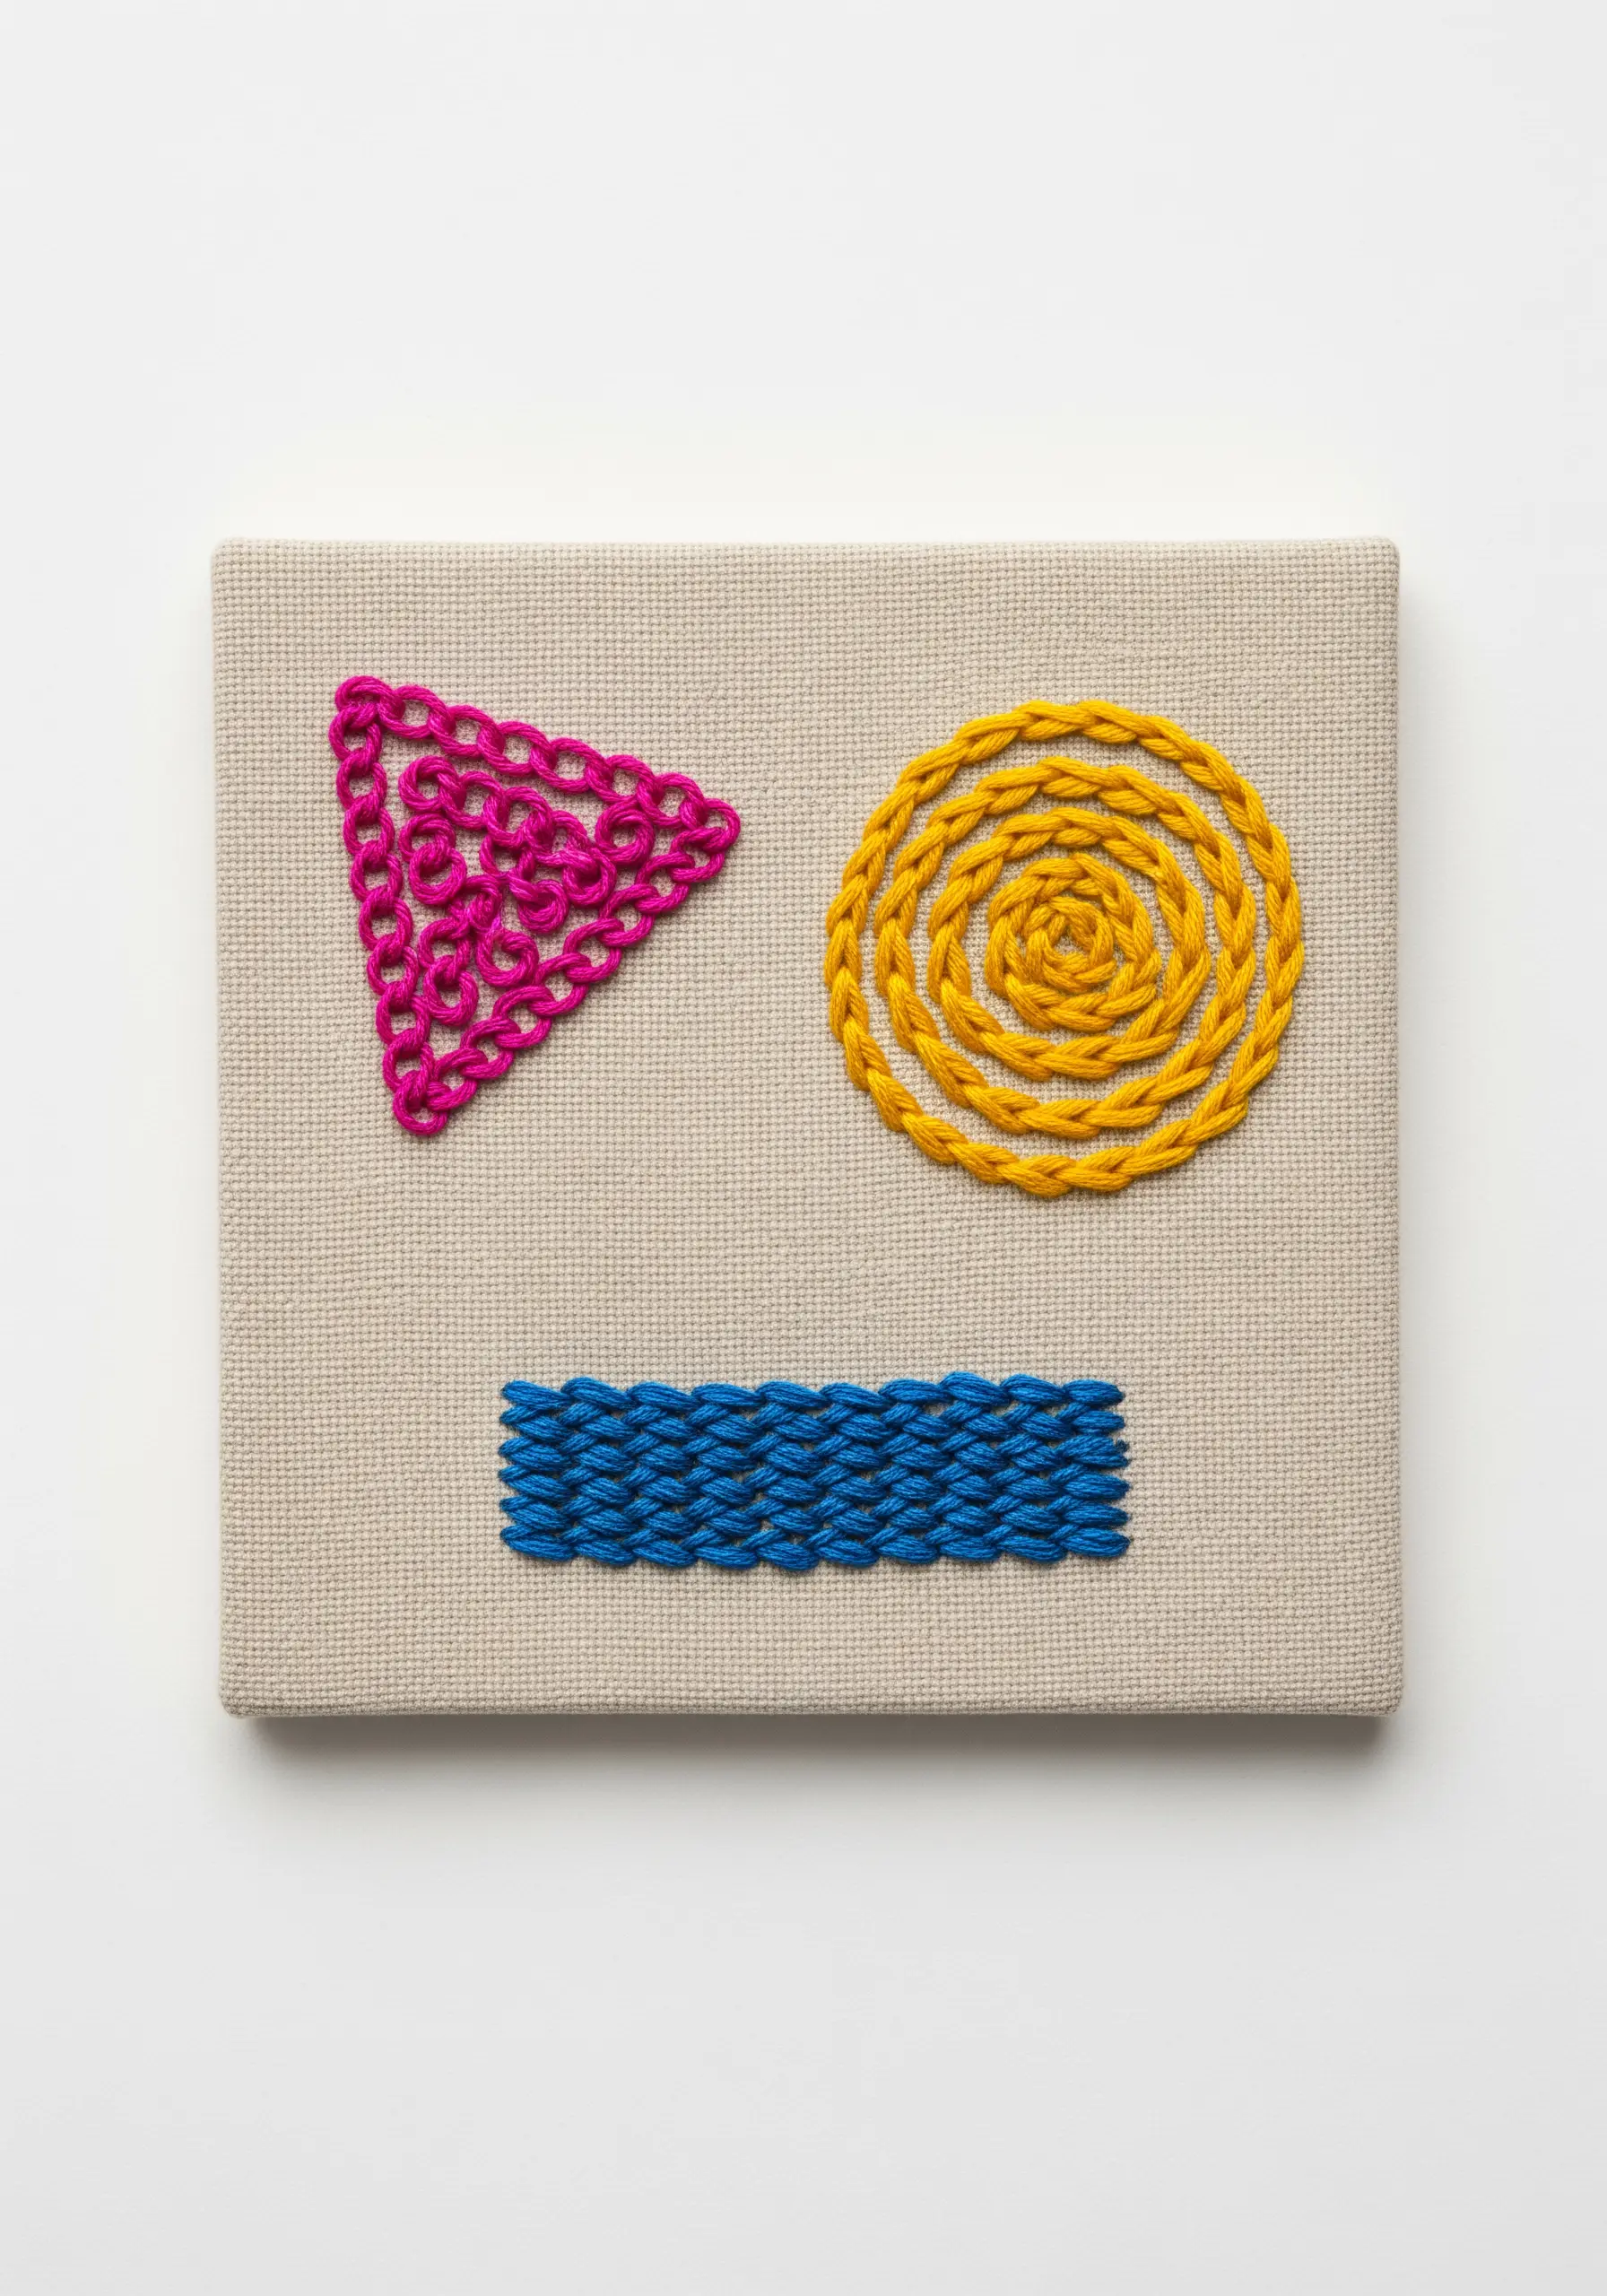
Instead of relying on outlines, let the texture of your stitches define your abstract forms.
Choose three distinct, highly-textured stitches—like the Pekinese stitch, a heavy chain stitch, or a knotted loop stitch.
Assign each stitch to a simple geometric shape (a triangle, circle, or rectangle) and fill the shape completely, paying attention to the direction of your stitches.
The inherent texture of each stitch will create a clear boundary for the shape while also giving it a unique tactile personality, perfect for bold color pop embroidery ideas.
12. Frame Negative Space with an Organic Outline
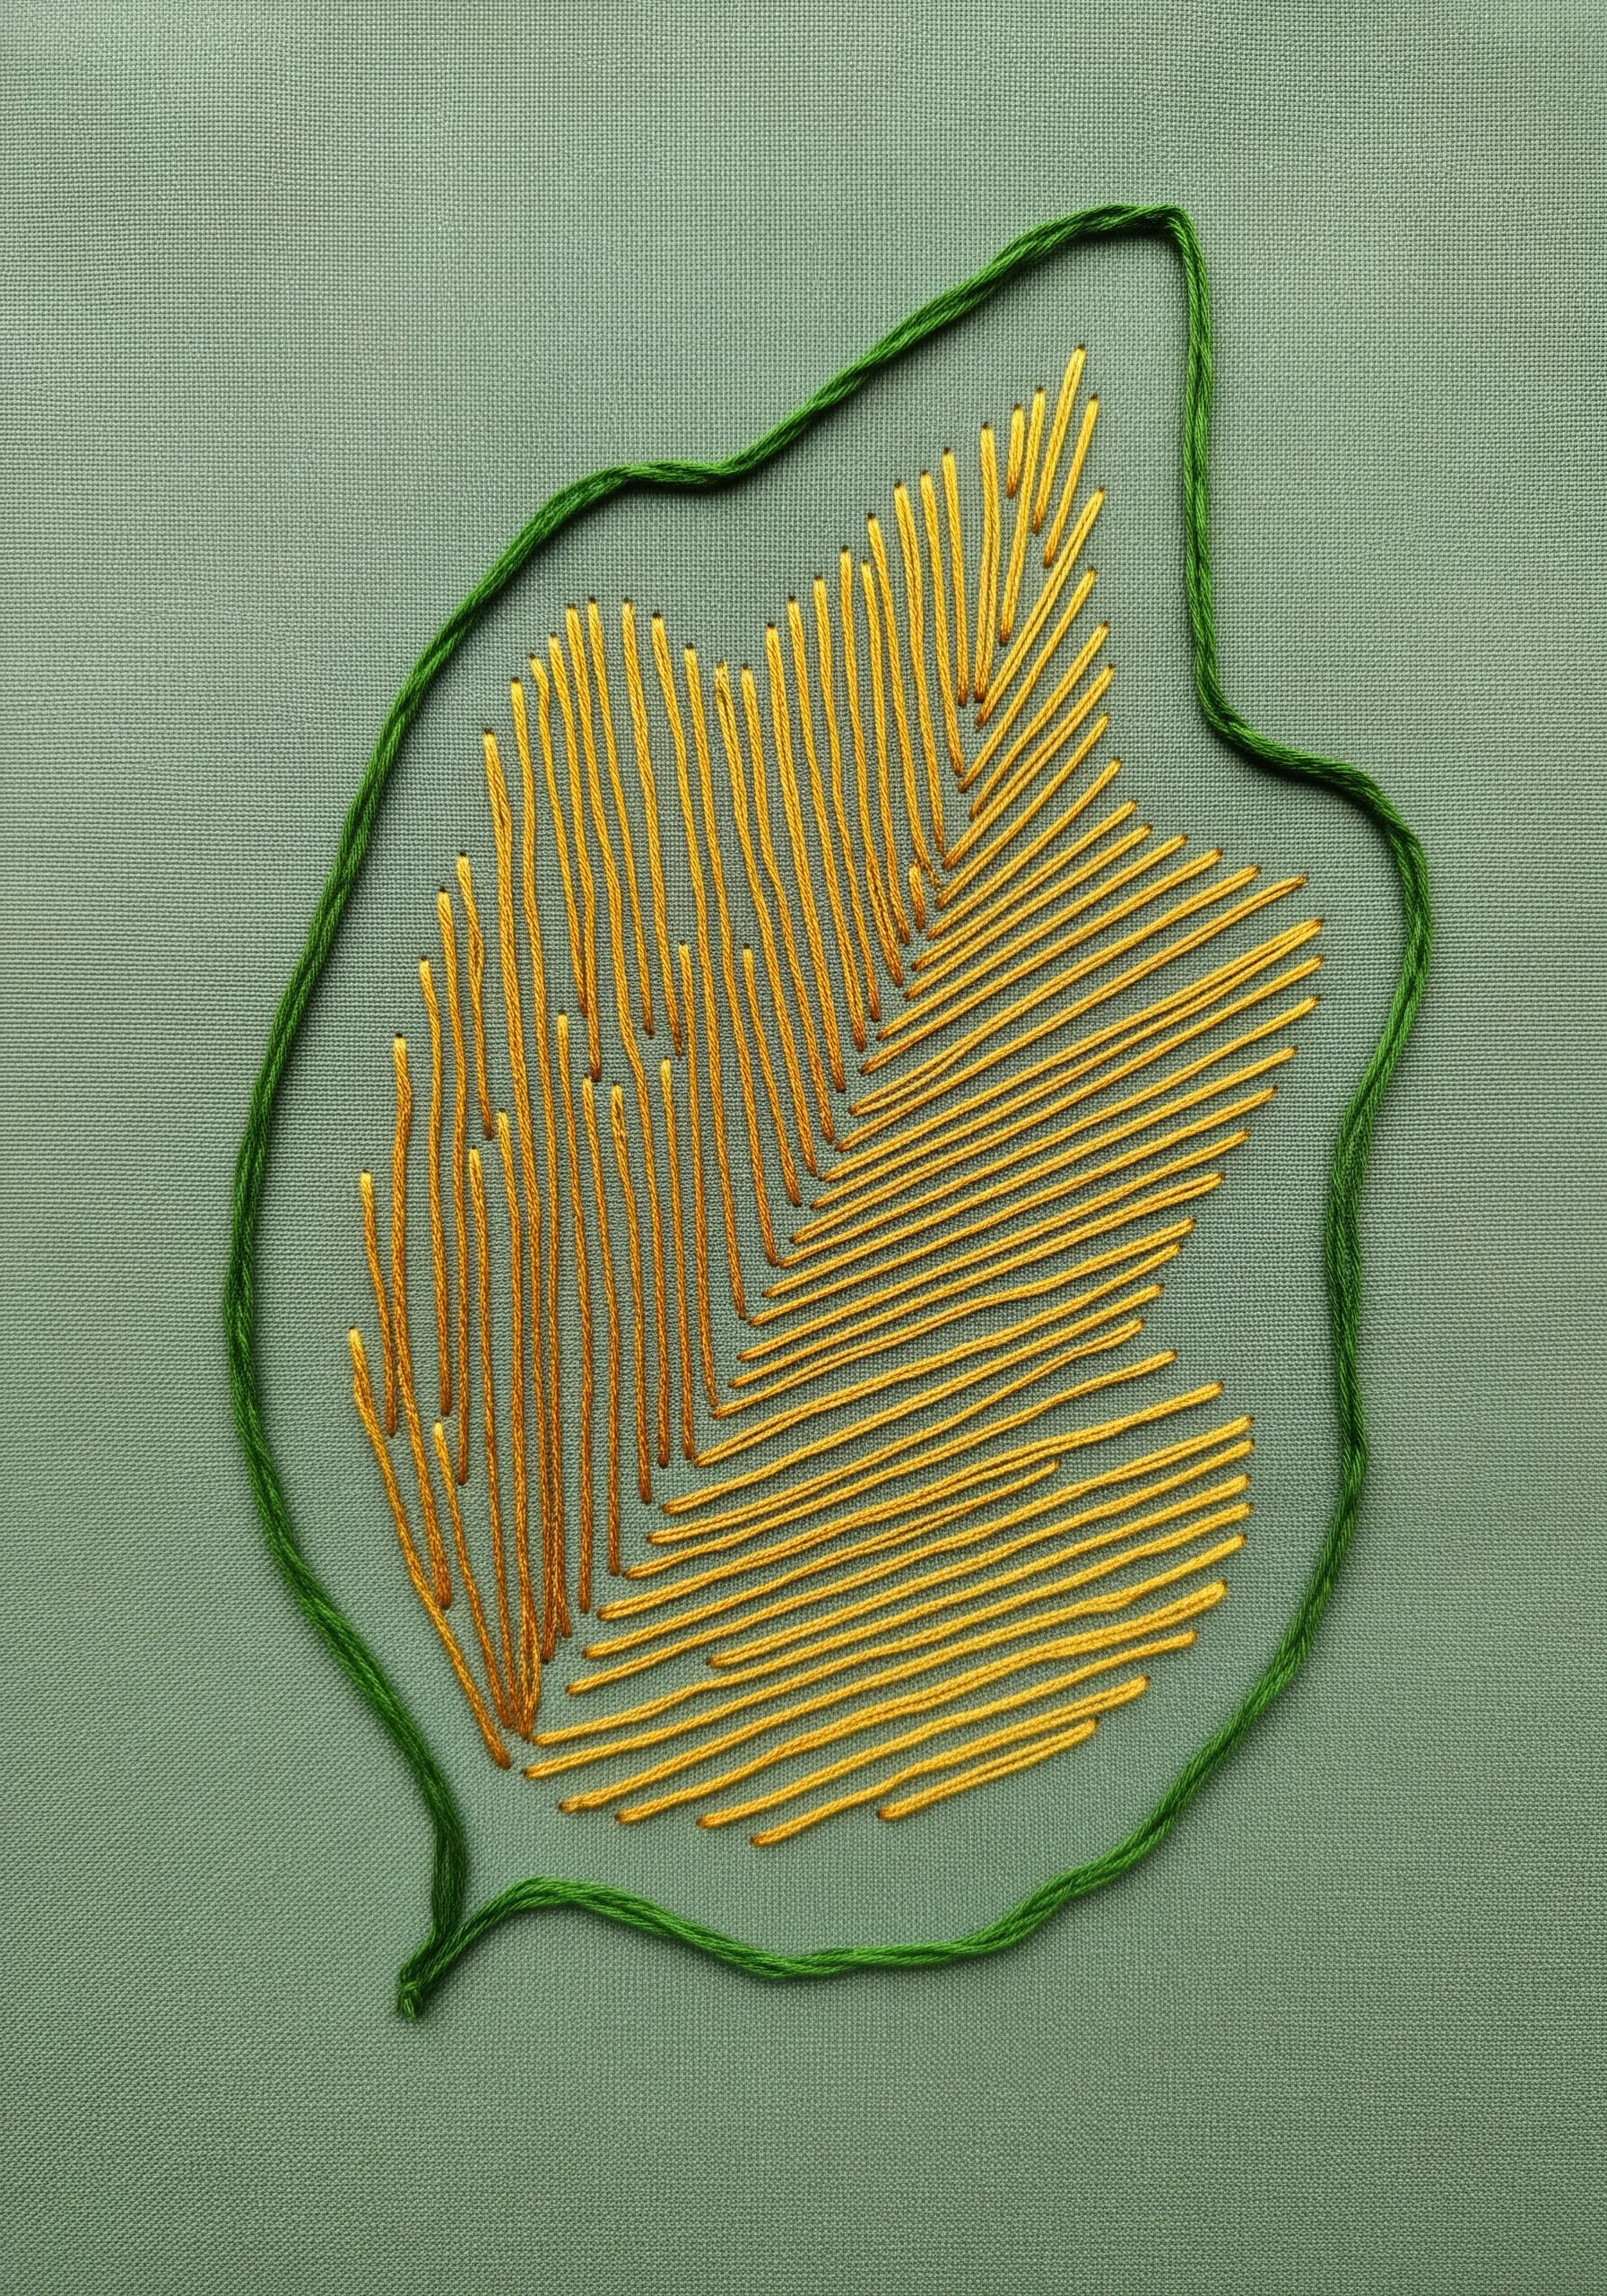
Use an outline not to contain a filled shape, but to define the boundary of an open, airy one.
Create a loose, organic outline of a shape like a leaf using a textured stitch like stem stitch or a whipped running stitch.
Instead of filling the shape completely, use sparse, parallel straight stitches to suggest internal structure, like veins or shadows.
This technique allows the color of your fabric to become an integral part of the design, creating a piece that feels light and breathable. The contrast comes from the empty space itself, a core concept in negative space stitch ideas.
13. Create Division with Directional Color Blocking
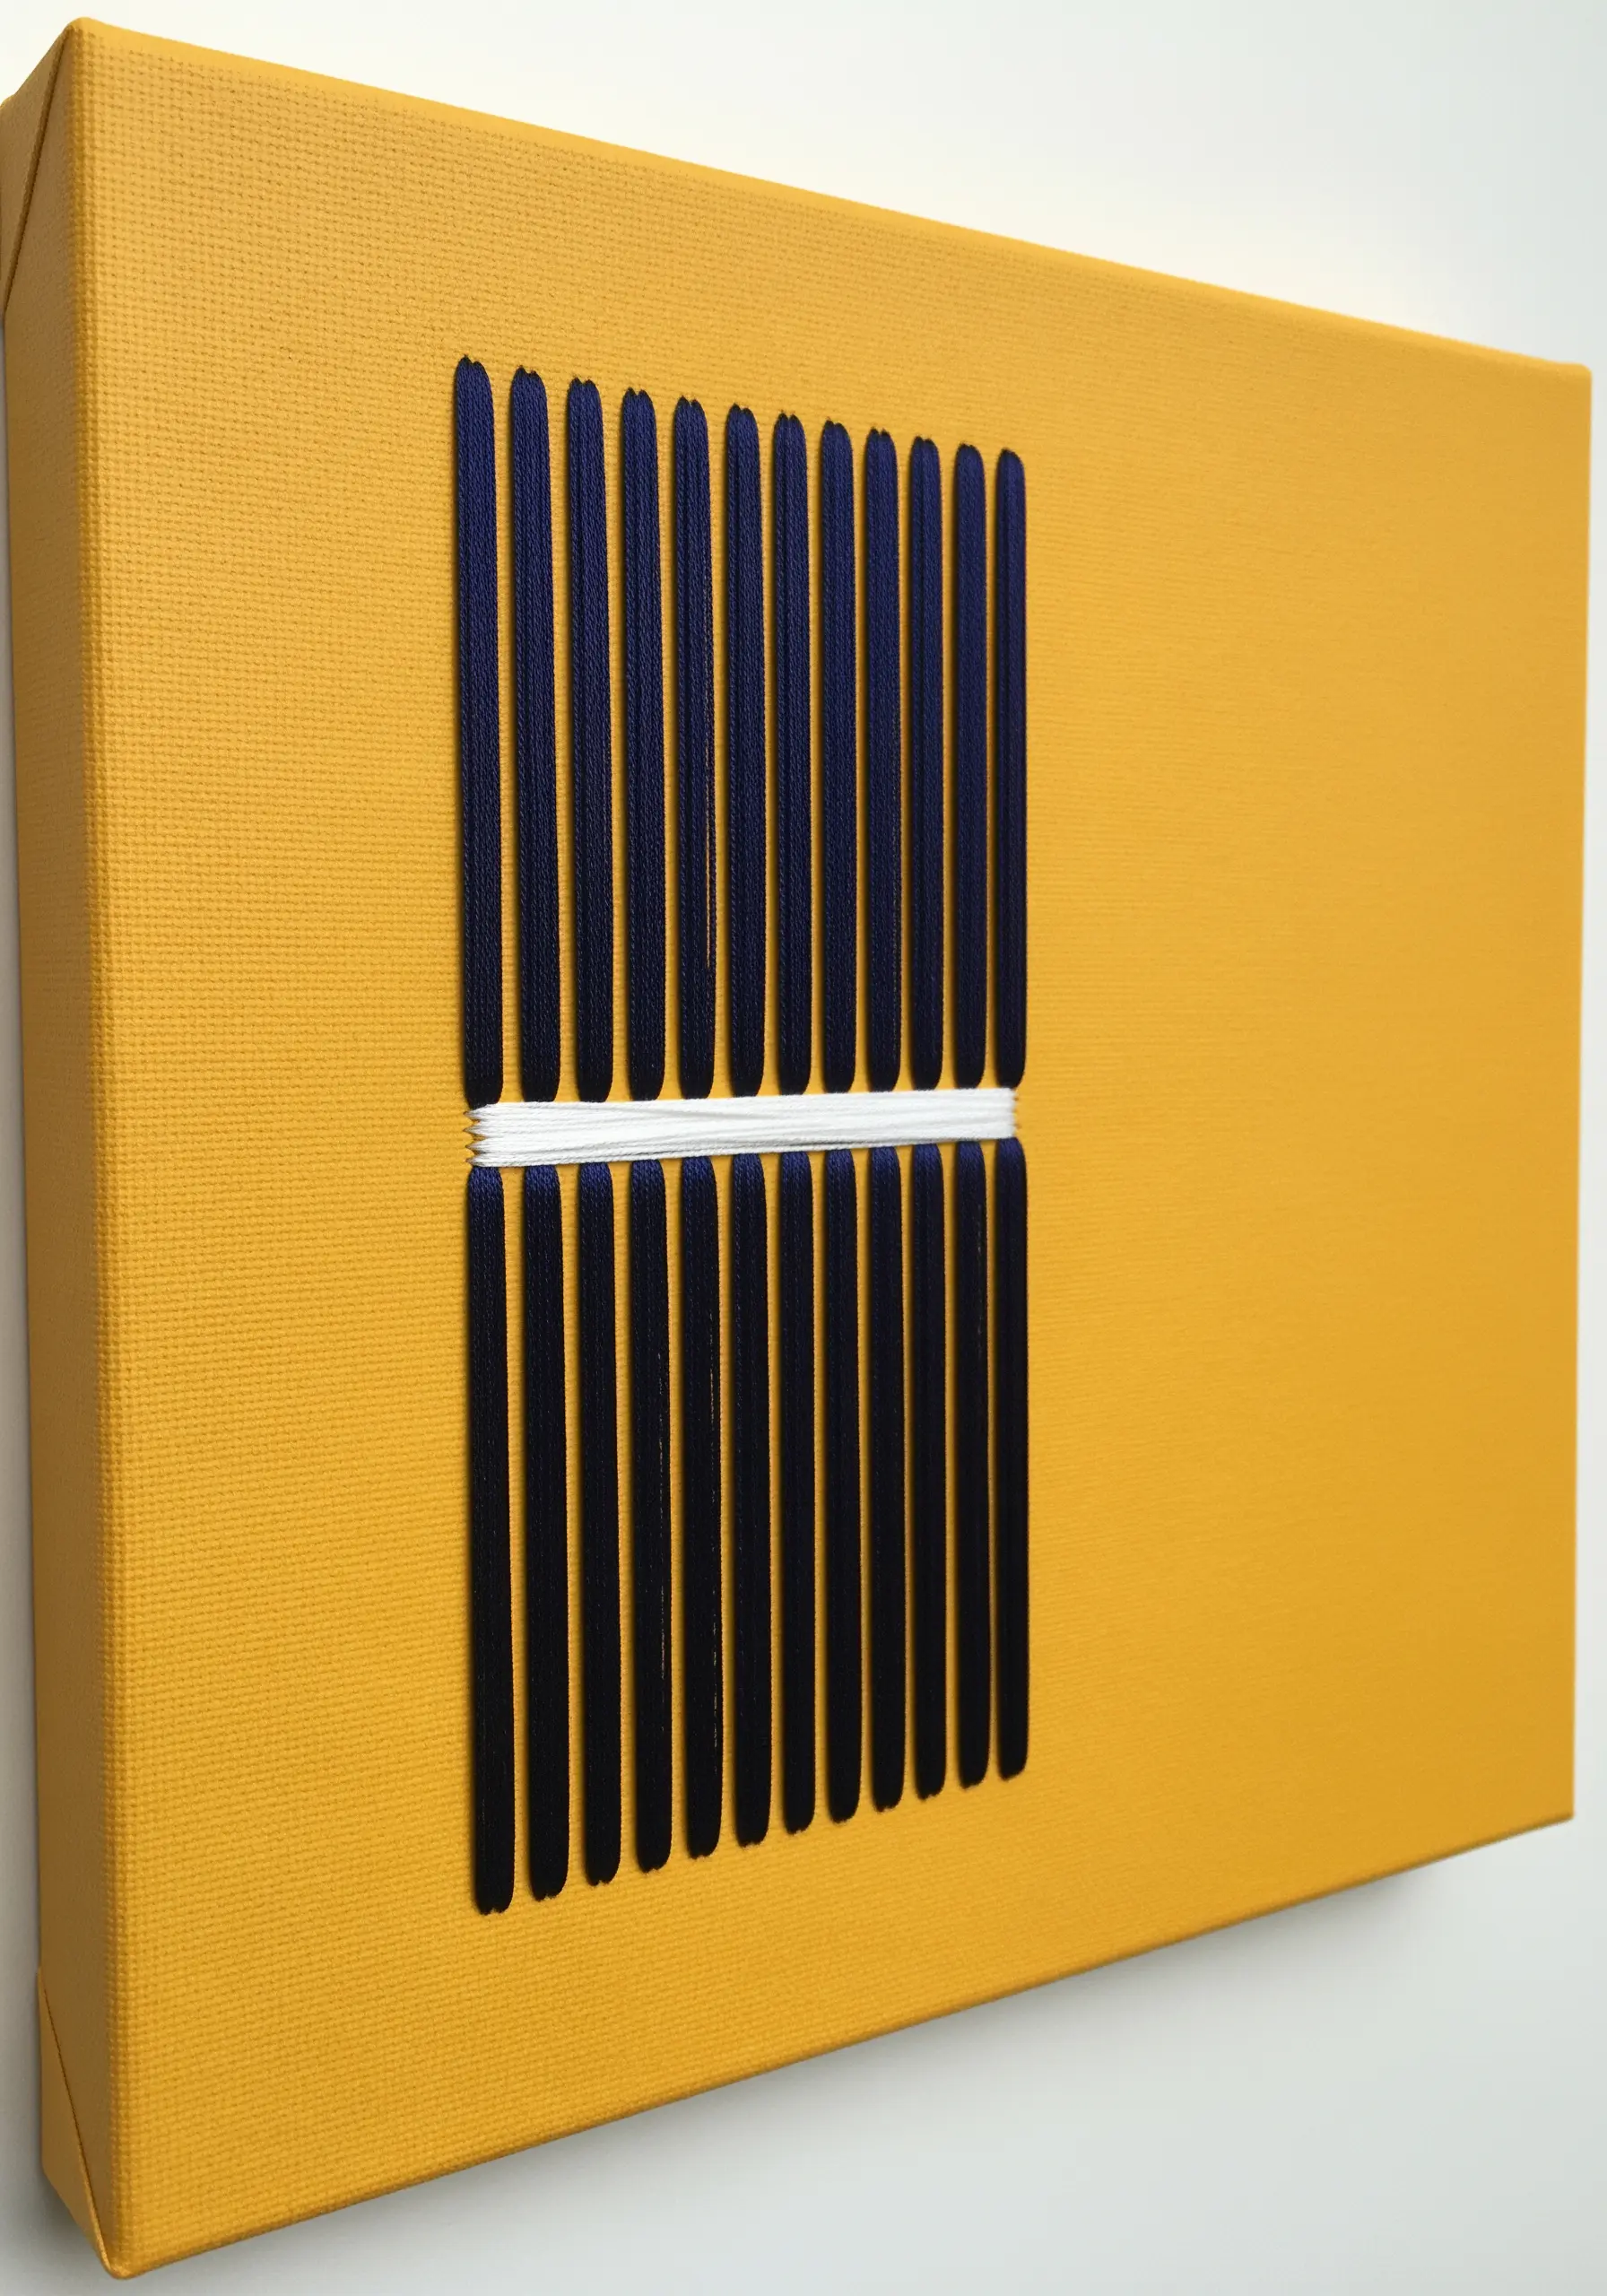
Use the direction of your satin stitches to create sharp, graphic divisions within a single block of color.
Lay down a series of long, vertical satin stitches in a dark, bold color on a brightly colored canvas.
Interrupt this pattern with a single, horizontal band of stitches in a contrasting light color.
The abrupt shift in both color and direction creates a powerful visual break. This method turns a simple block of stitching into a structured, architectural element with clean lines and high impact.
14. Inject a Single Stream of Accent Color
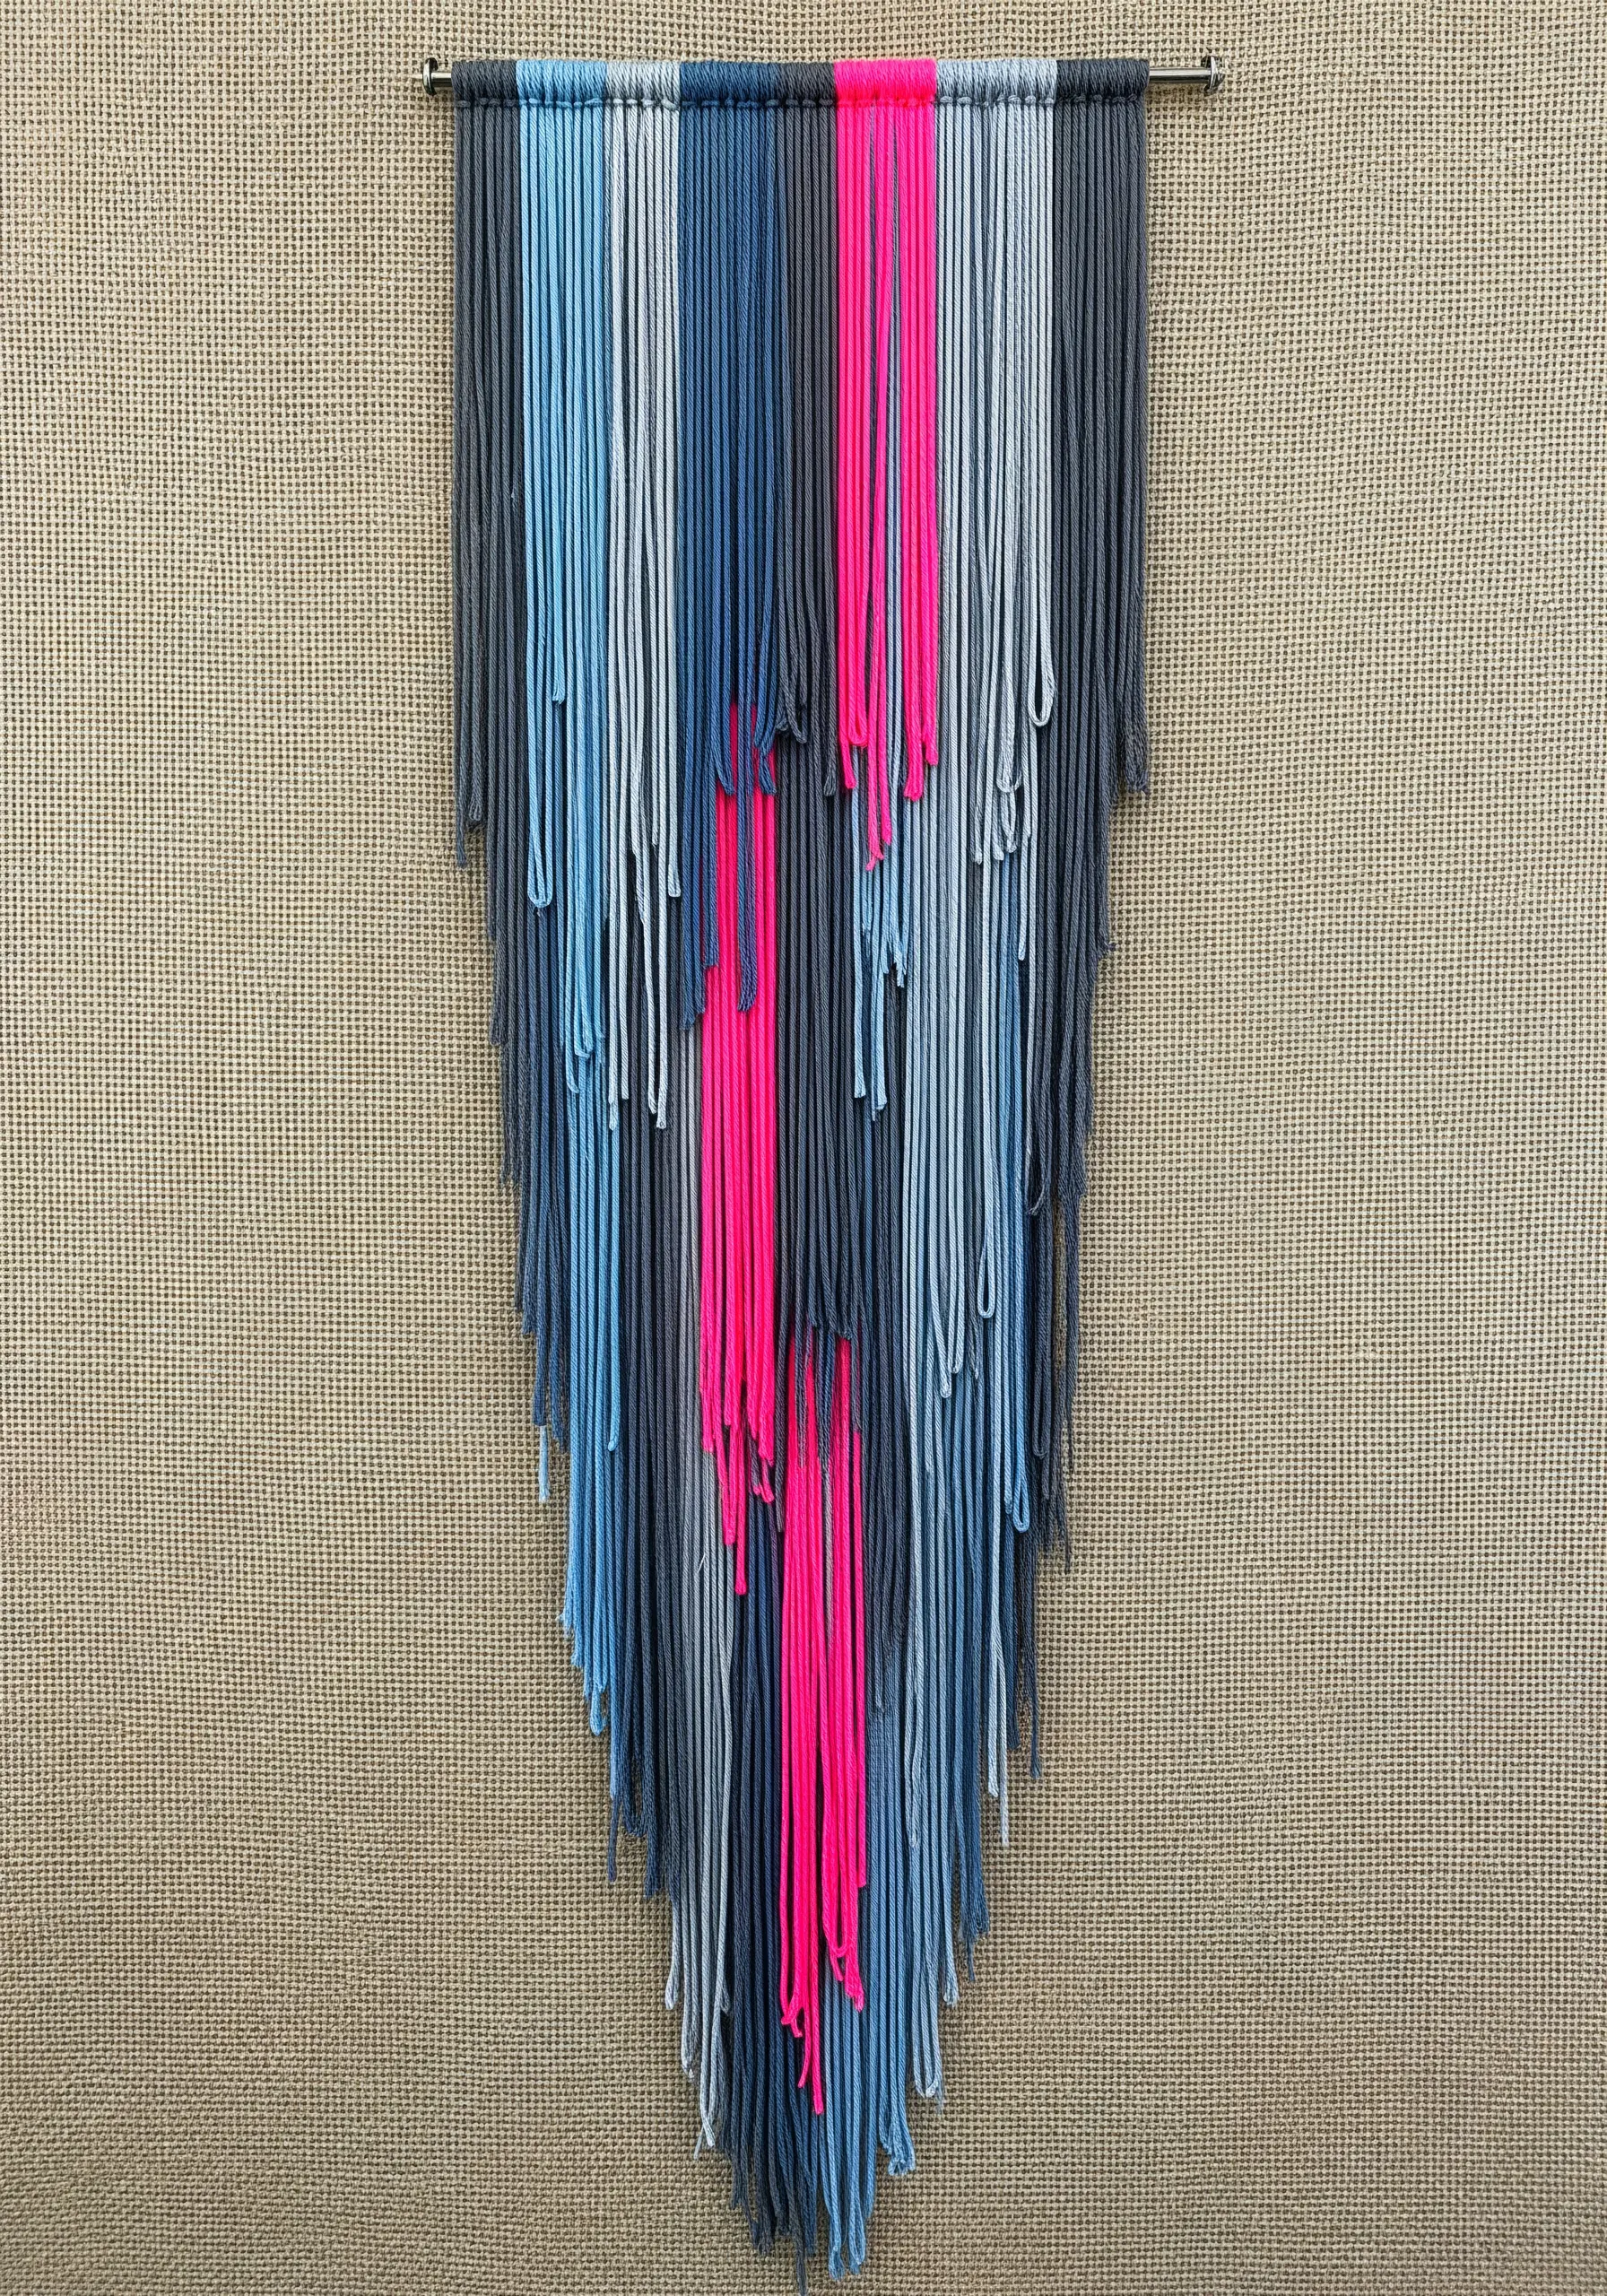
When creating a piece with a largely harmonious or analogous color palette, introduce a single, unexpected pop of vibrant color to create a focal point.
In a composition dominated by cool tones like blues and grays, dedicate one narrow, vertical section to a shocking neon pink or electric yellow.
This sliver of intense color will instantly draw the eye, breaking the visual monotony and adding a contemporary, energetic feel to the entire piece.
This is a go-to trick for designers of inspiring yarn wall art projects who want to make a statement.
15. Contrast Organic Gradients and Geometric Solids
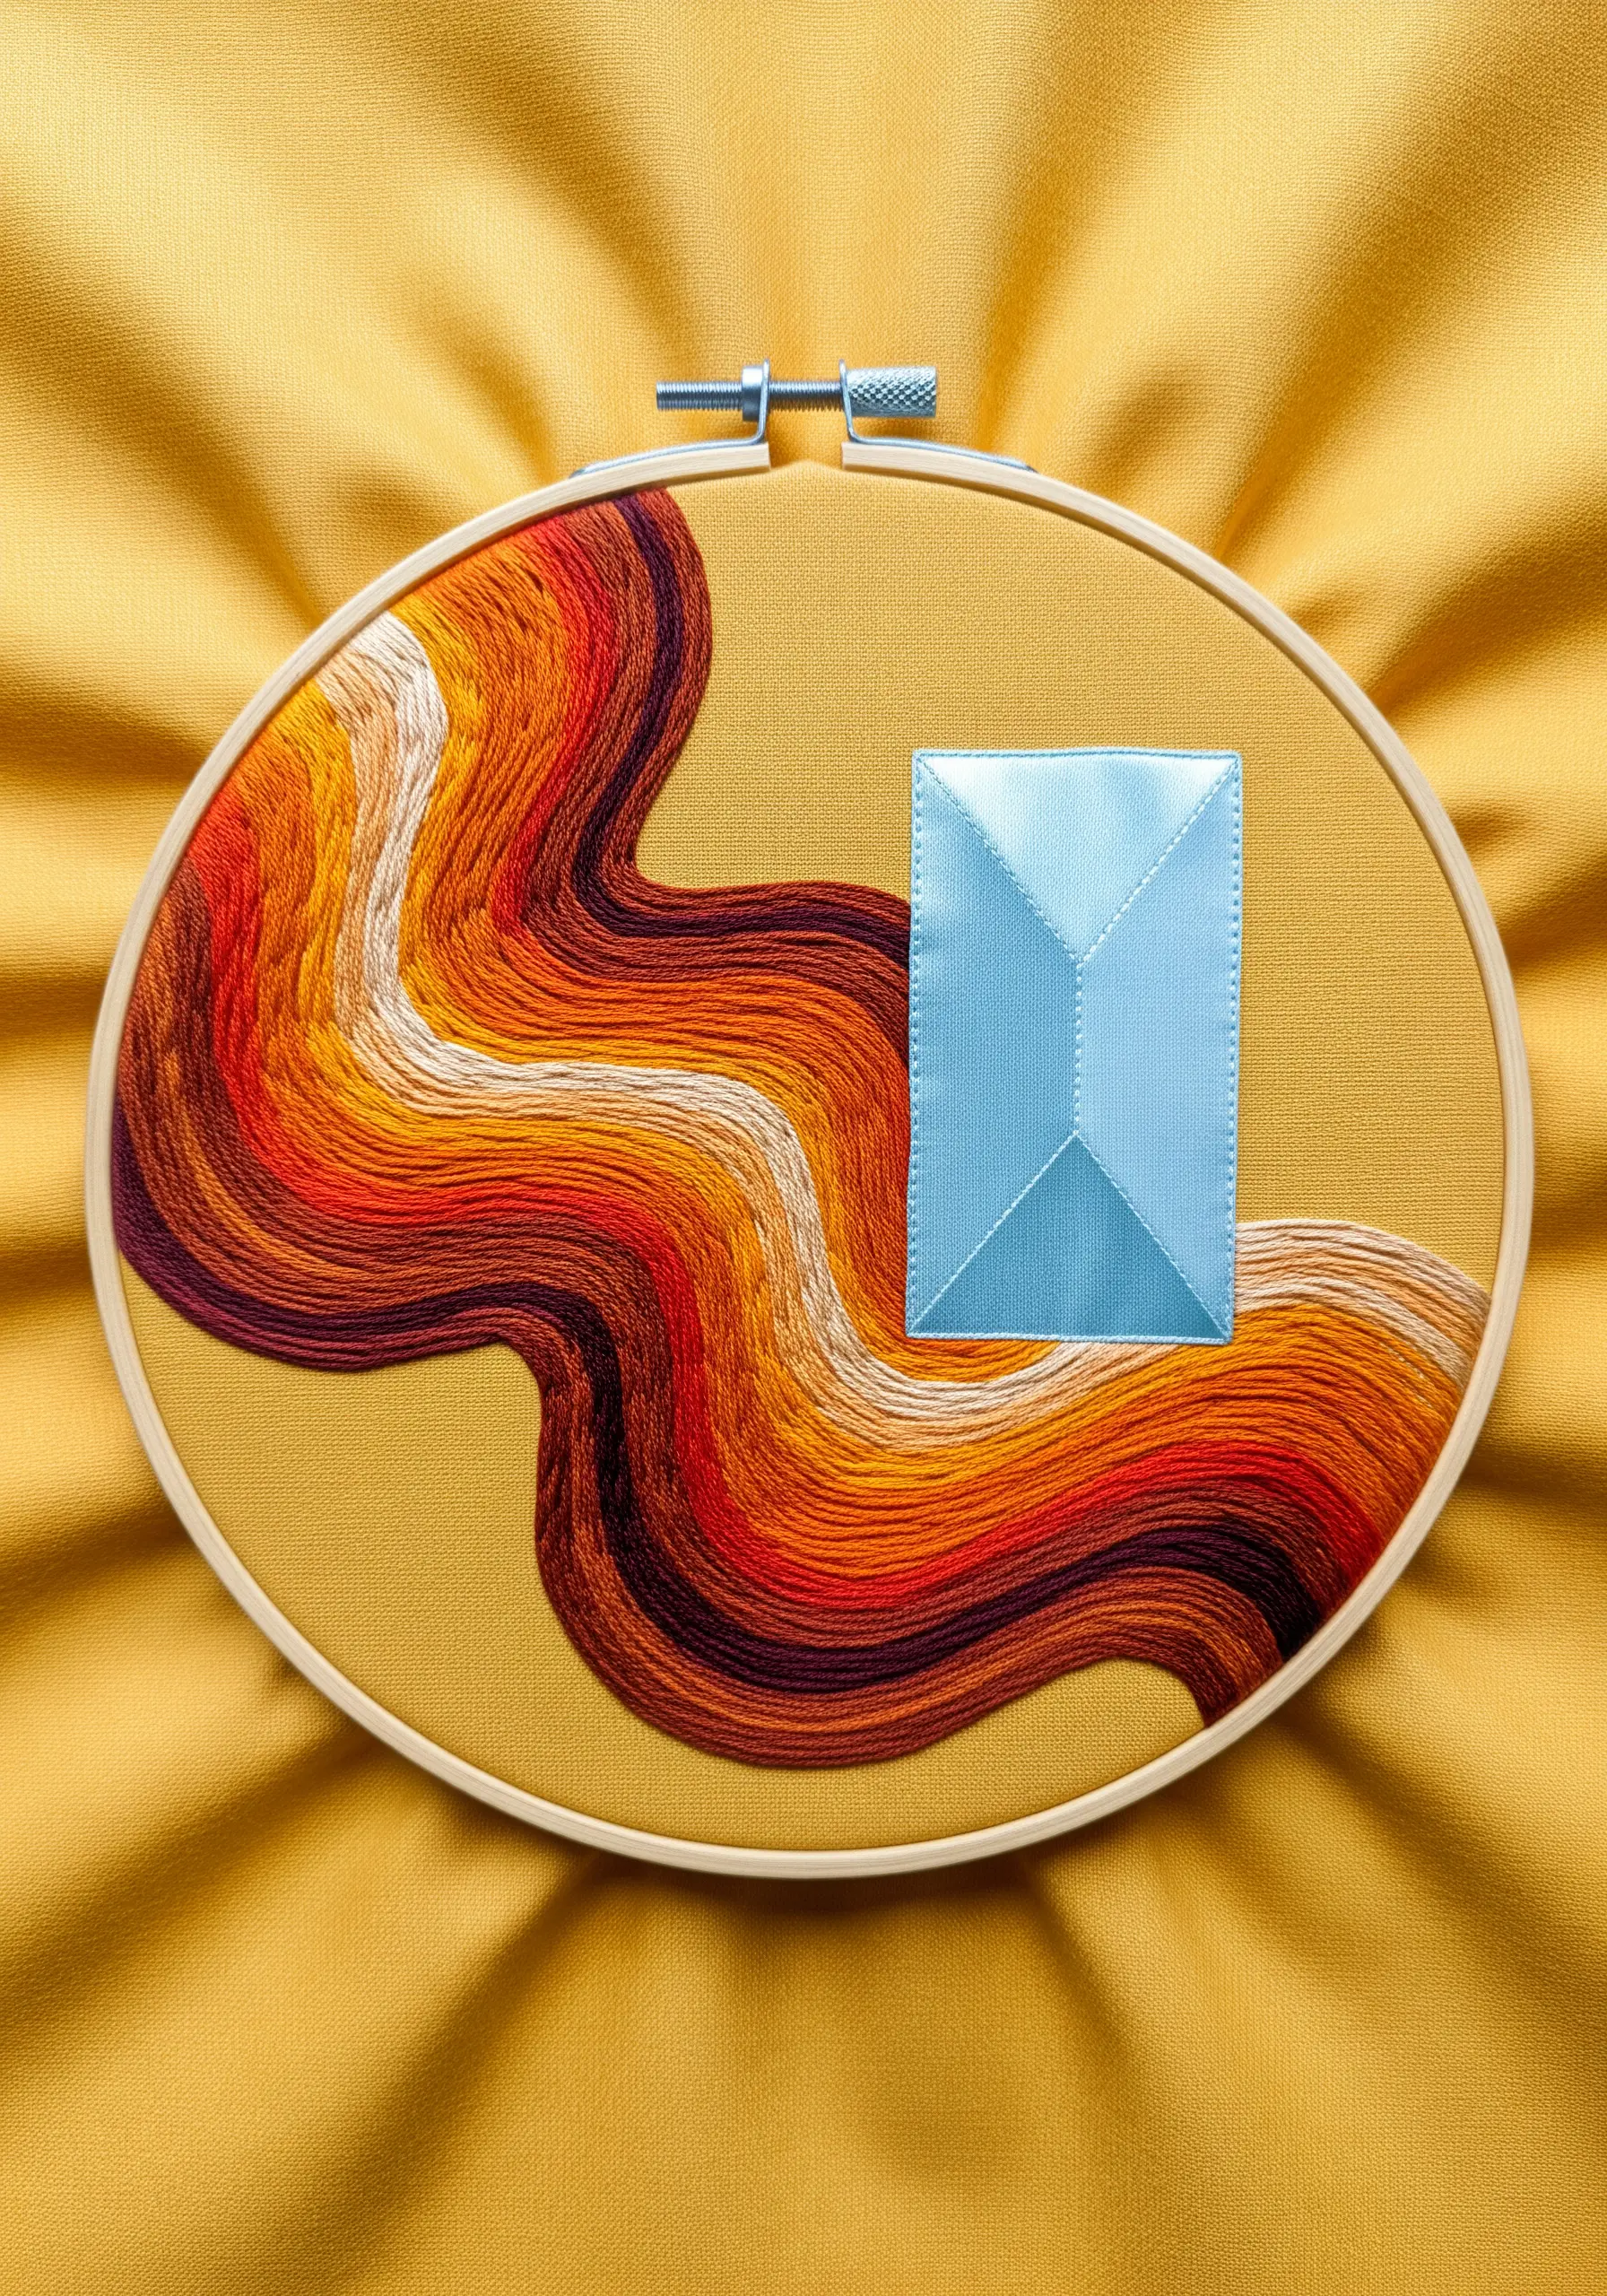
Create a sophisticated composition by pairing a fluid, color-blended shape with a hard-edged, solid one.
Use long-and-short stitch to create a smooth, organic wave of warm, analogous colors like reds, oranges, and yellows.
Then, appliqué or densely stitch a crisp, geometric shape—like a square or triangle—in a cool, contrasting color directly beside or overlapping it.
This juxtaposition of color temperature (warm vs. cool) and form (organic vs. geometric) creates a balanced tension that feels both natural and thoughtfully designed. It’s an excellent application of fabric collage techniques.
16. Use a Micro-Accent to Focus Bold Strokes
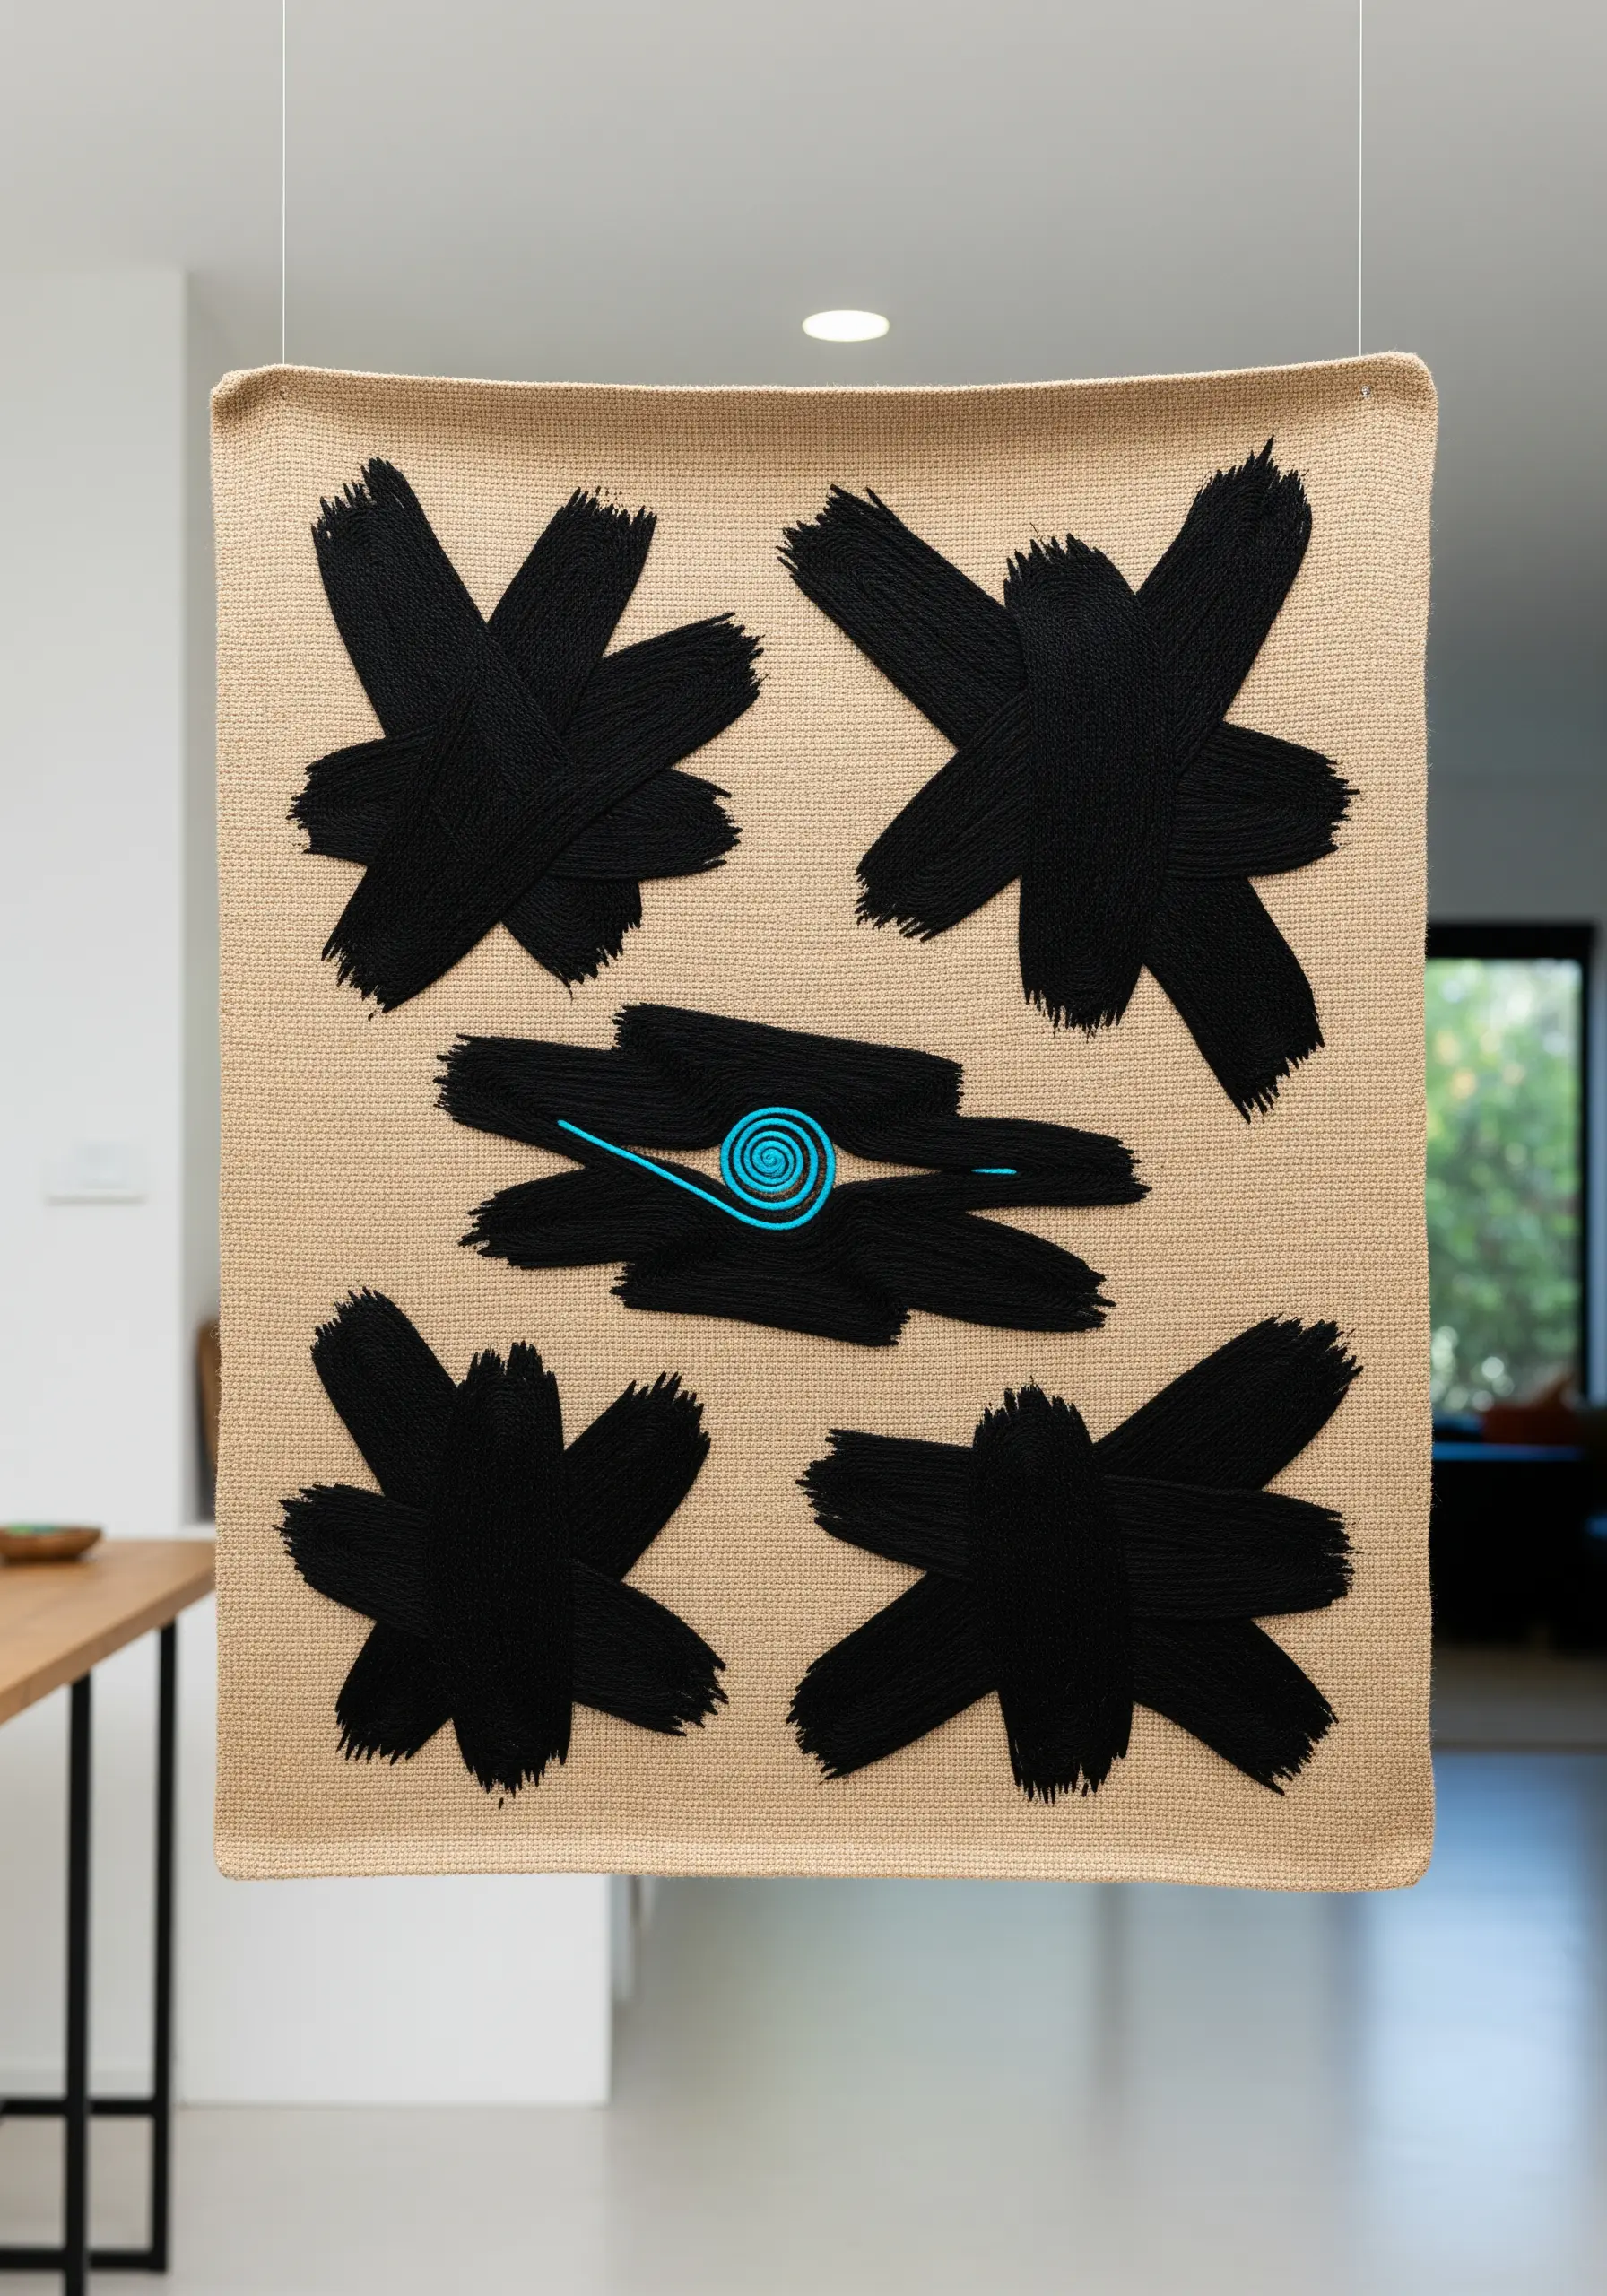
Balance large, expressive, brushstroke-like stitches with a single, tiny point of precise detail.
Fill your canvas with big, bold shapes using thick black yarn or floss, worked in a way that mimics energetic paint strokes.
Then, in a strategic location—often near the center—add a very small, tightly-wound spiral or a tiny geometric shape in a vibrant, contrasting color.
This minuscule accent acts as a visual anchor, a quiet center in the midst of the surrounding energy. The extreme contrast in scale and precision gives the piece incredible depth and focus. This method is a hallmark of bold brush stroke style stitches.
17. Juxtapose Thread Sheen and Fabric Texture
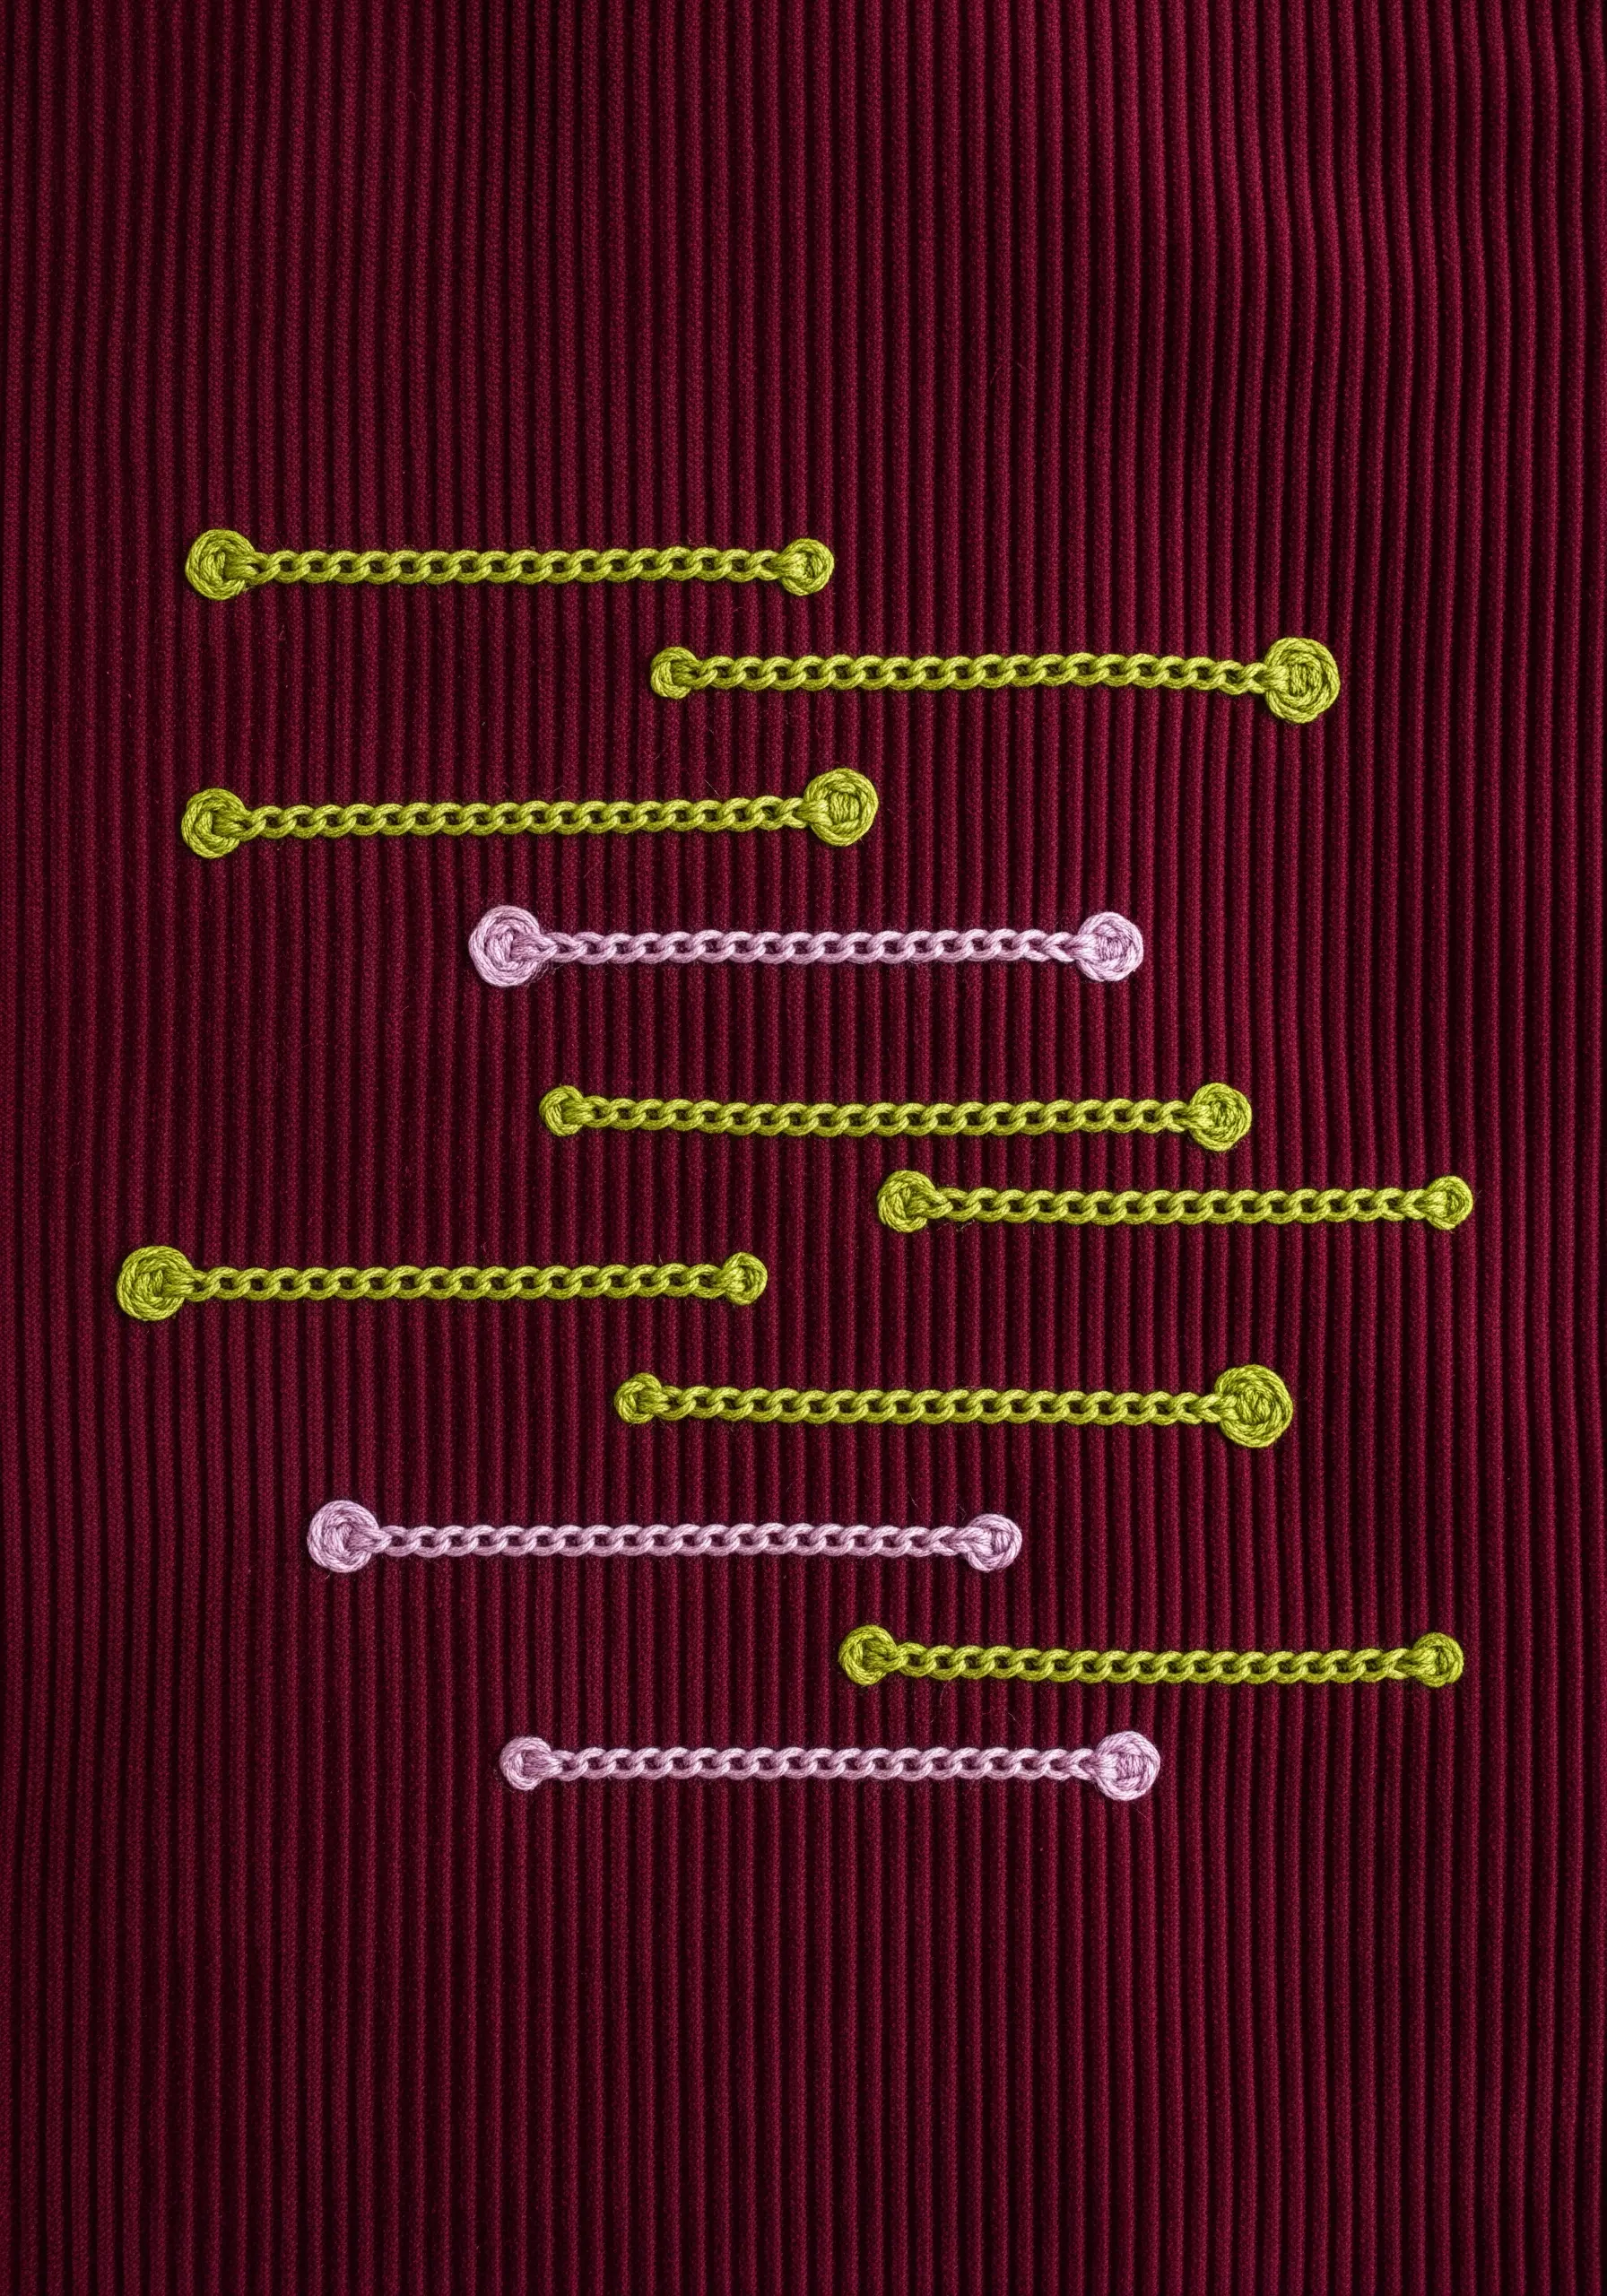
Create subtle but rich contrast by stitching on a fabric with its own distinct texture, like corduroy, velvet, or ribbed knit.
Choose a thread with a different finish from the fabric—for example, a satin or metallic floss on a matte, ribbed background.
Work a stitch that sits on top of the fabric’s texture, like a chain stitch or a series of French knots.
The way light catches the smooth, reflective thread versus the textured, light-absorbing fabric creates a sophisticated interplay of surfaces. The contrast is not just in color, but in how each material interacts with light.


