
Your embroidery is more than just thread on fabric; it’s a way to infuse your personal spaces with intention, calm, and quiet beauty. Often, the difference between a simple craft and a piece of art lies in the smallest details—the choice of stitch, the weight of a line, or the texture of the thread.
Forget the pressure to create something complex. Instead, I invite you to explore how simple, deliberate stitches can transform your bedroom into a sanctuary. Each pattern here is a starting point, an invitation to slow down and create something that feels both modern and deeply personal.
Let’s look at how you can adjust these techniques to create polished, serene pieces. You already have the skill; now, let’s refine the vision.
1. Linear Landscapes on Linen
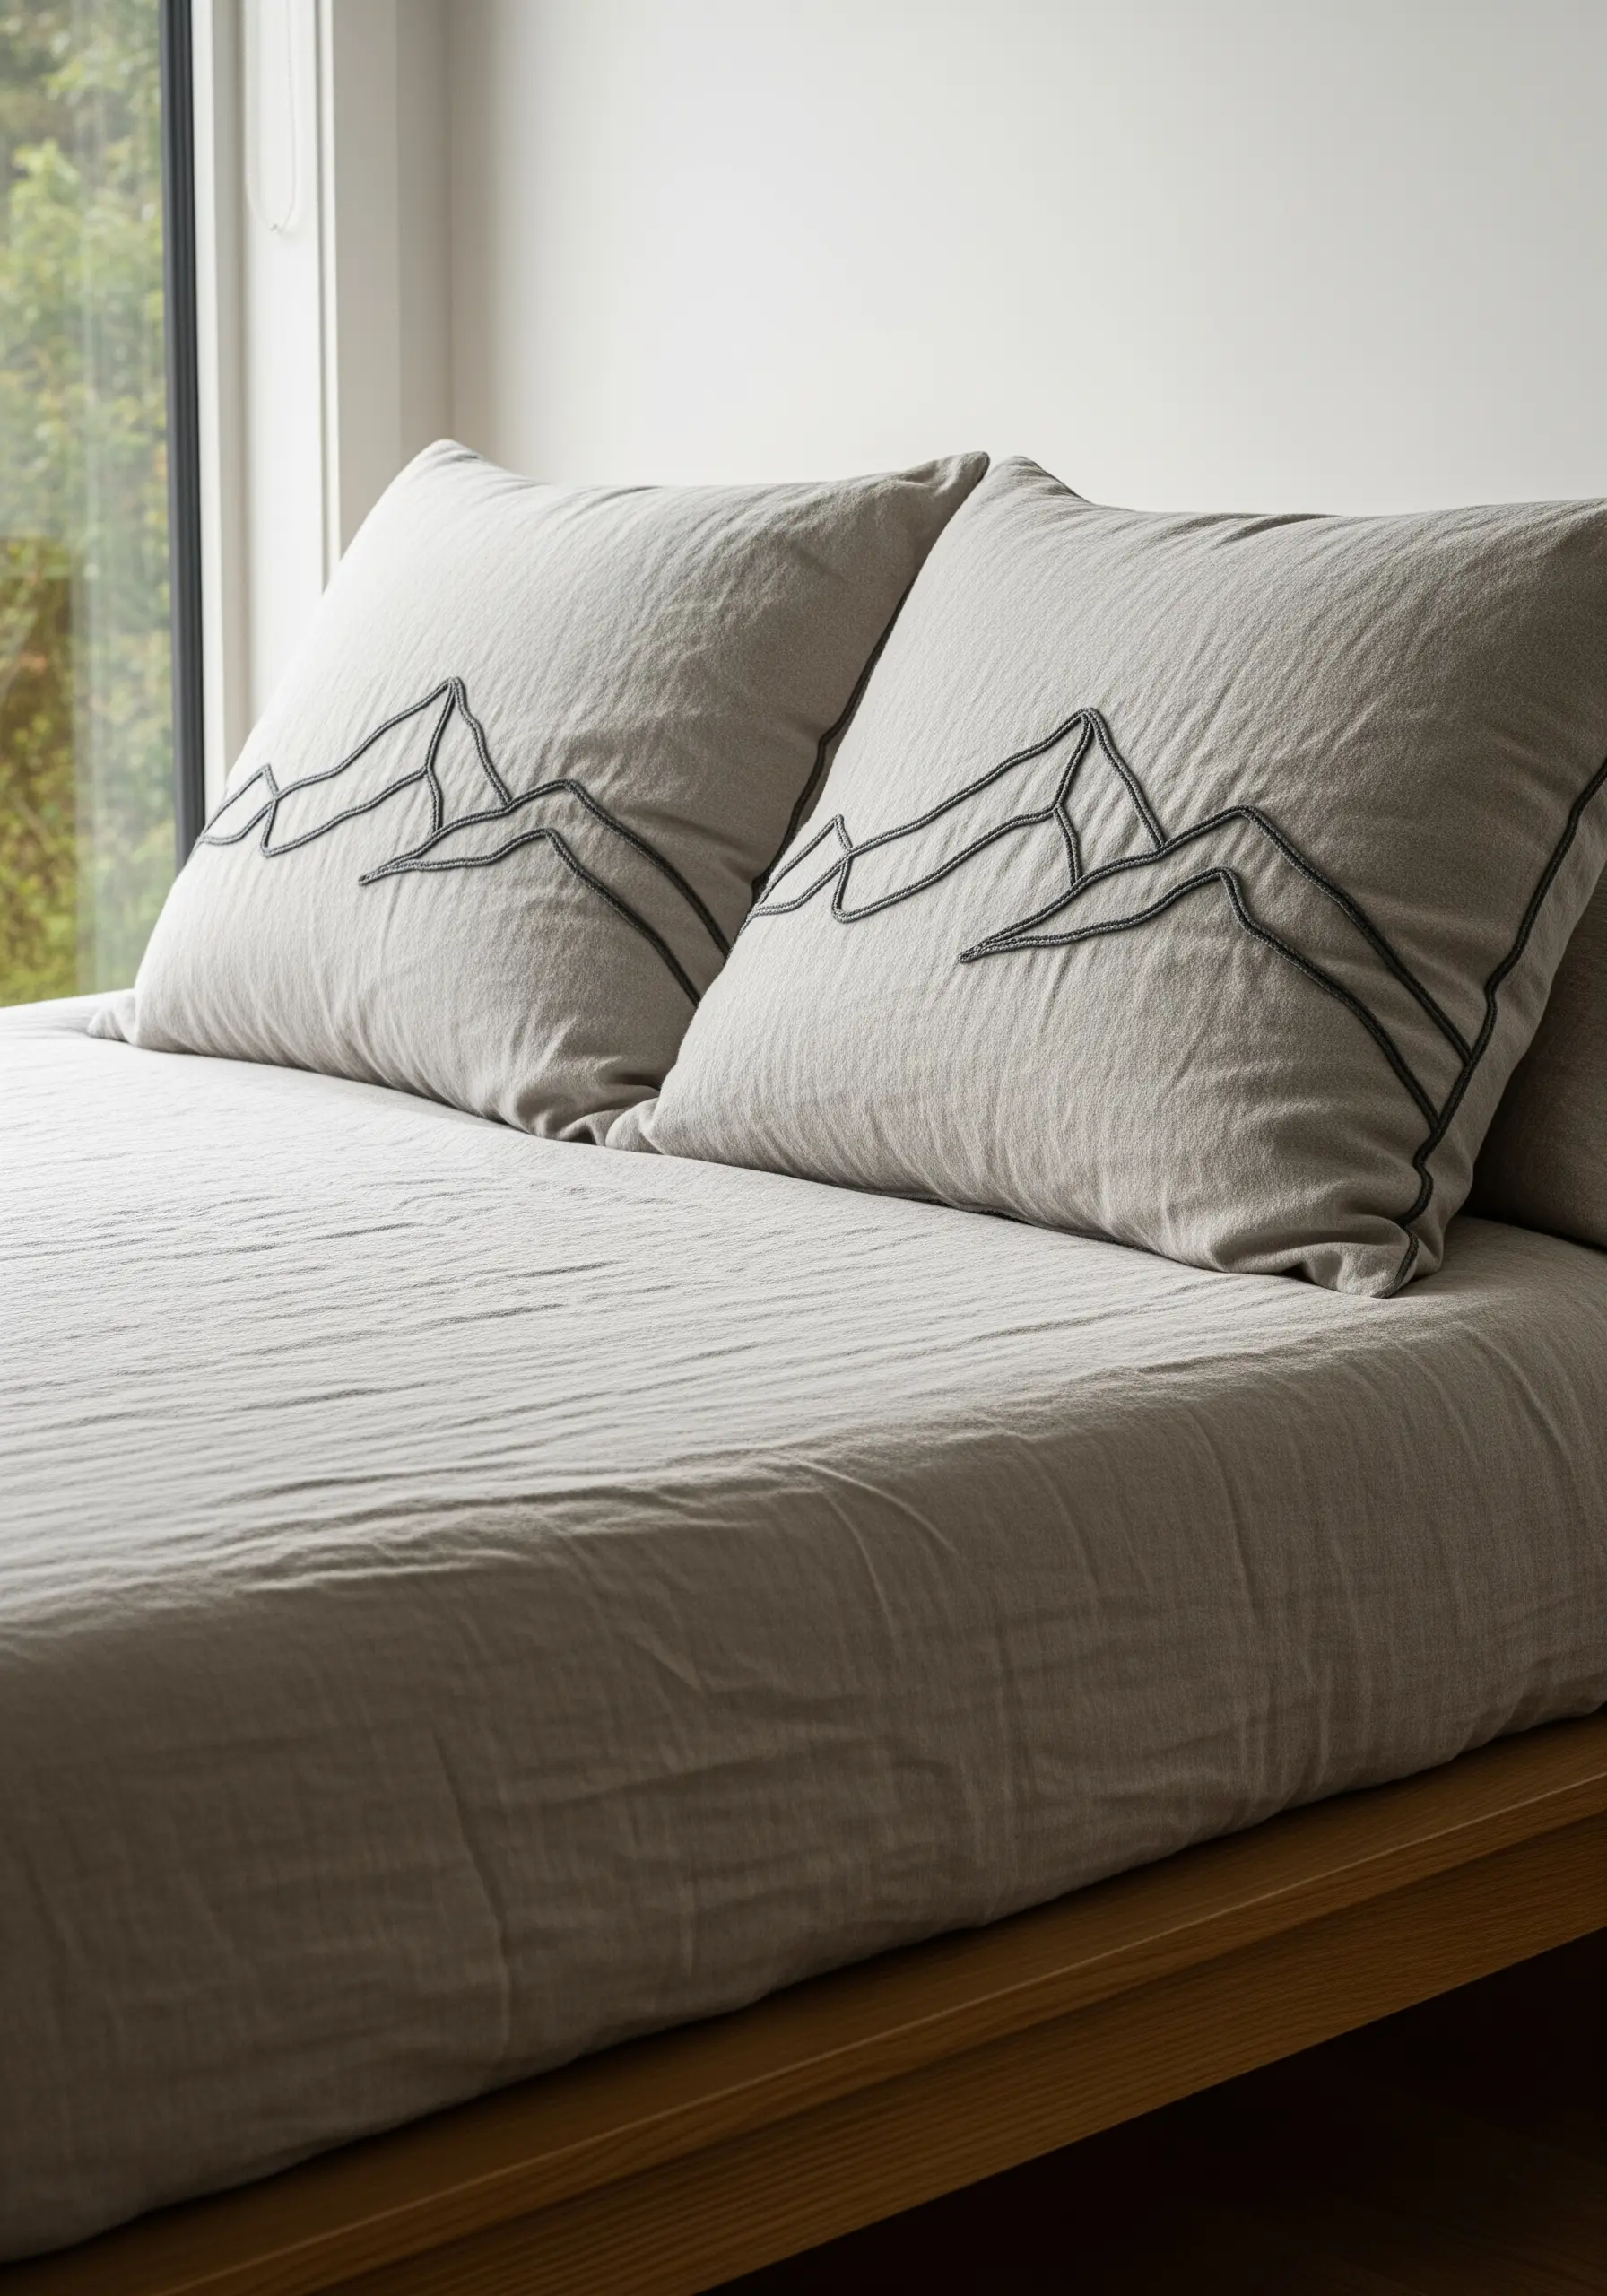
To achieve this bold, graphic look on linen pillows, use a whipped backstitch or a heavy chain stitch.
This technique creates a raised, rope-like line that stands out against the fabric’s natural texture.
Opt for a full six strands of cotton floss or even a fine wool thread for substantial weight and presence.
The design’s power comes from its simplicity and the generous use of negative space, allowing the single line to define a tranquil mountain scene without clutter.
2. Meditative Spirals with Sashiko Stitches
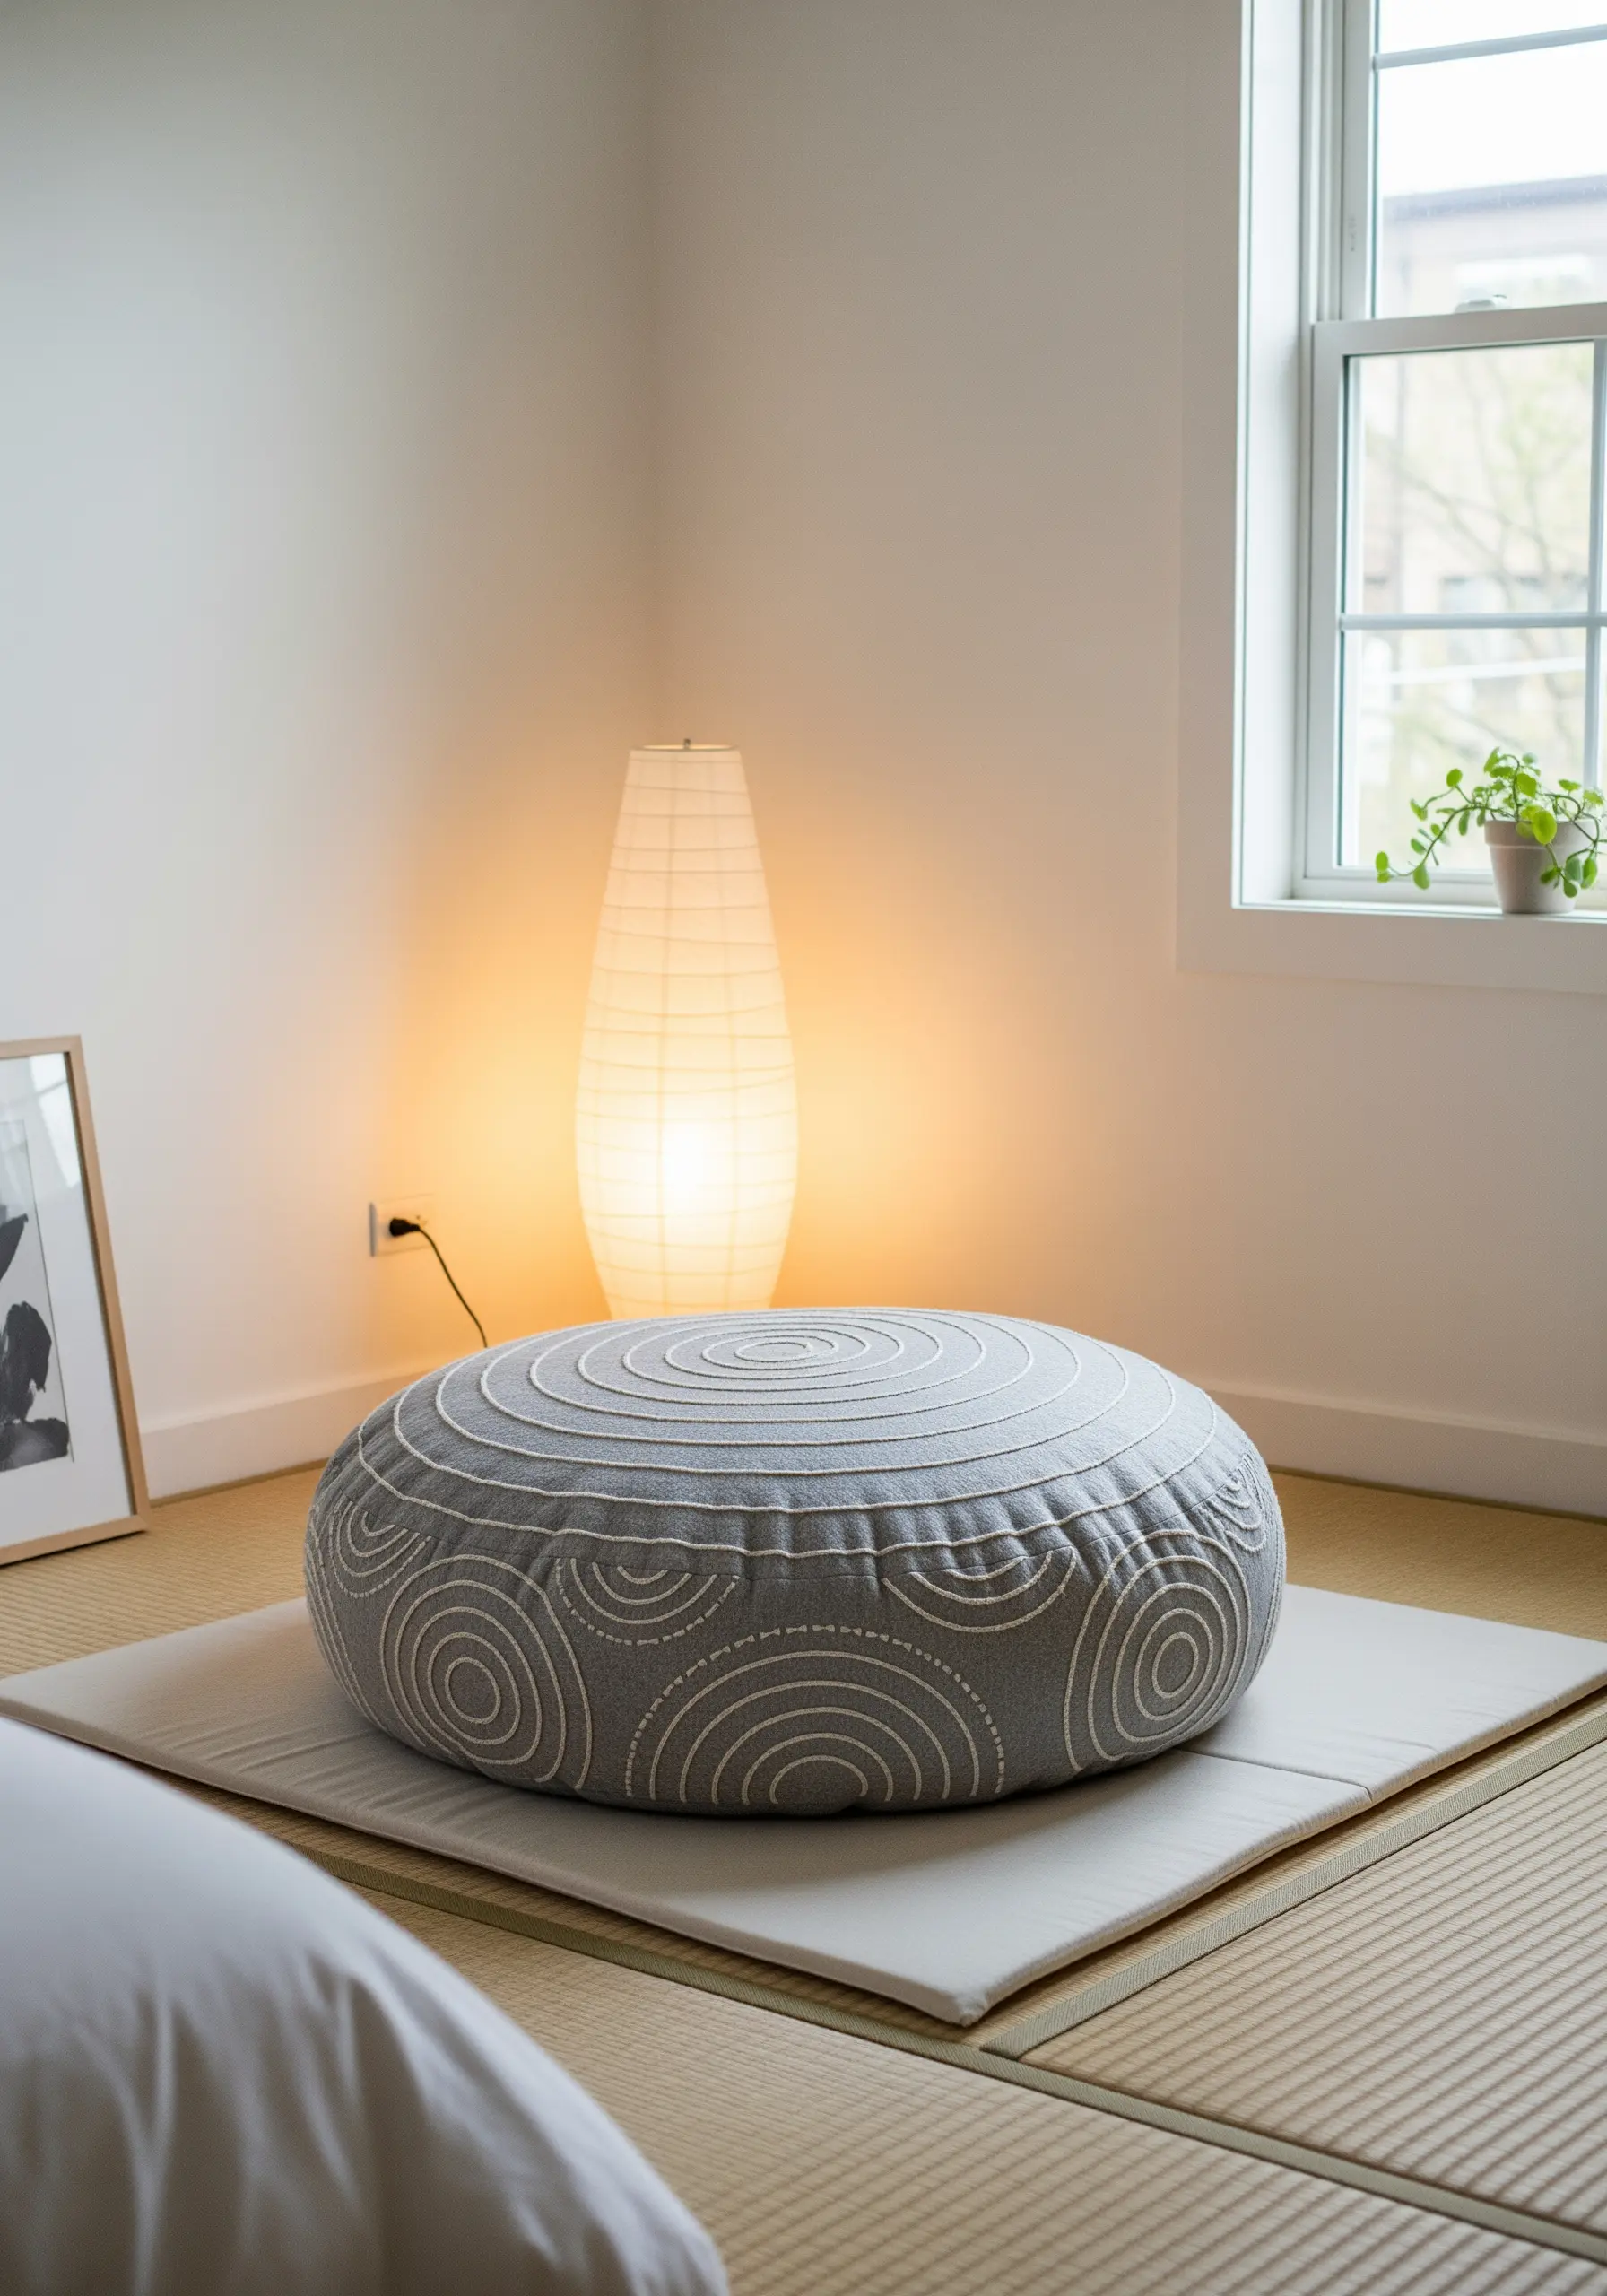
Create this calming, concentric pattern on a meditation cushion using the principles of Sashiko, a traditional Japanese running stitch.
The goal is rhythmic consistency in your stitch length and the spaces between them—this uniformity is what gives the design its serene, hypnotic quality.
Use a long Sashiko needle and a palm thimble for better leverage and control, turning the act of stitching itself into a mindful practice.
Choose a high-contrast thread, like white on grey, to make the geometric pattern crisp and intentional.
3. Delicate Veins on Stretched Canvas
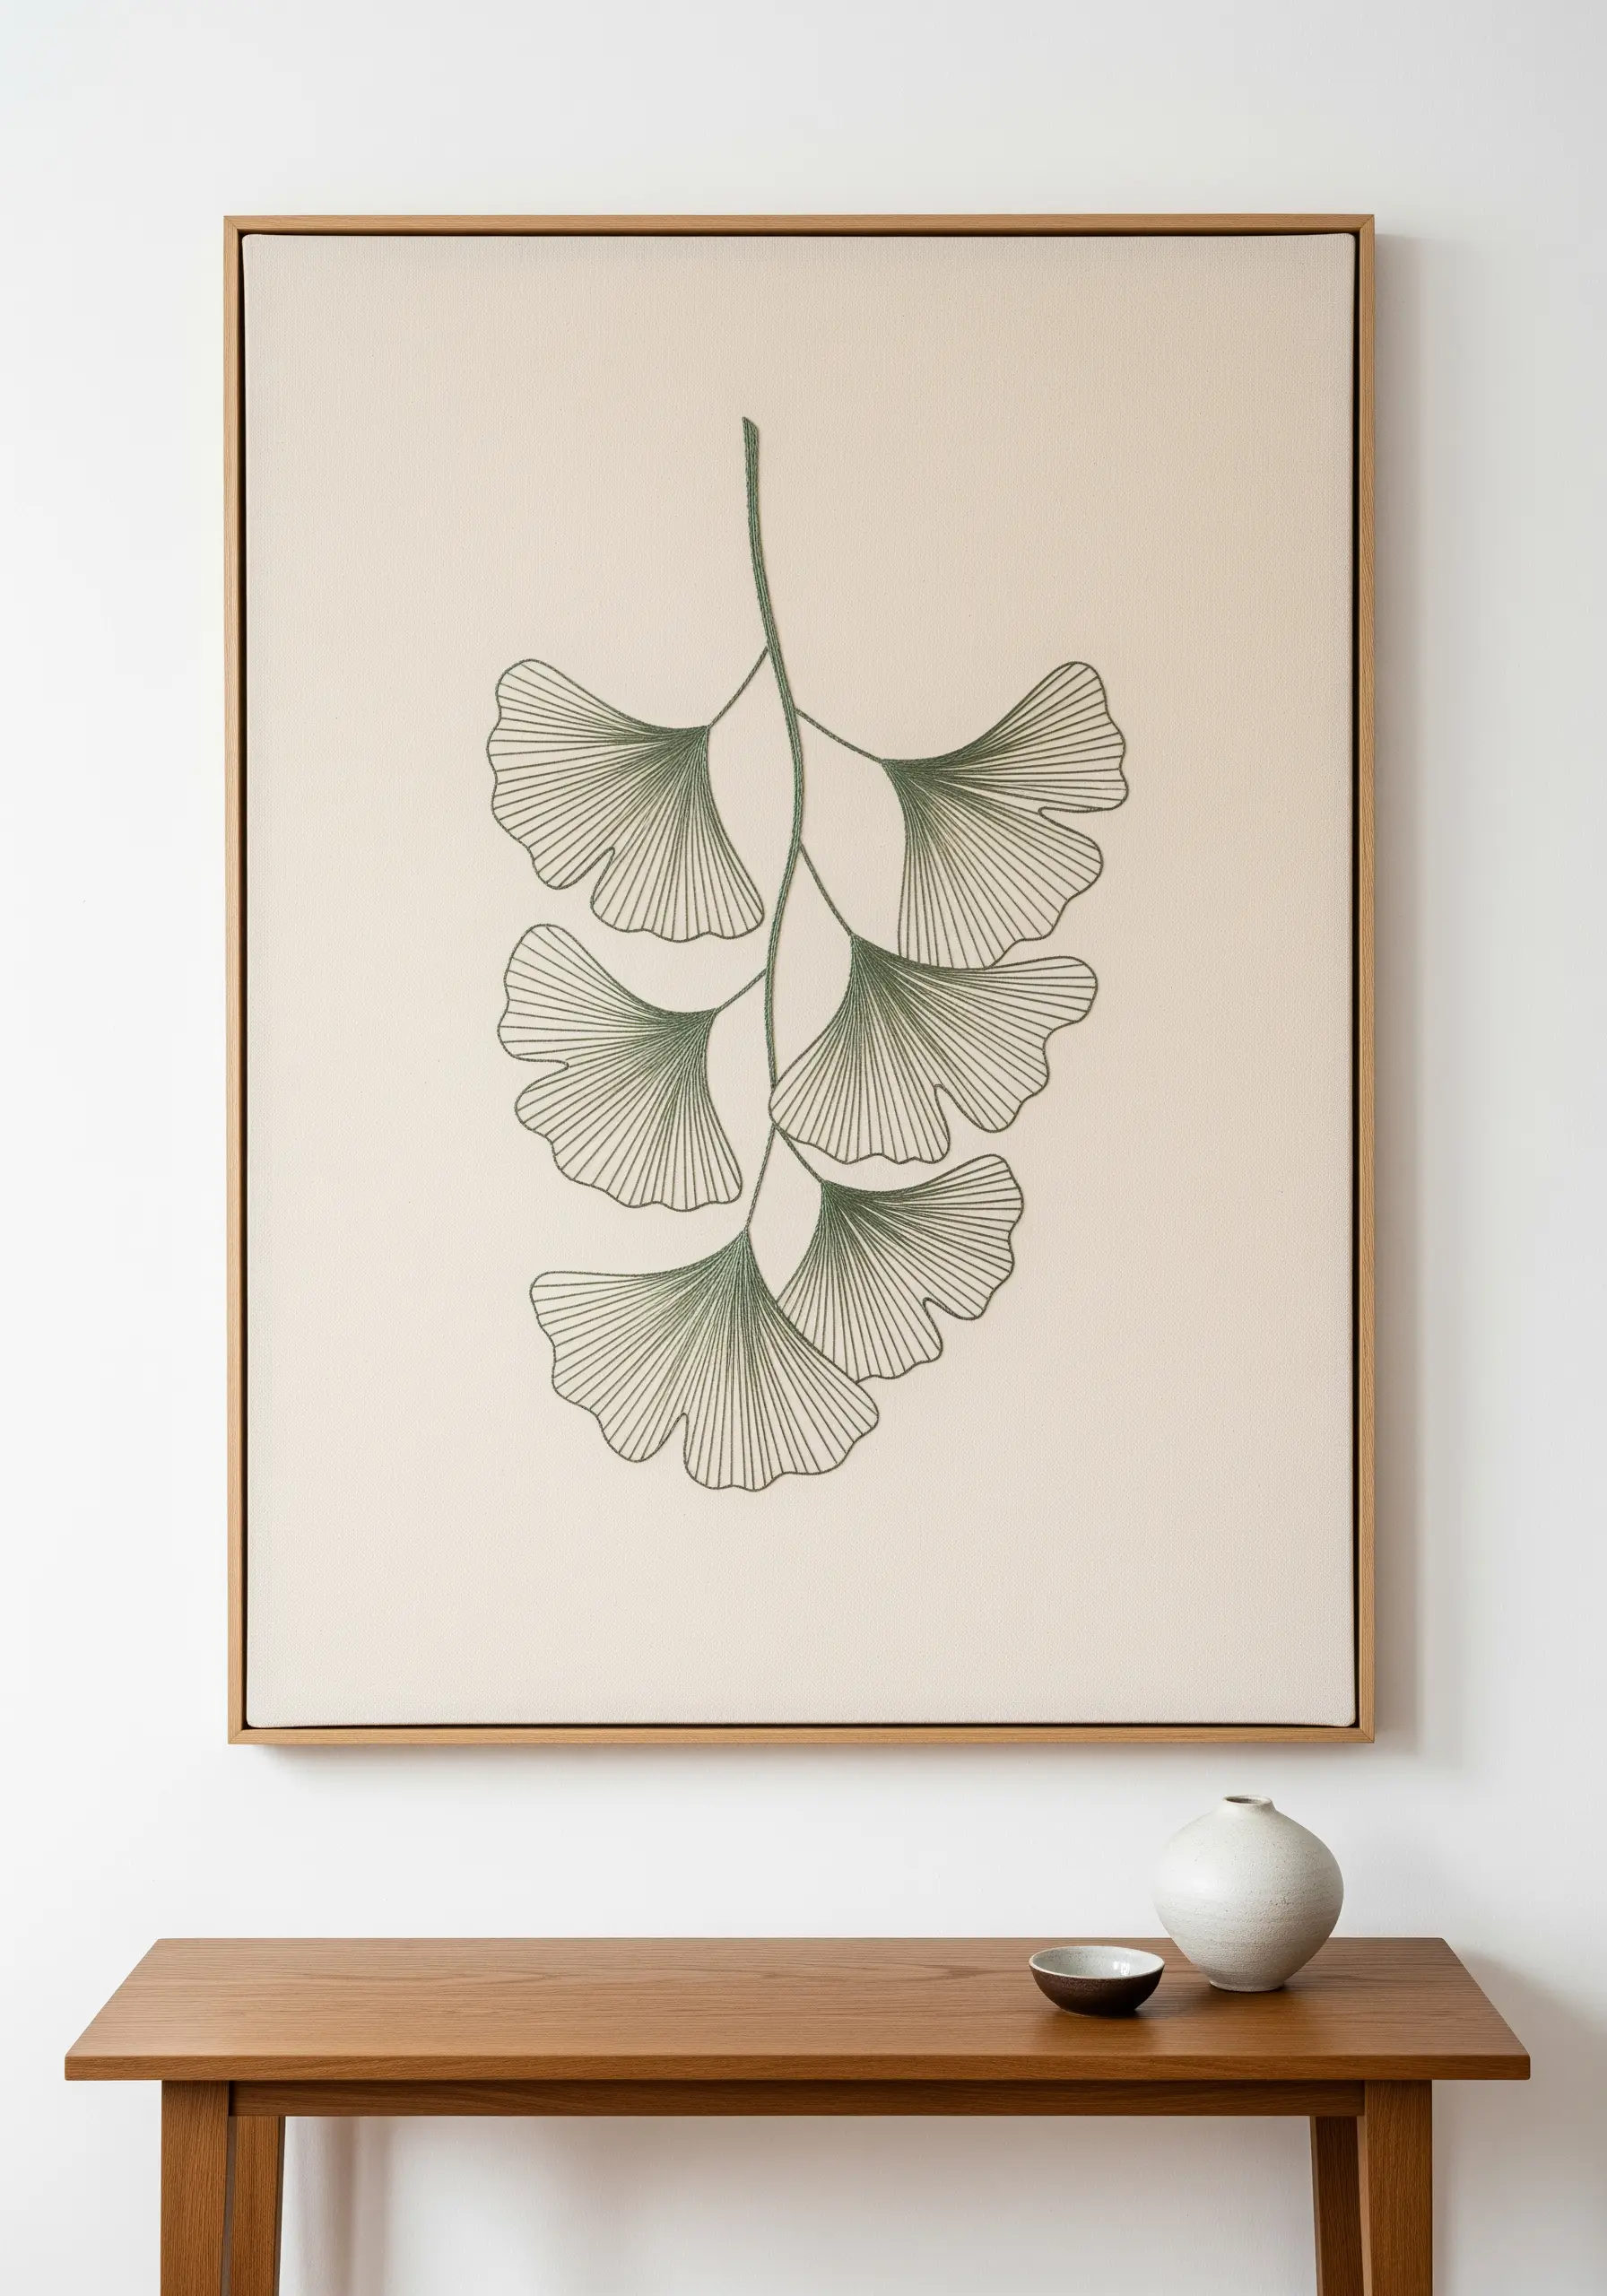
Recreate the delicate structure of a ginkgo leaf by using only one or two strands of floss for the finest possible lines.
Use a simple backstitch for the main outlines and radiating straight stitches for the inner veins, mimicking the fan-like structure of the leaf.
For a large-scale project like this, it’s crucial to stretch your fabric tightly in its final frame before you begin stitching; this prevents any puckering or distortion and ensures the finished piece hangs perfectly flat.
This method turns a simple botanical sketch into elegant framed embroidery pieces that look professionally made.
4. Flowing Lines on Sheer Curtains

When embroidering on delicate, sheer fabric, preparation is everything.
Use a lightweight thread and a very fine, sharp needle to avoid creating noticeable holes or pulls in the weave.
To stabilize the fabric and prevent stitches from gathering, apply a water-soluble stabilizer to the back of your design area before you stitch.
Once you are finished, a simple rinse will dissolve the backing, leaving behind a clean, flowing pattern that seems to float on the curtain itself.
5. Architectural Details with Running Stitch
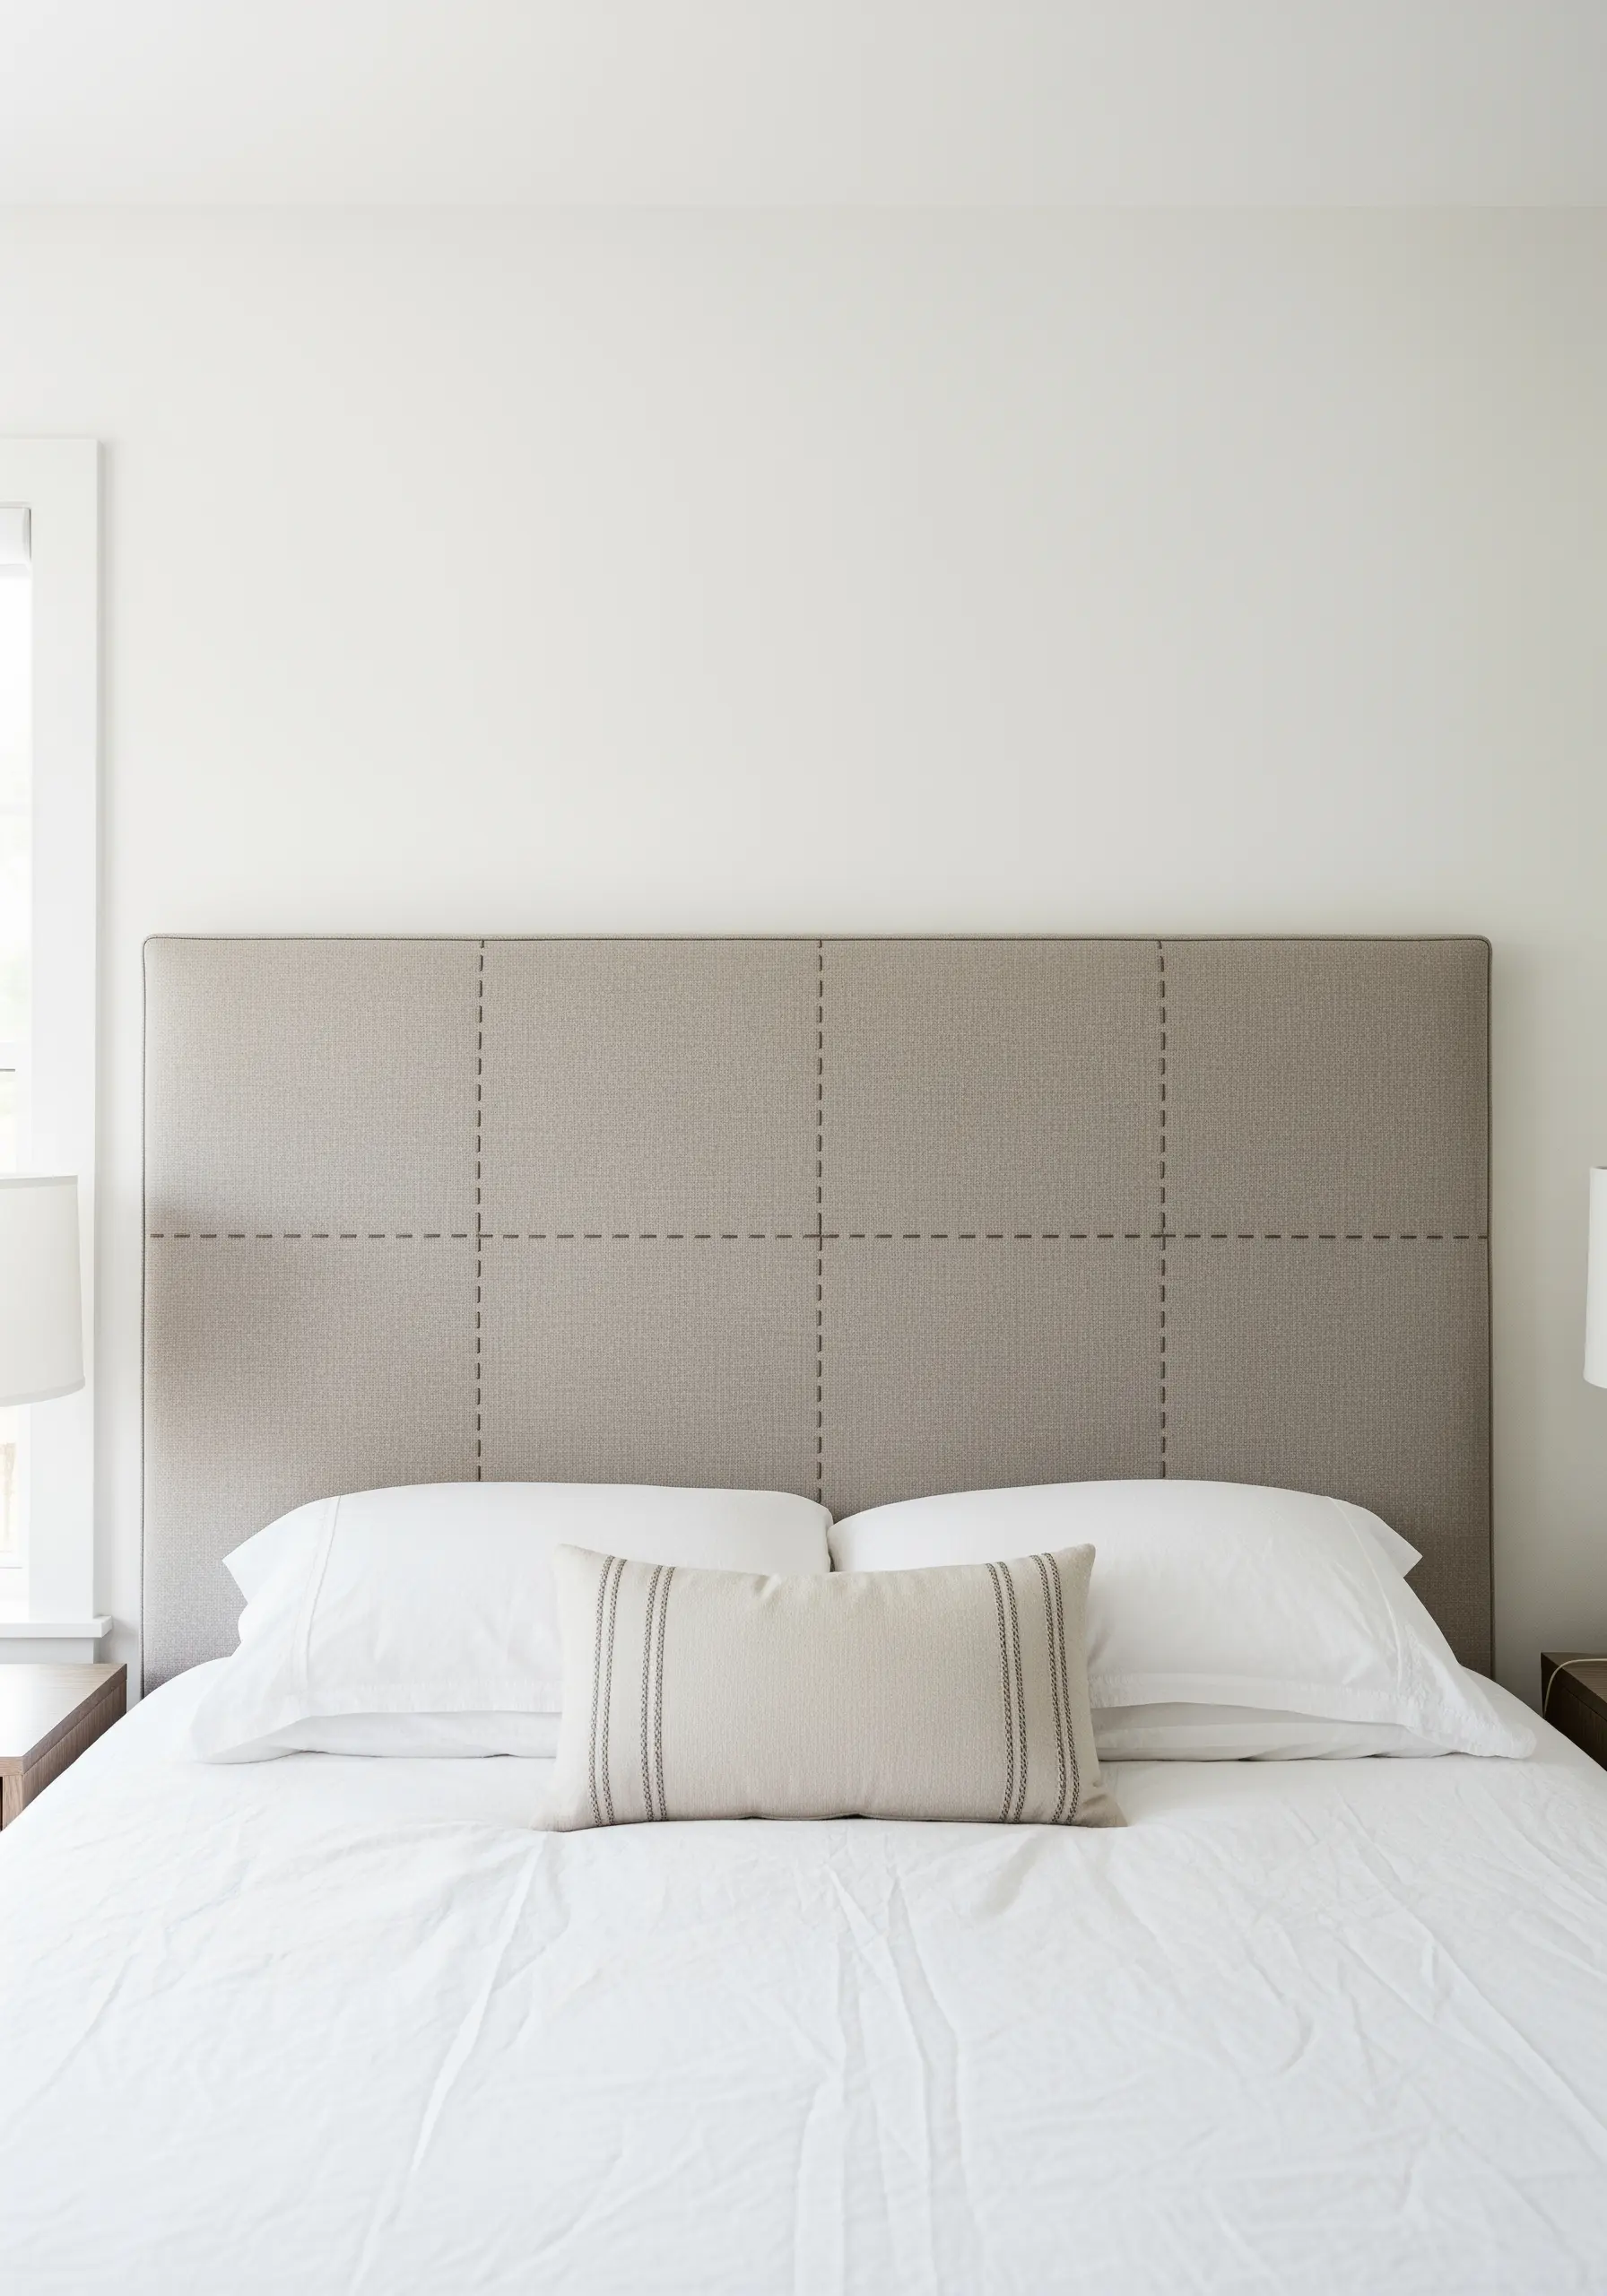
Add a layer of visual structure to an upholstered headboard with a simple, well-placed running stitch.
Use a thick thread, like pearl cotton, and a curved upholstery needle to easily navigate the dense fabric and padding.
Mark your grid with a ruler and tailor’s chalk before you begin to ensure your lines are perfectly straight and evenly spaced.
This technique adds a subtle, handcrafted detail that feels both modern and timeless, proving that even the most basic architectural stitch ideas can elevate furniture.
6. Scattered Constellations on Knits
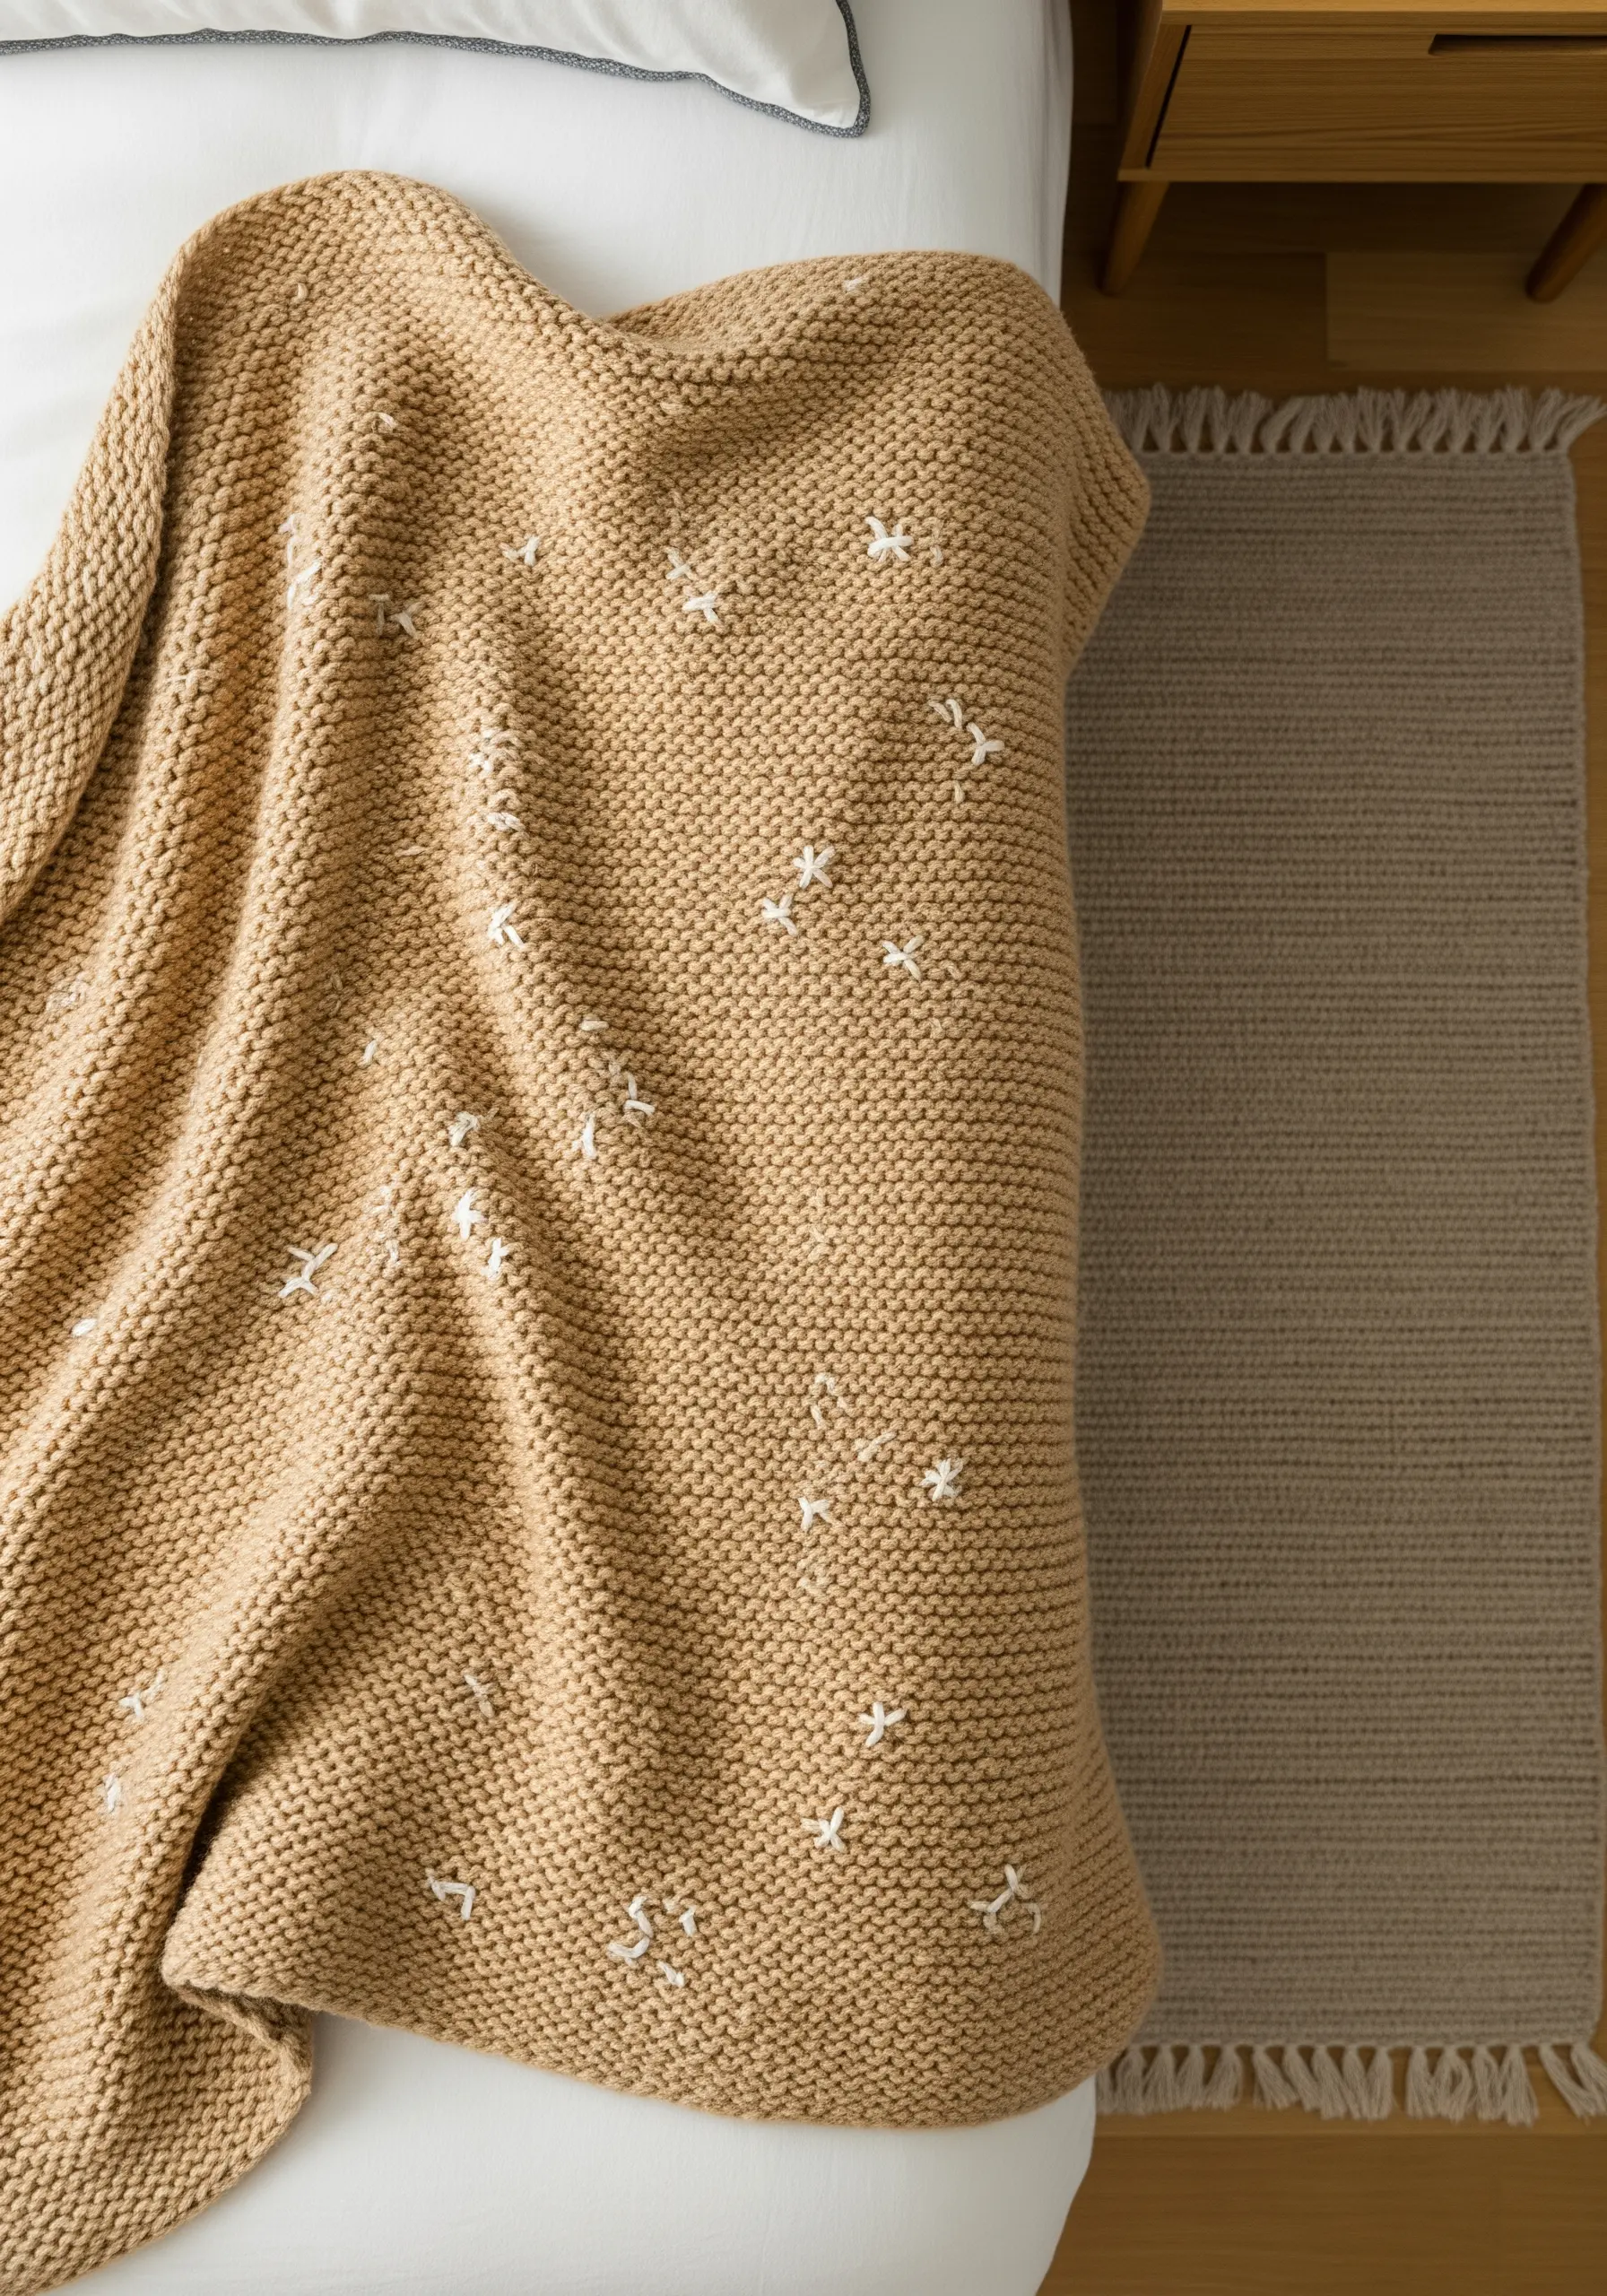
Embellishing a chunky knit blanket requires a gentle touch and the right tools.
Use a tapestry needle with a blunt tip to glide between the fibers of the yarn rather than splitting them.
Create a scattered pattern of simple cross stitches or seed stitches using a contrasting yarn color.
This random placement creates a whimsical, constellation-like effect that adds a personal touch without compromising the soft, cozy structure of the knit.
7. Luminous Stitches on a Lampshade
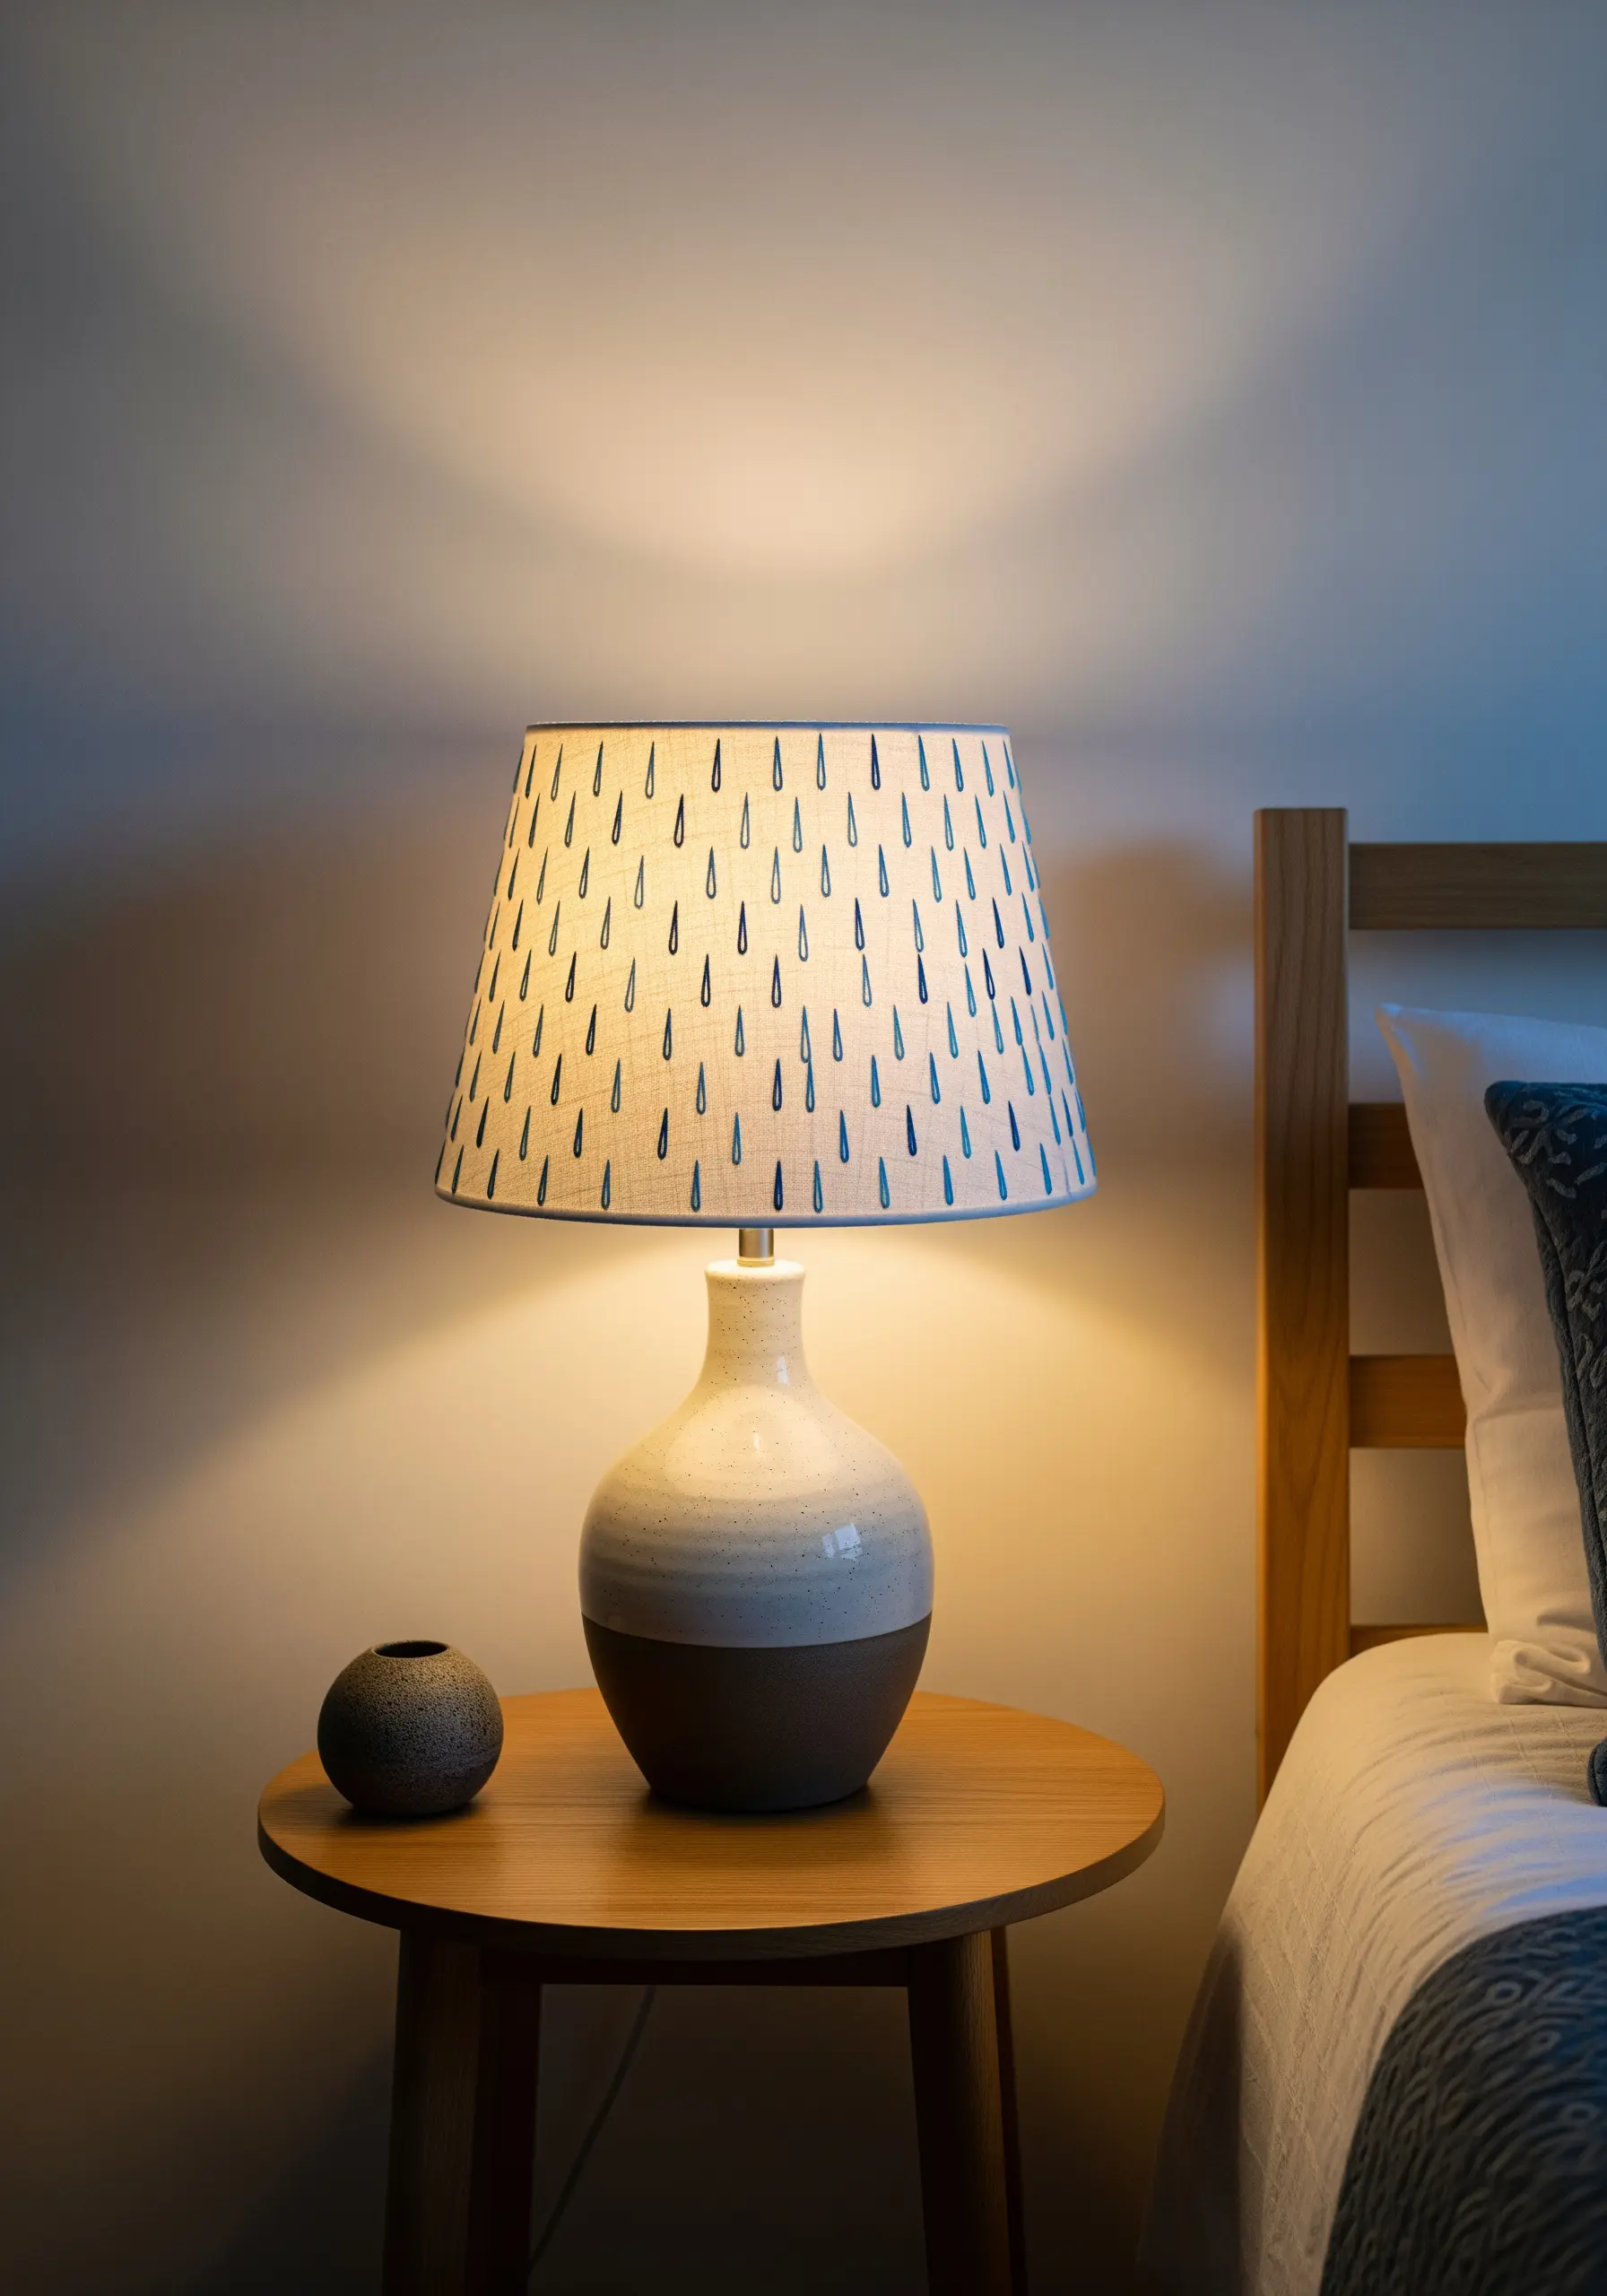
To embroider a lampshade, you must work on the fabric panel before it is attached to the wire frame.
Trace your pattern onto the fabric and use a satin stitch to fill in the simple raindrop shapes for a solid, opaque look.
Consider how the light will interact with your thread choice—a matte cotton will create a soft, diffuse glow, while a rayon or silk thread will add a subtle sheen.
The repeated vertical pattern draws the eye upward, adding a sense of calm and height to your bedside lighting.
8. Graphic Waves on Indigo Fabric
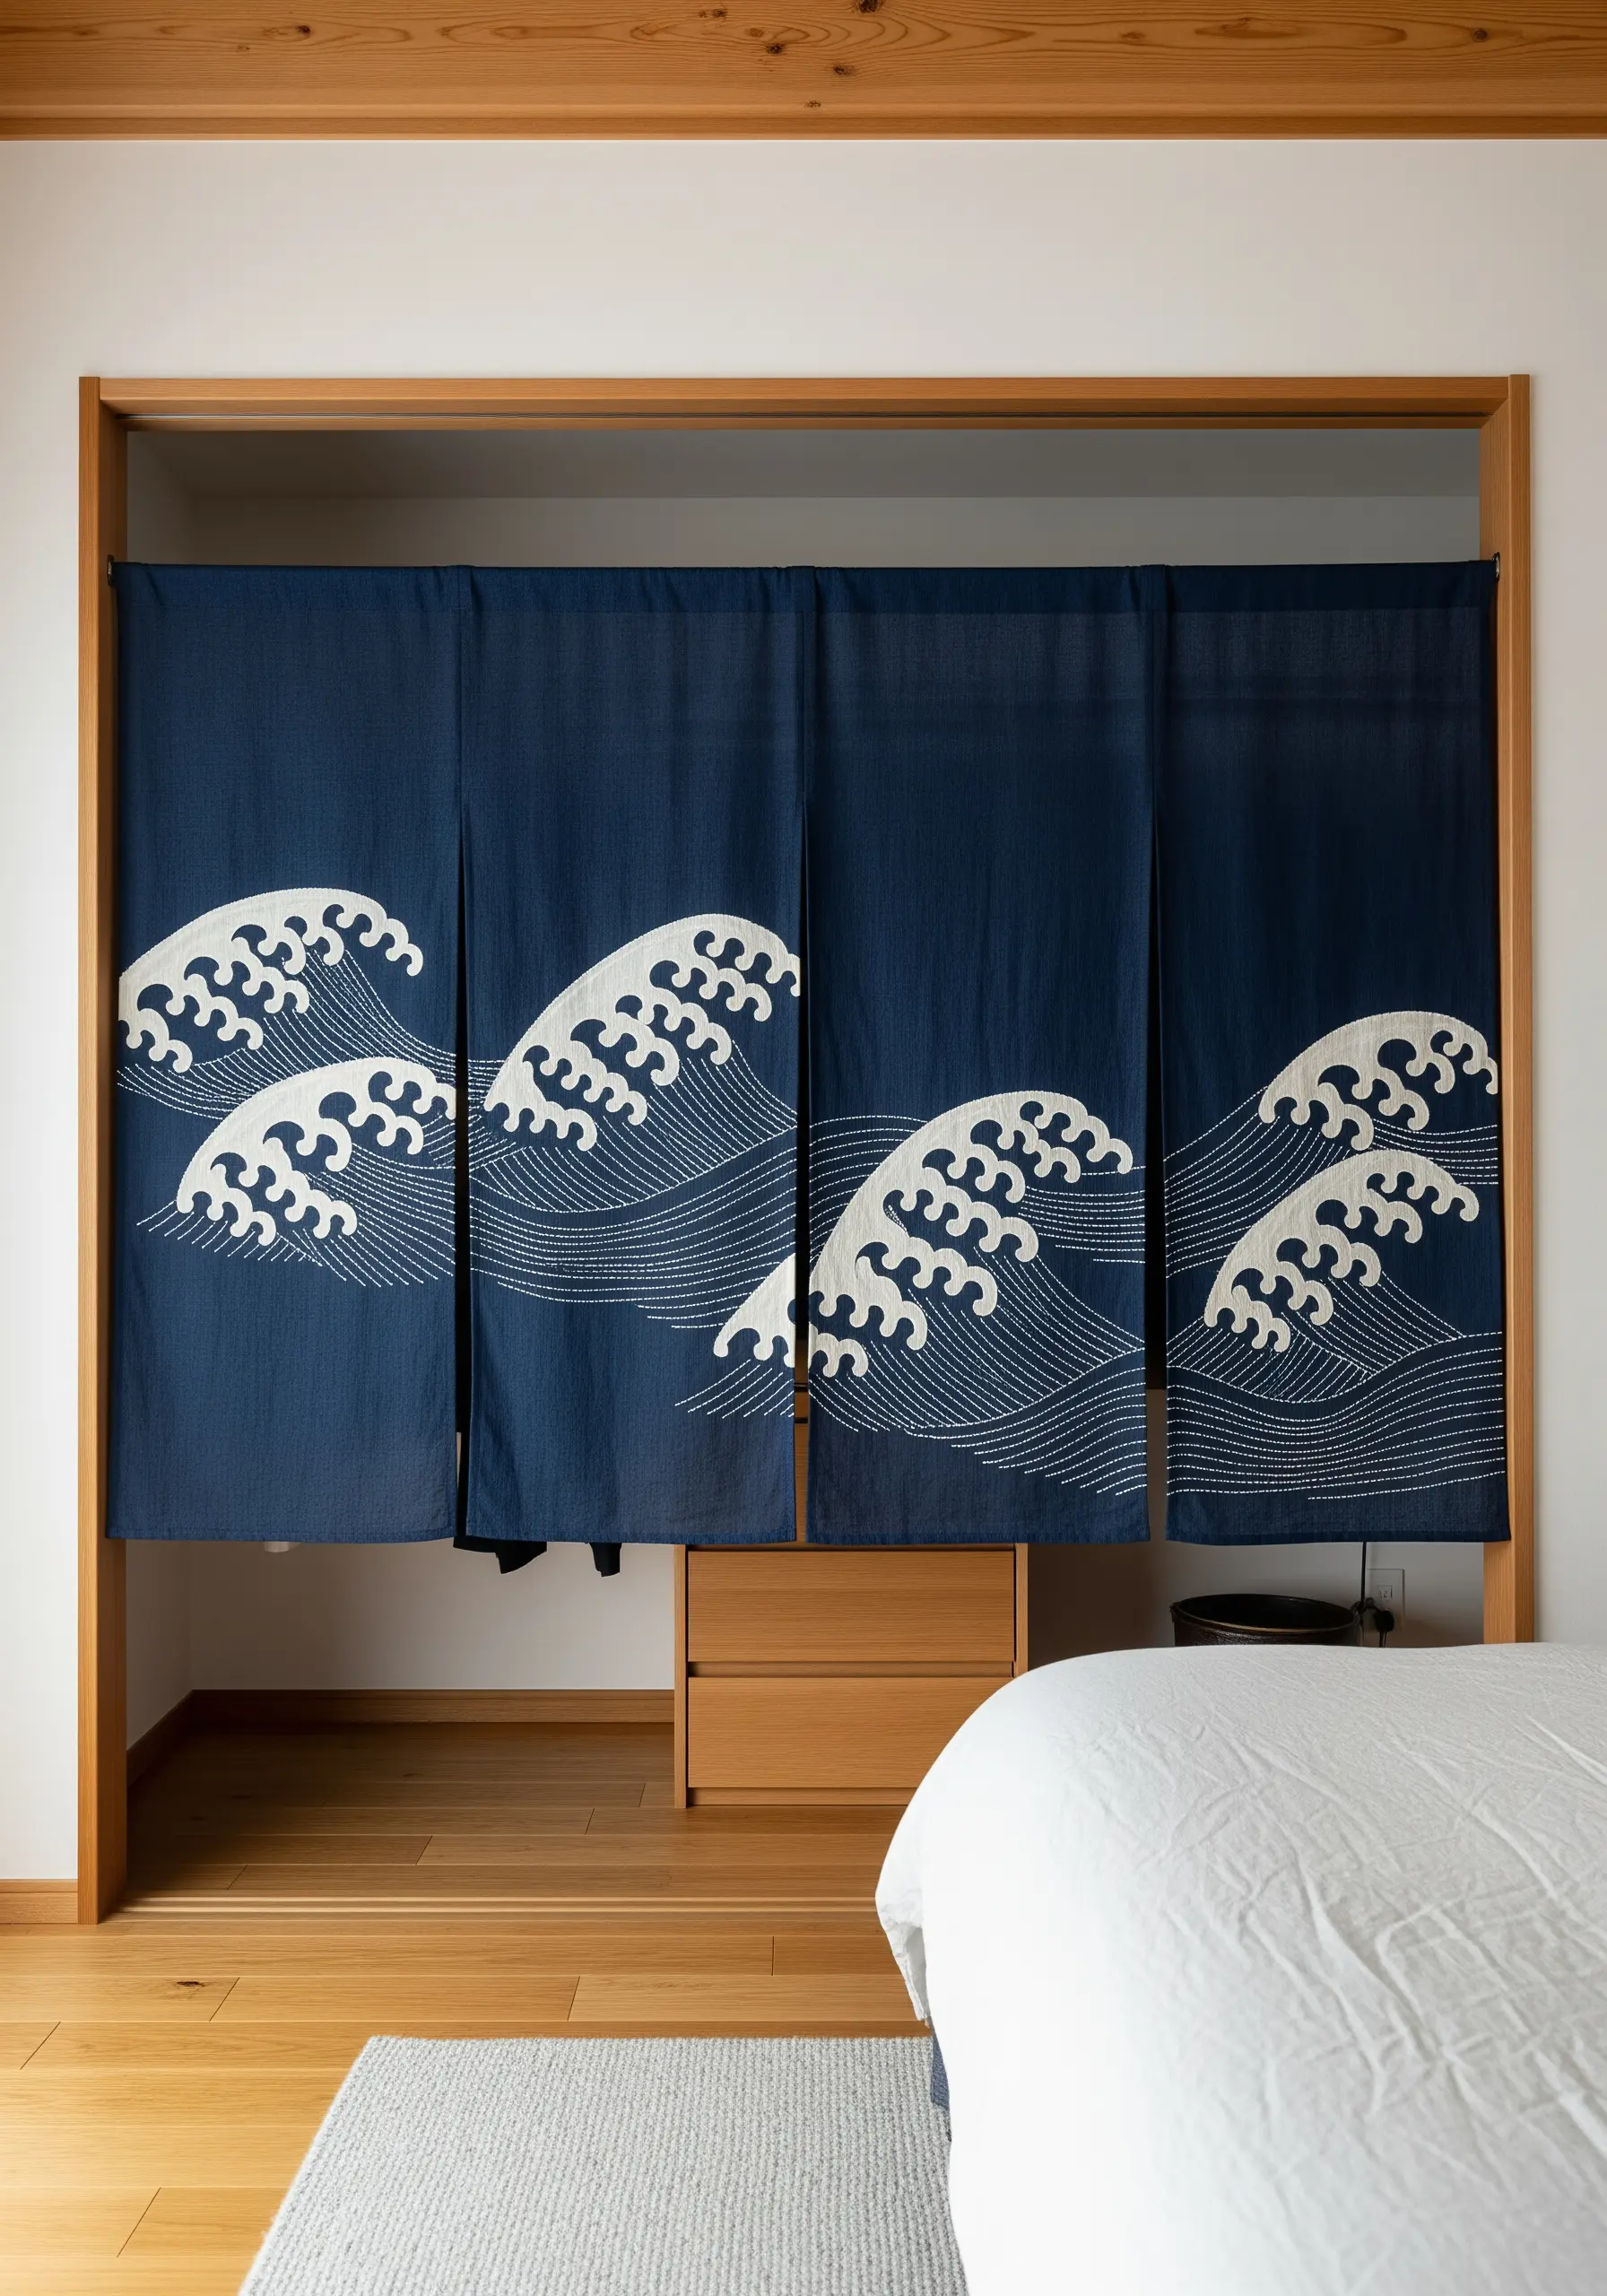
This design’s impact comes from the powerful contrast between the solid white thread and the deep indigo fabric.
To achieve the bold, foam-like crest of the waves, use a dense, smooth satin stitch, ensuring your stitches lay flat and parallel.
For the delicate lines that suggest water, switch to a simple backstitch or rows of running stitches using a finer thread.
This variation in stitch density and line weight is what creates the illusion of movement and depth.
9. Botanical Illustrations on Furnishings

Treating an upholstered bench like a canvas allows you to create functional art.
For this bamboo design, use a stem stitch or split stitch to achieve clean, flowing lines for the stalks.
Render the leaves with a fishbone stitch; this technique creates a central vein and allows the stitches to angle outwards, perfectly mimicking the natural growth of a leaf.
This combination of stitches adds just enough texture to make your plant-inspired embroidery feel dimensional and alive.
10. Sculptural Threads in Oversized Hoops
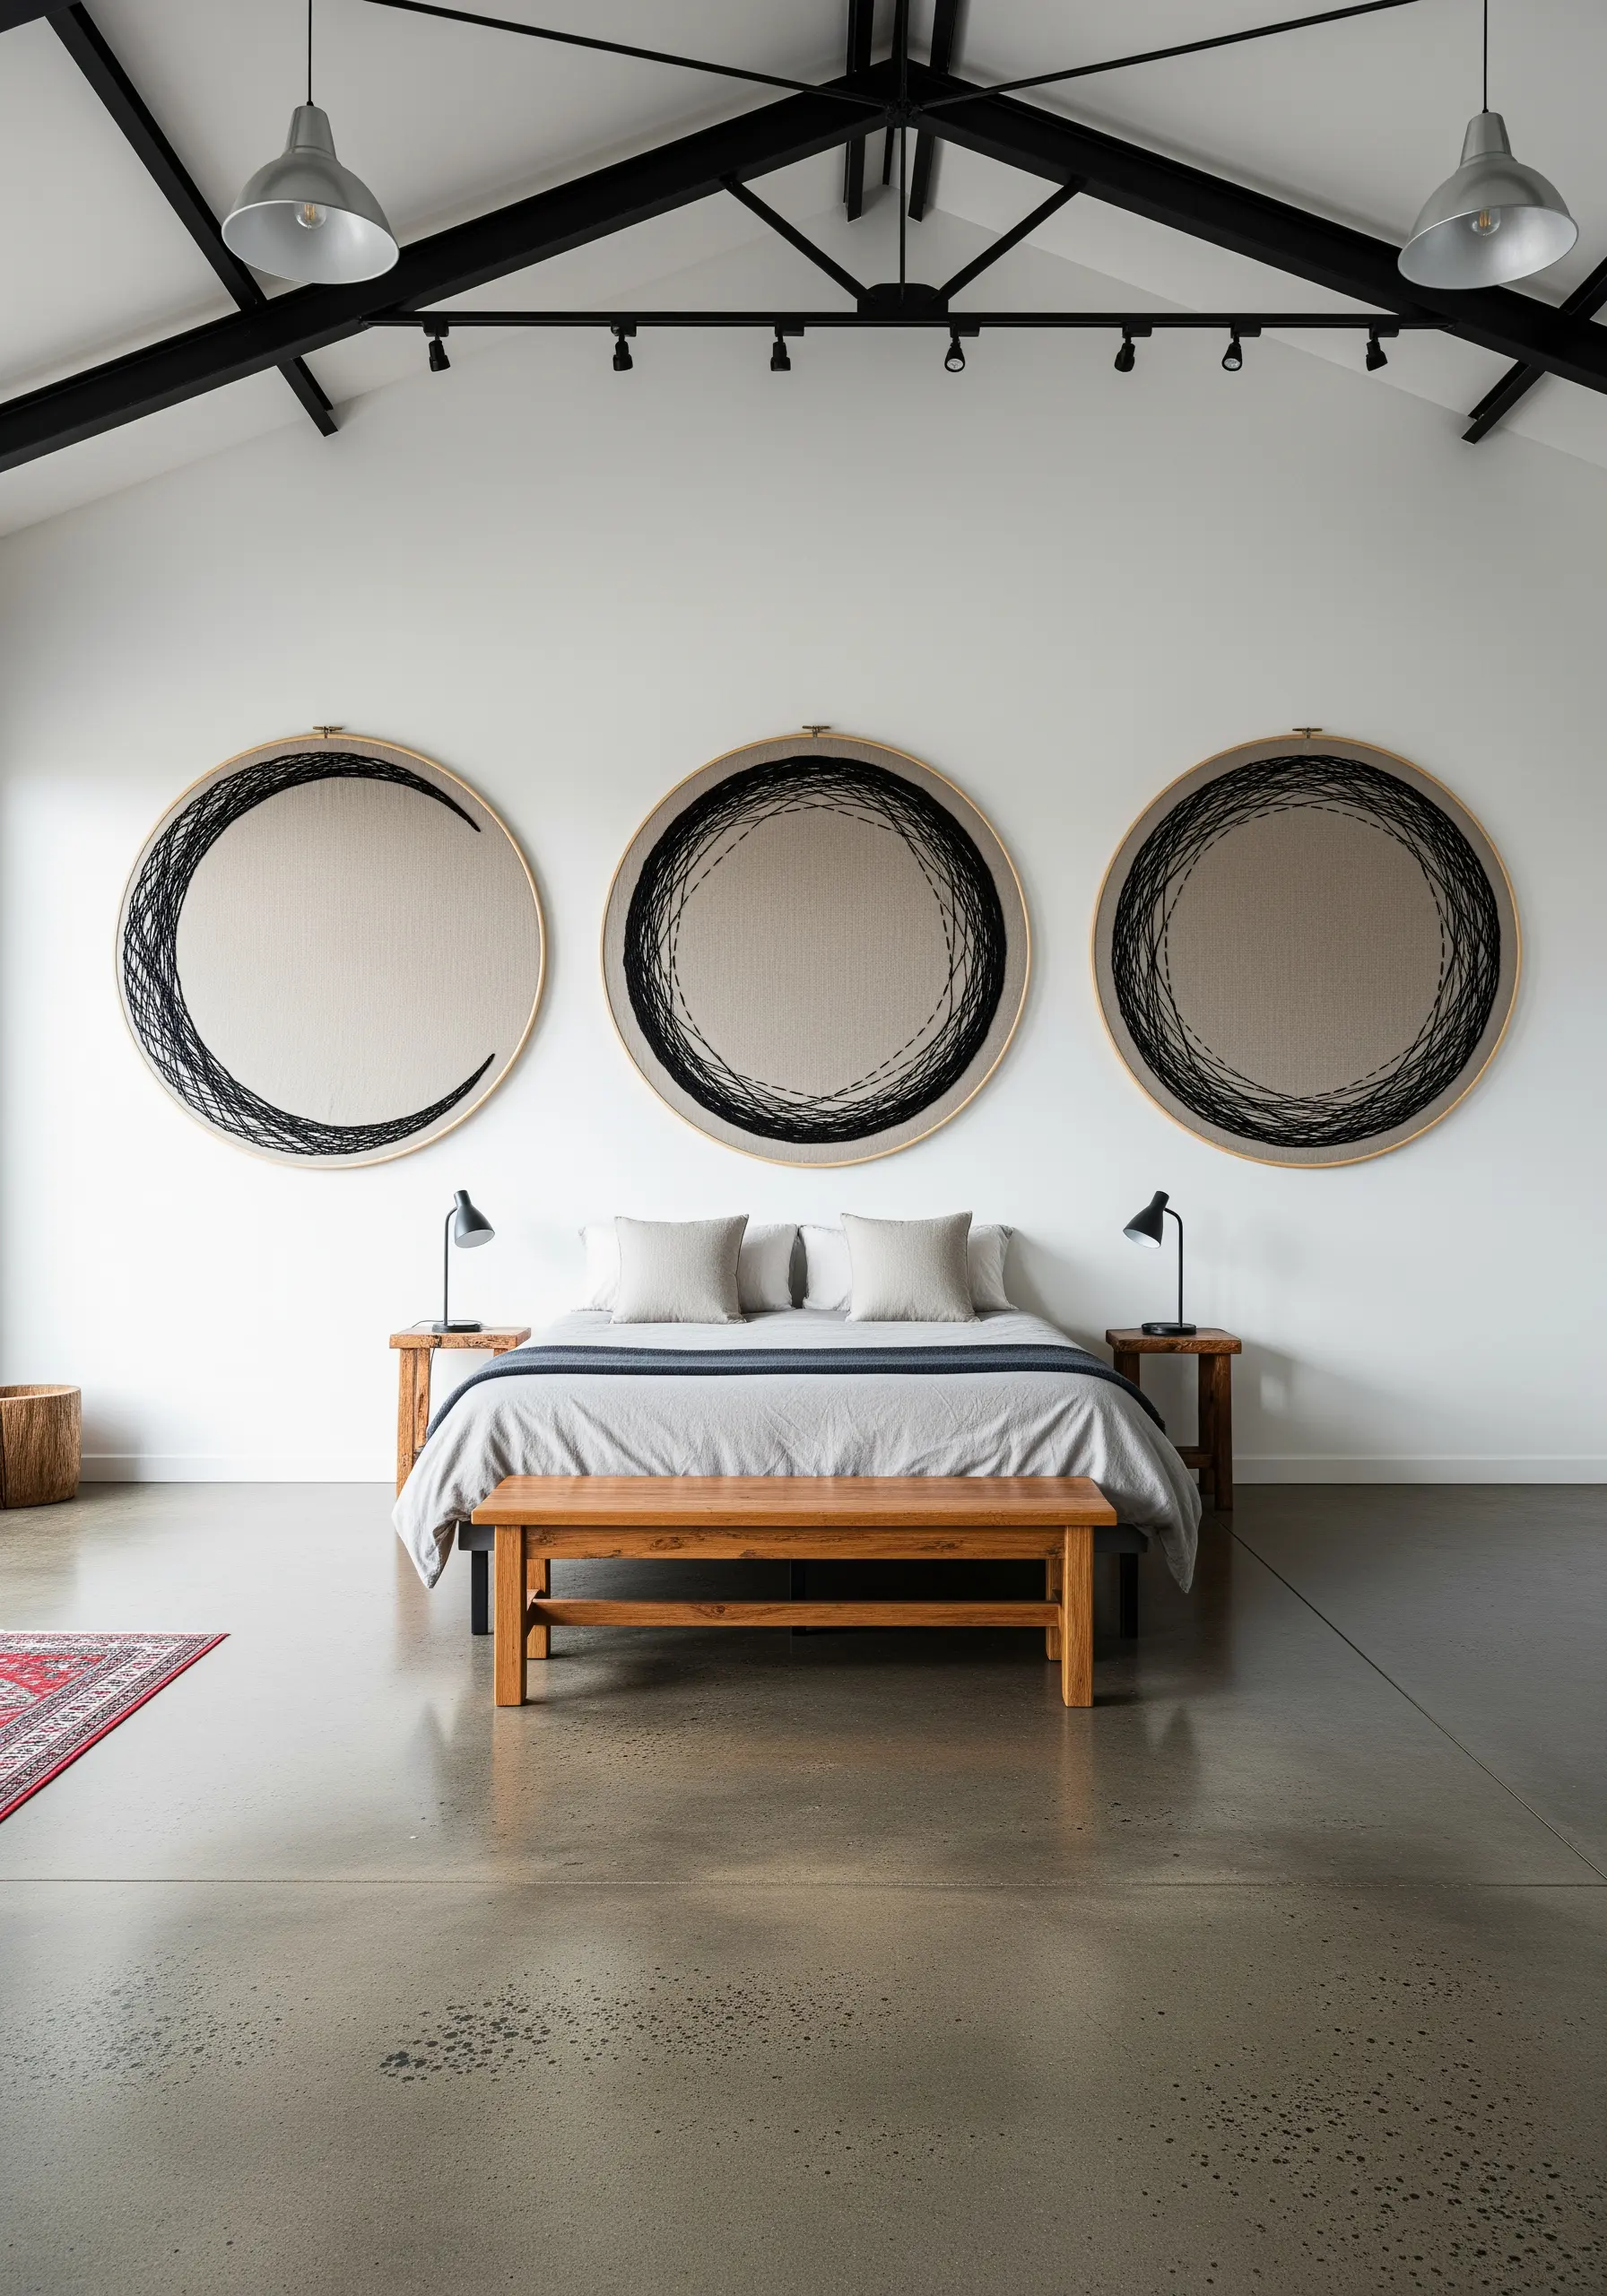
Move beyond traditional stitching by using thread as a sculptural medium.
Secure your base fabric in an oversized hoop, then wrap thread or fine yarn from one side to the other, building up layers to create abstract forms.
Play with tension and overlapping lines to control the density and shape of your design.
This technique transforms simple materials into giant wall-mounted fiber art, where the negative space is just as important as the thread itself.
11. Modern Grids and Textural Nodes
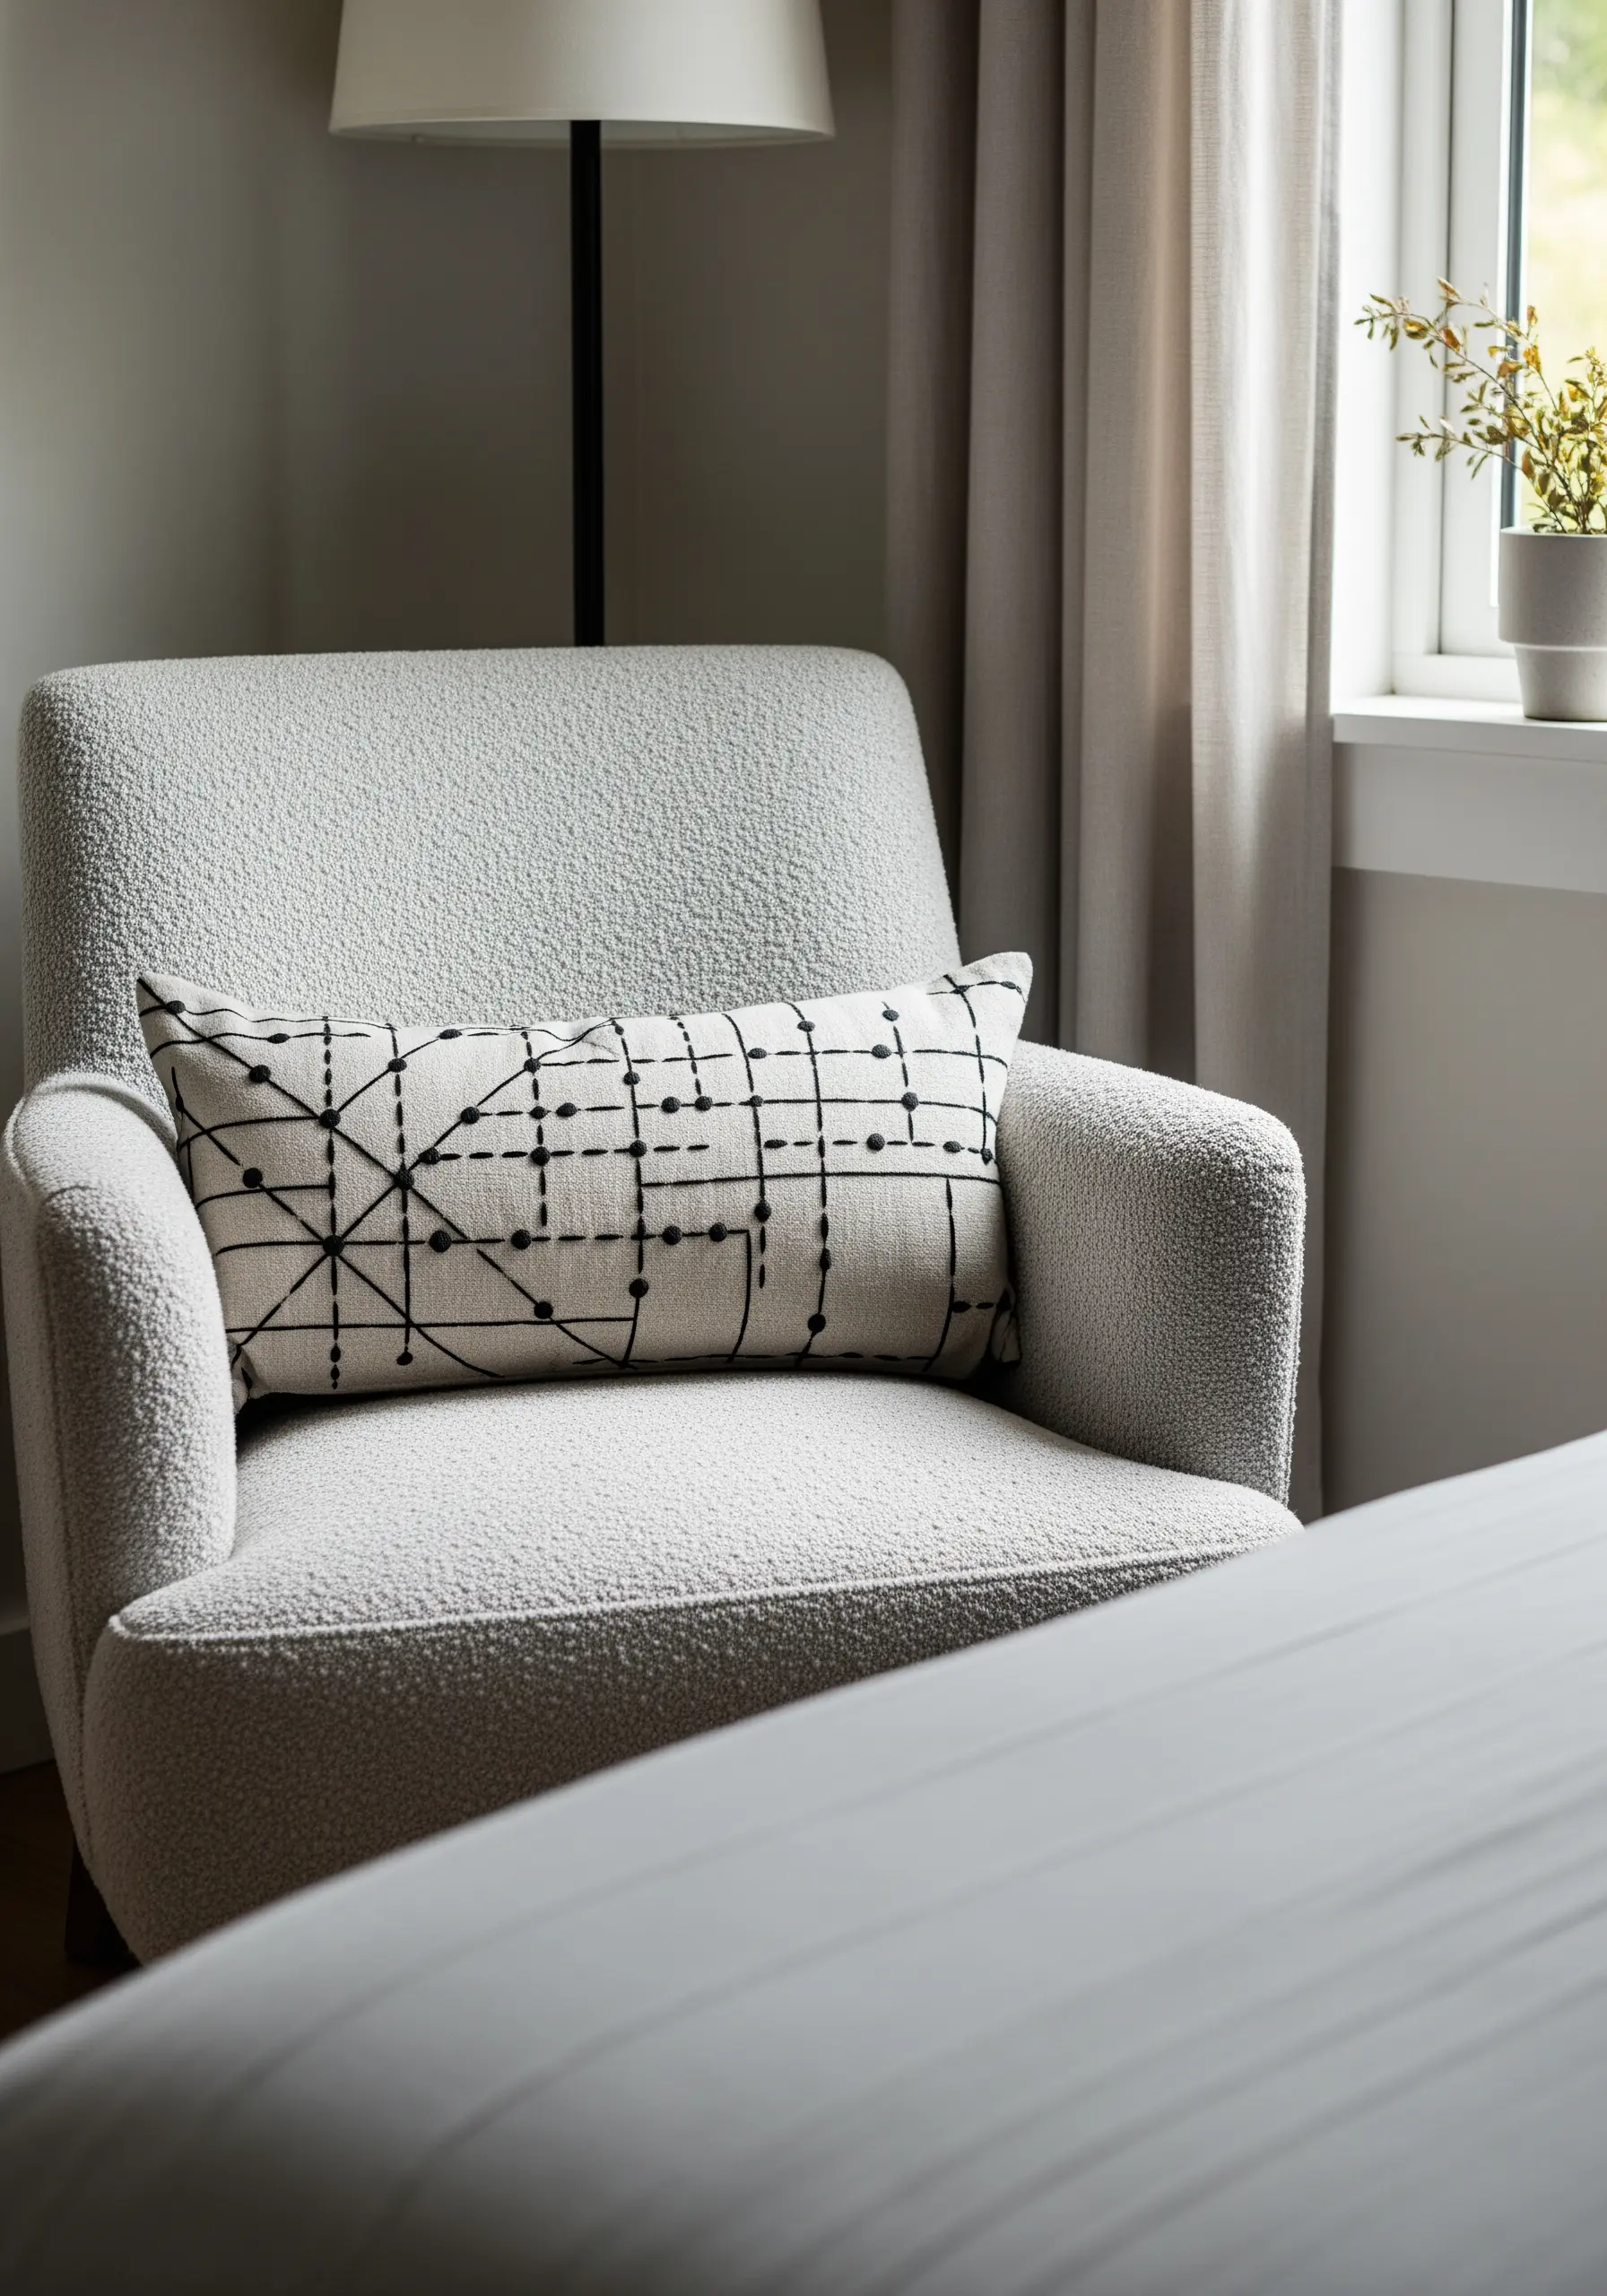
This pattern achieves a modern, technical aesthetic through the clean combination of lines and dots.
Use a ruler and a disappearing ink pen to mark your grid, ensuring absolute precision before you make a single stitch.
Work the lines in a simple backstitch, and create the dots with French knots or colonial knots for a raised, textural effect.
The contrast between the flat lines and the dimensional knots gives the piece a sophisticated, map-like quality.
12. The Refined Finish of a Blanket Stitch
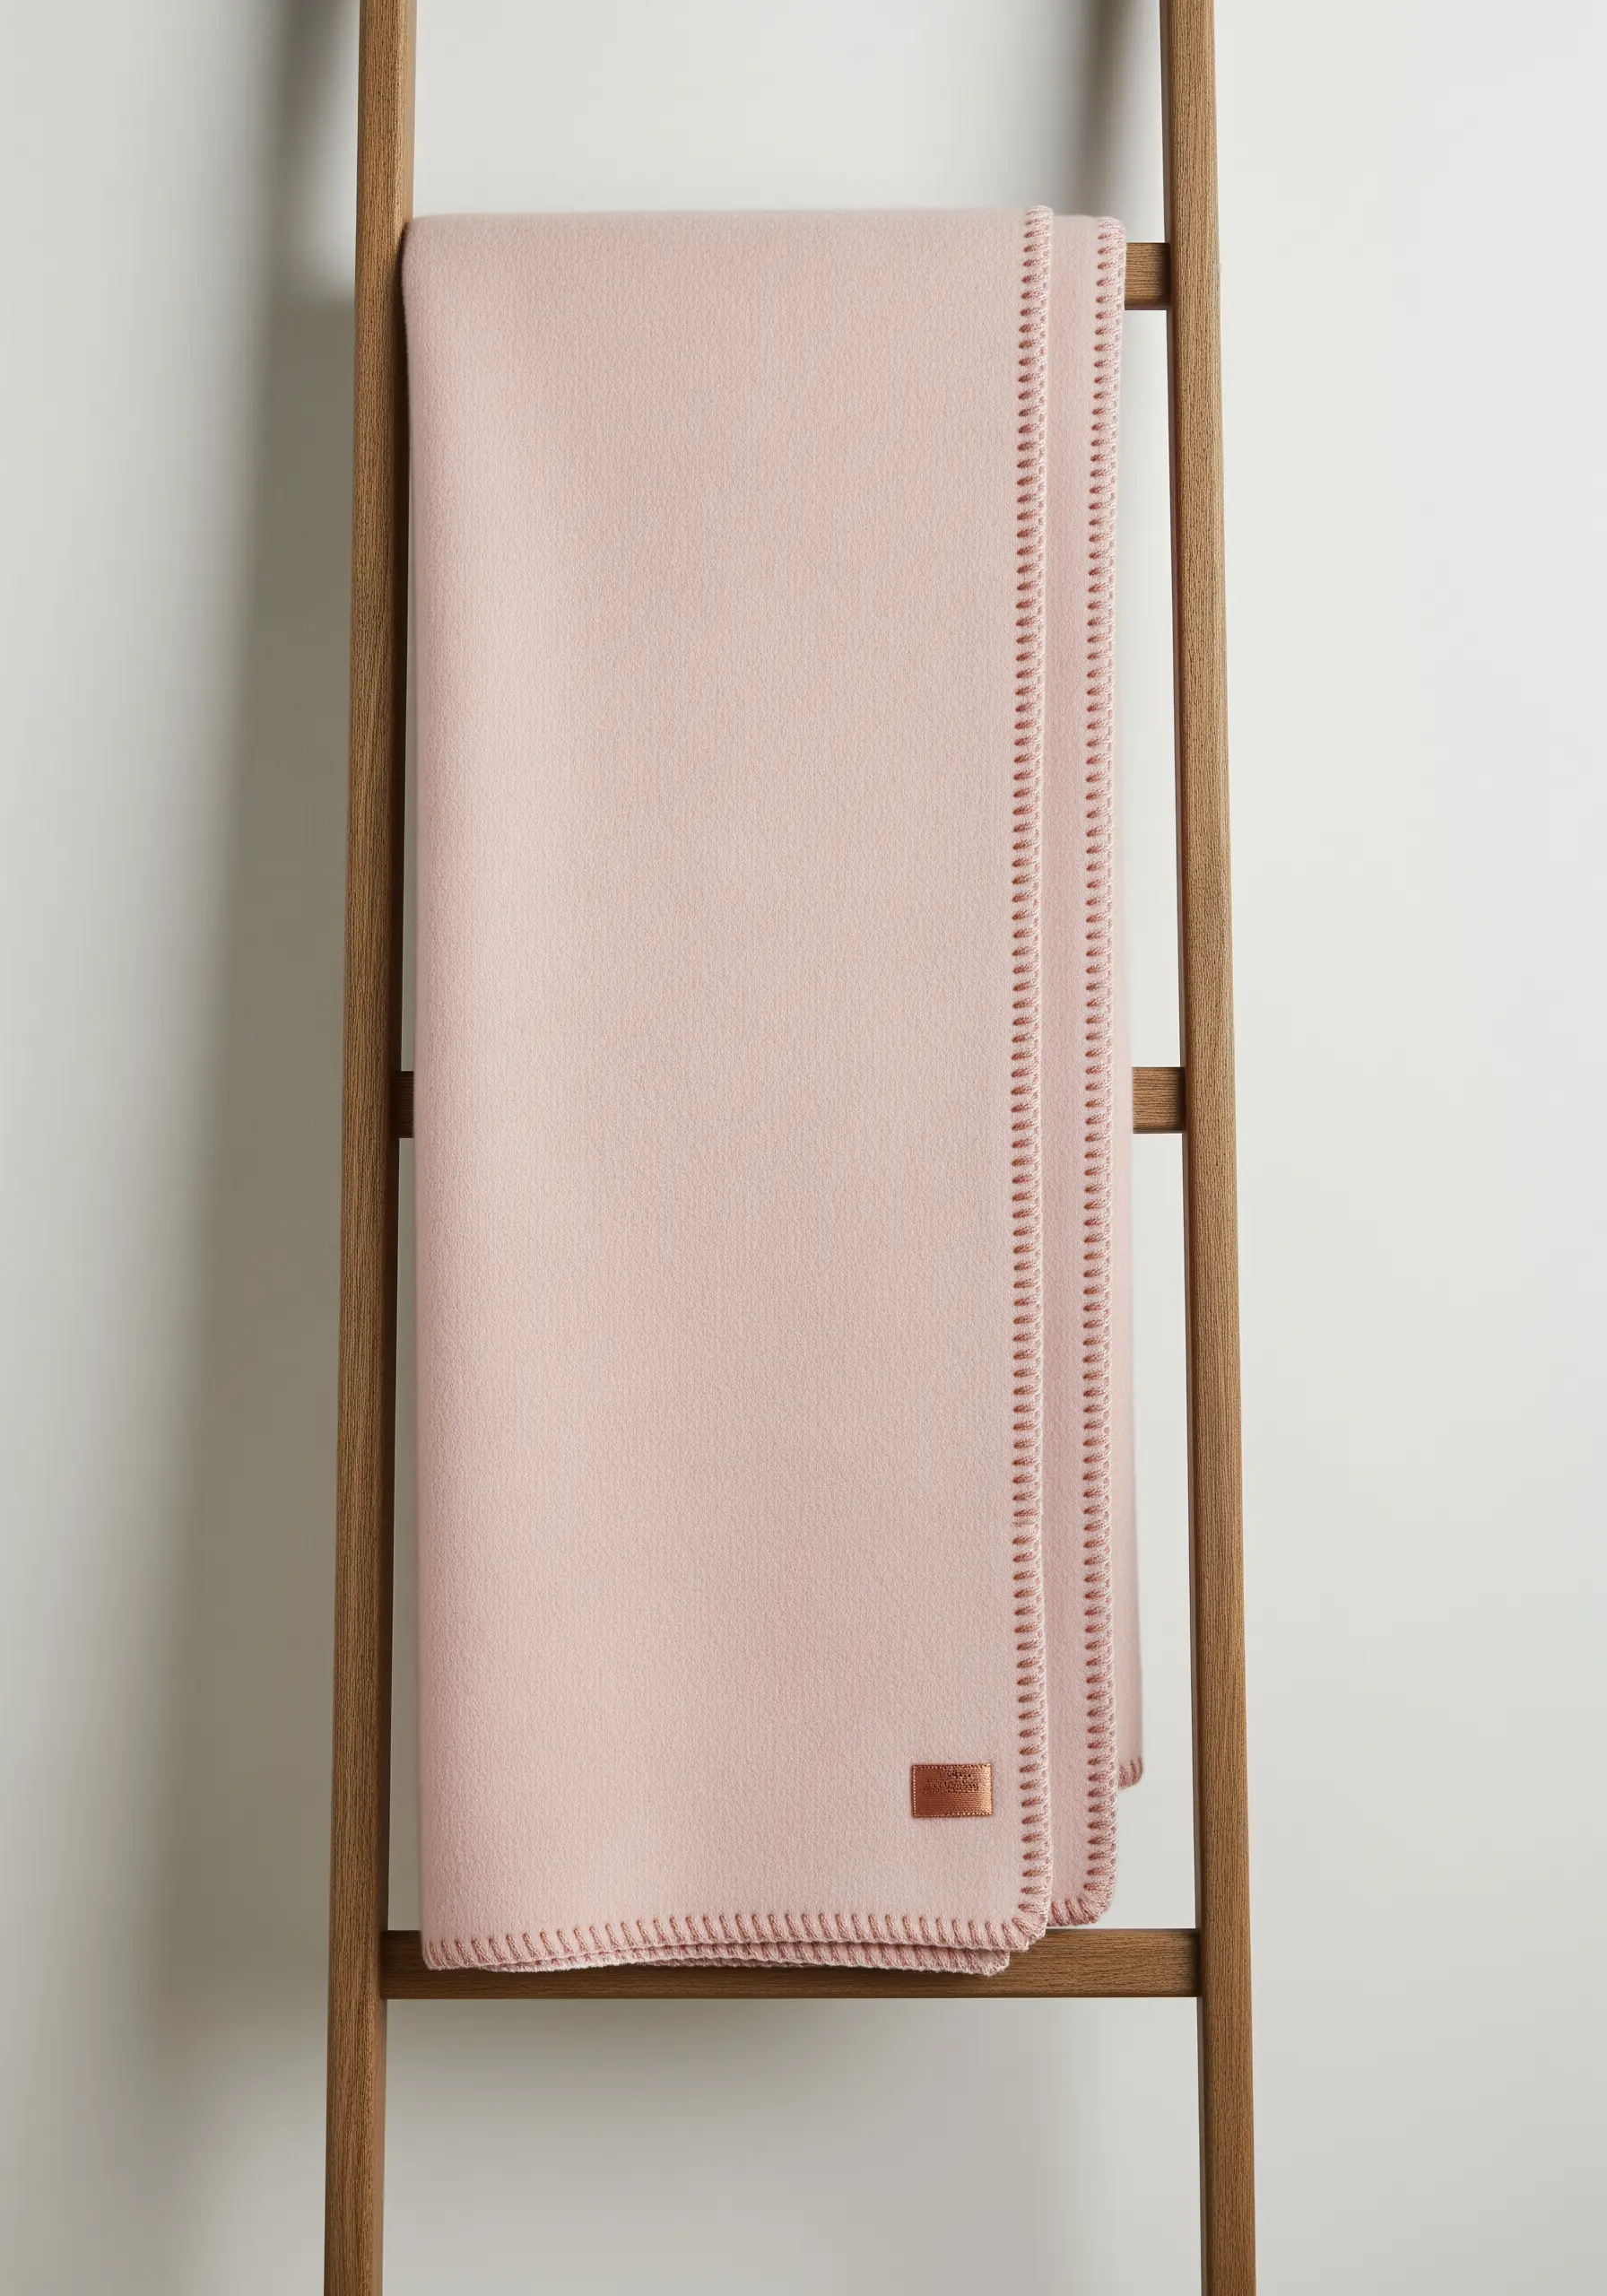
The blanket stitch is a fundamental technique that provides a clean, durable, and decorative finish to the edge of any fabric.
To execute it perfectly, keep your stitch depth and spacing consistent as you work your way around the hem.
For a subtle, modern aesthetic on a soft wool or fleece throw, use a thread that matches the fabric color exactly.
This simple detail elevates a basic blanket into a polished, thoughtfully crafted piece.
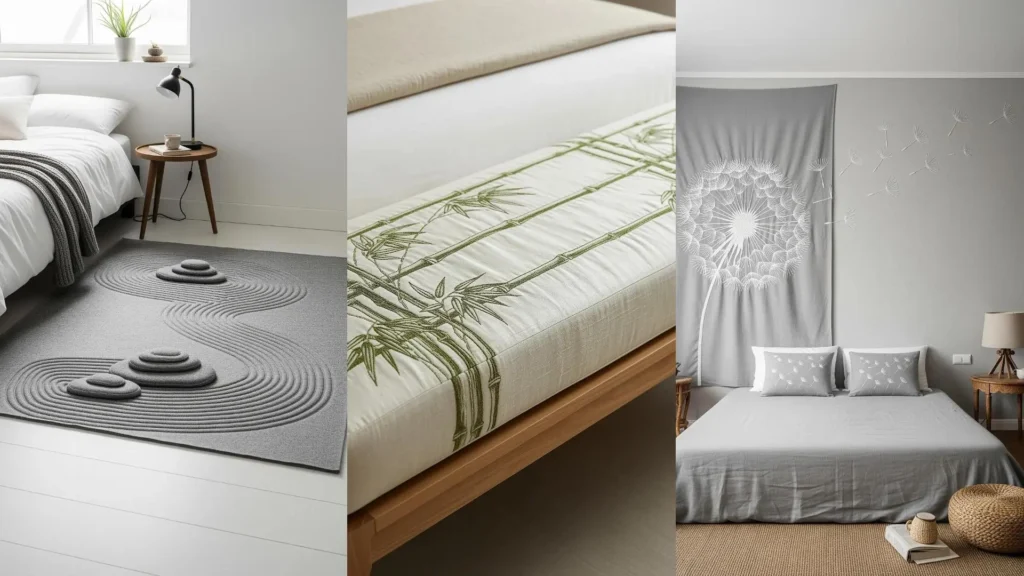
13. Evoking Zen Gardens with Couching
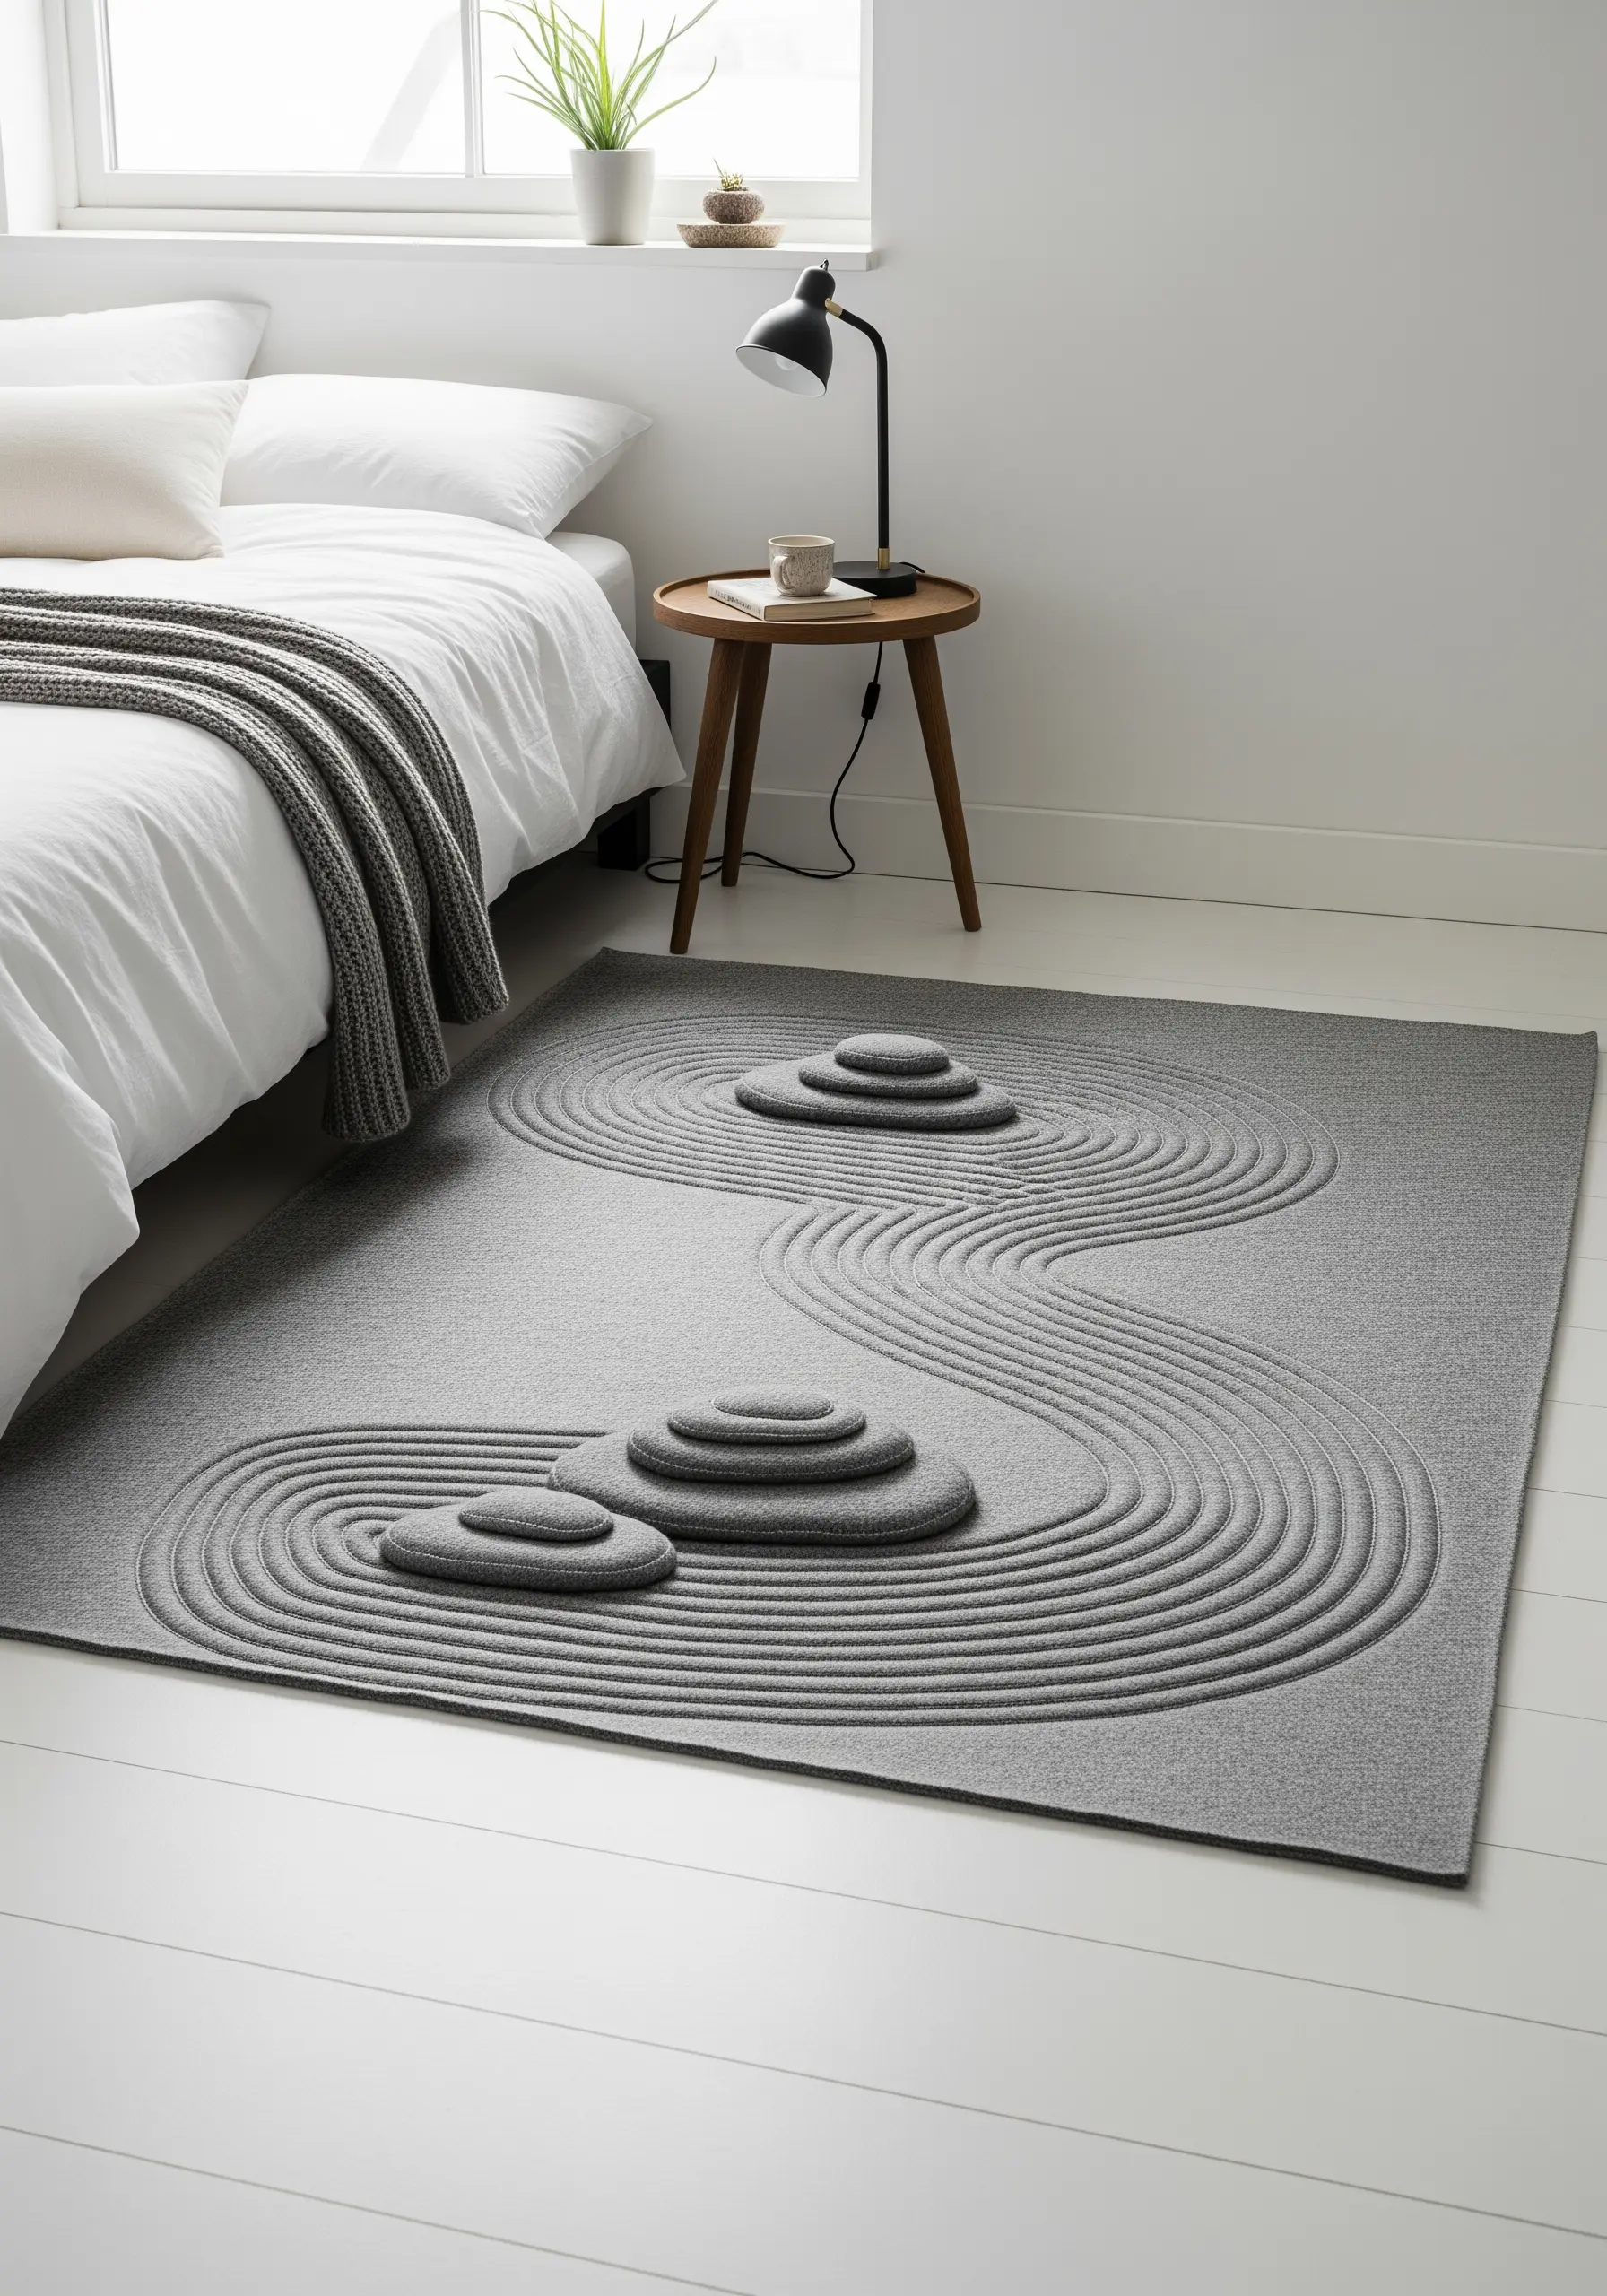
While this is a rug, you can translate its raked-sand texture into embroidery using the couching technique.
Lay down thick cords or yarn in sweeping, organic lines on your base fabric.
Then, use a thinner, matching thread to tack the cord down at regular intervals with small, perpendicular stitches.
This method allows you to create bold, raised lines and sculptural effects that mimic the tranquil patterns of a Zen garden.
14. Celestial Motifs for Quiet Comfort
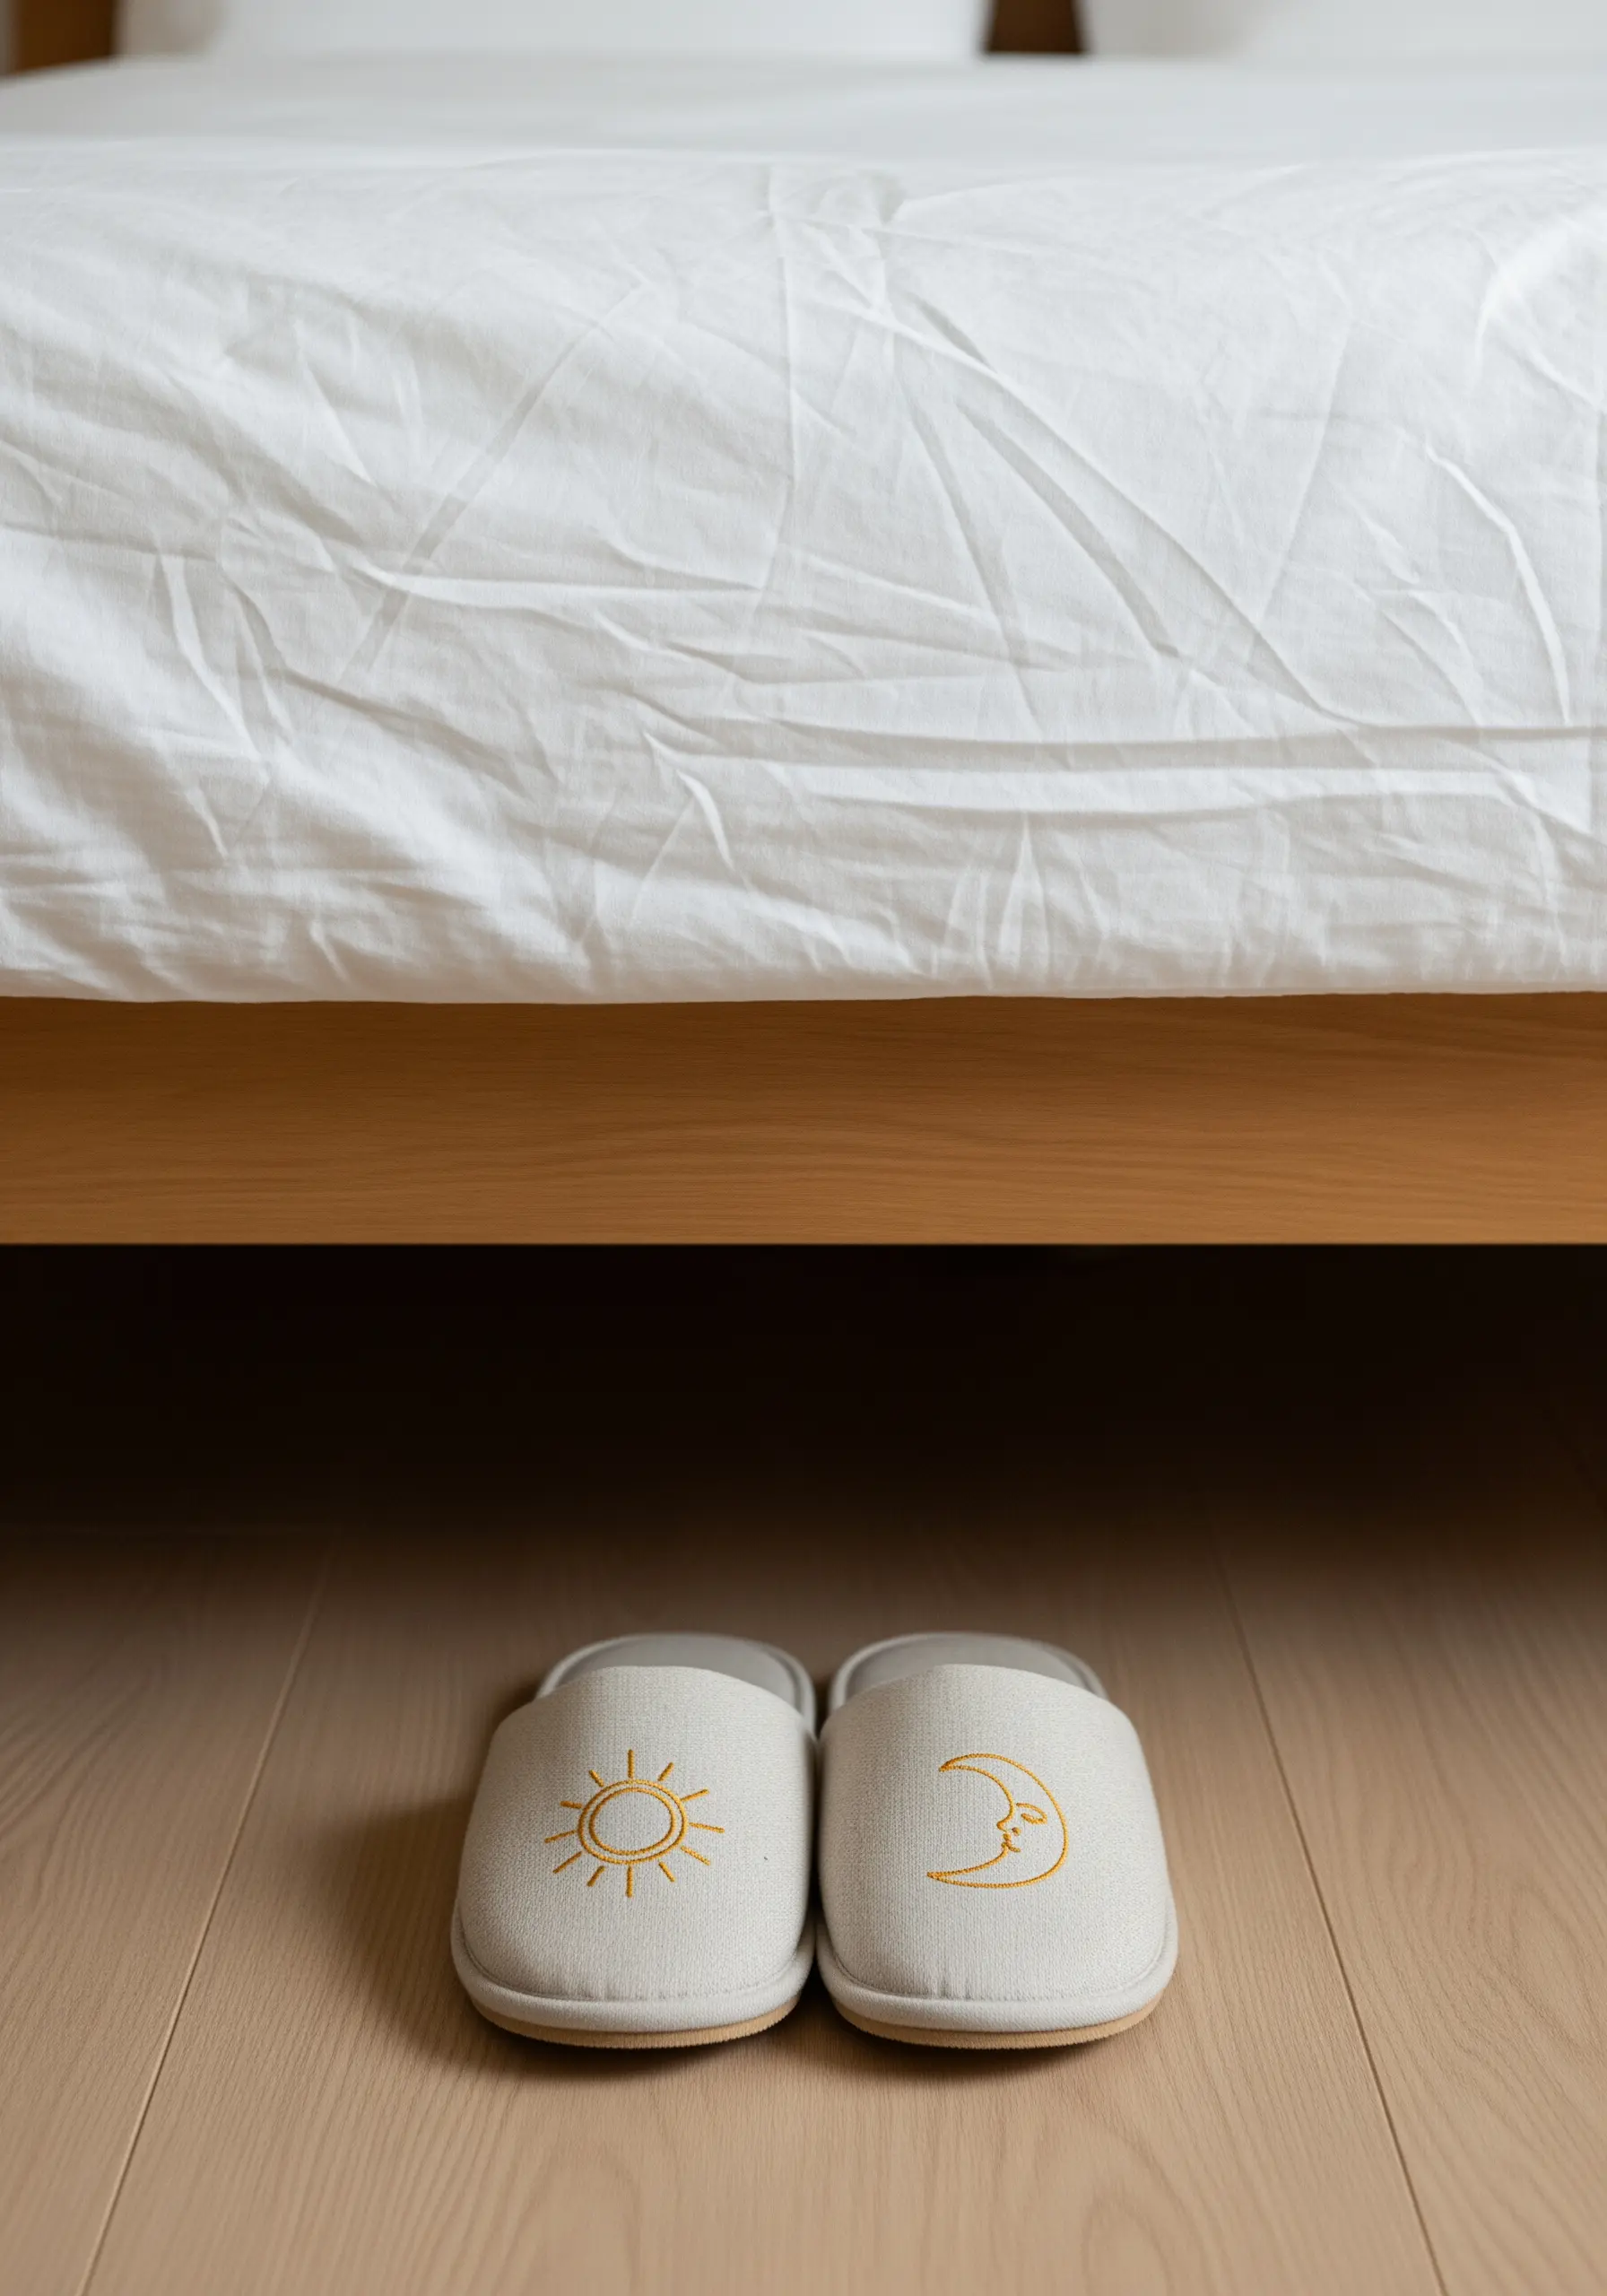
Embroidering simple, iconic motifs on everyday items like slippers infuses them with personal meaning.
Use a single strand of floss and a sharp needle to create crisp outlines with a backstitch or split stitch.
For the sun’s rays, use single straight stitches of varying lengths radiating from the center.
The power of these minimal celestial embroidery designs lies in their clean simplicity and symbolic nature, offering a quiet start and end to each day.
15. Organized Calm with Stitched Labels
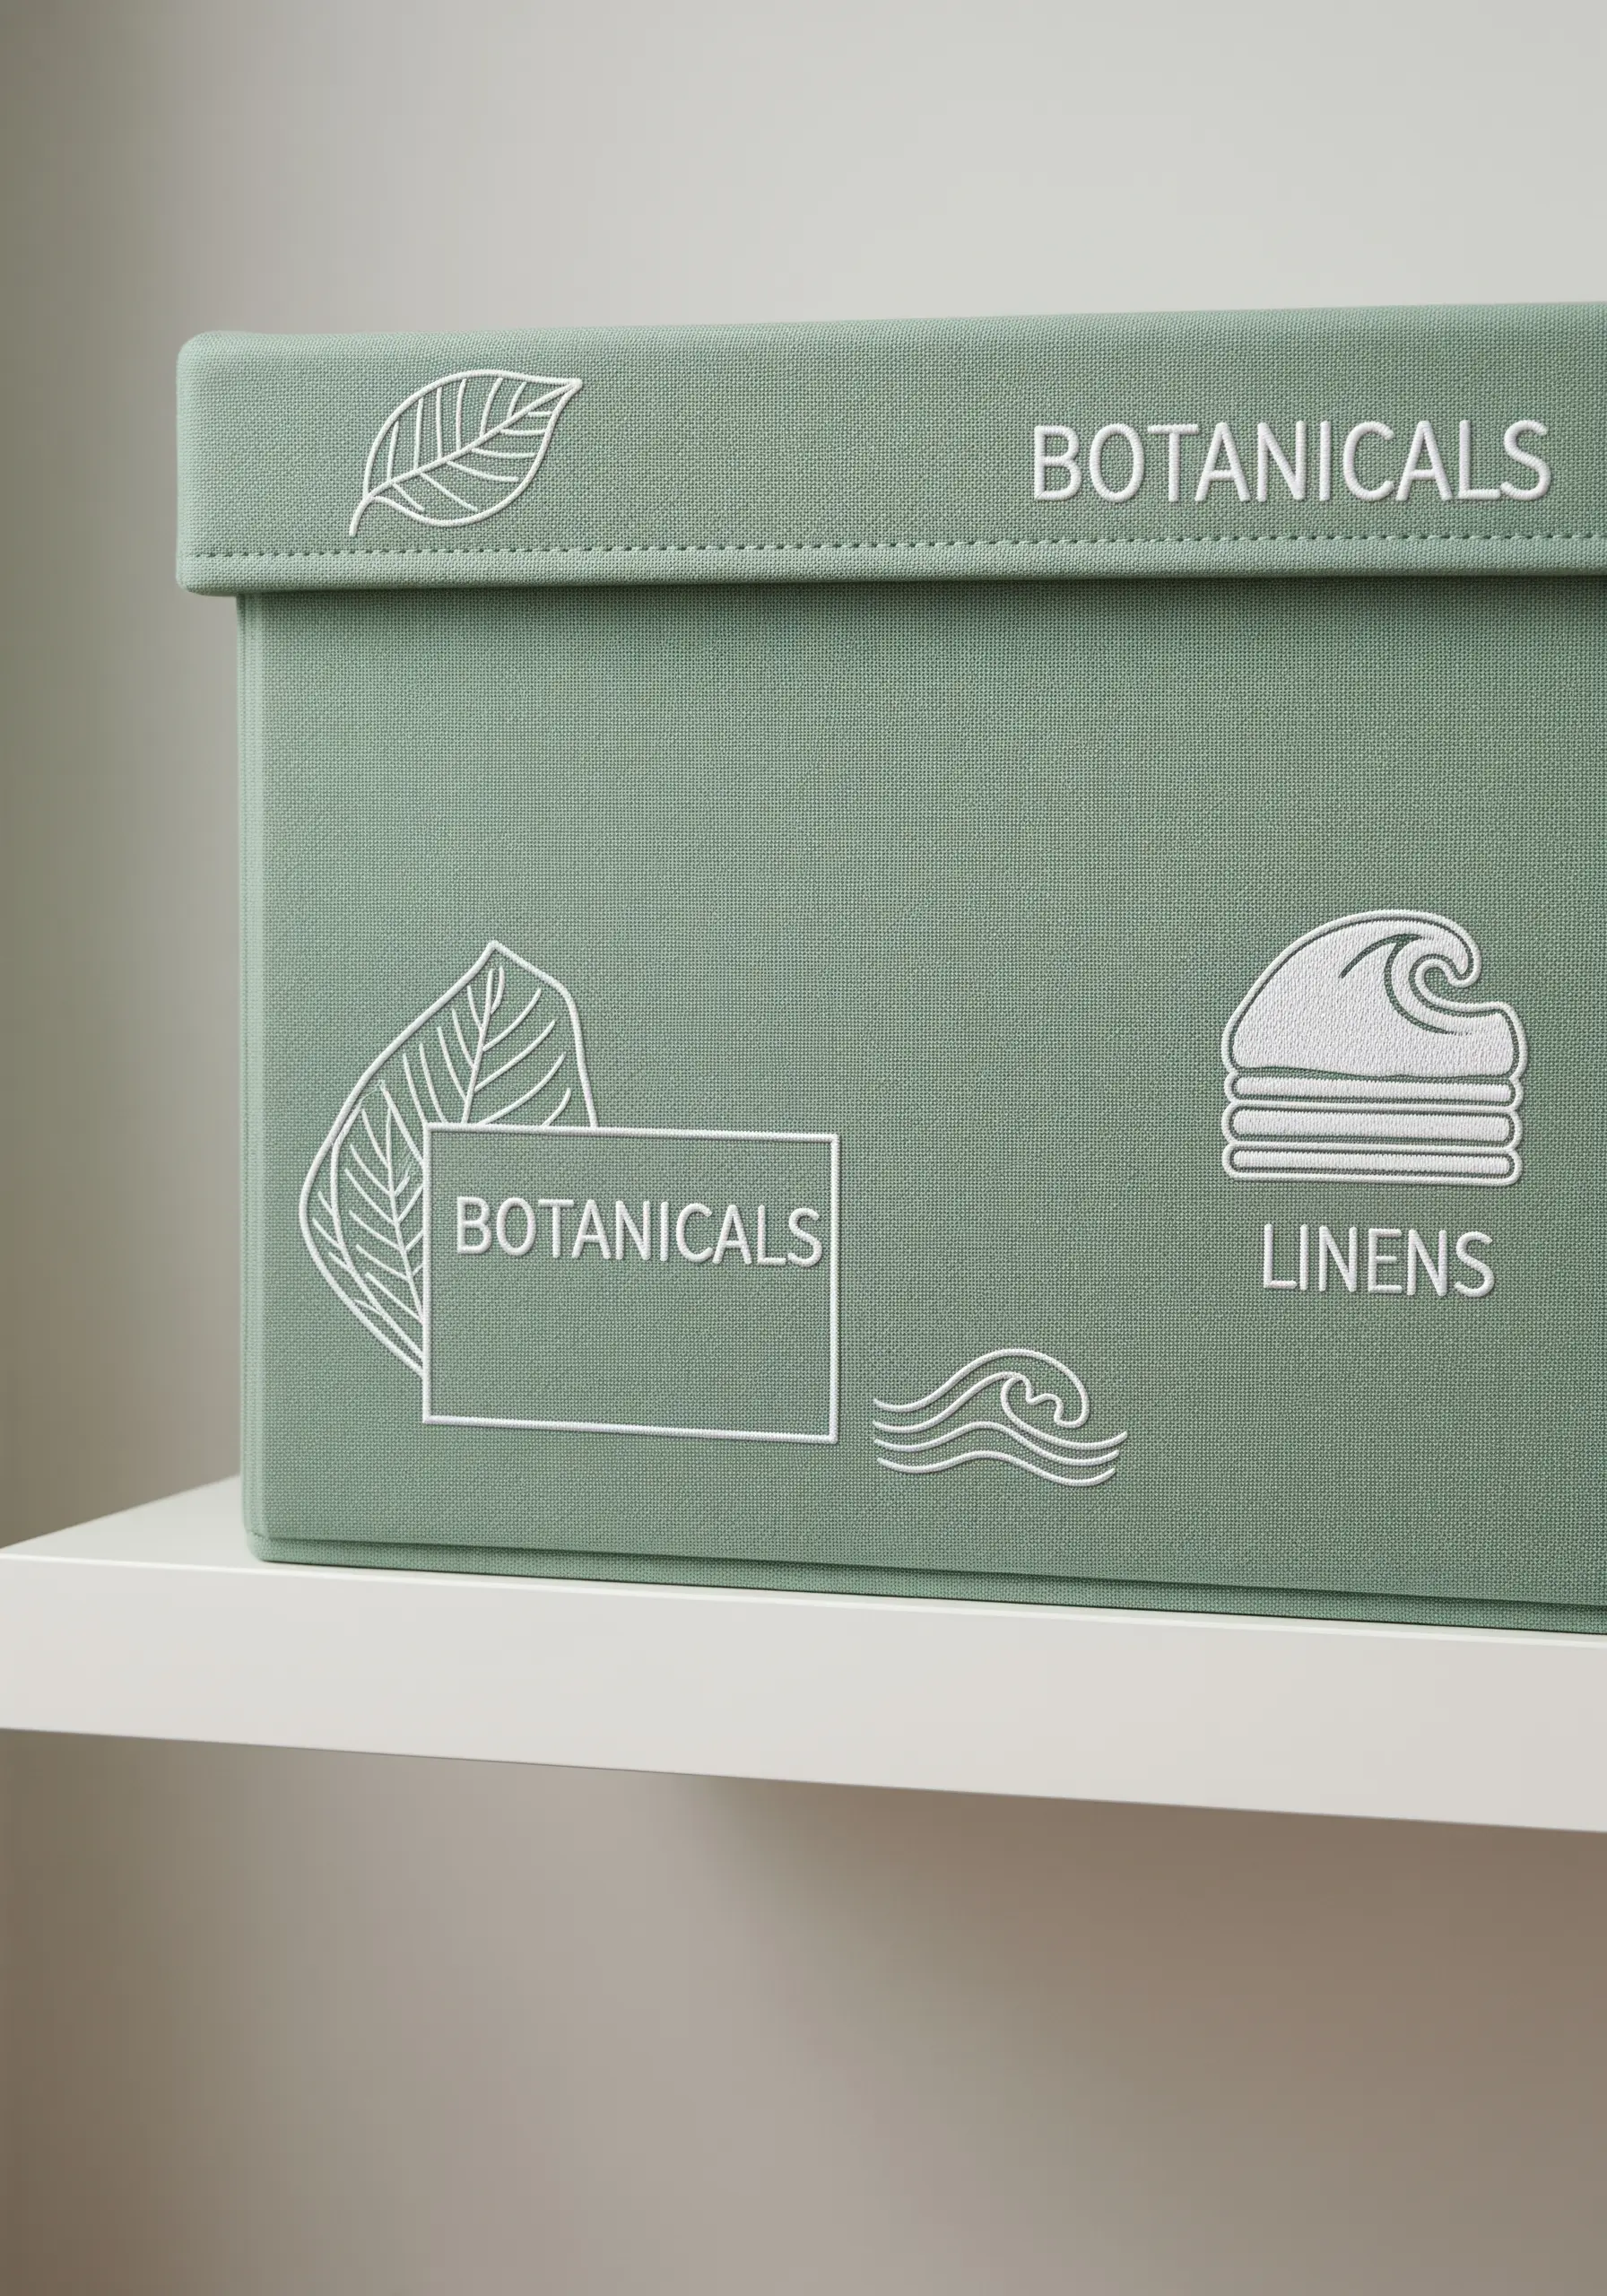
Elevate your organization by replacing paper labels with elegantly stitched icons and text.
To ensure your lettering is flawless, print your designs onto water-soluble stabilizer paper.
Adhere the stabilizer to your storage box, stitch directly over the printed lines using a simple backstitch, and then gently wash away the paper with a damp cloth.
This foolproof method leaves you with sharp, professional-looking labels that add a touch of handcrafted sophistication to your shelves.
16. All-Over Botanicals for Upholstery
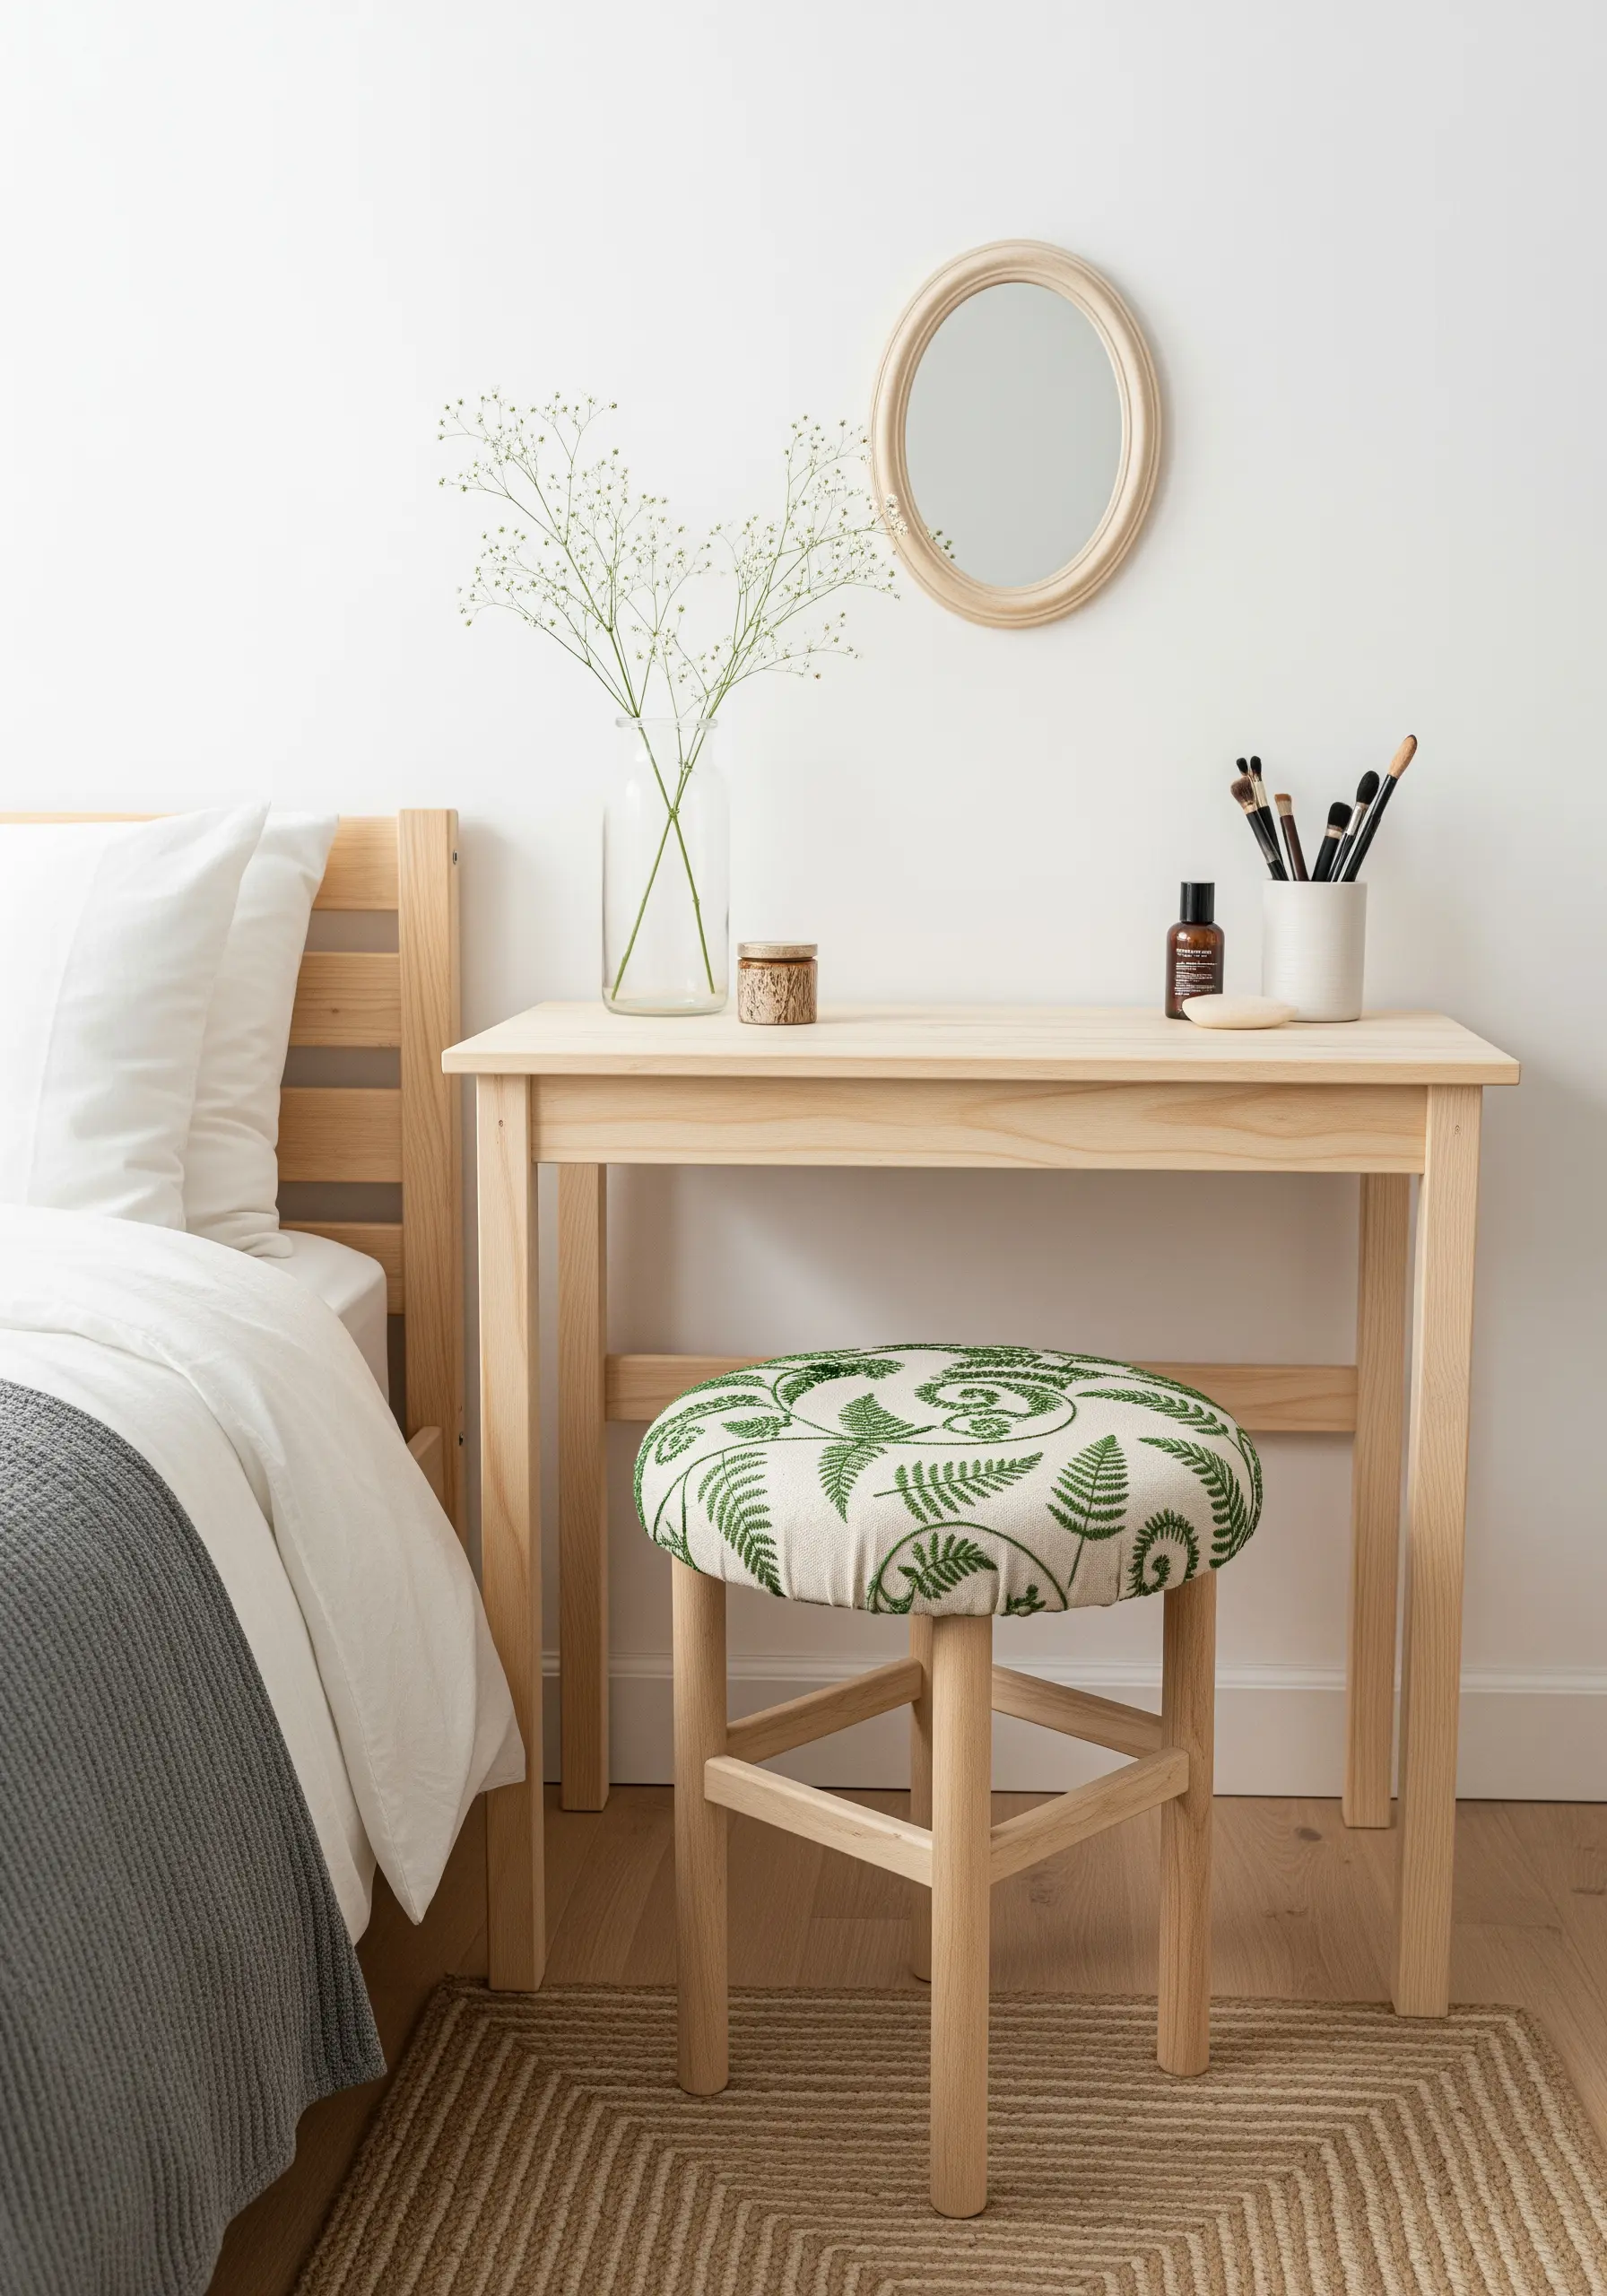
Creating an all-over pattern on an upholstered piece, like this stool cover, demands a cohesive approach.
Choose a single stitch, such as a stem stitch, and use it for the entire design to create a unified, illustrative texture.
Before you start, use carbon paper or a transfer pen to apply the repeating pattern across the entire fabric piece.
This ensures your fern & ivy embroidery ideas are balanced and evenly spaced, resulting in a professional, intentional finish.
17. The Meditative Rhythm of Kantha Stitching
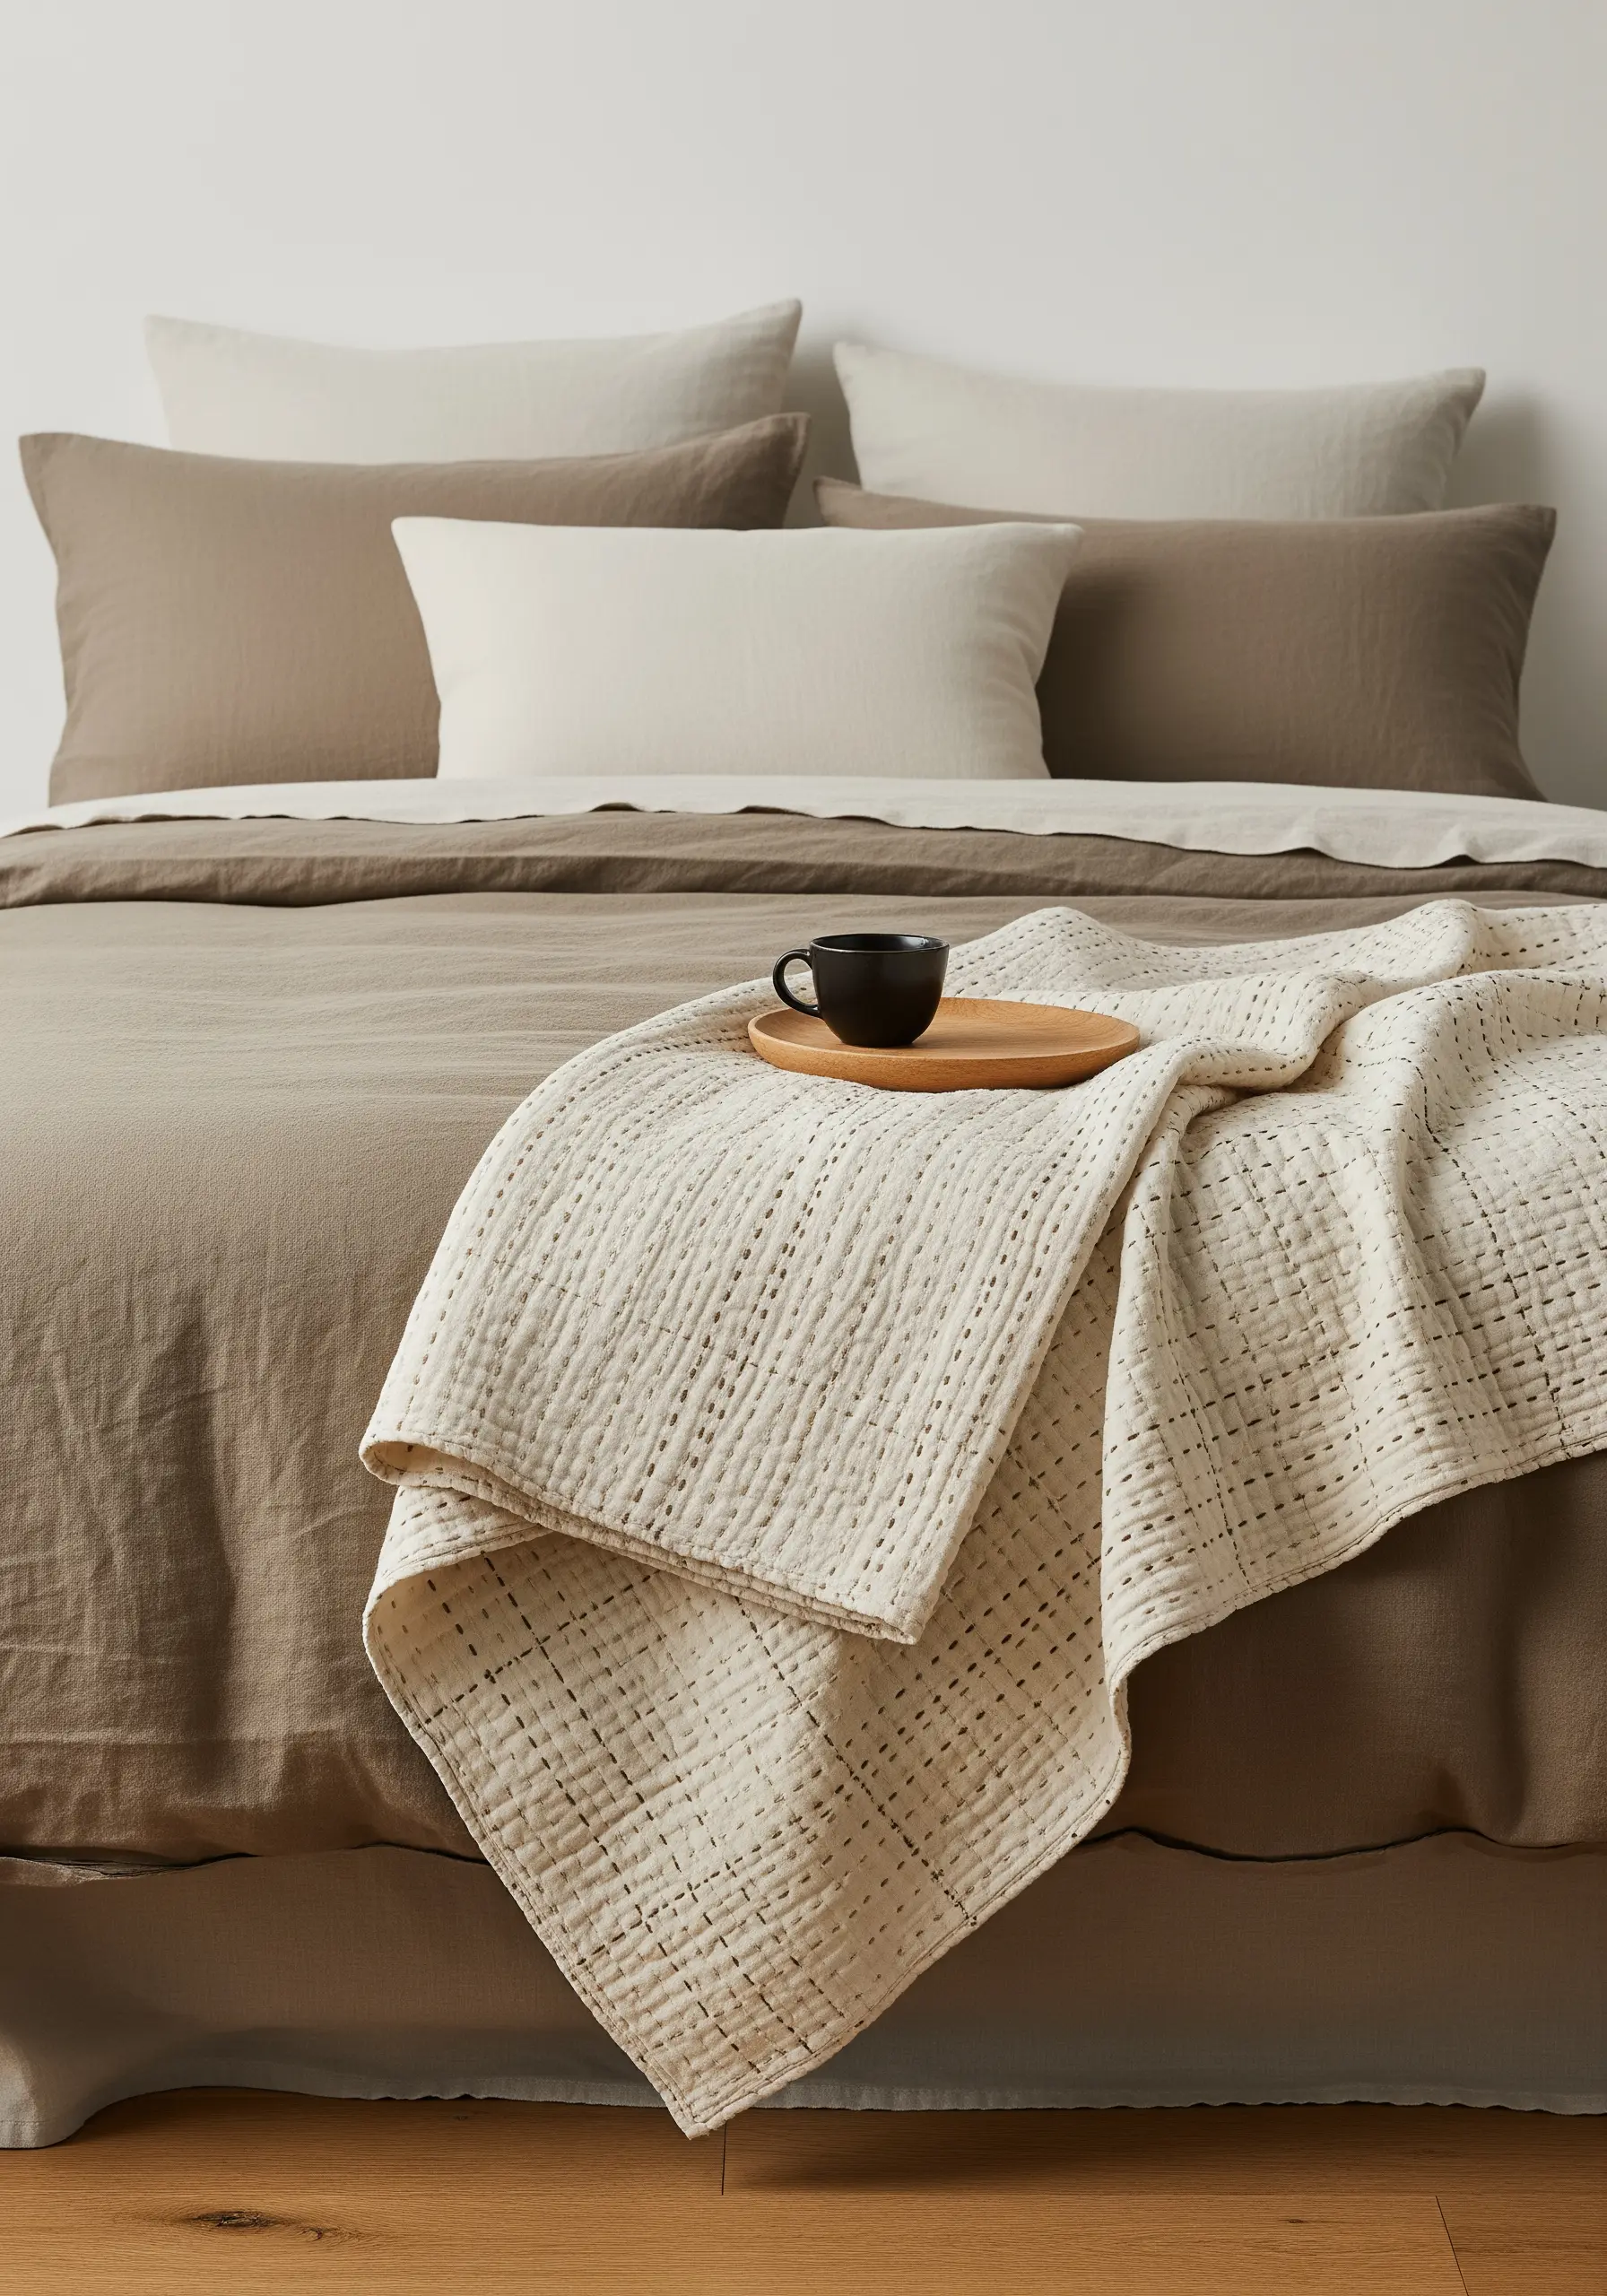
The beautiful, puckered texture on this blanket is achieved with Kantha, a traditional quilting technique from India that uses a simple running stitch.
Layer two pieces of fabric and stitch them together with parallel rows of running stitches using a thick thread like pearl cotton.
The magic is in the repetition; the process is incredibly meditative, and the result is a textile with a soft, pliable texture and a rich history.
Don’t strive for perfect stitches—the slight variations are what give Kantha its unique character and warmth.
18. Lunar Phases in Thread and Texture
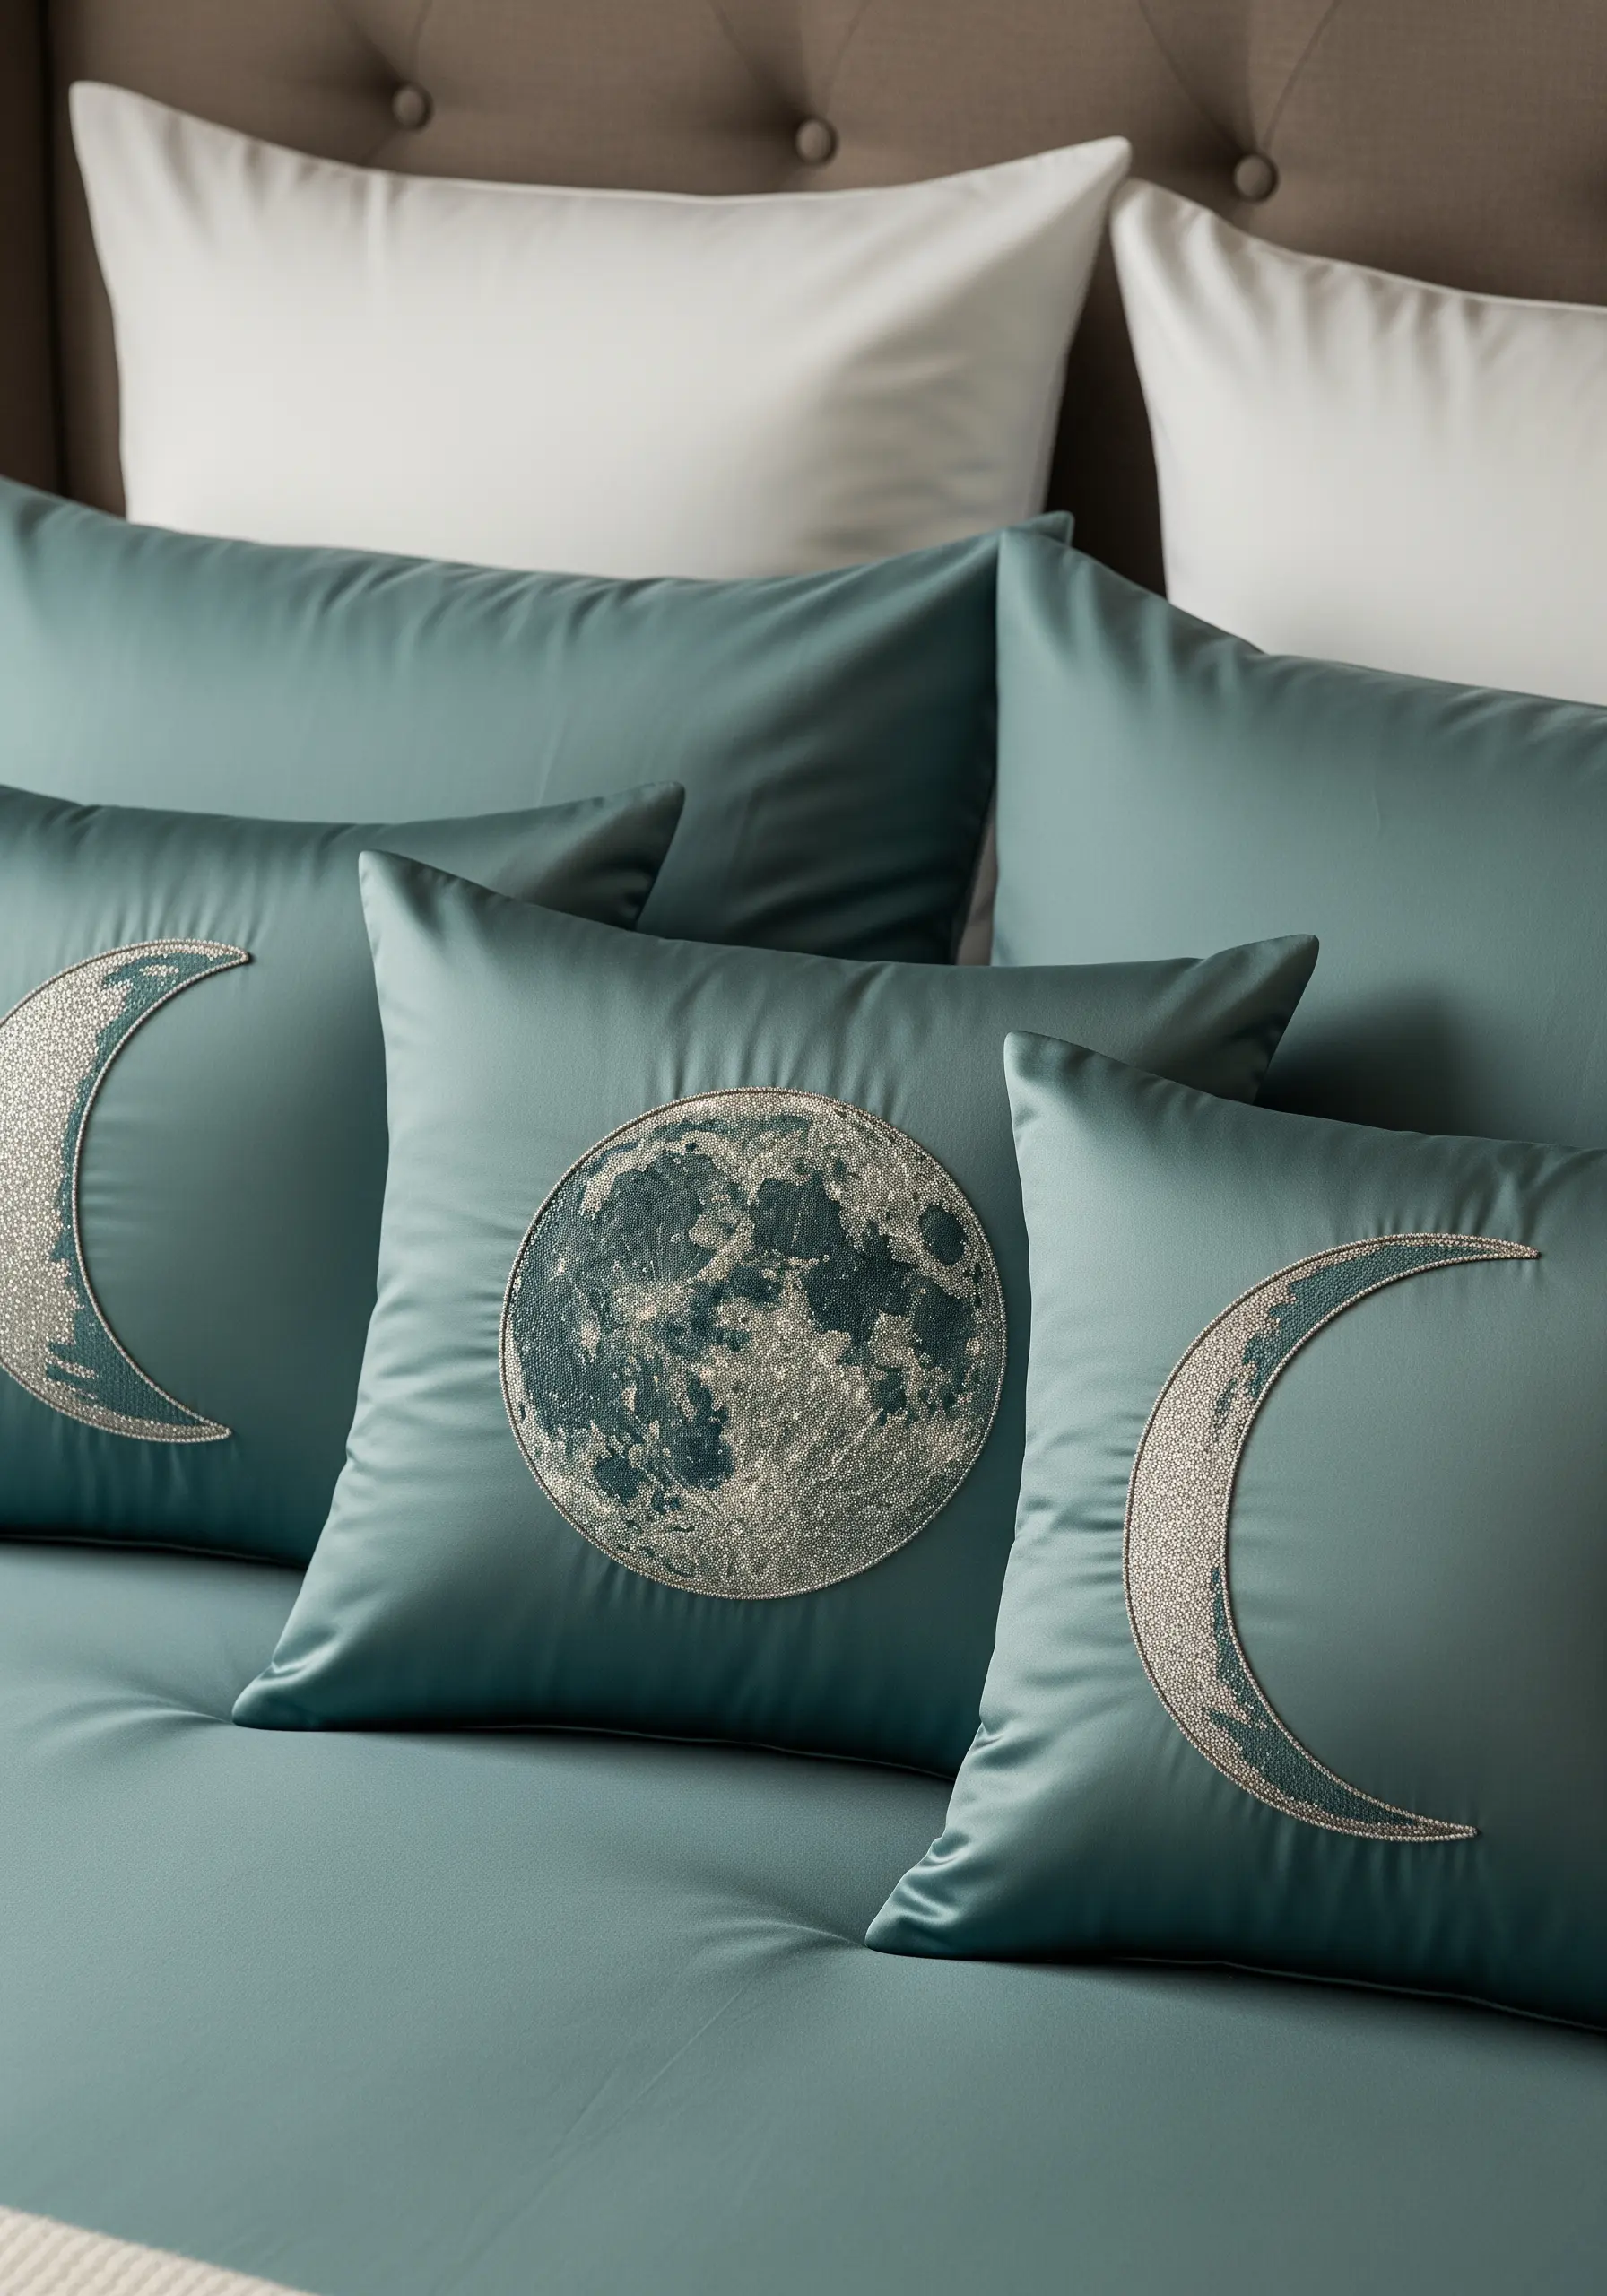
Capture the moon’s cratered surface by using a dense cluster of French knots and tiny seed stitches.
Use several shades of grey, off-white, and silver thread to build up layers of color and texture, giving the sphere a realistic, dimensional quality.
For the clean crescent moons, contrast this texture by using a smooth, shimmering satin stitch with a metallic silver thread.
This juxtaposition of texture and sheen makes the celestial design visually compelling and sophisticated.
19. Expansive Movement Across the Wall
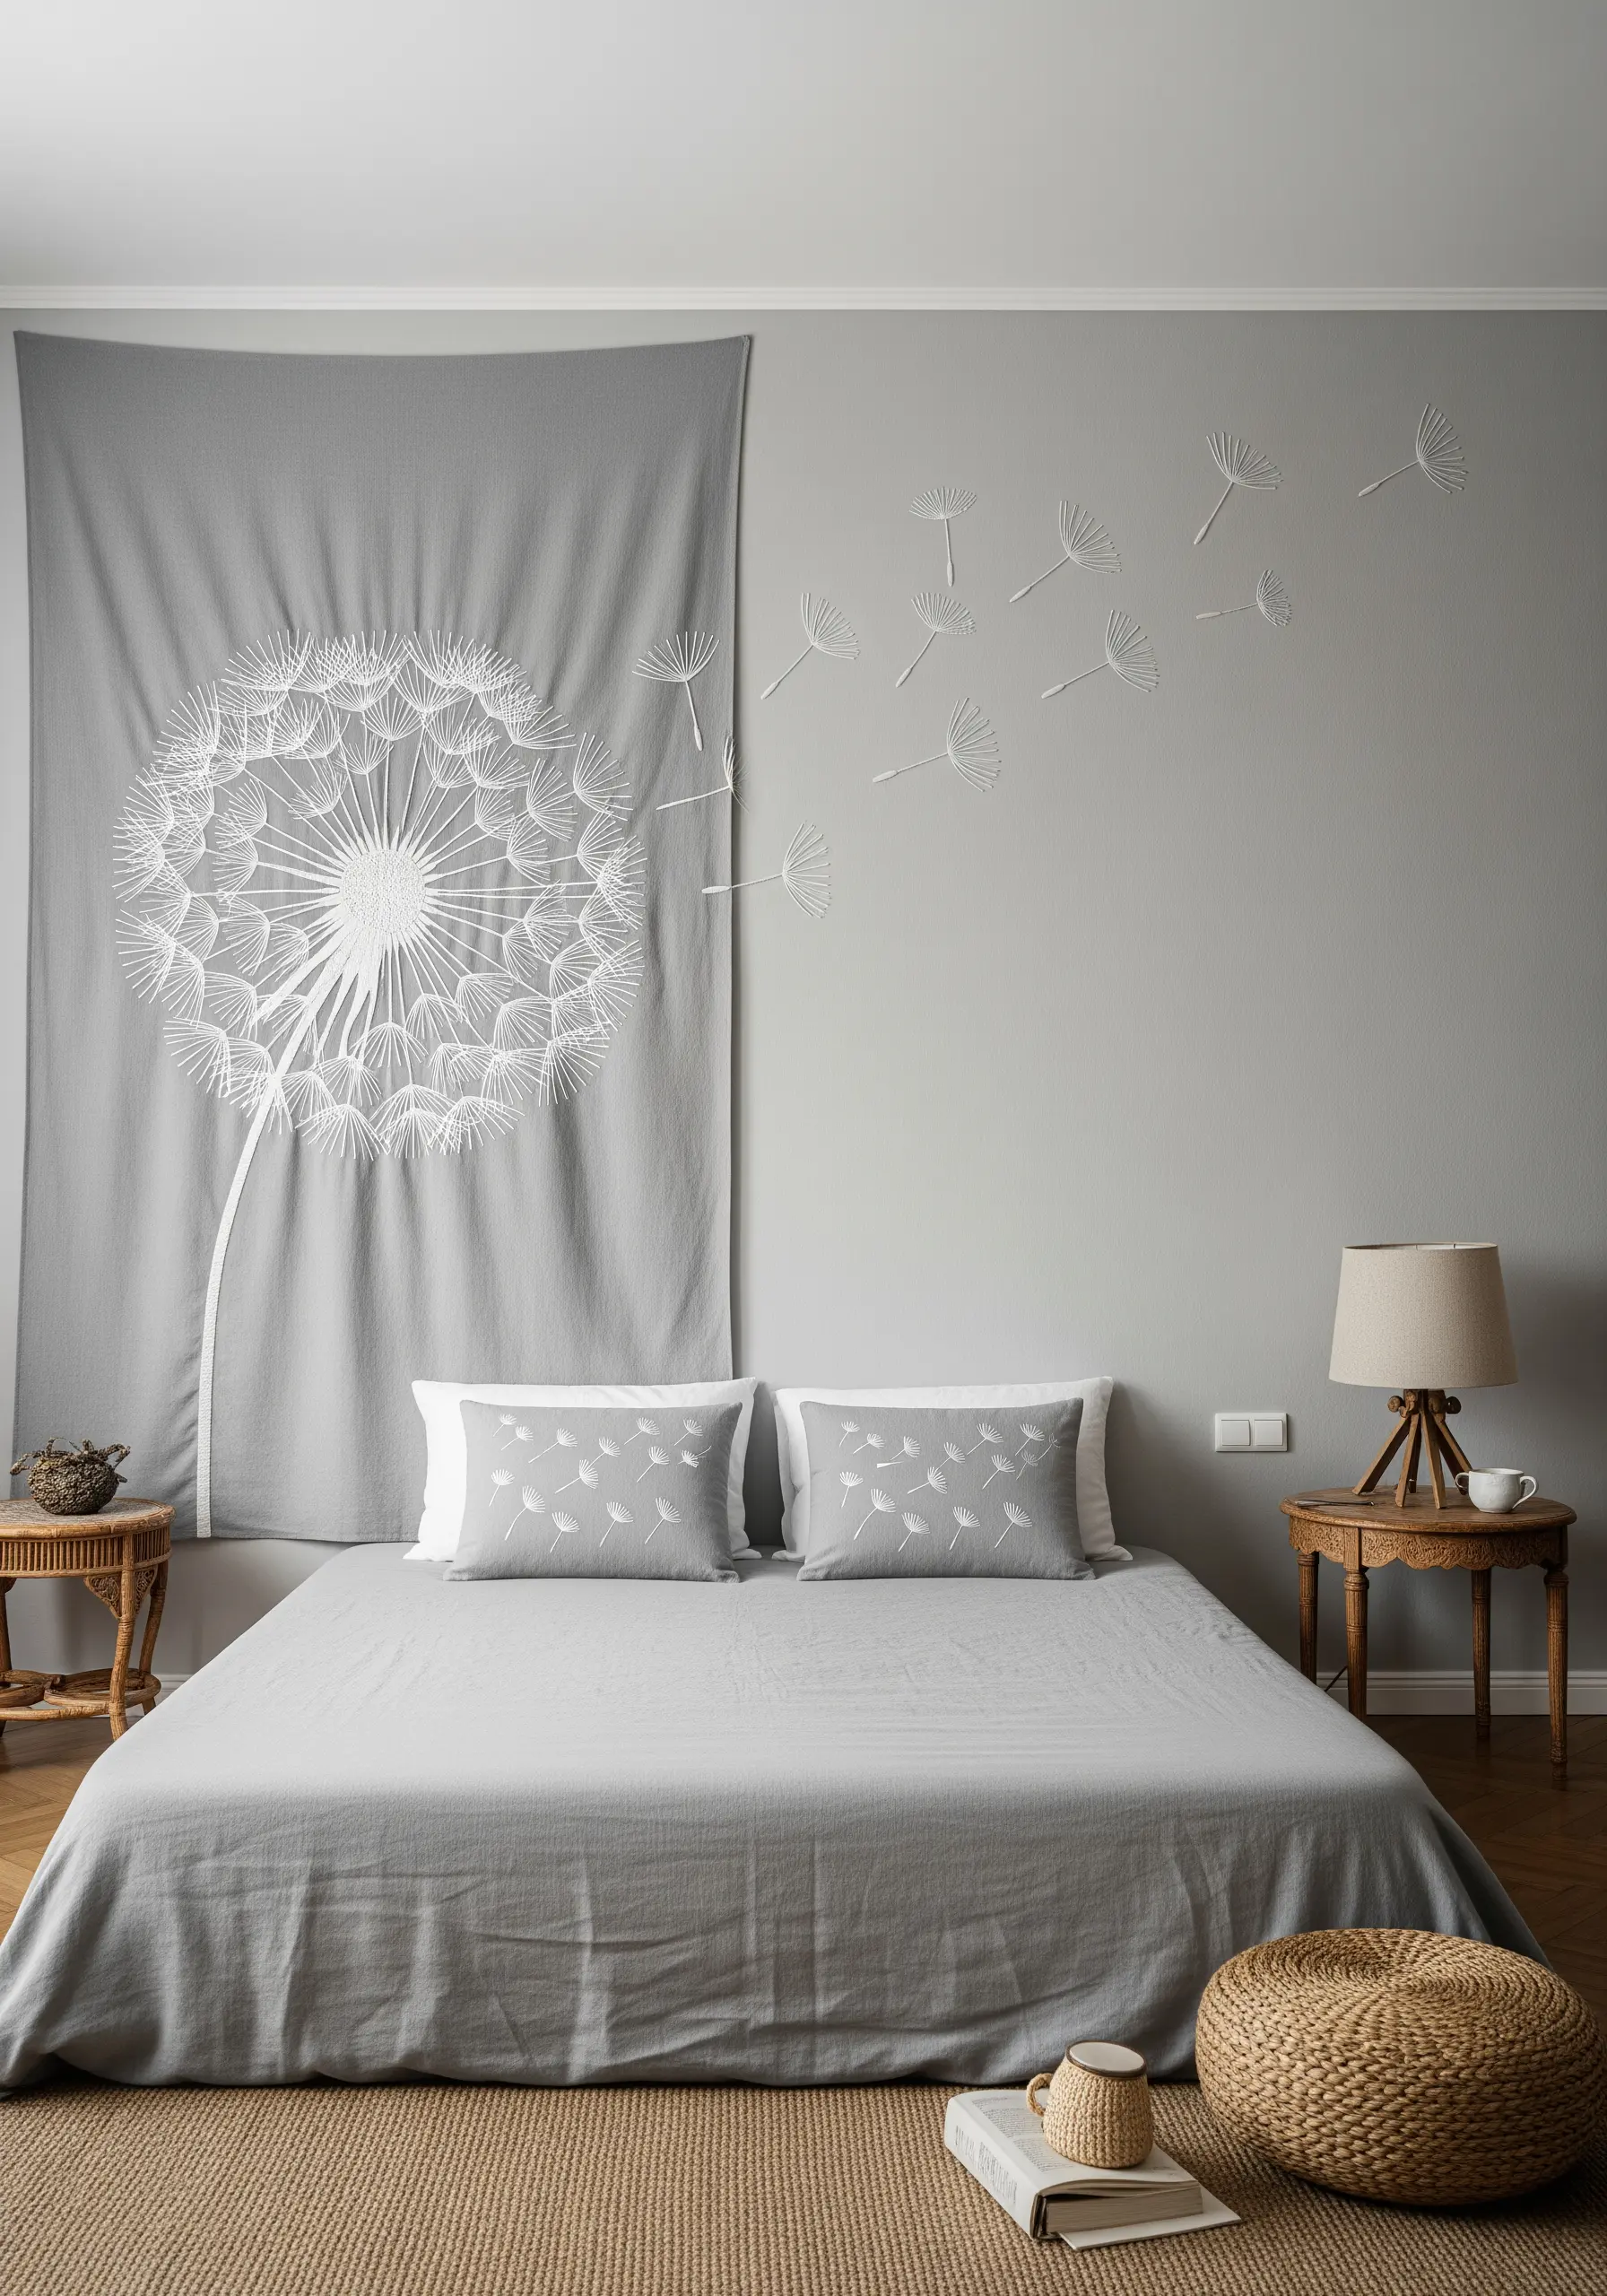
Break free from the confines of the hoop by allowing your embroidery to spill onto the surrounding wall.
Stitch the main dandelion on a fabric panel, then create the individual floating seeds as separate, tiny embroidered pieces.
You can stitch them on a sheer, dissolvable stabilizer, and once the stabilizer is washed away, you are left with thread-only motifs.
Attach these delicate seeds to the wall with tiny dabs of removable adhesive to create a breathtaking sense of movement and whimsy, perfect for dandelion stitch projects that feel alive.


