

You have the threads, the fabric, and the desire to create something beautiful. But perhaps you feel your work could be more intentional, more polished. The secret isn’t necessarily learning more complex stitches, but learning how to use simple stitches with greater purpose.
This collection is designed to shift your focus from merely filling a pattern to truly understanding how texture, line, and color work together. Earth tones are the perfect canvas for this exploration. They are forgiving, harmonious, and encourage a focus on form and technique rather than dazzling color.
Consider these ideas not as strict instructions, but as thoughtful invitations. See how changing the direction of a stitch can create shadow, how layering fabrics can build a landscape, and how a single, clean line can have more impact than a thousand decorative knots. It’s time to stitch with quiet confidence.
1. Master the French Knot Landscape
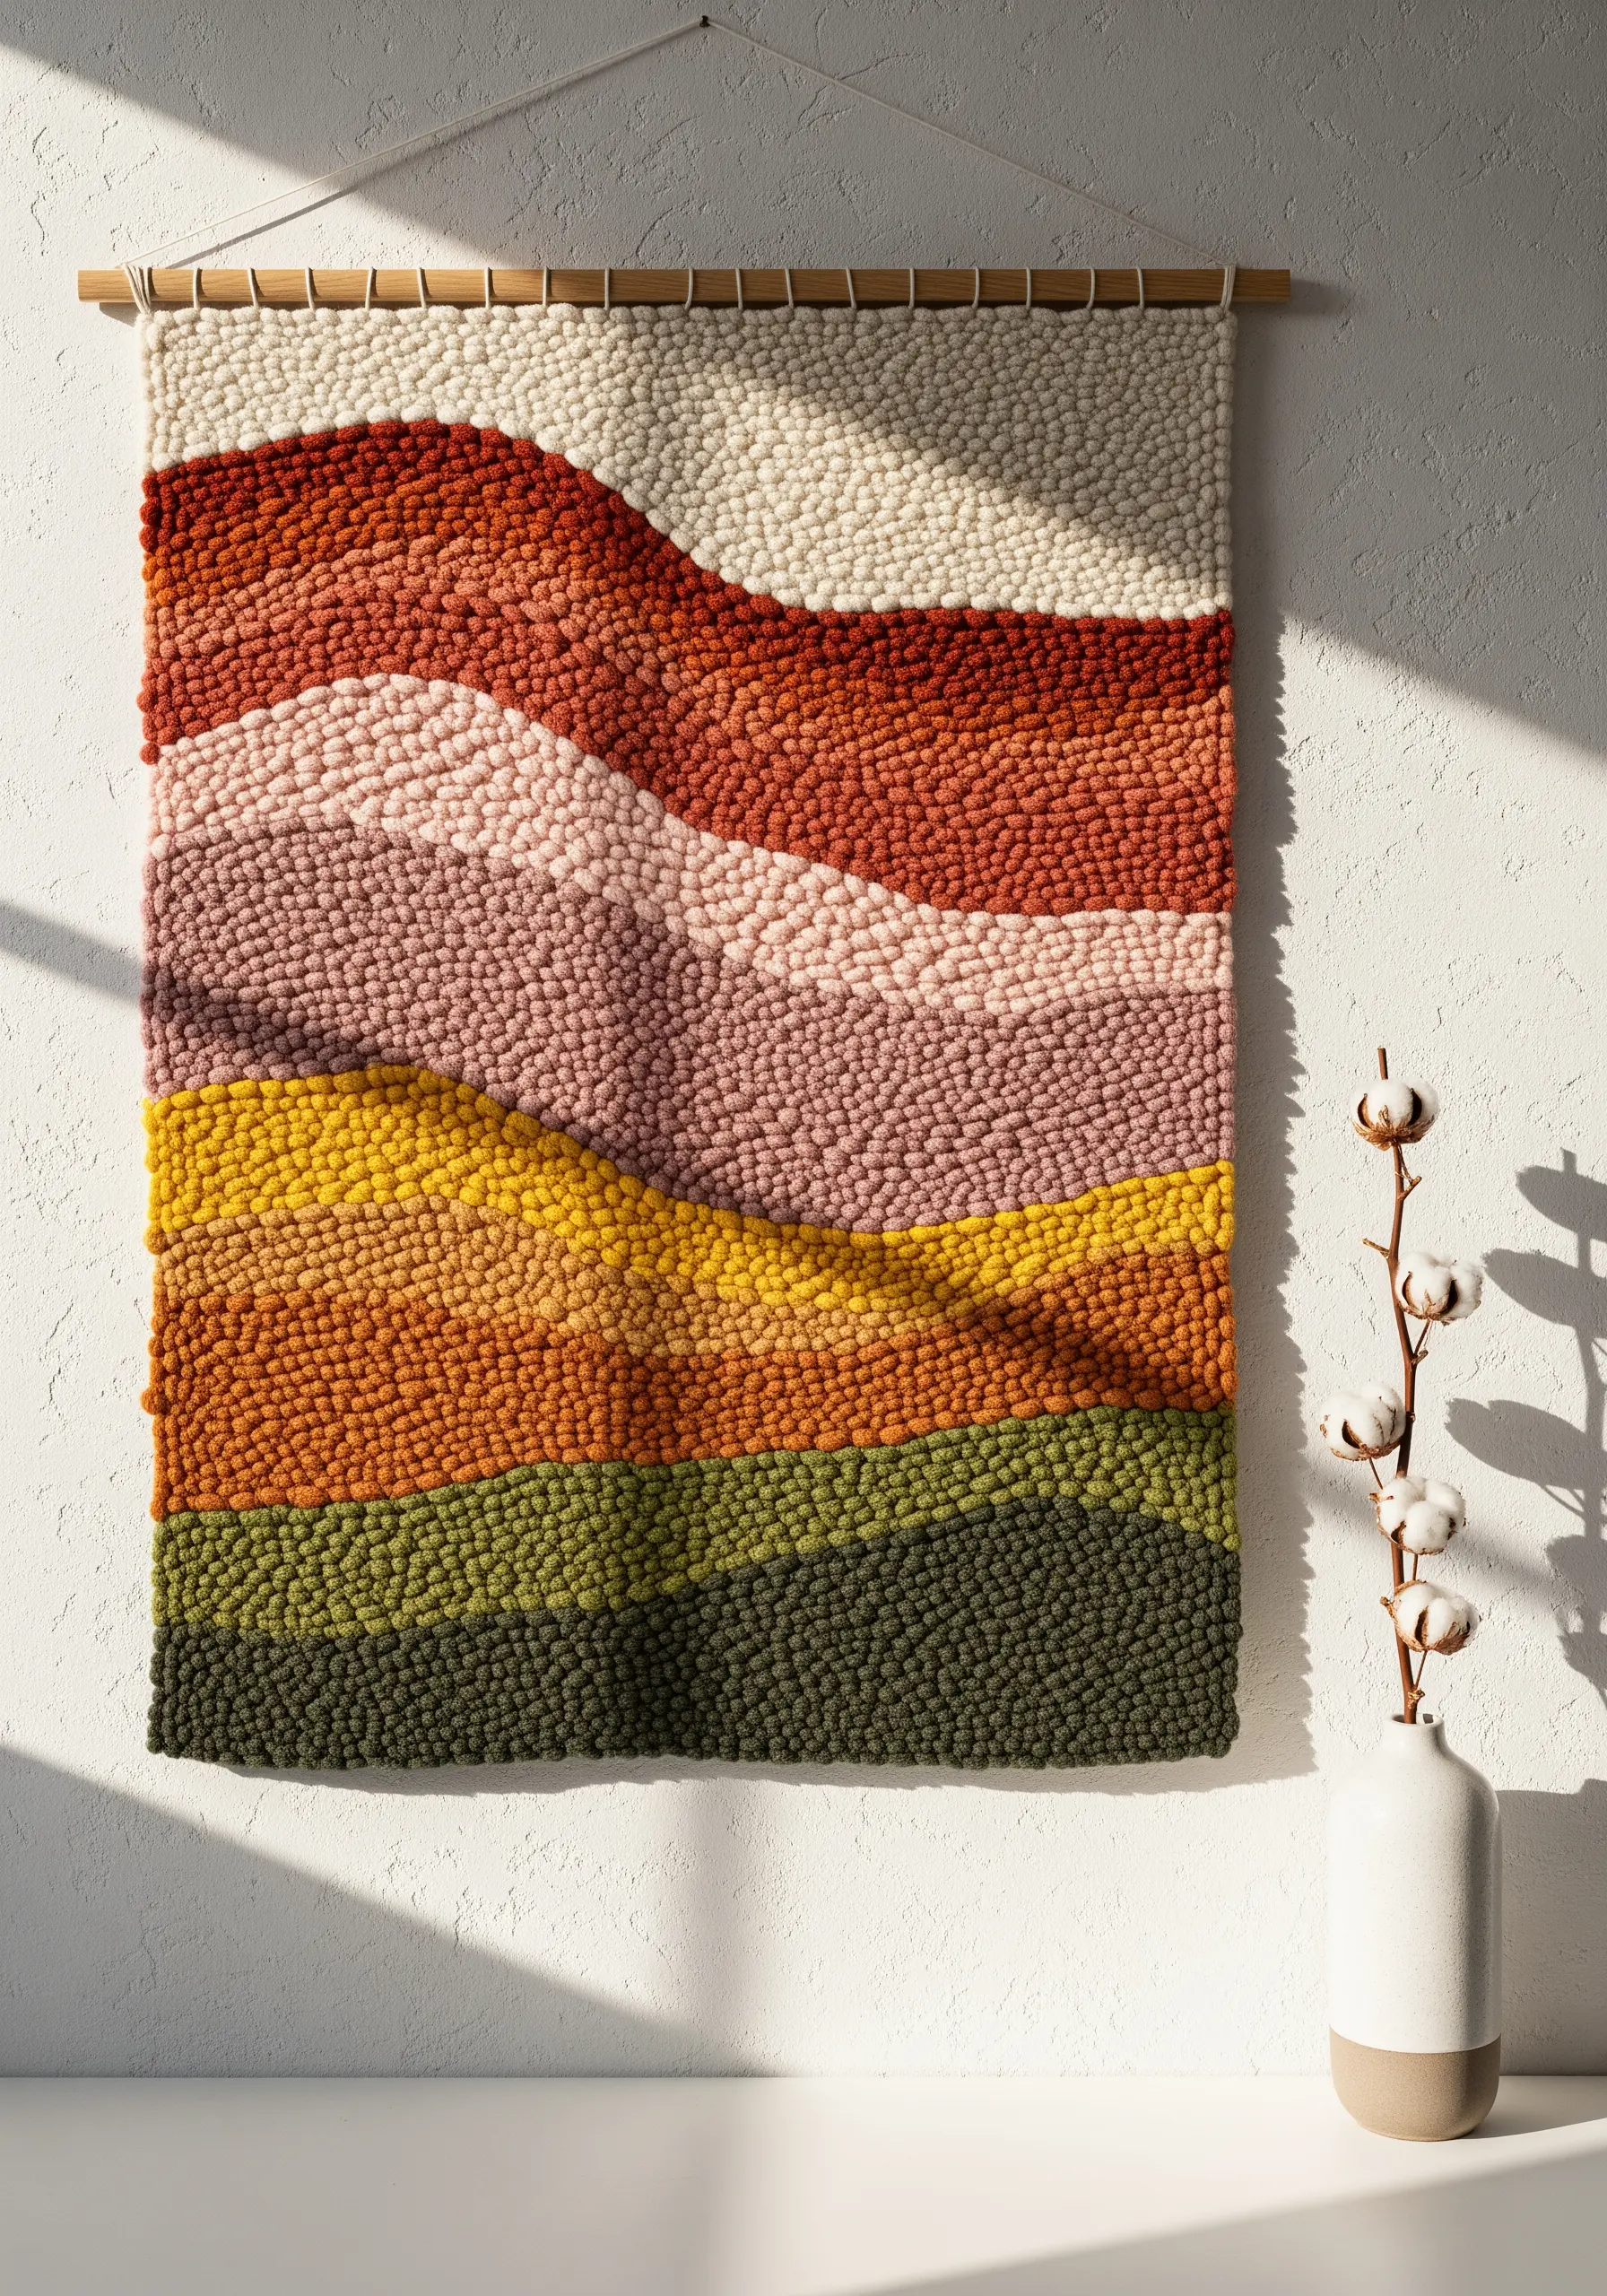
Create a plush, painterly landscape using densely packed French knots or a punch needle technique.
Instead of focusing on individual stitches, think in terms of color fields, allowing the boundaries between shades to be soft and organic.
Vary the height of your loops or the number of thread wraps in your knots to build subtle dimension, making some hills recede and others come forward.
This method transforms simple stitches into stunning yarn wall art creations inspired by nature, focusing entirely on texture and color harmony.
2. Sculptural Couching for Tactile Dimension
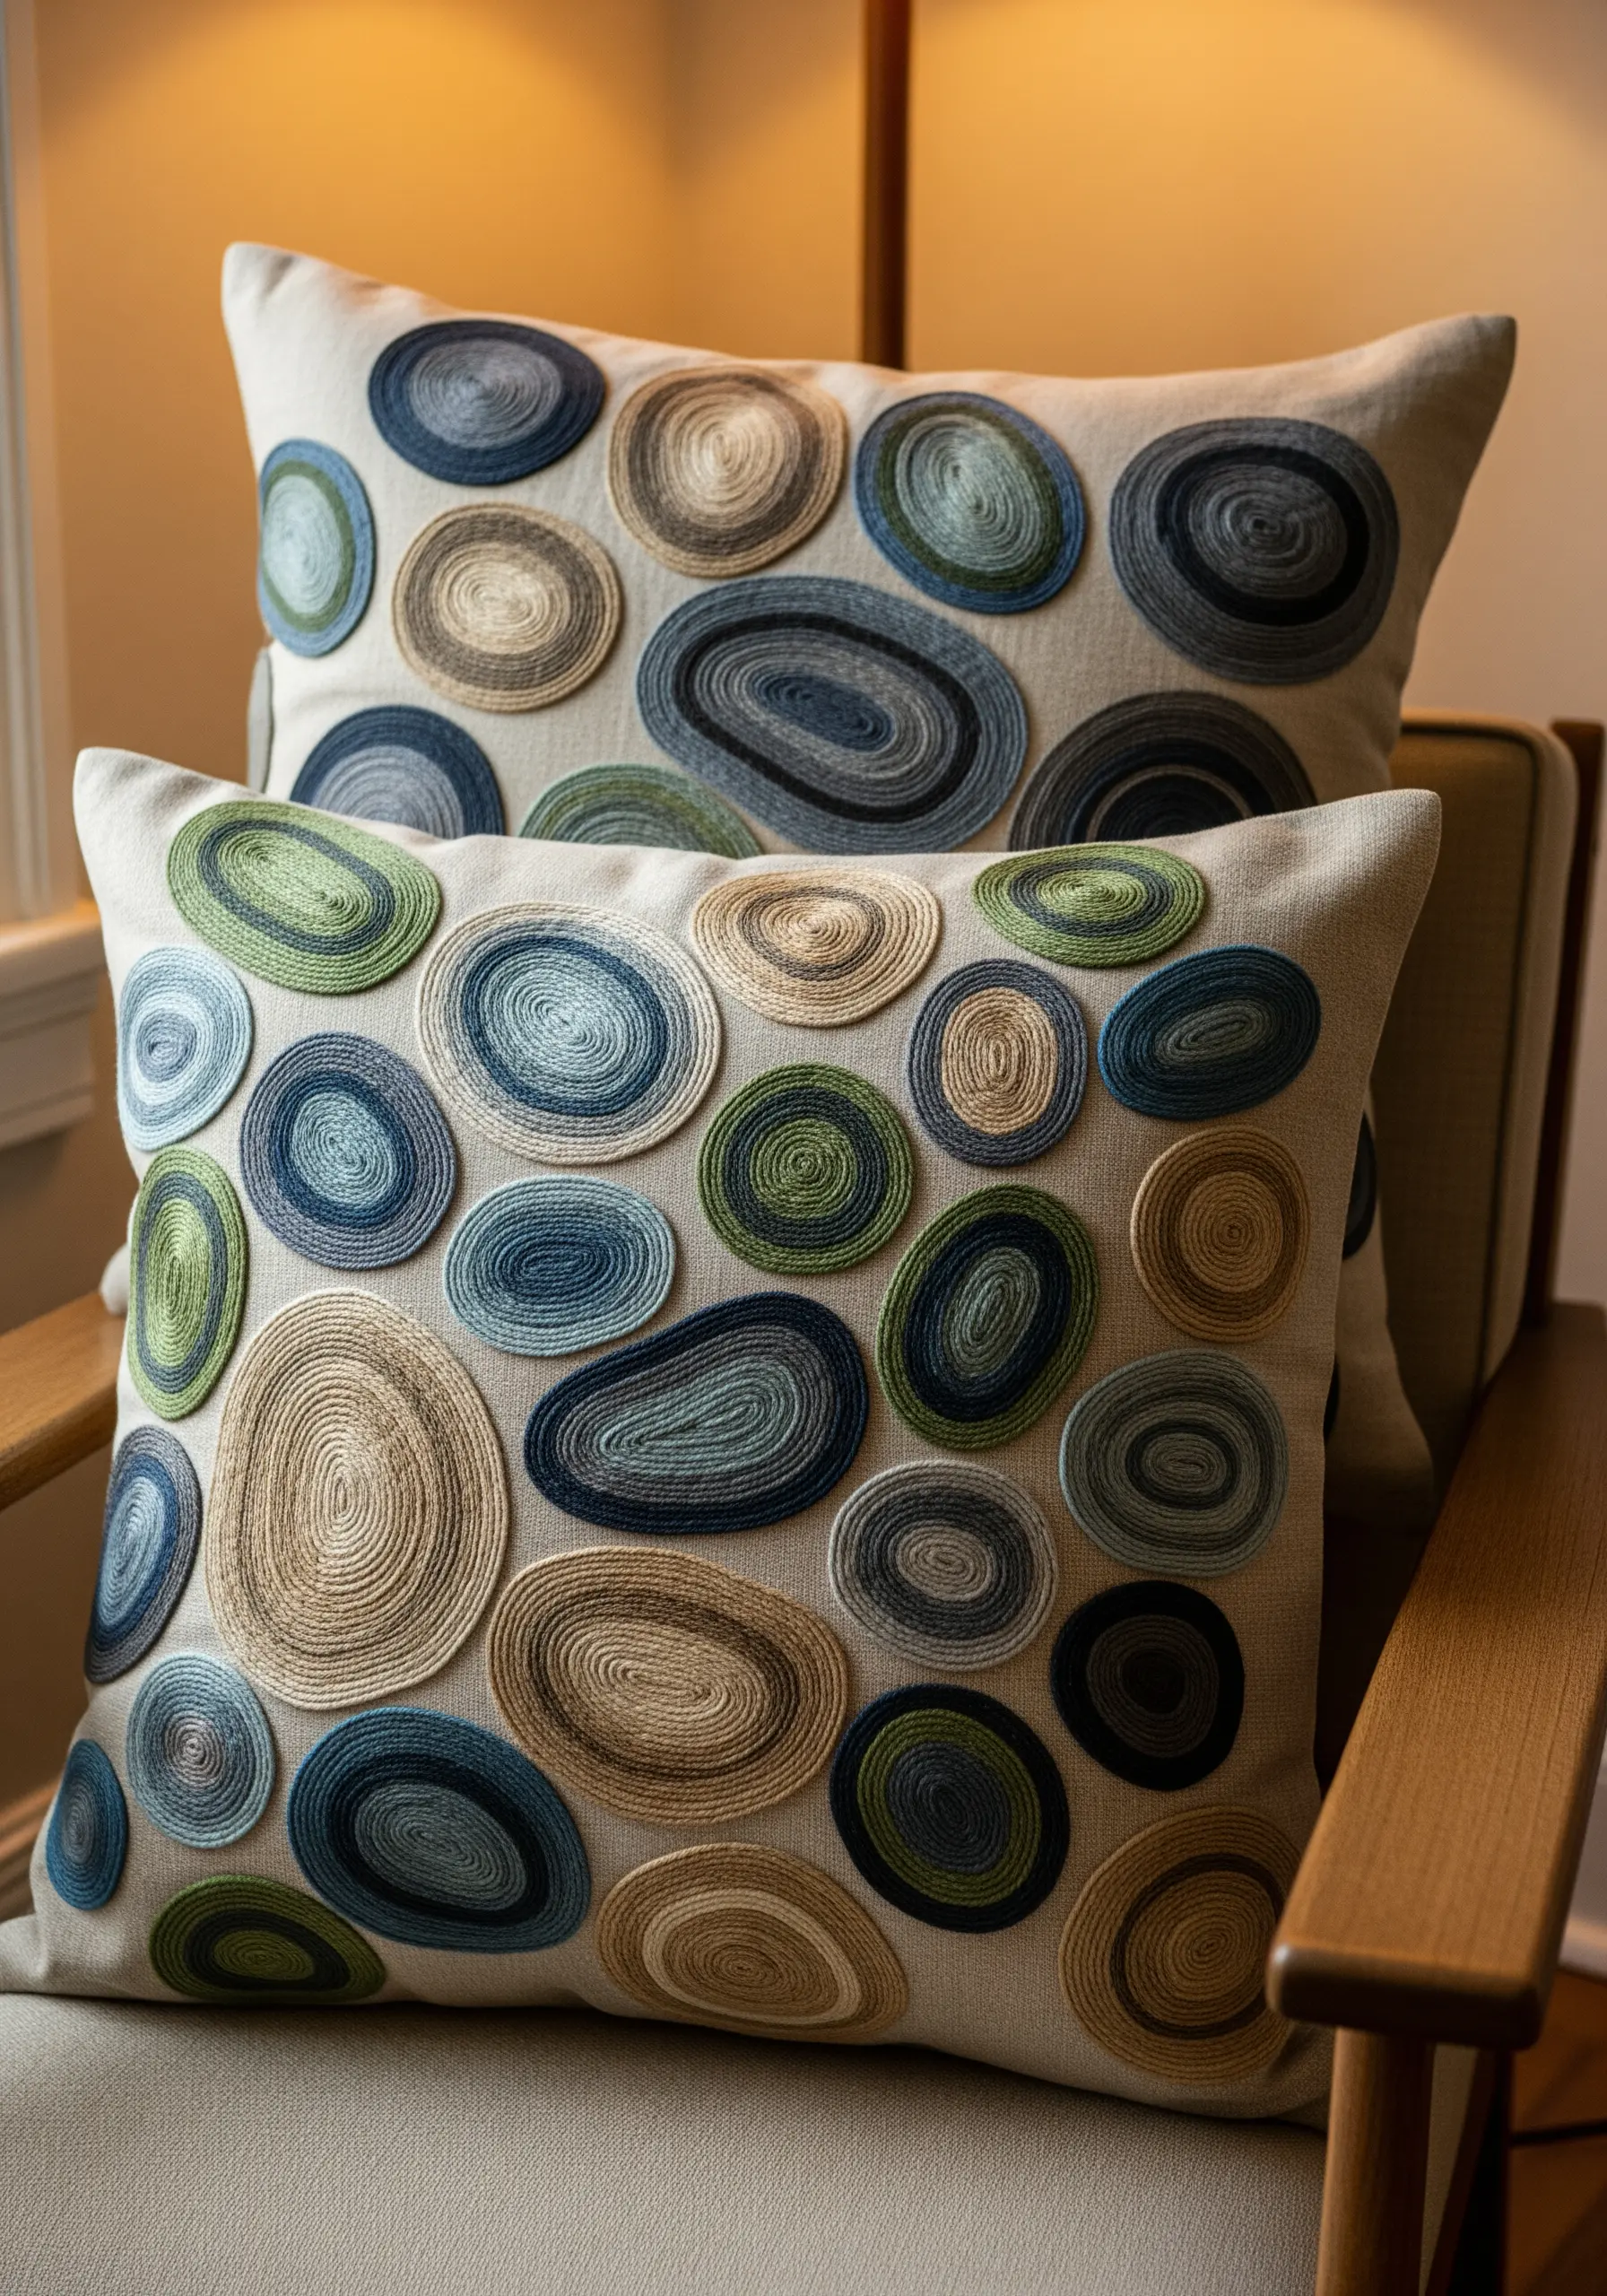
For a bold, three-dimensional effect on pillows or upholstery, use couching with thick materials like yarn, jute, or even thin rope.
Lay your thicker cord on the fabric surface and use a thinner, matching thread to tack it down with small, evenly spaced stitches.
Overlap the coiled shapes to create a sense of depth and movement, turning a simple cushion into a piece of touchable art.
This technique is the foundation of high-texture fabric collage, where the line itself becomes a sculptural element.
3. Create Graphic Contrast with Negative Space
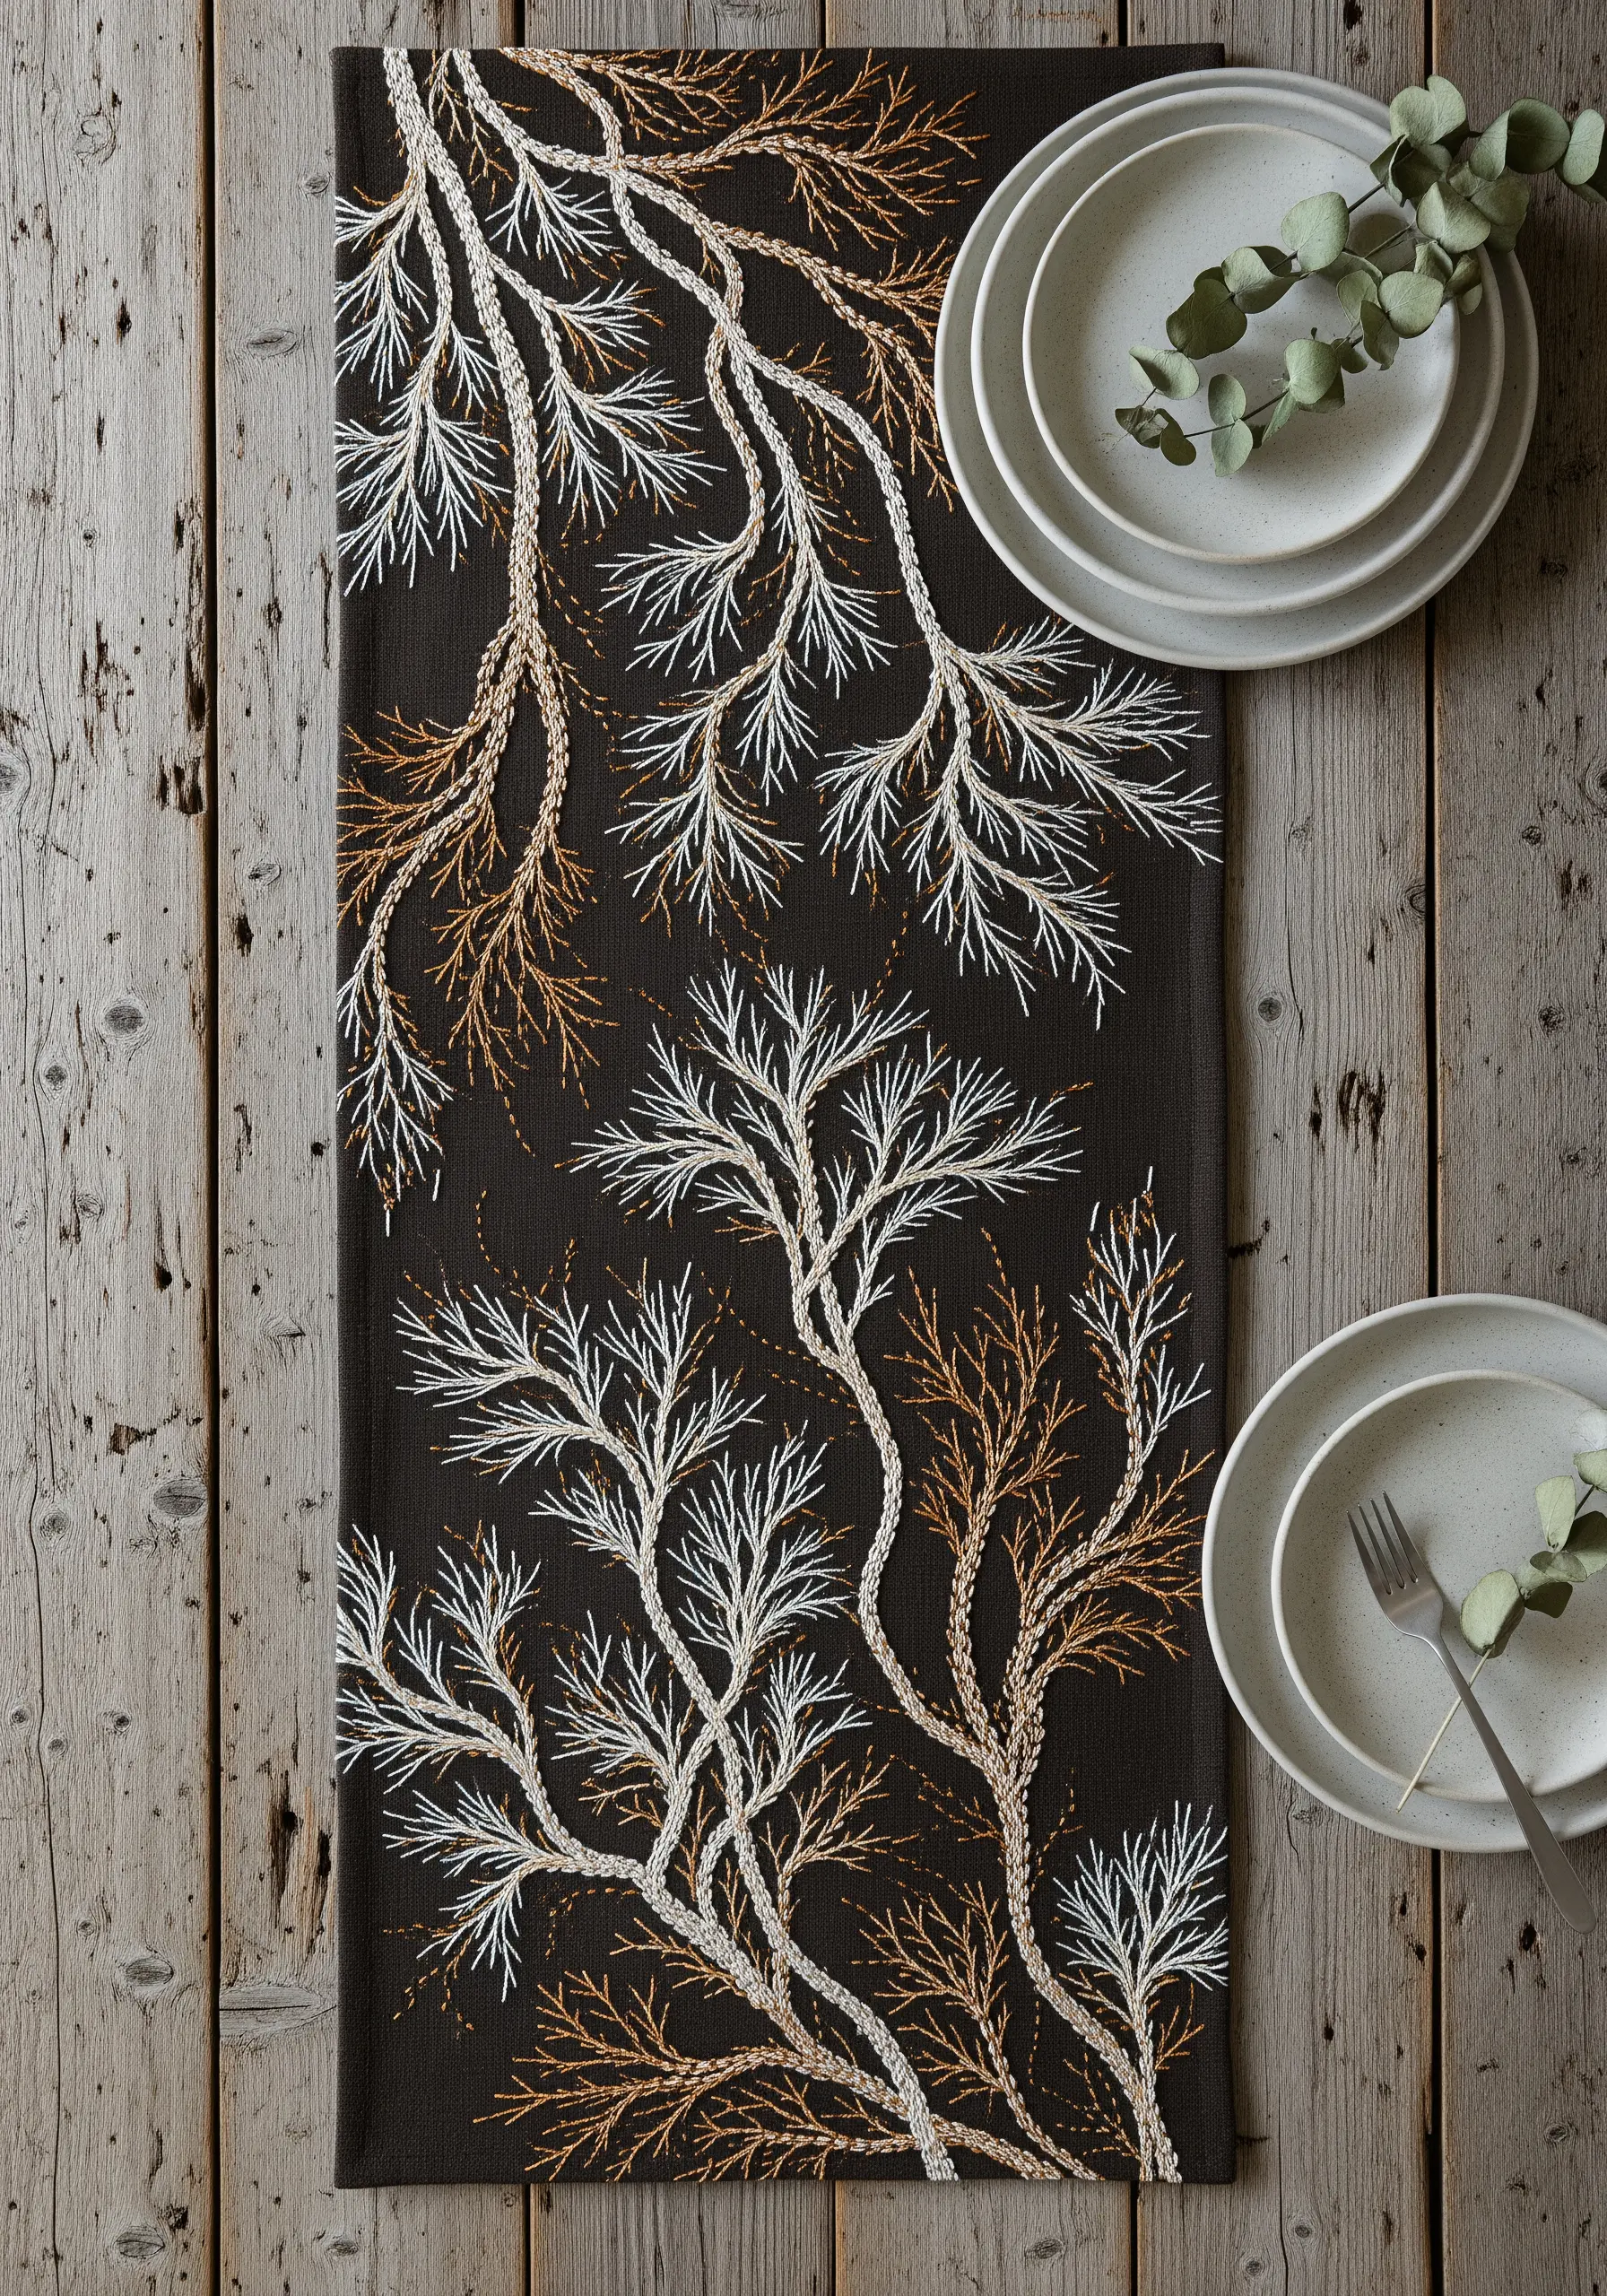
When working on dark fabric, allow the unstitched background to define your design.
Use a simple backstitch or split stitch in a high-contrast thread, like ivory or metallic gold, to create sharp, elegant lines.
The negative space becomes an active part of the composition, giving your botanical motifs a modern, airy feel.
This approach can transform simple table linens into luxe spring centerpieces with minimal stitching.
4. Layering Stitches for Geological Depth
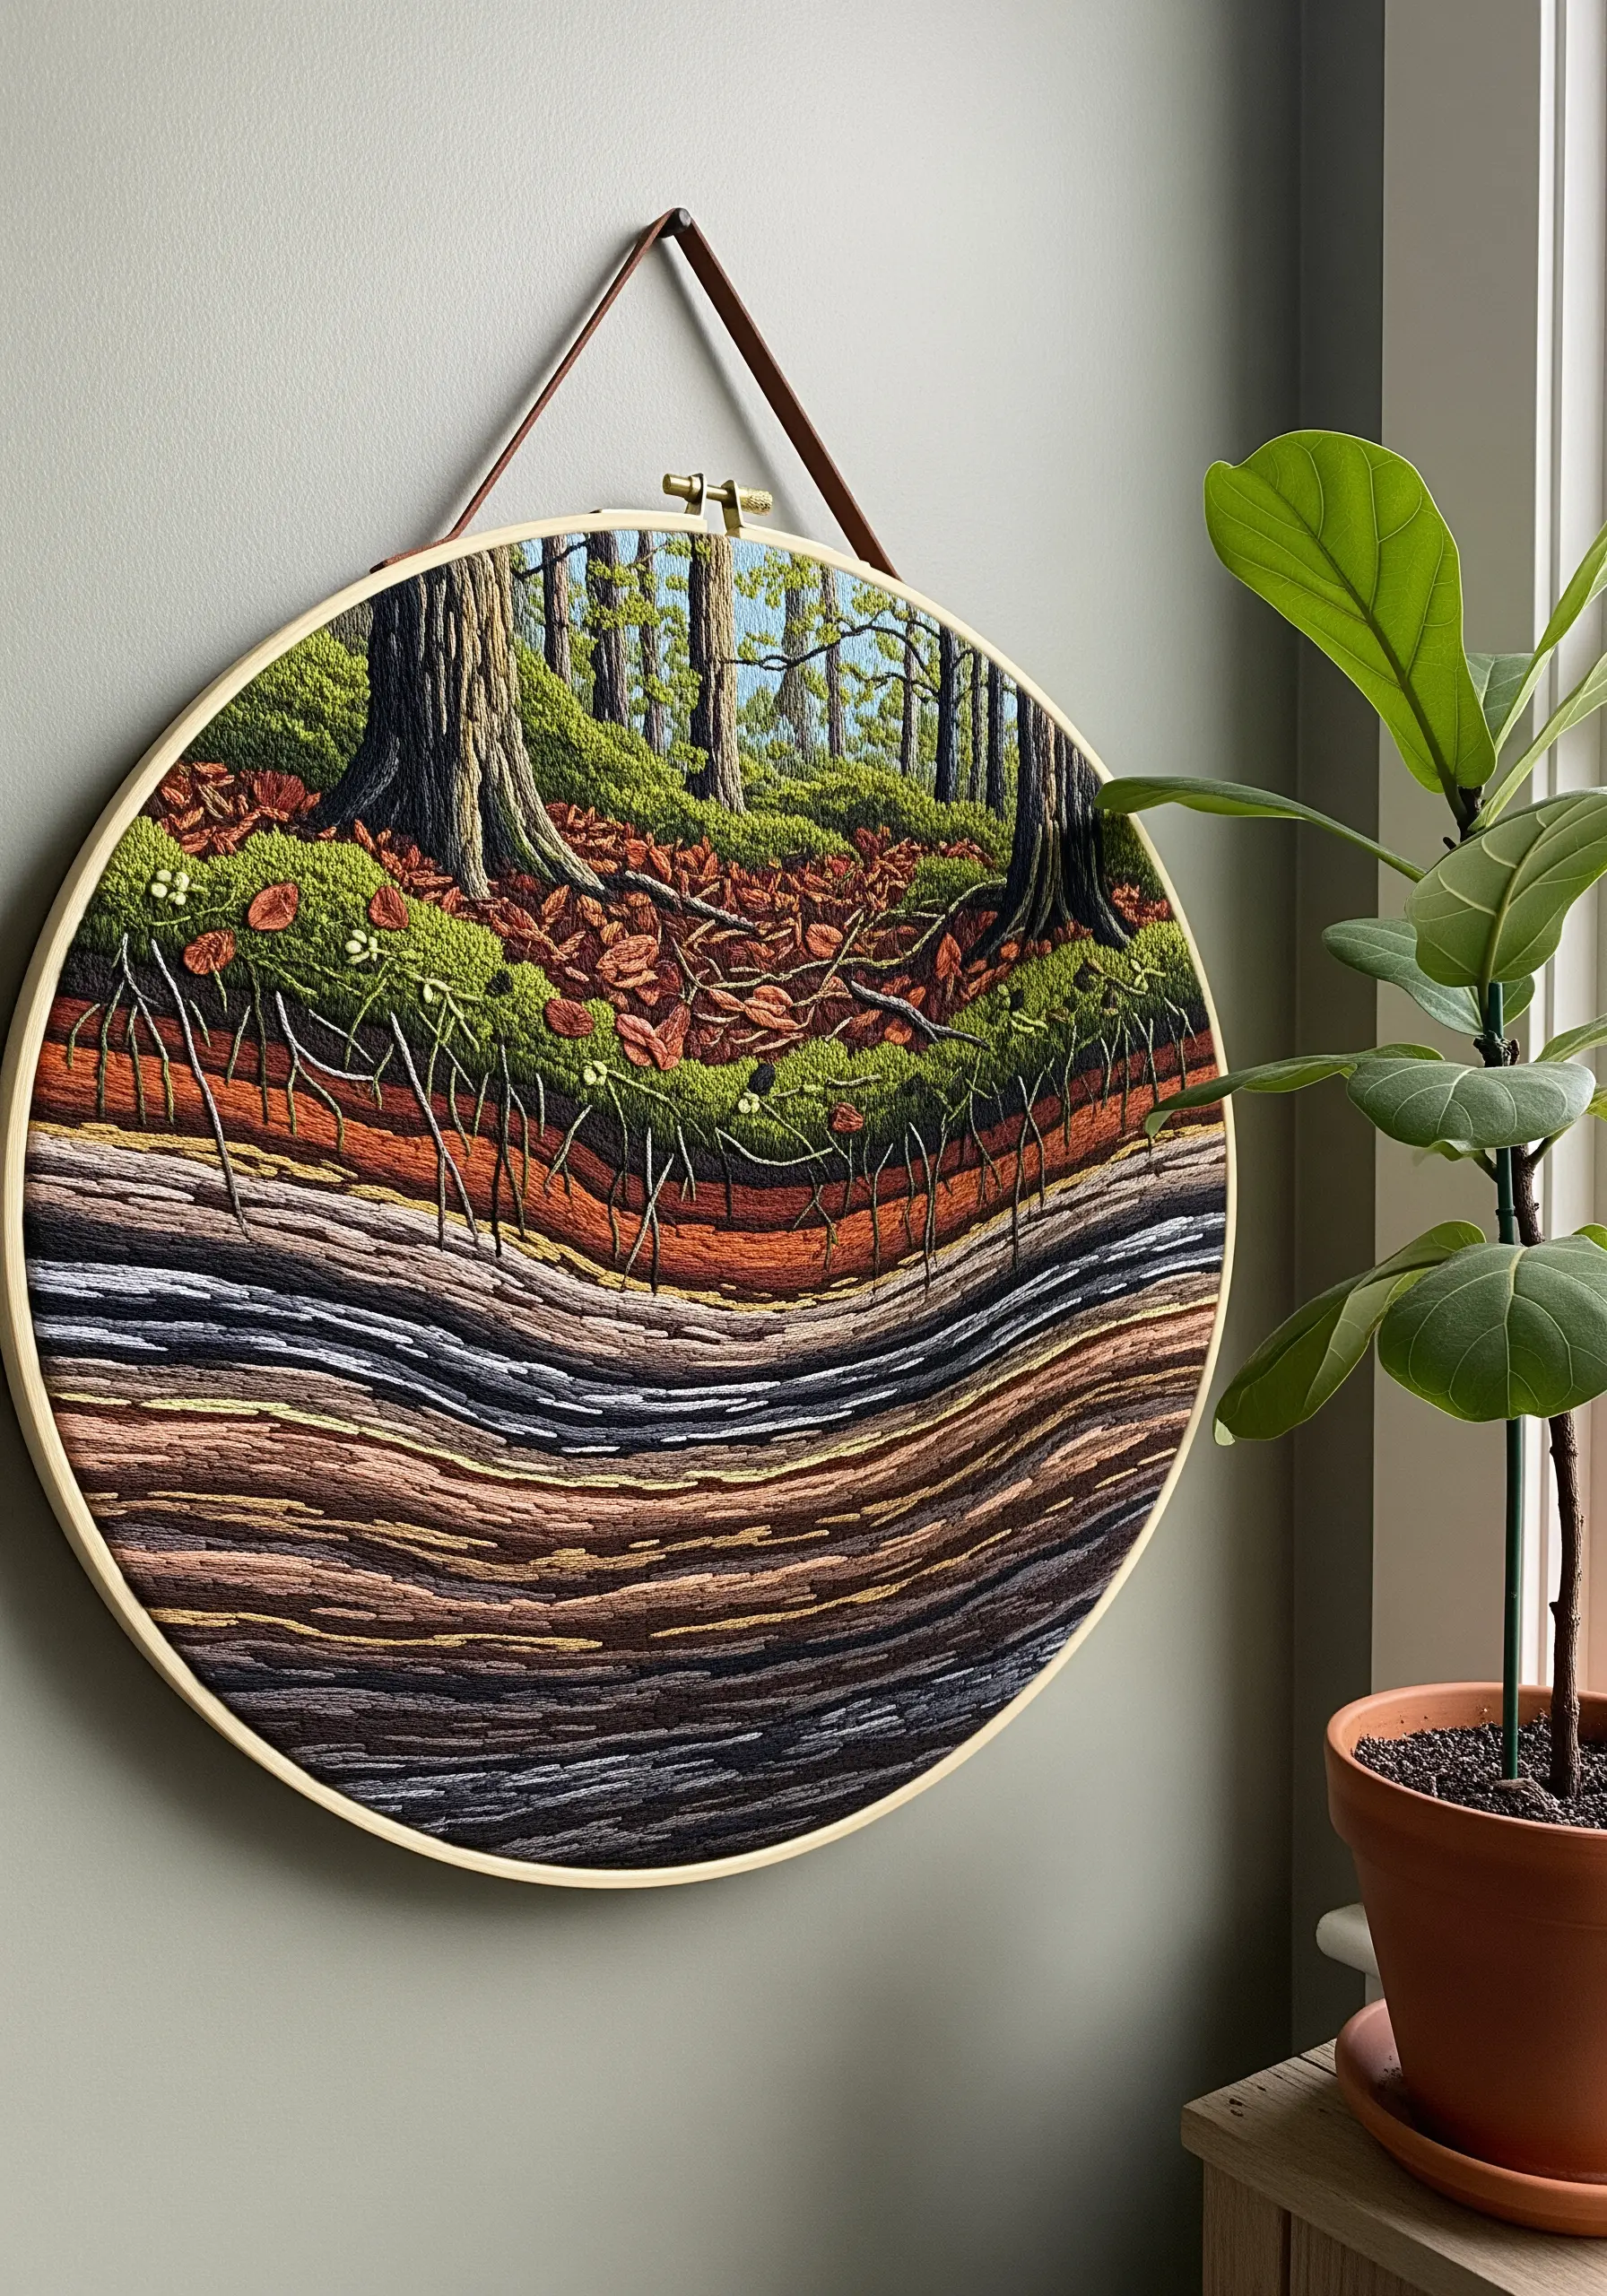
Build a complex, narrative landscape by assigning different stitches to represent natural textures.
Use long-and-short stitch for smooth soil layers, dense French knots for moss, straight stitches for fine roots, and satin stitch for rocks.
This method allows you to create a scientifically-inspired cross-section that feels both artistic and educational.
It’s one of the most rewarding embroidery projects inspired by textures you’d find on a nature walk, inviting closer inspection.
5. Recreating Bark with Appliqué and Stitch
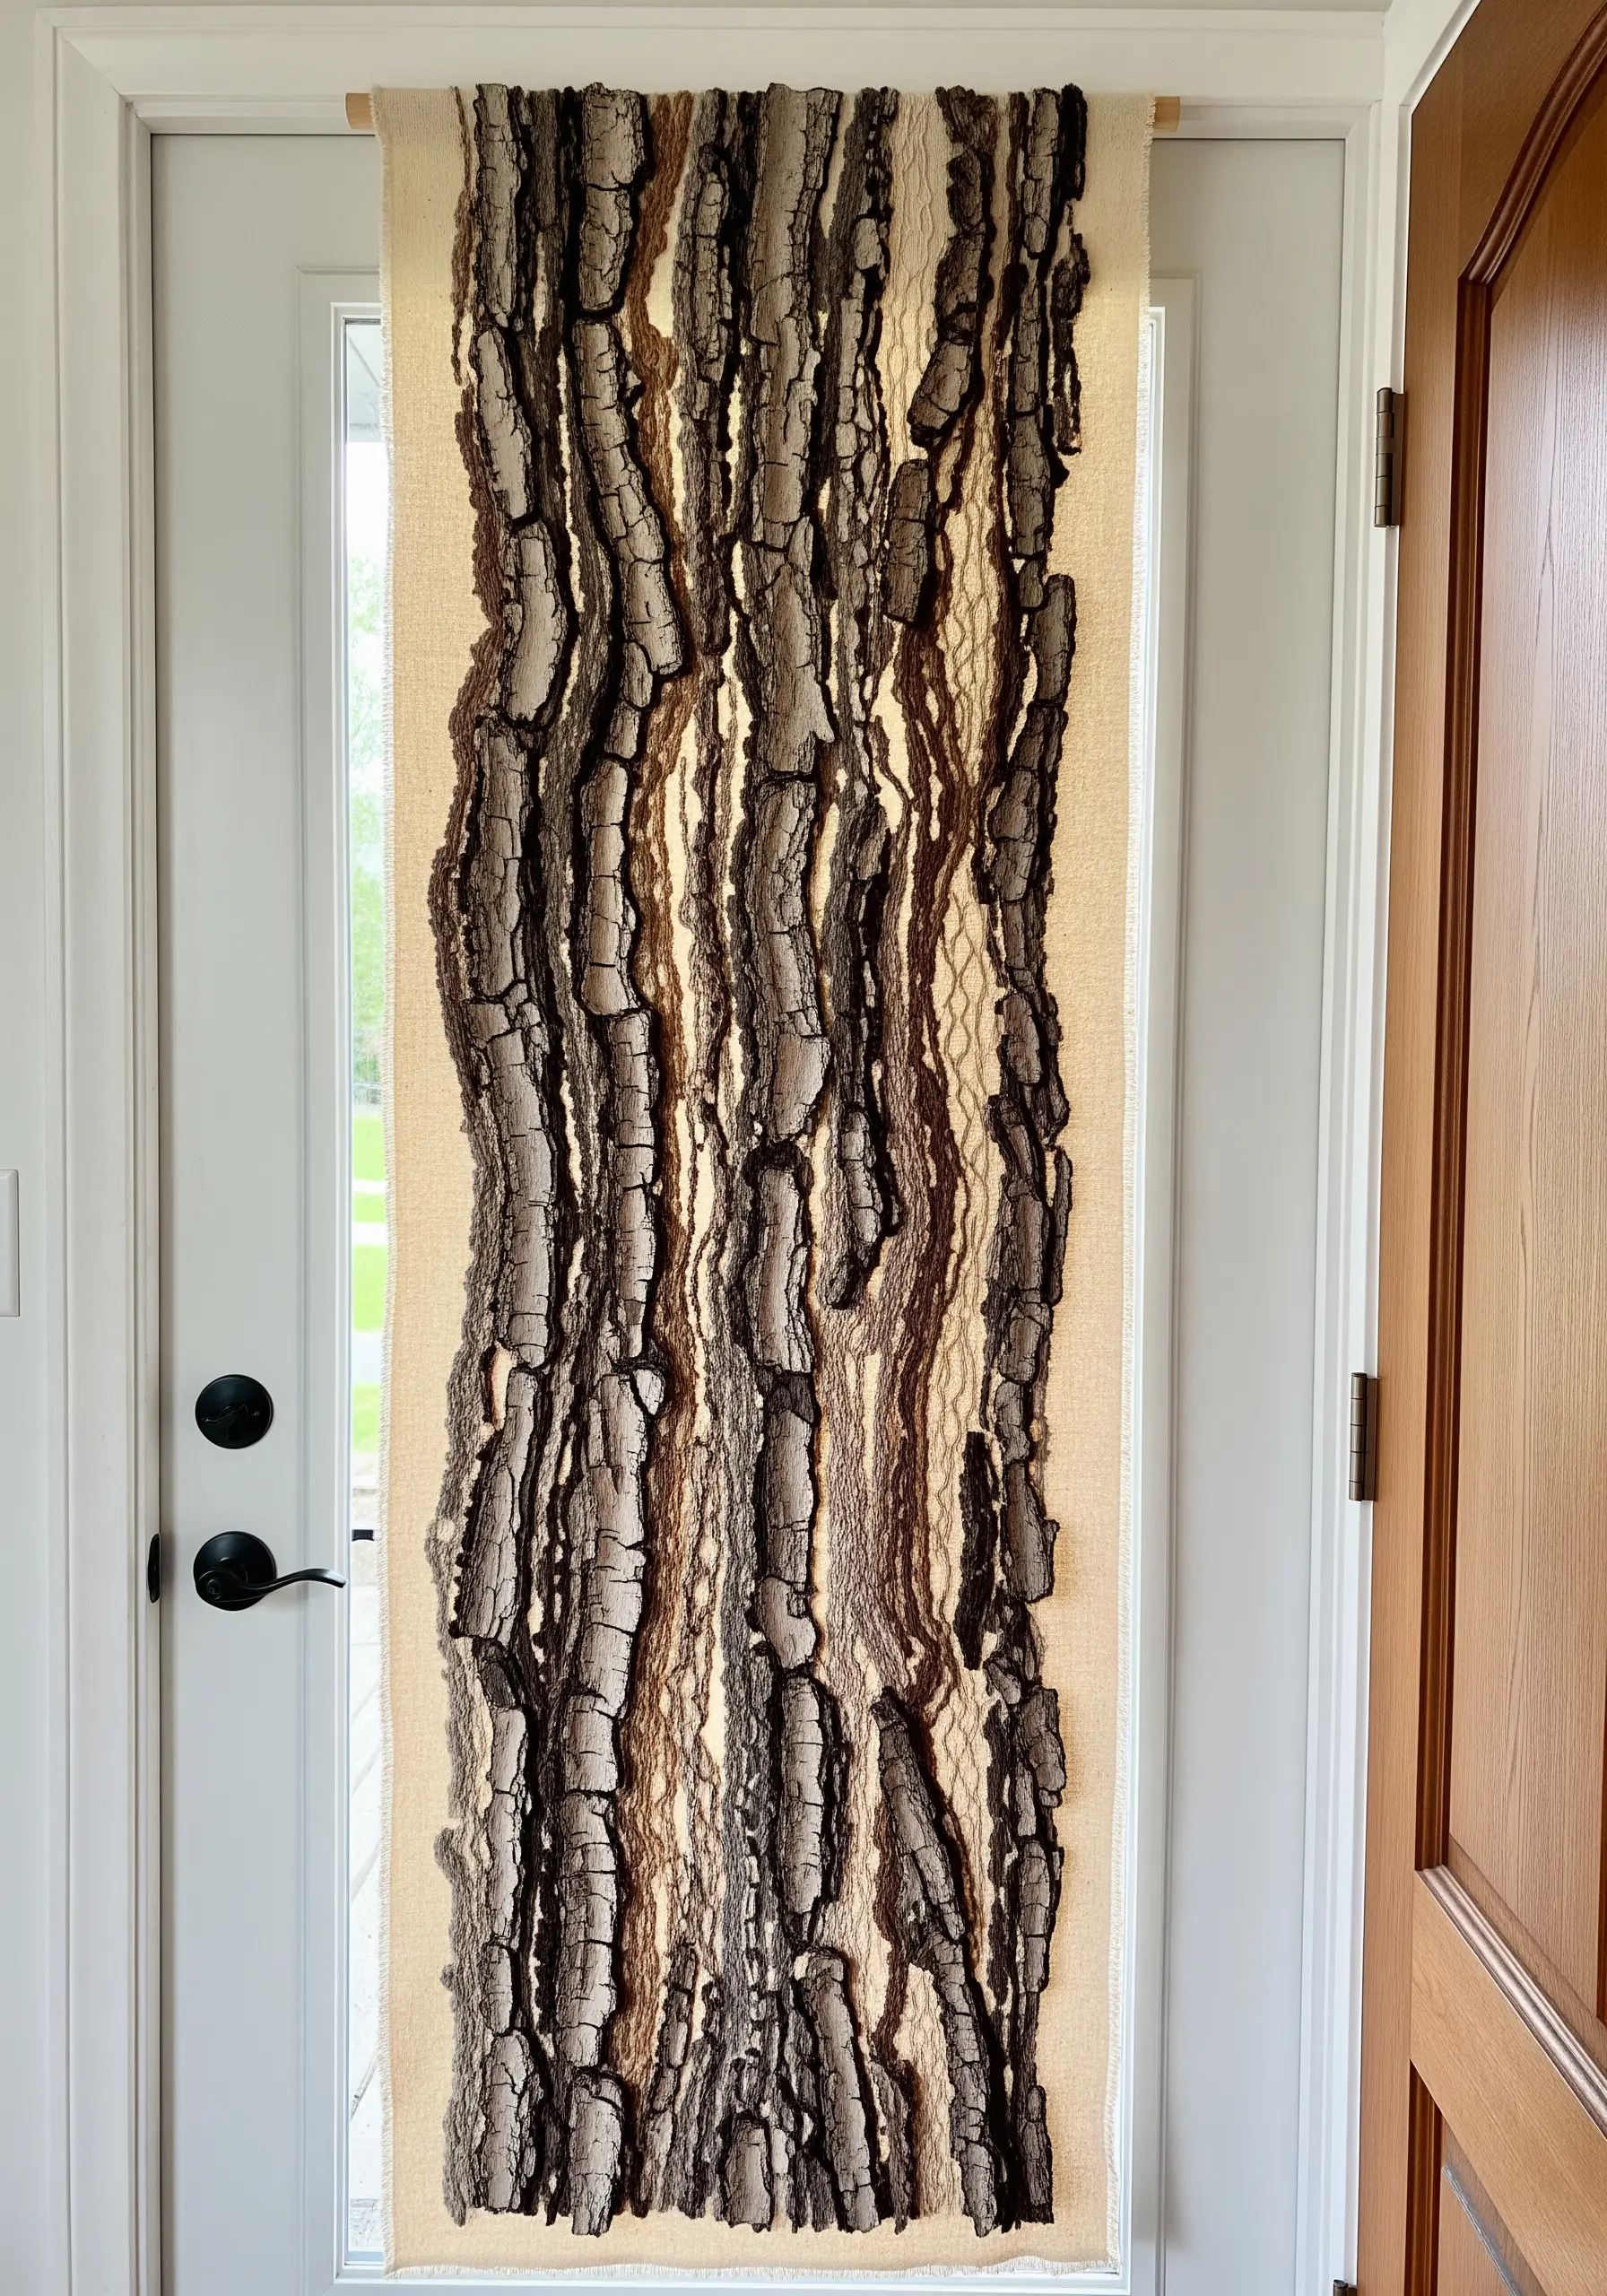
To mimic the rugged texture of tree bark, combine fabric layering with dense, directional stitching.
Start by securing strips of felt, wool, or coarse linen onto your base fabric.
Then, use free-motion machine embroidery or hand-stitched seed stitches in various shades of brown and grey to create grooves, highlights, and shadows.
The result is one of those mixed-fiber projects that look like gallery art but is built from simple, intuitive techniques.
6. Minimalist Yarn Couching on Canvas
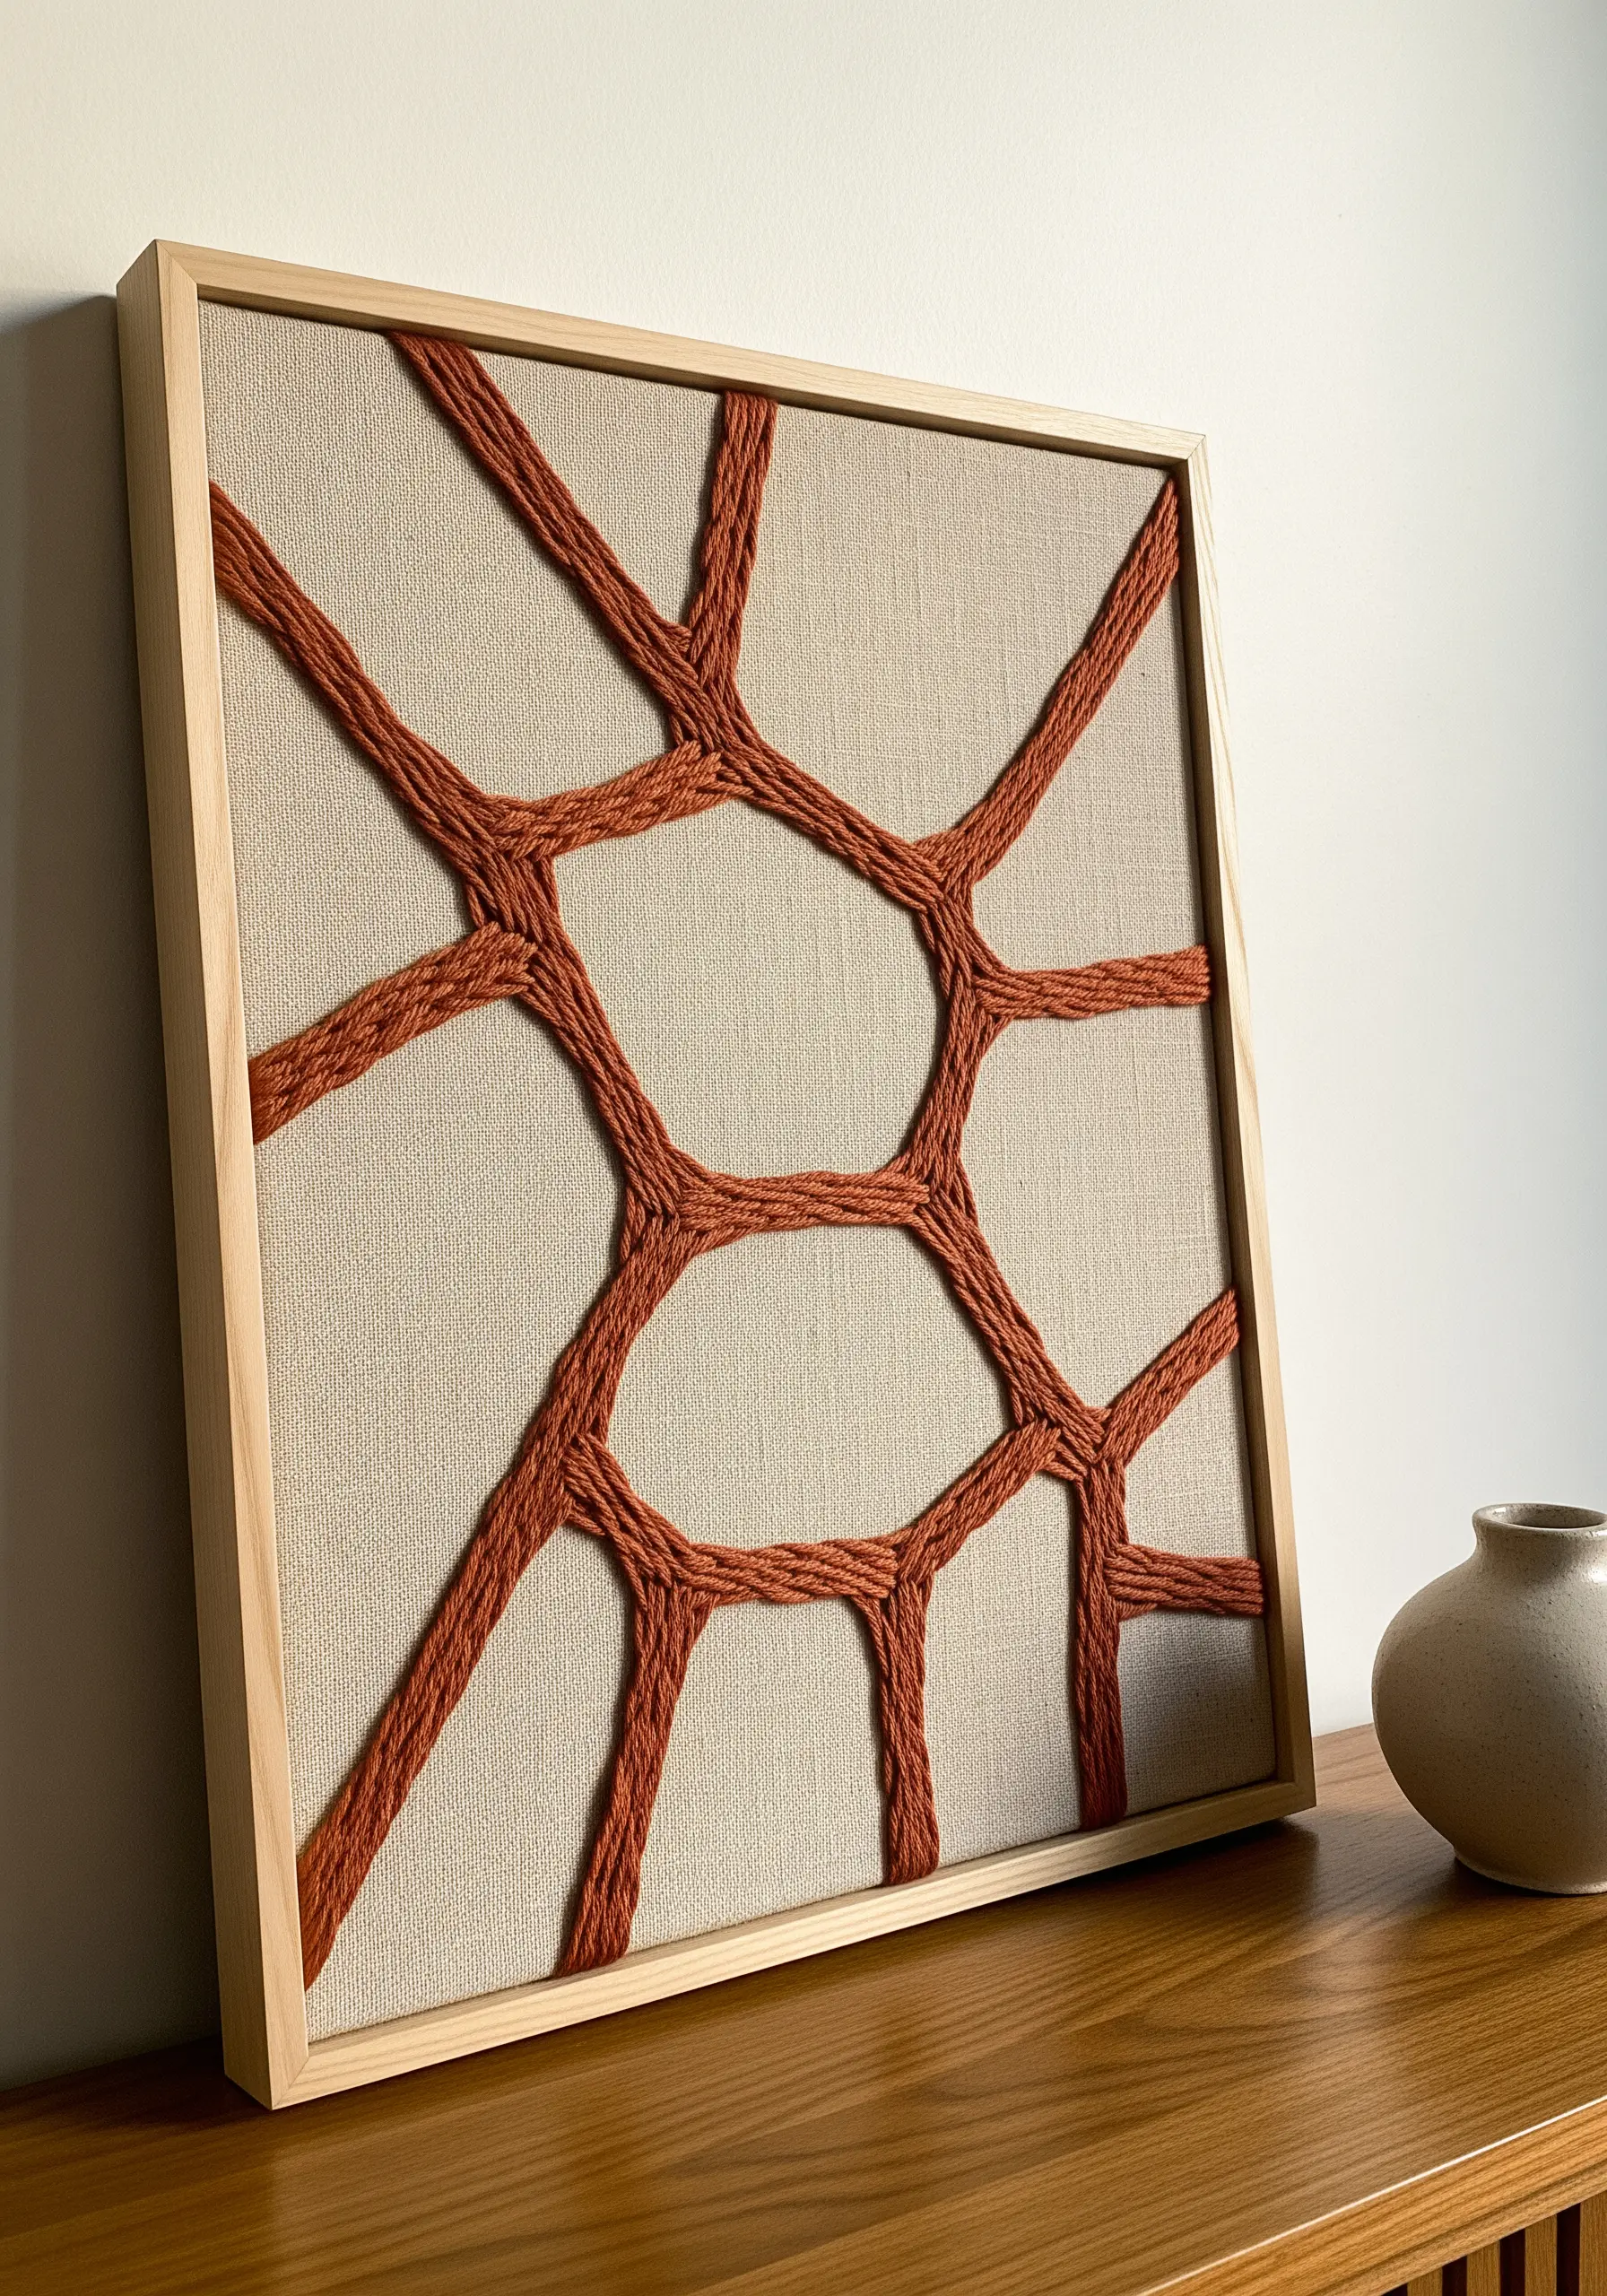
For a bold, modern statement, couch thick yarn directly onto stretched canvas or heavy linen.
Draw your abstract design first, then use a single strand of matching embroidery floss to tack the yarn down with small, nearly invisible stitches.
The contrast between the soft, thick yarn and the flat canvas creates a striking architectural quality.
This is a fast and effective way to produce large-scale minimalist embroidery wall art.
7. The Sophisticated Satin Stitch Gradient
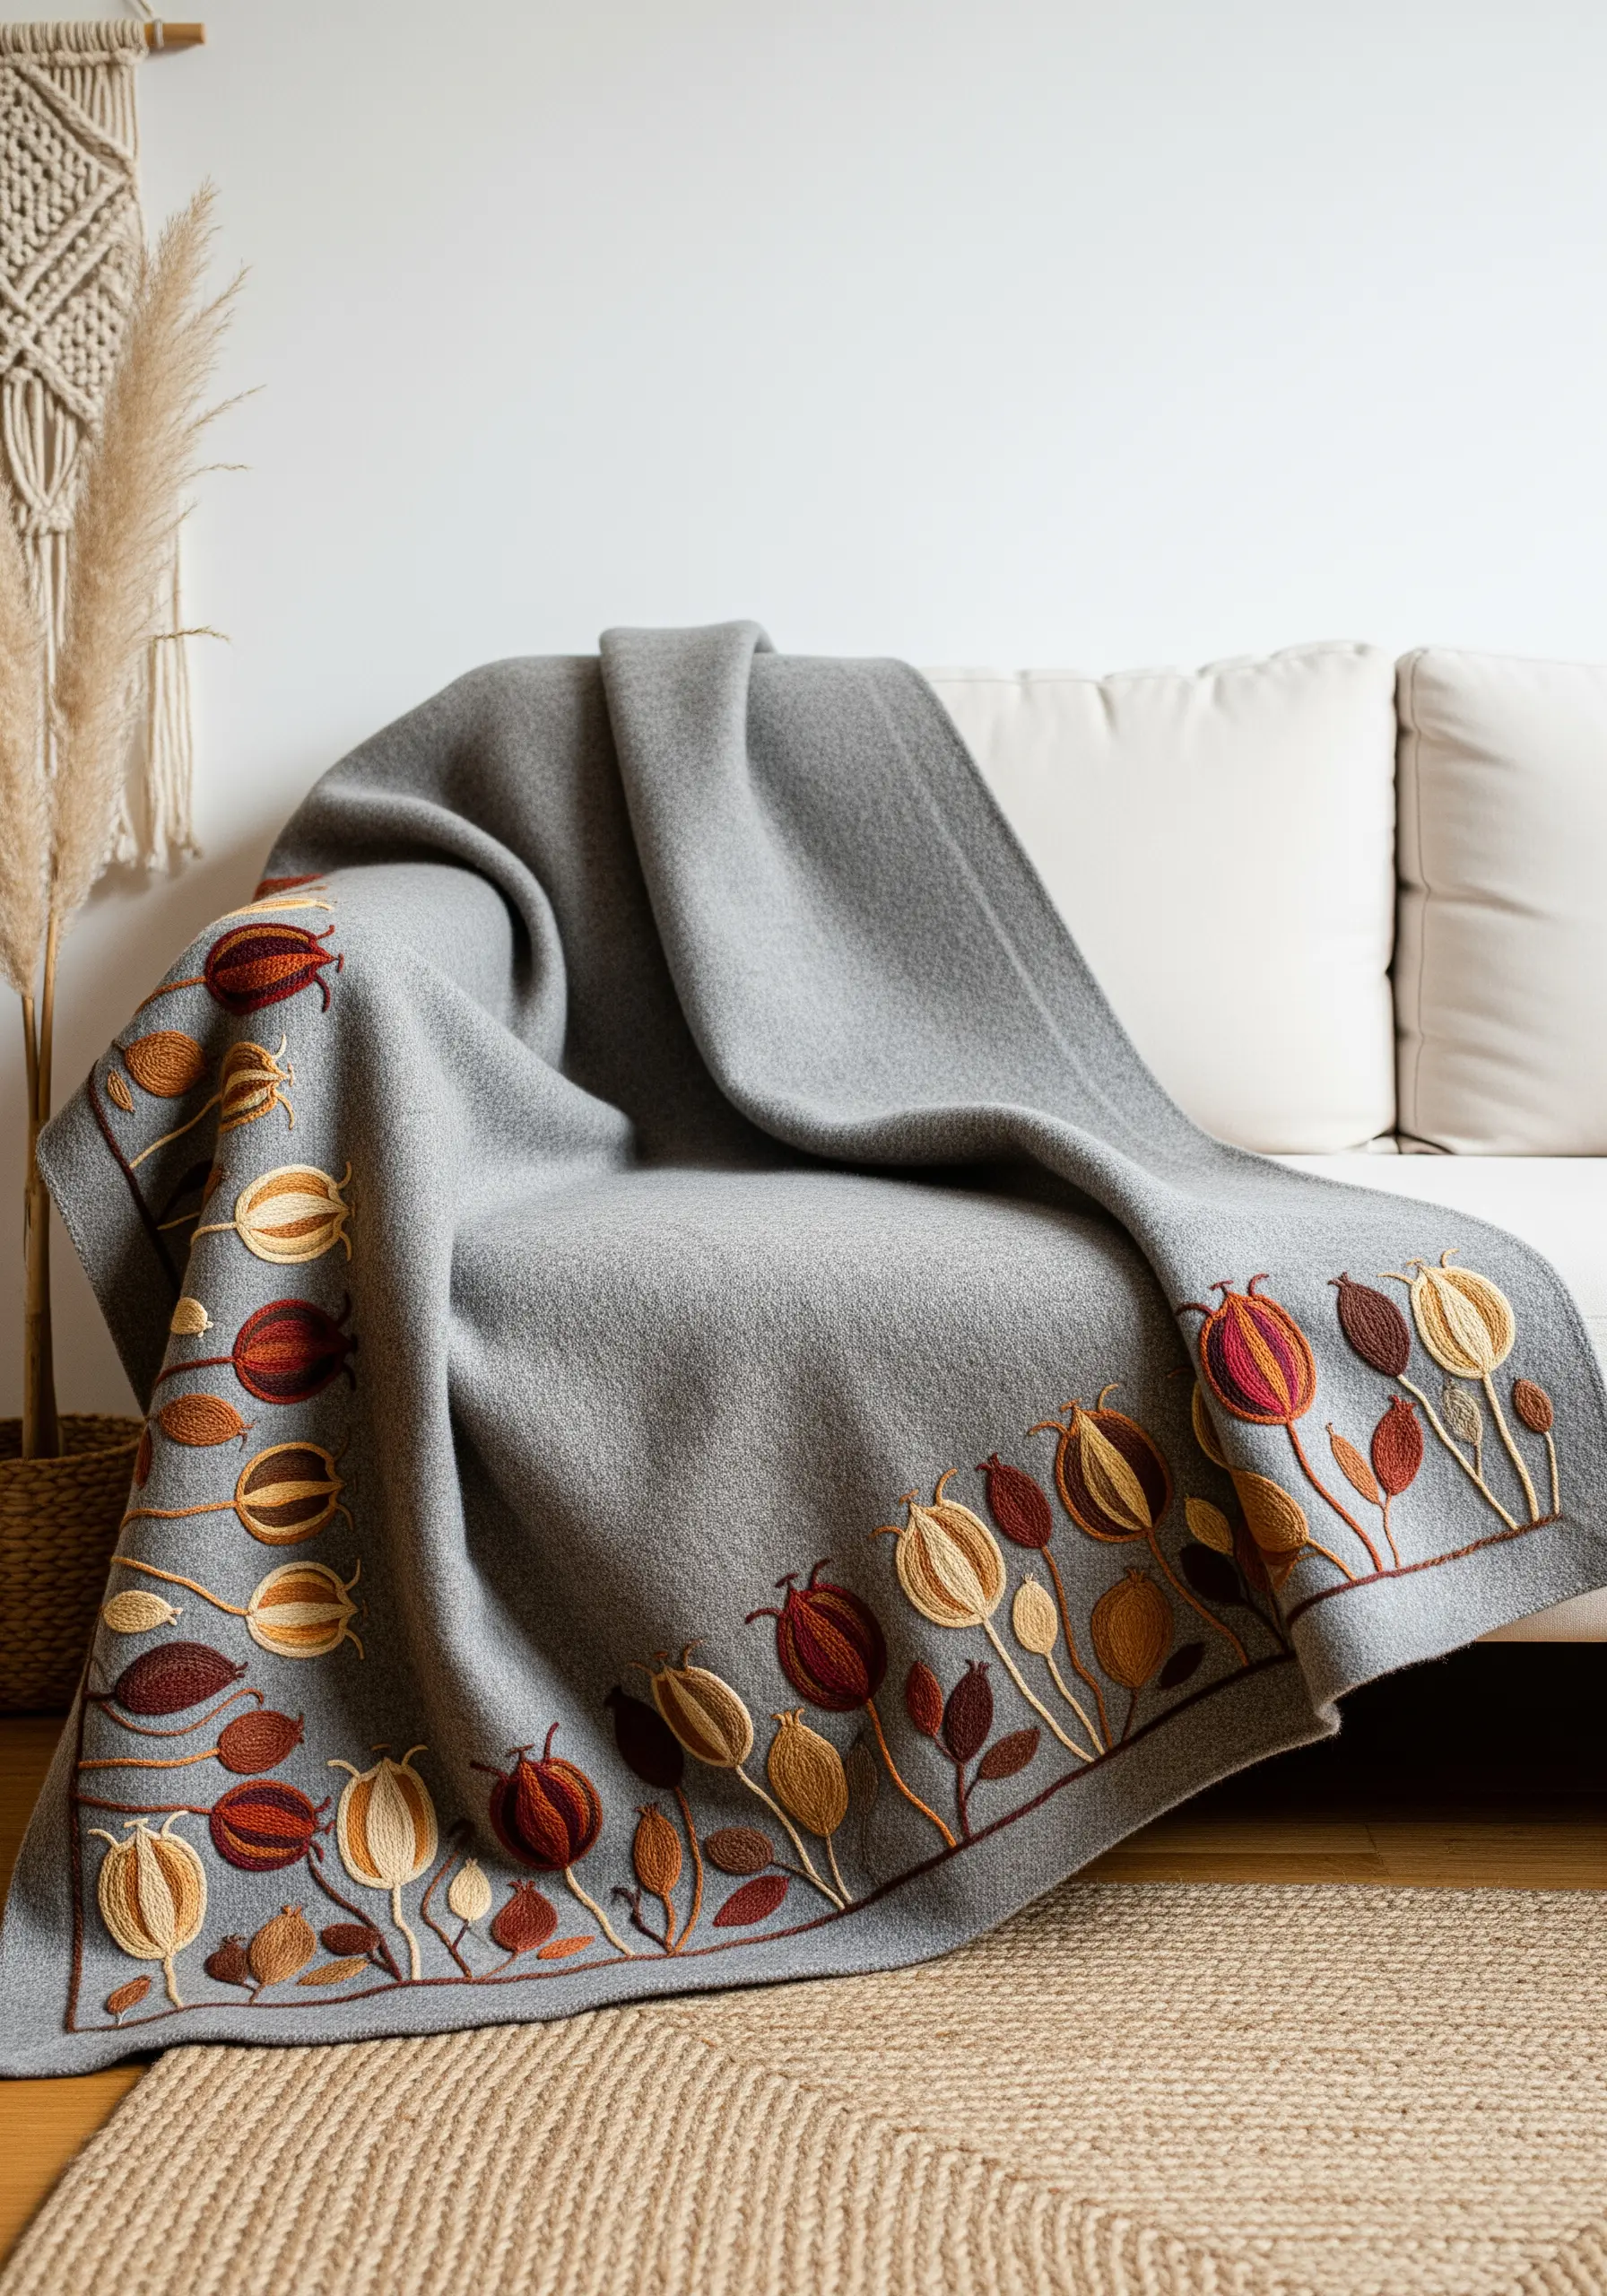
Elevate a simple satin stitch by using a subtle gradient of earth tones within a single shape.
Mentally divide your motif—like a petal or seed pod—into sections, and fill each with a closely related shade of floss.
This adds a painterly realism and depth without requiring complex blending stitches, perfect for creating luxurious embroidered throws and blankets to make winter even cozier.
8. Emulate Block Printing with Dense Stitches
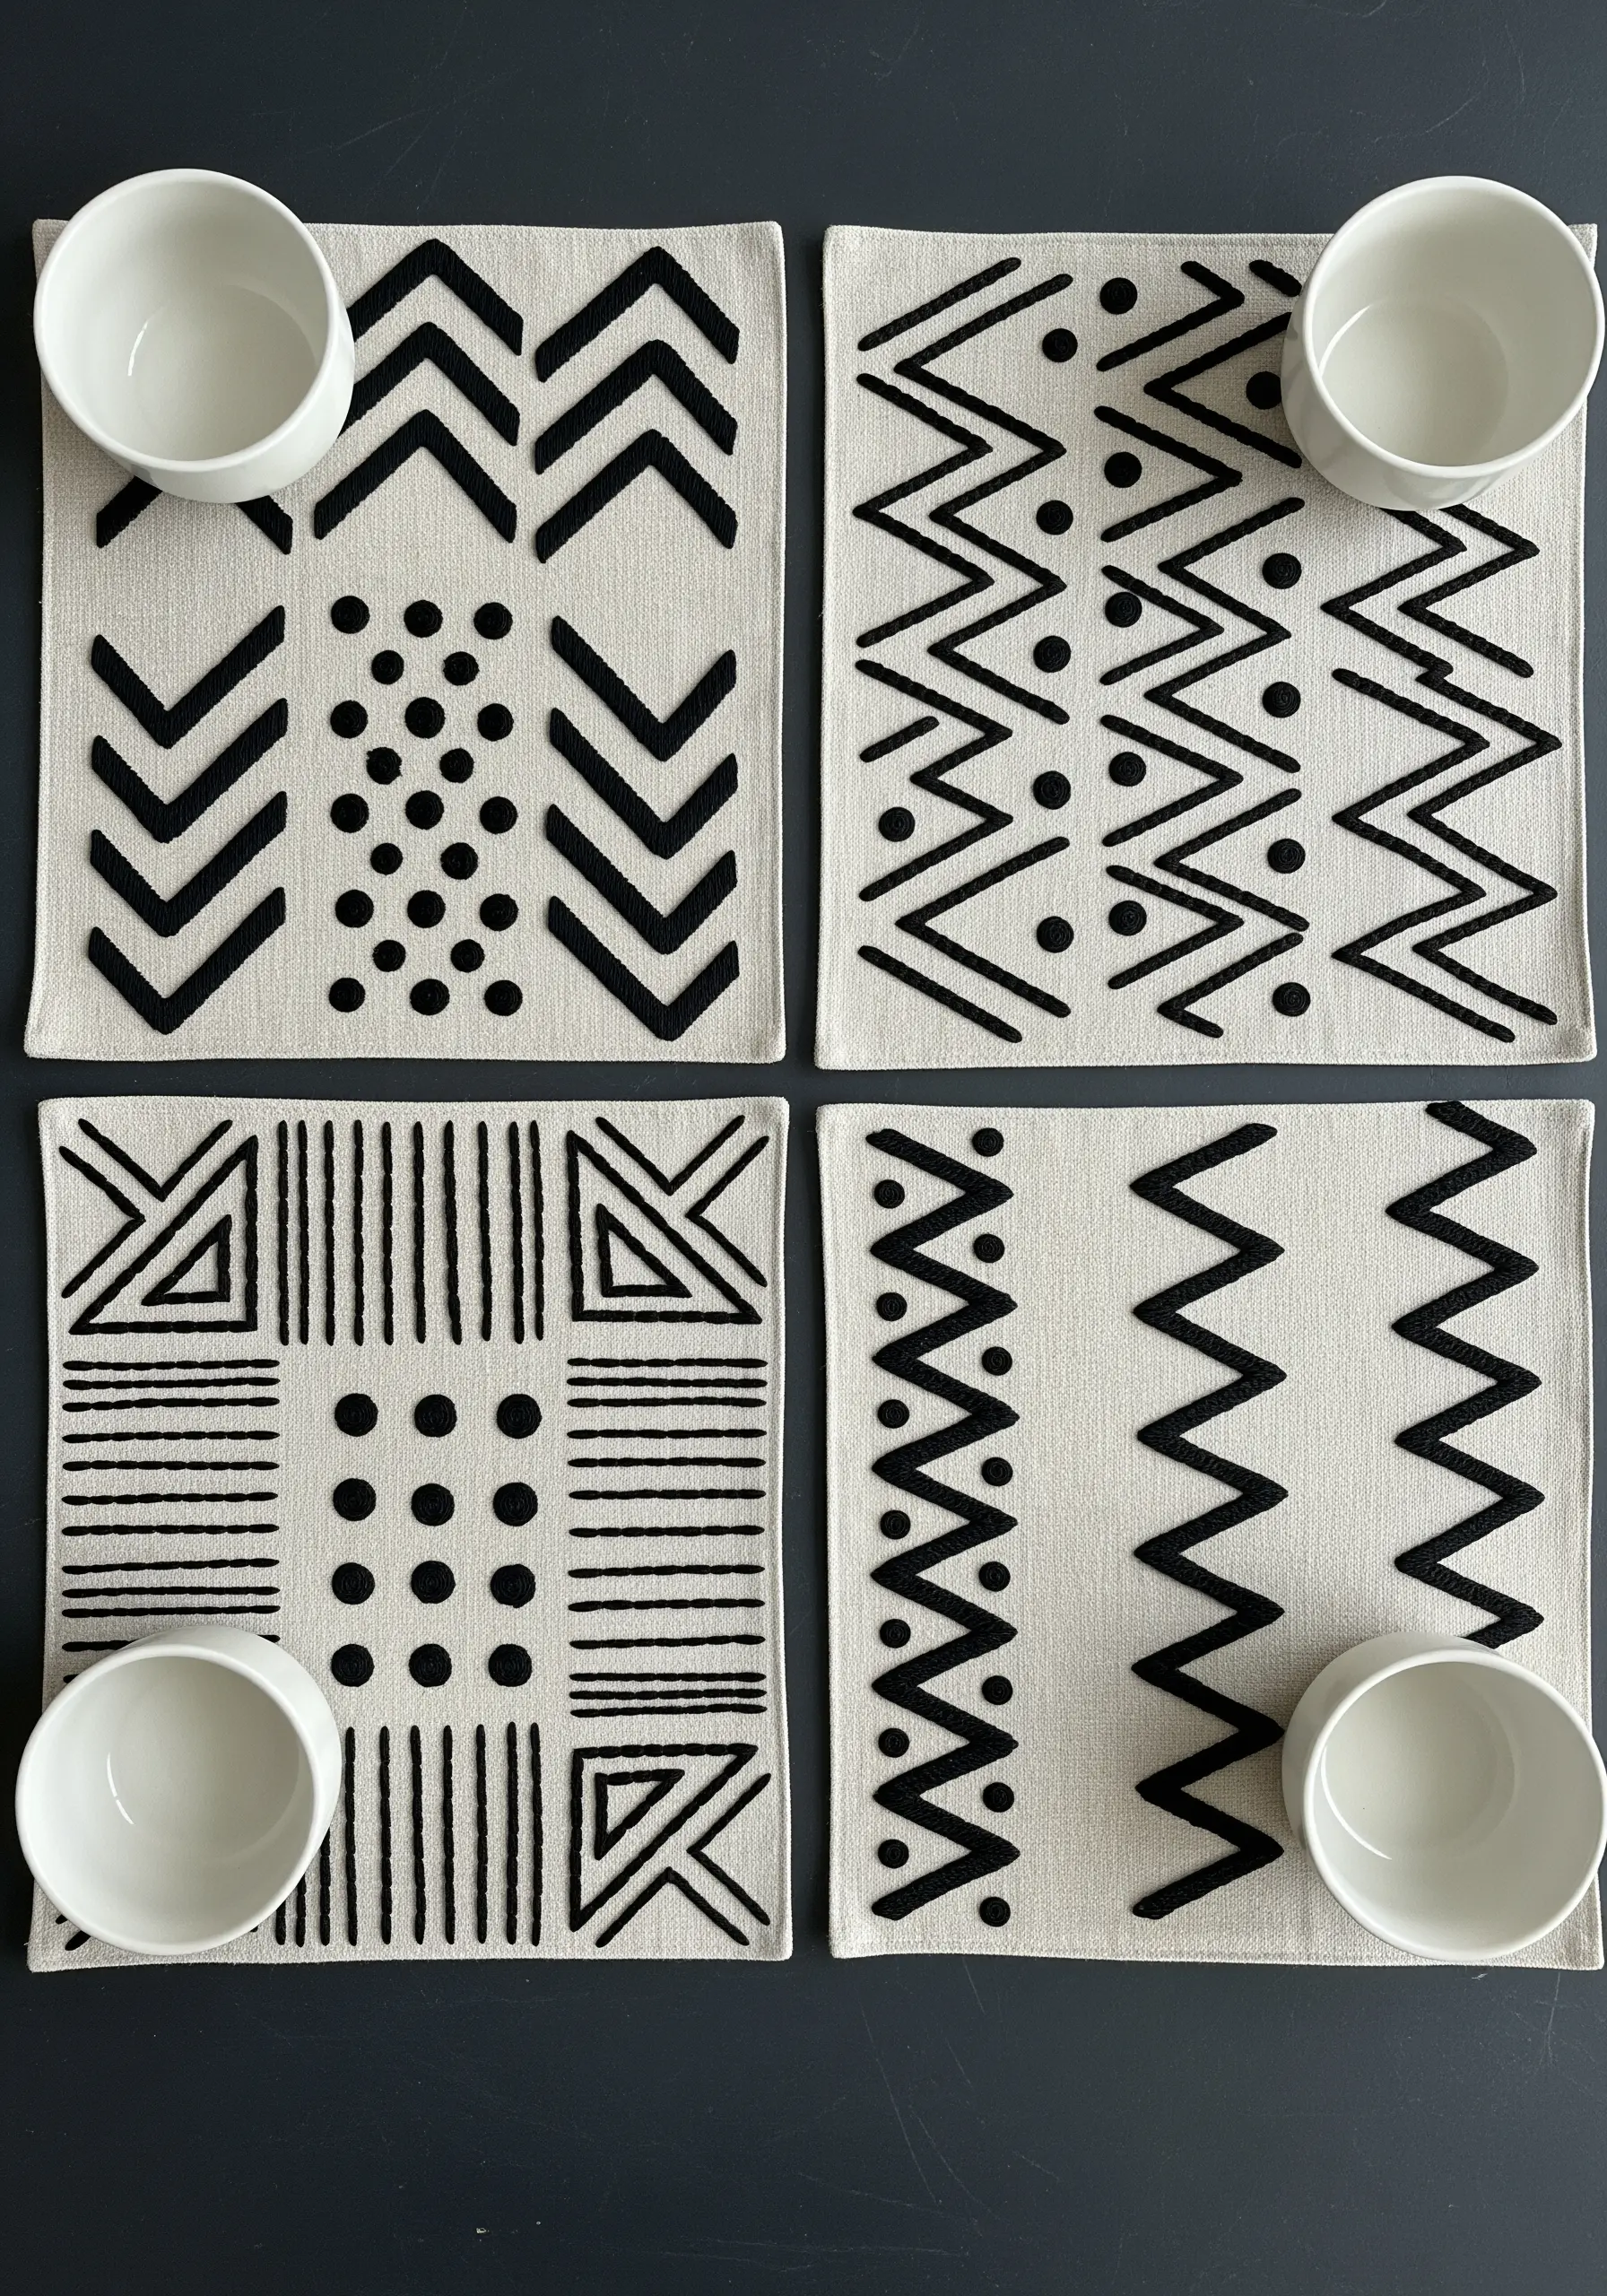
Achieve the bold, graphic look of block printing by using densely packed fill stitches like satin stitch or brick stitch.
Use a matte-finish black cotton floss on a high-contrast neutral fabric, like unbleached linen or cotton canvas.
The key to success is maintaining perfect thread tension and creating crisp, clean edges for a sharp, printed effect.
These are powerful small embroidery patterns to customize your home decor with impactful style.
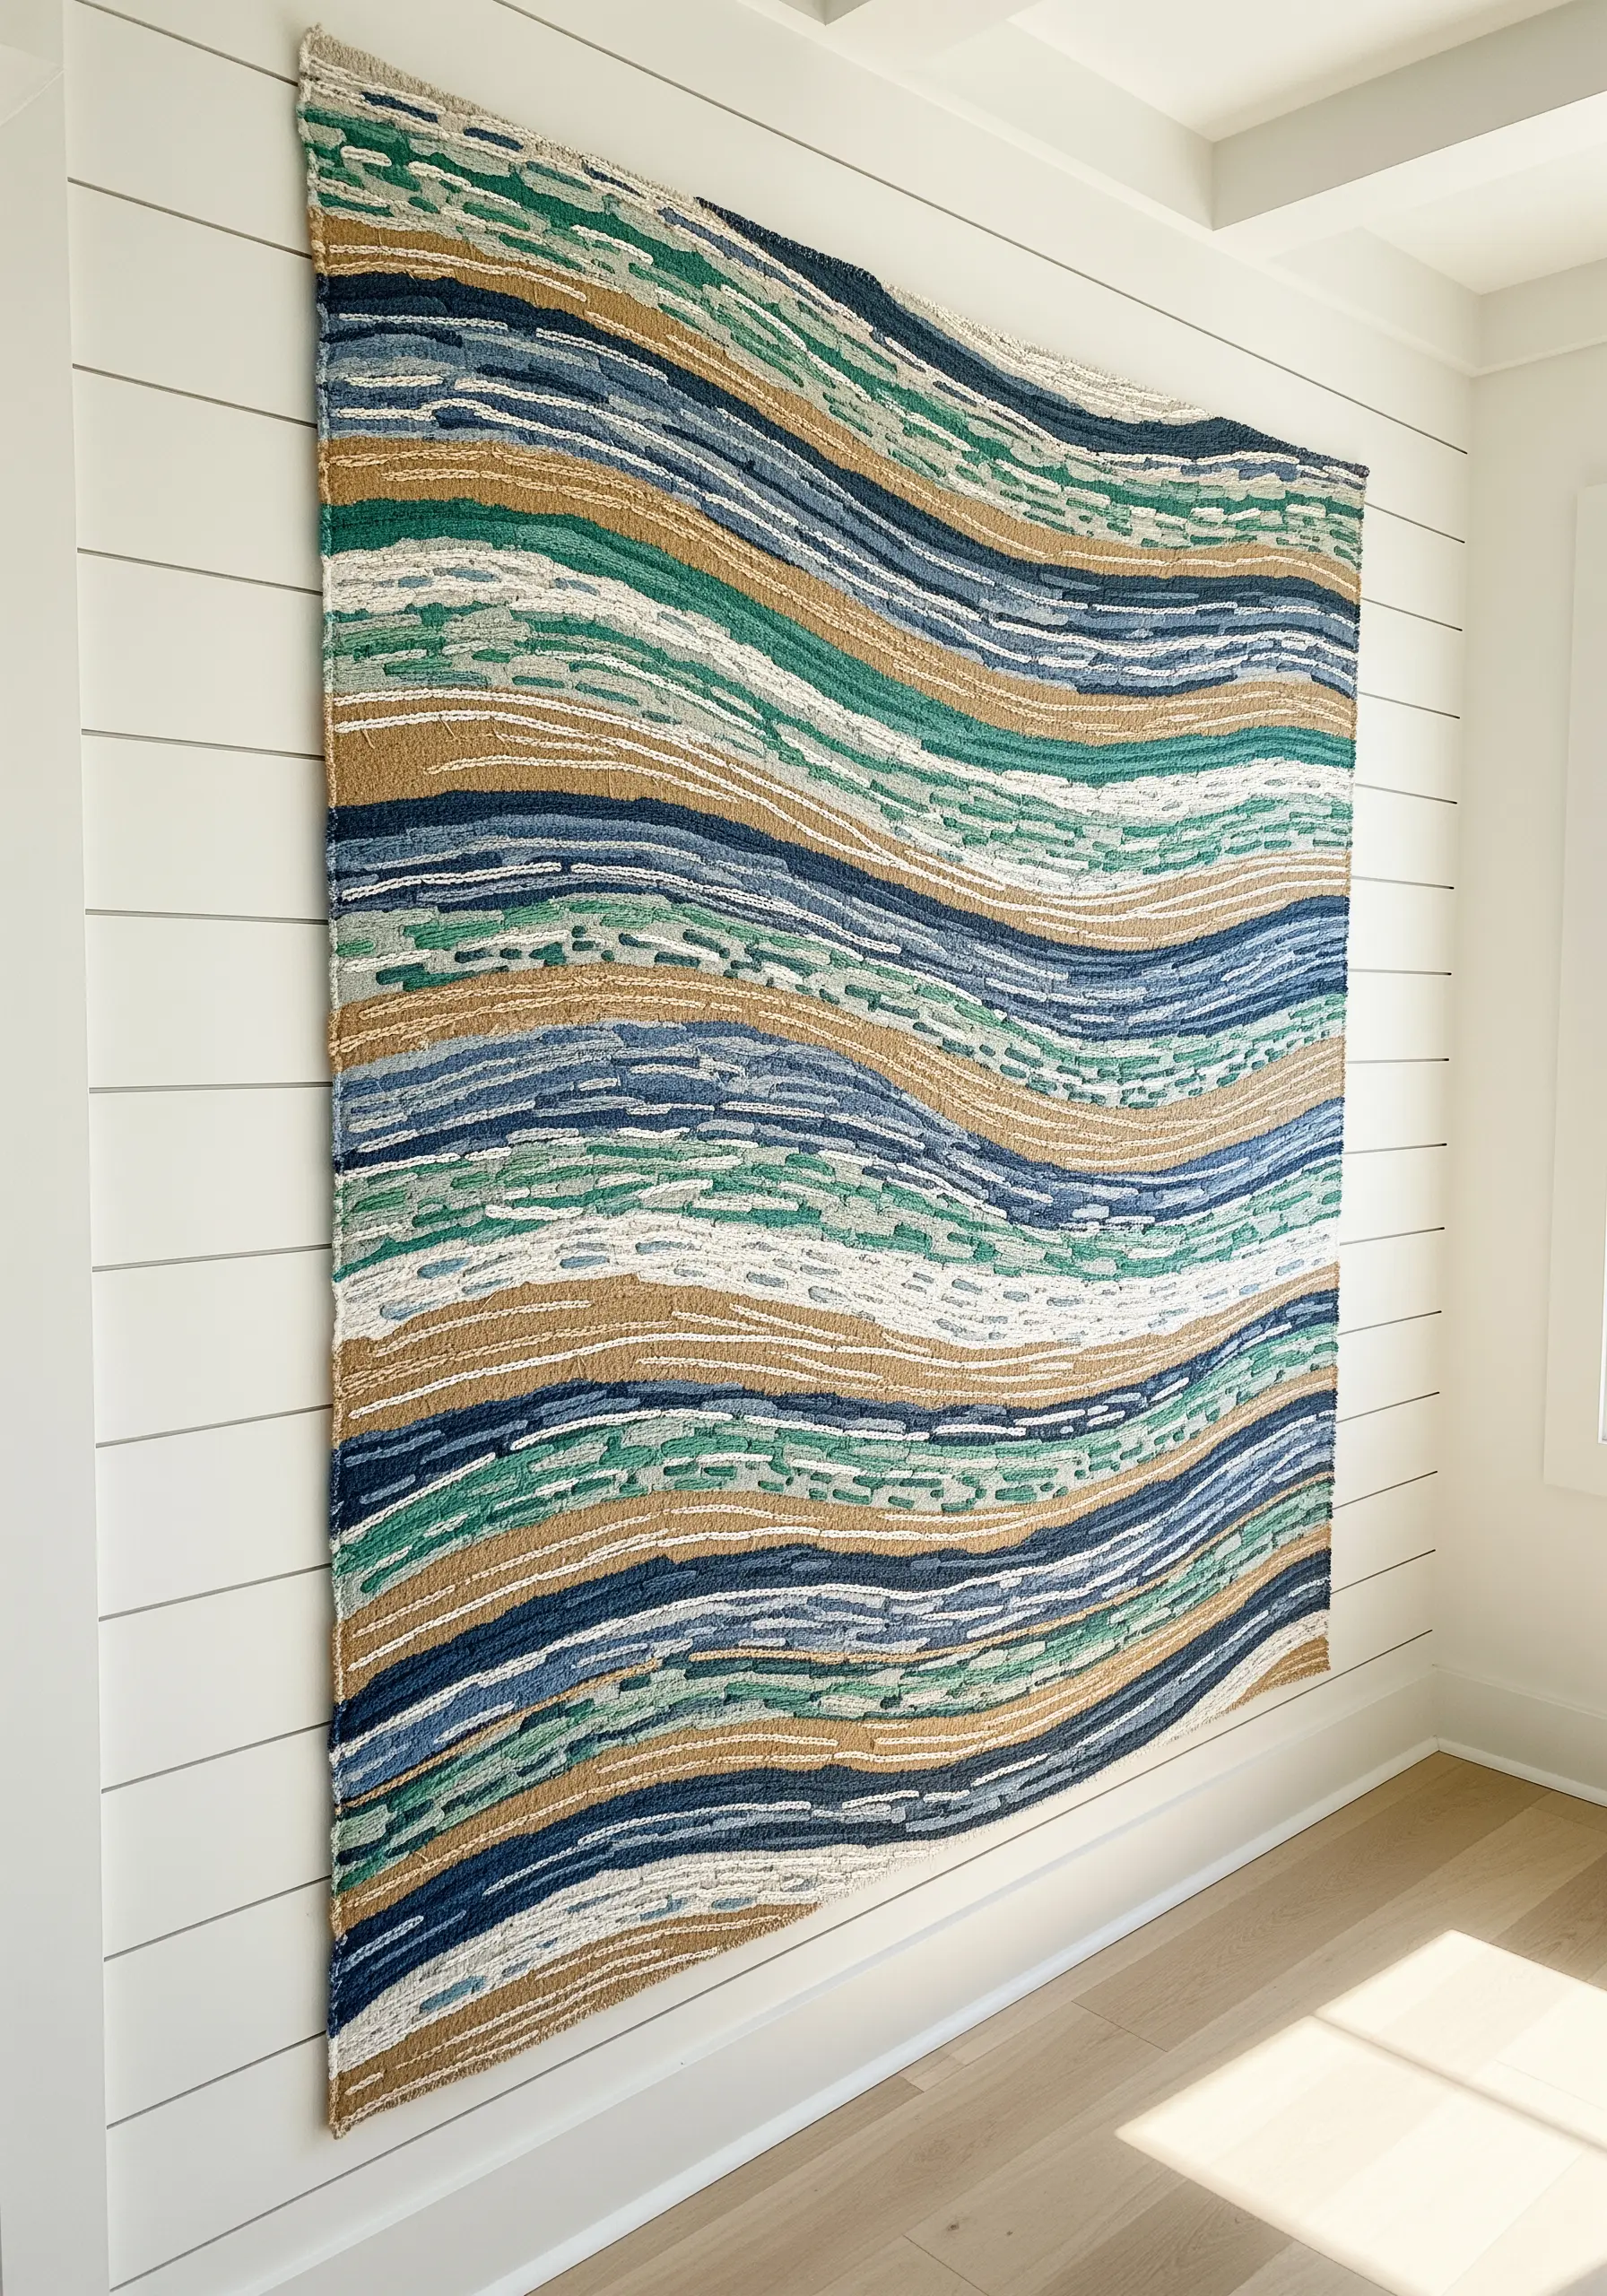
9. Raw-Edge Appliqué for Abstract Landscapes
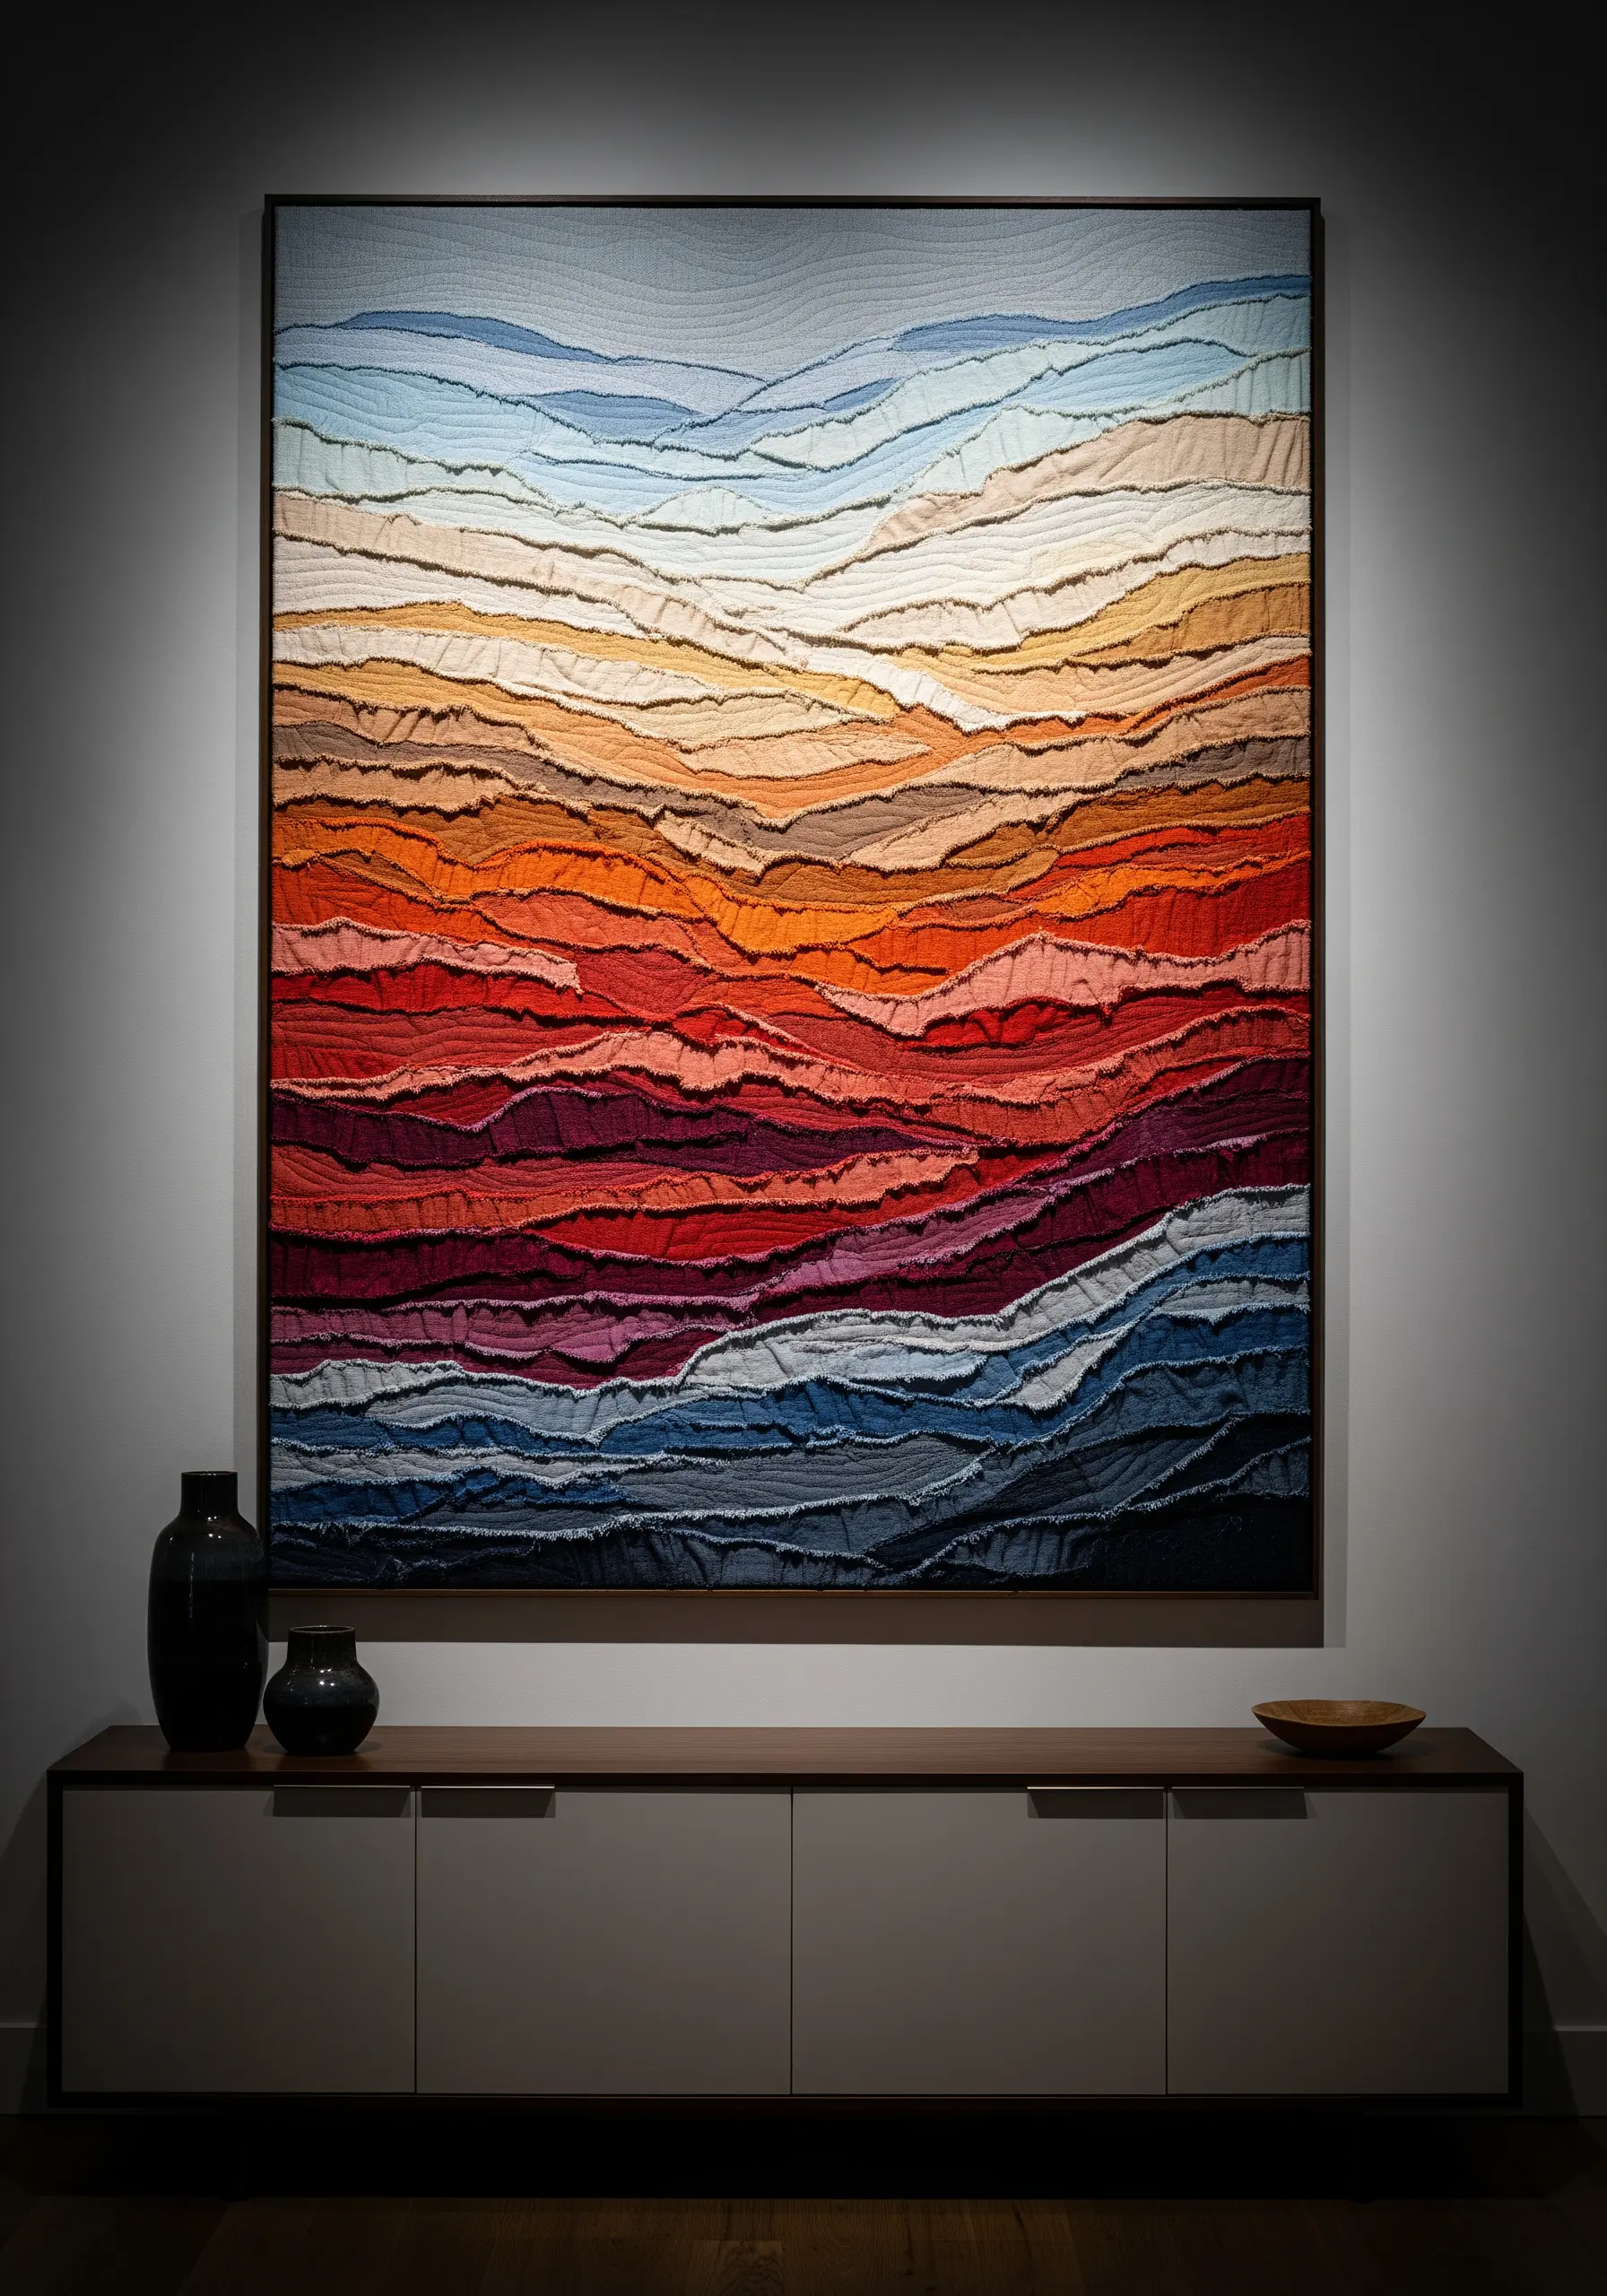
Create a large-scale abstract landscape by layering torn or cut strips of fabric with varying textures.
Combine materials like linen, denim, corduroy, and cotton to build a rich, tactile surface.
Secure the layers with simple, visible running stitches or machine stitching, allowing the frayed edges to contribute to the organic, painterly feel.
This approach is ideal for creating fiber art installations that are perfect for gallery-worthy DIY projects.
10. Padded Satin Stitch for Fluid Lines
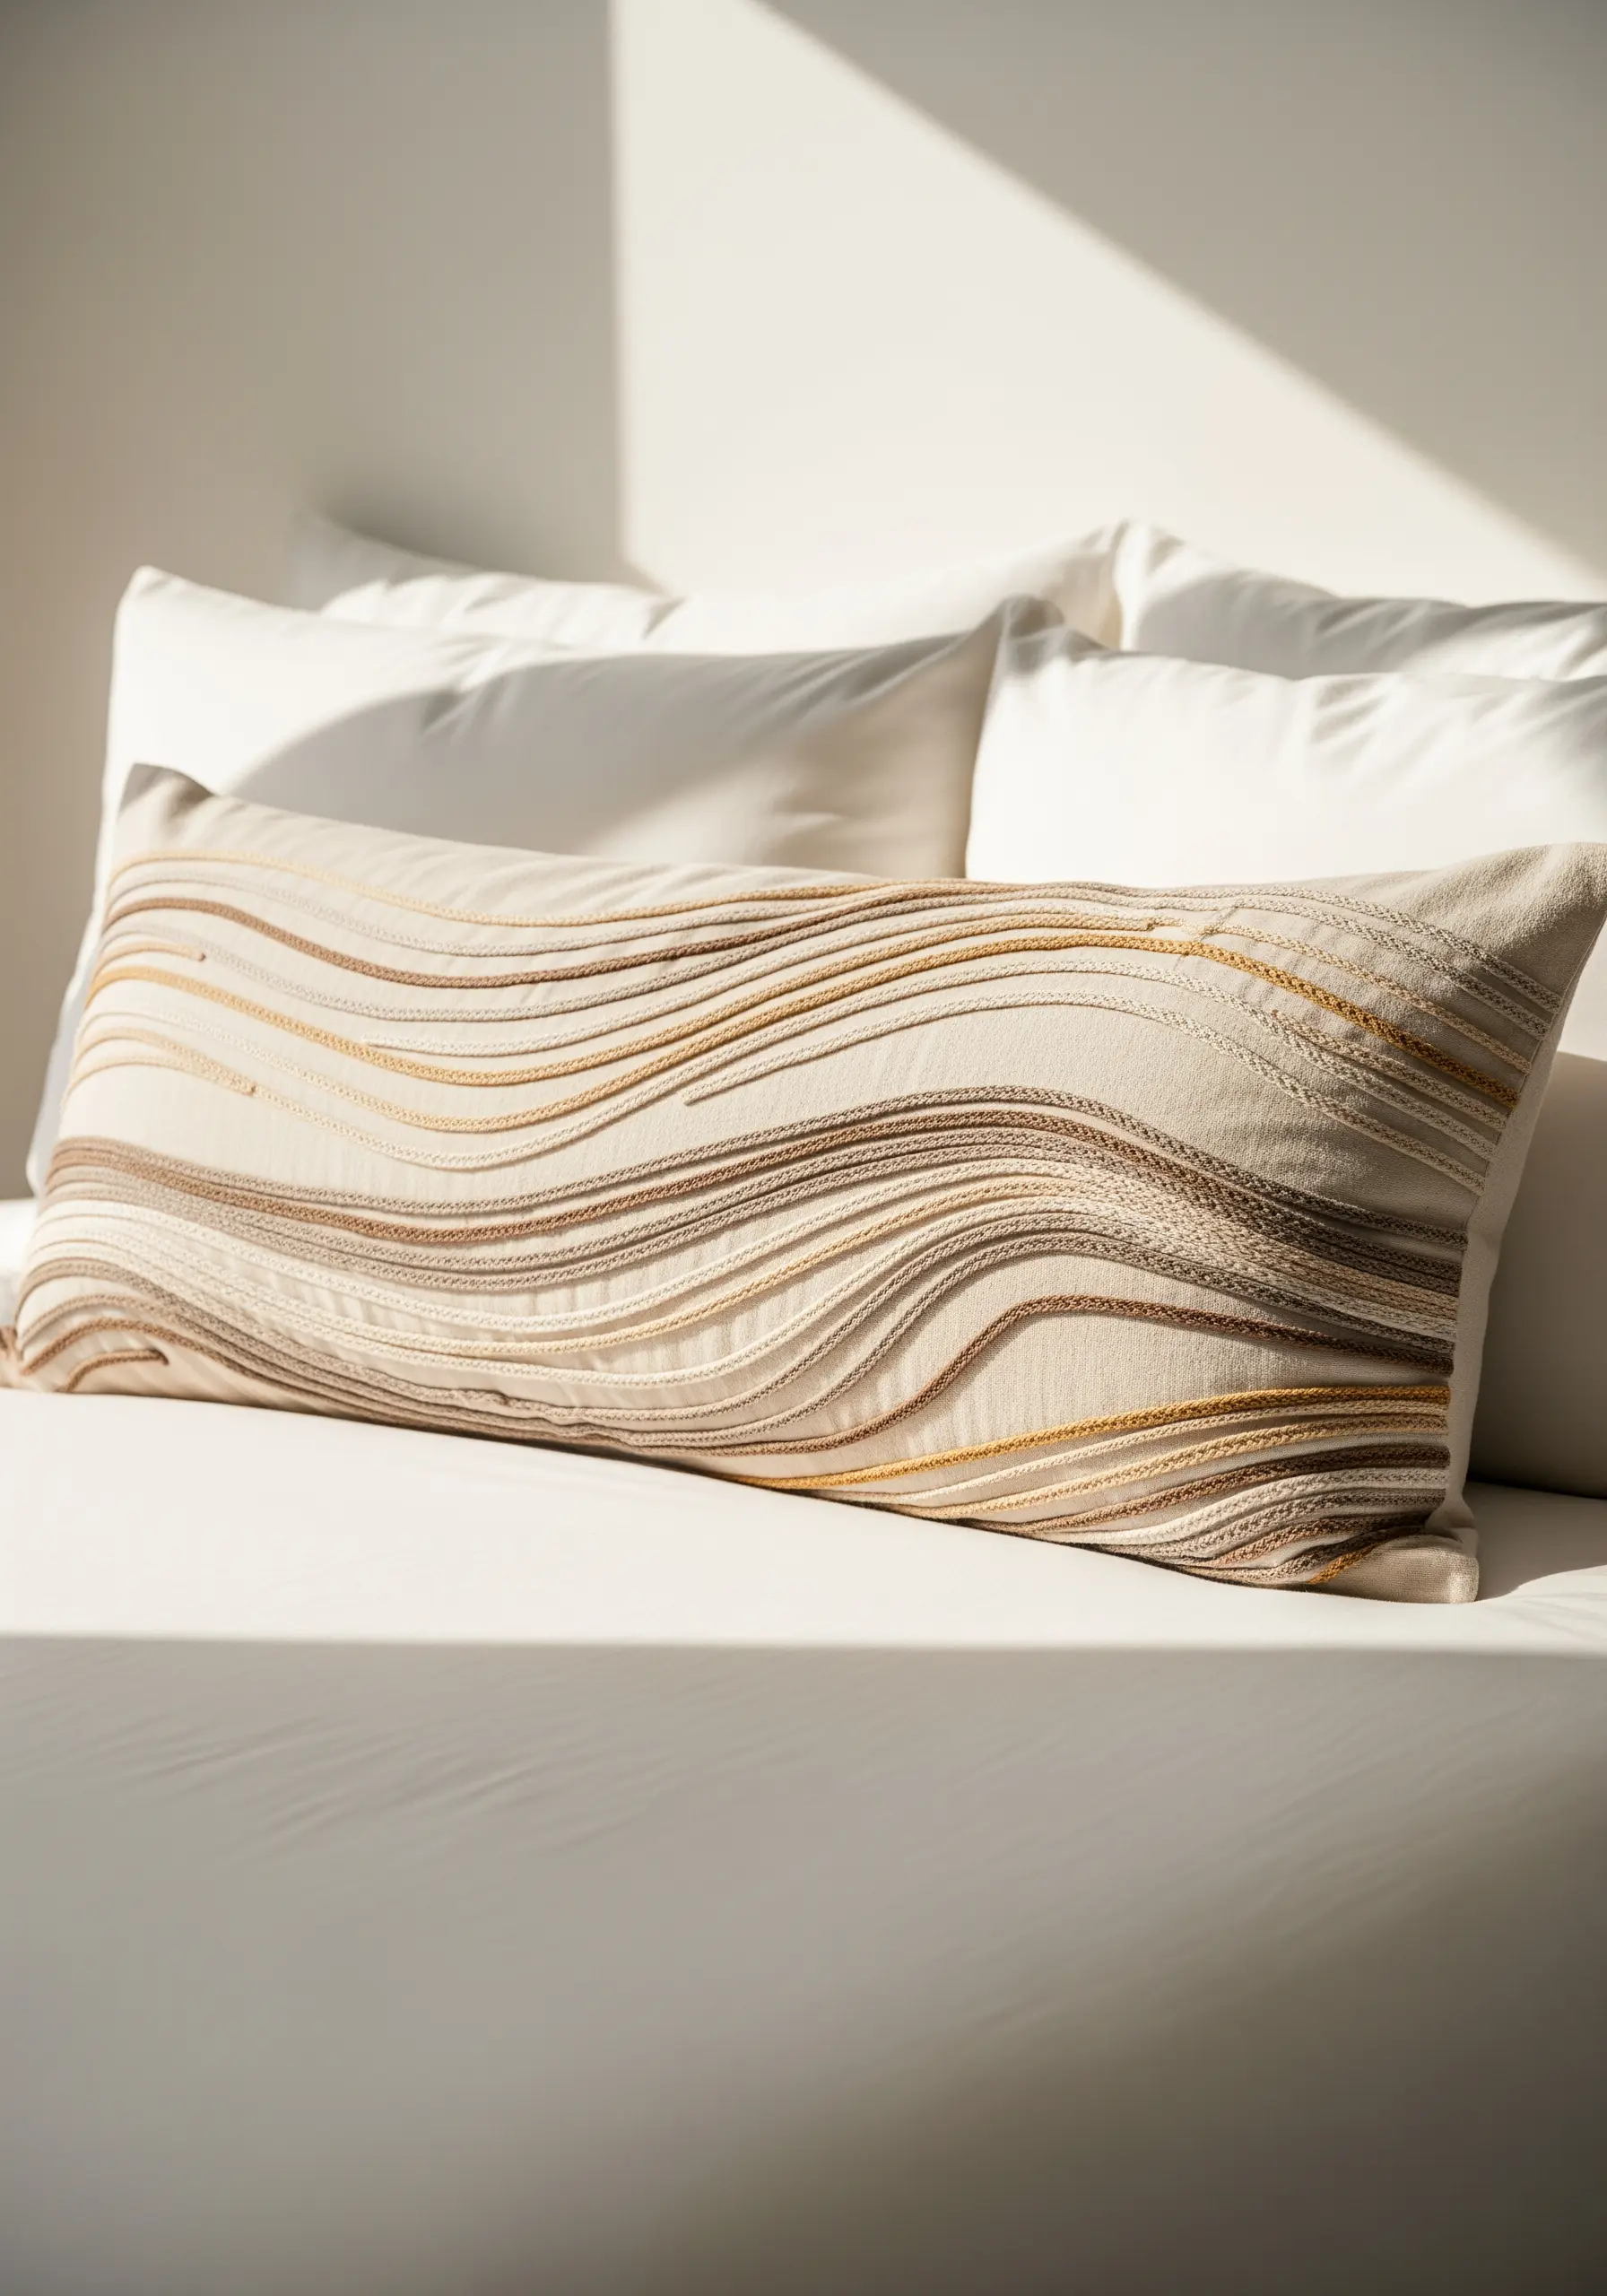
To make your embroidered lines stand out with a subtle, three-dimensional curve, use a padded satin stitch.
First, lay down a foundation of several straight stitches within the shape you want to fill.
Then, work your satin stitches over this padding at a perpendicular angle. This lifts the embroidery from the surface, creating elegant highlights and shadows.
It’s a beautiful detail for linen-tone embroidery cushion covers, where texture is key.
11. The Meditative Power of Couching Spirals
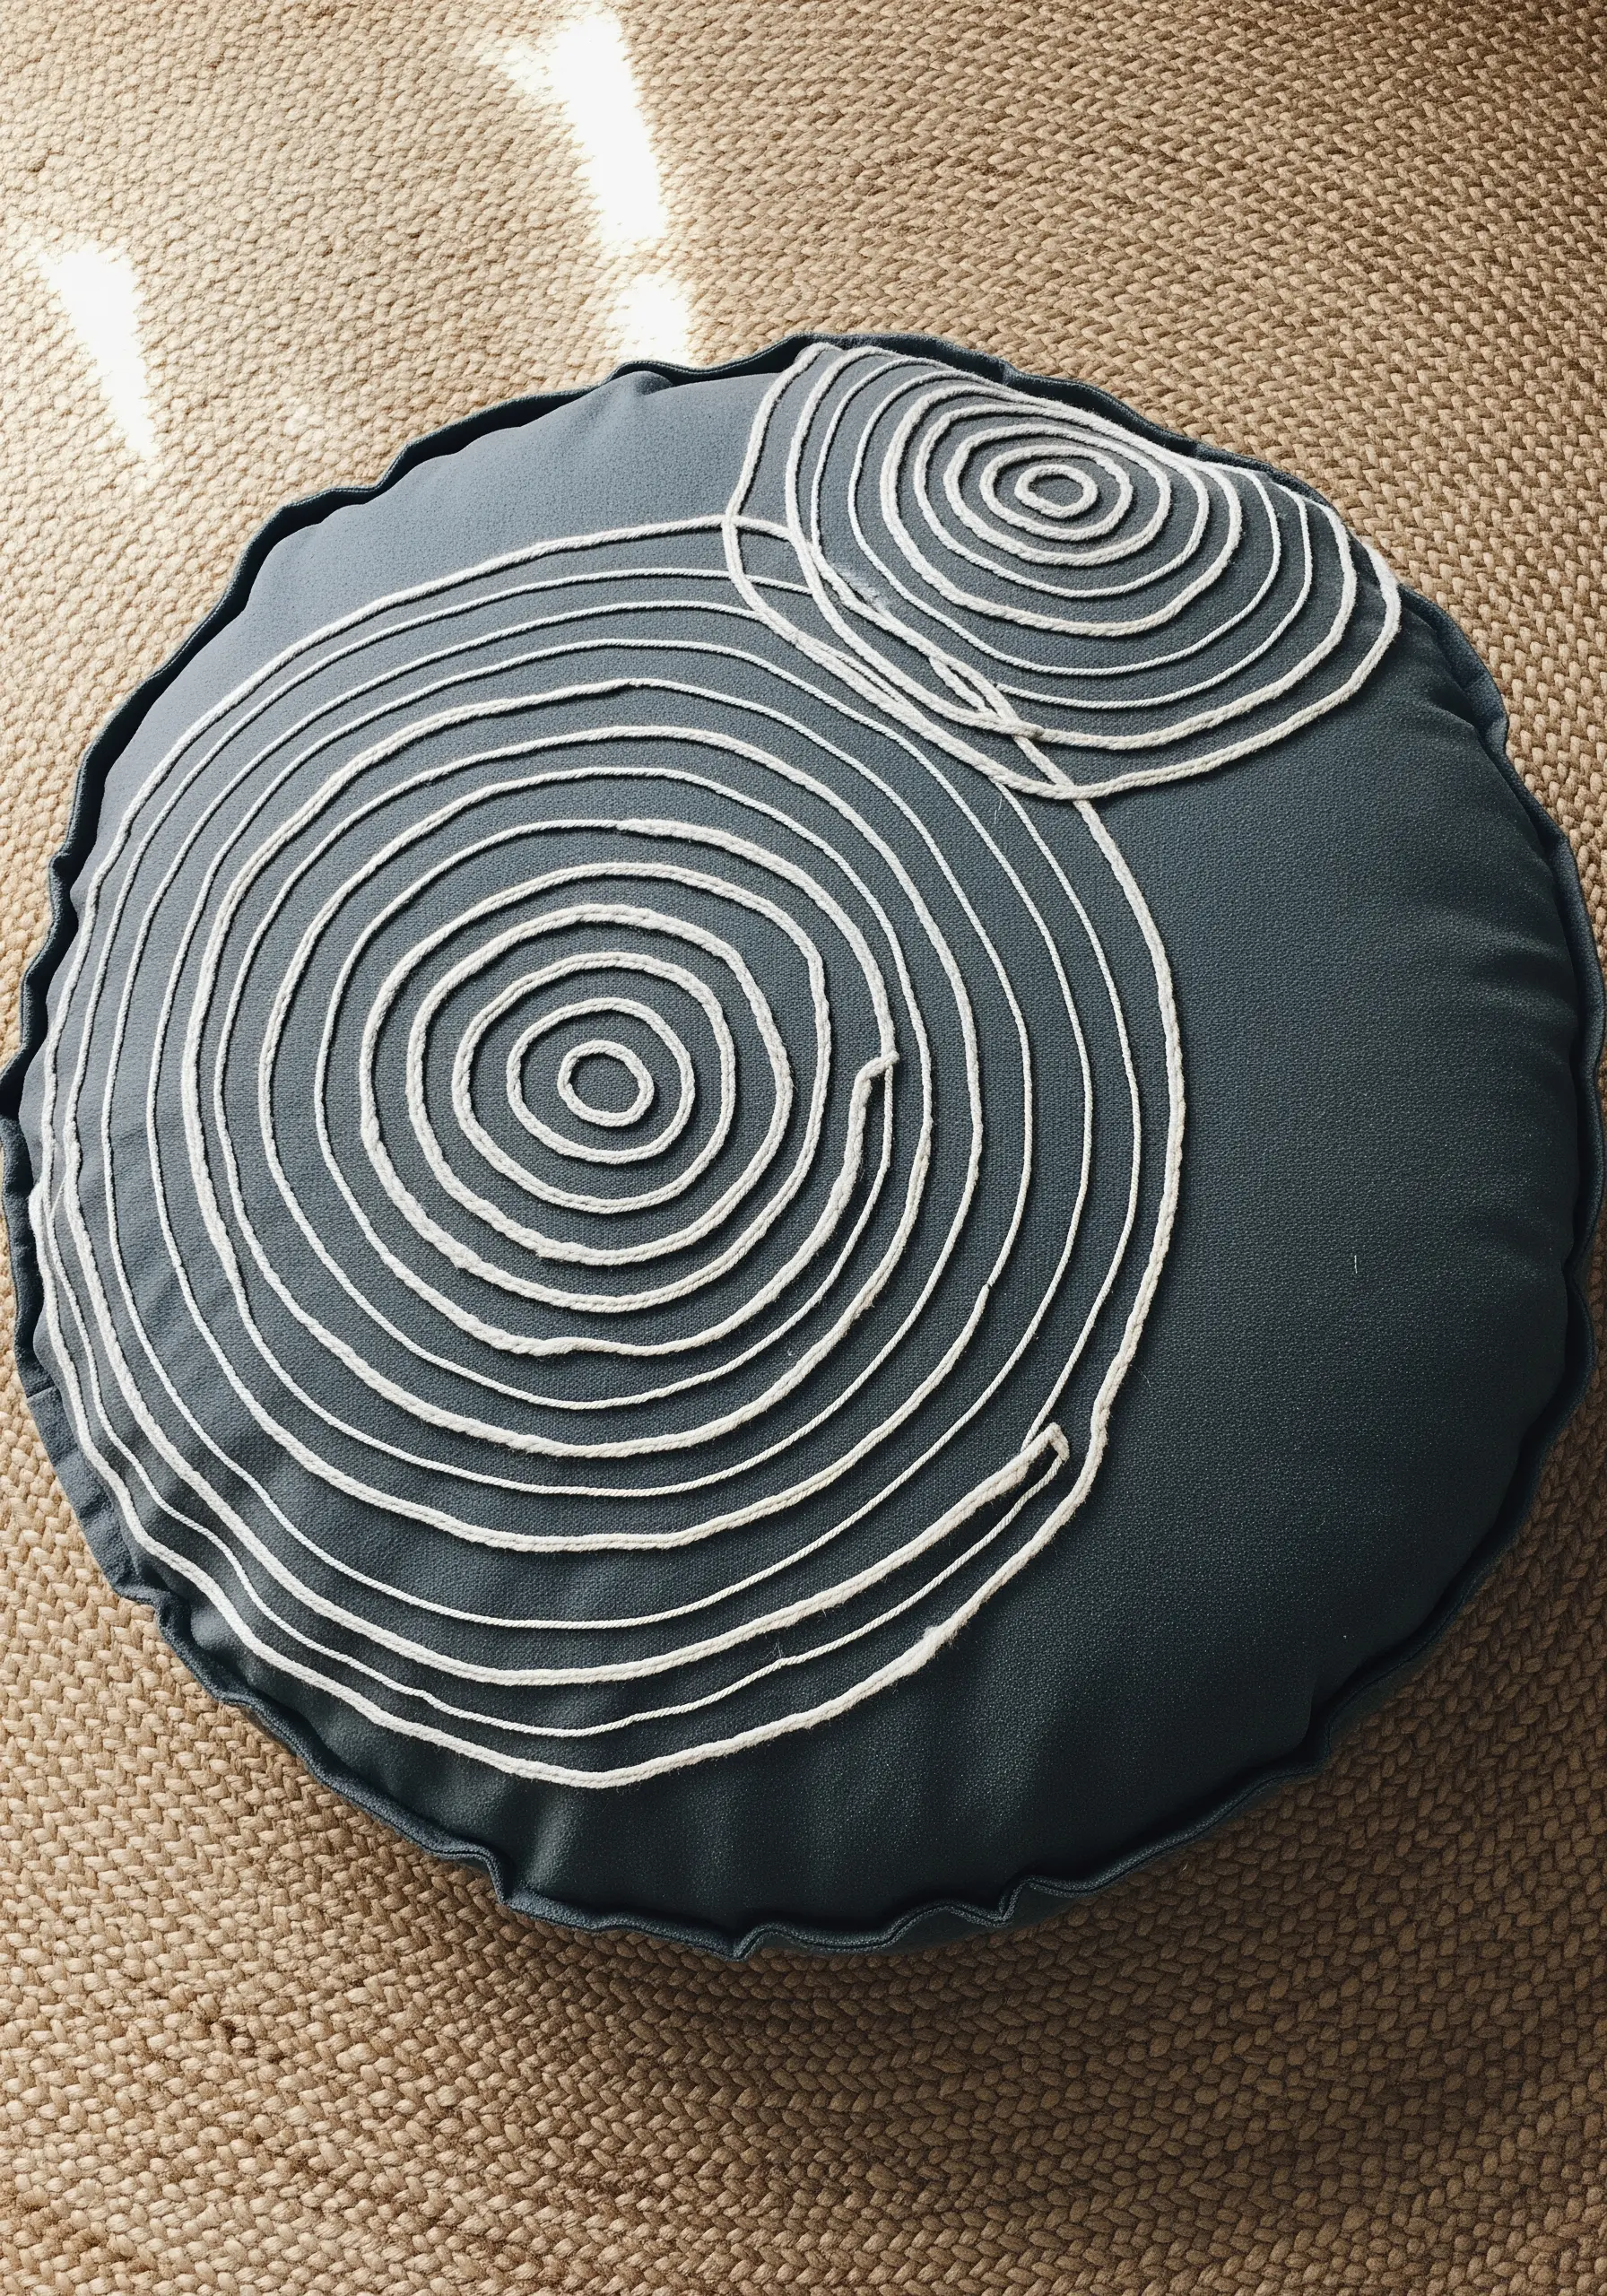
Create bold, graphic patterns by couching thick cotton rope or cord onto your fabric.
This technique is less about intricate needlework and more about guiding the cord into fluid shapes, securing it with small, anchoring stitches.
The result is a highly tactile design that feels both modern and primal.
These are the kinds of minimal DIY embroidery projects you’ll actually want to hang, adding instant focus to a room.
12. Delicate Line Art for Botanical Studies
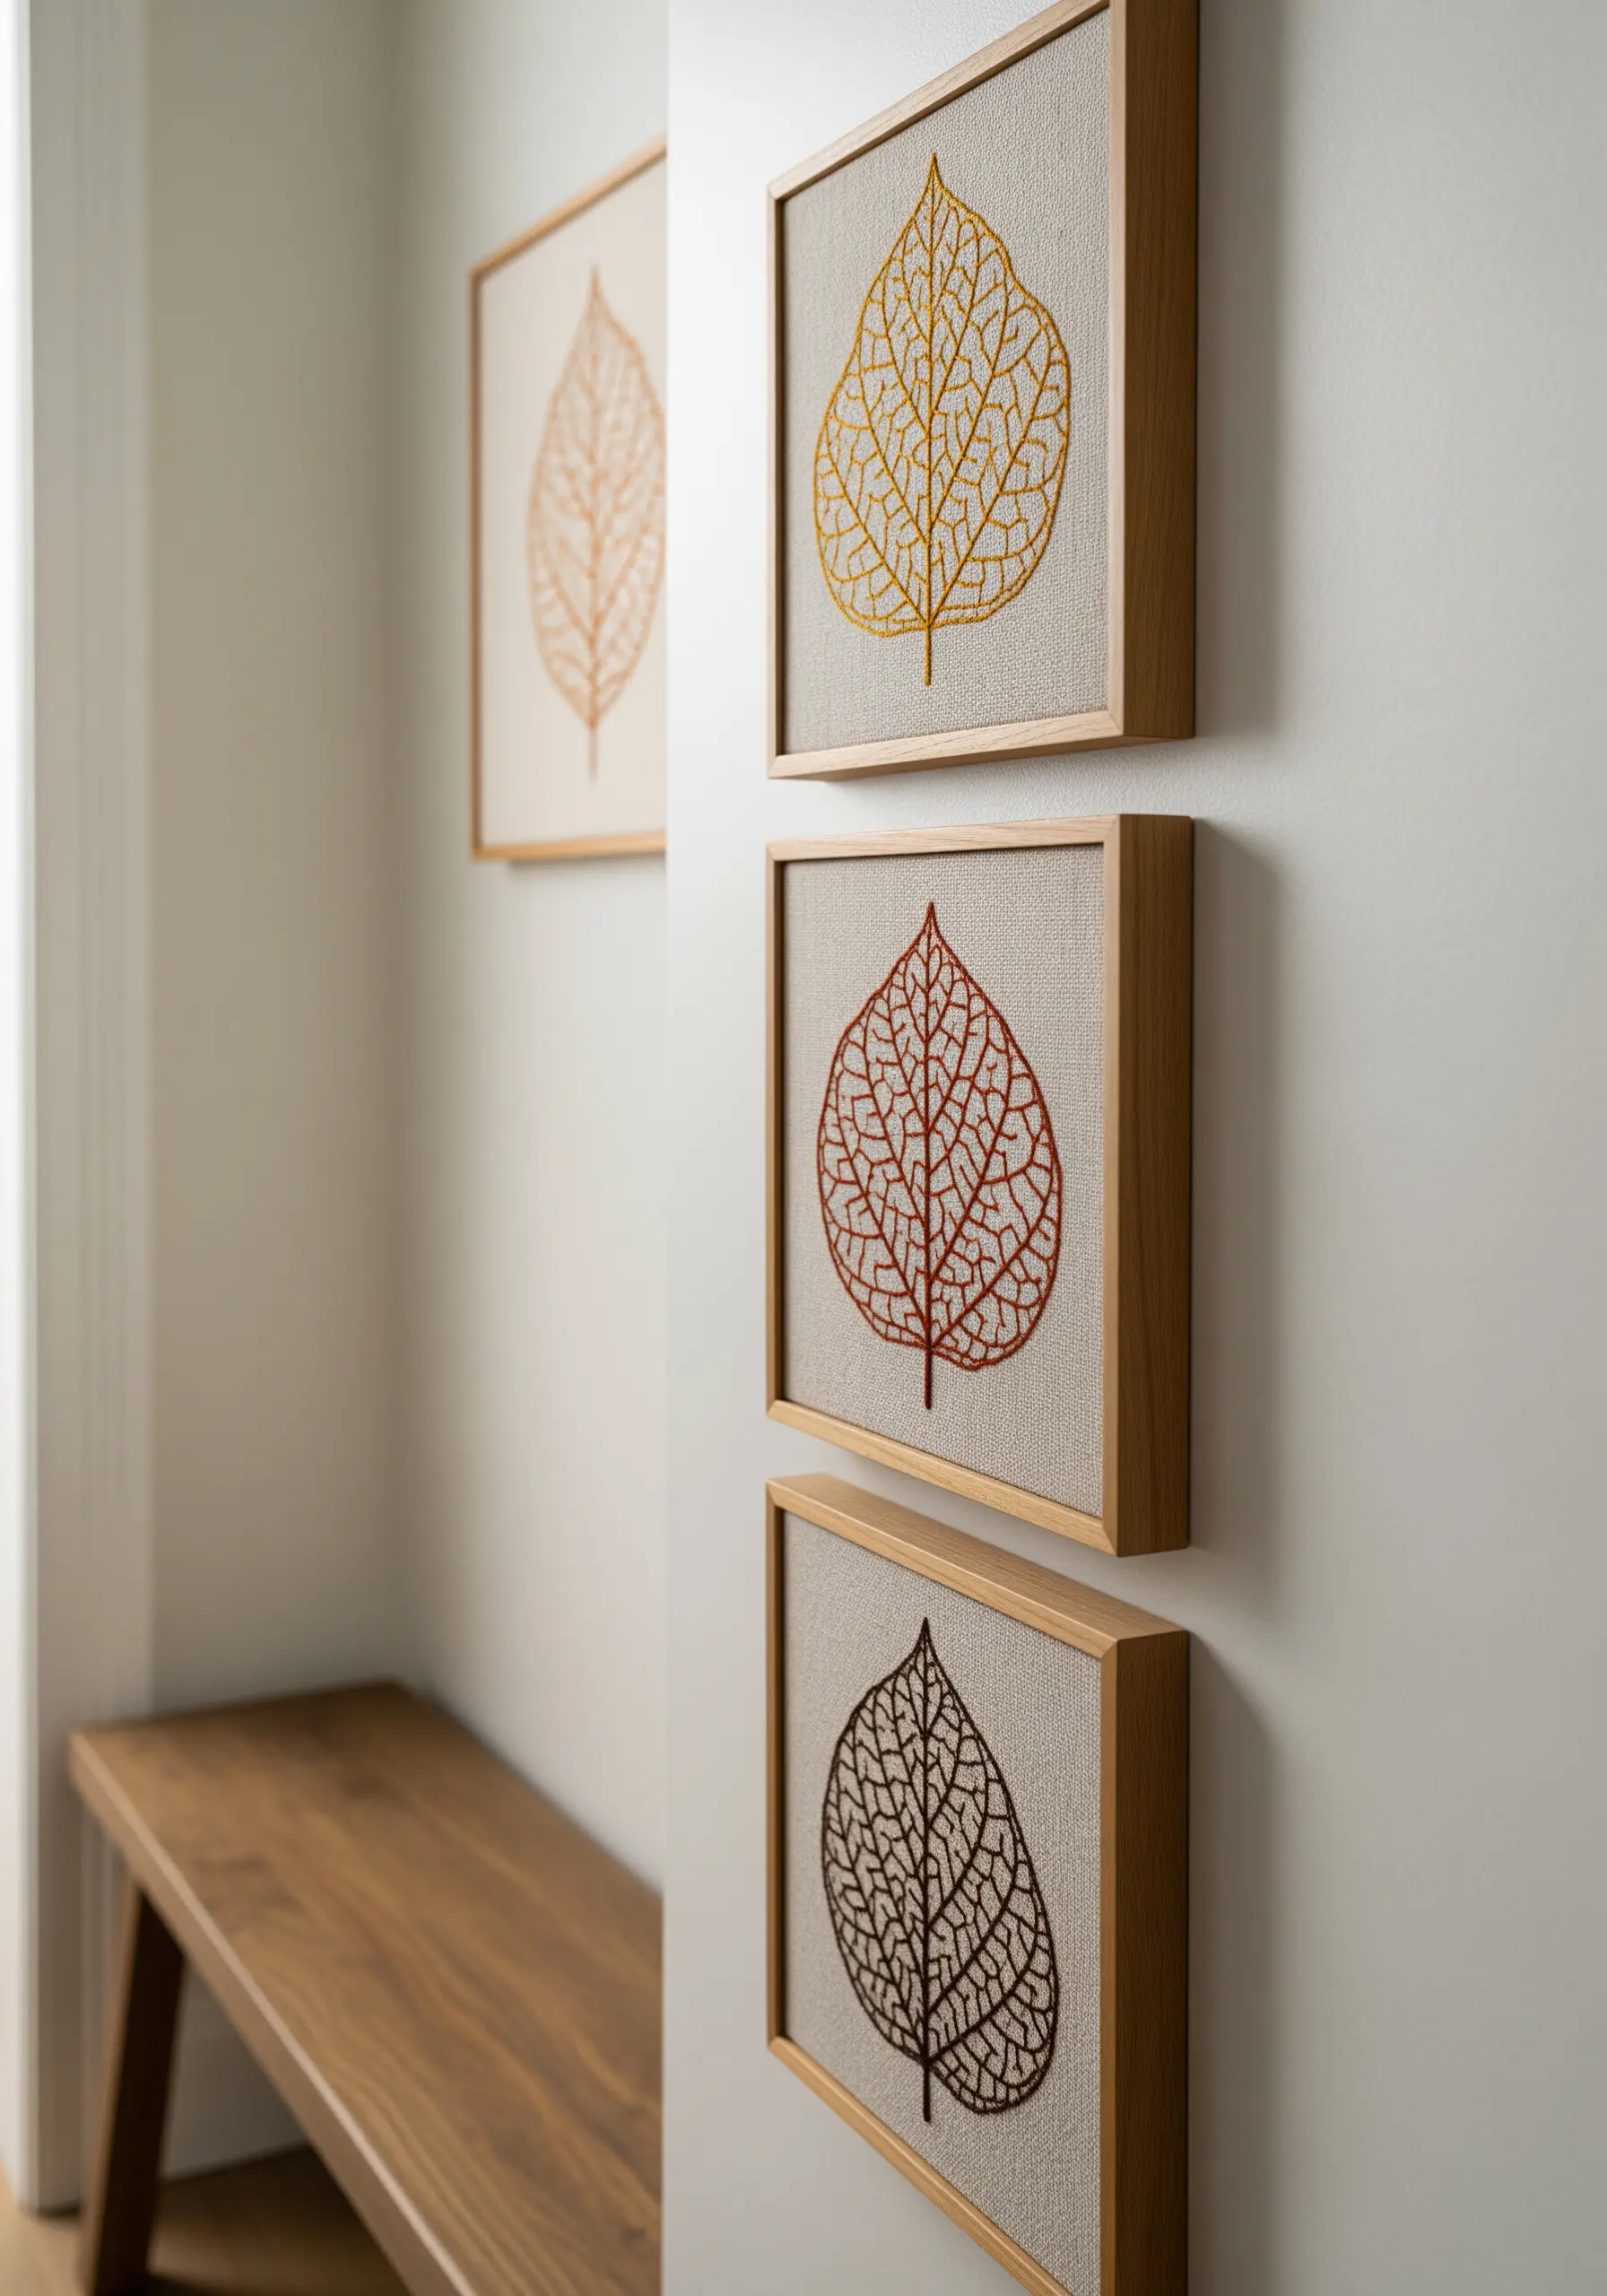
Capture the intricate vein structure of leaves using only a single strand of thread and a precise backstitch.
The elegance of this technique lies in its simplicity and restraint; the focus is entirely on the clean, unbroken line.
Use a high-quality, smooth thread to ensure your stitches are uniform.
Grouping several of these framed embroidery patterns together creates a sophisticated, gallery-style wall display.
13. Block Color with Directional Satin Stitch

For large geometric landscapes, use satin stitch but intentionally change the direction of your stitches for each color block.
Stitching one mountain face vertically and the adjacent one horizontally will cause them to catch the light differently, creating a powerful illusion of planes and depth.
This simple trick adds dynamic visual interest to otherwise flat shapes.
It’s a perfect technique to transform bare walls without over-decorating.
14. Building 3D Moss with Assorted Knots
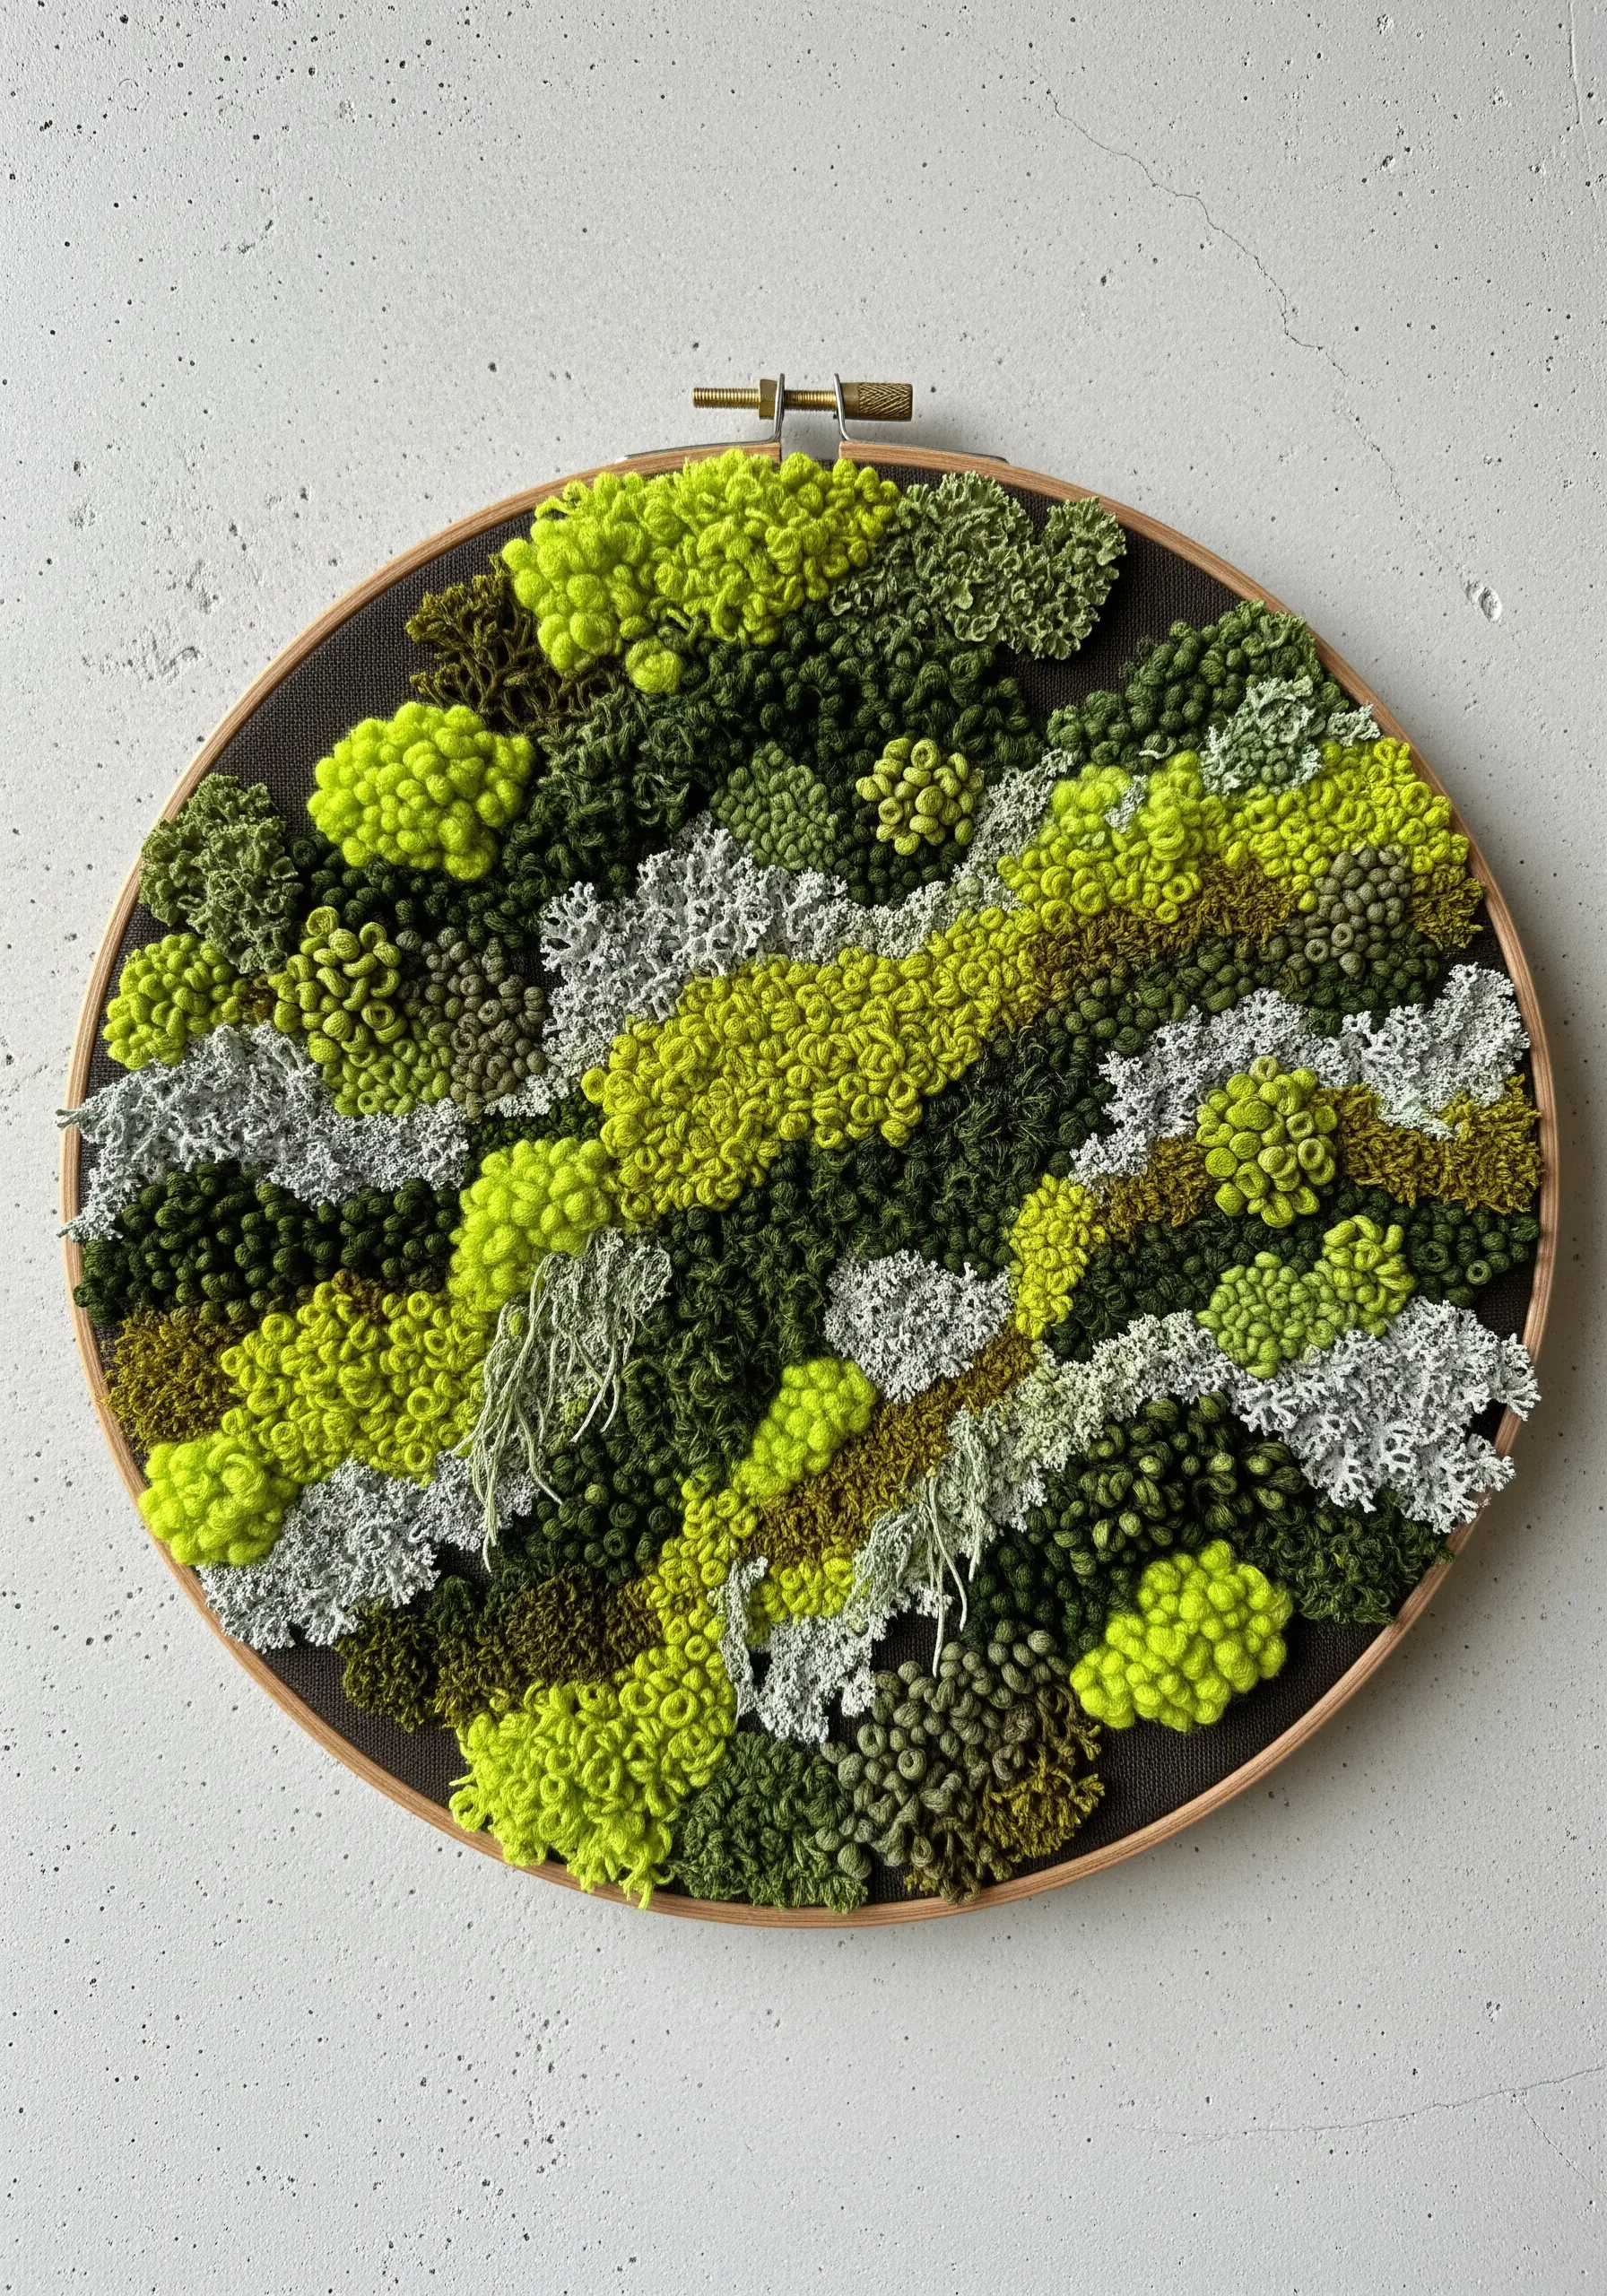
Recreate the lush texture of a mossy forest floor by combining different knots and stitches.
Use tightly packed French knots as your base, then incorporate bullion knots and turkey work loops (which you can trim to different heights) for variation.
Mix several shades of green, chartreuse, and grey floss to achieve a natural, variegated look.
This is one of the most effective nature-texture embroidery hacks every crafter needs to know for creating realistic dimension.
15. The Fishbone Stitch for Symmetrical Leaves

For flawless, symmetrical fern fronds or leaves, the fishbone stitch is your most reliable technique.
It creates a beautiful central spine and angled sides in one continuous, rhythmic motion, giving your botanicals a clean and elegant structure.
Pair the leaves with tiny lazy daisy stitches for simple flowers.
This stitch is perfect for small handmade projects that double as thoughtful gifts, like scented sachets or bookmarks.
16. Creating Movement with Woven Stitches
For a large-scale piece with a woven feel, first lay down vertical bars of color using appliquéd fabric strips or long satin stitches.
Then, work across them horizontally with a darning stitch, weaving your needle over and under the vertical bars.
Varying the colors and textures of your horizontal threads will produce a rich, undulating surface that mimics tapestry.
You can create stunning fiber art installations that transform any room instantly with this method.
17. Graphic Embroidery for Translucent Surfaces
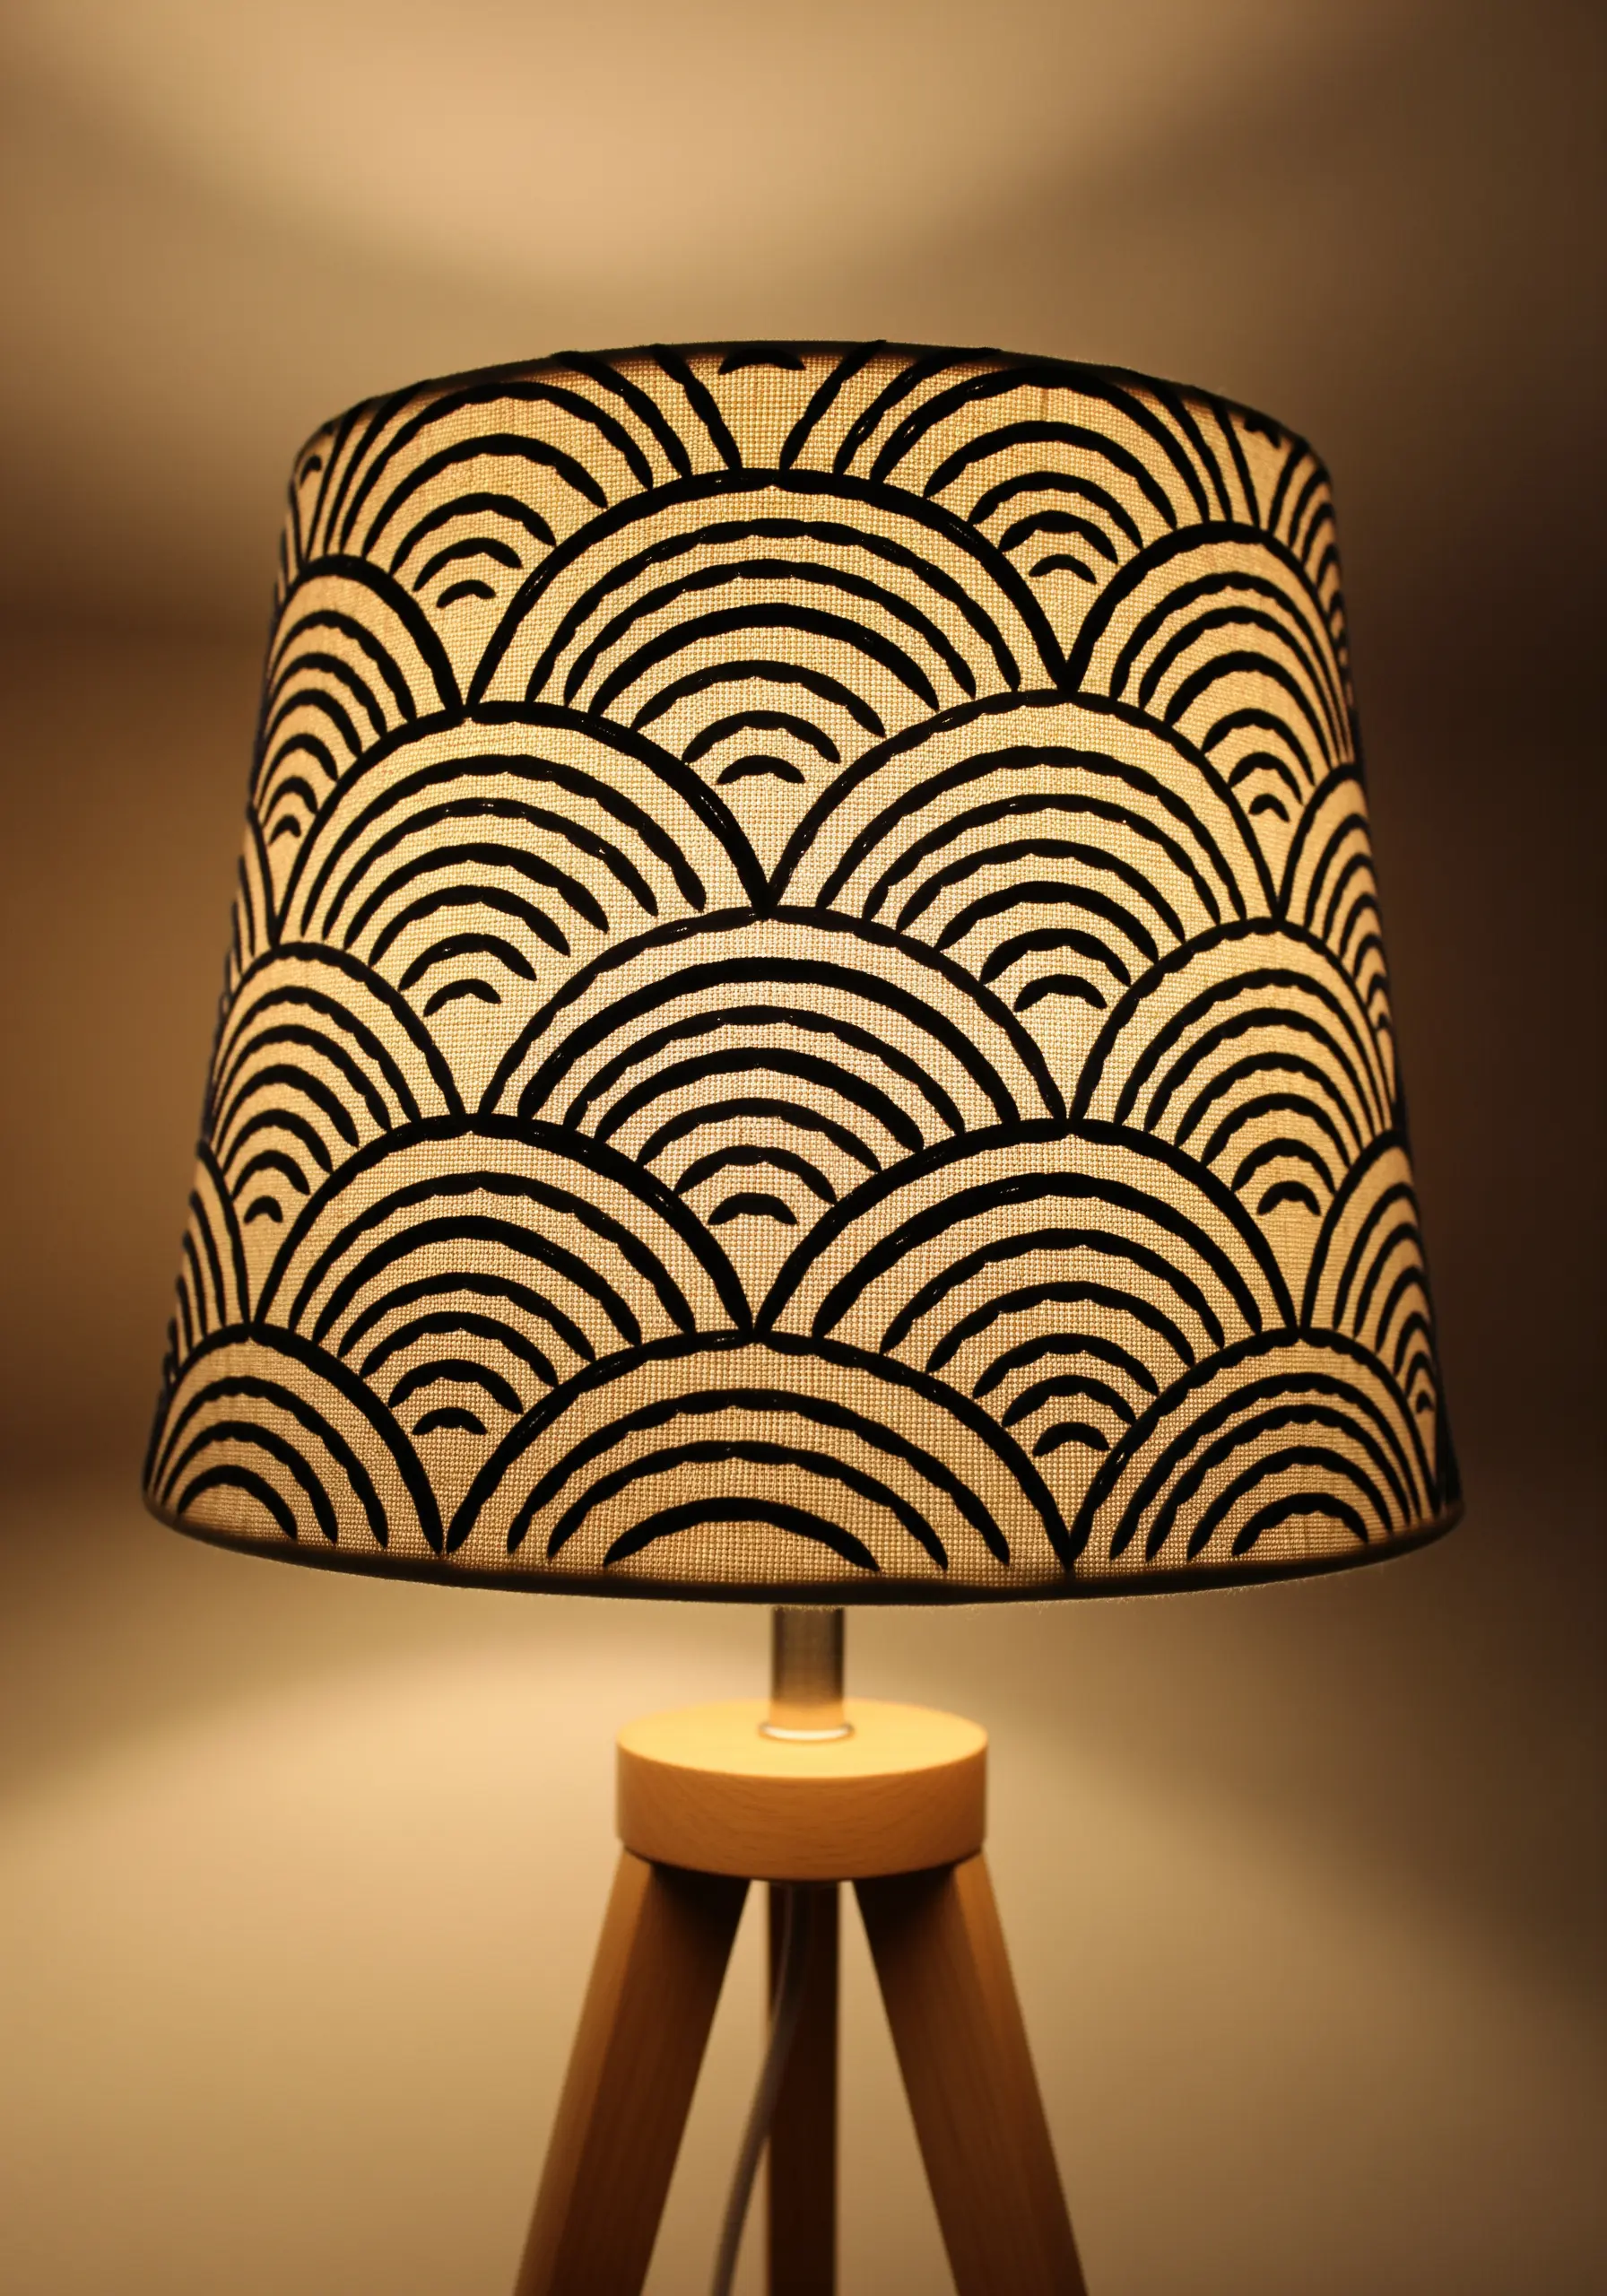
When embroidering on a lampshade, remember that your work will be backlit, making every stitch visible.
Use a bold, graphic pattern and a dark, thick thread to create a strong silhouette.
Opt for a dense satin stitch and secure your thread ends without knots, which would cast bulky shadows.
Instead, weave the tails back under your stitches on the reverse side. This is one of those simple DIY embroidery tricks to transform plain fabric instantly and elevate an everyday object.


