

The embroidery hoop is more than a tool—it’s a frame for a story, a canvas for texture, and a boundary you can creatively push.
If you’ve ever felt your work was missing that final touch of polish or personality, the solution isn’t always a more complex pattern. Often, it’s a subtle shift in technique: choosing a stitch for its texture, not just its coverage; using color to create depth, not just decoration; or arranging multiple pieces to transform a wall.
Here, you’ll find ways to refine your approach. These ideas are designed to help you see your thread and fabric with new eyes, giving you the confidence to create hoop art that feels intentional, vibrant, and uniquely yours.
1. Master Realistic Leaf Gradients
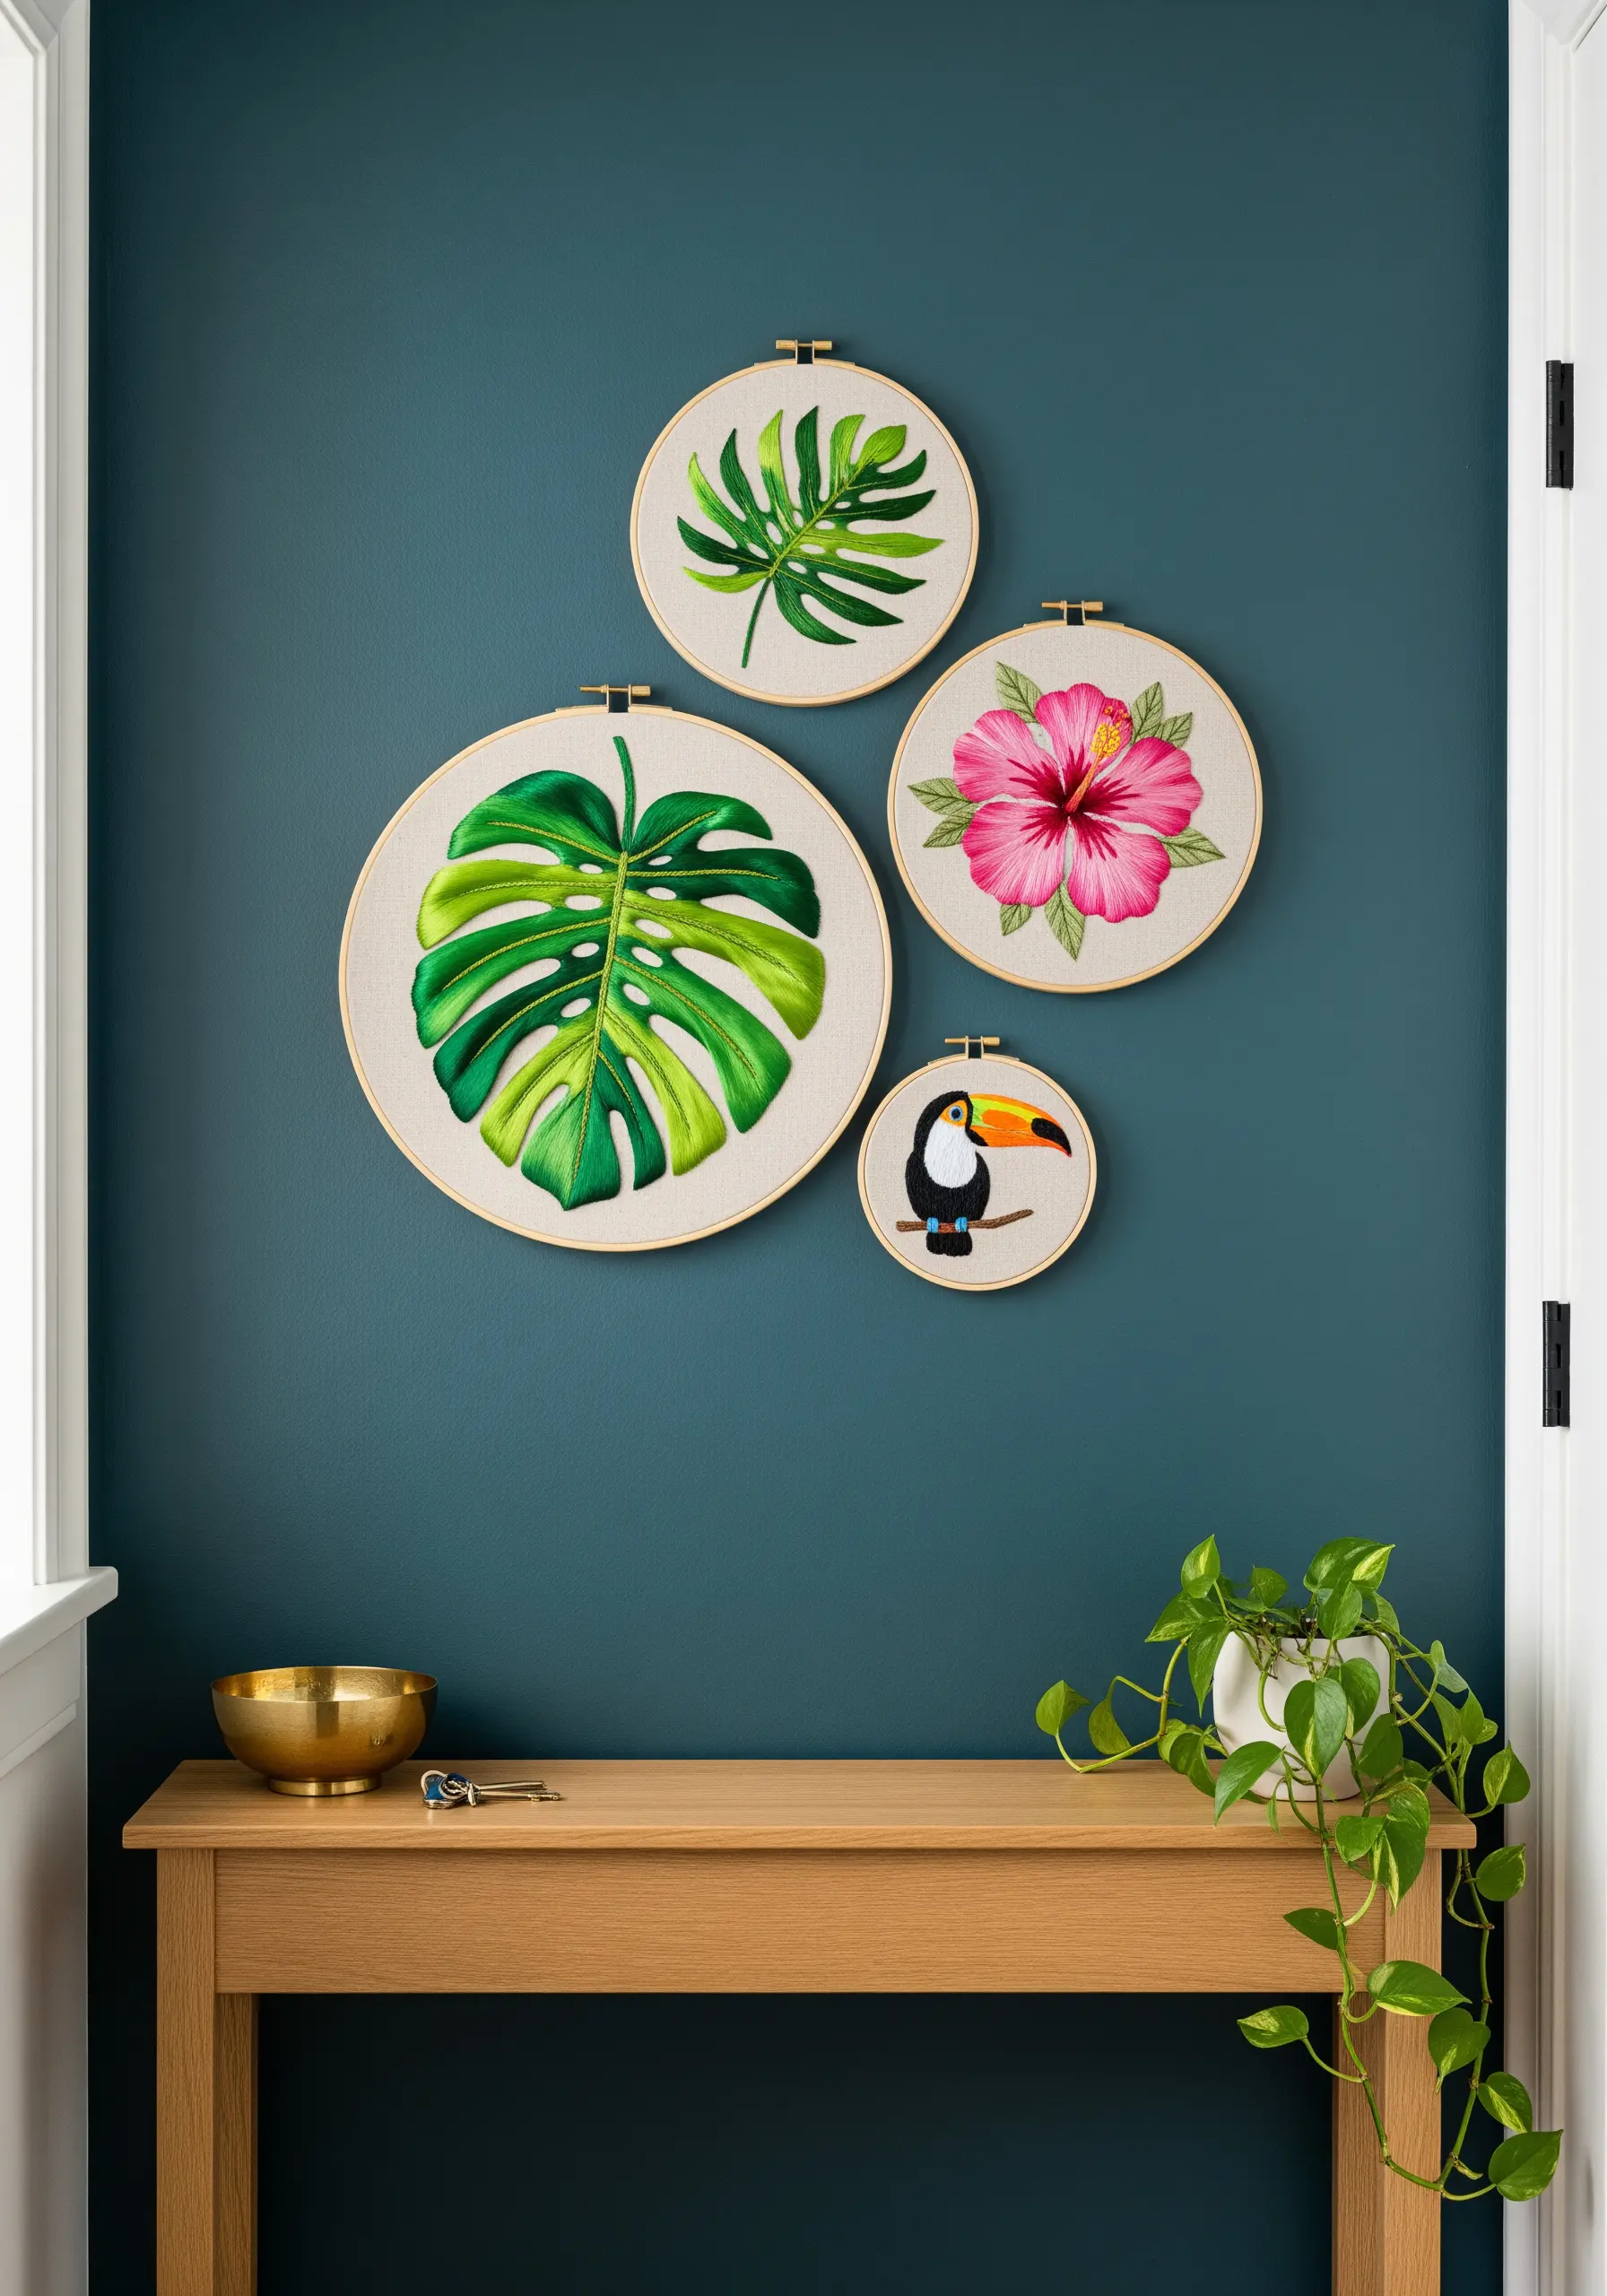
Create lifelike depth in botanicals by using the long-and-short stitch, also known as thread painting.
Start with your darkest green thread to fill the areas in shadow, then gradually introduce lighter shades, allowing your stitches to overlap and blend seamlessly.
For the central vein, use a single strand of your lightest green or even a pale yellow, stitched with a fine backstitch to create a crisp highlight.
This technique turns a flat leaf shape into a dynamic, three-dimensional element, making your tropical leaf and flower combination patterns look professionally finished.
2. Embrace Architectural Satin Stitch Blocks
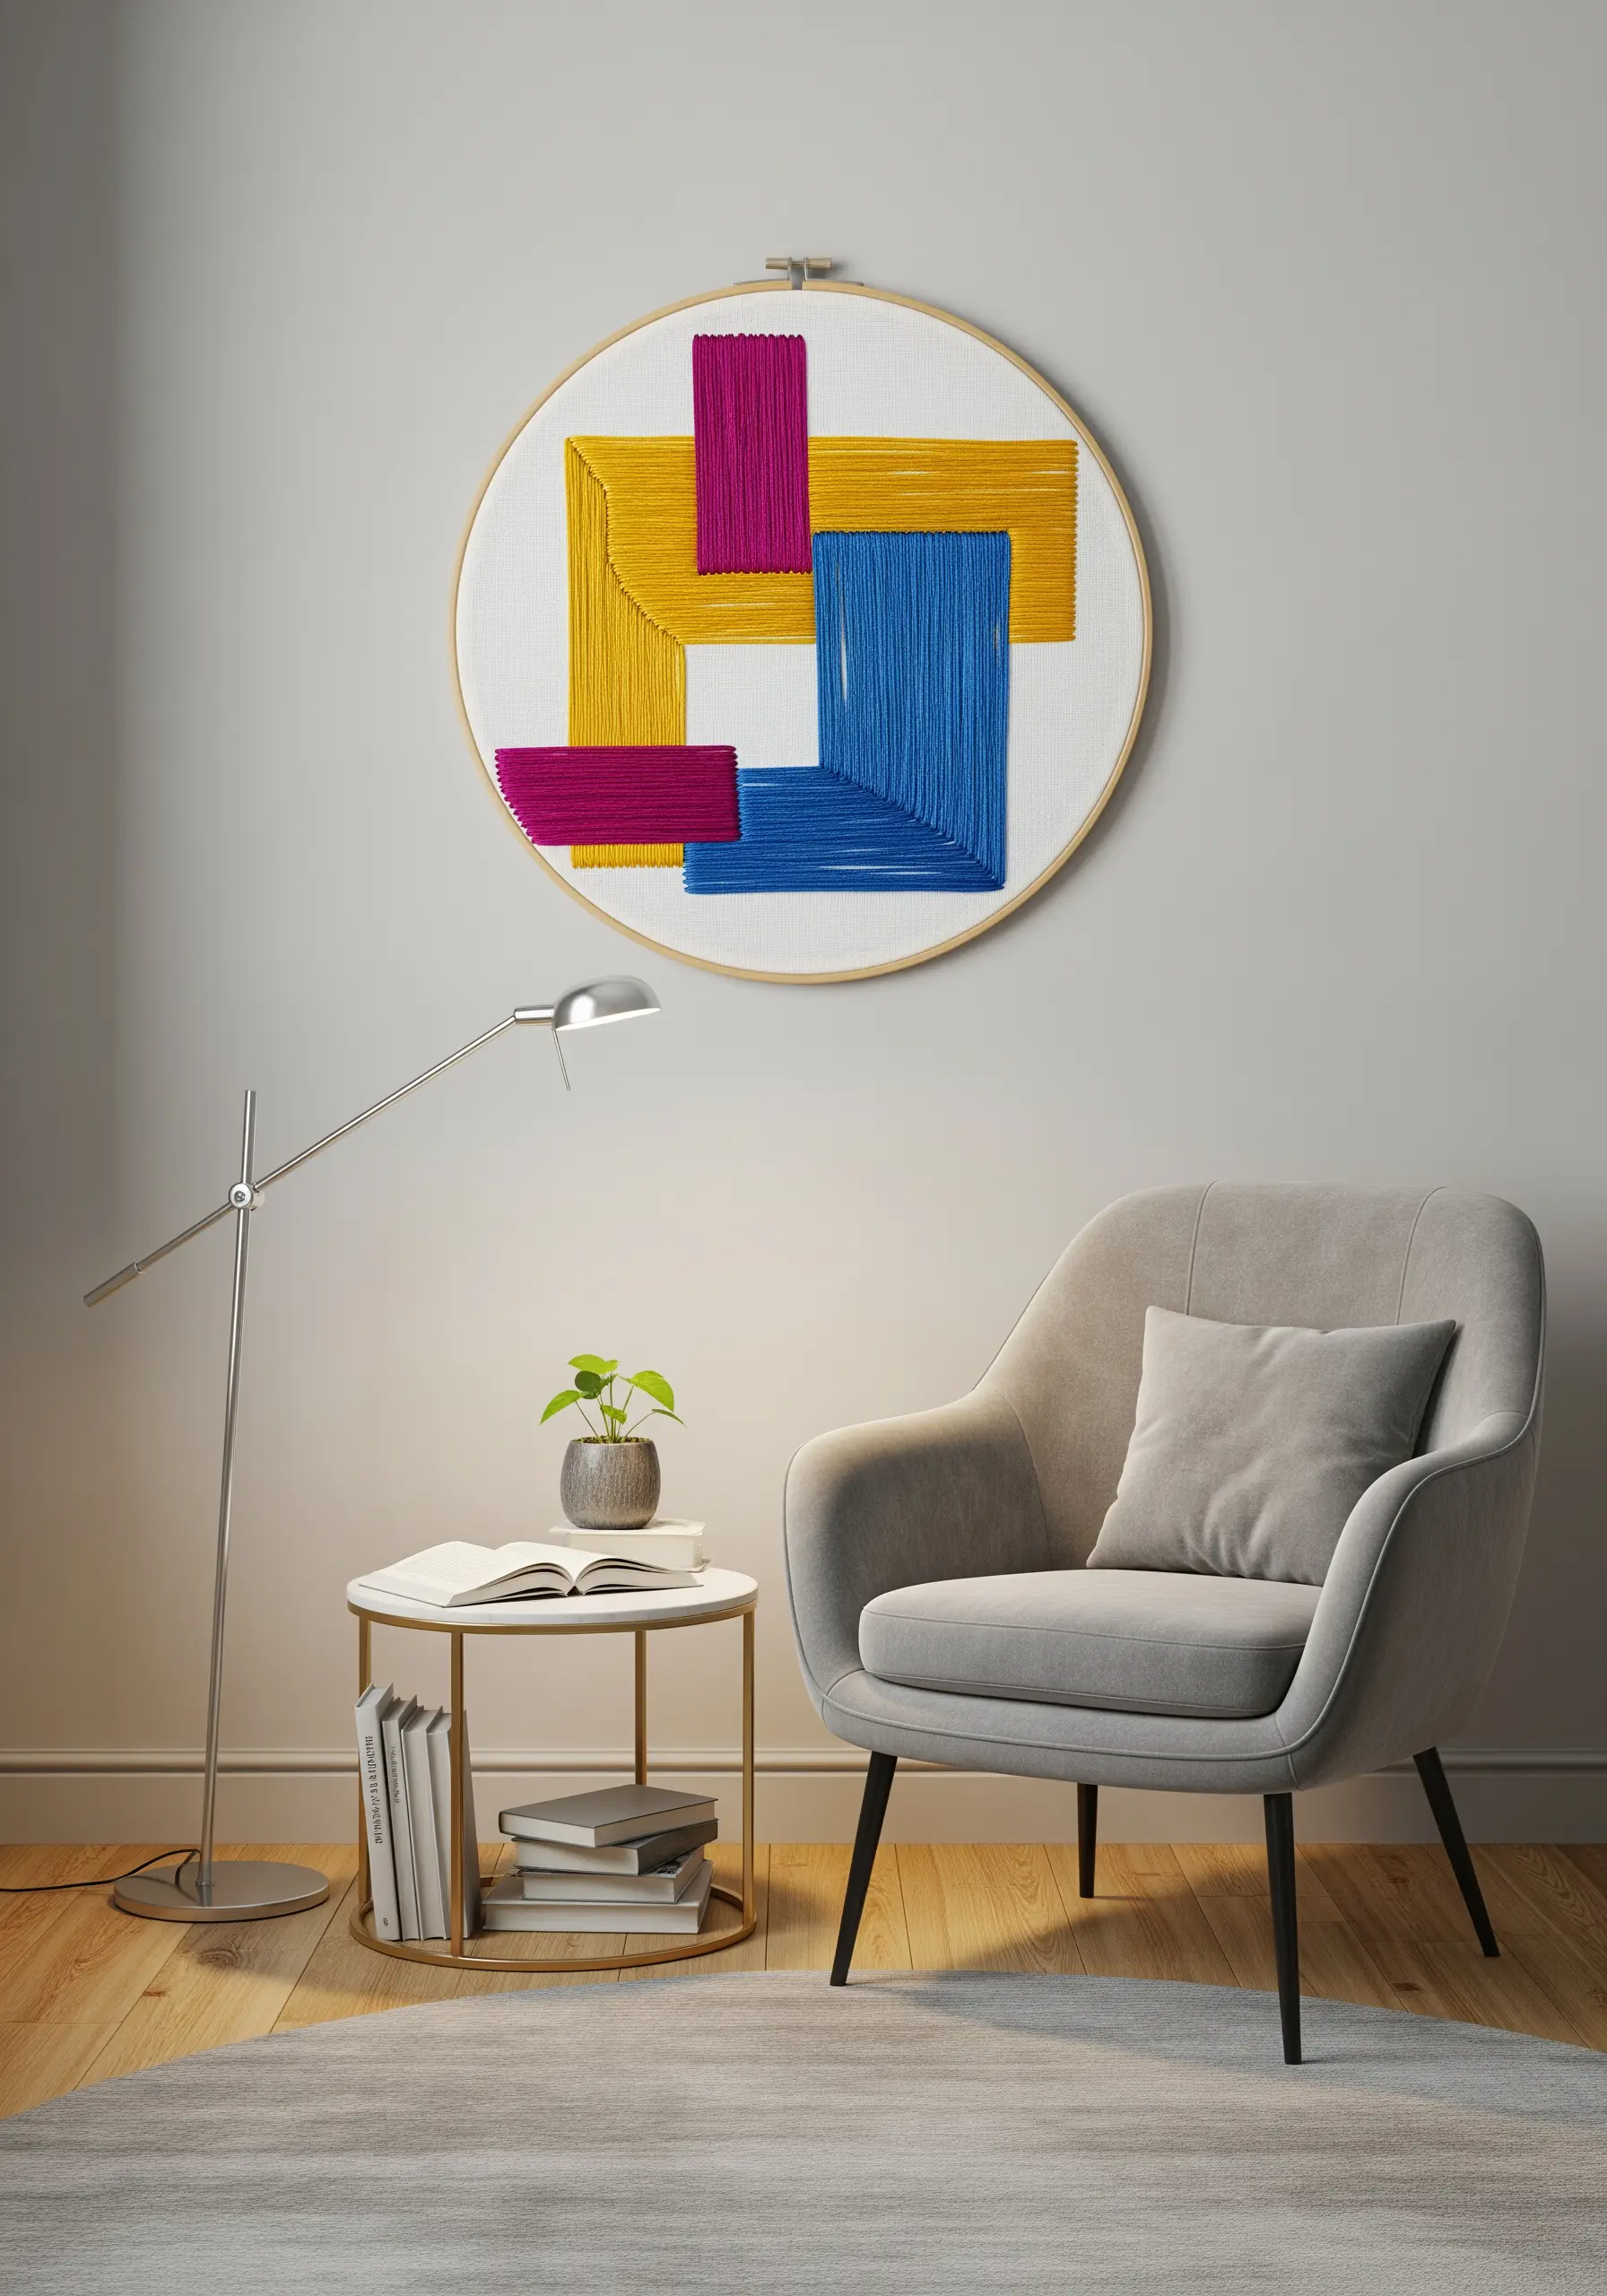
Transform simple geometric shapes into a bold statement piece with perfectly executed satin stitch.
To achieve those flawless, glass-smooth surfaces, always outline your shape first with a split stitch.
This creates a slightly raised edge that guides your satin stitches and keeps them perfectly contained for a sharp, clean finish.
Use a full six strands of floss for maximum coverage and a high-impact, tactile block of color. The tension between the overlapping shapes and the negative space is what gives this design its modern power.
3. Create a Celestial Triptych with Texture
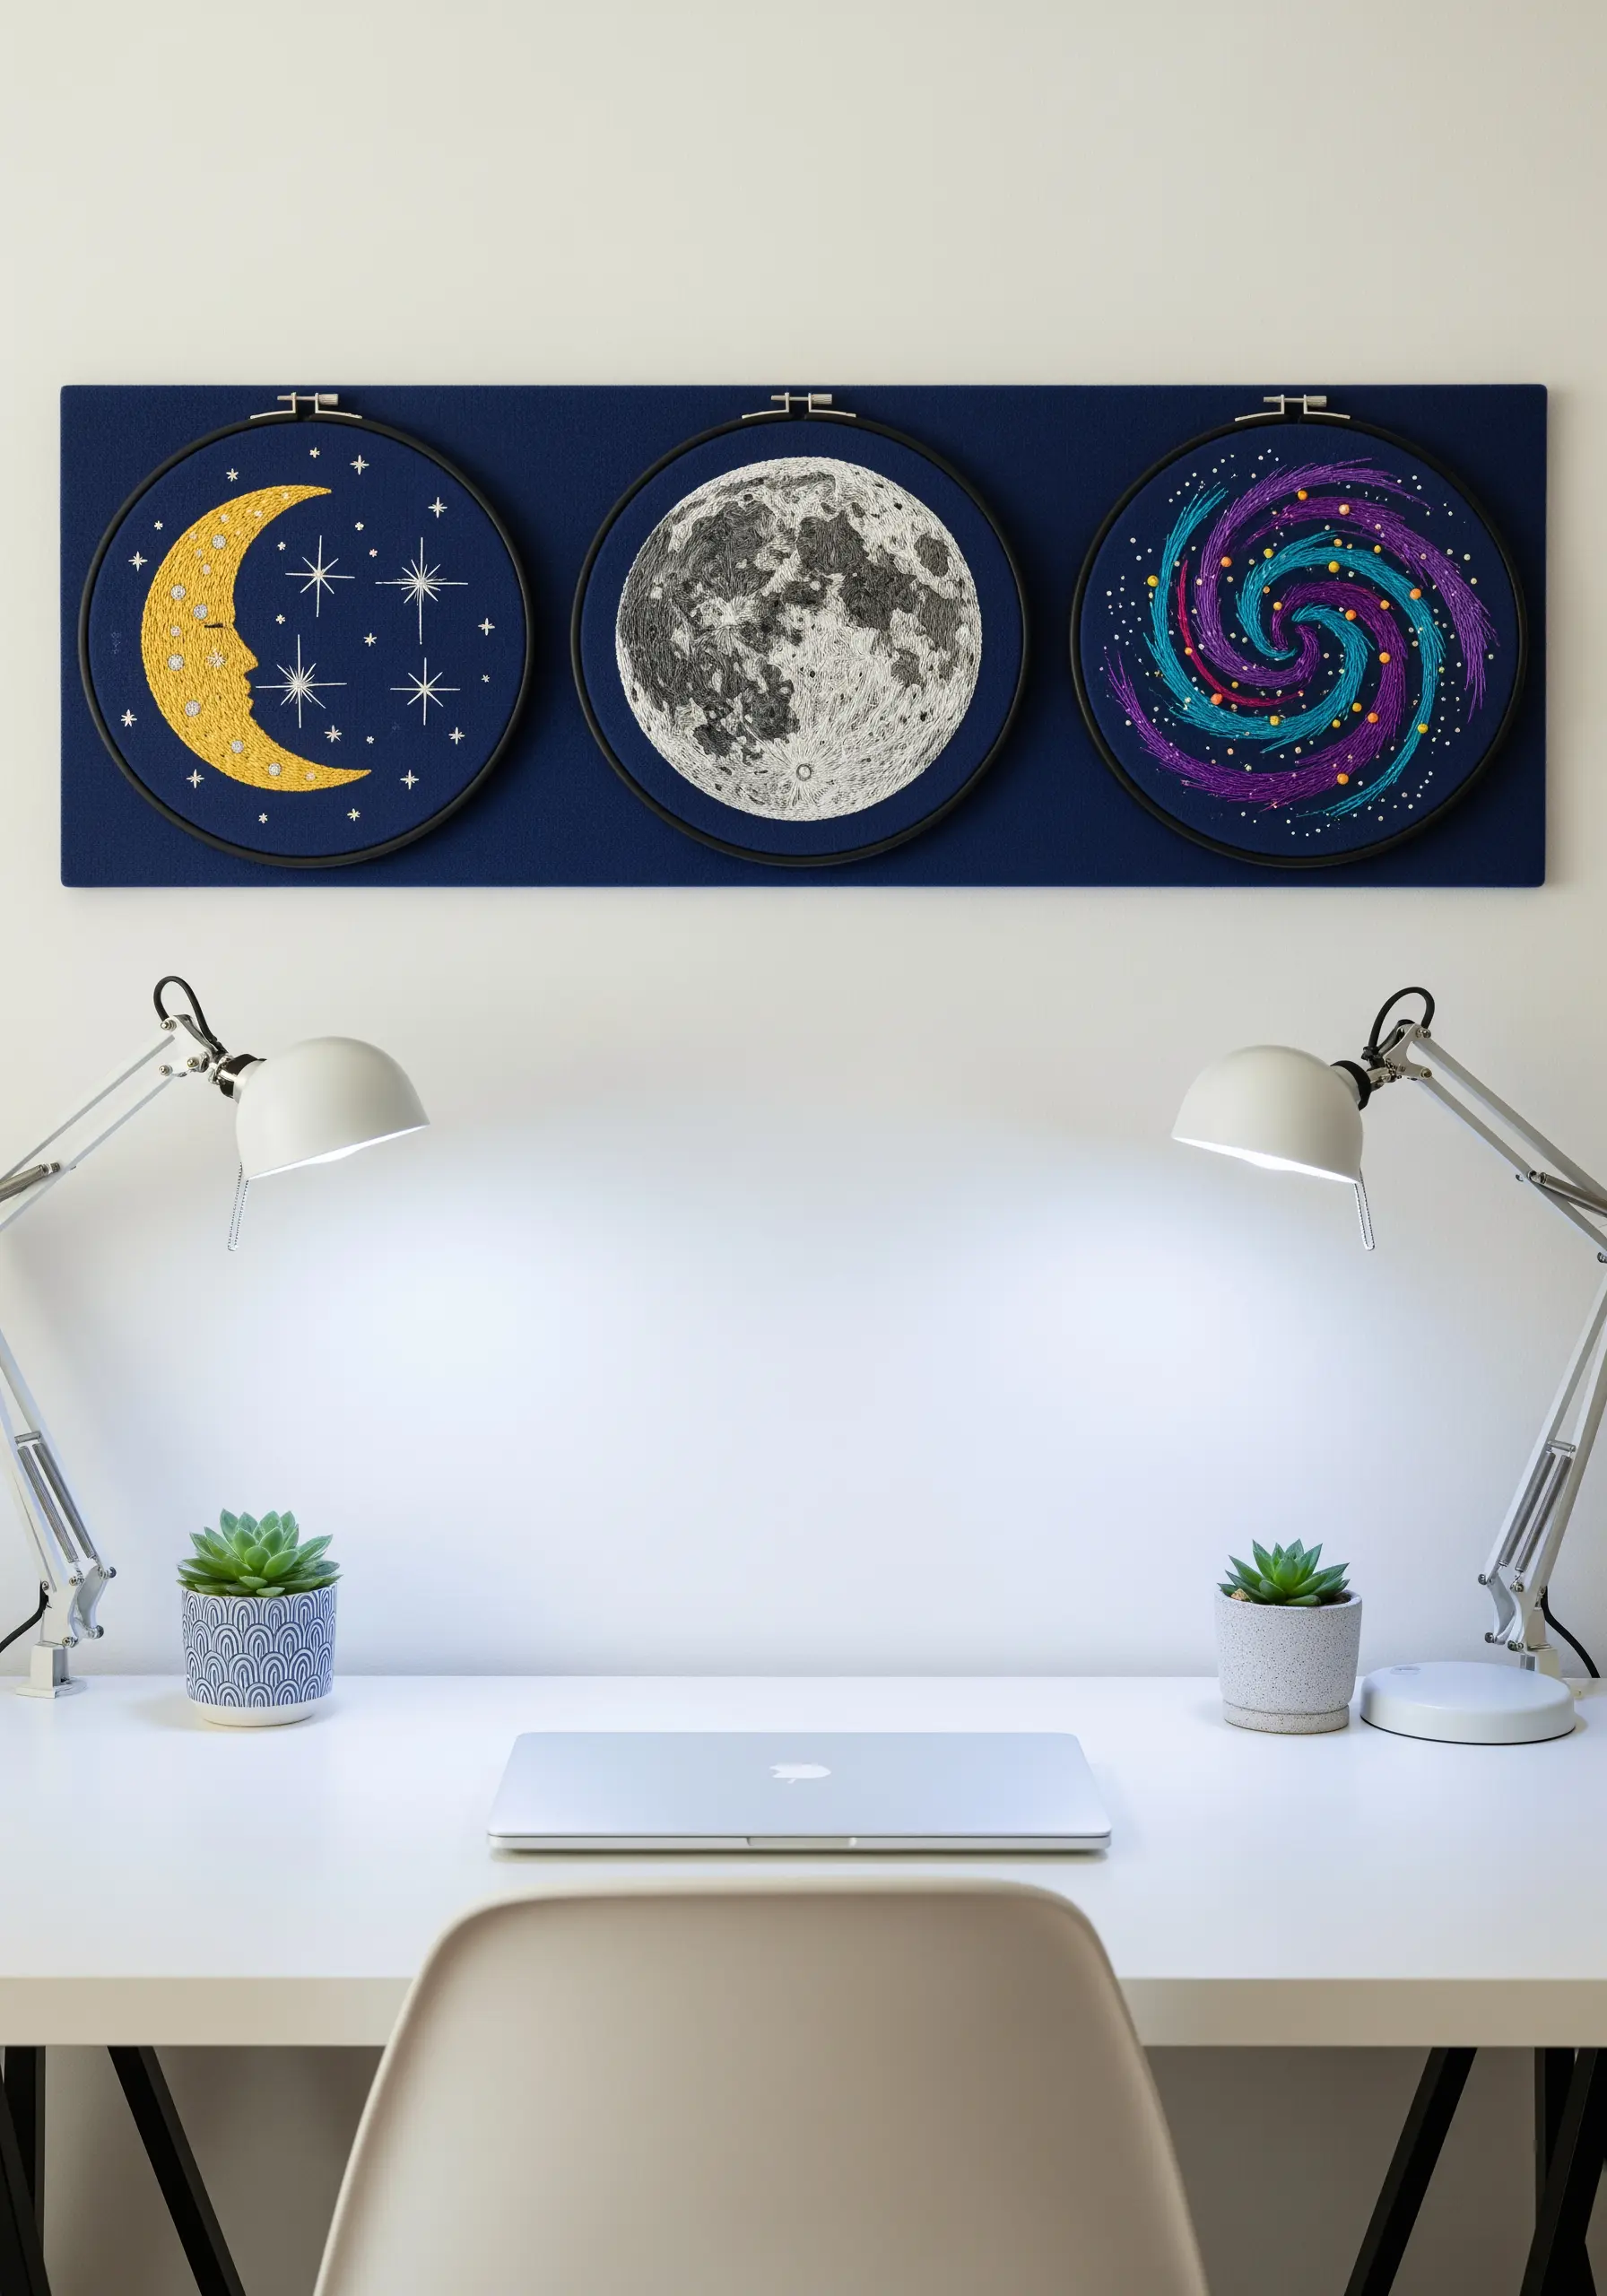
Tell a cosmic story by dedicating each hoop in a series to a different texture and technique.
For a realistic moon, use a dense field of French knots in varying shades of grey, white, and black to mimic craters and shadows.
Use a single strand of metallic thread for sharp, glittering stars against a dark fabric background—it catches the light beautifully.
For a swirling galaxy, couch a variegated or metallic thread in a spiral pattern to create fluid movement that contrasts with the static stars.
4. Design a Cohesive Wildflower Column

Elevate a narrow wall space by arranging simple floral hoops in a vertical line.
The key to a cohesive look is consistency: use the same size hoop and the same neutral linen fabric for each piece.
This creates a unified canvas, allowing the unique color and shape of each wildflower to stand out without competing.
Vary your stitches—lazy daisy for petals, French knots for flower centers, and stem stitch for delicate stalks—to add subtle texture to your nature-themed embroidery samplers.
5. Combine Appliqué with Stitched Details
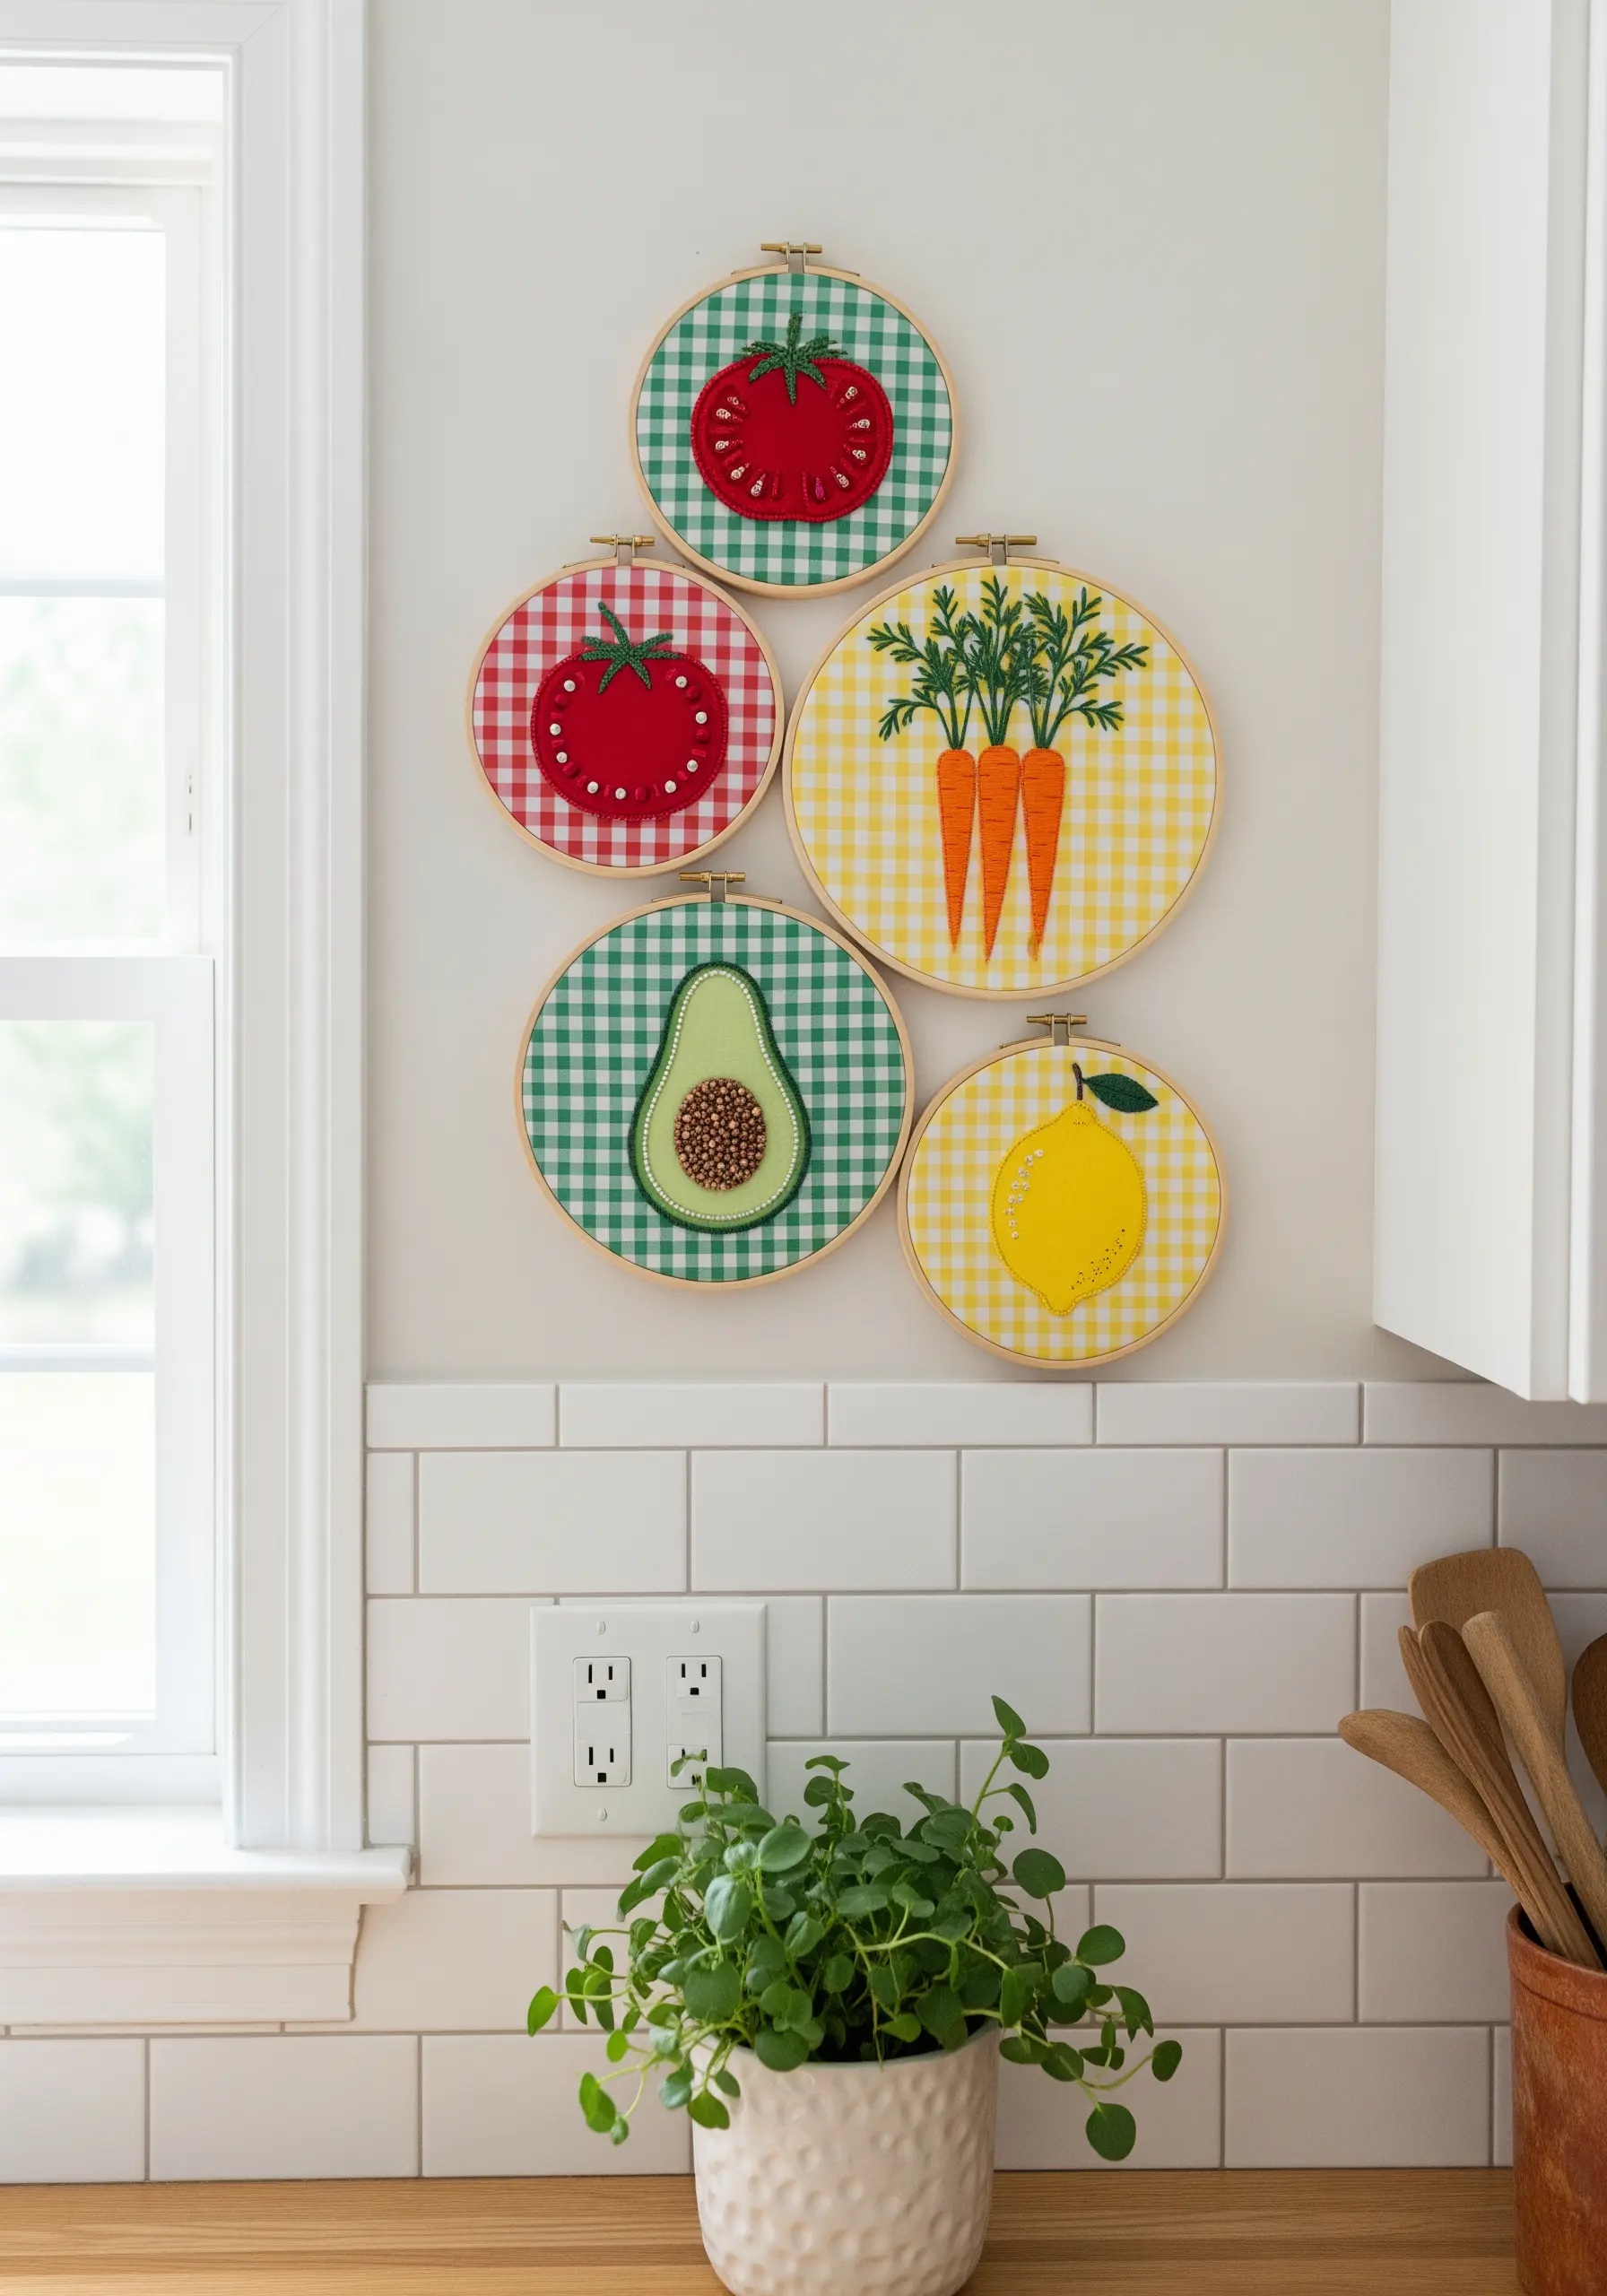
Add playful dimension to your hoop art by layering felt appliqué with simple embroidery.
Cut your main shapes from felt and secure them with a neat running stitch around the edges.
Then, bring them to life with stitched details: use French knots for tomato seeds, satin stitch for an avocado’s smooth texture, or straight stitches for a carrot’s leafy tops.
Using a patterned fabric like gingham as your base adds another layer of visual interest and cottage-inspired charm.
6. Paint a Landscape with Thread and Texture
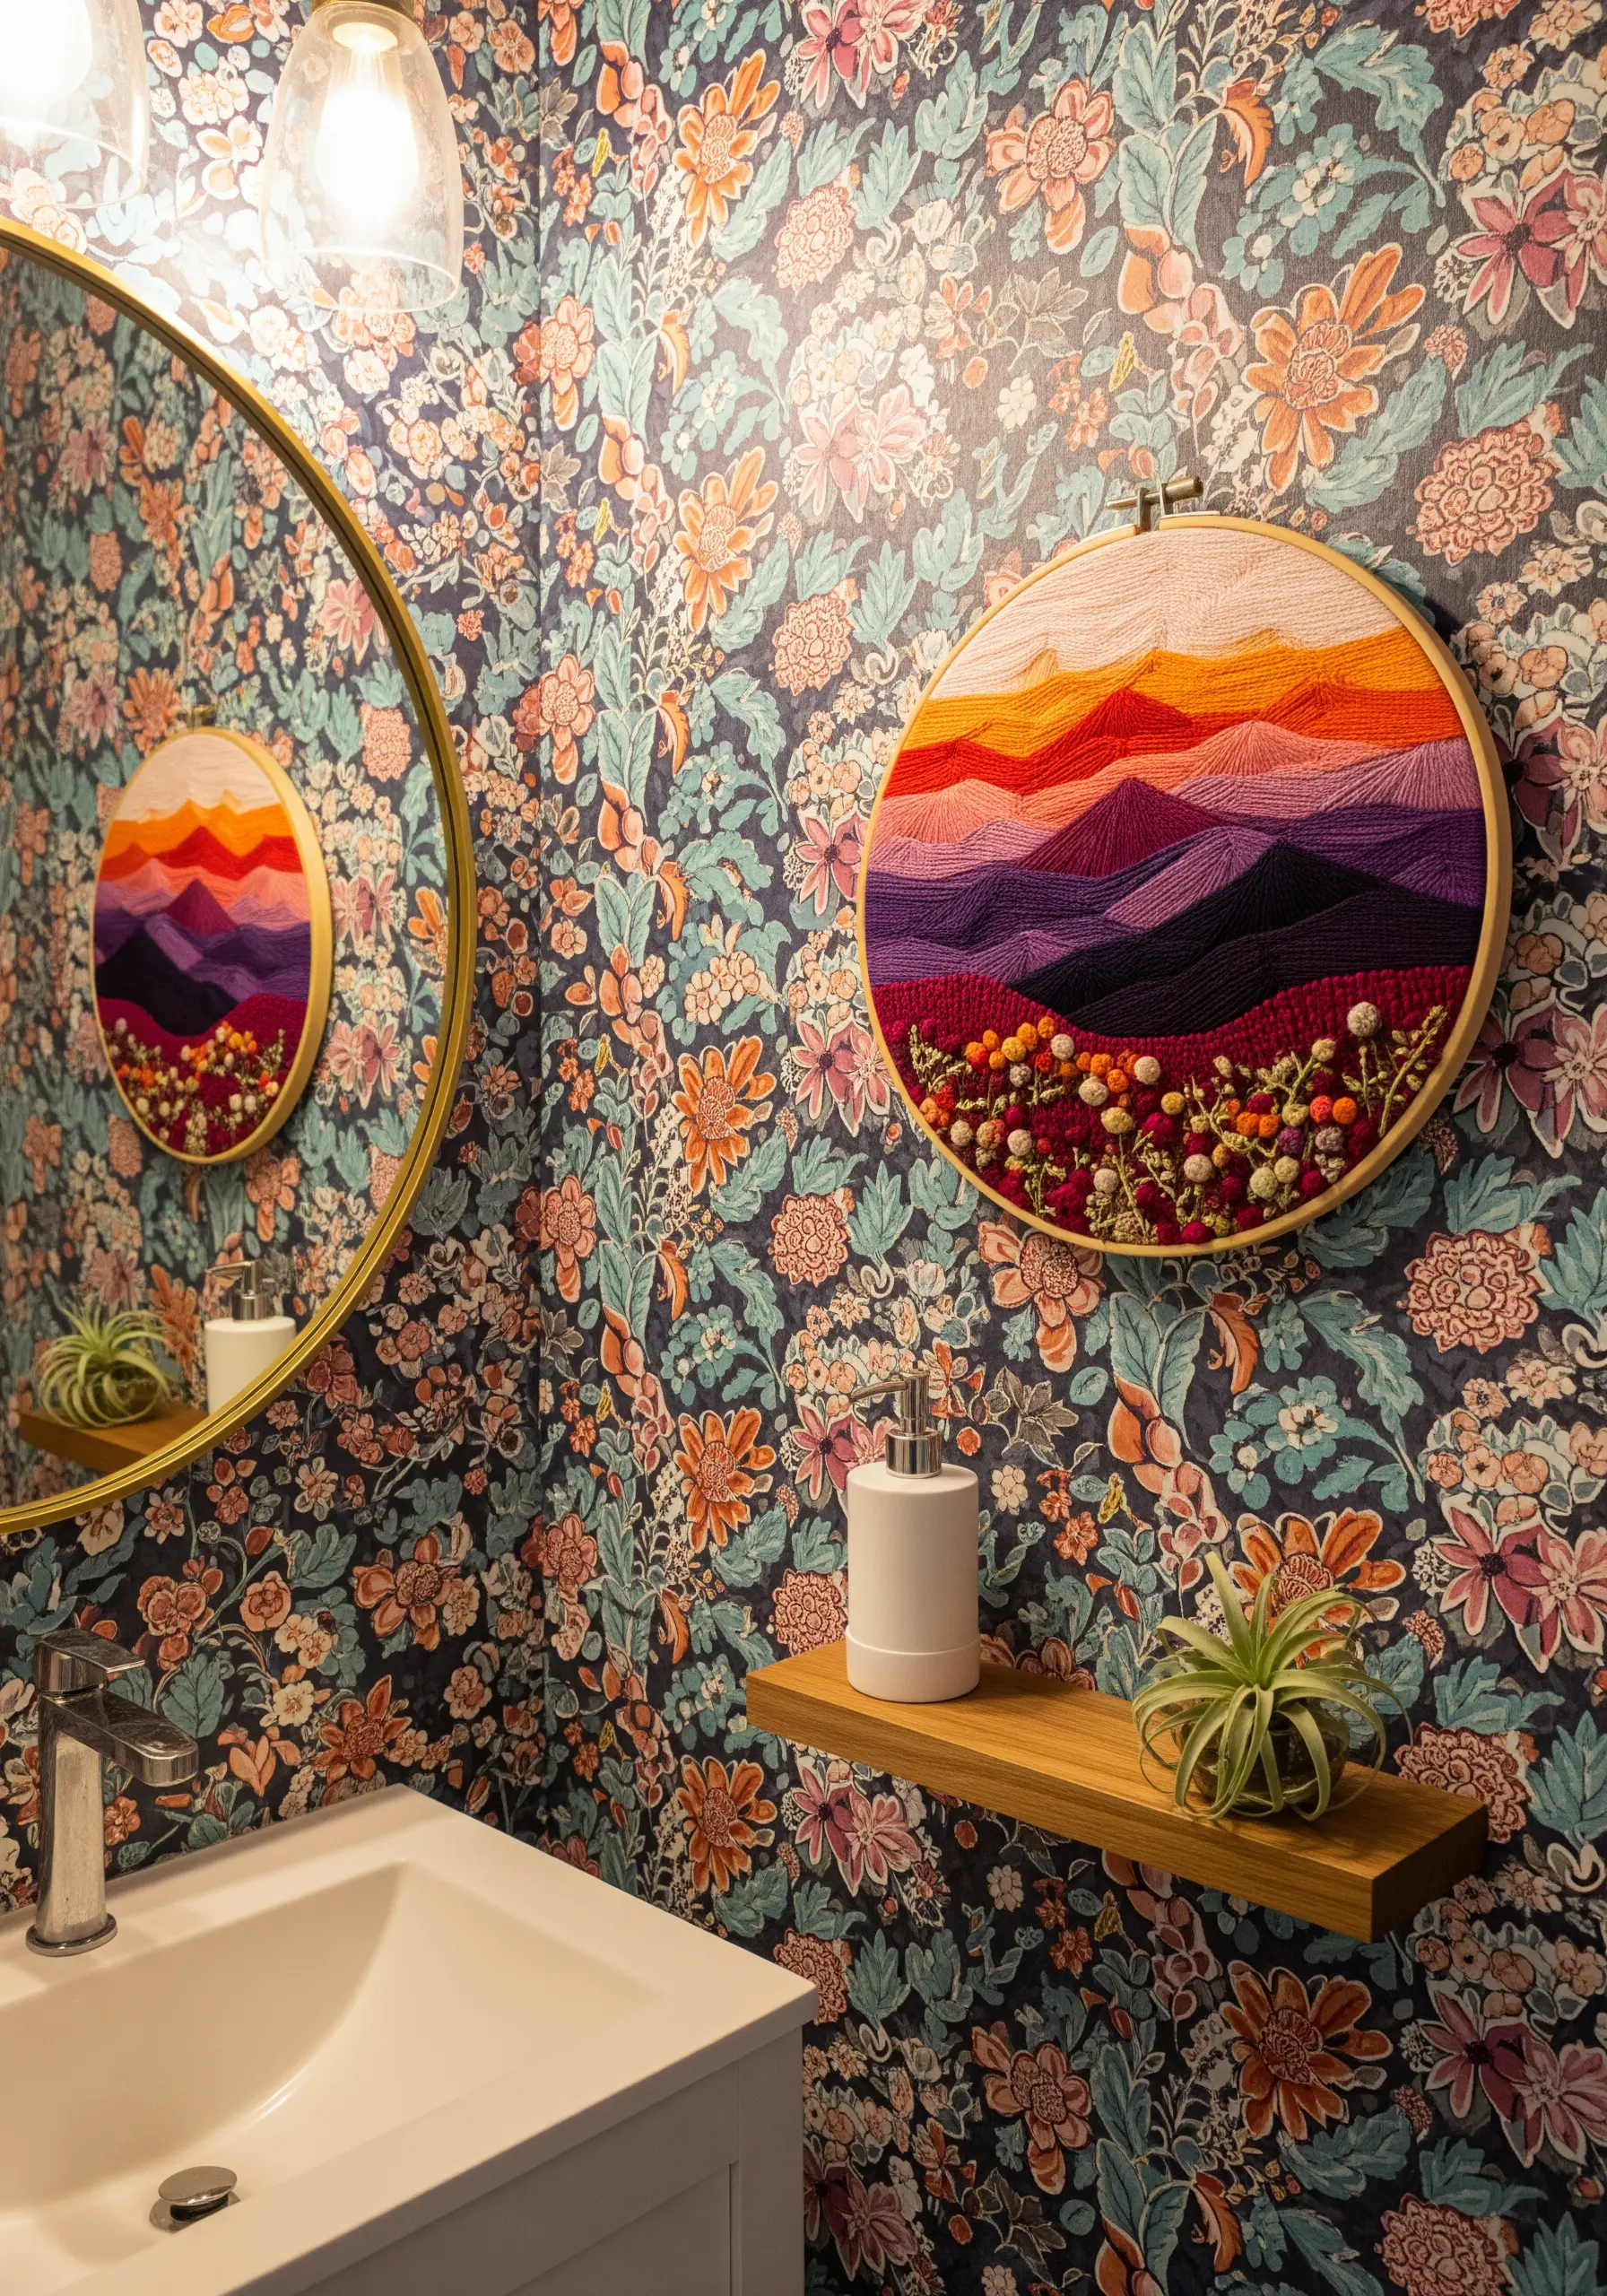
Create atmospheric depth in a landscape by assigning different textures to the foreground, midground, and background.
Use dense French knots and bullion stitches in the foreground to create a lush, tactile field of flowers that appears closer to the viewer.
Fill the distant mountains with smooth, directional satin stitch, which recedes visually and mimics the softness of faraway hills.
This contrast in texture is a powerful way to build perspective and make your landscape feel immersive.
7. Sculpt an Underwater Scene with Knots
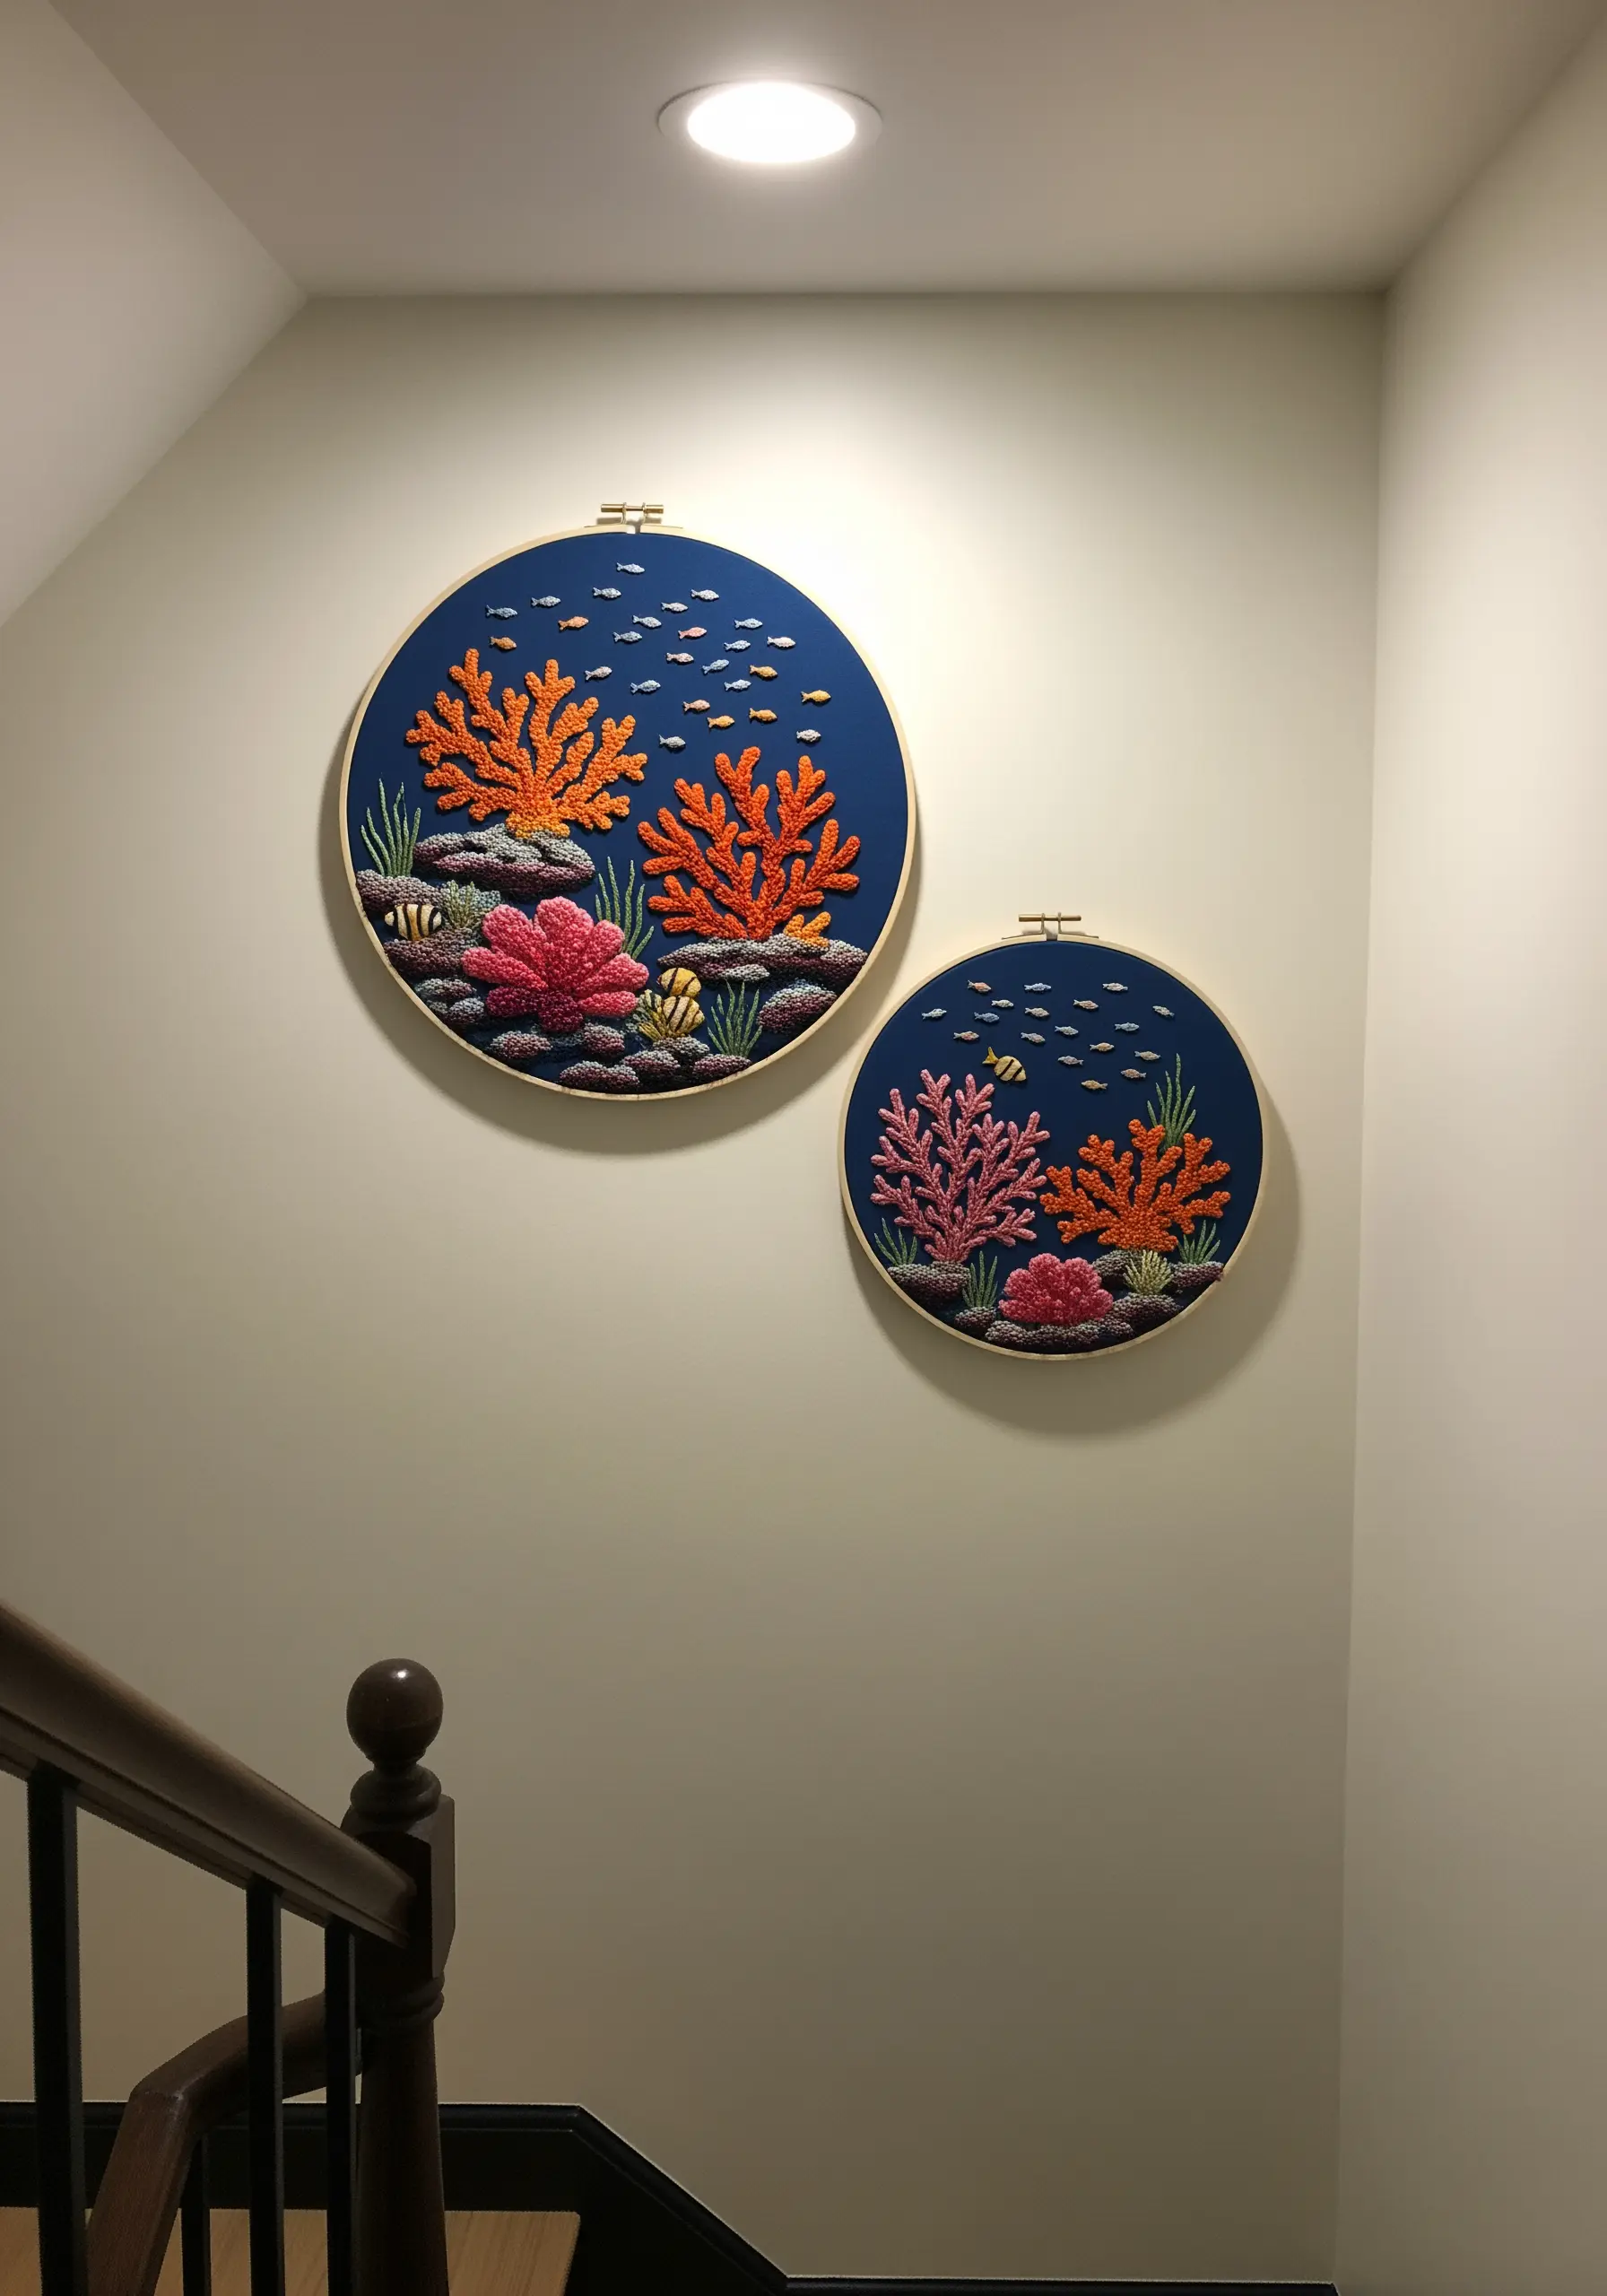
Build a vibrant coral reef that rises from the fabric using high-texture stitches.
Use clusters of French knots in bright oranges and pinks to form the coral, varying the number of wraps around the needle to create different-sized knots for a more organic feel.
Incorporate bullion knots for elongated, worm-like coral shapes, adding another layer of dimension.
A dark blue cotton fabric provides the perfect deep-sea backdrop, making the bright, textured stitches pop with intensity.
8. Use Expressive Color in Animal Portraits
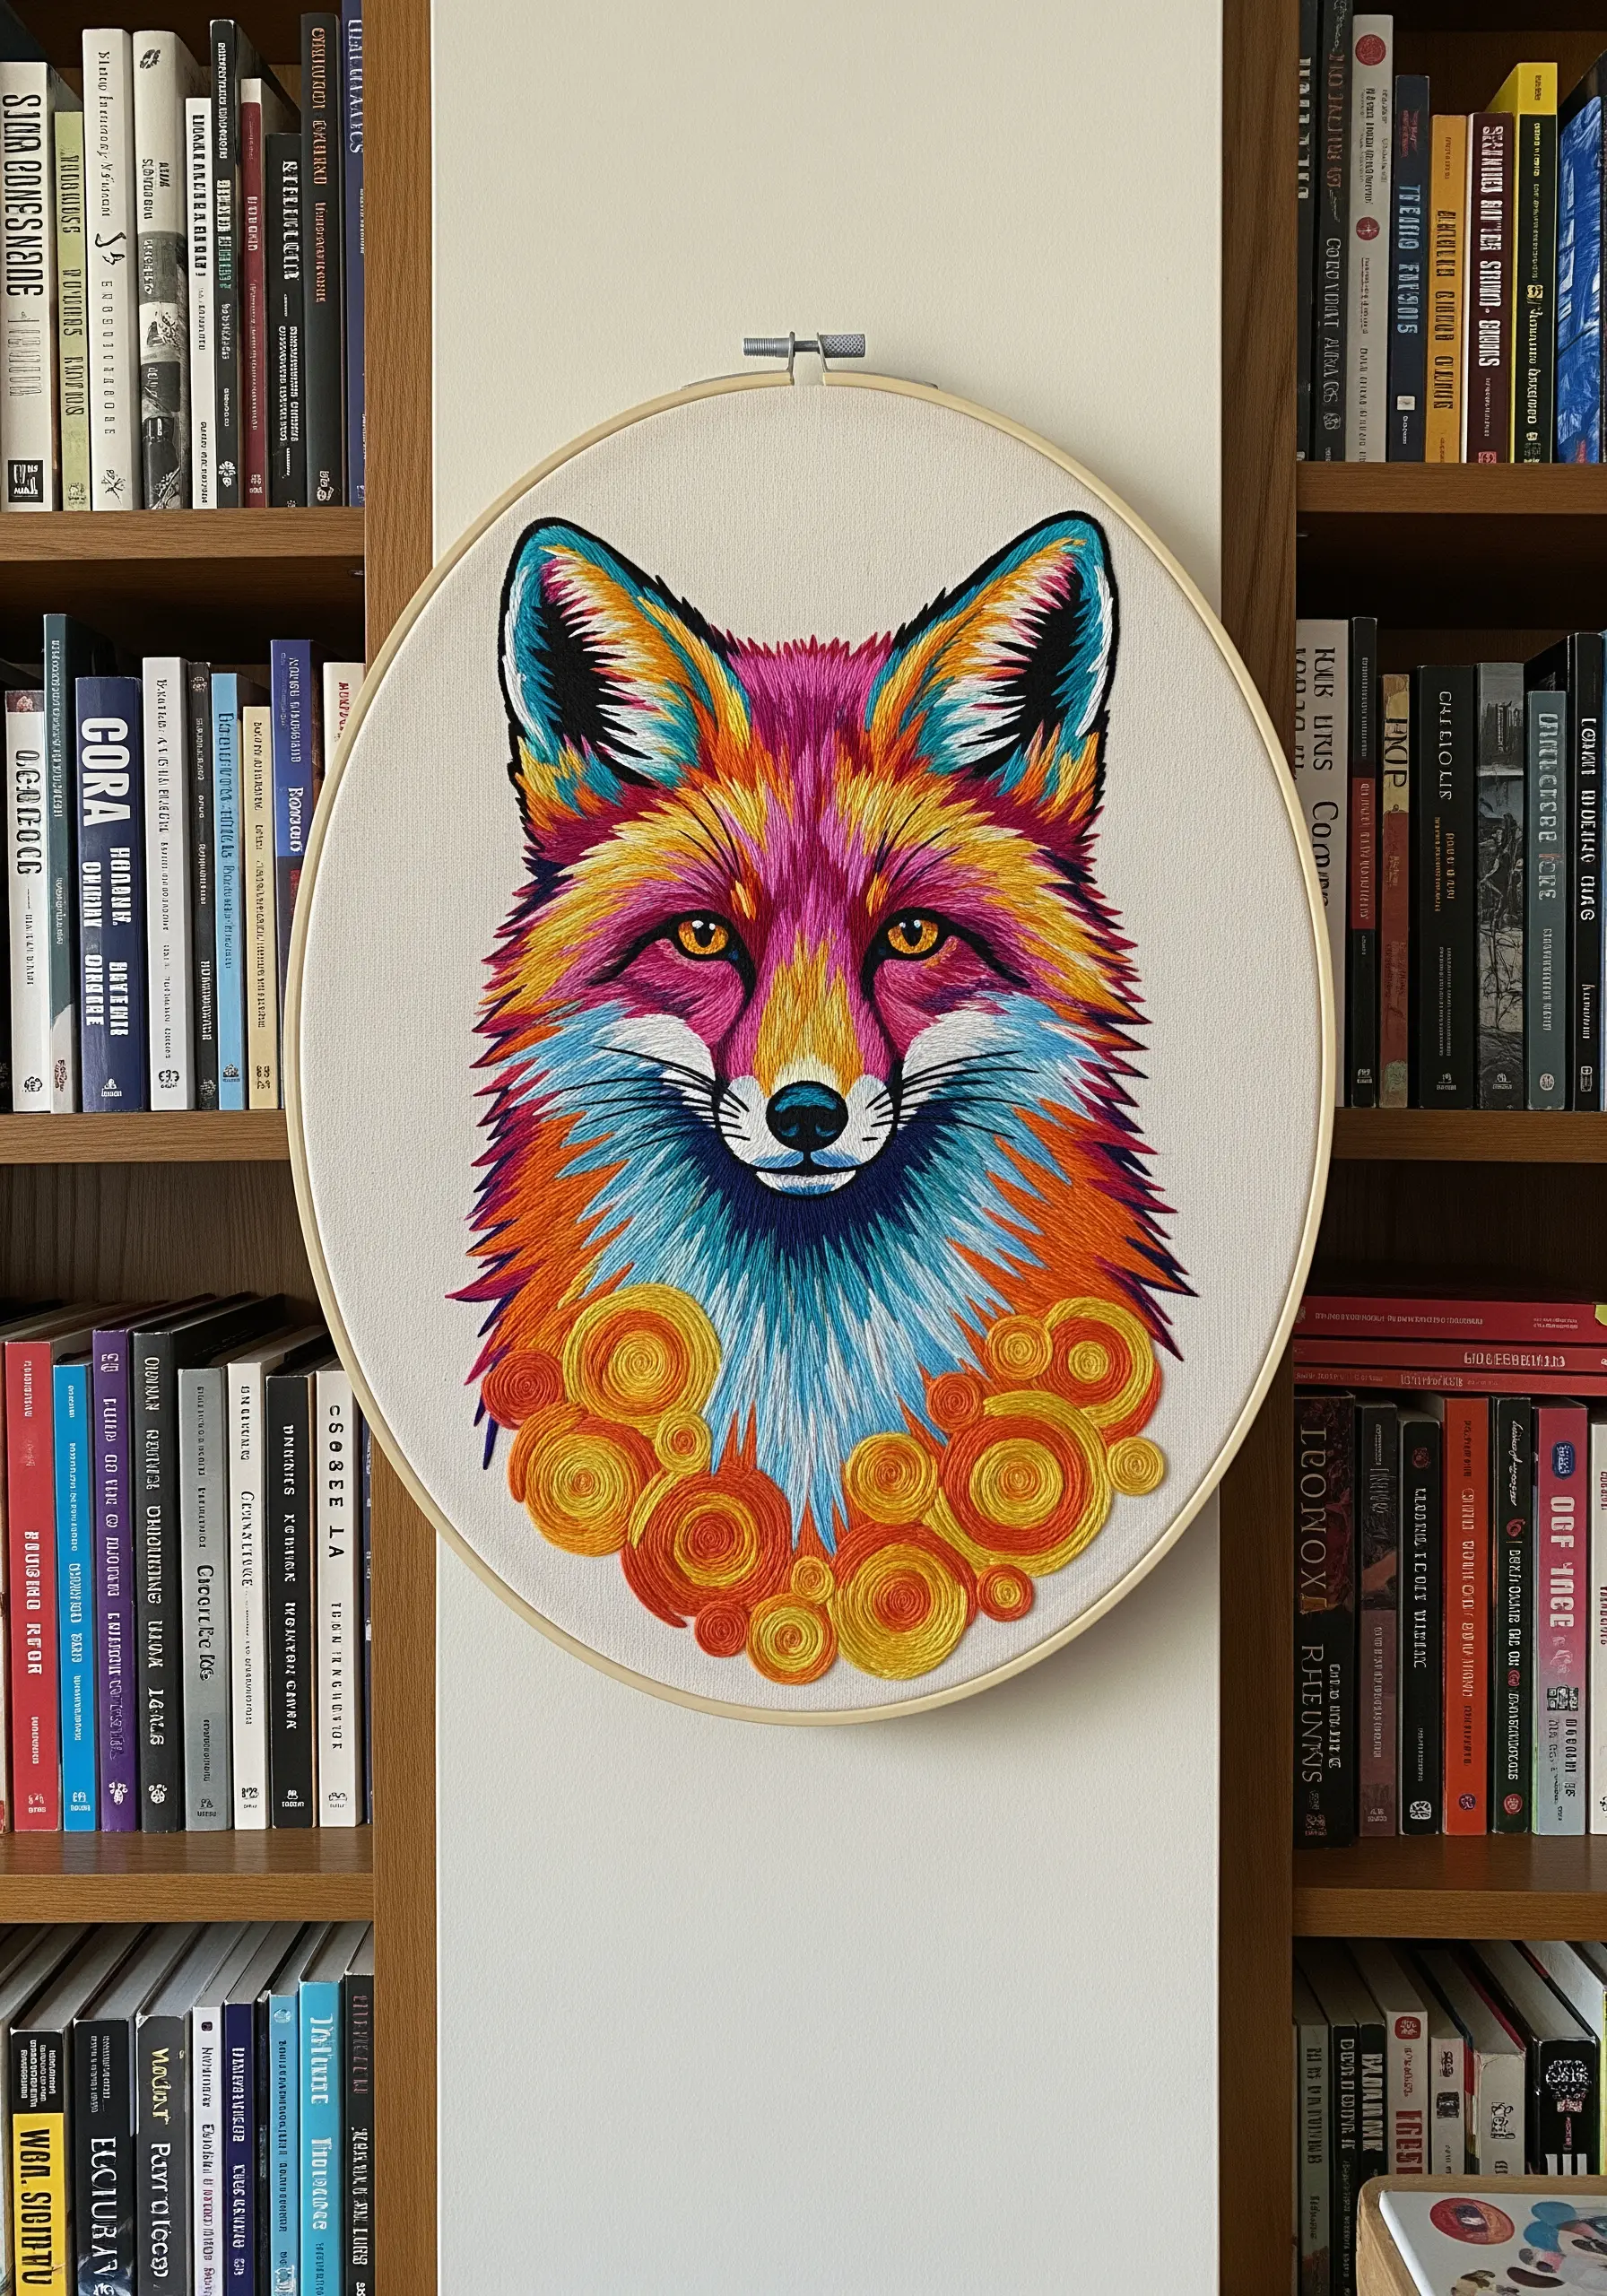
Move beyond realistic tones and infuse an animal portrait with emotion through a vibrant, unexpected color palette.
Use split stitch or long-and-short stitch to blend bold magentas, cyans, and oranges, treating the fur like a canvas for abstract color blocking.
To create a dynamic focal point, try a series of whipped backstitch circles around the neck, adding texture and movement.
This technique transforms a simple portrait into a piece of expressive, contemporary texture-rich thread art.
9. Achieve Geometric Precision with Outlines
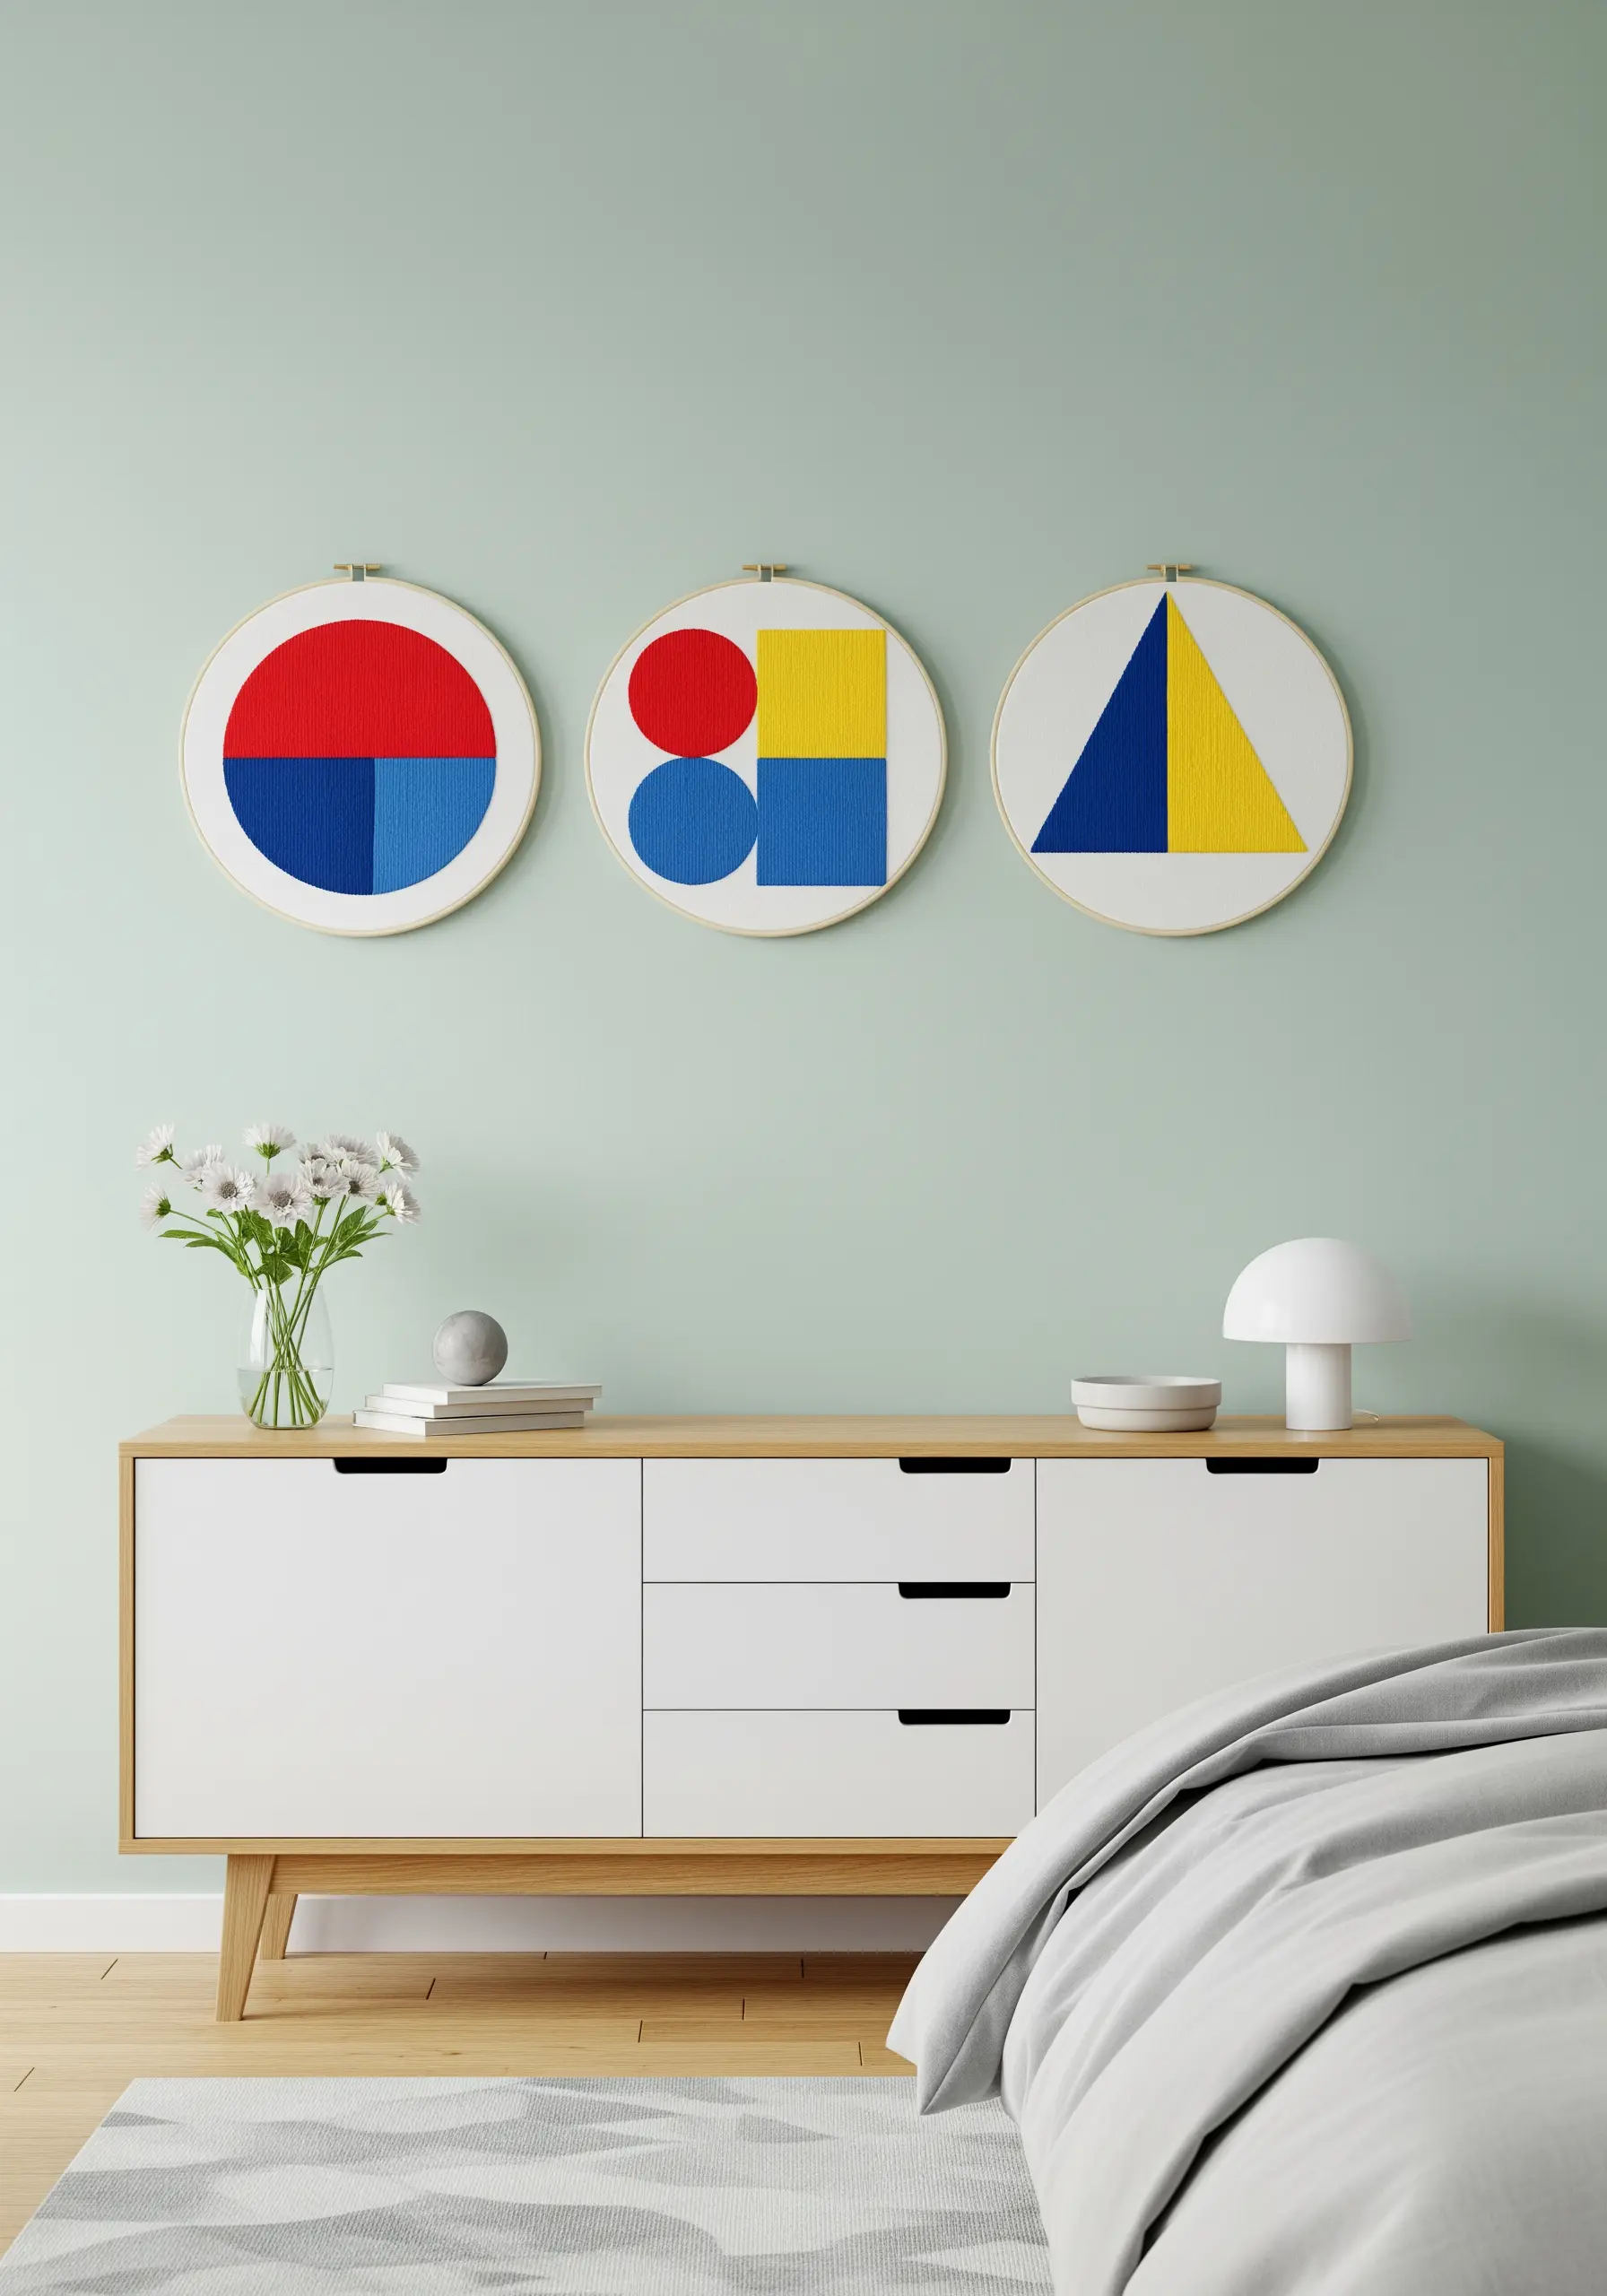
For minimalist, Bauhaus-inspired designs, the sharpness of your shapes is everything.
Before filling any area with satin stitch, carefully outline it with a single line of split stitch using two strands of floss.
This simple preparation creates a firm, raised edge that acts as a boundary, allowing you to tuck the ends of your satin stitches underneath it for an exceptionally crisp and clean line.
This small step is the secret to making your modern grid and dot stitch concepts look polished and professional.
10. Create a Multi-Hoop Wall Installation
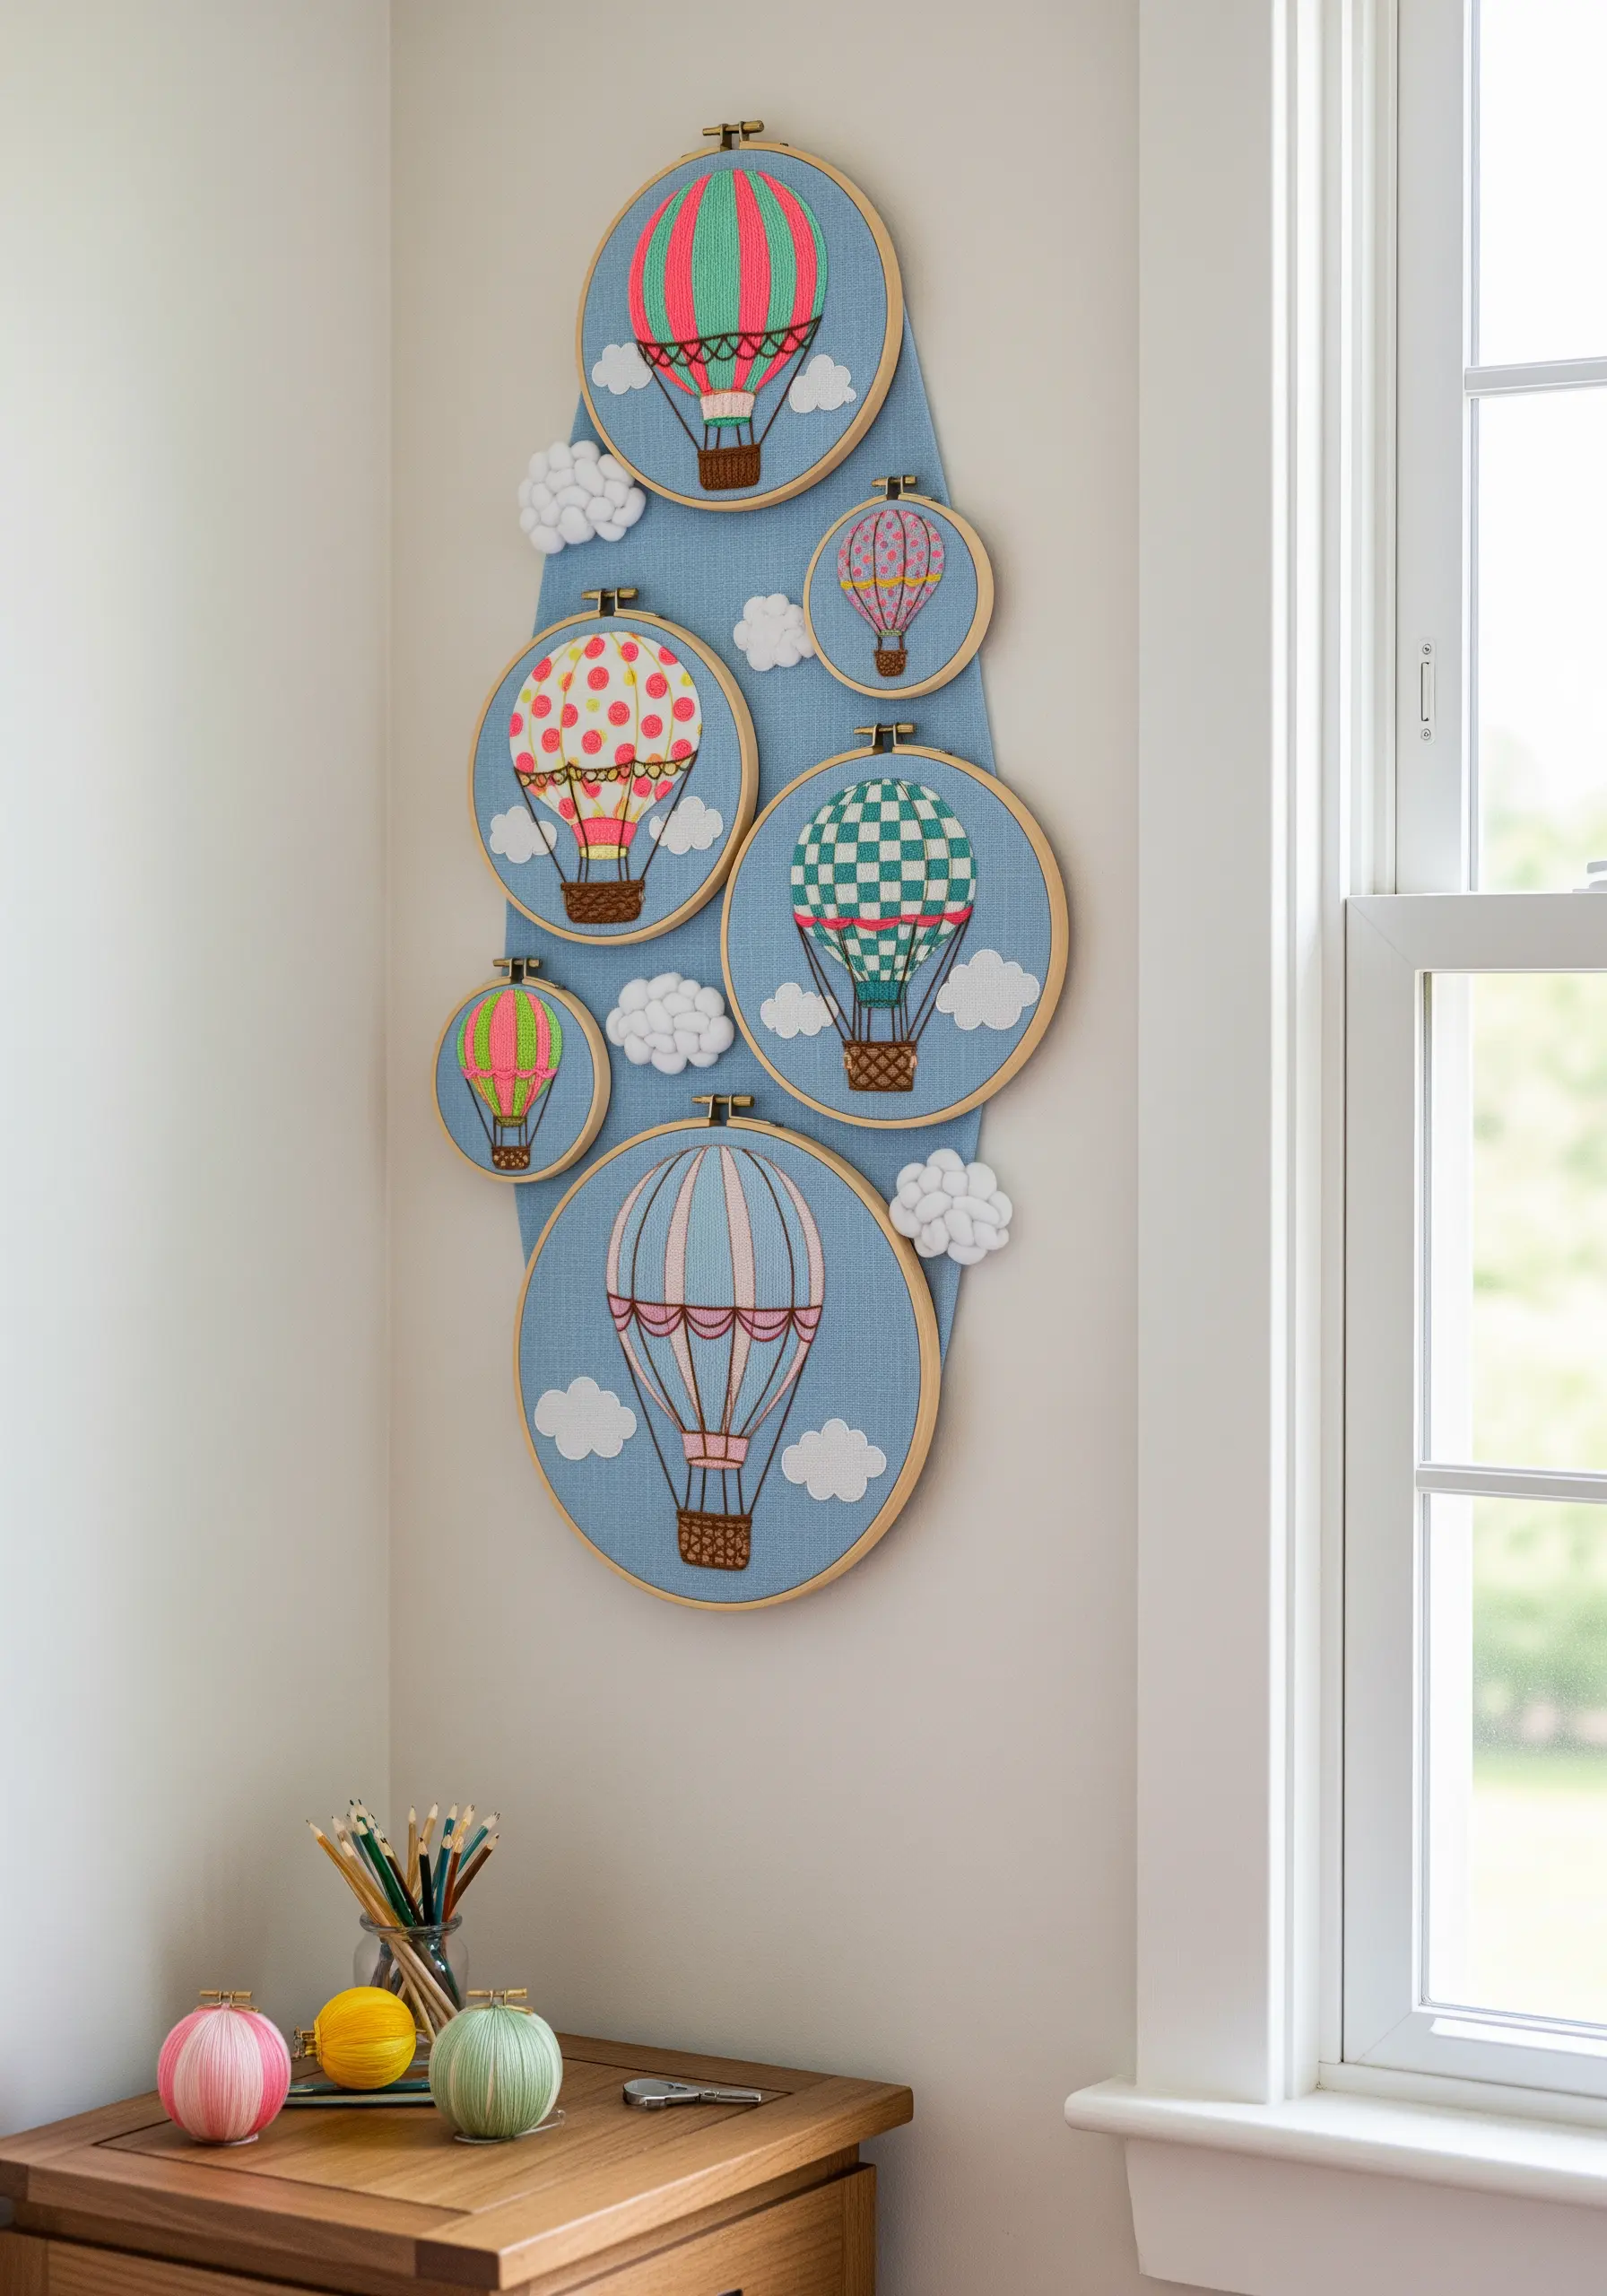
Turn a collection of hoops into a single, cohesive art piece by mounting them on a custom fabric-covered panel.
Trace the outline of your hoop arrangement onto foam board or thin plywood, cut it out, and wrap it tightly with your chosen background fabric.
Arrange your finished hoops on top, varying their sizes to create a sense of movement and visual rhythm.
Add textural elements like fluffy pom-pom clouds between the hoops to connect the individual pieces and complete your embroidered nursery decor scene.
11. Stitch a Meditative Mandala with Metallics
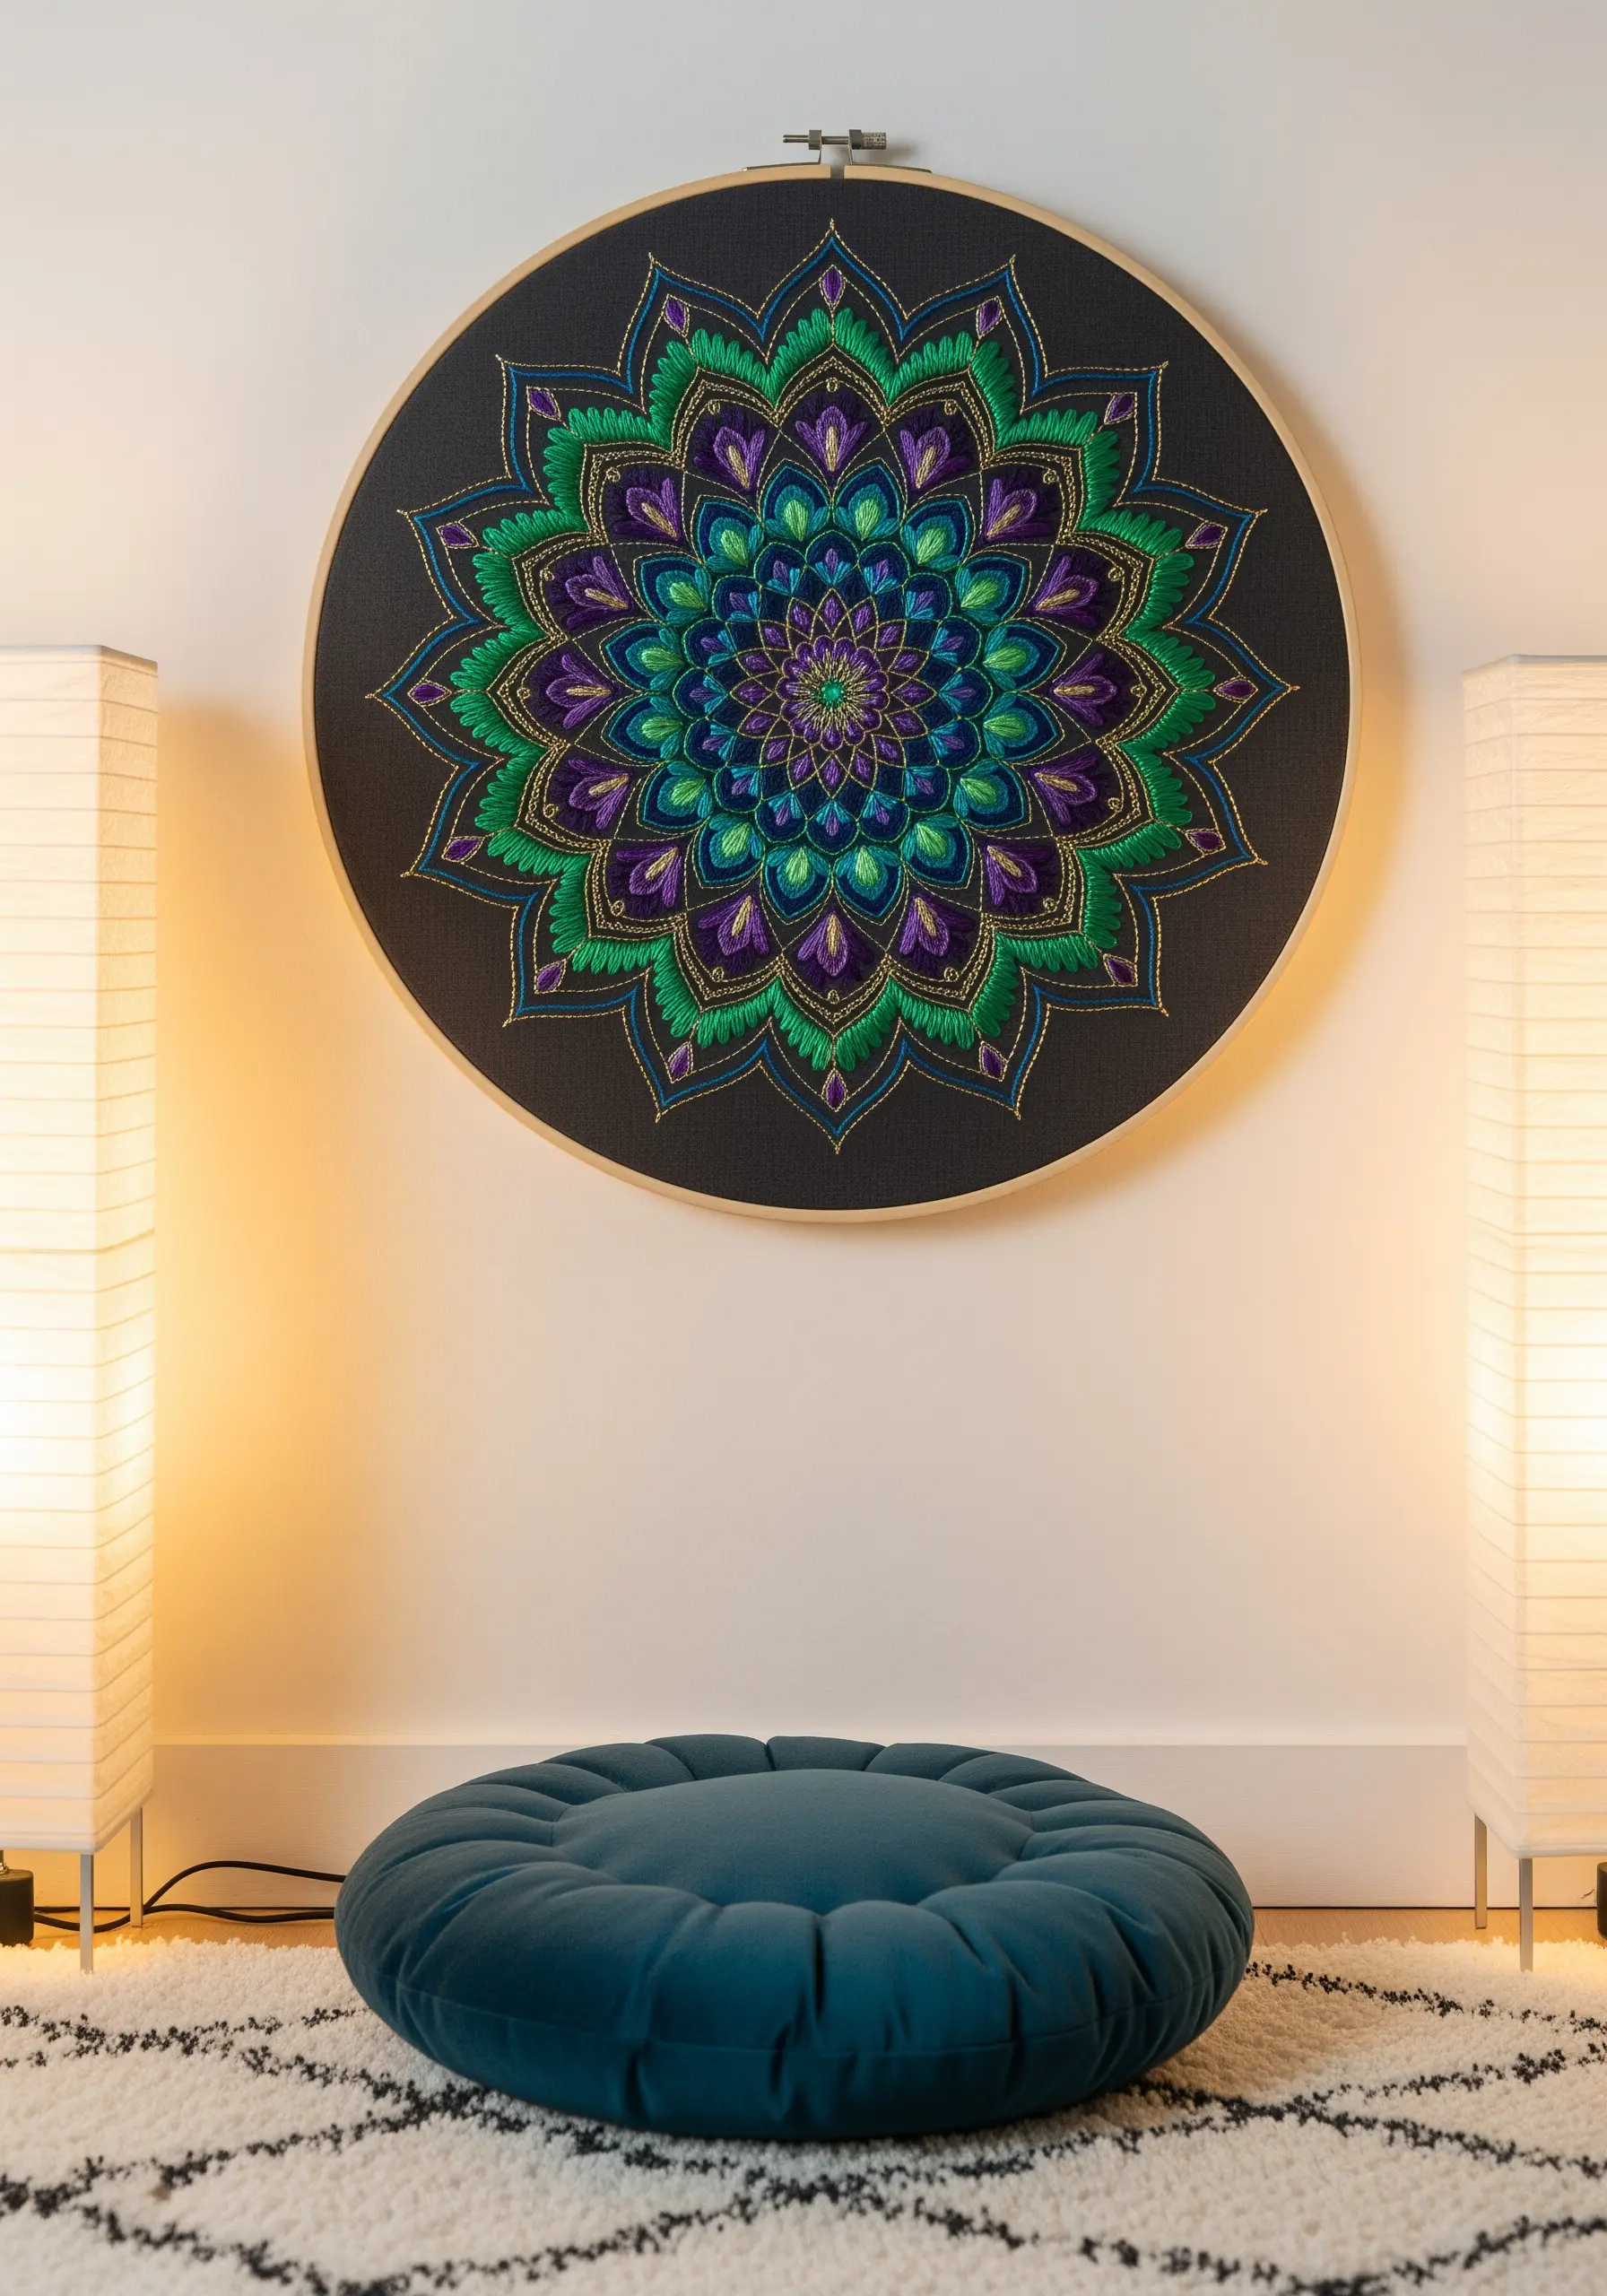
Elevate a mandala design by strategically incorporating metallic or silk threads.
Use standard cotton floss for the majority of the pattern to build color and form, then introduce a metallic thread for the final outline of each petal or for central accent details.
This contrast in sheen catches the light differently, creating a subtle shimmer that draws the eye inward.
Stitching on black or dark navy fabric makes these jewel tones and metallics especially vibrant, turning your embroidered mandala wall art into a mesmerizing focal point.
12. Design an Impressionistic Landscape Diptych
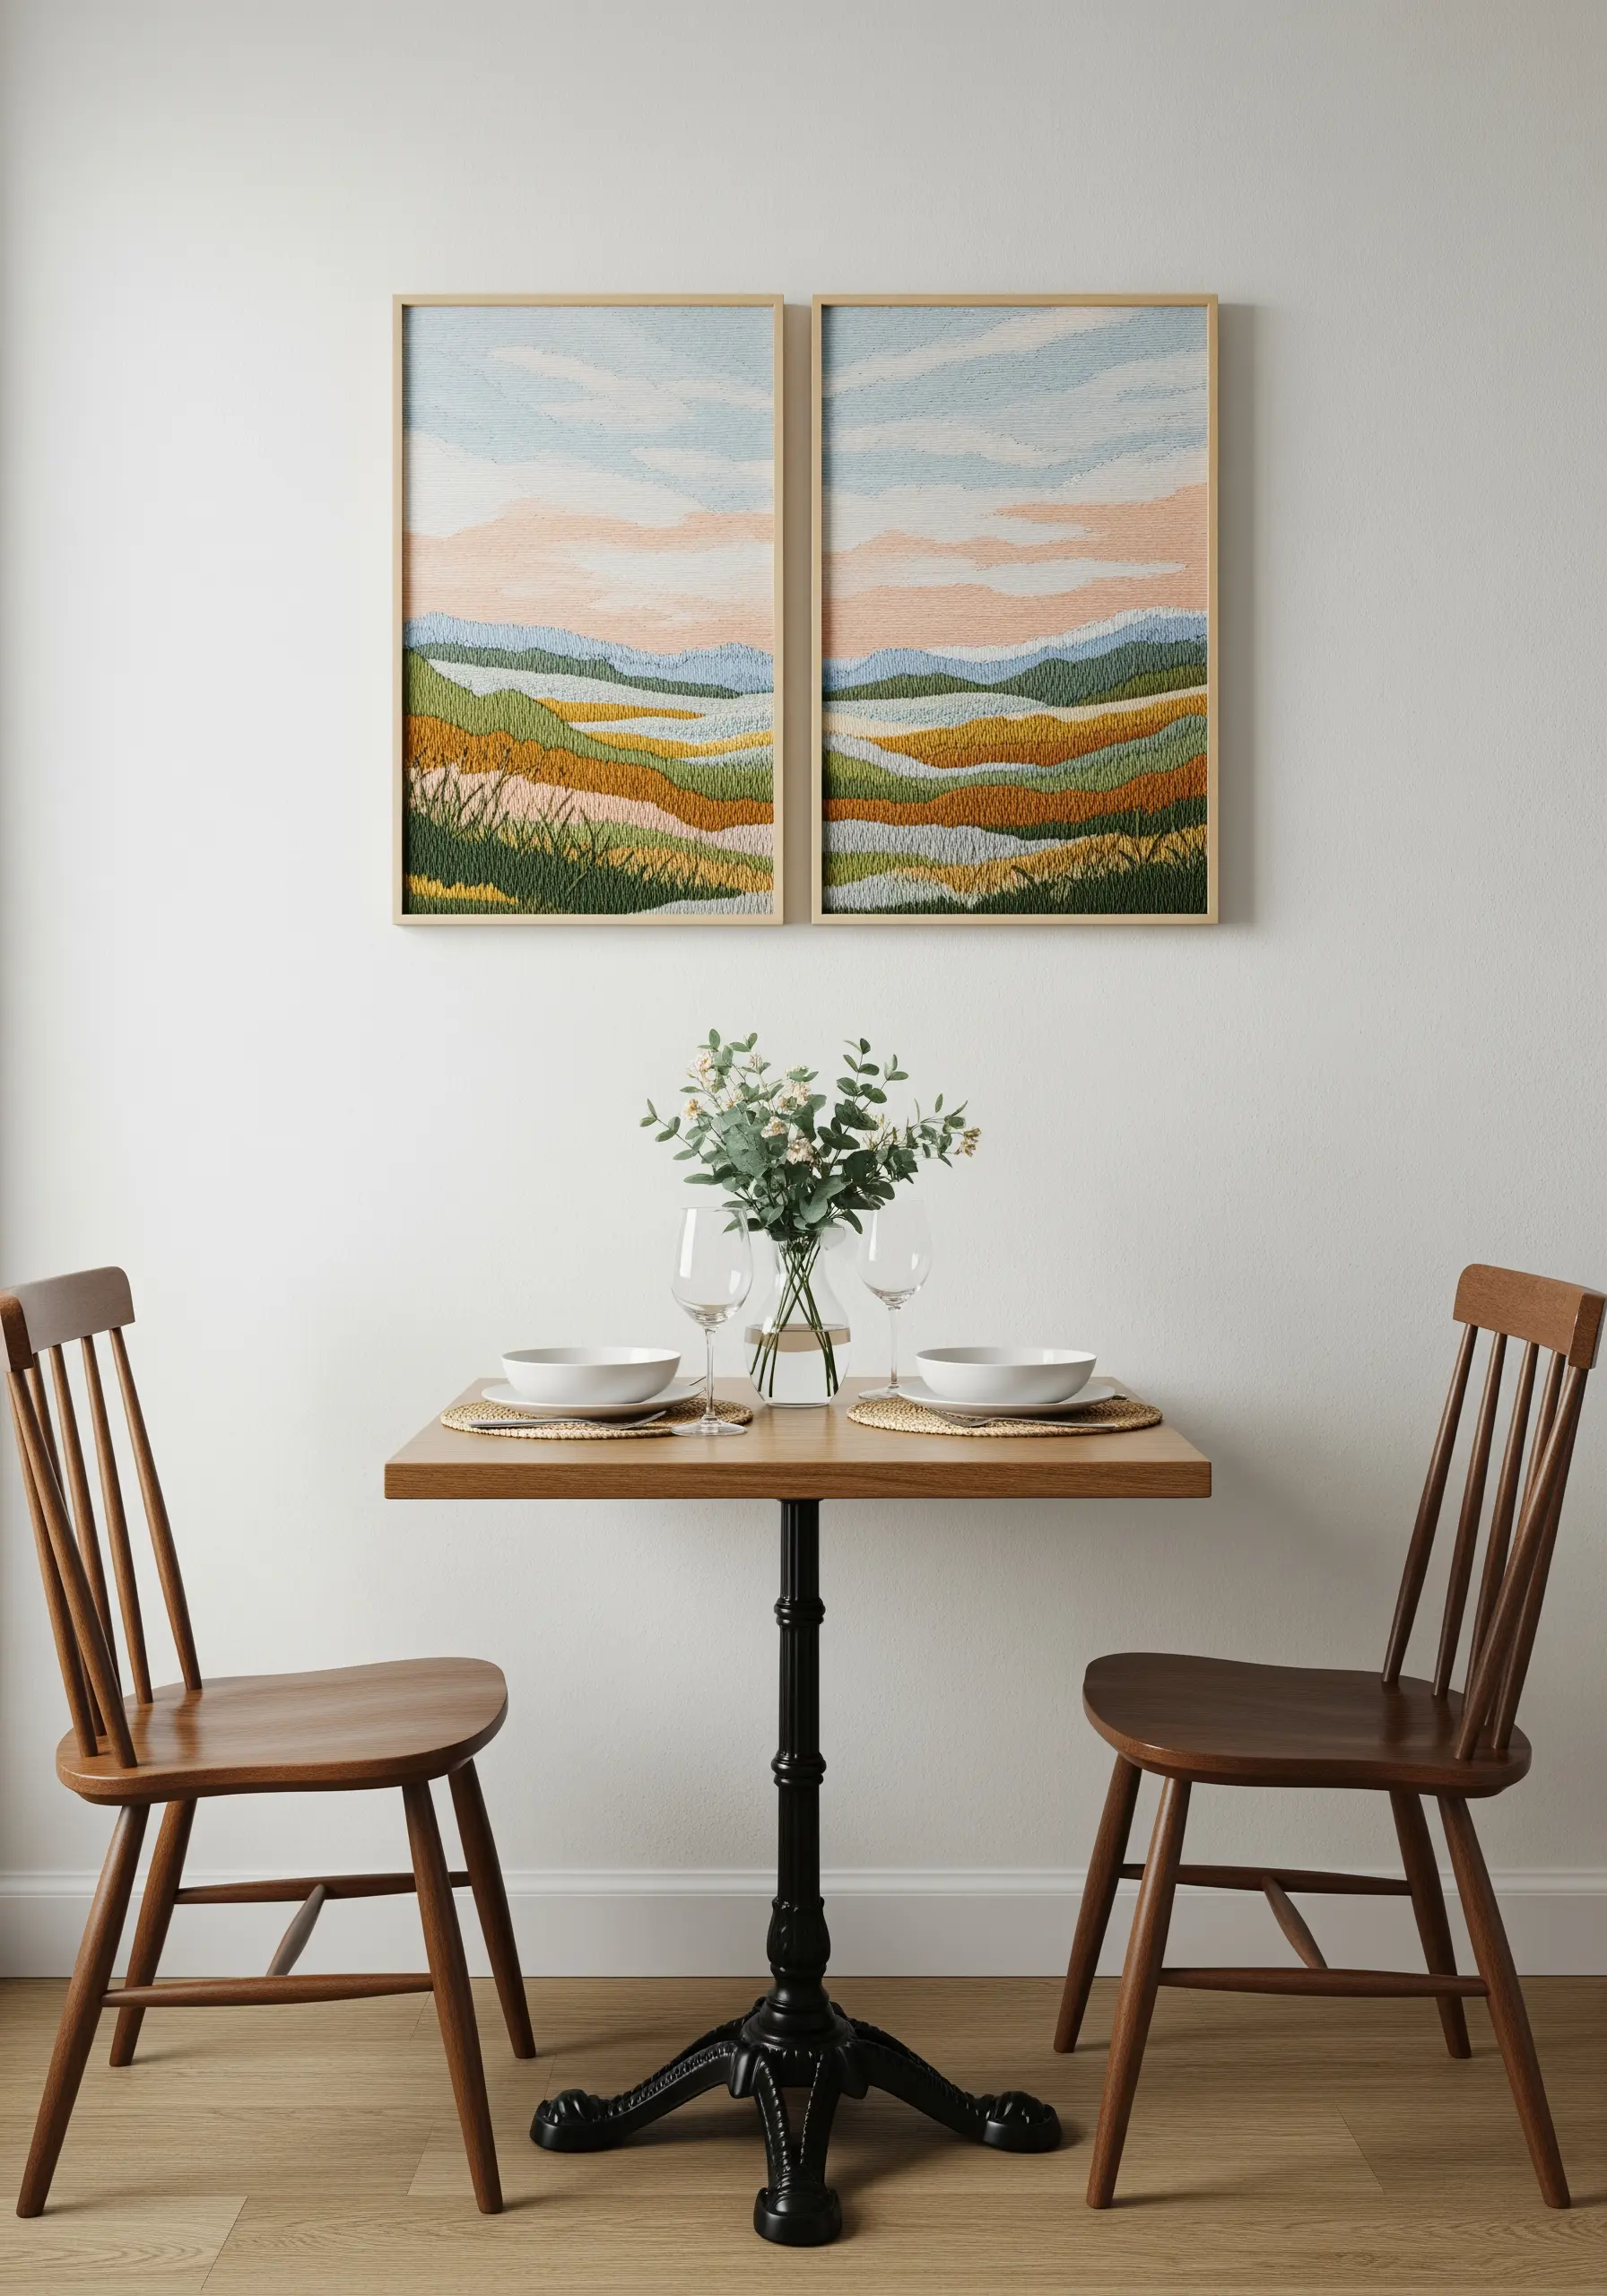
Create a large-scale art piece by splitting a single landscape across two adjacent frames.
Instead of crisp lines, fill the space with dense seed stitches, French knots, and short straight stitches, layering colors like an Impressionist painter.
This approach, known as thread painting, creates a soft, textural effect that emphasizes color and light over sharp detail.
Displaying the two panels side-by-side expands the scene, giving your embroidery the presence of a traditional painting.
13. Define Shapes with Bold Padded Outlines
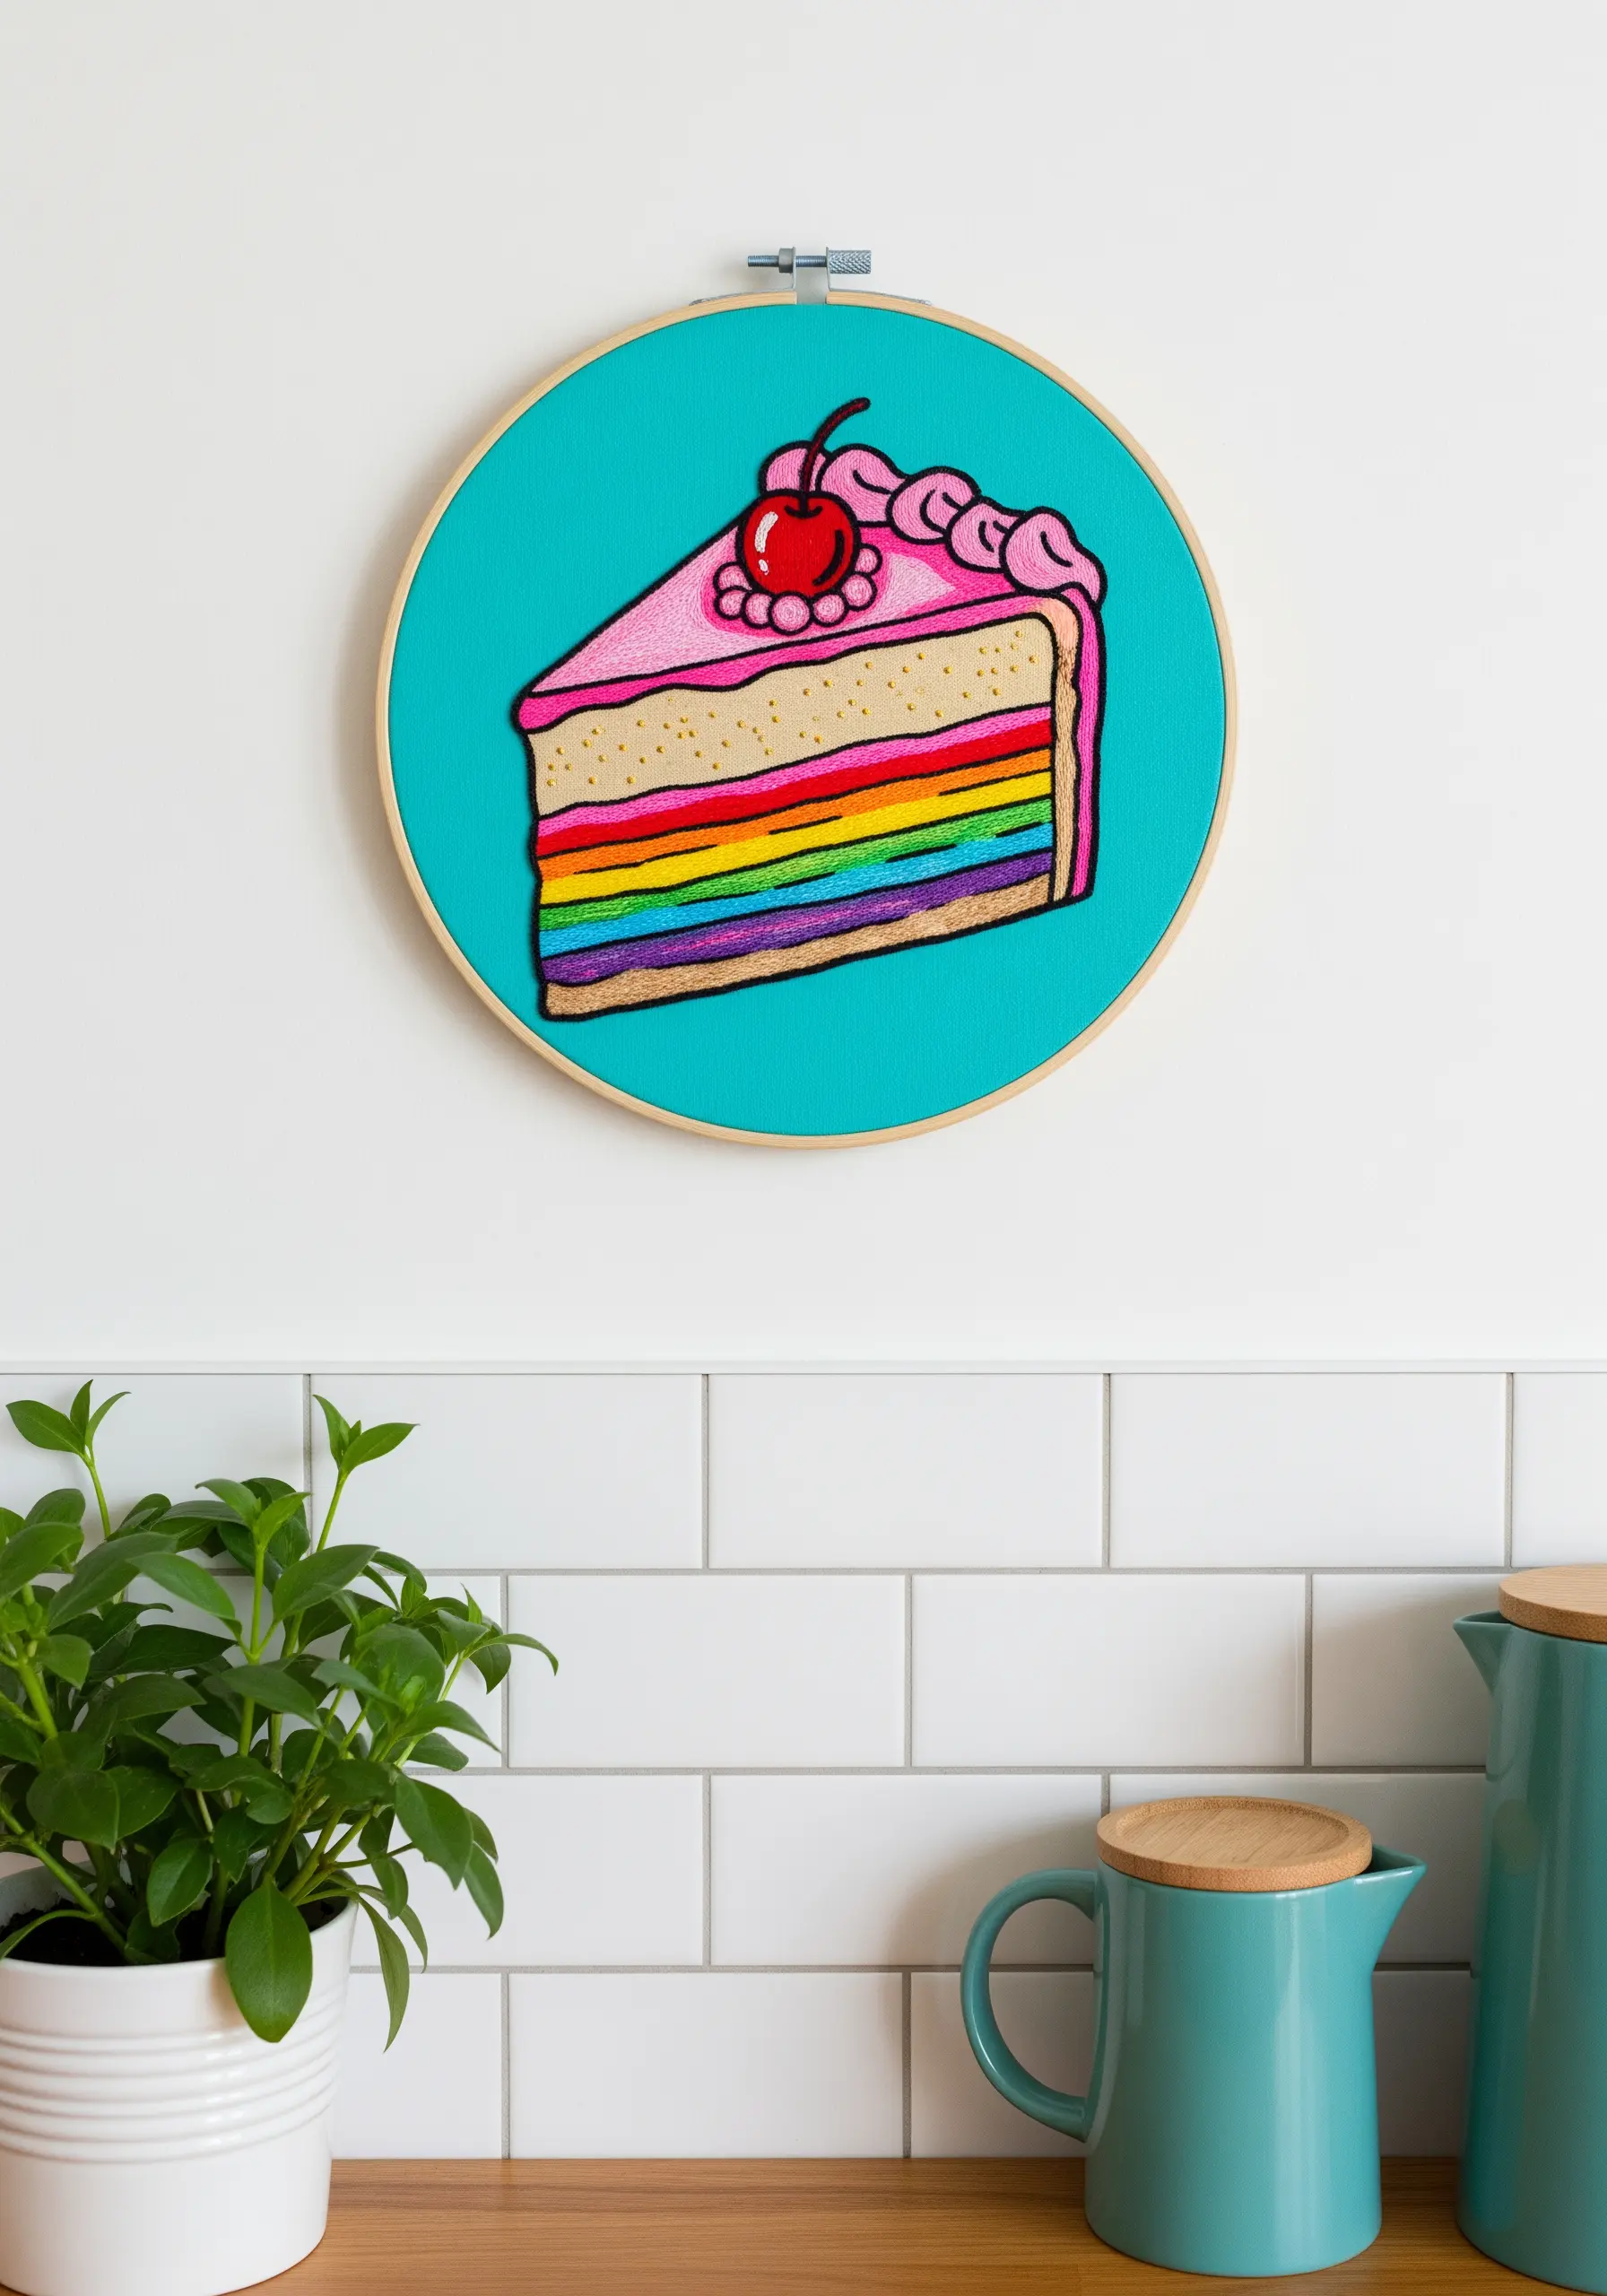
Make your motifs pop by using a padded satin stitch for the outlines.
First, stitch a foundation of straight stitches or backstitches along your outline. Then, cover this padding with a dense satin stitch using all six strands of floss.
This technique raises the outline from the fabric surface, creating a bold, almost cartoonish definition that makes colors appear more vibrant.
Pairing this with a brightly colored background fabric enhances the graphic, playful effect.
14. Modernize Folk Art with High Contrast
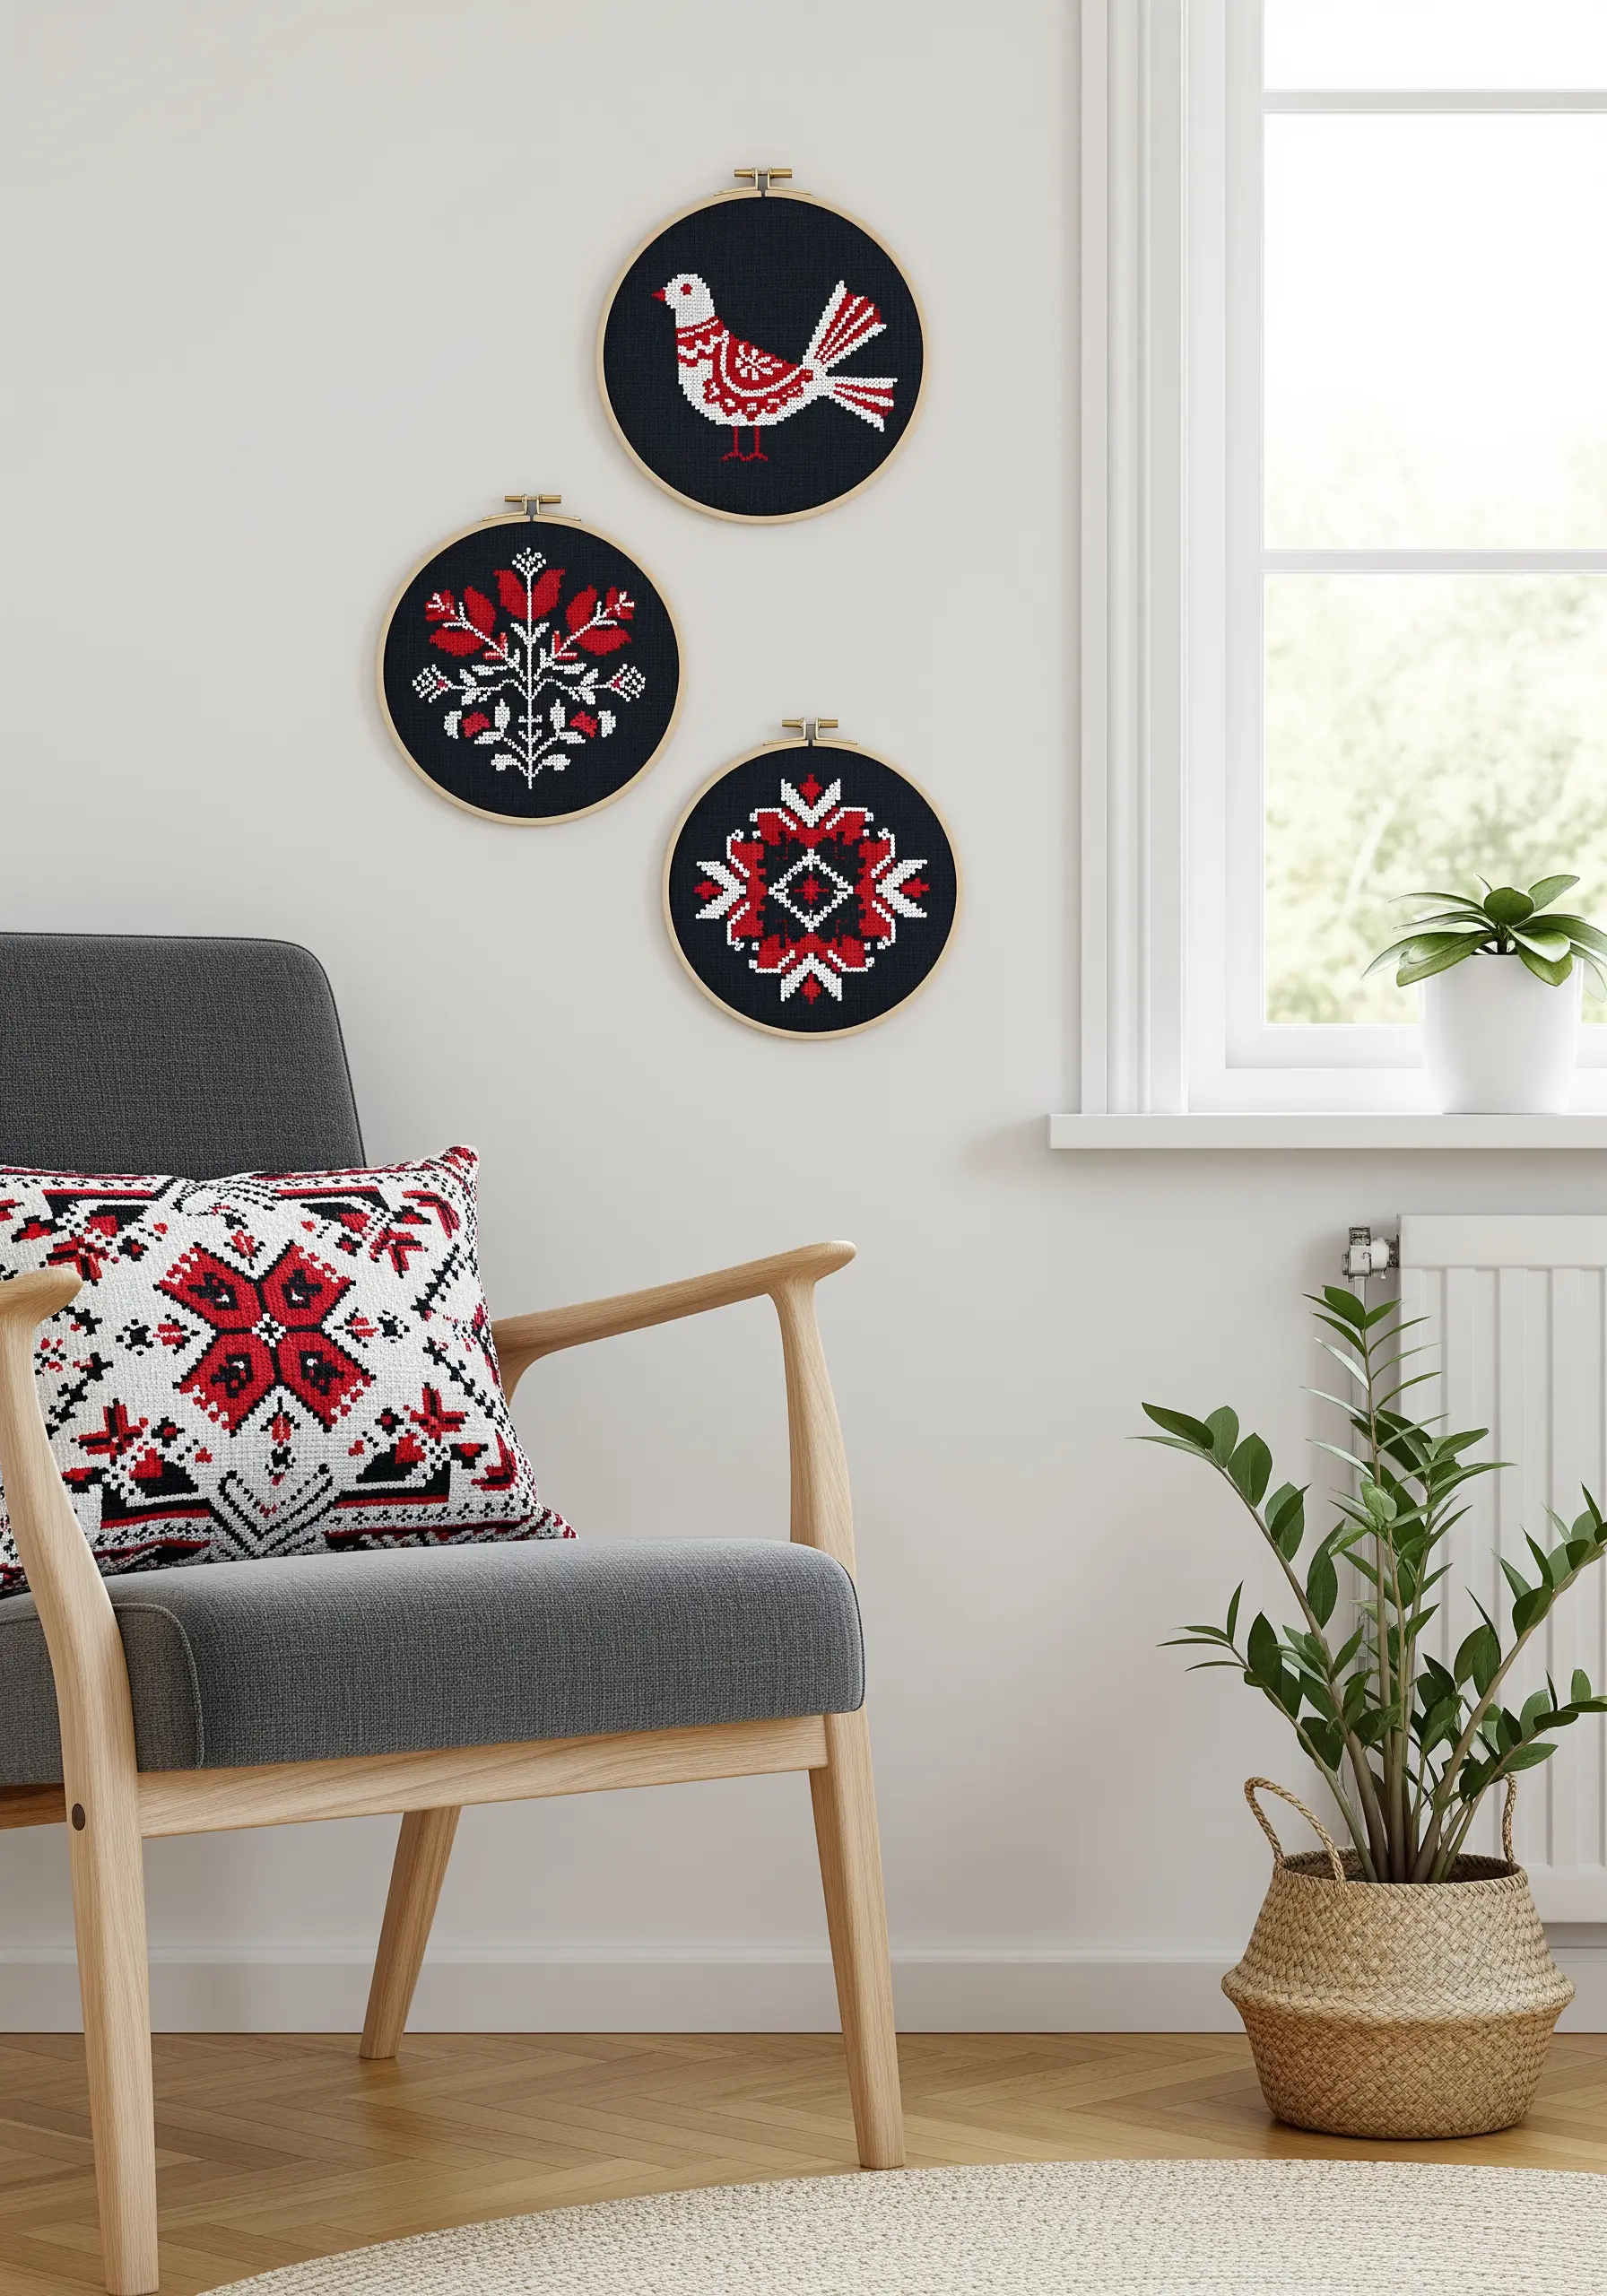
Reimagine traditional folk motifs with a modern, graphic sensibility by using a strictly limited color palette.
Choose a deep black or navy fabric as your base, and work exclusively with bright red and crisp white threads.
This high-contrast combination strips the designs down to their essential forms, emphasizing the beauty of their symmetry and line work.
Grouping three distinct motifs together creates a curated gallery wall that feels both timeless and contemporary.
15. Use Stitch Direction to Imply Movement
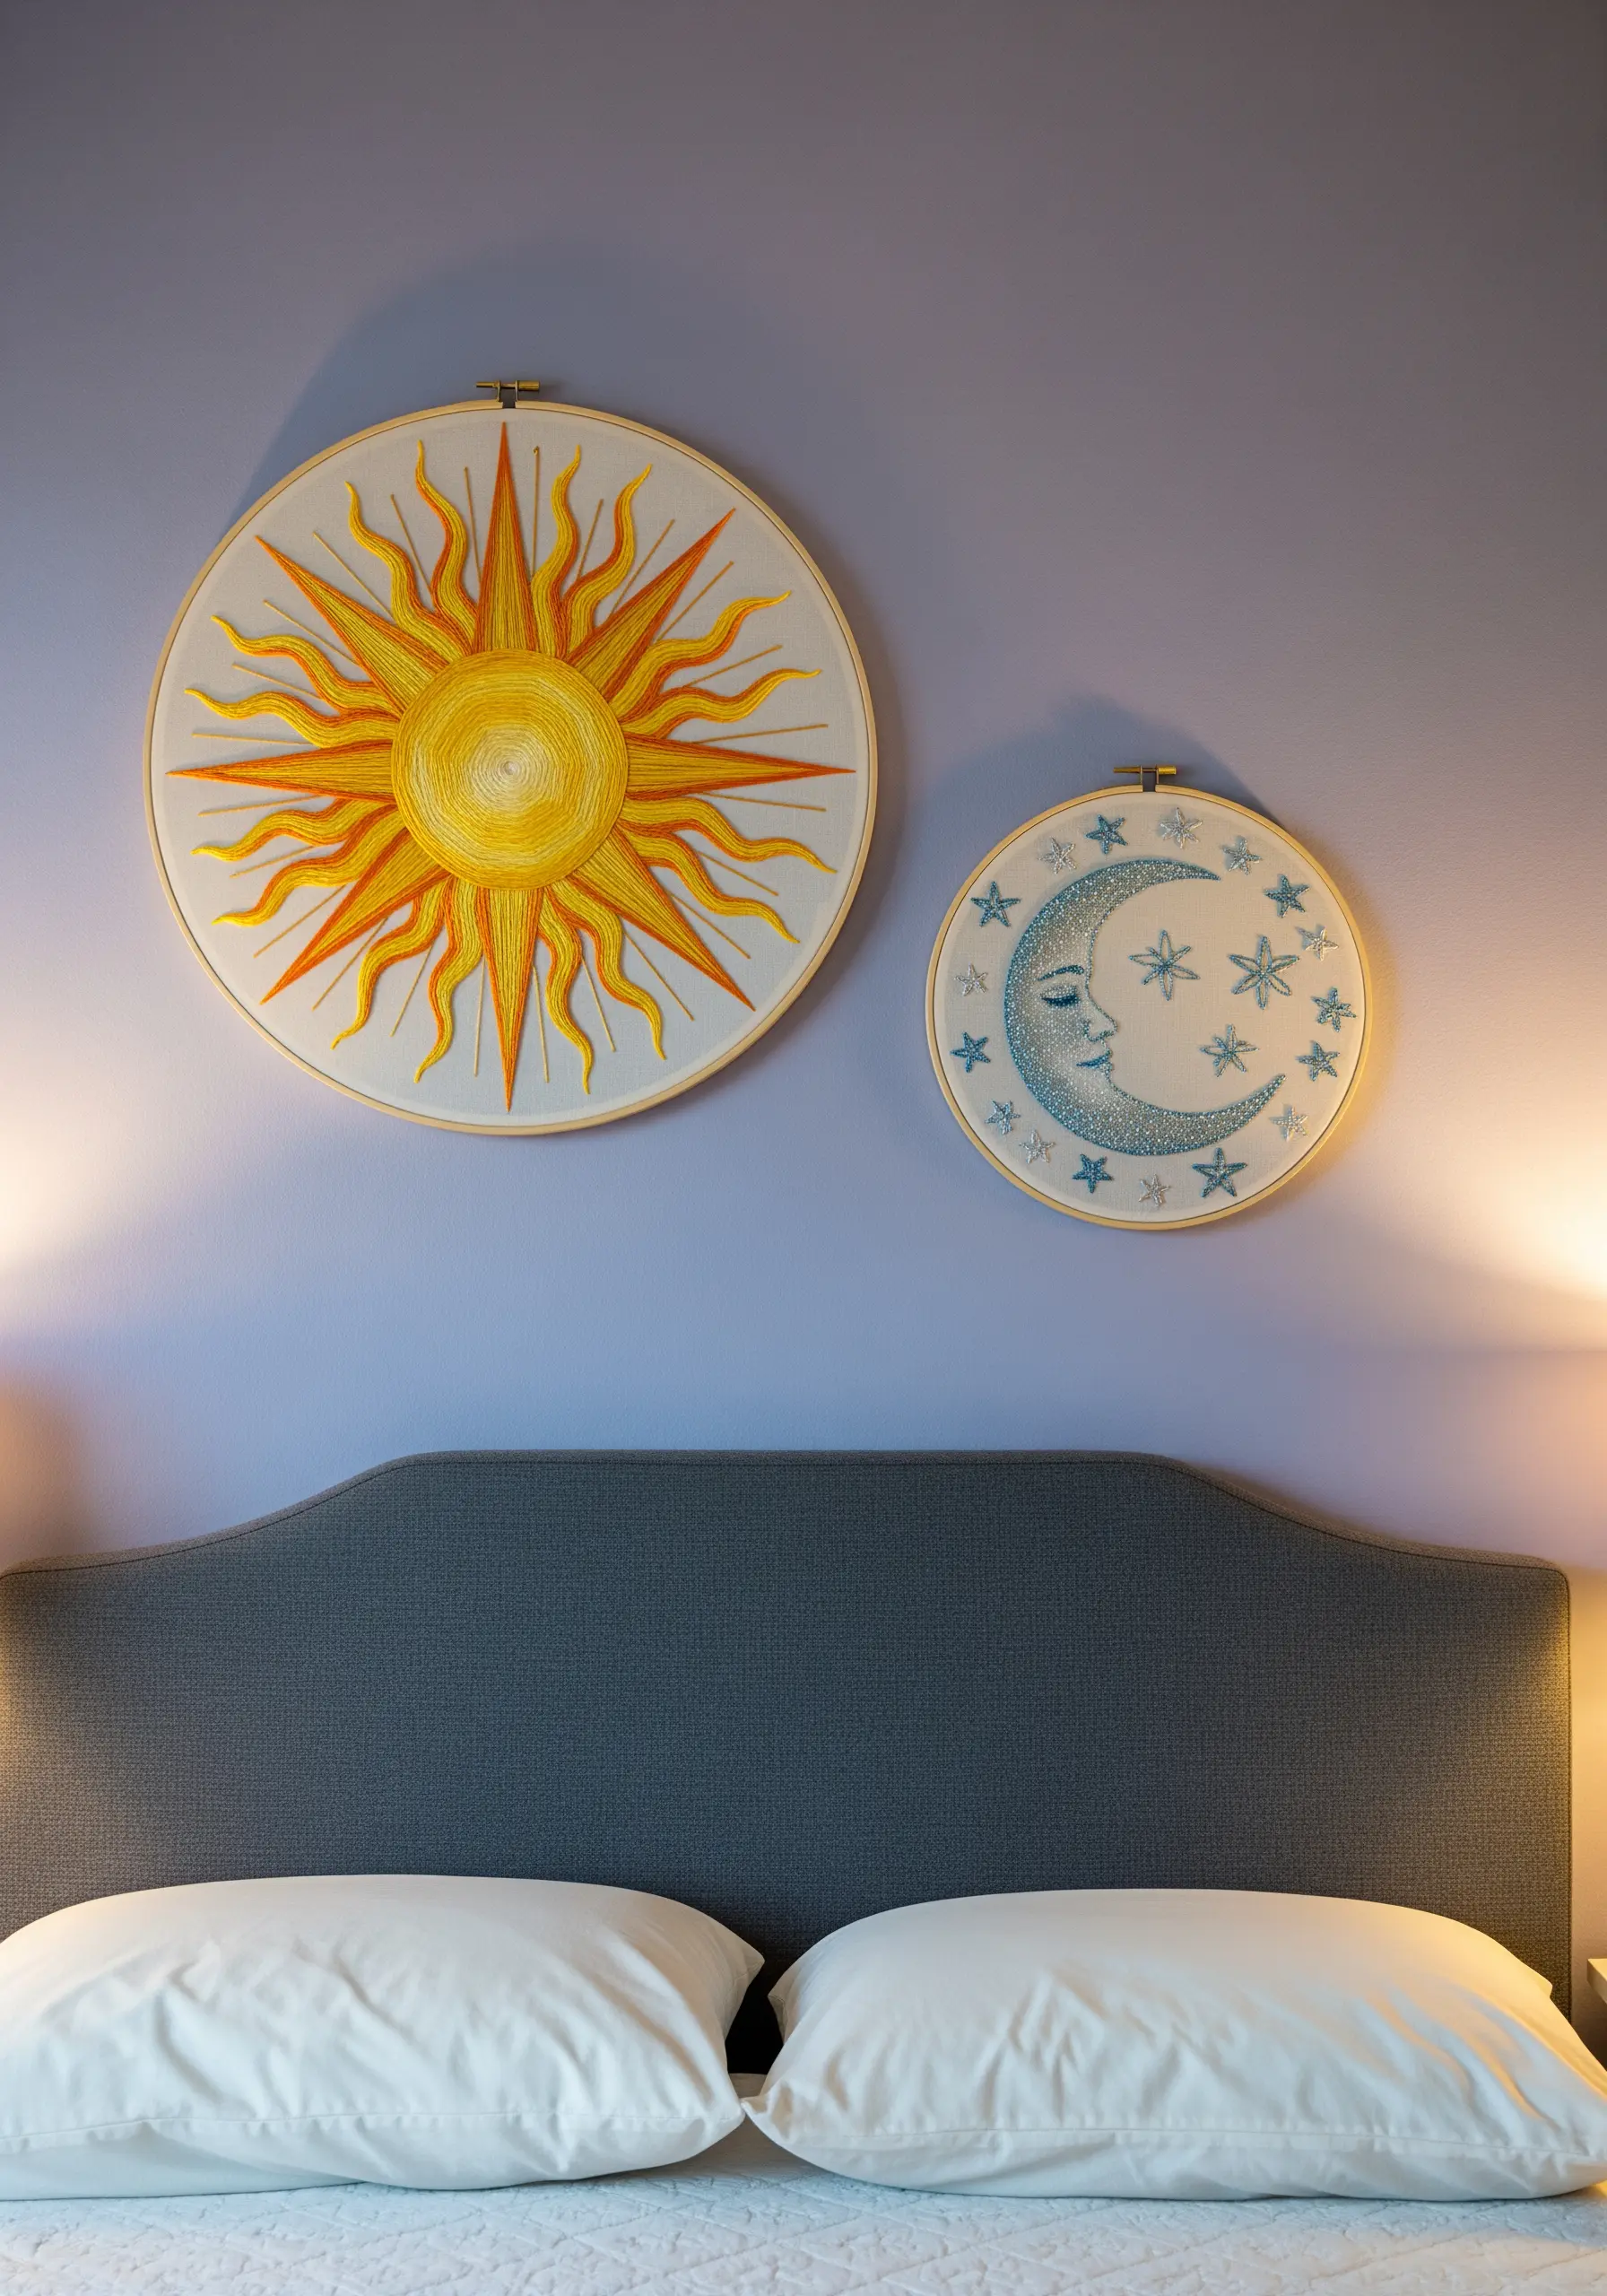
Guide the viewer’s eye and create a sense of energy by being intentional with the direction of your stitches.
For a radiant sun, work your straight stitches or satin stitches from the center outward, making the light feel like it’s exploding from the core.
For a serene moon, follow the curve of the crescent with your fill stitches, which reinforces its calm, gentle shape.
This subtle technique animates your minimal sky and moon designs, giving each element its own distinct personality.
16. Add Dimension to Printed Fabric
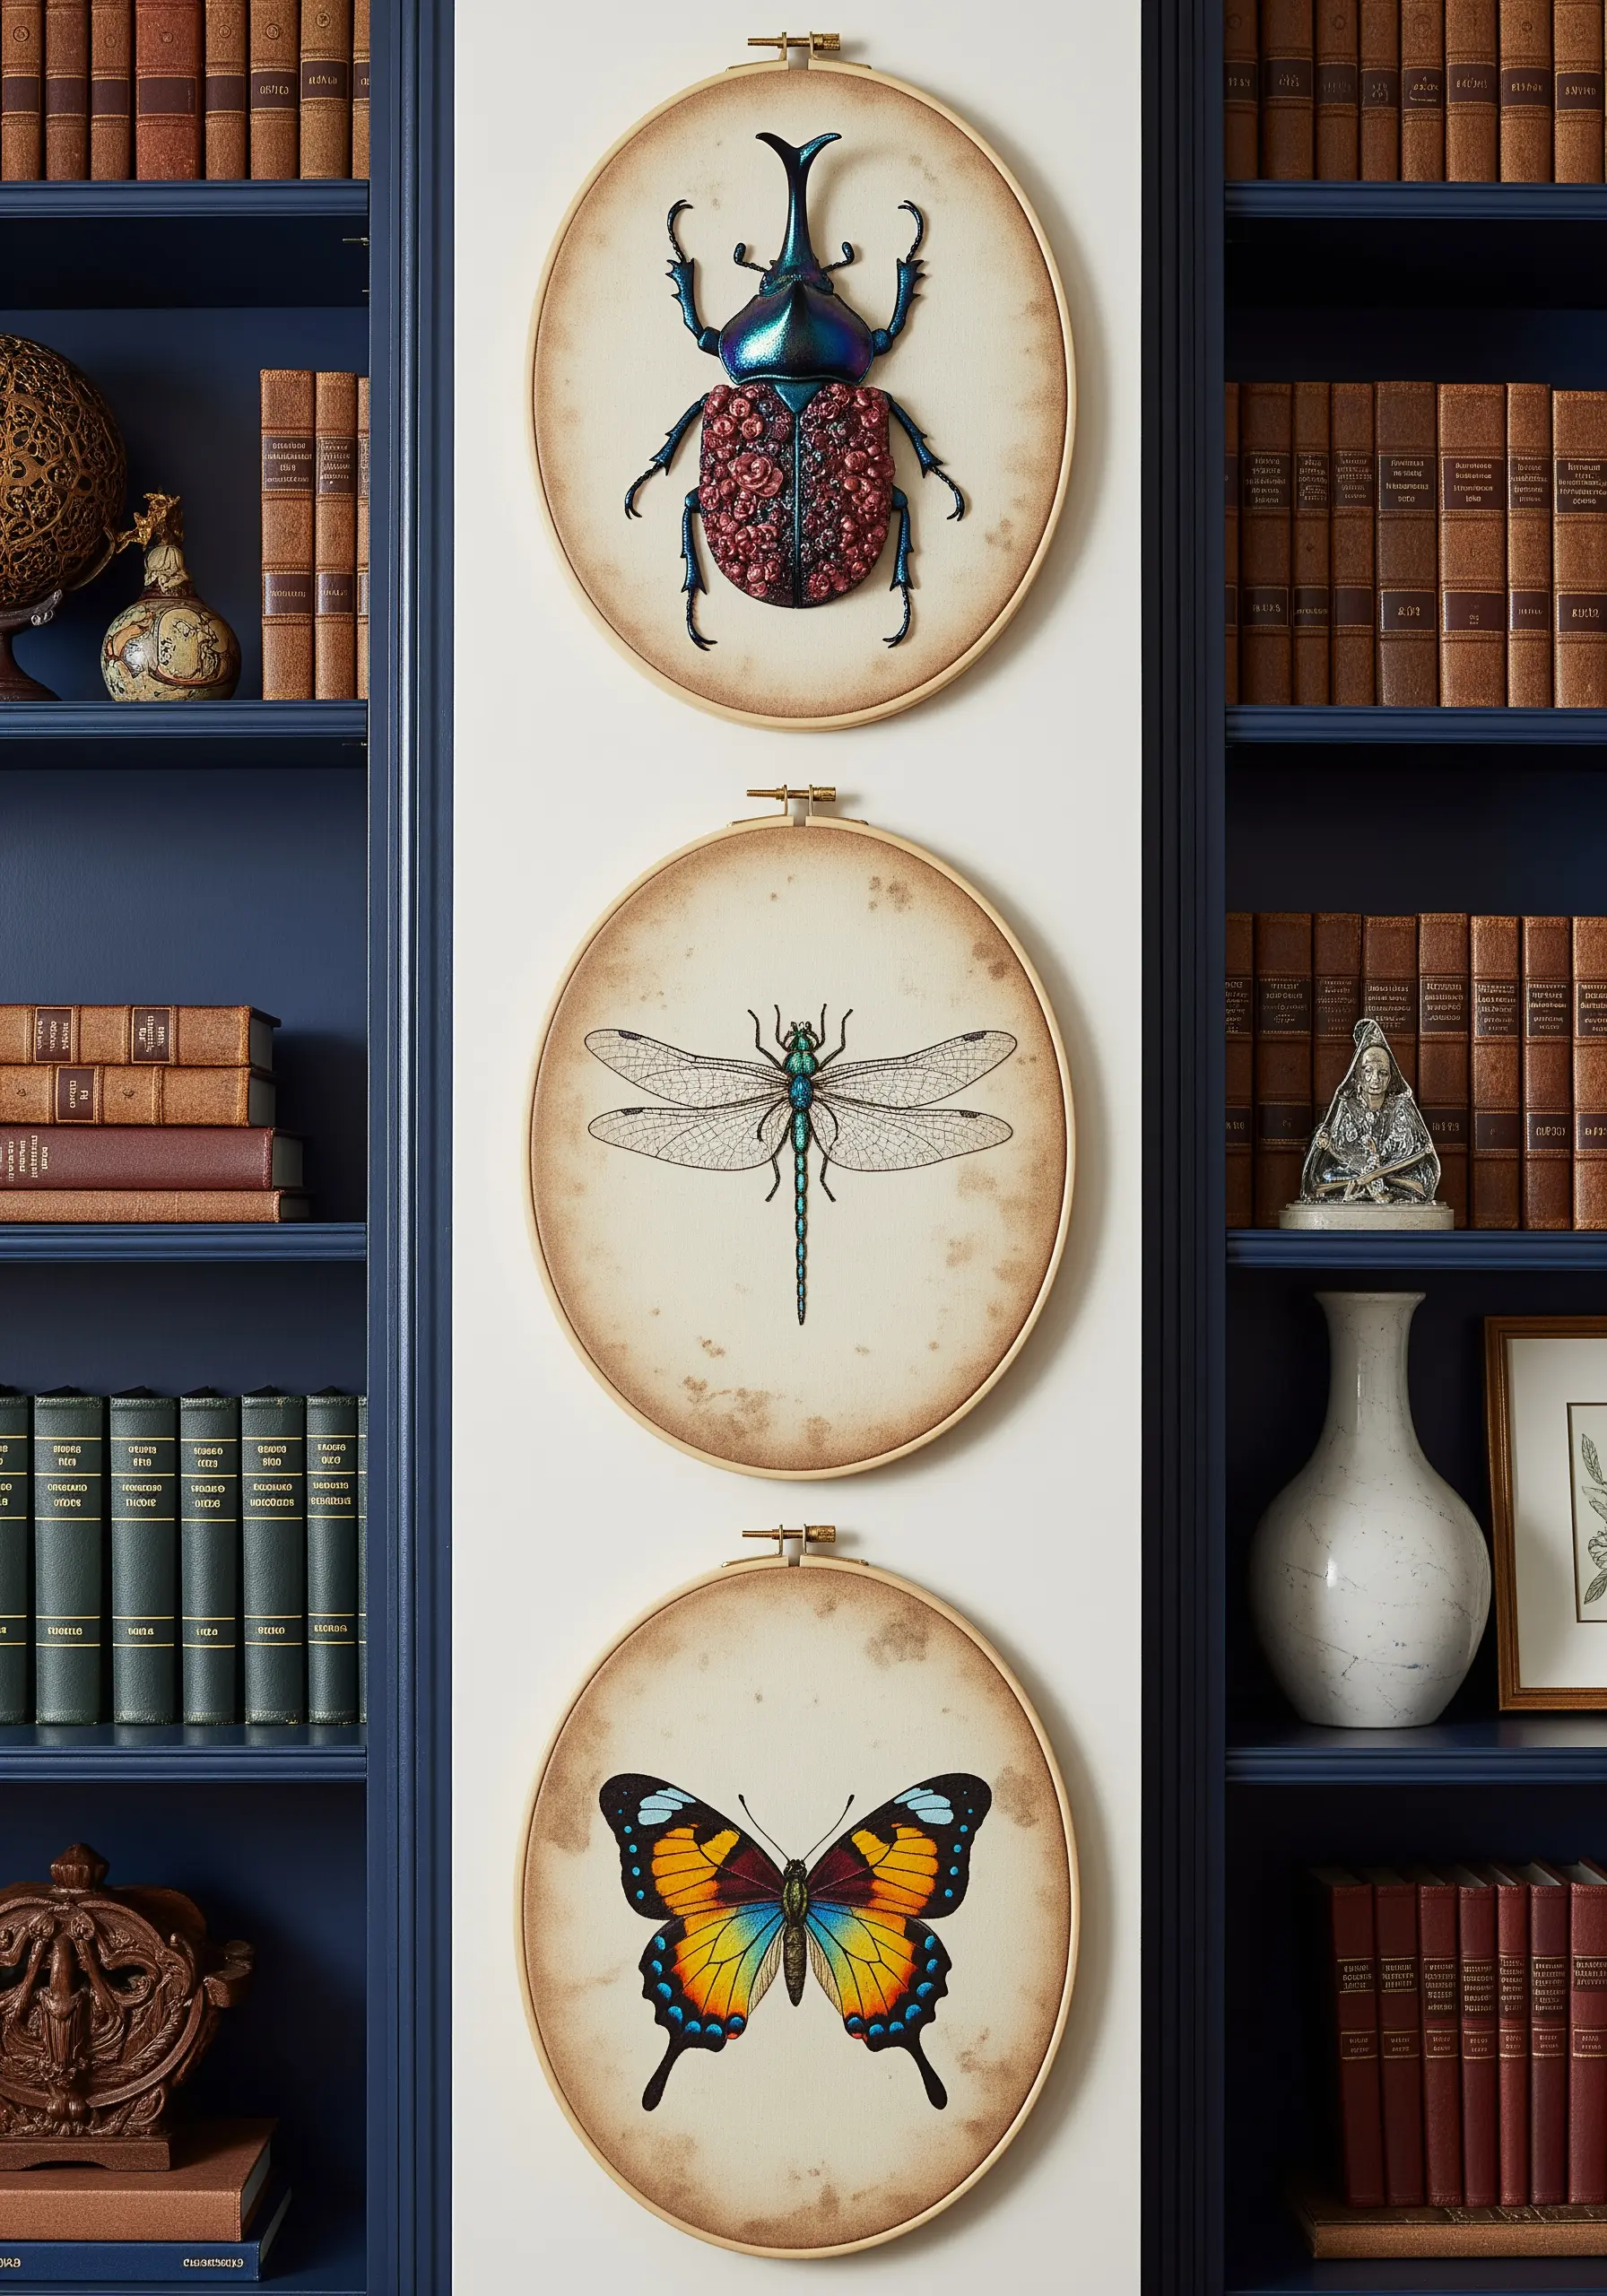
Combine the precision of a printed image with the tactile beauty of embroidery for a stunning mixed-media piece.
Start by printing a high-resolution vintage illustration onto printable fabric or having it professionally printed on cotton canvas.
Then, select specific areas to enhance with thread. Add a layer of glossy satin stitch to a beetle’s carapace, use fine backstitch to define a dragonfly’s wings, or thread-paint a butterfly’s wings for vibrant color.
This technique creates a hyper-realistic effect where texture and sheen bring the illustration to life.
17. Construct a Sculptural 3D Bouquet
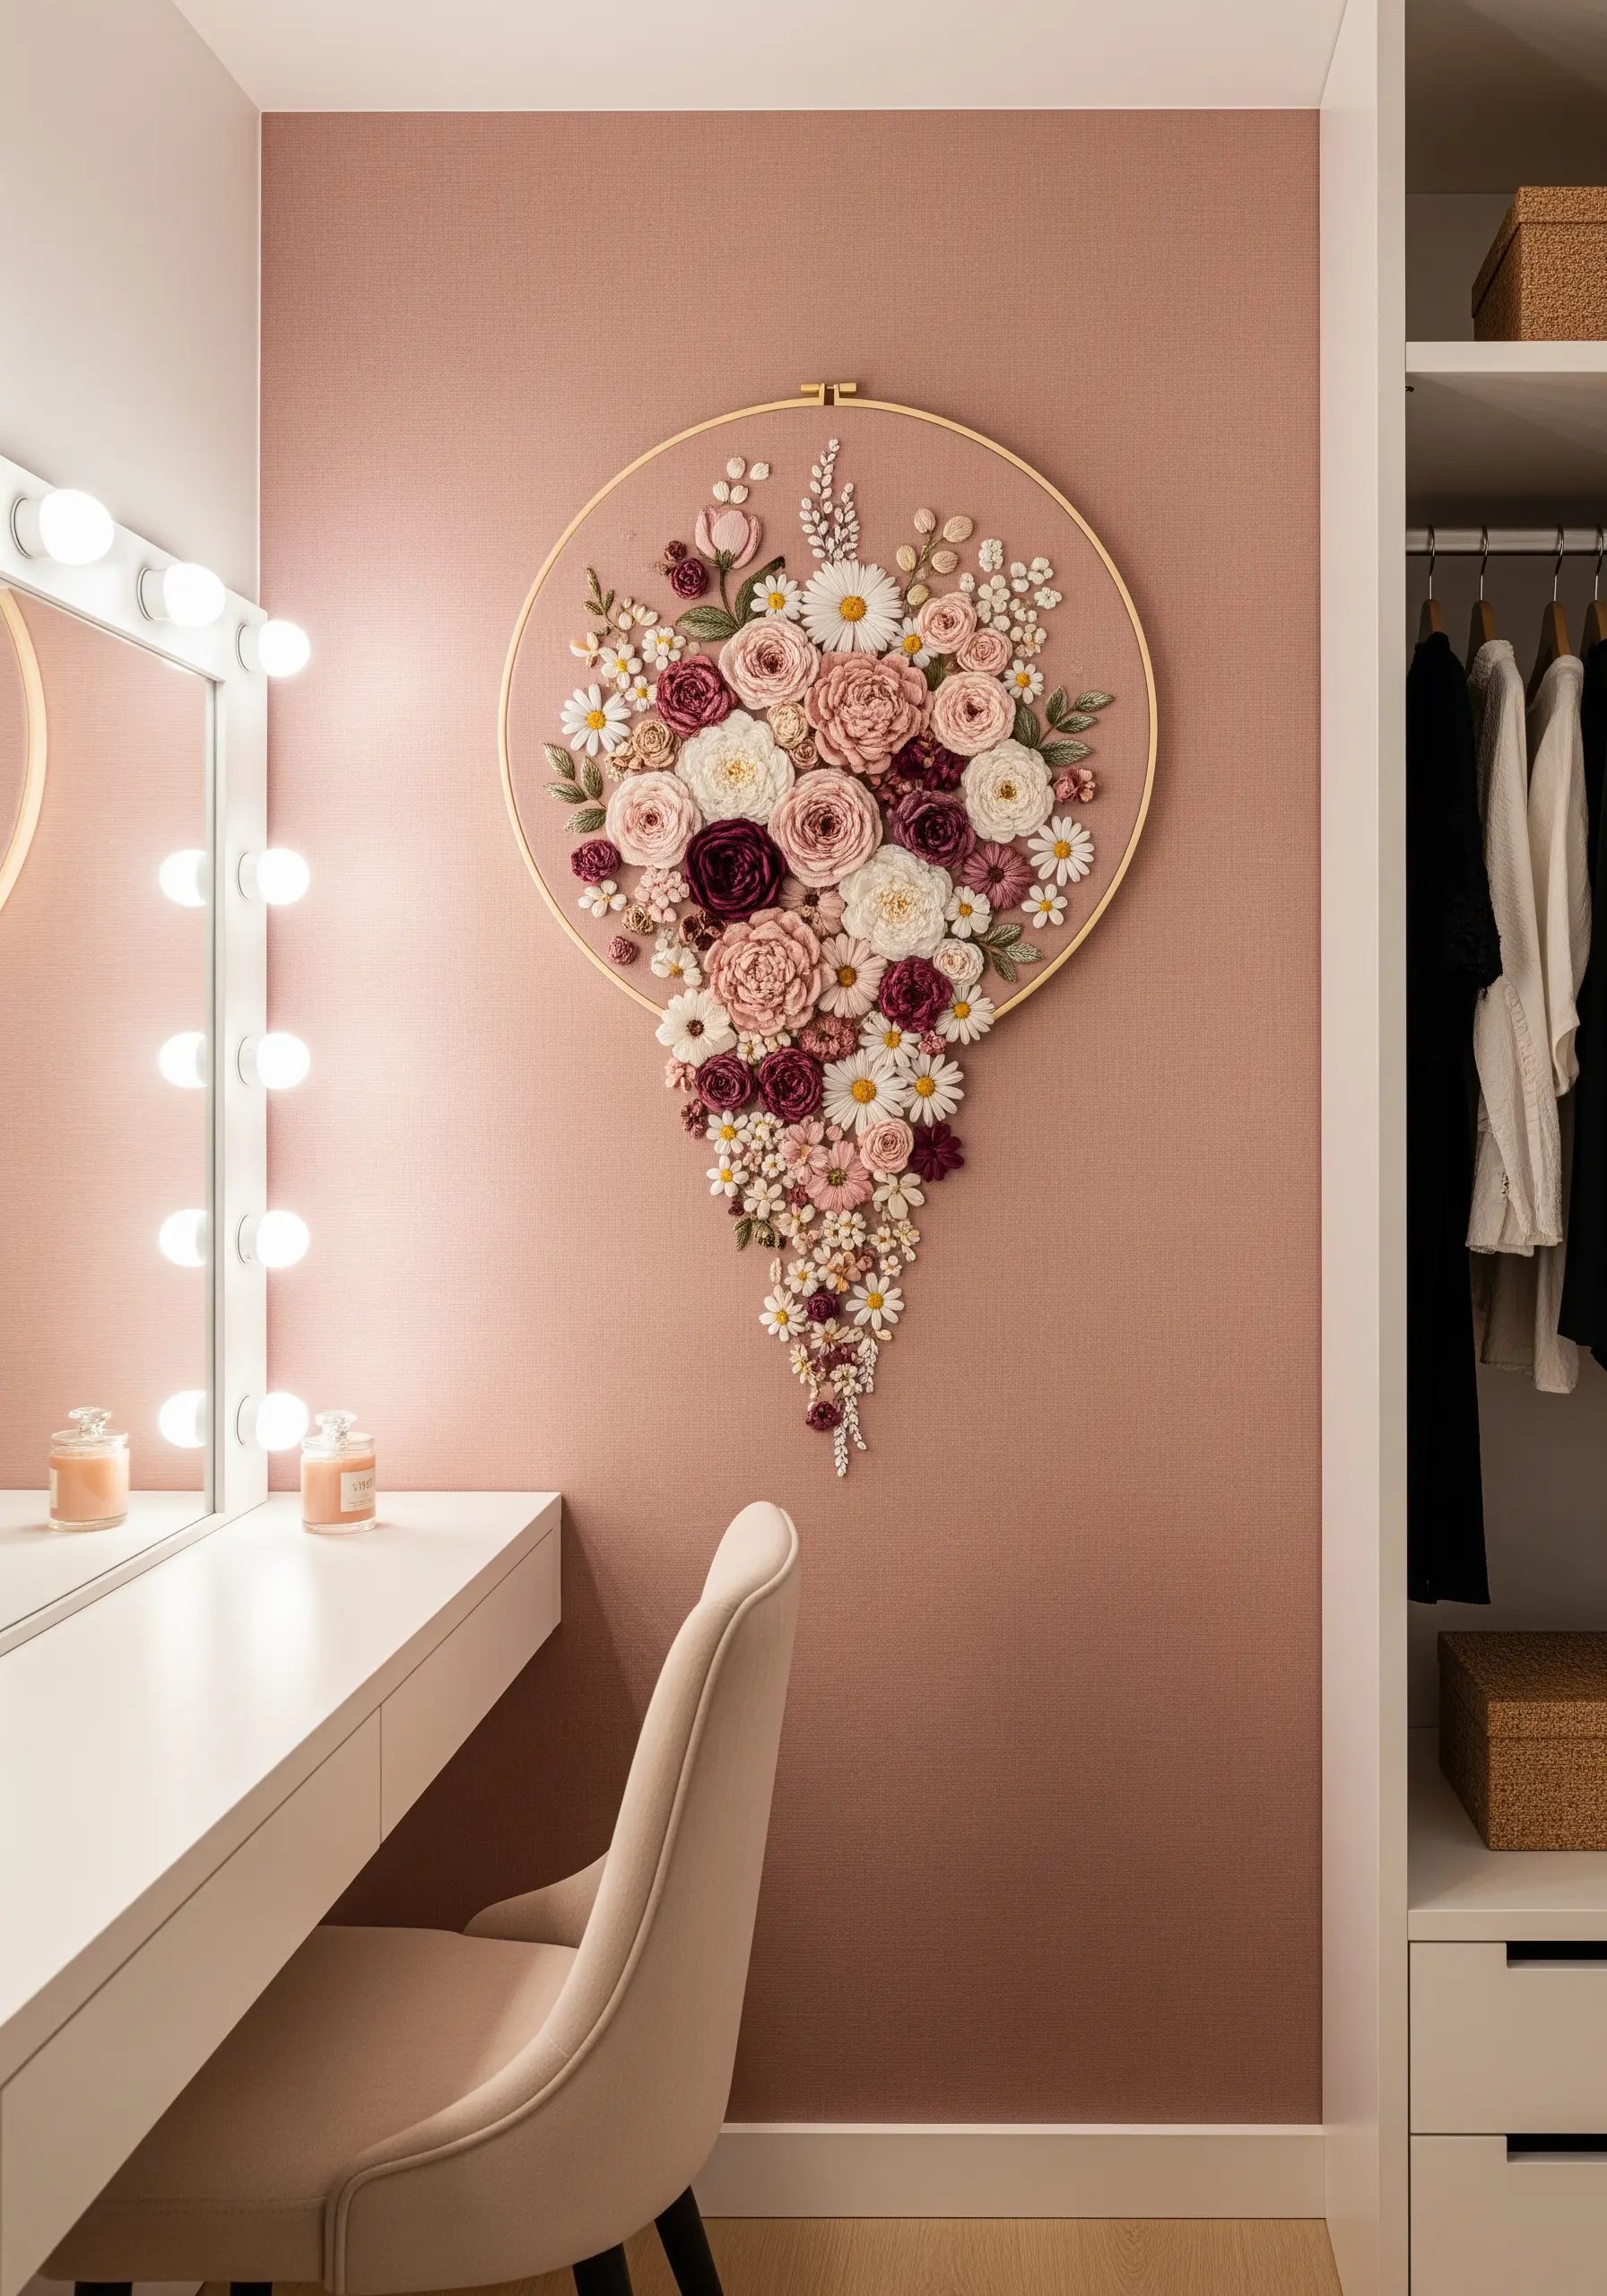
Move beyond the hoop’s surface by using stumpwork and other 3D embroidery techniques to build a floral arrangement that has physical depth.
Create detached petals using wire-edged buttonhole stitches, which you can then shape and layer to form realistic roses.
Use woven picot stitches to make raised, three-dimensional leaves and petals that stand away from the fabric.
Arranging these elements in a cascading shape that breaks the boundary of the hoop turns your embroidery into a breathtaking sculptural installation.
18. Capture Expression with a Single Line
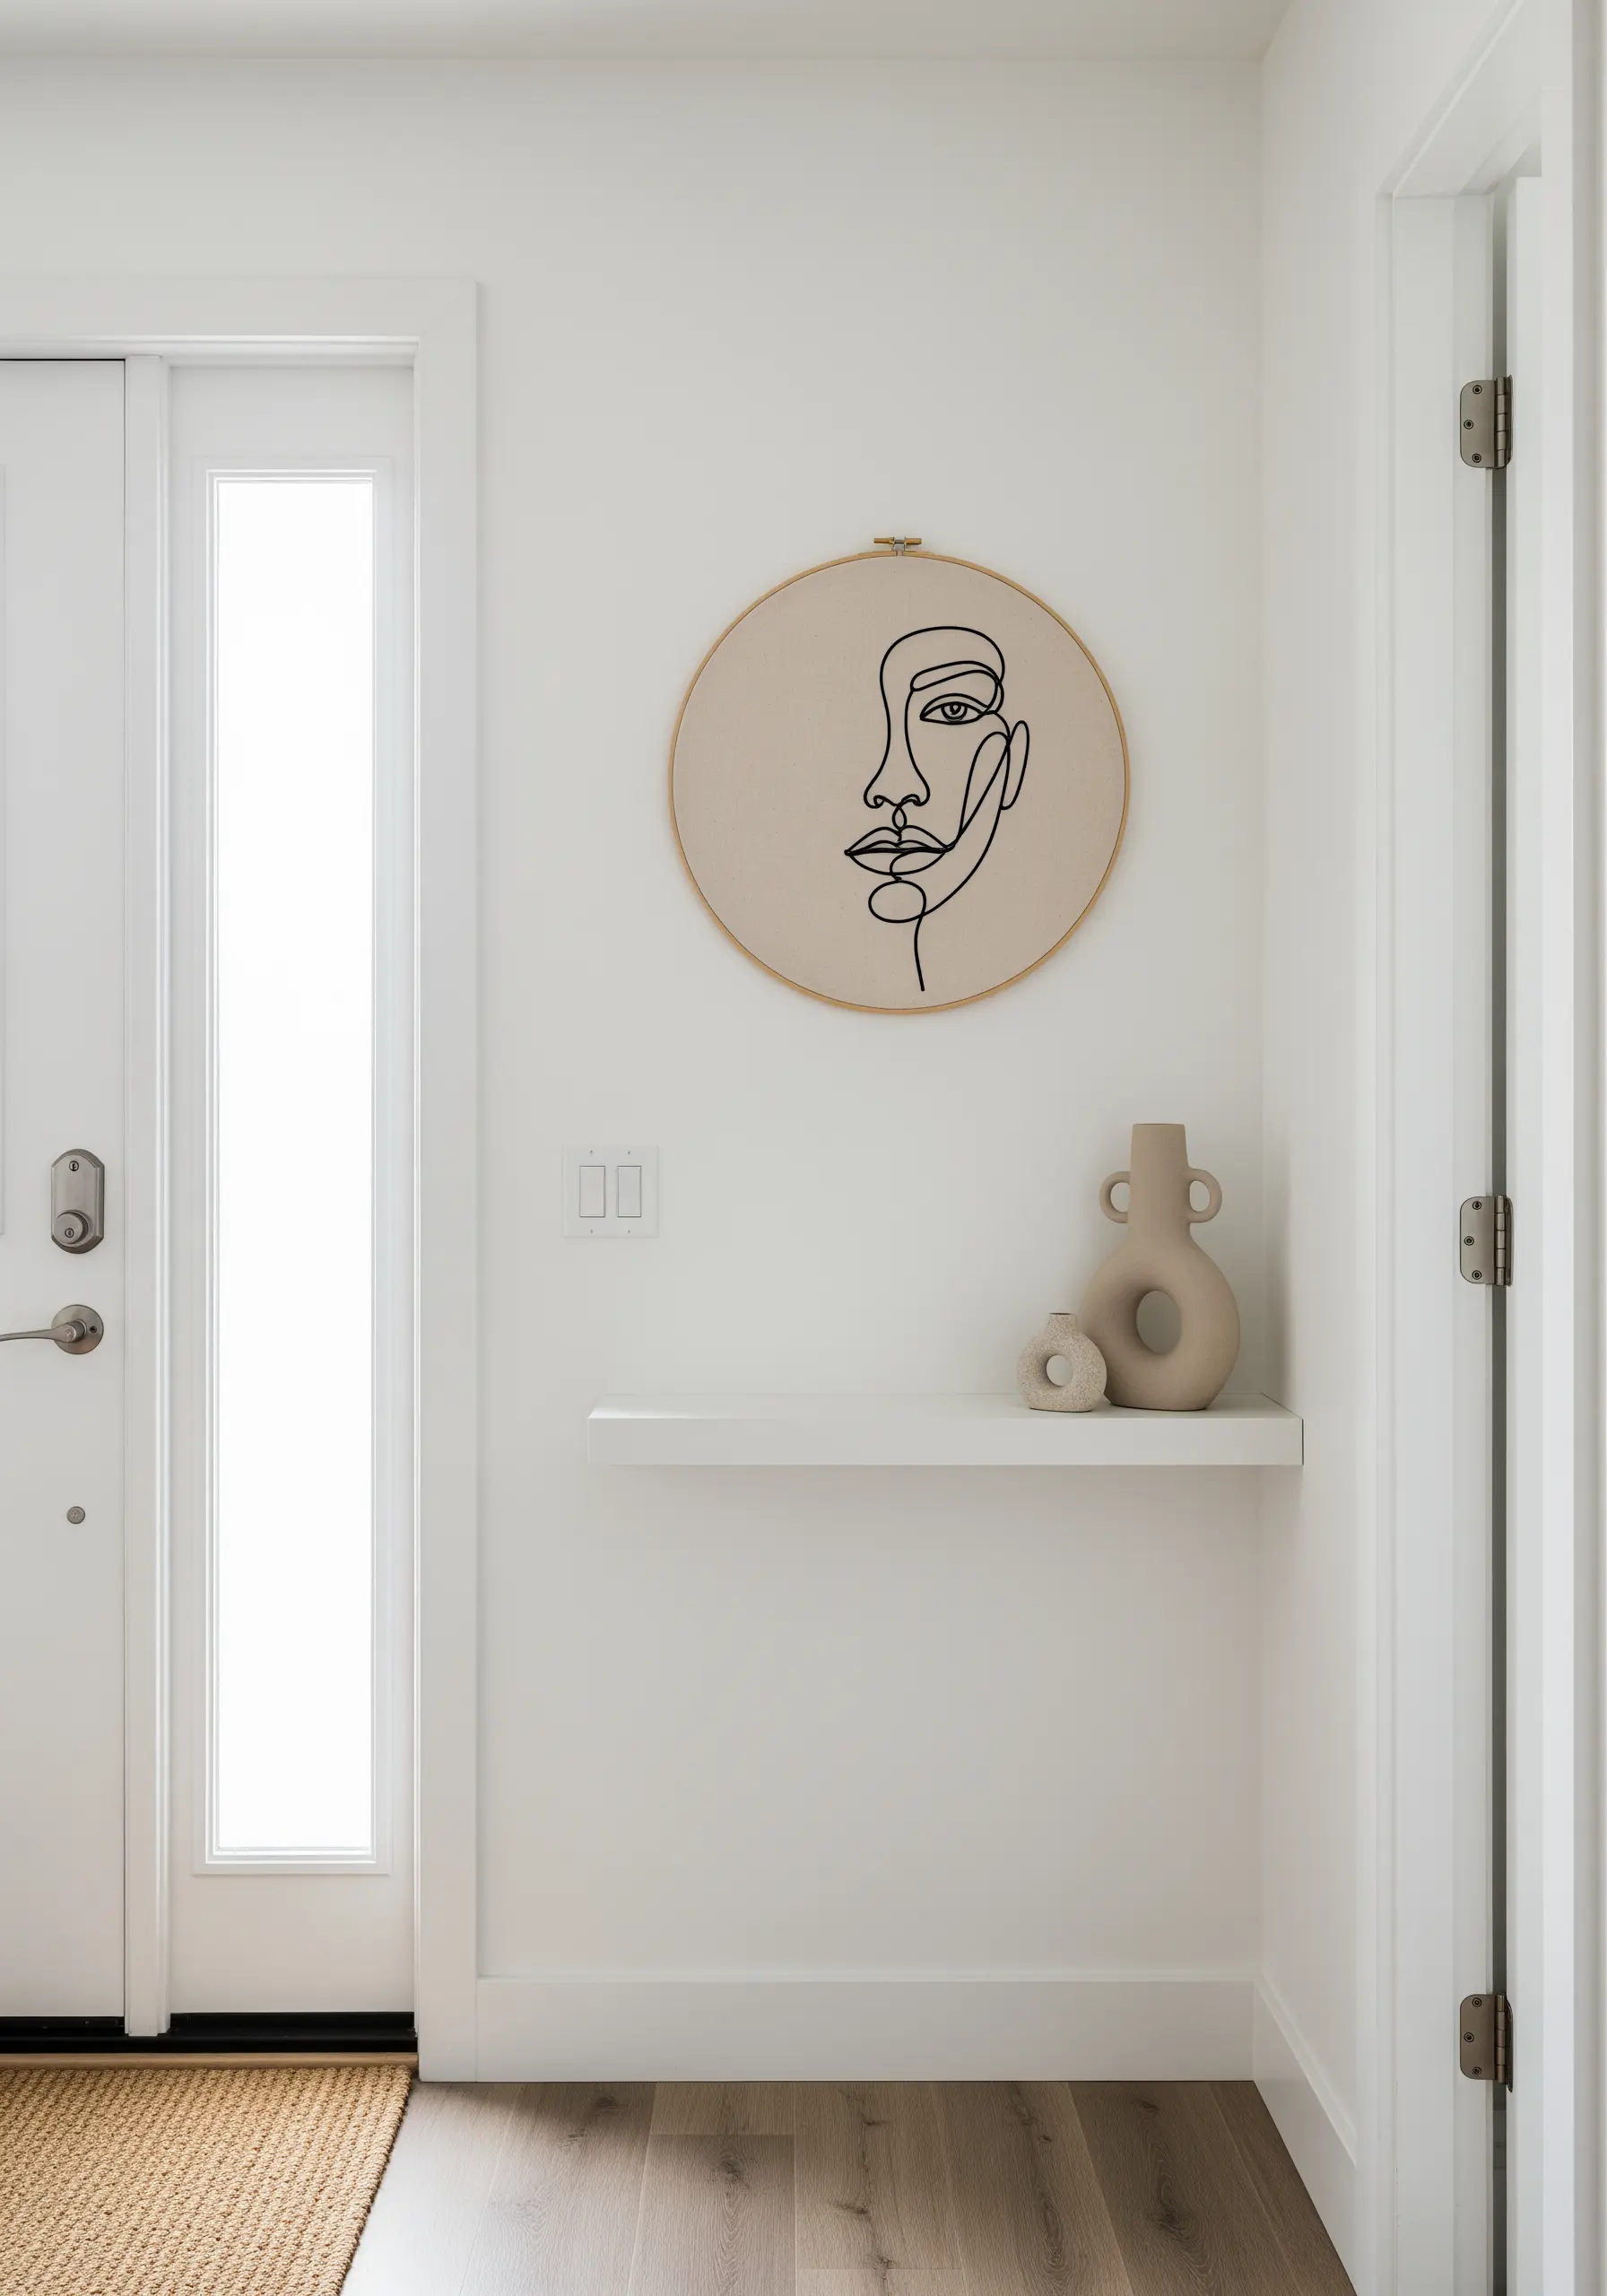
Explore the elegance of minimalism by translating a continuous line drawing into thread.
The key to success is a perfectly smooth, consistent stitch that doesn’t break the flow of the line. A whipped backstitch or a stem stitch are excellent choices.
Use three to four strands of black floss on a neutral, tightly woven fabric like sand-colored linen or cotton.
The simplicity of the technique allows the emotion and form of the drawing to take center stage, creating sophisticated, gallery-style art from a single line.


