

Mandala embroidery is more than just a pattern; it’s a practice in mindfulness, a way to translate rhythm and intention into thread. Each stitch becomes a quiet meditation, and the circular form offers a unique canvas for exploring symmetry, texture, and color in a way that feels both grounding and deeply personal.
But how do you move from simply following a pattern to creating a piece of art that truly resonates? The secret lies in the details—the choice of a specific stitch to create texture, the decision to use a single color to emphasize form, or the courage to combine thread with unconventional materials.
Here, you’ll discover how to elevate your mandala stitching from a simple craft to a refined art form. We will explore techniques that add dimension, depth, and a professional finish to your work, transforming your meditative practice into stunning decor that brings a sense of calm and beauty to your space.
1. Large-Scale Mandala Tapestry with Sketch-Style Stitching
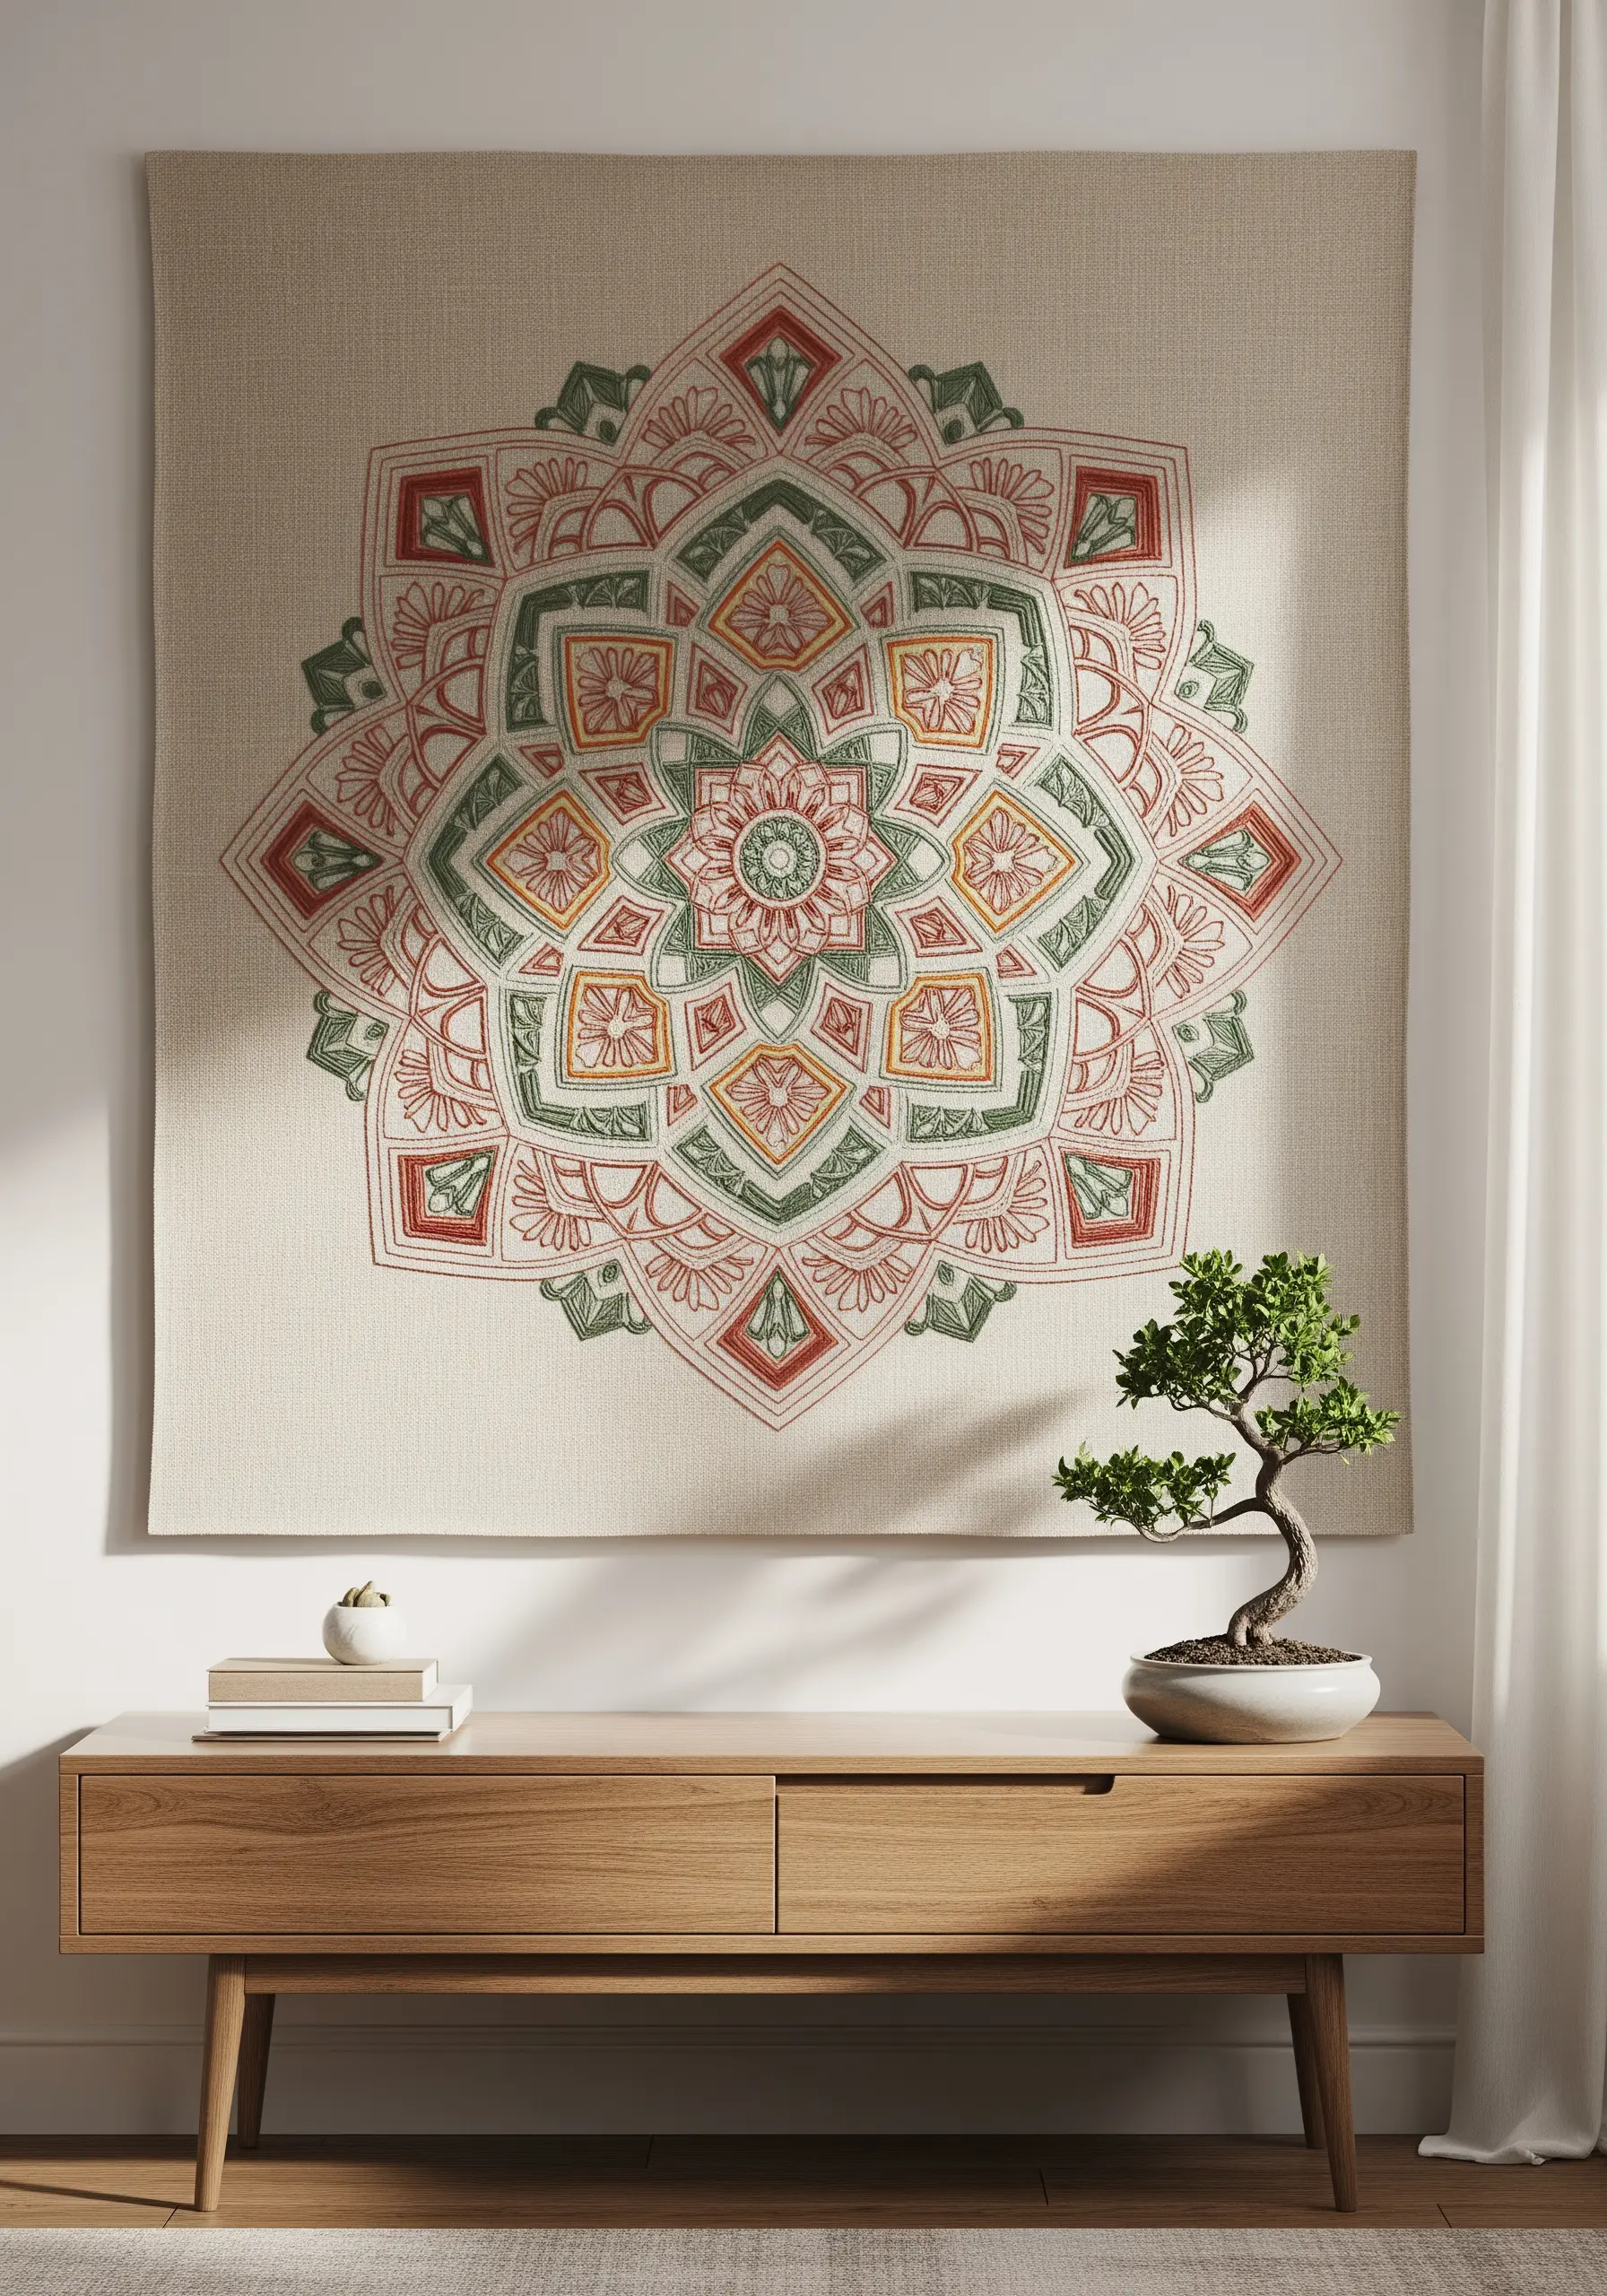
When working on a large scale, choose your stitches strategically to balance detail with efficiency.
Opt for a whipped backstitch or a simple stem stitch using a heavier thread like #5 perle cotton to create clean, visible lines without overwhelming the design.
This approach gives your work a hand-drawn, illustrative quality that feels both intricate and effortless from a distance.
For the fill areas, use a light seed stitch instead of dense satin stitch; this adds texture and color without the immense time commitment.
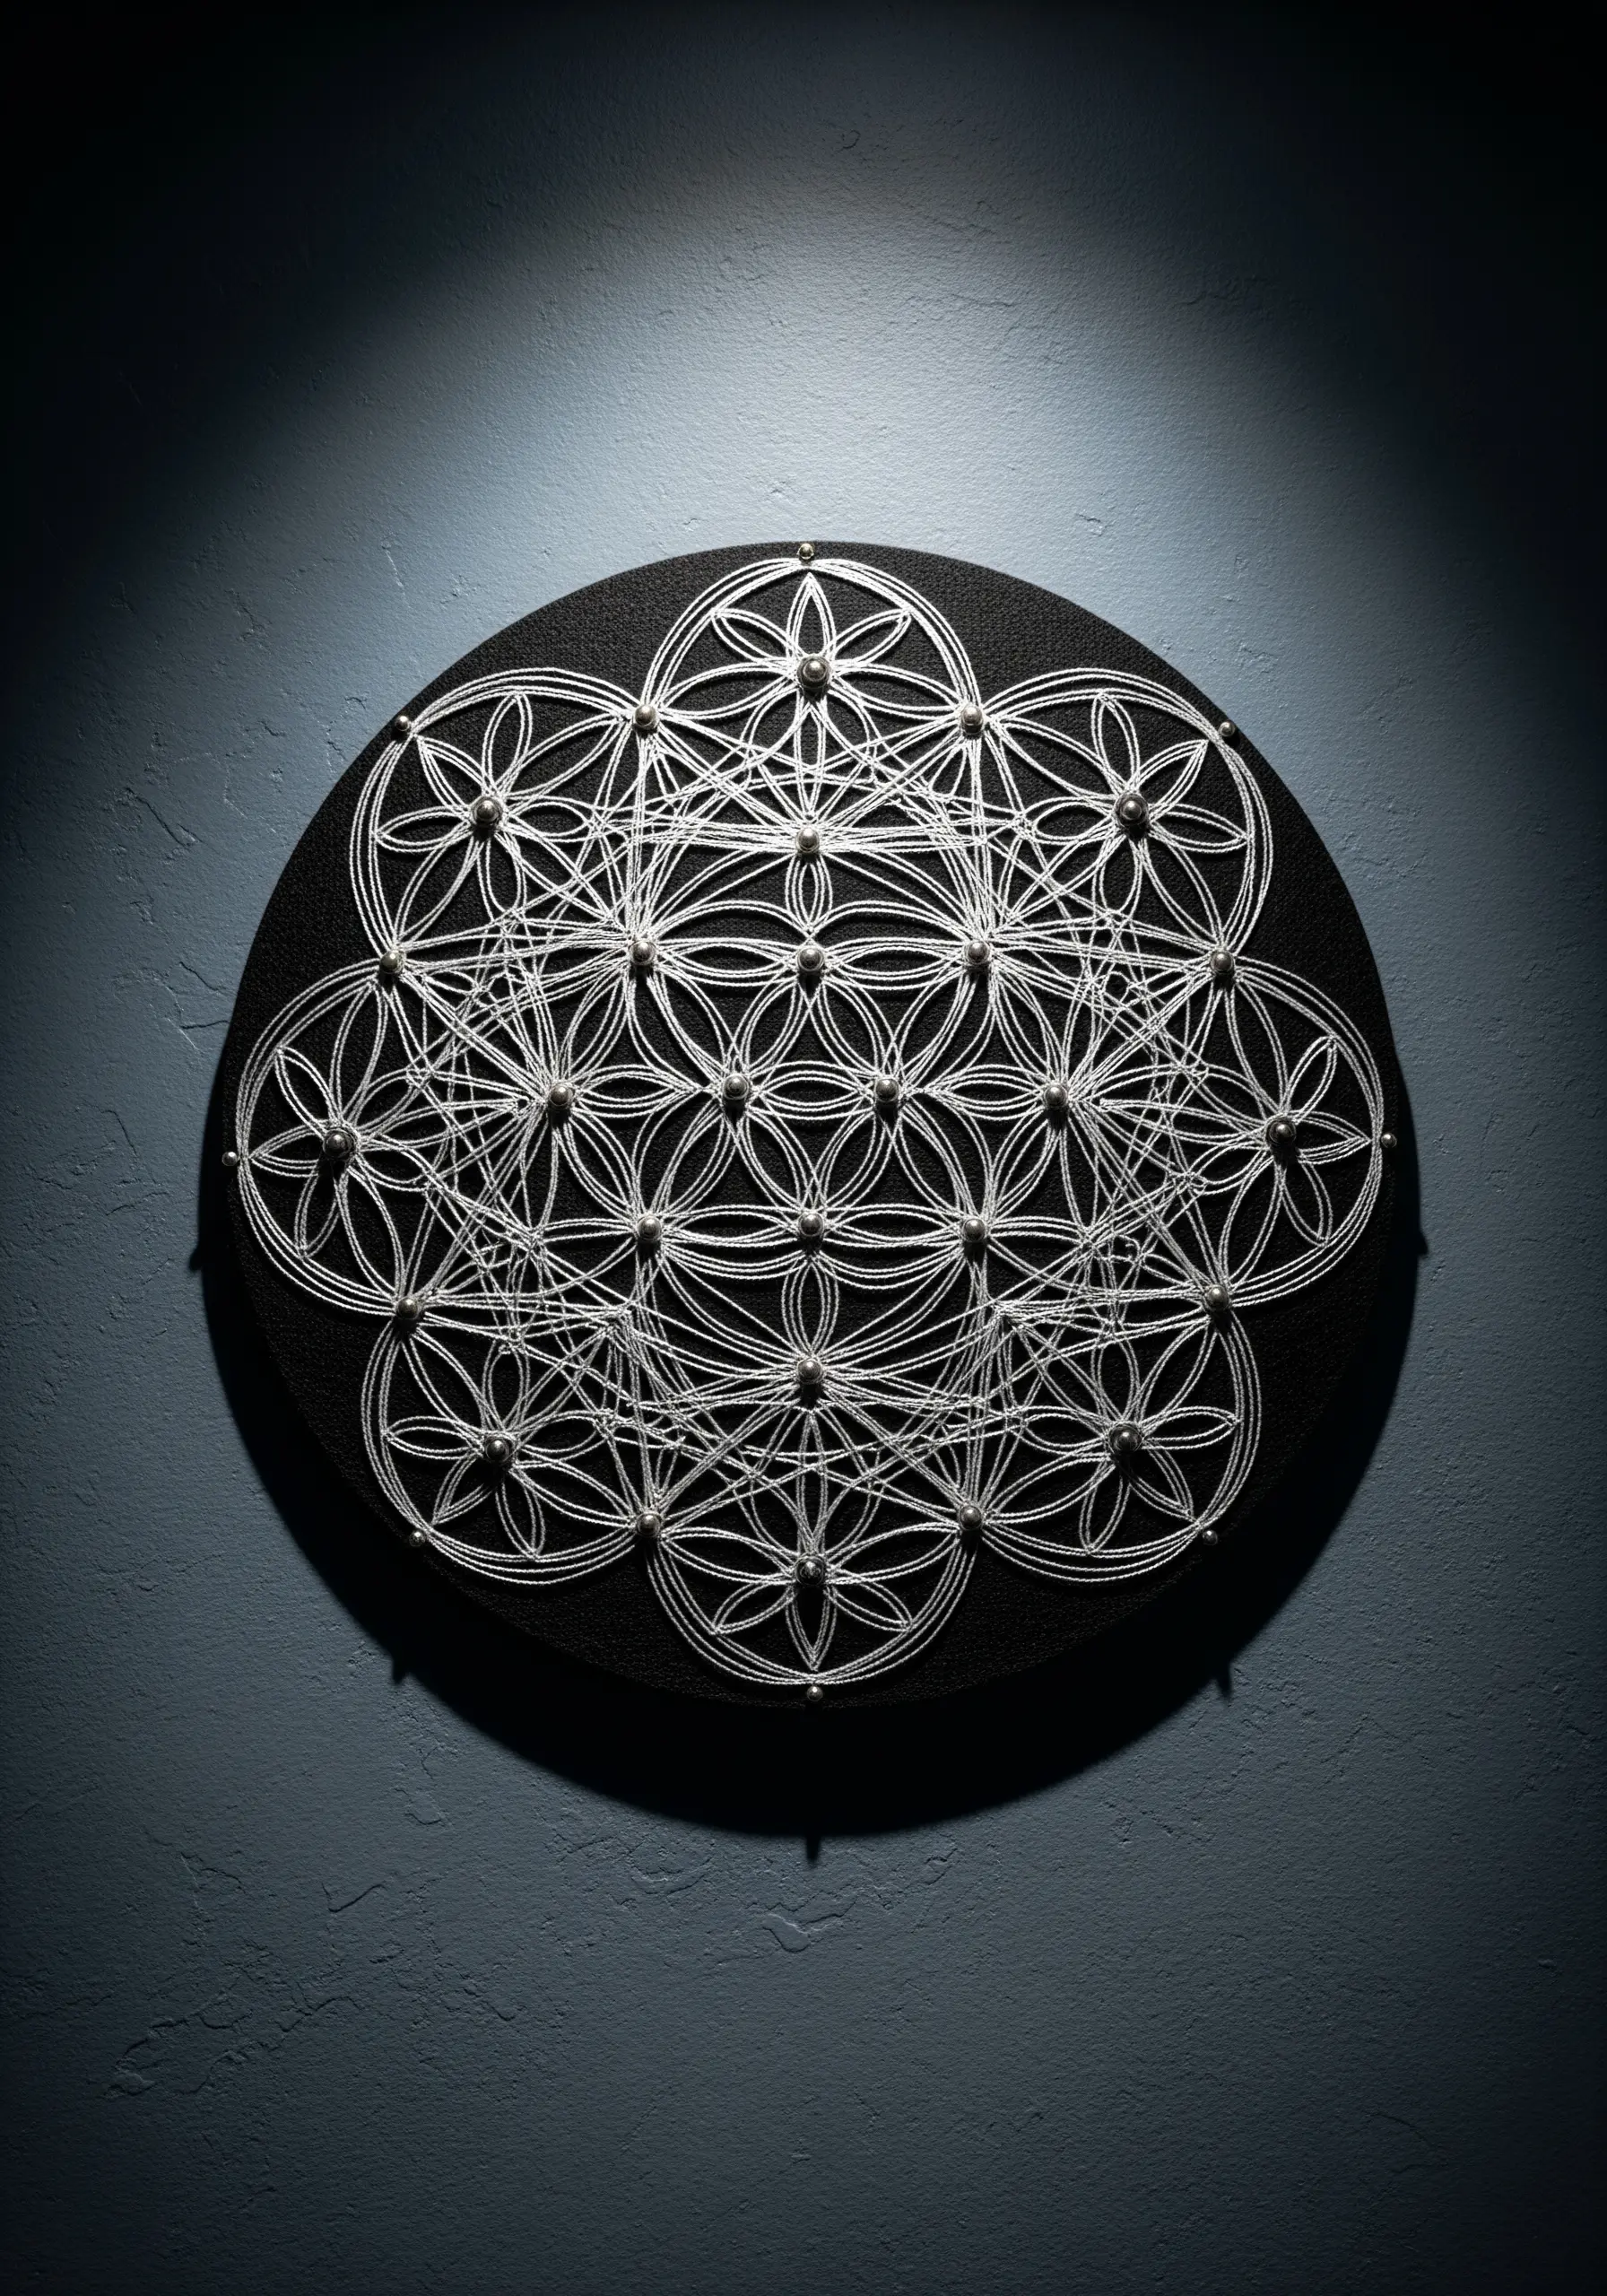
2. Celestial Lotus with Metallic Constellations

Make metallic threads work for you, not against you, on dark fabric.
Use a thread conditioner like beeswax or Thread Heaven to tame unruly metallic floss, and work with shorter lengths (no more than 12 inches) to prevent tangles and fraying.
For the delicate constellation lines, a simple backstitch is perfect.
Contrast this fine linework with a densely filled lotus using a satin stitch or long-and-short stitch, making it the undeniable focal point of your cosmic design.
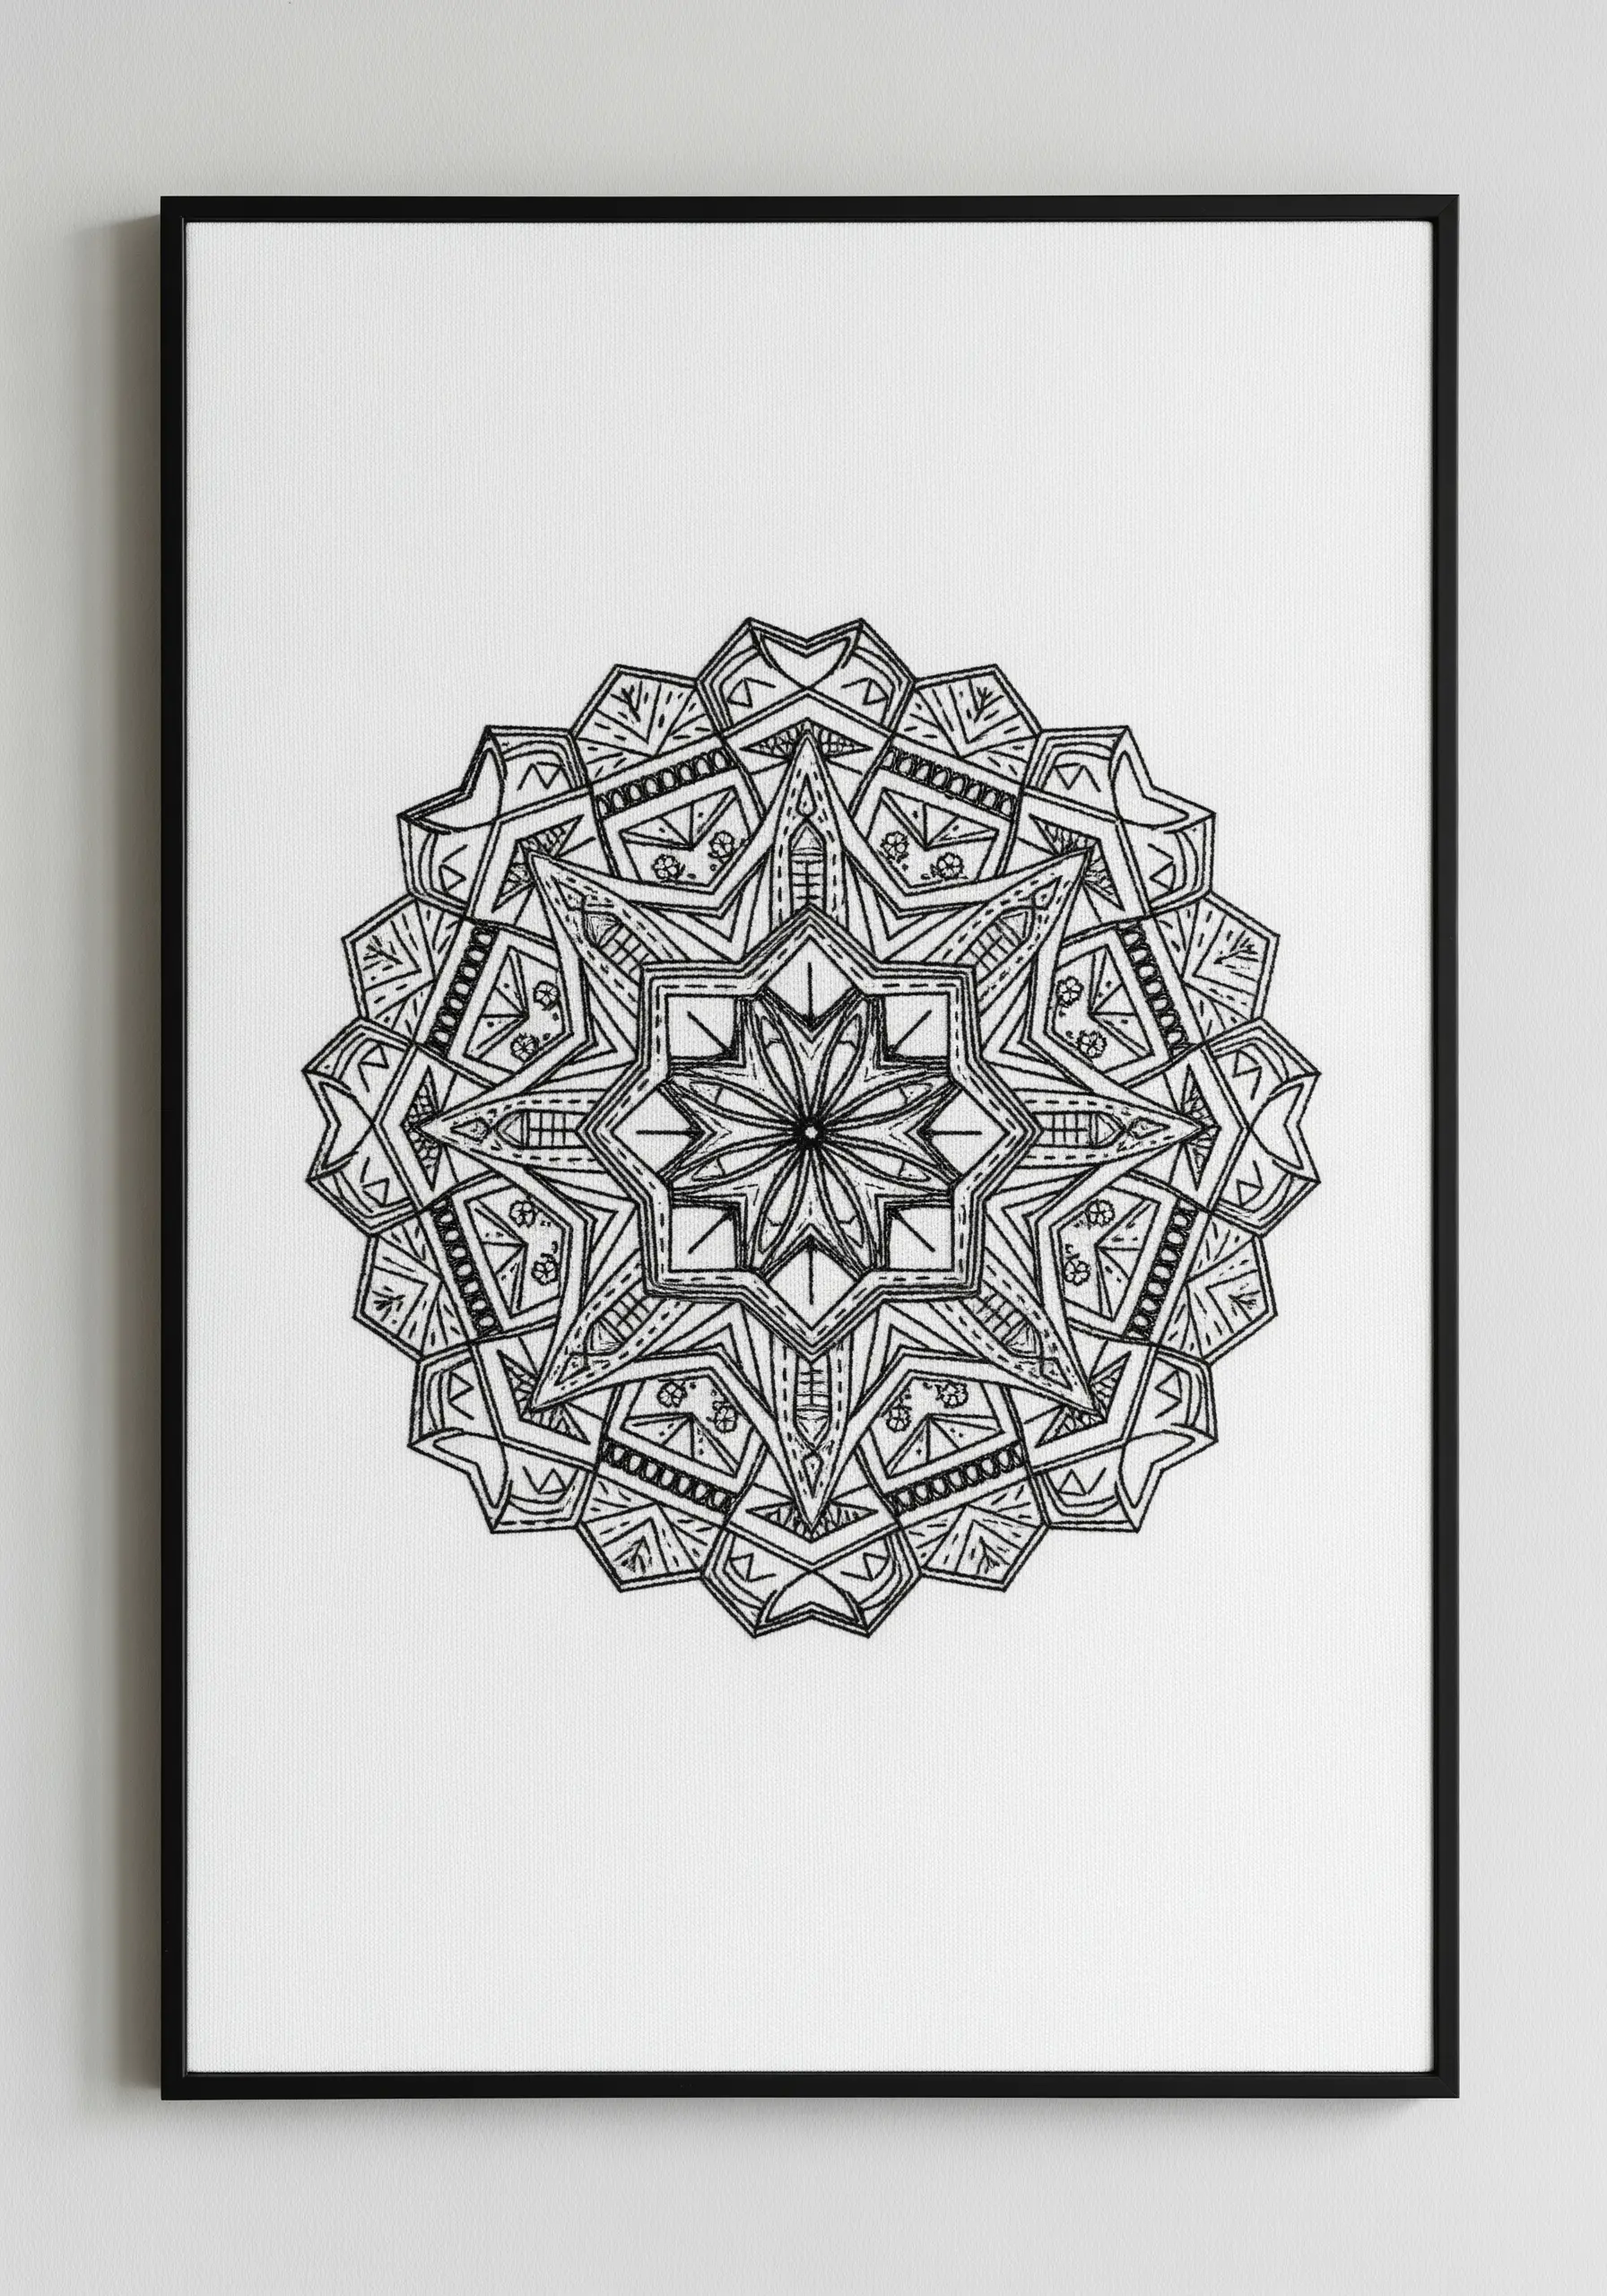
3. Monochromatic Mandala Triptych
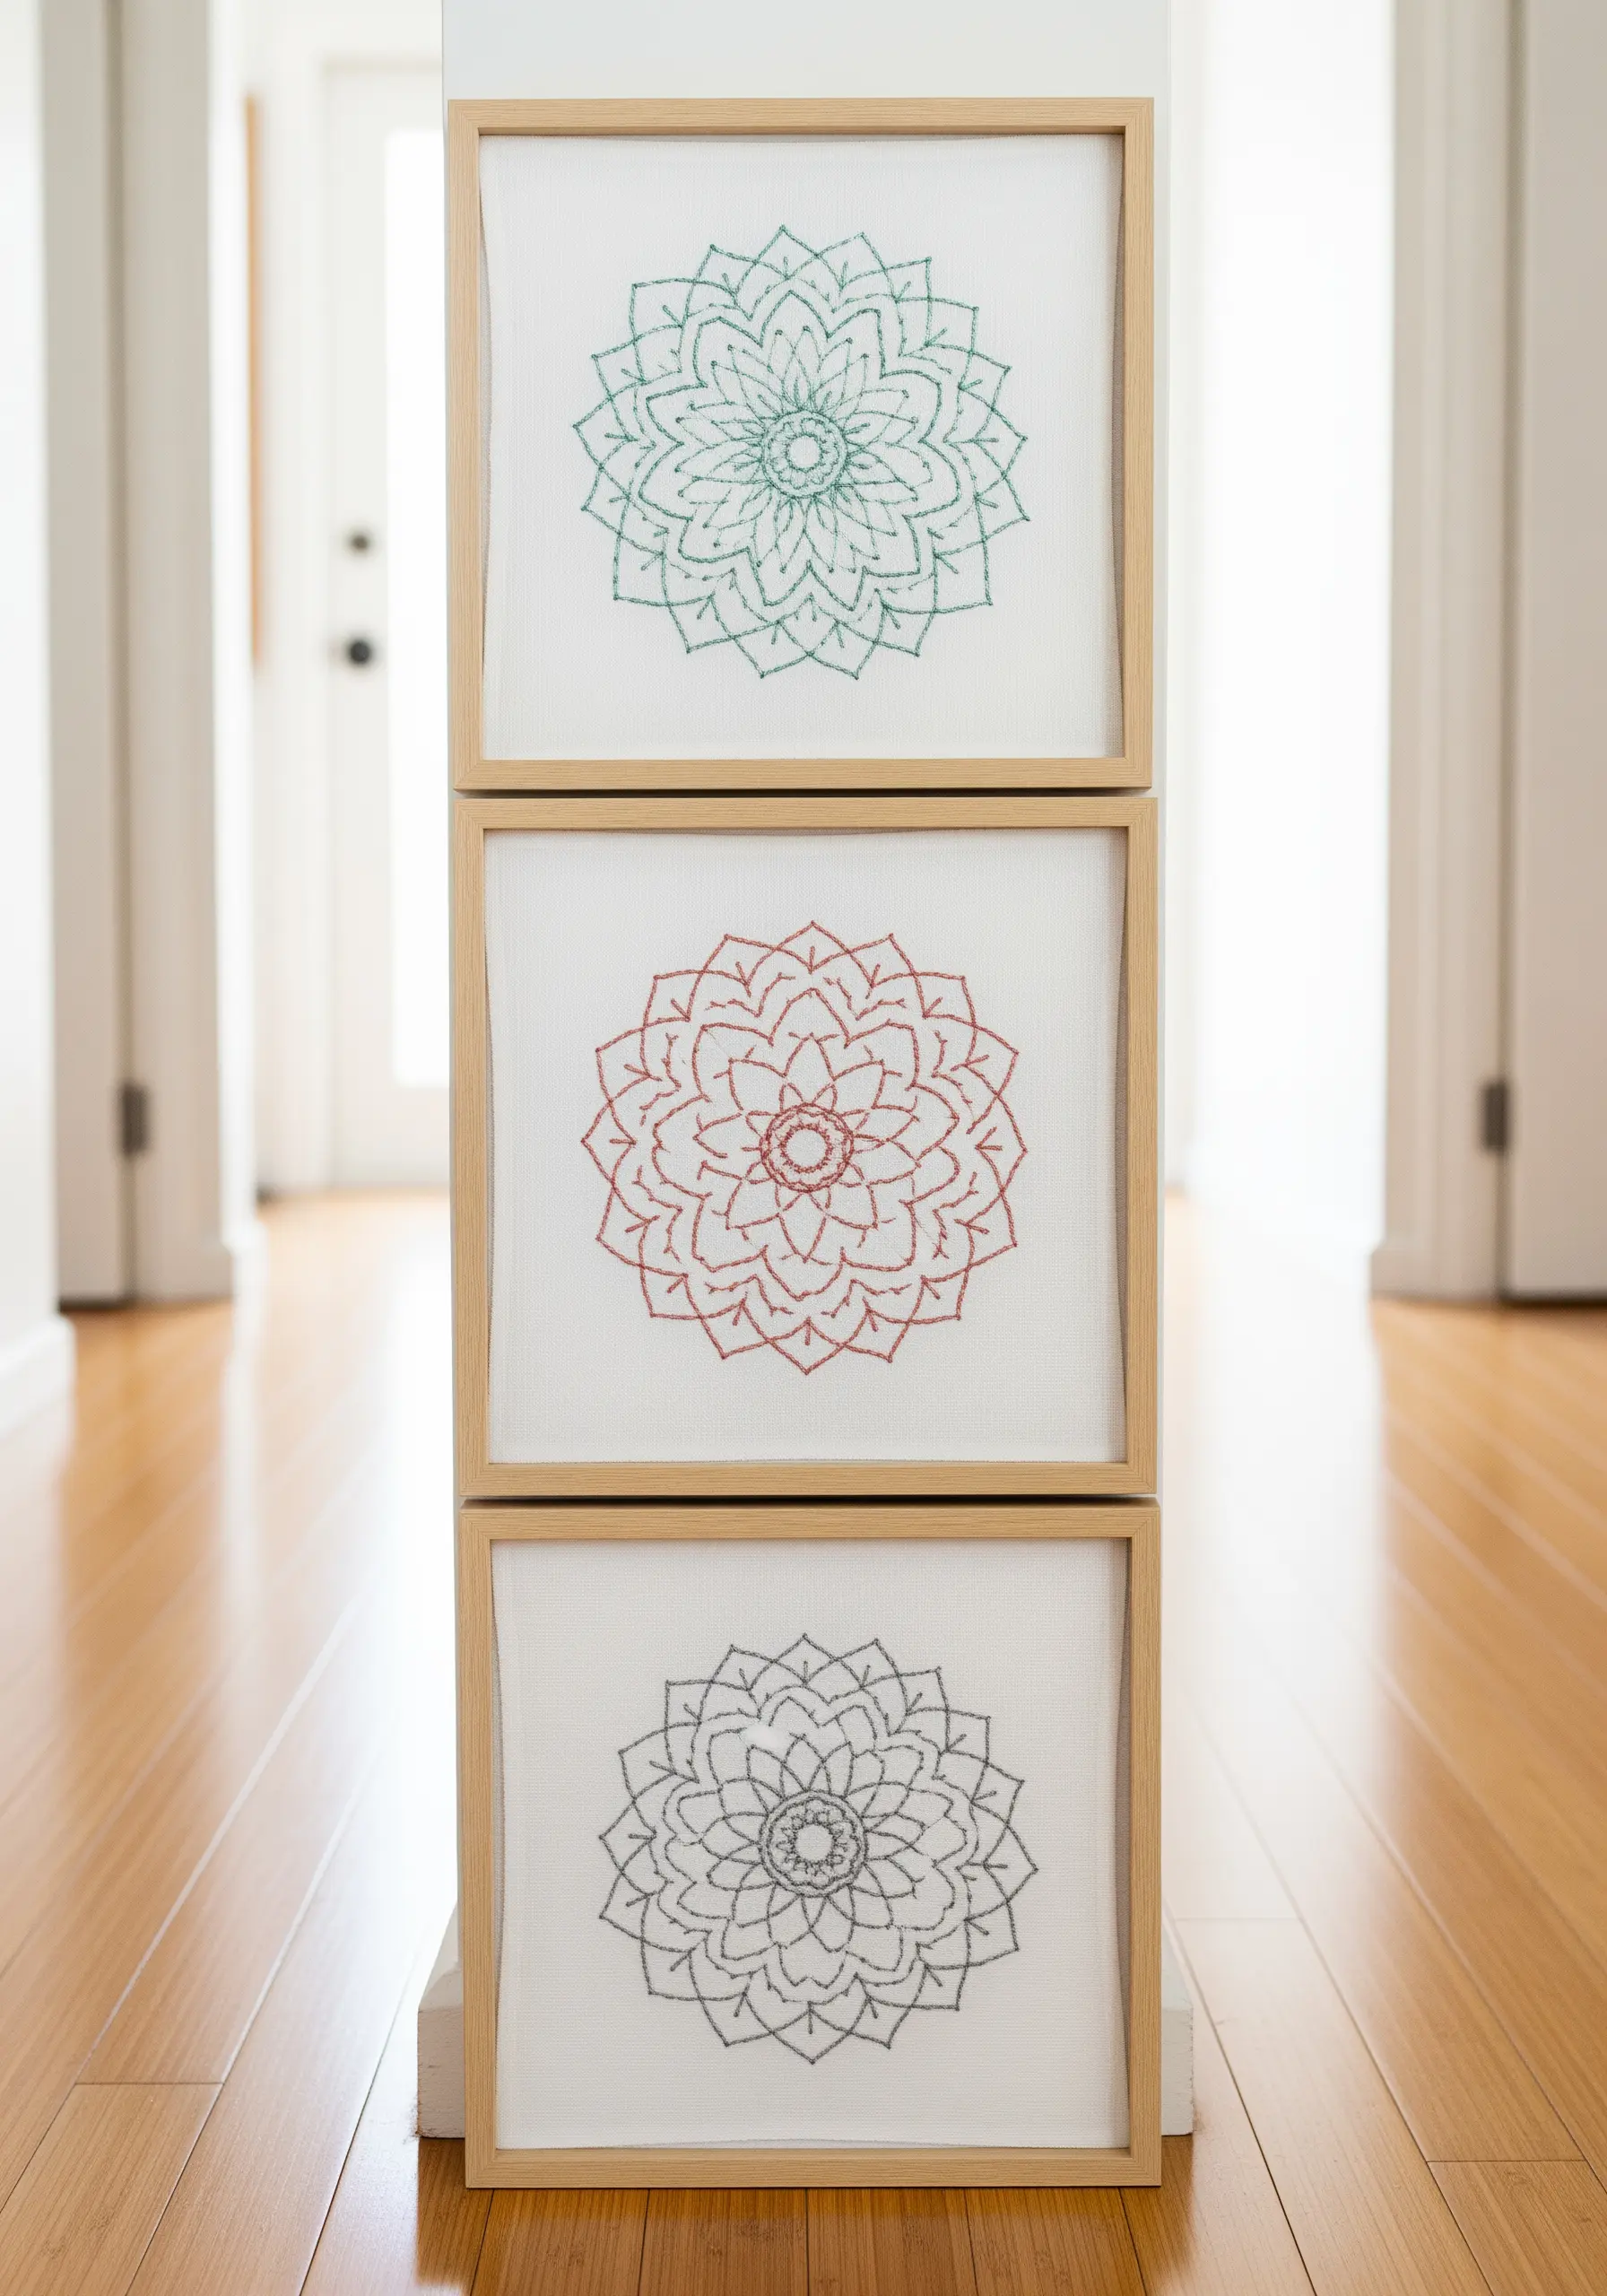
Create a sophisticated, cohesive art series by focusing on line and form over color.
Choose a single thread color for each piece and stitch it on a neutral, high-quality linen or cotton fabric.
The key to a professional finish is impeccable stitch consistency—ensure every backstitch is the same length.
This minimalist approach isolates the geometric beauty of the mandala, turning simple stitches into a refined, gallery-worthy display.
4. Chakra Mandala with Layered Felt Appliqué
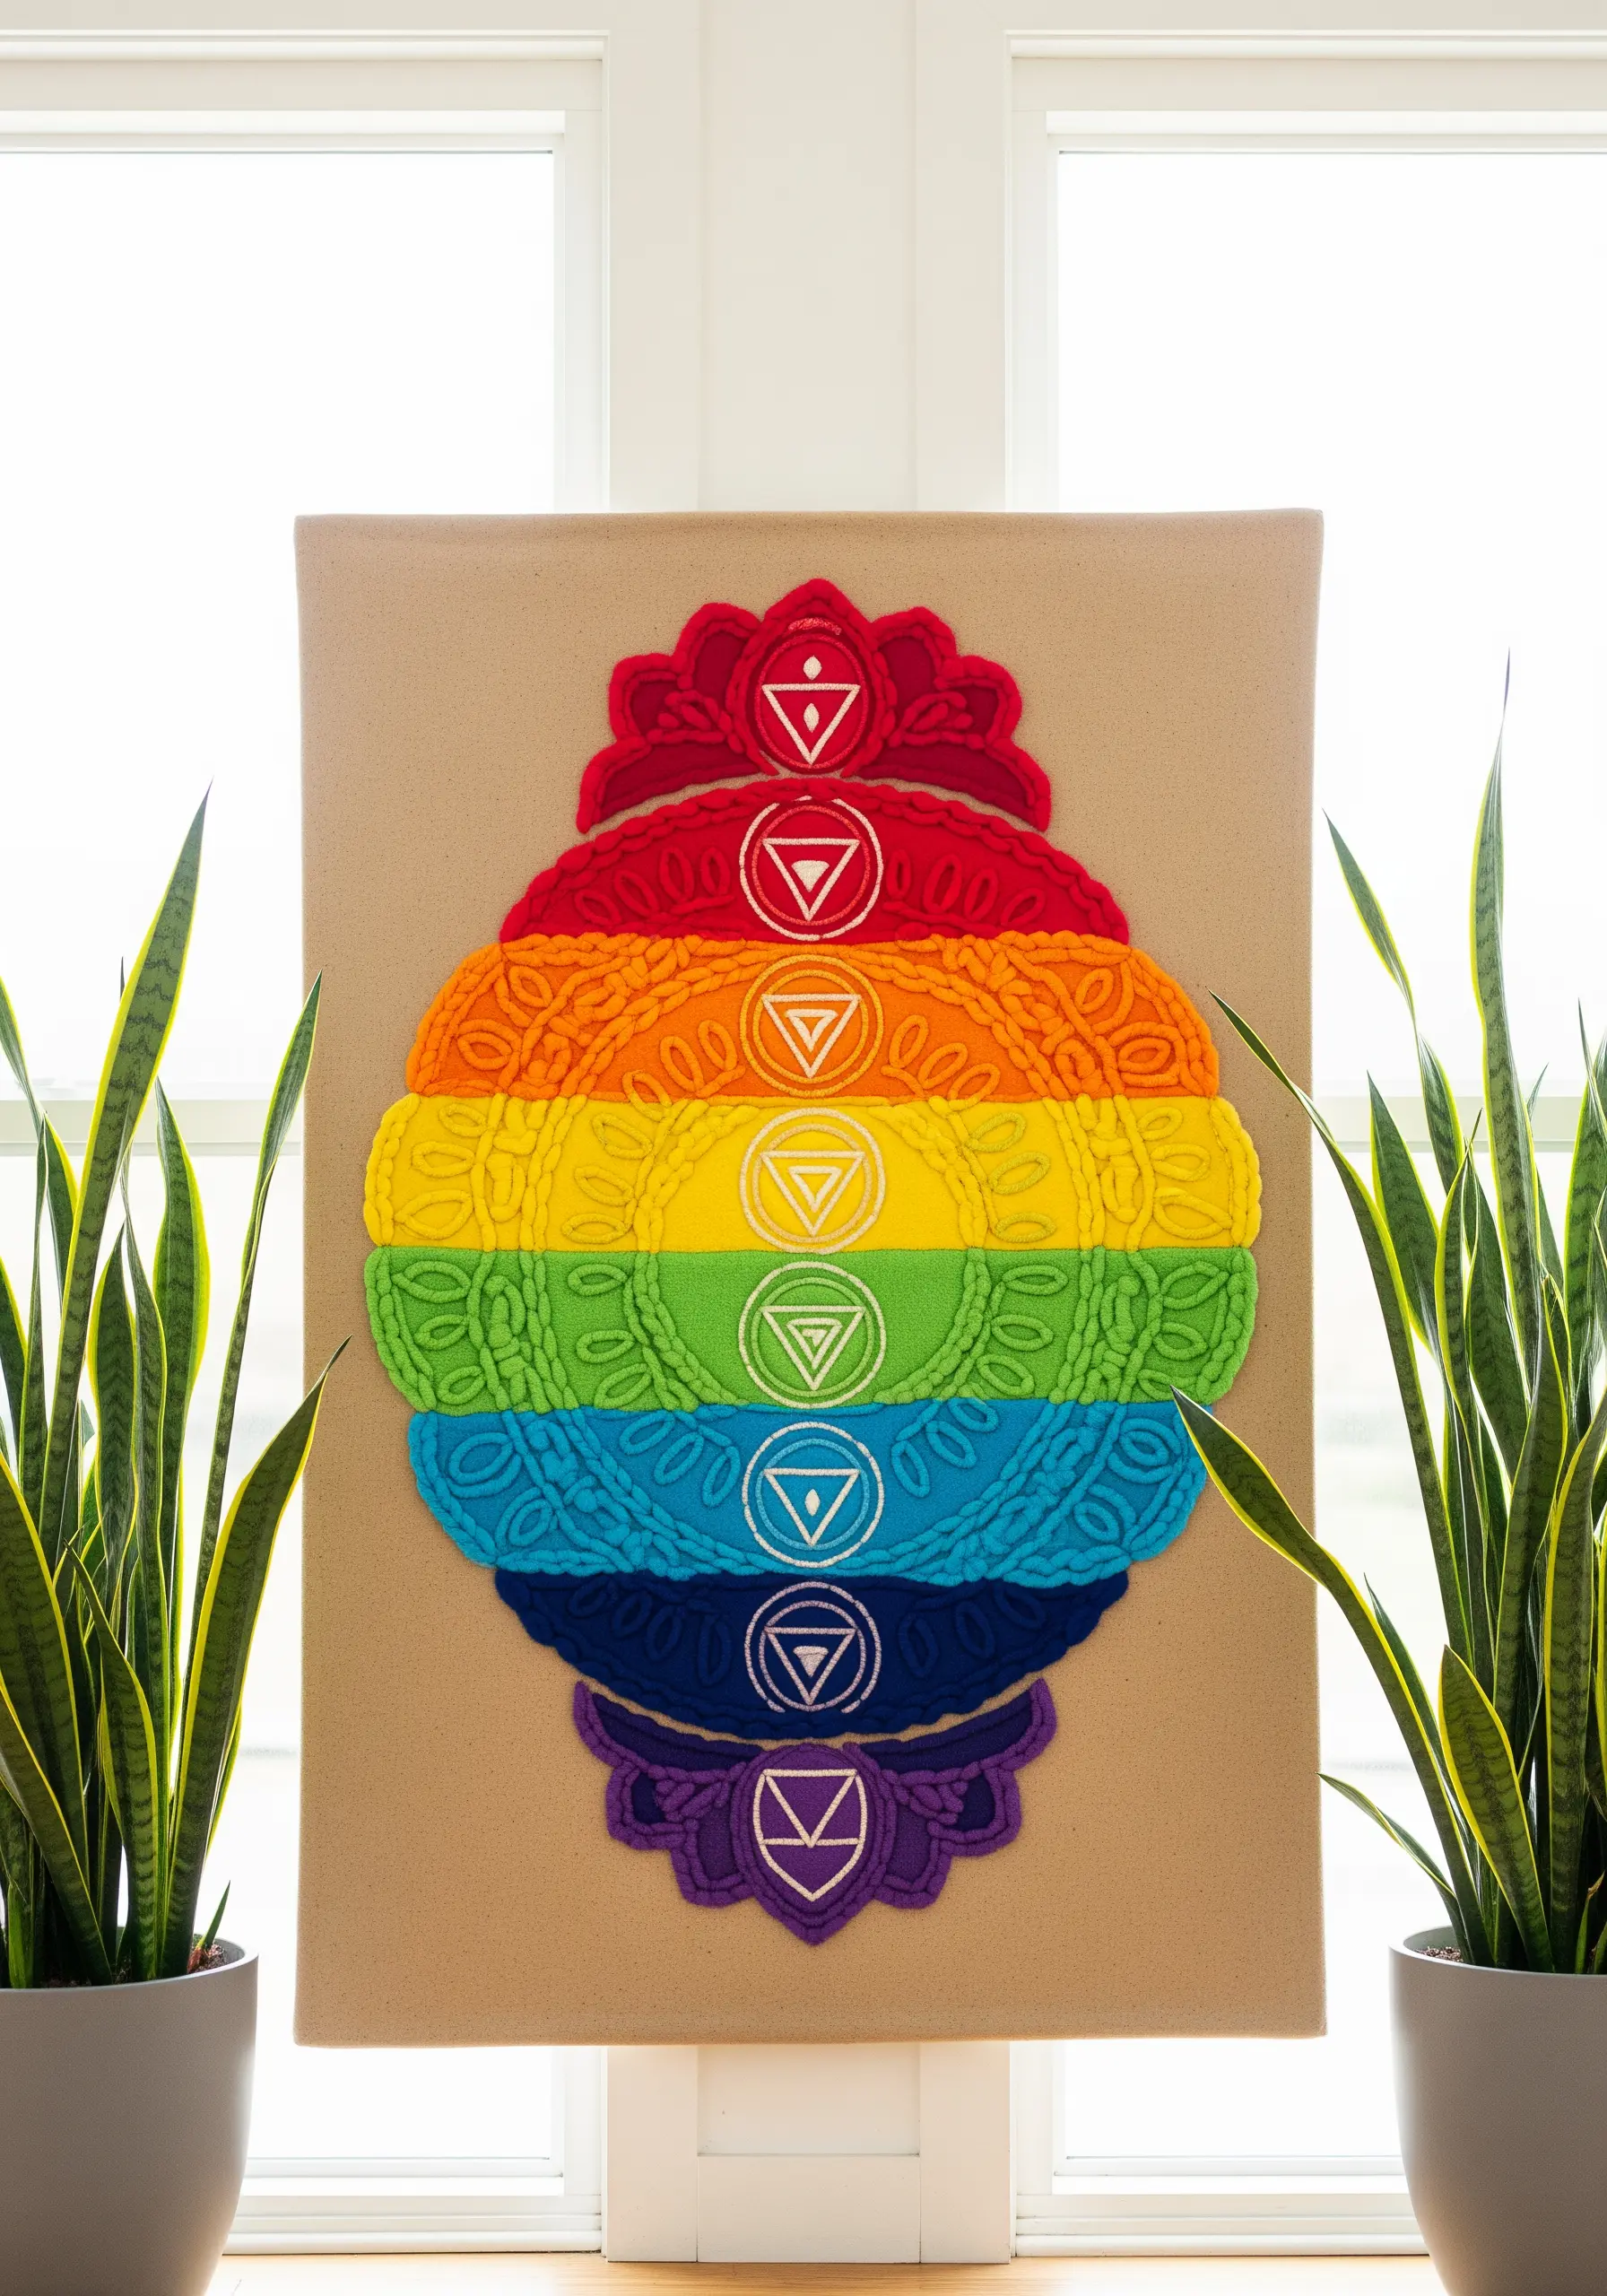
Introduce bold dimension and vibrant color by combining felt appliqué with embroidery.
Cut your chakra shapes from high-quality wool-blend felt and secure them to your base fabric using a neat, decorative blanket stitch around the edges.
The felt provides instant, saturated color and a raised texture that would take hours to achieve with thread alone.
Add fine details like the chakra symbols on top with a simple backstitch for a clean, graphic finish.
5. Geometric String Art Mandala
Translate the striking geometry of string art into a textile format for a modern, sculptural piece.
Instead of nails, use small, sturdy pins (like appliqué pins) pushed into a fabric-covered cork board or foam core base.
Wrap a strong, smooth thread like a metallic cord or a fine yarn between the pins to create the intersecting lines.
This technique emphasizes the mathematical purity of the mandala’s form and creates beautifully sharp geometric patterns.
6. Botanical Mandala with Textural Foliage
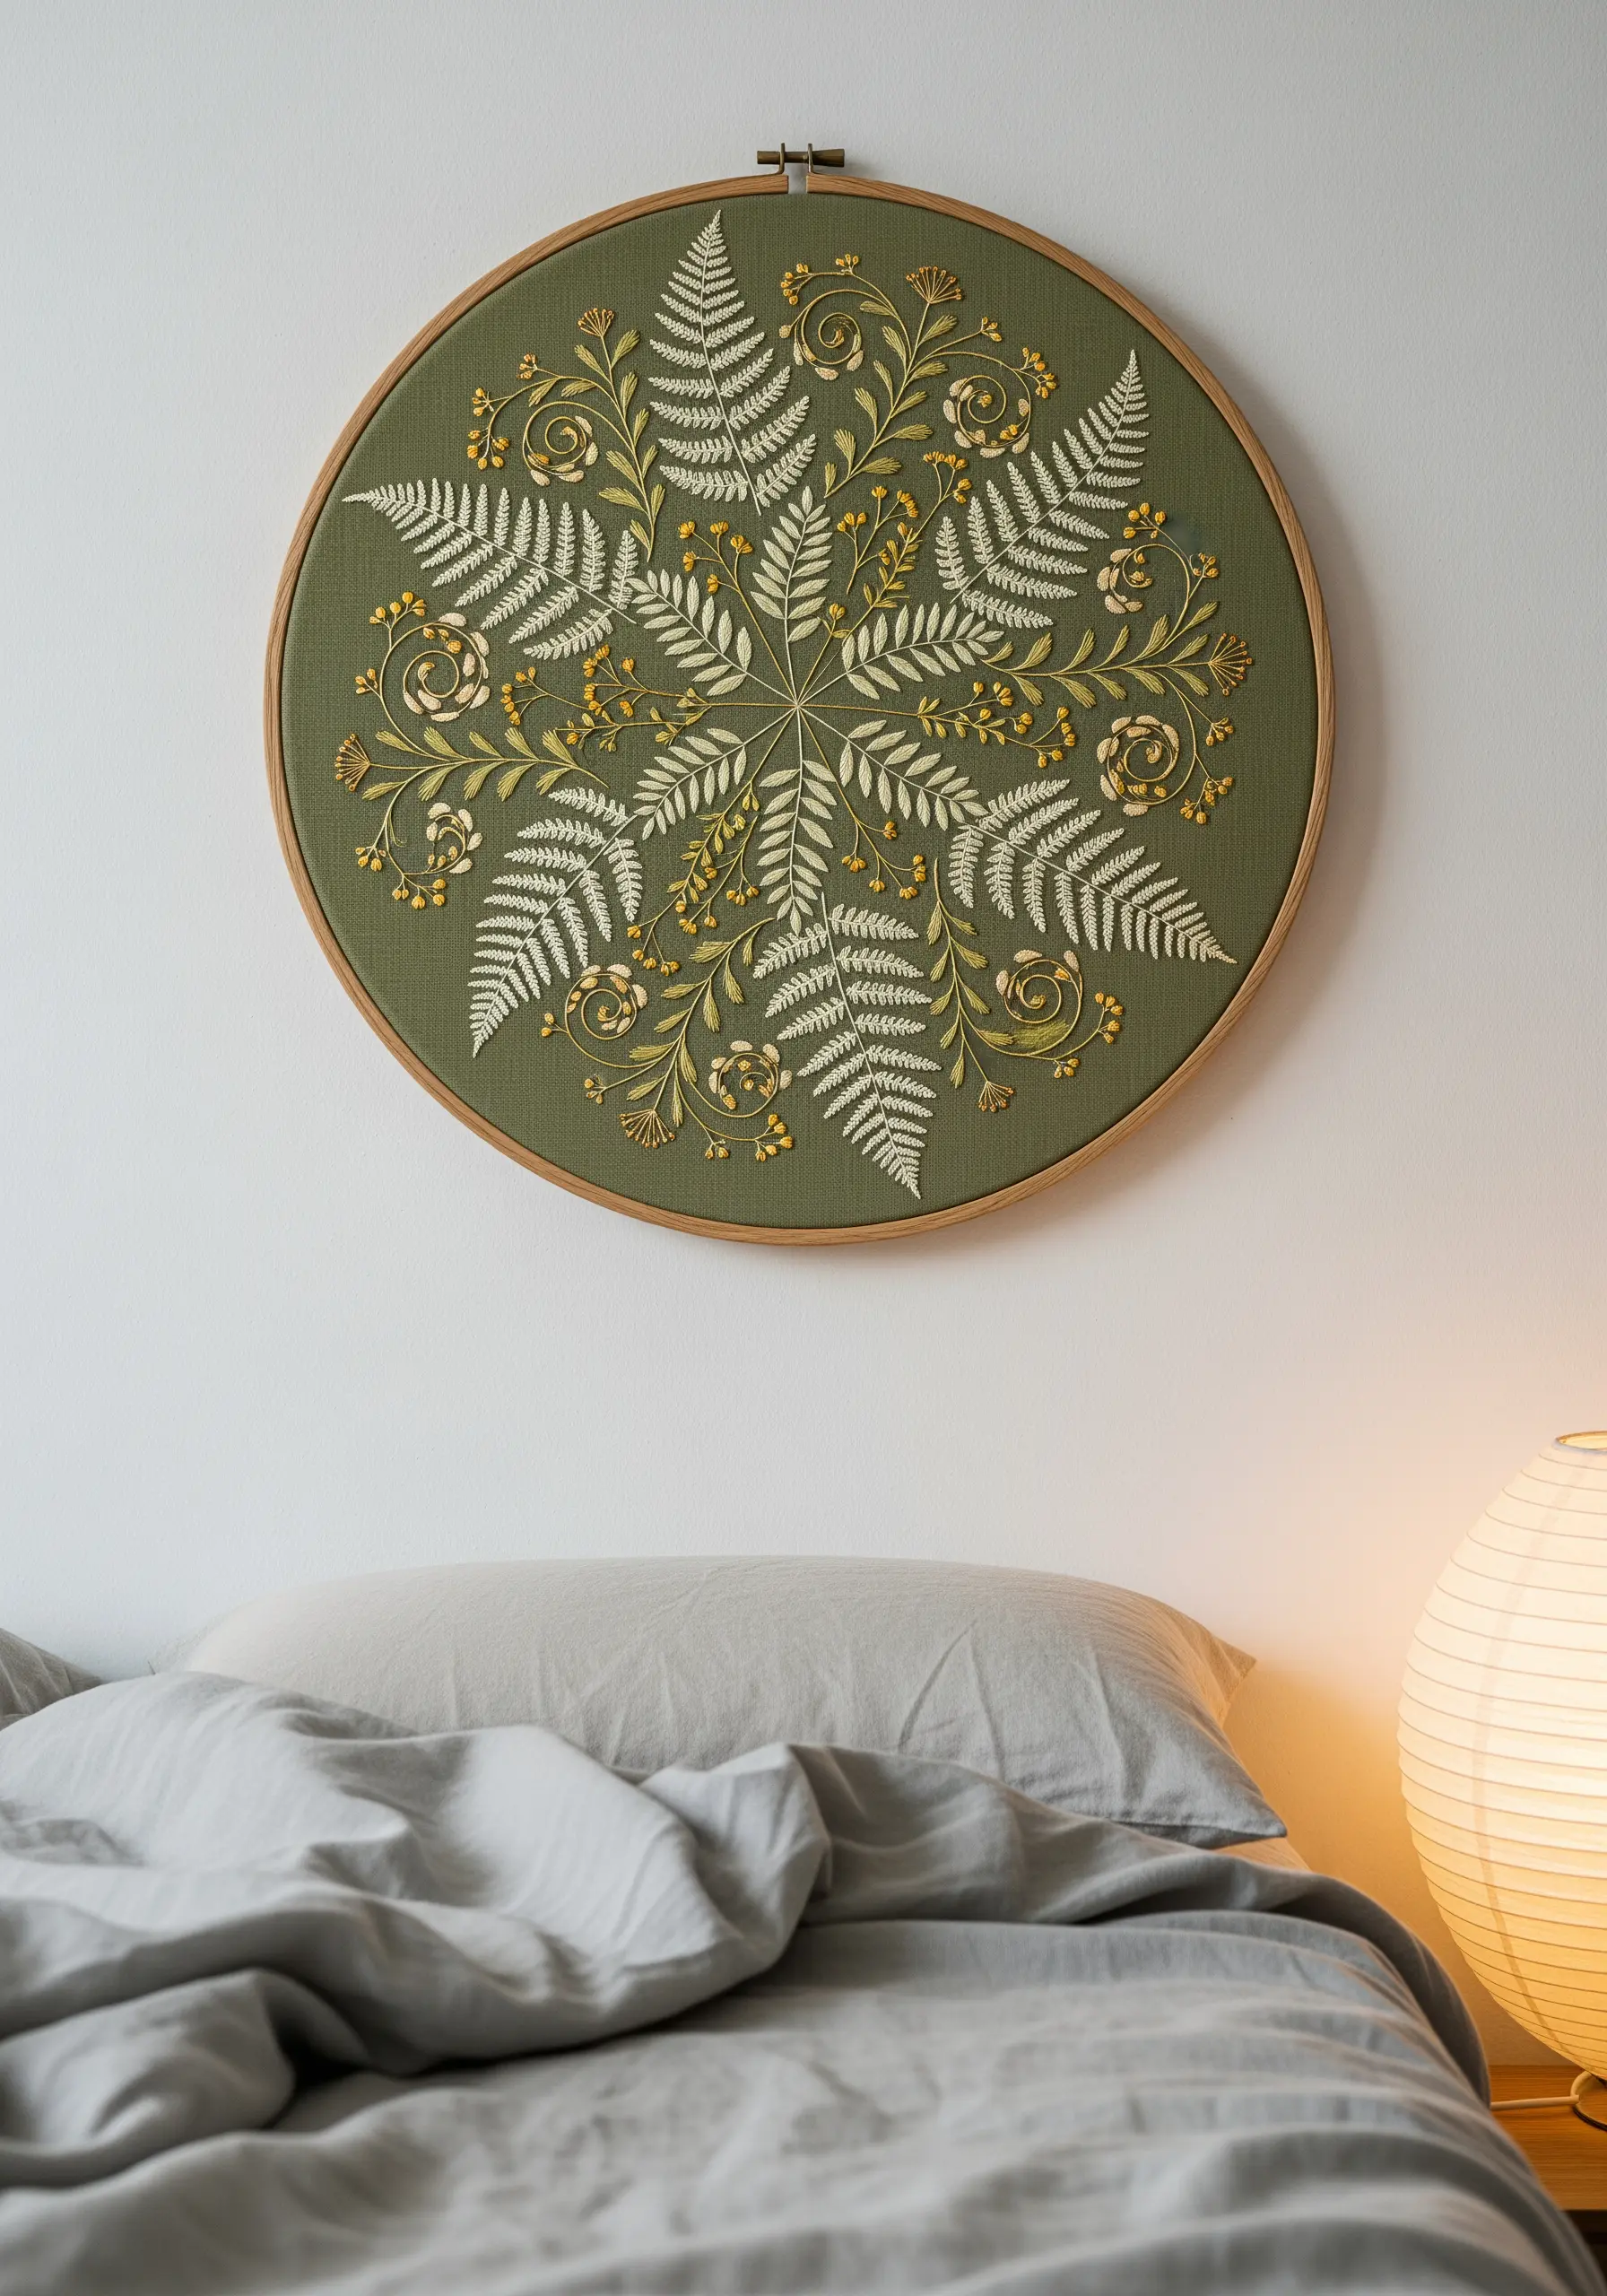
Give your botanical elements a lifelike quality by choosing stitches that mimic natural textures.
Use a fishbone stitch for the fern leaves; the central spine and angled stitches perfectly replicate their delicate structure.
For the small yellow flowers or berries, scattered French knots add pops of color and a raised, pollen-like texture.
This combination of directional and knotted stitches creates a design with both visual and tactile depth, elevating it beyond a simple outline.
7. Labyrinth Mandala with Bold, Graphic Lines

To achieve a bold, graphic look that feels intentional and clean, reinforce your outlines.
Instead of a single line of backstitch, use a whipped backstitch or a heavy chain stitch with a six-strand floss or #5 perle cotton.
These stitches create a smooth, solid line with a slight ropelike texture, perfect for designs that rely on the strength of their linear pathways.
The result is a powerful, modern statement piece with unmistakable presence.
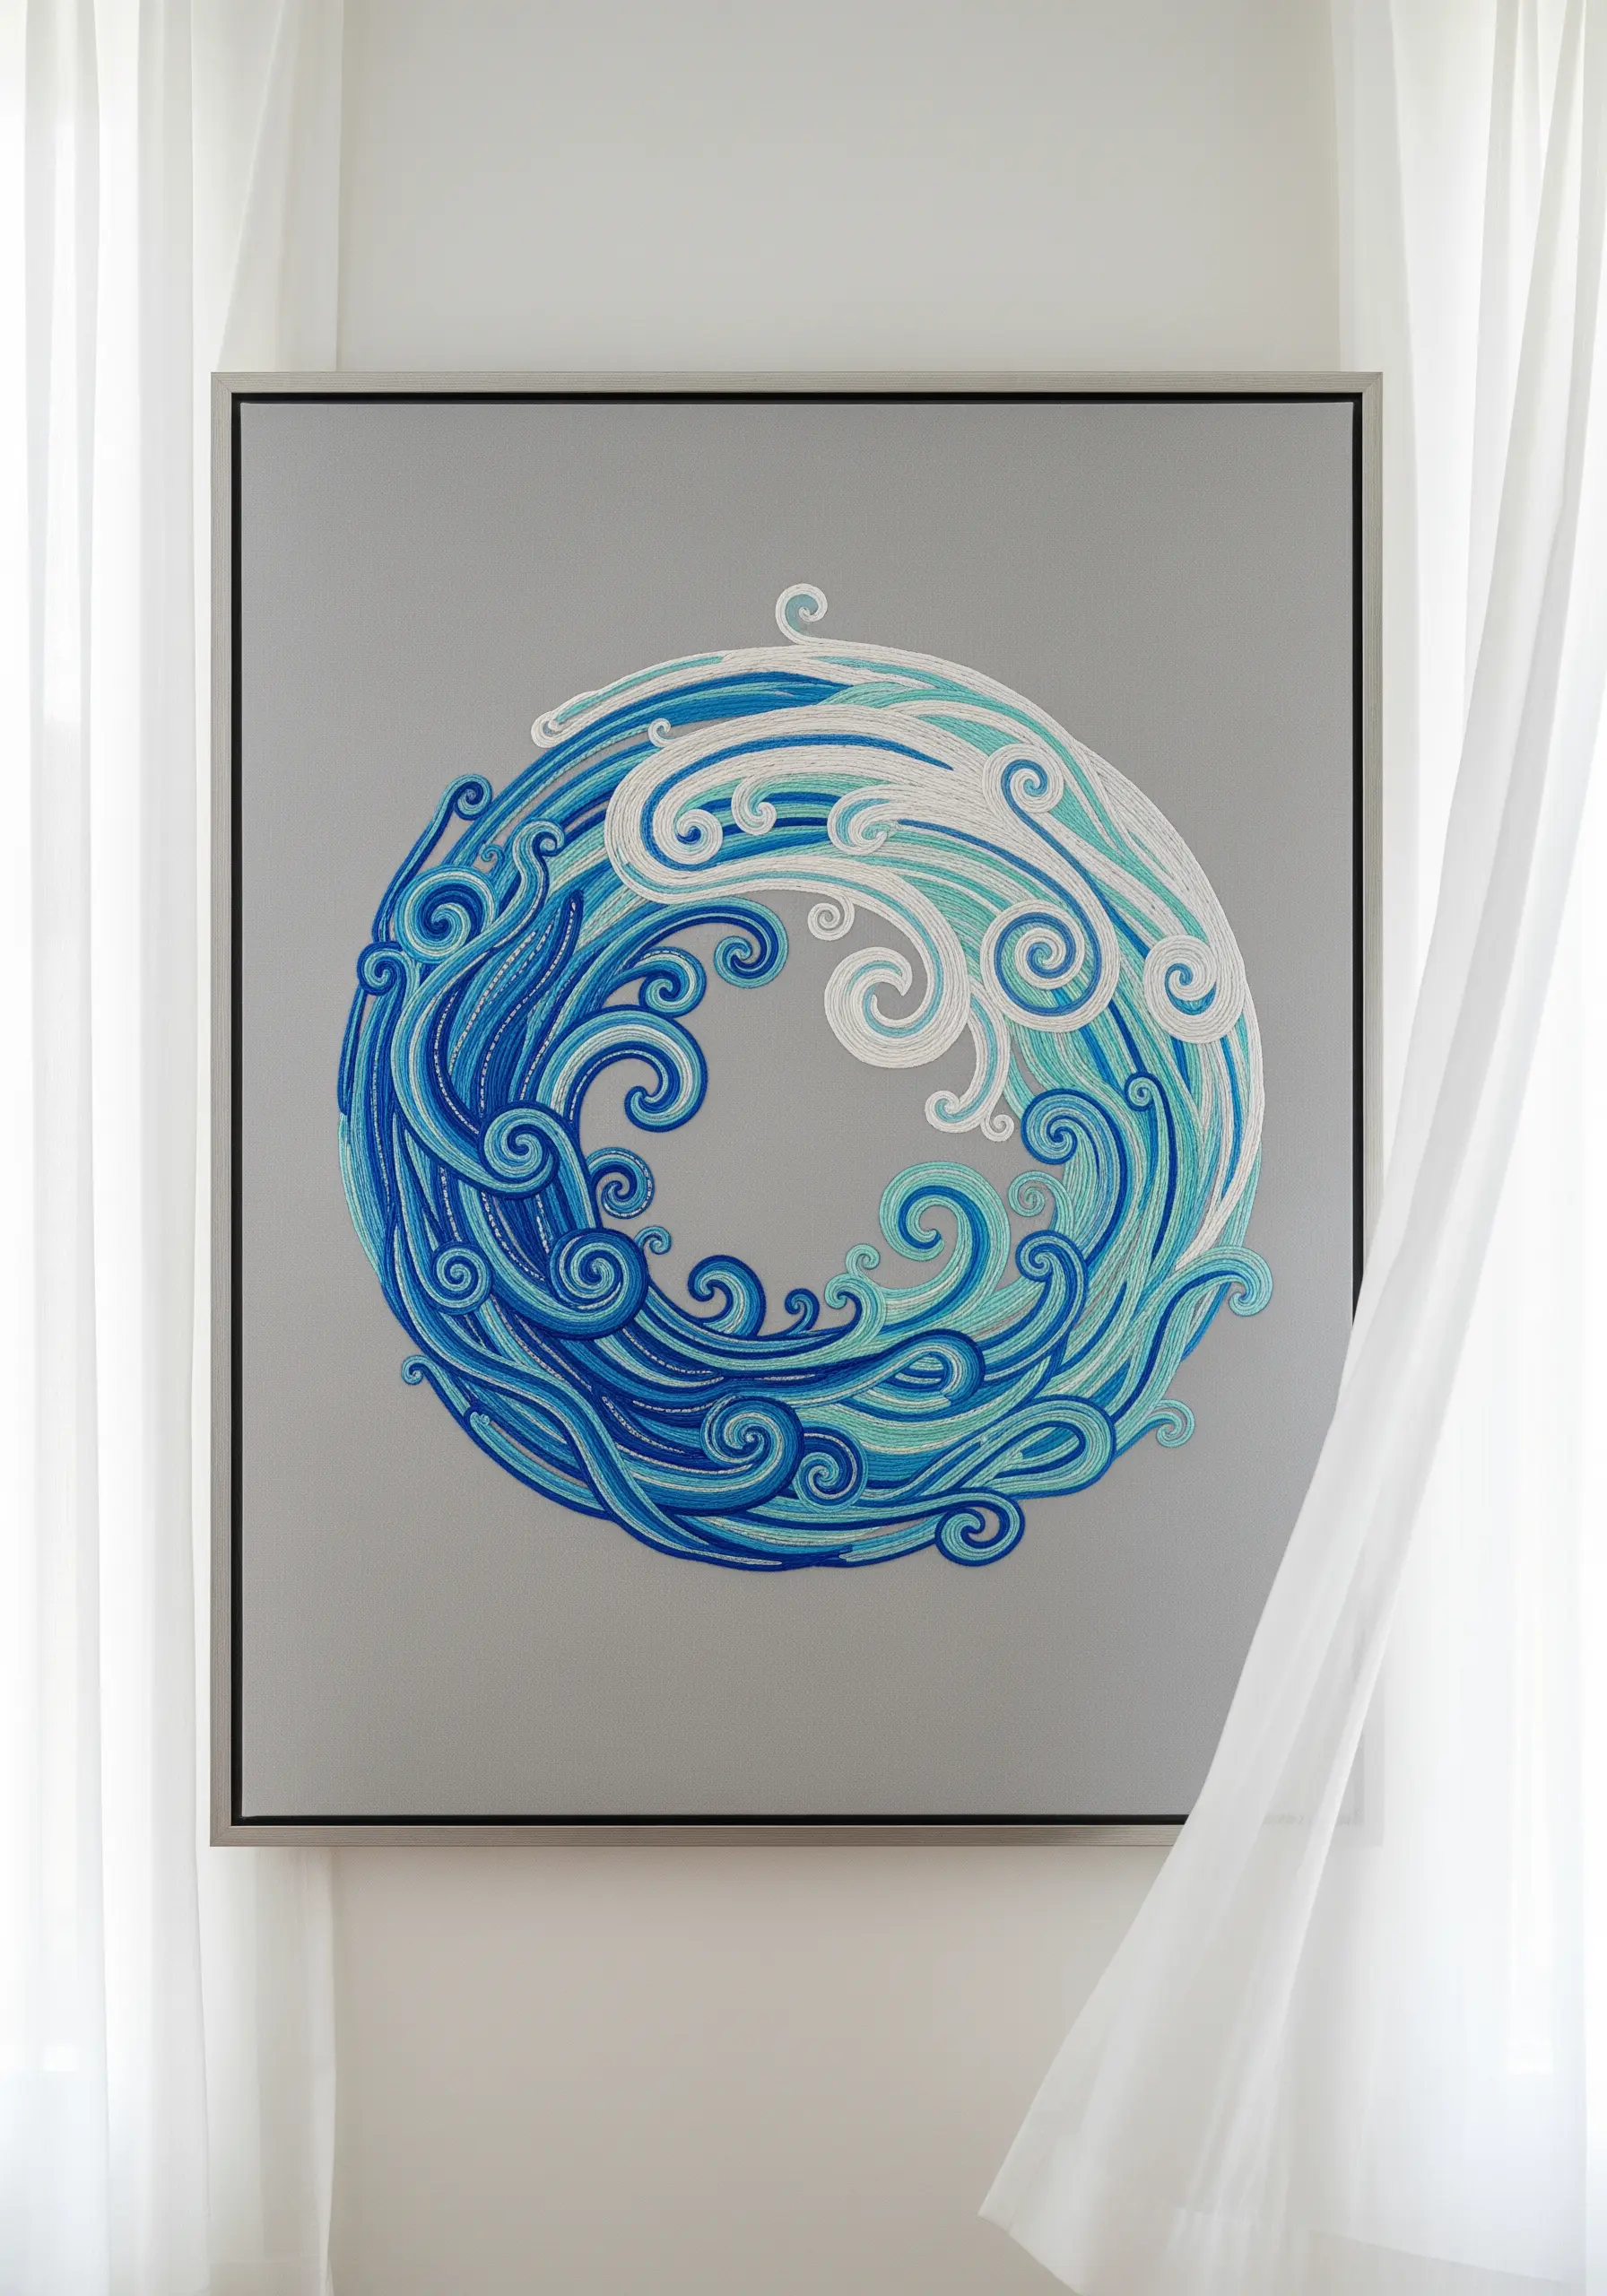
8. Ocean Mandala with Couching and Shells
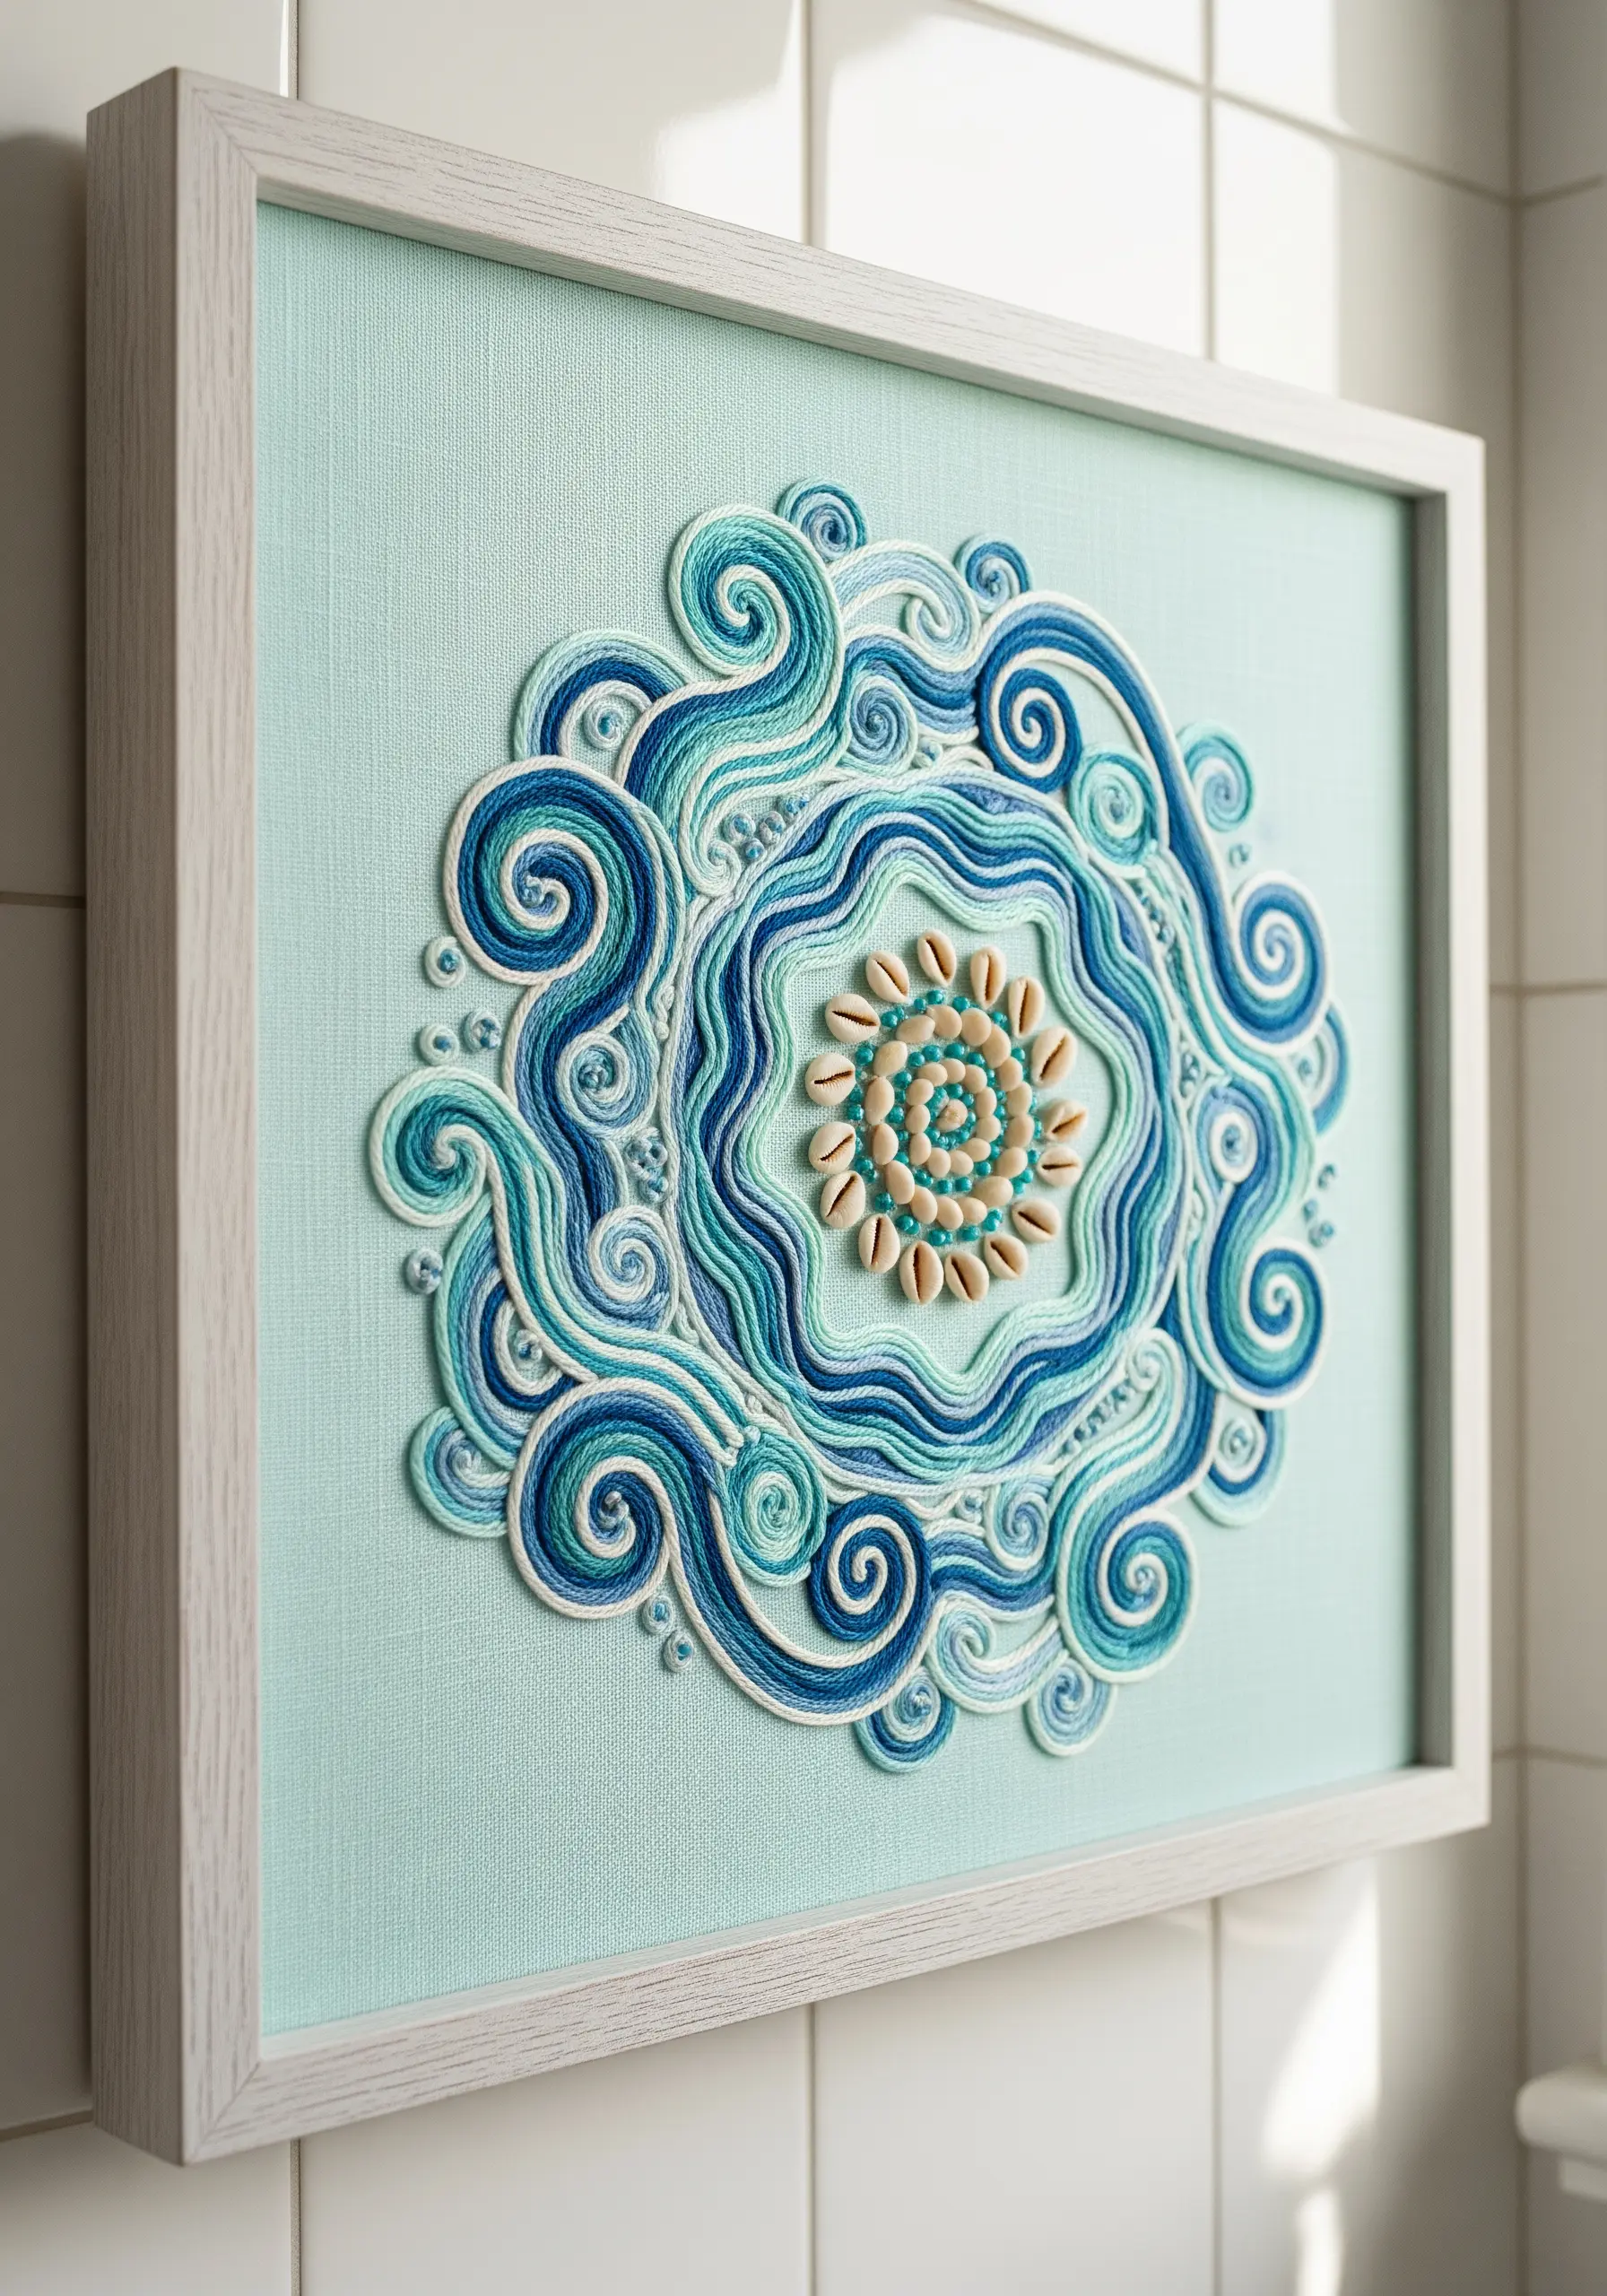
Integrate natural elements seamlessly by using the couching technique to create texture and secure objects.
Lay down variegated blue and aqua yarns or thick twists of floss to form the swirling waves, then use a single strand of a matching color to tack them down with small, invisible stitches.
This method allows you to create fluid, dimensional lines that would be impossible with standard stitches.
Anchor a central motif of cowrie shells using the same couching method around their base for a secure, organic finish.
9. Radiant Sunset Mandala with Color Gradients
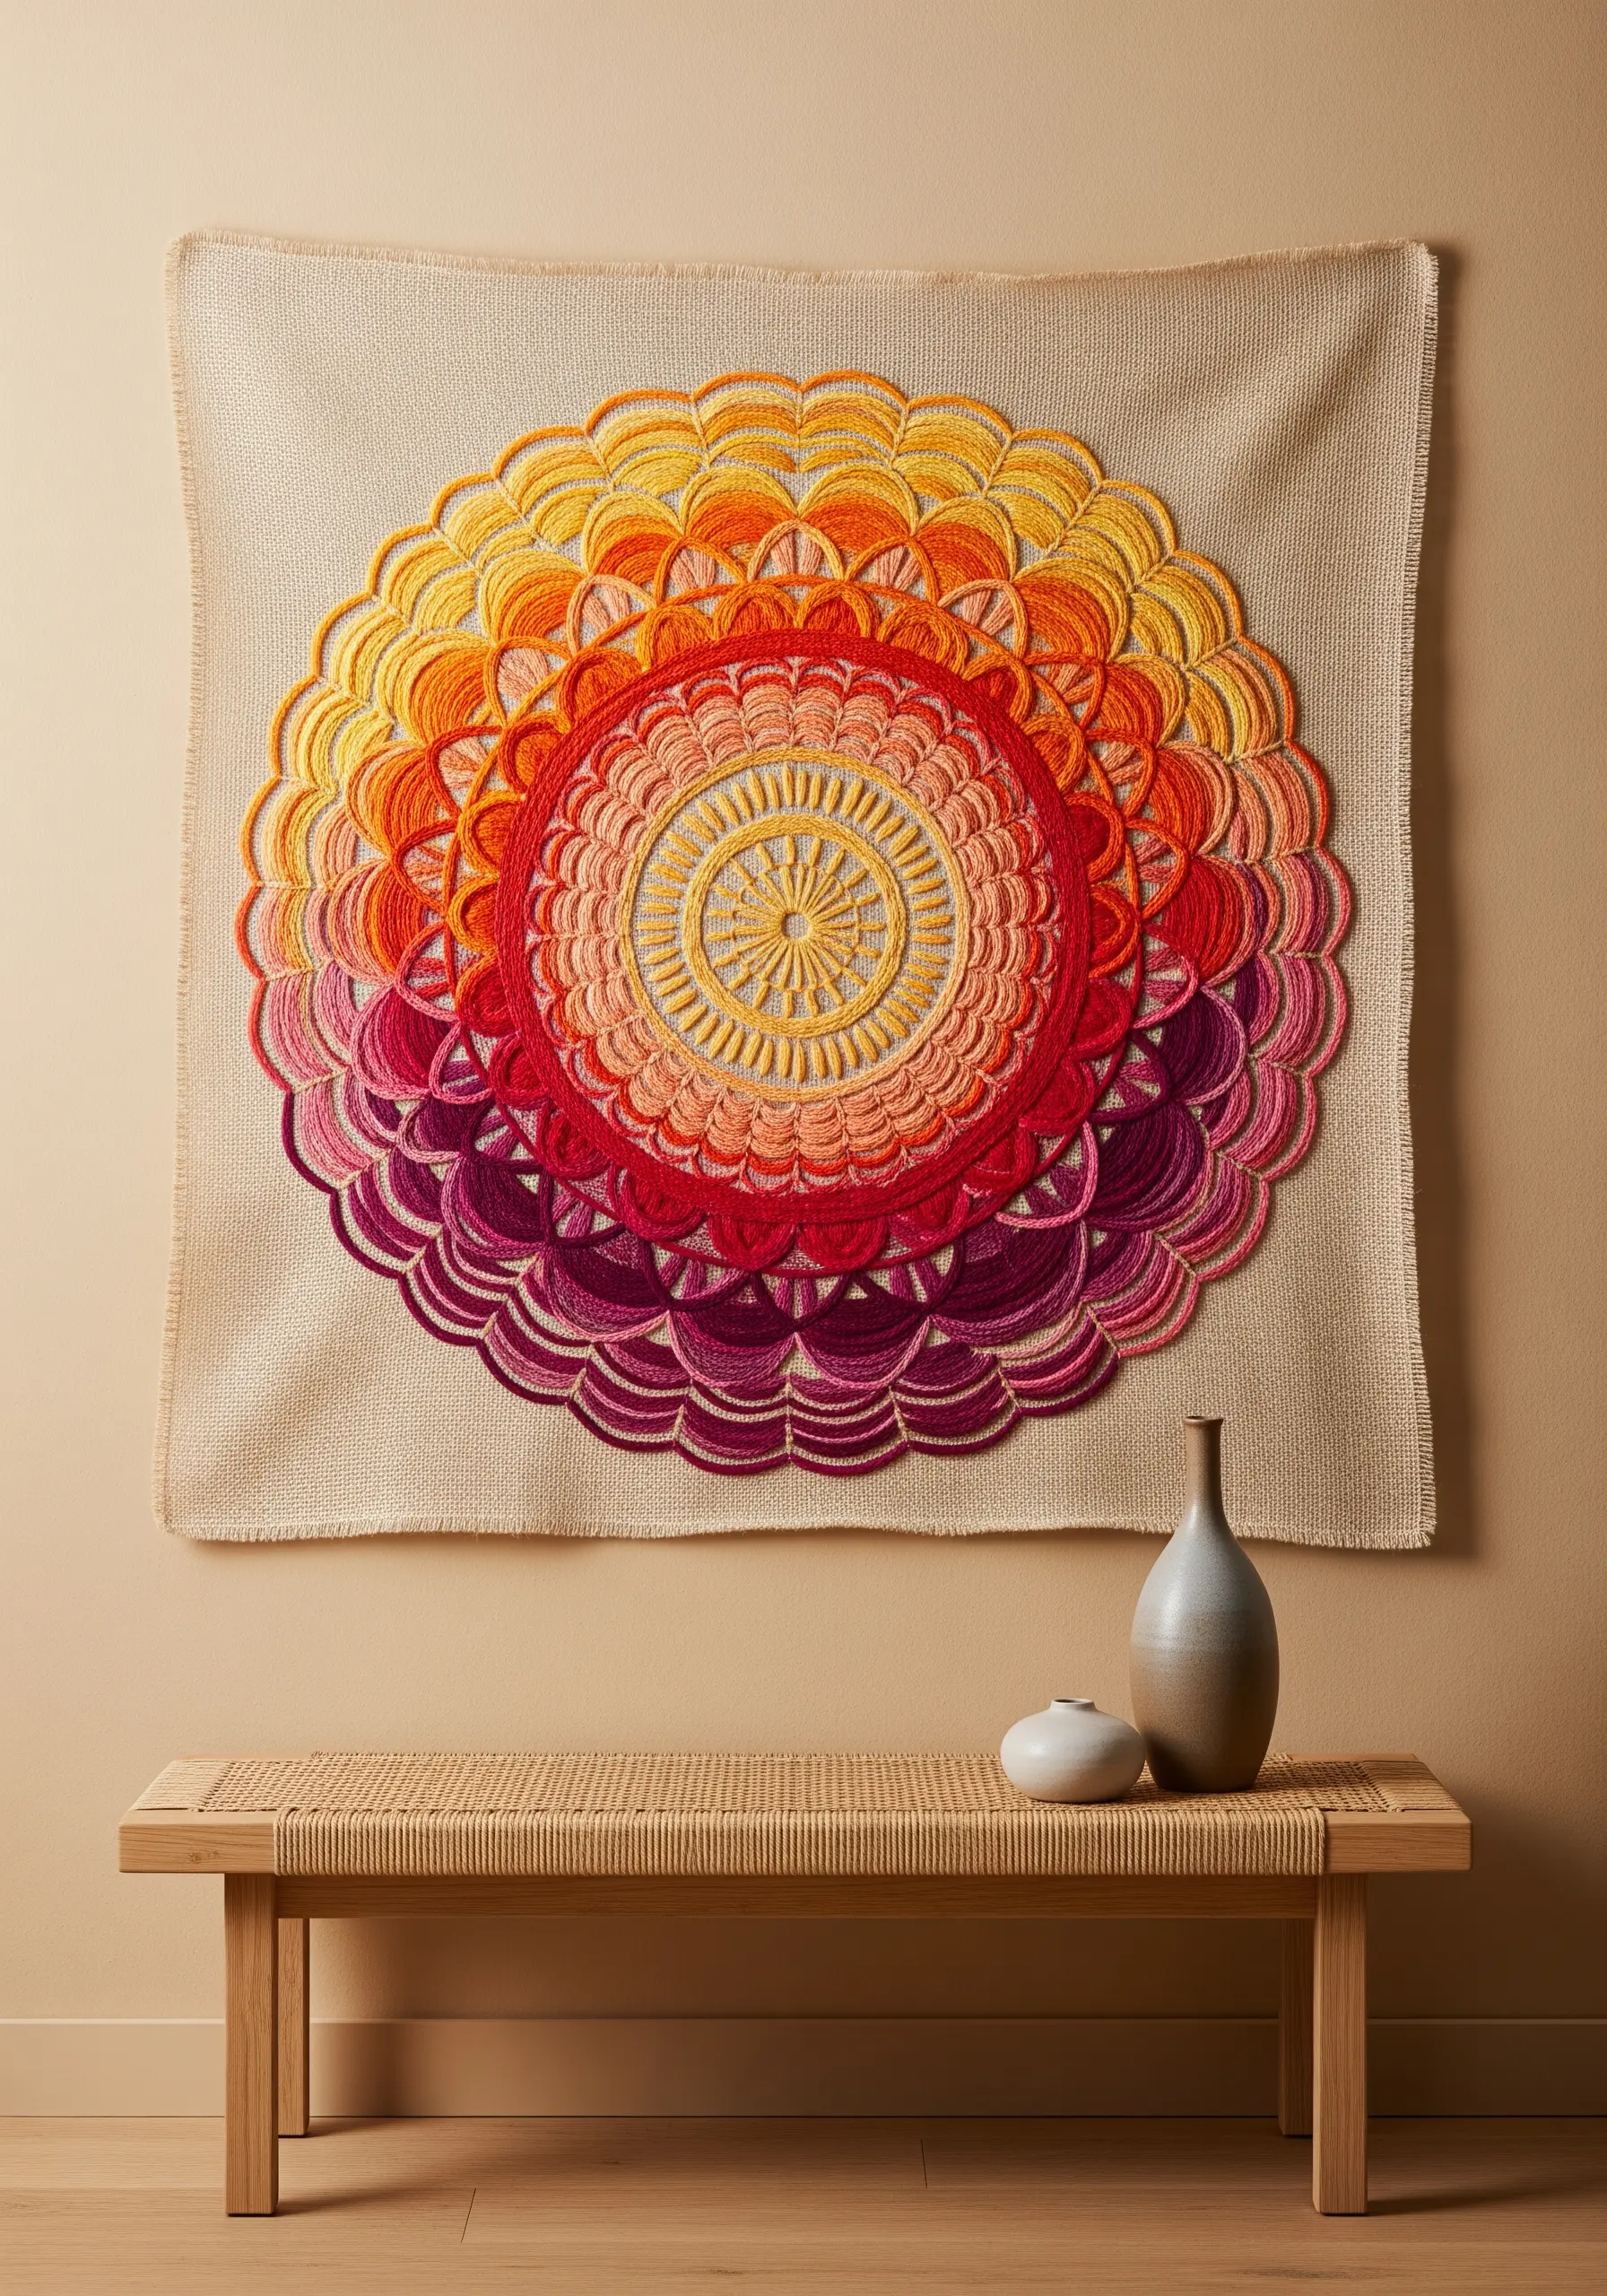
Create a seamless and vibrant color transition by mastering the long-and-short stitch for your fills.
Work in concentric rings, blending each new color into the previous one with interlocking stitches of varying lengths.
This technique eliminates the harsh lines that can occur with satin stitch and produces a soft, painterly effect.
By using a gradient of analogous colors—from yellow to orange, red, and purple—you can capture the warmth of a setting sun.
10. Ensō Circle with Gestural Stitching
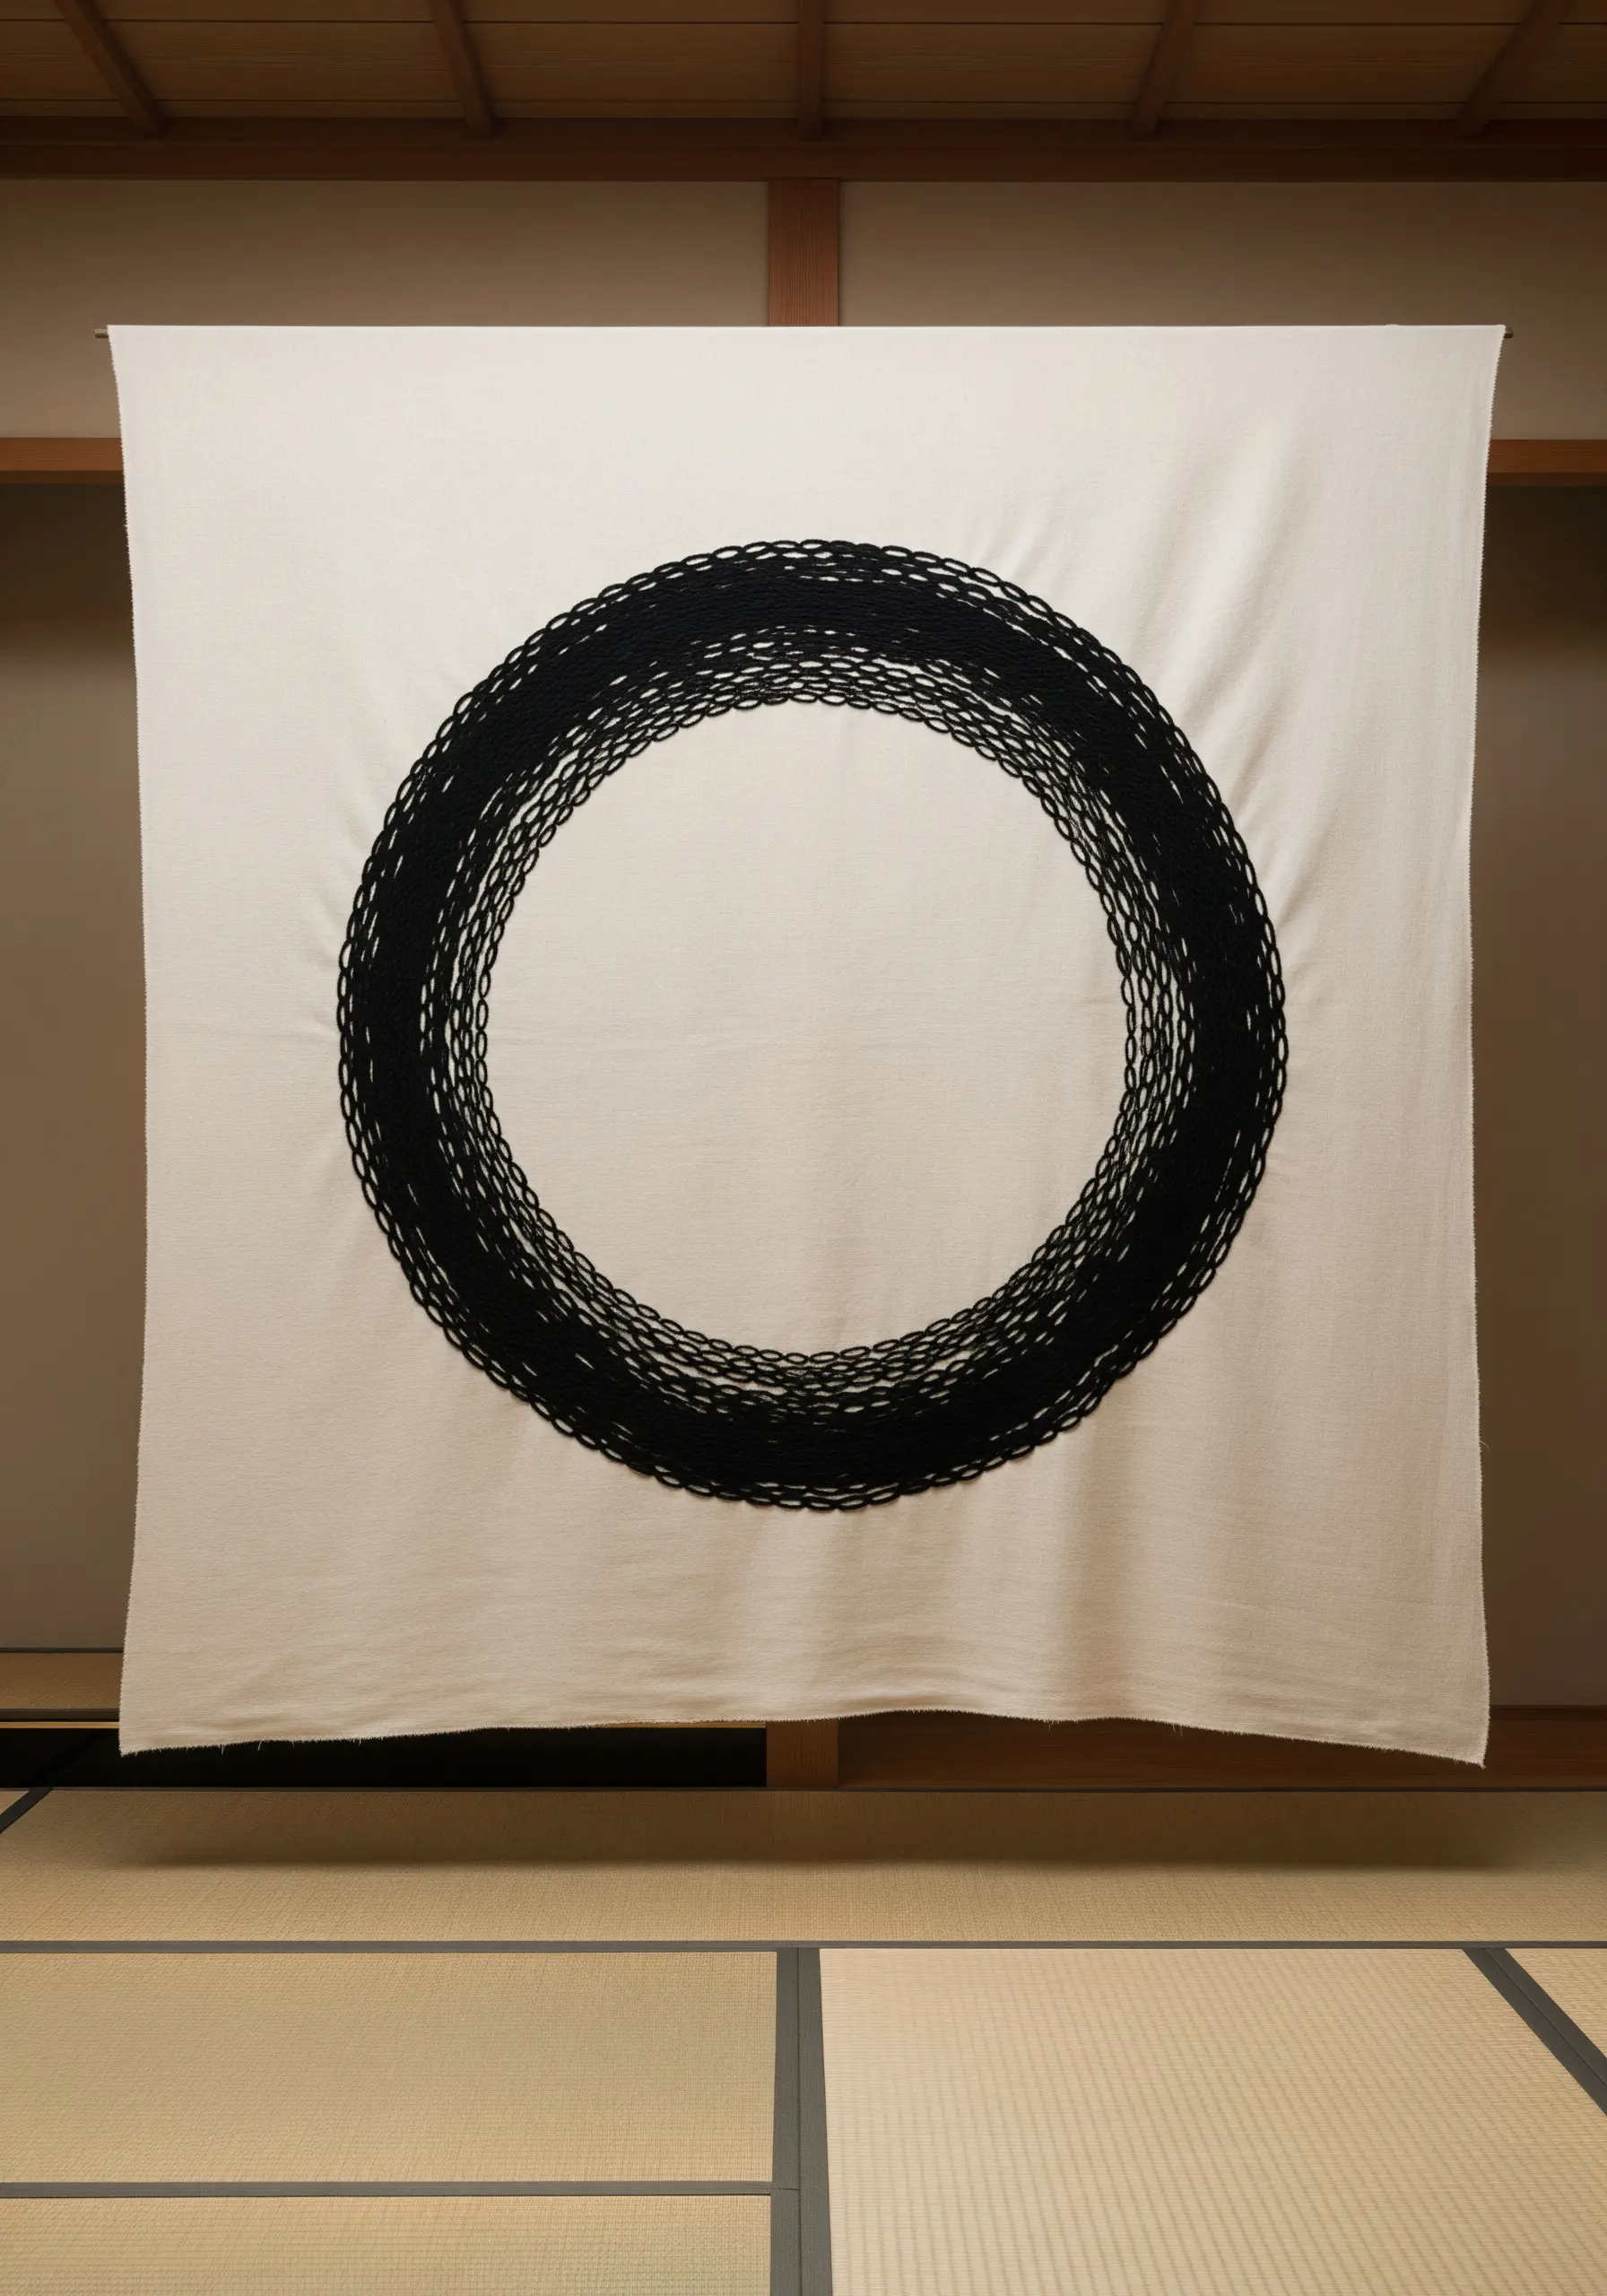
Capture the spirit of the Japanese Ensō, or zen circle, by focusing on gestural, expressive stitching.
Instead of a perfect, uniform line, build the circle with layers of overlapping running stitches or long, sweeping straight stitches.
Vary the stitch direction slightly as you work your way around to create a sense of movement and energy.
This technique is not about geometric perfection but about embodying a moment of mindfulness in thread.
11. Embellished Peacock on Velvet
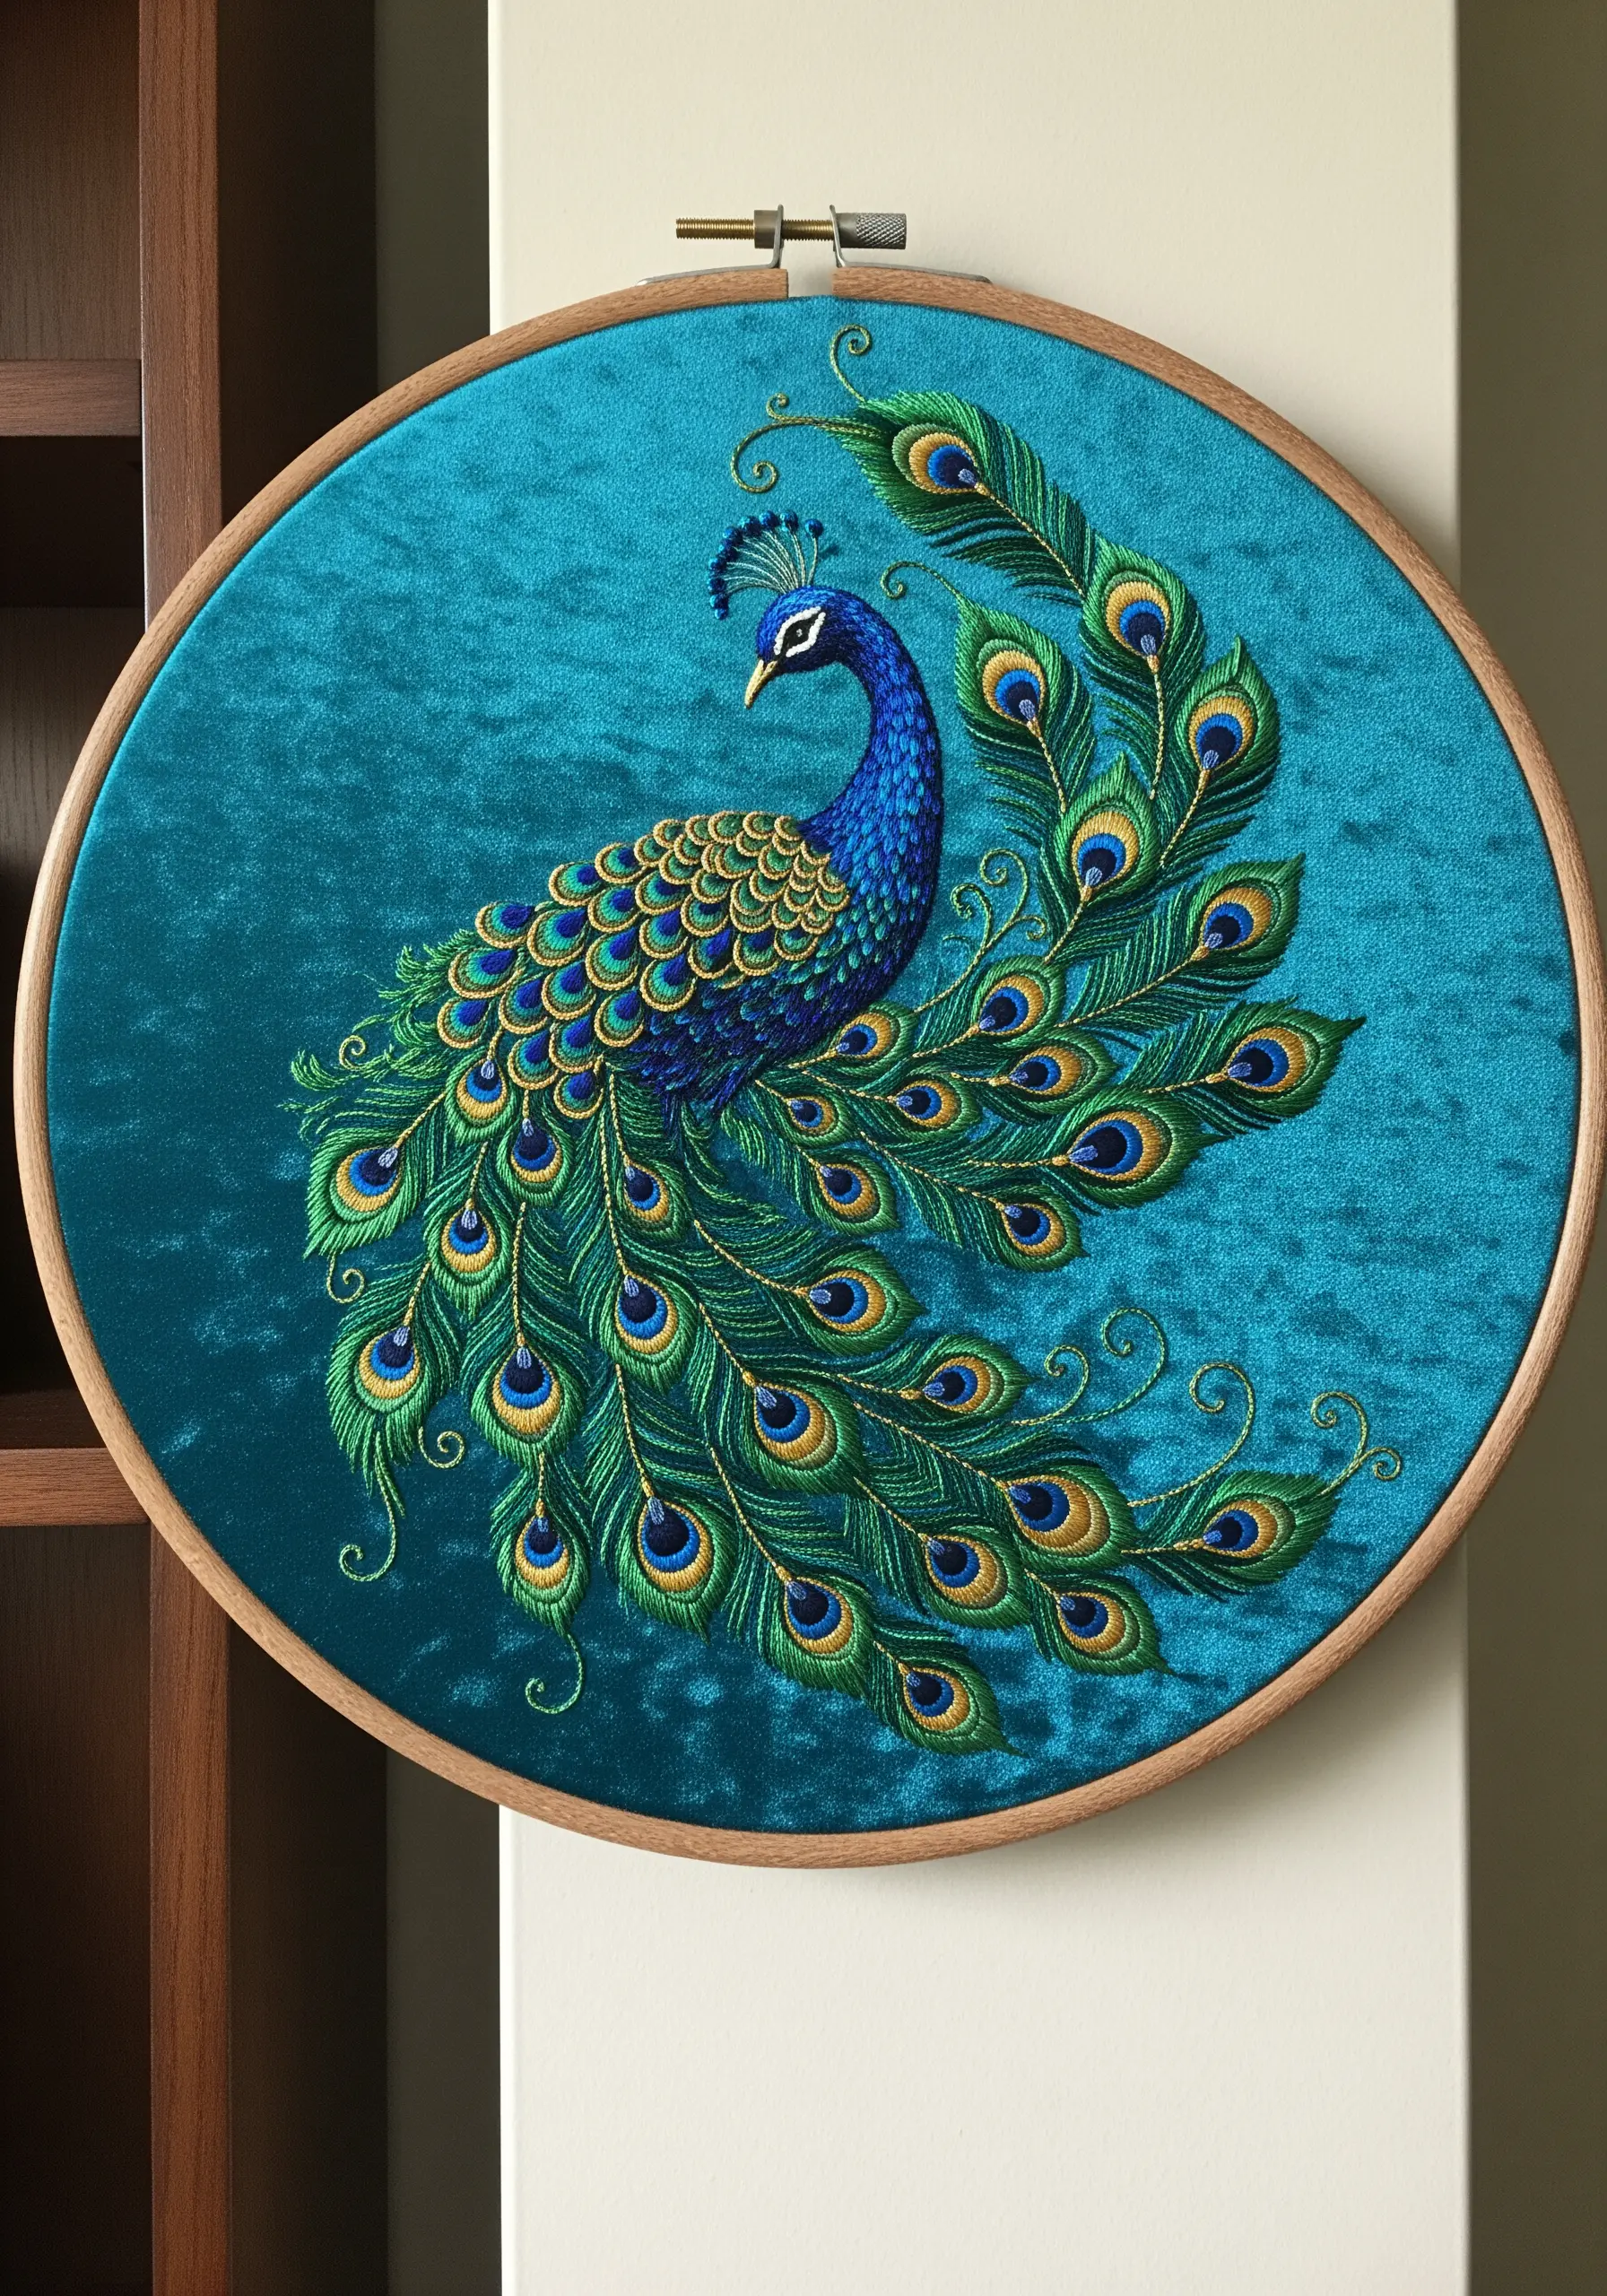
When stitching on a high-pile fabric like velvet, your technique must adapt to the luxurious surface.
Always use a tear-away or wash-away stabilizer on the back to prevent stitches from sinking into the pile and to provide support.
Choose threads with a natural sheen, like silk or rayon floss, to complement the velvet’s luster.
Turkey work or bullion knots for the peacock’s feather eyes will add incredible dimension that stands up against the rich texture of the fabric.
12. Tree of Life with Textural Roots and Leaves
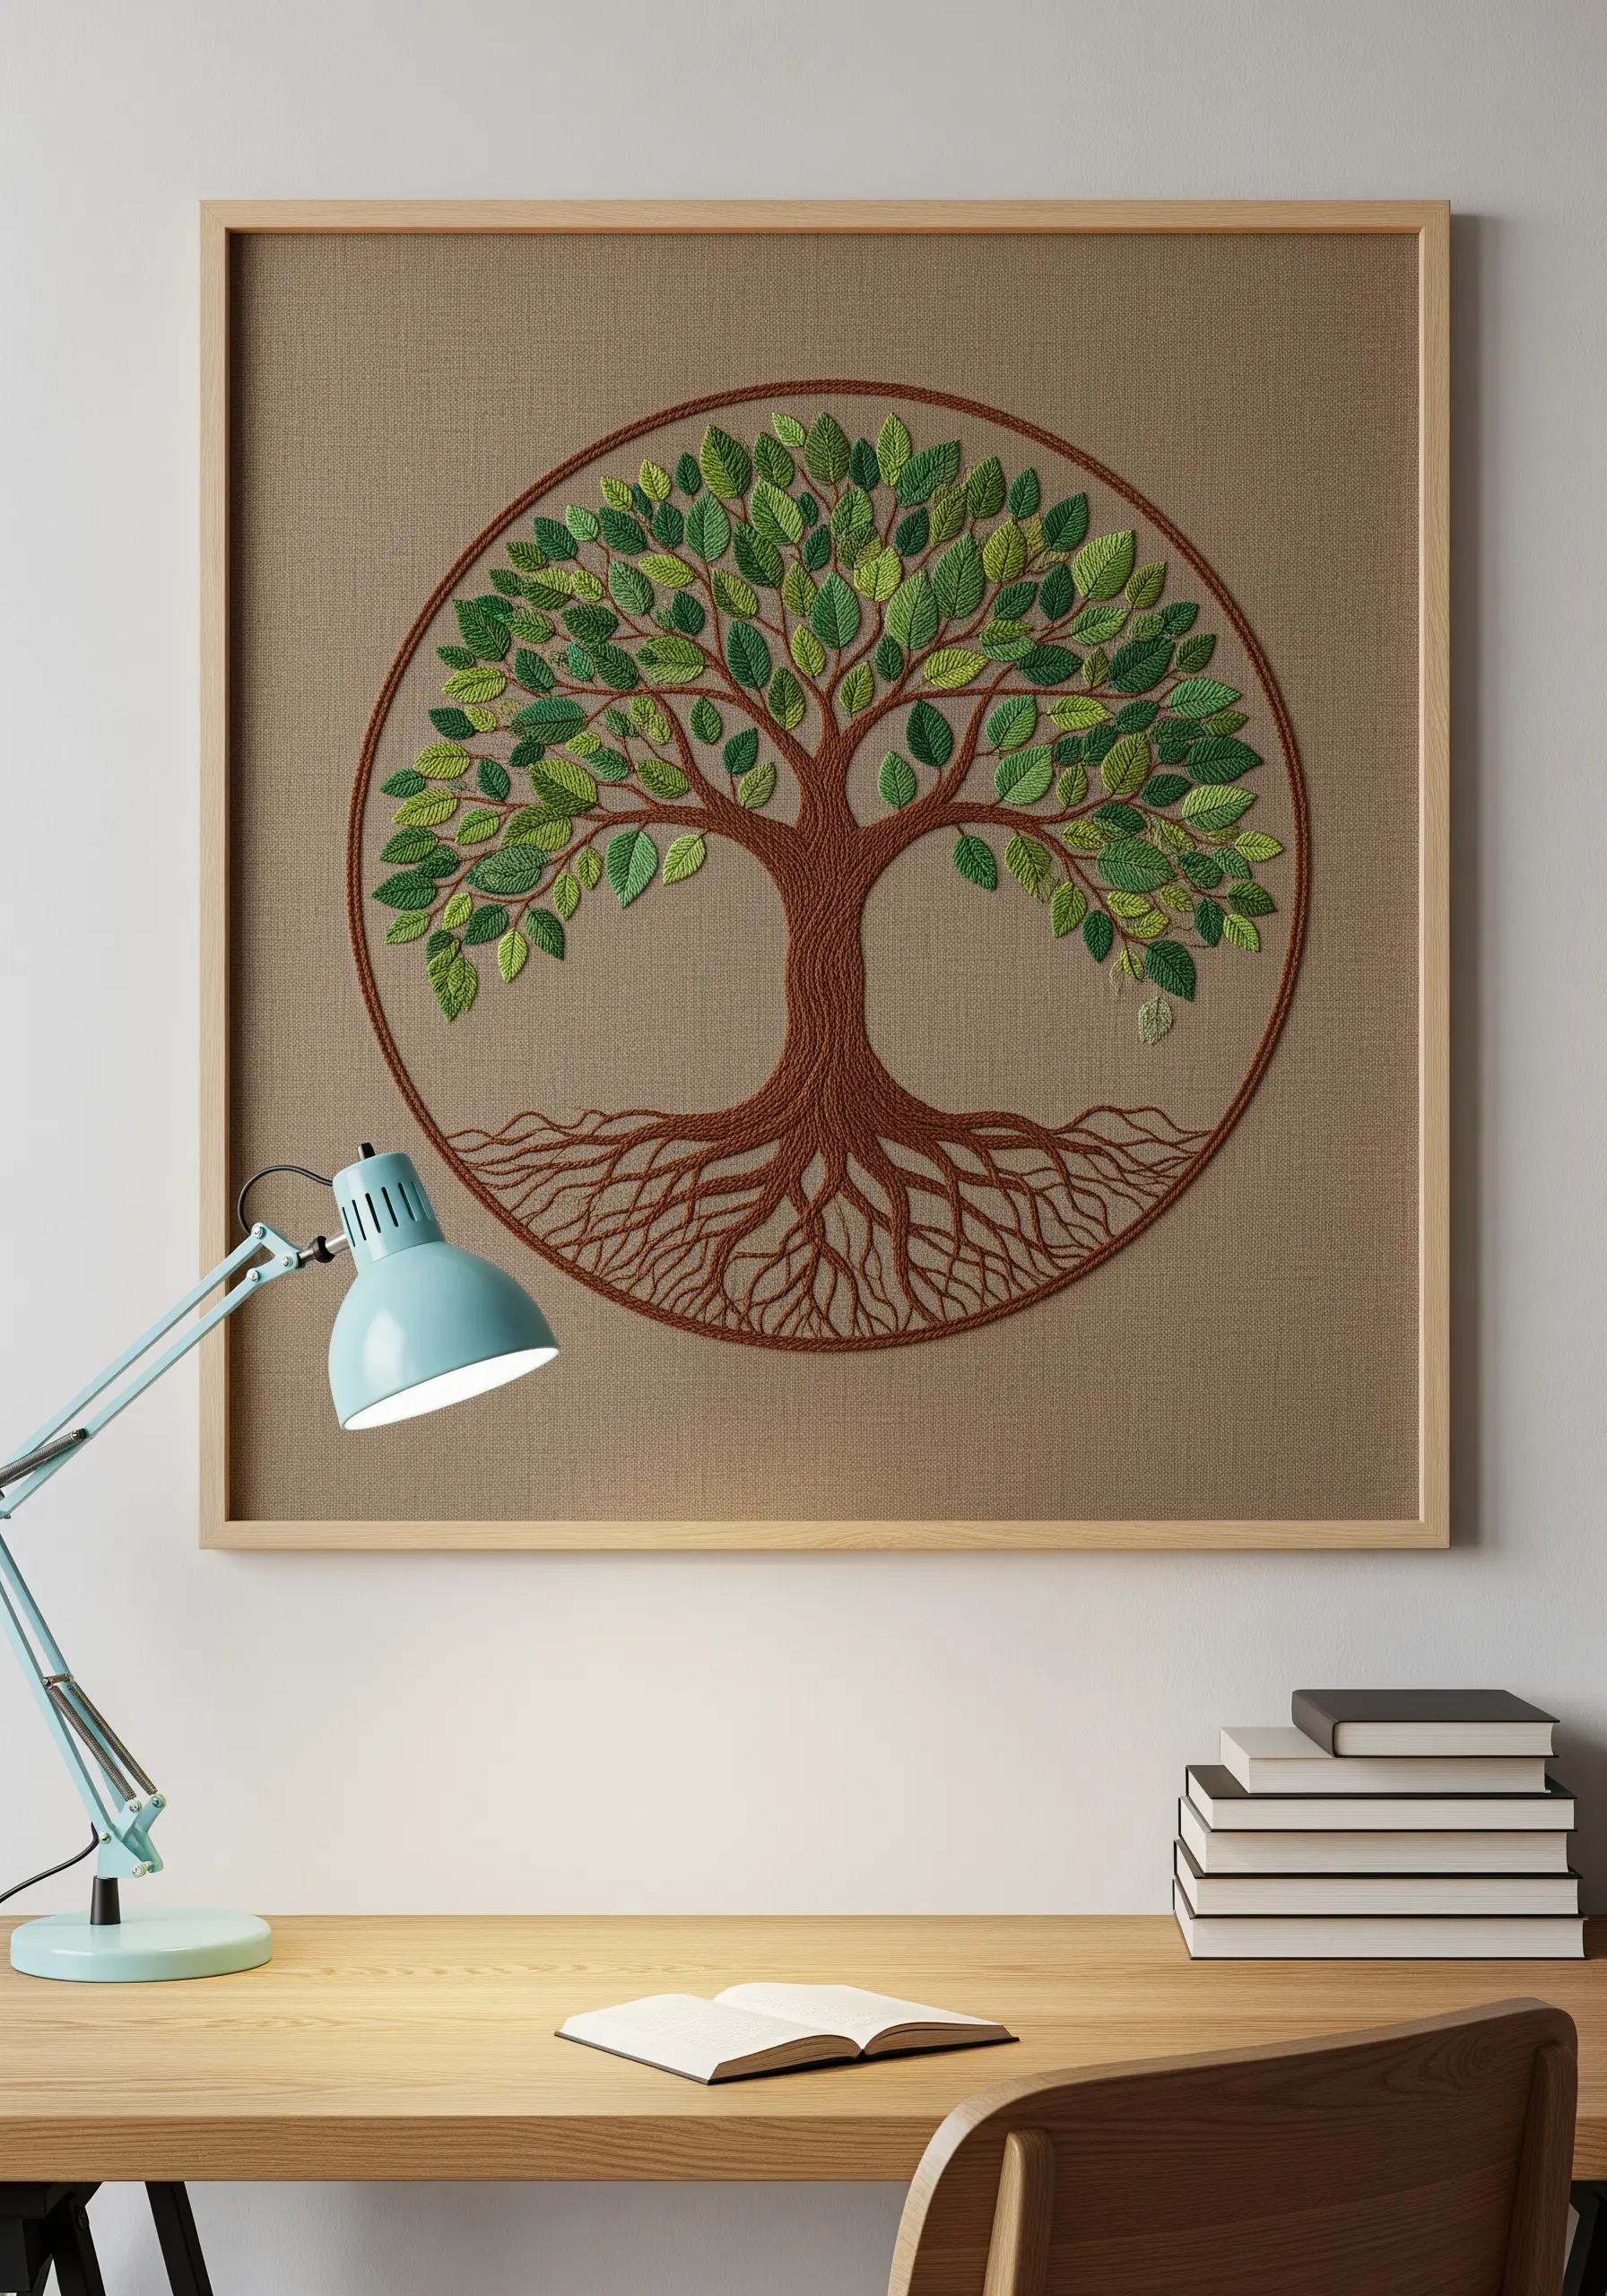
Bring your Tree of Life to life by differentiating the textures of its elements.
For the intricate root system and branches, use a whipped backstitch or stem stitch to create smooth, flowing lines.
Create a dense, leafy canopy by filling each leaf shape with fishbone stitch or a simple satin stitch, varying the angle of your stitches for a more natural look.
For the trunk, use tightly packed vertical split stitches to mimic the texture of bark, adding depth and realism to your work.
13. Dynamic Starburst Mandala
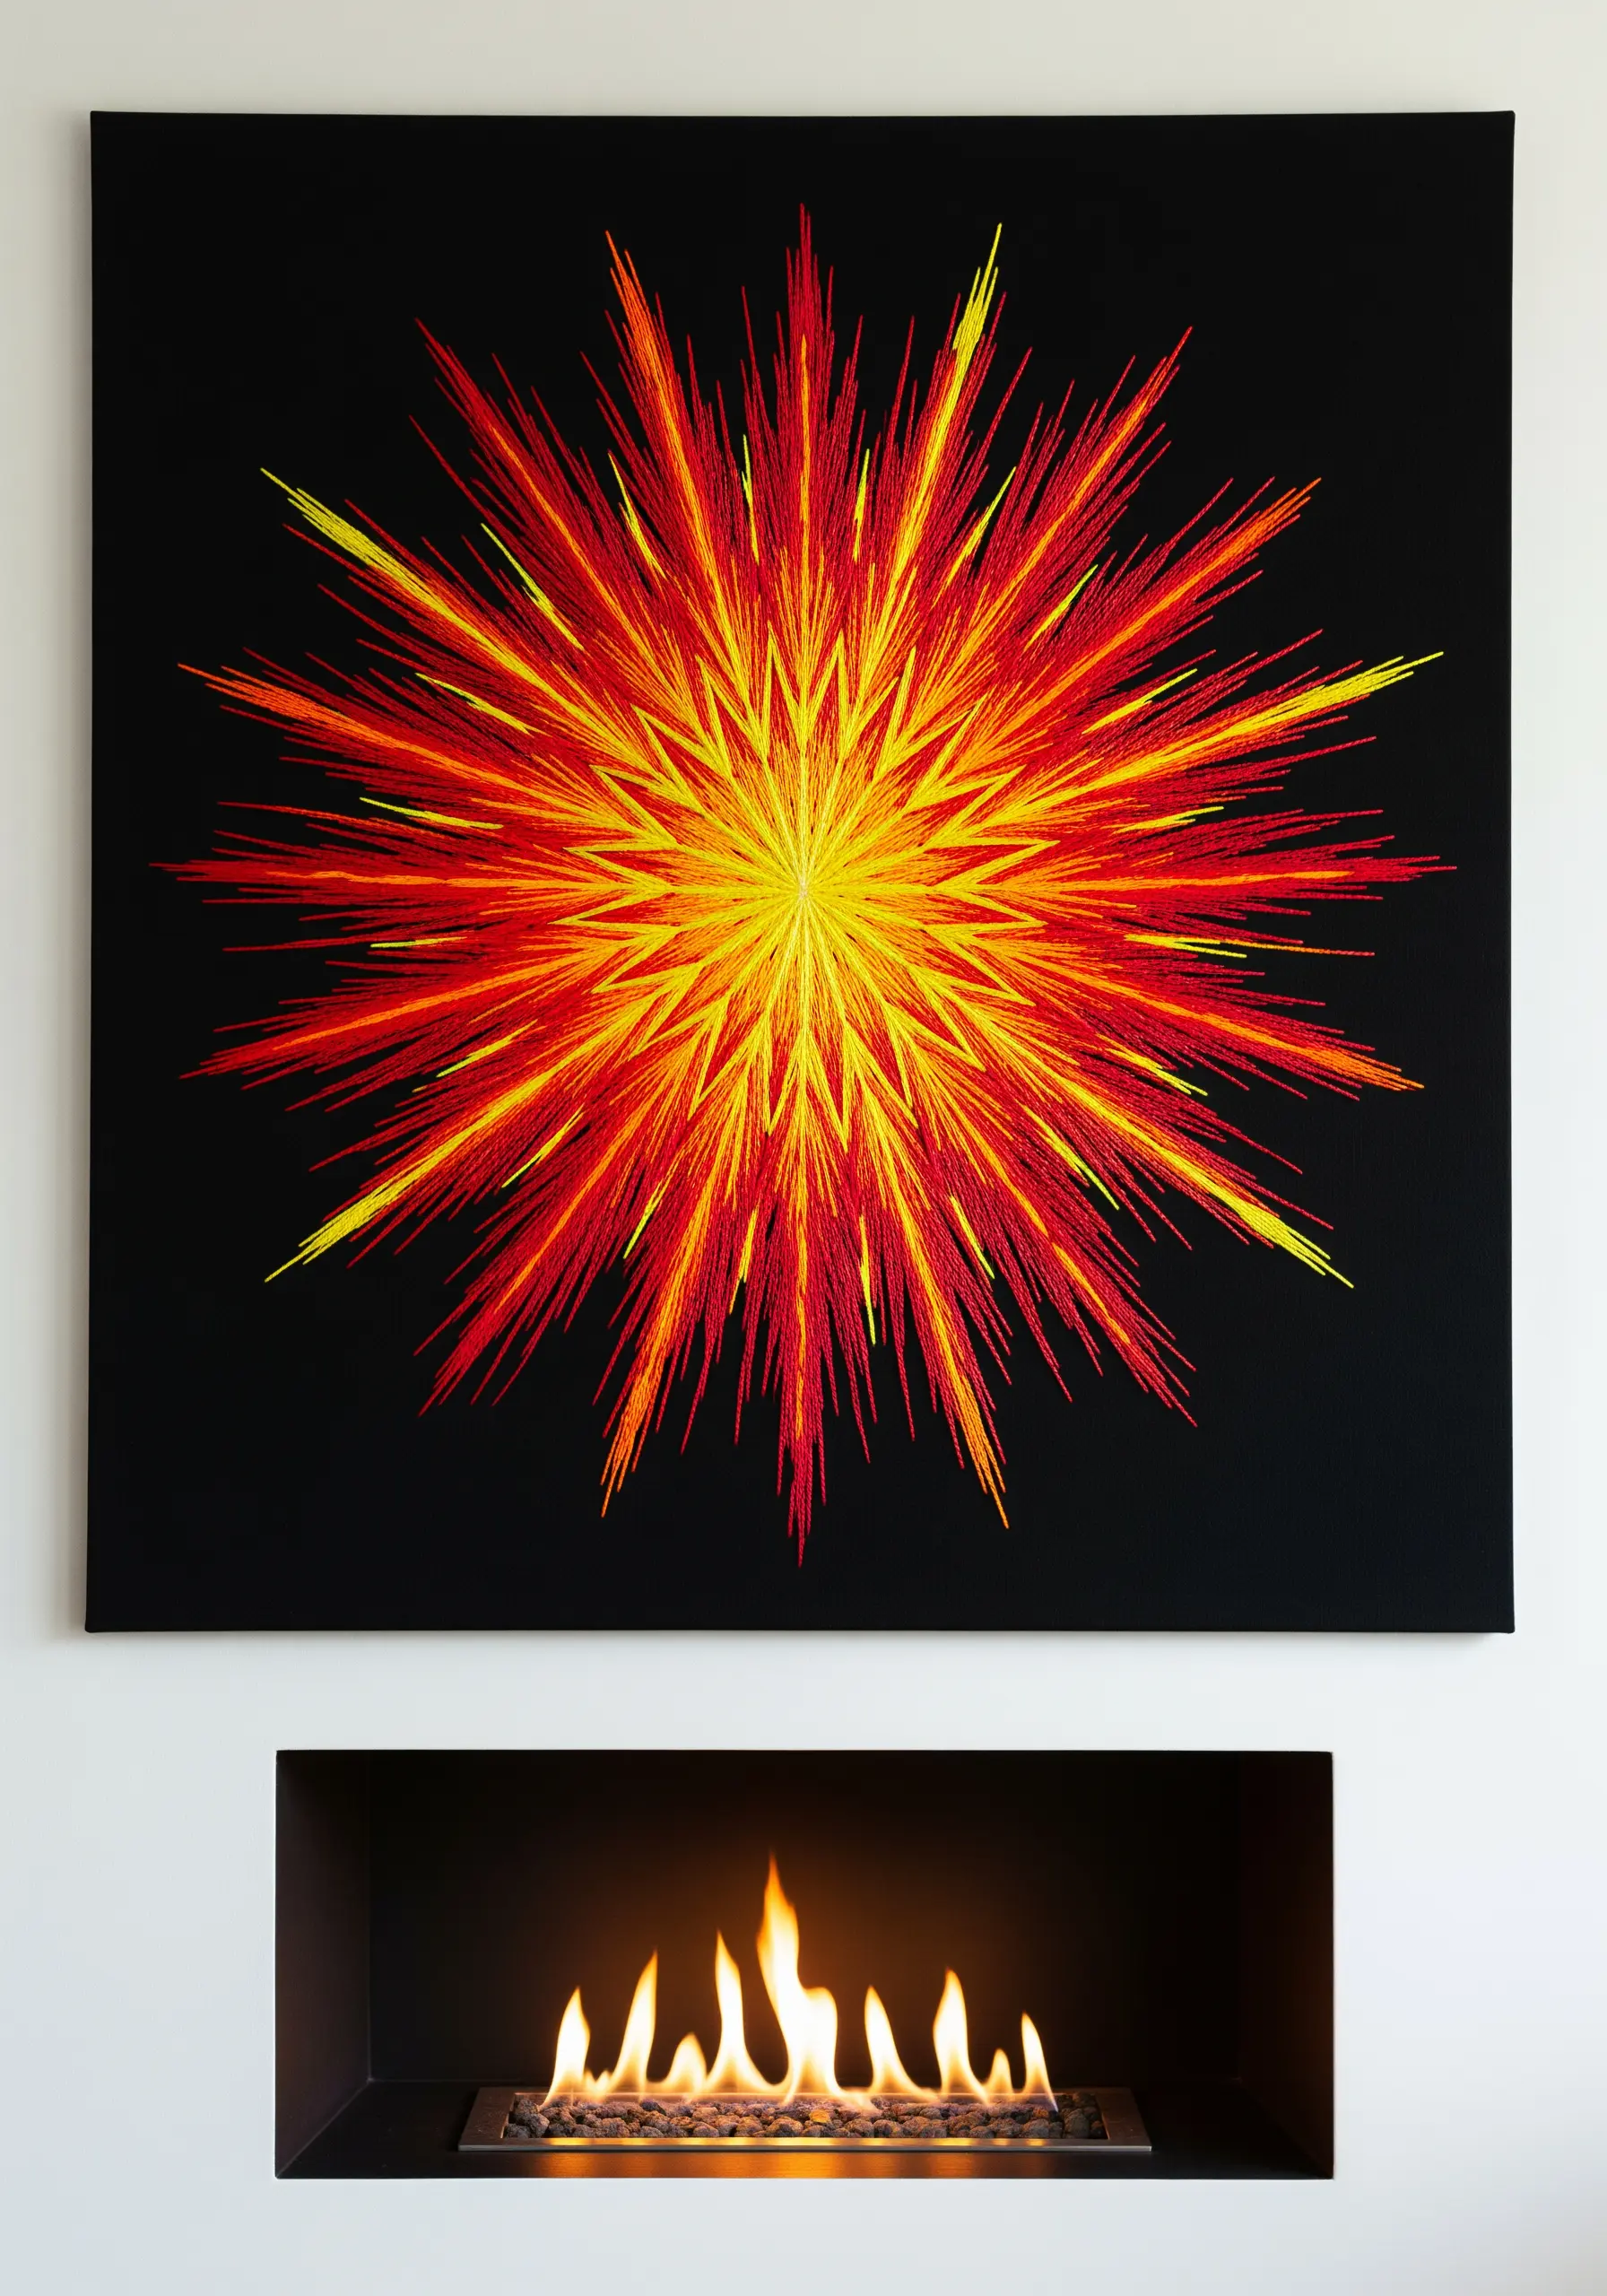
Create a powerful sense of energy and movement with radiating straight stitches.
To prevent long stitches from snagging or sagging, keep them taut but not so tight that they pucker the fabric. A high-quality, tightly woven fabric and a good stabilizer are essential.
For extra stability on very long stitches, you can add a tiny, unobtrusive couching stitch at the halfway point.
Layering different colors and lengths of stitches enhances the explosive, dynamic effect.
14. Ethereal Mandala on Sheer Organza
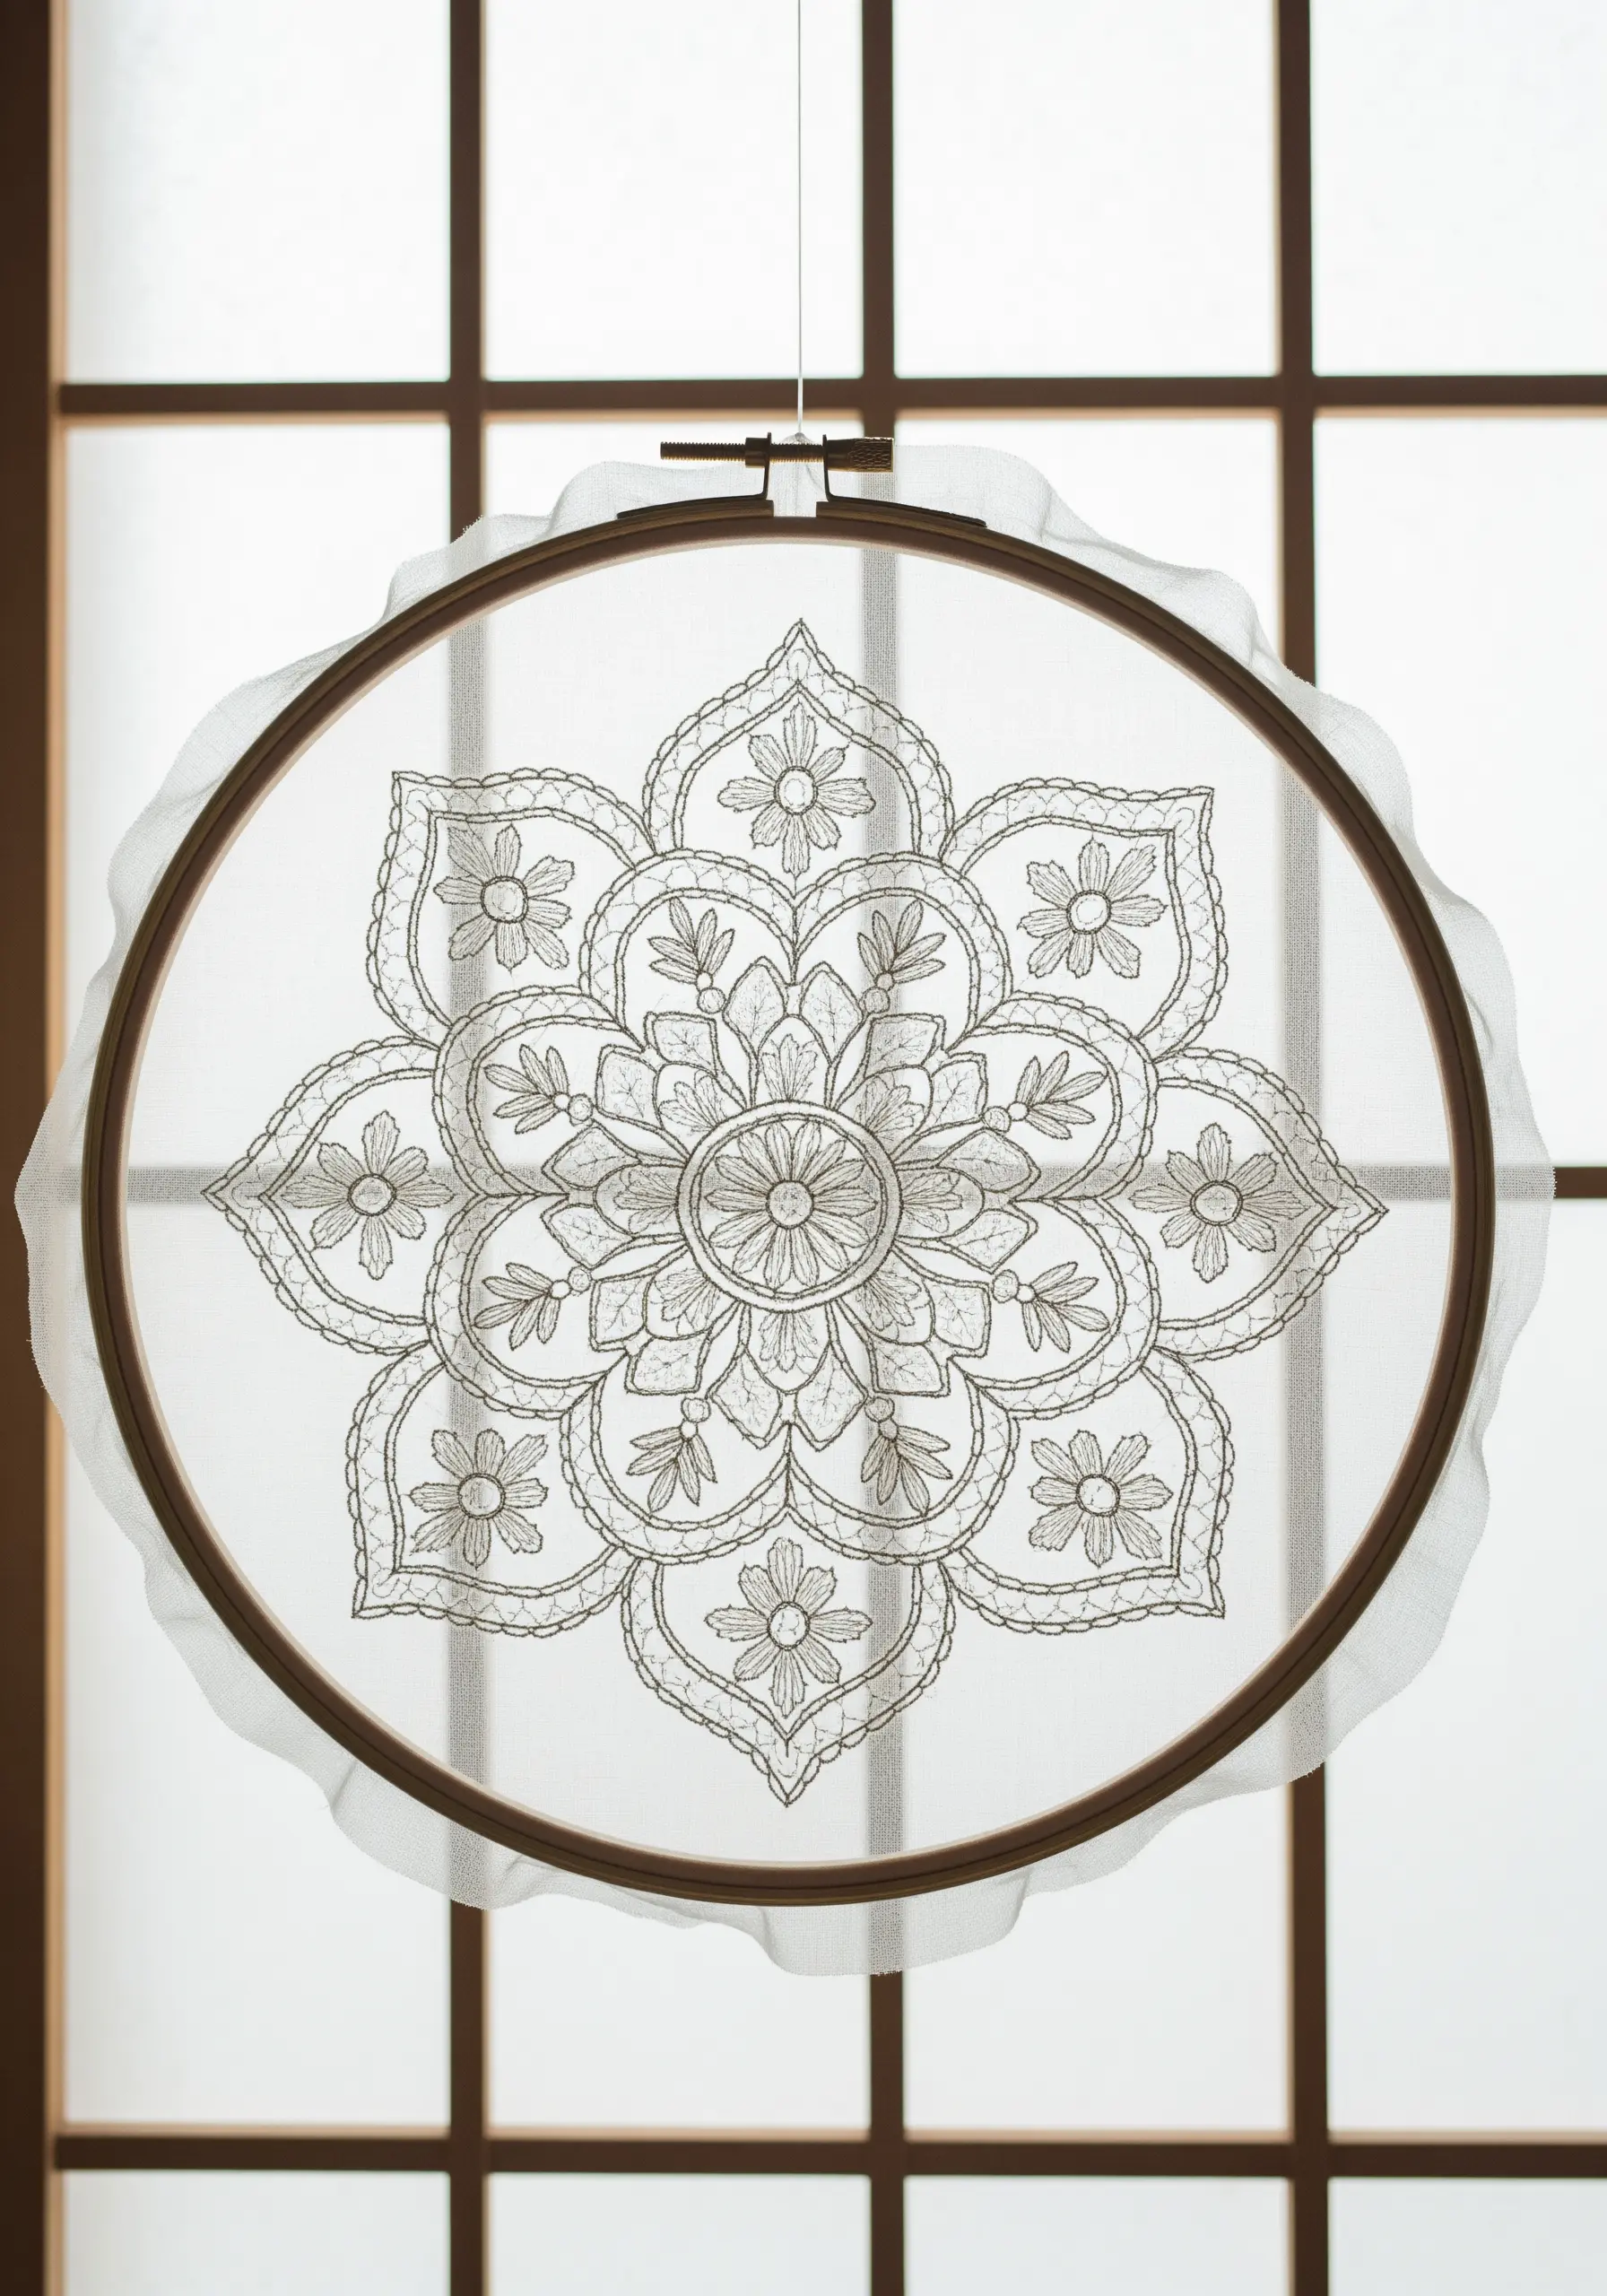
Stitching on a sheer fabric like organza creates a magical, floating effect that plays with light.
Use a very fine, sharp needle (like a size 10) and a lightweight thread to avoid puckering or tearing the delicate fabric.
Since the back of your work will be visible, focus on keeping your stitches neat and secure your threads by weaving them under existing stitches rather than tying knots.
This technique transforms your mandala into a delicate piece that interacts beautifully with sunlight.
15. Quilted Mandala with Embroidered Blocks

Construct a monumental, heirloom-quality piece by combining embroidery with quilting techniques.
Embroider individual mandala motifs or pattern segments onto separate fabric squares first. This makes the detailed stitching manageable.
Once all blocks are complete, assemble them into a larger composition and quilt them with a simple stitch-in-the-ditch technique.
The subtle puffiness from the batting adds a lovely dimension and softness to the overall design.
16. Sculptural Mandala with Couched Rope
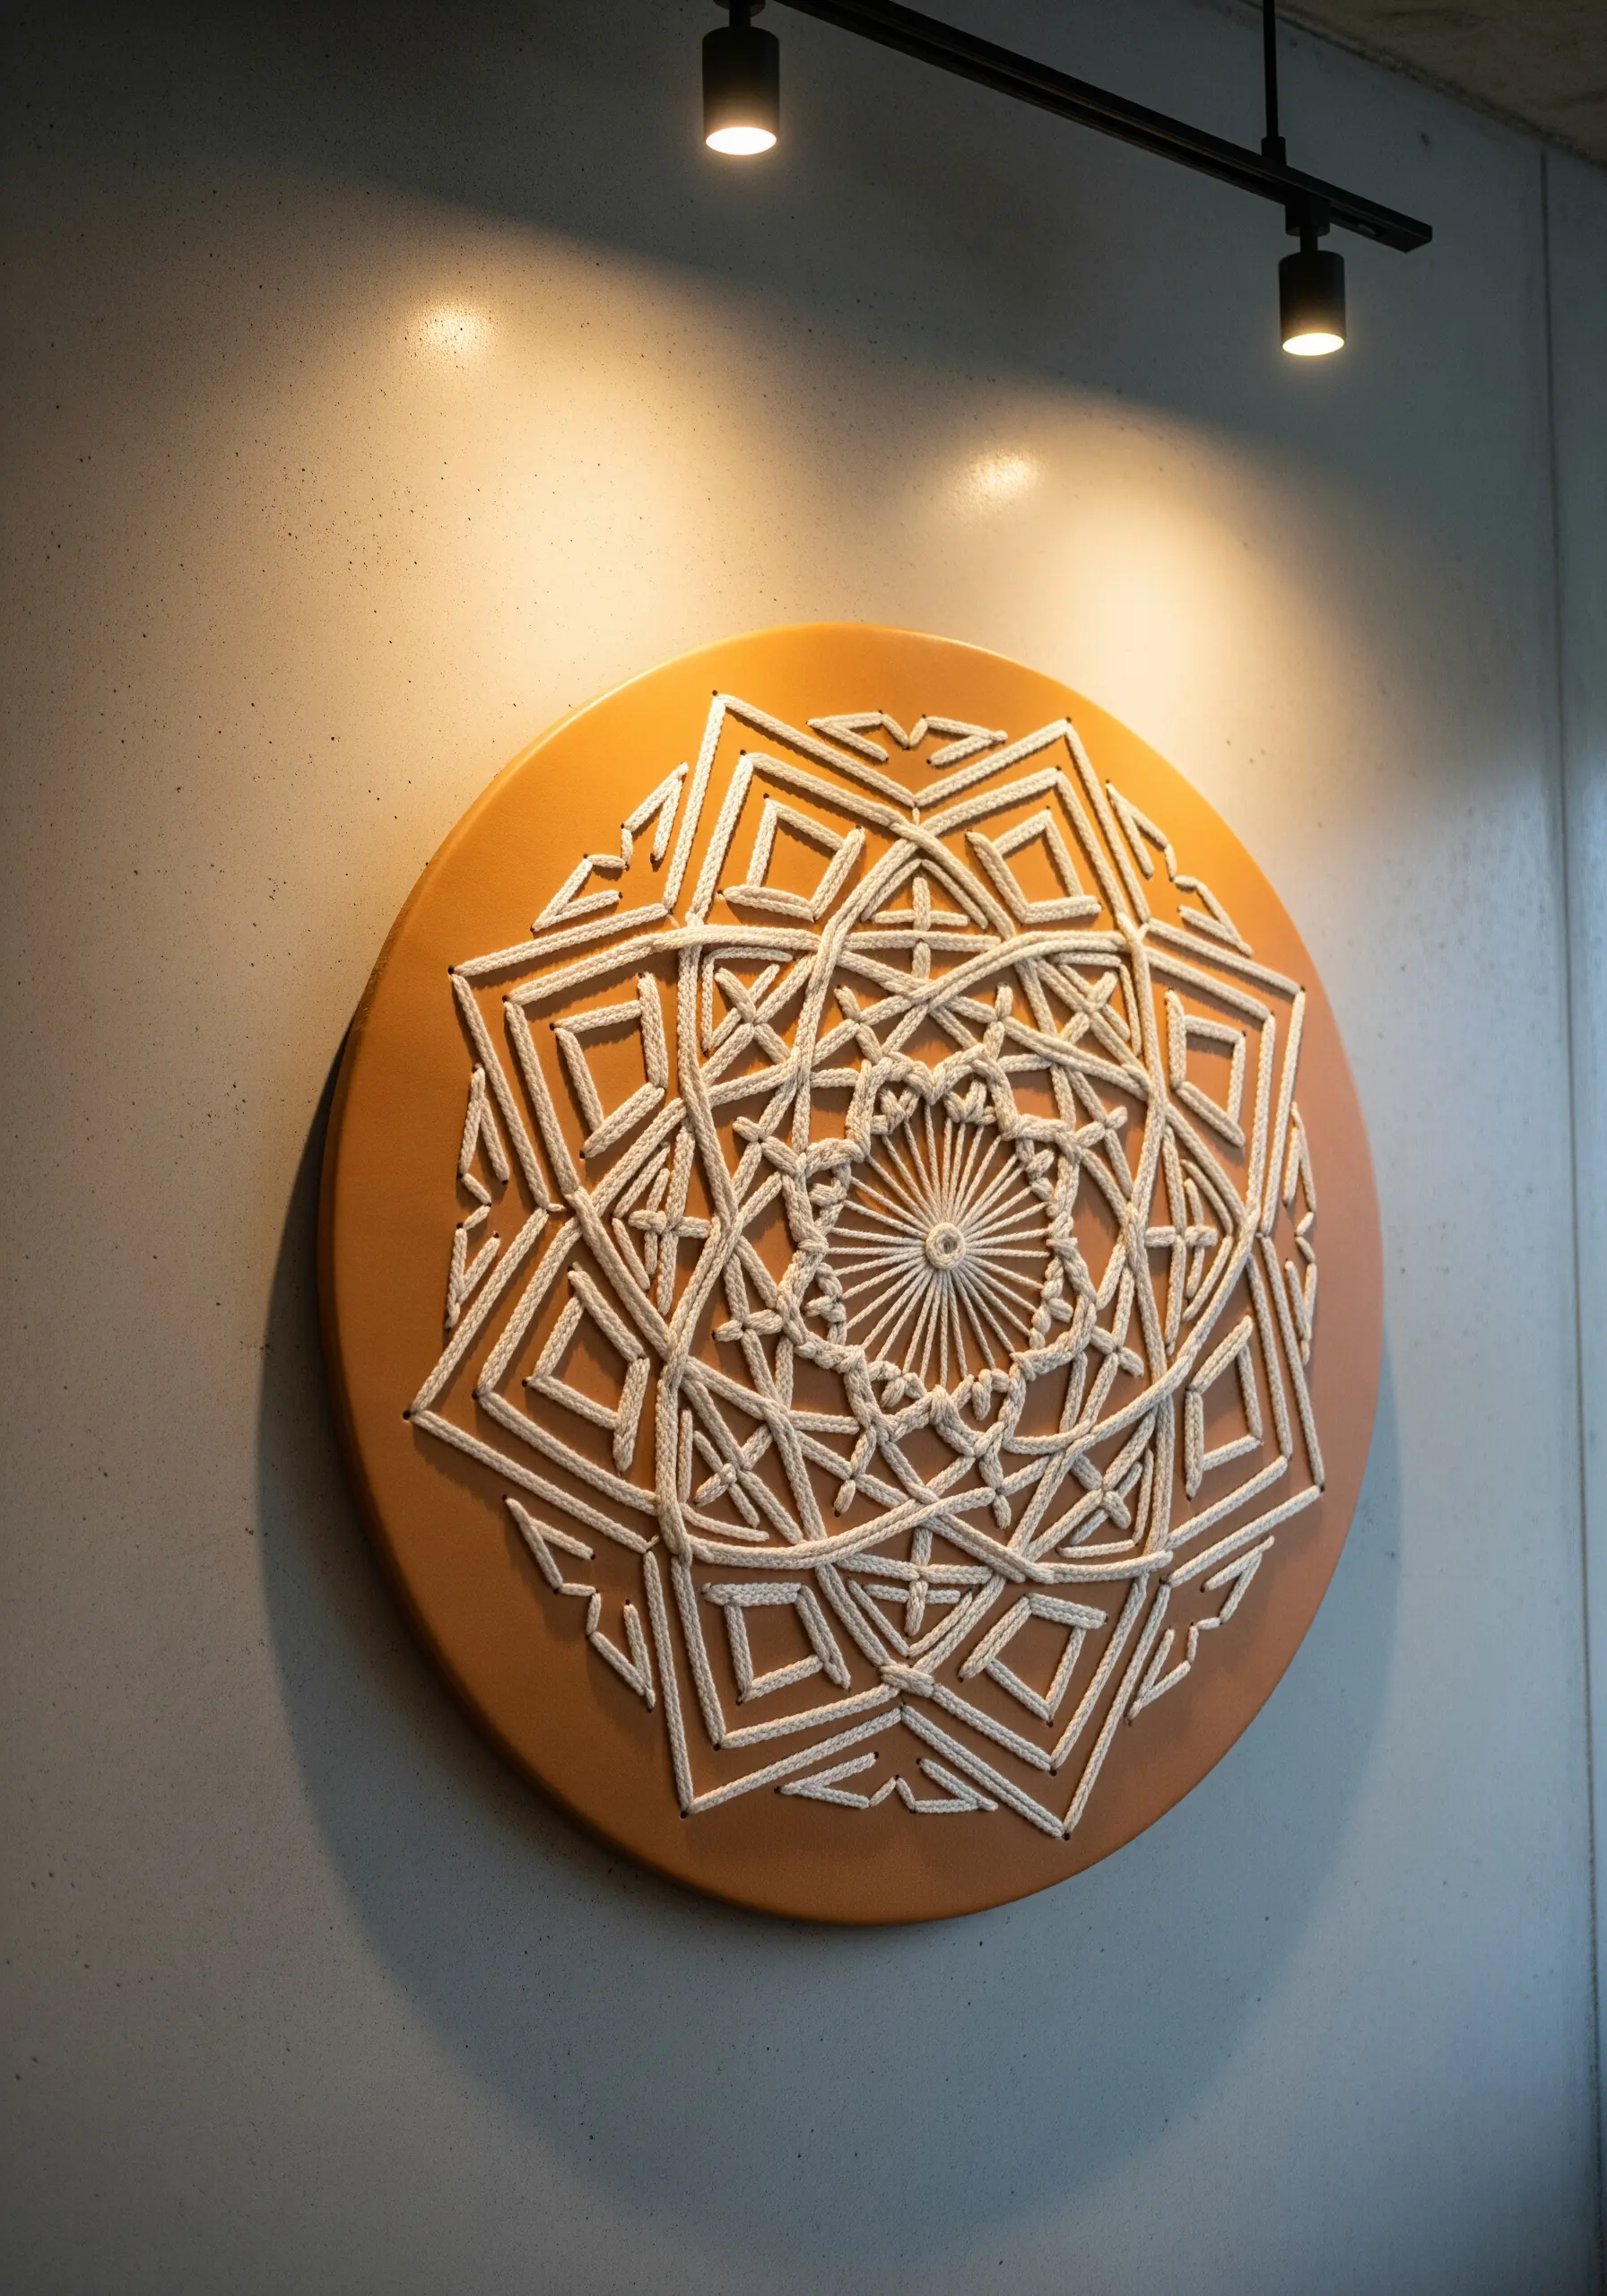
Create a bold, three-dimensional artwork by couching thick rope or cord onto a solid surface.
Stretch your fabric over a sturdy artist’s canvas or a wooden board. Arrange your rope along the design lines and use a strong, coordinating thread to tack it down every half-inch or so.
The key is to make your tacking stitches discreet, sinking them between the twists of the rope.
This technique adds architectural and sculptural interest, turning your mandala into a statement piece.
17. Serpentine Mandala with Raised Satin Stitch
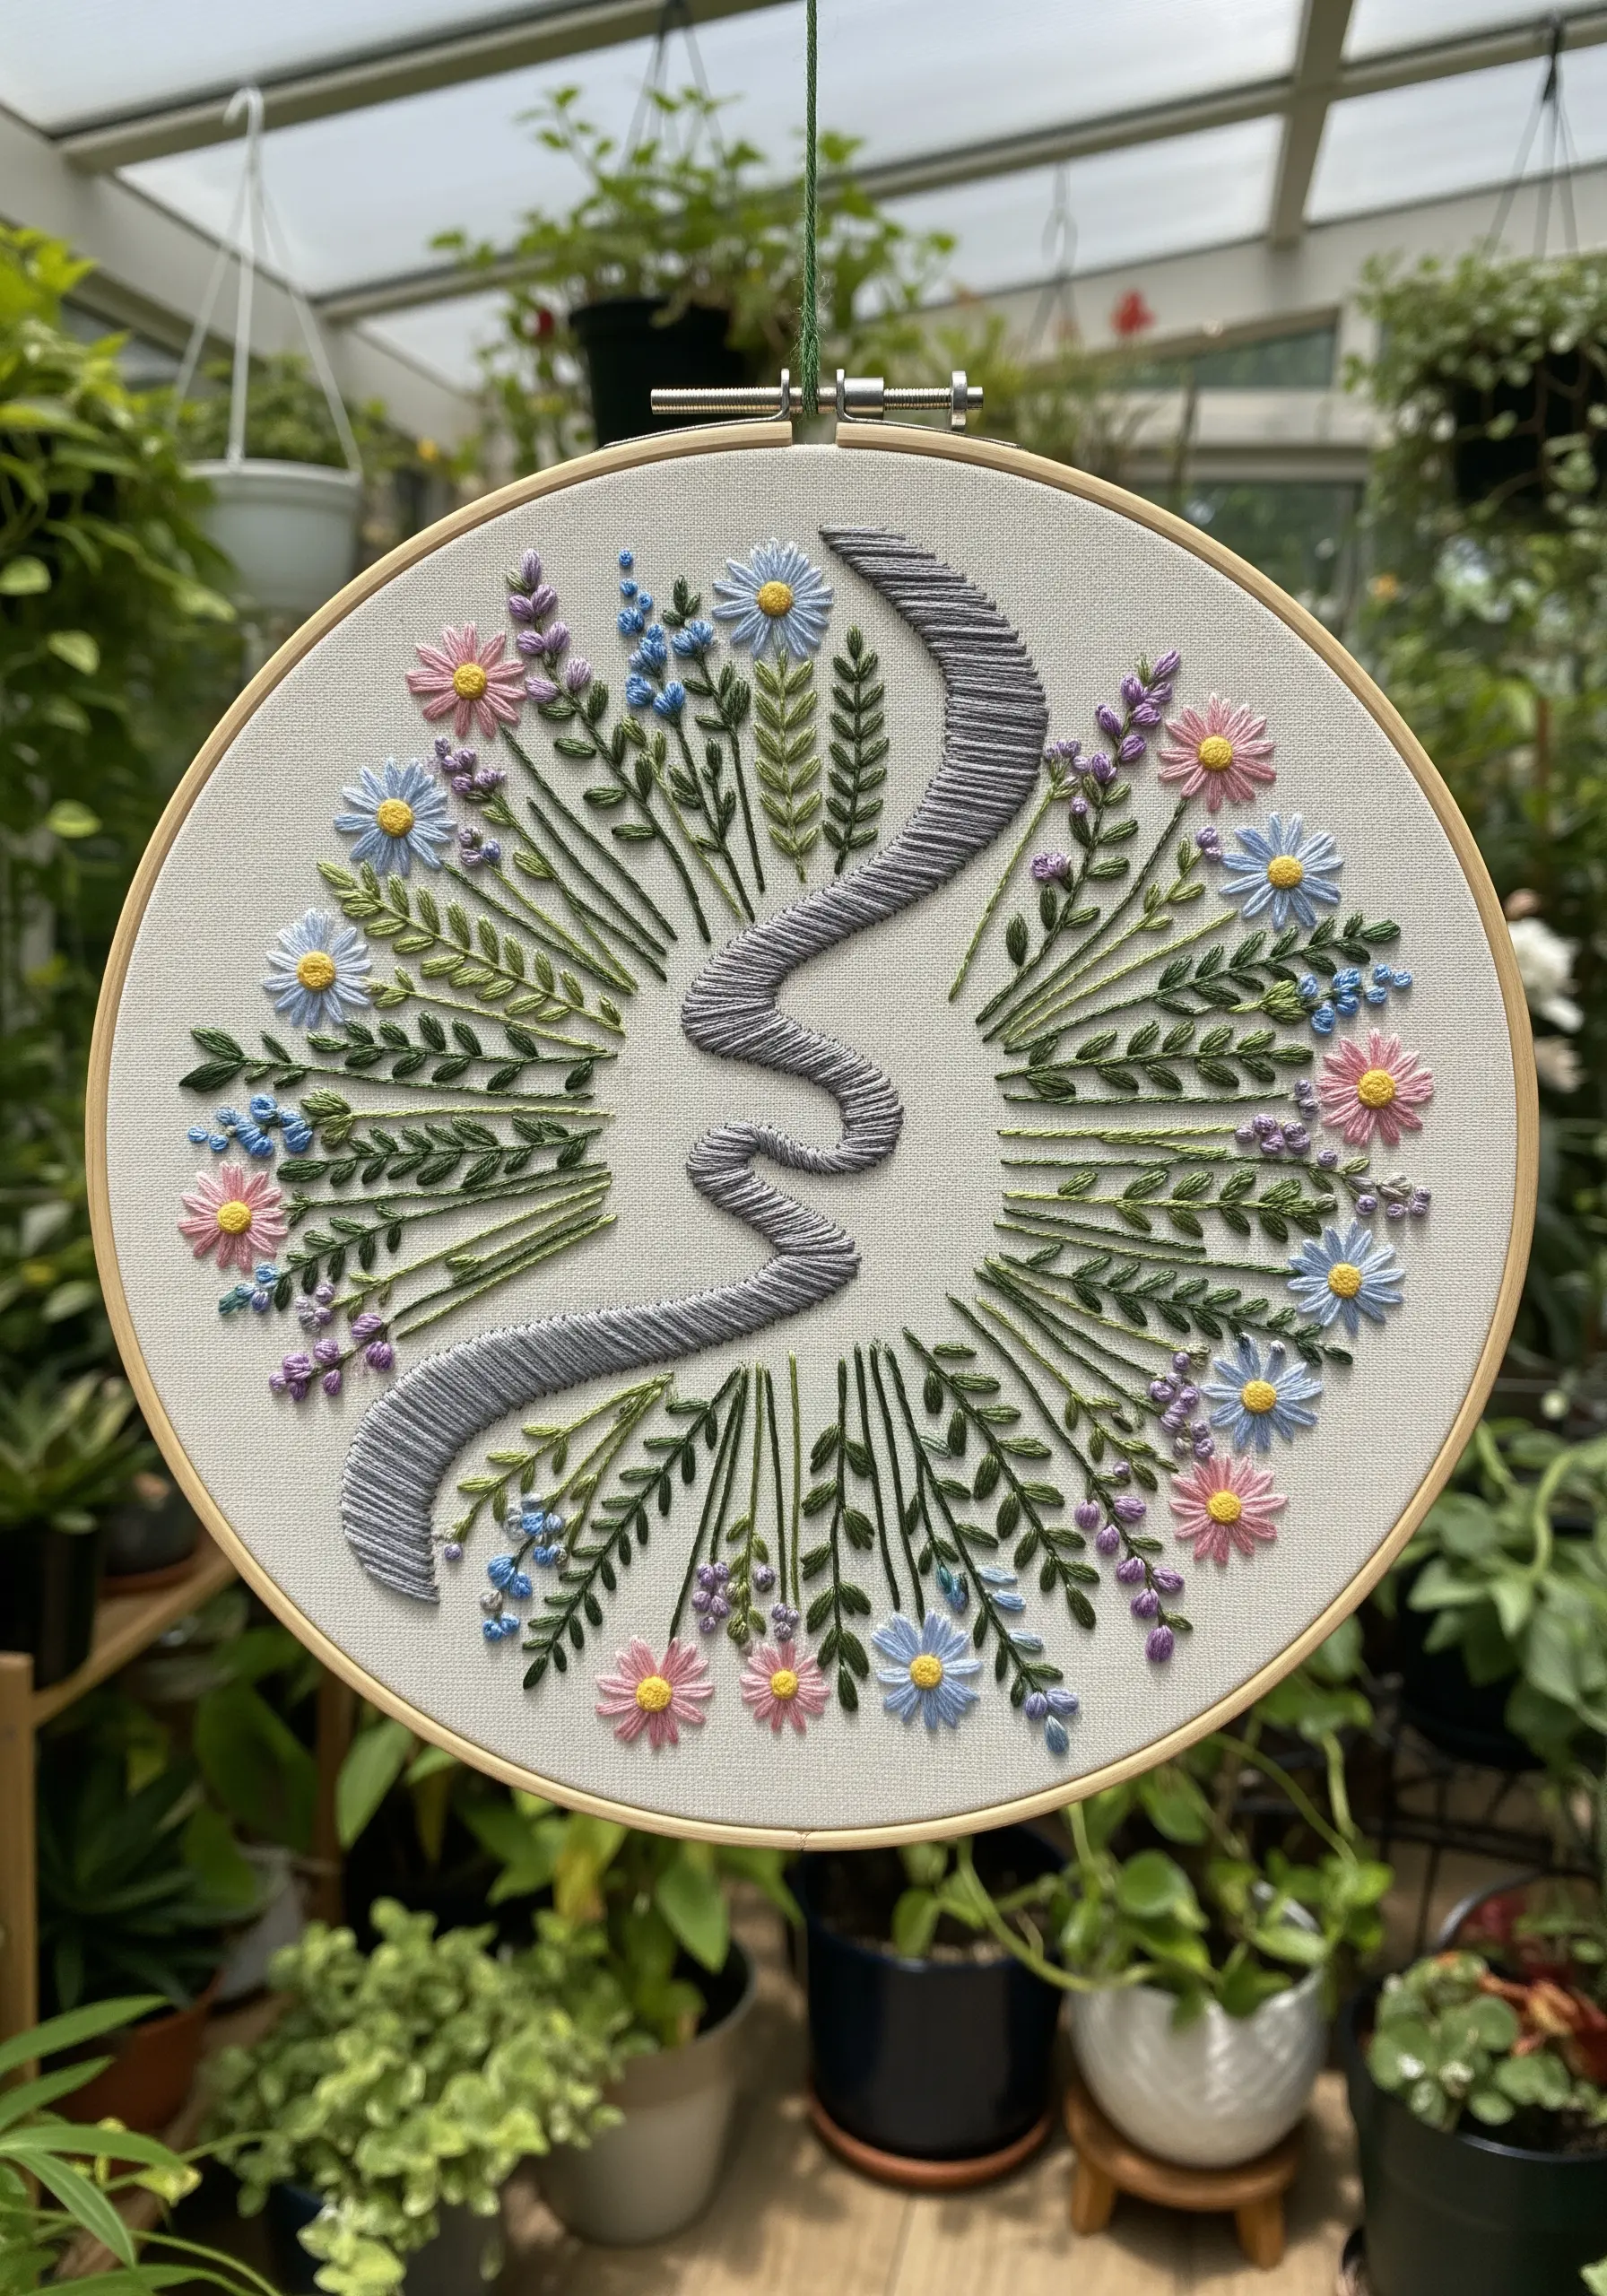
Create a smooth, sculptural centerpiece by using a padded satin stitch.
First, fill the shape of the snake with a foundation of small running stitches or felt padding. Then, cover this padding with satin stitches worked perpendicular to the length of the shape.
This technique raises the element from the surface, giving it a satisfying, three-dimensional quality that contrasts beautifully with the flatter floral stitches surrounding it.
The smooth, dense texture of the satin stitch effectively draws the eye.
18. Mixed-Media Mandala with Watercolor Wash

Combine the soft bleed of watercolor with the crisp precision of thread for a stunning mixed-media piece.
Lightly sketch your design on watercolor paper or tightly woven fabric, then apply a wash of color to the background, allowing it to dry completely.
Once dry, stitch your geometric mandala over the painted surface. The thread adds texture and sharp detail that makes the soft, dreamy background pop.
This is a perfect way to explore creative collage inspirations with thread and paint.
19. Galactic Spiral with Chain Stitch and Sequins
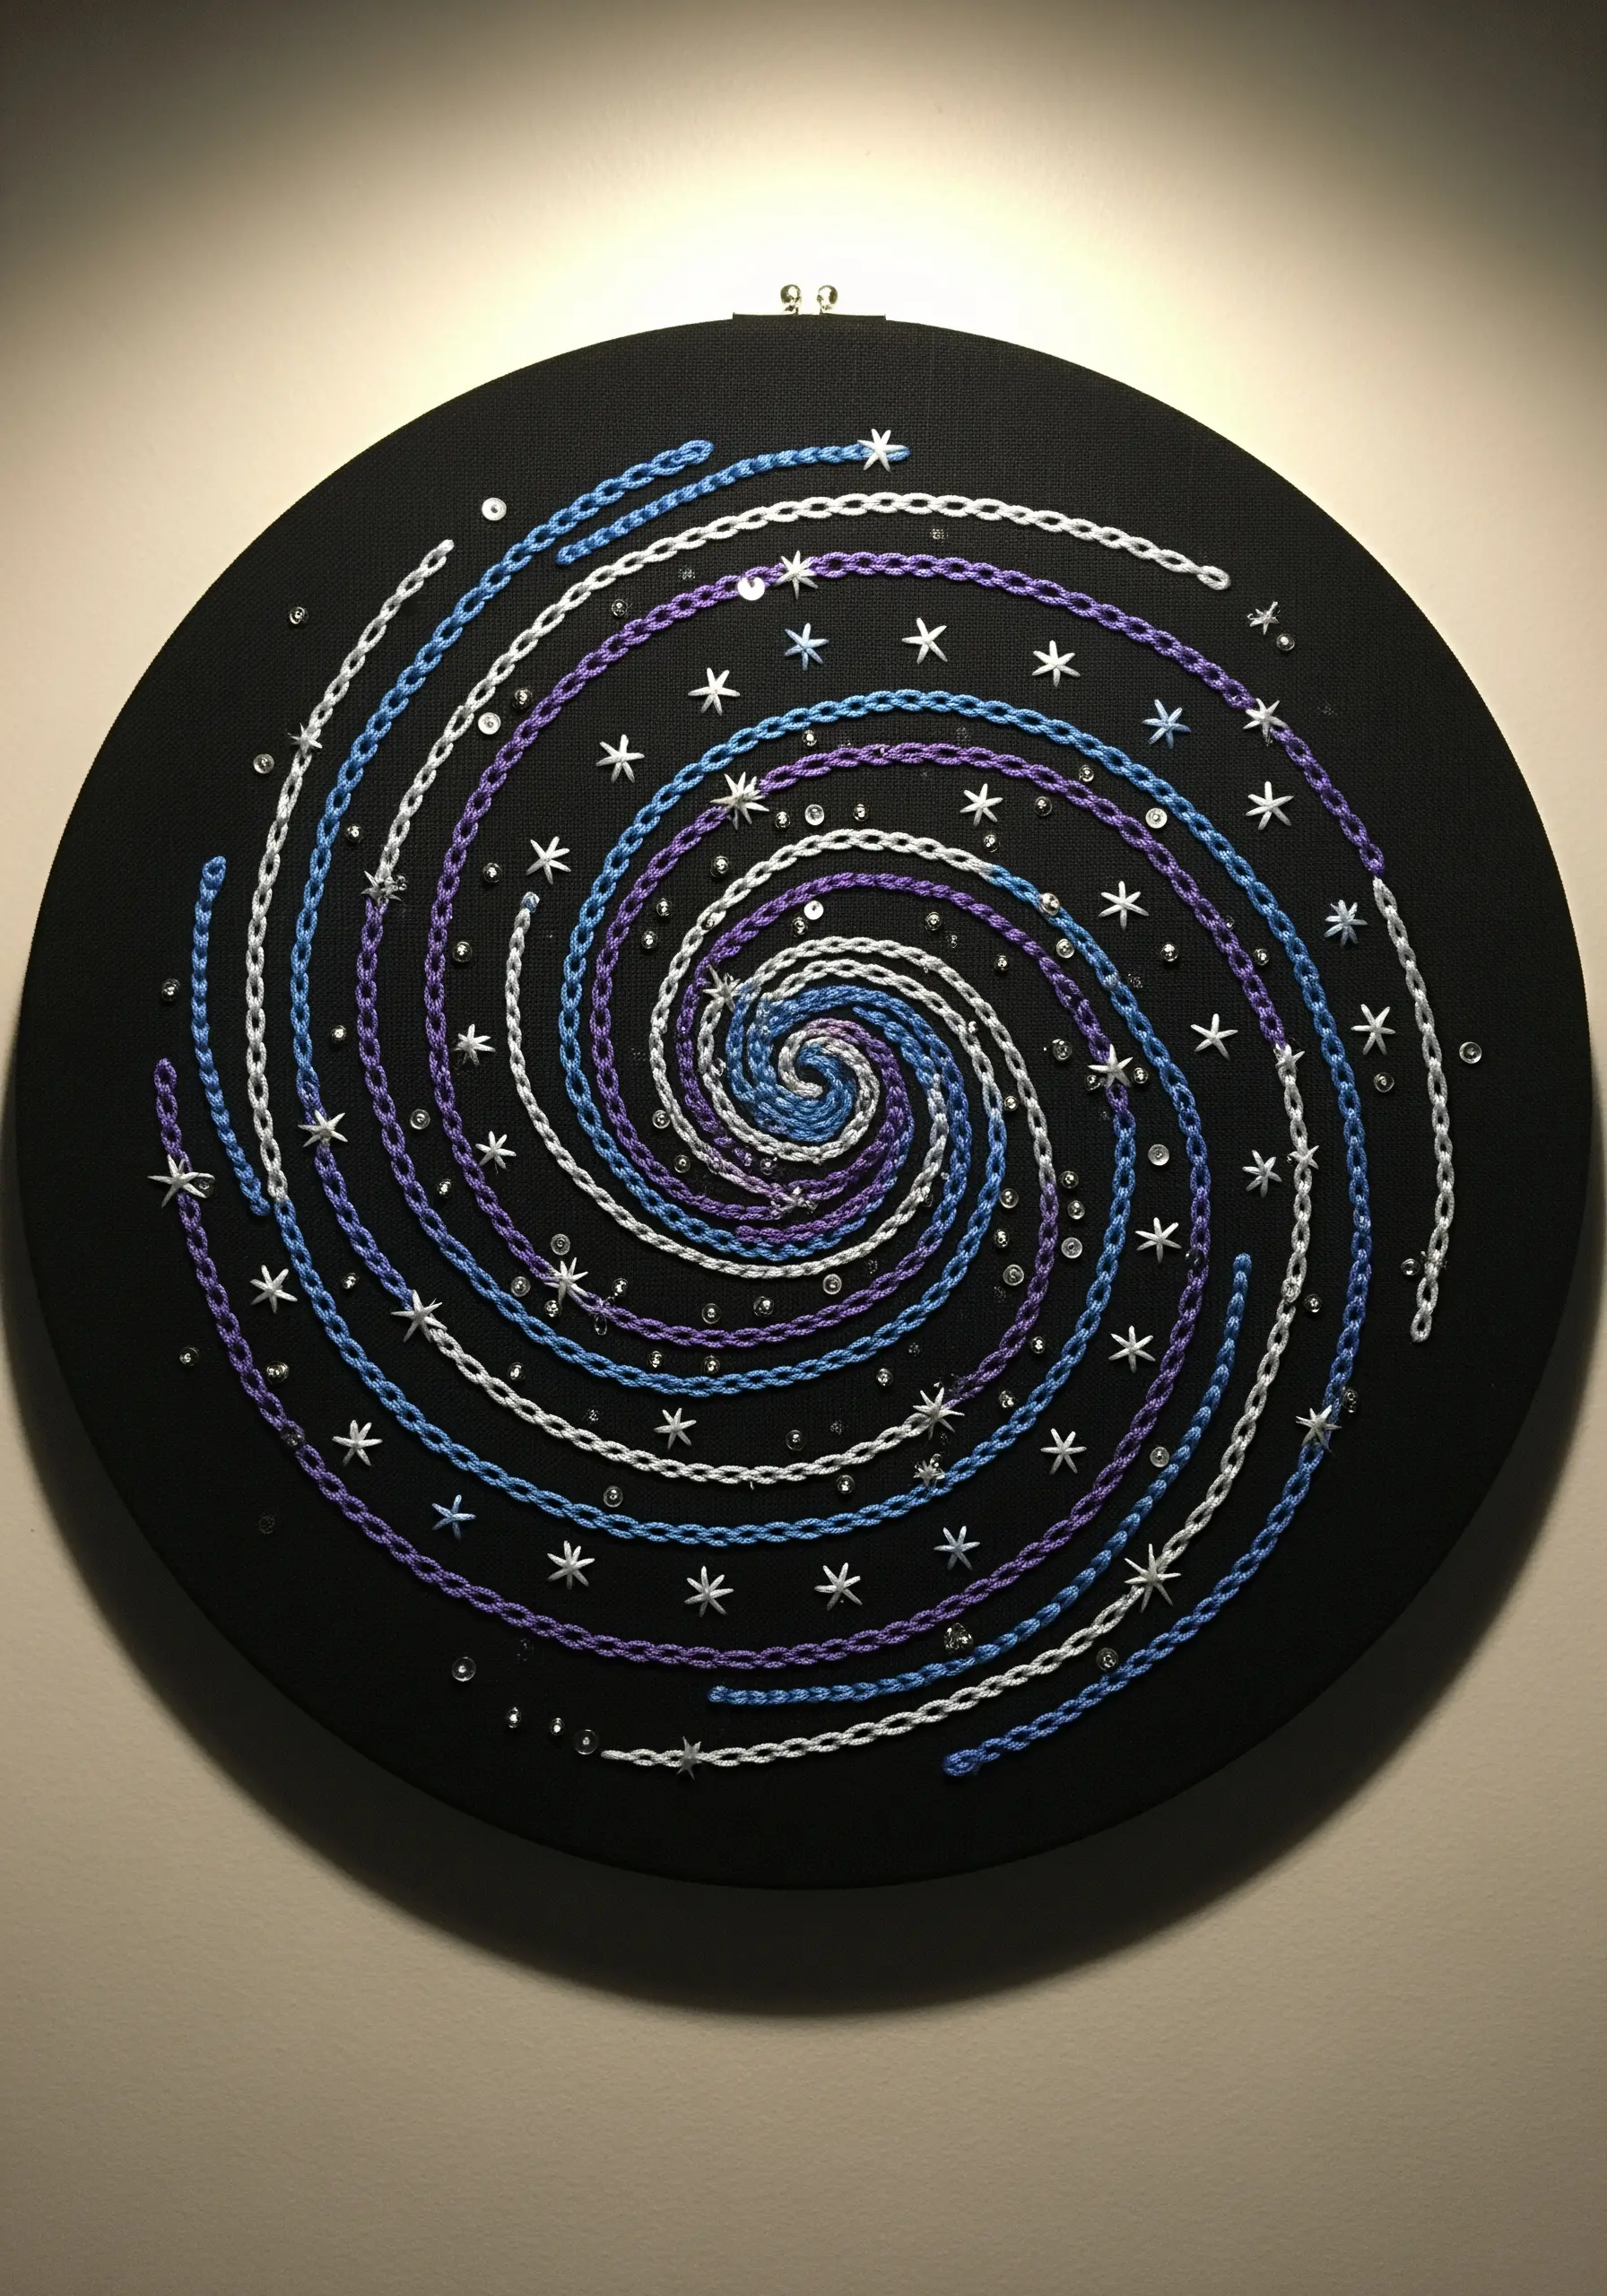
Capture the motion of a swirling galaxy by using a chain stitch and thoughtful embellishments.
The chain stitch creates a substantial, rope-like line that is perfect for defining the spiral arms. Work with variegated threads in blues, purples, and whites to add cosmic color depth.
After the stitchwork is complete, scatter tiny silver sequins or beads throughout the design, securing each with a single French knot or a small stitch.
These additions catch the light and mimic a starfield, adding a final touch of magic.
20. Beaded Mandala with Gemstone Accents
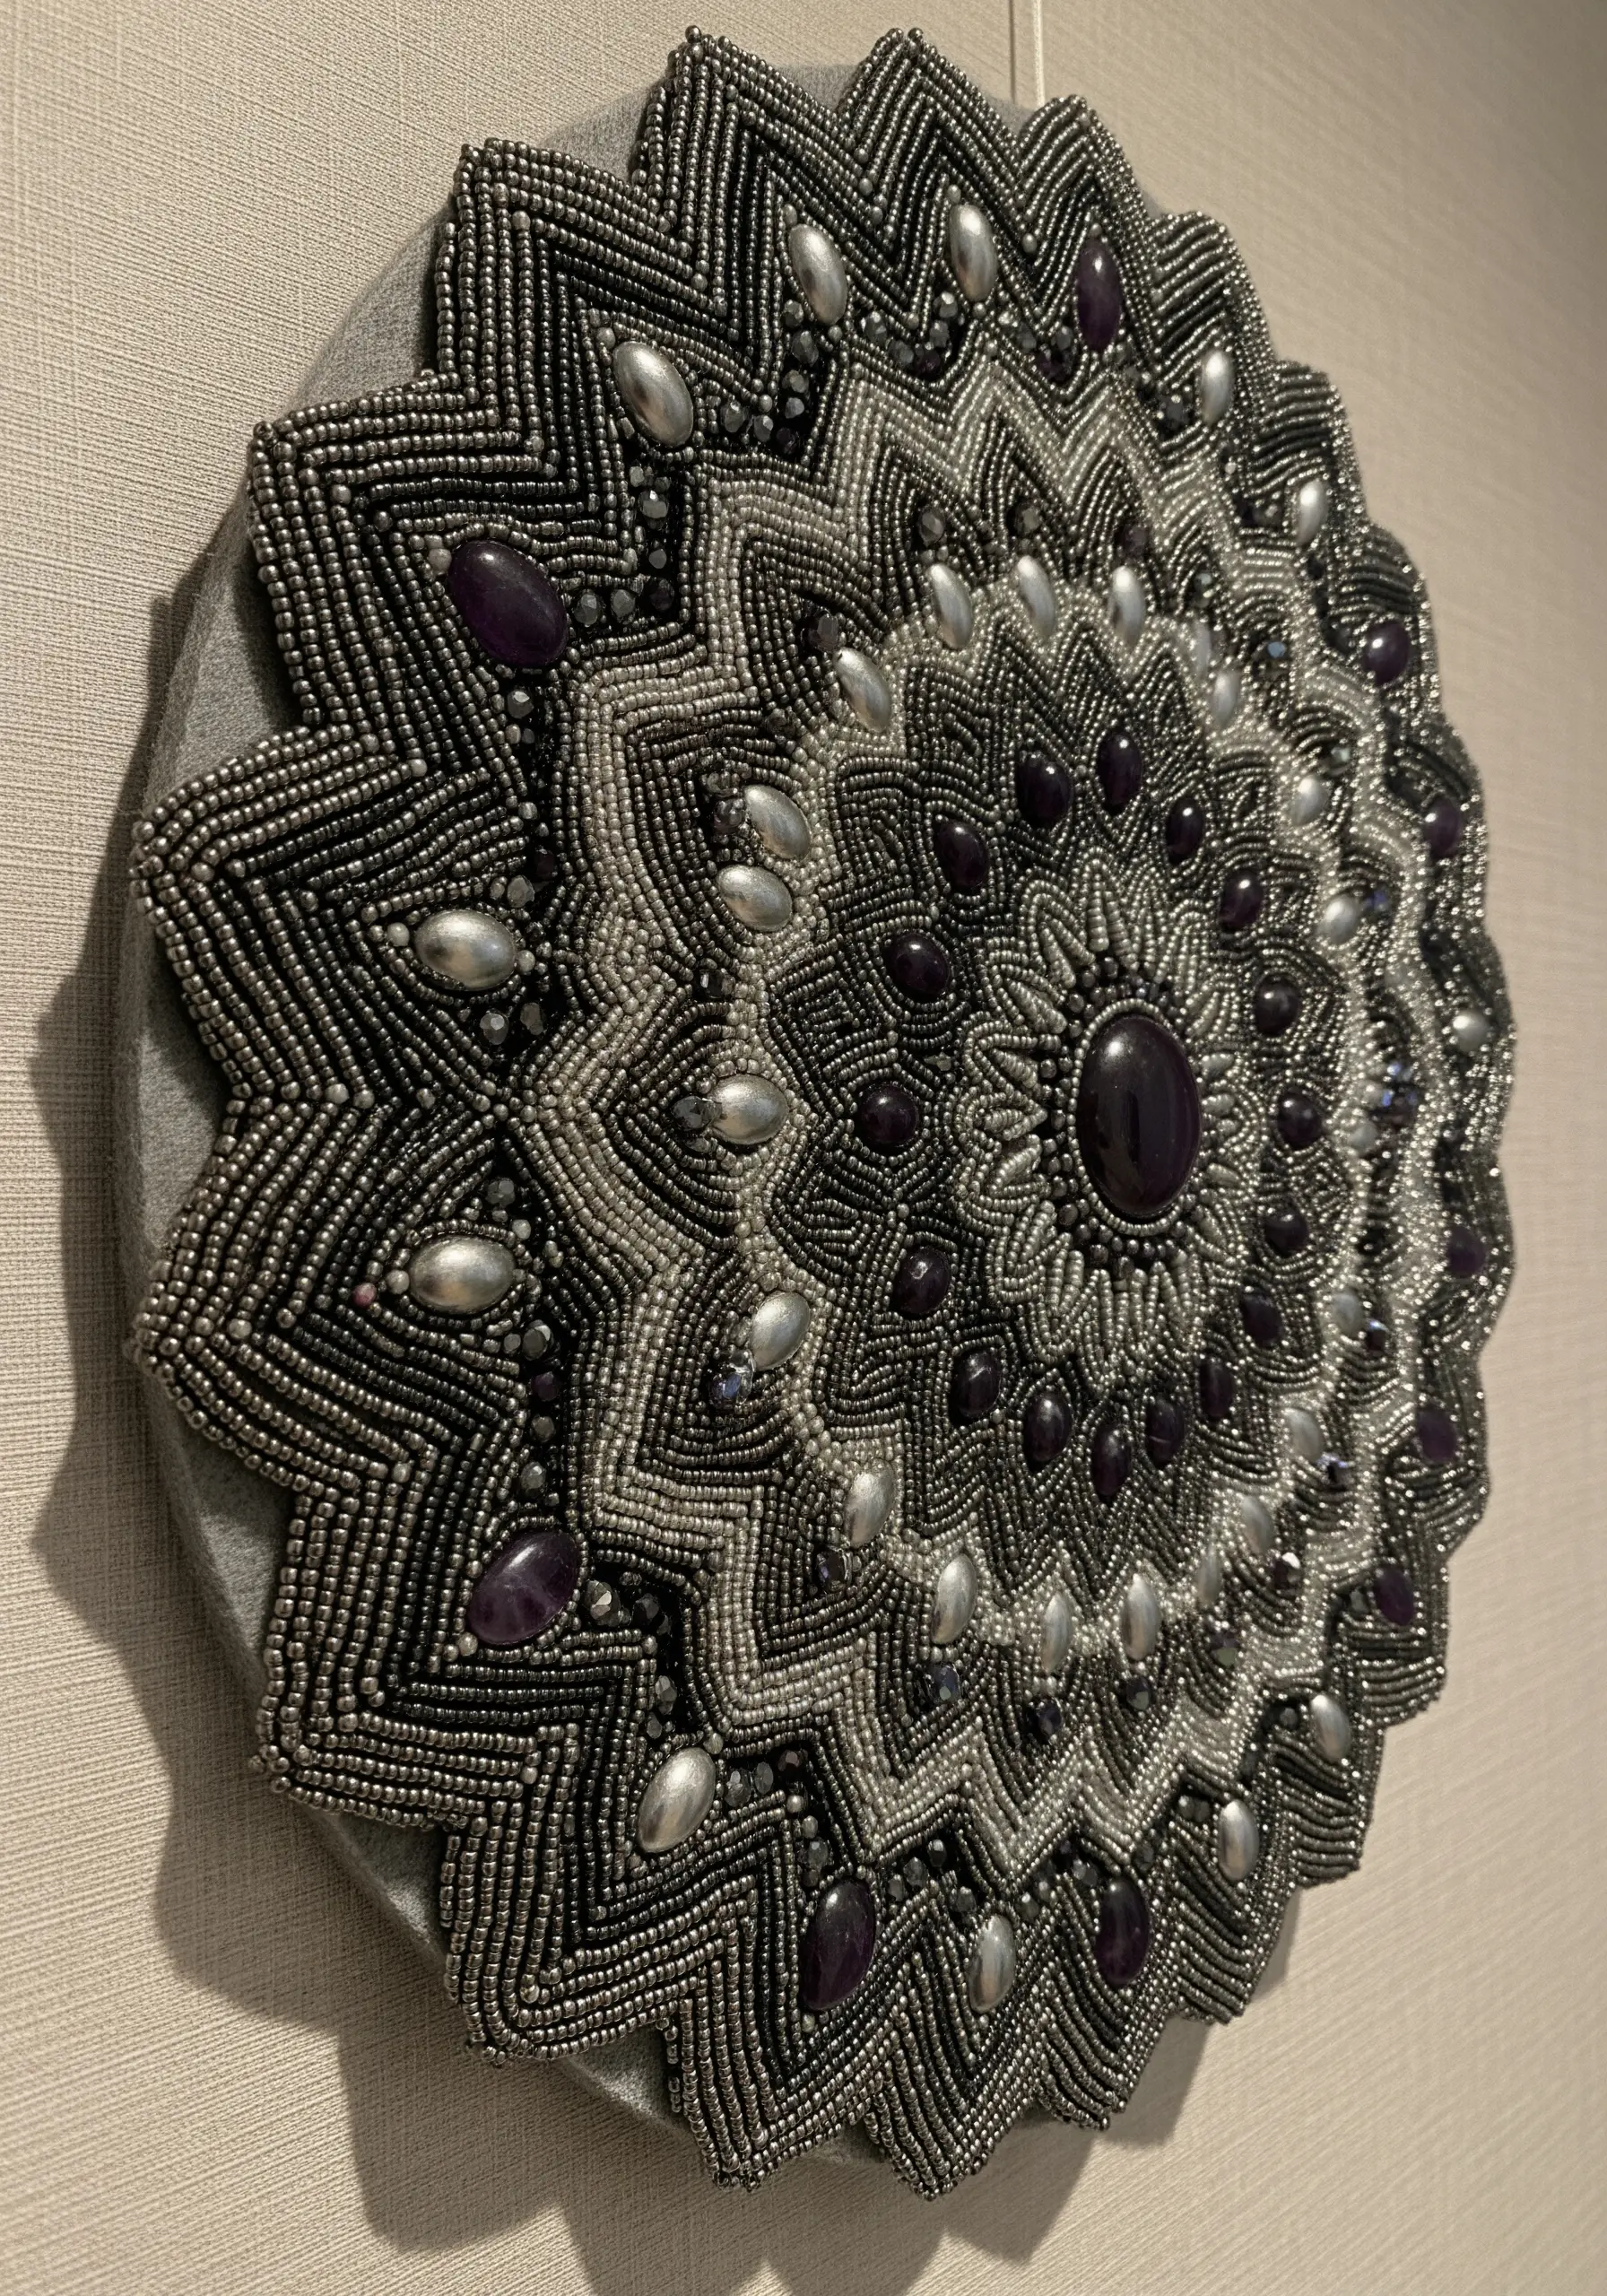
Elevate your mandala with the luxurious texture and weight of bead embroidery.
Use a sturdy beading needle and a strong nylon thread like Nymo. Outline your shapes with a backstitch, threading a bead onto each stitch.
Fill larger areas with concentric circles of beads, ensuring they sit snugly against one another for a dense, pavé effect.
Intersperse larger gemstone beads or crystals at key points in the design to create focal points and add a sophisticated sparkle.
21. Stained Glass Mandala for Window Display
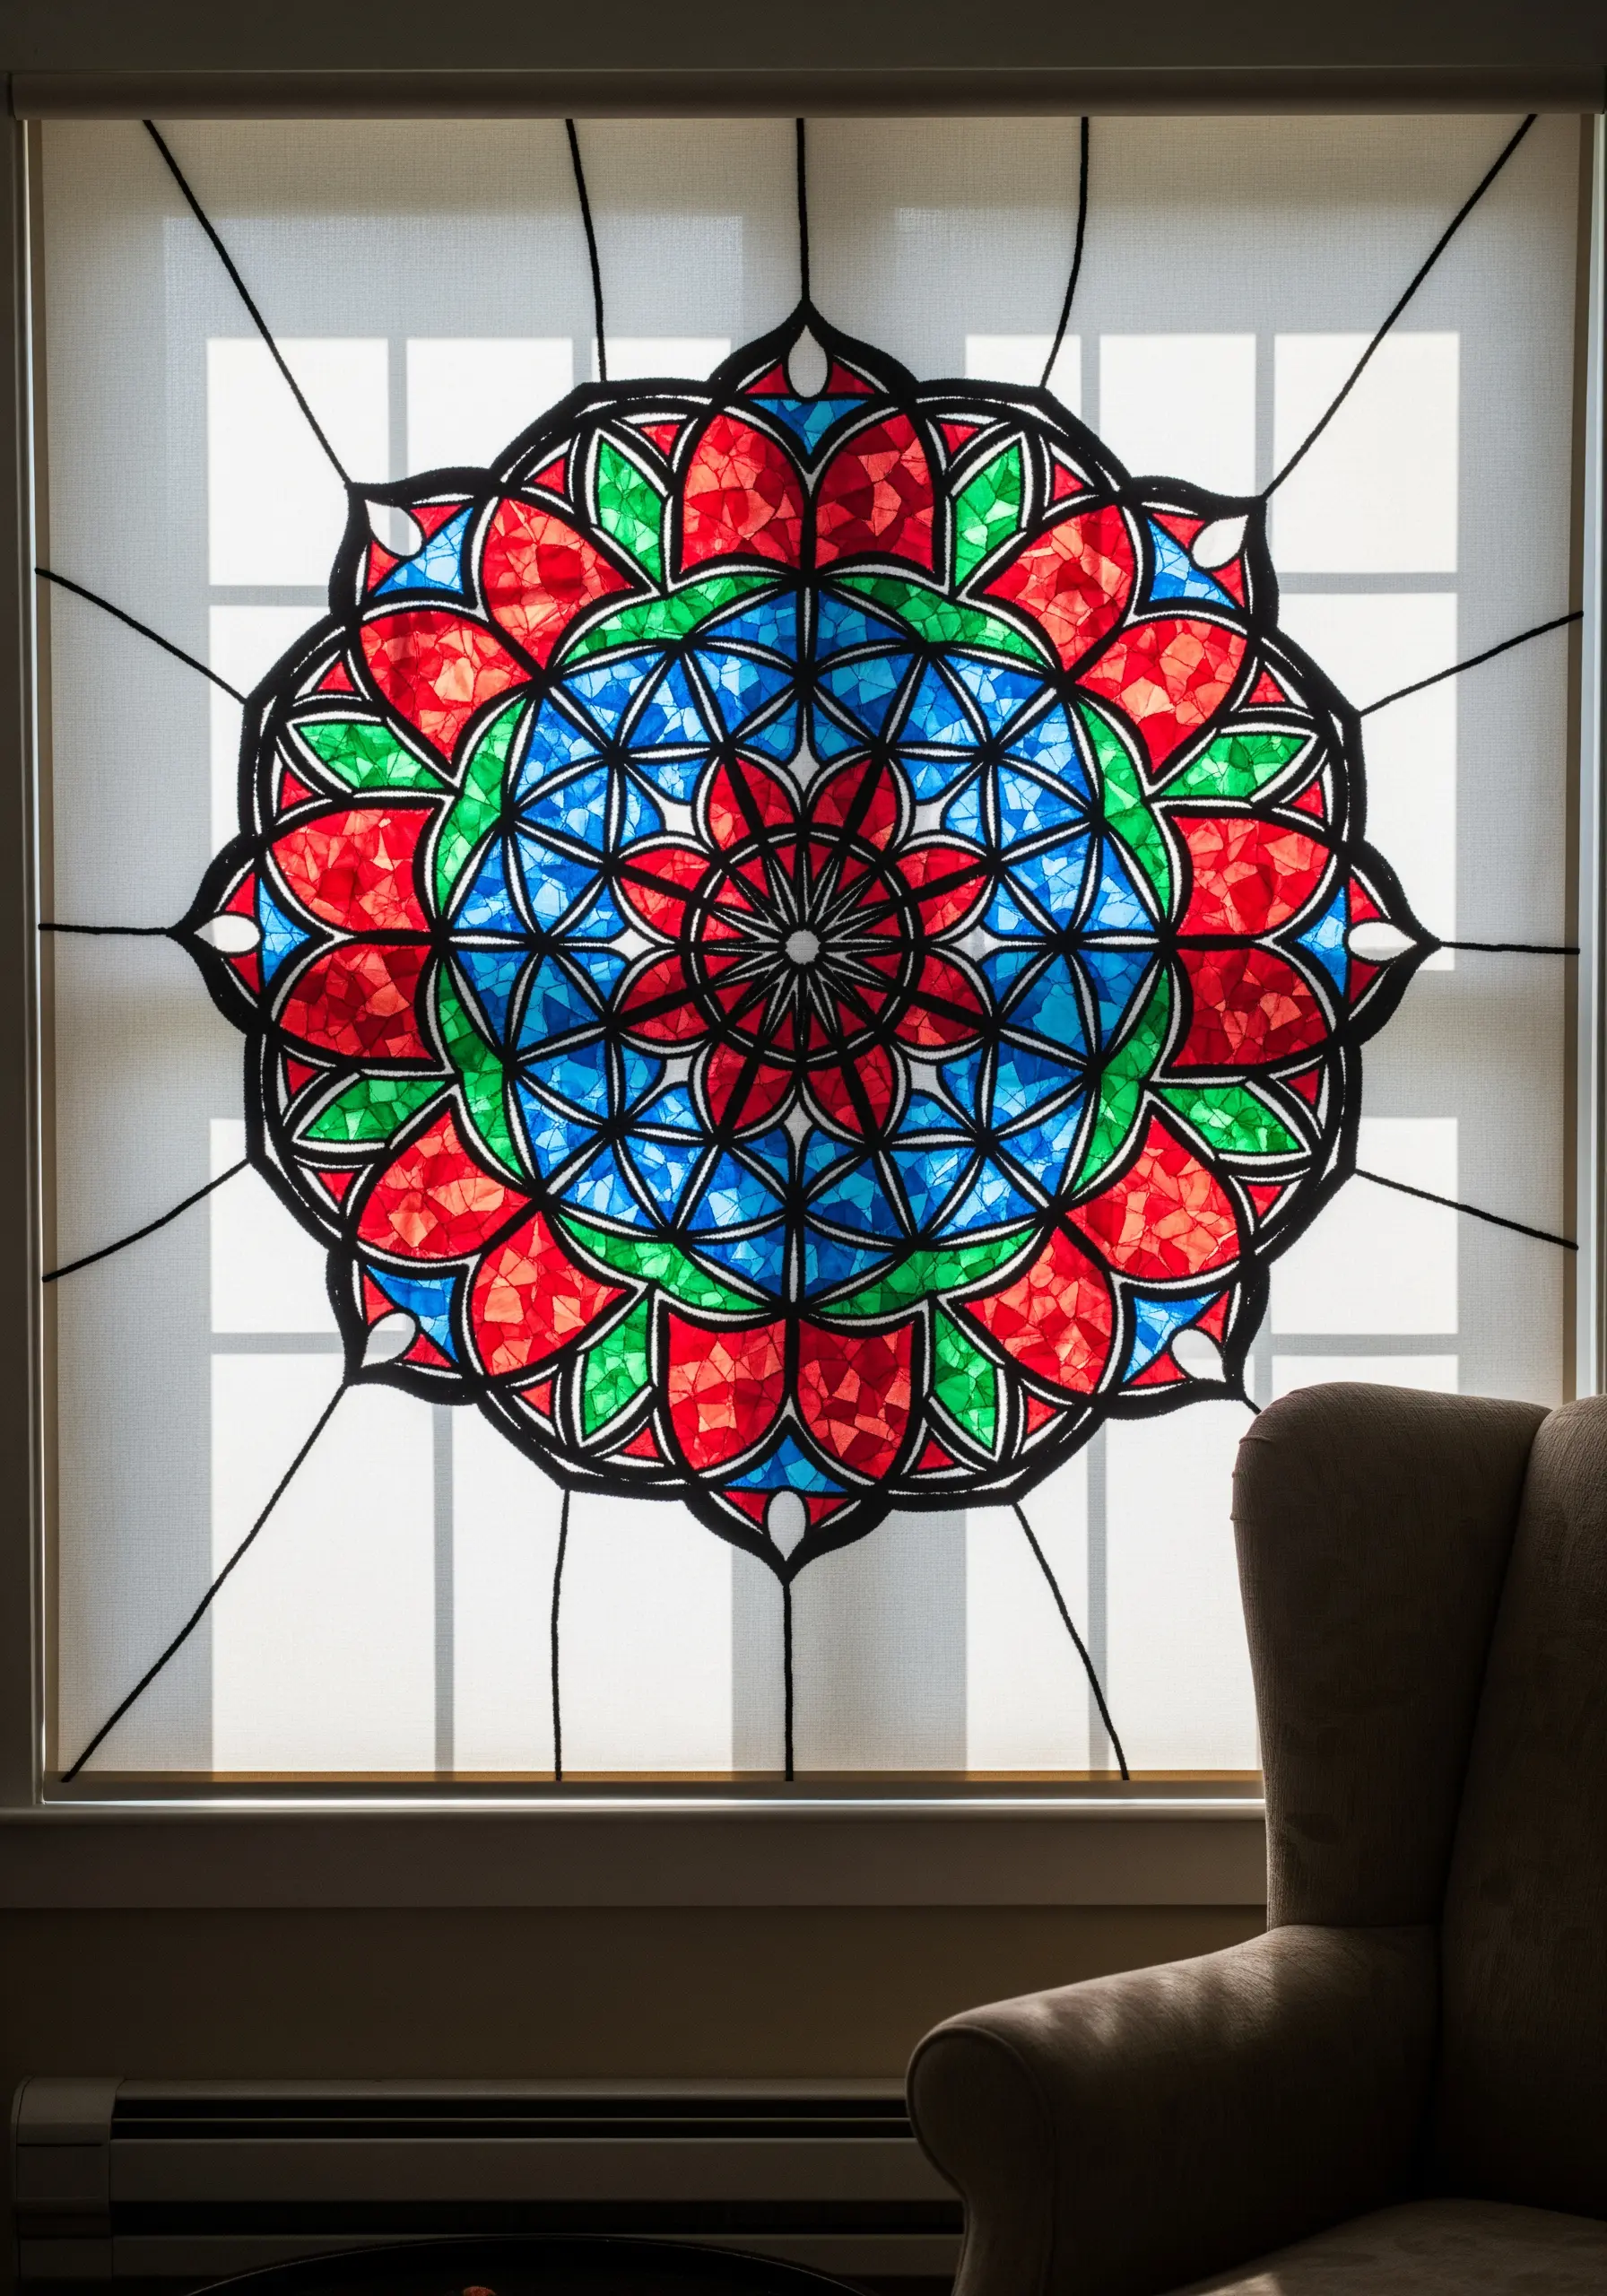
Recreate the luminous effect of stained glass by using bold outlines and vibrant fills.
First, stitch all the ‘lead’ lines using a thick, black whipped backstitch or a heavy chain stitch to define the sections clearly.
Then, fill each segment with jewel-toned floss using a smooth satin stitch. Ensure your stitches all lie in the same direction within each shape for a uniform, glass-like sheen.
When hung in a window, light will pass through the fabric, making the colors glow.
22. Zen Garden with Padded Stones and Raked Lines
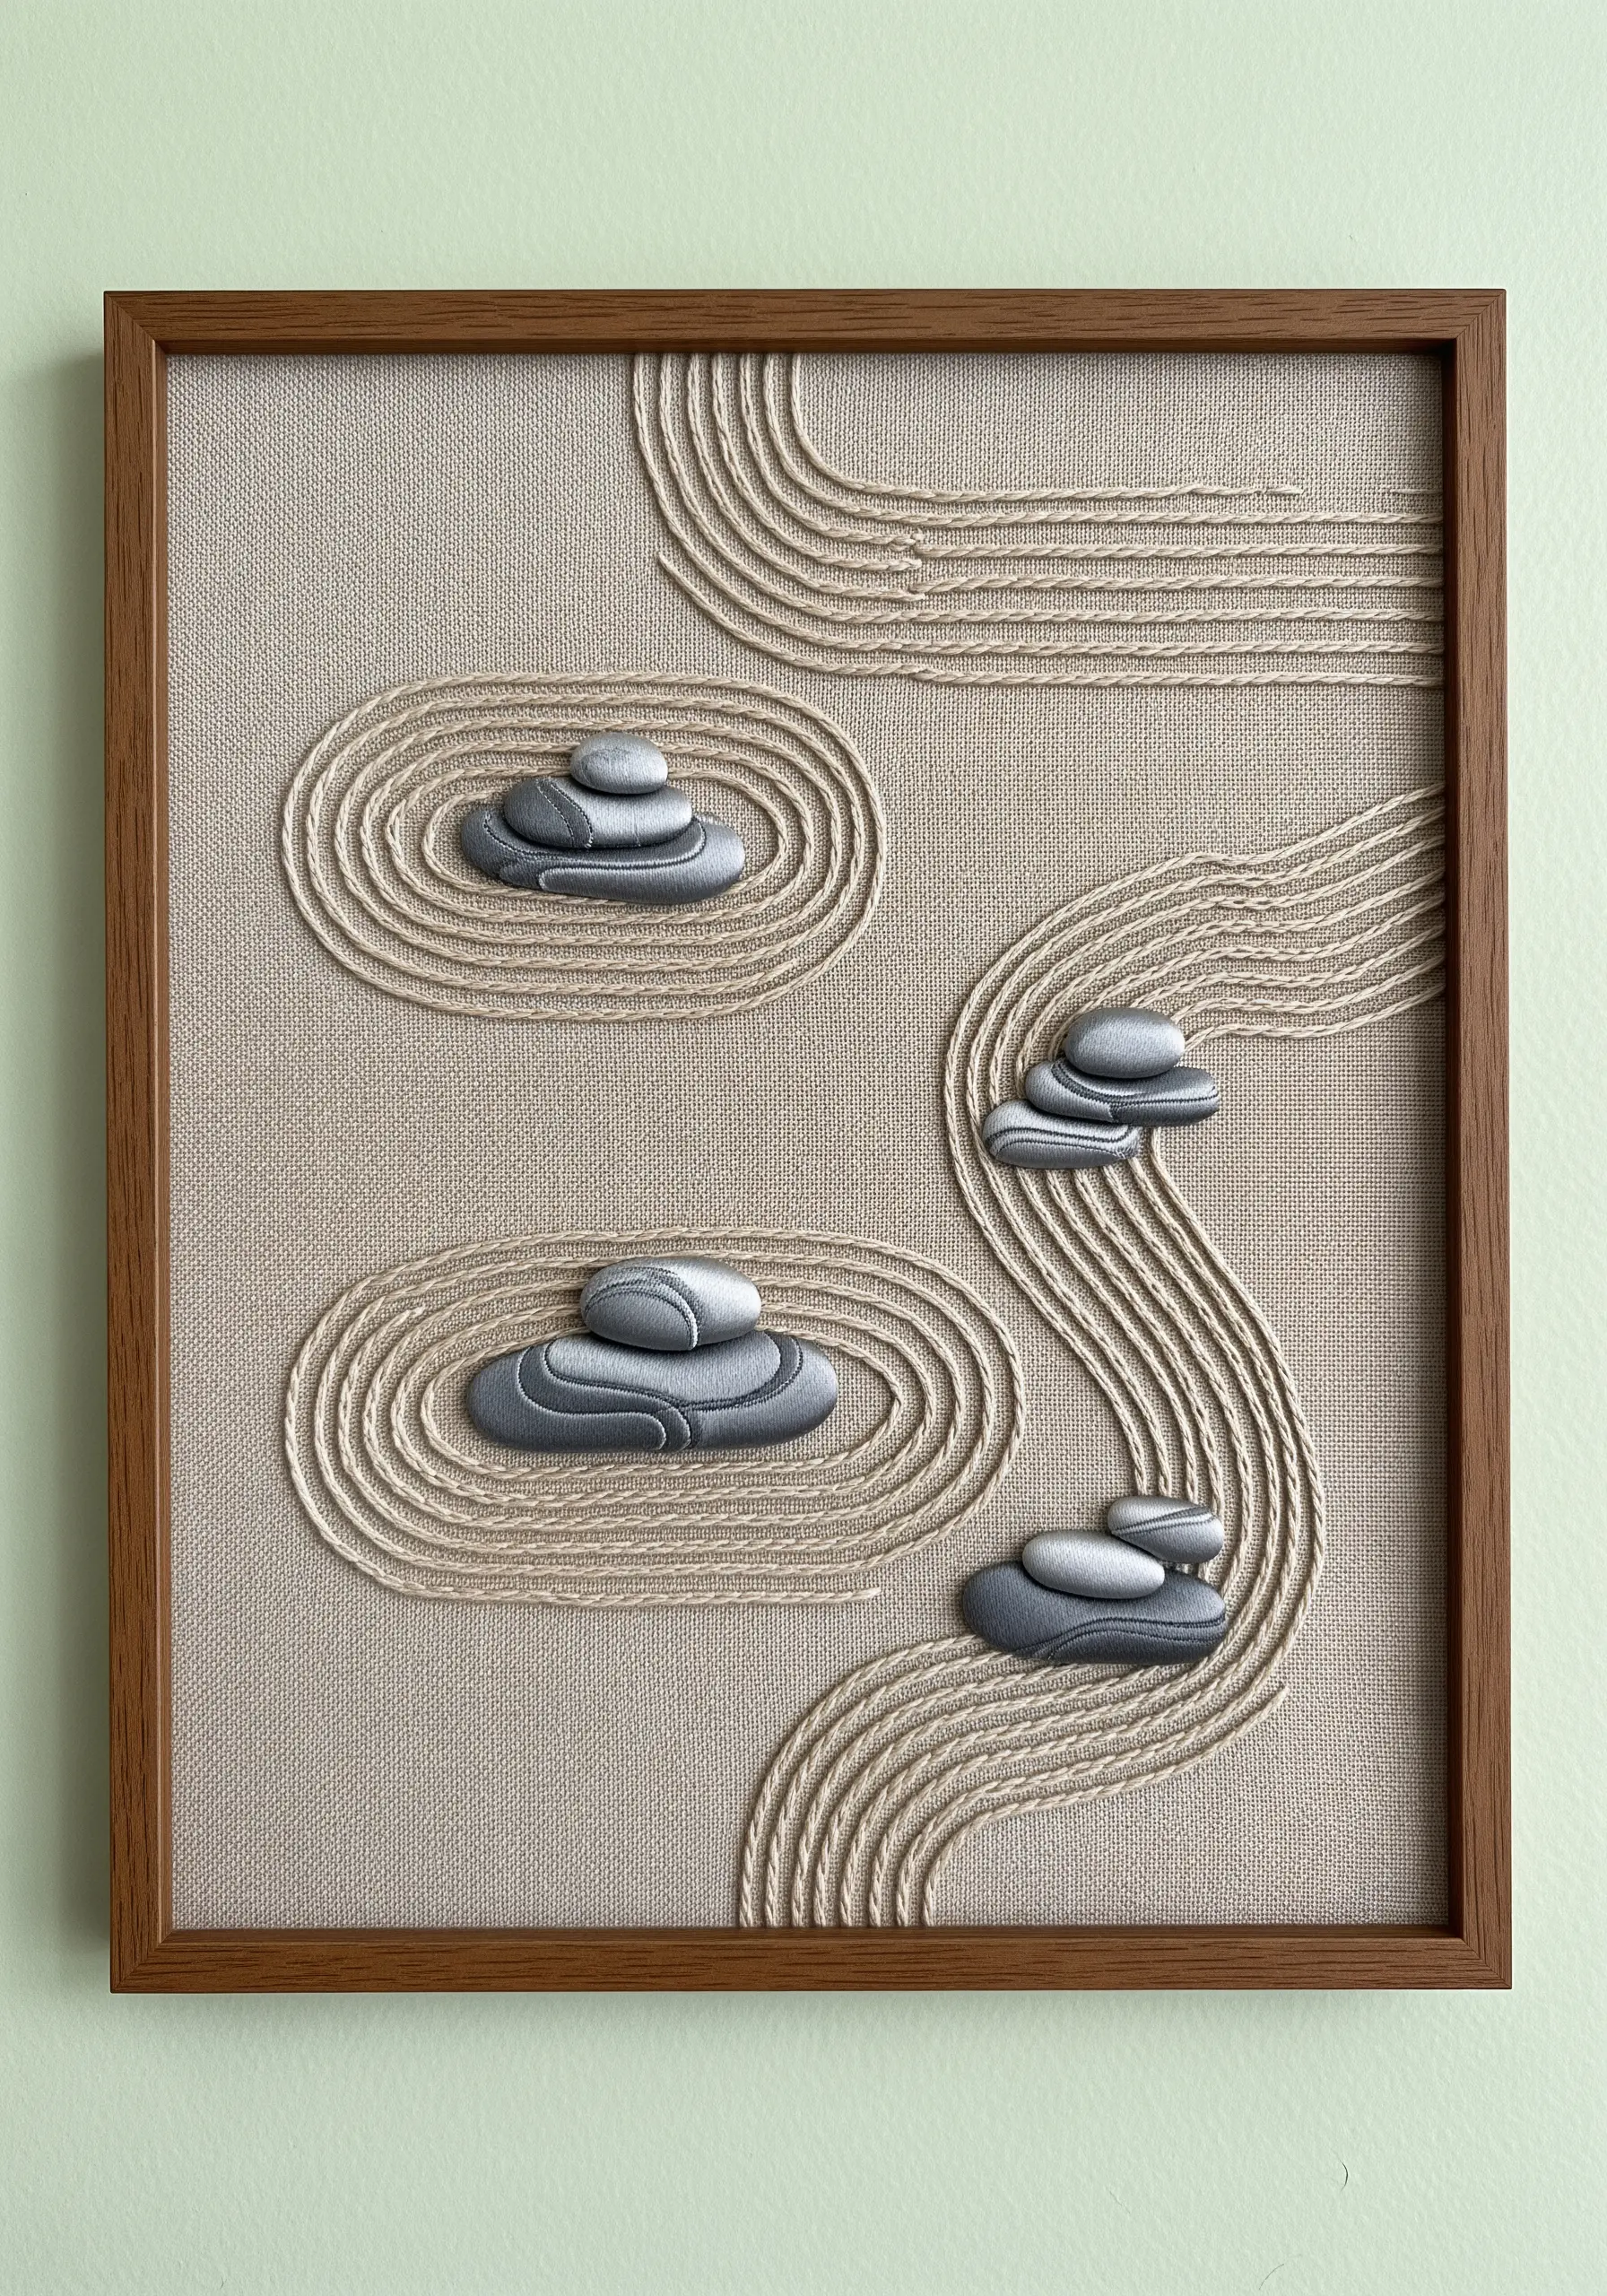
Evoke the tranquility of a zen garden by focusing on texture and form.
Create the raked sand effect with perfectly parallel rows of running stitch or backstitch using a neutral-colored thread.
For the stones, use a padded satin stitch. Create a small felt pad or a base of foundation stitches, then cover it with smooth, gray satin stitches to give the stones a pleasing, three-dimensional shape.
This minimalist composition is all about the interplay between line and form.
23. Four Seasons Mandala Wheel
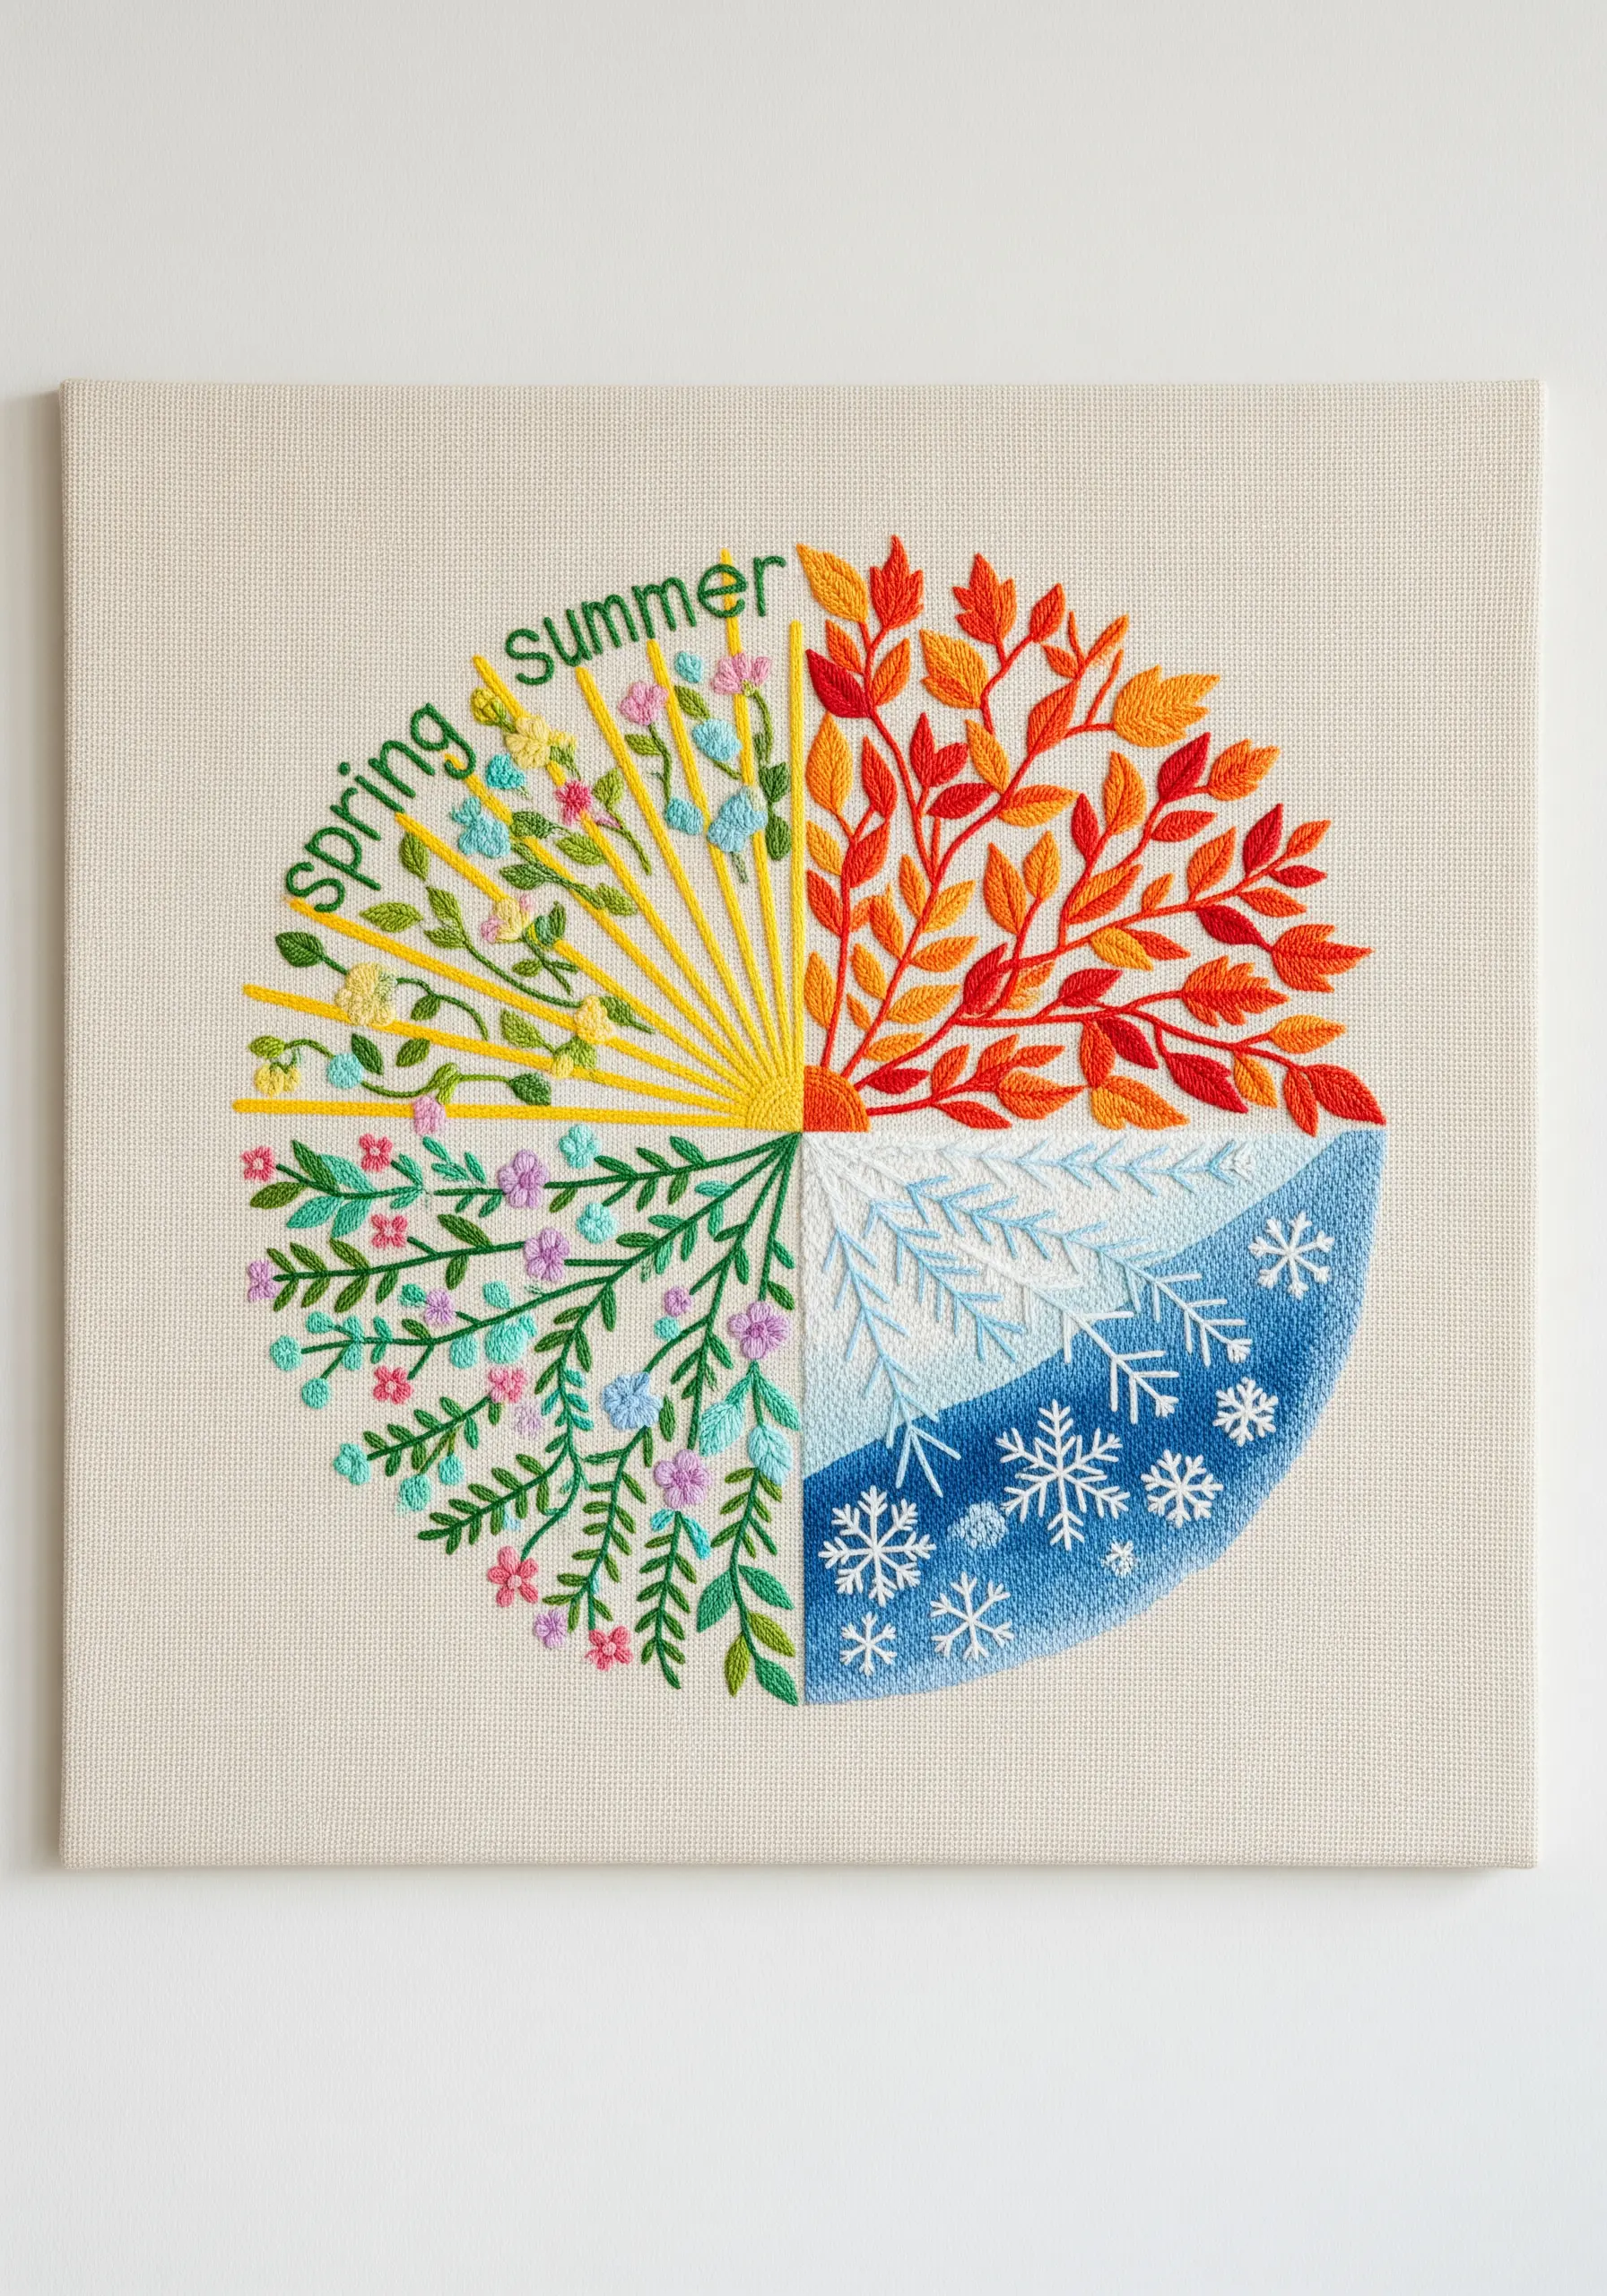
Tell a cyclical story within your mandala by dividing it into thematic quadrants.
Assign each of the four seasons a section and a distinct color palette—fresh greens for spring, warm reds for summer, muted oranges for autumn, and cool blues for winter.
Use simple, representative motifs for each season: lazy daisy flowers for spring, radiating straight stitches for the summer sun, fishbone stitch leaves for fall, and French knot snowflakes for winter.
This approach transforms a geometric shape into a narrative piece.
24. Chunky Woven Mandala on Burlap

Create a piece with significant tactile appeal by using chunky yarn and weaving techniques.
Mount a piece of sturdy burlap in a large hoop or on a frame. Use a large tapestry needle to couch thick wool roving or weave it directly through the open weave of the fabric.
A simple running stitch or couching is all you need to create concentric circles of incredible texture.
This method is perfect for creating large-scale yarn wall art projects inspired by geometric patterns quickly and effectively.
25. Sunburst Mandala with a Wrapped Hoop
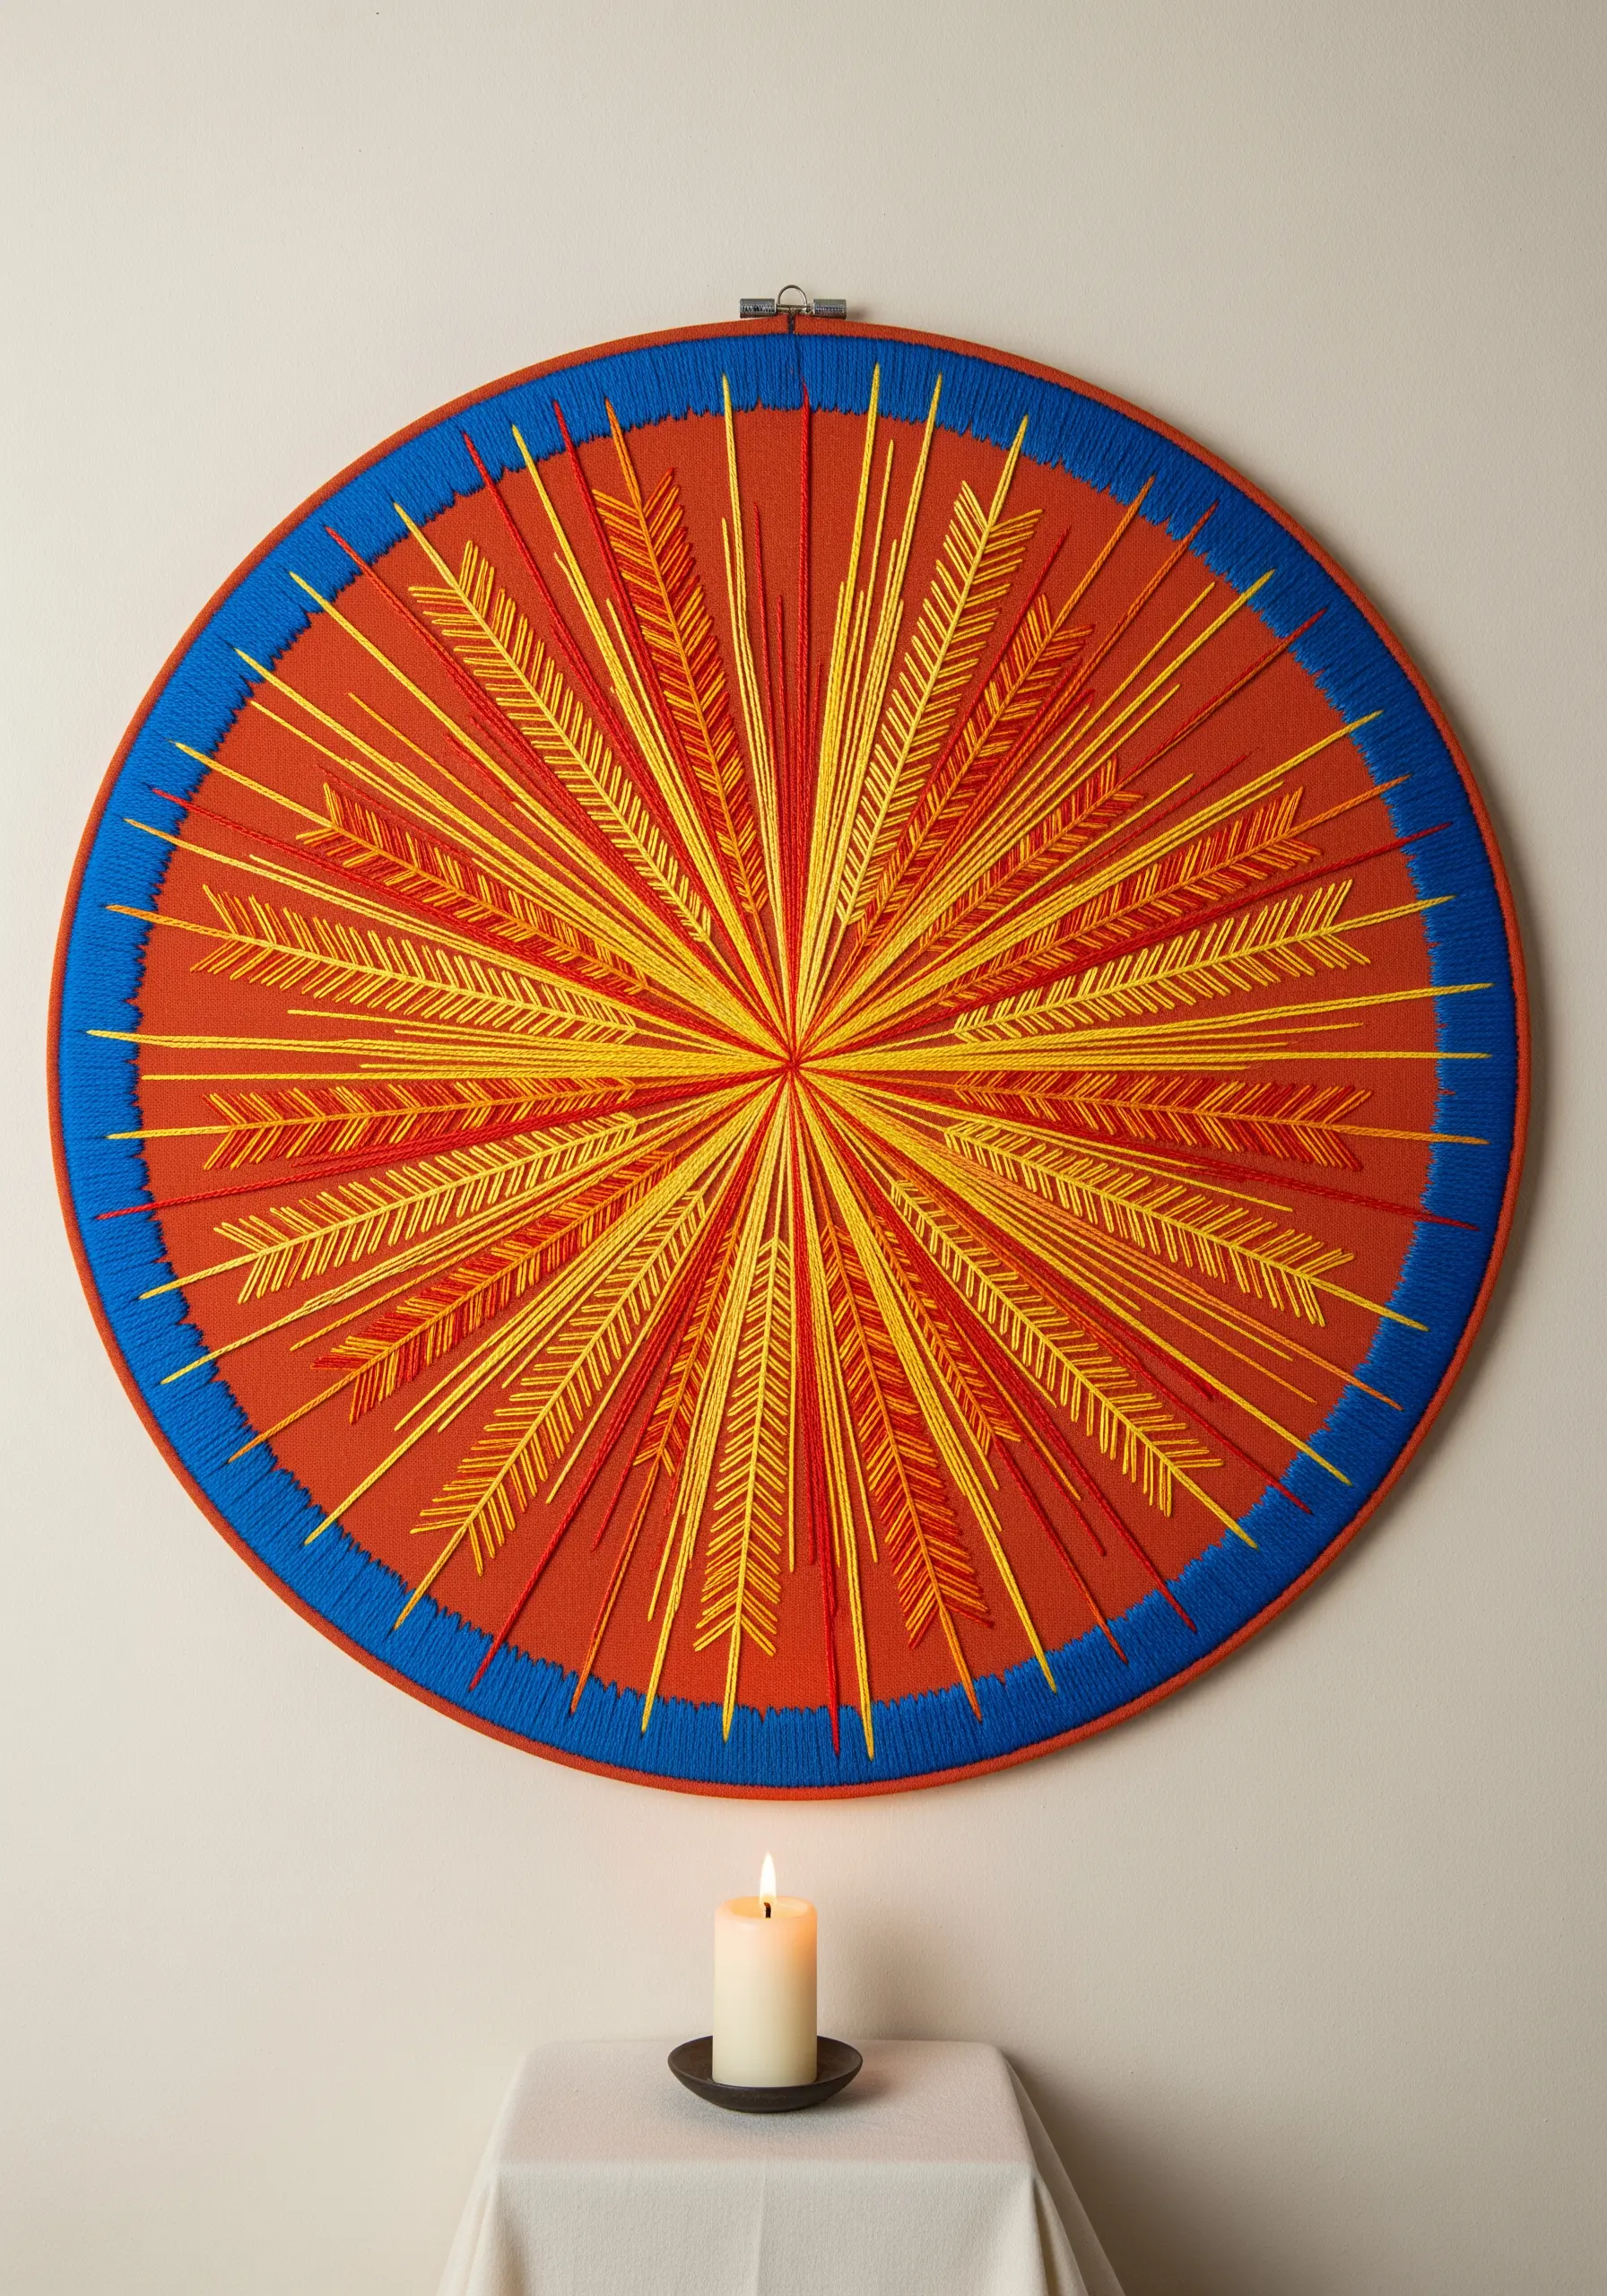
Integrate your embroidery hoop into the final design for a polished, cohesive finish.
Before you begin stitching, tightly wrap the outer ring of your hoop with a complementary color of yarn or embroidery floss, securing the ends with a dab of glue.
For the stitching, use bold, radiating straight stitches to create a dynamic sunburst effect.
The wrapped hoop acts as a frame that feels intentional and enhances the overall color story of your piece.
26. Serene Lotus Pond in Padded Satin Stitch
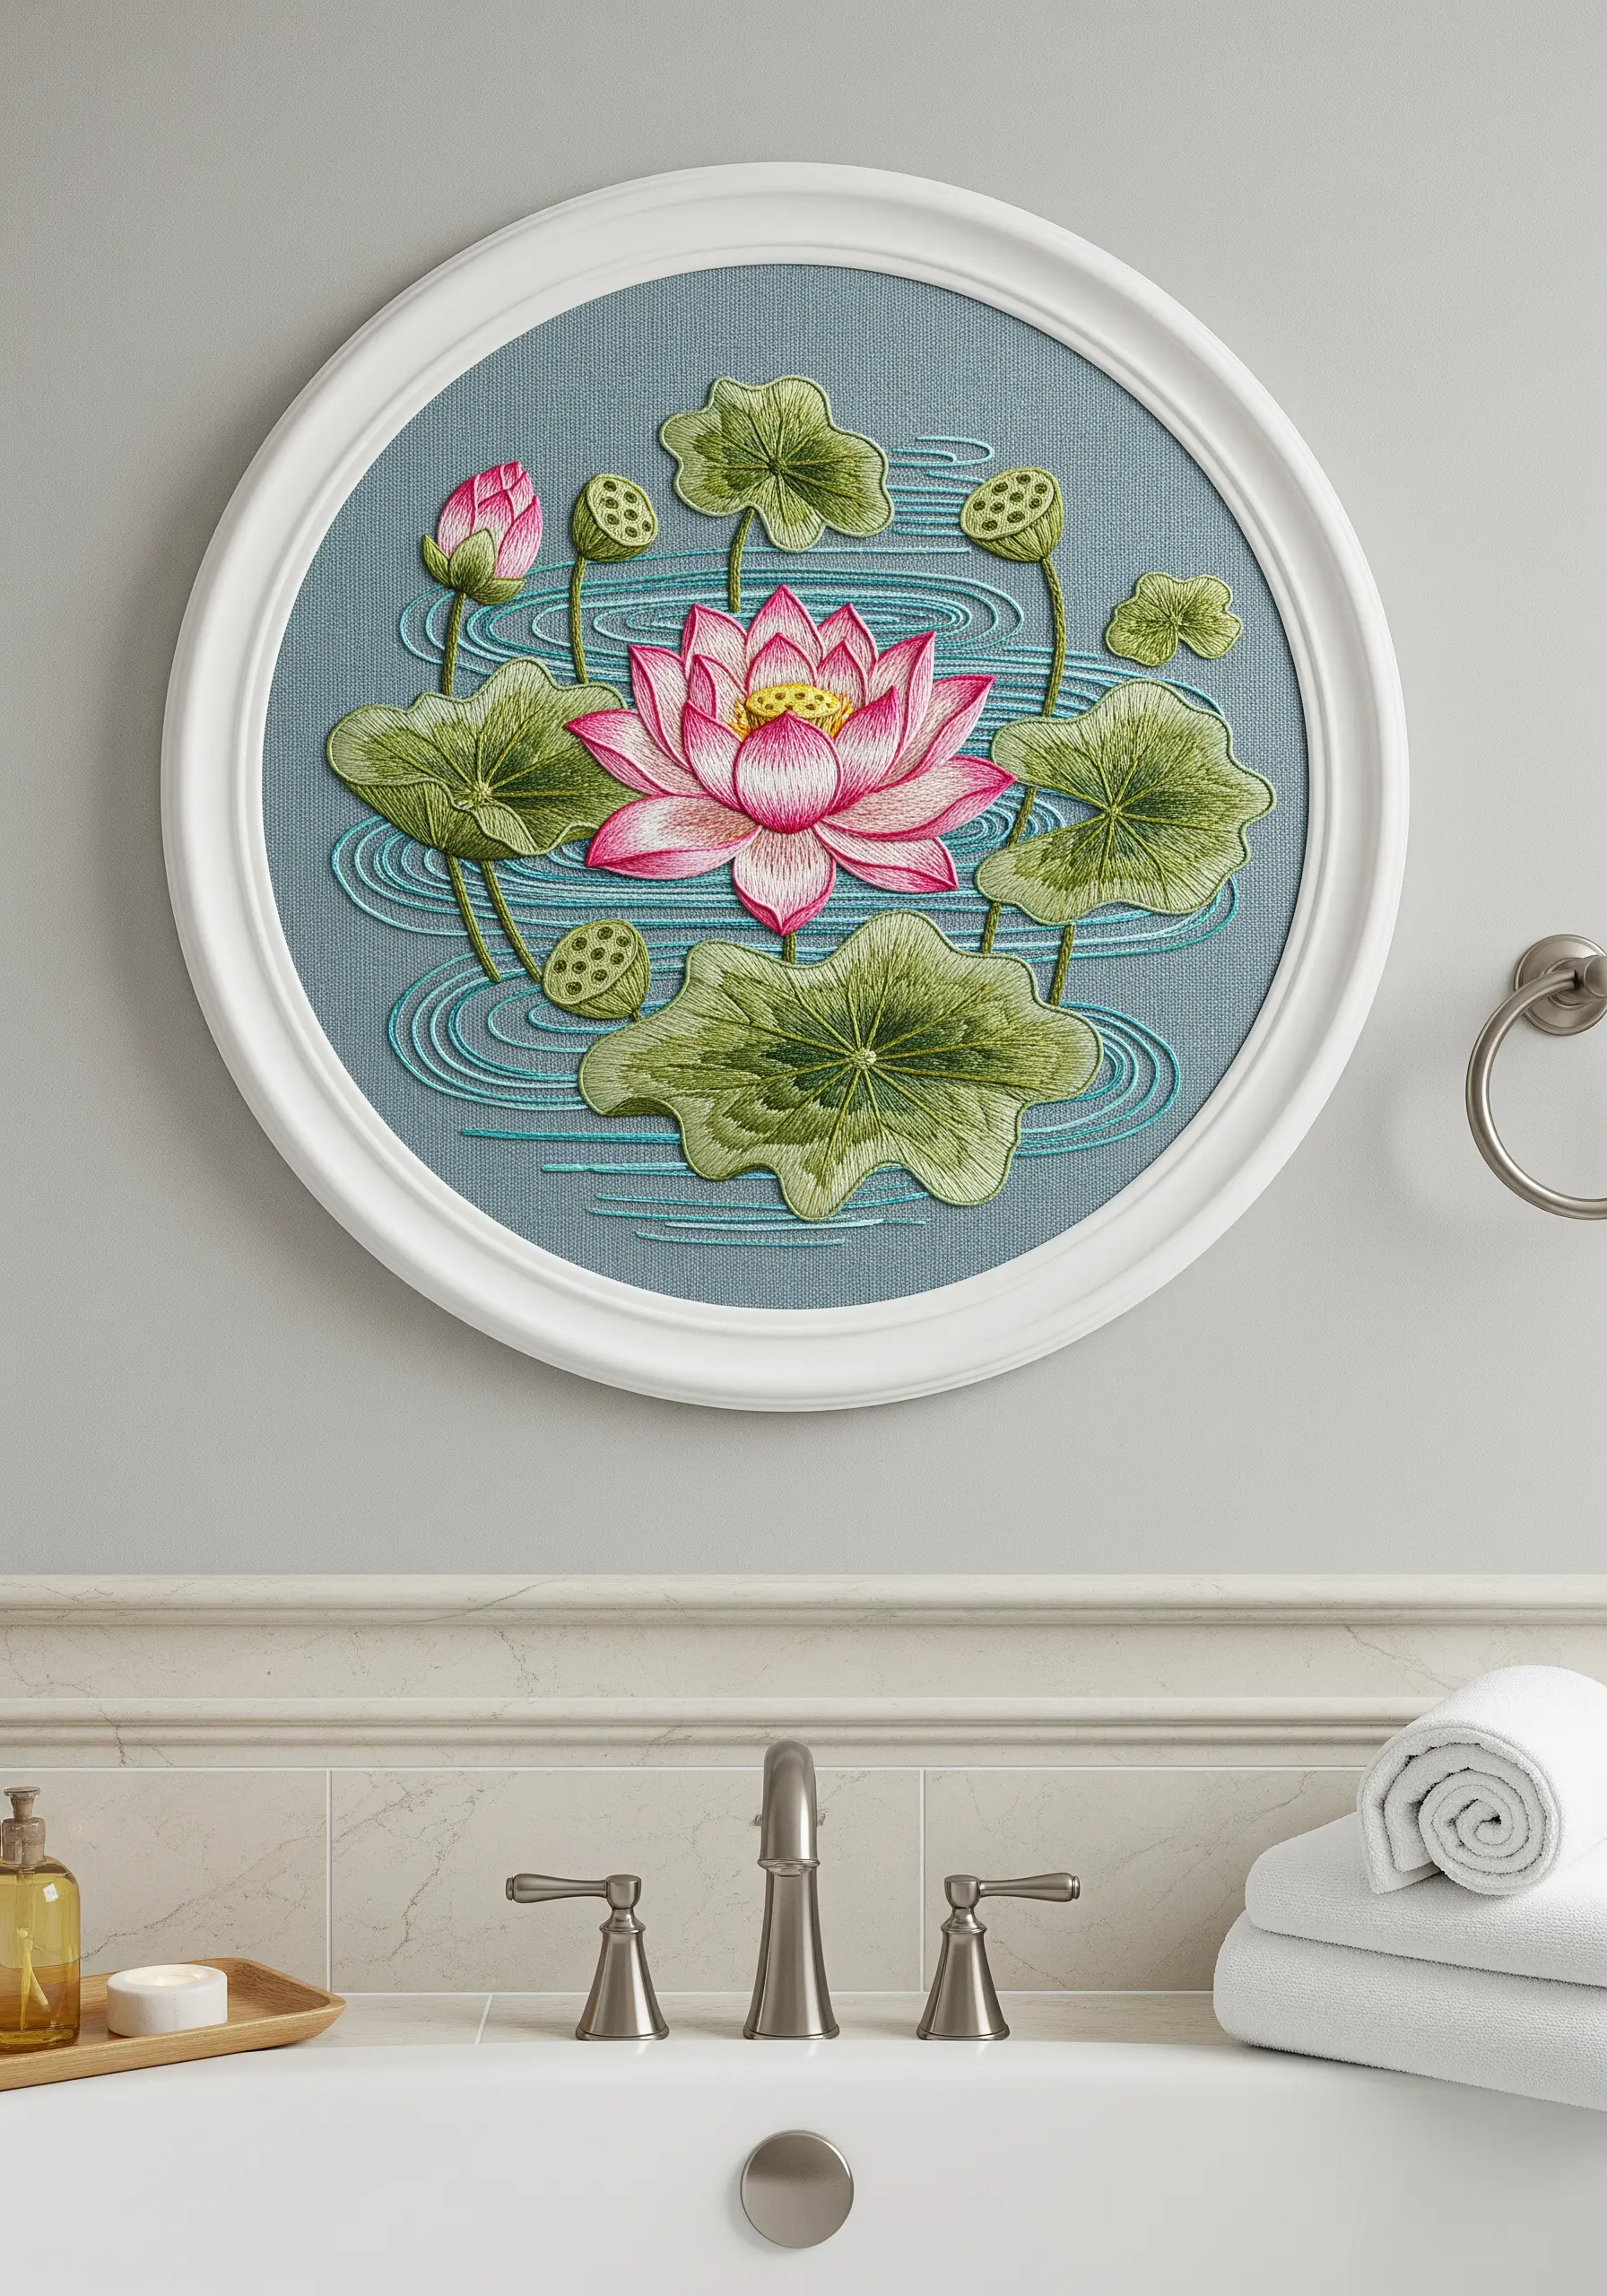
Create a sense of depth and realism using padded satin stitch for your primary elements.
Build up the shapes of the lotus flower and lily pads with a layer of foundation stitches or small pieces of felt before covering them with smooth satin stitch.
This lifts them from the background, making them appear to float on the water’s surface.
For the water itself, use simple, concentric lines of split stitch in a slightly darker shade to create the illusion of gentle ripples.
27. Intricate Blackwork Geometric Mandala
Explore the meditative quality of blackwork, where complex patterns are built from simple straight stitches.
Choose a fine thread (one or two strands) and an evenweave fabric like linen or Aida, which helps in keeping your geometric patterns precise.
Fill the sections of your mandala with different repeating blackwork patterns—like grid, diamond, or cross motifs—to create a design rich in texture and detail.
The monochromatic scheme allows the intricate stitchwork to be the star.
28. Golden Om Mandala on Silk

For a design with spiritual significance, elevate it with luxurious materials and flawless technique.
Stitch on a luminous fabric like silk or satin, using a stabilizer to prevent puckering.
Use a high-quality metallic thread for the Om symbols and outlines. To achieve a perfectly smooth satin stitch, use a laying tool or the side of your needle to ensure each strand of floss lies flat and parallel to the next.
This meticulous attention to detail results in a finish that truly glows.
29. Monochromatic Mandala with Varied Textures
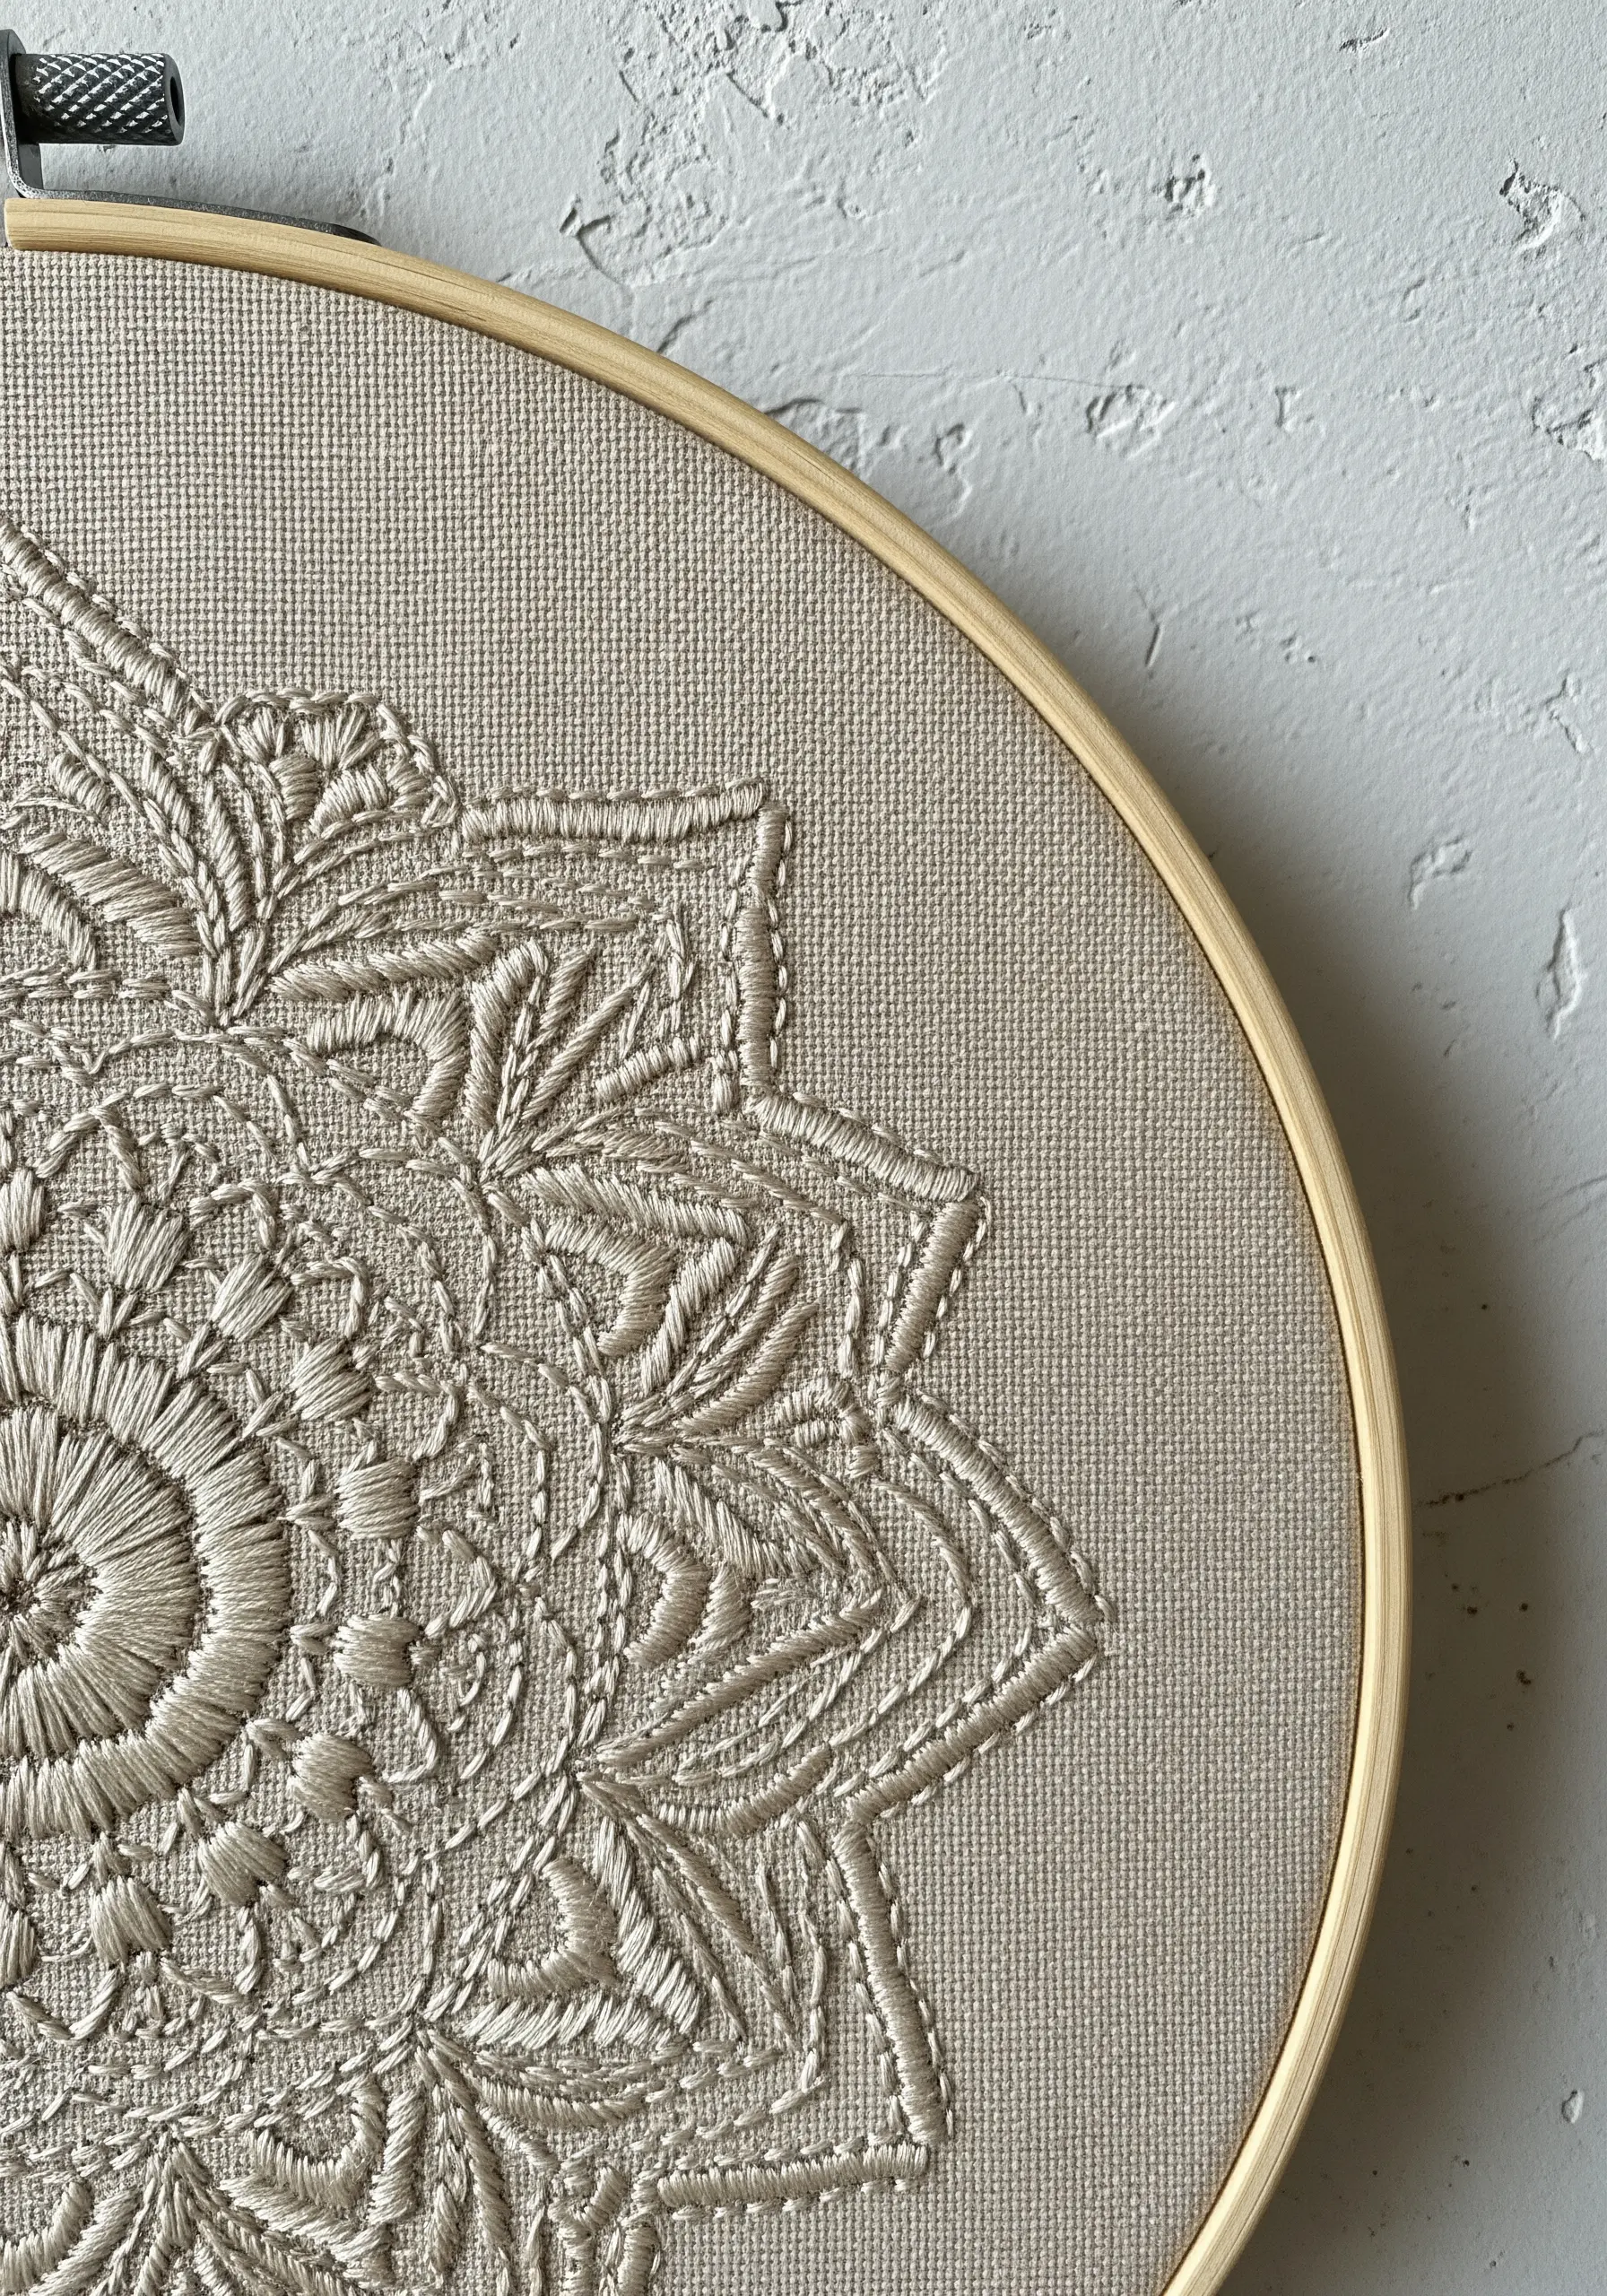
Create a sophisticated and tactile piece by focusing entirely on texture, using just one color.
Select a single shade of thread and a matching fabric. Then, assign a different stitch to each section of your mandala—use satin stitch for smooth areas, French knots for bumpy texture, chain stitch for bold outlines, and seed stitch for light fills.
This technique encourages the viewer to look closer and appreciate the rich interplay of light and shadow across the different surfaces, proving that you don’t need color to create a dynamic design.
30. Flowing Yin-Yang with Couched Yarn
Capture the essence of fluidity and movement using couching with variegated yarn.
Lay down strands of yarn in swirling patterns that follow the curves of your design. Then, use a single strand of coordinating embroidery floss to tack the yarn in place with small, evenly spaced stitches.
This technique allows you to create bold, painterly strokes of texture and color that would be impossible with traditional embroidery stitches.
The result is a piece that feels both dynamic and balanced.
31. Color-Blocked Lotus with Clean Outlines
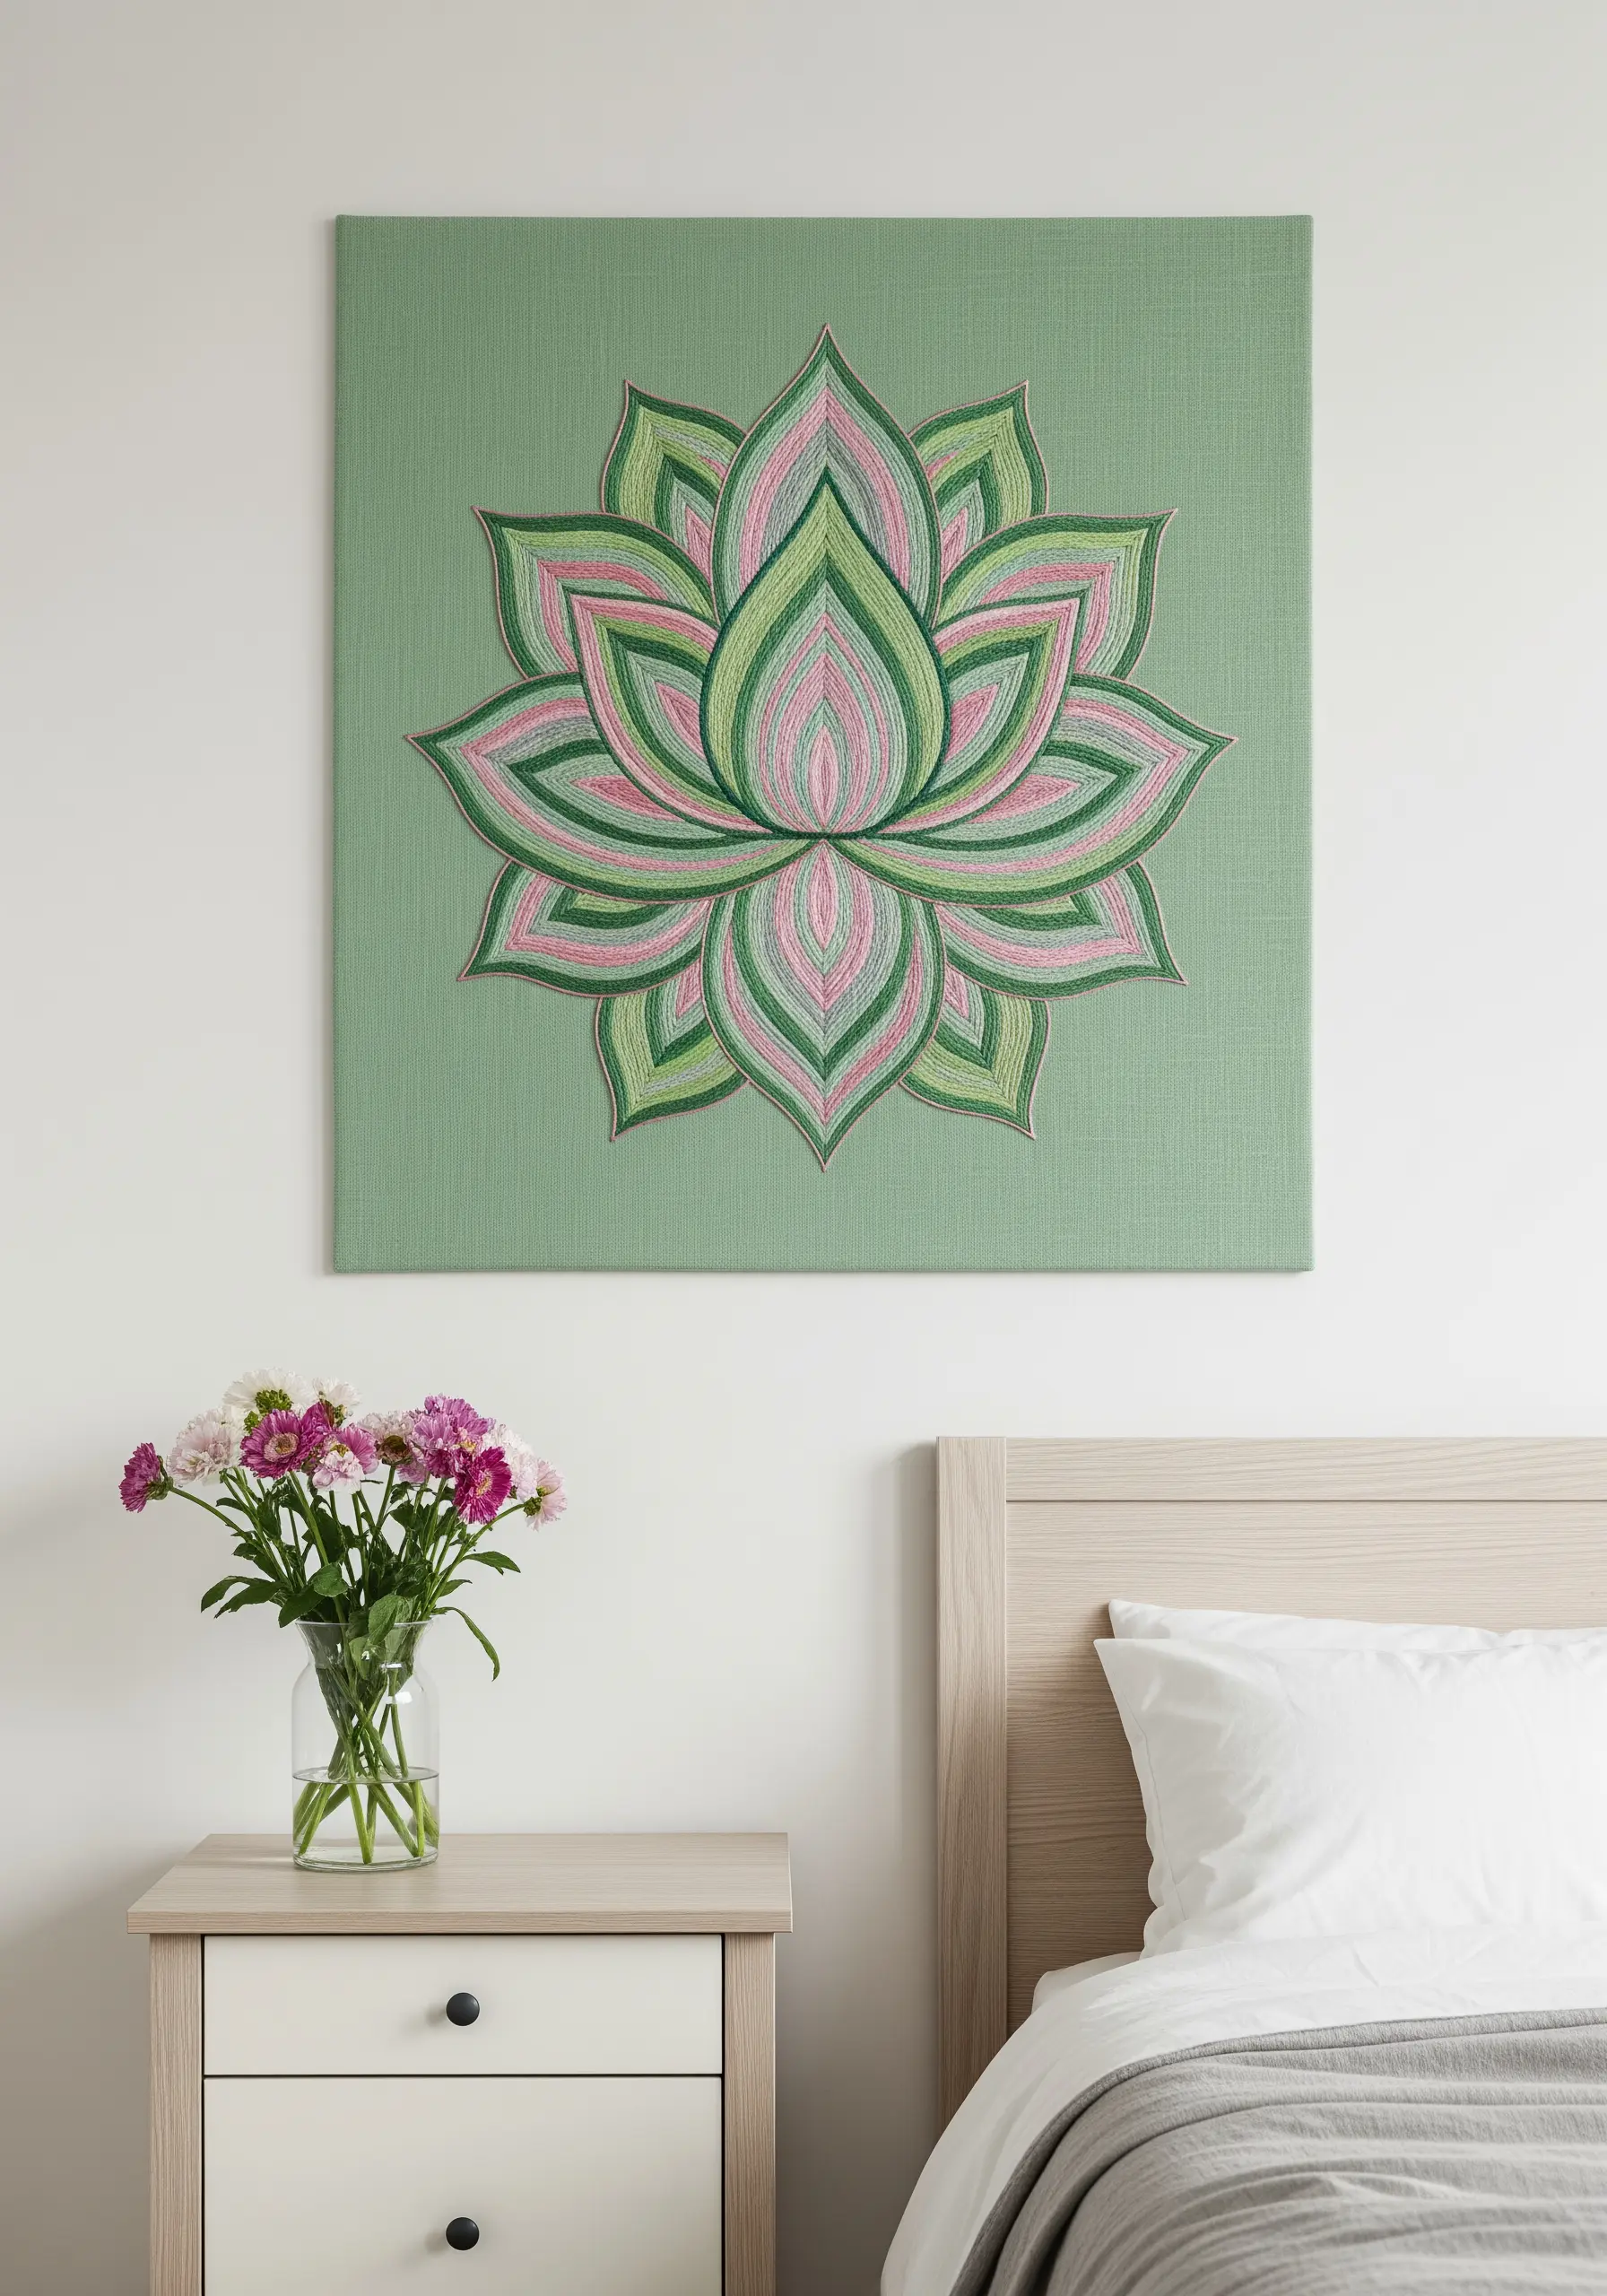
Achieve a modern, graphic aesthetic by using bold color-blocking within your mandala.
Define each petal and section with a crisp backstitch or stem stitch outline in a contrasting color like dark green or gray.
Then, fill each shape with a solid, consistent satin stitch. The key is to keep your fill stitches perfectly parallel and contained within the outlines.
This approach gives the traditional lotus motif a clean, contemporary update that feels both calm and vibrant.
32. Folk Art Mandala with Simple, Expressive Stitches
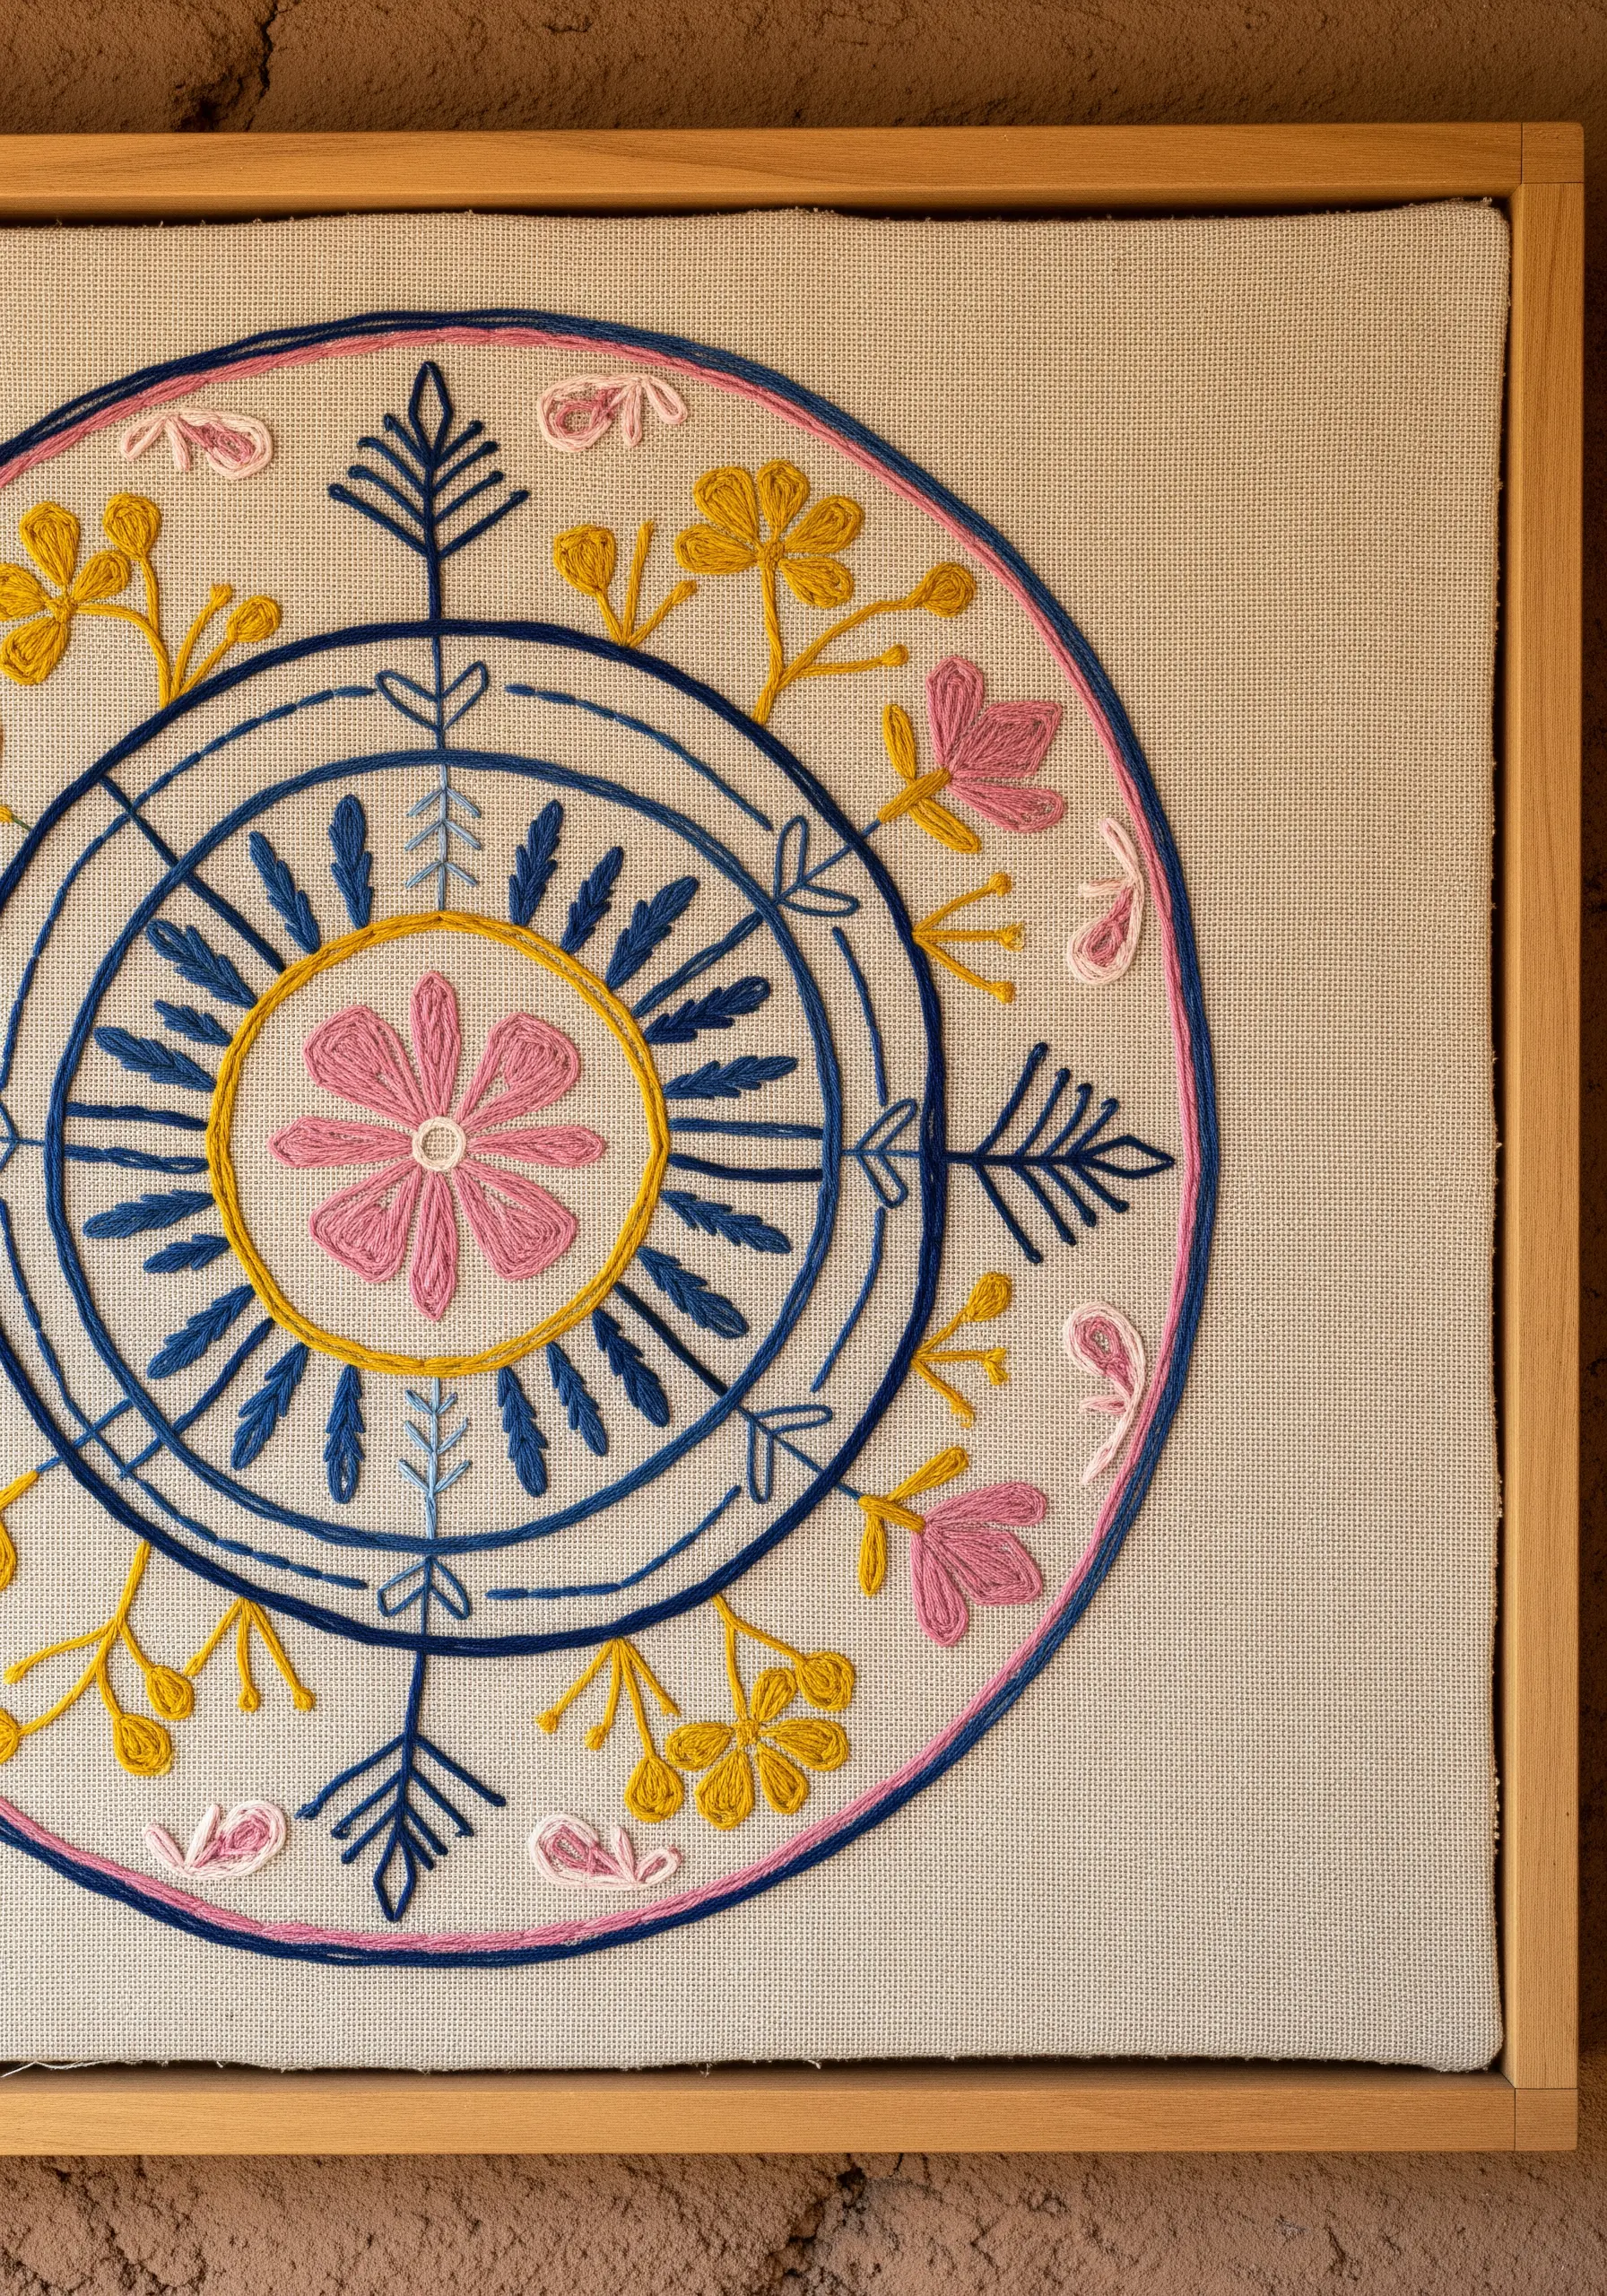
Embrace a charming, rustic aesthetic by using simple stitches and a playful color palette.
Rely on foundational stitches like chain stitch for outlines, lazy daisy stitch for petals, and straight stitches for accents.
Using a slightly thicker thread, like a #8 perle cotton or all six strands of floss, will enhance the design’s handmade, folk art quality.
This style is less about perfect precision and more about expressive, joyful mark-making.
33. Cathedral Rose Window in Fine Detail
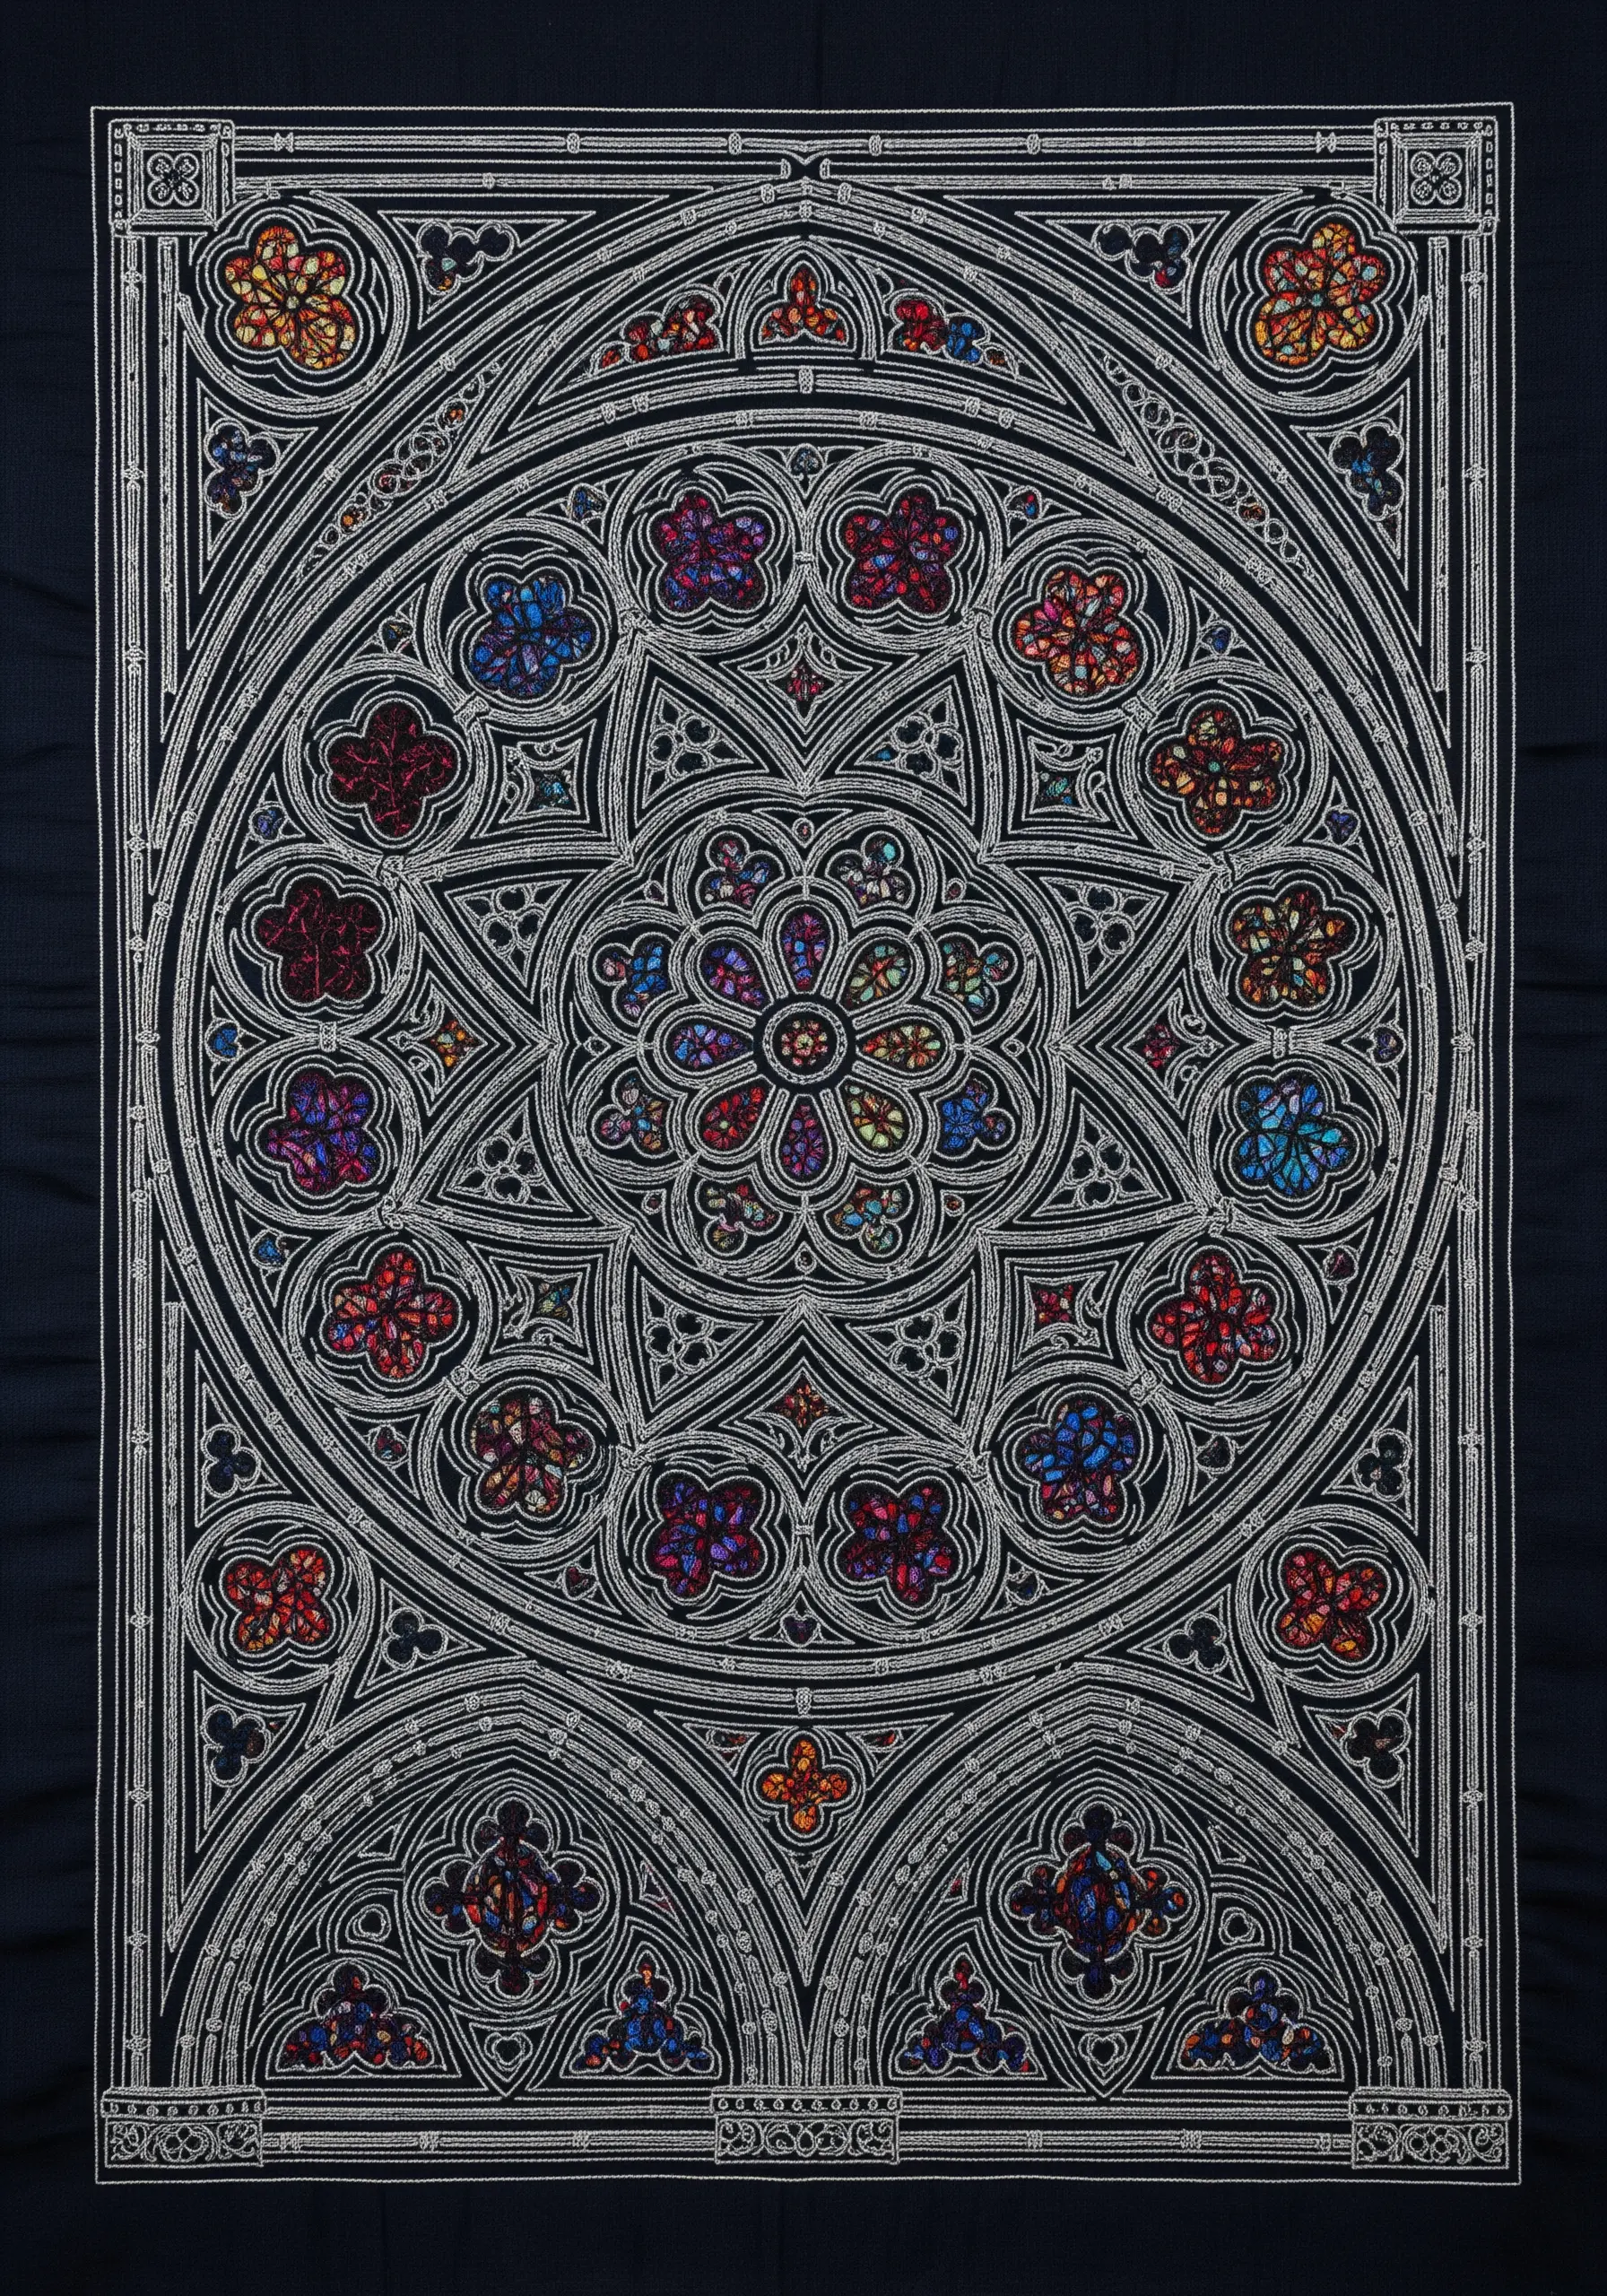
To capture the delicate intricacy of a cathedral window, your approach must be precise and patient.
Use a single strand of a light-colored floss (like white or silver) on a dark background fabric to mimic the stone tracery.
Stitch the entire framework with a tiny, meticulous backstitch or split stitch. Then, add pops of color in the small panes with just a few satin stitches or seed stitches in jewel tones.
The contrast between the delicate white framework and the rich color accents is what creates the stunning illusion.
34. Minimalist Radial Mandala
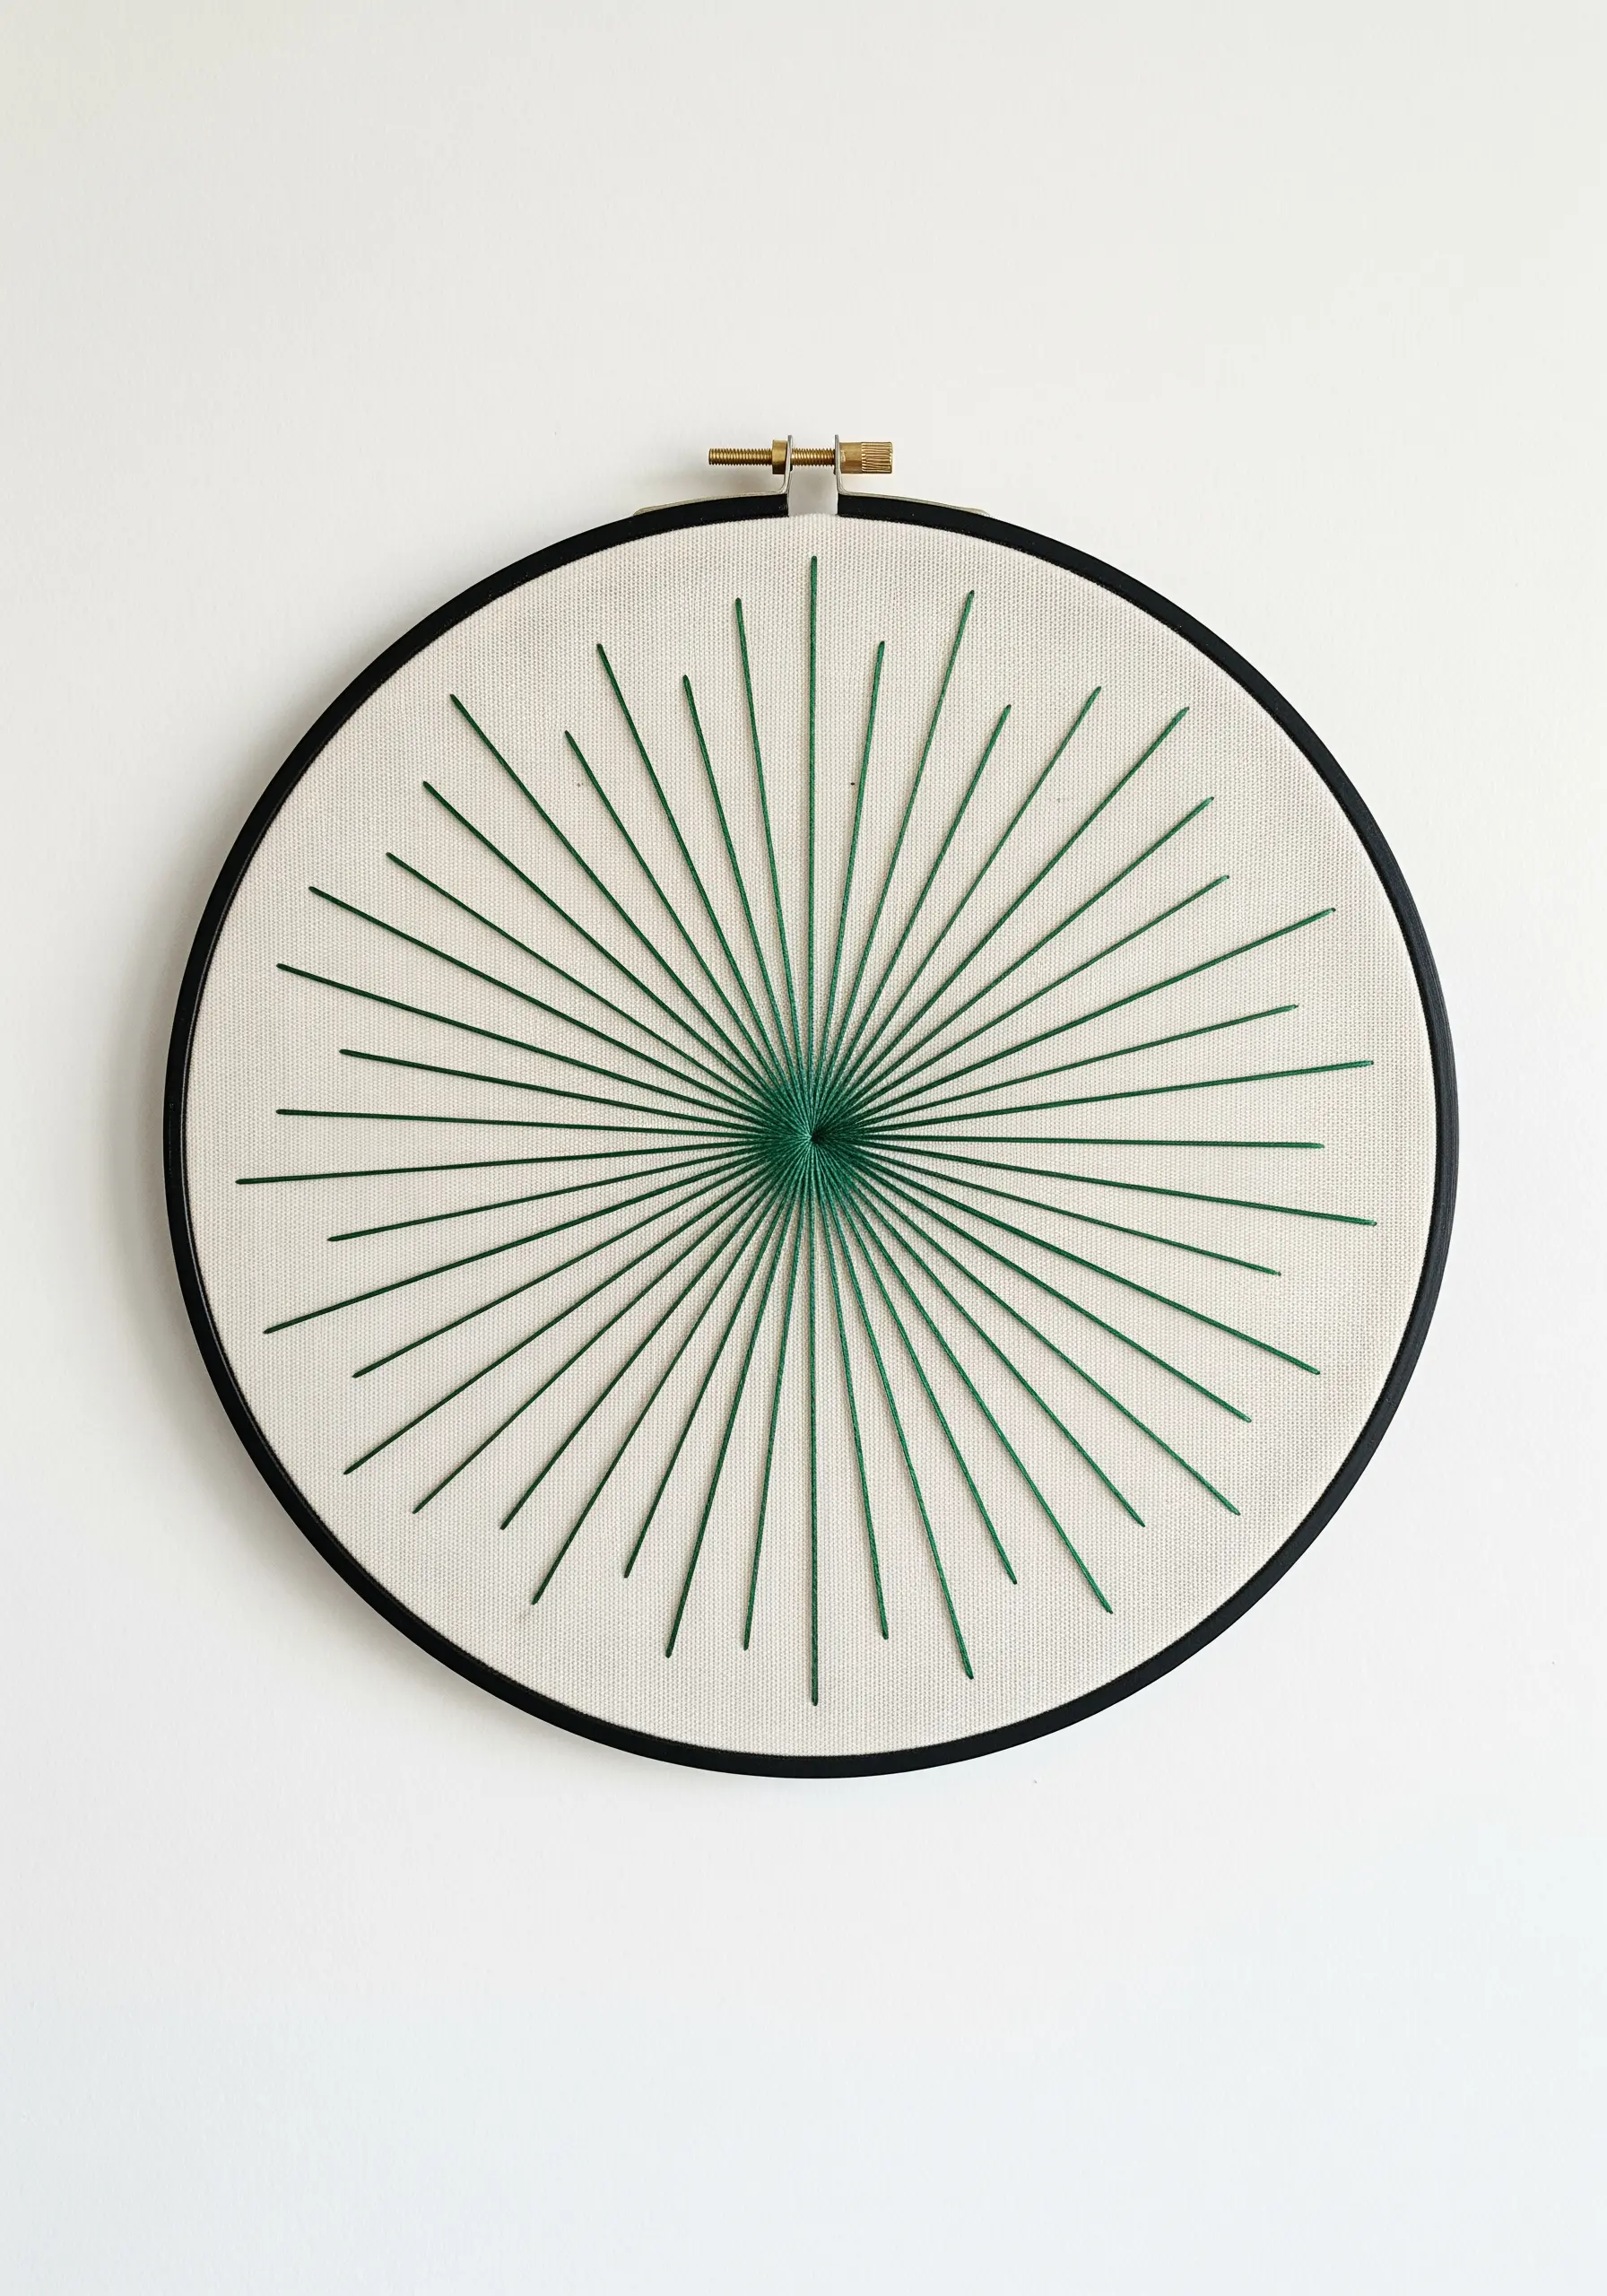
Create a striking, modern piece by focusing on the purity of radial lines.
Begin by marking a precise center point and guidelines on your fabric. Use a ruler to ensure perfect spacing.
Execute each line with a single, taut straight stitch from the center to the outer edge (or vice versa). Use a thicker thread like perle cotton for lines that have more presence.
The power of this design lies in its geometric precision and the dramatic tension between the stitched lines and the negative space.
35. Textured Sun Mandala with Graded Color

Build a highly tactile and visually warm sun by layering stitches and blending colors.
Create a dense, coiled center using a spiral of chain stitch or a cluster of bullion knots. For the rays, use a fishbone stitch, which allows you to easily blend two shades.
Start each ray with a yellow stitch down the center spine, then fill the sides with orange stitches. This creates a subtle gradient within each ray, giving the sun a natural, fiery glow and incredible dimension.


