

Have you ever looked closely at a leaf, a seed pod, or a wildflower and wondered how to translate its intricate detail into thread? It’s easy to feel stuck with the same few stitches, creating designs that feel nice, but not quite alive. The secret isn’t learning dozens of new, complex techniques, but rather learning to see—and then stitch—with more intention.
Think of these samplers not as simple practice pieces, but as focused studies. Each one is designed to help you master a specific aspect of botanical embroidery: the subtle color blending in a turning leaf, the sculptural form of a mushroom, or the airy texture of a dandelion clock. They are exercises in observation, translated through needle and thread.
By working through these ideas, you are training your hands and your eyes to work in concert. You’ll learn why a French knot creates the perfect texture for moss, or why a padded satin stitch gives a berry its plump, round form. This is how you move from merely copying a pattern to truly interpreting the natural world in your own unique, polished style.
1. Mastering Leaf Variegation with Blended Stitches
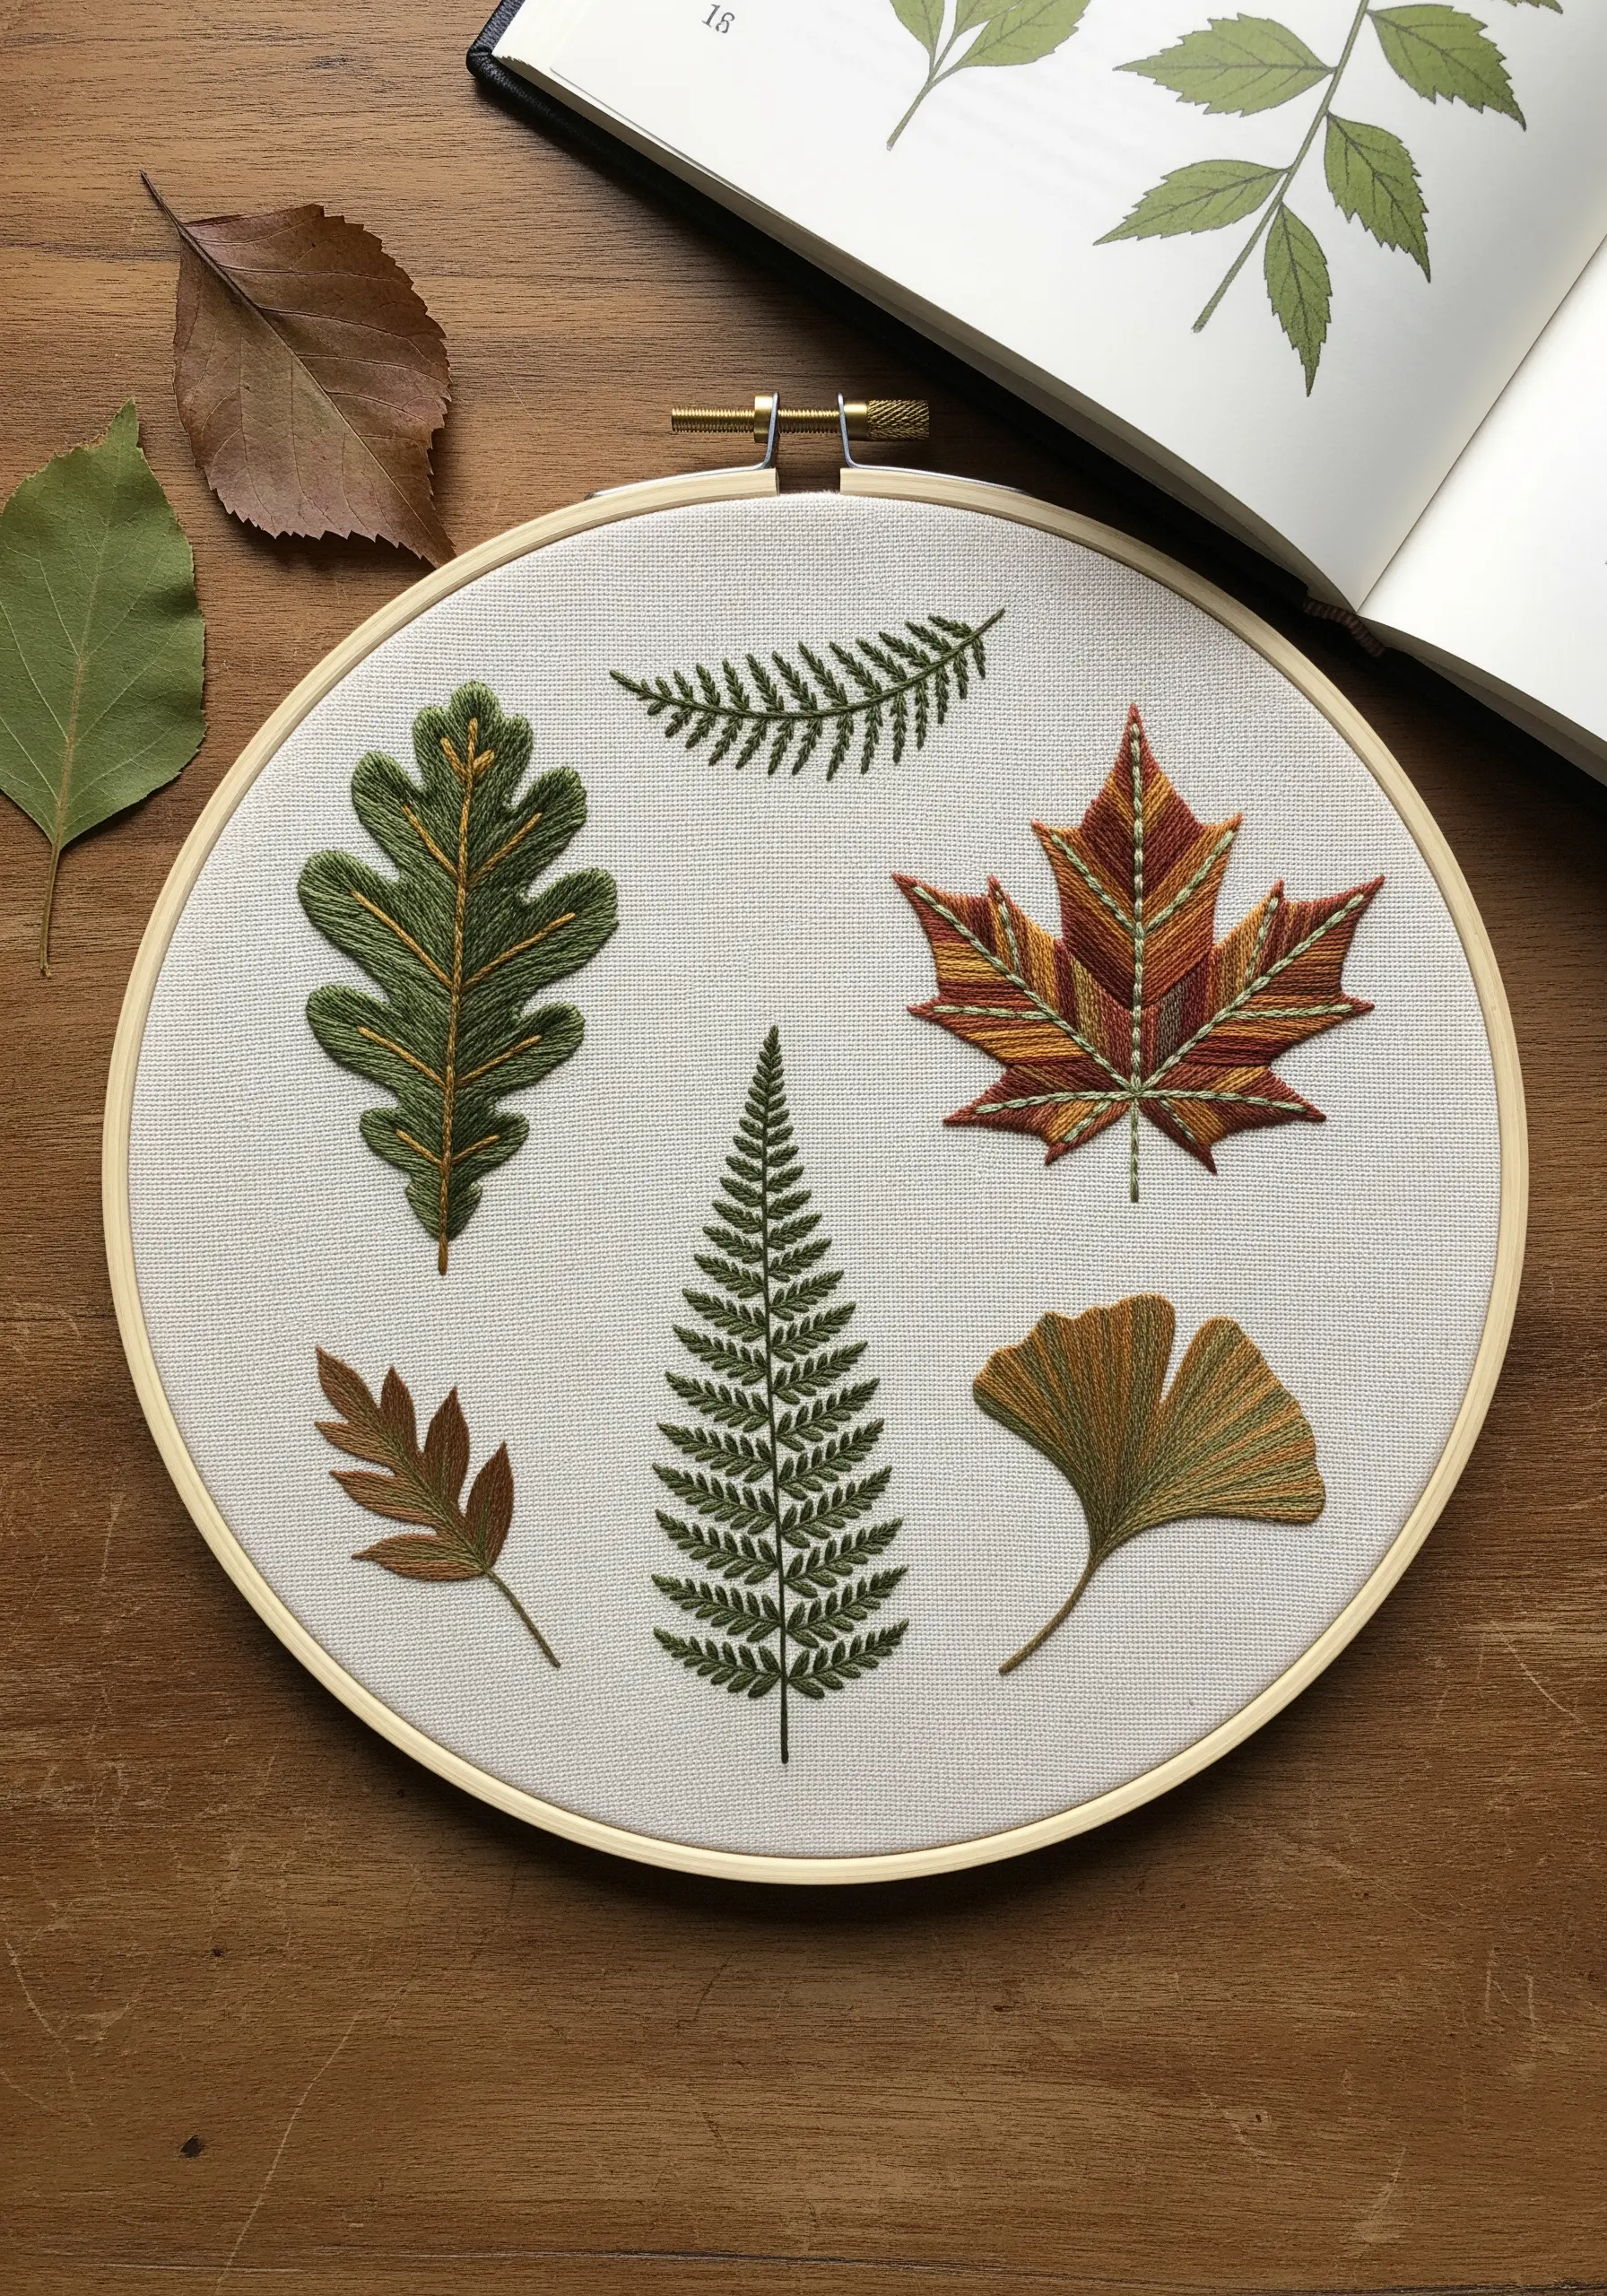
To capture the authentic color shifts in a maple leaf, use long-and-short stitch with three or four closely related shades.
Start with the lightest color at the edge and blend inward, allowing your stitches to interlock softly rather than creating hard lines.
Contrast this detailed needlepainting with the simplicity of a satin-stitched Ginkgo leaf, which relies on a single, luminous color for impact.
For the central veins, use a single strand of a darker thread in a split stitch to create a fine, raised line that adds structure without overwhelming the delicate shading.
This practice helps you learn when to blend colors for realism and when to use solid fills for graphic effect.
2. Building Floral Texture with Stitch Variation
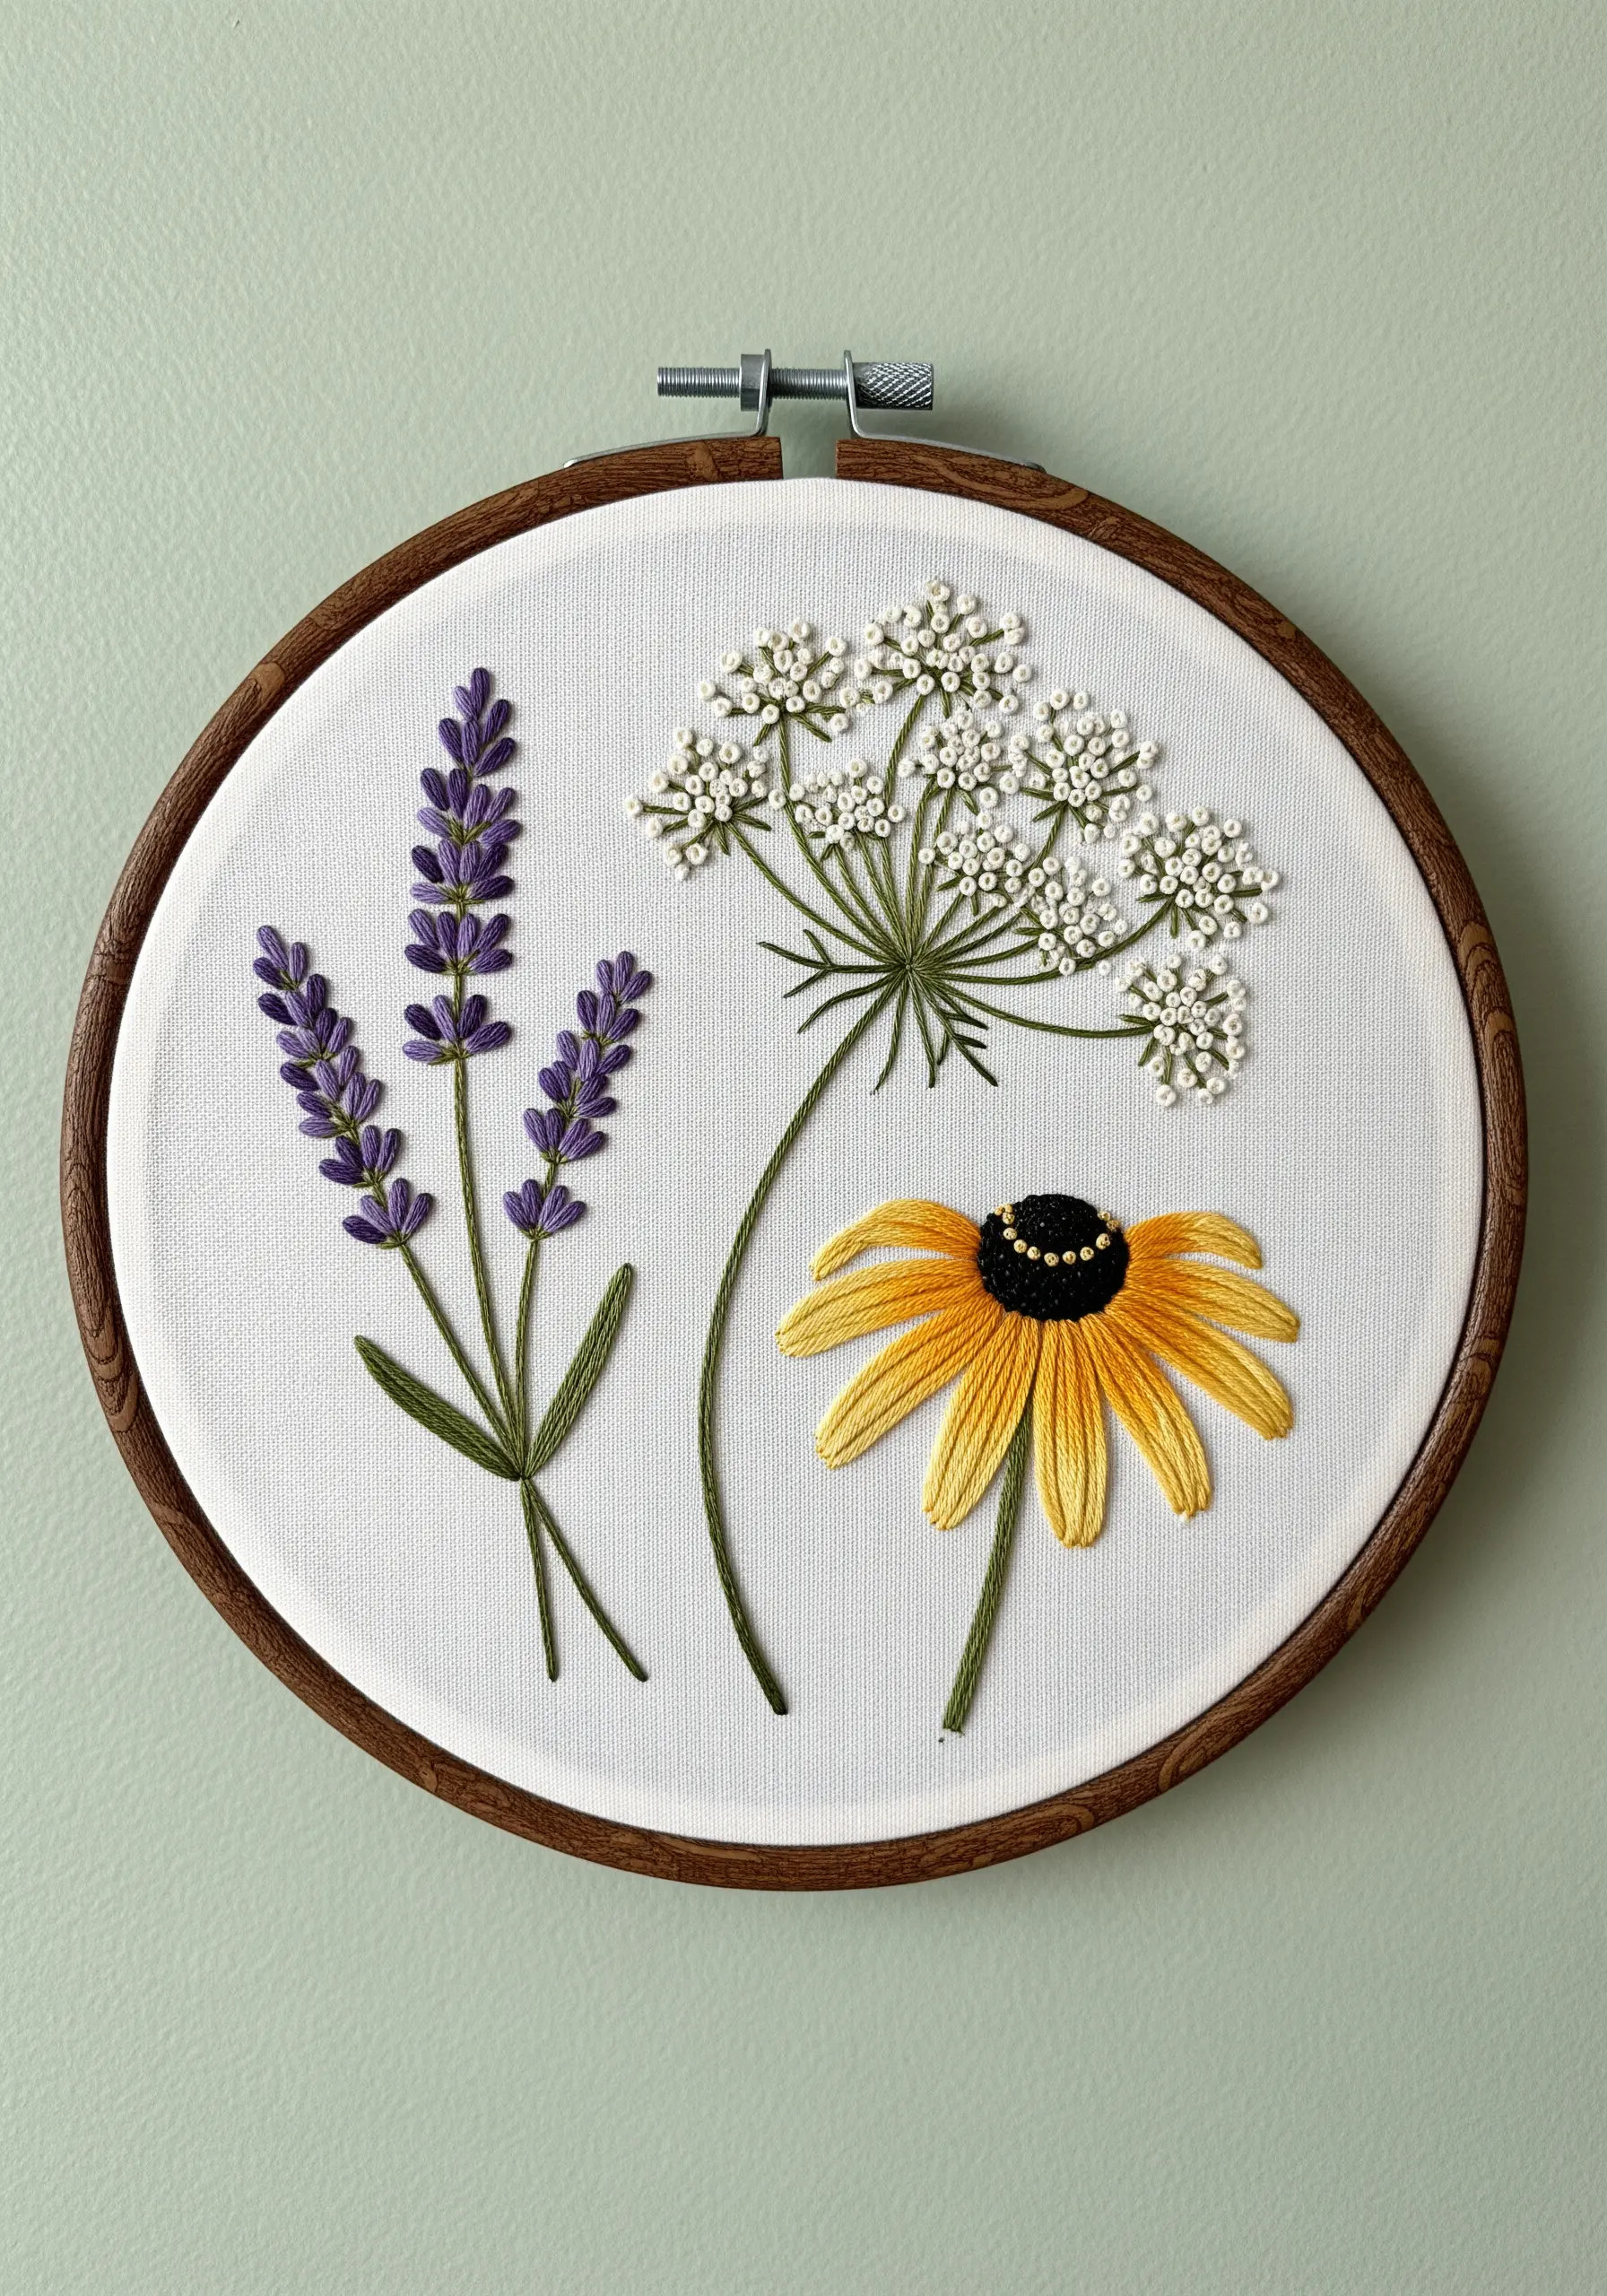
Make each flower in your composition distinct by assigning it a unique textural stitch.
For the Queen Anne’s Lace, use tightly clustered French knots in off-white and pale green to simulate the dense, delicate flower head.
Render the Black-Eyed Susan’s petals with long, directional satin stitches, ensuring each stitch tapers toward the center to create a sunburst effect.
The lavender stalks are built with layered detached chain stitches (lazy daisies), which gives them volume and mimics the shape of real buds.
This method trains your eye to see plants not just as shapes, but as a collection of unique textures.
3. Sculpting Fungi with Dimensional Stitching
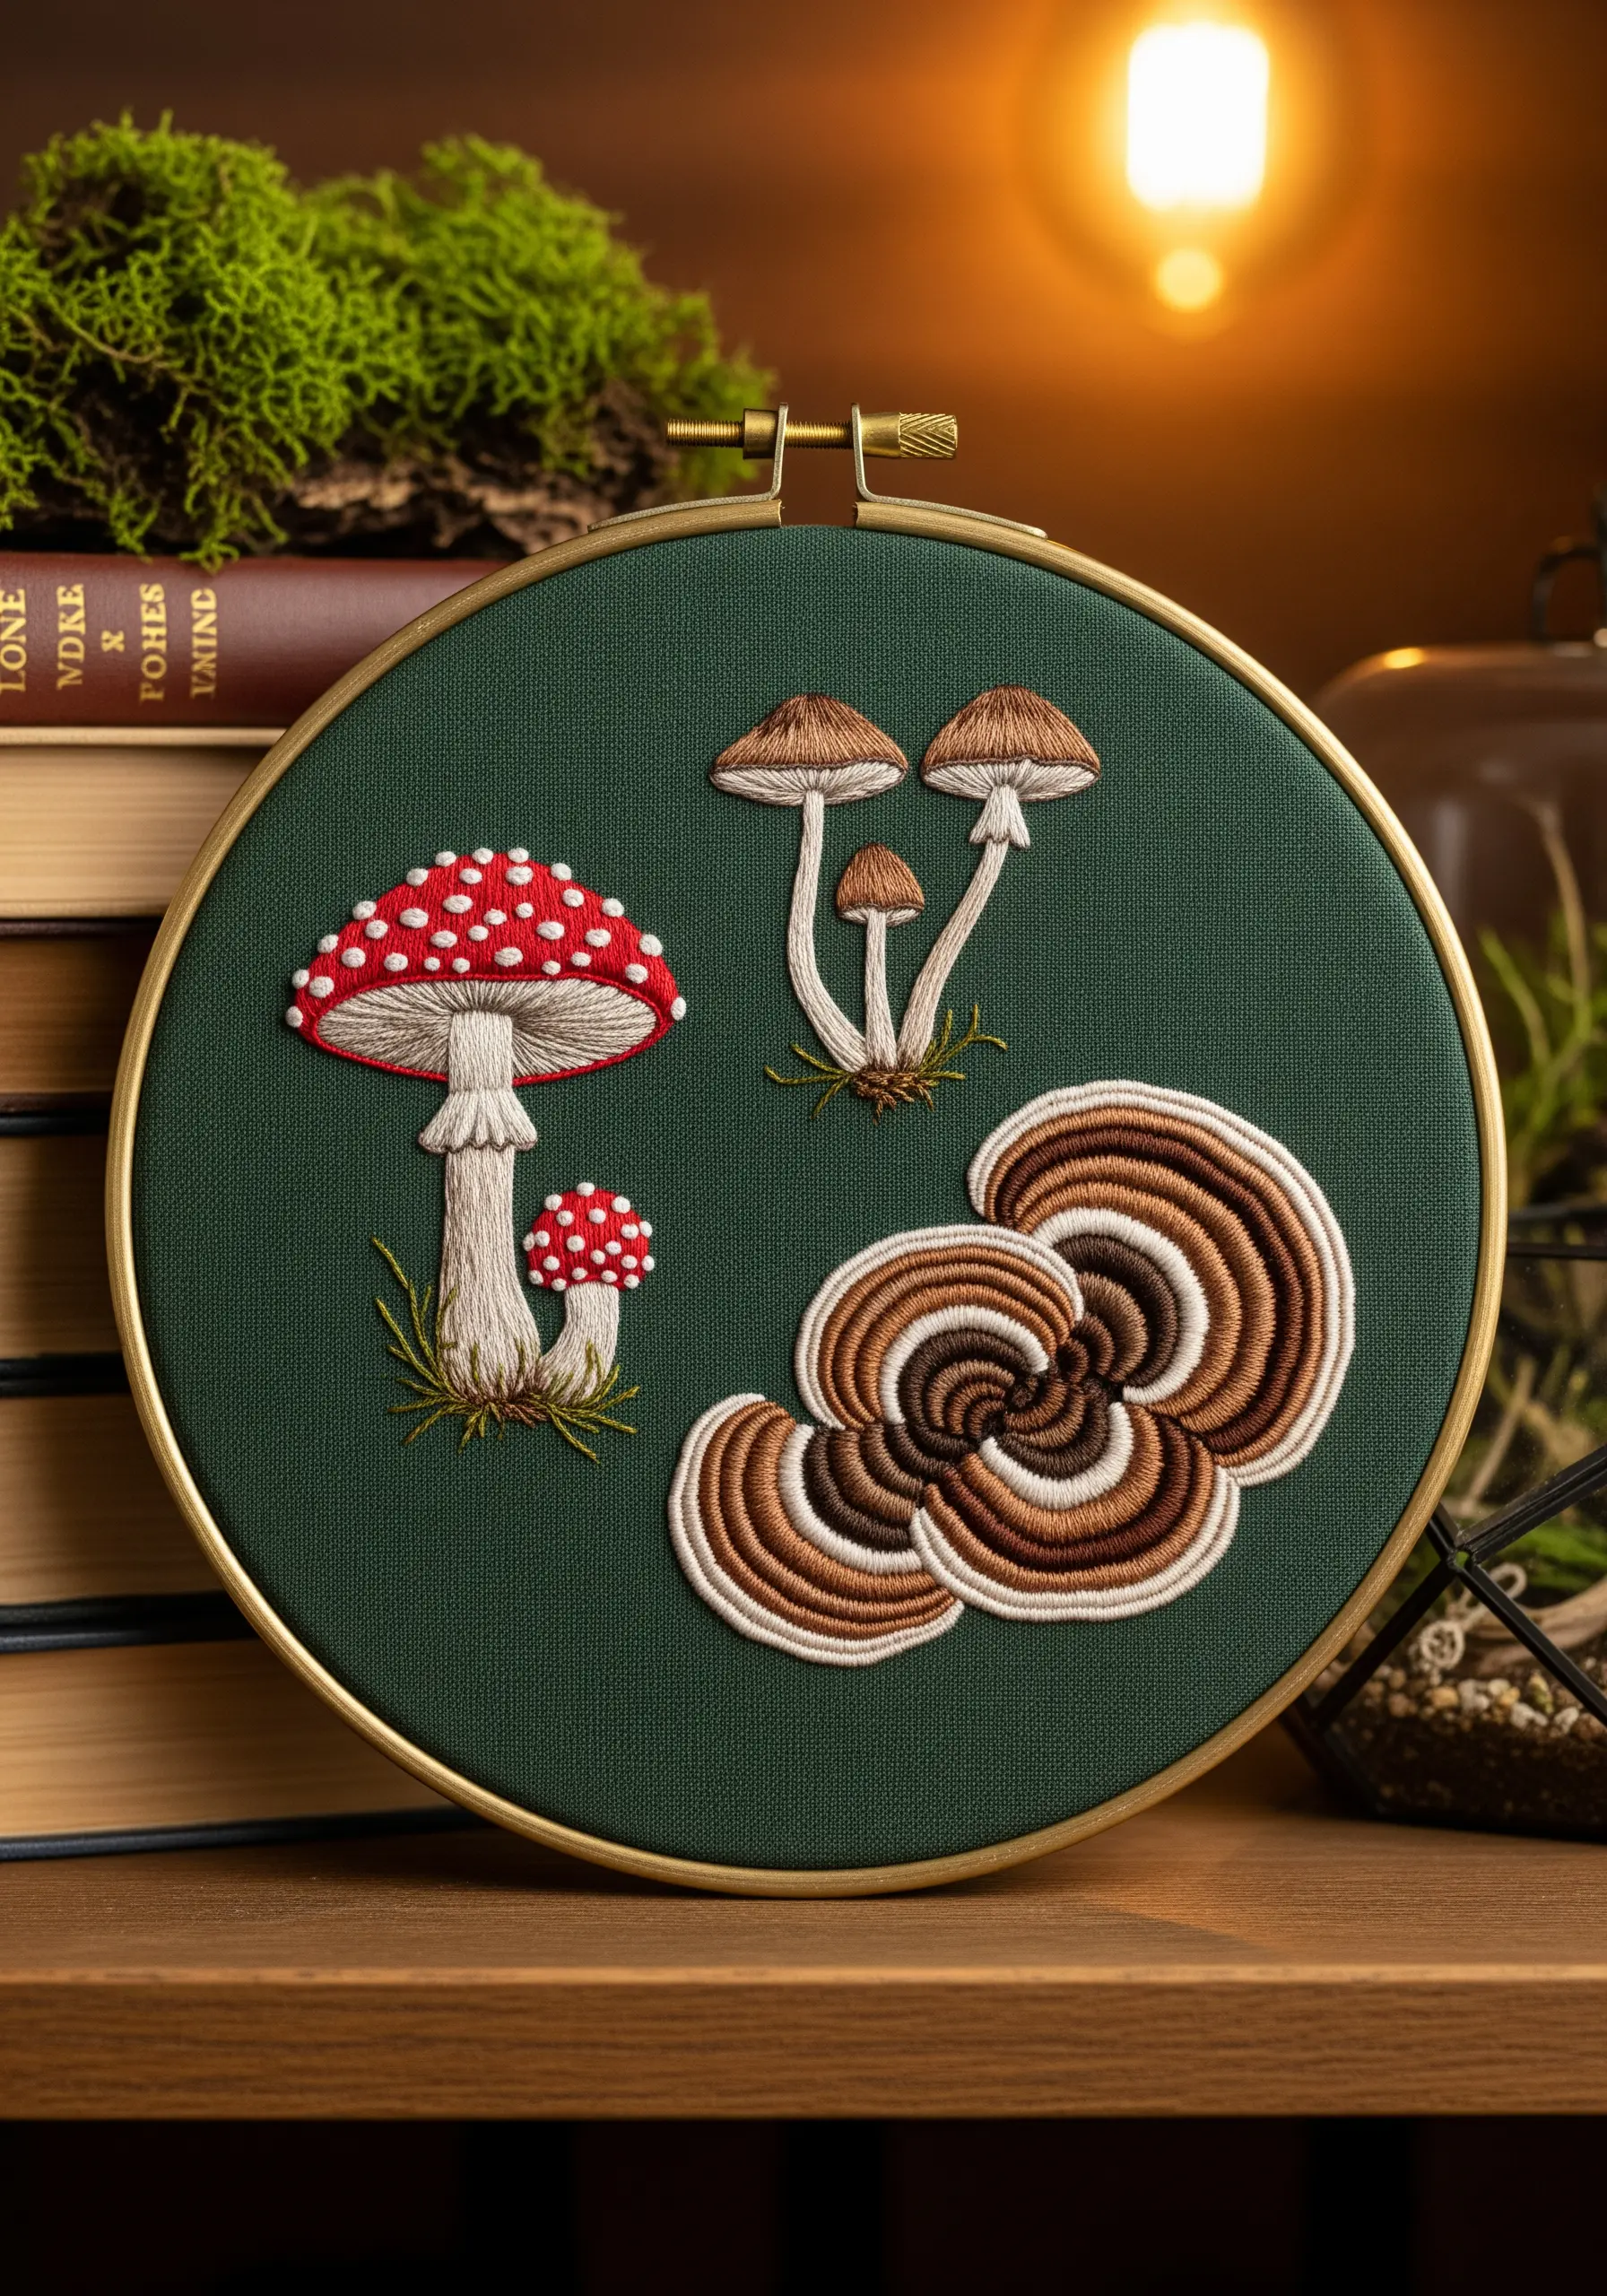
To give the Amanita mushroom cap a convincing rounded shape, create a padded base before you begin your satin stitch.
You can do this by filling the area with foundation stitches (like seed stitches) or by cutting a small piece of felt to size and stitching over it.
For the turkey tail fungus, the direction of your stitches is everything—angle your long-and-short stitches to follow the natural, fanned-out growth lines of the mushroom.
Use several shades of brown, tan, and cream to create the concentric rings, which will give it depth and realism.
Choosing a dark, matte fabric like deep green cotton makes these earthy tones appear more luminous.
4. Stitching Ephemeral Textures: Seed Heads and Grains
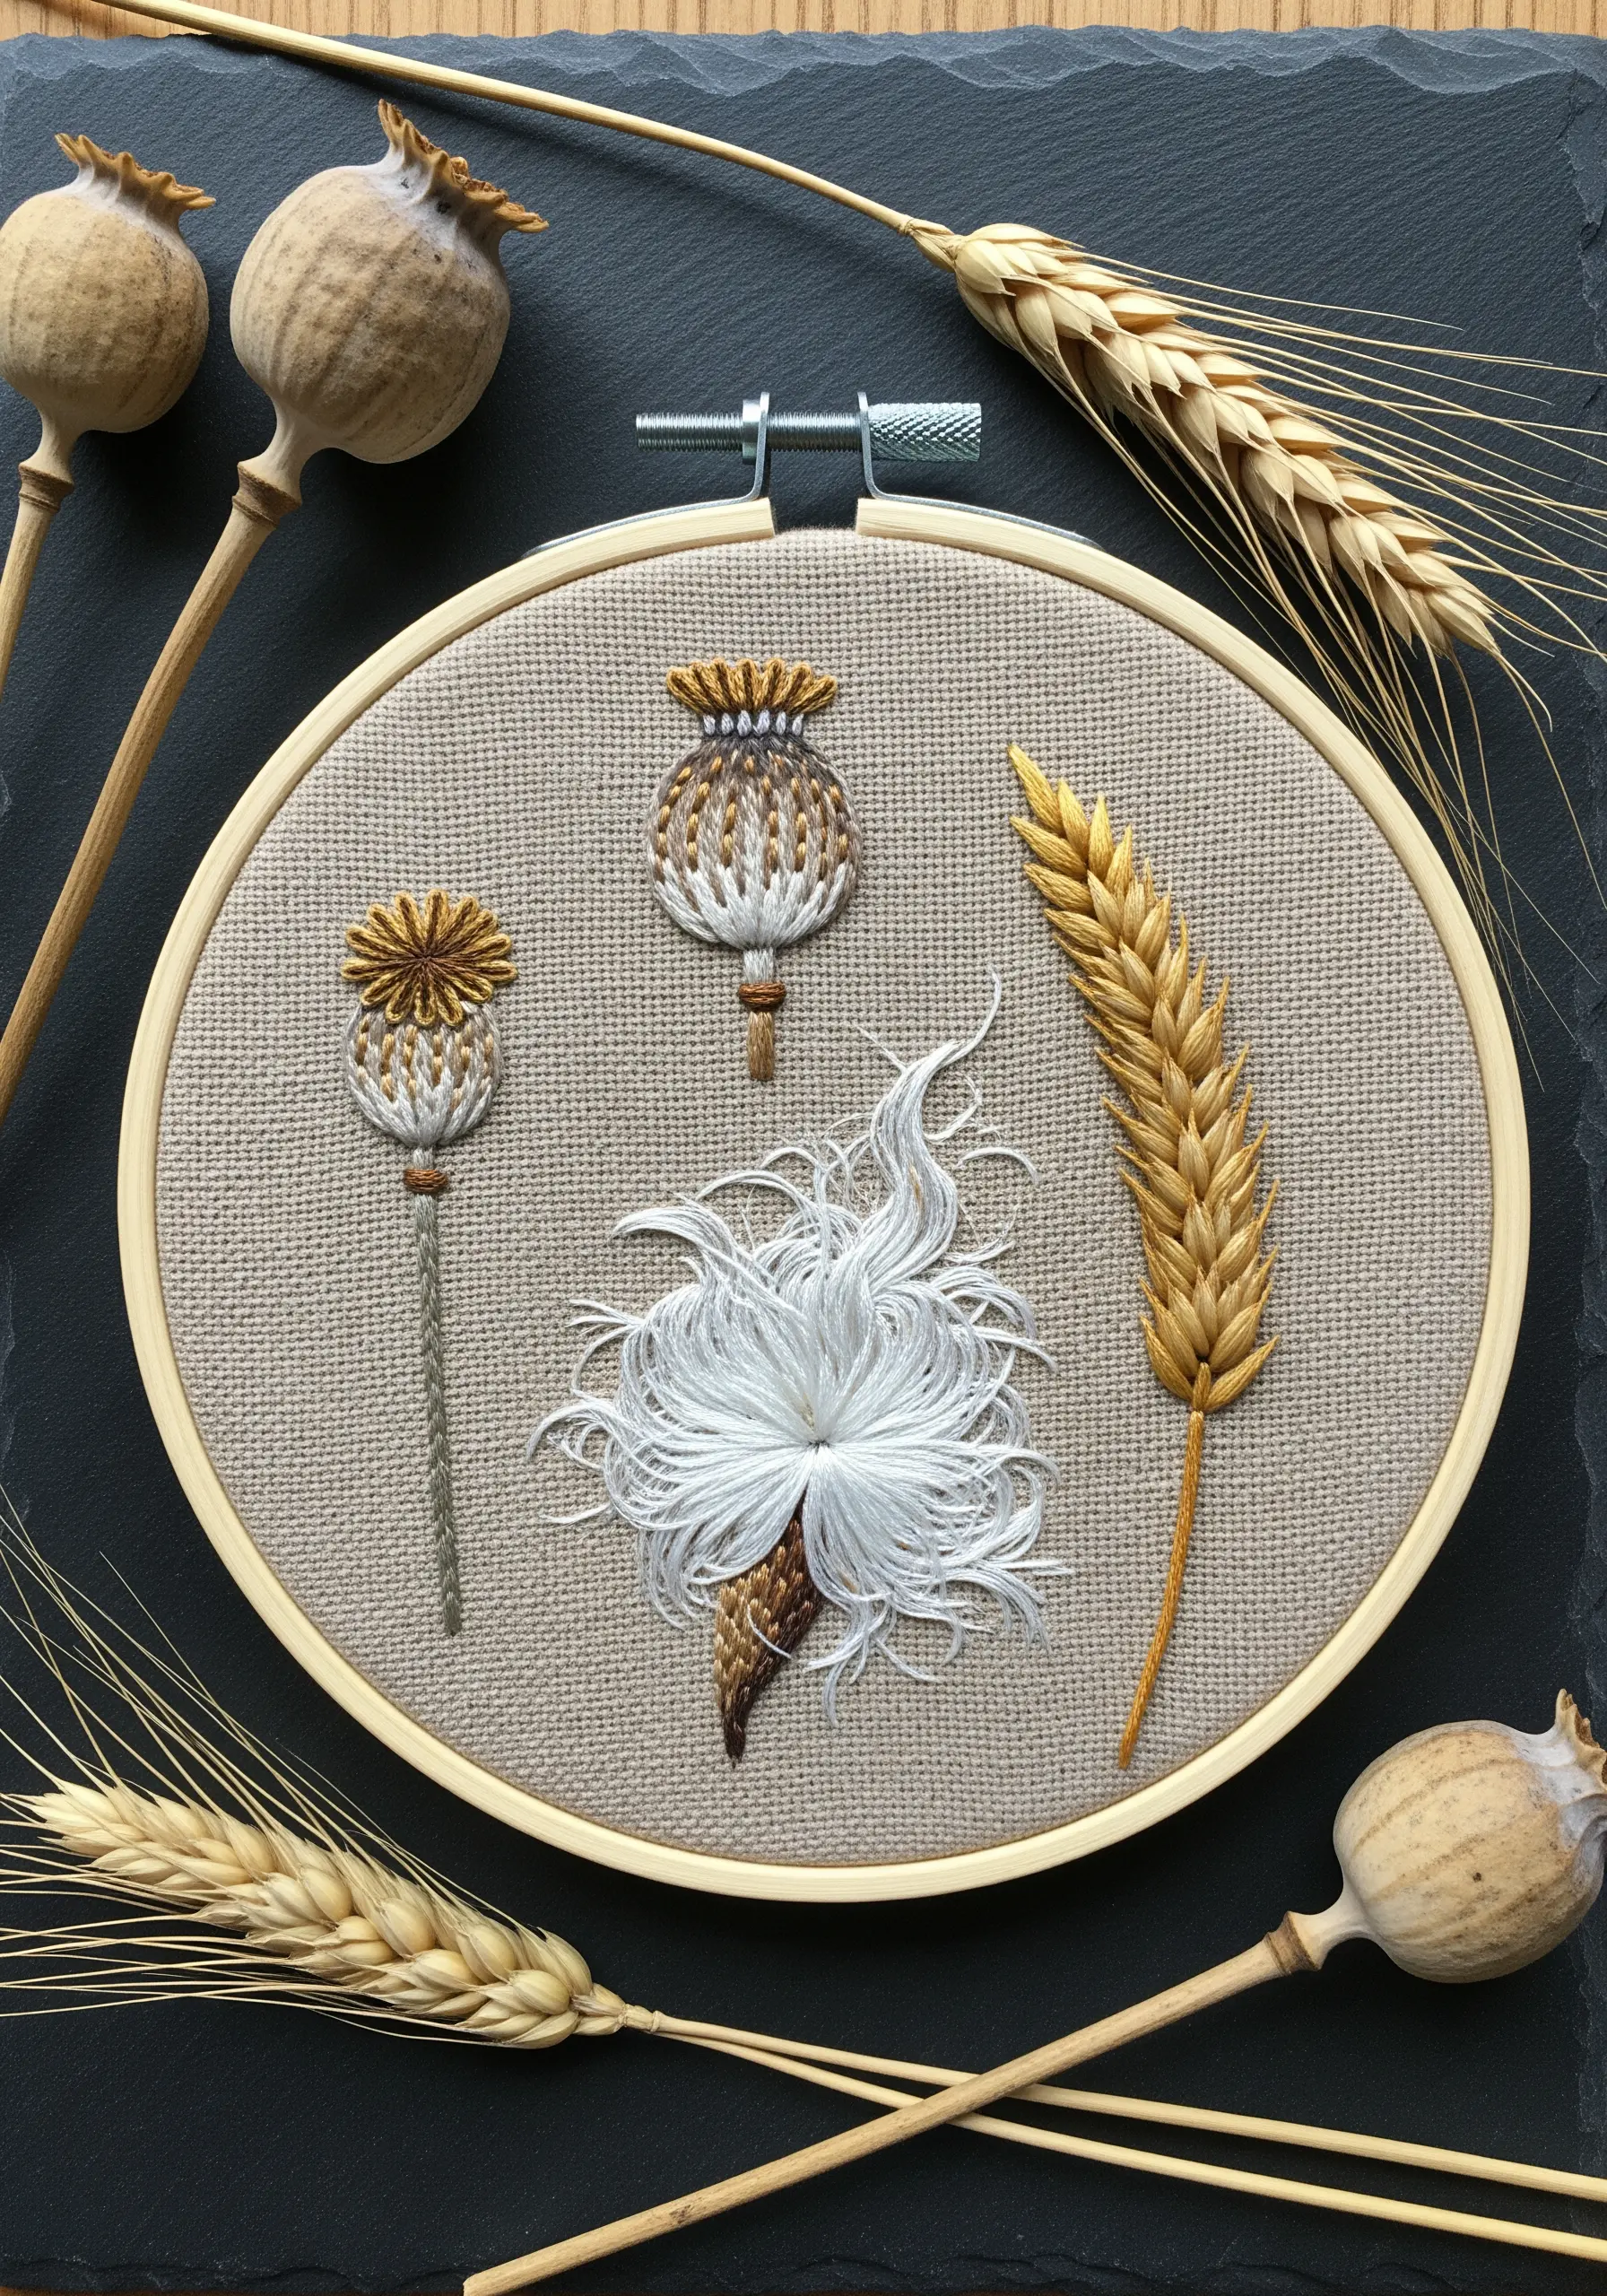
Capture the airy, delicate quality of a fluffy seed head by using turkey work (or Ghiordes knot).
Keep your loops long and stitch them with a fine, single-strand thread, then trim them unevenly to create a wild, natural look.
For the poppy seed pods, a woven picot stitch or a series of detached buttonhole stitches creates a three-dimensional form that stands away from the fabric.
The wheat stalk is a perfect study in satin stitch; vary the angle and length of each stitch slightly to mimic the organic structure of the grain.
This sampler is an exercise in translating the most delicate textures you’d find on a nature walk into thread.
5. A Study in Form: Geometric Succulent Sampler

Use a simple grid of backstitches to frame each succulent, turning your hoop into a botanical specimen box.
To achieve the crisp, clean edges essential for these structured plants, outline each shape with a split stitch before filling it with satin stitch.
This outlining technique acts as a barrier, preventing the fill stitches from shifting and ensuring a sharp, defined silhouette.
For the trailing ‘string of pearls’ succulent, use French knots of slightly varying sizes to create a sense of movement and natural imperfection.
This gridded approach isolates each plant, forcing you to focus purely on its form and structure.
6. Narrative Stitching: The Monarch Metamorphosis
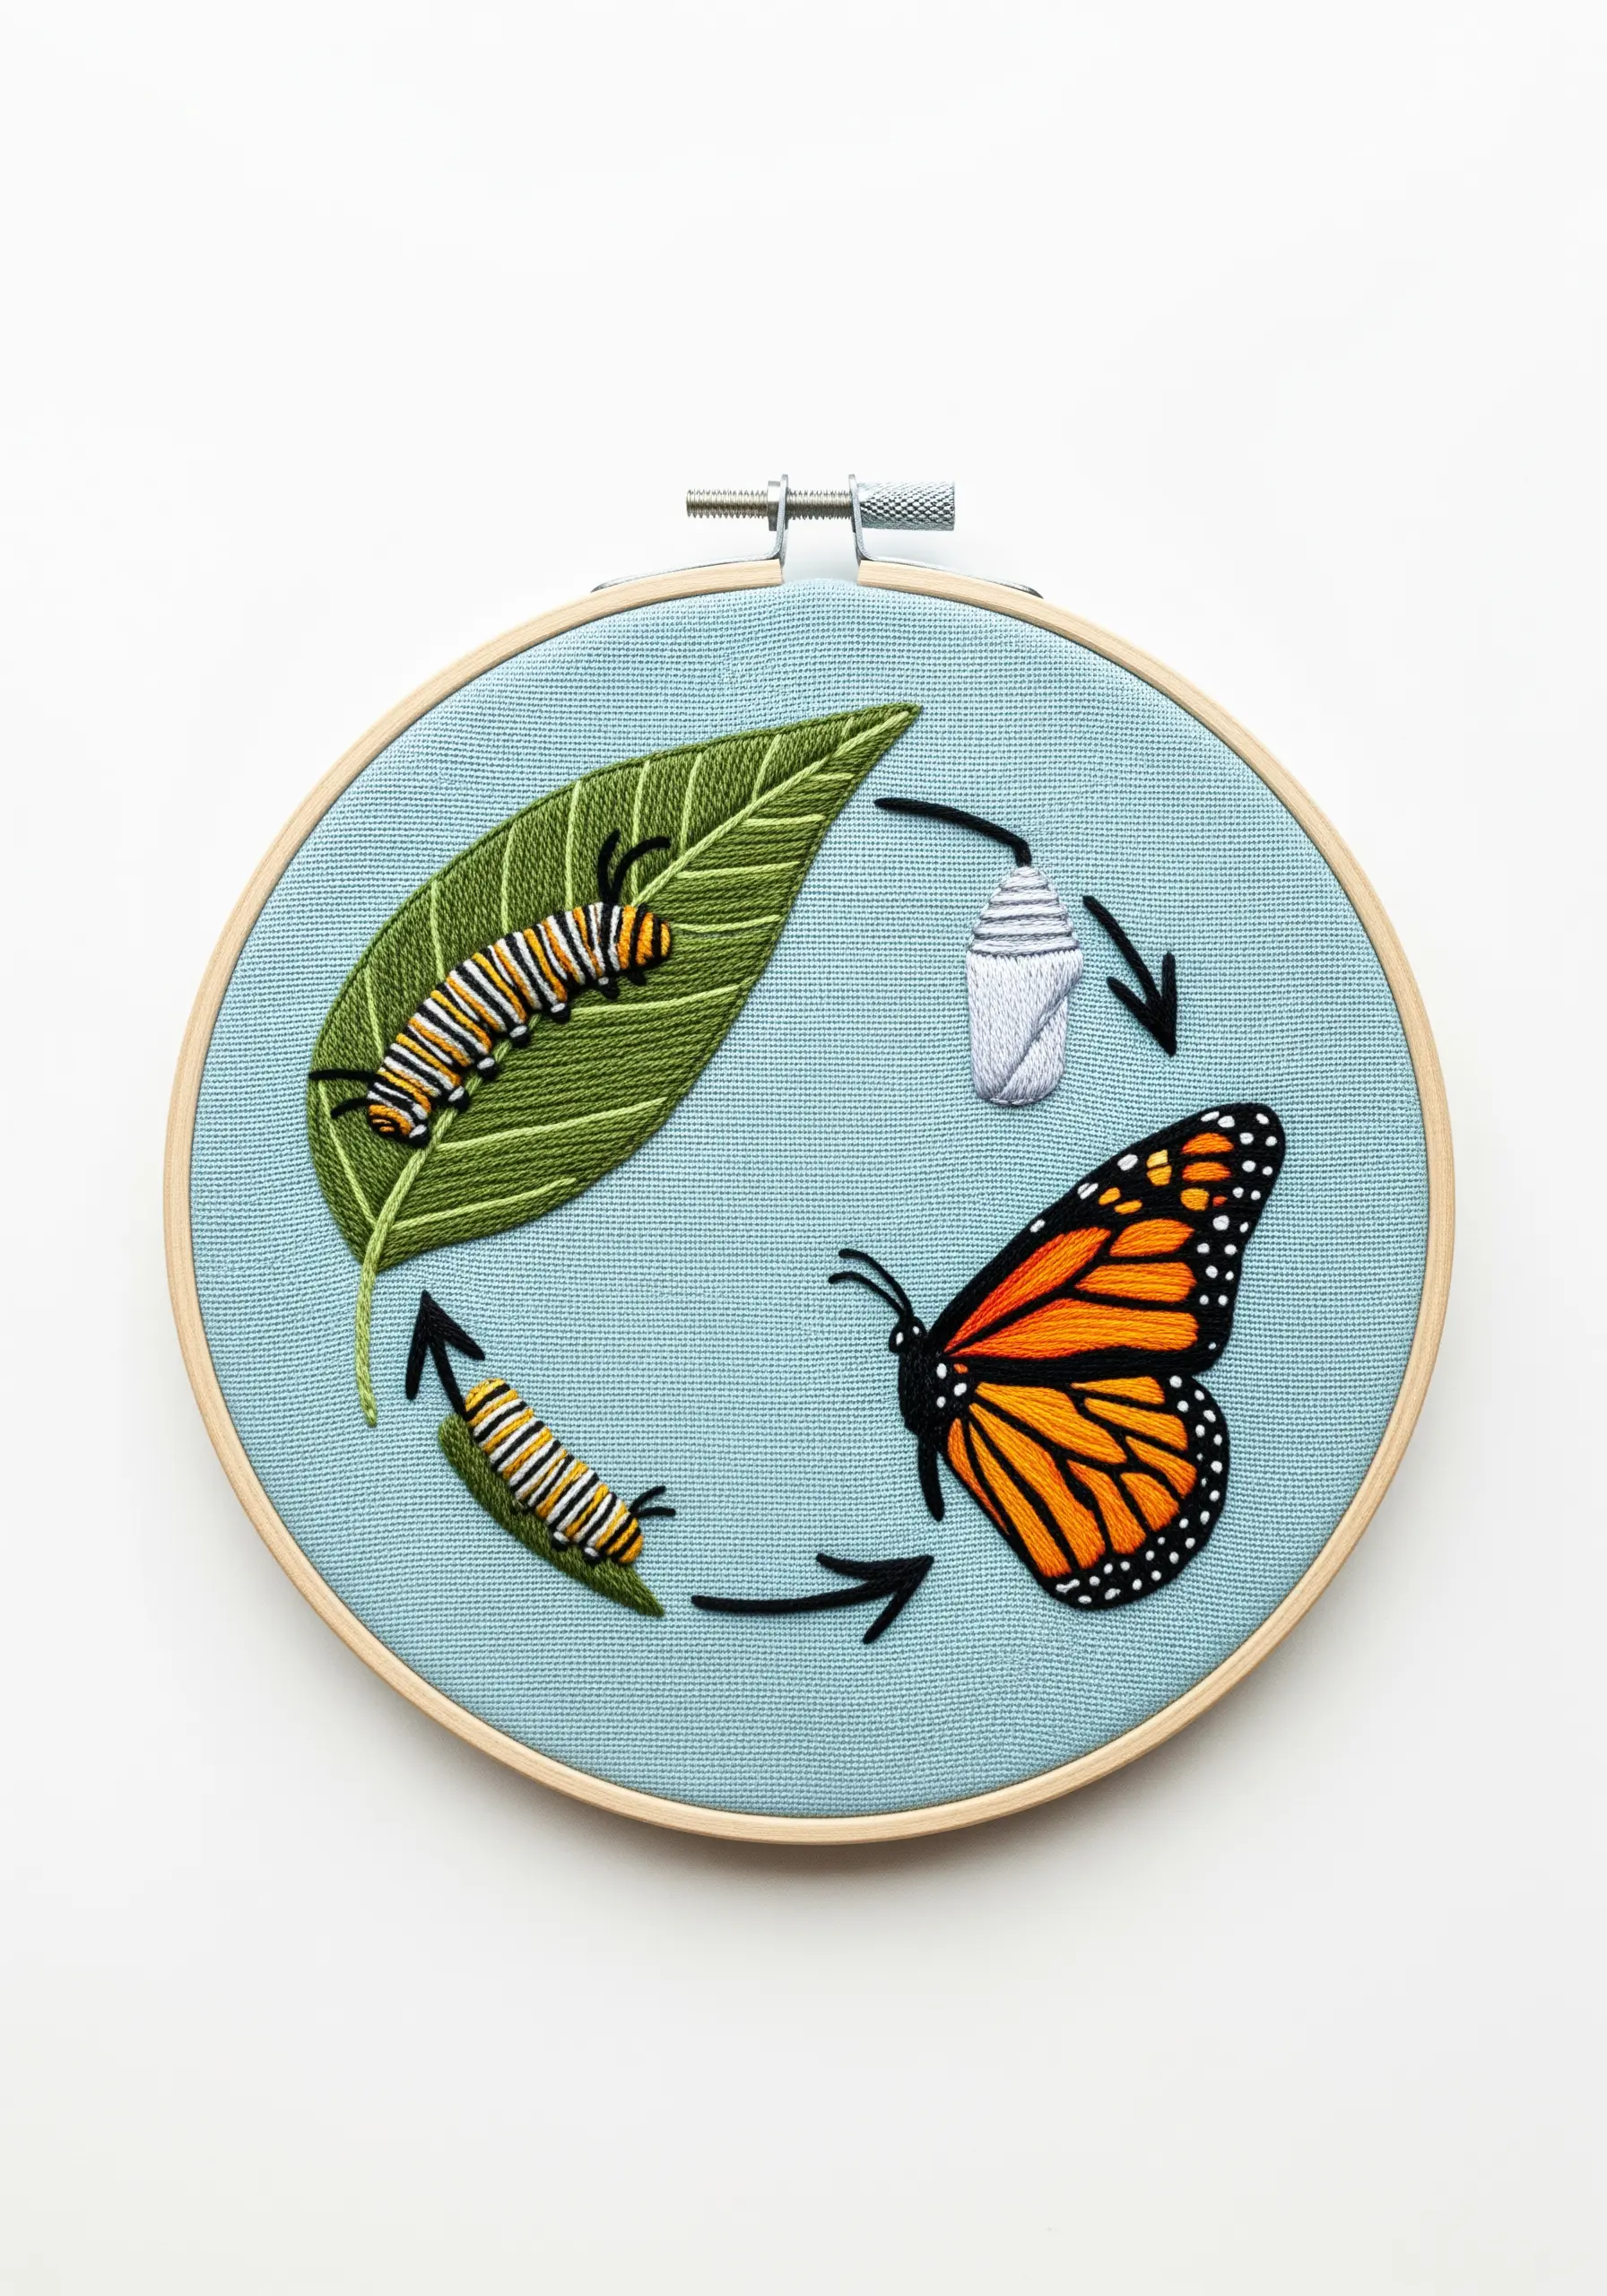
Tell a story with your stitches by capturing the distinct forms of a life cycle within a single hoop.
For the butterfly’s wings, use long-and-short stitch to smoothly blend the orange, yellow, and red tones, creating a gradient that feels soft and painted.
Define the bold black sections with a sharp split stitch outline before filling with satin stitch; this creates the clean, graphic lines characteristic of a Monarch.
The chrysalis requires a different texture—use vertical satin stitches with a slight curve and add highlights with a lighter thread to give it a smooth, rounded form.
The directional arrows, stitched in a simple backstitch, tie the narrative together visually.
7. Achieving Crisp Botanicals on Dark Fabric
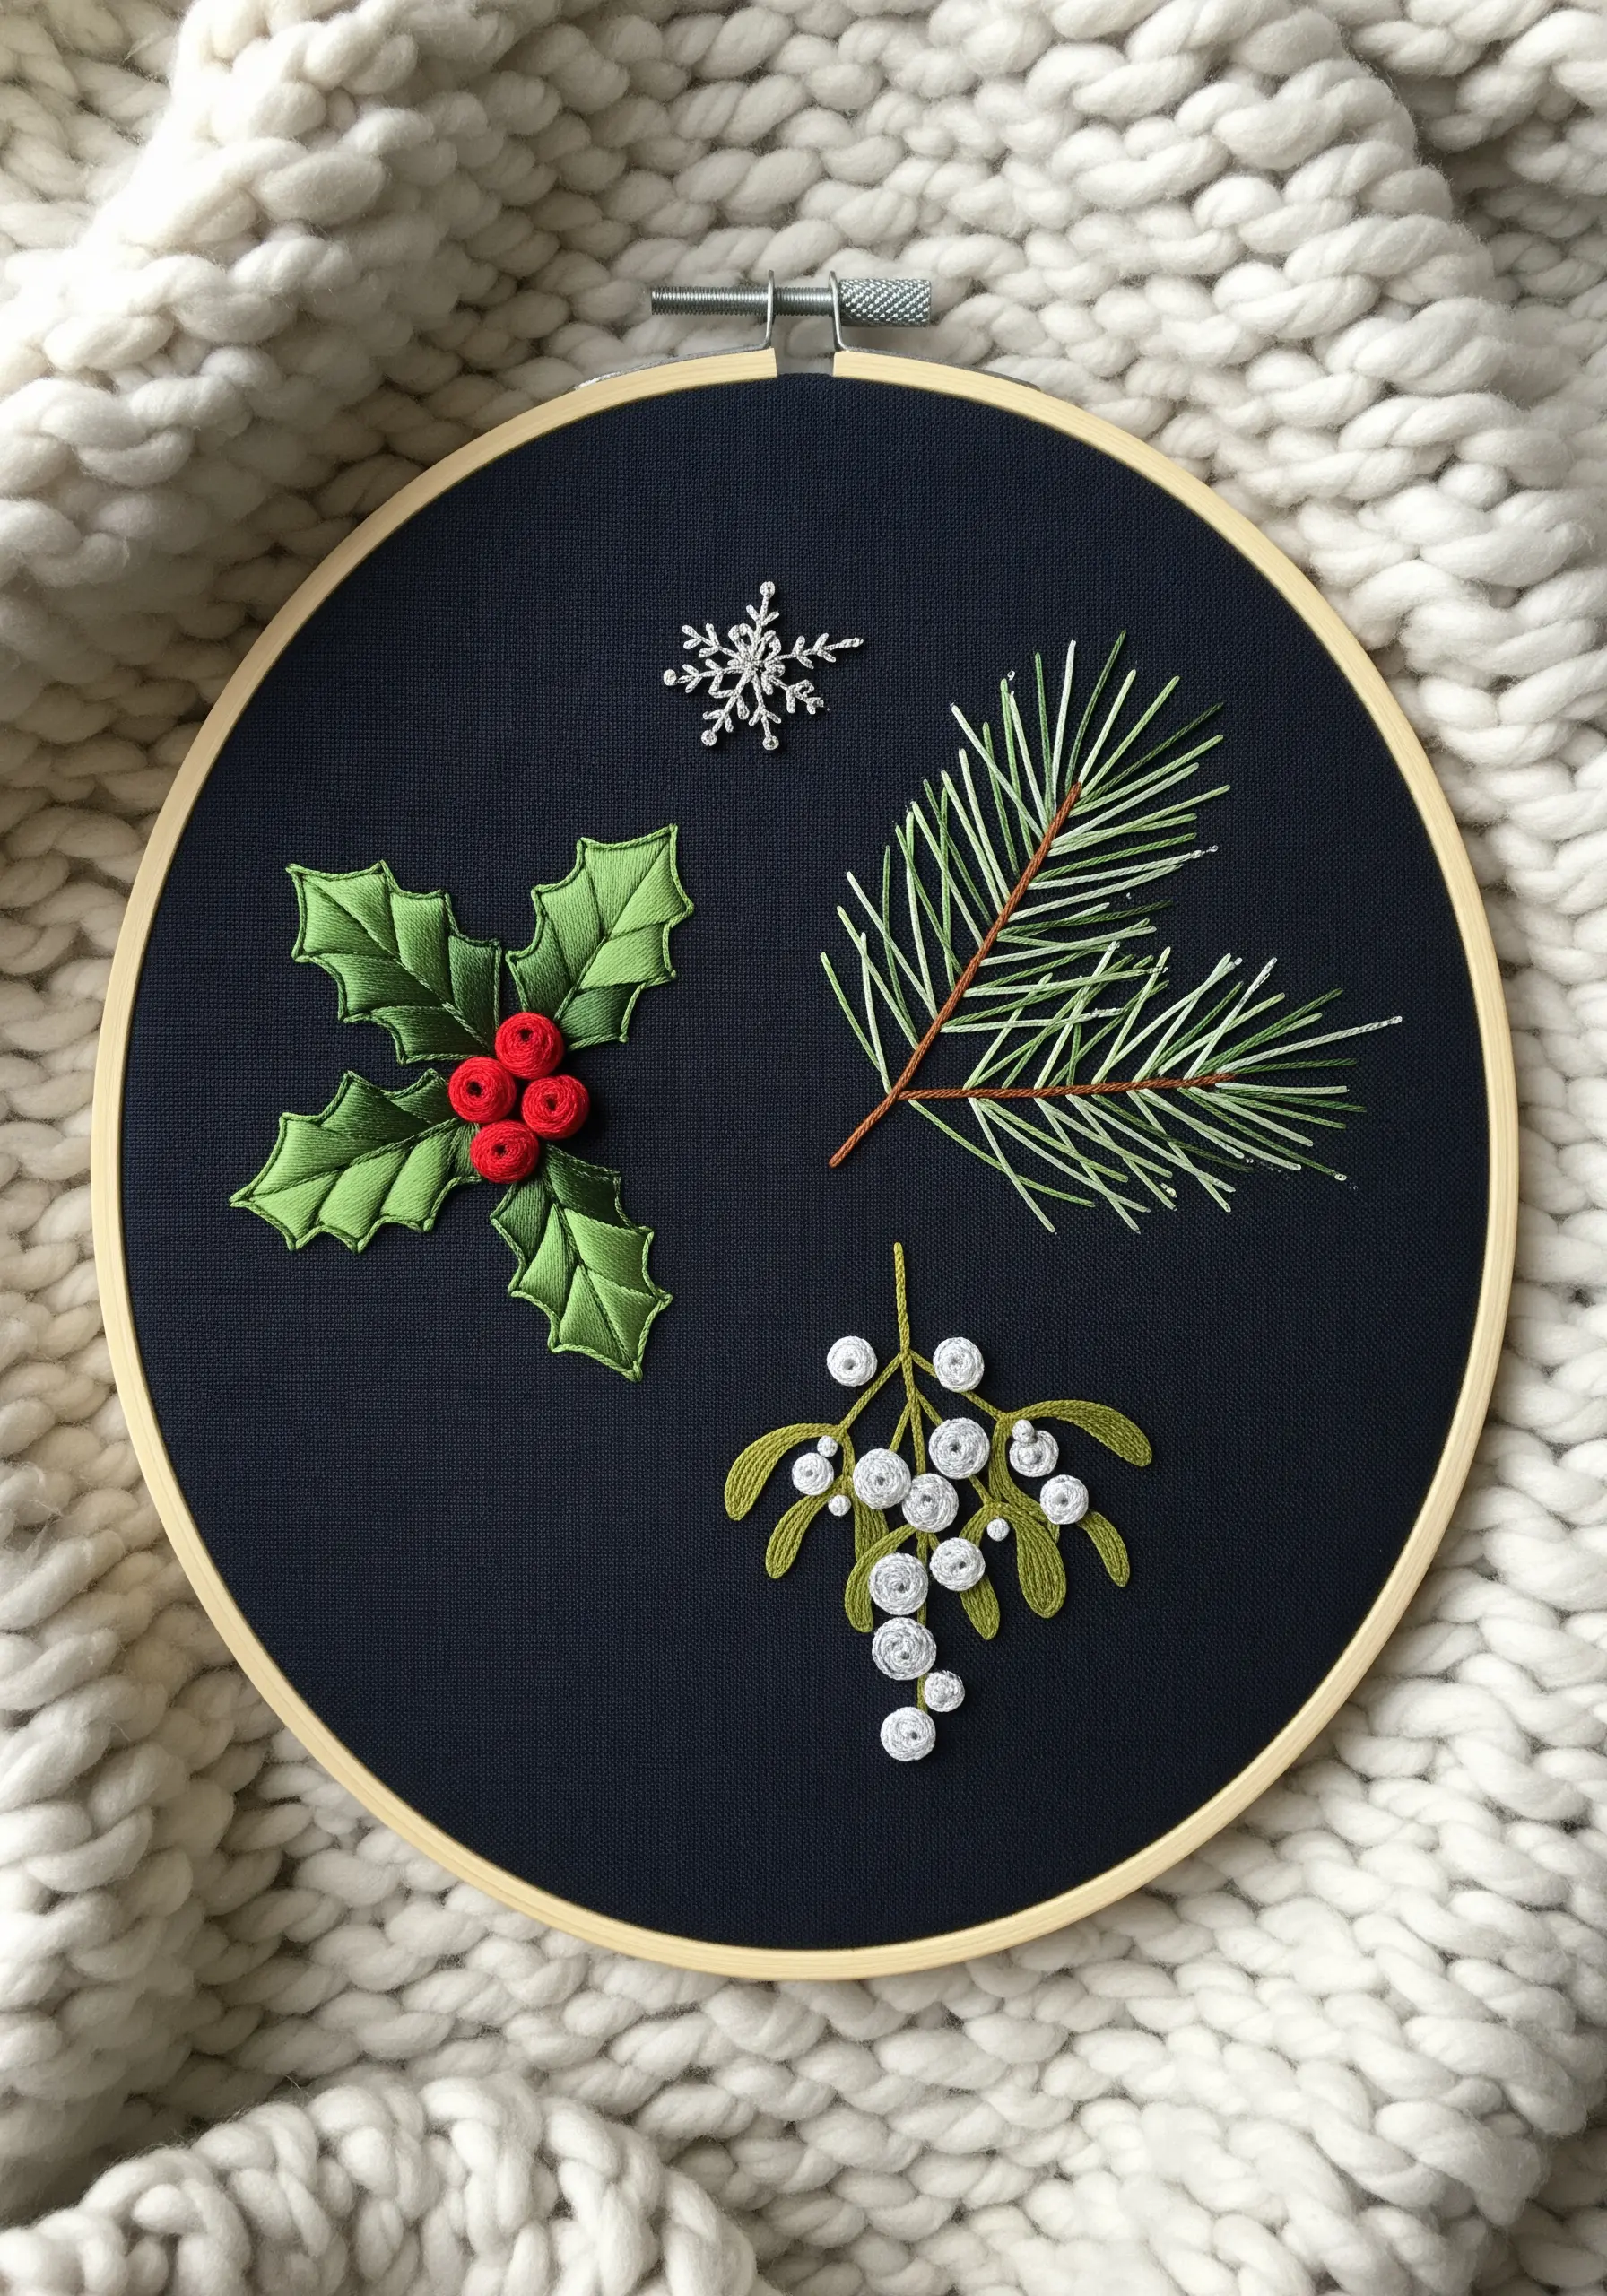
Make your colors pop against a dark background by first creating a foundation of split stitches within your shapes.
Stitching your final satin stitches over this base layer raises the thread slightly and prevents the dark fabric from showing through, resulting in more vibrant, opaque colors.
For the holly berries, use three to four strands of floss and a padded satin stitch to give them a plump, three-dimensional appearance.
The fine pine needles are best rendered with precise, single straight stitches, while the delicate snowflake uses the same technique to become one of those minimal festive motifs that adds elegance without bulk.
8. Rendering Delicate Foliage: An Herb Sampler
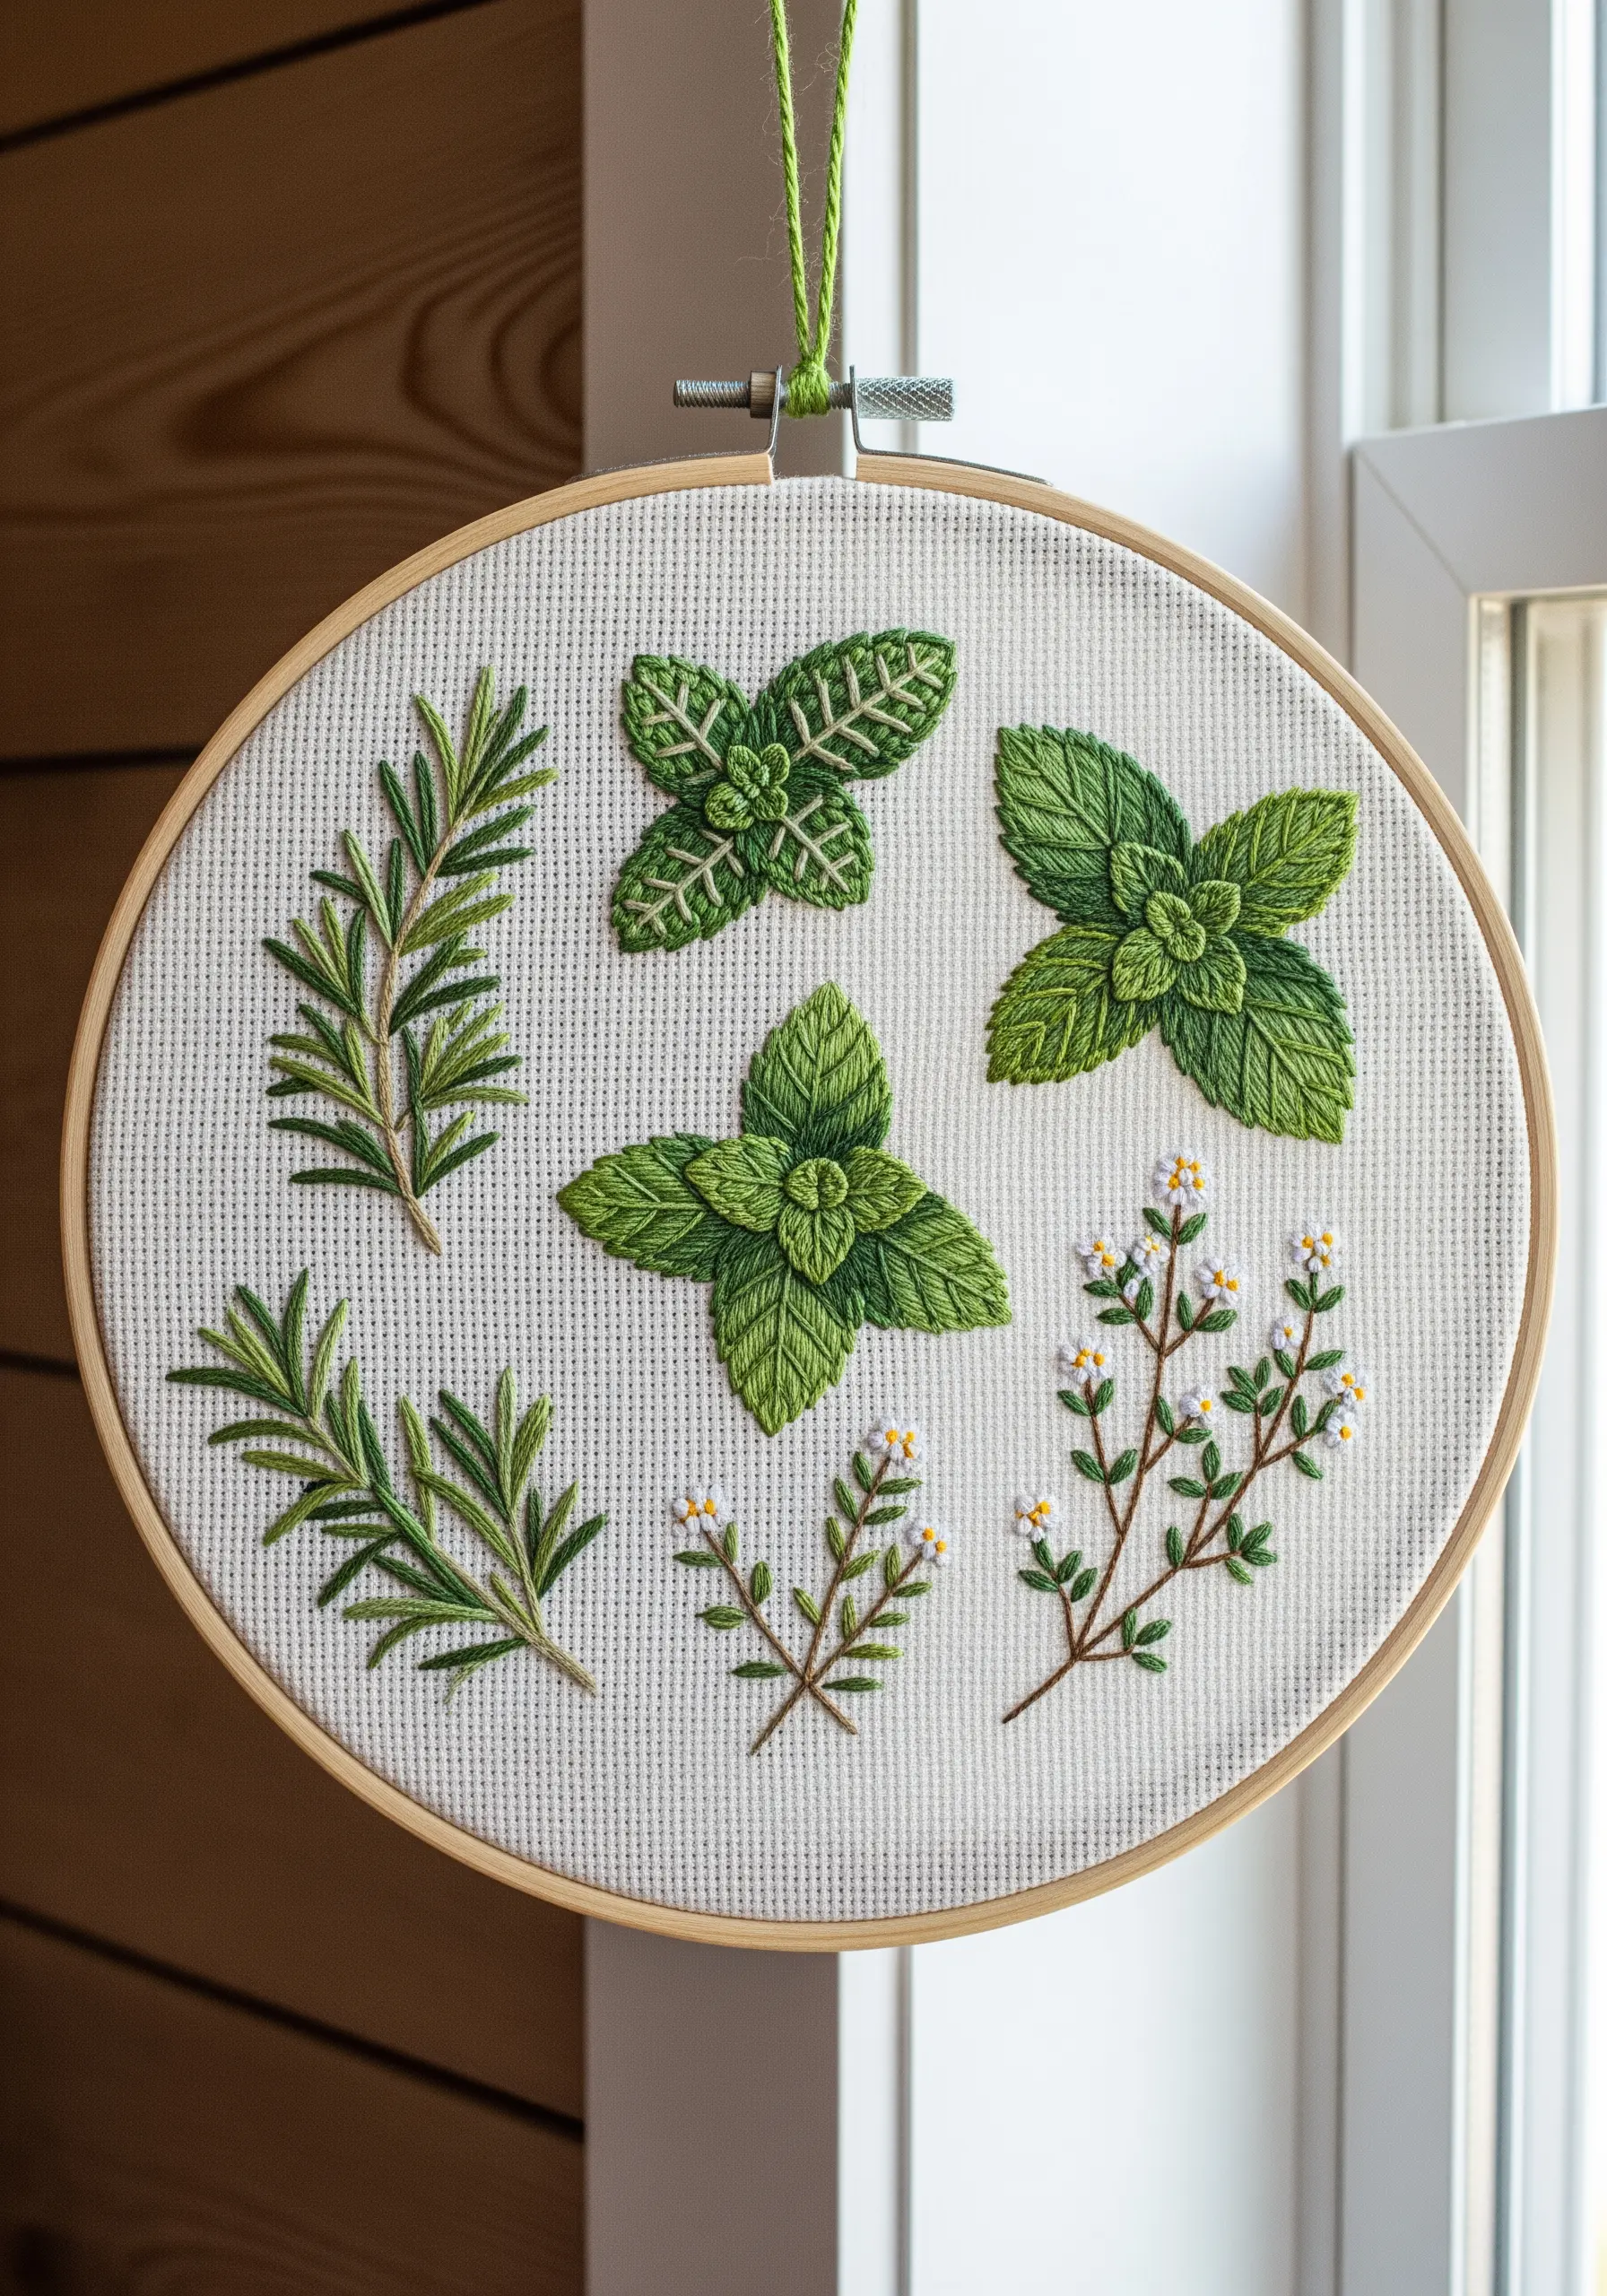
This sampler is an excellent way to practice rendering the fine details of different leaf structures.
Use the fishbone stitch for the mint leaves; it simultaneously creates the central vein and the angled texture of the leaf blade in one efficient motion.
For the rosemary, a whipped backstitch is ideal for the woody stems, giving them a smooth, rounded finish that looks more realistic than a standard backstitch.
The tiny flowers on the thyme can be created with single, delicate French knots using just one or two strands of floss.
Working on Aida cloth, as shown here, forces you to be precise with stitch placement, which is great practice for control.
9. A Tactile Study of the Forest Floor
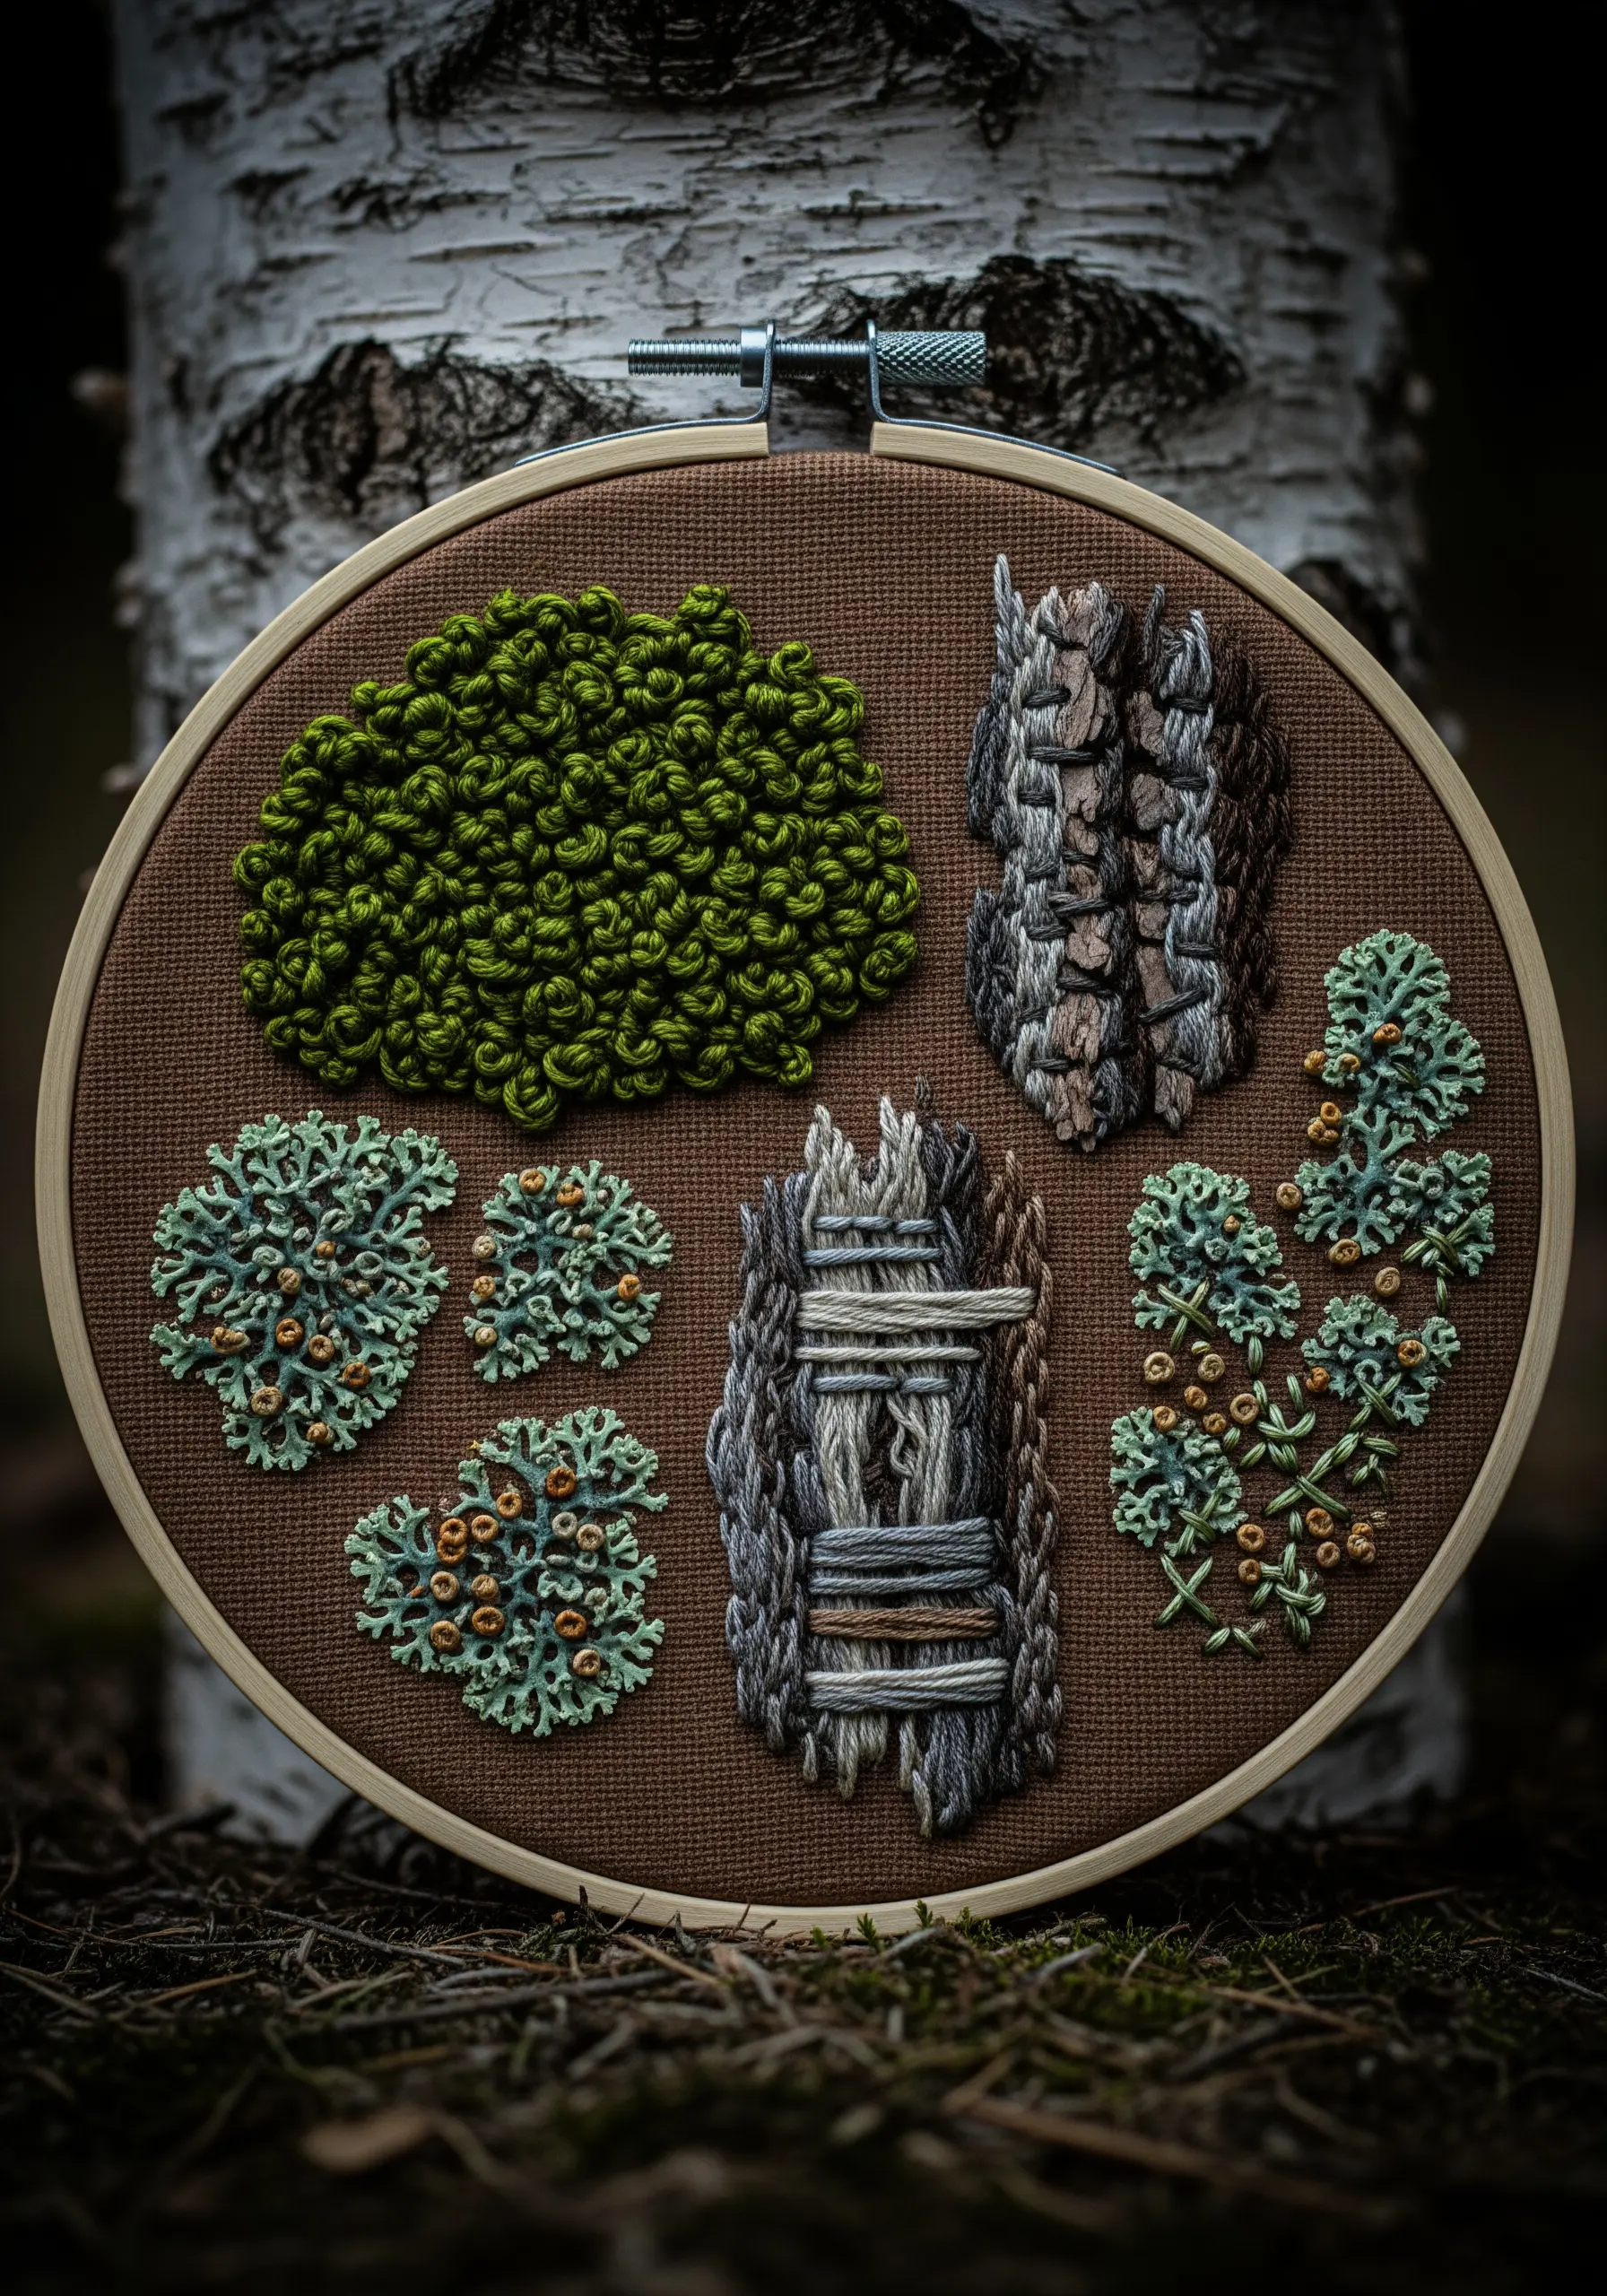
Move beyond visual representation and focus entirely on texture with a sampler inspired by moss, bark, and lichen.
Create the dense, spongy look of moss by packing French knots of varying green shades and heights tightly together.
For the bark texture, lay down long vertical stitches using several strands of variegated grey and brown thread, then couch them down with a finer thread to create ridges.
The lichen rosettes are formed with clusters of colonial knots or bullion knots, using contrasting colors for the centers to mimic their cup-like structure.
This is one of those high-texture fabric collage embroidery projects that prioritizes touch over pure representation.
10. Stitching Coastal Flora and Seaweed
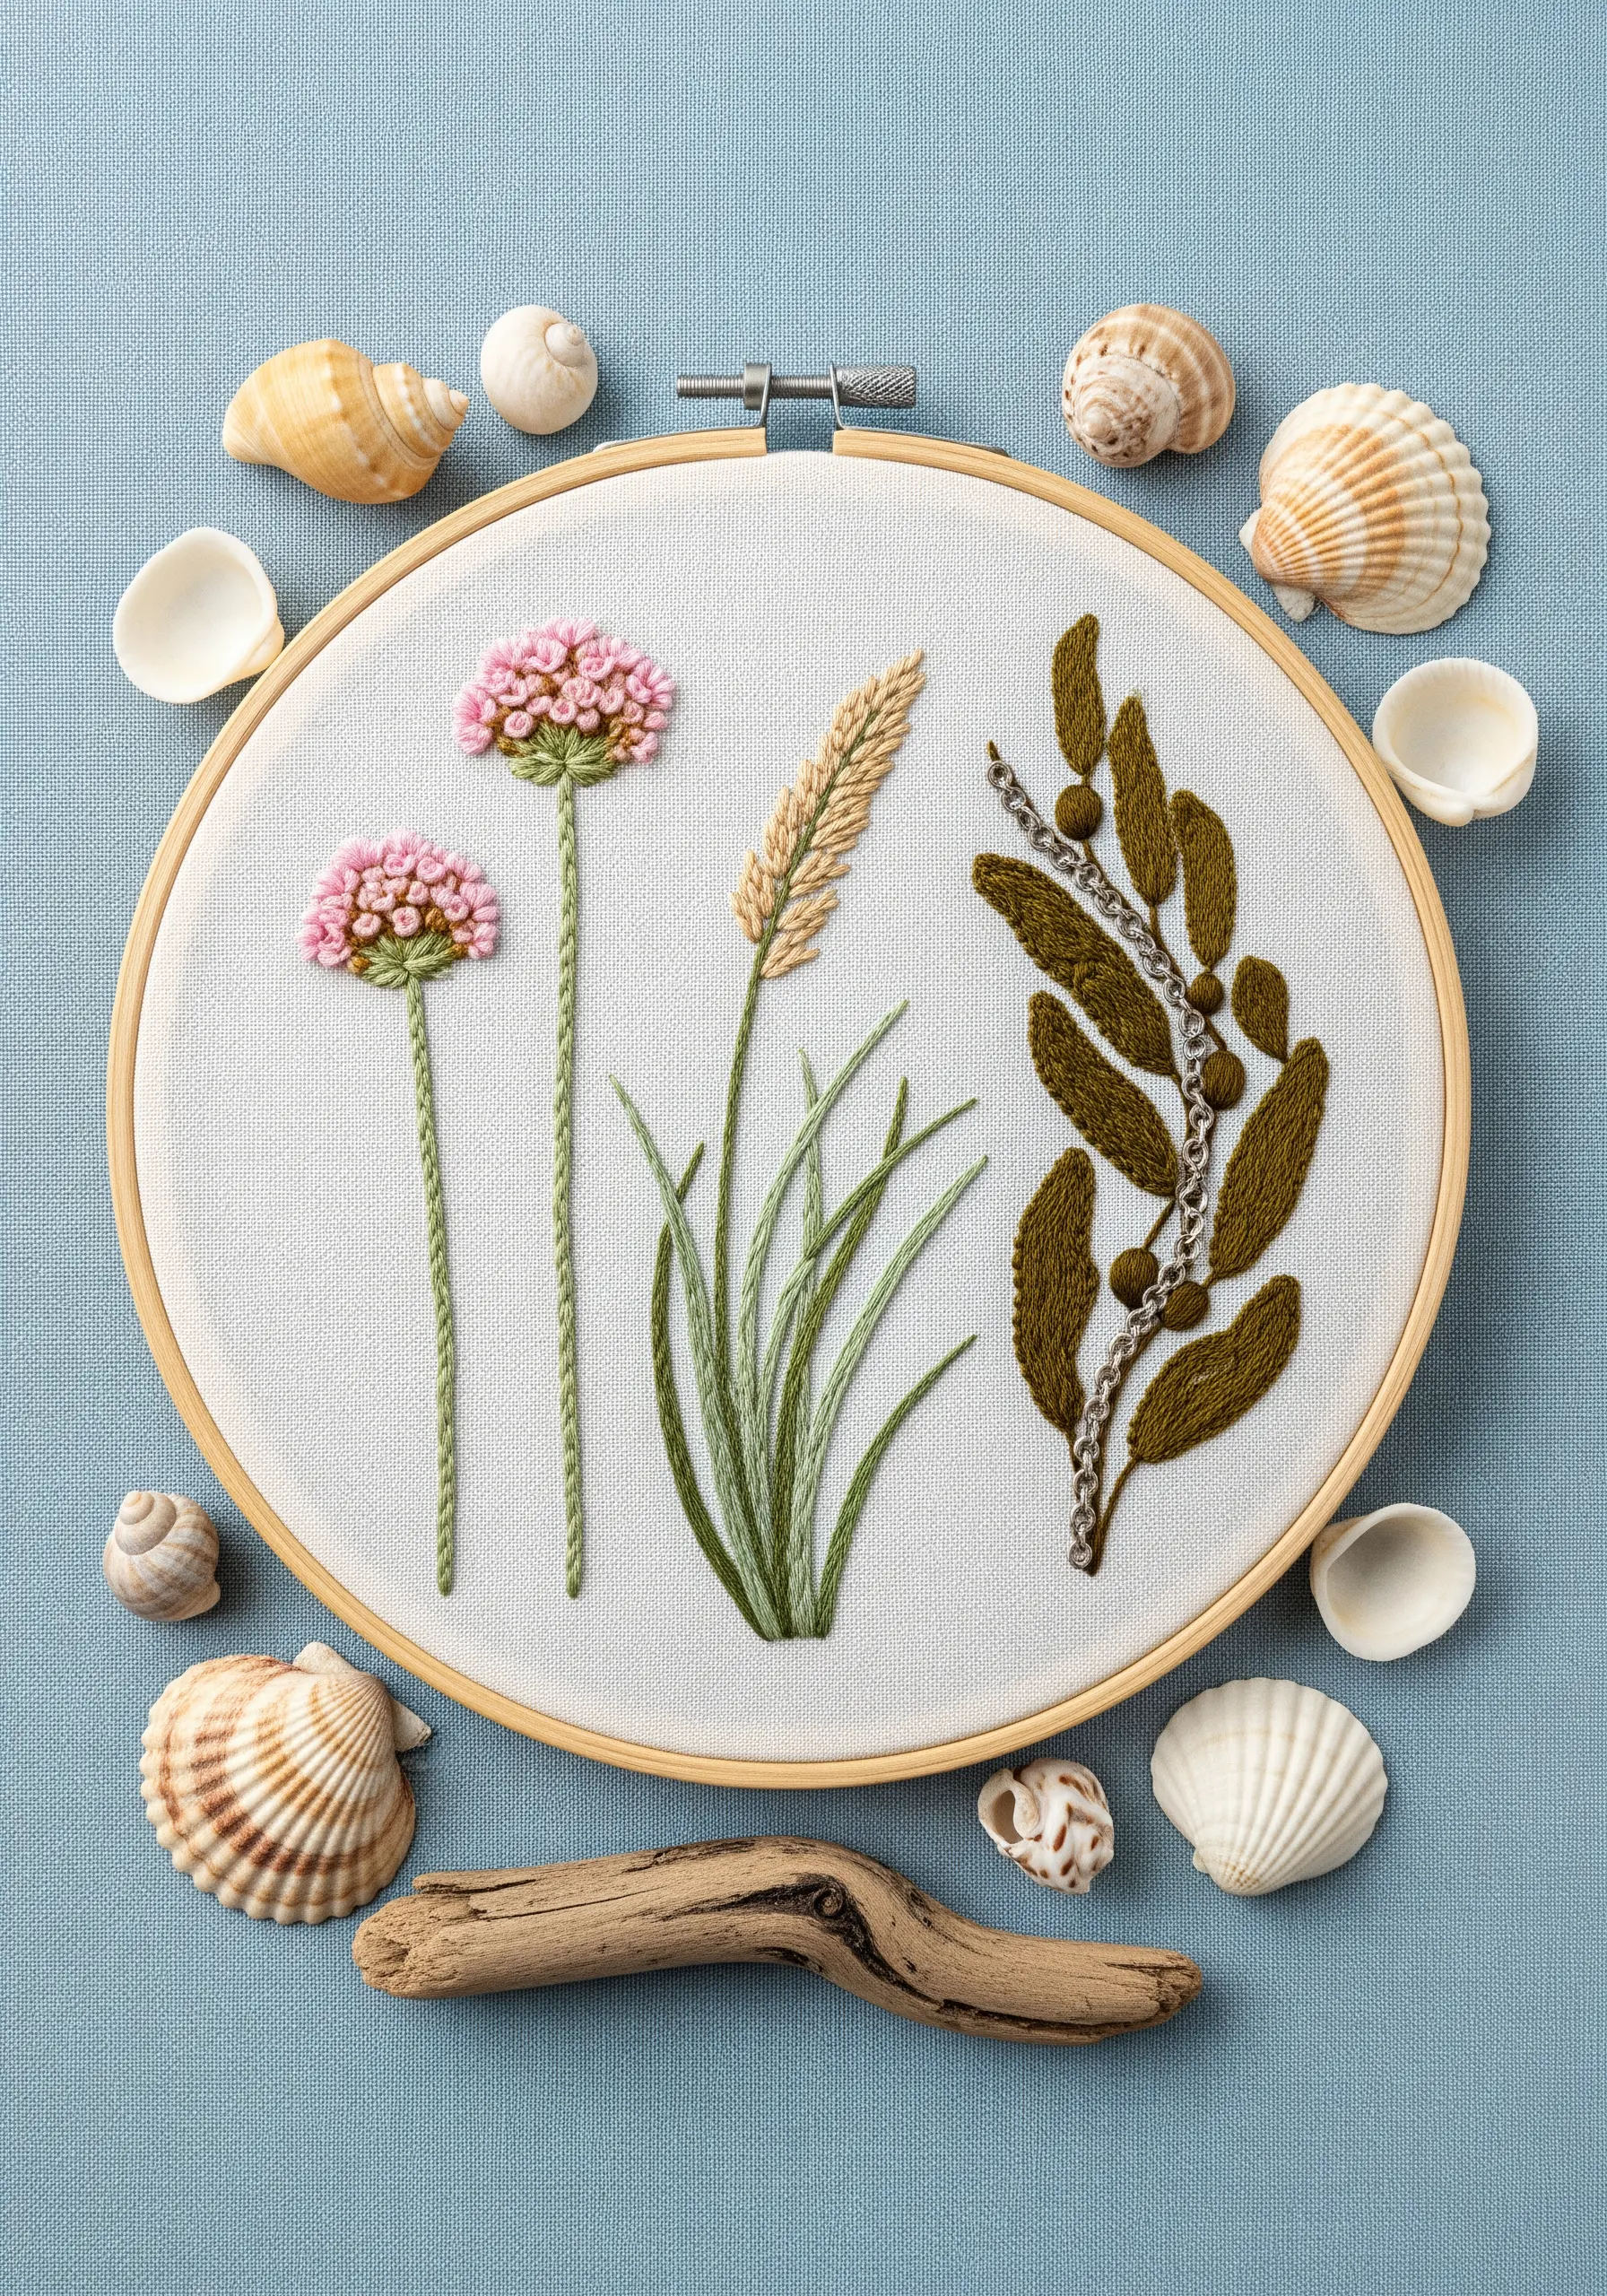
Capture the breezy, delicate nature of coastal plants with light, airy stitches.
The sea thrift flower heads are made from clusters of bullion knots stitched in a circle, giving them a fluffy, dimensional quality.
Use a very fine thread—perhaps just a single strand—and long straight stitches or stem stitches to create the slender, windswept grass blades.
To achieve the segmented, bubbly texture of the seaweed, try couching a pre-made chain stitch or a very fine cord onto the fabric surface.
A neutral linen background enhances the soft, natural color palette of these seaside botanicals.
11. Botanical Illustrations: From Root to Flower
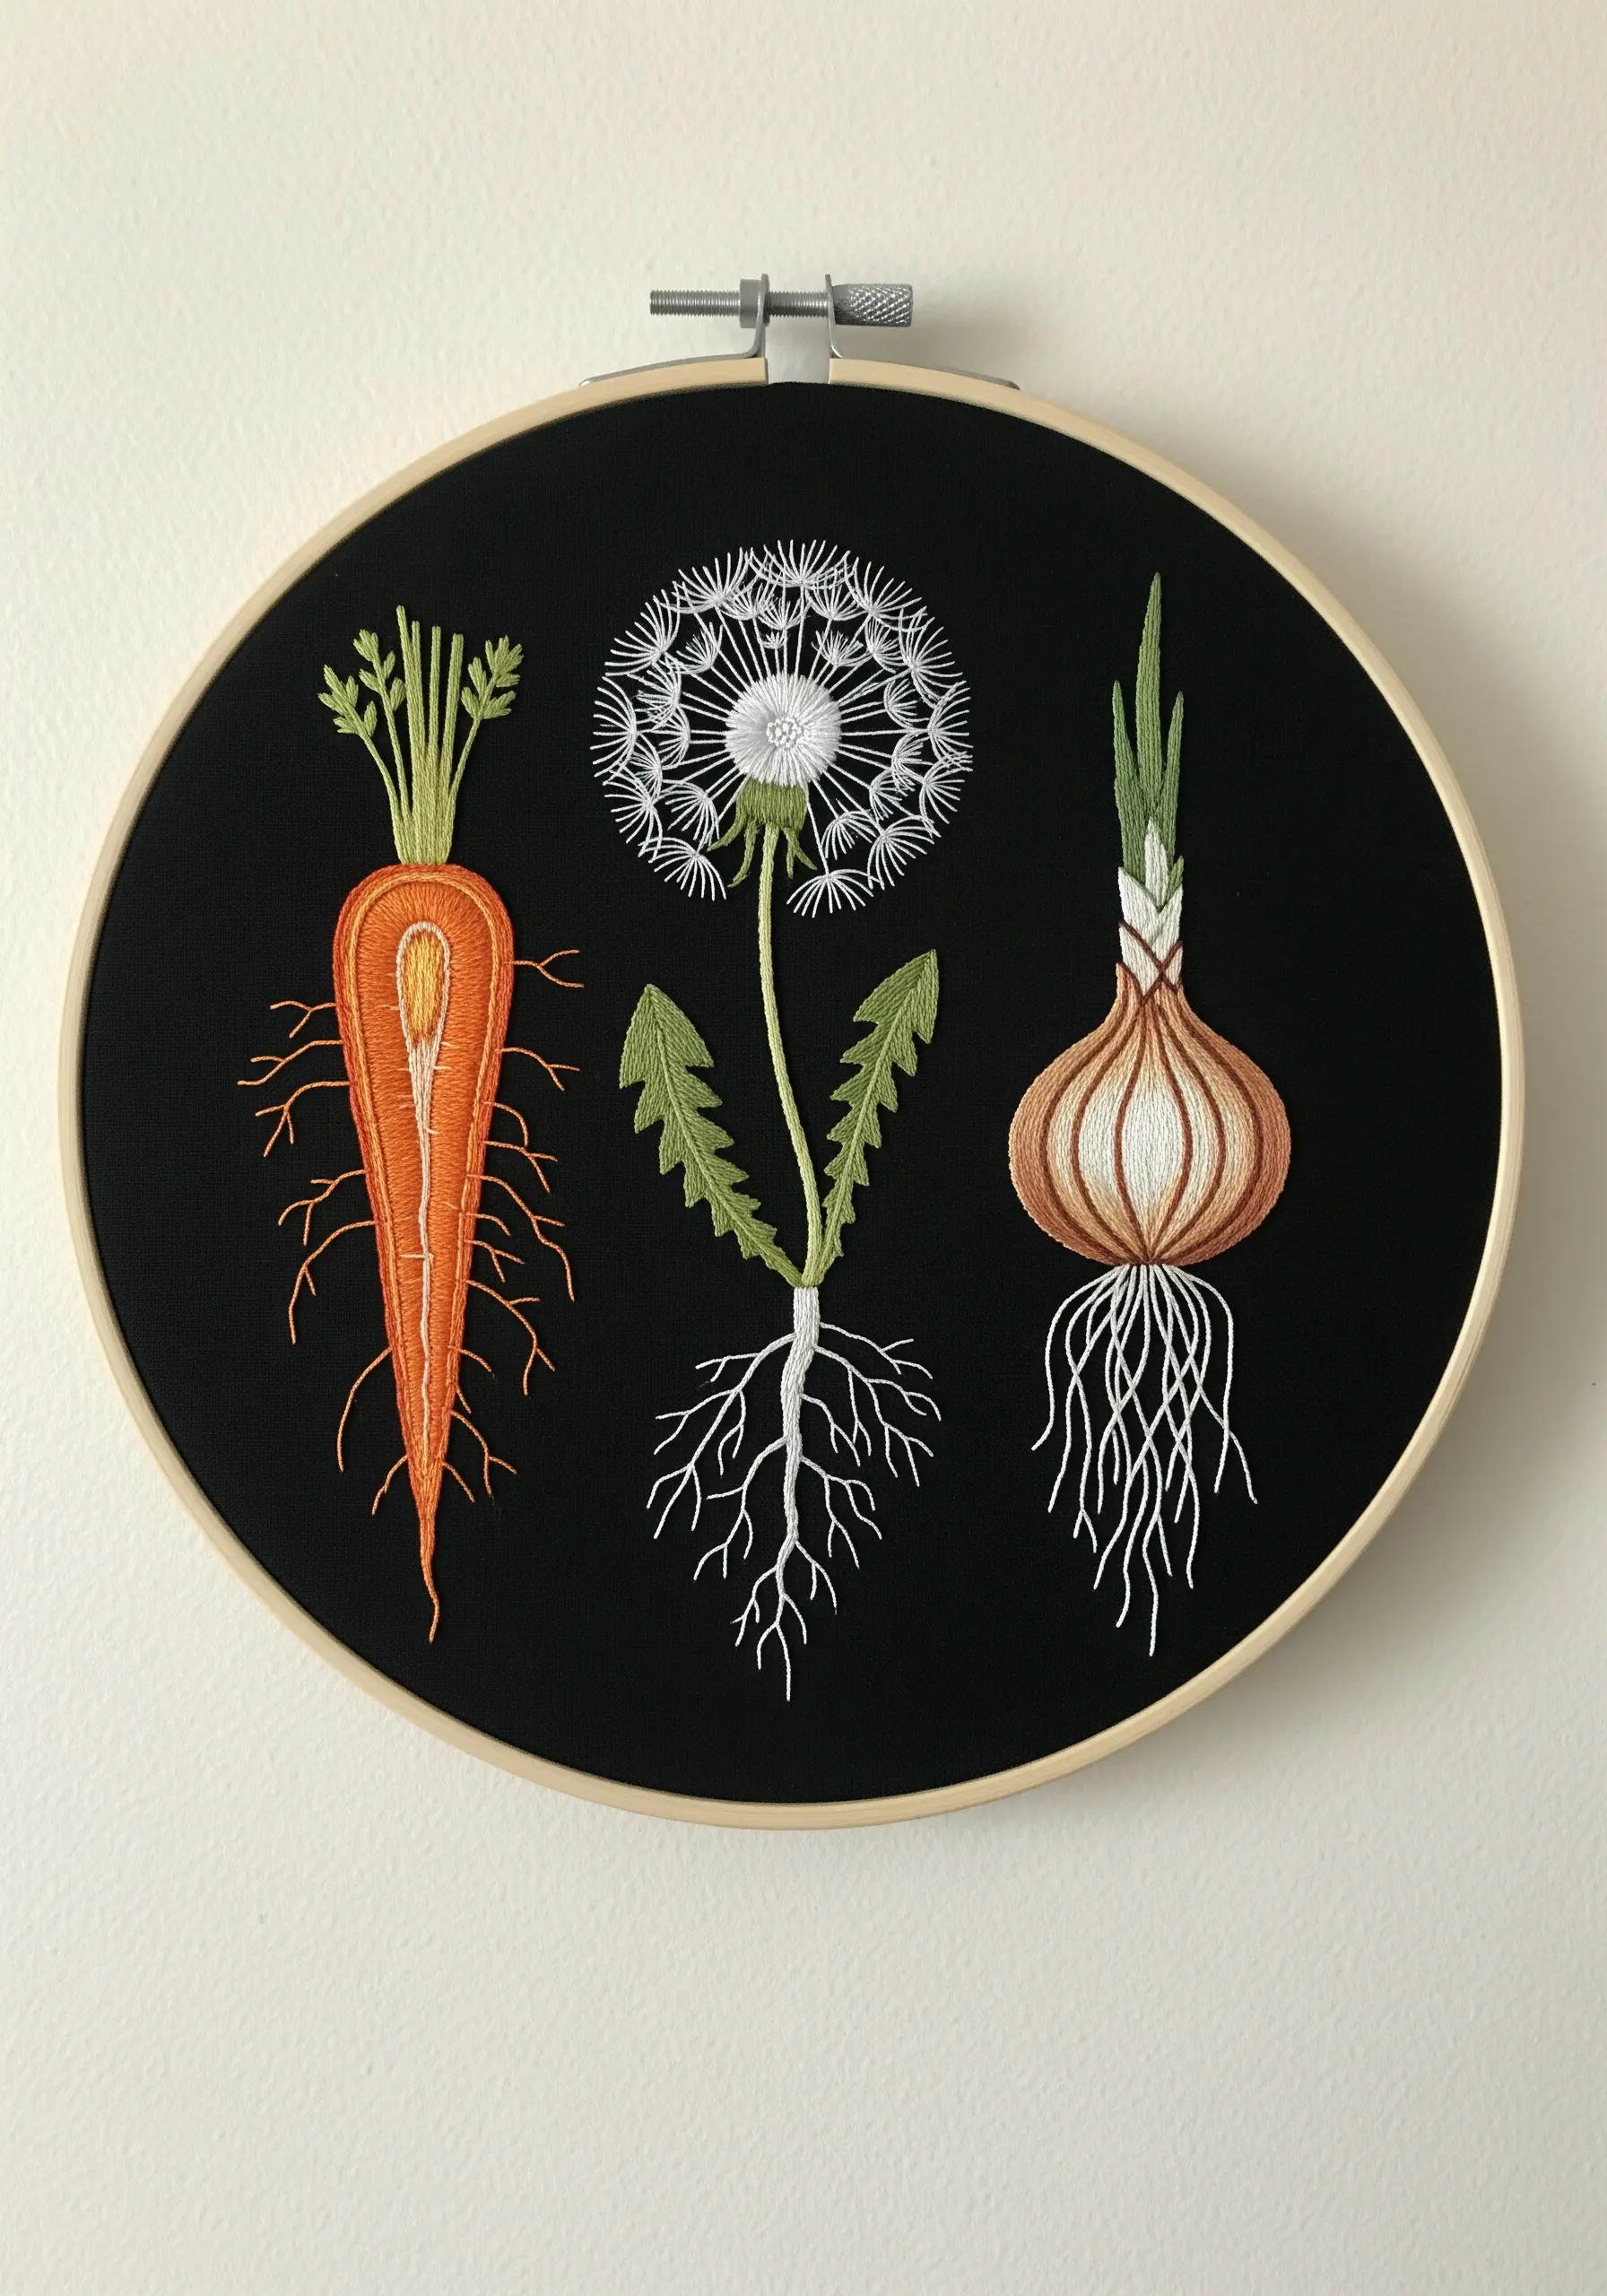
Adopt the style of a scientific illustrator by revealing the hidden structures beneath the soil.
The dramatic contrast of the black fabric makes every stitch count, so focus on clean lines and smooth fills.
For the fine, web-like root systems, use a single strand of white floss and a combination of split stitch and single straight stitches to create an organic, branching network.
The dandelion seed head is an exercise in radial symmetry, using straight stitches for the parachute-like pappus and detached chain stitches for the seeds, creating a sense of lightness and impending flight.
12. Elevating Florals with 3D Stitched Petals
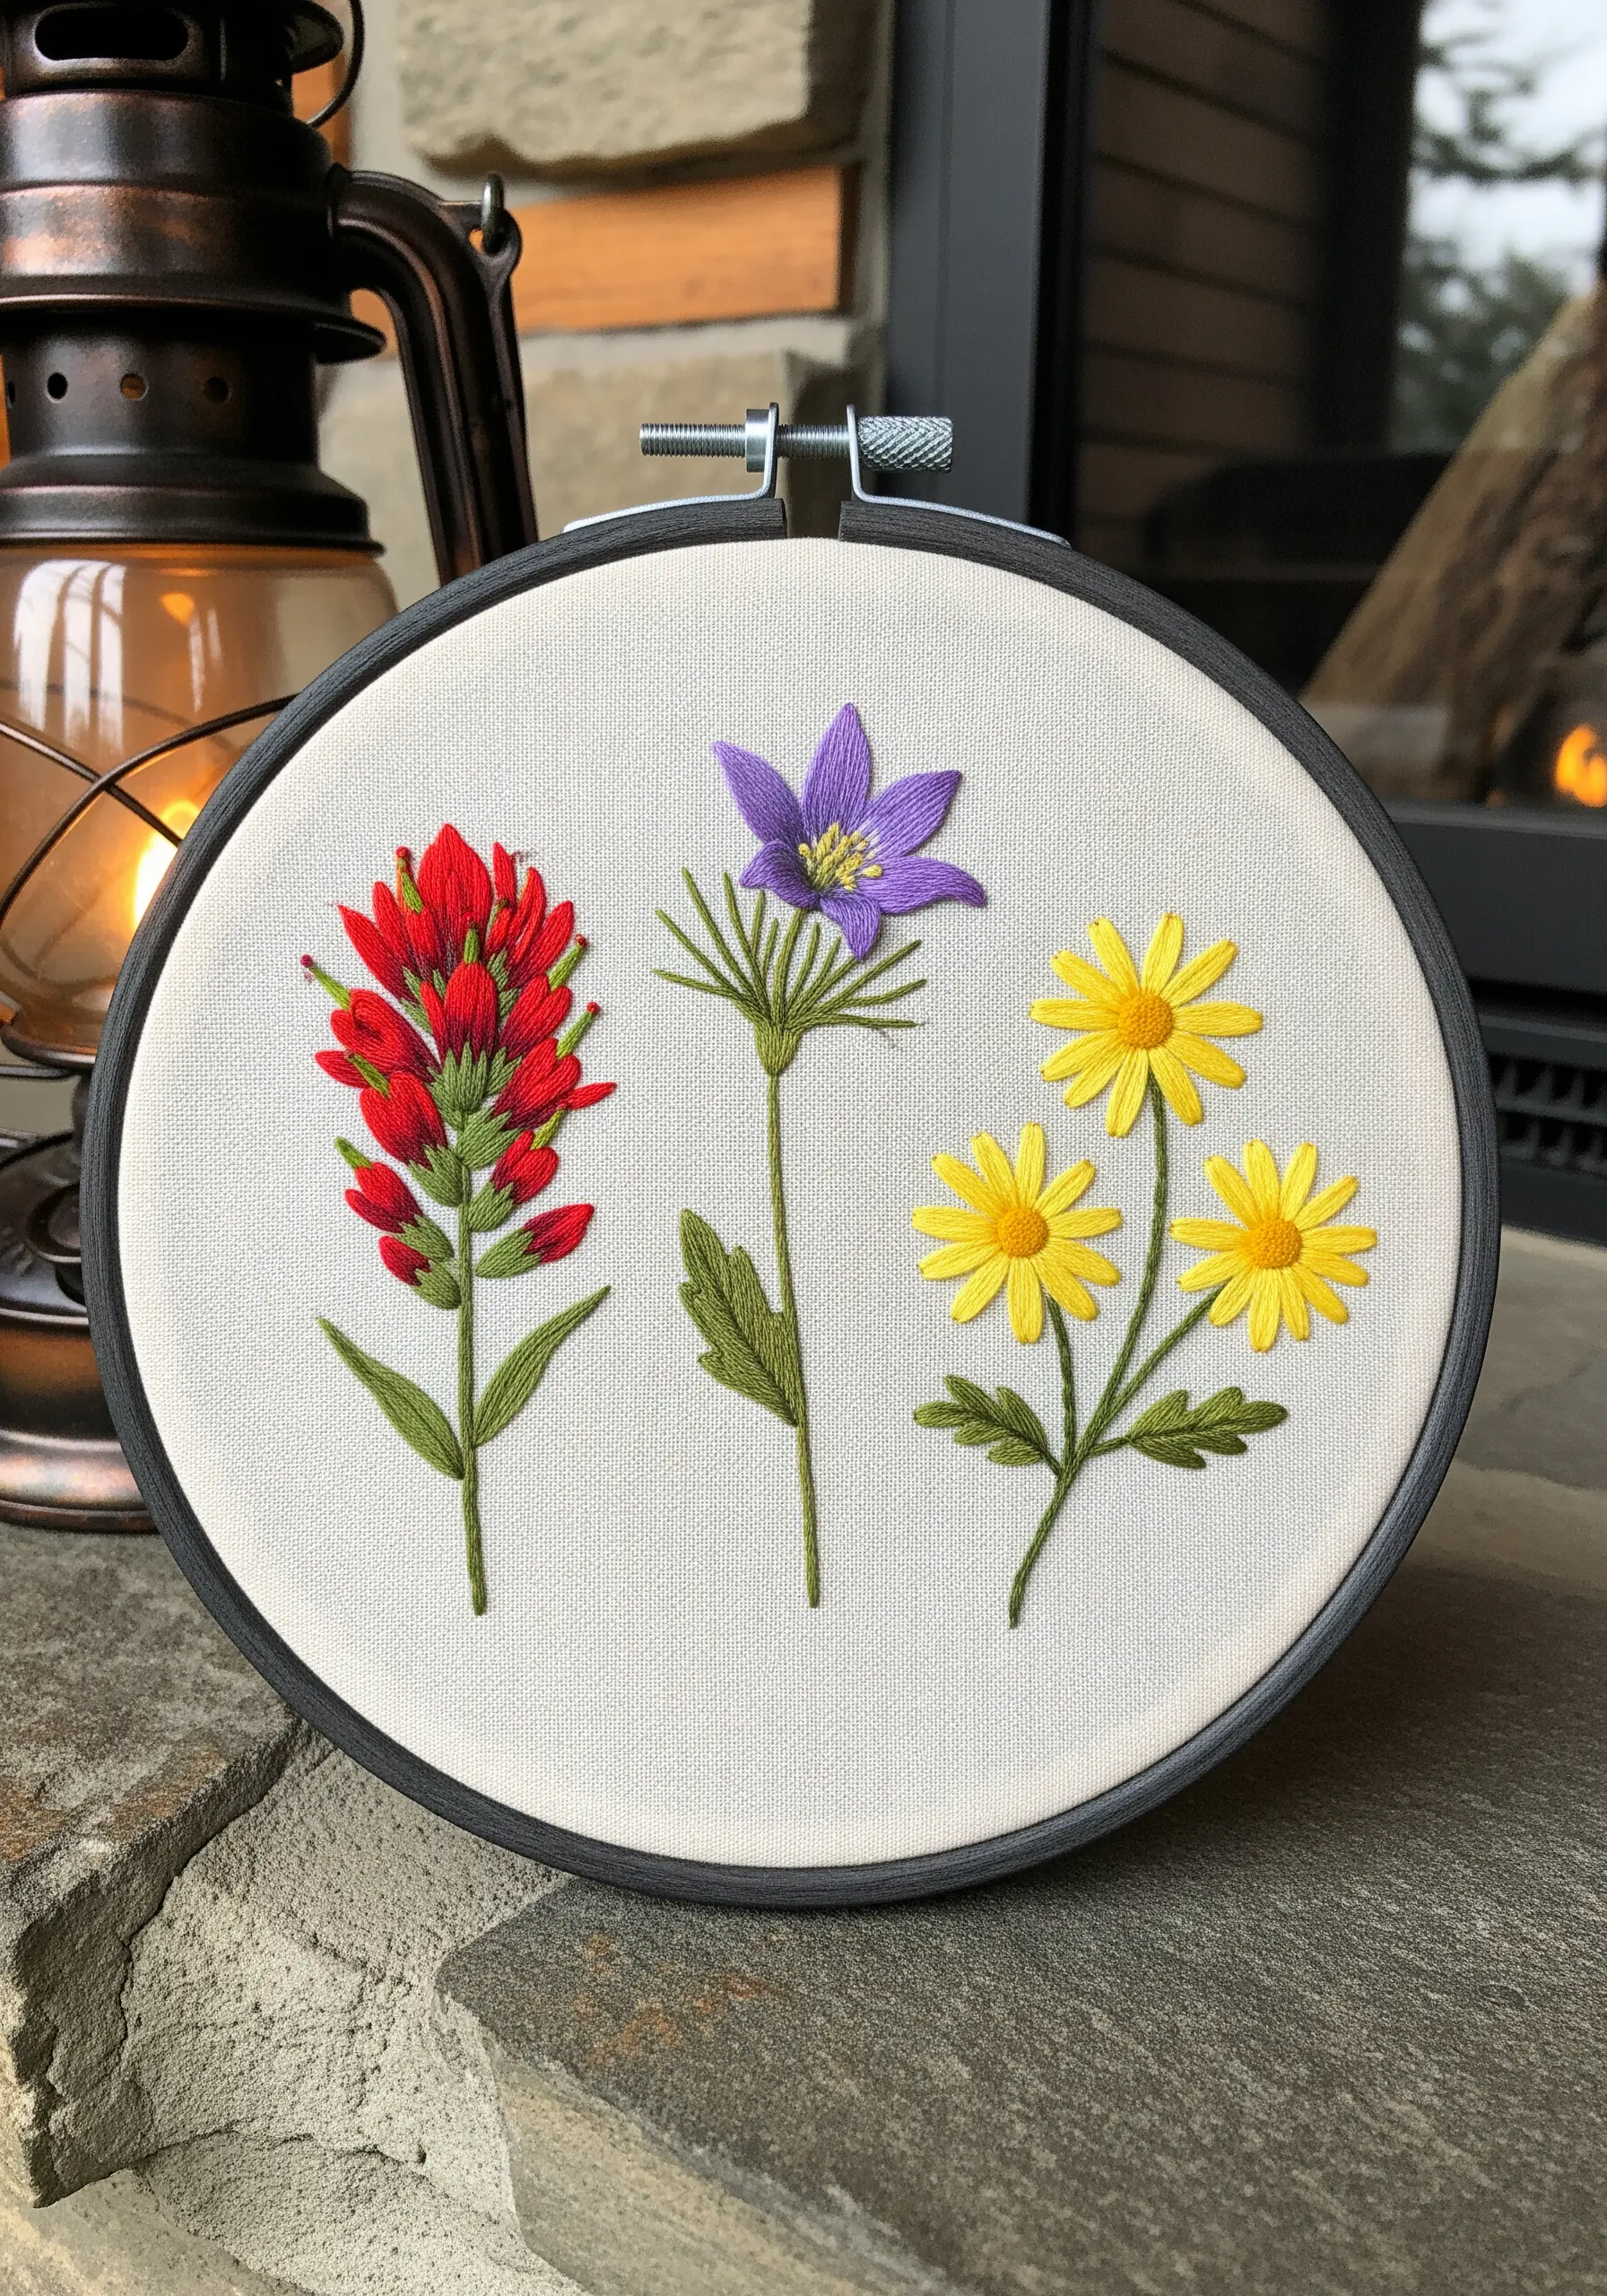
Add instant depth and realism to your floral work by incorporating detached, three-dimensional elements.
The purple petals of the pasqueflower are likely created with a detached buttonhole stitch or a woven picot stitch, worked off the fabric and then tacked down only at the base.
This technique allows the petals to lift away from the surface, casting natural shadows and creating a more dynamic, lifelike form.
By contrasting these 3D petals with the flat satin stitch of the yellow daisies, you create a compelling focal point and a richer tactile experience.
13. Sculpting Fruit with Volumetric Stitches
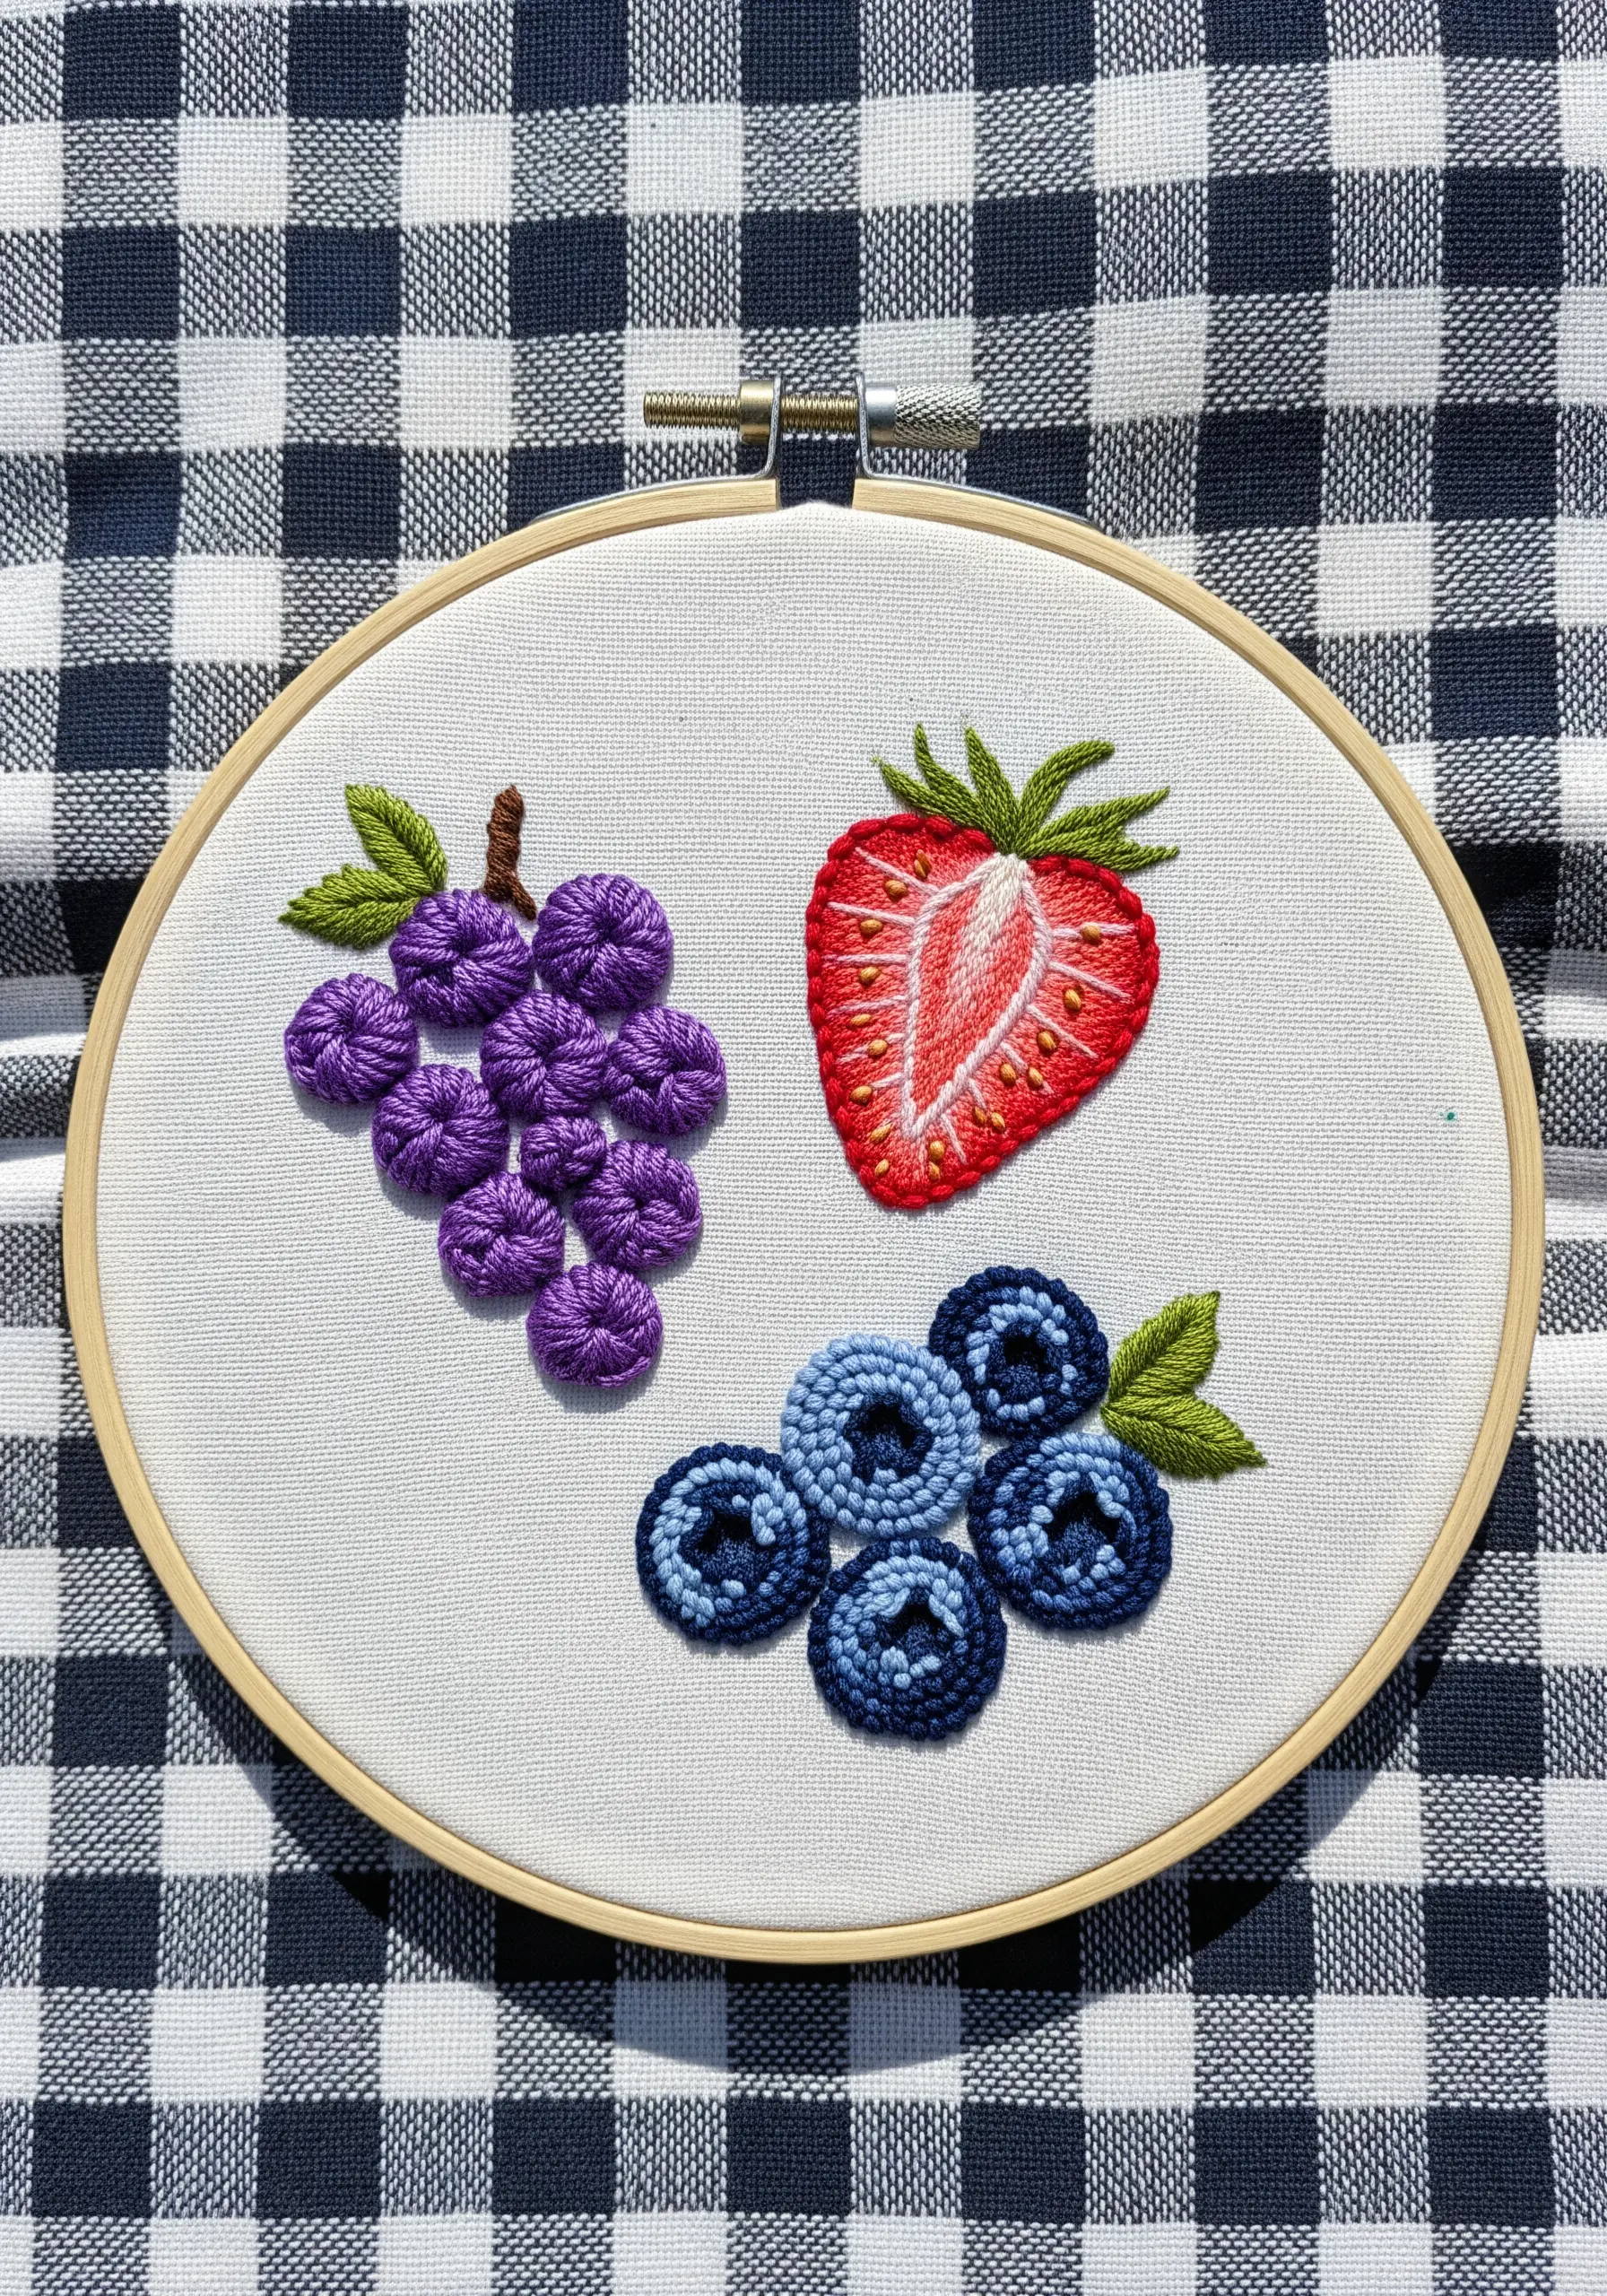
Go beyond flat fills and use sculptural stitches to give your embroidered fruits a plump, realistic form.
The grapes and blueberries are made from raised, circular stitches like bullion knots or woven wheels, which are perfect for creating that round, clustered effect.
Vary the tightness and number of wraps in your bullion knots to create slight variations in the size and shape of each piece of fruit.
For the strawberry, fill the shape with a smooth satin stitch, then scatter tiny seed stitches across the surface in a contrasting color to mimic the achenes (seeds).
14. The Graphic Beauty of Weeds and Wild Plants
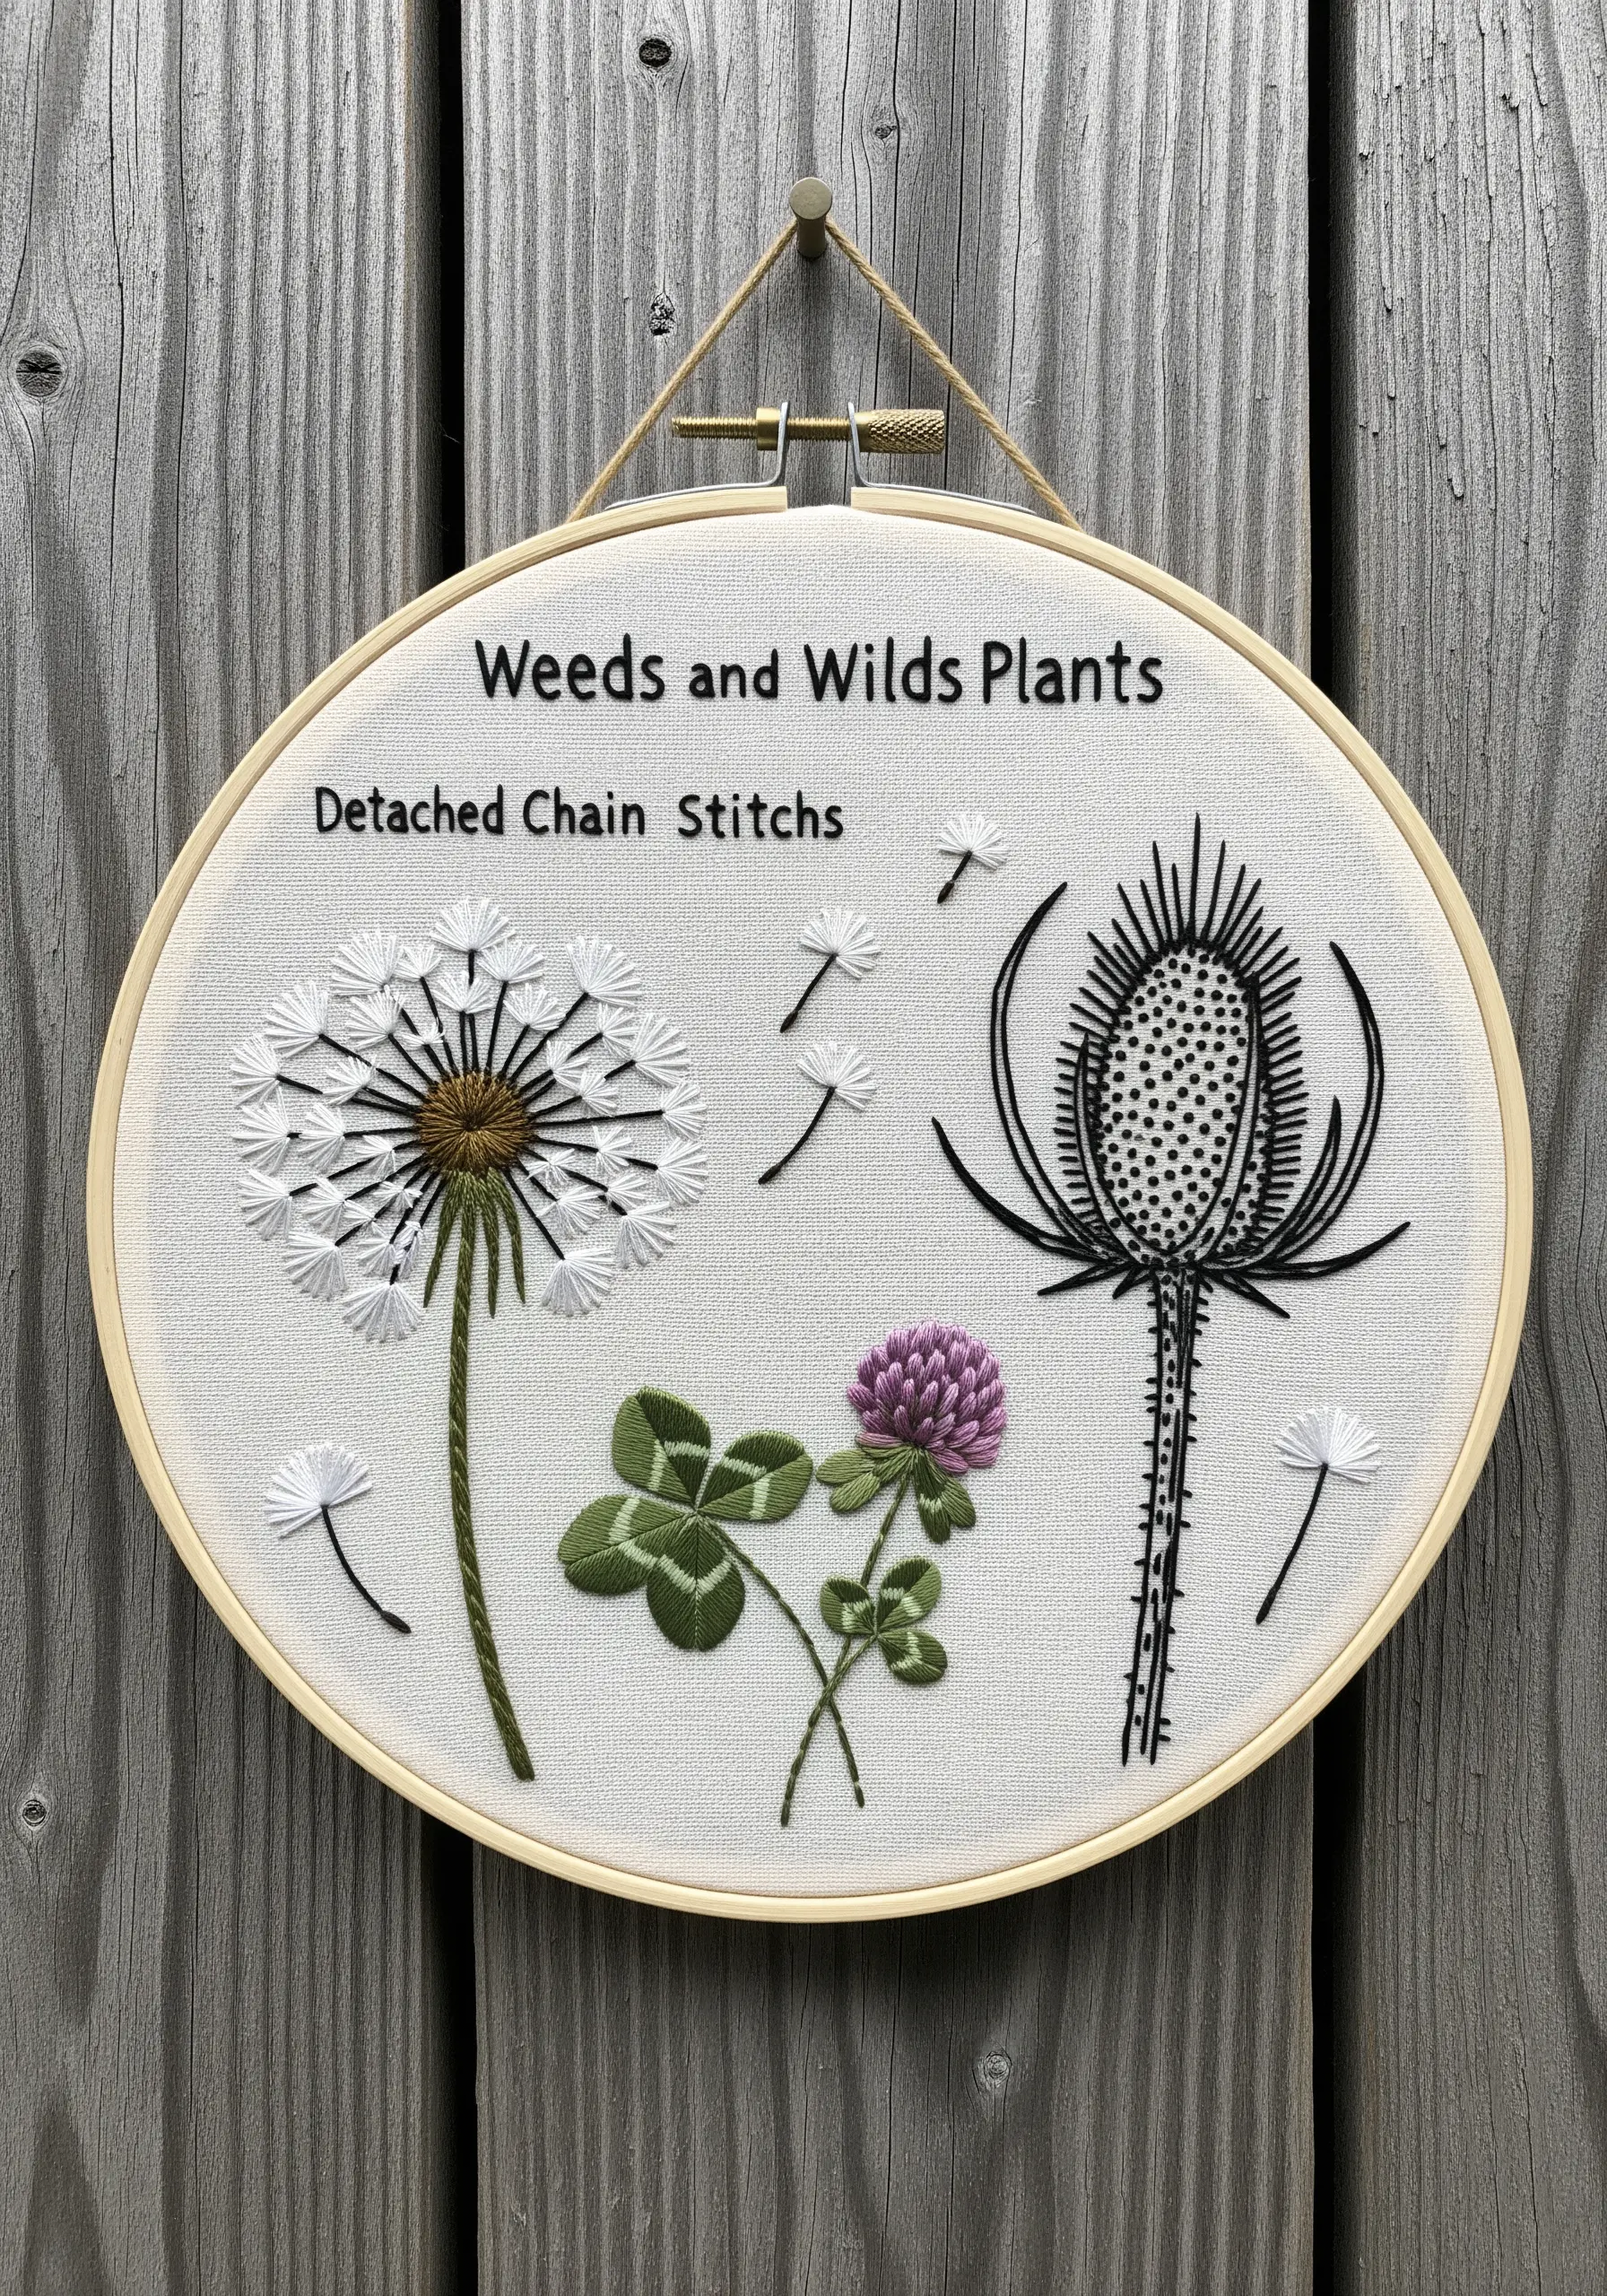
This sampler proves that you can capture the essence of a plant by combining simple line work with focused textural details.
The thistle is rendered almost entirely in black backstitch, giving it a bold, illustrative quality that emphasizes its sharp, spiky form.
In contrast, the clover leaves are filled with a soft satin stitch, and the dandelion head is a cloud of detached chain stitches arranged in a sphere.
This approach is perfect for creating modern botanical line art embroidery patterns that feel both delicate and graphic.
15. Creating “Floating” Motifs on Sheer Fabric
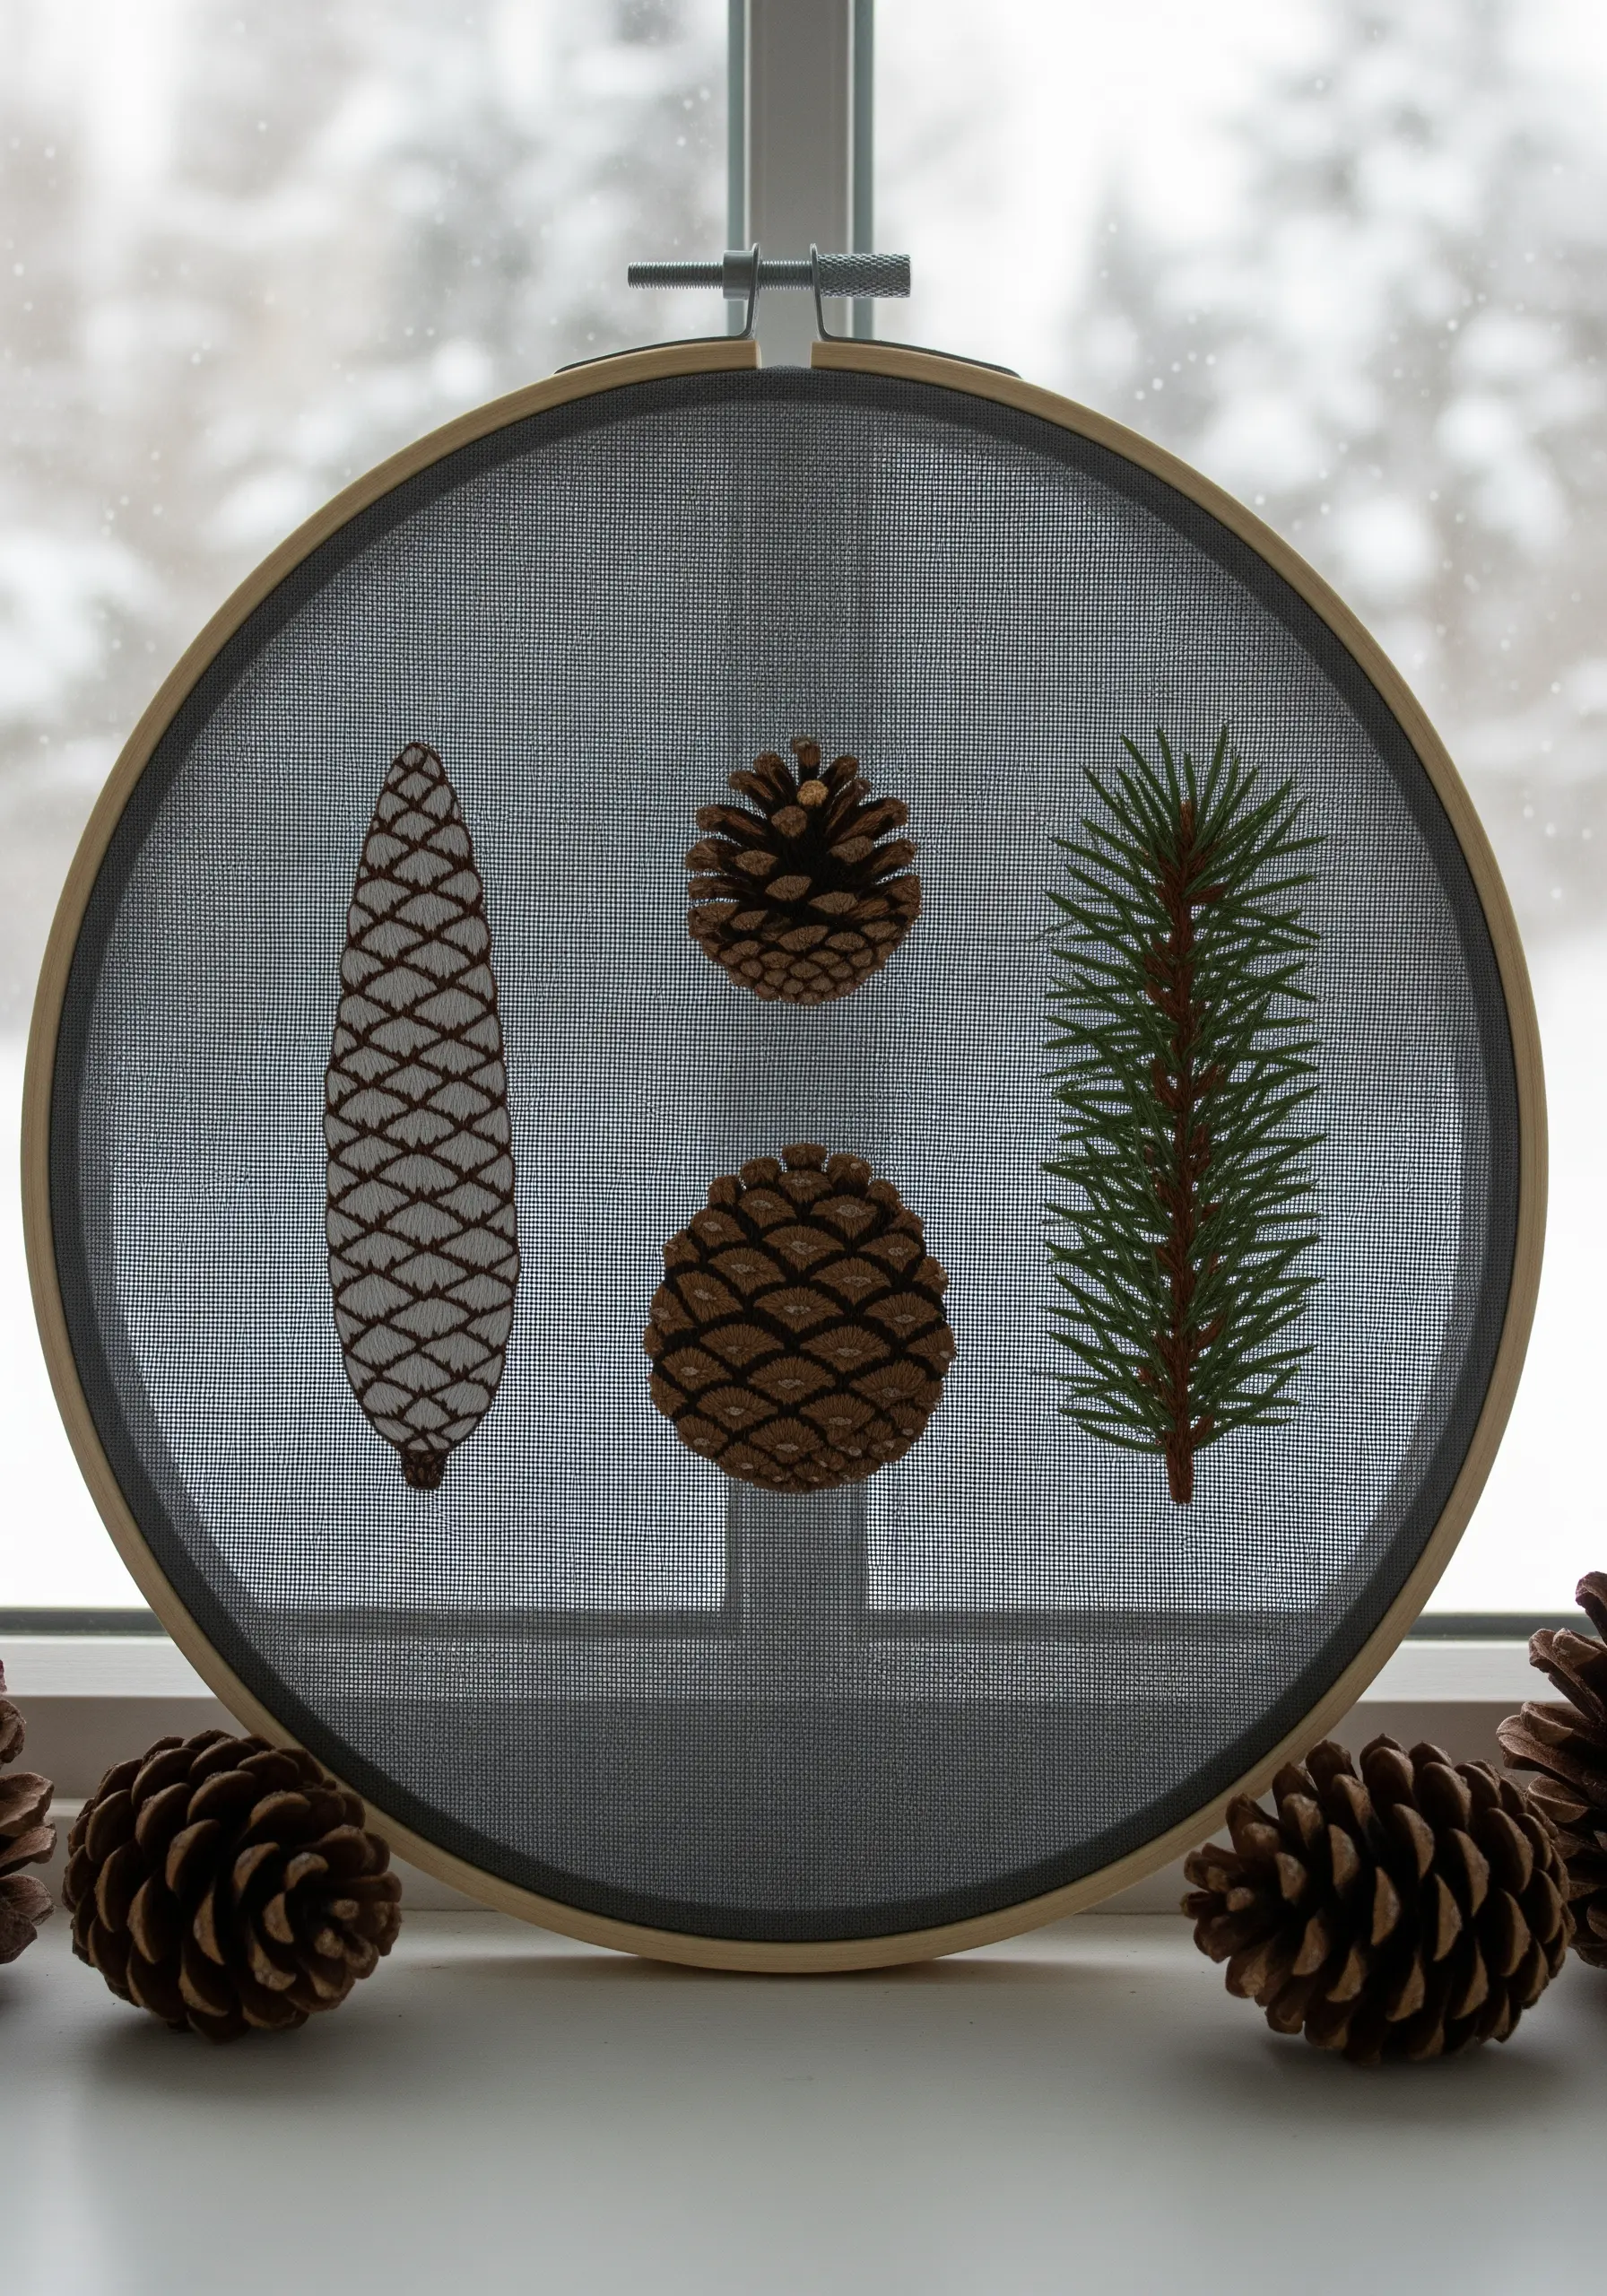
Embroidering on a sheer material like mesh, tulle, or organza creates a stunning illusion of floating motifs.
To do this successfully, you must use a stabilizer, such as a water-soluble film, to prevent the delicate fabric from puckering under the tension of your stitches.
You also have to be meticulous with your thread tails, as knots will be visible. Weave your ends securely under existing stitches on the back of your work.
This technique challenges your precision but rewards you with a piece that interacts beautifully with light.
16. Advanced Needlepainting for Tropical Foliage
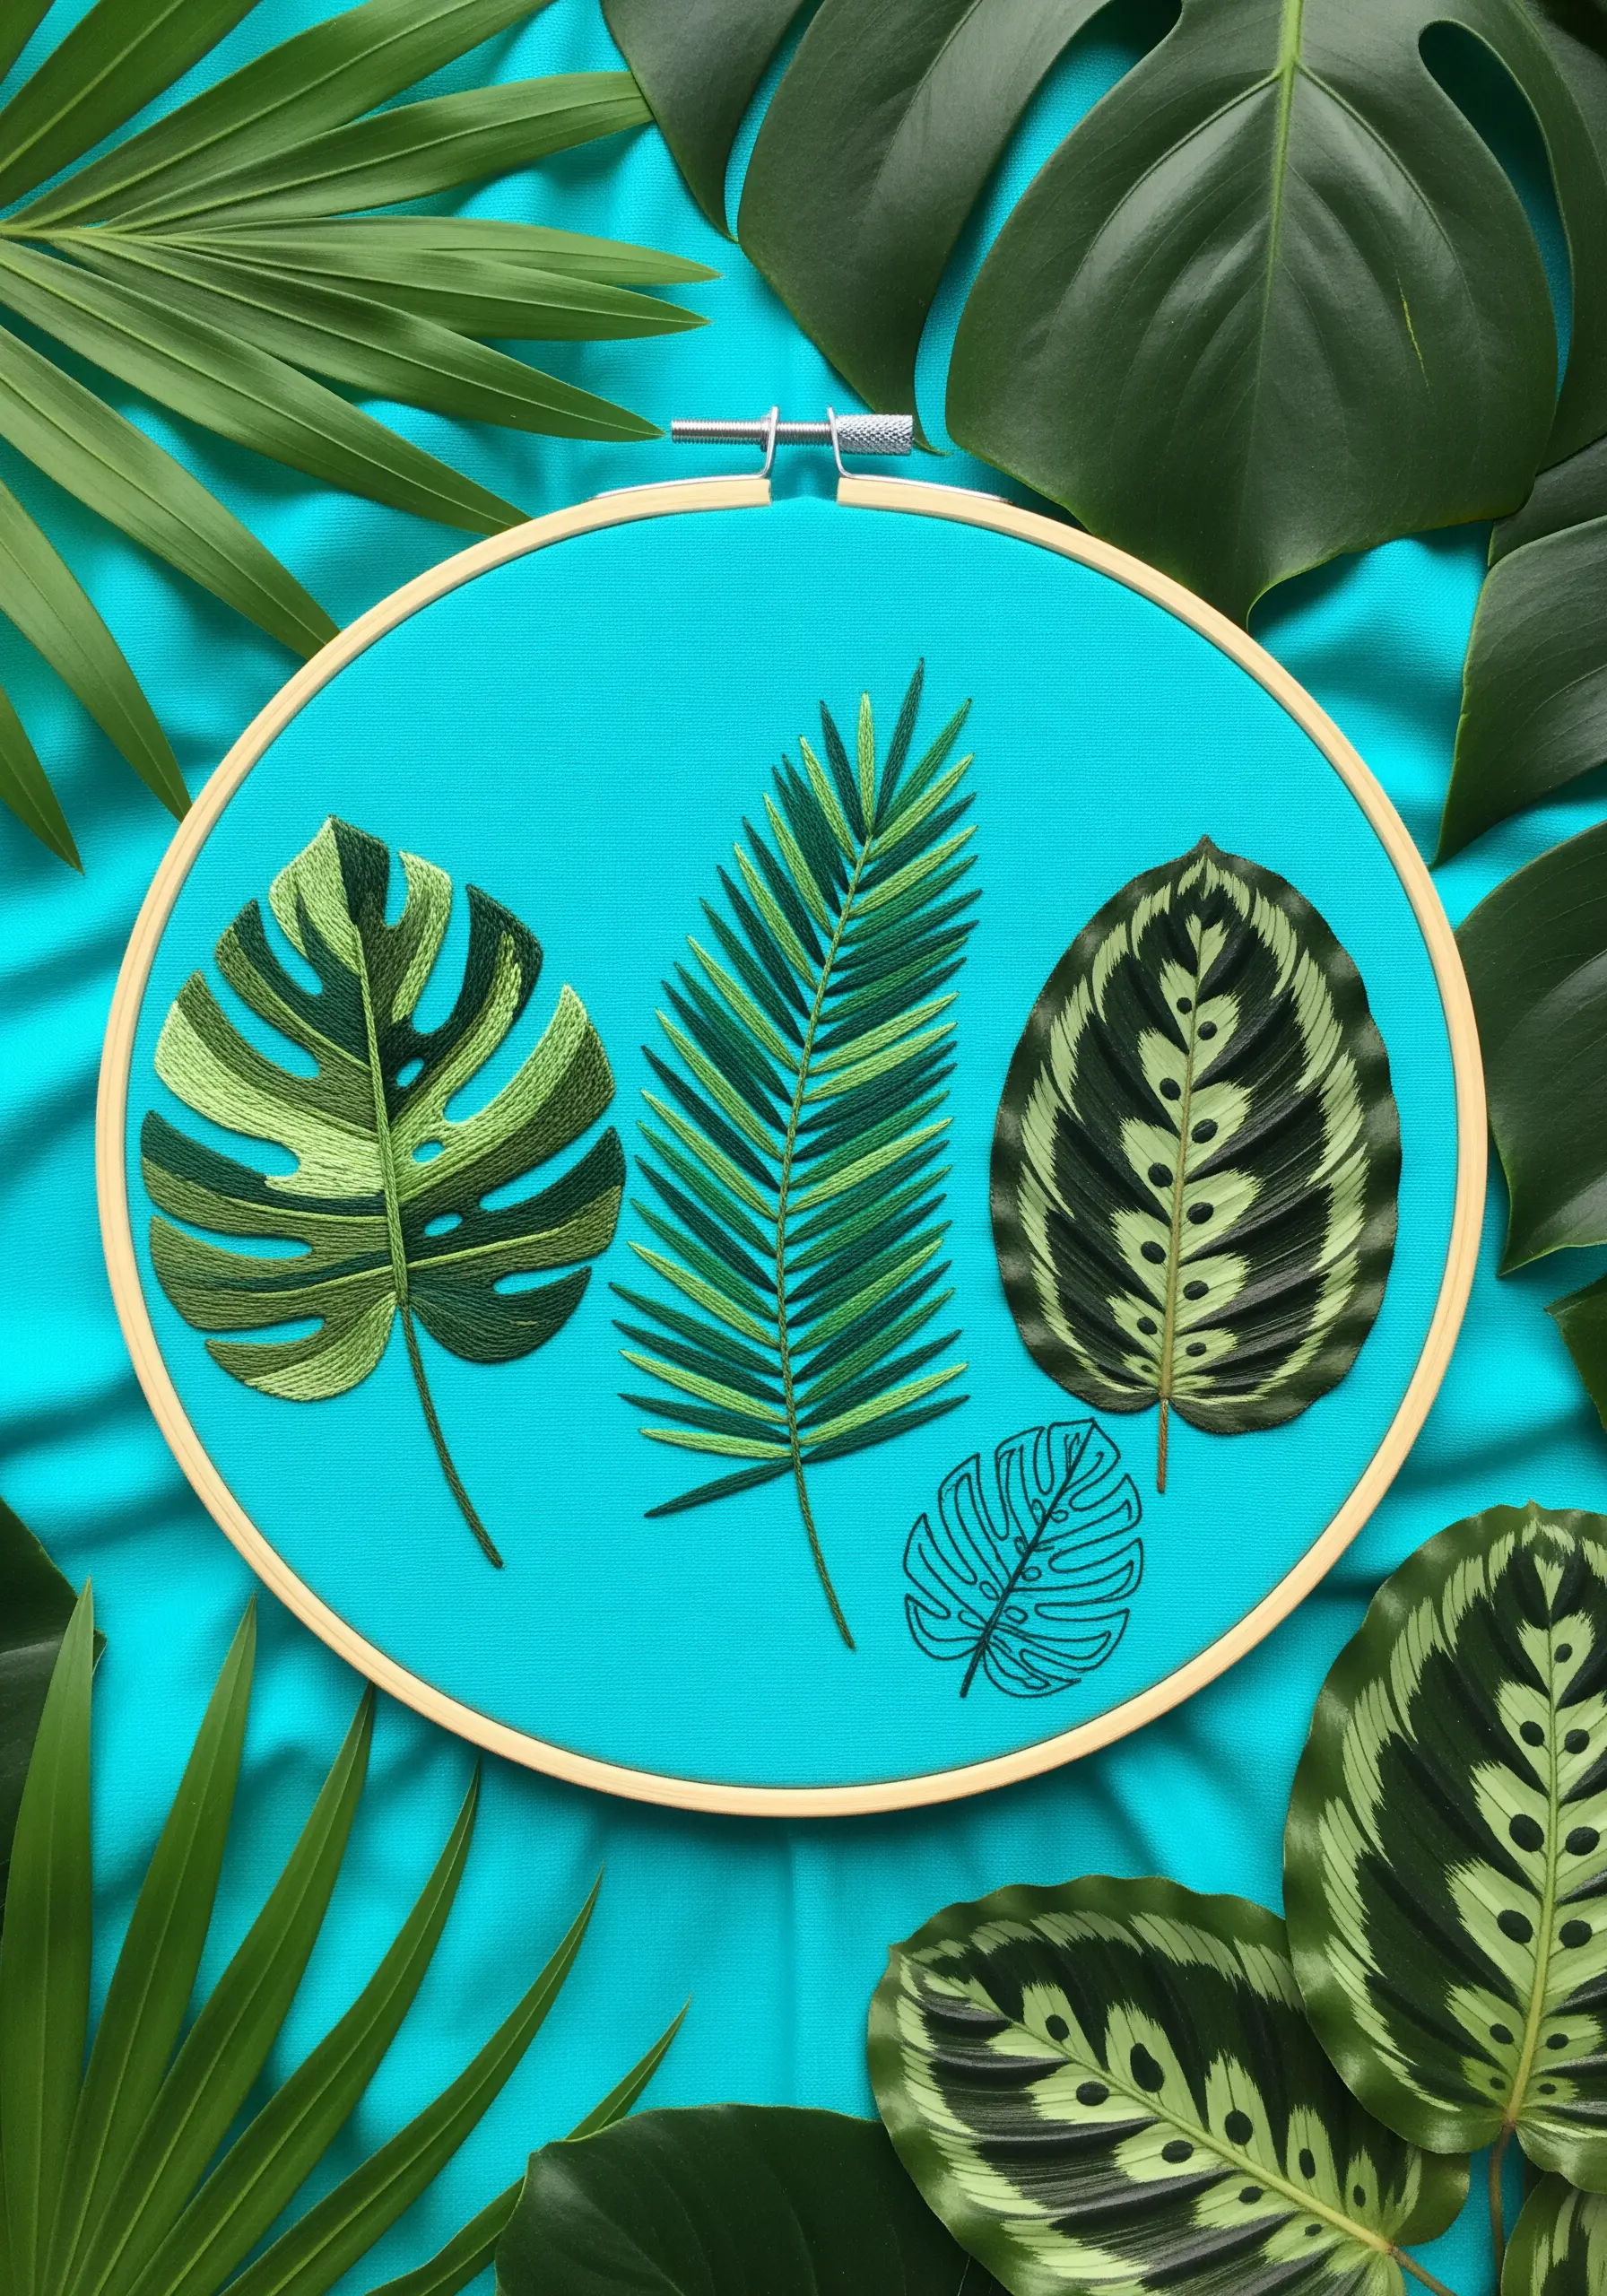
To capture the intricate patterns of a Calathea or Monstera leaf, you need to master the art of needlepainting (long-and-short stitch).
Begin by drawing your pattern directly onto the fabric, marking out the different color zones clearly.
Work with a single strand of floss to achieve the smoothest possible color transitions. Your stitches should be of varying lengths and interlock like the teeth of a zipper to avoid creating harsh lines between colors.
This technique is meditative and slow, but it’s the only way to achieve a truly photorealistic, painted effect with thread.
17. Creating Depth with Monochromatic Texture
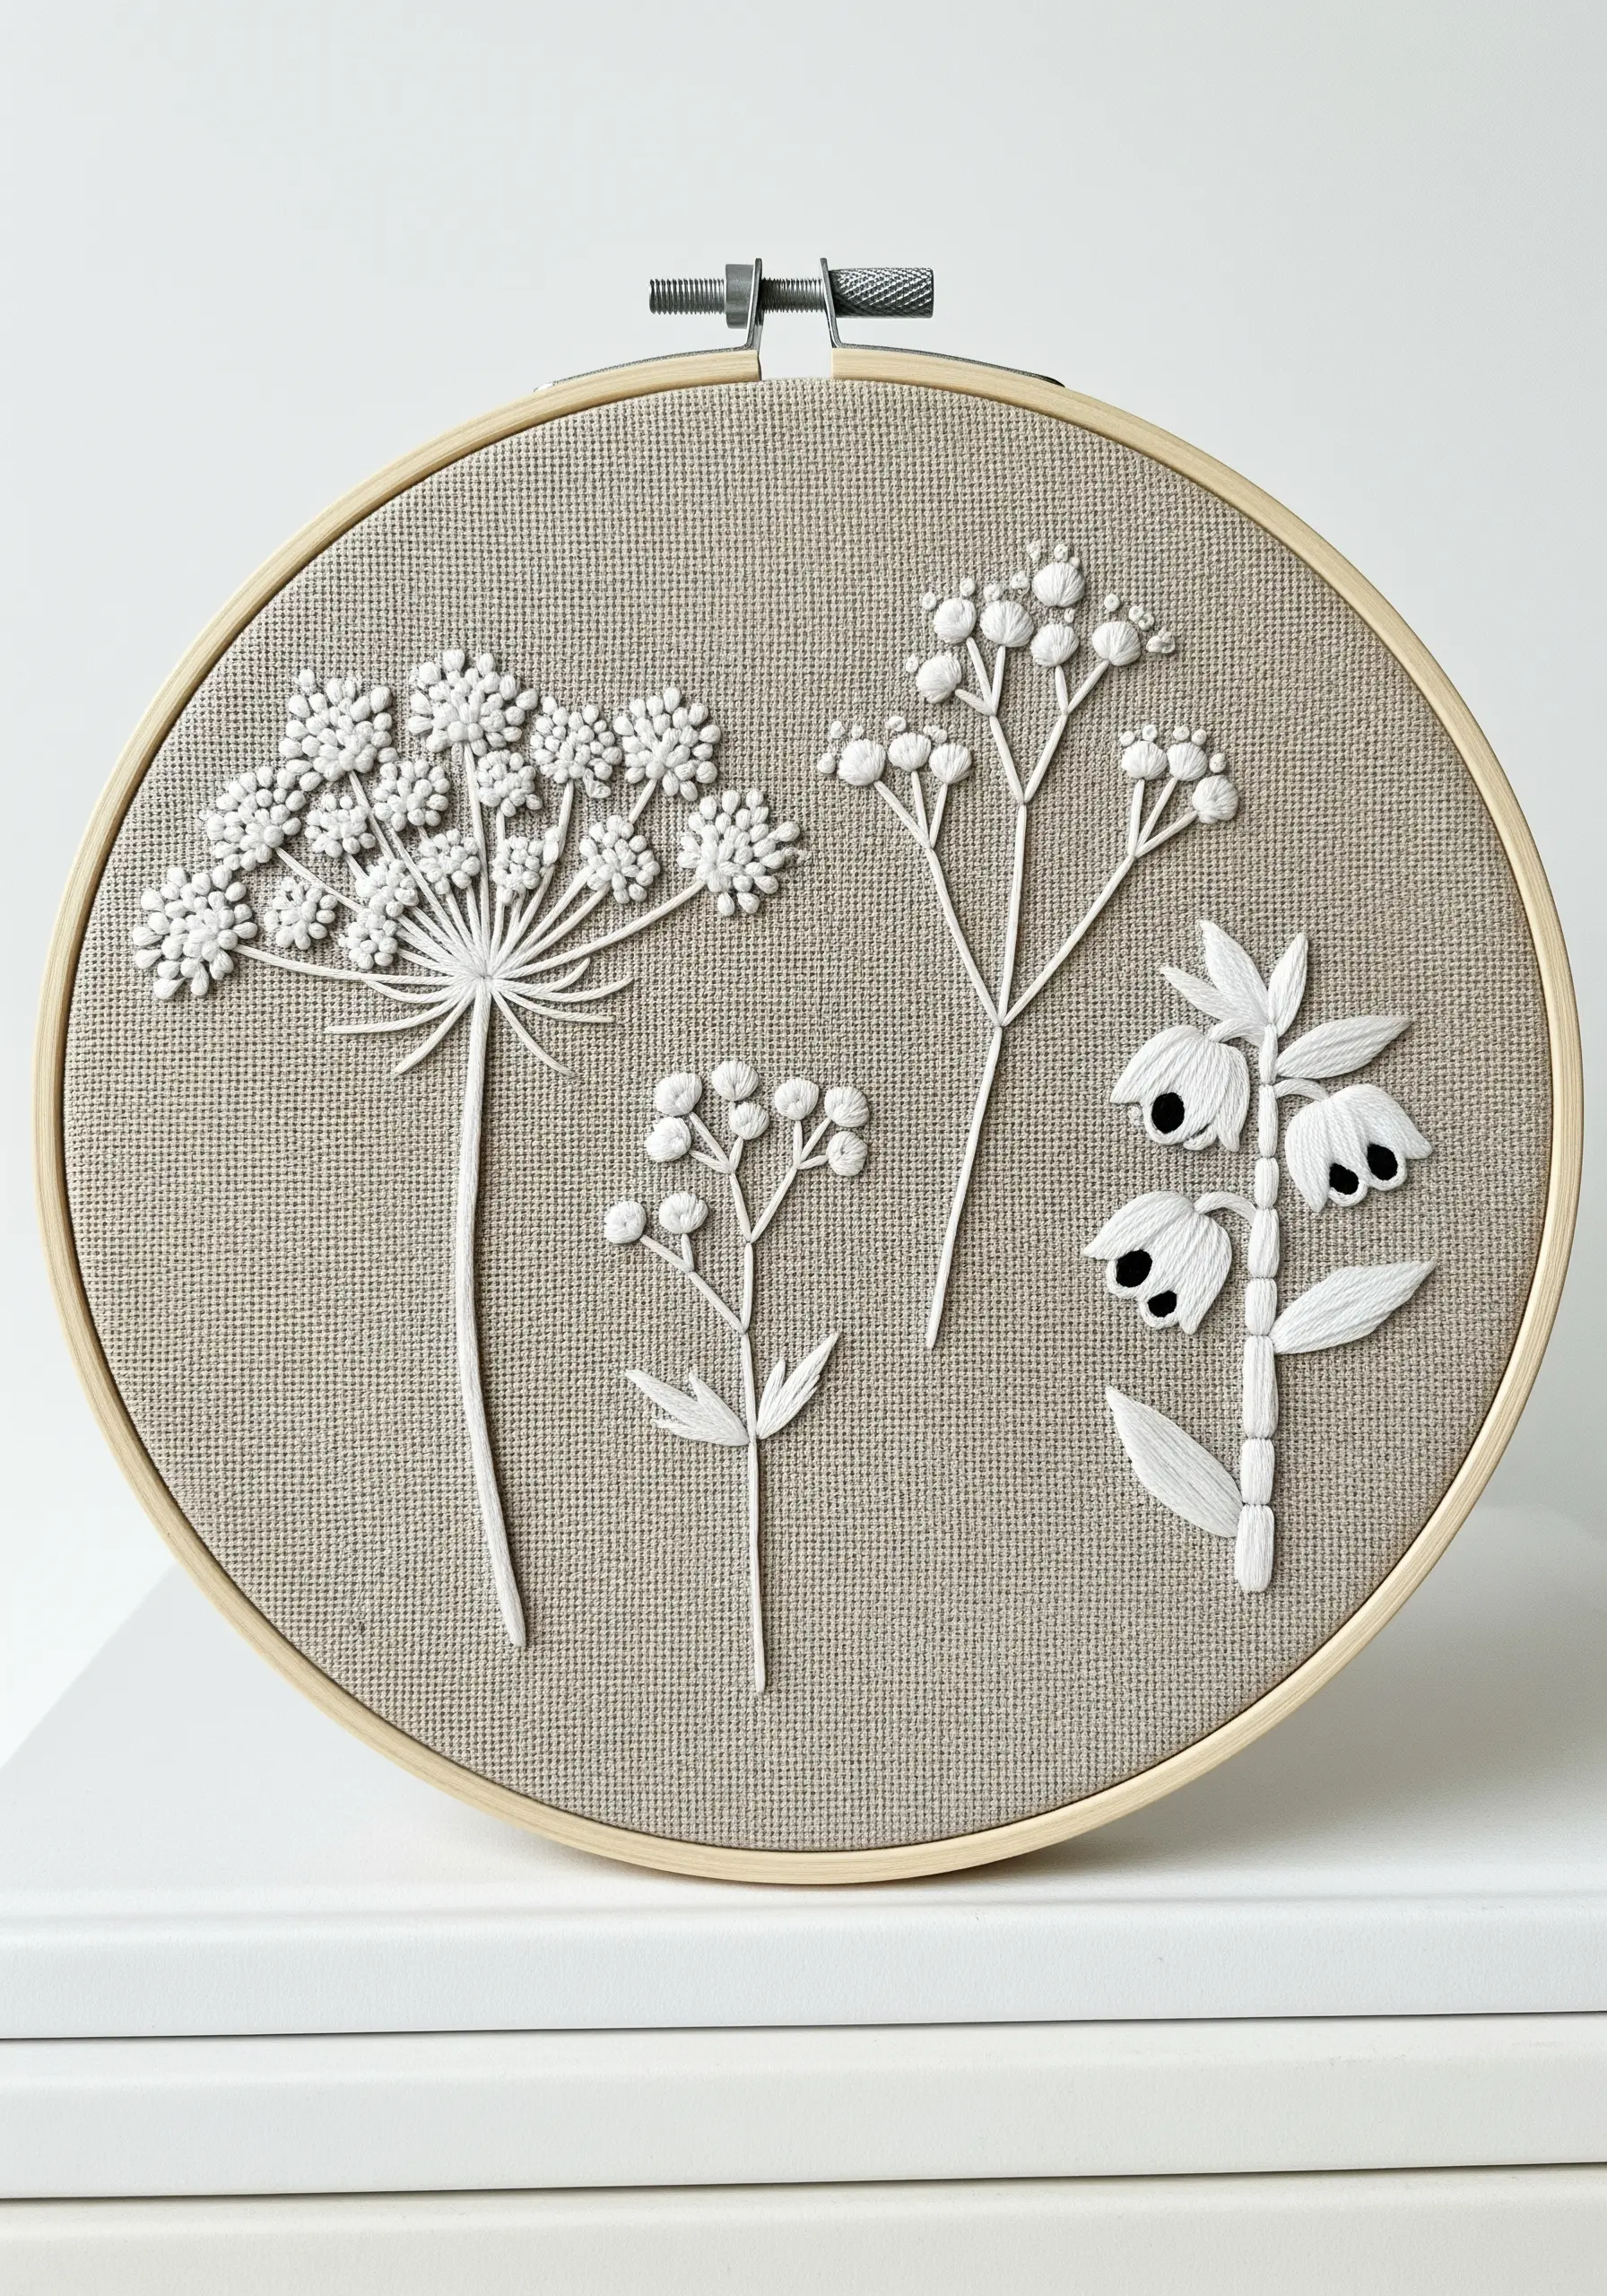
When you limit yourself to a single color, texture becomes your primary tool for creating definition and interest.
This monochromatic study uses different stitches to sculpt light. Padded satin stitch raises the central flower, making it catch more light and appear more prominent.
The densely packed French knots of the Queen Anne’s Lace create a rougher texture that absorbs light, making it appear deeper and more shadowed.
This is a powerful exercise in understanding how stitch choice alone can create contrast and dimension, a principle you can apply to elegant beige and blush embroidery pillow ideas.
18. Stitching the Intricate World of Carnivorous Plants
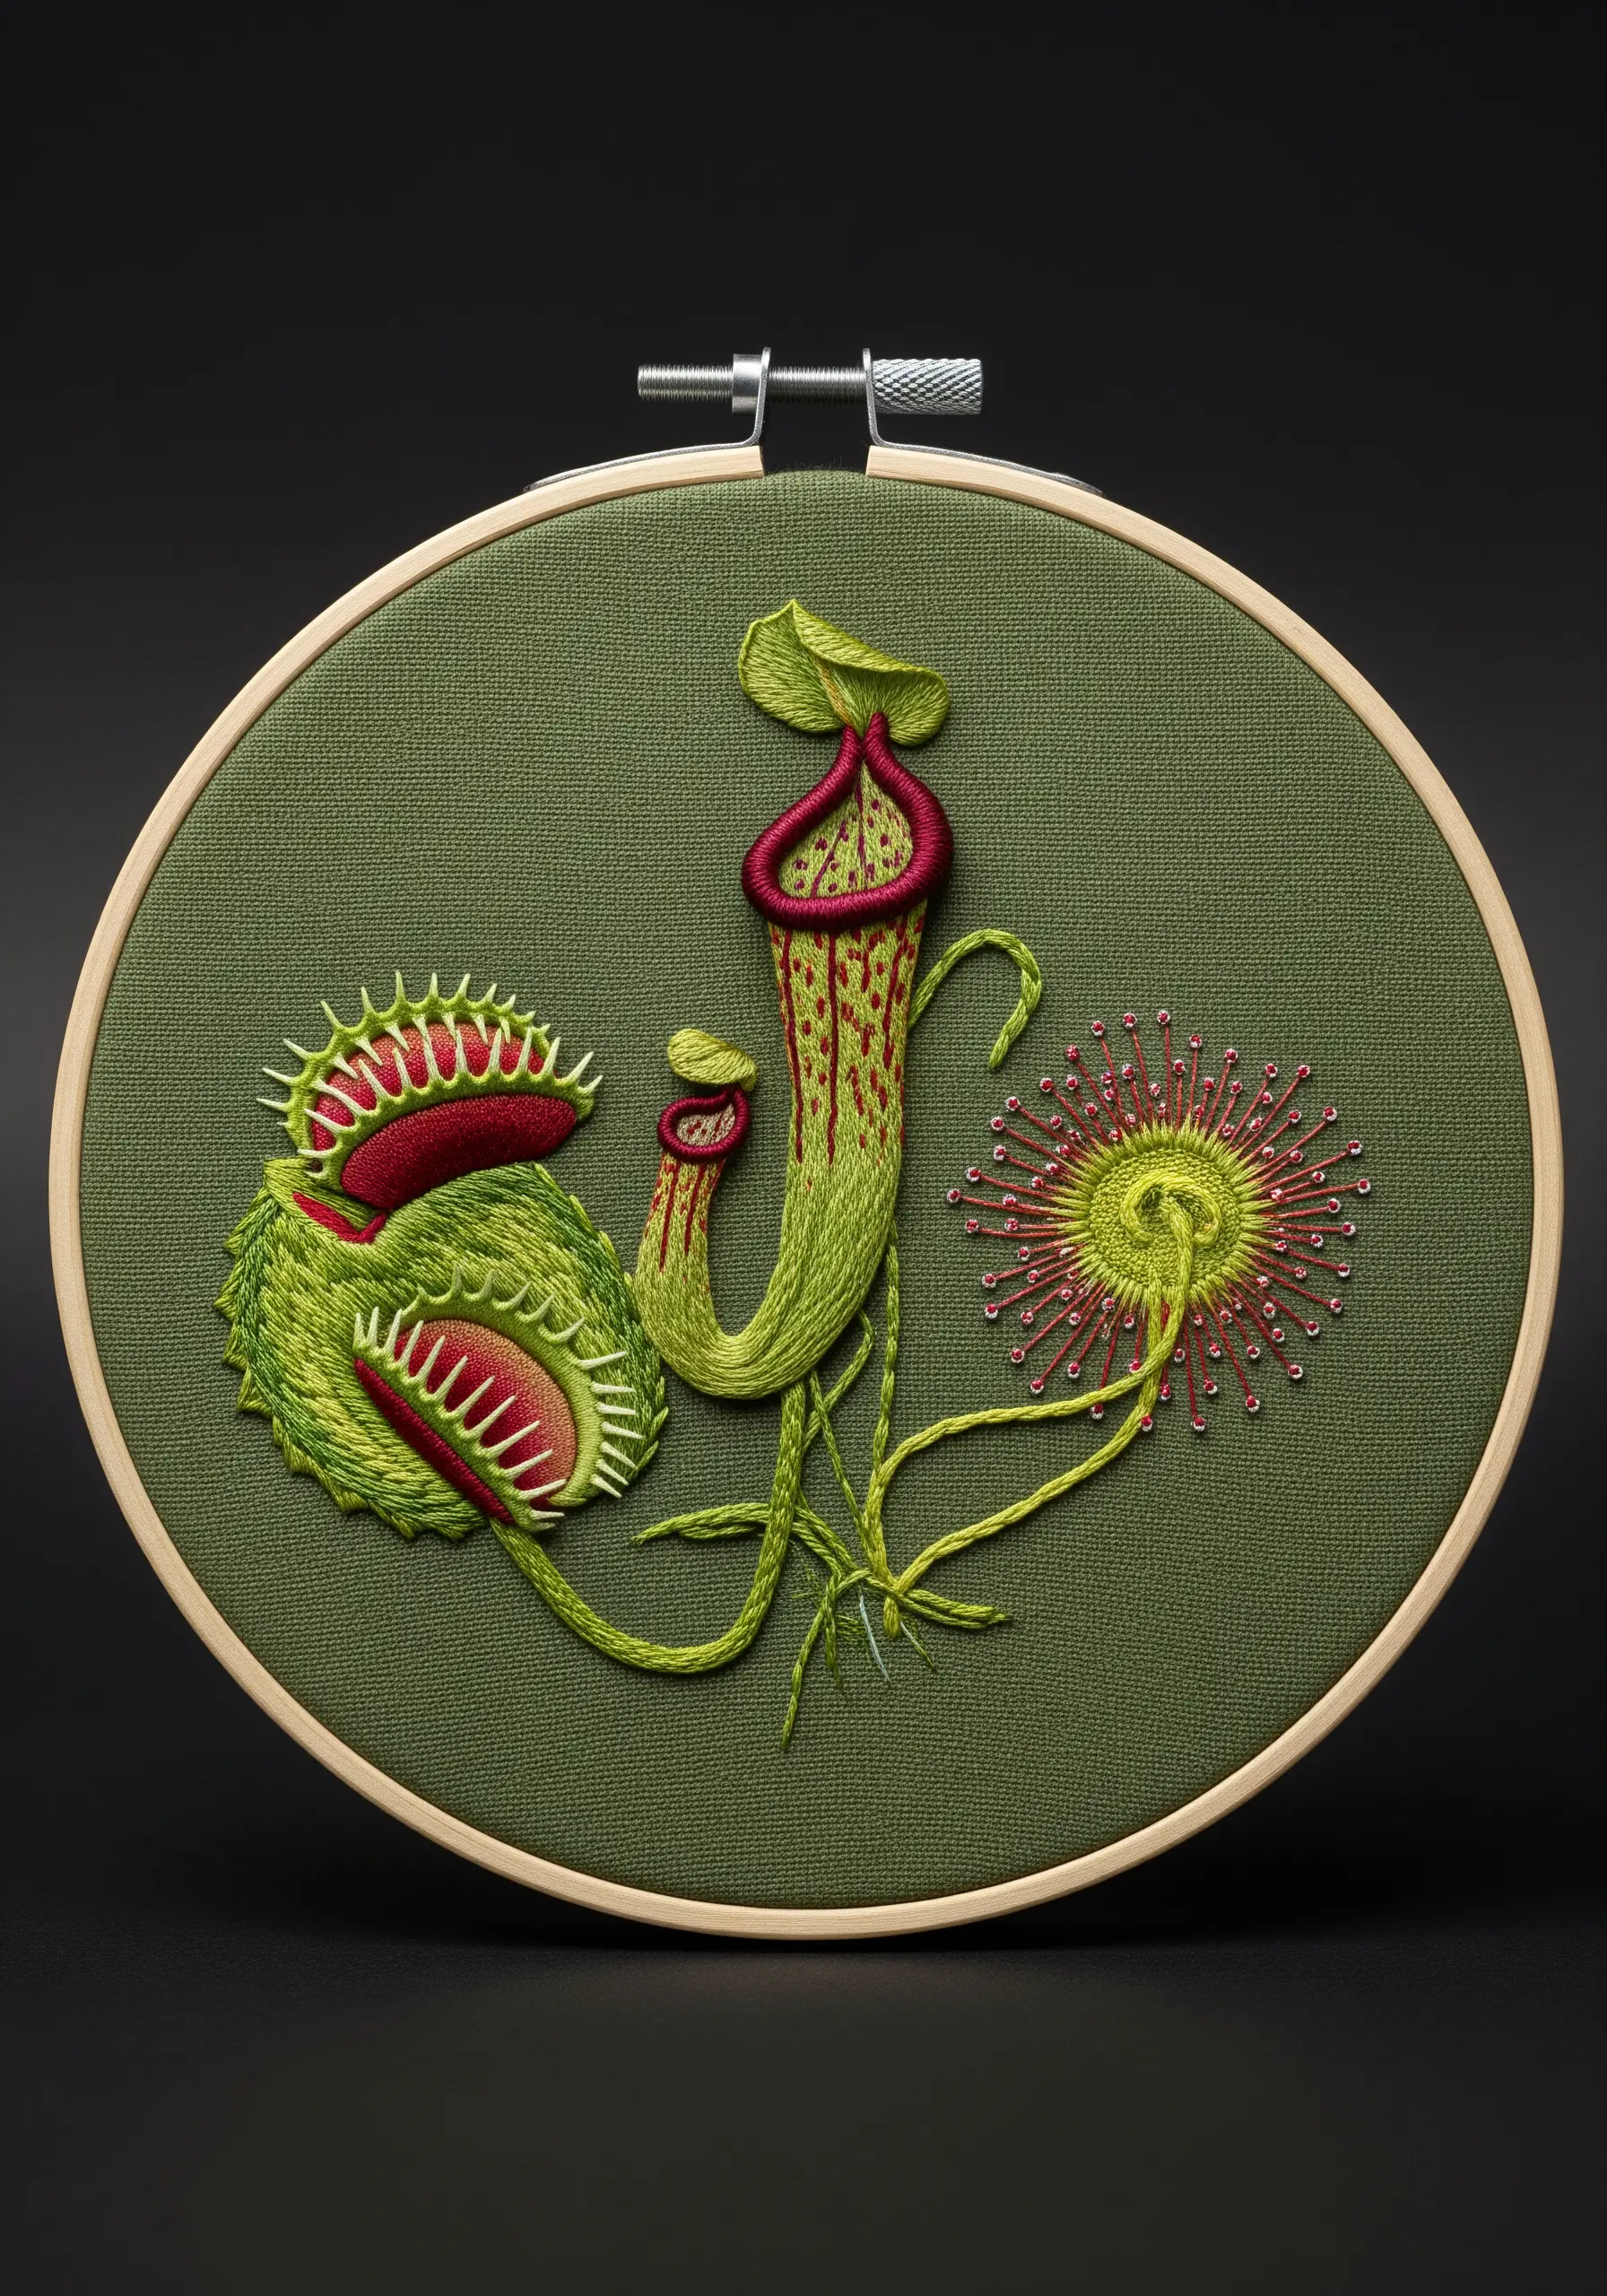
This sampler is a masterclass in fine detail and precise stitching.
To create the delicate red veins inside the pitcher plant and the menacing ‘teeth’ of the Venus flytrap, use a single strand of floss and a sharp needle.
The speckled pattern on the pitcher plant can be achieved with tiny, randomly placed seed stitches in a contrasting color.
For the glistening tips of the sundew plant, use a single straight stitch for the tentacle and cap it with a tiny French knot or a glass bead to simulate a drop of dew.
The success of this piece lies in its precision, so work slowly and deliberately.
19. A Harvest Sampler of Texture and Color
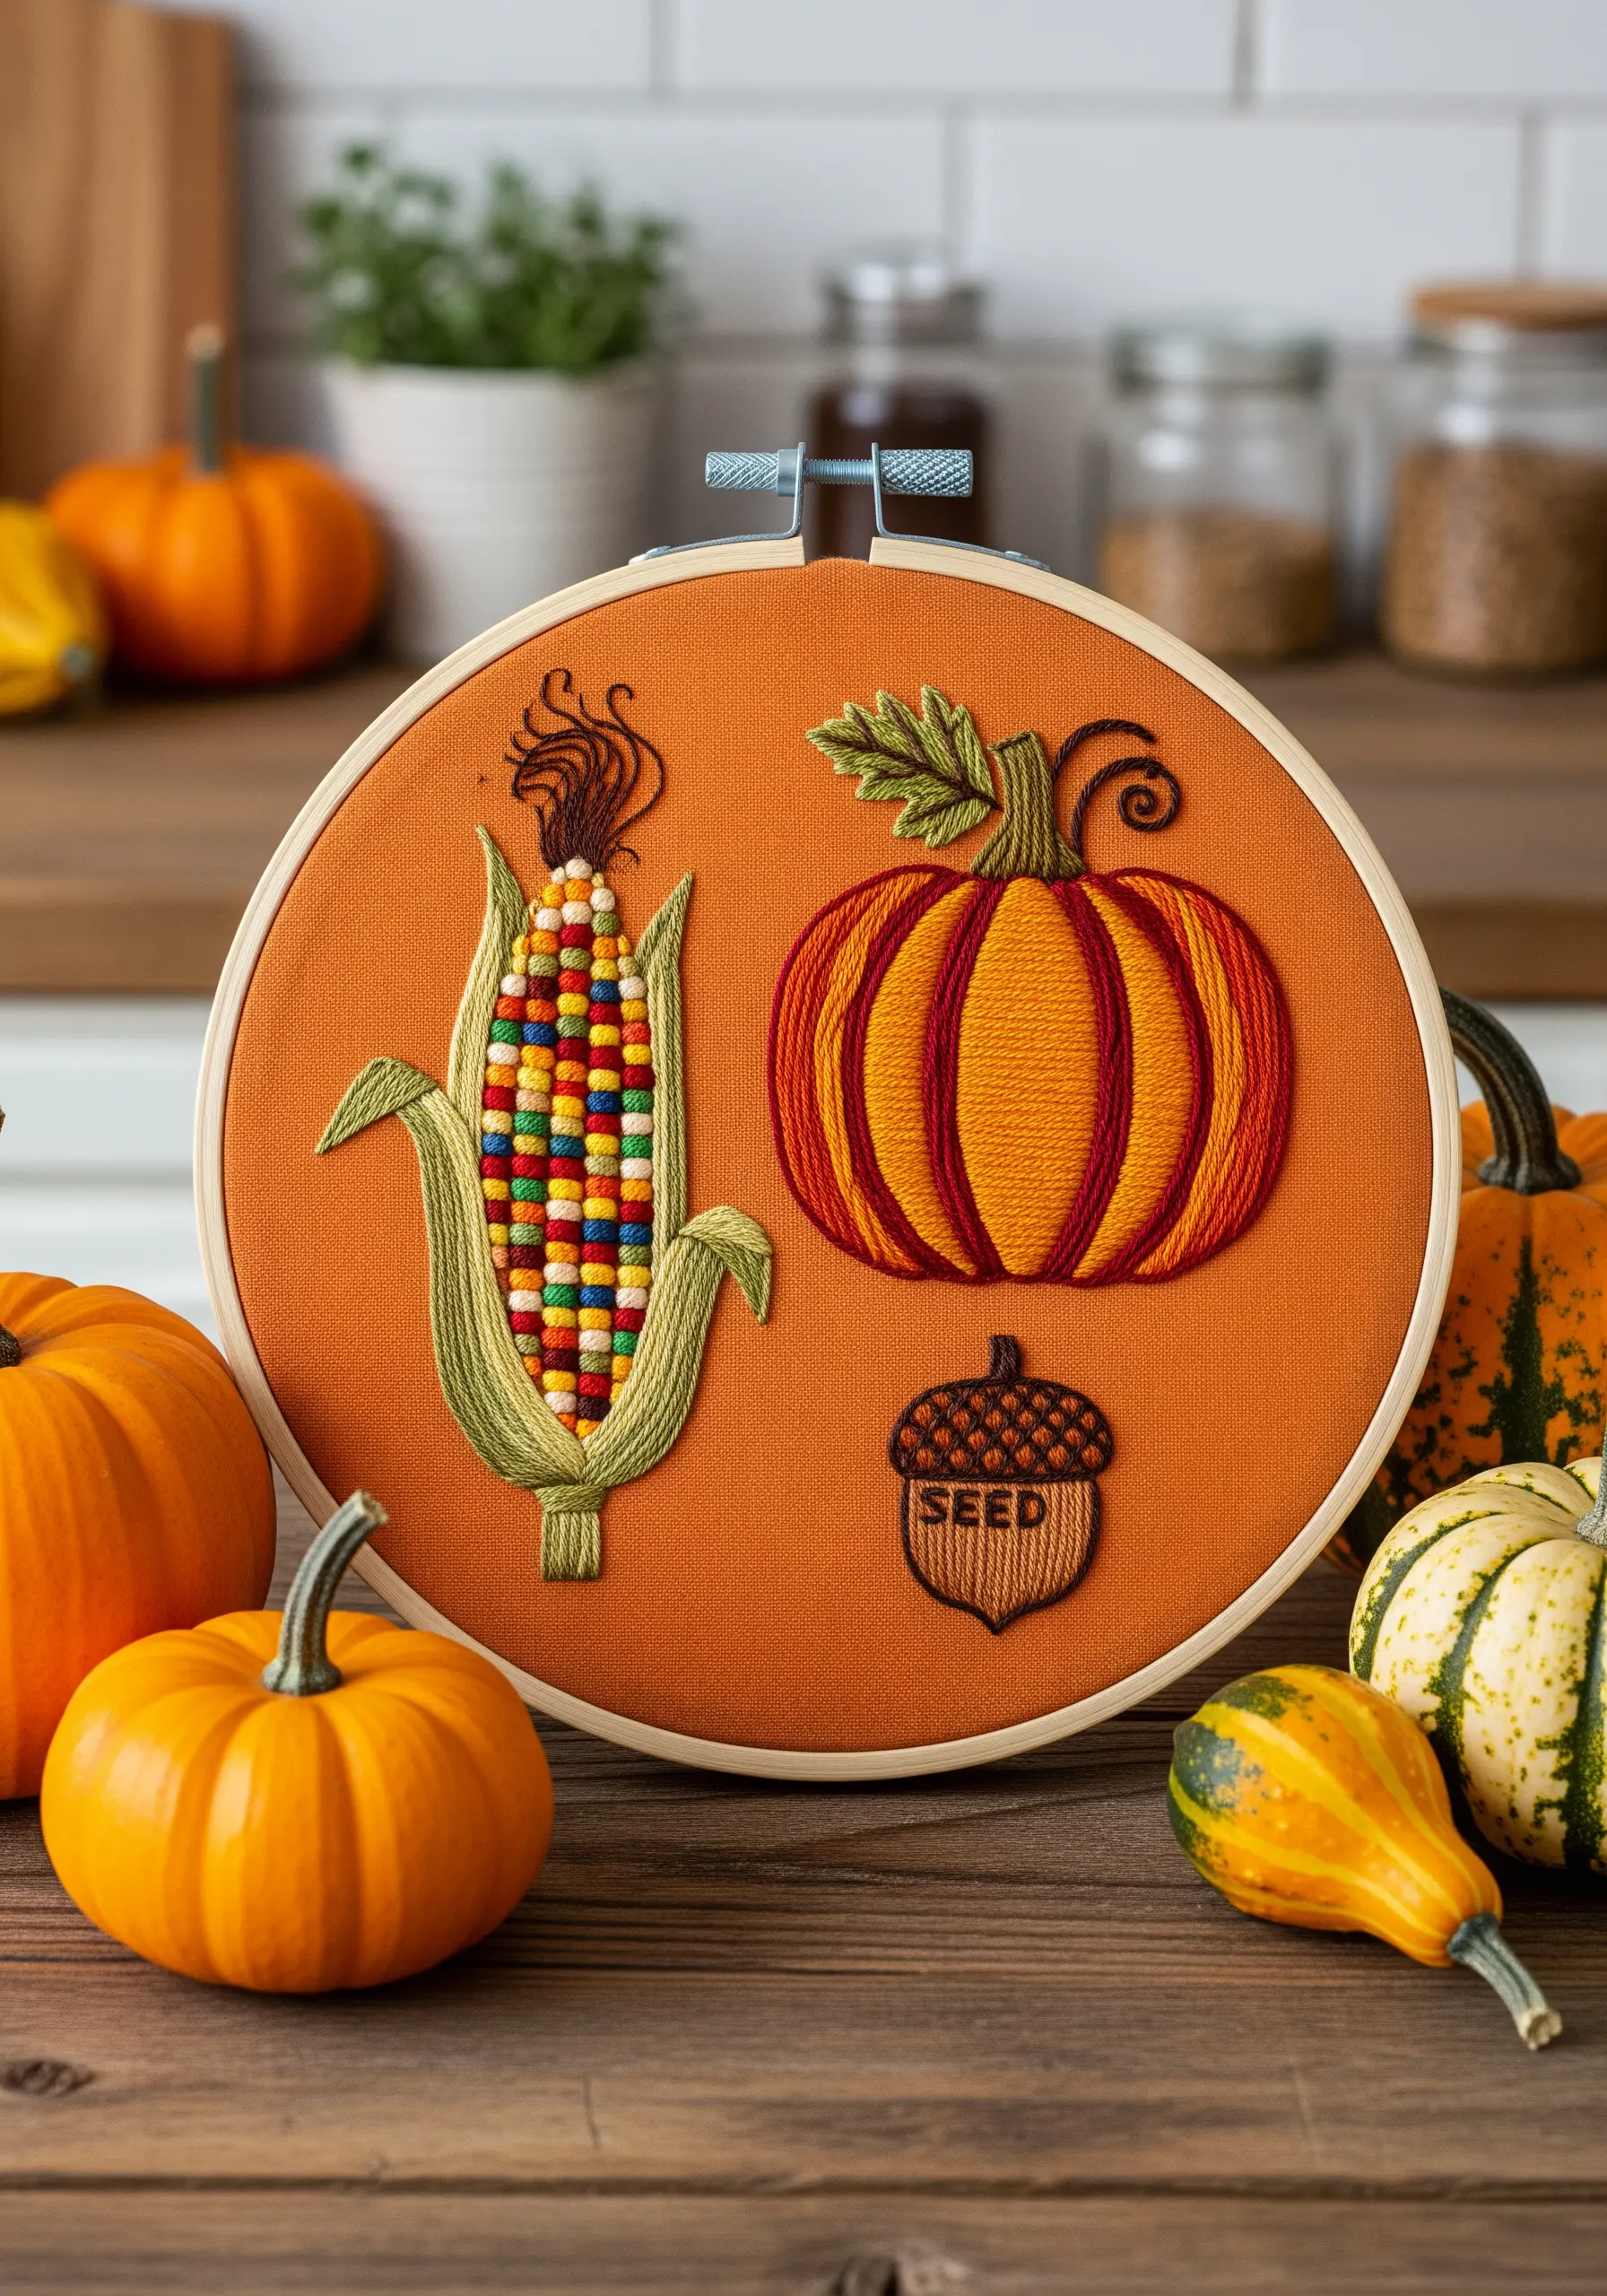
Celebrate the abundance of autumn by combining bold shapes with a rich variety of stitches and colors.
To create the mosaic-like appearance of the flint corn, fill in a grid with tiny satin stitches or small woven wheels, using a wide palette of jewel tones and earthy colors.
Give the pumpkin its classic ribbed shape by working the satin stitches vertically within each segment, using a darker shade of orange for the outlines to create depth.
For the corn silk, try couching a bundle of fine rayon or metallic thread at the top of the cob; this will give it a realistic sheen and a gracefully messy drape.
20. Stitching Graceful Climbing Vines and Florals
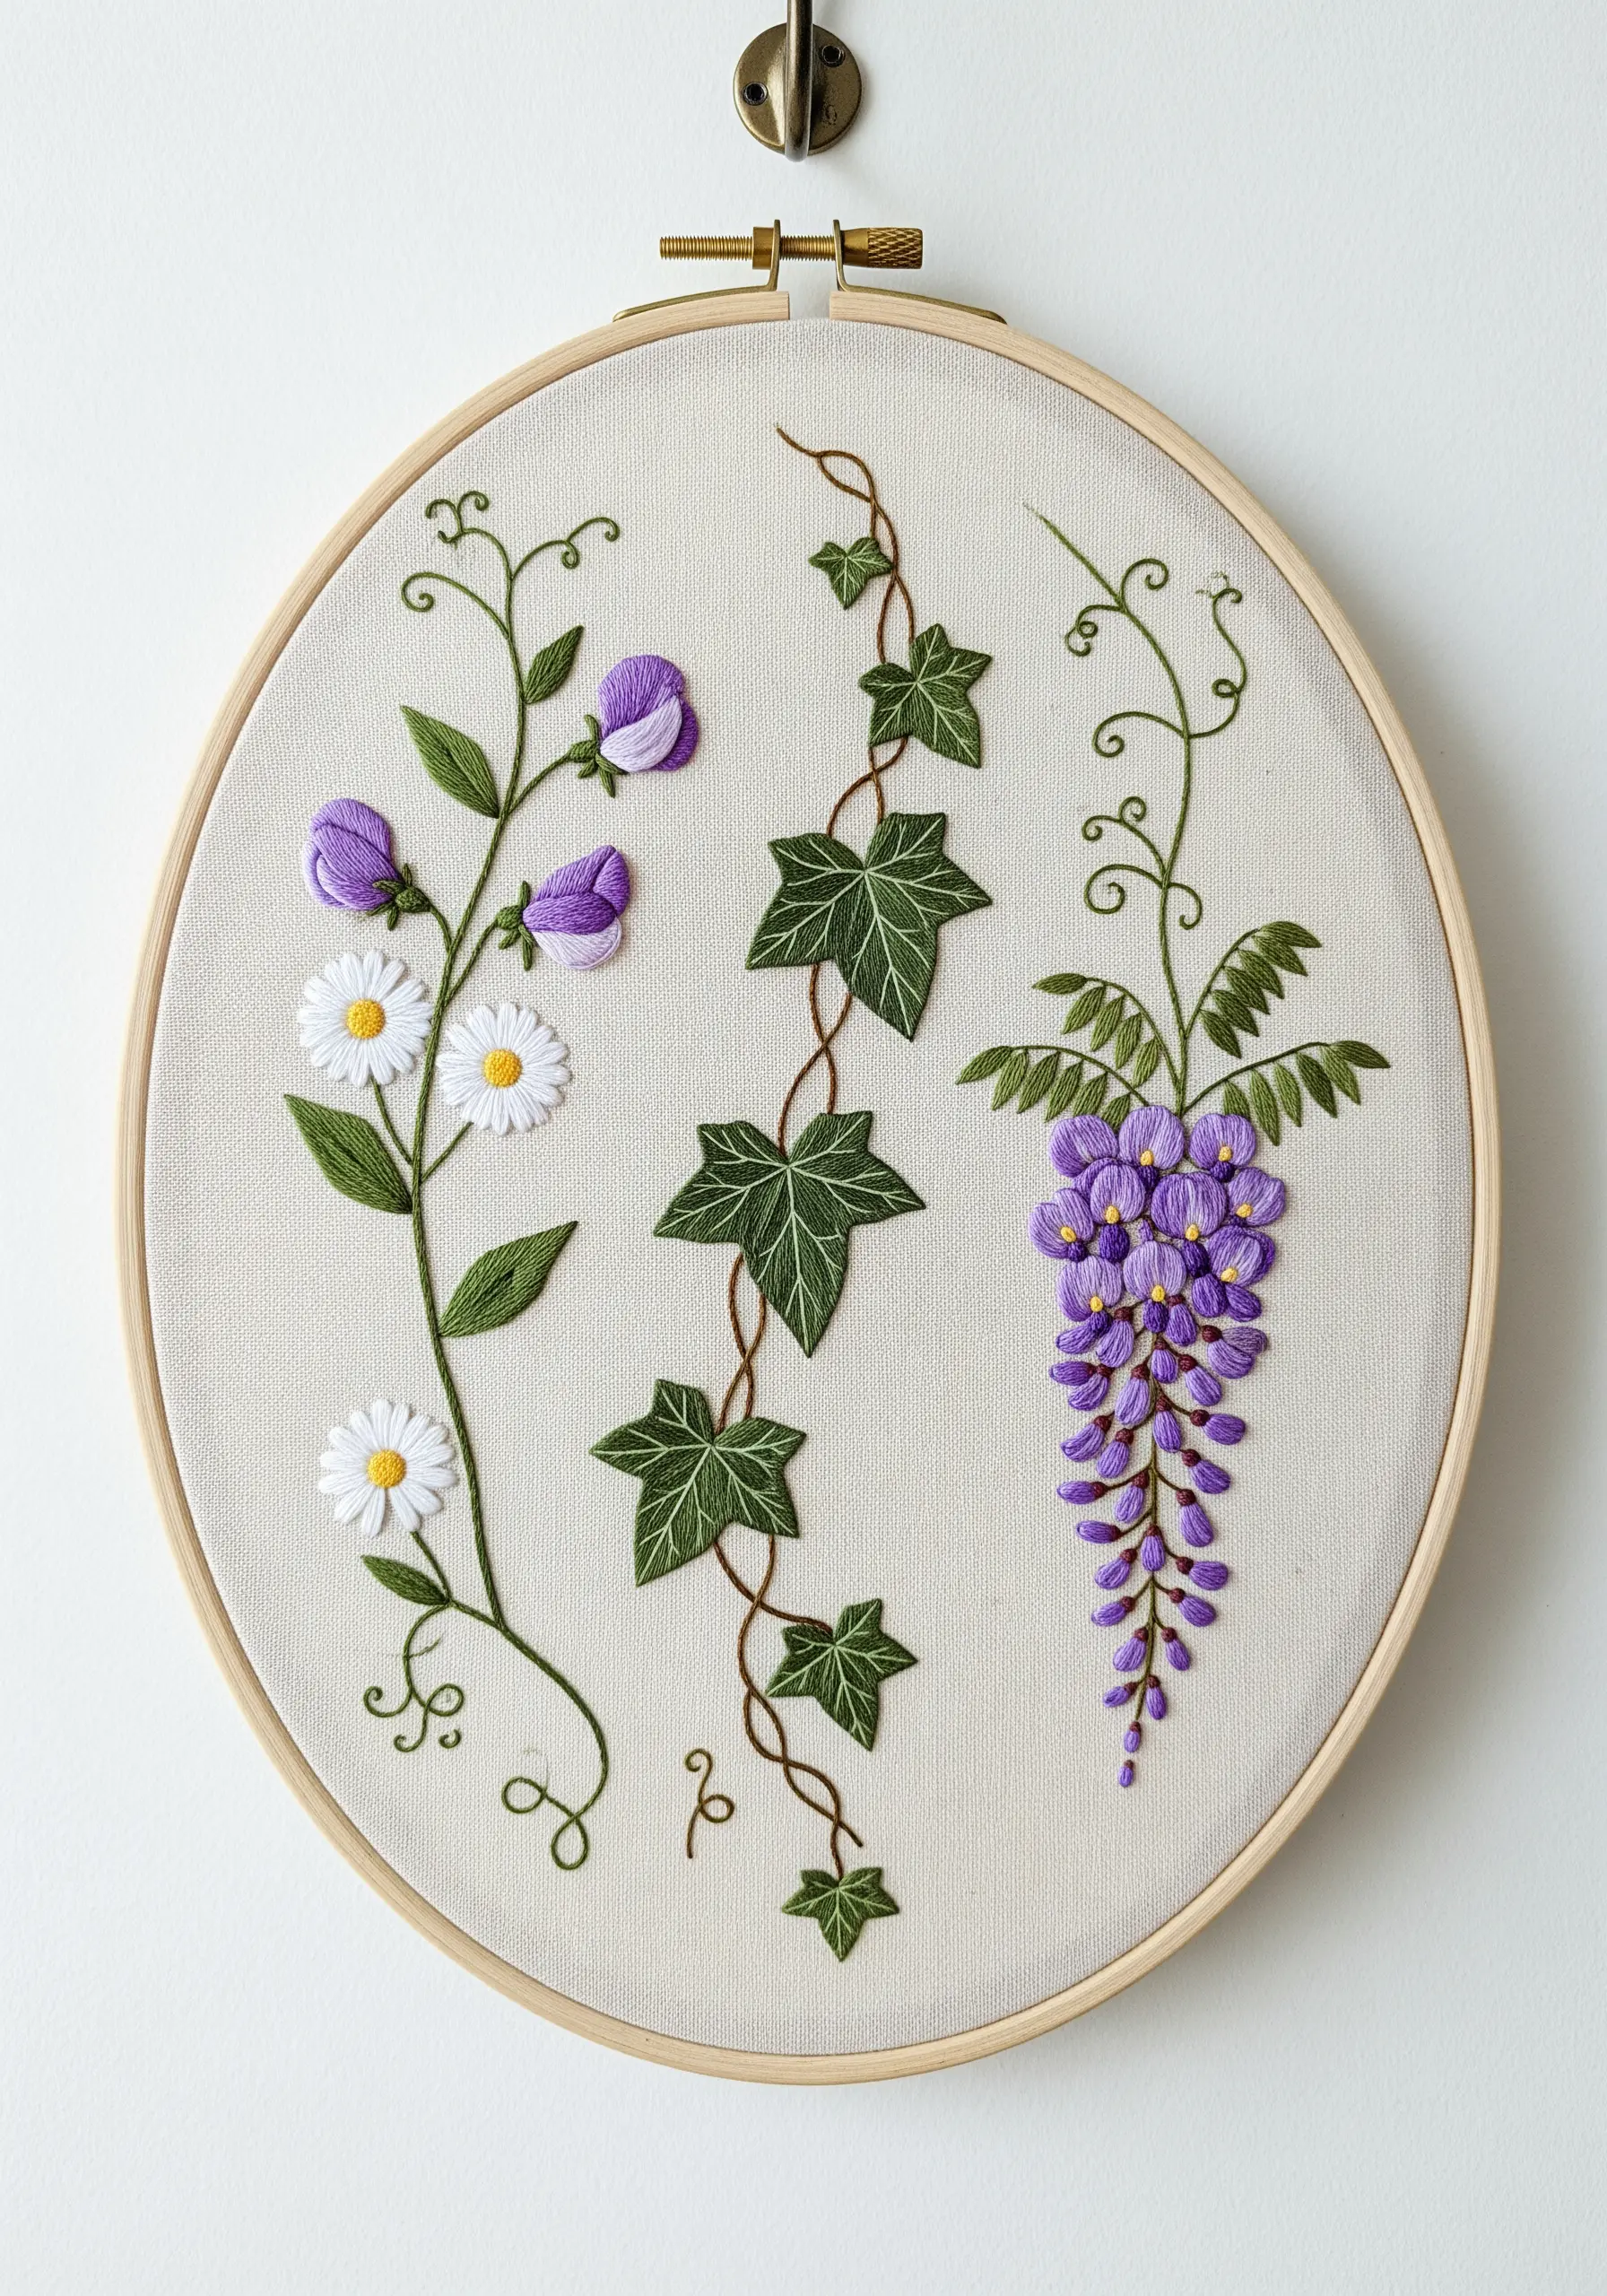
The key to stitching elegant, flowing vines is to choose a stitch that creates a smooth, uninterrupted line.
A whipped backstitch or a stem stitch is ideal for this, as it eliminates the segmented look of a standard backstitch and allows for graceful curves.
For the cascading wisteria blossoms, use a series of small bullion knots or layered detached chain stitches, gradually transitioning from a dark to a light purple to create a sense of depth.
Add delicate, curling tendrils with a single strand of thread and a few carefully placed curved stitches to complete the illusion of a living, climbing plant.


